Printable Version of Topic
Click here to view this topic in its original format
914World.com _ 914World Garage _ Long stiffening kits
Posted by: ahdoman Oct 23 2009, 08:04 PM
Does any body make a stiffening kit that can be welded to the outside of the long?
Posted by: ConeDodger Oct 23 2009, 08:12 PM
Yes but I am at a loss to remember who it is... do a search and there have been recent threads that discussed the options in this regard.
Posted by: ahdoman Oct 23 2009, 08:36 PM
As always, I tried that already. The problem is the word "long" is in just about every post.
Posted by: MDG Oct 23 2009, 08:38 PM
AA sells the clamshells that go on the outside; I think they are a Restoration Design product
Posted by: Grelber Oct 23 2009, 08:55 PM
I got mine from Brad Mayeur at 914ltd.
Posted by: Bruce Hinds Oct 23 2009, 09:11 PM
I bought a set many years ago from an outfit called Part Werks of Chicago. they go back and connect into the trailing arm mount too and really strengthen the chassis. Problem is they are heavy. I thought the strength would be good for my v8 project, but I never installed them.
If you want to check to see if they are still around, they were at 3750 N. Lake Shore Dr., Suite 7C, Chicago 60613
312-472-1096
They are substancial and come with a new jack tube and a support plate to hold it in place. I think I paid 200+ for these things about 20 years ago, I may let them go but haven't decided it I want to put them in or go through all the effort to replace the longs.... all the work these guys do on the cars is encouraging.
B
Posted by: ahdoman Oct 23 2009, 09:56 PM
Thanks all.
The only thing I could find at AA is the replacement parts that restoration design makes. I believe these are the replacement shells and not a stoffening kit.
Anybody got a web address for 914LTD? I found them on yellow pages but nothing more.
Also nothing on Part Werks of Chicago except a couple of threads on club complaining about them.
Posted by: Heeltoe914 Oct 23 2009, 10:27 PM
Steve what is your purpose? Are you looking to repair of stiffen the chassis? I for one think the inside eggman??? Are the best IMHO.
Attached image(s)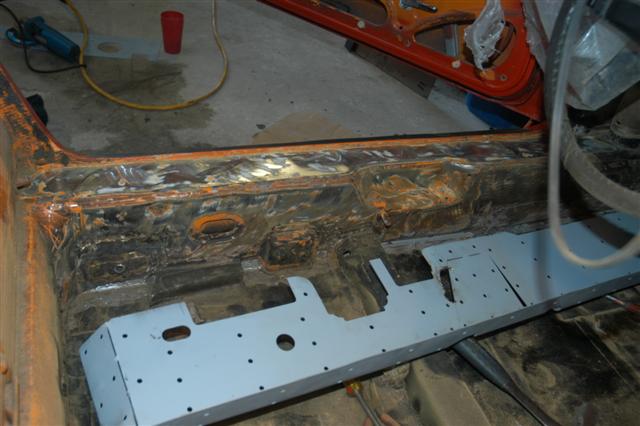
Posted by: tat2dphreak Oct 23 2009, 10:30 PM
THIS is the one you WANT.
it ties the suspension to the long for more rigidity. great product.
Posted by: Heeltoe914 Oct 23 2009, 10:34 PM
I am sure Brad makes good stuff. anyone have pics of his kits?
Posted by: ahdoman Oct 23 2009, 10:48 PM
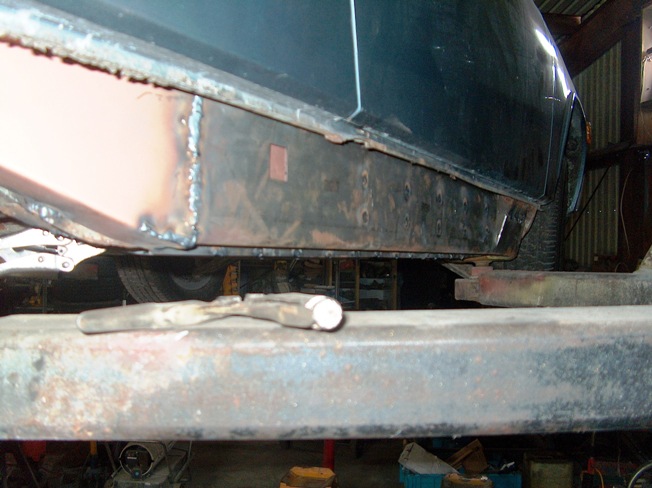
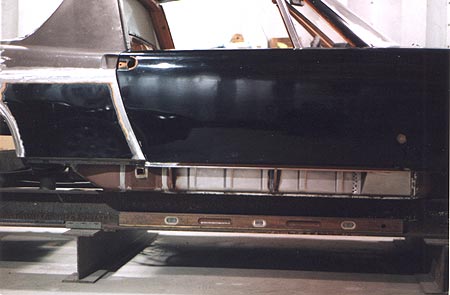
Unfortunately it looks like "the turd" has a sag problem on the drivers side. I think there's rust inside the long but it hasn't made it's way through to the outside. The bottom seam flexes a little. I need something to "clamshell" the rear portion starting about 10" in front of the jack point and extending back to where the long curves up. Andys came through with a couple of pieces of stock that might work. I'm going to spend the day tomorrow cutting, grinding & welding.
Posted by: dakotaewing Oct 23 2009, 11:20 PM
Here is a few pics of one of Brads older kits with a few of my own modifications...
Im the last pic you will see a gap between brads kit and the top of the long - This
is where I addes some additional 1/4" square rod to brad kit to fill the gap, later
welding this area as well -
Attached thumbnail(s)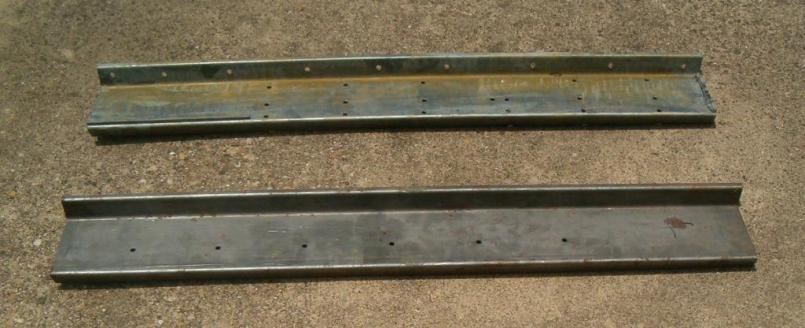
Attached image(s)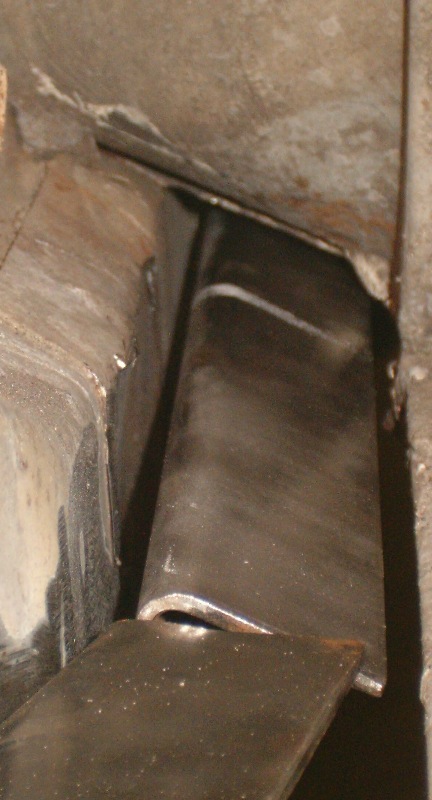
Posted by: r_towle Oct 23 2009, 11:22 PM
George Hussey (AA) designed the original clamshell overlays that weld onto the outside of the long.
Its meant to go on very tight, it should help aline the car...
Rich
Posted by: pete-stevers Oct 23 2009, 11:54 PM
not sure but i think chappy has them installed on his crazy turbo
Posted by: Rand Oct 24 2009, 12:02 AM
Just check it all out. There are some very knowledgeable folks who say the inner side is where the strength is. The outer is just a shell and reinforcing that does more to add weight than strength.
The outer shells have some questions. Engman's inner is without question.
Personally I hate adding weight, so I make damn sure it counts. For me that means Engman style in the cabin, and some very carefully placed bracing between the firewall and suspension ears, plus tie the rear shock tower tops to the longs better.
Posted by: shoguneagle Oct 24 2009, 01:15 AM
I went to both extremes - I welded Brad Mayeur's kit to the external of the longs "after making sure/making rust repairs" to the original longs. In addition, I welded the inner stress kit into my car. I believe without checking the kit belongs to Engman but check the suppliers listed either on this board or the other one to ensure I am right. I maybe giving credit when it belongs to someonelse. They both work together quite well.
I purchased another outer long stress kit but do not remember who made it. I believe it was the sheet metal parts provider who was recently bought out by someone from Canada.
Hope this helps.
Steve Hurt
Posted by: Cire Oct 24 2009, 06:19 AM

Steve what is your purpose? Are you looking to repair of stiffen the chassis? I for one think the inside eggman??? Are the best IMHO.
Got any more pictures of you putting in the long stiffener? What are your thoughts on if you had to do it again... Would you do it the same way? Did you do the back first and connect the two sides? Did you do two sides and connect the back? I also see you have some epoxy or sealer or something in your pictures. Whats that for? = )
Please tell all.
Eric
Posted by: Grelber Oct 24 2009, 07:57 AM
Here's a pic of my passenger side with the Brad Mayeur long kit welded in, and painted, etc. We put the new jack posts on as well. I also put in the Rich Johnson rear console stiffening kit as well (way overkill, but hope one day to have some serious horsepower).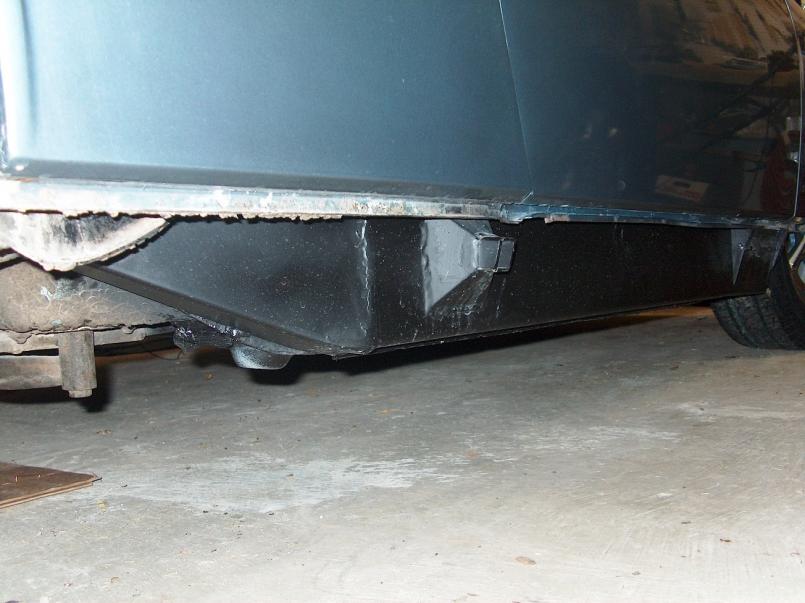
Posted by: Cire Oct 24 2009, 08:49 AM
Here's a pic of my passenger side with the Brad Mayeur long kit welded in, and painted, etc. We put the new jack posts on as well. I also put in the Rich Johnson rear console stiffening kit as well (way overkill, but hope one day to have some serious horsepower).
Looks great. Did you do the work yourself? Do you happen to have more pictures? How much was the Brad Mayeur long kit? How long did it take you to get it welded in? If you had to do over would you stay with the style you selected or would you go to the internal long stiffeners? I had 30 more questions but I will slow down a bit. = )
Thanks again for the great info. = )
Eric
Posted by: carr914 Oct 24 2009, 09:28 AM
AA sells the clamshells that go on the outside; I think they are a Restoration Design product
The Only thing is AA sells these as a pair, you have to buy the Passenger & Drivers side. I got my Passenger side from Restoration Design.
T.C.
Posted by: tat2dphreak Oct 24 2009, 09:44 AM
those are just the clamshells too, I think, on AA... they don't seem to tie to the suspension like the mayeur kit. unless I'm missing it.
Posted by: r_towle Oct 24 2009, 10:01 AM
George designed the original overlay that Restoration Design sells.
I suspect George has them sitting on the shelf, ready to ship.
The overlay is designed to go over a repaired outer long that has the jack post all fixed etc.
It is lighter than Brads kit and it fits the contours of the long much better.
It is fairly simple to install and it does tie in the rear suspension point.
It is one piece, unlike Brads kit, so it goes up the angled section.
Install is simple spot welding or plug welding.
Given what is going on with Restoration Design and the new ownership, I am not sure if they are ready to ship new orders yet, or make new parts yet.
Call George, he has loads of sheet metal on the shelf
Posted by: Grelber Oct 24 2009, 12:25 PM
Here's a pic of my passenger side with the Brad Mayeur long kit welded in, and painted, etc. We put the new jack posts on as well. I also put in the Rich Johnson rear console stiffening kit as well (way overkill, but hope one day to have some serious horsepower).
Looks great. Did you do the work yourself? Do you happen to have more pictures? How much was the Brad Mayeur long kit? How long did it take you to get it welded in? If you had to do over would you stay with the style you selected or would you go to the internal long stiffeners? I had 30 more questions but I will slow down a bit. = )
Thanks again for the great info. = )
Eric
I had the long kits put in as well as new rear floorboards, lower firewall and some other welding. I had a local guy do the welding for me (wanted it done right). I paid $300.00 for the long kit, but that was 2+ years ago.
Here's a pic of the install before grinding, painting, jackposts, etc:
Attached image(s)
Posted by: Bartlett 914 Oct 24 2009, 12:47 PM
Brad's kit is awesome! We are about to cut up a car that is totally rusted. Pans are gone. When we jack up the car, it still wants to stay straight. I have heard that the car will squeak less also.
914 Limited
Brad Mayeur
p914ltd@yahoo.com
309 694-1797
Brad is a great guy to deal with.
Posted by: Heeltoe914 Oct 24 2009, 07:22 PM
Steve what is your purpose? Are you looking to repair of stiffen the chassis? I for one think the inside eggman??? Are the best IMHO.
Got any more pictures of you putting in the long stiffener? What are your thoughts on if you had to do it again... Would you do it the same way? Did you do the back first and connect the two sides? Did you do two sides and connect the back? I also see you have some epoxy or sealer or something in your pictures. Whats that for? = )
Please tell all.
Eric
I was thinking you should check the little triangle like area first you cant correct allot of your flex by just making sure its tied in well and has not started rusting out.. Ask me how I know????
I was ask if I had to do it over again which would do Well for me and in that I have driven 100s of 914s, really after being a instructor for so many years I always get the other 914 students, I feel the inside is the was to go Think about it outer is not tieing in the flex areas as well will it help I think yes the outer well 100% help but will it be as strong as the inner IMHO no. I would say the inner is allot harder to do in that you do have to remove the complete interior and undercoating along with some shaping, It’s a great winter project and as fare as how it made my car feel WOW its like I added a cage not as much twist at all. So really the outer is good and is a nice weekend project to where the inner is going to test you a little more.
But I also think it goes without saying if you feel there is rust inside the longs don’t just cover it up get into it an replace what needs to come out you will be allot happier you did 5 years form now.
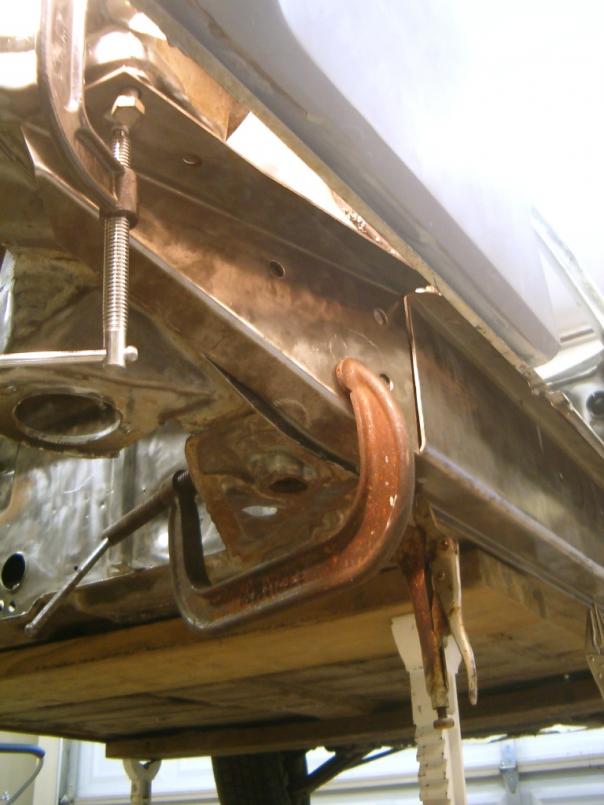
Oh Eric I did the back first and than the two sides.. I used a big clamp to hold the parts as I welded, I did not wont to have a gap behind the new parts. The sealer and black caulking is yes to close it all off and after the carpet was but in you wont even know it was done,
Posted by: 9146986 Oct 25 2009, 09:22 AM
The Restoration Design pieces are lighter and perfectly contoured to fit over stock longitudinals. Any previous repairs could make this difficult to install. The other thing is they don't support the suspension mount like Brad Mayeur's kit.
I've installed four sets and like them. Yes they are heavier, but they work better than anything else.
Here's a couple mods that I do.
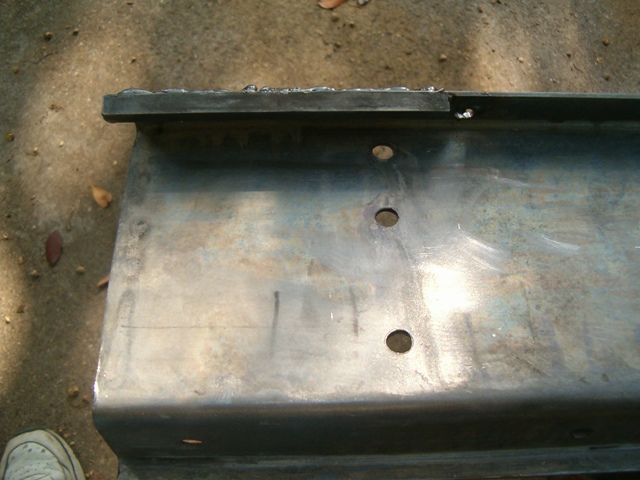
These clamshell over the outside of the longitudinal, which hasn the weep holes along the bottom. Most guys just smash the weep holes flat and clamp on the clamshell. What I do is cut them off with a cut off wheel and then bump the metal flange inward to make the weep hole still funtional.
I also cut windows in the sill right above the stiffening ribs, and weld the clamshell at the top of those vertical ribs.
Here's the little "windows"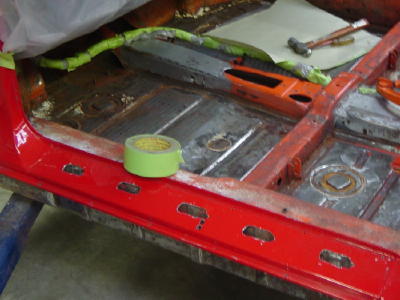
Here's the weep holes cut off
Posted by: Justinp71 Oct 25 2009, 07:36 PM
[/quote]
Looks great. Did you do the work yourself? Do you happen to have more pictures? How much was the Brad Mayeur long kit? How long did it take you to get it welded in? If you had to do over would you stay with the style you selected or would you go to the internal long stiffeners? I had 30 more questions but I will slow down a bit. = )
Thanks again for the great info. = )
Eric
[/quote]
I just installed this kit a few months back. The kit was about $320, I think including shipping. It took a few days to weld it in, the hardest part for me was making sure my door gaps where lined up before welding. They say you can do the whole thing in two weekends.
The brad kit is about 30 pounds and the engman kit was 18 pounds, I think it was definetly worth the extra 12 pounds to install brads kit since it ties the rear trailing arms directly into the chassis.
I think the main thing with the brad meyeur kit is that its more work to install...
Posted by: GeorgeRud Oct 25 2009, 10:42 PM
I've had Brad's kit on my conversion -6 for quite a few years now, and can't believe how much stiffer it is when I compare it to my factory 914-6.
If you're doing a conversion or hotrodded car, I'd go with Brad's kit. If it's going to be a concours queen, I'd use the Restoration Design/AA kit.
The inner Engman panels should be beneficial with either if you are into overkill!
BTW, Brad is absolutely one of the nicest and most honest guys you'll ever meet. I've known him since the mid 70s!
Posted by: dakotaewing Oct 25 2009, 11:10 PM
Here are a few more photos I have of my install -
Photo #2 shows the additiona of the 1/4" rod to fill a gap as well -
Attached image(s)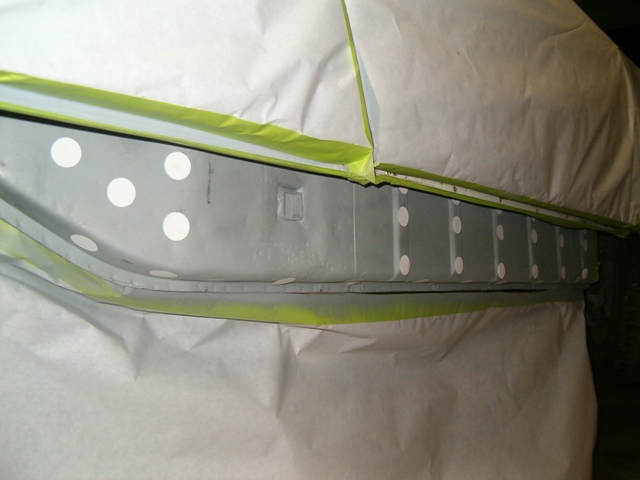
Posted by: JazonJJordan Oct 26 2009, 12:05 AM
![popcorn[1].gif](style_emoticons/default/popcorn[1].gif)
Posted by: Cire Oct 26 2009, 06:53 AM
Here are a few more photos I have of my install -
Photo #2 shows the additiona of the 1/4" rod to fill a gap as well -
Great pictures. = ) Did you drill holes and weld through the holes or did you just go around the outside? Also, from the web site pictures it looks as though the door sills have to come off... But yours look like they went on under it... Do you have any more pictures? = )
Anyone got any pictures of long stiffening work being done? A picture is worth 5000 words... = )
Thanks all!!!

Eric
Posted by: Cire Oct 26 2009, 06:58 AM
Here are a few more photos I have of my install -
Photo #2 shows the additiona of the 1/4" rod to fill a gap as well -
Great pictures. = ) Did you drill holes and weld through the holes or did you just go around the outside? Also, from the web site pictures it looks as though the door sills have to come off... But yours look like they went on under it... Do you have any more pictures? = )
Anyone got any pictures of long stiffening work being done? A picture is worth 5000 words... = )
Thanks all!!!
Eric
Here are those pictures I was referring to.
Eric
See how the bottom of the door sill has been removed and then re-attached... Does it have to be done or will it go right under the current sill edge? My door sills are good and dont need to be replaced. Just want to stiffen the chassis.
Thanks again all. = ) Again, love those pictures.
Posted by: dakotaewing Oct 26 2009, 08:04 AM
Eric -
I drilled the holes in the top of Brads kit with a drill press in order not to remove,
or put holes in the sill plate. I drilled all the holes with a drill press prior to installation.
Attempting to drill holes after installation would take a LIFETIME,
due to the guage of metal on Brads kit -
Posted by: RAB914 Oct 26 2009, 09:41 PM
Posted by: ClayPerrine Oct 26 2009, 10:15 PM
I think some of you are missing the difference between the restoration parts that AA and GPR sell, and the Brad Mauyer kit.
The former is for replacing the rusted panels in a stock long. The Brad Mauyer kit is for reinforcing the long.
The stock long looks like this:
|[
|]
|[
|]
Or if you want to picture it, like a piece of corrugated cardboard with the outer layer peeled off. You see the wavey cardboard underneath.
What Brad Mauyer's kit does is to put the outside on the wavey metal. Now it is truly like the corrugated cardboard. And despite it being just paper, corrugated cardboard is stiff.
The long after Brad Mauyer's kit:
|[|
|]|
|[|
|]|
It adds so much rigidity that the top on my car doesn't squeak, and hasn't in 5 years. Plus I can stick a jack under the rear donut, and both wheels leave the ground at the same time.
The only problem I have with the Brad Mauyer kit is that I had to grind a notch into it to clear the oil suction hose from the factory oil tank.
It is HIGHLY recommended.
The Engman kit is very good, but I do not believe it to give the same amount of reinforcement.
Now that is MY opinion, and I researched both before I made my purchase.
Posted by: Red72 Oct 4 2016, 10:20 AM
This seems to be the best thread on the 914Ltd (Brad Mayeur) kits (although it's a little old). I'm looking at doing this soon, but trying to budget it all out. Any painting of the body required once it's all installed, or just on the new bits?
Posted by: injunmort Oct 4 2016, 05:26 PM
no, after all the welding, they look great. no grinding, no paint, looks factory. plug and play.
Posted by: Red72 Oct 4 2016, 06:21 PM
no, after all the welding, they look great. no grinding, no paint, looks factory. plug and play.
Perfect, thanks!
Posted by: marksteinhilber Oct 5 2016, 01:34 PM
The longitudinal is designed as a box section beam with thin walls, doubled where reinforcement is needed. The firewall and the floor pan add sides to make another type box to make the car stiffer from a torsion standpoint. All of this connects the various suspension mounts, engine mounts, and shock towers together where primary loads get applied. If you weaken critical areas where the firewall ties in, and weaken 1,2,3 or 4 sides of your box longitudinal with rust, you get our standard sagging 914.
How to repair: Fix all rust weakened or holed areas with new steel. Try to make structure at least 90% as strong as original.
How to then strengthen for track or AX: Add Engman kit inside cabin and add overlay or additional layers of steel to the box on the outer longitudinal. Consider the additional kits from Maddog, Patrick, and others to add these layers between the structural attachment points for suspension and engine. Even the inner and outer firewall are important for torsional stiffness. Don't add more weight than needed! If you add weight low, remove some weight higher up.
Kits are easy, but I got a quartered car. It died so that mine can live!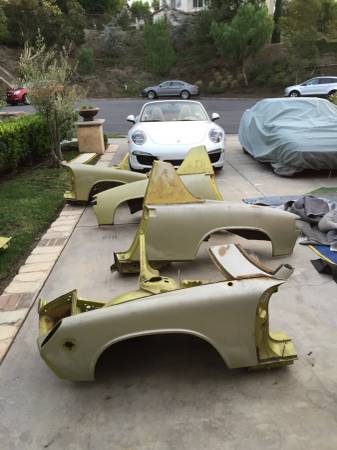
Mine had big holes in both sides and bottom of longitudinals, both sides. Cali car. Hell holes were not rusted out.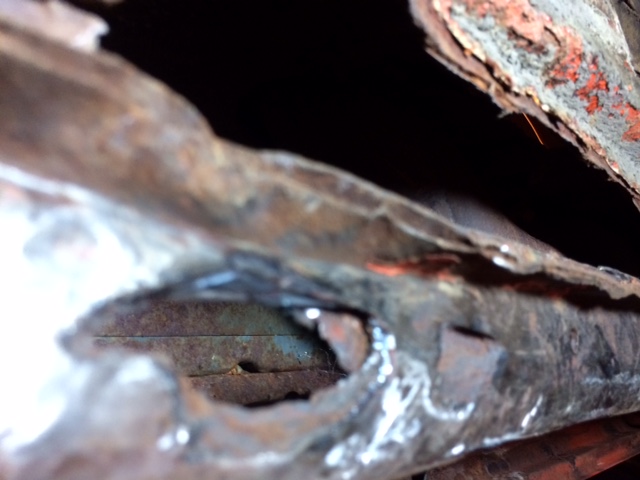
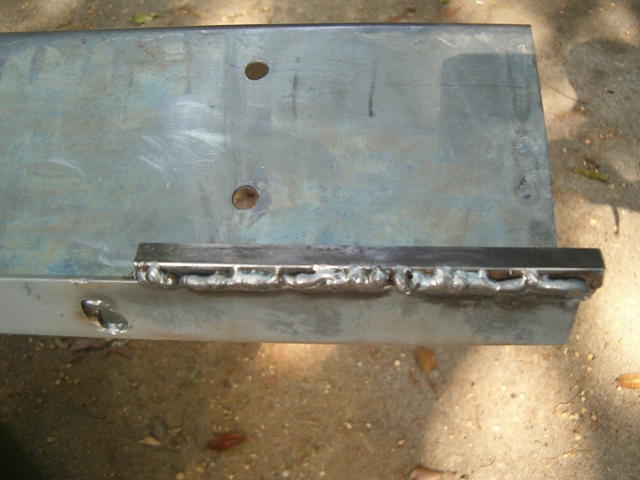
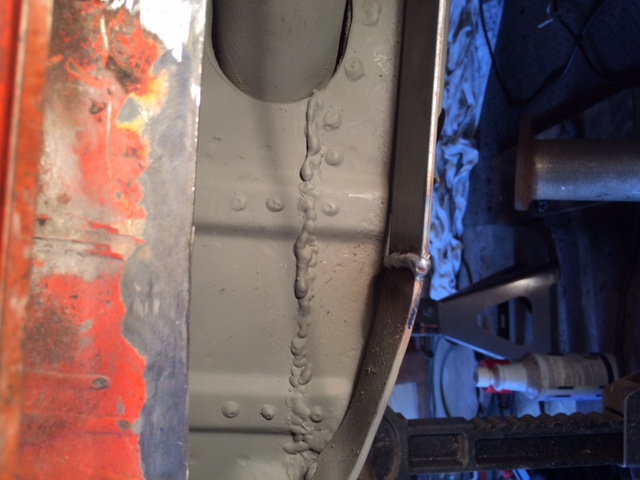
Rusted out sections were surgically cut out one or two at a time while car was supported at six points including rear of trans, door gaps were checked continually. Each hole was then inserted with new steel with full MIG butt welds. Then overlayments were added on outside and inside of longs, and inner lower firewalls got an extra overlayment. Layers are added with fillet welds along the edges and rosette or plug welds to tie the layers together to carry the load evenly between them. Inside the box, I added flat bar that ties the suspension console, engine mount, firewall, and almost three feet of the longitudinal box together on the bottom of the box longitudinal. This flat bar is tied to the bottom of the longitudinal with continuous edge welds and rosettes. Car is taking some time, but it needs to be done right while it's stripped down. I'm 230 lbs. I can jump up and down on door sill and door gap doesn't change. I'm also a Mechanical Engineer with degrees from MIT, and I specialize in the design of welded steel ships and tankers.... 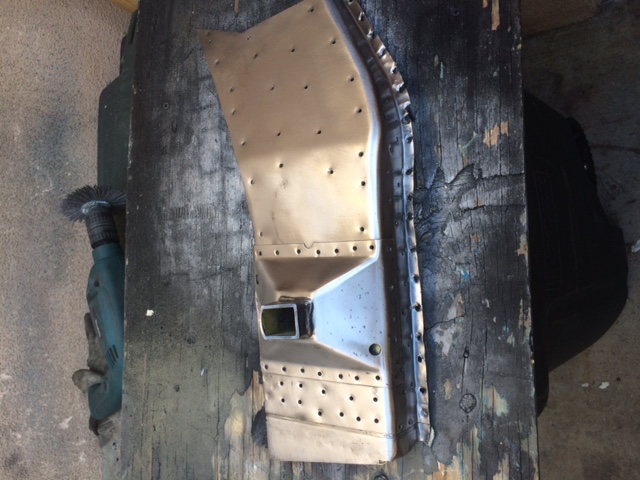

Posted by: marksteinhilber Oct 5 2016, 01:53 PM
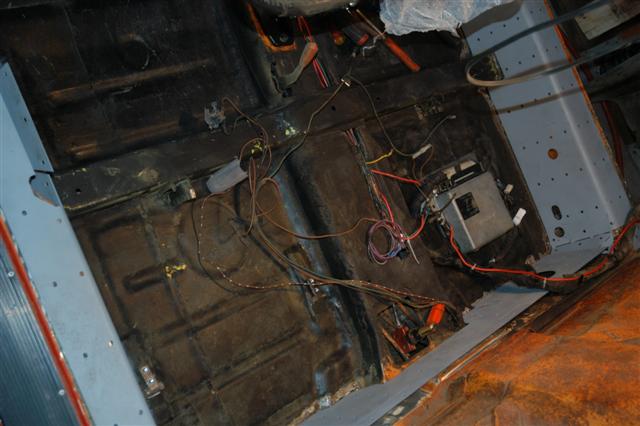
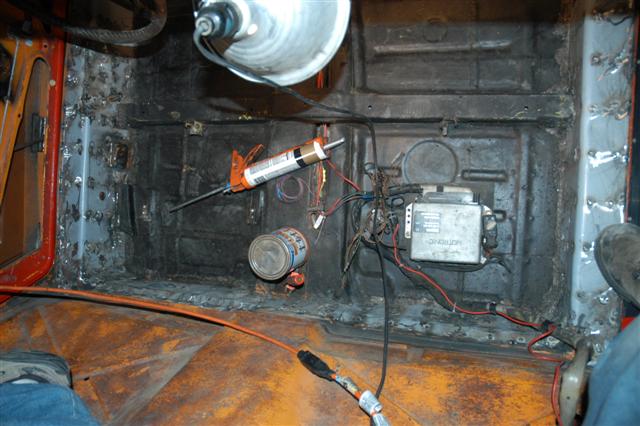
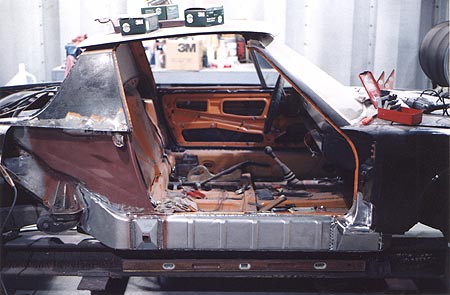
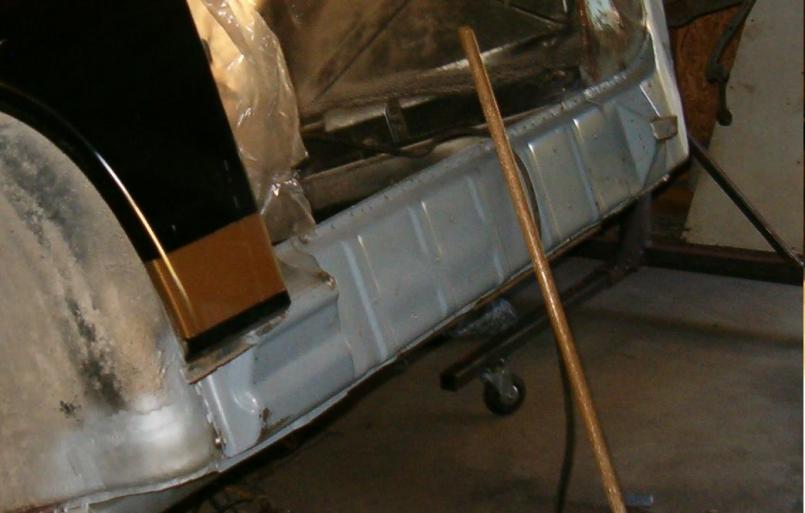
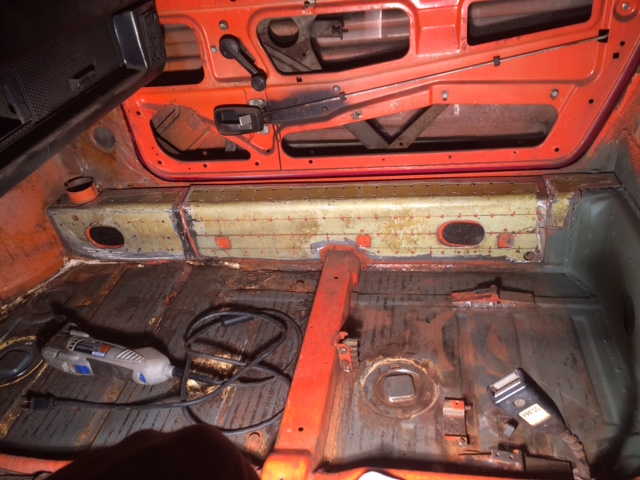
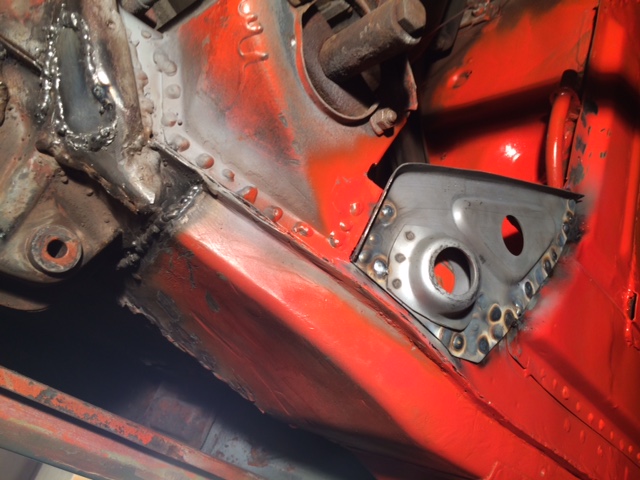
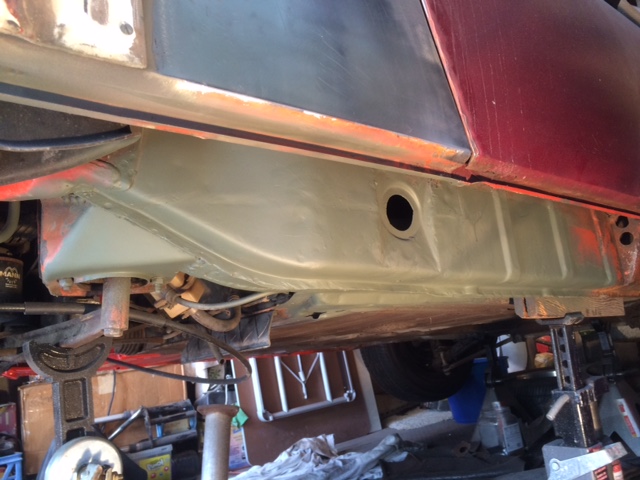
Oh, OSPHO or other rust remover can be used to arrest rust when you're in there, it leaves a phosphate coating behind after rinsing that helps prevent rust. Once dry, a good weld through primer or even cold galvanizing spray can be used between the layers, but you do have to wire wheel where your going to weld. Once welded. wire wheel all to bright shiny metal, OSPHO again to basically etch the steel, rinse, fully dry, and then prime with your choice. I often use self etching primer in rattle cans because it is very convenient, but many opt for an epoxy primer which many regard as the best. I don't plan for this car to even see rain. Here's a few more shots that help explain my repair and stiffening.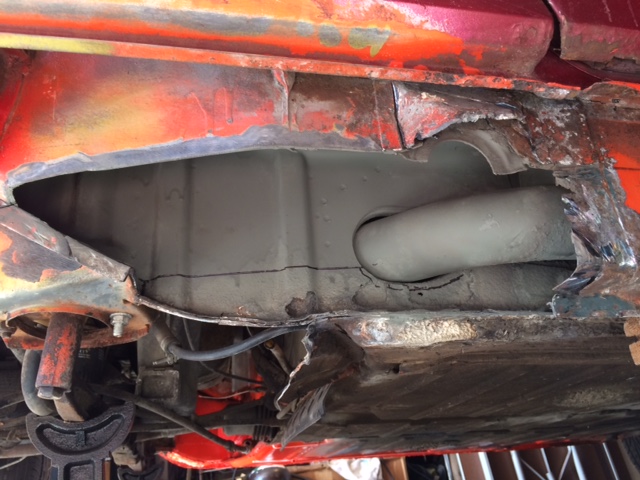
 [attachmentid=576
784]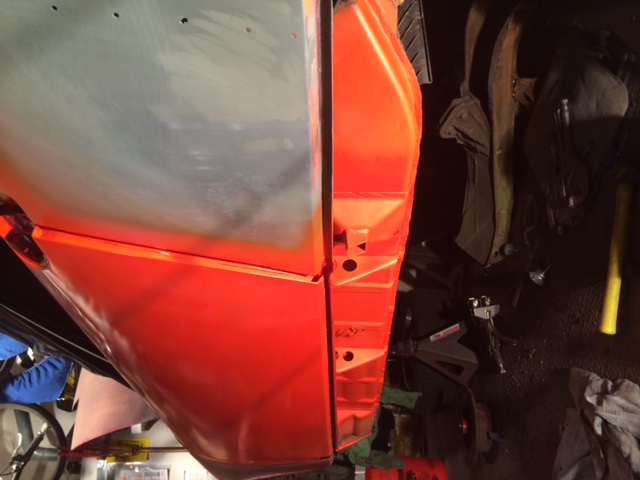
Attached image(s)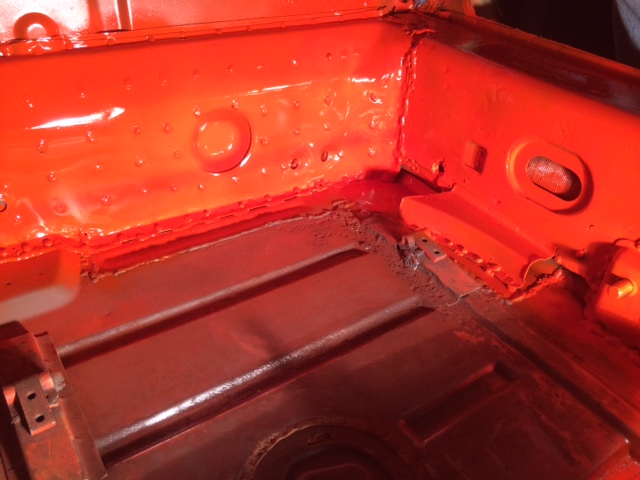
Posted by: marksteinhilber Oct 5 2016, 02:04 PM
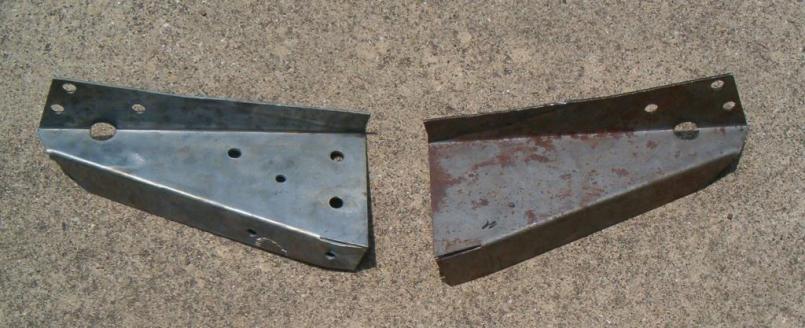
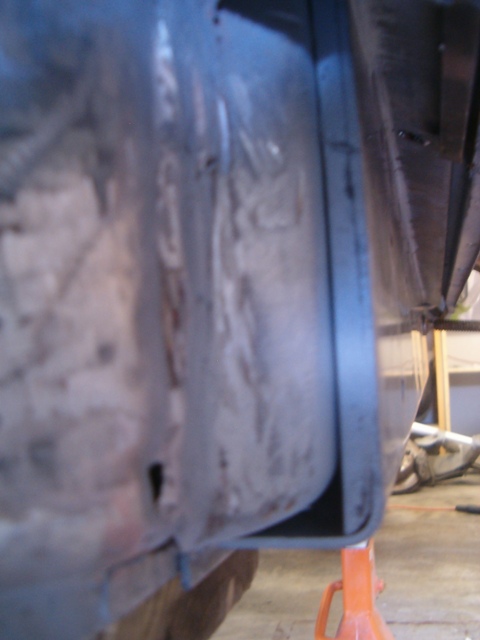
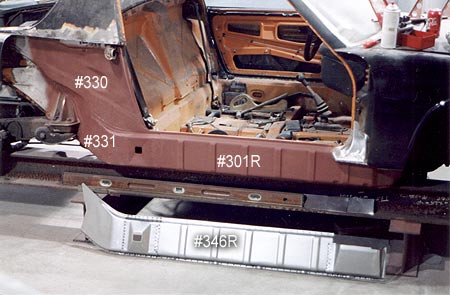
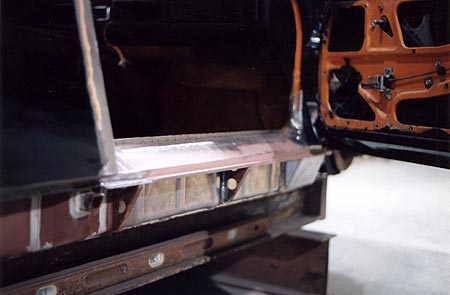
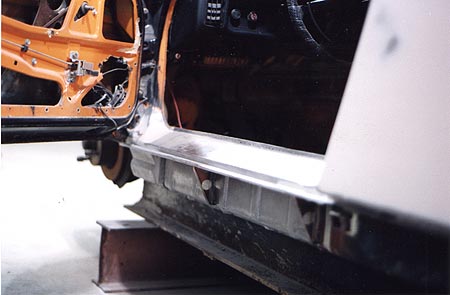
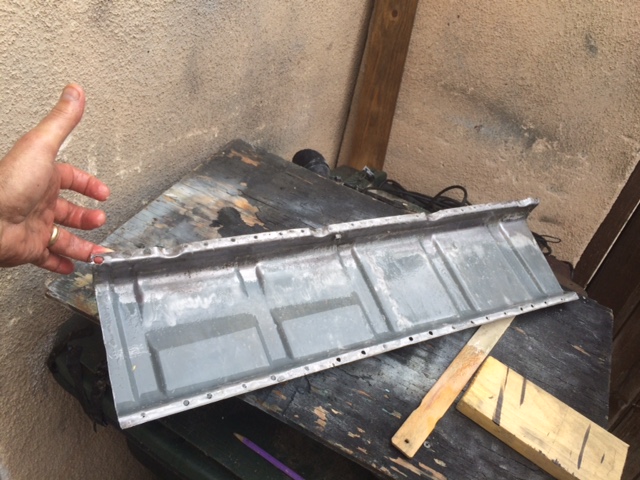
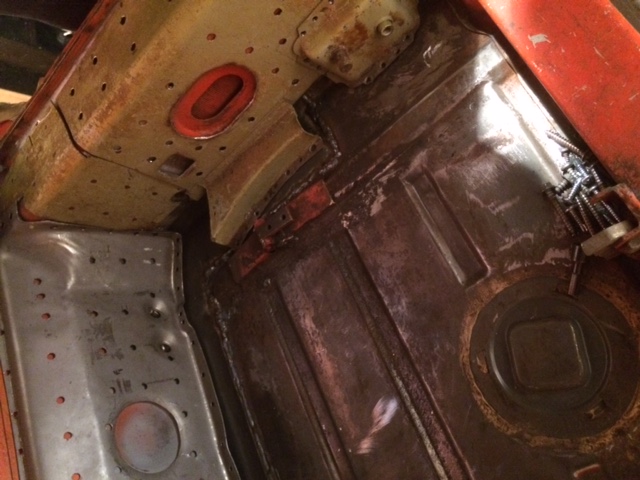
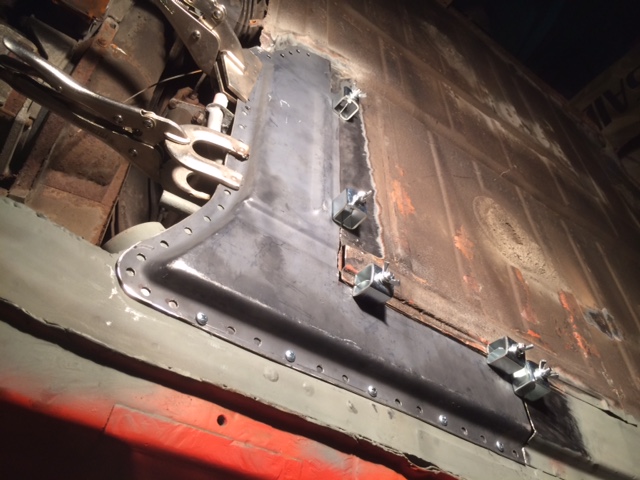
I learned plenty from this website. Jack point repair can be done with just a hole cut below the door latchplate. Outside long can be overlayed by carefully removing triangle plates and sill. I've been able to reuse those pieces as I was careful how I used a spot weld cutter and thin cutting wheels. I use a 4 1/2 grinder, 3 inch electric die grinder, and a dremel, each with thin metal cutting wheels. Here, I'm ready to put the overlays and the new jack point parts from RD into place.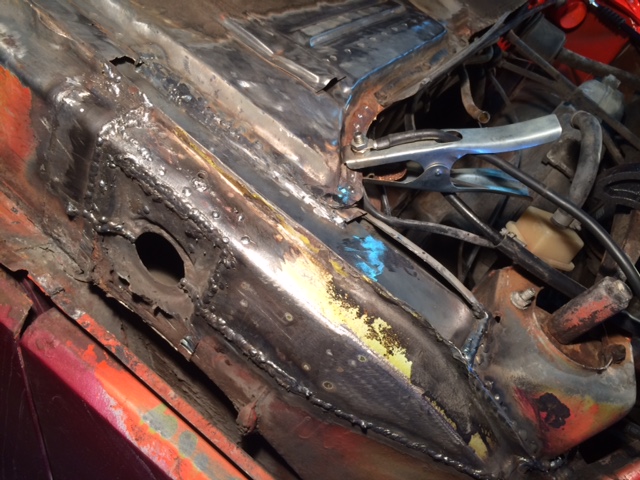
Powered by Invision Power Board (http://www.invisionboard.com)
© Invision Power Services (http://www.invisionpower.com)