Printable Version of Topic
Click here to view this topic in its original format
914World.com _ 914World Garage _ SDS Installation into the 74 2.0 (SDSEFI)
Posted by: Larouex May 11 2010, 11:18 PM
Hello,
I wanted to document my SDS install as I am doing a few custom steps I haven't seen anyone post yet.
I ordered the EFI system with the 02 System (which requires welding in the bung and sensor, more on that later). I already have the Crane Xr700 and the Crane Coil, so my ignition is solid and works well and decided to skip the ignition and crankfire for now.
My first goal was to fit the SDS ECU into the existing 914 DJet ECU as I had a couple extra boxes. I am pleased with the results, although I have to mount the O2 sensor and tach boost box, so far I am not sure how I want those items to no be conspicuous in the engine bay.
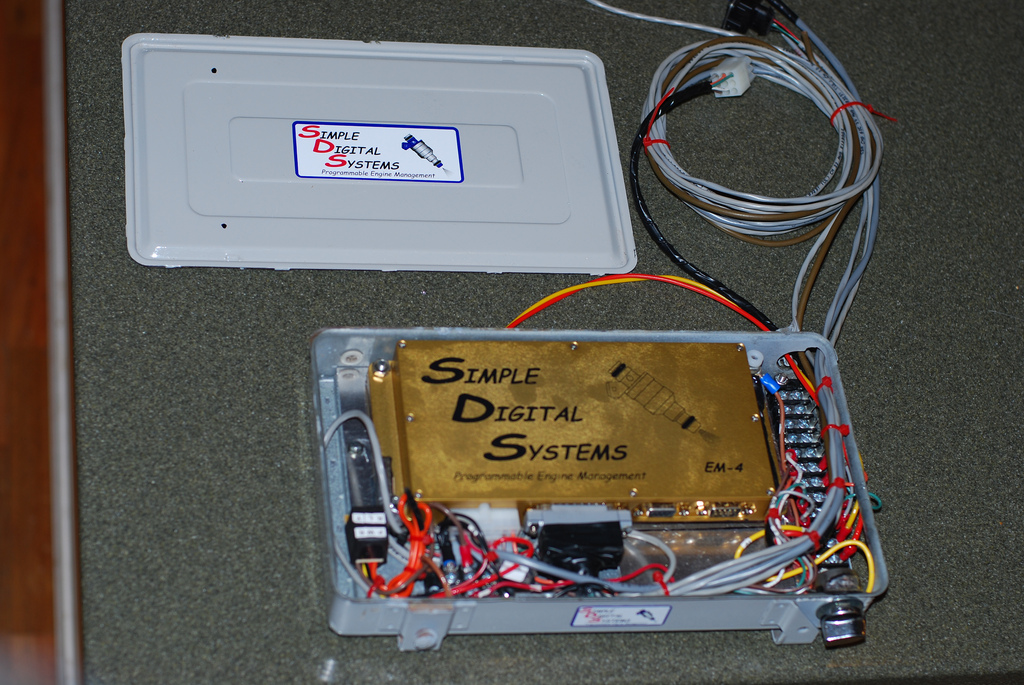
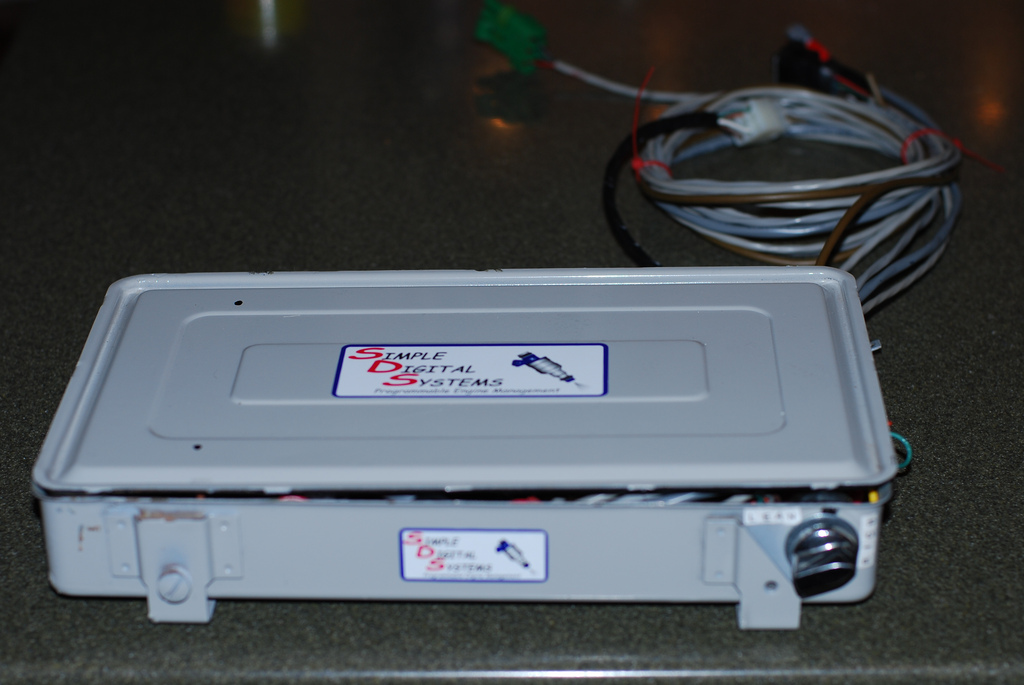
I will post more as I get the install further along, but here are the pics of the box install and fitment...
Full image set @
http://www.flickr.com/photos/23338977@N03/sets/72157624044519508/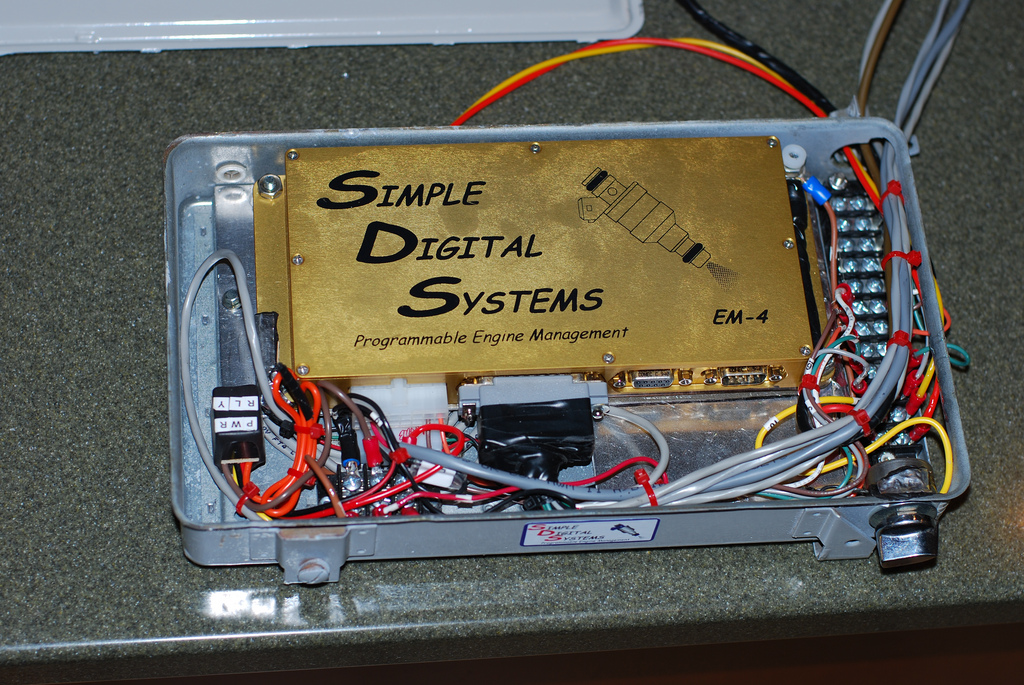
Posted by: ottox914 May 12 2010, 06:32 AM
Does the lid not quite fit down on the case? I was thinking of doing that for my SDS install, but used the area where the factory box went to add some really big relays for the SDS system and fuel pump. If you snoop around my sig the link to the project is there.
Posted by: Jake Raby May 12 2010, 07:12 AM
Be careful when sealing the SDS in a container.. I have had issues with that in the past as the ECU ran at a temperature that was elevated. I've always surface mounted the ECUs since that occurrence with no issues.
Posted by: Larouex May 12 2010, 08:46 AM

Be careful when sealing the SDS in a container.. I have had issues with that in the past as the ECU ran at a temperature that was elevated. I've always surface mounted the ECUs since that occurrence with no issues.
Hmm, good information and you would know! In your opinion, the SDS ECU needs air flow for cooling of the internals?
Posted by: Larouex May 12 2010, 08:49 AM
Does the lid not quite fit down on the case? I was thinking of doing that for my SDS install, but used the area where the factory box went to add some really big relays for the SDS system and fuel pump. If you snoop around my sig the link to the project is there.
Nice thread, thanks. I am going to read it in detail this afternoon.
Posted by: Jake Raby May 12 2010, 09:03 AM
When the ECU runs at elevated temps, the engine does weird things... Things I never have experienced when the ECU was mounted in an exposed area.
Posted by: charliew May 12 2010, 09:04 AM
If it's got drivers in it it will fail in a enclosed box. Why does no one want to mount the ecu's in the cab? The fiero uses a compartment inbetween the seat backs to house the ecu.
Posted by: ottox914 May 12 2010, 09:31 AM
Be careful when sealing the SDS in a container.. I have had issues with that in the past as the ECU ran at a temperature that was elevated. I've always surface mounted the ECUs since that occurrence with no issues.
Exactly the reason I mounted mine in the rear trunk. I like the idea of the stealth install, but was not sure about the airflow issues that may have occurred.
Posted by: Mark Henry May 12 2010, 11:02 AM
I did the in the can trick PITA and I wouldn't do it again. I just cut a large hole in th bottom never had a moisture issue, but I did have a good engine seal.
I tried to mount it the way you have it at first, but I felt that the bend in the wires was too extreme and it has a good chance of fatigue and therefore failure.
Posted by: Mark Henry May 12 2010, 11:36 AM
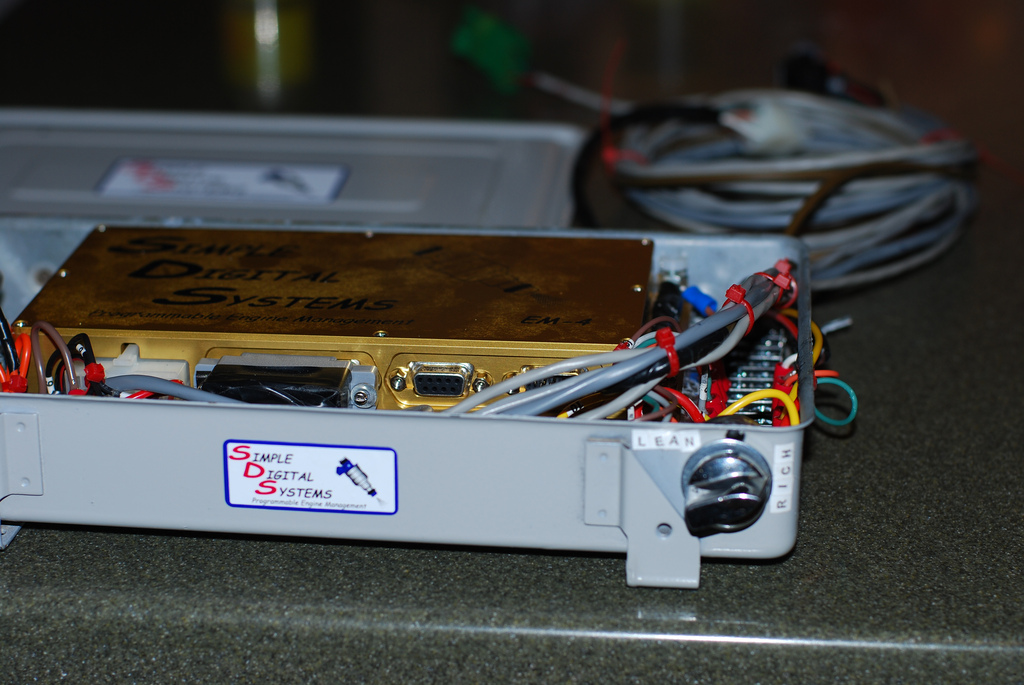
BTW you don't want to mount your rich/lean mixture knob like that, because that's not how you use it. It needs to be mounted beside your pendant.
As you drive you turn the mixture knob till you have a good AFR then you look at the percentage and add (or subtract) that to your fuel value, then move to the next RPM range and repeat till you have done all the fuel values. It seems odd at first, but you catch on very quick. A stock engine in good condition I can have good tune this way within minutes.
Look for the thread with my ashtray mount, it's the best setup as you'll have a heads up display. Easy to tune as you drive this way.
Posted by: Larouex May 12 2010, 11:41 AM
BTW you don't want to mount your rich/lean mixture knob like that, because that's not how you use it. It needs to be mounted beside your pendant.
As you drive you turn the mixture knob till you have a good AFR then you look at the percentage and add (or subtract) that to your fuel value, then move to the next RPM range and repeat till you have done all the fuel values. It seems odd at first, but you catch on very quick. A stock engine in good condition I can have good tune this way within minutes.
Look for the thread with my ashtray mount, it's the best setup as you'll have a heads up display. Easy to tune as you drive this way.
Thanks Mark, I understand that now. I will move that out of the box.
Posted by: charliew May 12 2010, 12:04 PM
You actually did a nice neat job though.
Posted by: Larouex May 12 2010, 12:06 PM
After all of this excellent feedback, I think I might just mount the box as is in the cabin <g/> No rain, no heat and I can get to the lean/rich button while driving. It still is a clean install.
Larouex
Posted by: Mark Henry May 12 2010, 12:38 PM
After all of this excellent feedback, I think I might just mount the box as is in the cabin <g/> No rain, no heat and I can get to the lean/rich button while driving. It still is a clean install.
Larouex
Yep, whip out the hole saw and cut the hole to get that big fuching connector through into the cab. Don't think...just do it.
Posted by: ConeDodger May 12 2010, 12:47 PM
Another thing you might consider, though it is an extra expense - Jeff Bowlsby (Bowlsby) and Jeff Keyser (MightyOhm) can make you a custom SDS harness that is much nicer than the one provided by SDS. That is the route I am going and SDS is giving me a $275 credit for harness delete. The Bowlsby MightyOhm harness is shielded for EMI, weatherproof and can have a connector that allows you to unplug your engine for engine drops and leave it wired so reinstallation is just - put the engine back in and plug it back into it's fuel injection harness. Really a neat solution. Perhaps one of them will chime in but it is something you should consider...
Posted by: Jake Raby May 12 2010, 12:48 PM
In my 912E I installed it just behind the Driver's jump seat mounted to the bulkhead.
Posted by: Larouex May 12 2010, 01:26 PM
Another thing you might consider, though it is an extra expense - Jeff Bowlsby (Bowlsby) and Jeff Keyser (MightyOhm) can make you a custom SDS harness that is much nicer than the one provided by SDS. That is the route I am going and SDS is giving me a $275 credit for harness delete. The Bowlsby MightyOhm harness is shielded for EMI, weatherproof and can have a connector that allows you to unplug your engine for engine drops and leave it wired so reinstallation is just - put the engine back in and plug it back into it's fuel injection harness. Really a neat solution. Perhaps one of them will chime in but it is something you should consider...
That would be great, the harness is a sore spot for me and I already did the FI portion of the harness. I have pinged Jeff on his site before and did not get a response, what is the best way to get one of these ordered?
Posted by: ConeDodger May 12 2010, 01:34 PM
The quickest way for you to get a hold of Jeff Bowlsby is to PM him through this site.
Search his screen name (Bowlsby) and just send him a note. Tell him I got you interested in his SDS harness and he can send you a picture. You have to be able to tell him your components and where you intend to mount things.
Another thing you might consider, though it is an extra expense - Jeff Bowlsby (Bowlsby) and Jeff Keyser (MightyOhm) can make you a custom SDS harness that is much nicer than the one provided by SDS. That is the route I am going and SDS is giving me a $275 credit for harness delete. The Bowlsby MightyOhm harness is shielded for EMI, weatherproof and can have a connector that allows you to unplug your engine for engine drops and leave it wired so reinstallation is just - put the engine back in and plug it back into it's fuel injection harness. Really a neat solution. Perhaps one of them will chime in but it is something you should consider...
That would be great, the harness is a sore spot for me and I already did the FI portion of the harness. I have pinged Jeff on his site before and did not get a response, what is the best way to get one of these ordered?
Posted by: Joe Owensby May 12 2010, 07:29 PM
I put mine inside the passenger compartment. There should be details in a link in my signature. I bacisally hollowed out the foam in the backpad to make room for the controller. Keep on posting. JoeO
Powered by Invision Power Board (http://www.invisionboard.com)
© Invision Power Services (http://www.invisionpower.com)