Printable Version of Topic
Click here to view this topic in its original format
914World.com _ 914World Garage _ OT Bright flashes of welding coming from Area51Werks today
Posted by: rick 918-S Jun 5 2010, 11:20 PM
Spy shots from inside Area51Werks. Lots of cutting, hammering, fabrication and welding were rumored to have taken place today. 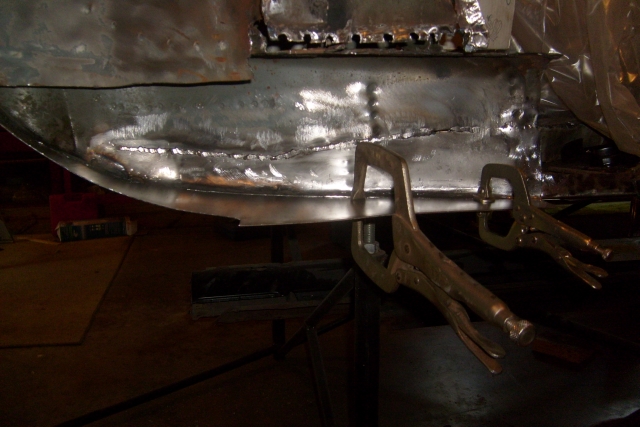
Posted by: rick 918-S Jun 5 2010, 11:21 PM
One more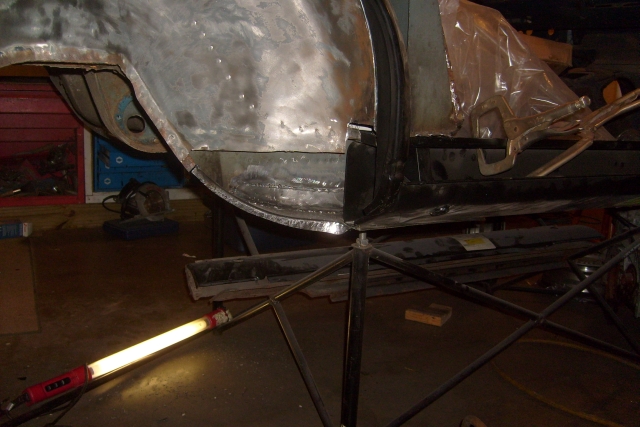
Posted by: markb Jun 6 2010, 01:26 AM

Posted by: RobW Jun 6 2010, 02:16 AM


Posted by: qa1142 Jun 6 2010, 06:26 AM
Rick
I need to drive up and see you shop sometime
you do nice work

Will
Posted by: rick 918-S Jun 6 2010, 07:59 AM

Rick
I need to drive up and see you shop sometime
you do nice work
Will
Come on up! But I warn you, I may put you to work.
![whip[1].gif](style_emoticons/default/whip[1].gif)
Too many projects not enough time.

Posted by: MDG Jun 6 2010, 08:43 AM

Master craftsmanship.
Posted by: scotty b Jun 6 2010, 09:42 AM
Looks familiar 
Attached image(s)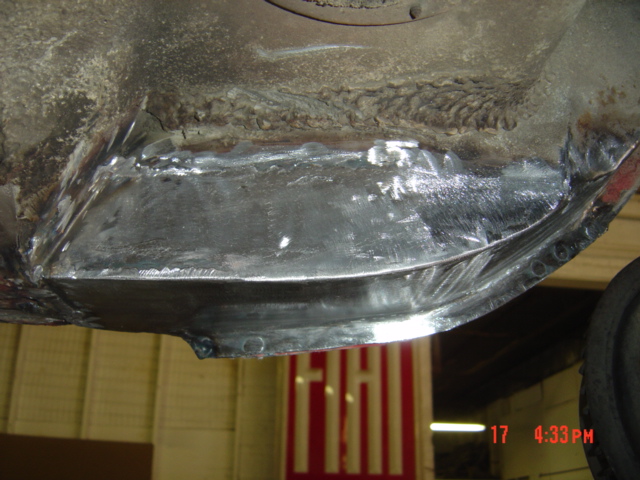
Posted by: rick 918-S Jun 6 2010, 10:52 AM
Looks familiar
Scotty, we live in a parallel universe
I just wish sometimes it was my full time gig again. 
Beats the hell out of spending your sunday afternoon balancing a payment spread sheet and looking through a $ 100,000.00 worth of invoices from a contractor.
Posted by: jmill Jun 6 2010, 10:59 AM
Sweet!
But I really want to see this one.
Attached image(s)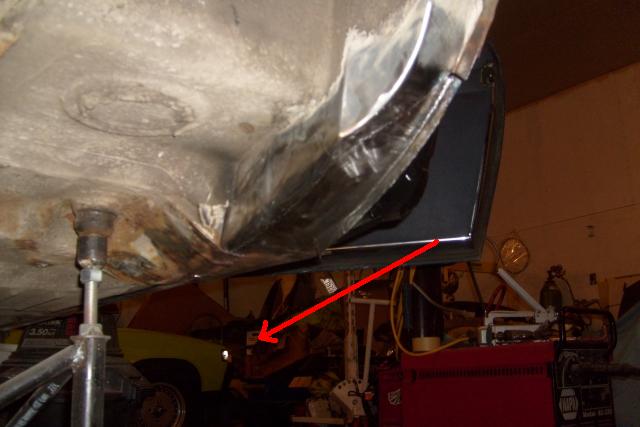
Posted by: scotty b Jun 6 2010, 11:06 AM
I did that 230 a few years ago and it was frightening. Another one of the " cover up " scenarios. The guy bought the car in 73 IIRC and never new it had been bondoed over underneath. He literally turned white when he came by and realized what his wife had been driving in for 25+ years. Rust hjoles big enough I could put my hand inside, that had been taped, wiped and undercoated
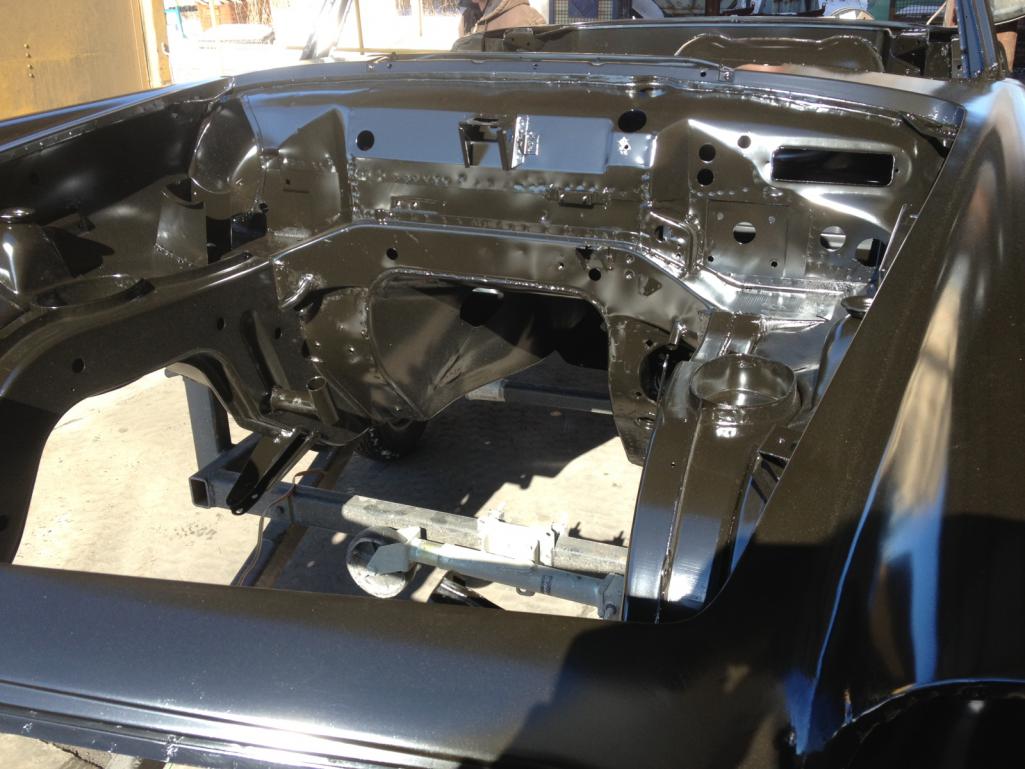
Posted by: rick 918-S Jul 29 2010, 09:50 PM
More welding photos from last weekend
Attached image(s)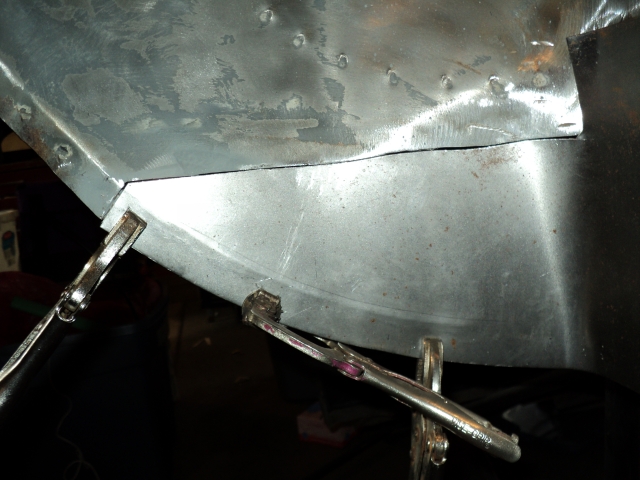
Posted by: rick 918-S Jul 29 2010, 09:52 PM
Couple more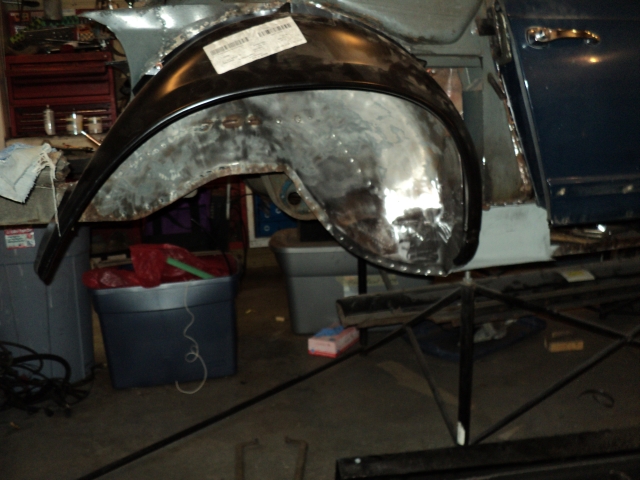
Scary! 
Posted by: rick 918-S Jul 29 2010, 10:05 PM
So I have this 29 Ford Rat Rod body in my storage garage. It was a coupe but the roof went missing many years ago. My oldest son Aric took an interest in it so I started scrounging for parts. I came across a 348 engine a friend had rebuilt but never used. He told me I could have it if I can an picked it up. Well it was laying out back of his garage wrapped in plastic. It's almost junk. I pulled it apart and the internals are ok. the heads will need to completely gone through.
Then I discovered this... 
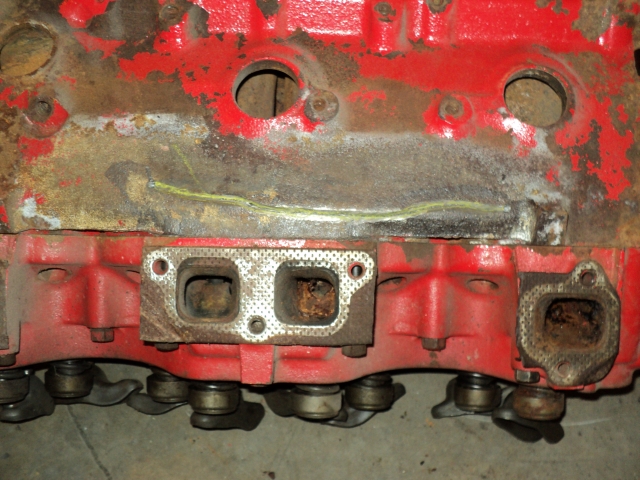
Posted by: rick 918-S Jul 29 2010, 10:11 PM
So Aric and I tag teamed it. I pulled out the buzz box and some nickel welding rod. Aric heated the block with the rose bud torch head and kept it hot while I arc welded the crack. We had the head bolted on tight and worked the crack slow. After welding you will have some pin holes. The sand cast block has lots of impurity's. I took the cutting head, (couldn't find my #2 tip) and melted the nickel rod around the pin holes and peened them closed.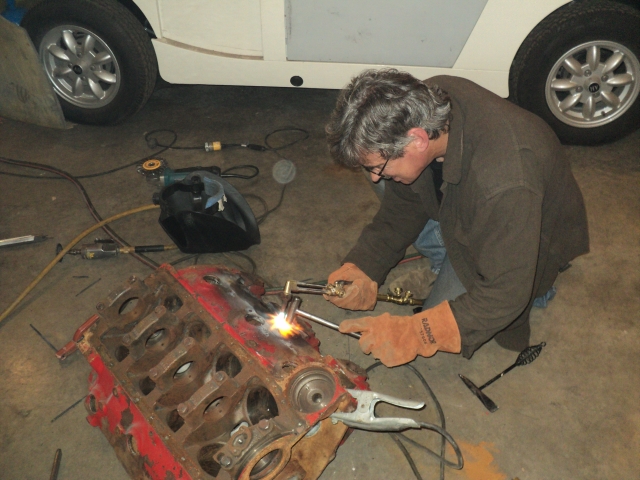
Posted by: rick 918-S Jul 29 2010, 10:14 PM
And here it is. We filled the block with coal slag to help the block cool slow and covered it with blankets.
BTW: This is a common problem on these early blocks. The water jacket at the top of the block is very thin. Many of these blocks get tossed but with a little patience they can be welded.
Posted by: markb Jul 30 2010, 12:42 AM
Wow, that seems really old school! And very cool!
Posted by: 76-914 Jul 30 2010, 08:17 AM
Good luck with that truck engine. Tons of torque but it doesn't like high rev's. IIRC the first yr 348 (1958) was the fast one and did not have the water jackets that yours has. Didn't that engine have a peaked surface where the heads mate. I can't remember. We used to drop those in 55-56 chevys. Had to cut out some firewall, reverse the rear motor mounts and fab some L brackets for the front mounts. You took me back a few years with those pic's, Rick. 
Posted by: rick 918-S Jul 30 2010, 09:17 AM
Well, We had a small set back. I ran low on Acetylene about 2/3 of the way through the welding so we cut the heat off kind of early. I thought I was ok but as with any cast iron you never really know until you check on things the next day. So, off to the welding supply store and back at the welding. More later.
Attached image(s)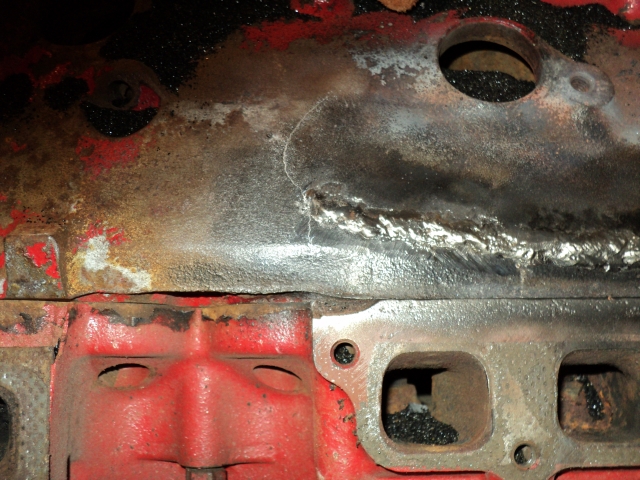
Posted by: rick 918-S Jul 30 2010, 09:22 AM
Good luck with that truck engine. Tons of torque but it doesn't like high rev's. IIRC the first yr 348 (1958) was the fast one and did not have the water jackets that yours has. Didn't that engine have a peaked surface where the heads mate. I can't remember. We used to drop those in 55-56 chevys. Had to cut out some firewall, reverse the rear motor mounts and fab some L brackets for the front mounts. You took me back a few years with those pic's, Rick.
This is all for the look. We just want it to drive. Old school build, 3X2 carbs, truck 4 sp and maybe a 6 or 8 lug rear axle. Were thinking 7 or 8" dirt track slash cut tread tires on the rear. Steel wheels.
Posted by: Vacca Rabite Jul 30 2010, 11:30 AM
http://www.muggyweld.com/castiron.html
I have heard good things about using these folk's rods for cast iron weld repair. never done it myself, so I can't say for sure. But from what I have been told, it eliminated the need to pre and post heating somehow.
Some of the guys on the military truck boards are a fan, and have used it on blocks and manifolds. Was going to try it, as I had a cracked manifold, but then decided to just swap engine instead.
Zach
Posted by: Porcharu Jul 30 2010, 01:13 PM
I will be using this to repair the castings in my good old table saw castings that have developed cracks after 40 years of contractor use.
http://www.tinmantech.com/html/cast_iron_welding_supplies.php
Posted by: charliew Jul 31 2010, 02:18 PM
My 63 ohc 258 jeep six developed a exhaust manifold crack, thats when the 355 sbc went in it.
That low rpm 348 would really like a passenger car 4 or 5 spd. Even a saginaw 4 spd out of one of the small v8 camaros in that light car would work. If you could find one they can't be too expensive. I used one in my jeep truck behind a 355 sbc with the jeep transfer case adapted for a few years.
For me a 312 ford would be neat.
Posted by: rick 918-S Jul 31 2010, 07:39 PM
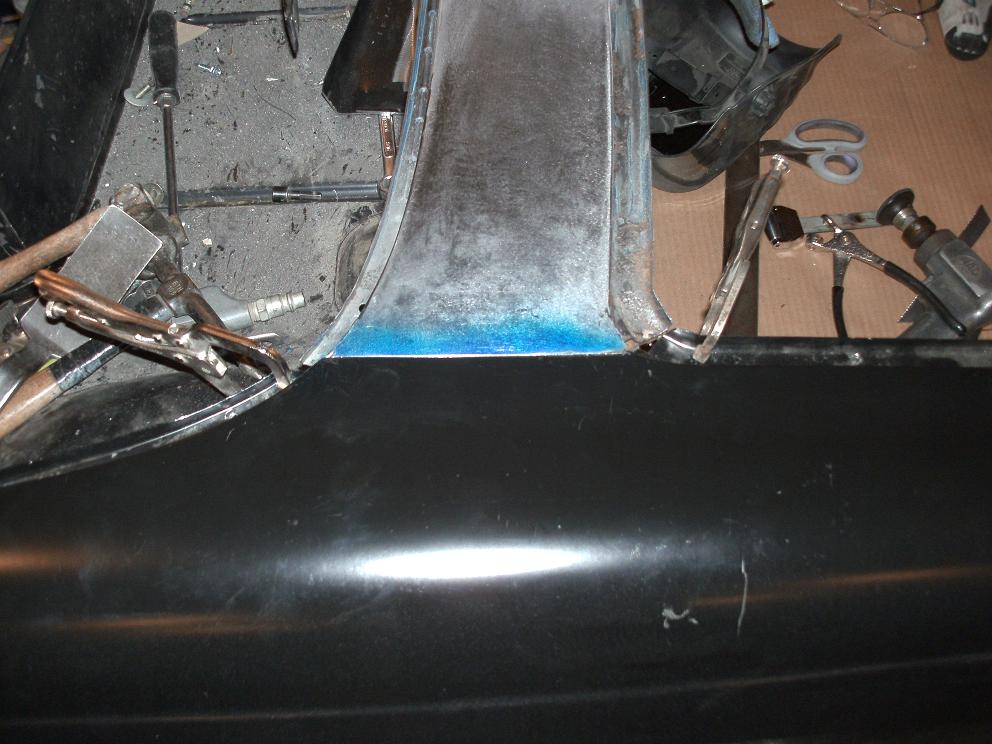
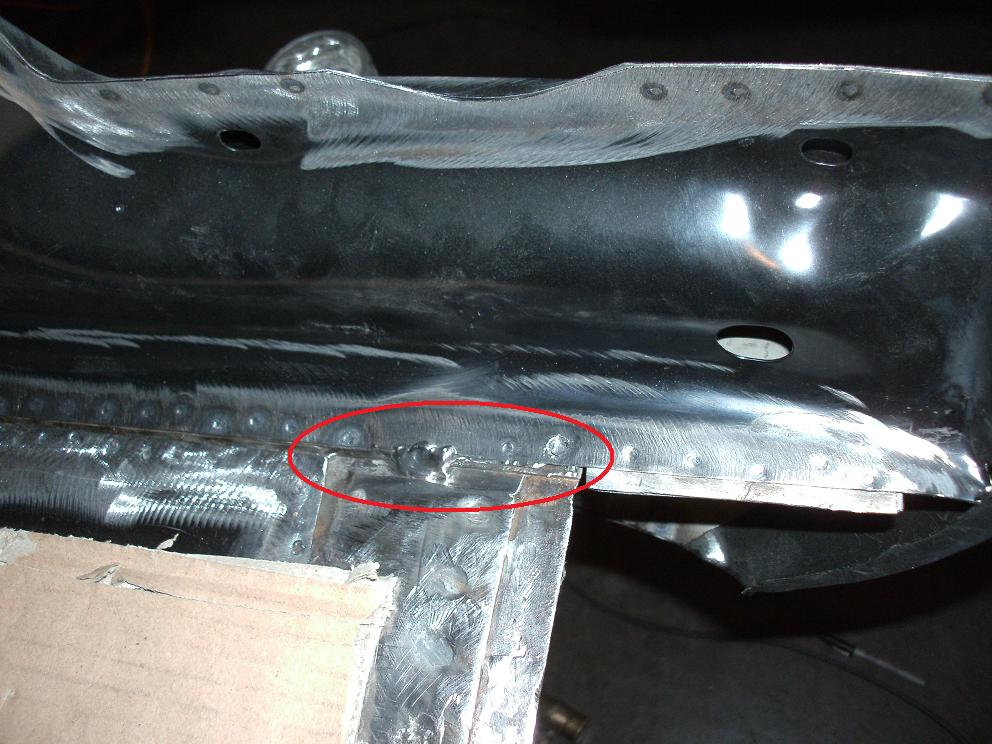
Did some fabrication today. This is a part that is not available so I had to make one. You think our 914 rust... 
Here's a tip for you all. I go to the local small town print shop and buy this card board. It's the backing for desk top calendars. It's the perfect pattern board and it's cheap.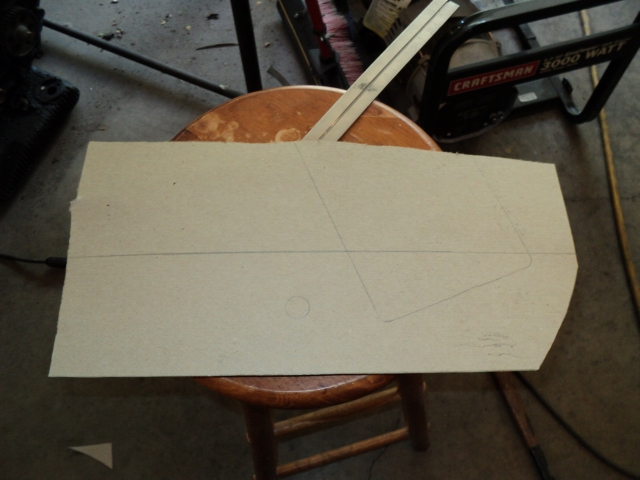
Posted by: rick 918-S Jul 31 2010, 07:39 PM
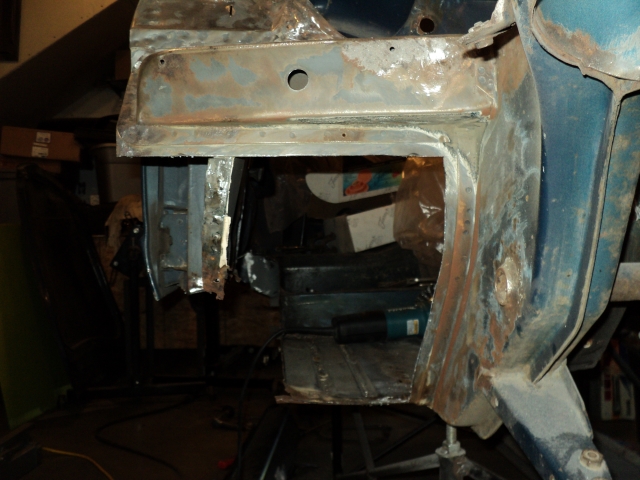
Part of this repair involves repairing a speaker hole someone hacked into the door post. It isn't bad enough that the car was rusted nearly half way up the sides this hole kills the strength of the post big time.
Attached image(s)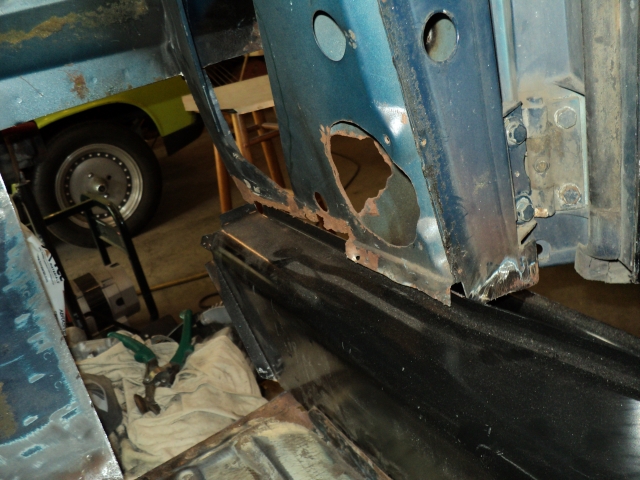
Posted by: rick 918-S Jul 31 2010, 07:51 PM
Adding a factory hole from the pattern. Notice the hand hammered flange around the opening.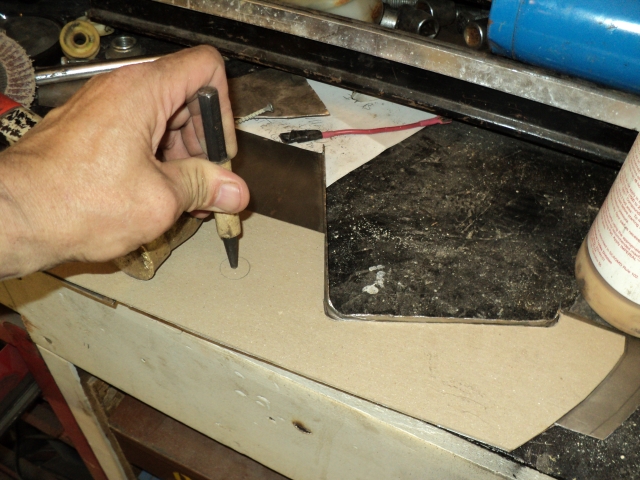
Posted by: rick 918-S Jul 31 2010, 07:55 PM
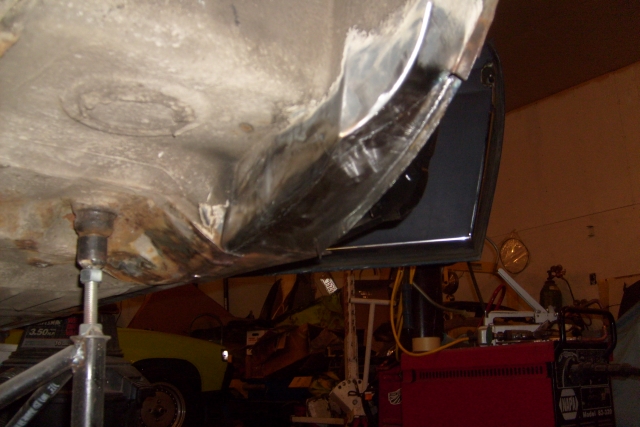
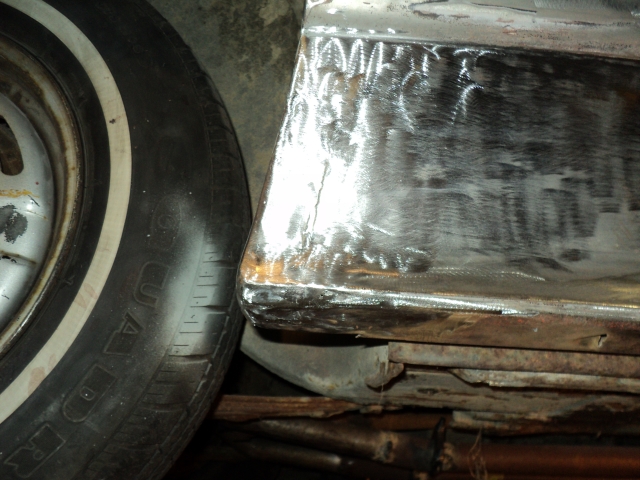
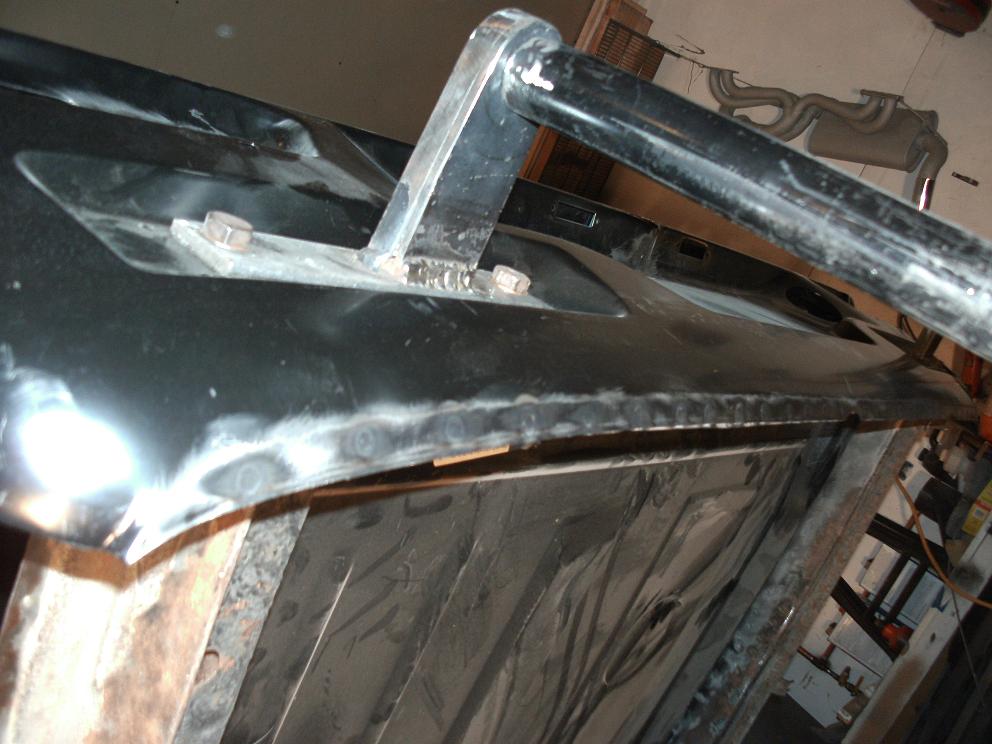
Fitting the new panel. It lines up nice. Notice the square cut out on the post. I cleaned up the jagged edges but I still need to patch that. That is from a hole saw from the speaker hack job.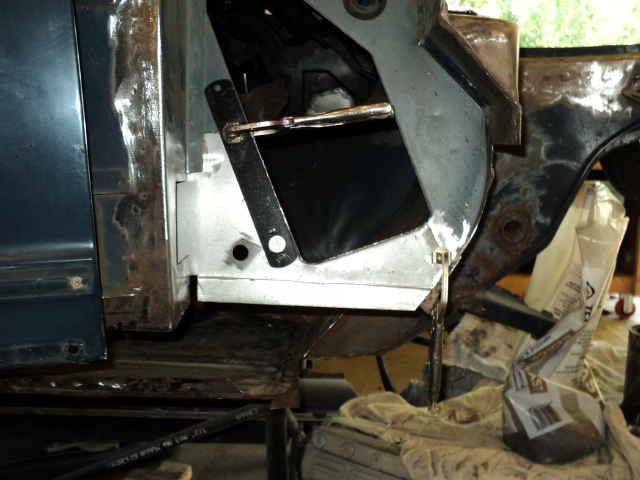
Here's how rusted this car was. This is the lower cowl panel.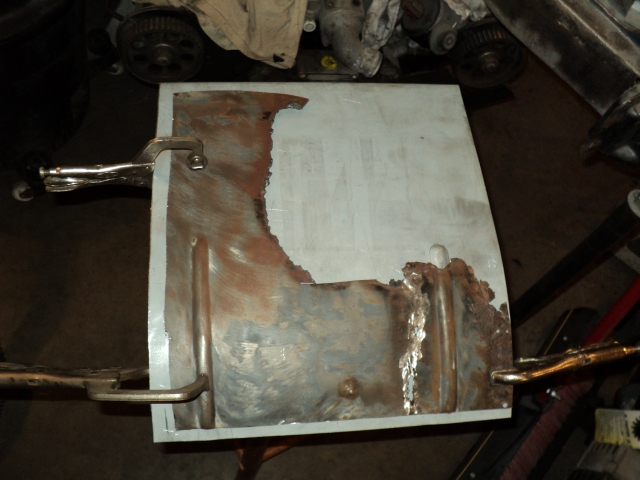
Posted by: rick 918-S Jul 31 2010, 07:59 PM
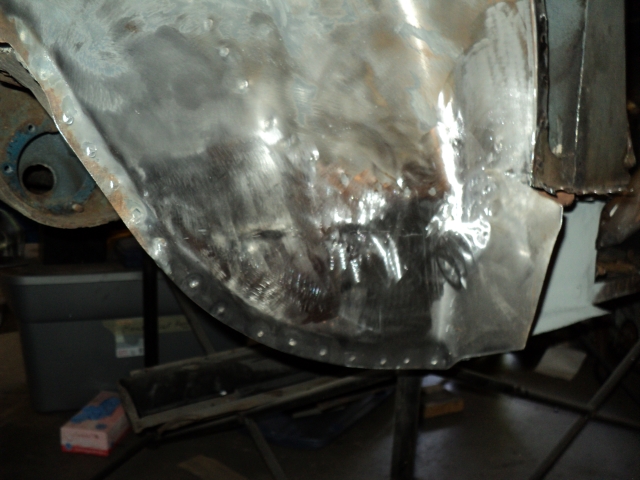
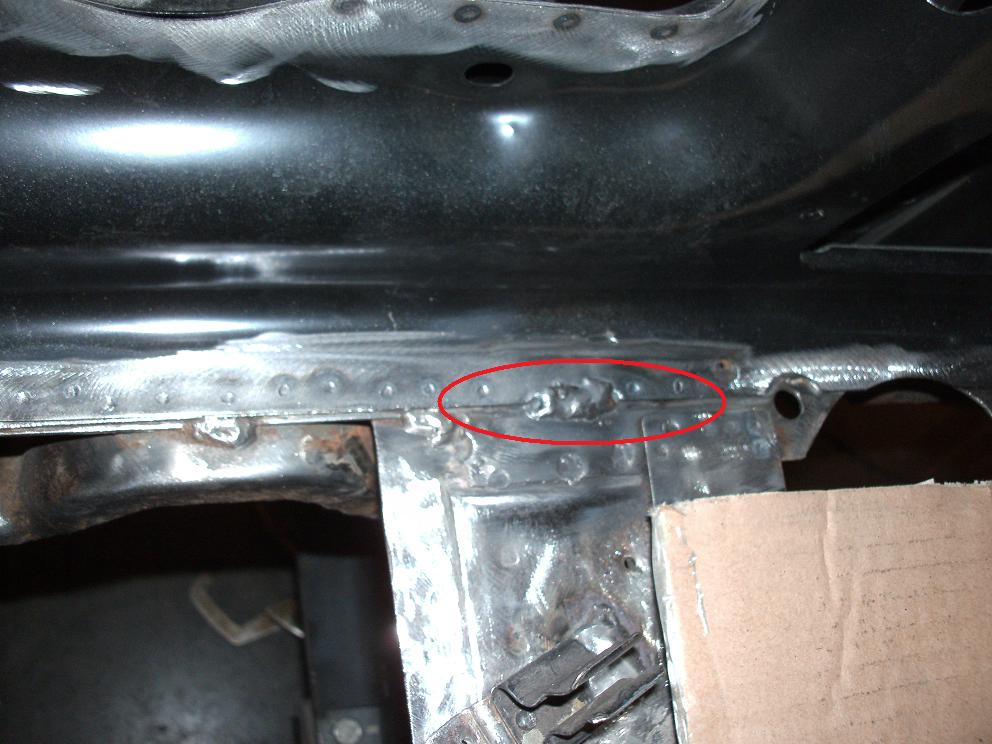
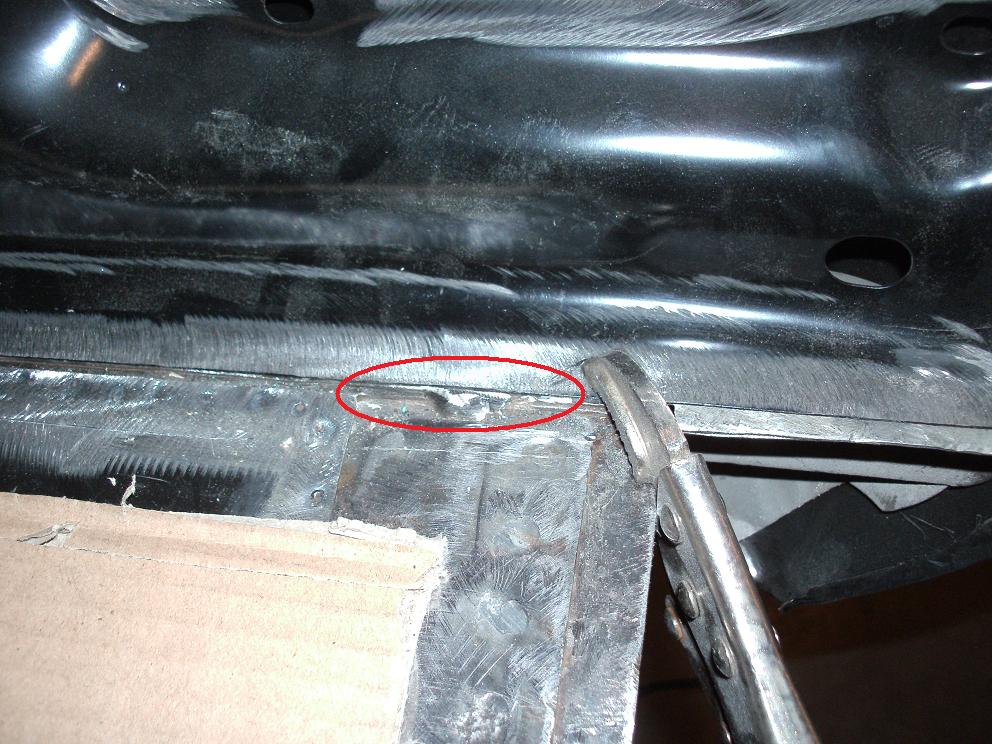
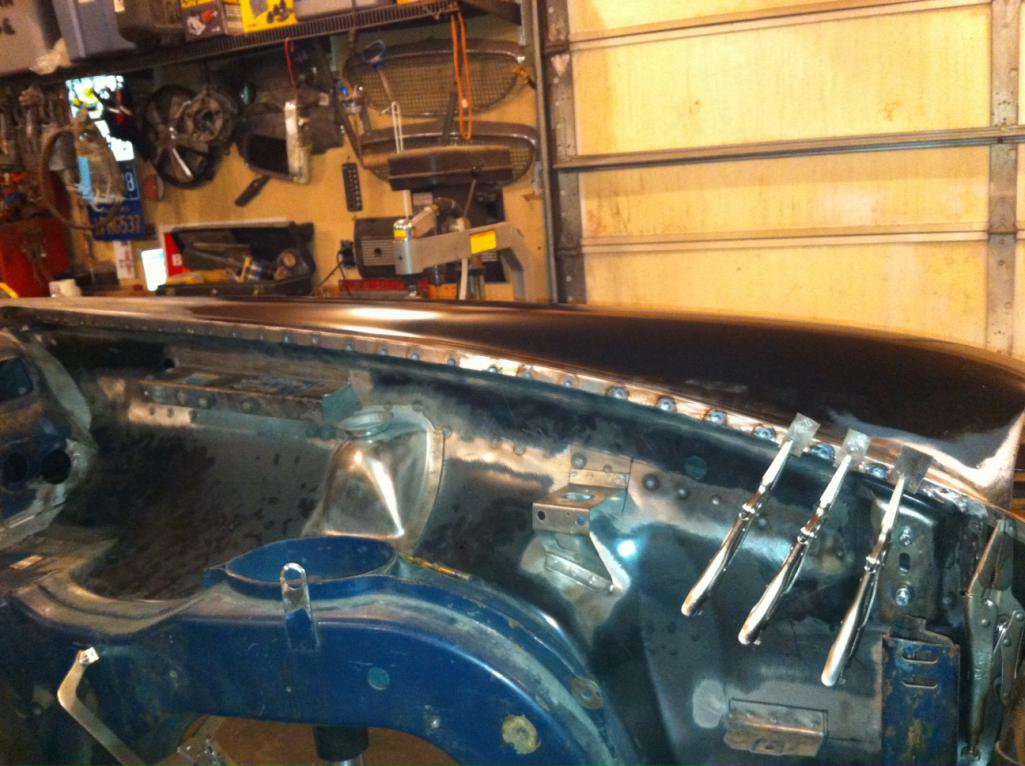
New lower cowl section.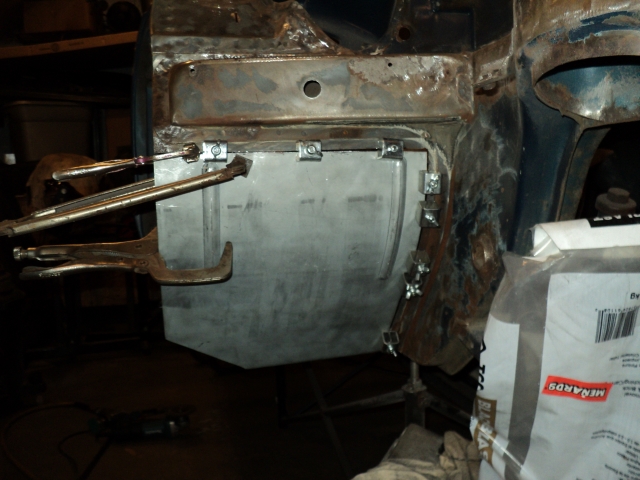
Speaker hole mostly repaired.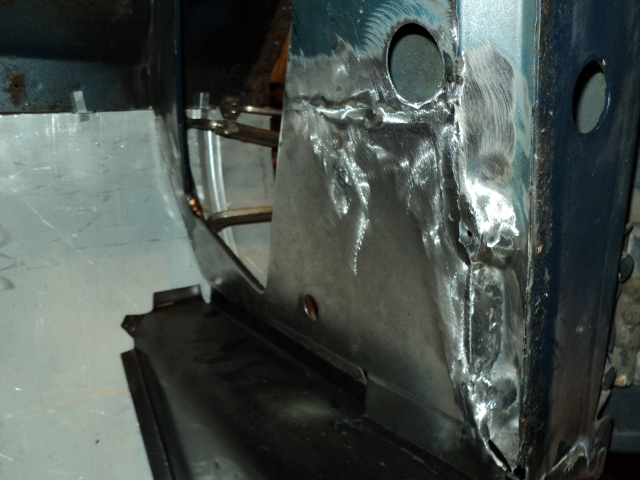
Posted by: rick 918-S Jul 31 2010, 08:05 PM
One more. Repair panel welded and ground.
Attached image(s)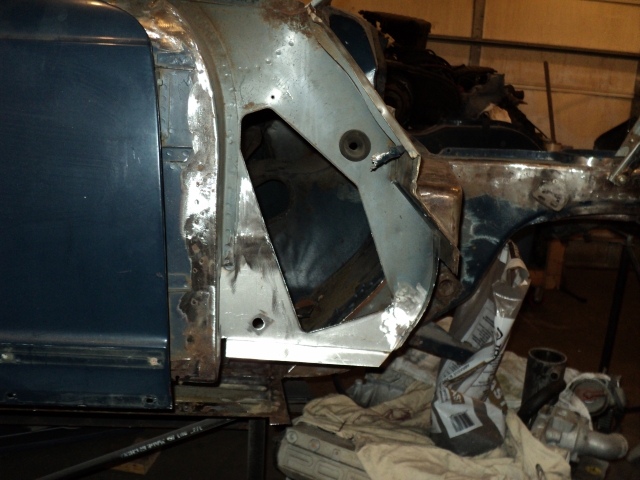
Posted by: Sleepin Aug 1 2010, 01:17 AM
You got skills Rick!
Posted by: rick 918-S Aug 28 2010, 06:46 AM
I didn't know where to put this post. I guess it's kind of a welding post. Last year when I installed my axles I guess I broke a triple square off in one of the bolts. It was on the outboard side of course. I already had my engine out and couldn't find my big socket to remove the axle nut. I don't remember breaking it but there it was.
I could wiggle the little sucker but couldn't get it out. Tried a dental pick...nope.  Tried a magnet..Nope.
Ok, last ditch effort. I drug out the old buzz box, removed the flux off of the end of a welding rod to insure it would stick and not actually weld, turned the machine way down, took aim, and..... GOTCHA!
Attached image(s)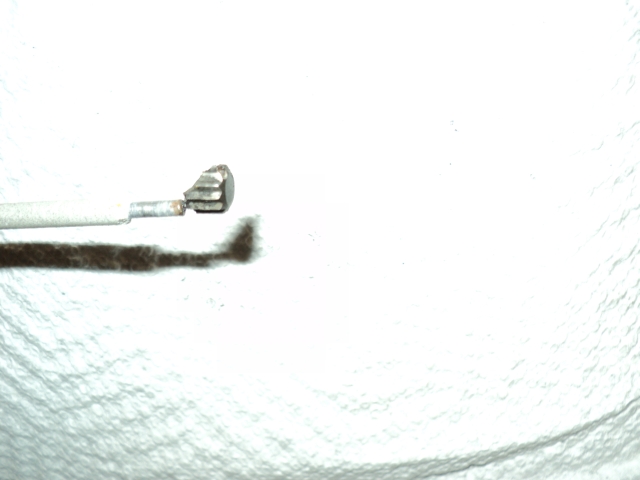
Posted by: McMark Aug 28 2010, 09:52 AM
When are you moving out here? We need to combine forces! B)
Posted by: rick 918-S Sep 25 2010, 09:12 PM
When are you moving out here? We need to combine forces!

Posted by: rick 918-S Sep 25 2010, 09:12 PM
Area51Werks took a field trip today. This is my brother inlaws 59 Square Bird. The car is from Montana. There is very little rust.
Now my Brother inlaw Dave and I had a basic clash of the titans brawl the first time we met. (34 yrs ago) Hey I was dating his little sister and he wasn't going to let anything bad happen to her. Besides we were : The next day we became fast friends and have worked together in my bodyshop on and off for many years.
Dave is more than capable when it comes to doing this work but I just like to weld so he let me do the metal work today.
Attached image(s)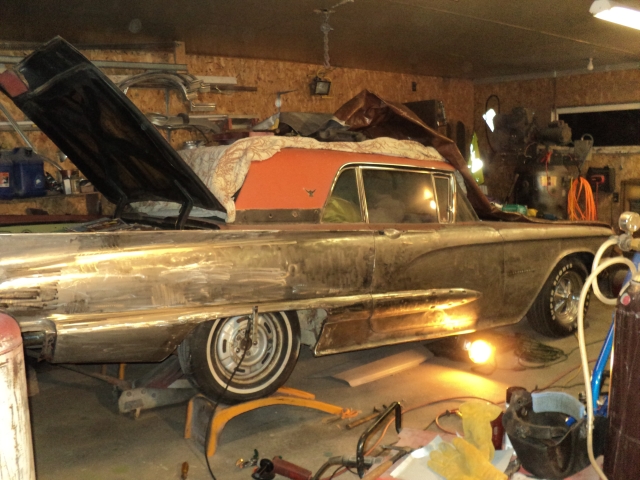
Posted by: rick 918-S Sep 25 2010, 09:13 PM
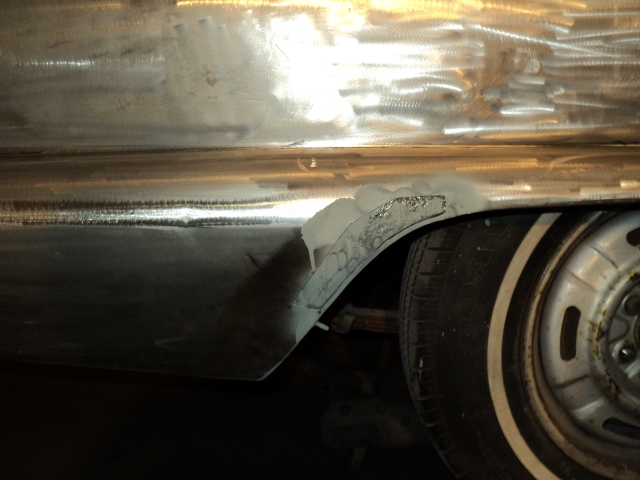
There was dirt trapped between the panels.
Attached image(s)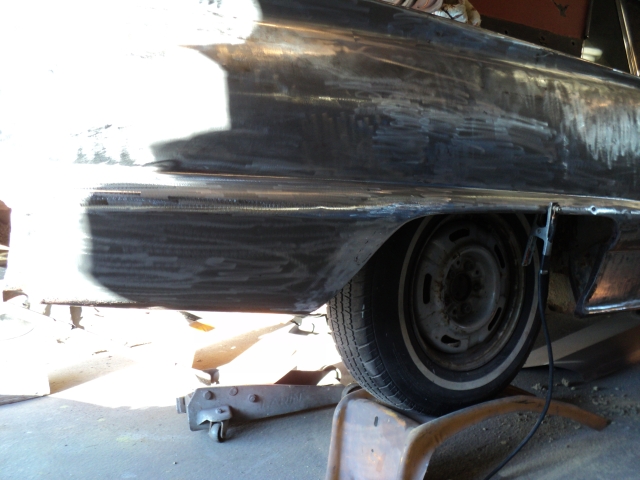
Posted by: rick 918-S Sep 25 2010, 09:13 PM
Couple more
Attached image(s)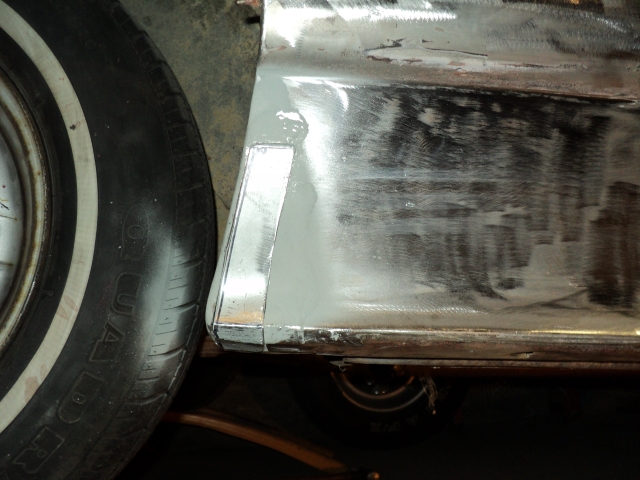
Posted by: majkos Sep 25 2010, 09:29 PM
Wow Rick!
You get all the fun!
I'm thinking of lowerin' Kar B Q
Posted by: rick 918-S Apr 7 2012, 11:46 PM
I haven't bumped this for awhile. I been doing some stuff I thought I would post here. Maybe someone will get some inspiration for this. Maybe not.. 
Tig welded this fender section.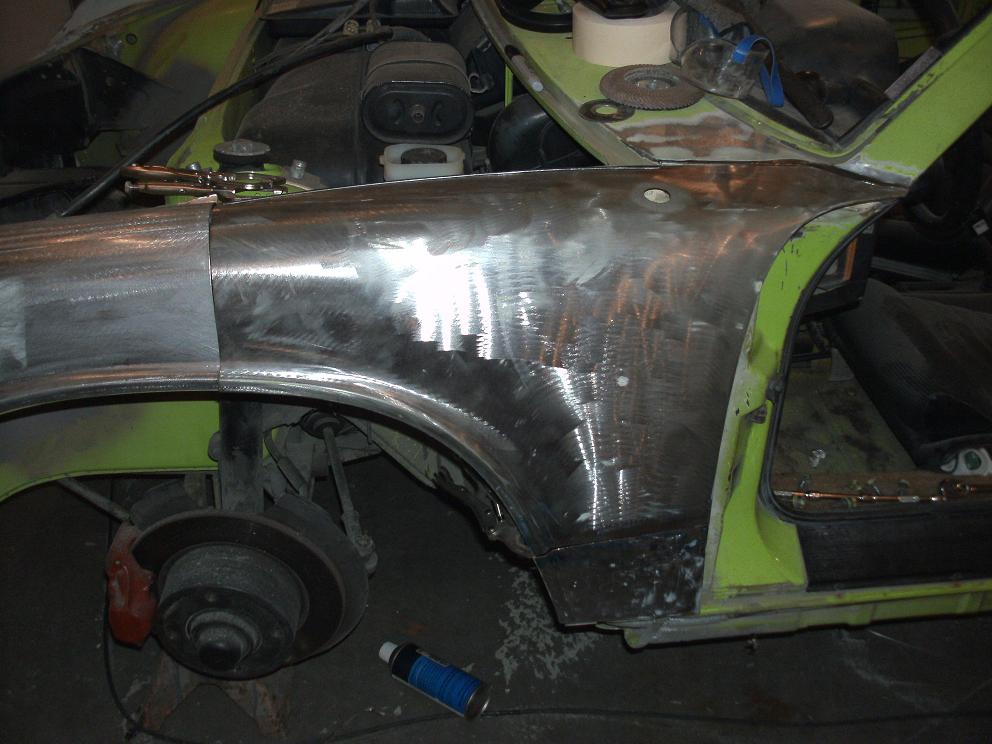
[attachmentid=307395]
This is my friend Pat's Mercedes. This is the final repair to the rear section of the car. The P.O. did a resto likely in the 80's. everything was brazed together and warped beyond repair. I ended up cutting off the brass and the warped sections of this filler panel and replacing it. All the factory seams on the car are butt welded and metal finished. That how my friend want it when he gets it back.
The first photo shows the extensive damage caused by the P.O. and his grinder. These marks were so deep and the panel was so warped I almost cut this back 8" and almost replace the whole section.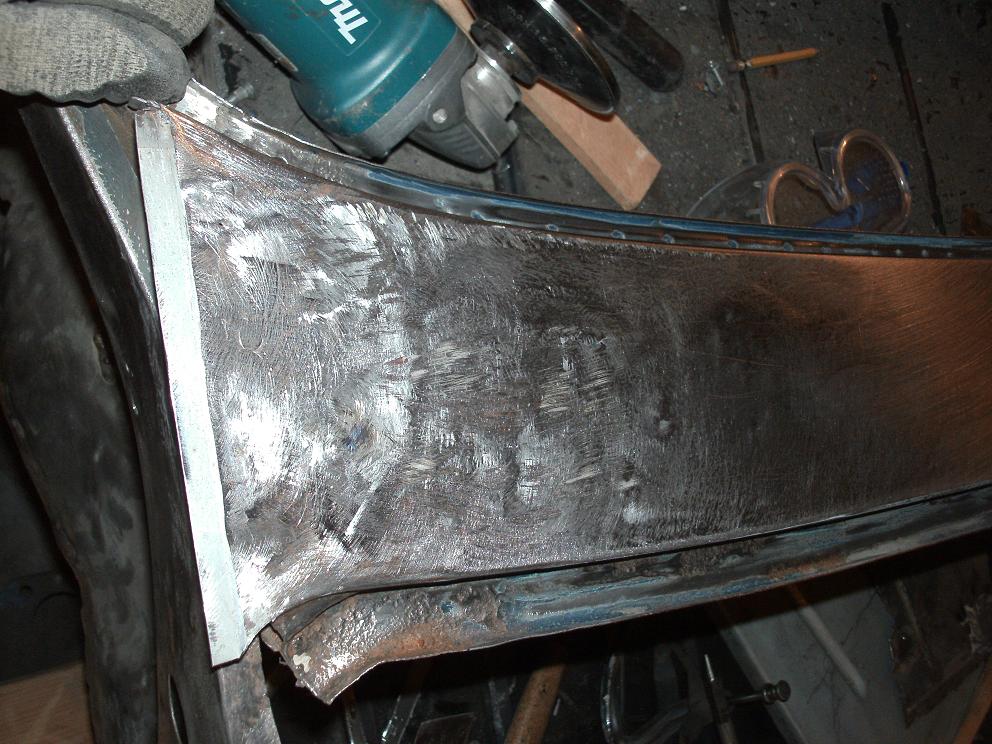
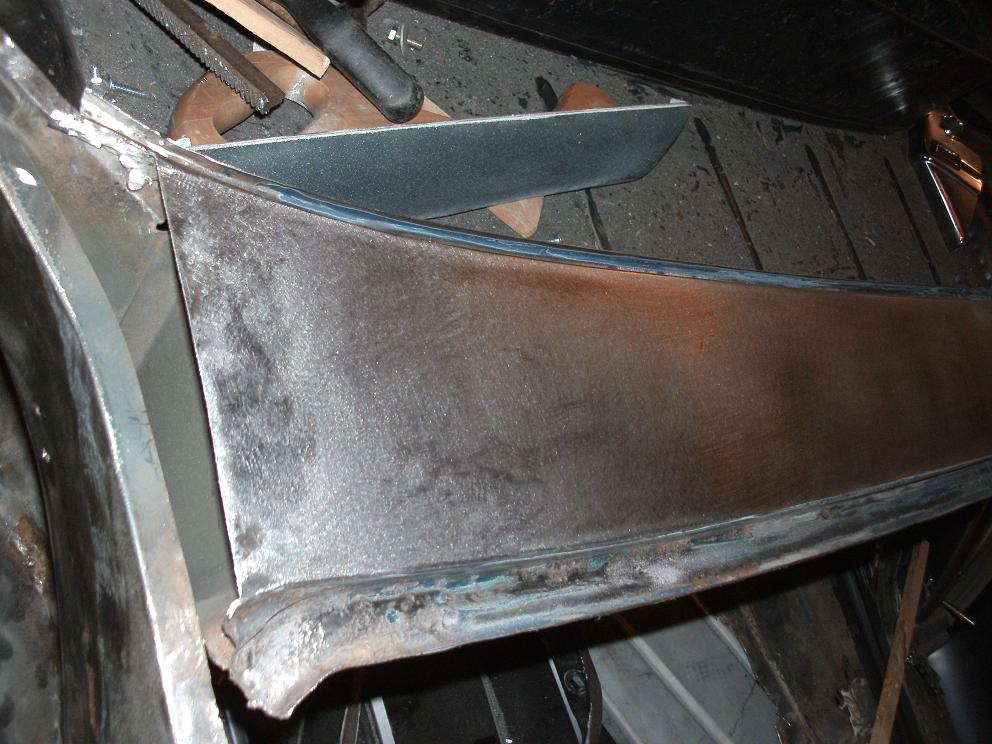
Here's after I fit, welded and finish trimmed the patch work.
Here's after I metal finished the warped and ground area.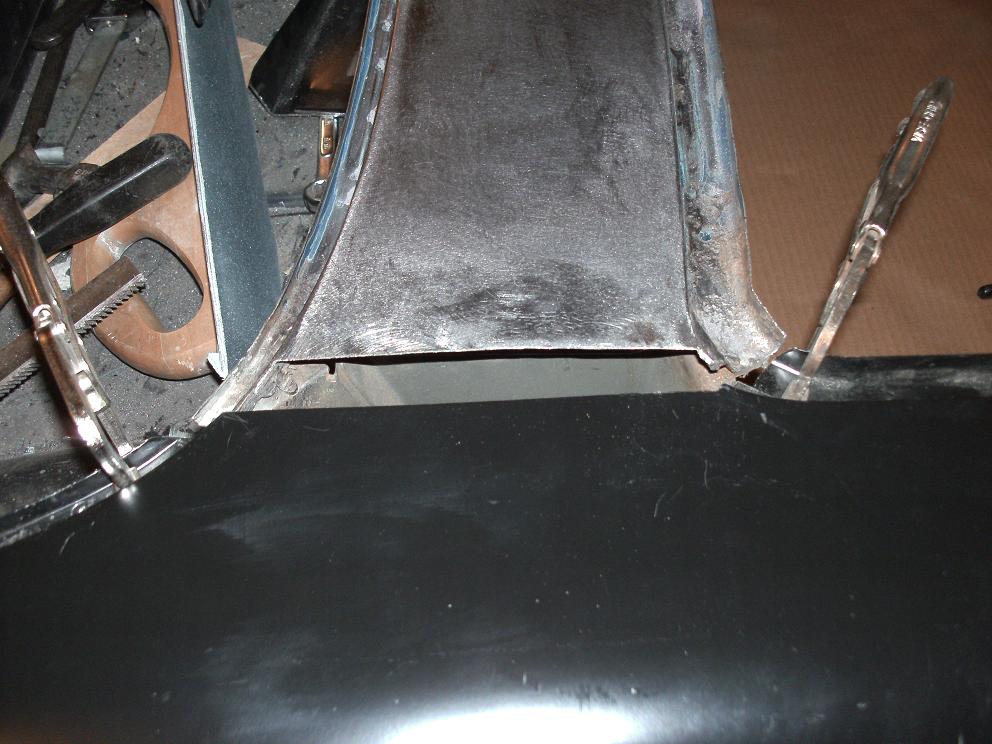
Posted by: rick 918-S Apr 8 2012, 12:22 AM
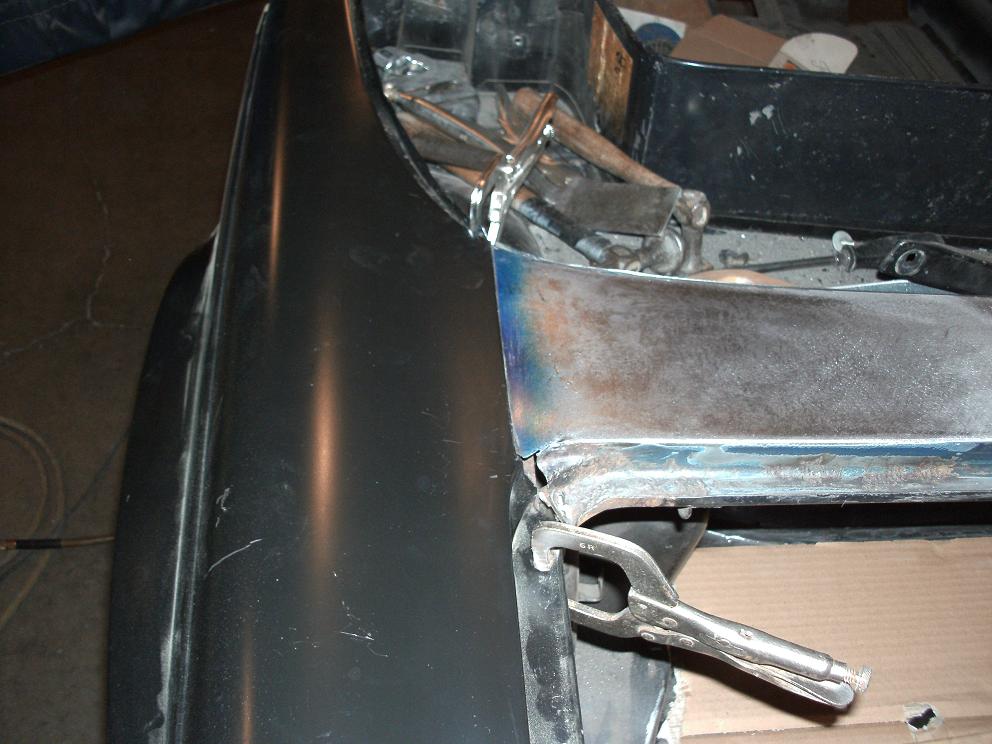
Then onto the Spot welding. I have a couple spot welders. This car needs to have the correct welding methods used. Inside the trunk at the base of the tail light panel there were a couple globby welds. I added them back in.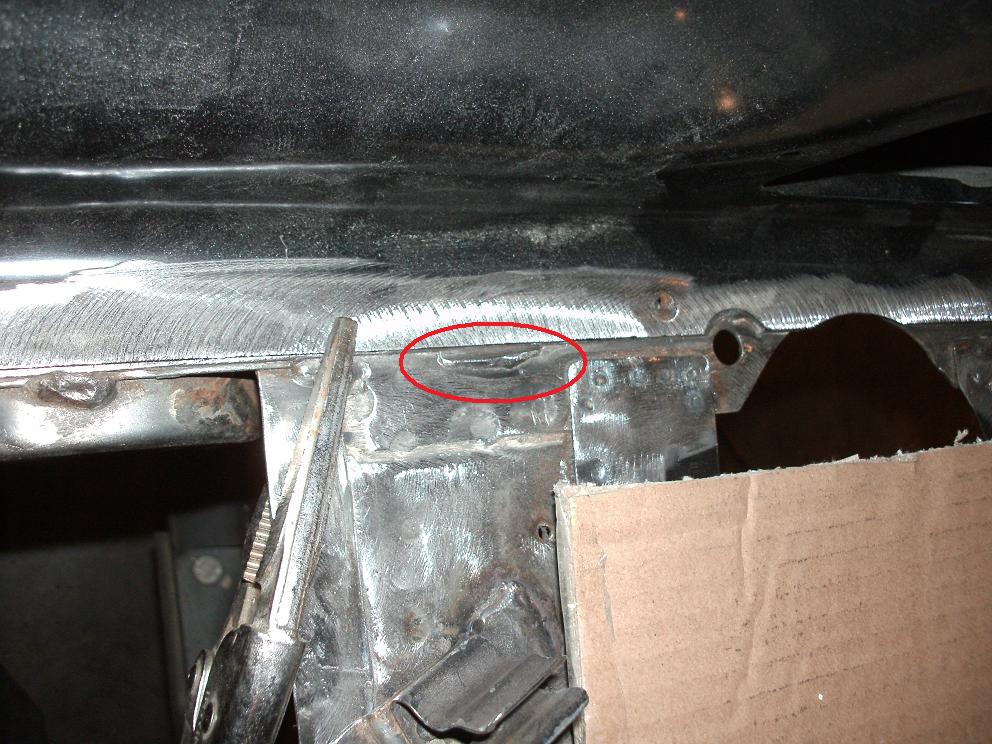
I finished spotting the tail light panel together.
Posted by: Travis Neff Apr 8 2012, 02:16 AM
Posted by: rick 918-S Apr 27 2013, 11:58 PM
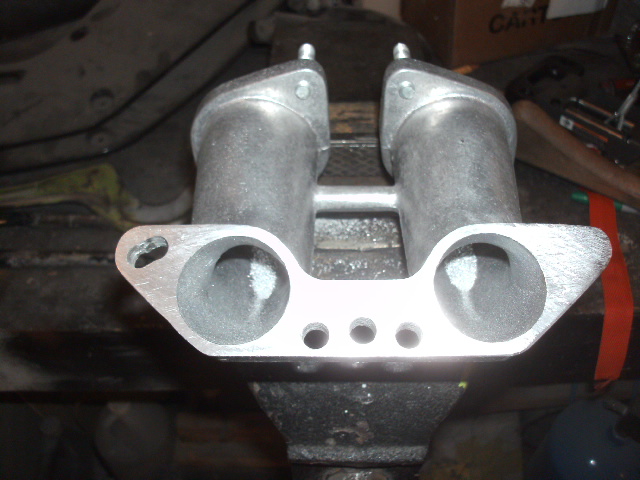
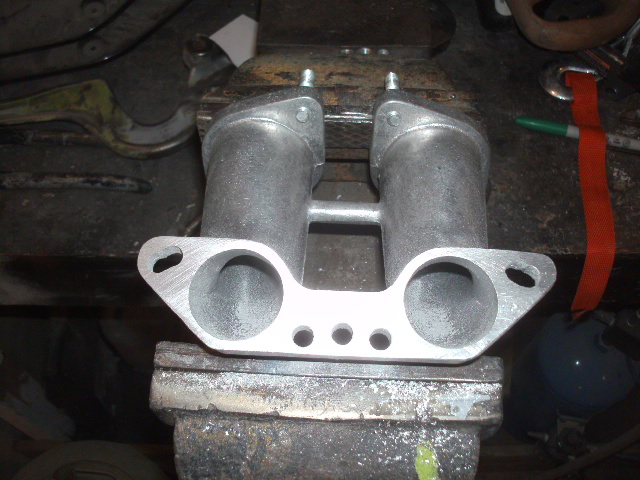
I purchased a set of manifolds for an ITB project. One of the ears was broken off. I spent a few minutes and made a repair. Fun with tig welding.
Attached image(s)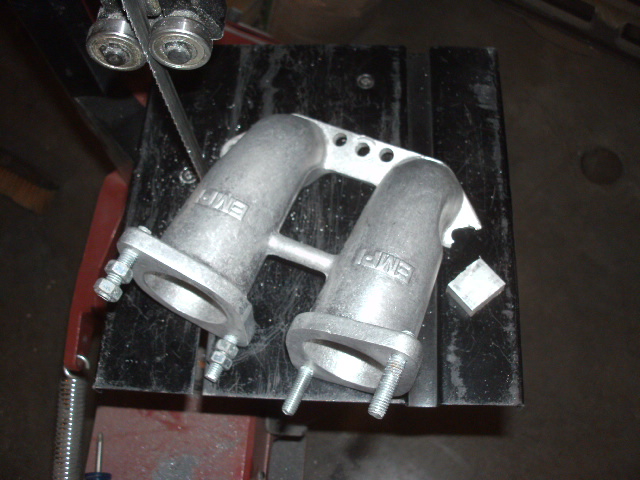
Posted by: Rleog Apr 28 2013, 05:09 AM
True craftsmanship.
Posted by: ottox914 May 1 2013, 08:42 PM
Crazy mad man skillz. I need to convince you to work on my 914. Its value would go up just by the masters touch.
Posted by: rick 918-S Jul 15 2013, 09:26 PM
This Mercedes is even challenging my skill set. The factory used to sell the front shroud as a complete unit. It is not available that way anymore so I need to assemble all the pieces and metal finish all the seams before sliding the shroud over the inner structure.
Now in case you don't know the lids and doors are aluminum. The sheet metal is assembled, then the doors and lids are filed to fit the openings. The gaps are perfect and set to 5mm from what I'm told.
So as I assemble the car I have to fit sheet metal parts that is normally welded "close" and fit by hand to the doors and lids that are filed to fit the sheet metal.  Not easy.
Here's the shroud As I build it. I hope it fits.... 
Here's the first metal finished seam from the cowl to the fender.
Attached thumbnail(s)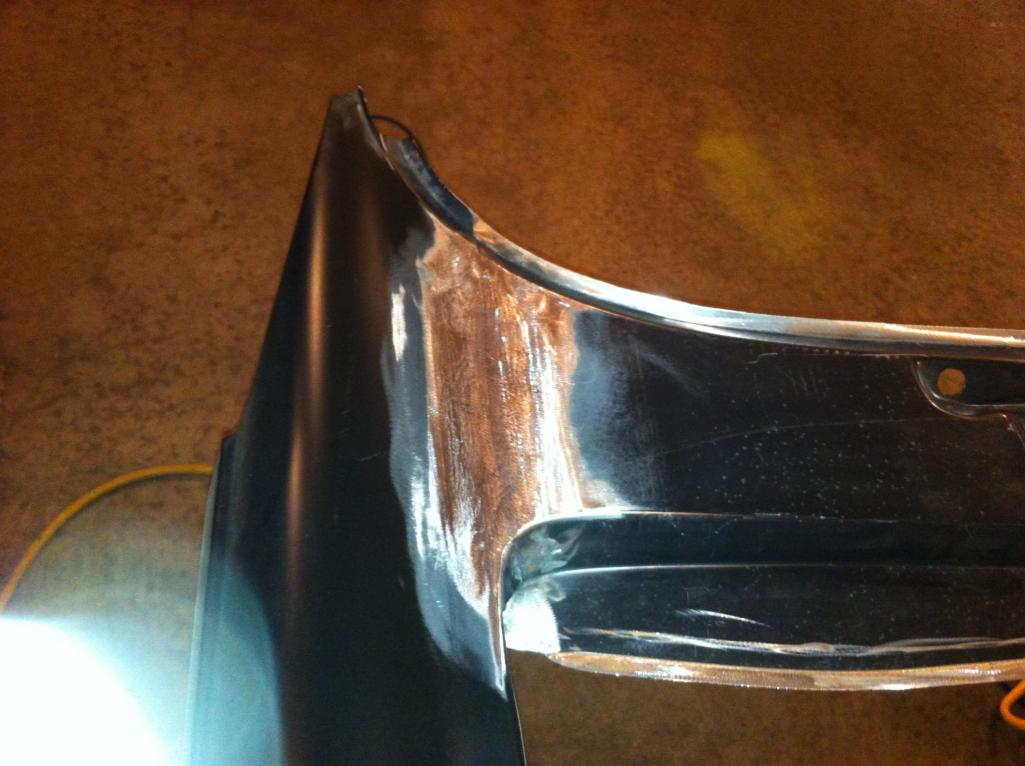
Posted by: rick 918-S Jul 17 2013, 09:43 PM
Part of the process when metal finishing is to Anneal the area you want to work. Here is a photo of the process. First you blow acetylene soot on the area you want to anneal. Then using a torch you work the area burning off the soot. Just enough to dissolve the soot and not over heat the metal. You want to relax the molecules not distort the panel.
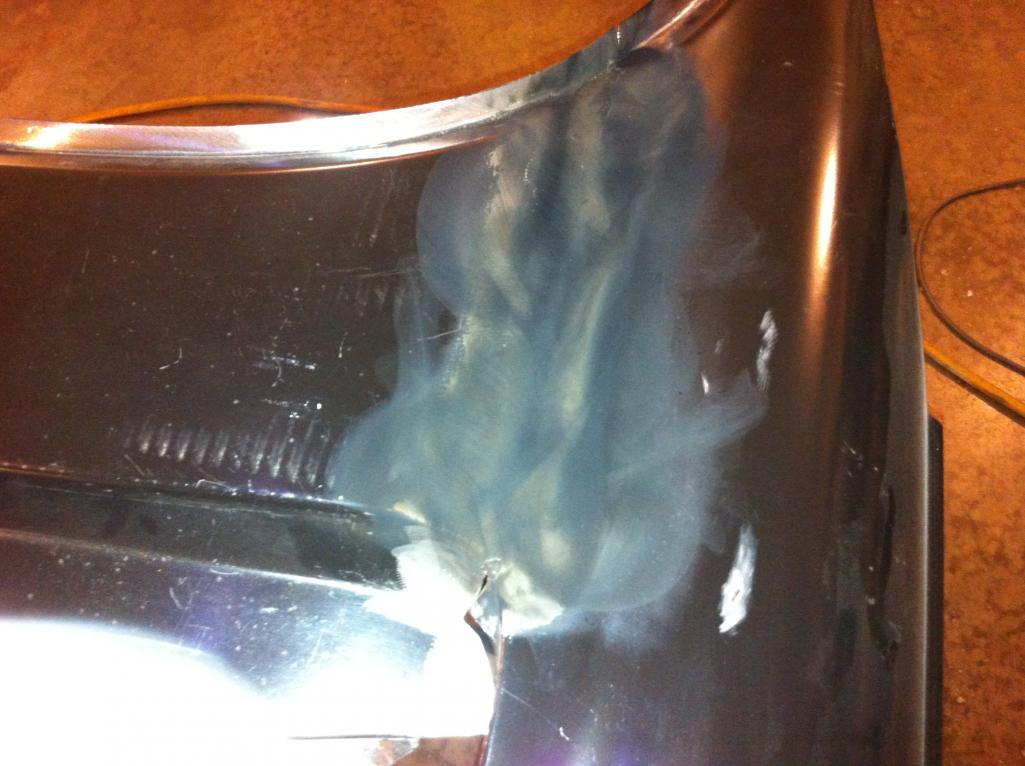
Here is the second seam after metal finishing.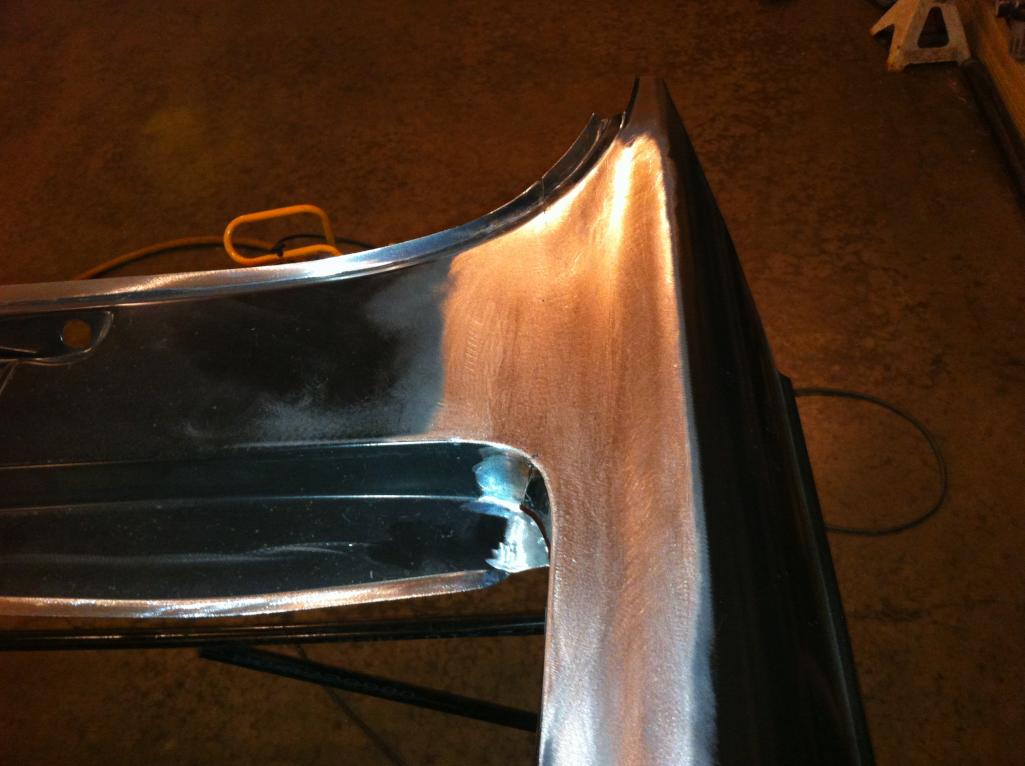
Posted by: rick 918-S Jul 17 2013, 10:32 PM
A couple more things you may find interesting. I used a copper strip as a back up. Notice I used my bead roller and rolled a bead groove down the middle. This allows the weld metal to protrude giving a good strong weld. 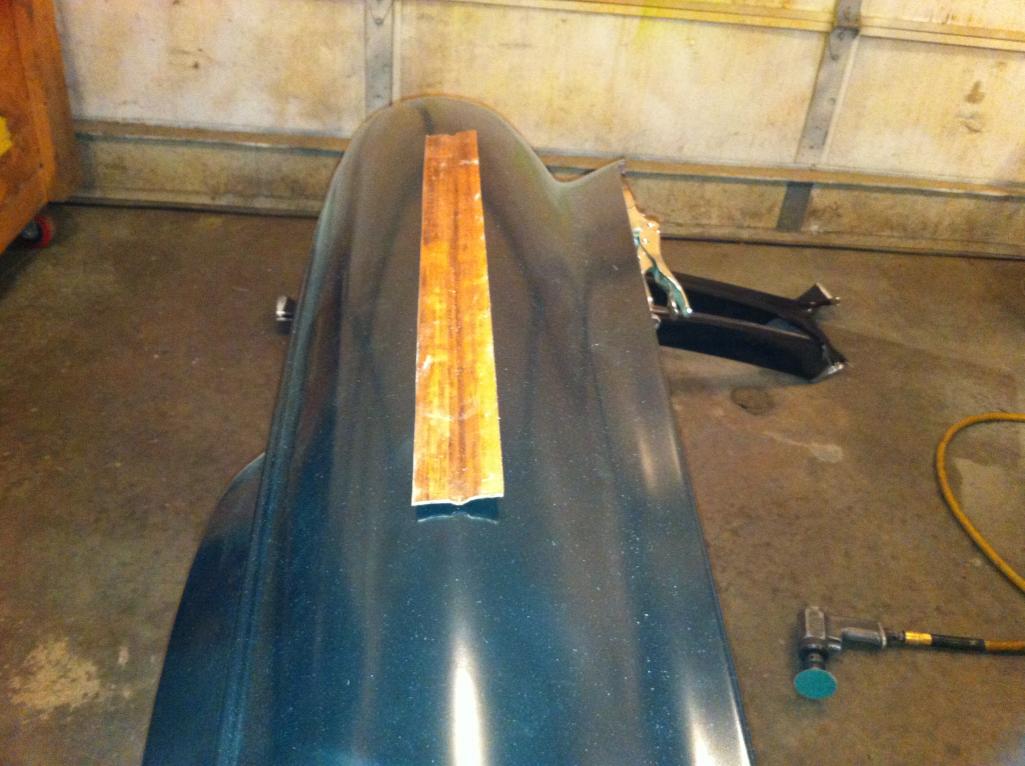
This is the under side of the fender to cowl seam with the back up strip in place.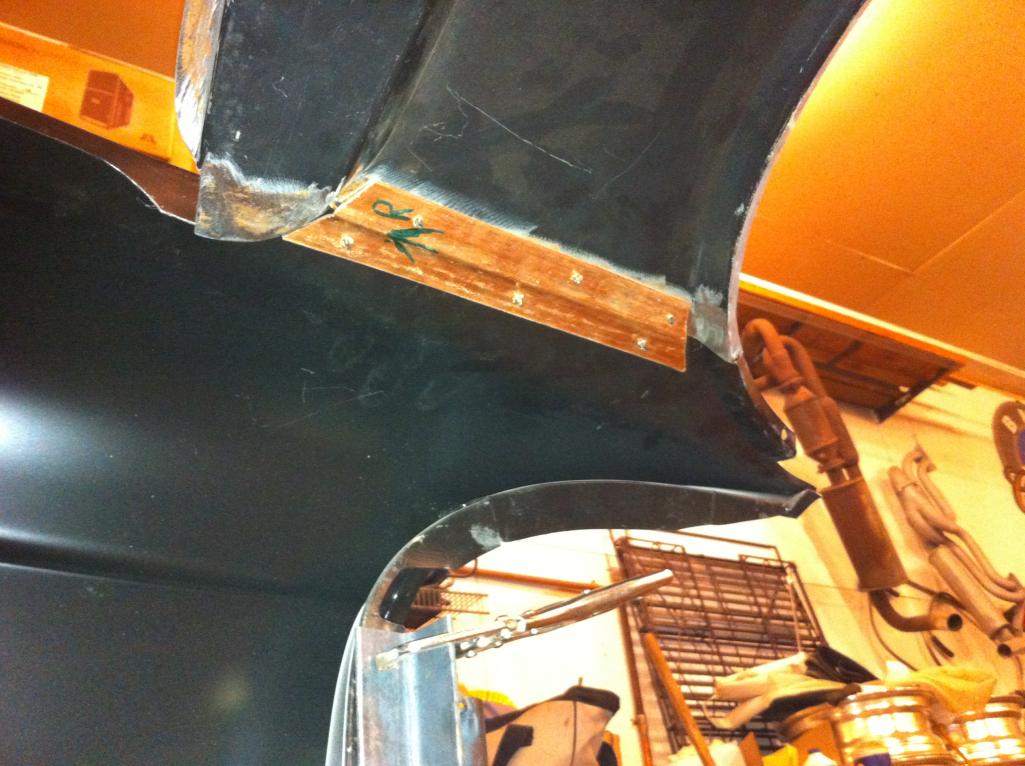
Posted by: rick 918-S Jul 17 2013, 10:33 PM
Here are the two parts cleco'd together. This gives a nice tight fit to tig weld.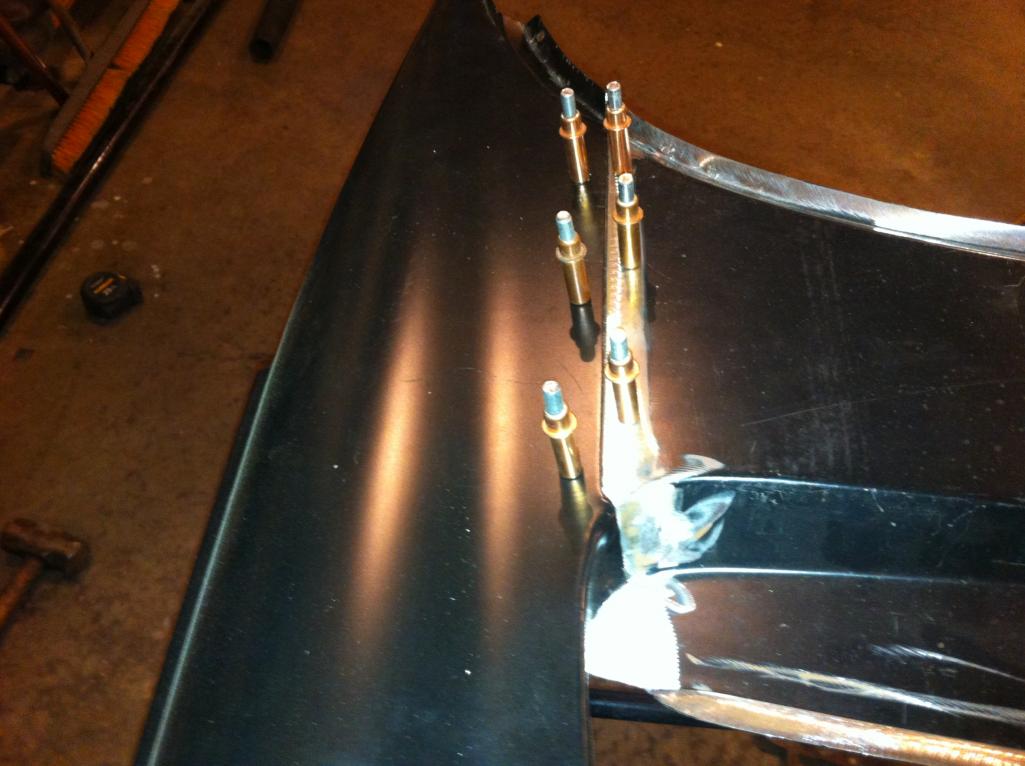
Here is the back side of the weld. Notice the pick marks on the back side from bumping the panels flush. The protruding weld and pick marks are exactly like the factory front end I took off this car.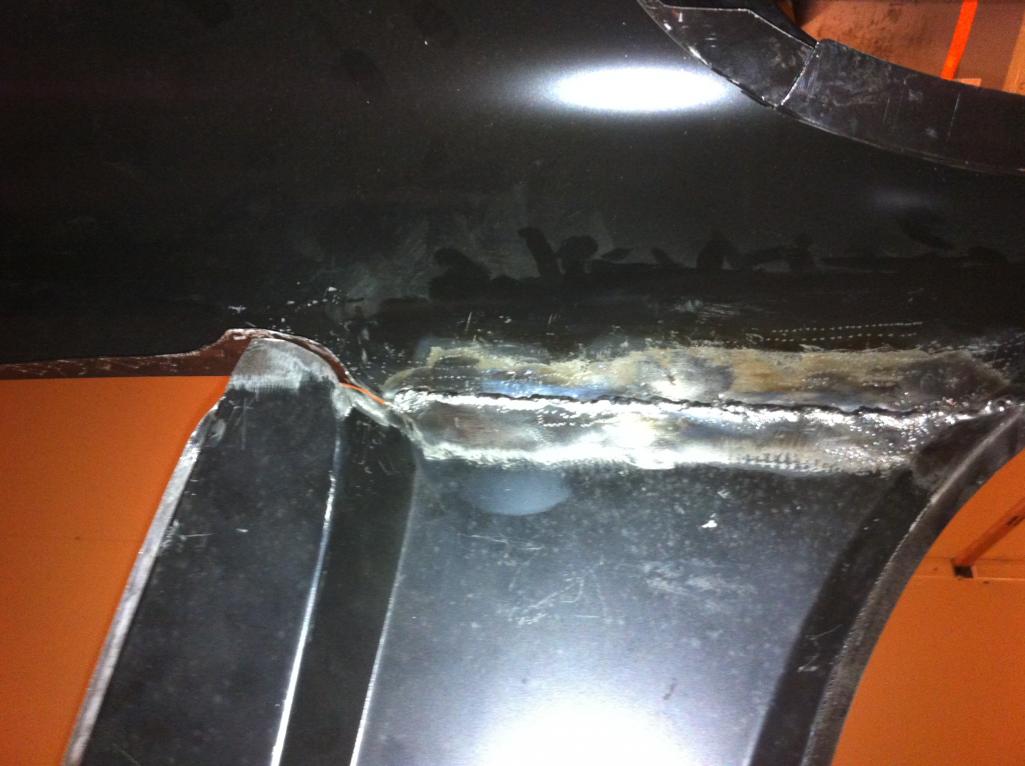
Posted by: 76-914 Jul 18 2013, 07:51 AM
![popcorn[1].gif](style_emoticons/default/popcorn[1].gif)
Posted by: tdgray Jul 18 2013, 11:02 AM
That is crazy mad skillz as usual Rick... I have got to learn me to tig weld
Posted by: rick 918-S Aug 3 2013, 06:56 AM
Spot welding and more spot welding. After several fittings I'm welding the front shroud to the inner panels on this 280 SL. Great hobby.
Drug out all the welders for this one.
The cowl top panel has a flange that is hammered over like a door skin then spot welded.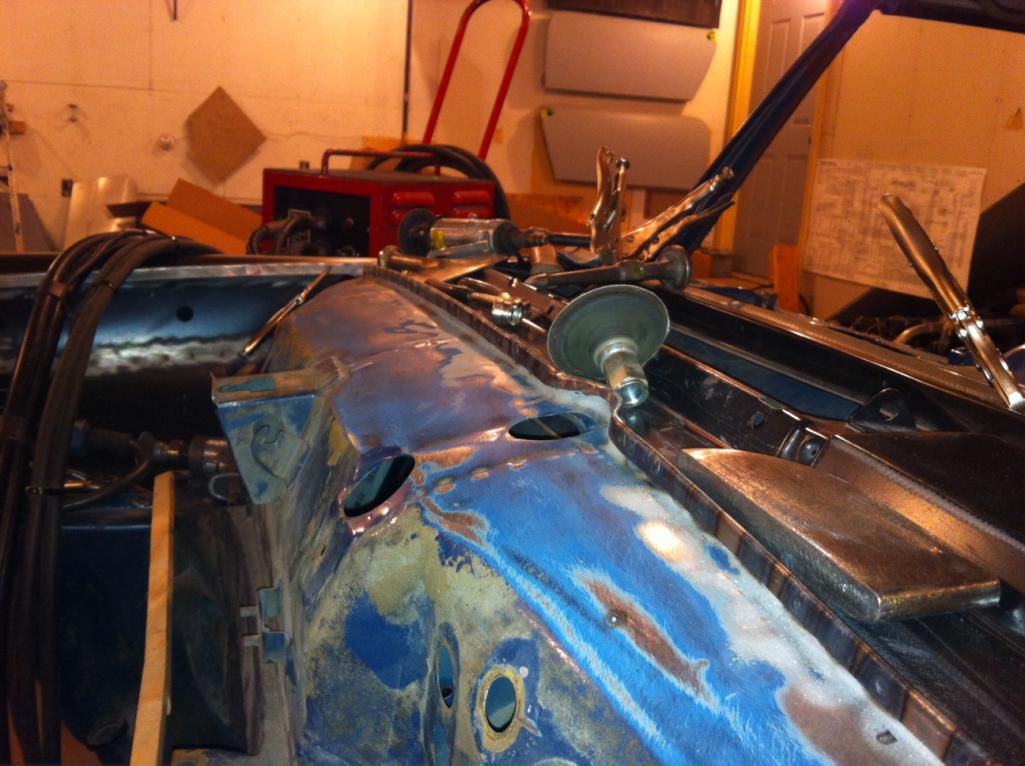
Then lots of spot welds all around the shroud. 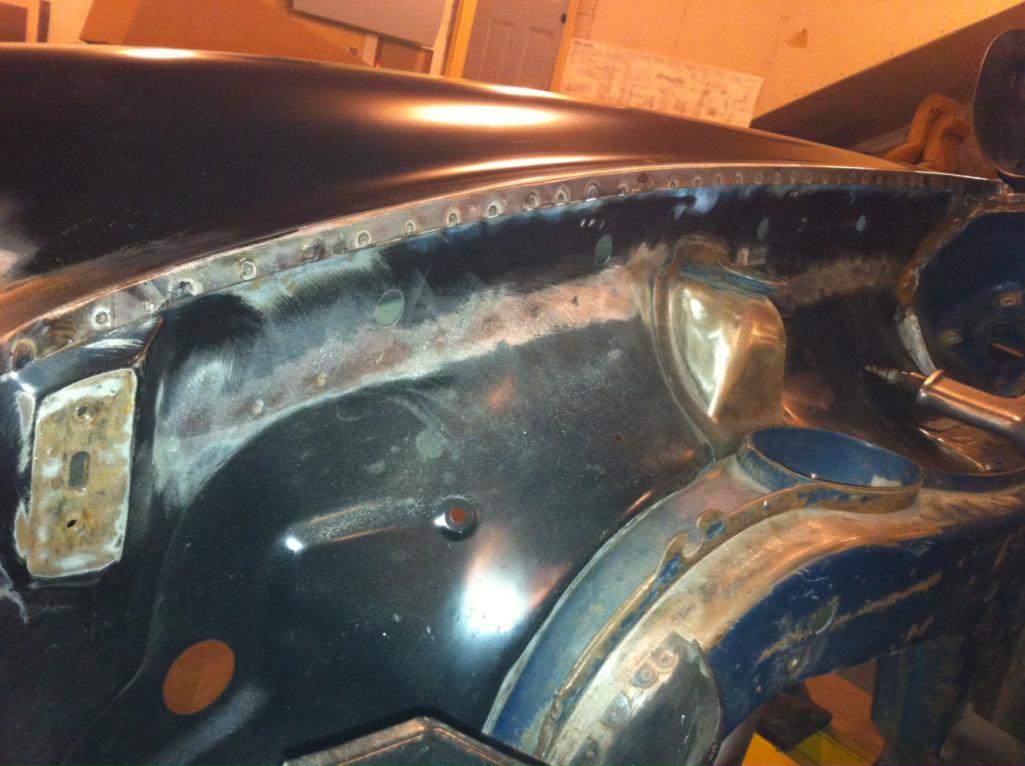
Posted by: Cairo94507 Aug 3 2013, 07:30 AM
Oh my! You have out of this world skills!
Posted by: jd74914 Aug 3 2013, 09:05 AM
That looks awesome Rick!
OT, but how do you like that Eastwood TIG?
Posted by: Elliot Cannon Aug 3 2013, 12:13 PM
It looks like the copper strip is held on with clecos. Do you just weld the cleco holes to fill them when you're done? I should do more with my TIG but the MIG is just so EASY to use. 
Posted by: rick 918-S Aug 3 2013, 12:24 PM
That looks awesome Rick!
OT, but how do you like that Eastwood TIG?
That tig works awesome! Aluminum and steel. Best bang for the buck.
Posted by: rick 918-S Aug 3 2013, 12:26 PM
It looks like the copper strip is held on with clecos. Do you just weld the cleco holes to fill them when you're done? I should do more with my TIG but the MIG is just so EASY to use.
Yep. Easy to tig the 1/8" holes when your done. I switch from my mig to tig depending on what I'm doing.
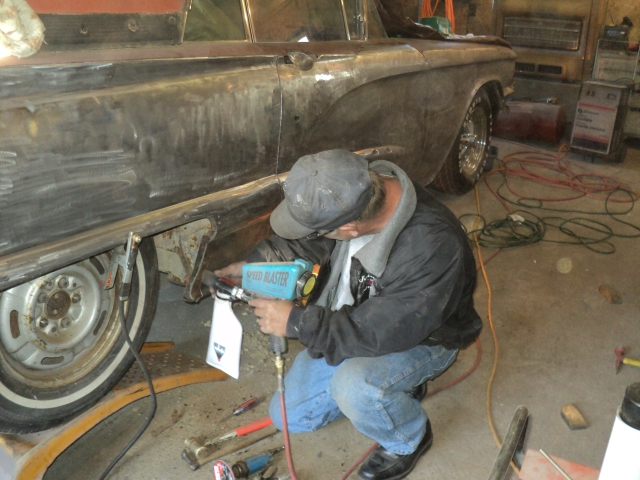
Posted by: r_towle Aug 3 2013, 10:04 PM
Dude,
Can you show the shield you are using with the speed blaster?
Rich
Posted by: rick 918-S Aug 4 2013, 08:39 AM
Dude,
Can you show the shield you are using with the speed blaster?
Rich
Are you talking about a spot blaster (sand blaster)? I use gorilla duct tape and heavy plastic and tape off the area I want to spot blast. Then I either stick the nozzle through the plastic or insert the whole gun through. when your done there is less clean up. Not sure if this is what your asking.
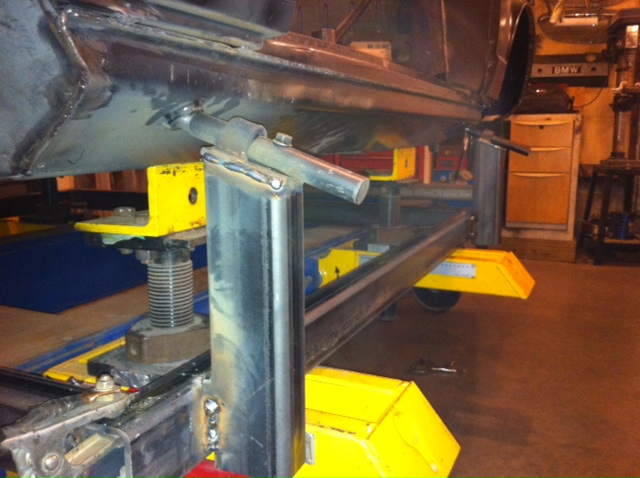
Posted by: rick 918-S Dec 13 2013, 11:40 PM
I'm wrapping up the Mercedes shell. My friend wants me to transport it to Romulus Michigan to get it e-coated. http://www.redi-coat.com/photos.html
He asked me to build a trailer that mounts the car by the jack points and has a single torsion axle that can be removed. So I'm building the frame on top of my Celette. The pins that lock the trailer frame to the car slide out and are locked with a grade 8 bolt. I drug out the old buzz box today to burn in the first pass on this 1/4 wall 2"X3" tubing. Then I multi pass over with the wire feed. With the heat the arc welder develops I don't have to pre-heat the 1/4 wall before running the mig welder.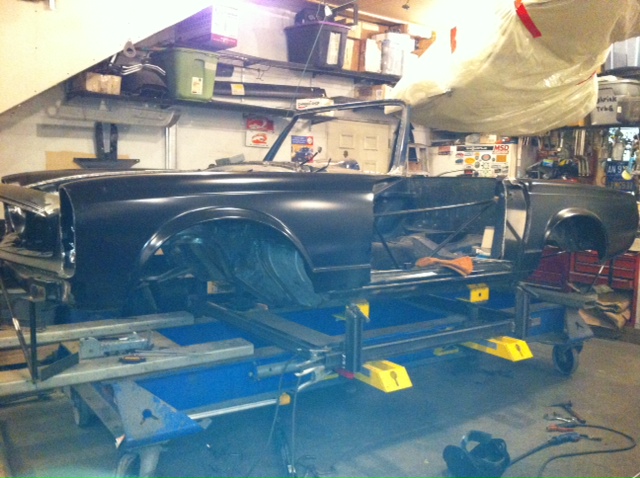
Posted by: r_towle Dec 13 2013, 11:43 PM
You must have smoked something when you were younger....
Wild stuff man....nice job
Posted by: Jeff Bowlsby Dec 14 2013, 12:11 AM
Art surpasses the sum of its parts. Talent is innate and cannot be learned as skills with experience can be.
Ricks unbeleivable talents + (time x money) = Art
What a privilege it is that you share your work with us Rick.
Posted by: rick 918-S Dec 14 2013, 08:11 PM
After several years of sitting mounted to my Celette the Mercedes is finally off. I have to add a removable tong and axle to this frame and haul the car to e-coat.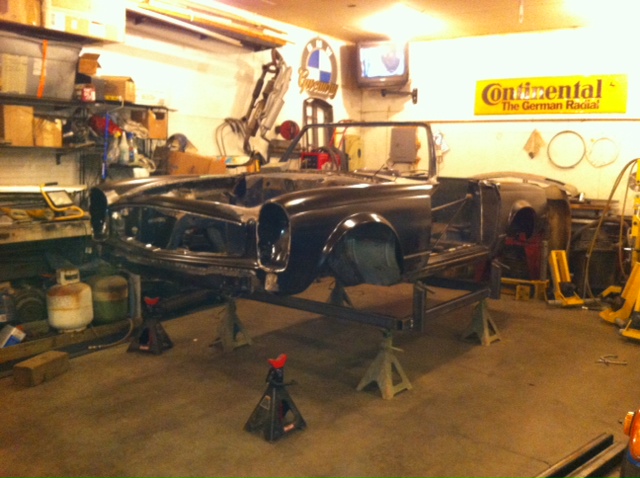
Posted by: iamchappy Dec 14 2013, 08:45 PM
Glad to see it getting done, that car has been appreciating all the years it's been on that bench....Ha
Posted by: rick 918-S Mar 24 2014, 04:29 PM
Just reviewing this thread and discovered I failed to add some cool photos of the Mercedes after it was e-coated. The end result of all that welding. 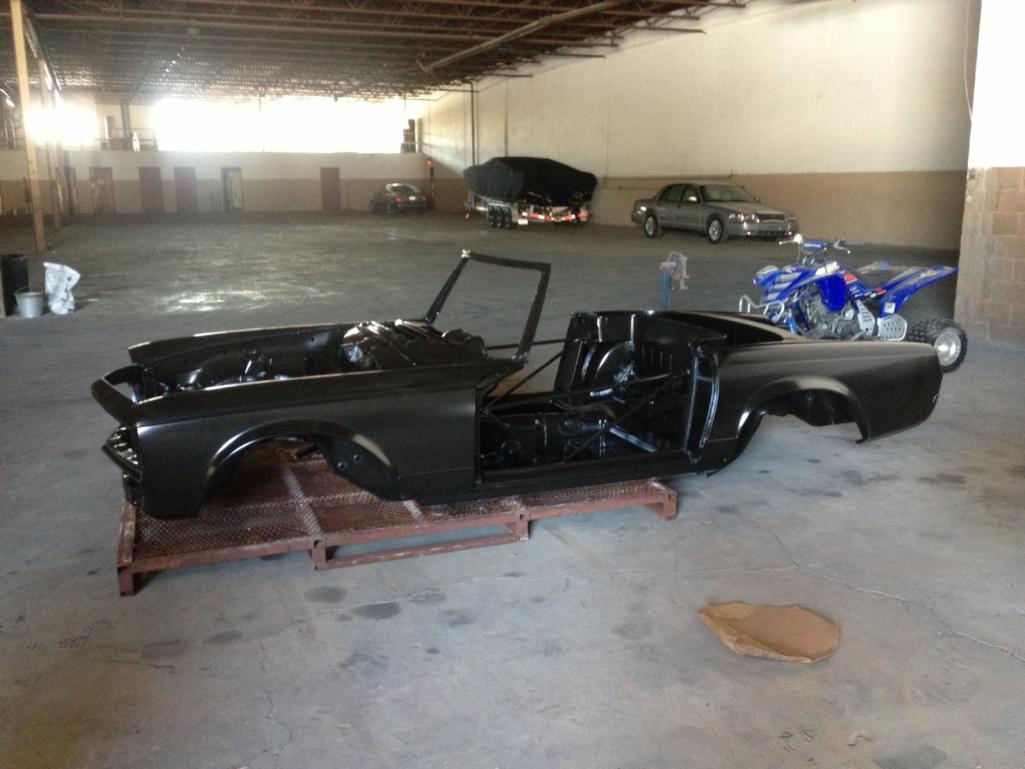
Posted by: effutuo101 Mar 24 2014, 04:43 PM
A buddy of mine is thinking about picking up a little Mercedes compressor from auction so he can strip out the drive train and put it in an old Mercedes. way more skill than I have, but a cool idea.
Powered by Invision Power Board (http://www.invisionboard.com)
© Invision Power Services (http://www.invisionpower.com)