Printable Version of Topic
Click here to view this topic in its original format
914World.com _ 914World Garage _ Gulf Blue Build Thread
Posted by: PanelBilly Jun 25 2010, 10:56 PM
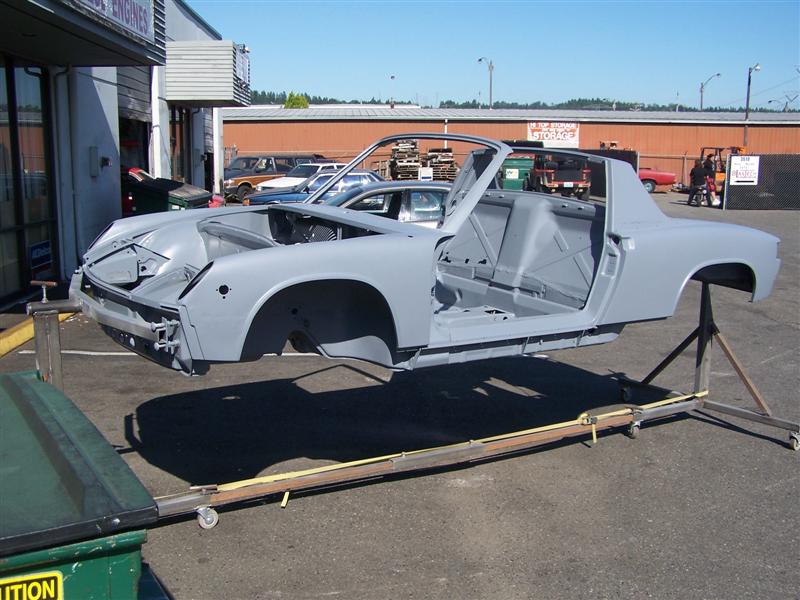
I managed to find some photos that we had thought were lost. This doesn't take me all the way back to the start of the project, but I've decided to start the photo story of the project.
April 2004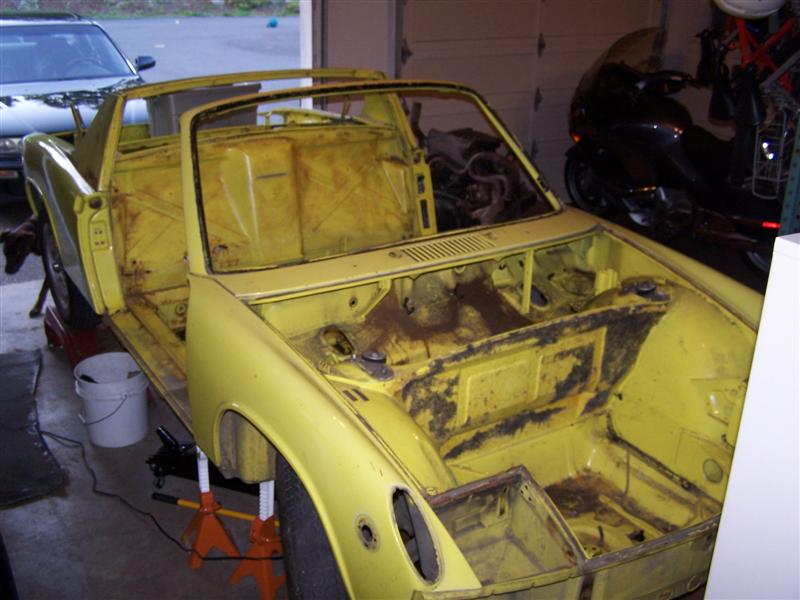
The 2 liter engine I sold with the fuchs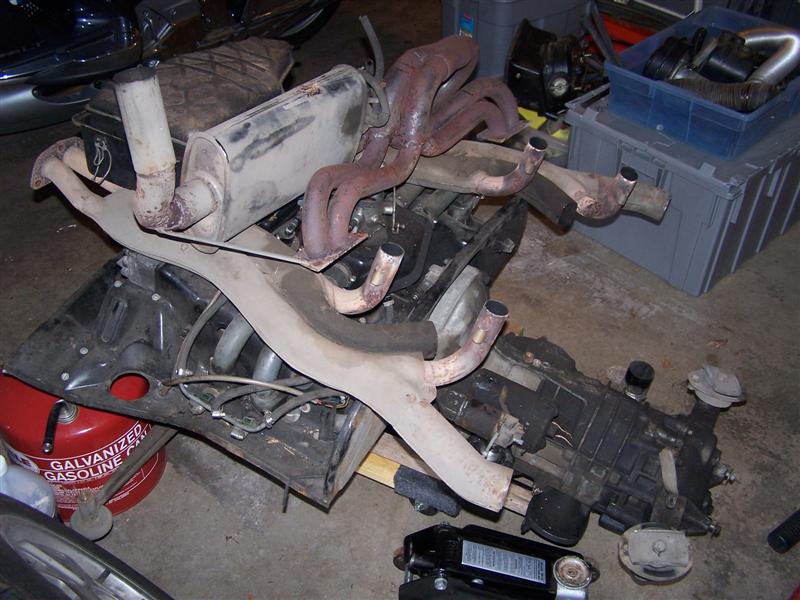
Posted by: PanelBilly Jun 25 2010, 11:01 PM
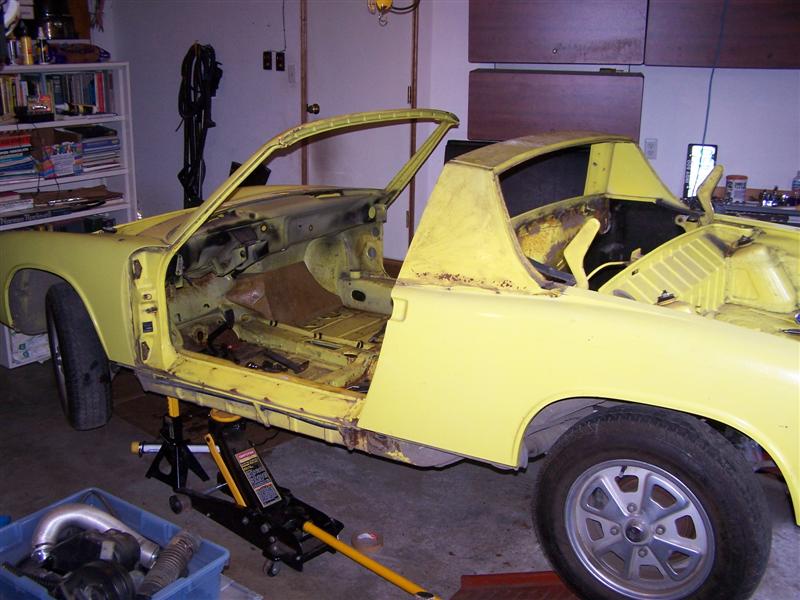
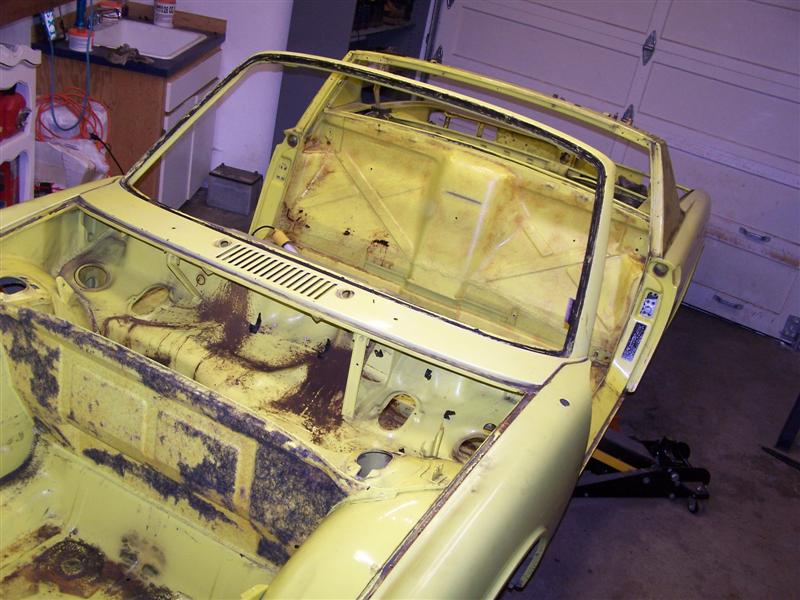
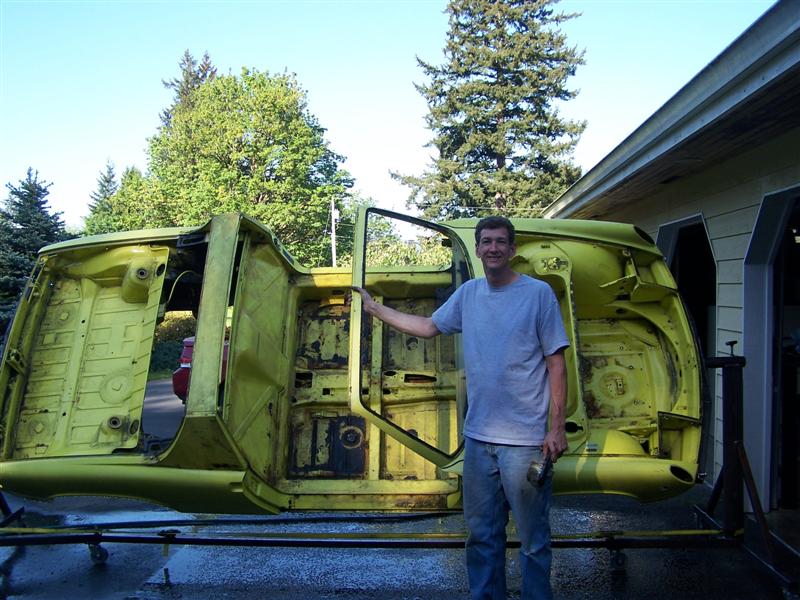
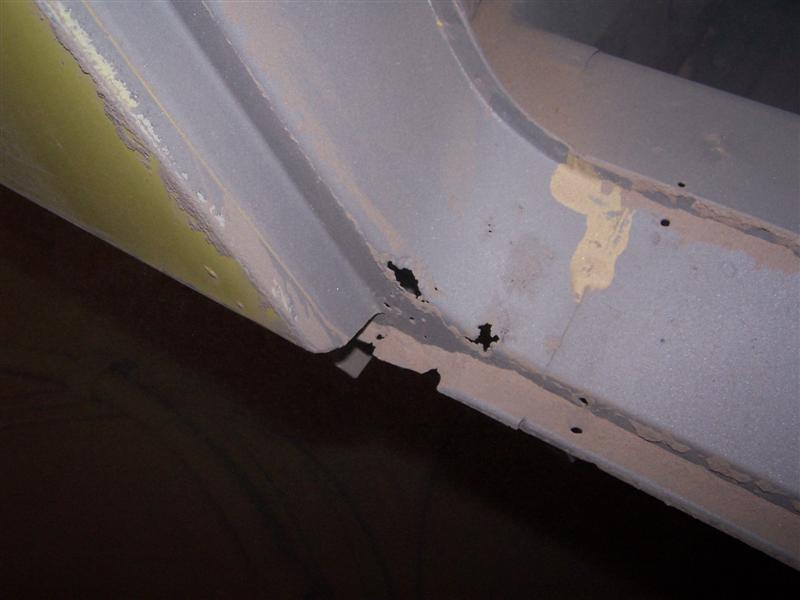
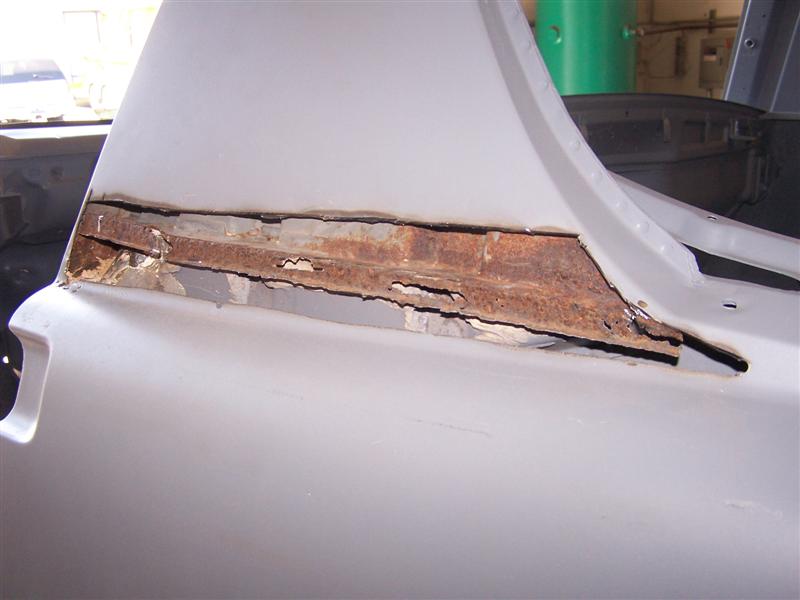
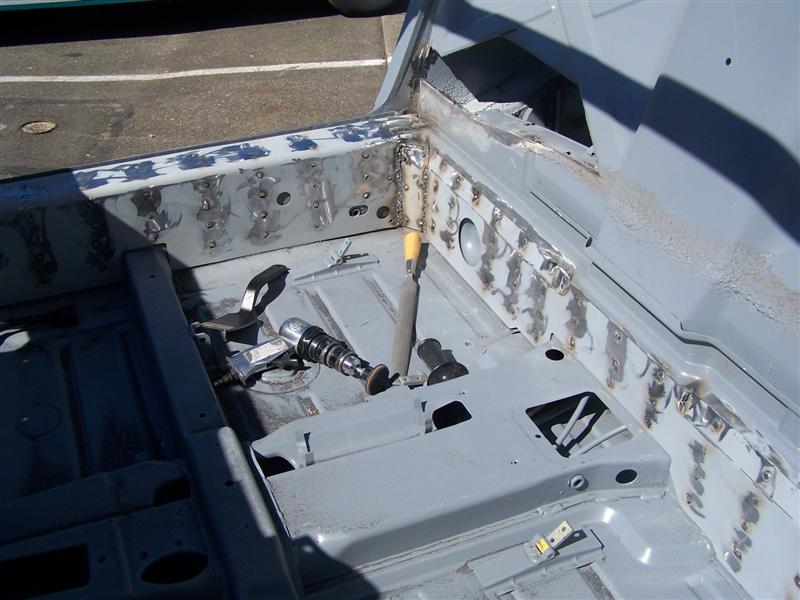
Here's some shots of the damage that I found when I got the car in the air and cleaned it off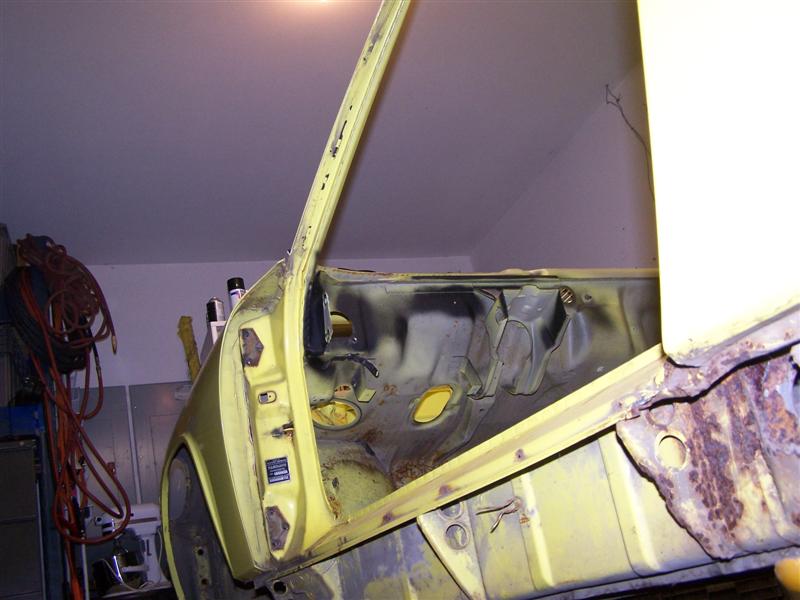
Posted by: PanelBilly Jun 25 2010, 11:08 PM
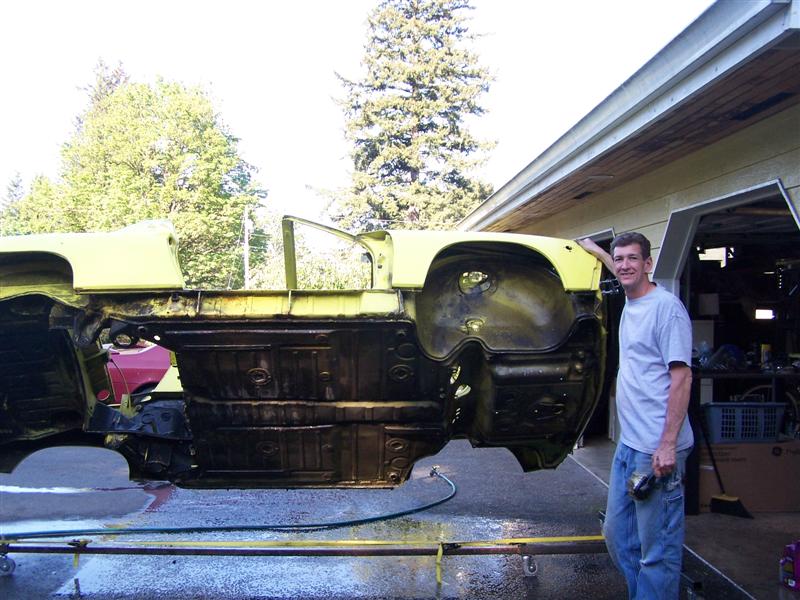
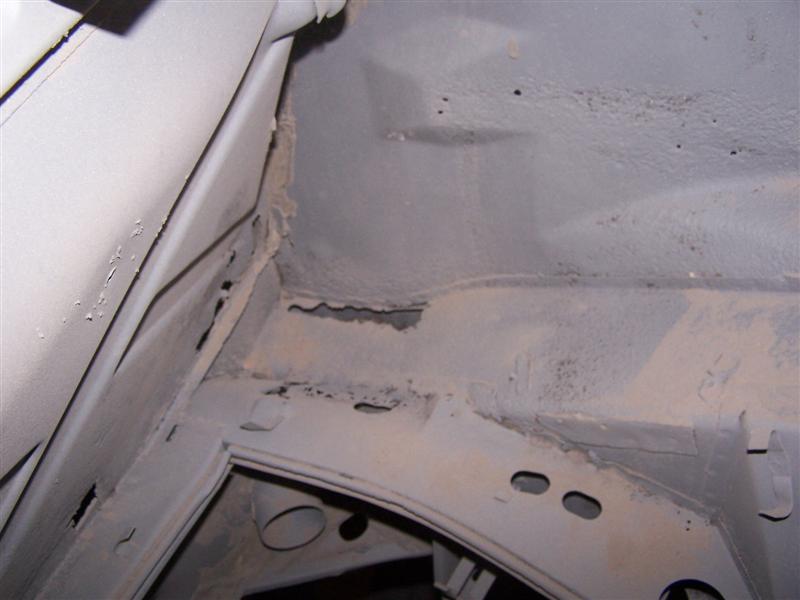
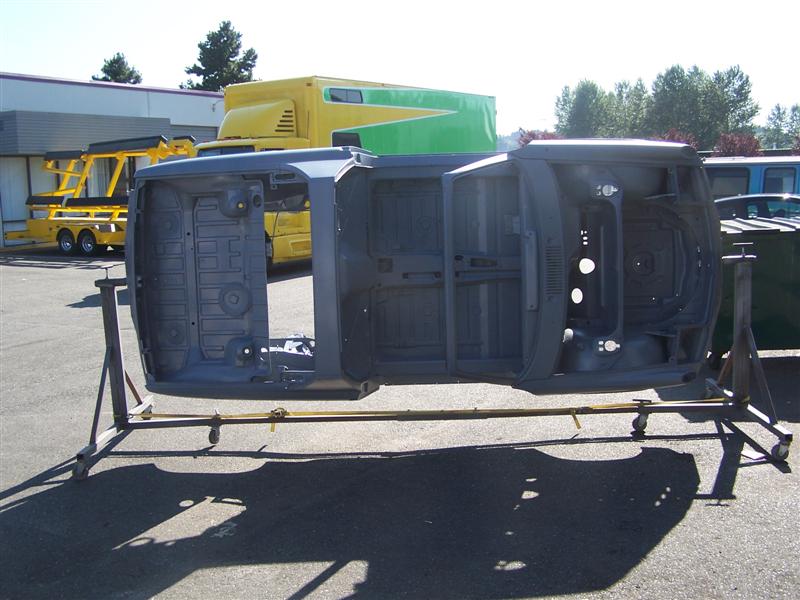
The car was walnut blasted and sealed with primer. Now I could see even more work to be done.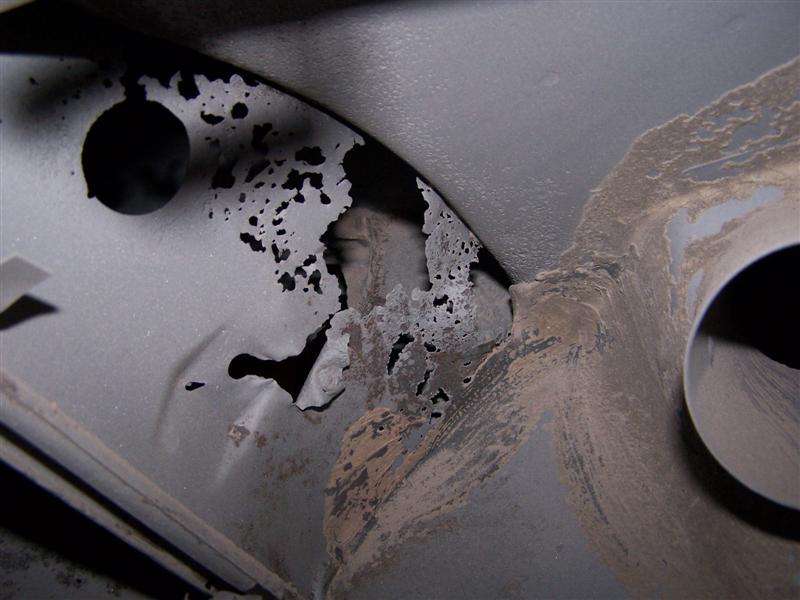
Posted by: PanelBilly Jun 25 2010, 11:14 PM
I enrolled in autobody at the local CC and stared working on the doors. Making the metal strips that hold the rubber strip on the doors was my first big job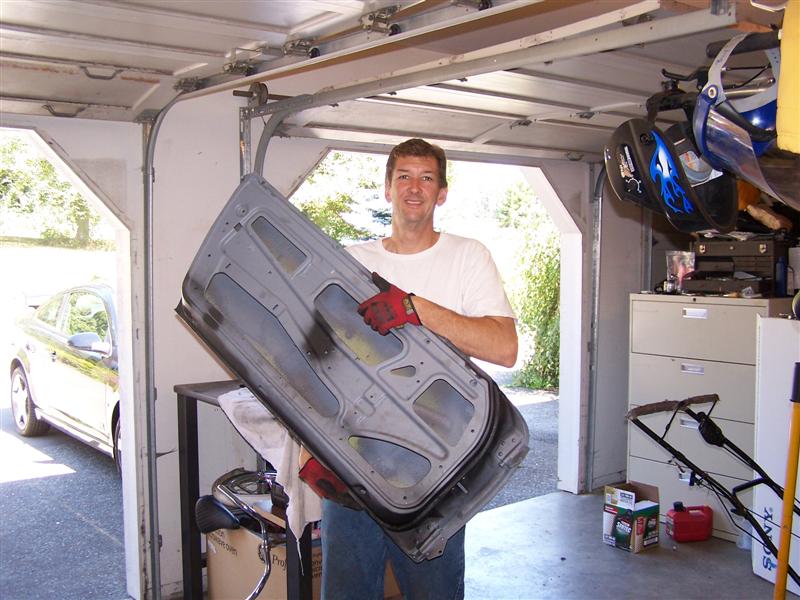

Posted by: PanelBilly Jun 25 2010, 11:33 PM
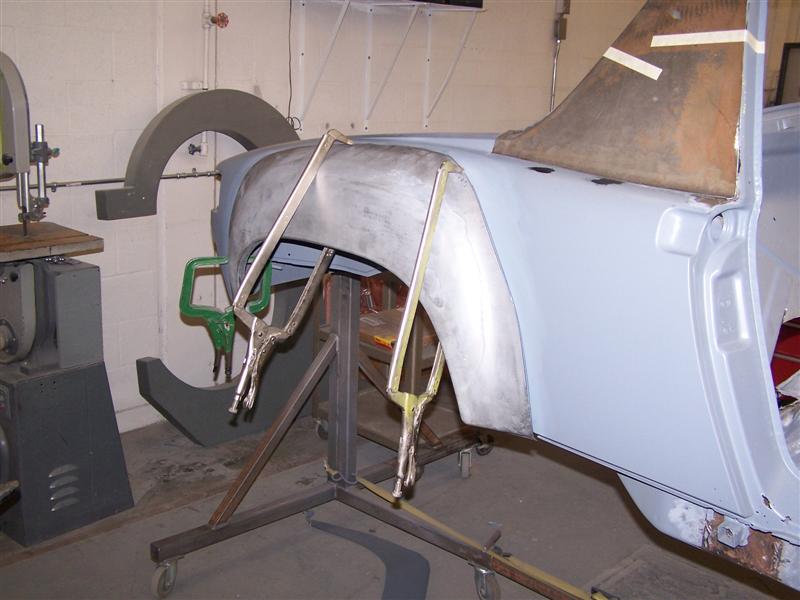
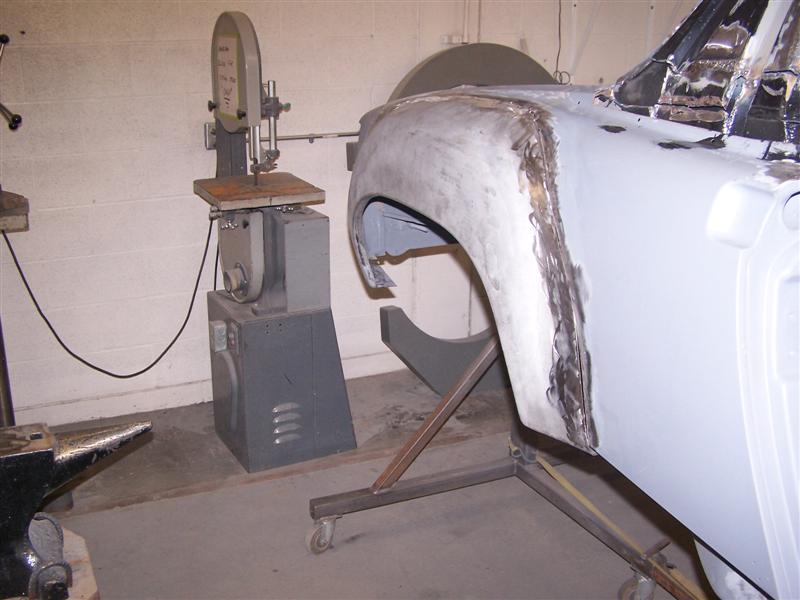
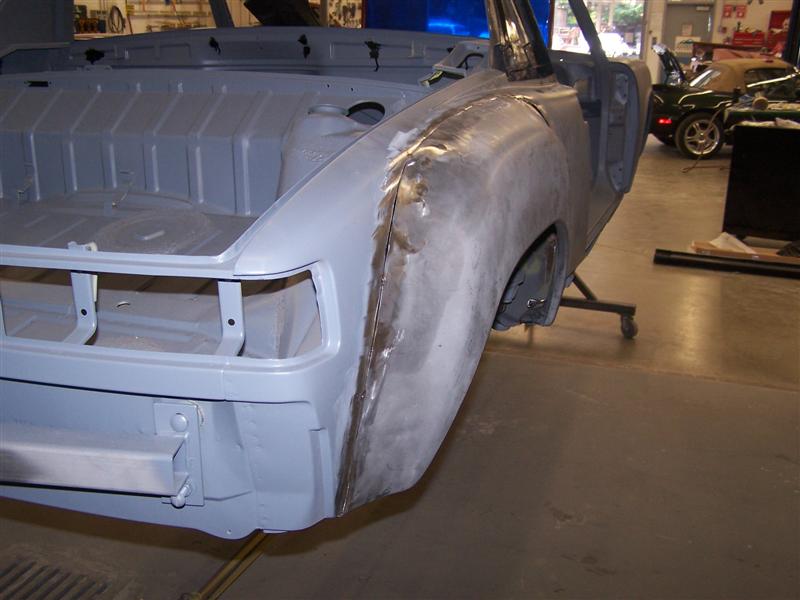
Flares from AA arrived and I started the process of fitting them. One of the photos shows a view of the work I did on the sail panels. I'll find the photos I took of that process and share them soon.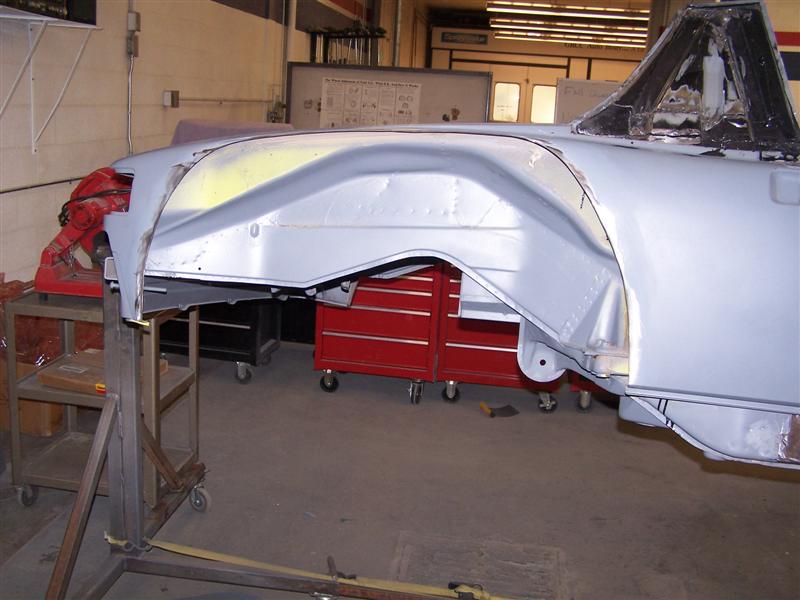
Posted by: PanelBilly Jun 26 2010, 09:08 AM
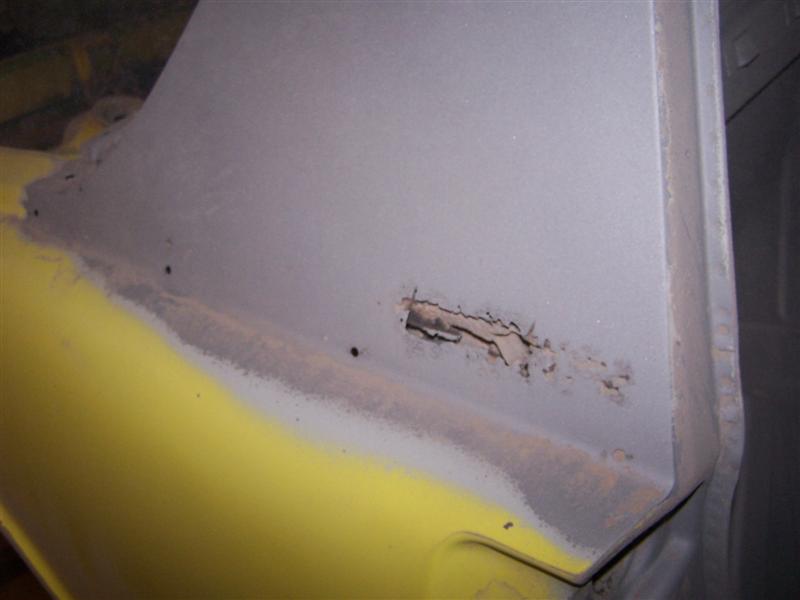
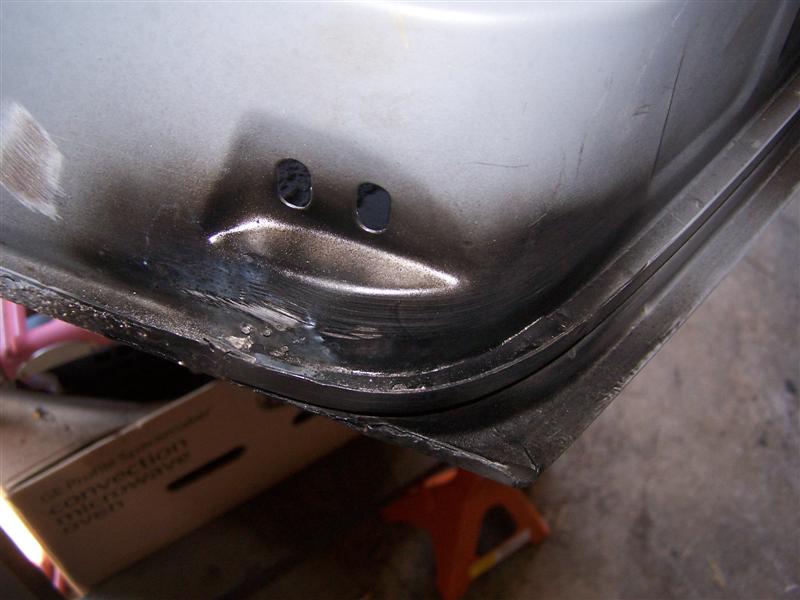
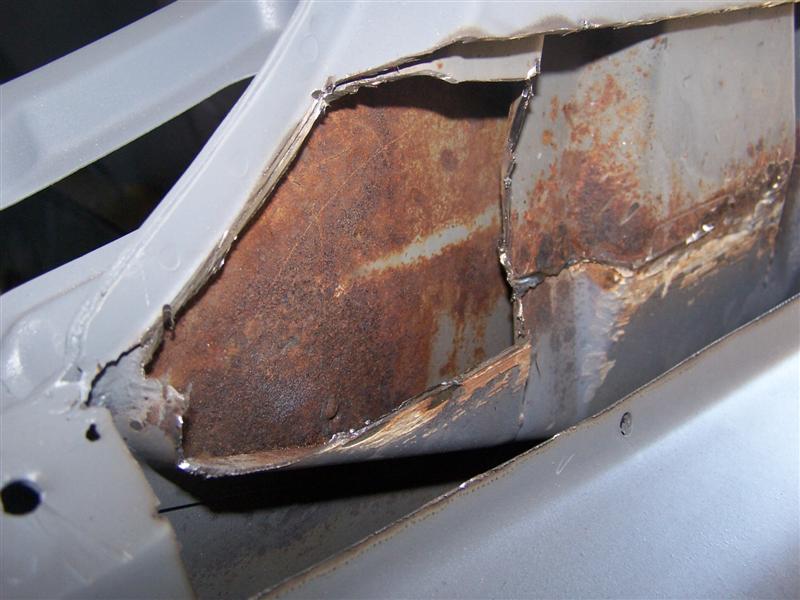
I cut away the rust holes on the inside of the sail panel and found more rust. Surprise, its a good time to practice welding. I goated everything with POR and then ground it off the endes so I could weld it. I should have used weld ready spray, but didn't know about the stuff at this point. 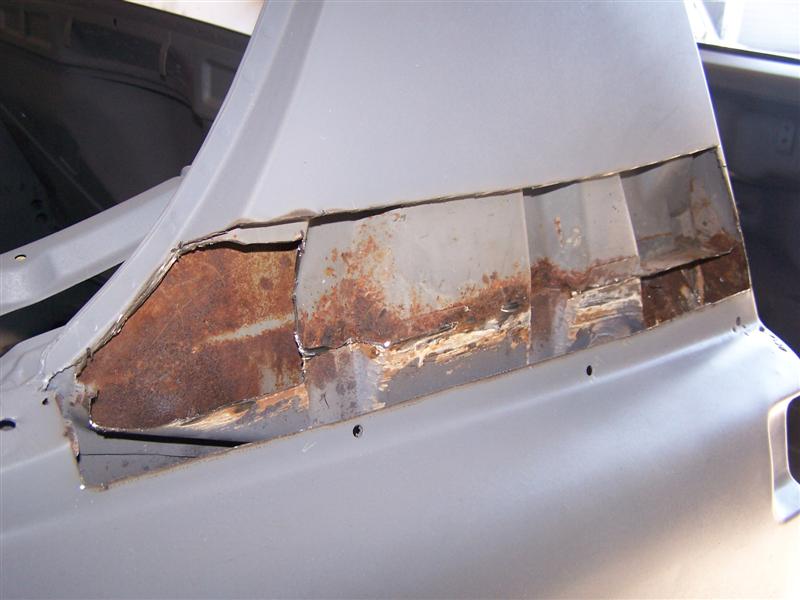
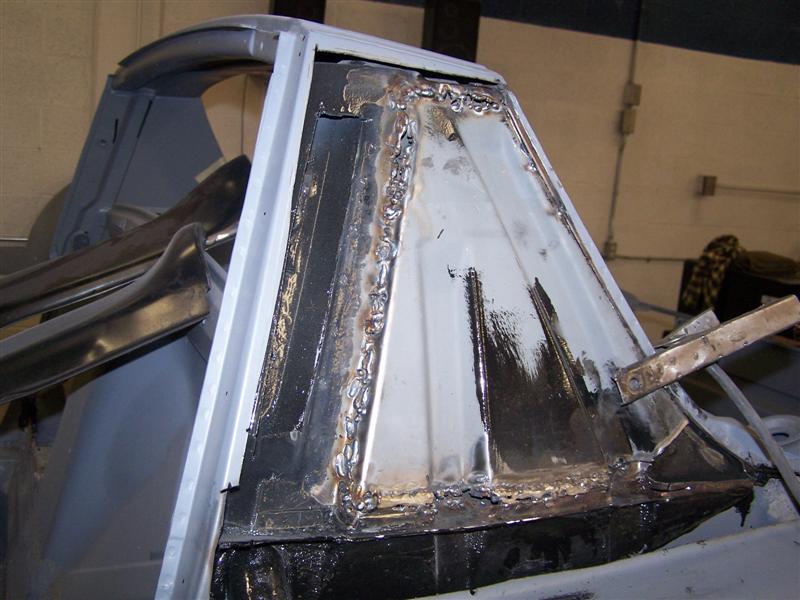
Attached image(s)
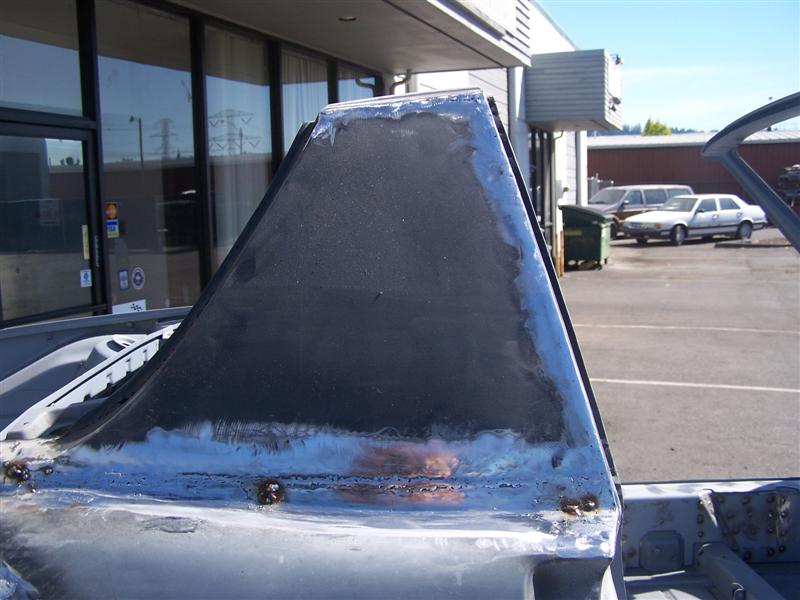
Posted by: PanelBilly Jun 26 2010, 09:13 AM
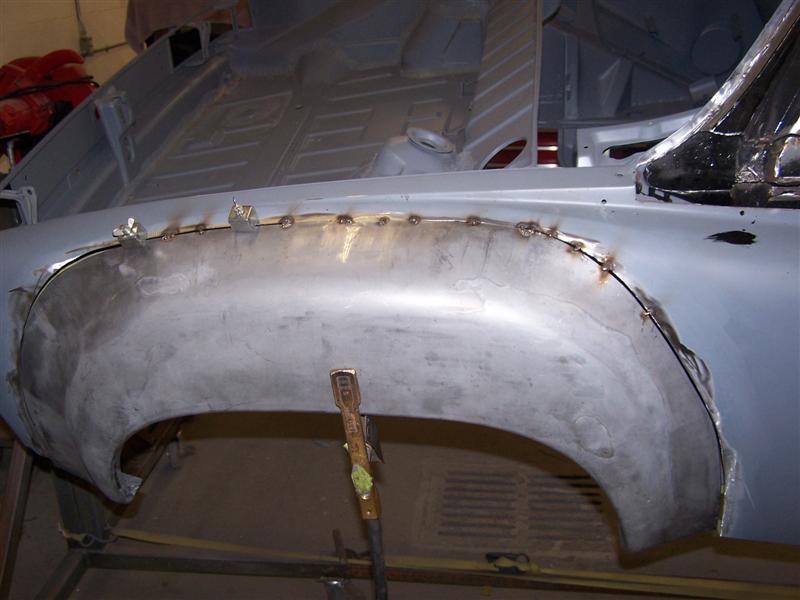
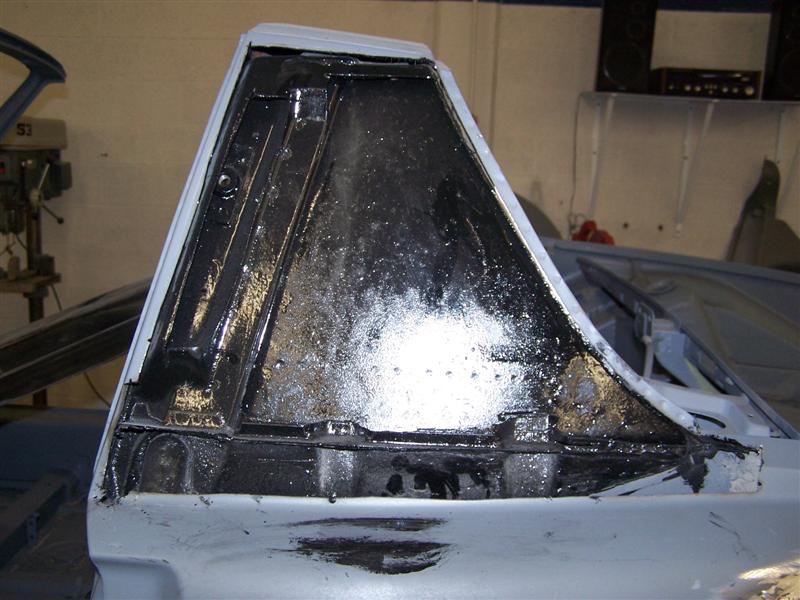
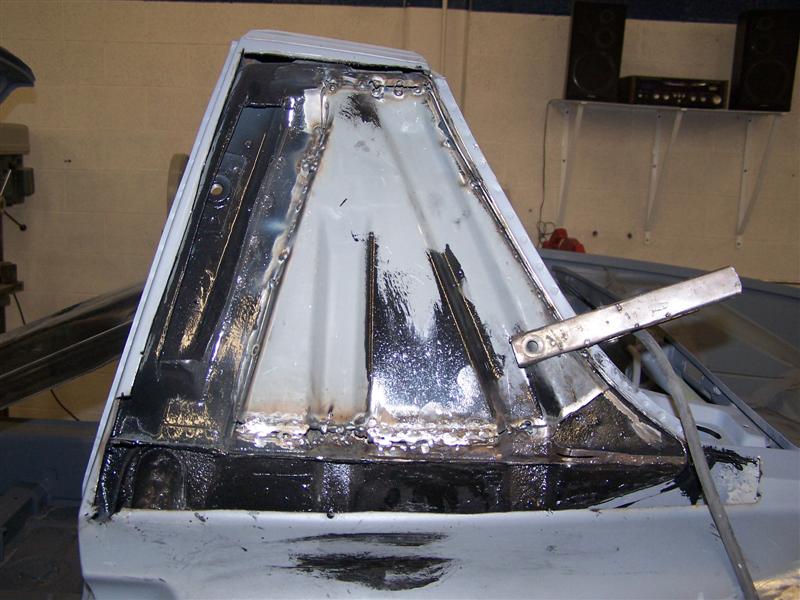
After I welded I recoated with POR. I purchased some defective sail panel skins from AA and reworked the metal to match my car. My welding skills were poor and I spent more time fixing holes than I did attaching it. 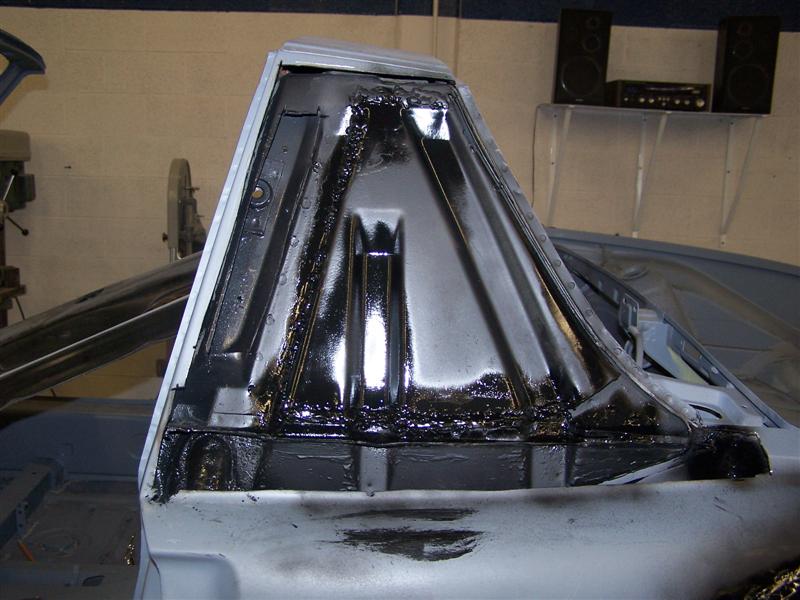
Posted by: PanelBilly Jun 26 2010, 09:24 AM
Next came the installation of the Engman kit. I didn't brace the door openings, but the car was solid and I didn't let any one area get too hot. A weld here a weld there. I moved around the car alot. I had ground the surface were exch hole was so I was metal to metal. At this point I had discovered welding paint.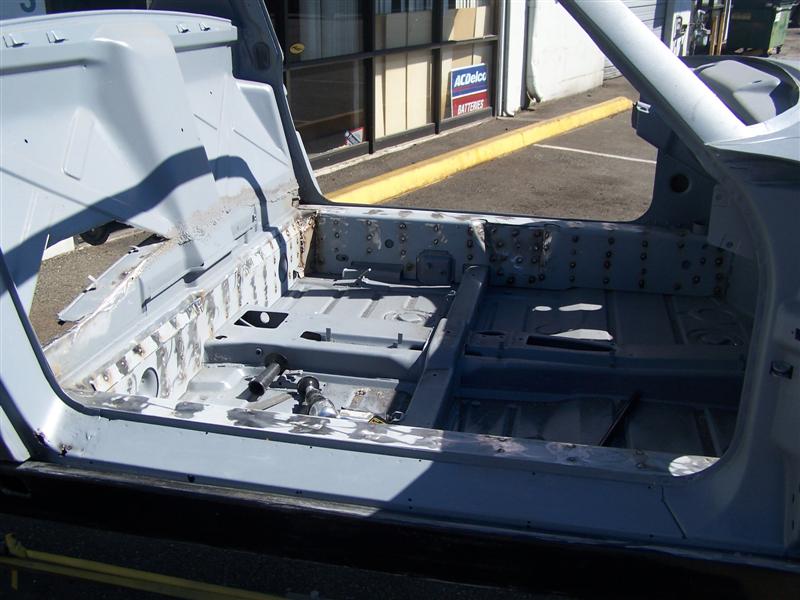
Posted by: 914rat Jun 26 2010, 10:49 AM
When do we get to the Gulf Blue part?Looks like you did some extensive rustoration.Nice Rotisseri.
Posted by: FourBlades Jun 27 2010, 05:48 PM
Great pictures! I have really enjoyed watching your restoration.
John
Posted by: jimkelly Jun 27 2010, 09:03 PM
have you checked your door gaps since welding in those reinforcements?
Posted by: PanelBilly Jun 27 2010, 09:39 PM
This is a retro thread. I'm going back and shoping what I've already done. And yes the gaps are fine.
Posted by: PanelBilly Jun 27 2010, 10:03 PM
I don't have a lot of photos showing the flare installation, but trust me I spent way too many hours attempting to line everything up. I think tacking the flare to the body and then cutting the old part out with an air saw is the best method because it leaves an equal gap for welding. 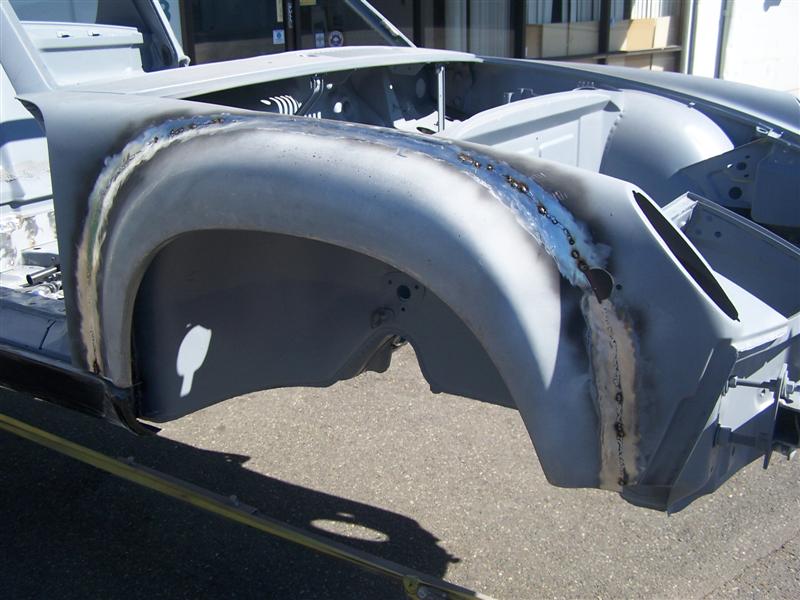
Posted by: PanelBilly Jun 27 2010, 10:09 PM
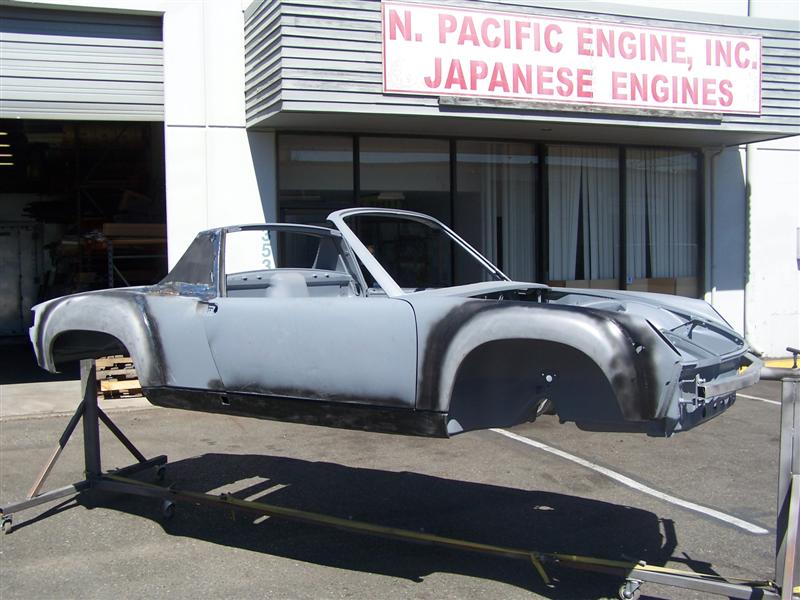
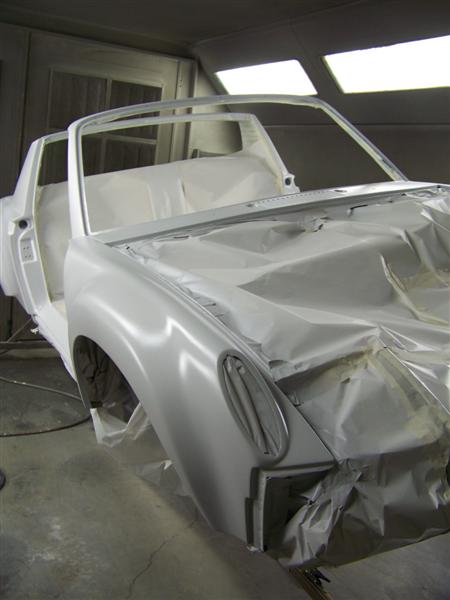
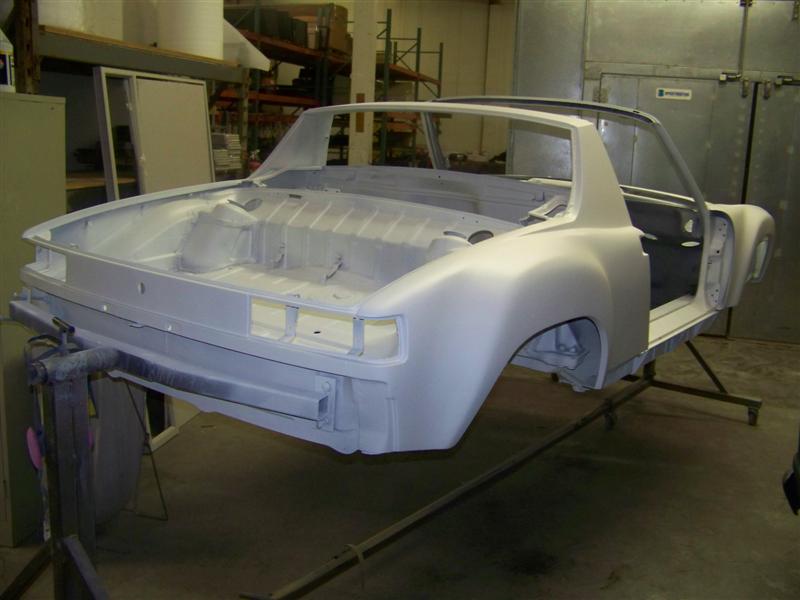
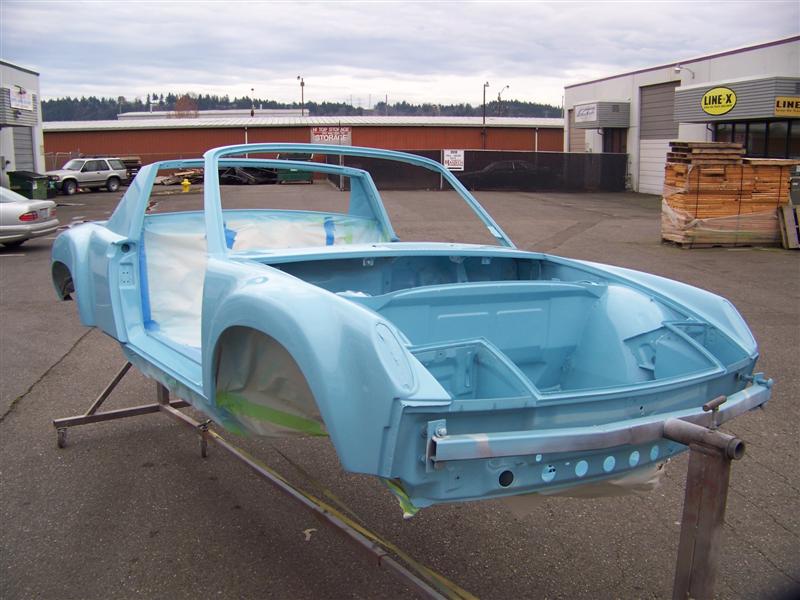
The entire car was sprayed with fill coat and block sanded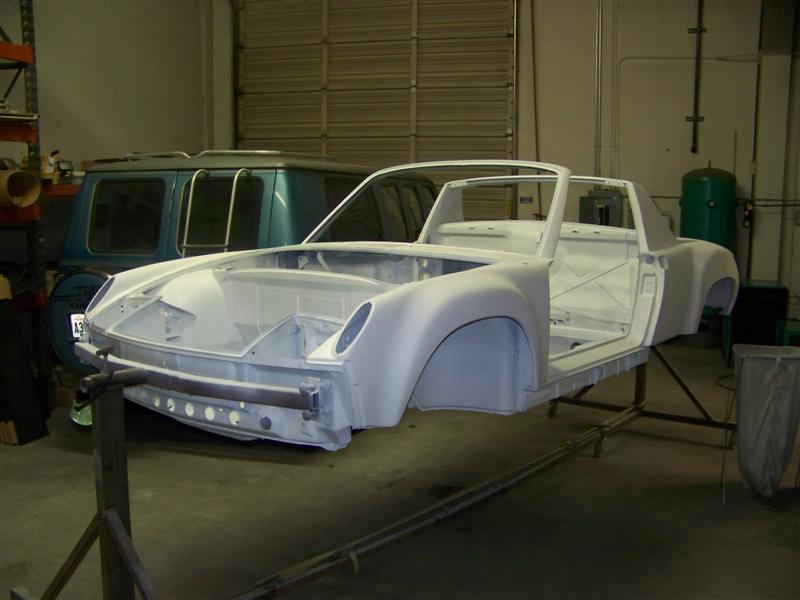
Posted by: PanelBilly Jun 27 2010, 10:16 PM
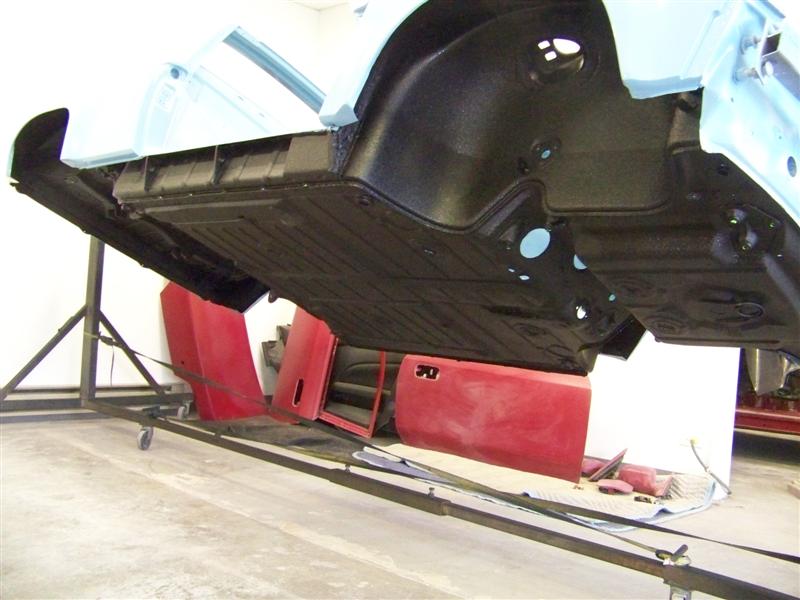
The bottom was coated with Poline. Later I had it coated with kevlar LineX, but this gave the underbody an extra layer of protection. 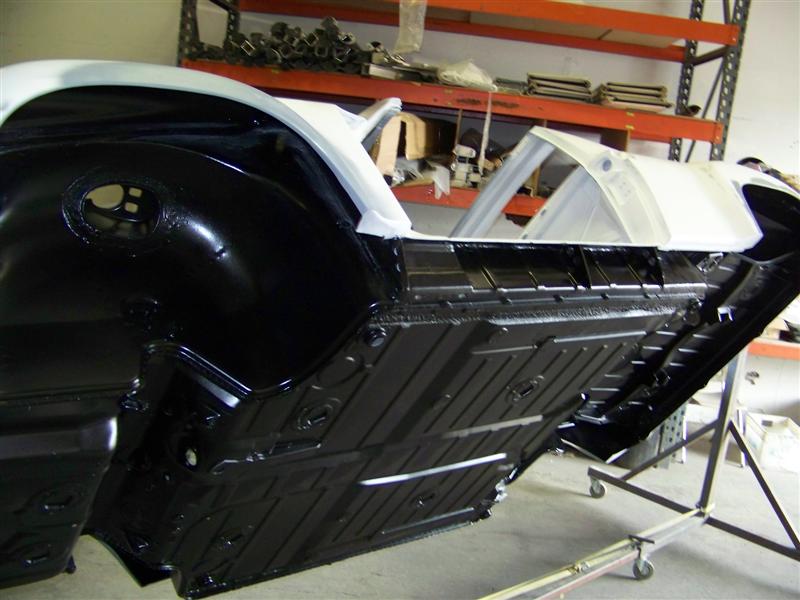
Posted by: PanelBilly Jun 27 2010, 10:27 PM
Here come color, trunks and interior first.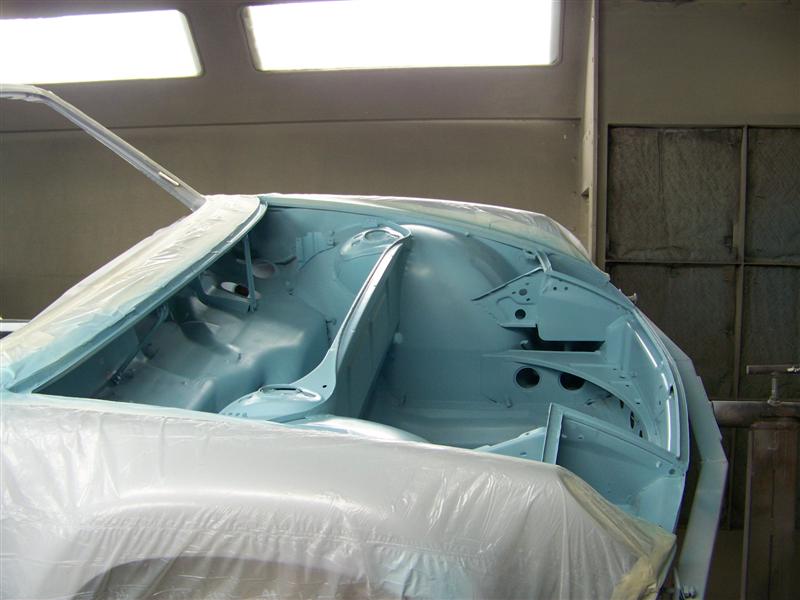
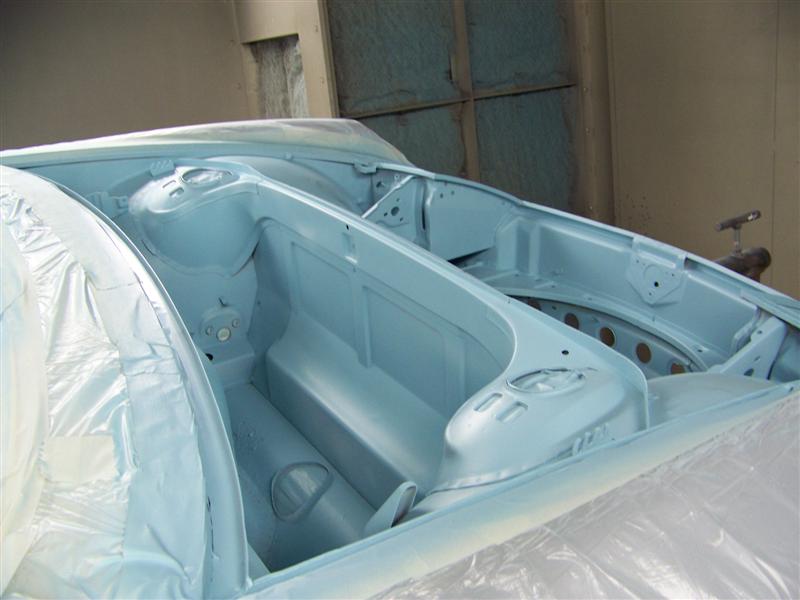
Posted by: PanelBilly Jun 27 2010, 10:30 PM
Taping off trunks and interior. Trusty helper who worked for beer and dinner. I did feed her more than tape. (I think she was having fun too)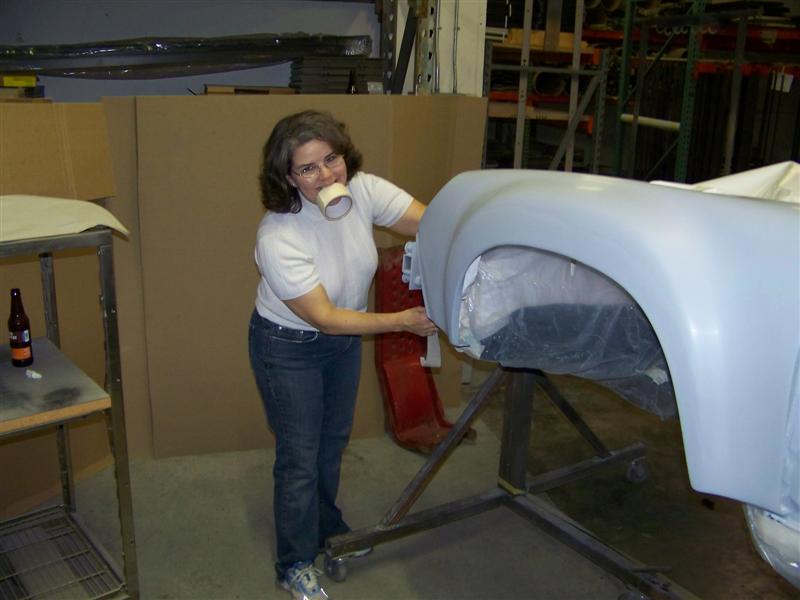
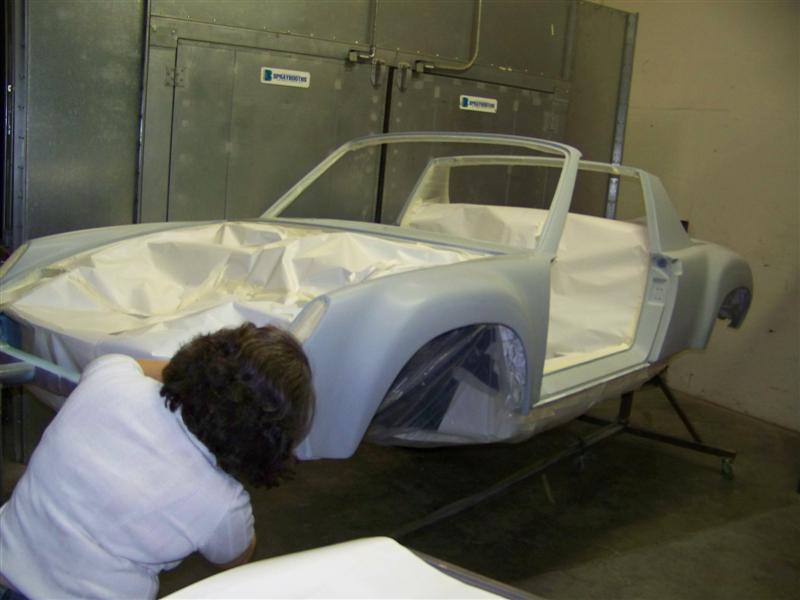
Posted by: PanelBilly Jun 27 2010, 10:32 PM
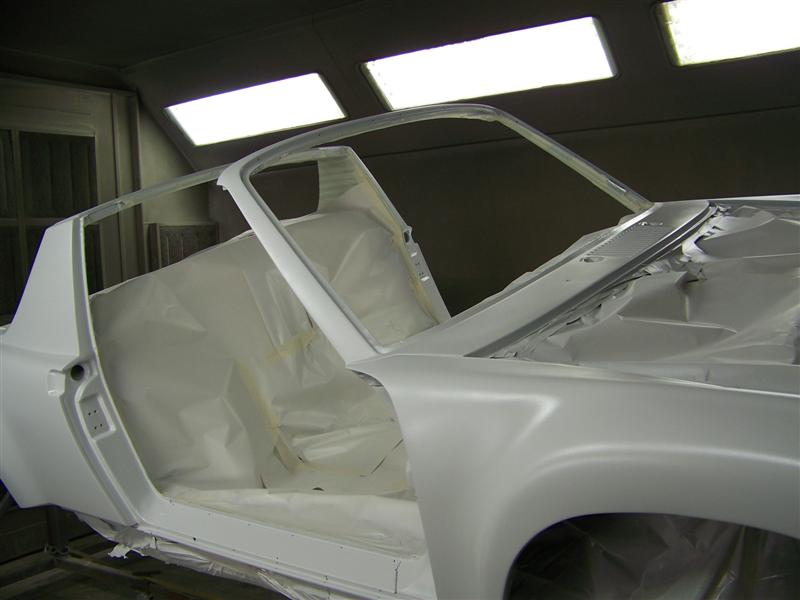
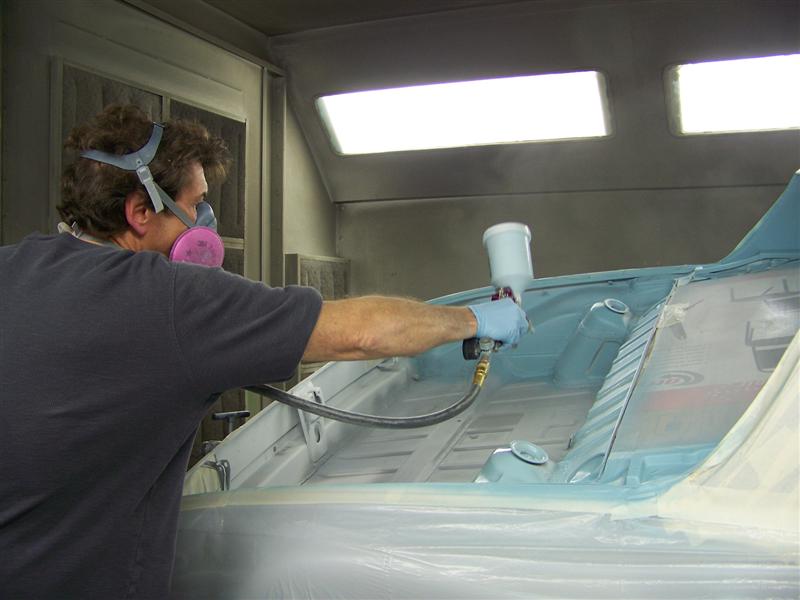
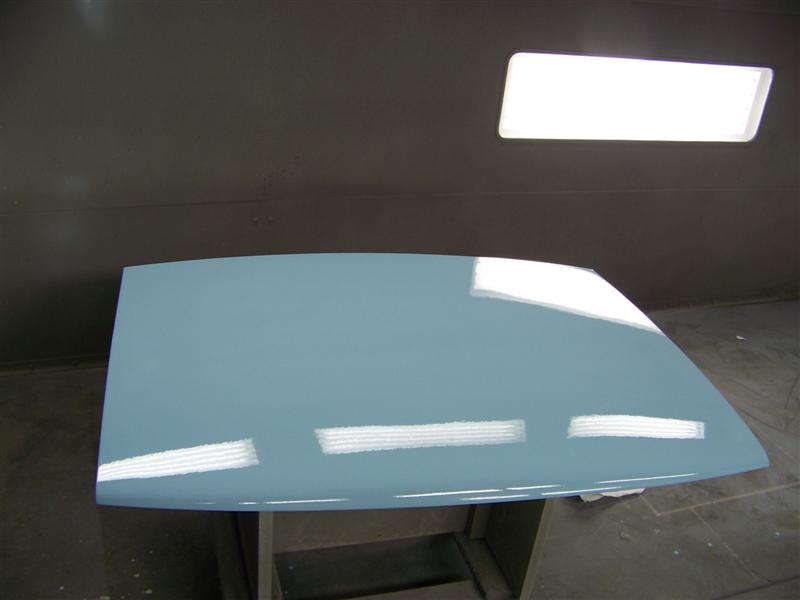
And now for body color (the first attempt at finding Gulf Blue)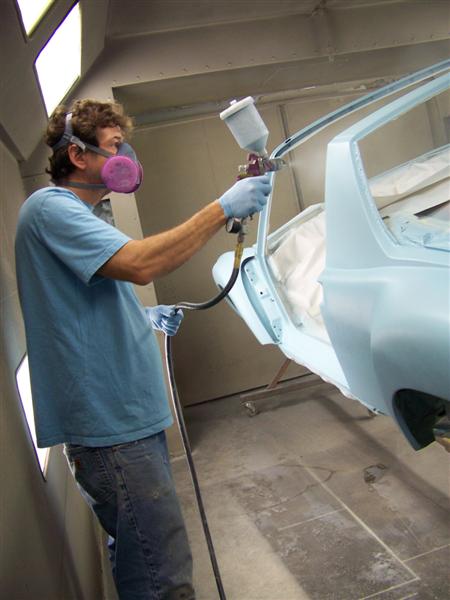
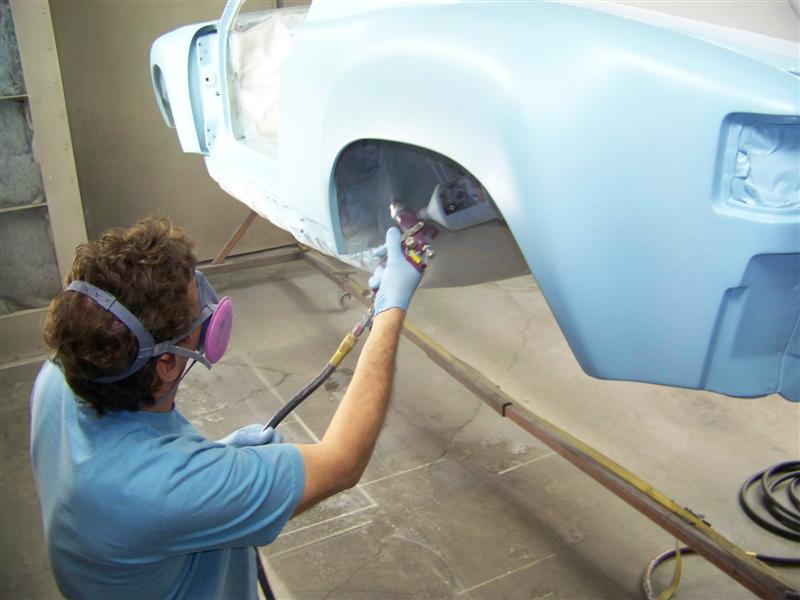

Posted by: PanelBilly Jun 27 2010, 10:34 PM
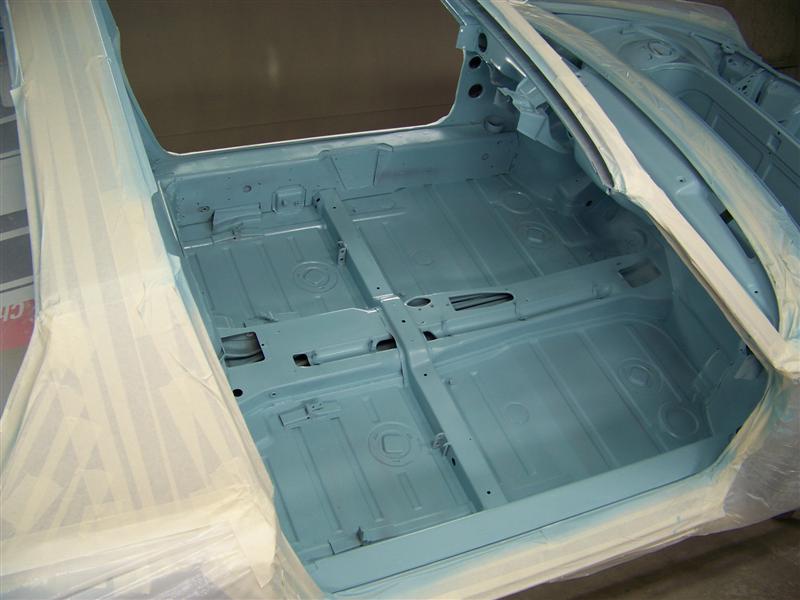
And the color is on (but not for long!)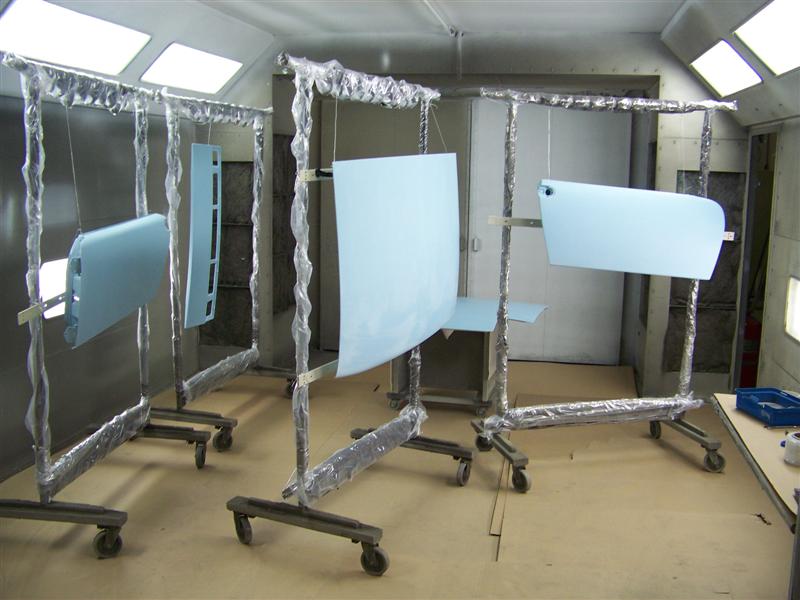

Posted by: PanelBilly Jun 27 2010, 10:42 PM
The color I used was from a code that matched a powder blue, but after it dried, it just wasn't a rich enough color. On top of that I wasn't happy with the clear coat. Out came the sand paper and off came the color.
Posted by: rjames Jun 27 2010, 11:22 PM

The color I used was from a code that matched a powder blue, but after it dried, it just wasn't a rich enough color. On top of that I wasn't happy with the clear coat. Out came the sand paper and off came the color.
ouch. I can only imagine the frustration!
Posted by: PanelBilly Jun 29 2010, 10:26 PM
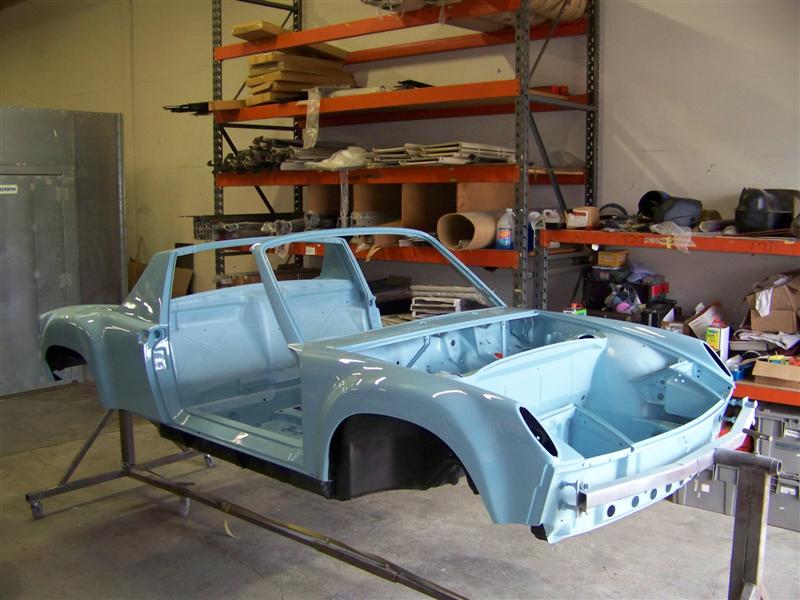
Resanded the color off the car, resealed it, color and six coats of clear.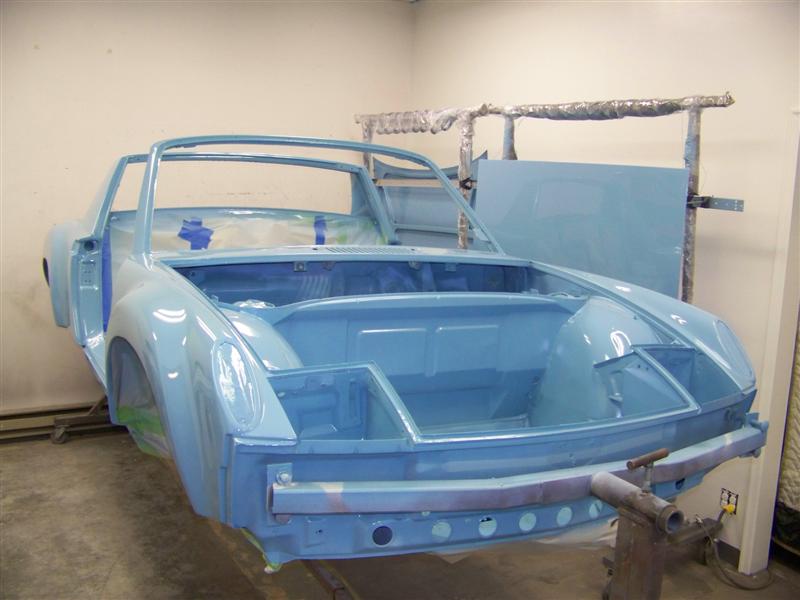
Posted by: PanelBilly Jun 29 2010, 10:35 PM
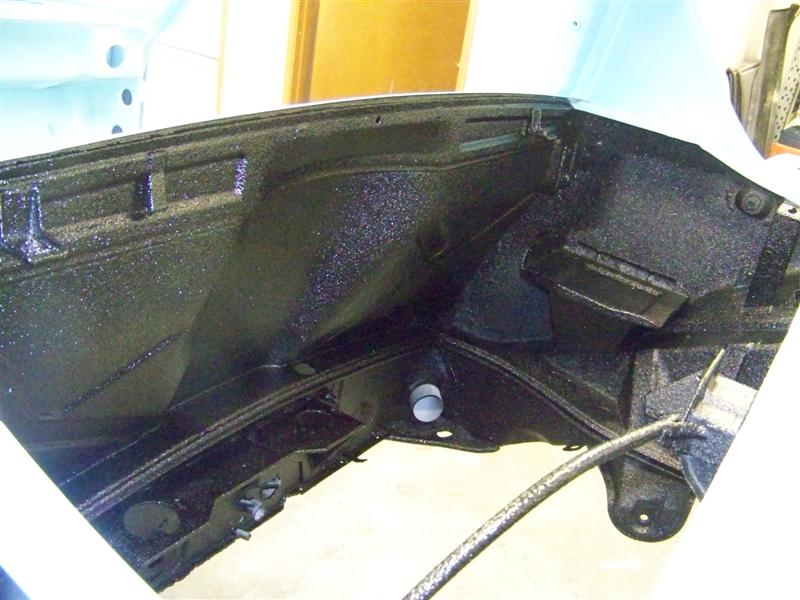
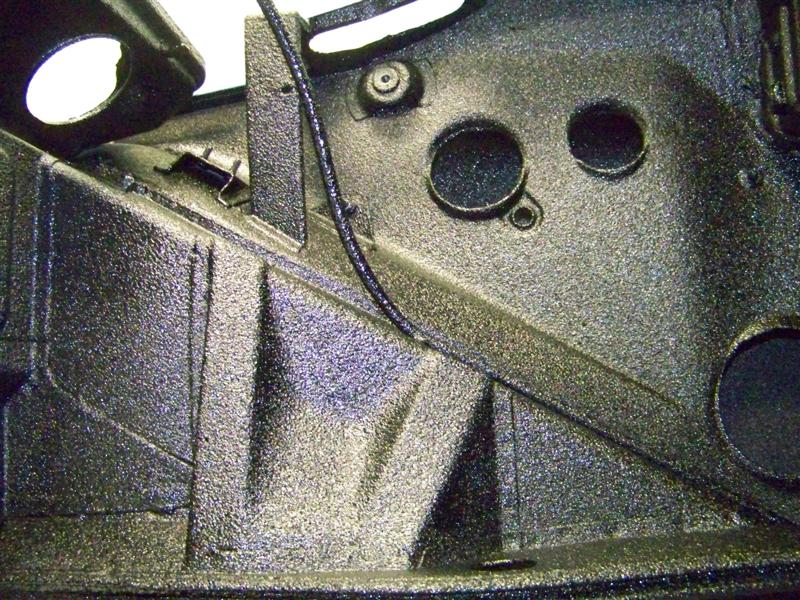
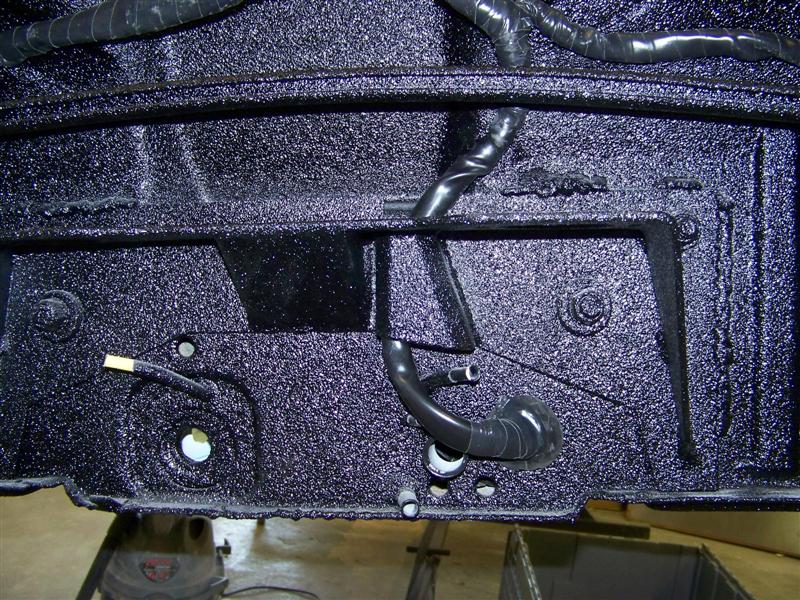
The /4 engine mounts were removed the /6 welded in, and the relay board post cut out The underside and engine bay were coated in the kevlar LineX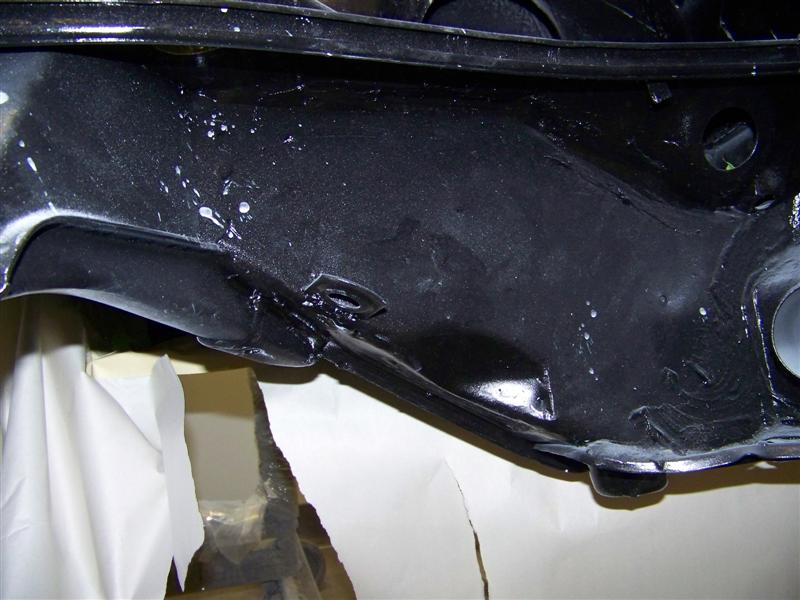
Posted by: PanelBilly Jun 29 2010, 11:06 PM
In the last group of photos, you can see part of the Prelude I worked on while I let the 914 sit for six months. I've heard different opinions, but I choose to let the paint and clear sit and shrink back. I guess some folks like to cut the clear right away and let it breath...., but that wasn't my direction. Lots of sanding and lots of water came next.
Posted by: PanelBilly Jun 29 2010, 11:31 PM
The body wire harness was rewrapped in the best electrical tape I could get and reinstalled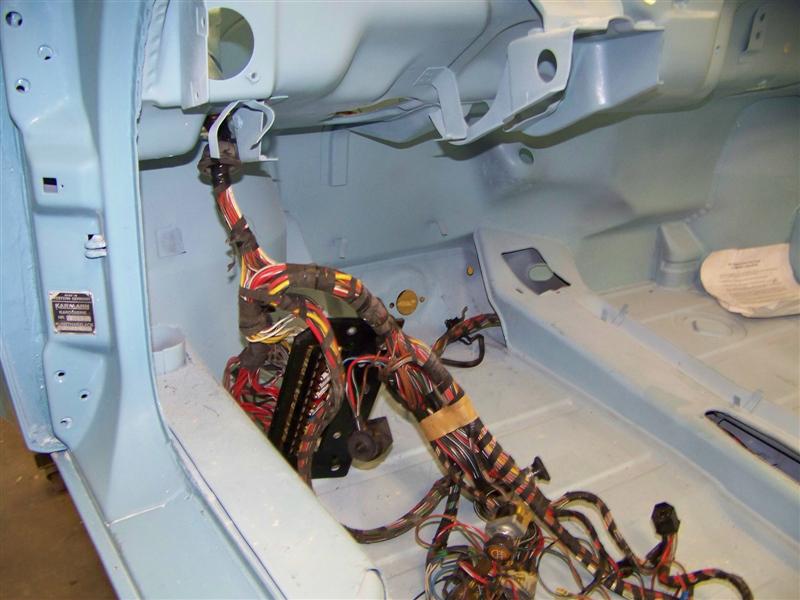
Posted by: PanelBilly Jun 29 2010, 11:35 PM
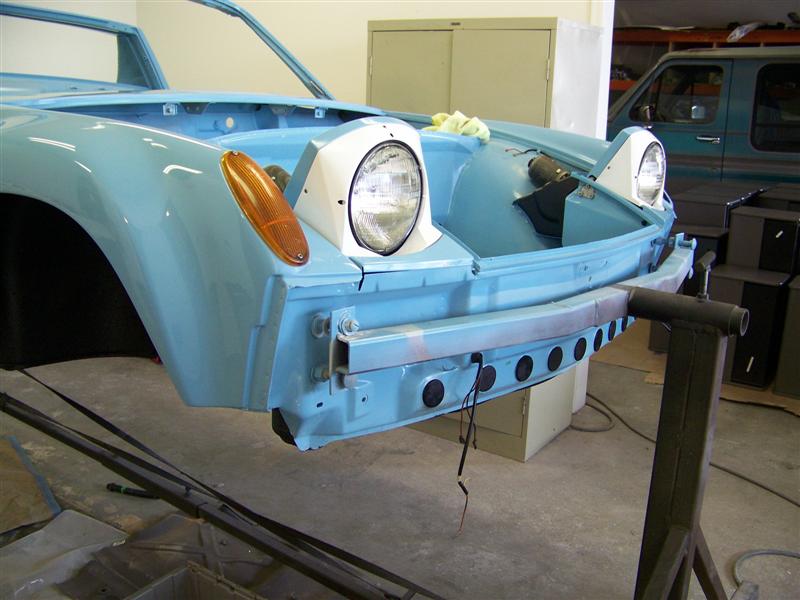
The headlights were redone and installed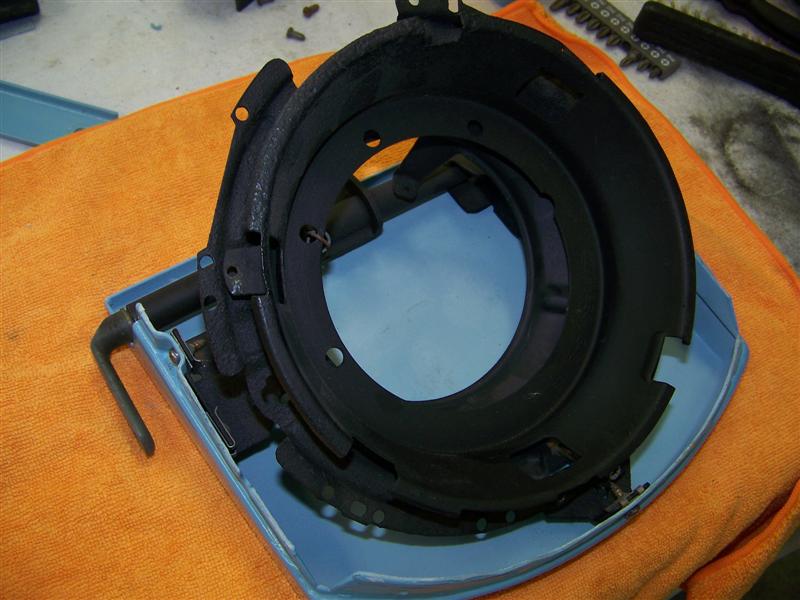
Posted by: PanelBilly Jun 29 2010, 11:38 PM
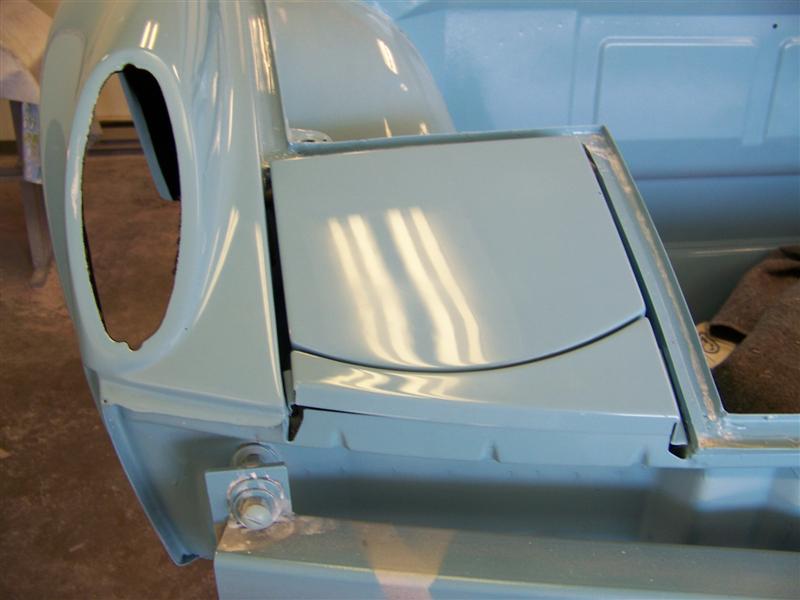
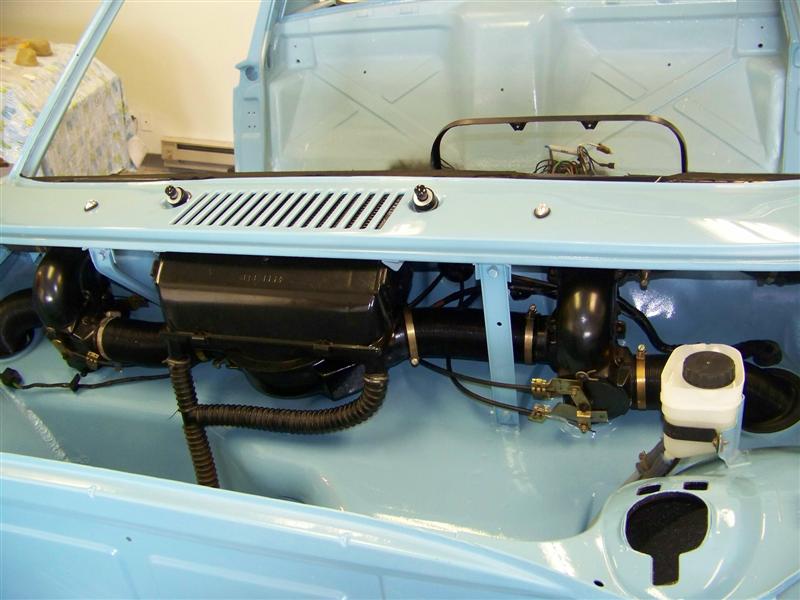
The air distribution was installed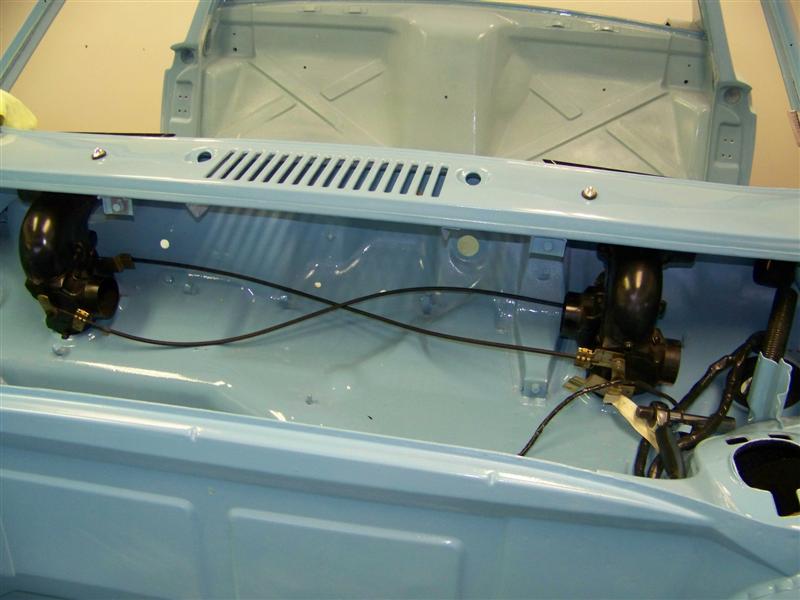
Posted by: PanelBilly Jun 29 2010, 11:41 PM
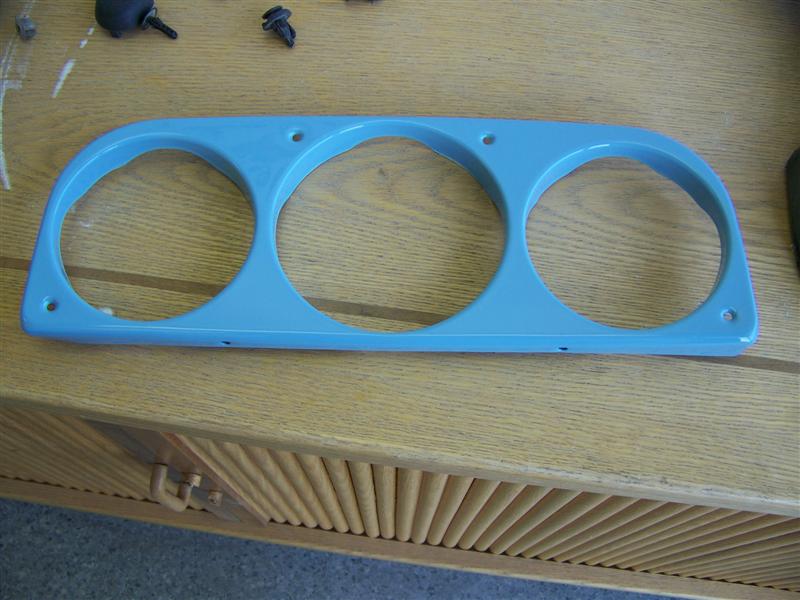
Some odd parts were painted 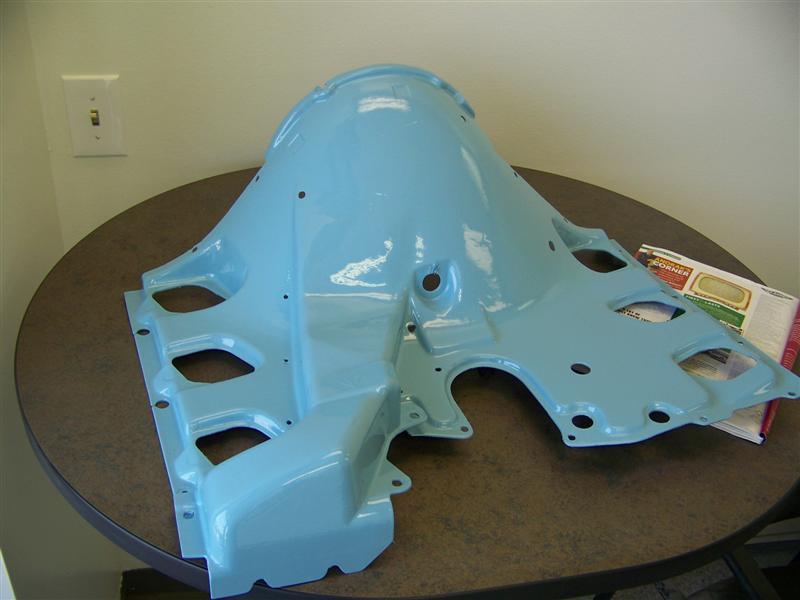
Posted by: Eddie914 Jun 29 2010, 11:43 PM
Billy,
The teener looked great when you had the gathering at your shop.
WOW! Now I see all the hard work that went into the finished product.
Mine just gets rougher all the time. I spend most of my time rebuilding the mechanicals from all the wear and tear from track days. The cosmetics just get more duct tape and Krylon.
Hope to see you again soon.
Cheers,
Eddie
Posted by: PanelBilly Jun 29 2010, 11:50 PM
The only mechanical I've completed to date is the tranny and the suspension. I've got the engine hanging from a stand in the garage and I've only started to figure out what to do with it. Know anything about changing cams?
Posted by: Root_Werks Jun 30 2010, 08:47 AM

Posted by: john deb Jul 25 2010, 05:34 PM
Hey Billy
We had fun looking at the work you have done on your 914 baby. It was good chatting with you.
j & s
Posted by: PanelBilly May 12 2013, 10:43 PM
I should have taken some photos, but this weekend I actually got some forward movement on my car! The windshield (with the help of Jurgen) got installed 2 weeks ago and this weekend I finished the chrome trim and putting the window in the passenger door. Goes up and down and the squeegies stay in place. Next week I plan to get the door panels on and work on the glove box.
Posted by: aircooledtechguy May 13 2013, 08:12 PM
I'm really glad to see you moving forward on your car again. What a SWEET ride!! the photos just don't do your work justice. What's next with it??
Posted by: PanelBilly Jun 3 2013, 10:20 PM
I finished assembling the drivers door and mounted the interior face that I had made many years ago. Its leather and I should have stored it laying flat.
Hopefully the wrinkles will relax. I couldn't find all the square nuts that fit in the retainer clips for holding the passenger door handle on, so that one isn't on yet. 
Next I need to figure out the interior trim for above the windshield. Mark hade one recovered for me with the clips deleted for the visors.
They just get in the way on my line of sight anyways. There was a little confusion and the center mount wasn't deleted, but at least it doesn't have any holes drilled in it.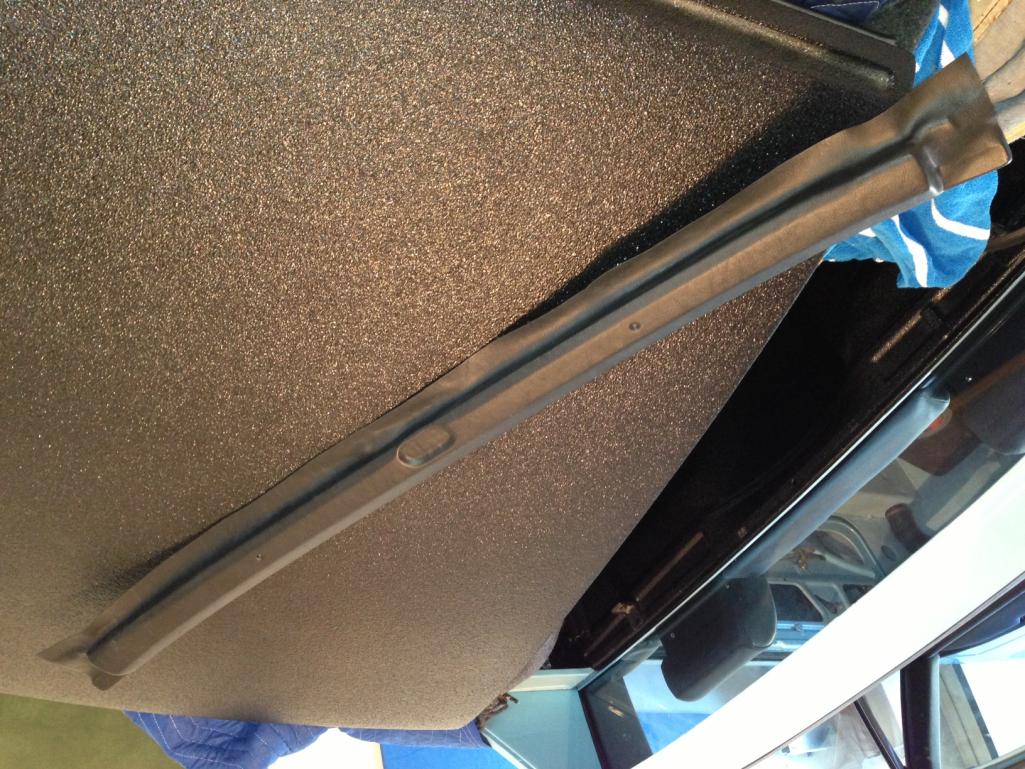
oops, the photo is up side down, but it shows the part just fine
Posted by: PanelBilly Jun 7 2013, 09:46 PM
Tonight I got the passenger door panel attached. Lining up the bolts was a pain in the ass. I finely put the bolts in backwards so the stuck through the
new panel and put nuts on the interior side. 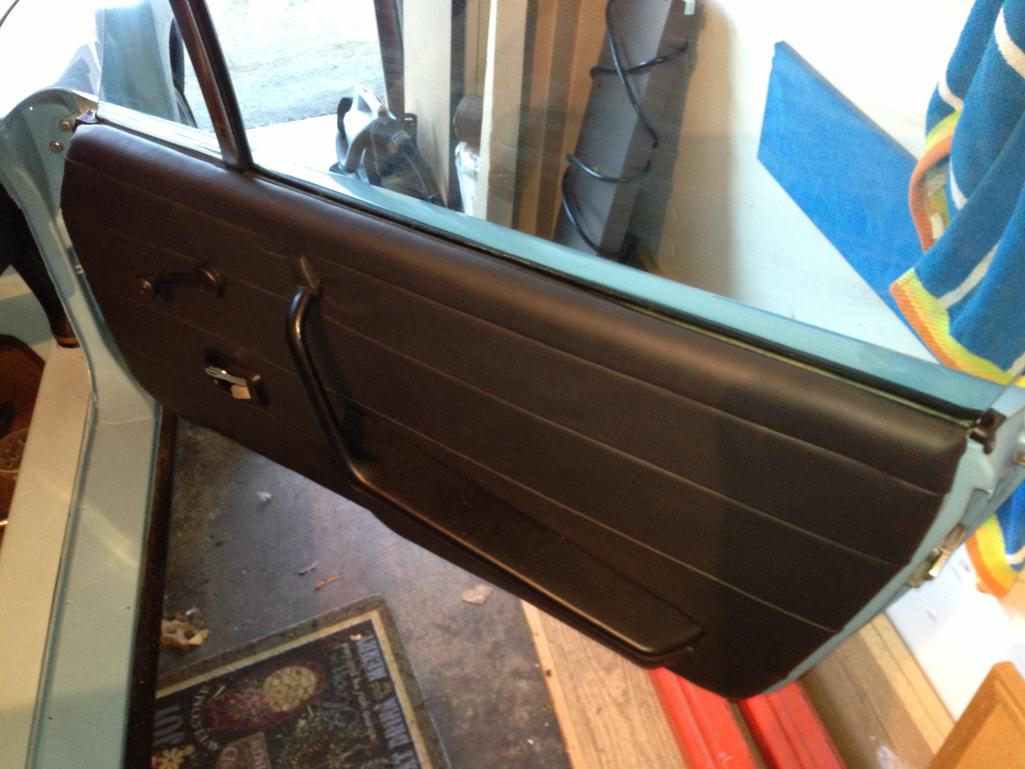
Then I worked on installing the frame that holds the ash tray. Note to anyone else who is doing a total restoration. The ash tray goes in BEFORE the dash cap.
Otherwise you need to remove the plastic nuts the hold the cap in place.
One step back...
Posted by: JRust Jun 7 2013, 10:11 PM
Progress is always good. Even when it involves removing something to make progress. Just means your actually working on your car  Congrats bud
Posted by: Daiberl Jun 7 2013, 10:22 PM
Billy, let me know if you need a helping hand again, happy to come down!
- Juergen
Posted by: PanelBilly Jun 19 2013, 10:59 PM
I got the interior trim for the roll bar screwed in tonight. I used square drive screws so I could hold them on the screwdriver. Nice to have something else finished.
This was another part that has new vinyl on it that's to 914Rubber.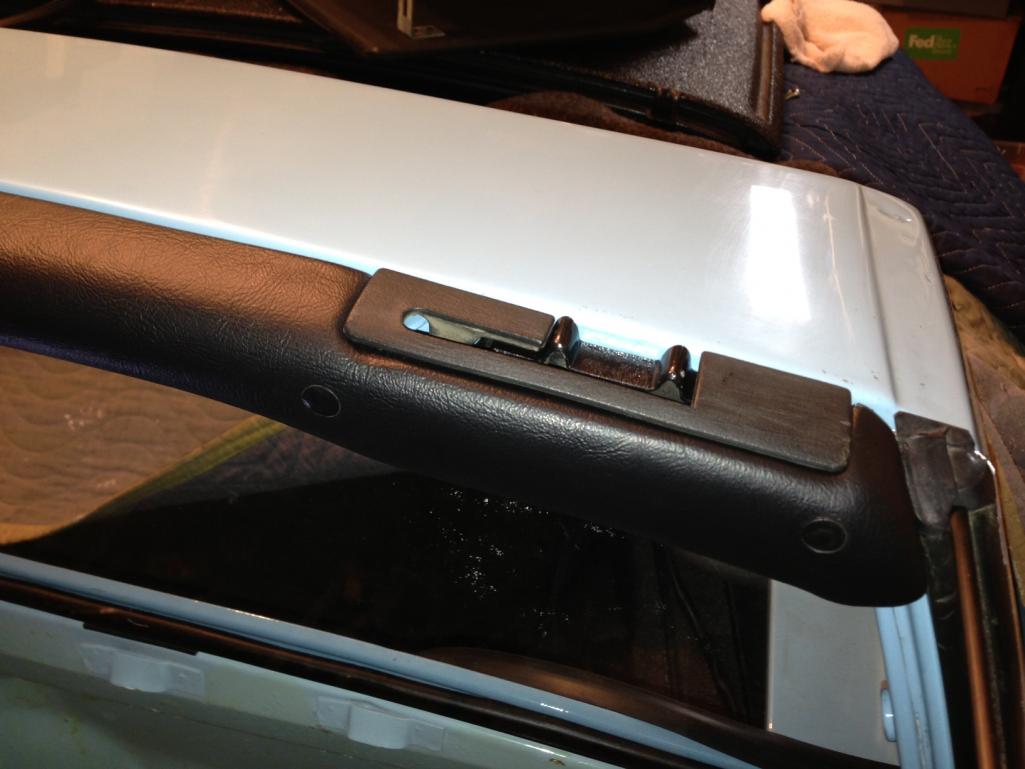
Posted by: jaxdream Jun 20 2013, 07:25 AM
Dadgum , that do look great !!! Not to hijack , but is the lever cover plastic or metal ?? I got a set of those top lever covers that are made of metal as well as some plastic ones . Just didn't know that they ever came in a metal edition.
Fantastic color and build here dude !!!! 
Jack
Posted by: mepstein Jun 20 2013, 07:32 AM
Dadgum , that do look great !!! Not to hijack , but is the lever cover plastic or metal ?? I got a set of those top lever covers that are made of metal as well as some plastic ones . Just didn't know that they ever came in a metal edition.
Fantastic color and build here dude !!!!
Jack
Metal is on the early cars, plastic on the later ones. Someone smarter than me probably knows the transition year.
Posted by: PanelBilly Jun 20 2013, 08:11 AM
I put on plastic, but I had a metal set in my garage too. The plastic ones fit better with the reupholstered trim
Posted by: Socalandy Jun 20 2013, 09:25 AM
Looks Awesome!!! Nice work
Posted by: PanelBilly Jun 21 2013, 10:18 PM
With Jurgen's help, I figured out that I needed to cut a slit in the reupholstered upper windshield trim, so the targa latches could grab the catch
I got the trim screwed into place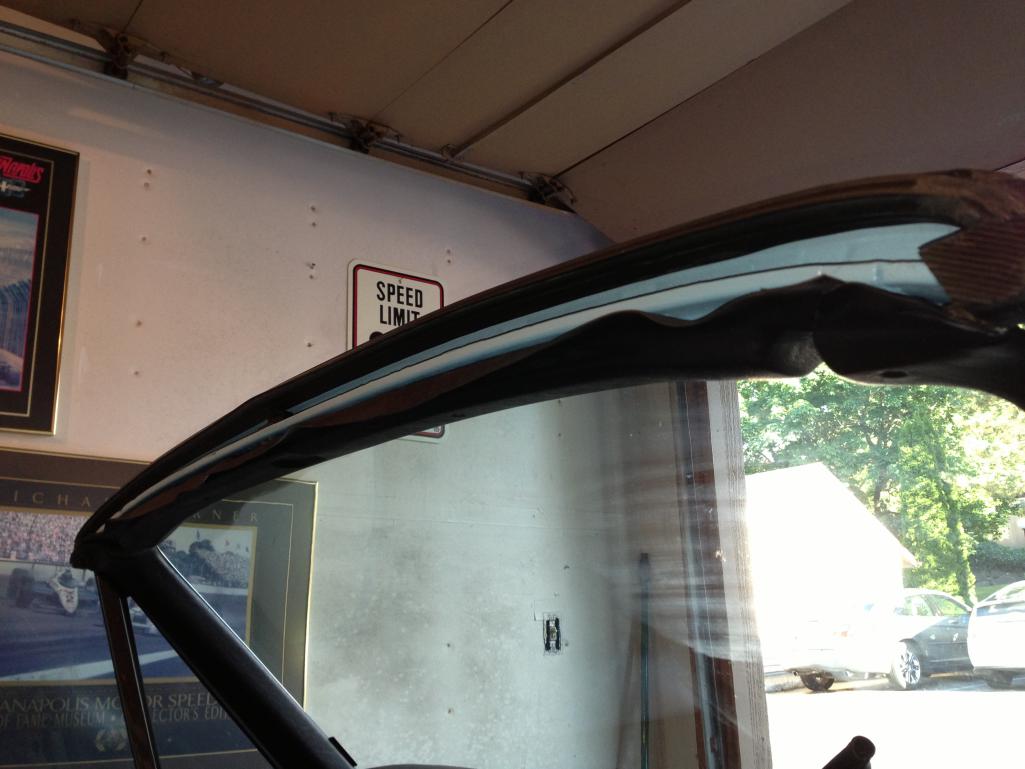
Posted by: PanelBilly Jun 21 2013, 10:27 PM
I got the lower seal for the targa installed (thanks to the one I got from Rich)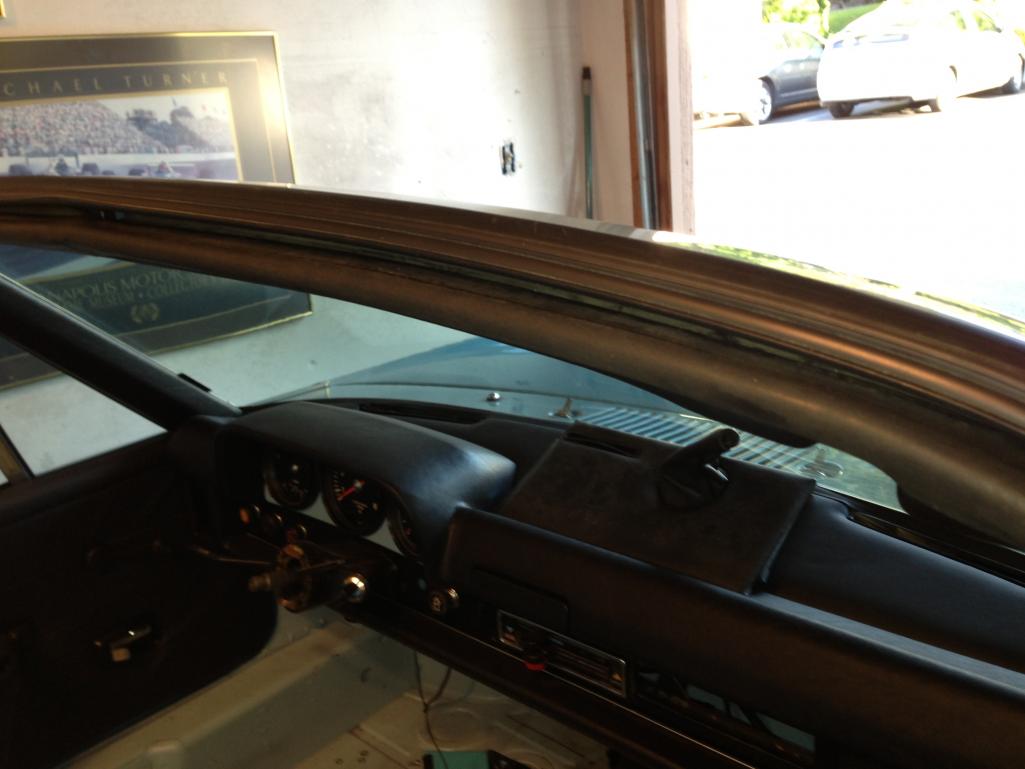
Here's the vertical trim on the windshield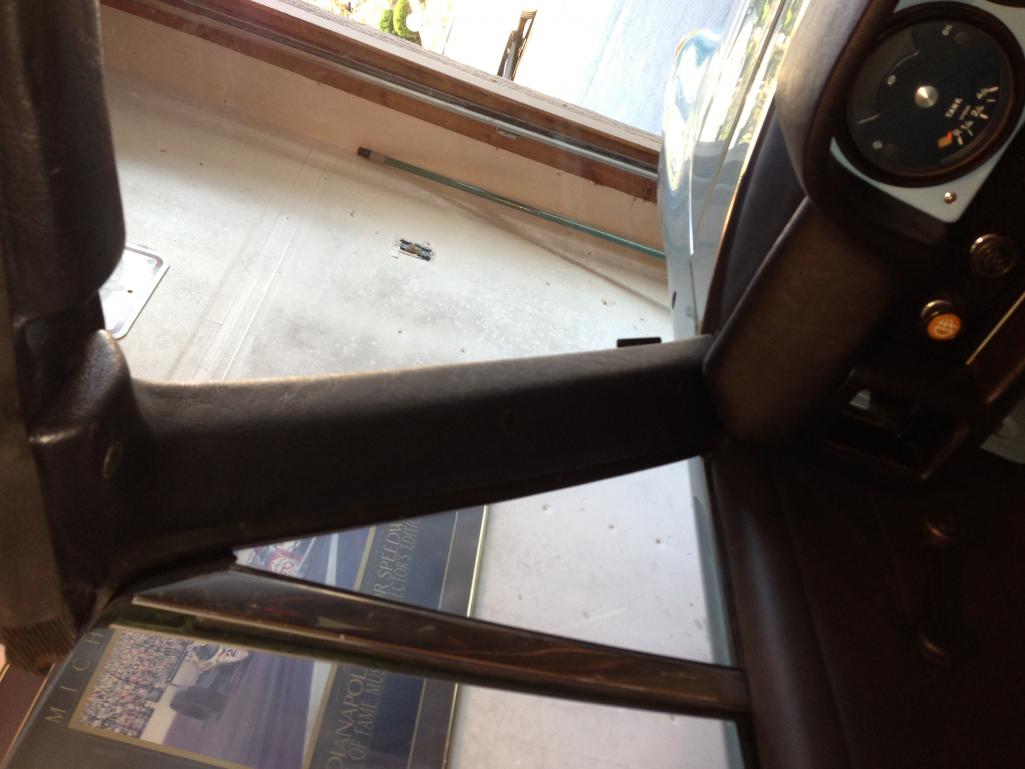
Posted by: PanelBilly Jun 21 2013, 10:34 PM
Installed the vertical trim on the roll bar and the coat hook clip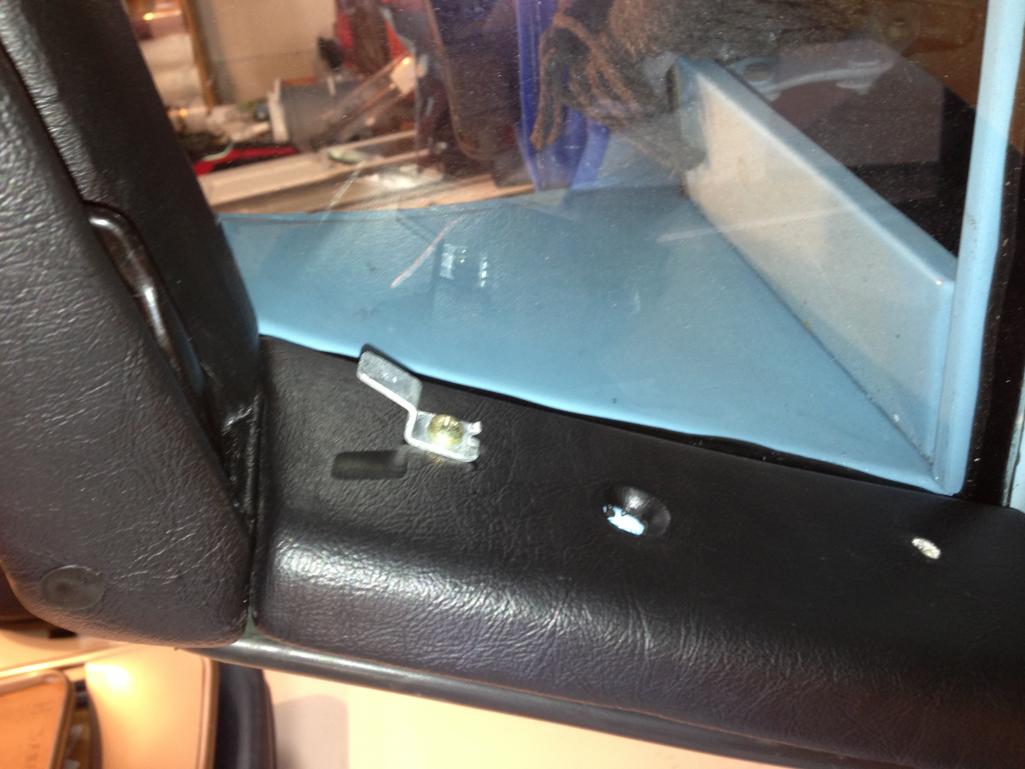
and now that's done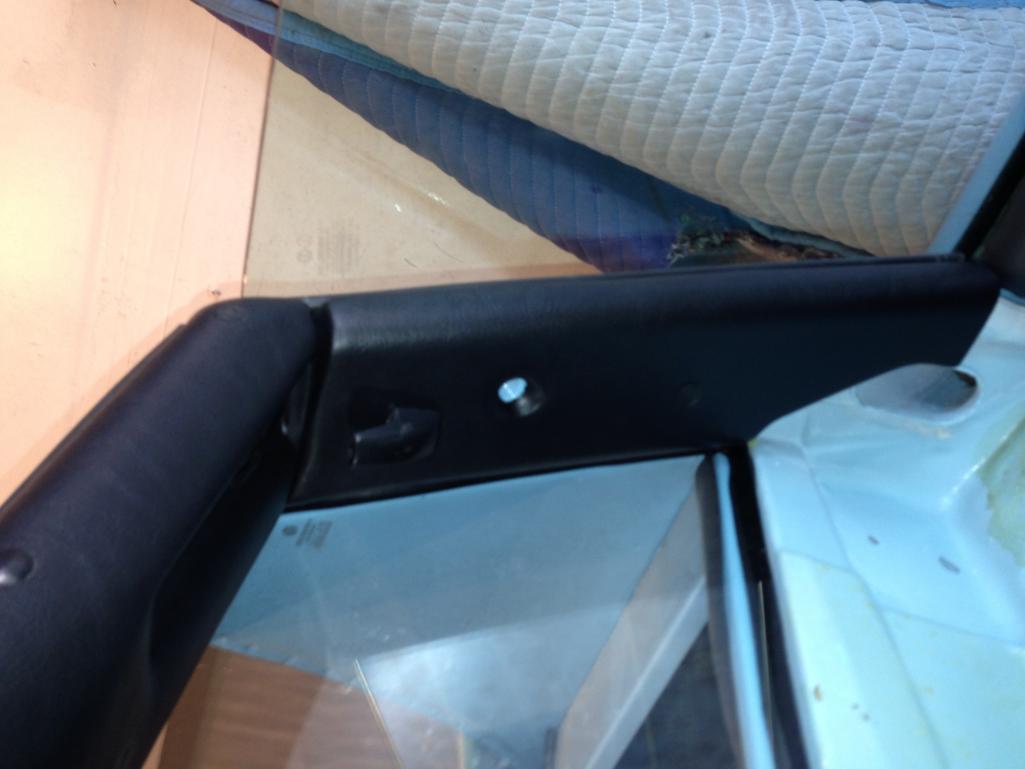
Nice new trim sure looks good
Next, I need to figure out how the seat belt attaches and what hardware I need to use
Posted by: rdauenhauer Jun 21 2013, 10:54 PM
 yer killin me
Posted by: PanelBilly Jul 22 2013, 08:42 PM
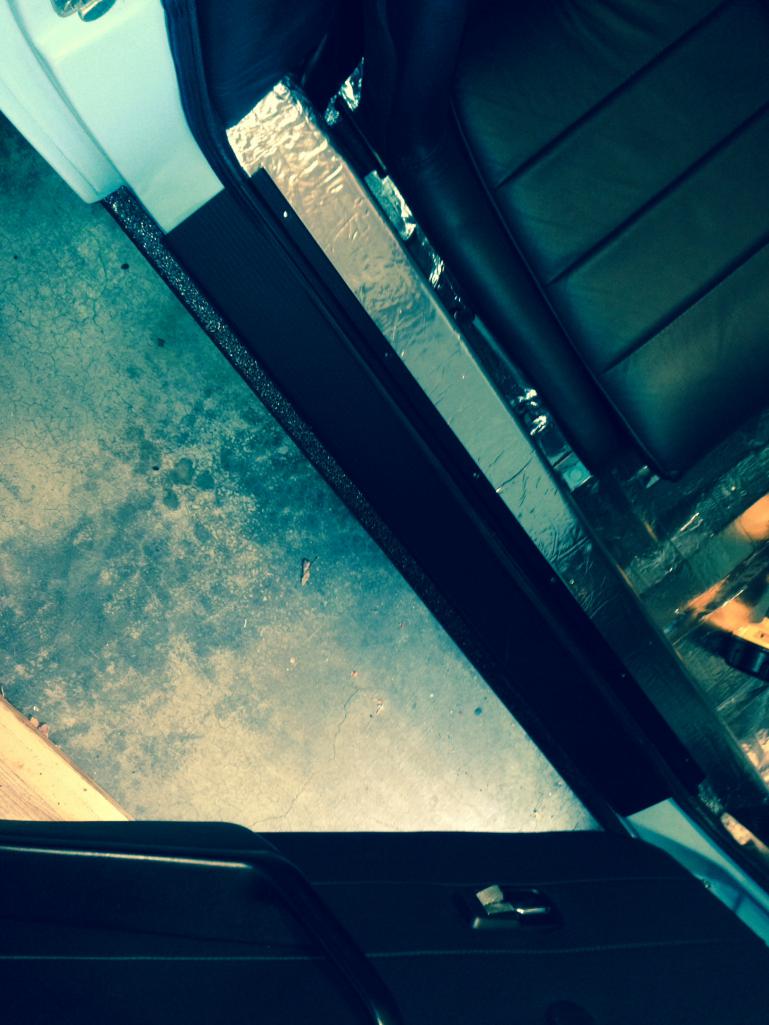
I read too many stories about how the sound of the /6 was sweet, but would quickly cause pain to your ears. The under carrage and engine compartment are coated with LineX, but I lined the interior too.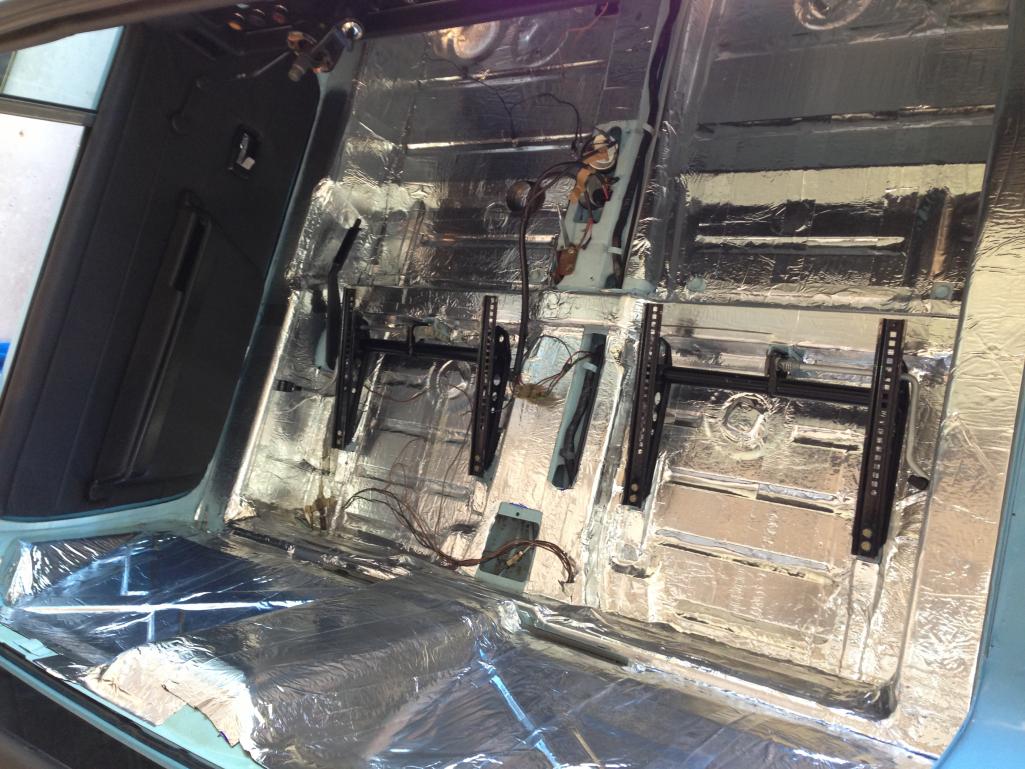
Posted by: PanelBilly Jul 22 2013, 08:46 PM
I installed the seat belts, although i know I'll need to pull them out again when the carpet goes in. I'll also need to pickup a set of "PRESS" stickers for the belts as these have long ago faded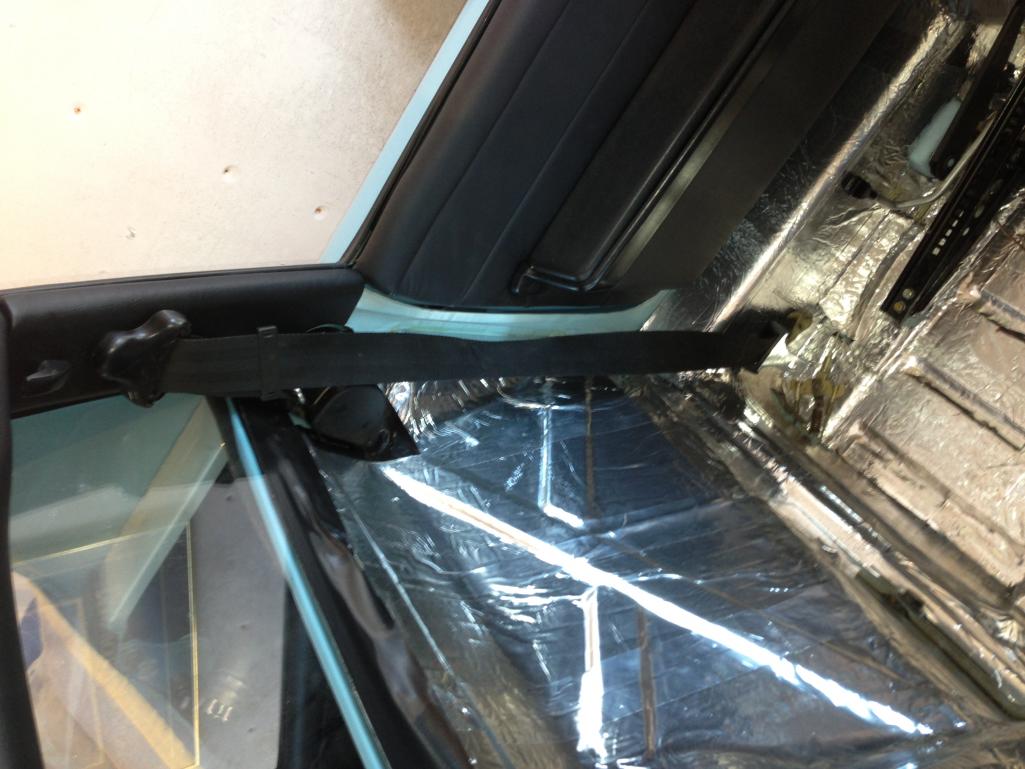
Posted by: PanelBilly Jul 22 2013, 08:48 PM
I edged the rear window with black gorilla tape when it meets the top of the back pad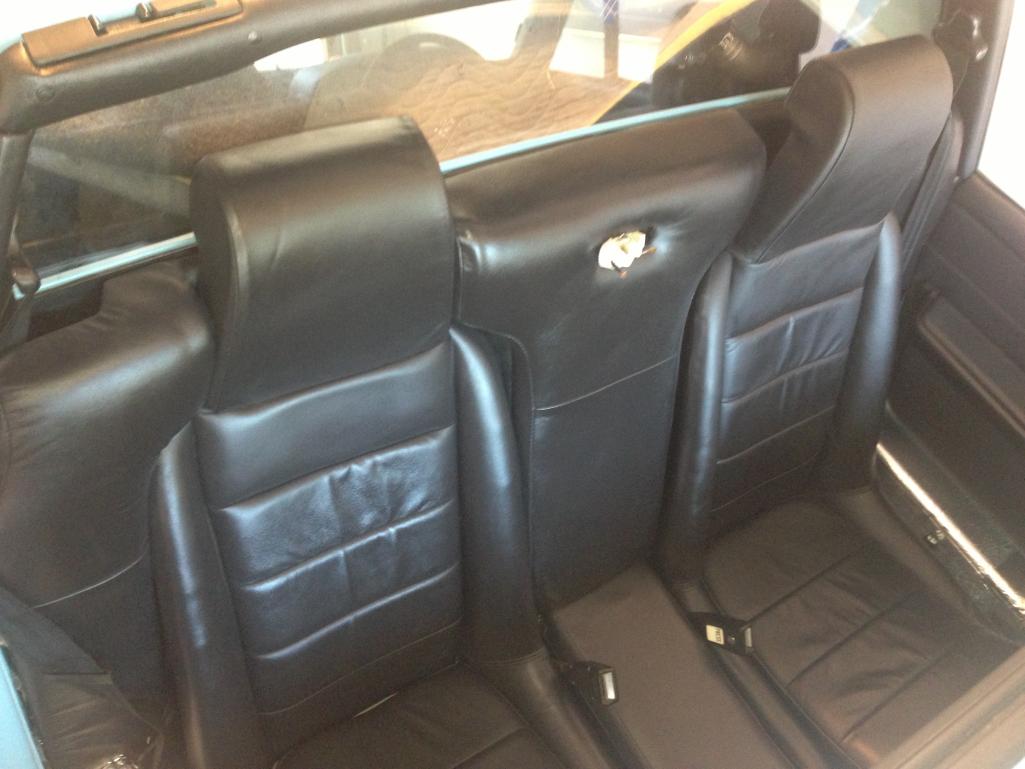
Posted by: PanelBilly Jul 22 2013, 08:51 PM
Seats were installed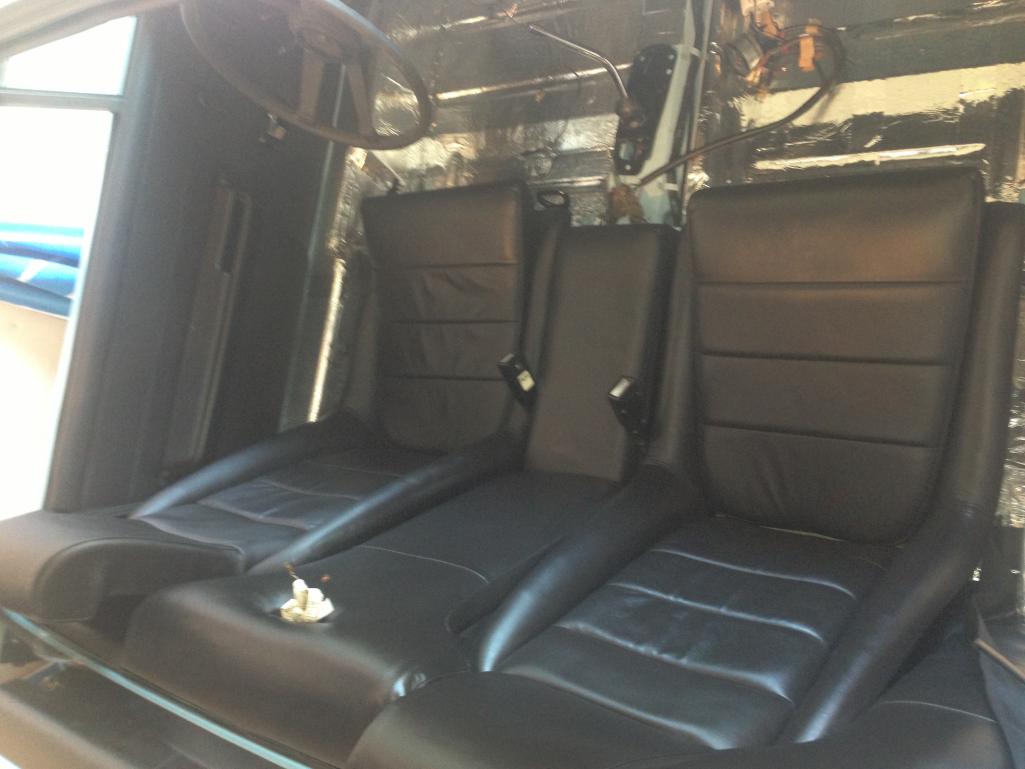
Posted by: PanelBilly Jul 22 2013, 08:54 PM
I got this crazy idea to make my own fabric dash face. After carefully making two of them trying to get it right, I decided I didn't like the look. I glued on the OEM one that came with the car.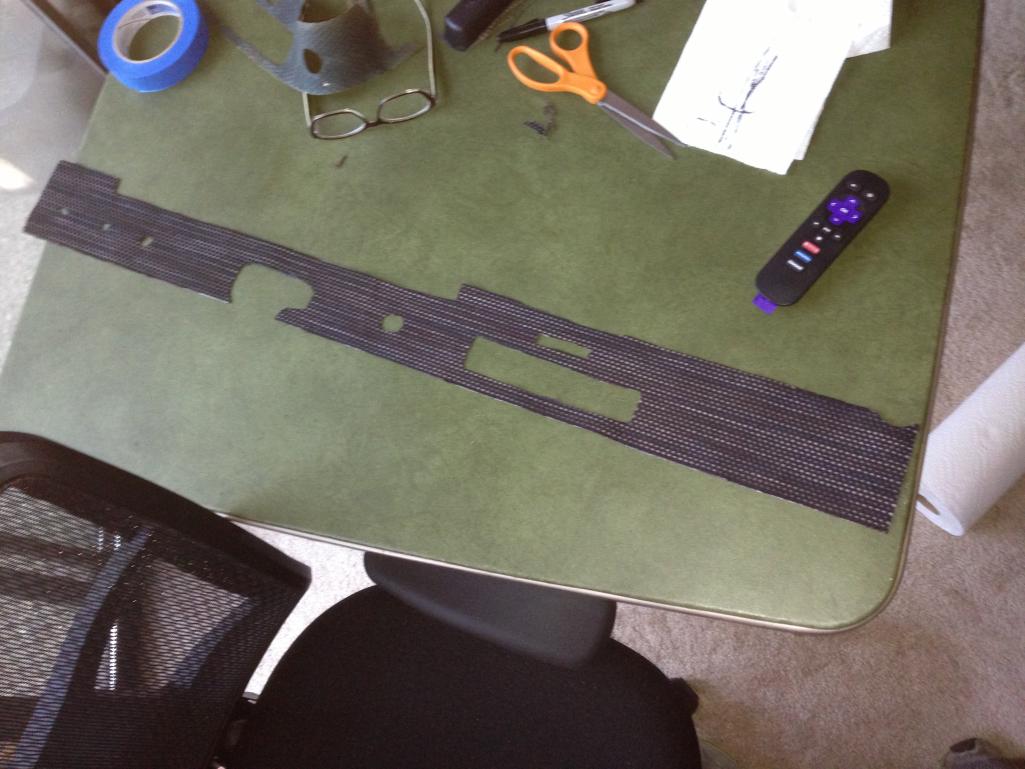
Posted by: PanelBilly Jul 22 2013, 09:29 PM
Here's the basketweave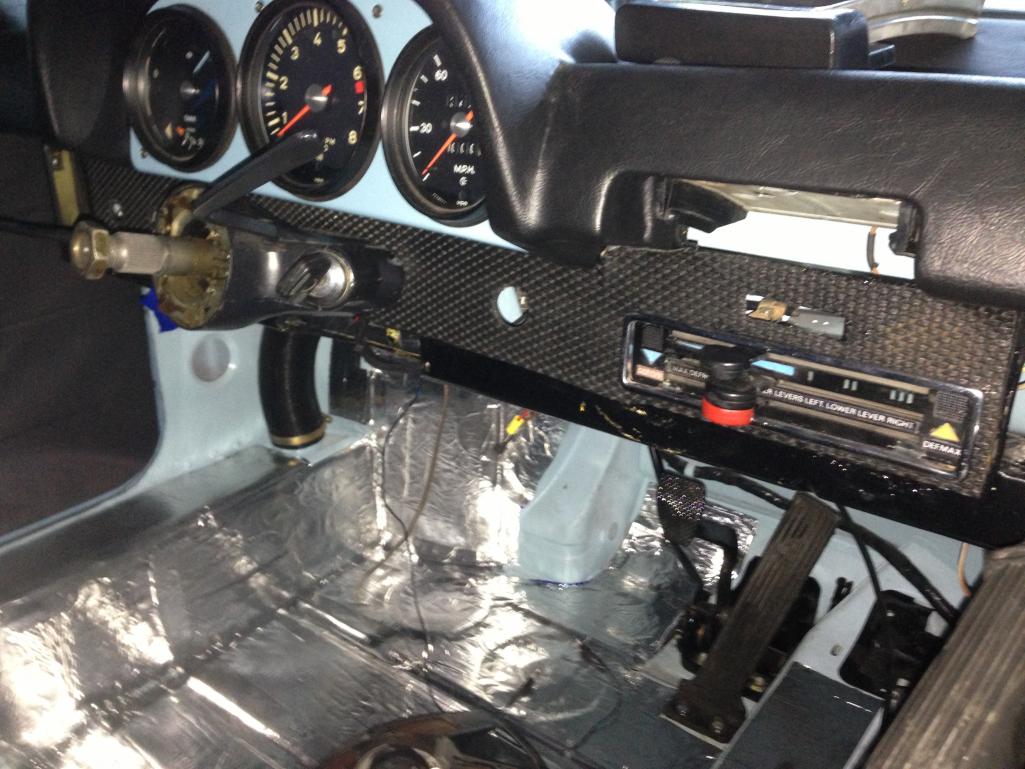
Posted by: PanelBilly Aug 6 2013, 11:19 AM
I got the glove box door installed now and the springs on both sides weren't difficult to install.
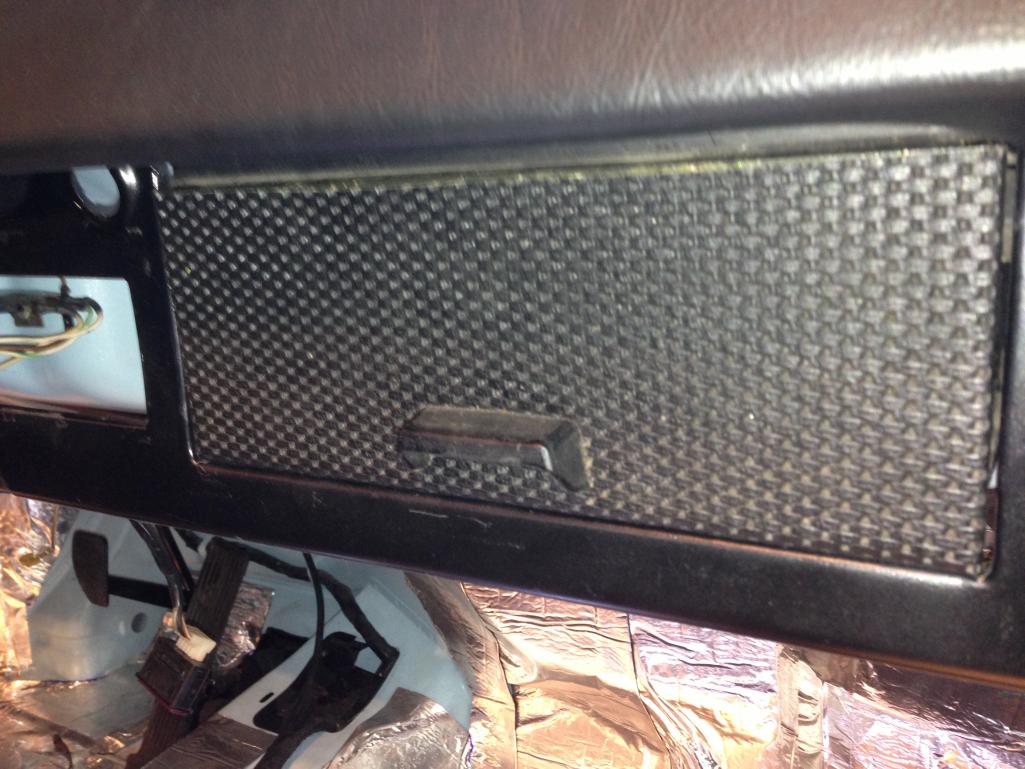
Posted by: PanelBilly Aug 6 2013, 11:21 AM
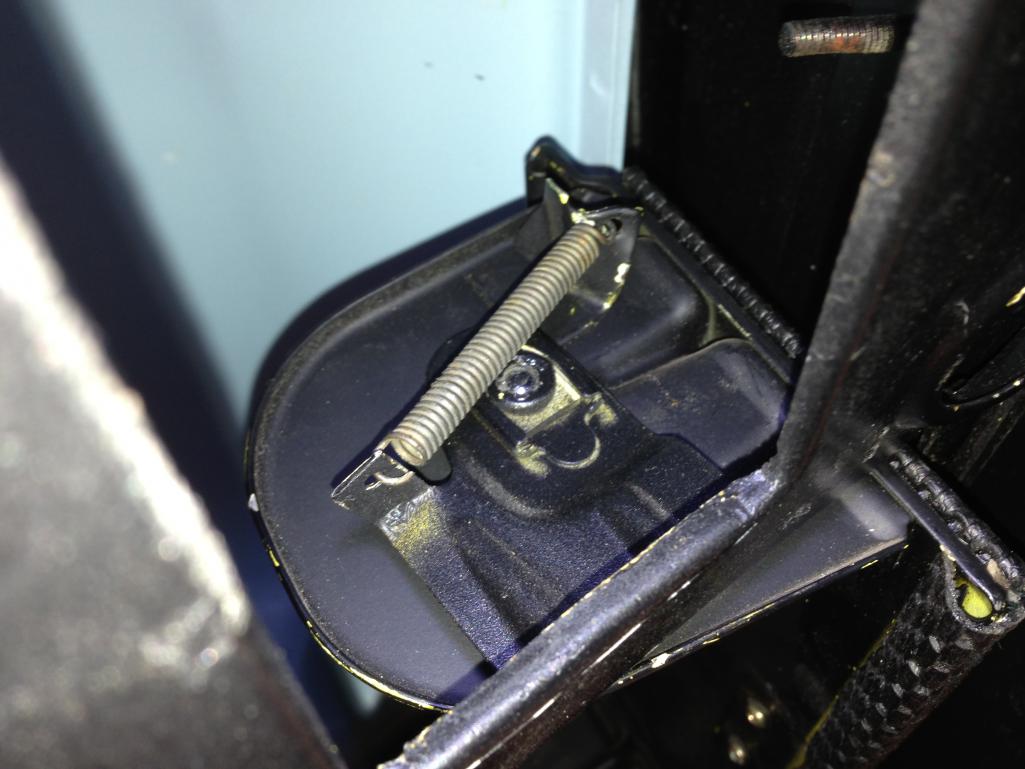
its much easier if the vents are removed
Posted by: PanelBilly Oct 20 2013, 04:27 PM
I installed new rubber seals in the front trunk and the doors today. Not sure what direction the seal between the fuel and tire should face, but its easy enough to reinstall.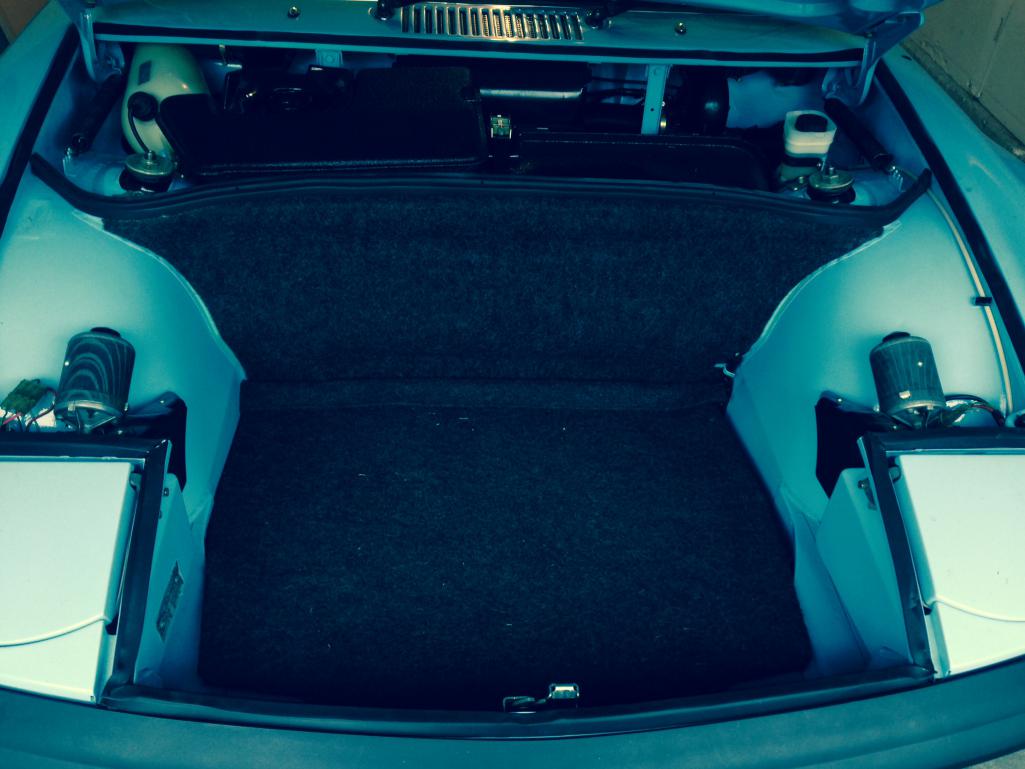
Posted by: PanelBilly Oct 20 2013, 04:33 PM
I also go the steering wheel installed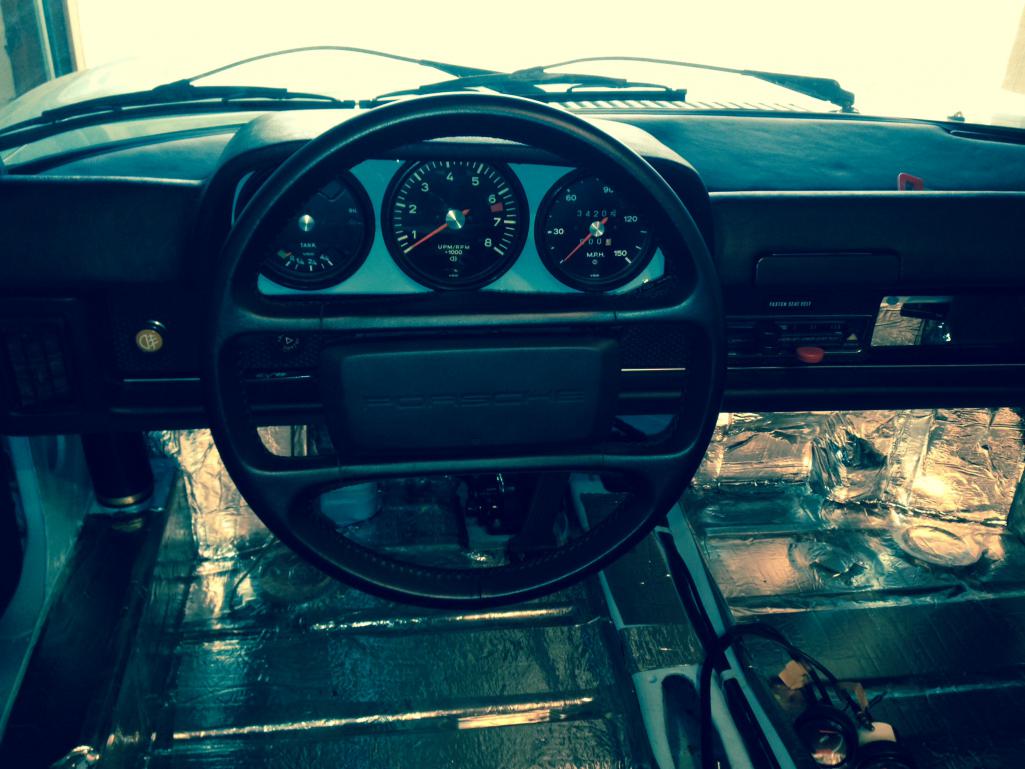
Posted by: Evil Older Brother Oct 20 2013, 05:12 PM
I also go the steering wheel installed
Nice wheel. Wondered when you were going to show off what you got on your honeymoon. Interesting is that this was the only thing your seemed proud of!
Posted by: CptTripps Oct 20 2013, 05:13 PM
Looking great man!
Posted by: Daiberl Oct 20 2013, 05:39 PM
Nice progress! I will try to come down in the next couple of weeks, hope you have something to do then so that I can help.
Posted by: PanelBilly Jan 19 2014, 08:13 PM
I needed the retainer clip that holds the fog light lens in place, so today I made one. Just need to get a set of seals from 914Rubber. Looked like it was going to be easier than it turned out. Forming small parts is harder than larger ones.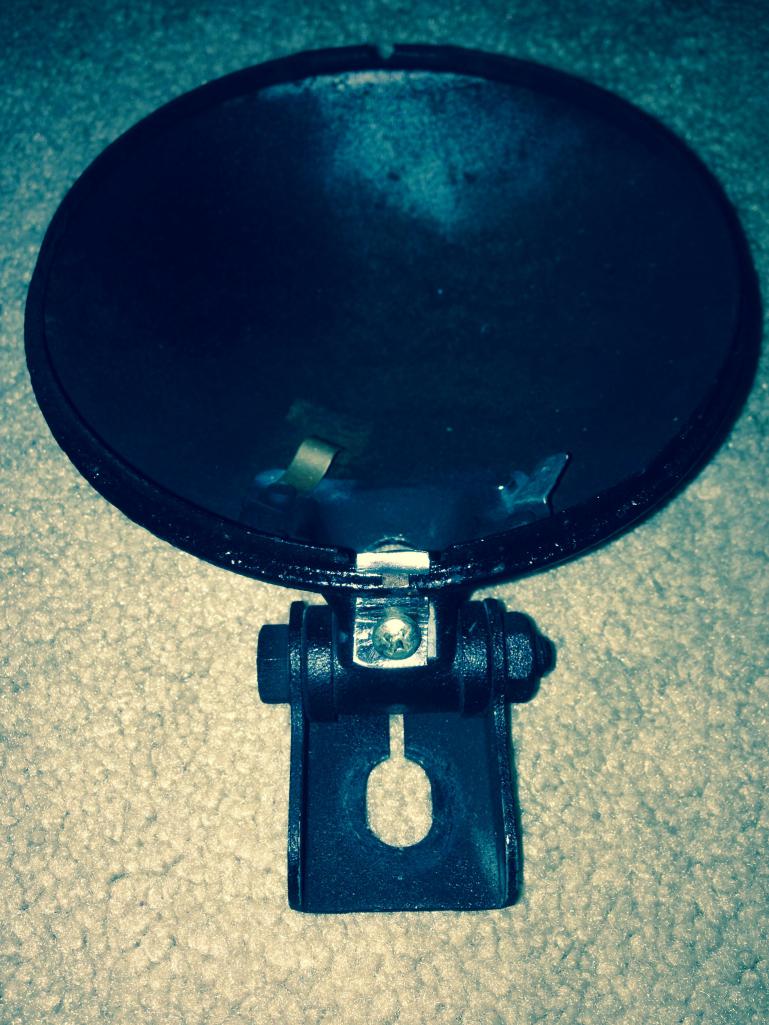
Posted by: mepstein Jan 19 2014, 08:19 PM
I finished assembling the drivers door and mounted the interior face that I had made many years ago. Its leather and I should have stored it laying flat.
Hopefully the wrinkles will relax. I couldn't find all the square nuts that fit in the retainer clips for holding the passenger door handle on, so that one isn't on yet.
A heat gun will get rid of the wrinkles. Just use it carefully.
Posted by: CptTripps Jan 23 2014, 09:19 AM
Just curious: What did it cost to have Line-X spray the underside?
I did the cabin with roll-on stuff on my last build, but there have been a LOT of advancements in the last 10 years in the DIY Bedliner market. If it's easier, I'd just have a company like Line-X spray the bottom and interior when I was all done with the body.
Rock-It Liner from SEM looks to be the "DIY" version of Line-X. 2-part system that I can spray on at home. That may be the better route, so I can control how much is applied and how thick it gets.
Posted by: OU8AVW Jan 23 2014, 12:25 PM
On the same note, what product did you use on the interior for sound deadening? That's up soon on my to-do list....
Posted by: CptTripps Jan 24 2014, 07:16 AM
Mike: look on eBay for a roll of "fat mat". I picked up 3'x33' roll for $60. Nearly identical to the Dynamat I bought last time...for about 8X the price.
I also saw a few YouTube videos about this stuff. I'm half tempted to try it.
http://bit.ly/1dUpnwe
Posted by: aircooledtechguy Jan 24 2014, 10:45 AM
Billy; Glad to see you making progress again on this gem.. Go Billy go! 
I use Fat Mat here at my shop with fantastic and affordable results. A heat gun or even a hair drier is a must to get it properly bonded to the metal. The adhesive stick like crazy with a little heat when applied. If no heat is used, it could come loose on roof sections when it gets cold (not an issue with these cars. . .)
Posted by: CptTripps Jan 24 2014, 02:56 PM
I never even thought of using it on my roof. Interesting idea.
Posted by: PanelBilly Jan 24 2014, 07:03 PM
Made the down payment on the machine work for the engine today. Also placed the order for new pistons. Valves and a shit load of misc stuff. Not everything I'll need but a large percentage of it. I'd love to do the assembley, but after investing so much I to materials, I'm scared of screwing it up.
Posted by: aircooledtechguy Jan 24 2014, 10:17 PM
I never even thought of using it on my roof. Interesting idea.
I don't use it on these cars on the roofs. I use it on steel roof cars.
Using heat is critical to getting sound mat to properly bond to a metal surface. It's this proper bond which enables the sound mat to dampen the vibrations in the metal body.
Posted by: CptTripps Jan 24 2014, 10:17 PM
I can COMPLETELY appreciate that! After spending a ton of money...and seeing a pile of perfectly good pieces/parts...it's tough to NOT spend the extra "little more" to make sure it's done right.
Posted by: PanelBilly Feb 15 2014, 11:46 AM
Let's see if this works. Its the 3D of my piston Piston.pdf ( 588.77k )
Number of downloads: 150
Piston.pdf ( 588.77k )
Number of downloads: 150
Posted by: saigon71 Feb 15 2014, 02:14 PM
Man you do nice work!
What's the ETA on the engine?
Posted by: Evil Older Brother Feb 15 2014, 02:53 PM
Nice Billy. Using the old art skills again.
I said art, not fart,,,,,,,,,,,,,,,,,,,
Posted by: PanelBilly Feb 15 2014, 03:58 PM
I can't take any credit for this. It's the final mock up from Wiseco.
Posted by: PanelBilly Feb 15 2014, 05:36 PM
Little jobs done, but every step is one closer
New radio delete plate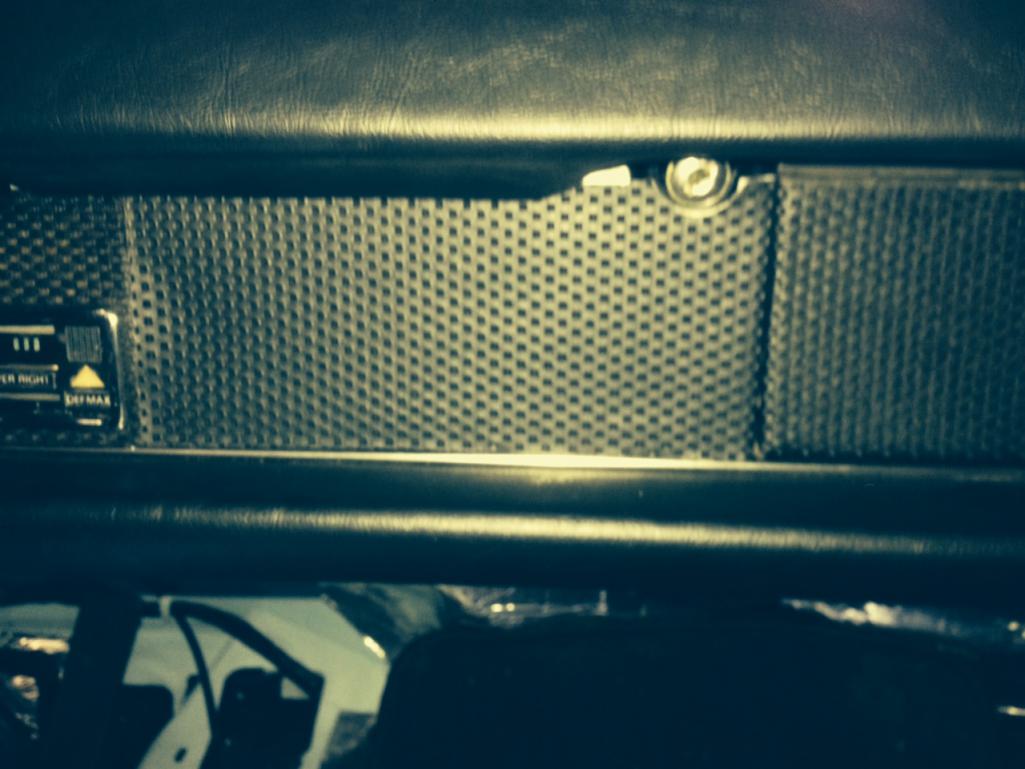
New interior light 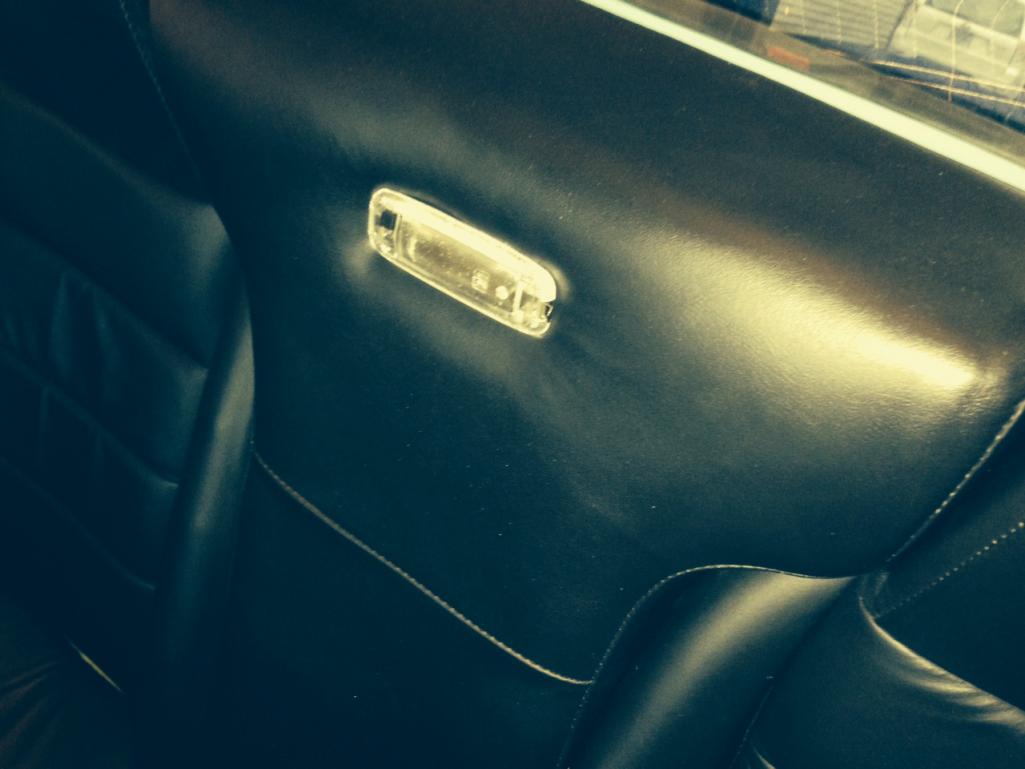
Posted by: rick 918-S Feb 15 2014, 07:25 PM
So when's the debut?
Posted by: PanelBilly Feb 15 2014, 07:49 PM
Eta is April. Then comes install and tuning.
Posted by: jm993rs Feb 16 2014, 06:58 AM
Very good work !! 
Posted by: cary Feb 17 2014, 12:07 AM
Nice work ................
Posted by: PanelBilly Feb 18 2014, 10:48 PM
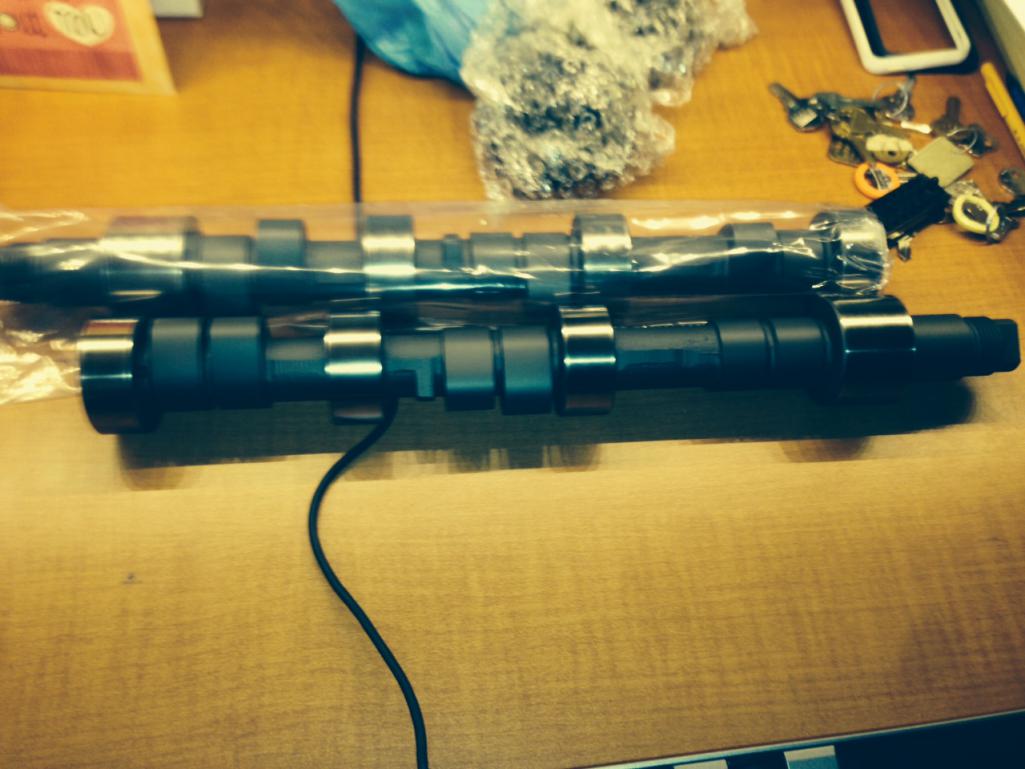
I got my message today that Webcam is shipping my cams, Jerry Woods is sending the modified distributor and new plug wired and my half shafts are clean and ready to go to the powder coater with the shift rod section that is exposed in the engine bay. I worked on my list of things to do/buy last night and I added more than I marked as done!
Posted by: bulitt Feb 19 2014, 06:30 AM
You deserve alot of credit for sticking with this for ten years!
Running Soon
Posted by: PanelBilly Feb 19 2014, 03:42 PM
I can use help. Willing to feed you and keep the fridge in the garage stocked if you want to come by this weekend. Lots of things to do. Some take talent, some don't.
Posted by: PanelBilly Feb 20 2014, 07:52 PM
Today I stopped at Triad to pick up my headers and muffler. I dropped them off on the way home to be ceramic coated a gloss silver. When I got to the front door, I found my cams!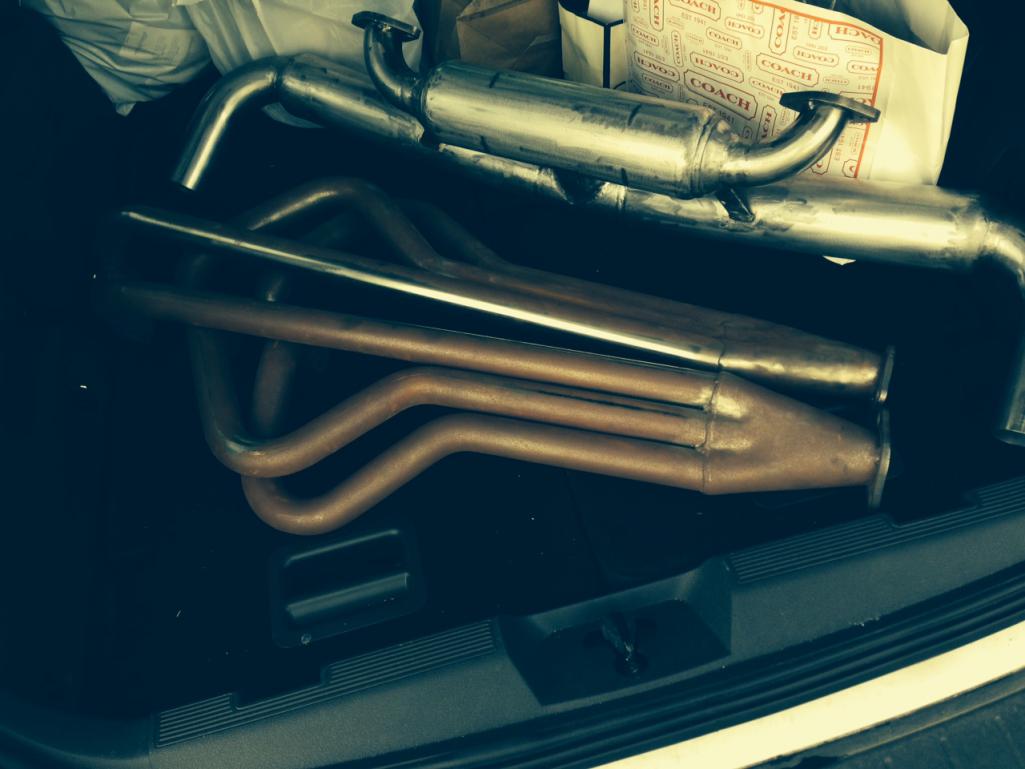
Posted by: PanelBilly Feb 22 2014, 07:27 PM
Today I pulled the stack out of the transmission to send off to Dr.E. Since he can't make it to Seattle next month, I'm sending it off to him for a transformation.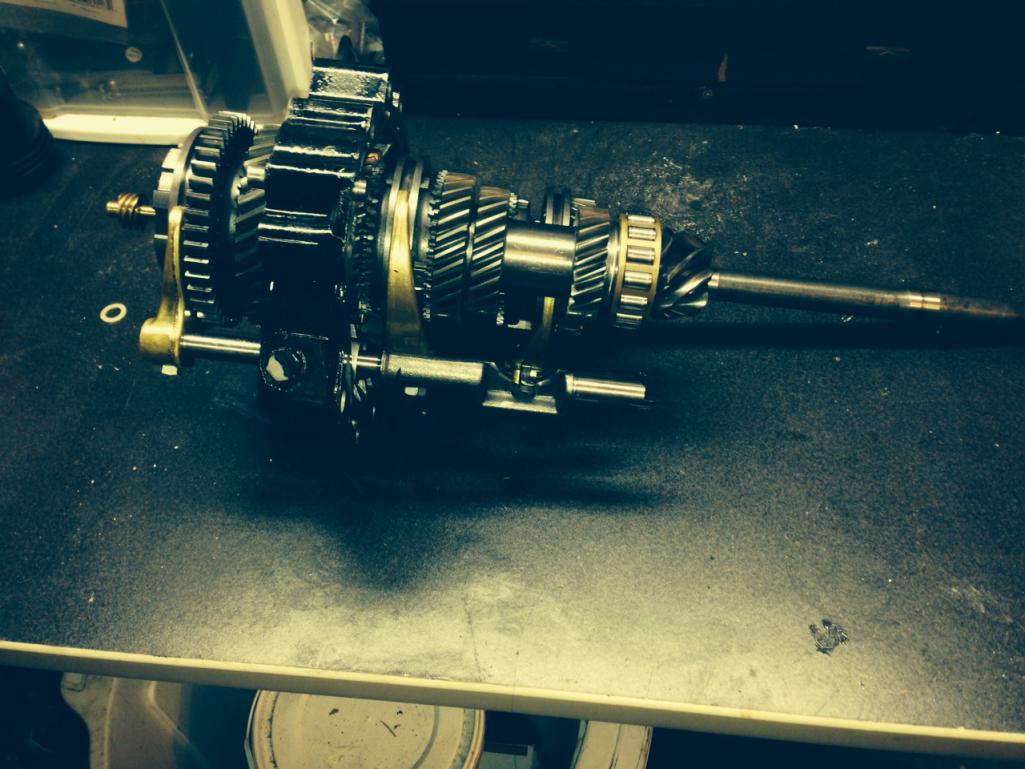
I spent the rest of the day digging in every box in the garage as well as the storage unit we have. I pulled out everything that was 914 and turned the spare
bedroom into a parts shop. Found the 2.0 muffler bracket I needed as well as a bunch of other stuff. Next week I need to drop off a batch to be powder coated.
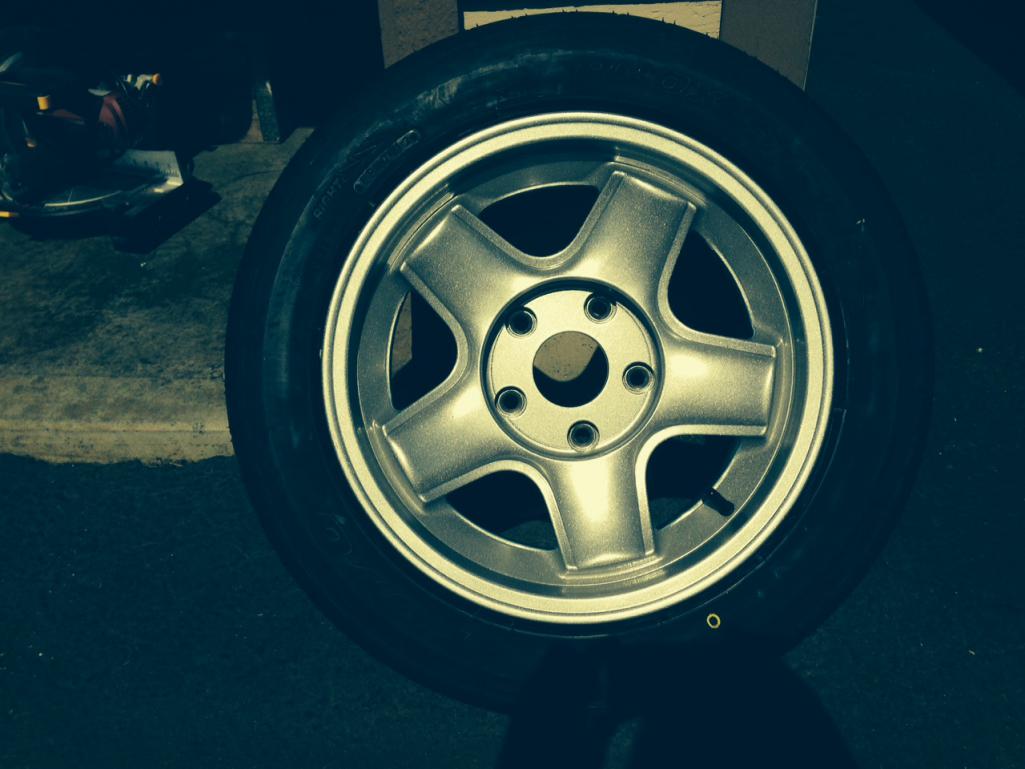
Put the car back on jack stands, so I could pull the wheels off. They need to be cleaned and re-painted.
Posted by: PanelBilly Feb 23 2014, 03:17 PM
I need to get the tires pulled off, so the wheels can be cleaned up and painted. I'd like to find a center cap with an unpainted crest in metal for them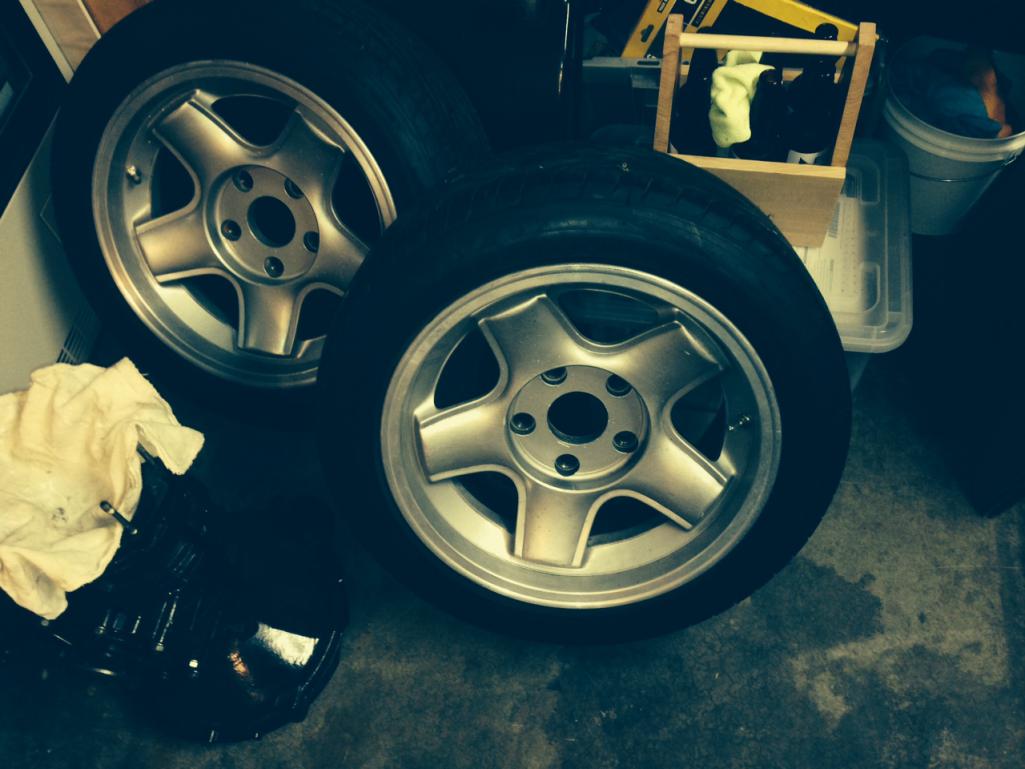
Posted by: Daiberl Feb 24 2014, 04:31 PM
I can use help. Willing to feed you and keep the fridge in the garage stocked if you want to come by this weekend. Lots of things to do. Some take talent, some don't.
Hi Billy,
I was on vacation, else I would have stopped by. PM me if you need help on one of the next weekends.
Posted by: OU8AVW Feb 25 2014, 01:37 PM
I have a set of wheel caps off some phone dials, might do the trick. Silver, basic crest....
Posted by: PanelBilly Feb 26 2014, 04:47 PM
I got my distributor back from Jerry Woods. Its been modified for the carbs and has the wire for the MSD.
I also dropped off a pile of parts at the coater today. Half shafts will be red, bunch is misc will be black and the fan and its housing will be titanium. I need to get the rocker covers from the machine shop as they will be titanium too.
I got to see my headers, but they weren't ready to be picked up yet. Maybe tomorrow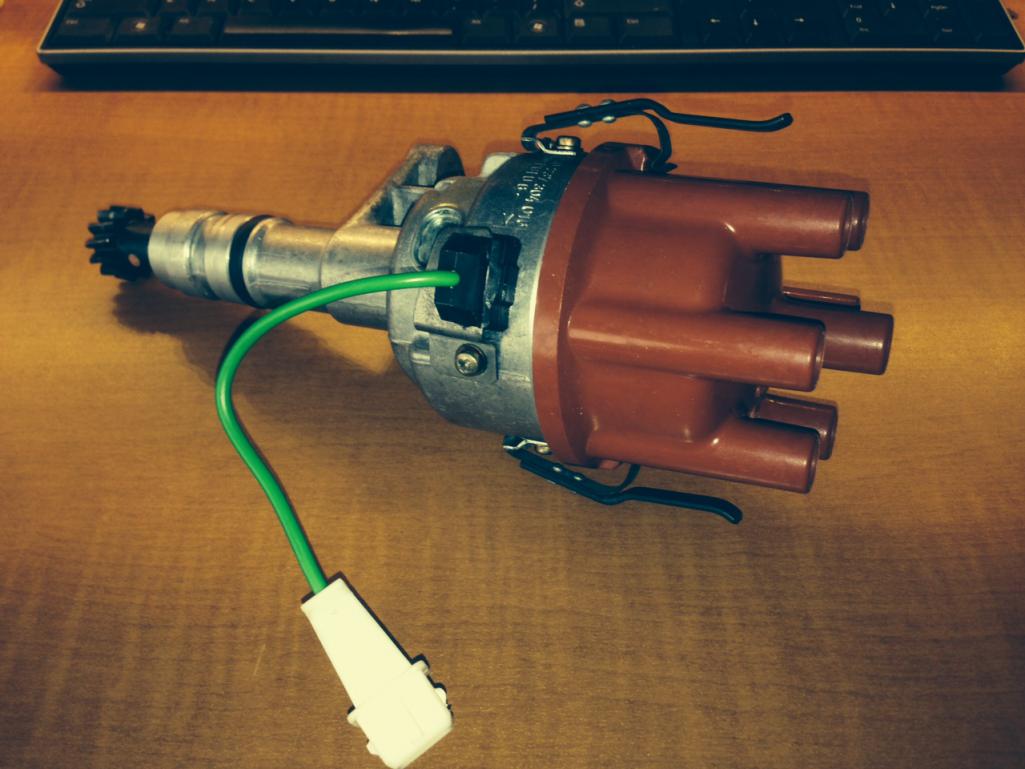
Posted by: JRust Feb 26 2014, 05:44 PM
Looking good! So great to see this build coming together. Such a beautiful car. Can't wait to see it on the road. Keep it up
Posted by: Johny Blackstain Feb 27 2014, 09:37 AM
![popcorn[1].gif](style_emoticons/default/popcorn[1].gif)

Posted by: PanelBilly Mar 1 2014, 04:56 PM
Got the re-chromed fog light grills back and mounted. Used the specrachrome paint process on them and it works 
Having a hell of a time with the locks for the targa top. After I got them installed, one of the c clips popped off. Everything still works, so I think I'm going to leave it for now. To access the clip I need to pull the pad off the top of the targa bar again and that's a pain. It will be a good job to do next winter when its too wet to drive the car.
I had the tires dismounted from the wheels and dropped them off to be powder coated.
Posted by: PanelBilly Mar 3 2014, 03:56 PM
The flywheel from Kennedy showed up today. Now the crank can be balanced.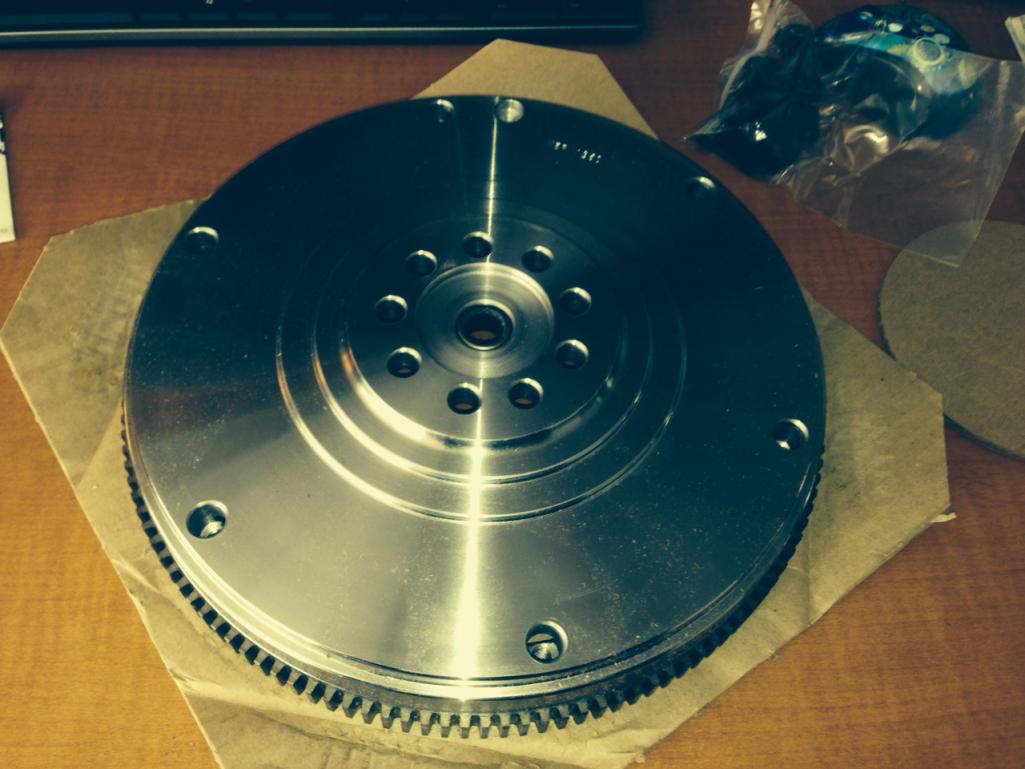
Posted by: PanelBilly Mar 5 2014, 09:22 PM
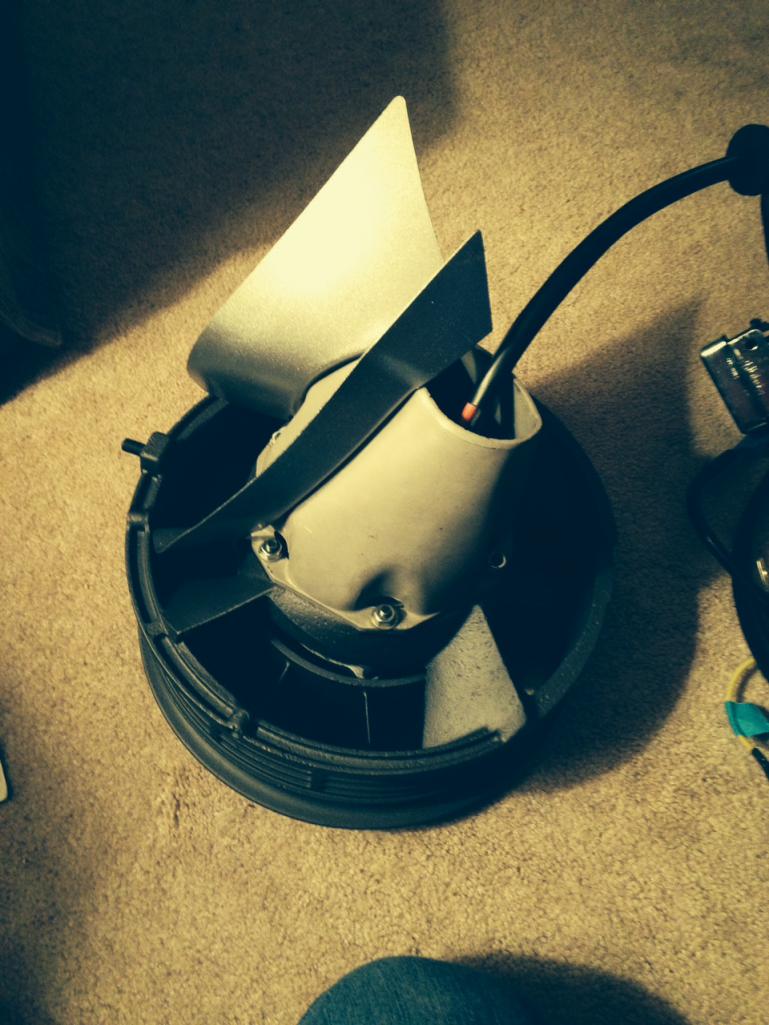
Lots of stuff today! The diffusers that go between the cylinders and guide the flow of air came back from the powder coaters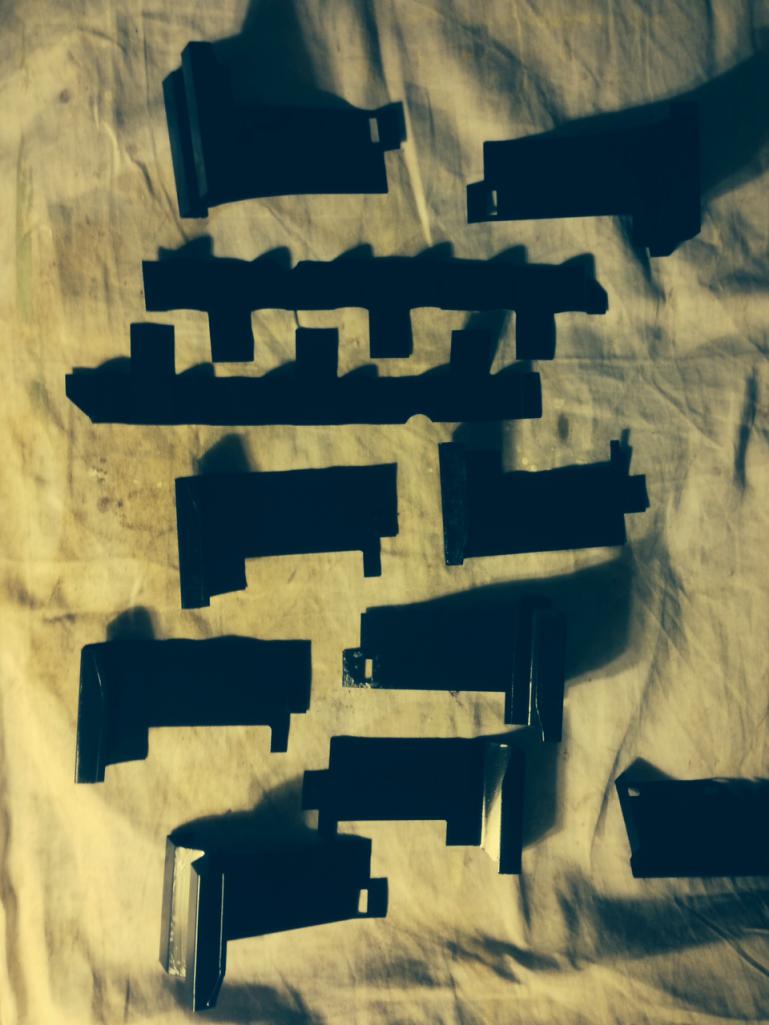
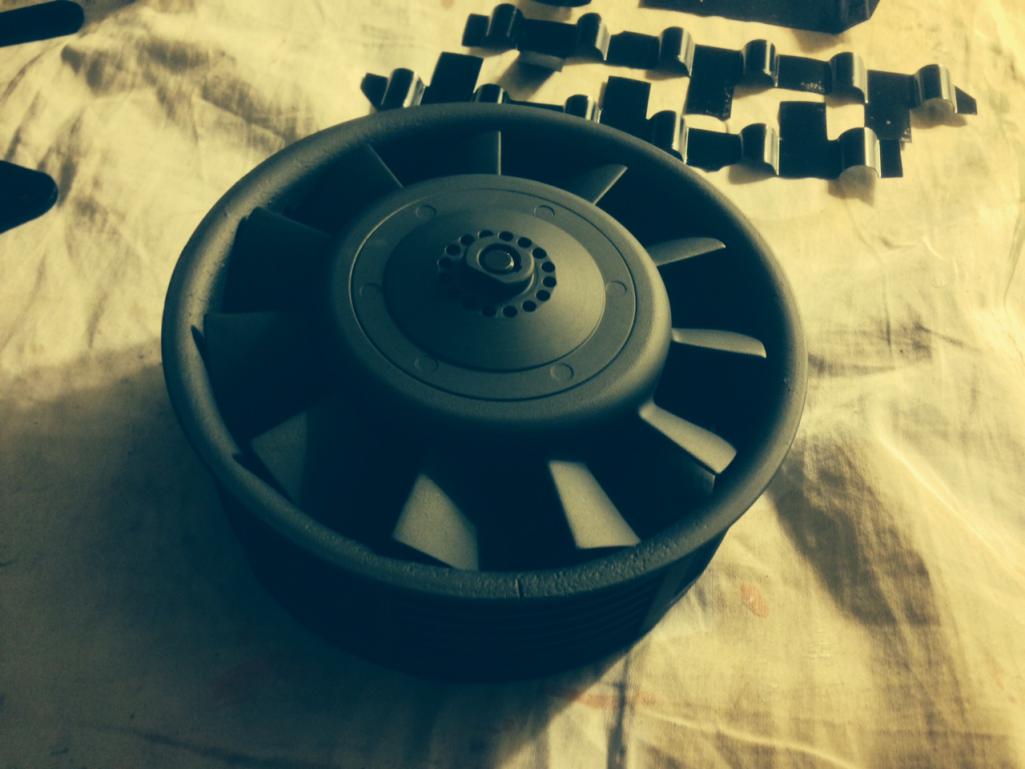
The alternator that was rebuilt and the fan casing and fan (the ring that secure the fan belt is still at the shop).
Its actually titanium colored, but the camera lighting made it look black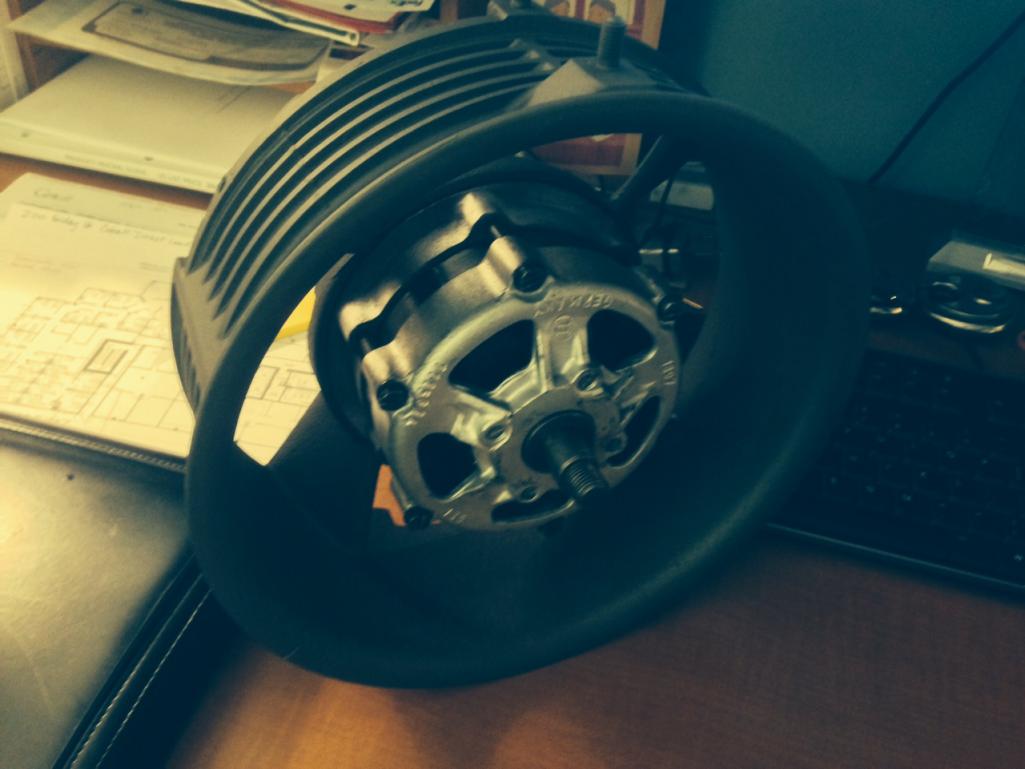
And the headers and muffler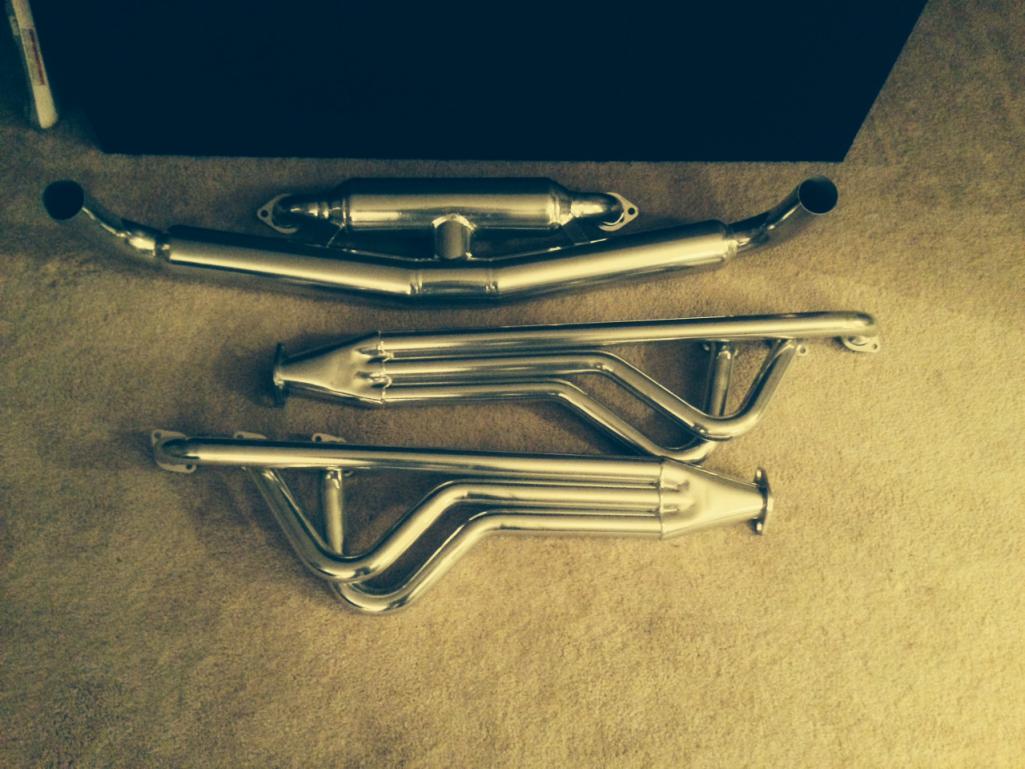
Posted by: quadracerx Mar 5 2014, 10:44 PM
WOW... Everything looks great!! Ill give you a call tomorrow...
Posted by: PanelBilly Mar 16 2014, 09:04 PM
I couldn't get much done this week. Work and St Patrick's came first. I did get the half shafts, the muffler hanger and the shift rod back from the powder coater.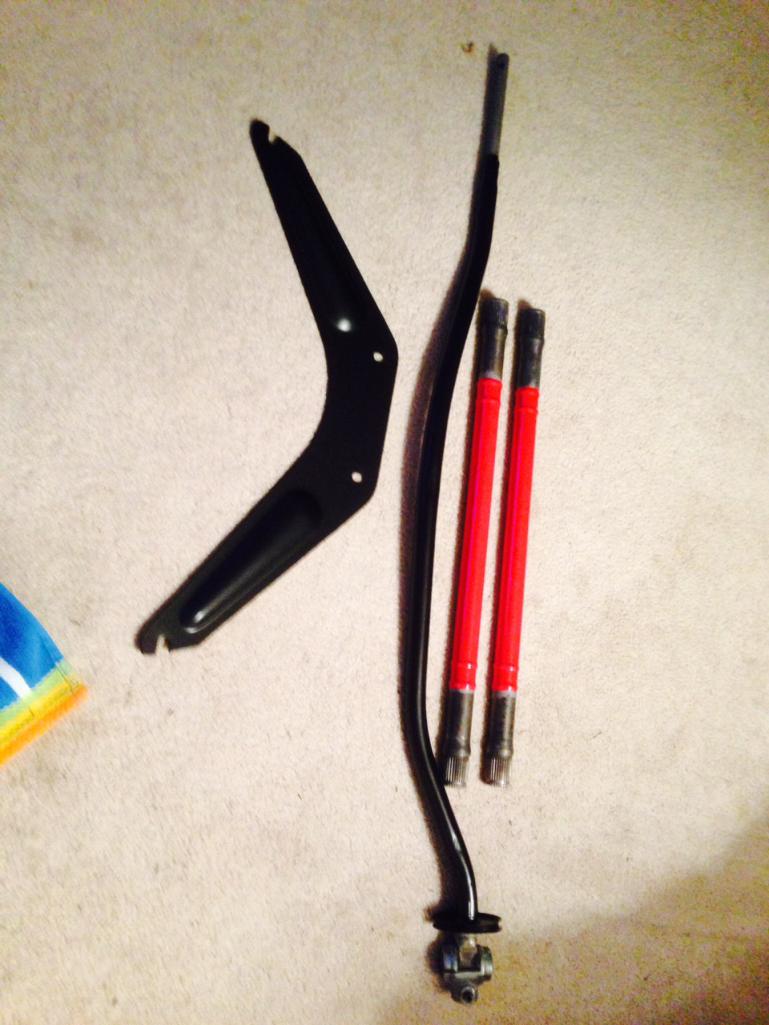
Posted by: PanelBilly Mar 28 2014, 10:17 PM
Lets see what showed up now....
Lower valve covers with the ribs already machined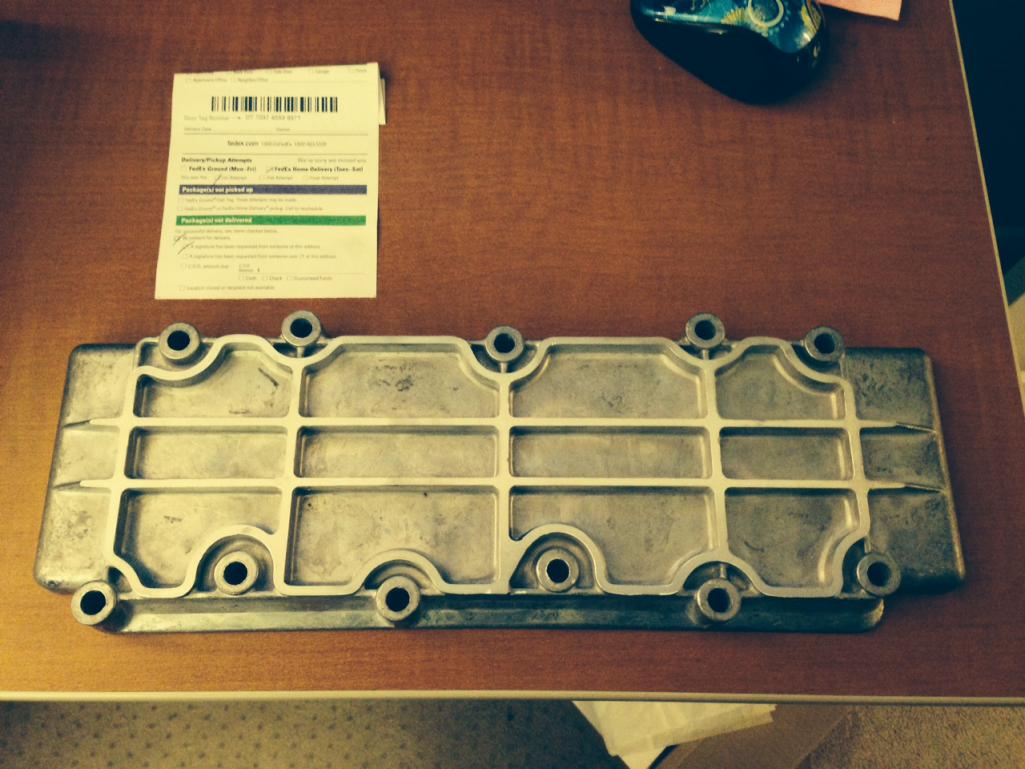
Hardware for oil lines with a drain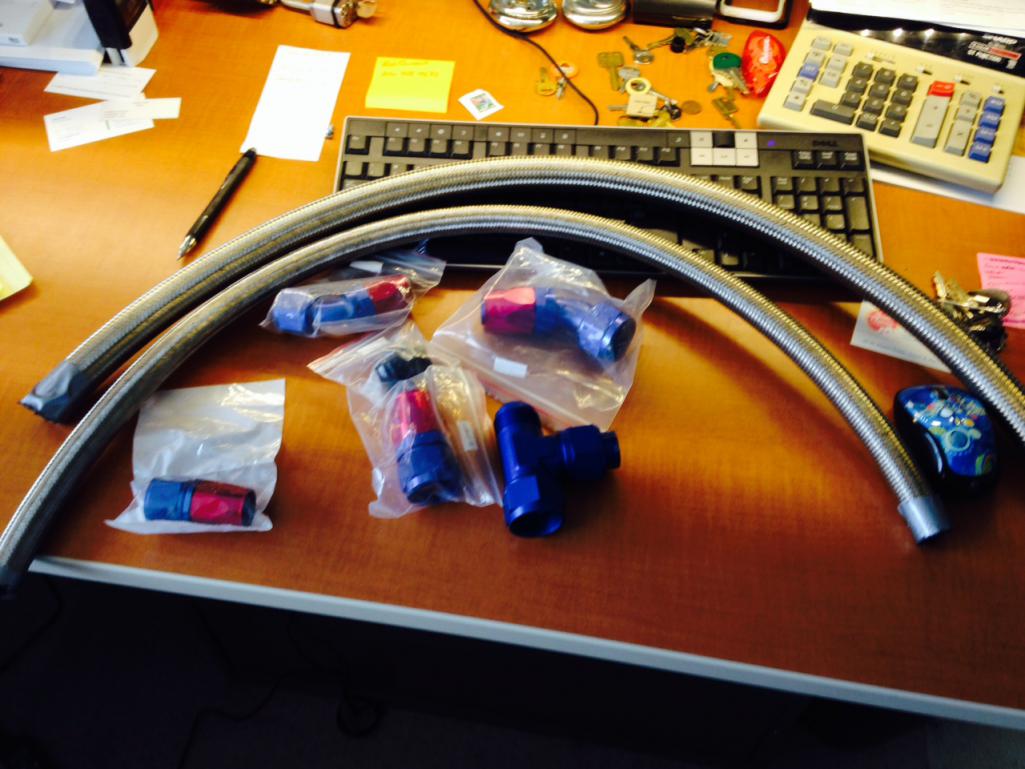
Oil retun tubes ( or whatever they're called)
and pistons the old ones on the left and new on the right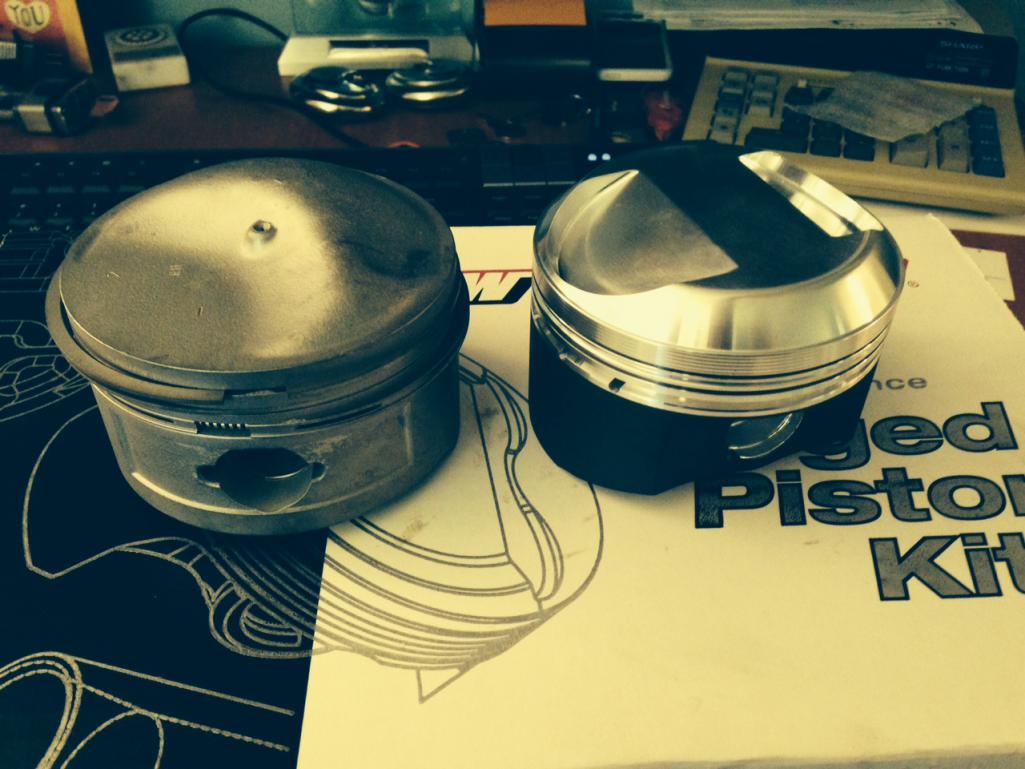
and a starter that I had rebuilt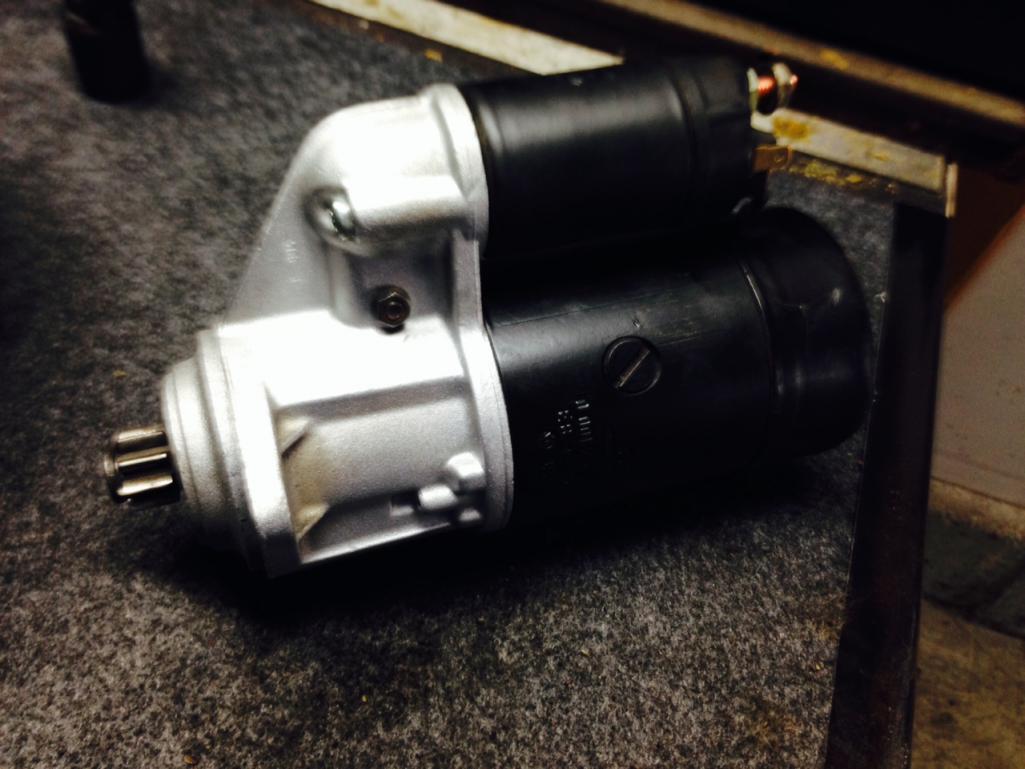
Posted by: r_towle Mar 29 2014, 07:06 AM
Great to see you working and painting again 
Now you just have to assemble all those parts,,,,,like a real life jigsaw puzzle
Posted by: jaxdream Mar 29 2014, 07:11 AM
Will that shift rod work with a six ???
Jacck
Posted by: PanelBilly Mar 29 2014, 08:31 AM
Yes the Triadwest headers work with a stock shift rod
Posted by: jaxdream Mar 29 2014, 09:51 AM
I asked cause I've seen pics of sixer's with other rods . you obviuosly have done your homework .
Jack
p.s. Love the Blue !!!!!!! 
Posted by: PanelBilly Mar 29 2014, 10:22 PM
Today Tom came by and helped me figure out most of the engine wiring. We also installed an inertia fuel pump cut off. 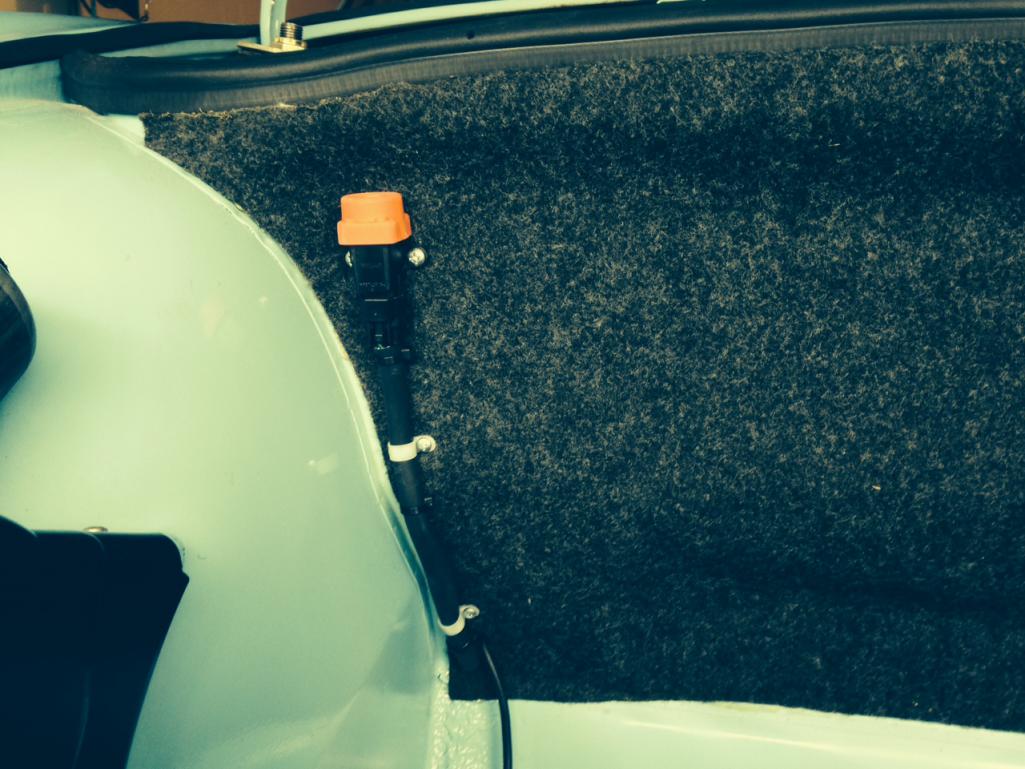
Posted by: PanelBilly Apr 5 2014, 03:23 PM
Yesterday I bead blasted the upper valve covers and the covers for the timing chain cases. Today I blasted the timing chain cases themselves. The valve cover and the case covers are going to be powder coated. the cases will just me natural. Before and after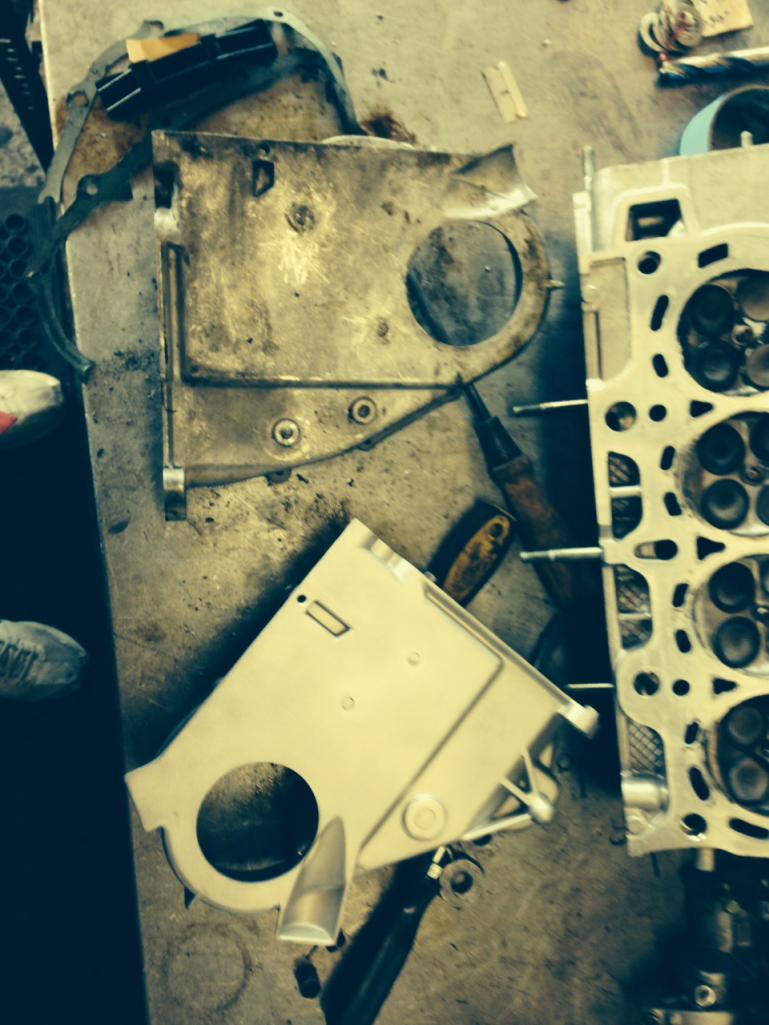
I also used some scrap vinyl to over the "press" lable on the seat belts that wsa faded away and ugly. Not OEM, but the car is so modified, it doesn't matter
I also made a deal to move my car to a shared garage in Seattle. There's 5 GT3's there and a bunch of other cars in various stages of life. All the tools I could ever imagine and a lift. Sure will be easier to install the engine with some room to work.
Attached thumbnail(s)
Posted by: PanelBilly Apr 5 2014, 03:25 PM
Strange the photo double posted , but only shows once on the page where I typed.
Posted by: PanelBilly Apr 5 2014, 11:31 PM
Tonight's lesson.
You can't pre-assemble the wiring harness to the alternator because the wires only fit through the schrod in one direction. Well I got practice screwing the alternator to the fan housing
Posted by: PanelBilly Apr 7 2014, 09:27 PM
Installed the carpet today, Thanks URY.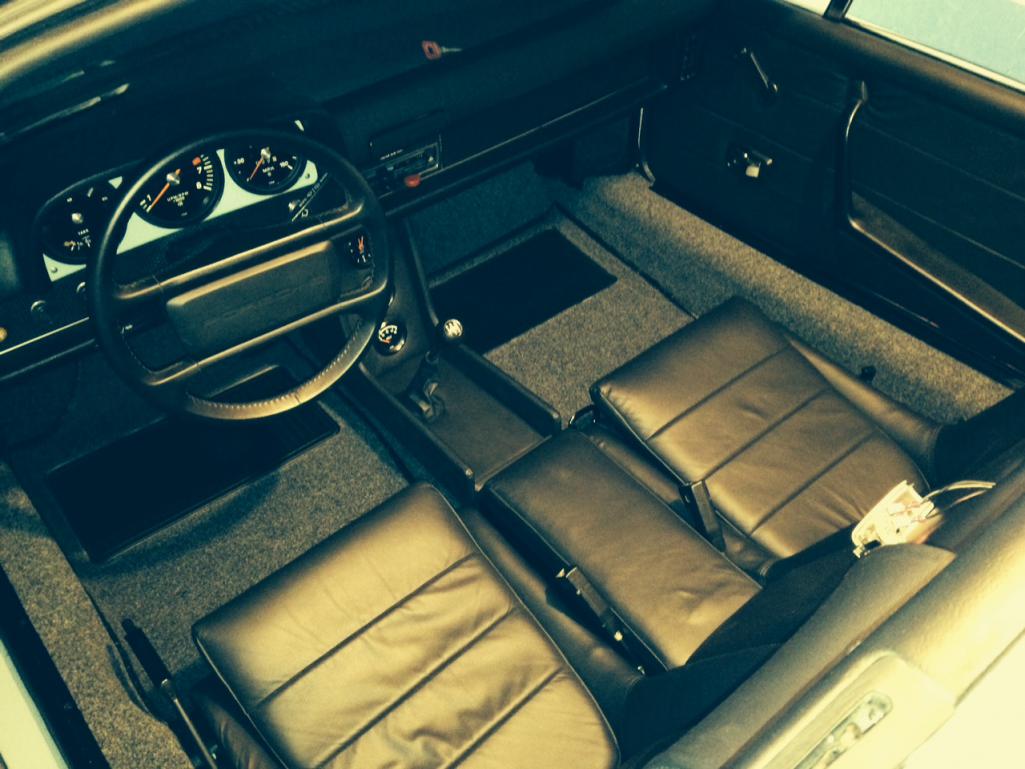
Posted by: Qarl Apr 7 2014, 10:28 PM
Installed the carpet today, Thanks URY.
Your interior looks gorgeous! Love the steering wheel in this setup. Looks like it belongs!
Posted by: aircooledtechguy Apr 8 2014, 08:55 PM
Billy, your car is looking GREAT!!!
Posted by: PanelBilly Apr 9 2014, 05:35 PM
Picked up the air cleaners from powder coat today. Wheels are done too, but the tires aren't mounted yet. I'm busy tomorrow, so I'll get them on Friday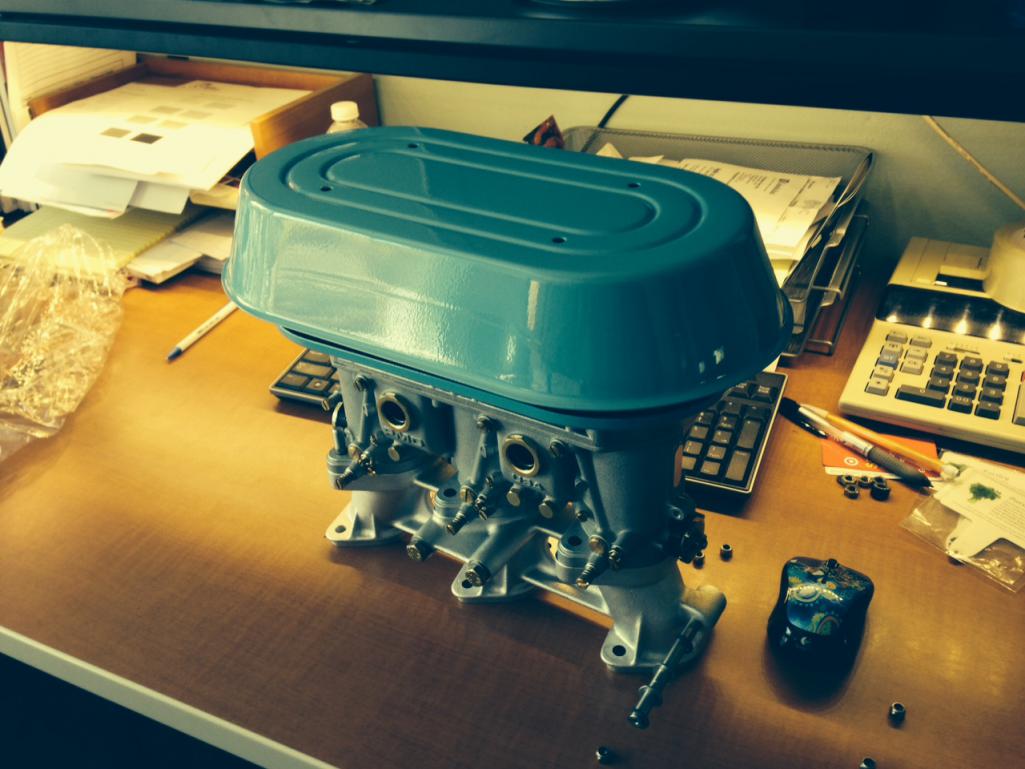
Posted by: Daiberl Apr 9 2014, 07:33 PM
Time for me to come down and take a look as well as help you I think, great progress! Where will you now install the engine, Ralph Meaney's place?
Posted by: PanelBilly Apr 9 2014, 10:15 PM
The shared shop is run by a fellow named Scott. I think it will be a great place to finish up the car.
Posted by: sixnotfour Apr 10 2014, 07:46 PM
Scott...Ralph...Colin... and renters
Posted by: PanelBilly Apr 11 2014, 05:05 PM
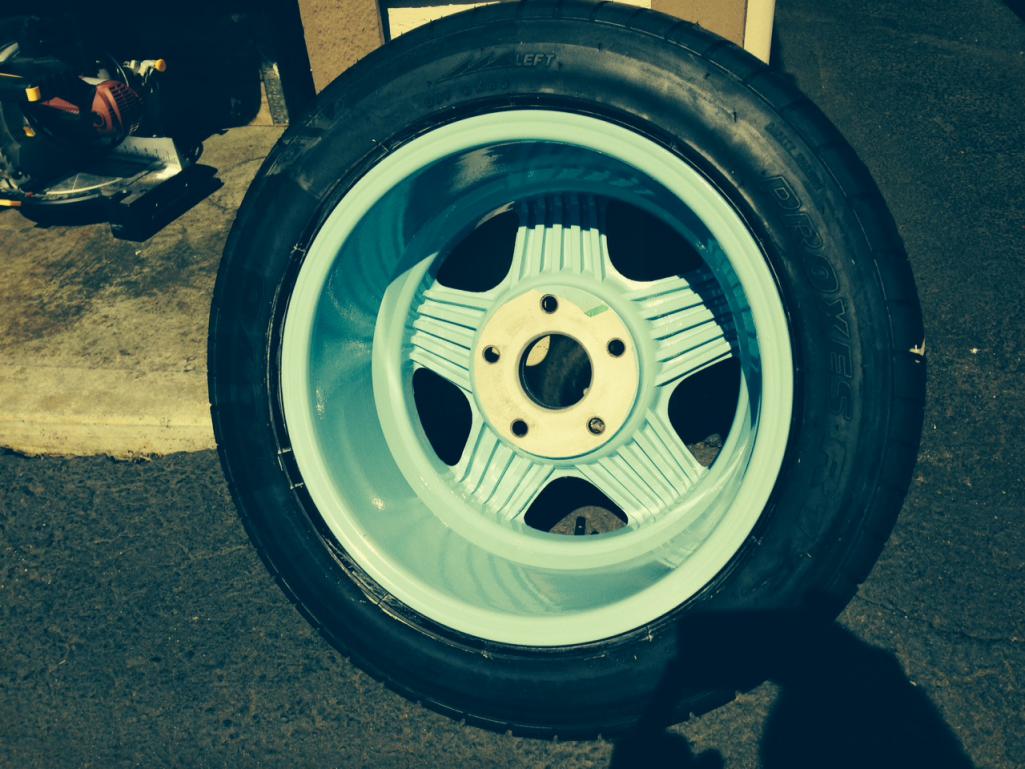
Today, I got my wheels back from the powder coated. Outside is silver and inside in custom color to match the car. I also got the valve covers and timing chain covers back. Now if the machine shop could just get to my engine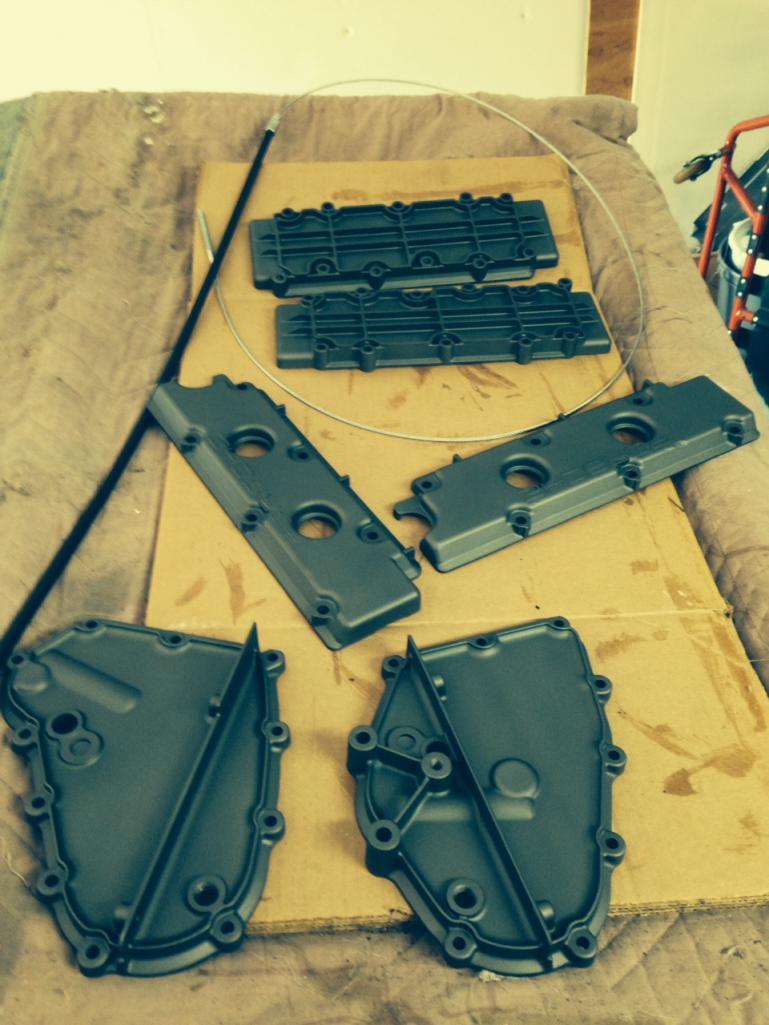
Posted by: 914forme Apr 12 2014, 08:42 AM
Just read all 6 pages, this is a great looking build. Keep up the very clean work. Can't wait to see this car completed.
Posted by: nsr-jamie Apr 12 2014, 10:40 AM
Nice !! What kind of car is the steering wheel from? Very cool and the entire car !!
Posted by: PanelBilly Apr 12 2014, 12:55 PM
Nice !! What kind of car is the steering wheel from? Very cool and the entire car !!
It a one off
Posted by: 2mAn Apr 12 2014, 01:04 PM
Now if the machine shop could just get to my engine
thats the hardest part...waiting... my engine build on my BMW has been 10 of the 12 months this swap has been taking. machine shops are almost as bad as paint shops.
Nice !! What kind of car is the steering wheel from? Very cool and the entire car !!
It a one off
not sure if serious

Hang in there, just keep plugging away at the other bits so that when the motor is ready you can drop it in and drive it. nothing worse than having a running car that you arent driving yet because XYZ is missing
Posted by: PanelBilly Apr 12 2014, 02:44 PM
Wheels are on and the car is off the jackstands. I thought it was time to update my avatar, but with this tile operating system, I can't seem to resize the picture so it will work. I need to buy another camera. This phone has a crappy camera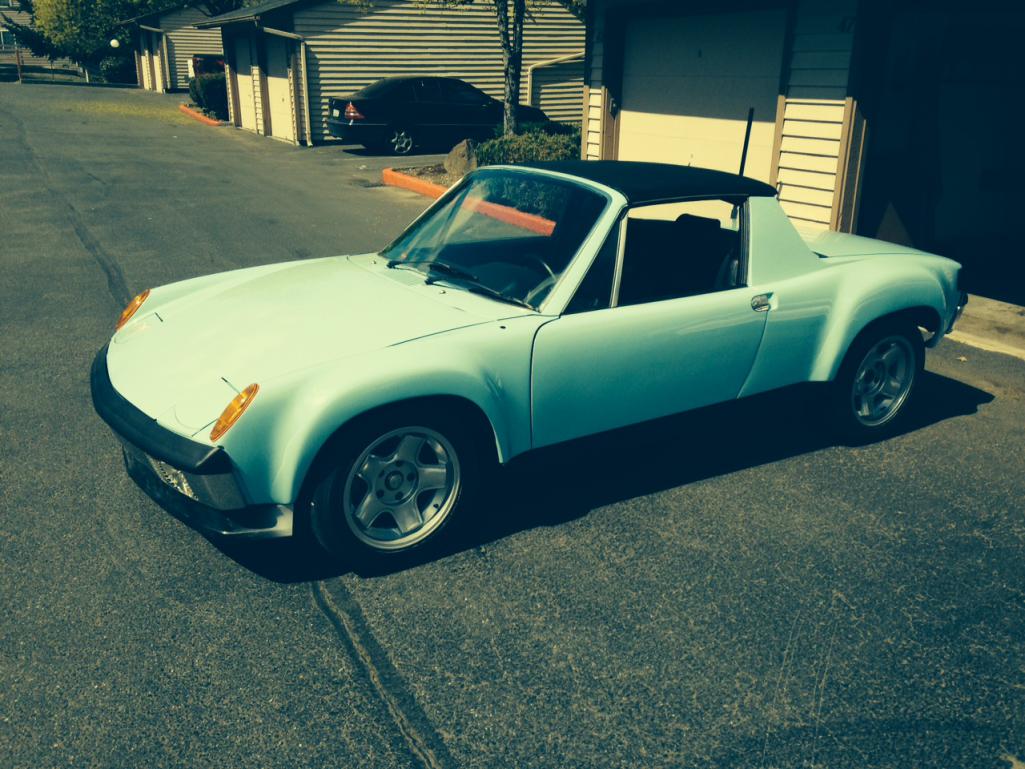
Attached image(s)
Posted by: Cairo94507 Apr 12 2014, 06:53 PM
SWEET!
Posted by: arkitect Apr 13 2014, 09:16 AM
Great looking car, love to see it in person.
Dave
Posted by: PanelBilly May 11 2014, 07:24 PM
Rods are on the crank and assembly is actually in progress. I was told that the Kennedy flywheel wasn't in balance (at least to the standard of the guy who is doing the engine). I'm glad he's got high standards. 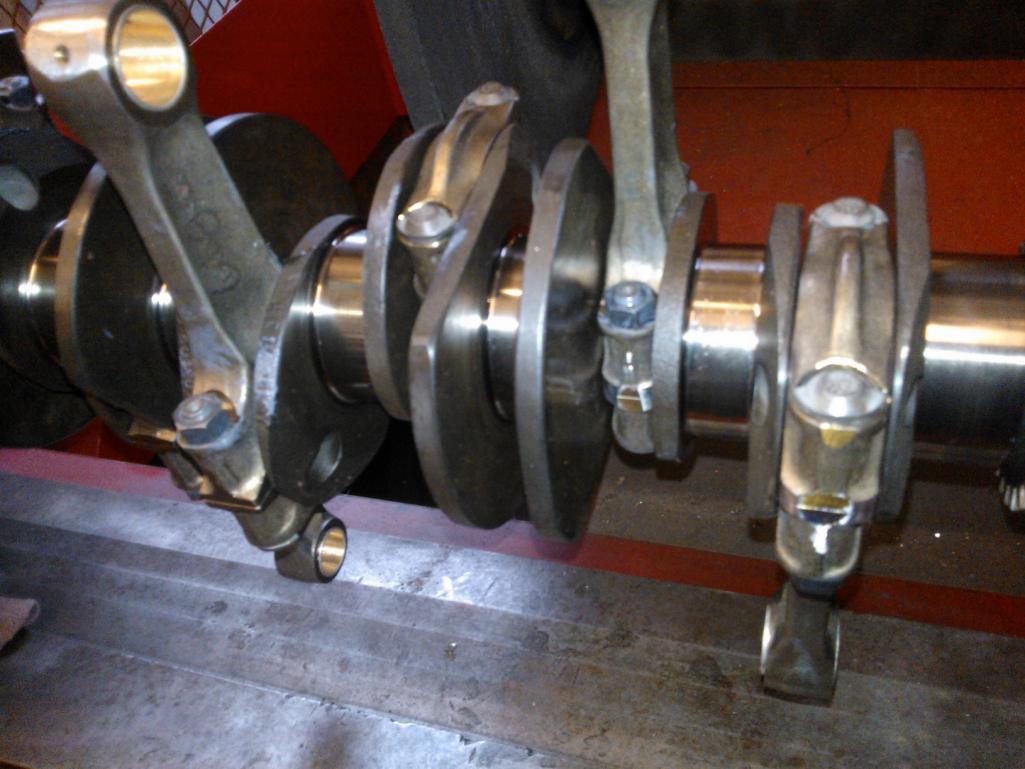
Posted by: PanelBilly May 23 2014, 09:04 PM
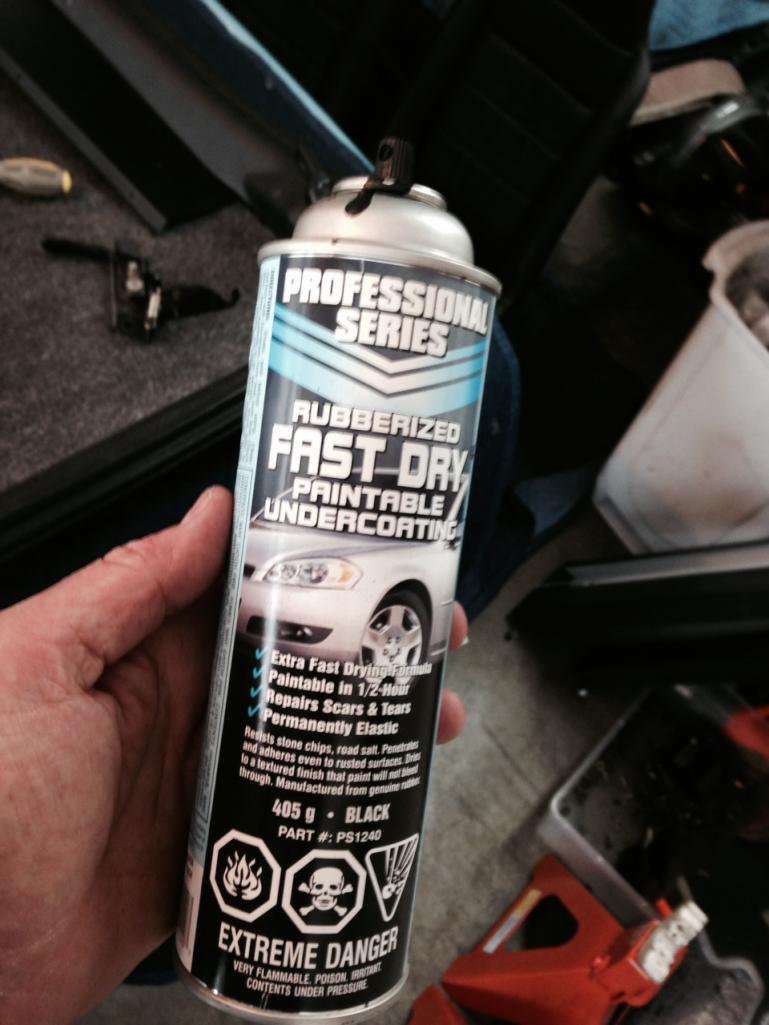
I picked up two of the metal targa hinge covers and replaced the plastic ones that I had on the car. The plastic was OK, but they were both a little warped. I painted the covers with some undercoat spray and they came out looking very much like the leather on the pad. I'm sure glad I had used stainless steel square head screws on the pad. Made removal and installation much easier. 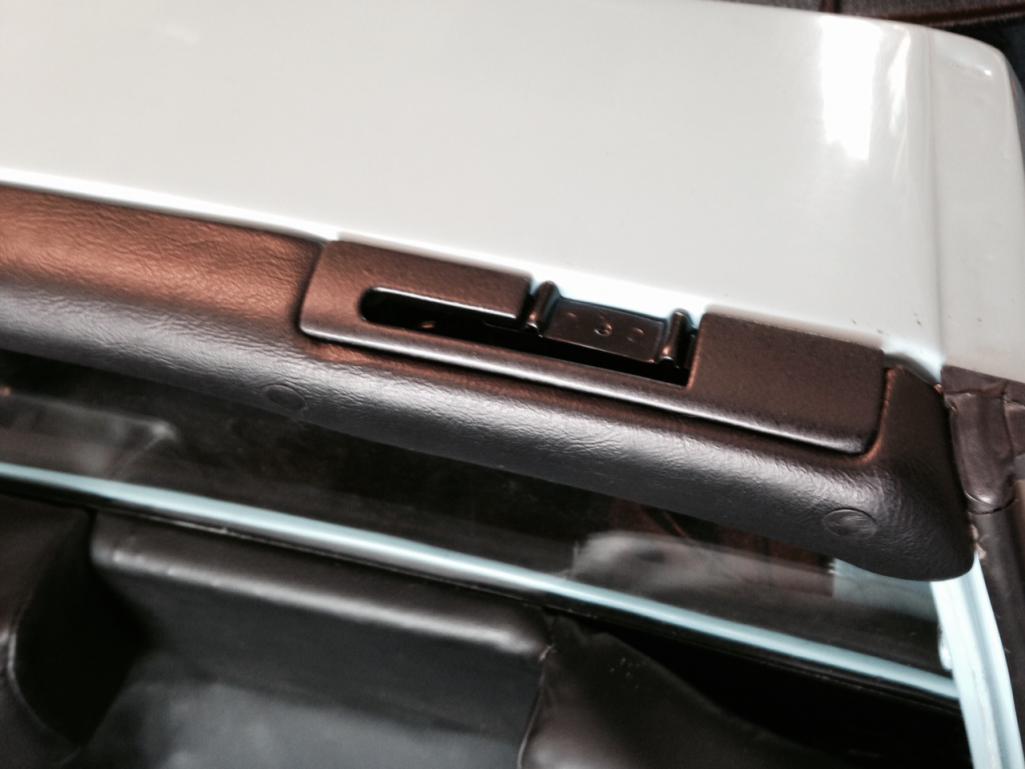
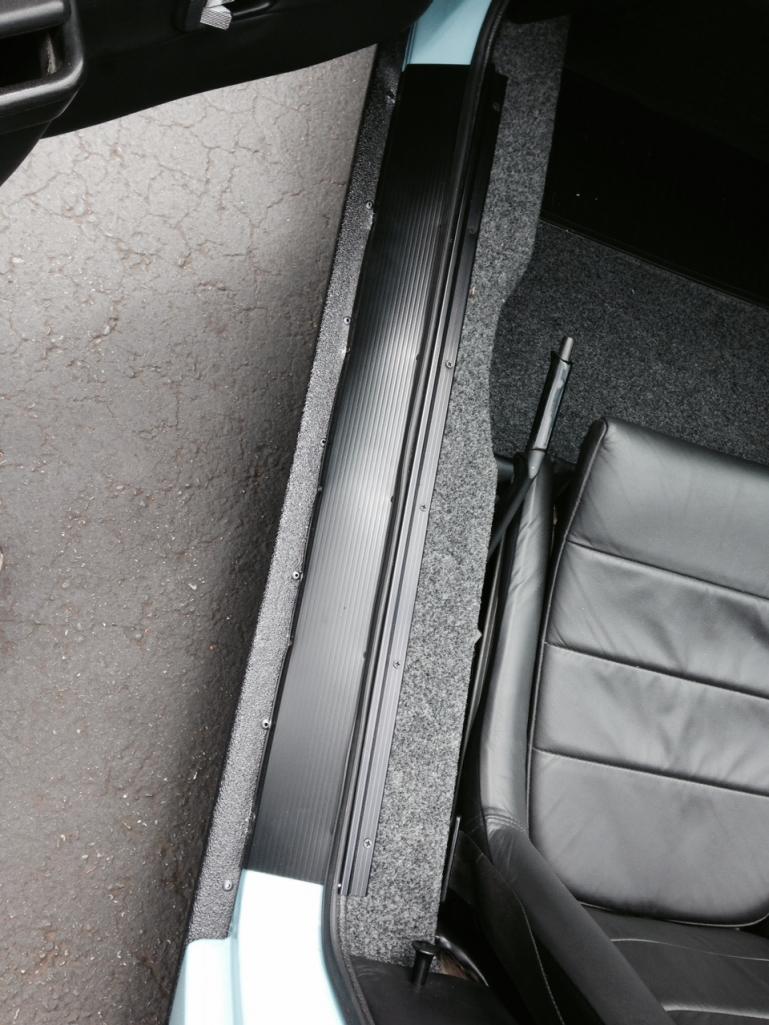
Posted by: PanelBilly May 24 2014, 05:10 PM
Today I added some vinyl under the seats where the carpet didn't cover the silver sound padding. I also installed
the thresholds that I got from 914Rubber. 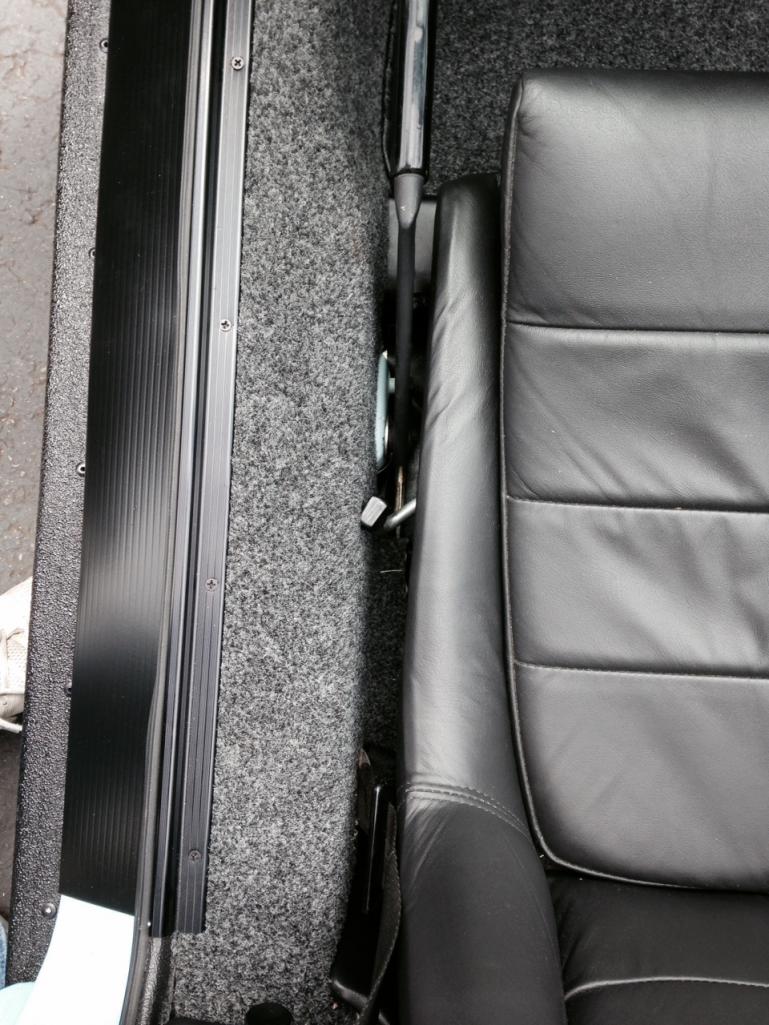
Posted by: dale73914 May 25 2014, 07:51 PM
Have just spent the last hour reading this when i should have been working
Must say, the standard of your work and attention to detail is impressive, car looks to be coming along very well.
A question, who retrimmed the seats and is it a kit that is available online ? They look great.
Cheers
Dale
Posted by: PanelBilly May 27 2014, 03:44 PM
Ordered a Quickjack today. In about a week I should be able to work under the car a lot easier
Posted by: Tom May 27 2014, 05:16 PM
Billy,
I have everything ready on my end. Put together the hot start relay harness this weekend and tested. All OK, just waiting for the engine to be assembled to the point where we can complete the electrical work on the harness. Can't wait to see this all come together.
Don't forget the tach adapter for the MSD unit.
Tom
Posted by: Justinp71 May 27 2014, 05:39 PM
Nice build, looks like your doing a 3.0 or 3.2? What are you doing for heads?
Justin
Posted by: Justinp71 May 27 2014, 05:47 PM
Ordered a Quickjack today. In about a week I should be able to work under the car a lot easier
Nice, I noticed they only raise the car to 22" will that be enough for you? I was contemplating those as well...
Posted by: PanelBilly May 27 2014, 11:33 PM
Ordered a Quickjack today. In about a week I should be able to work under the car a lot easier
Nice, I noticed they only raise the car to 22" will that be enough for you? I was contemplating those as well...
I can add pads to raise it more if needed.
Posted by: falcor75 May 28 2014, 01:09 AM
Nice !! What kind of car is the steering wheel from? Very cool and the entire car !!
Looks very much like a stock 964 non-airbag steering wheel?
Posted by: PanelBilly May 28 2014, 09:00 PM
I got a set of metal letter from Bruce Stone and cleaned them up with some sand paper. Didn't find the thread on spacing, so I got out the ruler and put them on as straight and even as I could. The camera phone just doesn't get the color right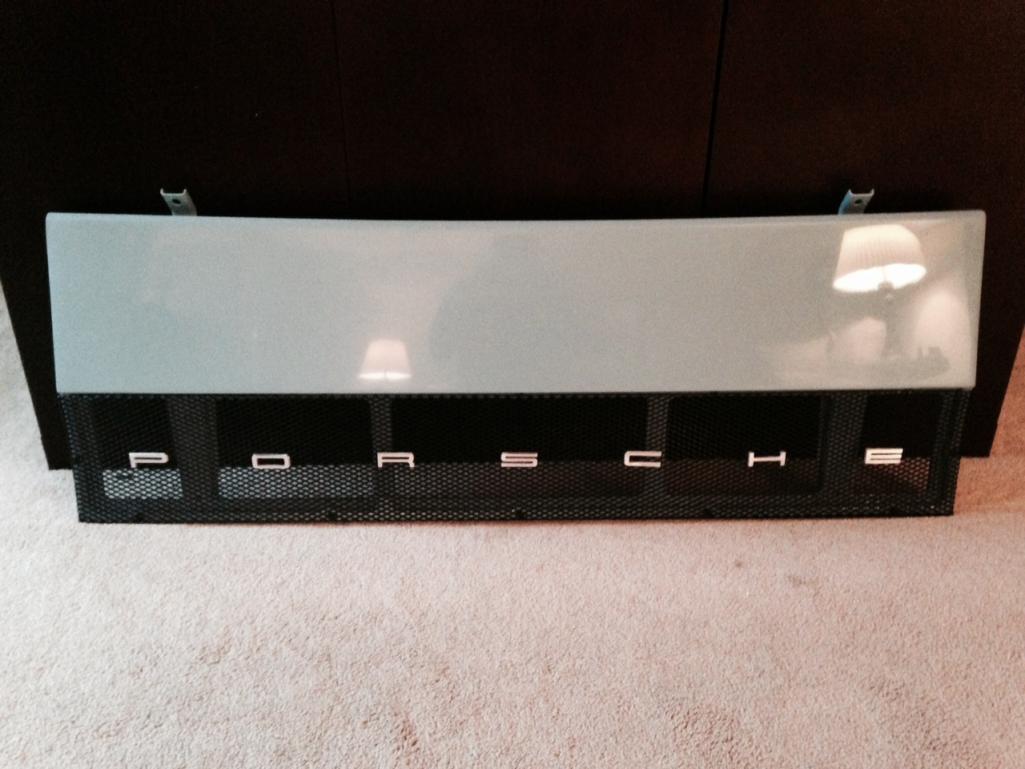
Posted by: aircooledtechguy May 28 2014, 09:09 PM
Billy, you car is simply a stunner!! I can't to see and hear your car in person at a future GTG.
Posted by: PanelBilly May 28 2014, 09:22 PM
Billy, you car is simply a stunner!! I can't to see and hear your car in person at a future GTG.
I can't wait to hear it too. I stopped by the machine shop today and the builder was working on the heads. He said something about improving the flow of the ports. Then he said he was off to Paris to spend a week with his daughter. I guess I'm not going to be hearing the engine this month
Posted by: PanelBilly Jun 3 2014, 09:41 PM
The lift arrived today. I'm splitting the cost with my brother. I'll post a photo of the car in the air later. For now, here's what it looks like right out of the box.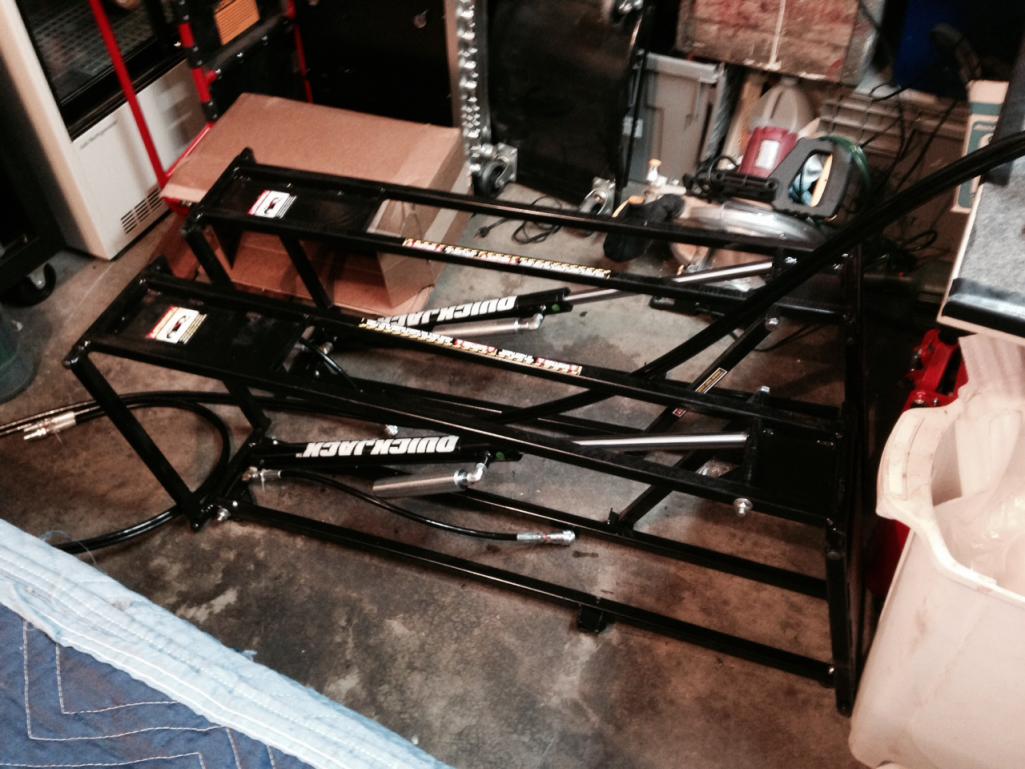
Posted by: Daiberl Jun 3 2014, 09:48 PM
Looks nice, when will we see it in person, any work get-togethers planned to help with the car?
Posted by: PanelBilly Jun 3 2014, 09:53 PM
Waiting on the engine. Tom is helping me get all the electrical lined up, but engine goes in first before we run the wire.
Posted by: Tom Jun 4 2014, 09:43 AM
Billy,
I will need about two hours prior to engine install to get everything ready. It can be after engine install, it will just be harder with the engine in.
Tom
Posted by: 914_3.0 Jun 4 2014, 11:02 AM
Just read it all, and it looks awesome. Nice work, and great to see you getting a long term project going again. I'm interested to see how your Quickjack works as well. Hope you get the lump back soon!
Posted by: PanelBilly Jun 17 2014, 04:46 PM
I sent my oil pump off to Henry Schmit for a rebuild and flow improvement. Came back 6 days later! That's service!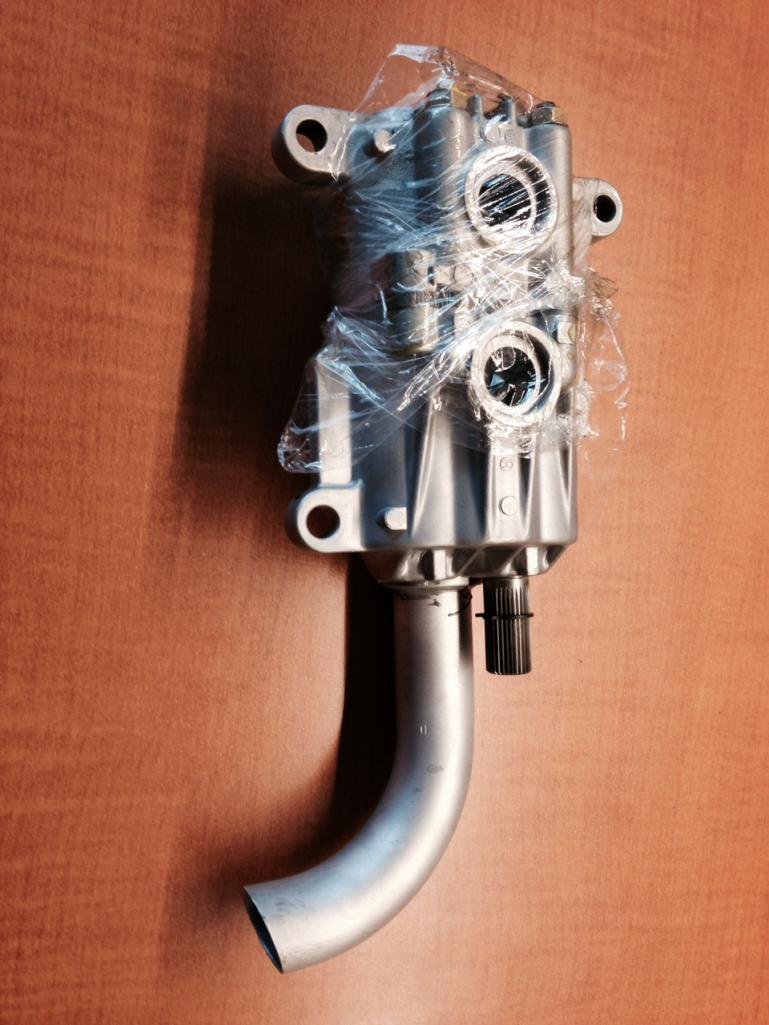
Posted by: Tom Jun 19 2014, 01:20 PM
Billy,
Got off my butt and finished your trans console bushing today. New one inner dia. is 0.590" while the old one was 0.617". So now it will be 0.027" tighter. New ones are 0.605". I guess they do not think the shift rod wears down over time as well as the bushing.
Tom
Posted by: Luke M Jun 20 2014, 11:36 AM
I sent my oil pump off to Henry Schmit for a rebuild and flow improvement. Came back 6 days later! That's service!
You mind sharing what this cost you.
I have 2 pumps that I need to have looked over for a future project.
Thanks,
Posted by: Mark Henry Jun 20 2014, 11:55 AM
I sent my oil pump off to Henry Schmit for a rebuild and flow improvement. Came back 6 days later! That's service!
I was wondering what he does for "flow inprovement"?
I surfaced mine for tighter tolerances, radiused a few sharp edges and DFL (dry film lube) the interior of the pump.
I can't see it needing much more improvement... the freaking pump is huge.
Posted by: PanelBilly Jun 21 2014, 12:11 AM
I sent my oil pump off to Henry Schmit for a rebuild and flow improvement. Came back 6 days later! That's service!
You mind sharing what this cost you.
I have 2 pumps that I need to have looked over for a future project.
Thanks,
$180 plus shipping both ways
Posted by: PanelBilly Jun 29 2014, 06:16 PM
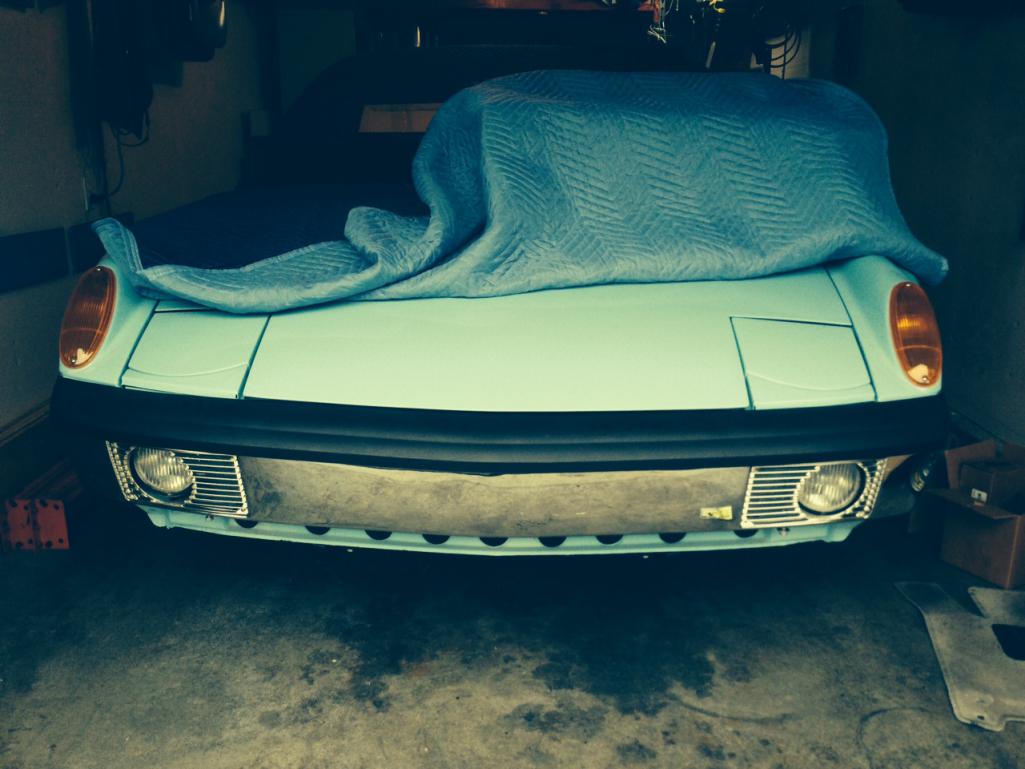
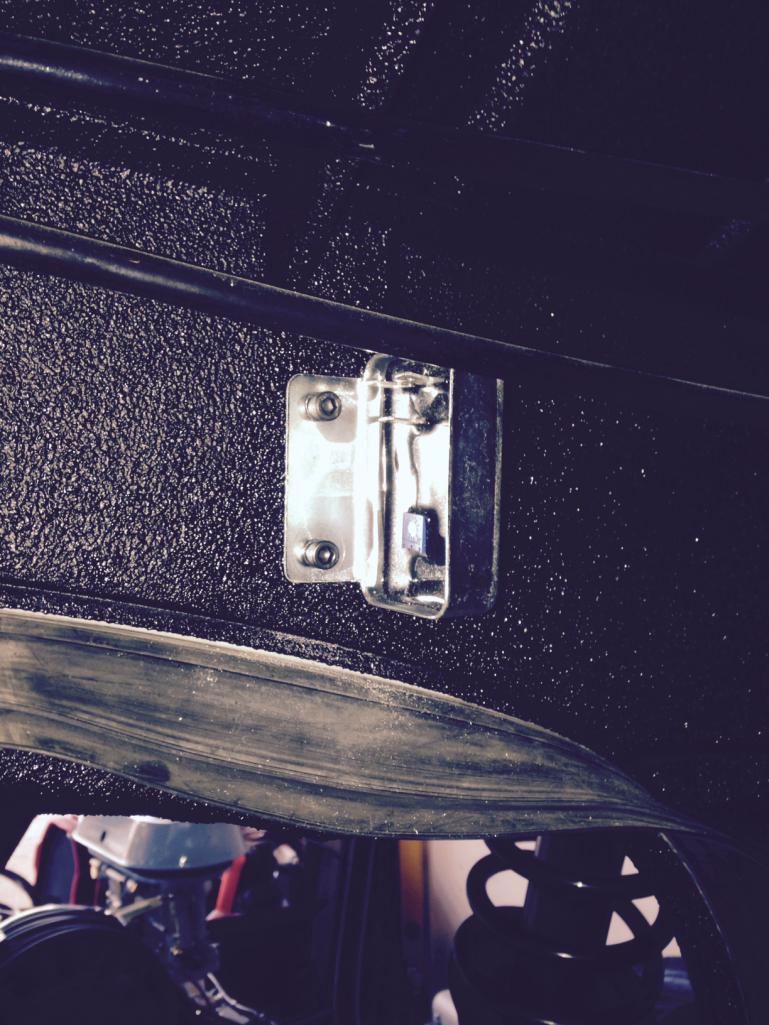
I slotted the brackets that attach the engine lid to the body and used the new quick disconnect hardware to install it. I don't remember if there is a rubber trim between the grill and the lid. I'll need to check 914 Rubber's site. Never painted the ribs under the grill black. Not sure if I'm going to or just leave it alone. Blue looks nice through the grill anyways.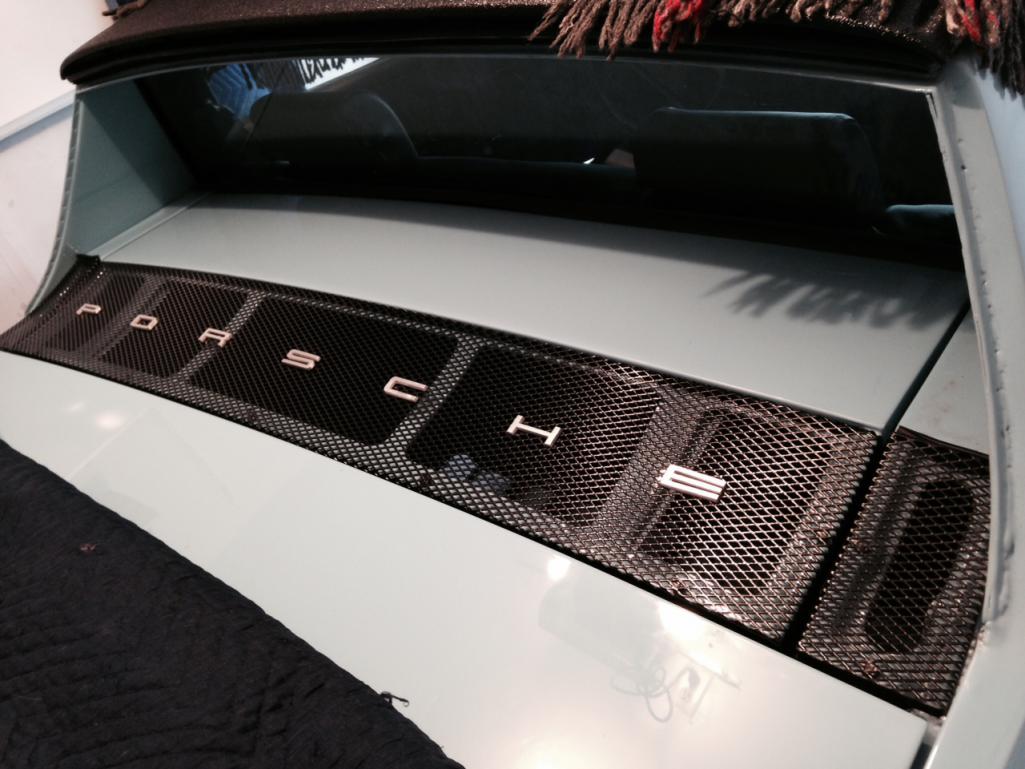
Posted by: PanelBilly Aug 10 2014, 11:11 AM
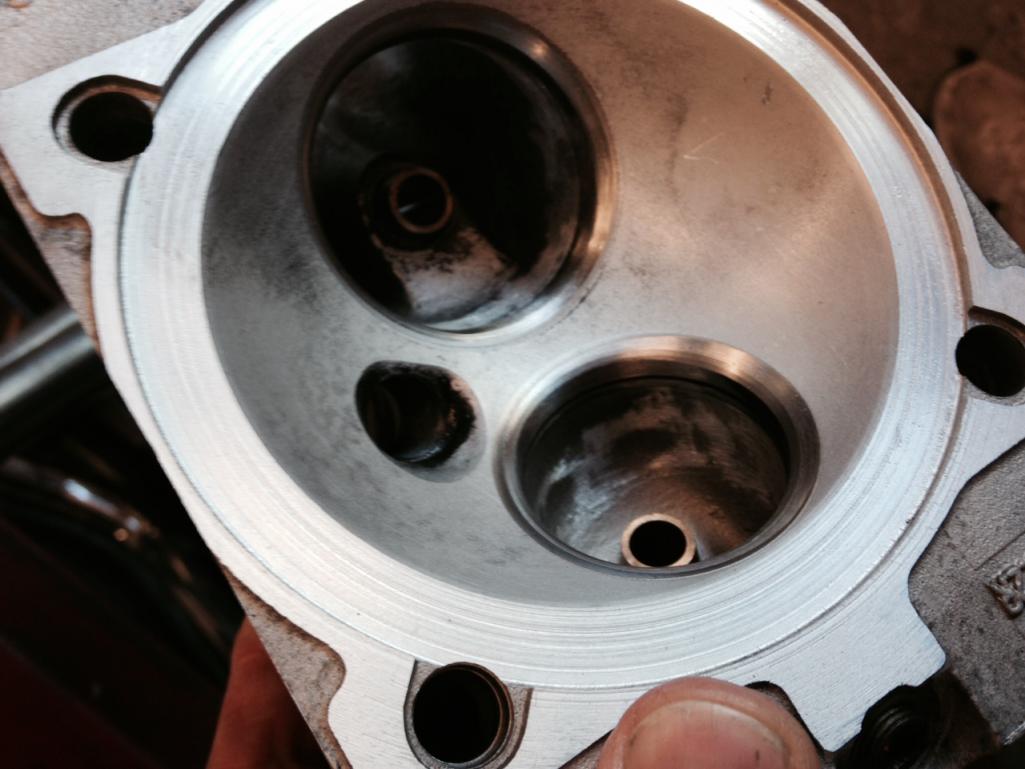
Finely some good news on the engine. The heads have been machined and the new valve guides are installed and reamed. The builder is off in the San Juans for a week, but his assistant reports that assembly is close. I see where he ground some material from the inside of the head where the valves seat. I have know idea what he's doing. Something about flow is all I heard him say. Just trusting that he knows more than me on this stuff. 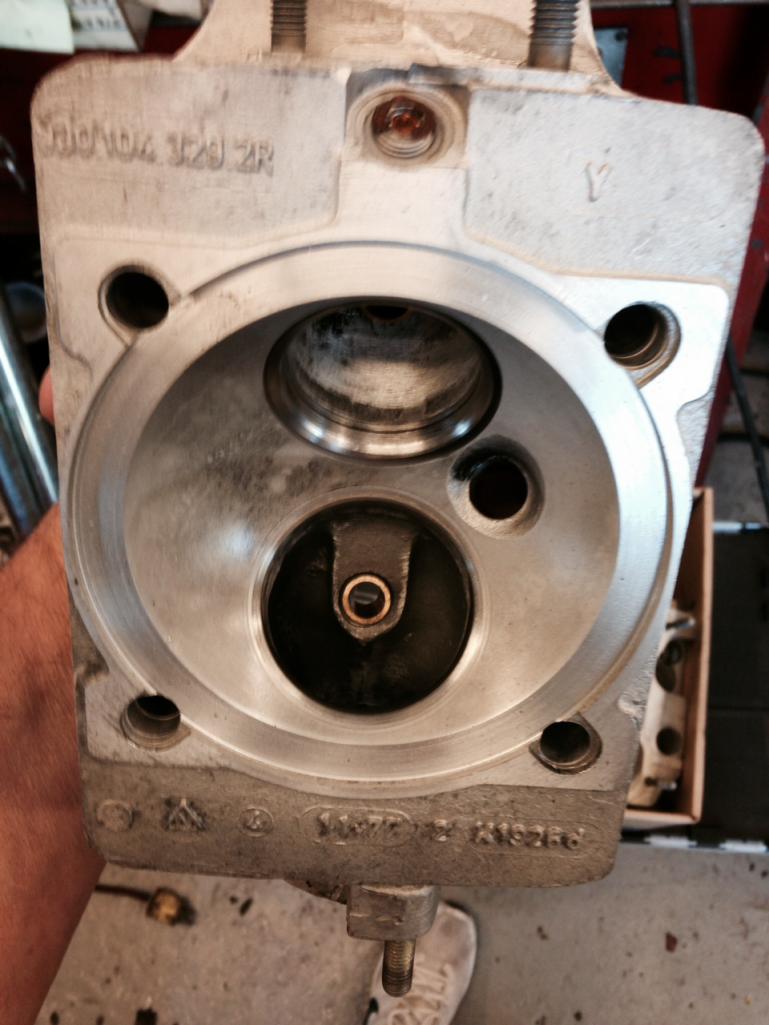
Posted by: effutuo101 Aug 11 2014, 08:49 AM
nice! looking good.
Posted by: PanelBilly Sep 6 2014, 06:00 PM
I was at the engine shop yesterday and found out that they were looking for the green vitron o rings that I had requested they use for sealing up the case. They had a gasket kit, but it has the blue rings (which I understand leak) and I want the engine to be as leak free as possible. Tried to order them from Pelican, but can't find them in the catalog. Left a "help" message for their parts department. Damn, I knew this would happen. Thing is ready to put together and were waiting for a part!
Posted by: PanelBilly Sep 13 2014, 01:56 PM
Got the o rings from Pelican and dropped them off at the builder yesterday. He said the assembly would begin next week.
Posted by: PanelBilly Sep 13 2014, 07:48 PM
Don't know if I'll ever install a radio, but since I left a hole in the fender, I put in an antenna. One of the best deals I got for this car. Only $15 from Pelican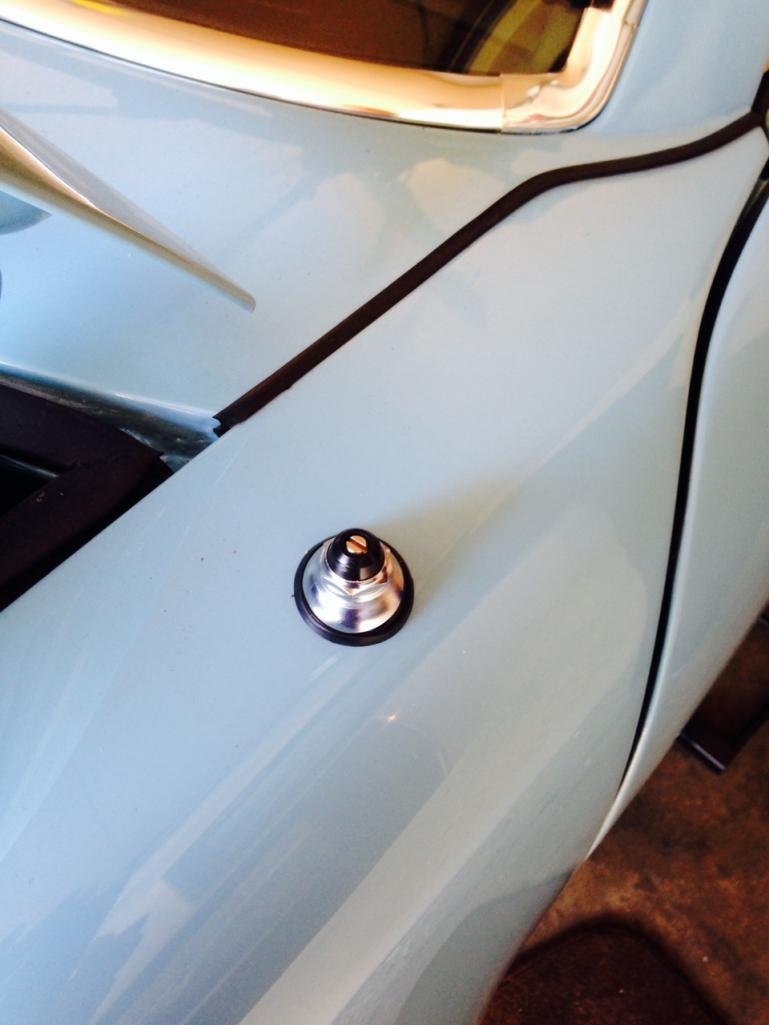
Posted by: PanelBilly Nov 1 2014, 05:22 PM
Put the refinished trim on the sail panels today
Attached image(s)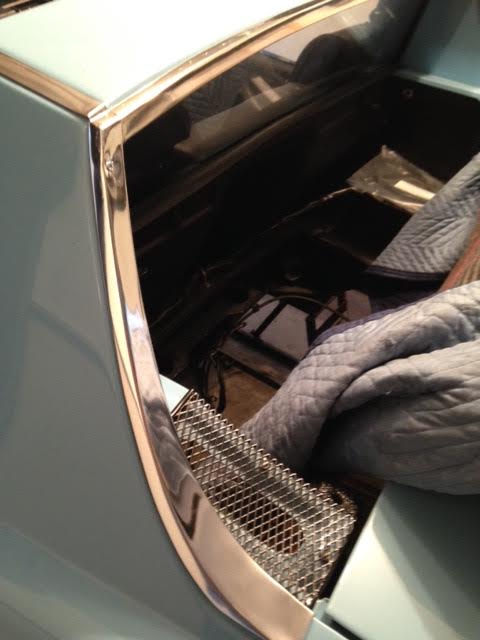
Posted by: FourBlades Nov 1 2014, 05:26 PM
Looking really nice man! 
John
Posted by: Mblizzard Nov 1 2014, 08:41 PM
I picked up two of the metal targa hinge covers and replaced the plastic ones that I had on the car. The plastic was OK, but they were both a little warped. I painted the covers with some undercoat spray and they came out looking very much like the leather on the pad. I'm sure glad I had used stainless steel square head screws on the pad. Made removal and installation much easier.
Where did you find the metal covers?
Posted by: PanelBilly Nov 2 2014, 11:32 AM
Mr Stone
Posted by: JRust Nov 2 2014, 11:40 AM
Looking great Billy! I vote for painting the ribs black on your engine lid. While the blue looks nice. I think it looks better with the Ribs black. The ribs themselves really aren't that appealing(to me). So I like them being the same black as the grill. Having said that your car is gorgeous & will look great however you do it.
Great news on your motor . Good to hear things coming together for you. It's been a long haul but will be totally worth it. I see many awards coming your way 
Posted by: PanelBilly Nov 3 2014, 06:07 PM
Got a call from the shop today and the engine is nearly done. They just need to do a few more things. Somehow I misplaced the oil sump cover (or its in their shop somewhere), so it looks like I need to get another one.
Posted by: PanelBilly Nov 7 2014, 04:17 PM
The engine work is nearly complete and I'll be bringing this baby home to get it ready for INSTALLATION. I need to figure out why the 2 bolts hanging out of the
timing chain covers are so long and if they should be replaced with shorter ones. There's also some long bolts for the engine mount that i suspect should be
replaced with shorter ones. 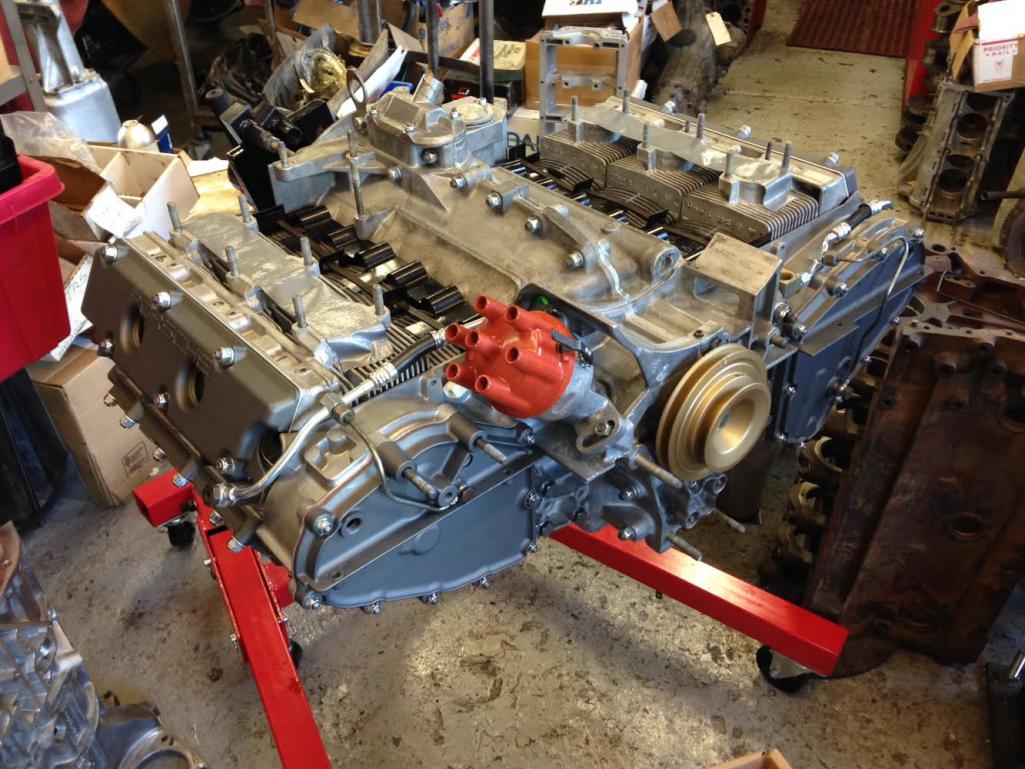
Posted by: PanelBilly Nov 7 2014, 08:02 PM

Posted by: RobW Nov 8 2014, 07:48 AM

Get that thing back on the road!

Posted by: PanelBilly Nov 11 2014, 10:39 PM
The engine is in my garage now!
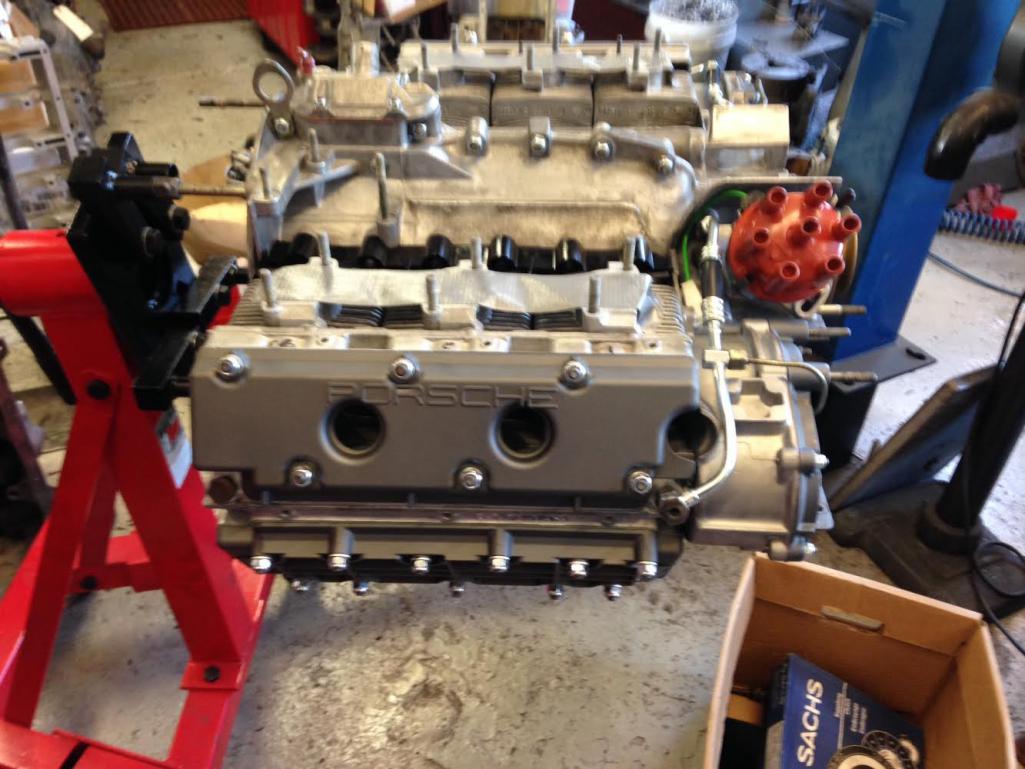
Posted by: PanelBilly Nov 15 2014, 01:27 PM
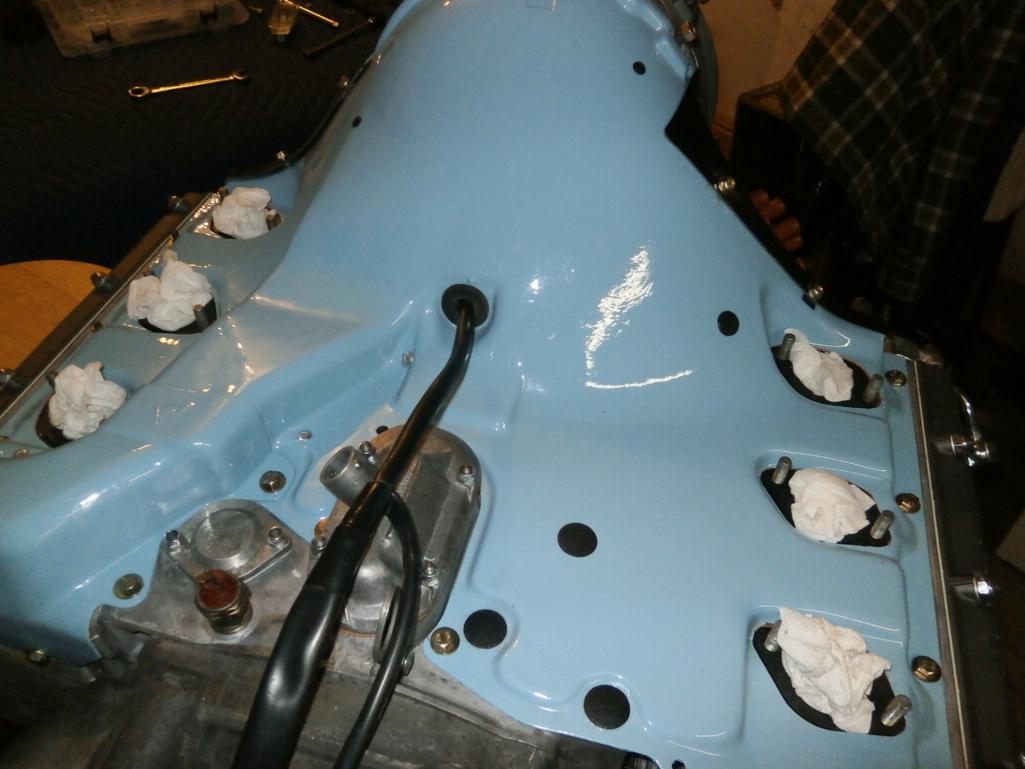
So the engine goes together. First the alternator wires need to be pulled through the shroud and the rubber grommet needs to be set. 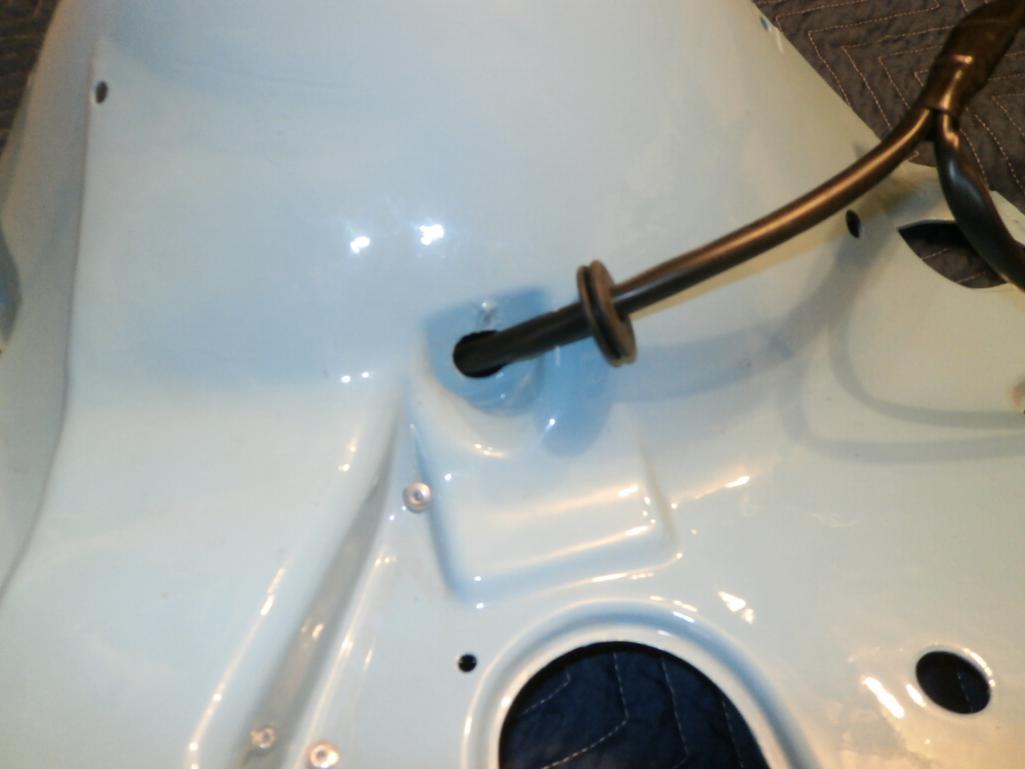
Then the wires slip through the inner cover that directs air evenly over the cylinders.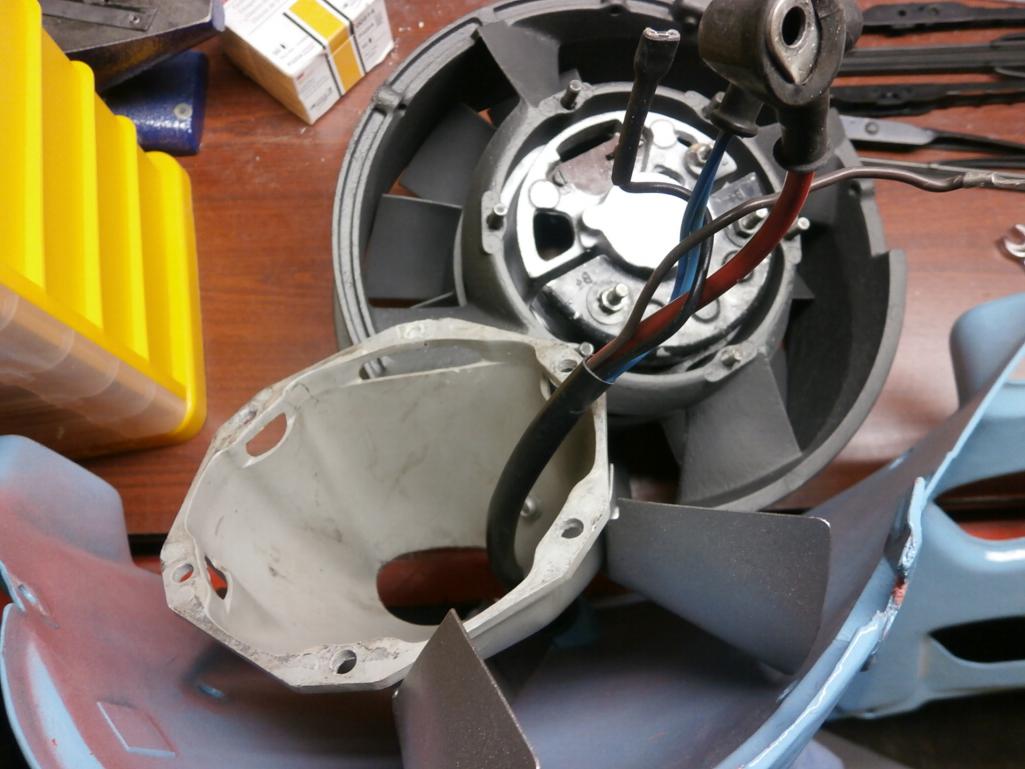
Then bolted to alternator. 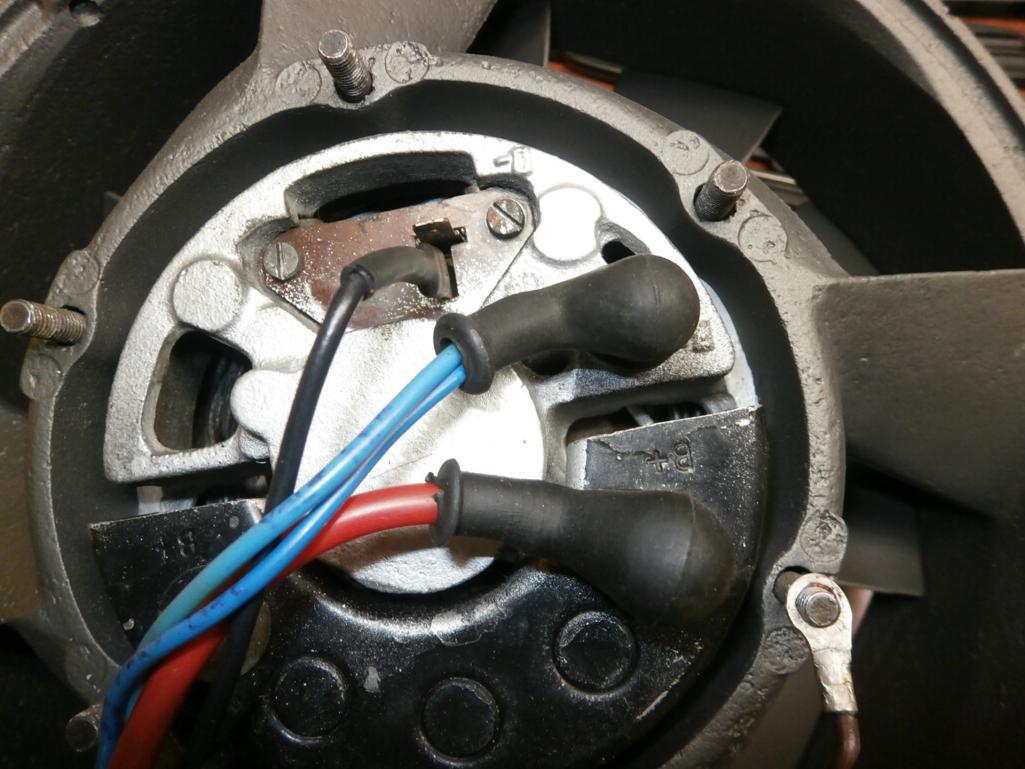
Ground wire to alternator case is a challenge to do. 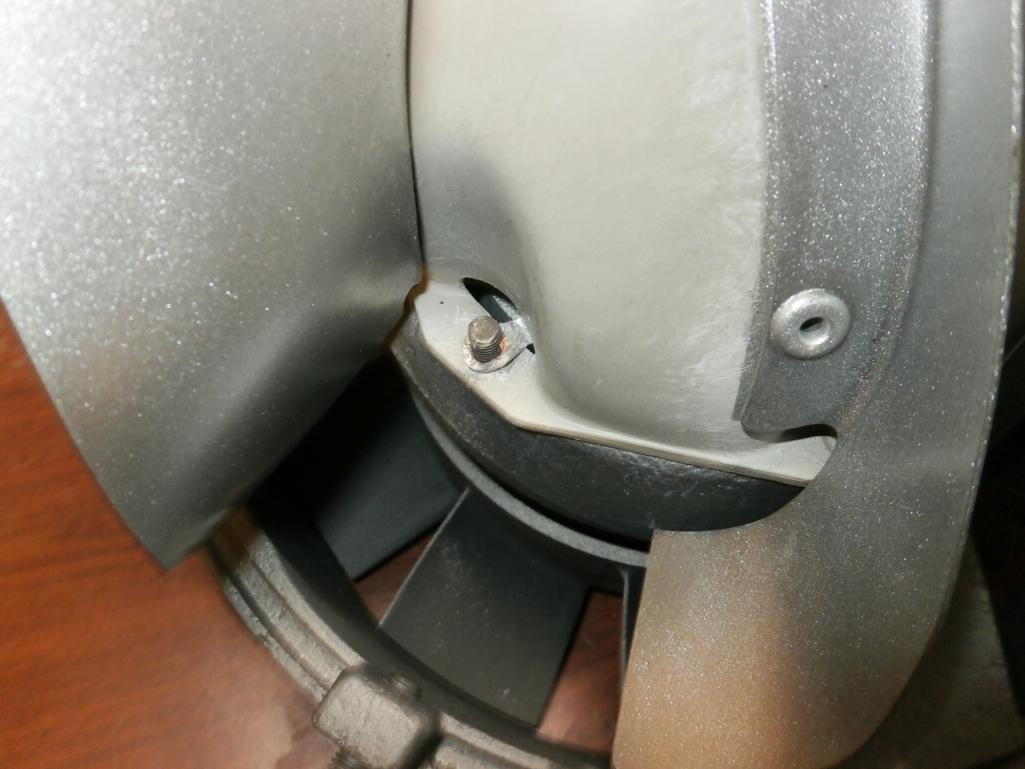
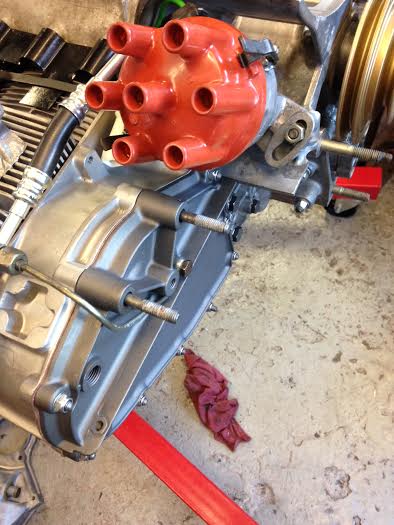
Posted by: PanelBilly Nov 15 2014, 01:33 PM
Fan housing strap was more fun.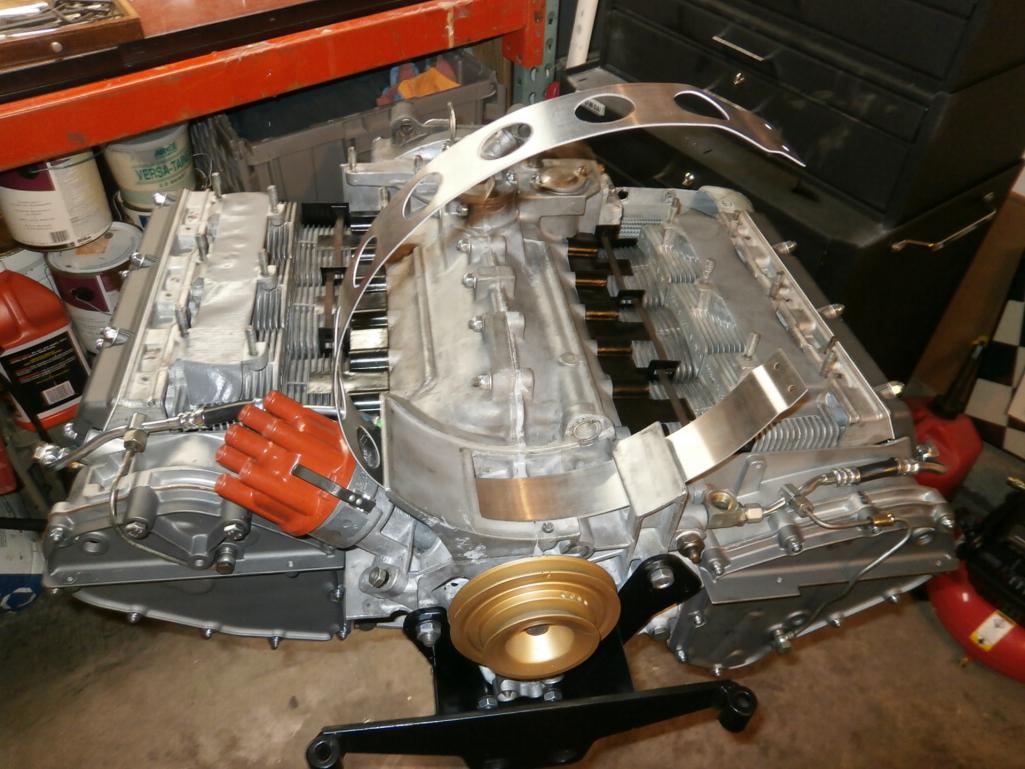
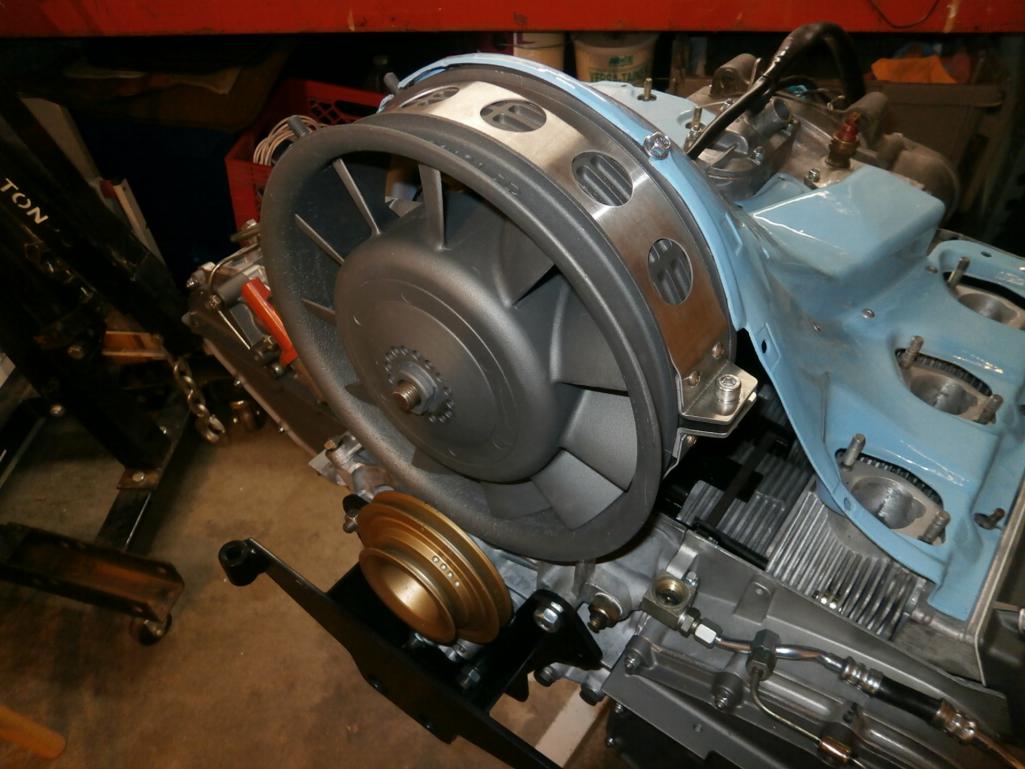
And now I'm trying to decide what hardware to use to secure the shroud.
Just used some bolts that were in the scrap pile.
Attached thumbnail(s)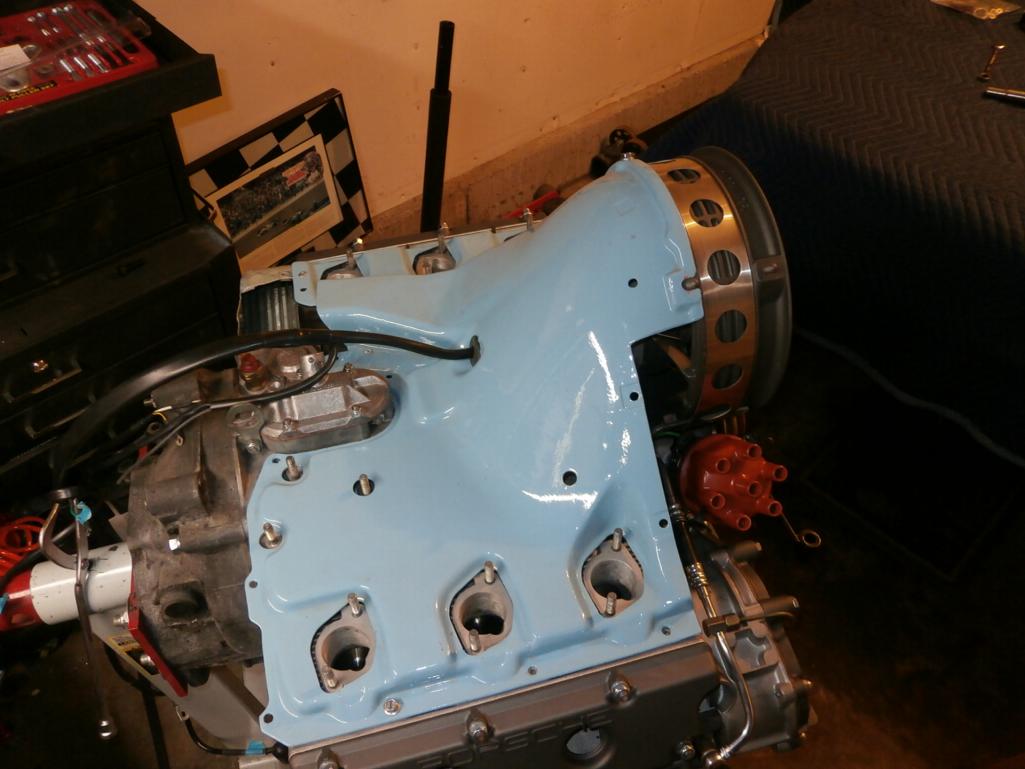
Posted by: Tom Nov 15 2014, 02:15 PM
Looking nice Billy. Sent you a PM about the wiring harness mods.
Tom
Posted by: PanelBilly Nov 15 2014, 06:44 PM
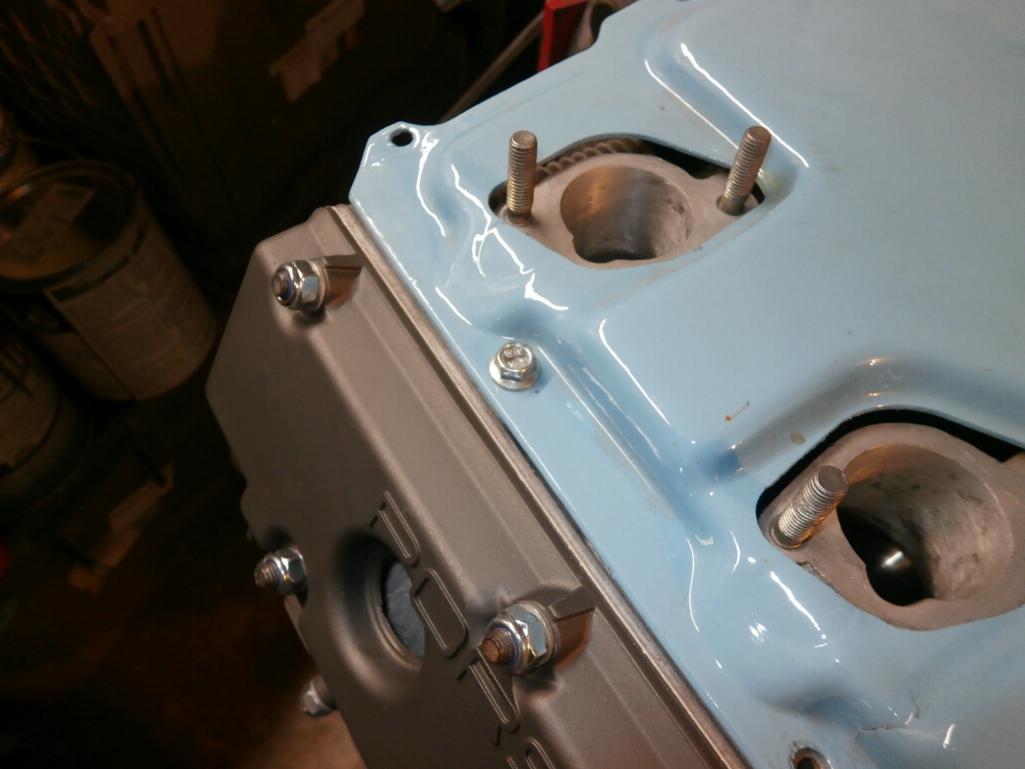
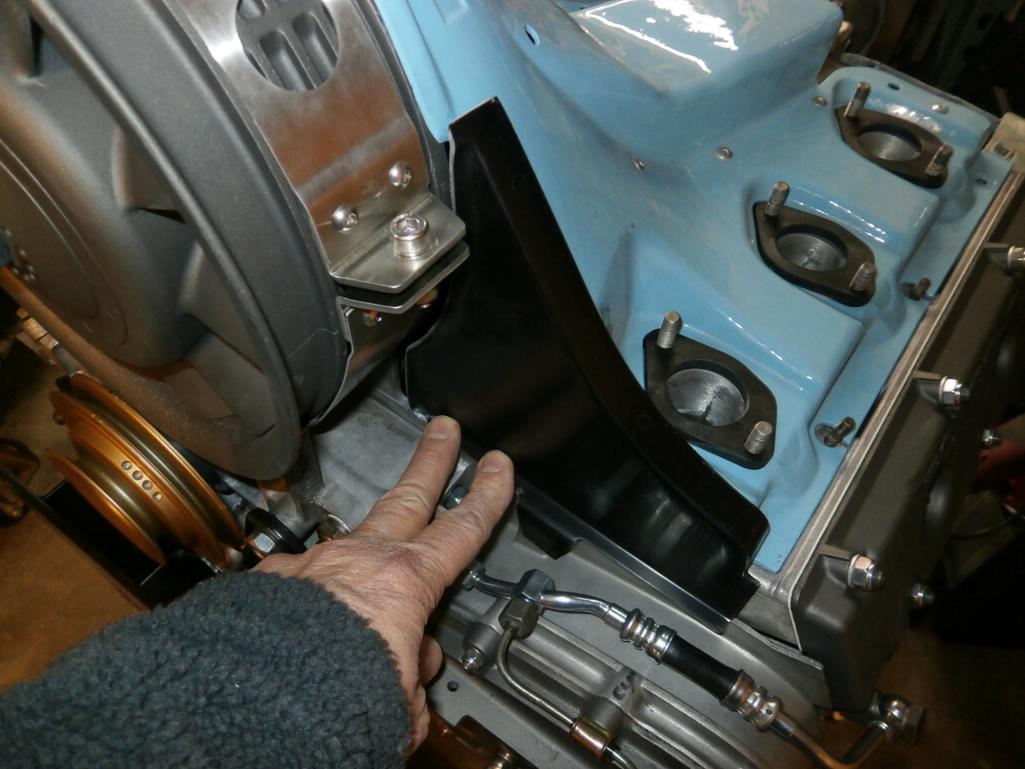
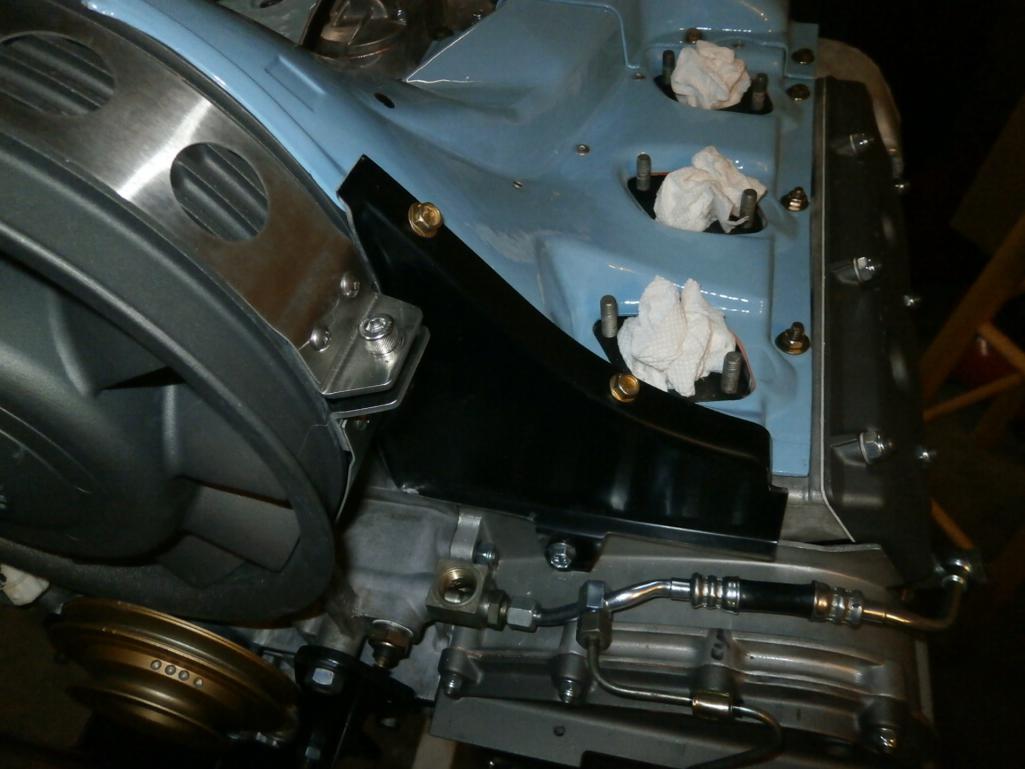
When I checked the size of the holes in the shroud with the insulators, I could see that I needed to trim the holes a little larger. I've read that this is normal, so I was prepared.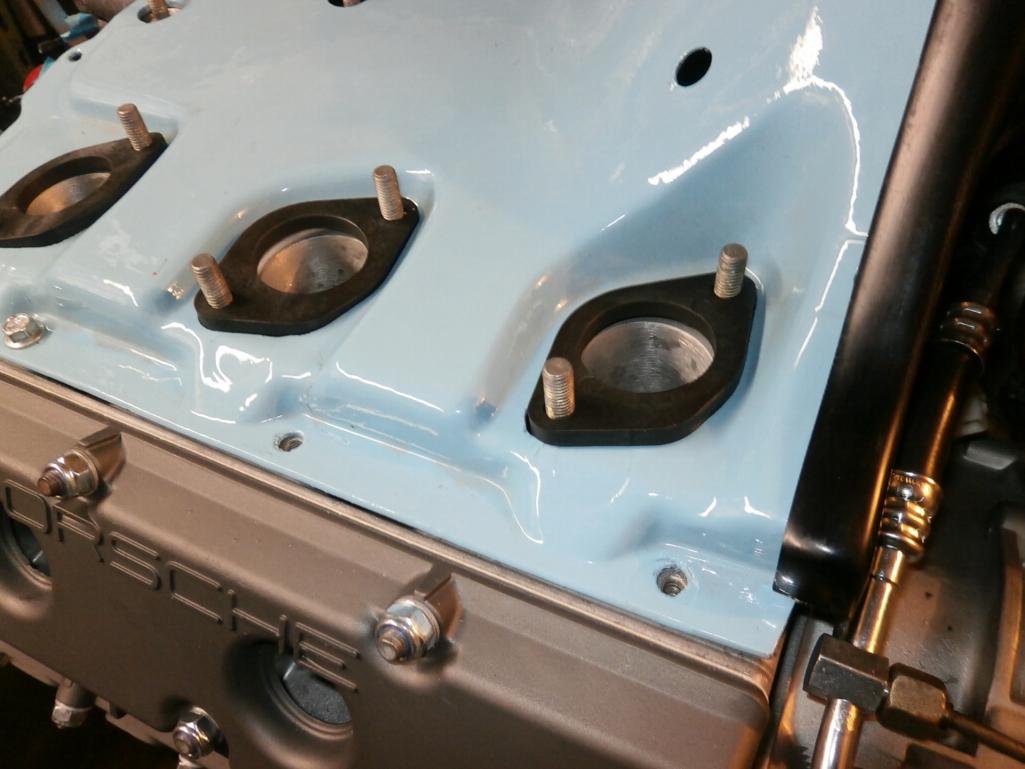
It wasn't too hard to grind the holes, I just had to make sure that none of the dust ended up in the engine.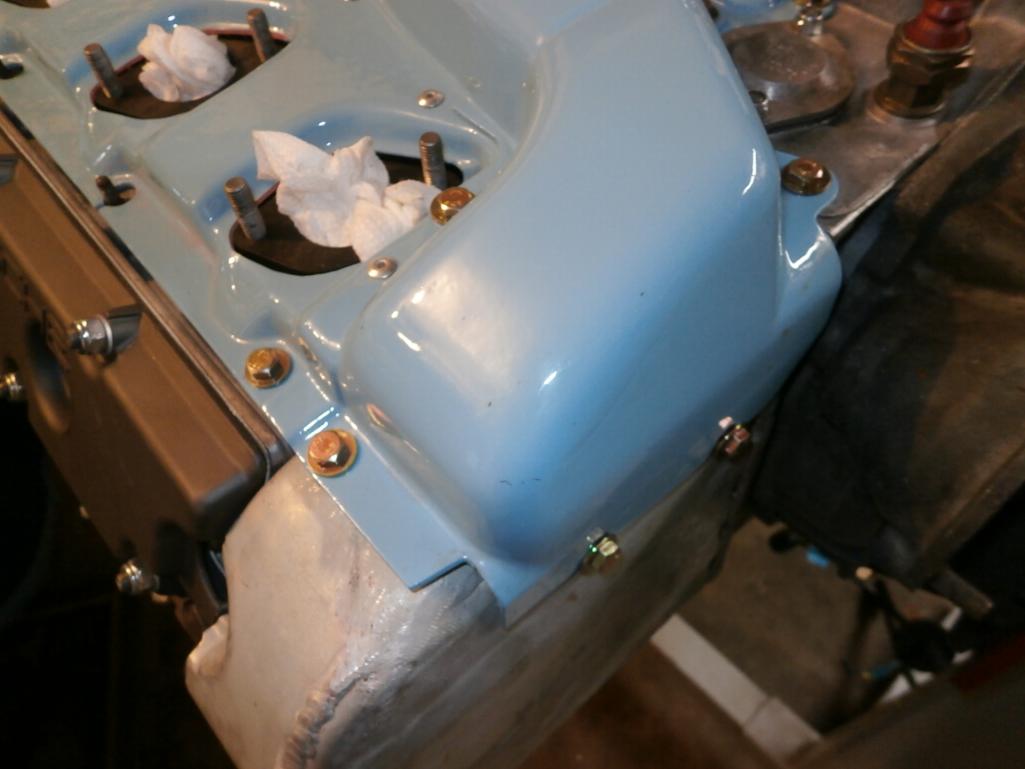
I figured I'd mock up the carbs and see if there was going to be any more problems, but it all fit great.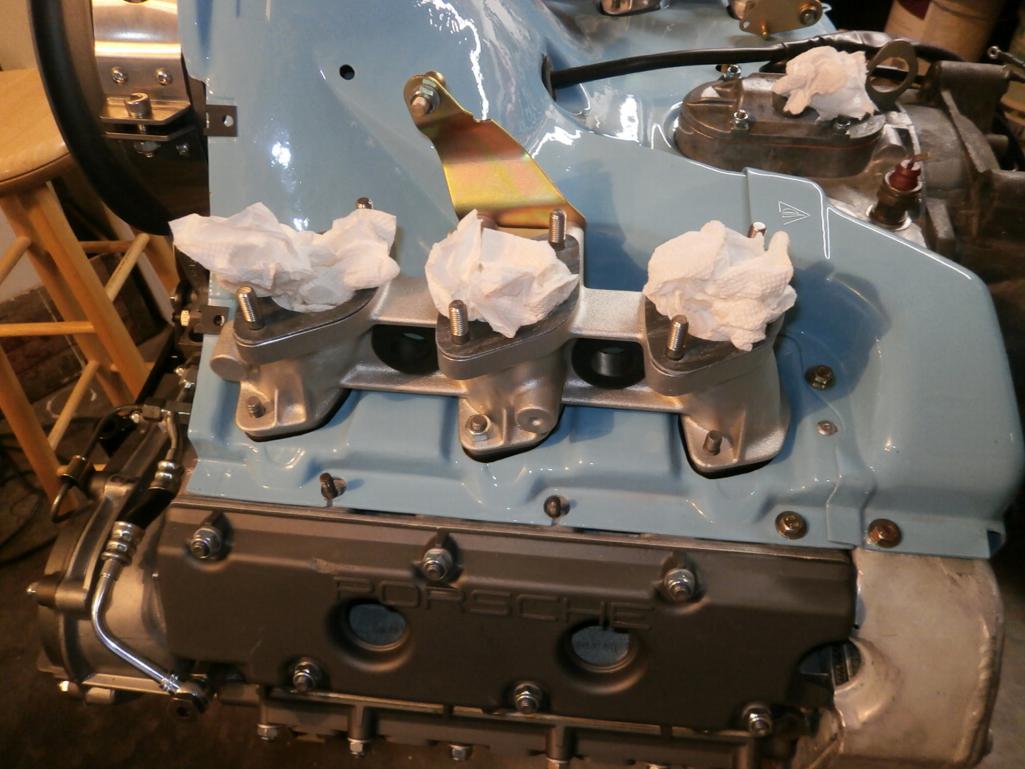

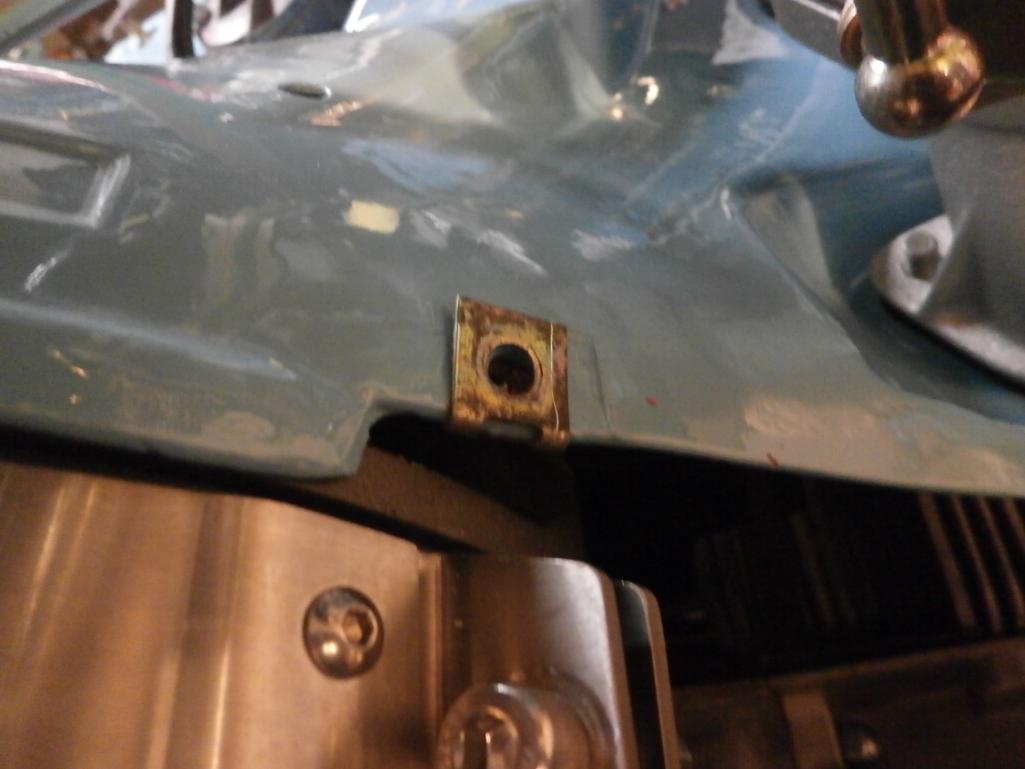
Posted by: PanelBilly Nov 15 2014, 06:51 PM
But I'm missing one of the fastener clips to finish the fiberglass block off trim that mounts to the front of the shroud. I have 3 of the 4. Anybody have an idea where to find them? I check 2 stores today, but no luck. I'm going to Ace tomorrow. They seem to have a large selection. 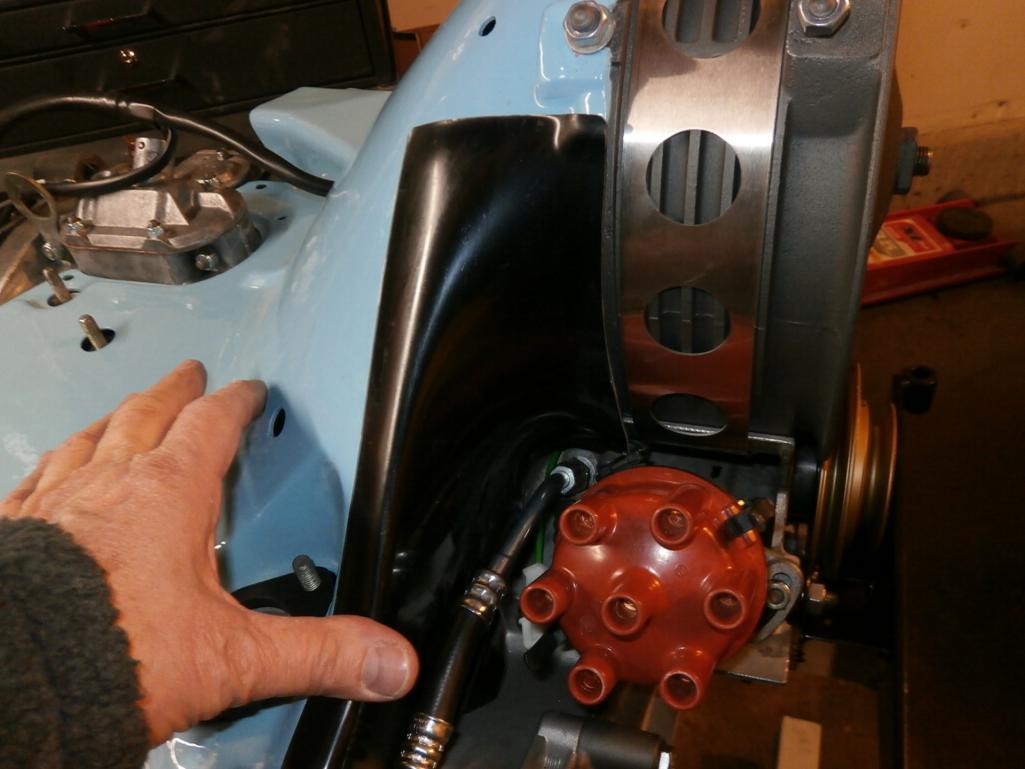
And I see that there are 3 holes in the shroud. Anybody know why they are there?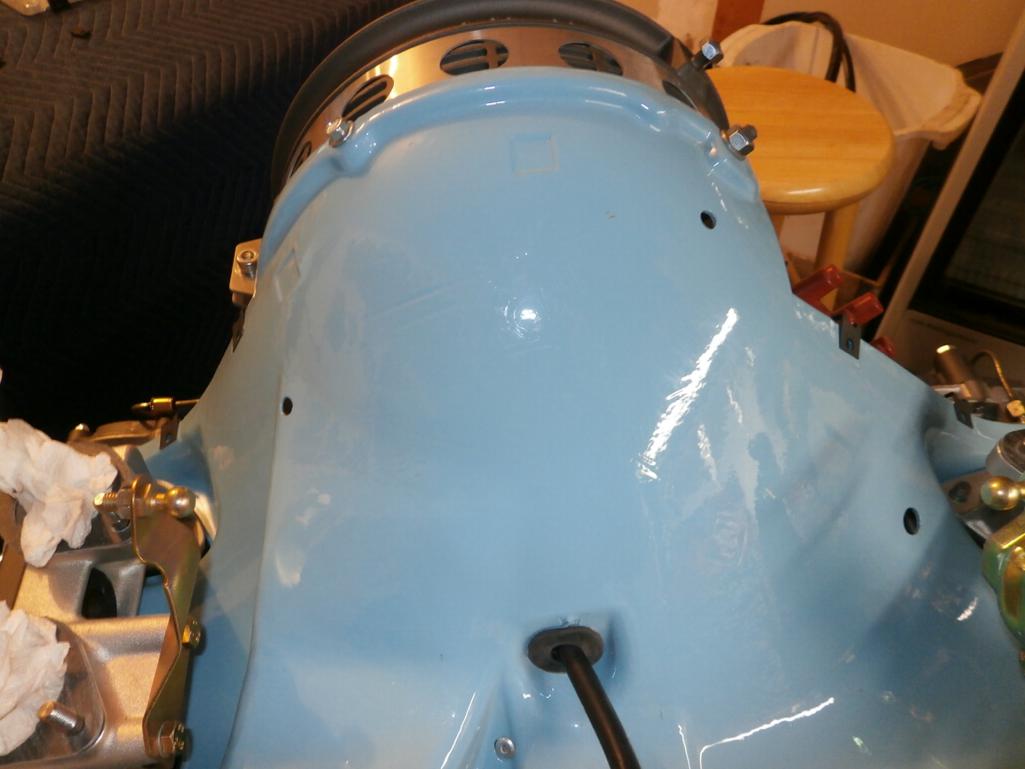
And do I need these 3 bolts sticking up from the block?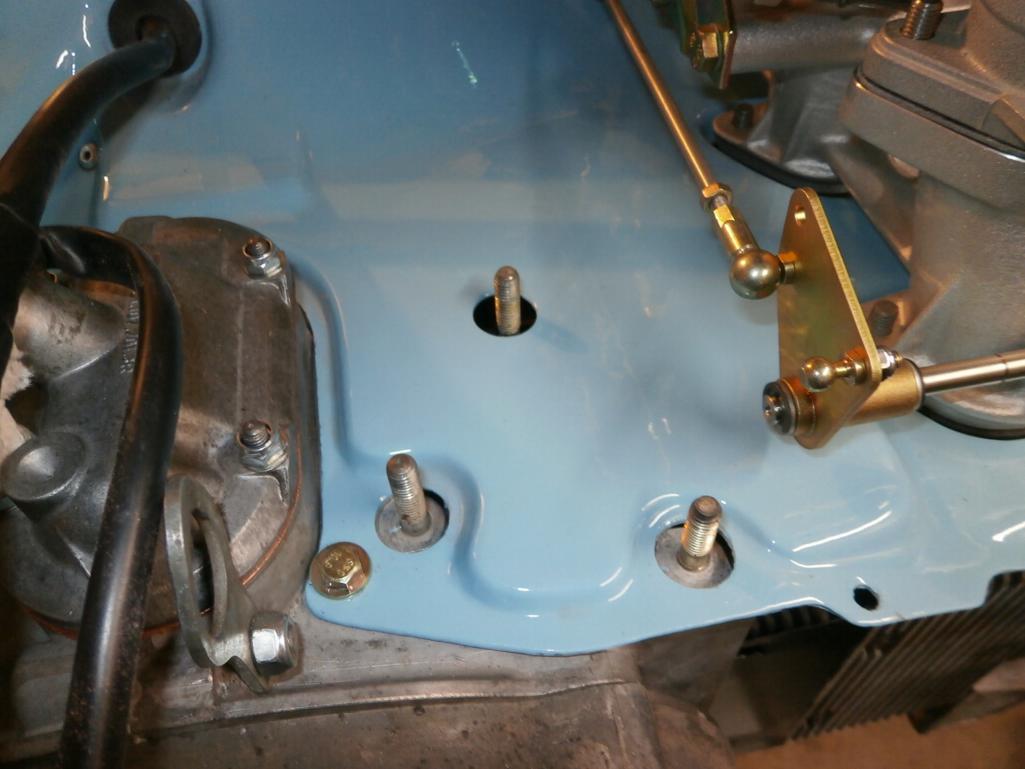
Posted by: Tbrown4x4 Nov 15 2014, 07:54 PM
Looks great Billy! Something so perfect about triple throat Webers on a flat six.
Posted by: puffinator Nov 15 2014, 08:05 PM
And do I need these 3 bolts sticking up from the block?
Those 3 bolts are for an accelerator bracket for the CIS injection. You don't need them with carbs.
Posted by: puffinator Nov 15 2014, 08:25 PM
In regard to the 3 holes. The one on the right, in your picture (passenger side) gets a plastic plug, the one on the left is for a bolt holding a "heat source" funnel to push air down to the heat exchanger (see my picture). The one on top is for a plug that holds spark plug wires on CIS engines.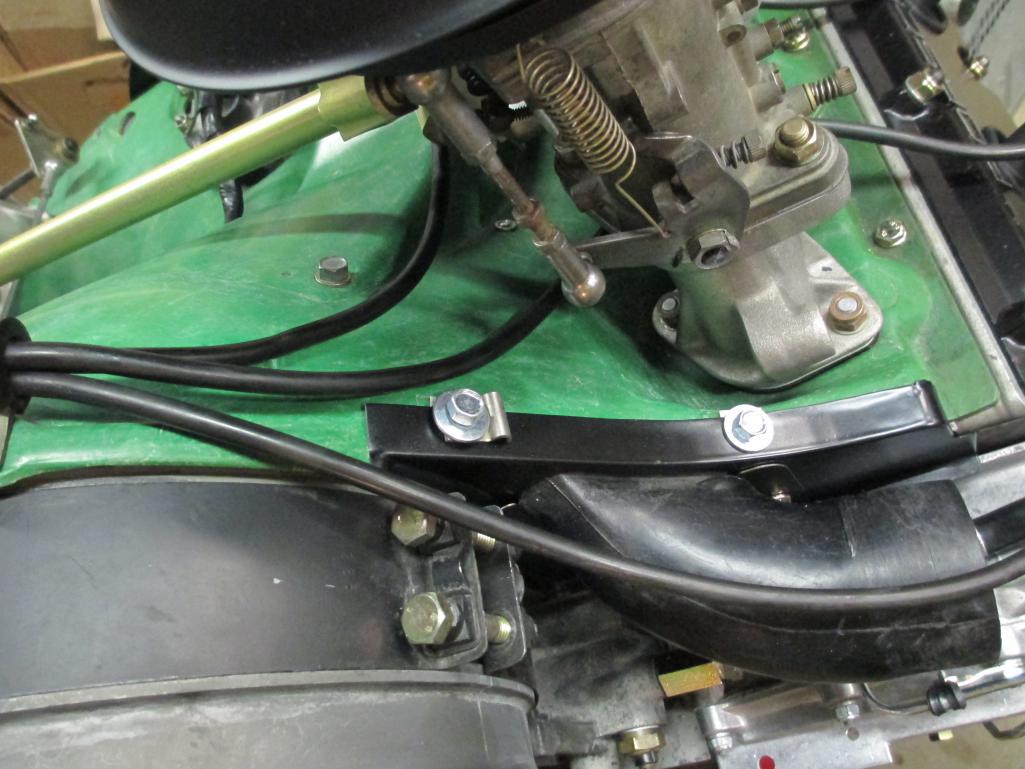
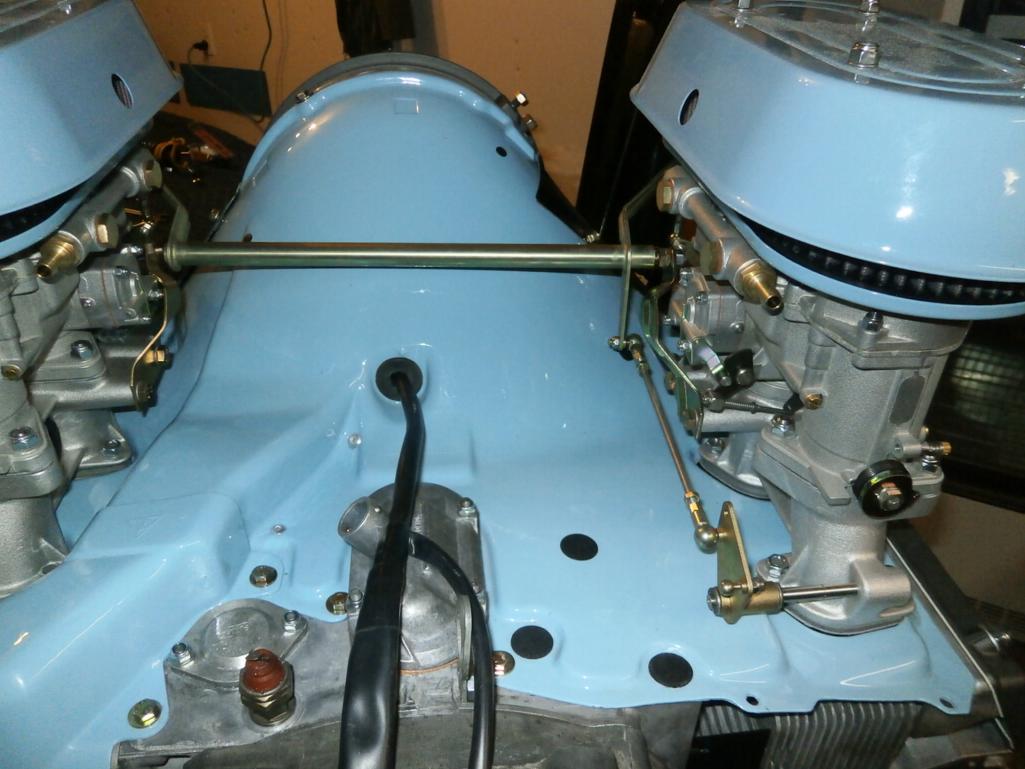
Posted by: PanelBilly Nov 22 2014, 07:35 PM
More work done today. First I have the braided ground cable attached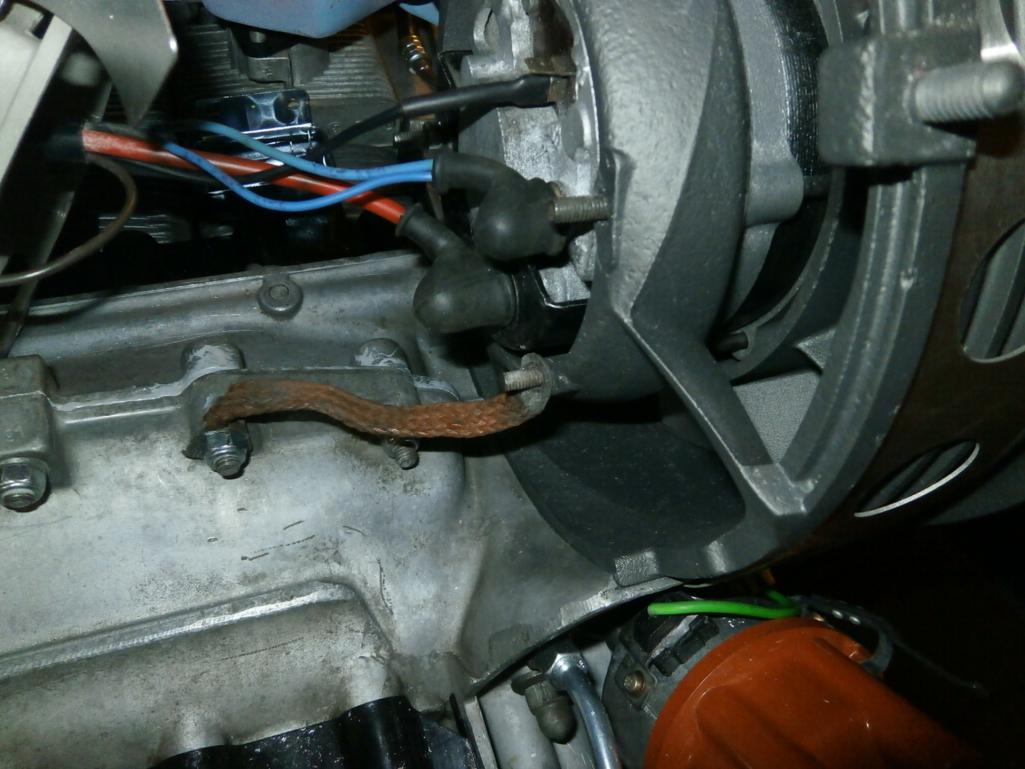
And the block off plates for the front of the shroud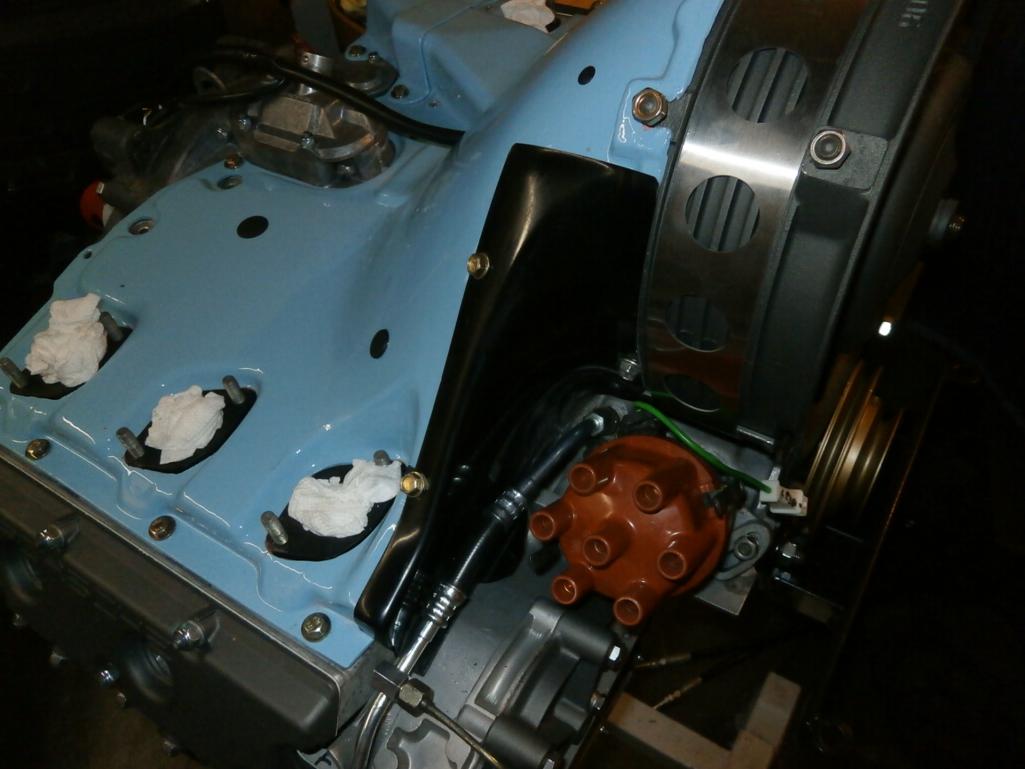
Posted by: PanelBilly Nov 22 2014, 07:37 PM
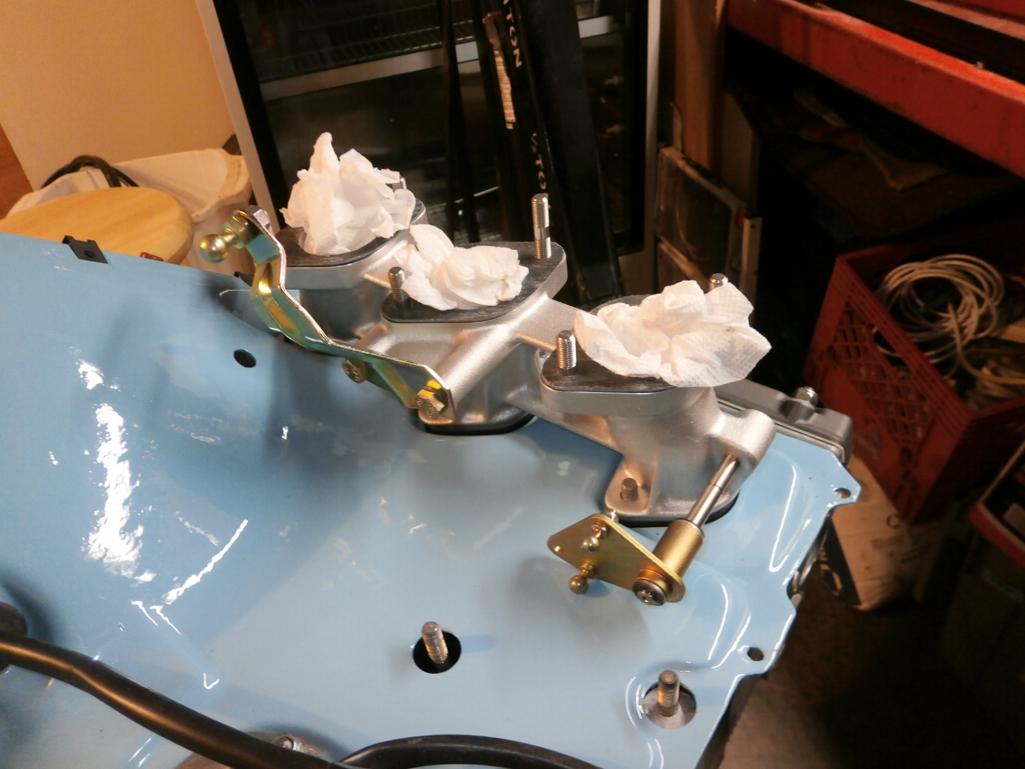
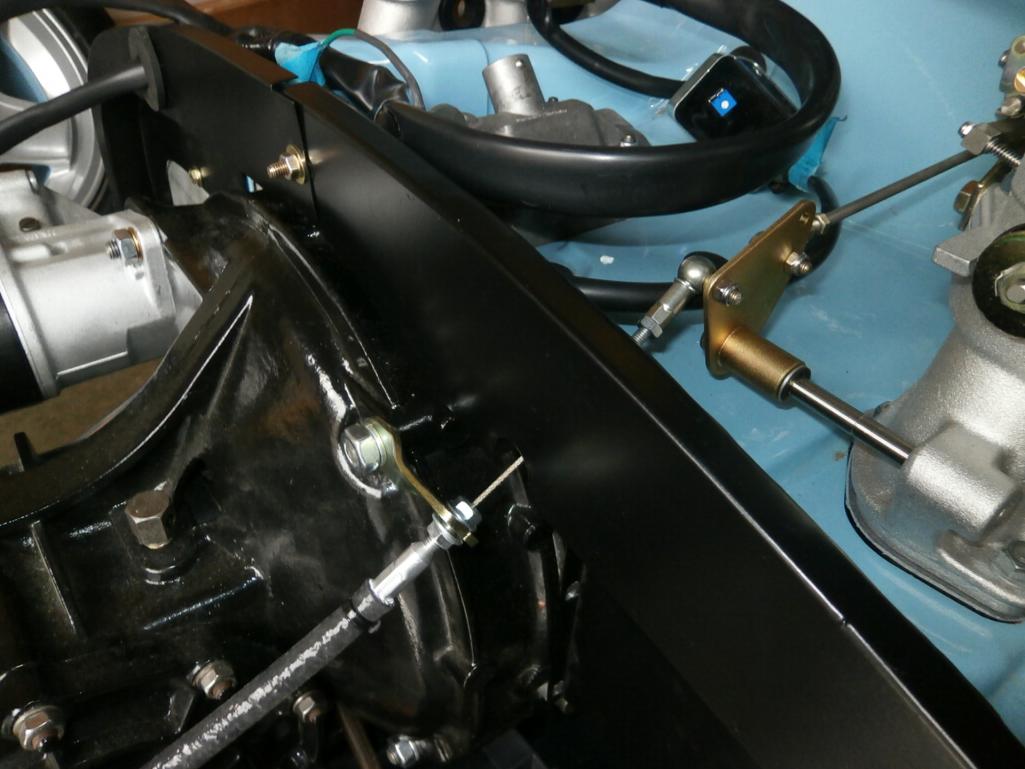
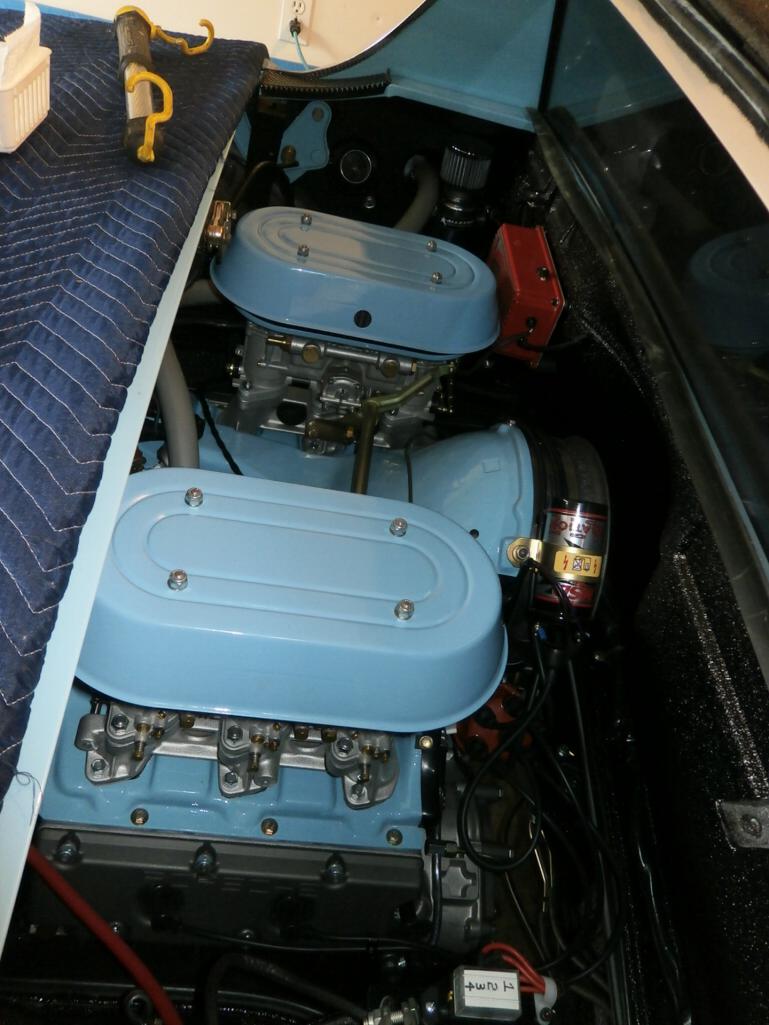
And the PMOs are all mounted up with the linkage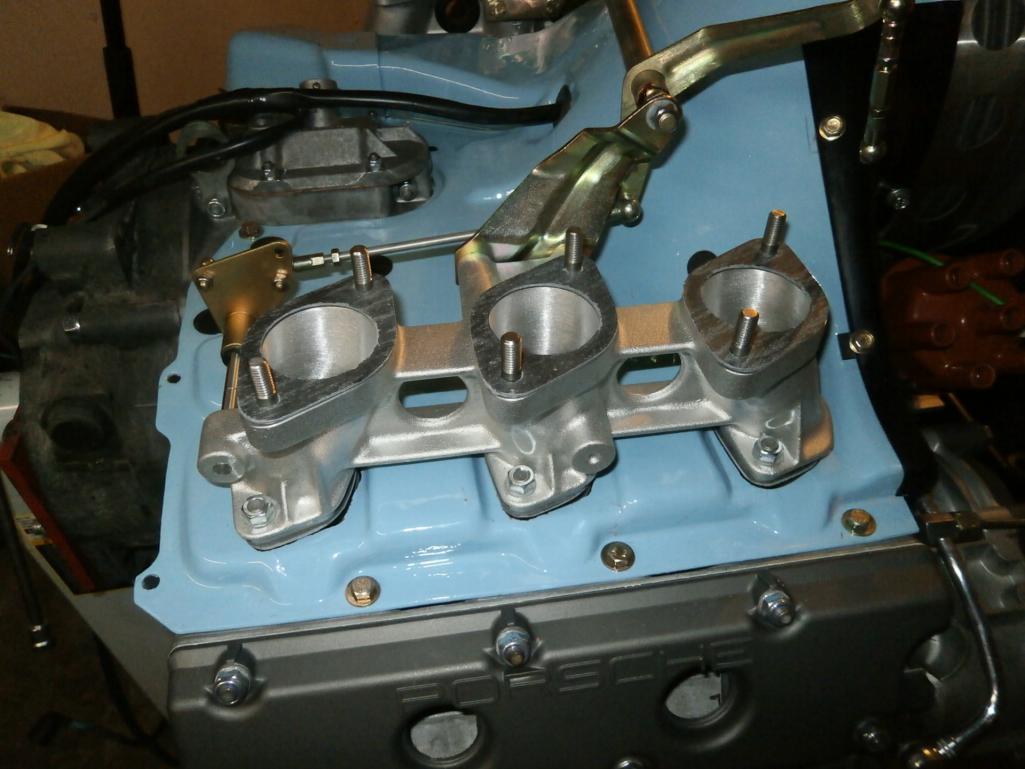
Posted by: PanelBilly Nov 22 2014, 07:39 PM
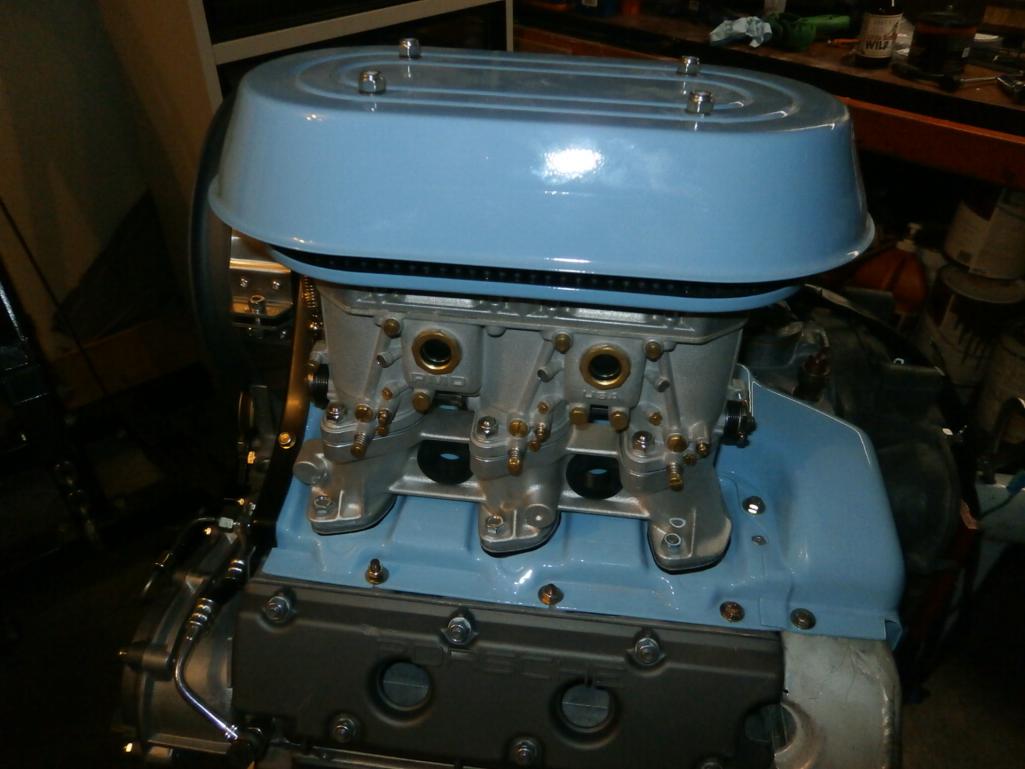
And since I had a box of plastic plugs, I capped all the holes in the shroud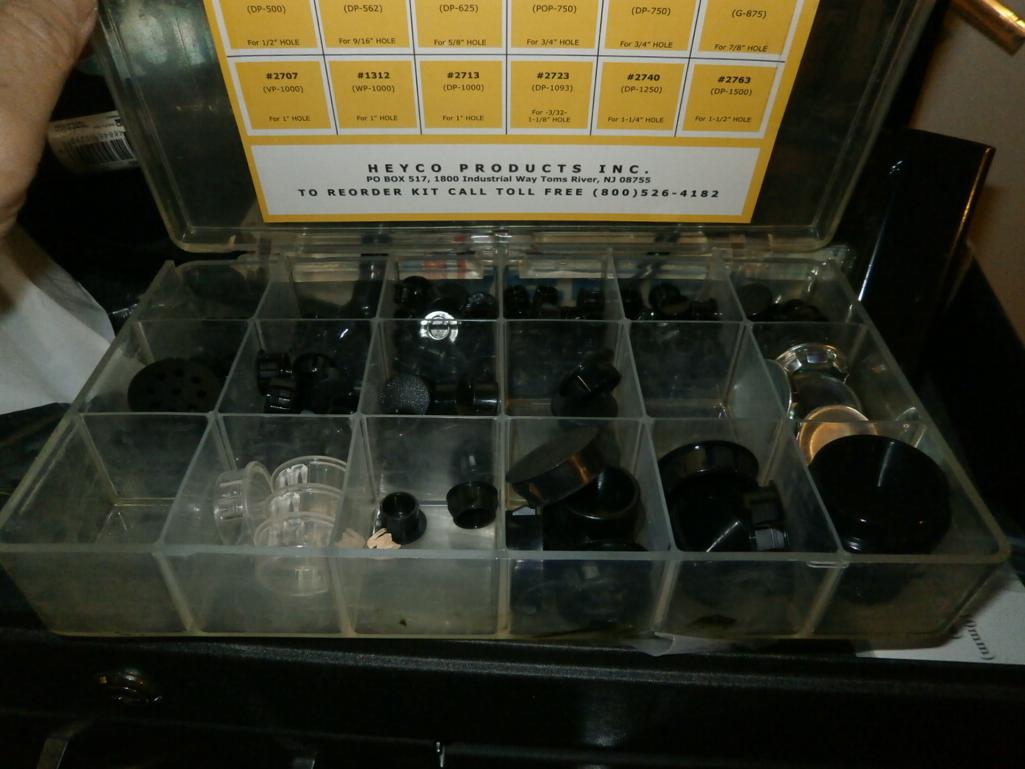
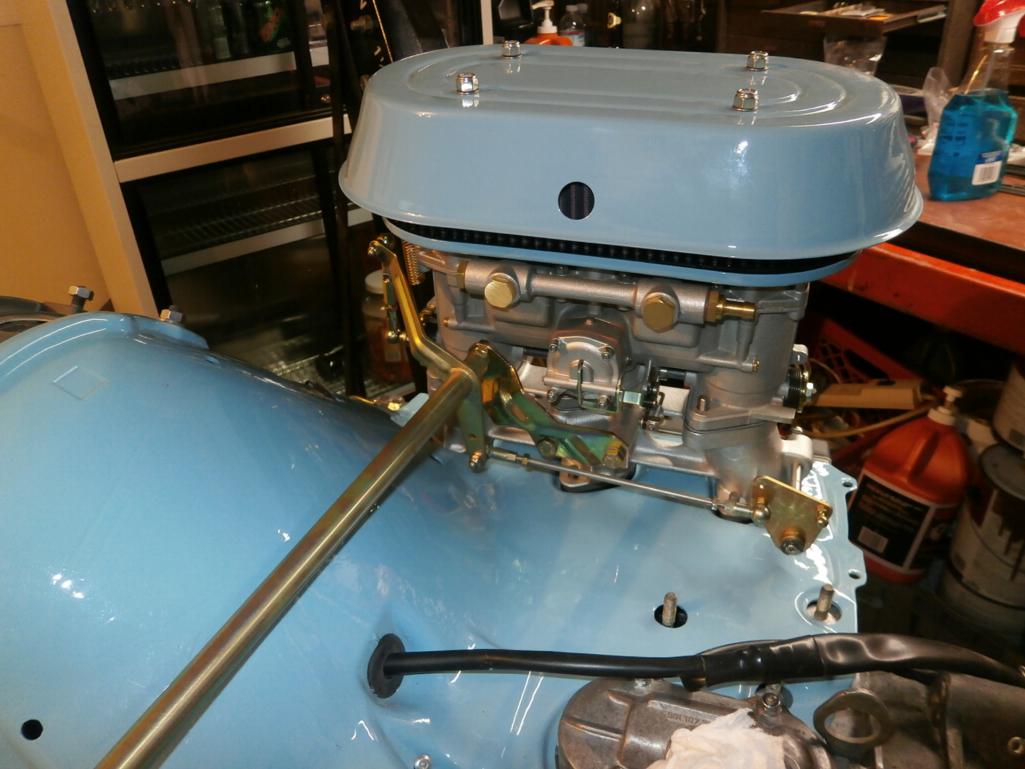
Posted by: PanelBilly Nov 22 2014, 07:42 PM
So this is where it stands. Now I need to figure out what sending units will be mounted to the engine and order up some new ones. Tomorrow I'm going to start the headers and fan belt. Then the tin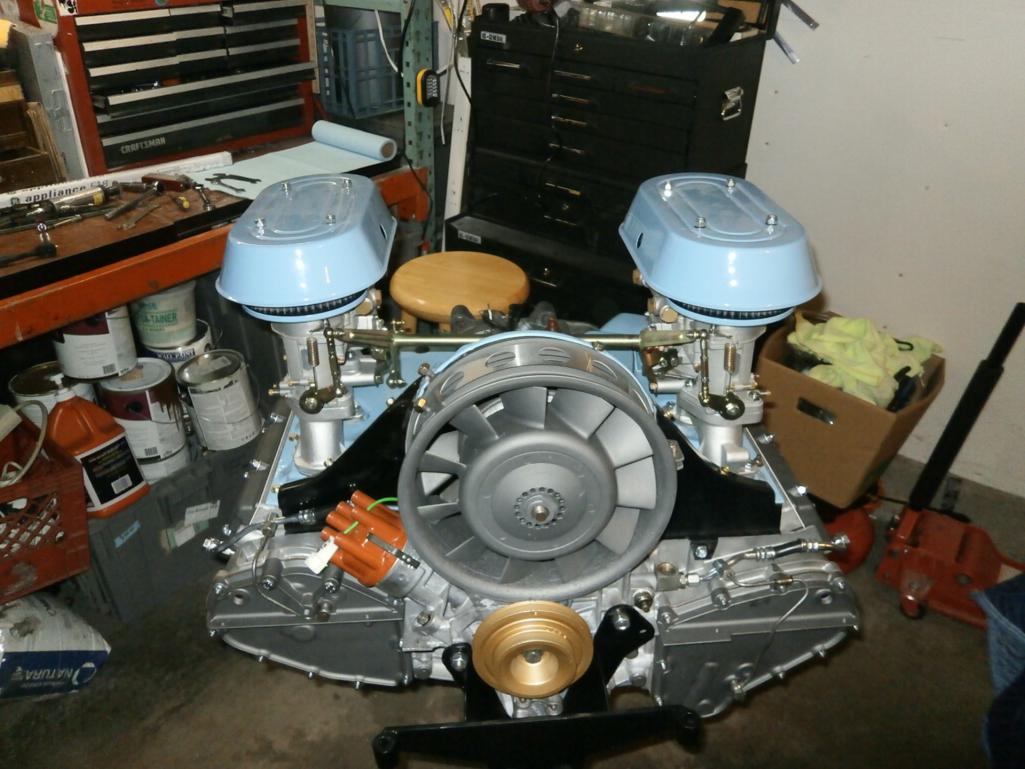
Posted by: mepstein Nov 22 2014, 08:06 PM
Too pretty to put in a car.
Posted by: JRust Nov 22 2014, 09:05 PM
Too pretty to put in a car.
 That is one sweet looking motor Billy. Way to pretty though
  . It really needs to go in a dirtier car otherwise it will just be over the top. I suppose I could throw it in my old v8 car to help you out
Posted by: PanelBilly Nov 22 2014, 10:03 PM
Too pretty to put in a car.
That is one sweet looking motor Billy. Way to pretty though . It really needs to go in a dirtier car otherwise it will just be over the top. I suppose I could throw it in my old v8 car to help you out I thought you were into the hybrid thing. This car is all Porsche
Posted by: KELTY360 Nov 22 2014, 10:07 PM
Am I the only one to notice the dust on the hats? I think you're going to have to repaint them Billy.

Simply fabulous...I'm sure it will sound as good as it looks.
Posted by: PanelBilly Nov 22 2014, 10:39 PM
Not paint, they are powder coated. Wipes clean
Posted by: rhodyguy Nov 23 2014, 11:32 AM
Mcclendons has a pretty extensive metric selection. Try the Renton store.
Posted by: JRust Nov 23 2014, 11:49 AM
I thought you were into the hybrid thing. This car is all Porsche
Hey to help out a friend I can go all Porsche. I'm giving that way

Posted by: billh1963 Nov 23 2014, 04:06 PM
Beautiful engine! I'll be curious to see how you like the PMO's.
Posted by: aircooledtechguy Nov 24 2014, 09:39 AM
WOW!! 
Good things really do come to those who wait. . . I'm lovin' watching this car come together!!
Posted by: type2man Nov 24 2014, 08:39 PM
That oughta run good!!!!
Posted by: PanelBilly Dec 6 2014, 06:08 PM
Headers were installed today, but i quickly learned that you can't Install both of them and turn the engine back over. So the second one goes on while you sit on the floor and try to hold the gaskets in place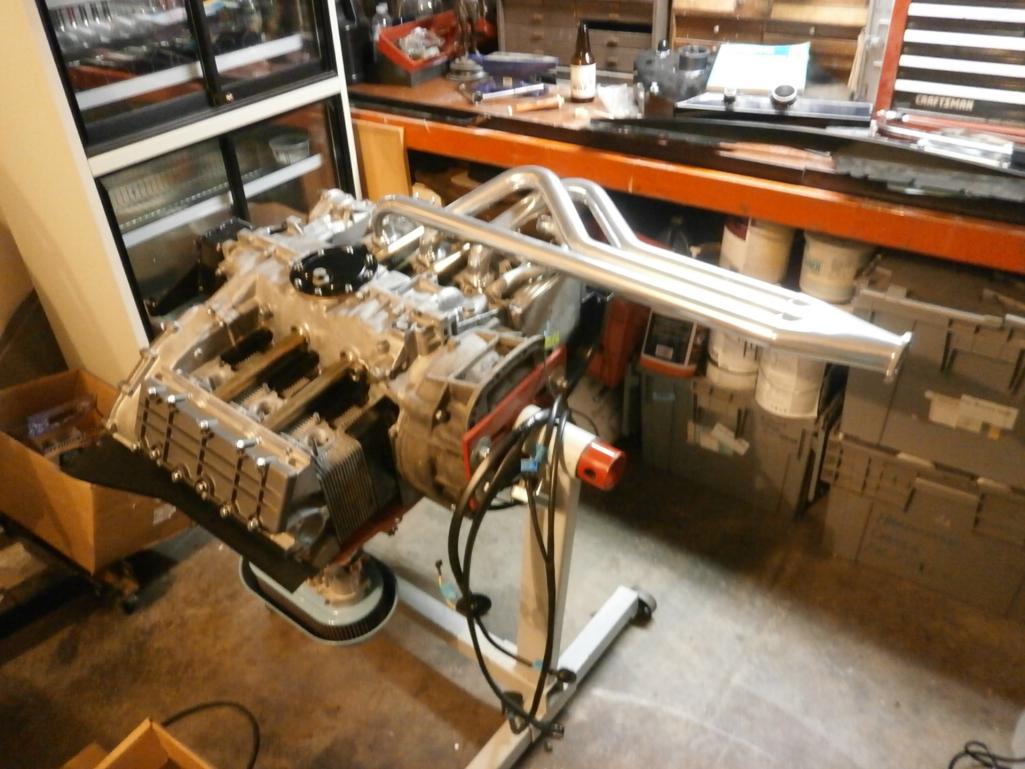
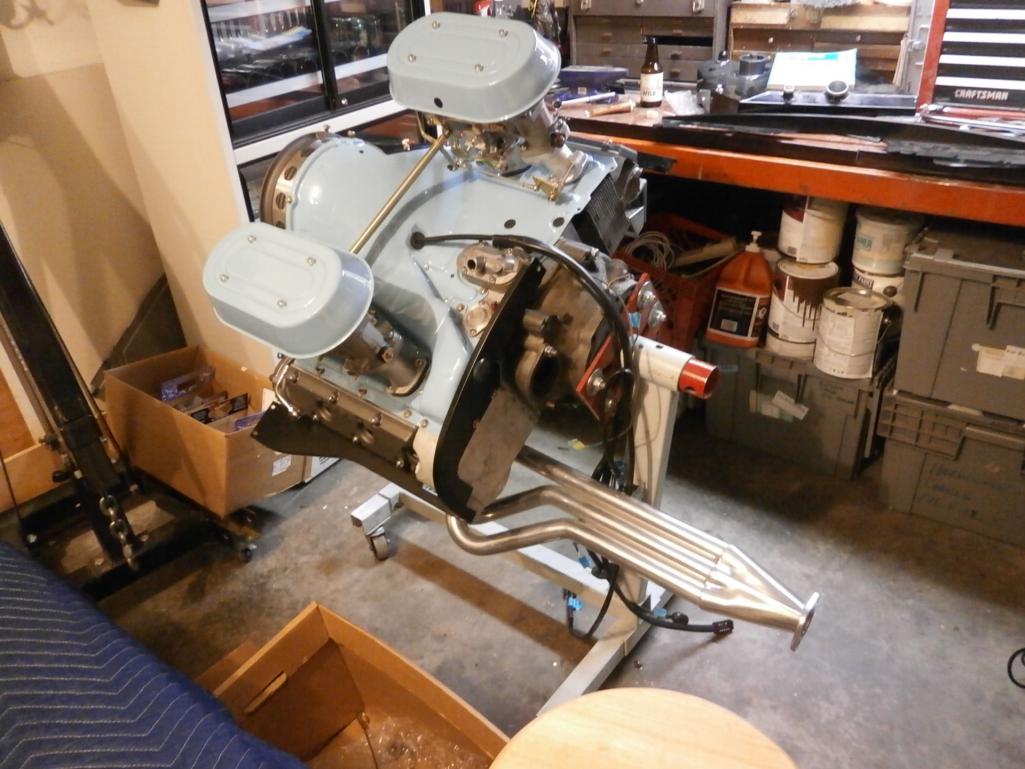
Posted by: PanelBilly Dec 6 2014, 06:10 PM
Here's the bottom view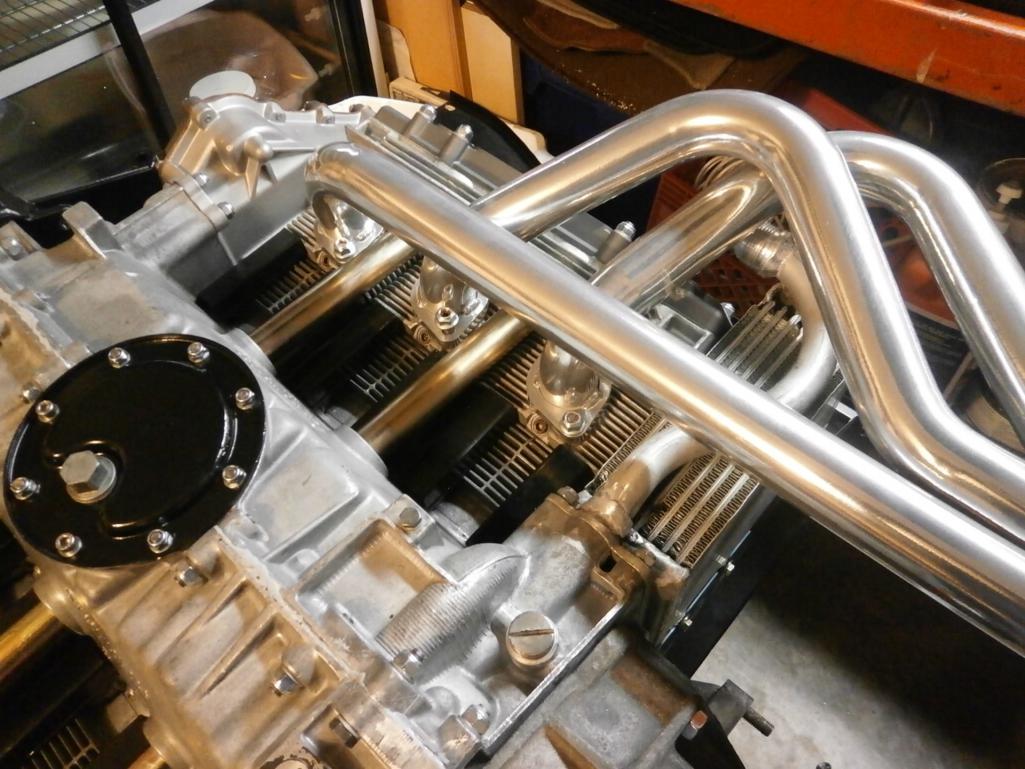
And from the top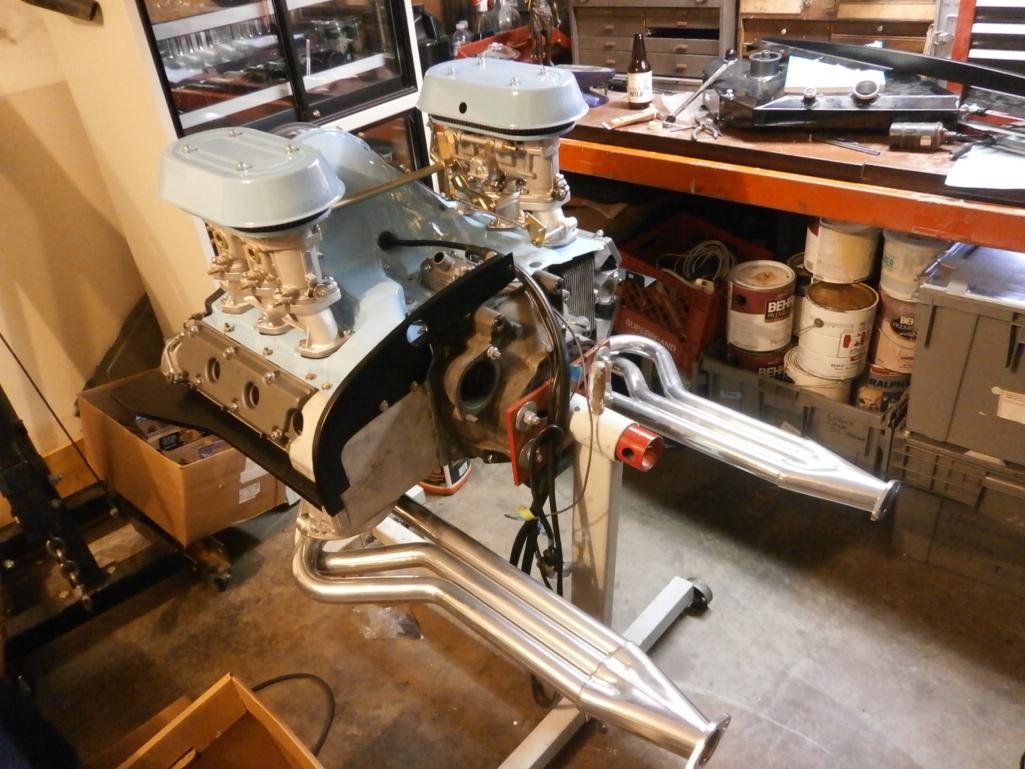
Posted by: PanelBilly Dec 6 2014, 06:28 PM
And then the exhaust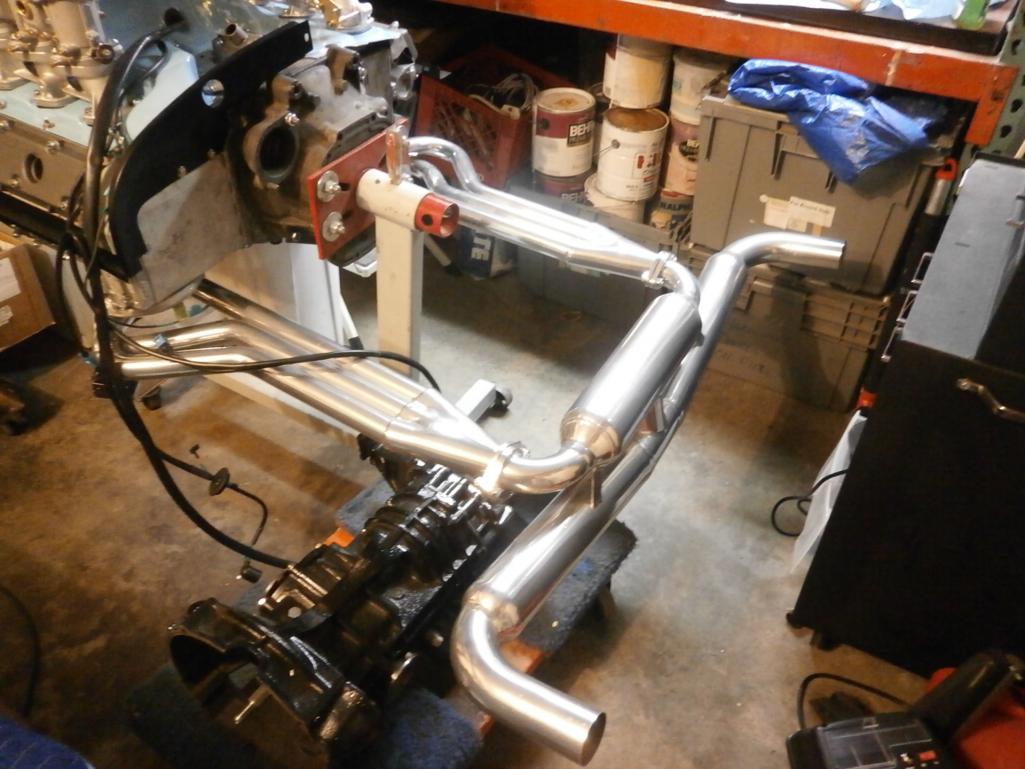
But I assembled it without the gasket. I thought I had one. I'm going to look a little more before I order a set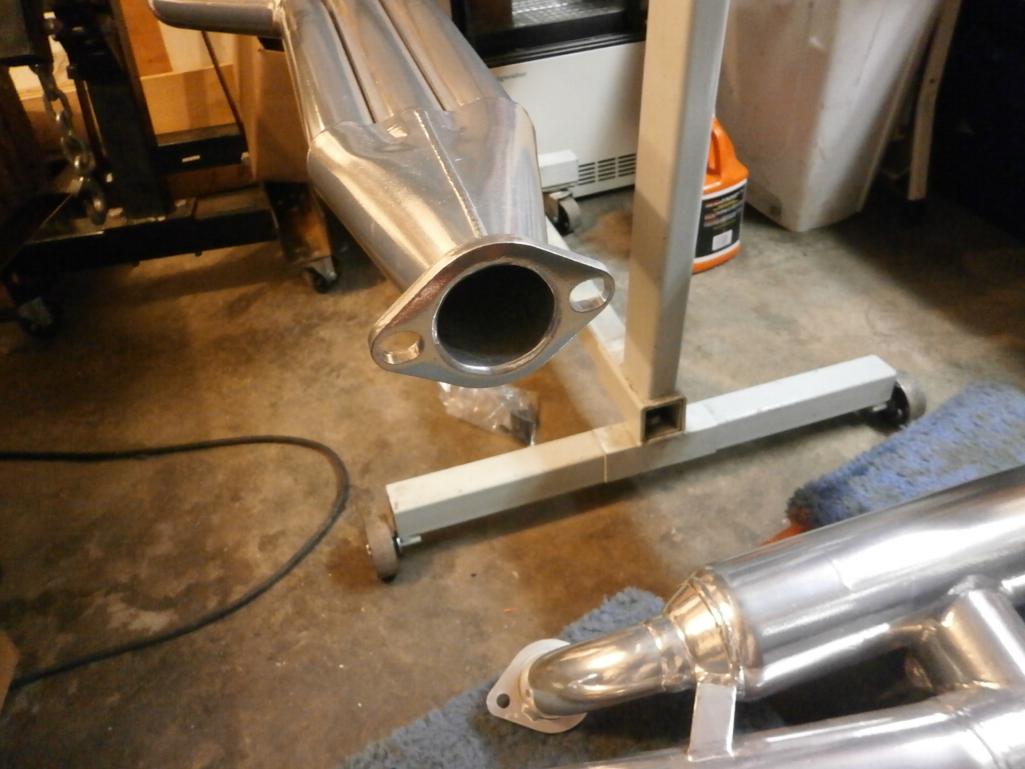
The engine is looking closer to ready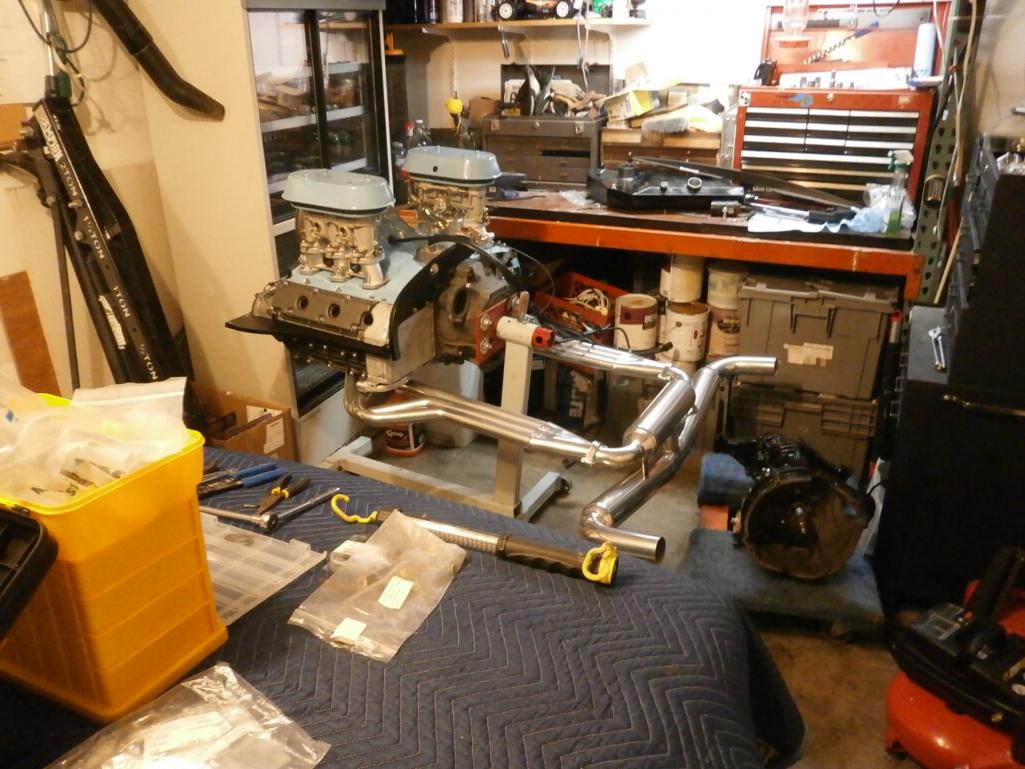
Posted by: bigkensteele Dec 6 2014, 06:31 PM
Looks fantastic! Can't wait to see it in the car.
Just wondering if it might not be easier to put the headers on after the motor is in the car? You will definitely want them loose at the heads when you go to mount the muffler and bracket to the back of the transmission. I learned that the hard way on my 4.
Keep it up - I have been watching this thread for a loooonnnngggg time!
Posted by: Cairo94507 Dec 7 2014, 09:02 AM
Seriously - get that baby in the car already!
Posted by: RobW Dec 7 2014, 09:06 AM
Seriously - get that baby in the car already!
Like you don't have a car on jackstands....

Posted by: PanelBilly Dec 10 2014, 09:36 PM
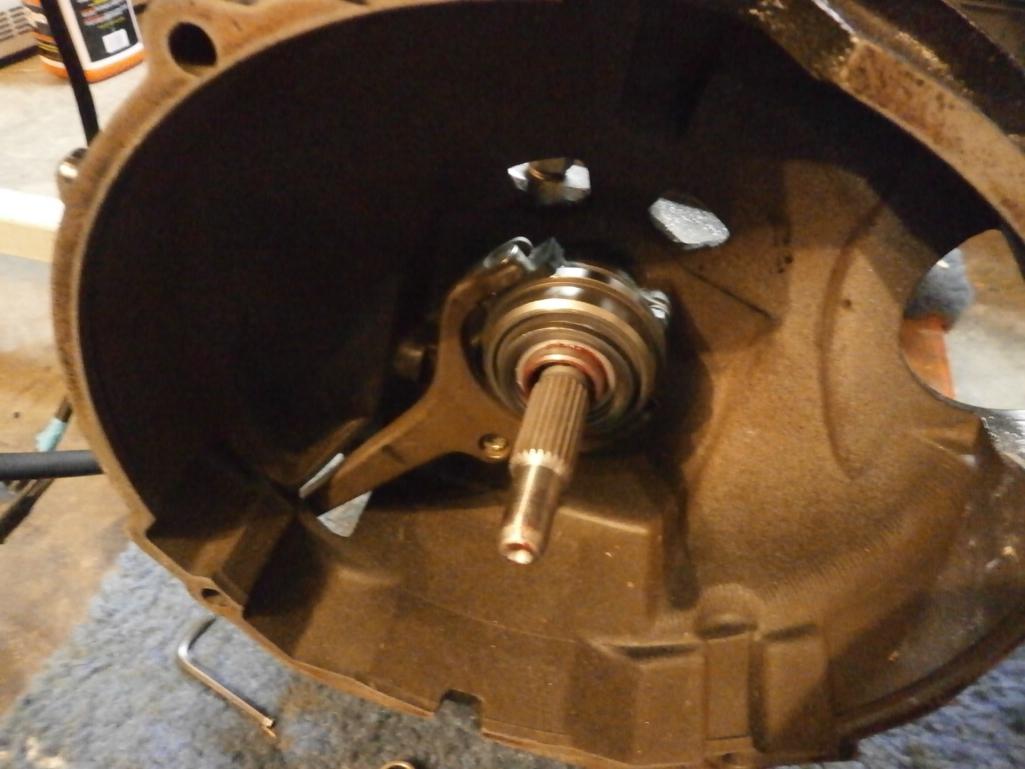
Today the oil pressure sender arrived and I have the throw out bearing finished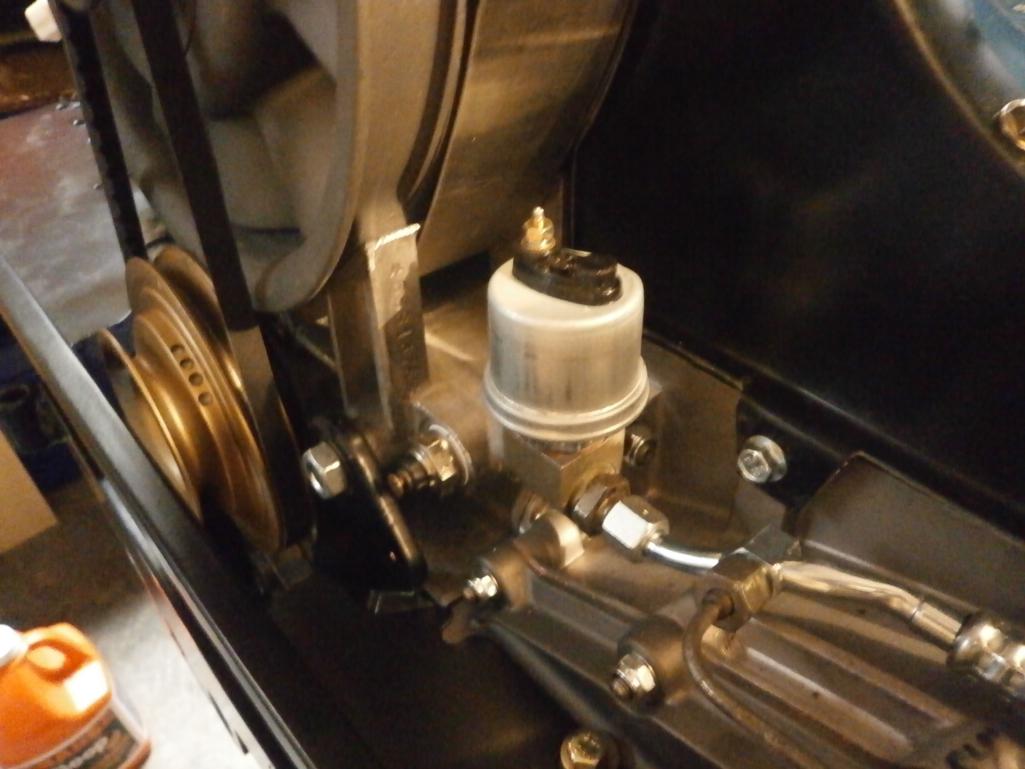
Posted by: PanelBilly Dec 15 2014, 12:11 PM
Broke one of the exhaust studs yesterday while I was torking them up. I should have just replaced all the studs before I started!
Posted by: aircooledtechguy Dec 16 2014, 10:43 AM
Posted by: PanelBilly Dec 27 2014, 10:25 PM
Today I got the timing marks scratched in the flywheel and color coded them.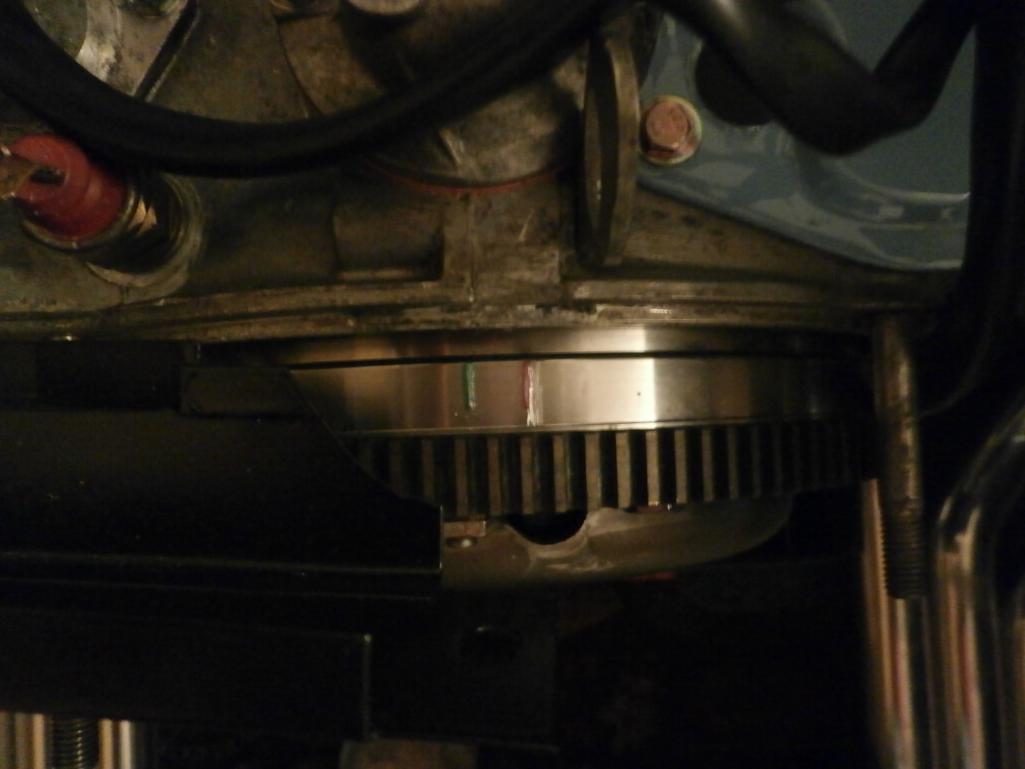
Here's the clutch mounted up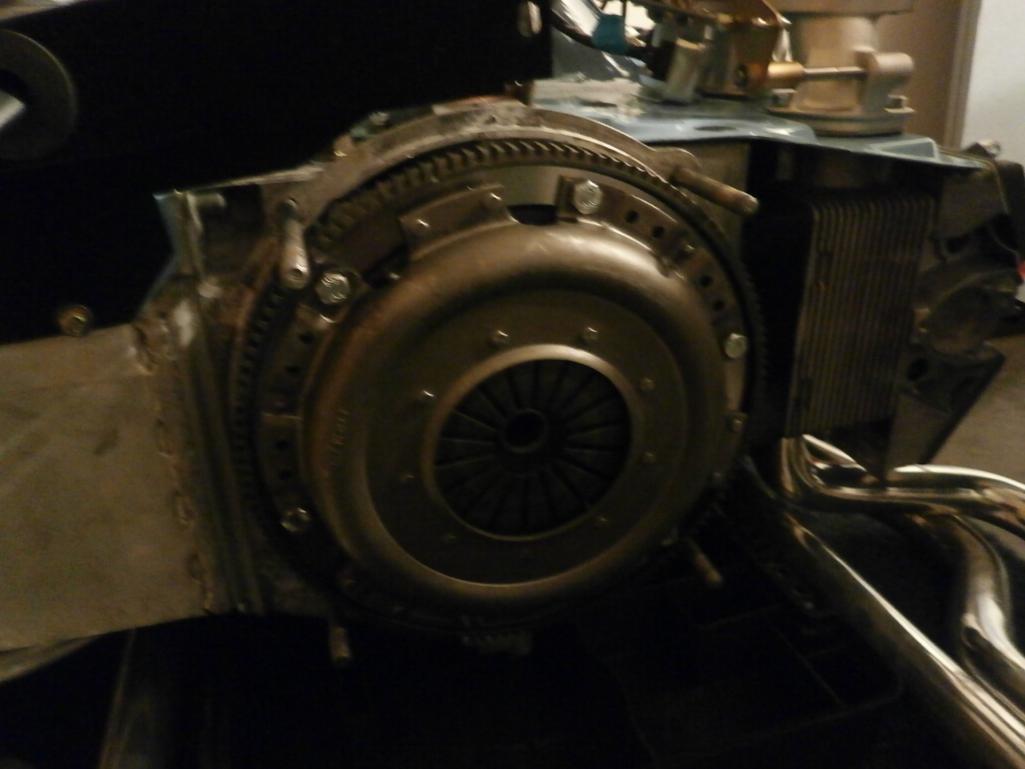
And the transmission mounted up without much fuss. Rebuilt starter needs one more bolt. I'll need to pick one up next week.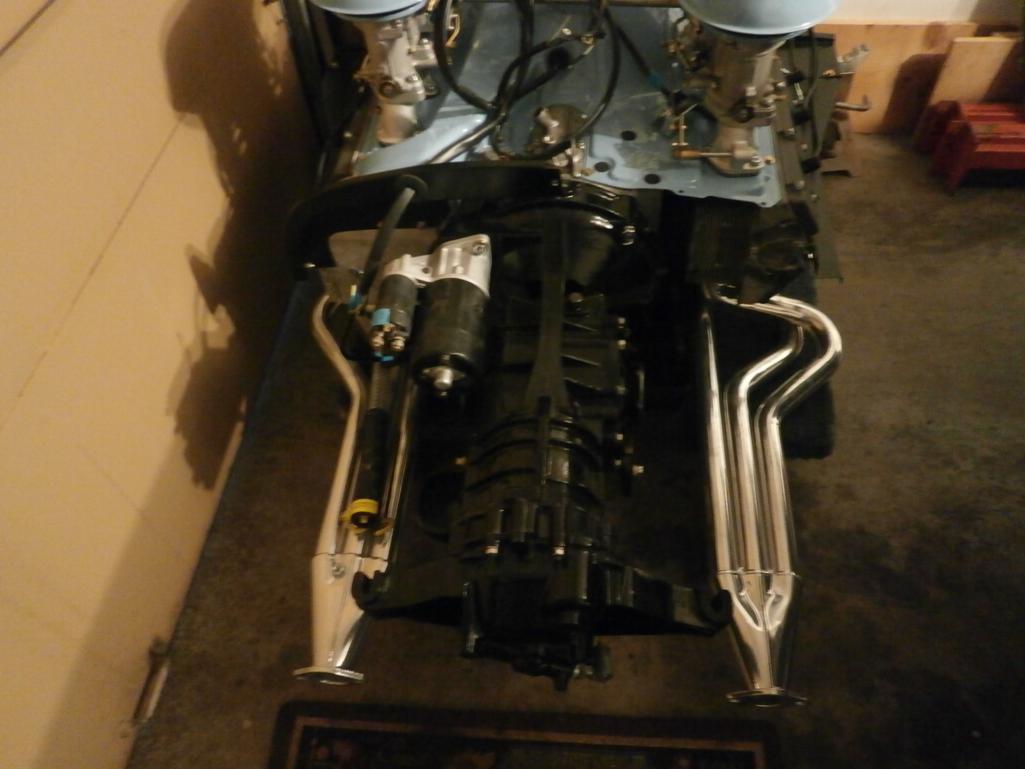
Now I need to find the gaskets for the muffler and get that mounted up.
Posted by: Cairo94507 Dec 27 2014, 10:35 PM
Very nice
Posted by: PanelBilly Dec 30 2014, 08:44 PM
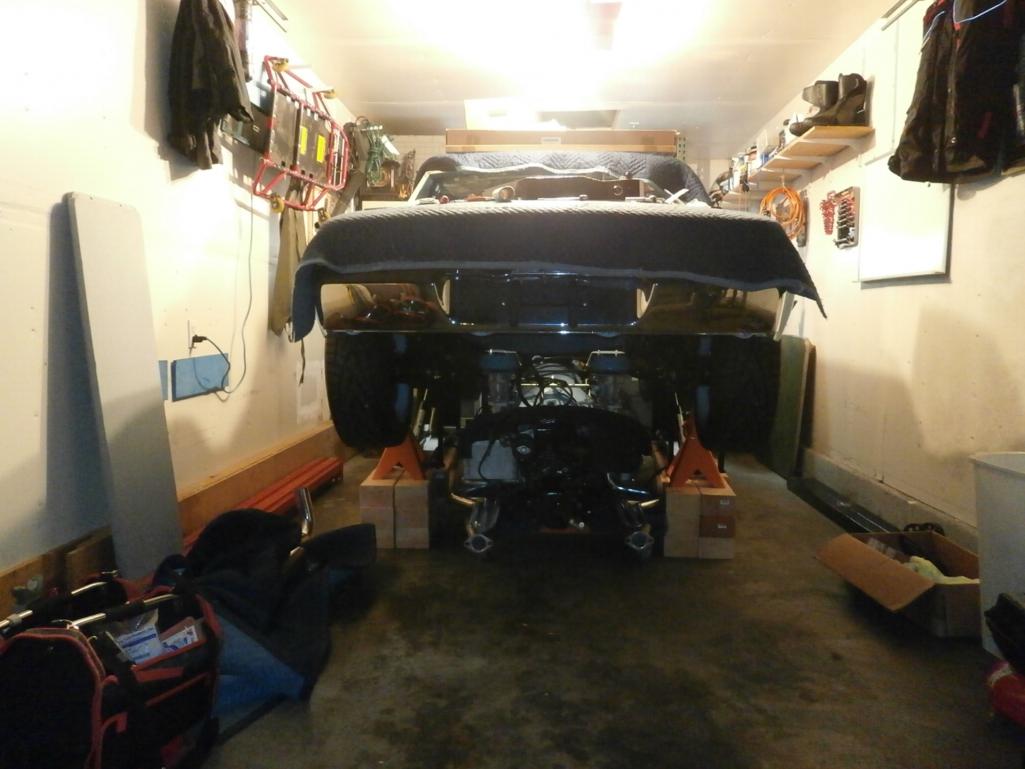
I needed the car high enough so I could slide the engine in, so by combining the new lift with some wood blocks, I got. I just didn't trust the lift, even though it has a built in cross bar to lock it. I stacked up some wood 4x6 blocks and stuck the jack stands on top. Just another level of safety. Not too much work to be done and I'll be dropping it back down to bolt in the engine. 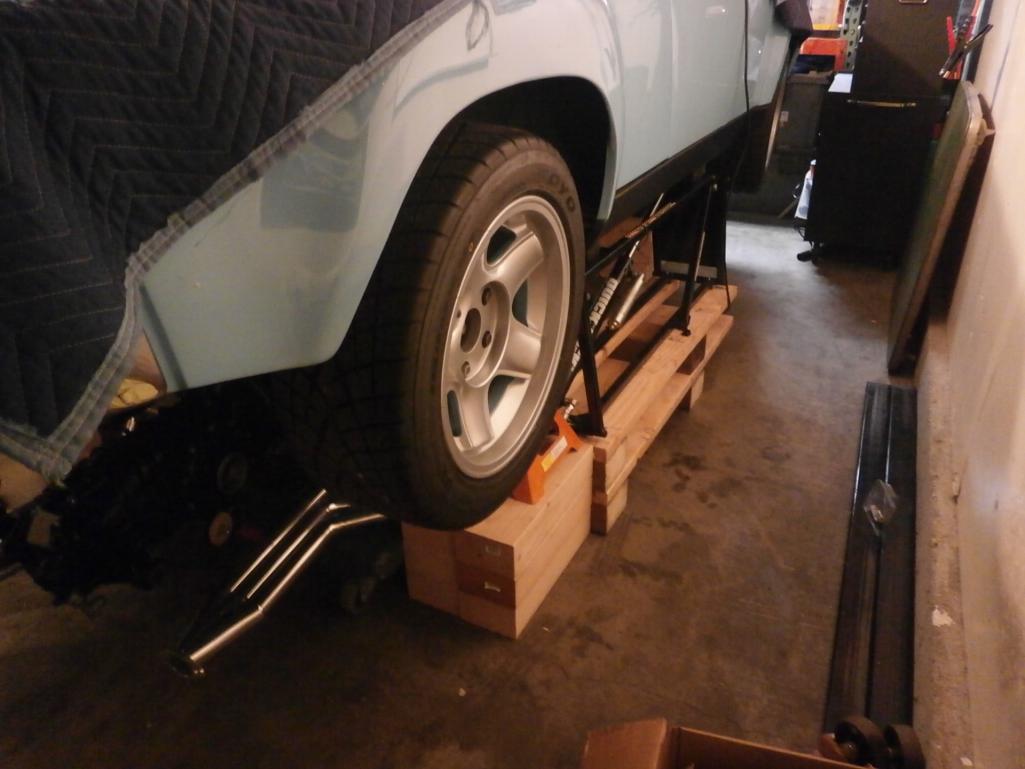
Attached thumbnail(s)
Posted by: Mblizzard Dec 30 2014, 08:55 PM
While the 6 x6 blocks rarely fail, I always use something to tie them together like a crank strap or pipe strap with a wood screw into each block.
Posted by: Evil Older Brother Dec 30 2014, 09:16 PM
I needed the car high enough so I could slide the engine in, so by combining the new lift with some wood blocks, I got. I just didn't trust the lift, even though it has a built in cross bar to lock it. I stacked up some wood 4x6 blocks and stuck the jack stands on top. Just another level of safety. Not too much work to be done and I'll be dropping it back down to bolt in the engine.
Remember your evil older BROTHER in your will.
At least be careful as we really like Julie.
Posted by: PanelBilly Jan 4 2015, 01:15 PM
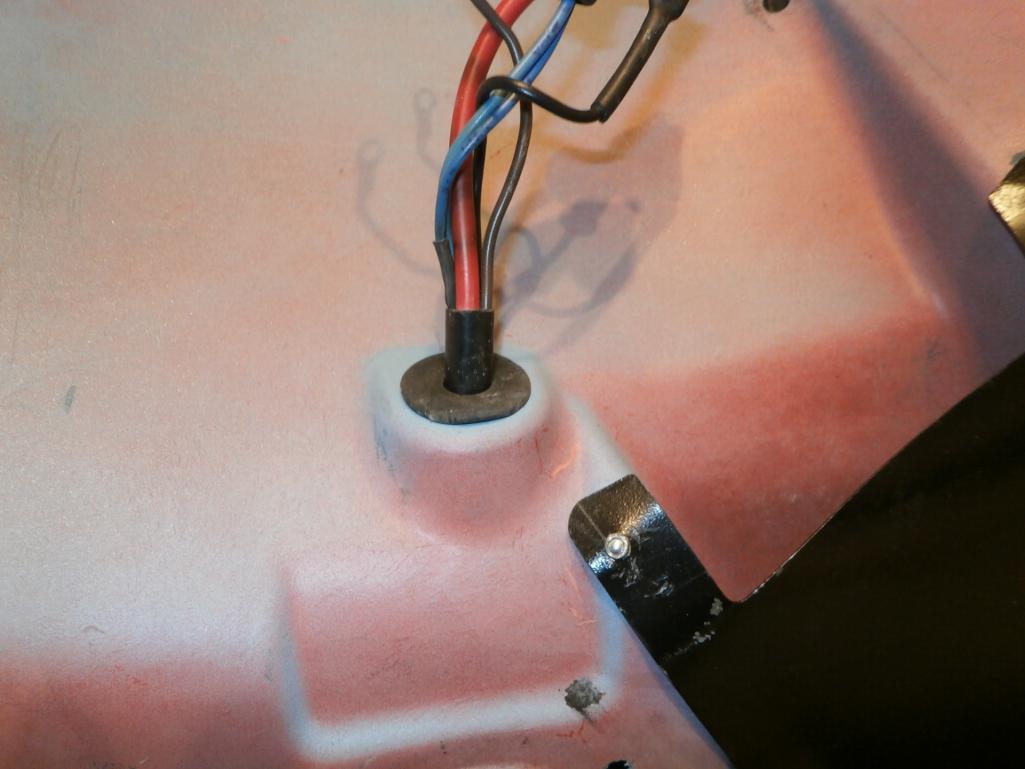
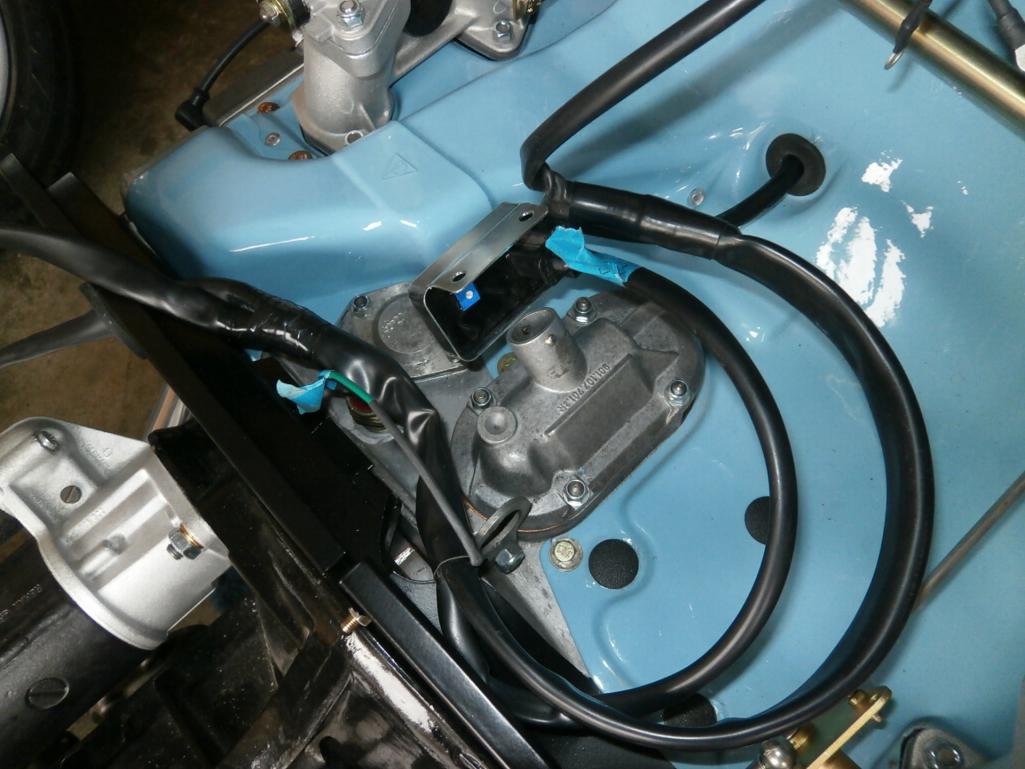
Working on details before the engine is in the way. I have the 14 pin connector back together and secured the brakelines so they didn't rub on the firewall.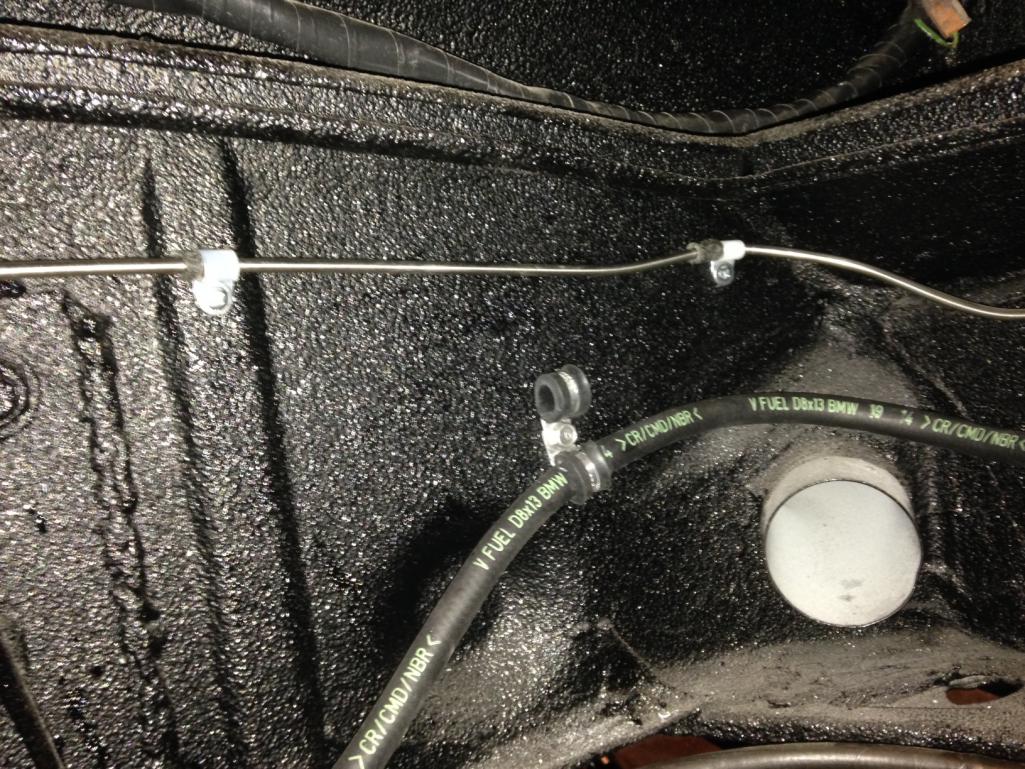
I also ran the fuel lines up to the regulator and fastened them so they were out of the way. I drilled out the original holes for the lines so some larger grommets would fit. I need to find a clean way to block off the intake for the heater ducting that runs in the longs.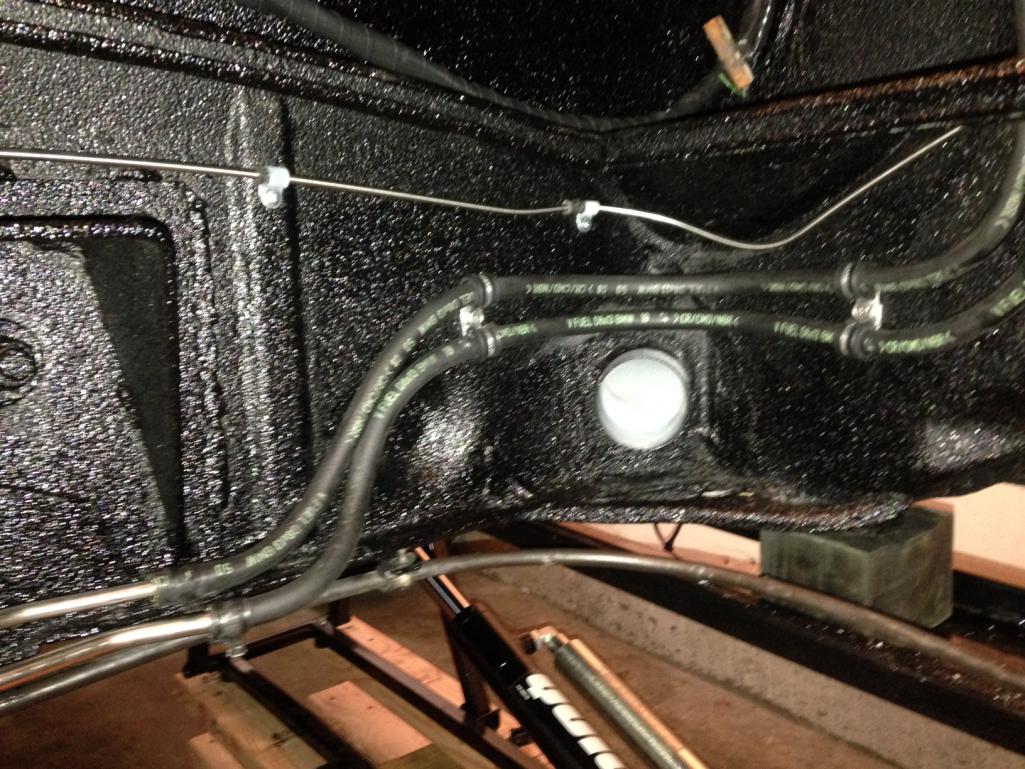
Posted by: rhodyguy Jan 4 2015, 01:27 PM
Billy, go to mcclendons and pick up a set of rubber pipe caps and ss screw clamps for the tubes. Next time run the center pieces of 6x at 90*. Less apt too tip over. What purpose does the piece of tubing, between the headers and case in post #182, serve?
Posted by: Mr.242 Jan 5 2015, 09:40 AM
. What purpose does the piece of tubing, between the headers and case in post #182, serve?
Oil line that connects to the side tank.
Posted by: rhodyguy Jan 5 2015, 10:59 AM
supply or return?
Posted by: PanelBilly Jan 11 2015, 04:56 PM
I did find some rubber caps at McLendons and they worked perfect.
I need to clean off some of the dust!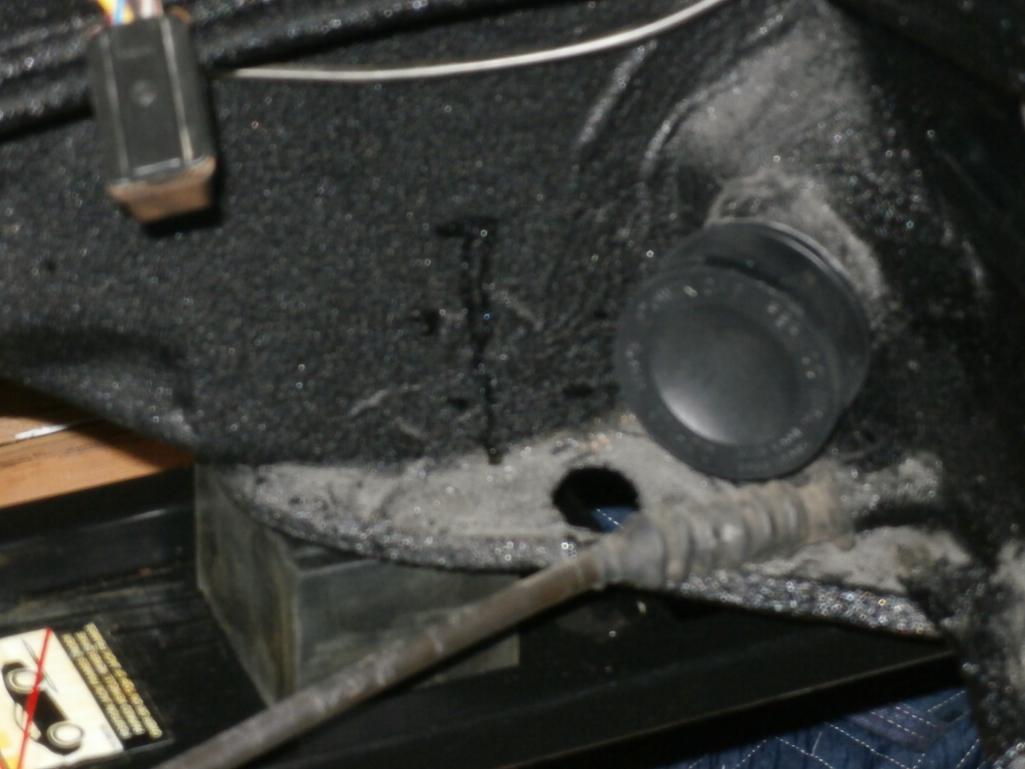
I got the last of the engine tin mounted up and the throttle cable is done. I need to get the wiring organized and figure out where to mount the regulator.
I posted over at the bird site for suggestions on how to organize the harness. Figured lots of folks over there have done this. Any suggestions?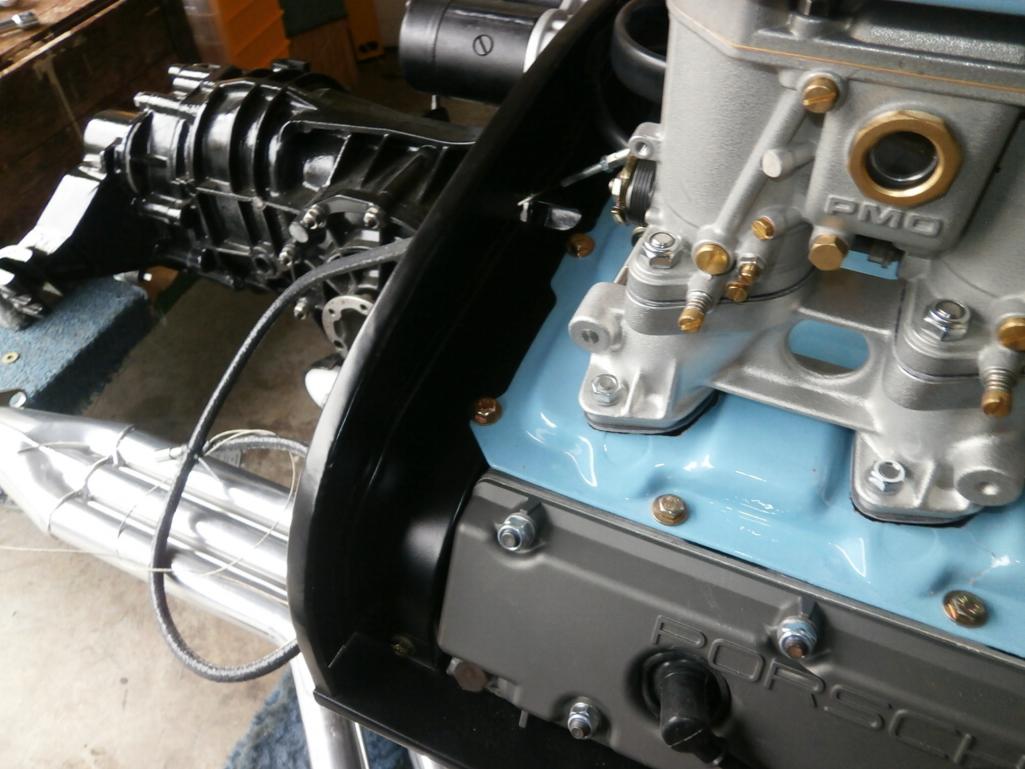
Posted by: PanelBilly Feb 15 2015, 01:51 PM
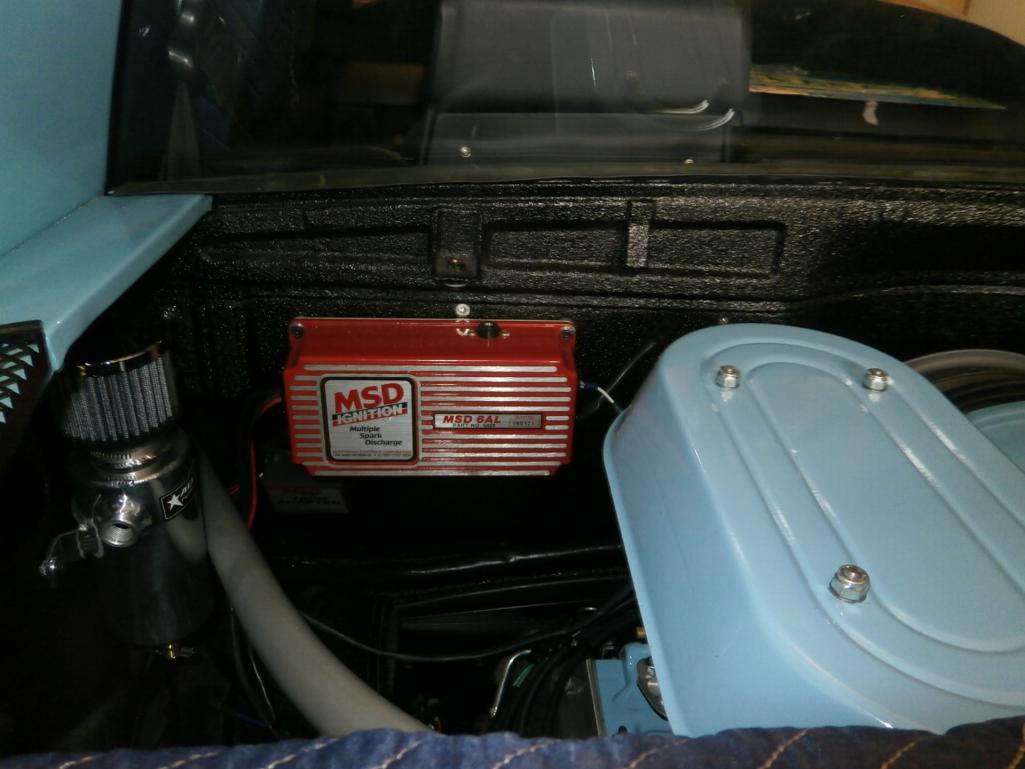
Mounted the MSD with nutserts or rivnuts (whatever you want to call them), so it could be removed and reinstalled easier. Pain in the ass making the single rubber
mount where the firewall angled back.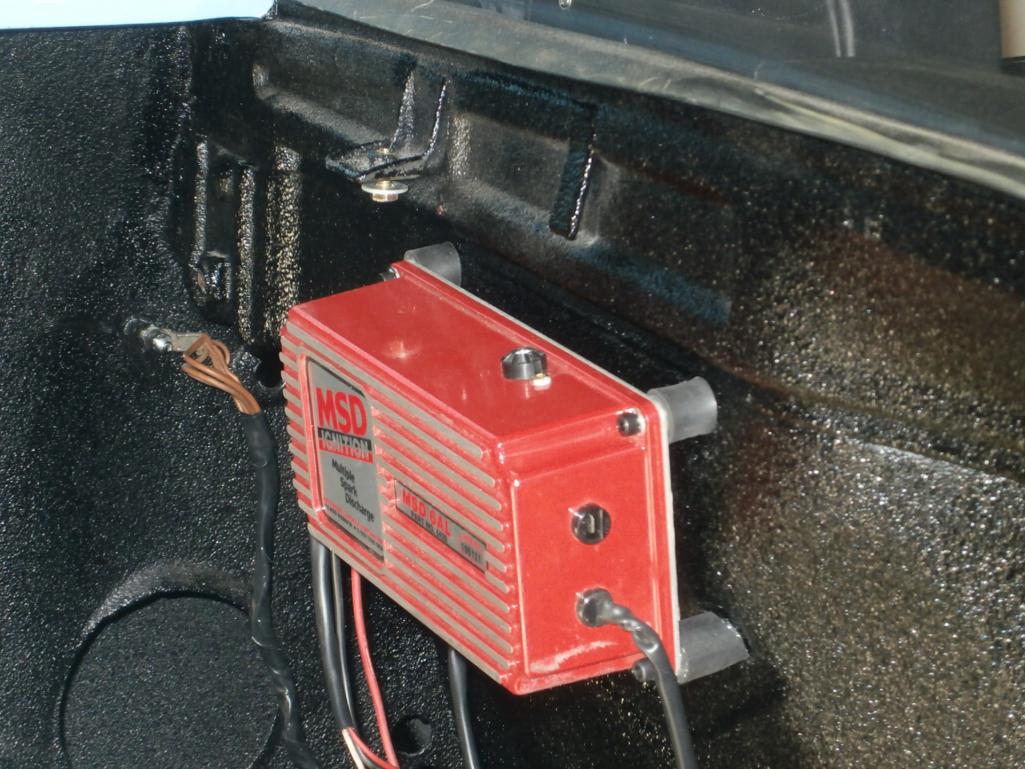
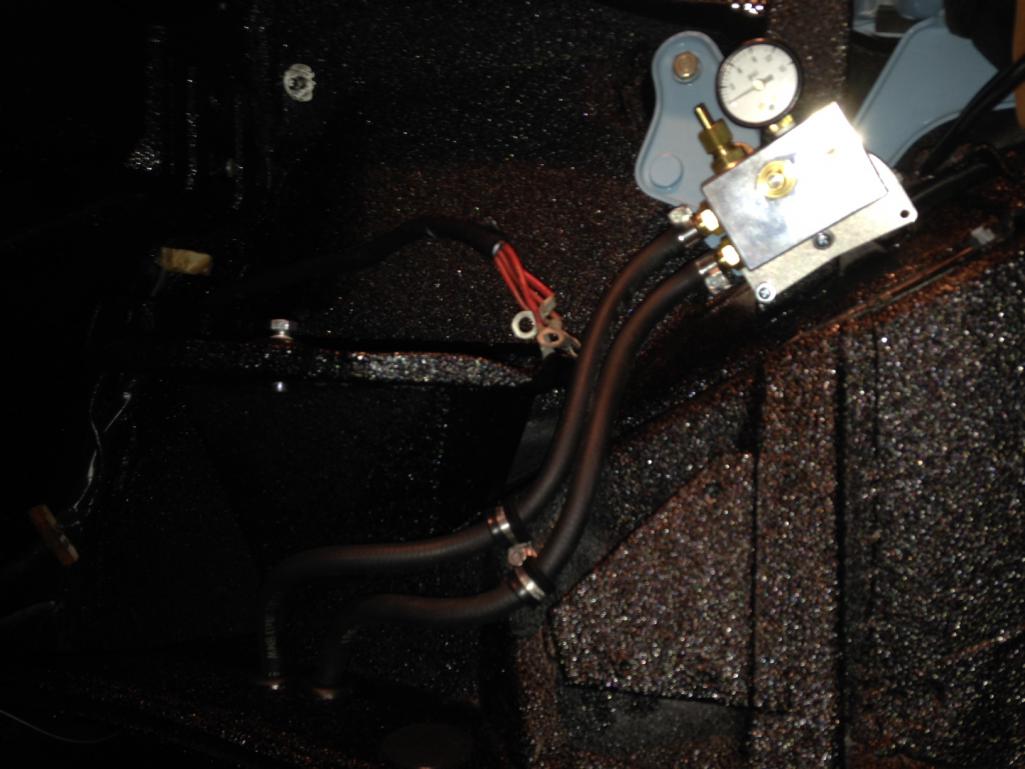
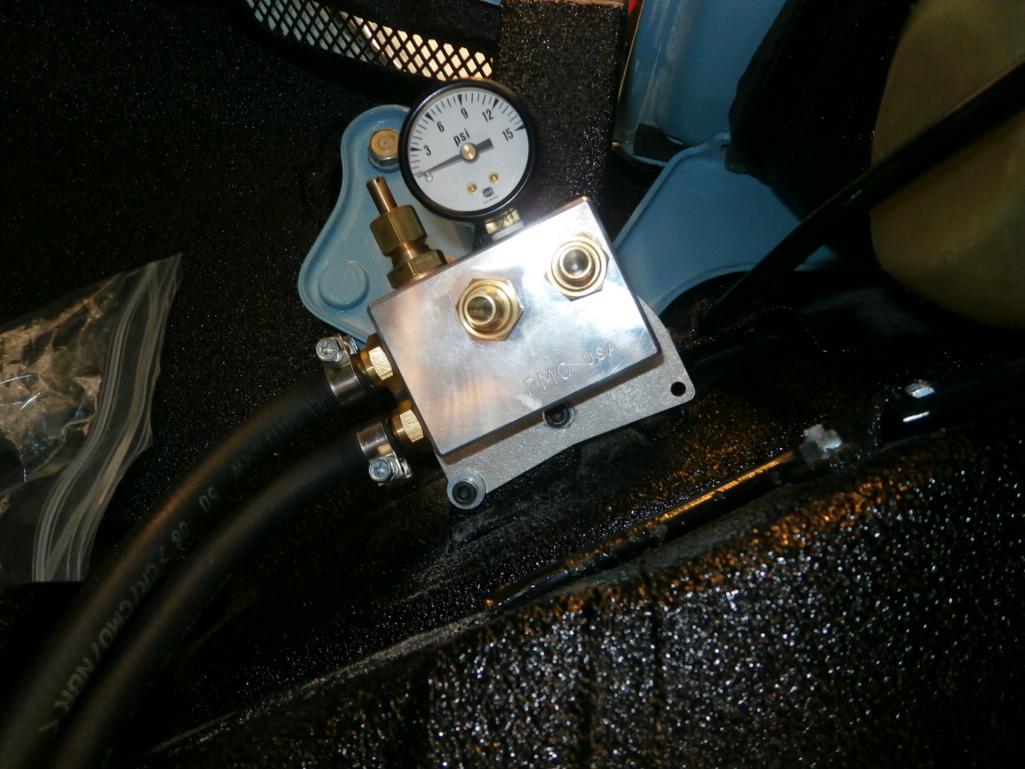
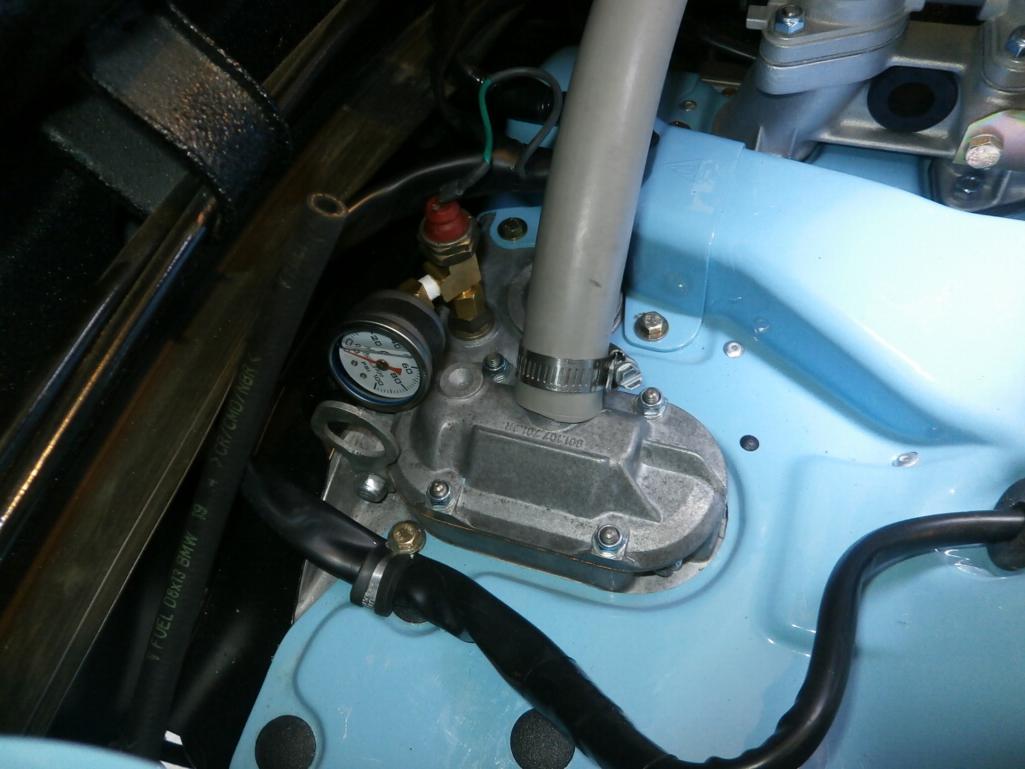
While I was mounting nutserts, I redid the fuel pressure regulator replacing the metal screws with bolts
Should have cleaned off the dust before I shot the photo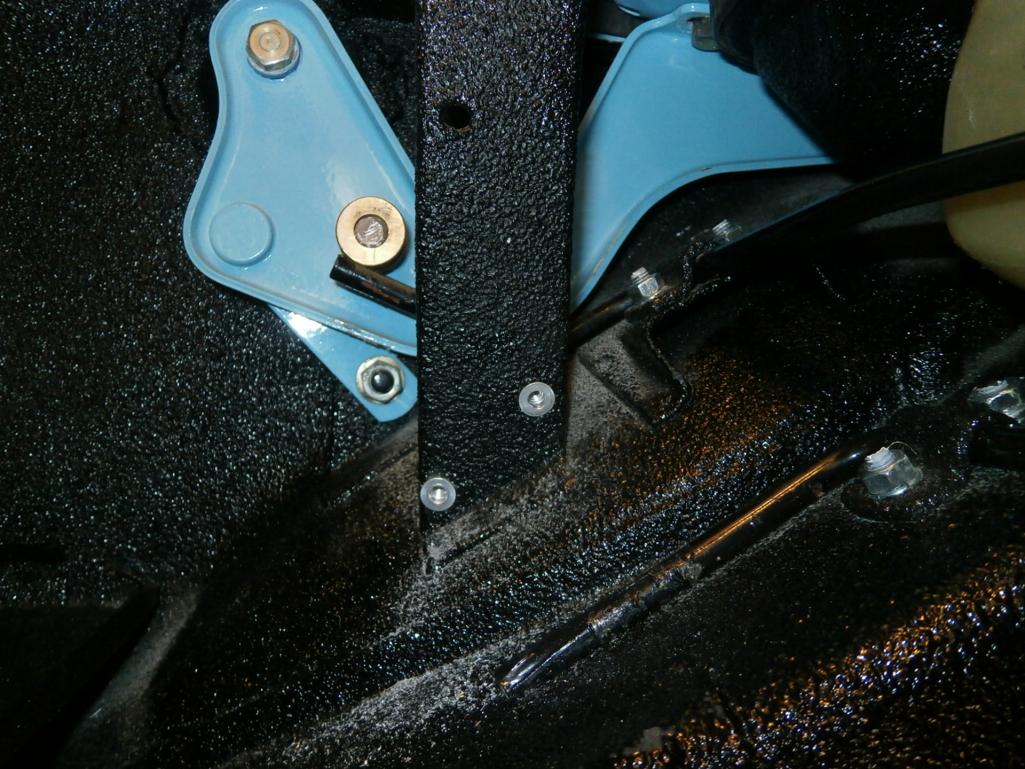
Posted by: Tom Feb 15 2015, 04:03 PM
Billy,
Finished with the wiring diagram except for a few final issues. To get the oil pressure gage wiring to the console, I am using #9 on the car harness that ran to the heater lever. That wire is green/white and will have to be extended about a couple of feet to reach the console. I have the soldering type connectors and heat shrink to make a great splice, just need a length of green/white wire, 14 gage and about 10 feet long. I will need to add a connector to the engine harness at position #9 with about 6 to 8 feet of the green/white also. Would you have this wire already or can you get it? Also the coil wiring from the MSD to the coil is black( I have some) and orange ( don't have). Same thing here, about 8 to 10 feet of orange ga.12 (14 ga. will do also). If you can get those let me know and I won't search for them.
Here is a picture of what I have. View it and let me know if you see something I have missed or done incorrectly.
Tom
Attached thumbnail(s)
Posted by: 914GTSTI Feb 15 2015, 04:14 PM
Very nice build !
Randy
Posted by: PanelBilly Feb 15 2015, 06:32 PM
Here's the new main fuse block that Tom makes. I'm not sure if the wiring is configured the way he likes it yet, but its easy to unbolt the bar and move them around.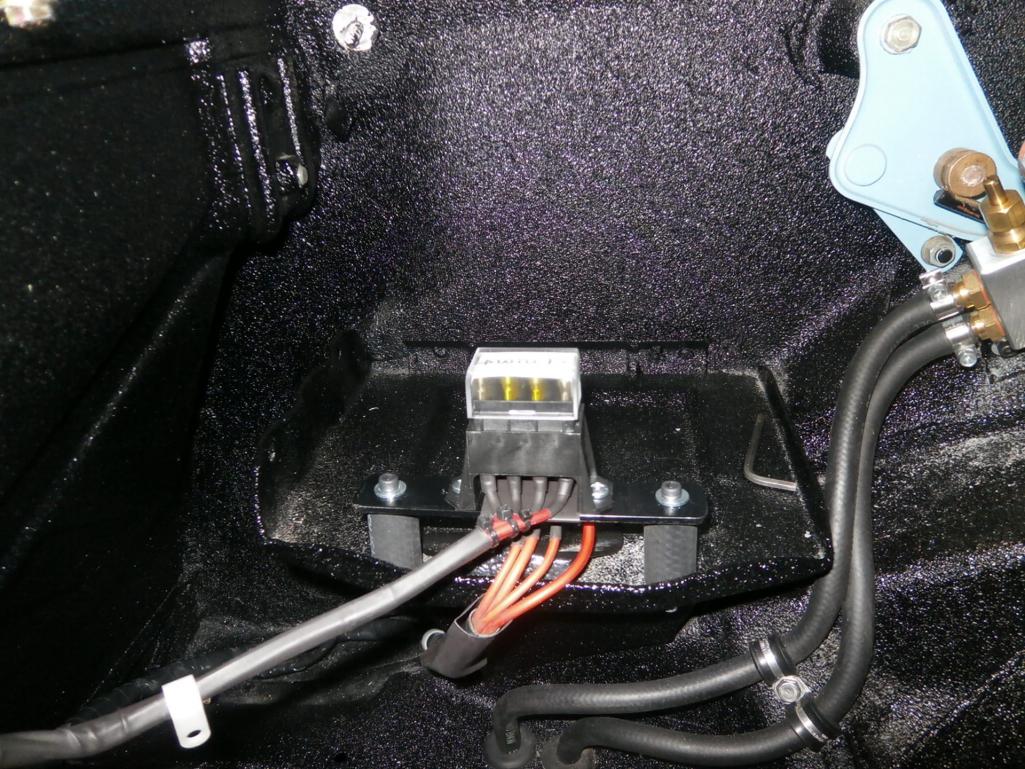
Posted by: napasteve Feb 15 2015, 06:59 PM
Panelbilly,
First, your build is simply incredible and following this thread has been a treat.
Maybe I missed it in some earlier post but can you tell us about the origin/displacement of the engine?
Posted by: PanelBilly Feb 15 2015, 08:50 PM
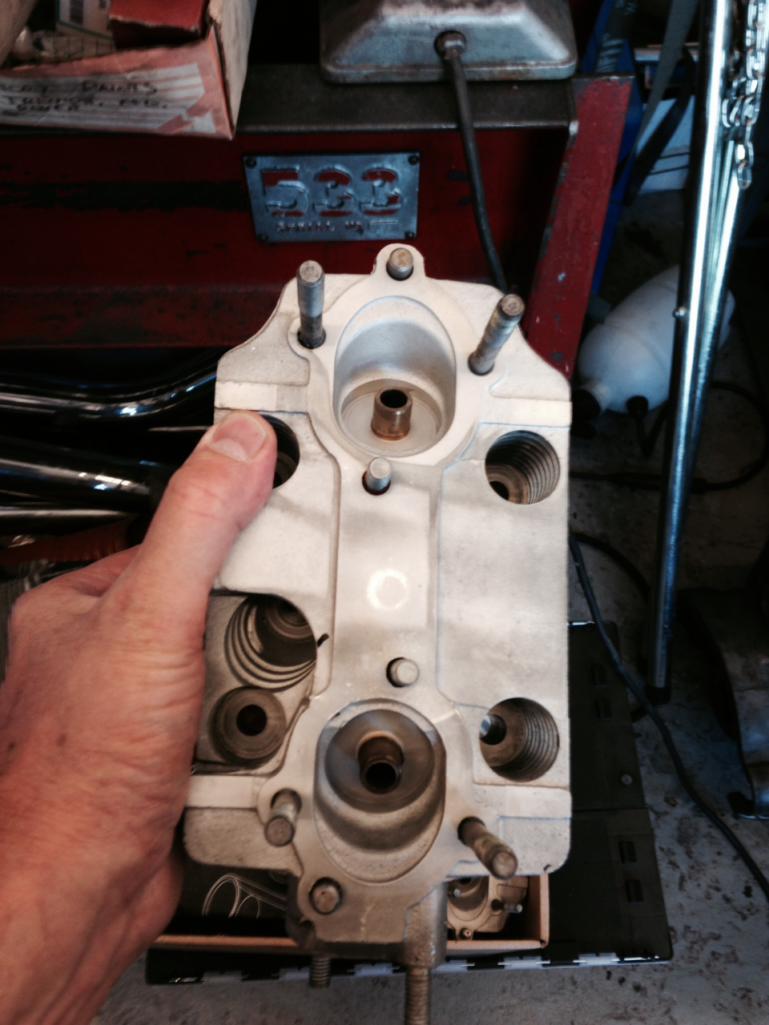
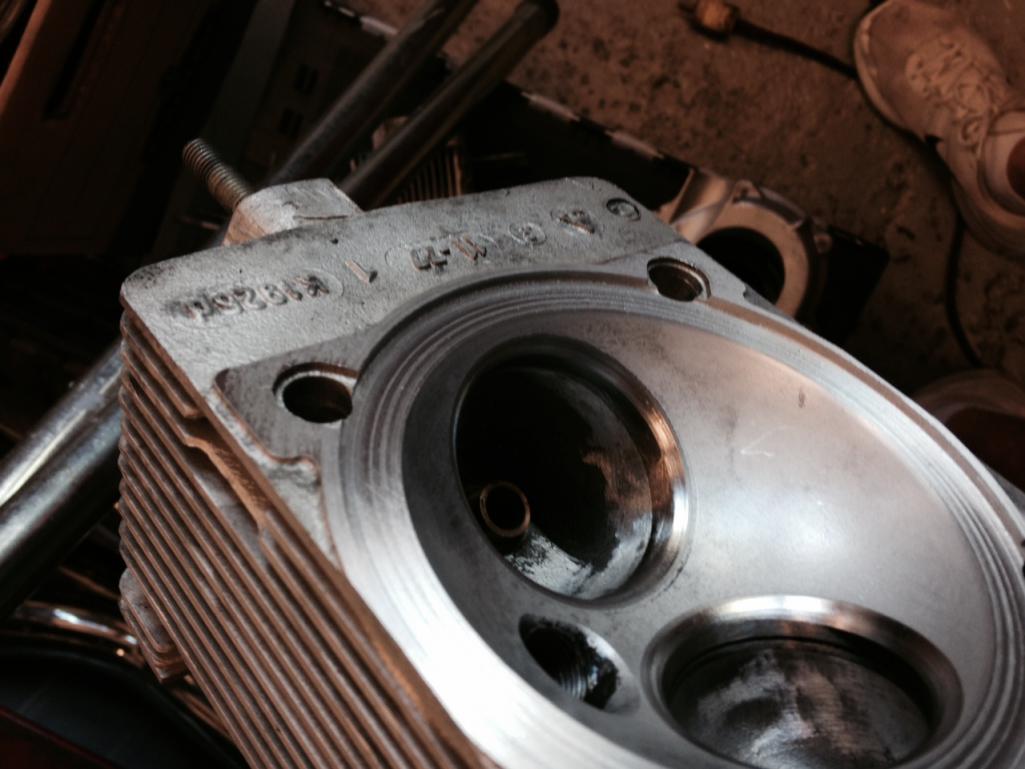
The engine is a 3.0 out of a '79 SC. I picked it up from a shop that had agreed to sell it for a customer who was having a 3.2 or 3.6 put in for them. It was a running engine, but I never started it. Somewhere on this site is some documentation of me taking the engine apart
Posted by: PanelBilly Feb 24 2015, 07:02 PM
I installed some more nutserts in the back of the engine bay to bolt in the voltage regulator.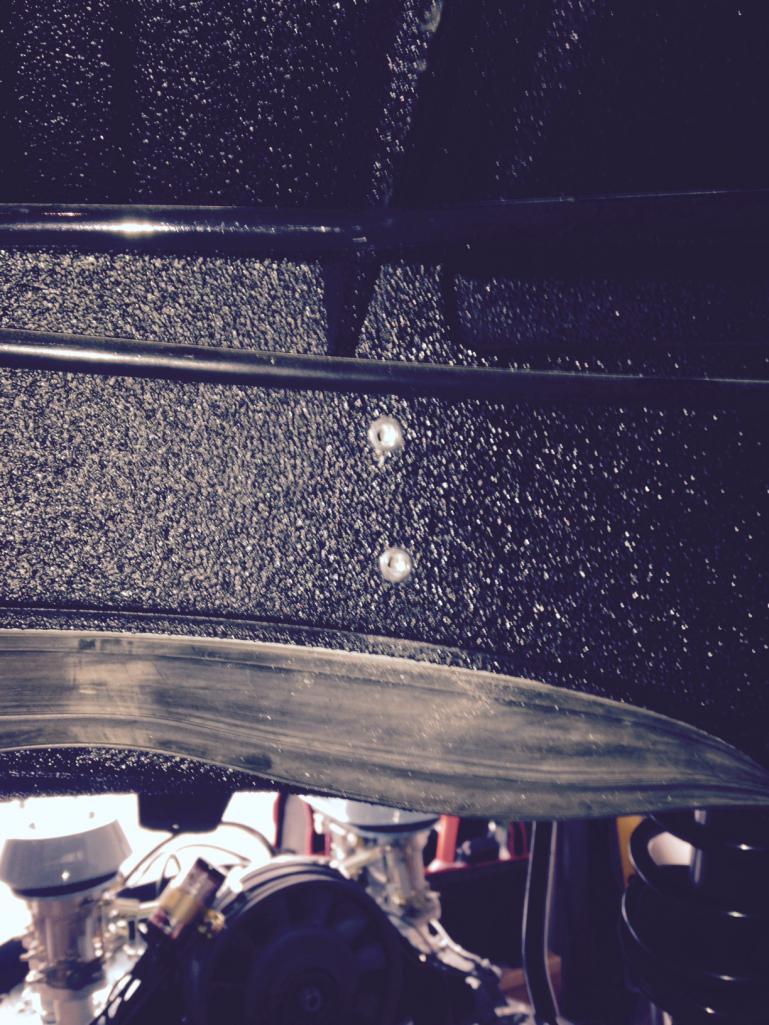
Posted by: Maltese Falcon Feb 24 2015, 07:36 PM
Nice build ...I like it
Posted by: PanelBilly Mar 15 2015, 11:52 AM
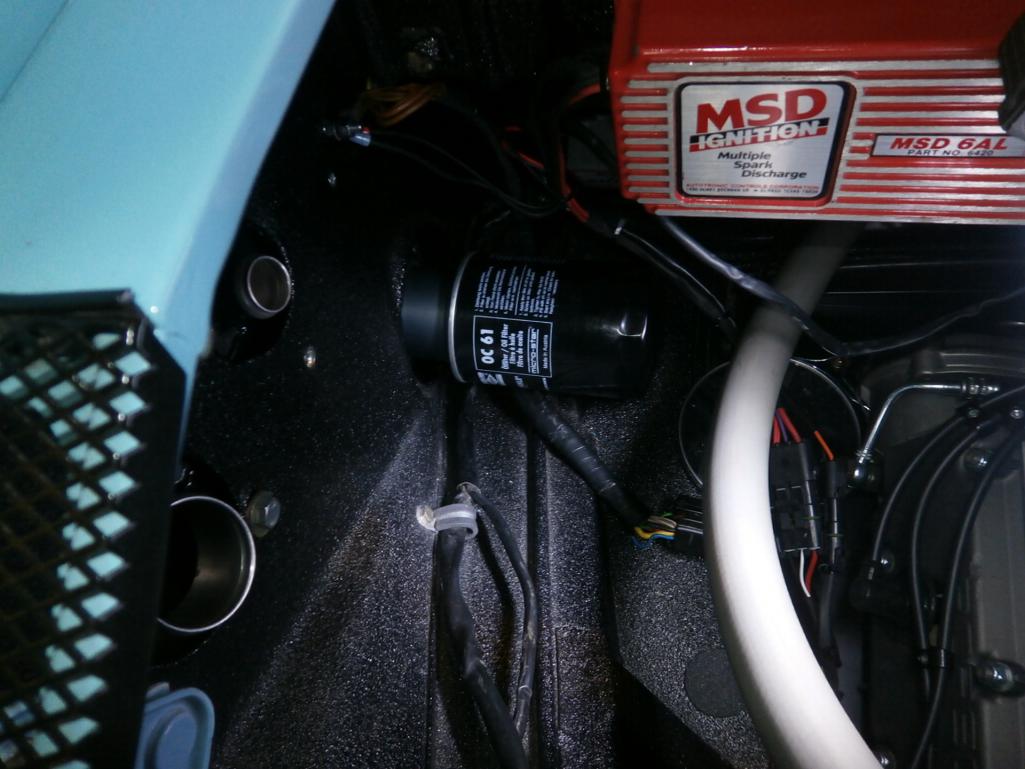
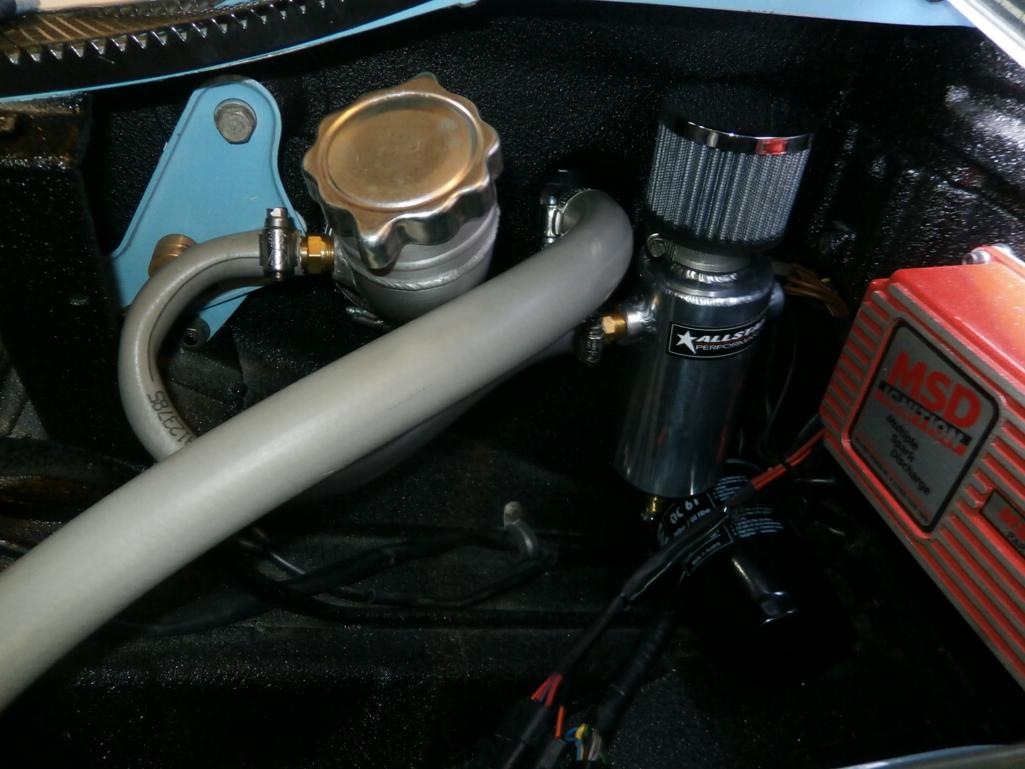
I mounted the oil catcher to the engine bay. 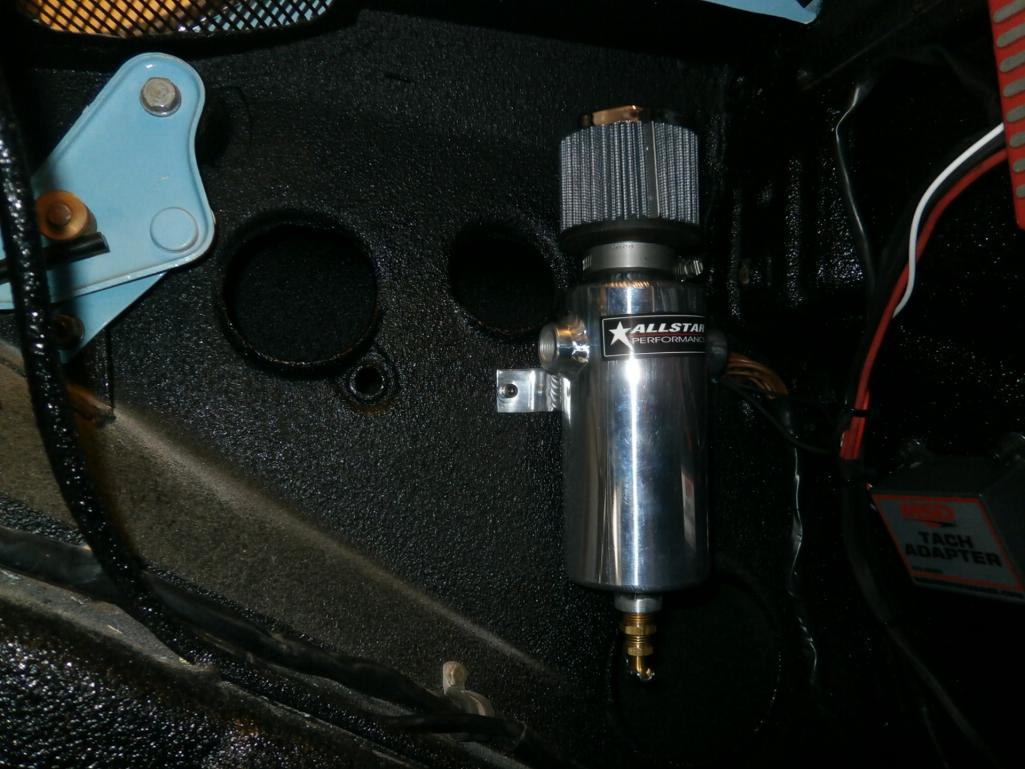
Posted by: PanelBilly Apr 16 2015, 09:39 PM
I had the vent tube cut off and a bung welded on the filler neck so the hose would fit to both it and the oil breather. Axles should be shipped tomorrow! 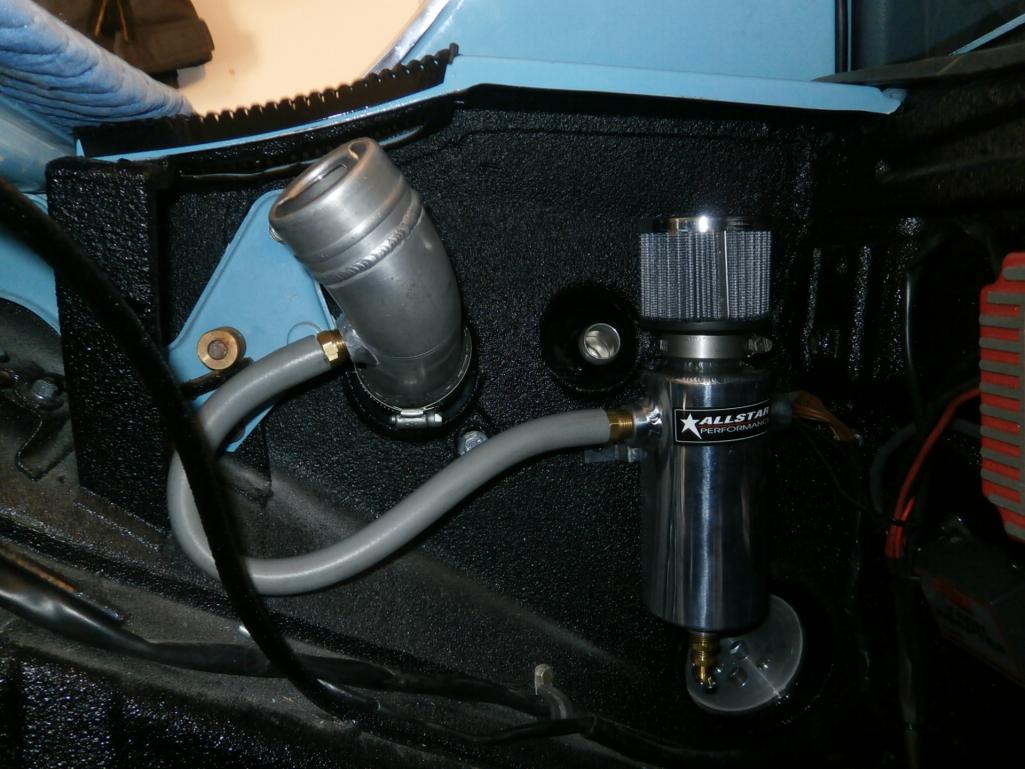
Posted by: Cairo94507 Apr 17 2015, 07:41 AM
Looking forward to seeing this car running.
Posted by: PanelBilly Apr 25 2015, 05:36 PM
Today my brother Al and Jurgen (did I spell your name right) came over to give me a hand
Here's the engine ready to go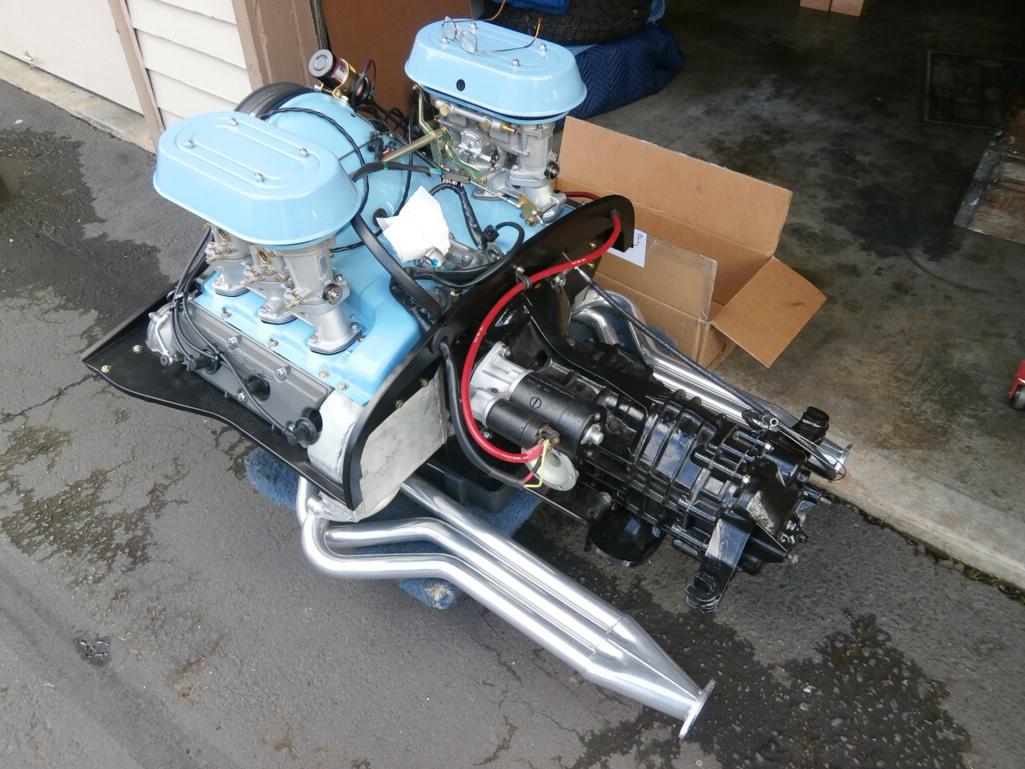
The axles were put on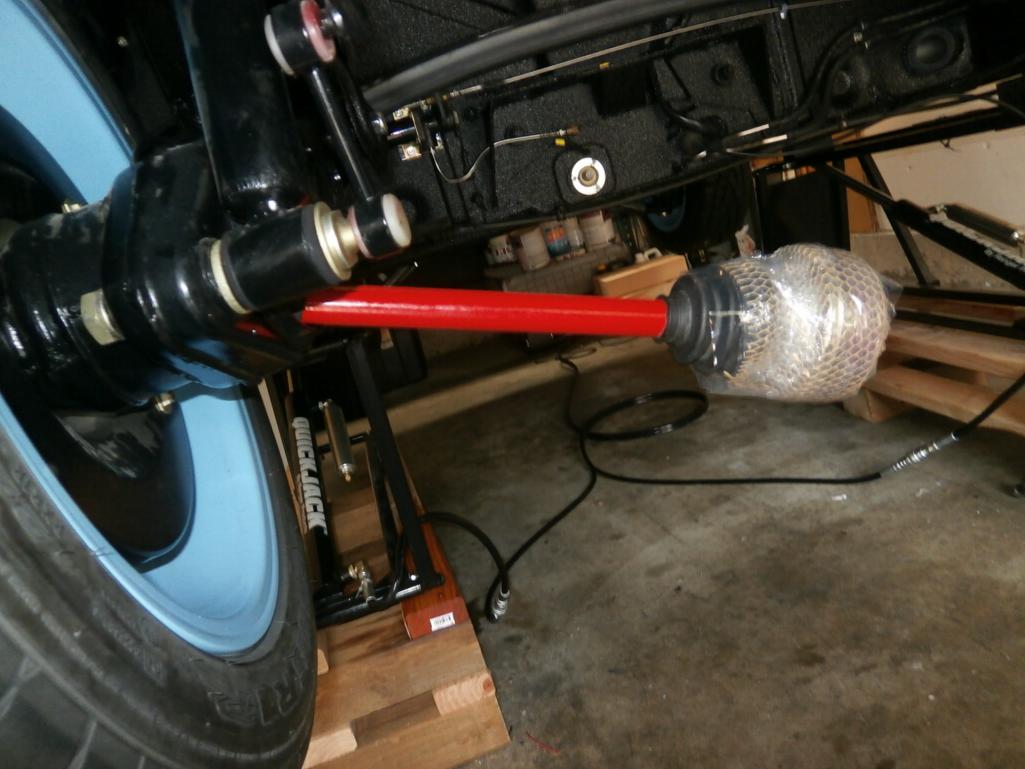
The engine was slid into place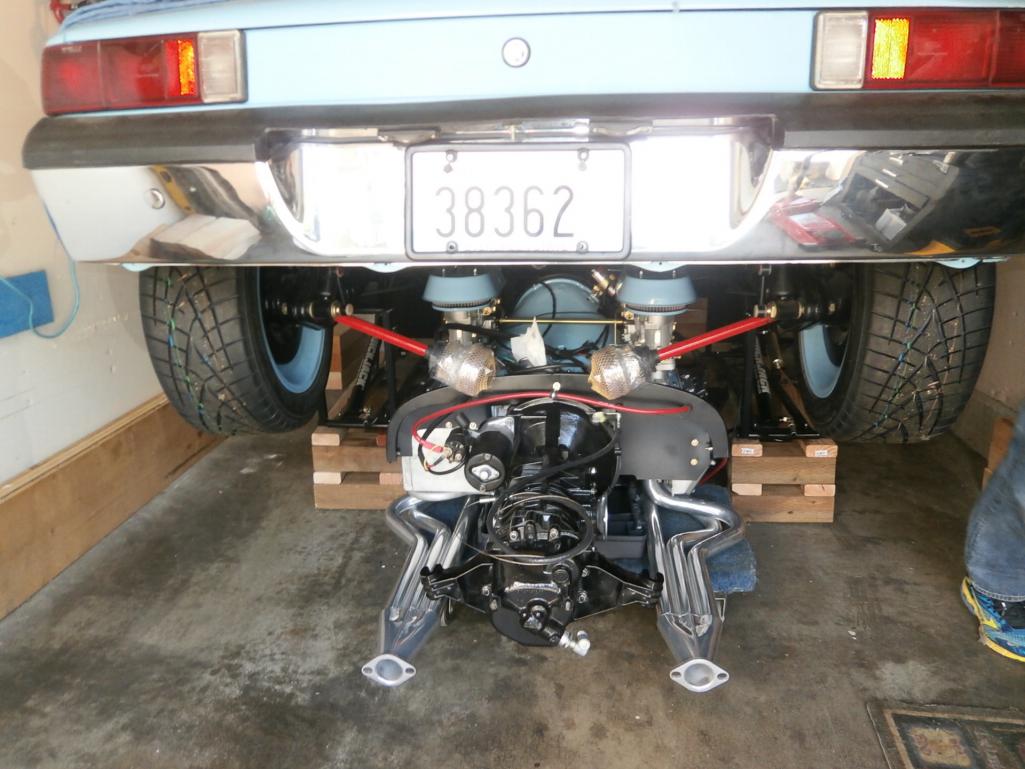
Posted by: PanelBilly Apr 25 2015, 05:38 PM
Then with much coordination it slipped into place
Posted by: PanelBilly Apr 25 2015, 05:42 PM
A few issues:
I need to get the plates that are on top of the transmission mounts and the big washer that goes on the bottom. Can't find them in my pile of parts.
I went to connect the axles to the transmission flange and realized the wheels would turn. It was the bolts! They're too long. Here's a photo of them on the transmission side. Looks to me like the wrong size got put with my order. I hope I didn't mess anything up when I tighten them to the wheel hubs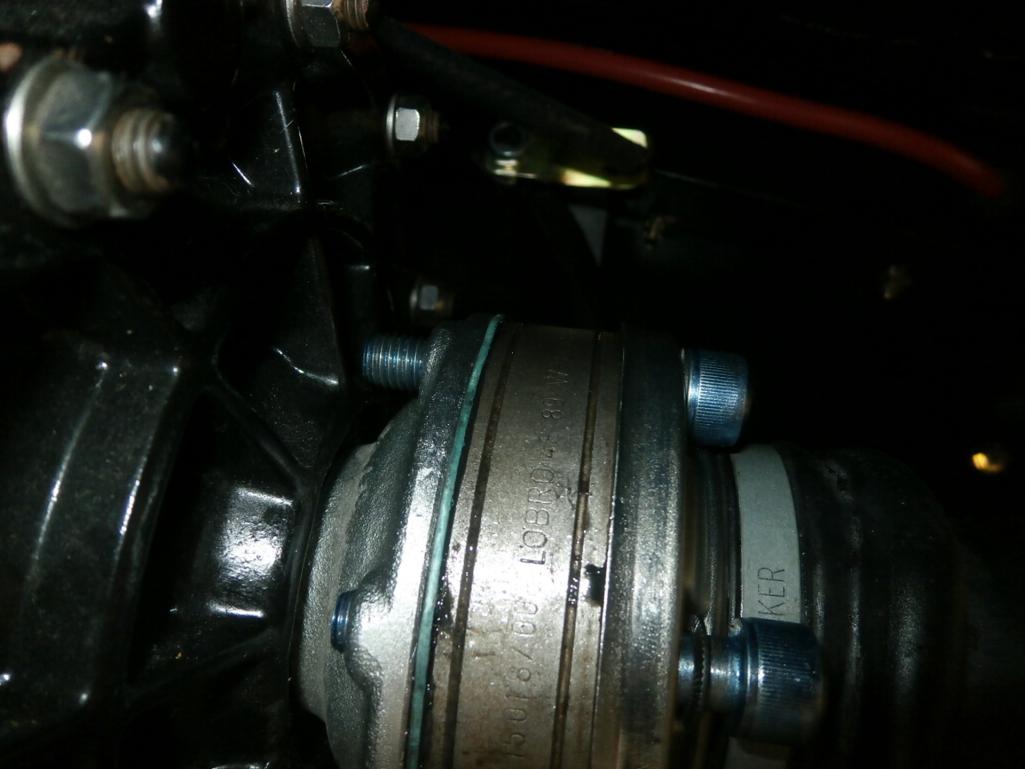
Posted by: PanelBilly Apr 25 2015, 05:43 PM
And here's the two helper (who did most of the work)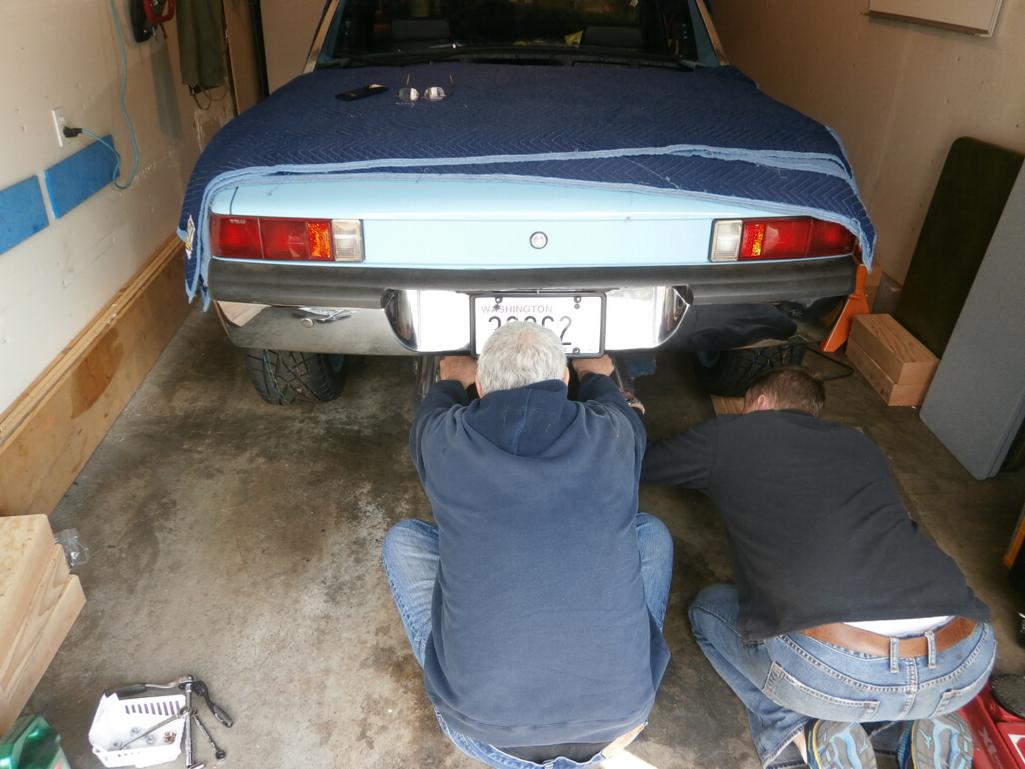
Posted by: Evil Older Brother Apr 25 2015, 09:15 PM
And here's the two helper (who did most of the work)
If I had known you would photo my ass, would have gone commando!
Damn that car is finally getting together. Can't wait to see you driving it.
Posted by: altitude411 Apr 25 2015, 09:22 PM
Super clean & looks great (engine) & thanks for "no plumbers ass" but....
Attached thumbnail(s)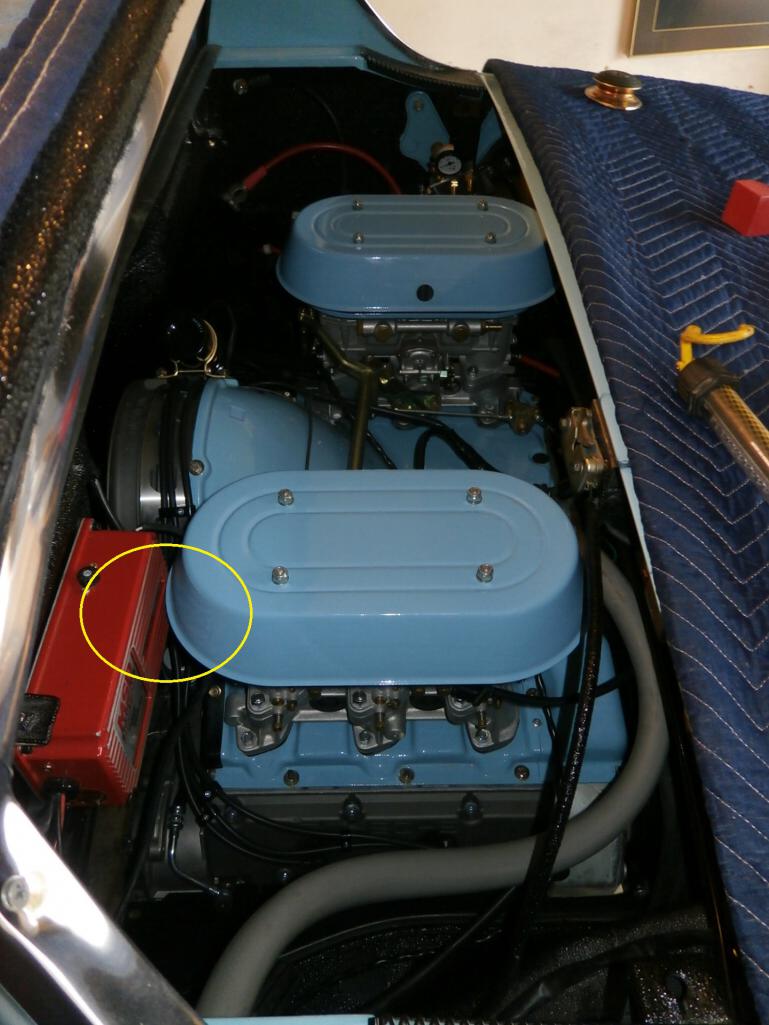
Posted by: JRust Apr 25 2015, 09:24 PM
Awesome Billy! So close to firing it up
Posted by: Mr.242 Apr 26 2015, 12:09 AM
Are we going to have a "fire it up" day where we gather on a Tuesday?
Teener Tuesday?!
Posted by: Cairo94507 Apr 26 2015, 07:21 AM
That has to be so satisfying to finally see the engine and car together. Great job.
Posted by: Camaro Mike Apr 26 2015, 08:11 AM
Congratulations!
Posted by: PanelBilly May 7 2015, 08:51 PM
Got the engine mounts in, but still need to tighten all the bolts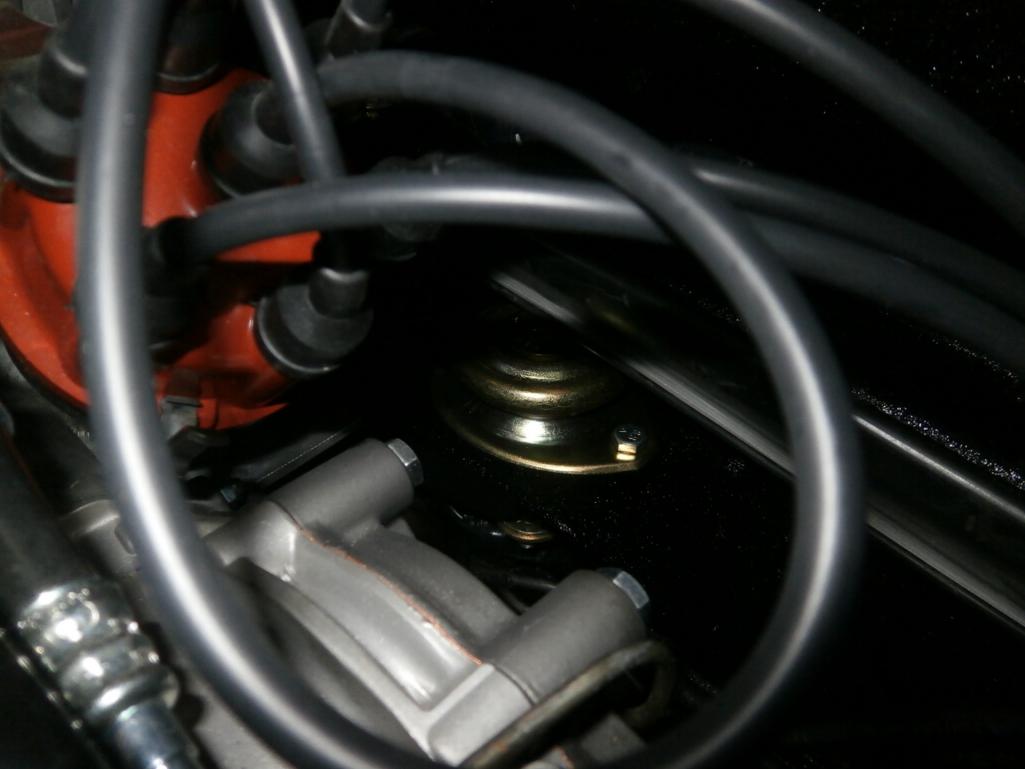
And here's the transmission mounts, but I need to flip over one of the top plates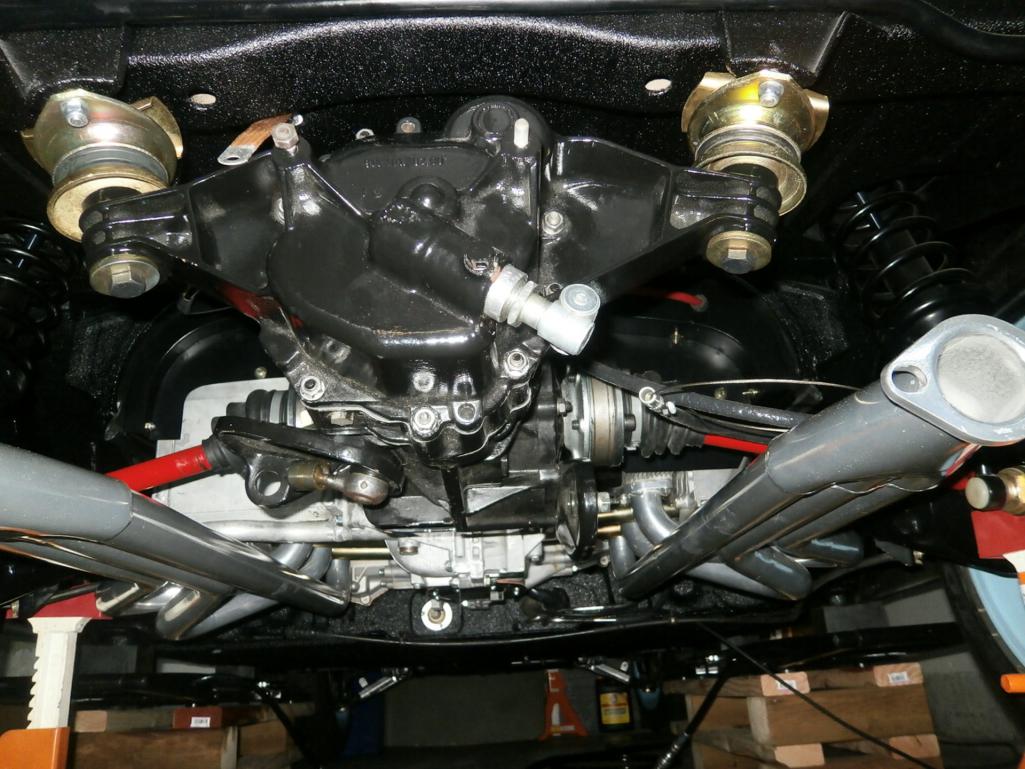
And the axles are bolted up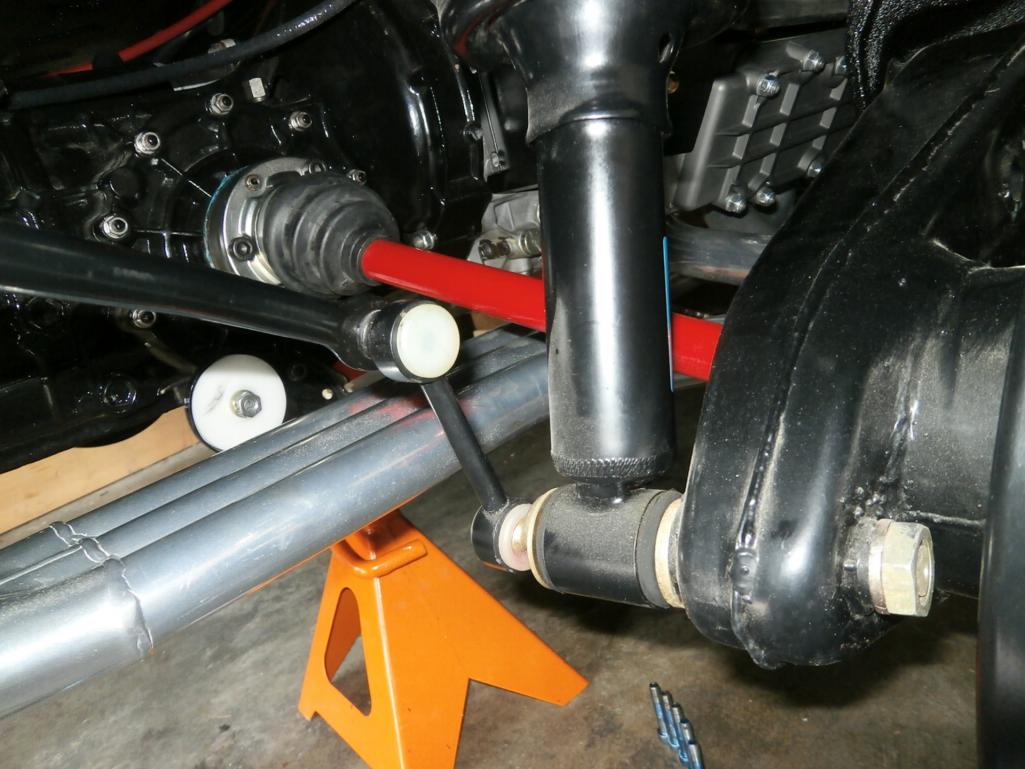
Now to make sure the engine is lined up right. Not sure how this is done yet.
Posted by: Cairo94507 May 8 2015, 07:10 AM
Man that is looking very nice.
Posted by: Phoenix914 May 8 2015, 07:19 AM
What's with the dust on your suspension?  Just kidding! Your car is awesome. Mine will never be that clean.
Posted by: PanelBilly May 10 2015, 09:14 PM
Jim came by yesterday and helped me get some more work done. We got some of the bolts in the tin on. Its one of those jobs that takes one person
above the engine and the other under. We got the transmission rod installed, but I still need to do the alignment.
I got the muffler ( or is it called a final) installed and I relocated the MSD box because it was too close to the rain hat. 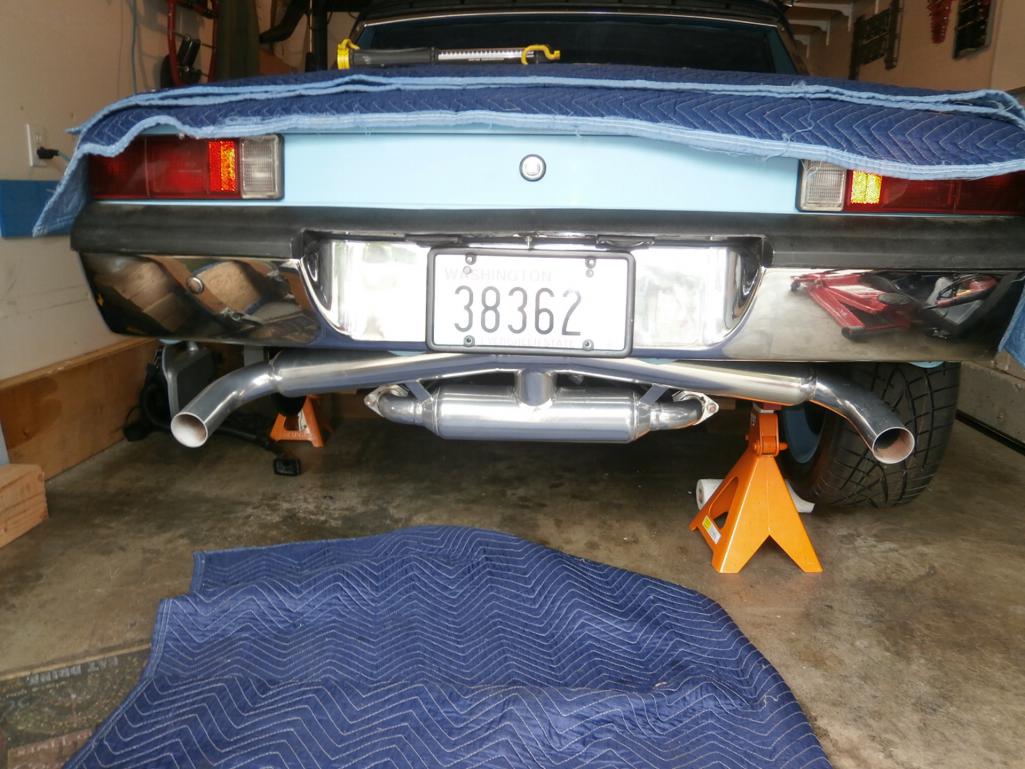
I was hoping to get the clutch and trottle cables done, but needed to order some hardware to finish the job. Also needed to order the hard oil line that comes off the bottom of the case.
Posted by: PanelBilly May 23 2015, 07:07 PM
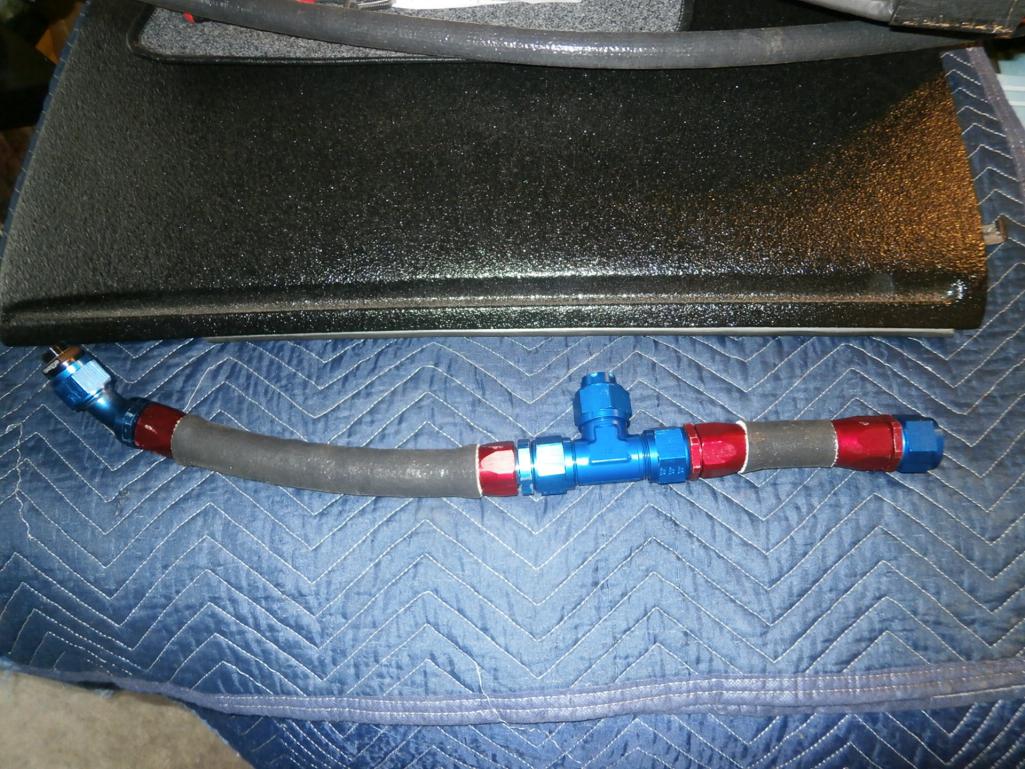
I got the fittings attached to the braided lines. That was more work than I expected. I was hoping that I measured them correctly, because they looked short. 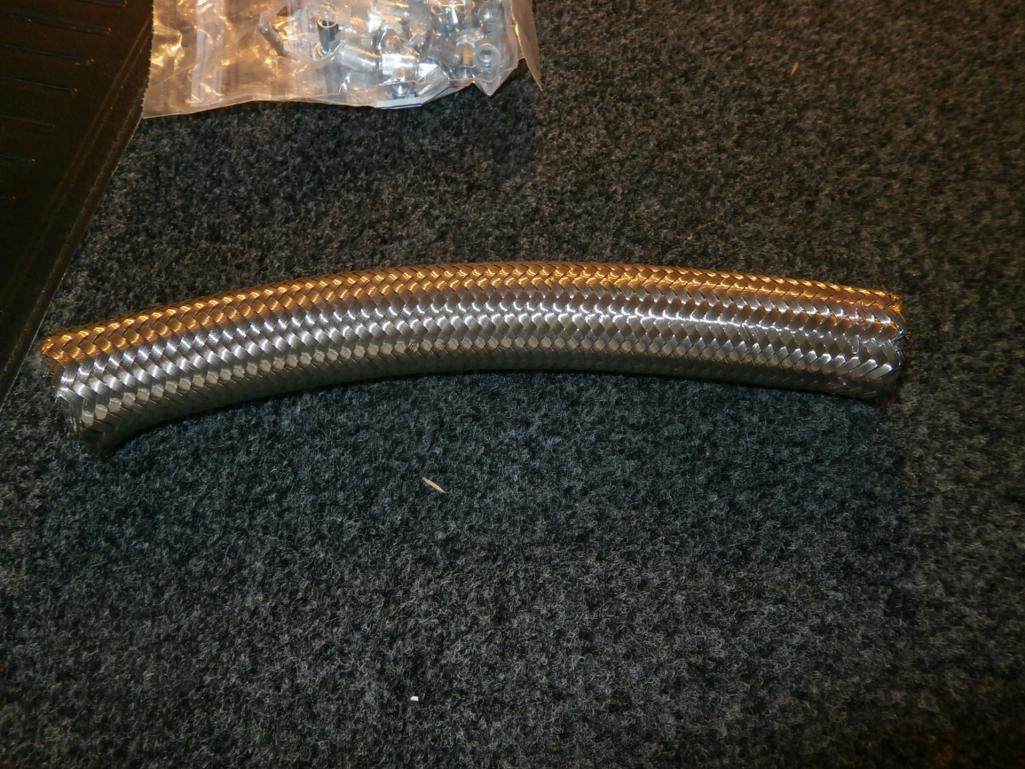

Posted by: PanelBilly May 23 2015, 07:14 PM
I attached the bottom oil line to the tank before installing it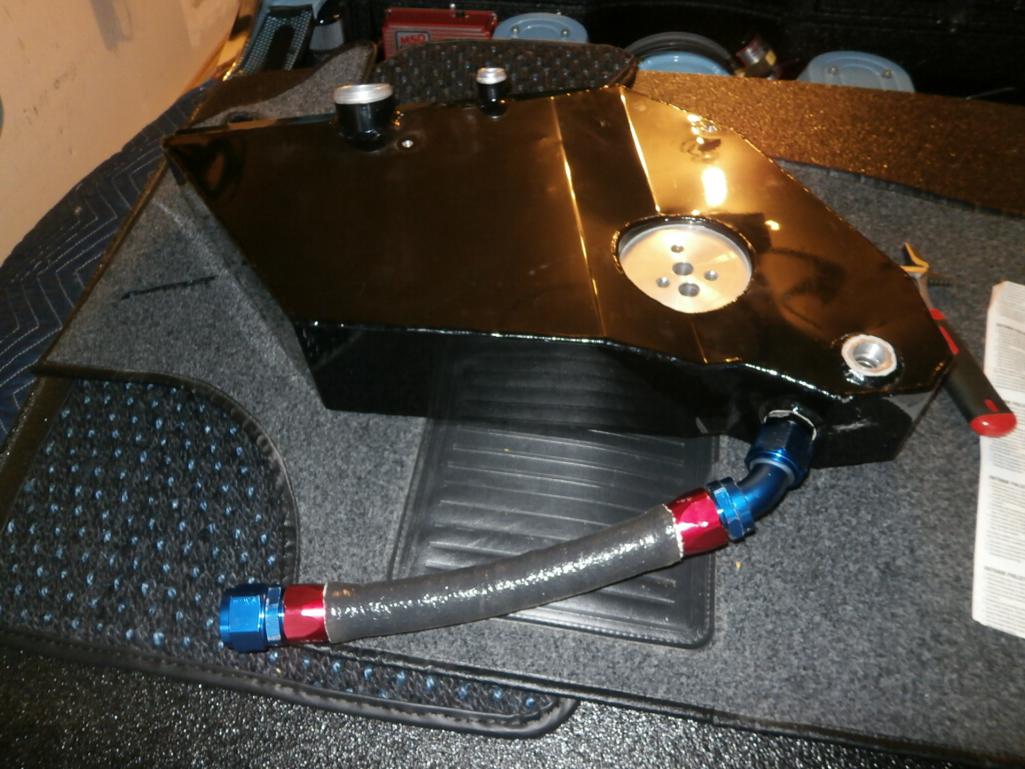
Then I bolted in the tank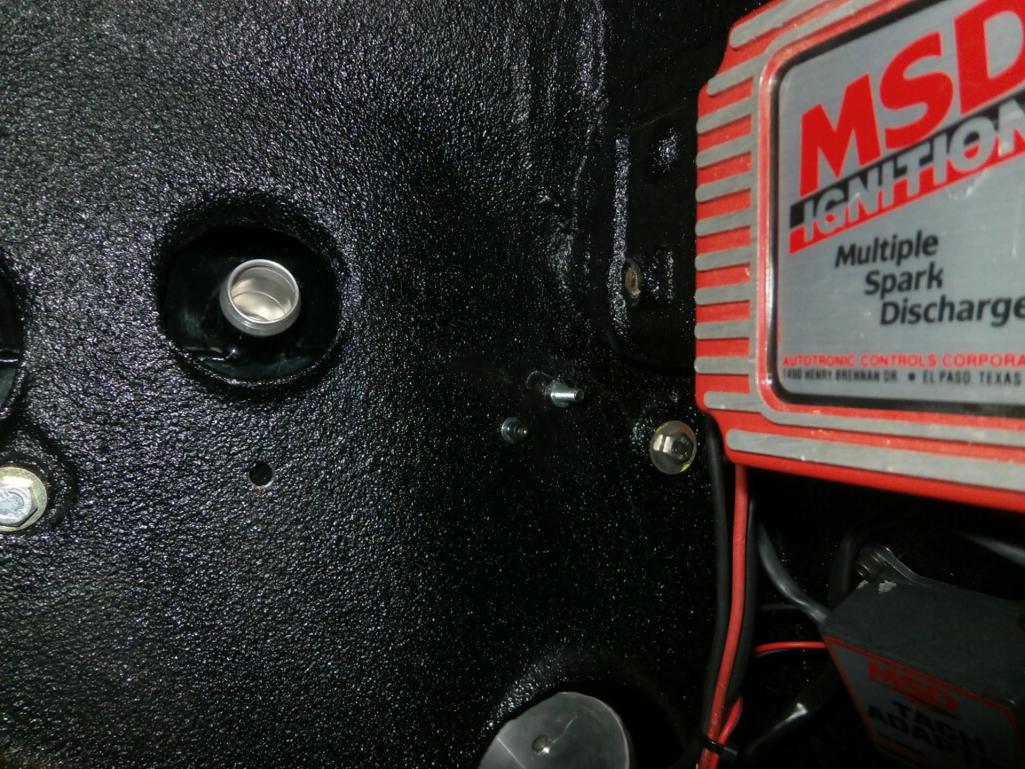
Maybe this will help me to remember what a pain it is
to get at the back bolt
Posted by: PanelBilly May 23 2015, 07:24 PM
Here's the view of the line as it comes off the oil cooler
Its not touching anything, that's an optical illusion.
My son in law dropped of a claws foot wrench I can use to
tighten the fitting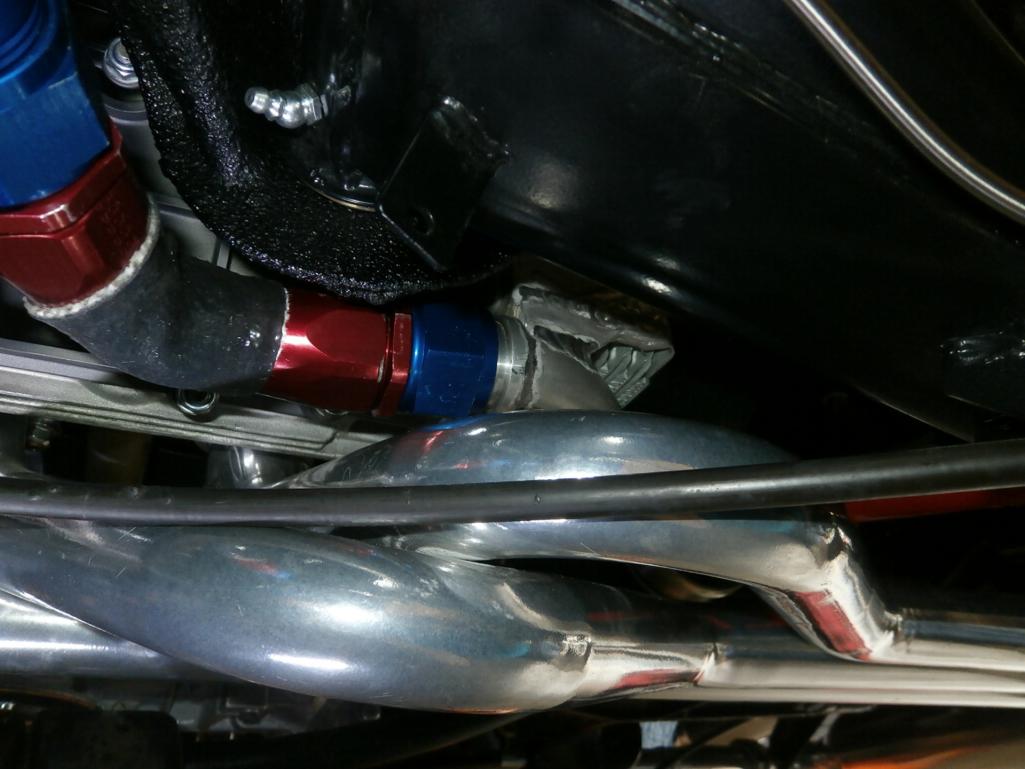
And I still need to install a support, but the drain is in a good location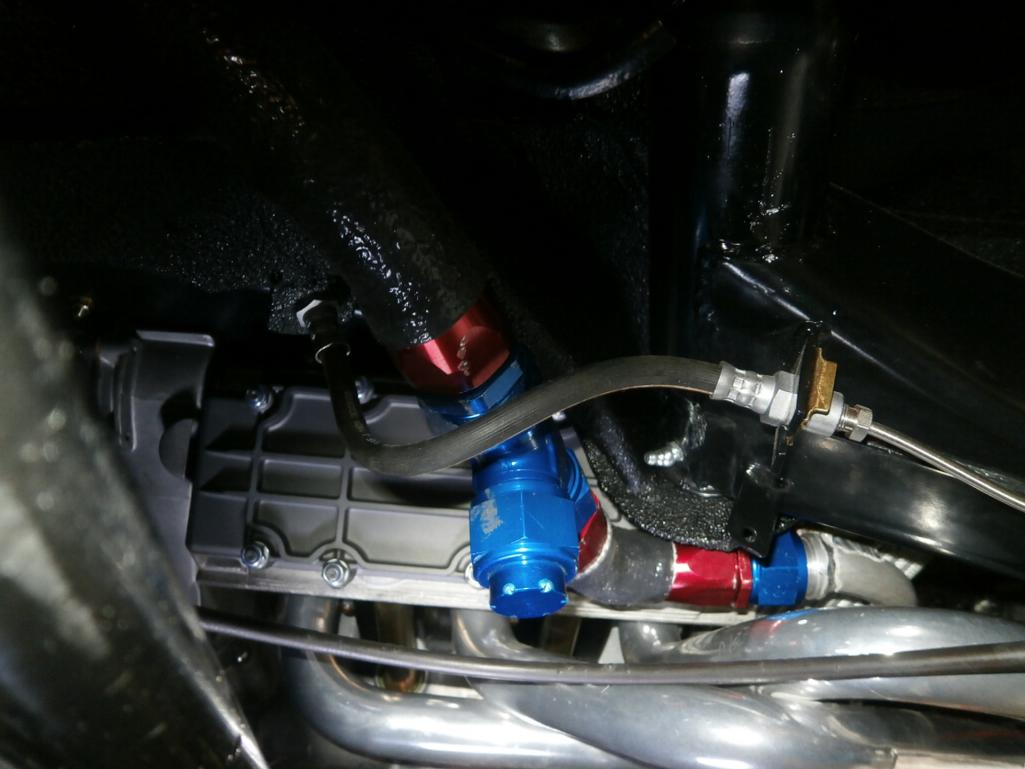
Posted by: 6freak May 23 2015, 08:13 PM
nice work Billy ..address that E brake cable touching the header
Posted by: PanelBilly May 23 2015, 08:46 PM
nice work Billy ..address that E brake cable touching the header
It's another illusion. Not touching.
Posted by: PanelBilly May 25 2015, 07:55 PM
Got the filler neck. filter mount, and all of the rest of the oil system finished today
Needed to use a mirror to put the bolts into the filter mount. 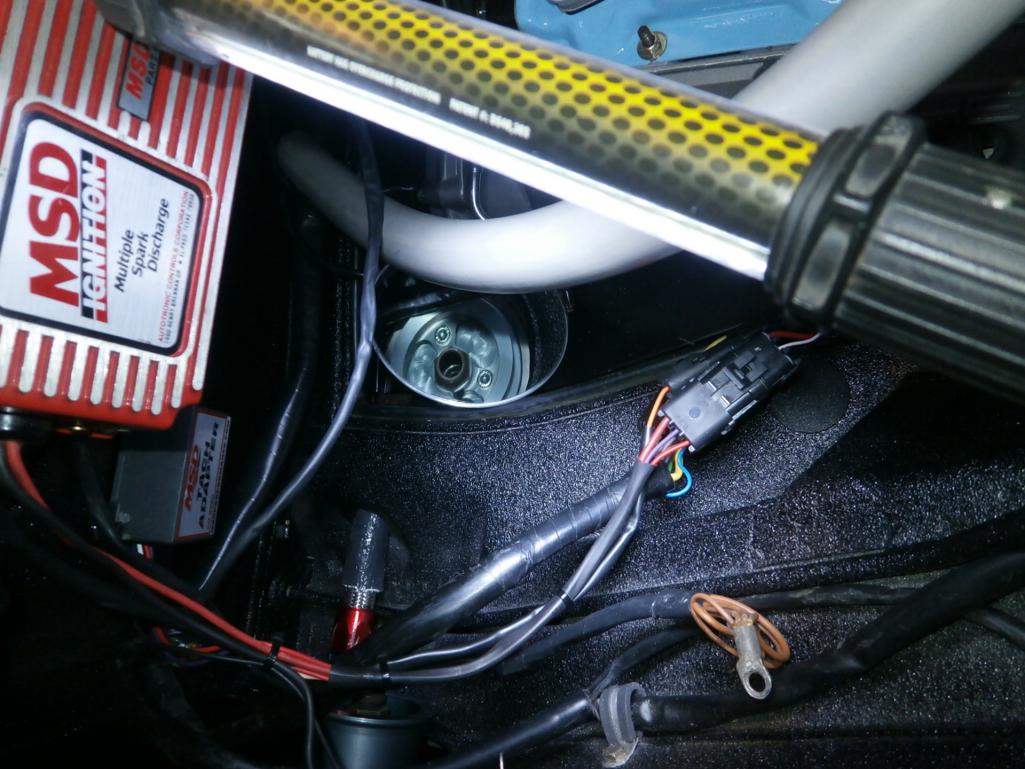
Posted by: PanelBilly May 30 2015, 05:13 PM
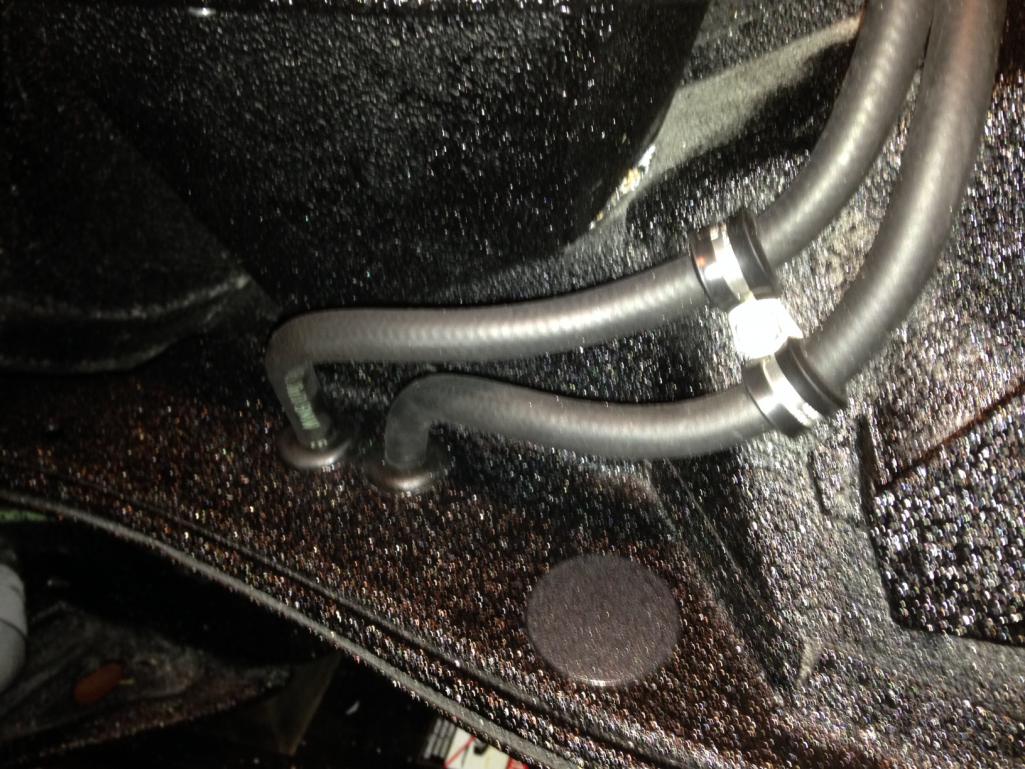
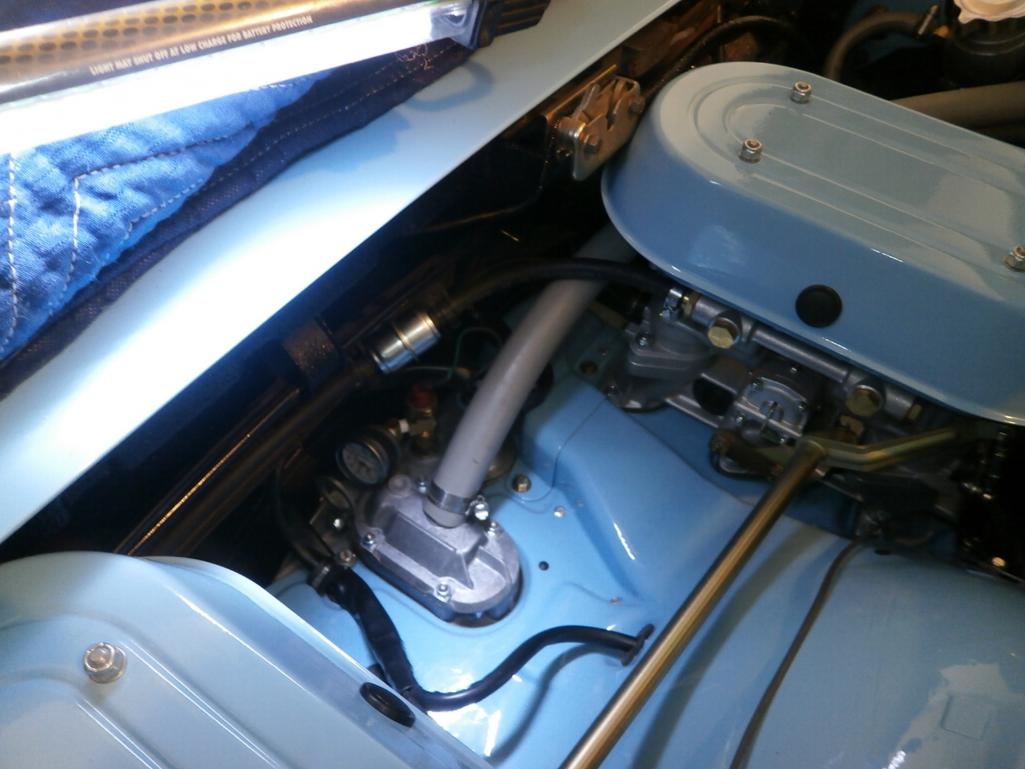
Got the fuel lines and filters connected today
Changed the angle of the oil pressure gauge on the block, so it
is easier to read
and added some hangers for the cables so they were out of the way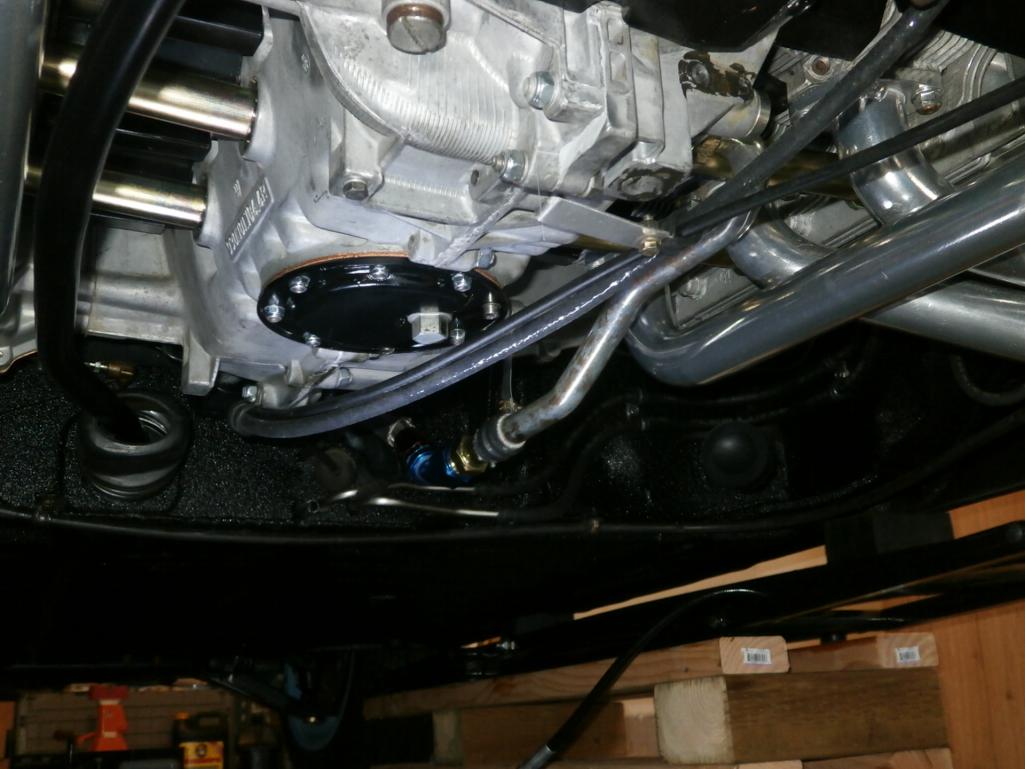
Then i connected the clutch cable so I could figure out how much
I want to have it shortened. There's a guy in town that makes cables and he said most likely he could fix it for me
Posted by: francar May 30 2015, 06:14 PM

Posted by: PanelBilly Jun 17 2015, 10:58 PM
I go the bolt to plug the o2 hole in the headers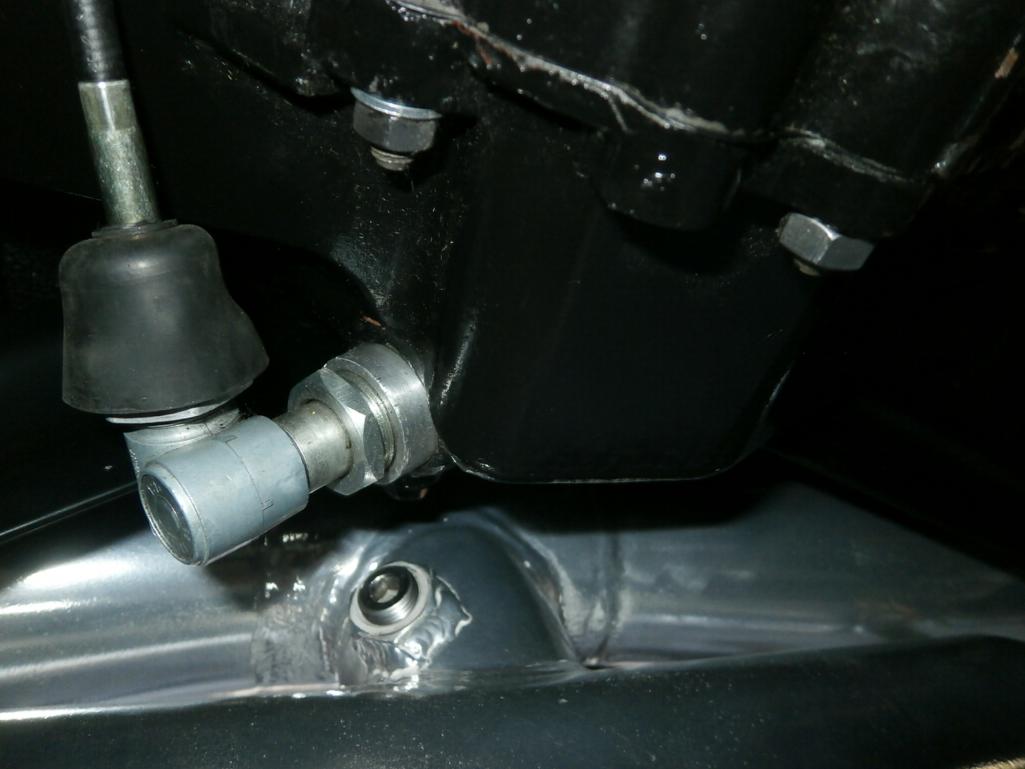
and I have the battery installed, but didn't do the negative yet 
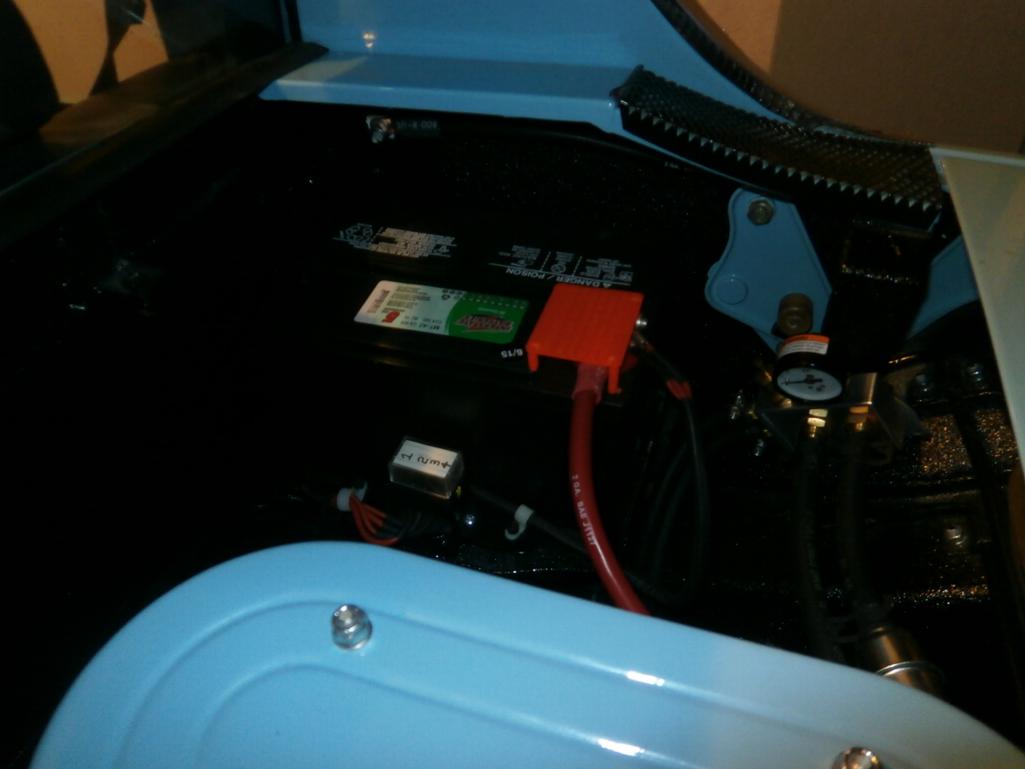
Posted by: PanelBilly Jun 20 2015, 05:18 PM
I attached the negative side of the battery today. Headlights were backwards. Raised in the off position and lowered in the on. Easy fix. The alarm for the key in with the door open seems to be going off sometimes. I'm thinking that's one of the door switches.
Added oil.
I cranked the engine over just to see if the starter worked and everything sounded normal. I need to find my spark plugs. They must be somewhere.
Posted by: turk22 Jun 20 2015, 08:50 PM

Posted by: PanelBilly Aug 12 2015, 10:04 PM
I thought I'd update the build thread now that the car is moving under its own power.
I installed a new exterior mirror on the driver's side. It sure is nice to be able to see what's behind me.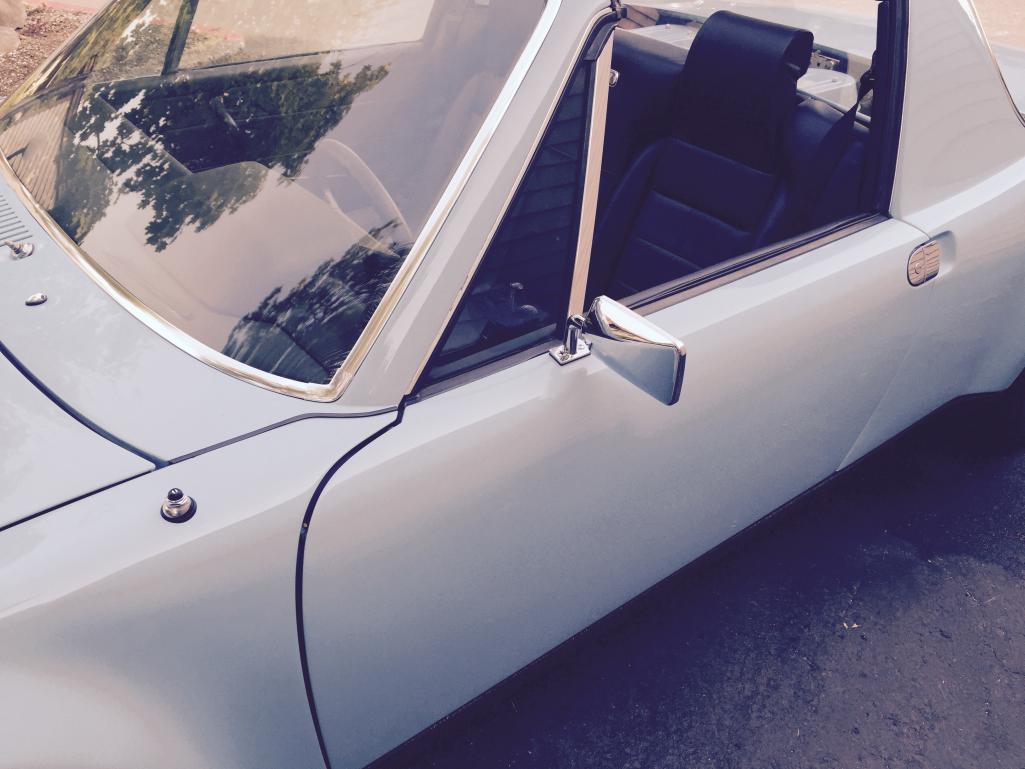
And thanks to Bob I have a combo gauge now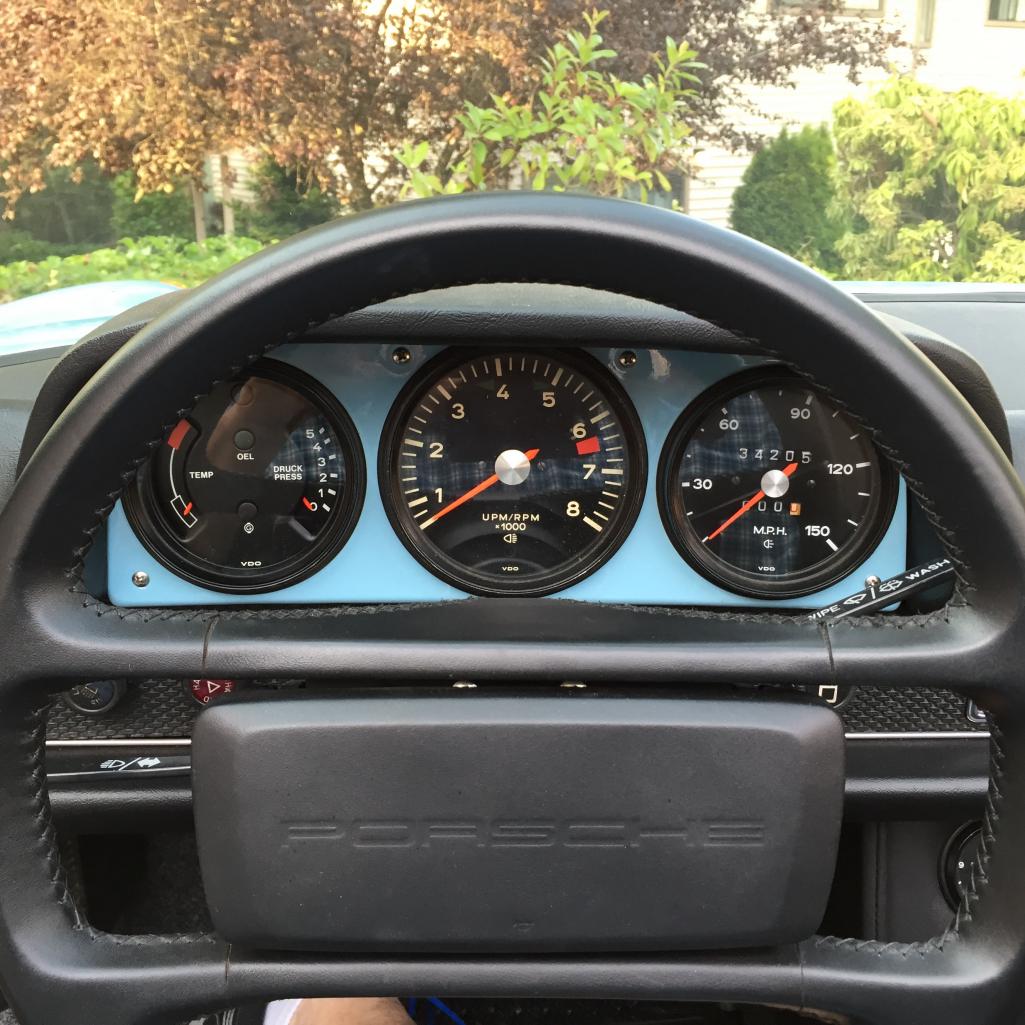
and I drove the car to gas station tonight. I still need to bleed my brakes and get
an alignment. Front end sure is light under power and I'm thinking a corner balance will reduce that.
Posted by: KELTY360 Aug 12 2015, 10:34 PM
Outstanding! Ready for prime time.
Posted by: Larmo63 Aug 12 2015, 11:07 PM
Very cool thread to read and an inspiration for guys like me who are starting out on the other side of that tunnel that you are almost all the way out of.
Posted by: jmitro Aug 12 2015, 11:28 PM
unbelievable!
Posted by: RoadGlue Aug 13 2015, 04:54 PM
Congratulations! You should be proud of this build. Look at what a beautiful car you now have. Awesome.
Posted by: rick 918-S Aug 13 2015, 05:01 PM
Very nice
Posted by: PanelBilly Sep 13 2015, 07:40 PM
Time to tie up some details. I got the alignment done last week and one of the trailing arms is bent, so it will need to be replaced. Even though its not perfect, the drive home
from the shop was much better than the one before the alignment.
I got the front spoiler painted with some texture paint so it will be a reasonable match to the LineX coating I had put on the rockers. This winter, I'm going to modify the spoiler
so it matches the flairs better, but for now, it acceptable.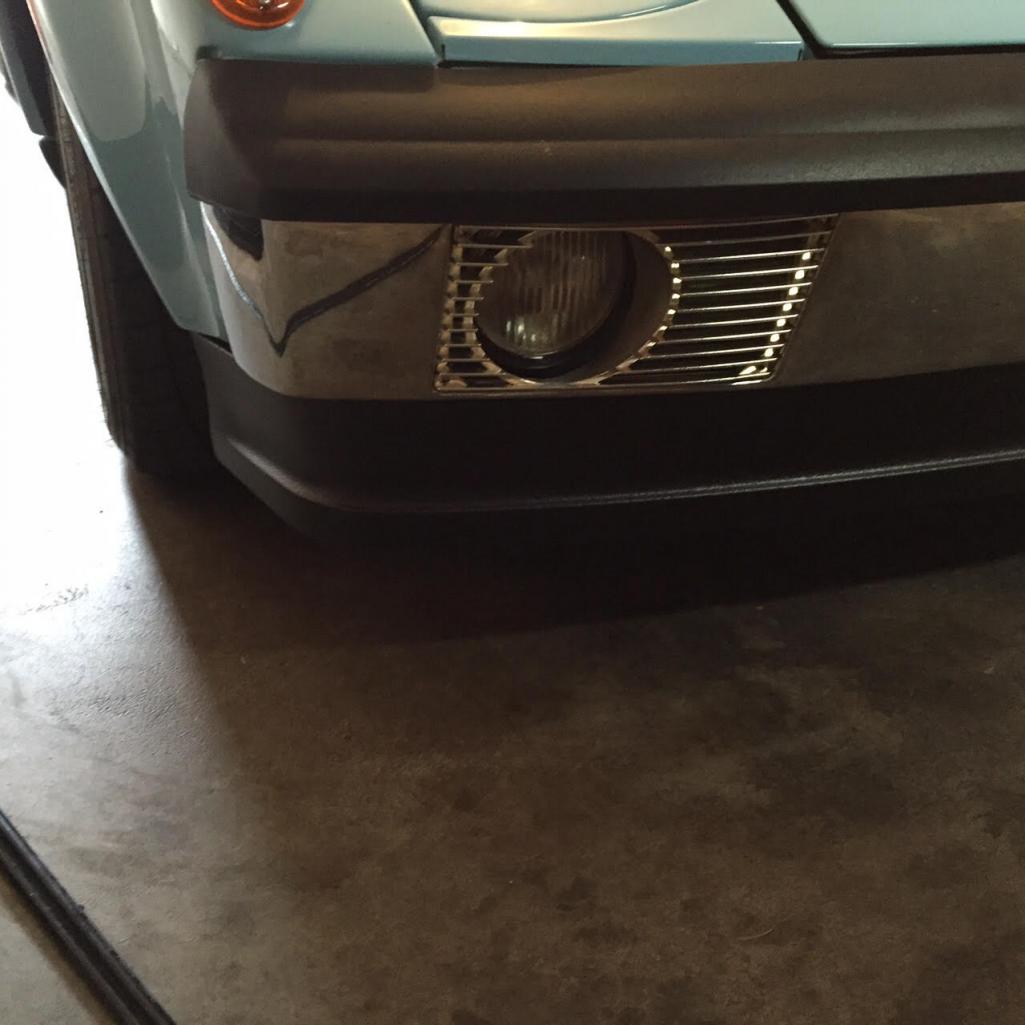
I got the wipers painted and installed. 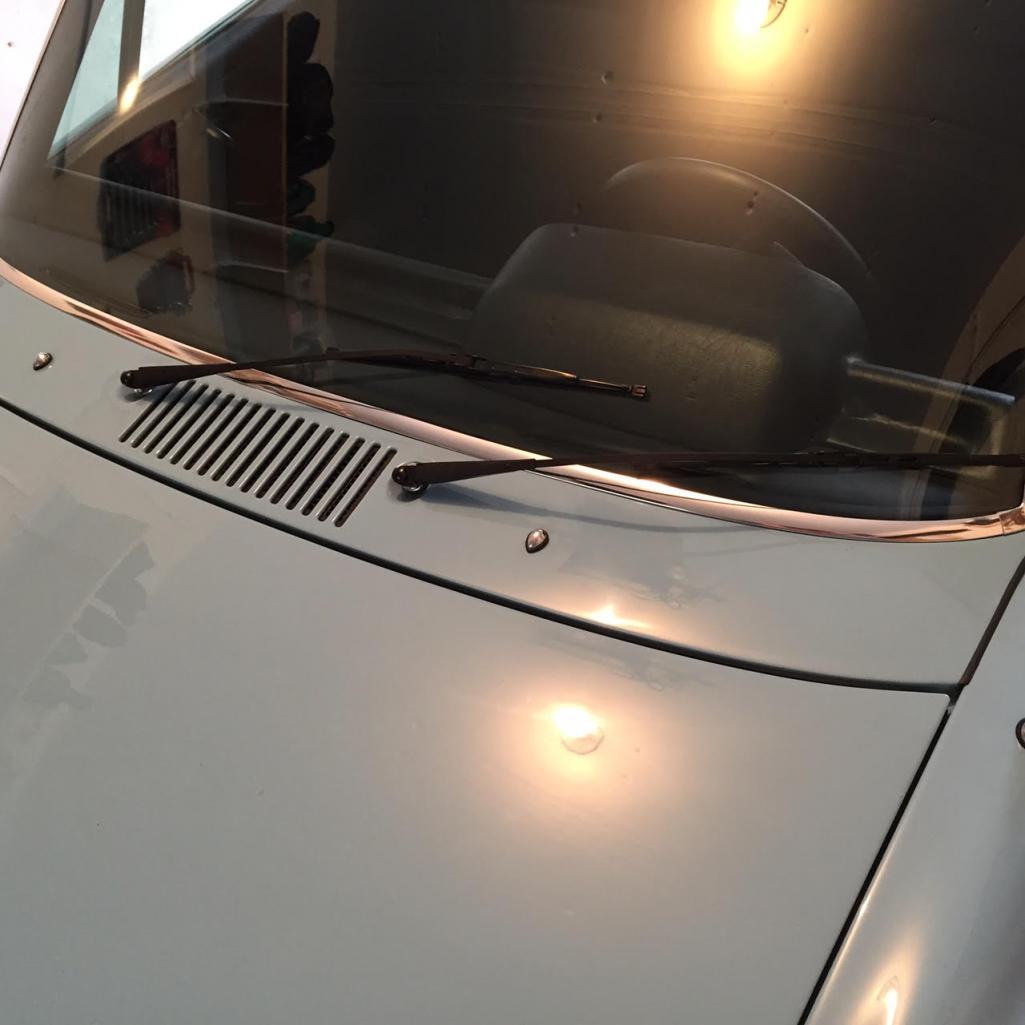
Finely, I installed the engine cover. The car looked kind of cool when the engine was exposed, but now it looks complete.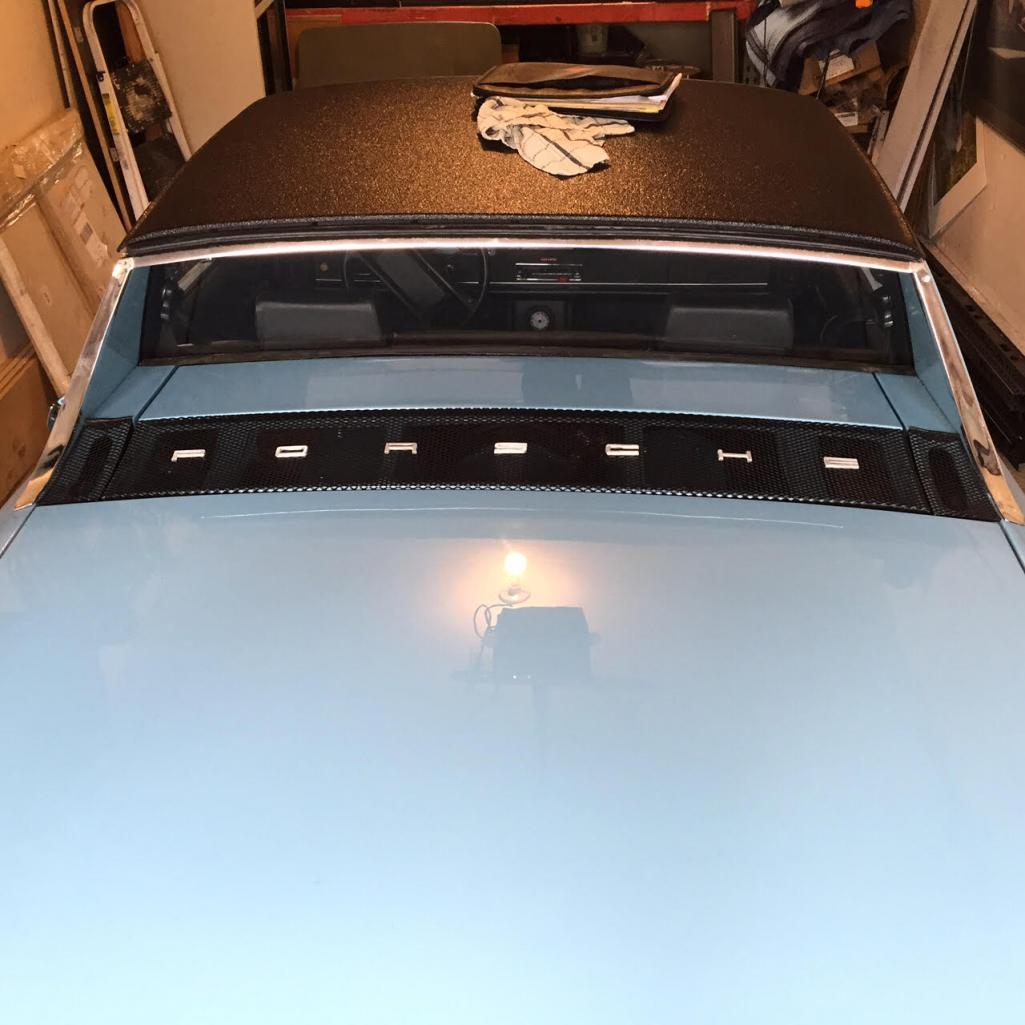
Now I need do get all the gauges operational
Posted by: turk22 Sep 13 2015, 08:55 PM
Its beautiful!
Posted by: Johny Blackstain Sep 13 2015, 09:01 PM
Posted by: PanelBilly Oct 14 2015, 06:42 PM
I got my new targa trim in the mail today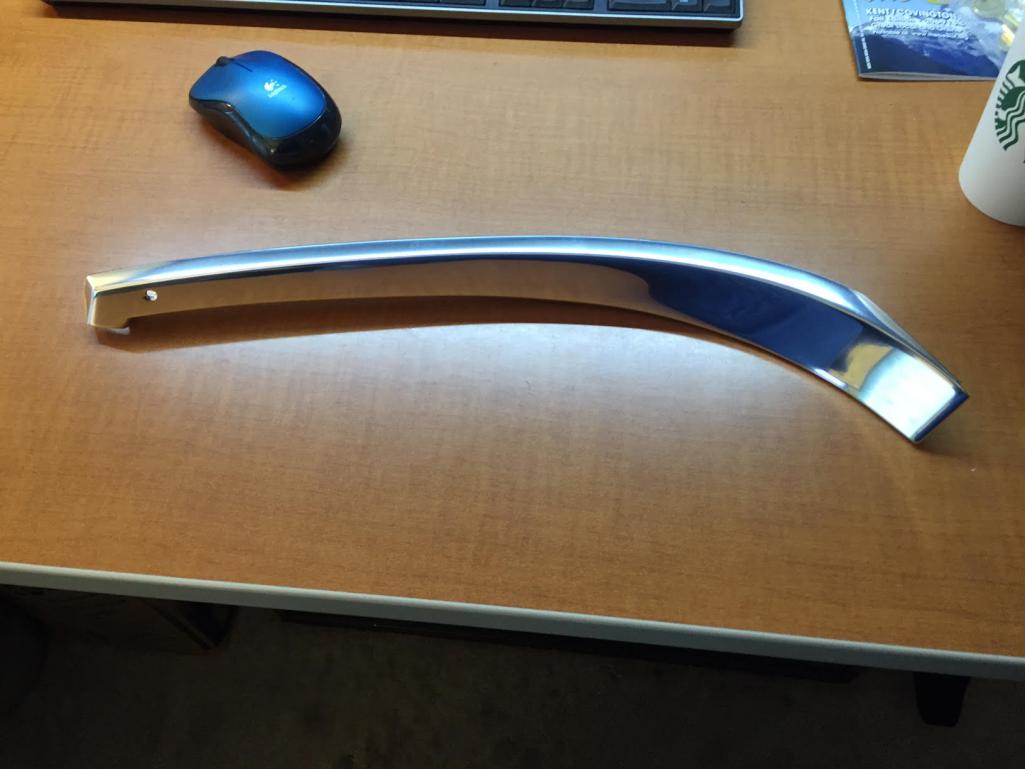
and here it is on the car
Posted by: Cairo94507 Oct 14 2015, 09:43 PM
Looking beautiful
Posted by: gereed75 Oct 15 2015, 05:21 AM
Looking beautiful
Where does one get new targa trim?? I thought it was NLA.
Posted by: mepstein Oct 15 2015, 05:28 AM
Looking beautiful
Where does one get new targa trim?? I thought it was NLA.
Its been available for a while. Pricey at around $125/each
Posted by: RobW Oct 15 2015, 12:30 PM
Where did the front spoiler come from? Is it wider for the flares?
Posted by: AZ914 Oct 15 2015, 01:47 PM
Awesome build, Billy! Makes me wish I painted my shroud and valve covers when the engine was out.
Posted by: rhodyguy Oct 15 2015, 03:00 PM
Purdy sweet Billy.
Posted by: PanelBilly Oct 15 2015, 03:40 PM
Where did the front spoiler come from? Is it wider for the flares?
Its one from 914Rubber and no I haven't done the work to blend it to match the flares. Its on my list to do
Posted by: Evil Older Brother Oct 15 2015, 04:14 PM
Time to tie up some details. I got the alignment done last week and one of the trailing arms is bent, so it will need to be replaced. Even though its not perfect, the drive home
from the shop was much better than the one before the alignment.
I got the front spoiler painted with some texture paint so it will be a reasonable match to the LineX coating I had put on the rockers. This winter, I'm going to modify the spoiler
so it matches the flairs better, but for now, it acceptable.
I got the wipers painted and installed.
Finely, I installed the engine cover. The car looked kind of cool when the engine was exposed, but now it looks complete.
Now I need do get all the gauges operational
And why would you put wipers on a car that will never, repeat, never see the rain!
Posted by: OllieG Oct 17 2015, 08:23 AM
Let's see a pic of the whole car Billy!
Posted by: jimkelly Oct 17 2015, 10:01 AM
you have got to get us a nice long DRIVE video once you get her on the road. she is beautiful
Posted by: PanelBilly Mar 28 2016, 09:03 PM
Lots of little details to finish up. Got some badging mounted today. Now the holes in the trunk are covered up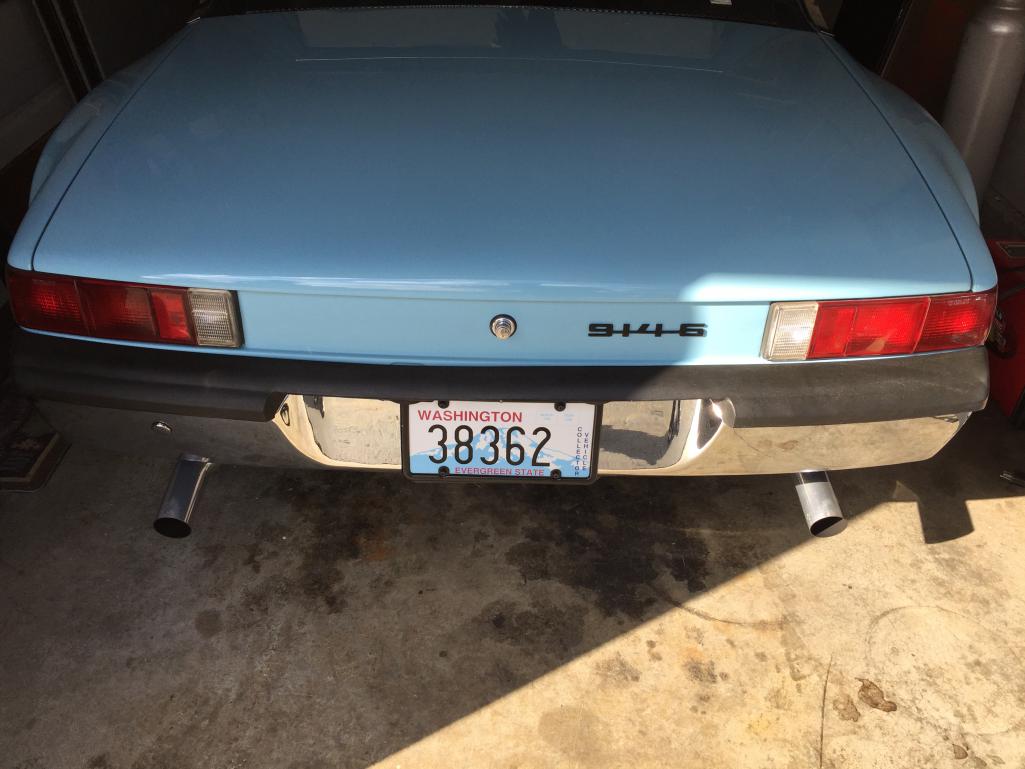
Posted by: Asheikh May 6 2020, 12:09 AM
Well documented and an EXCELLENT BUILD!
Powered by Invision Power Board (http://www.invisionboard.com)
© Invision Power Services (http://www.invisionpower.com)