Printable Version of Topic
Click here to view this topic in its original format
914World.com _ 914World Garage _ Love affair from the start
Posted by: tscrihfield Oct 5 2010, 06:13 PM
So .... here is the story. While in high school I received a job offer by a really nice guy to work in a Restoration/Body shop "Bennetts Rod Shop" in West Alexandria Ohio. I took it of course because I was an automotive student at a vocational school and could leave half a day early to go to work! So anyway while i was there I helped build a 1970 914-6 into a GT clone. 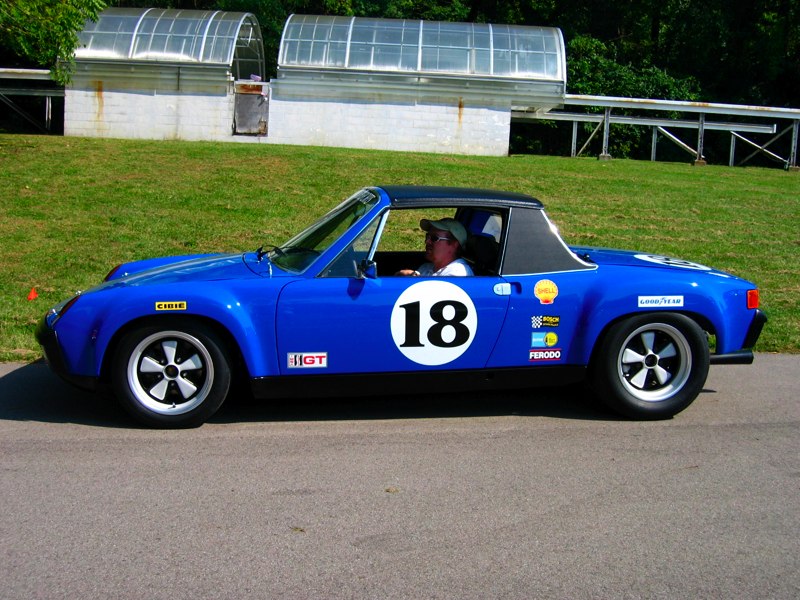
So this car inspired me GREATLY! I had to have one of my own... While working there I also got the opportunity to restore a 356 and do work on an old Nash, Also worked on a 70 VW Bus Limo! That was cool. My main job was fabrication, so I learned a ton while I was there!
In the Spring of 2008 I was getting married so I thought what better present to myself than to buy a 914 to restore. I had just bought a Garage (Just so happened to have a house on the same property...) so I finally had room to work. I bought a 74 sight unseen was told it had 38,000 Org miles and I thought... Well this couldn't go wrong... Little did I know it was a basket case.
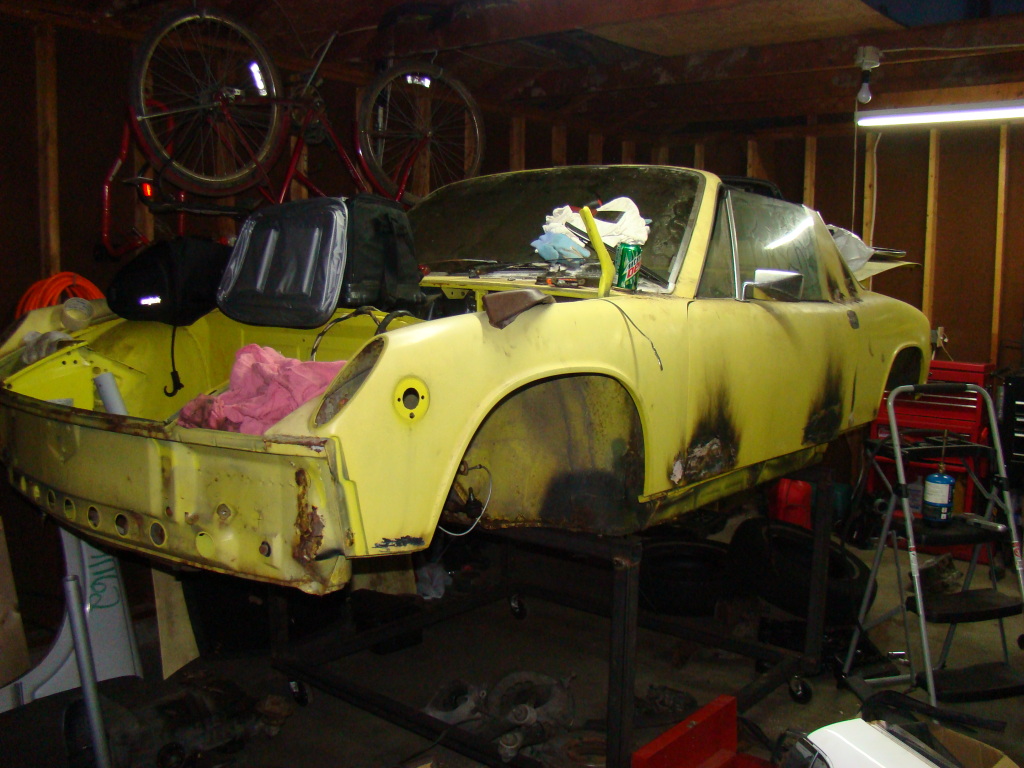
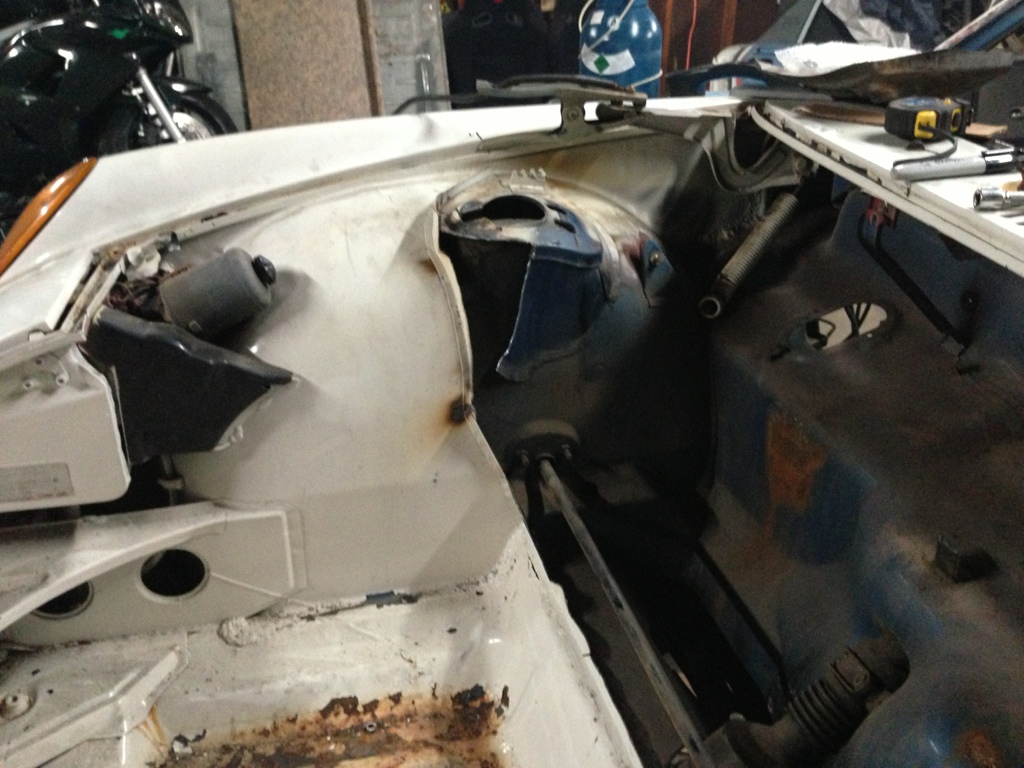
Despite the look from this angle... It was a hunk of junk! Seriously it had rusted the rear suspension out! So this summer after working on the old bodies engine (building a 2.0 based engine) for the past year or so I decided this body just aint gonna do it. So....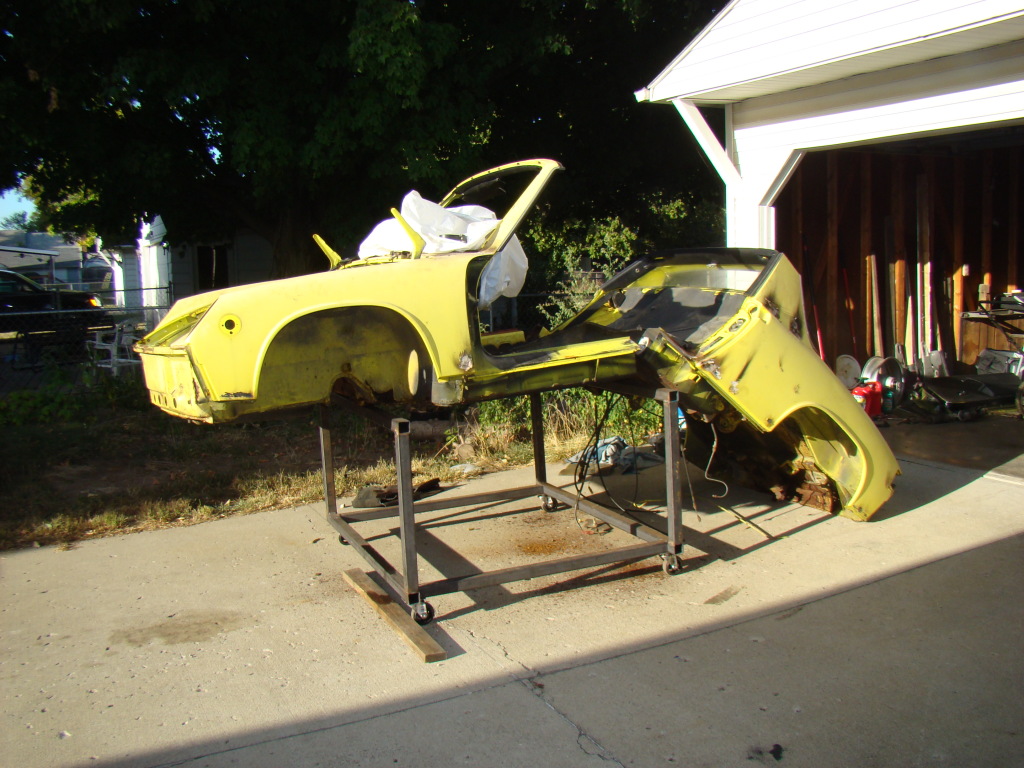
Yup I cut it in half! Tried to salvage what I could from it (which wasn't much) and move on. Then last month I found a nice donor for my new car... I knew that I wanted flares and have every intention on basing it on the car I had once completed. So My parents, Wife and I took a small vacation in Niagra Falls New York and just so happened to be that a 74 914 was for sale near there! 
Here it is loading on the trailer...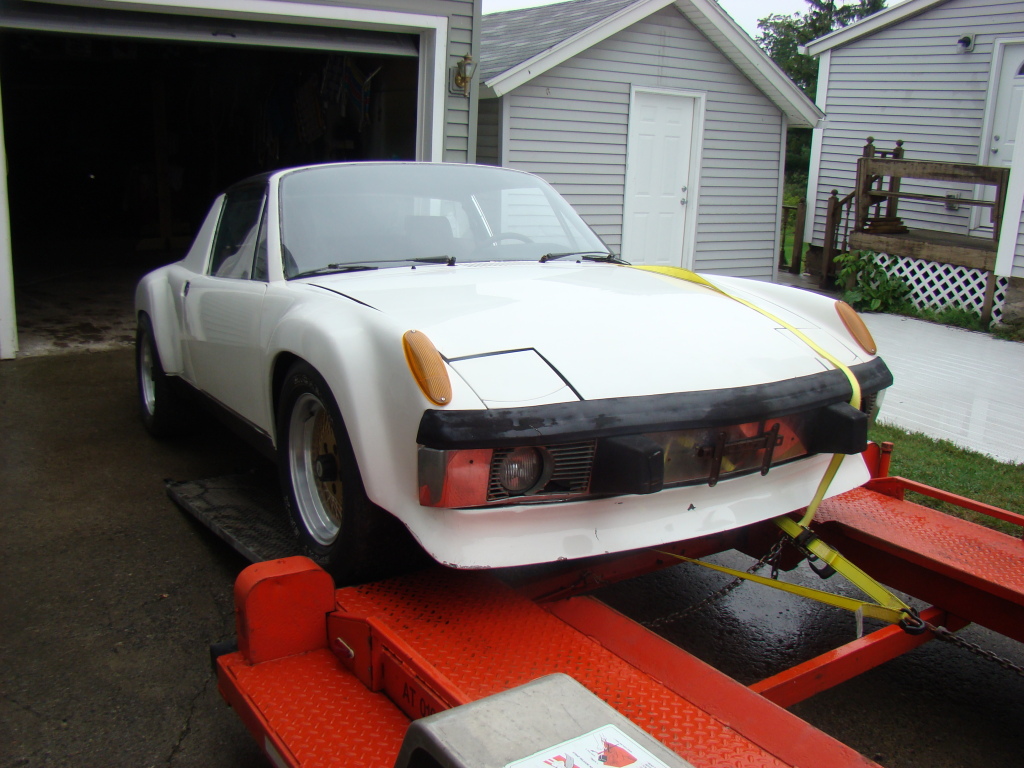
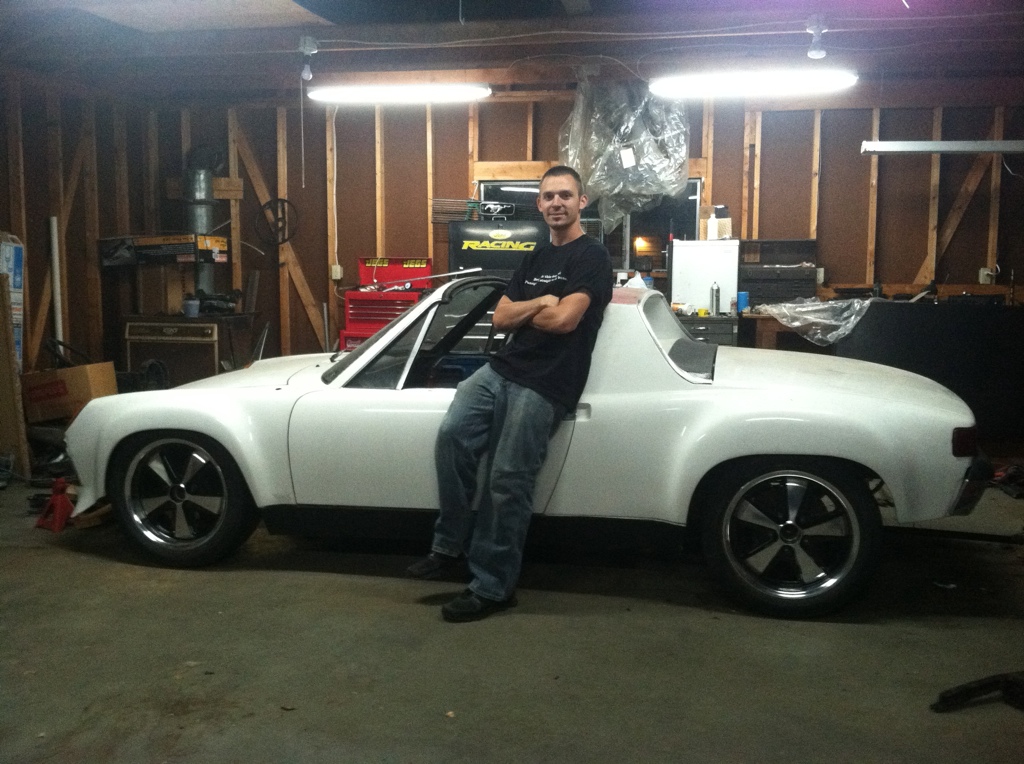
And My first picture with it... Not many have one of those!!! (Reference to my Shoulder)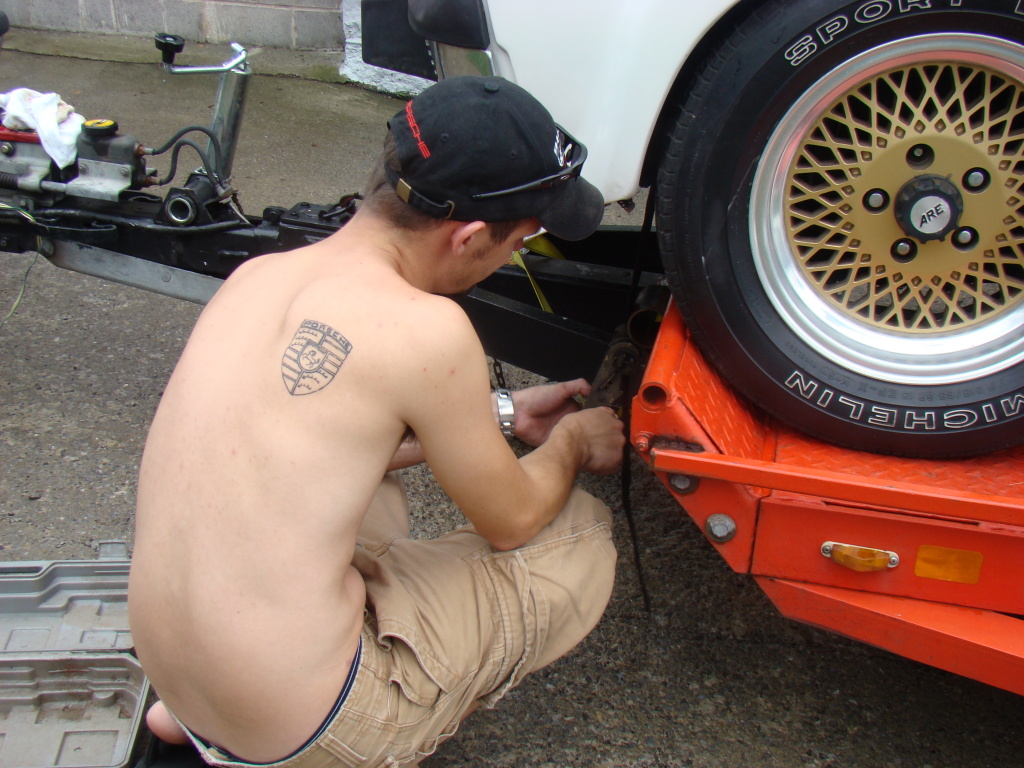
My Awesome Folks always have encouraged even my most wreckless Ideas... Now they are even helping load the car!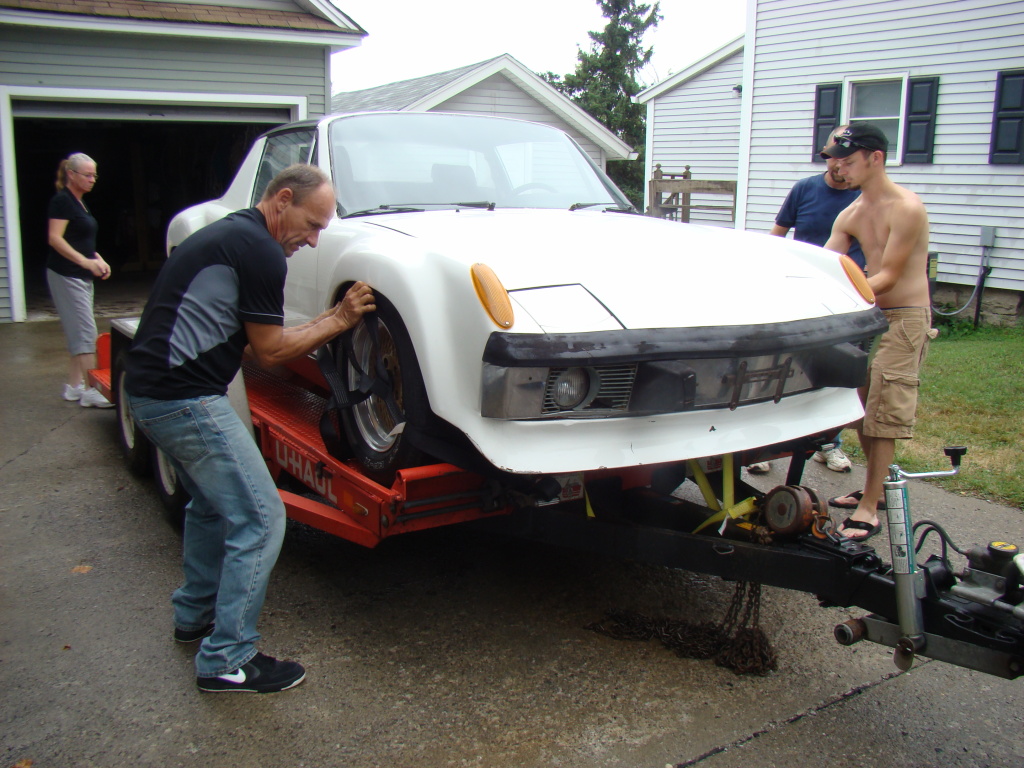
The rig that brought here home!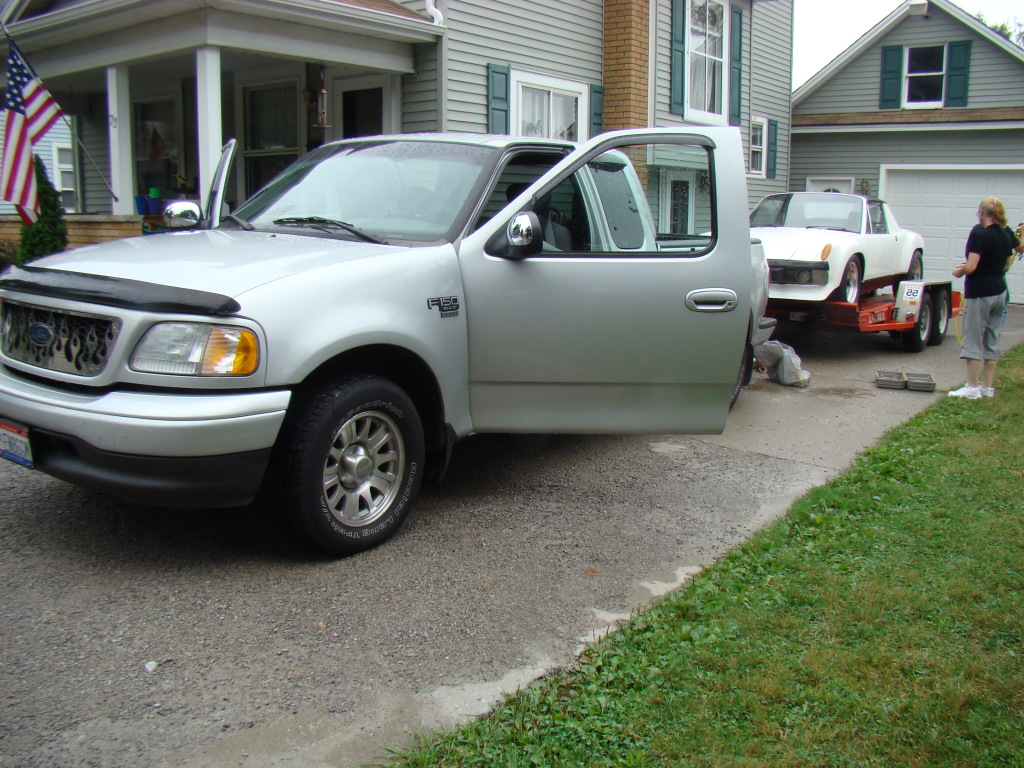
Nestled into its new home!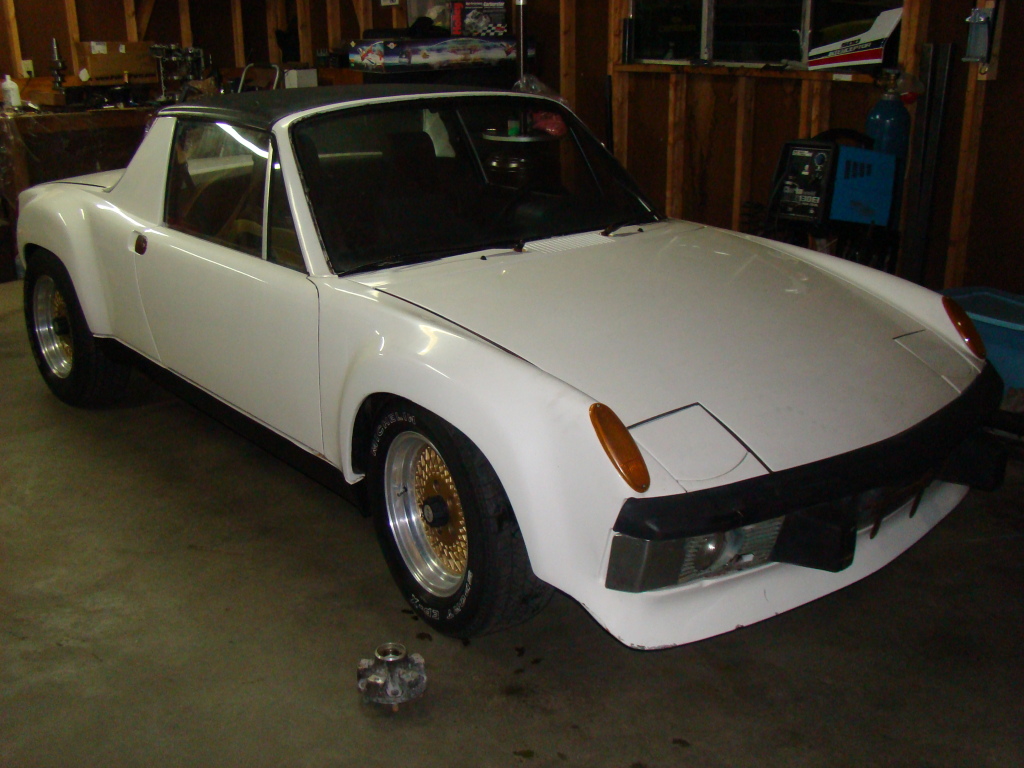
So now the Saga begins...
Posted by: Krieger Oct 5 2010, 06:27 PM
Very cool! keep us posted. How loud was the bang when the rear of the car fell?
Posted by: Tom_T Oct 5 2010, 07:08 PM
 .... part 2!
... well, you've passed the first test of a good marriage - she let you get another, even after you broke the first toy in half! 
Posted by: McMark Oct 5 2010, 08:37 PM
I have a feeling this is going to be an interesting thread.... ![popcorn[1].gif](style_emoticons/default/popcorn[1].gif)
Posted by: FourBlades Oct 5 2010, 08:43 PM
Looks like a great project!
Post lots of pictures. Some of us live for our resto fix.
John
PS. I can use the front panel off old yeller if you still have it.
Posted by: tscrihfield Oct 6 2010, 06:54 PM

Very cool! keep us posted. How loud was the bang when the rear of the car fell?
Can do.... And it fell slow... Darn it! So no noise. but it was real fun cutting it up!

Posted by: tscrihfield Oct 6 2010, 06:55 PM
.... part 2!... well, you've passed the first test of a good marriage - she let you get another, even after you broke the first toy in half!
Yeah she is pretty amazing woman! She really digs the car though, she just cant wait to take a ride in it.
Posted by: tscrihfield Oct 6 2010, 06:59 PM
Looks like a great project!
Post lots of pictures. Some of us live for our resto fix.
John
PS. I can use the front panel off old yeller if you still have it.
Will keep you all posted... I know what you mean! Your thread on Ol Blue resto was amazing! Loved the fixture BTW... You have a really great car!!!
IM'd on the front panel...
Anyone want the Wheels and 5 lug adapters off the white car? I am converting to true 5 lug with new wheels.... Just a thought...
T
Posted by: kphimself Oct 6 2010, 07:01 PM
Wow, just when i was getting the balls to cut into mine i saw that pic and they turned into a, well something else.
Posted by: tscrihfield Oct 7 2010, 07:52 PM
So here are some photos of what the progress looks like thus far.
Almost 2 months in.
Start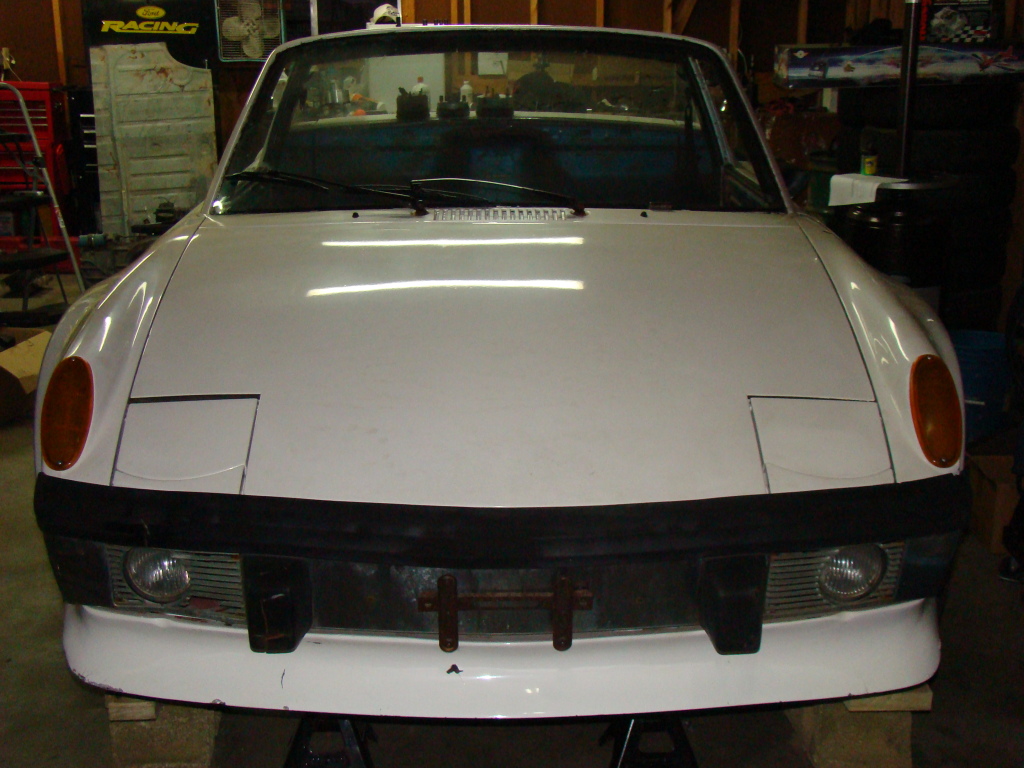
Under the back half...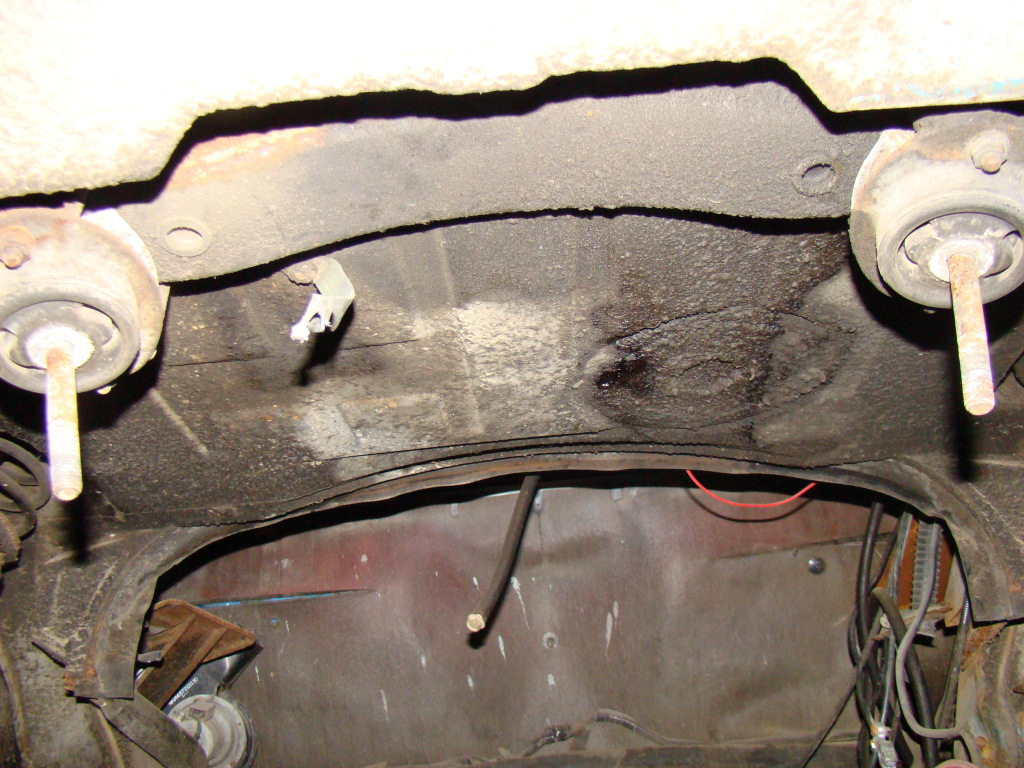
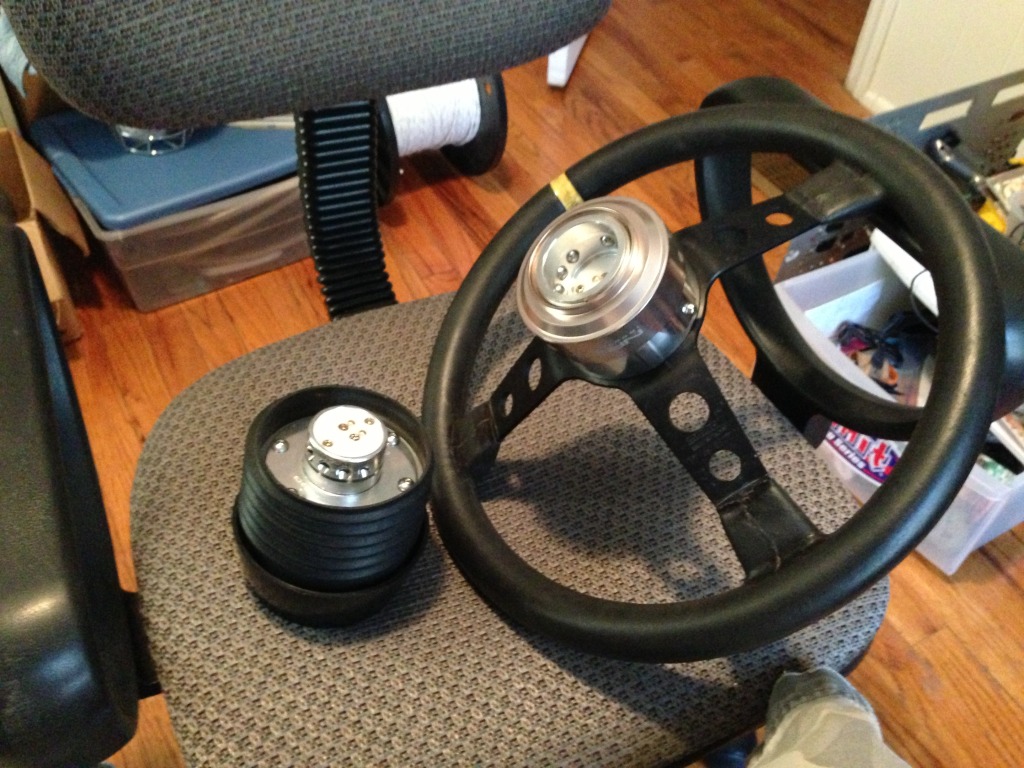
The hub I made for my MOMO wheel out of the stock set up and a machined adapter... I am thinking about making these along with instructions how to DIY.... That way you can have optimum wheel clearance and style for cheaper than the MOMO adapters.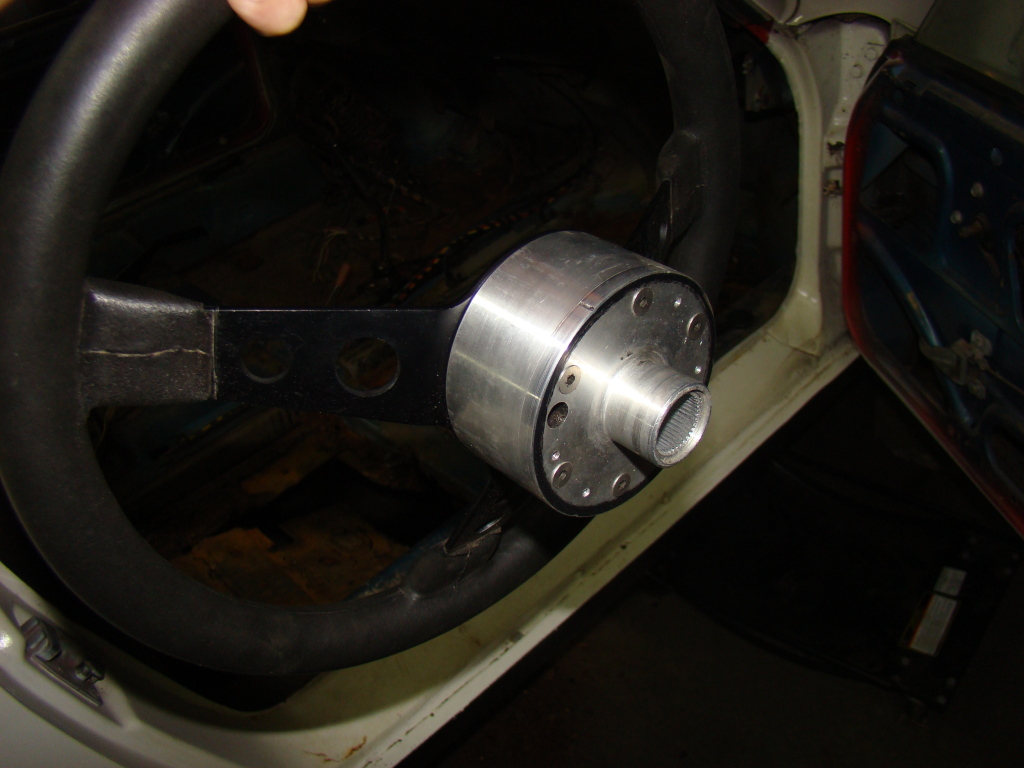
True 5 lug comming soon...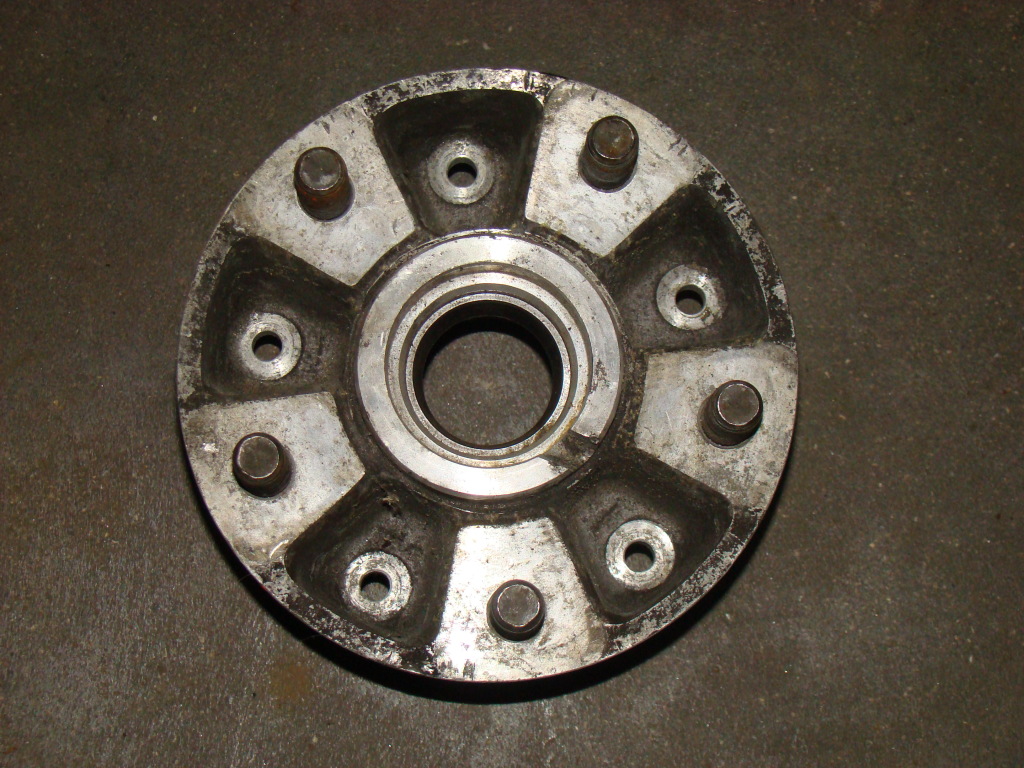
CV adapters I designed and made so I can run 930 CV's and stubs if anyone is interested let me know! ... also had to make a sleeve for the stub axle so you have correct bearing preload... ( not shown YET ) I recently learned that PMS has something to this nature but I didn't pay but just material prices for these bad boys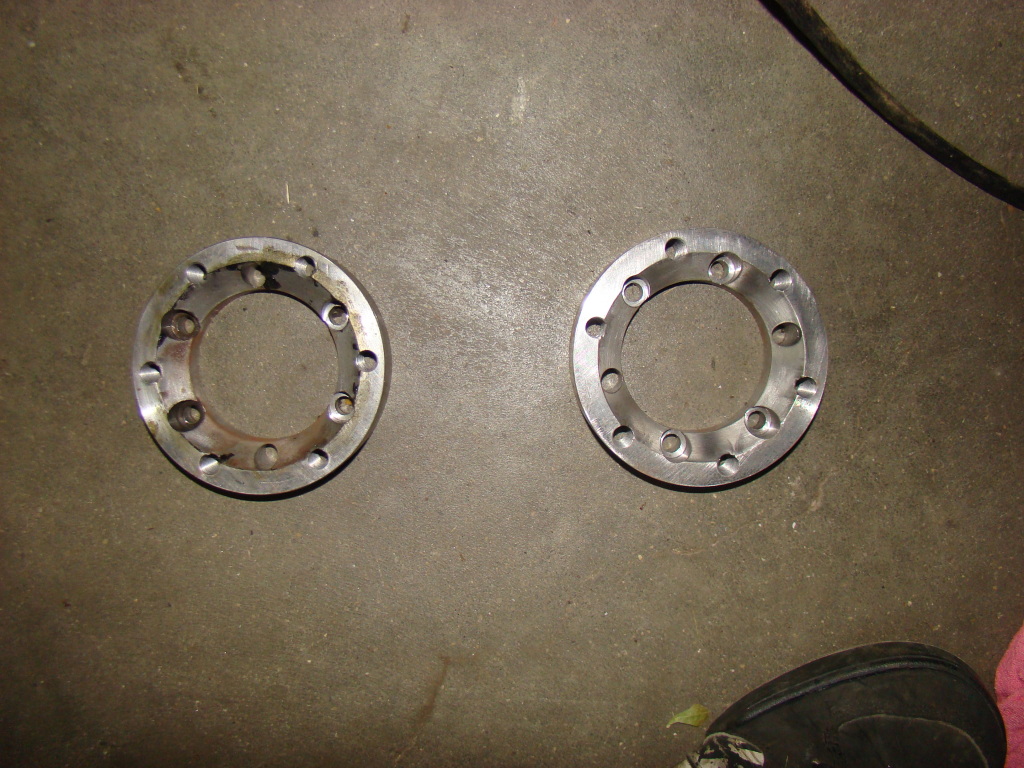
Wheels I may run.... Not sure yet... May not look right under the flares....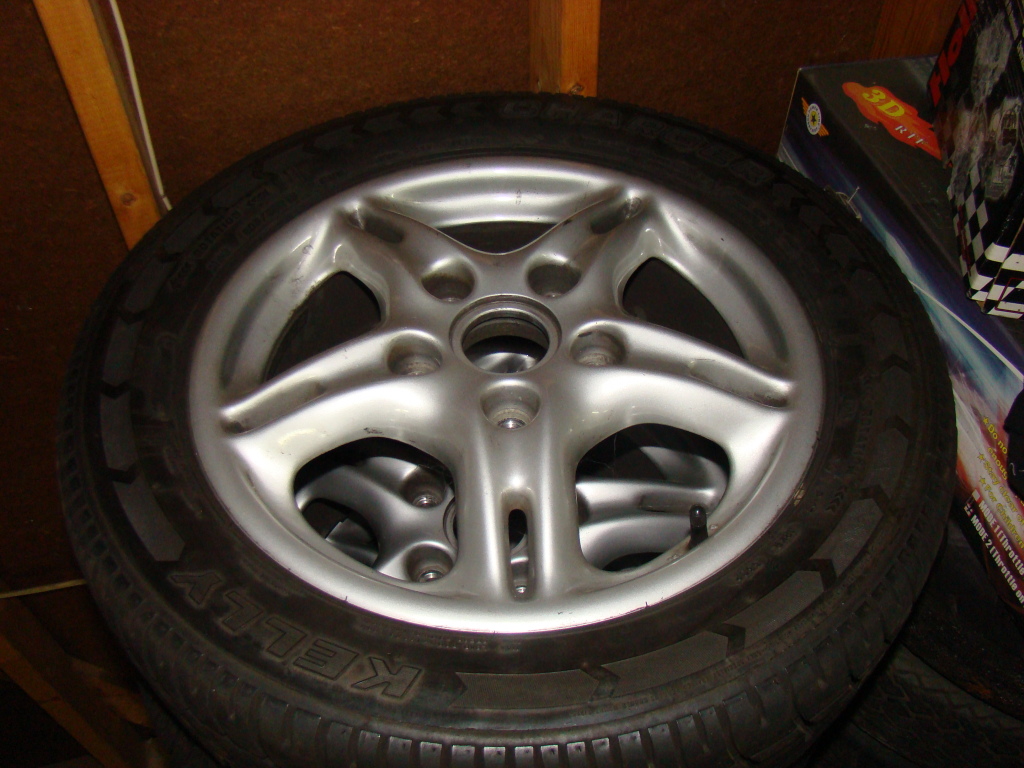
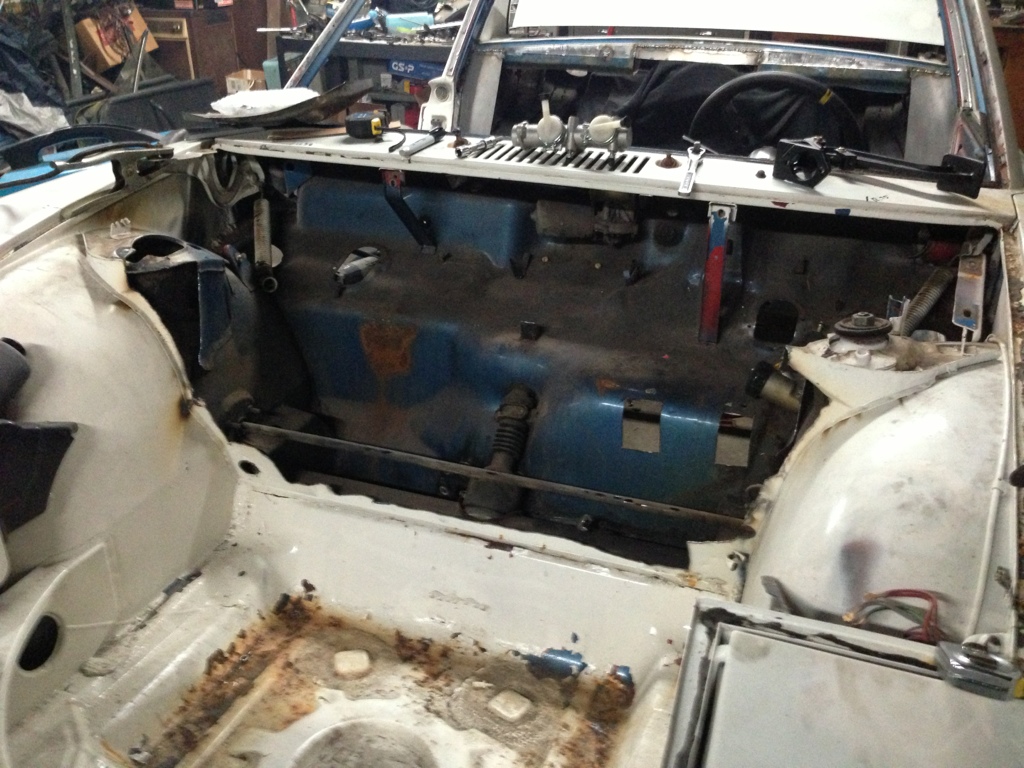
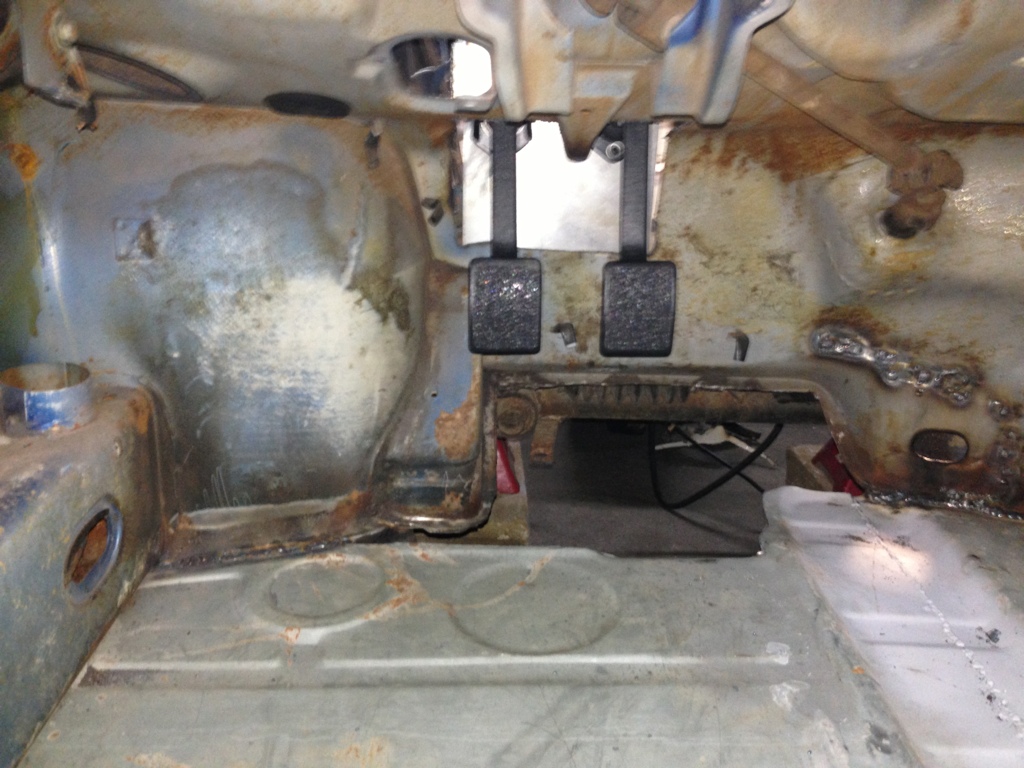
Interior is peeled out... Getting ready for a tubular set of Long supports removing the seat braces with a lower replacement and harness bar comming soon.... Along with replacement floor pans and some HELL hole work...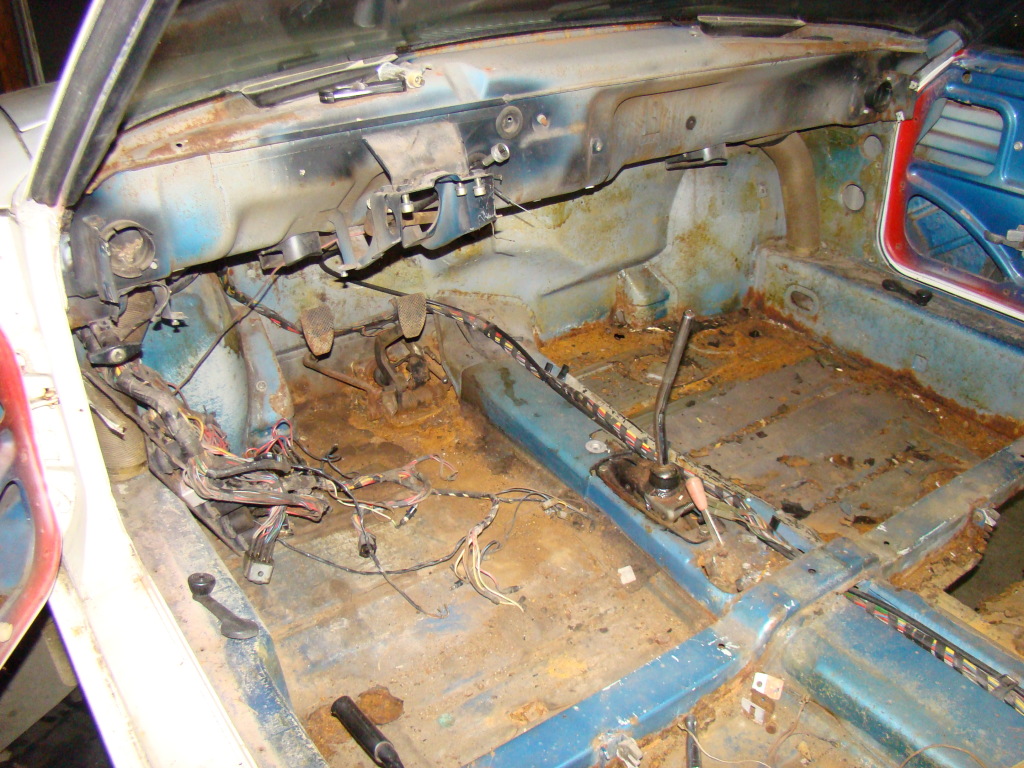
Just some updated progress trying to keep this up so you aren't bored...
Thomas
Posted by: rick 918-S Oct 7 2010, 08:23 PM
Nice start 
Posted by: tscrihfield Oct 11 2010, 07:41 PM
Nice start
Thanx for the welcome!
Got hit by a PO crap Drunk driver on Saturday and it has stopped me from working on the car... Me and my wife were headed to church and a DD (Not designated) ran into the back of us. My back is out of commision so I am pokin around on the internet for new ideas.... Anyone have any?
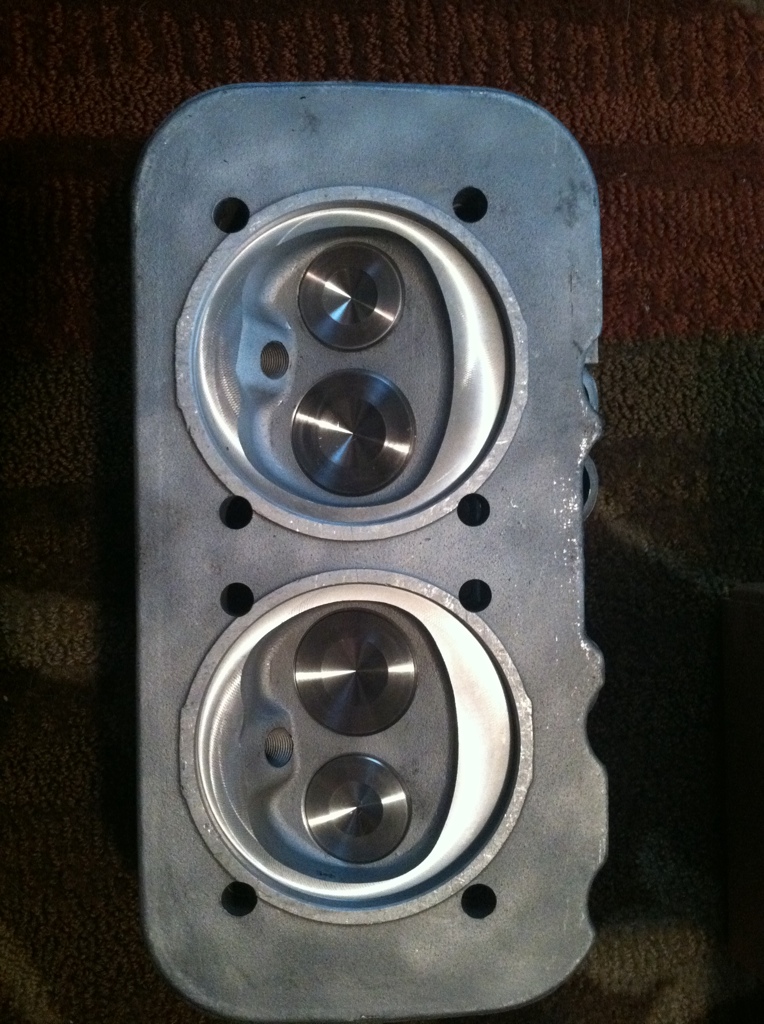
Update*... In better news I just ordered the type IV rebuild DVD from Raby and cant wait to start the rebuild. You may know from above since I have had the first car for comming up on 3 years I have had some time to collect parts and because my background is engines I decided to start there about 2 years ago. I bought a big bore kit, Web cam, H beam rods, gaskets, Lifters, cam gear....ect. Basically the only stock component is the crank, block and heads. So I will start with the back dated update of the engine.
Just thought I would include what I can for the time being. I will include pictures as soon as I can move around a bit better.
"Til then keep your stick on the ice.
and if women can't find you hansome they should at least find you handy."
-Red Green-
Posted by: tscrihfield Nov 7 2010, 03:59 PM
Just as an update. Had my first day back out in the Garage today. The doctor told me that I have 2 ruptured discs... Which sucks, so I have to take it easy. I am currently digging away at the cobbed up crappy mess that someone did some years ago and it seems that they really had no clue when it came to sheet metal fab. The hell hole had rotted a bit at the time of there so called "repair". They just took various pieces of sheet metal and welded them on one after another. No real ryme or reason just to cover holes. So as many of you may know, layers not prepped to be stacked RUST WORSE. So I am slowly peeling away. I will try to get the pictures up that I took today, tomorrow.
Anyone know of where I can get reasonable priced repair pieces for around the "Hell hole"? Also, Do I Have to peel the quarter to repair the area? I never had to go very deep into hell before...
Thomas
Posted by: ripper911 Nov 7 2010, 04:44 PM
[/quote]
And My first picture with it... Not many have one of those!!! (Reference to my Shoulder)
[/quote]
I do!
Posted by: tscrihfield Nov 7 2010, 07:38 PM
[quote name='ripper911' date='Nov 7 2010, 06:44 PM' post='1391863']
[/quote]
And My first picture with it... Not many have one of those!!! (Reference to my Shoulder)
[/quote]
I do!
[/quote]
AWESOME! Maybe we could start a thread of Porsche Tattoos? My wife has one to match!
Posted by: hot_shoe914 Nov 7 2010, 08:12 PM
Anyone know of where I can get reasonable priced repair pieces for around the "Hell hole"? Also, Do I Have to peel the quarter to repair the area? I never had to go very deep into hell before...
Thomas
Restoration Designs.
Posted by: tscrihfield May 11 2011, 06:00 PM
So it has been entirely way too long since my last update but I have been up to some things lately and I will try to catch you up as much as I can....
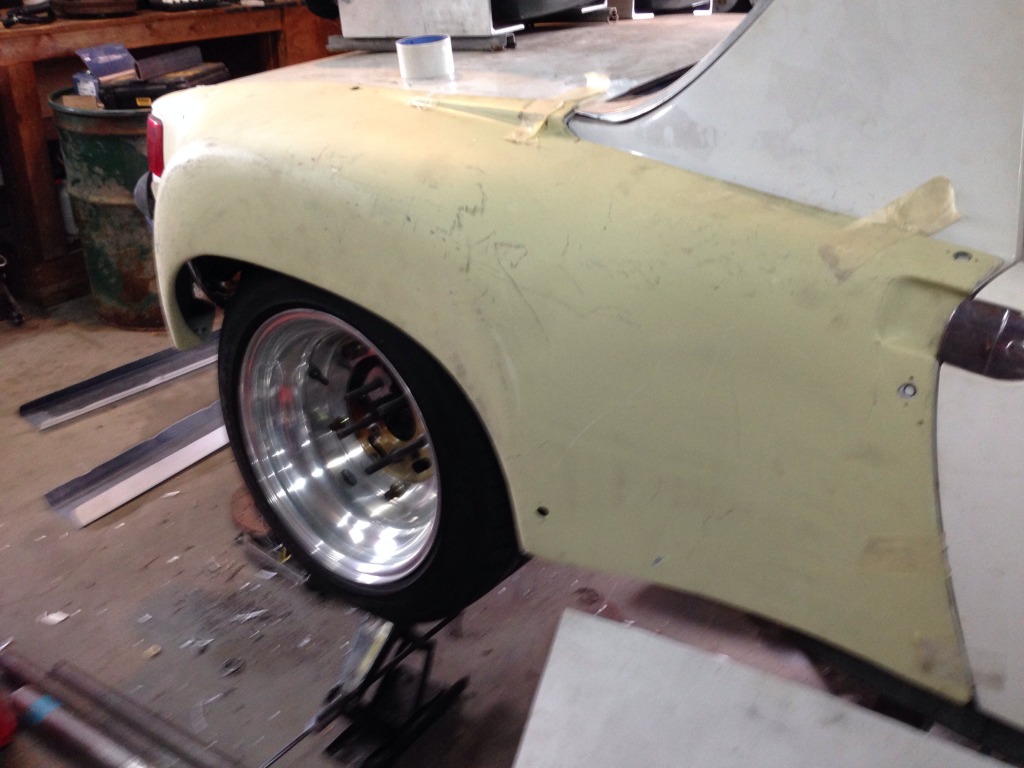
So I bought some wheels for the car back in February, I put my suspension back on for a day or two so I could mount them and see how they look.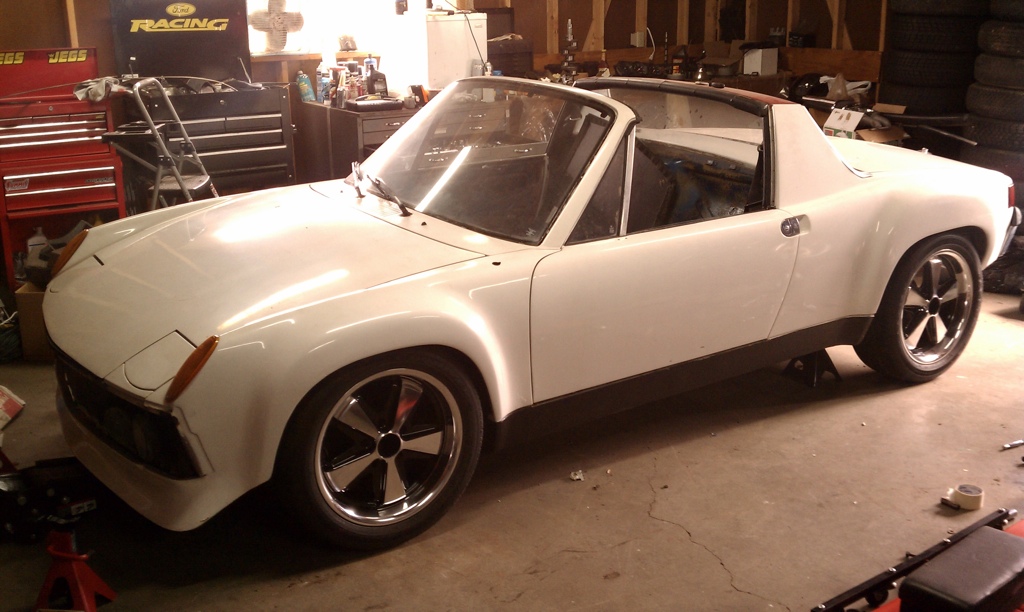
I like them! Cant wait to see it all the way down with the engine in.
Then after the suspension came back off I started with the modification of the front struts. Talking with a friend he had recently modified his Koni fronts to raise the spindles and lower the car. That way the car is not lowered by the torsion bars and the suspension is closer to it's original geometry. So I have BOGEs and thought, Why not....
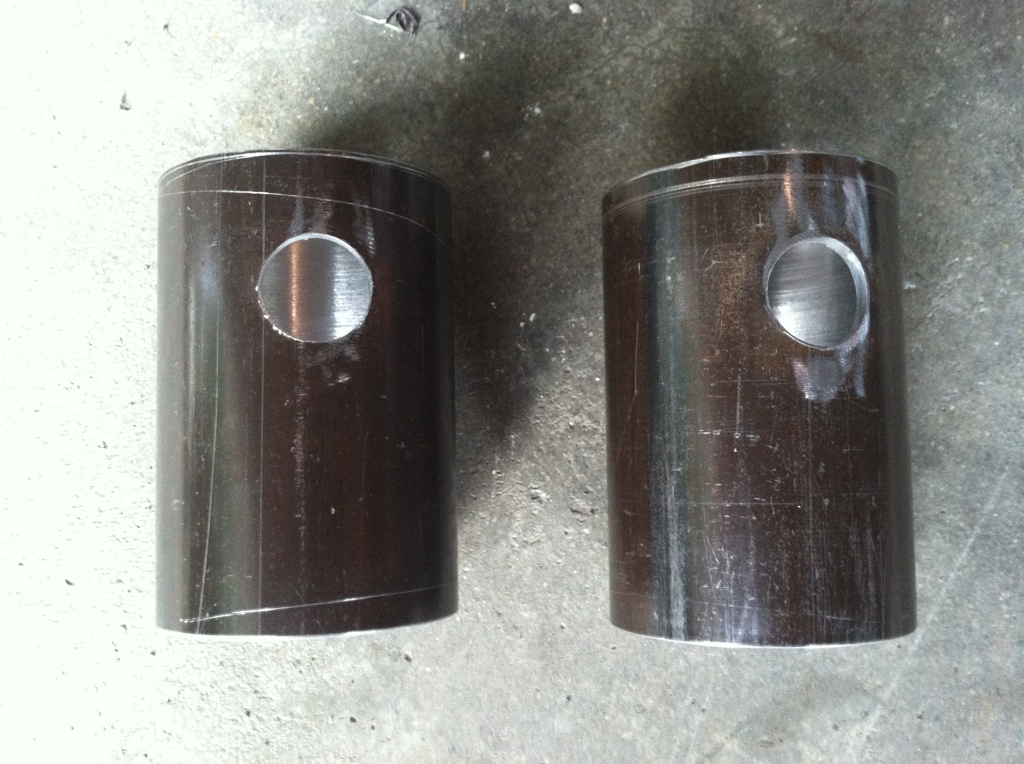
Because Boges are not made the same way as Koni's I had to take a different route. I started by removing the bottom Mount.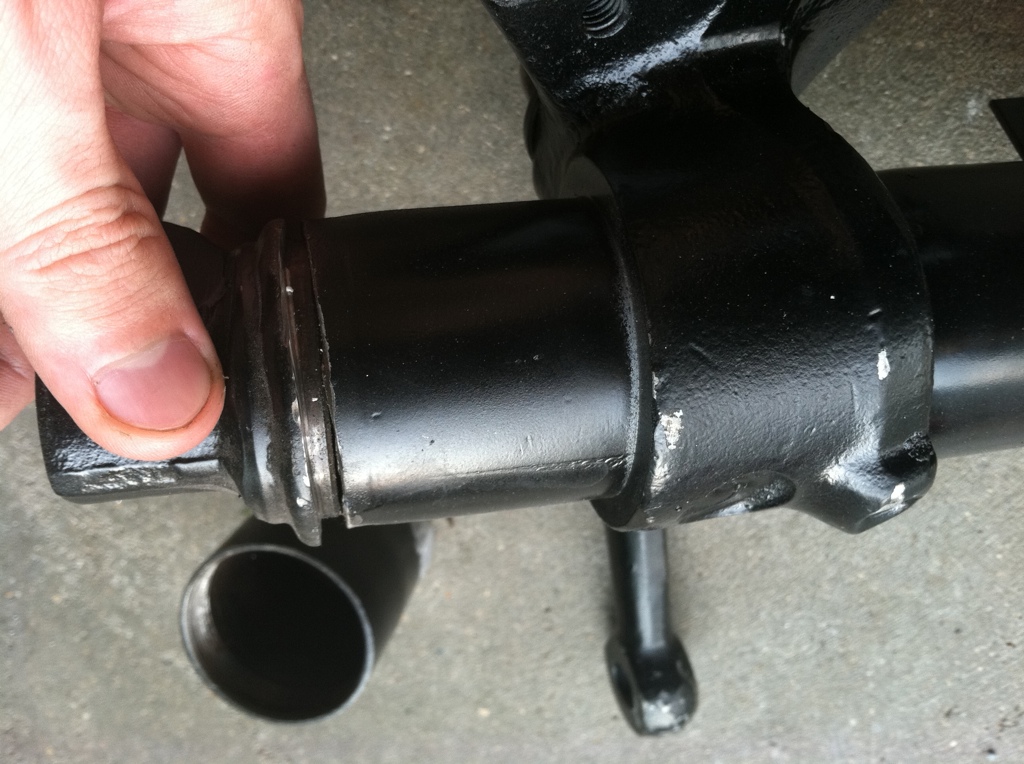

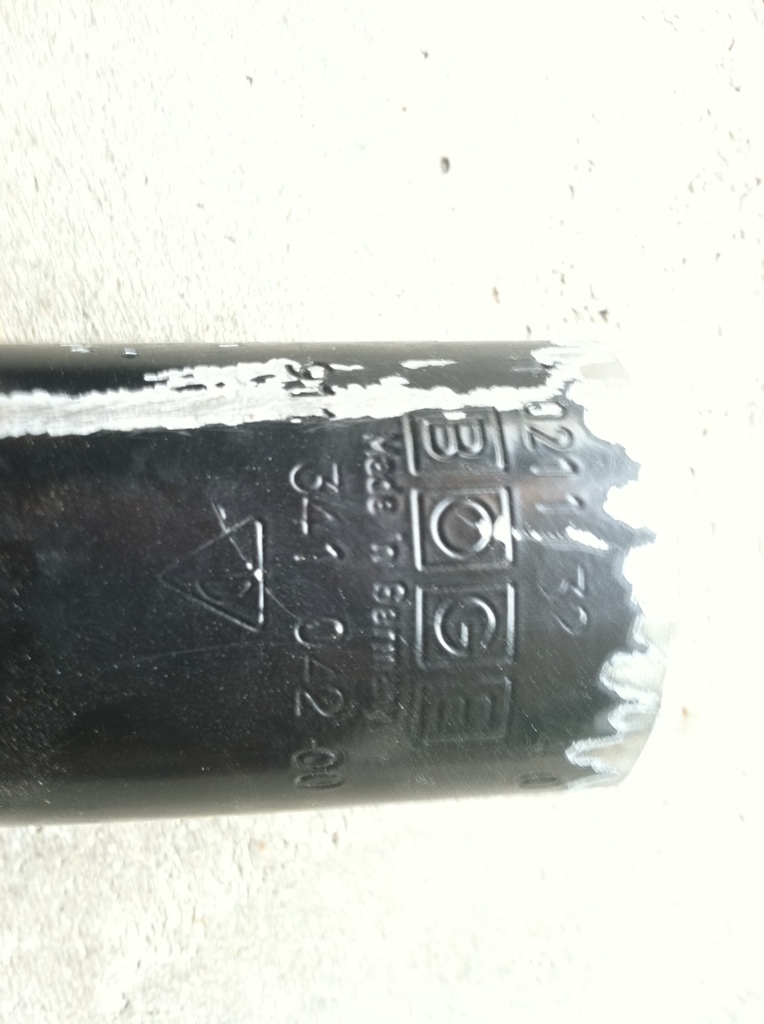
And then I cut 1.5" out of the top section just above the BOGE logo... 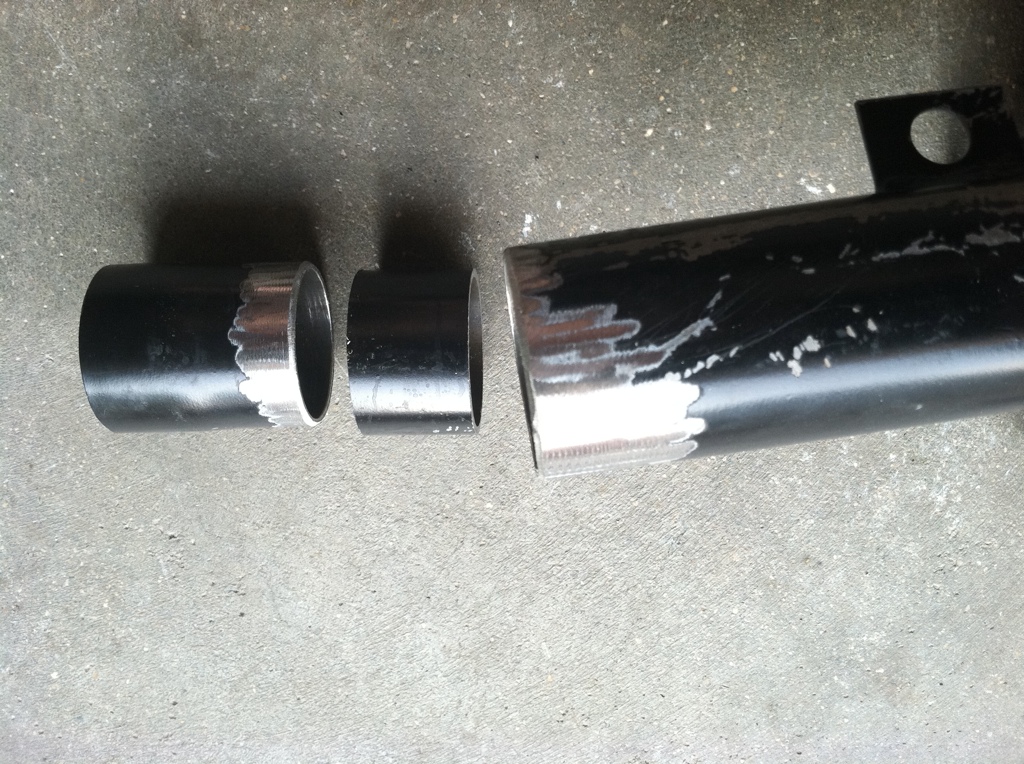
Then I tack welded the threaded piece of the tube back on the strut itself. 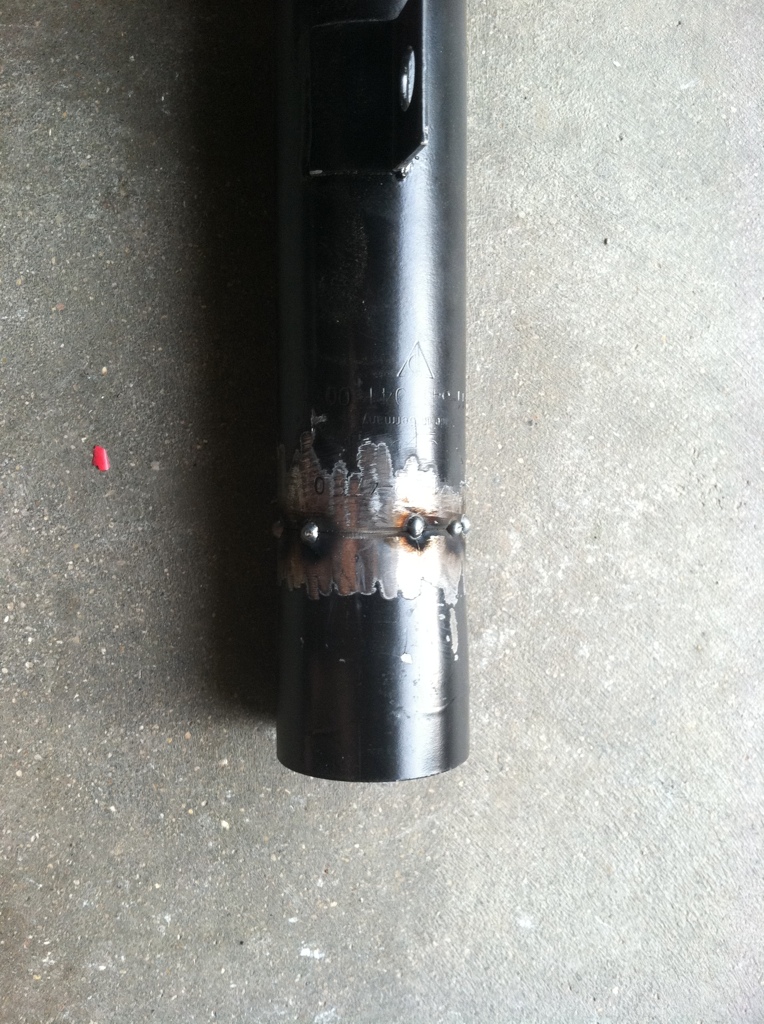
Tomorrow I plan on stopping by my dads shop to turn down a piece of 4140 to add an 1.5" to the bottom and weld the Ball joint mount to it. 
I would like to get back with my engine as well... I am just playing the sit around and wait game with my Heads...... I hope they make it back from CA. 
As it has been the longest winter in Ohio that I can remember... Now that it is seeming to get warmer, I can get back out in the garage more to work... So I will post more as the weather improves.
Posted by: Spoke May 11 2011, 07:36 PM
...I had just bought a Garage (Just so happened to have a house on the same property...
Ah, a spoken by a true car guy.
Keep up the good work.
Posted by: porsche_dreamer May 11 2011, 08:14 PM
Hey just out of curiosity are you still at Bennett's? I tried to get on there a few months back, and he didn't seem to interested in hiring anyone. Car looks great though. You should attend the porsches 2 oxford show at the end of july, if you get her running.
Posted by: tscrihfield May 11 2011, 08:51 PM
Hey just out of curiosity are you still at Bennett's? I tried to get on there a few months back, and he didn't seem to interested in hiring anyone. Car looks great though. You should attend the porsches 2 oxford show at the end of july, if you get her running.
No I left there back in 2007. Bob actually closed the shop early this year. He is still doing work for some folks. He just won another Concourse show... He tought me a lot! Man is a genious when it comes to working sheet metal!
As far as P2O I will be there regardless, been there the past two years. Most likely wont be on the road until next year though. I have too much going on with work this summer and other projects (Wifes Projects!) with the house... But it will be cutting it close as long as my heads come back otherwise I will have to save for some of Raby's Heads... Which would just suck!
But it would set me back a pace or two! But it seems like you live close enough where you from Eaton/Richmond area?
Posted by: tscrihfield May 11 2011, 08:53 PM
...I had just bought a Garage (Just so happened to have a house on the same property...
Ah, a spoken by a true car guy.
Keep up the good work.
Thanks!
Car Blood runs deep... it seems as if we are born with it!
Posted by: porsche_dreamer May 11 2011, 08:59 PM
Im on the edge of liberty, actually closer to oxford. I have been to P2O the last 4 years. I hear its gonna be big this year.
Posted by: Gint May 12 2011, 06:00 AM
Nice progress.
What are those wheels? They don't appear to be Fuchs.
Posted by: tscrihfield May 12 2011, 10:21 AM
Nice progress.
What are those wheels? They don't appear to be Fuchs.
They are actually a Fuch replica. 17 inch by 7 wide.
Thomas
Posted by: tscrihfield May 12 2011, 10:25 AM
Im on the edge of liberty, actually closer to oxford. I have been to P2O the last 4 years. I hear its gonna be big this year.
I hope so! it seemed considerably bigger last year in comparison to the year prior.
I only live about 25 mins from you though! Interesting!
Posted by: tscrihfield May 13 2011, 09:57 PM
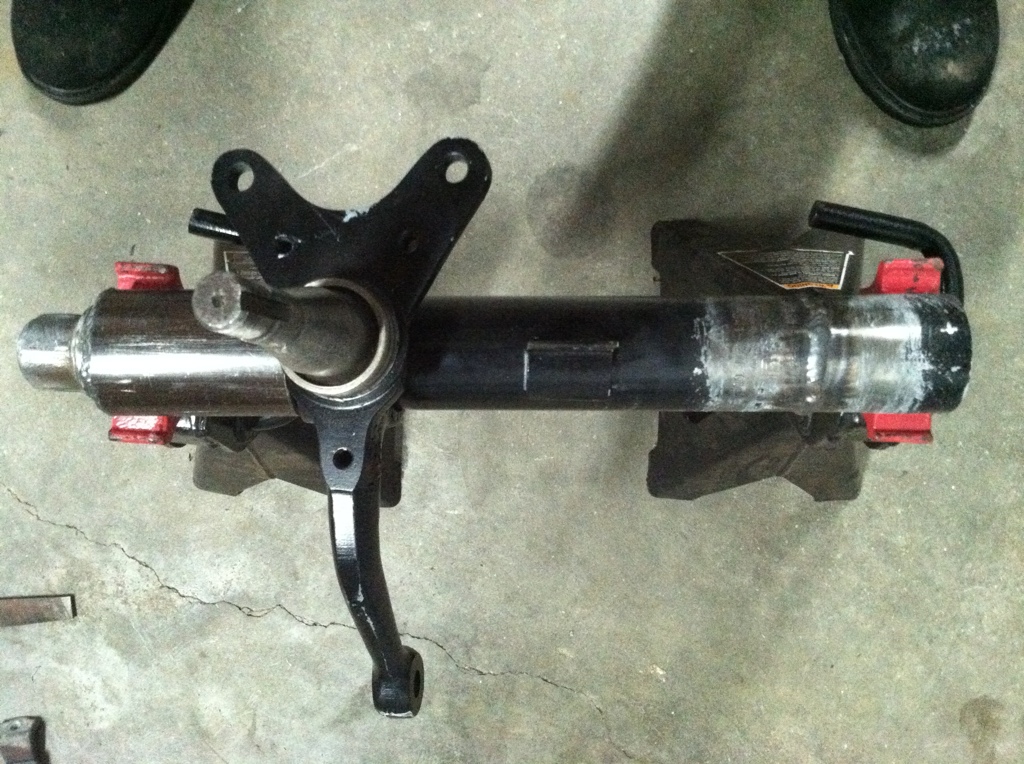
Okay so I finally got to complete the construction on my lowering struts...
I made the sleeve to fit the bottom of the strut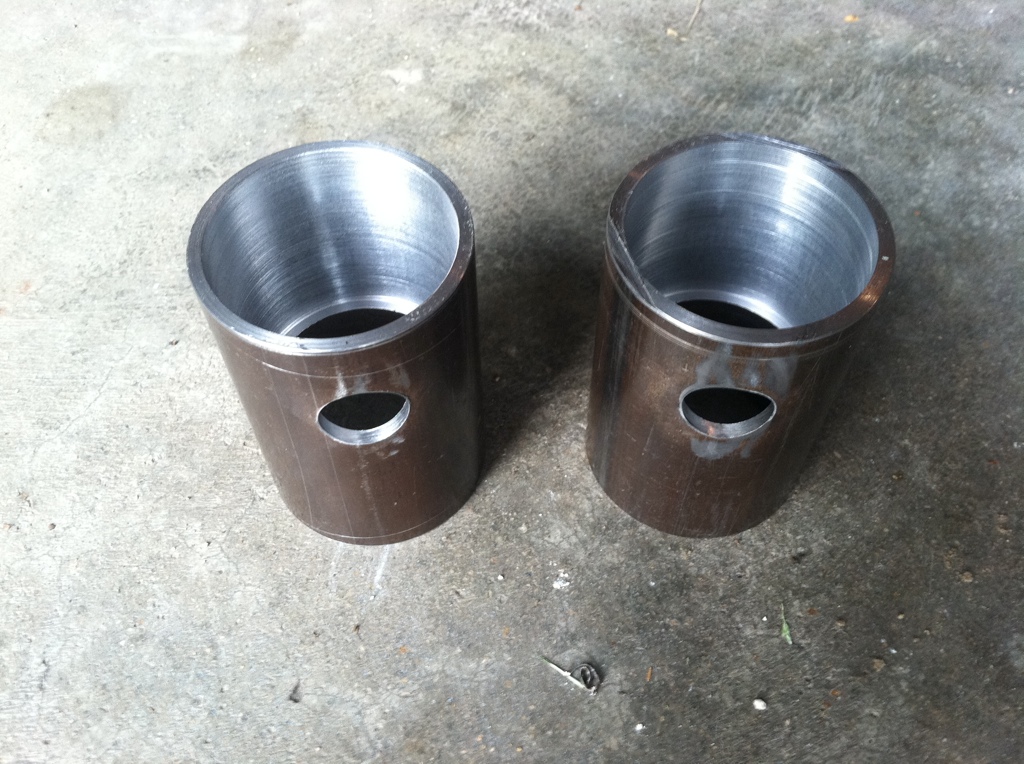
I decided to plung mill a good 5/8" hole to plug weld them against the strut tube much like the way the spindle is attached.
Then I welded the Ball joint mount to the sleeve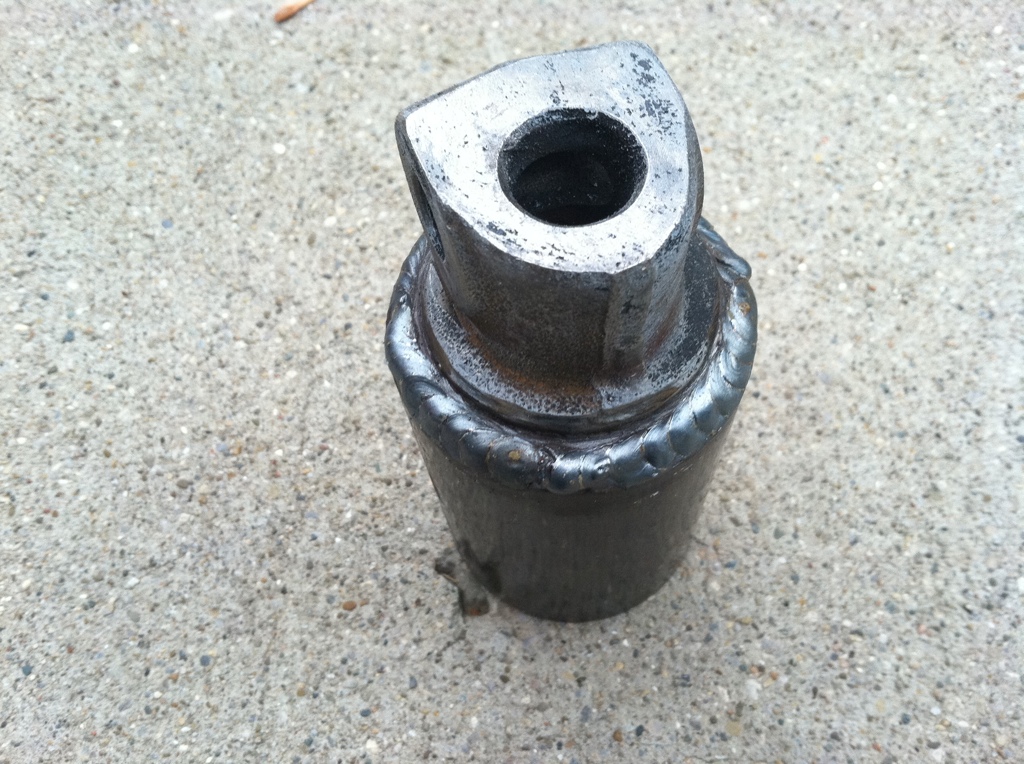
After I welded the mounts on I then slid the sleeve over the strut and tacked it on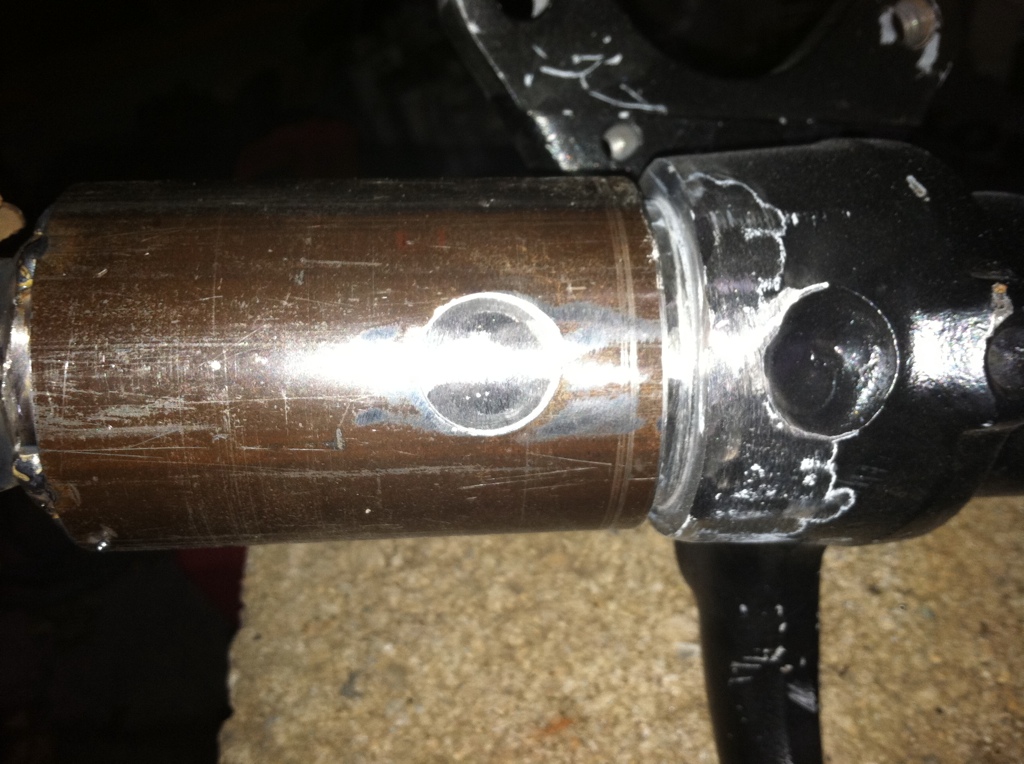
After I measured everything and ensured that it was square I finished the welding.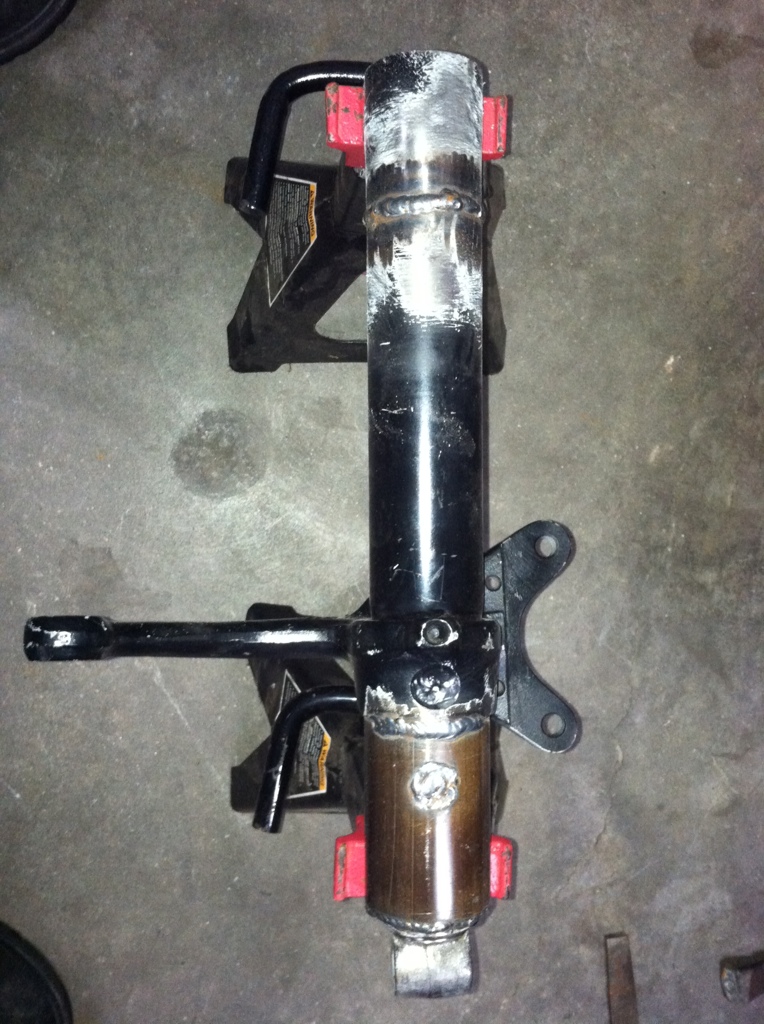

Now for Paint..... Hmm what color???? 
Posted by: abnrdo May 14 2011, 03:28 AM
Thats nice! Never thought about lowering a 914, cause they are pretty low already! Nice work!
Posted by: Cairo94507 May 14 2011, 07:13 AM
Man you have some serious skills no doubt. How much did you move the strut arm? 19mm? 25mm? Inquisitive minds want to know.
Posted by: tscrihfield May 14 2011, 05:53 PM
Man you have some serious skills no doubt. How much did you move the strut arm? 19mm? 25mm? Inquisitive minds want to know.
38mm or 1.5".
The reason I lowered the suspension in this fashon is because the stock Geometry is the prime handling of the car. (Hince why Porsche's engineers made it that way) But like most vehicles if you lower the center of gravity the body roll decreases and handling increases. So with this modification I have integrated both. Lowering and keeping stock geometry. The only downside is the bumpsteer gremlin.... Uhhg happens to almost every car when lowered**.... So in the Near future you will see my bump steer kit that I will make to accomodate the modified struts.
** for those who are unaware of Bumpsteer. It is a condition caused by changing a geometry in the steering set-up, Most often lowering. (Also happens to poor engineered automobiles as well!) All while at level ride height the vehicle may be aligned fine but when the suspension is compressed it pushes or pulls the tie rods or Heims whichever you might have, causing it to oversteer, understeer, pull or push.
Hope this helps and inspires!
Thomas
Posted by: FourBlades May 14 2011, 06:15 PM
Love those struts man. I have never seen anyone make lowering struts that way but it makes perfect sense if you have the tools you need. Your car is going to look really wicked lowered that much.
I am nearly done welding your old headlight buckets and front valence into my IMSA car. It took way longer than I expected but I went down a lot of side tracks that had to be done to get here.
How do you plan to lower the rear of the car while maintaining any suspension travel? Have you seen the kit that Chris Foley makes? I think Jeff Hail is using the same one.
John
Posted by: tscrihfield May 14 2011, 07:19 PM
Love those struts man. I have never seen anyone make lowering struts that way but it makes perfect sense if you have the tools you need. Your car is going to look really wicked lowered that much.
I am nearly done welding your old headlight buckets and front valence into my IMSA car. It took way longer than I expected but I went down a lot of side tracks that had to be done to get here.
How do you plan to lower the rear of the car while maintaining any suspension travel? Have you seen the kit that Chris Foley makes? I think Jeff Hail is using the same one.
John
Thanks!
I subscribed to your thread. I really cant wait to see yours either! Glad that the parts are good use to you!... I totally understand side tracked...... Ohhh look something shiny......
As far as the rear.... I have a few idea's most likely perches but still undecided. I use a program called Inventor it is an add on for auto CAD and I often play with different scenerios with concepts to figure out what will work best with loads and travel. I am not familiar with the set-up from Chris Foley. Is he the owner of one of the racing business CFR?
Oh and for those of you that like the ideas that I come up with such as Lowering struts and my 911 SC draive shaft conversion. I am planing on making a DIY kit for each of the ideas that I design so you can do it too. I know that in ownership for a lot of folks it means doing the work and making it your own. So even though you might benchmark from someone else. making it and installing it yourself makes you feel like the car is more than just and another driveway ornament.
Thanks,
Thomas
Posted by: Gint May 15 2011, 11:36 AM
What are those wheels? They don't appear to be Fuchs.
Thomas
I figured that. What brand?
Posted by: tscrihfield May 15 2011, 07:53 PM
What are those wheels? They don't appear to be Fuchs.
Thomas
I figured that. What brand?
Sorry should have expected that....

Not sure the brand but CIP1 distributes them... I figured they arent too expensive with the discount back a few months they were $700 shipped and if they dont work out I will buy the forgeline wheels I have been eyeballing.... But the quality of the wheel is much better than I expected! Really a great deal!
Thomas
Posted by: Gint May 15 2011, 09:13 PM
Yeah, I kinda like the looks of them too. The petals are narrower and the corners look a little sharper. And 17" is a plus too. If you get a chance to get a closer pic I'd like to see it.
Posted by: tscrihfield May 16 2011, 04:45 PM
Yeah, I kinda like the looks of them too. The petals are narrower and the corners look a little sharper. And 17" is a plus too. If you get a chance to get a closer pic I'd like to see it.
17's were a must due to more tire sizes/types to choose from for performance tires.
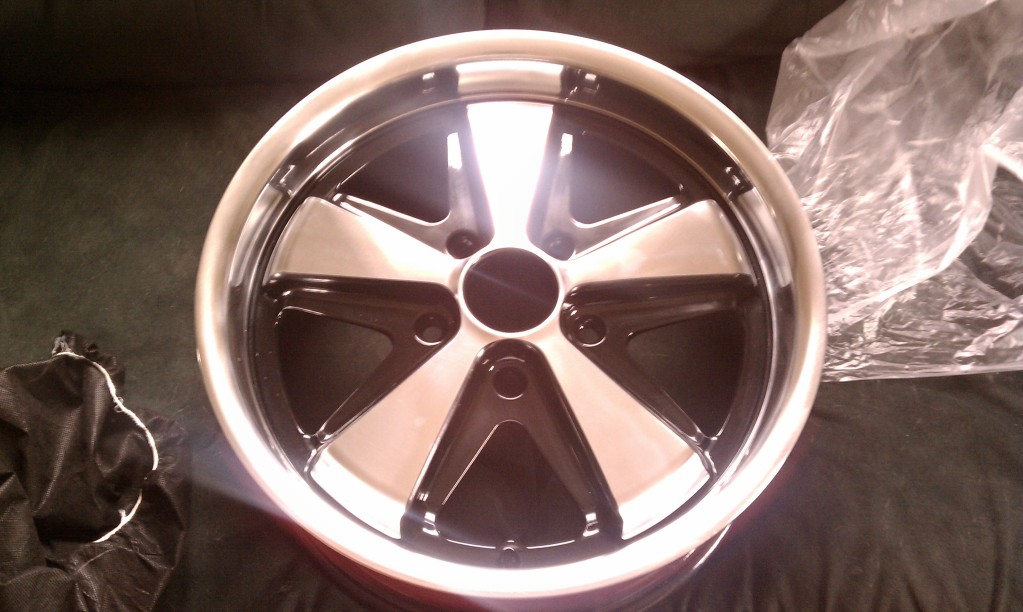
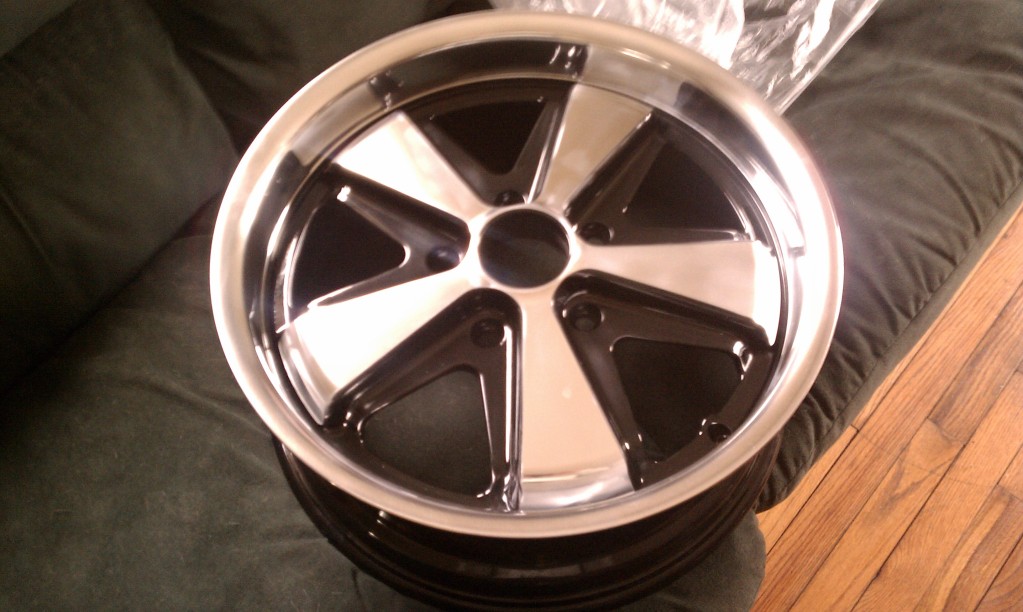
These are pretty close prior to the tires going on. Let me know if this helps. I can try to get a better picture if you need.
Thomas
Posted by: tscrihfield Jun 27 2011, 07:16 PM
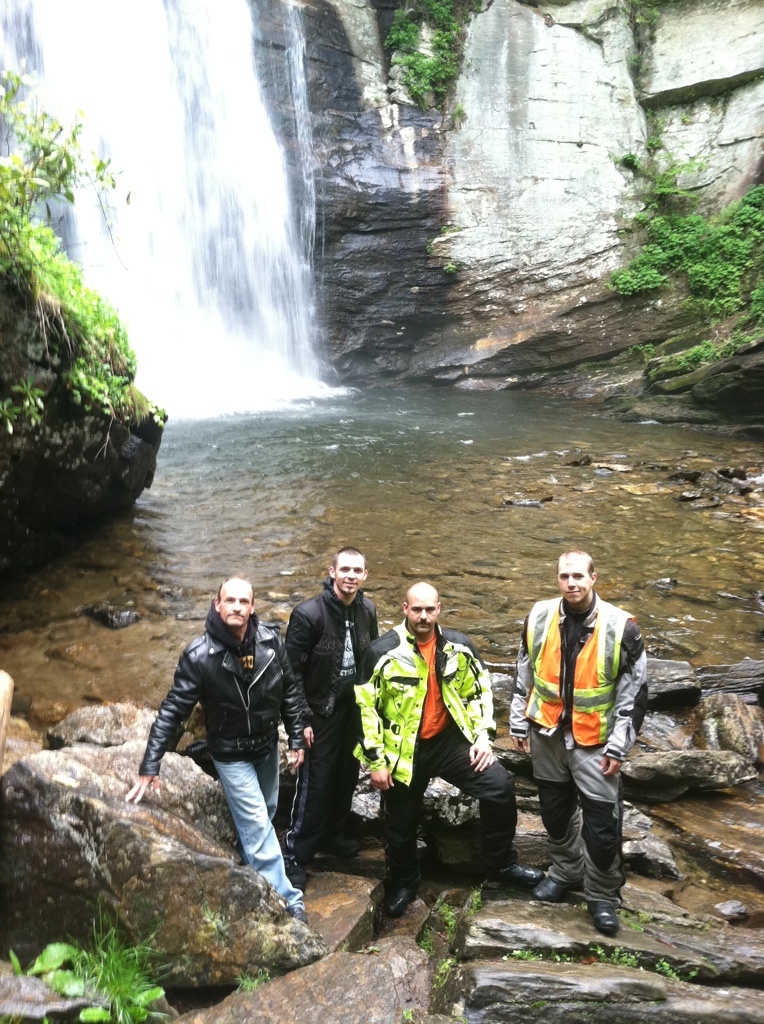
Well it has been way too long since I last updated... Well to give you some reasons why is because summer is here... The bike tends to take some of my time when the weather gets nice... So back in May dad and I took a trip to NC to hit some twistys and I took him down the Dragon for his first time.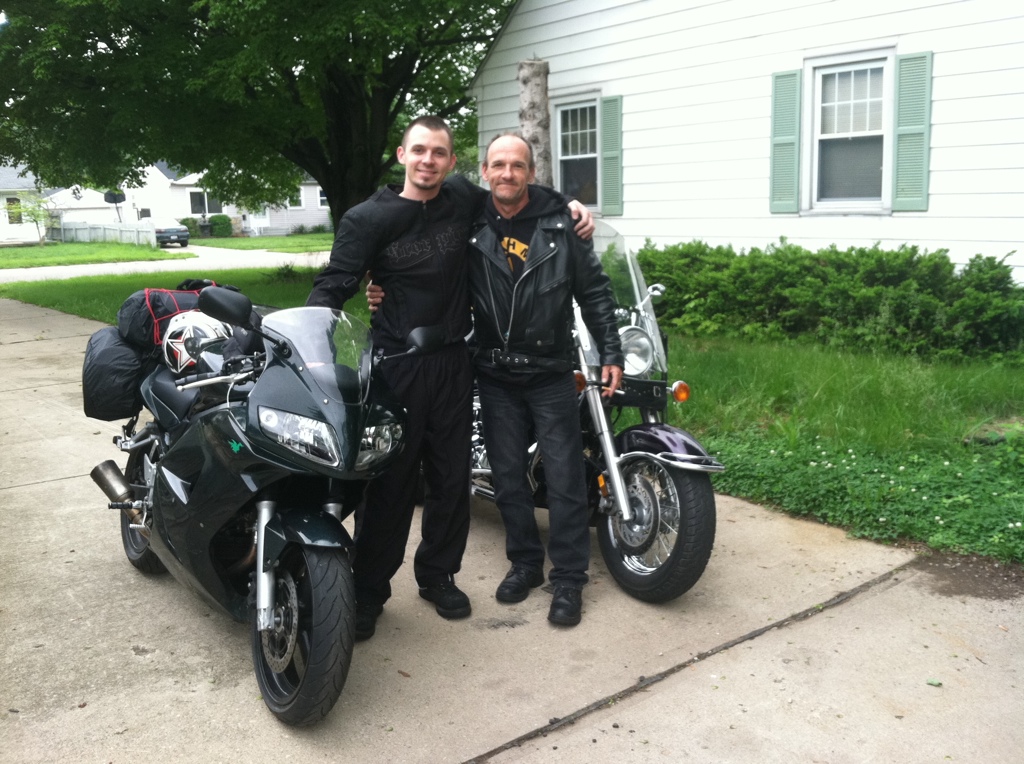
And I got back with a special Delivery... Oh yeah... 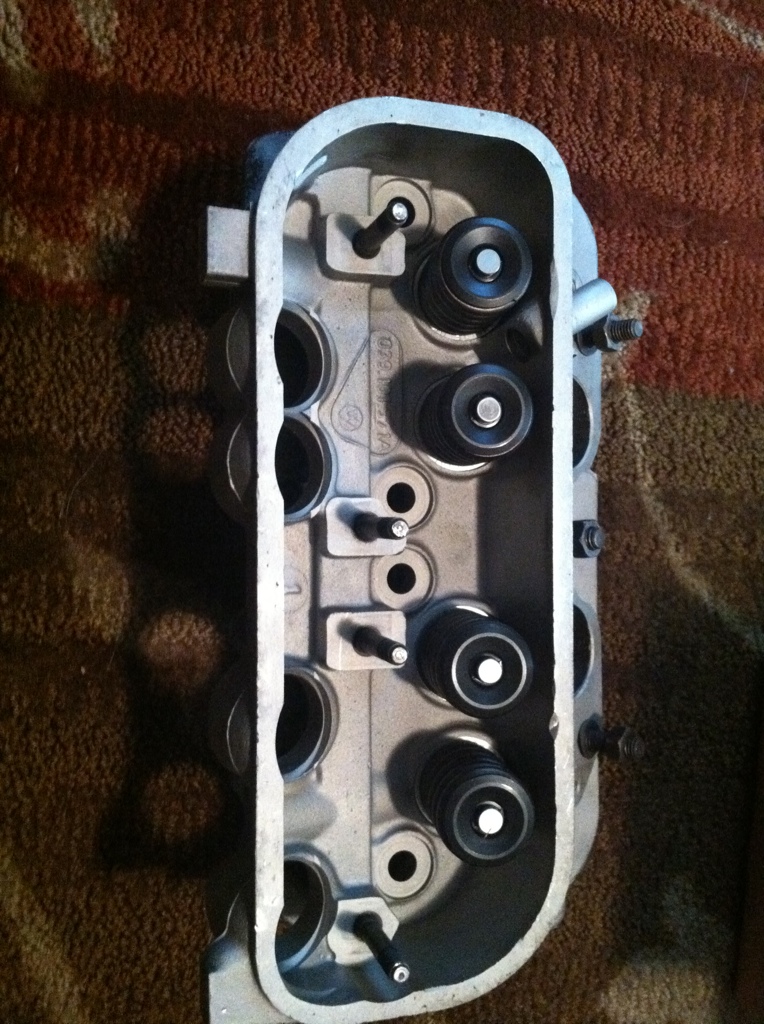
And since then I have been busy with Work, Wife, and Life... But this weekend I got to spend a little time with my teener... I painted the front struts finally. I know that it is really close to Bilstein Green but it is because I like the color. Not trying to make it look like something its not... 
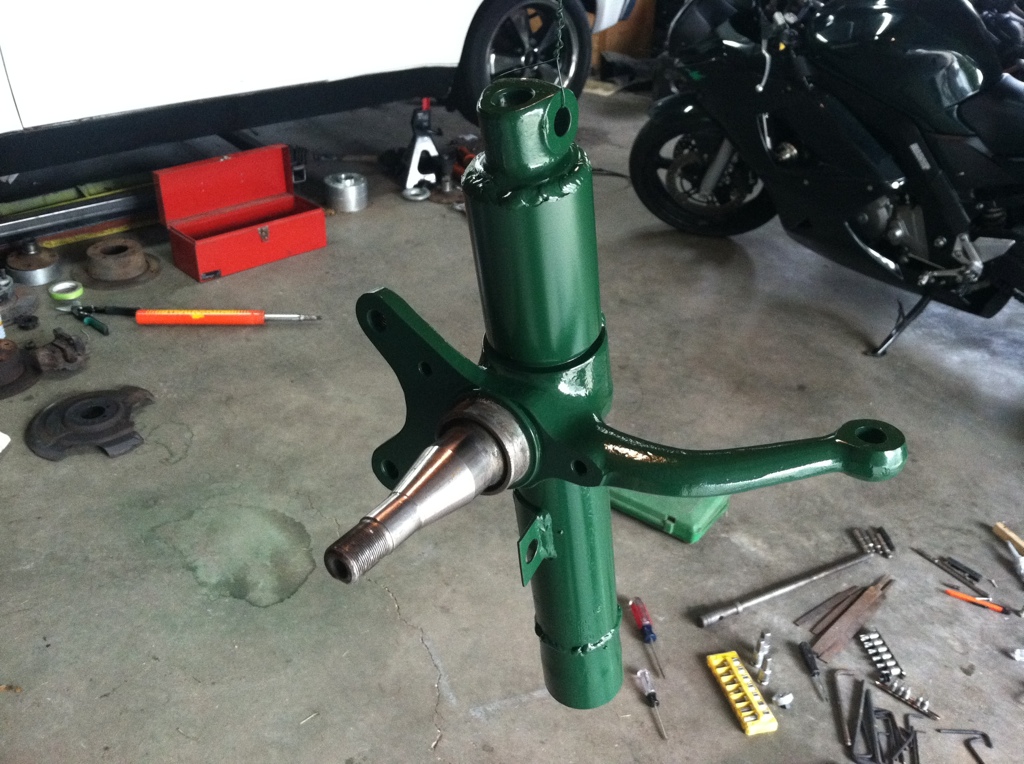
But that is a breif update. I will post more soon and more often now that I have a little time for the next couple of weeks.
Posted by: porsche_dreamer Jun 27 2011, 10:20 PM
Looks like a lot of fun. I like the green too!
Posted by: tscrihfield Jul 9 2011, 10:46 PM
Well, I have a few things going on at once but tonight I got a little bored and decided to start on the Megasquirt build. I am going with the MS3 with the expansion. So I set up the work station. Static dissipative mat : check, soldering iron : check, solder : check & I was good to go!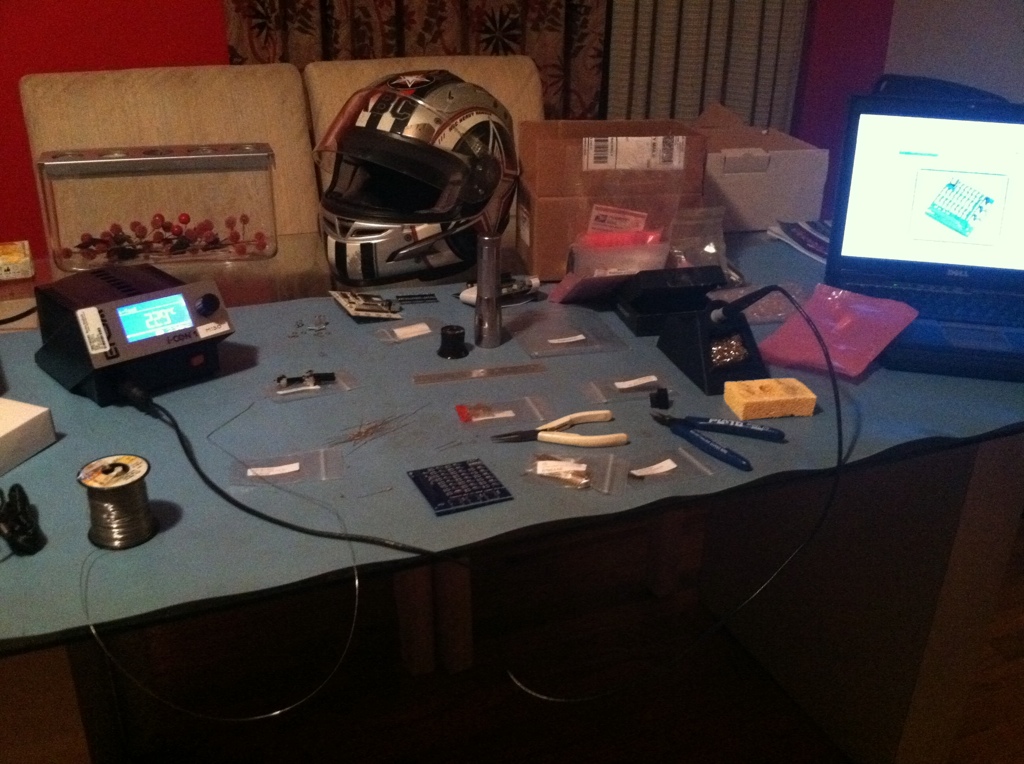
It only took about an hour to populate and solder the JimStimX. Good board to start on to get a feel of the material! Not what I'm used to soldering! I forgot how lucky I have it soldering military grade products! None the less the quality is still good. 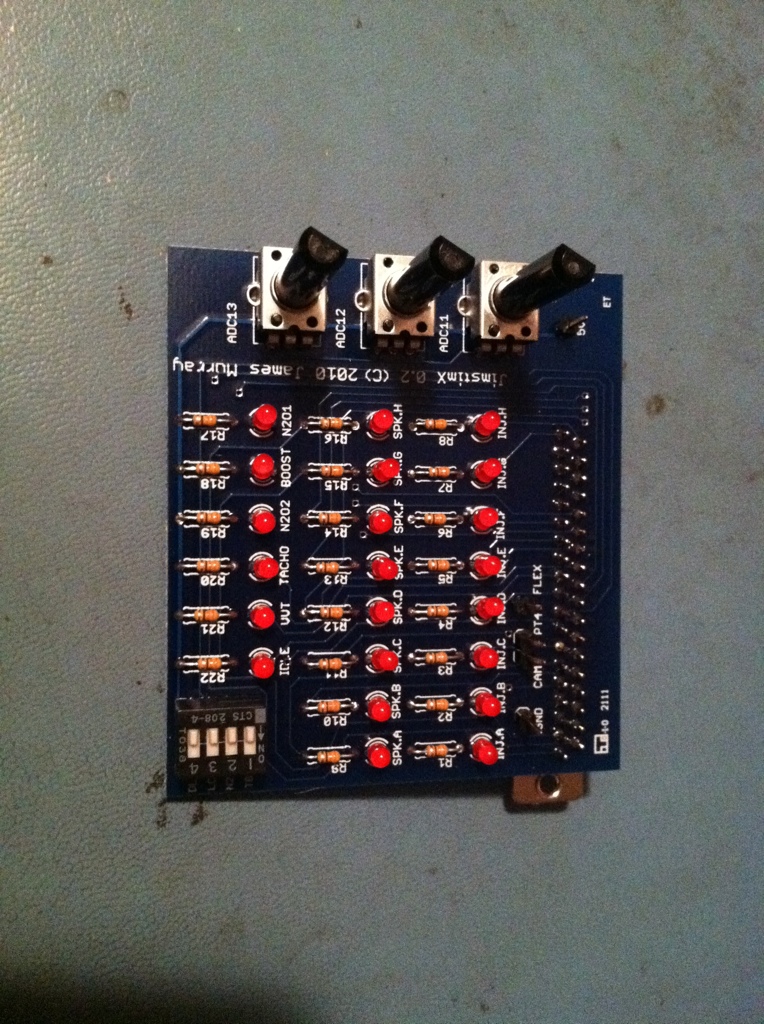
Fun for evening that was mostly uneventful!
Posted by: tscrihfield Aug 18 2011, 05:39 PM
Again, a while since the last post. As of now I have finished the Megasquirt it is just waiting on the rest of the engine to get finished.
This afternoon I put the crank assembly together. 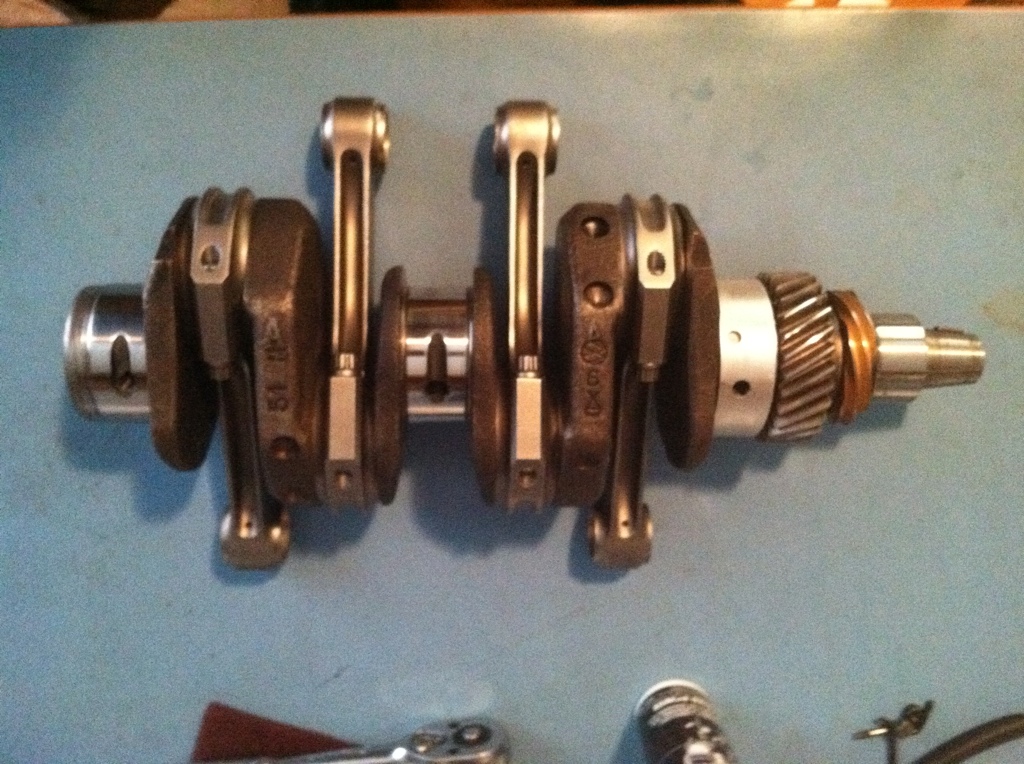
Can't wait to get the rest together!
Posted by: jim_hoyland Aug 18 2011, 09:15 PM
Thomas, Thanks for sharing. Really enjoy your narritive and ideas.
Posted by: tscrihfield Aug 22 2011, 08:11 PM
Thomas, Thanks for sharing. Really enjoy your narritive and ideas.
Thanks Jim! I try to write it as I would a story. Which is what it is to me... Hopefully it has an ending!

As far as Ideas. I really have a mind that never stops, especially with the car. Glad you like them. I have many more for the car, some of which are going to be shot down by the folks who have strong opinions!

Thomas
Posted by: tscrihfield Oct 1 2011, 09:08 PM
The last photo I posted of my entire car the suspension was only mocked up. I was still taking measurements for spacers I was making, Struts I modified, rear suspension what nots and the whole bit. Today after spending all morning in ASQ exams I finally did some extensive work to the car. All of the suspension is complete minus brake parts. (Which I am waiting for a large shiment from Wilwood engineering.) The front end is set torsion on the highest setting and this is how low it sits already! I love the raised spindle! The car is still sitting high for what I am looking for but looks great. Im thinking of placing the roof at 40" and calling it the 914-40 like the ol' Ford Gt-40 based on its 40" roofline. Seeing it on its own paws for the first time in a year was pretty exciting. ~Enjoy~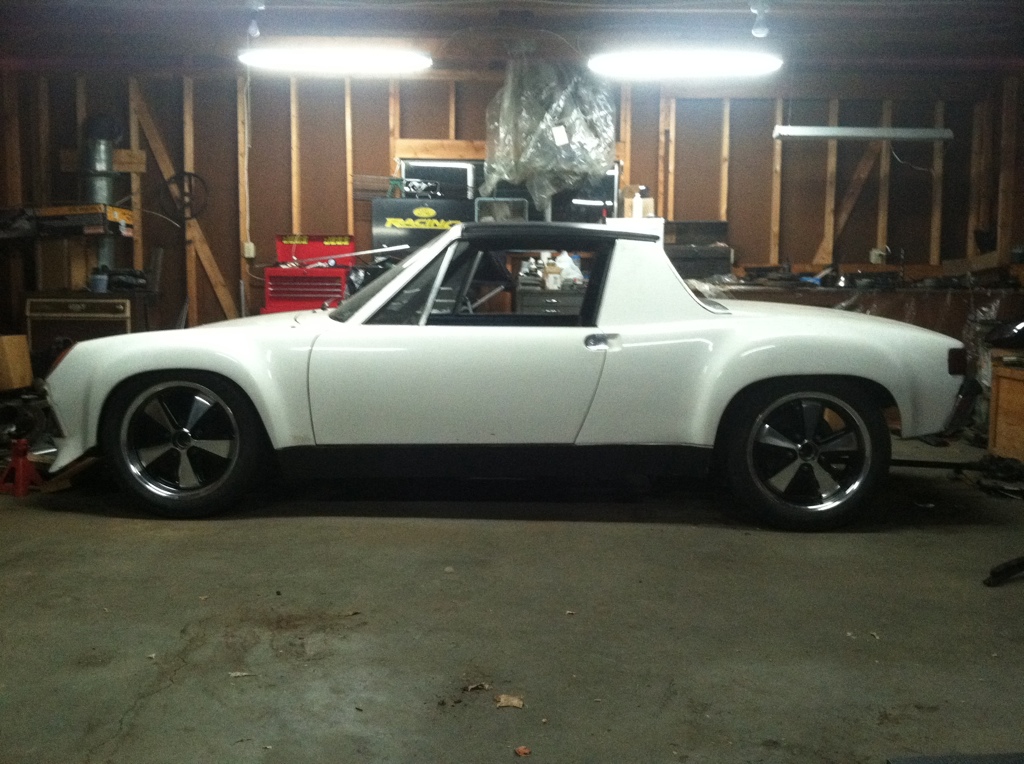
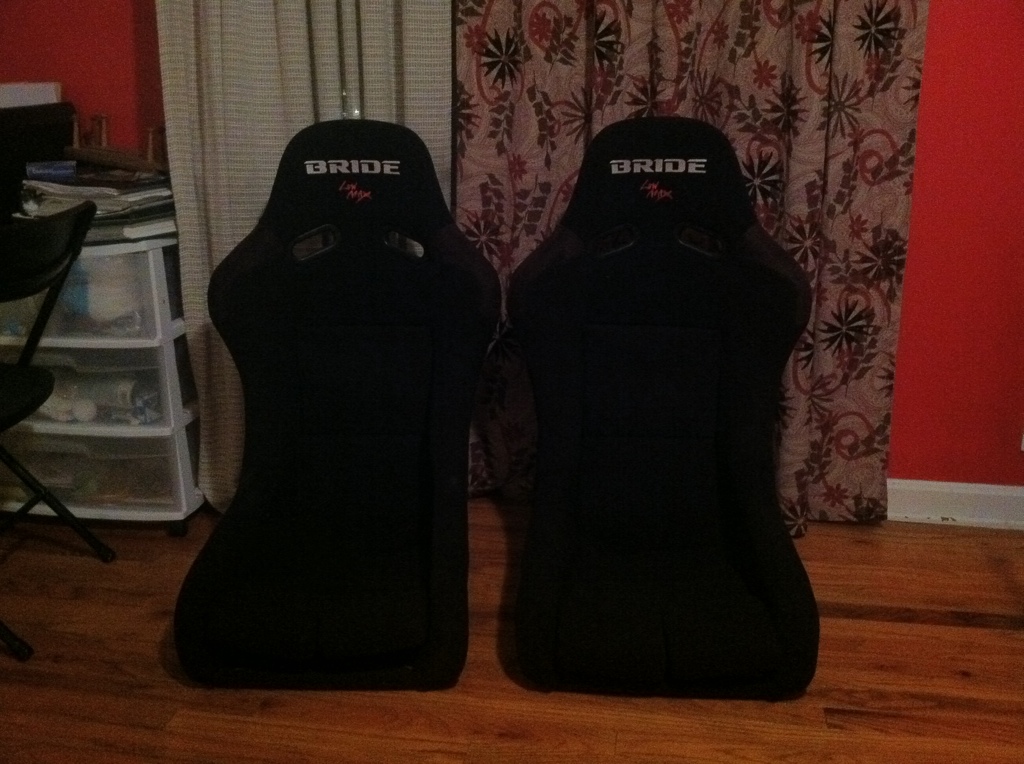
In other news on the car... I picked up my seats. I found a set of Bride Low max's a guy was parting with for about 66% off of retail price, so I nabbed them up! They only weigh about 7 lbs a piece which is a plus. 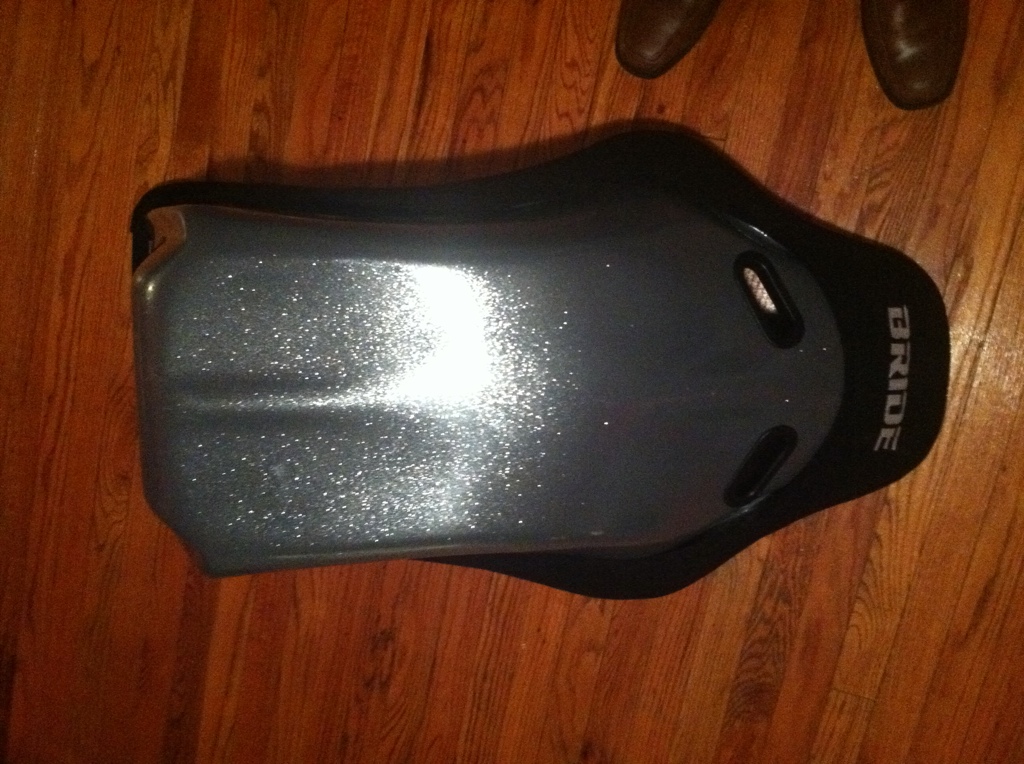
On the engine... I am about to seal up the case. I have double and triple checked clearances, now it is seal and torque time for that. I will post photos of the engine progress when there is more done.
Cheers
Thomas
Posted by: rnellums Oct 2 2011, 12:43 AM
This looks amazing! Keep it up!
Posted by: Ericv1 Oct 2 2011, 07:57 AM
I plan on a five lug conversion next year. I saw those replicas in a Excellance magazine ad. They look awesome. Keep up the good work.
Posted by: tscrihfield Oct 3 2011, 03:28 PM
This looks amazing! Keep it up!
Thanx Ross! You have a couple of nice beauties yourself! Cant wait to see the racecar!
Thomas
Posted by: tscrihfield Oct 3 2011, 03:30 PM
I plan on a five lug conversion next year. I saw those replicas in a Excellance magazine ad. They look awesome. Keep up the good work.
Thanks!
I love the 5 lug conversion! More wheels to choose from! I do like these 17" wheels a lot I wanted them to set my car apart from most. I think they have accomplished what I had hoped!
Posted by: tscrihfield Oct 3 2011, 03:38 PM
Anyway so to follow up the work done on Saturday, Sunday I worked on a friends pickup truck and then test fitted the new bumper, needs minor fitting to look correct but its okay for a test fit. I like the look of the foglight-less bumper, has a clean look. 
And then to top off everything else, Today I had a christmas moment when I arrived home! 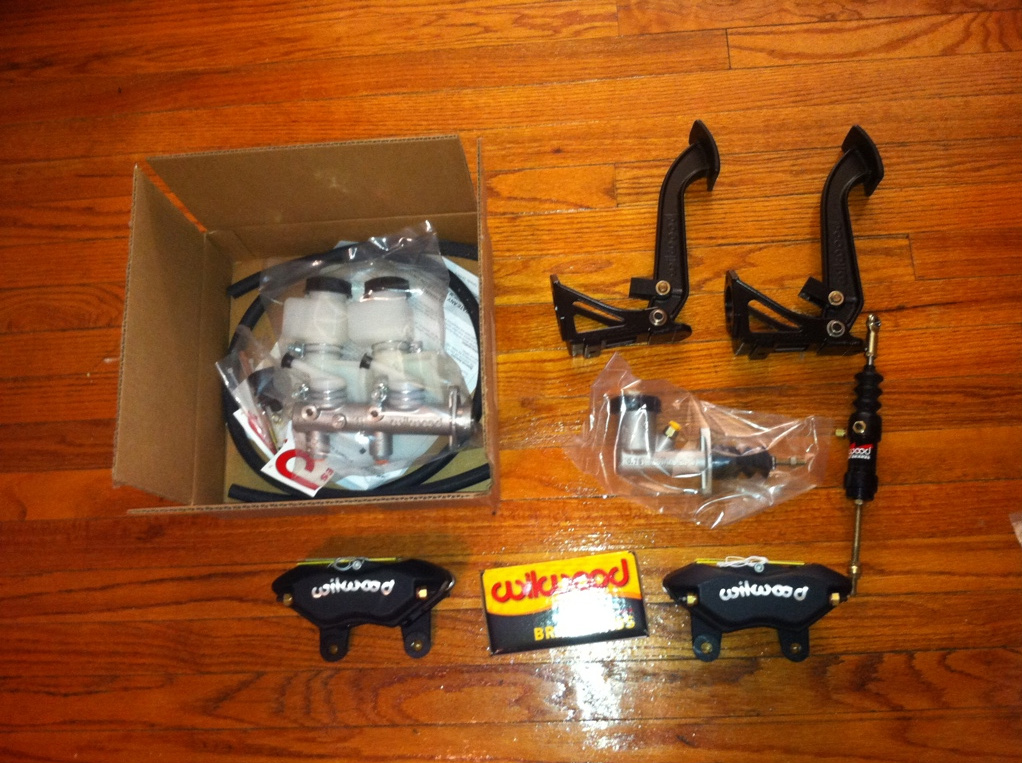
Oh I cant wait to start on this install! Hydraulic clutch kit, tandem remote resevoir master cylinder, pedals and calipers (2 more not photo'd). Looks like I'll be busy for the next few weeks eh?
Let me know if anyone is interested in Wilwood P/N's for brake parts. I had to do a lot of measuring to find the ones I wanted. Just in case you want to save some time and benchmark, Im not stingy! I'll share info!
Cheers!
Thomas
Posted by: tscrihfield Oct 3 2011, 06:45 PM
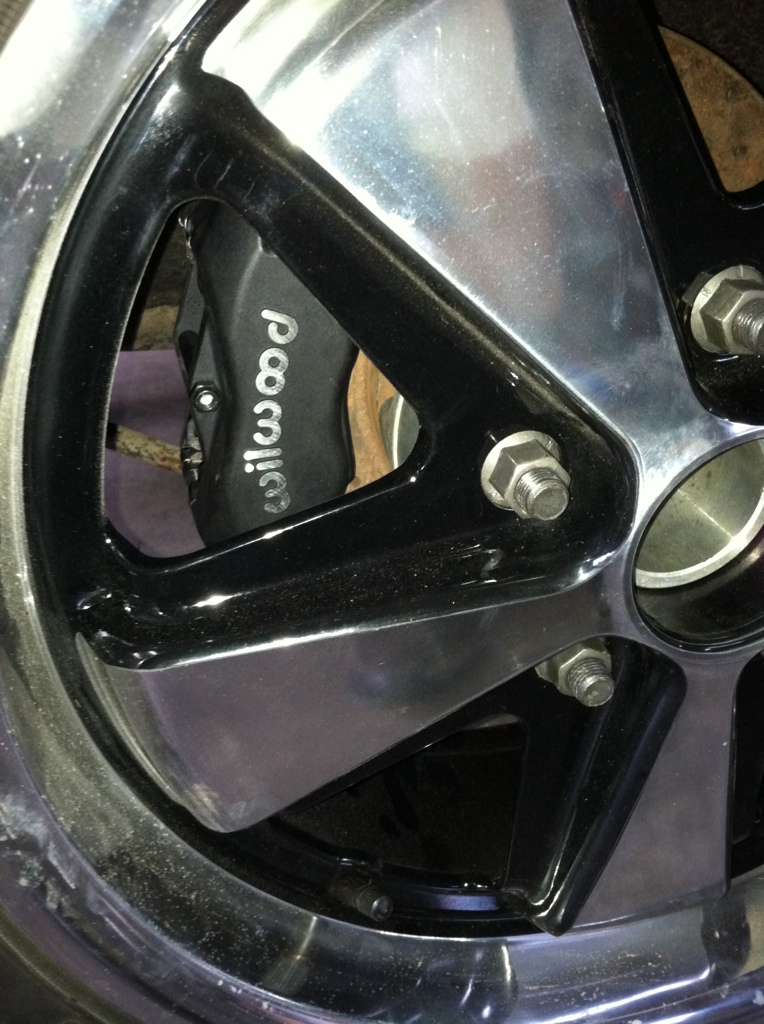
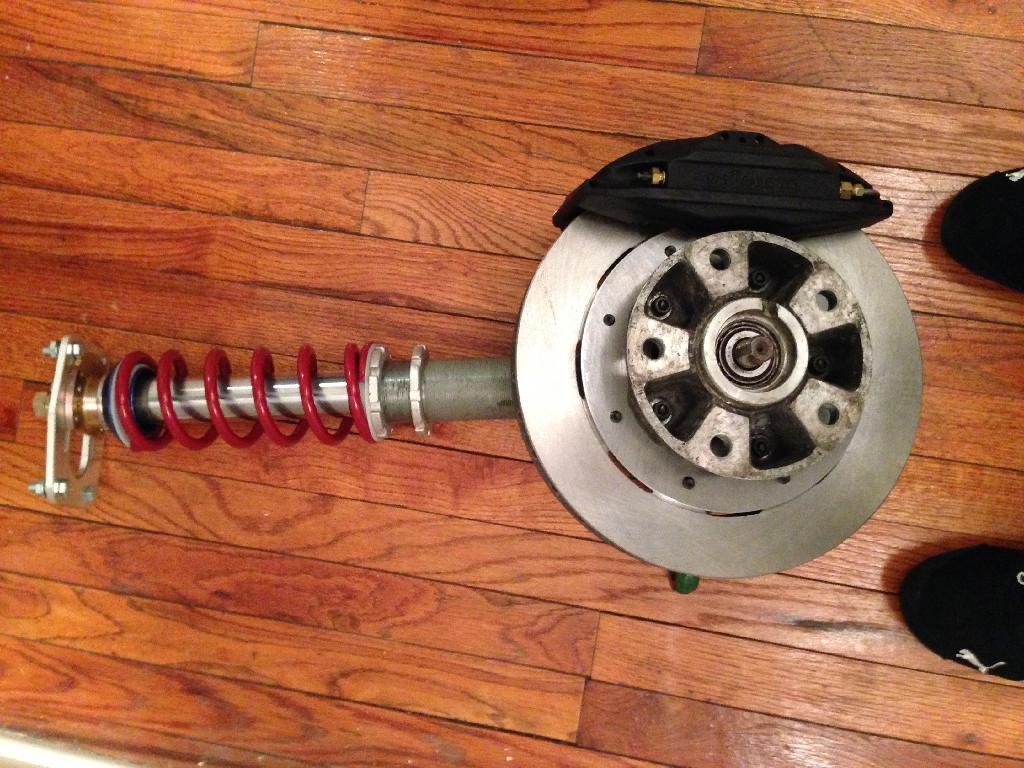
Well as I am a little impatient at times. I couldnt wait to see what the caliper looked like on the car.... SO... I went and bolted one up.
I love the Wilwood "Peek-a-boo"!
Sorry for the semi rusty rotor... Been sittin in the garage waiting on the caliper and developed a little surface rust! 
Cheers
Posted by: rnellums Oct 4 2011, 06:20 AM
Those calipers look great! Did you ever consider going to a larger diameter rotor to fill the wheels out more?
Posted by: tscrihfield Oct 4 2011, 07:18 PM
Those calipers look great! Did you ever consider going to a larger diameter rotor to fill the wheels out more?
I actually had planned on 16" rims before I found the 17" beauties! On top of that, I wanted the ease of ordering standard 911 rotors as well. I did look at a few rotor options before the $$ factor killed my inner child. A set of big reds for 17" rims is around $3500
... I have about $300 a corner with calipers and rotors. With that I have 9 square inches of pad surface per pad, So I am happy with them. What brakes are on the race car of yours Ross?
Thomas
Posted by: rnellums Oct 4 2011, 07:38 PM
They are Volvo big brakes on the front with front 914 calipers relocated to the rear. The wilwoods seem like a much cleaner upgrade though! Can you keep the e-brake?
Posted by: tscrihfield Oct 4 2011, 07:44 PM
They are Volvo big brakes on the front with front 914 calipers relocated to the rear. The wilwoods seem like a much cleaner upgrade though! Can you keep the e-brake?
They are really!
You can keep E-Brake if you go with these!
http://wilwood.com/Calipers/CaliperList.aspx?subname=Combination P-Brake
I can machine you a radial mount block and can weld it in. I thought about running them but not sure yet. I havent started installing the rears for that reason!
Posted by: campbellcj Oct 4 2011, 08:06 PM
Thanks Jim! I try to write it as I would a story. Which is what it is to me... Hopefully it has an ending!
I predict it will have an ending, followed by a sequel...or several. I'm up to version 4 of my car at this point, 9 years in. Many other folks here have similar 'problems'.
Great work so far. I'm looking forward to following progress!
Posted by: tscrihfield Oct 4 2011, 08:14 PM
[
I predict it will have an ending, followed by a sequel...or several. I'm up to version 4 of my car at this point, 9 years in. Many other folks here have similar 'problems'.
Great work so far. I'm looking forward to following progress!
Exactly what I am thinking the further I dig into this rabbit hole! I really need to own about three of these cars. One for Race use, One for street use, and one to make completly unusable for both due to power and weight! That is my goal! So I guess the ending will be the gravestone for me!
Thanks Chris! BTW LOVE the new rendition of your ride. I have followed yours since before you had the FG hood. I had your Flikr account bookmarked when I still lived at home with the folks. You have a very nice ride indeed!
Thomas
Posted by: rnellums Oct 5 2011, 06:17 AM
They are Volvo big brakes on the front with front 914 calipers relocated to the rear. The wilwoods seem like a much cleaner upgrade though! Can you keep the e-brake?
They are really!
You can keep E-Brake if you go with these!
http://wilwood.com/Calipers/CaliperList.aspx?subname=Combination P-Brake
I can machine you a radial mount block and can weld it in. I thought about running them but not sure yet. I havent started installing the rears for that reason!
Having an e-brake would be nice
! I need to secure another garage space first though!
Posted by: tscrihfield Oct 5 2011, 10:37 AM
They are Volvo big brakes on the front with front 914 calipers relocated to the rear. The wilwoods seem like a much cleaner upgrade though! Can you keep the e-brake?
They are really!
You can keep E-Brake if you go with these!
http://wilwood.com/Calipers/CaliperList.aspx?subname=Combination P-Brake
I can machine you a radial mount block and can weld it in. I thought about running them but not sure yet. I havent started installing the rears for that reason!
Having an e-brake would be nice
! I need to secure another garage space first though!Haha... Which one needs to bunk? Whitey won't mind a friend. Let me know.
Posted by: veltror Oct 5 2011, 10:51 AM
Nice, nice
Posted by: rnellums Oct 5 2011, 01:25 PM
I may take you up on that If I don't get something figured out before winter. Apollo is in a friends garage right now, but they want the garage back once the hard freezes come.
Posted by: tscrihfield Oct 5 2011, 06:40 PM
I may take you up on that If I don't get something figured out before winter. Apollo is in a friends garage right now, but they want the garage back once the hard freezes come.
Sounds good. If you want to lets try to before any snow starts! LOL....
Anyway, just let me know man! Oh and I hope you have a cover! A lot of work is going to go on this winter!!!
Thomas
Posted by: tscrihfield Oct 5 2011, 06:40 PM
Nice, nice
Thanks!
Posted by: tscrihfield Oct 18 2011, 06:18 PM
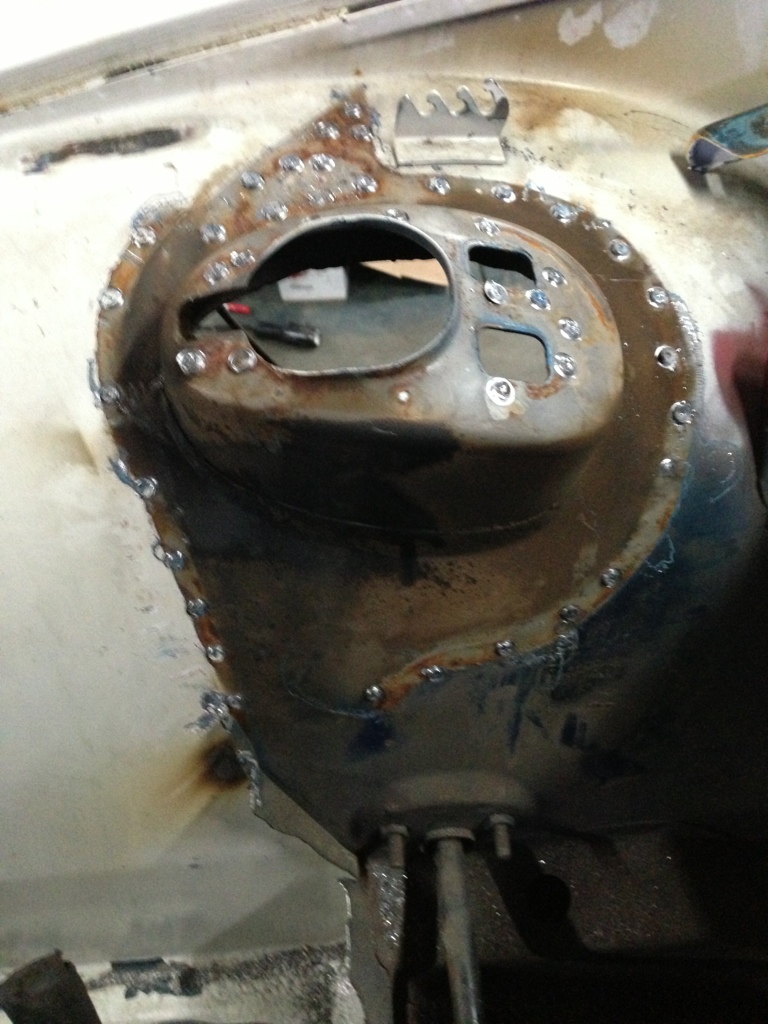
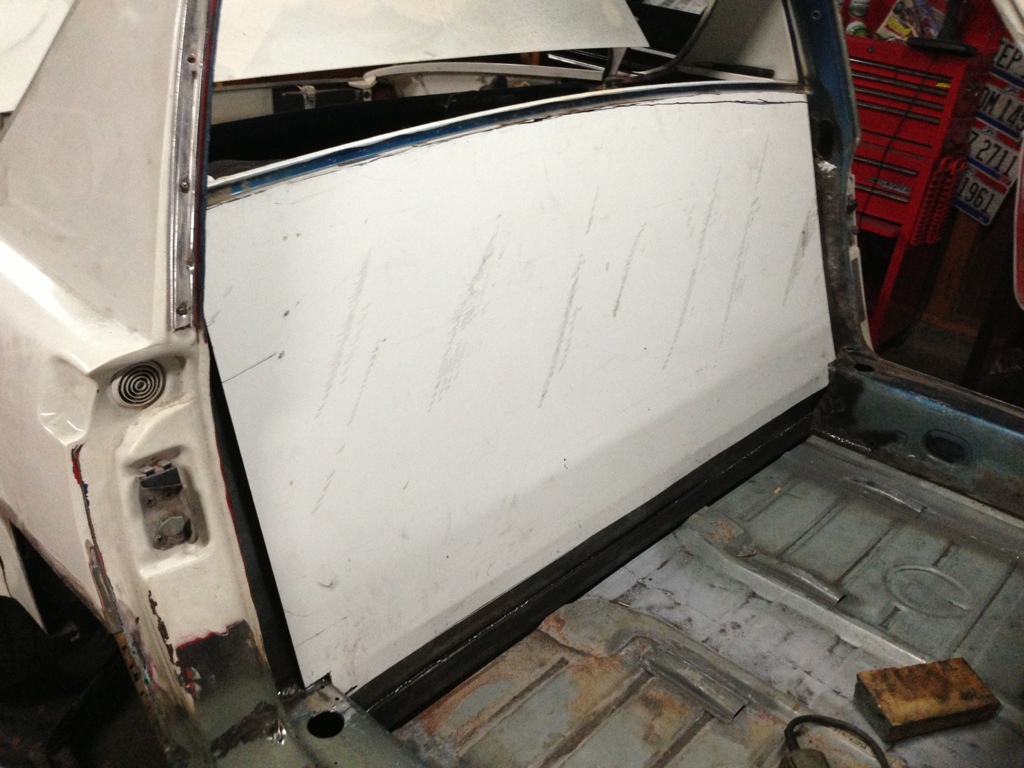
Well I finally got some work done over the past week or so. I have been back and forth between the car and the engine, but have made significant progress on both.
I started working on the long area/ Hell hole and as stated before the DAPO had his own idea on how to fix the rustation! However, his way "Sucked a big root!" (One of dads sayings!)
So check this out....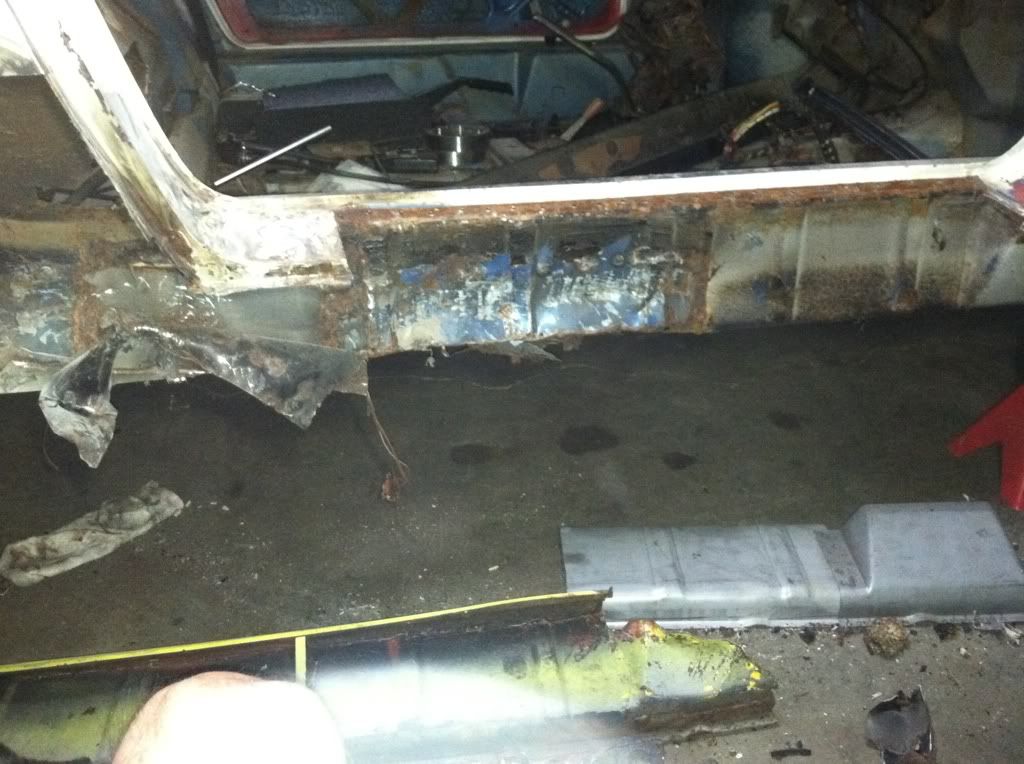
and....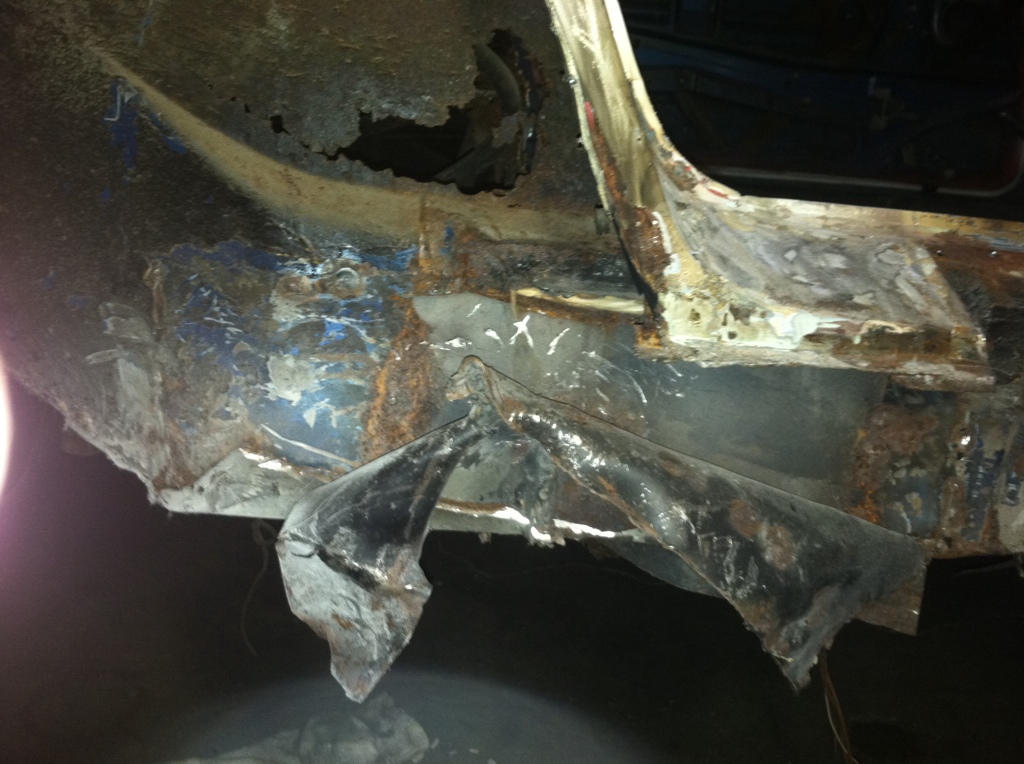
So ... I am still cutting away trying to get back to where the bare original pieces of the long are.
Anyhoooo. I also got back to work on the engine. As you will soon find, I am a bit OCD and will test fit, measure, re-measure, re-test fit, weigh and re-weigh about two-hundred times before I finally bolt an engine together so... I spent a while longer just to make sure.
The first part of the crank & Cam going in...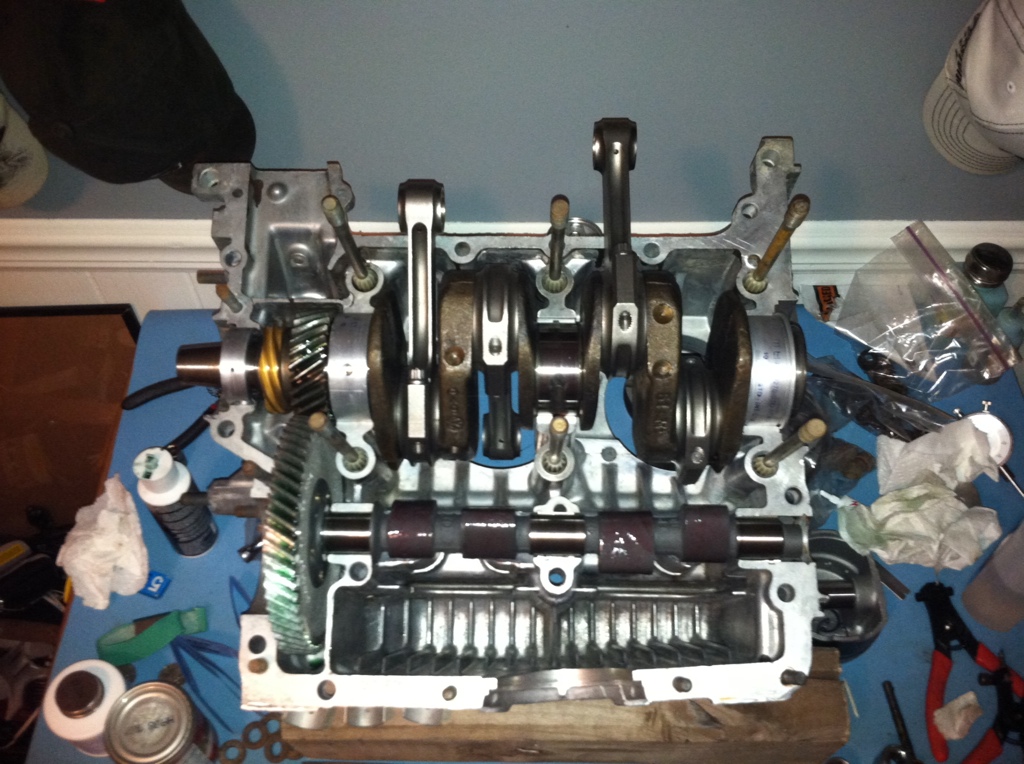
The halves together...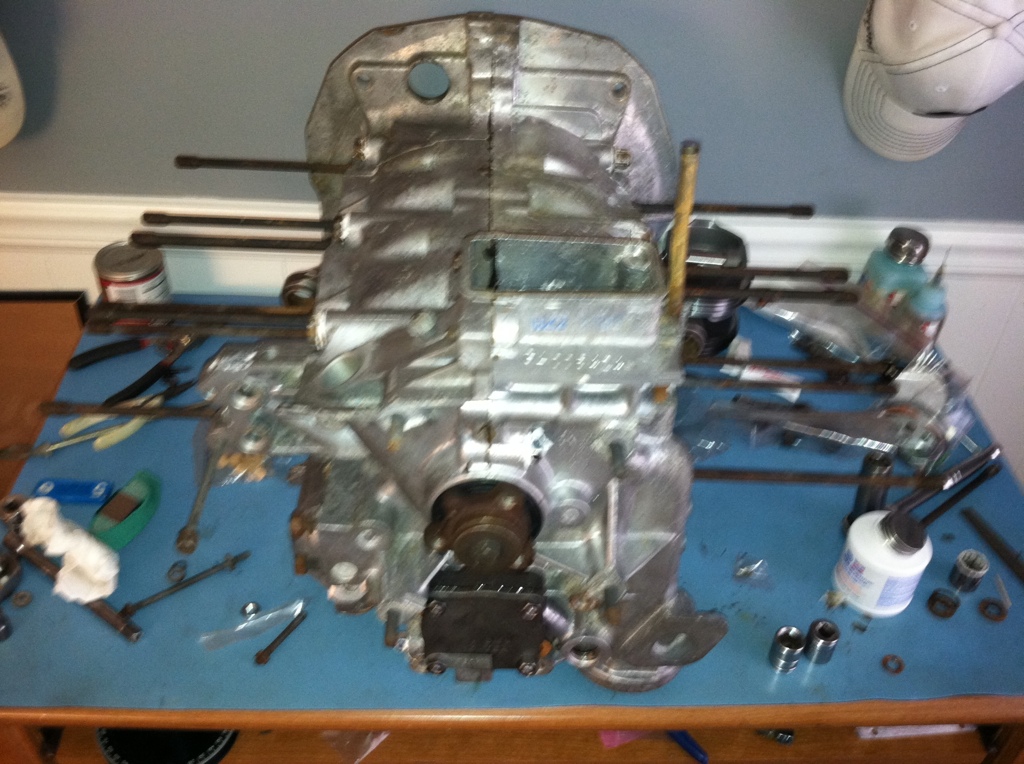
The cylinders going on....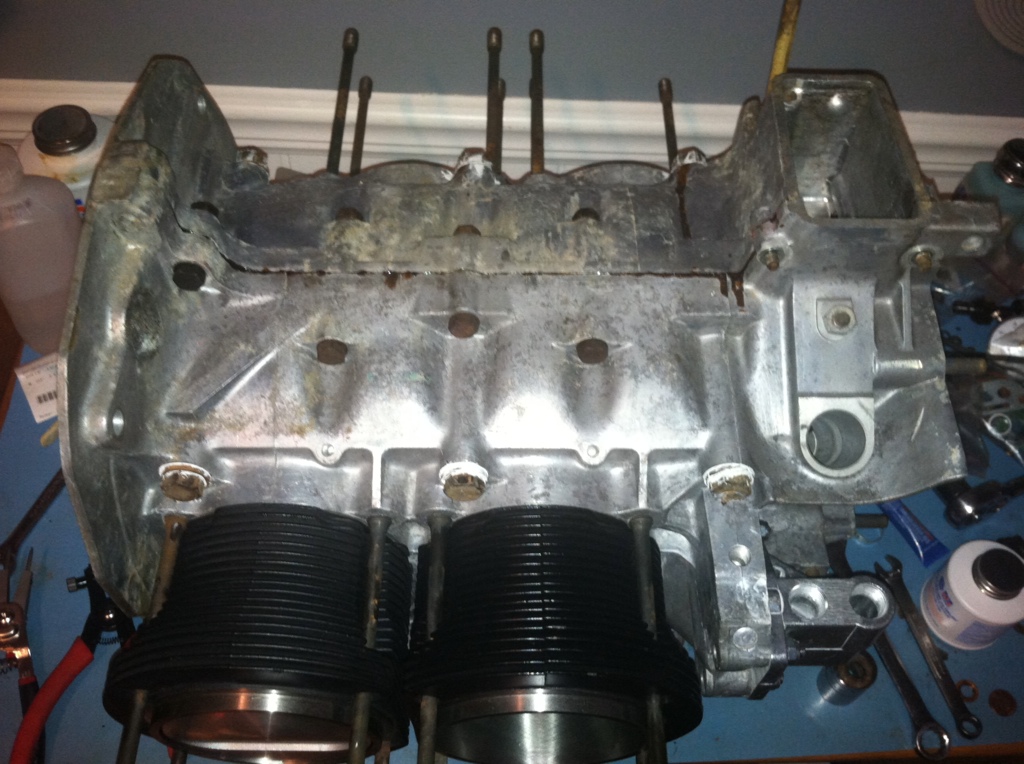
And the cylinders and heads on...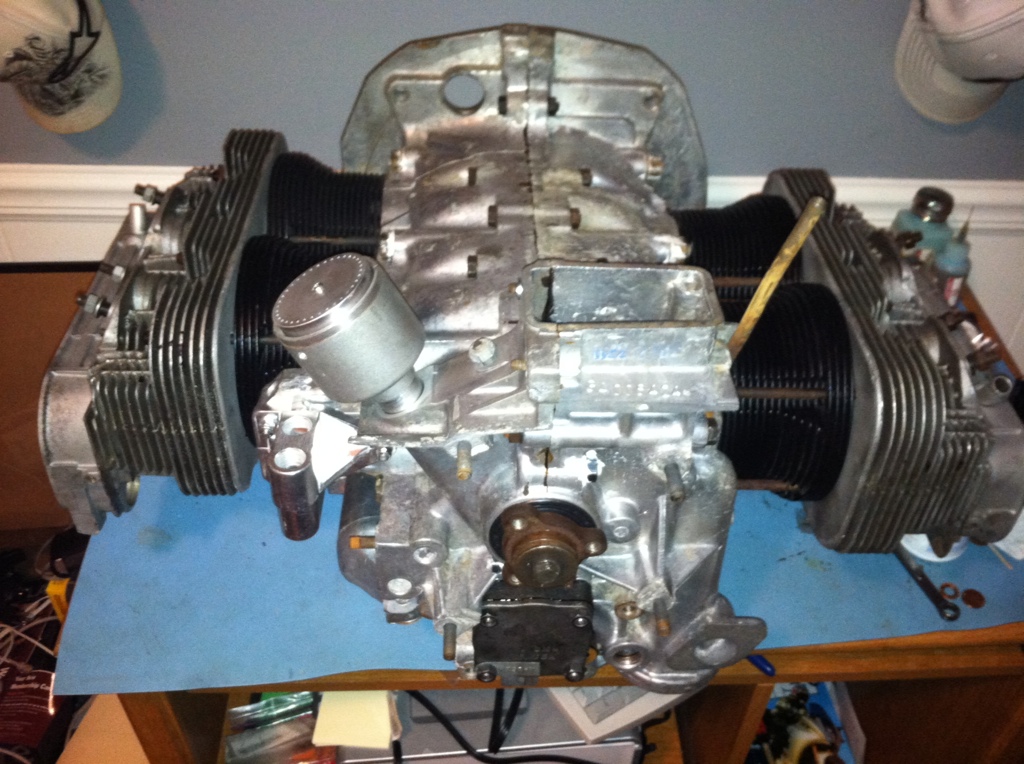
It is starting to get fun again now that there is so much to do... And for those that are inquiring... Yes I am building this engine in my office... What of it?
Well until next time ....
Keep your stick on the ice.
Cheers!
Posted by: Cairo94507 Oct 18 2011, 07:49 PM
Very nice work; you have skills. I have no problem with your engine in the office.....my wife might however.
Posted by: rnellums Oct 18 2011, 09:00 PM
What is that item where the dizzy usually sits?
Posted by: tscrihfield Oct 19 2011, 12:49 PM
What is that item where the dizzy usually sits?
Well, I will get into that a little later... That is when it is proven. I have designed a trigger style dizzy with a 32 -1 tooth trigger wheel. For sequential FI....
Posted by: tscrihfield Oct 19 2011, 12:50 PM
Very nice work; you have skills. I have no problem with your engine in the office.....my wife might however.
Thanks! Yeah my wife is great really! She doesn't mind.
Posted by: BajaXJ92 Oct 19 2011, 01:14 PM
What is that item where the dizzy usually sits?
Well, I will get into that a little later... That is when it is proven. I have designed a trigger style dizzy with a 32 -1 tooth trigger wheel. For sequential FI....
Now you've got my attention....

Posted by: tscrihfield Oct 19 2011, 04:27 PM
What is that item where the dizzy usually sits?
Well, I will get into that a little later... That is when it is proven. I have designed a trigger style dizzy with a 32 -1 tooth trigger wheel. For sequential FI....
Now you've got my attention....
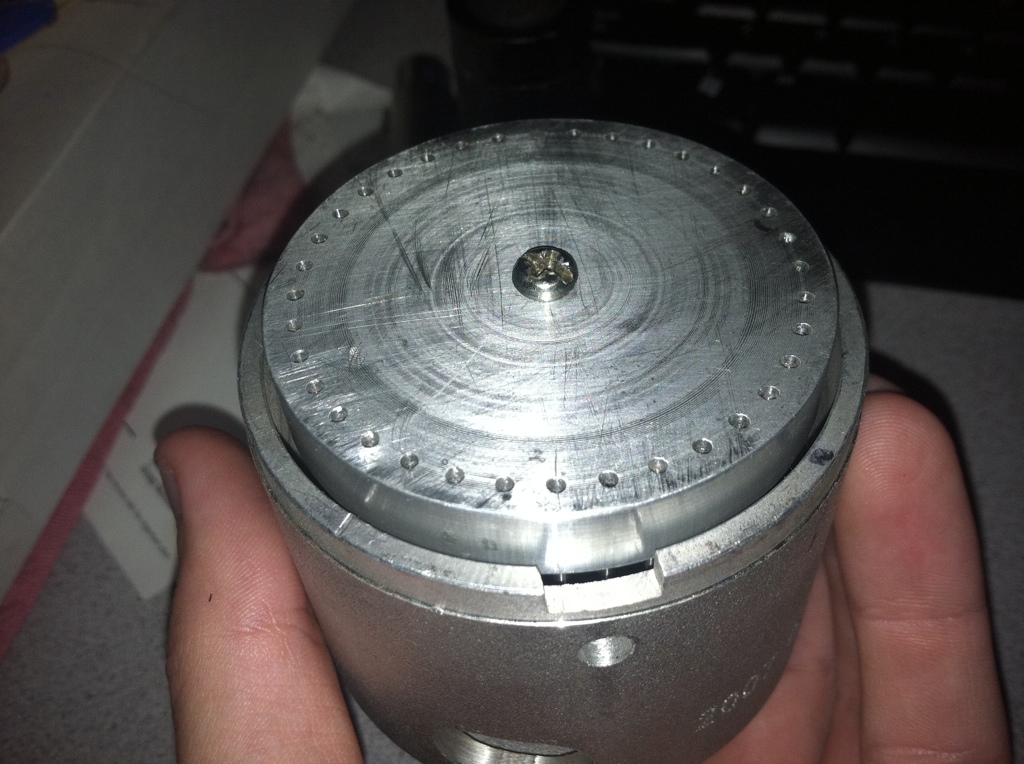
Okay, to elaborate.... For inquiring minds....
As you may know from reading my earlier posts, I am going to eventually put EFI (Megasquirt MS3X) on my car... I went with the expansion to have Seq FI. The only issue is you need both a crank and cam signal for sequential FI. Now, I know that the dizzy is ran off the crank but it is in time with the cam spinning once to the crank spinning two times... So I am going to have a crank sensor as well as the dizzy that I am making.
So I hollowed out a chinese made version of the Bosch
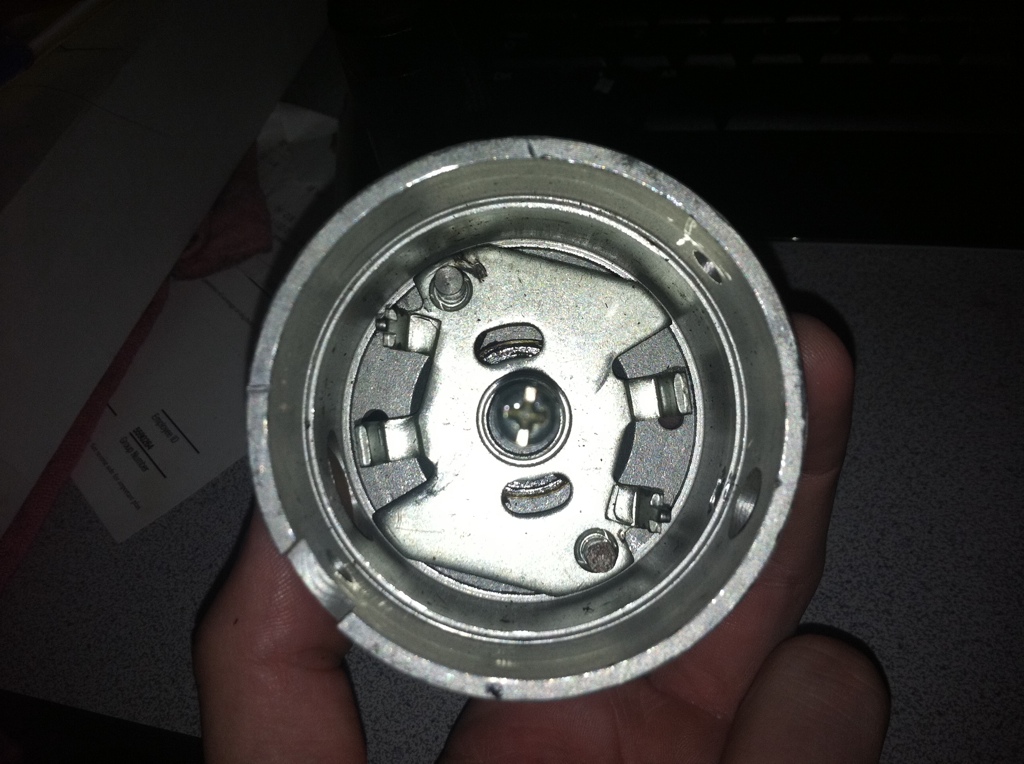
And then, I designed and built a trigger wheel... I know that it is not a traditional trigger wheel due to the roll pins but I designed it for this application. (Still has all 32 teeth for now...)
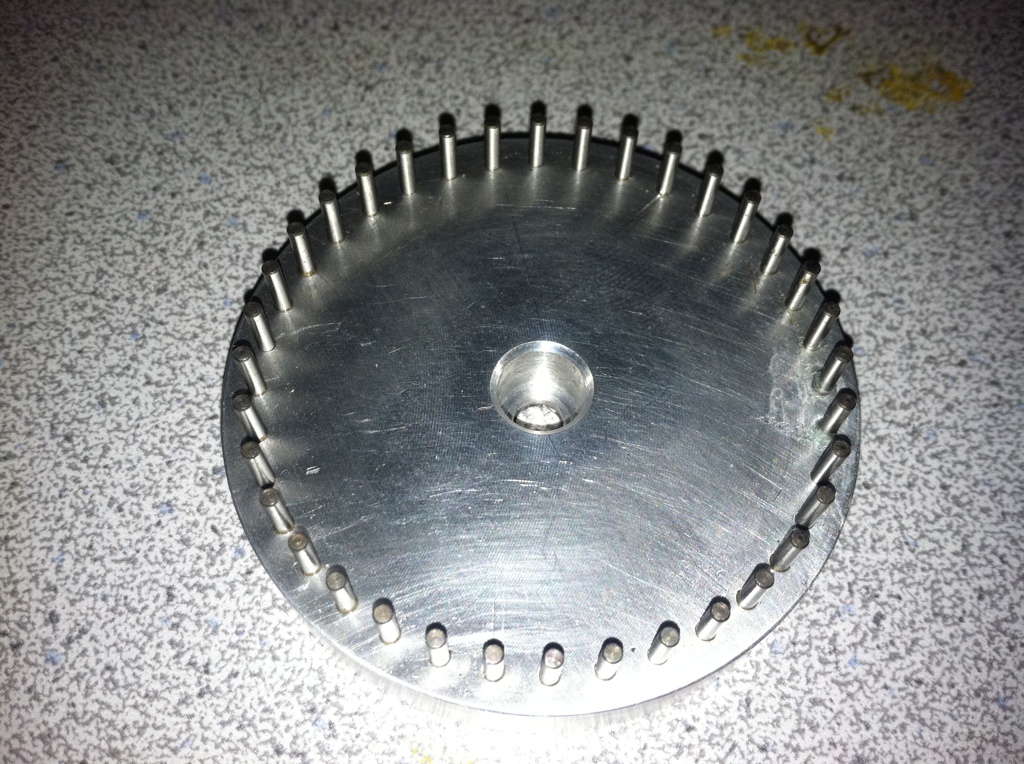
and installed on the dizzy... Not sure what I am going to do to lock it to the shaft yet but that will come later.
I am going to run one of these Hall effect sensors...
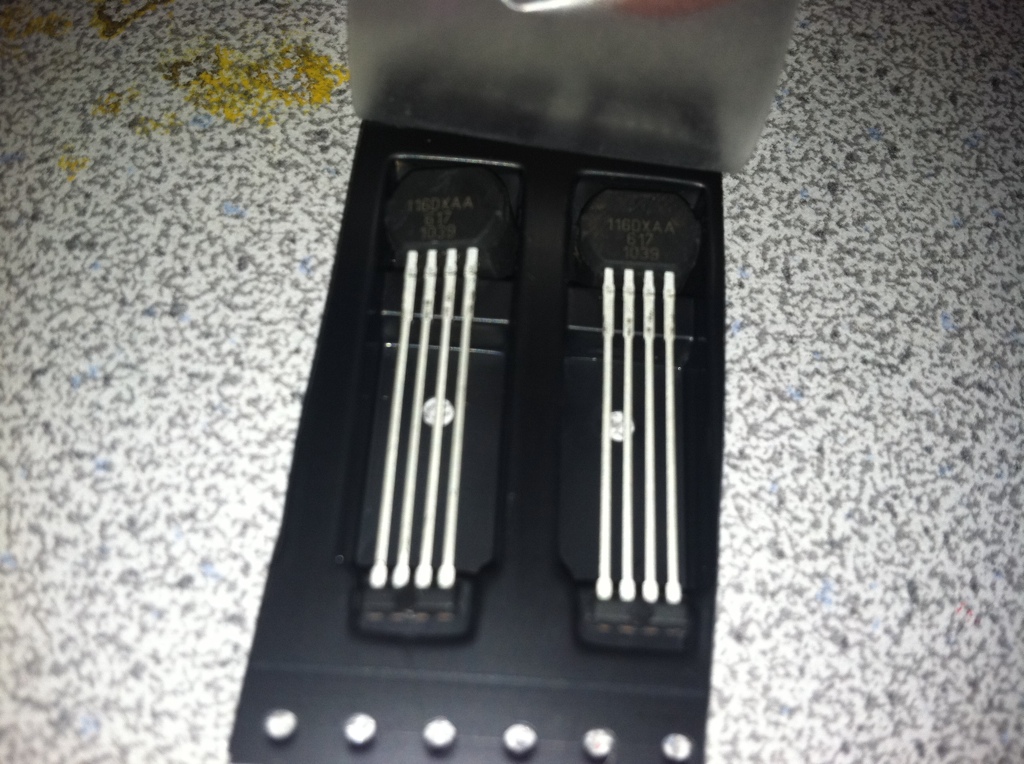
I am still in the process of designing the base for them to mount internal of the housing.... You can look them up here.
http://www.allegromicro.com/en/Products/Part_Numbers/0617/index.asp
and I bought them from Digikey...
Well thats the story of it for now... Like I said it is yet to be proven but once it is I am thinking of building a few of them for folks that would want to run them on their FI systems.
Well Hope you enjoy... And remember, If women dont find you handsome they should at least find you handy!
Cheers!
Posted by: rnellums Oct 19 2011, 10:18 PM
That looks sweet! Copyright it quick!
Posted by: tscrihfield Oct 20 2011, 03:11 PM
That looks sweet! Copyright it quick!
Well... I would if this wasnt a hobby... Lets face it... Unless this had 300,000 people banging at my back door waiting to buy one, the effort/price to Copyright would be useless.... Plus I would rather post ideas and let others do their R&D too, we can all benefit that way! This way the more people who build one the more we have to choose from... Someone is bound to get it right!
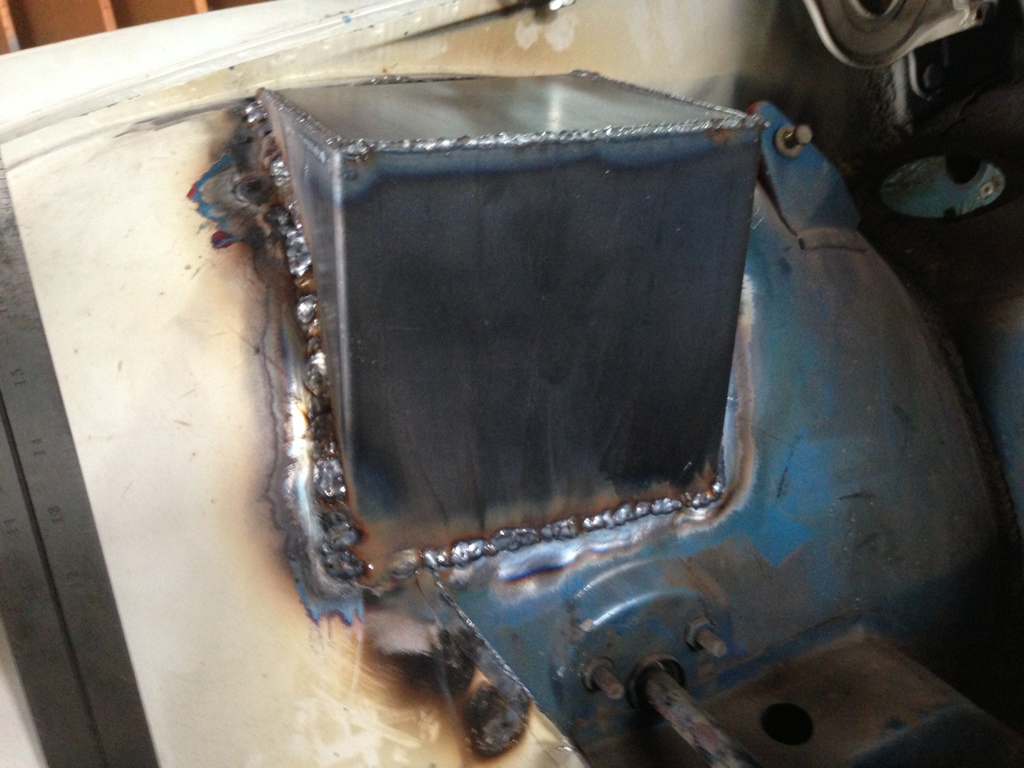
Posted by: tscrihfield Nov 28 2011, 09:21 PM
Well... A lot has happened since my last post. I finished assembly of the engine. 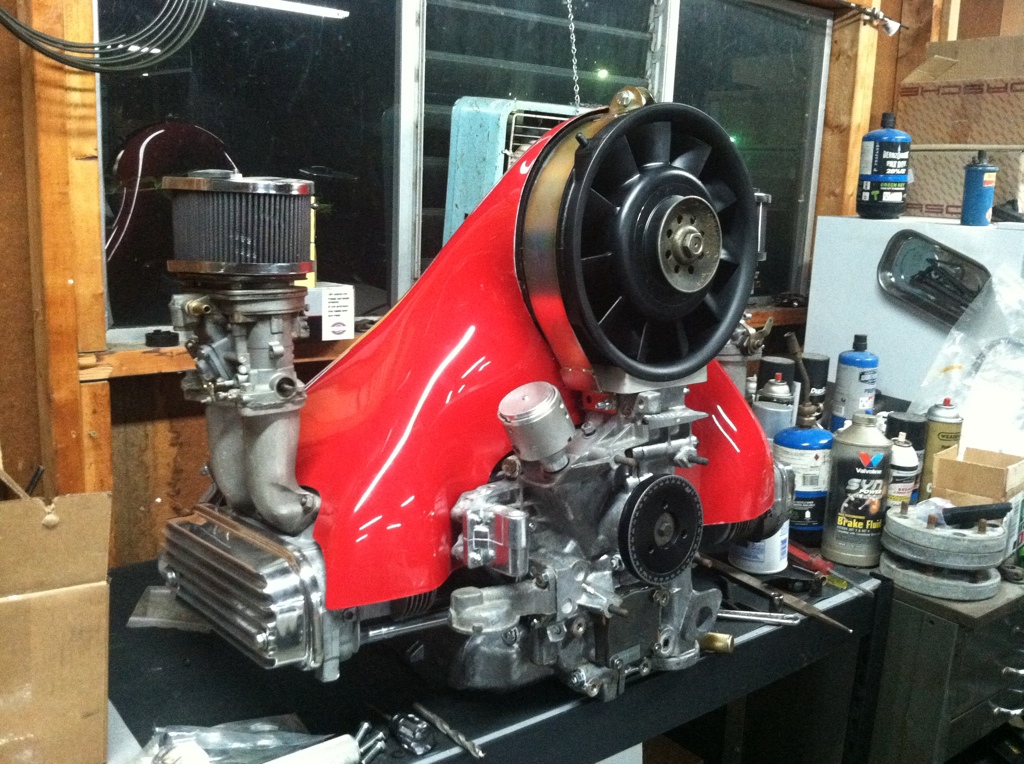
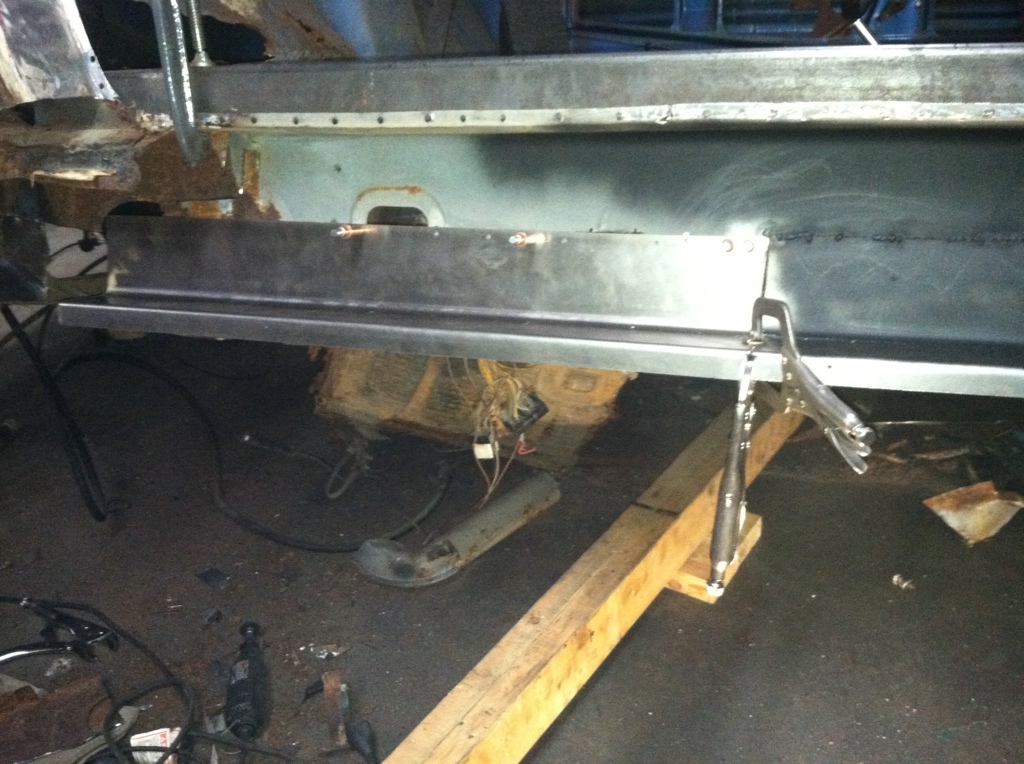
I also have been working on the longitudinal/hell hole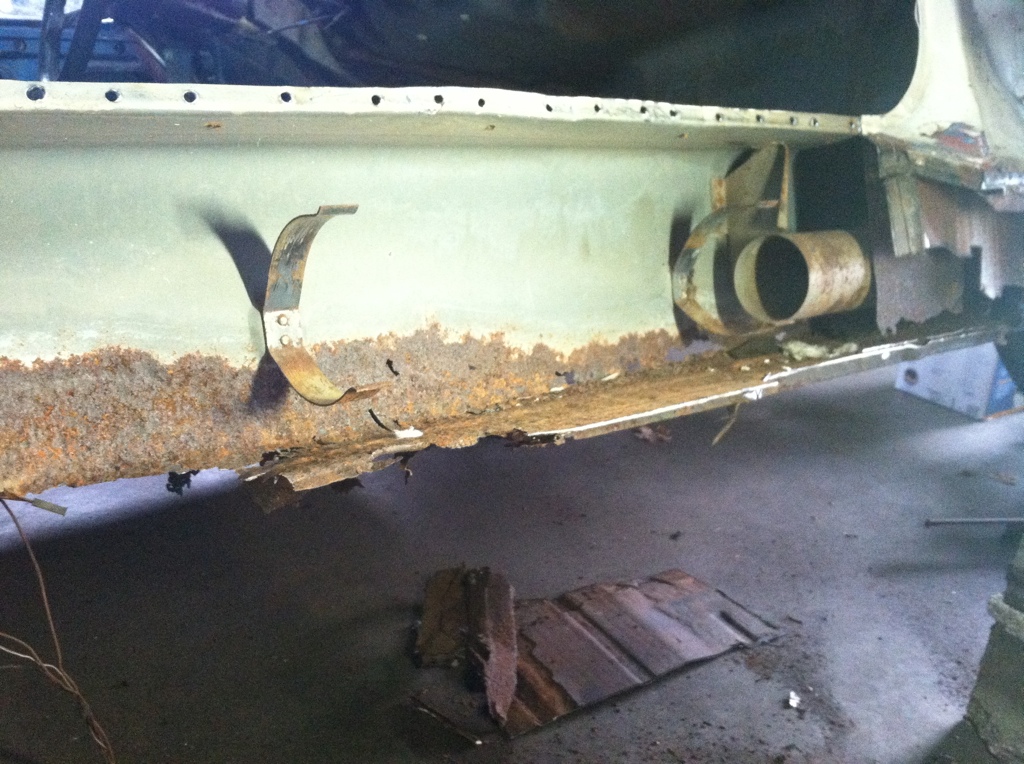
This is a part of the inner long that I fab'd 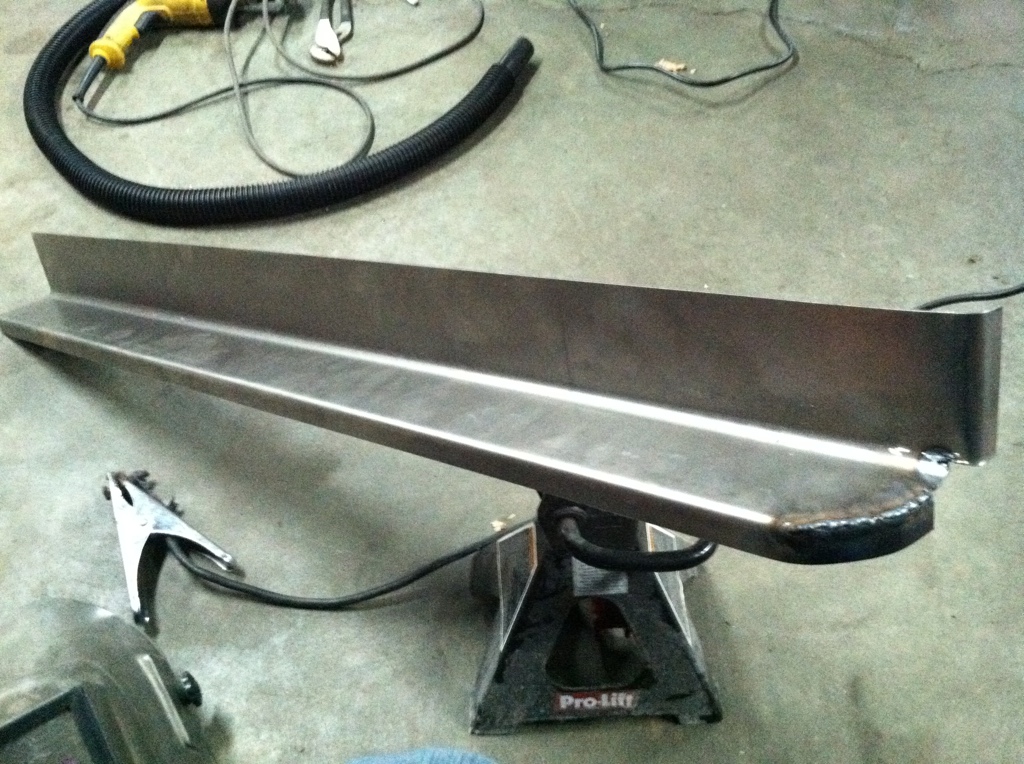
Being installed...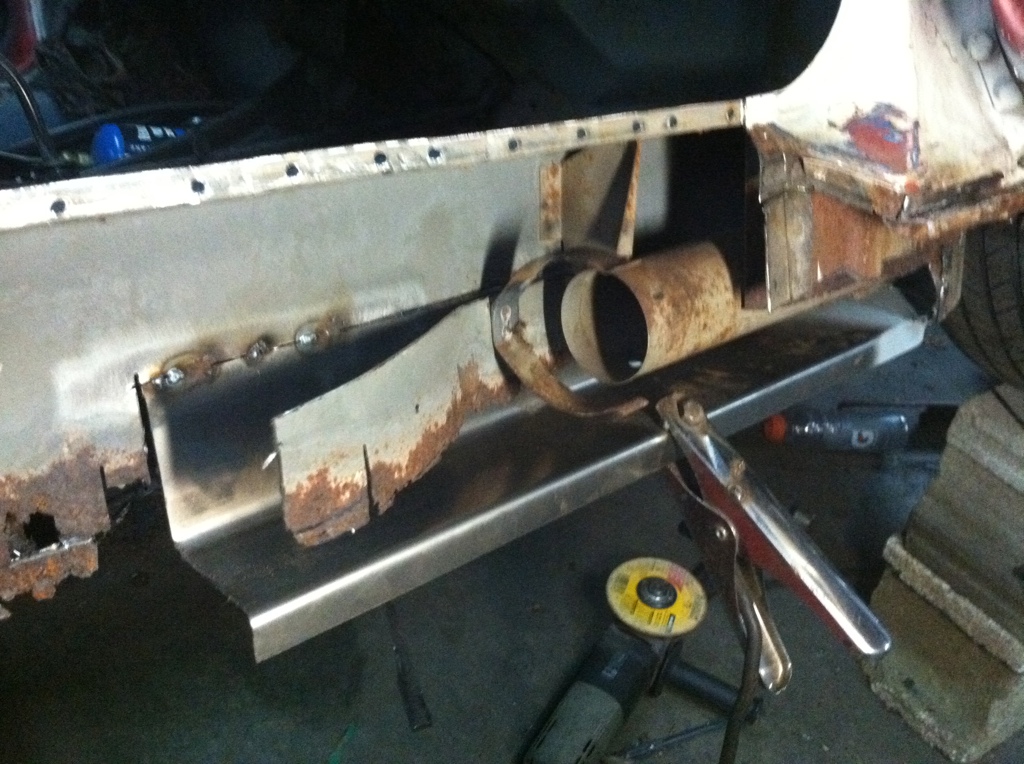
From the interior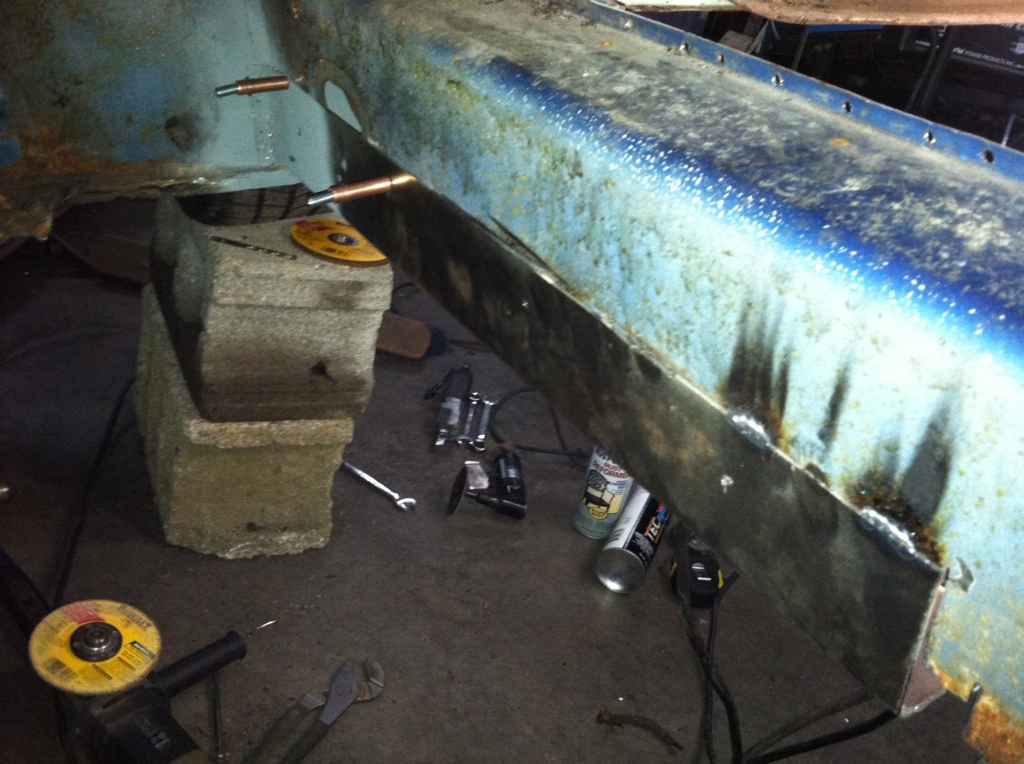
Posted by: bigkensteele Nov 28 2011, 09:32 PM
Looking good! Did you get my PM about the floorpan?
Posted by: tscrihfield Jan 11 2012, 07:44 PM
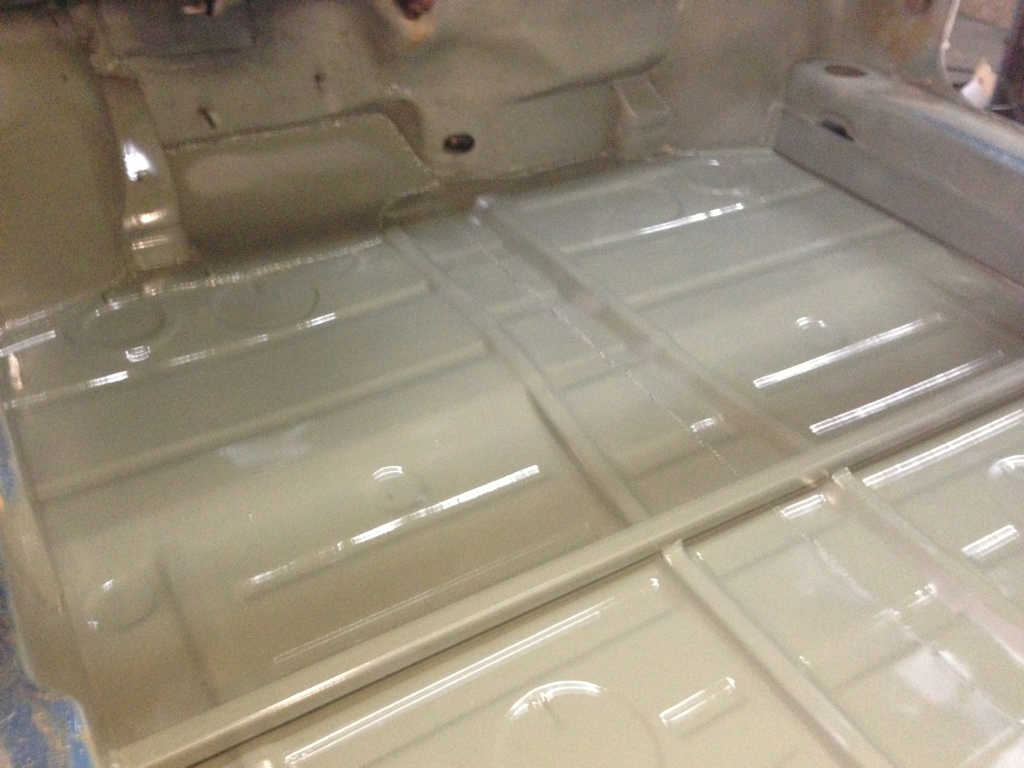
Well I have to say long breaks between posts are becoming the norm. I have mostly finished the long now and I am continuing on the floor.
This was the wheel well...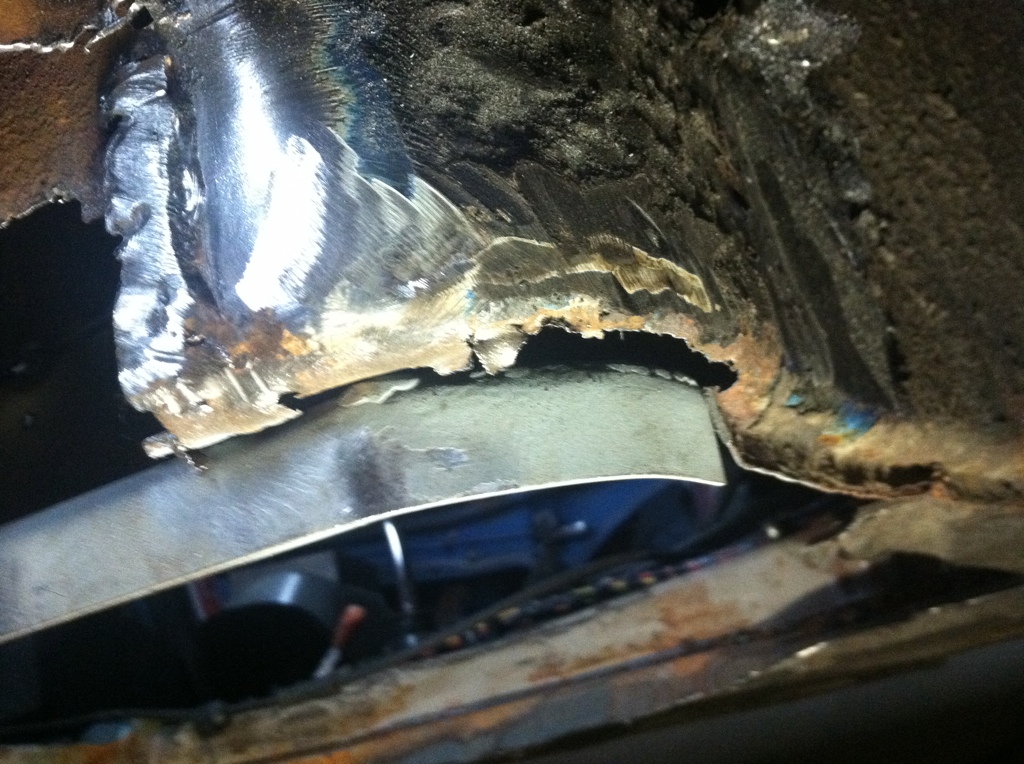
Fitting a patch in place of the carnage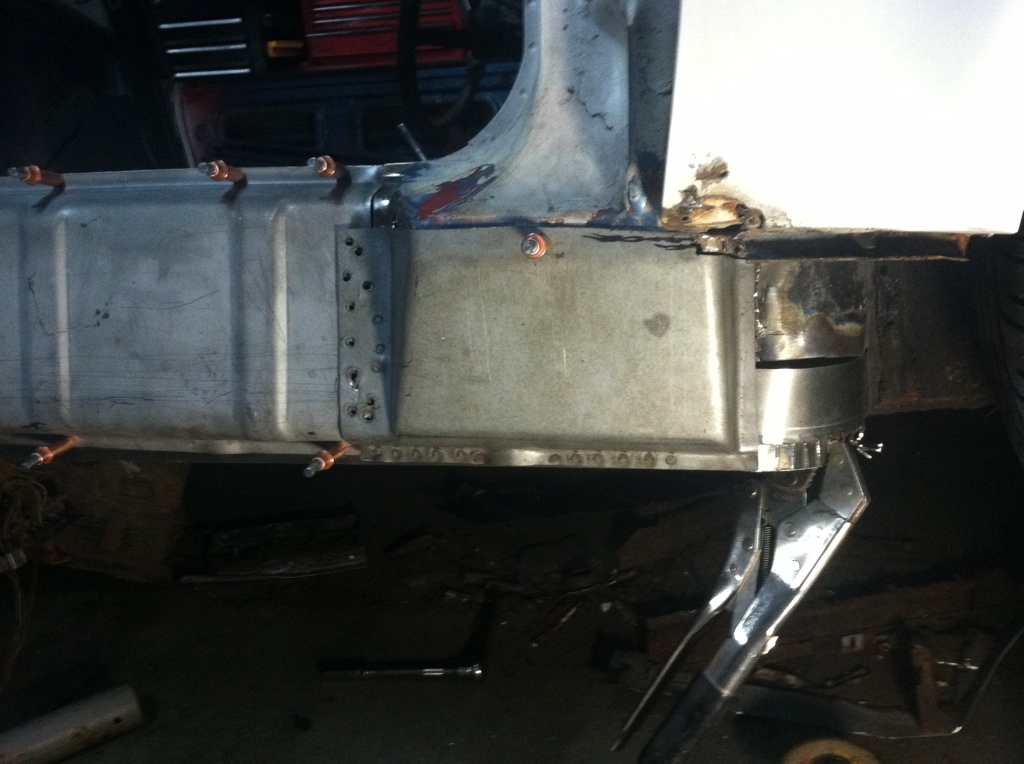
Then the patch welded in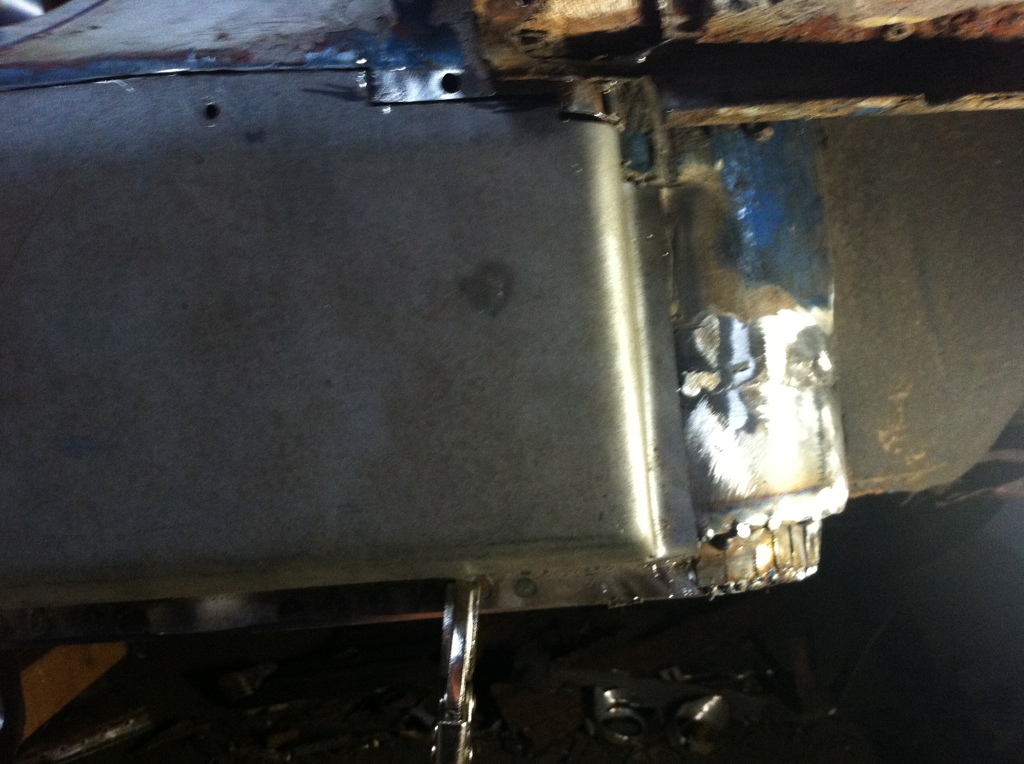
And then...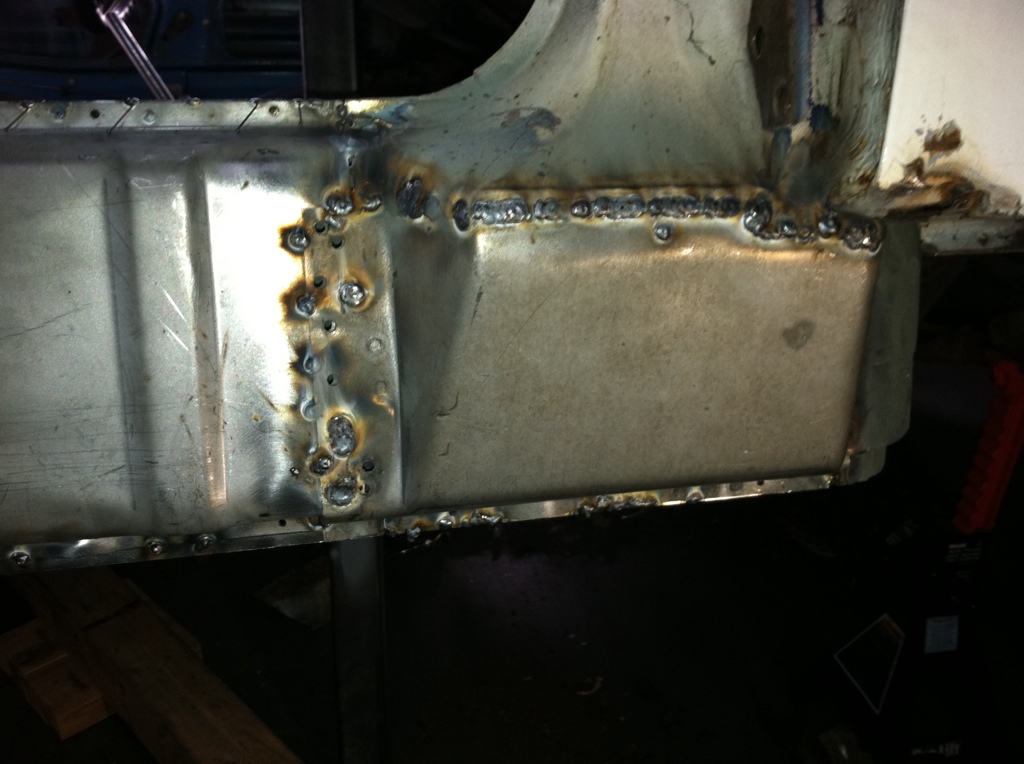
Sum it up with...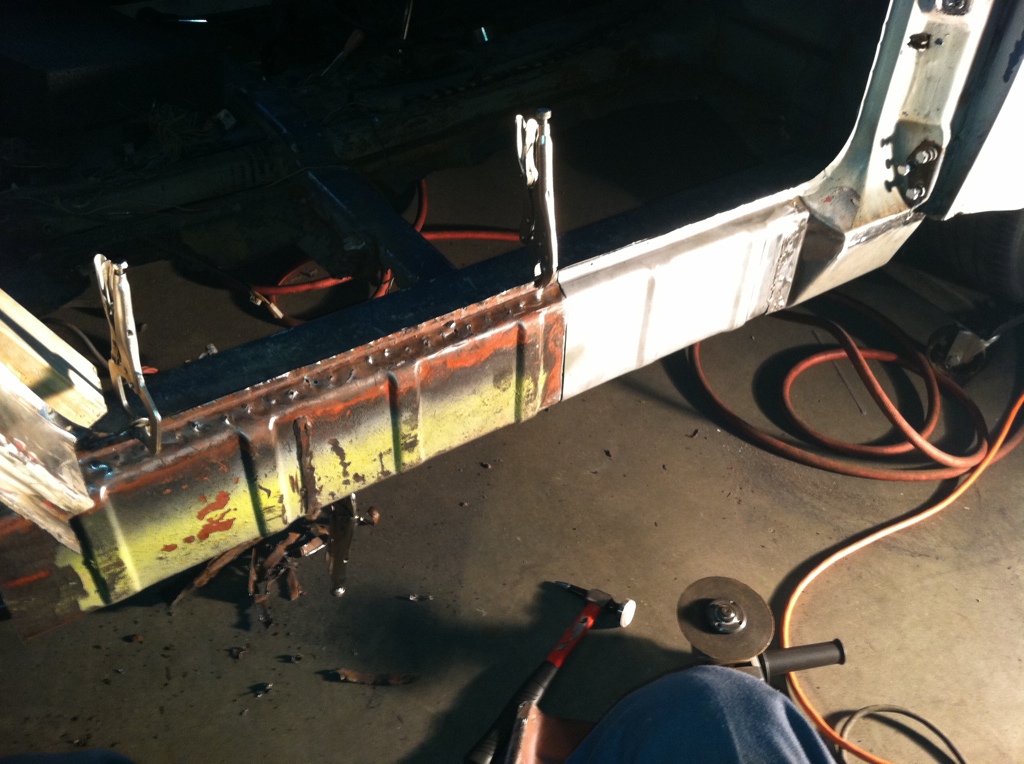
Unfortunately this doesnt have all of the steps... But you get the point.
Posted by: rnellums Jan 11 2012, 09:06 PM
Lookin Good!
Posted by: tscrihfield Jan 11 2012, 09:31 PM
Lookin Good!
Thanx Ross!
Posted by: Krieger Jan 11 2012, 09:37 PM
Good work! Some seam sealer/undercoat and it'll be like new.
Posted by: SirAndy Jan 11 2012, 09:46 PM
Great work!
And please do yourself a favor and get rid of those cinder blocks! 
Posted by: tscrihfield Jan 12 2012, 04:38 PM
Great work!
And please do yourself a favor and get rid of those cinder blocks!
At first I was thnking "what cinder blocks"... I forgot I used them... It was difficult getting the car high enough to work on. No worries though, found some Jackstands that go about 3 1/2 feet which do the trick!
Posted by: tscrihfield Jan 16 2012, 08:52 PM
http://www.youtube.com/watch?v=4jyJy_1O1zE
Engine is a go! I love the sound... Please no greif on the Shroud! I know some hate it, but I have some tests to run on it before I give it up!
I am so excited you cant smack the smile off of my face!
Posted by: saigon71 Jan 16 2012, 09:25 PM
Great work you are doing here.
Posted by: rnellums Jan 17 2012, 09:03 AM
Wohoo!  . We need to organize a 914 rally somewhere in our area when the weather gets nice. I wanna see your handiwork in person!
Posted by: tscrihfield Jan 18 2012, 12:08 PM
Thanks guys! I am really enjoying this build!
As for a meet up... I am okay with that anytime! Maybe we could plan a BBQ in the spring or summer. I know a few in the area that are on here such as Bigkensteel and a couple others that would probably want to get together.
Let me know.
Thomas
Posted by: Van914 Jan 18 2012, 02:34 PM
Thomas,
Looks like you are makeing progress.
Great work!
Van914
Posted by: tscrihfield Jan 18 2012, 04:32 PM
Thomas,
Looks like you are makeing progress.
Great work!
Van914
Yeah, the goal is try and make the spring DE at mid Ohio. If not I will at least be at the Top Gun challenge for DE at Putnam. Thanks Van! Are you going to the chili party on Saturday?
Thomas
Posted by: bigkensteele Jan 18 2012, 05:32 PM
Thanks guys! I am really enjoying this build!
As for a meet up... I am okay with that anytime! Maybe we could plan a BBQ in the spring or summer. I know a few in the area that are on here such as Bigkensteel and a couple others that would probably want to get together.
Let me know.
Thomas
Absolutely! I can think of 4 or 5 off the top of my head here in Cinci, a couple in Louisville and a couple more in IN. We should throw something together for Spring.
Posted by: Jacob Jan 18 2012, 06:37 PM
Like what you have done!
Thanks for your pictures and posts.
I would like to see which part numbers you chose for the brakes, I saw where you offered to post them but I missed it if you did already.
Posted by: tscrihfield Jan 18 2012, 07:04 PM
Like what you have done!
Thanks for your pictures and posts.
I would like to see which part numbers you chose for the brakes, I saw where you offered to post them but I missed it if you did already.
Sure no problem.
This is the link http://wilwood.com/Calipers/CaliperProd.aspx?itemno=120-11578
They fit well on 911 boge struts. I also have yet to relocate the rear swing arm ears formthe rear calipers.
Posted by: tscrihfield Jan 18 2012, 07:07 PM
Thanks guys! I am really enjoying this build!
As for a meet up... I am okay with that anytime! Maybe we could plan a BBQ in the spring or summer. I know a few in the area that are on here such as Bigkensteel and a couple others that would probably want to get together.
Let me know.
Thomas
Absolutely! I can think of 4 or 5 off the top of my head here in Cinci, a couple in Louisville and a couple more in IN. We should throw something together for Spring.
Sounds great to me! Let's do this! I say may? What do you guys think? Between The three of us let's put something together! What do you say we start a separate thread to gauge interests?
Thomas
Posted by: rnellums Jan 19 2012, 07:31 AM
Sounds good. I think I may join you for the DE at Putnam whenever that is. I just paypal'd for my flat tow setup today!
Posted by: falconfp2001 Jan 19 2012, 01:24 PM
Anyway so to follow up the work done on Saturday, Sunday I worked on a friends pickup truck and then test fitted the new bumper, needs minor fitting to look correct but its okay for a test fit. I like the look of the foglight-less bumper, has a clean look.
And then to top off everything else, Today I had a christmas moment when I arrived home!
Oh I cant wait to start on this install! Hydraulic clutch kit, tandem remote resevoir master cylinder, pedals and calipers (2 more not photo'd). Looks like I'll be busy for the next few weeks eh?
Let me know if anyone is interested in Wilwood P/N's for brake parts. I had to do a lot of measuring to find the ones I wanted. Just in case you want to save some time and benchmark, Im not stingy! I'll share info!
Cheers!
Thomas
Hi Thomas,
I'd like the part #s for the Calipers and the Pads. Also, if you could post details on how you are mounting the Pedals and master cylinders for the Brake and Clutch? I'm also interested in how your mounting the Slave for the clutch? have you thought of a Tilton Annular Slave Cylinder?
Great work BTW. Wish I had your welding and fab skills
Frank
Posted by: tscrihfield Jan 19 2012, 06:37 PM
Sounds good. I think I may join you for the DE at Putnam whenever that is. I just paypal'd for my flat tow setup today!
Awesome... You gonna tow it with the Suby?
Putnam is July 13th - 15th It will be a great event to attend. Especially due to a race in the same weekend. So you can watch a couple races and get a DE in.
BTW you can come by anytime to check out the car.
Thomas
Posted by: tscrihfield Jan 19 2012, 06:47 PM
Hi Thomas,
I'd like the part #s for the Calipers and the Pads. Also, if you could post details on how you are mounting the Pedals and master cylinders for the Brake and Clutch? I'm also interested in how your mounting the Slave for the clutch? have you thought of a Tilton Annular Slave Cylinder?
Great work BTW. Wish I had your welding and fab skills
Frank
Frank,
that is no problem. The Part number for the Calipers is 120-11572 and the pads are 150-8946K.
As far as the pedals and clutch slave cylinder. I have yet to mount them, but know how I want to mount them. The slave is a pull style Slave and it will pull the existing fork just fine, it will have a bracket that mounts to the diff housing bolts on the gearbox case. As for the pedals I plan to mount them where the existing pedals mount just with a plate that mounts to the floor for a more ridgid setup. I am very close to mounting them though so do stay tune for future episodes.
As for the fab skills, I have Dad and Bob Bennett to thank. They taught me everything I know. Dad started on me when I was about 5 building Go karts and anything else we wanted to make. Just was born into a lucky situation.
Thanks though. It is always good to know people like what they see!
Thomas
Posted by: rnellums Jan 19 2012, 10:11 PM
Sounds good. I think I may join you for the DE at Putnam whenever that is. I just paypal'd for my flat tow setup today!
Awesome... You gonna tow it with the Suby?
Putnam is July 13th - 15th It will be a great event to attend. Especially due to a race in the same weekend. So you can watch a couple races and get a DE in.
BTW you can come by anytime to check out the car.
Thomas
That's the idea. Apparently the race car weighs 1600(I have my doubts) but avoiding a
Trailer should keep the wear and tear down. I still need an accu-sump though. Keep up your good work!
Posted by: arkitect Jan 19 2012, 11:31 PM
Cool build thread, you really have good fab skills. Look forward to more.
Dave
Posted by: falconfp2001 Jan 20 2012, 01:48 PM
Wow, I didn't know they made pull slave cylinders like that. Do you have that part # as well.
I'd like to modify my clutch in the same way but keep the Gas and brake. Seems that would be easier as the clutch peddle is at such an angle you could just cut it and mount your new peddle but replacing both would keep everything looking clean.
Posted by: tscrihfield Jan 20 2012, 05:06 PM
Wow, I didn't know they made pull slave cylinders like that. Do you have that part # as well.
I'd like to modify my clutch in the same way but keep the Gas and brake. Seems that would be easier as the clutch peddle is at such an angle you could just cut it and mount your new peddle but replacing both would keep everything looking clean.
The Part number is for the entire kit which is slave cyl. clutch pedal and master cylinder. It is 340-1469.
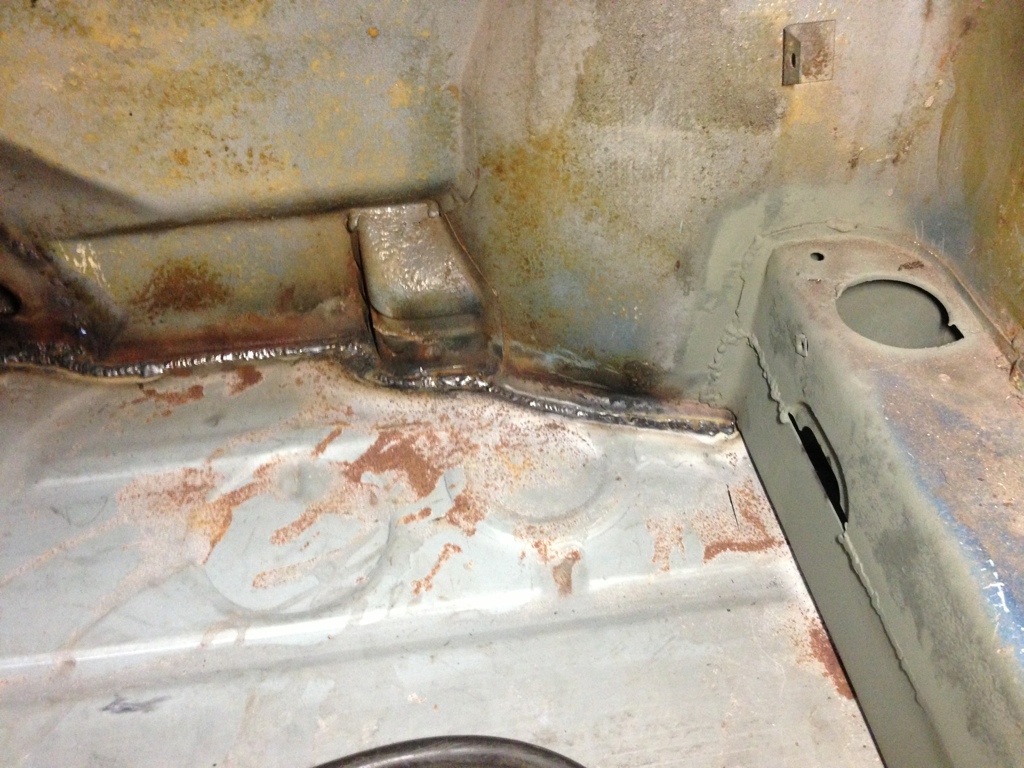
Posted by: tscrihfield Jan 30 2012, 09:05 PM
Working in the garage the past few weekends, but unfortunately on others cars... I did get a chance to work on the teener today though. 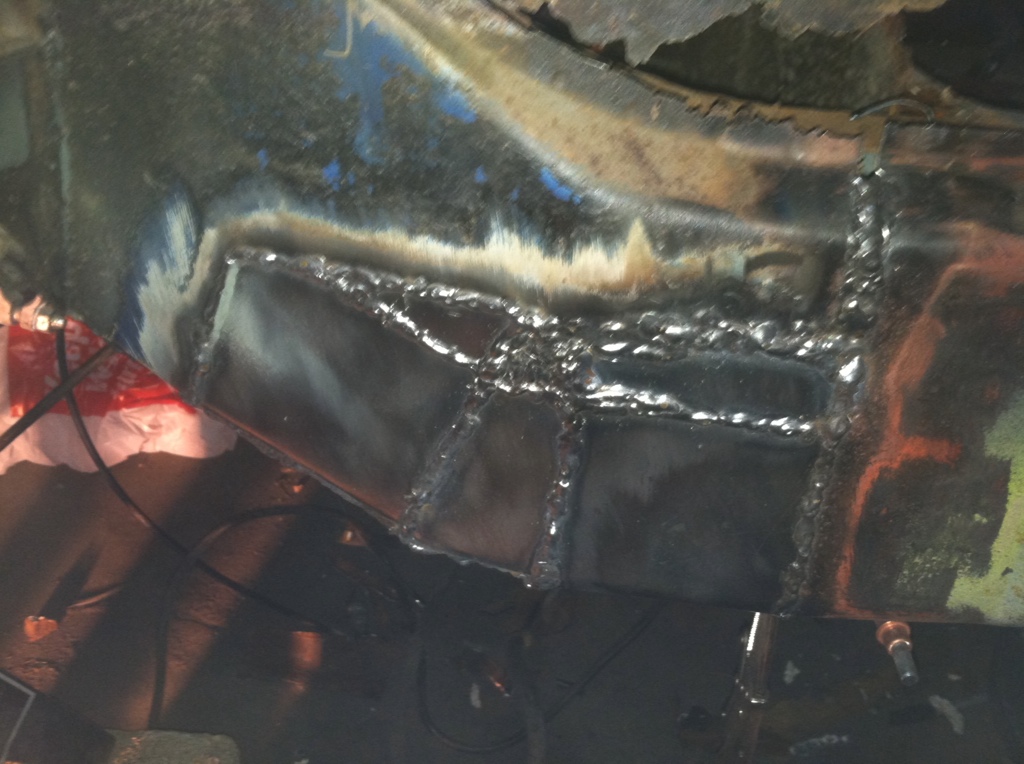
Finished the rear of the long. 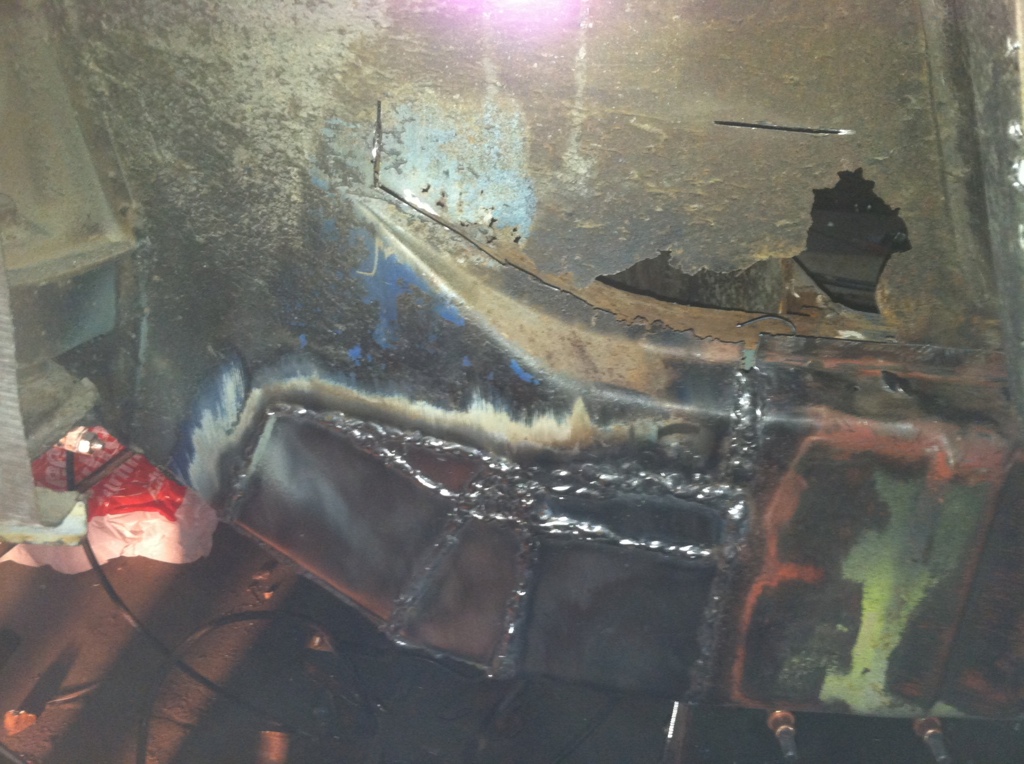
Started digging a little further into Hell. Funny how it feels that way. 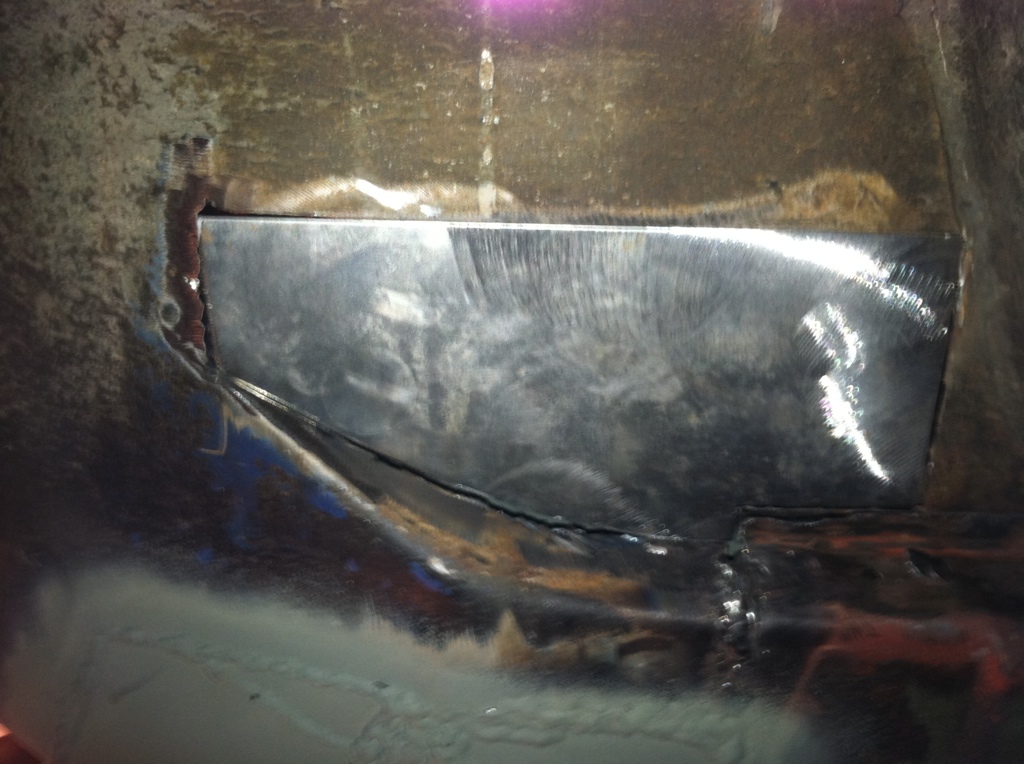
Fitting....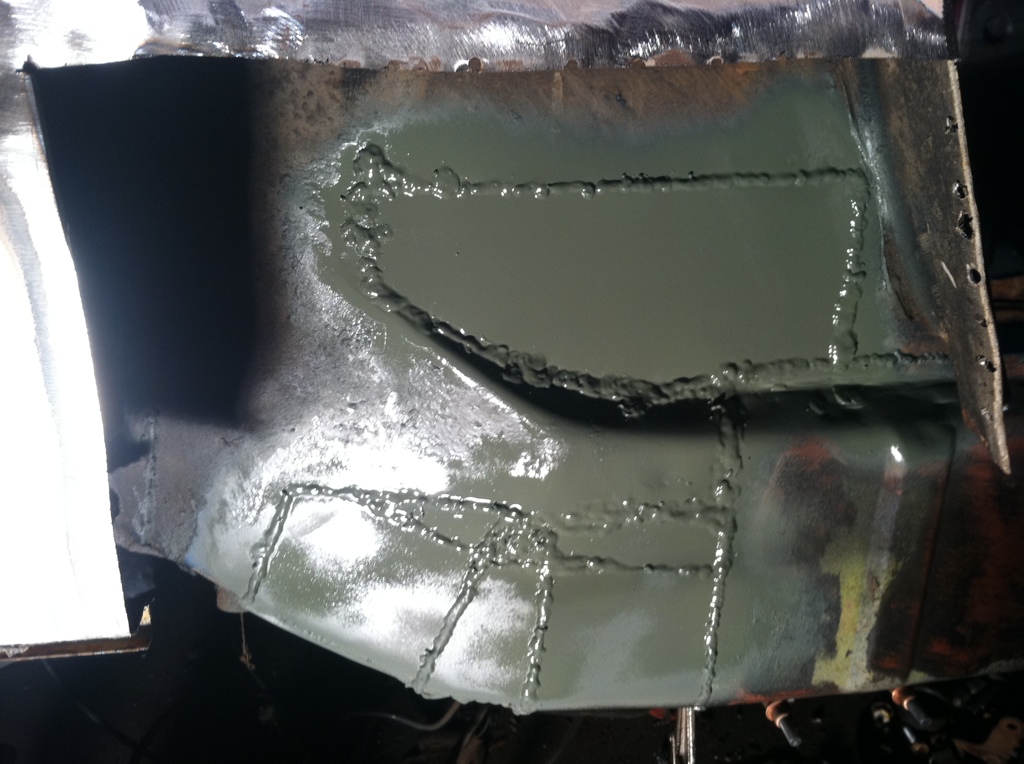
Done. Time for a  then off to bed...
Posted by: saigon71 Feb 2 2012, 04:12 PM
Working in the garage the past few weekends, but unfortunately on others cars... I did get a chance to work on the teener today though.
Finished the rear of the long.
Started digging a little further into Hell. Funny how it feels that way.
Fitting....
Done. Time for a
then off to bed...I like your patchwork in the hell hole...gave me some ideas on how to attack my drivers side long. What gauge sheet metal did you use on the long?
Posted by: tscrihfield Sep 19 2012, 08:20 PM
Well, it feels like a century since my last post. Car is still here... Just not finished of course.
My objective this year was to try to get more work done than post and I'm afraid I didn't get as much done as I'd hoped for. none the less... Here's for what I've done since February.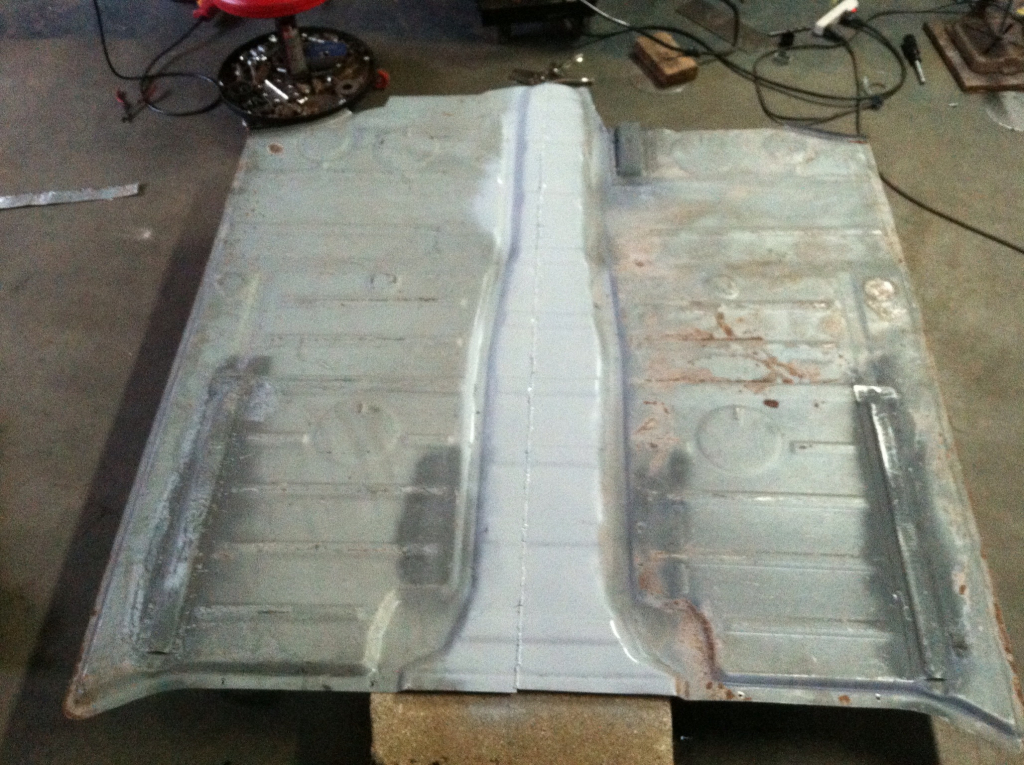
Floor put together....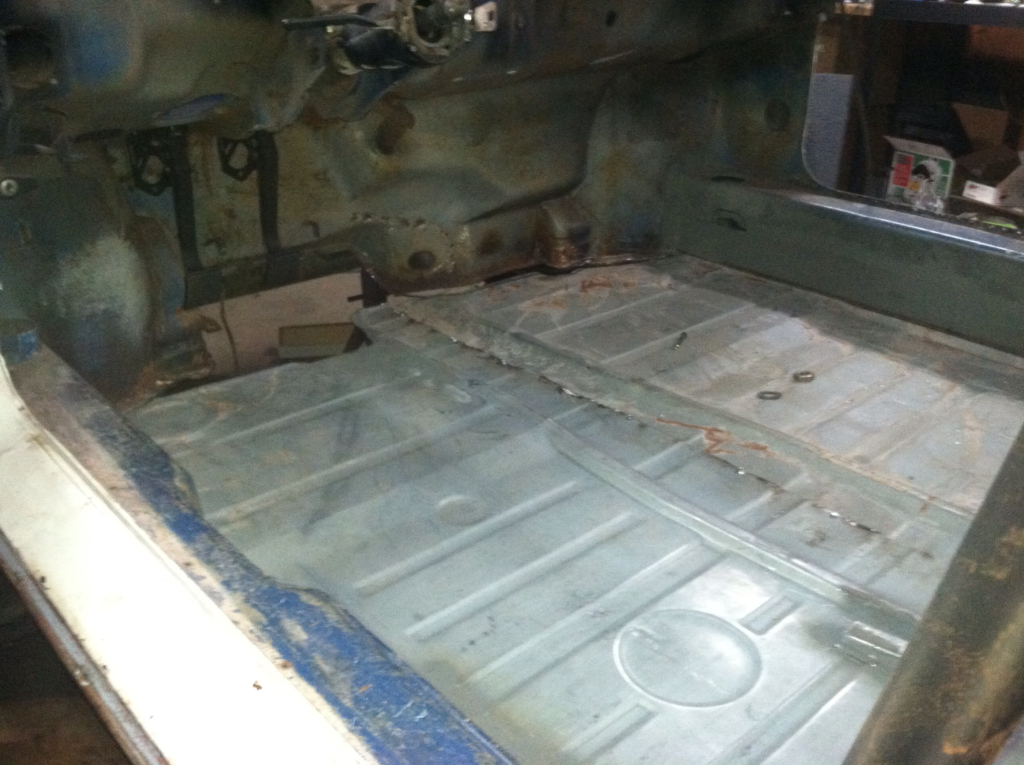
Tacked in place... Later welded....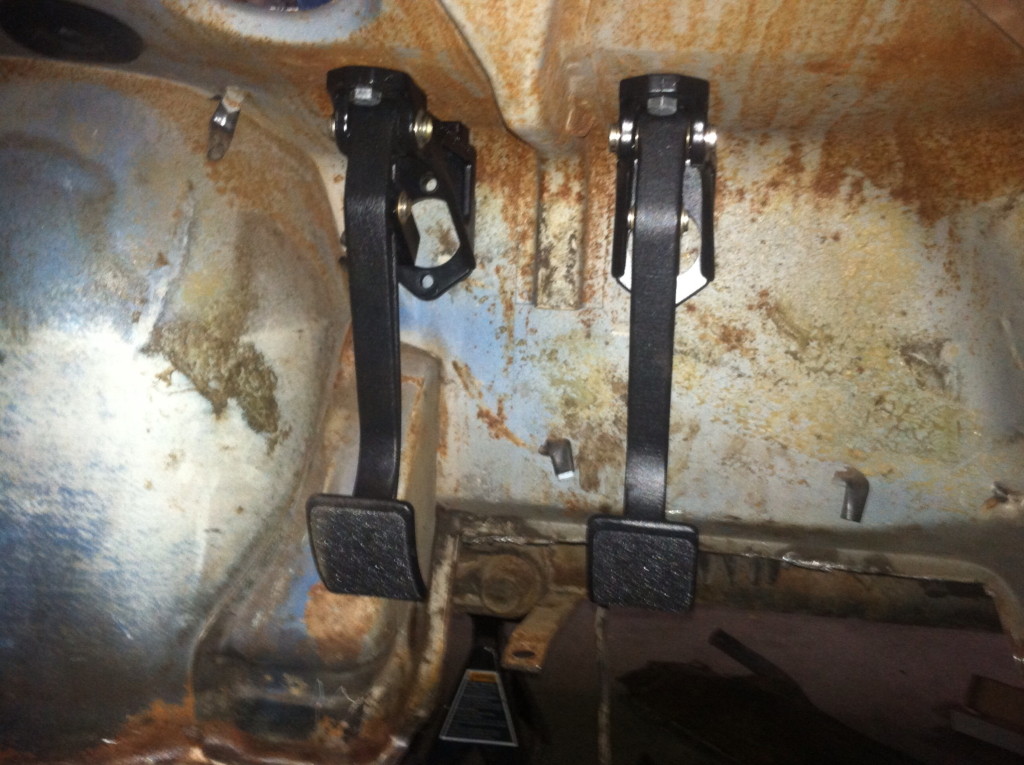
Figured out how to mount my pedals....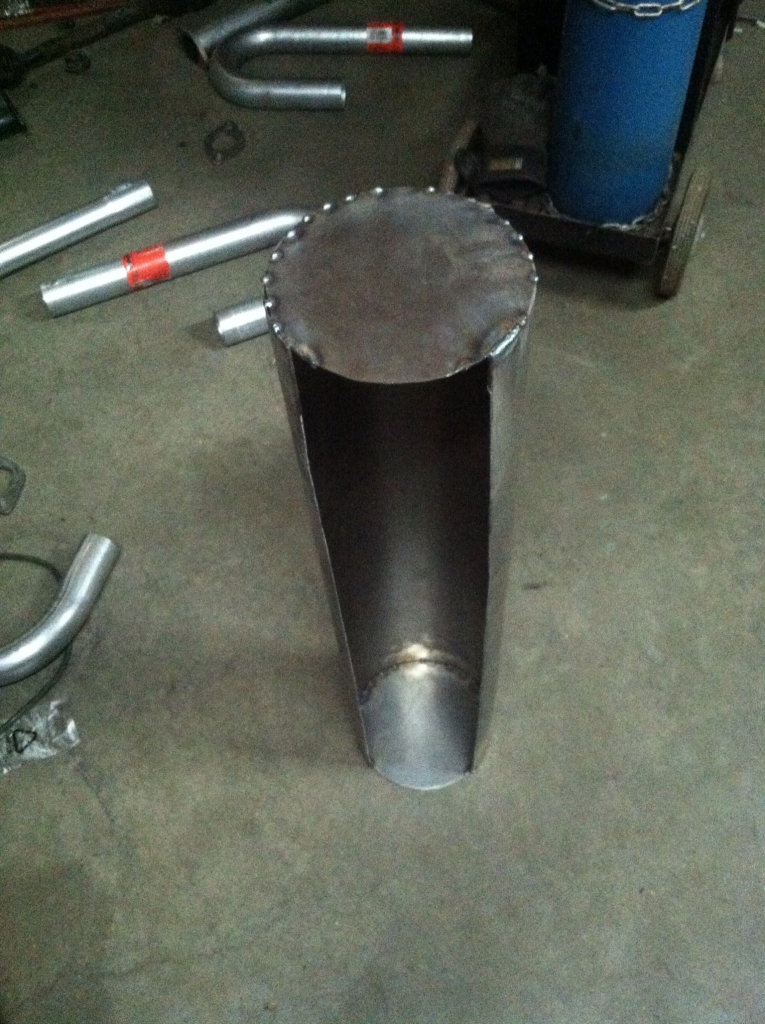
Started this strange thing... What the heck is it?
Posted by: tscrihfield Sep 19 2012, 08:27 PM
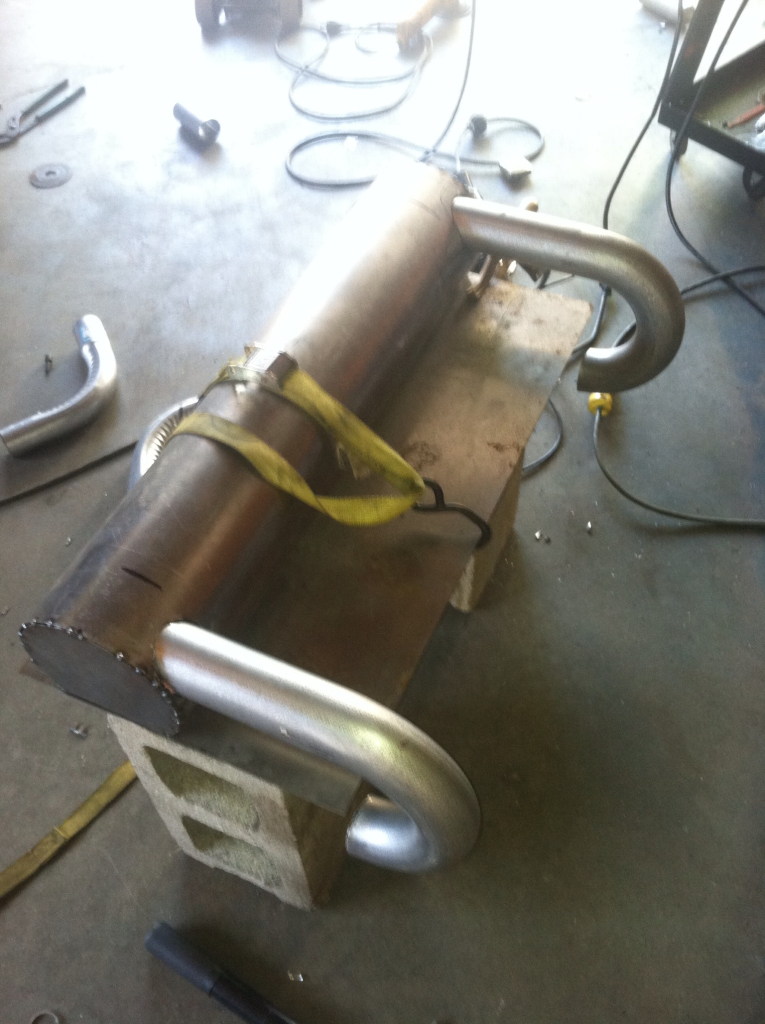
Starting to look like something...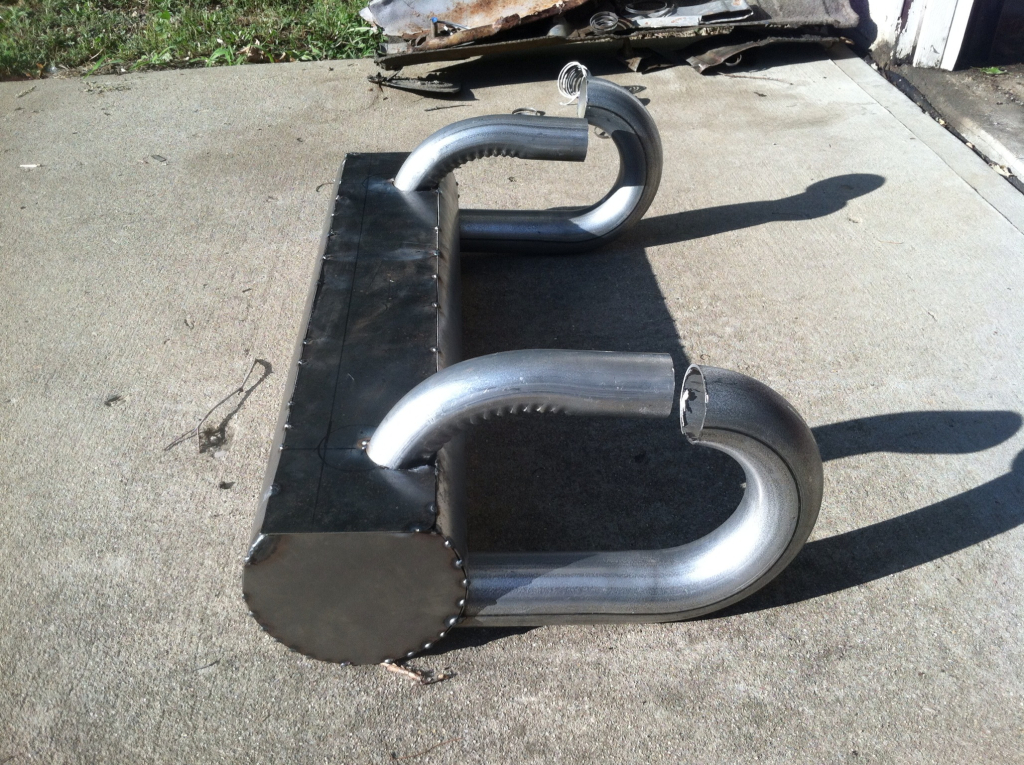
Starting to look like nothing again... Hahaha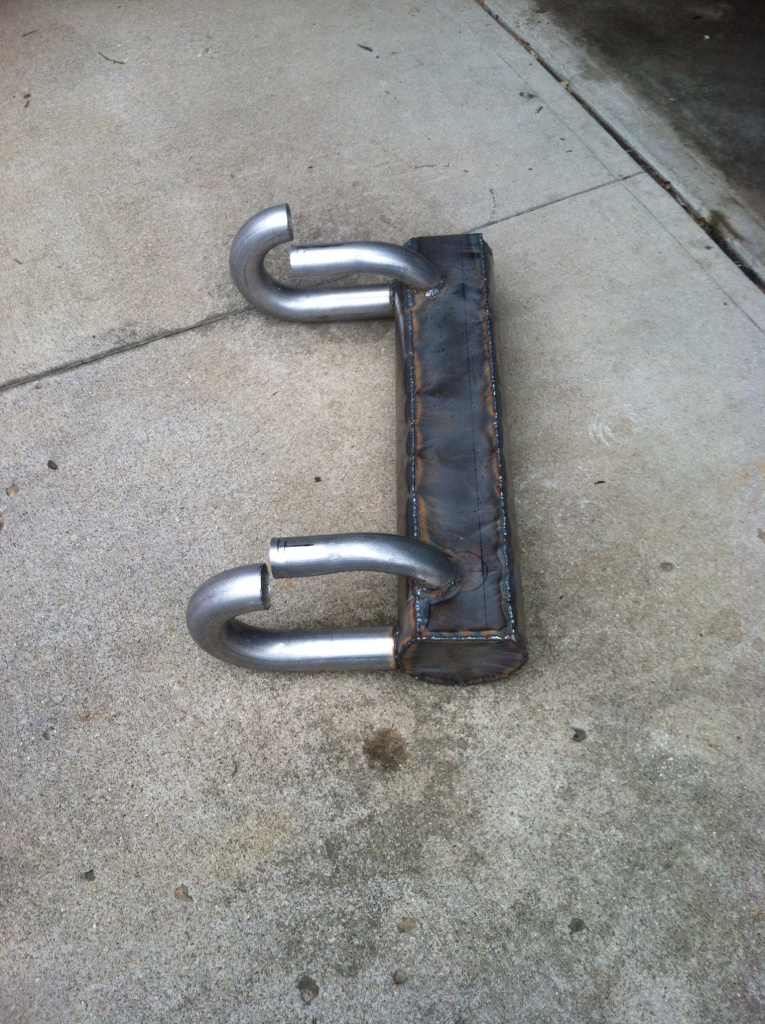
Laid some full beads and sealed up...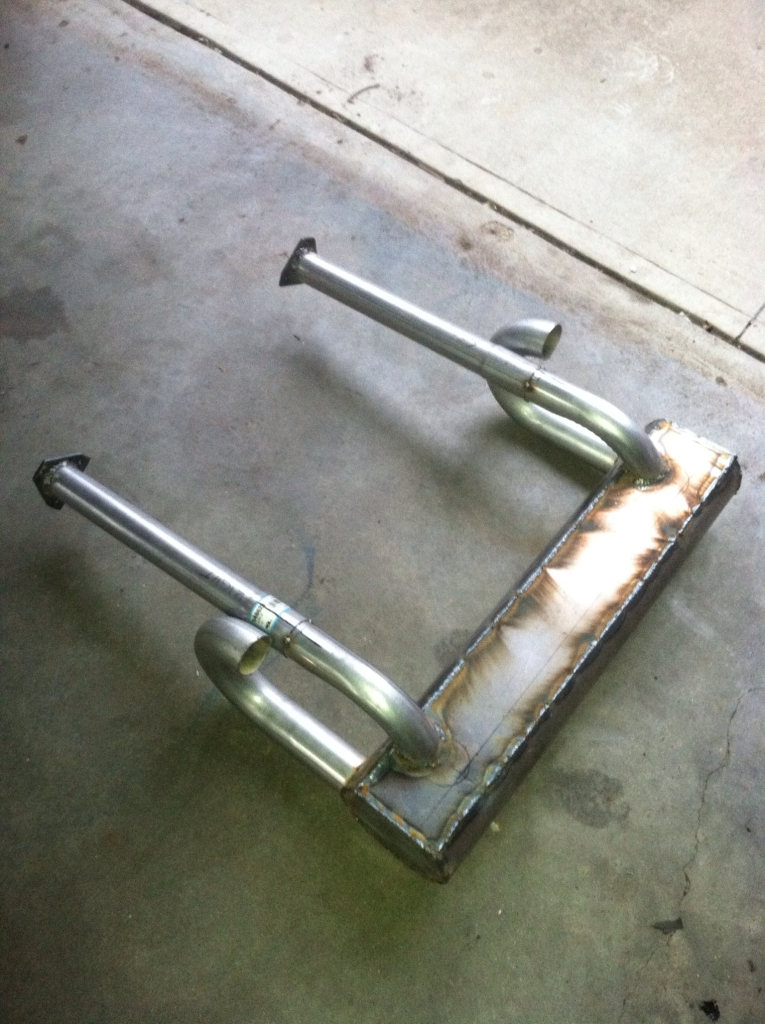
Tacked forward tubes on...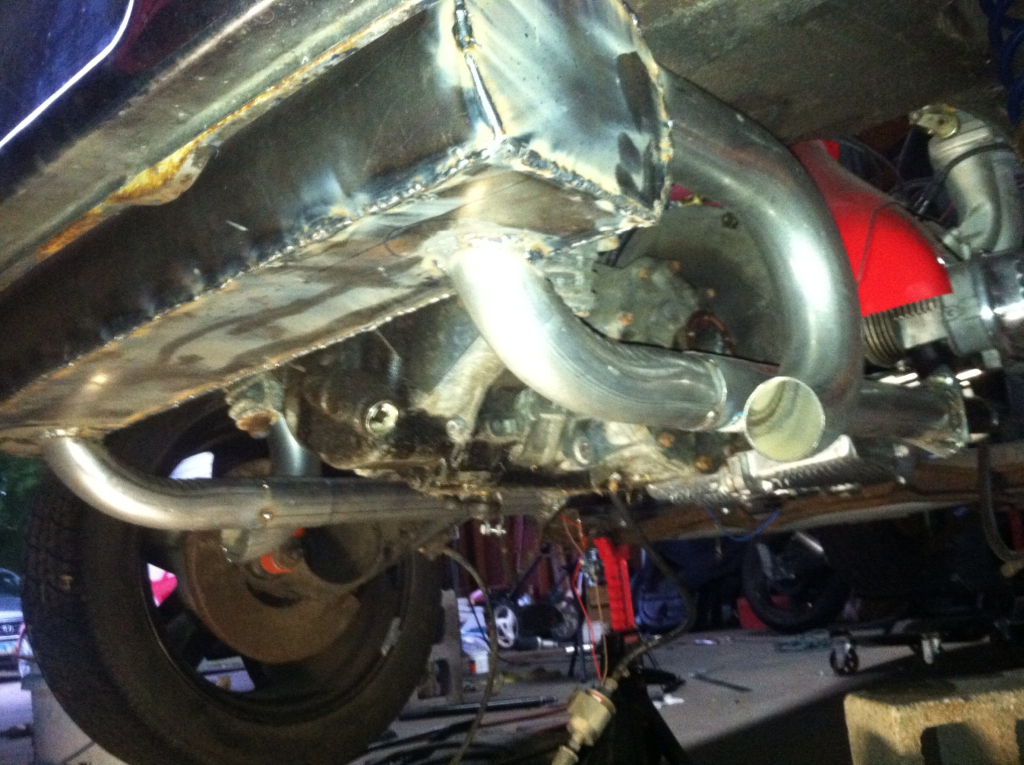
Mounted!
Can't wait to here how she sounds.... Maybe this weekend?
Thanks for watching! I will try to get to more and other things I am working on soon.
Thomas
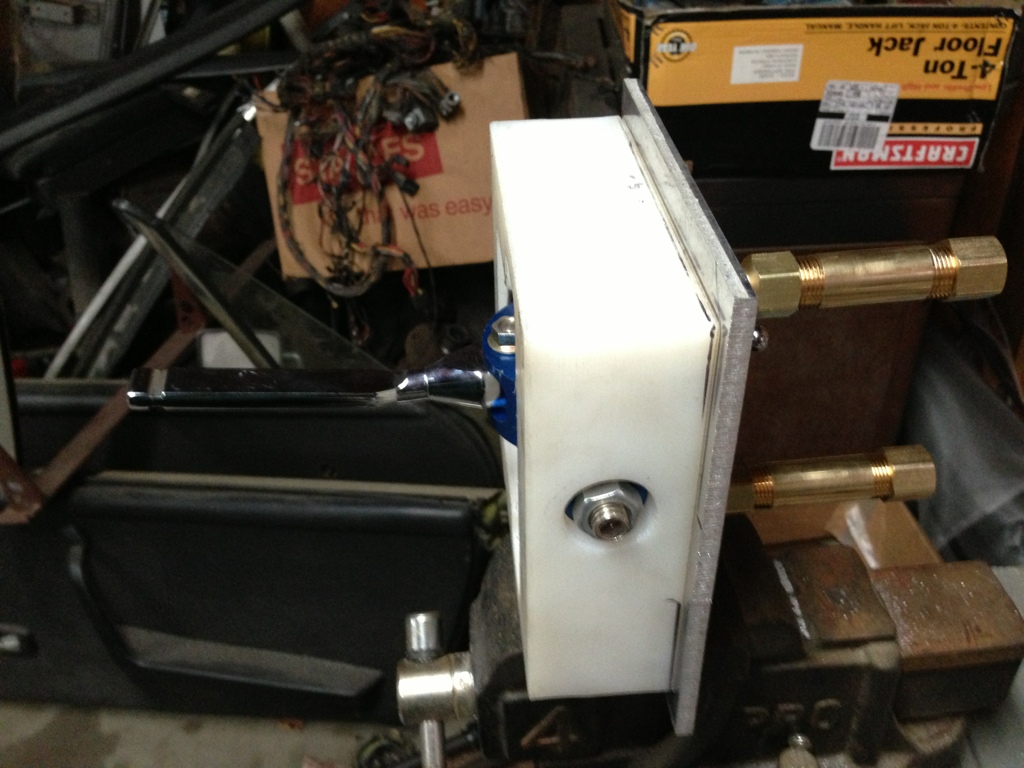
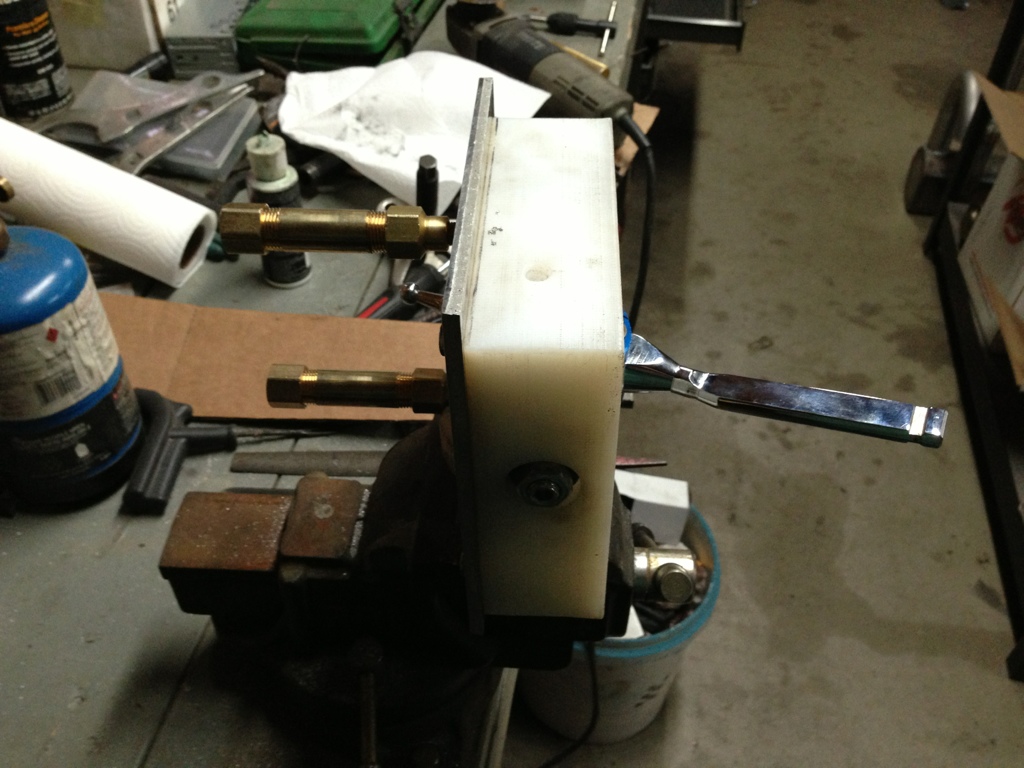
Posted by: tscrihfield Nov 18 2012, 05:06 PM
http://www.youtube.com/watch?v=mRGcx7MlsM8&feature=youtube_gdata_player
So my A.D.D. Has officially taken over. I have been jumping all over the place with this project. Any who this is the video of the shifter tower that I've made. I figured since I'm not going to put the tunnel back in, I could make the cable shifter now. I have to order the cables now, so itll be a few weeks before I get back to this portion of the build.
Anyone know a good source for push pull cables or is Mcmaster Carr my only choice?
Posted by: rnellums Nov 19 2012, 08:51 AM
Love it. Are you going to stick with the massive teflon block? I definitely think cable shifting is the way to go. I wanna see this thing in action!
Posted by: tscrihfield Nov 19 2012, 04:35 PM
Love it. Are you going to stick with the massive teflon block? I definitely think cable shifting is the way to go. I wanna see this thing in action!
The Teflon block Is most likely permanent. However, the ear that transfers side to side to forward to back motion may change to aluminum with a teflon/delrin bushing. The Teflon is actually very tough and has no wear characteristics like aluminum. In the end the Teflon won't be visible anyway because I plan to build a cover for the entire shifter that makes it more astetically pleasing.
Posted by: Michelj13 Nov 19 2012, 06:16 PM
I love your project. Wish I could weld and work metal like you can. That is fantastic! I am in the process of installing my MS setup. You may want to look at it. Also, I have been working on my 914 for more than 10 years if that makes you feel any better It has been a lot of fun for me also.
Posted by: kevin311 Nov 19 2012, 07:35 PM
http://www.youtube.com/watch?v=mRGcx7MlsM8&feature=youtube_gdata_player
So my A.D.D. Has officially taken over. I have been jumping all over the place with this project. Any who this is the video of the shifter tower that I've made. I figured since I'm not going to put the tunnel back in, I could make the cable shifter now. I have to order the cables now, so itll be a few weeks before I get back to this portion of the build.
Anyone know a good source for push pull cables or is Mcmaster Carr my only choice?
Cable shifter is definitely the way to go. I did it to my tail shifter and It totally changed the way the car drives.
Mcmaster is a good place, but any marine supply store should have good teleflex corrosion resistant ones on hand. Another good place to get them is Here
http://www.appliedracing.com/morse-cables-and-accessories/
Let me know if there is anything more you need. The cable shifter was the most fun project my dad and I ever tried.
Kev
Posted by: tscrihfield Nov 19 2012, 10:51 PM
Thanks guys! Glad to know you are enjoying the build.
This is actually one of the more fun pieces I have built yet.
Kevin, thanks for the insight on the morse cables. It helped me find the ones I am going with now.
As far as the MS... Im still weighing the options at ts point. I have a few more systems I am thinking about. Not to say that MS is not a good system, because it is great! It just may not be the system for this application. If my MS3 doesn't sell I may likely run it because I have it. Most of my components that I've either made or have bought will work in almost any application, but I am trying to get to a MAF opposed to a MAP due to the engine overlap and such...
Posted by: rnellums Nov 21 2012, 03:39 PM
And what application is that?!
Posted by: tscrihfield Nov 21 2012, 09:25 PM
And what application is that?!
 fuel injection of course!
 I see what your getting at Ross!
Posted by: bigkensteele Nov 22 2012, 12:07 AM
And what application is that?!
fuel injection of course! I see what your getting at Ross!
You know that you are going to have to come clean sooner or later.
Posted by: tscrihfield Dec 28 2012, 06:35 PM
im not giving in Ken! YET!
Well the shifter is off visiting a friend in what i will call "Beta" mode. I have everything made and tested to a point I will have it installed in next couple of weeks...
Now to the new stuff...
I finally finished the door sill on the passenger side...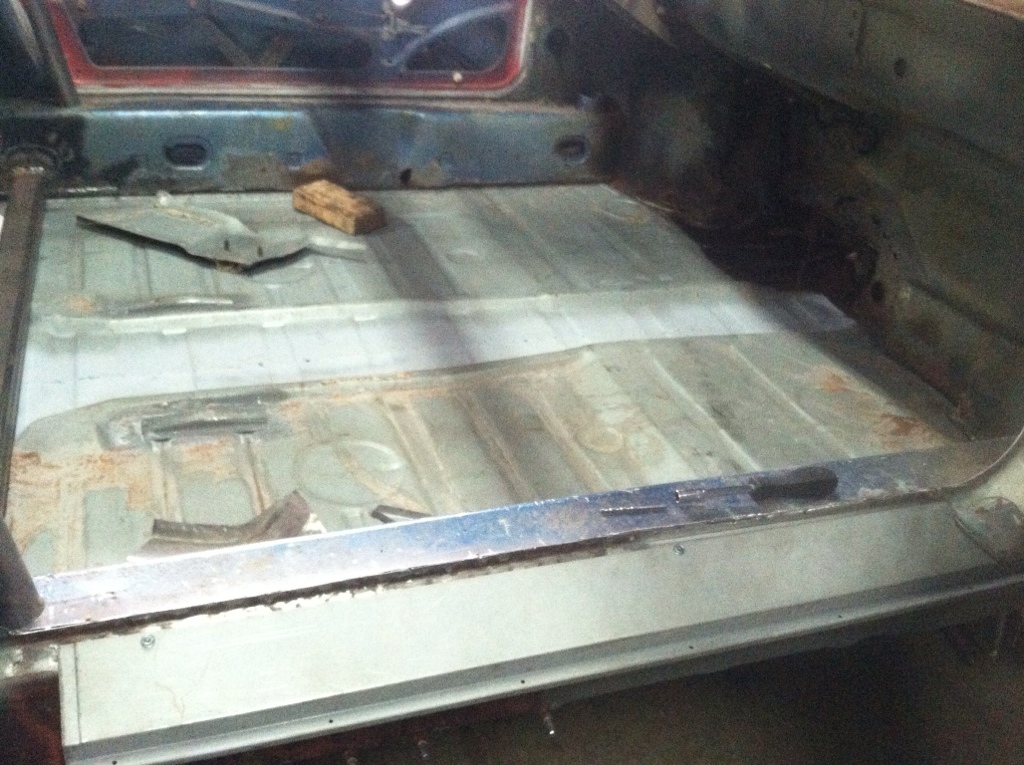
I finished welding in the fillers for the firewall 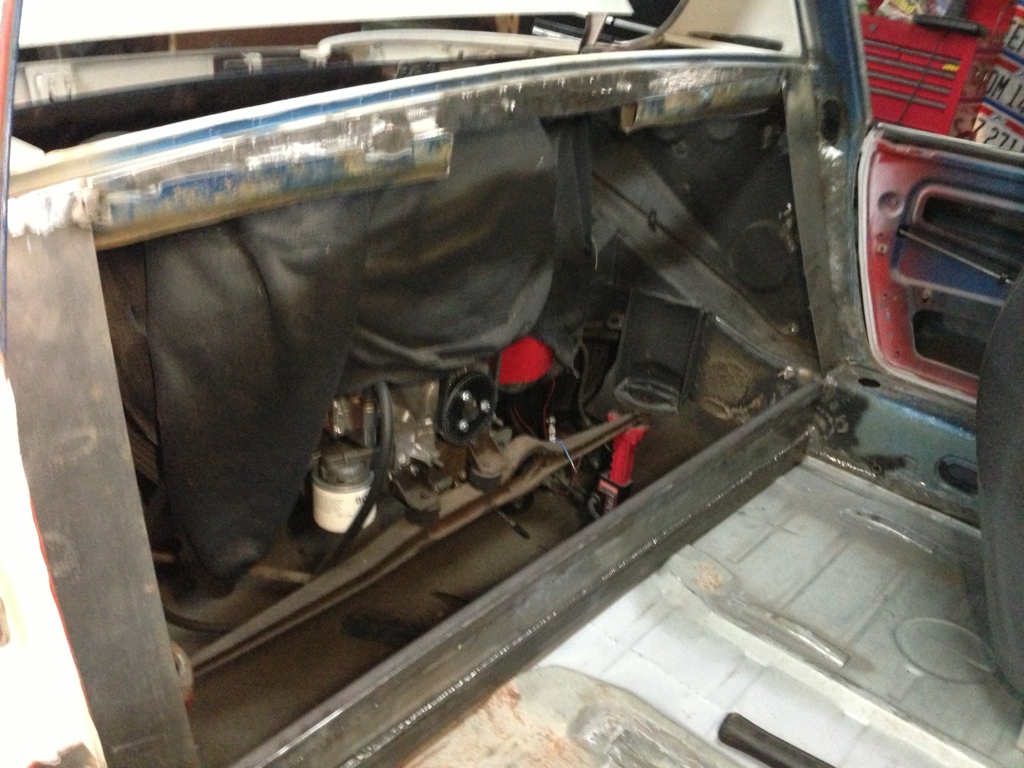
Then i finished welding in the floor.... all except the small area that is missing where the pedals used to go...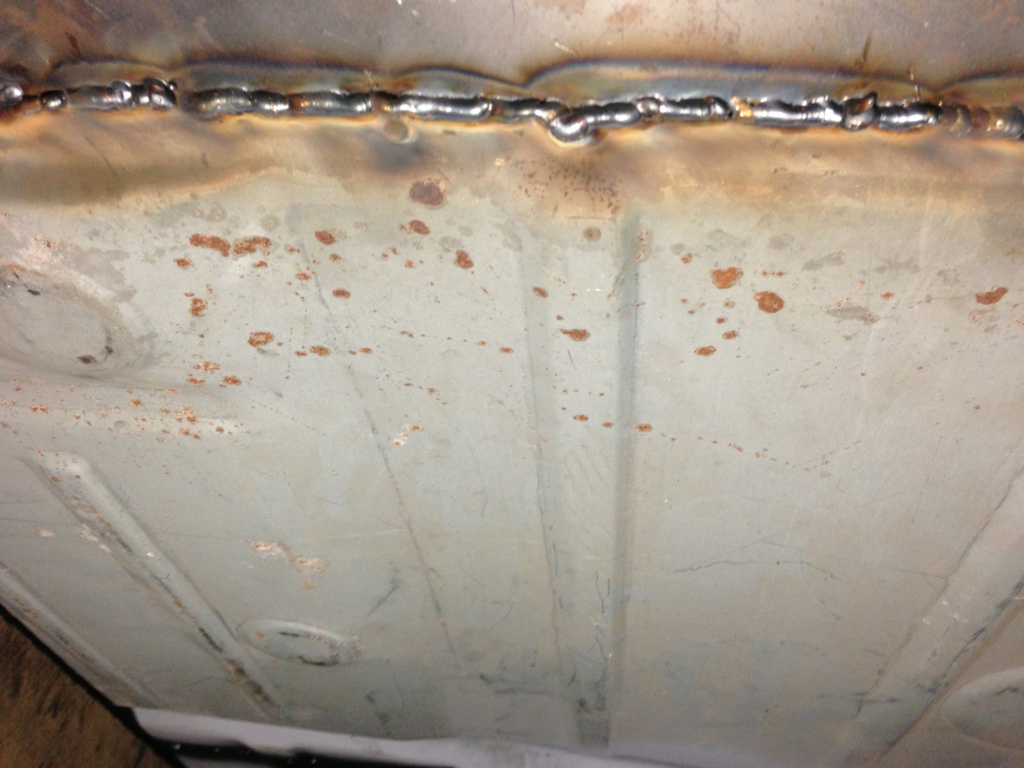
I then went loco and chopped up the front firewall! 
Then i had some fun with a spot welder...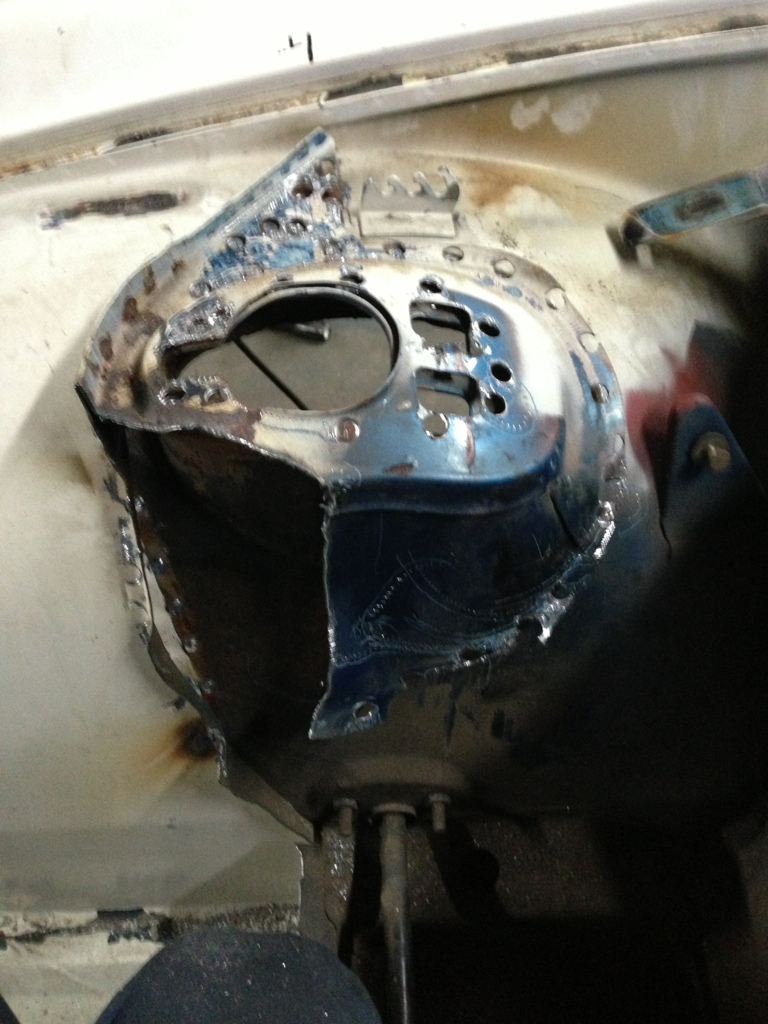
And because I have servere A.D.D. I moved over to my pedal box... 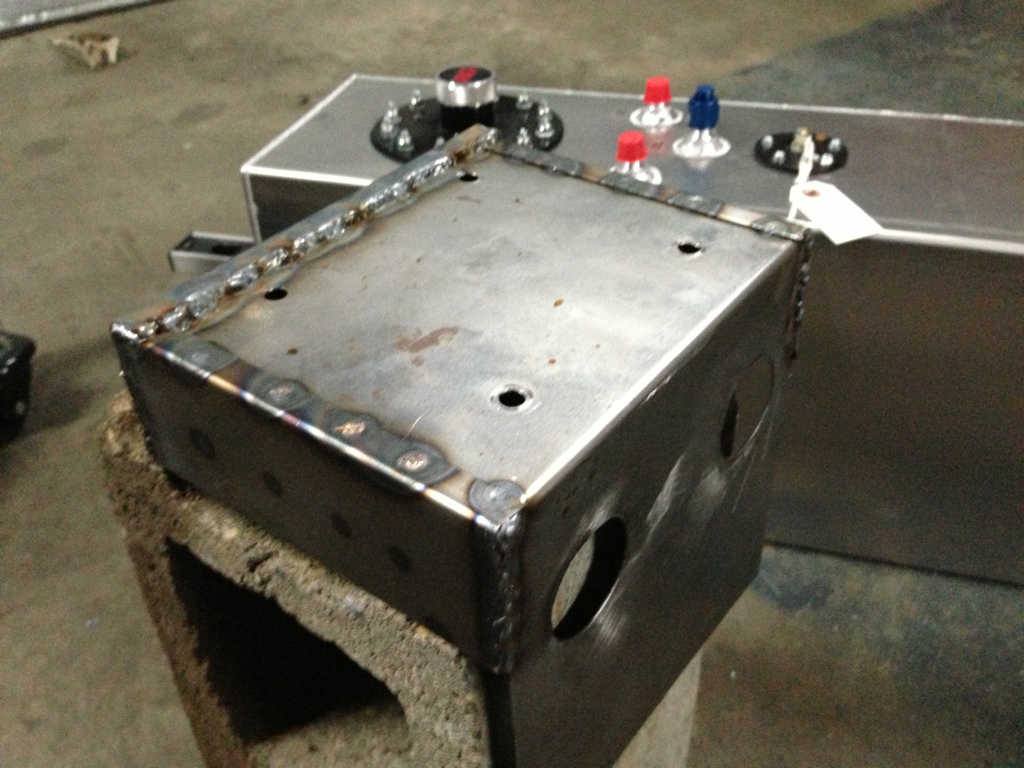
Oh and I set my christmas present in to see how it looks...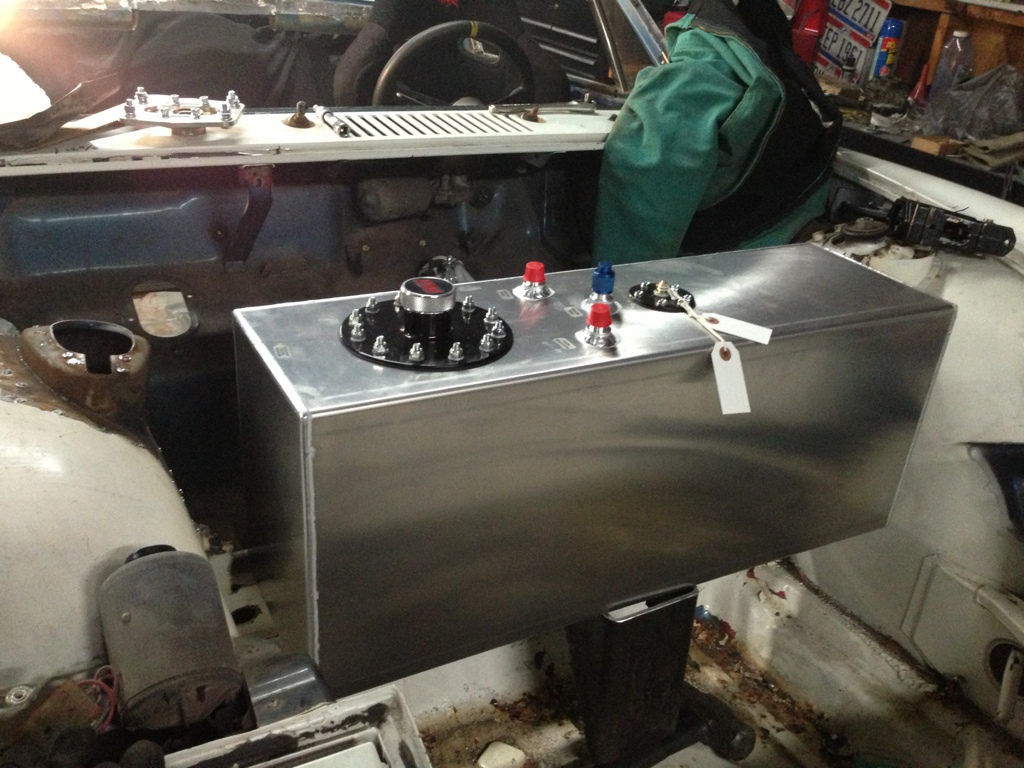
Feels great to make some progress.....
Cheers
Thomas
Posted by: FourBlades Dec 28 2012, 08:02 PM
Cool build Thomas!
What pedals are those?
Looking forward to seeing more.
John
Posted by: tscrihfield Dec 28 2012, 10:32 PM
Cool build Thomas!
What pedals are those?
Looking forward to seeing more.
John
Wilwood engineering. Thanks!
Thomas
Posted by: rnellums Dec 29 2012, 06:08 PM
Whoo! Big progress!
Posted by: turk22 Dec 29 2012, 07:16 PM
Great work. I know your not far from me, does the snow and cold slow down the progress, or do you have a heated space?
Posted by: tscrihfield Dec 29 2012, 11:45 PM
Great work. I know your not far from me, does the snow and cold slow down the progress, or do you have a heated space?
To be honest I think it helps me out. I have a wood burning stove and a propane forced air heater. But I run both lightly. I hate working in the summer because it is so humid and hot. neither conditions promote work with grinding, welding and so on. i throw on a couple layers of clothing and the work makes my heat...
Posted by: tscrihfield Dec 29 2012, 11:49 PM
Whoo! Big progress!
Yeah... I cant tell if this is in sarcasm or not... but ... I kinda feel bad since i told you that i would be posting more regularly.... to be honest i didnt foresee the amount of travel that i would be doing for work... i dont have anymore travel untill mid january so im pretty excited about that. Had a month off from it. and i have been off work since last friday.
How are things though? Maybe i can make a trip up to ol purdue and stop in for a meal and drinks.
Thomas
Posted by: rnellums Dec 30 2012, 12:06 PM
Not sarcastic at all! I have been busy too, but I was thinking we should do something. I have a feeling Cincy is a lot more fun than Lafayette. Maybe a 914 get together in Feb?
Posted by: tscrihfield Dec 31 2012, 06:51 PM
Ross, gathering sounds great!
Otherwise... I have a couple cool videos to share. A friend and I have completed a working prototype!
https://www.youtube.com/watch?v=rbnihF5J1c0
https://www.youtube.com/watch?v=n5tDvTsHgS0
I am still working out the reveserse lockout mechanism which i believe that I figured out today.
Happy new year all!
Cheers
Thomas
Posted by: 904svo Dec 31 2012, 07:18 PM
I keep the 914 shifter in my car and came up with this linkage arrangement.
I did not have enought room to install cables between the back wall and the front
of the engine so I went around the engine.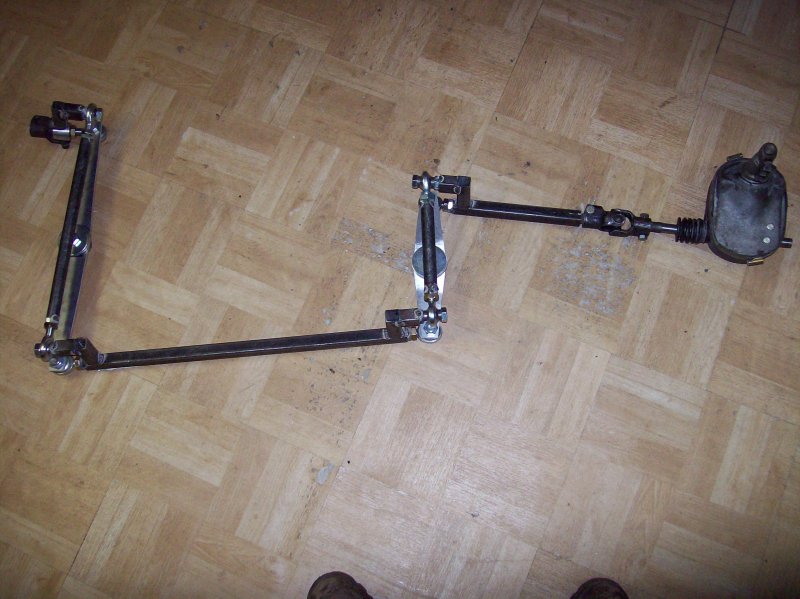
Posted by: Van914 Jan 2 2013, 07:54 AM
Thomas,
Great job on the Cable Shifter.
Van
Posted by: turk22 Jan 2 2013, 01:44 PM
Not sarcastic at all! I have been busy too, but I was thinking we should do something. I have a feeling Cincy is a lot more fun than Lafayette. Maybe a 914 get together in Feb?
I'm in!
At some point I may offer up a grill out for a drop my engine day... ( I want some help the first time...)
Posted by: tscrihfield Jan 2 2013, 04:49 PM
Thomas,
Great job on the Cable Shifter.
Van
thanks Van!
I have had a lot of fun with it! it really has turned out nice!
Thomas
Posted by: tscrihfield Jan 2 2013, 04:53 PM
Not sarcastic at all! I have been busy too, but I was thinking we should do something. I have a feeling Cincy is a lot more fun than Lafayette. Maybe a 914 get together in Feb?
I'm in!
At some point I may offer up a grill out for a drop my engine day... ( I want some help the first time...)
I am goiing to start a new thread or resurrect the old one from last year about a meet up in cinci. If you plan to drop the engine that would be a fine time to get together. Ill never pass on a teener work day.
Thomas
Posted by: tscrihfield Jan 2 2013, 09:08 PM
okay... so When I got home from work I got a little time to work on the car.
On monday, I went to see a fellow Porsche friend that owns a metal supply store and picked up a piece of aluminum for the firewall.
Today I got it fitted for the hole.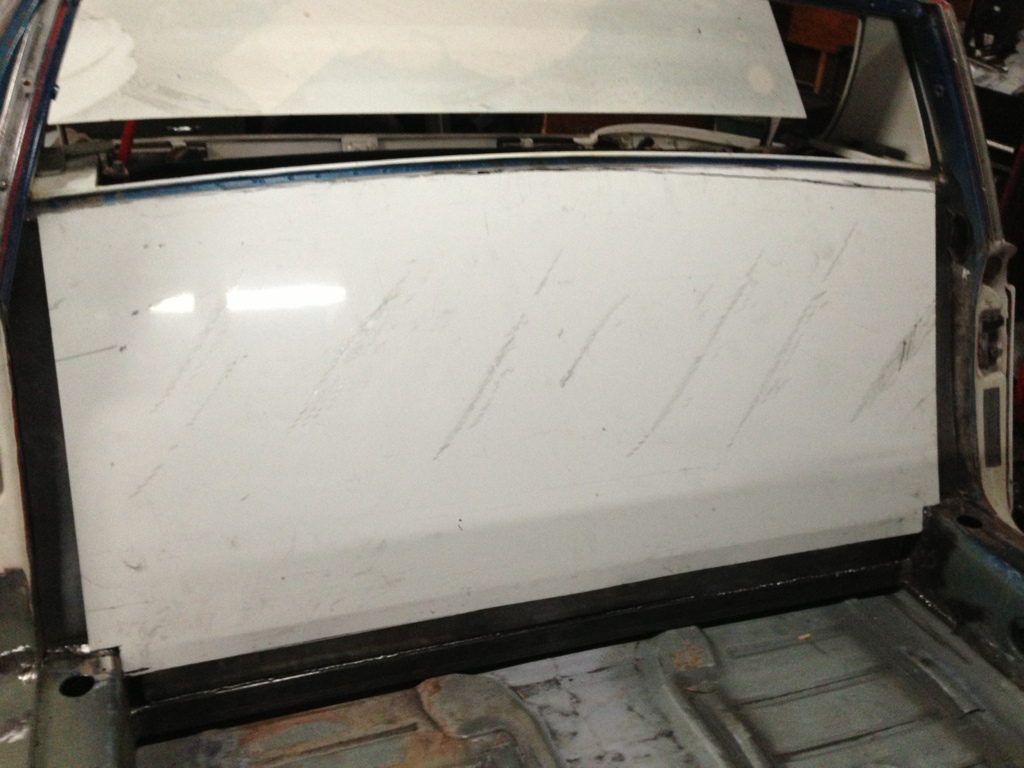
This is it for tonight.
Cheers
Thomas
Posted by: rnellums Jan 3 2013, 01:05 AM
Its starting to look like a real cockpit! Keep it up Thomas.
Posted by: tscrihfield Jan 6 2013, 04:26 PM
Thanks Ross!
Today I got some time in the garage and finished up the shifter. Now all I need to do is test it with the cables on the trans...
https://www.youtube.com/watch?v=-u0vDi6SQbI
www.youtube.com/#/watch?v=-u0vDi6SQbI
This is since the embedding is not working...
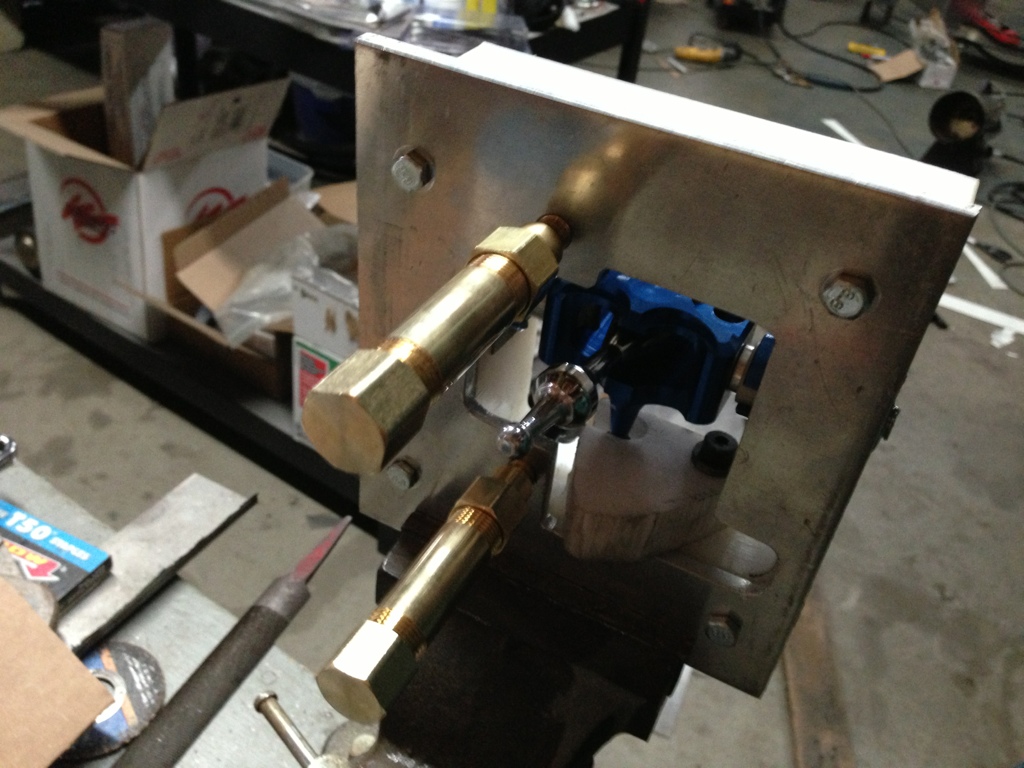
Posted by: tscrihfield Jan 6 2013, 04:41 PM
Now for still frames.
The spring plungers...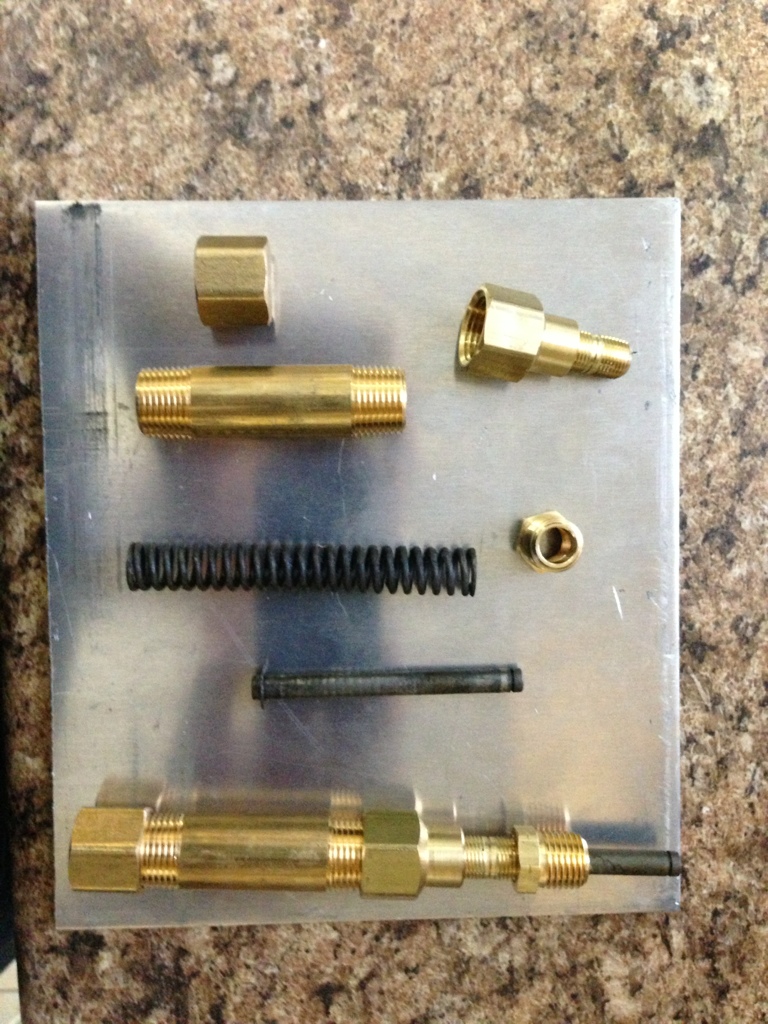
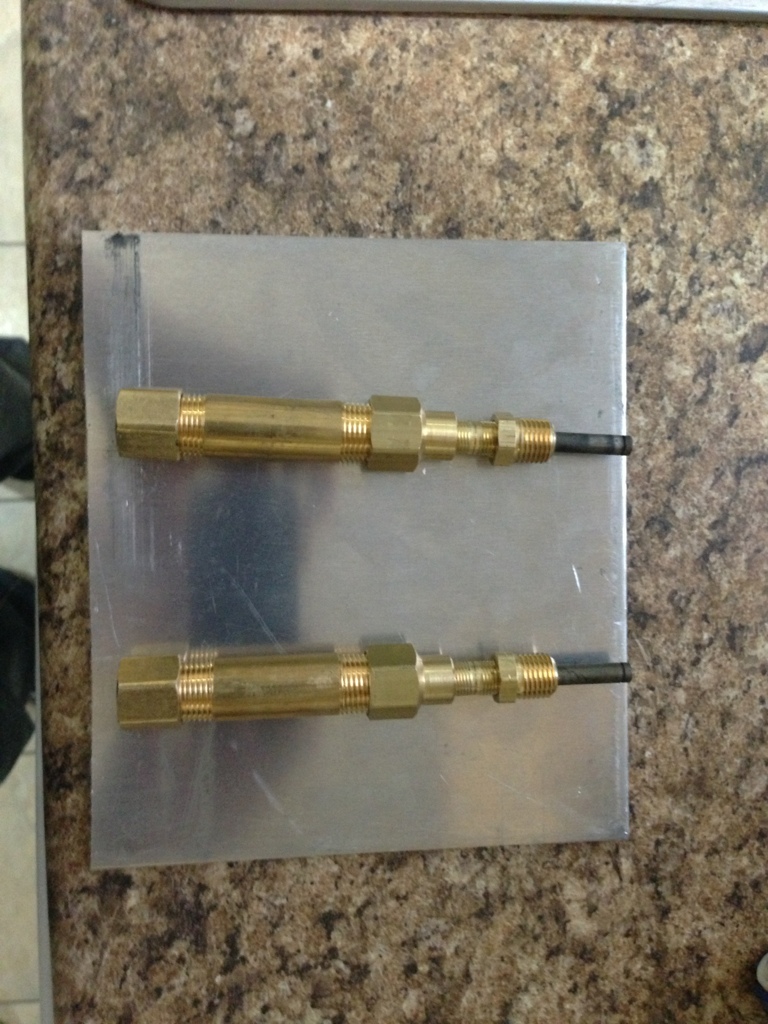
The shifter...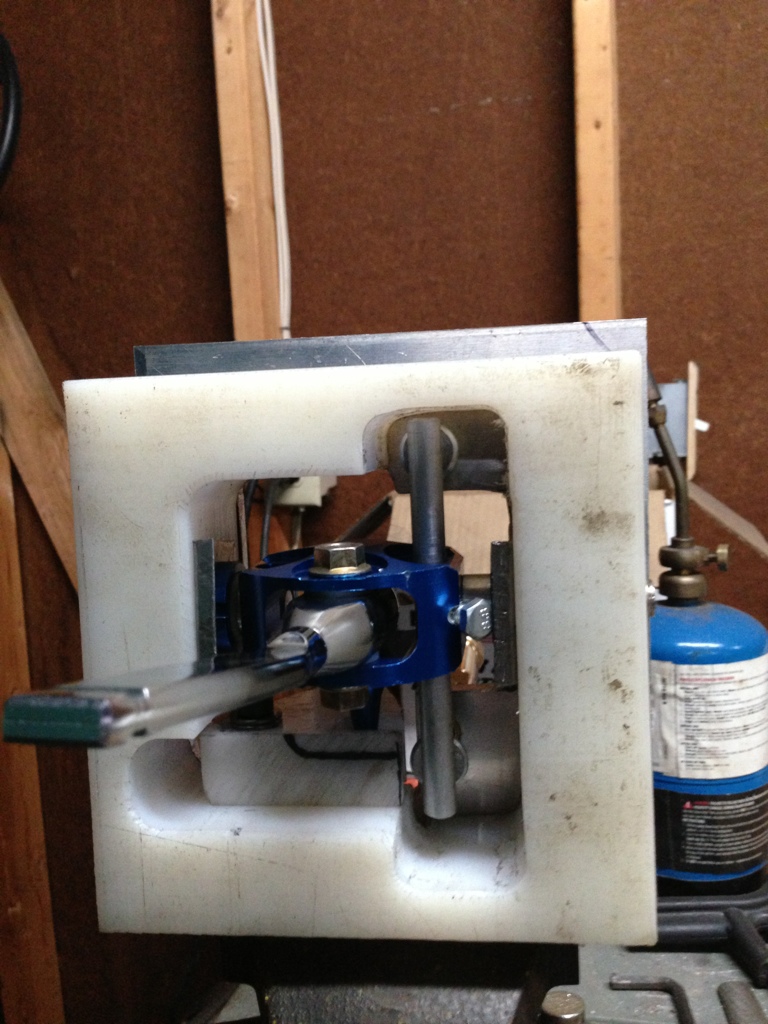
Posted by: rnellums Jan 7 2013, 08:48 AM
Is having the springs vertical going to make mounting it in the tunnel difficult? Seems like they take up a lot of space. The motion looks excellent though.
Posted by: tscrihfield Jan 7 2013, 04:38 PM
Is having the springs vertical going to make mounting it in the tunnel difficult? Seems like they take up a lot of space. The motion looks excellent though.
Well.... That's just it, there's not a tunnel... But the mounting of this shifter is going to be higher than the stock shifter. If you take the normal shifter go about 4 inches back and 8 inches up. That's where this will mount. I'll tell you though, when I did the mock with the other shifter, this thing has a tighter pattern than my GTi for shifting and it is solid as it gets. I cannot wait until I mount it... Now I just need to finish the seat mounts...
Thomas
Posted by: tscrihfield Feb 6 2013, 08:23 PM
Well, I've been busy just not posting.
A couple weeks ago I figured out a way to mount the seats utilizing the stock mounts and rails. It turned out nice and fear of height is not an issue. 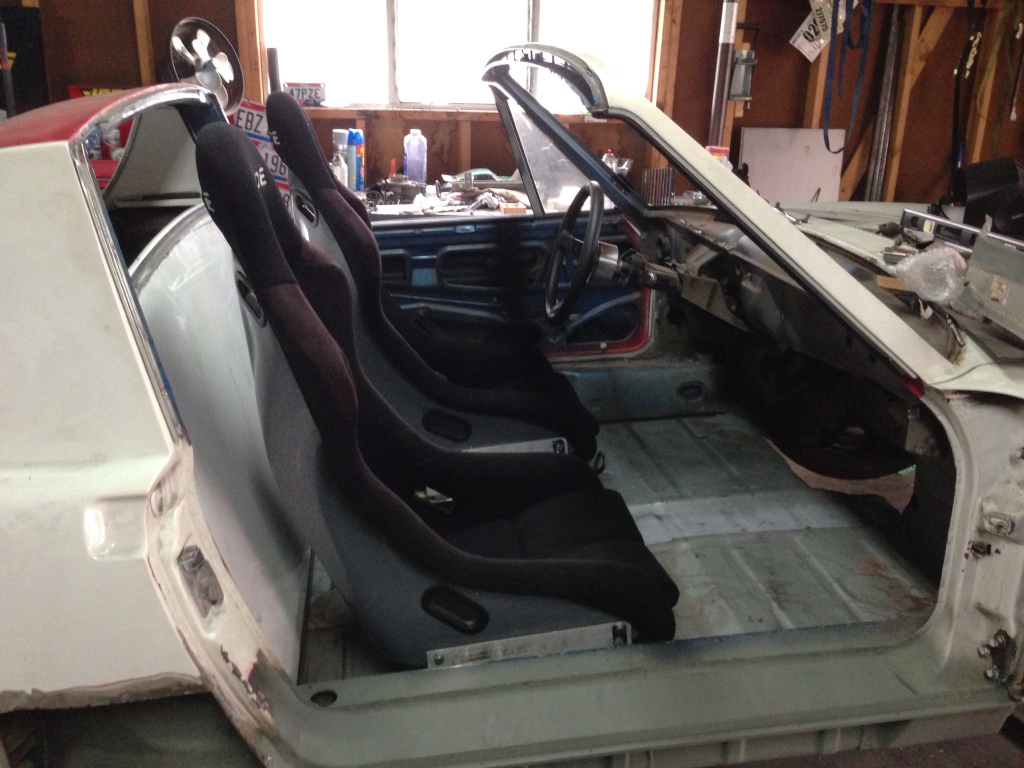
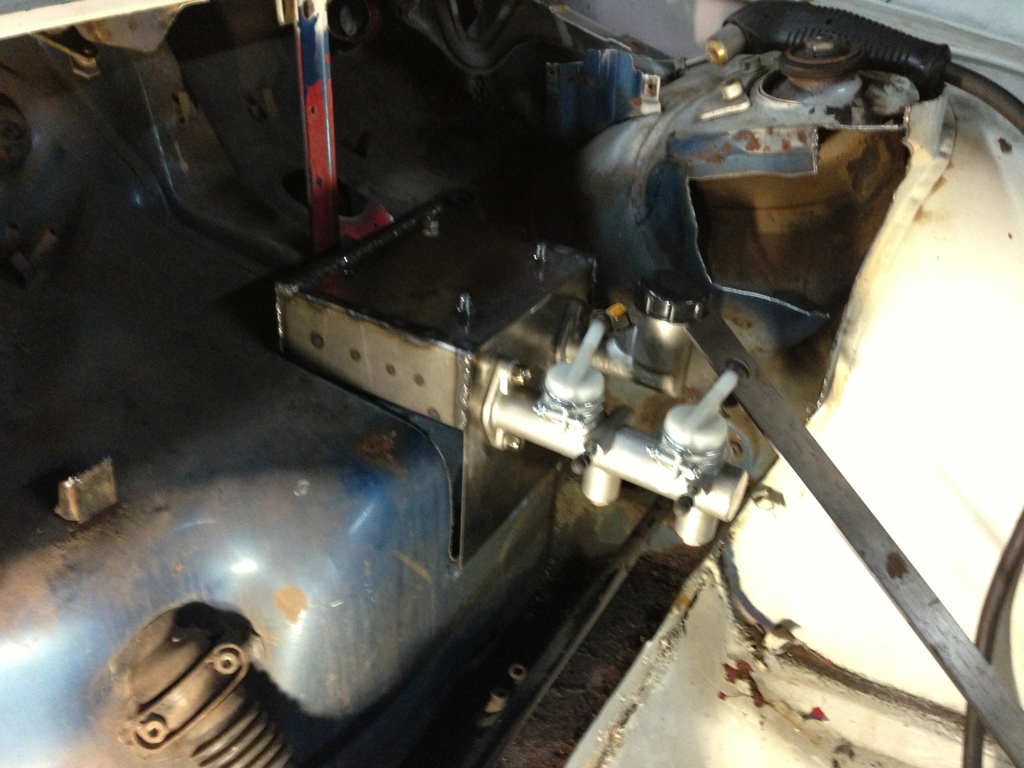
This past week, it got up to 60 degrees before it went to sub zero temps two days later... So I spent some time working on the car while it was nice. I mounted the pedal support box I made. 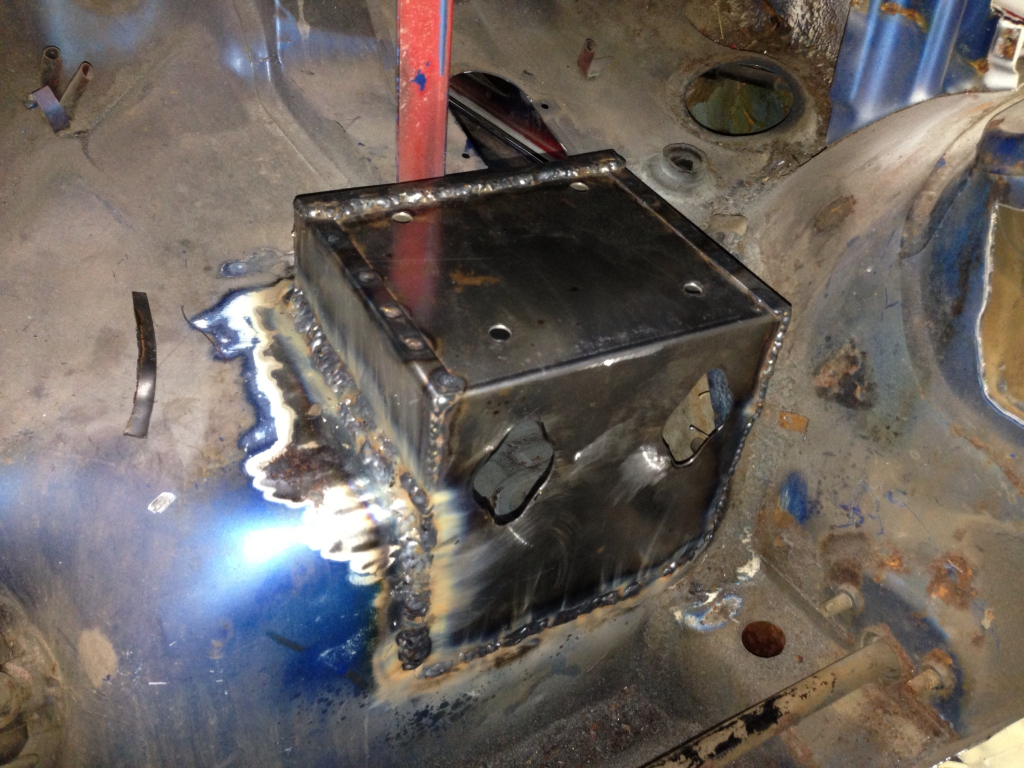
Over the past couple of weeks I've been working on a neat project for the interior. With the project I have figured out how to work a sewing machine and how to do pretty nice hand stitching. 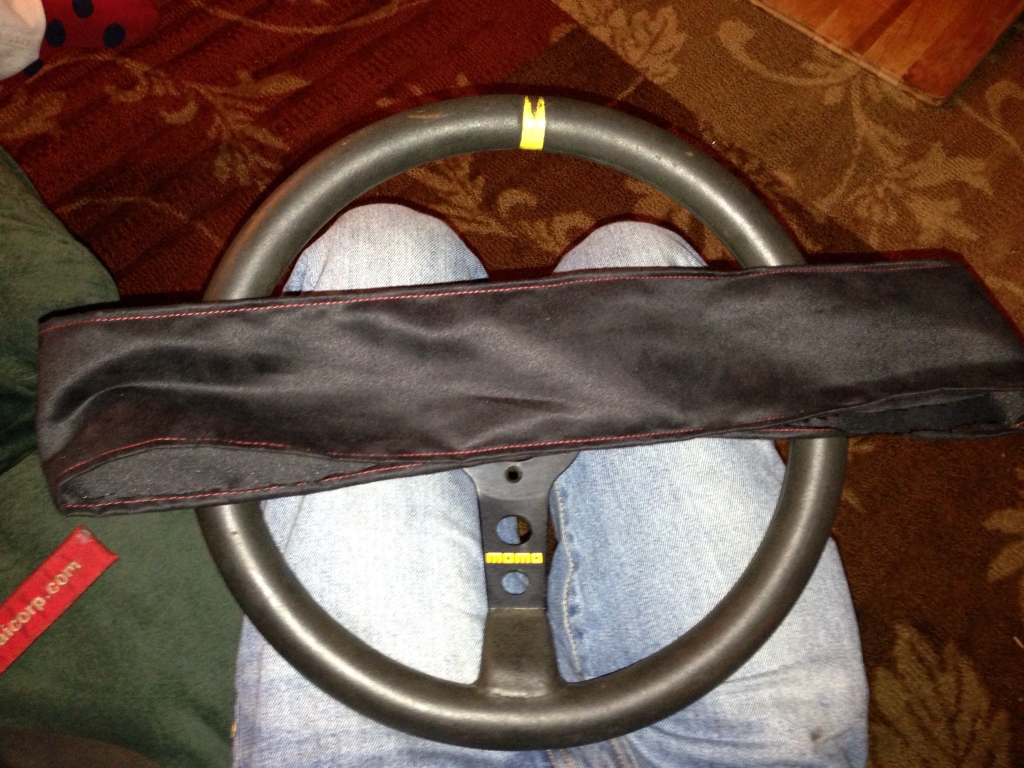
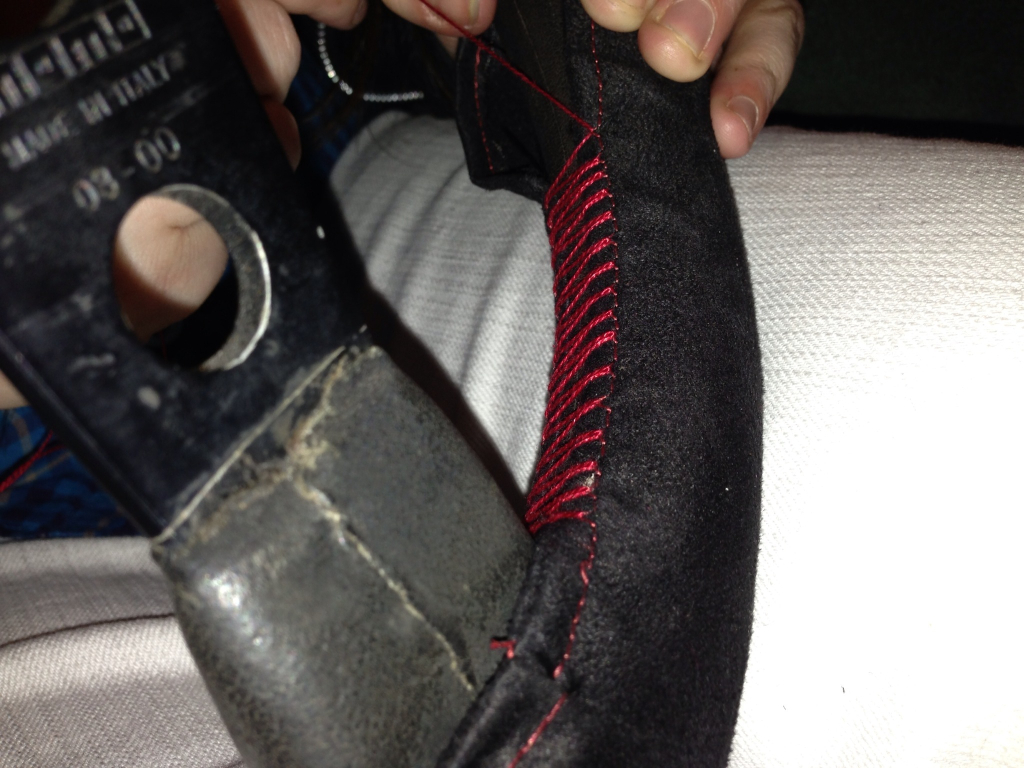
I am sure that I will have to make another one because I am not sure I like how this one is turning out... But I have enough material to make few errors and perfect this.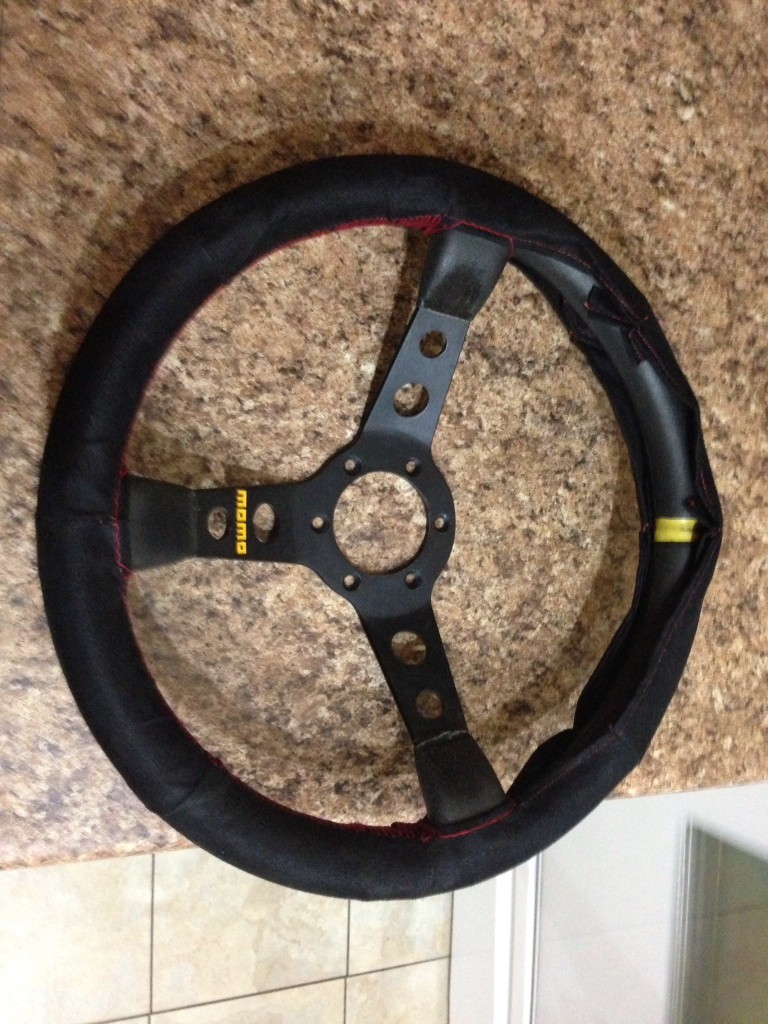
Posted by: rnellums Feb 7 2013, 09:30 AM
How do you think the new seats will affect legroom. It looks like they might be set up a bit further forward than stock. Recovering a steering wheel is tough, I remember recovering a stock wheel at one point and it didn't come out spectacular. It might be that gluing some 1/4" foam scrim to the back side of the suede before sewing it on would hide any wrinkles, or try using a material that will stretch a bit and cut the piece slightly smaller than it should be. (Thats what I did with seats at least)
Posted by: tscrihfield Feb 9 2013, 06:08 PM
Ross,
The seats could go back more. Not to mention, I gain some room due the firewall that I built. The seats are in the stock location with almost identical to stock mounting, with a few modifications.
Thanks for the advice on the steering wheel. I just wanted to try it for fun and if turns out, I'll keep it. If not, I will send it to a professional.
Now for some progress.
I got out to the garage pretty early for me on a Saturday (11:00am)... I'm usually working on Saturday mornings so it was nice for a change.
I started with the hole in the floor that was in need to be patched. 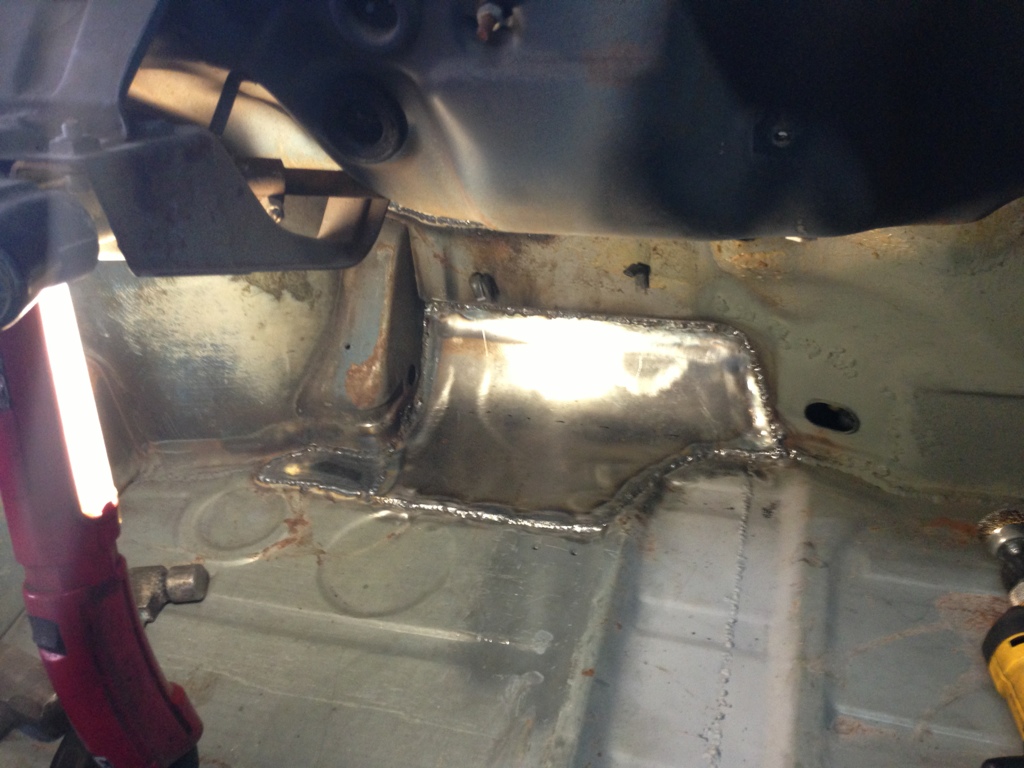
Then I put the seat mounts back in to see where I could fab in a brace for the floor.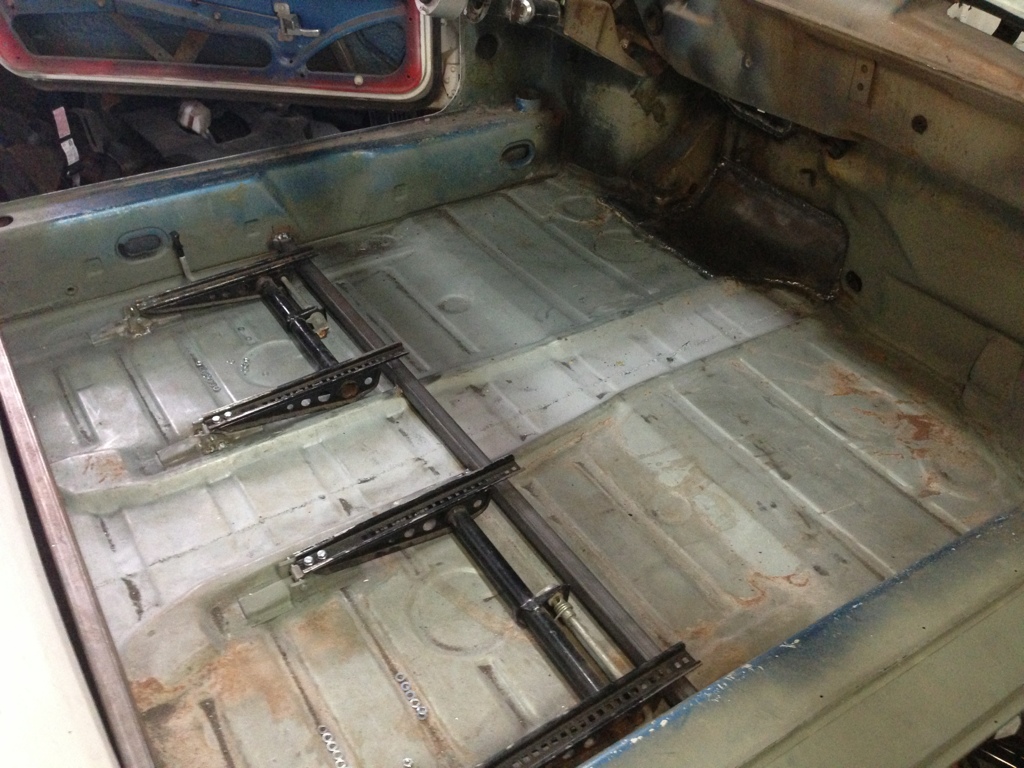
And lastly, I spent the better part of the afternoon sanding the floor to prep for primer.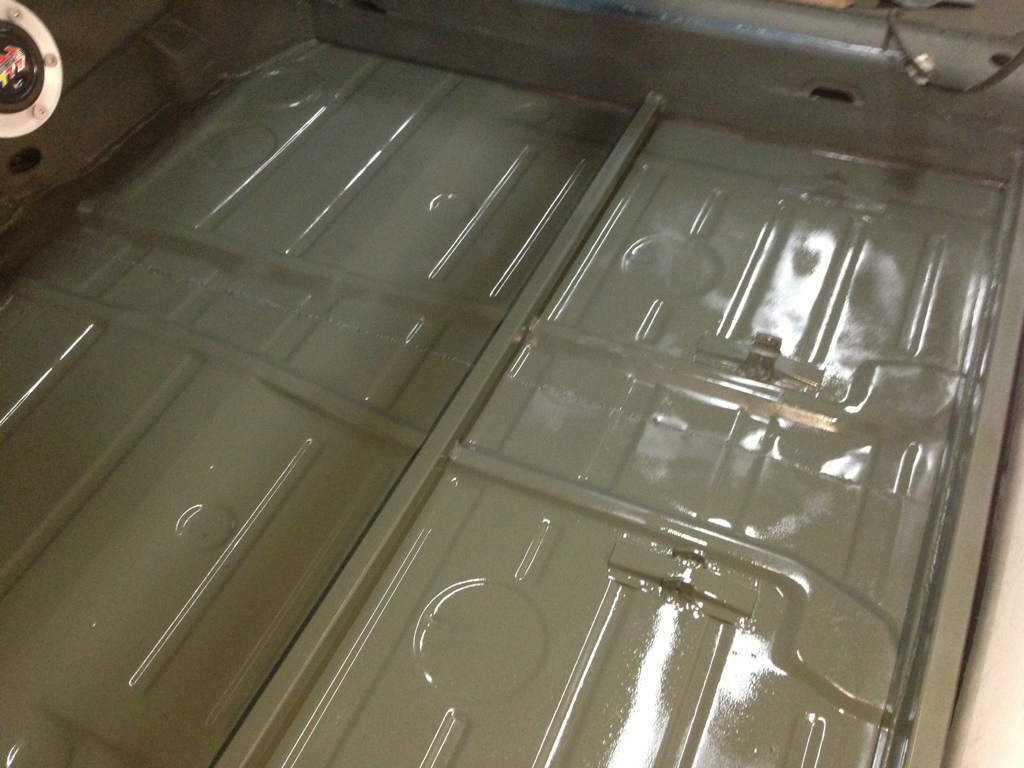
It was a long afternoon... But an enjoyable one!
Thanks for watching, keep your stick on the ice!
Cheers
Thomas
Posted by: tscrihfield Feb 17 2013, 10:31 AM
Got a few things done the past couple days.
Made some changes to an old cart I had built a few years back and added new casters. Then I sat the teener on it so I can start pulling everything back off of it and get the suspension straitened out.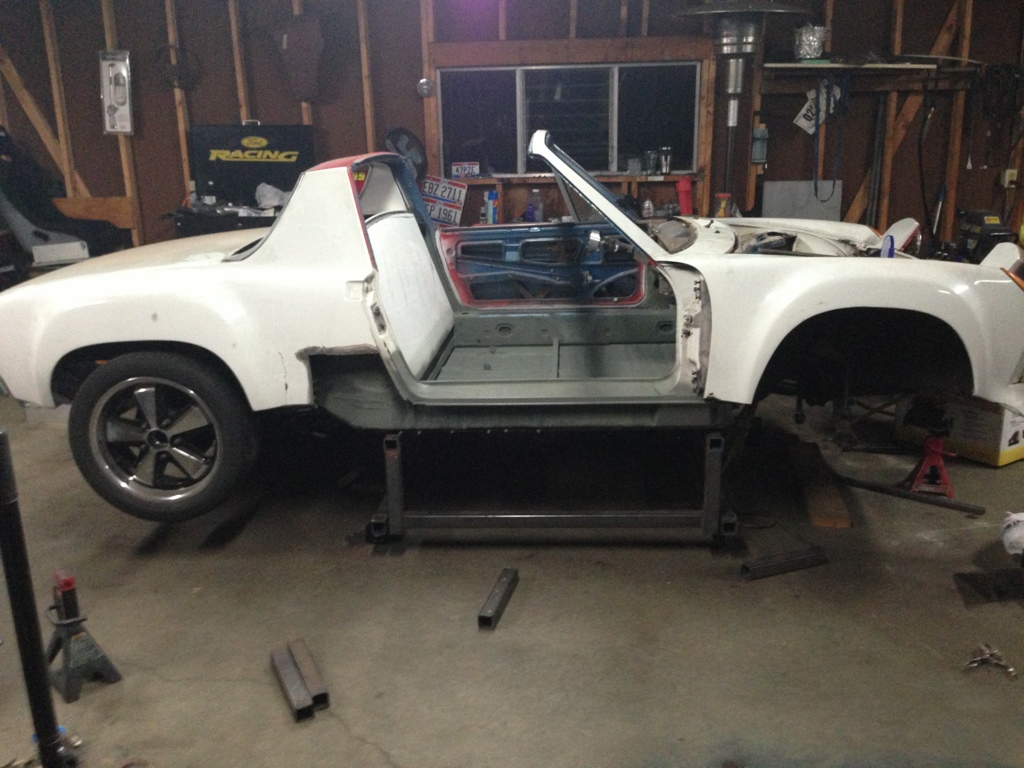
This will be a good stopping point because now I have to spend the next few weeks stripping this down....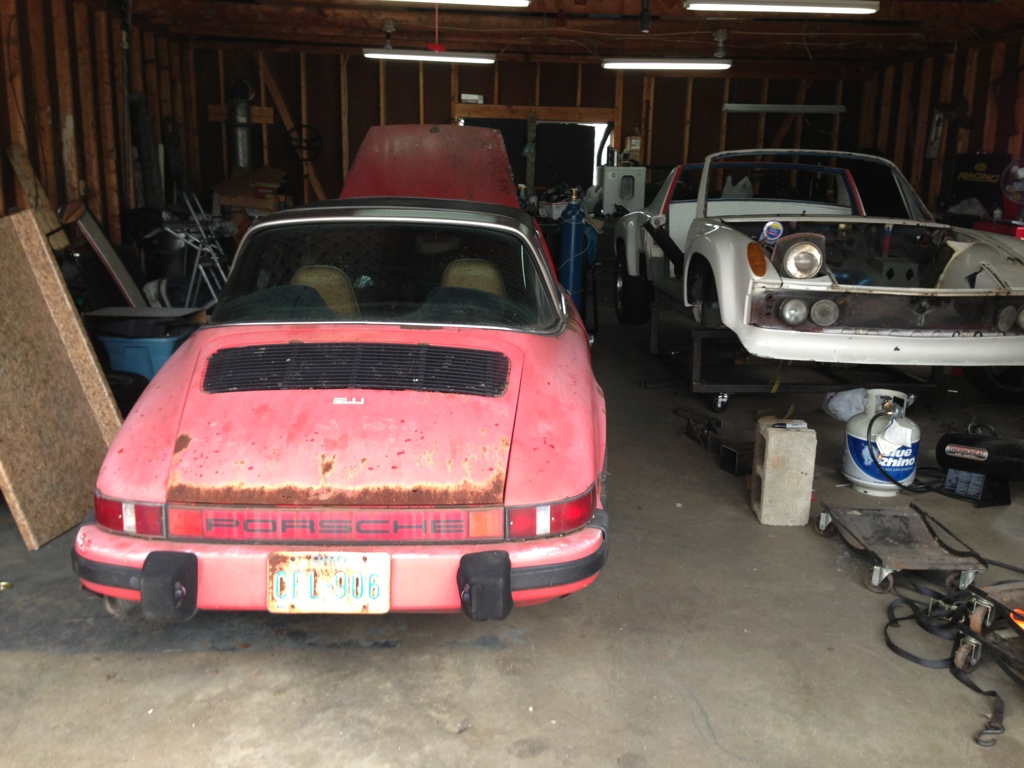
Posted by: rnellums Feb 17 2013, 11:38 AM
So you got it? That's awesome! Are you going to do the head studs yourself?
Posted by: tscrihfield Feb 17 2013, 08:00 PM
So you got it? That's awesome! Are you going to do the head studs yourself?
Picked it up Saturday. If I keep the Engine, I will do all that I can myself as always. The good news is that head work is fairly simple in comparison to many other head designs. I will twin plug the heads and build a SS high compression engine. The early 911 sixes are my favorite sound in the world!
Posted by: porsche_dreamer Feb 19 2013, 07:45 PM
Good score! I wouldn't mind checking out your project sometime.
Posted by: tscrihfield Mar 22 2013, 09:21 PM
Well, the part out of the 911 saga is over. All that is left is a 2.7 siting in my garage waiting for a rainy day.
In other news I have been working on some pieces here and there trying to catch all of my projects up and focus on a few major ones. As I've said before my ADD kicks in and the day goes out the window... Literally.
But I have been making good progress.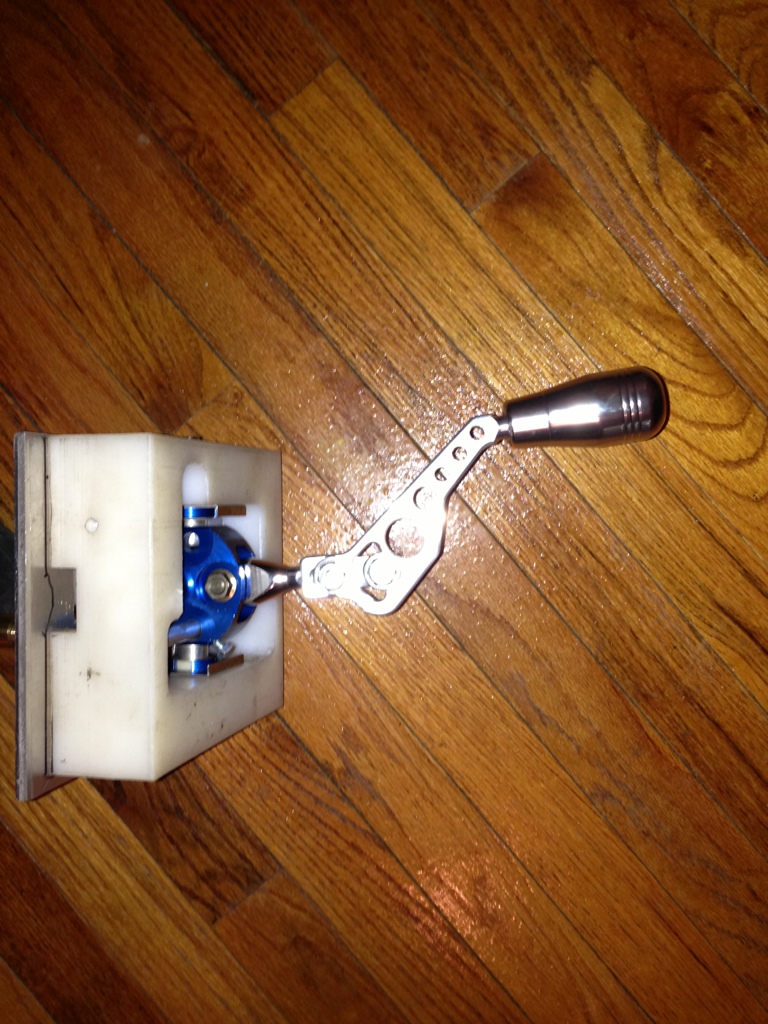
I have a handle on the shifter now. 
And I have built a mount for the shifter...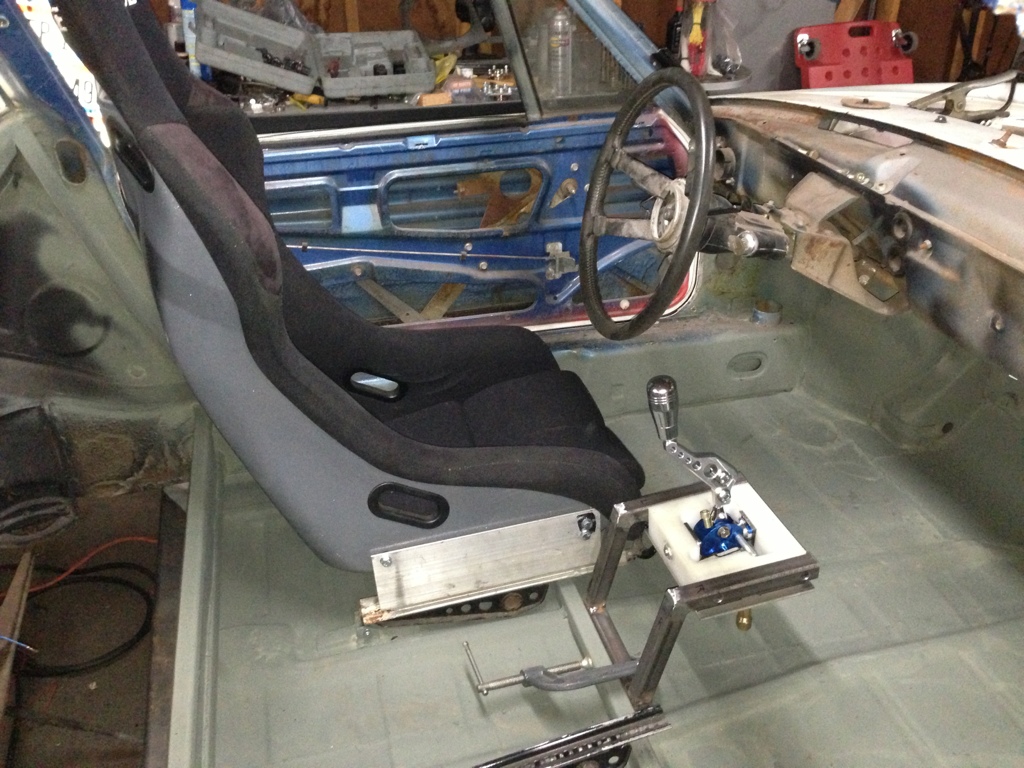
A rough view of the Cockpit and what it is morphing into...
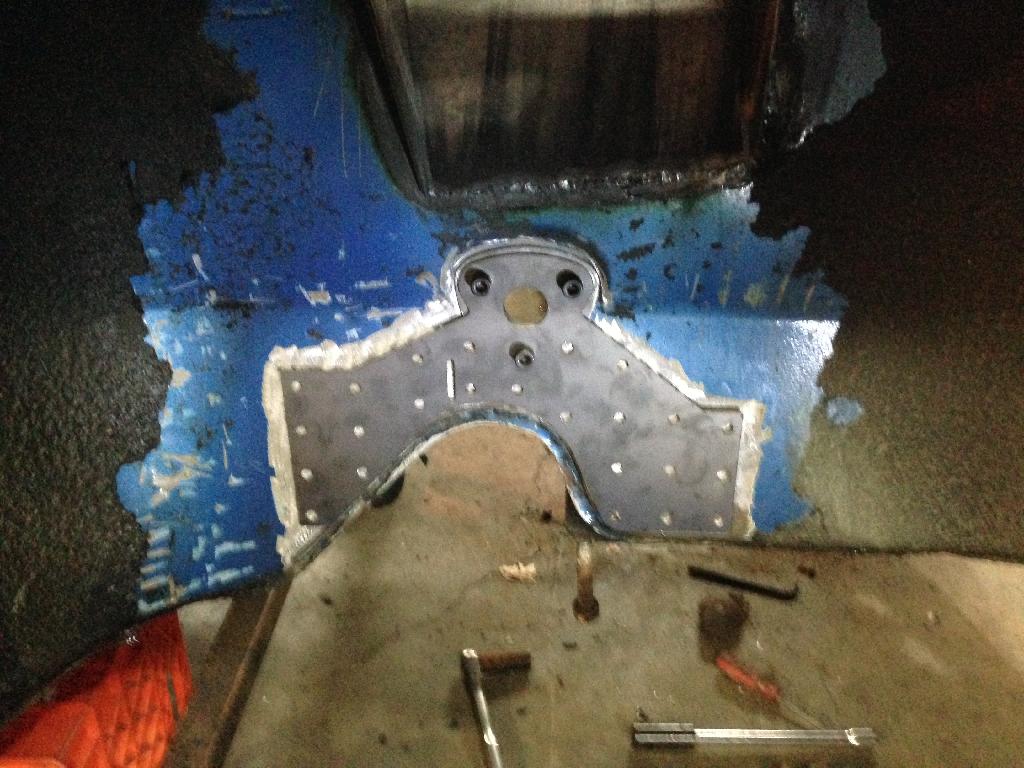
After hashing out exactly what I wanted for my camber plates, I have built them. They are a combination of 1/8" sheet and .2" plate. I figure for the verticle surface 1/8" will be plenty strong after I bent it in the break press and welded the top plates on.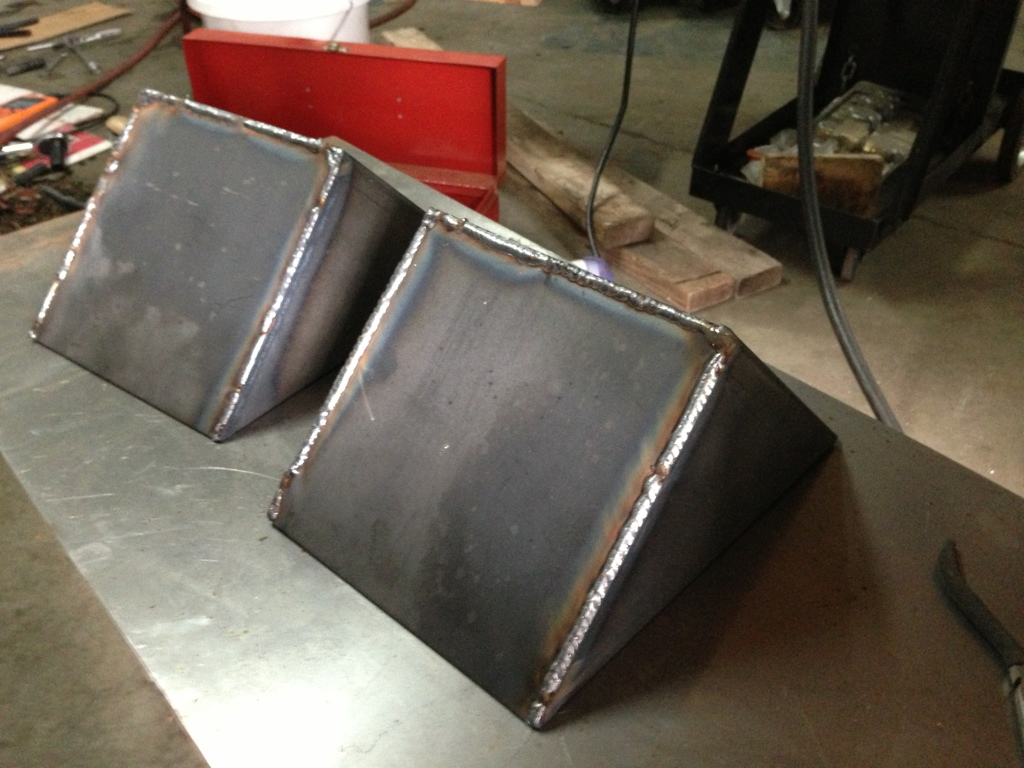
I installed the passenger side since it was the furthest along.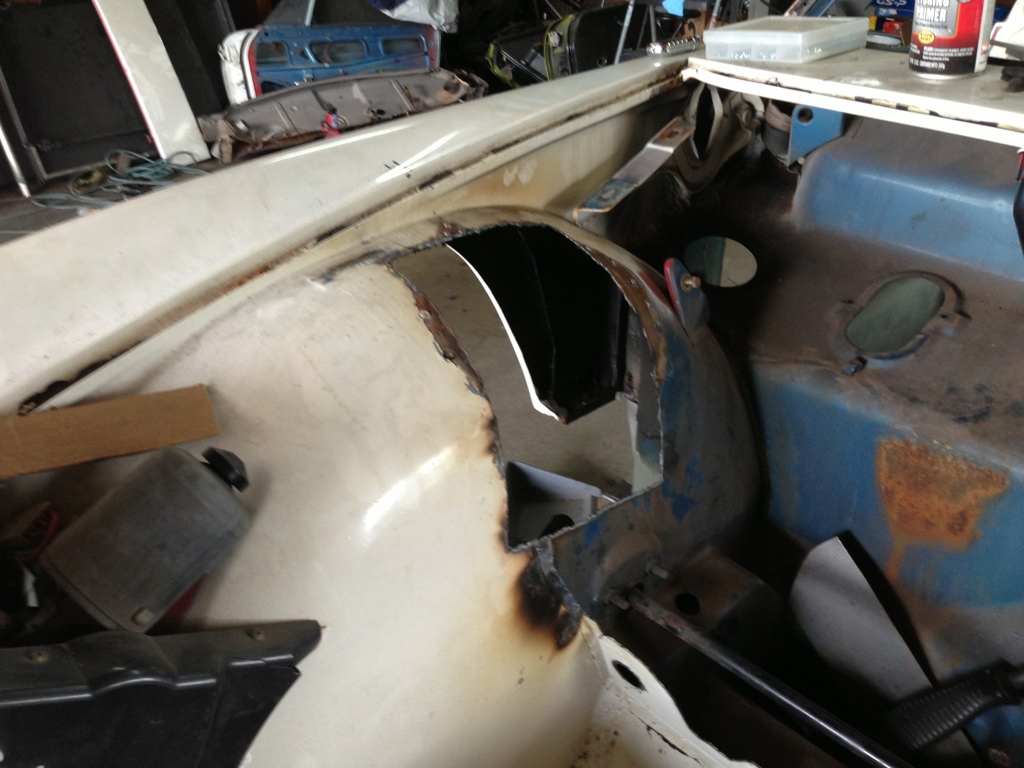
So in a nutshell, I've furthered in two areas and getting closer by the day to driving this machine. Til then, I'll be beating the crap out of my GTI with radical dreams of a 914 that is finished.
Thanks for watching and keep your stick on the ice!
Cheers all,
Thomas
Posted by: tscrihfield May 8 2013, 08:15 PM
Car is at a snails pace but by golly this thing will roll on its own when I stop redesigning and rethinking what I want outta this thing. All in all I'm having fun though!
Recent stuff. Most is just tacked in place waiting for everything to come together. 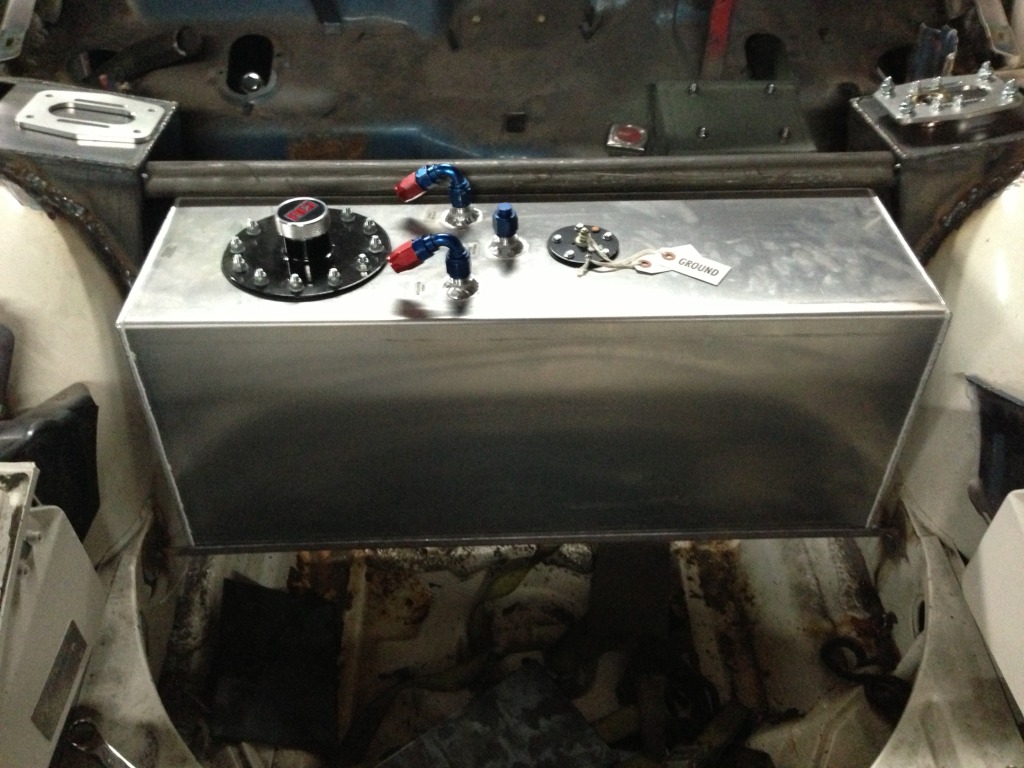
Tank is mounted and test fit with the hood and against the strut reinforcement bar.. 
Top view you can see the master cylinder and clutch cylinder hiding behind the tank and under the strut bar.
View from behind the tank...
Next up, hopefully have the cage in. Maybe next weekend....
Enjoy all!
Thomas
Posted by: FourBlades May 9 2013, 11:47 AM
Nice progress! 
you are not afraid to get radical with the fabrication.
Love the cable shifter setup and fuel cell.
John
Posted by: Van914 May 9 2013, 03:24 PM
Thomas,
Why so high with the tank? Is something going under it?
Van
Posted by: tscrihfield May 9 2013, 06:06 PM
Thanks John! I am going a bit radical, my thoughts are... It's just a car!
Van, nothing right now. There are two reasons though. 1 provisions for a GT cooler in the future when it has the 6 in it. 2 I am making a through hood filler so I wanted it close to the hood. The CG is not as low I know but what can you do with such A tall profile tank.
Thomas
Posted by: kg6dxn May 9 2013, 10:22 PM
I just got sucked into your build. Nice work! Some really cool ideas in here.
Posted by: tscrihfield May 10 2013, 05:08 PM
I just got sucked into your build. Nice work! Some really cool ideas in here.
Thanks! That means a lot coming from the guy who has pioneered more 914 engine swaps than I can count. I gotta say I have looked yours over a few times for ideas!
Thomas
Posted by: kg6dxn May 10 2013, 07:16 PM
I just got sucked into your build. Nice work! Some really cool ideas in here.
Thanks! That means a lot coming from the guy who has pioneered more 914 engine swaps than I can count. I gotta say I have looked yours over a few times for ideas!
Thomas


Posted by: hencar May 10 2013, 07:28 PM
Good job. Keep up the good work.
Henry
Posted by: shoguneagle May 27 2013, 11:00 AM
Here is another "sucked in sucker" ...er, er, another admirer. I really love the details of the sheet metal changes along with the designed modifications. Truly an artist at work!
These mods I would not have the patience, skills, etc to make; but, I really like them.
The thing I would do though is make and add the hydraulic clutch, pedal assembly, etc. May be a shifter later.
Keep up the good work; really enjoying every stage outlined and photographed in this thread.
Steve Hurt
Posted by: tscrihfield Jun 2 2013, 12:20 PM
Here is another "sucked in sucker" ...er, er, another admirer. I really love the details of the sheet metal changes along with the designed modifications. Truly an artist at work!
These mods I would not have the patience, skills, etc to make; but, I really like them.
The thing I would do though is make and add the hydraulic clutch, pedal assembly, etc. May be a shifter later.
Keep up the good work; really enjoying every stage outlined and photographed in this thread.
Steve Hurt
Sorry that I am just getting back to the thread. But thank you Steve for the kind words! If you need any advice in doing these upgrades/conversions I wouldn't mind sharing my knowledge.
I have not been doing too much lately as I am doing some work on a friends boxster. Infamous IMS bearing replacement, deep sump and clutch. Hopefully done before the Ault Park concours this weekend.
I am also collecting parts for my RSR struts. Anyone know someone who has done this on a 914 before that wouldn't mind to be contacted? Unfortunately this is one area that I don't just want to jump into due to the expense of parts and modifications. I know that elephant racing has some options but has been difficult to make contact at convenient times.
Currently the struts already have the spindles raised, what I am after is inserts used and what is the preferred spring rate and valving for a street/track car.
Thanks,
Thomas
Posted by: tscrihfield Aug 11 2013, 09:15 PM
Hello friends,
I've been busy since the last post. Not necessarily busy on my stuff but, busy none the less. I have now ordered the bits for my RSR coil over struts and am in anticipation for them to get here this week.
I have been having fun, fabbing and mounting this in an FD RX7.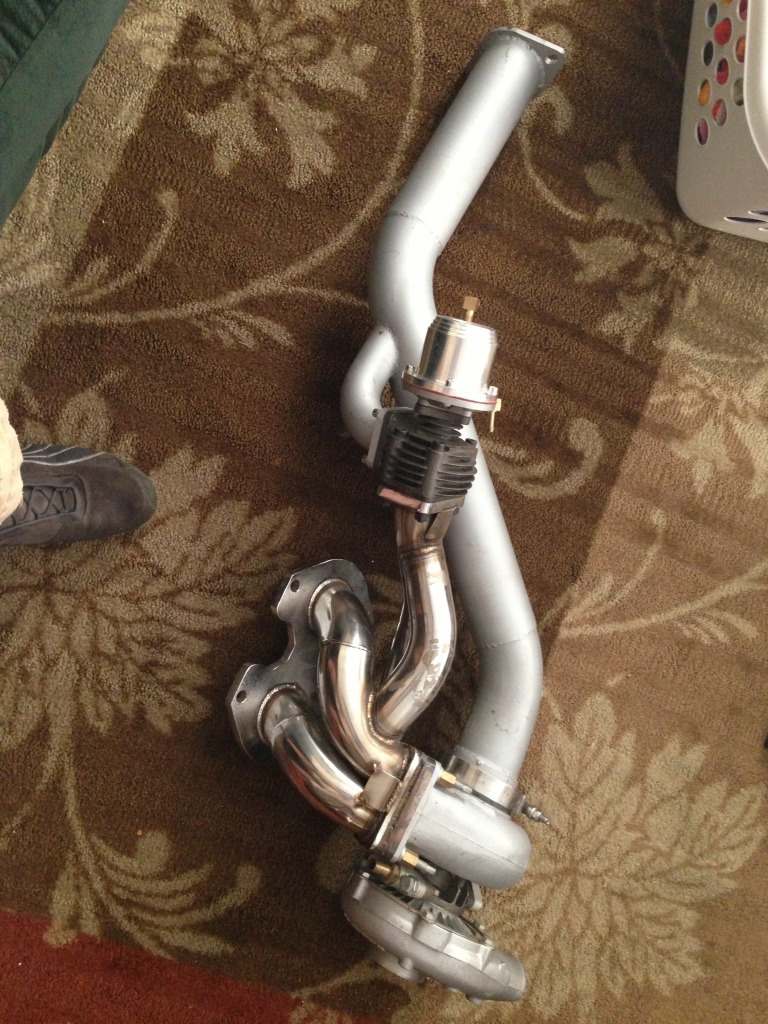

I have been tinkering in long owned parts just I hadn't ever got around to putting them together. I think the extension and quick release came together nicely. 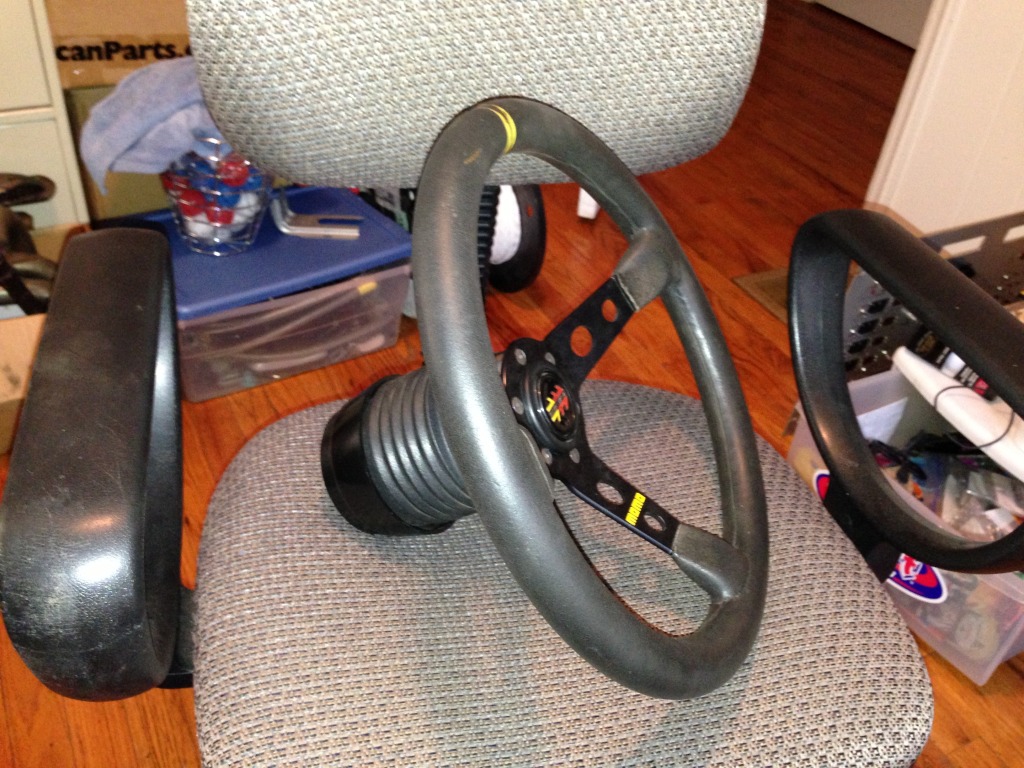
Yesterday I had the opportunity to visit a cool old shop with a bunch of really cool cars. He had more P-car parts than I can imagine. I dug around for hours and dug out some nice finds. But I picked up these. They were off one of the guys old Cars. 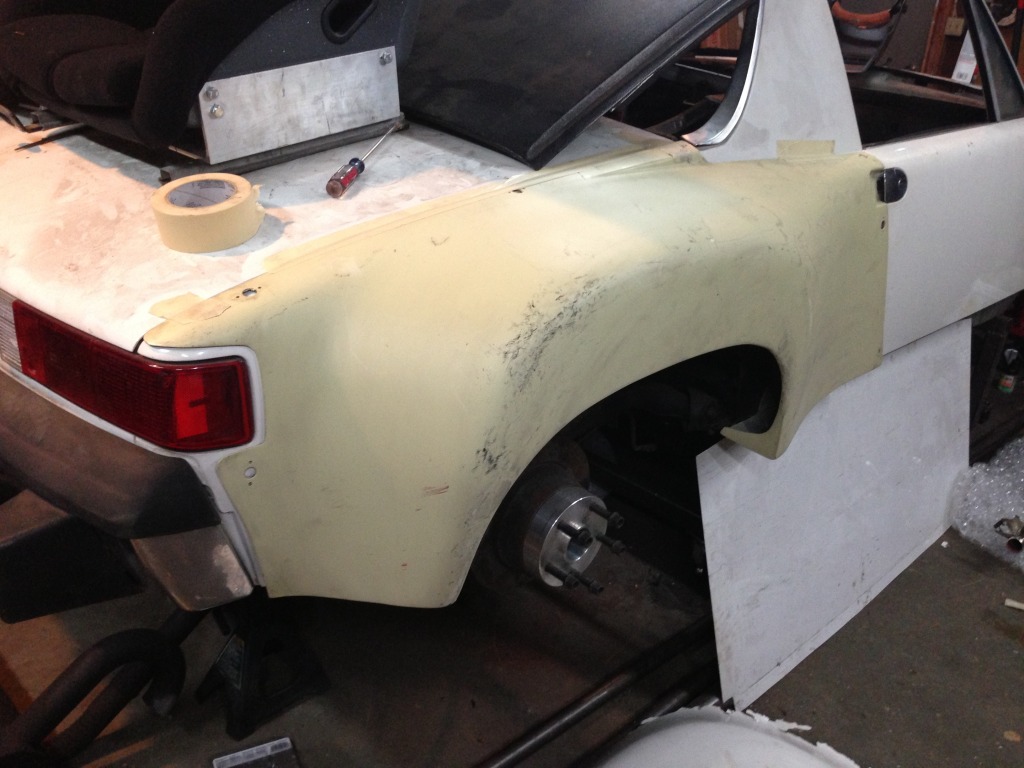
I will have more posts coming soon as my side work is slowing (hallelujah) and I have parts stacking up in the mean time waiting for me to do some work...
Thanks for watching, keep your stick on the ice.
Thomas
Posted by: FourBlades Aug 11 2013, 09:29 PM
Looking forward to seeing more of your work Thomas. 
You need to get your car done and driving.
John
Posted by: tscrihfield Aug 12 2013, 11:17 AM
Looking forward to seeing more of your work Thomas.
You need to get your car done and driving.
John
Touch'e John!
I actually am planning to hit it hard the next few months while the garage is less cluttered.

feel free to harass me as much as you can to ensure i stay on it!
Posted by: tscrihfield Aug 12 2013, 08:21 PM
Today was Christmas like when I got home. 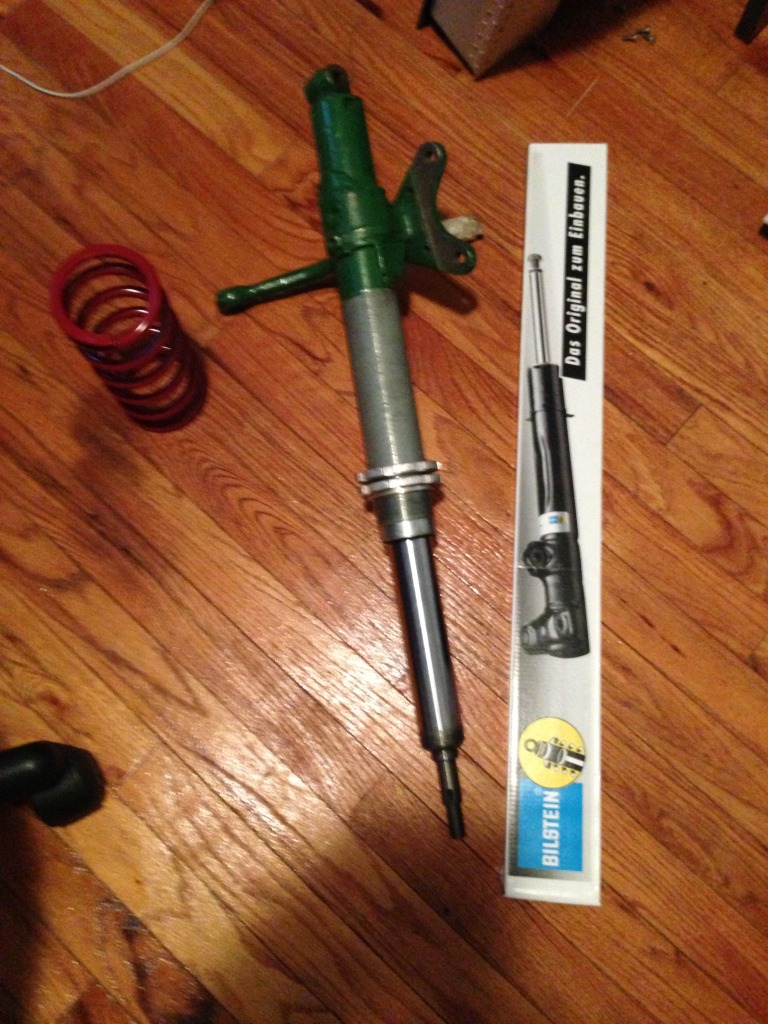
Just waiting for the spring hats from Rebel racing to come in and the struts will be good to go.
Then I went out and got my roll bar welded in. I need to clean up some welds but it turned out good. 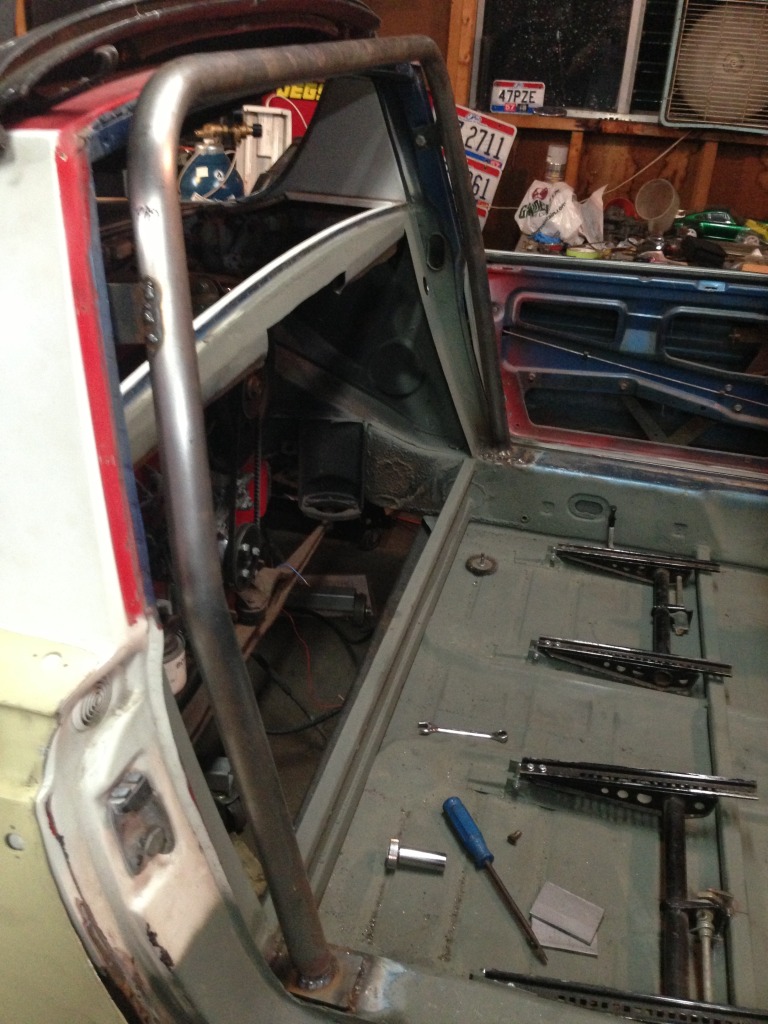
Thomas
Posted by: tscrihfield Oct 1 2013, 06:56 PM
https://www.youtube.com/watch?v=38hH3y_ZxGY
0-100 in this... That is when it finally gains traction
As I said before, I am building a massive single turbo RX7. I finally got the turbo in.
For those who know that there is compressor surge... I have figured it out(BOV needed more vacuum so I added a larger line). This was literally the first drive in figuring the setup out. I have to say, the Apexi power FC has made this job effortless and I love the ball bearing Garrett I strapped to it.
The engine bay...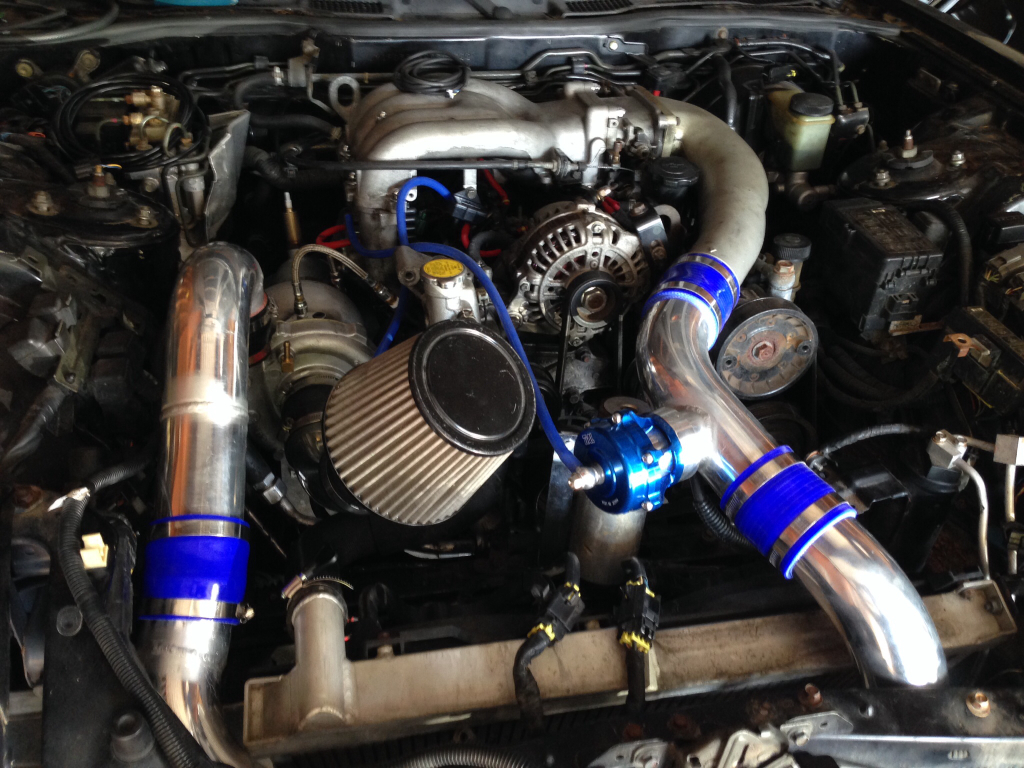
So, we go next weekend to Mid-Ohio to shake her down. Hopefully she shows me what the work was worth! I am in love with this car!
In better news. My car is back in the front lines of work so I can update progress on the 914 for a change!
Cheers all! with wine tonight but you get the point...
Thomas
Posted by: tscrihfield Nov 2 2013, 05:01 PM
Woke up early this morning to get some work done at the shop. I recently bought some wide5 three piece wheels and the bolt pattern was 4x130mm. So I welded up one hole and put it in the mill. 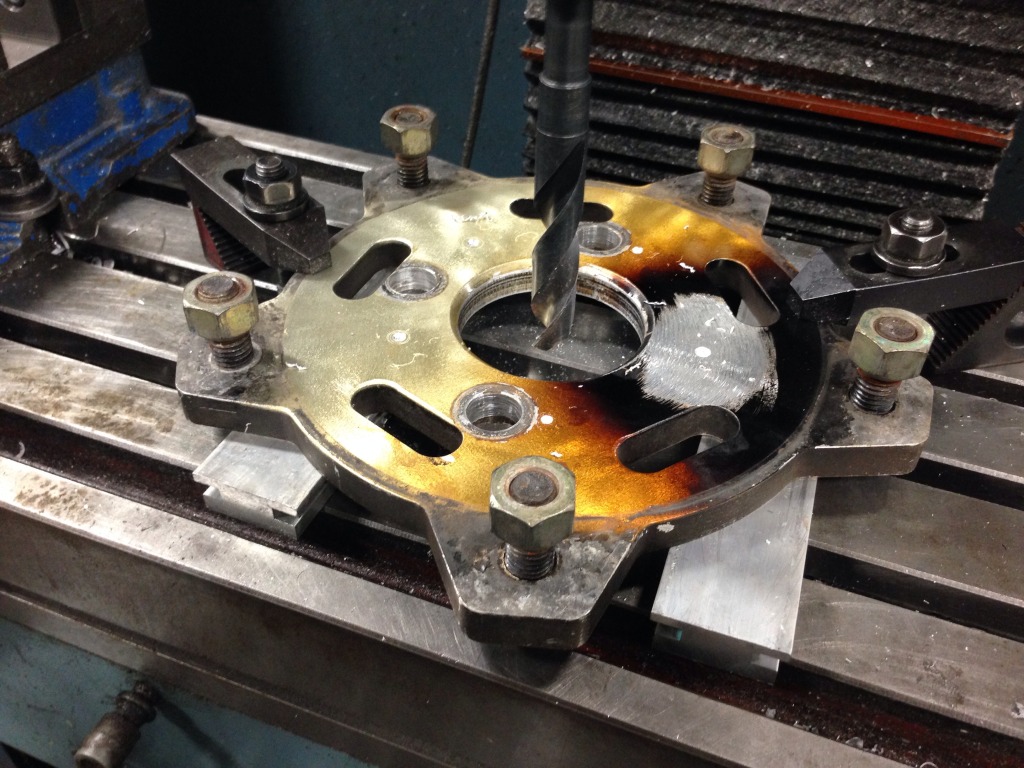

The charring is the clear coat on them.
I brought them home and mounted them to see how they look. 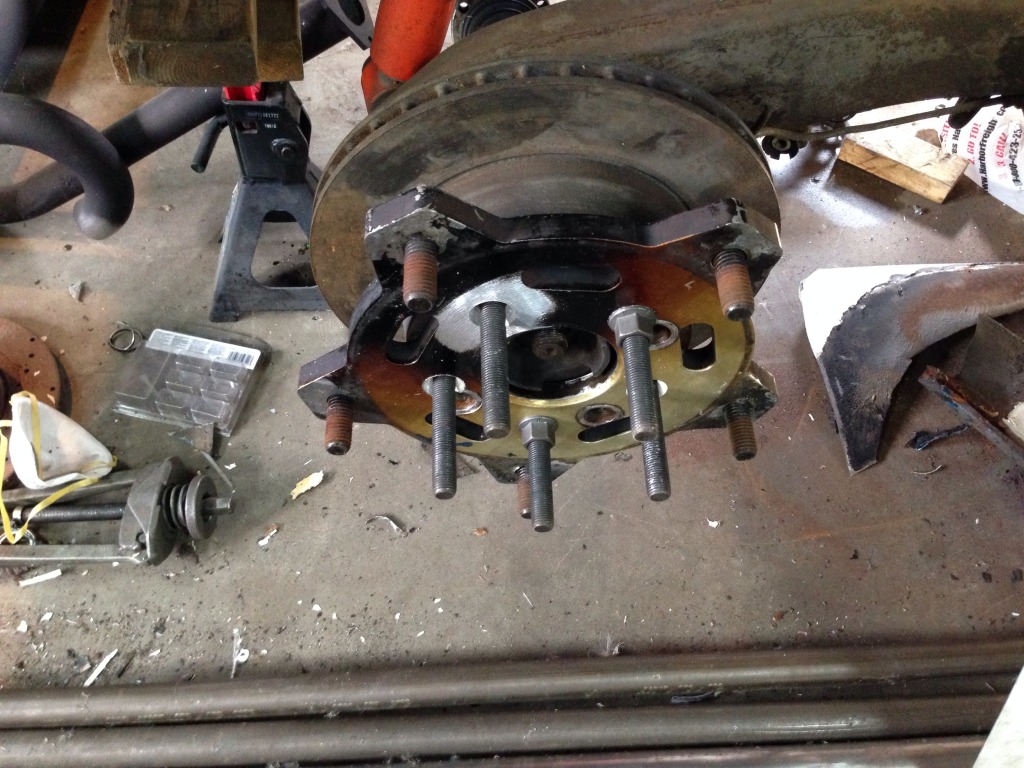
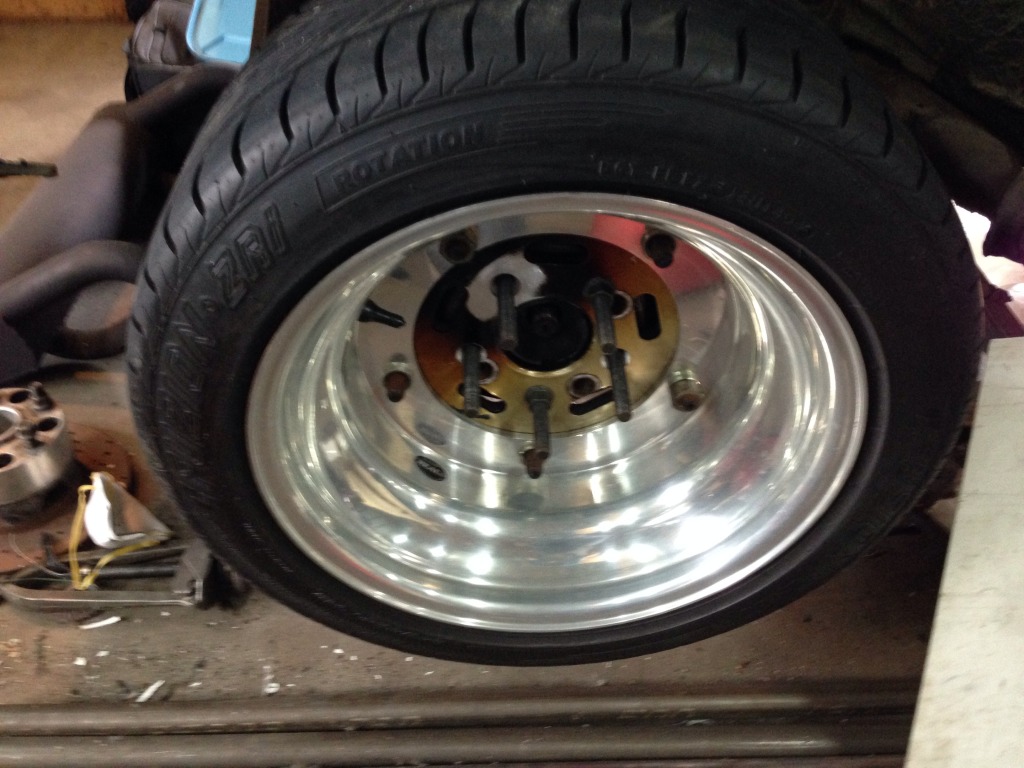
I have to paint them yet but I like the look of them and they fill up the wells with the 11" flares. I'm most likely. Looking at buying a custom set of Fuchs for the street, but that is in the future after the car is mobile.
Cheers
Posted by: rnellums Nov 2 2013, 06:52 PM
How much risk is there of making the bolt circle slightly off center?
Posted by: tscrihfield Nov 2 2013, 07:09 PM
How much risk is there of making the bolt circle slightly off center?
Do you mean eccentric? If so, there is always risk. But with the machine I did the work on, I am more than confident that they are good. Plus, if you look at the first image of them on the table. You'll see where I did touch off with the drill verifying the program and bolt holes were concentric. I used the cmm to verify after I was done, no worries now.
Posted by: rnellums Nov 2 2013, 10:25 PM
so I shouldn't try this with my corded Milwaukee drill?
Posted by: tscrihfield Nov 3 2013, 06:57 AM
so I shouldn't try this with my corded Milwaukee drill?
Depends on how steady your hands are.
I can see it being done more primitive tools, just not that primitive....
Posted by: AfricanHijinx Nov 5 2013, 09:50 PM
looking good, I need to make one of those cable shifters
Posted by: Joe Sharp Nov 6 2013, 10:49 AM
Woke up early this morning to get some work done at the shop. I recently bought some wide5 three piece wheels and the bolt pattern was 4x130mm. So I welded up one hole and put it in the mill.
The charring is the clear coat on them.
I brought them home and mounted them to see how they look.
I have to paint them yet but I like the look of them and they fill up the wells with the 11" flares. I'm most likely. Looking at buying a custom set of Fuchs for the street, but that is in the future after the car is mobile.
Cheers
Thomas, what wheels are those? I have a sandrail I want to turn into a street buggy.
Posted by: tscrihfield Nov 6 2013, 10:30 PM
Thomas, what wheels are those? I have a sandrail I want to turn into a street buggy.
Joe,
They are real racing three piece wide 5 wheels. Great wheel and half the weight of a fuch.
Thomas
Posted by: tscrihfield Nov 6 2013, 10:30 PM
looking good, I need to make one of those cable shifters
Thanks
If you need any help let me know.
Posted by: Joe Sharp Nov 7 2013, 12:33 AM
Thomas, what wheels are those? I have a sandrail I want to turn into a street buggy.
Joe,
They are real racing three piece wide 5 wheels. Great wheel and half the weight of a fuch.
Thomas
Who is the manufacture?
TIA
Posted by: tscrihfield Nov 7 2013, 08:10 AM
Thomas, what wheels are those? I have a sandrail I want to turn into a street buggy.
Joe,
They are real racing three piece wide 5 wheels. Great wheel and half the weight of a fuch.
Thomas
Who is the manufacture?
TIA
Sorry, "real" is the brand. I now reread my post thinking... Well that sounded dumb...
Here's the link... http://www.realwheel.net
Thomas
Posted by: Joe Sharp Nov 7 2013, 02:26 PM
Tahnk you Thomas.
Posted by: tscrihfield Dec 5 2013, 07:47 PM
So 2013 has really been an unproductive (on the 914) year. When it comes to the latter portion of it anyway.
I started a new job at the beginning of November. I am now working for Schneider Electric in the Square D brand. I feel much better now that I'm not a road warrior... But I'm working nearly 60 hour weeks... ... Guess it was out of the kettle and into the fire, but at least I'm home every night.
But I have been tinkering in the background. Buying parts, designing parts, assembling and doing what I can to clean the little bit of factory parts that are going back on the car.
I finally got all of the strut parts in (actually a couple months ago...) 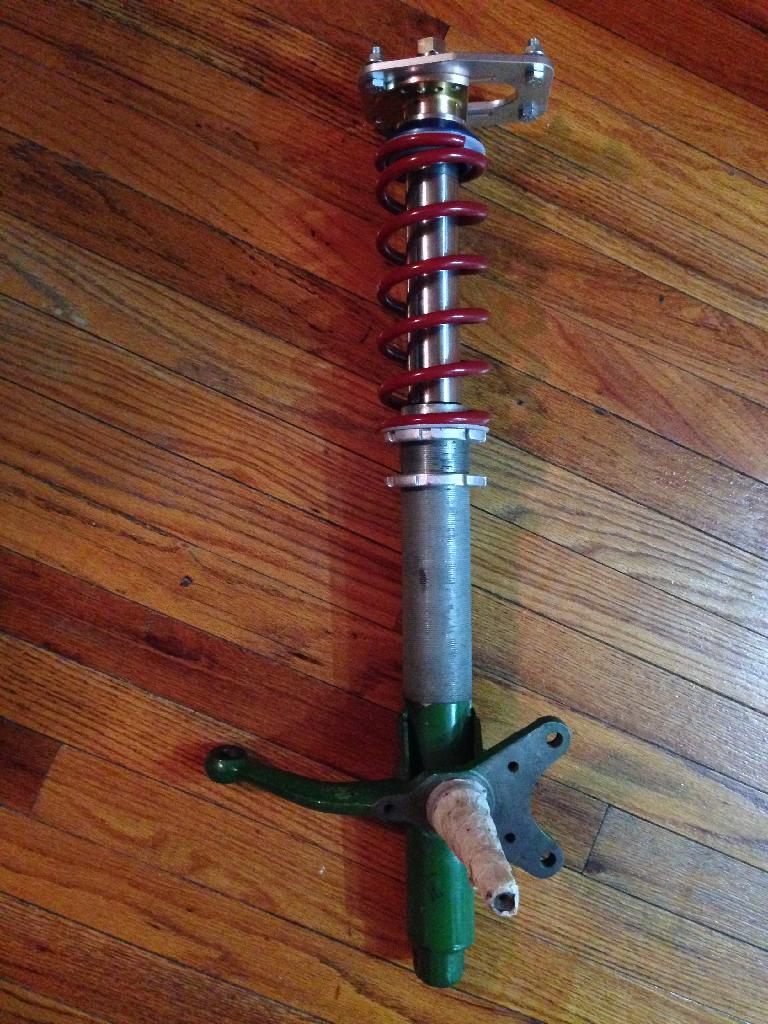
I can't wait to get the car back on the ground with these bad boys!
And I just couldn't wait to share these! Christmas came early!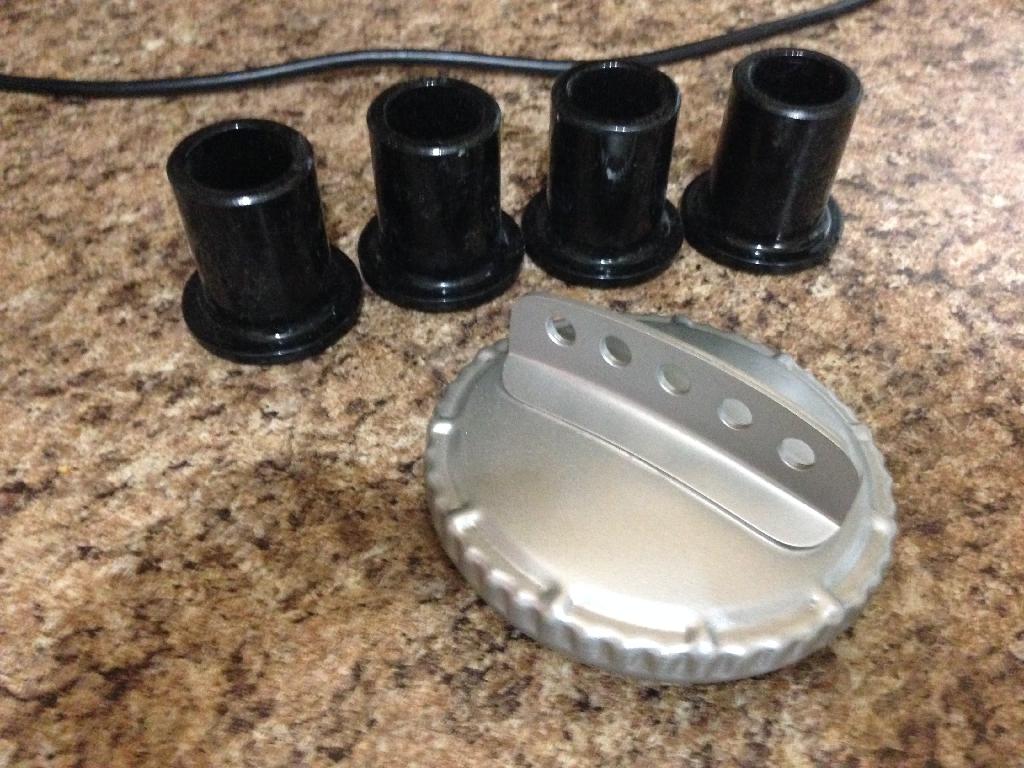
Parts compliment of Eric Shea! Thanks again Eric & PMB Performance!
Posted by: Van914 Dec 5 2013, 07:50 PM
Get-er-done!
Posted by: tscrihfield Dec 25 2013, 09:50 PM
First let me start off by saying, I have the greatest dad ever. Not just because he helps me with parts and such, but because he always supports me in the most positive manner along with helping me with parts.
So today being Christmas and all shouldn't really have surprised me with what happened but it was unexpected. A few weeks ago, I sent over some CAD files for some parts that I had been thinking about either having the shop make or sourcing. I told him to take a look at the drawings and let me know what he thought on types of materials/cost, CTE compatibility and what not.... I forgot to follow up with him on it since this month had been so busy. So, today he hands me a rather heavy box with a huge grin on his face.
Inside was two of these...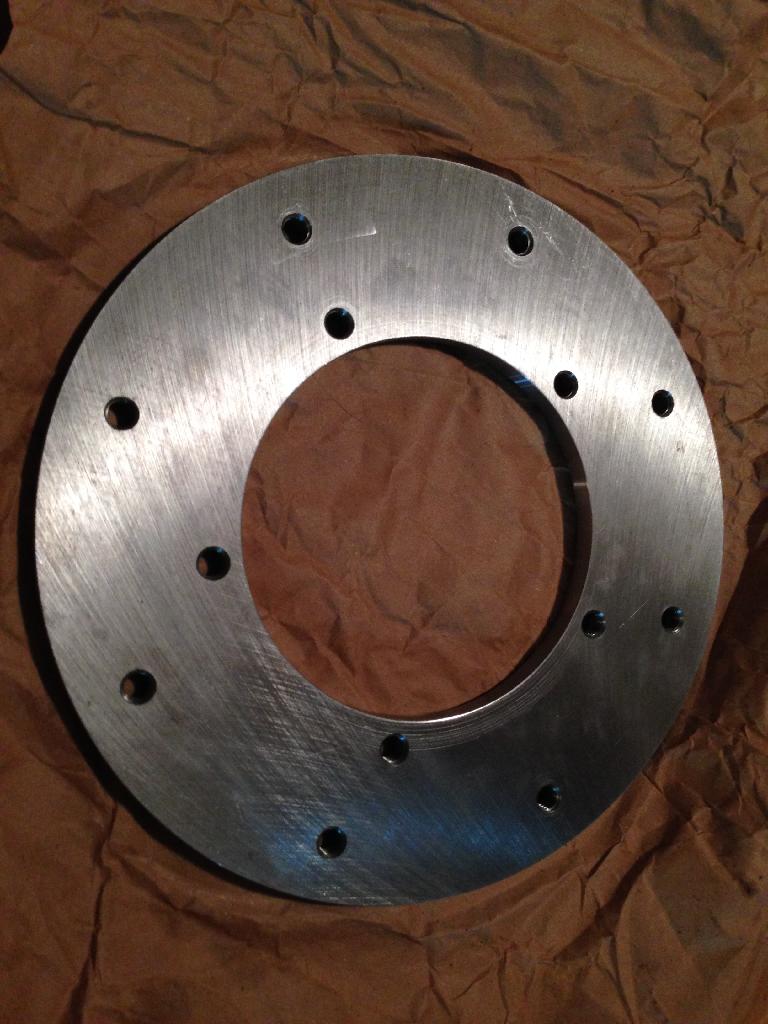
Now to explain what they are.... Pictures will better explain.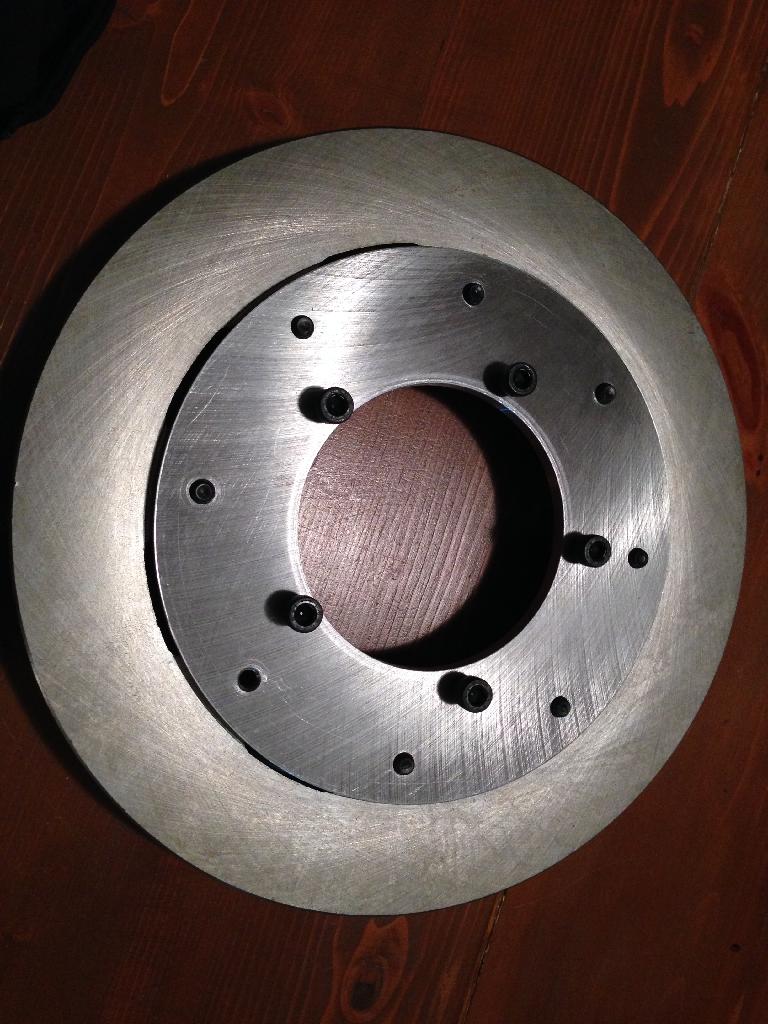
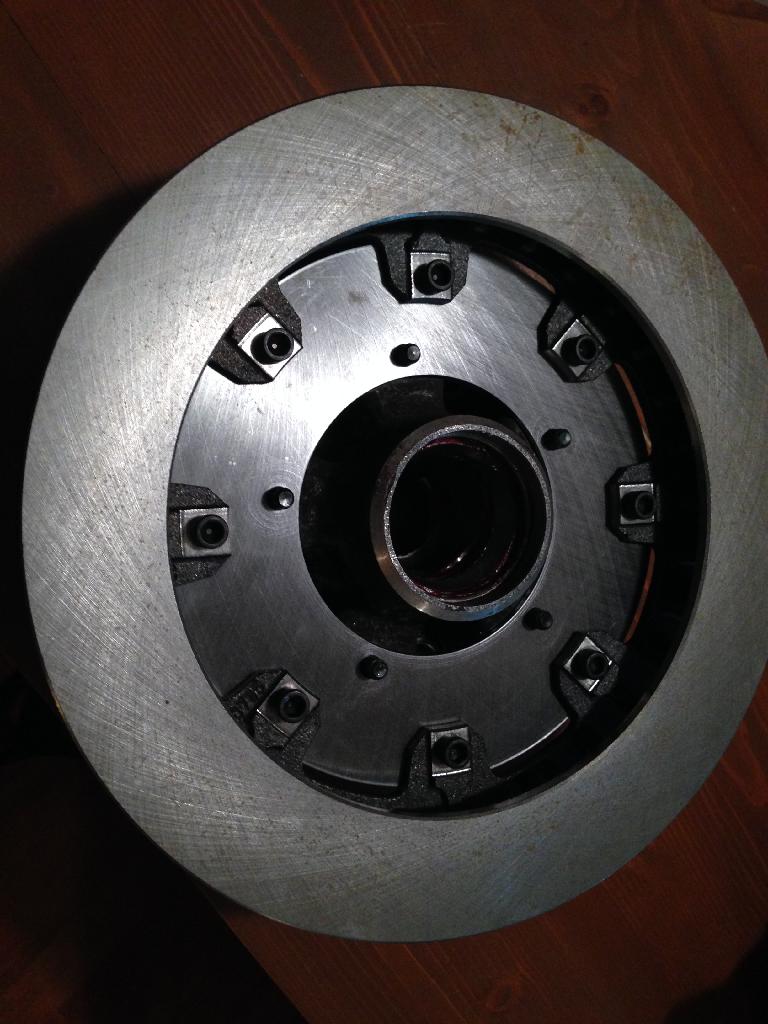
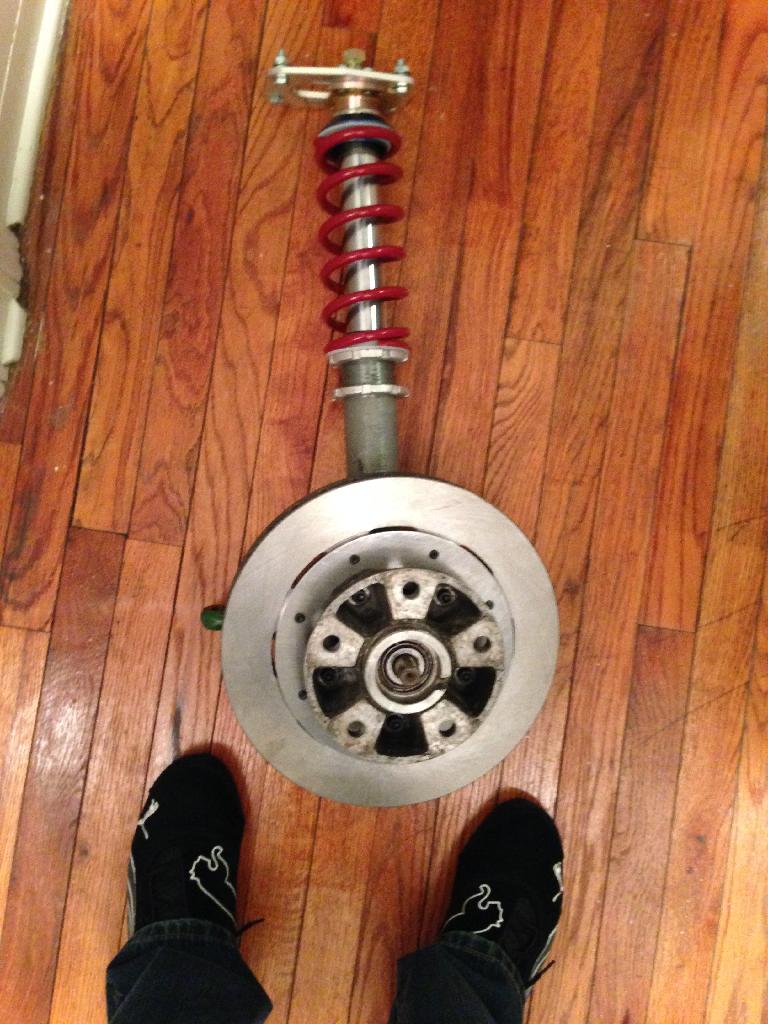
While I was in the middle of doing the RSR strut conversion, I thought to myself that the original brakes were not going to do the trick.... So I starting figuring out how to make these work. They are a 12" rotor by 1.25" thick and the caliper is a 4 piston dual bleeder. All wilwood equipment... Minus the custom hats. I am a very happy dude right now, I have been prepping the front suspension along with some other new goodies. As long as I get some time this weekend, their will be much progress to come.
Merry Christmas All,
cheers
Thomas
Posted by: Van914 Dec 26 2013, 04:26 AM
Thomas,
Looks like that will stop it!
Van
Posted by: tscrihfield Dec 26 2013, 05:10 PM
Thomas,
Looks like that will stop it!
Van
That was my thought... May be a bit overkill but, it is a cheaper alternative to turbo brakes.
Posted by: tscrihfield Jan 1 2014, 10:12 PM
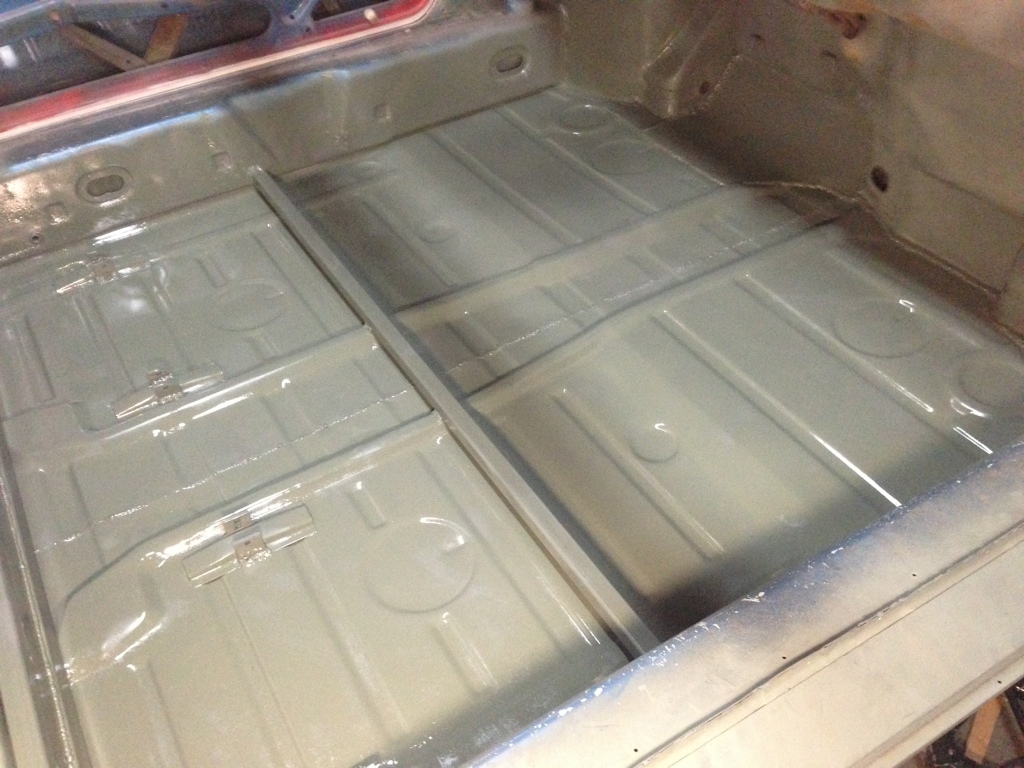
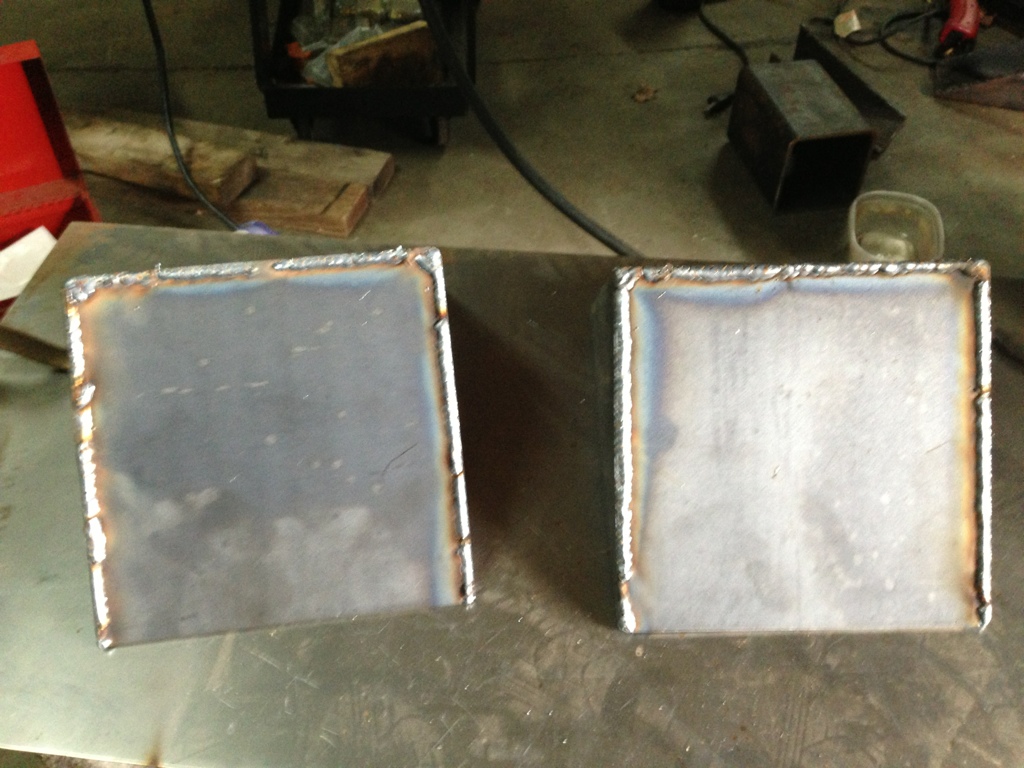
So, between the little time I had on Sunday and today I made some good progress before I ran out of shielding gas.
I used some WD40 to clean the undercoat first. 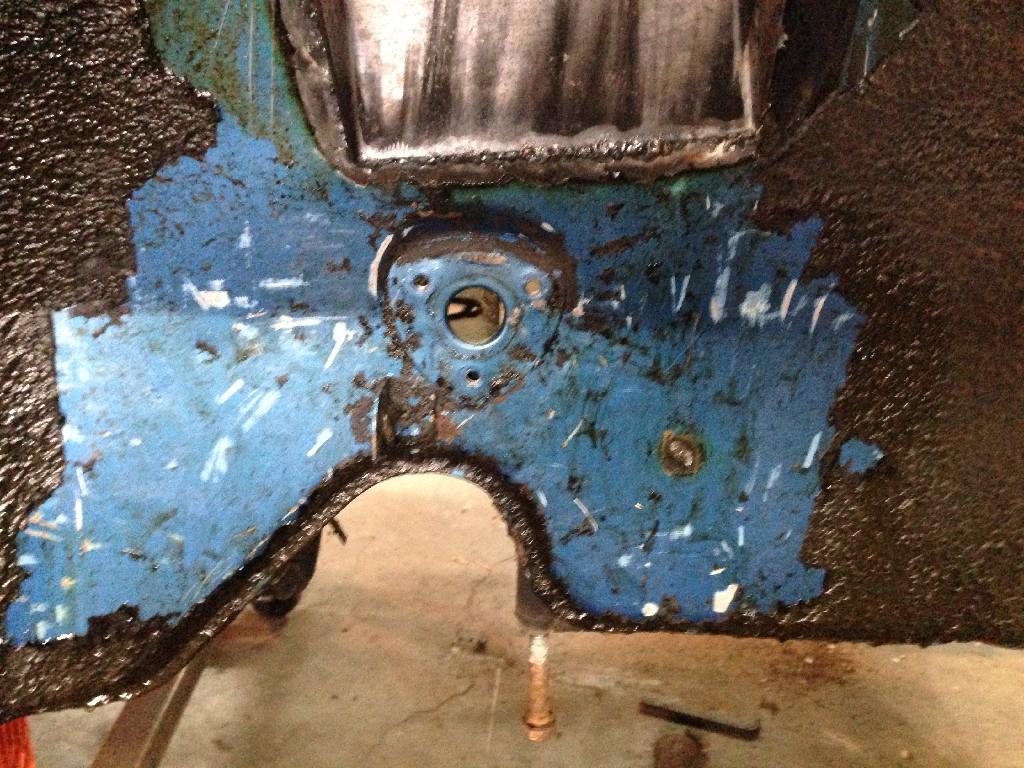
Can anyone tell me the original color seen here?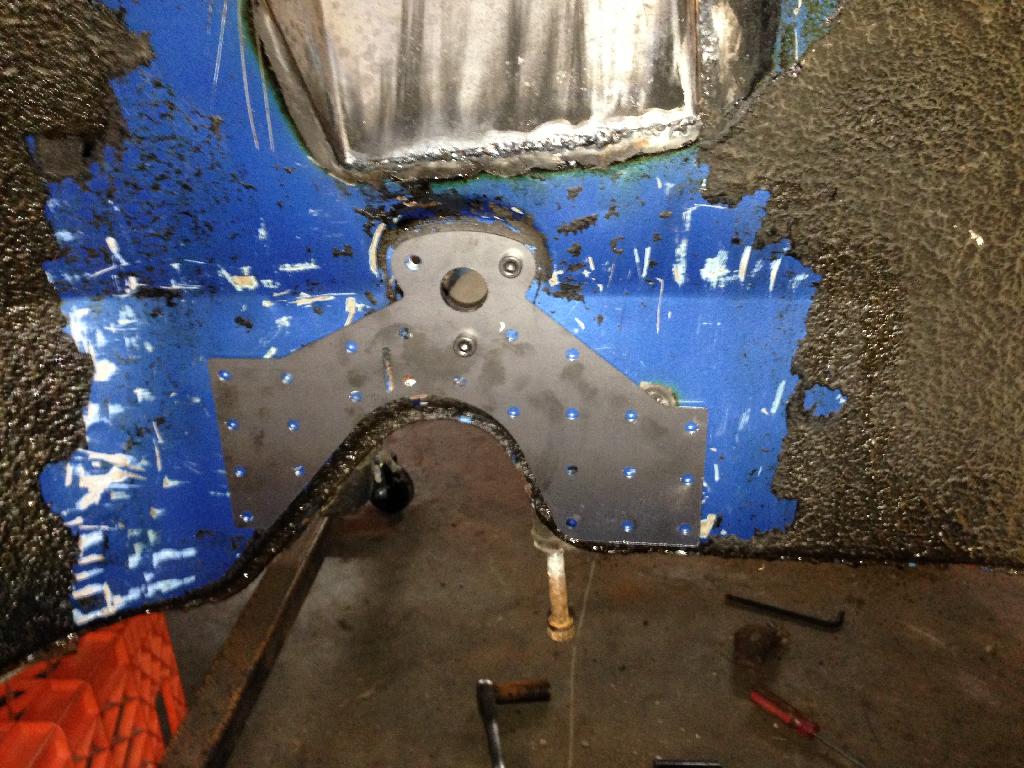
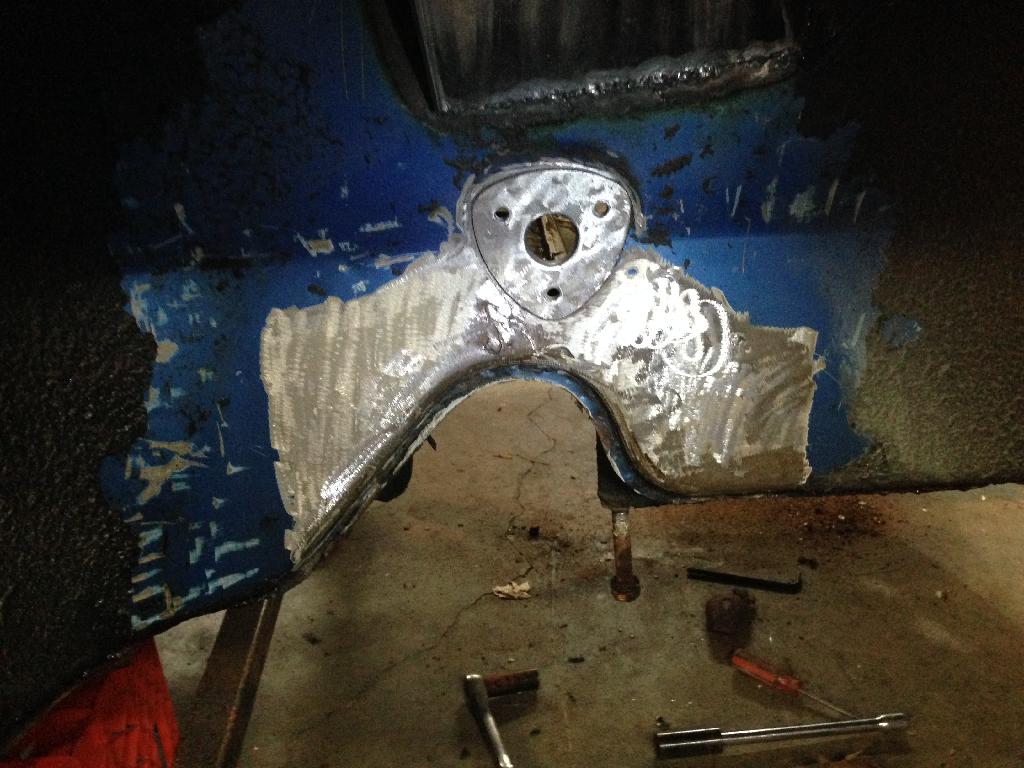
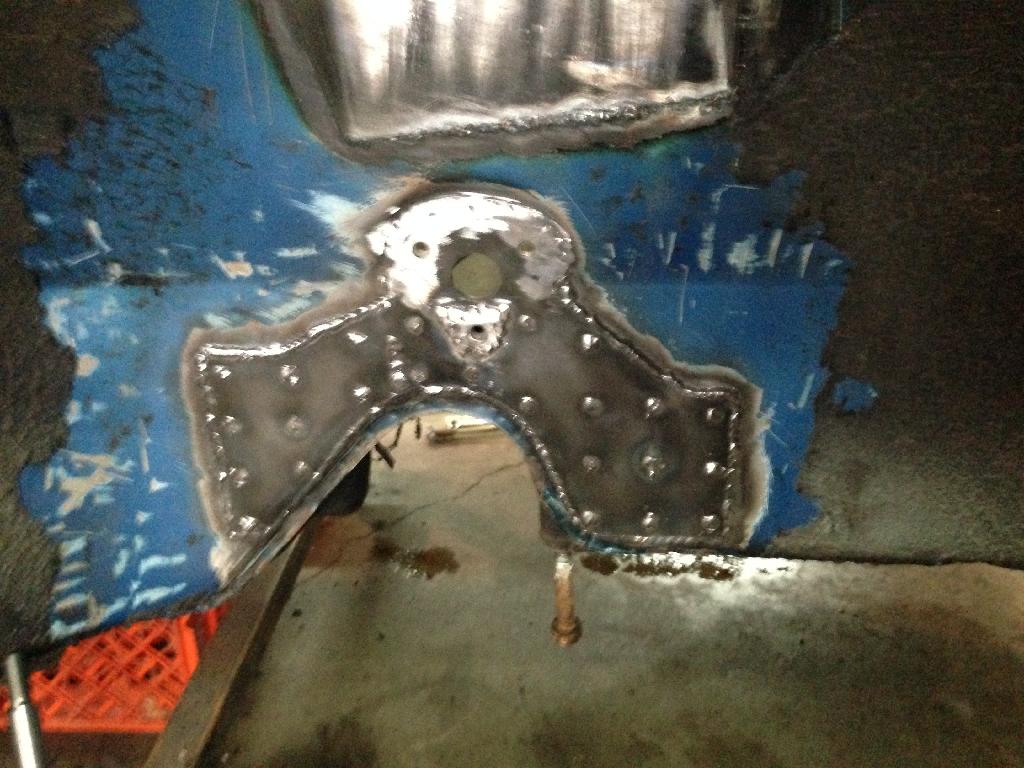
Once I ran out of gas, I move onto the camber plates to finish there. I think they turned out pretty well! 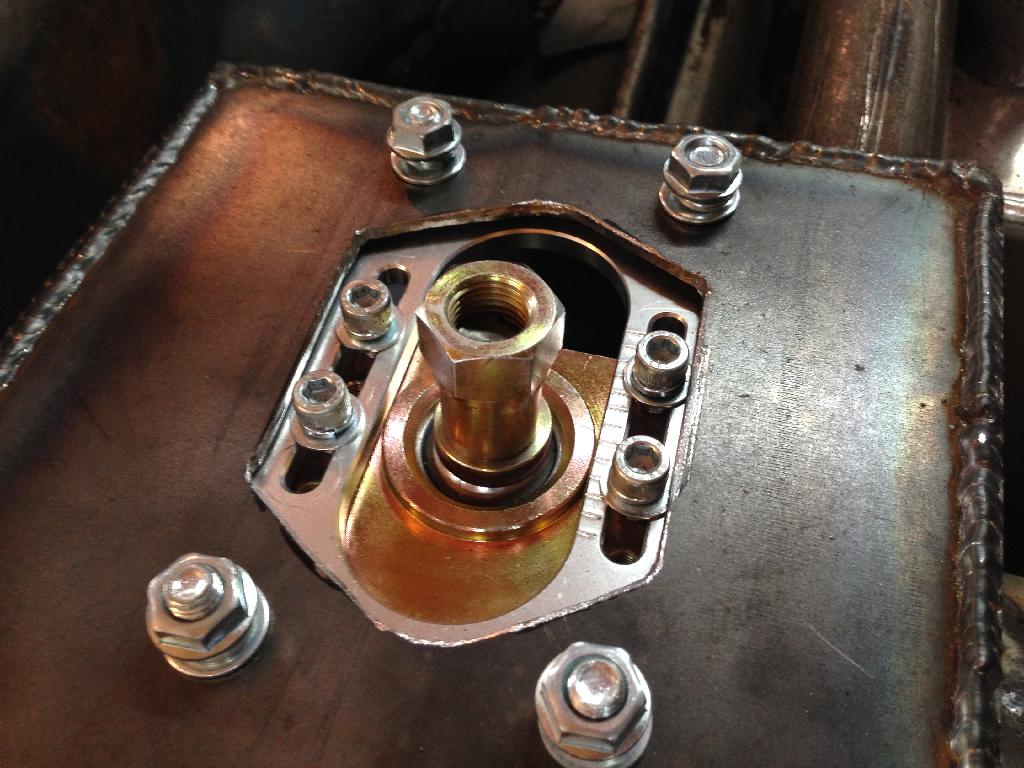
Posted by: injunmort Jan 2 2014, 12:35 PM
looks like Adriatic blue
Posted by: FourBlades Jan 2 2014, 01:37 PM
Nice work Thomas.
Good job by your Dad as well.
That will be an awesome car when done.
John
Posted by: tscrihfield Jan 2 2014, 05:16 PM
looks like Adriatic blue
I'm not sure though, this is a 74', the color is a little darker and it has a metallic look.
Posted by: tscrihfield Jan 2 2014, 05:17 PM
Nice work Thomas.
Good job by your Dad as well.
That will be an awesome car when done.
John
Thanks John, as are yours!
Posted by: Mueller Jan 27 2015, 09:51 AM
Great project, just finished going thru all 9 pages......
I dig the wide-5 wheels, I'm glad I am not the only one to have the thought to use those!
(I thought about it, you did it!)
Looking forward to seeing more of your work in the future!
Posted by: rdauenhauer Jan 27 2015, 10:01 AM
Alaska Blue Metallic (Alaskablau-Metallic) L96B ?
Posted by: euro911 Sep 4 2015, 05:41 PM
Egads ... can't believe I'm just now seeing this thread. Awesome hardly describes the fabrication skills you possess, Thomas
If you haven't figured out the original color yet, look at the paint code tag in the door jamb
Subscribed
Posted by: turk22 Sep 6 2015, 10:22 AM

Looks like Alaska Blue Metallic, I had one many years ago, its a great color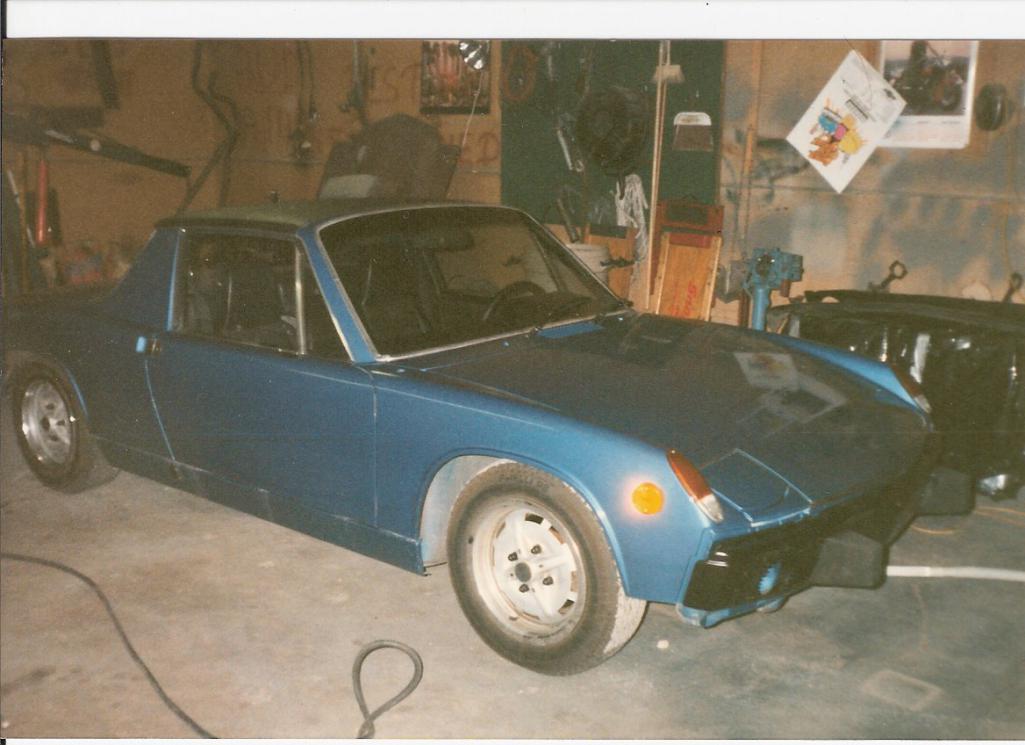
Posted by: tscrihfield Sep 6 2015, 05:00 PM
Egads ... can't believe I'm just now seeing this thread. Awesome hardly describes the fabrication skills you possess, Thomas
If you haven't figured out the original color yet, look at the paint code tag in the door jamb
Subscribed
Mark,
Thanks for the compliment. I really owe the talent to my dad, and mentor Bob Bennett. They took the time to teach me and I am blessed to have worked with them.
Unfortunately who ever painted the car had eliminated the paint code tag on this car but I have to agree with Turk that it is Alaska Blue Met.
I hope to have more updates soon as I am shifting my focus back to it. It kinda got lost in the middle of my track obsession.
Thomas
Posted by: ndfrigi Mar 1 2016, 12:10 AM
Hey Thomas, any update on this project? Hope everything is doing okay too there and also any news with your 73 yellow?
Powered by Invision Power Board (http://www.invisionboard.com)
© Invision Power Services (http://www.invisionpower.com)