Printable Version of Topic
Click here to view this topic in its original format
914World.com _ 914World Garage _ Show Me Your Engine Compartment Seals
Posted by: Eric_Shea Nov 12 2010, 08:27 PM
I'm installing new rubber engine seals around the shelves in the engine compartment.
If your engine is out, can you snap some pics of the factory corners? If I recall there's some 45's in there or some angled cuts that I's like to duplicate. There some big "staples" (for lack of a better term) as well correct?
Pictures would be great.
TIA.
E.
Posted by: McMark Nov 12 2010, 08:58 PM
Sorry, no pics, but the whole seal is cut on a 45 at the front, then clipped together with hog rings (see upholstery). The back corners just sorta overlap.
Posted by: Eric_Shea Nov 12 2010, 11:19 PM
Thanks Mark... that's a start. What I was thinking as well. Would like to know more about the overlaps in the back.
Anybody have pics?
Posted by: ConeDodger Nov 12 2010, 11:28 PM

Thanks Mark... that's a start. What I was thinking as well. Would like to know more about the overlaps in the back.
Anybody have pics?
'
No but I do have a whole bag of upholstery hog rings and a hog ring pliers... Let me know if you need it.
Posted by: Mikey914 Nov 13 2010, 01:56 AM
Not allway possible to miter at a 45. I've also foind that a hole punch (like you use on paper) and tip ties work well. Much easier to replace. I had a customer that sent me some pictures and it look pretty good. When you do cut, use a very sharp knife and keep it wet. It will slice like butter
Attached thumbnail(s)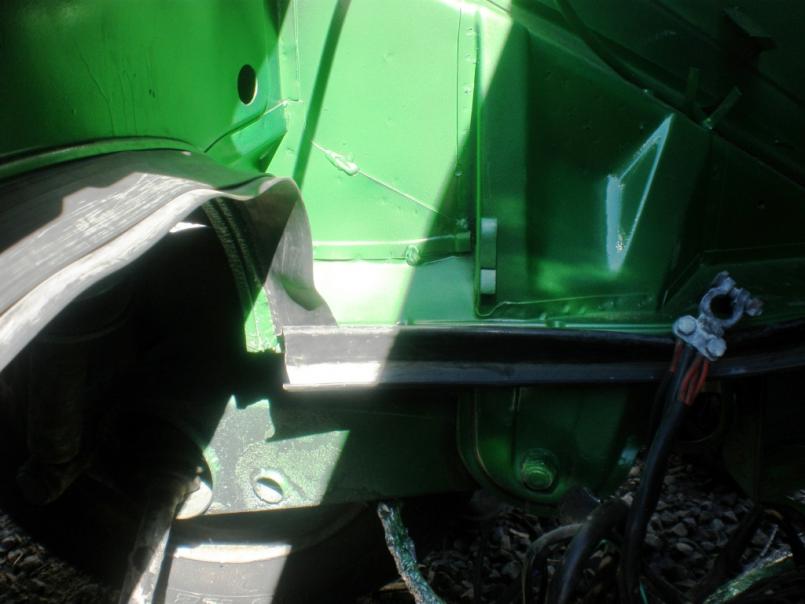
Posted by: McMark Nov 13 2010, 12:35 PM
That picture appears to show the rear 'rainbow' piece being cut just before it overlaps. I usually leave enough of the rear piece to overlap some of the horizontal seal.
Posted by: Eric_Shea Nov 13 2010, 12:52 PM
Is that the proper orientation of the rainbow seal, with the shorter slab on top?
Posted by: Racer Chris Nov 13 2010, 02:58 PM
Doesn't this belong in the CW forum?

Posted by: Eric_Shea Nov 13 2010, 05:45 PM
Pat won't allow me to post in there. 
Posted by: ConeDodger Nov 13 2010, 06:02 PM
Pat won't allow me to post in there.
Really? 'Cause when I retrofit a rear foglight on my car I was going to go there to ask where to drill the holes and stuff...


Posted by: Racer Chris Nov 13 2010, 07:13 PM
Pat won't allow me to post in there.
Good answer, lol.
Posted by: rick 918-S Nov 13 2010, 07:24 PM
Here's one
Posted by: rick 918-S Nov 13 2010, 07:26 PM
Ooops, That was on the way to the garage. 
Here's a couple. Sorry, I already pulled the side seals but the rainbow seal is still in place.
Attached image(s)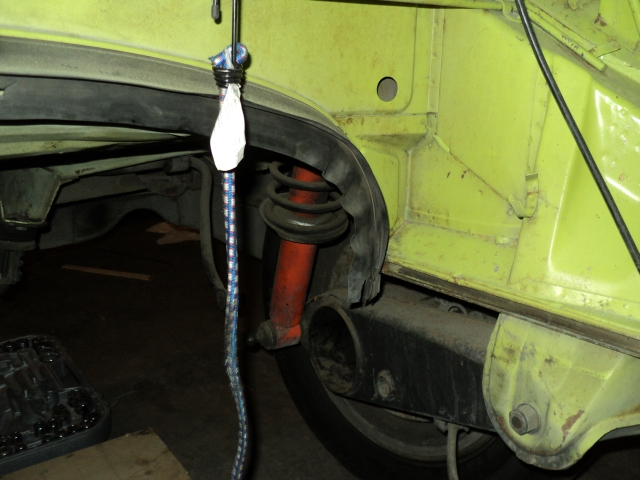
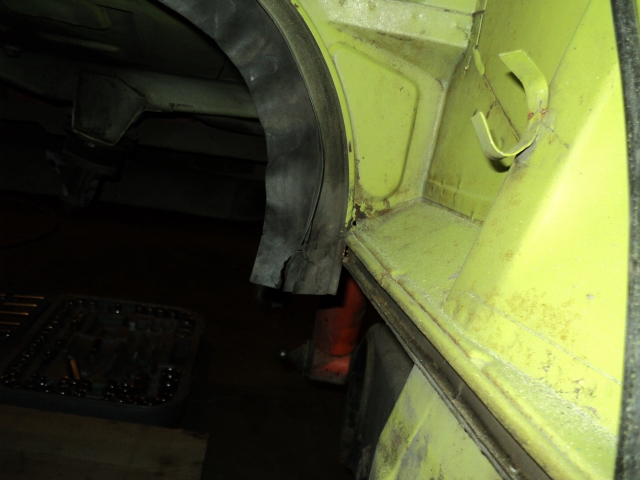
Posted by: rick 918-S Nov 13 2010, 07:28 PM
Eric, Do you want to use my front and side seals for a pattern? They were almost too nice to pull. If I wasn't painting the engine bay I would have left them in place. The rainbow seal pictured here is kind of ratty but you cann see the upper part of the seal is shorted than the lower part of the seal.
Attached image(s)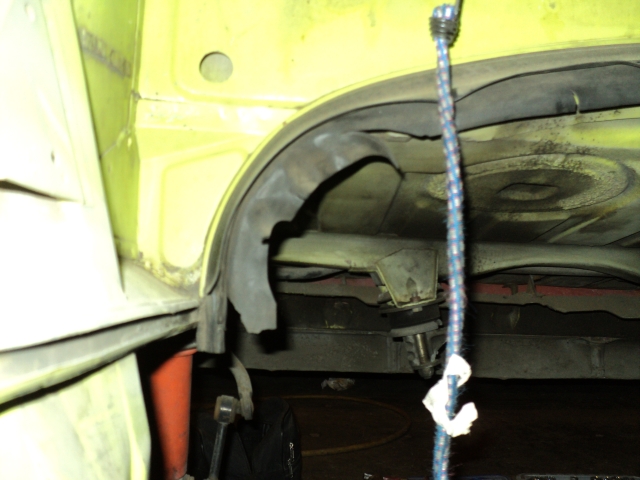
Posted by: Krieger Nov 13 2010, 08:18 PM
Money shot! This is what is left of a front seal-left side. I took two of them from wrecked cars. I trimmed them for side pieces. They seam to last very well. This is the ugaly leftover. 
Attached thumbnail(s)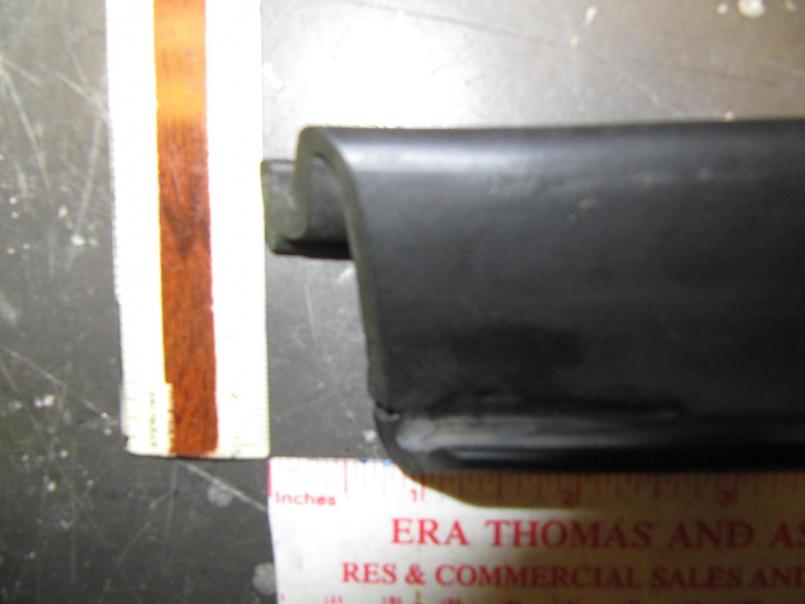
Posted by: Eric_Shea Nov 13 2010, 11:07 PM
Thenks Rick and Andy!
@ Rick - No need but, could you take a picture like Andy's? I want to finish this tomorrow and that would do it. That rainbow seal is perfect! Thanks and stay warm!!
@ Andy - Excellent. So that's the left side of the front seal and it's trimmed inward to about 3/4"?
@ Rob - I might like to have a look at those hog rings and pliers...  Maybe I can see a picture of the side seals where the ring went through (bottom? middle?)
Posted by: ConeDodger Nov 13 2010, 11:15 PM
Thenks Rick and Andy!
@ Rick - No need but, could you take a picture like Andy's? I want to finish this tomorrow and that would do it. That rainbow seal is perfect! Thanks and stay warm!!
@ Andy - Excellent. So that's the left side of the front seal and it's trimmed inward to about 3/4"?
@ Rob - I might like to have a look at those hog rings and pliers...
Maybe I can see a picture of the side seals where the ring went through (bottom? middle?)Mark will get back from Tahoe tonight and back to work tomorrow. Maybe he can take a pic of where that hogring situation occurs. The hogrings and hogring pliers are in my tool box and I can have them Priority Mailed out ASAP. Though I don't know why I would be that nice considering you just cost me probably $30K less the trade in value of the 4Runner...
So Oly and Sven were talking and...

Posted by: rick 918-S Nov 13 2010, 11:26 PM
Ok, More pics coming. I have to resize
Attached image(s)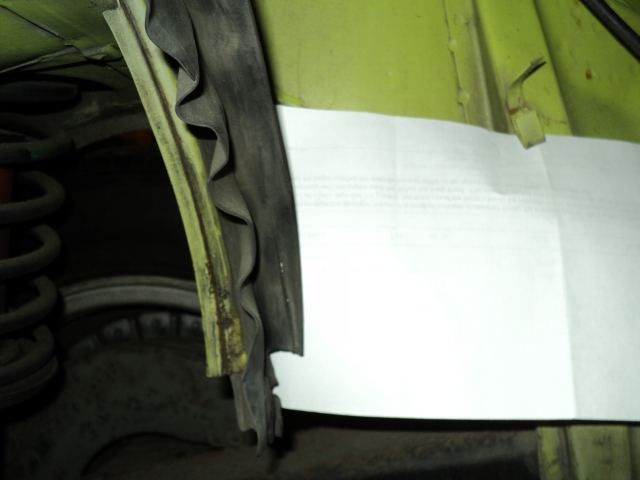
Posted by: rick 918-S Nov 13 2010, 11:36 PM
My front seal to side seal did not have a hole in it for a hog ring. Are you guys sure someone didn't add a hog ring to your seal at some point? Notice the close up. No holes.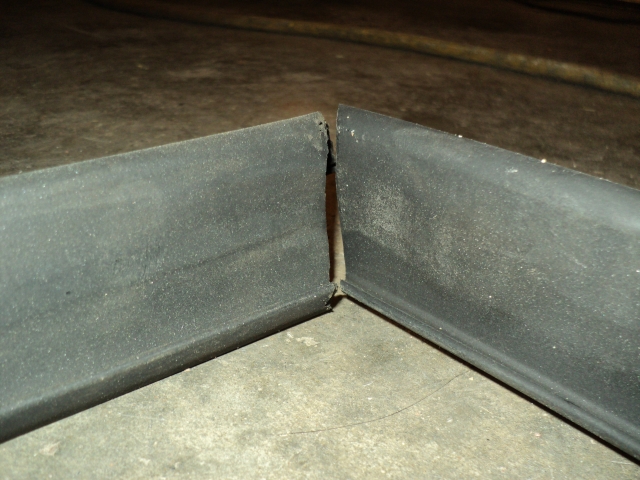
The 45 deg angle is cut very vertical on hte seal.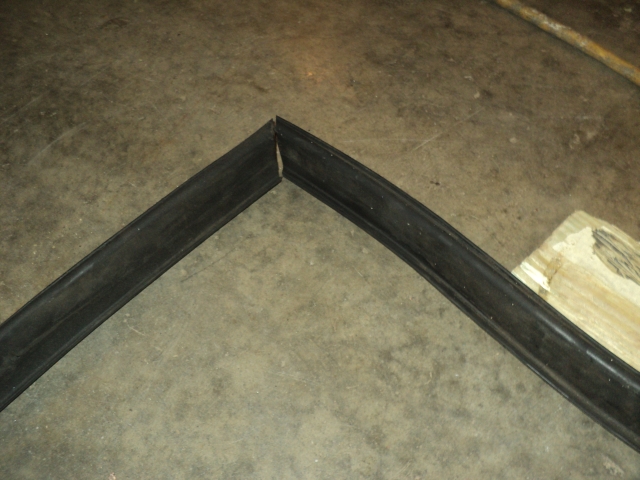
Posted by: rick 918-S Nov 13 2010, 11:37 PM
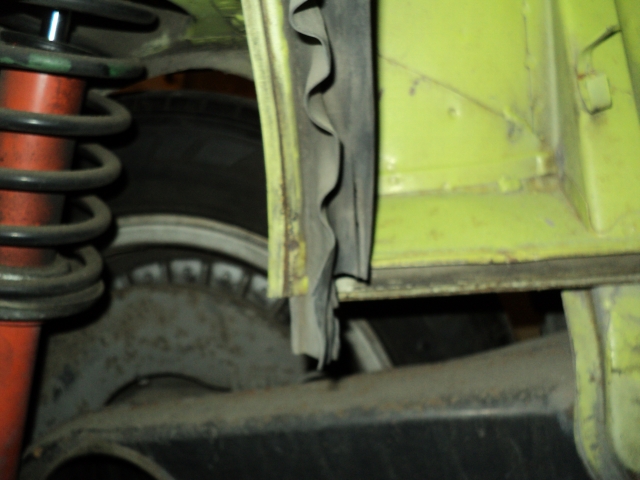
Couple more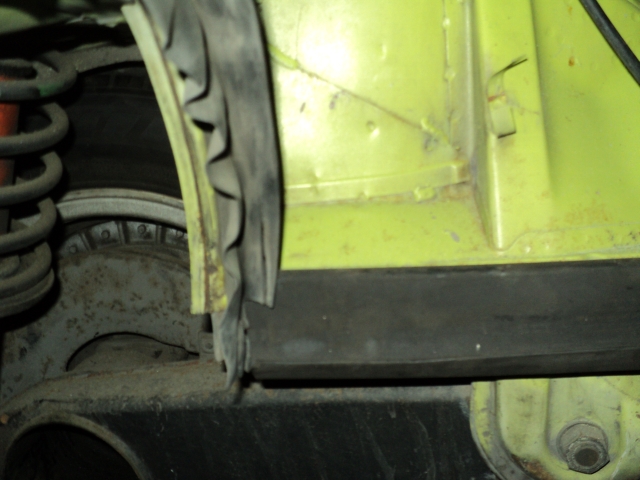
I think the short flap on the rainbow seal should be behind the side seal. 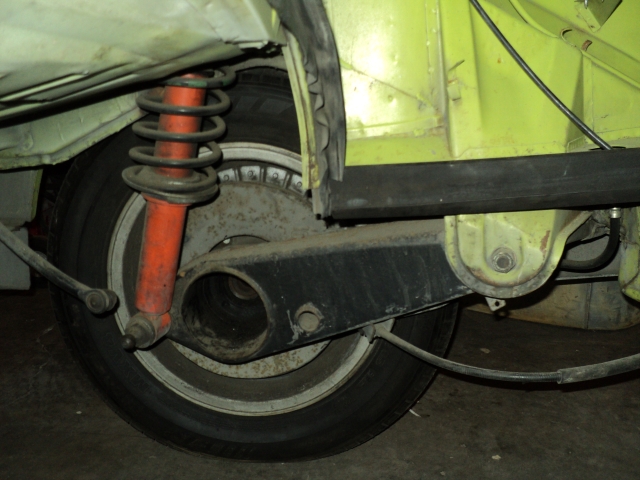
Posted by: rick 918-S Nov 13 2010, 11:51 PM
I have a cheap hog ring pliers and a bin full of hog rings But I'm not sure if all years had the corners ringed. My 1973 seals were not holed or ringed.
Attached image(s)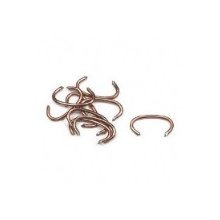
Posted by: Eric_Shea Nov 14 2010, 12:06 AM
Oh that's great info Rick. Many Thanks!
All coming together now. I'll have my morning cut out for me.
Food for thought on the rings as well... thanks for that.
Posted by: swood Nov 14 2010, 12:09 AM
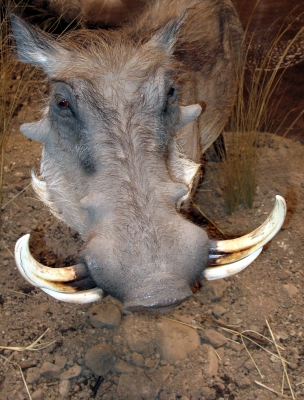
Why are they called hog rings? Just askin...
Mmmmm...i'm thinkin about bacon now...
Posted by: bandjoey Nov 14 2010, 12:14 AM
As the name implies they go in a pig snout. Tie a rope on that and pigs follow where ever u want.
Posted by: rick 918-S Nov 14 2010, 12:15 AM
Why are they called hog rings? Just askin...
Mmmmm...i'm thinkin about bacon now...
 Could have come from the shape.
 Attached image(s)
Posted by: McMark Nov 14 2010, 12:26 AM
You gotta use these...
The 73 definitely had rings. Mine did.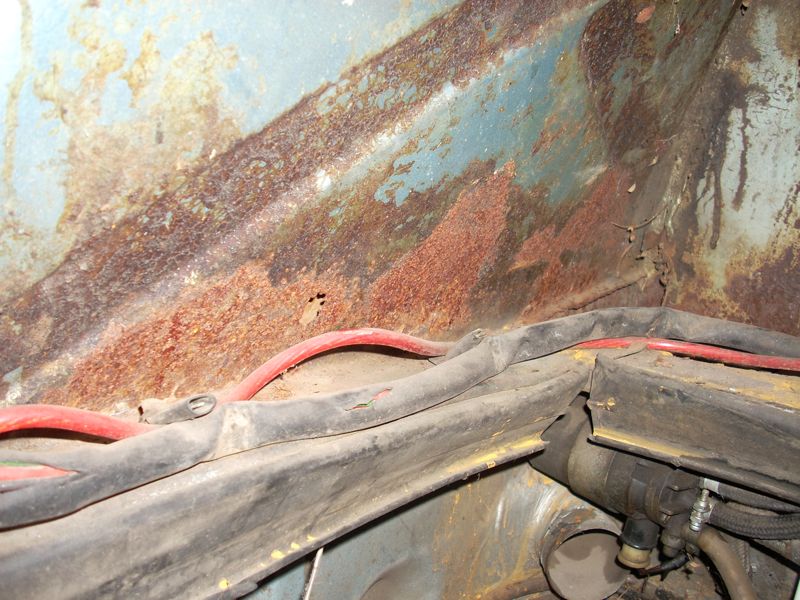
Posted by: Eric_Shea Nov 14 2010, 12:29 AM
Twisted bastard...
Posted by: McMark Nov 14 2010, 12:29 AM
The ring on the other side.
Attached image(s)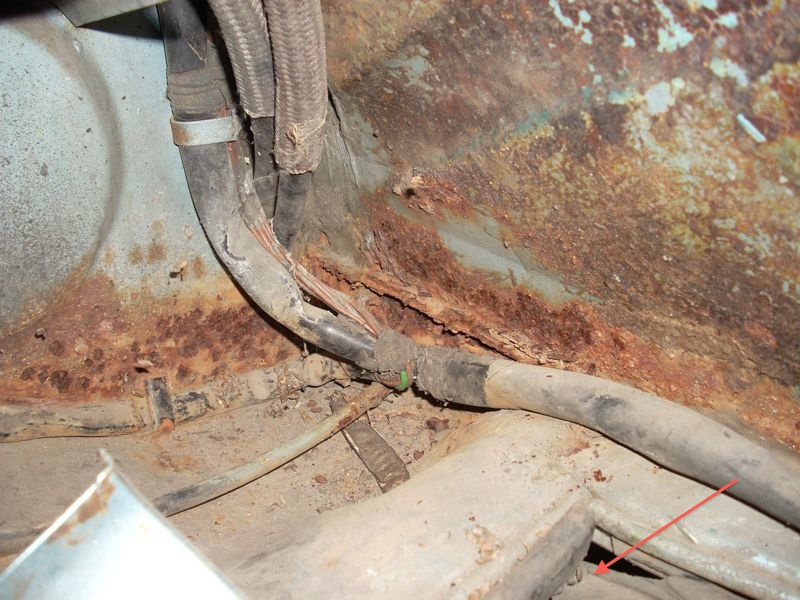
Posted by: Krieger Nov 14 2010, 08:41 AM
@ Andy - Excellent. So that's the left side of the front seal and it's trimmed inward to about 3/4"?
Yes and if you look close at the pic you can see where the hog ring went. A little lower than the other shots, Klaus must have had one too many that day.
Posted by: McMark Nov 14 2010, 01:50 PM
The hog ring goes in the middle of the vertical height of the seal.
IMHO, the rainbow seal should extend down inboard of the side seal, overlapping down to the bottom of the J.
The rainbow seal should be installed with the short side up, based on my sample of two cars that I'm sure have OE seals. Remember that the OE rainbow seal was not an extrusion, it was cast and had the bend molded into it, so you couldn't install it either way, and it also didn't ripple because of extra material.
Posted by: Eric_Shea Nov 14 2010, 02:34 PM
Thanks all for your help:
Rainbow seal going in. I agree, short side up: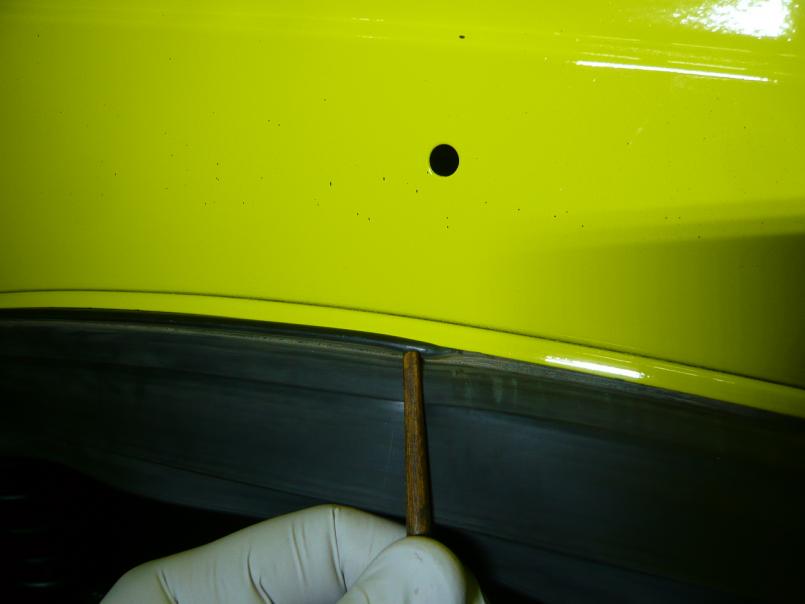
That's so the engine tin can seal on both top and back (my hand pretending it's the engine tin):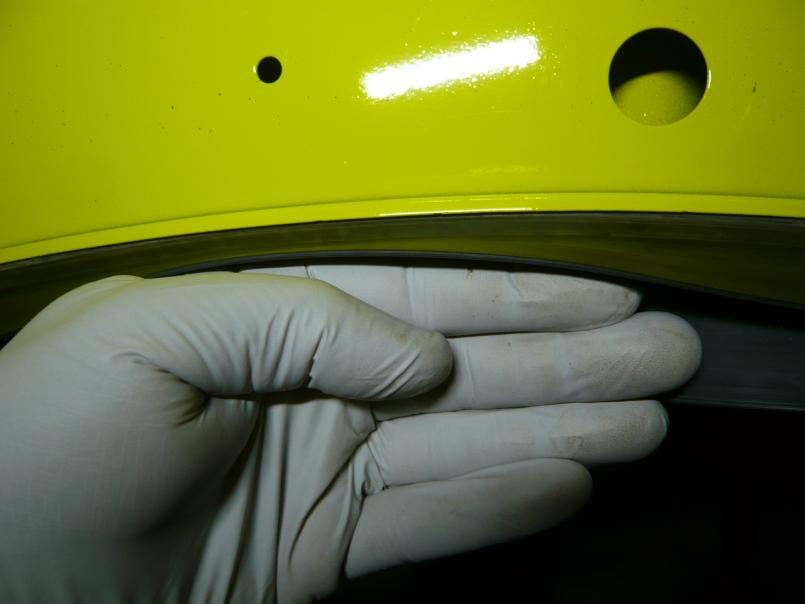
Trimming the flap for the short side: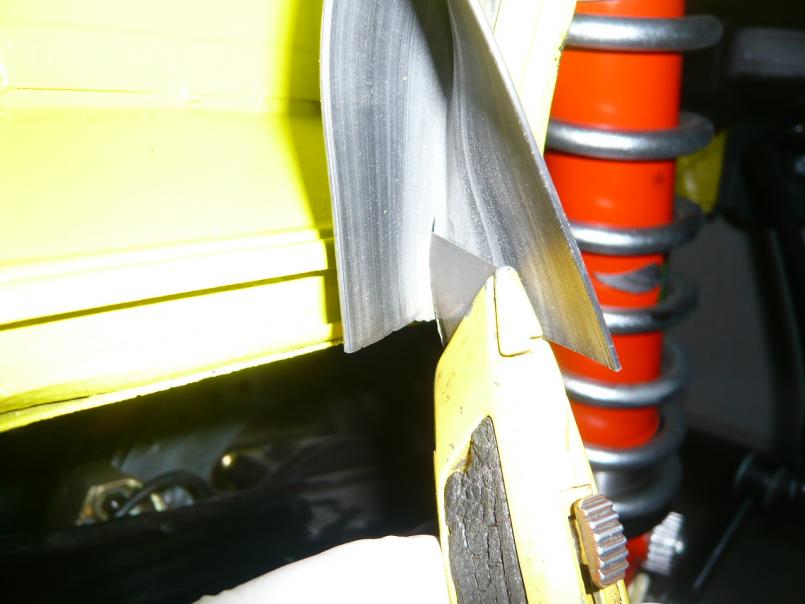
Notched out:
Rainbow seal in: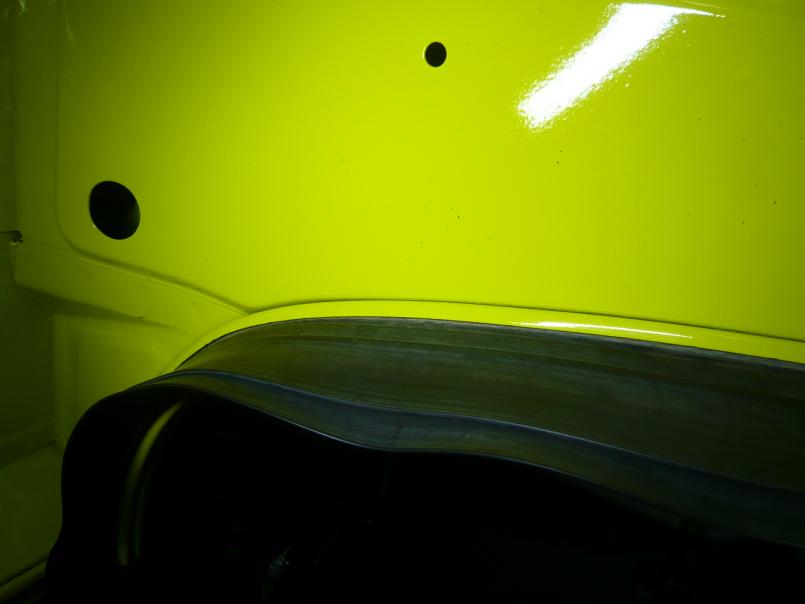
The "notch" in the rainbow seal as it pertains to the side seal. Mark is correct. I think this should have extended down beyond the "J" that you can see in the side seal. That said, everything will be sealed with this setup so I'm not too worried: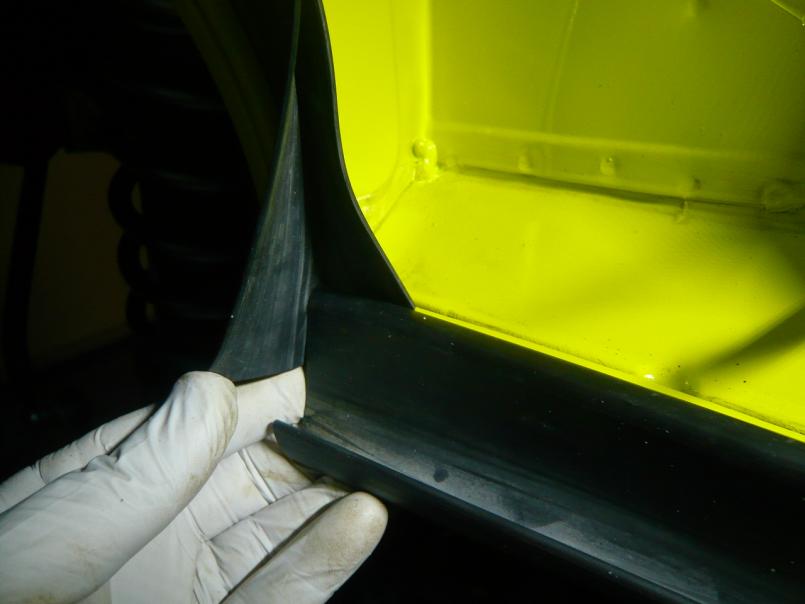
Believe it or not, I used a grinding wheel to cut the 45 degree angle in the seals. I cut with a box knife first and then polished off the angle on the stone: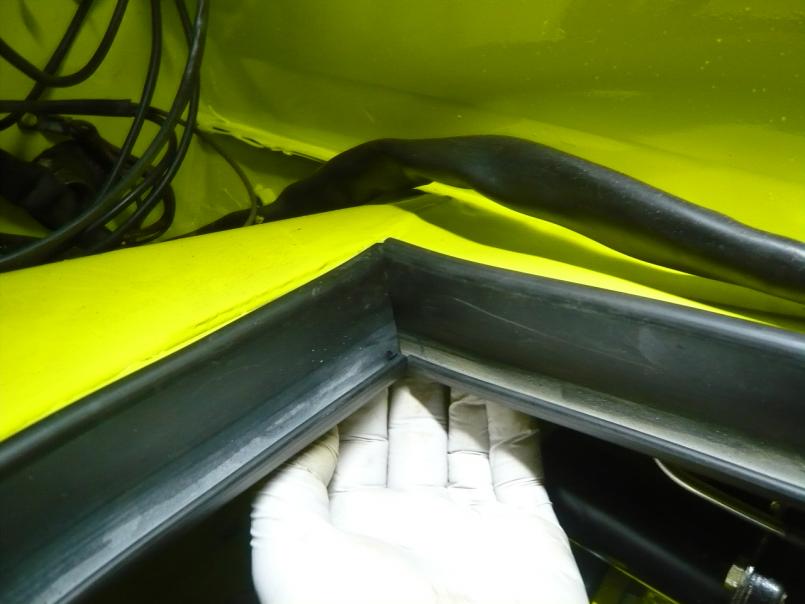
Firewalll section in: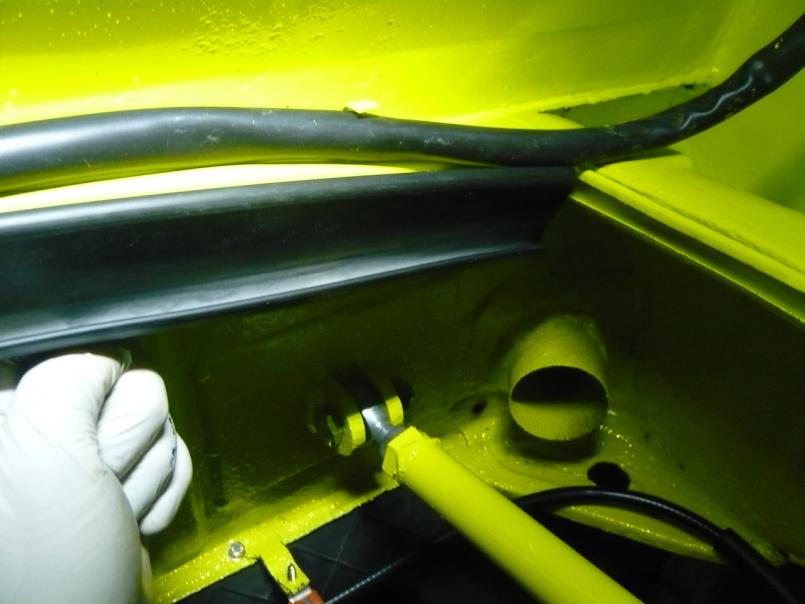
As a side note; I got my e-brake pins and clips hooked up while I was in there: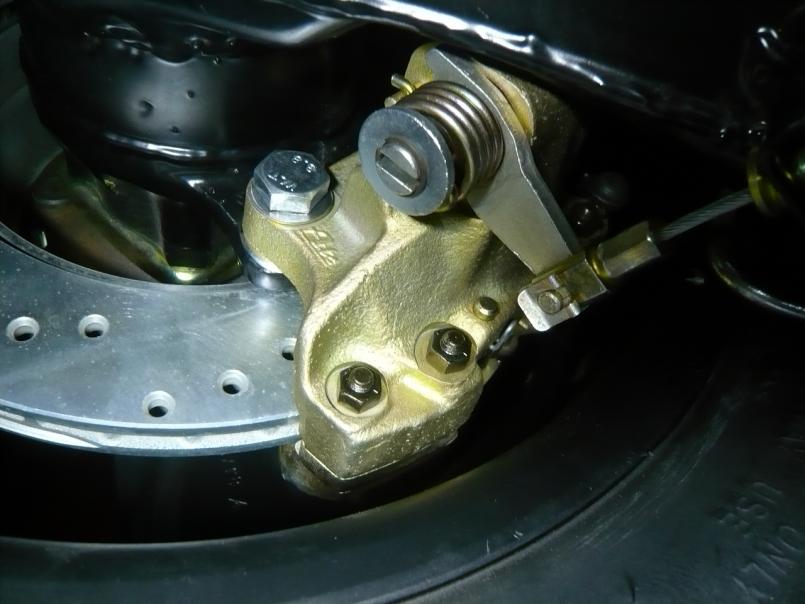
Actually, one of the more enjoyable jobs I've done on the teener. Good to know that area will be sealed off properly with new rubber. I'll need some hog clips to get it all buttoned up though. I can see where they would hold everything together.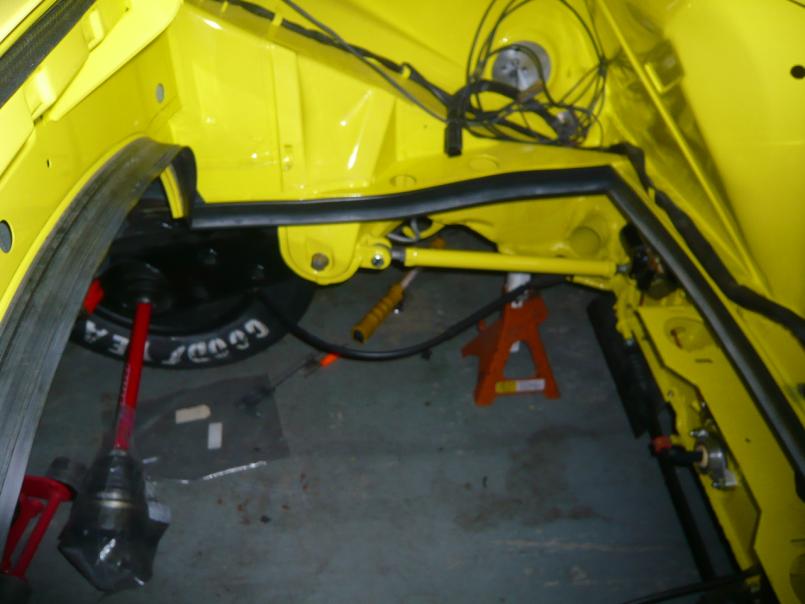
Posted by: rick 918-S Nov 14 2010, 04:14 PM
Looks great Eric. If you just want a couple hog rings and the pliers to install them I could send you a couple. I have a bunch. Otherwise Eastwood sells them with the pliers. LMK 
Posted by: Eric_Shea Nov 14 2010, 04:19 PM
Thanks Rick...
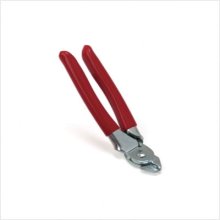
Question; Does one need those pliers? Not sure what the unique characteristic of them is.
Posted by: rick 918-S Nov 14 2010, 04:21 PM
Thanks Rick...
Question; Does one need those pliers? Not sure what the unique characteristic of them is.
They have cupped jaws to hold the ring while you squeeze them. I can take a photo if you want but I really should be working. I'm so easily distracted..

Posted by: Eric_Shea Nov 14 2010, 04:23 PM
No worries... I get it now.
Posted by: Mikey914 Nov 15 2010, 12:57 AM
Looks great Eric!
Posted by: Mikey914 Nov 15 2010, 01:01 AM
The hog ring goes in the middle of the vertical height of the seal.
IMHO, the rainbow seal should extend down inboard of the side seal, overlapping down to the bottom of the J.
The rainbow seal should be installed with the short side up, based on my sample of two cars that I'm sure have OE seals. Remember that the OE rainbow seal was not an extrusion, it was cast and had the bend molded into it, so you couldn't install it either way, and it also didn't ripple because of extra material.
I never realized the OEM was a cast part. I was wondering if the seal in question was a reproduction that was made thinner?
Eric, let me know if you had any problems with the rainbow seal "ruffling" up. I tried to make mine as close to OEM as possible. Any feedback is appreciated.
Thanks
Posted by: Eric_Shea Nov 15 2010, 09:29 AM
Once you get it installed and distributed, the rainbow seal isn't really ruffled (see last pic) but... it looks like Rick's stock seal is. I wonder if that's a heat issue? All those seals look spot-on stock to me.
Powered by Invision Power Board (http://www.invisionboard.com)
© Invision Power Services (http://www.invisionpower.com)