Printable Version of Topic
Click here to view this topic in its original format
914World.com _ 914World Garage _ Andyrews Progress Thread
Posted by: Andyrew Jan 19 2011, 01:01 PM
Welcome to my Audi Turbo 914 build thread! This first post has been highly edited for your(and my) ease of navigation.
`
`
The car 1973 Porsche 914 1.7 w/ appearance group package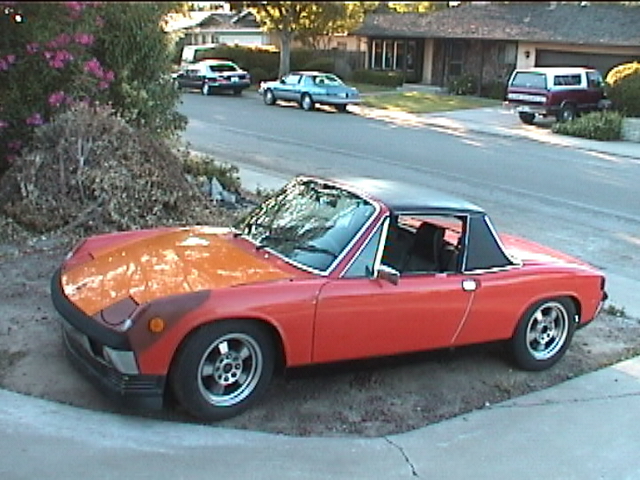
`
The Story:
I purchased this car when I was 14years old and had bought 2 other 914s with it for a measly $1100, The other 2 914’s were basket cases and one had been in a roll over. The previous owner put the 2.0 from the roll over car in this car. I parted out the other two cars and http://www.914world.com/bbs2/index.php?act=ST&f=2&t=14097 on mine after I couldn’t figure out how to adjust the valves (It seemed easier..). I do a 5 lug conversion as well as put some fiberglass flares on the car and many other things before I decide to paint the car. That is the start of this thread. 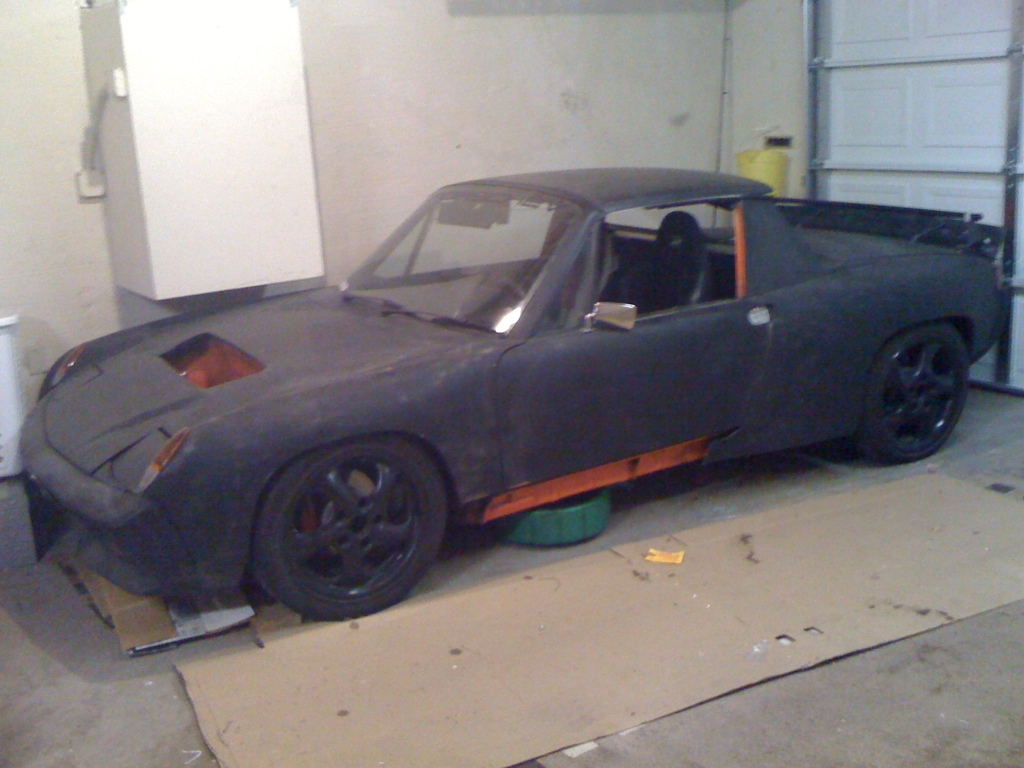
`
Next I decide that I don’t like how the v8 drives and how I could never keep it cool so I decide to embark on a journey with an engine I was already more familiar with. The Audi 1.8T.
To start at the 1.8T engine conversion click below.
http://www.914world.com/bbs2/index.php?showtopic=114780&st=309
Details on the car:
Engine: Audi AEB 1.8t Engine, Fully rebuilt, balanced rotating assembly and blueprinted, balanced and clearanced Intermediate shaft.
Crankshaft: Stock/polished
Rods: Scat Forged I beam rods
Pistons: Stock
Cams: Stock
Valves: Stock intake, Stainless nitrite coated Supertech exhaust AEVN-1103
Valve springs: Supertech high rpm valves SPRK-AUDI18
Piston rings: Goetze 08-502900-00 (Factory stock)
Head gasket: Elring Stock head gasket
Rod bearings: 034 Dry film coated bearings 034-202-1008
Crank bearings: 034 Dry film coated bearings 034-202-1000
Intake Manifold: Stock
Throttle Body: Stock AWM
Exhaust Manifold: APR Iconel Stage 3 manifold
Exhaust: 3" turbo back stainless steel w/ 2 stainless resonators
Intercooler: 700hp air to water core.
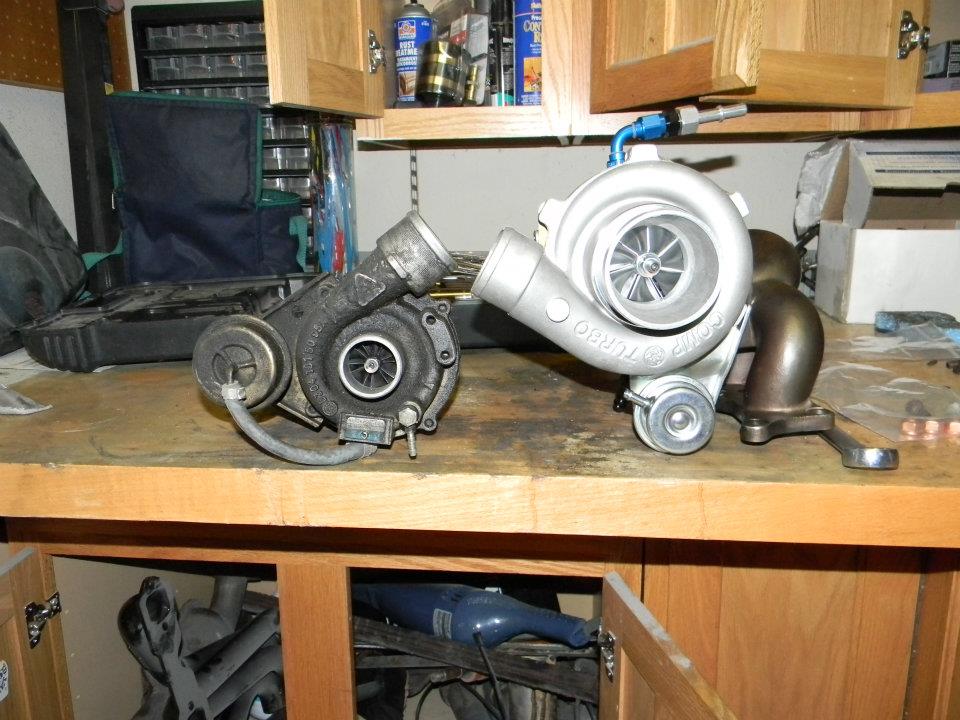
Turbo: Comp Turbo triple ball bearing CTB5356
Injectors: Bosch 550CC injectors ported and flow matched to 1300CC
Fuel Pump: Bosch 044 inside 034 Surge tank
Fuel rail: Stock fed with AN10 line
Water pump: Davies Craig EWP150 w/ LCD controller
MAF: PMAS HPX MAF in 3" housing
Boost controller: Cortex EBC
Transmission: Audi A4 1.8 5 speed code EHV FWD unit
100mm stub axles from boxster transmission
eBay sprung type LSD
Wiring: Strip all Porsche wiring, Replace with Audi wiring 100%
Engine Management: Modified OEM Audi Ecu
Power brakes: Not yet
ABS integration: Not yet
Traction control integration: Not yet
Launch control: Not yet
Cruise control: Yes
Climate control/AC: Yes
OBD2 full control: Yes
Check engine light: No smile.gif
Front trunk and rear trunk: YES!
8psi: 240whp (Canyon and autox setting)
14psi: 280whp (Street)
17PSI: 300whp (Track and Street driving) (Estimated power goal)
30psi(E85): 400whp (Full tilt mode)
Suspension:
Raised 911 spindals up front with Koni yellows
Mueller Roller Needle Bearings front and rear in leu of all bushings
Turbo tie rods
22mm Torsion bars
http://www.914world.com/bbs2/index.php?showtopic=50483&hl=nascar
Koni yellows rear
911 rear hubs with 100mm studs
Ground control coil over kit in rear
225lb springs
Brakes:
911 A calipers front
Stock 914 rear calipers
Vented rotors front and rear
Porterfield semi race pads
19mm M/C
Proportioning valve replaced with T
Wheels:
Boxter rear 17 x 8.5 twists up front with 245 40 17
911 turbo 18 x 10 turbo twists in back with 285 35 18
Body:
Rich Bontempi HPH Flares Front and Rear, Molded
916 front and rear bumpers (front bumper to be reworked completely)
6" ducktail spoiler with supports
Engman long stiffening kit
http://www.914world.com/bbs2/index.php?act=ST&f=2&t=48483&st=100
Camp 914 hood shocks rear
Camp 914 Euro front turn signals
http://www.914world.com/bbs2/index.php?showtopic=112231&st=0
Interior(In Progress):
Fully custom interior (Still in design phase)
Harness Bar
5 point Cam lock harnesses
http://www.914world.com/bbs2/index.php?showtopic=21720&hl=pepboys
~~~~~~~~~~~~~~~~~~~~~~~~~~~~~~~~~~~~~~~~~~~~~
Now that the intro is done, here is my checklist of things that I want to get done with it.
Register *5-15-11*
Fix ignition **5-30-11**
Tune (again) ecu ** Converted back to Carbs after ECU died 5-30-11**
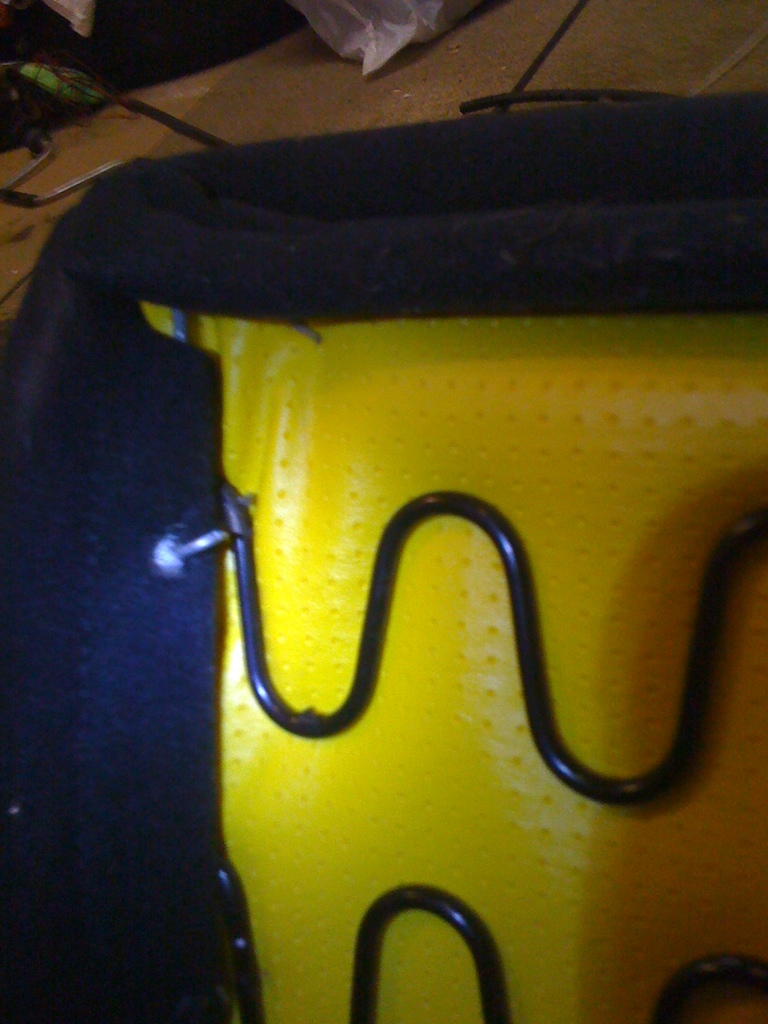
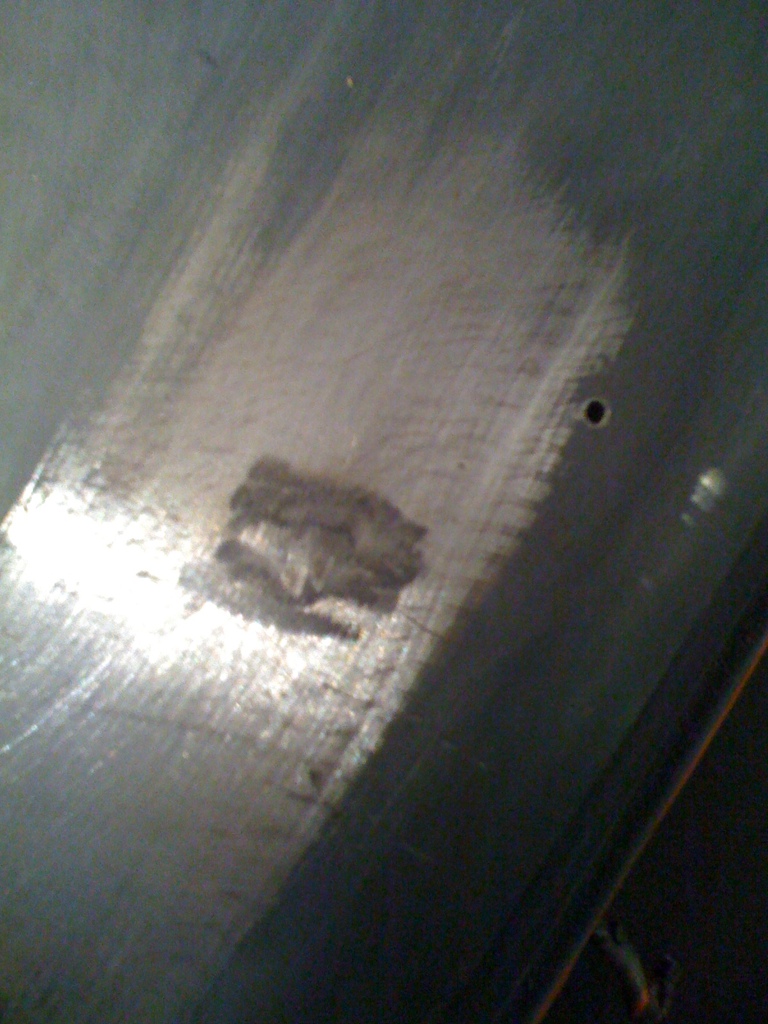
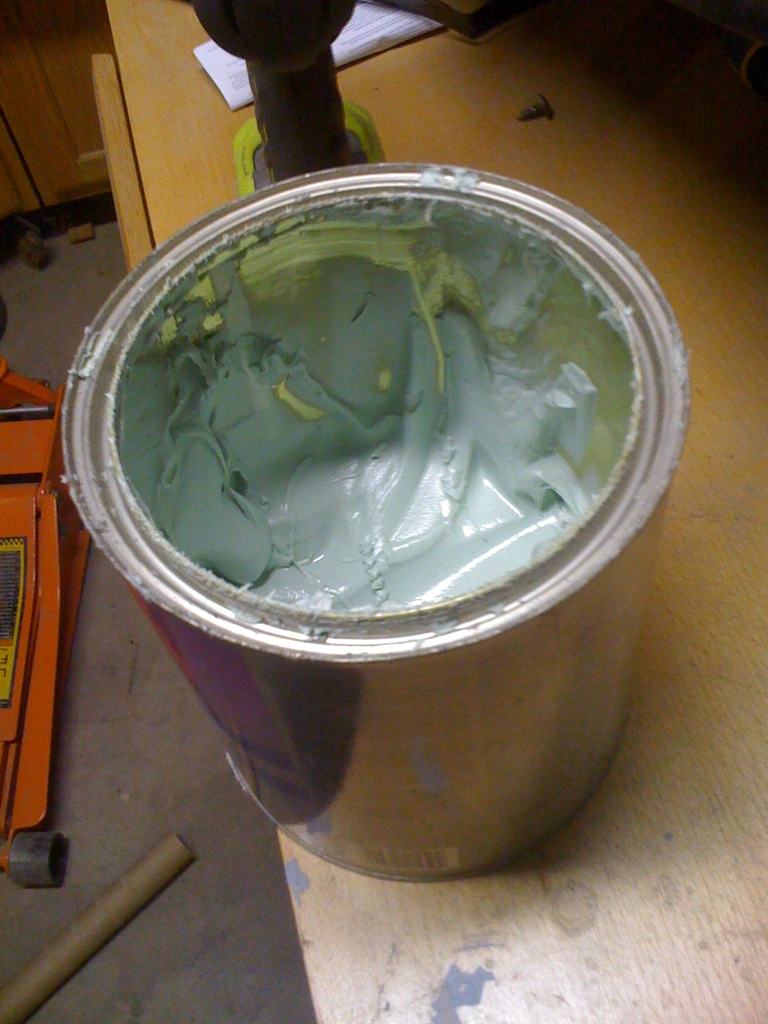
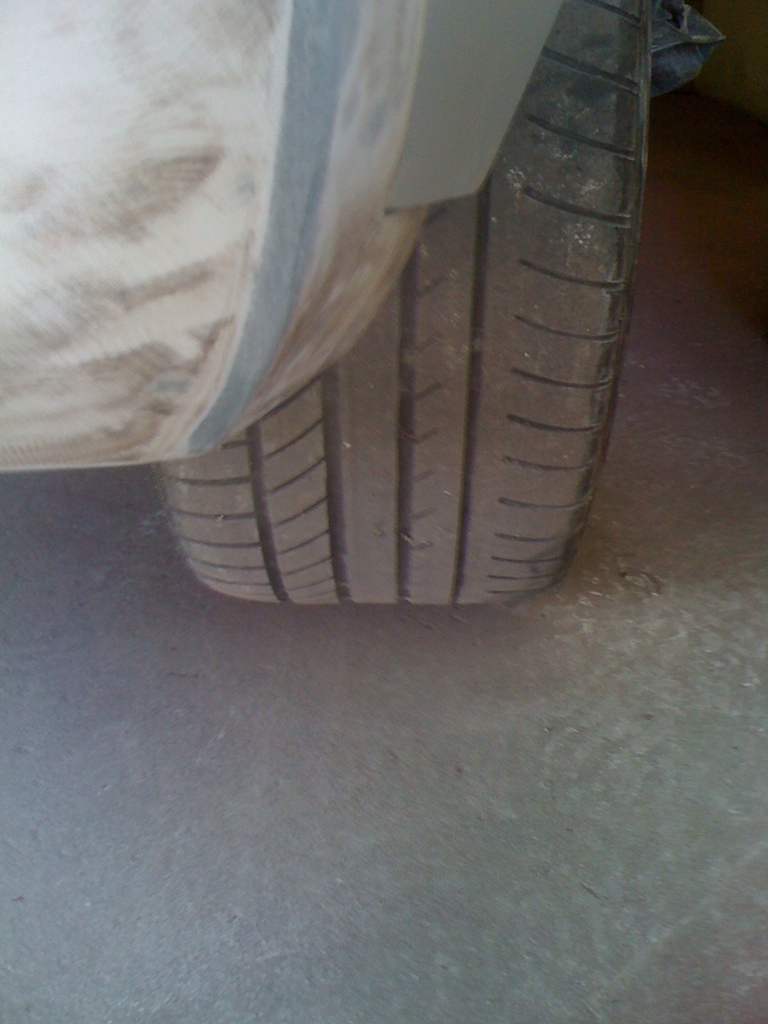
Clean goo in trunk (pic)
Install Dr window crank *5-30-11*
Change oil http://www.914world.com/bbs2/index.php?showtopic=114780&st=20#
Change water pump http://i239.photobucket.com/albums/ff312/professor914/P1010007-2.jpghttp://www.914world.com/bbs2/index.php?showtopic=114780&st=20#
Flush coolant
Finish targa bar S http://www.914world.com/bbs2/index.php?s=&showtopic=114780&view=findpost&p=1427889
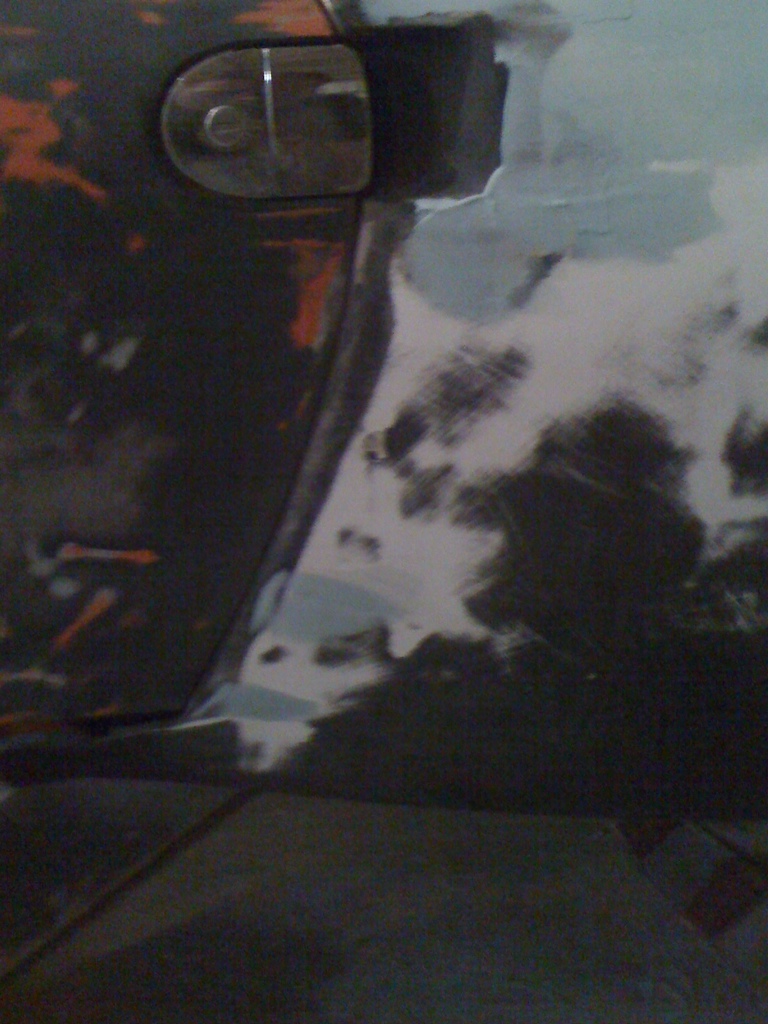
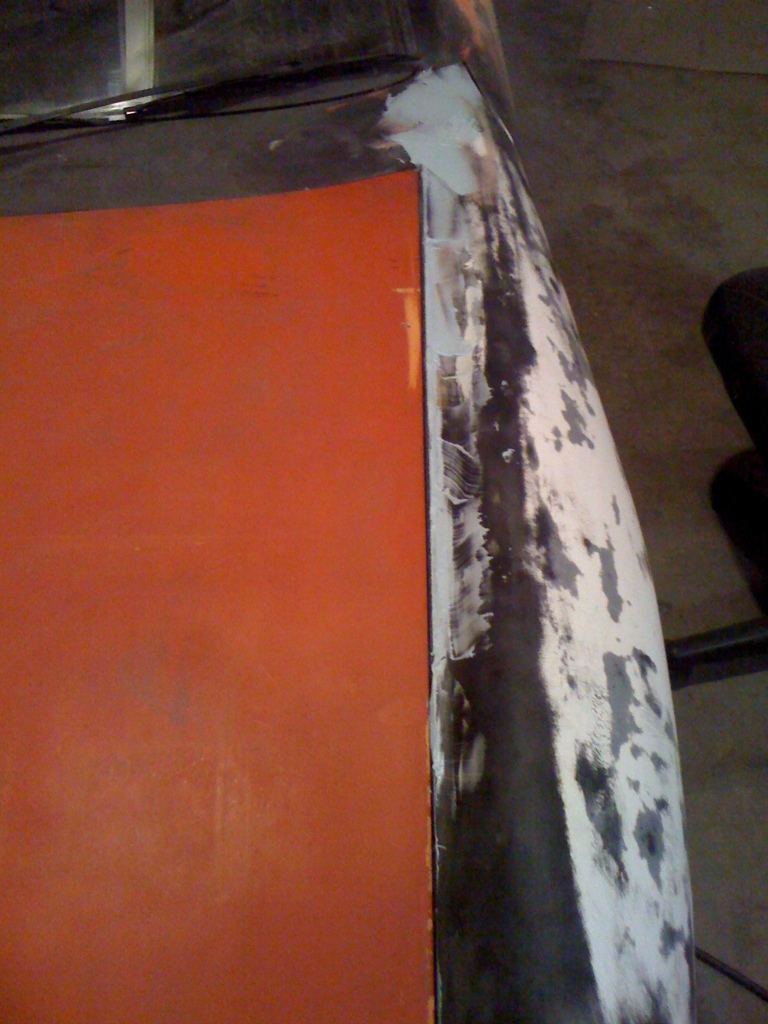
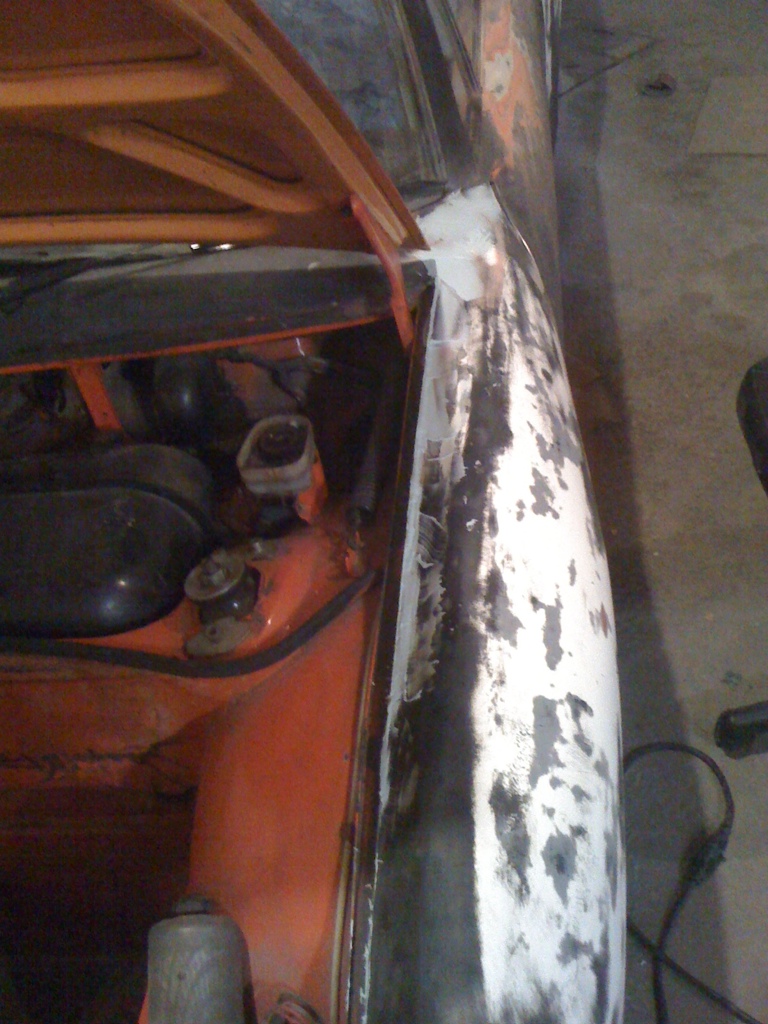
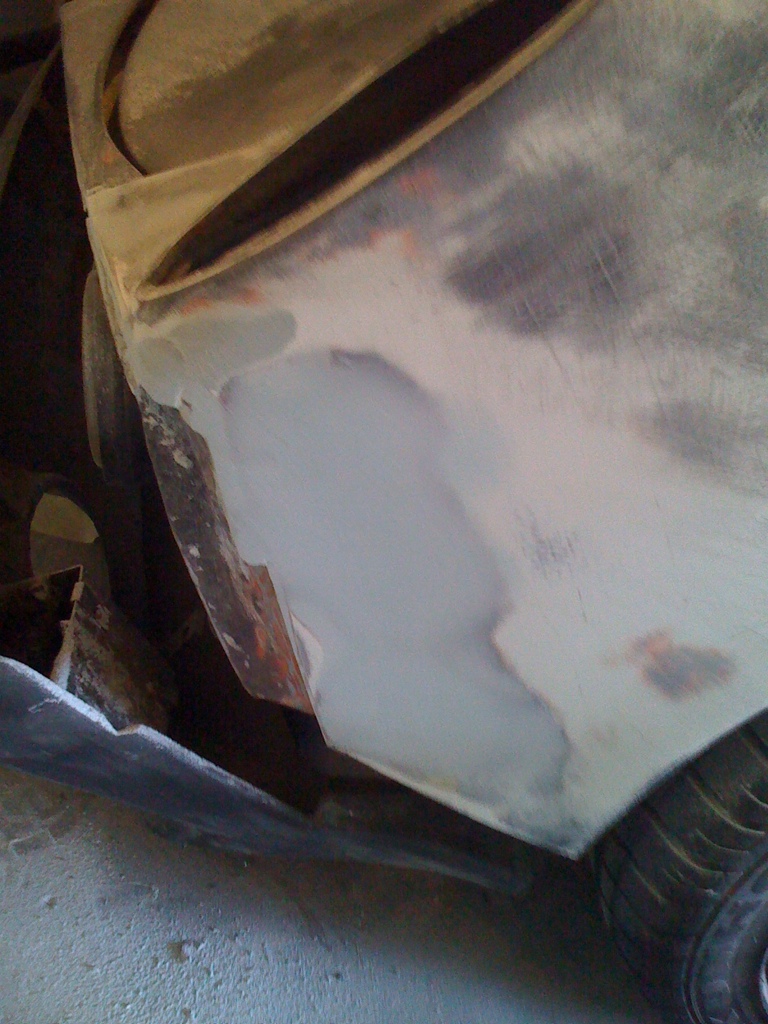
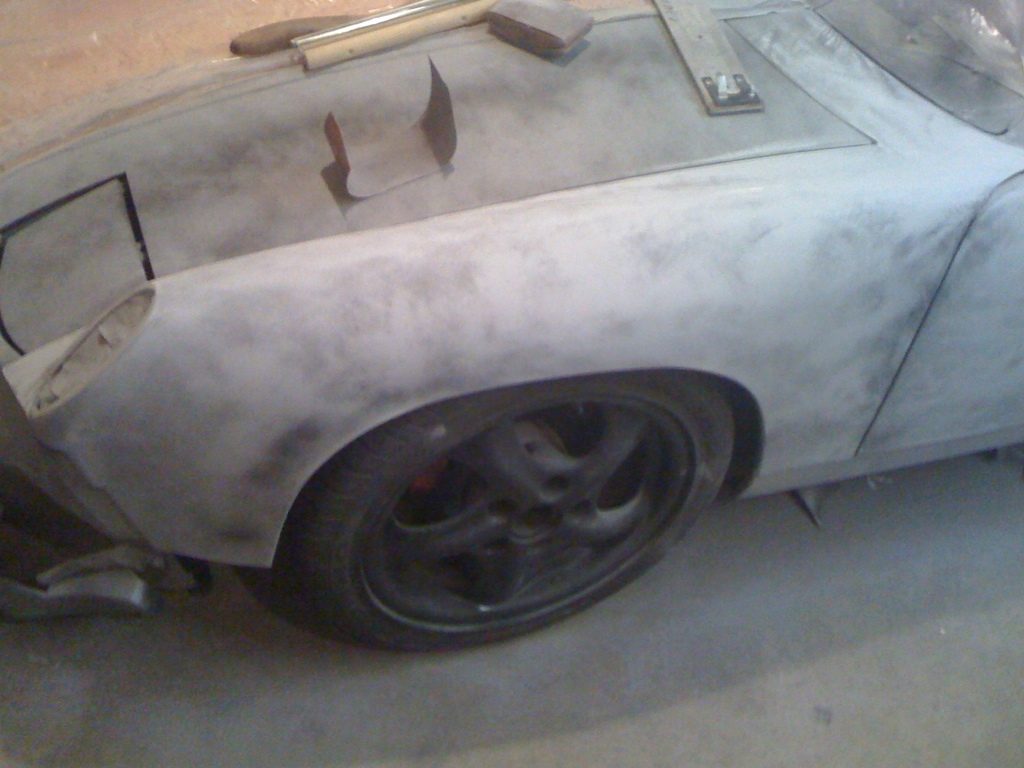
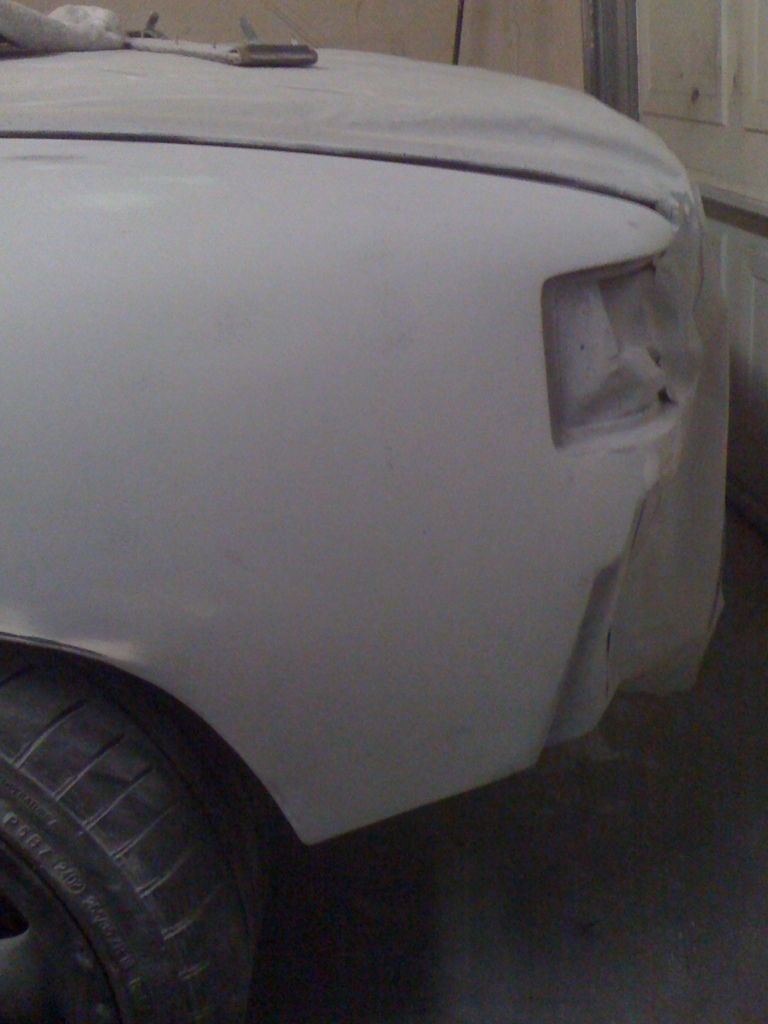
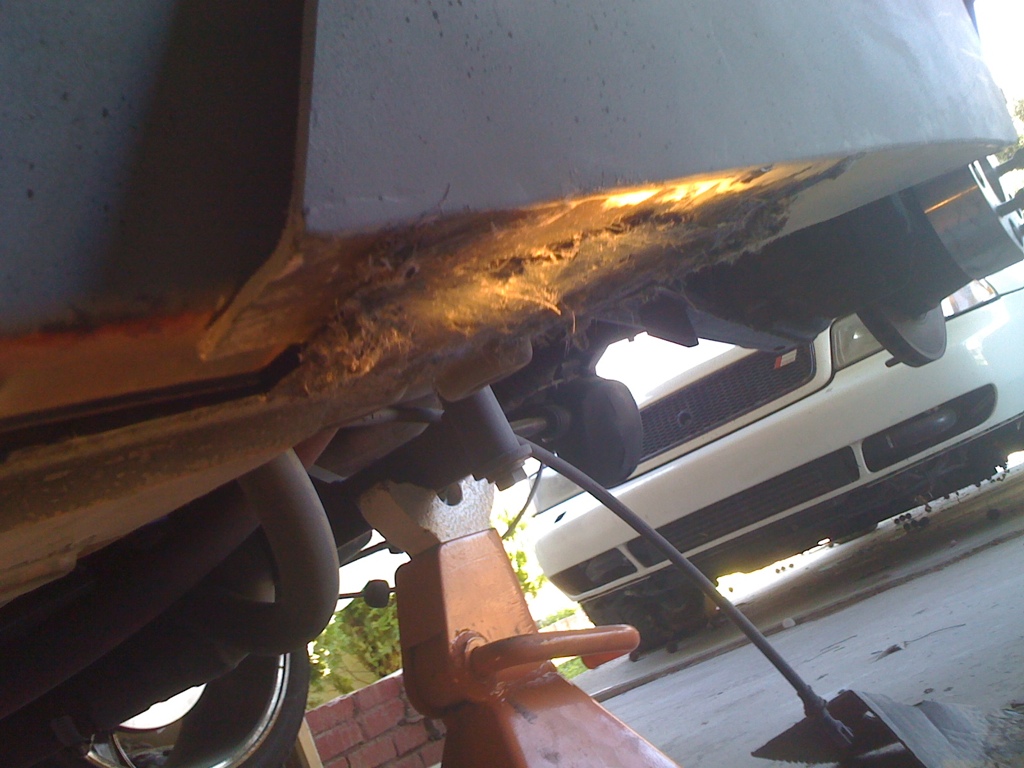
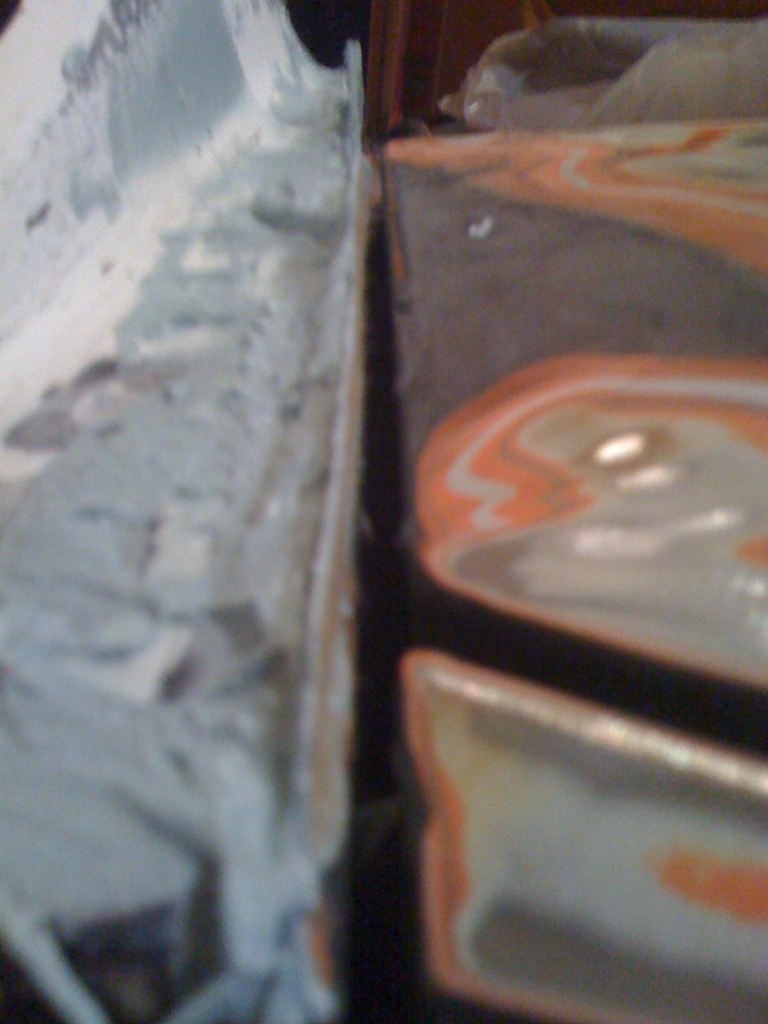
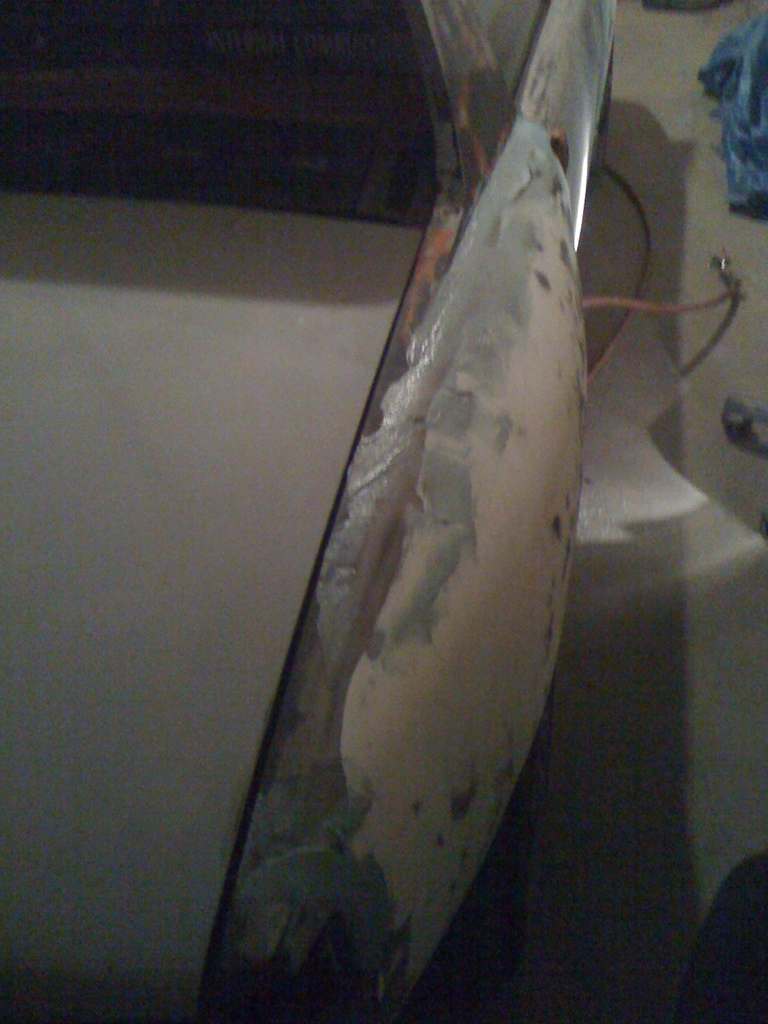
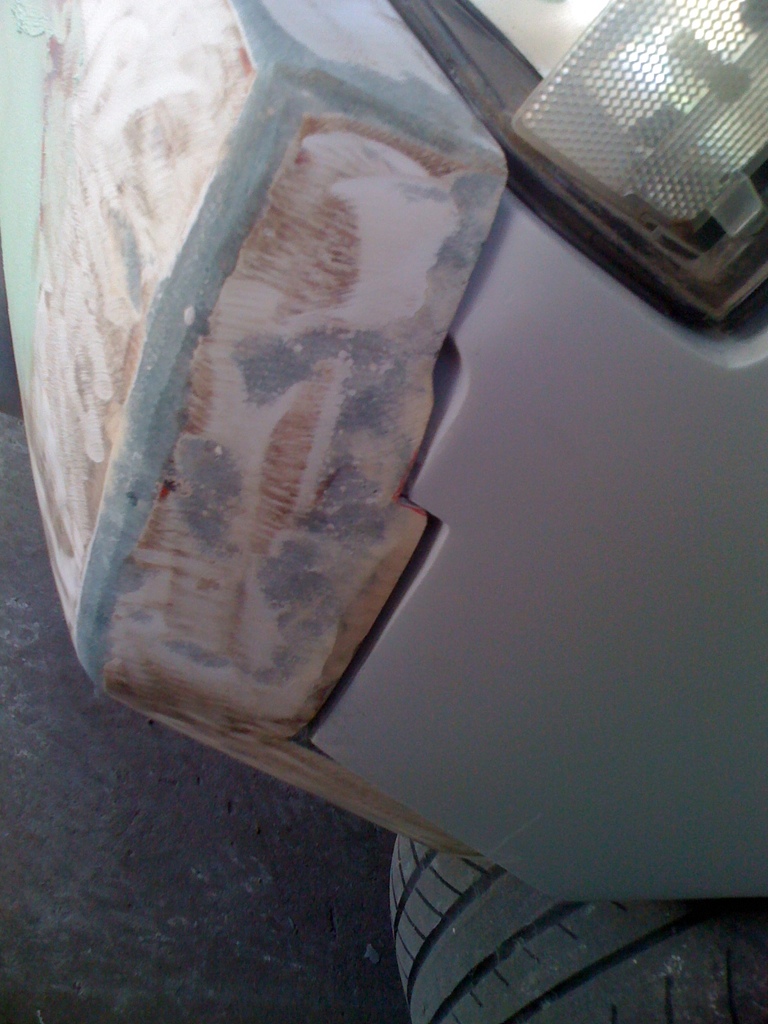
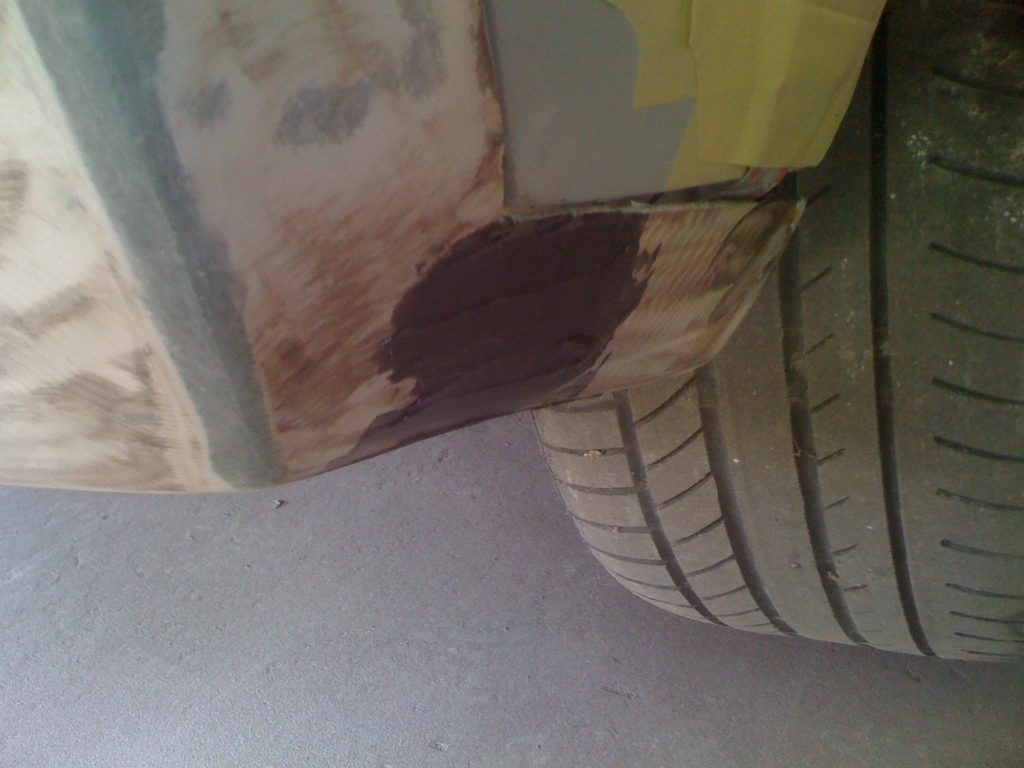
Dr front 1/4 http://www.914world.com/bbs2/index.php?s=&showtopic=114780&view=findpost&p=1424229 http://www.914world.com/bbs2/index.php?s=&showtopic=114780&view=findpost&p=1425834http://www.914world.com/bbs2/index.php?showtopic=114780&st=40#
Dr door http://www.914world.com/bbs2/index.php?s=&showtopic=114780&view=findpost&p=1424229http://www.914world.com/bbs2/index.php?s=&showtopic=114780&view=findpost&p=1425834[/url]http://www.914world.com/bbs2/index.php?showtopic=114780&st=40#
Rocker pannels *5-7-11*
Dr rear 1/4 http://www.914world.com/bbs2/index.php?s=&showtopic=114780&view=findpost&p=1424229http://www.914world.com/bbs2/index.php?s=&showtopic=114780&view=findpost&p=1425834[/url]http://www.914world.com/bbs2/index.php?showtopic=114780&st=40#
Trunk http://www.914world.com/bbs2/index.php?showtopic=114780&st=40&gopid=1429421&#
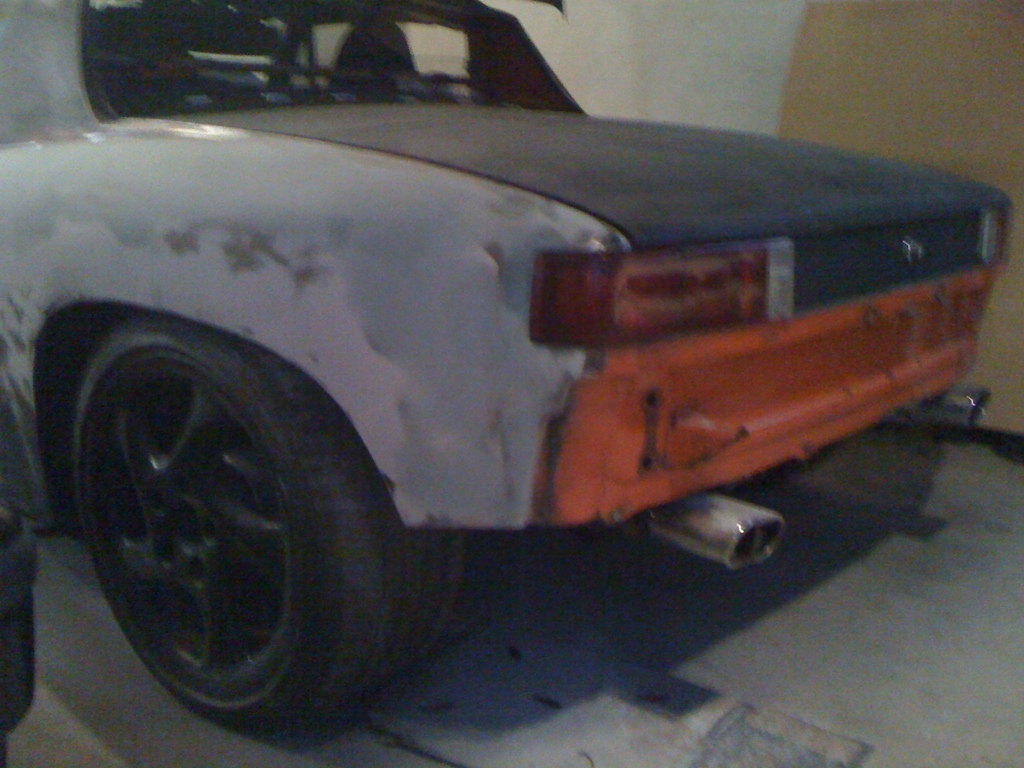
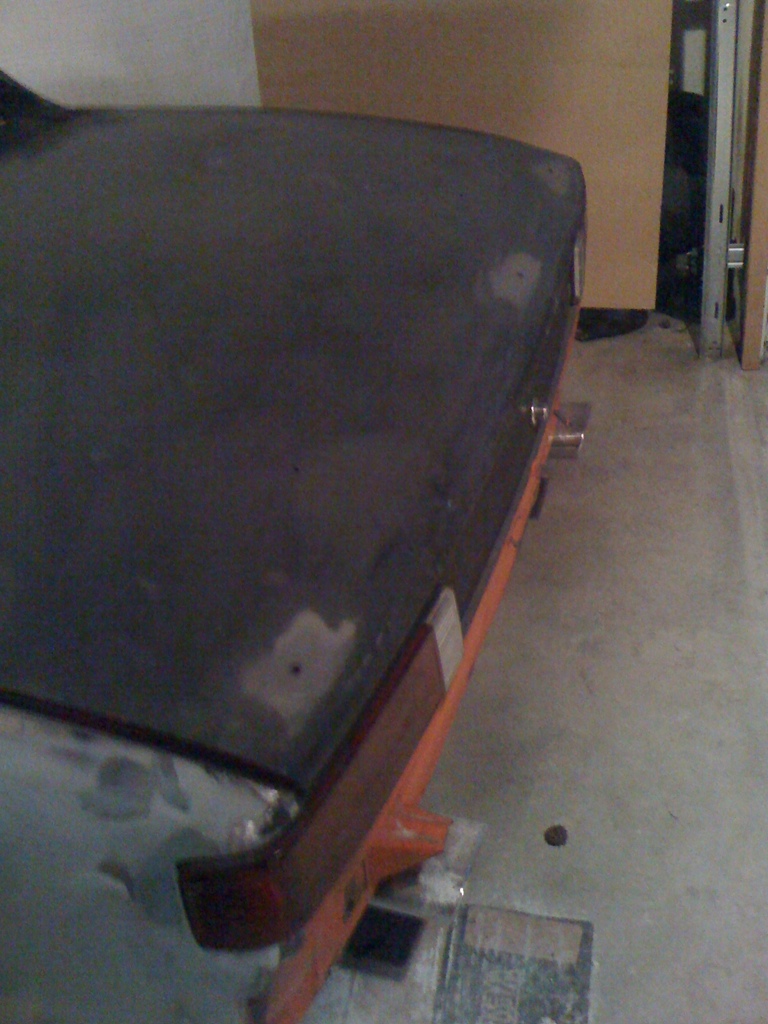
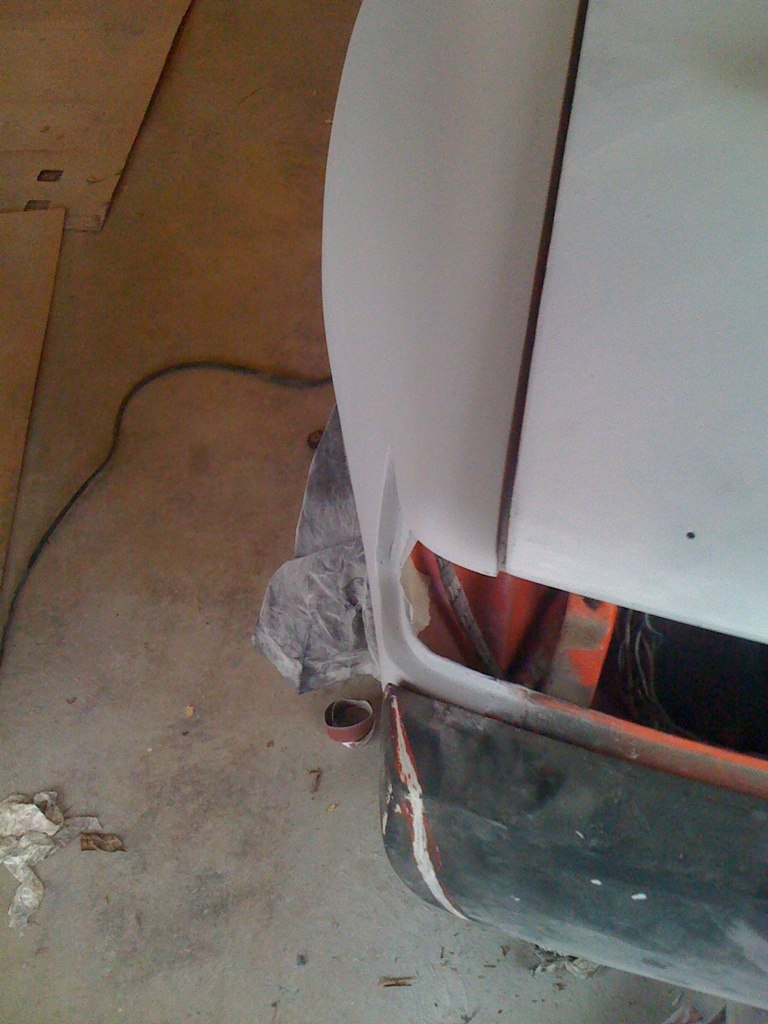
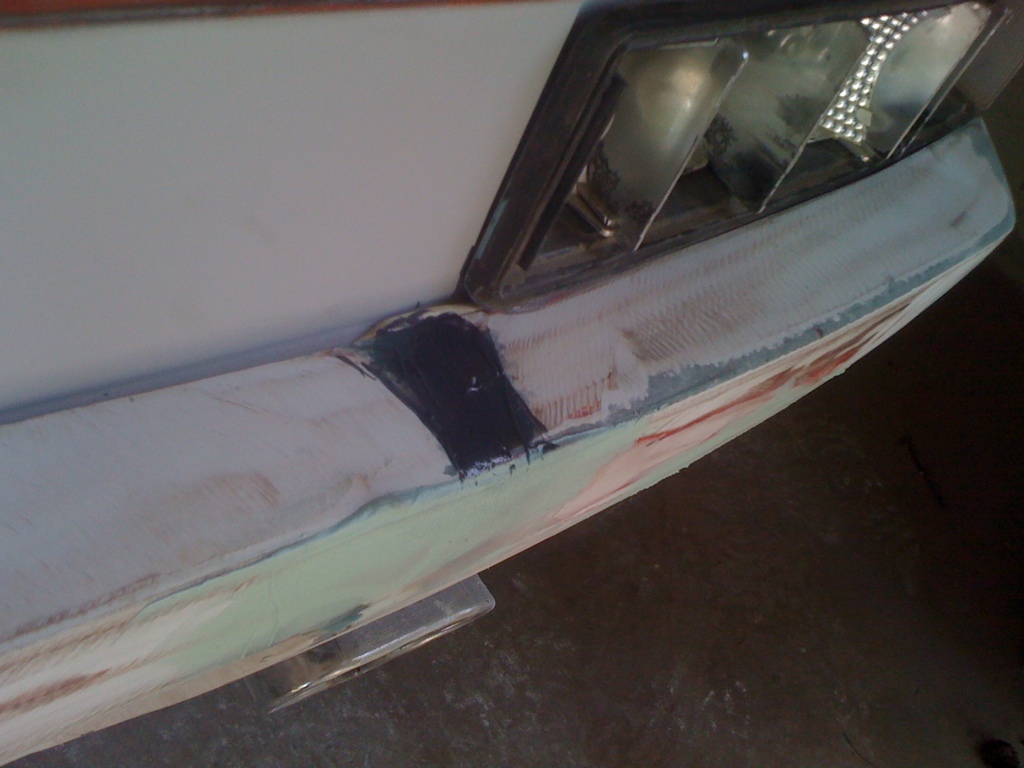
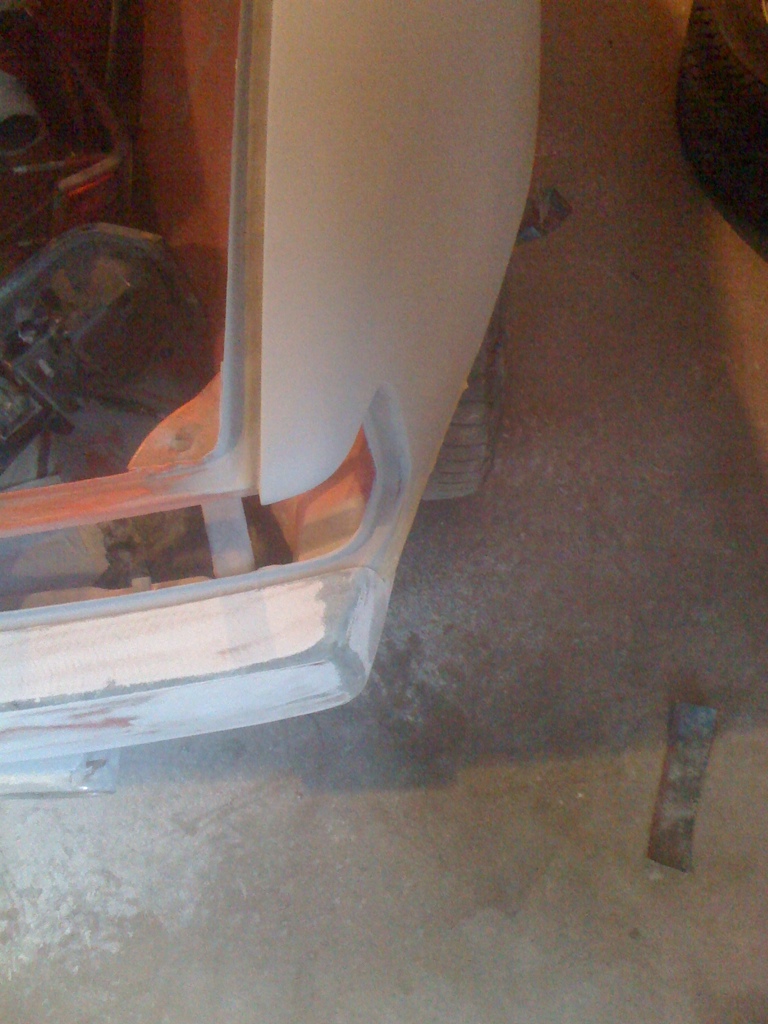
Rear bumper *Page 8*
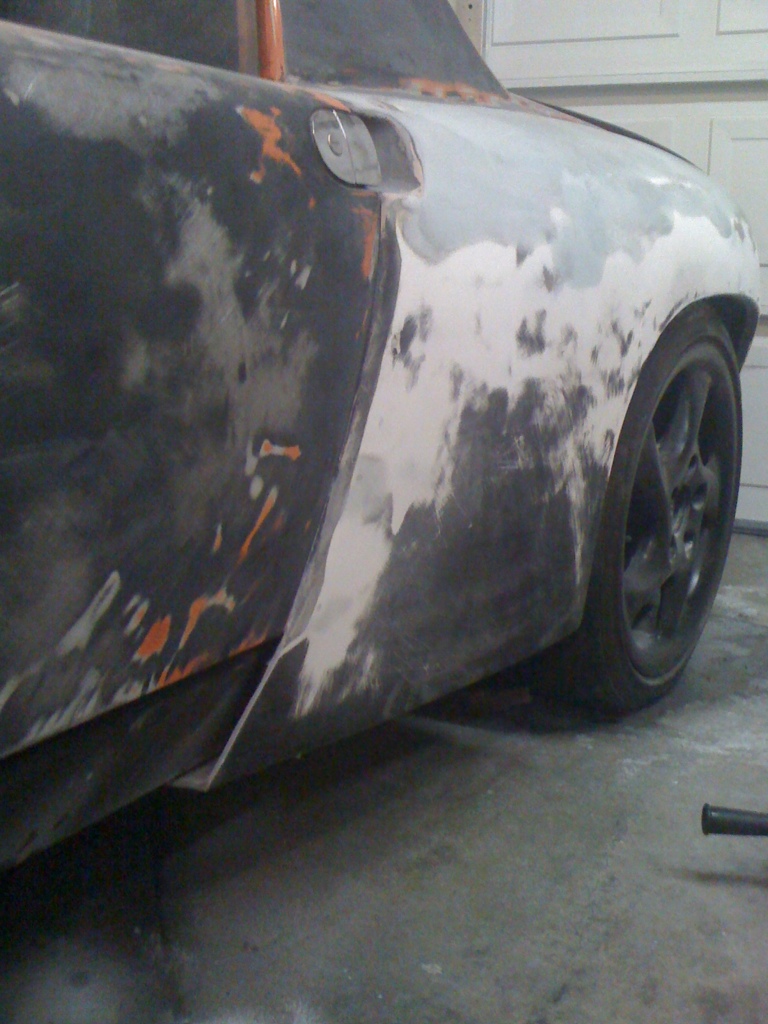
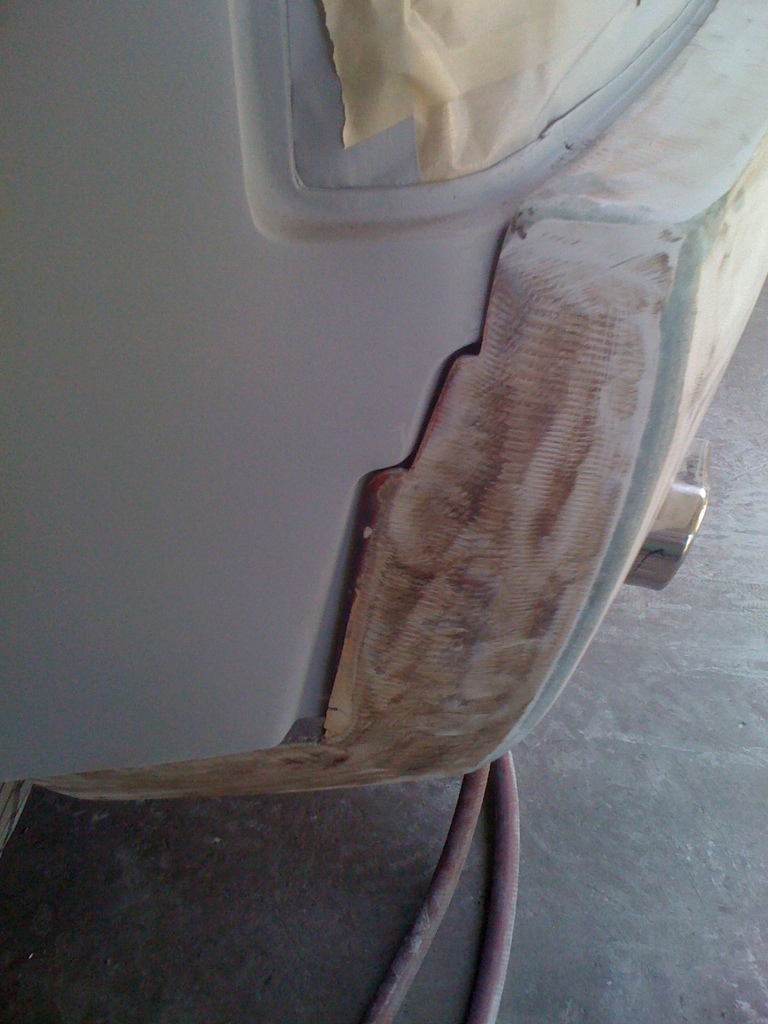
Pass rear 1/4 *4-17-11*
Pass door *4-17-11*
Pass front 1/4 *4-17-11*
Front bumper *5-5-11*
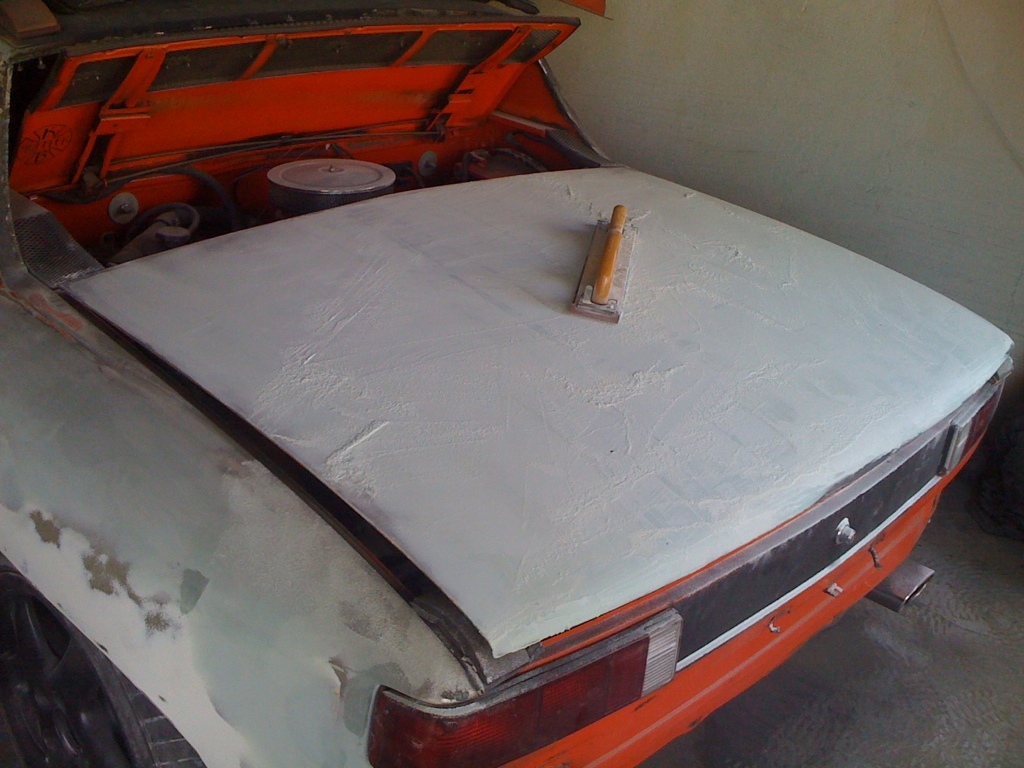
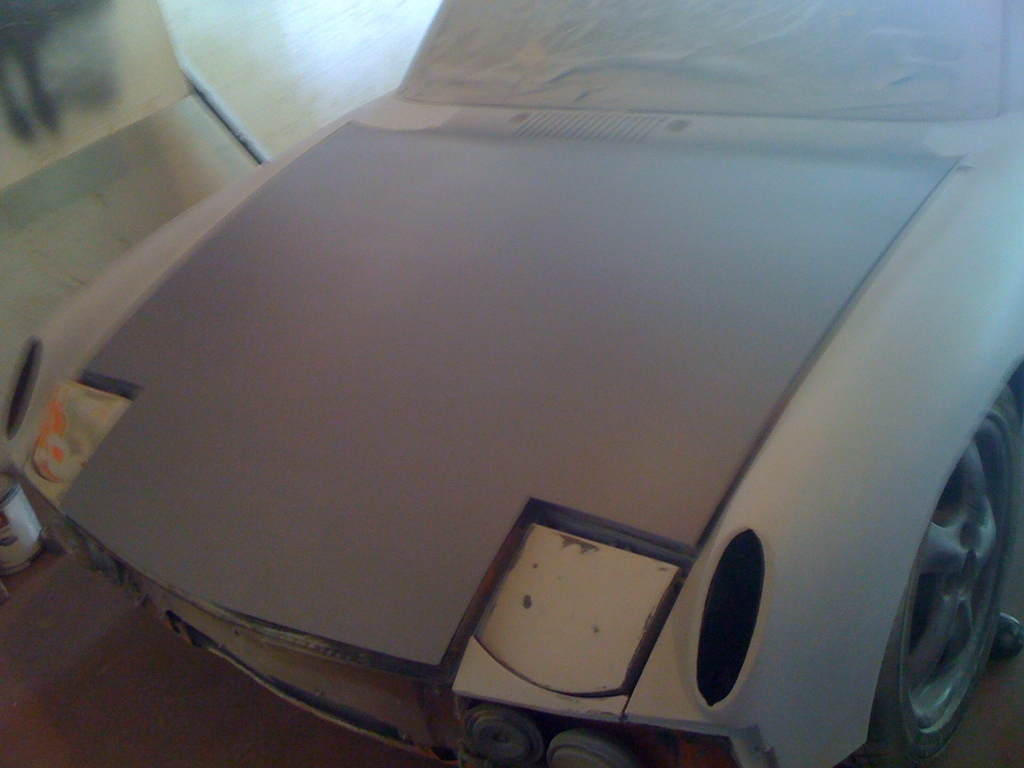
Hood *Primer 5-2-11* *Paint 5-15-11*
Top *5-4-11[url=http://www.914world.com/bbs2/index.php?showtopic=114780&st=120#]
Primer sealer *5-15-11*
Paint *5-15-11*
Radiator cutouts in wheel well (And replace hood with stock) http://www.914world.com/bbs2/index.php?s=&showtopic=114780&view=findpost&p=1422955
Fix headlights *6-8-11*
Fix horn
Finish seat install http://www.914world.com/bbs2/index.php?showtopic=114780&st=0&gopid=1420224&# http://www.914world.com/bbs2/index.php?s=&showtopic=114780&view=findpost&p=1422955
Finish carpet *6-8-11*
Finish front sway bar
Fix Dr Door handle
Posted by: Andyrew Jan 19 2011, 01:04 PM
Posted by: kg6dxn Jan 19 2011, 01:26 PM
AWESOME! 
I want you to drive and enjoy. You going to buy a wrecked Audi or Passat?
I do hope I get mine running first!
Posted by: Andyrew Jan 19 2011, 01:37 PM
At this point its either... Im even entertaining alternate engine swaps...
But I really want a trani swap.
Its all about what I stumble upon... Heck my friend has a slew of Honda B18's.. I've been thinking to myself "Just for the heck of it, could I put a honda engine in with the radiator in the fender and have both trunks? "
However I still think the best setup is the 2.8 v6 with trani swap...
Alas, that is another thread for another day...
Posted by: underthetire Jan 19 2011, 01:41 PM
Going to be one hell of a ride 
I'm thinking GM ecotech for an engine swap myself.
Posted by: pt_700 Jan 19 2011, 01:49 PM
will be following this with great interest as i plan on doing a similar swap myself someday. have a bunch of the rod simpson hybrid kit pieces but, got stupid and married and bought house before i finished. upgraded brakes / suspension are my future acquisitions.
how do you like the f.i. setup you're running? what kind of gas mileage you getting? what engine swap kit did you use?
paul
Posted by: Andyrew Jan 19 2011, 02:18 PM
F.I setup: Its actually a pretty great unit, HOWEVER it doesnt do programing on the fly (while running). So basically any tuning changes you make to the map have to be made while the engine is off (IE turn it off for 15 seconds then restart). This may not seem like much, but when your used to changing a cell until it is performing the way you want and move to the next cell, its a PITA and causes for much longer tuning times. That being said my dad uses this fuel injection setup on his BB 72 El Camino SS.
He gets 15mpg on a good day. I think I tracked 17-19mpg highway. The issue was RPM's. When your cruising at 3.5-4k rpm's you just cant get good gas milage. If I was at 1700rpms at 65mph I could probably get 25+
What I will say that the fuel injection gave me was a WHOLE LOT more power. Realistically ~75-100tq at low RPM and ~ 50hp. I previously had the car dyno tuned at 245whp and 275wtq on a 600 carb. The difference in power was night and day. When I hit the gas in second gear now I just light up the tires.
Alas this is one of the reasons why I want to go with a different engine. In order for me to enjoy this engine It would have to make 10 more MPG and have ~ 100lbs of tq less. Right now it feels to powerful for me to take comfortably through the mountains and rip it up. Sure I could control it with my right foot but whats the fun in driving flat out when flat out is 25% throttle? Anything more than that and the back end wants to come around.
Posted by: shoguneagle Jan 19 2011, 05:59 PM
WHAT???? YOU HAVE NOT BEEN WORKING OR DRIVING "MY CAR" FOR THE LAST FIVE YEARS???? I LEFT IN YOUR CARE WITH THE UNDERSTANDING YOU WOULD WORK ON IT AND DRIVE IT!!!!
I am leaving today with the trailer to pick it up and take it Home!!!!
![]()
![]()
![]()


Just kidding. I will be in California sometime this summer and will stop by to visit you. I am going to follow your thread with great interest for any changes, working on it, and driving it.
It seems other priorities take place and push our car projects down the line.
Take care and great to see you still have the 914.
Steve Hurt
Shoguneagle
Posted by: SGB Jan 19 2011, 07:05 PM
Sounds like a rocket.
You should look at Tangerine Racing's trailing arm stiffening too, I think...
Posted by: arkitect Jan 19 2011, 09:16 PM
Andrew,
Go with a Audi engine like you want, don't settle for something else. A deal will bound to come your way, just need to keep looking.
Dave
Posted by: Andyrew Jan 20 2011, 01:24 AM
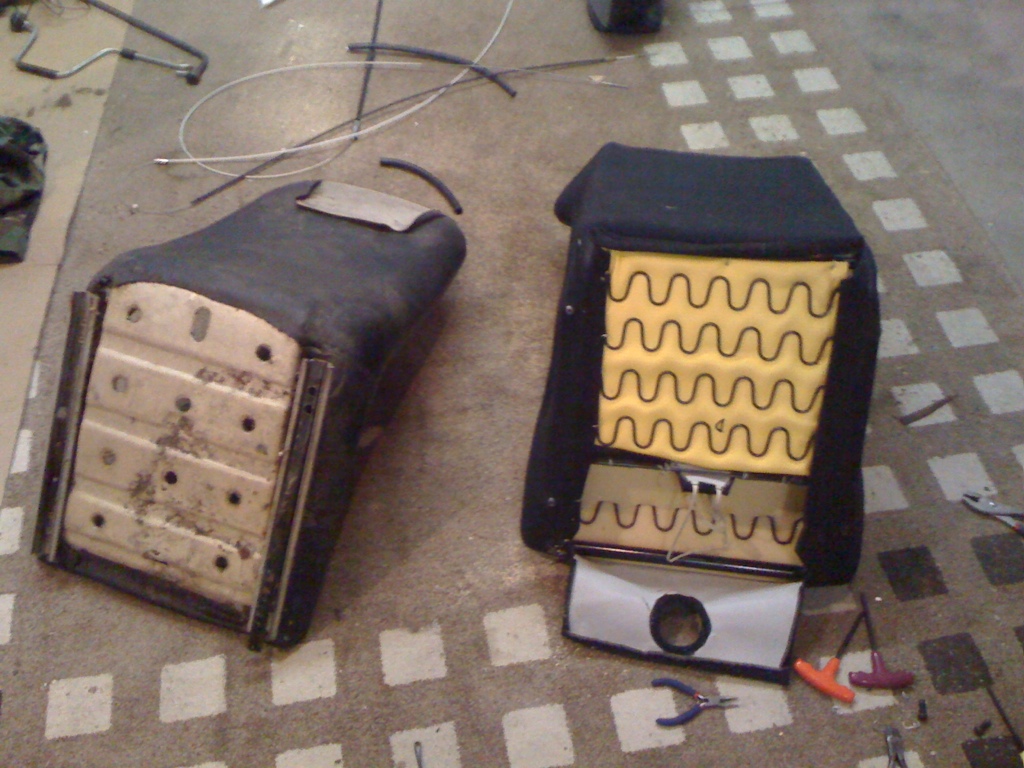
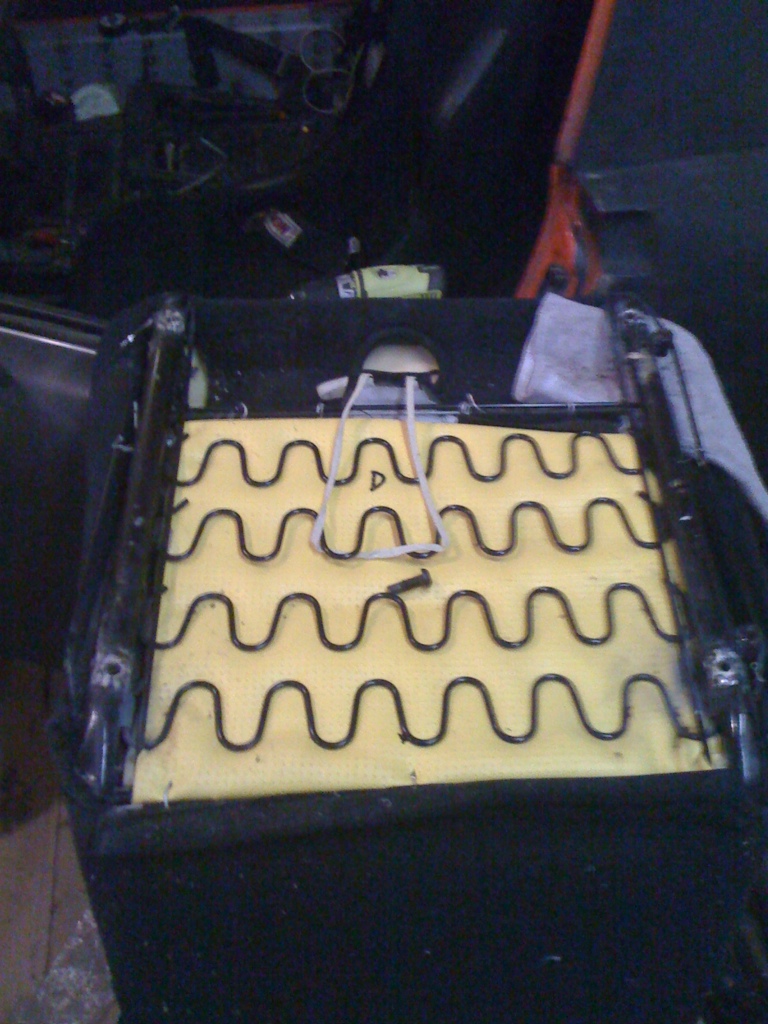
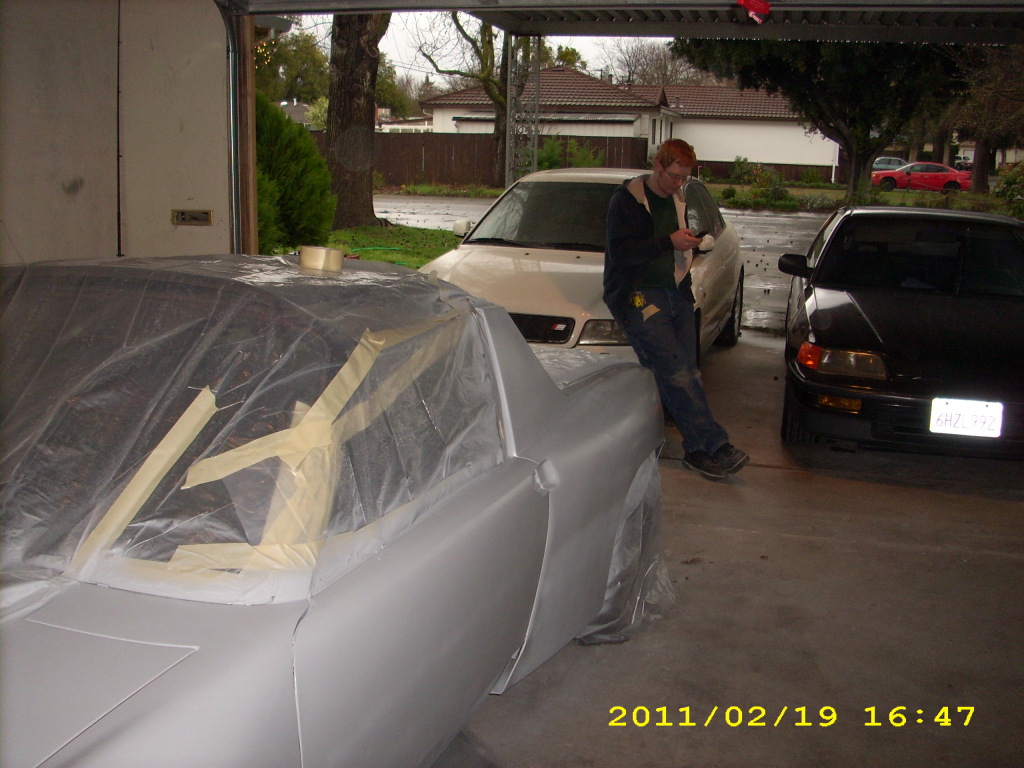
Got some progress done on the Pass side seat.
The drivers side seat I mounted with the provided sliders and removed the 914 bracket alltogether. The passenger seat where height isnt as big of an issue, I customized the seat mount and rewelded the mounting holes to use the 914 seat. Similar to rdauenhauer's in my "Pep Boys Seat" thread (link in first post).
Almost finished the seat, but I couldnt find my step bit for enlarging the holes on the 914 slider, I tried ovaling them out but ran out of time. Tomorrow maybe?
Here is a pic of the results and a link to the pictures.
http://s1210.photobucket.com/albums/cc411/andyrew914/914/1-19-11/
Posted by: ernestj911@gmail.com Jan 21 2011, 12:54 PM
This is a great 914 one the inspirations for me to get into these conversions. If you want more manageable power, then the easiest thing to do would be to put in a all Aluminum LS 5.3 GM engine. Your talkin 300hp. less 80-100bls. and fuel injected. Then when you are itching for more power, these things love mods, heck you can go 500 with this engine. Best of all you can find them for $500 bucks. You could have this thing running over a weekend. Then when you are board, bolt up that Audi transmission.
Posted by: Gint Jan 21 2011, 08:20 PM
Is it done yet? 
Posted by: Andyrew Jan 22 2011, 02:08 PM
Nope, Very little going to be done today... I got roped into helping my GF setup for her best friends baby shower, AND I have to help during the shower tomorrow...
Yesterday we went to the snow.. So pretty much this weekend is a wash, but I was expecting that. Monday i'll hit on it again and finish up the seat, then possibly work on something else.
Posted by: Andyrew Jan 25 2011, 01:19 AM
No progress tonight on the 914, however I did spend way to much time installing a front motor mount on the CRX.
The car has traction bars (PO) and the traction bars didnt give any provisions for a front motor mount.
Been driving the car for months without a front motor mount and changed all the other motor mounts, but still the motor clunked around.
I got a front motor mount and have been meaning to install/weld in provisions for it but never got around to it. After installing my garage door a couple weeks ago I just happened to stumble upon some 1" x 3/16 extra bar that I could use. So scouring the bolts and modifying the incorrect front motor mount so it fit, I spent about 3 hours and got it all welded up. (ran out of welding wire as well...)
TOMORROW, I will get some work done on the 914...
The CRX is now ready for an autox if I so feel it.. Yay!
Gratuitious pic..
Posted by: Andyrew Jan 26 2011, 11:16 PM
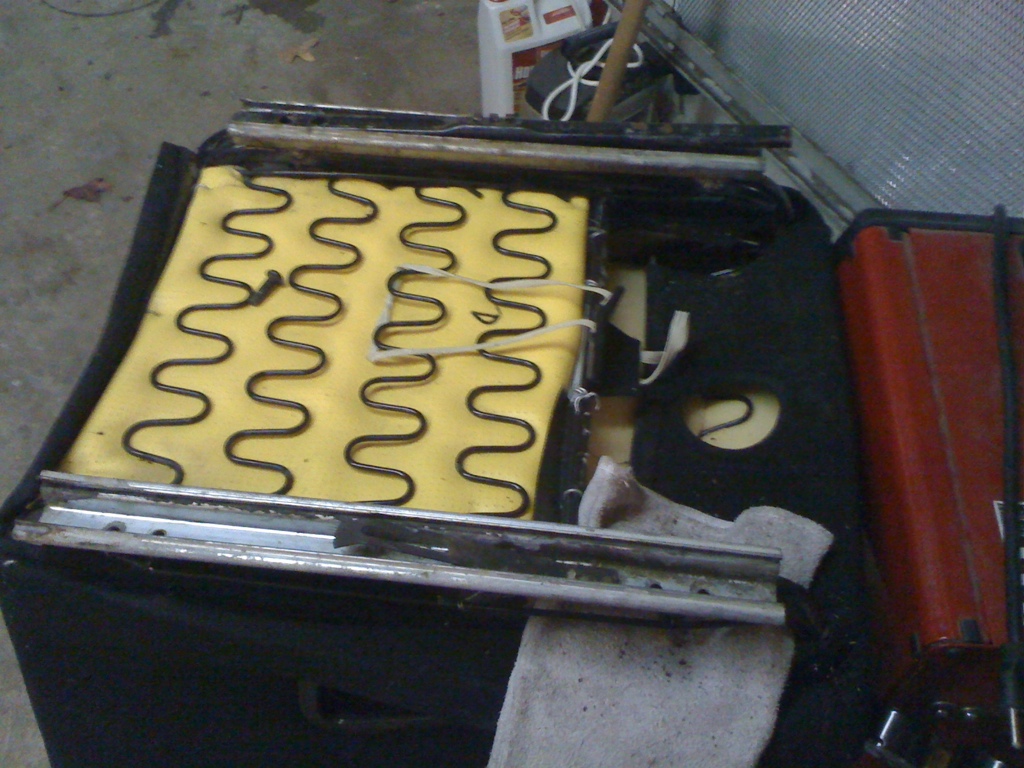
Finished the seat install!! I actually did most of the remaining fitting and reworking during lunch and got to the point of bolting it on before I had to leave lunch. I bolted it on when I got home and took a gratuitous pic for yall! Interior is starting to come together slightly! Just need to order (or make...) a carpet kit now. 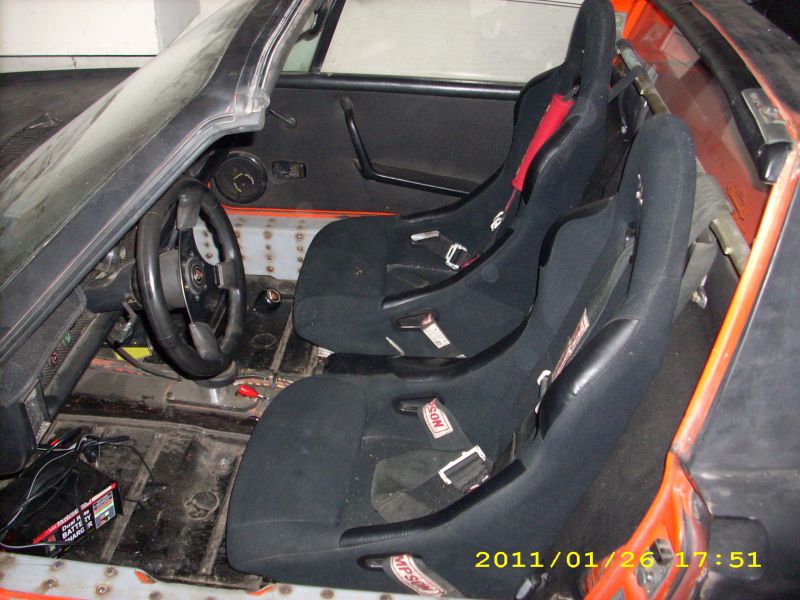
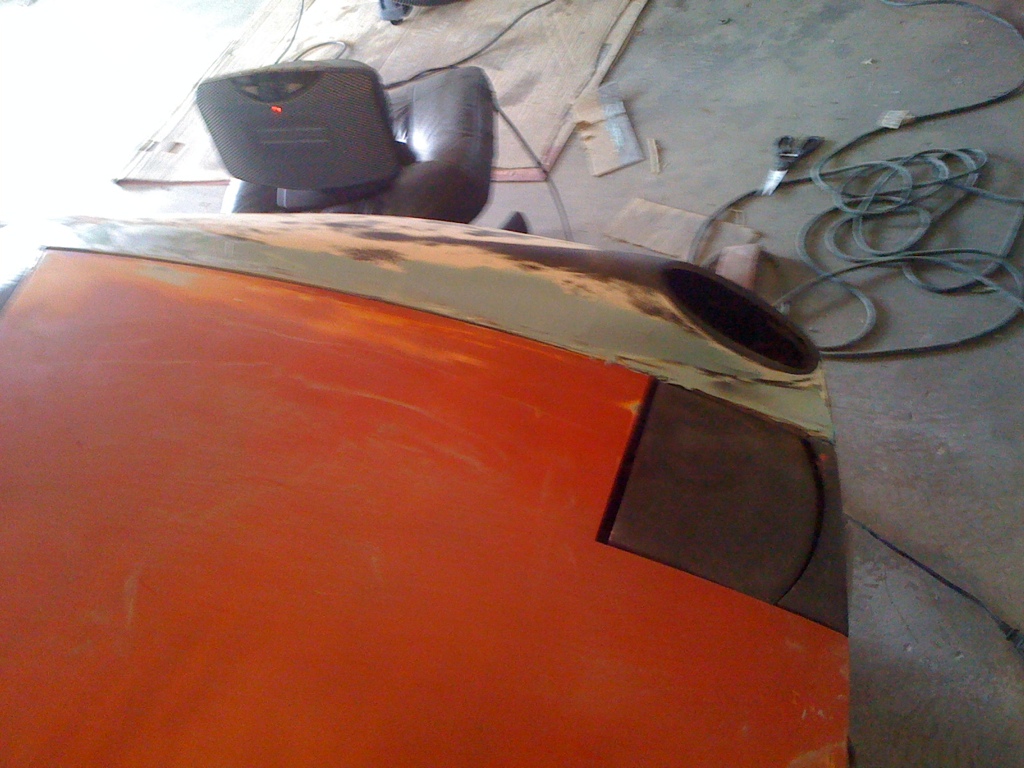
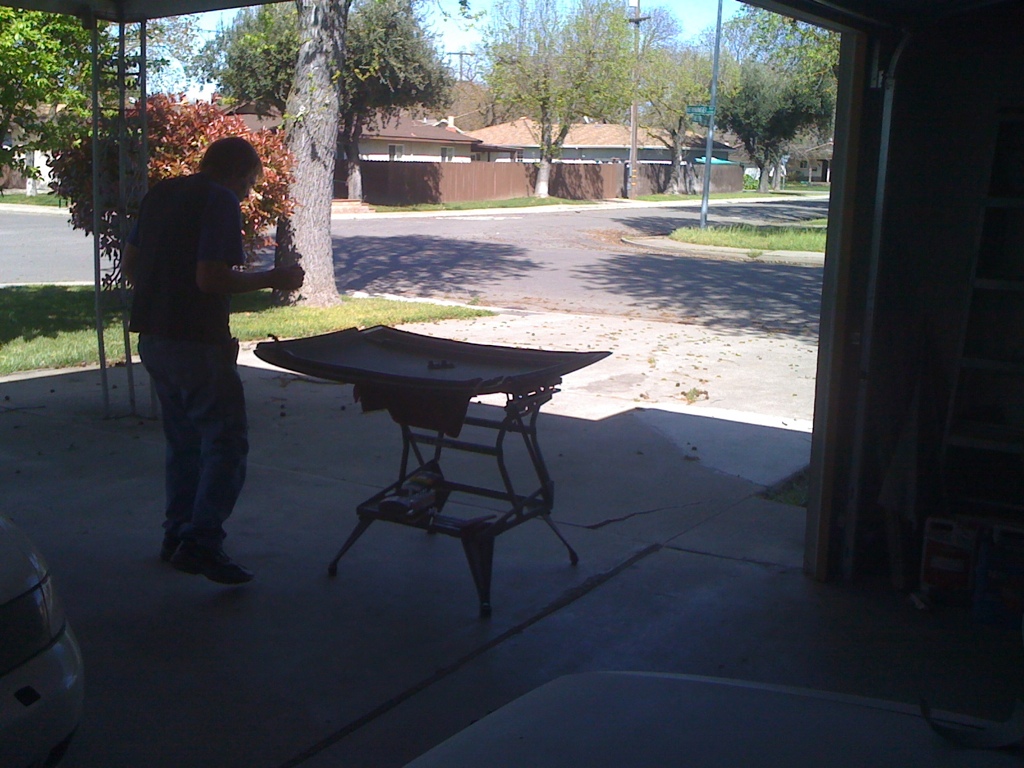
Next on the list was the water pump came in! So I jacked up the rear and put it on stands. Unfortunately I havent put in a drain petcock in the lowest point of the water system yet.... So I tried to pull one of the hoses off, but I could only get it open just a little bit with a screwdriver and let it drain.. In the meantime Dad brought over my stock hood and we decided to get to cutting the wheel well out. Couldnt find a template or anything to go off of, so I just started cutting 
Passenger side is smaller and both sides need finish touch up, but i'll get that finished when i do the bodywork on the hood. We installed the original hood and relined it up the best we could. 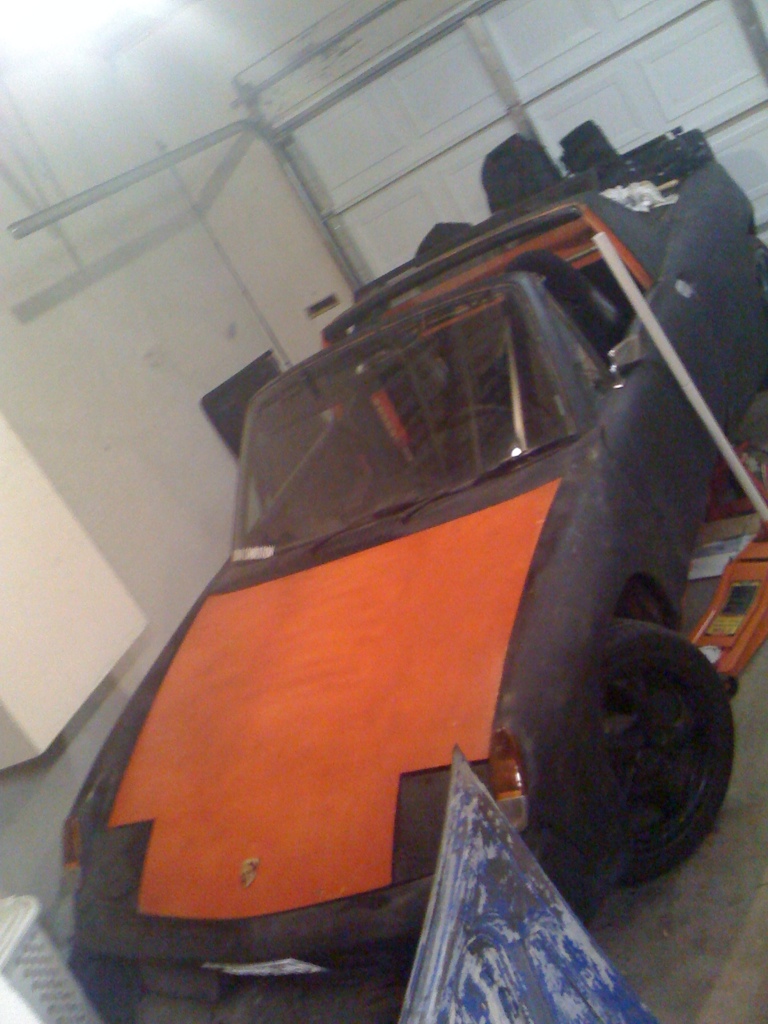
So ends today. I'll let the water keep dripping overnight and maybe get some work done tomorrow.
Posted by: Lennies914 Jan 26 2011, 11:22 PM
Looking good Andrew. Is that an orange band badge on the hood?
Posted by: kg6dxn Jan 26 2011, 11:39 PM


Posted by: Andyrew Jan 27 2011, 12:26 AM

Looking good Andrew. Is that an orange band badge on the hood?
No, its actually a newer style badge. IIRC, I actually have a new orange band badge in a box somewhere. I ordered it a while ago and they sent me the wrong one, told them and they gave me the new one free. IIRC (This was like my first purchase... 7 years ago?)
Posted by: Justinp71 Jan 27 2011, 12:38 PM
Lookin Good!
Posted by: Andyrew Jan 27 2011, 02:21 PM
Thanks!
Progress from lunch today.
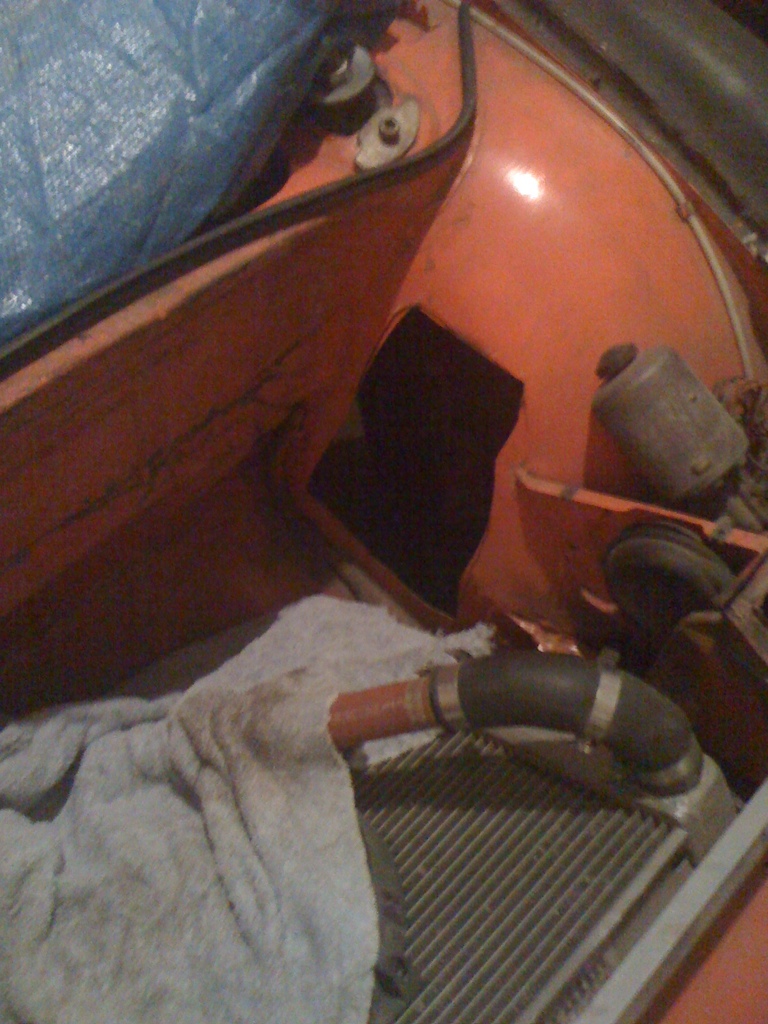
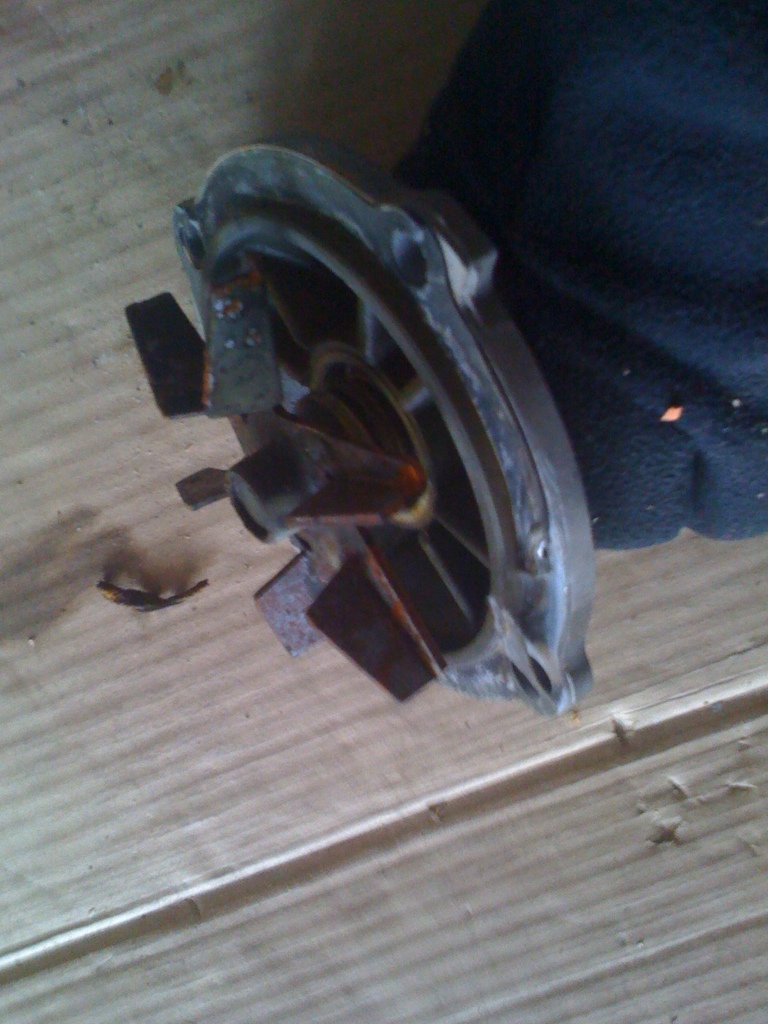
All radiator lines attached to the pump were removed. Pump was loosened and the belt was removed.
I have determined that I need to remove the entire bracket and pump to be able to remove the pump. This is next on the list of things to do. 
Posted by: Andyrew Jan 28 2011, 05:48 PM
Progress from today!
Finished removing the water pump. Looks like the old one was still pretty good! Oh well, I prefer this other design anyways.
Hopefully i can remember how the housing sits, I cant remember right now... The lines should help me figure it out though. 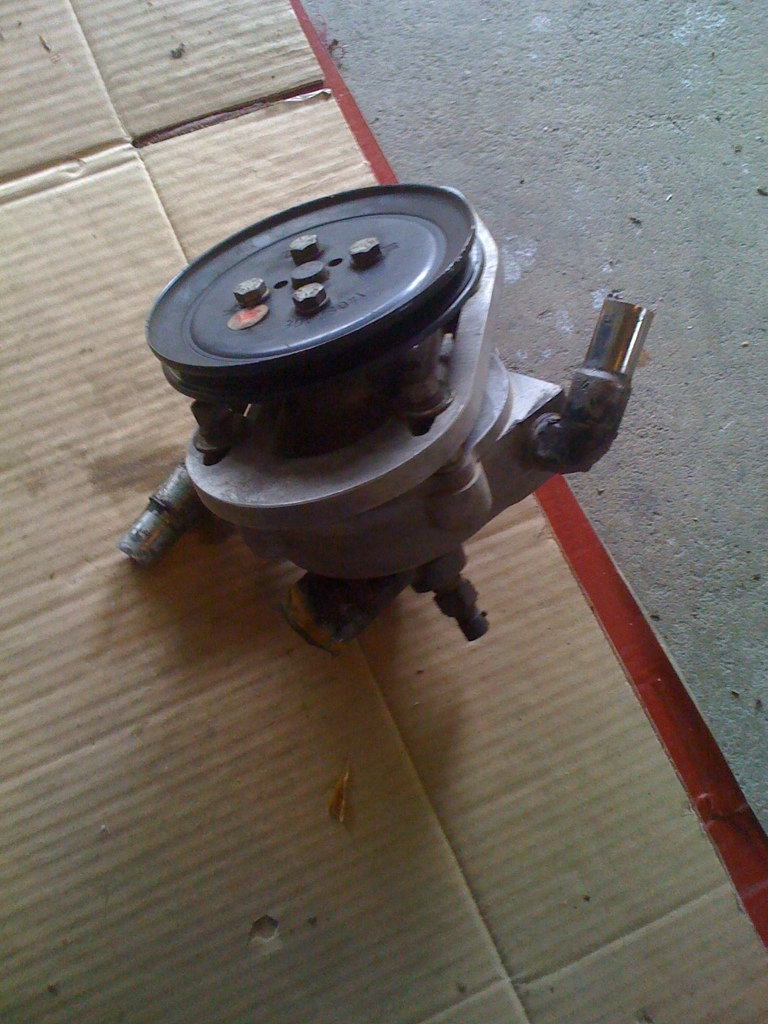
Posted by: matthepcat Jan 28 2011, 07:55 PM
Right on. Just get her driving again, and you will be motivated.
Love your rear fenders and wheel combo.
You should consider swapping to VW bus axles. Should stop your constant replacement. They seem to be holding up well on my 350 conversion.
Posted by: kg6dxn Jan 28 2011, 08:25 PM
It looks like nothings wrong with that pump. Most Mopar pump use thinner stamped steel blades. What's the plan with the pump?
Posted by: Andyrew Jan 28 2011, 11:16 PM
Replace it anyways. Its the pump that came with my kit and i was unsure of its condition. Ill just replace it with the cast unit and keep the old unit as a spare.
Matt, funny, i had some bus axles but couldnt find anyone who had the adapters for sale. Thanks for te compliment on the wheels!
Posted by: Andyrew Jan 29 2011, 07:56 PM
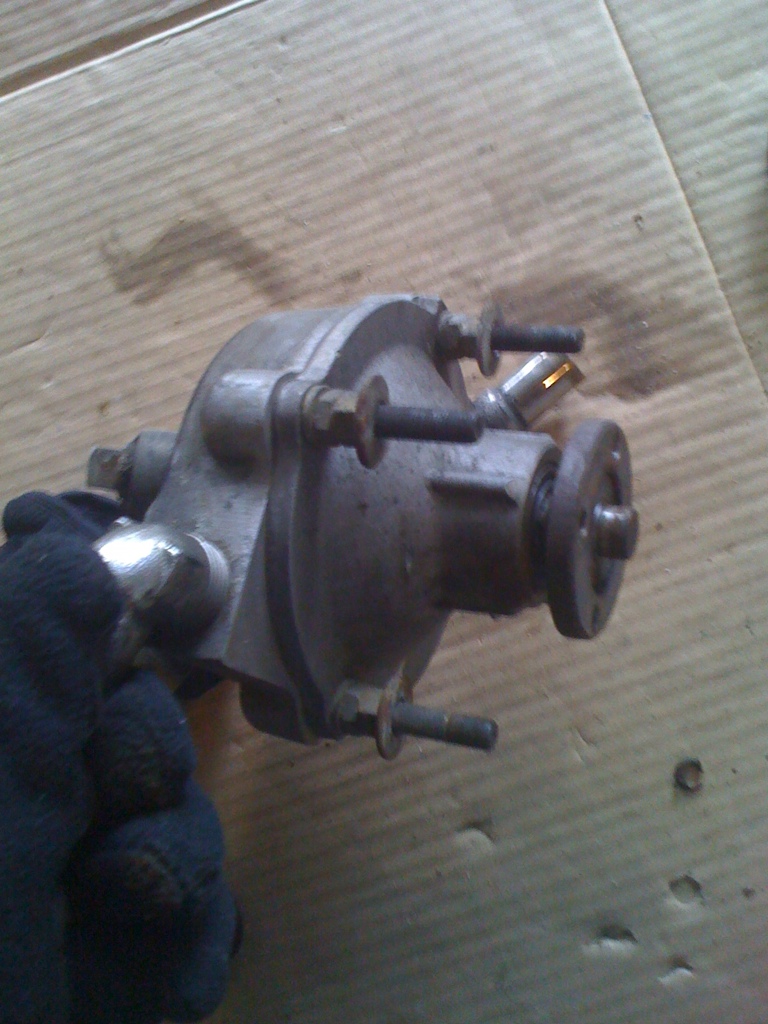
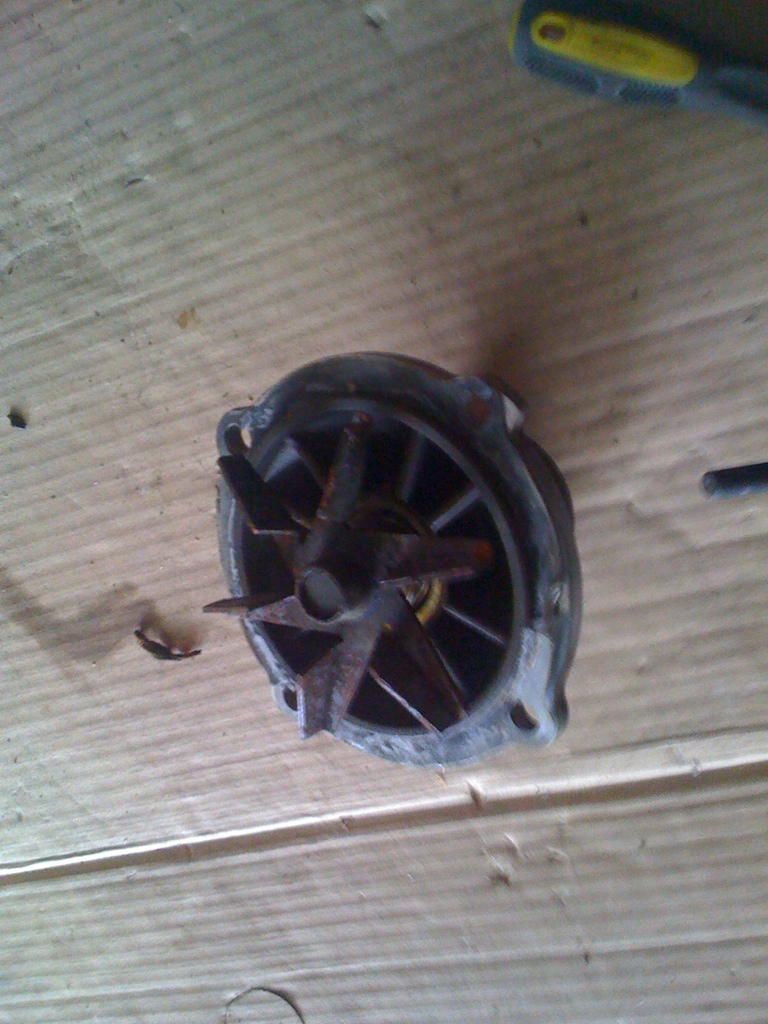
Progress so far today. Been working since 9am, unfortunately things would have gone a lot easier if the water pump wasnt giving me problems the whole time... I shall explain..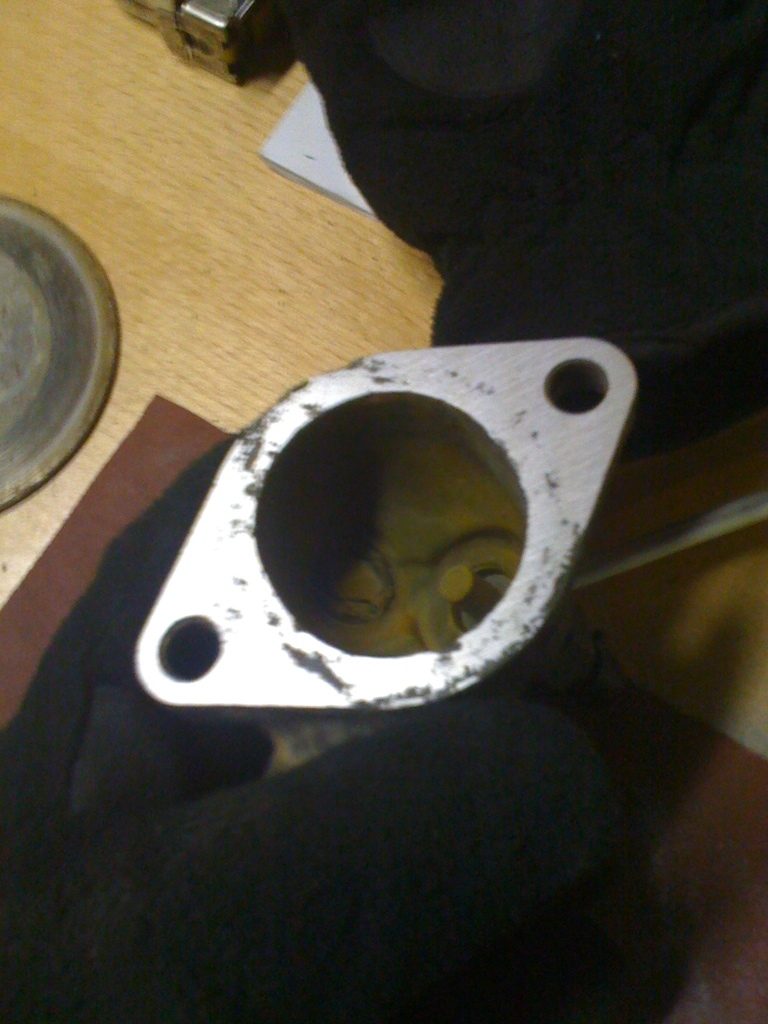
First off I took off every piece so that I could clean everything for reinstall, This piece above was pitted really bad so I took some sand paper on the flat work bench and sanded it down, but as you can see this is about 1/2 way through. 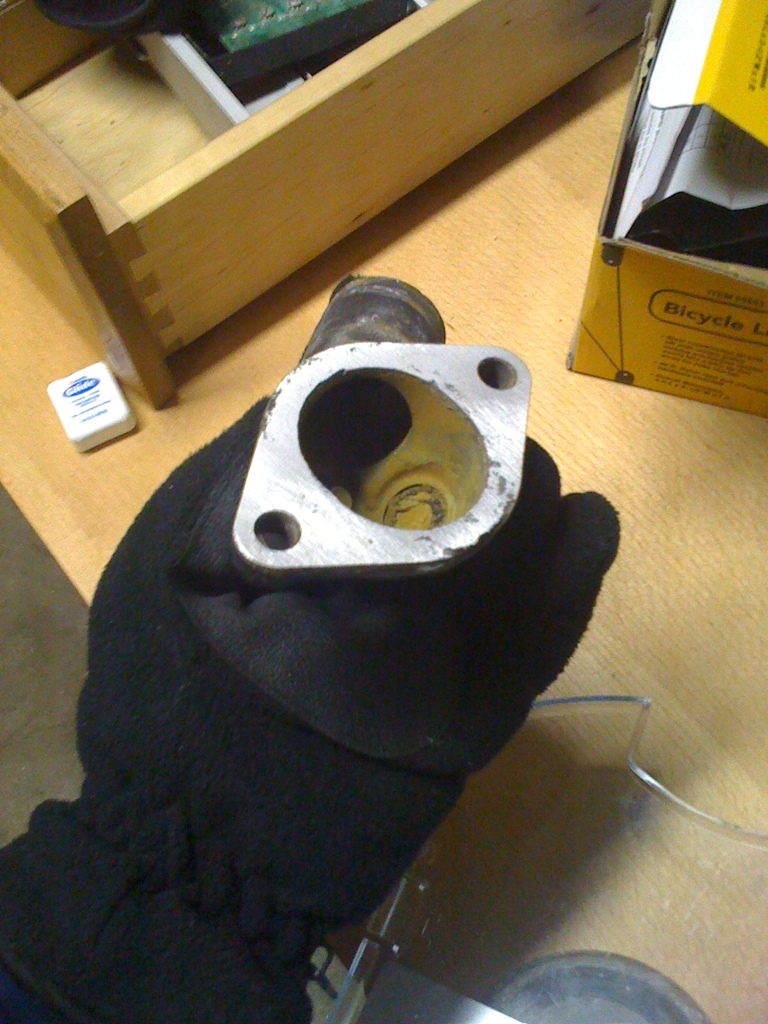
Here is where I said F~ it, its good enough. 
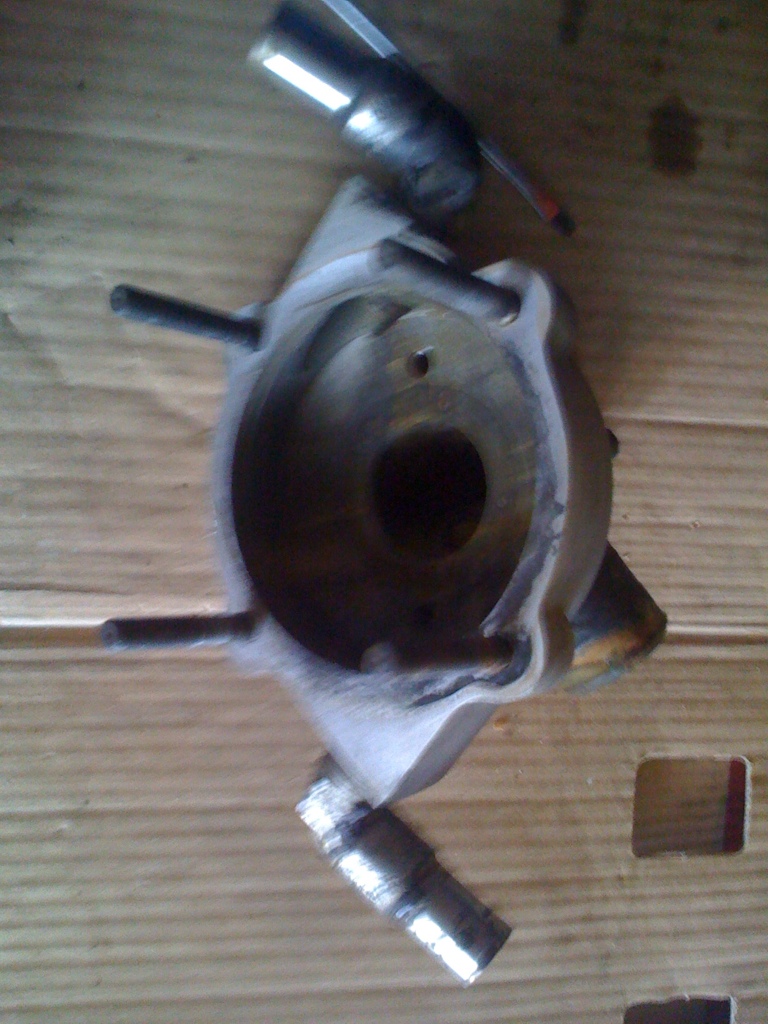
Then I started on the housing, and got it so it flowed a little better.. 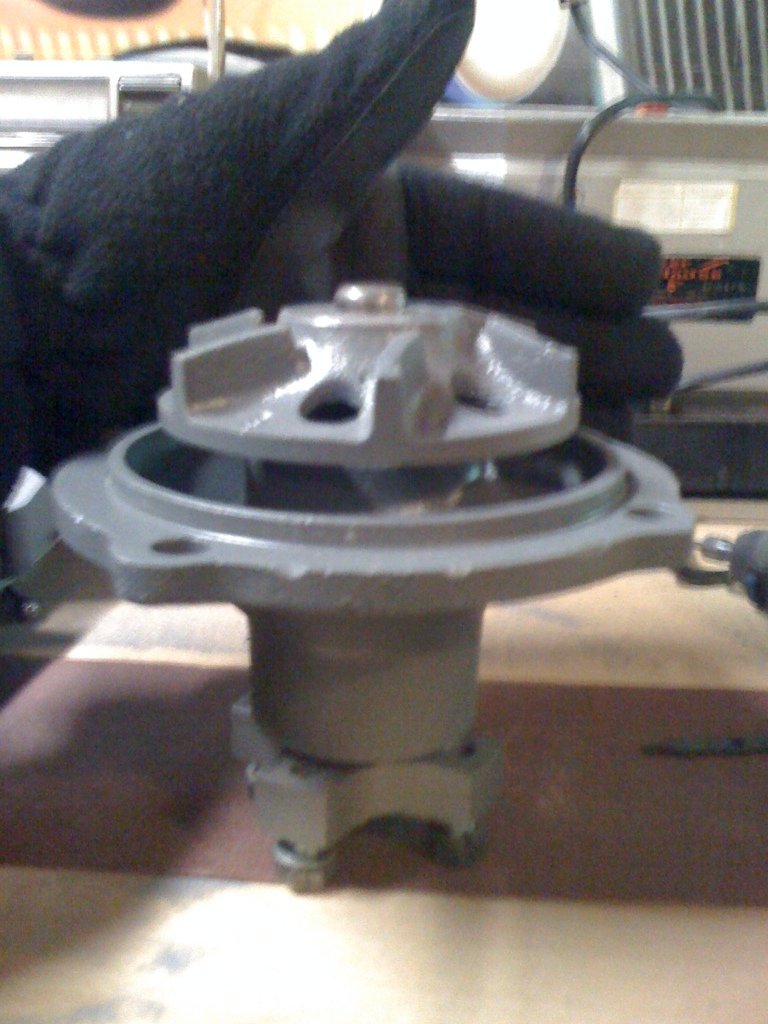
I then went and said OK and put sealant and gaskets and buttoned everything up. However I never checked to see if it spun... This would cause me 2 hours searching for another gasket later... Then when I put the pully on I noticed it didnt spin. Shit. Took it apart and noticed that there was a step in the housing and it caused for the impeller to touch the
housing.. So about an hour or more of grinding on the housing and a little of the impeller it finally fit. 
I decided to put a couple of lips on the pipes to prevent slipage. I also took the dremel and ruffed it up as well(not in photo).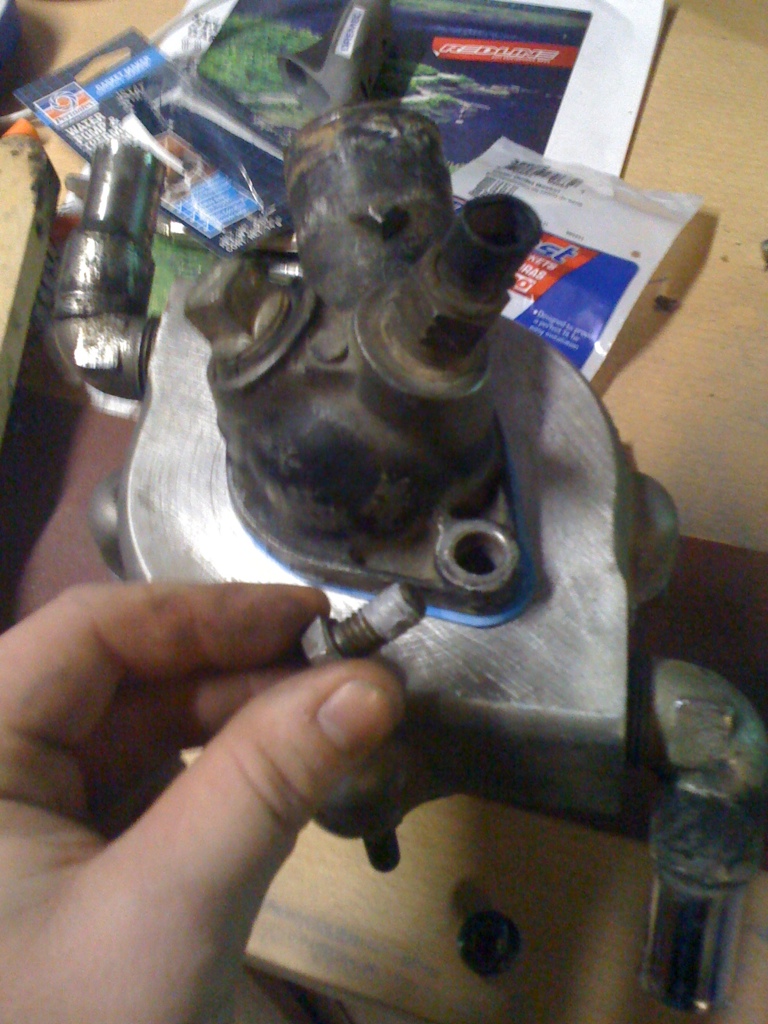
Threw on some silicone on the treads as the bolts go directly into the housing.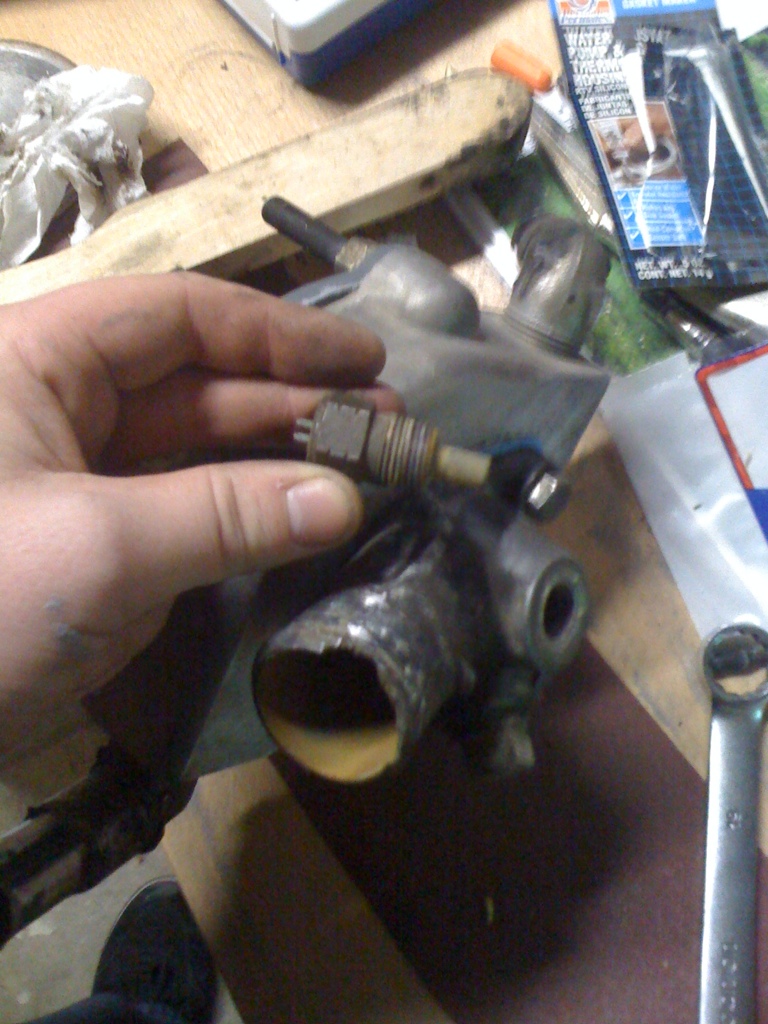
This had silicone on them that had hardened completely (probably 15 years old or more) and needed the impact gun to break loose. Replaced thermostat (ECU thermostat).
So after finding a gasket (2 hours... no one likes MOPARs) I set to get everything back together. Took a couple of tries to get the water pump braket oriented correctly but finally I got it in and installed.

Completed unit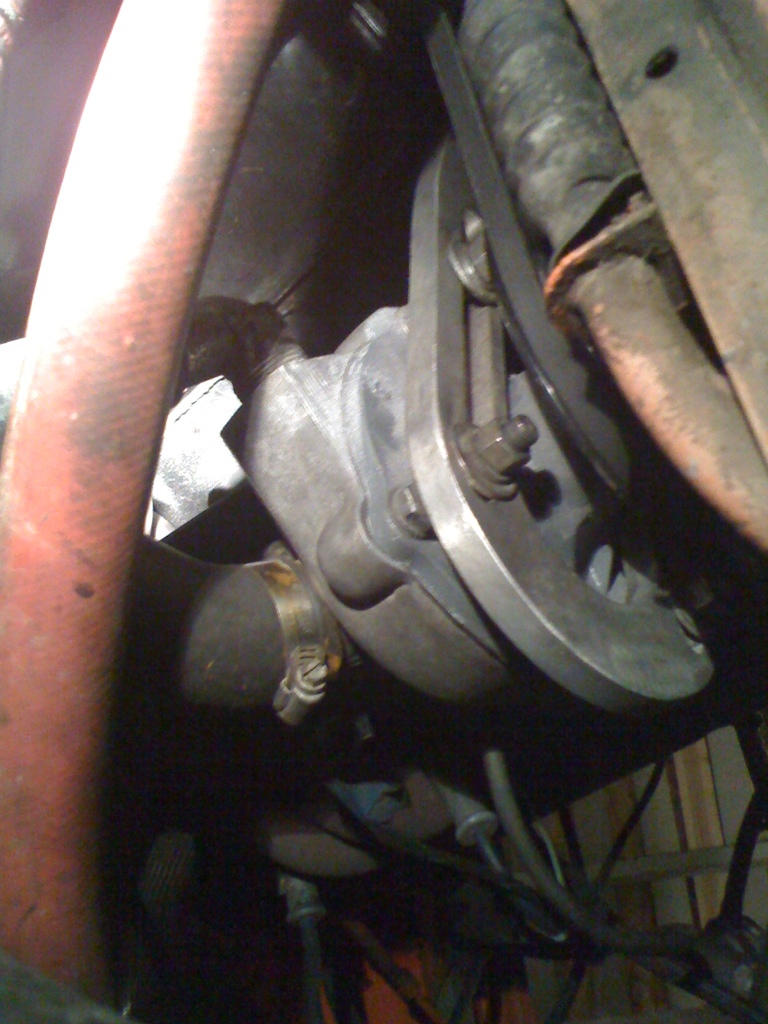
Installed
Oil changed (Left out drain plug... lost about 3 quarts... yay)
What to do next? I have all night.....
Posted by: kg6dxn Jan 29 2011, 08:02 PM
I like Mopars. Here's a pic of my old car...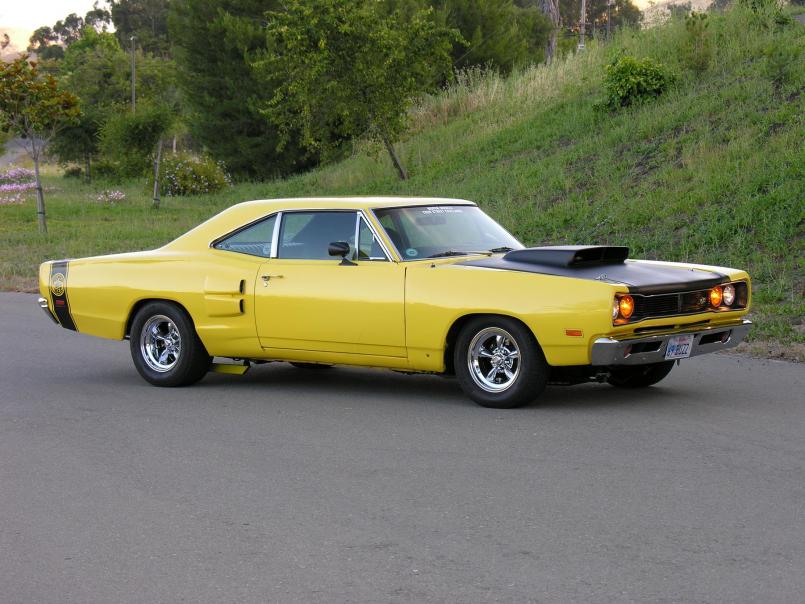
Keep it up Andrew! 
Posted by: Andyrew Jan 29 2011, 08:21 PM
Thats a bad ass mopar mike!
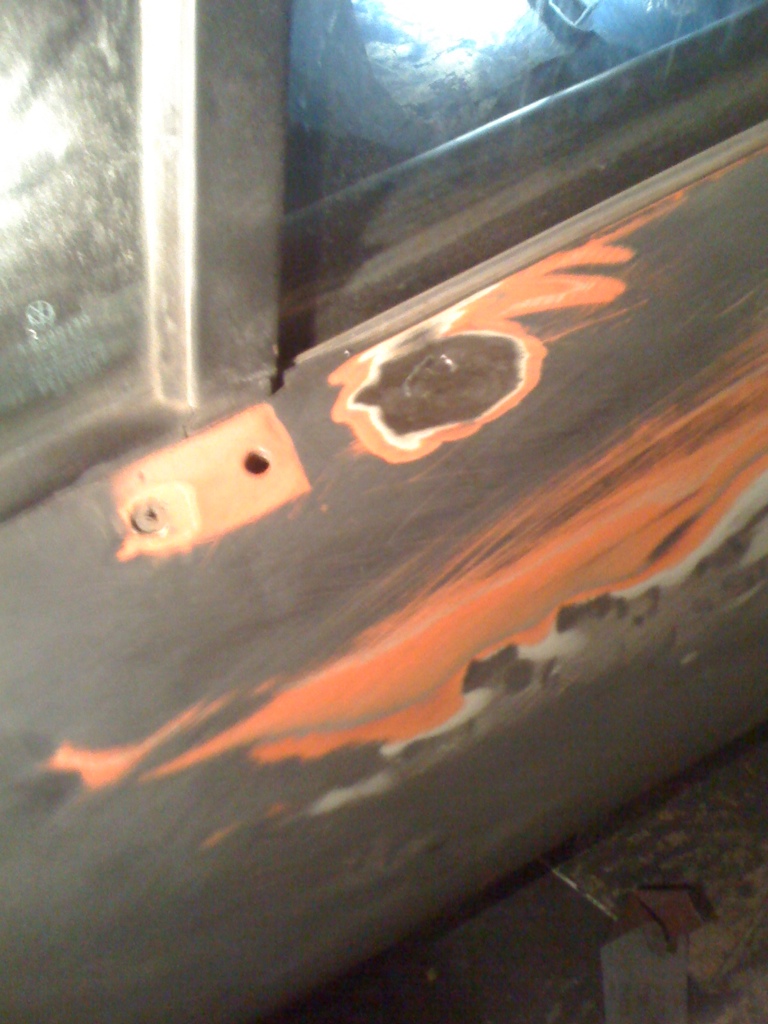
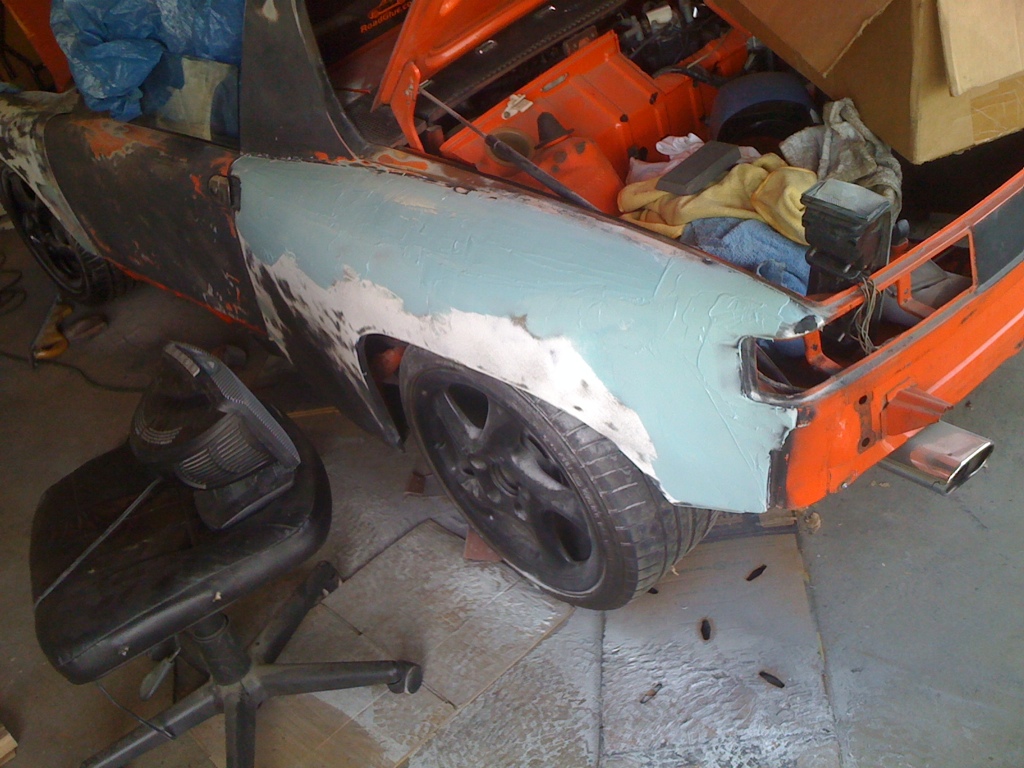
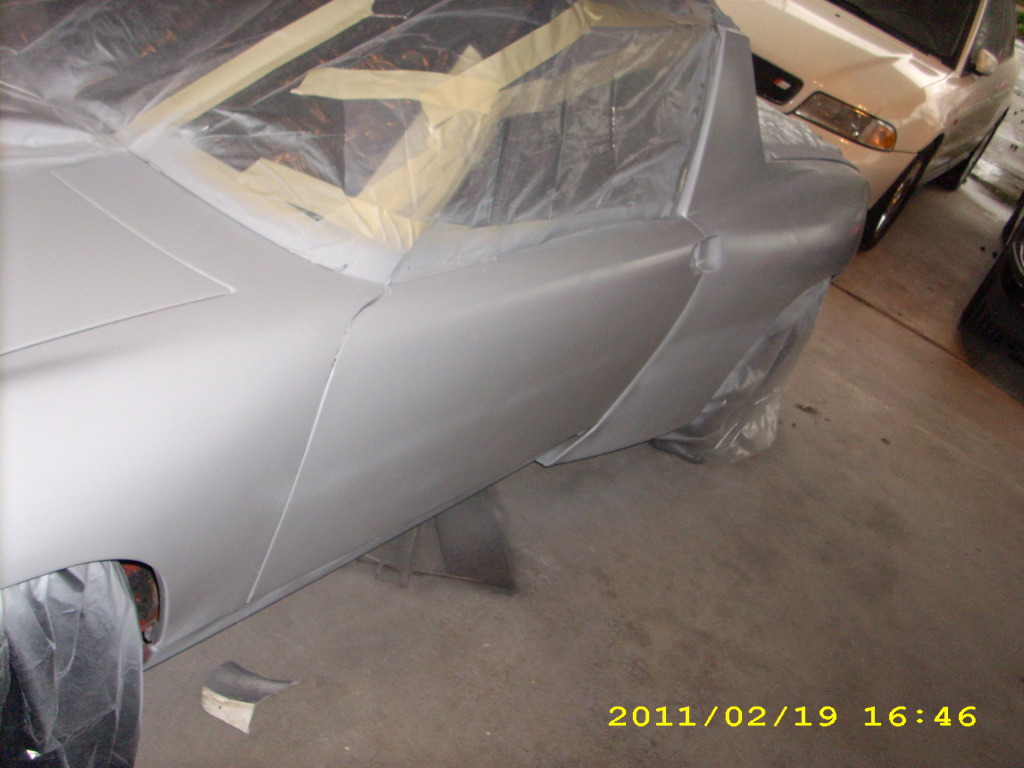
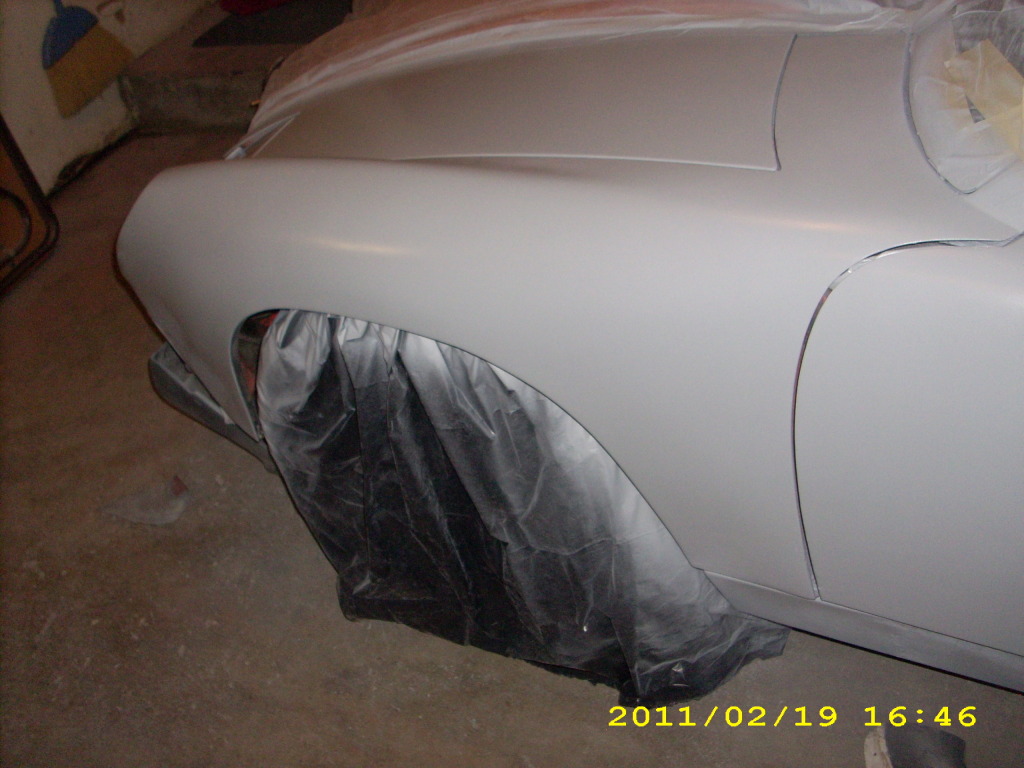
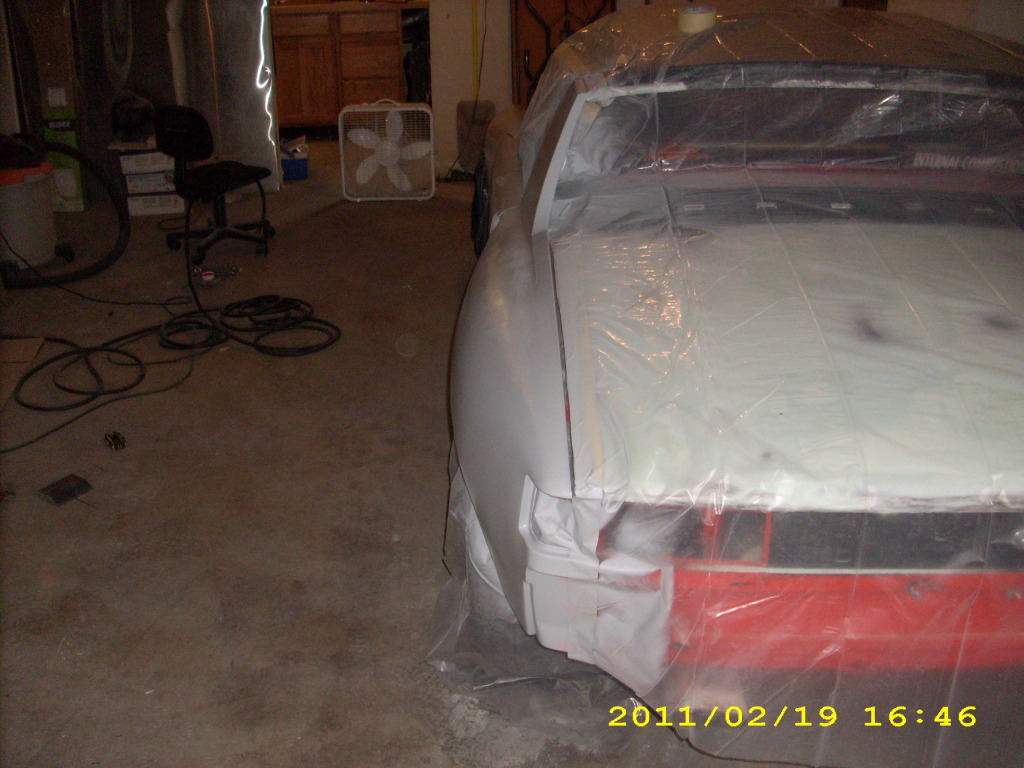
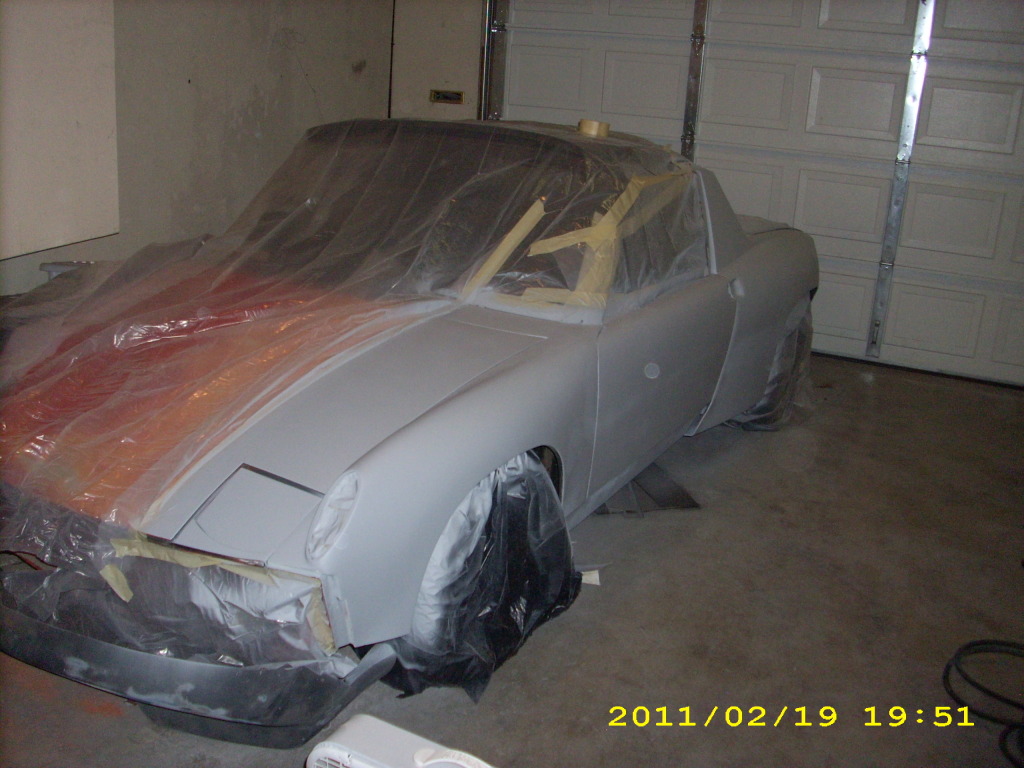
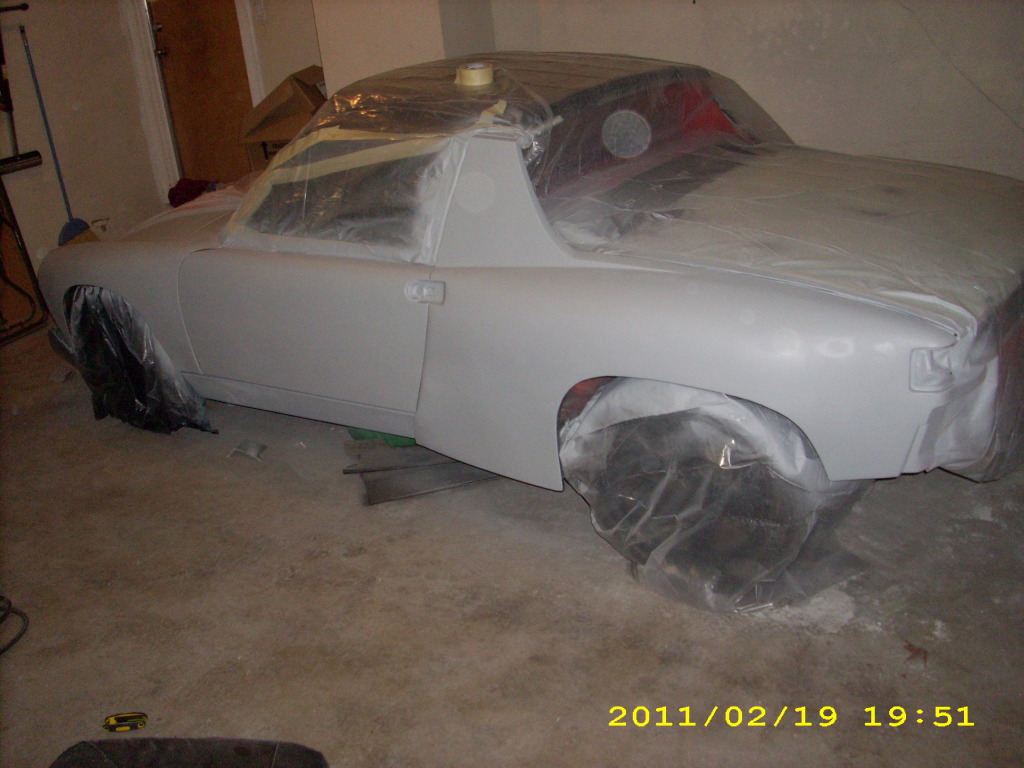
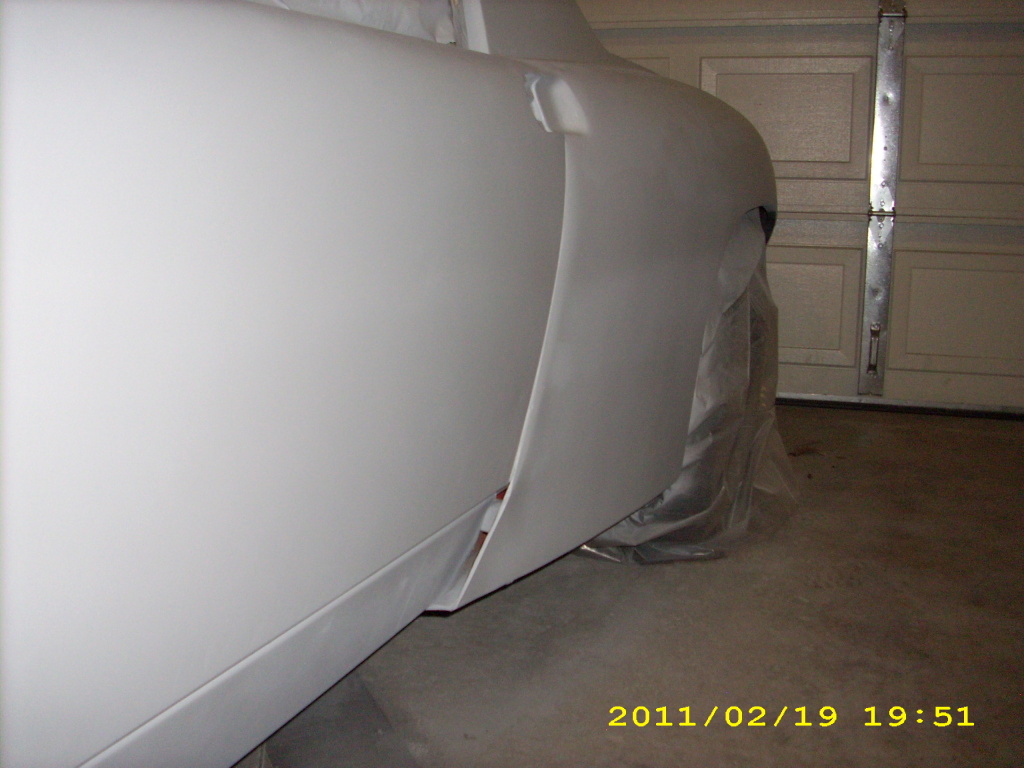
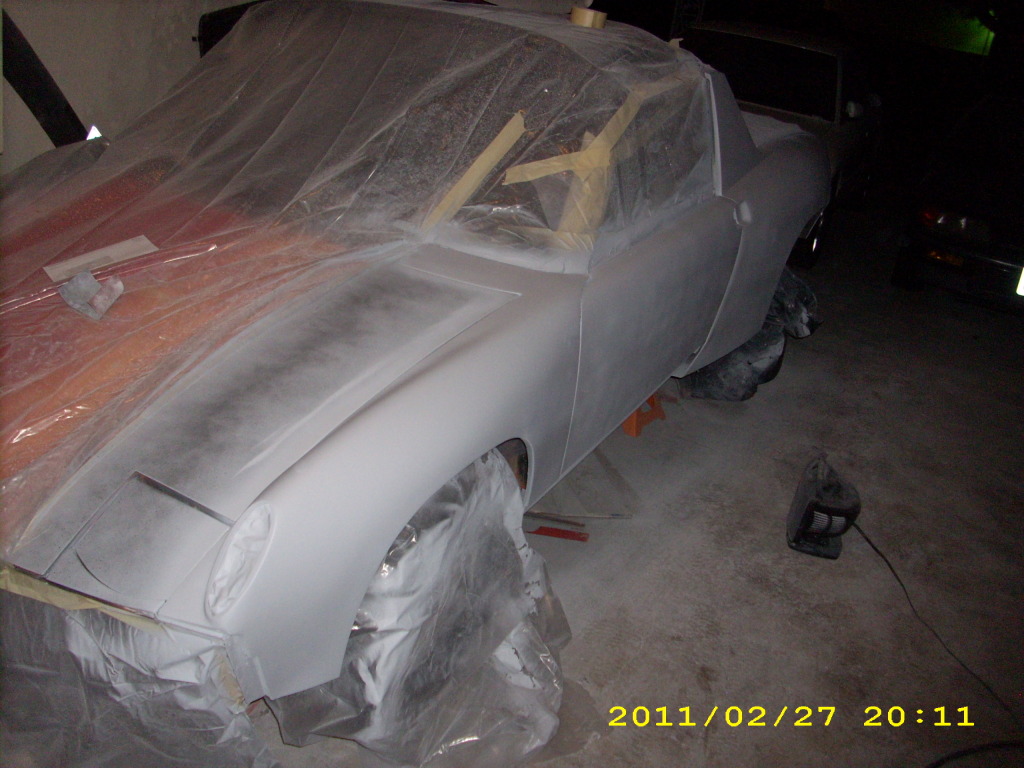
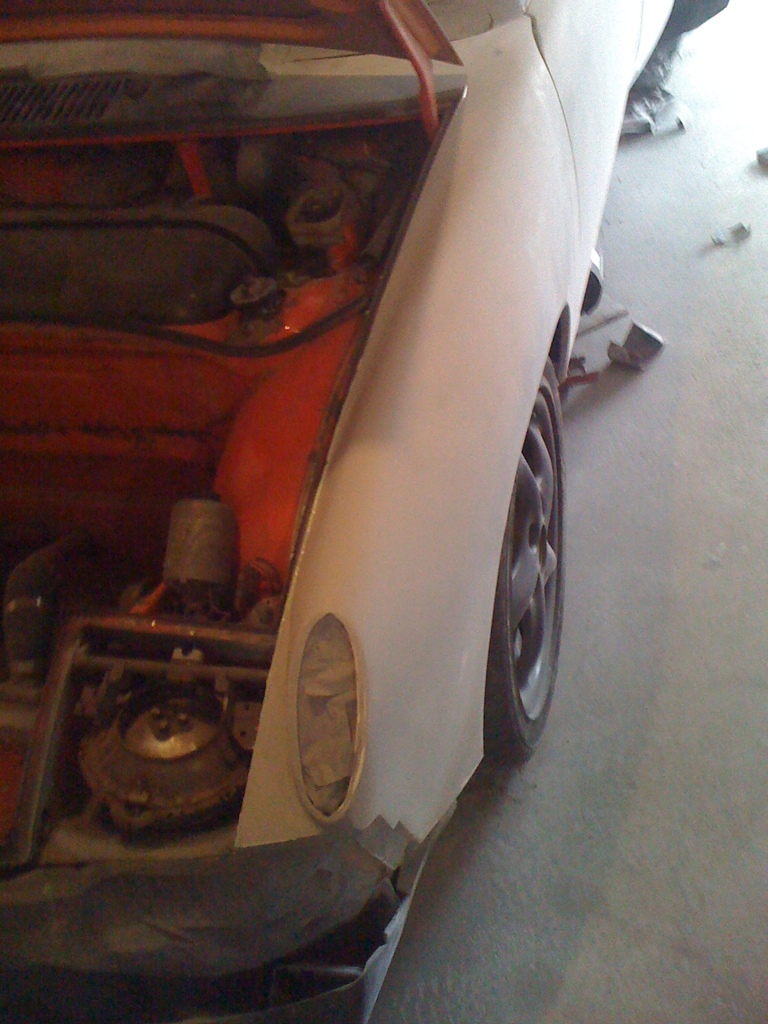
Posted by: Andyrew Jan 30 2011, 02:08 AM
Bit the bullet.
Started ~ 8 finished ~ 11. 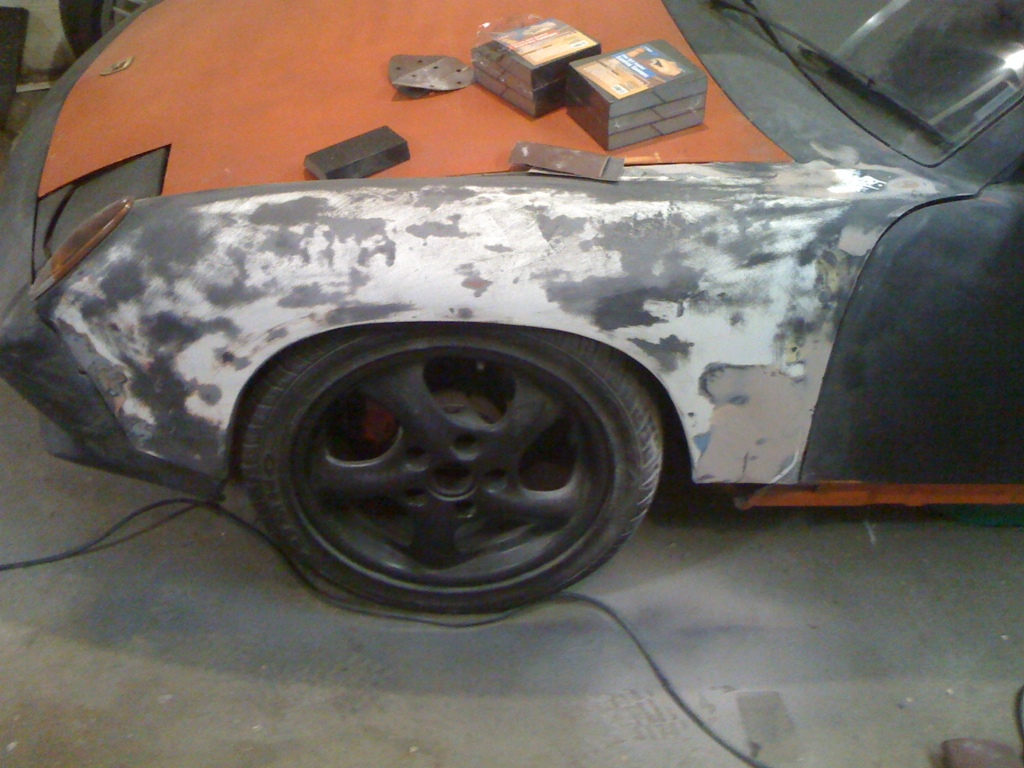
Needs some more bondo, really just needs a skim of glaze puddy. 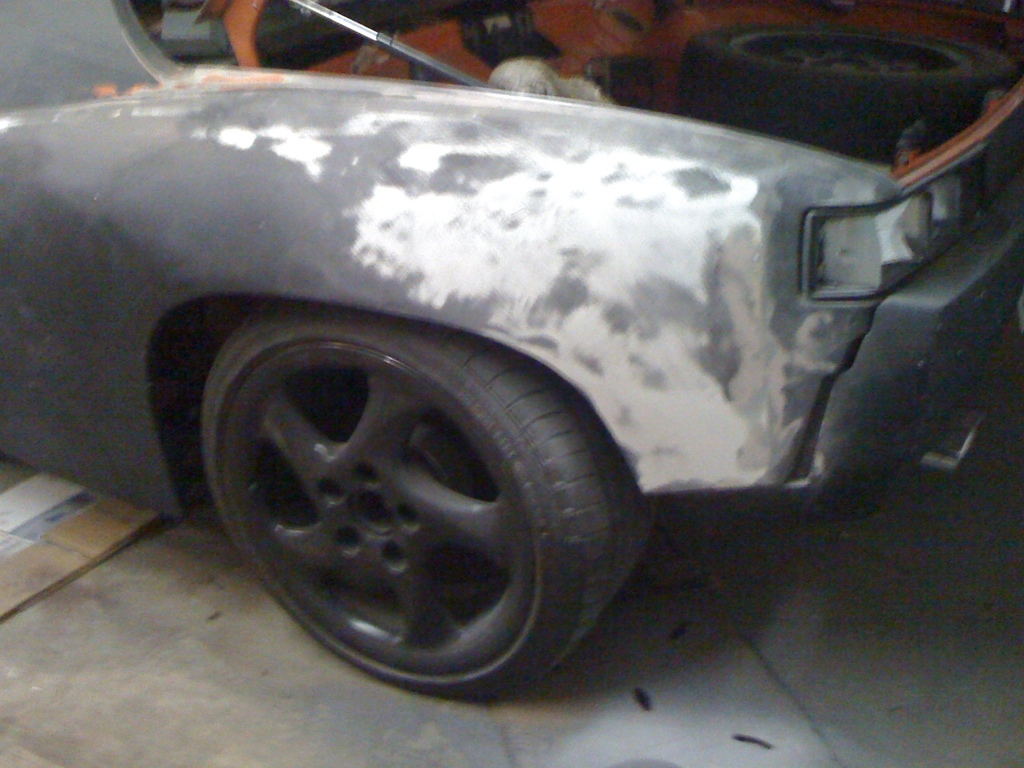
Start
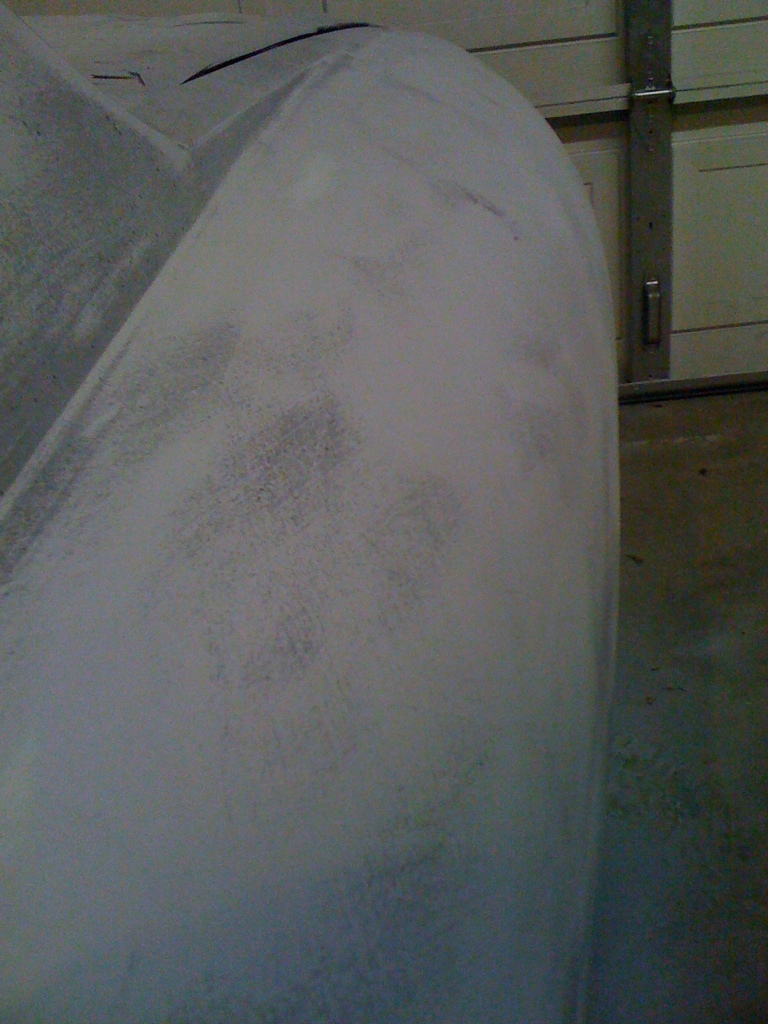
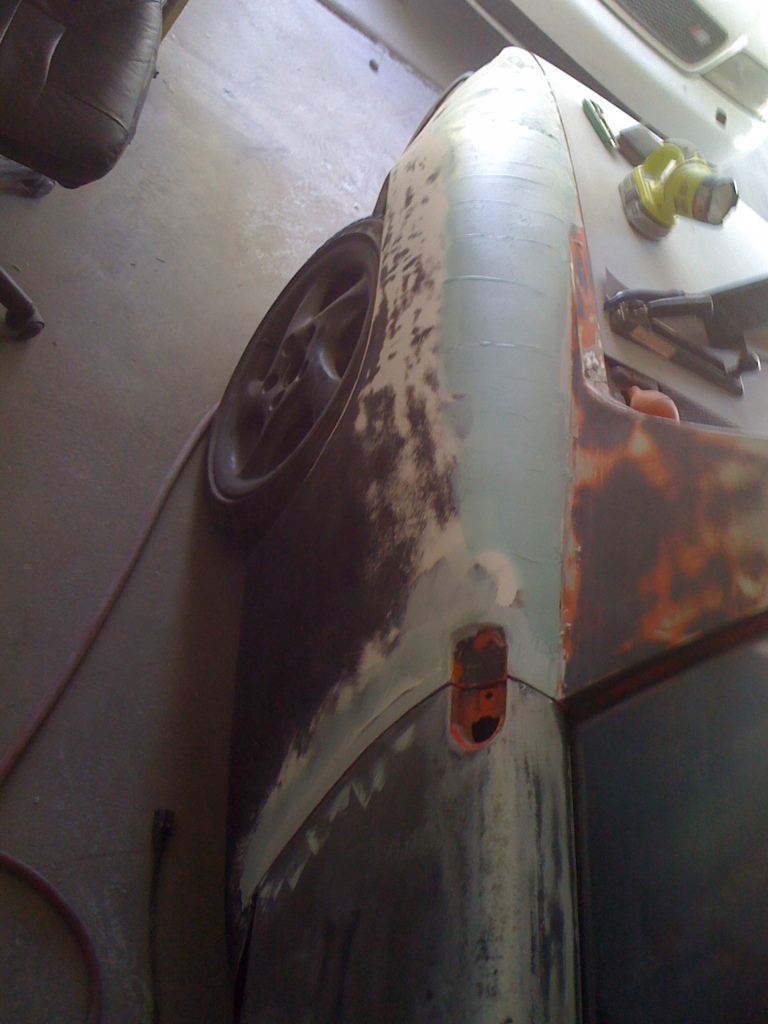
Fiberglass low area's poking through, time for primer filler then another run with the sanding block. 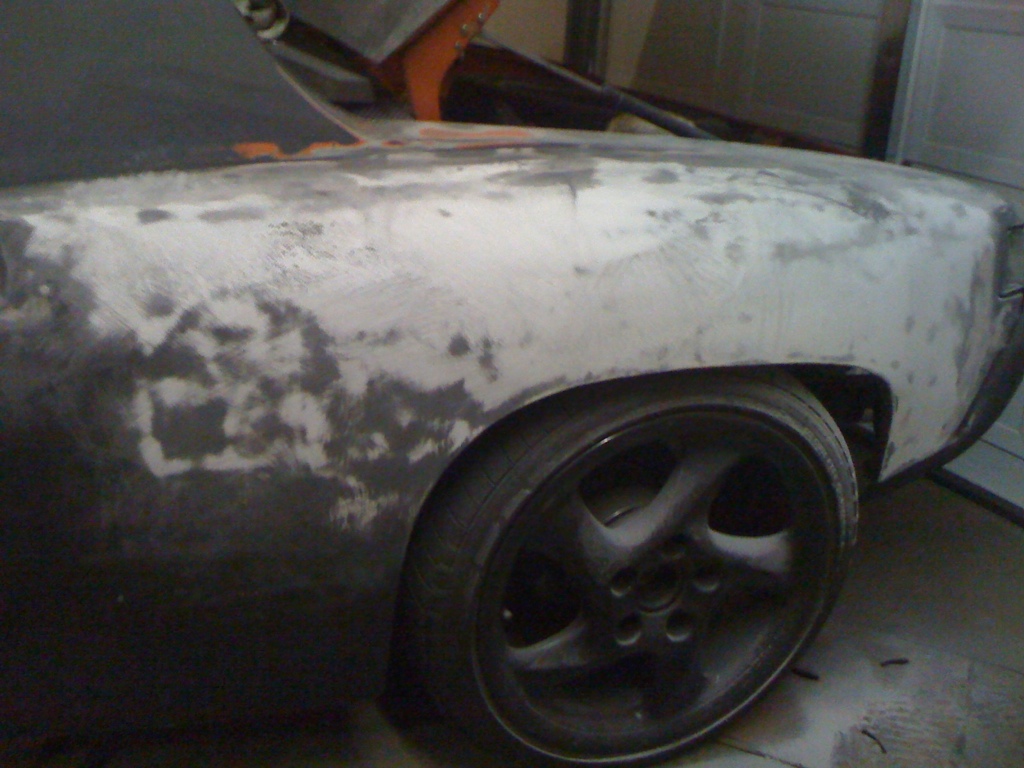
Getting better..
Need to reinforce the fender before I tackle more of this area, It should be pretty flat though. 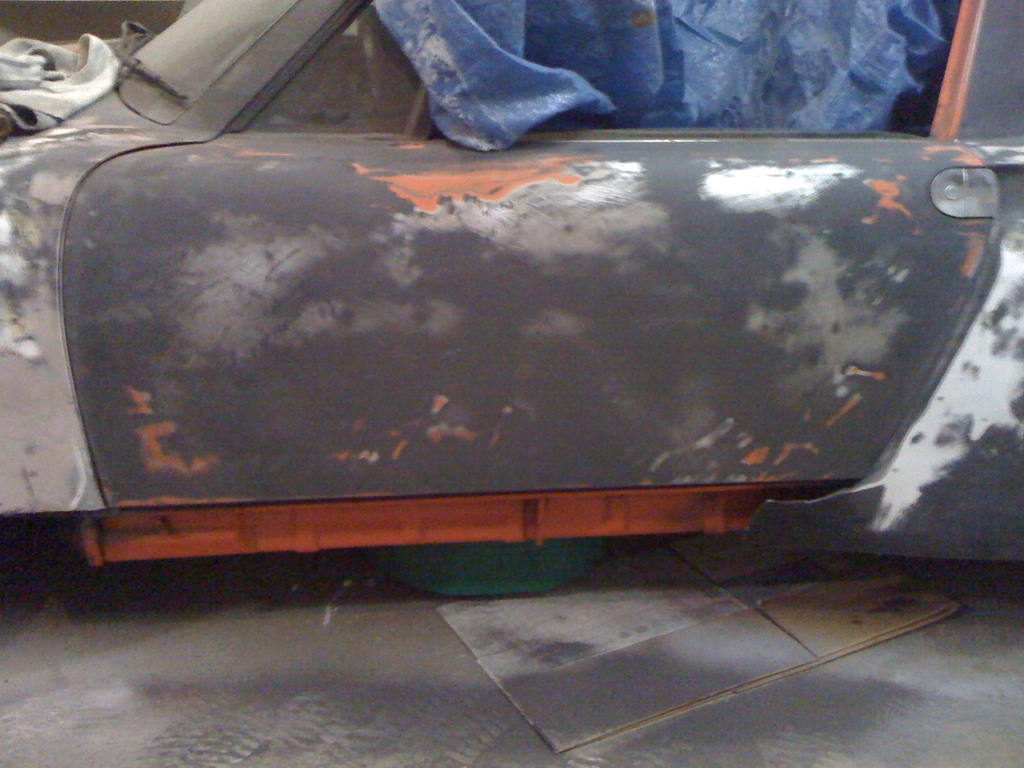
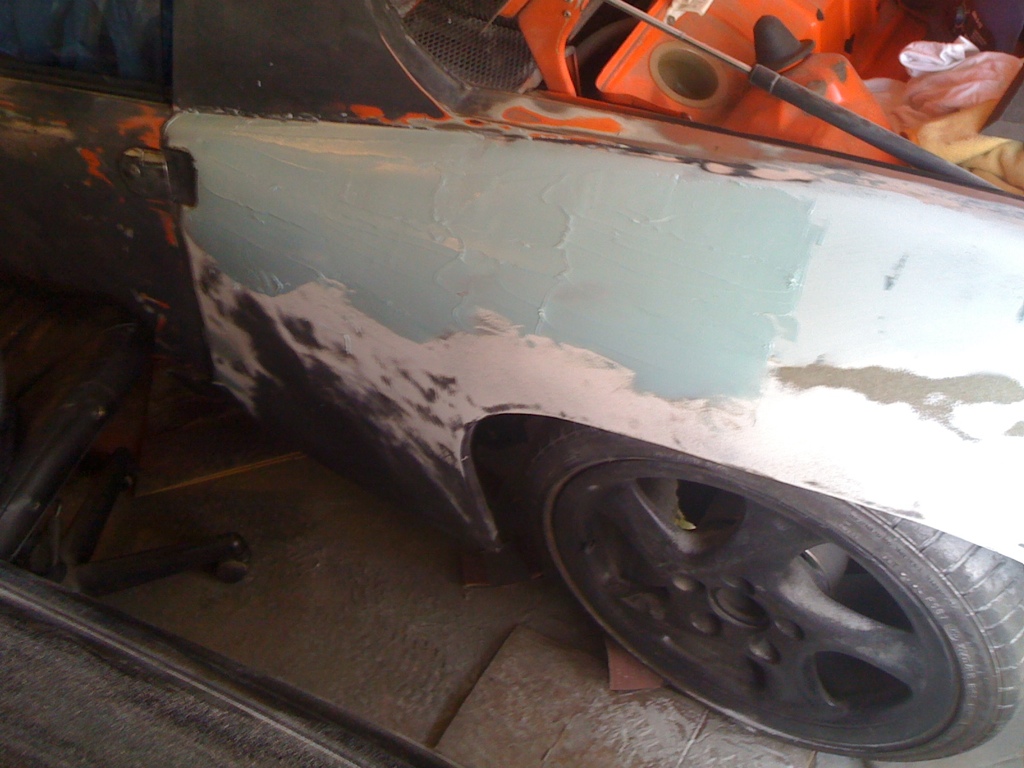
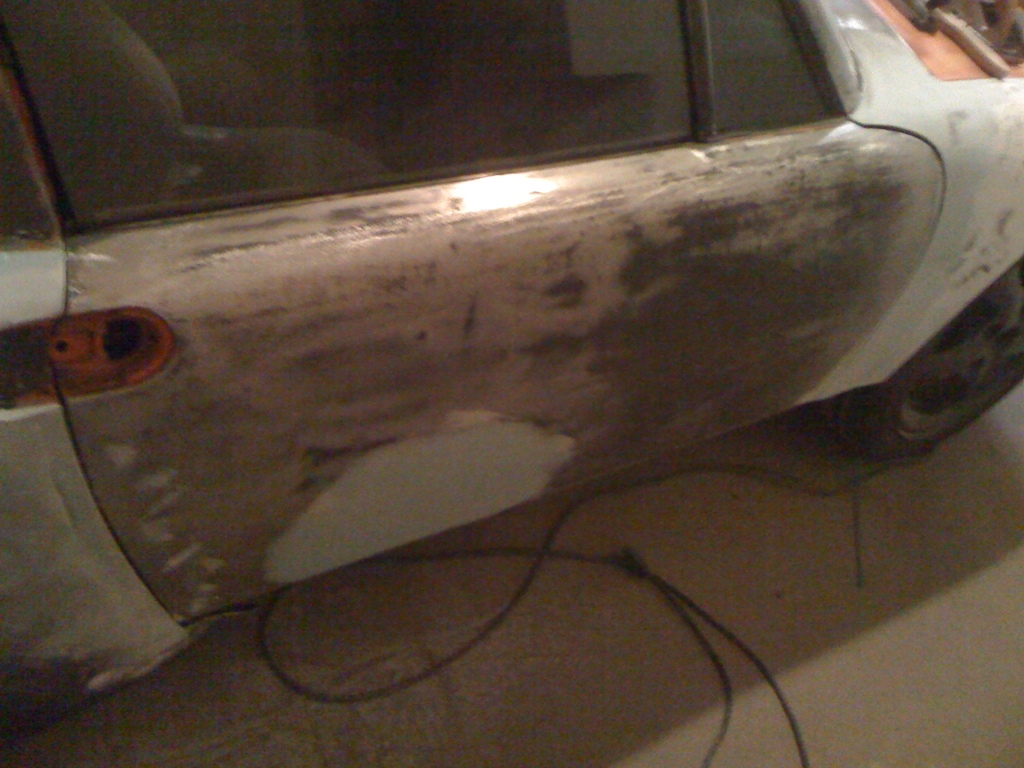
Next was the door. Needs primer filler.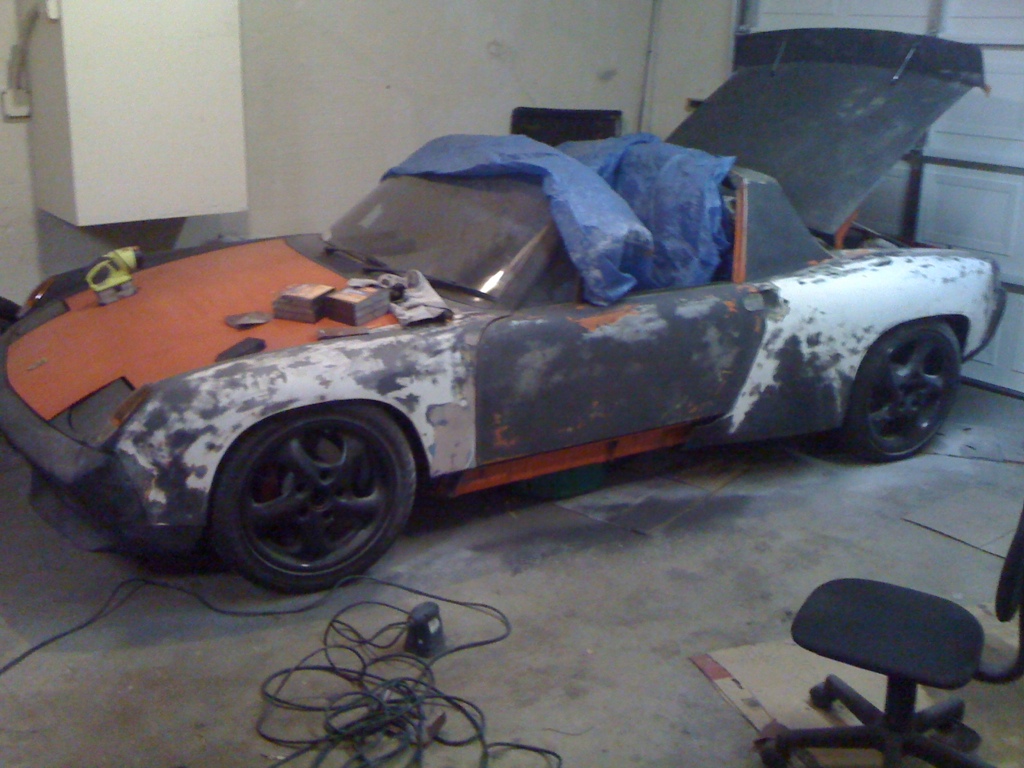
3 hrs work... Need to get me some supplies! Tuesday afternoon I am free so i'll be tackling it more then with supplies in hand.
Supply list:
Kitty hair (bondo for fiberglass)
Bondo (Ok, I will say Plastic Filler)
Glaze puddy
Primer Filler
Guide Spray
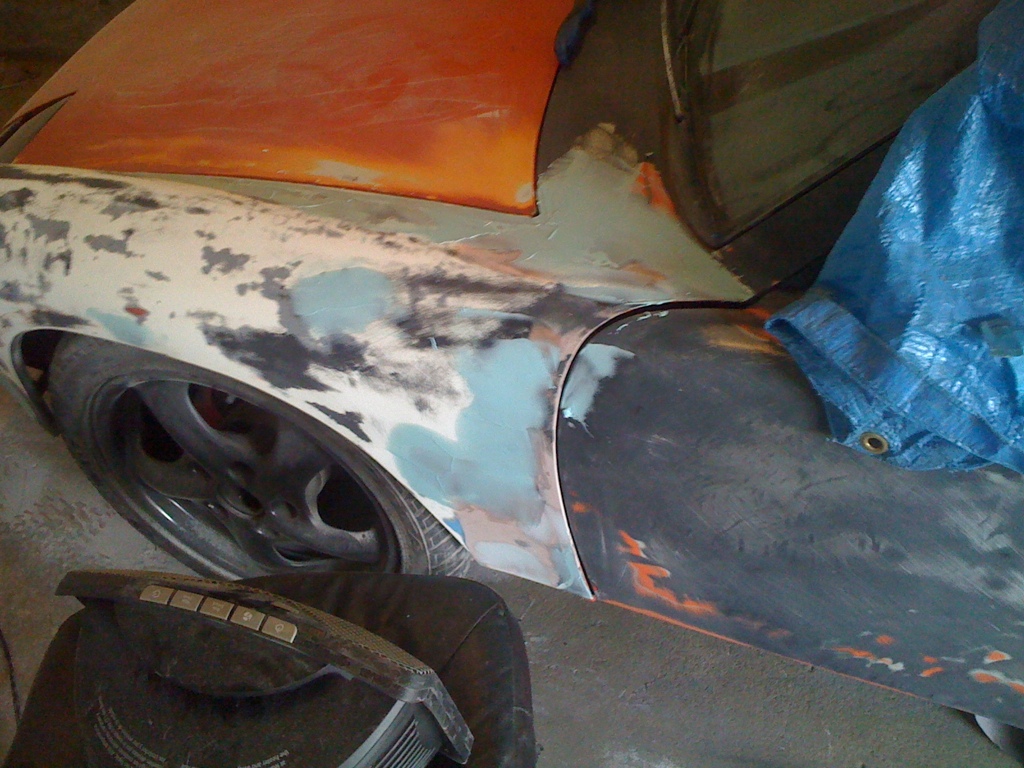
Posted by: Andyrew Feb 2 2011, 12:20 AM
Havent got a working compressor at the house yet so I did some work with the filler.
Unfortunately what I thought was Kitty Hair was actually Metal Ready.... I have no clue how that mix up happened. Im going back tomorrow to see if I can exchange.
So I decided to just use plastic some quality filler I had picked up instead. 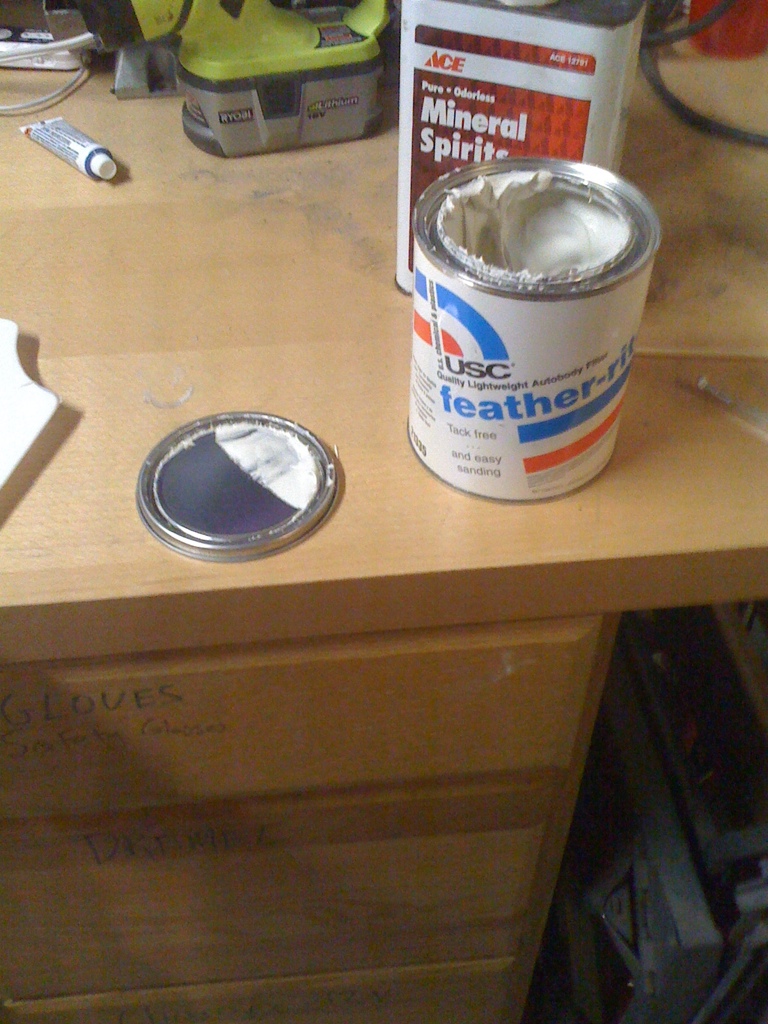
I first had to fill a hole probably from some aftermarket mirror.
So here are the results. I might sand some tonight, I have 2 heat lamps on the body right now. 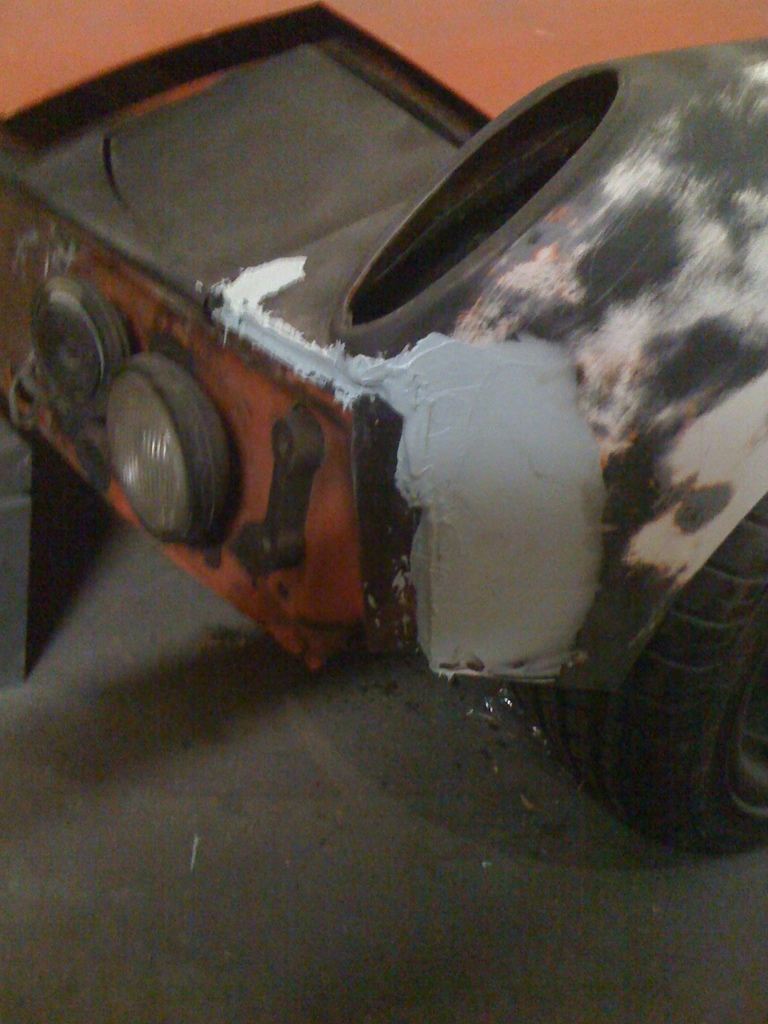

All in all I used about 1/2 a quart. A lot more than I thought I would have. I laid it down thick at the rear fender, I didnt like how my sanding went so I wanted to give it another go.
Hopefully i get a compressor at before Saturday so I can lay down some primer filler. In the mean time its bondo and glaze putty and hours of sanding.
Posted by: computers4kids Feb 2 2011, 09:10 AM
Dang Andrew...you really are serious about getting your car going again. Thanks for the updates!
Mike...loved your mopar machine. I had a built challenger in the day. Thought I was real smart and destroked a 440...what a disaster that was. Ran fine...gutless wonder. 
Posted by: Spoke Feb 2 2011, 09:27 AM
Lookin' good. Do you have a long board sander for the flat panels? I made a flexible one out of very thin pieces of oak. They worked great for smoothing over the curves in the fender tops.
Posted by: Andyrew Feb 2 2011, 10:30 AM
Mark,
Yup, To be perfectly honest, I forgot to register for night classes this semester and couldnt get in, I decided to focus the time on the 914 VS other hobbies. Its been long enough.
Spoke I have a solid 24" one, and then a flexible 12" one. So far i've been ruffing it in with a 6" block and 80 grit. Ill be hitting it with the 12" board over the fenders next and take it to 160 or so then its primer filler to do the real smoothing.
I really dont like the transition from the rear fender to the door, but there isnt much I can do about it.
Tomorrow i'll line up my tools and take a pic for refference. Im sure I need some more tools before this car is painted.
Posted by: orange914 Feb 2 2011, 06:41 PM
andrew, you planning on spraying it? sounds like you need a compresor? you can use mine as soon as it finds it's way home from coperopolis, i have a pnumatic flat board sander your welcome to use too.
Posted by: kg6dxn Feb 2 2011, 07:24 PM
Andrew,
What type of flares are those? How wide will the let you put under there?
Posted by: McMark Feb 2 2011, 08:58 PM
Aren't those just 911SC flares? 
[Mike will get my joke]
Oh, and Andyrew, you're making great progress. Love to see this thread bump up to the top on a regular basis.
Posted by: kg6dxn Feb 2 2011, 09:09 PM
Aren't those just 911SC flares?
[Mike will get my joke]

Posted by: Andyrew Feb 3 2011, 10:43 AM
andrew, you planning on spraying it? sounds like you need a compresor? you can use mine as soon as it finds it's way home from coperopolis, i have a pnumatic flat board sander your welcome to use too.
Mike,
Sounds great! I might not need the compressor but the flatboard sander would be AWESOME! I have 2 old compressors that im going to try and make work and my dads big compressor if I have to.
I'll call you tomorrow!
Mike,
HPH flares, same as the ones Mark just posted on the NEO thread. Im close to max. Probably a little bigger up front, I know guys that run 10.5 race slicks all 4 corners IIRC (or 10.5's rear 9.5's front) I might be able to fit 305's or something in the back and 275's in the front, but 255's and 285's are fine for me, good cheap availible sizes.
Mark,
Thanks! I try and sneak out to the garage as much as I can. The easy stuff is all done now, its about the long tedious stuff now (bodywork), so the more time I get to spend on it the quicker it will be done, but it IS going to take time. I am excited about the progress that I have made so far!
Posted by: Andyrew Feb 4 2011, 11:36 PM
Got some more filler layed down


These were some problem areas that I was really concerned about. So far they are coming out really well.
Only spent about 2 hours on it unfortunately. A bunch of other things came into play today. 
Finished off with some Margarita's and Fajita's!
Posted by: computers4kids Feb 5 2011, 10:09 AM
Got some more filler layed down
Finished off with some Margarita's and Fajita's!
Now we're talking "real progress."Posted by: Andyrew Feb 5 2011, 08:17 PM
They were Yummy!
Today I didnt get near as far as I had hoped... Did about 1.5 hours of sanding and then spent the rest of the day trying to fix the washing machine... New machine, Old house... Overflow issue. Still isnt resoved but it works..
Ill put about 2 hours in tomorrow and post of pictures then.
Posted by: Andyrew Feb 6 2011, 08:39 PM
Got a little progress today before the game started. 
Finished the filler for the rear fender. From here its final sanding prior to primer filler. Still have some more work to do to get the front fender ready for primer filler.
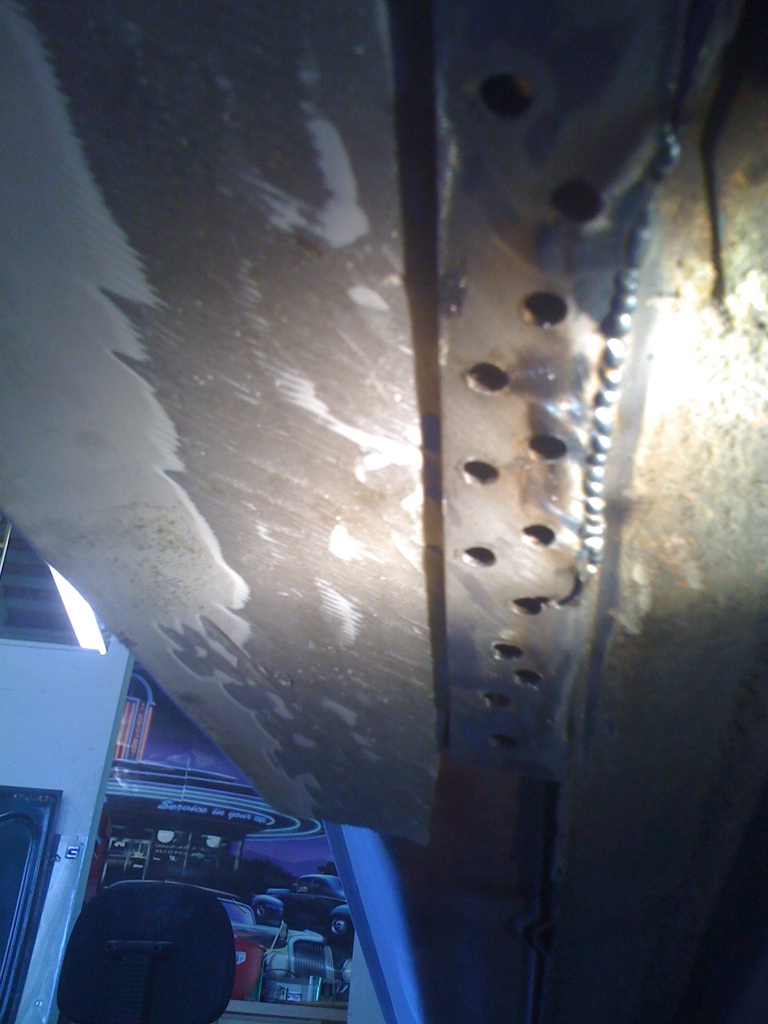
Ran out of filler so I decided to get working on the targa bar as I could make noise without worry. I still had to finish grinding and rewelding the lip on the targa bar to eliminate it and make the bar smooth (no chrome pieces on the bar)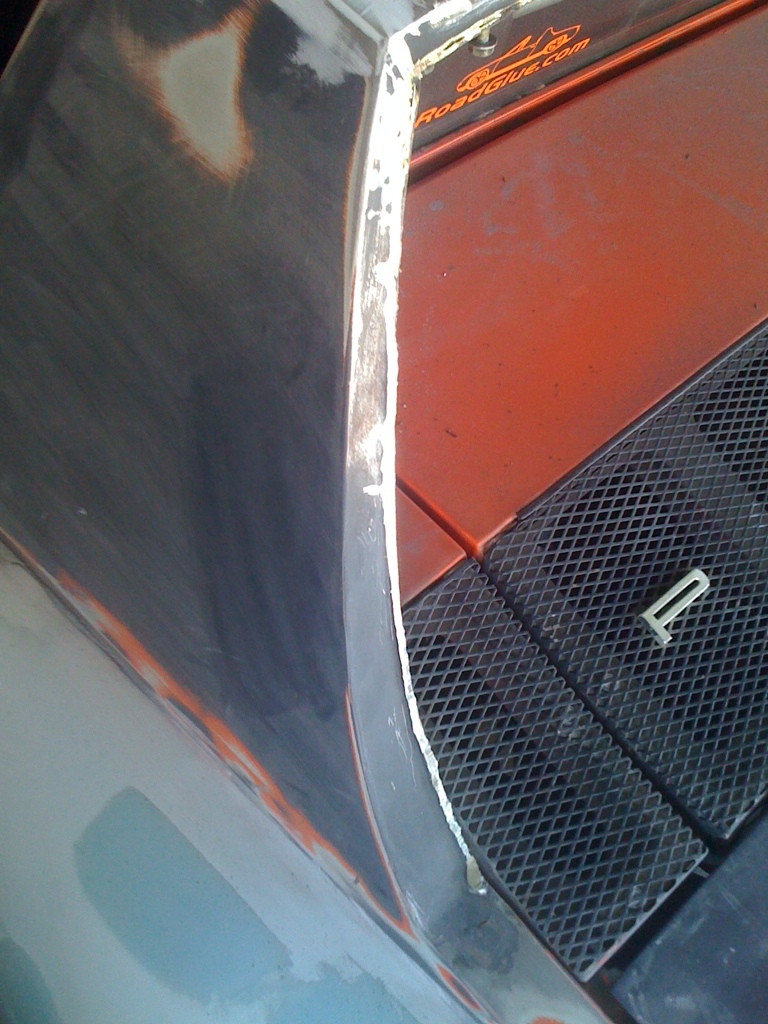
Wanted to protect the bondo from the welding. 1/8" MDF board works pretty well. 
Tack welded it up to test it out. 
Stitchwelded it. 
All welded up.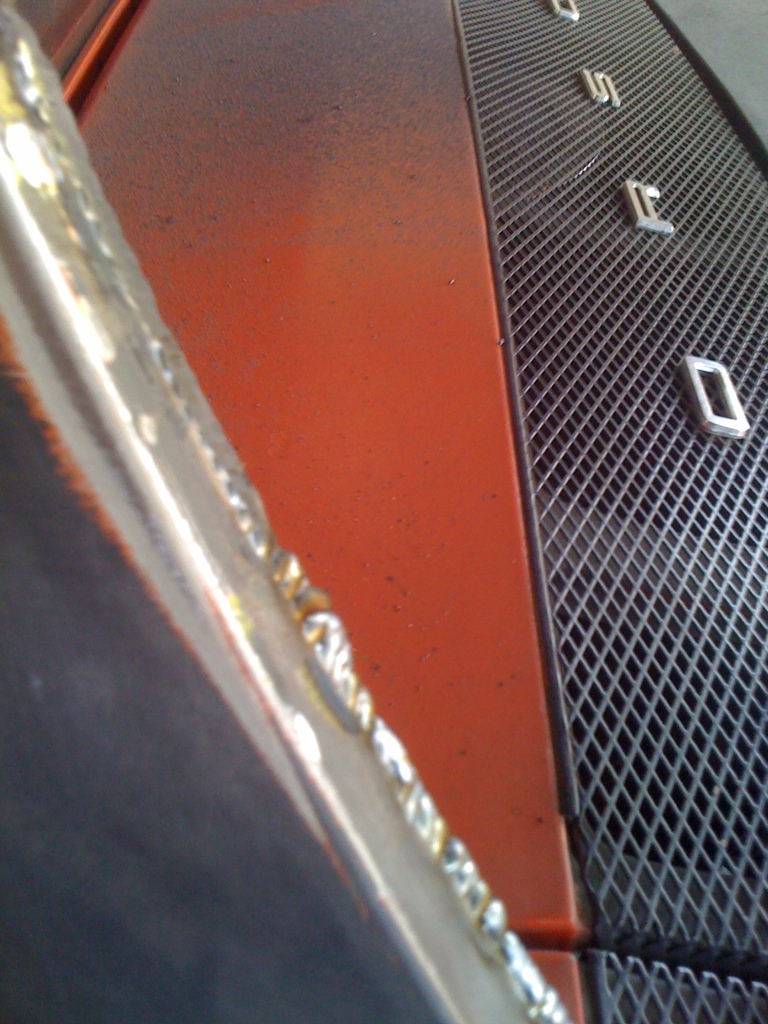
Highest points of the weld. The top portion is the lip all ground down and welded solid. I'll finish grind it later when I apply some filler. 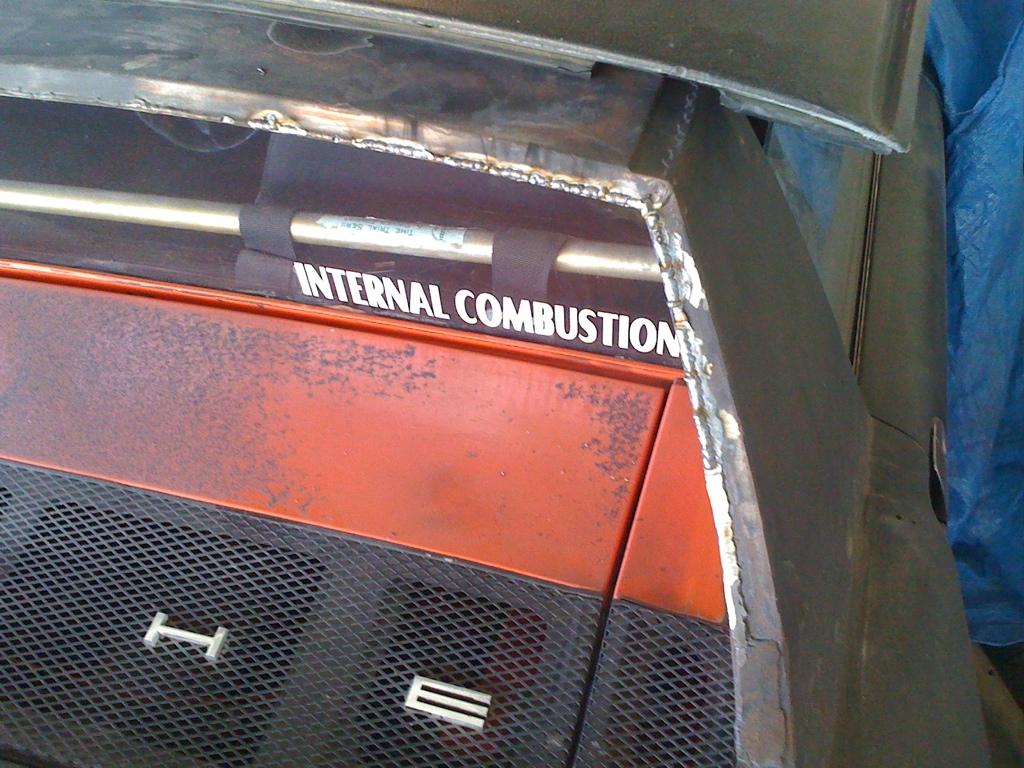
Started work on the other side. I think I might finish it tonight depending on how late this football game goes.
Posted by: Andyrew Feb 7 2011, 12:32 AM
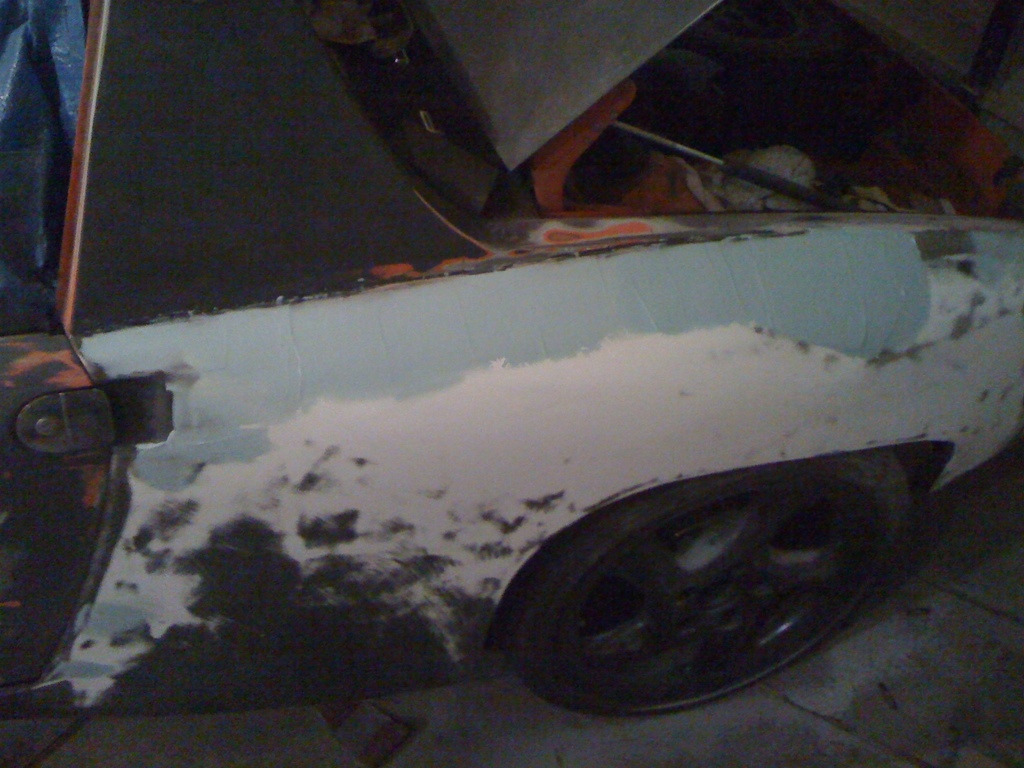
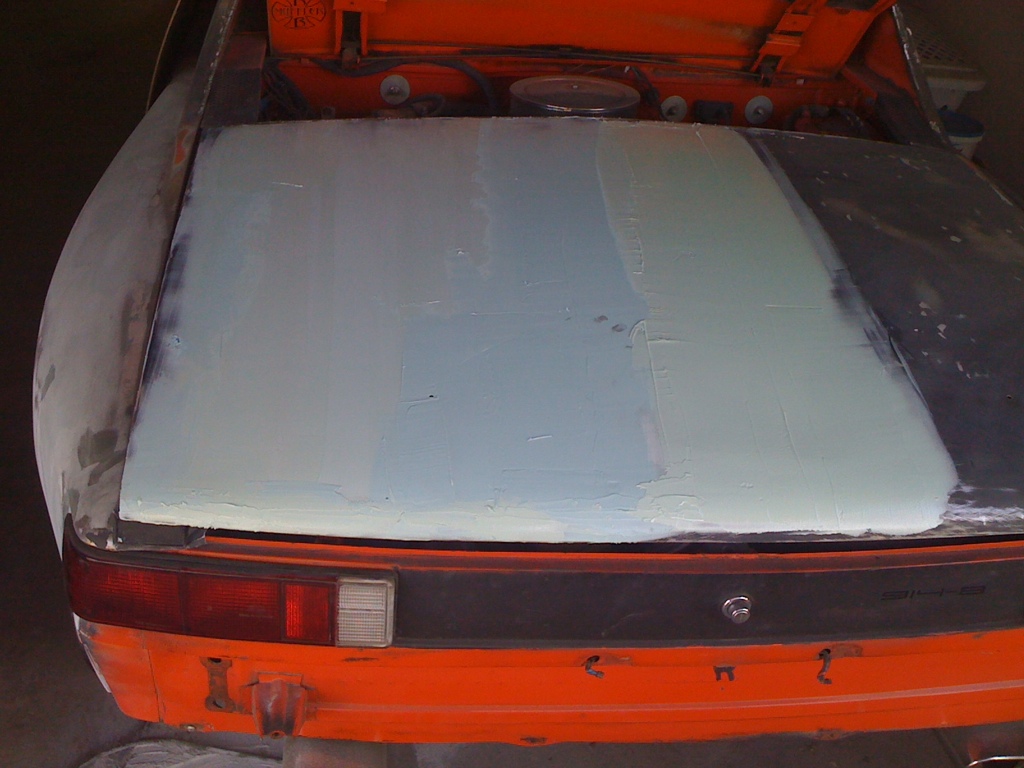
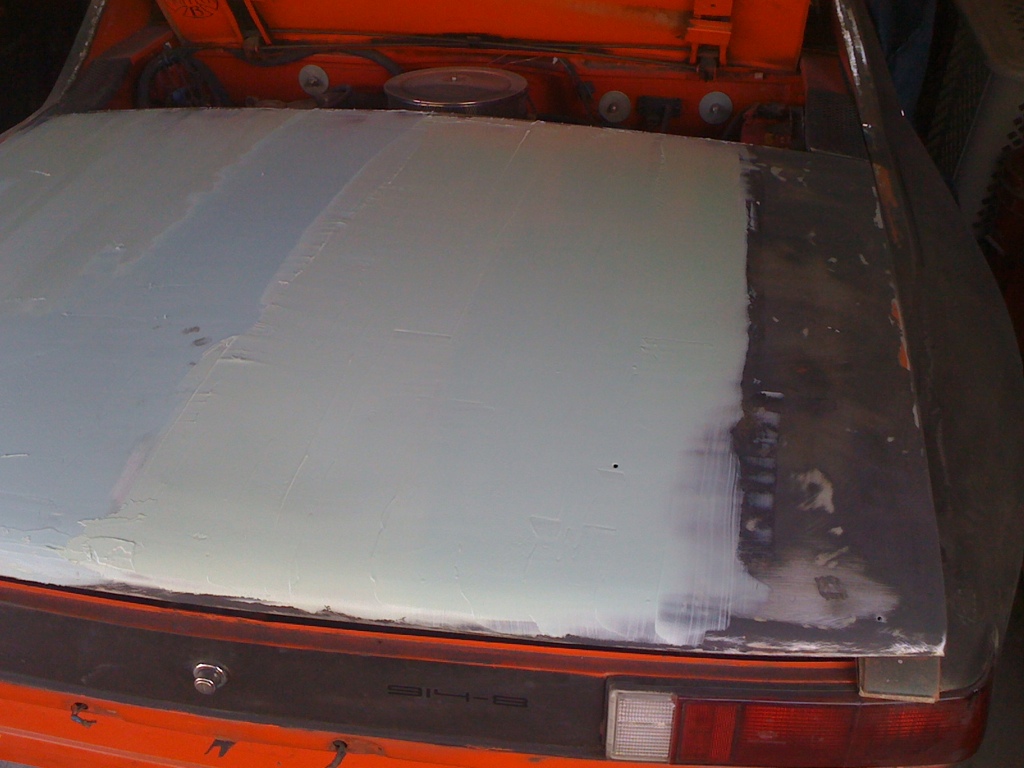
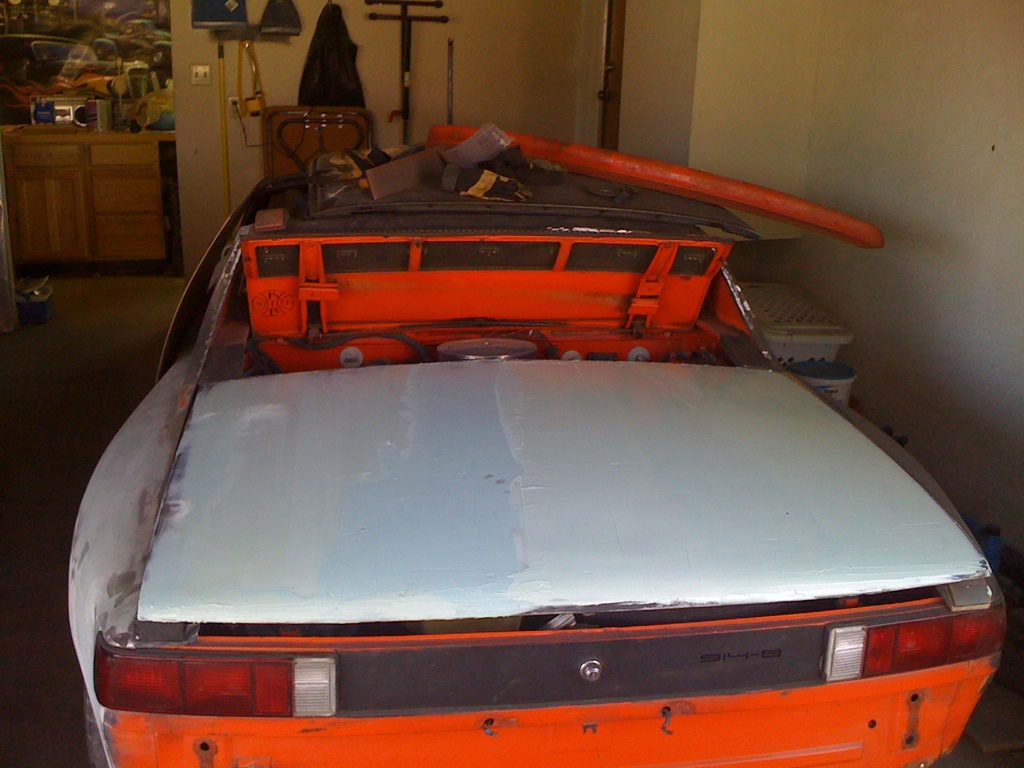
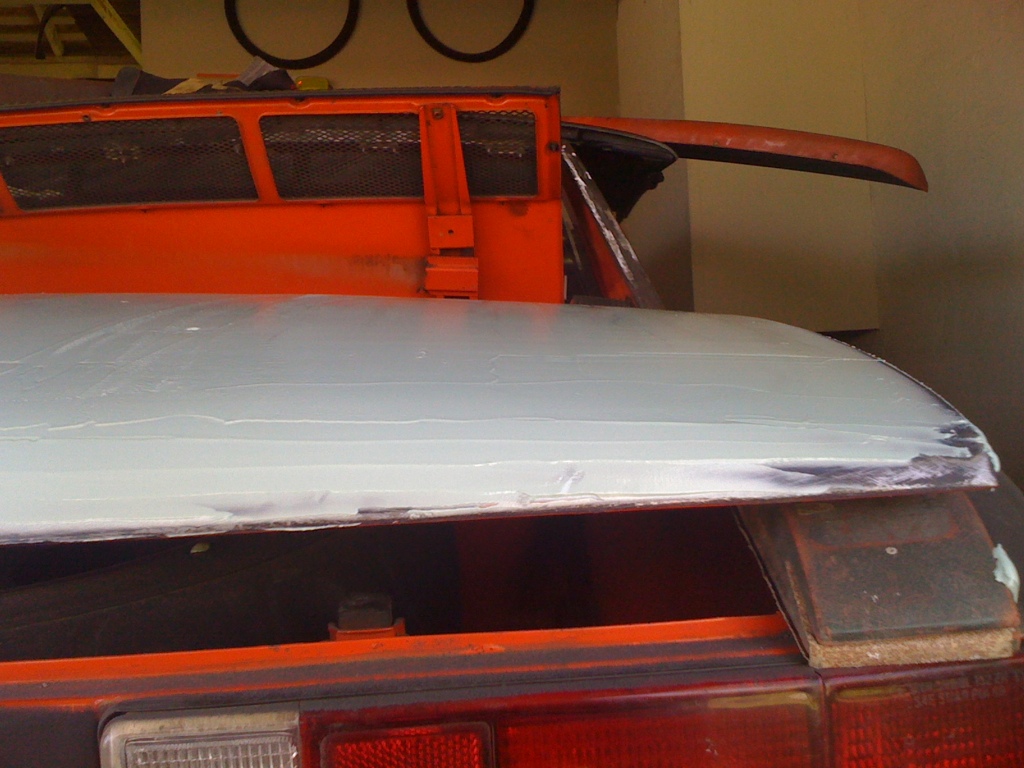
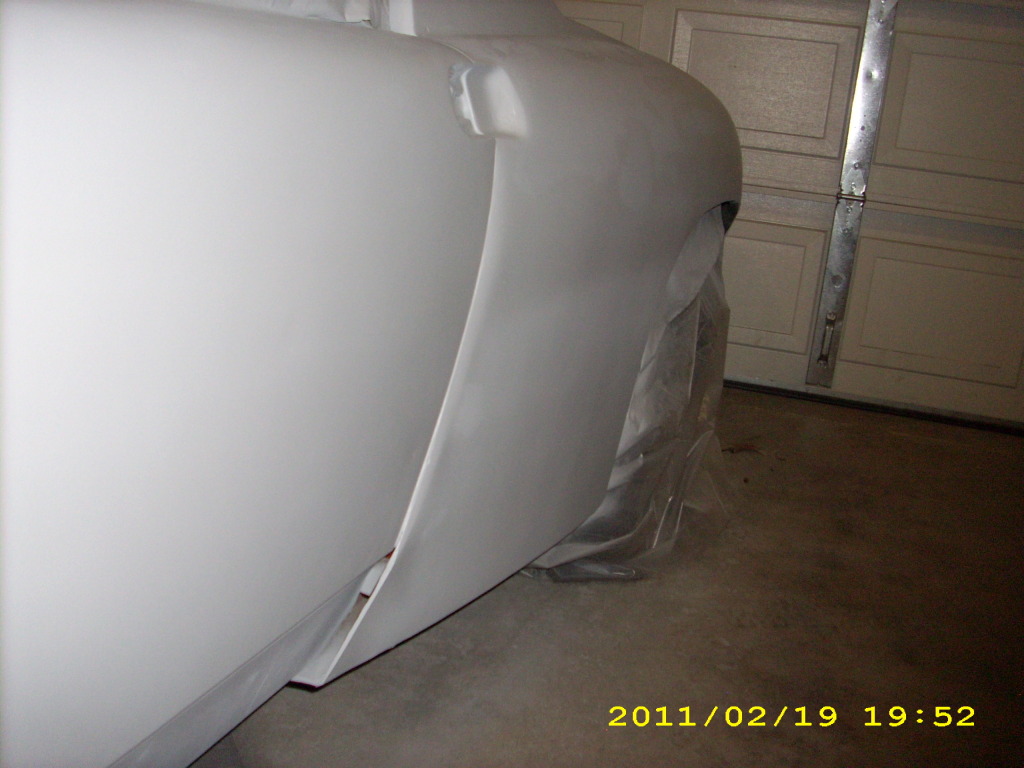
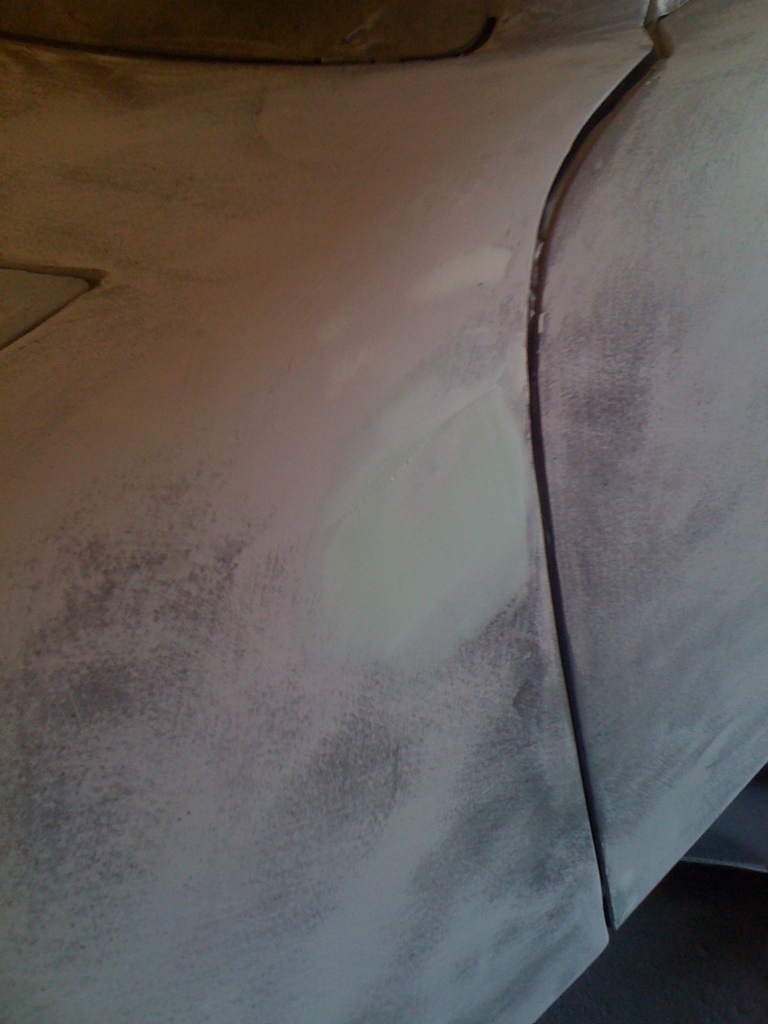
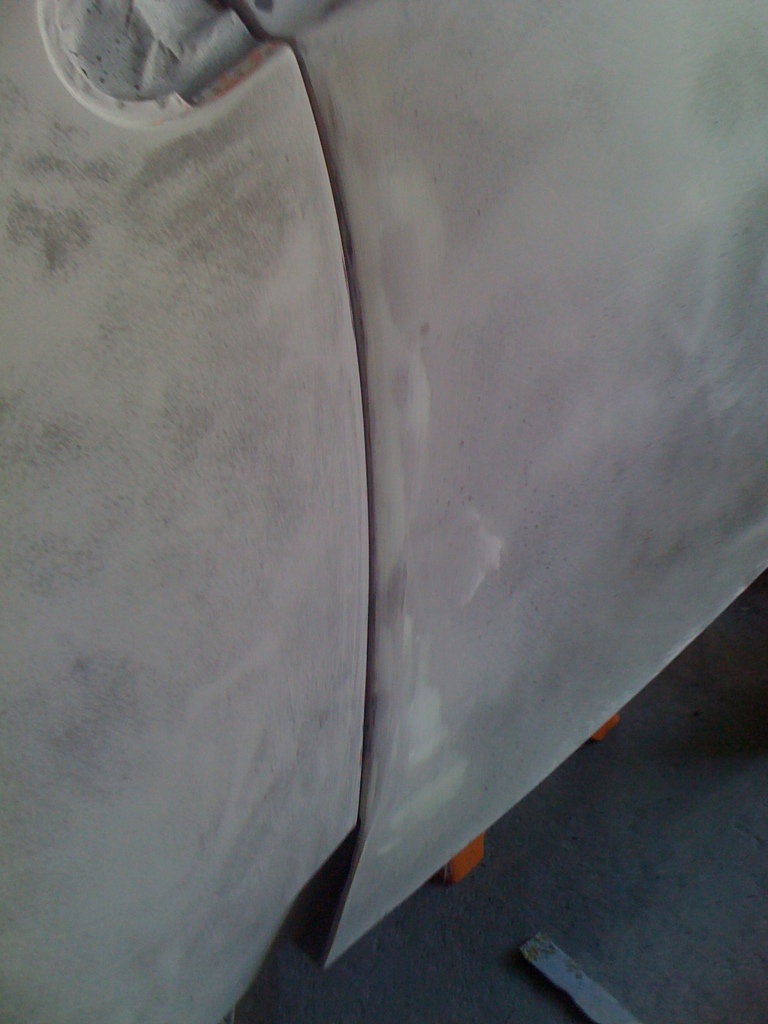
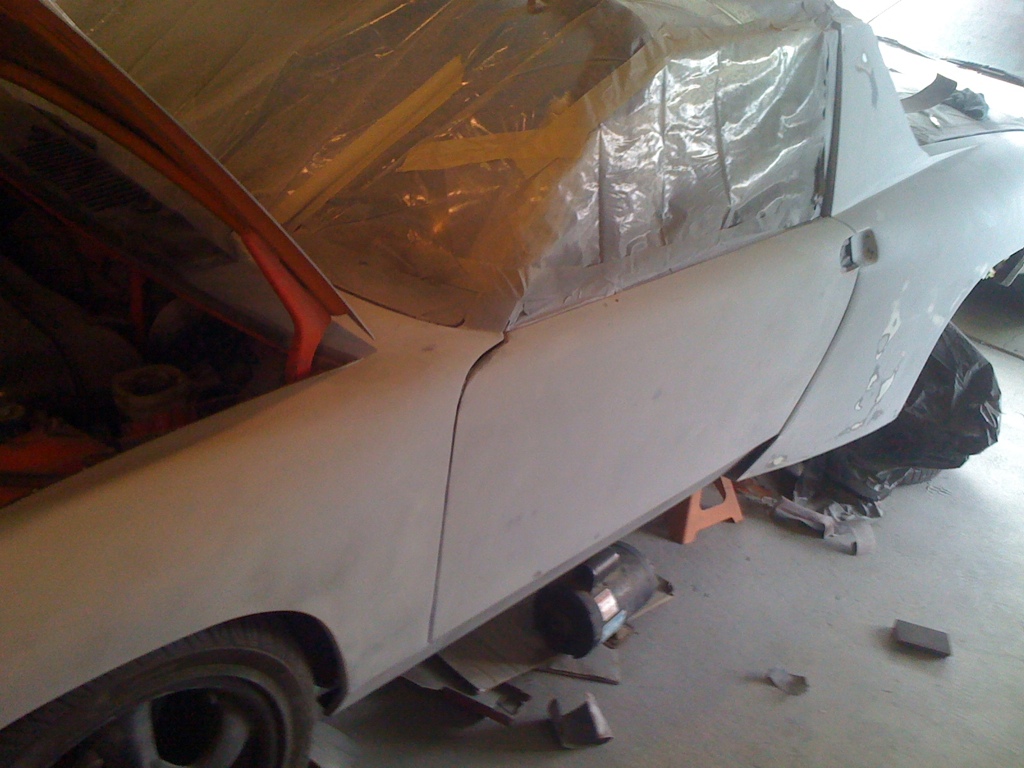
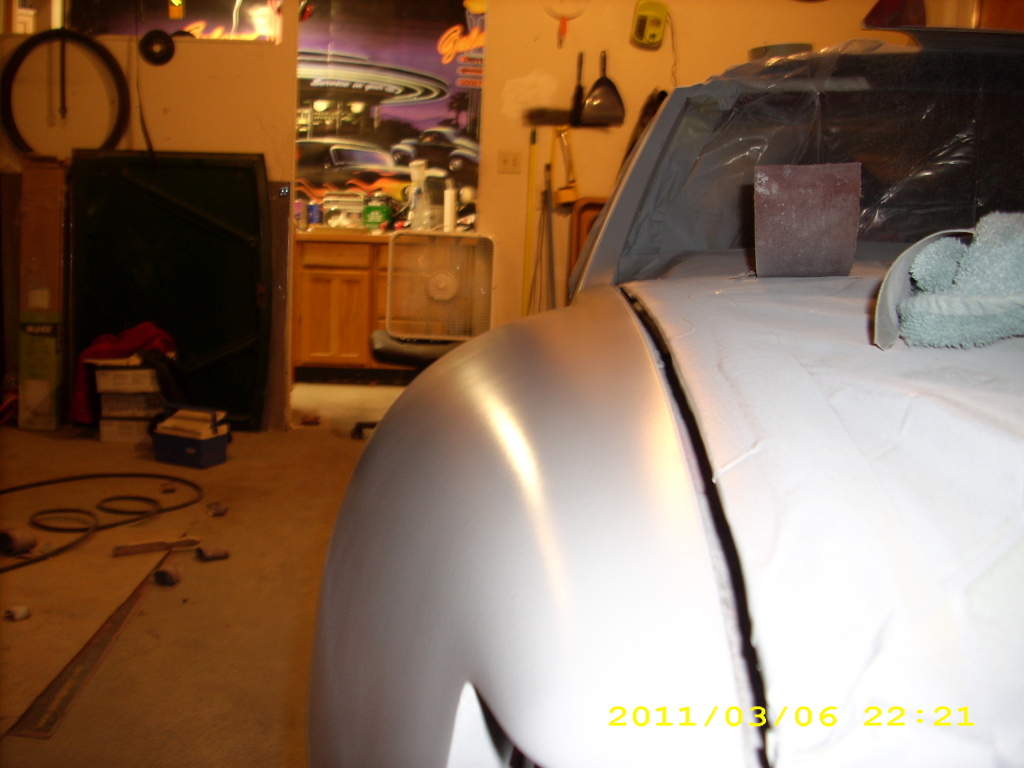
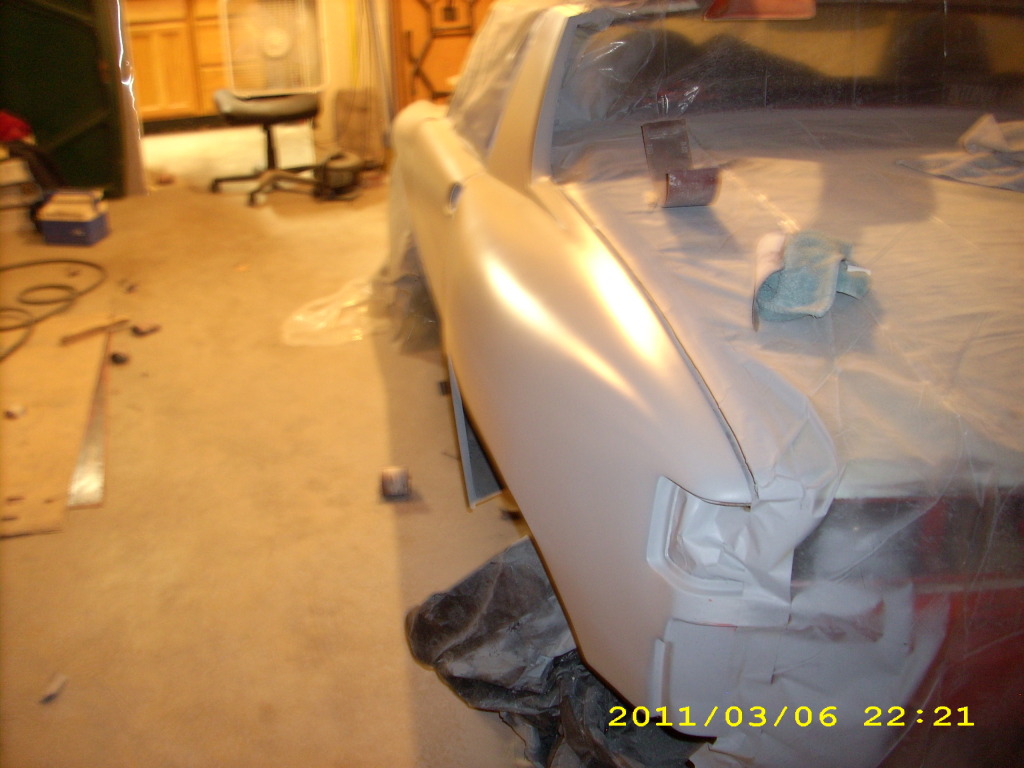
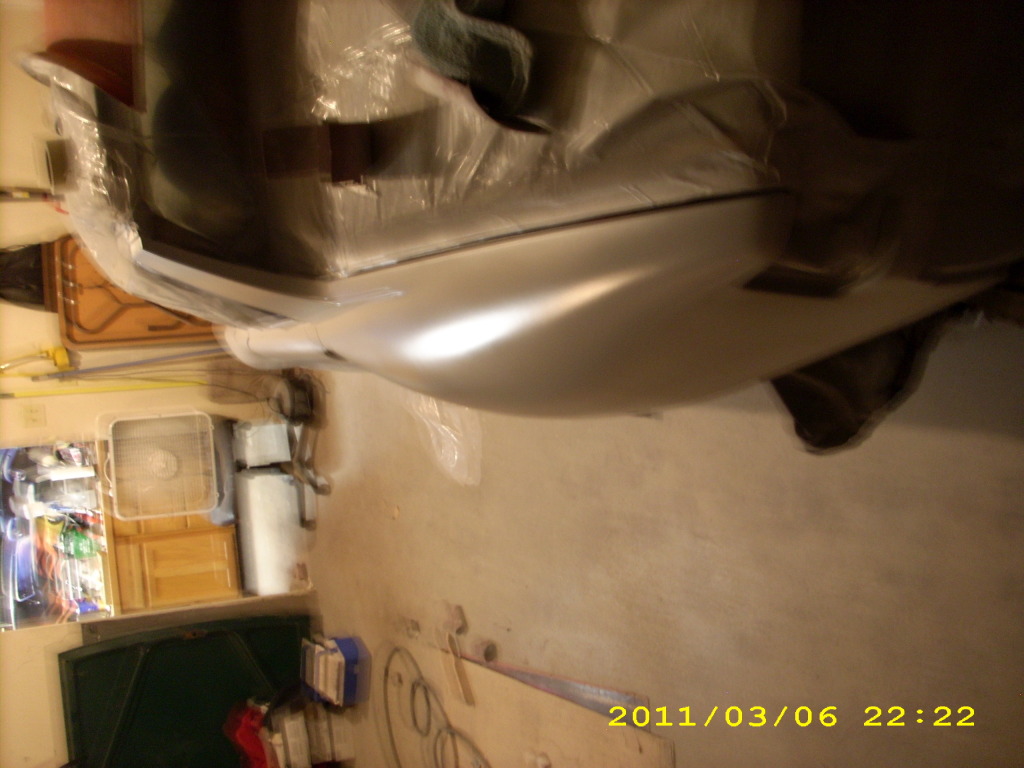
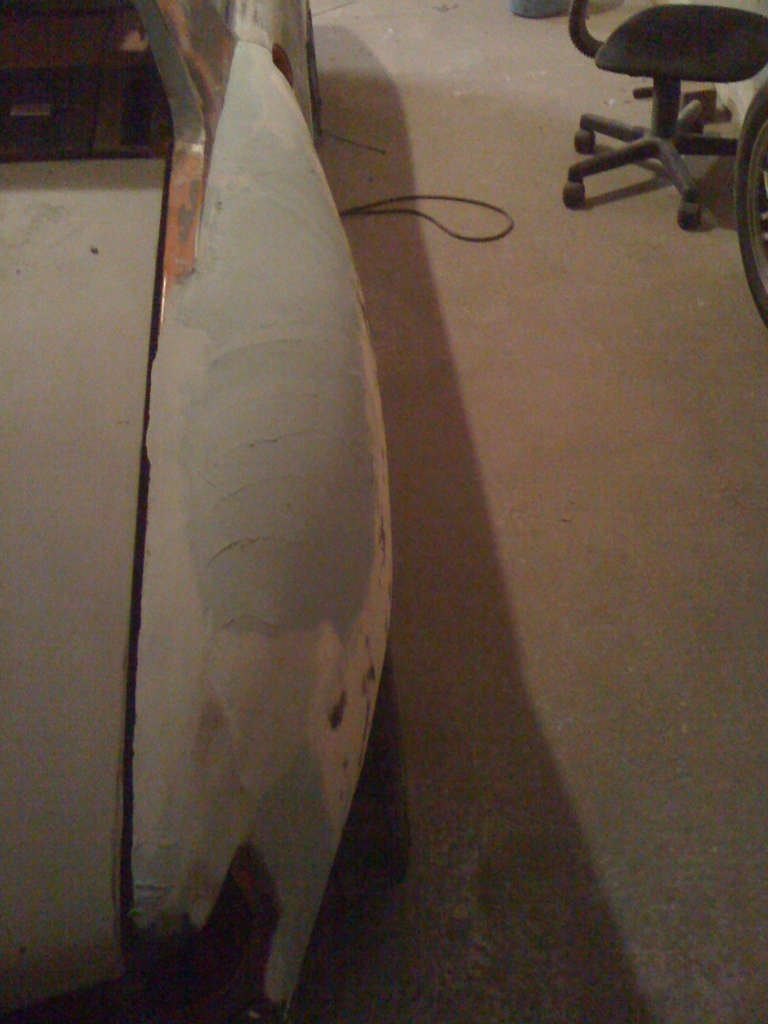
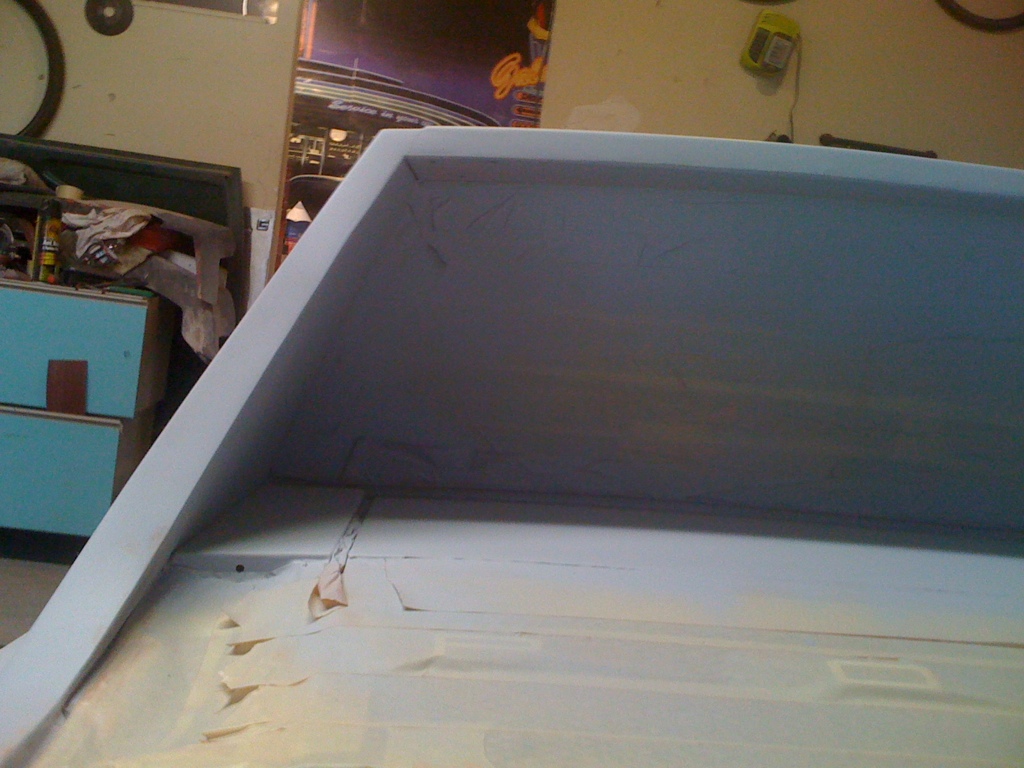
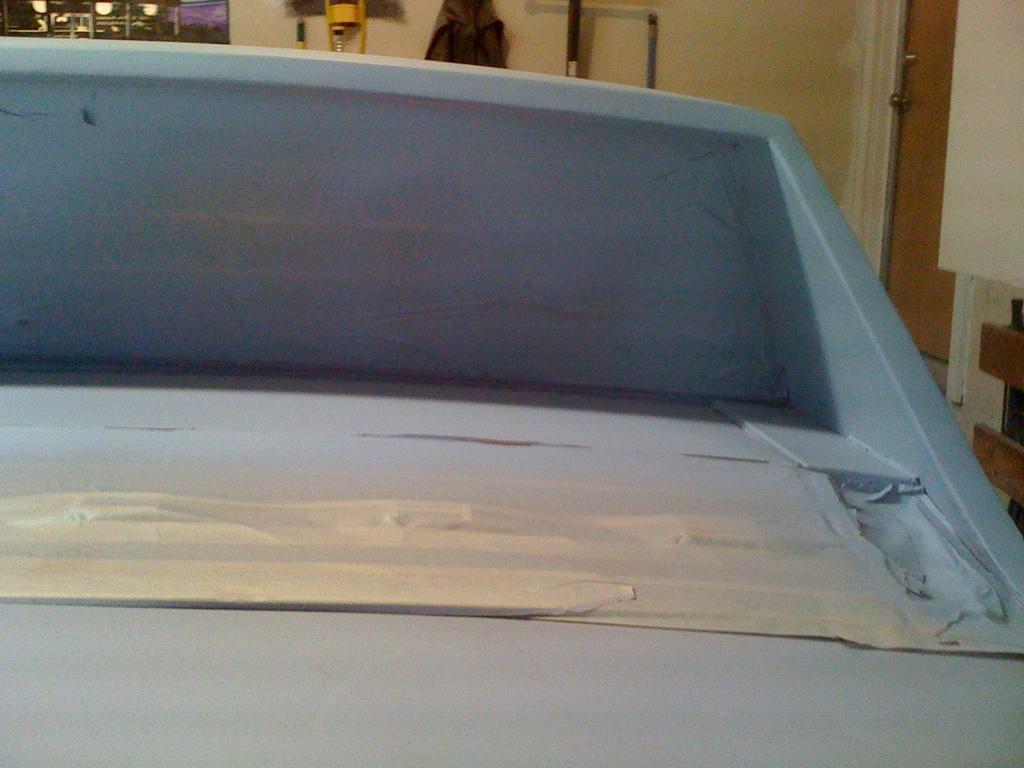
Finished up sanding the LR fender tonight. I was afraid the area around the tail light would need some more filler and I was right... darn it I knew I should have laid it more evenly.. BUT the rest of the fender is DONE with filler. Needs primer filler and final sanding. 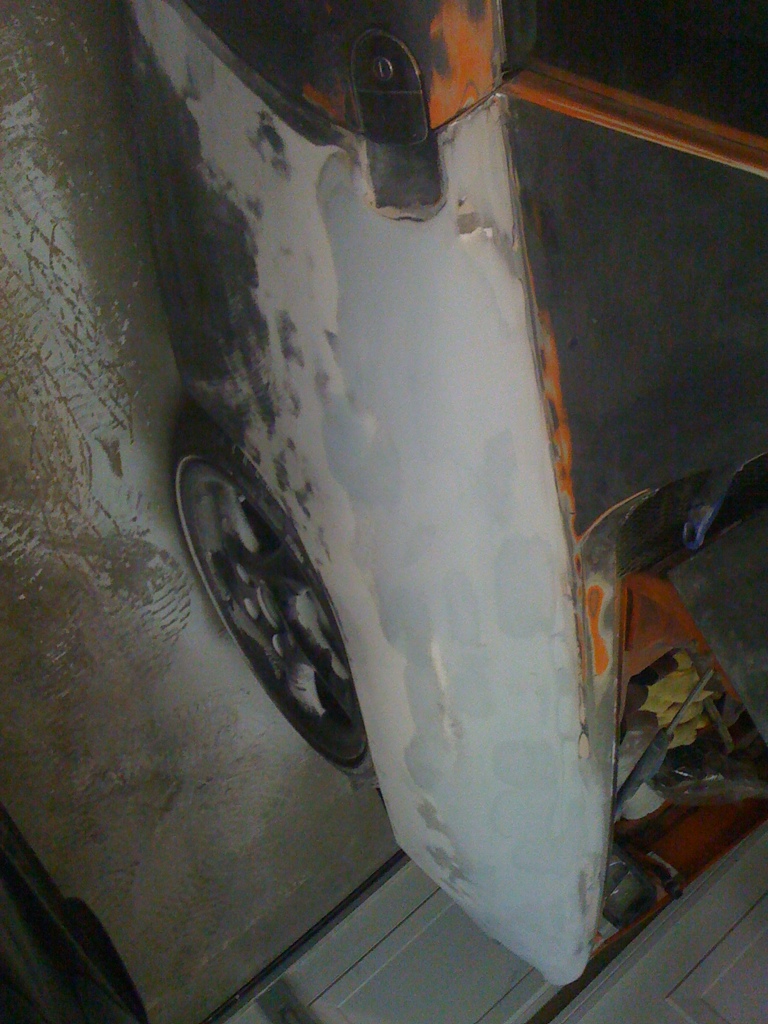
Front fender got some sanding as well, then I got tired of the dust kicking back at me (I typically have the fan on and door open, but it was night and cold..) so I called it a night. 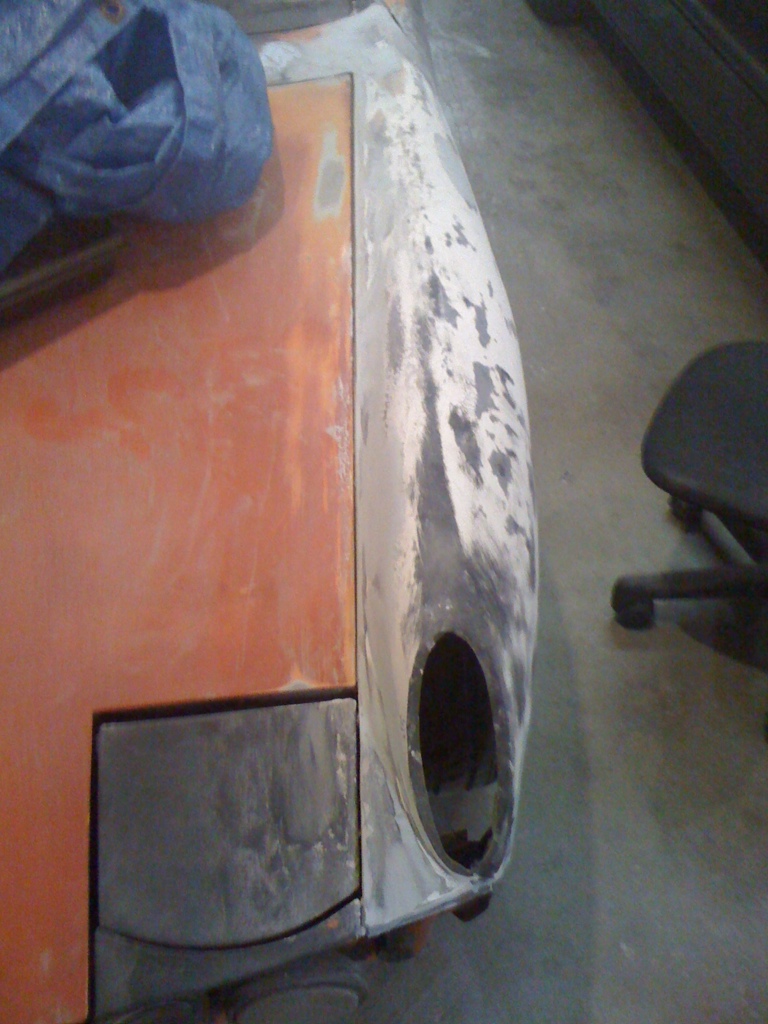
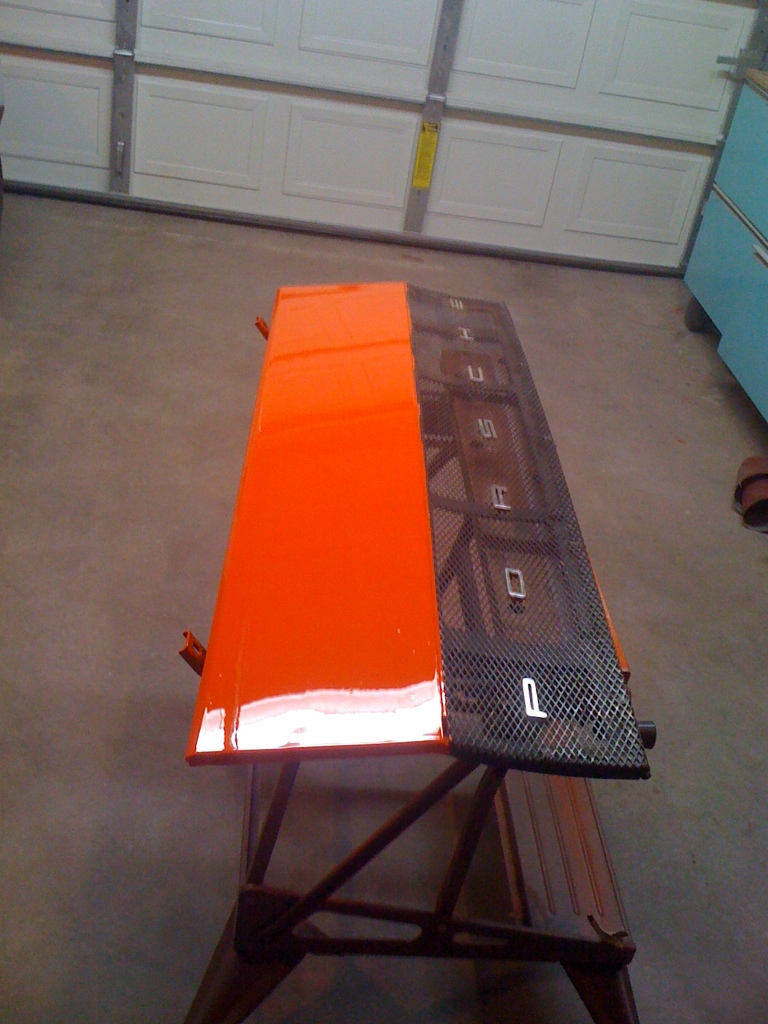
Posted by: Andyrew Feb 10 2011, 01:27 AM
Made some progress yesteday and today. Not enough yesterday to post... (Mixed and laid some small batches of filler)
But I bought some filler. Supposed to be better than the other stuff. 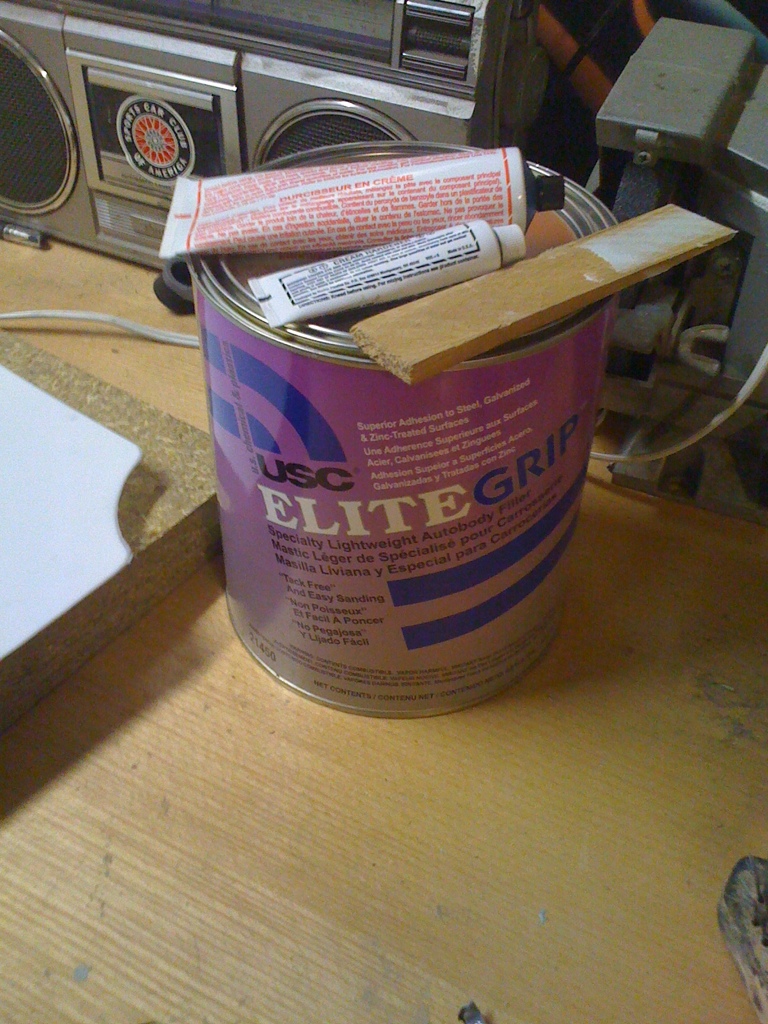
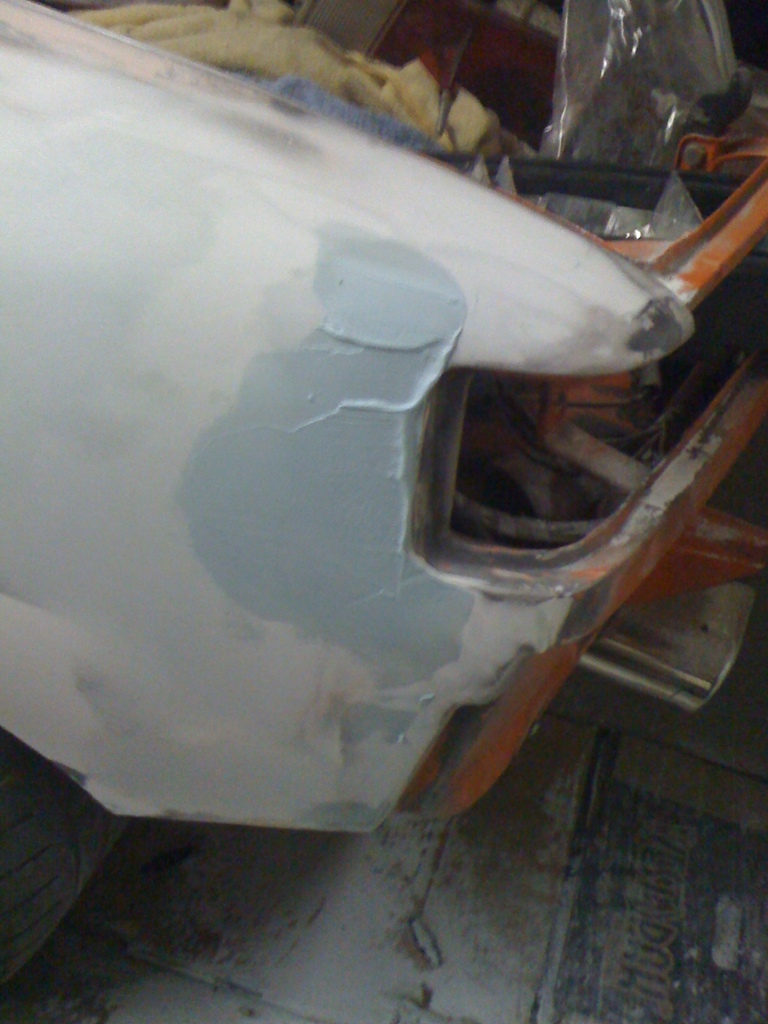
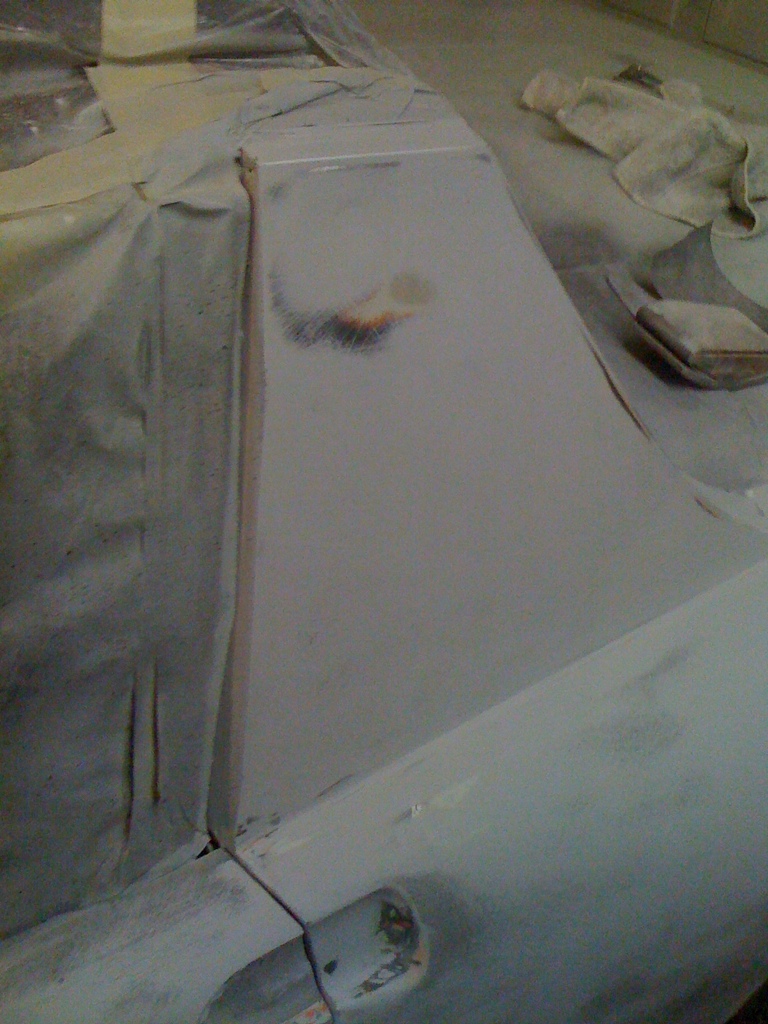
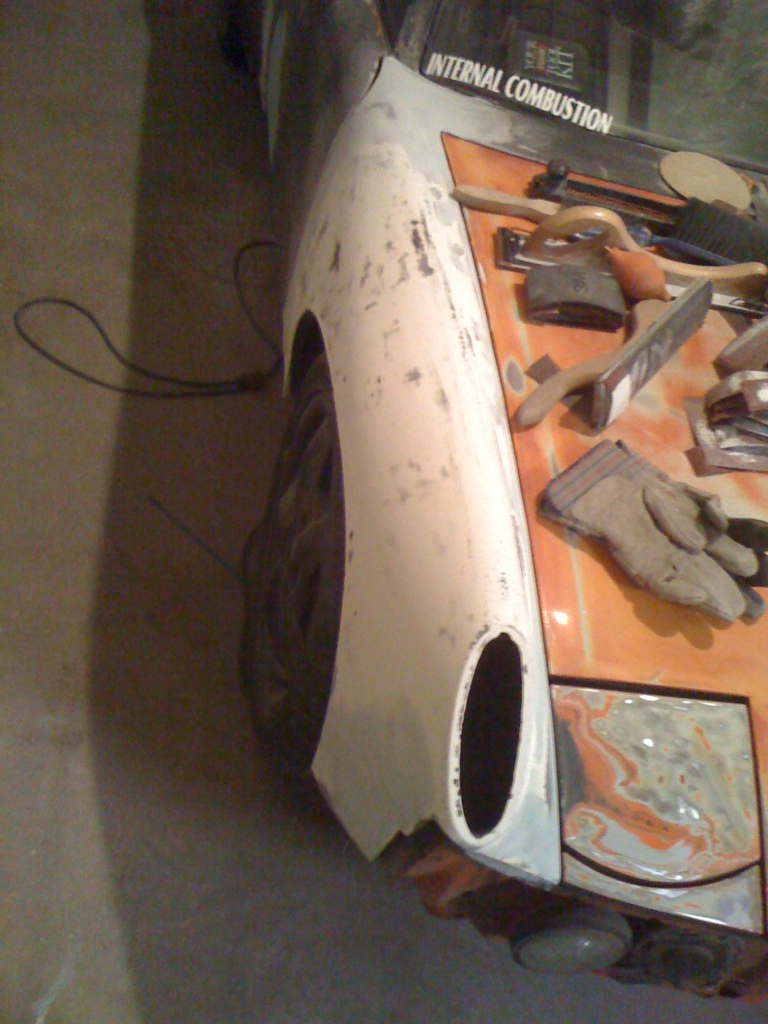
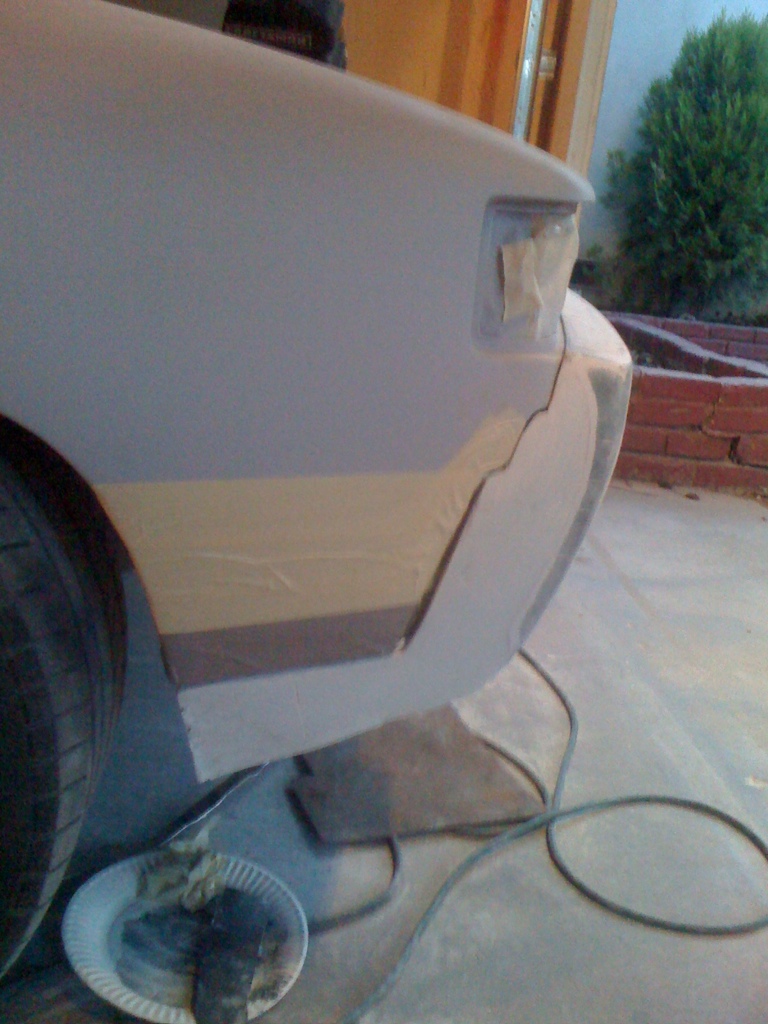
Put the front bumper on and made some tape and marks for myself. Still need to put it on again and redo it. both the bumper and the body are going to take quite a bit of work to look right together (yay fiberglass bumpers...) I think im going to get the body where I like it and just match the bumper. 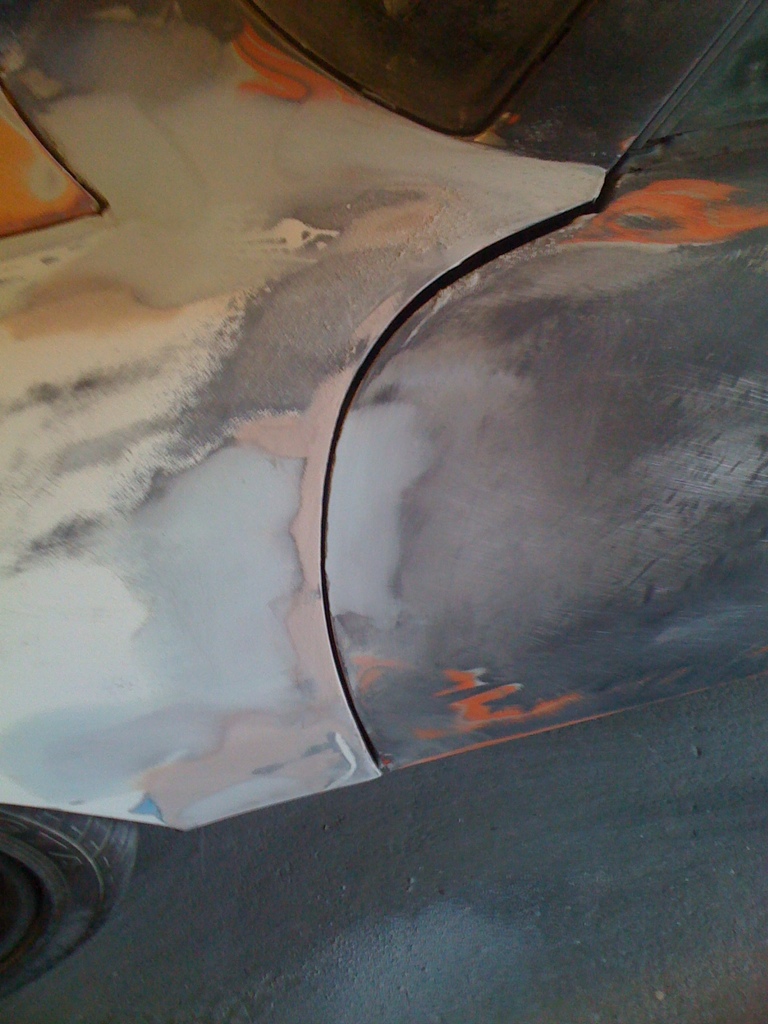
Noticed a low spot on the door. Filled it in some. (This is the stuff i'll notice when I actually throw some primer filler and guide coat on...)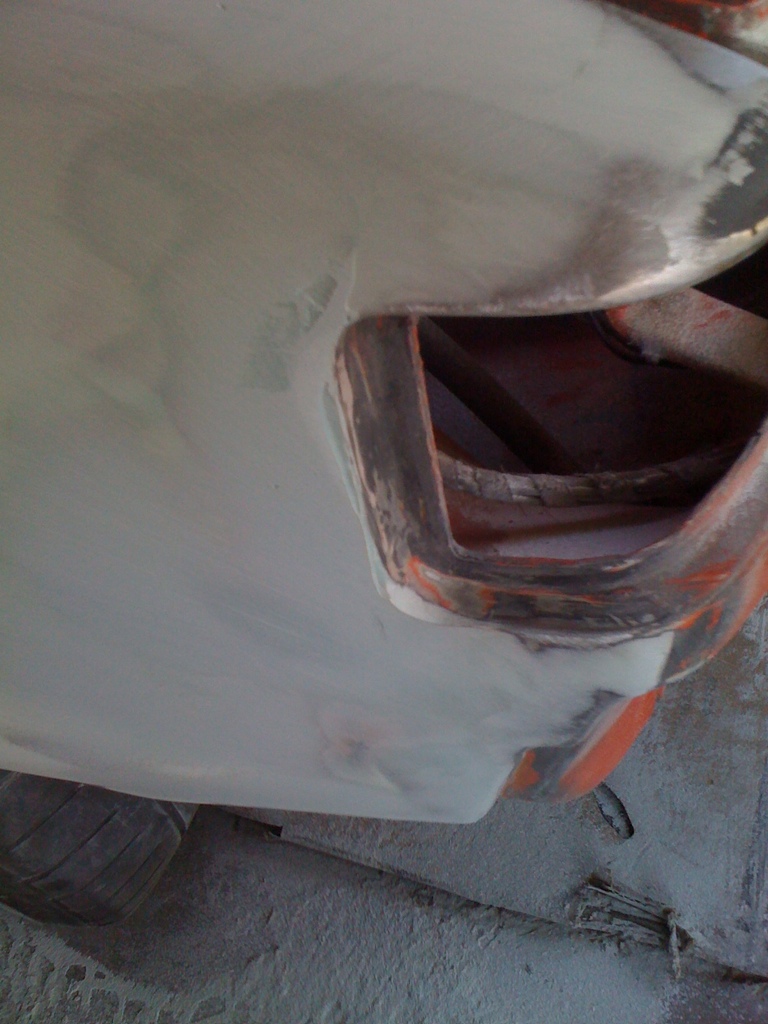
This is prior to 2 more applications of filler... Last application I said "fudge it" and laid it on thick.. Took 20 mins of my lunch to sand it today.. Arg..
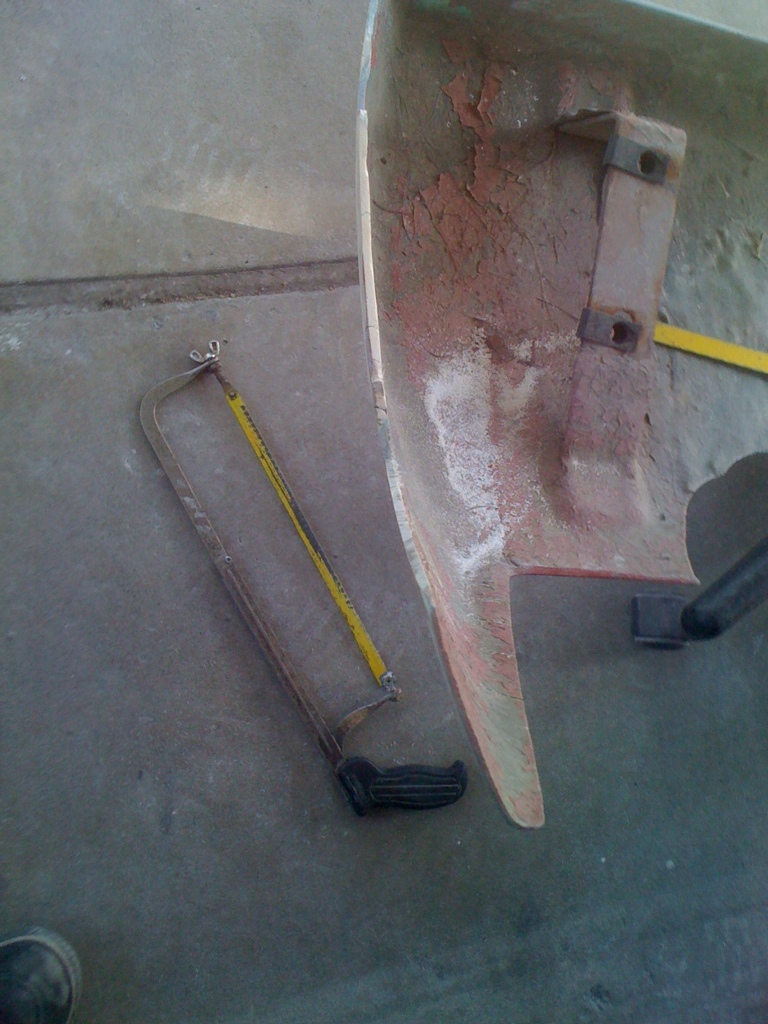
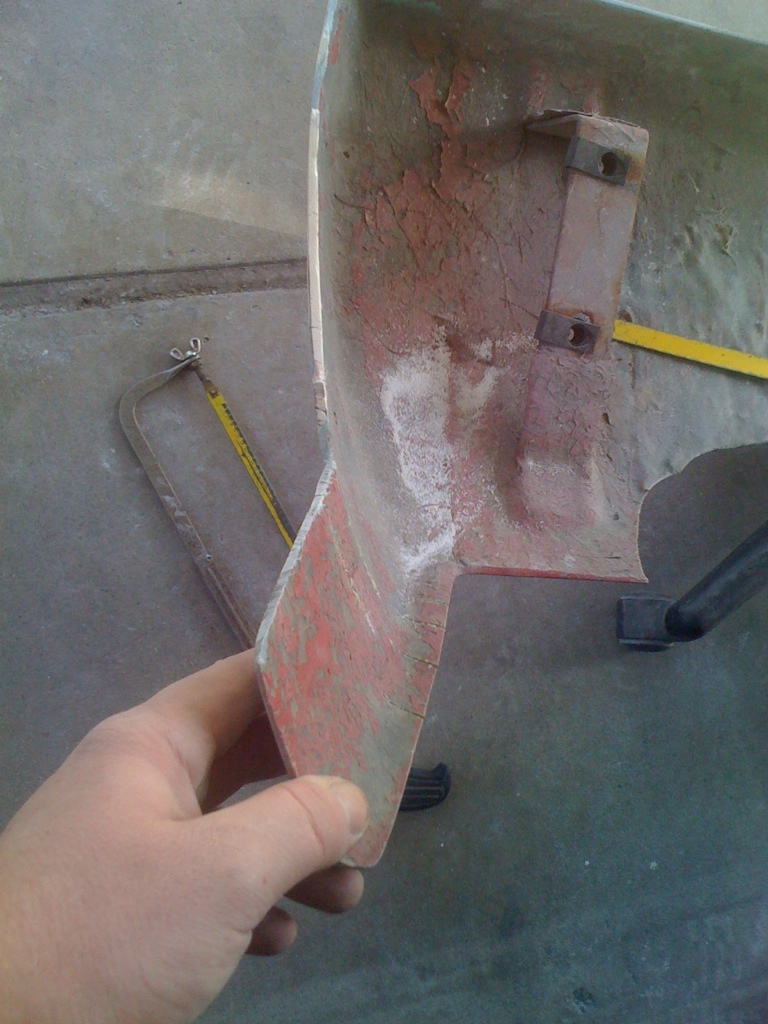
I was done with working on the fenders (for now) so I decided I would pull the supports off the spoiler. took some finessing, but I got them loose. 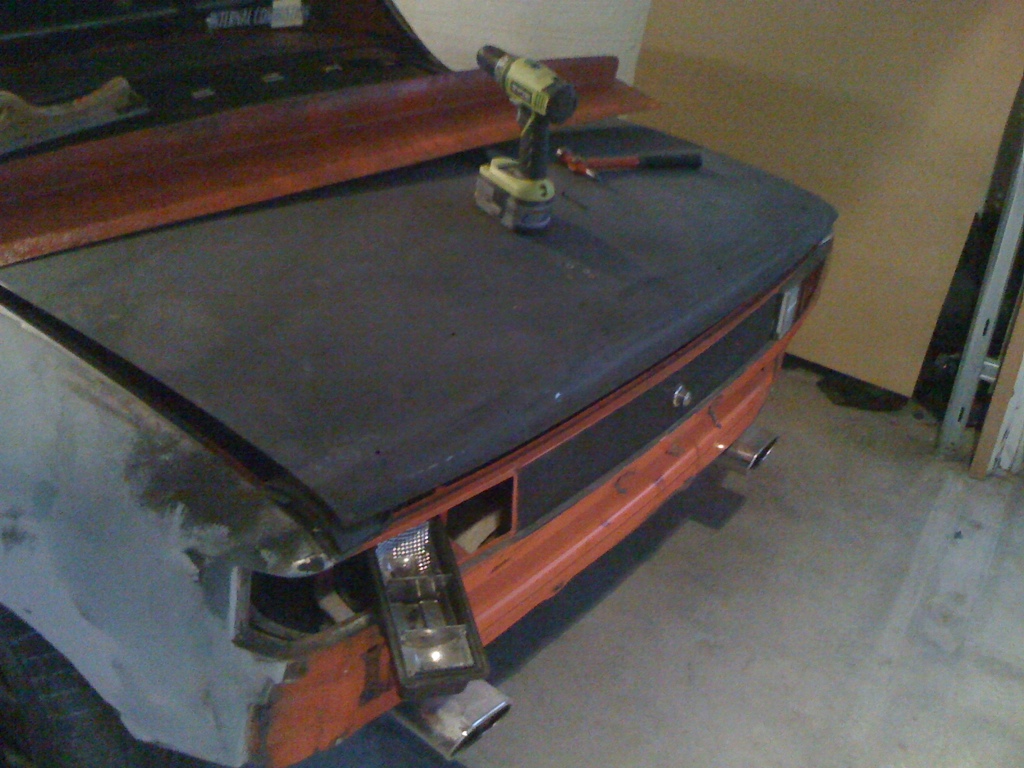
And I then removed the rivets holding it on. 
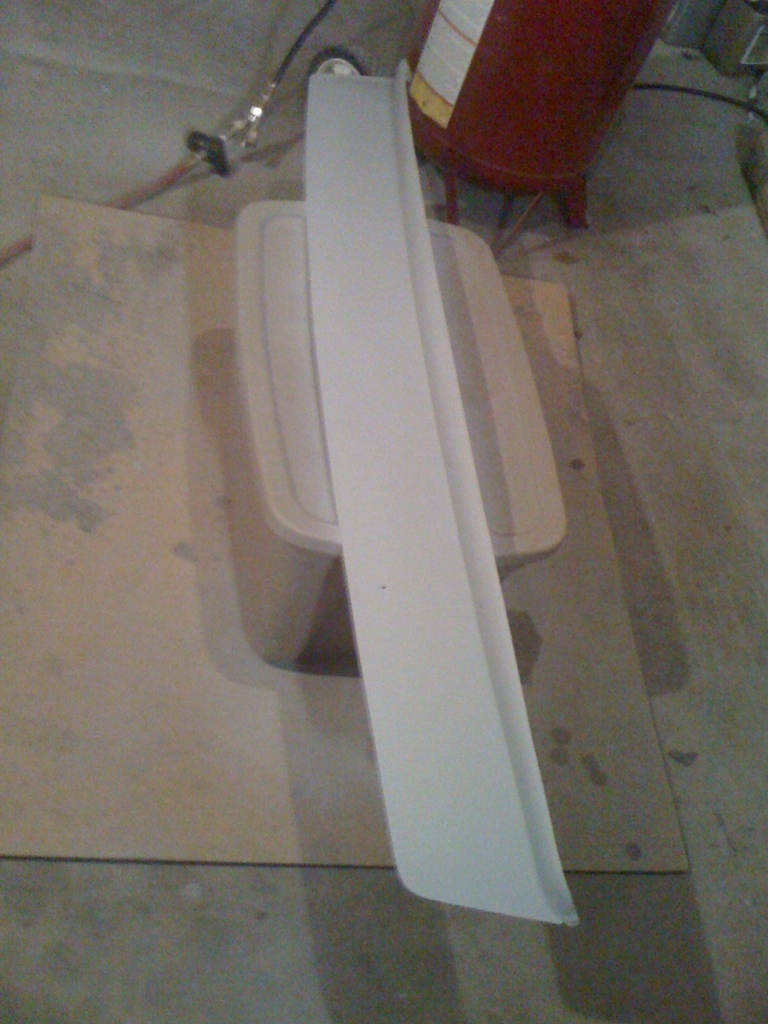
Threw the light in to get a look at what I was dealing with. I love the spoiler, but I love a clean rear end as well... Thoughts anyone? 
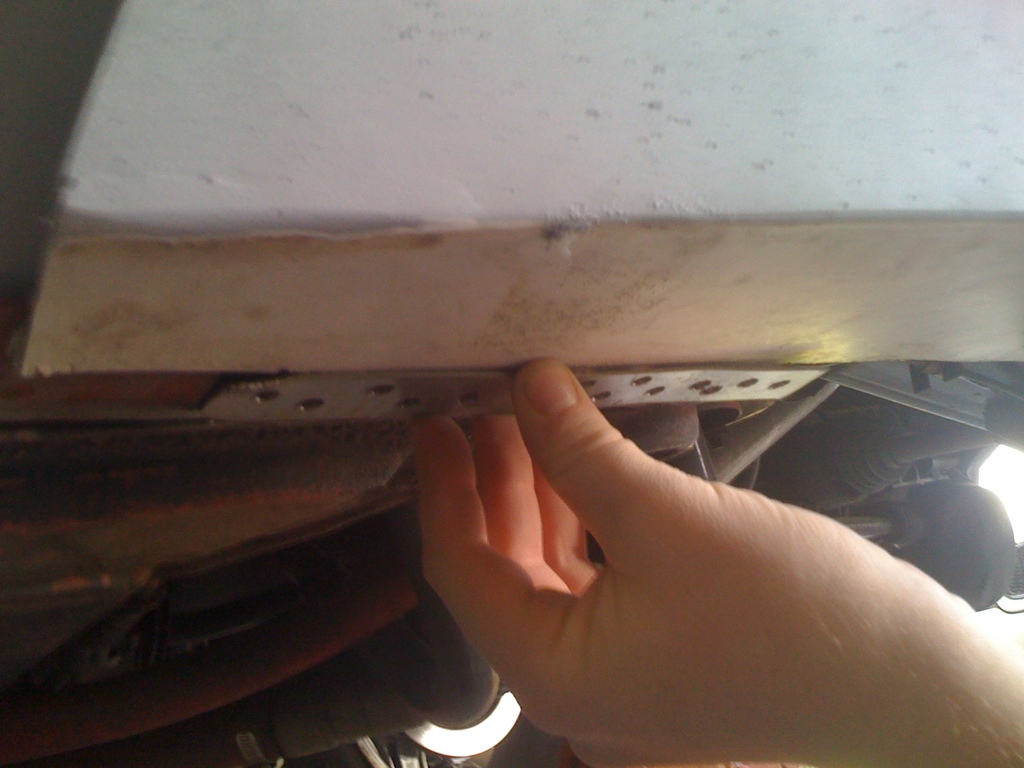
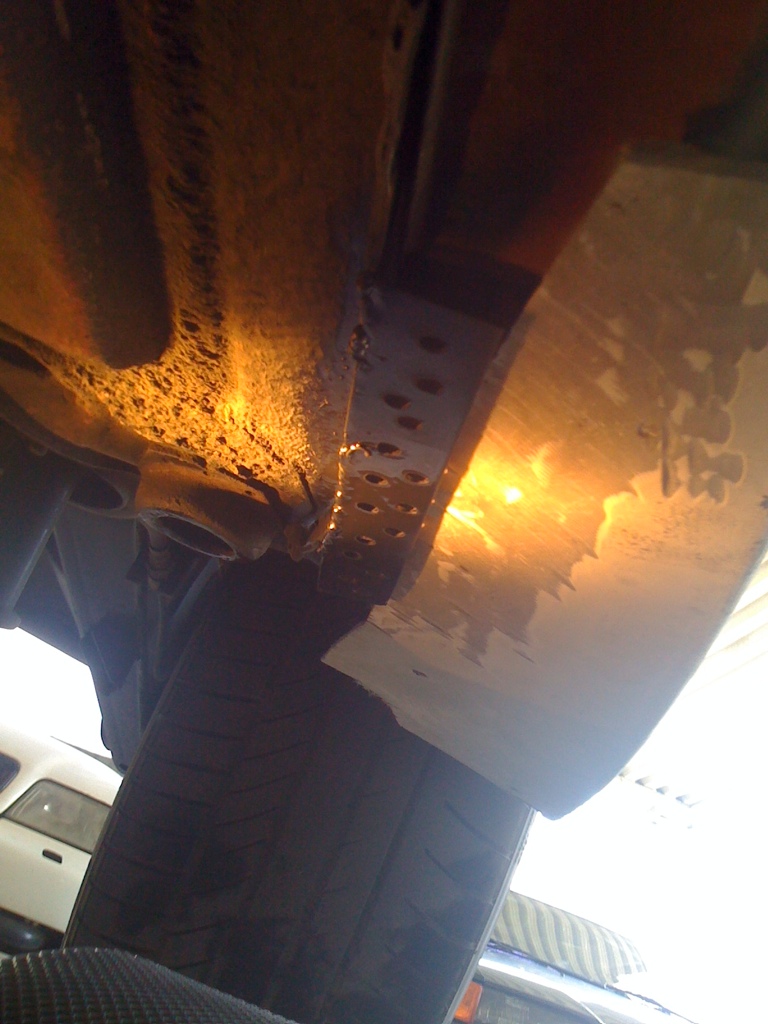
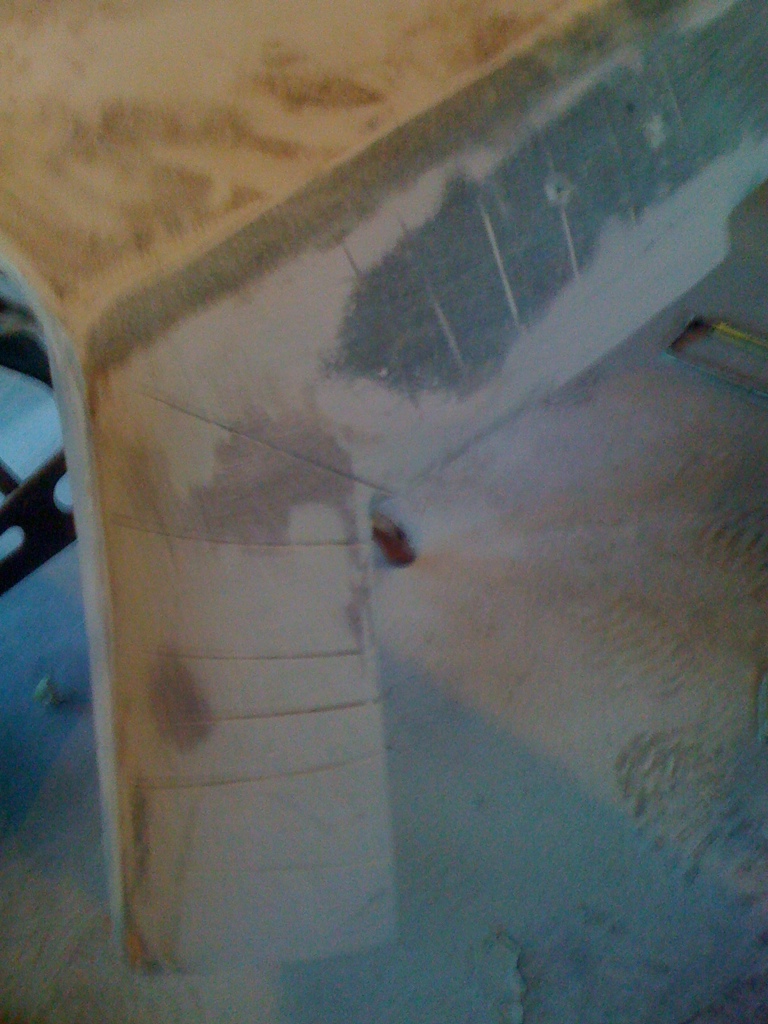
Since the trunk was clear, I figured it was a good time to plug the holes from the previous ducktail spoiler. They were good sized holes, but nothing some welding cant fix (I actually couldnt get a block behind it because of the double layers, but it filled just fine) The spoiler actually hides all but 1/2 of these holes, but I figured I would clean it up anyways in-case water got in. 
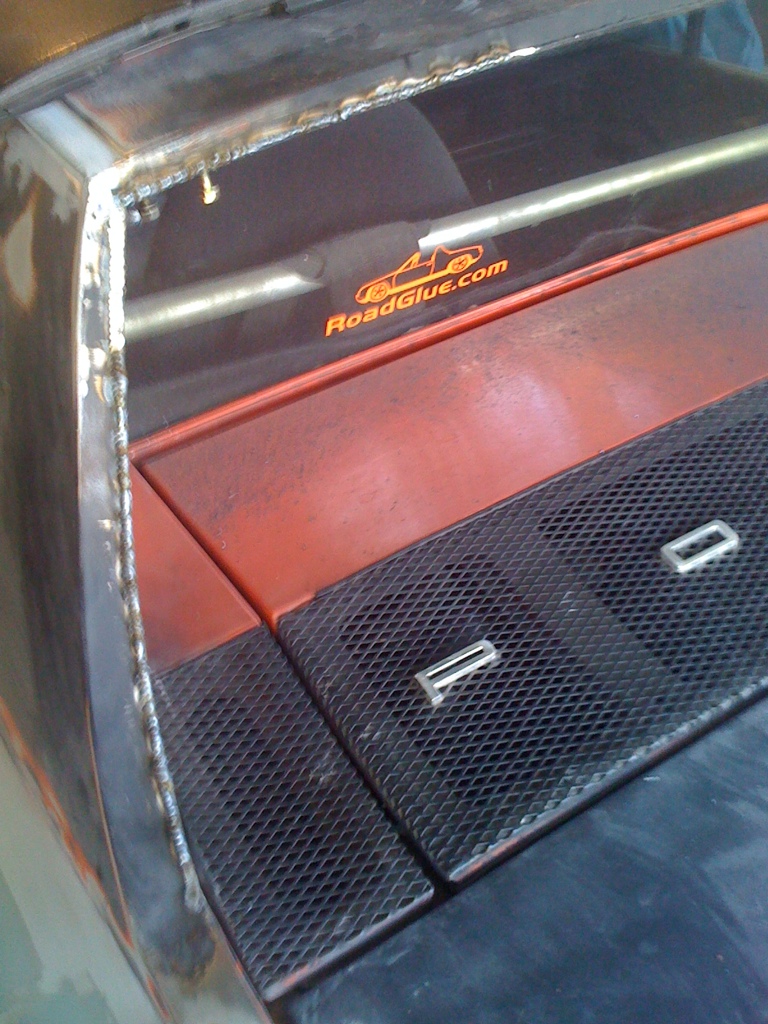
I then decided to work on the targa bar some. ground down and welded @6" intervals, then i'll grind all of it down and weld it. (6" intervals was to keep the targa bar from splitting.
I need to get me a bigger grinder... This is tedious... A big 9" with 36 grit pads would be wonderful... My 4.5" works, but the grinding stones are only good when they are really fresh... Meh, maybe i'll just buy a bunch of stones...
Finally I decided to longboard sand the trunk.... Whoooo eeee I got a lot of work to do.... Im debating a bunch of primer filler, or just skim it with glazing puddy and flat board it... Tough decisions... Maybe i'll hammer and dolly it (However most of the area's I WOULD do that in have the trunk reinforcing behind it... I do have my Map/Oxygen tanks... I could shrink them (and risk some oil canning..). Im looking for suggestions here as well..
Posted by: orange914 Feb 10 2011, 12:48 PM
Got a little progress
Wanted to protect the bondo from the welding. 1/8" MDF board works pretty well.
OH... thats not the new fender flair template!?
Posted by: Andyrew Feb 10 2011, 01:16 PM
Haha! Nah, that wouldnt be over the top now would it?
Posted by: Beach914 Feb 10 2011, 01:38 PM
Yup, You need to do a dually rear set up to get tires wide enough. Maybe from a chevy pick up.....just kidding. Looks really good.
Posted by: Hontec Feb 11 2011, 06:43 AM
Man, that's a lot of work going into filling/sanding!! 
Posted by: Andyrew Feb 11 2011, 10:19 AM
Yup, Bodywork is always extremely laborous... Especially something like this where I have to create my own body lines.. There is a lot of "That looks like shit, what if I do this", And certainly plenty of "Well, I could do this, but Eh Its good enough". Those kind of lines are what makes the difference in the final sanding.. Its rediculous how much more work I have to do, but its what you have to do for a decent paint job..
I have been pushing a lot of time lately towards my new washer/dryer... It works fine, but the drain for it @ the house can not keep up with the pump.. I've been doing some serious engineering to get this stupid thing to work and its costing a lot of money just to get it to work..
I just keep pushing for the day when I can finally lay down some Phoenix Red... Mmmm that color is sooo pretty.
Posted by: pt_700 Feb 11 2011, 12:24 PM
i prefer my 914's rather unadorned (in response to your question about rear spoilers). after reading the thread and link about the low pressure area behind the targa bar, it's likely there's not much airflow back there to push on a spoiler anyway. looks like you'd have to use a big wing to have much effect.
by the way, there's some really good stuff in that thread and link (http://www.914world.com/bbs2/index.php?showtopic=115467&hl=targa). surprised so little was studied about the aerodynamics of these cars.
thanks for the posts and pics! keep 'em coming!
paul 2008_poster.pdf ( 276.51k )
Number of downloads: 673
2008_poster.pdf ( 276.51k )
Number of downloads: 673
Posted by: Andyrew Feb 11 2011, 03:42 PM
Well the biggest problem is this car can actually USE the spoiler.. Without a spoiler the rear end gets REALLY unstable at speeds much over 100mph. I've been at 145 with just the small ducktail spoiler and that was just a bit scary.. This spoiler is a larger spoiler and should have better downforce at lower speeds. I was also considering the "vortex generators" on one of my spare tops, which should help get wind to the spoiler.
I think i'll just get another trunk as a spare and have it flush... For now i'll paint this hood with the spoiler.
Posted by: Lennies914 Feb 11 2011, 09:11 PM
It's good to see the progress you're making. I personally enjoy the body work more than the mechanical work. I'm looking forward to starting my next project. You are inspiring me.
Keep it up, it's looking great. 
Posted by: computers4kids Feb 12 2011, 09:47 AM
Andrew,
If you ever want to tow your car down here I'll be glad to give up a Sat or Sunday and help you. I have a 60 gallon compressor, DA, simple air tools, air block & hammer body tools...nothing special but works. I only have a cheapo HF wire fed...not worth the trouble.
Looking great...you are definitely motivated.
Posted by: J P Stein Feb 12 2011, 11:09 AM
Not many lunatics have the urge to modify the targa bar.....but I'm one.
Here is an old thread with my run at it mixed in.....there are a few items covered in it. I don't think it made the car any faster....... 
http://forums.pelicanparts.com/porsche-autocross-track-racing/199326-project-pics-we-got-em.html
Posted by: J P Stein Feb 12 2011, 11:14 AM
Spoiler?.....yeah, that's the ticket.
If a little is good, max per rules is better.
Attached thumbnail(s)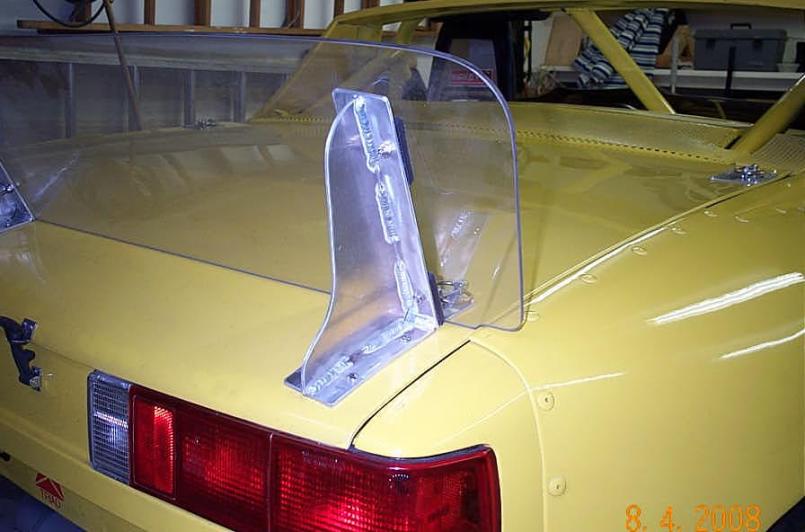
Posted by: Andyrew Feb 13 2011, 11:45 AM
I'll update this thread tomorrow. Not much to post but the pics will be uploaded to the Photobucket account if you want a sneak peak.
Posted by: Andyrew Feb 16 2011, 02:25 AM
Vday weekend I didnt do much like I said. 
Started off with my new favorite beer. 
Friday I picked up some glazing puddy and some grey primer filler(not pictured)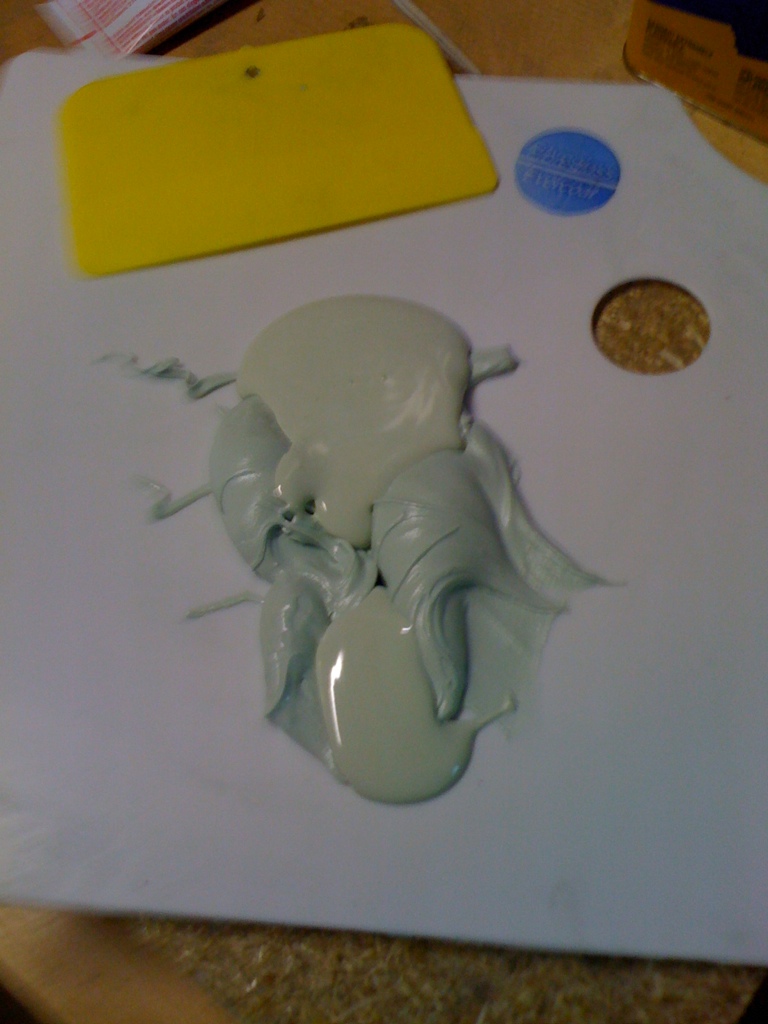
I basically laid down a bunch of filler/ glazing puddy mix over the trunk as I decided it would be easier just to sand it smooth. 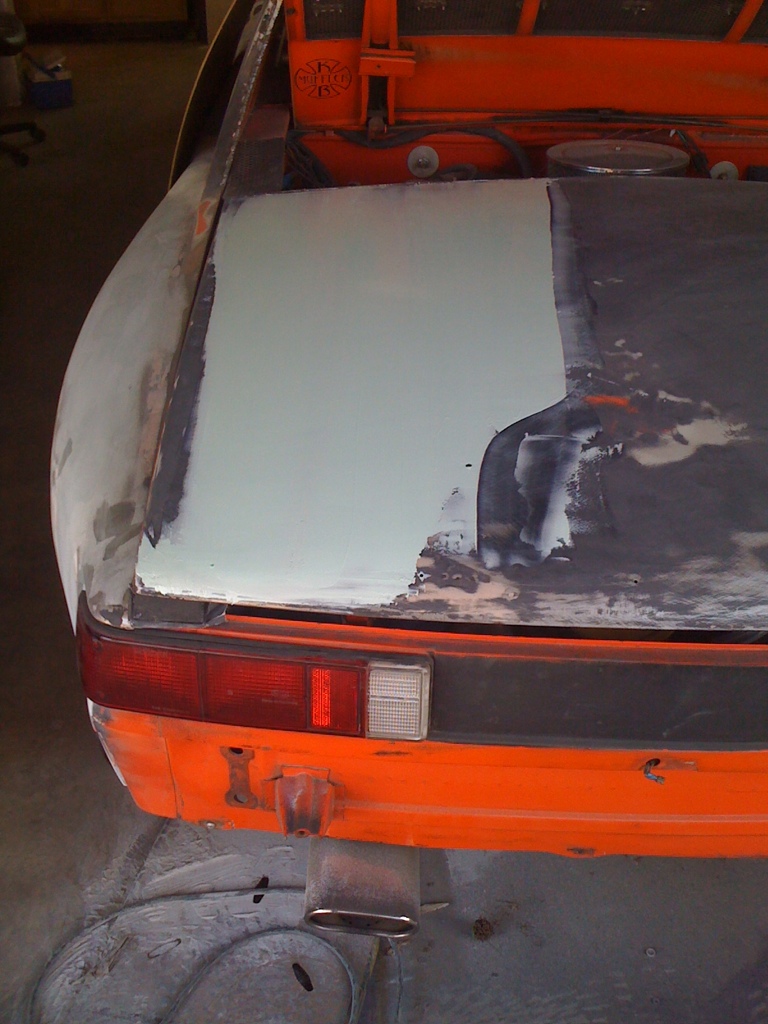
Laid it about 1/8" over the whole trunk. Lots of filler...
Fast forward to tonight. 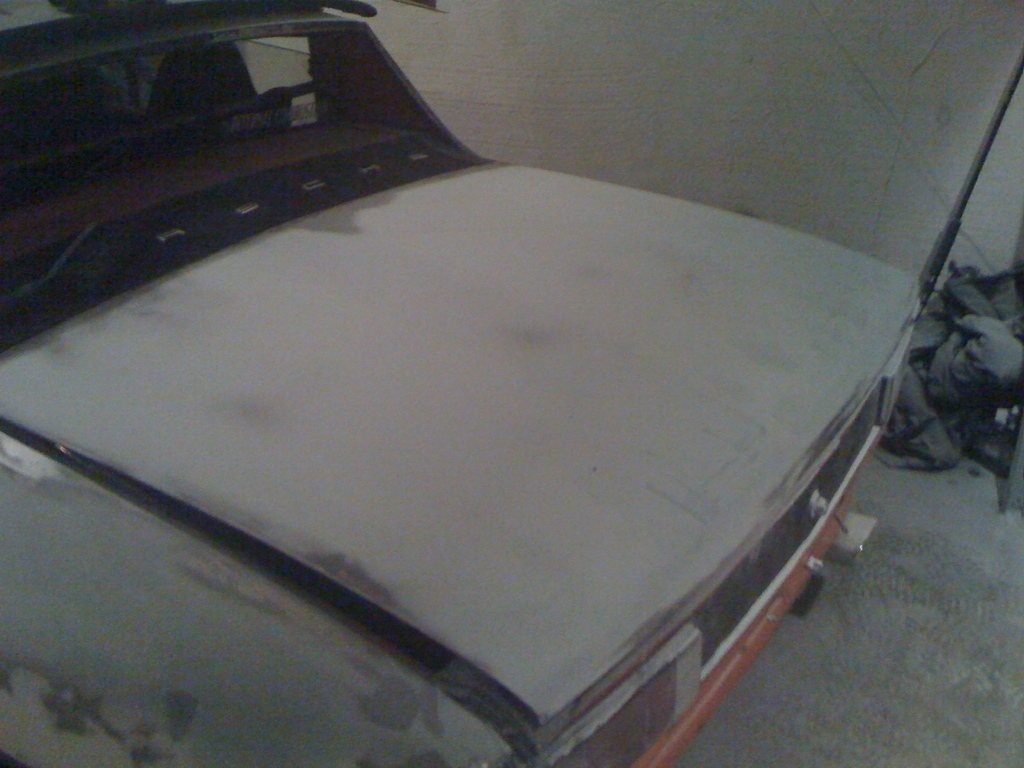

Lots and LOTS of sanding over the trunk. It got really boring so I went down to 60 grit from 80 grit (I dont have that much 60 grit... so i save it, I have about 100 feet of 80 grit..)
Laid down a layer of glaze, then sanded, and laid another layer of glaze down. I still have maybe one or two more layers of glaze to get all the low spots/ pinholes, but the bondo/glaze combo worked really well and was very easy to spread.. I just wish i had more practice in technique. Oh well. 
I enlisted some help of Orange914's son, a good friend of mine.

He was very happy for some reason... I told him I would "make him a star"
If I could get more help like this from more local friends, this would possibly go by faster.. 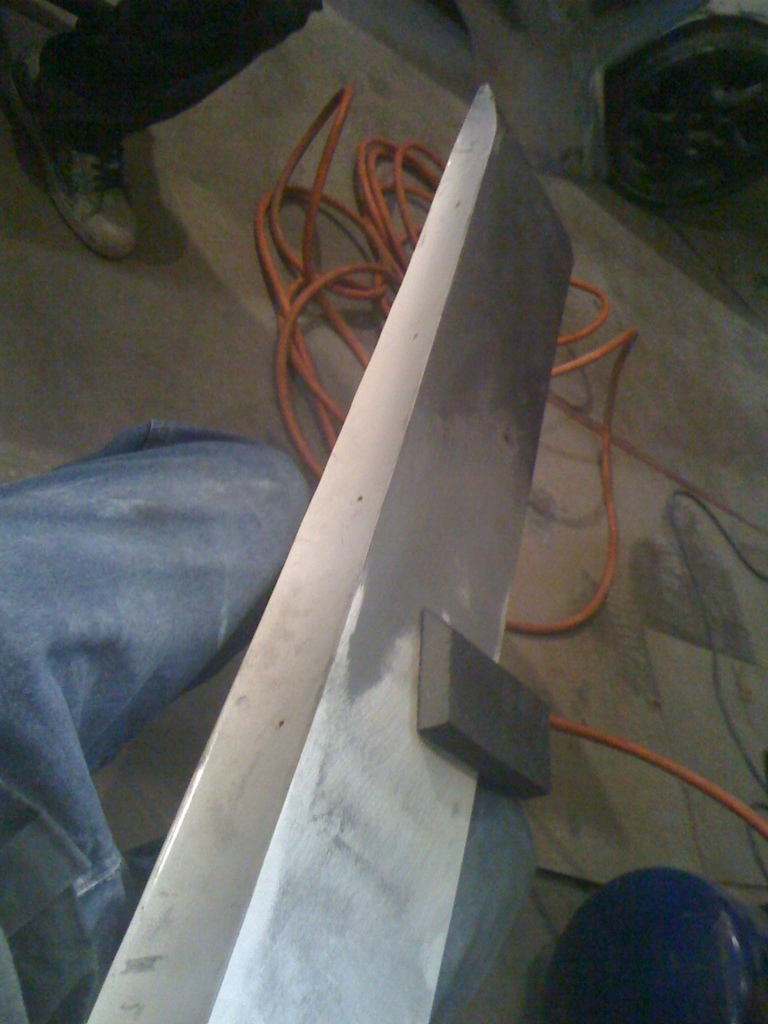
Sanded the spoiler most way with a course block. 
Some primer filler and a bit more sanding and this spoiler will be ready for paint! 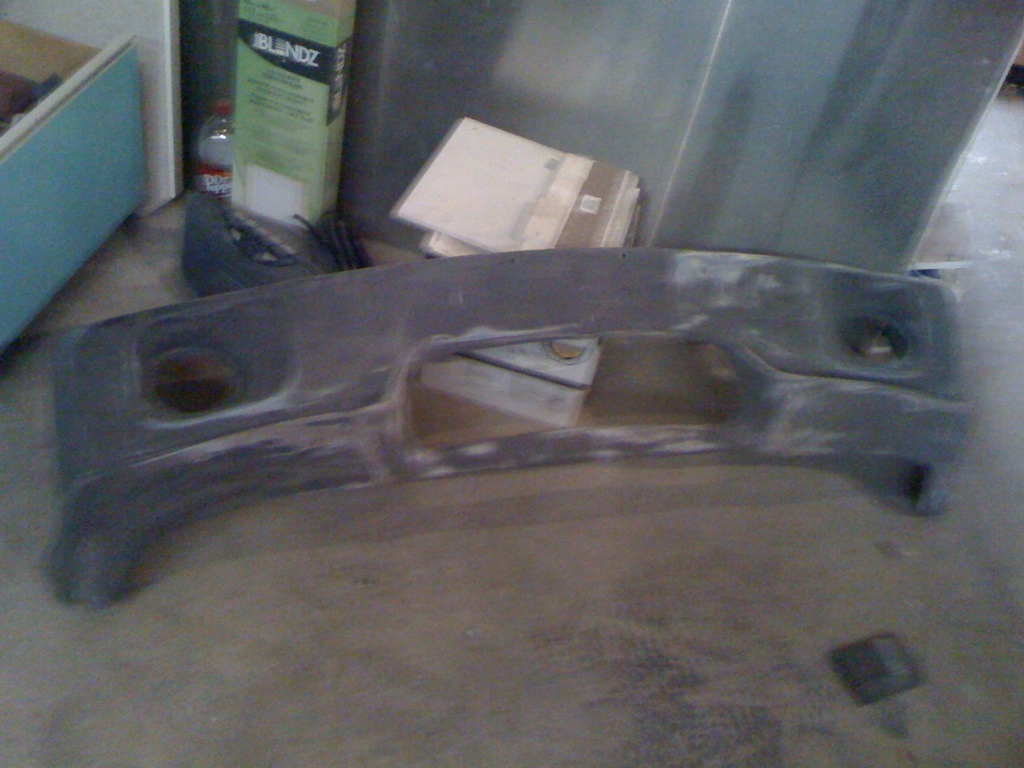
My friends accomplishments. Took off a couple layers of primer and commented on the poor overall shape of the bumper. He is very much adiment that I shouldnt change the bumper in design... maybe he's right... We'll see what I end up doing.
Thats all for tonight! BIG weekend ahead, should be BIG progress! I got my hands on a compressor so let the priming commence!!!!
Posted by: kg6dxn Feb 16 2011, 09:44 AM

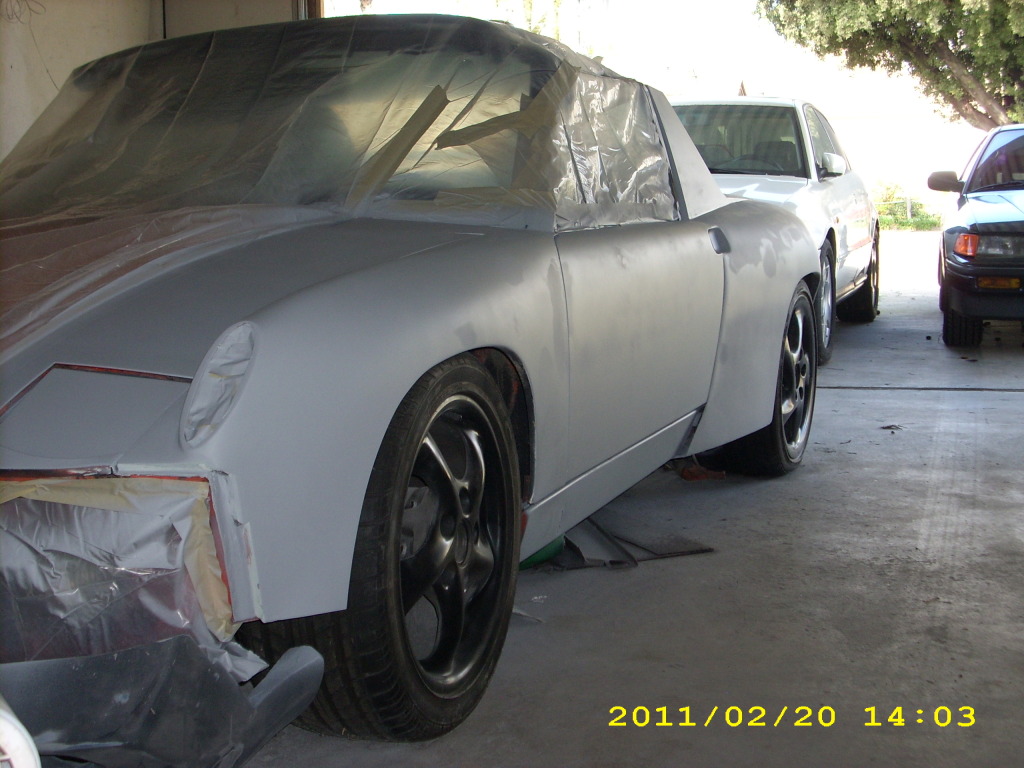
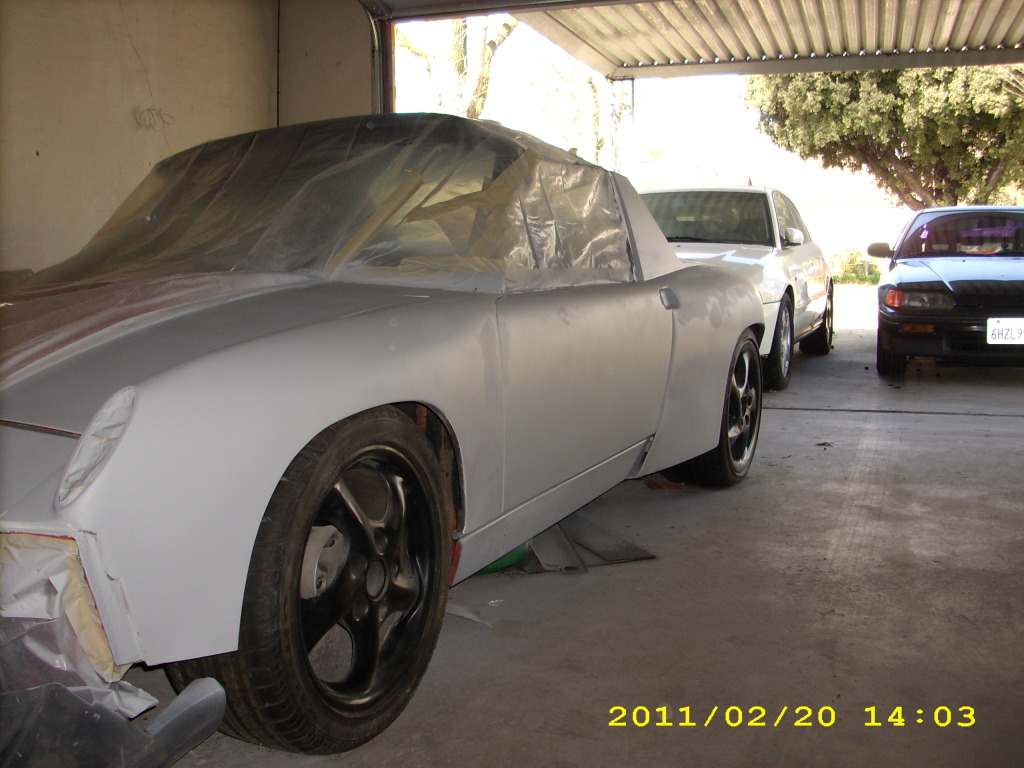
Posted by: Andyrew Feb 20 2011, 03:18 AM
Lets start with Friday.
I didnt get near as much done as I wanted, Particularly because it was raining and I was dealing with a multitude of other issues.. Arg. 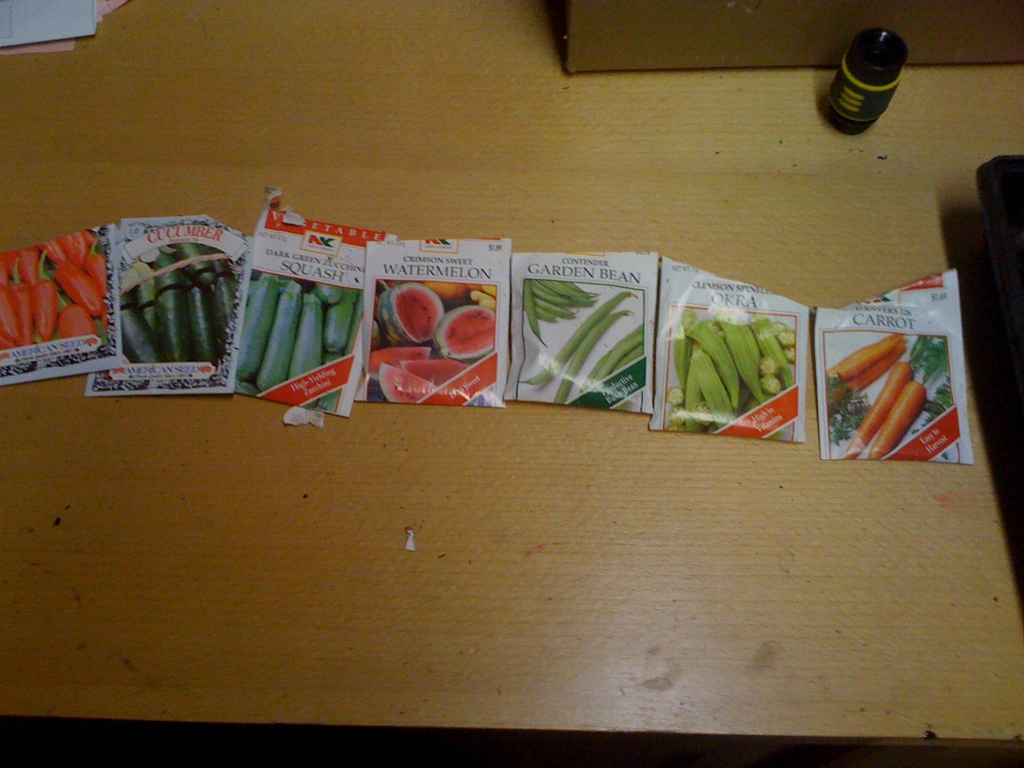
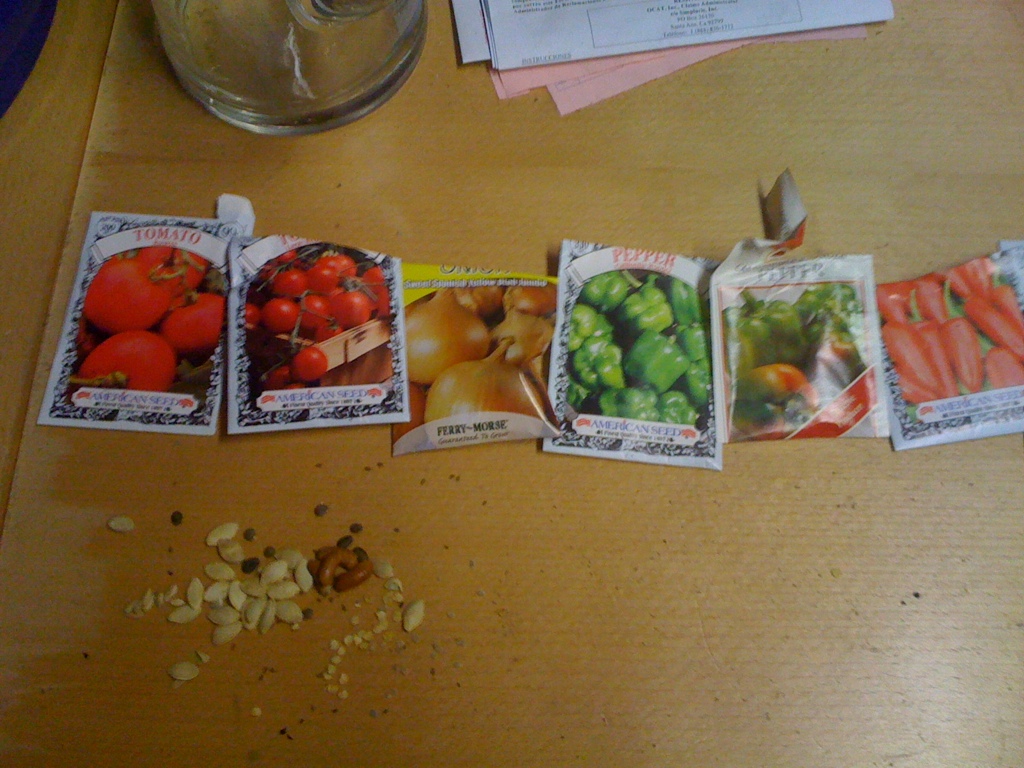
I did get my garden started 
I picked up a longboard air sander... Oh I wish I did this prior to doing the rear trunk.. Arg. 
More progress on the damn targa bar. This is a project and a half... Finally figured out that a cutoff blade attached to my grinder works pretty damn good. Grinding blades just make heat, cutoff blades just slice through the welds. 
Found my window crank! yay! No vice grip!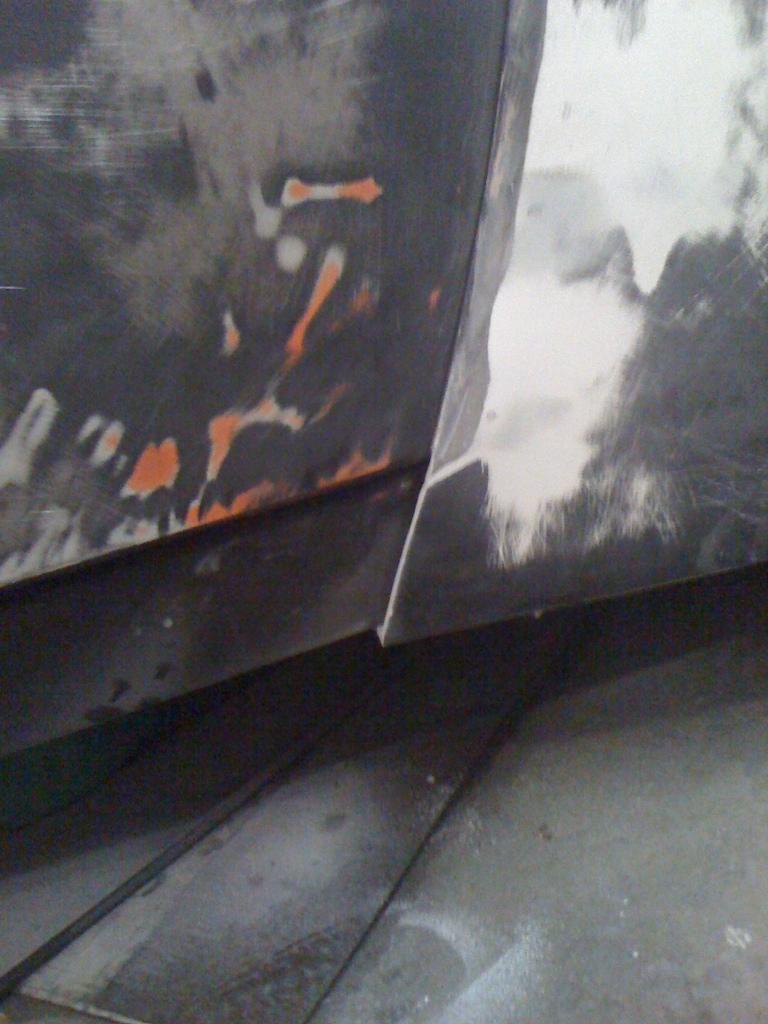
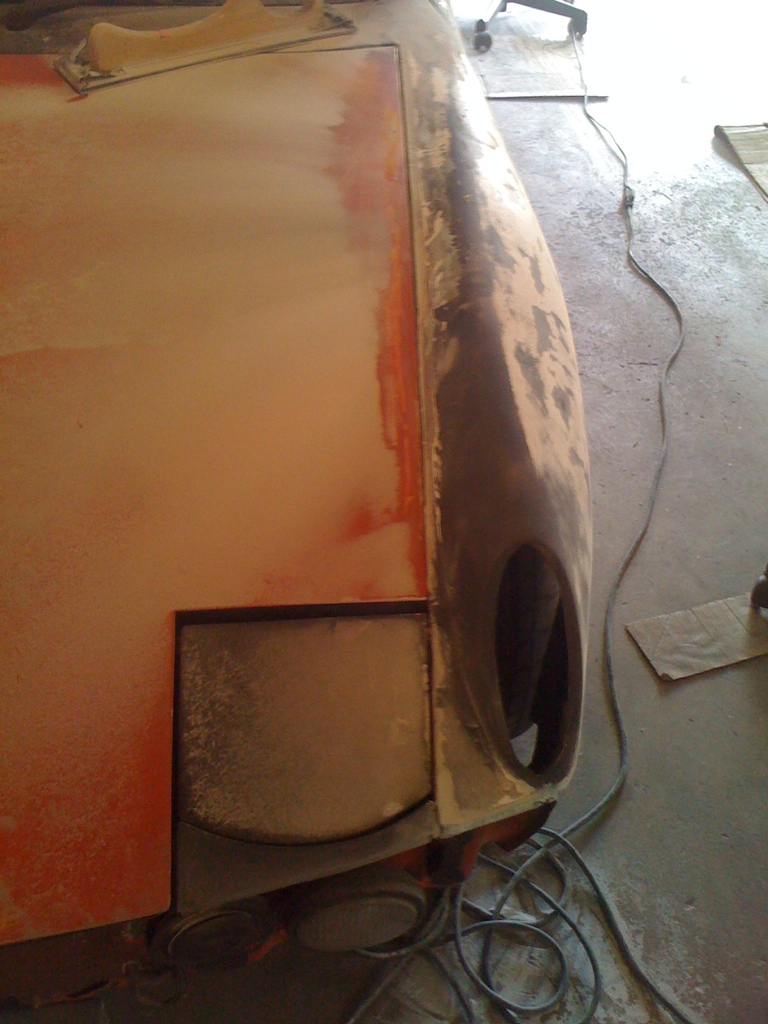
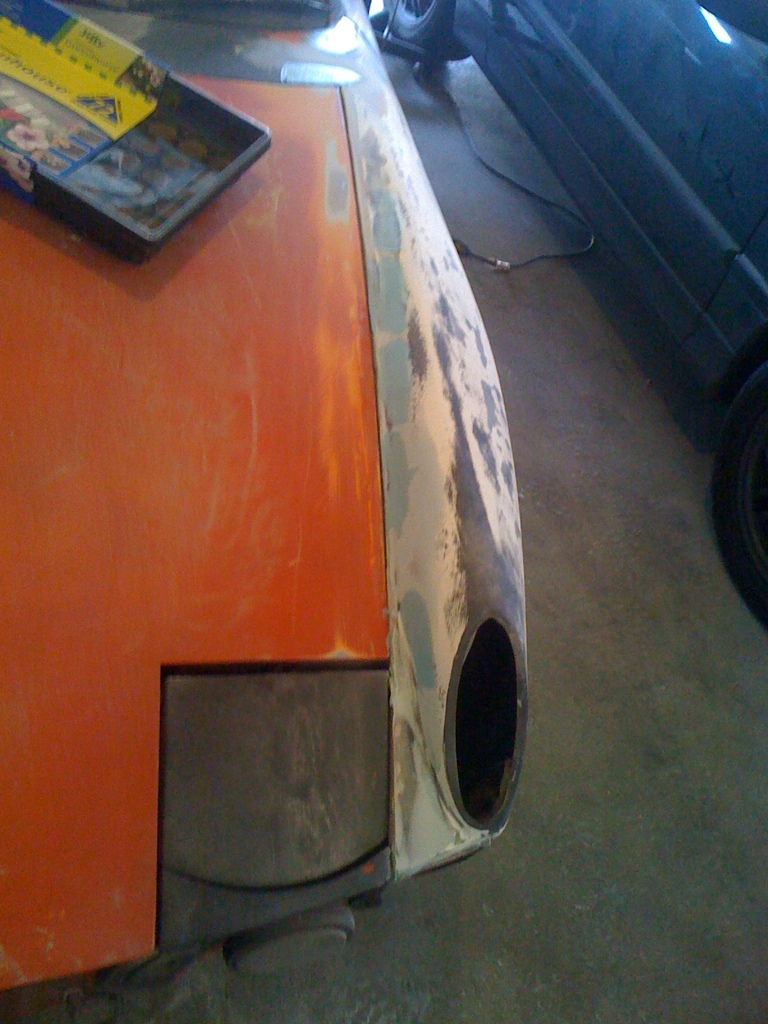
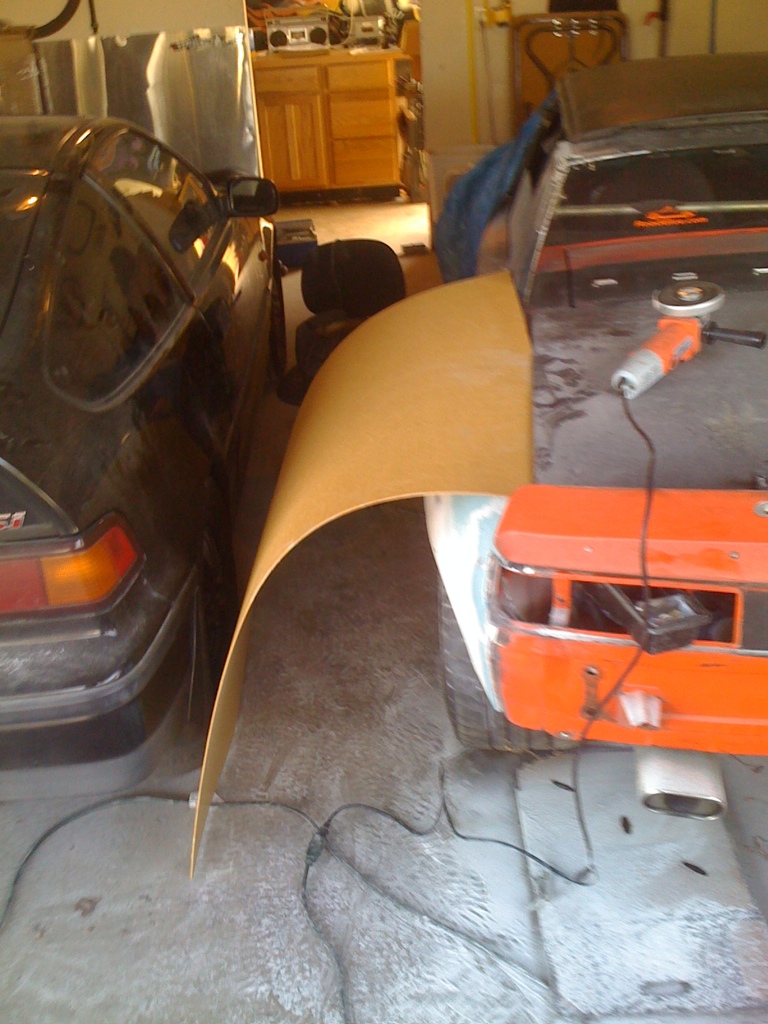
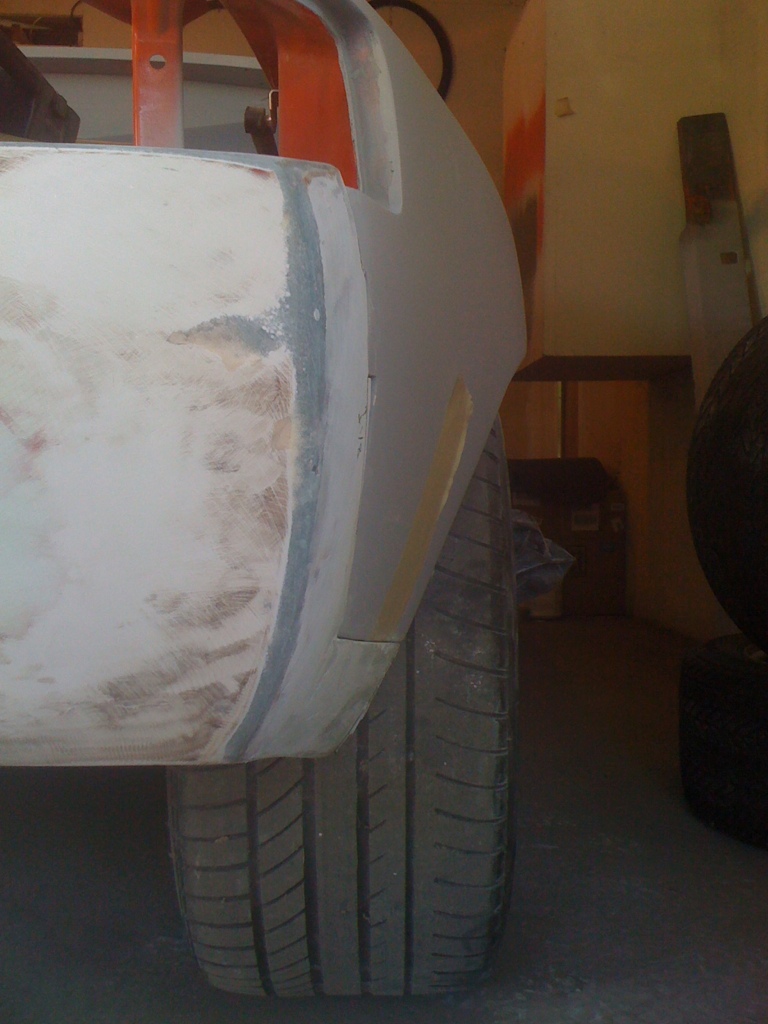
Took the plundge and cutoff the excess from the flare. 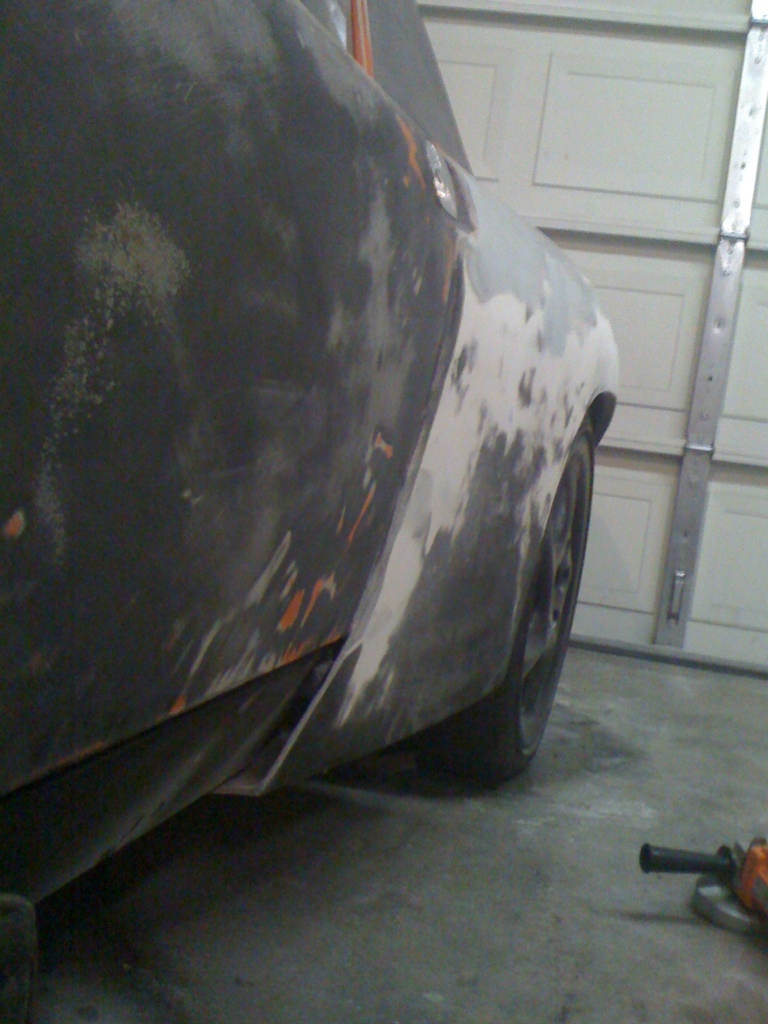
Then I took a step back and said "Wait a minute, I actually like this! A built in brake cooker (or similar) scoop! I can shape my rocker pannel if I want to later, but for now this allows me to progress.
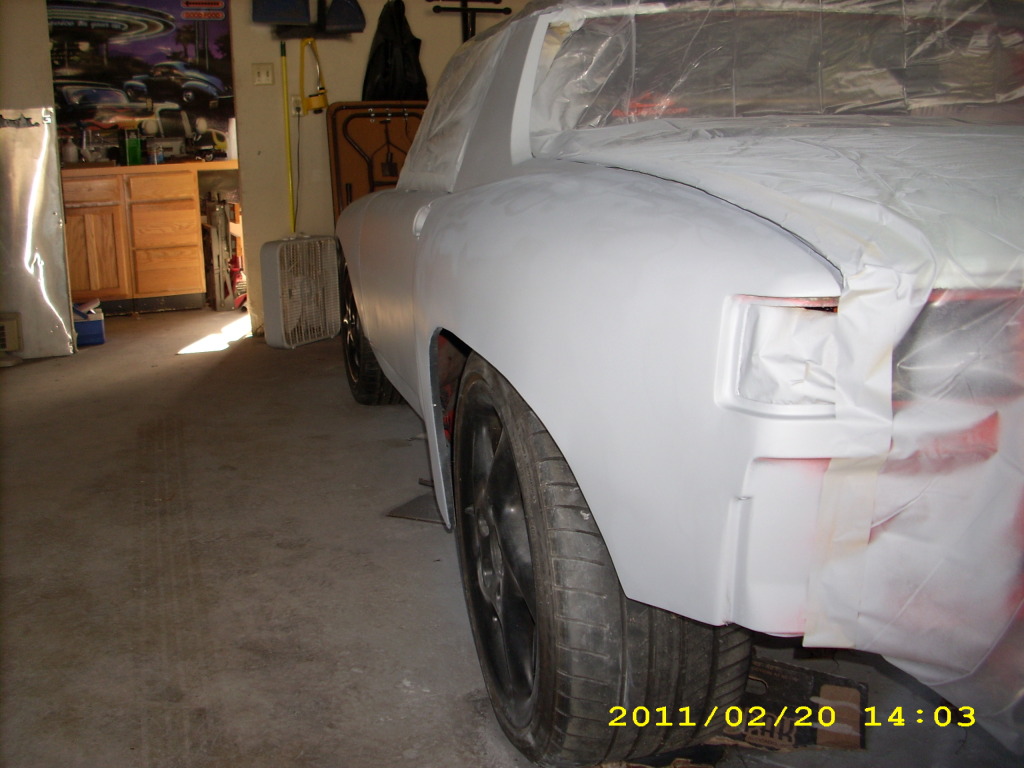
Posted by: Andyrew Feb 20 2011, 03:42 AM
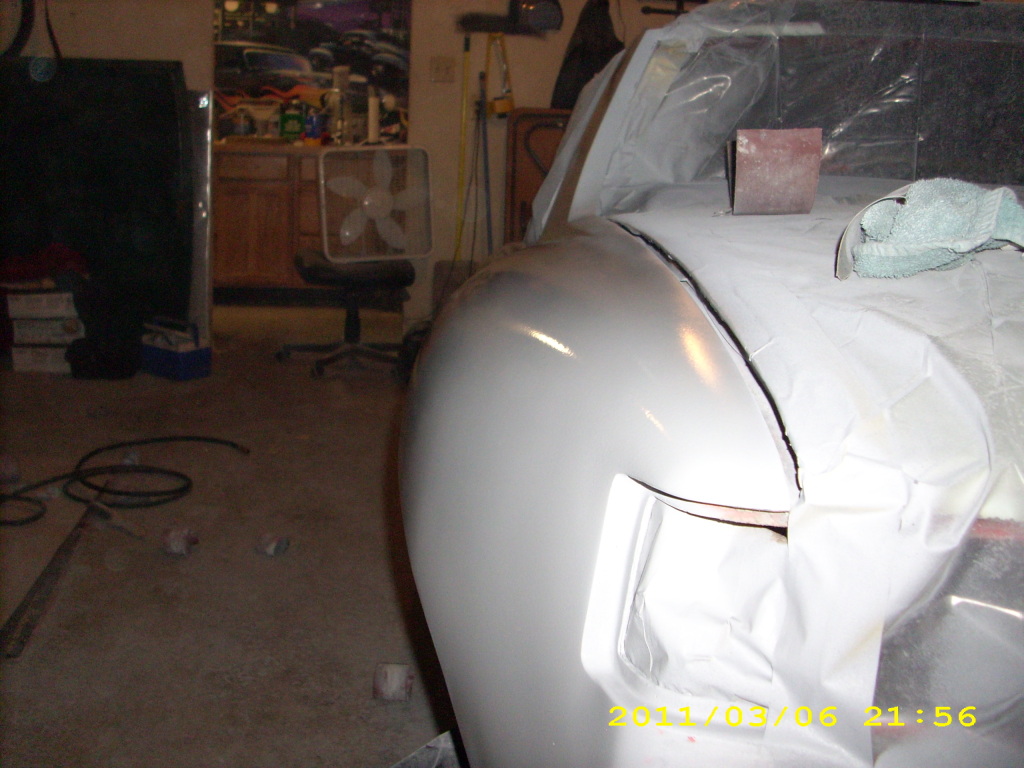
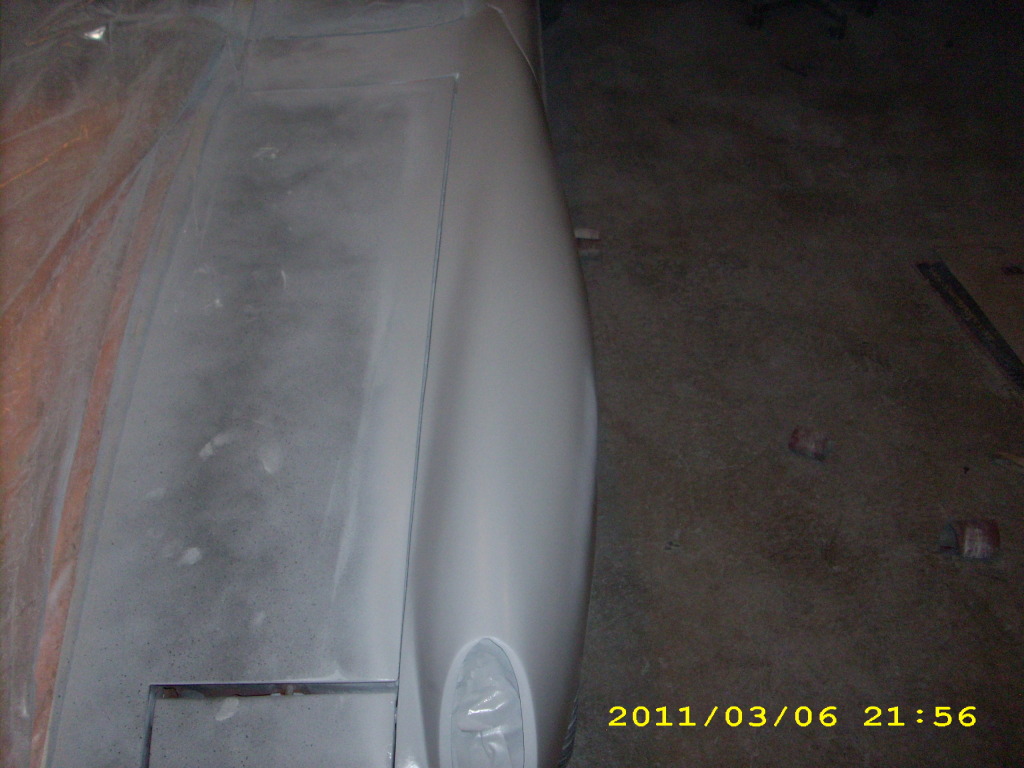
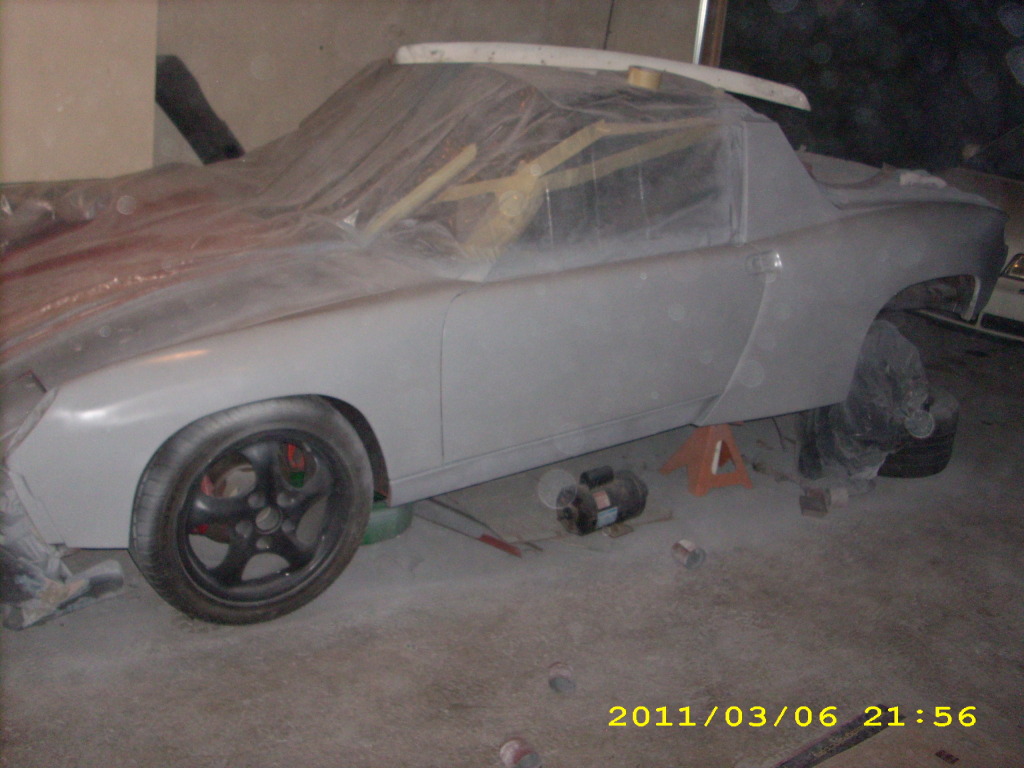
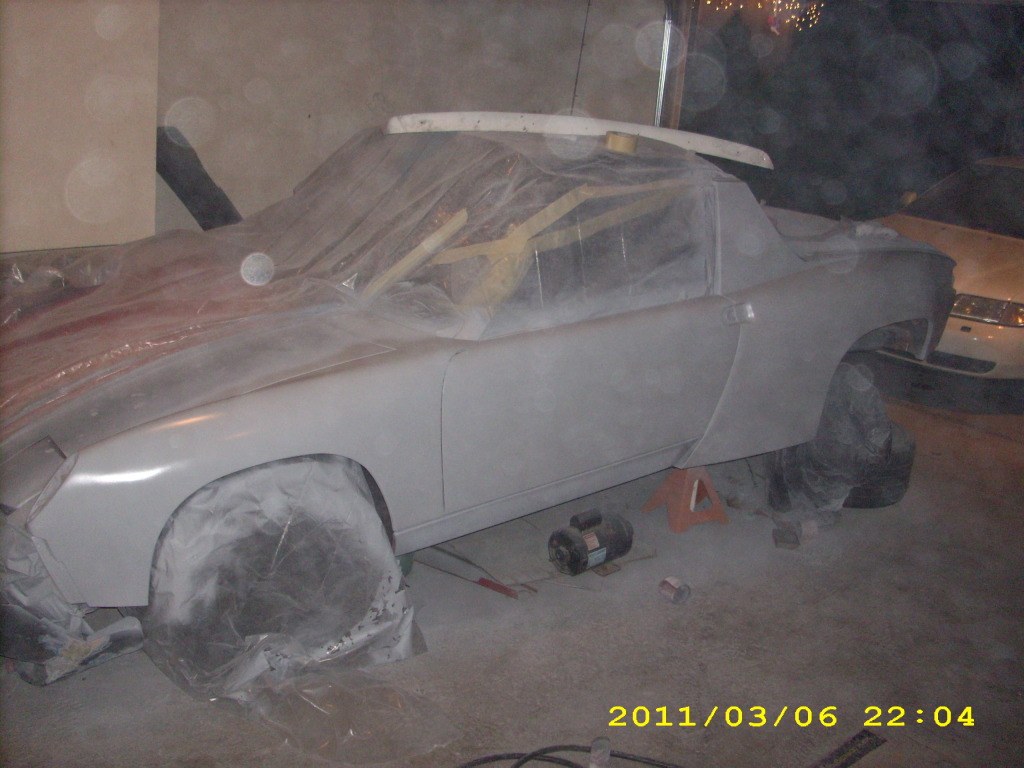
PRIMER DAY!!!
I should have done some more bodywork, but in reality I needed to see where I was. Lots of little pinholes from the bondo and a couple of areas that are a tad low or the bondo wasnt sanded. Overall I am REALLY happy with the progress so far, It looks REALLY GOOD!
The sprayer needs to be adjusted properly.. This was simply a bit of a test to see how it all went down. I could have laid it more evenly, but so far I didnt notice any issues.
I'll have to get my black primer stirred and mixed if they can do it as its pretty hard, we'll see what the paint shop says, but ya. Im curious now if my old Phoenix Red paint will still be good.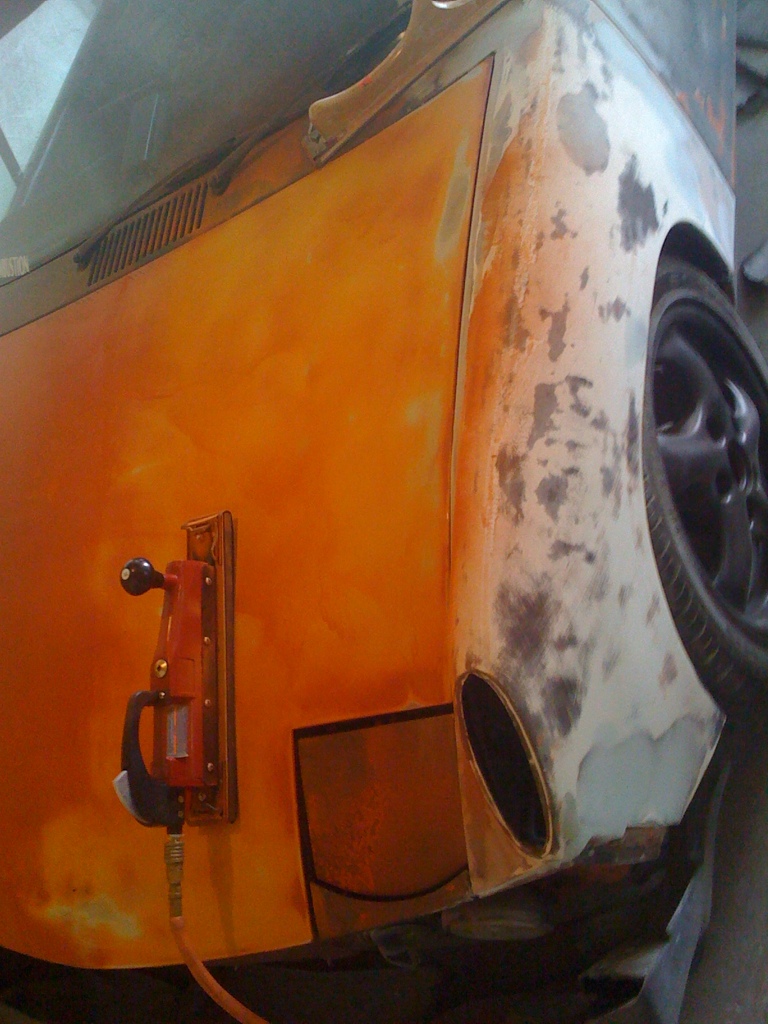
Put the air board sander to use. Worked great! Need a bigger compressor.. 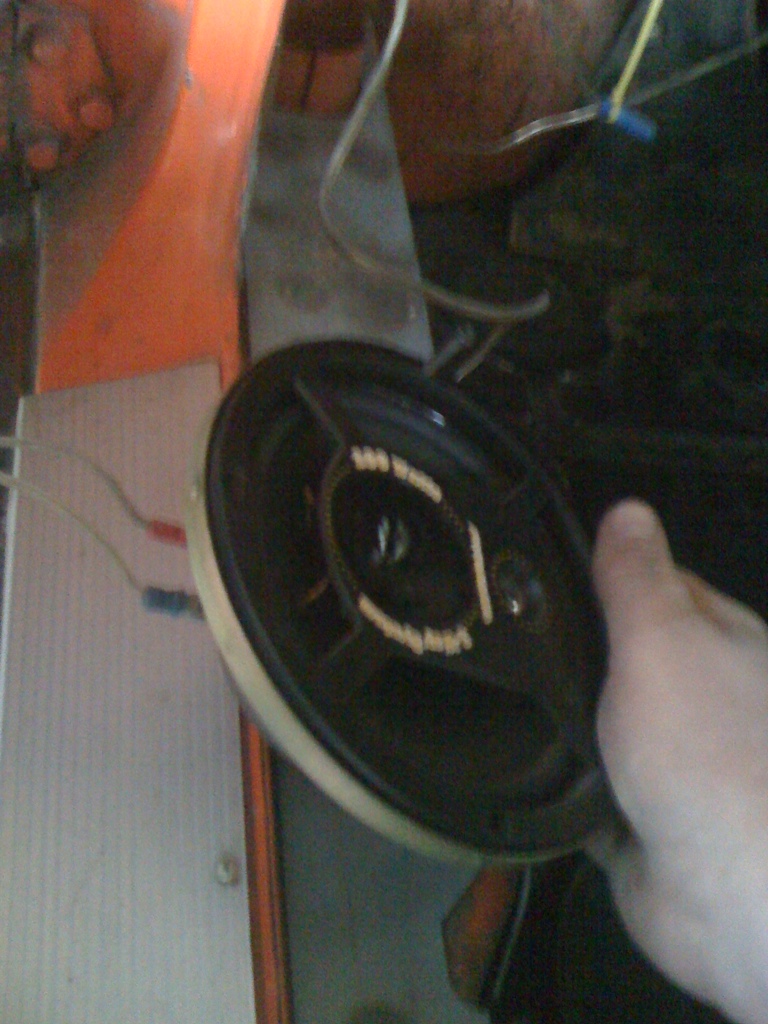
Removed door panel so I could remove the outer door handle. Pic is for my reference for speakers. This is Dr. side speaker. 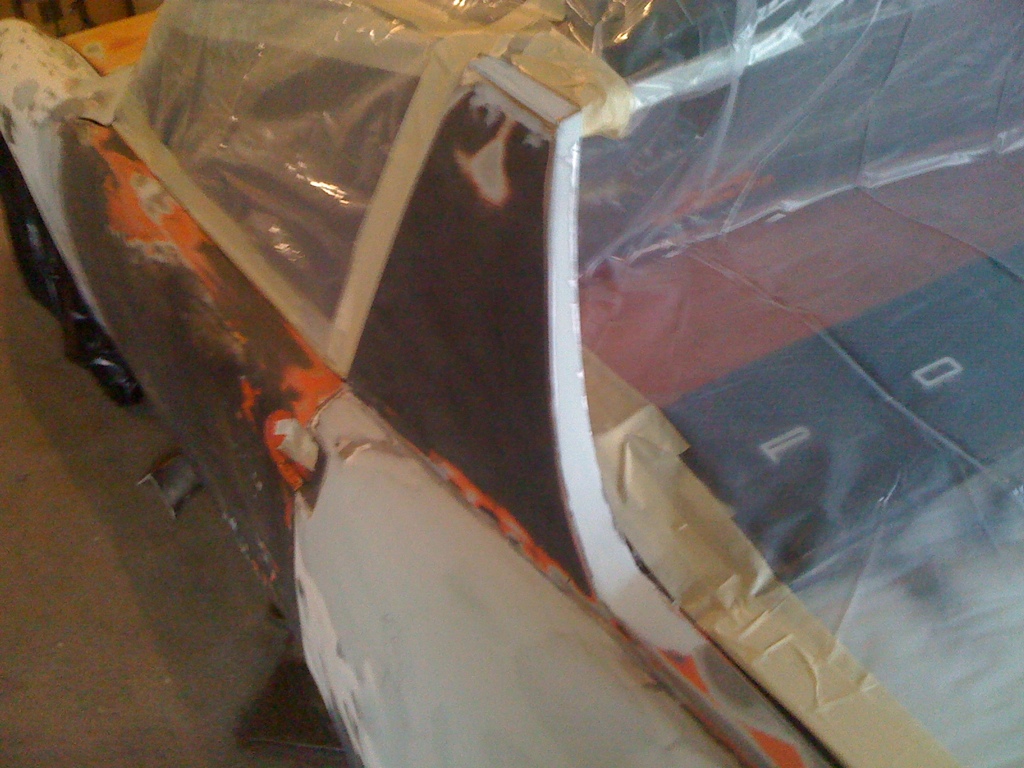
Forgot to take pics of bondo and sanding of the targa bar... Oh well. 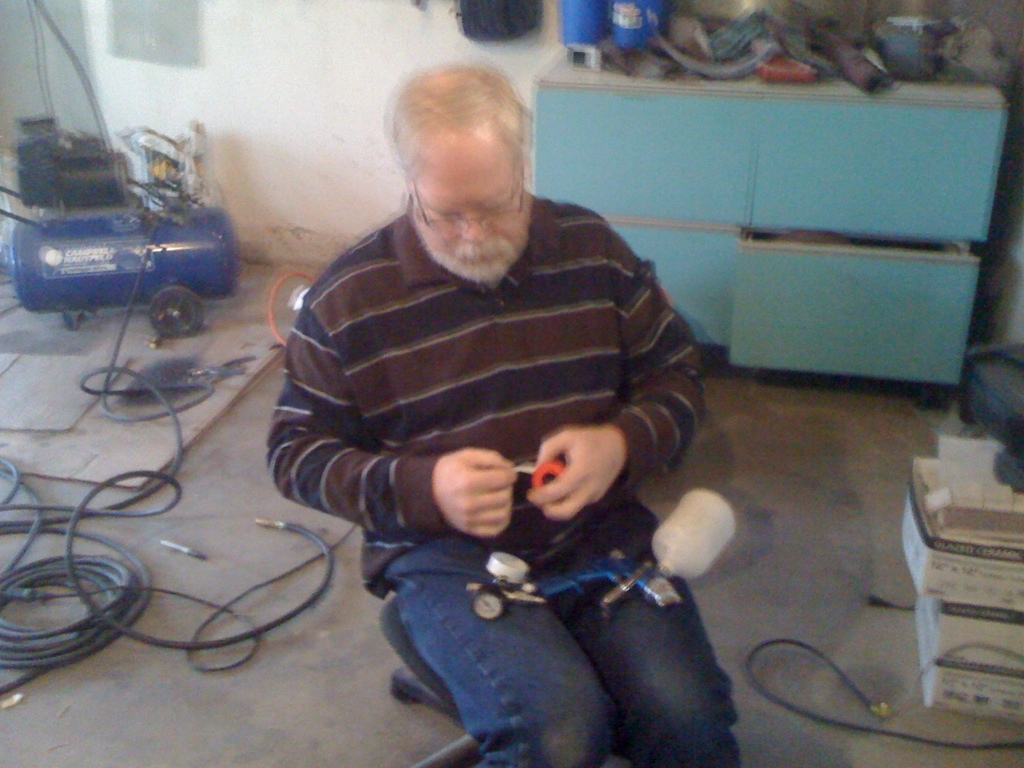
Heres dad putting a regulator on the gun. 

Taping job. 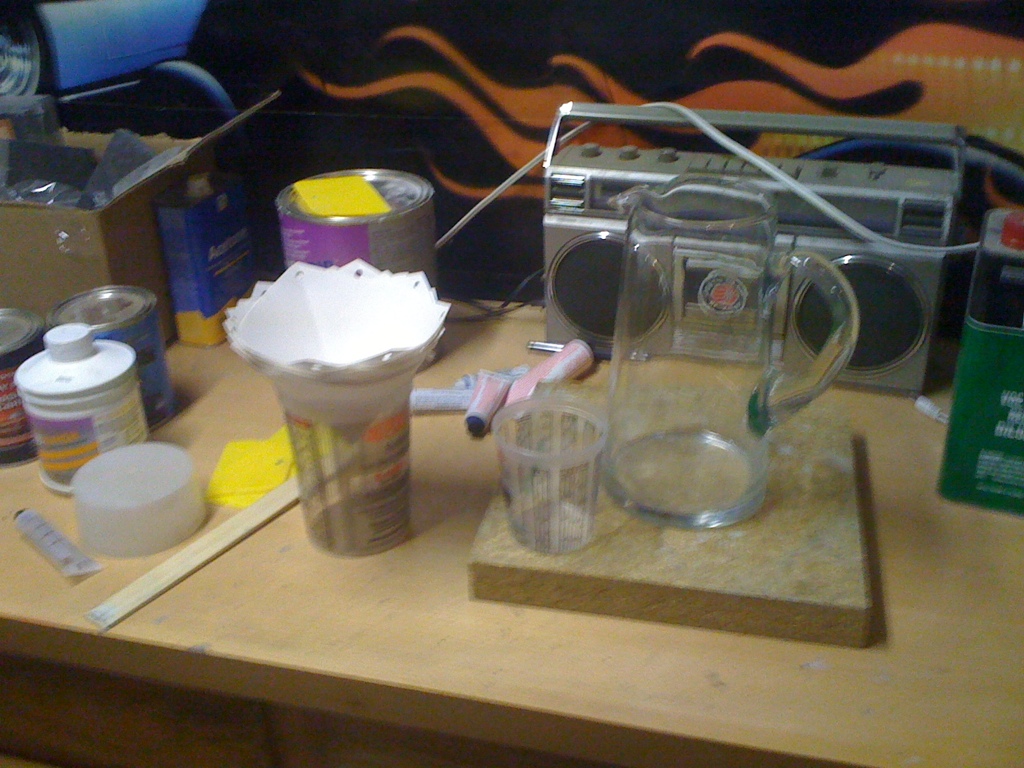
Work station.. The glass jar is to hold the spray gun, I dont have a vice yet so this had to work.
THE PRIMER!!
Still wet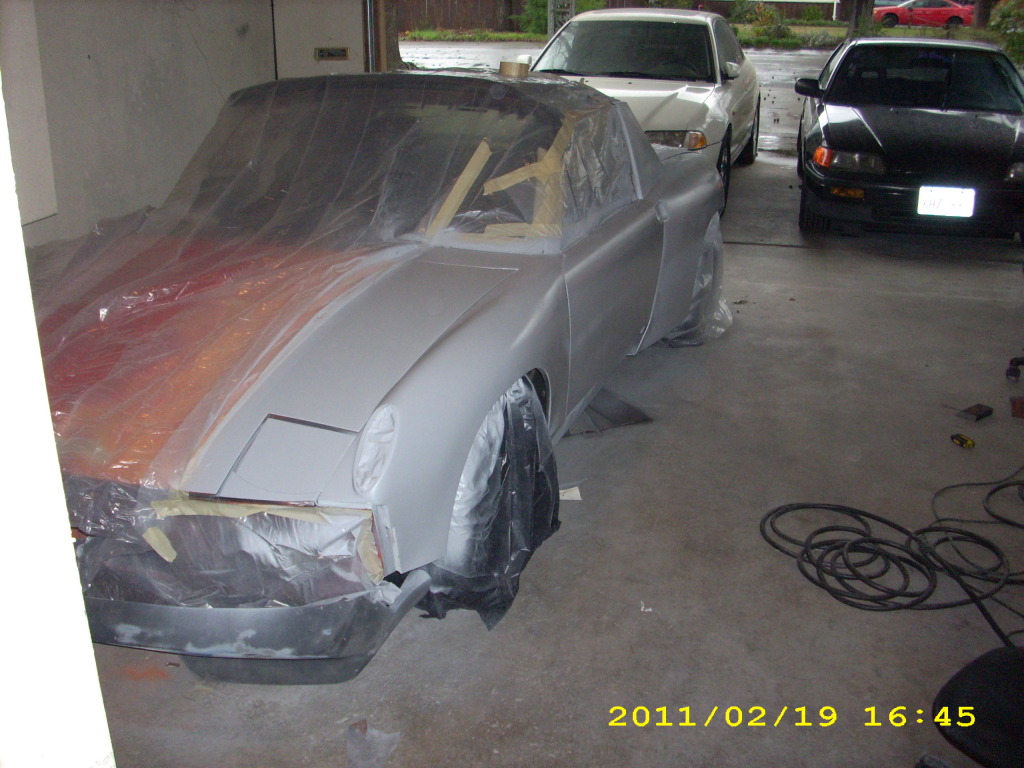
Hours later, All dry!
A Happy Me!
Tomorrow is guide coat and we go down in grit, 120? 220? Not sure, We'll see!
Posted by: computers4kids Feb 20 2011, 08:31 AM
Andrew, the car is looking great! I think that is so neat to have a dad that you can share your passion of cars with.
I bet you are starting to get excited about your teener again.
Mark
Posted by: Andyrew Feb 20 2011, 02:11 PM
It has been amazing having my dad be with me through this whole thing (I mean cars in general). He is a wealth of knowledge and has taught me almost everything I know. He and I both share almost every single passion (He likes golf a little more, and I like games a little more, but thats it ).
We are both REALLY looking forward to seeing my car in paint. I dont even think my mom knows im painting my car, however she loves my car (Her second car was a 914).
Posted by: dan10101 Feb 20 2011, 03:18 PM
It has been amazing having my dad be with me through this whole thing (I mean cars in general). He is a wealth of knowledge and has taught me almost everything I know. He and I both share almost every single passion (He likes golf a little more, and I like games a little more, but thats it
). We are both REALLY looking forward to seeing my car in paint. I dont even think my mom knows im painting my car, however she loves my car (Her second car was a 914).
I see lots of kids out there with nothing to work towards, nothing to hope for, they are the ones that are in trouble. Andrews had this vision for this car for almost 9 years. It's changed many times along the way and faded at times. I've had the dream of this car sinced the 70s when Hot Rod magazine did a article on a Red V8 914. I've actually had very little input in the decisions for this car. I wanted him to do it his way. God has blessed me with a great Son.
As far a Mom knowing, well now she does. I had to show her the post. She says "There won't be anyone more excited then me when that car is finished." I doubt it, but she said it.
It's not about the destination, it's about the journey...
Attached thumbnail(s)
Posted by: Andyrew Feb 20 2011, 03:50 PM
One of my all time favorite pictures of my car Thanks for reposting that Dad!
This is the photo that I want to recreate when its all said and finished. 
I went and took some pics with the wheel covers off. Looking better all the time! 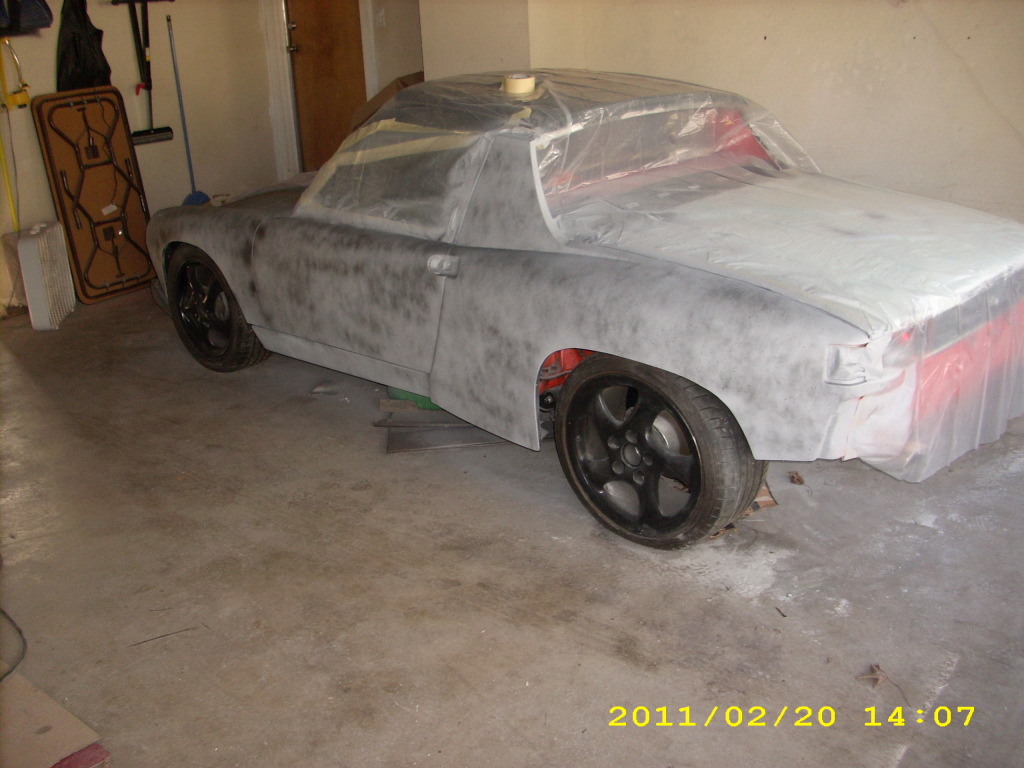
Threw some guide coat on. I MIGHT work on it a little bit tonight, but I have some other things to do.. This might be it for this weekend. More progress to come on Tuesday night .
Posted by: JRust Feb 20 2011, 04:48 PM
Looking great Andrew! Love custom flares. You are doing amazing work on those flares. Can't wait to see the pics after paint 
Posted by: kg6dxn Feb 20 2011, 06:47 PM
Love the progress!
BTW, paint those wheel spacers black... 
Posted by: arkitect Feb 20 2011, 11:54 PM
Andrew,
Great job...making a ton of progress. Are you changing the engine out, what did you decide?
Dave
Posted by: Andyrew Feb 21 2011, 12:29 AM
Mike,
Ya I probably should paint those.
Dave,
As of right now the engine is staying the same. I think I'll keep the engine in till I either blow up the trani or find a parts Audi/Passat. There is a subaru v6 engine/trani in the classifieds for 1500, but im not local nor do I have the spare cash to blow on it right now. Either way probably another year or so with the current setup.
I am up in the air with the future engine. We will see how I feel when time progresses. I may just want to put in an Audi trani instead.
Posted by: Gint Feb 21 2011, 09:10 AM
That's pretty cool. Good prgress Andrew, keep at it.
Posted by: Andyrew Feb 23 2011, 02:03 AM
Met a local forum member and really great guy today! Talked about 914's for quite a while. He let me borrow a couple of specialty sanders!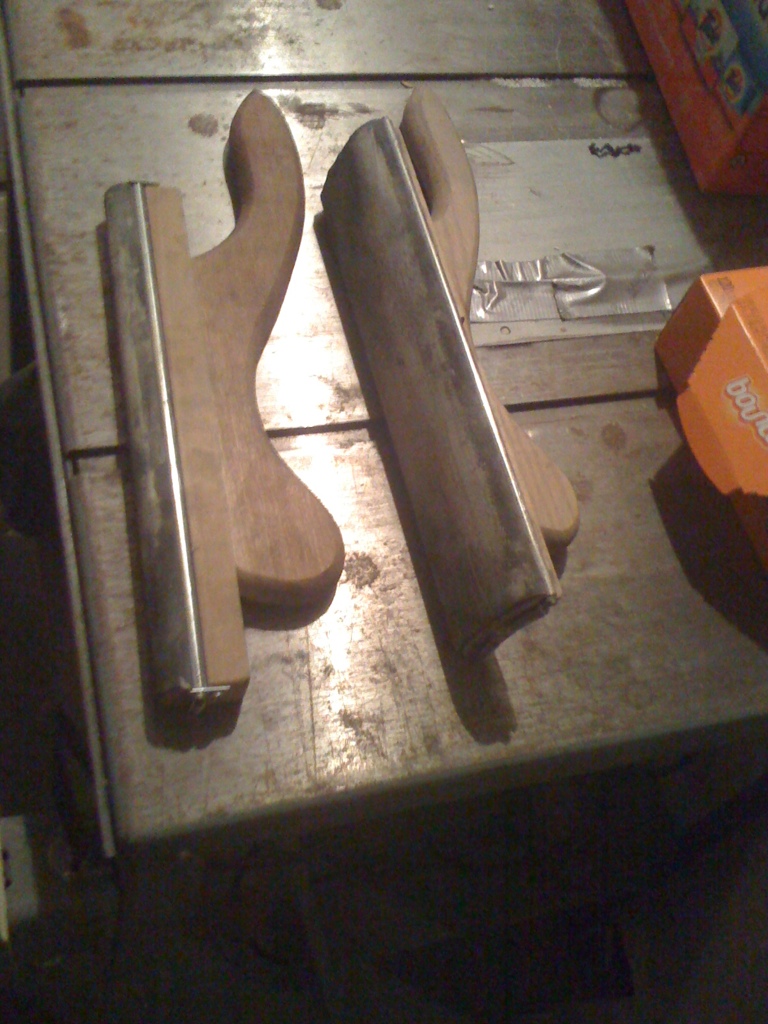
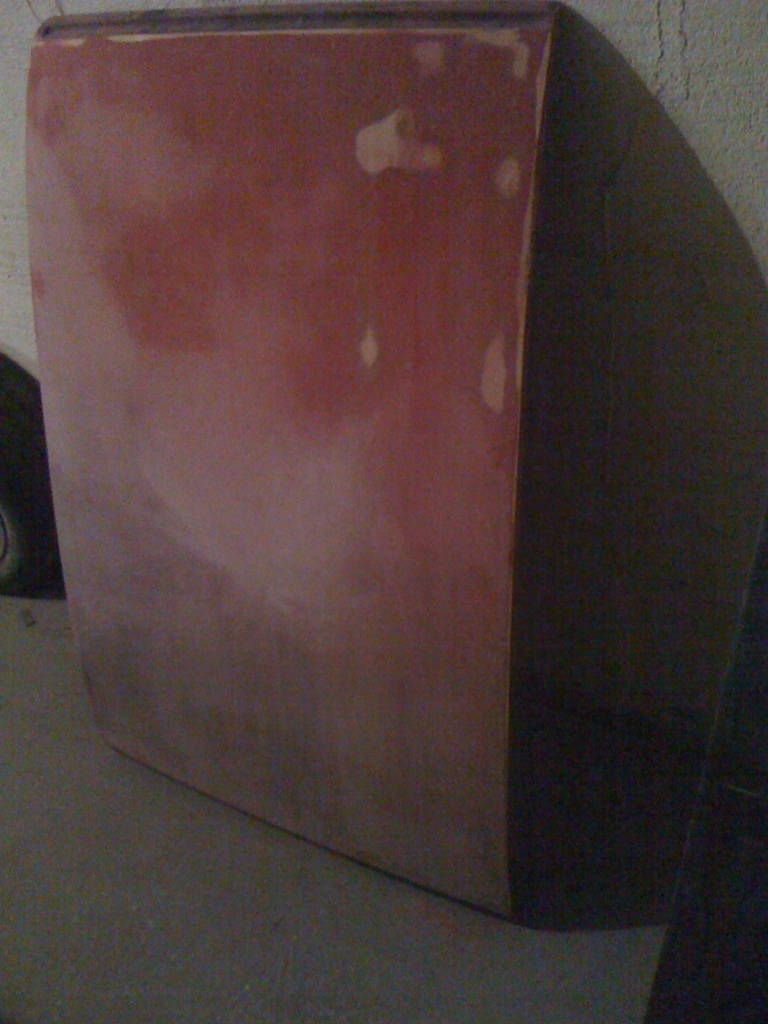
He even gave me a couple of parts! I now have that spare trunk lid I wanted! I'll grind this to bare metal this weekend and fill any holes and glaze over it like the other trunk. 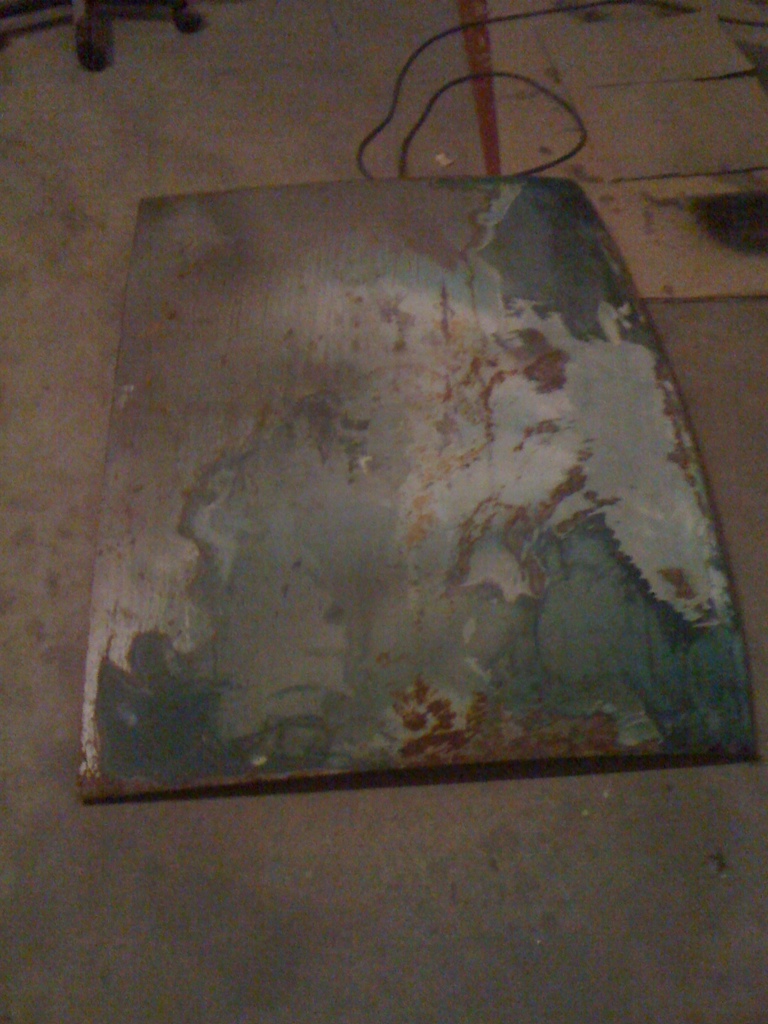
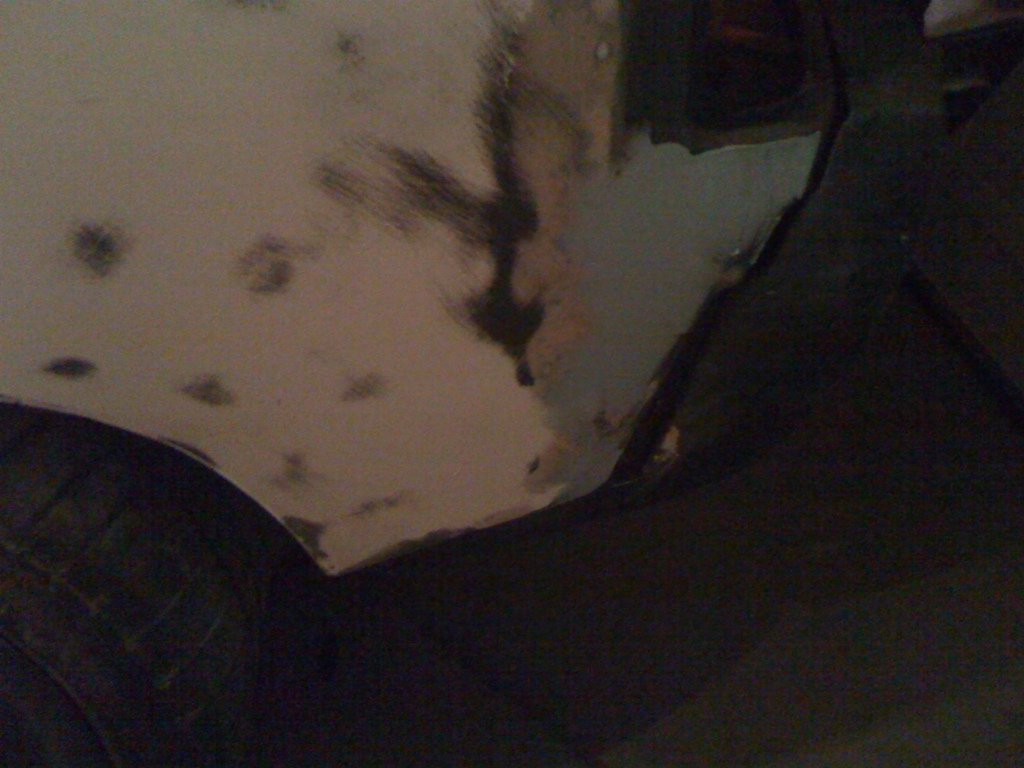
Got to work on the 914 a little though. Sanded the guide coat down to see where I was. Not bad, but definitely need another layer of primer filler. 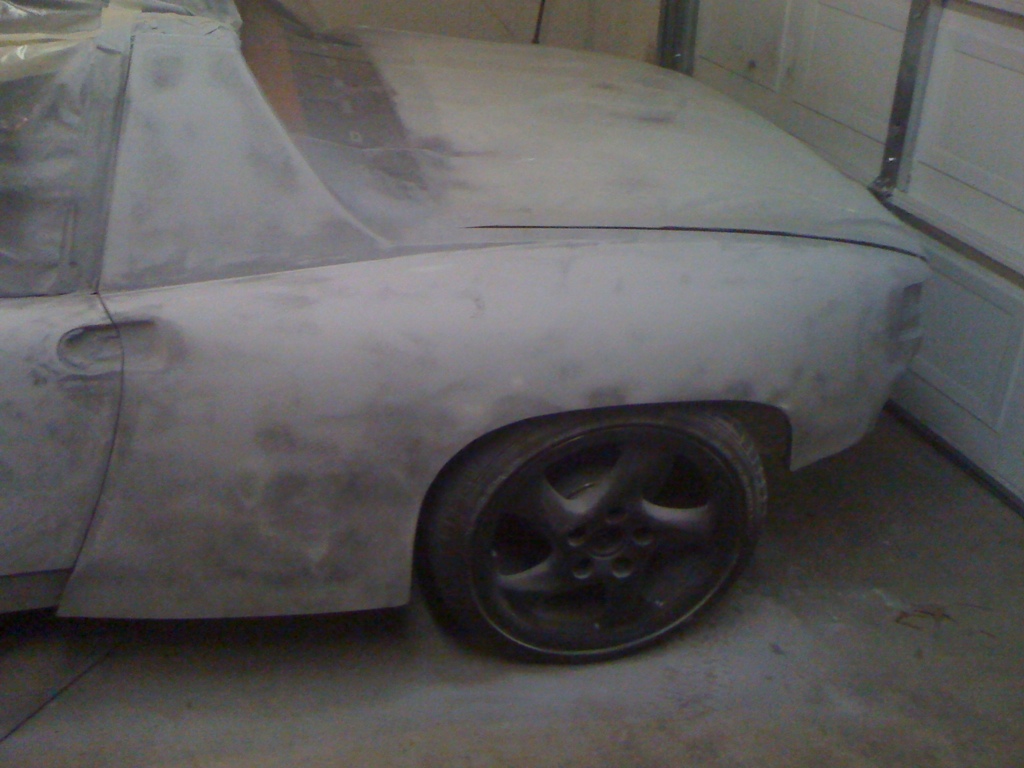
Took it down with 120, Really starting to feel and look nice. I focused on getting the rear 1/4 down. Its ready for some glaze to fill in some pinholes then its primer filler again. Not a lot of work left to do on this fender before final sand. 

I just realized yesterday that I did all this work so far in a month. Im really happy with that. I still have LOTS to do, but the fact that things are getting done is very good!
Posted by: Andyrew Feb 23 2011, 02:20 PM
Went to my parents durring lunch and picked up a couple of things. FINALLY found the fiberglass I had bought many moons ago... But I cant find the resin. its probably not good anymore anyways.
I'll be hitting the store probably tomorrow durring lunch to pick up some resin and hardner. If your wondering why I havent sanded the bottom portion of the rear flares, its because the bottom portion is not properly reinforced. I need to weld some tabs and reinforce it with fiberglass. I think thats what i'll do on saturday. That and the rocker pannels.
Ugh, I hate fiberglass work... 
But welding
Posted by: Andyrew Feb 28 2011, 01:33 AM
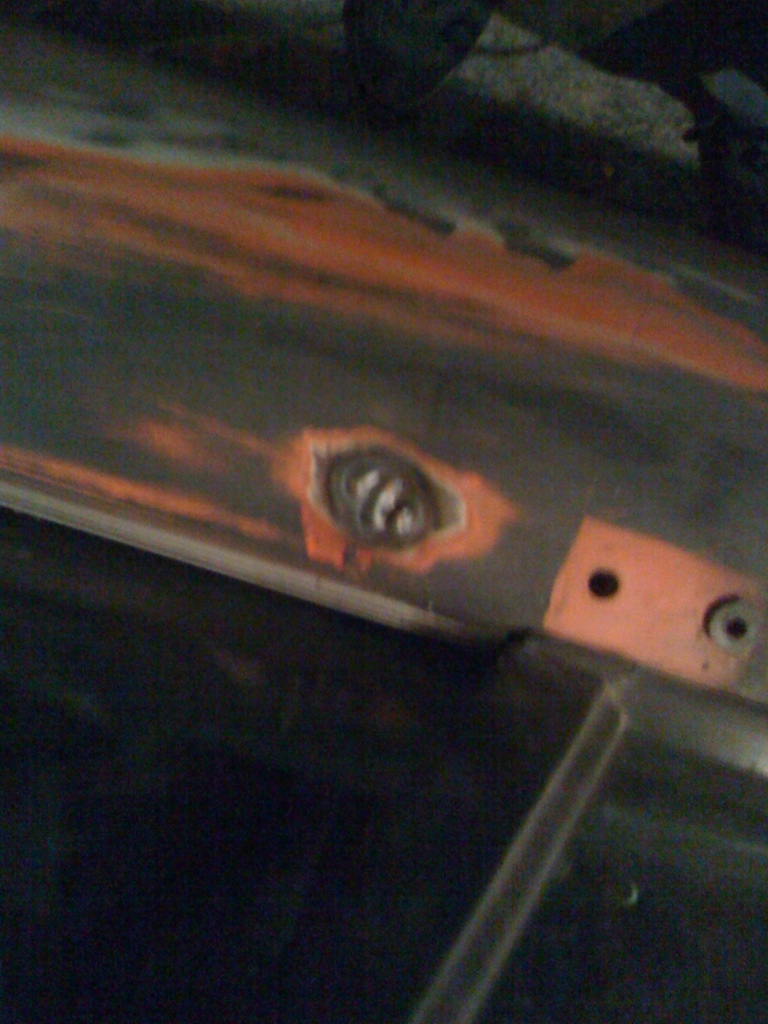
Cut and drilled the extension I need to reinforce the fenders. 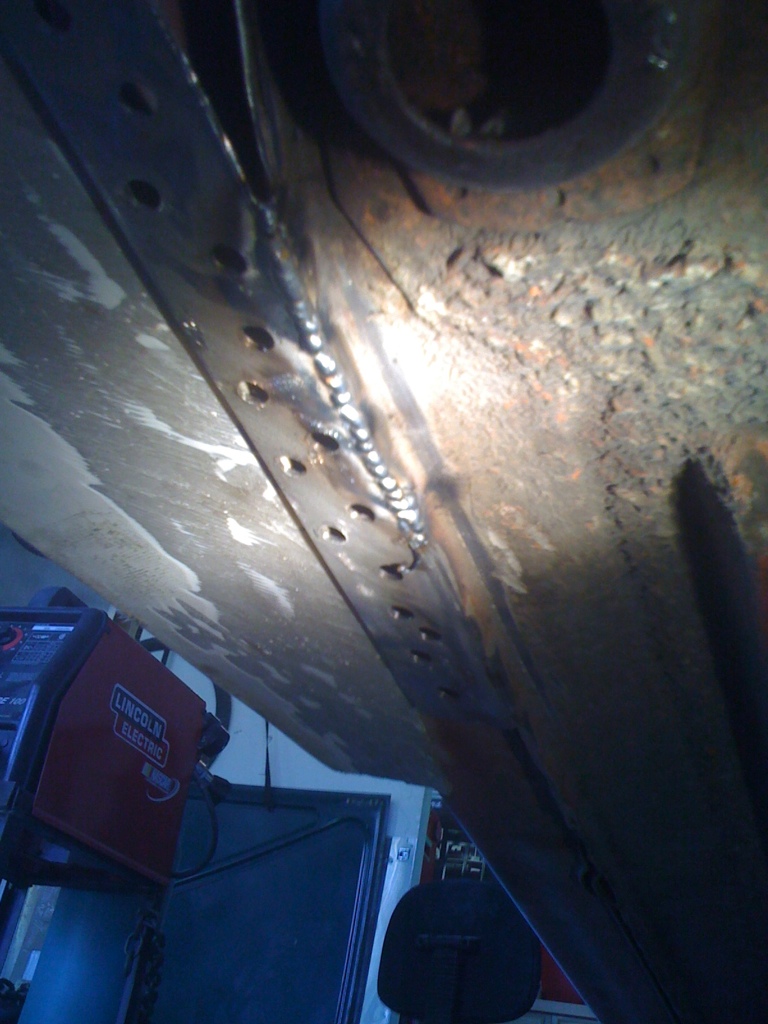
Extension welded and primed.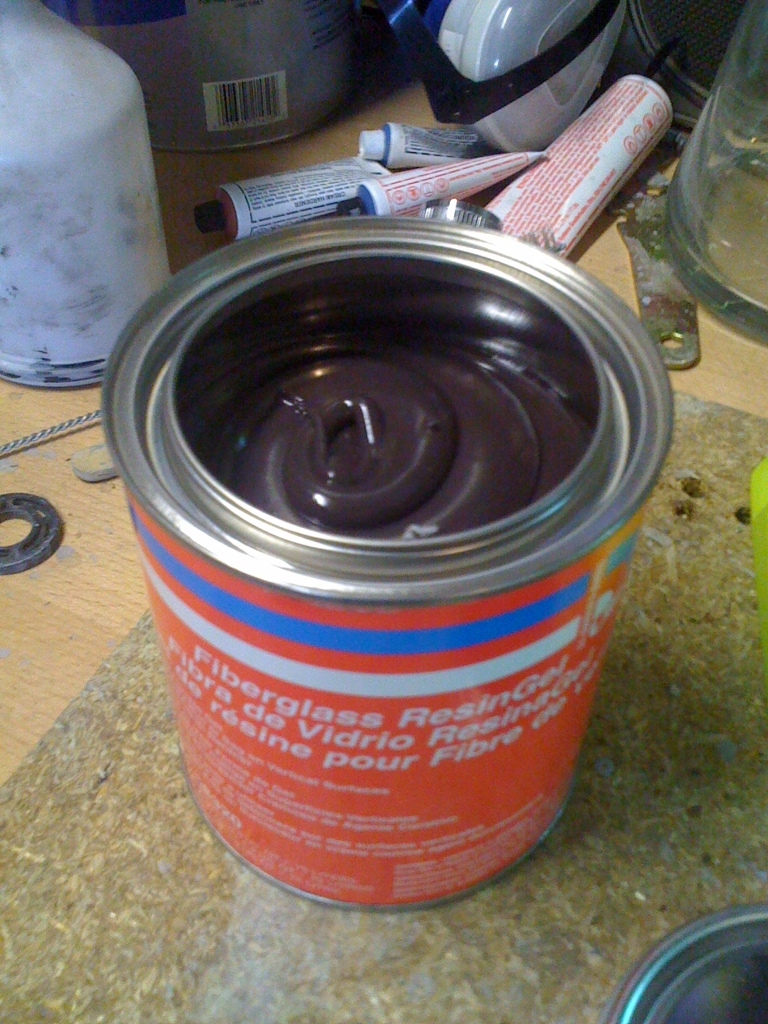
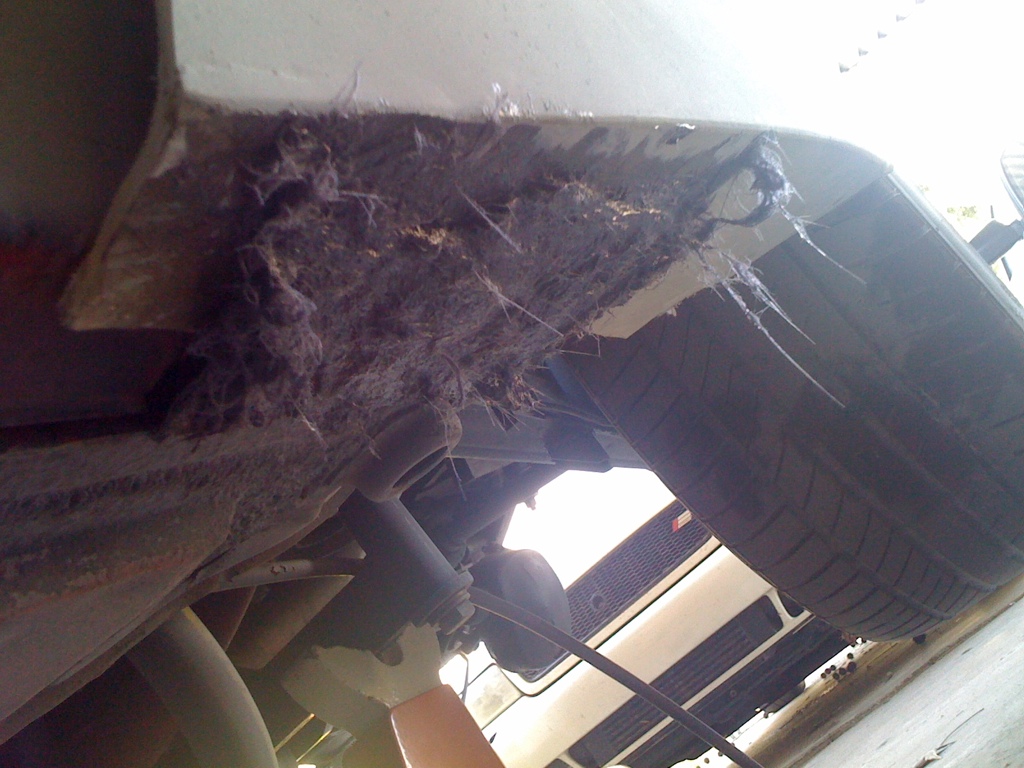
Instead of resin, I saw this stuff at the body shop and figured i'd give it a try. Supposed to be good for vertical stuff. Well it was impossible to "dip" the fiberglass in, so I literally had to add the fiberglass to the mix and stir it in and add it to the panel like kitty hair (or bondo with fiberglass). It also uses cream hardner. I wouldnt do it again, but it worked. 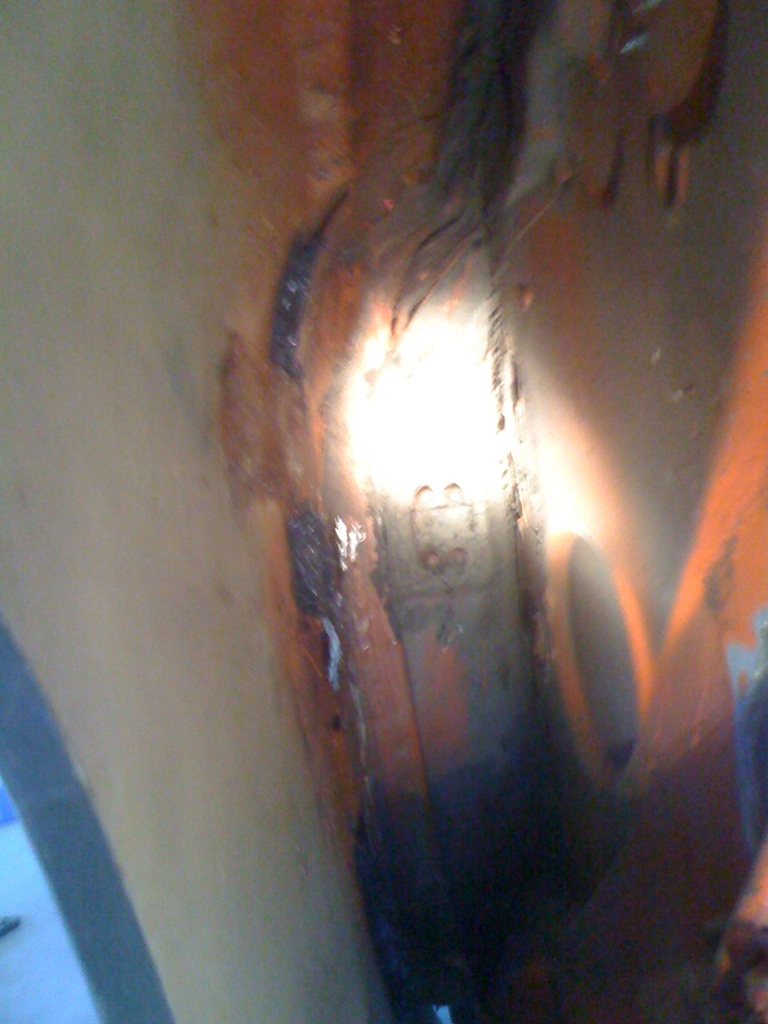
Reinforced some of the area's that I didnt do so well the first go around. The fender is VERY solid now. 
Just a couple of pictures, but there was a lot of pinholes that I filled. 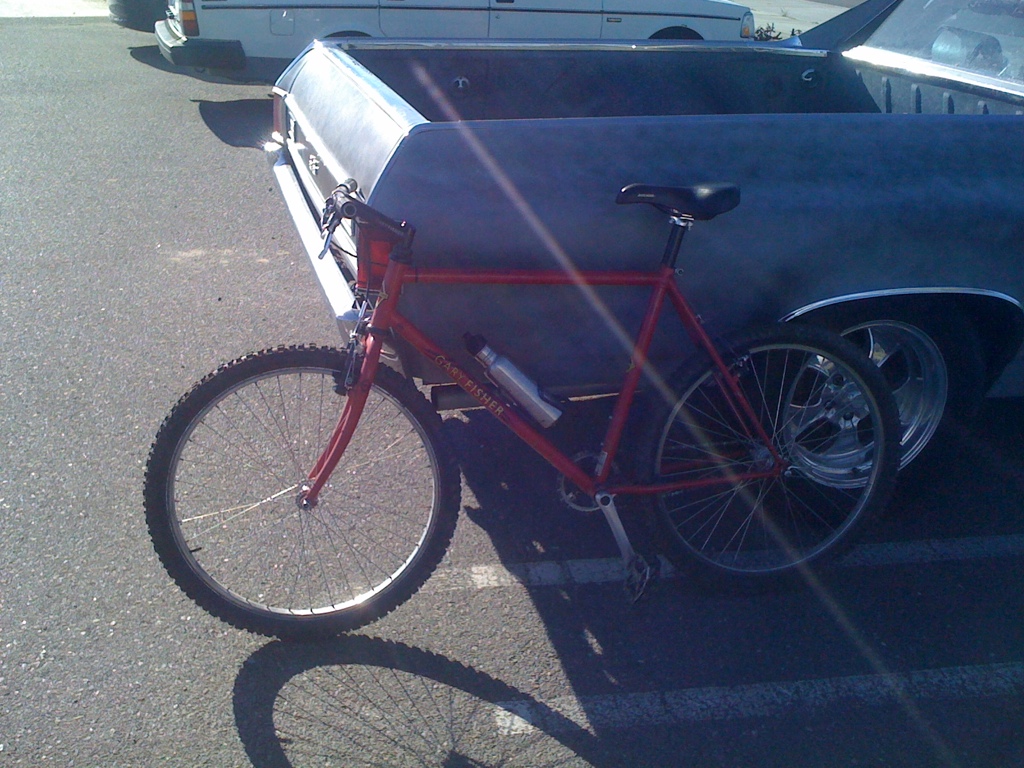
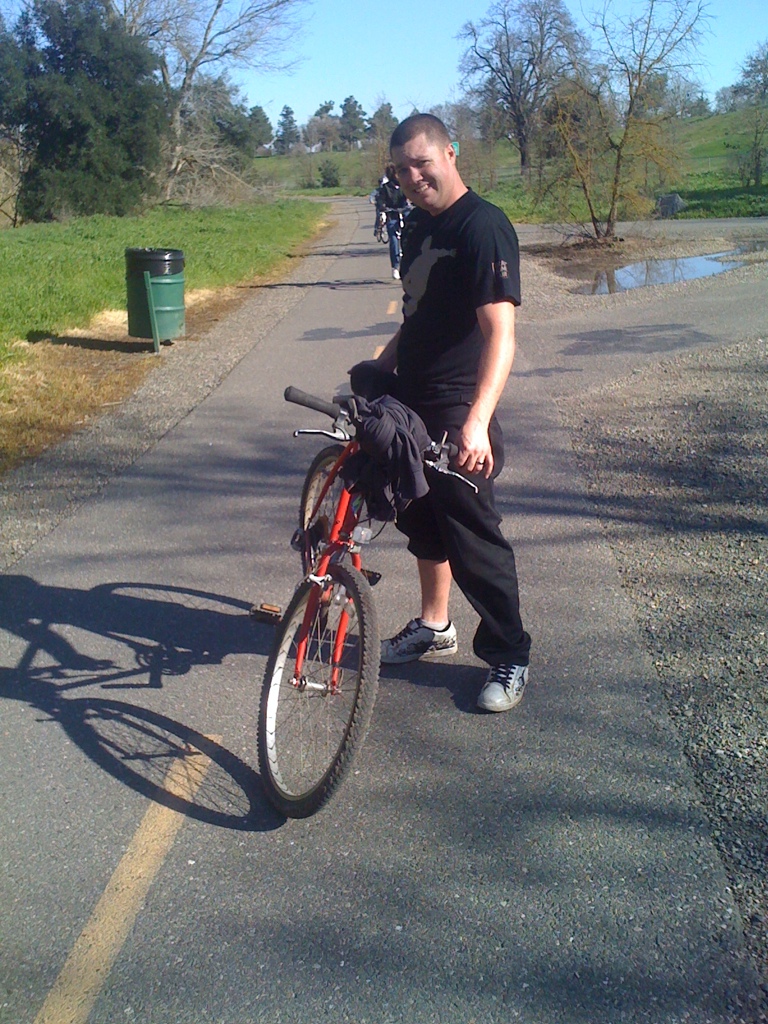
Went for a bike ride since the weather was awesome! My Gary Fisher single speed is on the top, my friends Specialized is on the bottom. However my friend completely demolished his rear wheel showing off doing a stoppie... You cant tell but it is completely bent beond repair.
Guess what? More primer!! It looks SO good! 
The primer doesnt come out of the gun very nicely, but this is my last bit of primer filler. My next layer of primer will be primer sealer and i'll reduce it a bit.
Posted by: Andyrew Mar 7 2011, 02:01 PM
So I dont have many pictures of the sanding to 220 grit or some of the glazing puddy work, It was a stressful weekend to say the least so i just concentrated on working.
The Fuel of the weekend was whiskey and coke with a twist. I put 1/3 a glass of ice, took a slice out of a lemon and dropped it in the glass, squeezed the rest of the lemon into the glass, poured an appropriate amount of whiskey, and 1/2 a can of coke (Actually diet Shasta..). Twas delicious! (My lemon tree is full of lemons so I needed to use some of them..)
Anyways onto the progress. 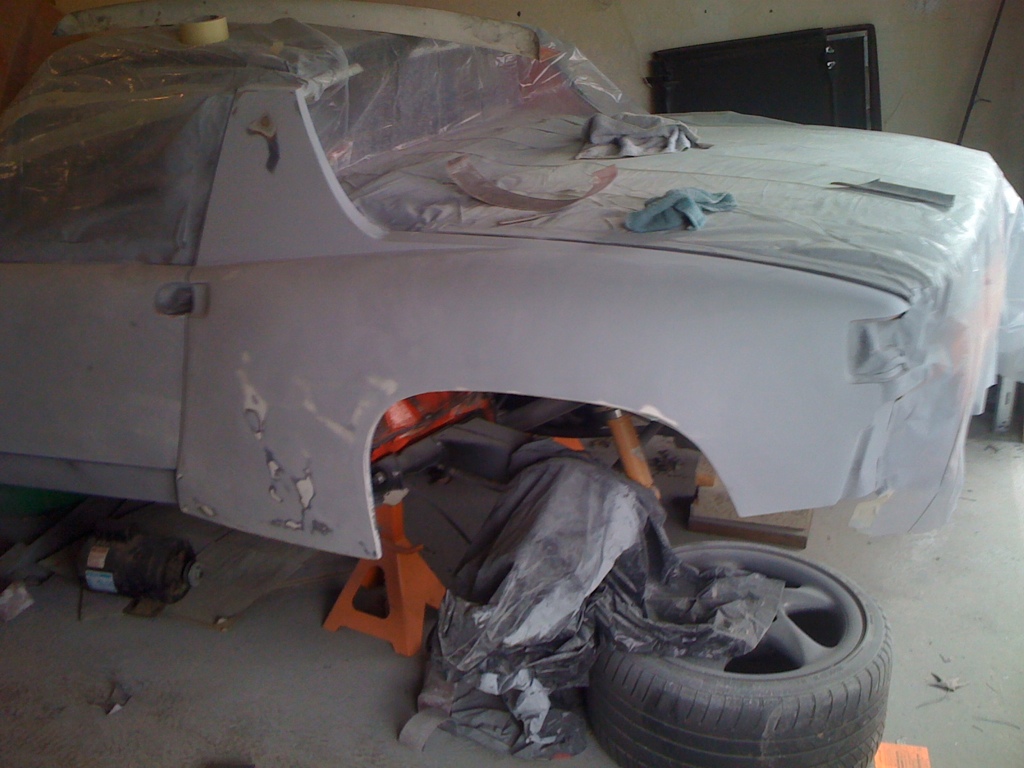
Sanded to 220, Feels so very smooth.
Now onto primer! This is my last bit of primer on this side. From here im going to finish the targa bar and finish the hoods, then rotate the car around for the passenger side!
I know I have a bunch of them, I'll try and only post the good ones, but its hard to tell. 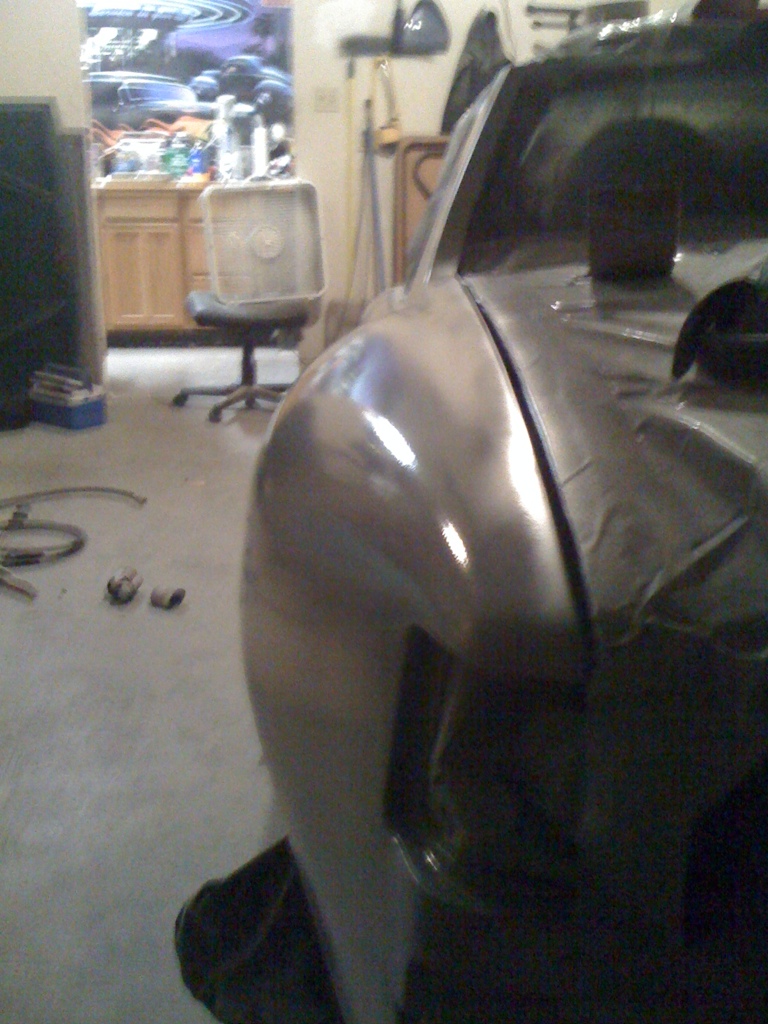

Ah, yes, I forgot to put the tire cover back on... Yay, now I have hours of cleaning that tire...
i remembered to put it on for the second coat of primer though..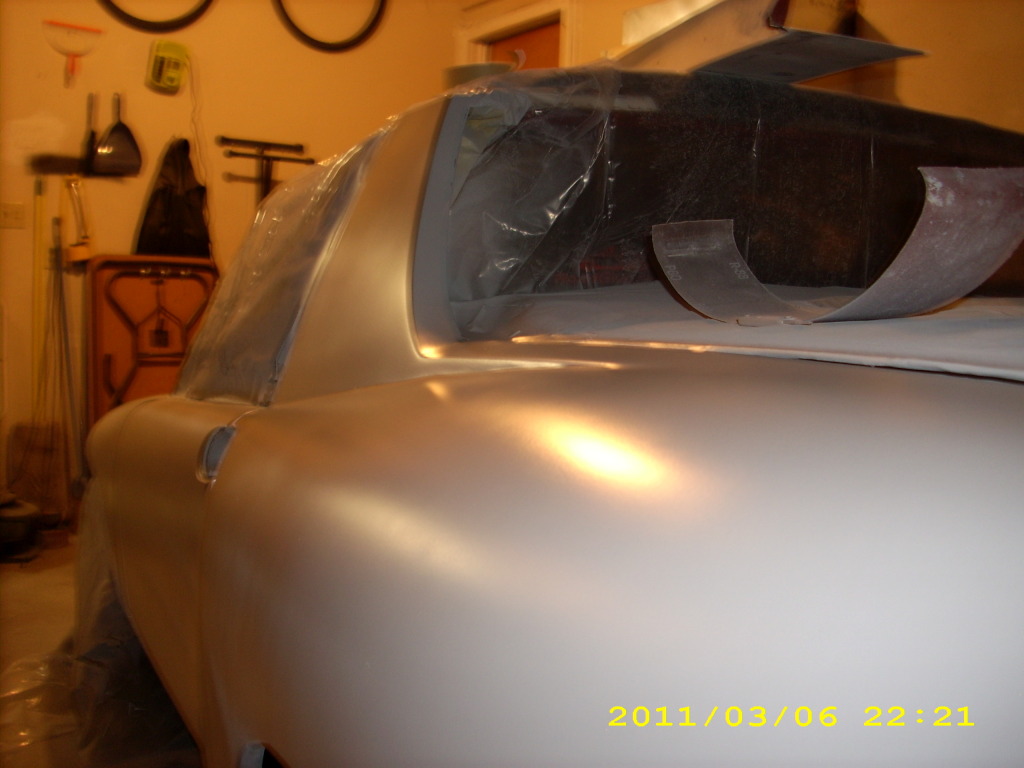
Overall impression is that it looked REALLY nice when wet. When it dried I noticed that I didnt do so hot on coverage in the lower portions of the rear fender. But this was probably my second coat so it probably has a good coat on it still.
Overall the gun shot WAY better with the primer reduced. I didnt measure but it was between 10-20% reduction.
I am REALLY happy the way this turned out. I need to work on shooting as I have a feeling that my pacing was off, and if this was base coat some of my spots would have ran a little, however I didnt get any runs this time.
Posted by: Lennies914 Mar 7 2011, 08:31 PM
Looking great Andrew. WCR this year?
Posted by: Andyrew Mar 7 2011, 09:31 PM
Lennie, Not in the cards this year $$$ wise. There are a couple of local car shows (American graffiti being the biggest) that I'm shooting for. But its going to have to wait till next year for a WCR
Posted by: Andyrew Mar 13 2011, 11:11 PM
Threw some filler on the rocker pannel in some low spots. Sanded this down with 36 grit then 80 grit (I laid it a bit thick...). I should mix some glaze to put on this tonight.. Hmm, maybe i'll do that for lunch tomorrow. 
There was a pinhole that I missed and a low spot in the door. Filled it with glaze then sanded down the area with 150 and 220 grit with a block. 
Aaand 2 layers of primer reduced ~20%
Progress started on the trunk again! I laid some glaze in some trouble areas and sanded down with 150 grit then hit it with 240 grit for just a little. 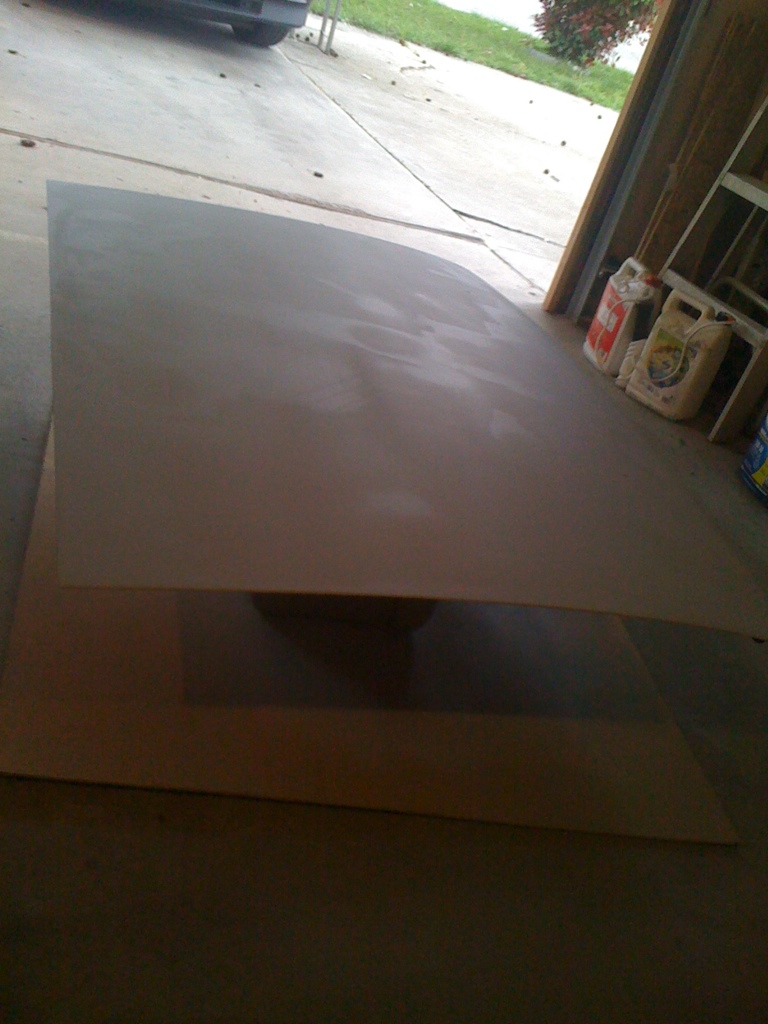
Here it is with 2 coats primer (painted same time as door). I need to work on my spraying a little, my pattern wasnt very good. However the primer settled really nice. There was one spot where a glob of primer came out, Not sure what happened there but oh well, i'll fix it later. I then sprayed some guide coat on and started sanding but the guide or the primer wasnt dry 100% (was about 2 hours after priming @ 65 deg) because it just immediately gummed up the sandpaper multiple times. I called it a night at this and worked on the CRX.
Not sure if I'll work on it next weekend or not.. GF has the weekend off.
Posted by: Andyrew Mar 16 2011, 12:52 AM
No pics today.. I only got a couple hours to work on the 914... Spent about an hour sanding the rear trunk from the last primer filler application down with 150 then 220. A couple of low spots on that but nothing this or next primer filler application shouldnt fix.
I also sanded the rocker pannel down with 80 then 150.
The trunk saw almost 2 layers of primer, but I ran out and didnt want to open the other quart (Not to mention the compressor was low on air and it was 10:45 and I didnt want to turn it on...). I also had a hell of a time adjusting the gun and shot more than 70% of it with the gun not adjusted correctly.
More learning curve I guess. Arg.
I dont think i'll get any work done this weekend as the GF is off and its saint patty's so I think she wants to go to the local drinking stuff. Buuut i might be able to get a couple hours on the car in the wee morning. I would really like to get the rear trunk DONE soon so I can test out painting it. I need some practice painting with the gun prior to actually painting the whole car at one time. I think I will be painting my friends crown vic prior to me painting my car, but we'll see. If thats the case, then i'll get some good practice. (Im pretty sure he wants to paint it black too.. ARG... Im going to try and convince him white...)
Posted by: orange914 Mar 16 2011, 05:33 PM
(Im pretty sure he wants to paint it black too.. ARG... Im going to try and convince him white...)
paint it white
we need some pictures of andy's mad max camo geo
Posted by: Andyrew Mar 24 2011, 12:37 AM
Got some mixed progress done tonight.
Finished grinding the targa bar down, but I still have to weld about 1/3 of it back up and I FINALLY have my welder back.. Arg. (My friend used up 3/4 of a 2lb spool of wire.. bought me a new spool though)
My friends Geo... (Orange914's son)
Pulled the windshield wiper setup out. Figured out the trick to this which no one mentioned on any of the posts I found. Obviously there is the 3 bolts (two up top on the cowl, one behind the speedo to the right), but you have to remove the rubber grommets on the top as well with a knife. THEN you basically force the passenger side upper bolt out and pulling it down removes the back bolt and then the right side bolt can come undone. Once I figured this out it was a 1 minute job (however it had me scratching my head and looking up posts for an hour). 

Paint on the headlight cover. Yup, thats a lot of layers... Most of the car goes down to bare metal this go around so its not that big of a deal.. Just a lot of paint to take off...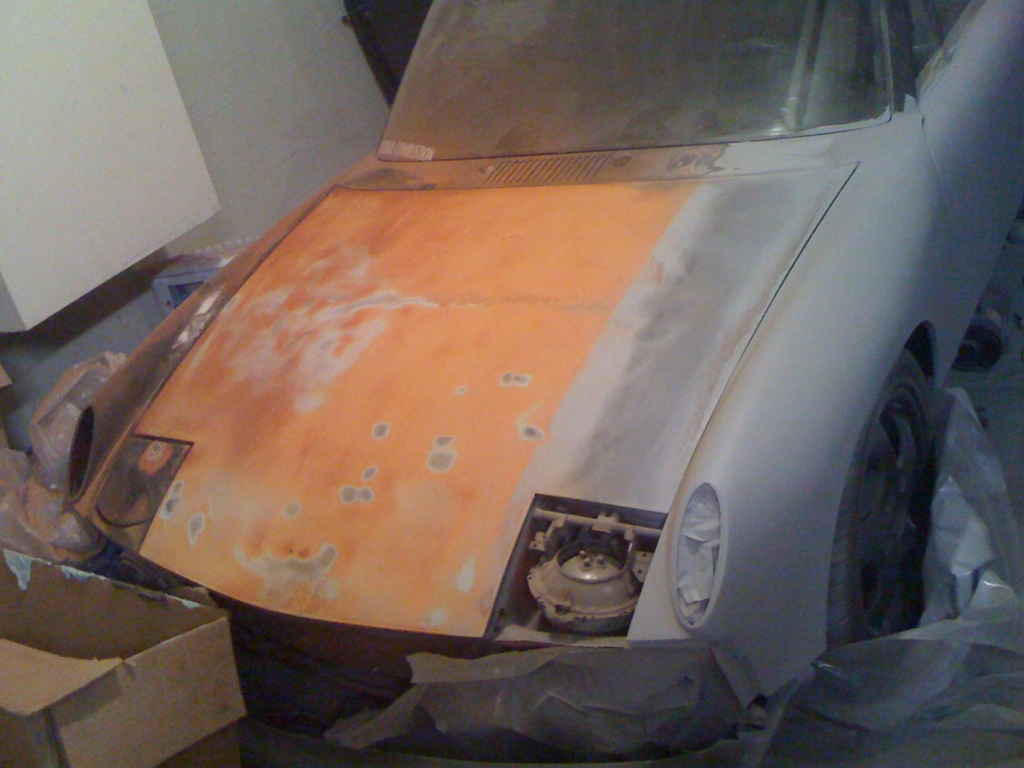
Front hood, Focused on taking area's with paint chips to bare metal. The whole trunk is smooth, but i'd like to get it down to the original primer at least (2 layers). My DA isnt working well, and the paint is pretty darn hard.. My air longboard with 80 grit cuts it, but its really taking a long time.
Spent some time on the rear bumper, sanded down a BUNCH of bondo that is on it. this bumper is a mess... Oh well, its just a bumper, maybe i'll get creative with it.
Thoughts on me sectioning out the white area to get the bumper to match the new flare lines more? 
Spent 25 bucks and got a REAL primer gun.. 1.8 tip. Gun was on sale for 15, regulator and dryer was 10. HF special.
I have a long weekend to myself coming up. I'll be flipping the car around and starting on the passenger side!!
Posted by: Andyrew Mar 24 2011, 12:40 AM
My friends geo with what took so much welding. Full size truck brush guard, sectioned and cut down. Welded to the sides and to the 1/8" skidplate on the bottom of the car.
Yes, this car DOES see mud. 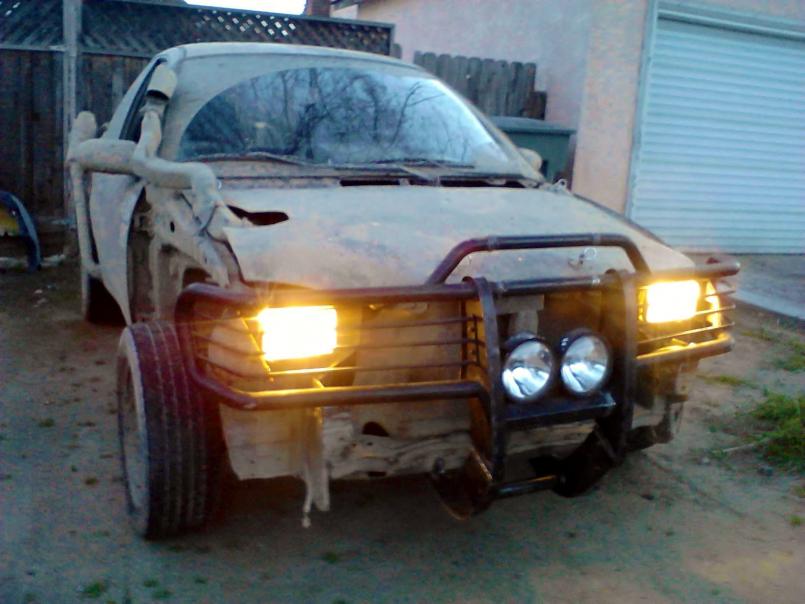
Posted by: Andyrew Mar 28 2011, 10:48 AM
This weekend wasnt completely a wash.. I got to work on the car on sunday.
Started the morning with some cleaning and prepping, moved the car over so I could get to the pass side and still fit the honda in the garage. I started and ran the engine for ~ 5 minutes today, it died on me and I think its because it ran out of gas or the filter was clogged. This has been added to the to do list (replace fuel filter..)
I finished welding and grinding the targa bar, its ready for glaze puddy and primer. 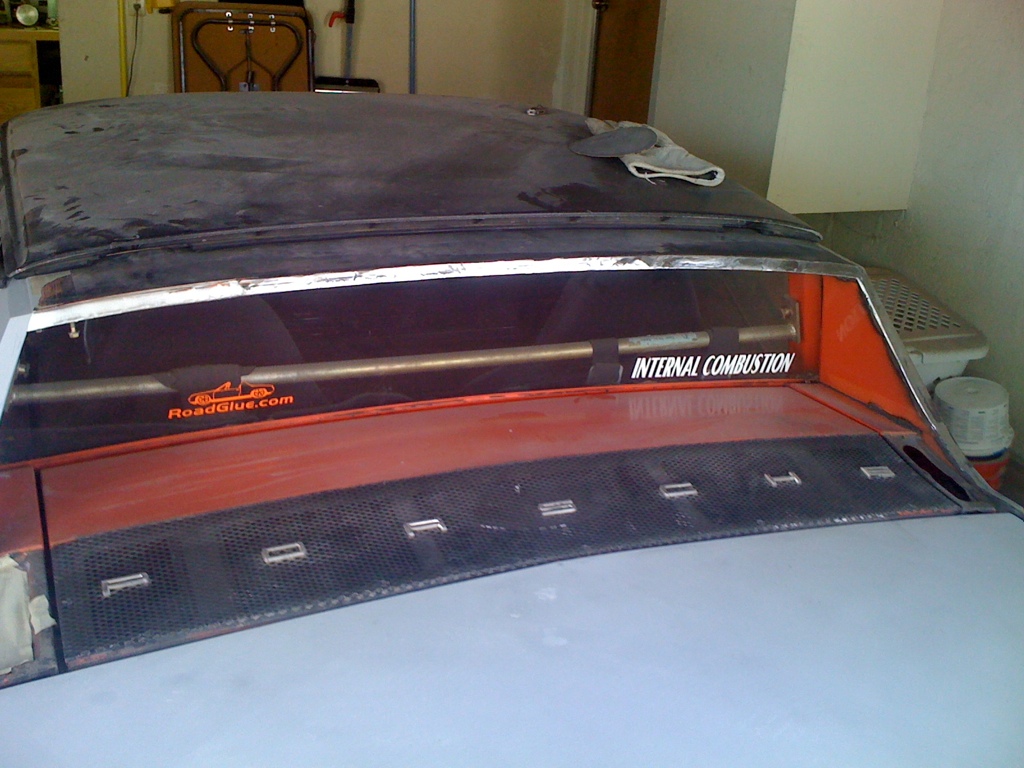
Then the rest of the day was devoted to helping friends with random stuff. But I returned at night with my uncle! (He had a heart attack and was under for 13+ minutes, He has slowly regained memory but is still not 100%. He used to own his own shop and painted several cars up until his heart attack almost 2 years ago, he's now at the point where Im pushing him to learn those things he loved to do. He still has muscle memory, but he forgets what the next step is and needs to be coached). 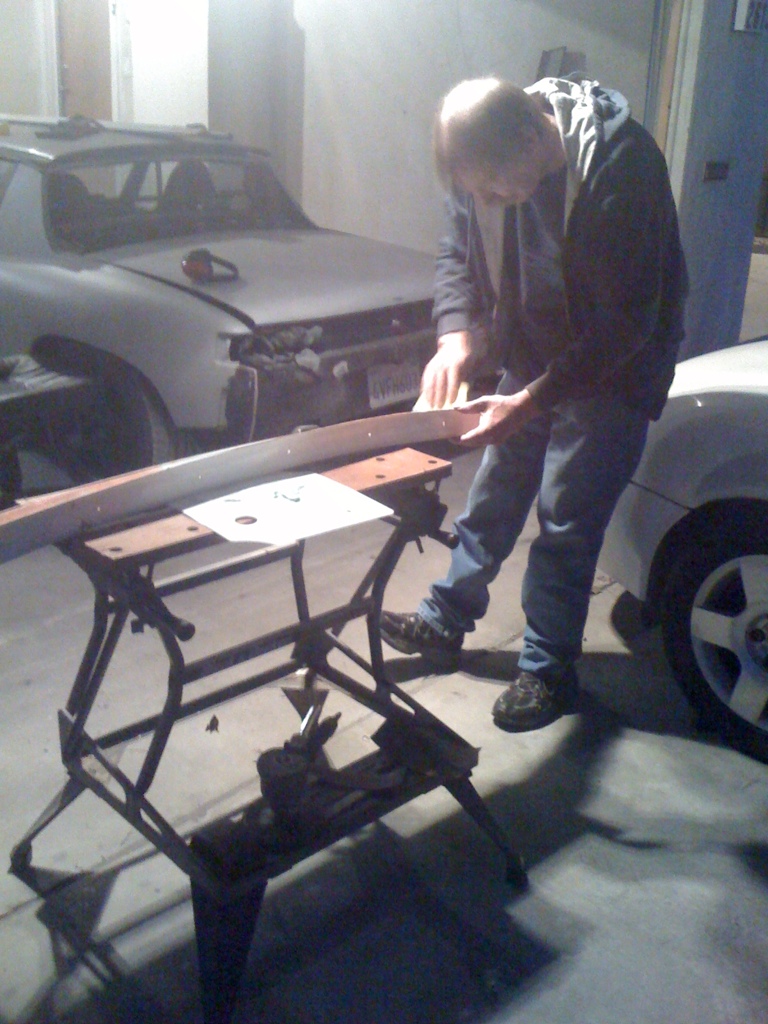
Here is my uncle laying down bondo/glaze mix on the rear spoiler. Decided to fill in the "texture" that was on the spoiler. 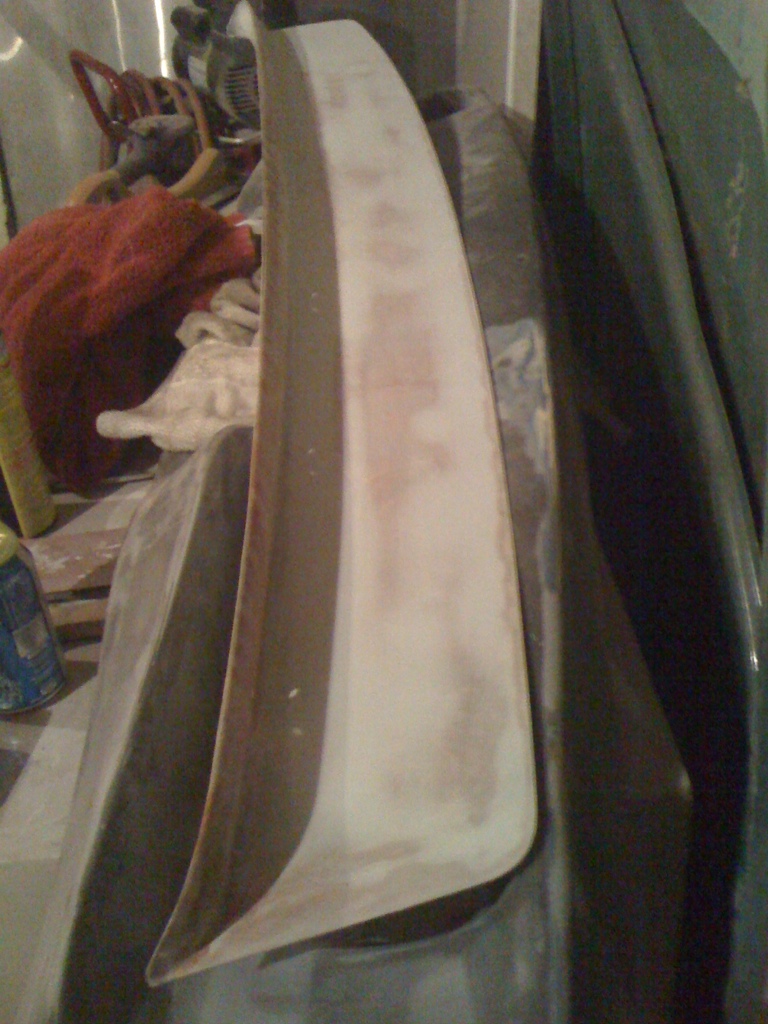
All sanded down, now to bondo the bottom portion. 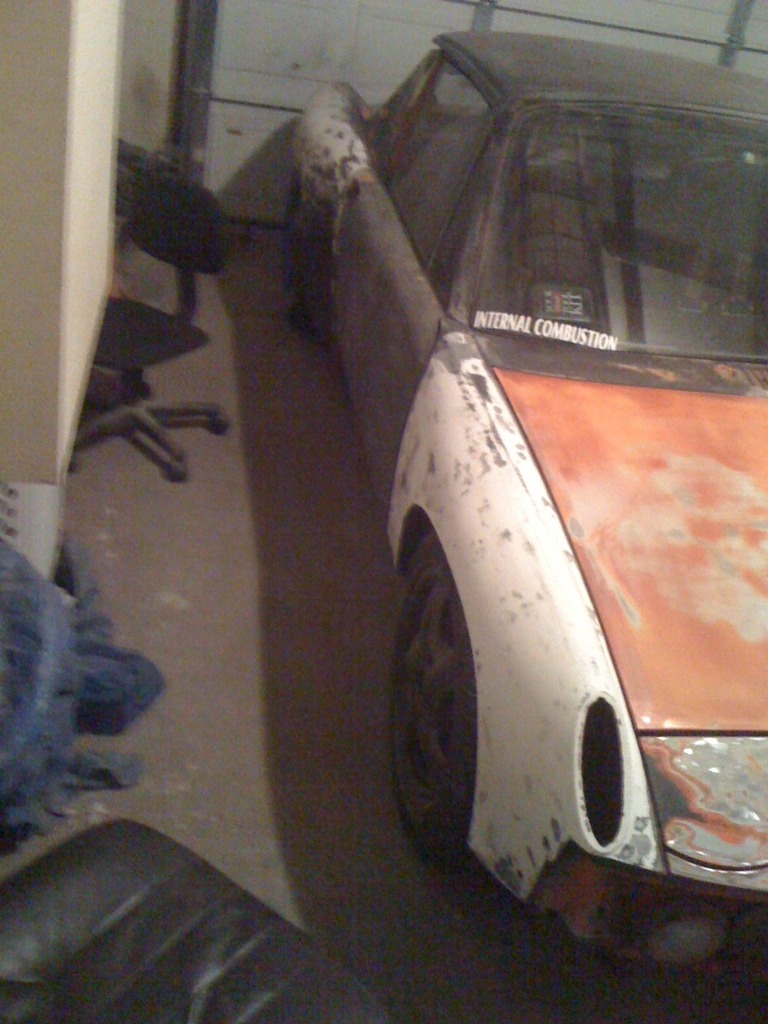
Sanded down the whole pass side with 80 grit, ground down the rivets from the fender flares, welded some supports for the fenders, and welded the pass mirror holes up. Its almost ready for some bondo/kitty hair mix to finish off the flare attachements like the other side. I also need to reinforce behind the flares, I'll use the purple stuff as it seemed really good for that on the rear flare.
Posted by: kg6dxn Mar 28 2011, 10:53 AM
Great progress! keep going
I need to get my car in the garage... 
Posted by: Andyrew Mar 28 2011, 10:59 AM
You could build one of these...
http://www.carportstation.com/IVG2/N/ProductID-40901.htm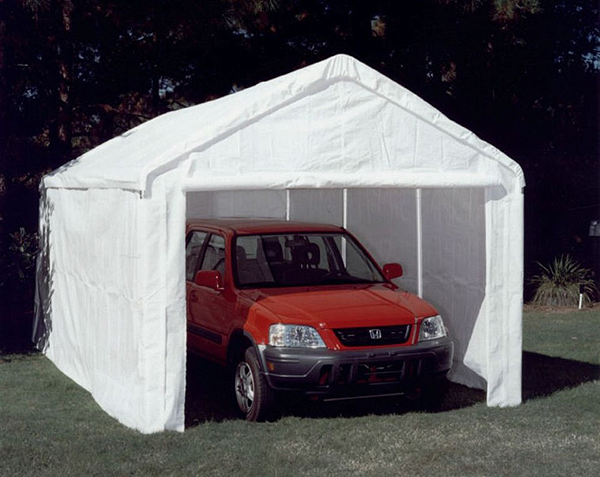
With one of these and 3 tarps
http://www.harborfreight.com/12-1-2-half-ft-x-20-ft-portable-car-canopy-92928.html
Im contemplating it for my back car area.
Posted by: kg6dxn Mar 28 2011, 11:01 AM
You could build one of these...
Im contemplating it for my back car area.
I wish!. Not allowed in San Ramon unless behind a fence. Not allowed in driveway.
Posted by: Andyrew Mar 30 2011, 09:39 AM
Progress from yesterday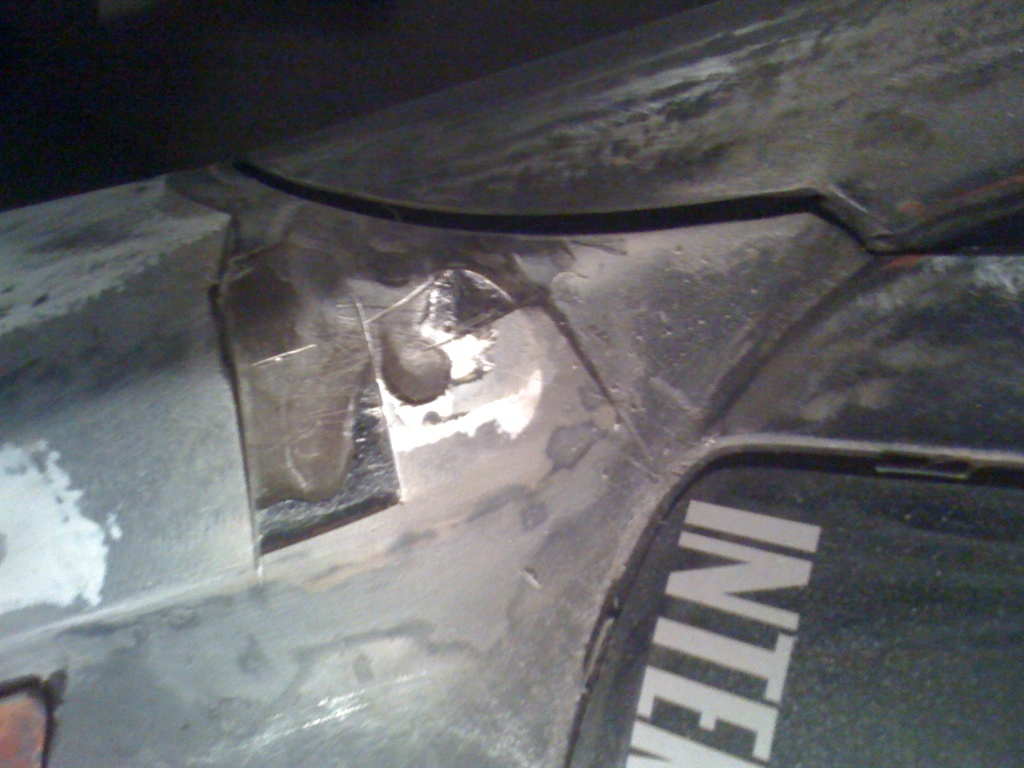

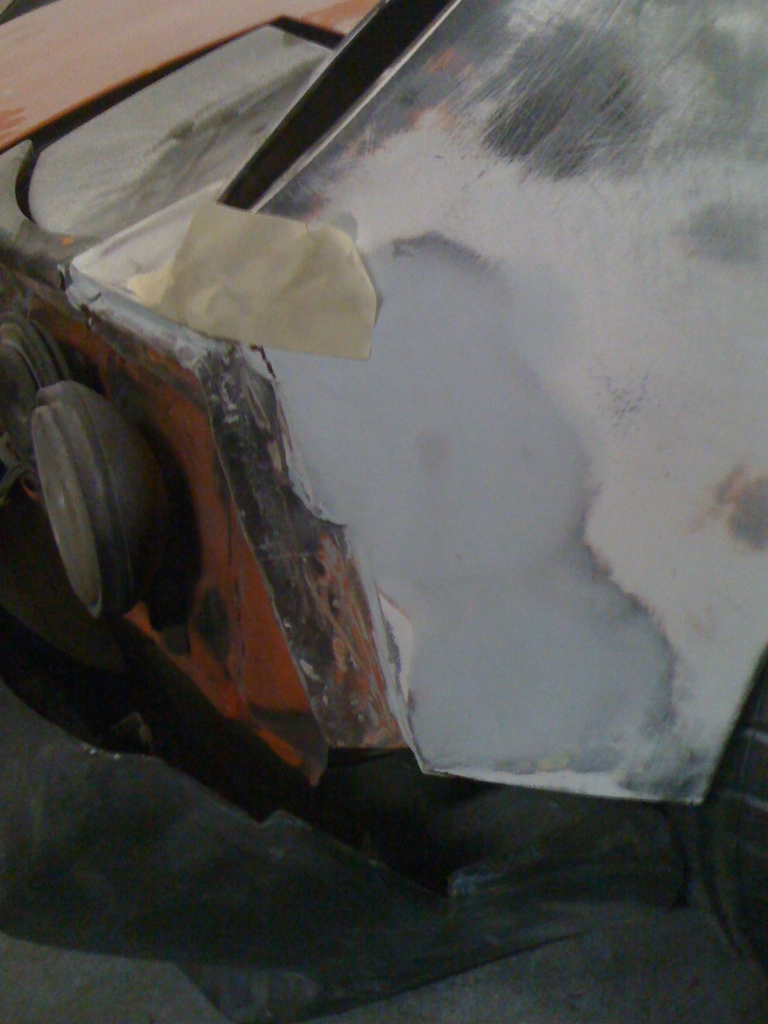
Cut this part of the front fender off because it was weak and it was high/wont blend nicely. 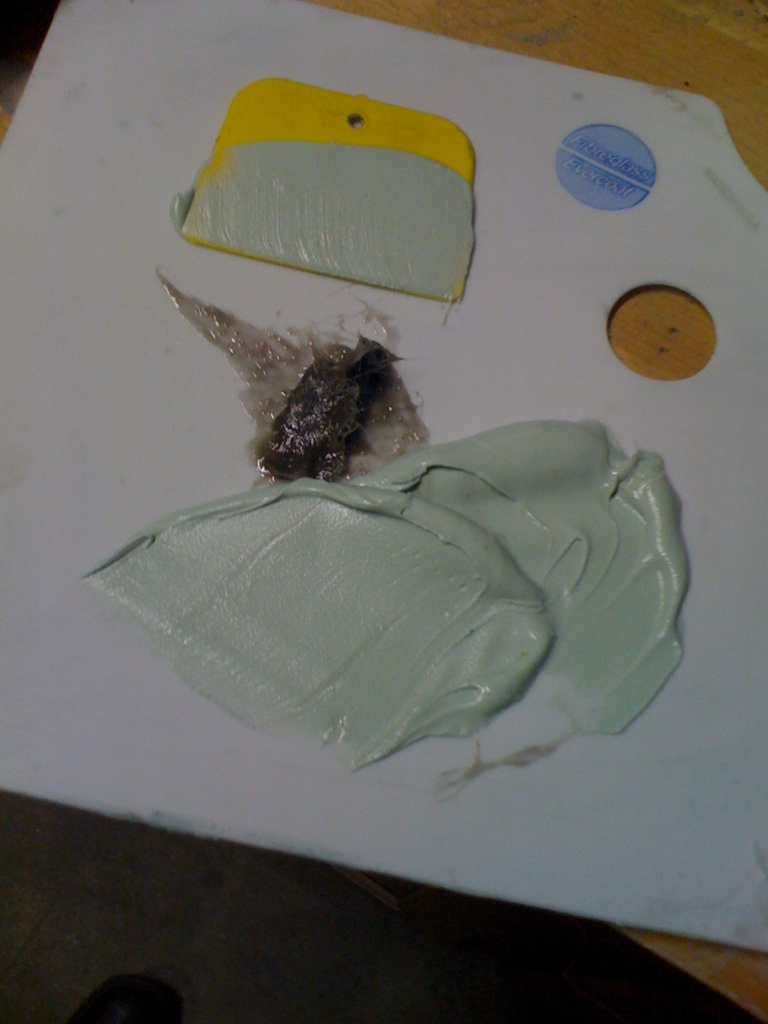
Mixed up a kitty hair/bondo mix. You can see it standing free vertically after me holding it for 10 seconds. Provides a little more strength and vertical stability. 
Stuffed the mix under the separation in the fender for strength and laid it out.

Fenders had a step between the fiberglass and the factory fender, this is to eliminate the step. I'll be blending it in with the hood later like the other side. 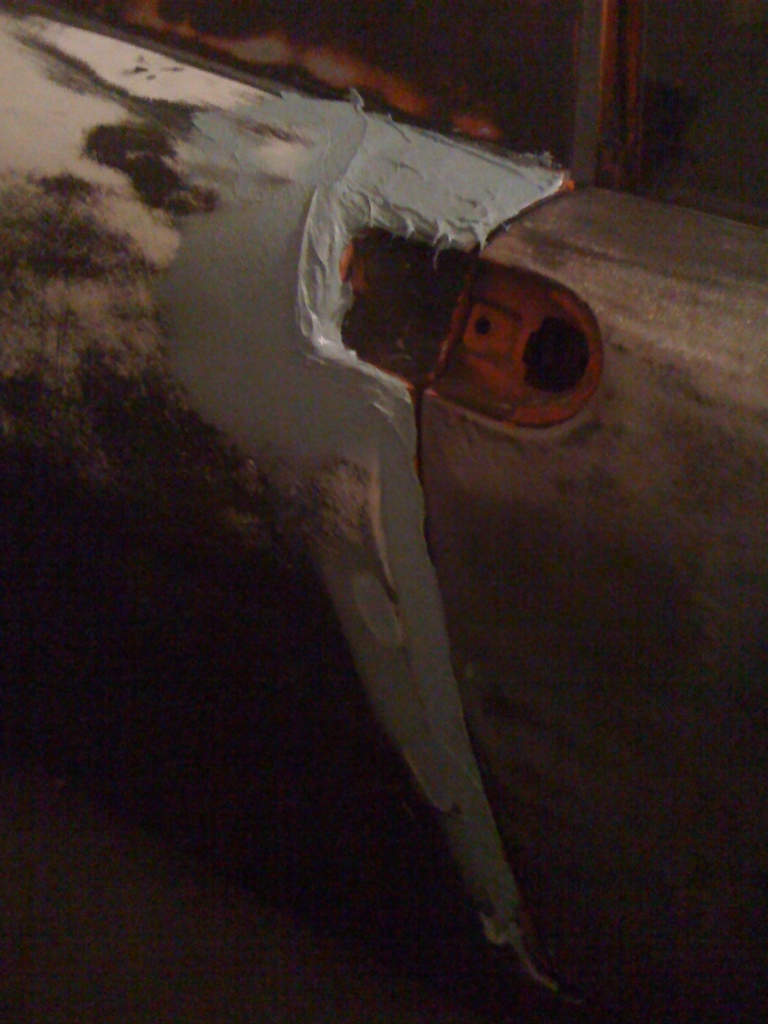
More mix, built up for blending.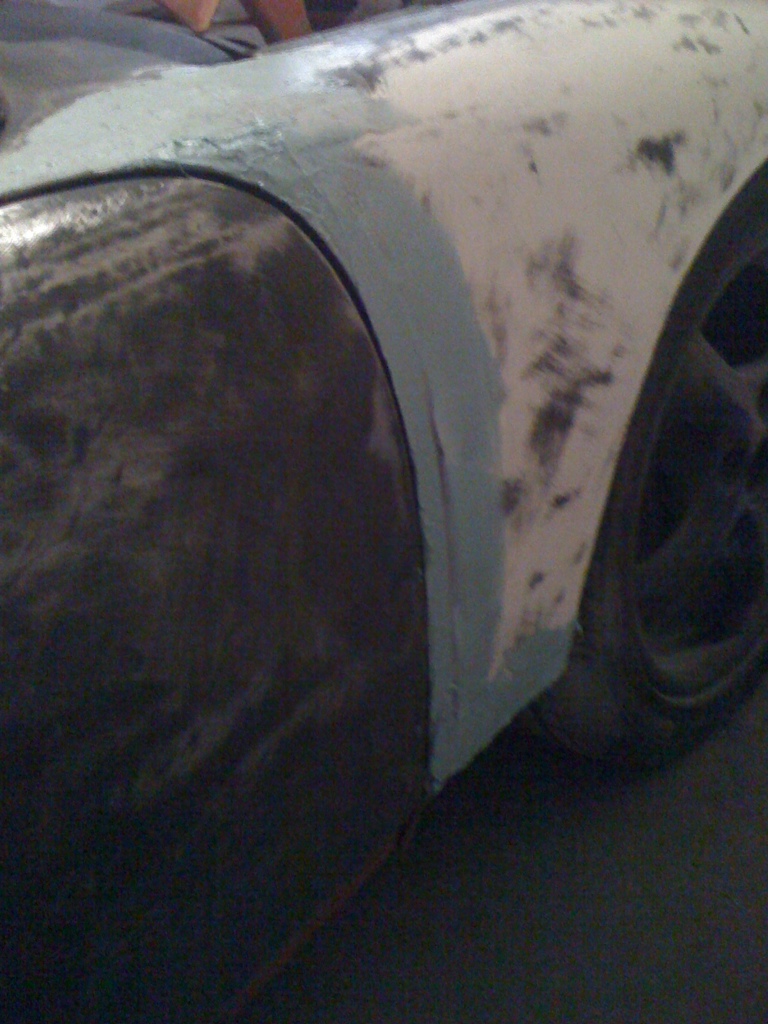
Dried nice, looks like this will work well. I'll get to sanding it this weekend.
Posted by: Andyrew Apr 4 2011, 11:33 AM
Worked Saturday night and 1/2 the day on Sunday. 
Inlisted the help of my uncle again. He worked on finishing the spoiler and sanding down the targa top while I bondo'ed and sanded the fenders. 
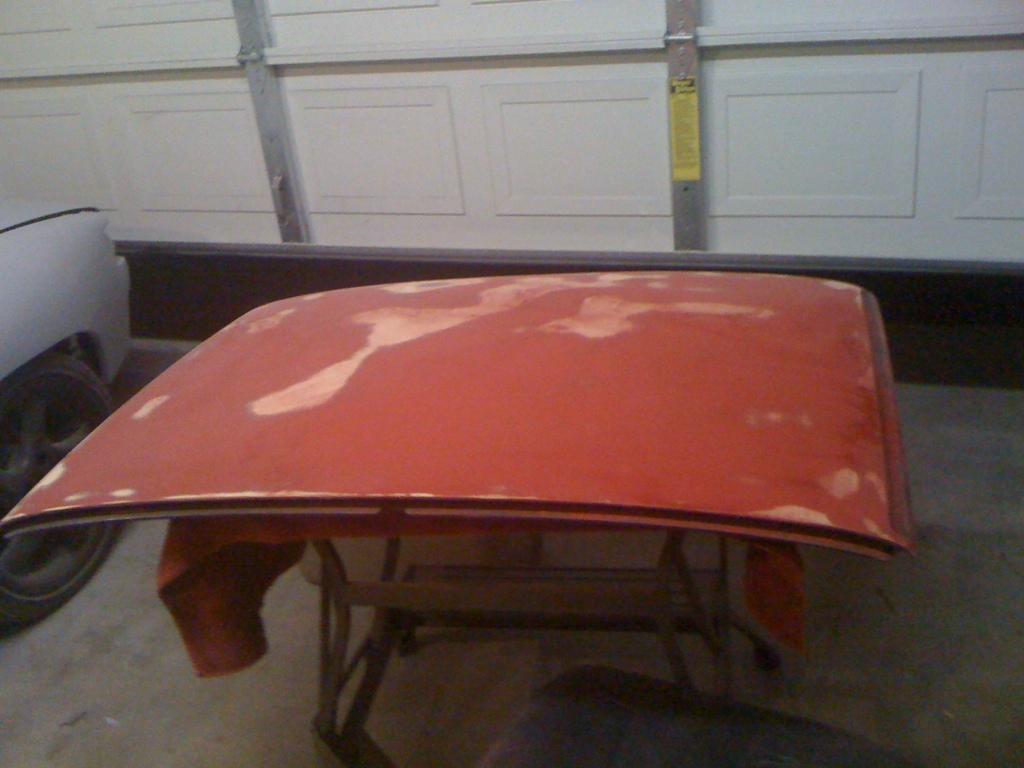
Used about 1/3 of a gallon of bondo. Most of it went to the rear fender for shaping like the pass side. You can see how much sandpaper was used today.. The targa top used to be primer black, it still needs to be taken down past the clearcoat into the red and maybe the primer down underneath. The spoiler is done and ready for primer. I really wanted to prime last night however it got to late. I am hoping to be able to prime on Tuesday. This is great progress on this side and I feel this side went much quicker than the drivers side.
I forgot to mention I bondo'ed and sanded the targa bar where I did all the grinding/welding, so its ready for primer.
Posted by: Andyrew Apr 6 2011, 09:21 AM
Laid 1/3 a quart of primer with the new primer gun. Oh what did I do with my life before a primer gun? This thing is SWEEET! I cant believe how smooth it laid the primer down and with never a thought of hickups!! Best $25 ive ever spent on this project. Truth be told I was itching to use the primer gun for 2 weeks already so I just said "f'it" and decided to lay some primer.
2 coats of primer on the rear trunk and one coat on the targa bar, door, and fender. I didnt do the rear fender because it actually wasnt ready (I did say I was itching to use that gun right?), It needs some more bondo/glaze before its smooth enough to primer over.
Any rate im happy! progress is going by quick on this side!
Posted by: kg6dxn Apr 6 2011, 01:54 PM
Looking good!
Posted by: Andyrew Apr 11 2011, 12:26 AM
Progress from today. Laid a bunch of filler/glaze mix. Got the rear shaped pretty darn good. Spent about 8 hrs on this. My uncle came and continued work on sanding the targa top. He works at his own pace, but he finally made it through the clearcoat that was on this top (I swear it was 3-4 layers of the stuff, and it was pretty darn hard). I am pretty sure i'll sand it down to the primer underneath myself and get it in primer.
At this point 3/4 of the car is in primer! I expect to be able to paint by the end of next month.
Not pictured but I will be reinforcing the fender on Tuesday. I have already made the reinforcements that will be welded in and at that point I will fiberglass the underside of the flares as well. 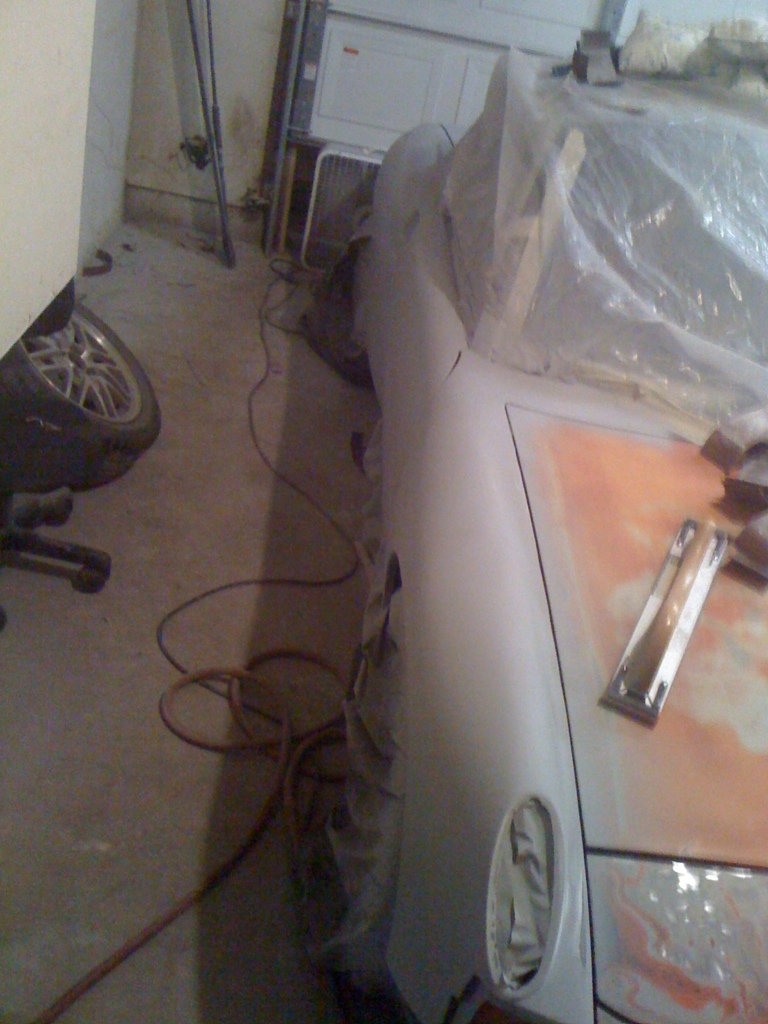
One thing to point out, I put 2 really thick layers of primer down. I am getting low on primer so I think i'll get a gallon of the grey primer. I still have to do the front trunk, the spare rear trunk, the targa top, and probably 2 more coats of primer on the Pass side. I expect to use about 1/2 a gallon of primer, the rest of primer can be used for my dads El Camino or my honda. 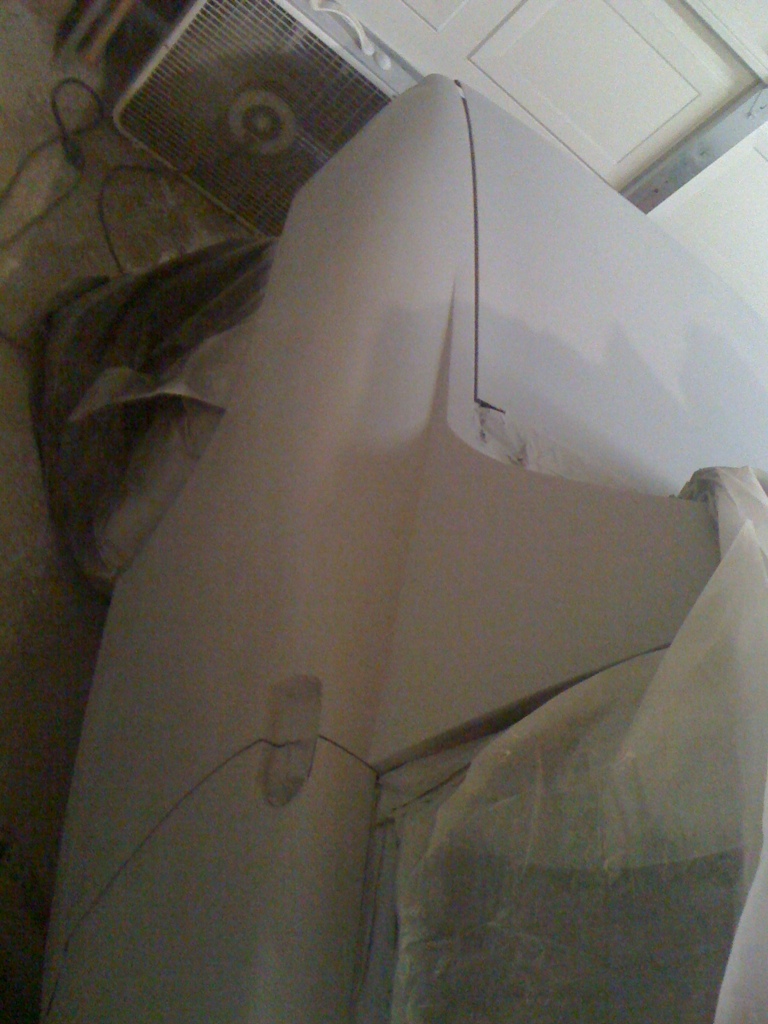
I am deciding on what to to with the bumpers now...
Posted by: kg6dxn Apr 11 2011, 08:52 AM
Nice progress. I'm impressed!
Posted by: Andyrew Apr 13 2011, 12:12 AM
Today was spent chasing down light bulbs... Arg... 8' fluorescents are not fun... Found some but they were the wrong style... back they went..
Lots of light in the garage now. Should be plenty of light to spray the car in if I put a spotlight on the side while spraying.
Next order of buisness was reinforcing the rear fender. Welded in the piece like last time. Though I would use kitty hair but it sucked balls VS the fiberglass putty stuff, it was just way to thin. In the end It worked out but If I would have gone with the putty stuff I would have had less headache.
Afterwards I mixed some of the putty stuff with some fiberglass and reinforced the backside of the fender. Strong as can be now. Tomorrow Im going to try to convince the GF to help me do some sanding (She did say that she would help me sometime...)
Posted by: computers4kids Apr 13 2011, 08:11 AM
Tomorrow Im going to try to convince the GF to help me do some sanding (She did say that she would help me sometime...)
Andrew, your car is really starting to come together! Great progress. OK, let me know how the GF thing goes...are you sure you want to test that relationship with sanding...
![popcorn[1].gif](style_emoticons/default/popcorn[1].gif)
Posted by: mepstein Apr 13 2011, 08:39 AM
Today was spent chasing down light bulbs... Arg... 8' fluorescents are not fun... Found some but they were the wrong style... back they went..
Lots of light in the garage now. Should be plenty of light to spray the car in if I put a spotlight on the side while spraying.
Next order of buisness was reinforcing the rear fender. Welded in the piece like last time. Though I would use kitty hair but it sucked balls VS the fiberglass putty stuff, it was just way to thin. In the end It worked out but If I would have gone with the putty stuff I would have had less headache.
Afterwards I mixed some of the putty stuff with some fiberglass and reinforced the backside of the fender. Strong as can be now.
Tomorrow Im going to try to convince the GF to help me do some sanding (She did say that she would help me sometime...)Use a mask.
Posted by: Andyrew Apr 13 2011, 09:35 AM
I had her weld about 4 years ago.. Turned out she was afraid of sparks...
That was the last time she helped me on the 914, since then she's handed me wrenches once or twice.
Also she's afraid of power tools.
So im going to hand her some 80 grit, wear some gloves, and have her sand on the bumpers a little in the hard to reach areas with a fan on her work.
Posted by: McMark Apr 13 2011, 10:10 AM
Kickin' ass!
Posted by: Spoke Apr 15 2011, 02:56 PM
Car is lookin' good. Love the garage paint booth. Done it several times.
Posted by: sawtooth Apr 15 2011, 03:45 PM
Nice progress I hope be painting about a week or two after you. Can't wait to see yours finished. The body lines with those flares looks fantastic.
Posted by: Andyrew Apr 15 2011, 08:48 PM
Thanks guys! I was able to get some done this morning. Sanded down the primer with the guide coat. Wasnt very far off, I laid bondo on some trouble area's but they were mainly pin holes and the like. Im currently waiting for the bondo to dry and entertaining some guests, but afterwards i'll be sanding it down and primering again tonight.
I bought a gallon of primer for this and a couple of other projects so i'll be laying a bunch of primer tonight for where the low sports were.
I'll take some pics tonight, but by the end of the weekend I should be done with the passengers side!
I need to spend a bunch of time on the bumpers, but Im really not sure if I WANT to... I'll give it some work in between paint so we'll see how far I get this weekend on the bumpers. I may just get them smooth and spray them black and put my time in stock fiberglass bumpers because thats the style I like the most.
Posted by: AZ914 Apr 15 2011, 08:52 PM
Lookin good man...
Posted by: Andyrew Apr 16 2011, 12:52 AM
Sprayed about 4 layers of primer on... Stupid be mixed to much primer. I sprayed it about 5% reduction for a heavy build, and laid it on thick the first coat. To thick actually as I got a couple of bubbles.
I'll show some pics tomorrow. But I sanded it down really quick with 220 to cut most of the 80 grit scratches out prior to priming. I should be able to get most of those scratches out tomorrow and primer seal it by the end of the day! However I need to get some 180 grit.. Im almost out of 220 grit, and completely out of 150 grit, and primer should cover 180 grit scratches.
Posted by: Andyrew Apr 17 2011, 02:08 AM
No pics, but I got side tracked many times during the day... 2 layers of primer and one tiny spot of old filler apparently didnt have enough hardner, sanded the whole area out and reapplied filler.
Got some 180 grit paper from the store, Its the paper stuff, but it works really good. I want to sand the car down again to make sure I have all the low spots filled before I primer seal it, but im pretty sure its all done.
Depending on how much time I have tomorrow, i'll finish the passenger side and commence work on the A pillar, targa bar, engine lid, and front trunk.
Posted by: ConeDodger Apr 17 2011, 08:22 AM
Nice progress Andyrew but no matter how nice you do the body work, and what color you paint it I will still have no idea how to instruct on an autocross course for a car possessed by the devil!
Posted by: Andyrew Apr 17 2011, 12:51 PM
Im going to give it a throttle stop and retard the timing so it has less torque and only ~ 200 hp for a while. I want to give it a couple of autox's this season. Still have to dial in the suspension, no clue how my mixmatch of suspension stuff is going to come out like.
Posted by: kg6dxn Apr 17 2011, 01:31 PM
Advance it until it almost wont start. That will reduce low end torque and move the HP hogher in the rpm band. Don't be to worried about pre-ignition. A car this light will almost never make a V8 ping.
Awesome progress. Body work and paint is the thing that intimidates me...
Posted by: Andyrew Apr 17 2011, 01:31 PM
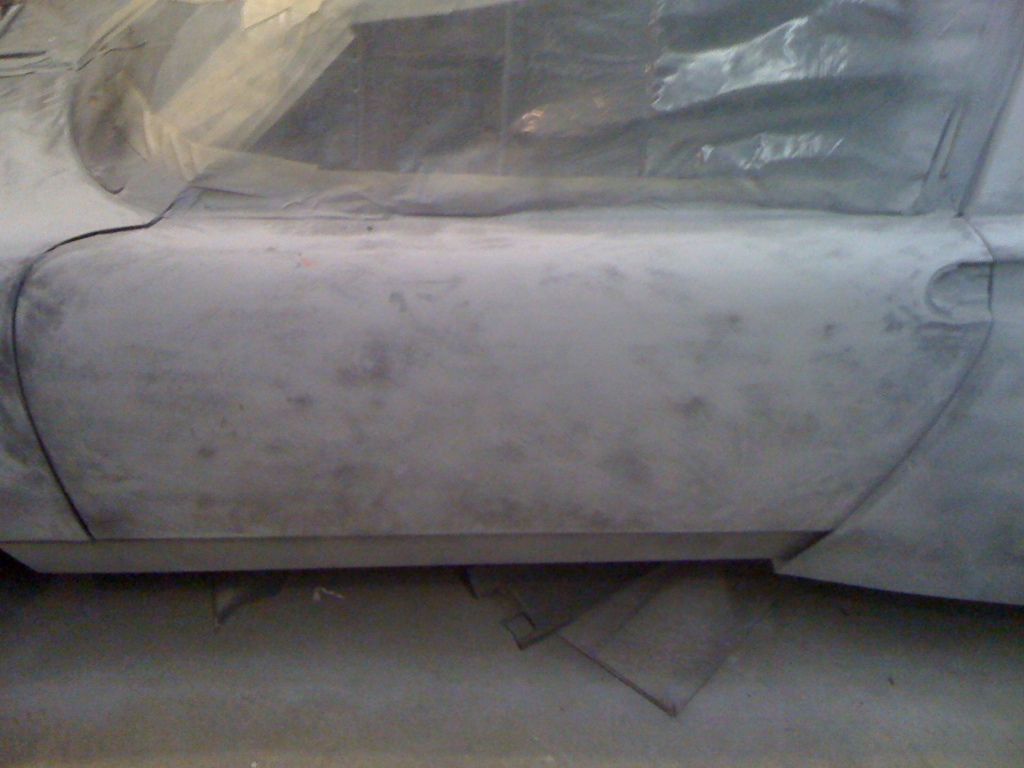
Pics!
Pulled it out and took some pics. (my excuse was cleaning)
Attached thumbnail(s)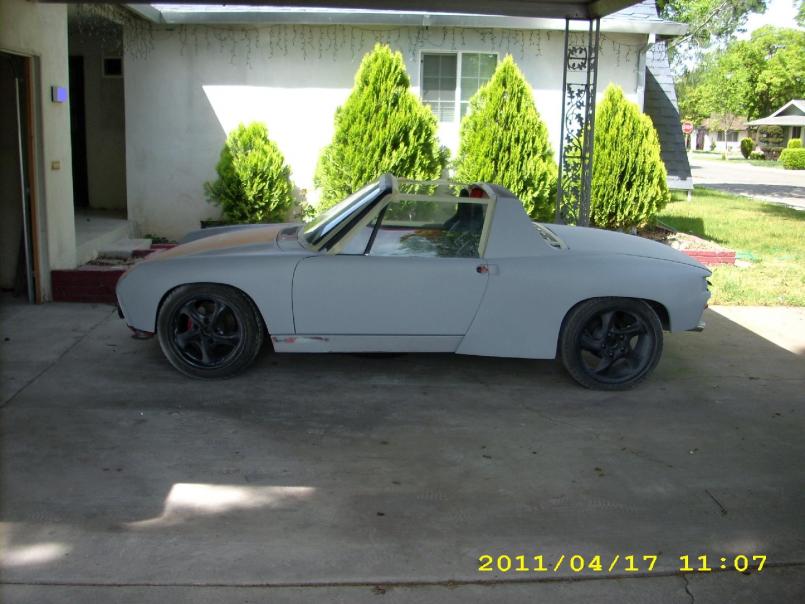
Posted by: Andyrew Apr 17 2011, 01:32 PM
two
Attached thumbnail(s)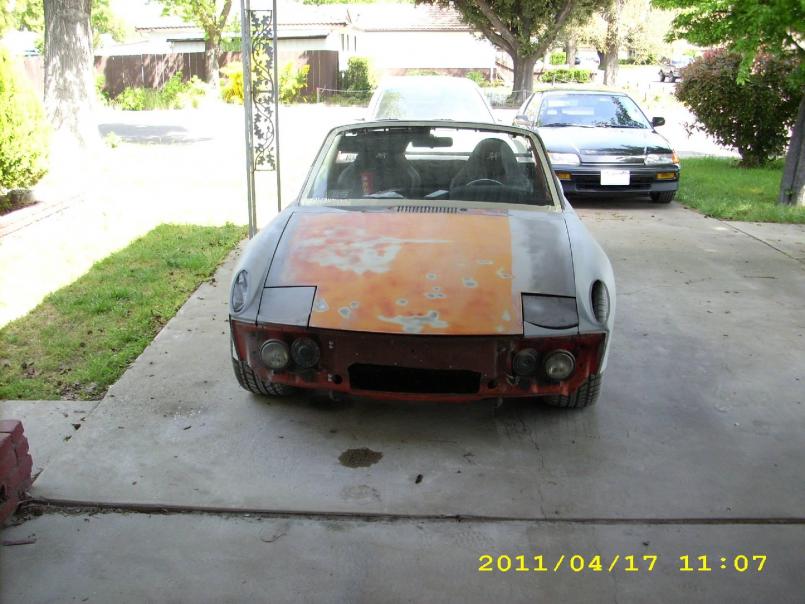
Posted by: Andyrew Apr 17 2011, 01:33 PM
three (looks mean, and yes, I know the cutout is crooked. I think im going to open it up some before I put the bumper back on. )
Attached thumbnail(s)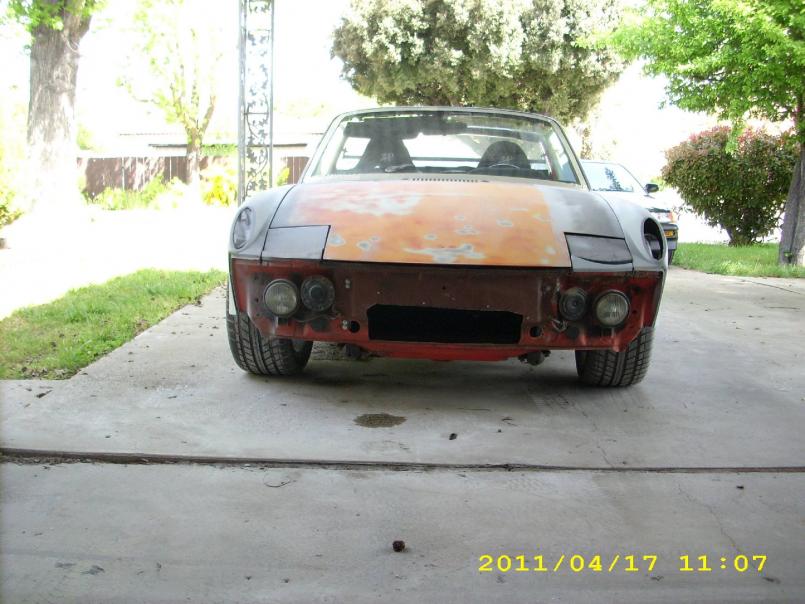
Posted by: Andyrew Apr 17 2011, 01:34 PM
four
Attached thumbnail(s)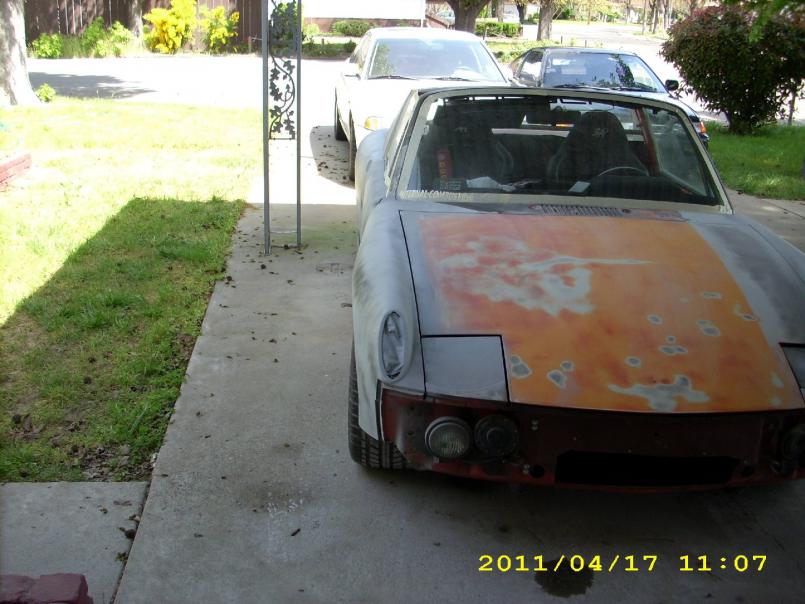
Posted by: Andyrew Apr 17 2011, 01:34 PM
Five
Attached thumbnail(s)
Posted by: Andyrew Apr 17 2011, 01:35 PM
six
Mmm liking that duct.
Attached thumbnail(s)
Posted by: Andyrew Apr 17 2011, 01:36 PM
seven
Attached thumbnail(s)
Posted by: scotty b Apr 17 2011, 01:37 PM
Pics!
Pulled it out and took some pics. (my excuse was cleaning)
FYI roll cages made of tape ARE inexpensive and crafty, but I have it on good word they won't pass a tech inspection

Posted by: Andyrew Apr 17 2011, 01:37 PM
Eight
(This is why I use my Iphone.. This is taking forever!!
Attached thumbnail(s)
Posted by: Andyrew Apr 17 2011, 01:38 PM
LOL scotty!
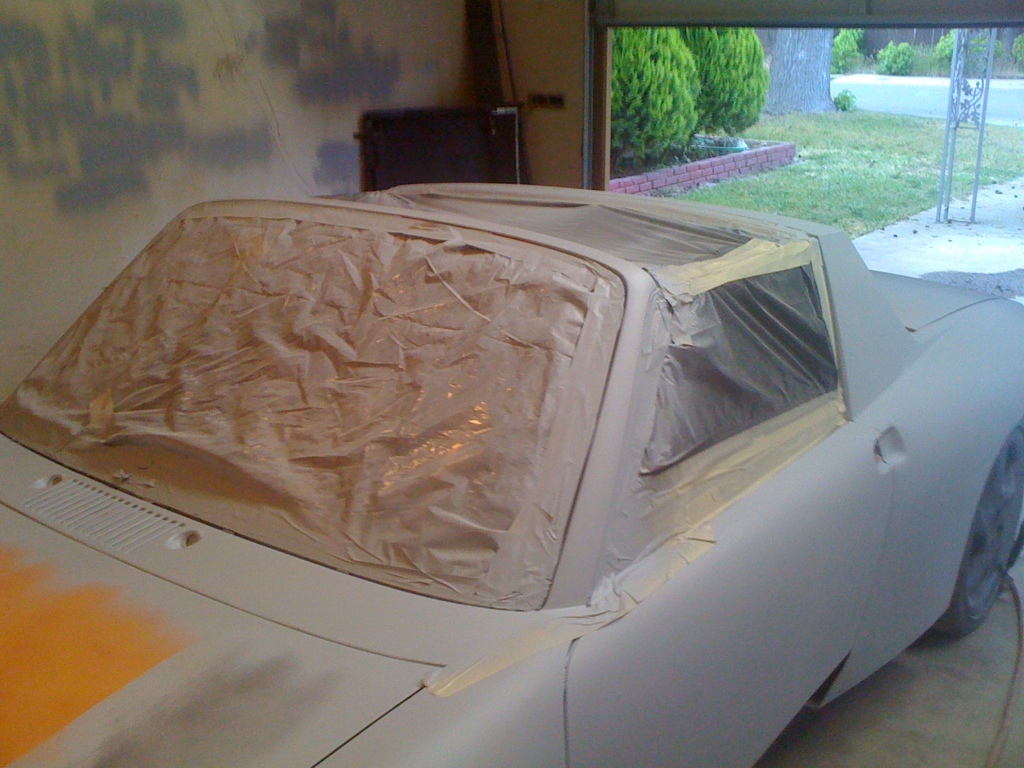
As you know im taping up the a pillar and targa bar so I can start working on those areas.
Attached thumbnail(s)
Posted by: Andyrew Apr 17 2011, 01:39 PM
I took way to many pics... They just kept looking so good!!
Attached thumbnail(s)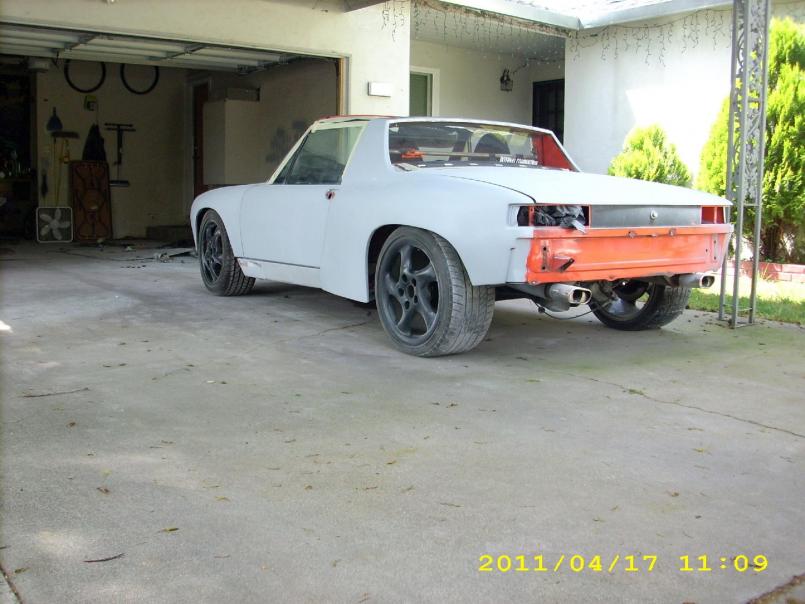
Posted by: Andyrew Apr 17 2011, 01:40 PM
Guide coat on. I need to start sanding now!! Arg..
Attached thumbnail(s)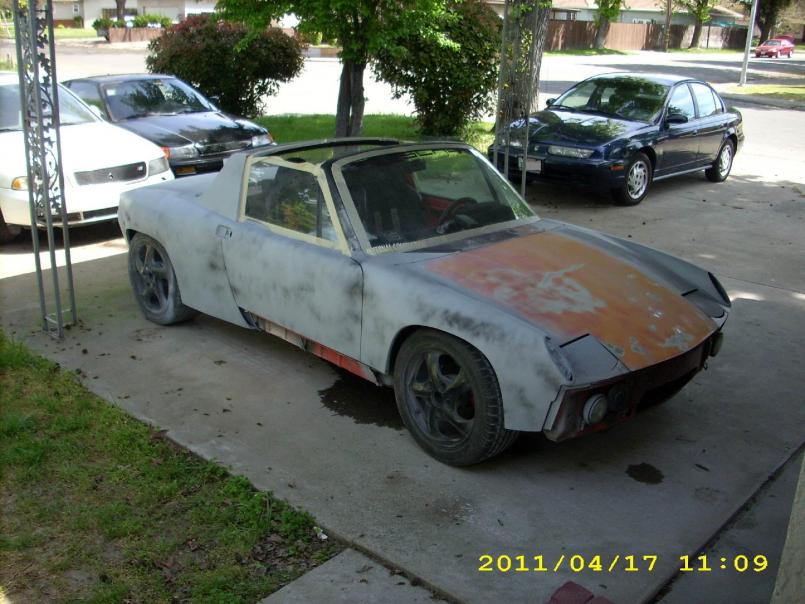
Posted by: Andyrew Apr 17 2011, 01:42 PM
Damn just noticed how much primer went on the pass long... Damn. I'll have to acetone that off. The paint underneath is PERFECT. Factory with NO rust.. Oh its beautiful.
Oh and last pic.
Time to start sanding.
Attached thumbnail(s)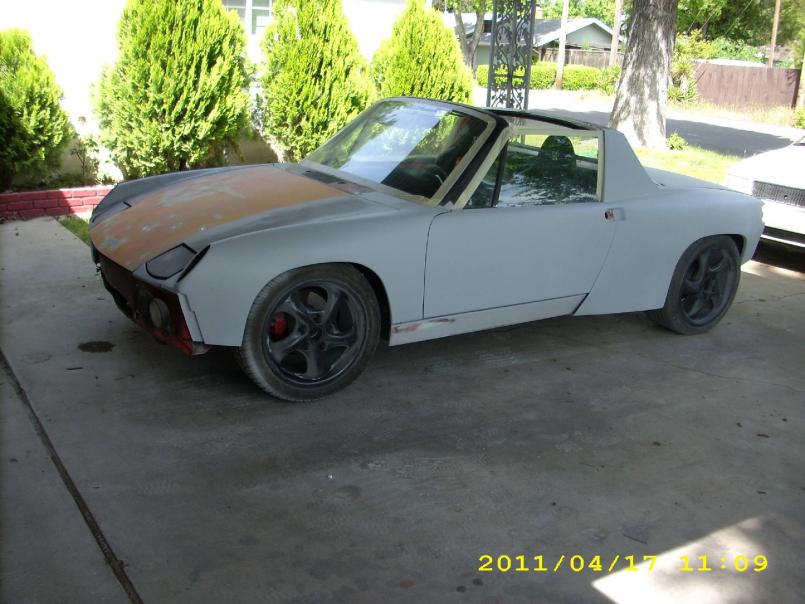
Posted by: kg6dxn Apr 17 2011, 01:43 PM
Nice! I see you are already prepared for Santa with all those Christmas lights...
Posted by: Andyrew Apr 17 2011, 02:18 PM
Im lazy The Christmas lights are stapled in  ..
..
Posted by: computers4kids Apr 17 2011, 02:54 PM
Andrew, forget all the timing tweaks etc, just put a block of wood under the pedal V8 owners drive sensibly.
Posted by: Andyrew Apr 17 2011, 03:58 PM
1/2 throttle still pushes over 300lbs of tq to the wheels off idle.. Messing with the timing should help push the powerband up
Posted by: Andyrew Apr 25 2011, 10:47 AM
Hows about an update?
Saturday morning I installed a 2500CFM fan in the garage! Picked it up for $100 from a body shop that decided to stop priming in their main shop. (original price was $260).
Up and running in a hour! 
Spent a bunch of time sanding the cowl area (read 4+ hours.. Apparently no one bothers to sand those vent holes and the wiper holes)
Sanded and primed the rear as well
All went well till I went for a second layer of primer on the targa bar.. 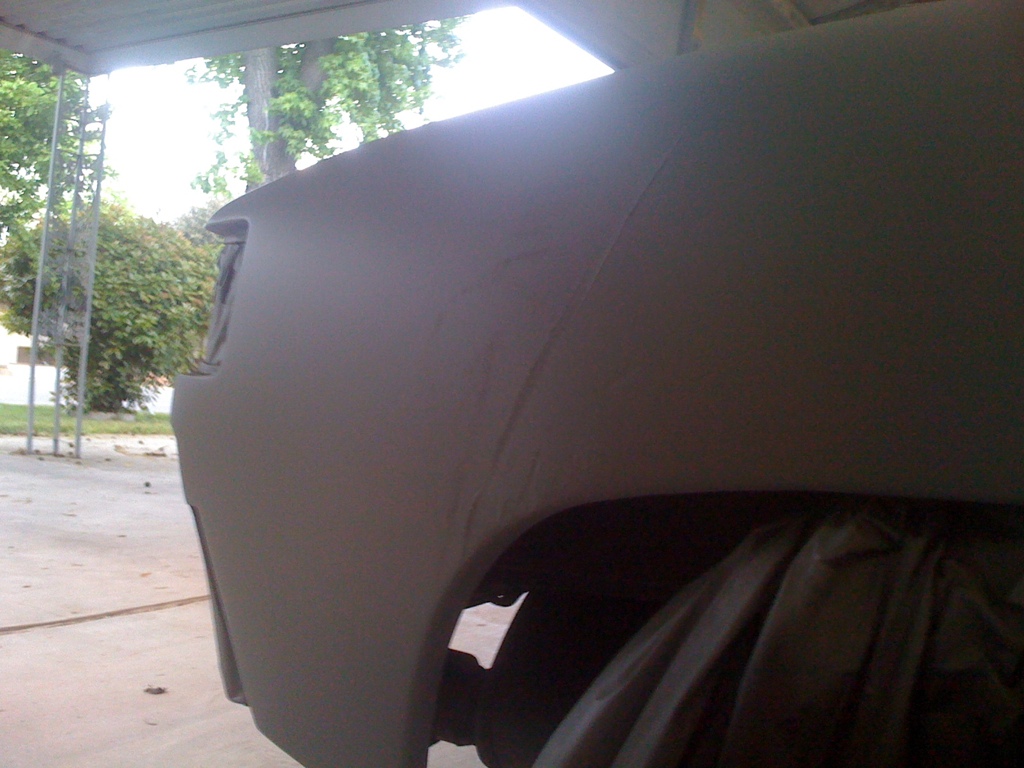
I was PISSED OFF... This was supposed to be the last final layer of primer on this side.. Damn.
I sanded this all down last night and its ready for a second coat of primer fill on a couple area's. So i'll get the fender and those area's in primer tonight hopefully.
Im ordering paint today FYI.
Posted by: tdgray Apr 25 2011, 12:07 PM
Been there done that... at least it wasn't in your clear coat... mine was
Posted by: rick 918-S Apr 25 2011, 12:22 PM
Looking good man! That fan should work nice.
Posted by: Andyrew Apr 25 2011, 12:51 PM
Been there done that... at least it wasn't in your clear coat... mine was I was rushing myself.. Not enjoying the process because a friend of mine was pissing me off so I wasnt thinking.
When I spray I will have 2 others in the garage, one on each side of the car. Their whole job is to keep me from either leaning on the car, or keep the hose from touching the car.
Posted by: kg6dxn Apr 25 2011, 06:34 PM
Awesome! I want to paint mine Now...
Posted by: Andyrew Apr 27 2011, 12:03 AM
Paint is ordered.
One gallon of single stage with appropriate reducer and hardner. I also got a quart of primer sealer by direction of my paint buddies, apparently the primer I was using isnt actually a sealer. However he did tell me that what I should do is prep the body with 220 grit and lay down the primer sealer, Then while the primer is still wet (10 mins later), lay down the first coat of paint and then the subsequent layers of paint. He says that it just turns out amazing. I trust him, and I have plenty of paint to be able to make touch ups if I need to.
I sprayed the area's that I needed to finish, so the whole car, minus the front trunk is in final primer. I have some touch up pitting in the targa bar that i'll fix over the next week, and i'll get the front trunk done this weekend.
Once the paint comes in then I think i'll start by test spraying the targa top.
Posted by: charliew Apr 27 2011, 12:14 AM
I wouldn't paint over primer that hasn't dried. Non sanding sealer is good for at least 12 hours to recoat. But the data sheet doesn't say anything about painting over it before it dries. When you build up several coats of paint it can take weeks or months for the paint to dry completely. That will be where the shrinkage will show up.
Posted by: Andyrew Apr 27 2011, 08:59 AM
The primer that I bought is supposedly good for wet on wet application, AKA its built for this.
However I cant say that im more than skeptical, which is why I posted this.
This is what I got
http://www.tcpglobal.com/kustomshop/itemdetail.aspx?itemno=KUS+KIT-KEP505-QT
HOWEVER looking at it now I think I got the wrong thing.. This is epoxy primer/seal.. I believe I wanted Urithane epoxy/seal.. aka this stuff.
http://www.tcpglobal.com/kustomshop/itemdetail.aspx?itemno=KUS+KUP405-QT
Since I went with a urithane paint.. aka this
http://www.tcpglobal.com/restorationshop/itemdetail.aspx?itemno=RSP+AU1805-KIT-M.
I was also told to spray the primer with a fast reducer (which I picked some of that up)..
I placed this on Monday, so im going to call and see if I can get them to change the order to urithane primer, not epoxy.
Posted by: Andyrew May 3 2011, 12:26 AM
OK so last weekend was a test on my part for painting and setting up the garage for painting. I learned that I need to either do a LOT more prep in the garage to prevent any dirt from getting in the paint and I also need to work on painting vertically as I had more runs than I was comfortable with. I also need to work on gun setup as I think I had to much paint spraying out of the gun, which contributed to the runs.
Today I sanded the targa top in 180 and layed 3 layers of primer on it. I am going to sand it down to 400 and practice spraying vertically on it this weekend. 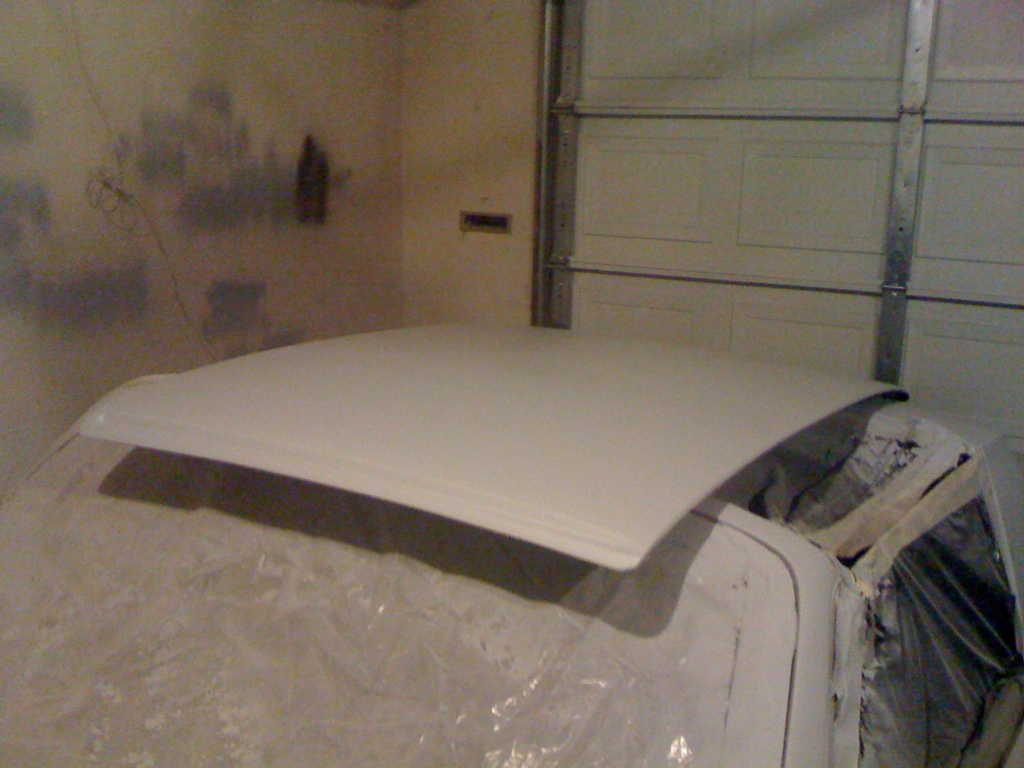
I sanded and sprayed the hood down, but its obvious to me it needs quite a bit of bodywork to be straight. This may take some time. Guide coat went on after. 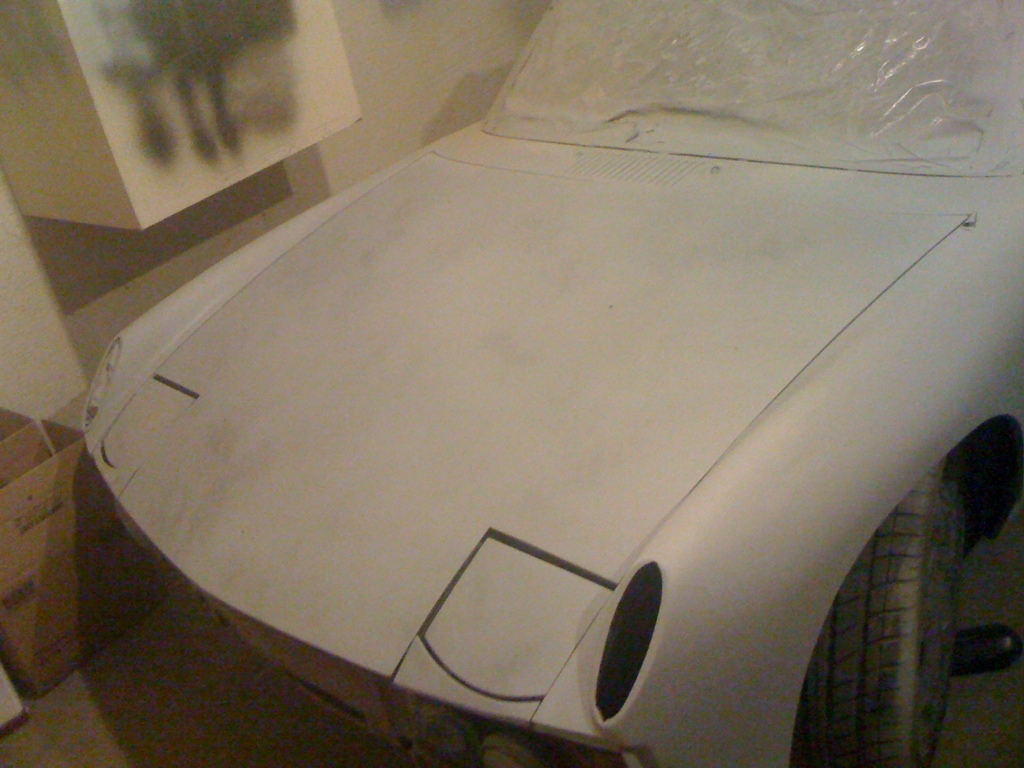
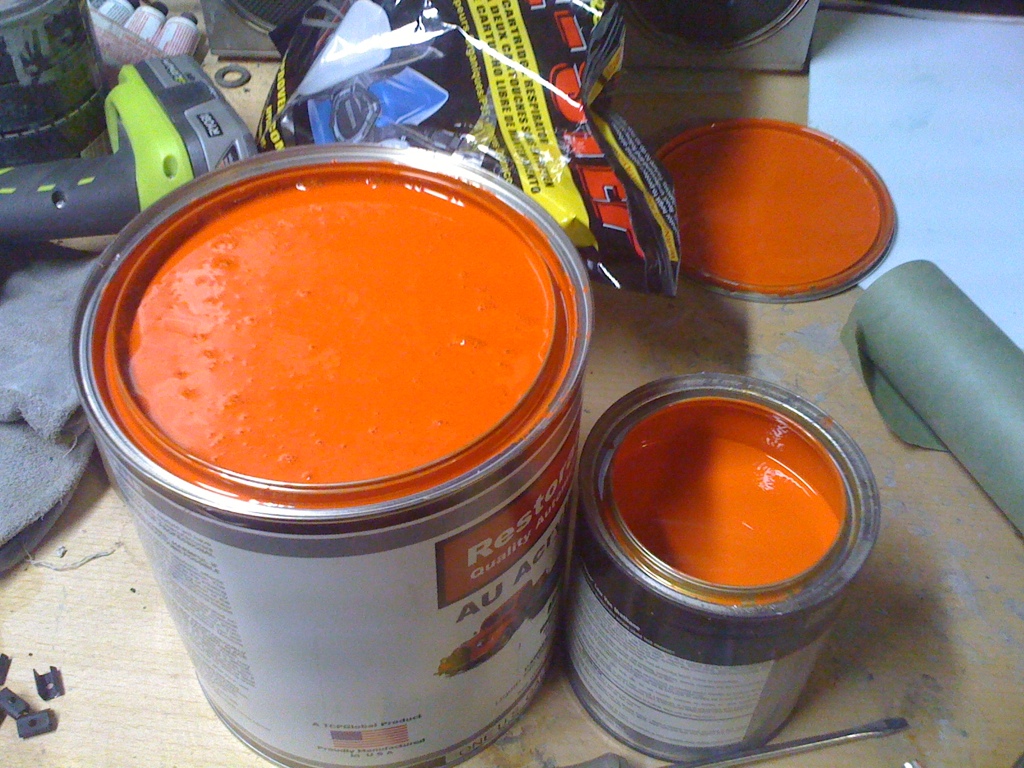
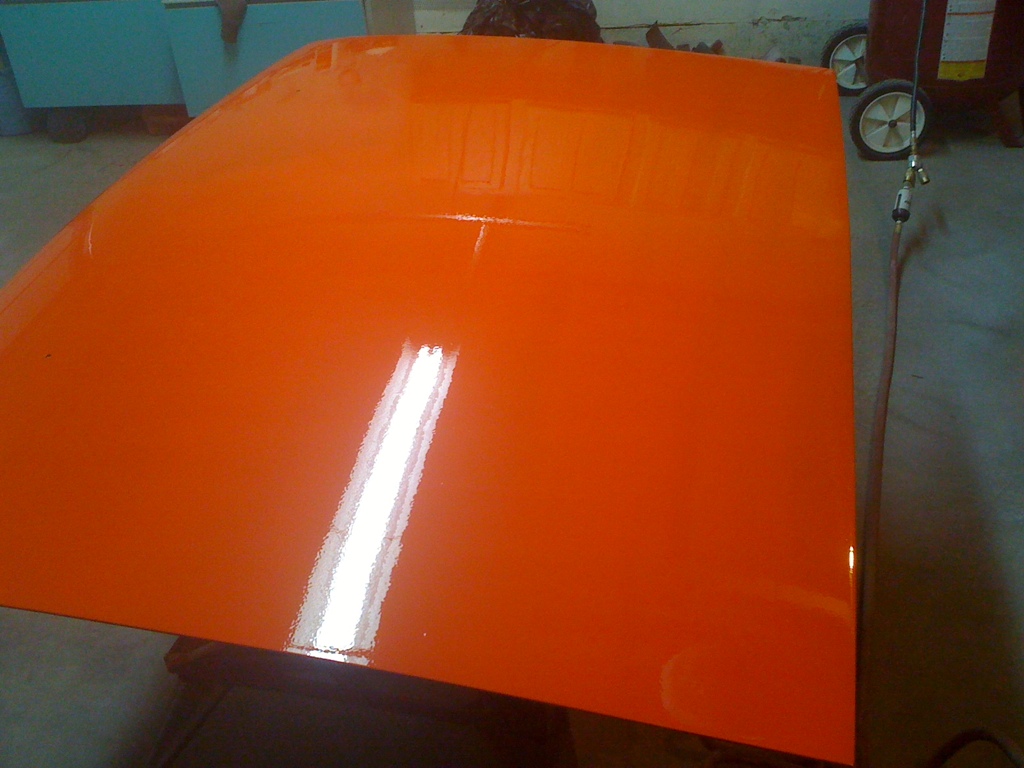
I opened up my paint that I bought and compared it to the factory phoenix red. Almost an exact match, I stared at it for quite a while before I realized that the Hugger Orange was just a TAD more red. Which I am really happy with as I wanted it to be a tad more red!!! I also realized that I have a LOT of paint to spray this tiny car... The crown vic that I sprayed last weekend took 1/3 a gallon on 3 heavy coats. I am probably going to spray 7-10 coats on this car and still only use 1/3 of a gallon!! And this car should be a breeze compared to the big crown vic.
Posted by: Andyrew May 3 2011, 12:31 AM
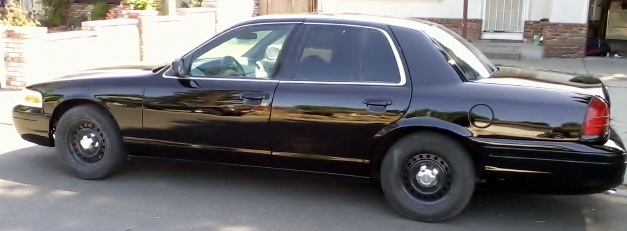 Here is a pic of the crown vic 3 days later.
Posted by: Andyrew May 3 2011, 01:04 PM
Woo Hoo! Carpet kit came in! Cant wait to get it installed! Bought a cheap lightweight kit off ebay ($75 shipped after negotiation!). I'll be glueing it in after paint.
Posted by: Andyrew May 4 2011, 11:49 PM
Hey look.
I sprayed some orange!
Just as a preface, this was a test run. I had a lot more runs when I sprayed the crown vic last weekend than I wanted. So I went and practiced on the targa top this evening.
I went and sanded the top down to 320 and went ahead and sprayed it after degreasing it.
I spoke with my paint shop next door to my work and he said that he reduces the single stage only 10% even if it calls for 25% on the sheet. I went ahead and reduced it to about 17.5 as I wanted to actually get some practice laying the coats a little thinner so I could improve my technique. I sprayed the top almost completely vertical. First coat went on with no problem and no runs. Second coat I couldnt see very well and obviously overlapped more than I should have and caused runs. I believe I went to slow in the spraying of the paint as well.
Anyways Here are some pics of this gorgeous color! I am really liking this paint from TCPGlobal. Its a bit thin, but it really has a nice shine for 110 bucks a gallon (with reducers and hardners). 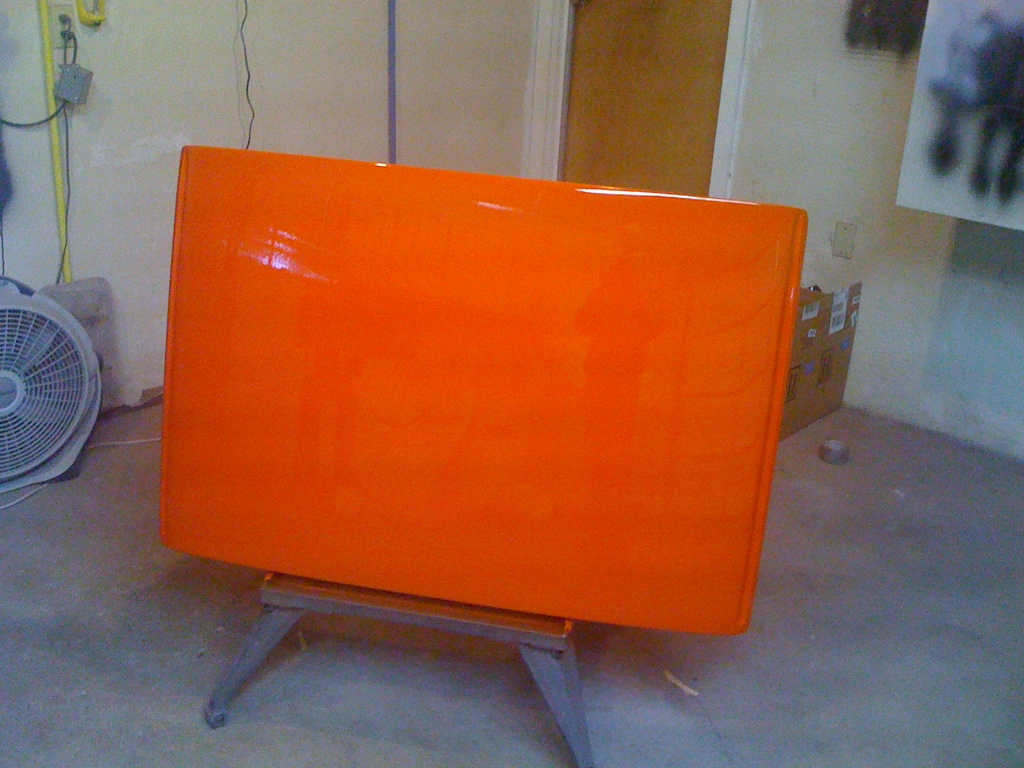
One coat
Two coats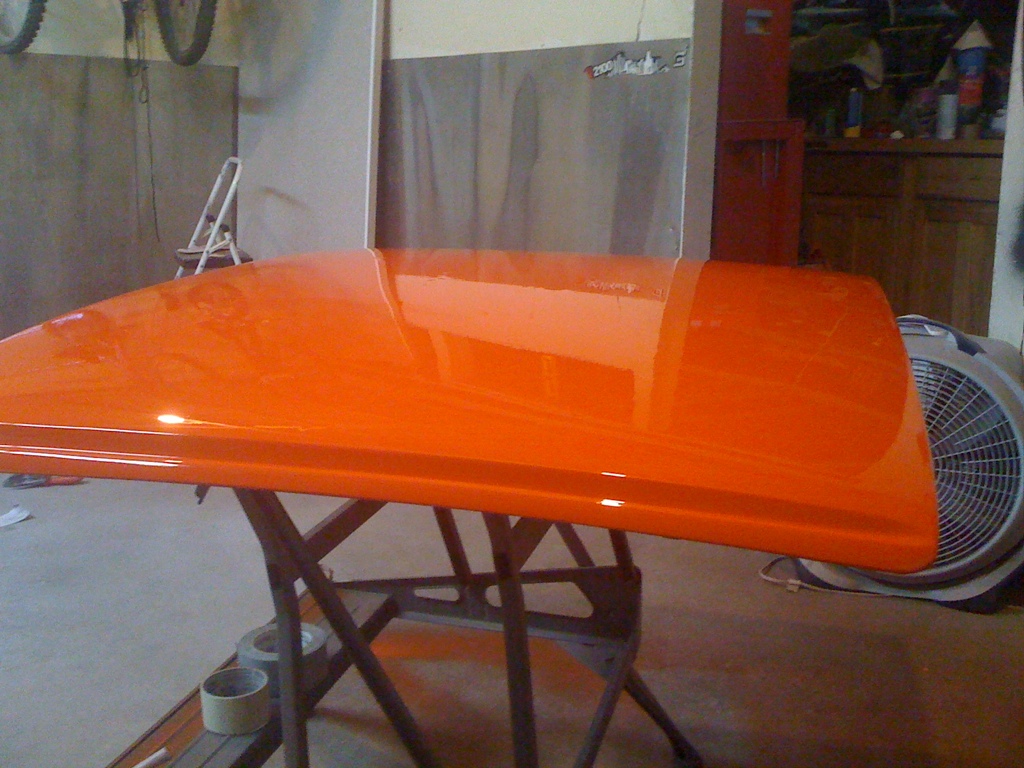
Shot of the runs
I will be sanding this down (I will practice wet sanding and buffing, then i'll sand it down to 400) and respraying it for more practice.
I did not prep the garage at all and so there is a bit of dust, but even worse there are a TON of bugs in the paint.... I did NOT have this issue with the Crown Vic. Granted it is night and I sprayed the crown vic around noon. The bugs came in about an hour after spraying, It didnt help that I let the paint dry horizontally...
Posted by: shoguneagle May 5 2011, 12:47 AM
Andrew,
Great job in painting and preparation. It is nice that you are finally seeing the car completed as you dreamed when you started several years ago. I will definitely come by and see the car if available during June when we are on our way to Oregon. We are going to look at property, not the West Coast meet. We are going to go to the Parts Heaven Parts Swap on I believe the 5th. Getting rid of my extra parts left over from the car build.
Keep up the good work. Since you are painting your car, I think I will consider doing mine. Will be talking to you.
Again, Great Job.
Steve Hurt
Posted by: Andyrew May 6 2011, 09:45 AM
Steve,
I will not be going to the parts heaven swap meet, unfortunately I have way to much going on this month and next in preparation for my GF's graduation and for a local car show (where I will be "unveiling" the car)
I've got a lot of thoughts on the DIY'er paint job.
Posted by: Andyrew May 6 2011, 09:54 AM
So.. I liked it so much on Wed that I decided to do it again!
I tried to do the setup that was told to me by my paint guy.
I sanded down to 220. I then primered it with primer sealer (This was epoxy primer/hardner.. And I reduced it with urethane reducer.. Again I bought the wrong primer...) On a fast reducer. Then 10 mins later I hit it with the first coat. I also only reduced the paint down 10% with medium reducer. I hated it, It was so thick and unworkable. Spray pattern was a lot worse this way as well. I think it layed out very dry. So on the next coats I added more reducer and the last coat I added even more reducer.
Here is another thing I noticed. With the light grey primer, I had full coverage in 2 coats. With the grey epoxy primer underneath, I didnt even get full coverage after 4 coats.
One thing I did notice is that most of the scratches were hidden. I think I thinned the epoxy primer to much so I didnt have the hide that I really could have had, but regardless. It was certainly a learning curve.
Less bugs this time as well, I shut the back door this time 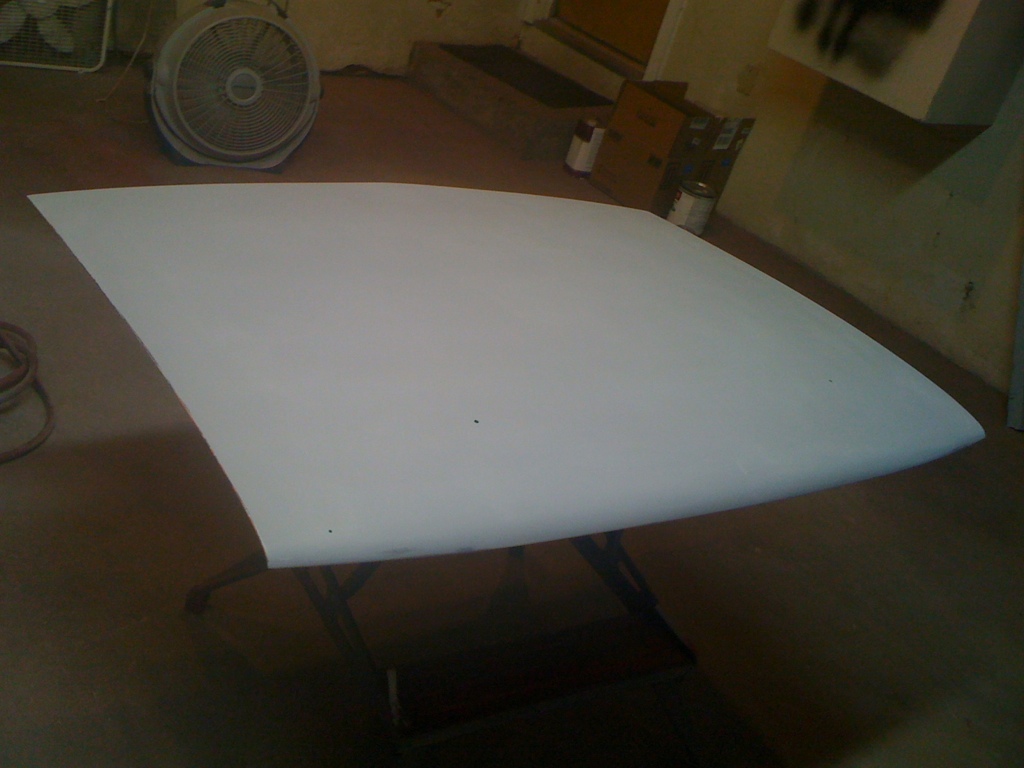
Posted by: dlo914 May 6 2011, 10:29 AM
Awesome job on painting! I wish i had the patience for painting. :\ Also the shaved targa sail looks very nice, i've been debating on doing that for our car as well to eliminate a bit of chrome from our car. Keep up the good work!
Posted by: kg6dxn May 6 2011, 08:42 PM
Great progress. Keep it up!
Posted by: Andyrew May 7 2011, 02:19 AM
3rd day in a row? Whats wrong with me? 
Practiced thinner applications of the paint. Also used 25% reducer.
I did NOT go with the epoxy primer base. I noticed some tiny 'cuping' or little dents in the paint which i would think would be some chemical reaction, say vapors not releasing or so on the trunk. I will NOT be spraying the epoxy down as a base on the body. I am going to go over the primer I have for the chemical reaction reason and because it lays down VERY nice over the base. Great coverage.
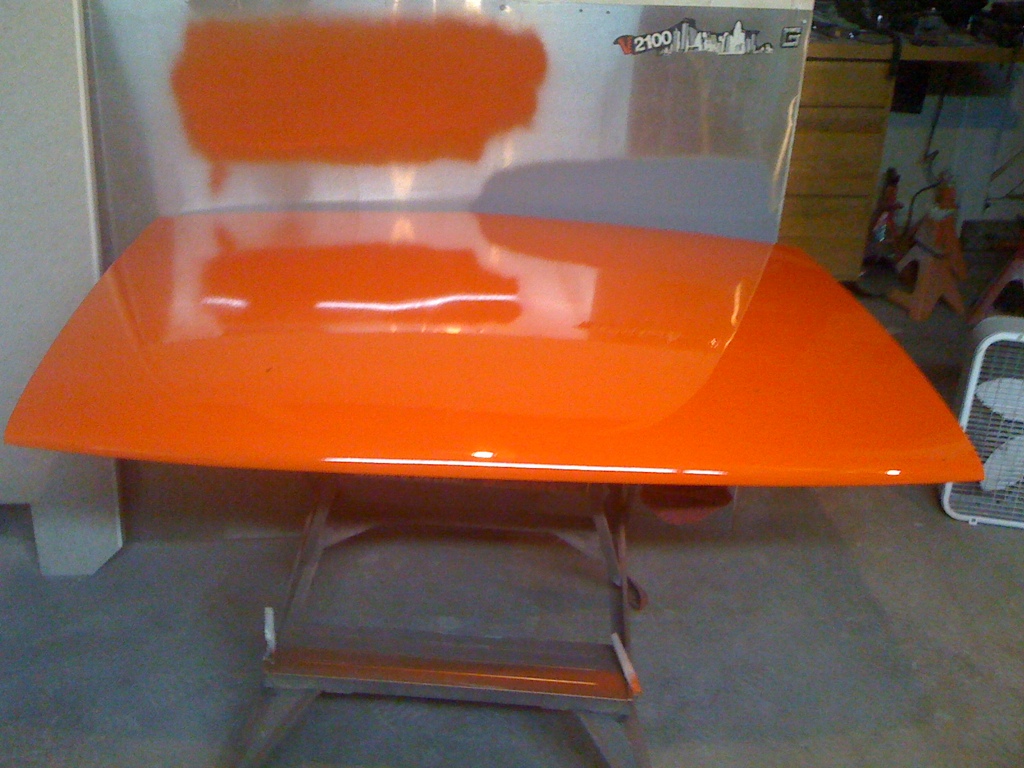
Engine lid came out nice. I did very little work on this and it shows, couple of dents that I didnt notice it till final sanding (at which I had already told myself I was painting tonight).
Posted by: arkitect May 7 2011, 08:39 AM
Great job Andrew! Nice to see some color going on. In the past I've painted both ways over primer and over a sealer. It seamed that when I went over primer I had less issues because I was doing it in the garage too with all the bugs and dust. My biggest help was laying down some water on the concrete floor to keep the dust down and painting before the evening. Even with lights at night its nice to be able to see by natural light as your painting.
Can't wait to see it. Dave
Posted by: FourBlades May 7 2011, 10:41 AM
That is a great looking color.
You are getting a lot of good practice in, which seems like the only way to learn
to paint.
Can't wait to see the car reassembled.
John
Posted by: Spoke May 8 2011, 05:04 AM
Love the color. My first new car was a 1974 Dodge (Mitsubishi) Colt and I painted it orange and about the same shade as yours.
Posted by: arkitect May 8 2011, 08:53 AM
Andrew,
Are you painting today?
Posted by: Andyrew May 8 2011, 09:12 AM
Dad came over and helped me quite a bit yesterday.
We were able to make the majority of the changes to the rear bumper. Cut slots in the top in order to curve the bumper more properly, cut relief slots in the license plate area as well. Spent about 2 hrs trimming the side to match the body somewhat, Still need to add some material (maybe...). I also need to mess with the piece below the flare to match the lines. I think i'll do that some today. 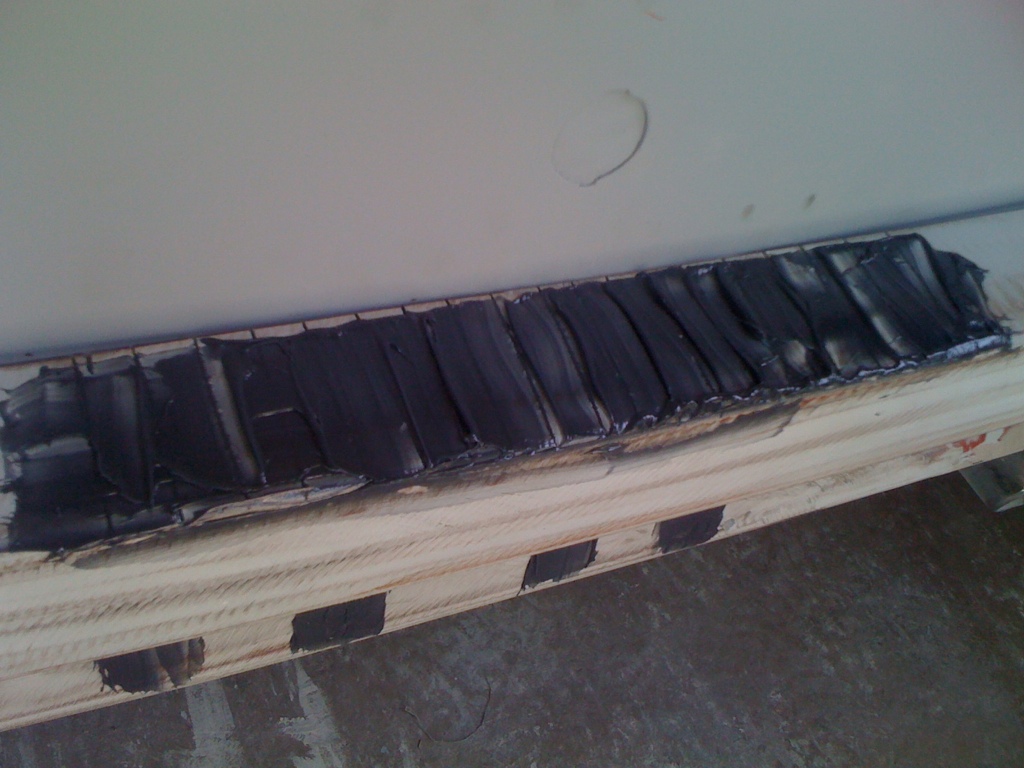
Sanded down the front bumper past 2 layers of paint and started getting it ready for filler. 
Sanded the front trunk down and noticed that the area where the crest is was dented pretty bad. Hammered it up, and layed 1/4" of bondo and sanded it down, probably max 1/8" now. Layed some of the epoxy primer down. You can see now why I had such a hard time going over the epoxy with paint, it is SO much darker than the polyester primer. 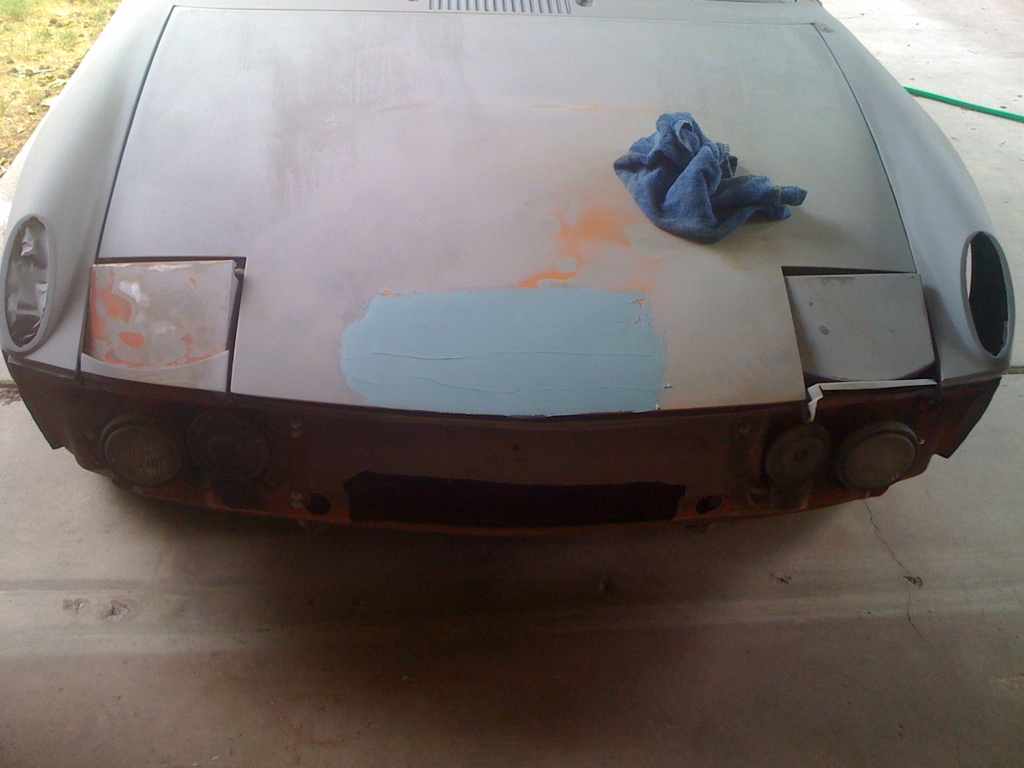
Also primered the front of the rear spoiler.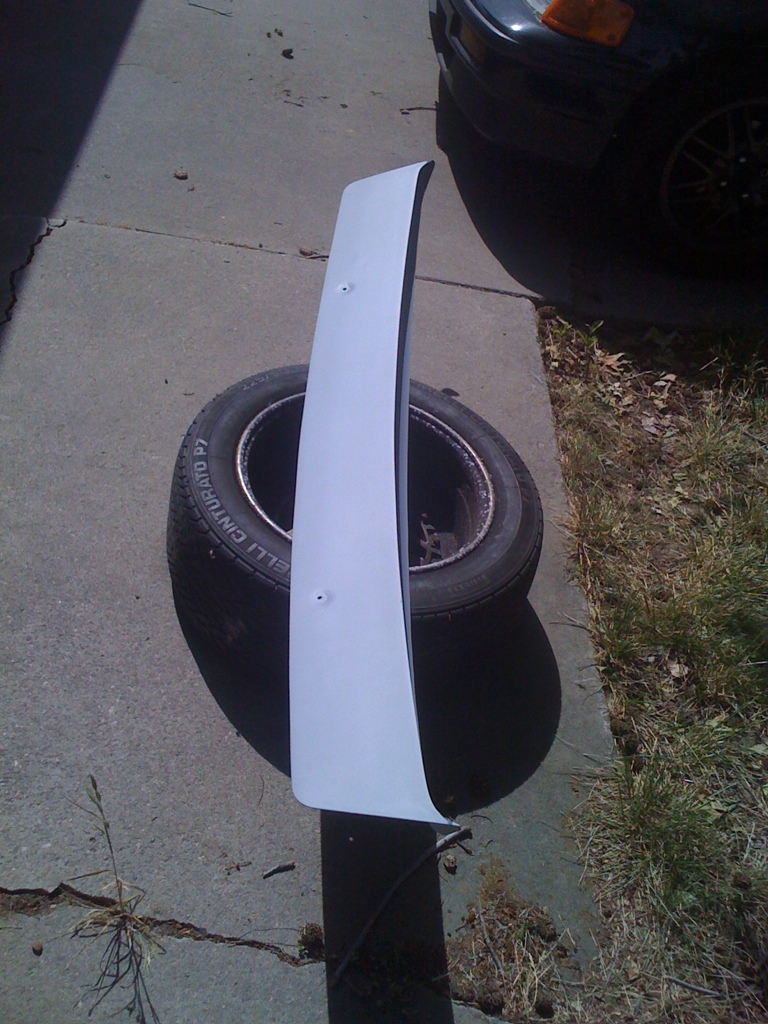
The front trunk and spoiler will be guide sanded down then primed over with grey primer, then sanded and painted.
I have set a DD for paint on the body for NEXT SUNDAY.
I have a lot to do in that time, but If its not then, its next month.. And I cant wait that long.
Posted by: Andyrew May 8 2011, 09:23 AM
Andrew,
Are you painting today?
No, I dont think im going to paint any today. Pretty sure im just going to work on the bumpers and hopefully get those done. Besides its mothers day so i'll be limited on time.
Posted by: Andyrew May 9 2011, 12:35 AM
10 hrs on the bumper today.. Still not done. but it looks goooooooood
Pictures tell the story. 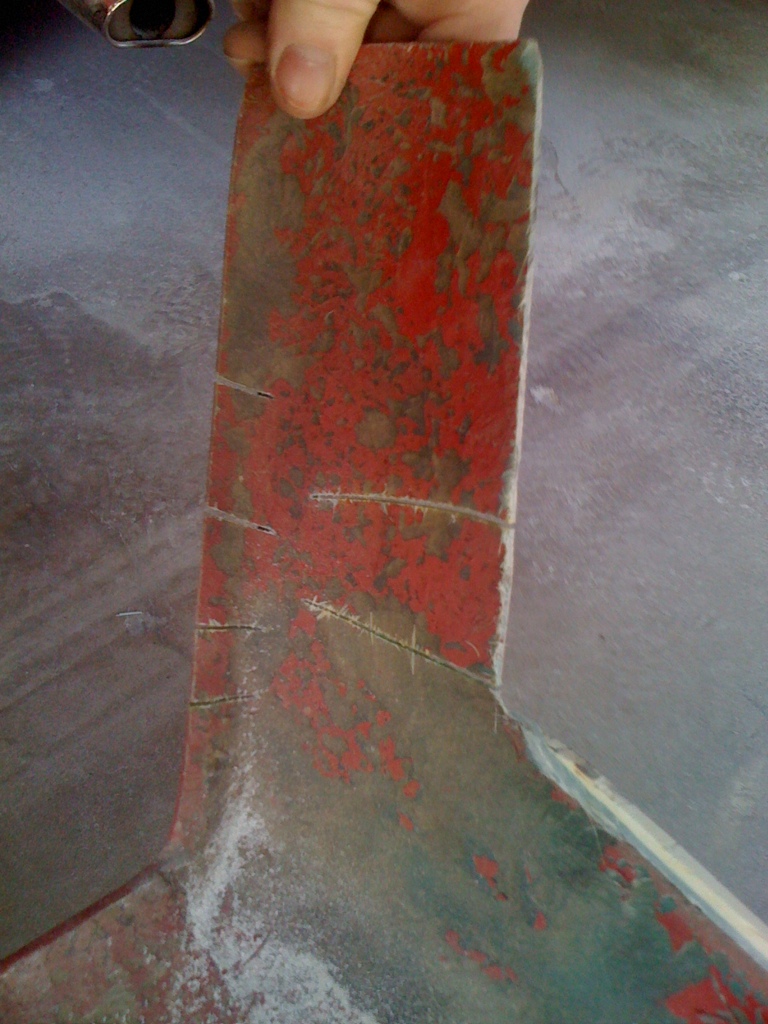

Used cardboard taped to te bumper to make my outline for what I need to add to the bumper. Used kitty hair on top of raw fiberglass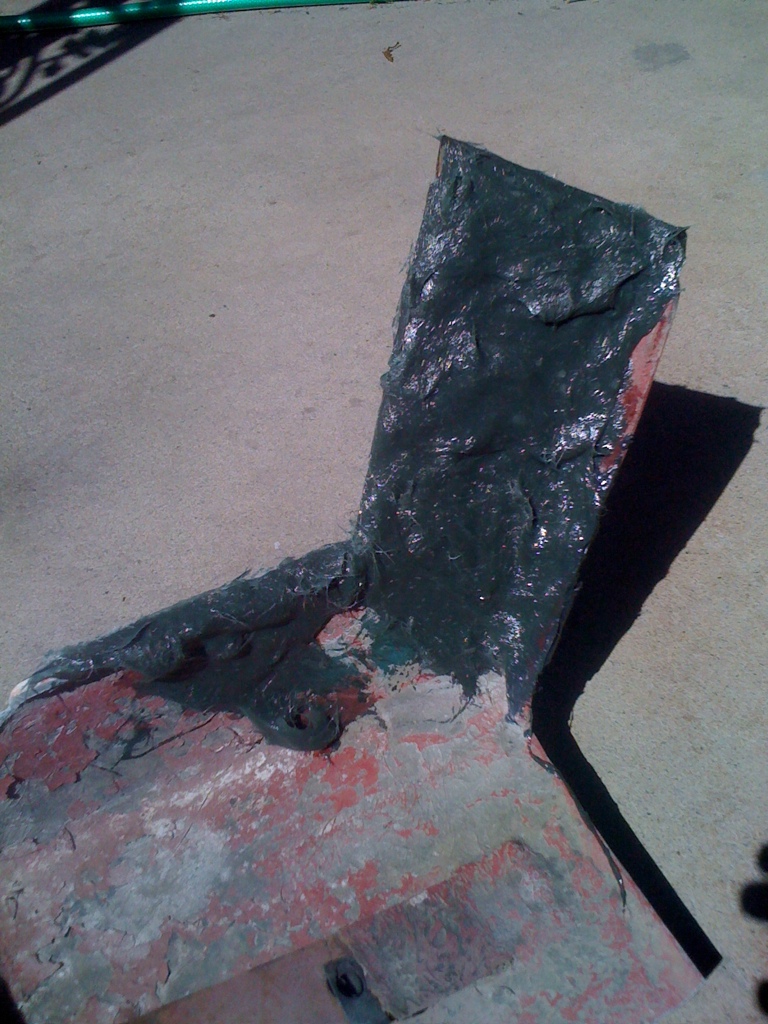
Let it dry, sand, multiple layers, ect. 
Result from that. Then added multiple layers of bondo to get it just shaped right, used a hacksaw blade to determine where I needed to sand down to get it lined with the body. This is what took all thetime. 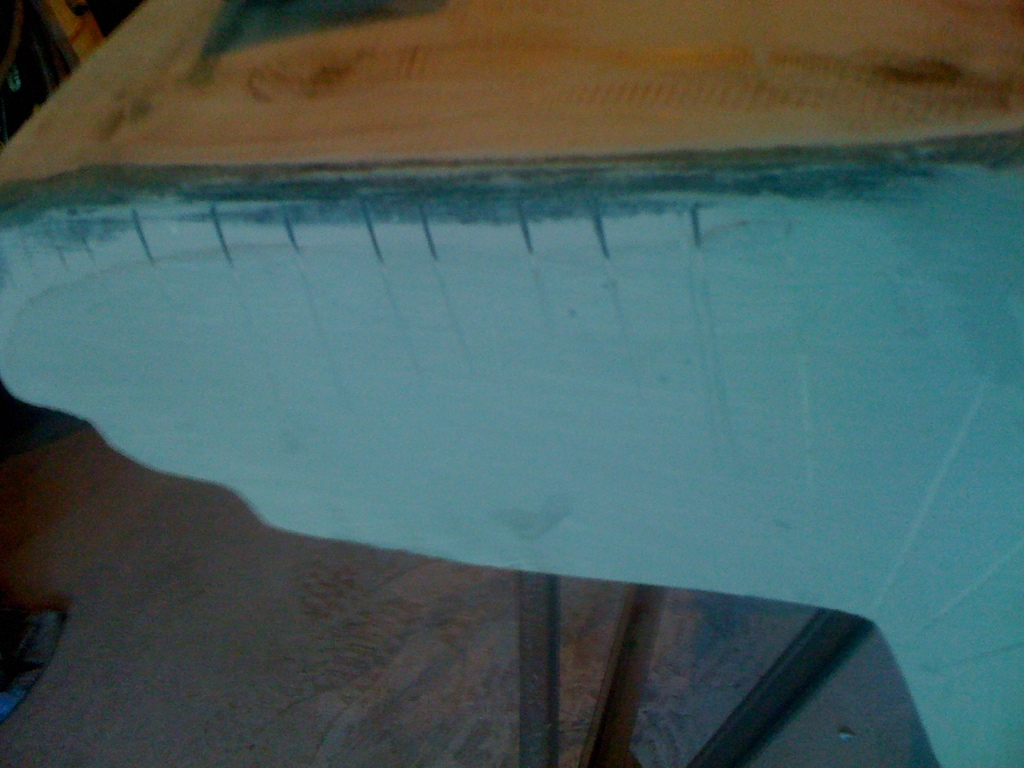

As you can see a lot of the sanding was in te raw fiberglass (Still not done.. ) to try and get the lines better a bit. 
Trimmed this to fit, looks good up top. 
Where it sits now. Looks so damn good.
Got some work done on the front bumper as well. 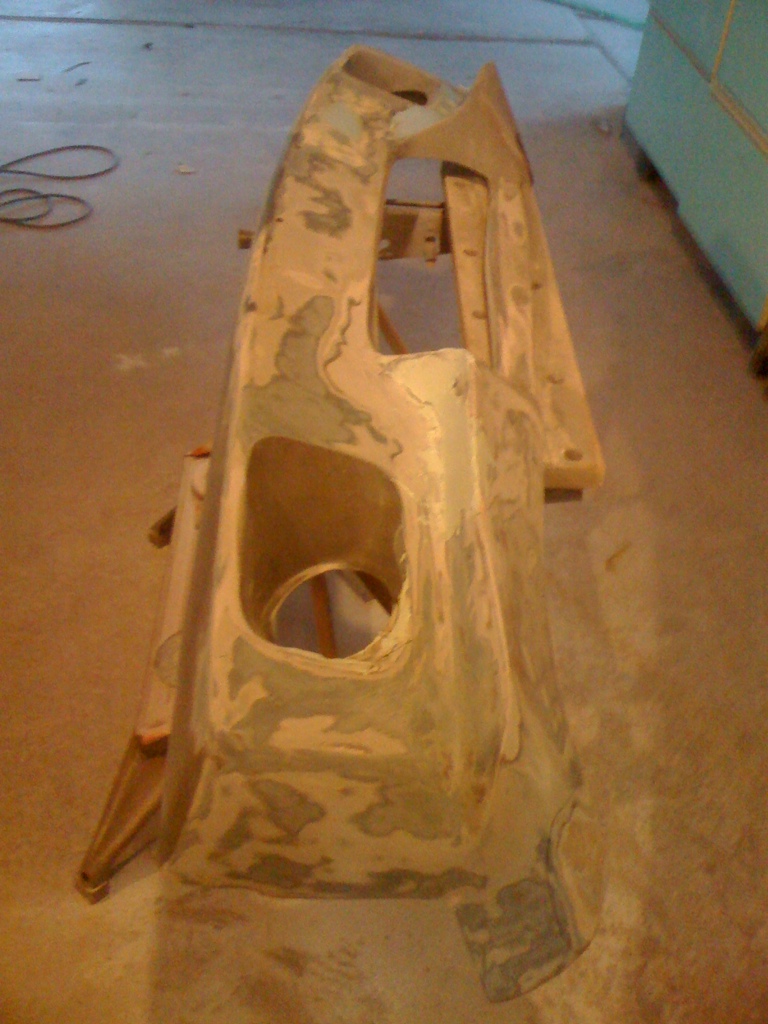
Not pictured. Sanded down the front trunk and primed it in 2 layers of light grey primer. Its nice and straight and ready for final sanding and paint.
I have a lot to do to prep for Sunday.. And I dont even have friday or saturday to work...
Posted by: computers4kids May 9 2011, 07:51 AM
Andrew, your car is really shaping up. I can't believe the amount of hours you have poured into your car in the recent months...it's really starting to show. Hopefully this cooler spell lasts a bit longer...perfect for painting. We all know, we're one day away from the valley going to "hot as...." 
Posted by: Andyrew May 9 2011, 12:21 PM
Planning to shoot this sunday.. Weather shows rain and 70 deg. I have mixed feelings about it.
Posted by: Andyrew May 10 2011, 12:14 AM
And I got 3 hours in tonight.
Heres a pic from last night. Hood. 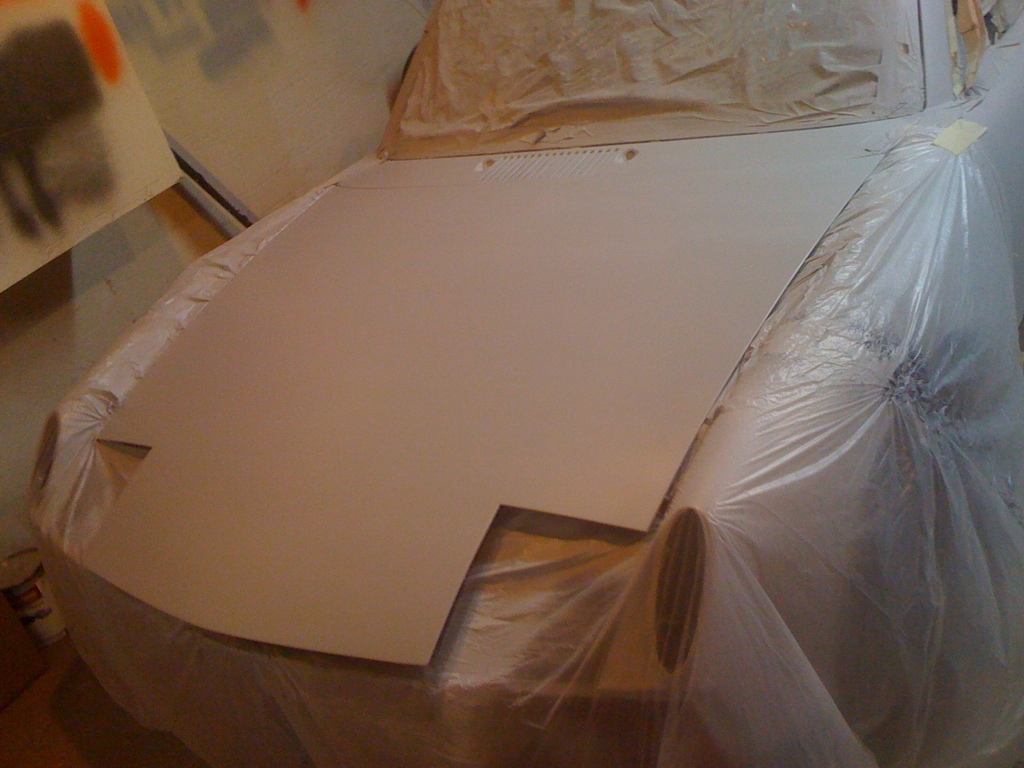
Focused on the bumper. 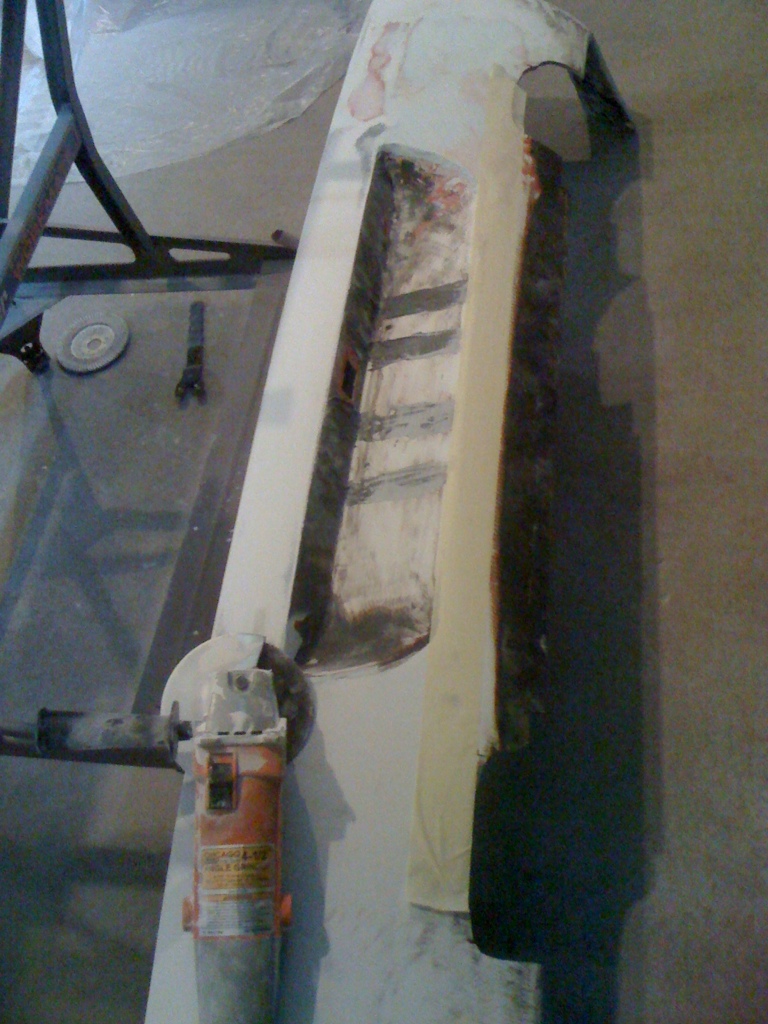
You can barely see the black area that im cutting off. Cutting this off for 1: design and 2. airflow. Thats a serious amount of lift on the rear end at over 100mph... I have plans for an underbody tray, I might do it someday.. 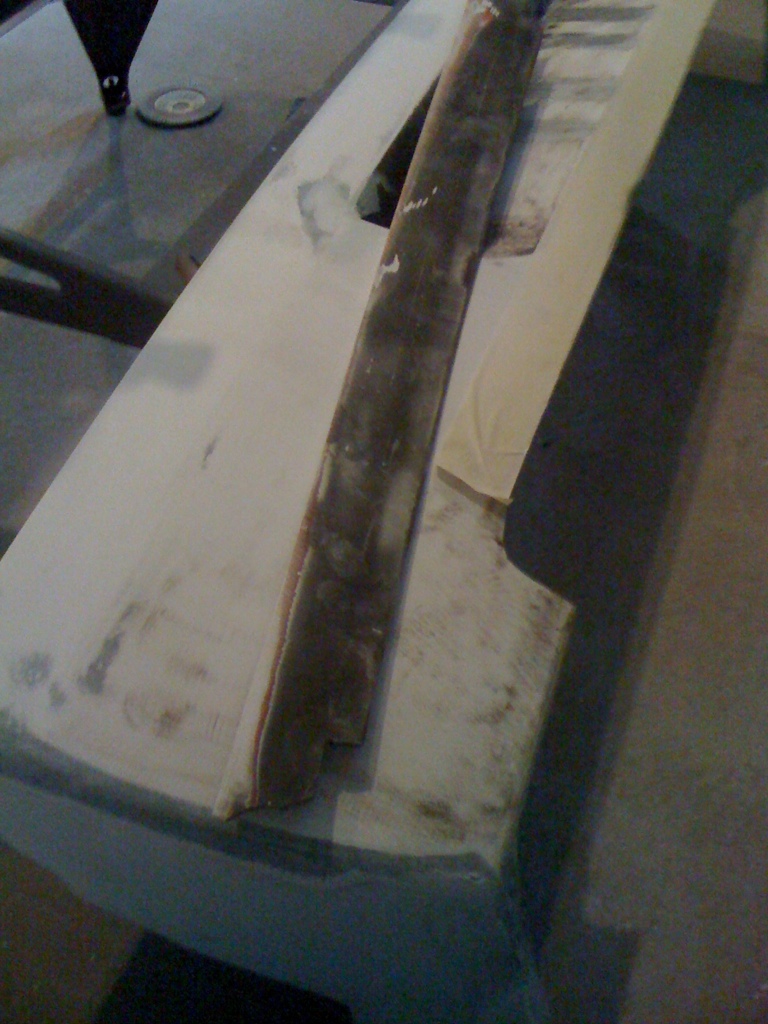
The piece cut off. 
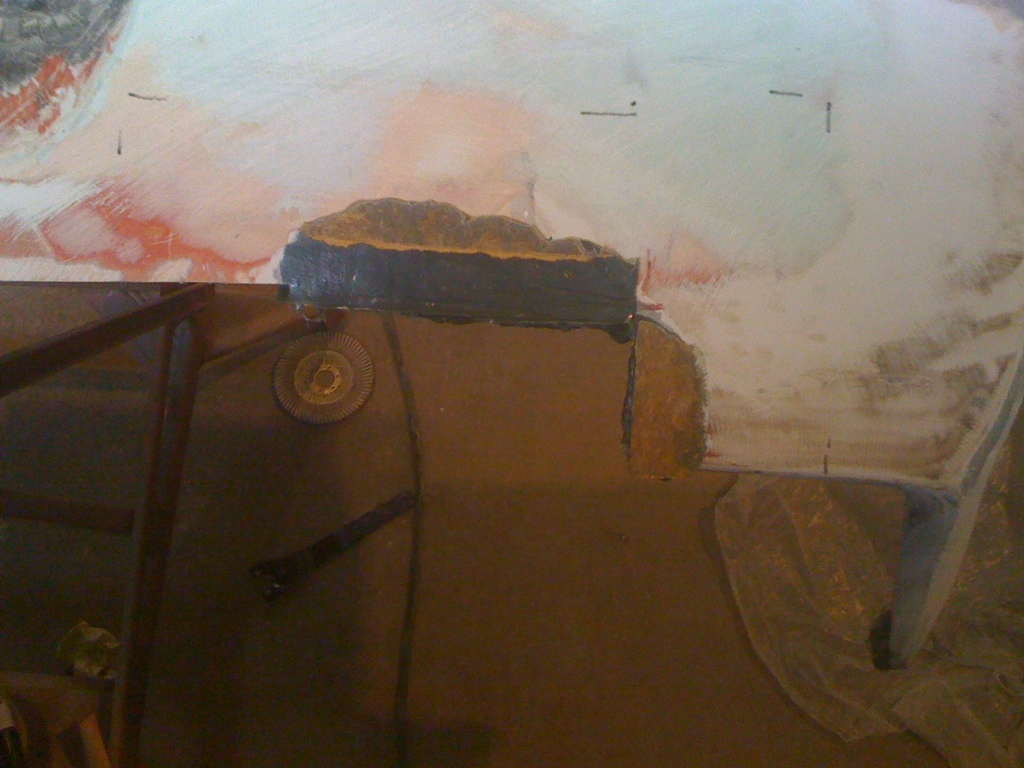
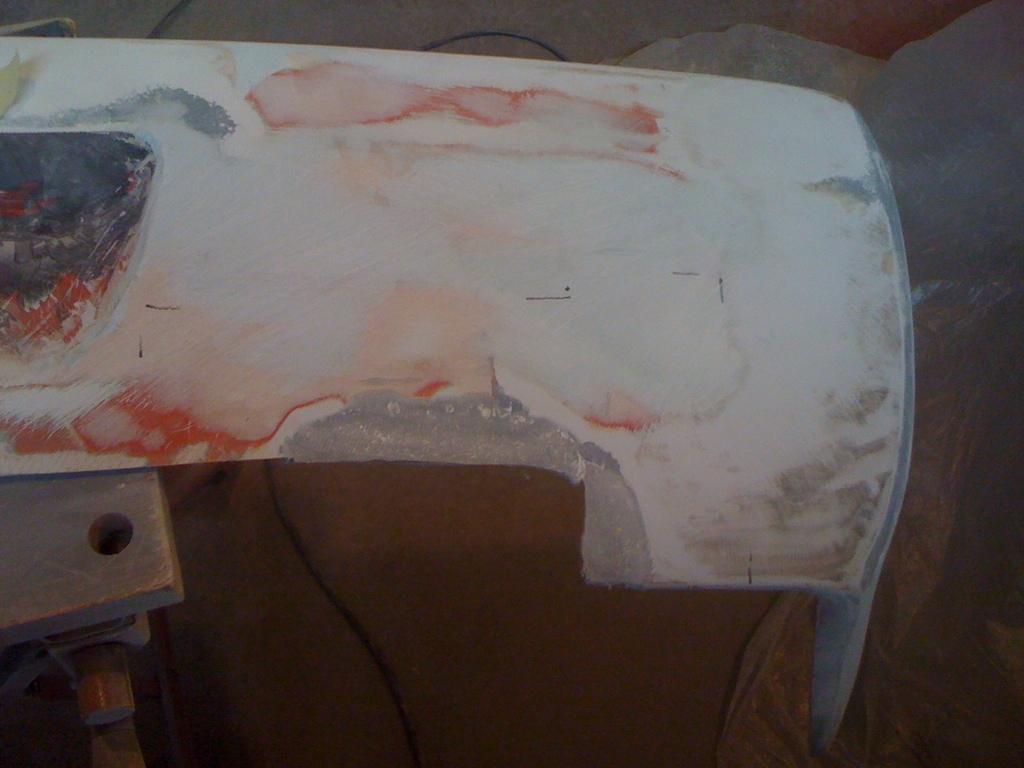
Good old kitty hair. Works really well for these kind of things (I HATE working with fiberglass and resin...). Ground flat with bumper with grinder.. 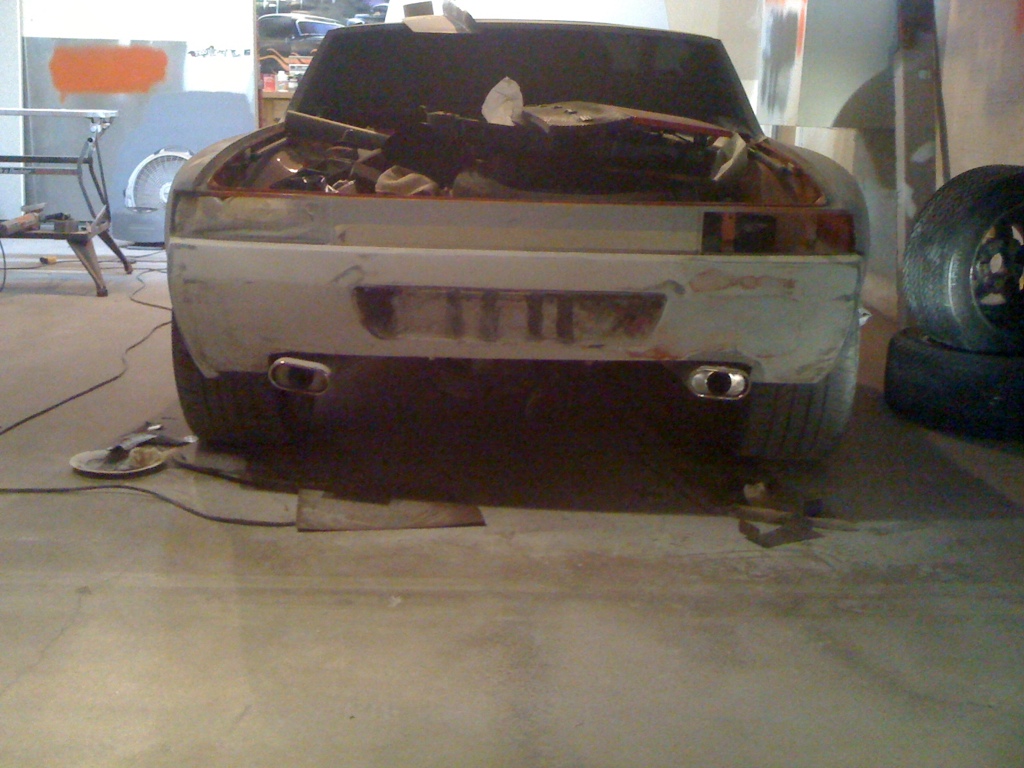

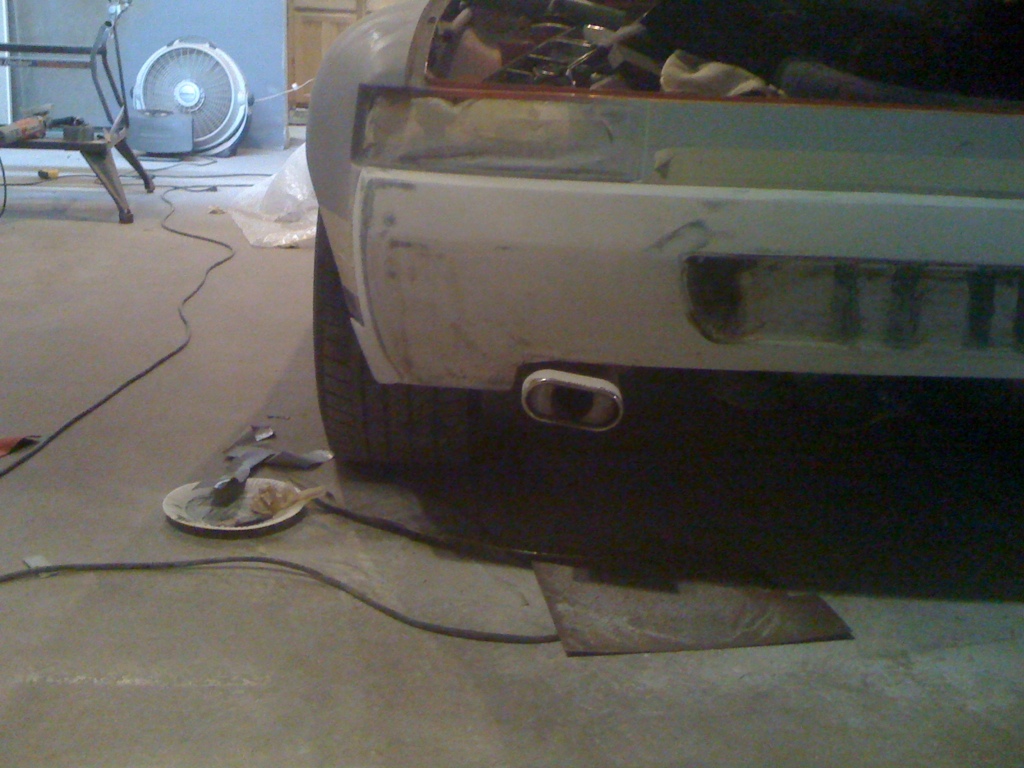
A bit of trimming done. Still a little more to do. Ignore the exhaust tips, they will get straightened later. 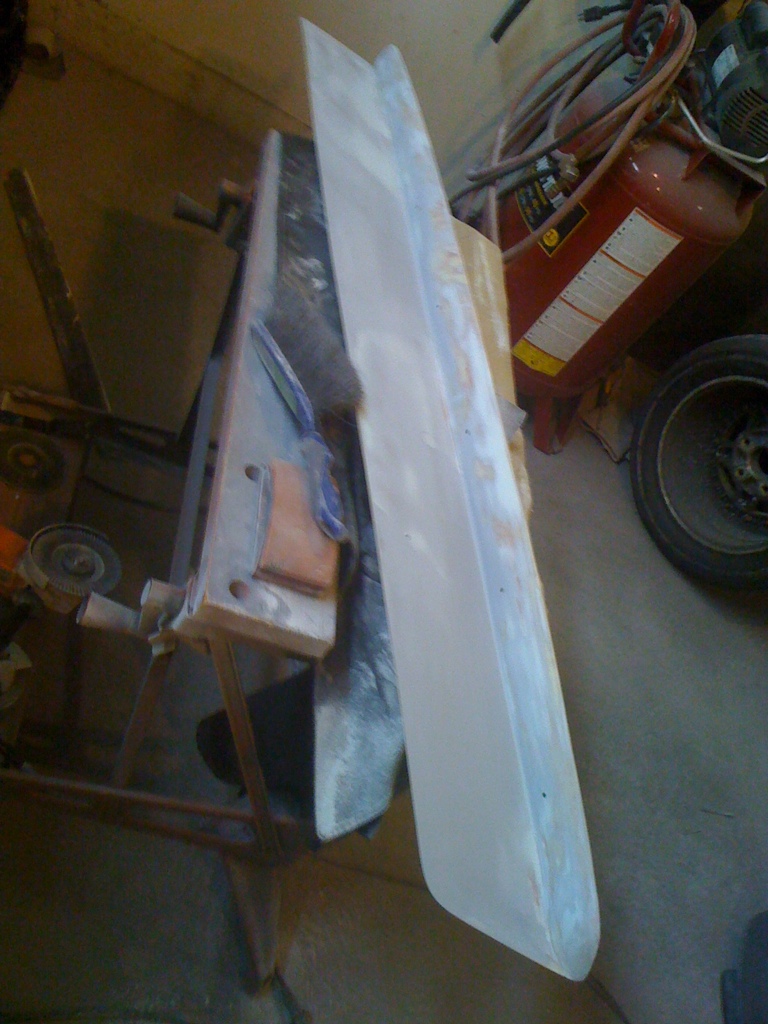
Filled pinholes and a couple of chips in the fiberglass. Sanded down (arg, I hate sanding..)
Thats all for tonight.. This stuff just takes to much time. Bumpers will not be sprayed with the body but I am OK with that. I can spray them any time.
Looking for 3 hours tomorrow... Tomorrow im going to start on sanding the body down to the 400 grit I need to paint over. Same on Wed. Thursday I start cleaning the garage for painting on Sunday as I dont have any time to work on anything on Friday and Saturday.
Posted by: sawtooth May 10 2011, 08:03 AM
Bumper is looking great Andrew, gonna be beautiful.
Posted by: Andyrew May 11 2011, 10:41 AM
Ordered some tires for the rear. 285 35 18's. (Fronts have 1k miles on them, but are 5 years old, rears are goooooone)
Received the seals from 914rubber.com
Sanded down the drivers side last night as well. It hit me that I have to paint under the targa bar prior to painting the rest of the car.. Soooo Im going to try and enlist some help tonight to get the car sanded quick enough to paint under the targa bar tonight..
Ahhh, I havent spent this kind of money in a while... Glad I have some 914 parts to sell to fund it!
Posted by: McMark May 11 2011, 11:07 AM
You'd be surprised how many people forget under the targa bar. Glad you caught it now! Lookin' good.
Posted by: Andyrew May 11 2011, 11:21 AM
Its either now or after paint on the rest of the car and I figure I'd rather do it now than later as it can sit for 3 days drying then I can properly mask over the paint..
Oh and I found out that dollar tree has 10'x12' (Thin..) painters plastic tarps. They worked well painting the hood, I'll pick up 5 or so for these little spot jobs. Probably use 3 to cover the car for this...
Posted by: Andyrew May 11 2011, 10:43 PM
Dad came over this afternoon and helped me get the rest of the car sanded. All set now to start prepping for paint tomorrow and to paint under the targa bar (And paint the front hood, I decided I will paint the front hood off the car as well so I can get to the fenders and the cowl area without worries).
I'll have some time on Friday morning as well so that might be when I paint those area's to keep the bugs away... But then again I might do it tomorrow night (Now that im thinking about it, probably not).
Posted by: Brent May 11 2011, 11:25 PM
The Modesto heat should be cool for a few days too. Hoping for bug free spray! Looks great Andrew!
Posted by: Andyrew May 12 2011, 05:12 PM
So apparently Tire Rack delivers within 24 hours of placing an order...
Pictures at 11.
Posted by: Andyrew May 14 2011, 05:09 PM
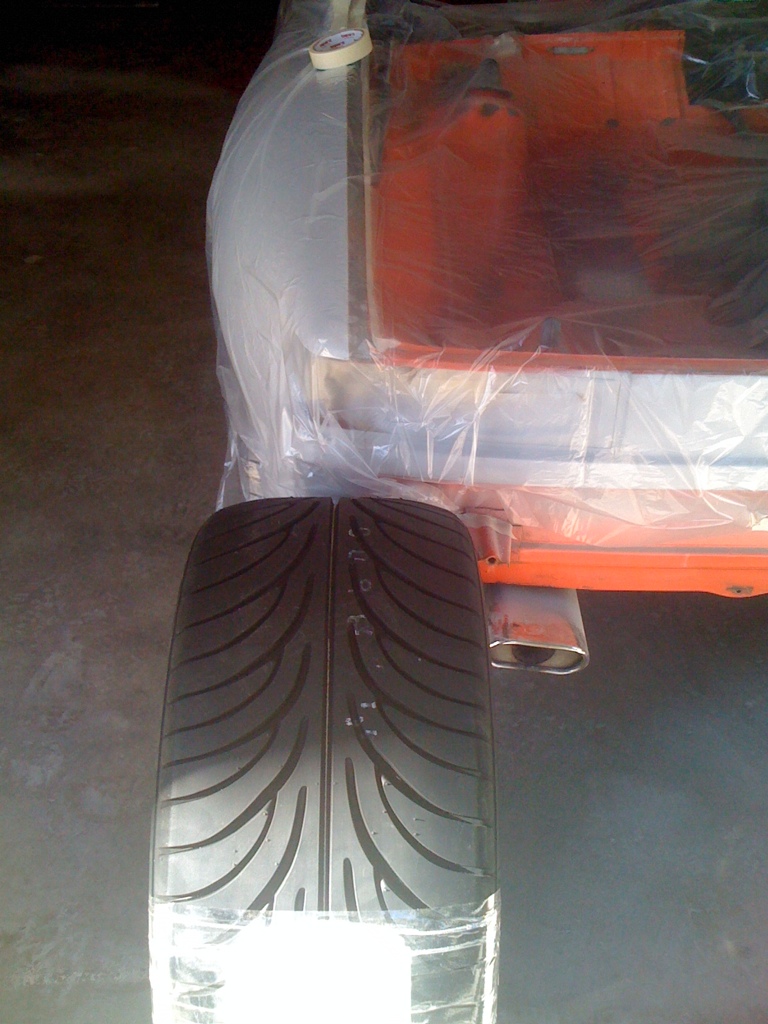
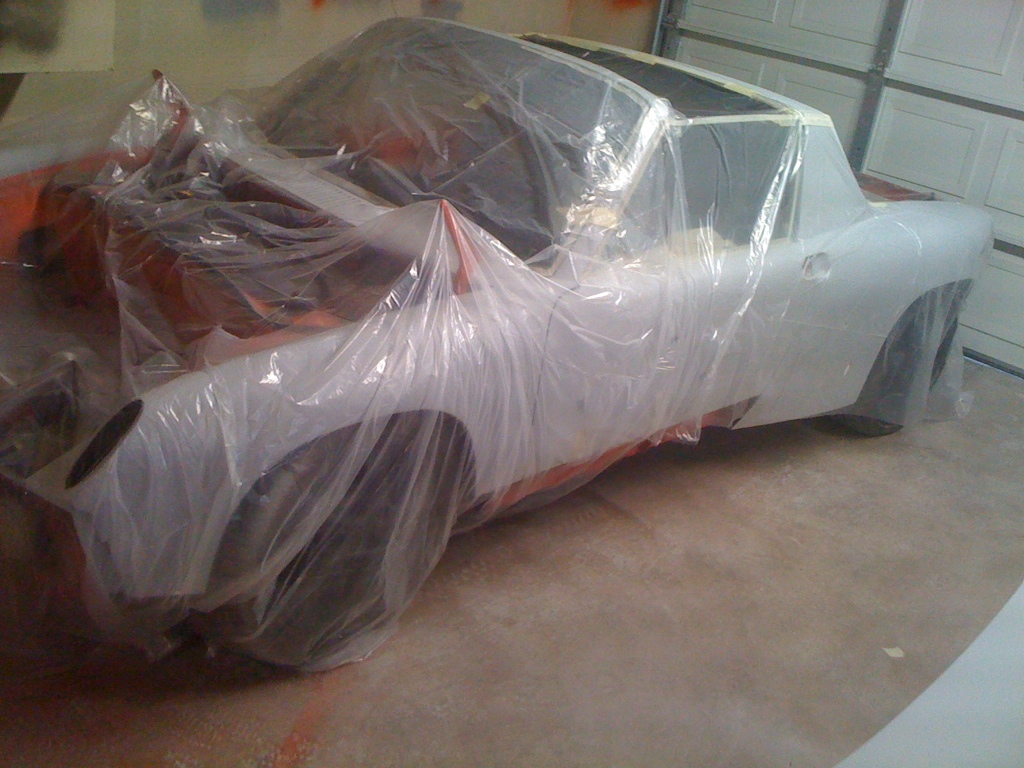
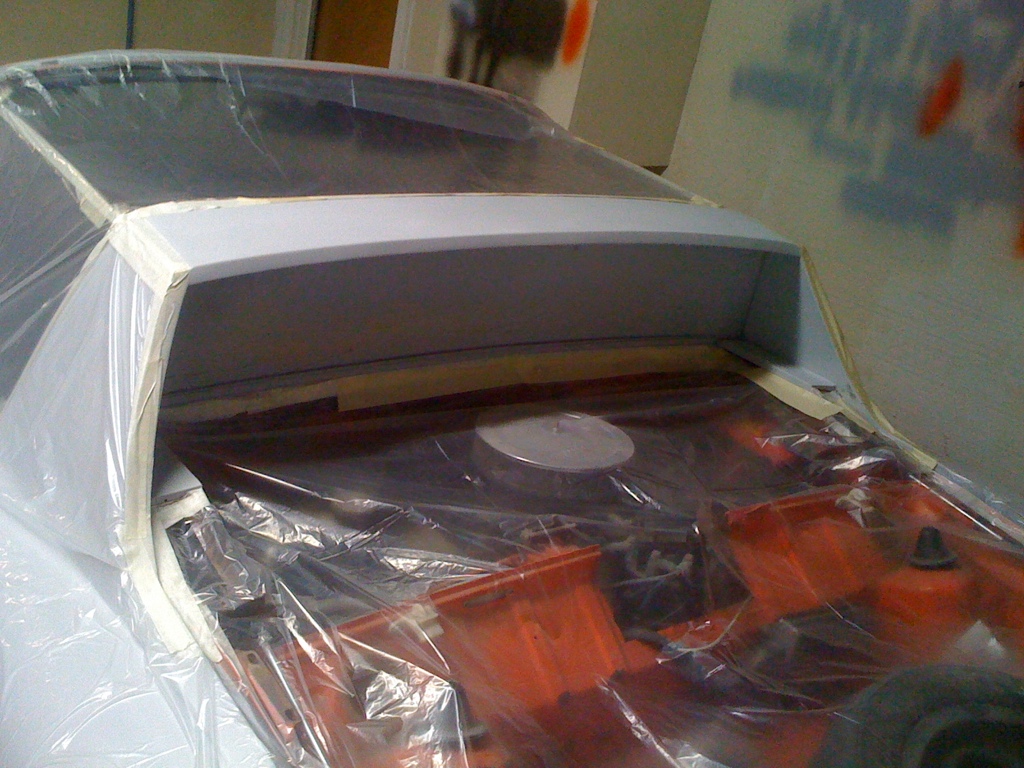
Posted by: Andyrew May 14 2011, 05:28 PM
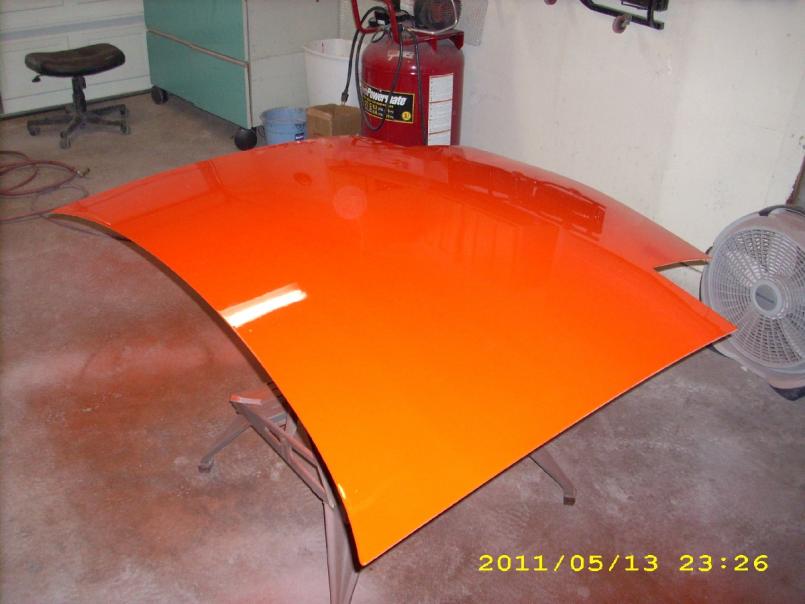
Posted by: Andyrew May 14 2011, 05:29 PM
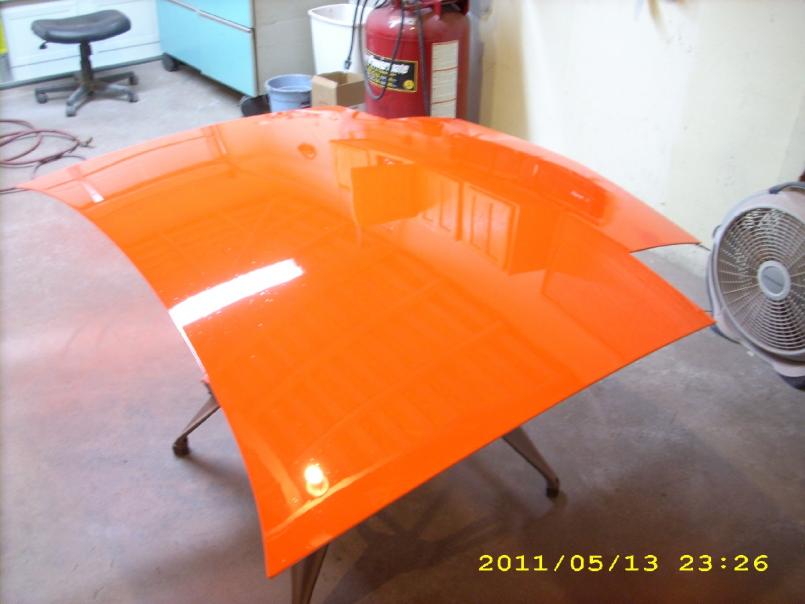
Posted by: Andyrew May 14 2011, 05:32 PM
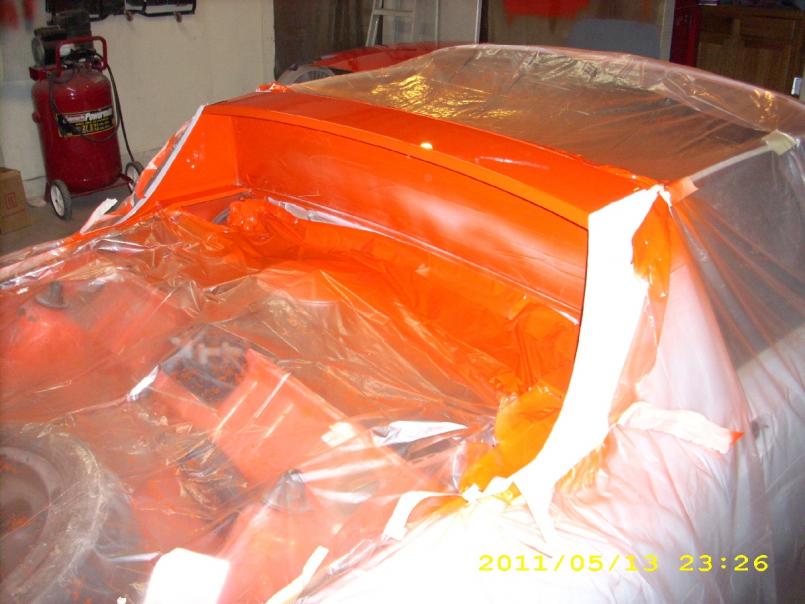
Posted by: Andyrew May 14 2011, 05:34 PM

Wait for tomorrow!!!
Posted by: kg6dxn May 14 2011, 06:26 PM
Wow. It's going to look great! Keep it up.
Posted by: arkitect May 14 2011, 11:10 PM
Great work on the painting, nice to see the fresh paint after you have done so many hours of sanding.
Posted by: JRust May 15 2011, 09:28 AM
Nice Andrew! Can't wait to see more orange . Get to spraying
Posted by: Andyrew May 15 2011, 04:08 PM
Teaser 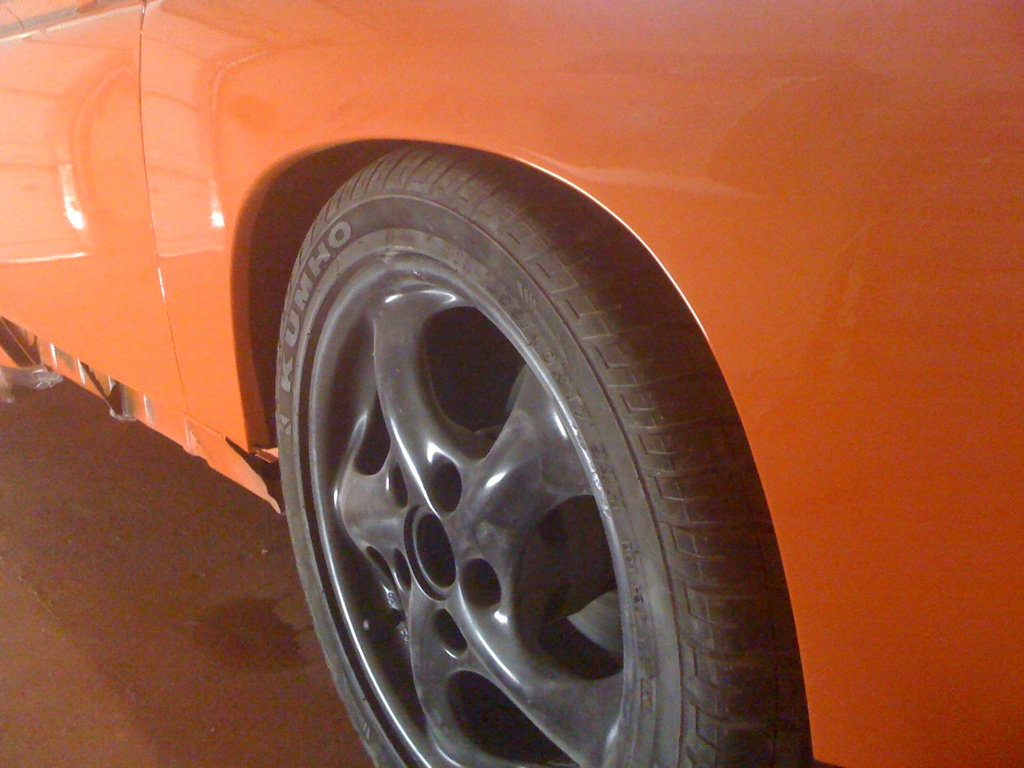
Posted by: chrispy May 16 2011, 12:21 AM
Nice job Andrew, It looks so sweet. All that hard work is paying off. Can't wait to see your car at Graffiti.
Posted by: Andyrew May 16 2011, 01:04 AM
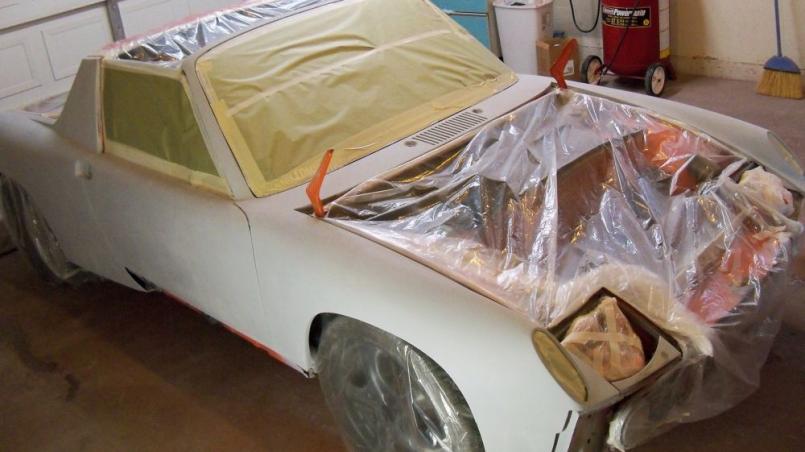
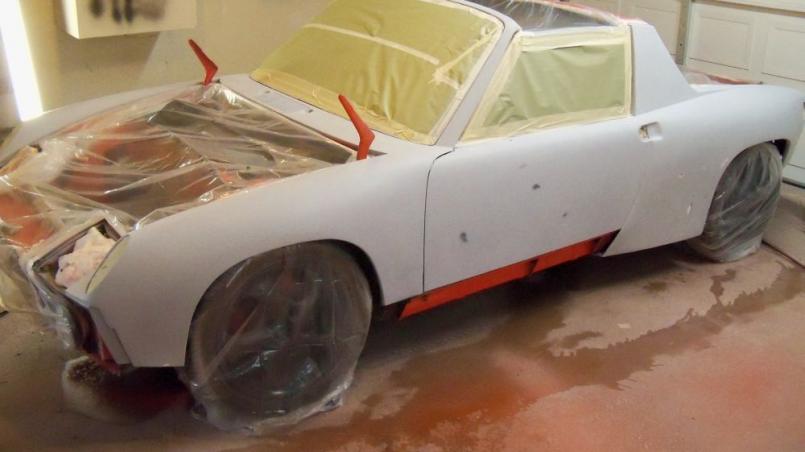

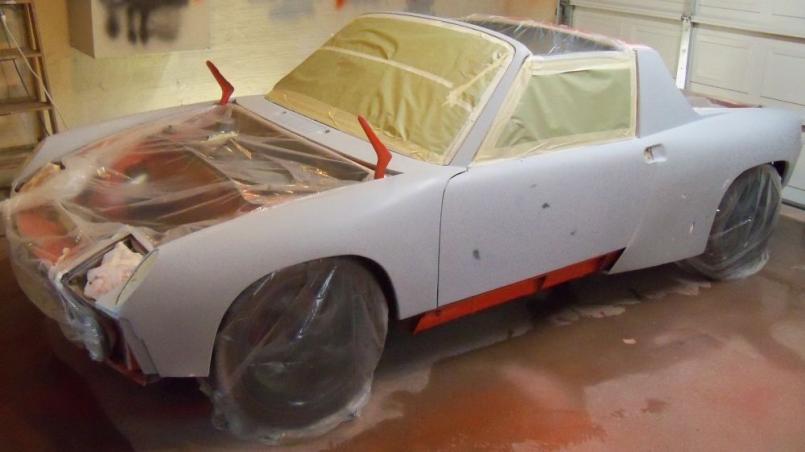
Posted by: Andyrew May 16 2011, 01:06 AM
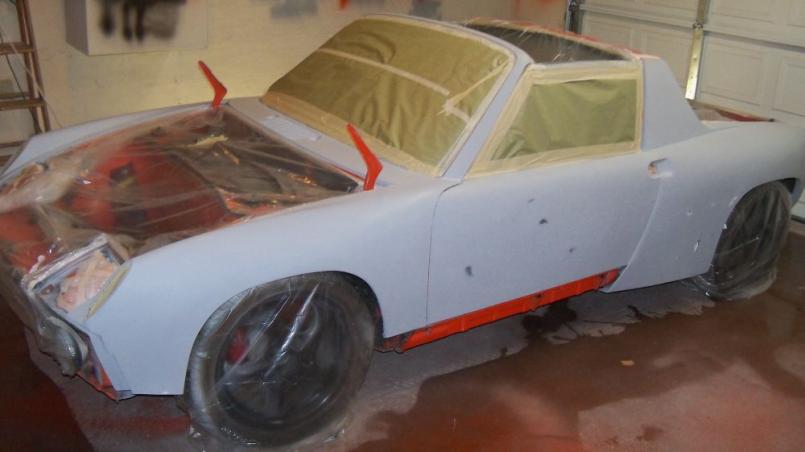
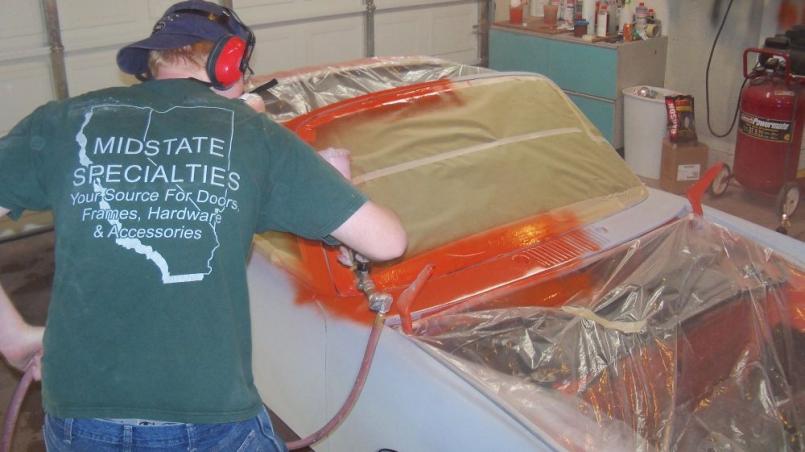
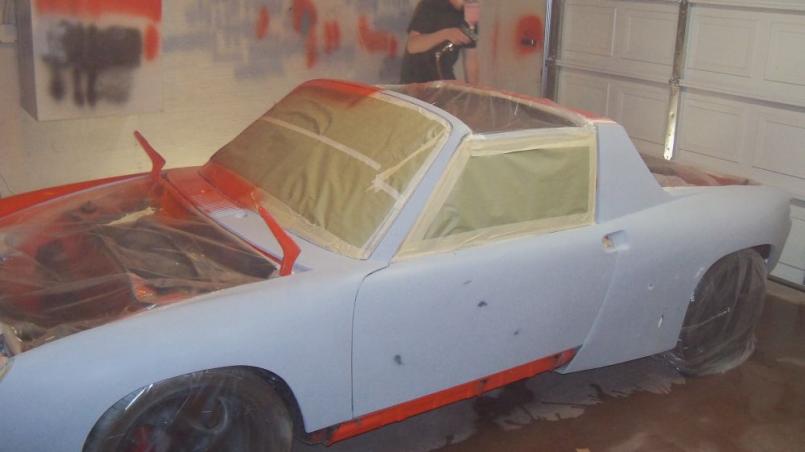
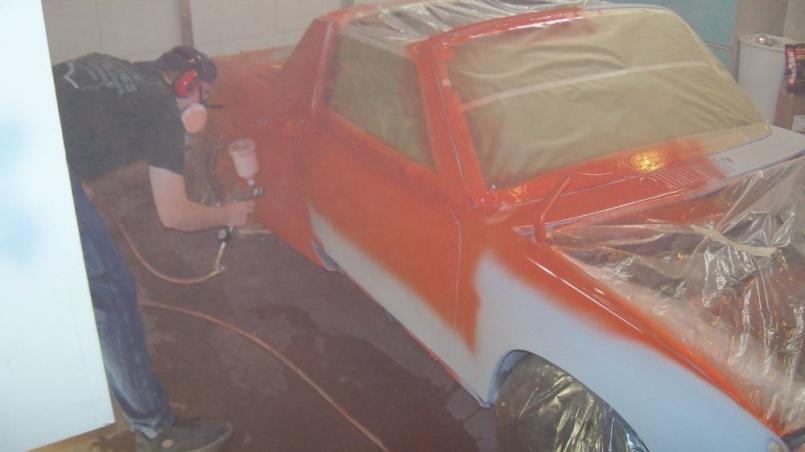
Posted by: Andyrew May 16 2011, 01:07 AM
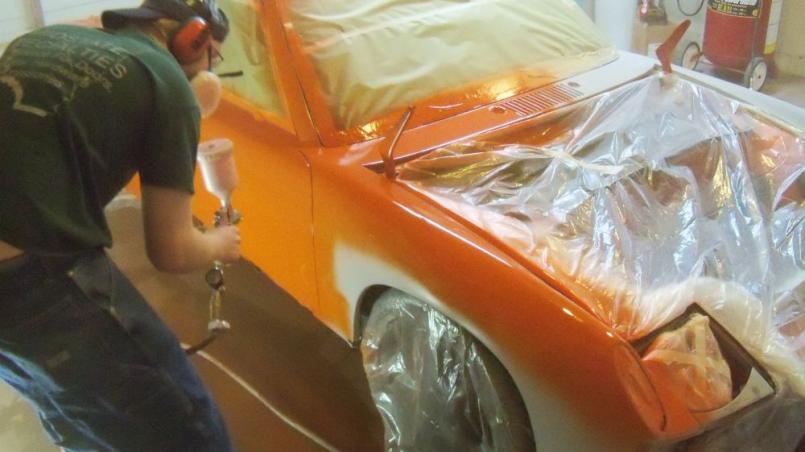
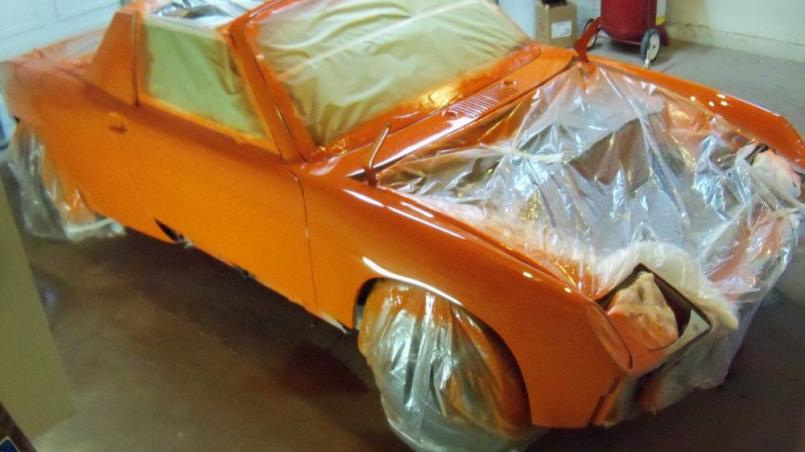
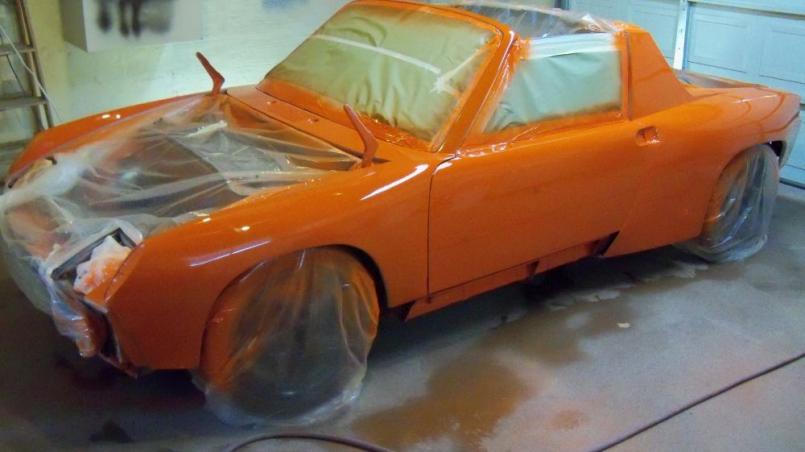
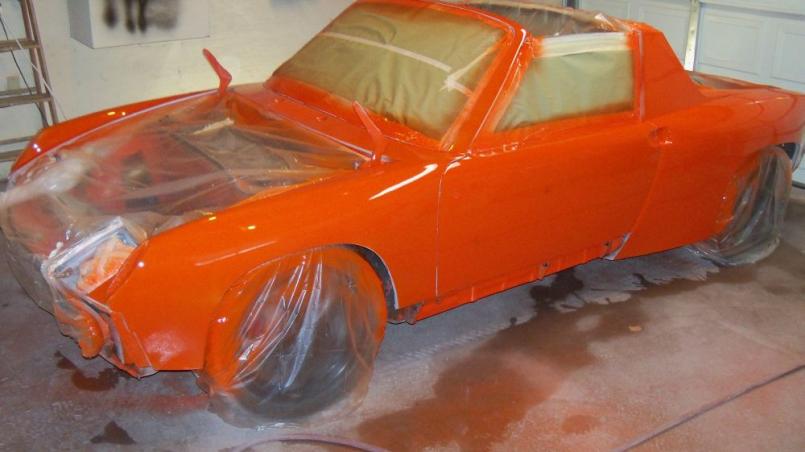
Posted by: Andyrew May 16 2011, 01:08 AM
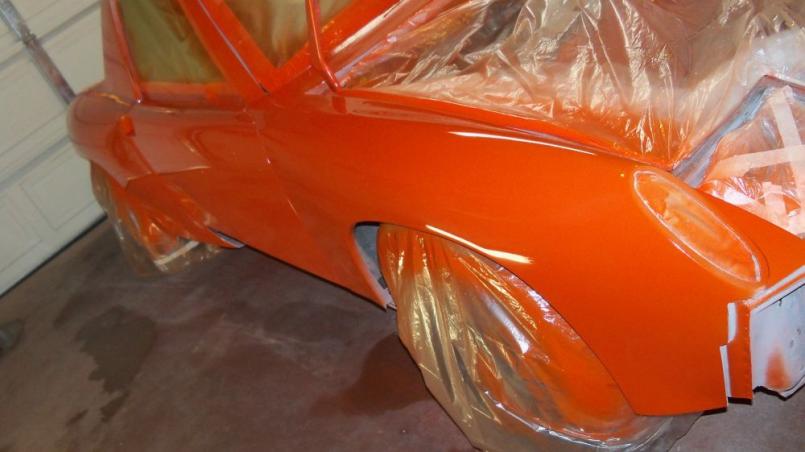
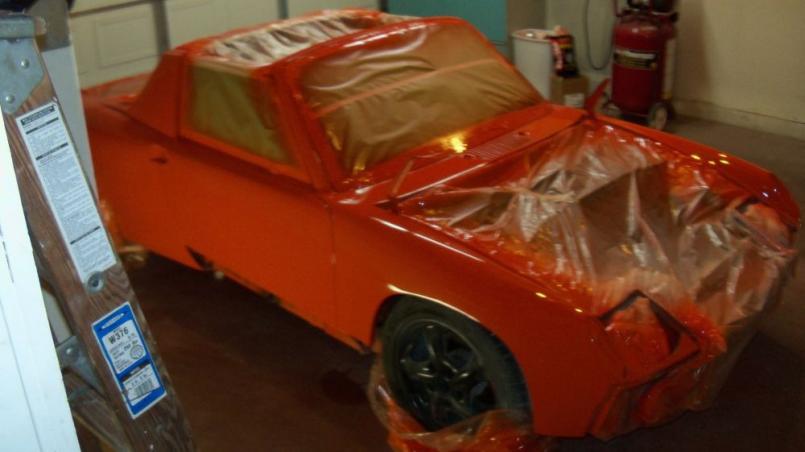
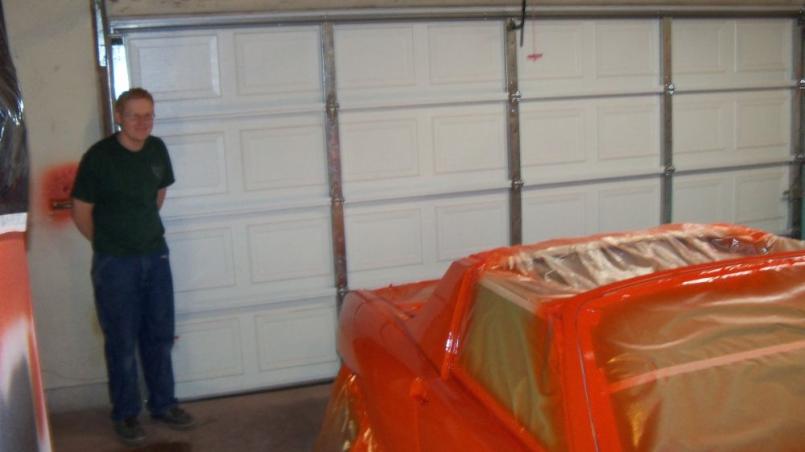
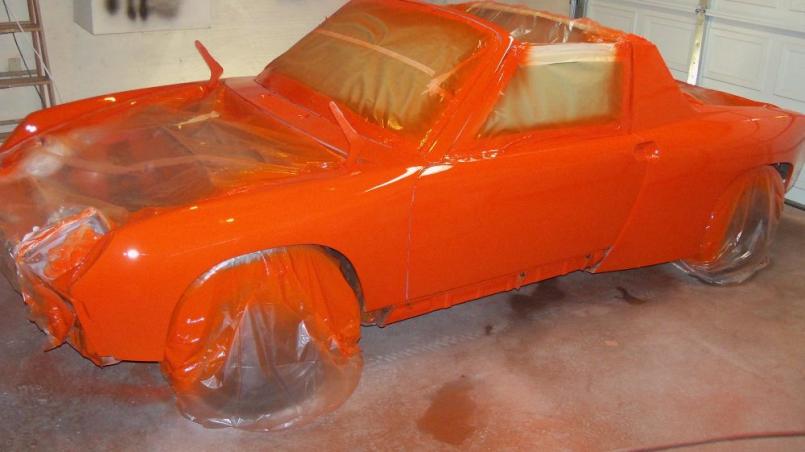
Posted by: Andyrew May 16 2011, 01:09 AM
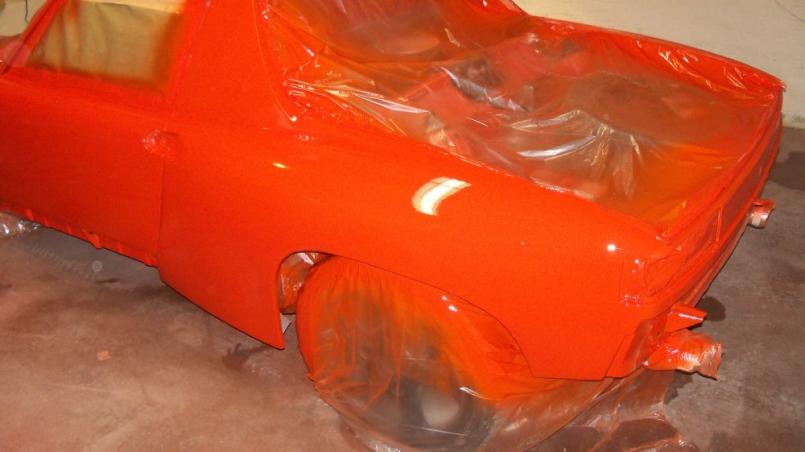
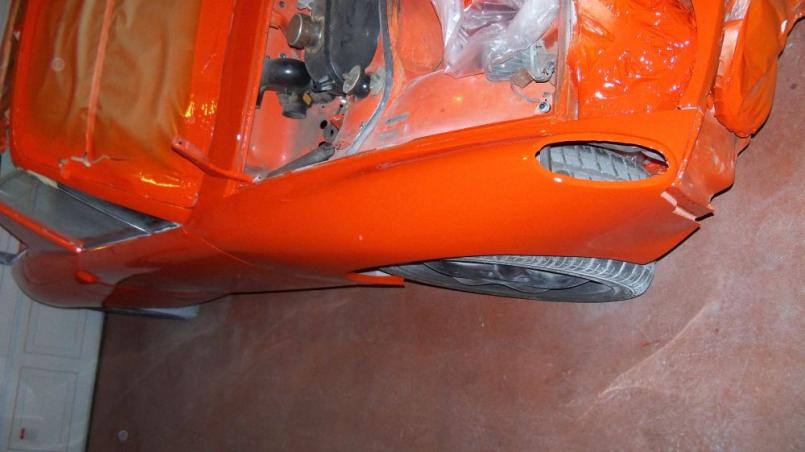
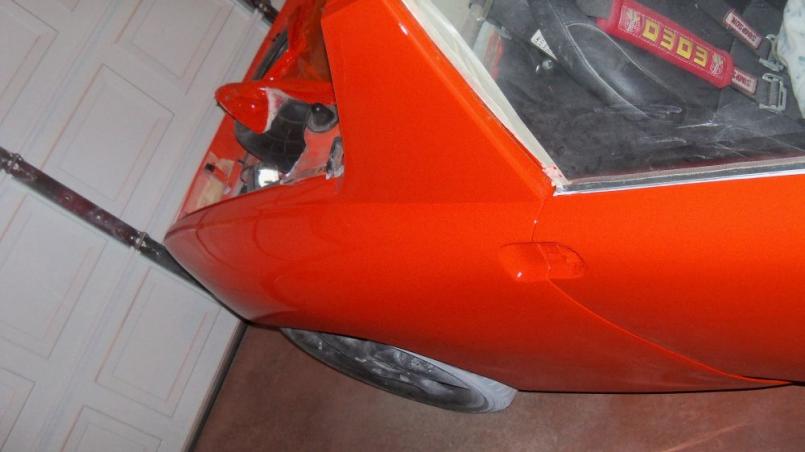
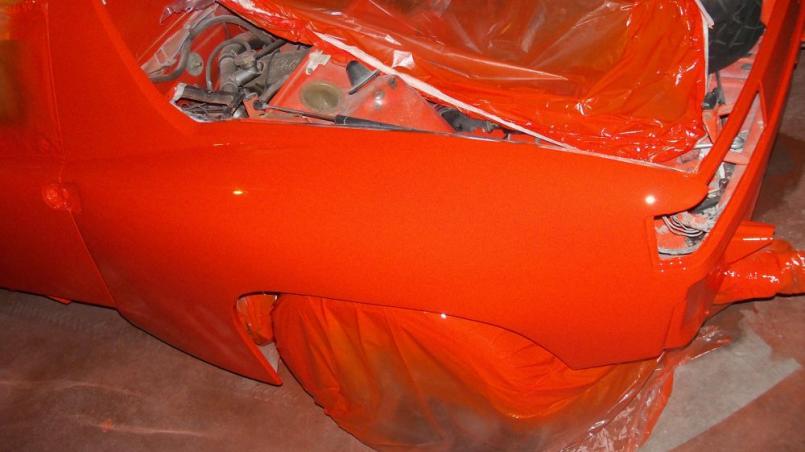
Posted by: Andyrew May 16 2011, 01:10 AM
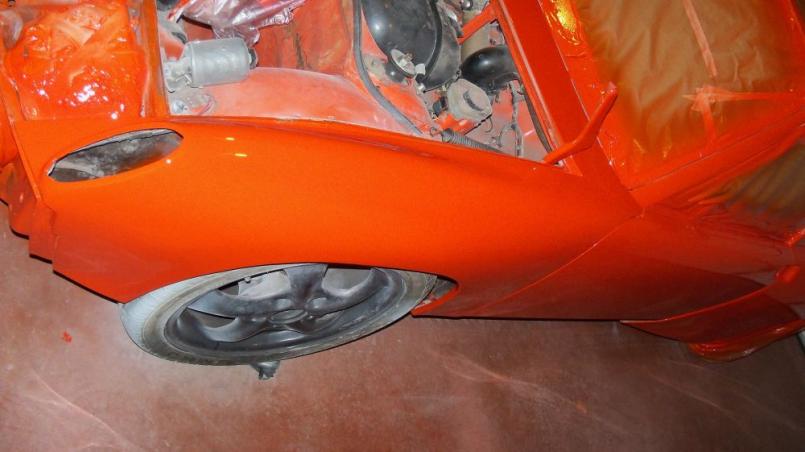
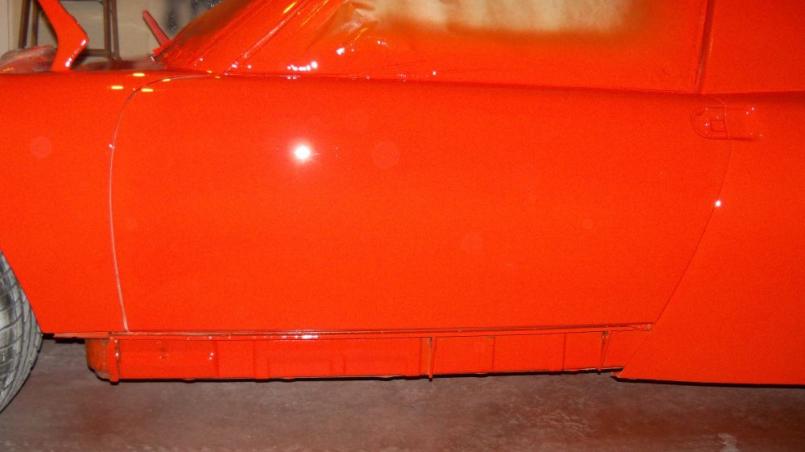

Posted by: Andyrew May 16 2011, 01:22 AM
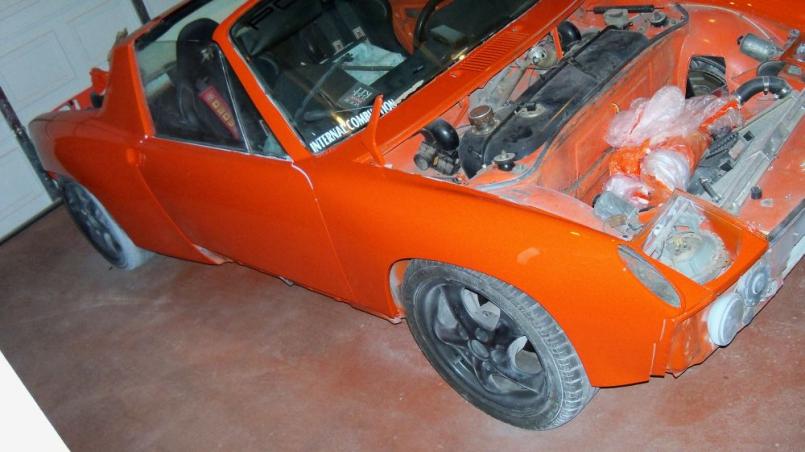
Done.
Turned out better than I had anticipated. We have very little dust in the top layer of paint. A bunch in the first layer but that was due to the weather strip channels not being prepped properly.
There are a few runs, More than I had hoped, but they started popping up around layer 5. There are 7-8 layers on the car. 5 was required for full coverage over the area's that the black primer broke through, Those got the extra layer. There is less orange peal than I had anticipated which is good, but the runs are not something im looking forward to fixing. It was a lot colder than I wanted to spray in (I had anticipated 70 deg, it was around 65 and dropped to 60 at times. I had my space heater going when I was not spraying to keep the heat up in the garage and I feel that really might have helped (However I overloaded the 20 amp breaker ~ 4 times because of it... Shop lights, compressor, fans, and heater...).
Paint is very glossy and very nice looking. We do have some concerns that my 285 tires might not fit without a bit of a spacer though, I hadnt realized how close to the inner fender my current tires were. So I may need to add a bit of positive camber and maybe some 1/8" spacers. We'll see how that turns out as I will be getting the wheels off the car to get tires mounted.
Still to do. Sand runs off targa top and see if I break through the paint if so respray. Sand rear trunk and respray, sand rocker pannels headlight lids and spray. Wetsand and buff, rest of my list on page one.
PS Im not a big fan of the pic of me grinning like an idiot
Posted by: computers4kids May 16 2011, 07:22 AM
Andrew...wow I love it! What are your plans for the jams and trunks? I can't wait to see this thing put together. Way to go...
Mark
Posted by: rick 918-S May 16 2011, 07:25 AM
Great progress! This car was at WCC 04 right?
Posted by: tdgray May 16 2011, 07:44 AM
Good Job WTG !
Get a Nib file for the runs... it won't be as bad as you think.
Posted by: dan10101 May 16 2011, 08:42 AM
Great Job planning this and getting it done.
You have a talent for laying down paint. I'm sure there are ways to do it better, but you prepped well, spend the time needed to get things right and it look great!
Mom says it's "ORANGE".
I say it's the new Red...
I'm thinking "Solar Flare"
Posted by: sawtooth May 16 2011, 09:00 AM
Congrats Andrew, great color!
Posted by: Andyrew May 16 2011, 09:14 AM
Thanks all!
Chris, I'll have your tools in the trunk to return them @ American graffiti if I dont see you till then!
Mark, I am going to try and clean the overspray off the jambs with acetone. Trunks will be resprayed down the line.
Rick, 2005, but yes we went on the track together. This was prior to the bontempi HPH flares, I had hammered out the fenders and had 16x7 fuch's with 225 tires.
Dad, Solar flare is a good idea.. But I still like my other idea and think im going to go with it. It'll be an "unveiling" post when its all done
Posted by: Root_Werks May 16 2011, 10:50 AM
That turned out nice!
Posted by: kg6dxn May 16 2011, 06:03 PM
Wow! That looks awesome! You want to paint mine?
Posted by: Andyrew May 16 2011, 08:38 PM
Mike, I certainly could. Shoot me a PM we'll discuss specifics there.
Posted by: arkitect May 16 2011, 11:24 PM
Andrew,
Great job, nice to see the color on it.
Dave
Posted by: Andyrew May 17 2011, 12:37 AM
Painted some of the trim. Not going to move very fast untill the paint is dry and polished. Then all the trim actually goes on and the new seals and such go back on. 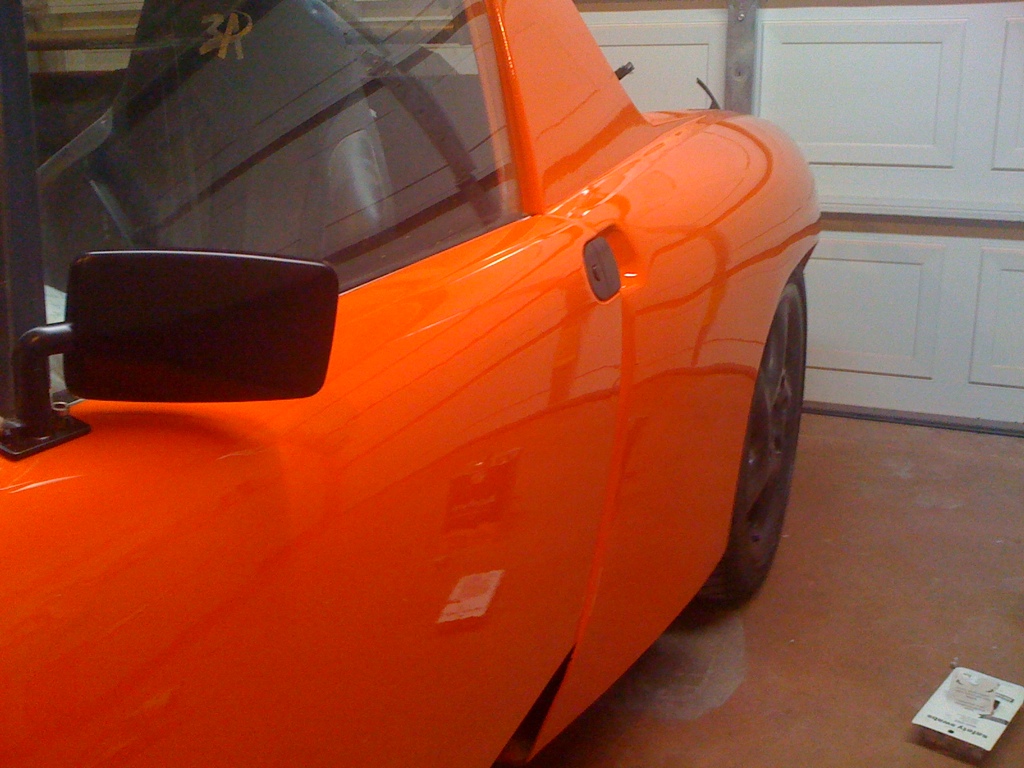
I am LOVING the color combo.
Posted by: saigon71 May 17 2011, 03:55 AM
That turned out real nice!
Looking forward to seeing the final product!
A fellow Ninja 250 rider,
Bob
Posted by: dan10101 May 19 2011, 12:05 PM
more paint picts.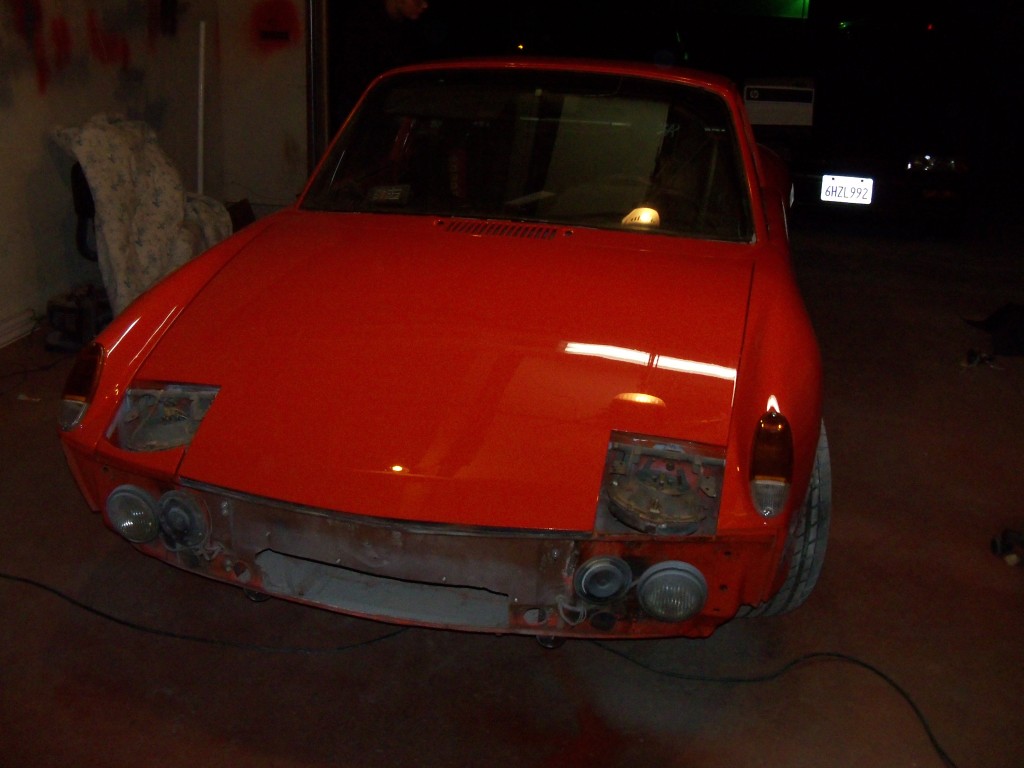
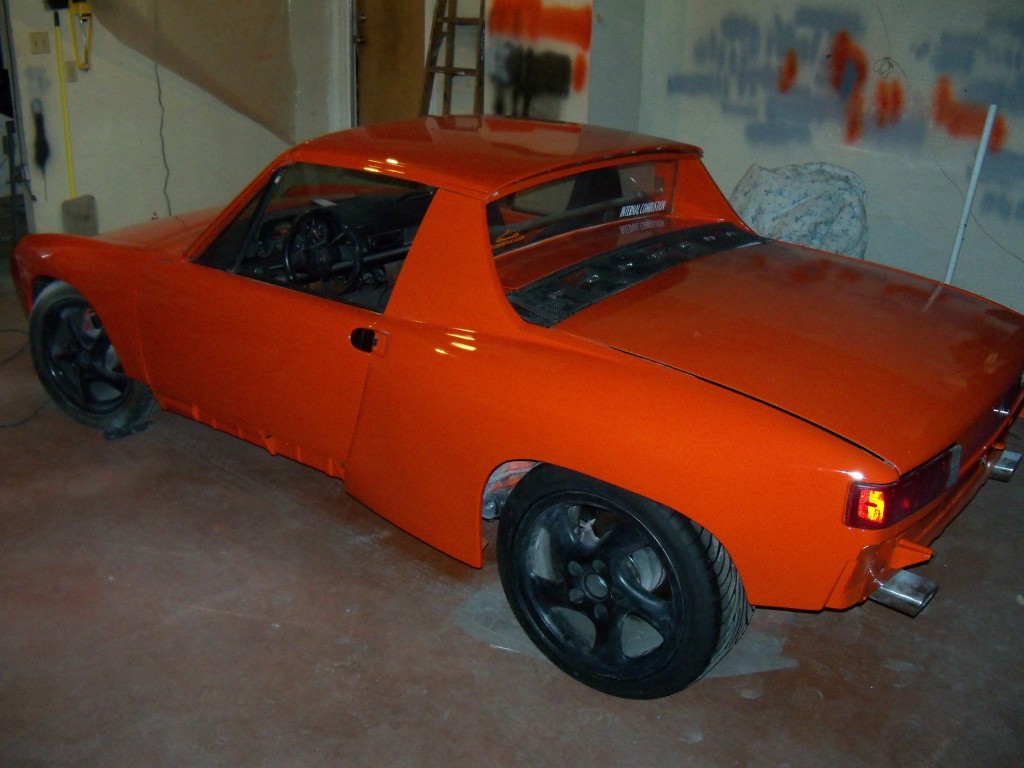
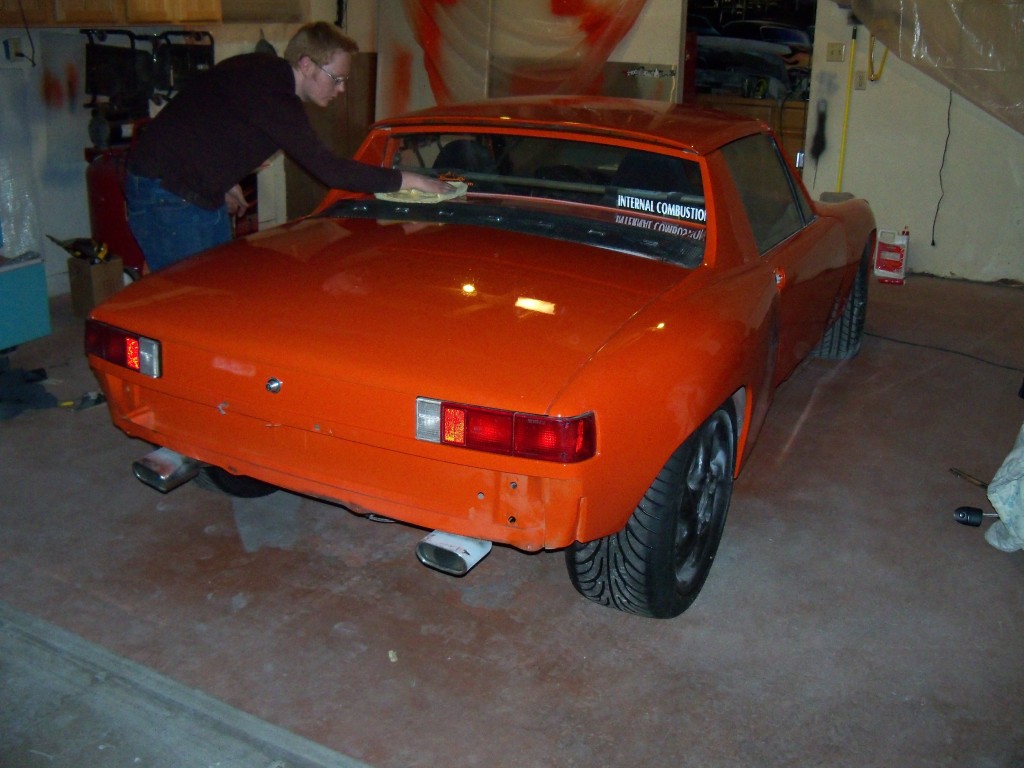
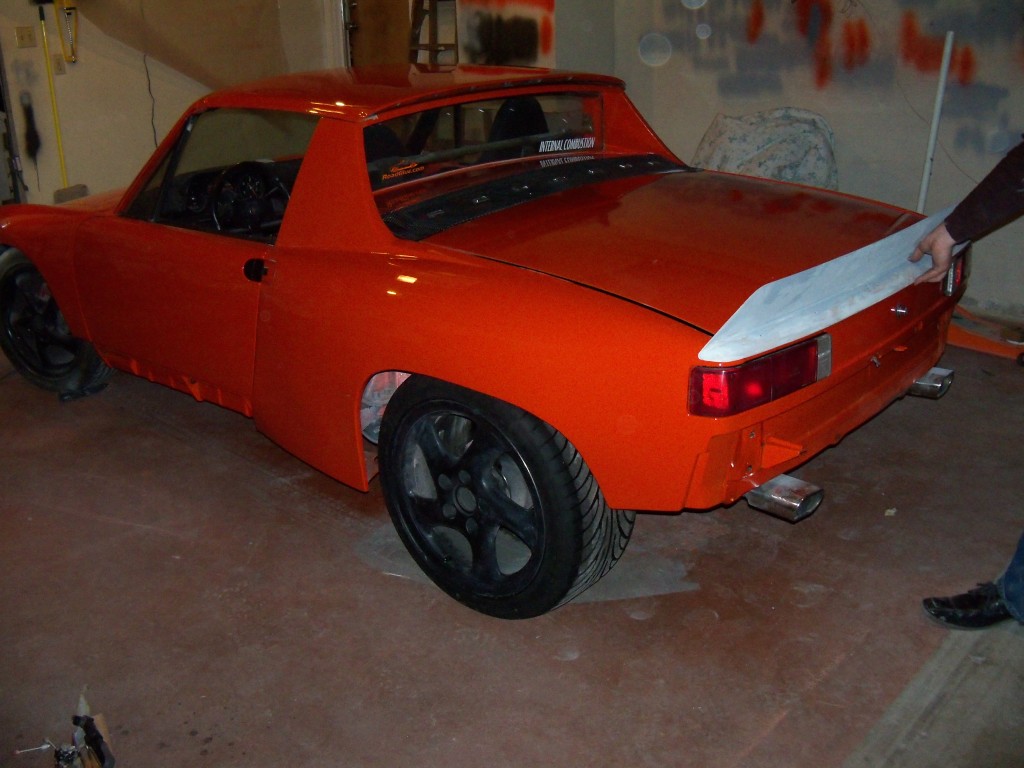
Get er Done!
Posted by: sawtooth May 19 2011, 01:56 PM
That looks fantastic, great job!
Posted by: Andyrew May 31 2011, 12:50 AM
10 days feels like a long time with no updates.
I have been pretty busy, but I had some time today to work.. UNFORTUNATELY I had some issues...
Long story short, ECU on the fuel injection setup went out. After swapping ecu's to my dads (We run the same Holley throttle body fuel injection setup....) and trying to retune the car, We were almost finished when something we dont know happened and the car wouldnt stay running. At this point I gave up and decided to throw the old Holley 600 carb back on the car. To autozone to grab a new fuel pump, about 45 minutes dicking around with swapping the fuel pump and we got the car running. Luckily I had the car dyno tuned on this carb (5 years ago...), and the guy worked his magic to make it run awesome, so when we fired it up it ran like a top. Its a little rich, but its pretty smooth.
I spent some downtime (waiting for dad to make some shopping runs) wet sanding some area's of the car. I have a bunch of dirt and runs in the paint and I tested out sanding out some of them. The runs are a PITA, dirt and such are a piece of cake... I went to 1500 on the drivers rear quarter and it really looks good. I need to get some 3A rubbing compound and see how it really looks. But throughout this week and next i'll be working on the front and rear bumpers, and getting the rest of the little things painted and seals installed. Again I dont know how much time I really am going to have, but I am going to do my best to get those items painted in less than 2 weeks.
Posted by: 914.SBC May 31 2011, 09:41 AM
Hey Andrew,
Thanks for the advise and help you gave me during my build. I dont have any words of wisdom to share cuz of all the things I have done in my garage, body work is the worst. Anytime there is a task with the word "work" in it, it can be painful.
Seriously, I love the color. I read all 12 pages of your build and your cooling system thread. I can tell you truly love 914's.
If you are ever down in Southern California, look me up. Would love to see that ride in person.
Regards,
Posted by: J P Stein May 31 2011, 09:48 AM
Very nice body work/paint.
Posted by: Andyrew Jun 3 2011, 09:26 AM
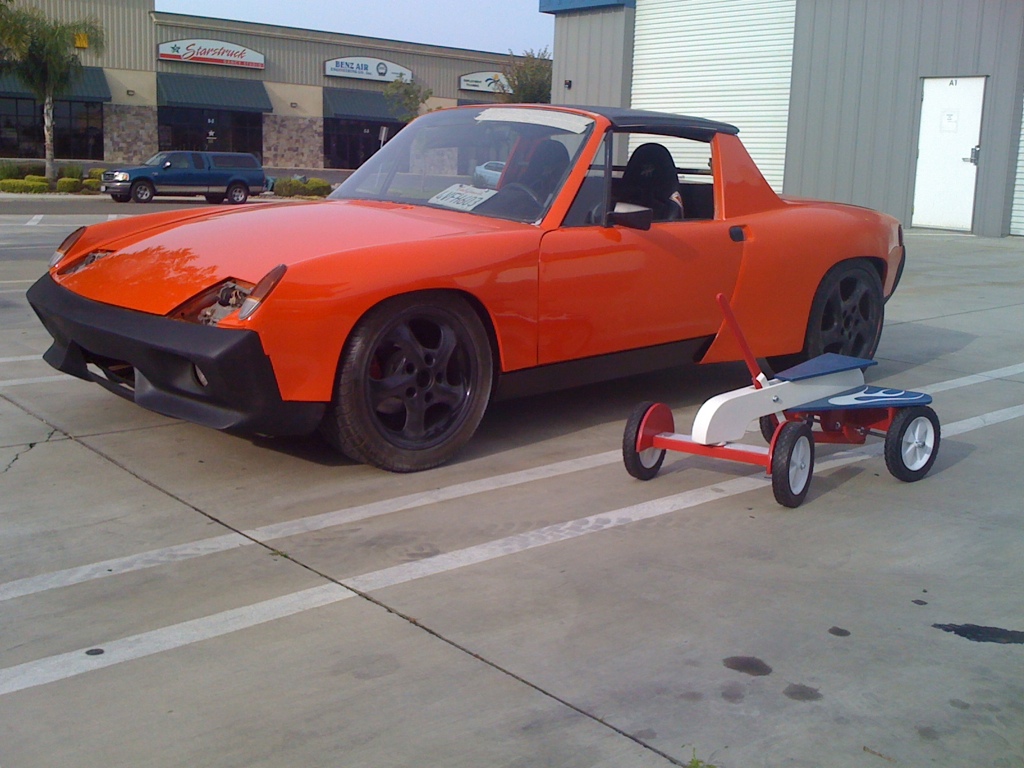
Drove to work, My co worker had his project there as well to show me
Still have a lot to do, Lots more wet sanding then hopefully buff it out soon.
Posted by: JRust Jun 3 2011, 11:14 AM
Way to go Andrew . Looking great & even better to see it on the road. Always a good feeling driving your teener. Especially after so much work going into that paint. Keep it up man
Posted by: banksyinoz Jun 3 2011, 02:13 PM
great work andrew, looks awesome, i am certainly a fan of the colour and contrasts, unfortunatly my wife hates orange so no orange for me
Posted by: Randal Jun 3 2011, 02:22 PM
more paint picts.
Get er Done!
Great Work Andrew. I hope that you'll be bringing that beautiful car up to Medford!
Nice spoiler. Did you make that?
Posted by: Andyrew Jun 3 2011, 03:17 PM
Randal,
No WCC for me.
Spoiler is the 6" Sheridan model IIRC.
Posted by: Andyrew Jun 6 2011, 12:25 AM
So spent a total of 17(give or take) hours this weekend between me and my dad cutting and buffing the paint. Its been raining all weekend as well so i couldnt get it in the sun for pictures. I'll upload the pictures tomorrow.
On the runs I started with 600 grit, then 1k then 1500. On the rest of the car it was 1k then 1500. On dirt specs I scraped them flat with a curved razor (details in pictures) then 1k and 1500.
Most of the flaws were removed from the paint this way. The fenders look FANTASTIC. This car really shines now. I cant wait to show you guys some in the sun pictures of this thing. (Dad took some, maybe he'll post some).
I am VERY happy. But there is still some buffing to do. I have to buff the hood 2 more times, as the 1500 scratches are still there in some spots.
Tomorrow i'll paint the headlight covers (as i'll be able to roll the car out of the garage finally since the rain is going to die down..) and get them on the car on Tuesday. Weather stripping also starts to go on tomorrow.
Posted by: Andyrew Jun 6 2011, 12:44 AM
Teaser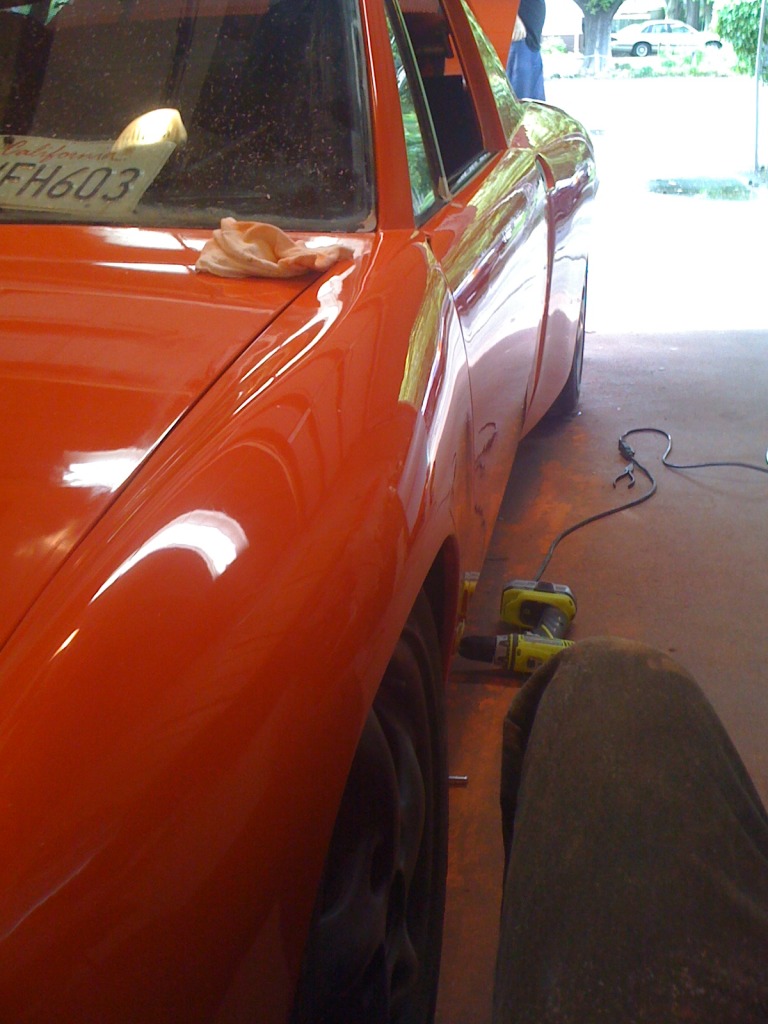
Posted by: Andyrew Jun 6 2011, 11:49 PM
Dad took this shot today.
Attached image(s)
Posted by: banksyinoz Jun 7 2011, 04:02 AM
Posted by: Eddie914 Jun 7 2011, 08:07 AM
Andrew,
Fabulous job!
What rear spoiler are you using? I want one!
Cheers,
Eddie
Posted by: ChrisNPDrider Jun 7 2011, 09:14 AM
PS Im not a big fan of the pic of me grinning like an idiot
That's a great pic!
So awesome to see your 914 lookin better than ever. WoW
Go Giants!!(?) Any plans to at least roll around with an SF baseball cap or one sticker? Your 914 at least will always be wearing their colors now
Posted by: Andyrew Jun 7 2011, 09:33 AM
Not a baseball fan in the least bit, LOL
So you will never see me rolling around with a SF baseball cap on.
Maybe one of these though..
http://cgi.ebay.com/ws/eBayISAPI.dll?ViewItem&item=220792277972&fromMakeTrack=true&ssPageName=VIP:watchlink:top:en
Posted by: Andyrew Jun 10 2011, 09:49 PM
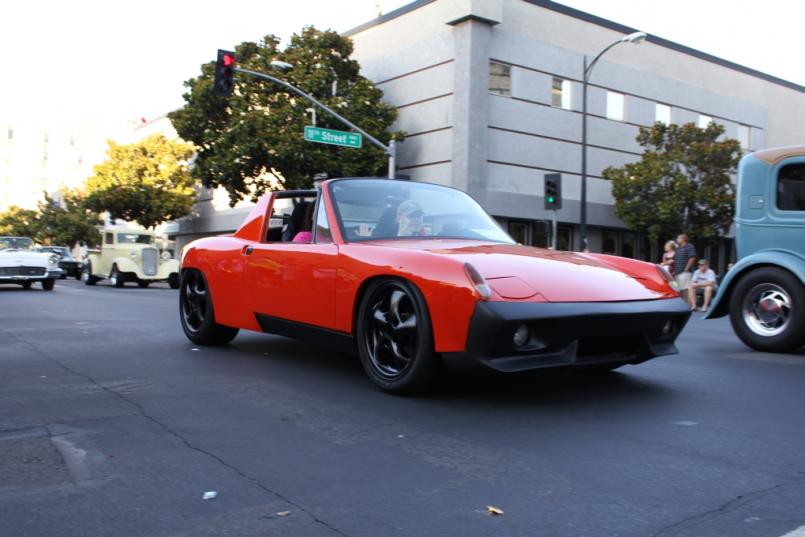
From the parade today
Posted by: Andyrew Jun 10 2011, 09:52 PM
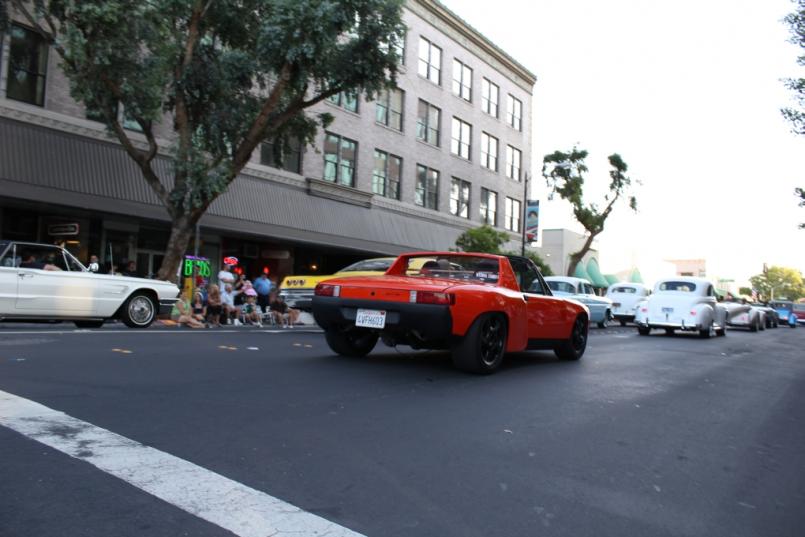
Mmmm Loving it
Posted by: kg6dxn Jun 10 2011, 09:55 PM
Looks awesome! I think your rocker needs to be orange. I'm jealous of your paint job. My car looks like shit! Very soon I will know how many shades of white you can have on one's car...
Posted by: orange914 Jun 10 2011, 10:03 PM
Mmmm Loving it
REEEEEEEEALLY NICE!!!!
Posted by: Rand Jun 10 2011, 10:11 PM
Congrats Andrew, she's looking really nice!!!
I'm with Mike, bring that rocker panel into the fold.
So cool to see some visual beauty bringing this girl out. There's a lot under the skin that most people don't know about. She's really shining.
Posted by: dan10101 Jun 10 2011, 10:36 PM
Here's my meager addition. Sure was exciting to see it in action with all the other cool cars...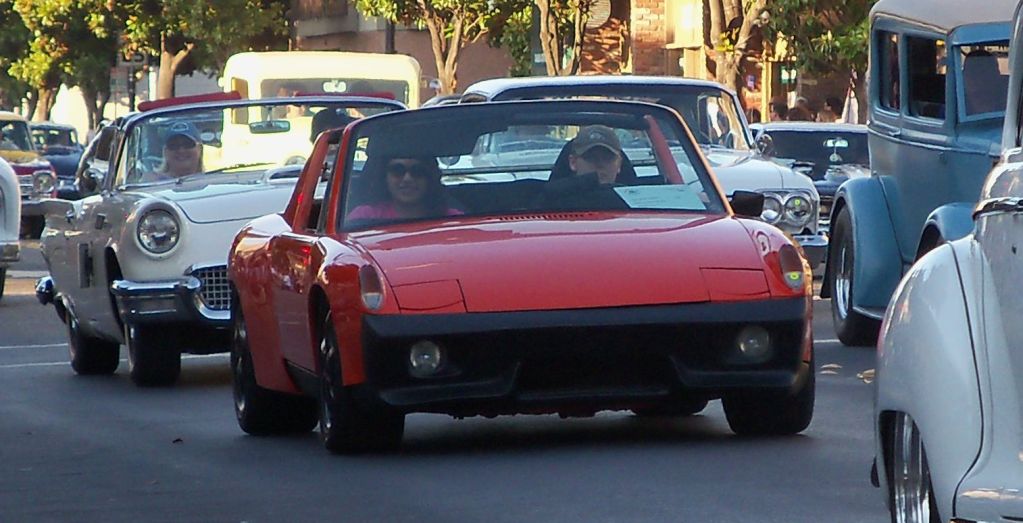
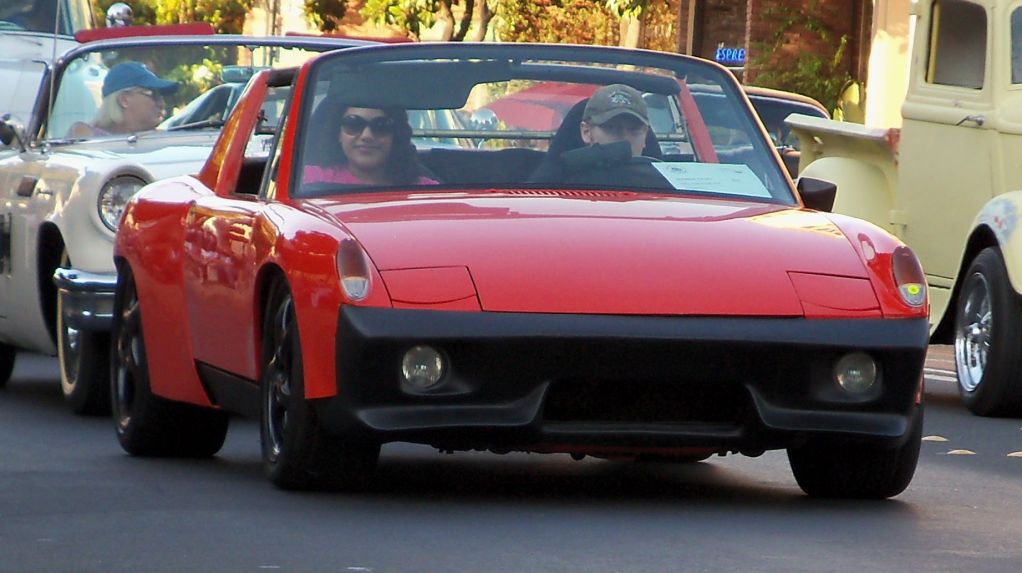
Yes Andrew, you now have a COOL CAR!
Posted by: dan10101 Jun 10 2011, 10:43 PM
Looks pretty modern for an old car parade....
At least they didn't turn you away this time.
Posted by: rktmn247 Jun 10 2011, 10:50 PM
Paint looks great!! The rockers match the nose. Its a different look and I like it!
Posted by: JRust Jun 10 2011, 11:10 PM
I like the black on the rockers. I would either paint a black stripe on the rear quarter along the bottom to match the rocker. Or go all orange as said above.
Please don't get me wrong. I love your car. You've done a great job on it. I just don't love that transition from rocker to rear wheel paint wise. I like the vent there
Posted by: Andyrew Jun 10 2011, 11:23 PM
No worries on the rocker guys, its either going orange or im painting a continuance of the rocker on the fender. Just one of those things i didnt get to
Posted by: McMark Jun 10 2011, 11:29 PM
I actually like the rocker 'combo' black and orange. Something different and unique. Jamie's got the right idea, if you decide to try something. I'd be happy to hook you up with a black vinyl 'stripe' if you wanna try the black bit in my Photoshop mockup.
Regardless, it's lookin' really great!
Attached image(s)
Posted by: tscrihfield Jun 10 2011, 11:30 PM
Car looks amazing! I didnt know if I was going to like it in the progress stages... but now that I see it out and on the road, its a winner! The body lines enhance the look of your car and it is very unique! Congrats and hopefully I will be joining the "Driveable" of the jackstands club soon!
Thomas
Posted by: computers4kids Jun 11 2011, 07:58 AM
Andrew, this is awesome! I didn't realize you had the mechanics all in order to start driving it. You have really created something pretty unique and striking. I like the photoshop black on the fenders to continue the black continuity. My favorite part of your car, at least from the pictures, is how those back tires just stuff those rear fenders...looks mean.
So what's next on the agenda with your car?
PS Are you happy with the vent kit in your rear stock calipers? I've converted my front to vent rotors and bigger brakes and can't decide on what to do with the back.
Posted by: Lennies914 Jun 11 2011, 08:09 AM
The car looks great Andrew. I think you should drive it over to the disco bay tranny clinic this weekend to show it off a little. 
Posted by: kg6dxn Jun 11 2011, 08:14 AM
The car looks great Andrew. I think you should drive it over to the disco bay tranny clinic this weekend to show it off a little.

Posted by: chrispy Jun 11 2011, 08:17 AM
Andrew the car looks awesome! Cograts on making the parade deadline.
I know that you sanded and buffed your heart out to show a quality car.
Chris
Posted by: dan10101 Jun 11 2011, 08:22 AM
He worked hard... No doubt.
Here are just a few of the build picts. I have a couple hundred more somewhere. Many of these have already been posted, but here they are in one place.
http://s719.photobucket.com/albums/ww198/dan10101/9148/
Posted by: Andyrew Jun 11 2011, 08:42 AM
Boy those are old pics dad!
Heres a friend of mines touchup from facebook, looks like facebook made the photo a little small, I'll have him email me the high res.
Attached image(s)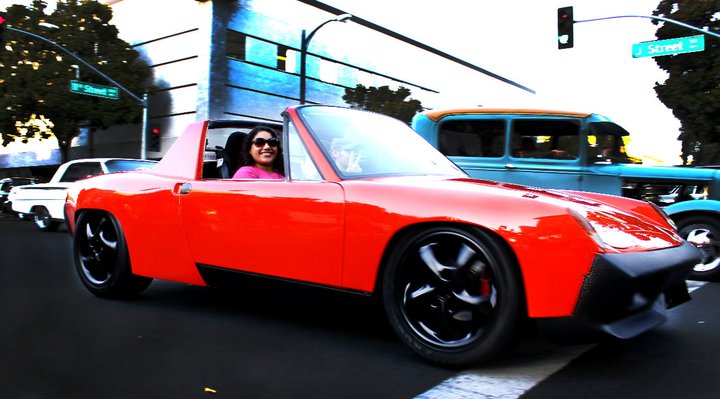
Posted by: Andyrew Jun 11 2011, 08:43 AM
PS, the fit of the tires front to rear is SNUG
The fronts rub while turning, Its wearing down the inside lip of the fender (Which Im OK with as long as it doesnt crack the fender).
Im going to raise it up 1/2 in after the show.
Posted by: Andyrew Jun 11 2011, 08:46 AM
The vent kit on the back. I am overall not happy with my brakes, but thats due to pedal feel. The vented rear's stocks are fine IMHO. If I needed some more brake back there I'd vent the stock front 914 calipers. Which I might do depending... For now my handbrake isnt even hooked up.
I havent done any hard braking either as my carb likes to die under braking...
Posted by: sixnotfour Jun 11 2011, 08:55 AM
Looks Great,
I like the Orange on the fender the way it follows the line of the door and curves forward, gives it some style , 
Posted by: dan10101 Jun 11 2011, 06:54 PM
A few photos from the car show. The link below is for those interested in other than orange 914 pictures  Lots of traffic around the little go cart. Fun talking to the people. We finally had to open the lid and show the dirty engine, everyone wanted to see it.
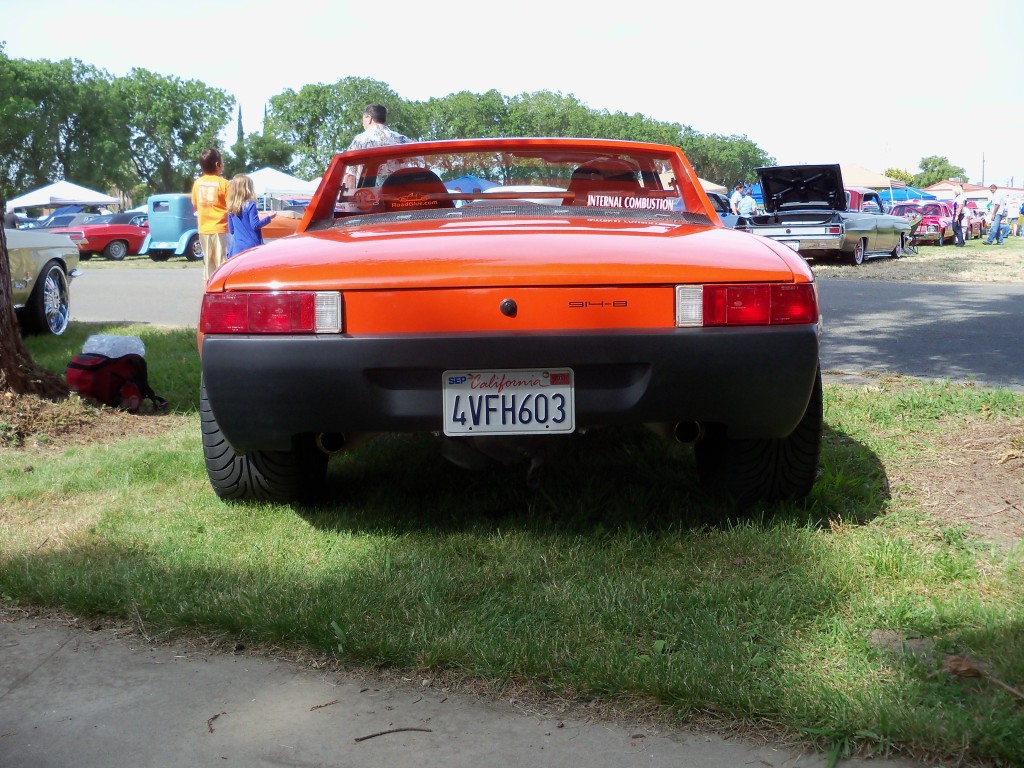
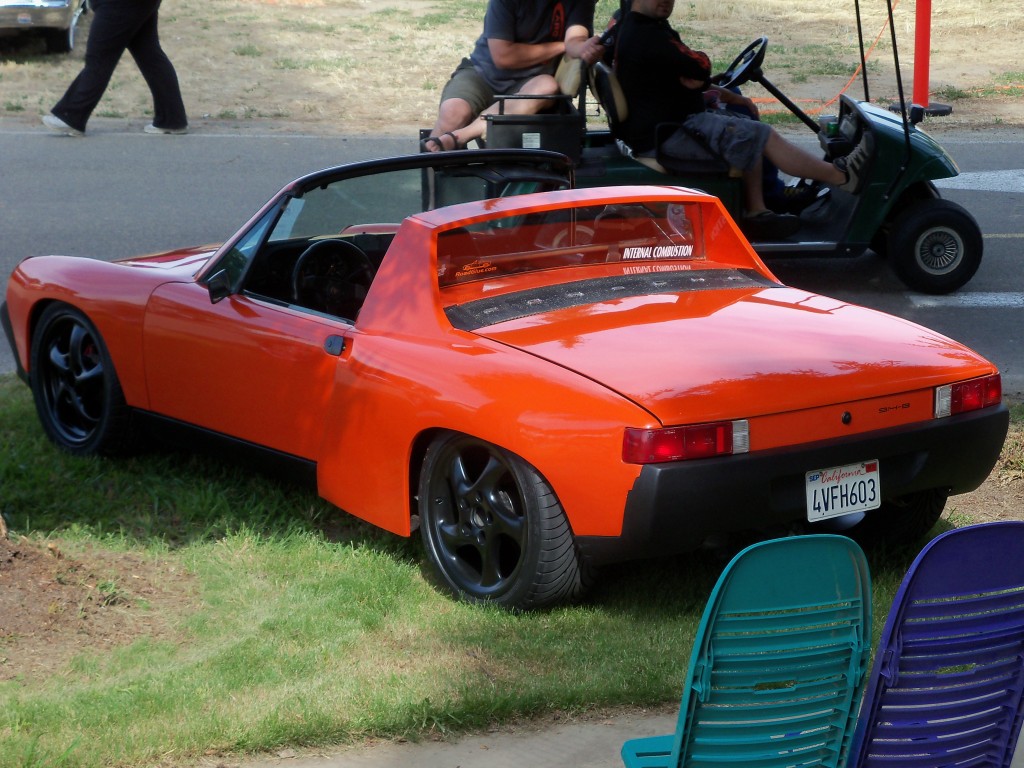
http://s719.photobucket.com/albums/ww198/dan10101/Graffiti%20Car%20Show%202011/
Posted by: kg6dxn Jun 11 2011, 10:19 PM
That car really looks nice. I'm jealous!
Posted by: Andyrew Jun 11 2011, 10:37 PM
I like your engine better
First post has been updated as well as the second post with my favorite pics.
Posted by: kg6dxn Jun 11 2011, 10:39 PM
You need to come to Discovery Bay tomorrow!
Posted by: Andyrew Jun 11 2011, 10:41 PM
I have the awards show at Graffiti tomorrow.. I cant really make it till later and Im not sure if I feel comfortable driving the car that far with the little issues that I've been having...
Doesnt mean I dont want to be there... I REALLY want to pop in and say hi...
Posted by: kg6dxn Jun 11 2011, 10:44 PM
Did you win? Congrats! 
Posted by: kg6dxn Jun 11 2011, 10:46 PM
I could have put in a flipped H for you today. I only opened mine for inspection and swapped the tail cone. That little girl could have helped you too.
Posted by: Andyrew Jun 11 2011, 11:07 PM
Tomorrow is judging.
Most likely no. There are so many NICE NICE NICE show cars out there.. If they like the odd and different... I have a good chance..
Im guessing I have a 1% chance at an award.
Posted by: Rand Jun 11 2011, 11:11 PM
Very sweet. Congrats Andyrew, you have rocked it yet again.
Take this with a grain of salt: The rockers.... dude, what you going to do wit the rockers? It seems like the flow is interrupted by the fender. Body color? Blacken bottom edge of fender to continue the stripe that's in front and behind that spot?
Not picking on it - amazing as is, just thinking out loud.
Posted by: Andyrew Aug 27 2011, 07:29 PM
Installed a WINK mirror today! Under $20 shipped to me from ebay. Really happy with it!
Now I just need to get some black vynal to put on the window to replace my visors.
Im really happy I didnt put the stock mirror back in, this one looks great!!
I have a couple of other neat little additions that i'll be putting in soon so stay tuned
Attached image(s)
Posted by: Andyrew Aug 27 2011, 08:21 PM
Well since no one can stay in front of me Id like to be able to see everyone who's behind me
Posted by: moparrob Aug 27 2011, 08:37 PM
OH MAN! I had a Wink mirror in my first 914 (33 years ago). It was awesome and I wondered what ever happened to them.
I got that and my 'Porsche' bolder tint and front air dam from Anything Limited which used to be in West L.A. Those were the days....
Posted by: kg6dxn Aug 27 2011, 09:07 PM
I'm on my 3rd wink mirror. Do yourself a favor. Mount some aluminum L channel to the front bottom of the mirror. If you leave the car parked in the sun, the mirror will soften and sag in the middle. Took about 6 months but has 3/4 sag in it. I screwed L channel on my new one. 12 months and no sag.
Posted by: kg6dxn Aug 27 2011, 09:09 PM
Oh, and bend the L channel to hold the right (passenger) side adjustment screw. This will stop it from breaking the embossed bolt off.
Posted by: Andyrew Aug 27 2011, 09:39 PM
Good advice Mike! I'll get to that sometime, as of right now the car is never parked in the sun (I park it in a warehouse at work).
Posted by: Andyrew Aug 27 2011, 09:40 PM
Good advice Mike! I'll get to that sometime, as of right now the car is never parked in the sun (I park it in a warehouse at work).
Posted by: matthepcat Aug 27 2011, 11:00 PM
Hey what size tires are on the rear?
Posted by: Andyrew Aug 28 2011, 12:55 AM
285 40 18's
Posted by: matthepcat Aug 28 2011, 04:28 PM
285 40 18's
Like

Posted by: Andyrew Aug 28 2011, 06:57 PM
I take that back 285 35 18's.
City of Modesto gave me a 1/2" piece of wood in my tire from their tree trimming (And crappy cleaning up) so now I have to replace it...
Yay..
Posted by: Andyrew Aug 29 2011, 12:49 PM
Sigh...
$200 later, I just ordered a new one.. American tire couldnt fix it, they did offer to prorate it for me for a new tire, but they couldnt get the same tire and I know the Sumitomo tires run very tall... I have a phone call into City of Modesto to see if they will do anything for me.
Attached thumbnail(s)
Posted by: Andyrew Aug 29 2011, 03:59 PM
I received a pleasant phone call from the city of modesto saying they would like to see the tire and are going to call me tomorrow to look at the tire!
There is hope!
Posted by: Dr. Roger Sep 3 2011, 02:54 PM
Glad you didn't sell her. Looking great now. Keep up the good work. =)
Posted by: Andyrew Sep 12 2011, 12:05 PM
Had a couple of cooling related issues. First off the autozone chrome water inlet on the intake manifold has been corroding away on the inside and finally corroded so far that it created a leak. Pretty bad.. So I drained and flushed the system and installed a factory cast piece that looks like it wont ever have that problem. Took a couple of tries to get all the air out of the system but I did it.
Another issue I had was I had a pusher and a puller 12 or 14" fans (cant remember) and the pusher's connections broke and caused for fraying of wires and a contained electrical fire. I removed the pusher and have been running just a puller, however I wired it backwards on accident and I also decided that one fan just isnt enough. So while dad was picking up some bolts at pick and pull for my honda he picked up a Lincoln Mark VIII radiator fan. 18" of fan glory that fits the radiator PERFECT. MY OH MY does this thing suck air. Absolutely dwarfs the old fan and supposedly pulls 4k CFM. I have it running on just the LOW setting and will setup a separate switch for the HIGH setting (its a 2 stage fan). The only thing I think I have left to do for the radiator is setup a duct to force the air out the wheel wells as I think there is some turbulence currently and I dont think its as efficient as it could be.
Attached image(s)
Posted by: jimkelly Sep 12 2011, 12:47 PM
that is one bitchen 914 - i must say - just what a pair of newly weds need : )
Attached image(s)
Posted by: matthepcat Sep 12 2011, 03:14 PM
Had a couple of cooling related issues. First off the autozone chrome water inlet on the intake manifold has been corroding away on the inside and finally corroded so far that it created a leak. Pretty bad.. So I drained and flushed the system and installed a factory cast piece that looks like it wont ever have that problem. Took a couple of tries to get all the air out of the system but I did it.
Another issue I had was I had a pusher and a puller 12 or 14" fans (cant remember) and the pusher's connections broke and caused for fraying of wires and a contained electrical fire. I removed the pusher and have been running just a puller, however I wired it backwards on accident and I also decided that one fan just isnt enough. So while dad was picking up some bolts at pick and pull for my honda he picked up a Lincoln Mark VIII radiator fan. 18" of fan glory that fits the radiator PERFECT. MY OH MY does this thing suck air. Absolutely dwarfs the old fan and supposedly pulls 4k CFM. I have it running on just the LOW setting and will setup a separate switch for the HIGH setting (its a 2 stage fan). The only thing I think I have left to do for the radiator is setup a duct to force the air out the wheel wells as I think there is some turbulence currently and I dont think its as efficient as it could be.
What size inlet hole did you cut? Mine seems much smaller than modern renegade conversions, and I wonder if this is causing my 200 degree freeway temps.
Posted by: kg6dxn Sep 12 2011, 03:42 PM
Mine is the entire width of the front trunk, from fog lamp gril to fog lamp grill. The key is to have twice as much on the air exit. That way it creates a low pressure zone. My rotary stays at 180 and slowly creeps to 200 if I'm not moving.
Posted by: Andyrew Sep 12 2011, 04:24 PM
My inlet on the bumper is ~ 5.5 x 21"
You can see the bumper cutout in the pic Jim posted, the cutout in the front of the trunk is a couple inches larger than that. The problem that I see with the inlet setup right now is that air that goes through the hole in the bumper isnt forced into the trunk, there is a couple of inches around the bumper all the way around between the bumper and the trunk. If I eliminated this gap with fiberglass on the bumper I suspect more airflow at higher speeds (Granted I dont have cooling problems at high speeds except on hot hot days).
And Mike has it right, the biggest thing is 2x the outlet as the inlet. Which is why I believe if you shroud the outlet the efficiency of the hole size would be much increased, for example you would only need 1.5x the size.
Just one of those things im looking to experiment with.
Posted by: kg6dxn Sep 12 2011, 06:34 PM
I have a rubber dam between the bumper hole and radiator. This forces all the air through my shroud.
Posted by: Andyrew Sep 12 2011, 10:06 PM
Do you have a pic of said rubber? I never noticed it on your car
Posted by: kg6dxn Sep 12 2011, 10:09 PM
Do you have a pic of said rubber? I never noticed it on your car
You can barely see it if you look through the grill. I would have to dissassemble the shroud to get a picture. It's made from a bed liner mat. 1/4" thick and cut to shape.
EDIT: Found a pic. Not great but you get the idea...
Posted by: Andyrew Sep 12 2011, 11:51 PM
So that material attatches to your bumper? Looks like that kind of thing could certainly work.. Better than hours of fiberglassing...
Posted by: Andyrew Oct 23 2011, 10:53 PM
This is just a teaser to some of our kick ass engagement pics. I was able to convince her to let me incorporate the 914 in some of our pictures. Were really happy how these have turned out so far and we hope you guys like them as much as we do! I'll post up some more in a couple of weeks.
Attached image(s)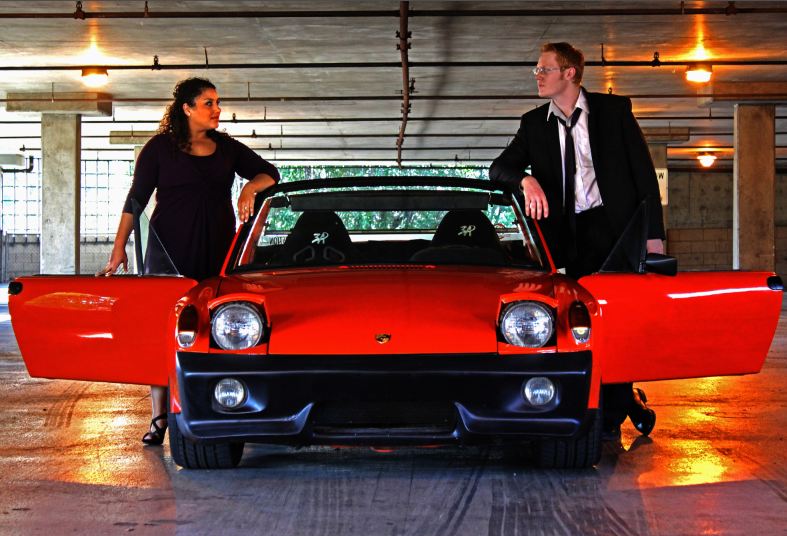


Posted by: kg6dxn Oct 23 2011, 10:58 PM
Posted by: Andyrew Oct 23 2011, 11:03 PM
High resolution for pic 2
Attached thumbnail(s)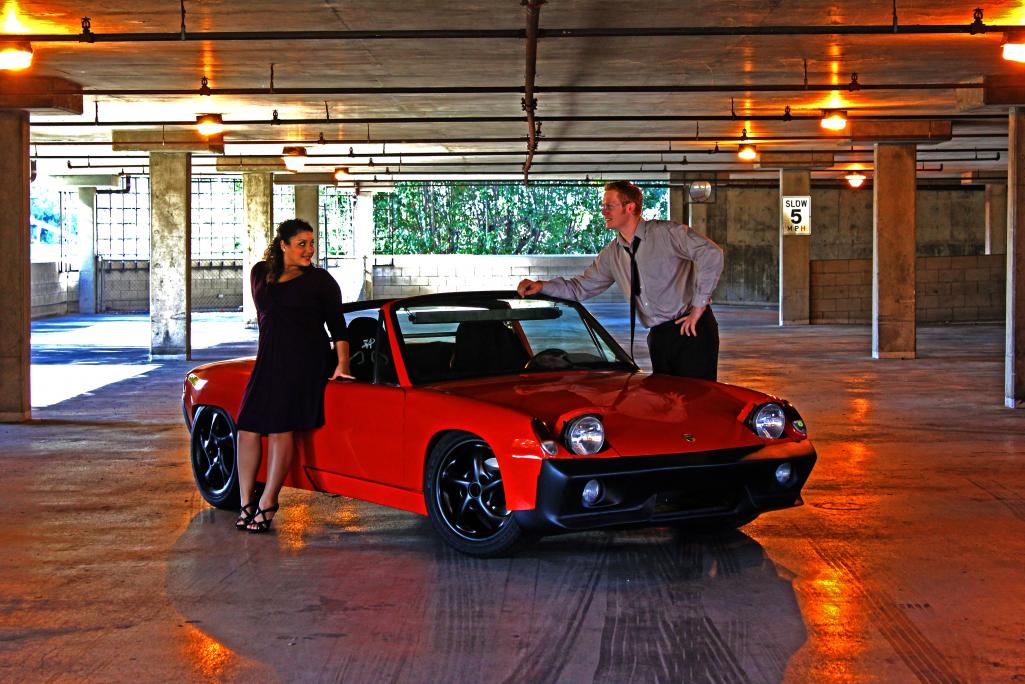
Posted by: davidj Oct 24 2011, 12:56 AM
Very sweet. Congrats Andyrew, you have rocked it yet again.
Take this with a grain of salt: The rockers.... dude, what you going to do wit the rockers? It seems like the flow is interrupted by the fender. Body color? Blacken bottom edge of fender to continue the stripe that's in front and behind that spot?
Not picking on it - amazing as is, just thinking out loud.
Still, this is an awesome 914!! Great Job!!
Posted by: Andyrew Oct 24 2011, 10:13 AM
My friend (Photographer) gets a little "edit crazy" sometimes
Attached thumbnail(s)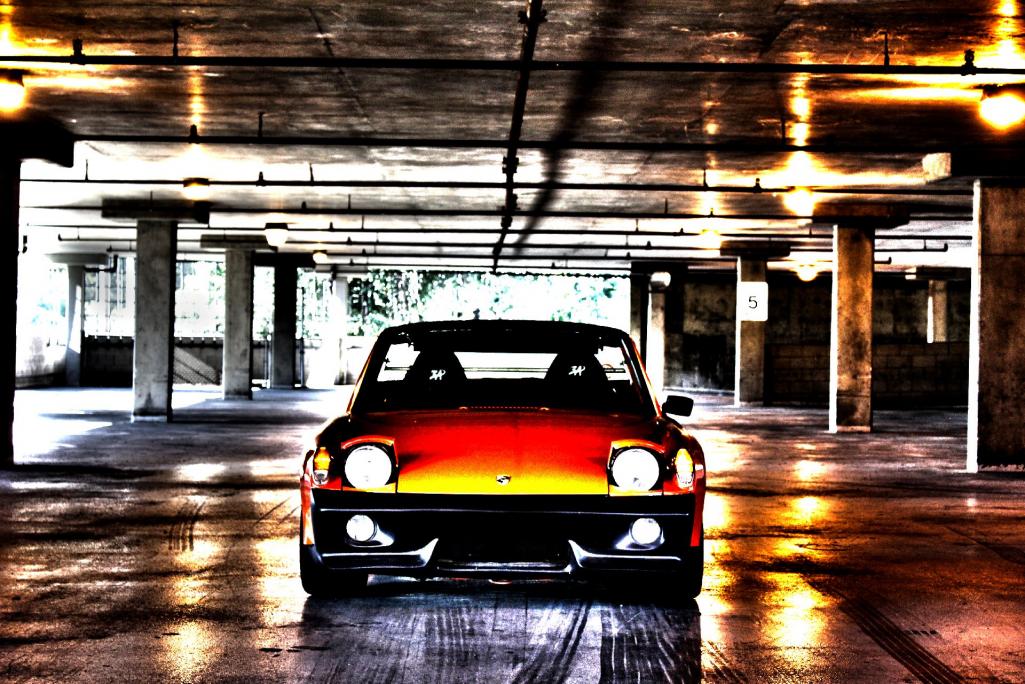
Posted by: jimkelly Oct 24 2011, 11:07 AM
those pics are keepers for sure - all of them.
black wheels - red longs - purple dress - wicked awesome shoes
she is smoking - and i ain't taliing about the ....... : )
all the best !!!
Posted by: computers4kids Oct 24 2011, 06:50 PM
Andrew,
These pics are awesome...I love them. Great idea.
PS I like your side valances painted body color.
Posted by: tscrihfield Oct 24 2011, 07:03 PM
Awesome photos!
Now take that lady and drive off into the sunset! 
Posted by: kg6dxn Oct 24 2011, 07:08 PM
Is there a 914 caravan to the wedding? 
Posted by: Andyrew Oct 27 2011, 10:52 PM
There is a 914 going FROM the wedding
Update on the car, Going in for a dyno tune tomorrow. Im looking for 225whp and 250wtq. (I have to consider that I have 100lbs in wheels and tires in the back) but most importantly im looking for smooth tq curve, smooth power through the powerband, better cruising (it never was that bad..), better cold starts, and better gas mileage.
Posted by: arkitect Oct 27 2011, 11:38 PM
Andrew,
Good looking picts. Great idea!!!!!!!!!
Dave
Posted by: Andyrew Oct 28 2011, 02:18 PM
Dyno tune is done. Found a couple of problems and fixed them (Mostly I was running without the secondary's... Vacuum pod had a solid gasket instead of an O ring. ). I need to figure a bigger air cleaner system as thats witholding some power, and I also need to go a general tuneup (wires, plugs, ect).
Overall it pushed out 235whp and 295wtq. It made at least 250wtq from 2k-5k rpms.
I havent gotten to drive it yet but I am sure looking forward to it! Its supposedly very smooth and sounds really good.
Posted by: ewdysar Oct 28 2011, 03:03 PM
Dyno tune is done. Found a couple of problems and fixed them (Mostly I was running without the secondary's... Vacuum pod had a solid gasket instead of an O ring. ). I need to figure a bigger air cleaner system as thats witholding some power, and I also need to go a general tuneup (wires, plugs, ect).
Overall it pushed out 235whp and 295wtq. It made at least 250wtq from 2k-5k rpms.
I havent gotten to drive it yet but I am sure looking forward to it! Its supposedly very smooth and sounds really good.
Is that still carb'ed or did you switch back to the FI setup?
Posted by: Andyrew Oct 28 2011, 03:05 PM
Still carbed. I have to build a megasquirt or pay 1500 for a computer to go back to FI.
Posted by: Andyrew Oct 28 2011, 03:47 PM
Heres the dyno. Red line is current. Blue line is 2005 dyno. Dont know why they didnt rev it past 5k but thats ok.
Keep in mind blue line is with 16" fuch's and 225 50 tires, red line is with 18" turbo twists with 285 35 tires. I estimate 26% drivetrain loss due to the tires, since Jake Raby estimates 25% typical loss with the 901.
This puts me right around 300HP and 375lbs tq.
Attached thumbnail(s)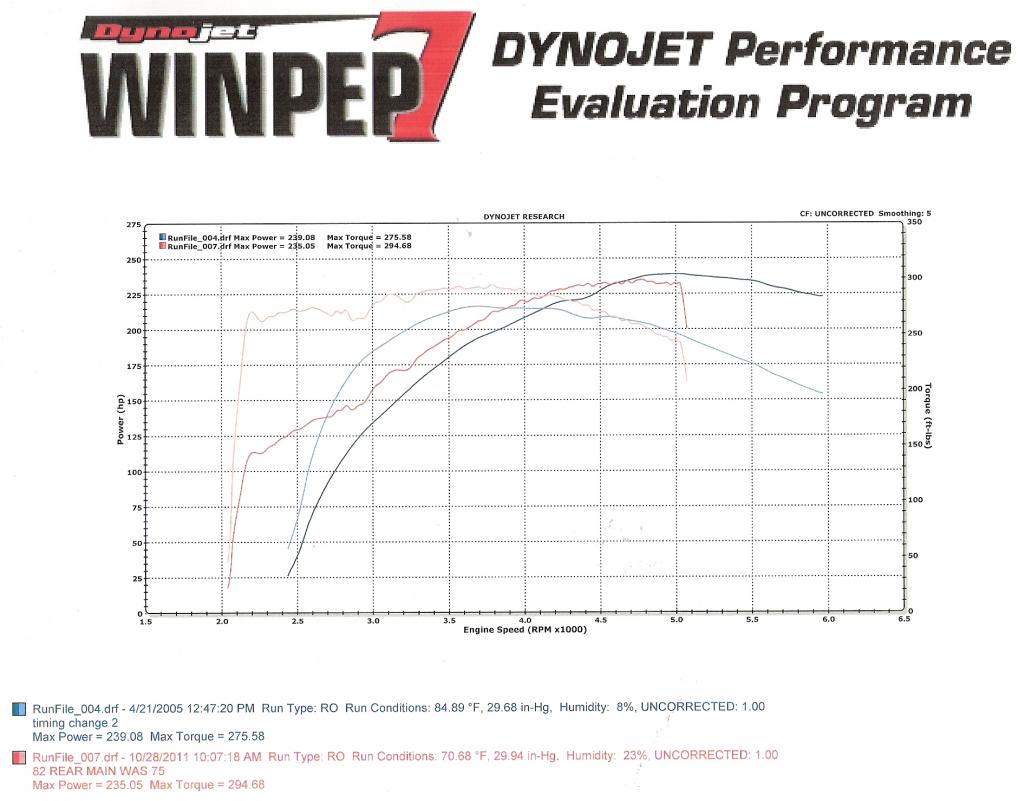
Posted by: dan10101 Oct 28 2011, 09:28 PM
I was at the dyno shop about 4 hours (on my day off). The day started with a BANG. A flash grenade went off about 20 minutes after I arrived about a block away. The cops were crashing someones gang/drug party at 8:30 in the morning. Another one a few minutes later. The dyno tune process is always interesting. If anyone is looking for this, Oakdale is a great shop with many skills. Besides that, it's a toy shop. I took a few pictures while I was there.
http://s719.photobucket.com/albums/ww198/dan10101/9148/Dyno%20Day%202011/
Andrews car drives much better. It's amazing how quick it was on only the front 2 bb.
It still made 220 hp in it's weakened state. I really should have checked the vacuum pod when I rebuilt the carb, but never thought it was a problem since it held vacuum. The tuner guy said it was a great way to keep the power down on my Son's hot rod.
Just so I don't forget all the tuner guy told me, here it is..
After correcting the vacuum pod, (he found it because he was putting a lighter spring in it so it would open sooner), He did a few other things.
Larger squirter for the accelerator pump to cure a dip in the power when the secondaries opened.
Larger secondary main jets, was 75 now 82. Since it was lean under full throttle higher rpm.
Adjusted the timing more advanced. (By ear, He really didn't like doing that) Then retarded it when it wouldn't crank over. We need to mark this and get it so we know for sure. He suggested a Van timing mark. I'm thinking there is a vibration from the crank. Maybe a self balancing harmonic balancer with a mark that we can see. (drill a hole in the firewall?)
Finally, on the last run he removed the air filter. (I think he forgot to put it back on), But as with many accidents, we discovered that the HP went up 5HP with no other changes. He suggested an aircleaner with the top lid that breathes. Open on the side and top. So maybe with a few tune up parts, air cleaner, Choke kit, an a harmonic balancer the engine may finally be done, for this year. He's going to have to change those seats if he want's his wifey to be to be confortable sitting there in her wedding dress. I'm pretty sure I posted the picture of my wife and I escaping on our wedding night in HER 914.
Always fun hanging out at a hot rod shop. And I think I may have sold my Gear Vendors Underdrive unit. 
Posted by: Andyrew Nov 3 2011, 08:55 AM
Big thanks to Dad for taking his day off on my 914!
I just picked up a couple more pictures and I just had to post a couple.
There are some AMAZING ones that I am holding off showing you guys. Im just posting a couple that I dont think Jerika will care to much about me sharing.
So far I have about 60 edited photo's.
Attached image(s)
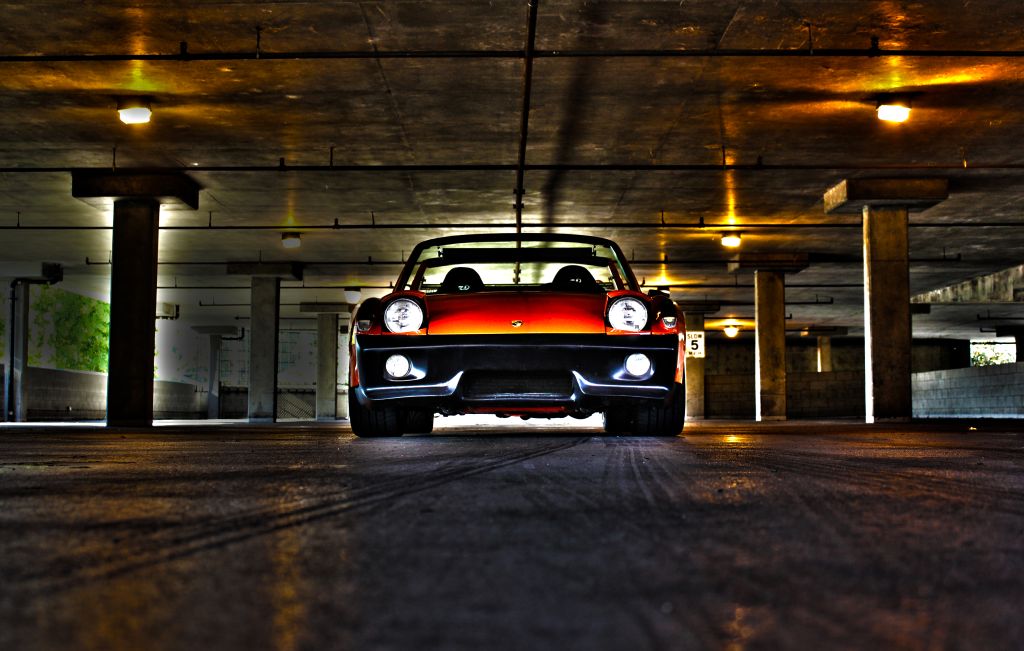
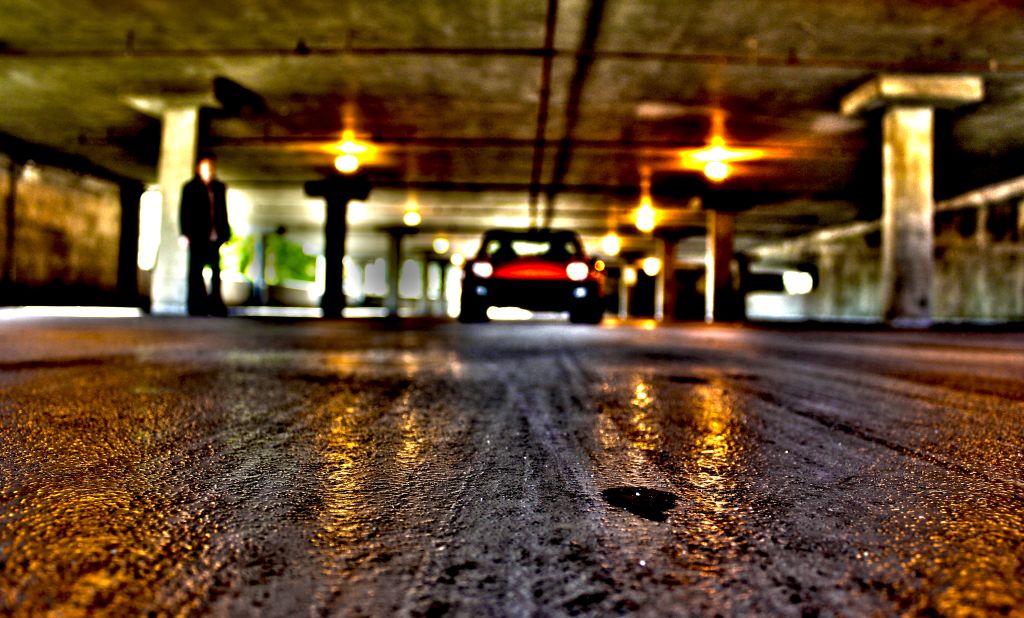
Posted by: McMark Nov 3 2011, 11:17 AM
Those are some great shots. You did a great job on the car, can't wait to see it in person.
BTW, did you ever pull off the transfer paper on your 914World Sticker? The clear sheet isn't part of the sticker. 
Attached image(s)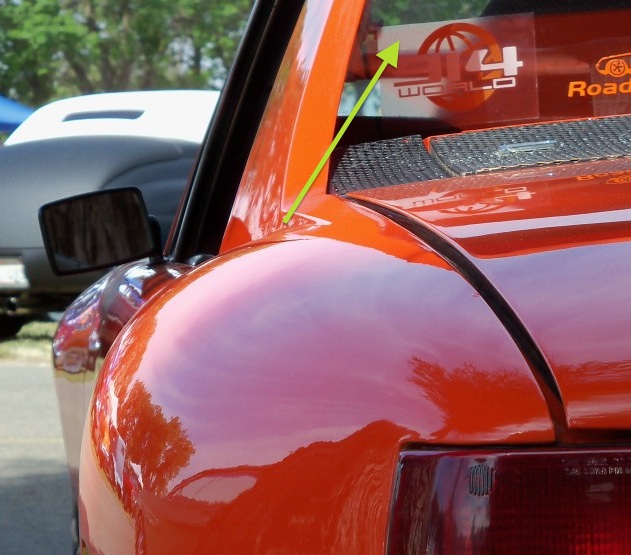
Posted by: orange914 Nov 3 2011, 12:36 PM
Big thanks to Dad for taking his day off on my 914!
So far I have about 60 edited photo's.
I'm not sure if you mean your dad's time off "FROM" you 914 or take these great photo's.
The 3rd (last picture) was really cool of your faded 914 with the focused near range ground... and by the way the oil drop ties the 914 theme in together...
Posted by: Andyrew Nov 3 2011, 12:41 PM
My dad didnt take the pictures, he went to the dyno.
Ya I thought it was pretty cool about the oil drop. Oddly enough the 914 doesnt drip a single drop of oil!
Mark, Ya I removed the sticker shortly after that the day that photo was taken
Posted by: Andyrew Nov 13 2011, 10:58 PM
Time for me to post the engagement pics 
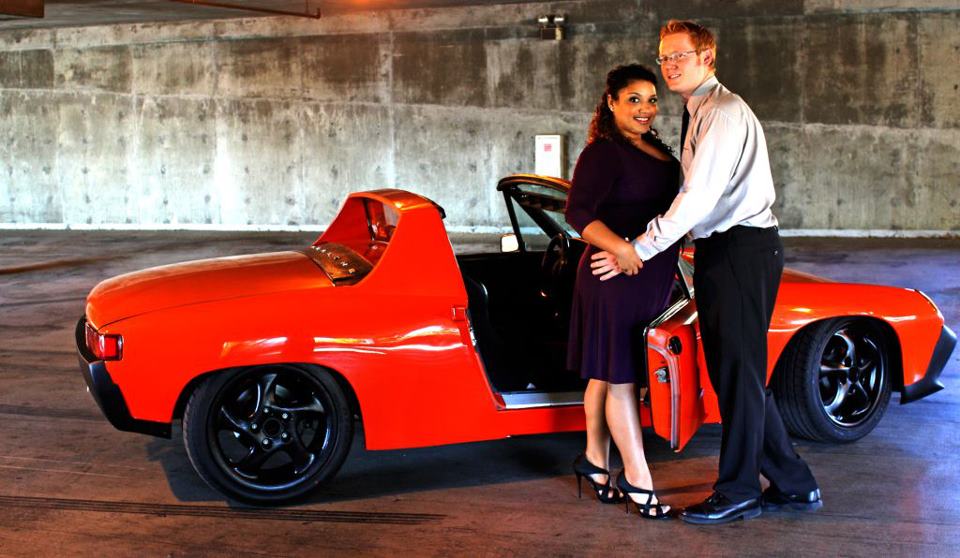
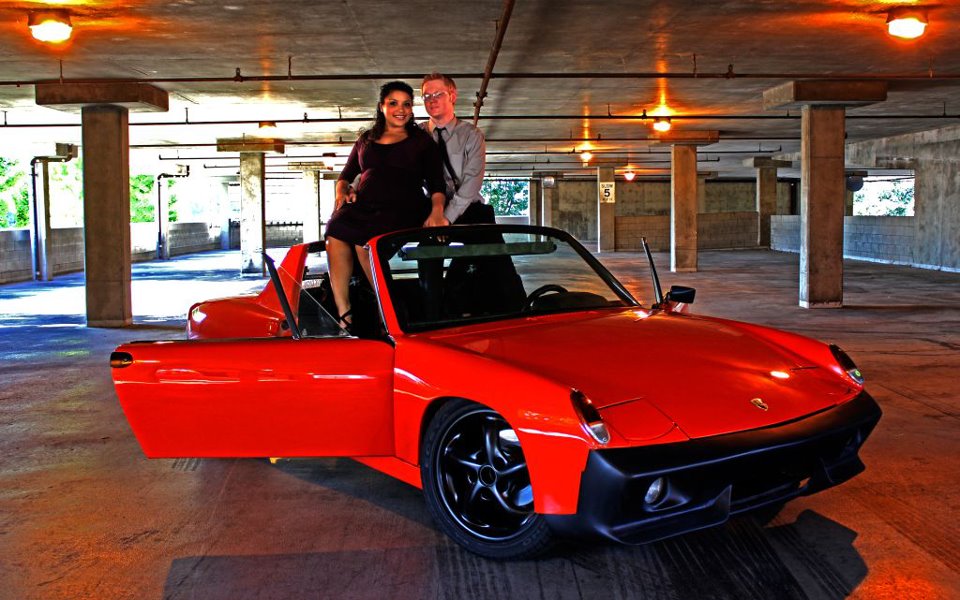


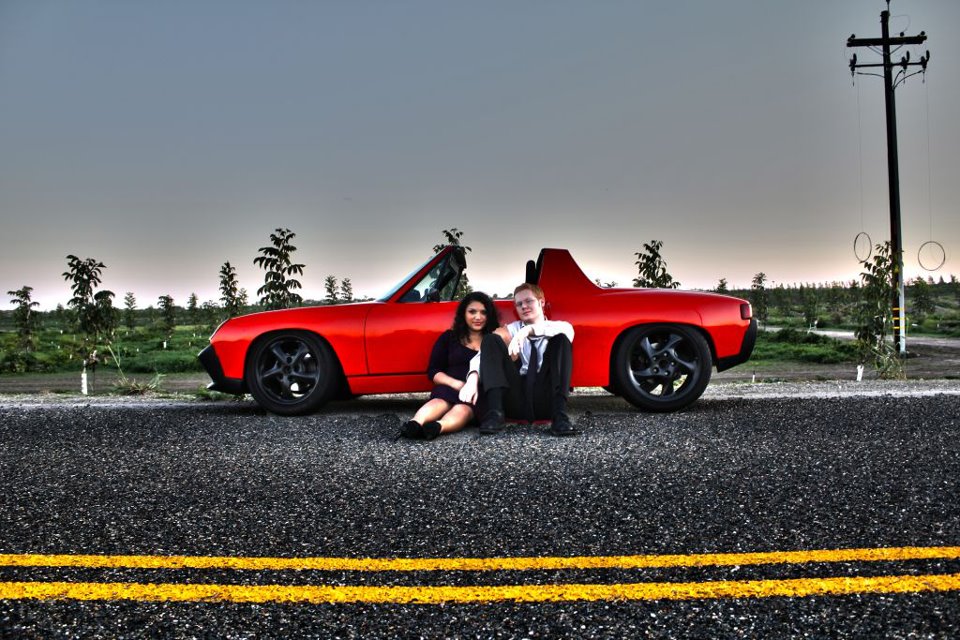
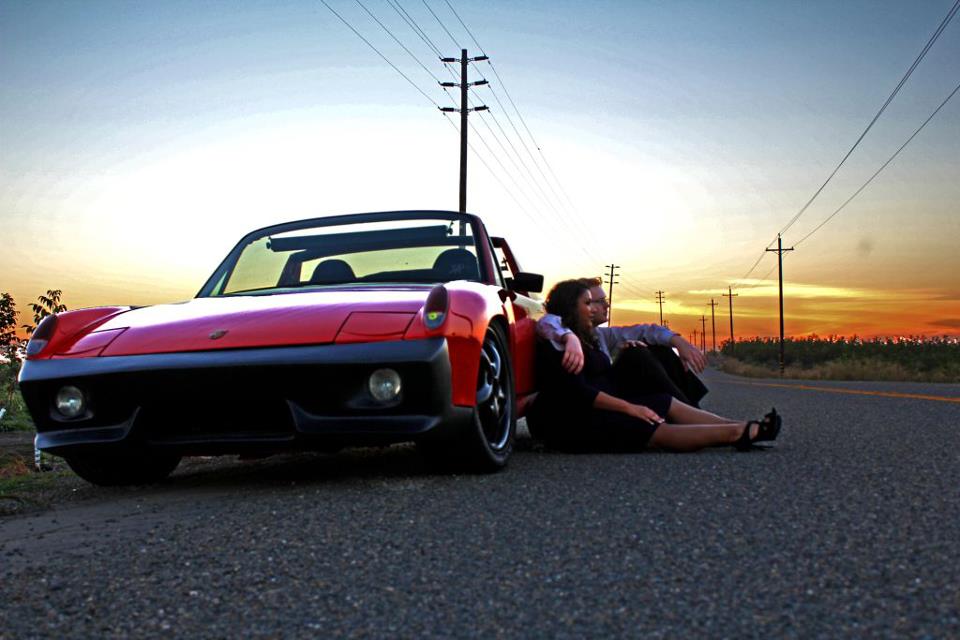
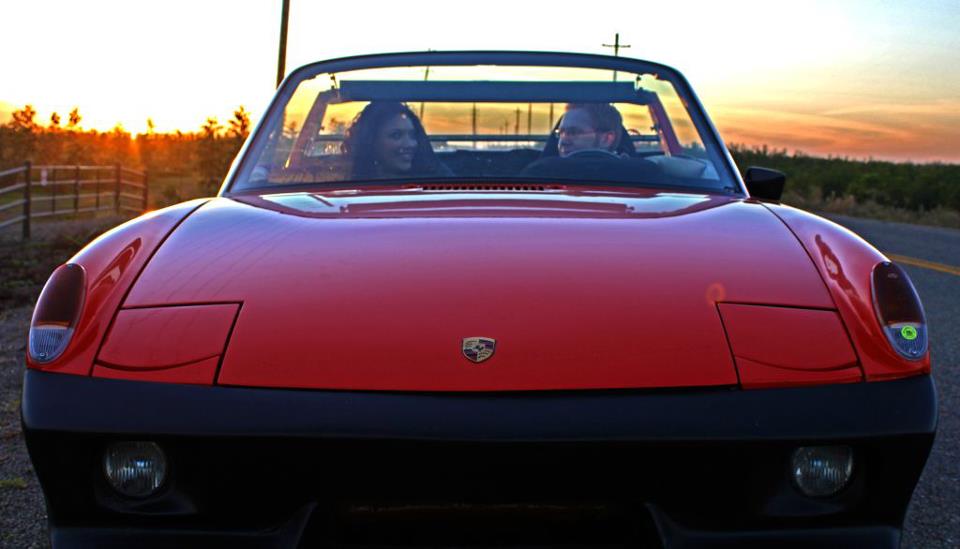


Posted by: kg6dxn Nov 13 2011, 11:02 PM
Cool Pics!
Posted by: rnellums Nov 14 2011, 08:29 AM
Amazing Pic!
Posted by: computers4kids Nov 14 2011, 08:42 AM
Those are great...my favorites are when you both are sitting on the road leaning against your car door.
Cool Mark
Posted by: 914.SBC Nov 14 2011, 03:56 PM
You know my daugheter is getting married in 5 months. She is a pro golfer and I suspect she will have similar pics in the sense that you captured both of your true loves. GREAT PICS....
Well done...
Posted by: matthepcat Nov 15 2011, 01:12 AM
Andrew,
What carb are you using for that latest dyno graph?
Posted by: Andyrew Nov 15 2011, 01:16 AM
600 or so holley single pumper, I know with fuel injection i can hit 350hp and well over 400lbs of tq.
Posted by: matthepcat Nov 15 2011, 01:27 AM
Is it vacuum secondaries?
600 or so holley single pumper, I know with fuel injection i can hit 350hp and well over 400lbs of tq.
Posted by: BajaXJ92 Nov 15 2011, 07:17 AM
Time for me to post the engagement pics
This picture is awesome!!
Congrats!
Posted by: Andyrew Nov 15 2011, 09:01 AM
Is it vacuum secondaries?
600 or so holley single pumper, I know with fuel injection i can hit 350hp and well over 400lbs of tq.
Yup
Posted by: 2xs performance Jan 27 2012, 07:57 AM
Sweet ride. I bet its a beast with the V8.
Posted by: Andyrew Mar 3 2012, 06:48 PM
Teaser More photos and video to come
Attached thumbnail(s)
Posted by: Andyrew Mar 5 2012, 12:37 AM
https://www.youtube.com/watch?v=tOJf7PpP4l0
https://www.youtube.com/watch?v=SwMCIE9bIKA
https://www.youtube.com/watch?v=dwsJnH1xpcc
Gopro video's to come a bit later..
Posted by: kg6dxn Mar 5 2012, 08:45 AM
Looks like fun
Posted by: dan10101 Mar 5 2012, 08:31 PM
I must say I was hesitant, but dam if it wasn't a kick in the butt. I can't get over how the exhaust sounds almost exactly like you were standing there. The echo off the concrete walls made seem like it was surround sound.
Does anyone remember a song from around 2000 that included the words "faster faster faster". Not that the video needed any sound enhancement...
Posted by: Andyrew Mar 5 2012, 08:40 PM
Been busy so I couldnt upload pics, but heres one of proof that Dad joined
Attached image(s)
Posted by: Andyrew Mar 5 2012, 08:41 PM
Nother
Attached image(s)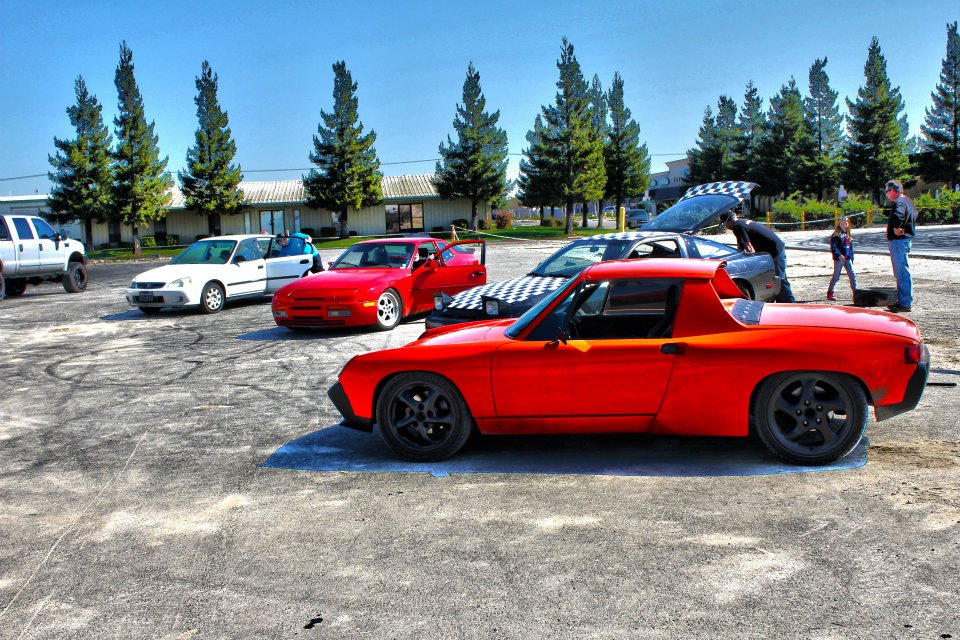
Posted by: Andyrew Mar 5 2012, 11:46 PM
Dad, This song?
https://www.youtube.com/watch?v=jDJpf2mQ0w4
Posted by: dan10101 Mar 6 2012, 12:31 AM
Good song, but not the one.
It's been years since I heard it, but i think it may have been a bit of 90s pop/rock or maybe techno. I just remember someone is the SFR SCCA doing a video of his autocross day with this in the background. Oh well, it was a long shot. I just thought it was good background music. Most car videos shouldn't have music anyway...
Posted by: orange914 Mar 7 2012, 12:16 PM
Teaser
More photos and video to come Got any videos to post yet?
I was surprised to see how tight the side to side movement of the rear wheels were in those tight wheel wells
that v-8 sounded wicked Wish I could've seen the 944 go at it.
Posted by: dan10101 Mar 7 2012, 02:43 PM
Teaser
More photos and video to come Got any videos to post yet?
I was surprised to see how tight the side to side movement of the rear wheels were in those tight wheel wells
that v-8 sounded wicked Wish I could've seen the 944 go at it.
Here is someone you know doing a better job with the 944 than I did. No wicked sound for some reason, it sounds a lot better in person. None the less, very good car control!
http://youtu.be/LX8j_GfIkvY
Posted by: Andyrew Apr 25 2012, 12:00 AM
Pics
Attached image(s)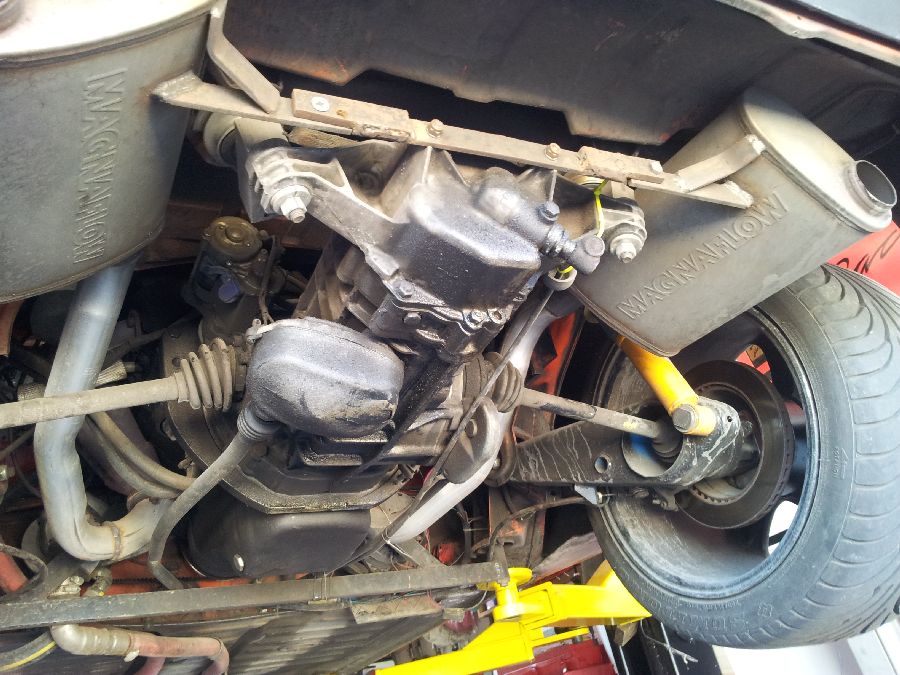
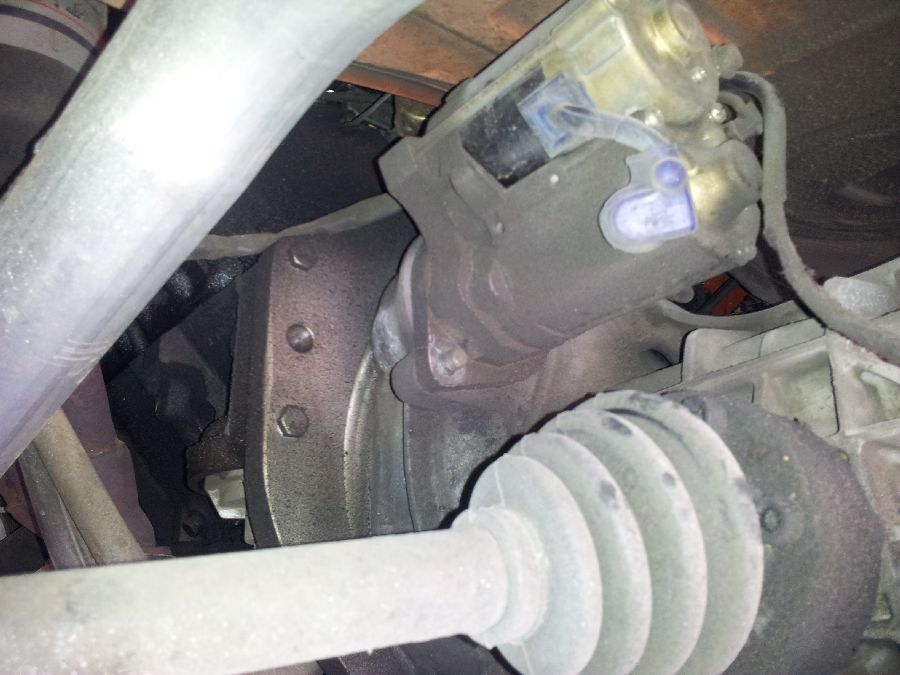
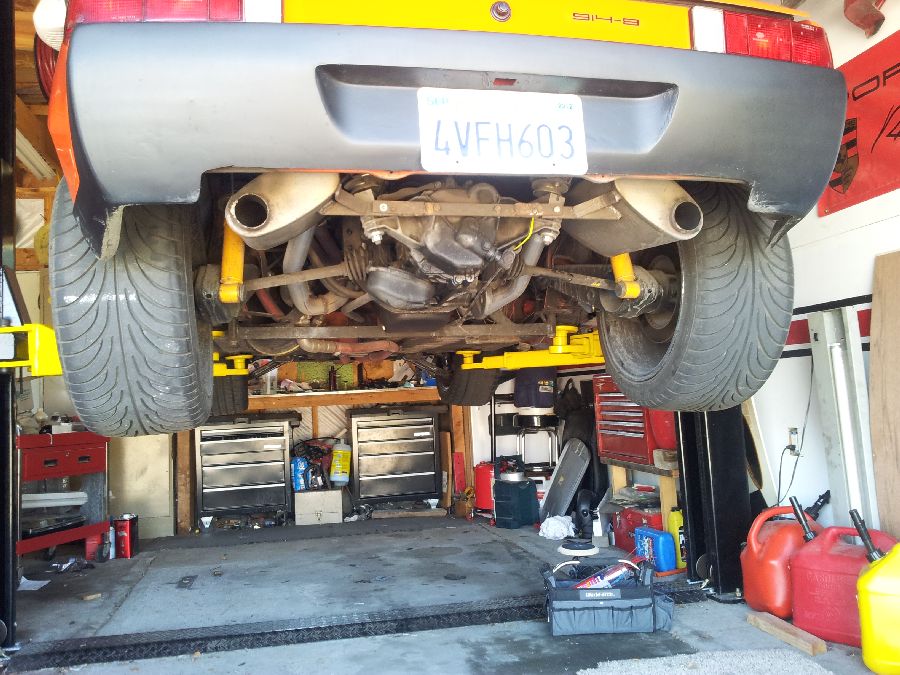
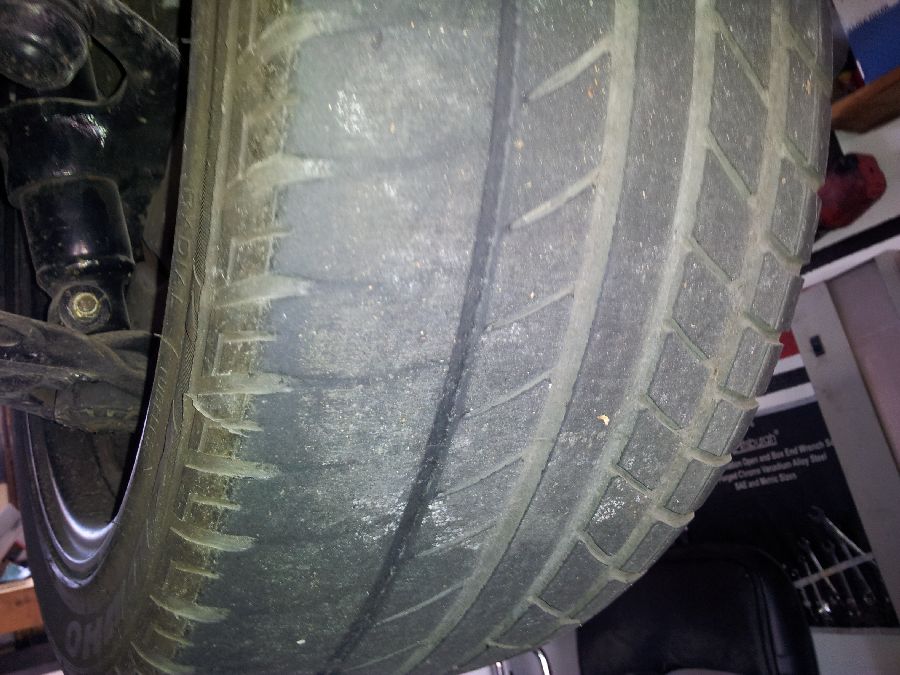

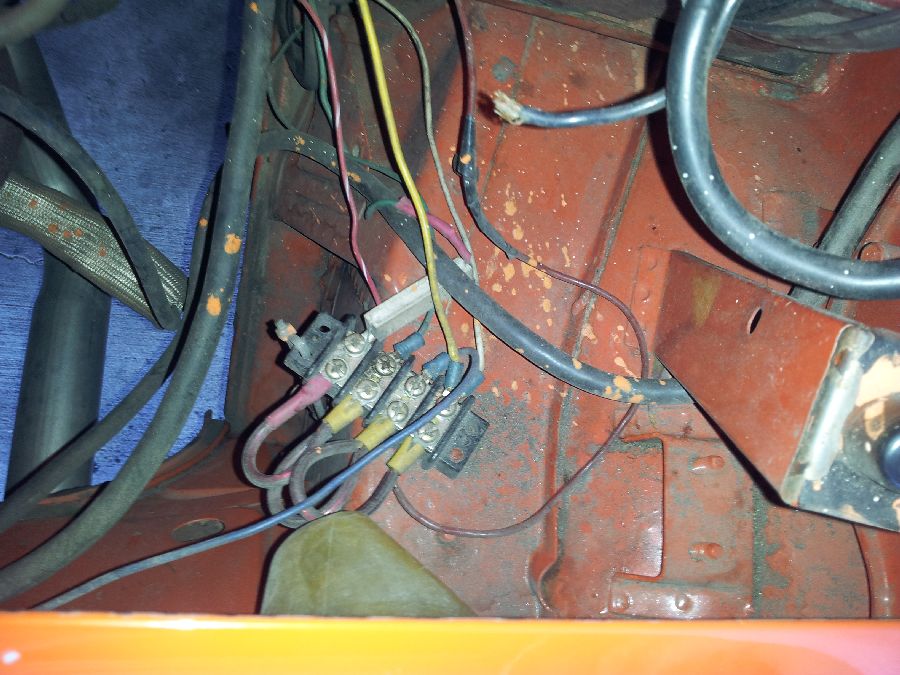
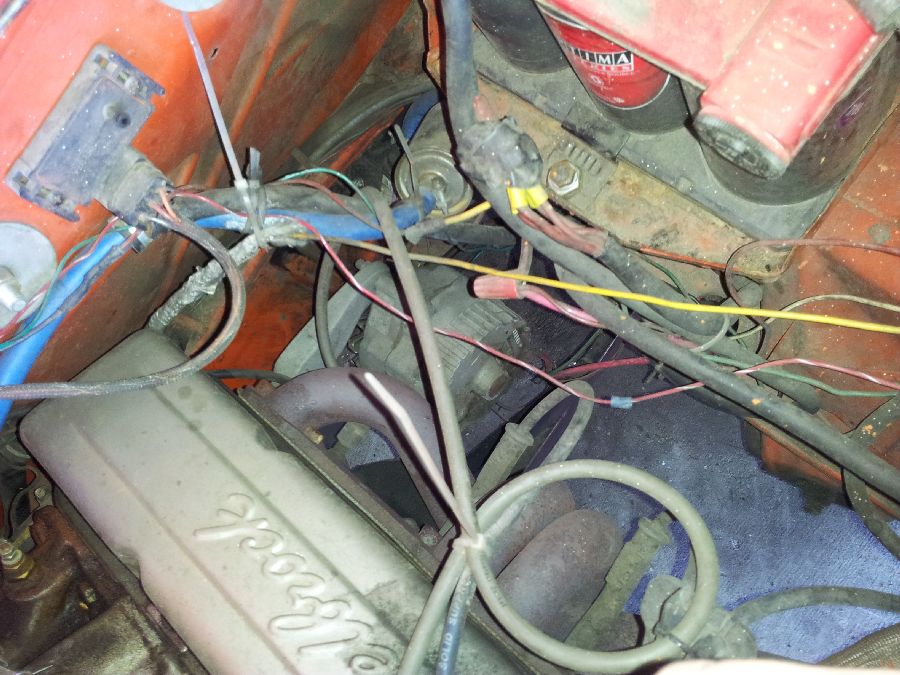
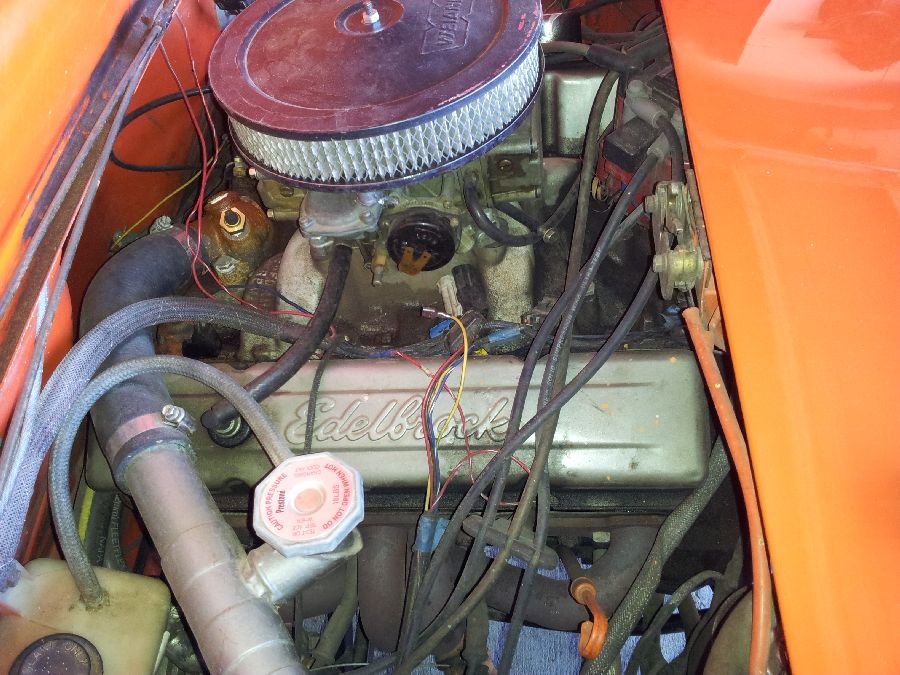
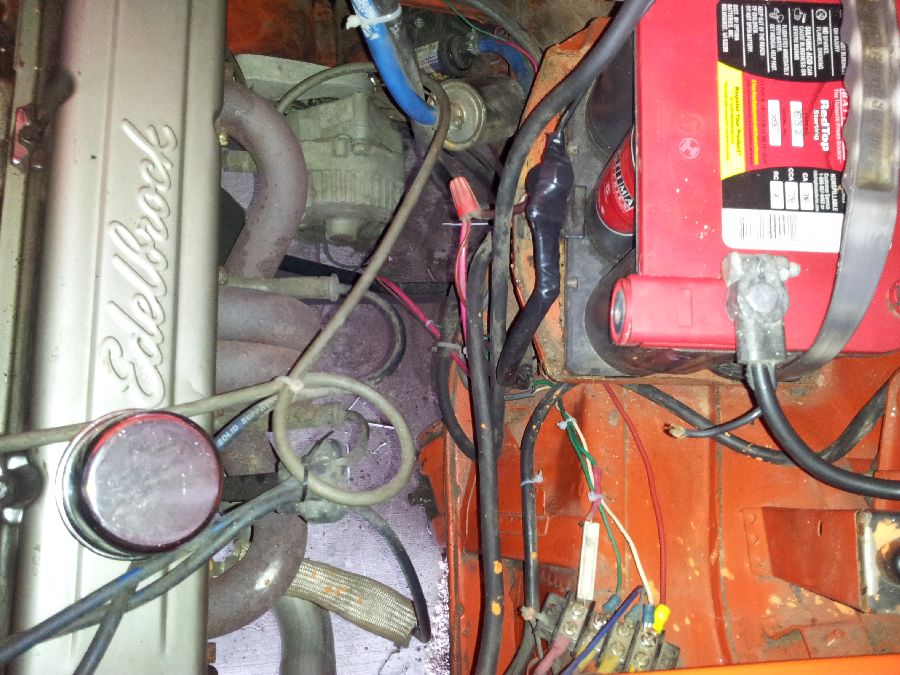
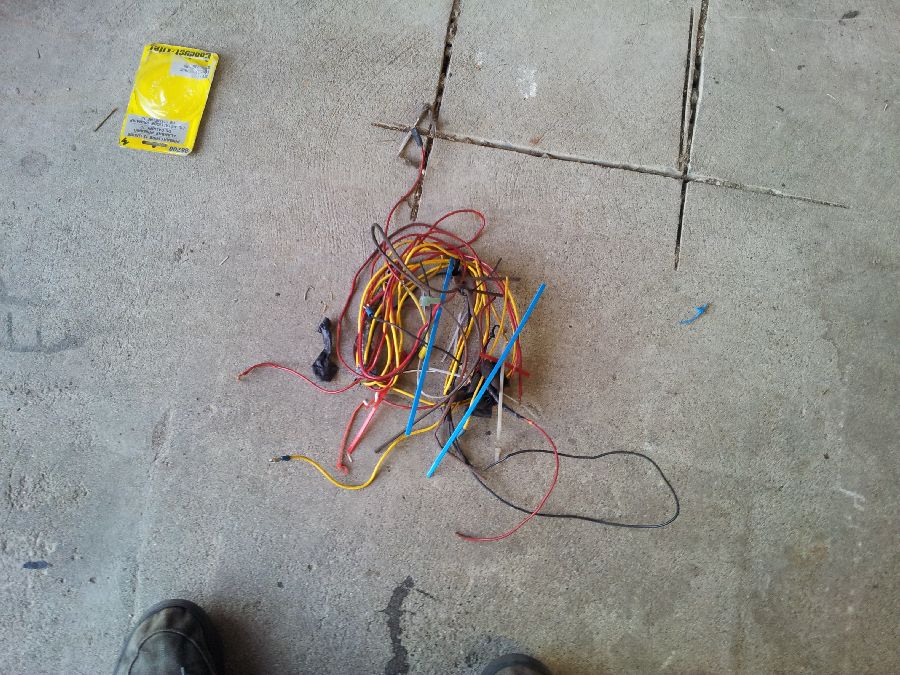
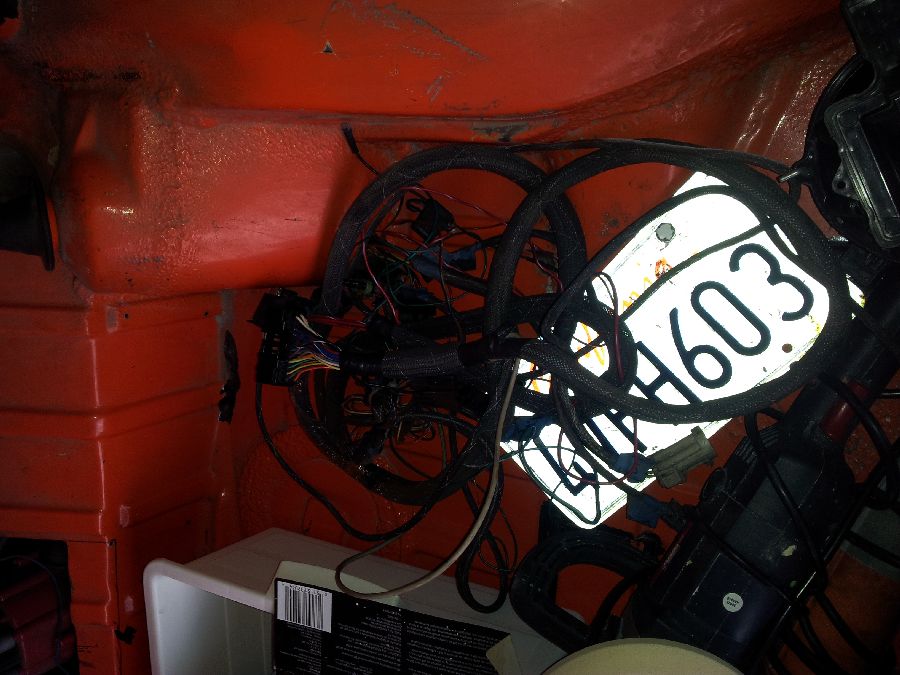
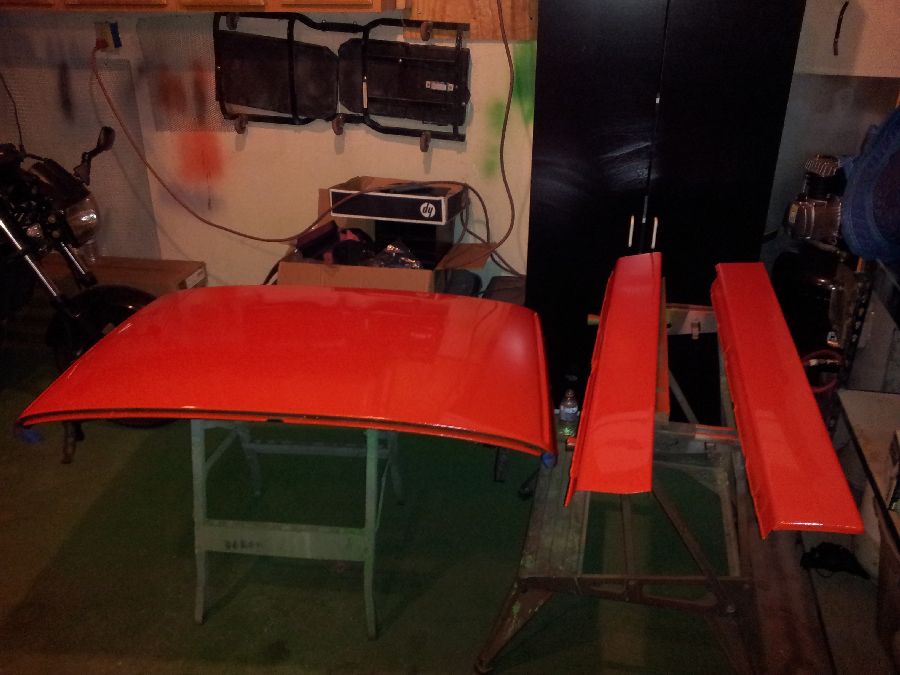
Posted by: Andyrew Apr 25 2012, 12:05 AM
In prep for WCR, we threw the 914 on the lift to check things out.
First off, starter bolt was GONE. Replaced.
CV joints were tight, All major bolts were tight.
Wiring needed to be cleaned up so I removed the ECU wiring from the fuel injection and removed and trimmed/replaced a bunch of wiring.
Also the targa top was looking sad as I never got around to respraying it. Also the rocker panels were sprayed with a spray can and were not the right color. So I sanded and sprayed them with my new gun... Unfortunately it took quite a long time to get the gun adjusted right so its not up to par and will get resprayed after WCR... Just no time now.
Still have a lot left to do and im swamped at work... so this is going way to slow.. New front tires are on order and an alignment will be done Thurs or Friday.
Posted by: emenot Apr 25 2012, 06:17 AM
Nope, Very little going to be done today... I got roped into helping my GF setup for her best friends baby shower, AND I have to help during the shower tomorrow...
Yesterday we went to the snow.. So pretty much this weekend is a wash, but I was expecting that. Monday i'll hit on it again and finish up the seat, then possibly work on something else.
Its pretty ironic, we were the pants but are slaves to the skirts...(*&^%&)

Posted by: stewteral Jul 20 2012, 06:06 PM
Well it has been far to long since I drove my 914 any bit regularly, and 4 years since it has been registered for the road. This whole time it has been locked in my garage waiting for me to work on it. Sadly I haven't done more than a handful of things to it over that time. This thread is to motivate me to change that.
The goal is to get the car to the point that I can drive and enjoy the car again. Most of you know some of the details on my car, but since this thread is about this car I figure I would list them.
73 1.7 Converted to 2.0 by the previous owner then http://www.914world.com/bbs2/index.php?act=ST&f=2&t=14097
Engine:
350SBC w/ .030 over
Edelbrock RPM Intake
Holley Pro Jet Comander fuel injection 650cfm (laptop programmable) * Converted back to 600 Holley Carb*
Shorty Headers
R/V cam
Remote oil filter
Aprox 350hp 400lbs TQ *250HP/250TQ Estimate after converting back to Carb*
http://www.914world.com/bbs2/index.php?showtopic=14097&st=88
Trani/Clutch:
Stock 914 Sideshift
Stock 914 CV's (on 3rd replacement)
Rennegade adapter
Kennedy Engineering VW conversion kit w/ Stage 4 clutch
Rennshifter
Suspension:
Raised 911 spindals up front with Koni reds
Mueller Roller Needle Bearings front and rear
Turbo tie rods
22mm Torsion bars
http://www.914world.com/bbs2/index.php?showtopic=50483&hl=nascar
Koni yellows rear
911 rear hubs with 100mm studs
Ground control coil over kit
275lb springs
Brakes:
911 A calipers front
Stock 914 rear calipers
Vented rotors front and rear
Porterfield semi race pads
19mm M/C
Proportioning valve replaced with T
Wheels:
Boxter rear 17 x 8.5 twists up front
911 turbo 18 x 10 turbo twists in back
Body:
Rich Bontempi HPH Flares Front and Rear, Molded
916 front and rear bumpers (front bumper to be reworked completely)
Cowl style hood (to be replaced with factory)
6" ducktail spoiler with supports
Engman long stiffening kit
http://www.914world.com/bbs2/index.php?act=ST&f=2&t=48483&st=100
Camp 914 hood shocks front/rear
Camp 914 Euro front turn signals
http://www.914world.com/bbs2/index.php?showtopic=112231&st=0
Interior:
Momo steering wheel
Harness Bar
5 point Cam lock harnesses
Uncracked dash
http://www.914world.com/bbs2/index.php?showtopic=21720&hl=pepboys
Carpeted backpad
Aluminum pedalboard
Future Plans:
Replace engine/trani with Audi 2.8 FWD
Replace dash with Audi dash, Retaining A/C and Heater controls.
Get new tires
~~~~~~~~~~~~~~~~~~~~~~~~~~~~~~~~~~~~~~~~~~~~~
Now that the intro is done, here is my checklist of things that I want to get done with it.
Register *Done*
Fix ignition **5-30-11**
Tune (again) ecu ** Converted back to Carbs after ECU died 5-30-11**
Clean goo in trunk (pic)
Install Dr window crank *5-30-11*
Change oil http://www.914world.com/bbs2/index.php?showtopic=114780&st=20#
Change water pump http://i239.photobucket.com/albums/ff312/professor914/P1010007-2.jpghttp://www.914world.com/bbs2/index.php?showtopic=114780&st=20#
Flush coolant
Finish targa bar S http://www.914world.com/bbs2/index.php?s=&showtopic=114780&view=findpost&p=1427889
Dr front 1/4 http://www.914world.com/bbs2/index.php?s=&showtopic=114780&view=findpost&p=1424229 http://www.914world.com/bbs2/index.php?s=&showtopic=114780&view=findpost&p=1425834http://www.914world.com/bbs2/index.php?showtopic=114780&st=40#
Dr door http://www.914world.com/bbs2/index.php?s=&showtopic=114780&view=findpost&p=1424229http://www.914world.com/bbs2/index.php?s=&showtopic=114780&view=findpost&p=1425834[/url]http://www.914world.com/bbs2/index.php?showtopic=114780&st=40#
Rocker pannels *5-7-11*
Dr rear 1/4 http://www.914world.com/bbs2/index.php?s=&showtopic=114780&view=findpost&p=1424229http://www.914world.com/bbs2/index.php?s=&showtopic=114780&view=findpost&p=1425834[/url]http://www.914world.com/bbs2/index.php?showtopic=114780&st=40#
Trunk http://www.914world.com/bbs2/index.php?showtopic=114780&st=40&gopid=1429421&#
Rear bumper *Page 8*
Pass rear 1/4 *4-17-11*
Pass door *4-17-11*
Pass front 1/4 *4-17-11*
Front bumper *5-5-11*
Hood *Primer 5-2-11* *Paint 5-15-11*
Top *5-4-11[url=http://www.914world.com/bbs2/index.php?showtopic=114780&st=120#]
Primer sealer *5-15-11*
Paint *5-15-11*
Radiator cutouts in wheel well (And replace hood with stock) http://www.914world.com/bbs2/index.php?s=&showtopic=114780&view=findpost&p=1422955
Fix headlights *6-8-11*
Fix horn
Finish seat install http://www.914world.com/bbs2/index.php?showtopic=114780&st=0&gopid=1420224&# http://www.914world.com/bbs2/index.php?s=&showtopic=114780&view=findpost&p=1422955
Finish carpet *6-8-11*
Finish front sway bar
Fix Dr Door handle
Starting state
I made a photobucket album to host my phone pictures that i'll take durring the process. I'll take quality pictures where I see the need.
http://s1210.photobucket.com/albums/cc411/andyrew914/914/
Hey Andyrew,
First off, your paint job is just Freakin' Awesome! Wow, what a great finish! I'm working on my 2nd 914 (restoration car) and could surely learn some things from you on paint work!
Unsolicited suggestion, accept them if you agree:
-Like you, I also have a SBC conversion car that I've been running on track for about 10 years now and am very concerned about the removal of the brake proportioning valve. While I always have hated the mushy pedal the valve creates, it IS important. I'm concerned that when you need emergency braking or one of the few wet days in Modesto, that you will get nasty rear wheel lock-up and spin the car. I'm running the Wilwood dual-master cylinder w/ balance bar setup and not only is it very low-cost, it works terrifically. I see that you are a skillfull guy, it should be not a big project for you to do: remote reservoirs mount under the front hood like the original and you will have the hardest brake pedal you have ever felt. When I'm on-track and don't have my bias adjusted correctly, I spin off like a top!
-I viewed you sliding your car in the parking lot and noted that the outside rear tire appeared to have Positive camber....this makes the car oversteery and not what you want. I would recommend 2 - 2-1/2 degrees of Negative camber in the rear. Rear stability is a blessing.
-Lastly, I saw your skillful fixes of the mechanical water pump. While this setup "works", I'd like to suggest going to a remote Electric pump if you continue to have cooling issues. Lord knows Modesto has long hot summers!
Why the electric? Because you get CONSTANT MAX water flow ALL the time. So when you are in traffic with the engine idling, you are getting water flow as though you had the engine revving 4000 (I did the homework on this issue). I've been running my Meziere 55 GPM pump for over 10 years with NO problems. The say it has an MTBF of 30,000 hours and will rebuilt it for around $50.
-One of the BEST things you did for cooling was cut that hole in your front hood, I tried ducted out the bottom for a long time and was always running hot. As soon as I cut my hood vent, all my problems went away, including running at Willow Springs in the upper desert of SOCAL in summer.
I hope this is help, enjoy that beautiful car you created!
Terry
Posted by: mittelmotor Sep 6 2012, 12:28 AM
Great thread, and very cool car!
I'm putting the finishing touches on my LS1 conversion (Renegade) and I was wondering how your transaxle was holding up. My car has 225-width rear tires, so that'll be a safety valve of sorts, and most of my driving will be hard on it in 1st and 2nd, then easy into 3rd (which is actually 4th, as 2nd is my new 1st gear, if that makes sense). Some say that 4th is the weak link.
My engine is stock, so maybe 260 rwhp and 280 lb-ft.
BTW, I've bought a lot of stuff from Rich Bontempi....a super helpful guy.
Posted by: Andyrew Sep 6 2012, 12:48 AM
Trani has held up very well considering. cv joints havent done so hot though.
Posted by: Andyrew Mar 16 2014, 06:17 PM
Update!
Been putting the car off since it drove like crap last time I drove it. Been about a year..
So over the past couple weeks I've done a couple of little things.
1.Replaced the starter with a http://www.ebay.com/itm/PORSCHE-911-MINI-STARTER-IMI-PORSCHE-912-914-930-/261387291529?pt=Motors_Car_Truck_Parts_Accessories&hash=item3cdbe58b89&vxp=mtr, Side note, the spacer is required..
2. Replaced all the HEI bits in the distributor with a http://www.amazon.com/Proform-66945BKC-Distributor-Tune-Up-Black/dp/B000CCFKD8/ref=sr_1_5?ie=UTF8&qid=1395015226&sr=8-5&keywords=gm+hei+kit
3. Replaced the Holley 600 with ahttp://www.amazon.com/Edelbrock-9906-Performer-Remanufactured-Carburetor/dp/B000CSWM5G/ref=sr_1_1?ie=UTF8&qid=1391301730&sr=8-1&keywords=Edelbrock+Performer+Remanufactured+Carburetors+9906
4. Replaced fuel pump and fuel filters
To do:
1.Fix leak in radiator (Top fill is leaking. should be an easy welded fix).
2.Flush coolant system and rebuild system to behave like a modern constant air 3.removal system.
4.Time engine
5.Fine tune carb
6.Redo throttle linkage/ routing
At this point out of the box the edelbrock carb has much more torque than the old holley and probably way more power. I havent given it more than 75% as the throttle linkage needs a hair more work and I was just "babying it" around the neighborhood. Couple dounuts, burnouts, drifts later I concluded that it very much likes to spin the rear tires without a seconds thought.
Attached thumbnail(s)
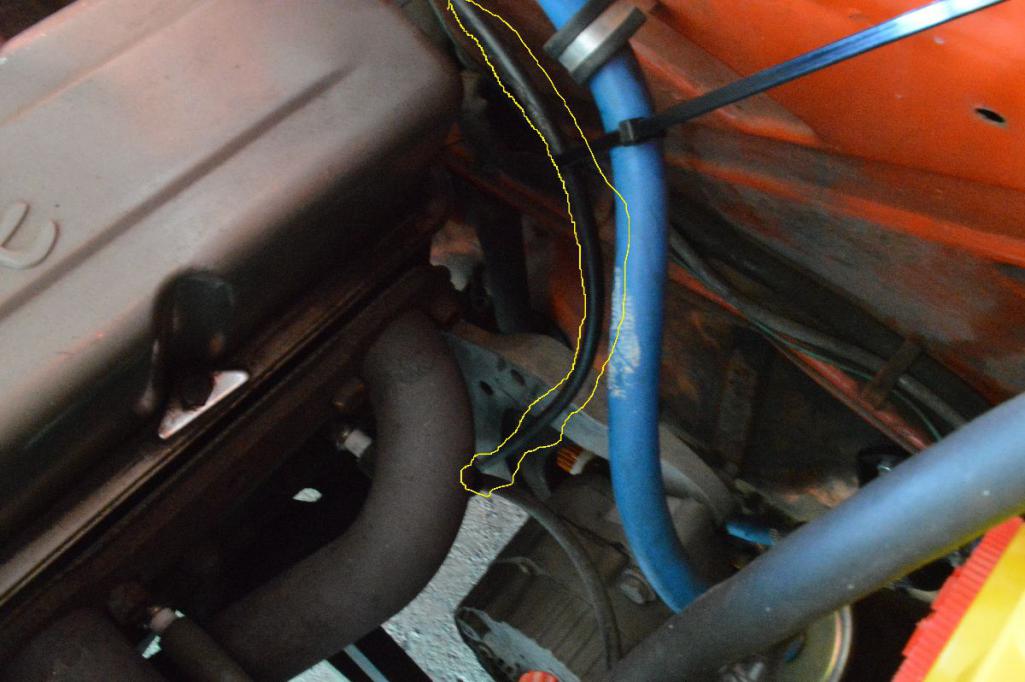

Posted by: Andyrew Mar 16 2014, 06:46 PM
For those curious whats been taking all my time... 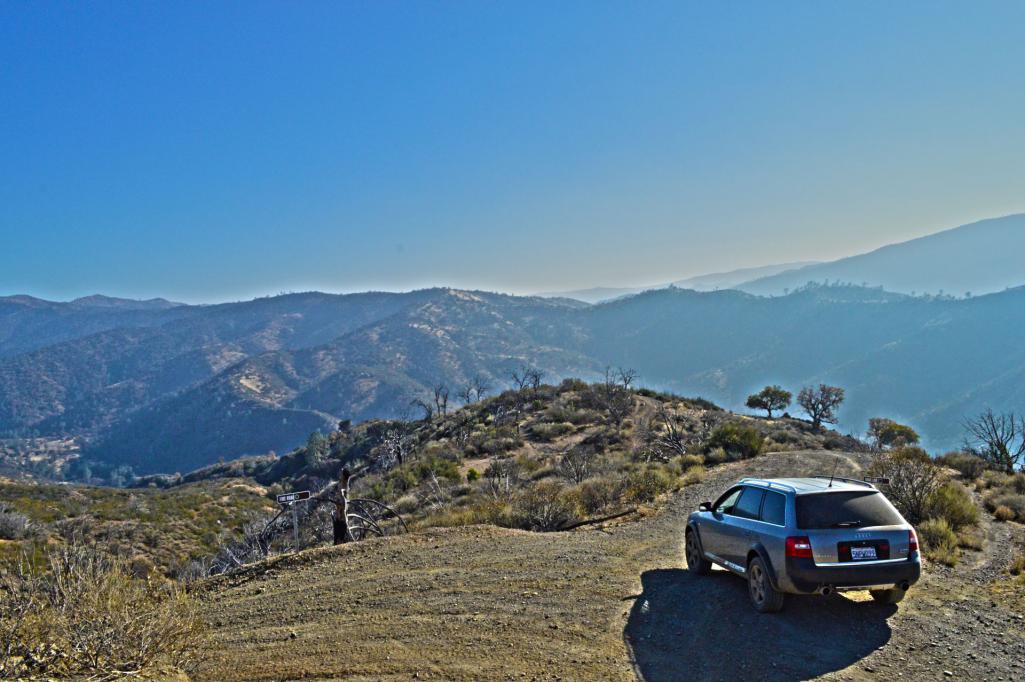
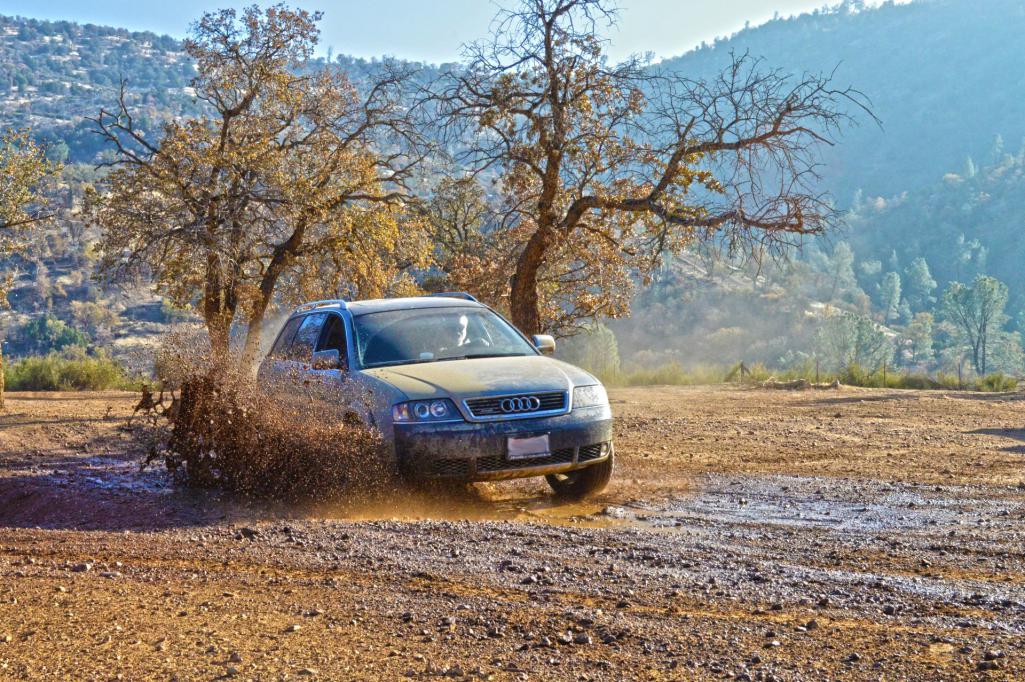
My daily is a 2002 Audi Allroad thats pretty much stock apart from a navigation head unit, tint and a exhaust. I've been having a lot of fun with it on some fire trails and some medium climbs.
Then any chance I get I take the bike out.. 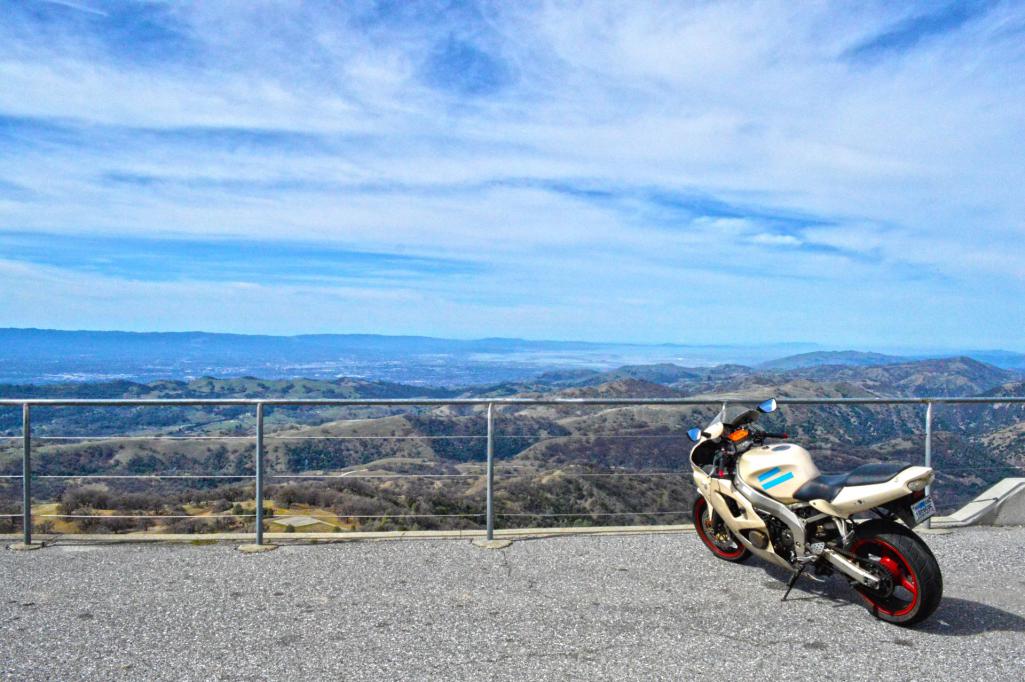
But Im deciding to switch gears on the bike, So the ZX6R is going to go away and I'll try and find me a nice Vstrom 1000 or something similar.
Posted by: Andyrew Sep 7 2014, 11:13 AM
Been letting the 914 sit in the garage. I'll be picking it up this winter to do some more work on it.
I washed it yesterday for the first time this year I think.
Took it around the block but was stopped short when I noticed the front end was clunking. The front wheel has slop it in so I checked the bearing and retightened it but it was fine. So My thoughts are either steering rack or maybe torsion bar(Bar feels sloppy).
So we'll pick this up later.
In the meantime, I had sold my Ninja 600 earlier this year and picked up a Triumph Tiger 955i. Much more suited to my skill level and I love it. I could use another 20hp to make it feel as quick as the 600 but its every bit as fast through the rough twisty canyon roads. Fantastic all around bike.
Also I just sold my Allroad recently and have an order in for a Fiesta St due to my commuting needs. Oh and its orange I'll be getting it first part of november and will use my bike for the time being.
Attached thumbnail(s)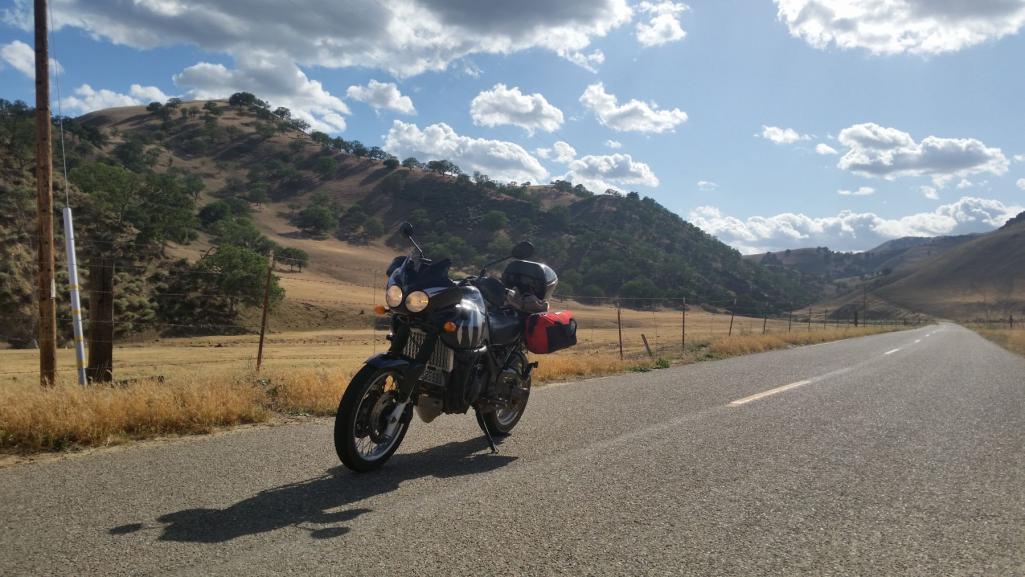
Posted by: Andyrew Sep 7 2014, 11:15 AM
Heres a recent of the 914.
Attached thumbnail(s)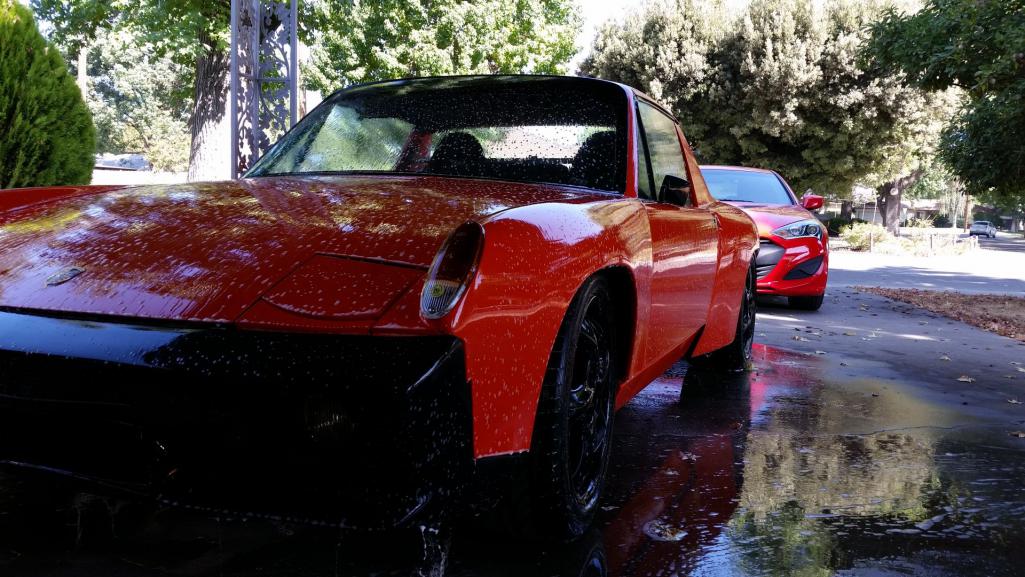
Posted by: Mike Bellis Sep 7 2014, 12:52 PM
There's a drought going on.
I want to see the Fiesta!
Posted by: Andyrew Sep 7 2014, 01:47 PM
Meh, Used about 5 gallons.. The 914 is super easy to wash..
I want to see the Fiesta to... I should be getting it the first week of Nov. I have a build date of Oct 27th (Ordered it from the factory... No non sunroof orange vehicles were available, Besides I saved like 5k from picking a car with options I didnt want and at a dealer that didnt want to haggle)
Should look just like this. I'll be dipping the wheels black like my 914 
Posted by: Rand Sep 9 2014, 12:13 AM
This sounds like a Top Gear episode....
The old put to pasture 914 v8 vs....
Ninja 600 vs....
Triumph Tiger 955i vs...
Fiesta???
Where's the Stig?
Posted by: Andyrew Apr 13 2015, 10:49 PM
9000th post!
I took delivery of the Fiesta ST in early Dec and have been driving it like mad! I have confirmed it is everything through the twisties that I want it to be, and that has confirmed for me what I want to do with the 914.
Its time to go ahead and proceed with something different! I am going to do the same engine conversion that Mike Bellis has. The Audi/VW 1.8 turbo. I will not be doing a 6 speed swap at this time, however I am going to be using the v6 transmission so I have a bit longer gearing, and combining that with my taller tires should yield an acceptable cruising rpm.
First stage will be to mock up and install the engine/trani setup similar to Mike's. Second state will be strip the car of its wiring and replace it all with the Audi's wiring. Then mock up and install the pedal cluster with the brake reservoir (That'll be a bit of a challenge), cutting down the Audi dash, and figuring a way to make the climate control work. It'll be a long arduous process that'll probably take years, but at this rate its either this, the car sits for more years and I drive the Fiesta (Since its a hoot), or I sell it.
Im going to take my time with it and do it right. I want to be able to drive this thing coast to coast sometime.
Im going to be funding this partly with painting some cars in the downtime
Engine: Audi AEB 1.8t Engine, rebuild unit and install upgraded rods for 600hp capacity
Transmission: Audi A6 2.8 5 speed FWD unit
Turbo: Comp Turbo triple ball bearing CTB5356 10psi 275hp, 35psi 500+hp.
Wiring: Strip all Porsche wiring, Replace with Audi wiring 100%
Engine Management: Modified OEM Audi Ecu
Power brakes: Yes
ABS integration: Yes
Traction control integration: Yes
Launch control: Yes
Cruise control: Yes
Climate control/AC: Yes
Alarm: Yes
OBD2 full control: Yes
Check engine light: No
Front trunk and rear trunk: YES!
Looking forward to this!
Posted by: Andyrew Apr 13 2015, 11:57 PM
Photo of the Snail that is going on this engine vs the factory snail. I actually drove it like this at 10psi for about 5k miles before developed an oil leak (ended up being the oil filter sandwich plate... $5 fix) that parked the car for a year and I went back to stock.
It is currently pulled off the A4 and waiting to go on my spare engine/trani that will go in the 914.
As mentioned this snail is good for 500+HP on race gas on this engine. Probably 400-450 on pump, but I will run it around 350 most of the time and bump it up when I need it.
Attached image(s)
Posted by: mgp4591 Apr 14 2015, 02:05 AM
Okay, that's just freakin' SICK!! You're forgiven for not driving your 914 to WCR... 
Posted by: Mike Bellis Apr 14 2015, 07:39 AM
Posted by: Andyrew Apr 15 2015, 01:34 PM
I was questioned about radiator hose routing for constant air purging and I think now would be a great time to explain that in a diagram.
This does a really good job of explaining the system and whats what. It would be easy to remove either the turbo or the heater core from this system.
In my new setup with the 1.8T engine I will be utilizing this almost 100% and modifying it to fit the mid engine layout. This means I will probably pull the heater line from the hot side vs going off the block to prevent from running multiple lines under/through the car.
Attached image(s)
Posted by: Mike Bellis Apr 15 2015, 02:11 PM
I have removed #4 and run a sandwich plate to a mocal thermostat on the way to my setrab oil cooler. I still have everything else in some fashion.
Posted by: Andyrew Apr 16 2015, 06:07 PM
Working on some sketches for the concept dash/interior durring my commute
Attached thumbnail(s)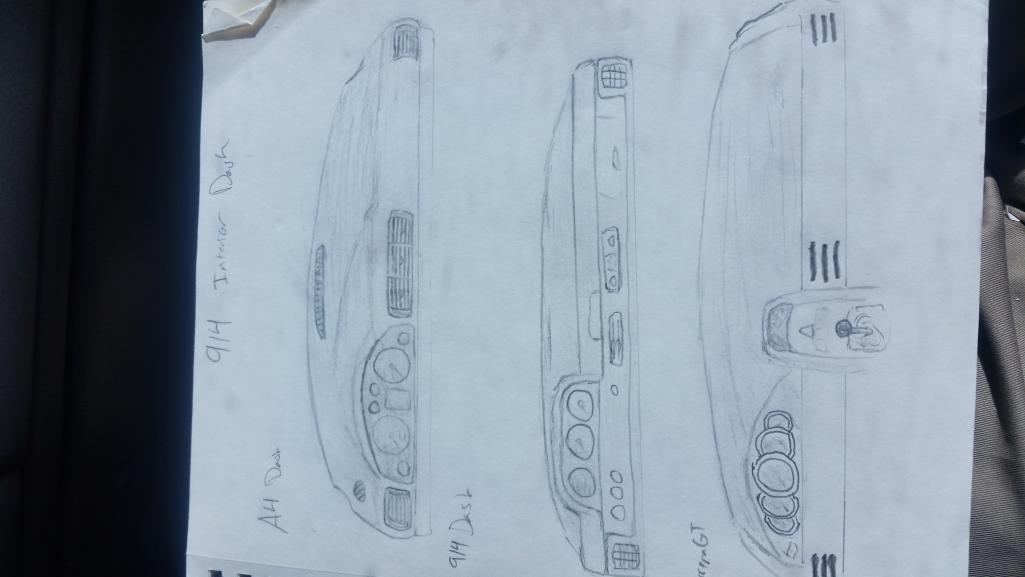
Posted by: Andyrew Apr 18 2015, 12:06 AM
Finished up my dash /interior concept.
Gotta figure out if I want to remake the door panels as well, but most likely
Attached thumbnail(s)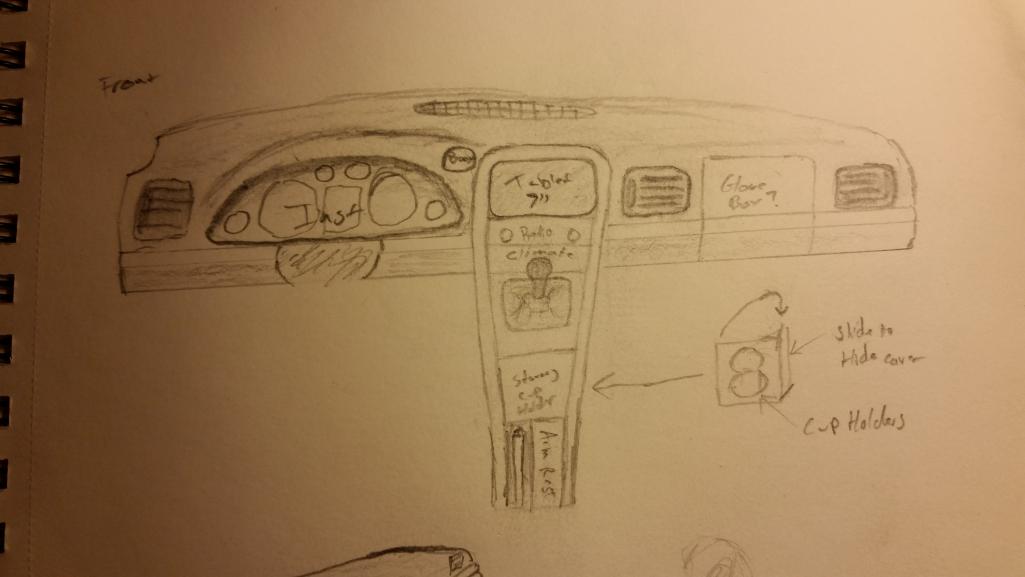
Posted by: Andyrew Apr 18 2015, 12:08 AM
Pt 2
Attached thumbnail(s)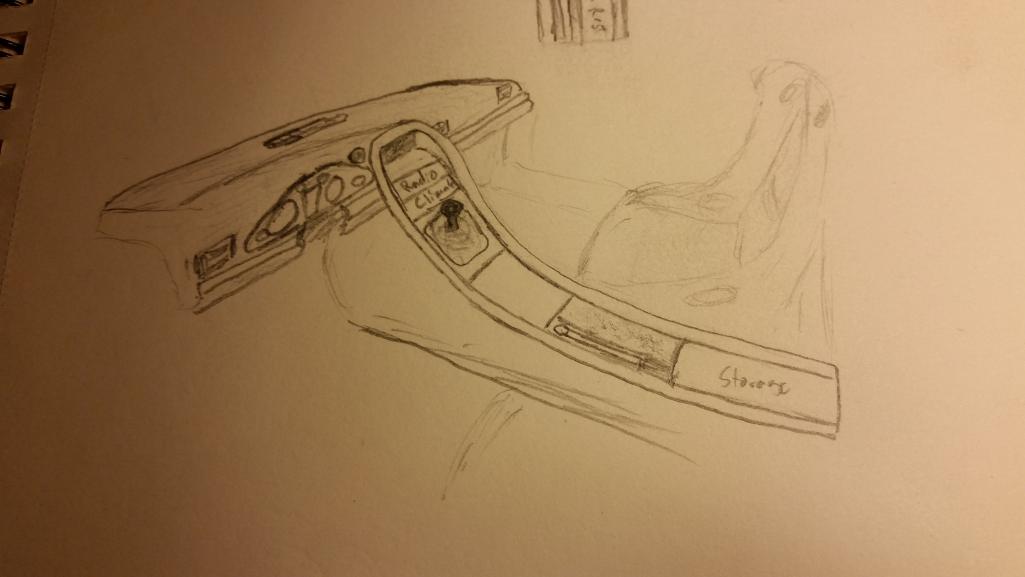
Posted by: Andyrew Apr 19 2015, 09:04 PM
Found some old pics of the car This was from my first day getting it home and cleaning it
Attached image(s) 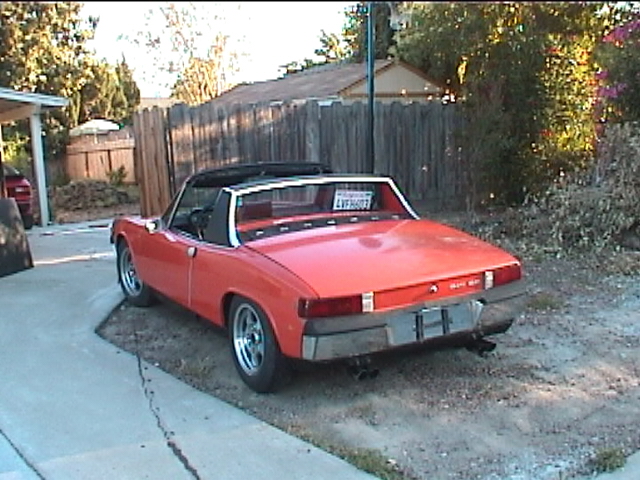
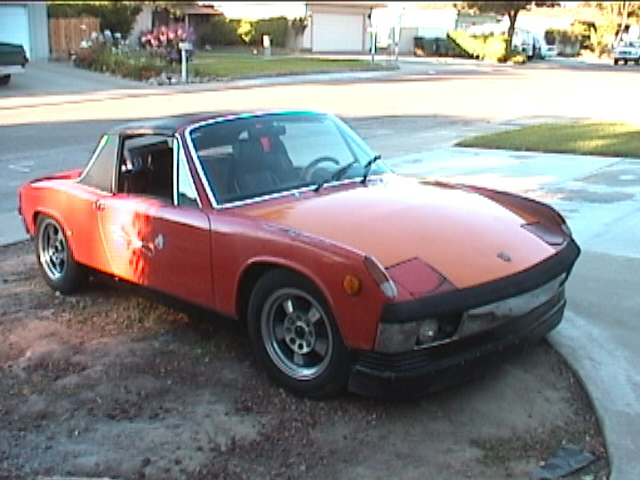
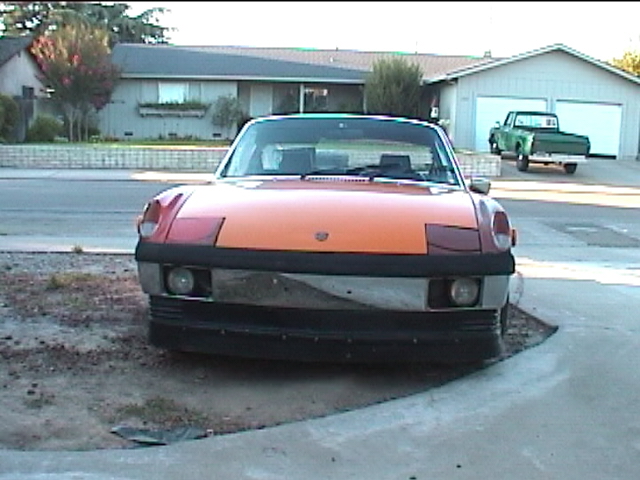
Posted by: Chris H. Apr 19 2015, 09:31 PM
Wow...flashback...was that before you even had a driver's license?
Good call on the Audi drivetrain. You already know your way around a 1.8t. Might want to get a good look at Mike's engine cradle. He just re-did it. Even though you're going with the 5 speed it should be a similar setup.
Posted by: Andyrew Apr 19 2015, 09:38 PM
Chris,
Yes it was! I was 14 at the time. This was before I even had a permit! I had been saving for quite a while and was choosing between a 510, a 914 or a 60's mustang. With my dad being into 944's at the time it was a natural progression to step into. I actually partially funded it with the back yard remodel you could see in some of the pics.
I plan on conversing with Mike about some of the more detailed aspects of his conversion like he conversed with me about 1.8's The cradle will be a difficult point. Depending on how quickly I get into building it I might have to outsource the bends (My dad has a bender but he's moving to oregon in 5 months). But welding is my strong point so I dont have any real qualms about building it.
Posted by: Mike Bellis Apr 19 2015, 10:28 PM
Most of my cradle is 1/2" & 5/8" DOM. I bent it with a 3/4" conduit bender. The triangulated small tube makes it light and strong.
Posted by: Andyrew Apr 19 2015, 10:49 PM
Conduit bender eh?
Like this puppy?
http://www.amazon.com/NSI-Industries-CB75-Aluminum-Conduit/dp/B00CTVQ74Q/ref=sr_1_2?ie=UTF8&qid=1429505323&sr=8-2&keywords=conduit+bender
Posted by: mgp4591 Apr 19 2015, 11:17 PM
Most of my cradle is 1/2" & 5/8" DOM. I bent it with a 3/4" conduit bender. The triangulated small tube makes it light and strong.
So... any pics of your cradle, in a previous thread maybe?
Posted by: Mike Bellis Apr 20 2015, 06:10 PM
Just like that bender. You will need a piece of threaded pipe or the correct handle to go with it. Either search for conduit bending on Google for instructions or I can come out and help you.
For pics of my cradle, see my build thread. Link below.
Posted by: Andyrew Apr 20 2015, 07:17 PM
Sounds good, Did you heat up the metal before bending or did it roll over OK by hand? I have a feeling I'll be attaching it to my vice on my bench so I doubt I'll need a handle
Posted by: Mike Bellis Apr 20 2015, 08:10 PM
They are meant to be bent on the ground with a handle and foot. Notice the ridged part on the right side of t your pic, this is for your foot. The tube hooks into the left side and pulling while stepping makes the bent. Curves and angles are very repeatable.
https://www.youtube.com/watch?v=zimw9PShuww
Posted by: Andyrew Apr 20 2015, 09:33 PM
The video I saw earlier didnt show some of the stuff on this video. Great video! I didnt realize you use your foot for the pressure.
Posted by: Andyrew Apr 27 2015, 11:18 PM
Well the SBC kit has been posted. http://www.914world.com/bbs2/index.php?showtopic=254491
On a more promising note I did receive my Boxster shifter and linkage!!
Also I have been playing around with fabric for the interior and practicing sewing
Deciding on colors for the interior, but I think I want to match this with orange stitching, and black suede for the seats/doors with leather accents. 
I've always loved brown interior, never had it!
Attached image(s)
Posted by: Mueller Apr 28 2015, 09:39 AM
Hey Andrew,
I bet it'll be a screamer with a built 1.8...I hope to go for a ride in Mikes 1.8 this weekend, at least around the block or a quick freeway trip! (hint, hint Mike! )
For bending the tubing, also look into filling with sand...depending on the radius, with or without heat...i have an oxy/acetylene setup if you want to come over if you need some extra heat.
A few youtube video and if you have a VCR, I have a tape you can borrow, or you can rent the DVD from here: https://smartflix.com/store/video/141/Working-with-Tubing
If you need anything CNC'd or plasma cut, don't be shy.
Posted by: Andyrew Apr 28 2015, 09:48 AM
Mike,
I will need to come up with some axle flangr adapters, I think I am going to use the bus CV's that i have with the outer adapters and make some inner adapters for the Audi flanges. Ill let you know when i get to that point and let you know.
Thanks for the tip on the sand! My dad is finishing buildin a GSXr powered buggy so we have been playing with bending larger pipe with a HF bender, but judging from the bends ive seen I think the conduit bender might work better for the small diameter pipe Ill be working with. I do have a map/oxy torch and thatll get what i need red hot so that should be sufficient, but thanks!!
I also really want a ride in Mikes car
Posted by: Mike Bellis Apr 28 2015, 11:23 AM
You guys will have to arm wrestle to see who rides first.
Posted by: Andyrew May 30 2015, 02:00 AM
Got a little bit of work done. Hopefully I will finish up the shift linkage this weekend 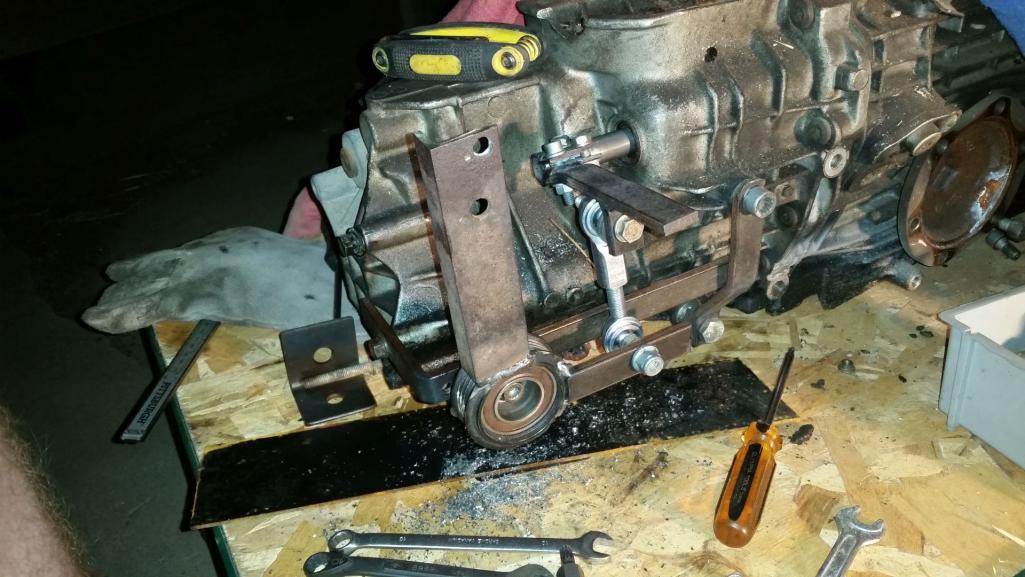
The main pivot that I used was a timing belt idle pulley. I planned on buying a new one and this fit the bill really nicely! Most of it was made from flat stock, the bit that goes around the trans shaft was the most difficult as after 3 times going to the steel shop I got the wrong diameter... In the end I settled on doing what Mike did and have it bolt tighten vs just a slip tighten. 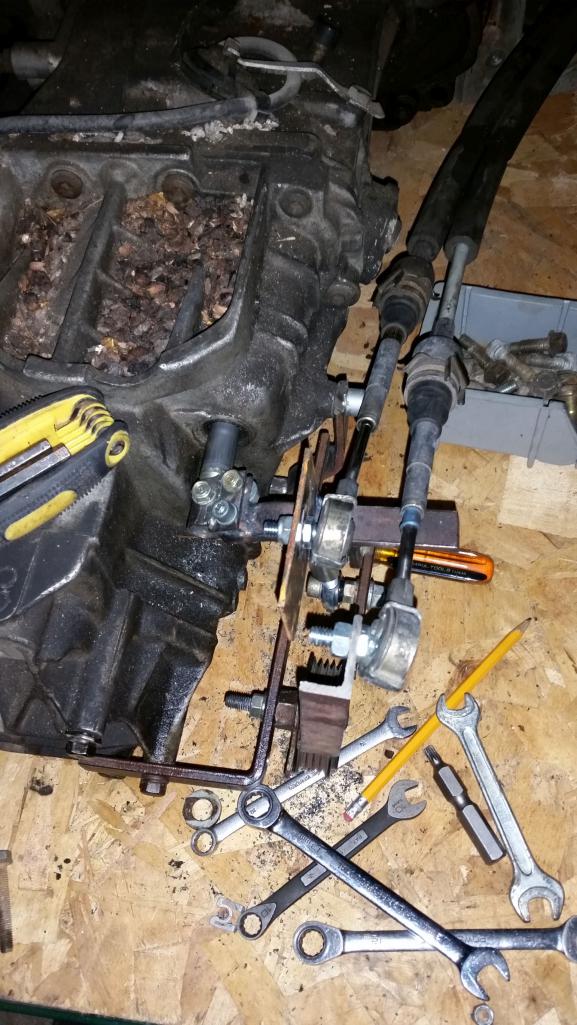
You can see there is a lot of extra metal on the setup and it will be trimmed off after all is said and done. What is left is fabricating the brackets to hold the cables in place then to test the system and adjust. My bench testing shows that it seems to work just fine, The linkage moves a bit more than necessary to find reverse, but I dont really see that as a long term issue. 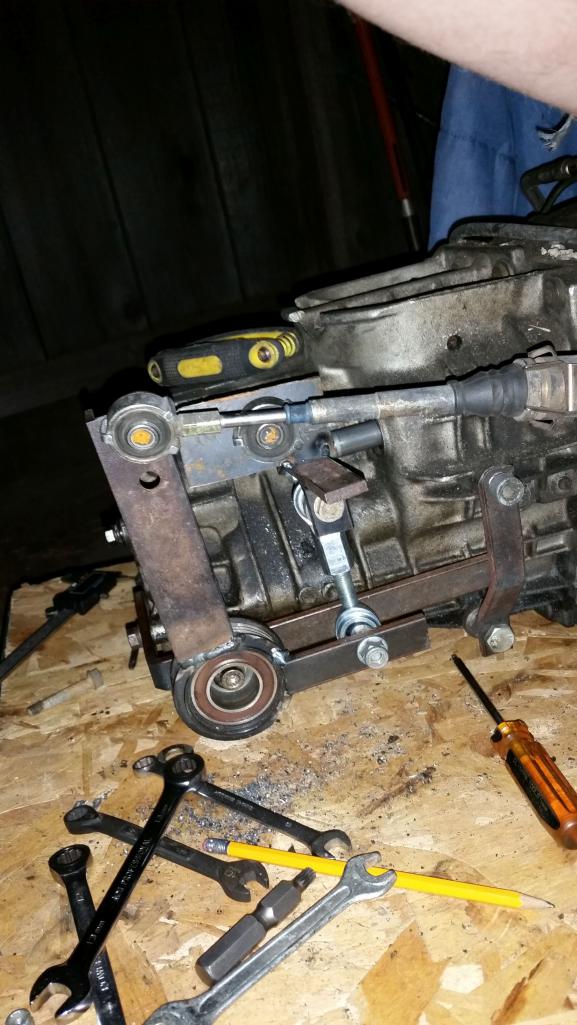
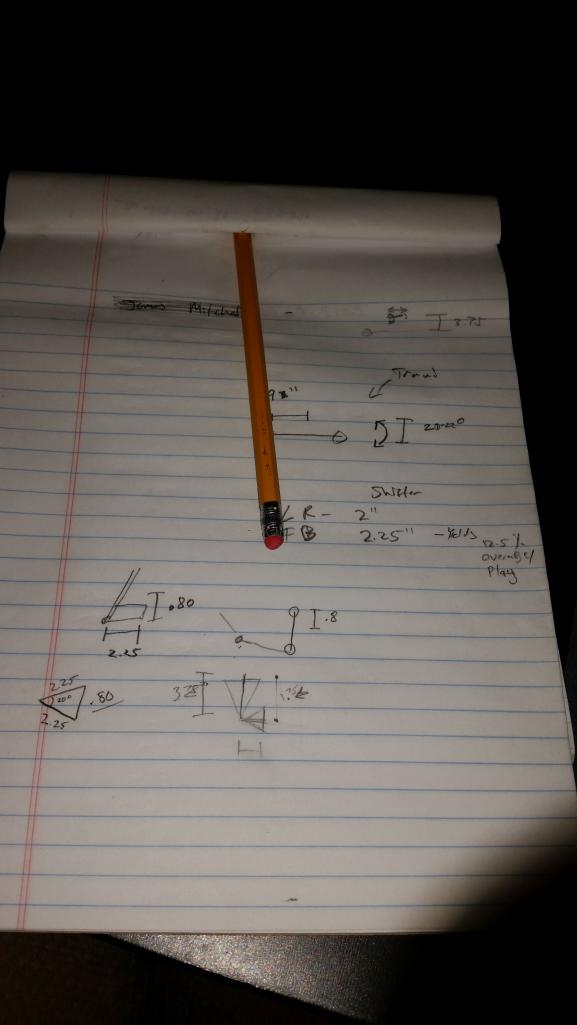
I did some maths to figure out angles and lengths... Its interesting that my setup is so much different than Mikes. in terms of lengths and angles. I highly doubt there will be much if any difference in feel. 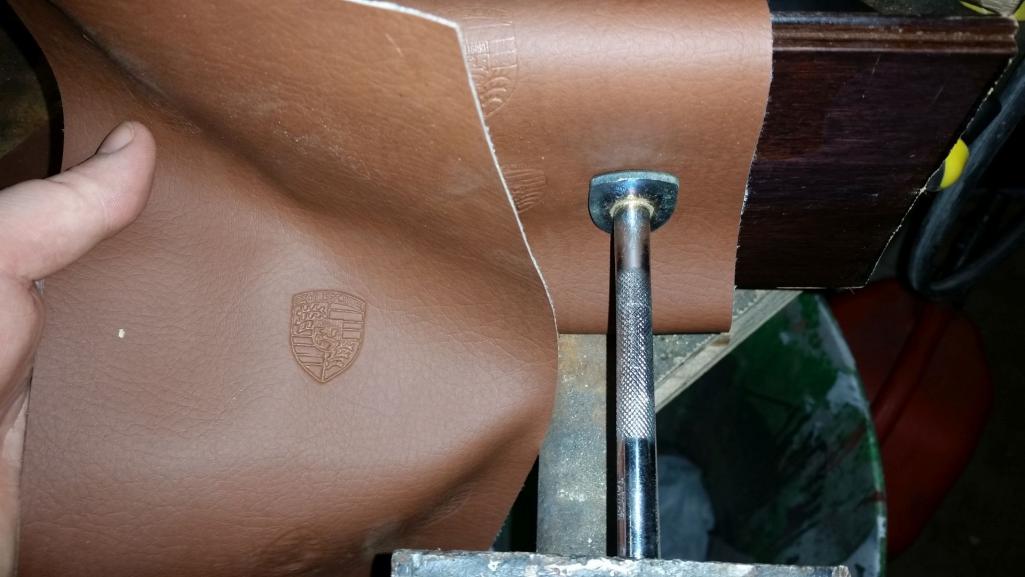
Oh and a fun toy
I hope I dont go overboard with this... But I plan to hide little Porsche crest everywhere, and a couple obvious one's in the headrests. If anyone wants me to imprint any leather or vinyl PM me. Its fairly small..
Posted by: Andyrew May 30 2015, 02:21 AM
Purchased this radiator and took some measurements. It actually came in 2 days I think? 2-ROW/CORE ALUMINUM RADIATOR+BOLT-ON RED FAN SHROUD 00-05 TOYOTA CELICA GT/GTS
http://www.ebay.com/itm/180901154597
Comes in two boxes separately, packaged fairly nice. However one of my plastic drain plug screws was broken. I plan on plugging those with a bolt anyways. 
Core height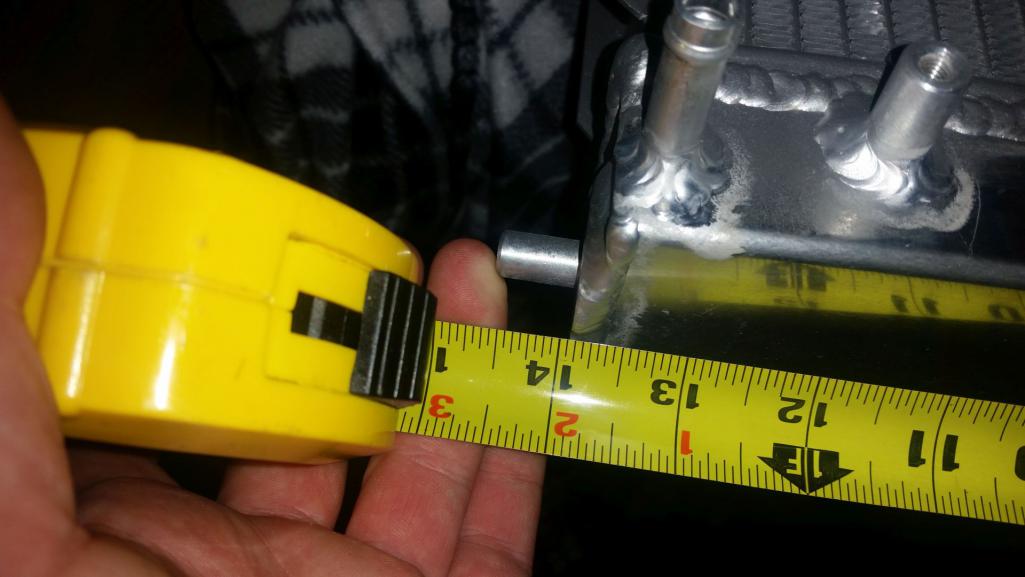
Actual height with mounting points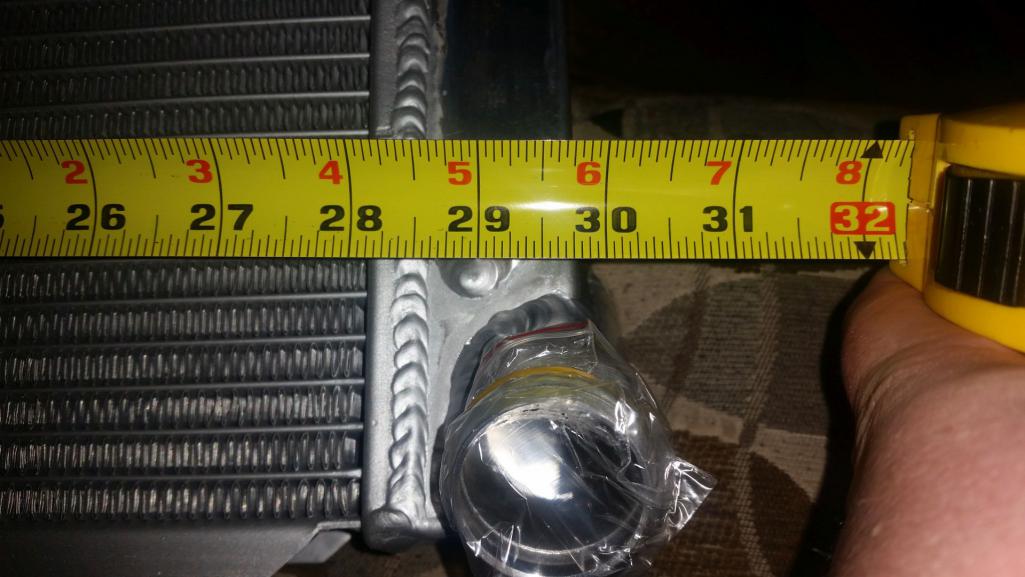
Width inlet to outlet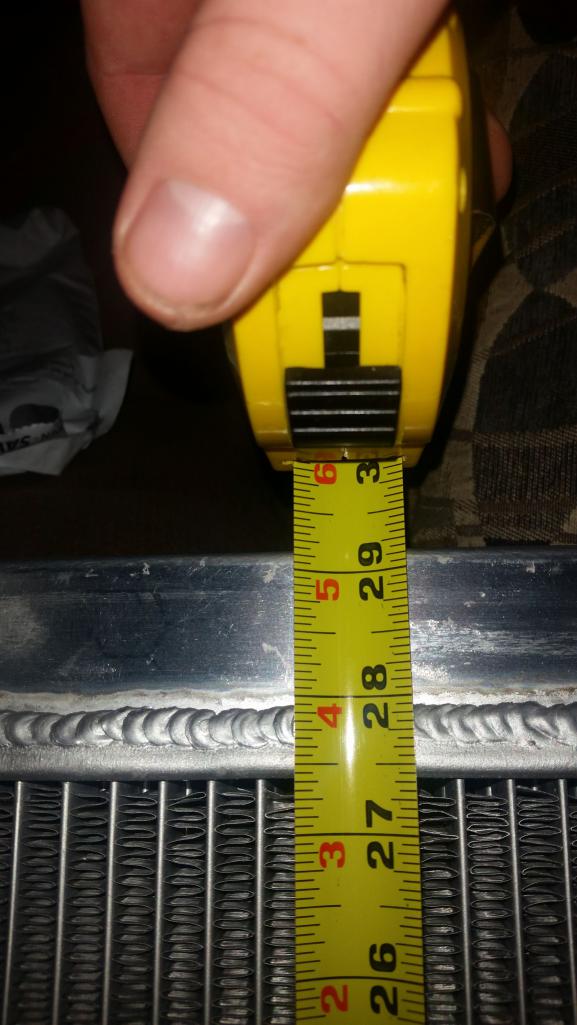
width side to side top, also shows plastic drain (one in upper right and lower left)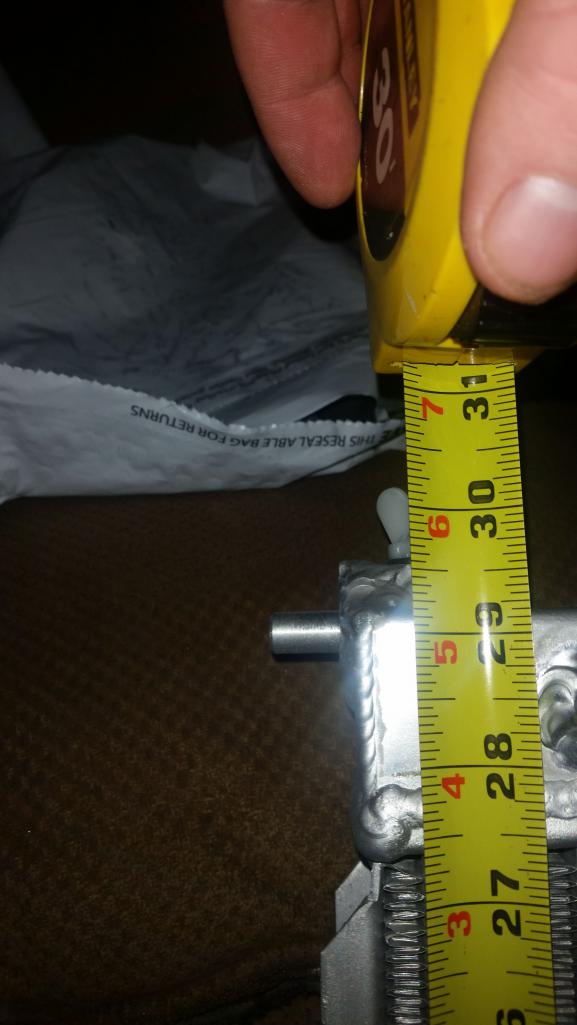
Width of the side tanks middle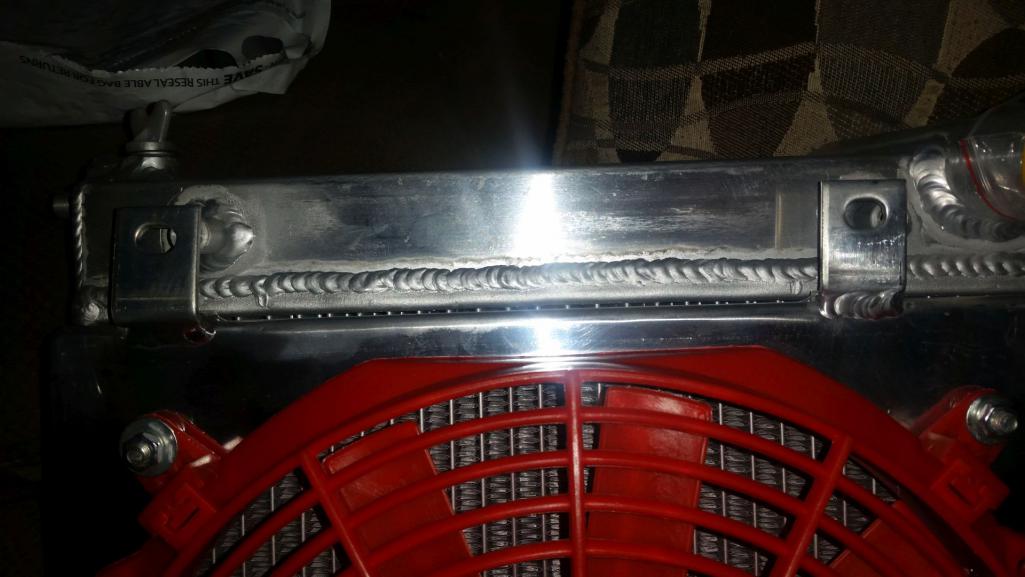
Horrible placement of tabs for the radiator shroud. I THINK it will bolt on but totally skewed angle and it doesnt really sit flat. I'll be using a gasket/foam underneath. 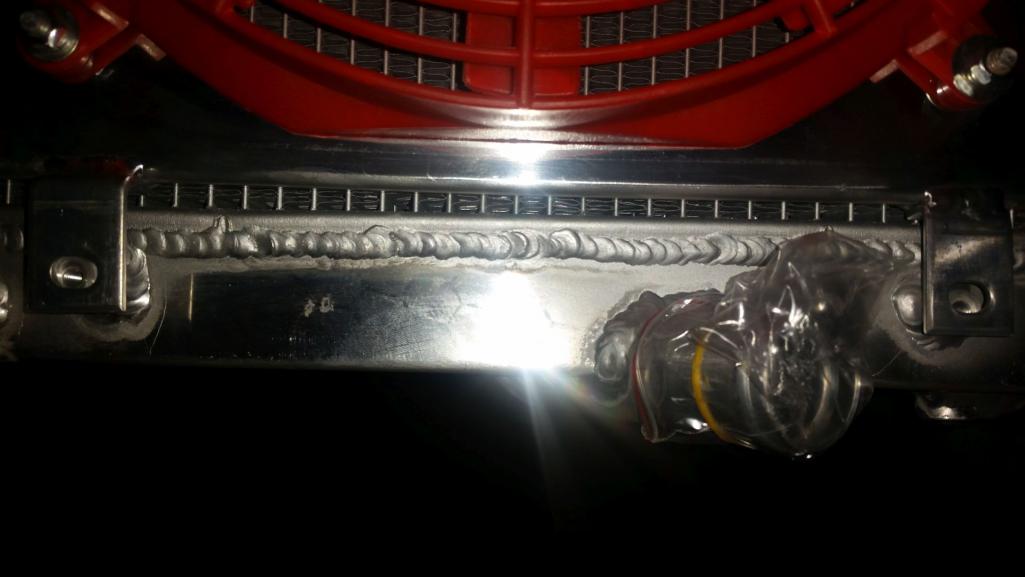
One hole lined up... This was with the shroud in what I believe to be optimum position. 
Total width just under 6", Core width is a full 2"
Side note, Core is a true 2 row. You can see/feel inside where the hose inlets are, and it looks to be of fairly good construction.
I also tested the fans and they did not flow what I felt to be enough to cool the system, Especially if I have a condenser in front of it. Fans are a claimed 1250 and I suspect closer to 7-800. I have an old Audi 12" fan that pushed out noticeably more air in a more uniform fashion. Also my 16" fan just blew both out of the water (For kicks my Lincoln mark 7 fan pushed ME back...)
I suspect I will be replacing the fans down the road, probably before I even run them as they are just some Chinese fan..
Posted by: matthepcat May 30 2015, 02:35 AM
No Chinese fans allowed
Looking forward to your build.
Posted by: dakotaewing May 30 2015, 06:55 AM
Andy,
Are the radiator inlet and outlet on the bottom of the radiator?
I haven't bought one of these, but I have been looking for a while -
It always appeared to me that the photos showed the radiators upside down...
Also, can you tell me which tranny your using? I see the post about the boxter shifter and linkage, but looks like I missed the post on the tranny details...
Posted by: Chris H. May 30 2015, 09:08 AM
Yeah I had to bend/open the holes to get the fans to mount. The radiator itself is pretty good. The fans should be enough for my setup but we'll see. Inlet and outlet are at the bottom, which is nice. I forgot to plug one of the drain holes on first start BTW...oops! Had to take the whole damn shroud back apart.
Posted by: dakotaewing May 30 2015, 09:28 AM
Chris,
Do you have any pics of your shroud or the assembly of the shroud ?
It would be interesting to see what you did -
Posted by: Chris H. May 30 2015, 10:09 AM
Sure. I'll dig them up.
Posted by: Andyrew May 30 2015, 10:19 AM
Dakota,
Trans is from a 92 Audi 100 FWD v6.
I've got a spare A4 quattro transmission that I am going to see about pulling some gears from to make the V6 box more 1.8 friendly. I dont mind being long toothed (Drove a 944 turbo for many years) but I dont want it to fall out of boost...
Posted by: Mike Bellis May 30 2015, 11:39 AM
I find my gears too short most of the time. The V6 gearing should be fine at your future HP level.
Posted by: Andyrew May 30 2015, 12:25 PM
Well that GT28 is VERY responsive in comparison to the Comp turbo that I am planning on running. Here is a video of a guy with the same turbo in his 1.8. Since I am going to be spinning this engine higher it will help but I dont think I'll have nearly the powerband that you have, and with the turbo lag even in RPM, a bit tighter first and second should help. It'll still be longer than your 1.8 box. What is your trani code or gear ratio's? I cant seem to find any passat trani ratio's to compare to the Audi ones.
https://www.youtube.com/watch?v=s1BH_9IJKWw
I have been considering bumping my engine to a 2.0L when I rebuild my engine so as to help with the low end.
Below is a link to the spreadsheet of the three gearboxes and others.. The yellow one is the V6 box as it stands (Audi 100 V6 fwd), the first grey is the A4 1.8T quattro box, and the tan is the custom box with the gears listed on the side. I was planning on snatching a V6 A4 box from PnP that would have the taller 5th gear than my Audi 100 box. This would really help lower cruising RPM and noise. If anything I could open the box in PNP and just buy the gears or something...
https://www.dropbox.com/s/8kikaf08oij9ijx/Audi%20Gear%20Ratios.xlsx?dl=0
Posted by: Mike Bellis May 30 2015, 12:56 PM
Mine is an EZG.
See spreadsheet... 012___01W_Audi_VW_transaxle_data_simplified.xls ( 41k )
Number of downloads: 357
012___01W_Audi_VW_transaxle_data_simplified.xls ( 41k )
Number of downloads: 357
Posted by: Andyrew May 30 2015, 01:36 PM
Aha,
Well thats the same FD,1st,2nd,3rd, and 4th as my proposed custom box... I need to go for a ride....
What size rear tires are you running, IIRC your running a shorter tire than me, combined with me running more RPM would make my gears feel much longer than your box. I remember when I had my KO3 and shifted at 6k I felt like it was a pretty short gearbox and hated going into 3rd for 60.. When I went with the big turbo and increase the limit to 7250 I loved the gear spacing.
Posted by: Mike Bellis May 30 2015, 02:33 PM
Aha,
Well thats the same FD,1st,2nd,3rd, and 4th as my proposed custom box... I need to go for a ride....
What size rear tires are you running, IIRC your running a shorter tire than me, combined with me running more RPM would make my gears feel much longer than your box. I remember when I had my KO3 and shifted at 6k I felt like it was a pretty short gearbox and hated going into 3rd for 60.. When I went with the big turbo and increase the limit to 7250 I loved the gear spacing.
245/50/16
I love the spread of 3-4. 1st & 2nd are short and 5th needs to be taller. Oddly enough my 6 speed has the same final ratio (.003 difference), doing 80mph at 3200 rpm. 1st on the 6 speed is super short.
Posted by: Andyrew Jun 1 2015, 10:29 PM
Got the cable shifter done yesterday. Very happy with it! I need to come up with some way of retaining the cables, right now there pretty tight I have to wiggle them with some force to put them in place, but its possible itll come out. Maybe a slotted hose clamp or zip ties (Or I could leave it... I seriously doubt it'll come loose) Whole shifter mechanism weighs 4.2lbs including the mounts. Better than I was expecting 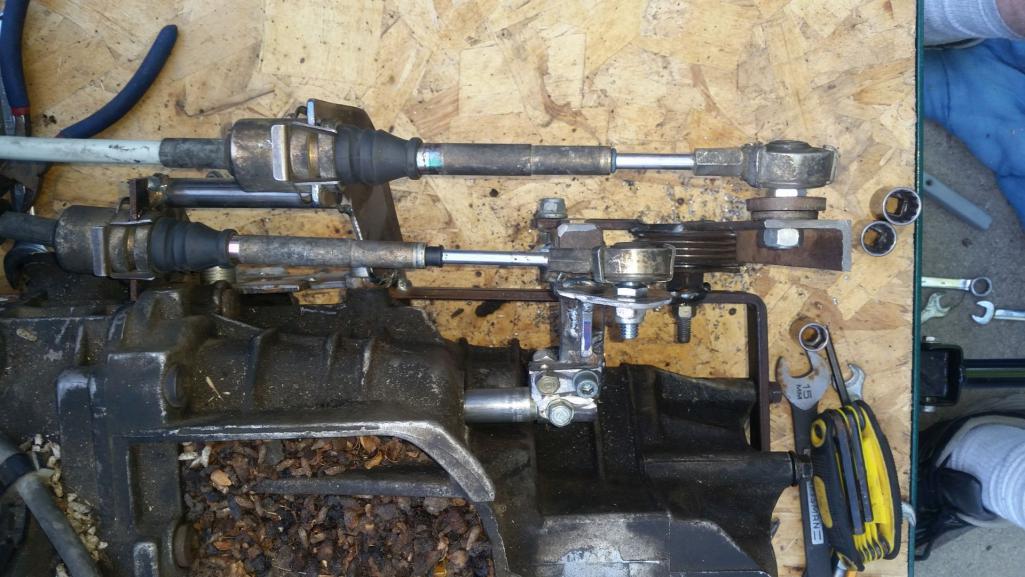
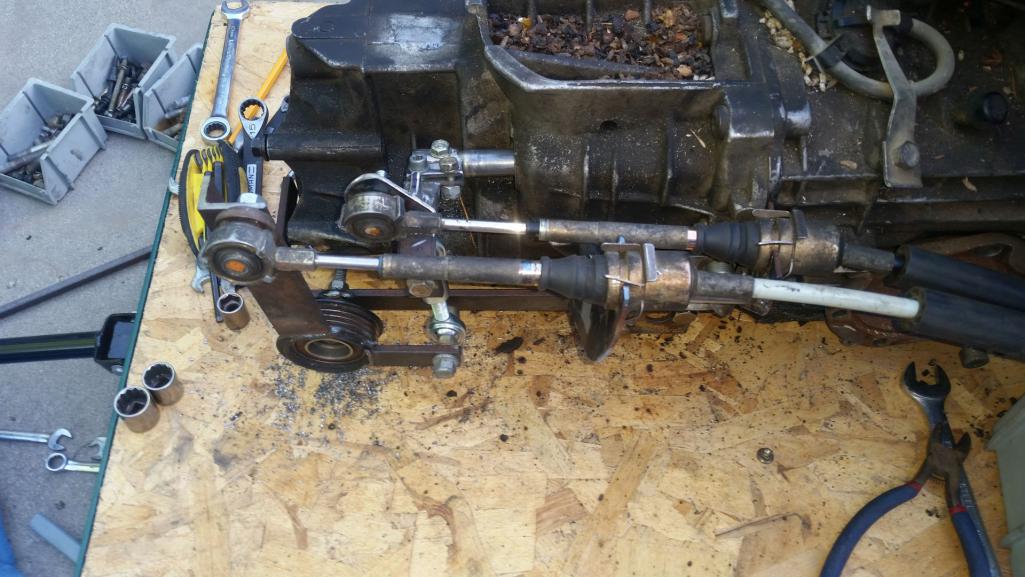
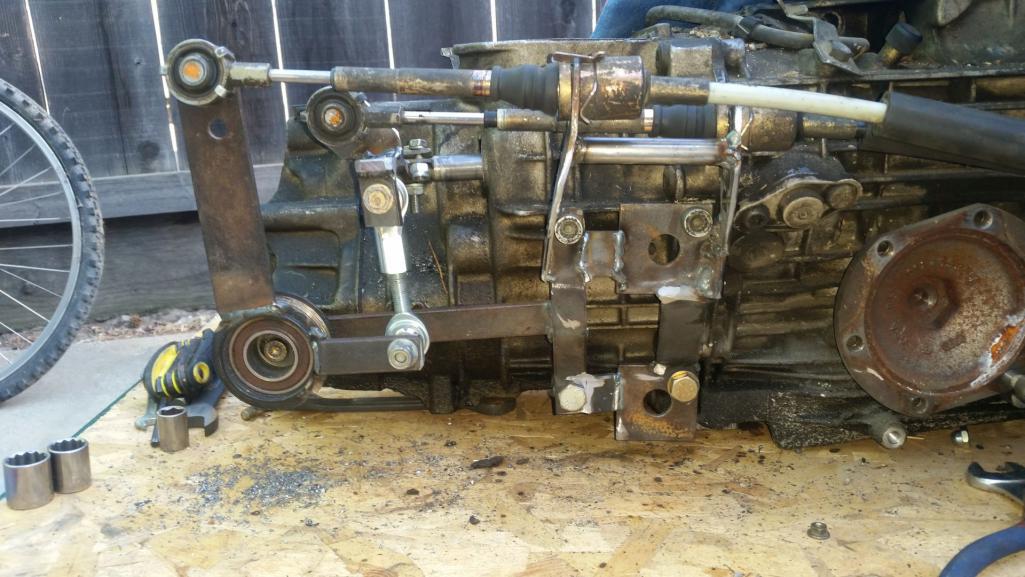
https://www.youtube.com/watch?v=WN1-YbGolBw
I mounted the engine on a cart to push around a bit better. I think I am going to start with an engine bar mount bar similar to the 914 bar. Should be easy enough to fabricate. 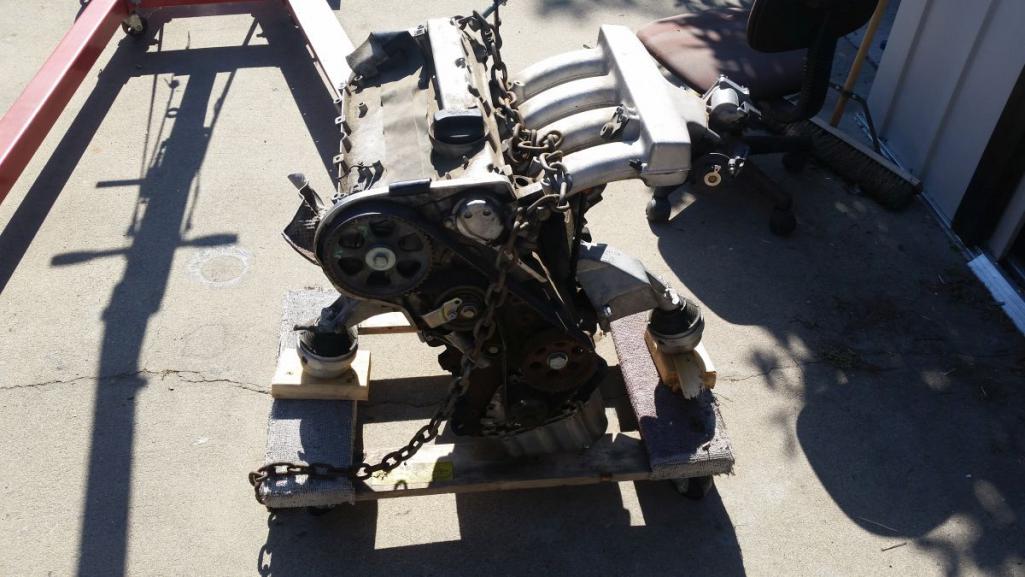
Posted by: Mike Bellis Jun 1 2015, 11:15 PM
Steam Punk!
Posted by: Mike Bellis Jun 1 2015, 11:17 PM
I have a better set of 100mm axle flanges for you. Fully round without the flat spot.
Posted by: Andyrew Jun 6 2015, 06:52 PM
Steam Punk!
Hahaha just saw this
Very trueI've been spending a bunch of time working on my excel sheet and getting all my purchases in order.
Did some research on my water pump and decided on the Davies Craig pump and electronic controller.
http://www.amazon.com/Davies-Craig-Metal-Electric-Controller/dp/B009OLPJ7A/ref=sr_1_4?s=automotive&ie=UTF8&qid=1433633578&sr=1-4&keywords=davies+craig
I am considering the new LCD display as well just because, but its going to get hidden behind my dash so I am not really that sure if I want it..
https://daviescraig.com.au/switches-controllers
Heres some info on the pumps and their research. Combined with their controller I think it would be a pretty efficient system..
https://www.youtube.com/watch?v=nrfux_-6RVw
https://www.youtube.com/watch?v=ia4BQR23r4I
Posted by: Mike Bellis Jun 6 2015, 07:07 PM
I highly recommend this pump/ It's a little cheaper too.
http://www.summitracing.com/parts/emp-e389a-bk14
I considered the davis pump but this one runs silent and is mounted in line. Works great on the 1.8t also most davis pumps ship without fittings. So there is an extra cost.
Posted by: Andyrew Jun 6 2015, 08:15 PM
Mike does that come with a controller like the davis pump? Because the davis pump itself is only 225, the controller is another 225/200
Posted by: Mike Bellis Jun 6 2015, 08:27 PM
Mike does that come with a controller like the davis pump? Because the davis pump itself is only 225, the controller is another 225/200
It does not have an LCD unit. It has some kind of controller bolted to it. I simply run a relay and have it start with the fuel pump. It starts slow and ramps up to full speed in a minute or so. Only way to hear it run is with your ear stuck to it.
It also pumps 55gpm. I could not find a rating on the davies unit.
Posted by: Andyrew Jun 6 2015, 08:57 PM
David unit is 30 or 40 depending on the model. (Im thinking 30, they actually reccend smaller for a 1.8
Check out that first video its got some amazing test results showing how the speed did not have that much affect on actual cooling ability as it allowed the radiator to do more cooling.
The swcond vid ahows how interesting the controller is and the main reason why I want to try this system
Posted by: Mike Bellis Jun 6 2015, 09:19 PM
Hopefully it will work well. One this to consider is most cars also have air flow over the engine to take away heat as well. The 914 conversions don't.
I found the 1.8t mechanical pump could not flow well enough to keep my engine cool.
You will be making a lot of HP which equals heat. I want to see this pulsating pump in action.
Posted by: Andyrew Jun 6 2015, 10:12 PM
Mike, Are you still running the stock water pump as well, just without a thermostat?
Posted by: Mike Bellis Jun 6 2015, 10:20 PM
Mike, Are you still running the stock water pump as well, just without a thermostat?
Stock pump is there with no belt and spinning freely. I have the thermostat with three 1/8" holes drilled in it.
Posted by: Andyrew Jun 7 2015, 10:10 PM
Mike,
I think I'll take you up on those axle flanges, I have some bus axles and adapters that I can probably just use as spacers (Or sell and make spacers) depending on my requirements there. Combine this with some 944 turbo axle stubs and it should be a relatively bolt in system..
Im still thinking I need to utilize the spacers as my ABS sensor or build the sensors on the back side of the flanges. This would take some real custom machining but I think its 100% doable. (I might enlist some help from guys with many more tools than I )
Onto this weekends progress... I fabricated the base of the engine mount. I could have made this level and had the bar go across all the way but that would require a lot of measuring and the engine in place. Heck I may still do that. BUT This gets me a low clearance bar that I can tie into. Bar is 1 1/2" DOM and is pretty overkill when you really look at it. I left an extra 10" overhanging total and will just use that for the real fabrication points of the chassis to the engine and cut off the excess. I am using the stock motor mount brackets and motor mounts themselves (The one's I am currently using are racing motor mounts and a very high density, I might switch one out for a stock mount to eliminate some vibration). 
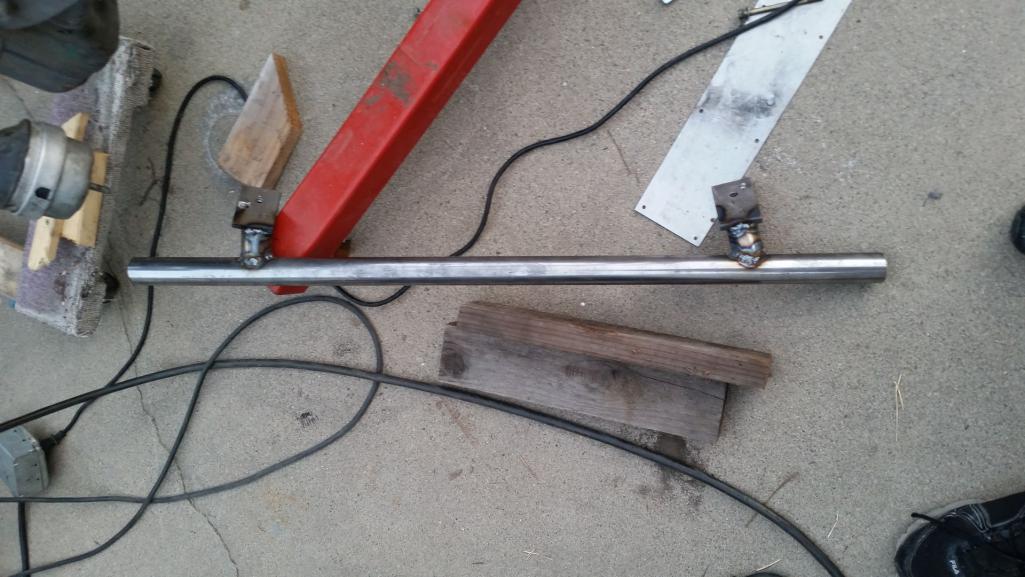
Posted by: Mike Bellis Jun 7 2015, 10:34 PM
How are you going to clock the transaxle so the shafts are level?
I'll dig the flanges out for the next time I see you.
Posted by: Andyrew Jun 7 2015, 11:13 PM
I'll just adjust the engine/trans so the shafts are level. Im really not anticipating a huge issue here. Since the engine can be relatively anywhere within about 15 degrees I'll just move it forward/back left/right till the shafts are equal. The shafts will be the largest priority for the engine placement. I'll find the location that puts the trans at the right height and the shafts at an appropriate angle at right height and pivot the engine till it clears as much as possible with the largest ground clearance. I think I am going to place the engine while its on 3 small jacks and just build the mount around that.
Posted by: Mike Bellis Jun 7 2015, 11:15 PM
I'll just adjust the engine/trans so the shafts are level. Im really not anticipating a huge issue here. Since the engine can be relatively anywhere within about 15 degrees I'll just move it forward/back left/right till the shafts are equal. The shafts will be the largest priority for the engine placement. I'll find the location that puts the trans at the right height and the shafts at an appropriate angle at right height and pivot the engine till it clears as much as possible with the largest ground clearance. I think I am going to place the engine while its on 3 small jacks and just build the mount around that.
That's basically what I did. I put a level on the tranny since the motor has no real level parts.
Posted by: Andyrew Jun 11 2015, 08:50 PM
Got a box of goodies today!
Gonna spend quite some time identifying everything... BUT
Top box is engine harness
Bottom box is dash harness plus the gas pedal (DBW)
To the right from the top down is: Ecu, Coils, Throttle body, MAF
Not pictured is alternator, and the dash cluster itself is on its way.
What I need now is the body harness itself. So that will be difficult/fun. I've got a couple local guys parting their cars out but I havent been able to convince them to let me at their parts car with three guys for a day... I can do pick and pull but Id rather have most of the stuff ripped out by someone else
Attached thumbnail(s)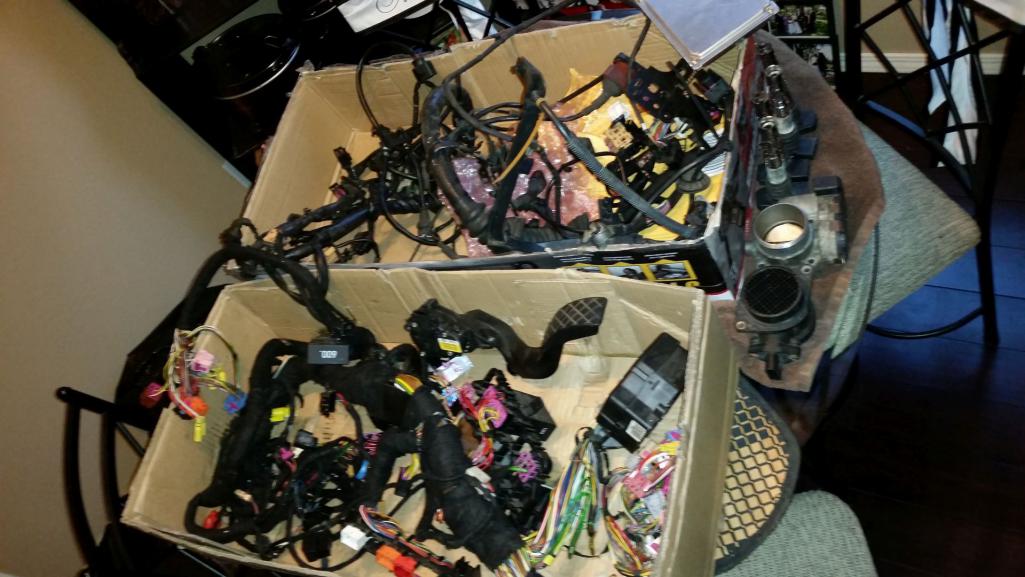
Posted by: Mike Bellis Jun 11 2015, 09:18 PM
All you need is the ECU harness, Dash cluster and harness, gas pedal and ODB plug. Everything else is extra. Wait, are you still going with the CCU?
Posted by: Andyrew Jun 11 2015, 09:38 PM
Yup.. Doing the whole shebang. ABS, traction control, ect. So I want to pick up a body harness to replace all of my current wiring. Whatever I dont use will either be unplugged/coded out/resistors. I'll have my tuner just remove everything I dont need.
Posted by: Mike Bellis Jun 12 2015, 06:31 PM
I'll be watching your wheel speed sensor solution...
Posted by: Andyrew Jun 12 2015, 08:14 PM
My understanding is that the speed sensor is based on the abs sensor. My plan is 944 turbo front abs sensors and custom rear to match my overzised rear tires.
Posted by: Andyrew Jun 12 2015, 08:14 PM
Oh and the rear will be on the cv adapter trans side.
Posted by: Mike Bellis Jun 12 2015, 08:58 PM
Oh and the rear will be on the cv adapter trans side.
If you go with something like this http://www.pacificcustoms.com/mm5/merchant.mvc?Screen=PROD&Store_Code=PC&Product_Code=ac501920gr&Category_Code=adapter-drive-flanges I have 3/16" magnets for you to embed. I think I have 12 left over, 3/8" long.
Posted by: Andyrew Jun 12 2015, 09:15 PM
Based on my understanding most abs systems have the magnet on the sensor side, but Ill let you know! The spacer/adapter will be custom milled I suspect.
Posted by: Andyrew Jun 13 2015, 02:25 AM
Playing around with the tire calculator I realized that I can use a 245/45/17 tire up front instead of the 245/40/17 tire currently up front and all of a sudden the front/rear ratio is perfect vs being 1" off.... I'll keep this in the back of my brain as I go through the ABS stuff... This might let me use stock Porsche ABS rings in the rear vs milling my own rear rings (an extra 5% more slots to compensate)
I'll have to see what I can come up with for that.
I also found out some different ABS ring sizes that I can pick up so I might just mill that into my spacer for my CV's (should be relatively easy, make the OD on the spacer the same as the ID on the ABS ring, weld on.)
Posted by: JRust Jun 13 2015, 06:46 PM
 Andrew I gotta say. My head hurts just reading about all that wiring
I don't have the patience to do all you are doing. You & Mike are "Nuckin Futs" man. My kind of people of course . Watching your thread to see this come together. Going to be sweet. Can't wait to go for a ride in it
Posted by: Mike Bellis Jun 13 2015, 06:48 PM
You & Mike are "Nuckin Futs" man.
Posted by: Andyrew Jun 13 2015, 10:34 PM
Andrew I gotta say. My head hurts just reading about all that wiring I don't have the patience to do all you are doing. You & Mike are "Nuckin Futs" man. My kind of people of course
. Watching your thread to see this come together. Going to be sweet. Can't wait to go for a ride in itI think Mike is a bit more nutz than I am to be honest! His wiring was way more difficult than what mine will end up being, and his whole car is just way more off the wall (In a good way)!
My wiring will be limited to plug and play. The MOST difficult thing will be figuring out the lights and a solution to the headlight relay. It WILL take a while for me to run the wires and eliminate the non essentials but the whole system can run with pretty much everything I am not going to be using removed.
The more difficult bits here will be the ABS fabrication, brake line fabrication, and figuring out the correct position of the stability control sensors and possibly tuning that code (Never heard of anyone doing it... so that will be SUPER difficult.. Luckily it can be switched off until its sorted out).
However all of that relies on someone actually buying the current v8 engine setup... I am at the point where I am getting anxious to put the 4 cylinder engine in place and start mocking everything up.. I can do a lot of wiring research in the meantime for what does what on the wiring harness and I still need to get my hands on a body harness....
I grabbed this and some other bits from my dads place.. This water pump should make a nice air to water intercooler pump. Pretty sure a lot of guys use this type of pump for this function.
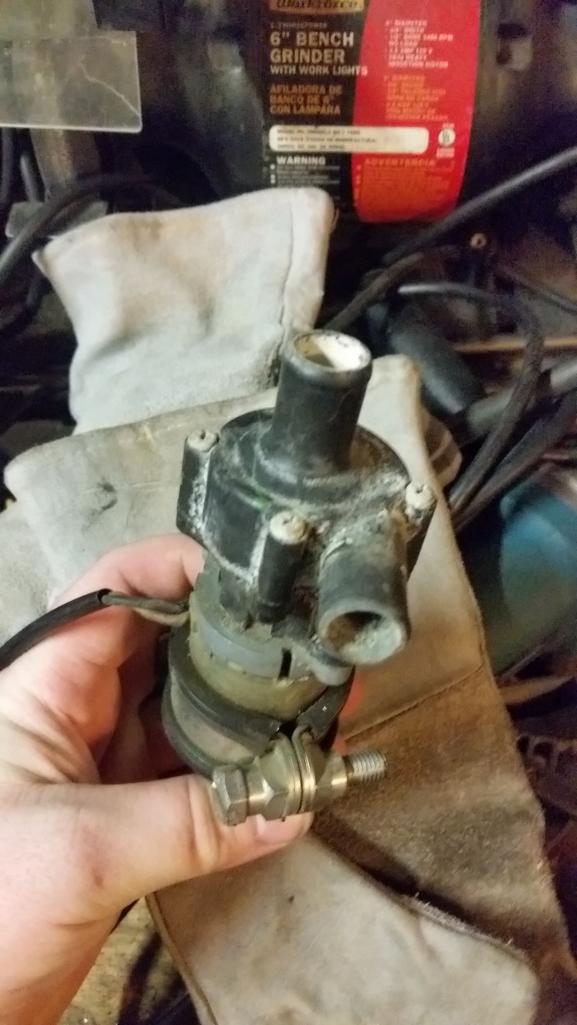
Posted by: Mike Bellis Jun 13 2015, 10:56 PM
I don't yet know what your donor car will be to get the body harness... When I did mine I went here: https://erwin.vw.com/erwin/showHome.do, paid a $35 for 24 hour access and downloaded every document VW ever made for my donor VIN. Well worth it. Full body wiring diagrams, tech articles, manuals, etc...
I don't know if Audi has a similar website but this was the best $35 I ever spent. I bet I downloaded 100 files or more.
Posted by: Andyrew Jun 13 2015, 11:14 PM
Hmm.. Very interesting. This is what I've been looking for..
Mind sending me an example of one of the wiring harnesses so I can see what they have?
Or just posting a pic of it here?
Posted by: Andyrew Jun 13 2015, 11:16 PM
I've been downloading some diagrams from the parts book, but there is no wiring charts or anything...
http://www.partscats.info/audi/en/?i=cat_vag_models&brand=au&number=1218&set=1227&ein=2001&f=249&hauptgr=1234567890&hg=9
Posted by: Andyrew Jun 14 2015, 12:08 AM
One hour later and I've downloaded all there is to be known for the B5 A4 chassis.. Thanks Mike! This surely will be a help.
Posted by: Andyrew Jun 14 2015, 12:48 AM
Been reading up on the stability control system and its requirements for the past 30 minutes...
Its doable! Requires more bits than I thought but still doable!
Posted by: Andyrew Jul 6 2015, 09:08 AM
Had a couple weeks of no progress due to a vacation but I am back on it slowly!
Got an oil cooler and fan, currently have it hard mounted, but am debating putting some rubber in between the metal.
I still have one tab left to weld but ran out of time tonight.
[attachmentid=507241]
[attachmentid=507242]
I have the smallest SPAL fan behind it that fits nicely in the cubby I made. I will be using some foam between the oil cooler and the body to make a nice seal to the area below the headlight and cutting slits in the front of the fender well (directly behind the oil cooler) for the air escape and finally closing off the area under the headlights so air passes through cleanly.
Lines will be run basically straight back to the engine, likely in either the center tunnel or possibly in the dr side rocker.
Since I am keeping the factory oil-water cooler I dont need much of an external oil cooler. Still debating on line size but I might try to run 8-an if anyone knows of a pressure loss calculator for AN lines let me know.
Posted by: Andyrew Jul 6 2015, 09:09 AM
Posted by: Andyrew Jul 12 2015, 11:17 PM
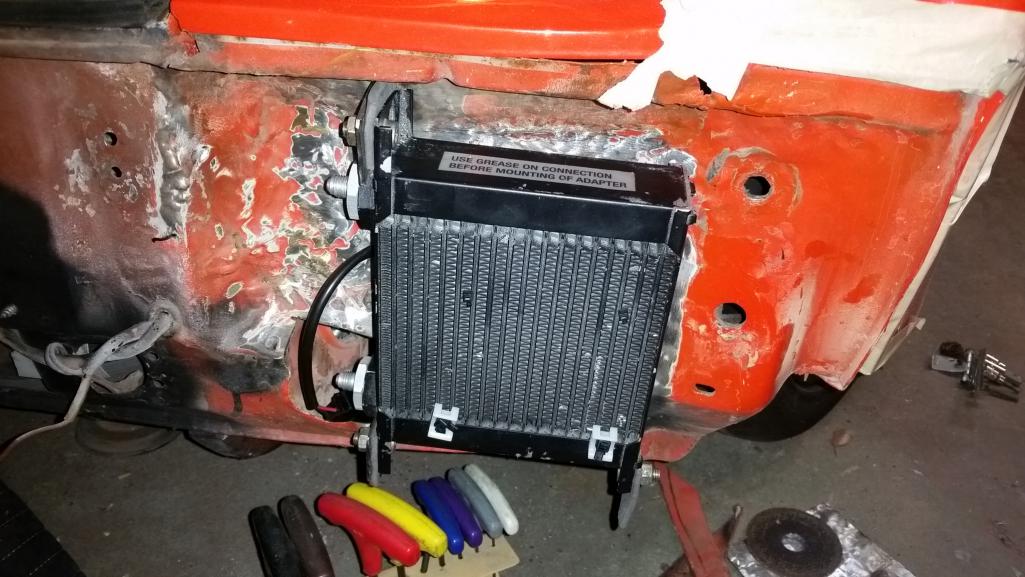
Finished the mounting of the oil cooler and added a little padding. 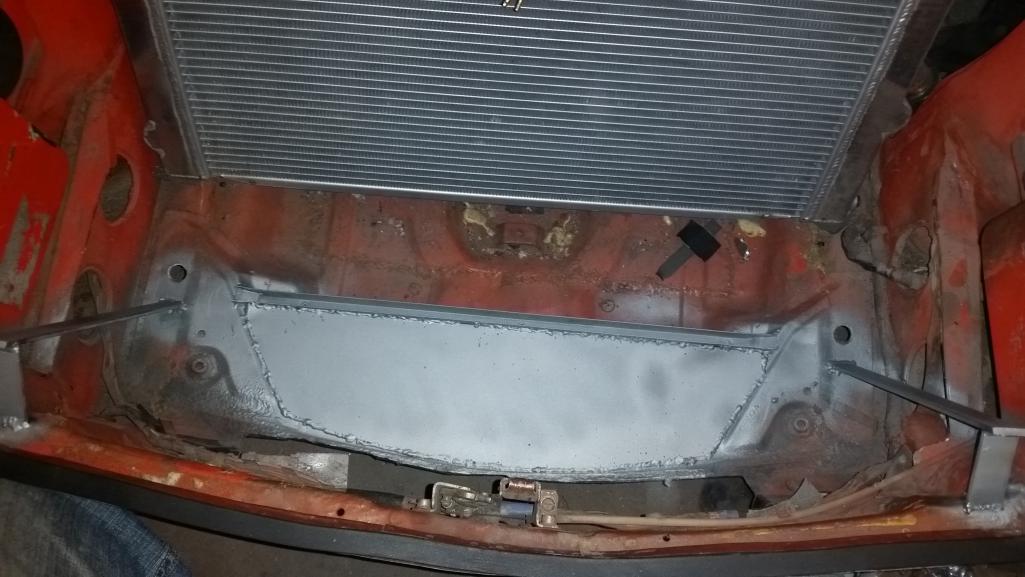
Here you can see the beginning of the radiator mount, 1/8" bar makes up the radiator vertical support, the bit holes in the floor will be tig welded later to bring the strength back. Thats where the lower radiator mounts sit. There is a steel 5/8 x 5/8 U channel (commercial window glass stop....) that the lower portion vertical portion of the radiator sits in allowing for no air flow past the radiator. The floor is 16ga steel fully welded. Then everything is hit with zinc galvy. 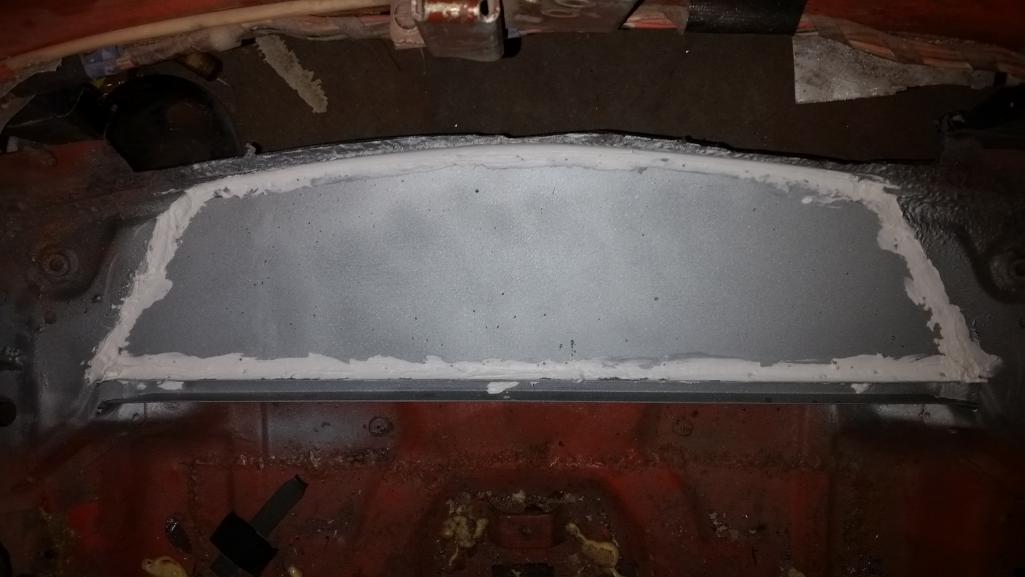
And the weld joints hit with calking. 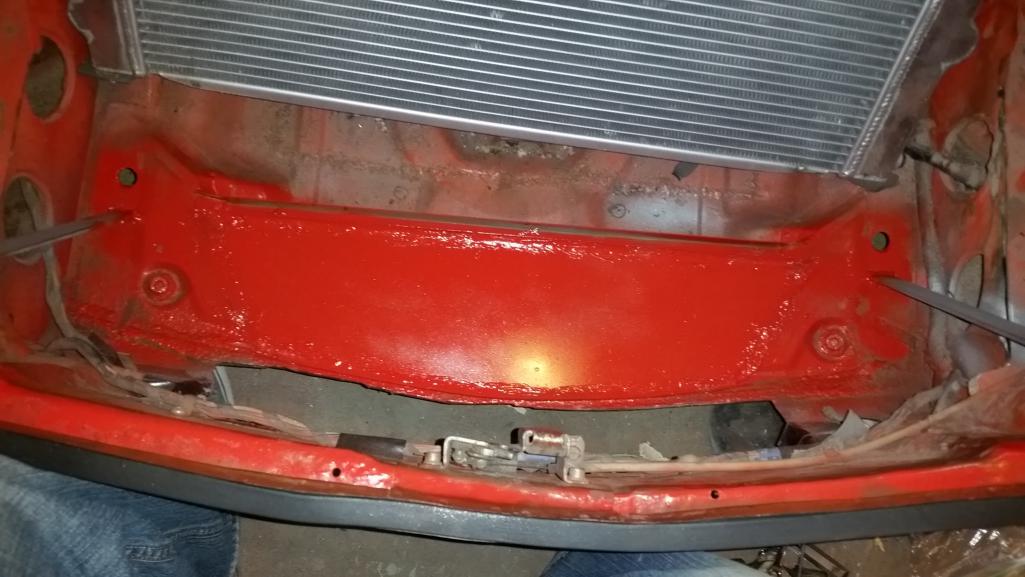
And painted rattle can.
Posted by: Andyrew Jul 12 2015, 11:22 PM
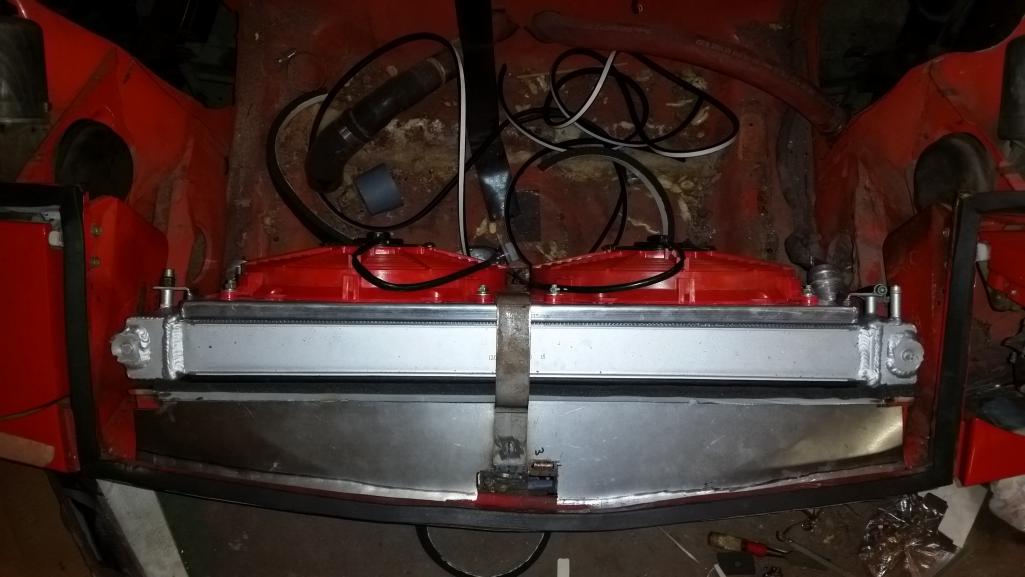
Finally the upper section is built. The vertical radiator supports are joined by another piece of 5/8x5/8 U channel steel (glass stop). for the radiator to sit on. We have some bulb seal on the radiator and some foam seal on the radiator support. Vertical gaps are taken up with foam seal (weatherstripping).
The upper section is more 16ga steel and I am debating on tack welding it, but I most likely will bolt it down with bulb seal underneath.
Vertical gaps have not been taken into account yet as I havent bought my AC condenser yet.
And I am testing with using the strap in the middle to hold everything down or build straps on each side that connect to the factory mount tabs that I hacked off a bit to much. Still more thinking to do here.
Posted by: Chris H. Jul 13 2015, 12:17 PM
Good start. That's gonna work well for you. I like how close you put the rad to the front of the trunk. Question...When you drilled the holes circled below did they go all the way through the trunk floor or not? It doesn't look like it. When I set mine up it looked like there were 2 layers of metal there with a gap in between but was too chicken to try drilling them out . 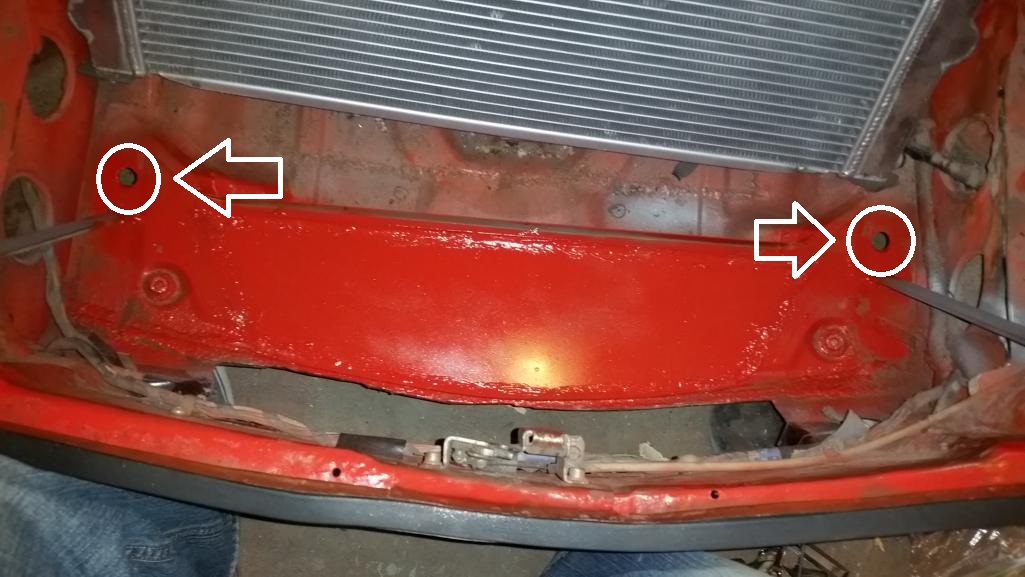
Posted by: Andyrew Jul 13 2015, 01:11 PM
The goal was to put it as close to the front as possible. Yes I did drill through both layers which is why I want to tig the holes..
Posted by: Chris H. Jul 13 2015, 01:26 PM
So could I theoretically drill through ONE layer and have enough space to drop the rad mounts and hold the rad in place or are the two layers of metal right on top of each other?
On the bottom of mine I have a piece of sheet metal with mounts in it similar to the renegade setup but it doesn't get the radiator as low as yours so I can't get it as close to the front. I'm going to slightly trim the top mounts which will give me a bit more clearance.
Posted by: Andyrew Jul 13 2015, 02:20 PM
They were within about 1/8" of each other(I'll take a pic tonight), If you cut the bottom of the radiator tabs down that much theoretically yes you could, but I dont think it would realistically work especially with how much you have to tilt the radiator at that point to make it fit.
Posted by: Chris H. Jul 13 2015, 06:43 PM
Interesting...good to know.
Here are some pics of my setup in case it gives you any ideas to use. Ignore the wires taped to the floor. I'll move those later this year but it requires taking the entire system out which I don't feel like doing yet. 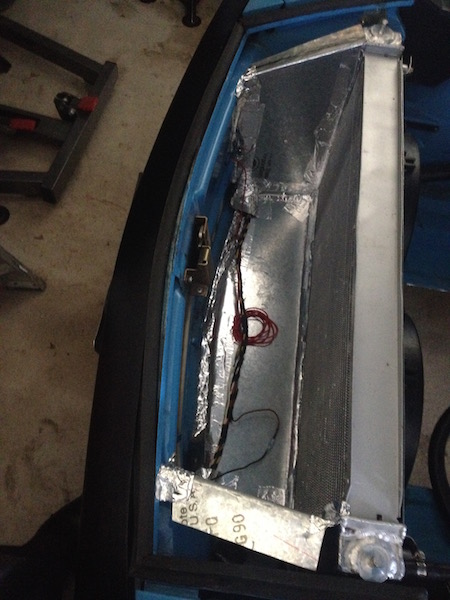
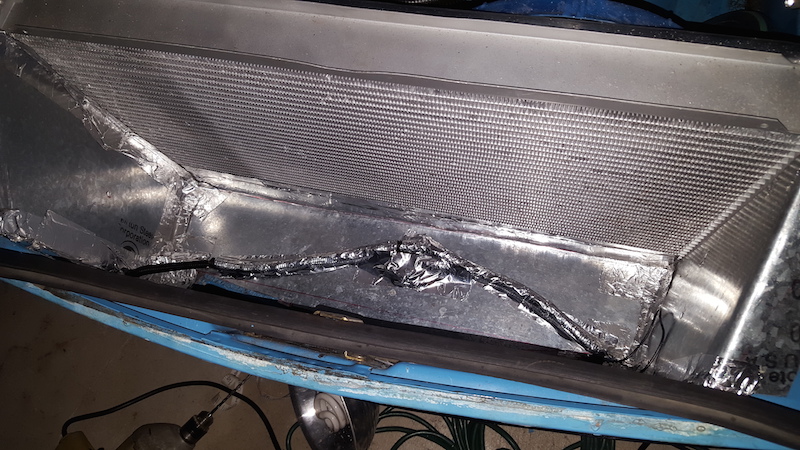
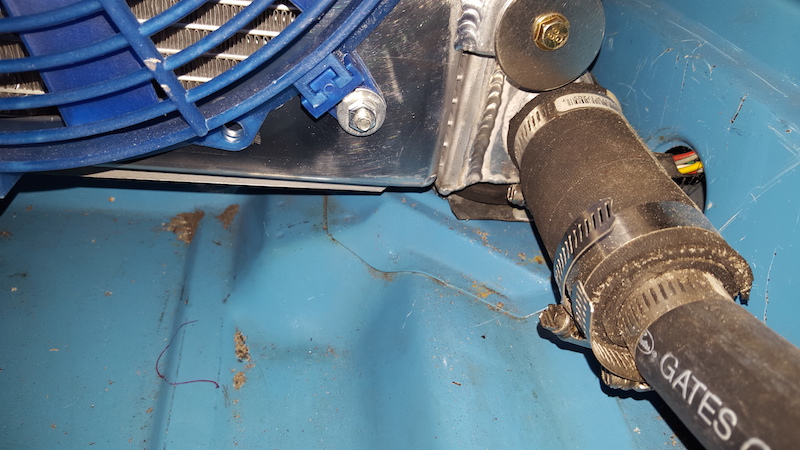
On the bottom There is a piece of sheet metal that is attached at the front to the former stock valance mounting holes. At the radiator there is a 90 degree lip bent upward about a half inch or so across and the radiator is bolted to it. at the very ends the metal extends another couple of inches and I installed rubber mounts to them which the radiator sits in. 
It's a '75 so at the very front of the car there are a couple of nubs that dictate where your side panels that funnel air to the radiator can be. Since I was pretty sure I'd be playing with the setup I bent a couple of u-shaped pieces and attached them with the stock bumper shock bolts. That way no holes drilled or welds. They're in there good and there's downward pressure on the bottom piece. Most important thing is to get ALL the air to go through the rad. 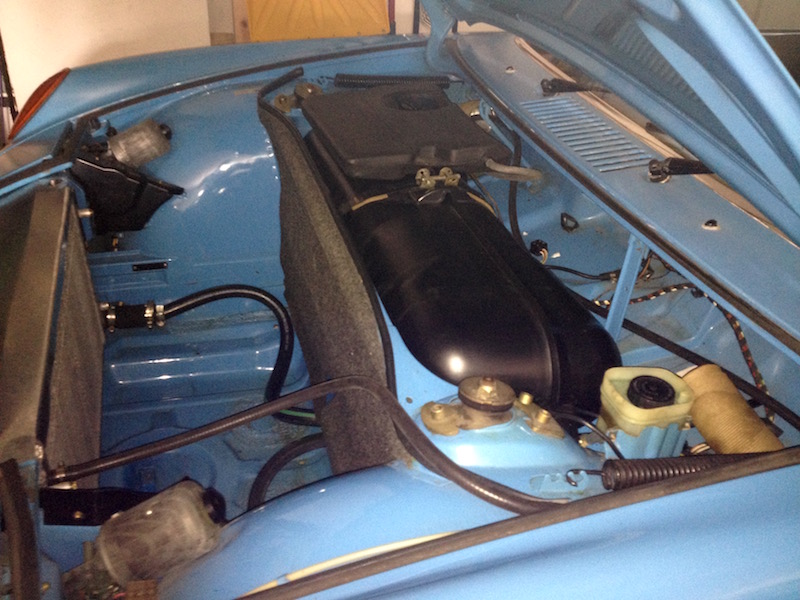
The top piece which you can see in this pic slides in just underneath the hood seal channel pretty tightly. The back edge is bent so that is can be attached to the radiator at the mounting holes. When it's fully in place the radiator doesn't move AT ALL, but my plan is to put some fasteners in the channel and small bolts on the attachment points on the radiator to make sure it doesn't work its way loose over time.
I'd still like to get the rad setup closer to the front, but for now I'm gonna start driving it.
Posted by: matthepcat Jul 13 2015, 06:51 PM
Looking good. Fabricating radiator shrouding is annoying....the fine balance of some flex but not too much flex....and how to keep the aluminum from rubbing holes into each other.
Posted by: Chris H. Jul 13 2015, 07:00 PM
Right, loose enough to flex a little, but not too loose. Andrew's got the right idea.
Matt, what about that Subie car in the classifieds? If you're looking for one there's not a better deal out there.
Good point on the rubbing...last thing on my list is to trim the side pieces where they touch the rad and insert some foam or rubber to keep the metal on metal thing from happening.
Posted by: Andyrew Jul 13 2015, 07:35 PM
This is the bulb seal that I bought from Home depot. Really flexible stuff and dirt cheap. The adhesive is very sticky as well which is a plus.
http://www.homedepot.com/p/Frost-King-E-O-5-16-in-x-1-4-in-x-17-ft-Black-EPDM-Rubber-Weatherstrip-Tape-V25BK/202844545
Chris your setup looks really nice!
What is the small air bleed line going to, a heater?
Posted by: matthepcat Jul 13 2015, 07:54 PM
Matt, what about that Subie car in the classifieds? If you're looking for one there's not a better deal out there.
Yea I checked it out. I want a turbo motor...I would be buying a whole care for a transmission, engine cradle and cable shifter.
Posted by: Chris H. Jul 13 2015, 08:01 PM
Thank you. I finally manned up and cut a hole big enough to bring some air in to the radiator. Buttoning things up tonight.
Good call on the weatherstripping. Looks like good stuff.
The small line goes all the way back to my VW expansion/recovery tank. I could probably just do a bleeder valve there but it really purges air out quickly with this setup. One or two cycles from empty and it's good to go.
Posted by: Chris H. Jul 13 2015, 08:06 PM
Matt, what about that Subie car in the classifieds? If you're looking for one there's not a better deal out there.
Yea I checked it out. I want a turbo motor...I would be buying a whole care for a transmission, engine cradle and cable shifter.
Ah...I get it. That's right you have a 6!
Posted by: Mike Bellis Jul 13 2015, 08:32 PM
Nice! Should be driving any day.
Posted by: Andyrew Jul 13 2015, 11:07 PM
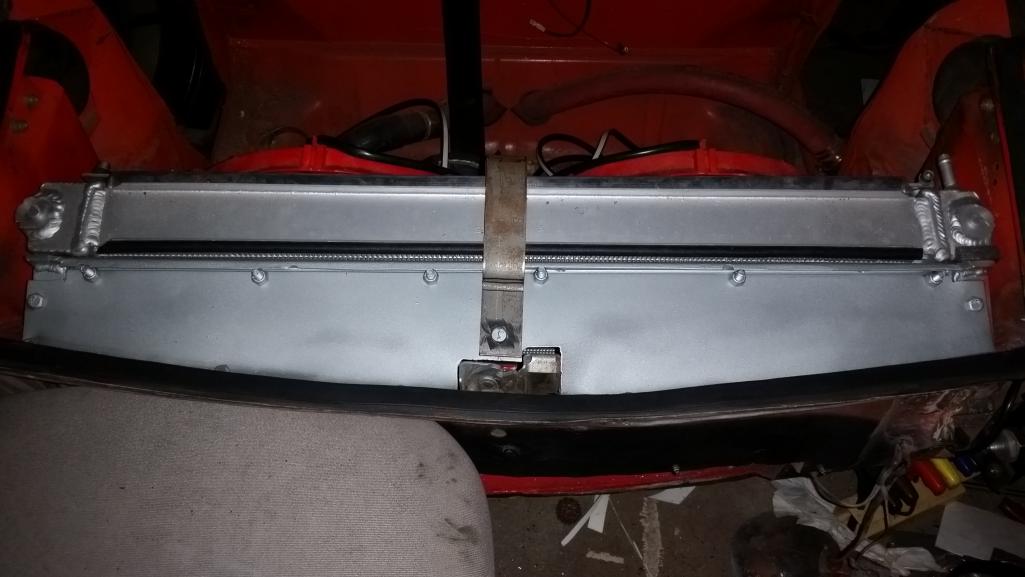
I decided to simply bolt the shroud to the body/support. 1/4 20 bolts with nylon nuts. I doubt itll come loose as I used the impact. 
side pic
Posted by: Chris H. Jul 14 2015, 07:21 AM
Looks great! That thing's not going anywhere. The hood will lock it in place when you close it.
Posted by: Andyrew Jul 28 2015, 11:24 PM
Still trying to dial in a body wiring harness... I've got one lead and hes getting ready to pull it.. So hopefully all that stuff comes in the next month and I can get started laying out the wiring.
I pulled the old radiator hoses, grabbed a plastic container and put all the radiator bits in the container. (NEED TO SELL THE V8 STUFF!)
I almost grabbed a spare engine but it got sold to quickly. Grabbed a spare 1.8 FWD trani for $60 delivered to me though Seller might have some other bits for me as well so we will see. This trani will have shorter gearing than the 2.8 trani I have but I am not yet sure if I will want that or not. Either way its a great pickup for me
Attached thumbnail(s)
Posted by: Mike Bellis Aug 5 2015, 01:26 PM
BTW, Conedodger has an wrecked Audi for sale with a new motor...
Posted by: Andyrew Aug 5 2015, 02:44 PM
Hmm... Doubt I will need anything.. I just got a bunch of nifty parts and my wiring harness is being pulled from a guy in NY this weekend..
My car fund cash flow is sure in the red lately . I think Im going to have a fire sale on the engine pretty shortly...
Posted by: matthepcat Aug 5 2015, 03:27 PM
Put the motor on ebay/ craigslist before you go too low on price.
Posted by: Mike Bellis Aug 5 2015, 04:14 PM
If I still had my El Camino, I'd be all over that motor!
Posted by: Chris H. Aug 5 2015, 05:28 PM
Yeah it may be time to separate that setup if no one wants to pay up. It's a damn good engine. Needs a wider audience.
BTW why does every car comment remind me of a movie?
https://www.youtube.com/watch?v=tWTjf0-GBQQ
This was my 2am college move go-to. Hollywood Knights.
Posted by: mgp4591 Aug 5 2015, 05:33 PM
Yeah it may be time to separate that setup if no one wants to pay up. It's a damn good engine. Needs a wider audience.
BTW why does every car comment remind me of a movie?
https://www.youtube.com/watch?v=tWTjf0-GBQQ
This was my 2am college move go-to. Hollywood Knights.
"this punch does have a little WHANG to it..."
Posted by: Chris H. Aug 5 2015, 11:29 PM
"Good though...."
Posted by: Maltese Falcon Aug 6 2015, 12:01 AM
Remember this Cobra in the movie?
The only way they could get it into the scenes was to allow its actual owner to do the driving. So the owner/driver picks my friend and body+paint man Jack Kimoto to sit shotgun during the street race scenes.
How cool is that ? 
Posted by: mgp4591 Aug 6 2015, 12:24 AM
Remember this Cobra in the movie?
The only way they could get it into the scenes was to allow its actual owner to do the driving. So the owner/driver picks my friend and body+paint man Jack Kimoto to sit shotgun during the street race scenes.
How cool is that ?
And going up against someones "rail job", basically a slightly lengthened frame with a '23 t-bucket dropped on it. I'd take the Cobra anyday...
If you need a good example of a real Cobra accelerating, check out the Gumball Rally sequence toward the end when the Cobra and the Daytona Ferrari exit the LA river and hit the surface streets- the Daytona moves out fast but the Cobra literally LEAPS from gear to gear as the exhaust sound explodes from the pipes. The sound may have been file audio but it's one of the greatest examples of power to weight ratios in film IMHO...
Posted by: Andyrew Sep 7 2015, 02:02 AM
Well... Lots of little things have been happening. Nothing Huge BUT lets to a rundown.
Interior is stripped, and I finally threw some galvanized paint on my longitudinal reinforcements since they were bare. 
Next big thing to figure out on the interior is the steering column. It looks like I need to cut the dash up to mount the column. Then I need to find some way of adapting the column to the 914 shaft.
In the mean time I have been acquiring quite the parts collection.
Steering column and wheel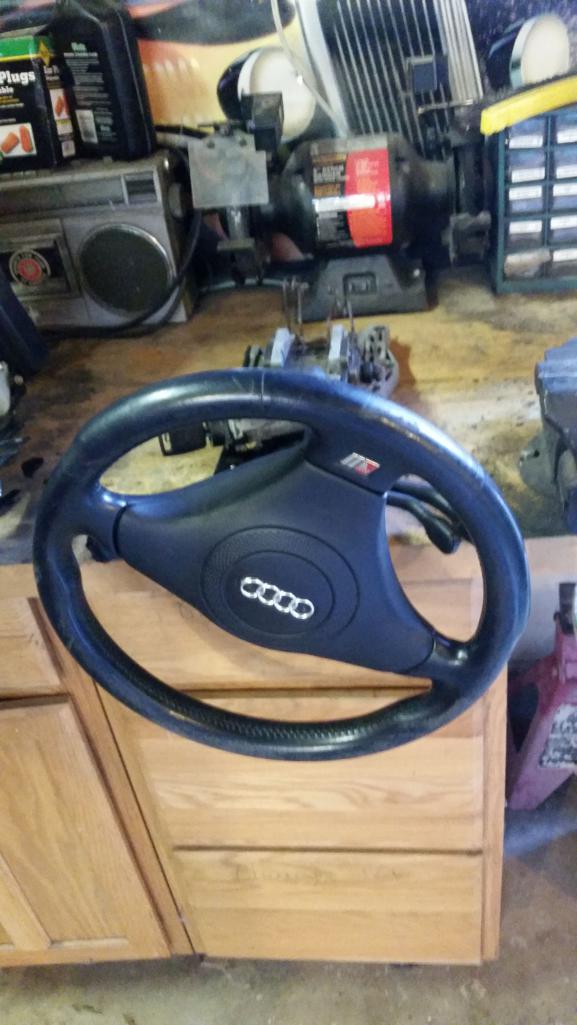
Body wiring harness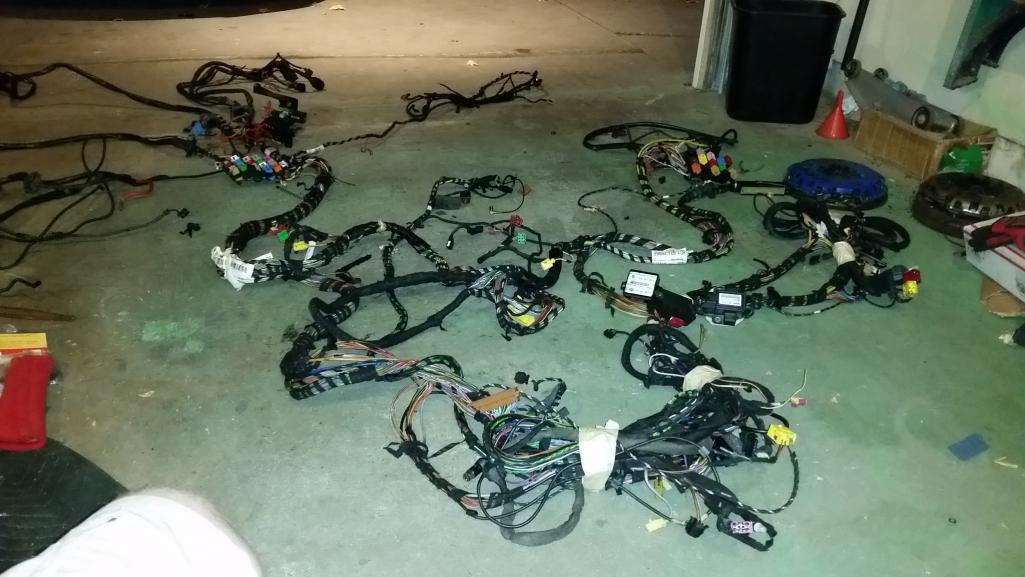
Posted by: Andyrew Sep 7 2015, 02:44 AM
Dash wiring harness (There are 2 dash wiring harnesses in the picture)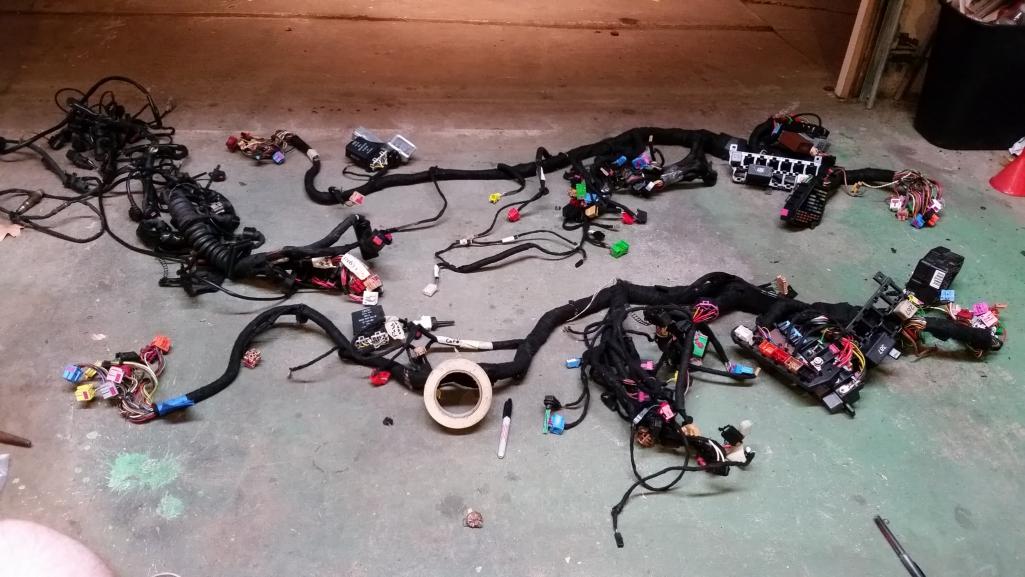
Engine harness (Bought it a while ago, but here it is laid out on plywood for storage and sorting)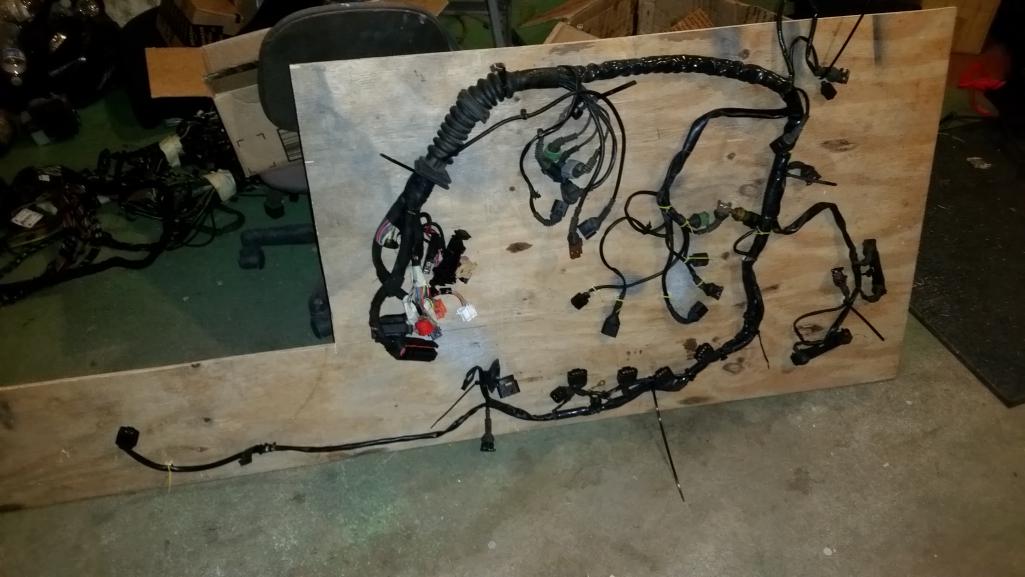
ABS module/block/sensors and pump for stability control (brake assisted)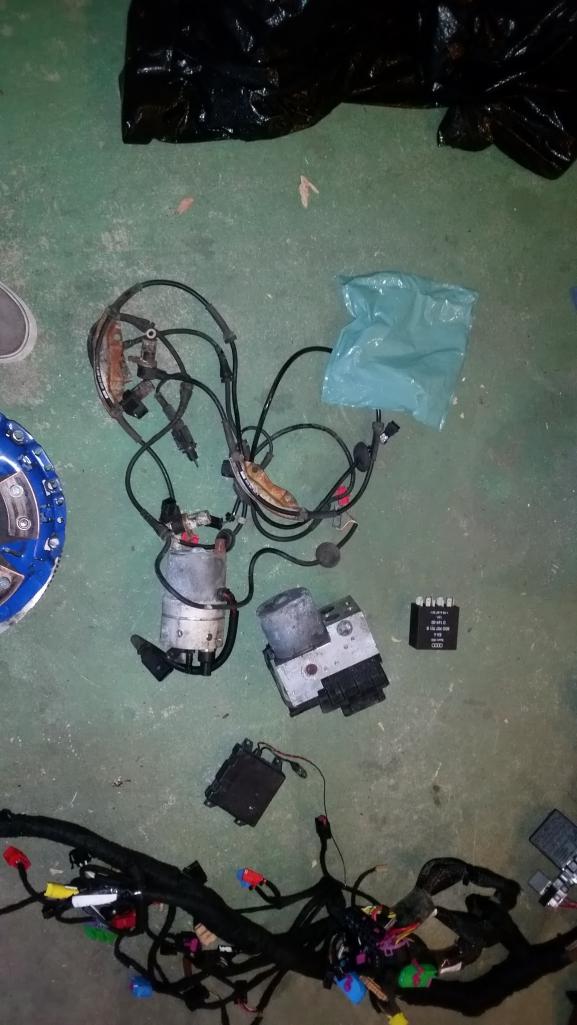
240MM 12lb flywheel for the 1.8T engine, 6 puck disk and standard pressure plate.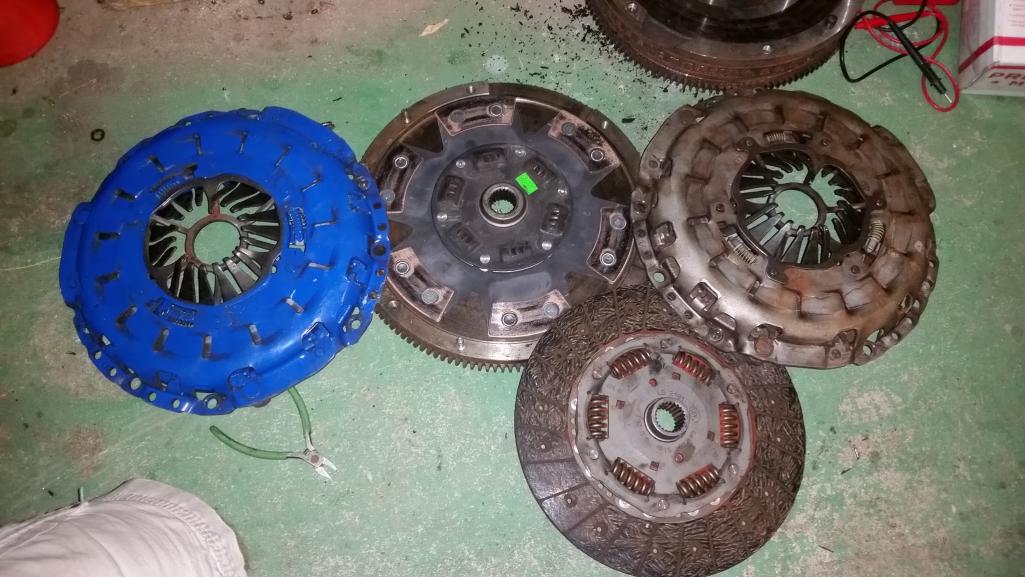
Posted by: Andyrew Sep 7 2015, 03:05 AM
Ac/Heater box complete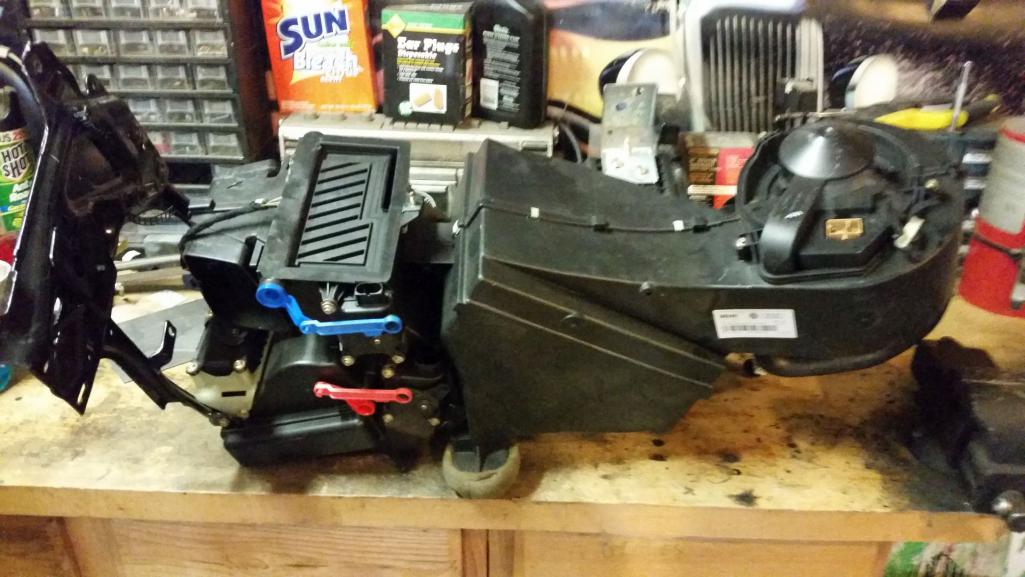
AC Heater box cut in half (removed fan) and opened up. 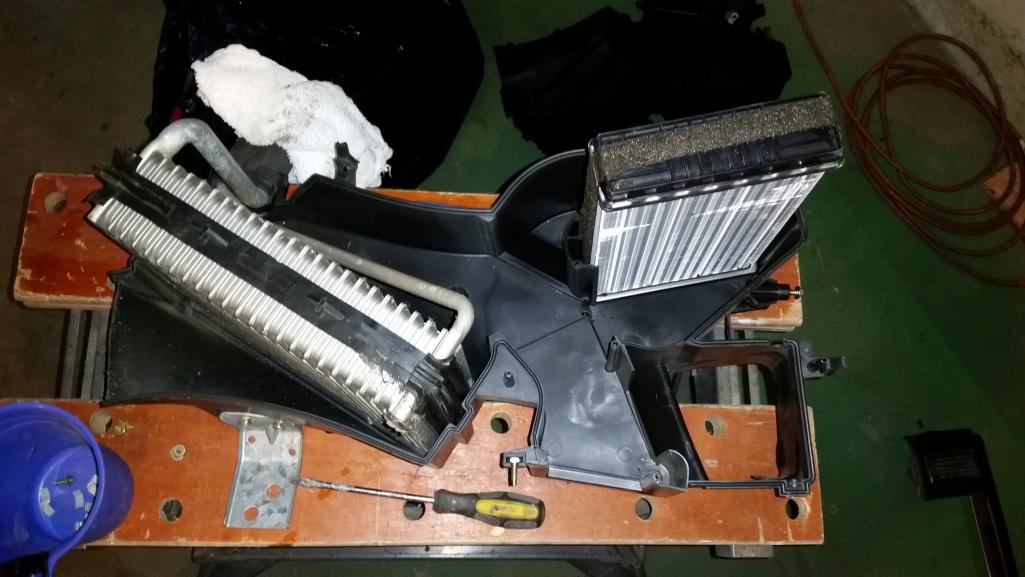
Fan in mock up position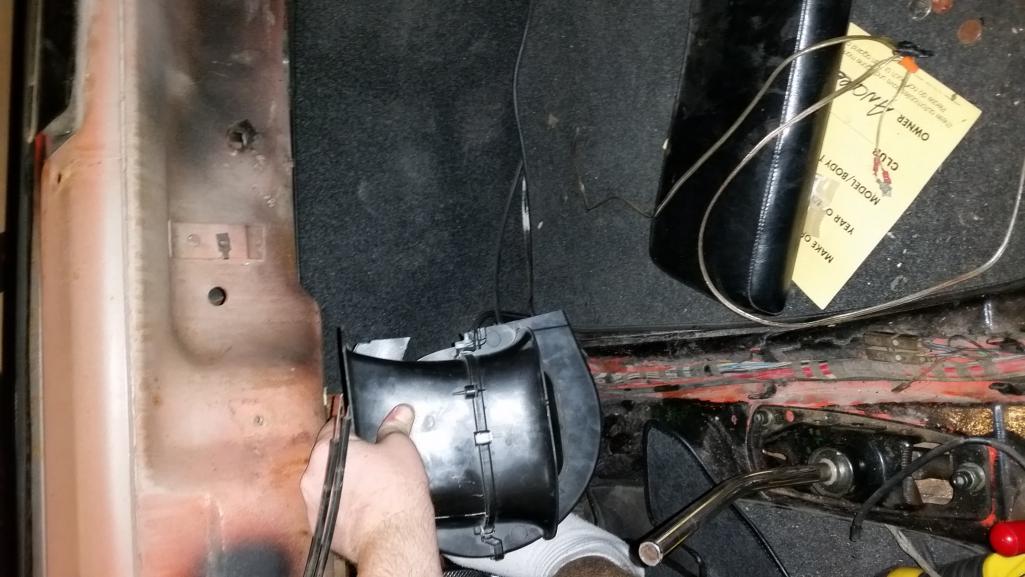
Ac/Heater box in mock up position. Yes this will kill half the front trunk but I still have plenty of space for a medium sized suitcase up front and this gives me much more legroom in the cabin. This position was suggested by my Jerika (my wife) and after looking at it, it make a lot of sense! And yes it is upside down, I dont have a good photo of the mock up position. The heater core connection lines will be cut short and the AC lines might get bent just to get a bit more room. And yes I will cut some holes to run the ducting to the cabin. 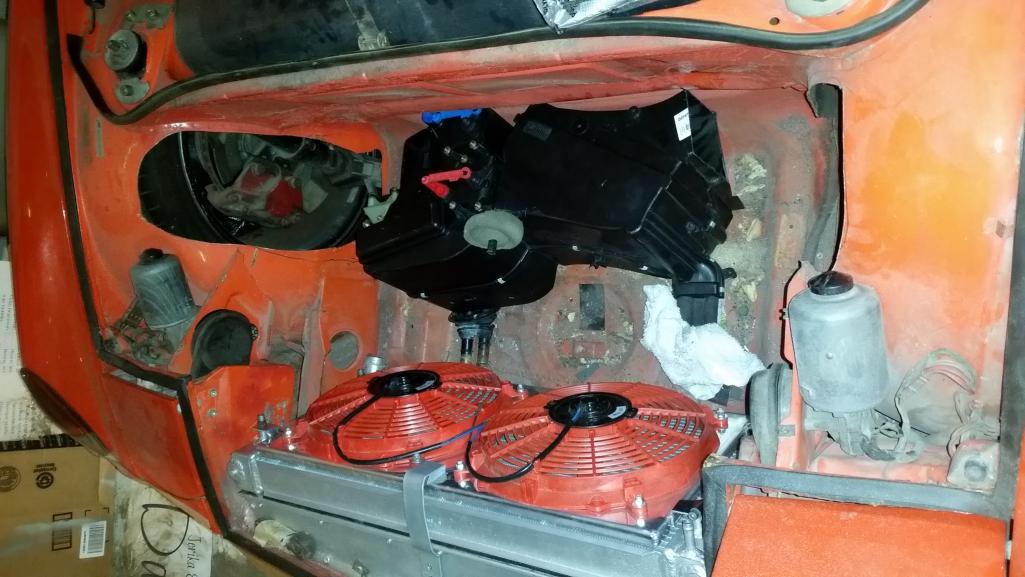
Posted by: Andyrew Sep 13 2015, 10:56 PM
Steering column is mounted and moved back.
Unlike Mike my steering column was not surrounded with steel it was surrounded with aluminum . So I first had to build a steel enclosure for that and then mount that to the 914 body. I decided to weld it and bolt the Audi column to it. (Secured with 8 1/4x20 bolts and an extremely tight fitting enclosure, Hammer required)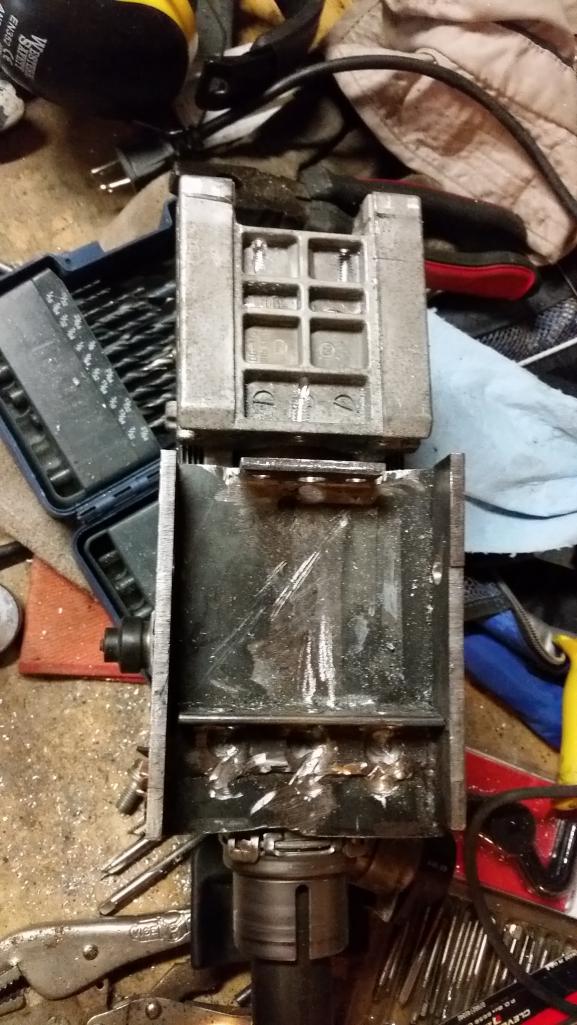
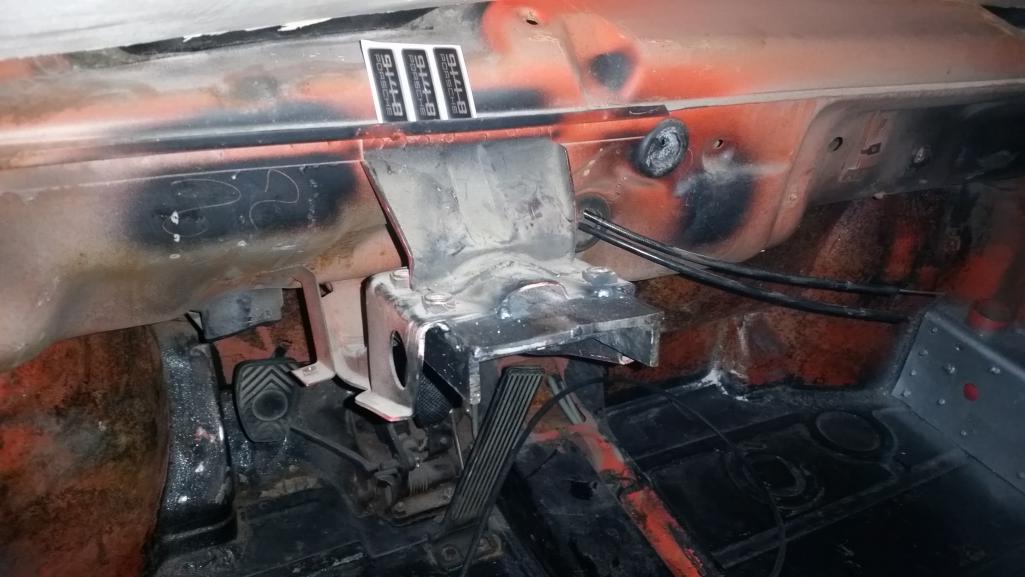
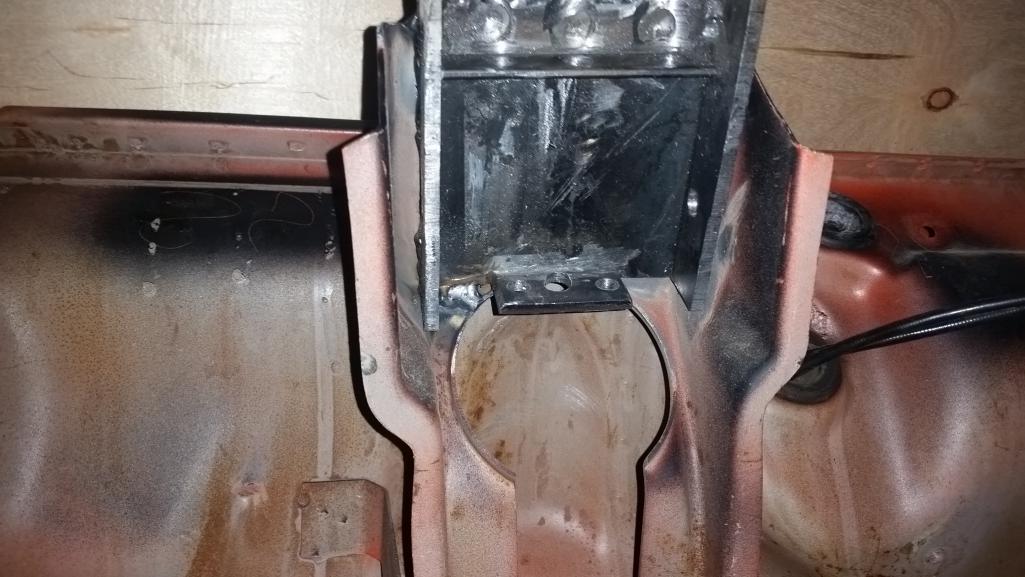
Posted by: Andyrew Sep 13 2015, 10:59 PM
However the position was not good enough for me... So I modified it, essentially twisted the assembly in and down (then back up). More bracing will follow later when everything gets fully welded and braced where needed.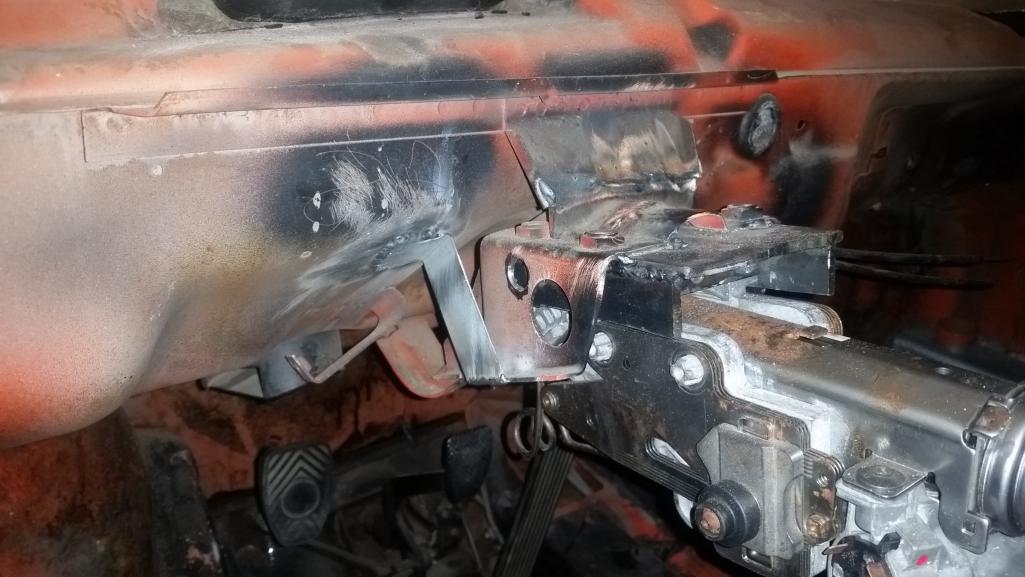
Before, All the way up and tilted up. 
After, All the way up and tilted up. 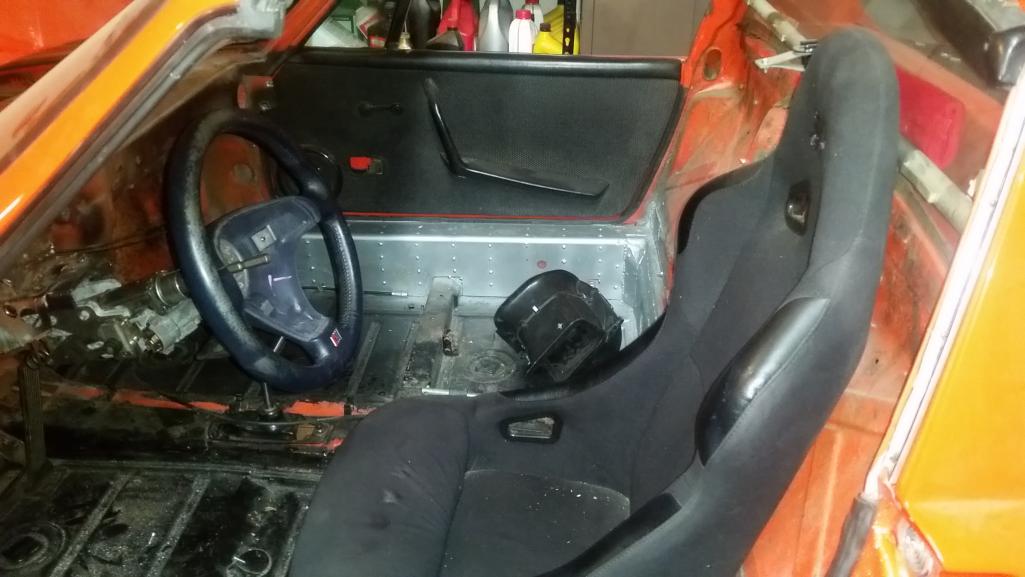
Posted by: Andyrew Sep 13 2015, 11:02 PM
Before all the way up and tilted down. 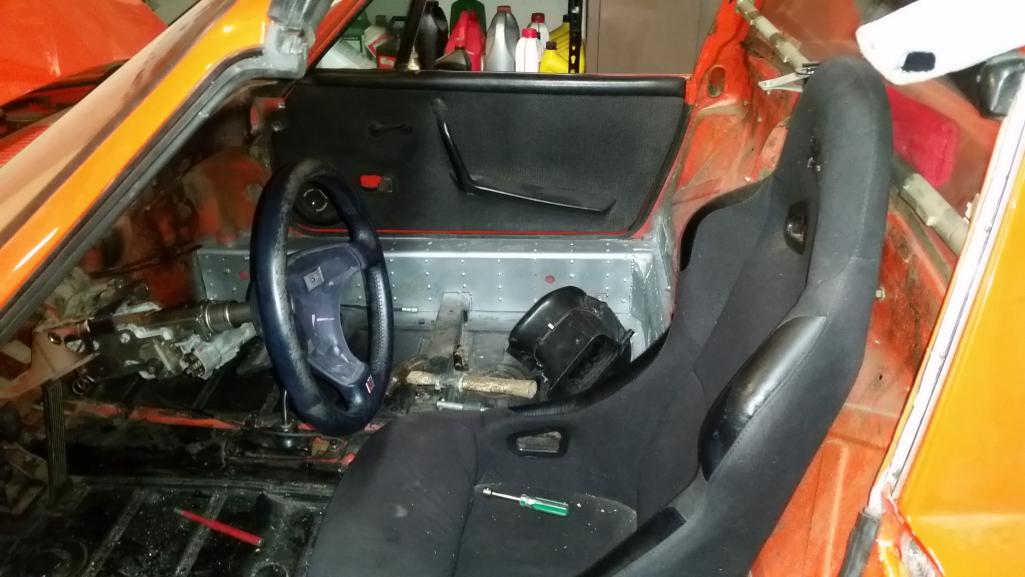
After all the way up and tilted down. 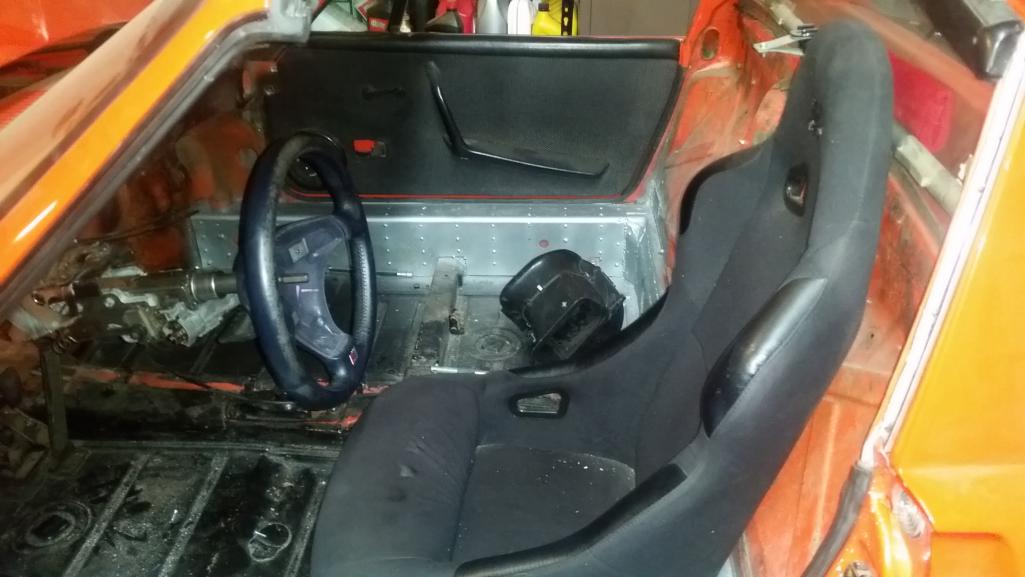
It only moved it away from the driver maybe 1/2 an inch, but I think it made a big difference in the driving position. I am very happy with it where it is. Now I will modify the steering shaft and get all that squared away!
Posted by: mgp4591 Sep 14 2015, 12:39 AM
So are you going to have a fixed seat or adjustable like stock? I agree that getting the column just right is essential for any mods- I'm planning on that using the stock SVX steering column but I've got tilt and telescopic, however not much in the latter. I'm getting all kinds of ideas from your last few pictures and getting antsy sitting in this frickn' wheelchair- I want to start working on stuff!! 
Posted by: Andyrew Sep 14 2015, 08:34 AM
Drivers seat is on forward and back rails as low as possible. Passenger seat is on stock 914 rail.
I am 6'0 with a lot of mid body height.
The Audi steering wheel is quite a lot bigger than the Momo I had in there previously. I'll keep looking around for a factory Audi wheel that is smaller and possibly pushed back , if I can find something then I think it'll help quite a bit as well.
Posted by: Andyrew Sep 14 2015, 11:58 AM
I might have found a solution that will push the steering wheel back some more.
The Audi steering wheel is VERY profiled. It is a good 4" in profile. This NRG adapter is low profile, say 1 1/2", Combine that with a nice flat steering wheel and not only do I get to actually use the telescoping feature, I can get a smaller steering wheel. Need to measure to ensure that the stalks are not going to get in the way.
http://thmotorsports.com/nrg-innovations/nrg-short-hub/srk180h/i-286499.aspx
Posted by: Andyrew Sep 21 2015, 01:16 PM
Steering column is done
Lots of mods to the steering linkage, but its very solid and seems smooth enough. Its also in the original position that the 914 steering knuckle was so that's a plus. 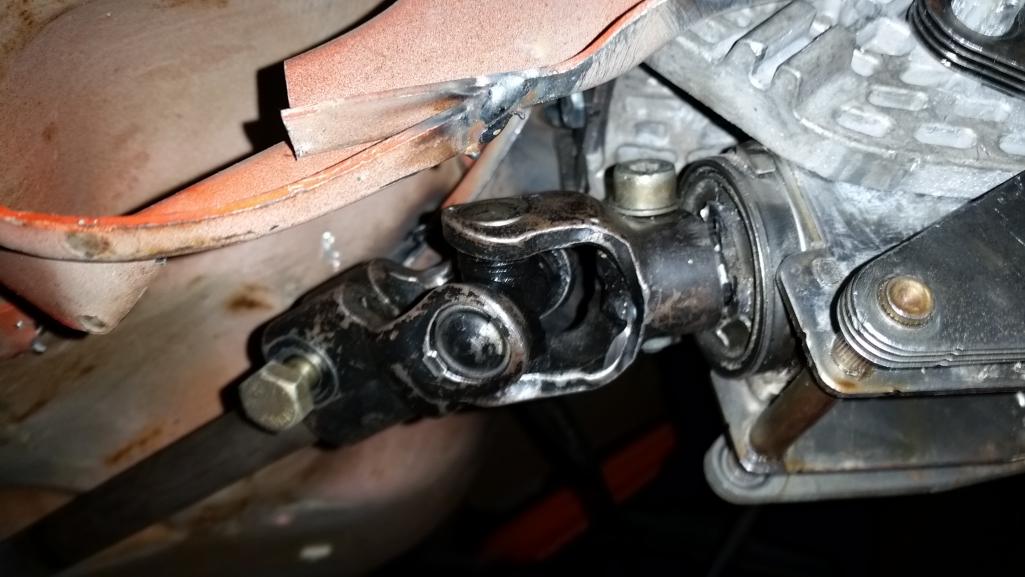
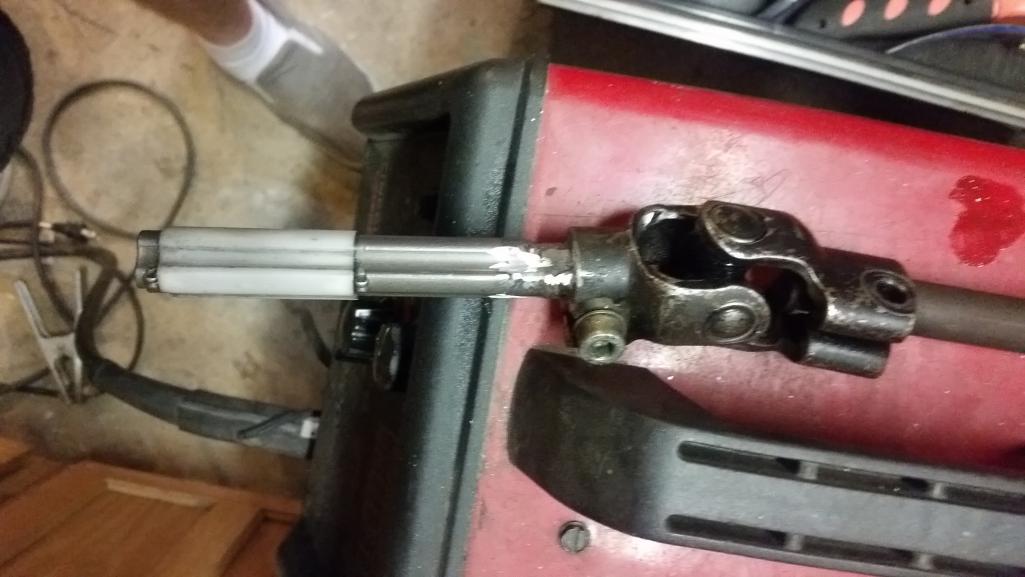
Modifications to the steering knuckle and column moved the knuckle assembly forward almost an inch.
Posted by: Andyrew Sep 21 2015, 01:37 PM
Gotta love those Germans....
Audi apparently individually wraps and connects all their different wiring harnesses separately.. They also have white ID tags on all their harnesses with part numbers that I can look up (most of the time) and ID what exactly they are for!
So I took the big chassis wiring harness (You remember, this one..)
And I removed all the wiring harness looms that I will not be using in the car.. And we made... Note I did remove one harness after this pic, and I havent touched the engine side (Note not engine harness, just all the wires on the engine side you can see they all have black plastic shrouding) So it will likely be a bit smaller all said and done. 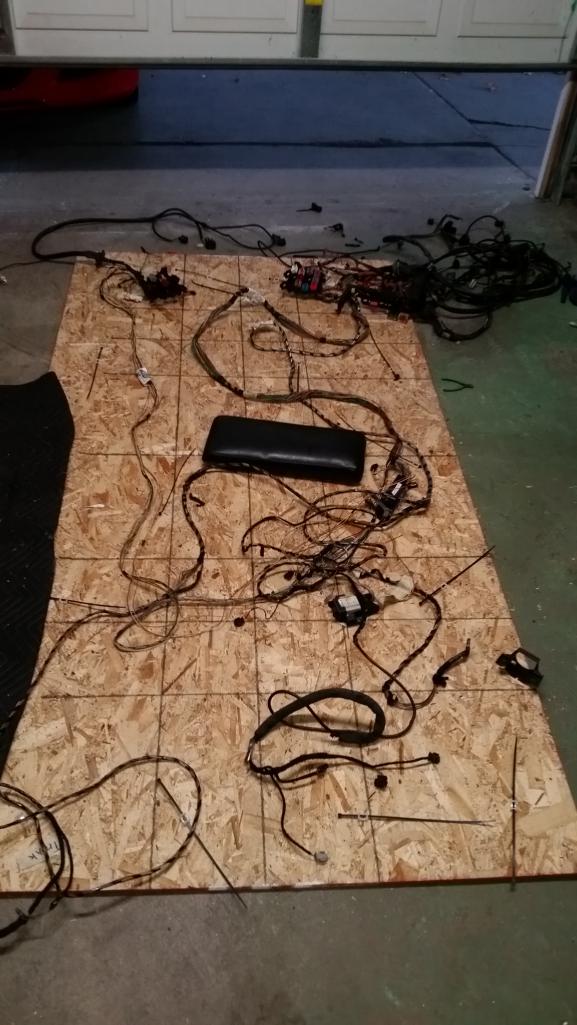
And we got this left over! Total weight of the removed wiring was ~ 20lbs! 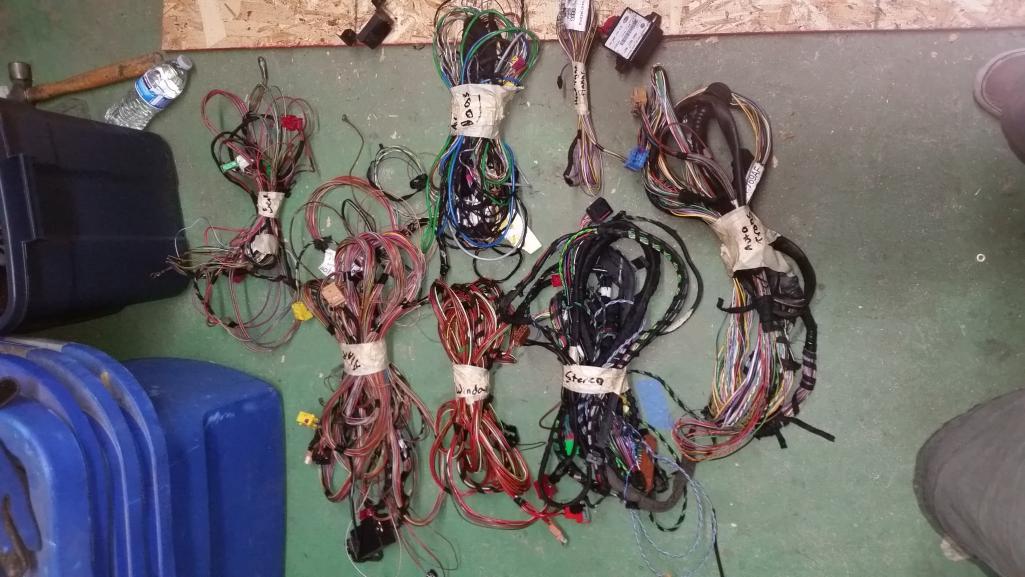
If I ever need to I can add the harnesses back relatively easy!
Next is to go through the dash harness and remove the similar wires that I dont need.
Posted by: Andyrew Sep 21 2015, 01:47 PM
I only have 2 harnesses left interior side of the chassis harness. the "body" which is basically all the lights, and "ABS" which houses all the stability control stuff and the abs stuff.
Posted by: 76-914 Sep 21 2015, 03:53 PM
My OG plan was to do as you have done Andrew, albeit Subaru. Then I realized that I may not live long enough to see it to completion,  . You however, have time on your side and I like your approach. WORD: don't drink or smoke anything when messing with the electrical. Your brain is left scrambled after a few hours of re-wiring anyway so there is no sense in starting out that way.
  I notice you try to work on it a little every day. Smart, if only for 1/2 hour at a time! At this rate you will be back on the road before Christmas. Kent
Posted by: Andyrew Sep 21 2015, 05:10 PM
My wife is currently busy with her masters degree schoolwork, so I get to spend ~ an hour or two on it 2-3 nights a week and then about 4 hours on it on the weekend (More if I get up early).
I dont think Christmas is in the cards at all... If I can make it by Christmas of NEXT year I will be happy.
The good thing about the wiring that I am doing right now is that the more I do the more sense everything makes. Im taking quite a bunch of pictures that are not posted, but I try to post everything that could be helpful to the next build (I might just do another Audi build... This is really starting to make sense... Probably not another one with ESP or power brakes, but maybe ABS...)
Posted by: Mike Bellis Sep 21 2015, 07:38 PM
Take it from me my friend... Once you start on wiring keep going. Do not take time off the project. No vacations. No long weekends away. No breaks! Not until you have it sorted out.
Once it's in your head, keep it there. A month off the car will be a real PITA to get back to.
Posted by: Andyrew Oct 1 2015, 02:21 PM
http://www.914world.com/bbs2/index.php?showtopic=265569
It appears as if I need to do an intro for the "Build Off Challenge" So here are the details
Andrew Dalen
Andyrew
Modesto, Ca
73 914 1.7 (Previously 5.7 SBC swap)
New engine: Audi 1.8 Turbo (Low boost: 275hp, Daily boost: 400hp, Race boost: 500+HP)
Exterior Color: Orange (Hugger Orange)
Interior color: Cinnamon Whisp/ Black Suede, Silver Paint
Wiring: Audi wiring 100%
Engine management: Modified OEM Audi ECU
ABS: Yes
Traction control and Stability control: Yes
Launch control: Yes
Cruise control: Yes
Climate control: Yes
OBD2 full control: Yes
Front and rear trunk: Yes!
Anticipated total budget required: $6500 less sold parts
The 5 large obstacles that I need to overcome are below.
1. Wiring layout/strip and integration into 914 wiring(Lights and wipers)
A. Finish ID'ing every plug
B. Finish stripping wiring (Dash harness, body harness, and engine harness)
C. Finish removing 914 wiring as well as existing wire identification
D. Install Audi harnesses
- 1. Locate and test install engine harness in body.
- 2. Locate and install dash harness in body.
- 3. Locate and install body harness in body.
- 4. Install engine harness in body.
E. Run power lines to the battery
F. Install battery and check for any shorts
G. Wire up lights and wipers
(This was just one of three harnesses required)
2. ABS Module integration (replumb all brake lines, abs sensor and pickup integration, revised pedal box)
A.
B.
C.
D.
E.
3. Audi engine/trans install
A. Remove v8 and cut out all non essential brackets and shelving in the engine bay.
B. Mount the mock up engine/trans together and locate it in the engine bay.
C. Cut out sections of the trunk for clearance
D. Create motor and trans mounts and mount engine/trans
E. Mount turbo and route plumbing for intercooler
F. Mock up and measure cv joints for order
G. Mount new fuel pump and run lines
H. Rebuild engine and install forged rods
I. Locate water pump, water reservor and lines
J. Plum intercooler pump, reservor, lines and radiator
K. Plumb oil cooler lines and run turbo lines
L. Run transmission shifter cables to the cabin, bleed clutch
M. Fabricate exhaust system
N. Oil and water in engine, hood up electrical connections except spark plugs, crank engine for 2 minutes to generate oil pressure and check for leaks.
O. Check ECU for error codes and address as needed.
P. Finalize connections and fire engine.
Q. Figure out what went wrong, fix it, and actually start the engine
R. 
4. Audi a/c and heater box mounted and plumbed in the front trunk, factory Audi climate control integration.
A.
B.
C.
D.
E.
5. Full custom interior build from scratch (custom dash, doors,center,back,ect. Tablet install for radio/nav/onboard diagnostics)
A.
B.
C.
D.
E.
(Note, this is draft one, I already have a new concept in mind for the interior that I have been drawing up)
You can see from the pics earlier in the thread that the bodywork is done and painted. Trunks will be painted in the build as well as probably a repaint of the engine bay. I also will redo the bumpers, but this may not make it into the build.
Posted by: madmax914 Oct 2 2015, 04:43 PM
I'm suffering from turbo envy! This will be an awesome build. I've been watching this for several months now, that 1.8L motor is impressive!
Posted by: Andyrew Oct 11 2015, 03:46 PM
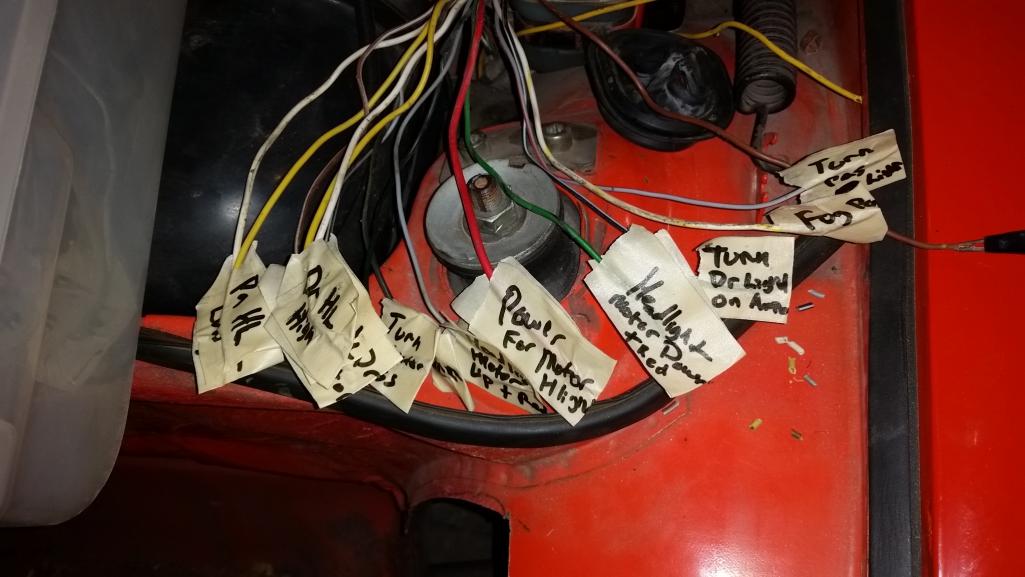
Figured out my front end wiring 914 side. I was waiting for a friend to come by and help me figure out some of the audi wiring and I have been waisting a lot of time thinking about wiring but it didnt happen, so..... 
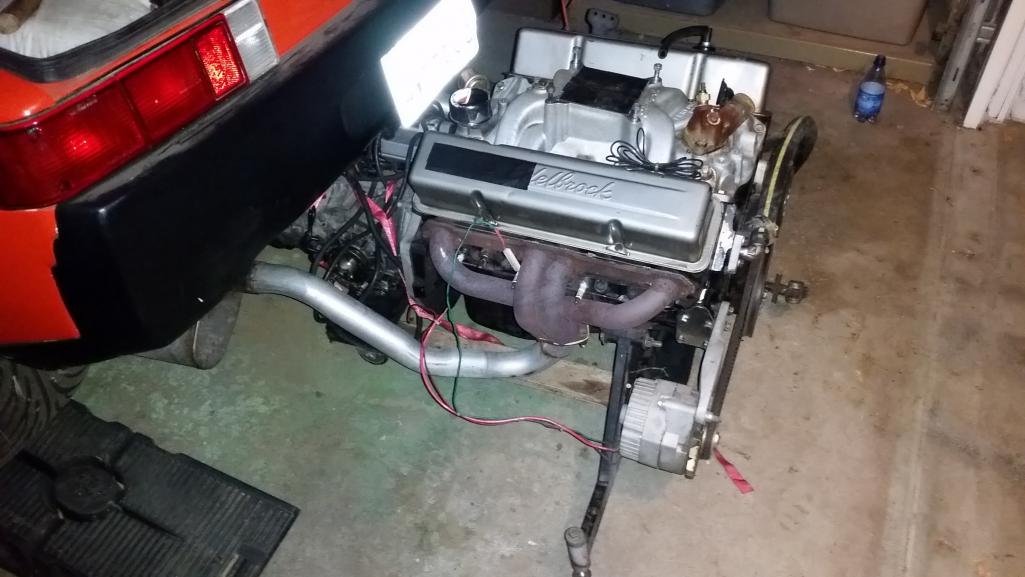
I pulled the v8 engine (buyer found), Ill be putting this in a members 914 in a couple of weeks.
Looks like it takes about 4 hours to pull the engine myself with breaks and figuring out how to lift the car up.
Ordered some spot weld cutting bits so the next thing is cleaning up the engine bay and removing the shelf. Once that is all done I can mock the engine and trans up and work on mounts, then when its all mounted I can switch back to finishing up the wiring
Posted by: 76-914 Oct 12 2015, 08:25 AM
What is it about wiring? The easiest part of a rebuild; physically speaking. Mentally; the most demanding part. I can see an entire build in my mind except the electrical. It's like entering a swamp.
Posted by: Andyrew Oct 12 2015, 08:52 AM
The biggest thing for me is that since I am simply using the Audi wiring harness I need to keep all the major components. I have about 30 plugs that I can not identify yet and I have yet to completely label the engine harness (However I have a full diagram that is labeled). I had a buddy that has stripped a couple of Audi's that knows most of the plugs in the car so I wanted him to come and help me ID the plugs I couldnt identify yet so I can determine if there are any more harnesses I could remove, or at least so I can place the harness in the correct place. Once that is all done I can work down the list of my TO DO's on my wiring.
NOTE: I updated post 422 to reflect my wiring to do's and my engine related to do's.
Posted by: Andyrew Oct 13 2015, 12:16 AM
Current interior concept.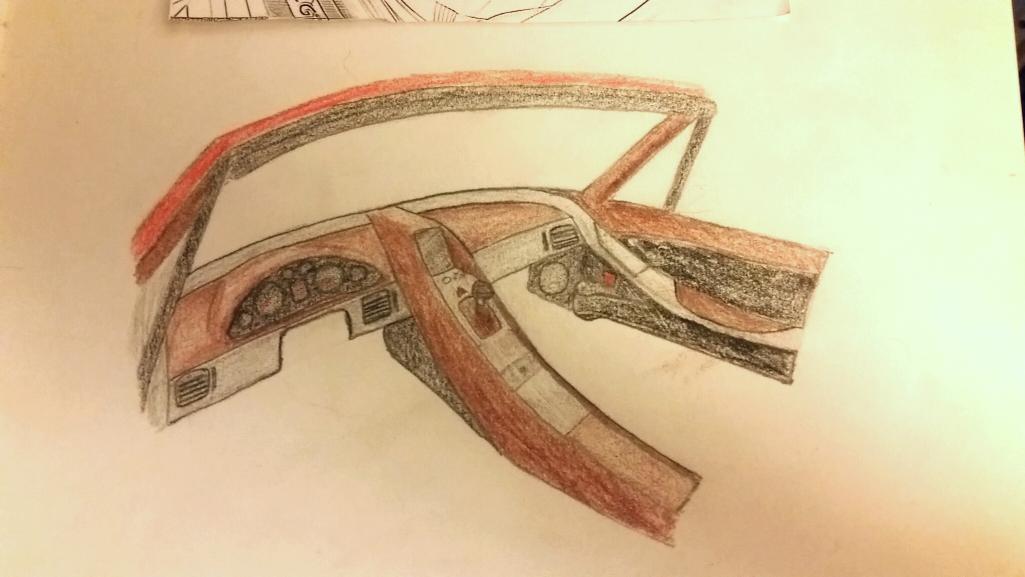
Posted by: Mueller Oct 13 2015, 12:20 AM
Neat drawing...looking forward to seeing this in person when you finish it.
Posted by: Mike Bellis Oct 13 2015, 07:31 PM
I'm looking forward to Andrew actually driving his car...
Posted by: Andyrew Oct 13 2015, 07:45 PM
Would be nice for sure I doubt I have more than 5k miles on the car in total
Posted by: Andyrew Oct 18 2015, 08:15 PM
There Multiplying...
Delay in progress due to mini build on members car.
http://www.914world.com/bbs2/index.php?showtopic=267385
Attached thumbnail(s)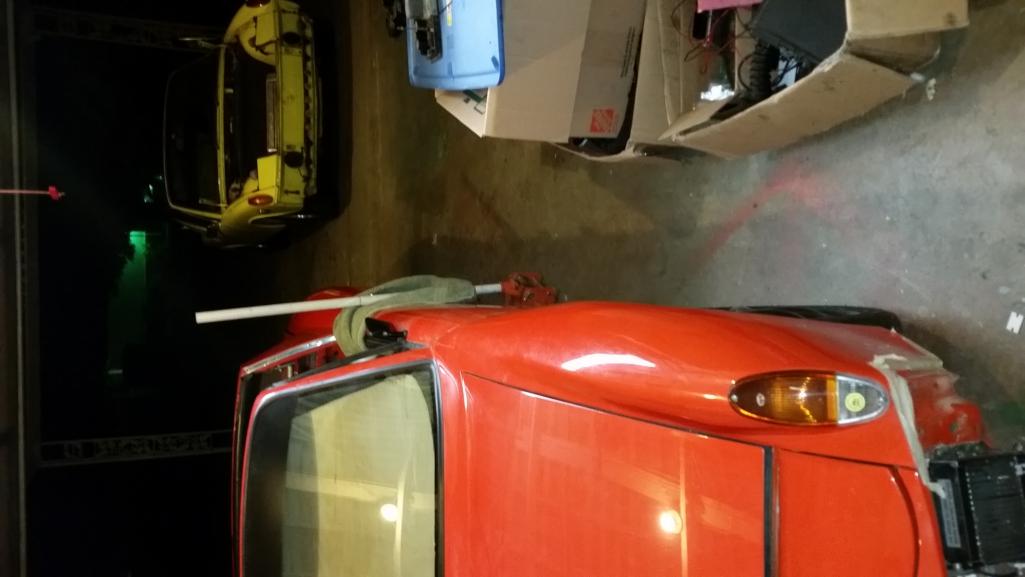
Posted by: Andyrew Nov 6 2015, 10:04 AM
Happy Birthday to me!
I received my new fuel setup in the mail. Very excited about this. 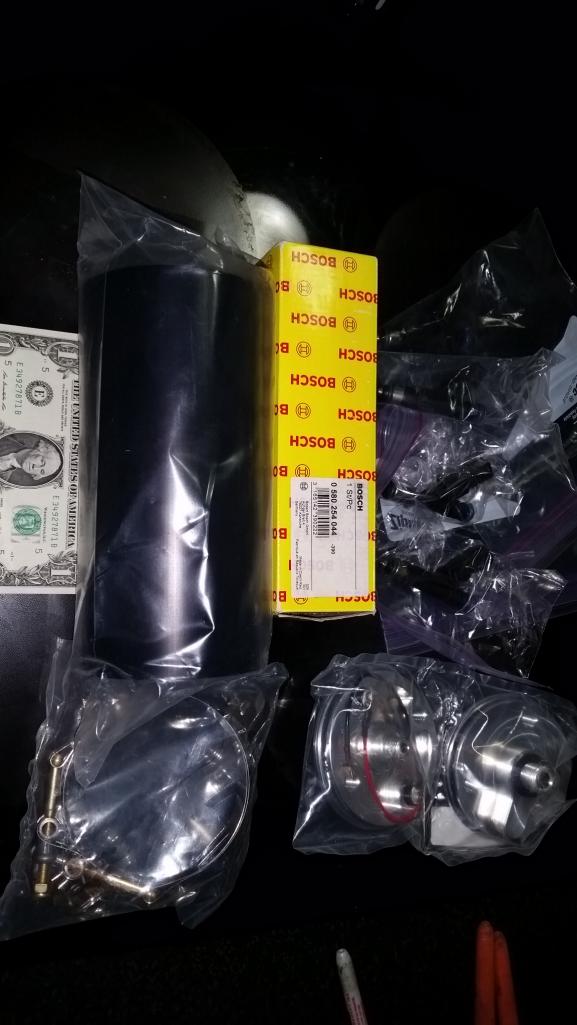
Bosch 1000CC EV fuel injectors (Can run up to a 93% duty cycle reliably) This puts me right at 545HP max at E85 with 43.5psi.
Fuel pump is the outstanding Bosch O44 which is one of the strongest and linear in the industry and can change the fuel pressure if I find that being required.
Now here is the fun bit
http://store.034motorsport.com/fully-enclosed-fp34-fuel-pump-surge-tank-for-bosch-044.html
Fuel surge tank. This encloses the Bosch 044 fuel pump and allows for it to be submerged constantly(Less noise and cooler running). The surge tank is primed by a carb low pressure fuel pump and remains full constantly effectively preventing any possibility of fuel starvation in corners. This also has the added benefit of allowing me to use the stock style fuel lines since they will be under zero pressure and allow for 100% flow of the lines. I will put this surge tank in the engine bay and it will keep my expensive high pressure lines very short and allow for no line pressure loss due to length
Its a win win win!
Presents from my wife. 
Ironically my wife checked out my amazon wish list and grabbed a couple items.
1.Low pressure fuel pump
2. Roller and corner roller tools for building the interior
3. Shades (Because you have to look cool)
4. Candy
5. Beer chiller
Finally had some friendly competition between my car and her car with her driving on Forza! Very proud that she actually beat me when I was using a stock 914! 
Posted by: Mike Bellis Nov 6 2015, 08:02 PM
turn up the pressure and turn down the duty cycle. I'm running at 4 bar (58.8 psi). 034 recommended my 330cc injectors at that pressure for my hp goal.
Posted by: Andyrew Nov 7 2015, 11:15 AM
Really 330CC's? Im really surprised that your able to push those injectors that much... I had 440's that I maxed out and IIRC I was running a 4bar FPR, mind you I was making similar power that you are now. You sure your only on 330's?
And yes I don't plan on running my duty cycle that high, I'm just showing where the injectors currently are at the standard pressure. I am probably going to tune for 4bar FPR. Whatever my tuner thinks is the best for my needs
Posted by: Justinp71 Nov 16 2015, 02:57 PM
With being a recent vw/audi owner (GTI), I am excited to watch this build.
Andrew are you pulling the motor out of the A4?
Posted by: Andyrew Nov 16 2015, 03:56 PM
With being a recent vw/audi owner (GTI), I am excited to watch this build.
Andrew are you pulling the motor out of the A4?
A4 has been sold as a driver. My daily being my Fiesta ST has given me no need for the quattro...
Motor I have is out of the junkyard. Im going to open it up to see if I want to built it. But I am keeping an eye out for a good usable motor. Maybe one with VVT so I can get some more low end.
End goal is to build a motor with cams, ported, oversized titanium valves and springs, rods/ stroker/pistons. Build it to rev to 8500 and put a larger hot side if I feel it needs to breath better up top. That would give me well over 4k rpms of usable power.
Posted by: 76-914 Nov 16 2015, 04:44 PM
OT: Just saw your car in the calendar. Great shot!
Posted by: Andyrew Nov 16 2015, 05:35 PM
Last years calendar right? I specifically didnt enter this year as I was already in it last year and wanted to give more people an opportunity to pop in..
Besides I voted for the hillside shot of the "multiple" cars, my Fiesta ST is actually hiding in the back
Posted by: Andyrew Nov 23 2015, 12:06 AM
Gotta get back on the horse!
Engine shelf removed/trimmed. 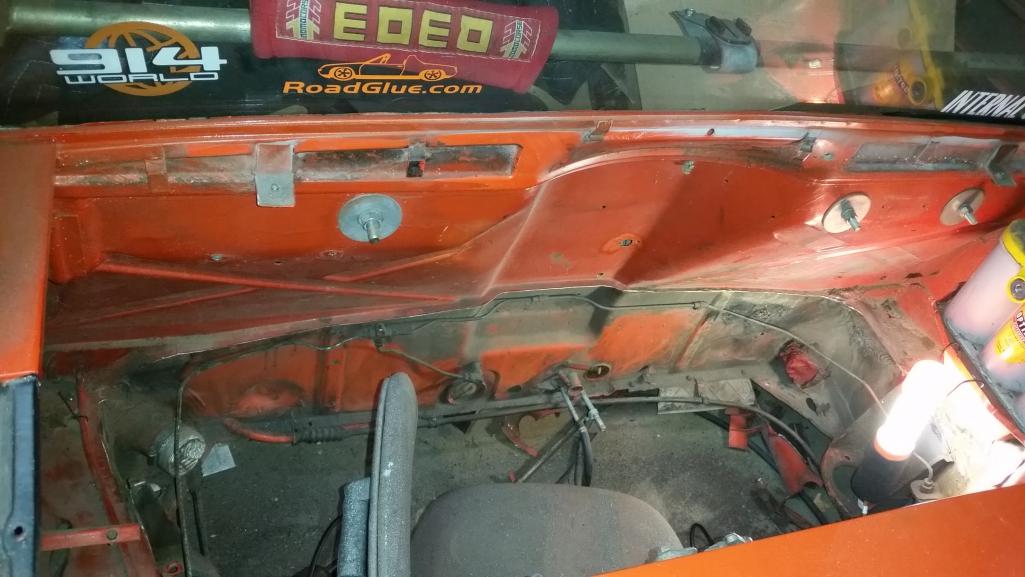
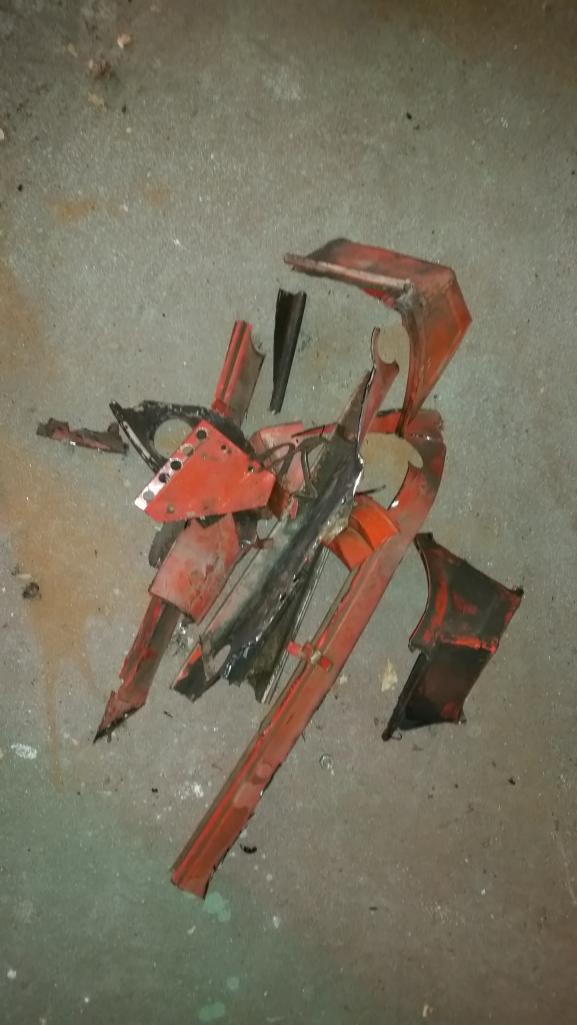
Test mounted the engine/trans then test set it in the engine bay. Looks like to make the axles level the pass side needs to be 1/2" higher than the drivers side when its on the movers dolly. Simple enough 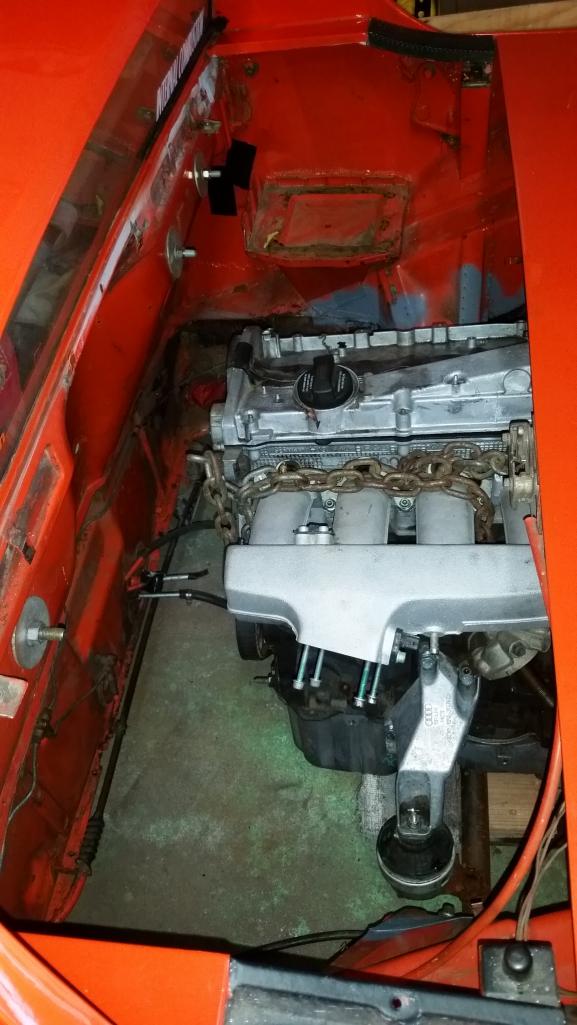
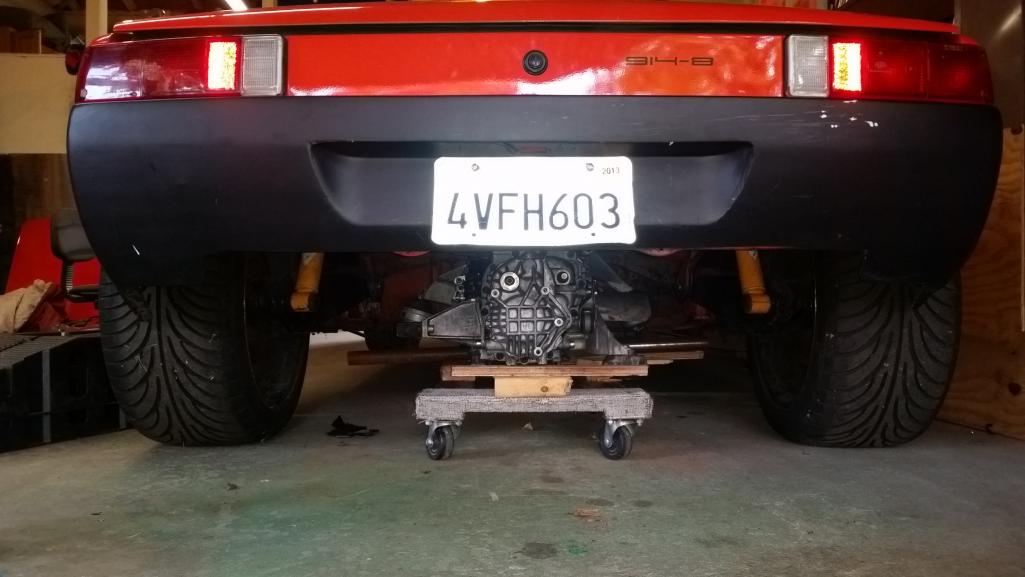
Posted by: Andyrew Nov 23 2015, 12:10 AM
Im still positioning the setup left,right, up, down, tilt, back. In my head the setup needs to come back an inch and up 2-3, or tilted forward about 5-10 deg to get the trans tucked up a bit more and the axles more level with the suspension. I'd like to get the axles almost level when the car is in its resting position. 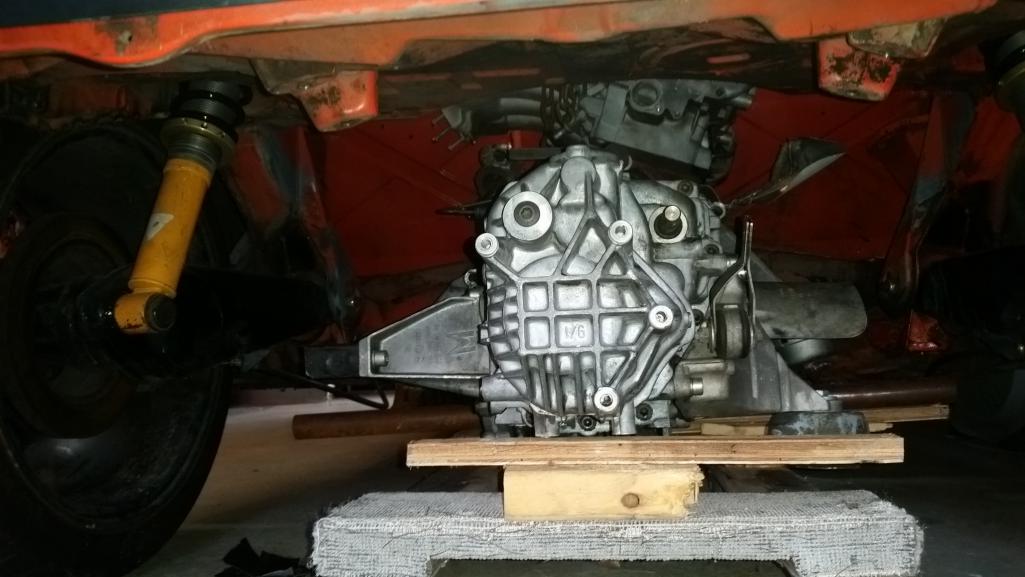
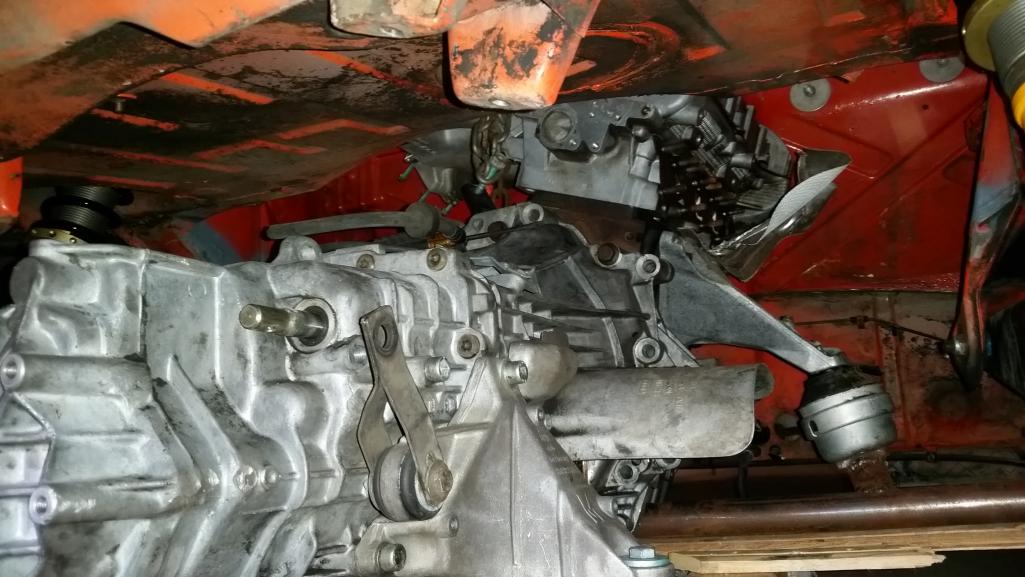
Hard to see in this photo, but the trans is about 1" forward of the axles when the engine is touching the firewall.
And finally, started reinforcing the rear shock tower for my brace. I am going to remove the firewall where the blue tape is (did get a full pic of it) and rebuild/box it about 6" back where the shocks are. I'm going to have a local metal shop bend up some steel similar to the 914 humps for strength and weld it in to the 1" bar brace I weld in between the towers. I am going for a near factory look when done. 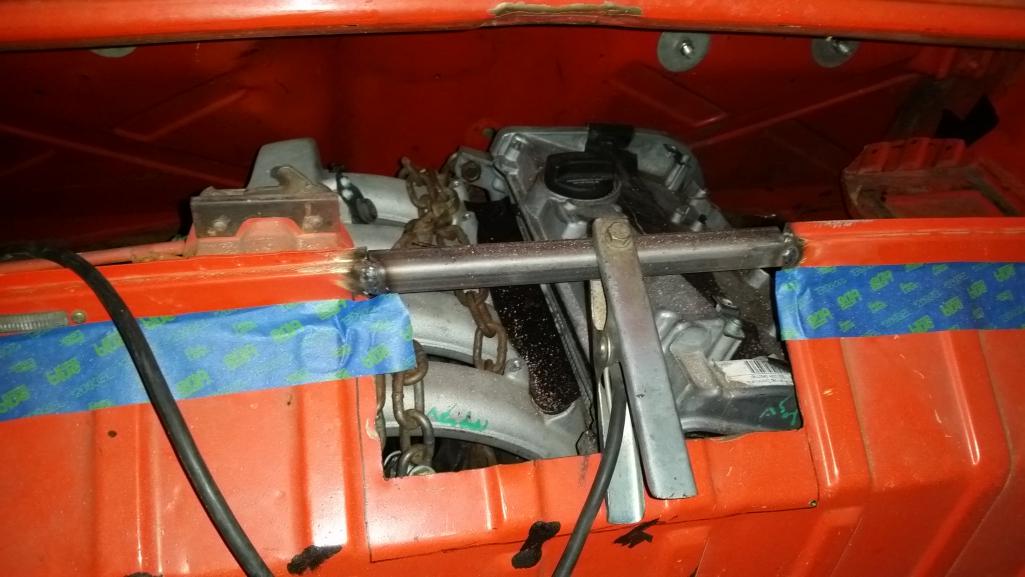
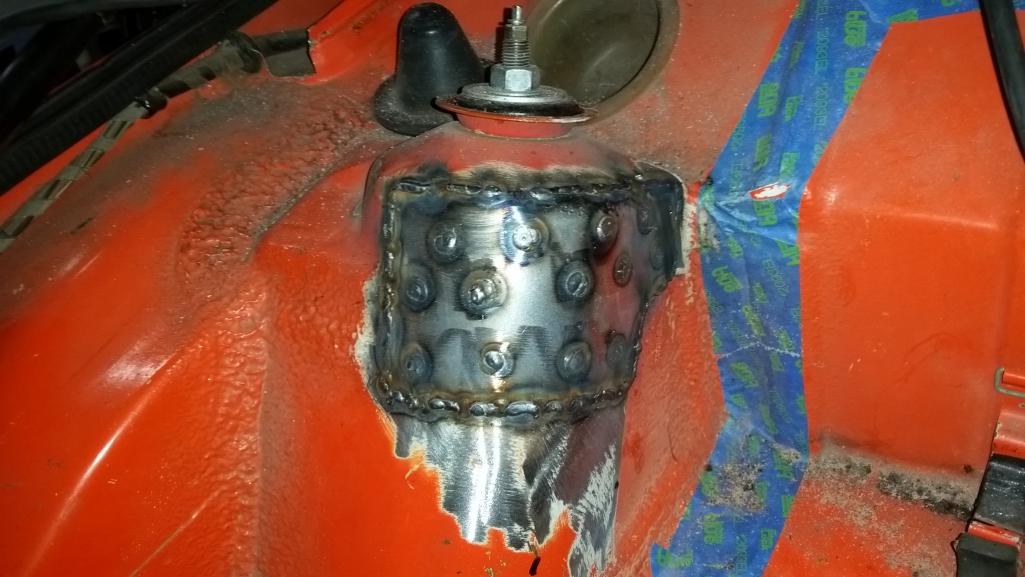
Posted by: rightpedal Nov 23 2015, 05:48 AM
Are you going to add more support in the front corners of the engine bay? I ask because we were looking at my build car (cut out engine tray) and the parts car (tray intact) thinking that's a fair amount of triangulation/support. Just looking to what others are doing in that arena.
Steve
Posted by: Andyrew Nov 23 2015, 09:17 AM
Its a fair amount of triangulation to the firewall which is essentially non structural.
That being said yes there is some additional reinforcements to come in the rear suspension console. Specifically the typical firewall to rear suspension ear. I am debating how exactly I am going to do my engine bar at this point, so I want to make sure everything is as strong as possible.
Posted by: Mike Bellis Nov 23 2015, 09:48 PM
I think you will end up cutting out the battery tray. There is very little room once you get everything bolted on. My turbo is smaller than yours...
Posted by: Andyrew Nov 23 2015, 10:50 PM
My manifold is more compact
Ill test mount it after I cut the firewall and see.
Posted by: Mike Bellis Nov 23 2015, 10:54 PM
My manifold is more compact
Ill test mount it after I cut the firewall and see.
I'm running the smallest T3 manifold I could find. Ended up being the cheapest too.
Posted by: Andyrew Nov 26 2015, 12:34 AM
It fits just fine in fact the manifold is about an inch away from the head so itll suck in more. 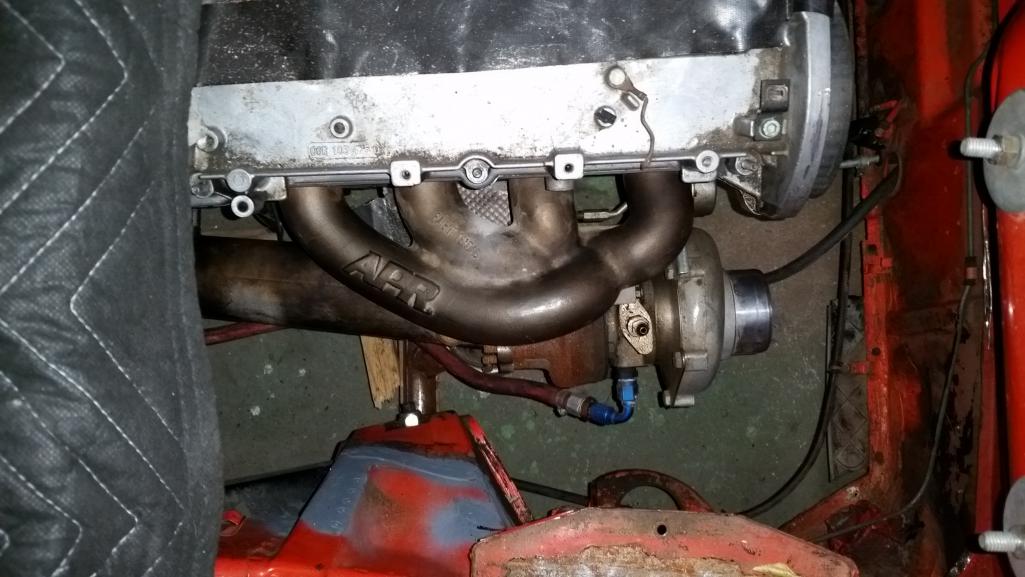
Also I got my water to air intercooler. Big hunking thing, a full 20lbs. 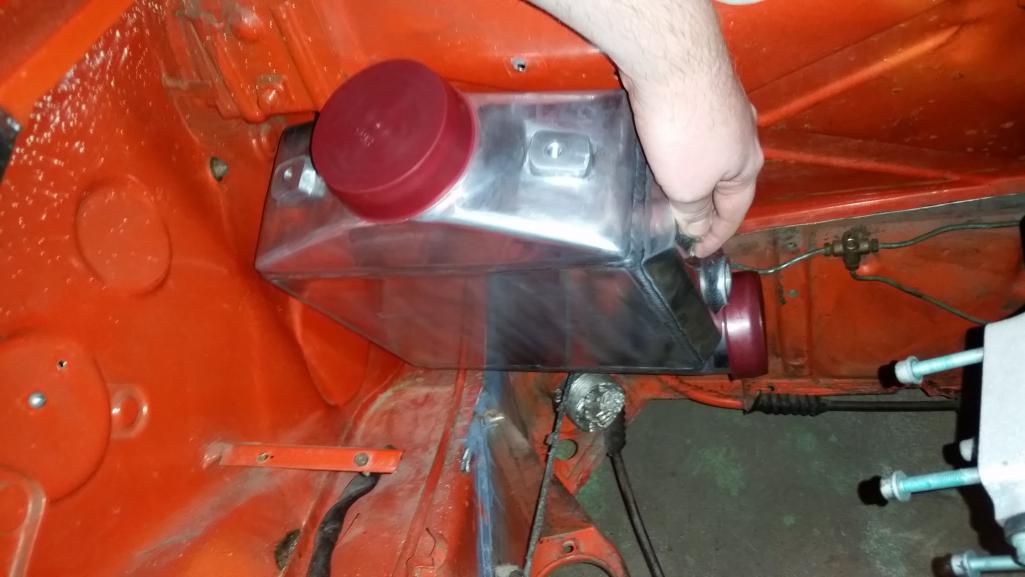
Posted by: Mike Bellis Nov 26 2015, 05:27 PM
It fits just fine
in fact the manifold is about an inch away from the head so itll suck in more. Also I got my water to air intercooler. Big hunking thing, a full 20lbs.
That turbo sites nice and low! More pics please...
Posted by: Andyrew Dec 1 2015, 08:33 AM
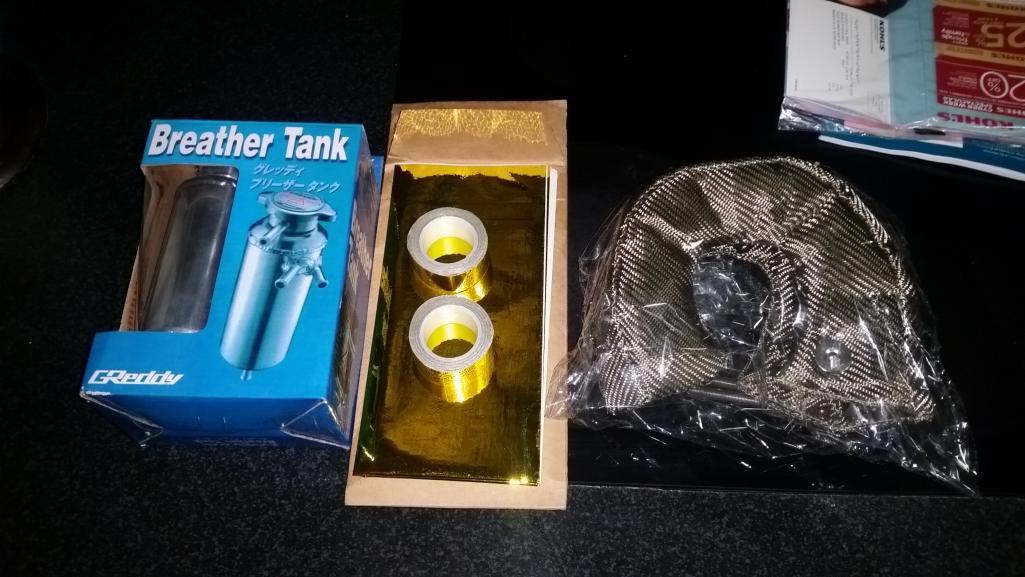
Overnight Parts from Japan! left is radiator tank for the water injecton (might not use this), middle is gold foil heat shielding, and right is turbo blanket. 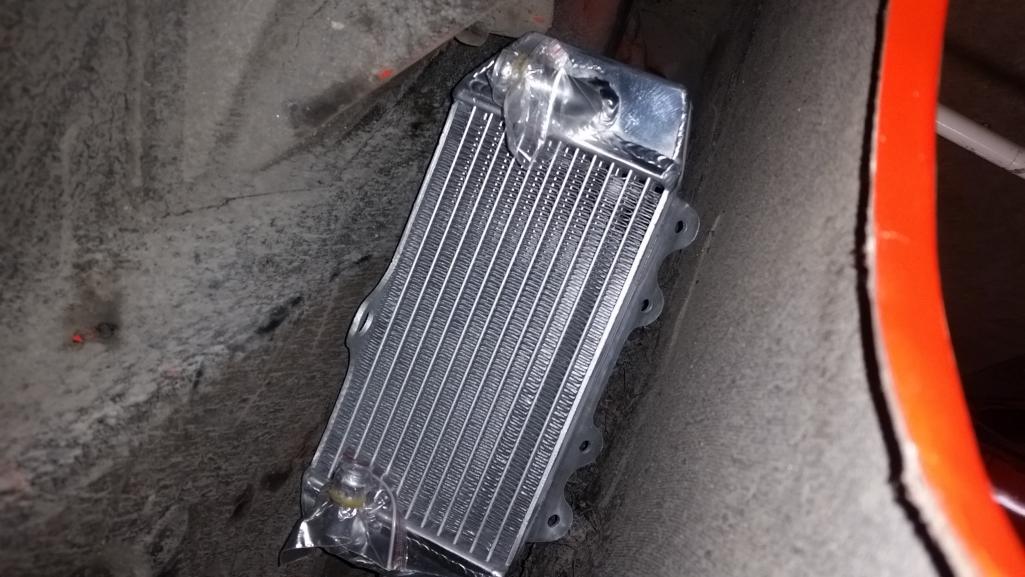
YZ85 radiator. Should make a nice water to air intercooler radiator. Shown in the dr side fenderwell. 
Electronic boost controller. Best on the market for features. Used this one many times. 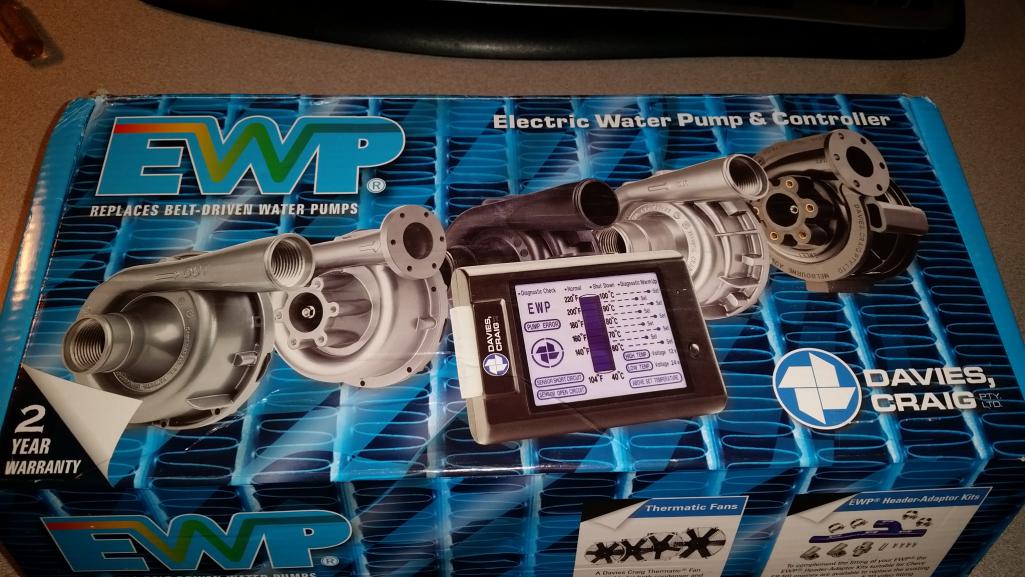
Davies Craig EWP130 water pump with LCD controller. Really happy about this one
Posted by: Andyrew Dec 1 2015, 08:40 AM
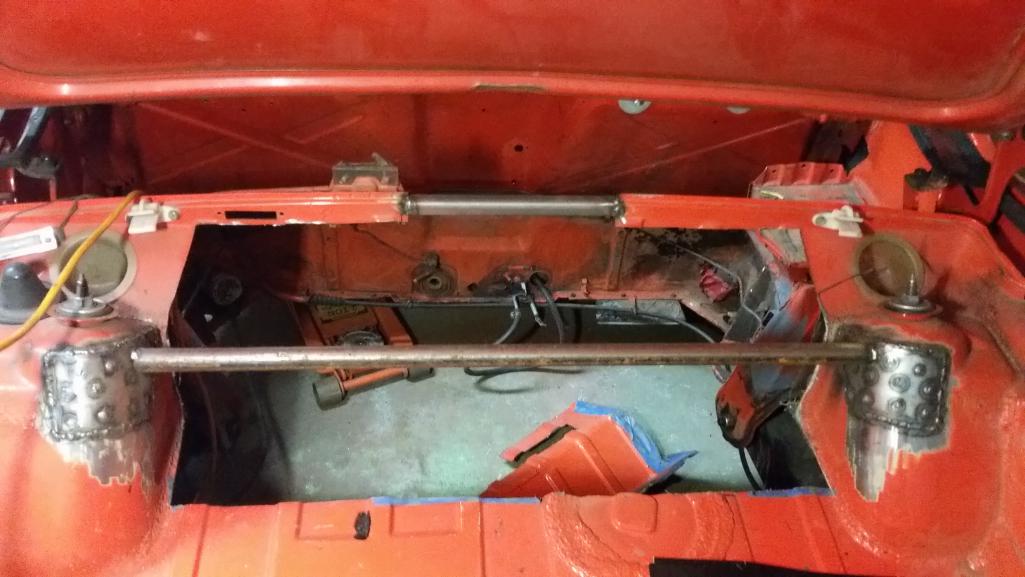
I did a thing... welded in a reinforcement to the shock towers prior to making the cut. Im going to cover the hole in ribbed 16ga steel. But before I do that ill box in a reinforcement to the shock tower from the rear long and seam weld all the joints for strength.
Not pictured but I got the injectors back from cleaning. Apparently they are 1300cc injectors not 1000cc, so lots of headroom for e85, should keep the injectors nice and efficient.
Posted by: Justinp71 Dec 7 2015, 12:31 PM
Looking Good! What turbo are you running?
Posted by: Andyrew Dec 7 2015, 02:04 PM
Justin,
Comp Turbo triple ball bearing CTB5356 About the size of a GT3071R.
Posted by: Andyrew Dec 7 2015, 02:35 PM
Progress from this weekend. 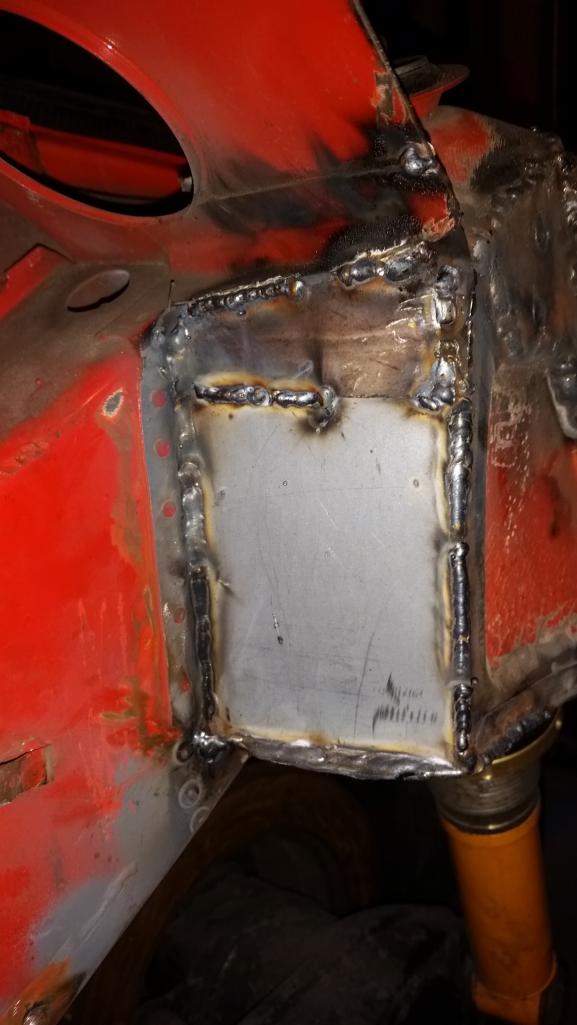
Triangulated the rear shock tower against the frame with 14ga steel. Also seam welded the frame to shock tower joint (not pictured). 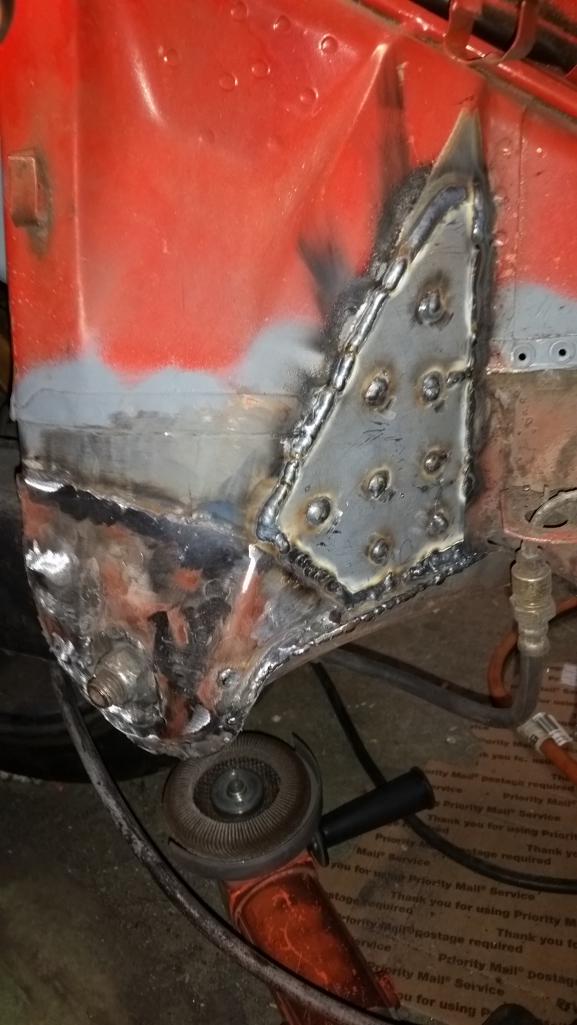
Reinforced the suspension ear with a Tangerine Racing reinforcement kit, and then my sheet of 14ga for mounting the brace to. 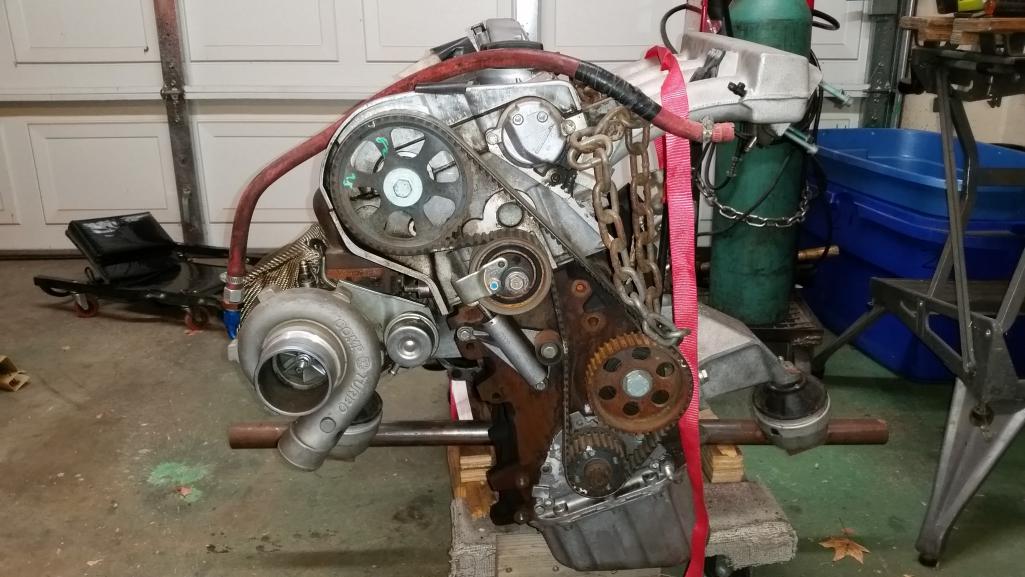
Engine with turbo mounted. 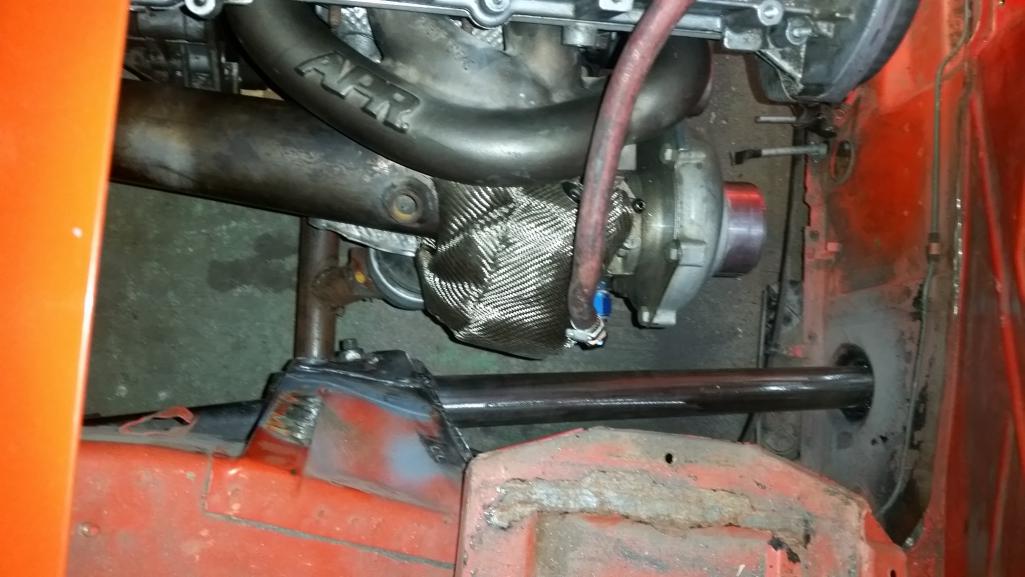
Brace mounted to the firewall and suspension ear. You can see the turbo mounted (Bolted in all the way). Plenty of room! This is with the engine in place. I didnt mount it up because I wasnt happy with the height of the engine/trani. I move the front of the engine up 3/4" and the rear of the trani up 1 1/2". I'll get that in place this week and hopefully that will be where I want it to sit.
Posted by: Andyrew Dec 16 2015, 09:02 AM
Progress from this extended weekend. There wont be any more progress until after christmas and maybe not even this year.. But I hope I can put a couple more hours in and finally mount the engine in place. 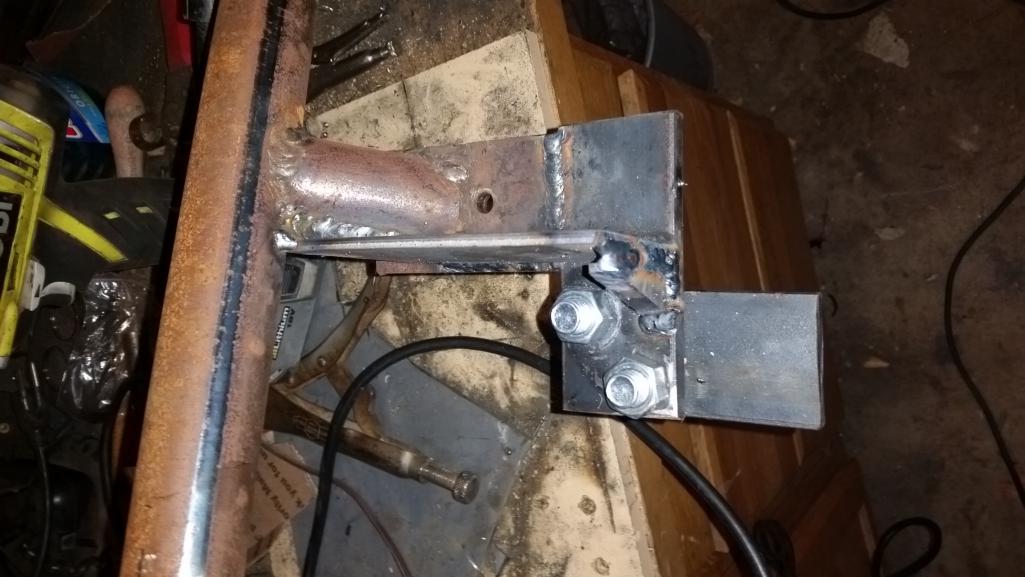
This may seem overkill but this seemed to be the most solid way to mount this. Instead of coming off the engine bar I made that goes under the engine I decided to come off the front of the motor mount. I am currently debading if I want to cut off the crossmember alltogether to save 4lbs, but I am leaning towards no. 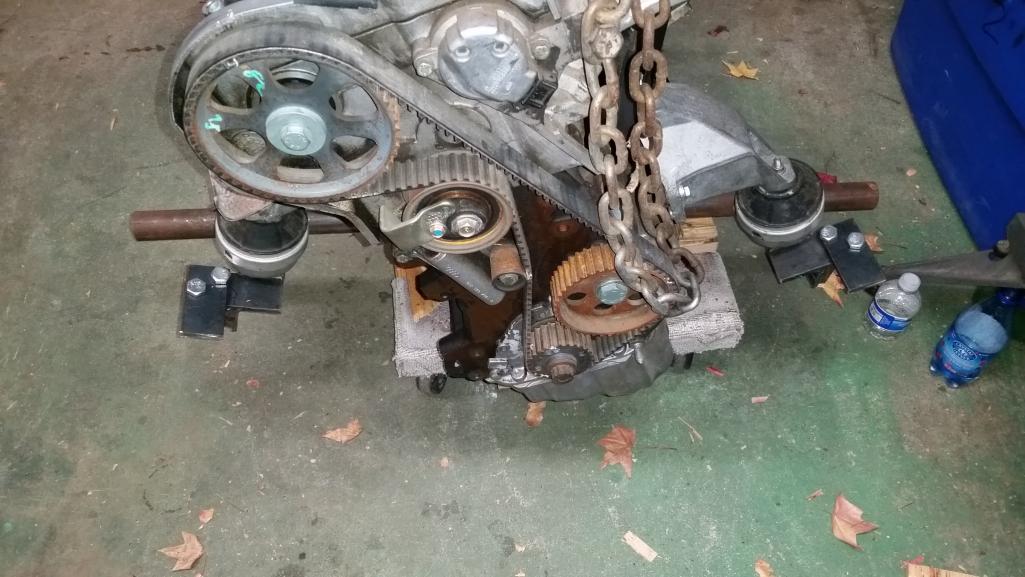
Great pic showing the relationship to the mounts. You can see 4 really easy to get to bolts and the front is out. 
Put the shift linkage on the test trani (Audi a4 1.8t fwd) only difference was I had to remove about 1/4" from a bolt mount to match the other trani. 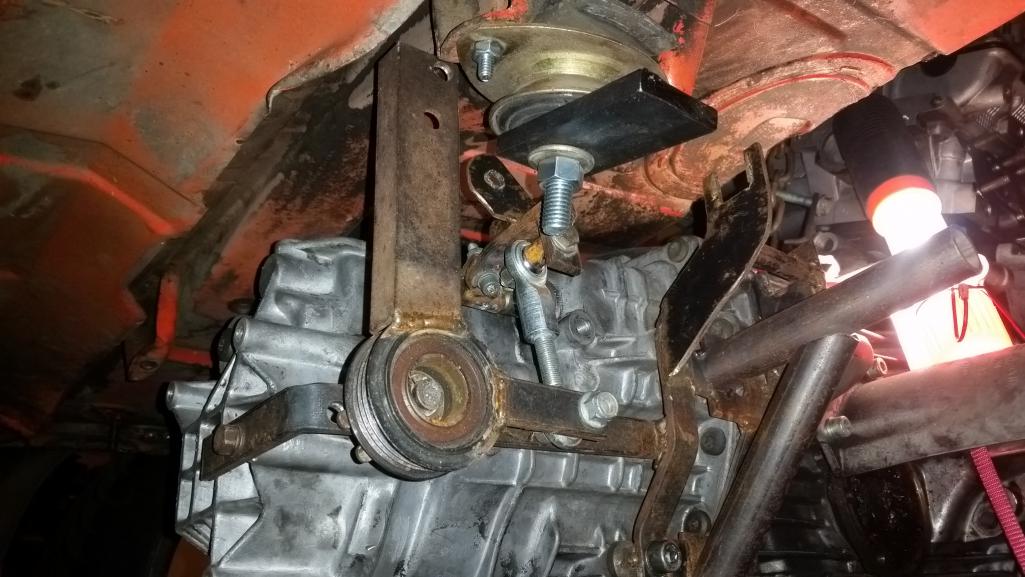
And then came the issue I was not expecting. My shift linkage was touching the trans mount. This is without the cable being attached to the linkage which adds 3/4"... At this point I wasnt sure how to proceed.
Posted by: Andyrew Dec 16 2015, 09:12 AM
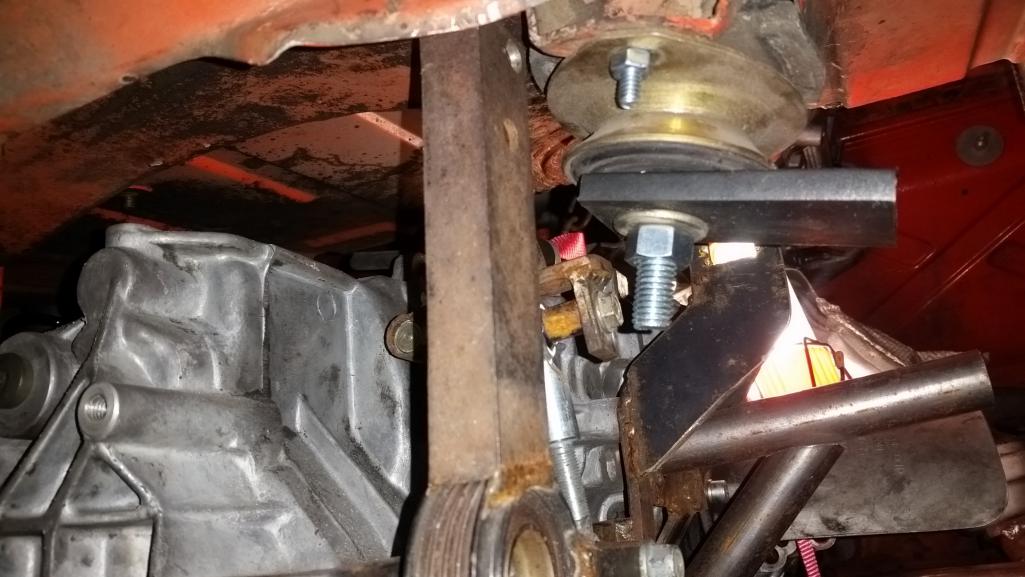
You can see its pretty much touching. You can also see in this the bar mounted to the trans mount. Its currently facing right but it will be facing forward and joined to the two pipes you can see jutting out from the trans.
So what to do? 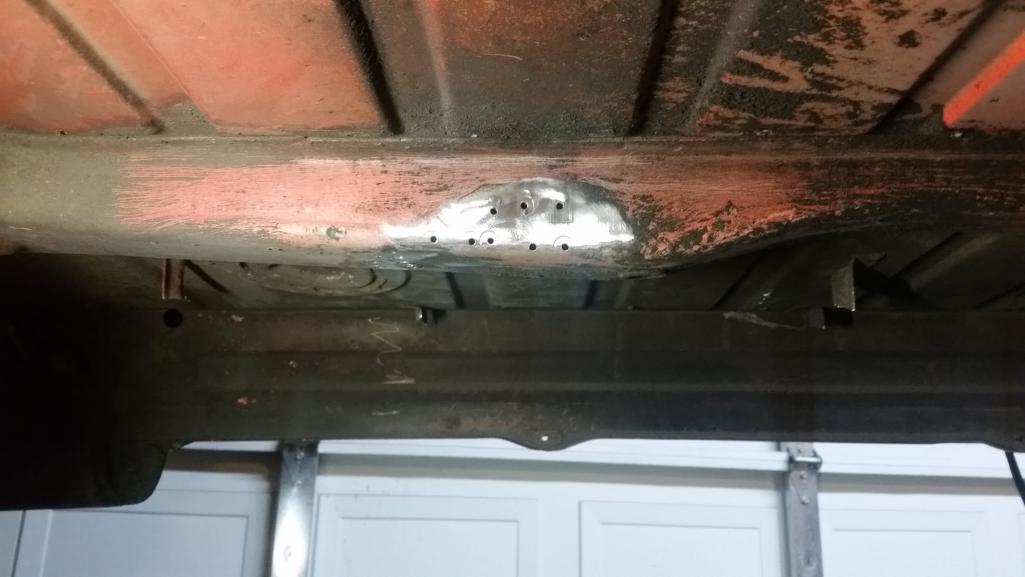
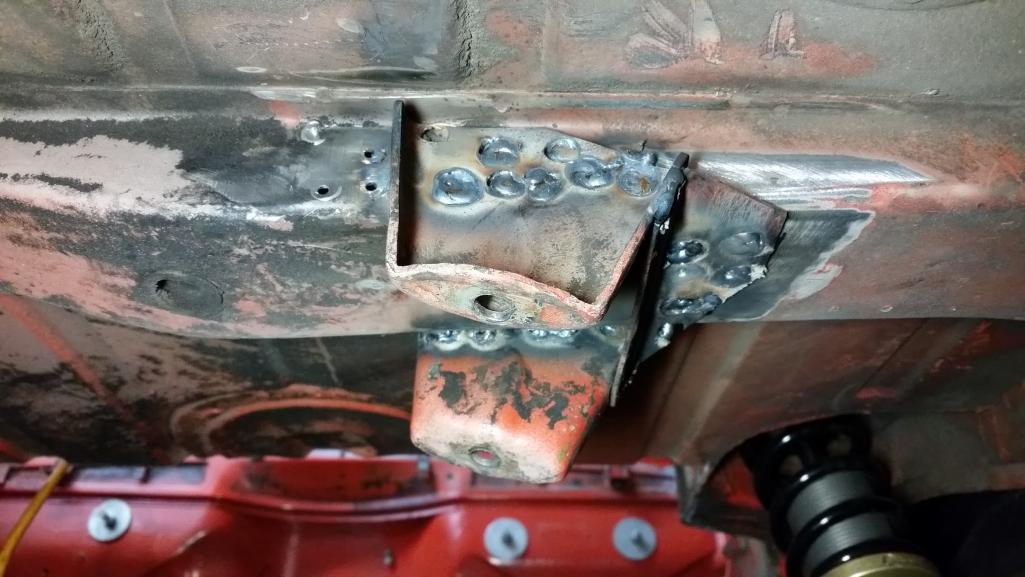
Well move the mount over of course! This took longer than I had anticipated... the spot welds were a PITA and I broke my spot weld remover as well.. (still had 5 bits left too  )
)
And finally A really cool temp controller. Tested on the bench and it works great. Audible relay click when it hits the set temp, and there is a 2 deg buffer. Its got provisions for keeping the temp both hot and cold which is really cool! With all these screens I have I am debating the "stockish" dash display I have. I have an idea that could work well for hiding these.
Posted by: 76-914 Dec 16 2015, 06:27 PM
Incorporate a hinged face plate onto the dash face that folds up to reveal digi's? Good to see you working on your build again, Andrew. One thing about fabbing shit up. Be prepared to do, re-do and then re-do again.
Posted by: Andyrew Dec 16 2015, 06:38 PM
Yup a hinged face trim on the pass side is my first idea. Second is a magnetic or snap in trim that I can remove/install. I dont have a glove box figured in my install but I could make it a large glove box that hinges or slides down.
Posted by: 76-914 Dec 16 2015, 07:29 PM
Yup a hinged face trim on the pass side is my first idea. Second is a magnetic or snap in trim that I can remove/install. I dont have a glove box figured in my install but I could make it a large glove box that hinges or slides down.
HF has some small (appx 8mm rd. x 2mm) rare earth magnets for < $5.
Posted by: Andyrew Dec 16 2015, 08:03 PM
Yup. Thought about putting that behind the fiberglass trim. I would be worried about noise/vibration though.
It also doesnt allow me to quickly check the displays so Im leaning towards hinged.
Posted by: Andyrew Dec 26 2015, 08:51 AM
Quick present recap. Amazon wish lists are awesome 
From left to right.
6" sub, Water injection pump, 1000w Amp, 5.5" speakers, Valve train bits, Amp volume controller, "8ga" amp install kit, Tubing flare, Tubing bender, Media button, Tweeters, 914mug/stickers, Flexible ruler.
The only thing left for my Stereo is the actual tablet. But I'll wait till it gets closer for that. I can run my phone till I get something that will work for a long time.
Posted by: 76-914 Dec 26 2015, 09:04 AM
Cool presents. Hopefully we can all get kitchen pass' to work on our cars this weekend.
Posted by: Andyrew Dec 26 2015, 06:57 PM
I got a pass to go for a drive with my cousin which was really nice so I call that a win
I think I will be able to find some time this week to finally weld in the mounts for the engine/trani. Thats my goal, Not sure if I can get it done but it will be a HUGE step forward if I can get it mounted.
Posted by: Andyrew Jan 1 2016, 12:26 PM
My final update for December 2015 is below
Guess who welded up the engine/trani mounts for their final position?
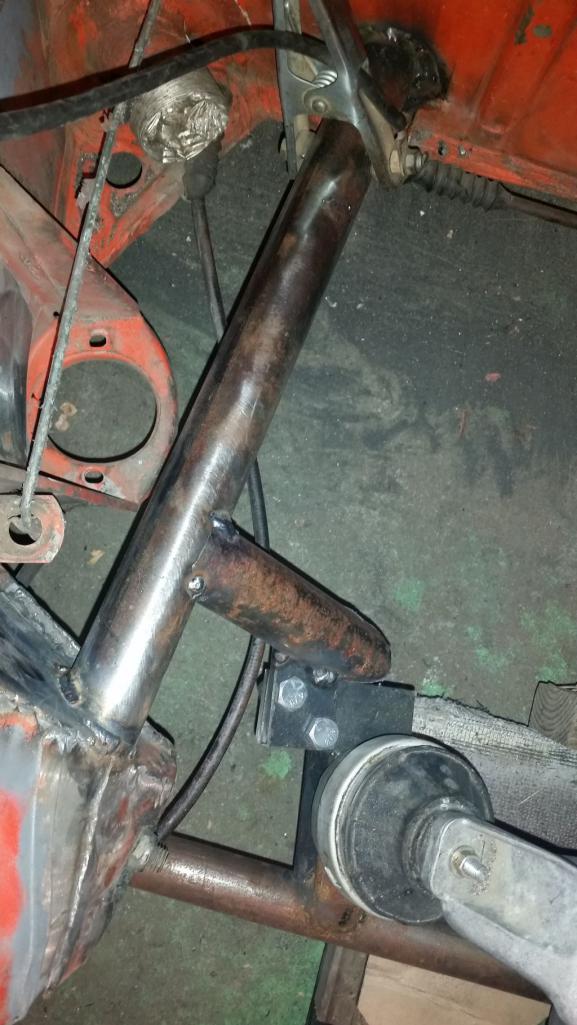
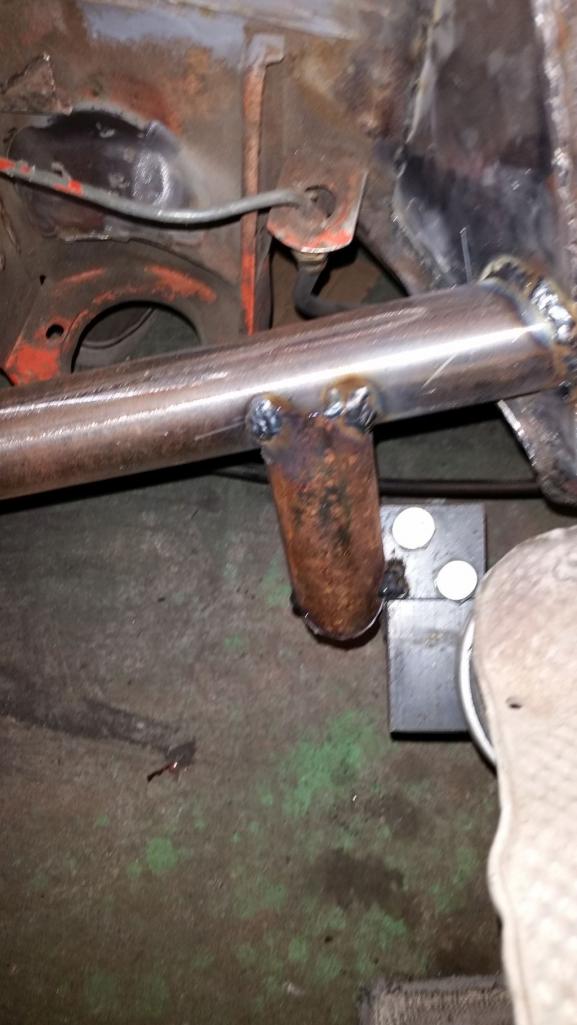
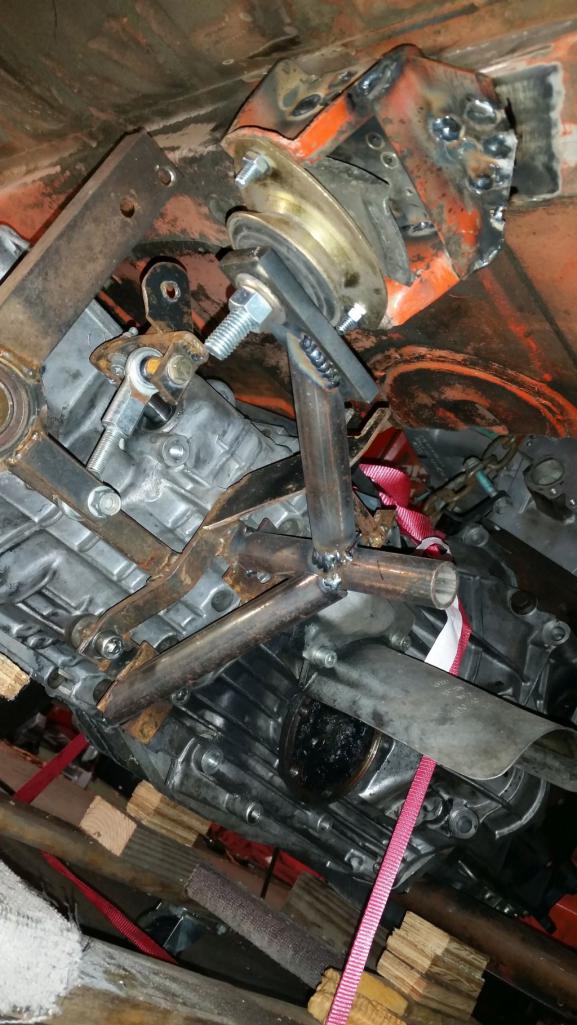

I'll add one support to this, I dont have any bolts on the trani closer up top that will triangulate this for load so I am going to use the hoist hole for one. 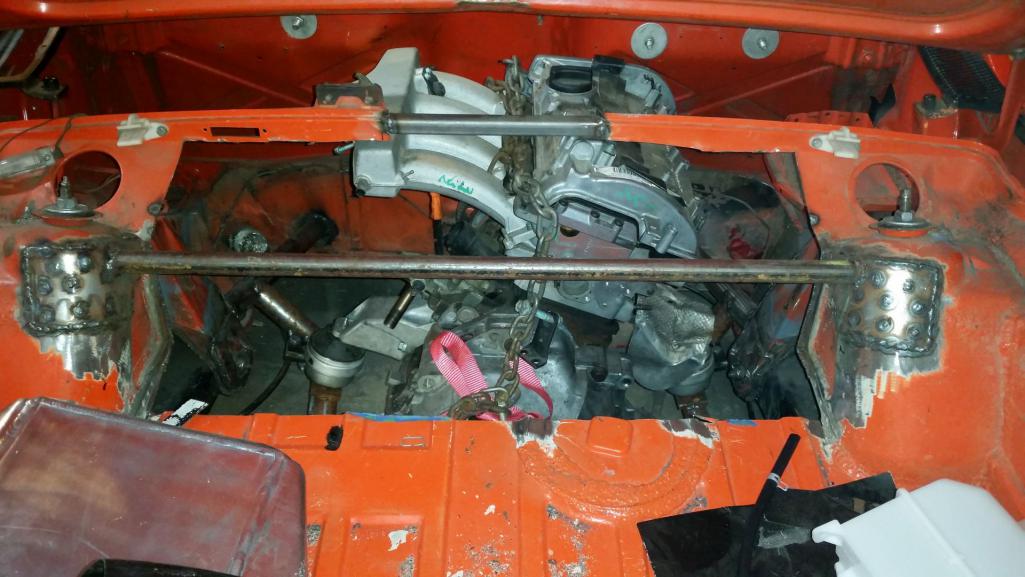
This is immediately after tack welds, They are all 90% welded now, but will finish that up in January. I was able to remove the 8 bolts holding it all together (4 up front and the 4 trani bolts for the oem mounts) and raise the car up in a couple minutes. Really happy with how that turned out
Posted by: 76-914 Jan 1 2016, 02:34 PM
Muy congrats, Andrew. Question. In your last pic, I see you cut out the piece adjacent to the trunk light and then welded a piece back in the same spot? Re-enforcement or change of plans? More pics, pls.
Posted by: Andyrew Jan 1 2016, 02:42 PM
That 1' cutout is for the distributor on a SBC conversion. Different clearancing is needed for the Audi engine.
Posted by: dan10101 Jan 1 2016, 03:03 PM
Looking good. Progress!
Posted by: Mike Bellis Jan 1 2016, 09:17 PM
Posted by: Andyrew Jan 2 2016, 11:49 AM
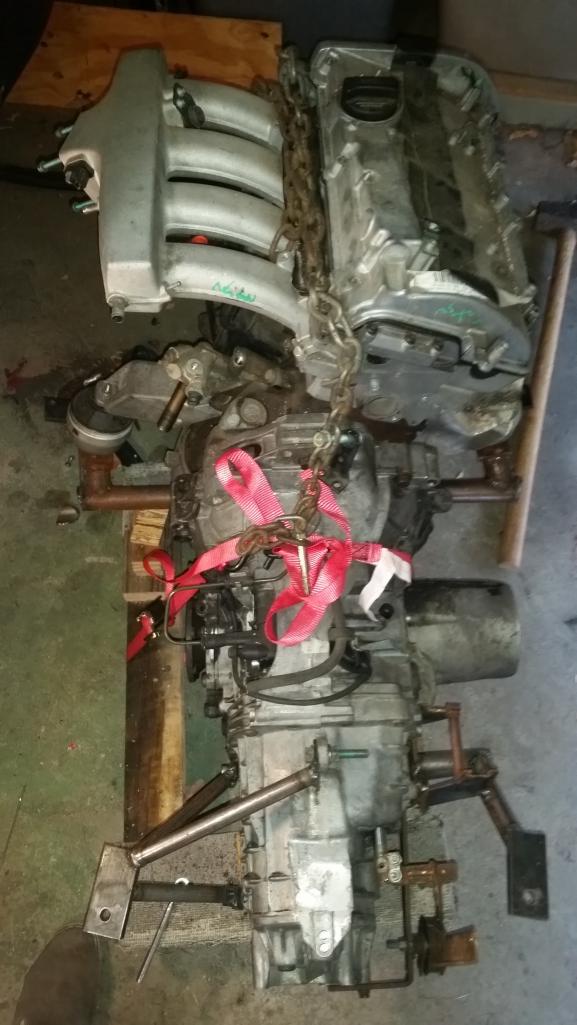
From yesterday, Finished off the welding on the body and the mounts, added the support, cutoff the excess and welded plugs to prevent rusting. 
Bench tested my boost controller finally and its bad.... Trying to get a refund from ebay but the guy that sold it to me didnt sell me the wiring harness (he played stupid in his auction, stating it was something else...) so I had to wait for a harness from China to come in and when I tested it well... ya. Dead LCD. 
So there happens to be a sale going on right now for another EBC that I am interested in. 6 settings (Which I like....) and its programed via computer. Gear based, RPM based, speed based, and can control my water injection as well (awesome!) Its very small so it would fit with my dash layout much better than the other one as well which I like.
http://www.usrallyteam.com/index.php?main_page=product_info&cPath=112_303&products_id=2017
Posted by: paroxysm Jan 2 2016, 09:19 PM
Not trying to hijack your thread
It looks very similar to my build, but for my rear tranny mount I just built an adapter.
I certainly need to upgrade my shifter assembly to be more rugged like yours mine was just some spare VW mk3 parts I had laying around.
http://s106.photobucket.com/user/pparoxysm/media/011_zps82288802.jpg.html
http://s106.photobucket.com/user/pparoxysm/media/DSC_0009_2_zps93ba9785.jpg.html
http://s106.photobucket.com/user/pparoxysm/media/DSC_0010_zpsc4c474e0.jpg.html
I hope to just finish this car enough to drive the bugs out of it this year. Anyone know if I can drive on a base stage 3 big turbo tune? Or should I try and dyno tune this thing without any of the bugs worked out?
Posted by: Andyrew Jan 2 2016, 10:51 PM
Awesome!
Do you have an active build thread on here? If not you should really make one, your build looks interesting! I think you have your engine about 2" forward of mine, do you have any cv issues and what cvs are you using?
What turbo are you using and what turbo is your stage 3 file for? I ran my turbo on my apr stage 3 file(made for a gr28rs) and didnt have any issues at 10psi but I was getting stuttering above that. You can get it tuned by some online tuners that give you a base tune and then fine tune it from logs you run.
Posted by: paroxysm Jan 3 2016, 12:17 PM
Awesome!
Do you have an active build thread on here? If not you should really make one, your build looks interesting! I think you have your engine about 2" forward of mine, do you have any cv issues and what cvs are you using?
What turbo are you using and what turbo is your stage 3 file for? I ran my turbo on my apr stage 3 file(made for a gr28rs) and didnt have any issues at 10psi but I was getting stuttering above that. You can get it tuned by some online tuners that give you a base tune and then fine tune it from logs you run.
http://www.914world.com/bbs2/index.php?showtopic=96945&hl=project%20stuka&st=0
This should be my build thread.
The turbo is a gt28rs, my program is revo stage 3 for the turbo. My motor is an AWW 2001 with only 7000 kilometers on it, I paid $1200 for it.
The motor came with a electronic boost controller(not hooked up yet), walboro fuel pump, wideband O2 sensor, genesis 500cc fuel injectors, all new never used.
Now for the CV passenger side is a stock 911 with a empty CV case from a passat B5 used as a spacer, drivers side is a bmw 540i that was the correct length. Don't know how long they last but I had to go cheap for now and that setup only cost $10.
Only problem I've been experiencing is sometimes the car refuses to shut off, place the key in the off position car tries to shut down but then it revs up and continues running, also if I put the car in reverse with the ignition off the backup lights are on.
Posted by: Andyrew Jan 3 2016, 01:22 PM
Ill continue this post on your thread
Posted by: Justinp71 Jan 5 2016, 12:05 AM
Posted by: Andyrew Jan 5 2016, 08:33 AM
Separated the engine from the trans last night and removed the intake and cylinder head
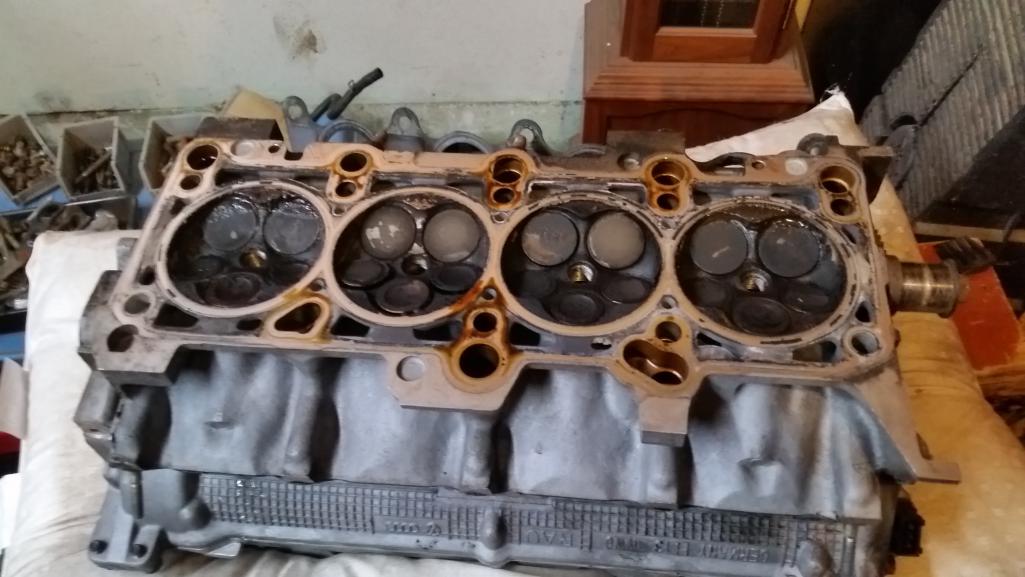
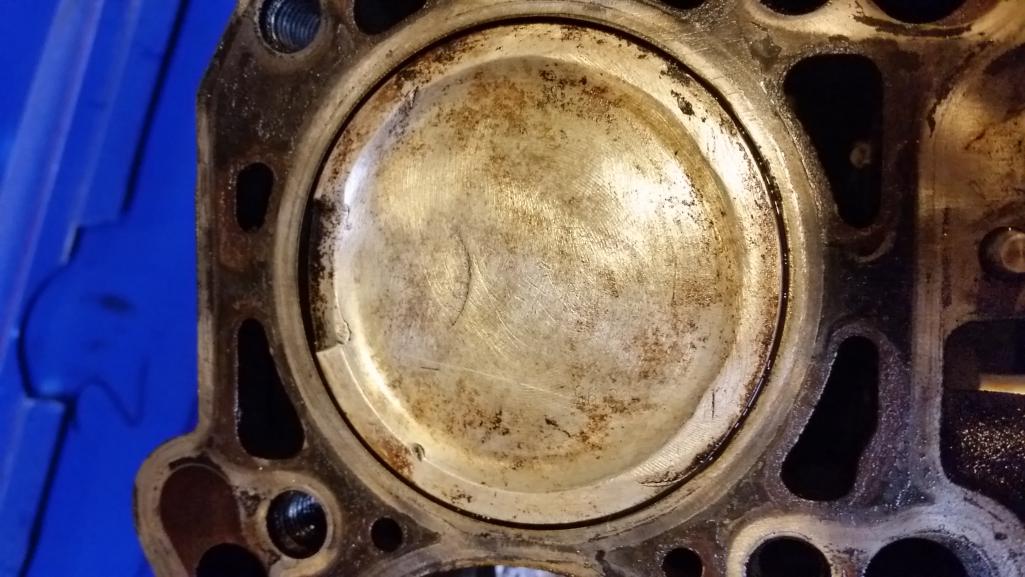
It appears as if the valves have been in contact with the pistons, you can see the mark on the piston in the center and 4 small nicks on the corners (think a square)
The engine builders are telling me to grind off the nicks and use the pistons but the valves need to be gone through.
Im going to take the cams off and do a leakdown on the valves then determine how much valvework I want to do. I have a line on titanium valves and springs that will help me push up the rev limiter to 9k but the turbo will die off after 8k(unless I put a larger exhaust housing on it..)
Trying to keep my engine work under 1500, but I am not sure if I will make it.
Posted by: Andyrew Jan 10 2016, 10:18 PM
Finalized the disassembly of the engine and dropped off the engine at the engine shop. 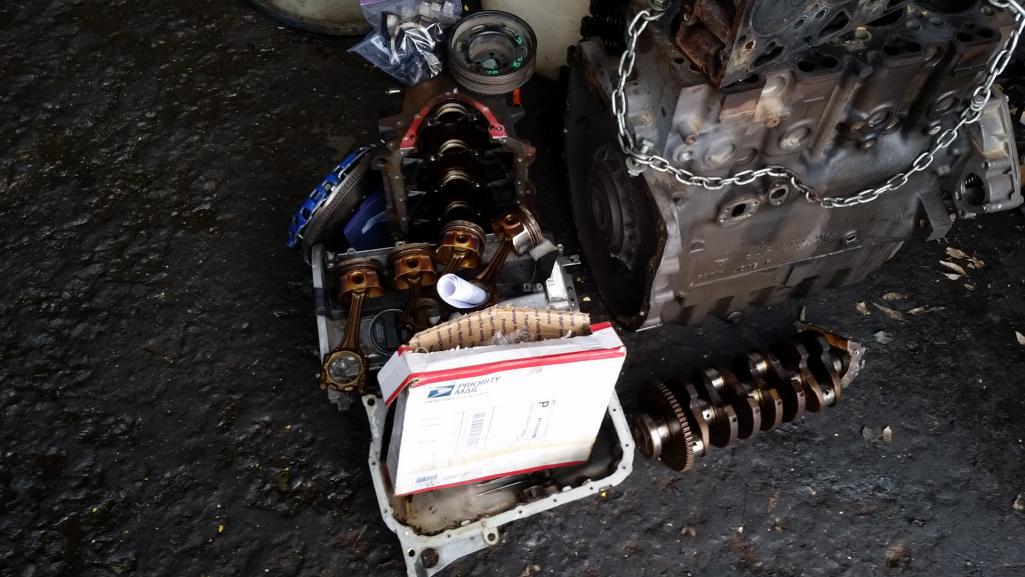
Work to be done by the engine shop:
Clean block/head
Surface block/head
Hone cylinders
Install H beam rods on factory forged pistons
Balance Rotating assembly
Polish crank
Should be done in about 2-3 weeks. I will assemble the engine at that point.
Also BIG thanks to Mike Bellis for stopping by today and dropping off these MUCH NEEDED 100mm stub axles! 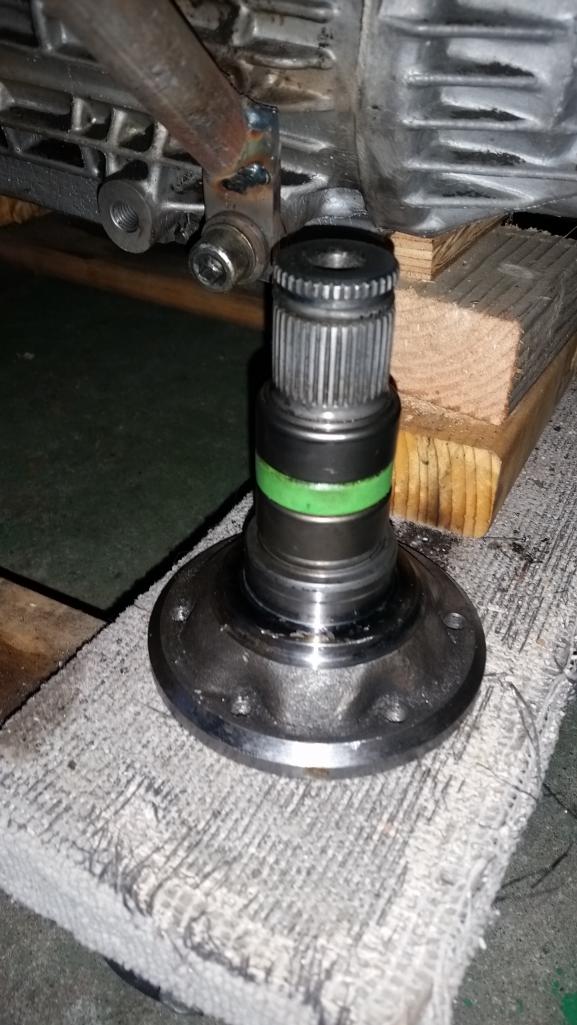
Posted by: Dion Jan 11 2016, 04:55 PM
Andrew, wow! Just wow. Impressive project. Keep going, baby.
Having seen what goes into bodywork in person with 914Daves project,
I've a new appreciation for anyone who tackles bodywork that doesn't do it for a living
and does it properly. Very nice.
Posted by: Andyrew Jan 16 2016, 03:19 AM
Progress: 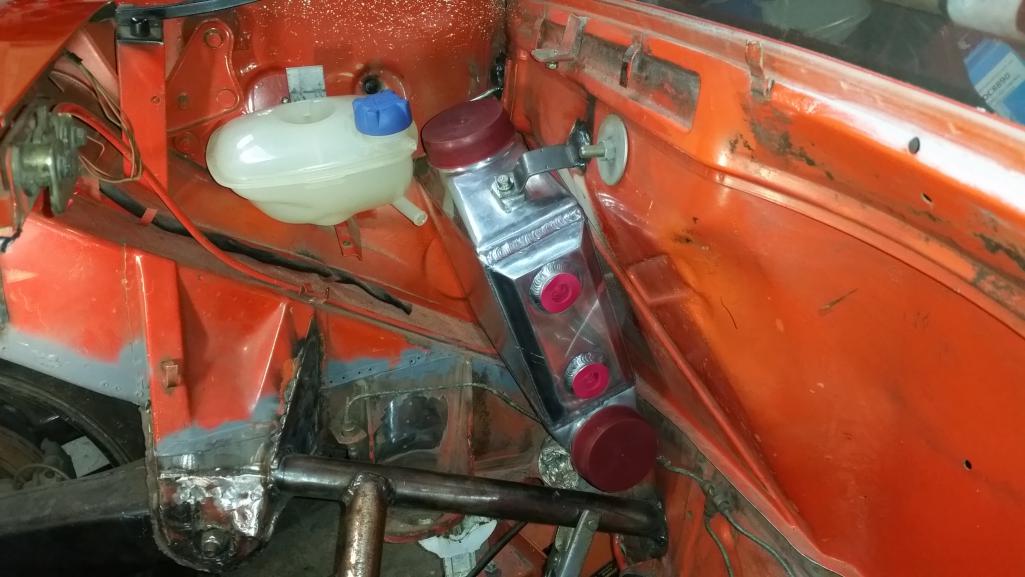
Mounted my intercooler and one of my tanks.
Machine shop kicked it up a notch and pushed the engine assembly out in a week! 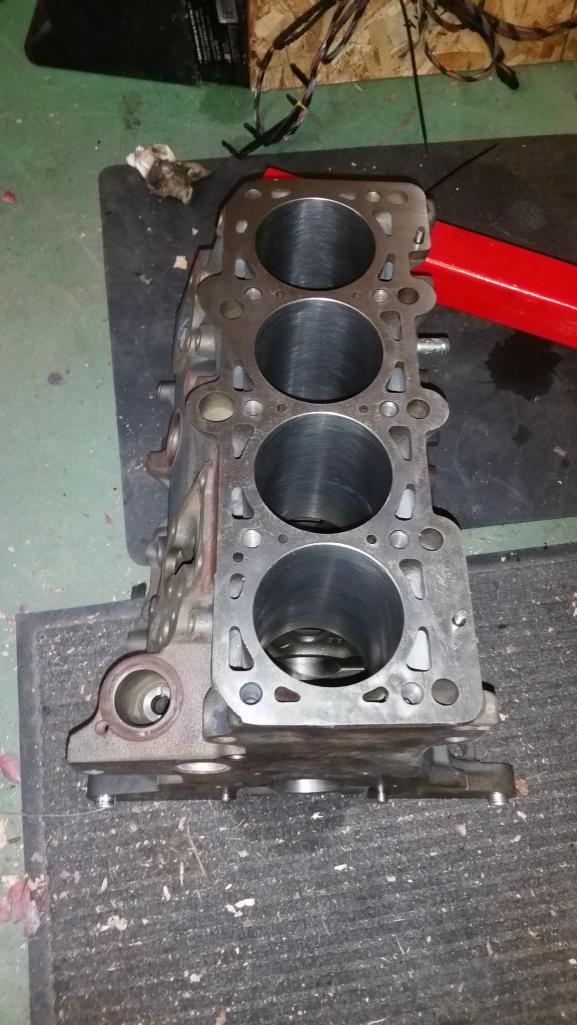
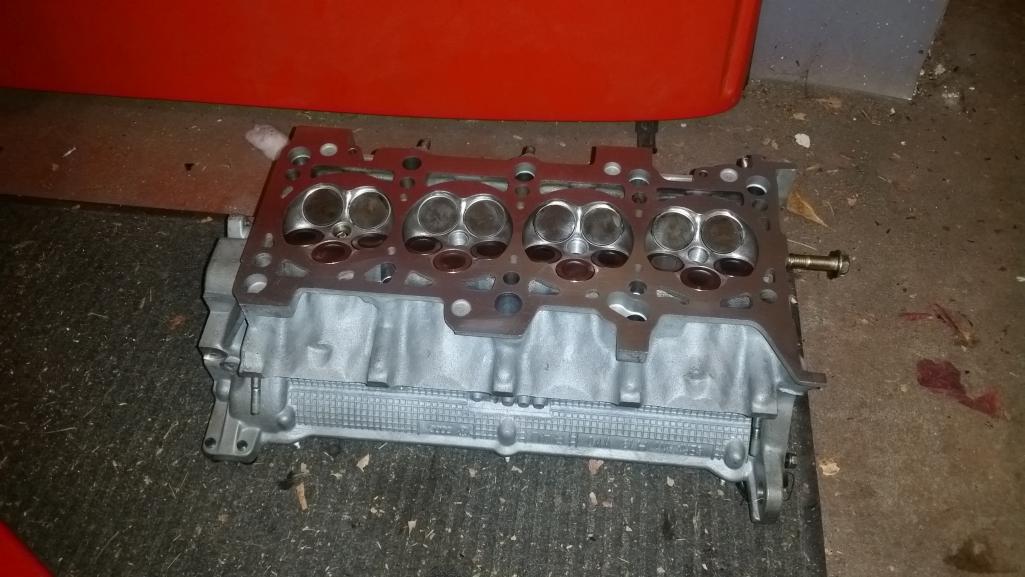
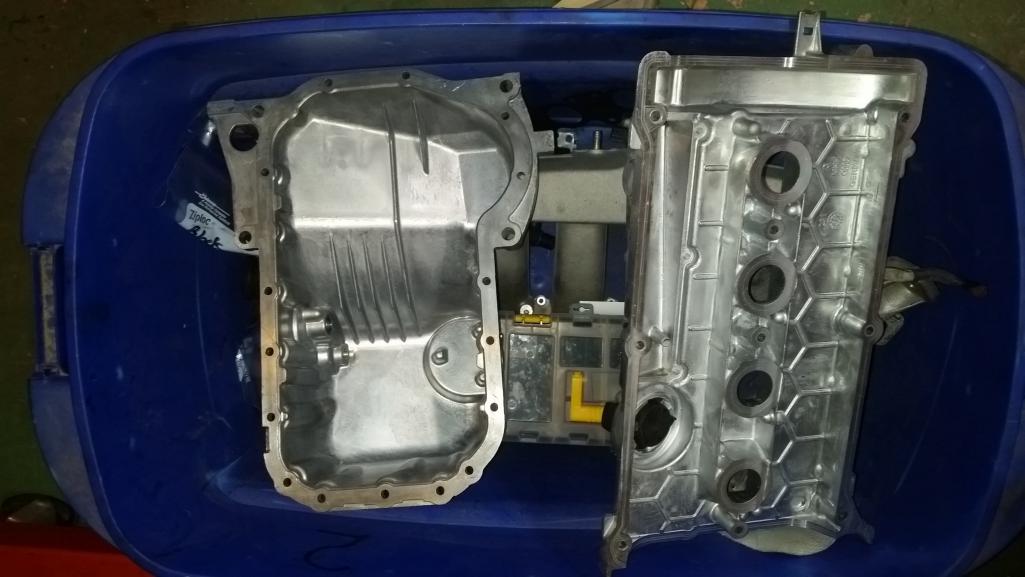
Got it back today and everything looks so clean!
Posted by: Andyrew Jan 16 2016, 03:23 AM
More of all the bits. 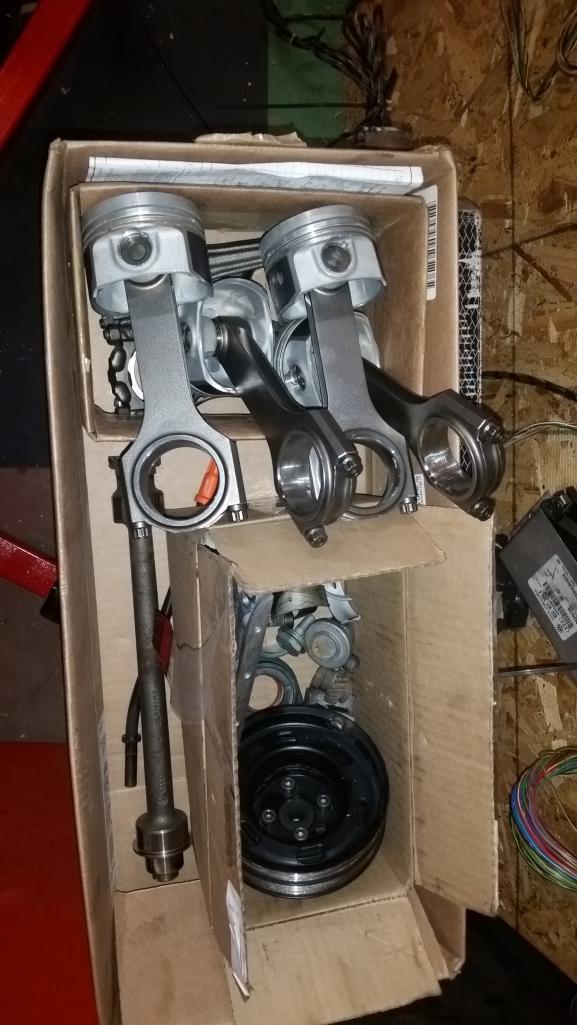
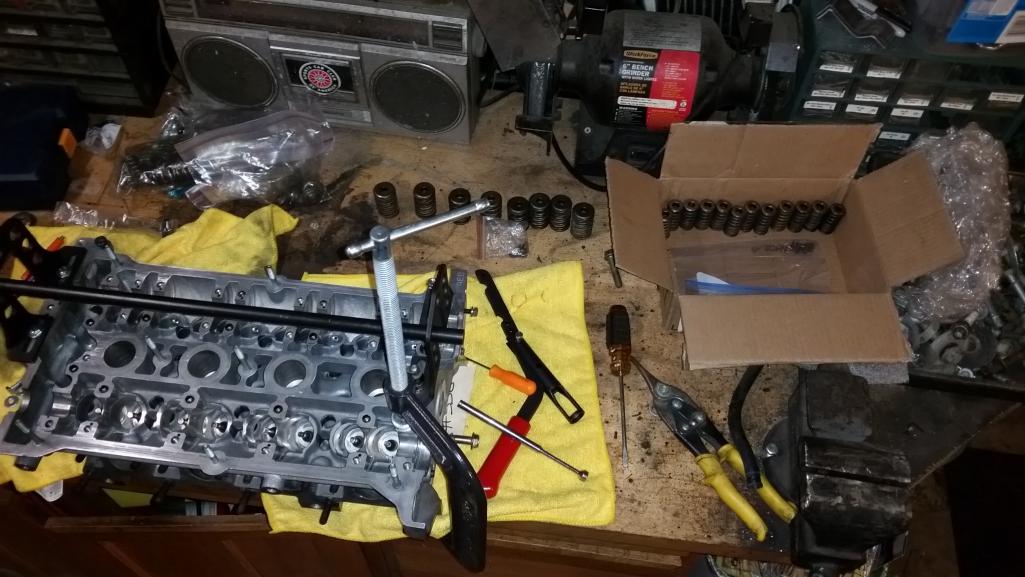
Removed the valves and cleaned up all the carbon deposits the hot tank didnt take off. 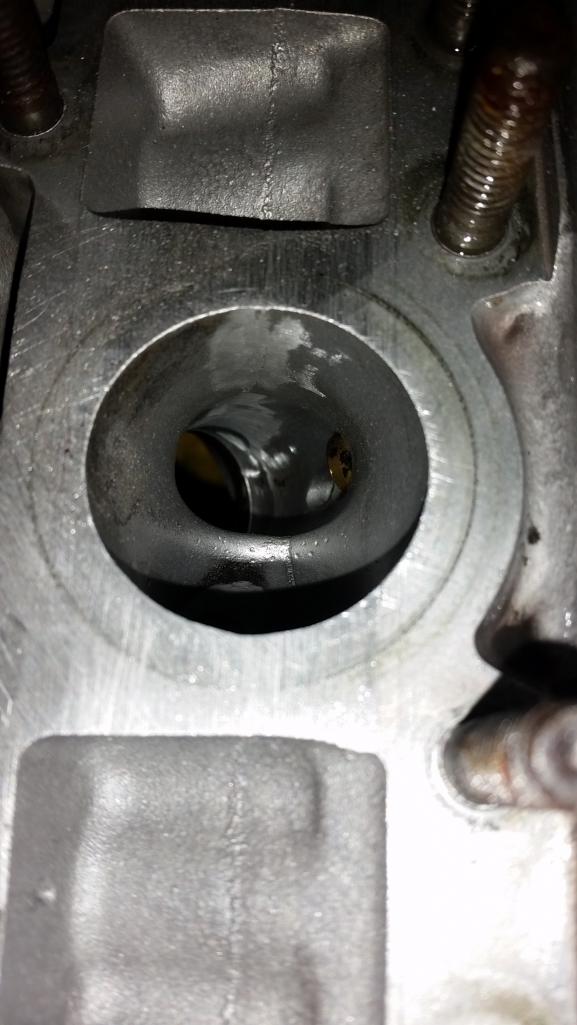
Removed the casting marks from the exhaust side, I'll hit the intake side this weekend. 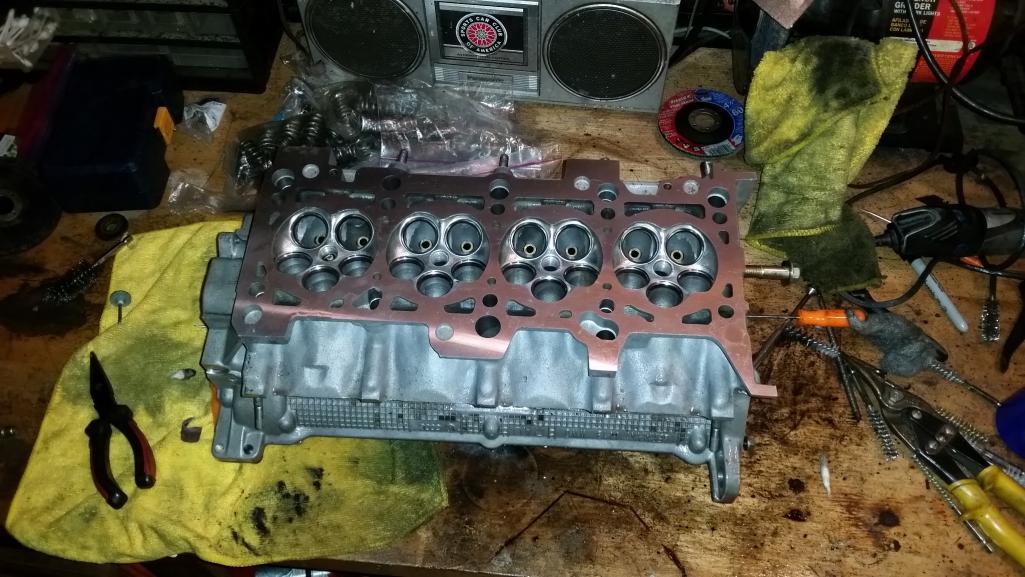
Mmm looks so nice!
Posted by: Andyrew Jan 24 2016, 04:44 PM
All the casting marks are removed from both intake/exhaust side
Not sure it'll do anything but its at least a step forward on the head build. In a couple years when I build a full stroker motor I'll do a full blown port + polish head.
My Supertech high spring pressure valves and nitrite coated exhaust valves came in! However I had one hickup. I picked up this set new in bag from a Audi community member, apparently it had swapped hands quite a bit and the original owner back in ~08-09 was going to put it in his race car 914 1.8T swap! I have a feeling it was the white race car that was in Excellence mag.
I lapped all the valves just for safety and everything seemed just perfect. Then I replaced all the valve guide seals and started to install all the valve springs.
So onto the valve spring hiccup. I went to install all the springs (If you've done this on an OHV head you'll notice the TINY amount of room on the intake valves... This task took me hours.... Ugh, tiniest of screwdrivers and ~ 1/4" room to work in at a severe angle) and when I got to the exhaust side I noticed that one of the exhaust inner springs was sitting a bit taller than the rest, took it out and I think the manufacturer packaged it wrong and put an intake spring instead of an exhaust inner spring . 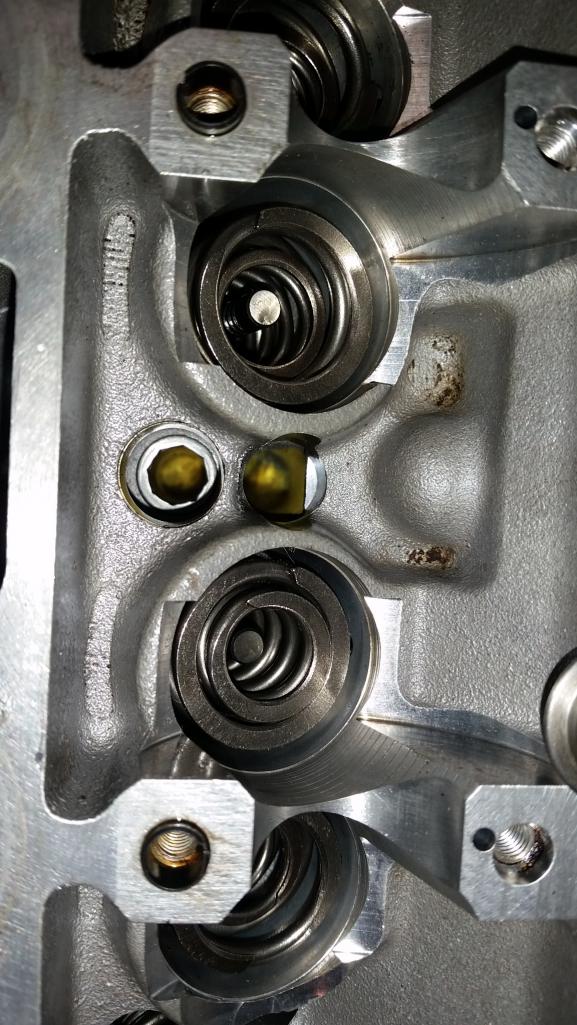
Quick email to Supertech and after $12 for the spring and shipping I had it the next day! 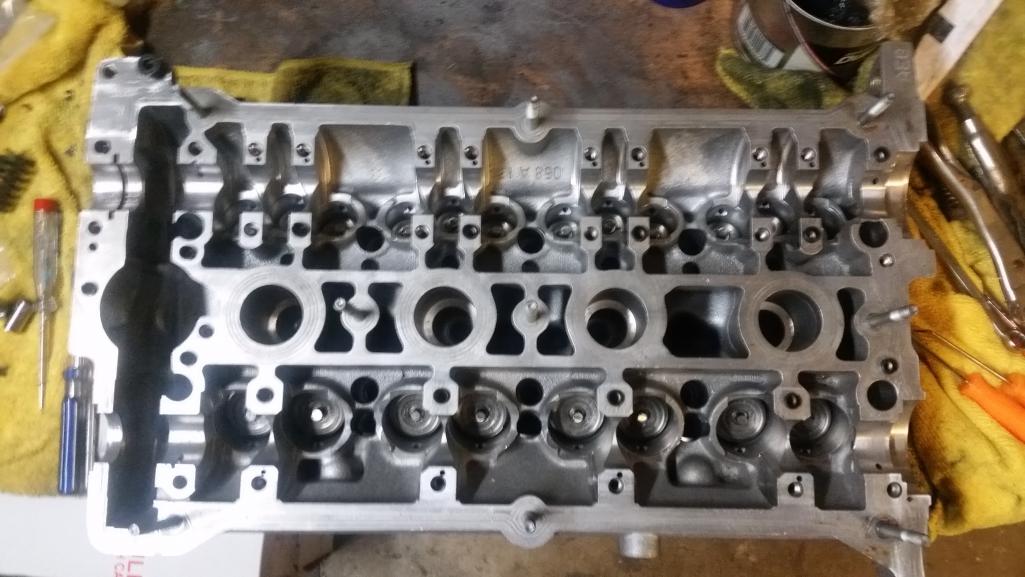
Finalized the install on the valves and springs and went to put in the stock hydraulic lifters but noticed that a few of the lifters wouldnt spring very well even though they had been sitting for a week. I let them sit in some ATF to try and loosen them but no luck. So a quick youtube search lead me here.
https://www.youtube.com/watch?v=ySf0r8GGMOY
So I went and disassembled all my problem lifters and any I thought were not perfect, Labeled them in a bag per lifter hole and let them soak for 6 hours in some Purple Power. 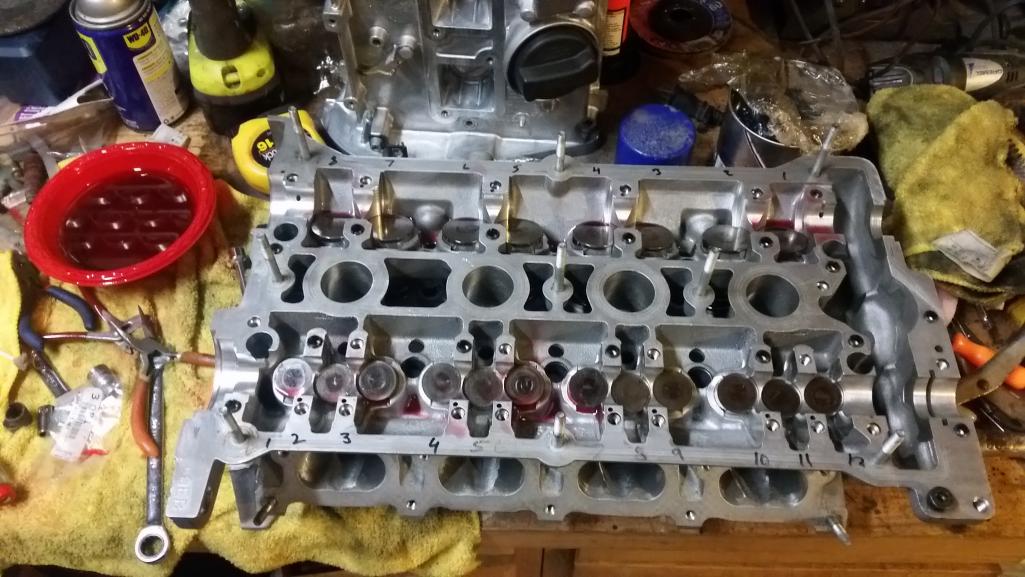
After 6 hours the lifters themselves were very clean and I could see gunk floating at the top of the bags. Cleaned everything up and lubed them with some ATF and sunk them back in the holes they are for.
Posted by: Andyrew Jan 24 2016, 04:45 PM
Oh and the tool I made for the valve guide seals. 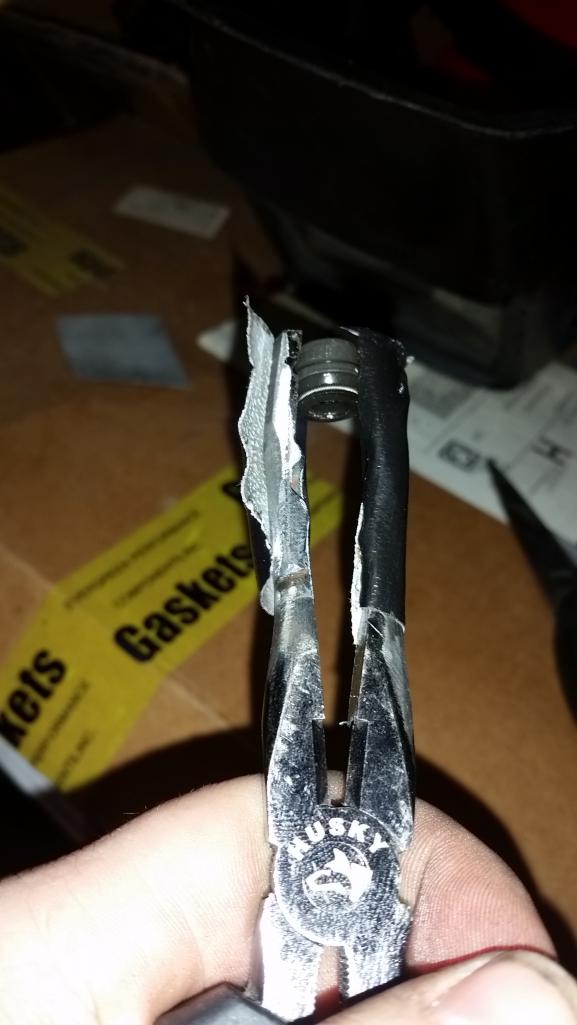
Posted by: dan10101 Jan 24 2016, 07:09 PM
Oh and the tool I made for the valve guide seals.
I love to make tools from tools, tools into parts, parts into tools and of course, parts into parts.
Hey, make sure you didn't swap springs with another cylinder. I'm sure you checked, but that's what I would have done...
Posted by: Andyrew Jan 24 2016, 07:21 PM
All the springs were new high strength, intake and exhaust, so no worries there (That said I still have them in line in a box).
I looked up a couple of valve guide seal removers and couldnt find what I wanted so this seemed like the best idea. Which was good because I really didnt have a lot of room to work with. Tape was there to prevent marring of the lifter walls.
Posted by: Andyrew Feb 1 2016, 12:19 AM
Finished up the cylinder head with new cam seals, a new cam chain timed correctly, new cam chain tensioner gaskets and new bolts torqued down the exhaust cam gear and intake cam. Didnt have any means of holding the cam in place so I used the old timing belt and screwed it down to the bench. 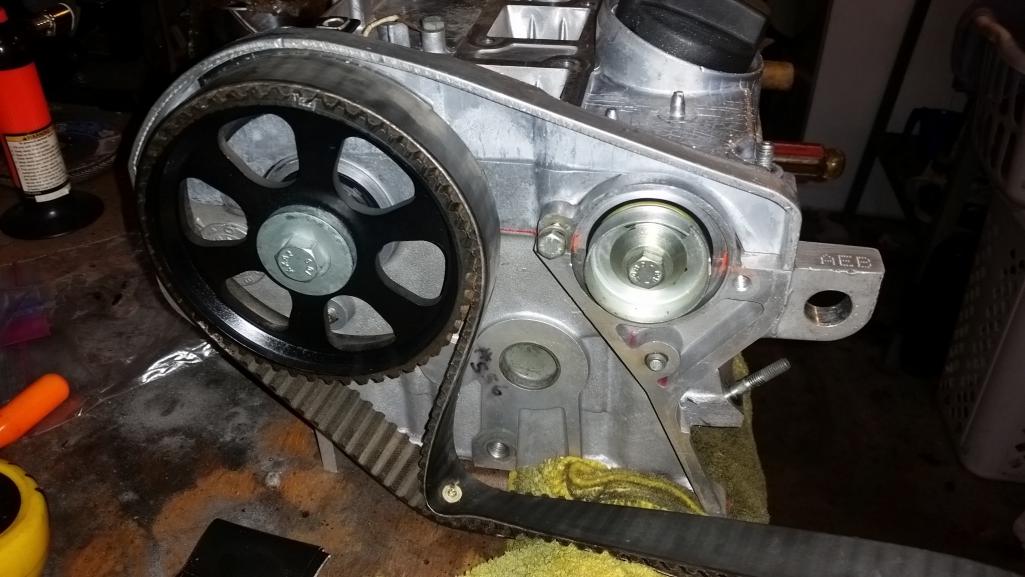
Im still waiting for my rings to show up from Germany or else the engine would have been assembled this weekend. In the mean time I took some time and plastiguaged the crank bearings, all came to be the exact same on the far side of the spec .038 which I think should help keep the bearings lubed up for the high RPM's and HP this motor will see.
Also I should note this engine will be receiving coated crank and rod bearings which will also help maintain the bottom end. 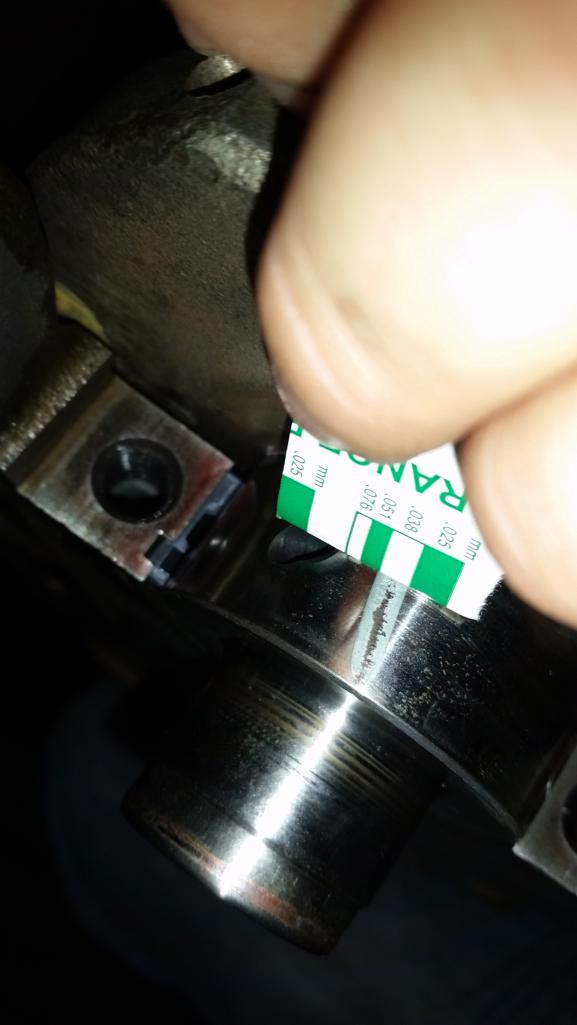
Threw in the oil pump drive with new seals.
I have the oil pump itself cleaning in some purple power for all of today and tomorrow. I'll put it back together and check the service limit of the pump before I throw it back on the engine. 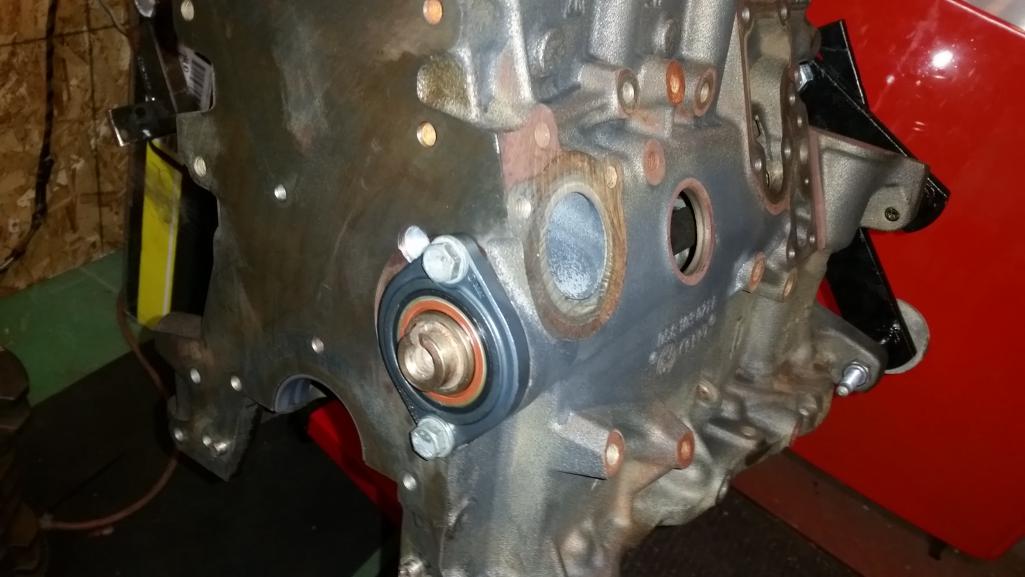
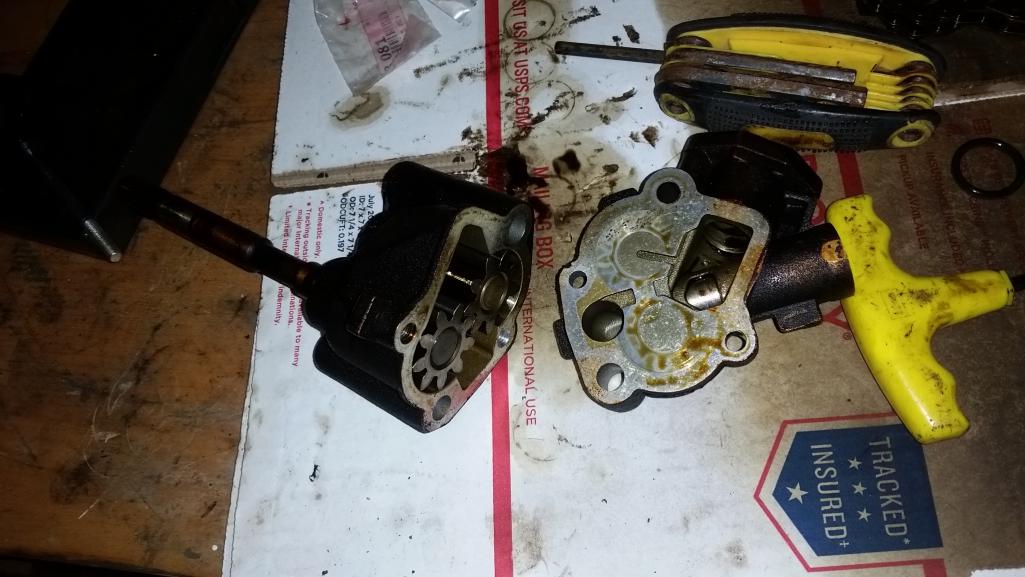
Posted by: veekry9 Feb 1 2016, 02:18 AM
I am liking the longitudinal four layout,traditional with an F1 sting ('80's).
Still considering a version of my own starring the 944's S2,that I may get started on in a few years*.
I am watching closely,knowing a stretch is needed for the big four,being so long.
Have you any idea how many successful installs have been done?
I had a look around and could find no reference to the type.
You're gonna have a screamer,sounding like a champ car running the Drake and Offys..hmmm,methanol injection.
Found one,a Honda S2000 I think,I'll look some more.
I recall a thread about engine swap types,haven't found it though.
As you're working on a new dash and console,a quick perusal of the work Amida is doing should generate some ideas.
The methods he uses are straightforward and effective,beautiful.
http://www.fiero.nl/forum/Forum3/HTML/000091-50.html
Good for wiring diagrams,pcbs,chassis layouts,etc.
http://www.gimp.org/
Posted by: Chris H. Feb 1 2016, 07:41 AM
Looking good! That's a lot of progress. Nice thing is you won't have to worry that anything is wrong with it internally when you BOOOOOSSSTTT it.
Have to agree the inline 4 is such a smooth, balanced engine. Every time I get in my DD (old) TSX I think...hmmmm.... .... 2.4L, 200 ish hp... Am I the only one who looks at random cars on the road and assesses it's potential as a donor?
Posted by: rick 918-S Feb 1 2016, 08:06 AM
Nice! Power on!
Posted by: Andyrew Feb 1 2016, 09:30 AM
I agree certain inline 4's are really well balanced. I was suprized when I picked up the rotating assembly, they only took a tiny amount off the crank and added a small weld to the harmonic balancer. I didnt notice anything done to the piston assemblys either, but I had already weighed the rods to be exactly the same, didnt know about the pistons but they are generally pretty light.
Posted by: Andyrew Feb 8 2016, 03:15 PM
Got some wrinkle black paint on the valve cover and some black paint on the block last week 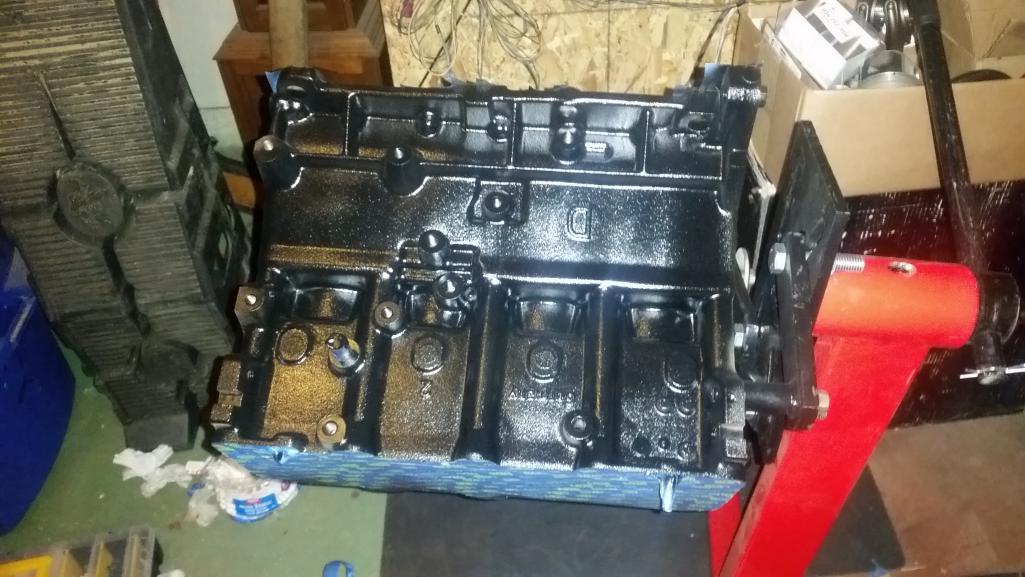
Got the rings Friday! 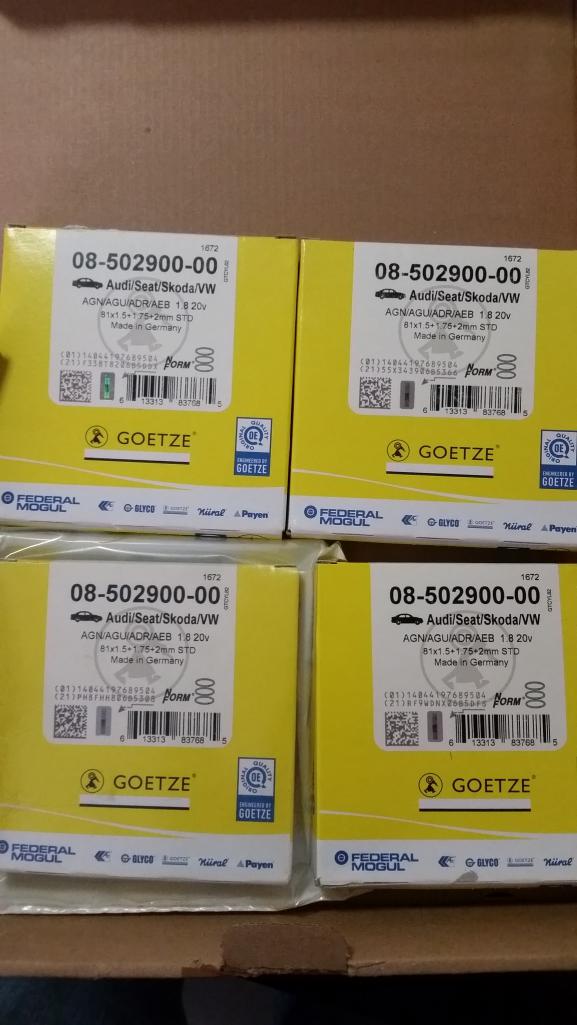
I spent some time and gapped them Friday evening. 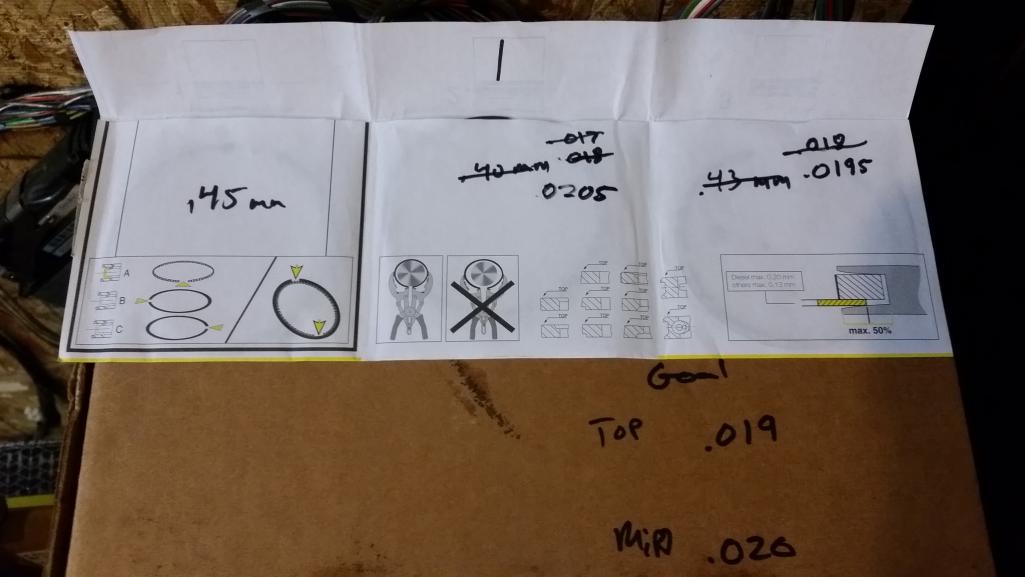
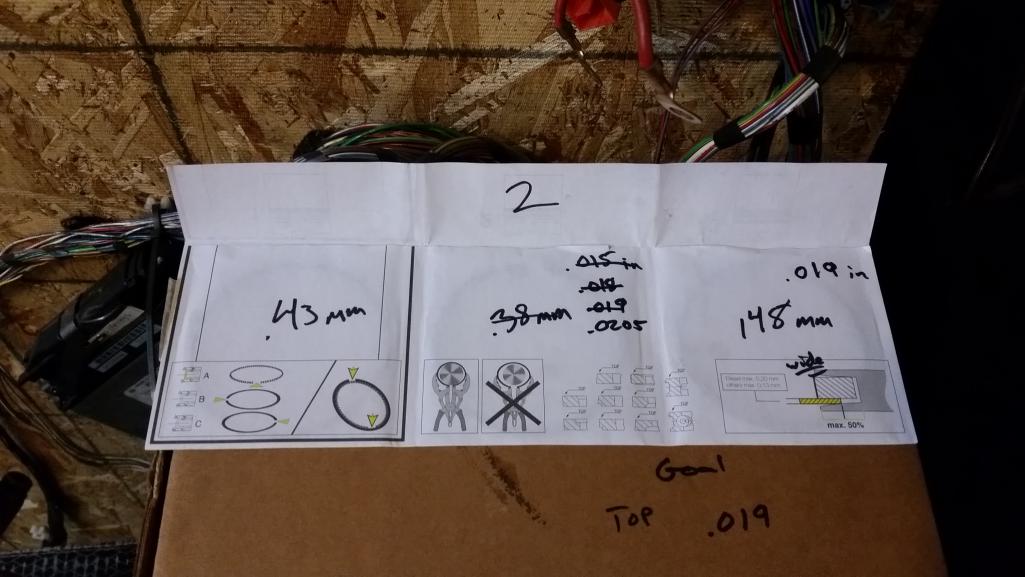
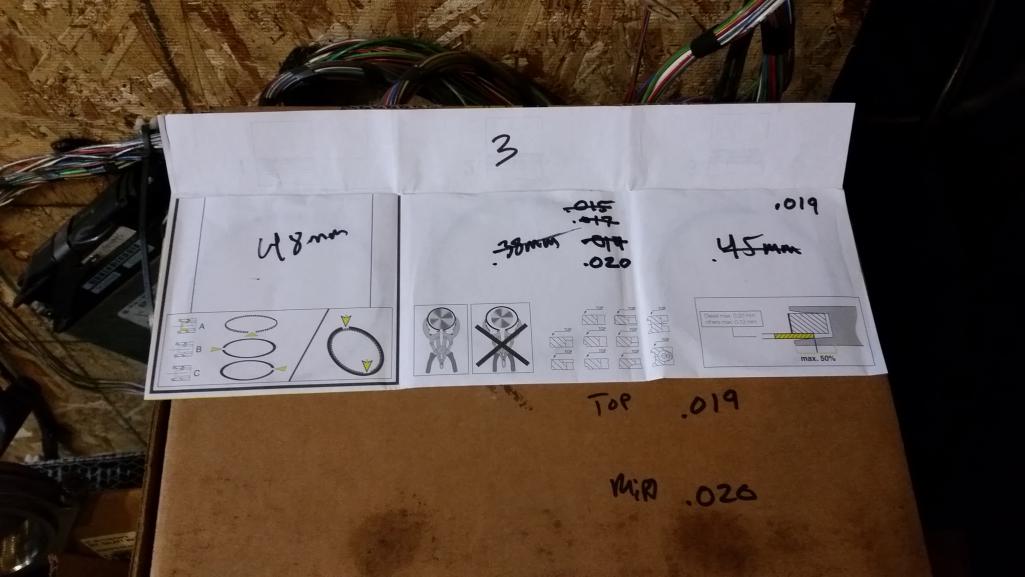
#4 is not shown, it is the same as #3. My goal was .019in top ring, .020 ring bottom ring and the oil ring was fine with any gap (Shown is in MM). The bottom ring needed to be .001in wider gap than the top. The top will expand with heat and similar builds have put .018in for the top ring, but since I am going to use water/meth on my higher boost 91 file and E85 for my max boost file, the cylinder temps should be relatively low. and therefore wont need so excessive gap differences.
Posted by: Andyrew Feb 8 2016, 03:32 PM
I also cleaned and started installing the crankshaft bearings caps. However when torquing the stretch bolts I had a very bad sound coming from the 3rd bolt I started stretching. The consensus so far is that I did not lube the heads of the bolts and it was binding on the bearing, also I had to much oil on the bolt itself and the oil was creating a physical barrier to stop the bolt from turning. I will be removing the bolts that I havent stretched yet, blow out the holes and reinstall the bolts. I will do this tonight when I get home..
Also, parts parts parts parts... 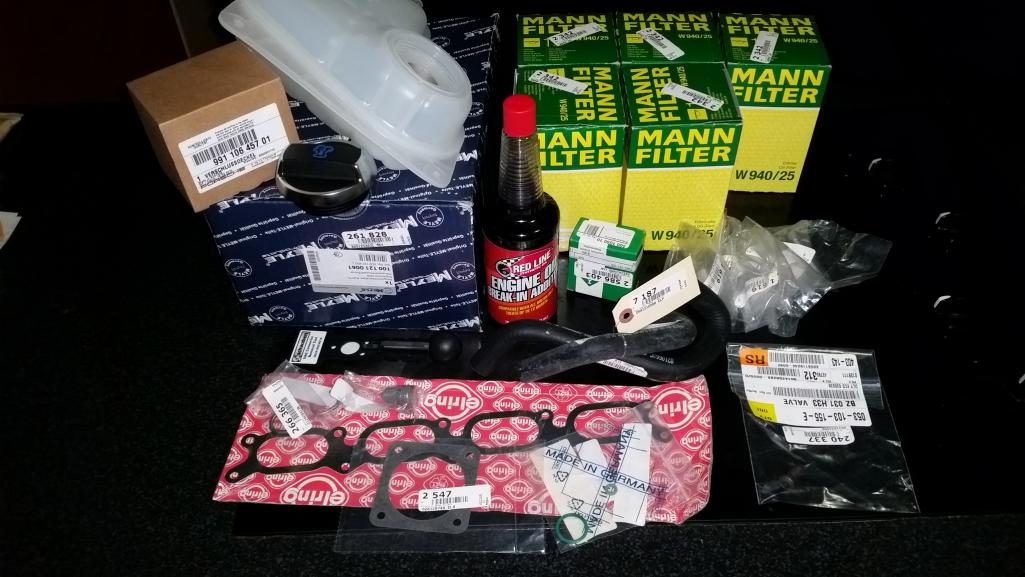
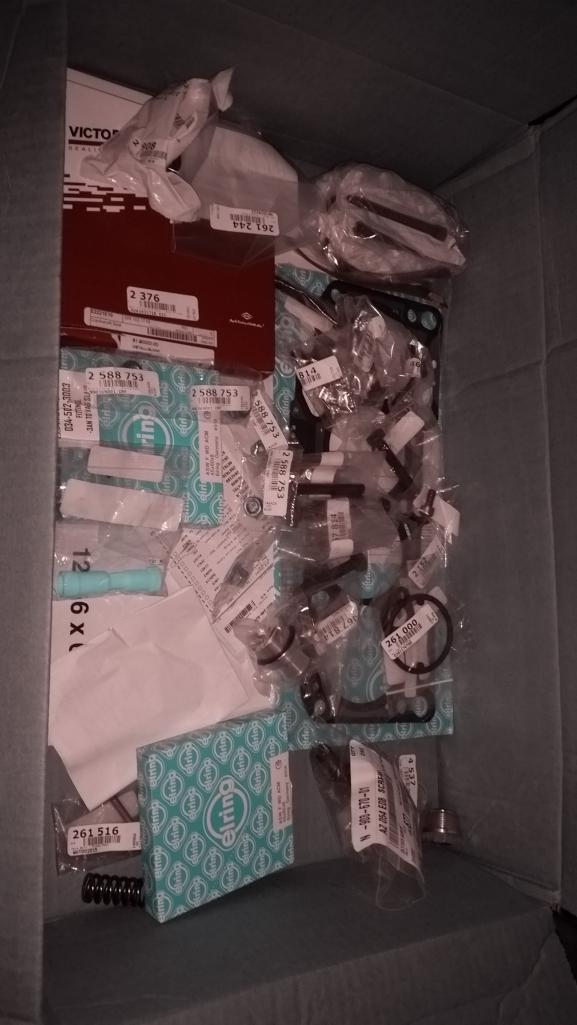
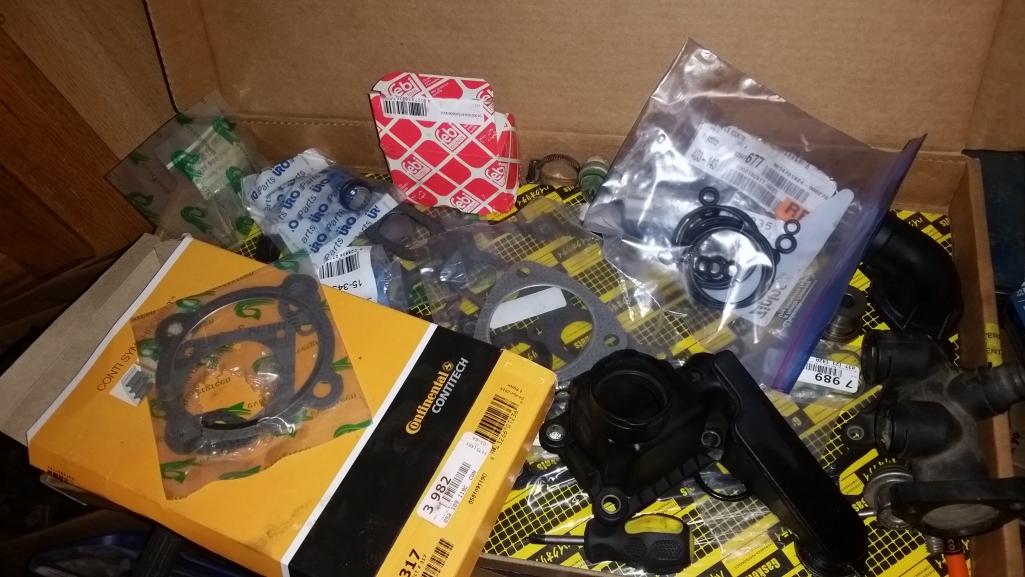
Posted by: Andyrew Feb 8 2016, 03:32 PM
Valve cover
Attached thumbnail(s)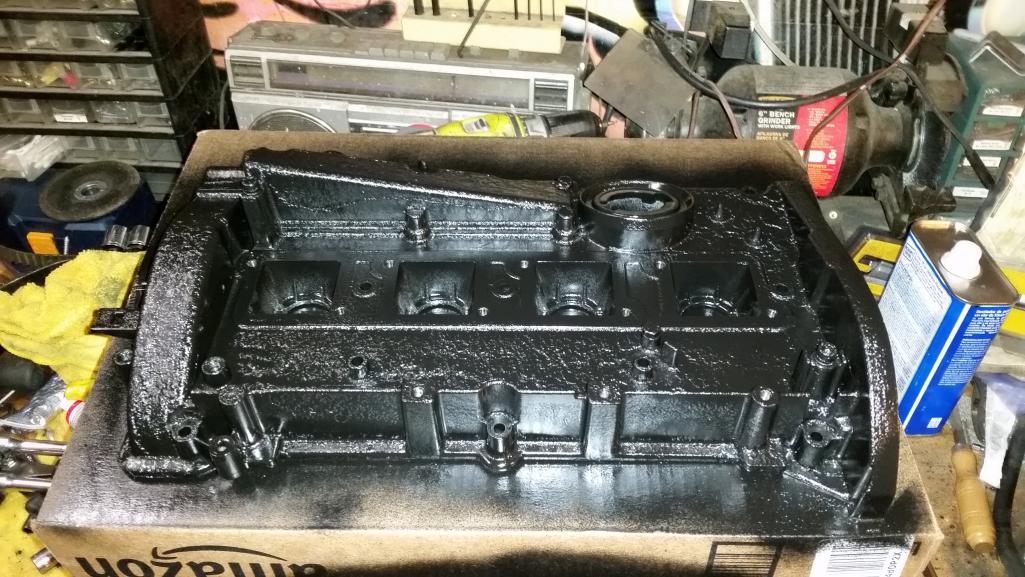
Posted by: dan10101 Feb 8 2016, 08:07 PM
Valve cover
Did you see the Audi commercial where the old Astronaut was bored and depressed until his son took him out for a ride in his new Audi?
It's not like I'm hinting or anything.
Posted by: Andyrew Feb 8 2016, 10:14 PM
Your welcome to the keys for as long as you want
Posted by: Andyrew Feb 11 2016, 02:56 PM
Since I am not likely to post any progress from this weekend I'll post the current progress today.
I finished the installation of the crank without a hitch. I cleaned up the piston ring groves since they were not cleaned properly from the machine shop. Also removing the caps on the rods was a PITA! I installed the rods/pistons and crank 100% with assembly lube and dipped the piston rings in oil. 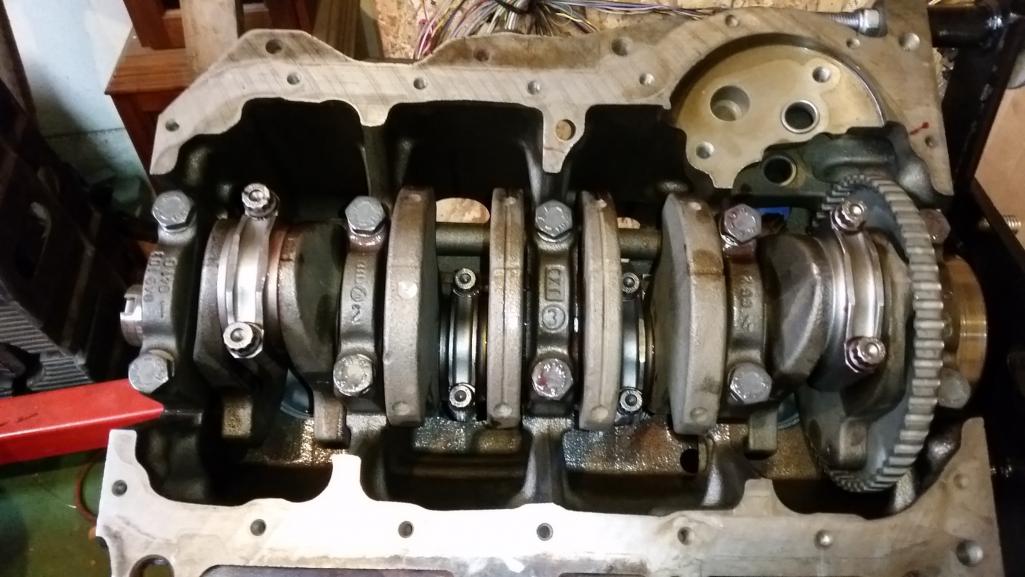
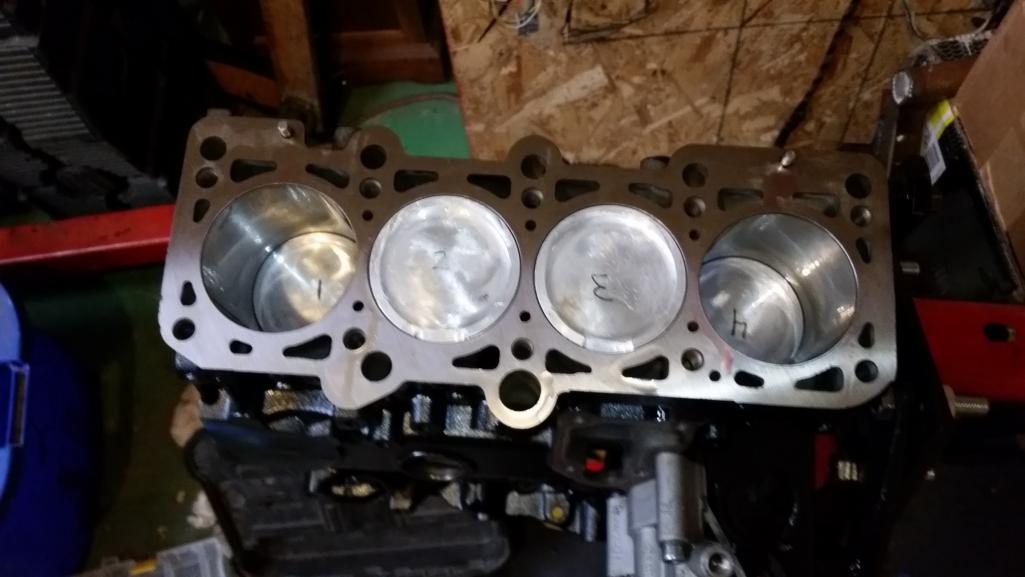
I also put the cylinder head on with new stretch bolts and lightly lubed the bolts and bolt heads with assembly lube. No issues on install of those Finally I installed the intake manifold. I am however missing a couple of nuts for the ends of the intake manifold so I need to grab some. 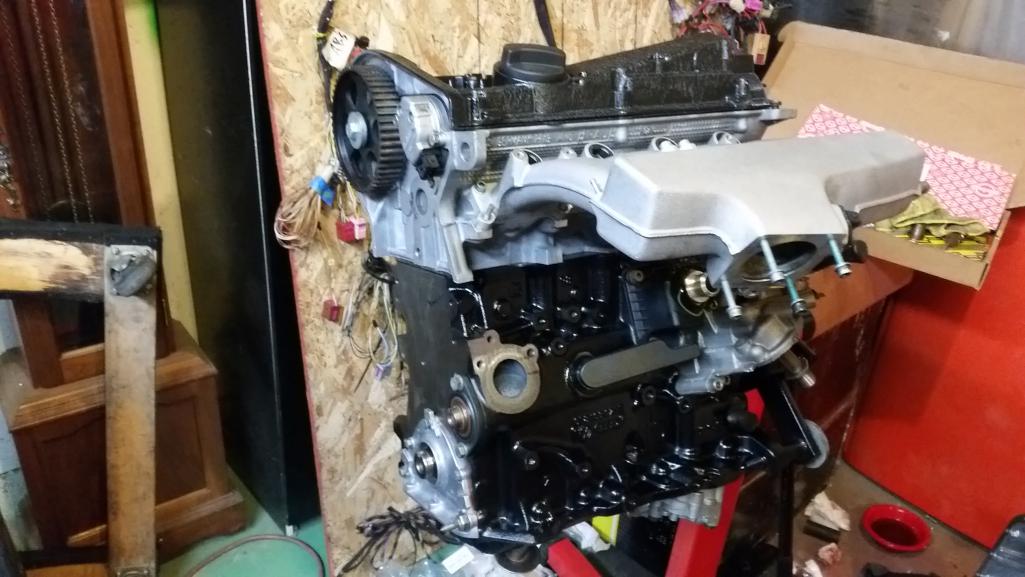
I tried installing my manual timing belt tensioner, but my grade 8.8 M6 bolts were stretching as I tried tightening them down to 20lb. Im going to go to the bolt store Friday to see if they have any grade 10.9 bolts and maybe those nuts I need. 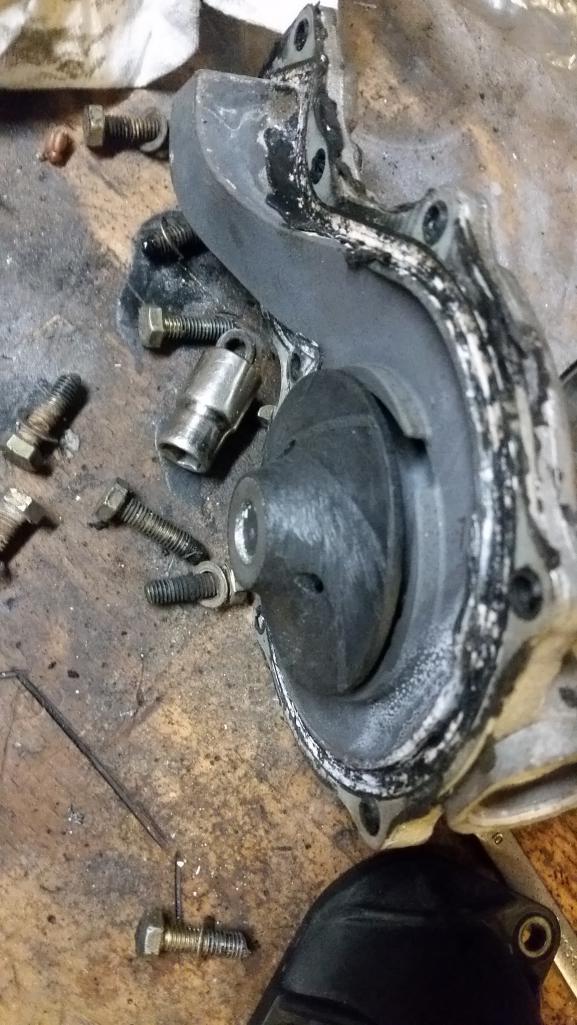
So I opened up and modified my water pump so it wont be a resistance for my electric water pump. I think it was the easiest option, maybe some day down the road I'll weld up a custom fitting but this wasnt in the cards at this point.
Posted by: Andyrew Feb 24 2016, 09:07 AM
Progress has been slow due to the holiday and I was away all last weekend for a guys weekend. Hopefully I can spend some time this weekend on it.
I bought some new M6 grade 8.8 bolts for the tensioner as I couldnt get any 10.9. Installed the tensioner and tried adjusting and noticed it wasnt tightening..... Apparently this is a common issue for this aftermarket $150 tensioner... The manufacturer has yet to comment on my warranty claim. 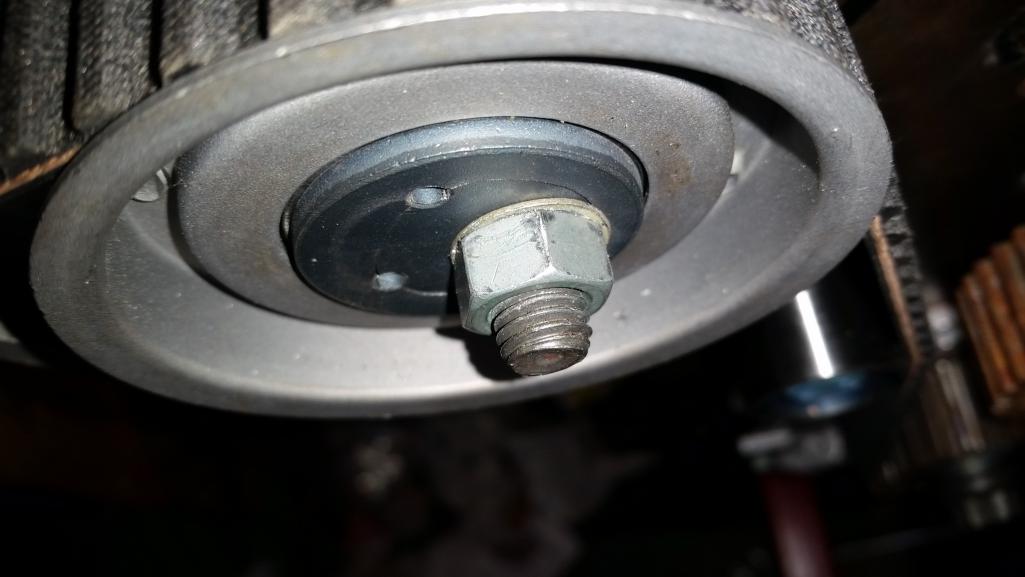
However I figured out how to make their $150 kit with the factory components, which makes me pretty angry. Its solid metal so I can tighten it down as many times as I want... 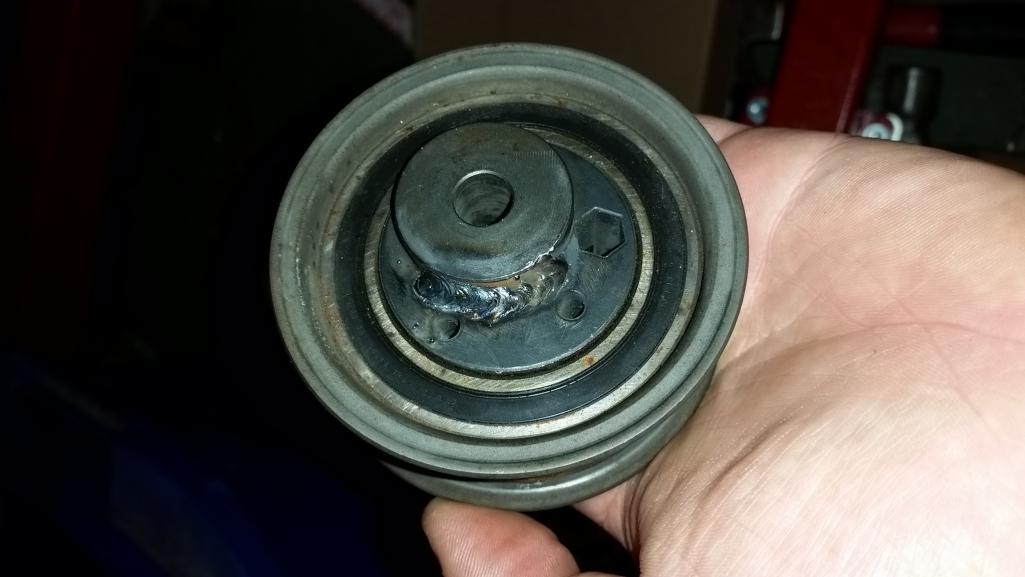
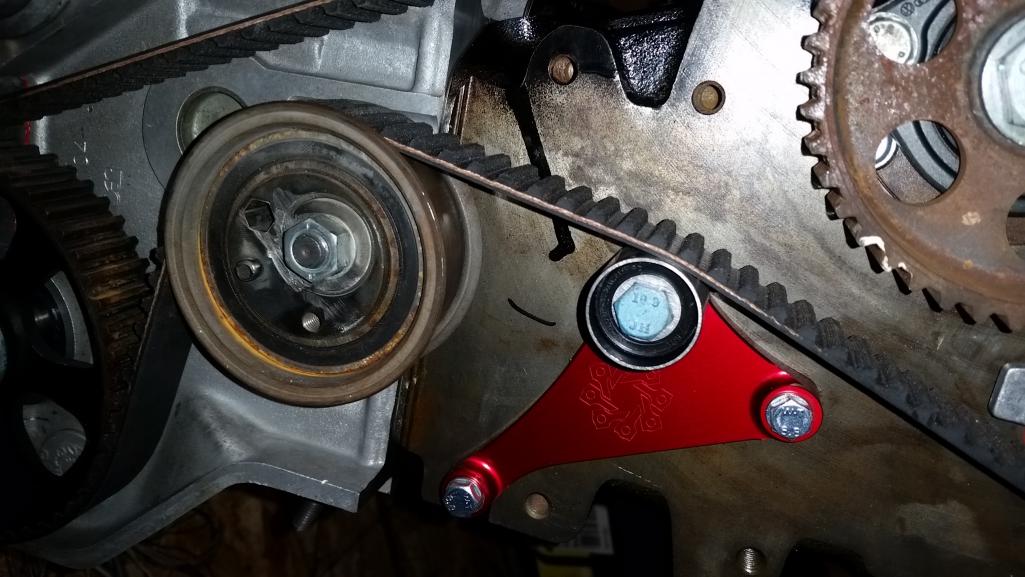
After this I tried turning the engine all the way around and it came to a hard stop. I checked all the valves and engine position and didnt find anything in the way. After a couple days of research I found out the problem was related to the oil pump shaft. The gear at the end of the shaft is near cylinder 4, my performance rods aparently require the gear to be clearanced 6mm or they hit. 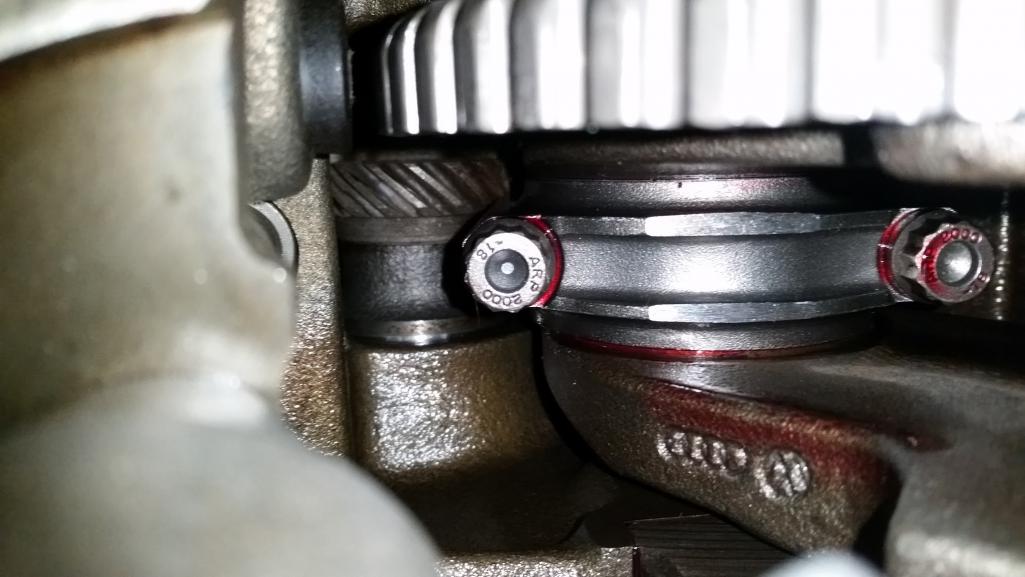
I have the shaft at the machine shop, they are machining it down and are going to balance the shaft when they are done (the shaft apparently is very unbalanced from the factory). It wont be lightened and polished like this one, but at least itll be balanced. 
Posted by: Andyrew Feb 24 2016, 09:16 AM
And some more small updates. I didnt have a crank lock so I built one for the front and rear of the crank. Rear for the crank gear (not pictures) and front for the flywheel/clutch. 
And I threw on the injectors/fuel rail/regulator. 
Posted by: 76-914 Feb 24 2016, 09:55 AM
Great progress!
Posted by: Andyrew Mar 1 2016, 04:10 PM
Final update for February. 
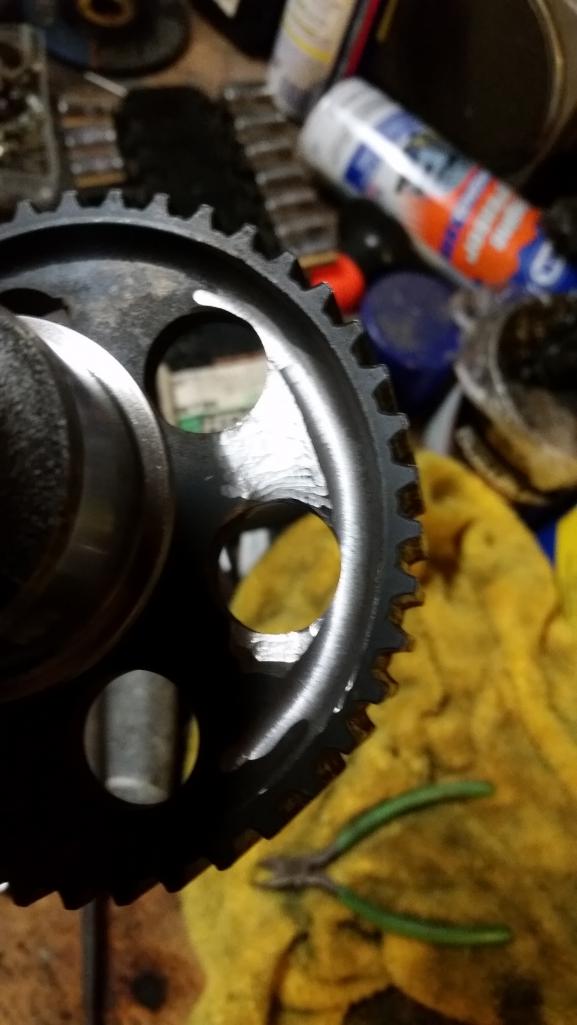
Got my oil pump shaft back and installed it in the engine. The guys mentioned that it was extremely out of balance, makes me feel really good that I got it balanced 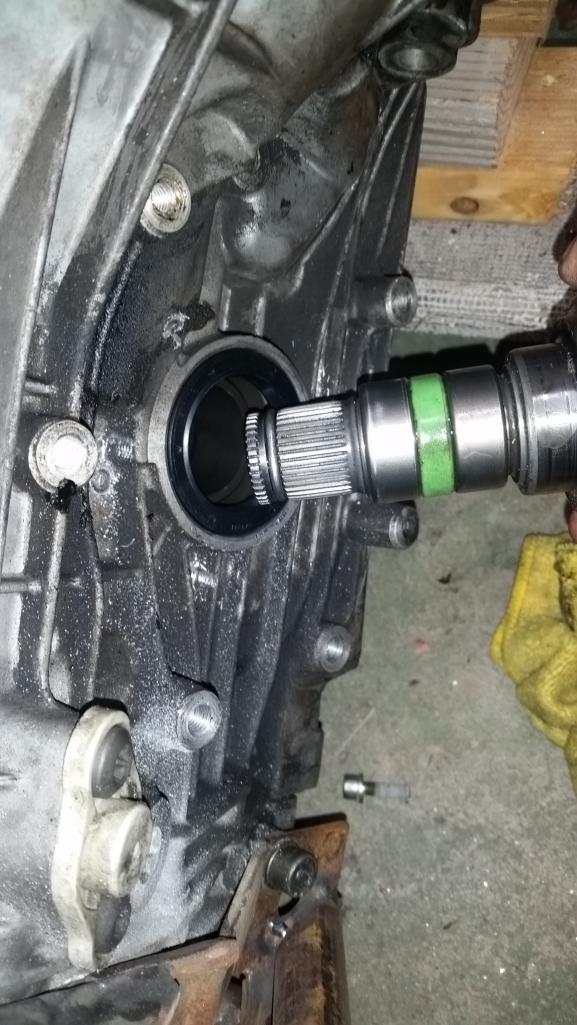
Removed the axle flanges and installed the new 100mm axle flanges with new C clips and flange seals (Oh and old crank bolts worked really well to thread through the 108mm flanges to pry against the trans and work the flange out). I had to use a hammer and dowel to drive the flanges in place, but they are in now and seem to be OK. If something happens then oh well, luckily these are all readily available parts so no real worries. 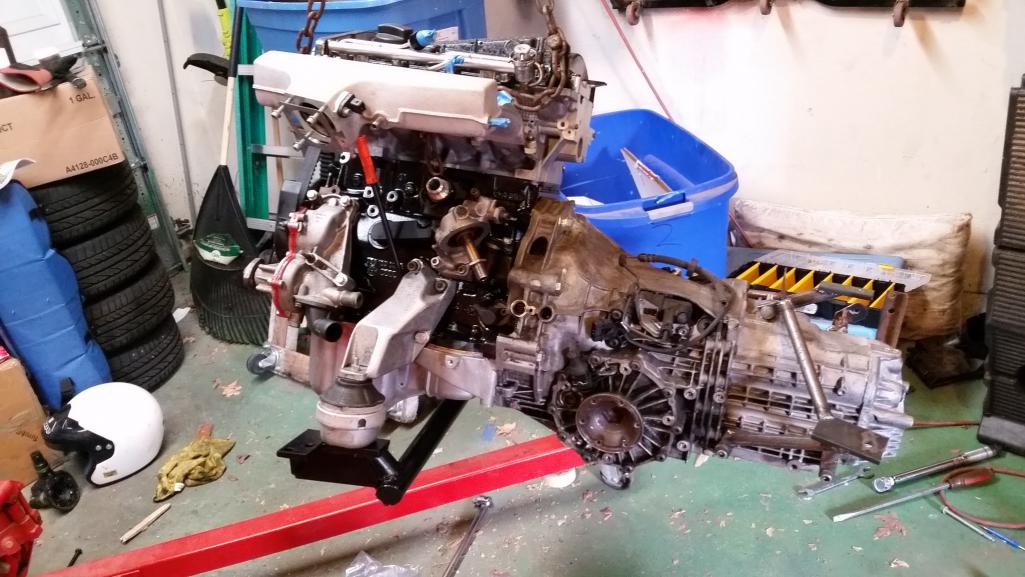
Mounted the engine to the trans, I didnt have the upper dust cover so I just shimmed the engine to the trans with a washer and moved the oil pan accordingly (according to the manual) since the trans has 3 bolts on the bottom that go to the pan. Took 3 trips to Home depot to get some bolts... All grade 10.9 vs the stock 8.8 which is nice. All torqued to 45ft lbs on the motor and 35ftlbs on the trans.
Posted by: 914forme Mar 1 2016, 07:39 PM
Making great progress here!
Posted by: Justinp71 Mar 2 2016, 02:23 PM
Looking Good!
Posted by: Andyrew Mar 8 2016, 03:24 PM
Test fit the engine with the trans/flanges so I could test fit other components for fitment. 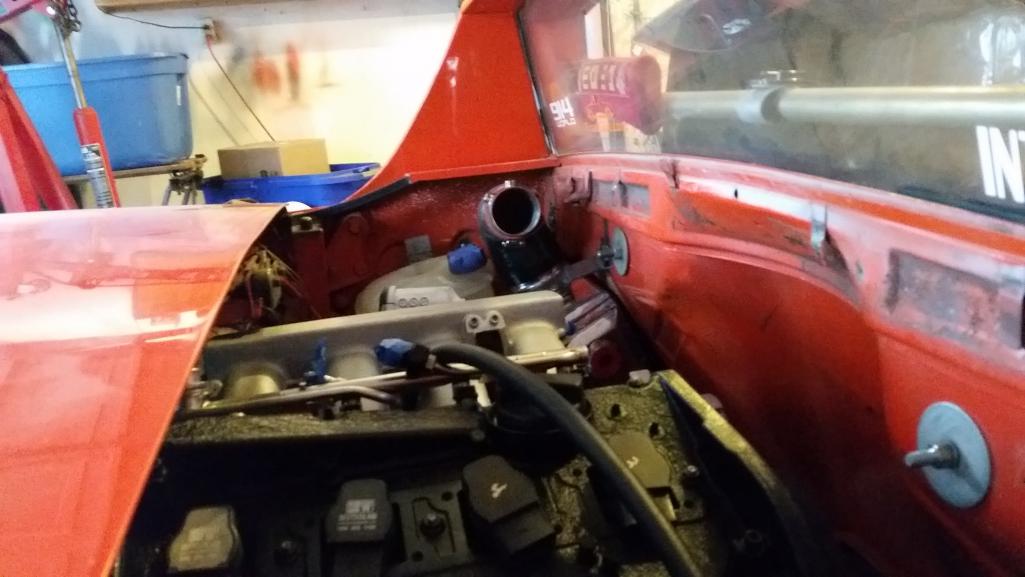
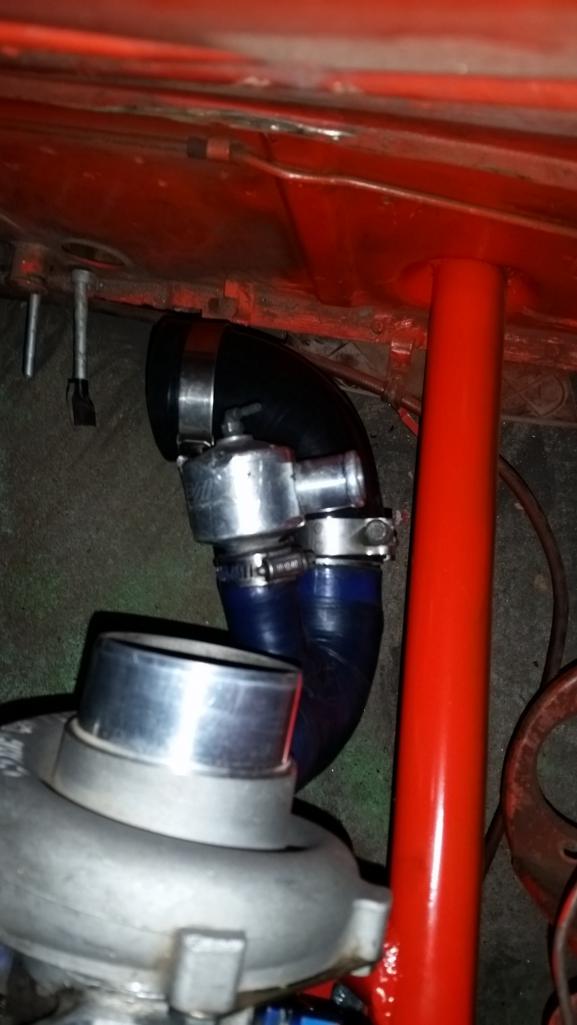
Turbo outlet and DV pipe test fit. Great clearance 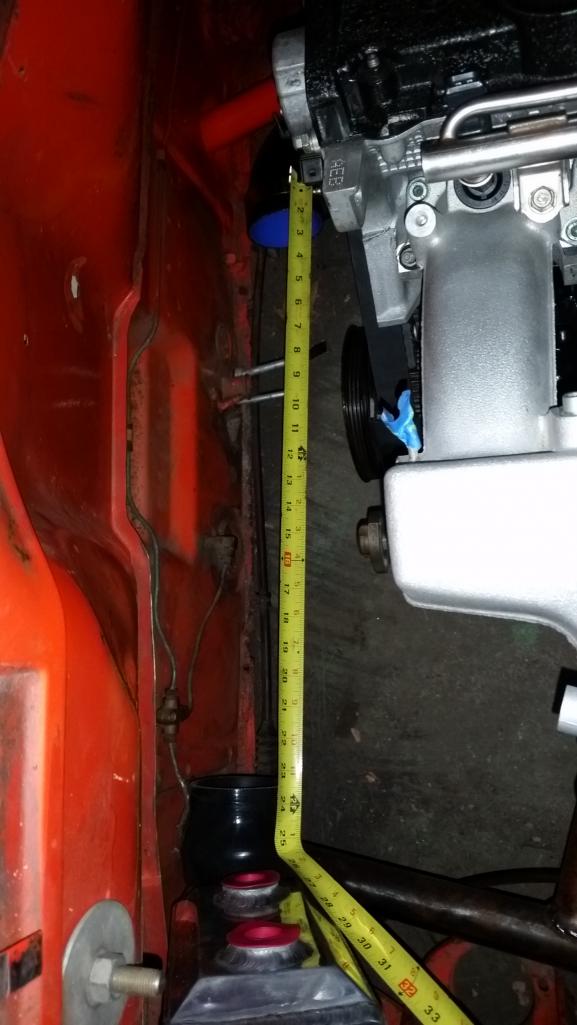
2' of aluminum pipe will be great here. I'll weld in the blow throught MAF fitting on this pipe. 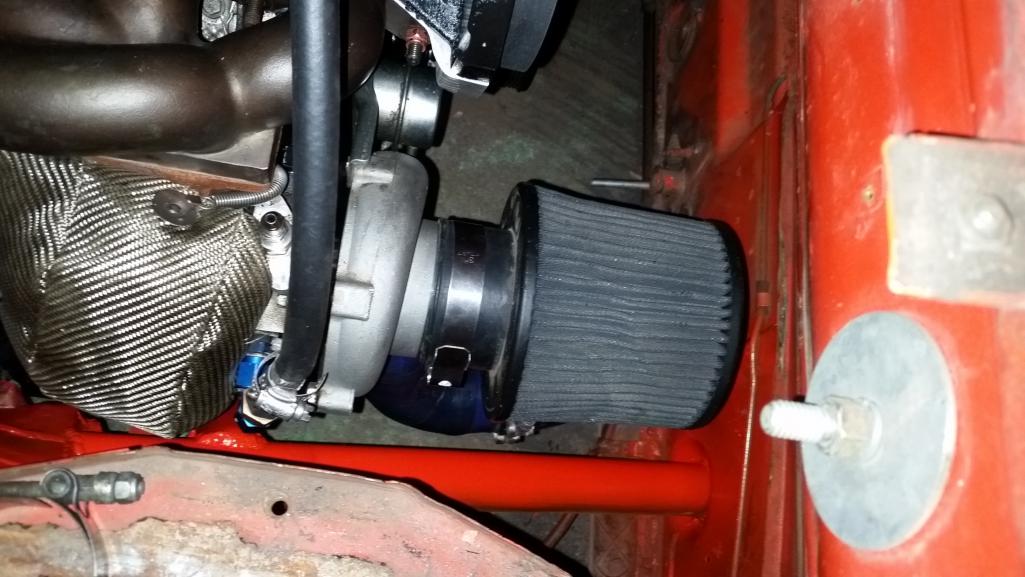
3" cone filter will work here for now. It will be located in the Pass fender after 3 month test period. 
But the big news is the super locally available bus axles will work right now of the box I let the wheel hang and I still had ~1 1/2 total play in the axle. So if I blow an axle I should be able to go to any NAPA and get a replacement.
Remember this is 100mm trans flange, Bus 100mm axles w/ stock 18 3/4" clip to clip length and renegade hybrids 100mm flange adapters on the stub axle to the stock 914 axle. This leaves me with two spare adapters
I can also help this with a grease fitting spacer or maybe my ABS rings that I am going to build later in the future.
Been buying misc bits and pieces I find I am needing. I should be 100% on fuel fittings and lines now. AN stuff is expensive especially when you have to deal with E85... I think I have ~ 400 just in fuel lines/filters/fittings..
Posted by: matthepcat Mar 8 2016, 04:58 PM
Nice work. This thread is nearing the fun stage for us observing...where cool noises happen.
Posted by: Mueller Mar 8 2016, 05:02 PM
Great progress....looks good in there!
Posted by: 76-914 Mar 8 2016, 05:30 PM
Posted by: Andyrew Mar 8 2016, 05:50 PM
Cool noises coming probably in 2 months
Exhaust parts on order (Stainless 3").
If I want I can 2step and antilag this engine with my tuner (ECU is currently in my tuners hands for a base tune, We will finalize the tune over the internet with logs)... But I like this turbo and I'd rather not destroy it yet.
Posted by: 914forme Mar 8 2016, 08:23 PM
If I want I can 2step and antilag this engine with my tuner (ECU is currently in my tuners hands for a base tune, We will finalize the tune over the internet with logs)... But I like this turbo and I'd rather not destroy it yet.
Who are you using to tune?
Posted by: dan10101 Mar 8 2016, 08:45 PM
It's getting exciting. 2 months for exhaust? Do you have an interim exhaust solution? In time for WCR?
Posted by: Andyrew Mar 8 2016, 10:39 PM
2 months till running. Ill probably do the exhaust in 2 weeks once I get all the parts.
Tuning is by Vagautoworks which is a very famous VAG tuner named Daz Dillenger. The tune itself is 400 for the pump gas tune, he will code out all the faults and will work with me until the tune is 110%.
What I have left to do prior to starting the car:
1. Finish intake plumbing
2. Finish exhaust
3. Finish oil cooler install and turbo plumbing
4. Mount fuel pumps and run all lines
5. Mount water pump and wire in.
6. Weld new outlets to radiator
7. Mount expansion tank and plumb radiator, coolant turbo, and oil cooler lines.
8. Wire the whole car.
9. Install boost controller
10. Add fluids and do pre systems check.
After the engine is running ill need to do the following.
1. Mount intercooler radiator and fan
2. Mount intercooler pump and run lines, wire in pump controller
3. Weld in trunk firewall
4. Burnout.
You know.. 2 months worth...
Posted by: Mike Bellis Mar 8 2016, 11:05 PM
You better take the rest of the month off from work so you can get busy!
Posted by: matthepcat Mar 9 2016, 12:15 AM
^^ Just go out to the valley Mike and get it knocked out in a weekend ^^
Posted by: Mike Bellis Mar 9 2016, 08:42 PM
^^ Just go out to the valley Mike and get it knocked out in a weekend ^^
I work in spurts. Remember my car was broke from September to February because I was too lazy to buy the part...
Then I get busy and get shit done...
Posted by: Andyrew Mar 14 2016, 11:18 PM
Made a bracket for the water pump. Im waiting for the alternator bracket before I mount this. 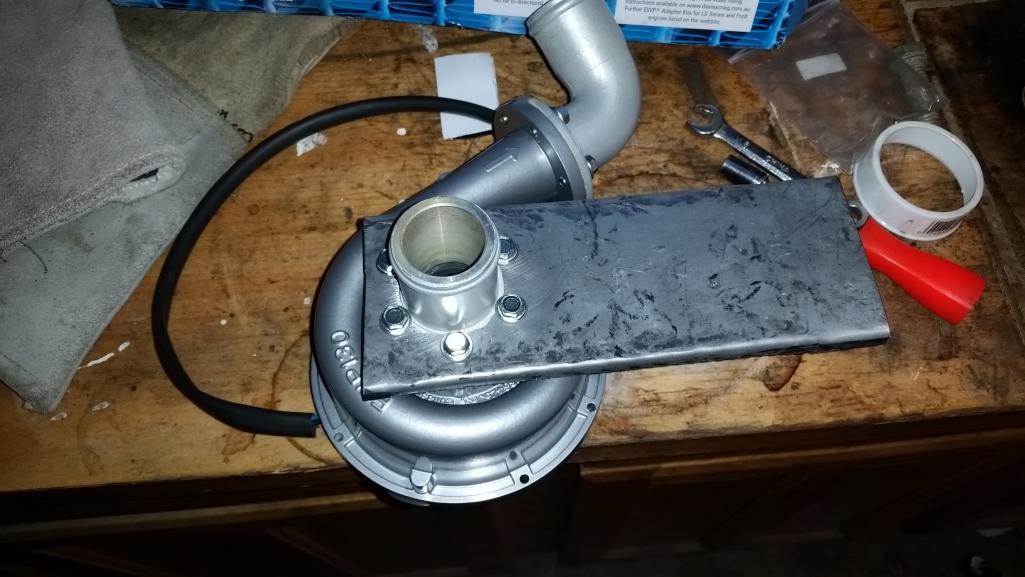
Welded in brackets for the coolant reservoir 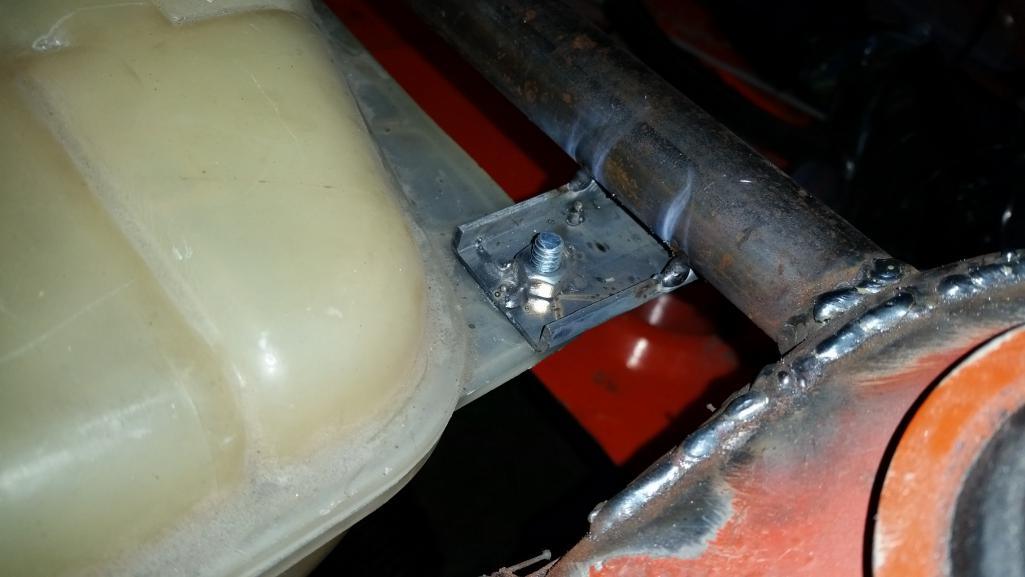
My AN lines and fittings came in. I must say these took a LOT longer to put fittings on than I thought. It took me over 3 hours to do 4 fittings. 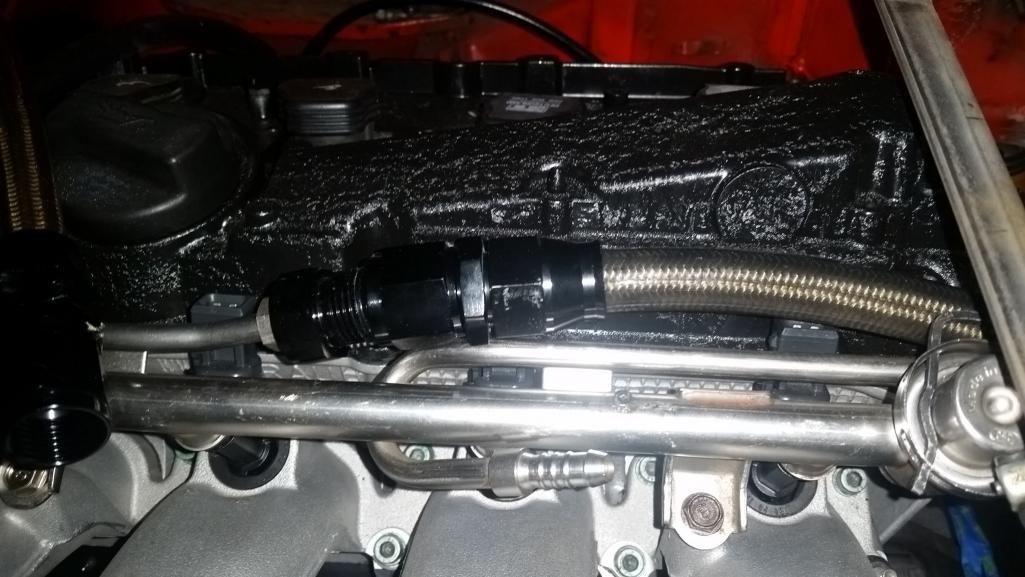
Took the trunk off. Whats that under the bumper? 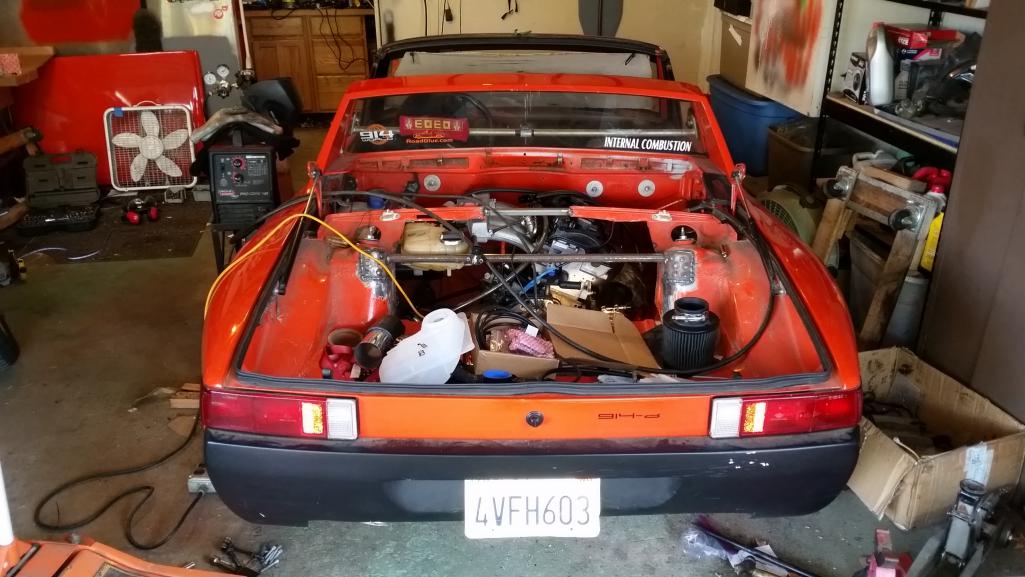
Posted by: Mike Bellis Mar 14 2016, 11:25 PM
All that work and your running a stock fuel rail?
Posted by: Andyrew Mar 14 2016, 11:27 PM
Exhaust parts came in
3" Stainless mandrel bent tubing, Vband clamp, 3" Stainless resonators. 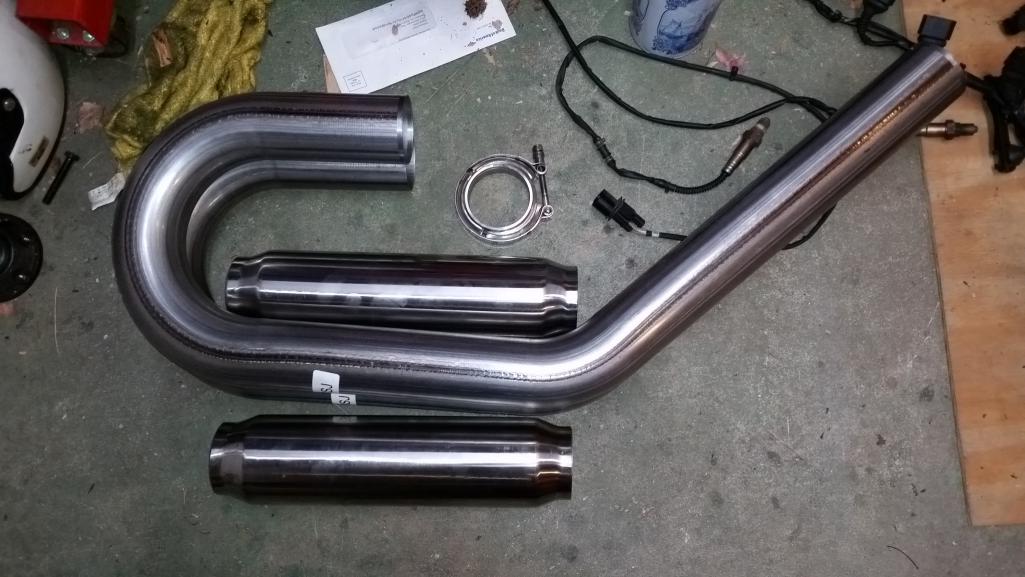
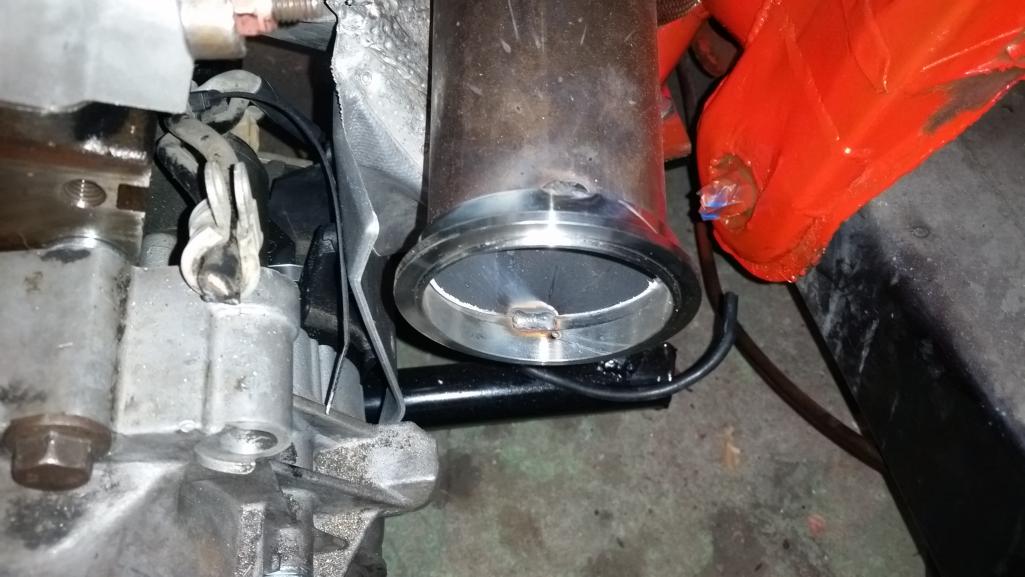
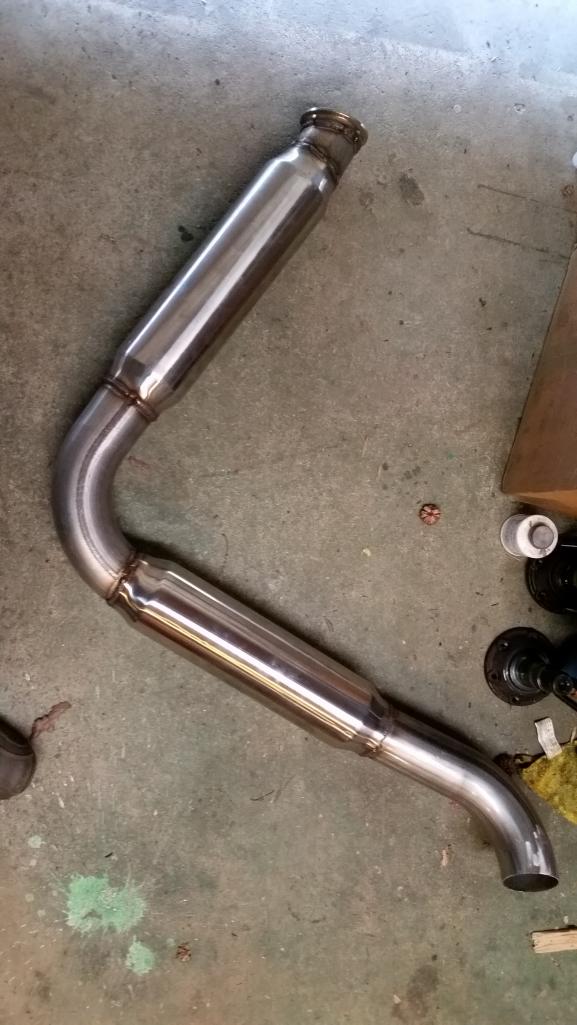
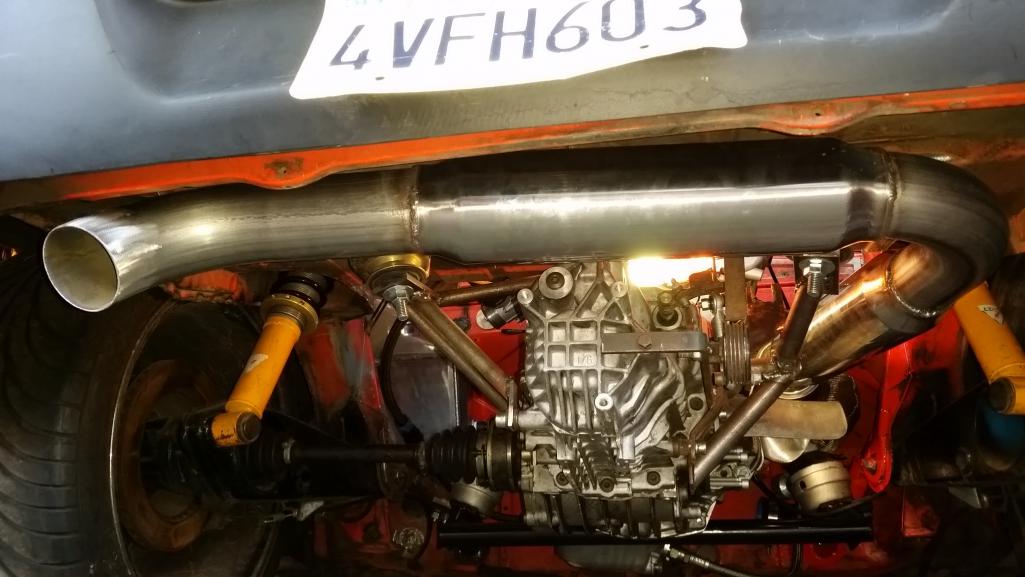
Pretty happy with the way it turned out. I still need to weld in a hanger. System only weighs a couple pounds so right now the Vband clamp is holding it pretty good.
Posted by: Andyrew Mar 14 2016, 11:34 PM
All that work and your running a stock fuel rail?
I was told it would not be the restriction until about 600hp, and with my AN10 supply lines probably not till way after that. Ill change it if I need to but right now I didnt want to deal with it. Assuming it doesnt leak...
Posted by: Andyrew Mar 14 2016, 11:34 PM
Last one for tonight
Attached thumbnail(s)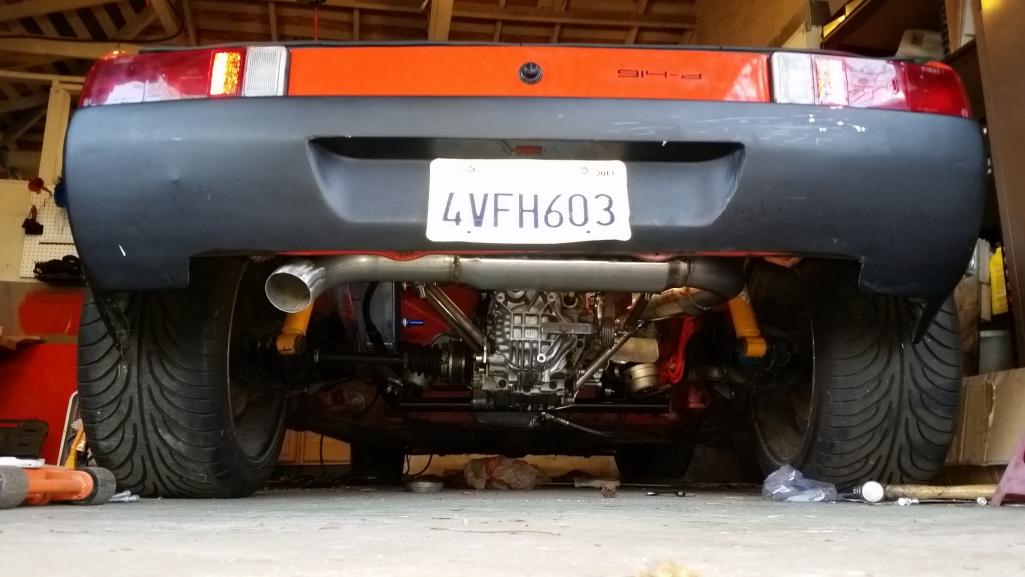
Posted by: Andyrew Mar 16 2016, 01:46 PM
Alternator bracket came in yesterday. 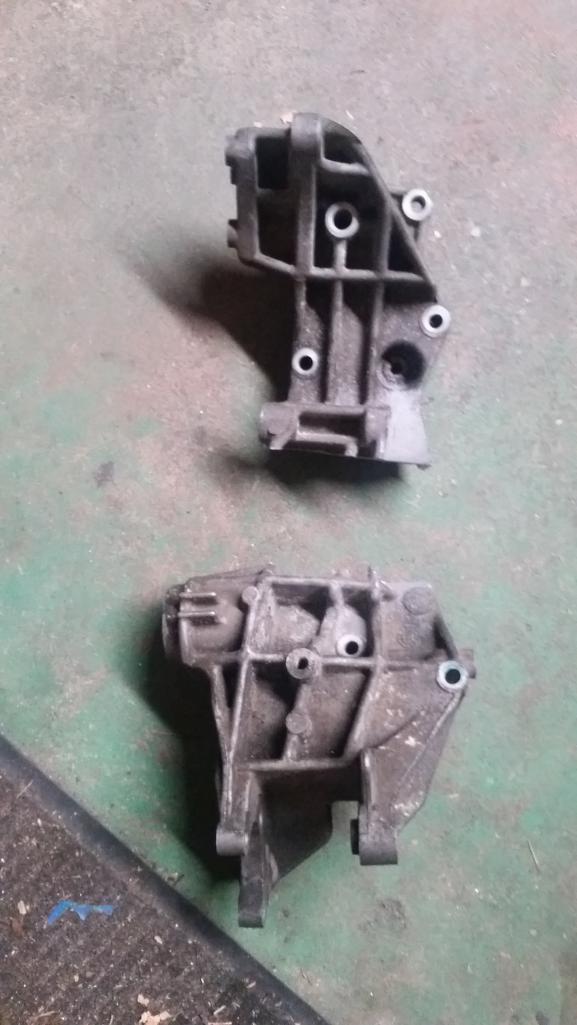
Quickly Karate chopped it in half. Only the top half is needed, the lower half has a idler pulley and the power steering pump. Both not being used.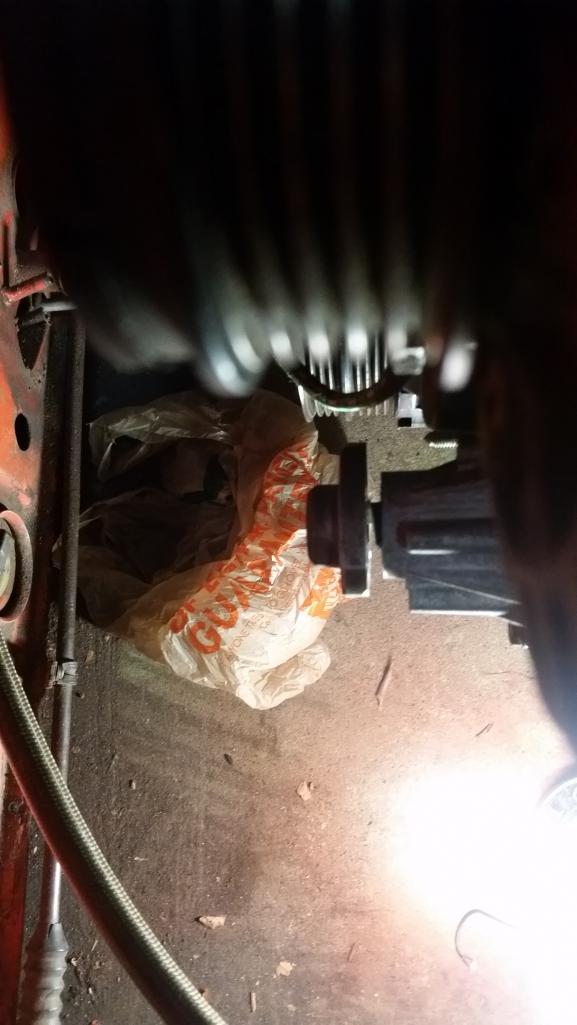
With the alternator mounted under the intake manifold you can see the gutted water pump sticking out.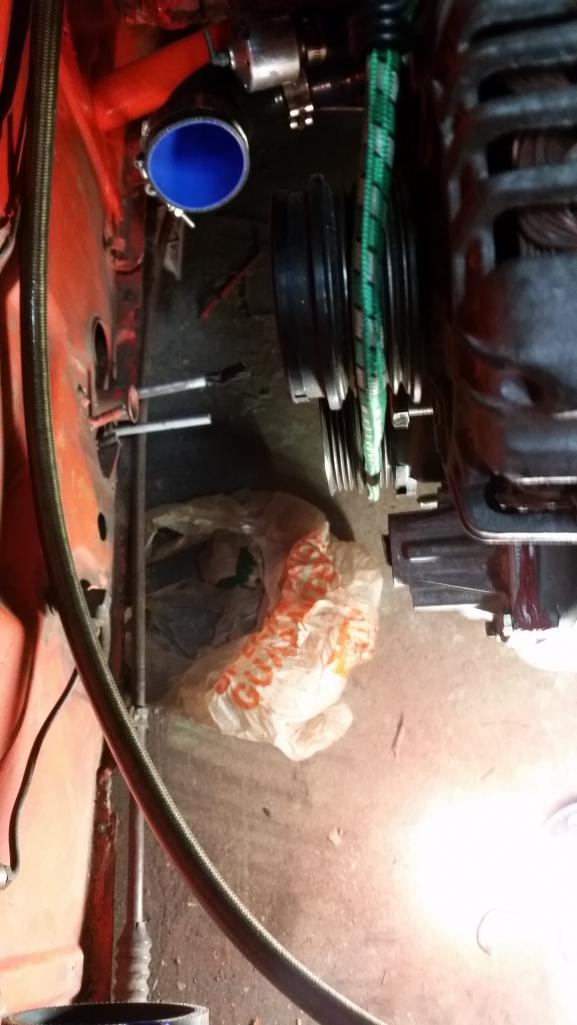
The pulley mount looks like it could interfere so off with its head!
This nets us with about a 26 1/2" belt, I have a 27.3" belt on order, and I think it'll work just fine. 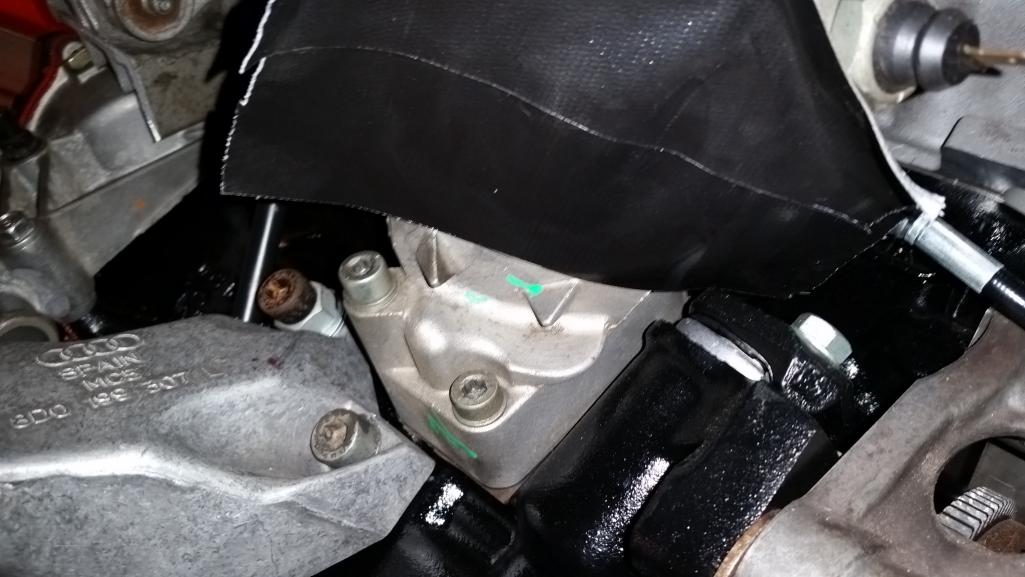
I also got the extended oil tube for my S4 oil cooler (Going to run this till I decide to run the external oil cooler...). But it requires the little cat ears to be ground off the oil cooler mount. Couple minutes with the grinder and they were off. Oil cooler is installed and the oil filter installed as well, but I will probably pull it and fill it prior to starting the engine.
Posted by: Andyrew Mar 21 2016, 09:52 PM
Got some work done this weekend.
Made a heat shield for the manifold to protect the coils and the oil feed line. New 3AN oil feed line also came in. 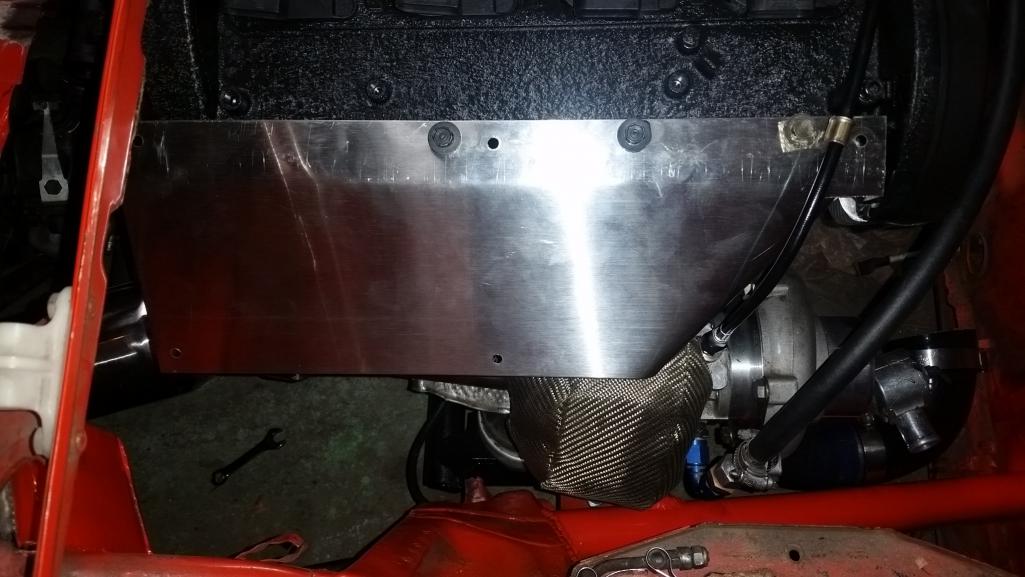
Got the remainder of my AN lines in. So I mounted up the fuel pump. I hate having to reach both sides to get to bolts so I welded the backsides of the bolts to the firewall 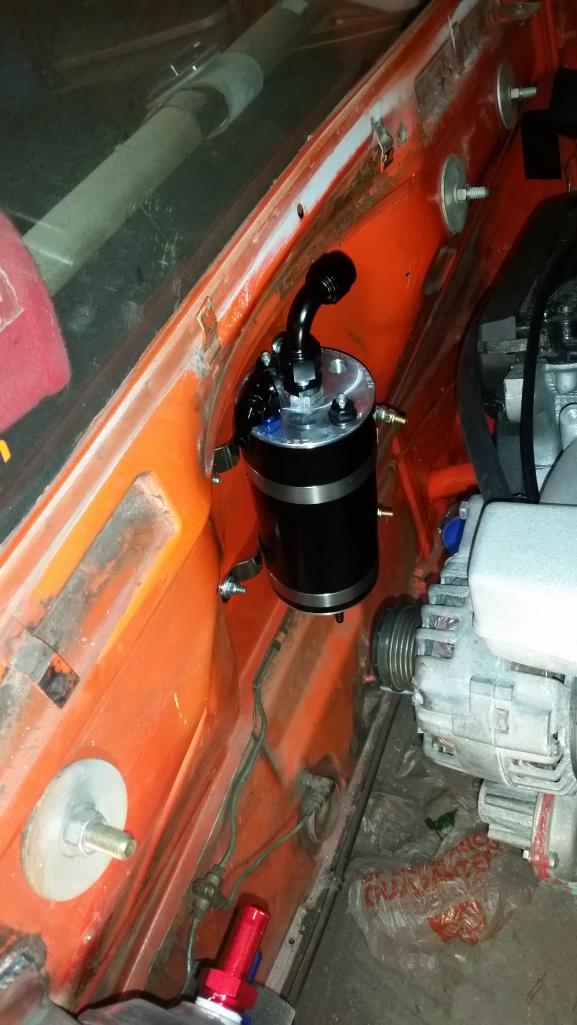
Located and clocked the water pump. This will actually be "free floating" but the outlet on the engine and the flange on the water pump are literally touching so it really doesnt move at all. 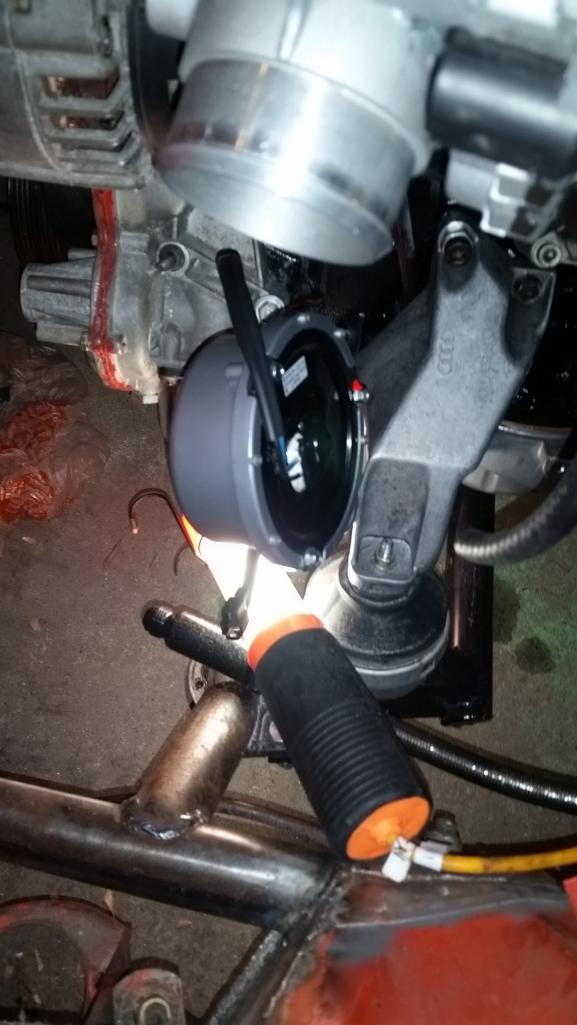
I experimented with aluminum welding.. Sometimes experiments fail... This one did
Had I actually preheated this and used pure Argon this might not have been so bad.
I am going to see if a local weld shop can clean up my welds with a tig so it'll hold pressure. If not I'll go by a members place and try my hand at it with his Tig. 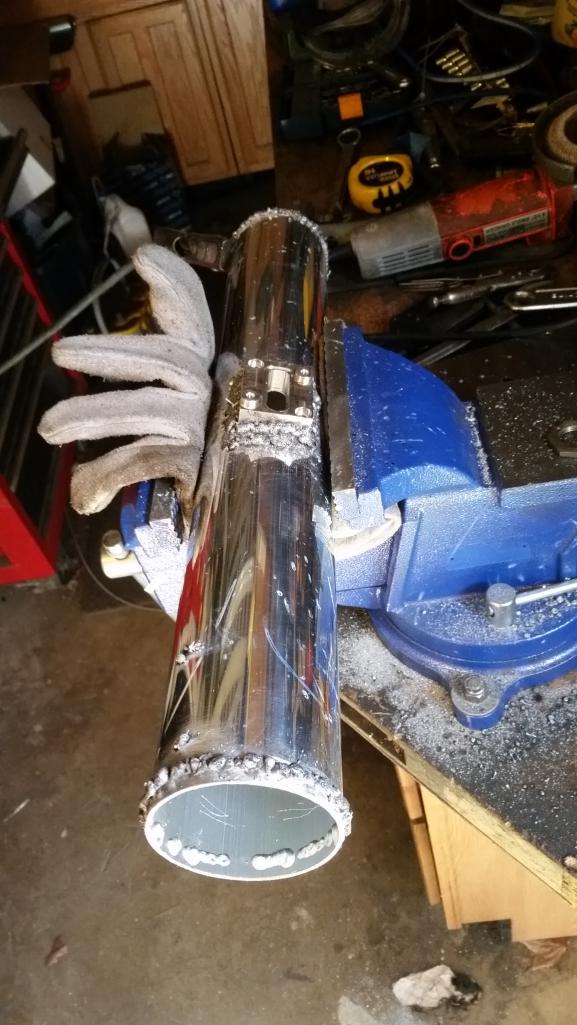
Posted by: Andyrew Mar 21 2016, 10:12 PM
Mounted the W/A IC radiator. Just one bolt right now. Trying to figure out the rest still.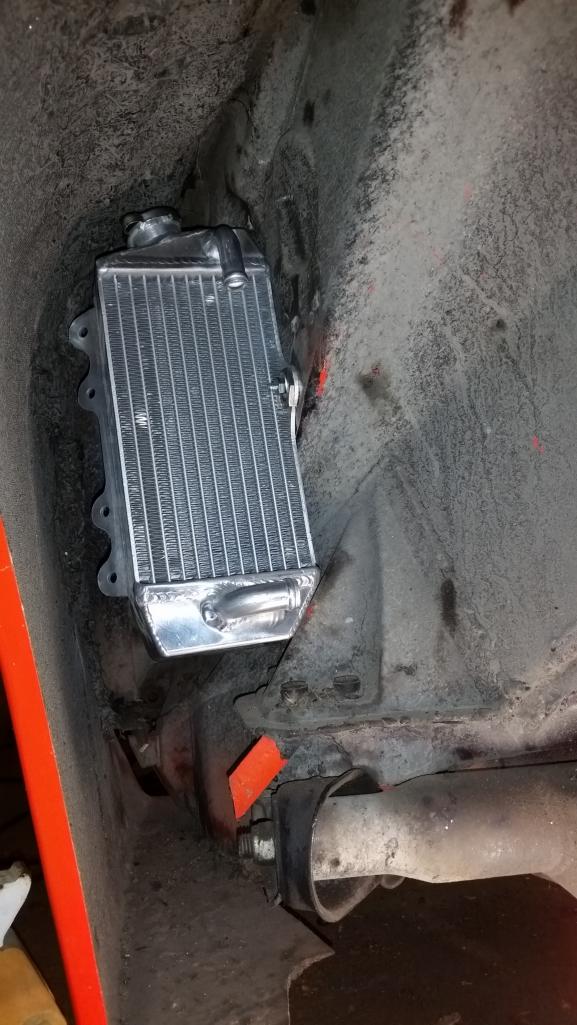
I'll route the hoses behind the radiator and through the firewall.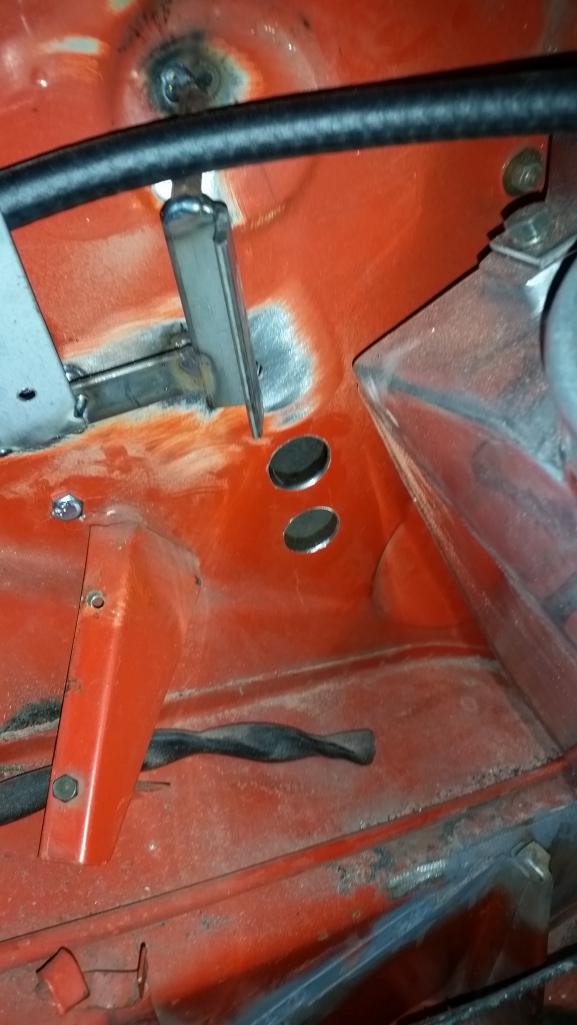
Speaking of hoses... How about some stainless joiners? 
And How about some more stainless joiners? A little explanations as well. This took quite a bit of research.. 
A little explination for the intercooler
Truth be told this is all just me delaying getting back into the electronics ... The wiring is really whats going to hold me back from getting the car running. I know about 50% of the critical electrical components and I cant read the factory manuals so I really have no idea what to do next... Im slowly working through it though
Posted by: jd74914 Mar 22 2016, 07:50 AM
I like the intercooler water cooler location. Nice and clean. Are you going to shroud and run a fan?
If you didn't shield with 100% argon I would cut all of those welds out; depending on the alloys aluminum aluminum welds can be brittle as-is so they really need to be done correctly. If you do end up TIGing them yourself, I've found the trick to aluminum is going relatively hot and fast; almost the opposite of welding steel. If you are fortunate enough to have access to a nice high frequency inverter machine, then you can set it up so it's more like welding steel and go slower.
Posted by: Chris H. Mar 22 2016, 09:09 AM
Truth be told this is all just me delaying getting back into the electronics
... The wiring is really whats going to hold me back from getting the car running. I know about 50% of the critical electrical components and I cant read the factory manuals so I really have no idea what to do next... Im slowly working through it though Manual is in German? What year? I'll look around for you.
Posted by: Andyrew Mar 22 2016, 09:50 AM
Truth be told this is all just me delaying getting back into the electronics
... The wiring is really whats going to hold me back from getting the car running. I know about 50% of the critical electrical components and I cant read the factory manuals so I really have no idea what to do next... Im slowly working through it though Manual is in German? What year? I'll look around for you.
I have the full (Were talking FULL) workshop manual. Problem is they look like this.
The body harness is a 2001 S4, the engine/dash is a 2001 A4 AWM engine.
Intercooler will have a fan, and probably a shroud in the future. I'll control the fan with the temp controller I posted a couple pages ago.
I think I am going to get a Steel flange for my MAP sensor. Then I can weld up the pipe no problem... Avoid all this aluminum BS.
Posted by: jimkelly Mar 22 2016, 10:07 AM
if anyone NEEDS a TIG its andyrew. especially for aluminum, and steel. wish i lived nearby, i'd love to observe his activities while drinking beer and eating jujyfruits
Attached thumbnail(s)
Posted by: Chris H. Mar 22 2016, 11:15 AM
I have the full (Were talking FULL) workshop manual. Problem is they look like this.
The body harness is a 2001 S4, the engine/dash is a 2001 A4 AWM engine.
Oh Lord...that's painful man. I'll see if I can find anything. Somehow my browser seems to be tuned to locate obscure manuals or supplemental materials. It's a gift
 .
.
Posted by: dan10101 Mar 22 2016, 12:00 PM
Did you see this?
http://www.audizine.com/forum/showthread.php/425744-The-1-8T-Wiring-Harness-Explained
Posted by: Andyrew Mar 22 2016, 01:12 PM
Yup. Its incorrect
Posted by: Andyrew Mar 22 2016, 01:19 PM
At this point my biggest concern is in regarding how the starter, alternator and battery wire up. They are my most difficult to pinpoint items. I would imagine it would be obvious, but its really not.
I'll figure out the engine itself when I physically throw the harness in.
In reality I am saving wiring for last and just doing the other stuff I HAVE to do until I run out and then I'll tackle the wiring till its good and done.
Posted by: 76-914 Mar 22 2016, 07:54 PM
I would work on wiring till I looked like this . I found medication and cursing soothed my brain but did little to complete the task. I would work on anything except wiring until the guilt set in at which time I would attack it once again. This cycle repeated itself at least 15 times before I worked my way thru it. Have fun and try to stay sane. Kent
Posted by: JRust Mar 22 2016, 08:44 PM
I'd consider relocating that fuel pump. Or at least add some rubber to dampen the sound. Right by your head you are going to hear that pump. Maybe it won't be heard over your killer motor setup though. I guess you get to try it & find out. I can hear mine which is down low on the firewall & behind the passenger seat. Maybe my Walpro is just loud
Posted by: Andyrew Mar 22 2016, 09:05 PM
I'd consider relocating that fuel pump. Or at least add some rubber to dampen the sound. Right by your head you are going to hear that pump. Maybe it won't be heard over your killer motor setup though. I guess you get to try it & find out. I can hear mine which is down low on the firewall & behind the passenger seat. Maybe my Walpro is just loud
The pump inside the surge tank should basically be unheard. I do plan on adding some rubber isolators at some point. Just dont have any at this point.
The 044 is a pretty quiet powerhouse anyways. What I will likely hear is the carb fuel pump that will prime the 044.
For right NOW Im going to leave it but yes at some point noise isolation will be extremely important as I finalize the interior and try to maximize the proper sound.
Small update for tonight. My belt and plugs came in. Belt fits great! So I'll grab a spare to keep in the car. I have 2 spare plugs to keep in the car. They are copper core so I'll probably change them out every oil change, but it'll have a stronger spark with them.
Belt is a 5 rib 37" 5PK940, but anywhere from 36.5 to 37.5 should work. But it should be an over the counter belt
Posted by: Chris H. Mar 22 2016, 09:30 PM
I would work on wiring till I looked like this
. I found medication and cursing soothed my brain but did little to complete the task. I would work on anything except wiring until the guilt set in at which time I would attack it once again. This cycle repeated itself at least 15 times before I worked my way thru it. Have fun and try to stay sane. Kent Dude...you have to look at those Audi wiring diagrams. They'll make you want to break stuff. Still haven't found anyone who has transcribed them with pics and stuff. Wonder if the Passat has a fairly similar layout. Probably more swaps on those.
Posted by: Mike Bellis Mar 22 2016, 10:33 PM
The electrical diagrams look simple to me...
I actually overlaid striped color lines on the wires to make it easy to read.
My ECU did crazy stuff on copper plugs so 034 switched them out to get rid of the misfire.
Posted by: 76-914 Mar 23 2016, 07:24 AM
He'll get it after he spends a couple of hours staring at those charts. I was stuck on the "old time" ones then came the "flow charts" which I cussed (remember I'm a plumber not an electrician) for the first few hours but came to appreciate later. Next was the Suby charts which appear similar to yours. What is "K"? Is that your ECU? Didn't see it in the legend. BTW, why are you even futzing over the elec? Doesn't Bellis live close to you?
Posted by: Andyrew Mar 26 2016, 07:32 PM
Made a list of stuff I need to do quickly.. did some work today but Ill post that later.
Finish fuel lines and install pre pump and filters -4hr
Silicone coupler plugs install and map sensor - 3hr
Pre oil turbo, tighten drain, add oil, Tighten oil lines.- 1hr
Finish radiator lines - 2hr
Plumb intercooler -1hr
Plumb intercooler coolant hoses -1hr
Finish clutch line install - 1hr
Install sensors on pedal assembly - 3hr
Install knock sensors - .5hr
Mount shifter - 1hr
Install wiring harnesses - 15hr
Wire starter and Battery 5hr
Wire fuel pump - 2hr
Wire radiator pump and fans 2hr
Test fuel system for leaks 2hr
Test cooling system for leaks 2hr
Total time left minimum: 45.5hrs
Posted by: Andyrew Mar 28 2016, 01:48 PM
So the progress from this past weekend..
I was not a fan of how tight the coolant lines were going to be coming from the radiator to the water pump. So... I made this drop. This will also support the water pump when the radiator line is clamped under the body. Happy with the turnout on this. Stainless steel is so nice to work with I should have started sooner for this type of stuff. At some point I believe I will make all the lines and just have random sections of hose just for joiners. 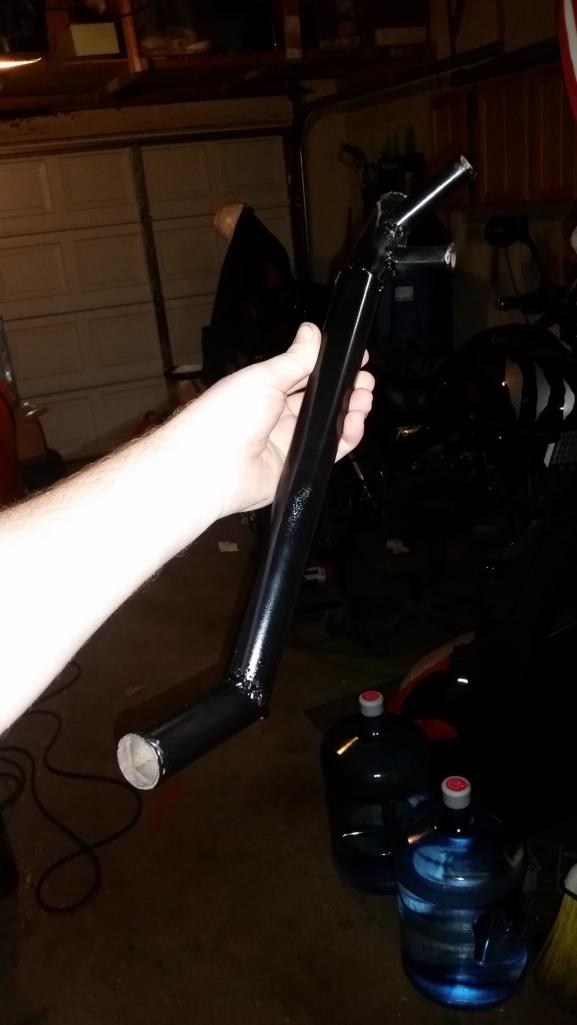
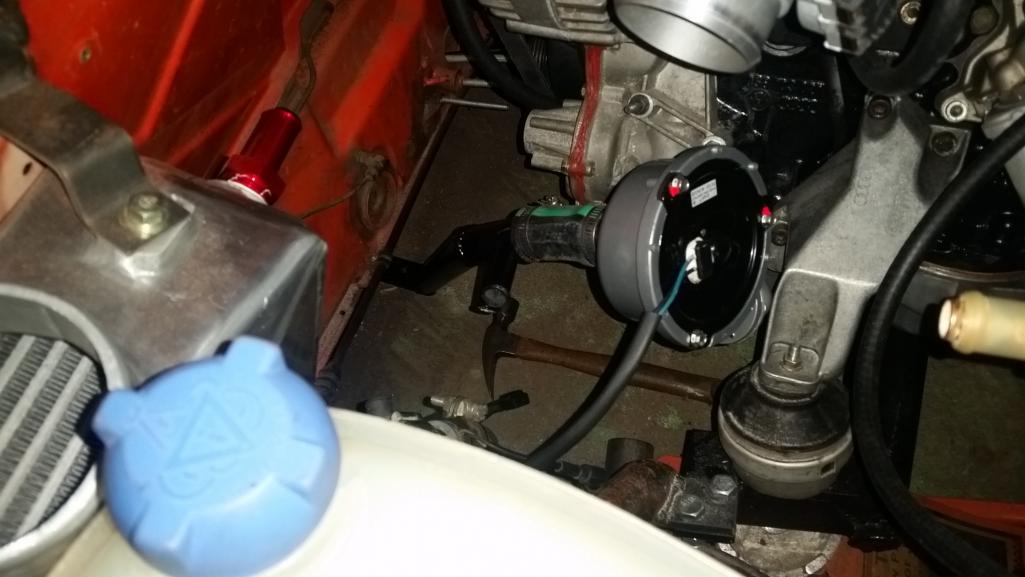
Finished welding up the exhaust, I had originally thought I was going to pull the motor but it doesnt look like it will be necessary, nor feasible prior to WCR. I welded the portion near the engine from the inside. Shouldnt have any leaks 
I spent almost 4 hours finishing the exhaust manifold bolts, my back still hurts. I had to make 2 more wrenches to get it as tight as I wanted. This was NOT easy. A swivel doesnt fit in most of the center 6 and you cant get a wrench or even a bent wrench in some of them. I welded a ground down 12mm to a wrench, bent it to fit, and bent a 12mm wrench for the others that that didnt work for. Also there is one that is directly behind the collector that is extremely difficult to start. I put some grease on my ratcheting wrench, put the copper nut on it and turned it one click at a time on my finger till it was on and then repositioned the wrench and was able to actually get a good 1/8 of a turn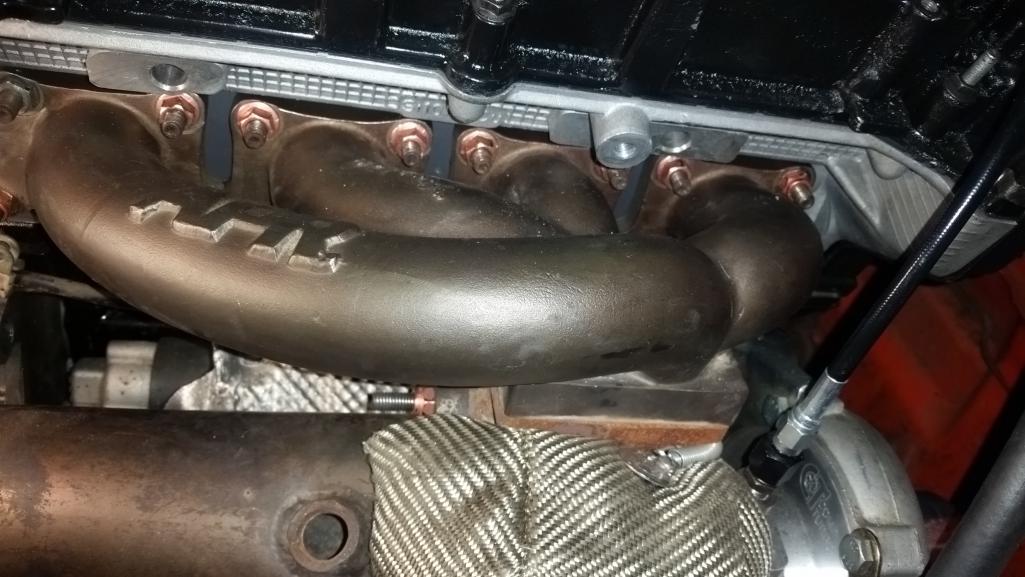
I ran the lines for the shifter after making some I'll weld some supports back in as some of it wasnt necessary. But you can see where the lines go through here. I need to fab up a mount for the shifter and then tighten up the rods on the trans side. 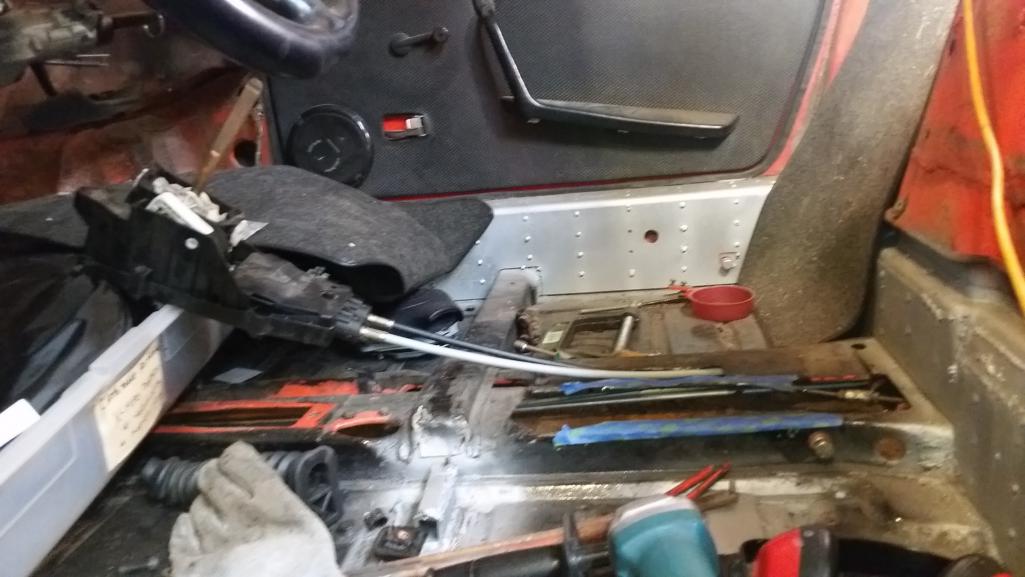
Did some more work to the radiator plumbing, working on this and that but its not worth a pic until its done. After the exhaust manifold I put the heat shield back on.
I started plumbing the radiator lines to the radiator and cut some pieces. I might have to weld some pipes for this as well to prevent kinks in the lines but I am running low on 1 1/4" SS pipe only a couple feet left, but should be enough to get what I need to get done, done.
I put my fuel line in place to start the mounting process but either I am missing a AN10 coupler or I missordered.
New one (red ) coming from LA.
Posted by: Mike Bellis Mar 28 2016, 06:01 PM
Great progress.
I installed my exhaust manifold with the motor out of the car. There is no way I can remove it without removing the engine. I also pinned the nuts with a punch so there is no way they can come loose.
Posted by: Andyrew Mar 28 2016, 08:00 PM
Gotcha. I got the large nuts on there hoping it helps. I had the nuts back out after about 20k miles but it was obvious when it happened.
Ill keep my special tools in the tool bag so I can tighten them on the road if it backs out. They are literally as tight as I can get them. The ones I could get my impact on are not coming off.
Posted by: Andyrew Mar 31 2016, 07:46 AM
While I was waiting for the below welding to cool I pulled the steering column and tried to figure out why it kept binding up on me... well the bolt that was supplimental holding the piece on the shaft that alides in and out for telescoping was hitting. I ground down the bold (its welded in anyways) and then found that the outside of the knuckle was hitting as well. I ground down the knuckle that wasnt structural and then ground the inside of the below to fit.And guess what, no binding and a smooth steering column. Yay!!! I was worried about that one.
Ill tighten it up and try it on the ground. If I dont like it ill scrap it and try again. Not screwing around with my steering column... 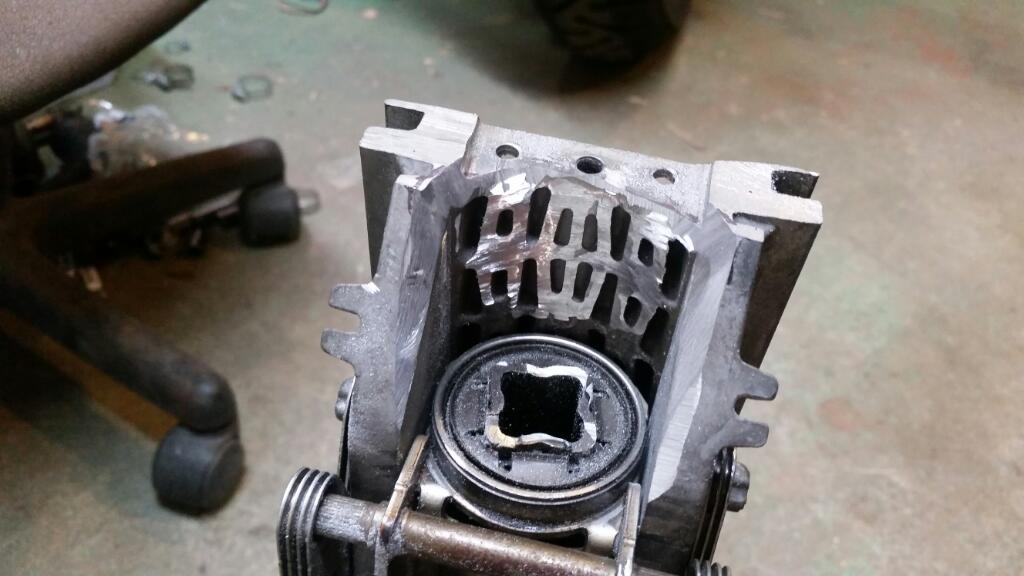
So the welding I was speaking about.. 
I worked on the clutch master. Pictures explain it pretty good. I am moving the pivot about 60 degrees so the master cylinder stays in the cabin. This will require cutting the tunnel a bit but ill reinforce it when I am done.
Rough position of final below. Ill probably weld the bolt on and use two nuts locked together with about 1/32 of play for free movement. But this works for testing. 
Note this is only a temporary pedal box. Permanent will be much different.
Posted by: Andyrew Apr 5 2016, 09:31 PM
Illness has prevented me from making much progress over this extremely important weekend.. I had all day saturday, but had to cut it short after a couple of hours..
And now with me laid up yesterday I am behind even further at work so any possible time I was going to spend on the 914 at night is now being spent on work related items to try and catch me up there...
So its very very likely that this car will not make it to WCR. I only have about 3 total weeks left of time I can spend working on the car and only 2 total weekends.
So I was able to make a little progress.. I welded in the clutch slave cylinder mounting brackets and installed the AN lines. 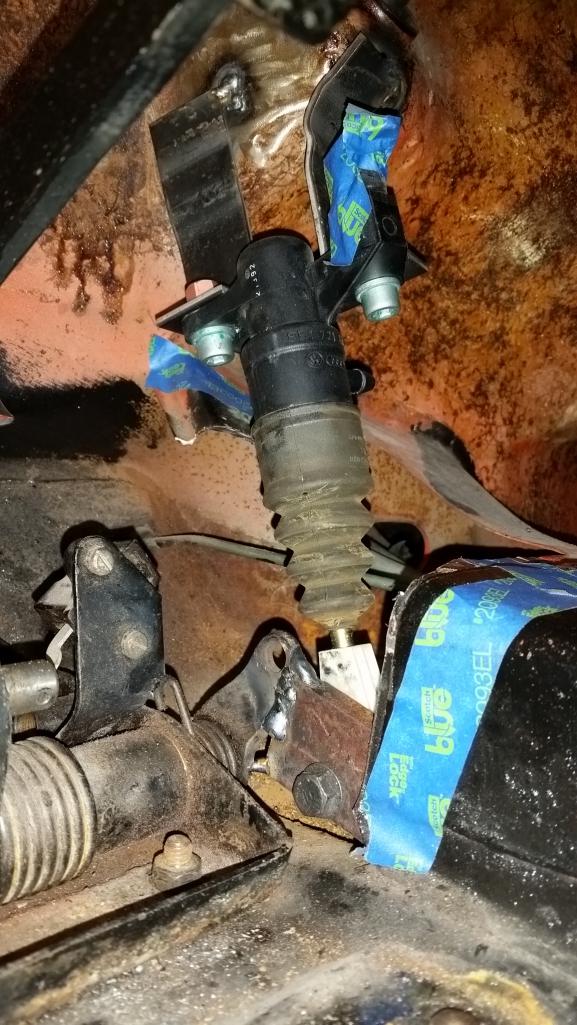
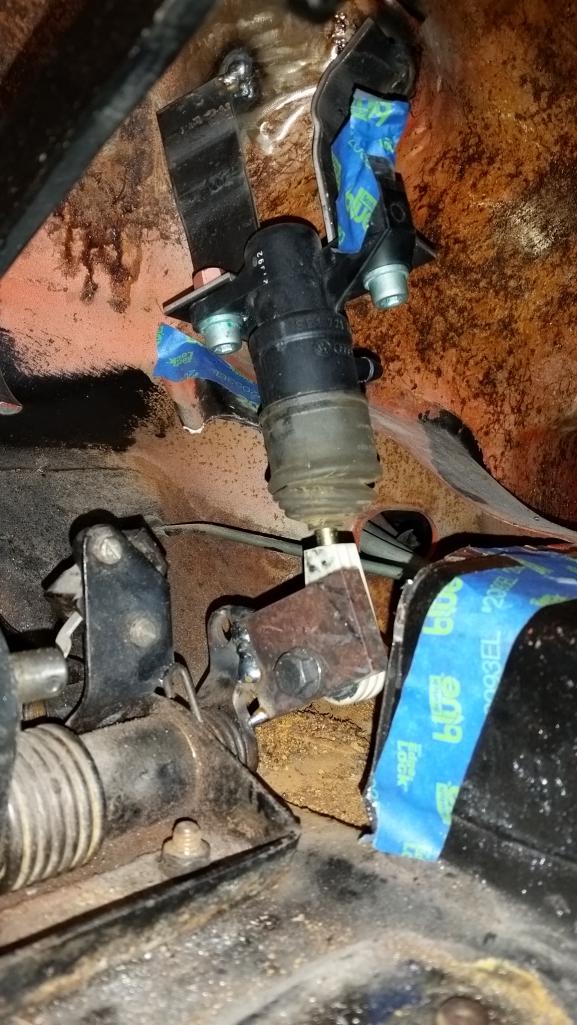
Buuut, the master cylinder is leaking where the pressure fitting is. The seal inside the master cylinder must have shriveled up as the trans side doesnt leak.
I have an OEM master cylinder coming, so hopefully all the leaks will be fixed with that.
Speaking of leaks... Decided I hate aluminum... Bought a steel flange for the MAF and welded it up with some of my spare muffler tubing. Added a bend in it to make it a bit easier for install. Overall it fits really well.
Attached thumbnail(s)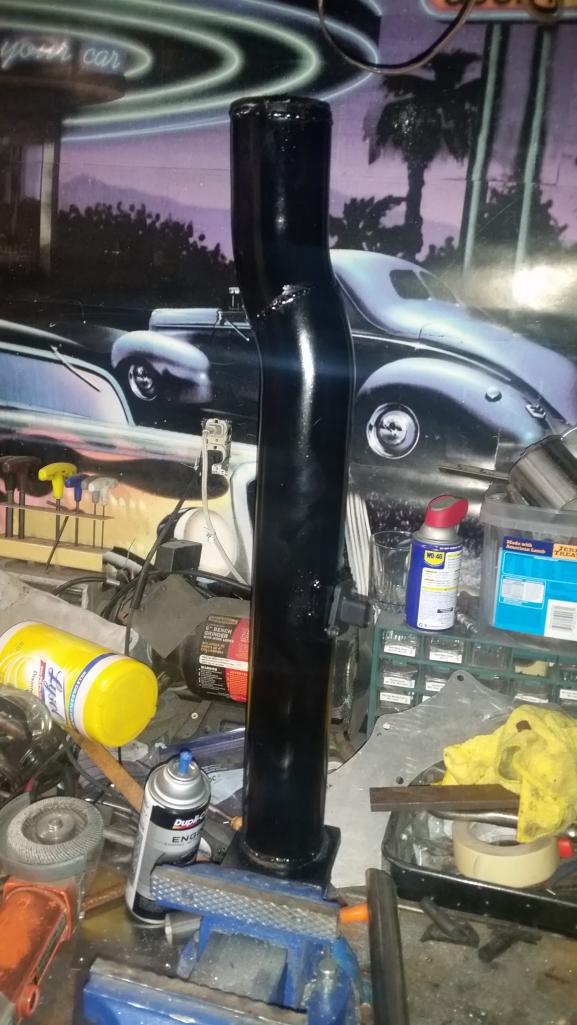
Posted by: 76-914 Apr 6 2016, 07:49 AM
Andrew, will the MC be inside the cabin with the next pedal reiteration?
Posted by: Andyrew Apr 6 2016, 09:02 AM
Most likely not. Ill probably use some sort of tilton pedals or similar floor mounted and put the MC behind them.
Posted by: Mike Bellis Apr 6 2016, 10:02 PM
Do me a favor and put some gussets on the master brackets. i think flex will be a long term failure issue if you don't. Most likely it will fail in the middle of nowhere...
Posted by: Andyrew Apr 6 2016, 10:55 PM
Oh thats already in the plans, I basically just tacked the brackets in to confirm that it would work in that position. I was planning on adding a third brace once I got it right.
Posted by: Andyrew Apr 7 2016, 07:12 AM
Worked on a solution for the clutch and brake sensors. I think this one might work well after I revise it a hair.
Also got the new clutch master cylinder in, no leaks and its actually incredibly light. I might have the stock pressure plate in there right now so I will probably have to upgrade it before I turn the boost up. Well see. 
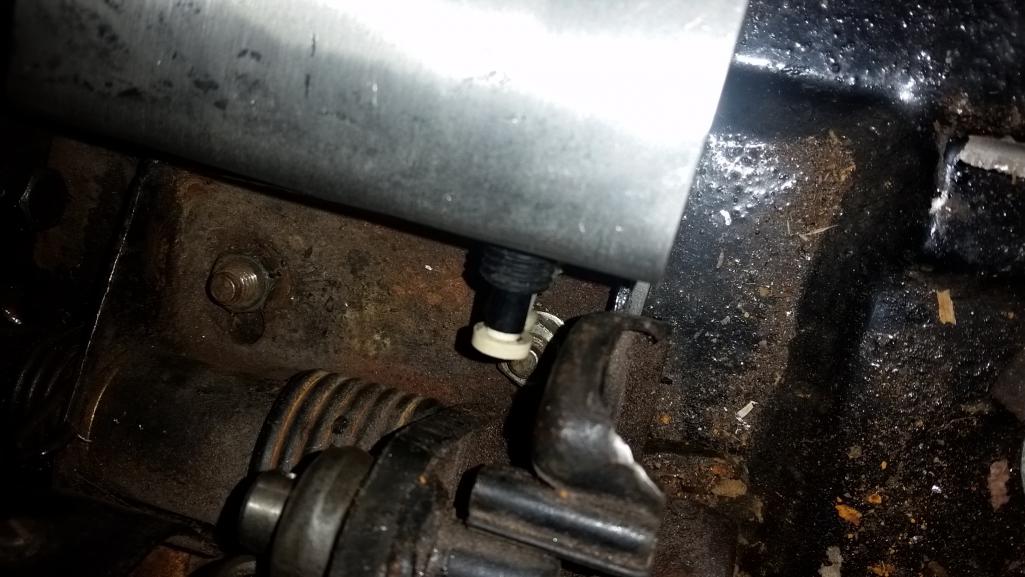
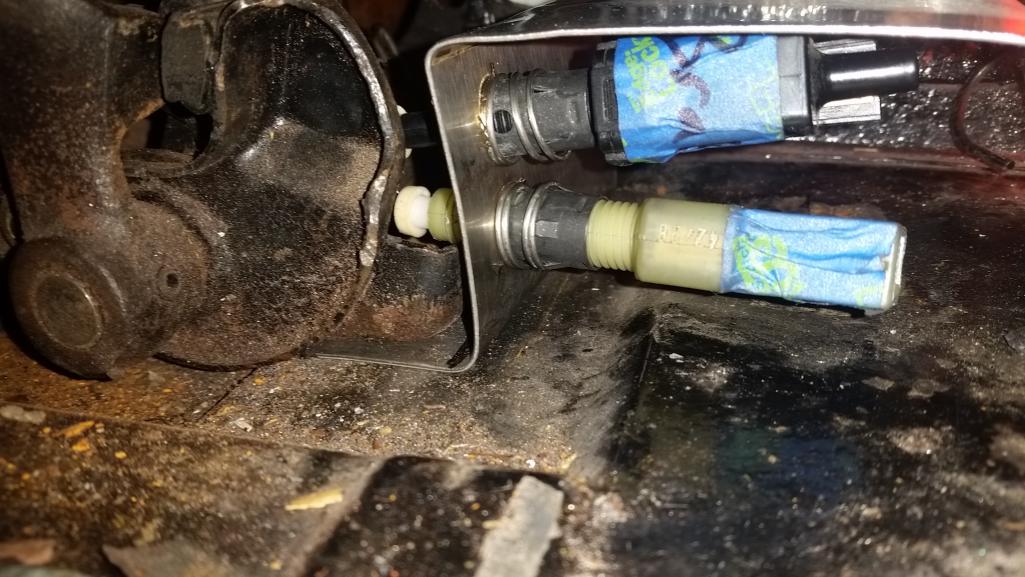
Current issue is the black sensor is all the way maxed towards the pedal so I need to either weld something to the pedal to activate it or rebend the piece to mount it closer. I currently have it slipped under the pedal assembly and mounted that way. The other option is to only use the white sensor and link them together.
Note this is just the brake pedal sensors, Ill have to weld on another bracket to this for the clutch.
Posted by: Andyrew Apr 11 2016, 01:36 PM
Had a couple of guys over Saturday to get as much done as possible. We were able to cross of a few things on the list.
Ran the radiator lines and tested for leaks. Leak found on one of my welds , I'll need to pull the pipe now and touch up the weld. 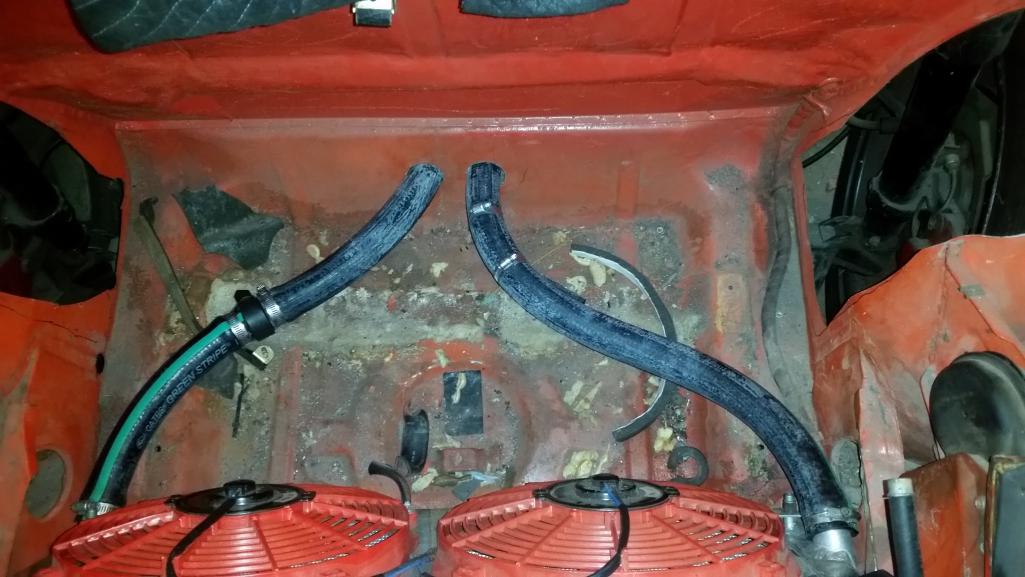
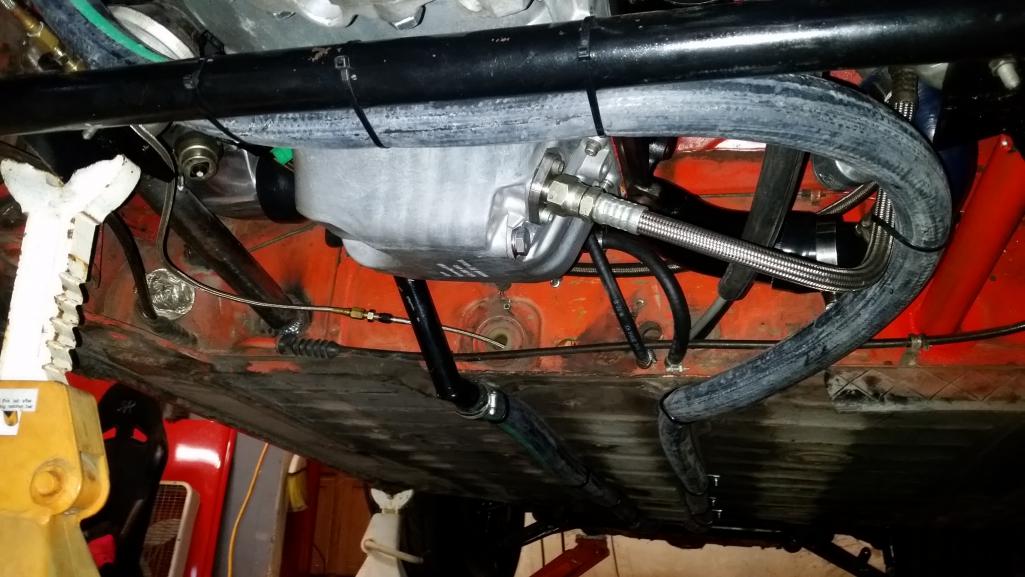
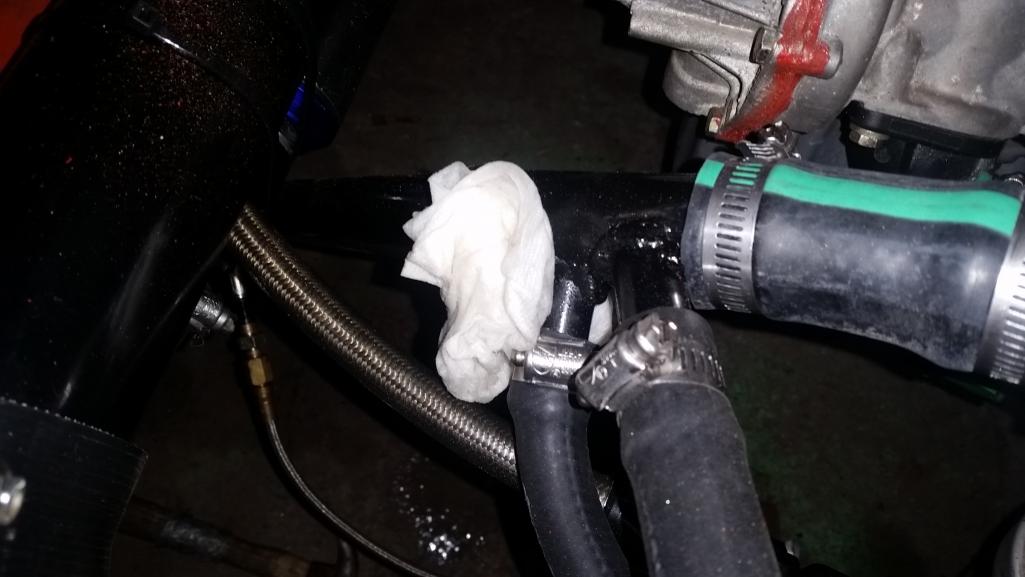
Ran all the fuel lines and fuel filters, Still need to tighten the main feed line and run new lines tank side. 
Pulled the CV joint, Tightened all the bolts, reinstalled both CV joints and tightened the stub bolt with an impact. I'll need to torque it down with my breaker bar when I get it on the ground.
Also started wiring the engine bay. Found a couple of plugs that are different than what I have so I'll need to determine what I want to do there. I have older sensors that have a different plug and I can splice them into the wire harness or just buy a new plug and splice that in. We'll see what I end up with.
Worked on the pedal cluster sensors a little bit, still a bit more work to do here but I'll get it situated.
Posted by: 914forme Apr 11 2016, 04:14 PM
I now know why you want this engine in your 914, after spending a weekend driving my wife EOS 2.0T, I would love to be running that engine in my 914. Revs, and just when you think it is out of power another surge kicks in.
And then today I go into work and see that one of my employees has just bought him self a Chilli Pepper GTS and I started to think, Engine from that, and transmission from his Cayman, and I would have a sweet 914.
I have to keep on my build, switching gears will make me never get it done.
Way to keep making progress on your Andrew, I know this will be a fun ride once done.
Posted by: Andyrew May 1 2016, 09:25 AM
Well there had been a lack of progress for the last bit of this month
But all for a good reason. Jerika and I made a trip we are not likely to be able to replicate.
Welcome to our European adventure!
This has been a long time planning (2 years)
We started out in Italy visiting Rome, the Amalfie coast, Florance and the Tuscany region, and finally Venice. Proceeded into Germany and started in Munich and the lower Bavarian region visiting the castles, Stugart for the Porsche museum, Nurburg for the Nurburgring, and a trip to Cochem in the Mosel valley wine region. Finally we ended up in Paris France for the last bit of our trip.
The Porsche museum was very cool, lots of very interesting exibits and we could have spent hours listening to all the audio guided tours. They were featuring the "transaxle" era, which really meant the 924 through 968 lineup. They featured some concepts that they had not previously shown the public to my knowledge such as a targa 924 concept and a rear engine awd 944.
The Nurburgring was very fun experience. The town of Nurburg is a tiny tiny town with the Ring being the square of industry, however it was pretty much dead while we were there and I am thankful for that. It looked like the whole place was built to hold a couple hundred thousand people. During the day there were the Prototype race class cars doing test laps around the grand prix track.
I rented a Renault Clio RS200 track prepped car specifically for the ring through Rent Race Car. The morning was full of snow and clouds so the track was damp and a bit slippery but you can see a video of my 4th lap below, I took it pretty easy due to the wetness and I didnt want to loose my insane deposit. Absolutely loved the car, its basically a DSG version of my Fiesta ST and the DSG reminded me of the PDKs.
At 5:15 pm the "Tourist" track opened up and we were allowed on the track, reminded constantly that we were not "racing". That being said it was obvious most people were going 10/10ths, and there were quite a few drivers that were obviously proffesionals. In fact I saw a few of the camafloge wrapped cars being driven very impressively.
The track was extremely impressive, imagine a combination of say laguna seca, willow springs, infineon raceway and about 5 miles of super twisty mountain roads with huge elevation and traction differences. I would absolutely love to have that be my local track, anyone in anything is welcome between the hours of 5:15 and 7:15.
I have probably 2k pics at this time so Ill just load some collages my wife made 


And finally a video as mentioned above of me driving the Nurburgring with Jerika.
https://www.youtube.com/watch?v=l6RJtwZqEmQ
Posted by: 914forme May 1 2016, 11:40 AM
Screw 914 progress the Ring called!! You where being awfully nice to your rental. You do know borrowed cars are the fastest cars you can drive!!!
Posted by: Mike Bellis May 1 2016, 12:03 PM
Looks like a fun trip! Glad you made it back OK. I haven't been there in 20 years and need to go back with my wife.
You only have 2 weeks to be ready for WCR. Better hurry!!!
Posted by: Andyrew May 1 2016, 12:40 PM
The video is a bit missleading, I was going a solid 85%, leaving 15% on the table for the fact that I really didnt want to spend 6900 euros if I wrecked it, and that it was still pretty wet out.
I also limited my speed to 100mph, as I found that to be a factor for major crashes in my hundreds of test laps on simulators and research. Even with all of that many corners suprized me, I am closer to knowing the track but no where close to knowing the correct line.
Posted by: Andyrew May 1 2016, 01:20 PM
Looks like a fun trip! Glad you made it back OK. I haven't been there in 20 years and need to go back with my wife.
You only have 2 weeks to be ready for WCR. Better hurry!!!
Technically still in France... (We actually heard a french couple say Oh HoHo! today, Jerika said life goal achieved when we heard it)
Posted by: Andyrew May 13 2016, 07:34 PM
Been working on wiring the past week. I needed some different connectors on a couple of my sensors so I soldered the new connectors on.
Sadly it looks like I need to extend the harness a bit. 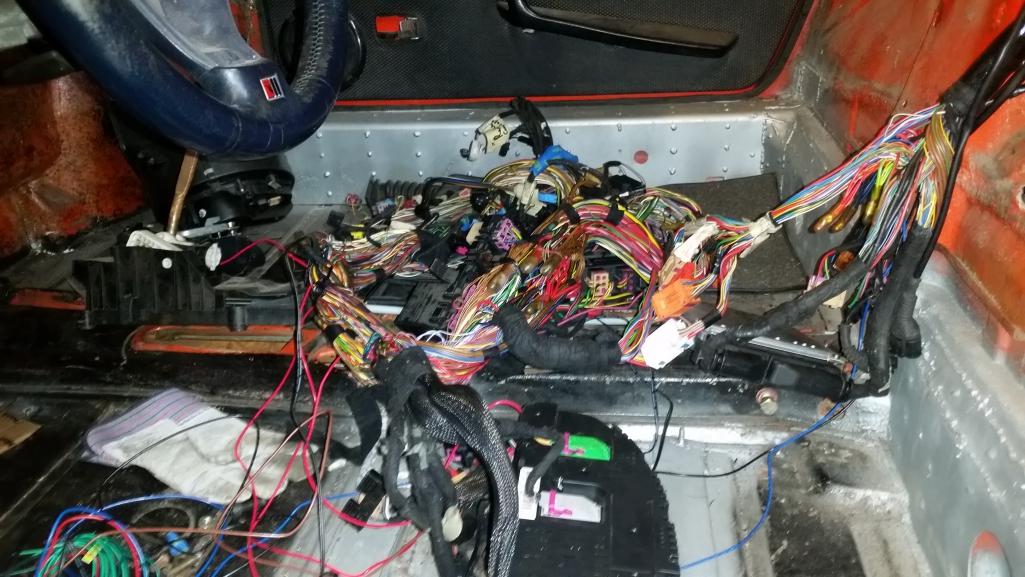
Luckily I have a spare harness to pull from. 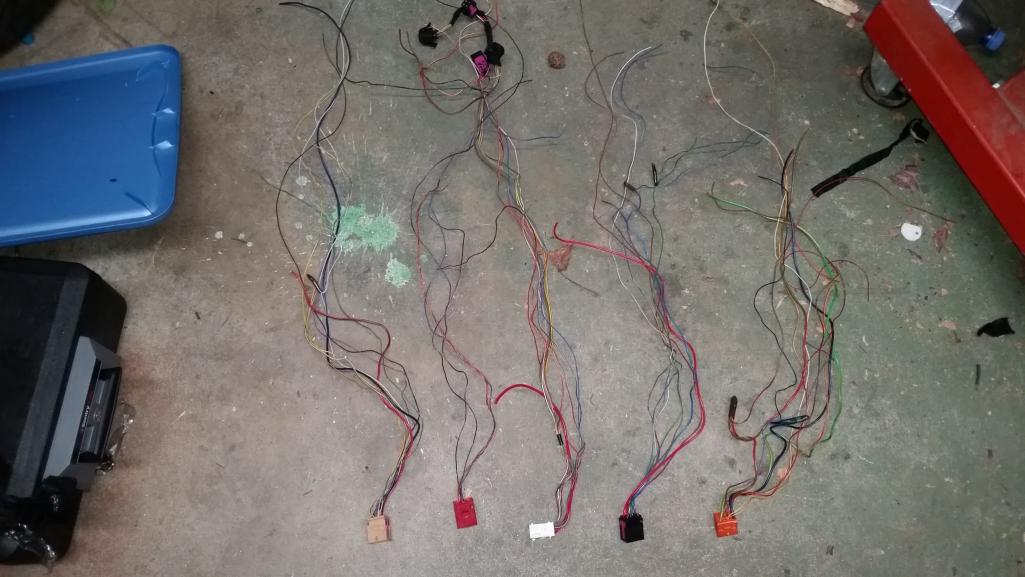
Supplies came in as well to tackle this 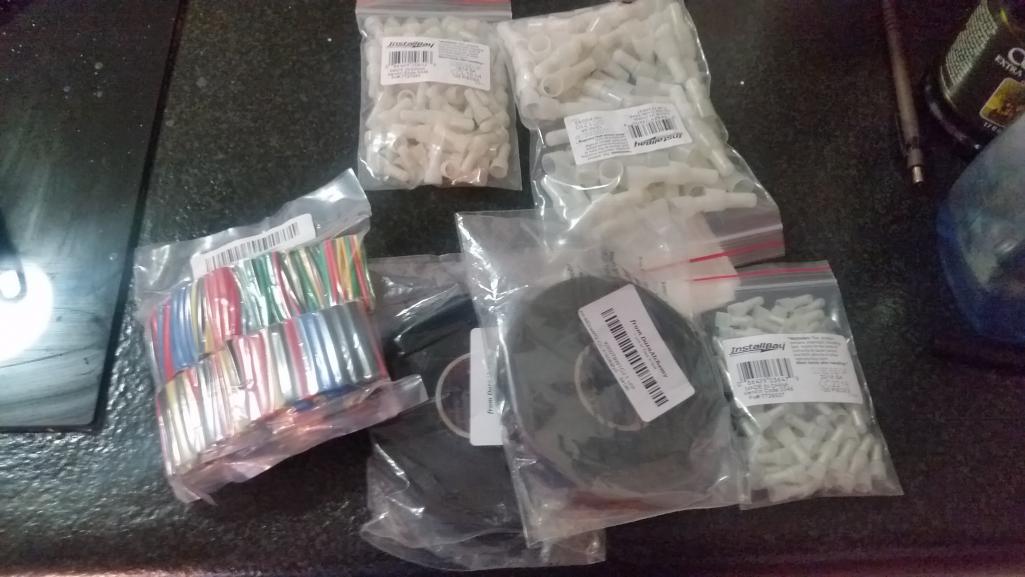
Also got the shifter mounted yes its crude. Its temporary until I get the center console built. 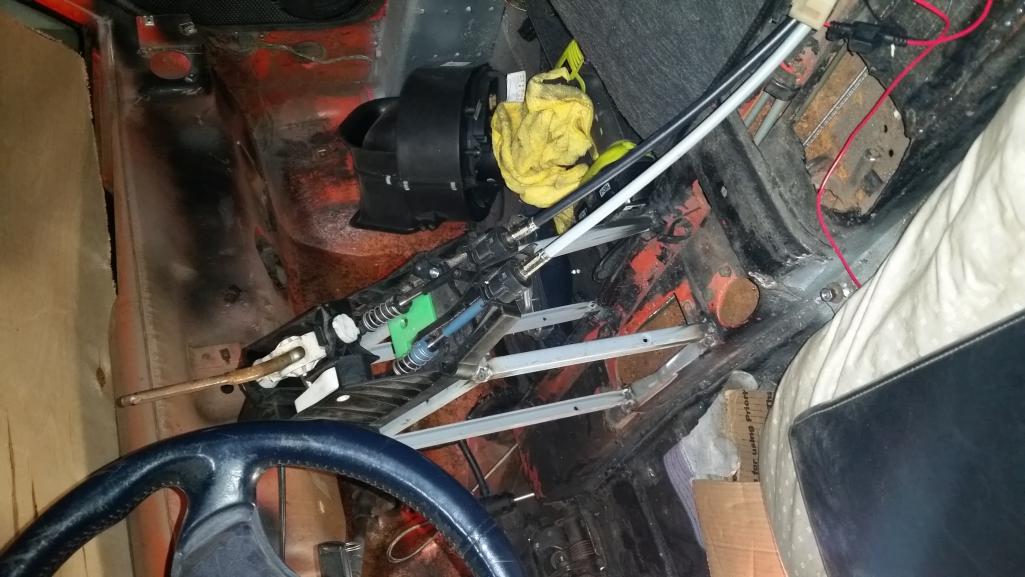
Video of action. Loving the location
https://www.youtube.com/watch?v=2yz_uBNnIPE
Ill be getting some help this weekend anyone in the area is welcome to swing by!
Posted by: Mueller May 13 2016, 09:11 PM
Nice progress there....
Sorry, I cannot make it, I am still in North Carolina....
Posted by: Andyrew May 15 2016, 03:03 PM
Had a bunch of help yesterday, especially from Mike Bellis! 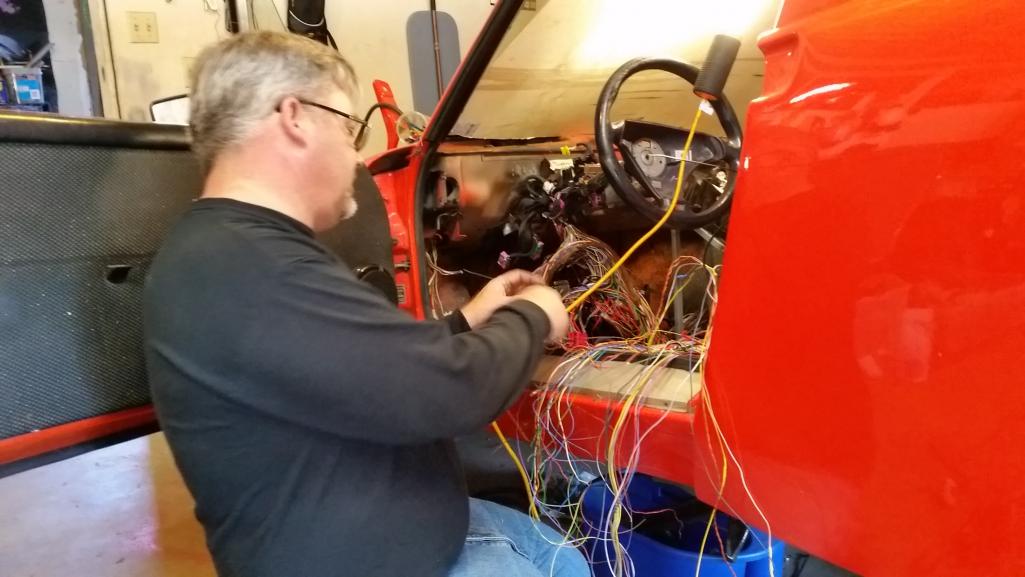
He spent all day extending the wiring harness until exhaustion took over and I finished it up last night at 1am. 
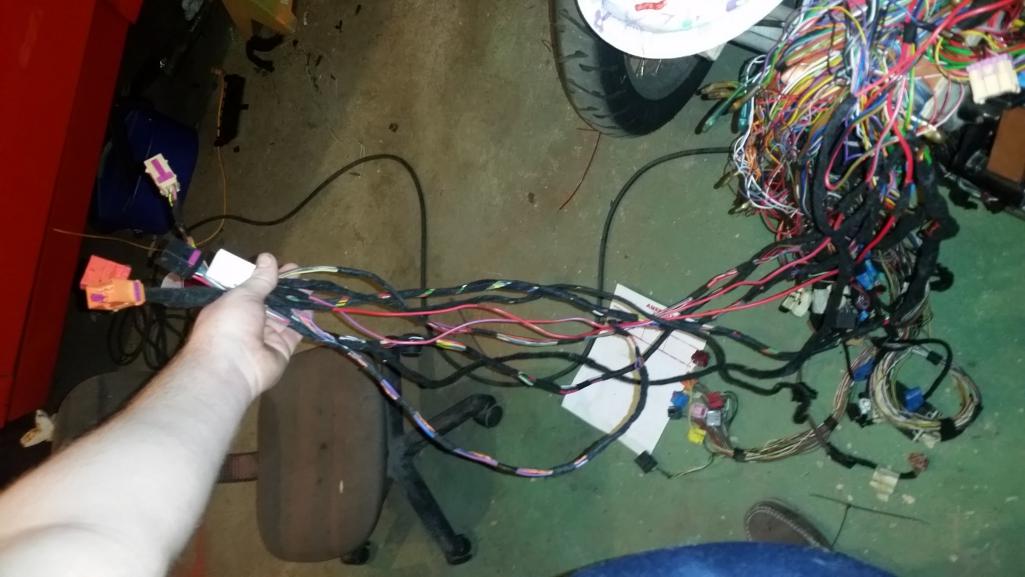
Im amazed at how much I learned just watching him..
Im going to see about finishing up taping and locating the dash harness tonight.
Also fixed the leaking coolant line and tested the system, everything seems to work great! But I still have to wire up the controller for the water pump. Ill do that after I mount the dash harness.
Posted by: dan10101 May 15 2016, 06:41 PM
Looks Good! Thanks Mike for helping him out!
Darla isn't helping much though...
Posted by: Andyrew May 31 2016, 01:25 PM
Last update for the month.
WCR last weekend was a blast!! The rock solid Fiesta ST was a monster on the autox and just flew around the mountain roads!
But enough about that... Progress was slow due to WCR/Work/Home duties.
The goal for next month is to have the engine running and the car drive-able!
Be sure to stay tuned.
I was however able to put a couple hours in to do some wiring. Laid the harness out and routed the positive cable from the battery to the relay box. Ran a really nice 2ga wire with some lugs that I soldered. I've got 6 more lugs and another 15ft of cable so we'll see if I use it anywhere else! Not pictured is a 250amp fuse that just came in the mail last night that I'll mount to the center tunnel in line with the main power.
Not pictured is a solution for the wires coming through the body into the engine bay. Currently a square hole and the wires are protected by some coolant hose. I have the original harness loom ECU box that I have cut up and I think will work nicely after some fanangling. It's still going to take a bit to finish up...
Attached thumbnail(s)
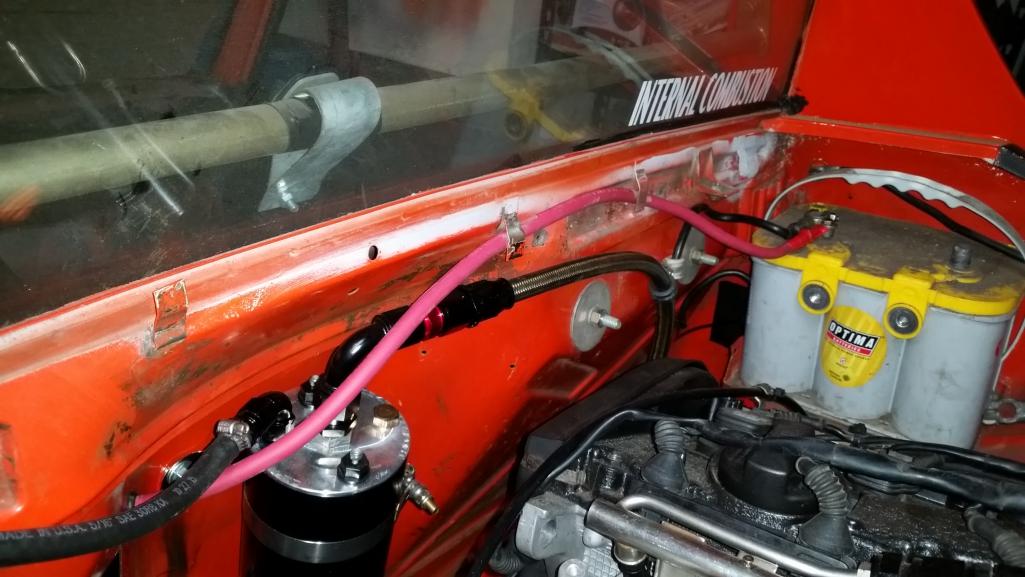
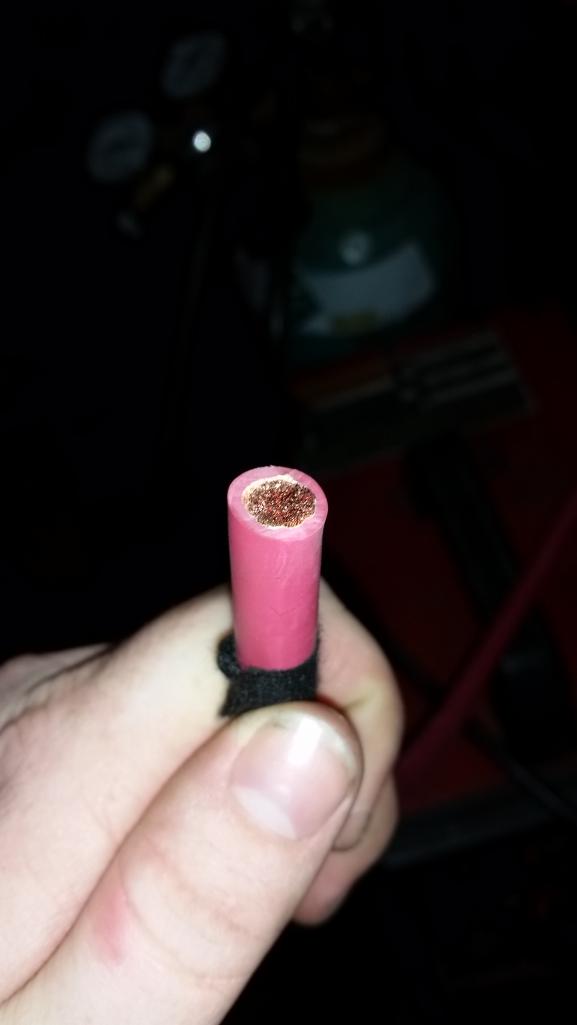
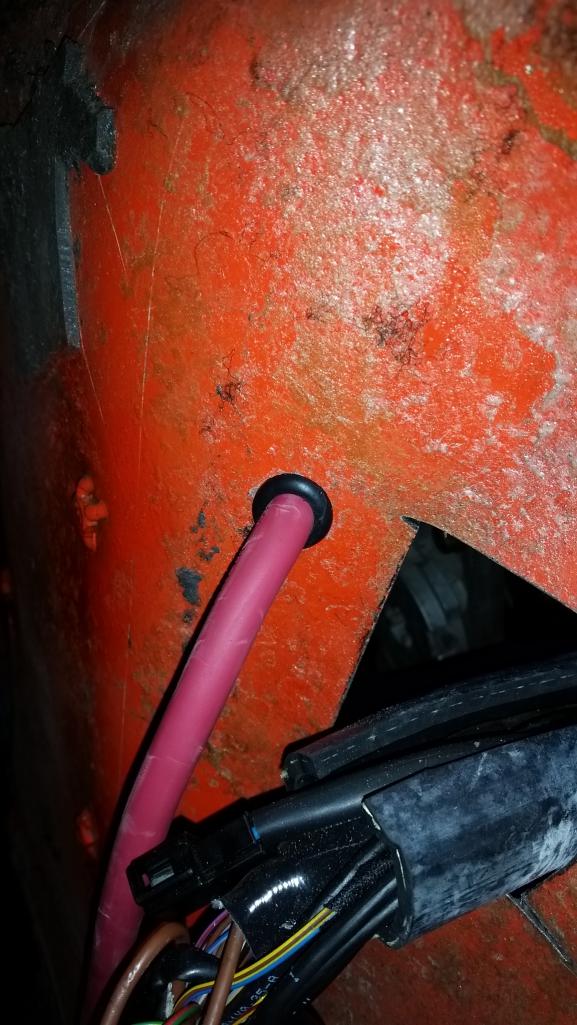
Posted by: Andyrew Jun 4 2016, 05:10 PM
Working mounting the wiring.
Also figured out the throttle stuff 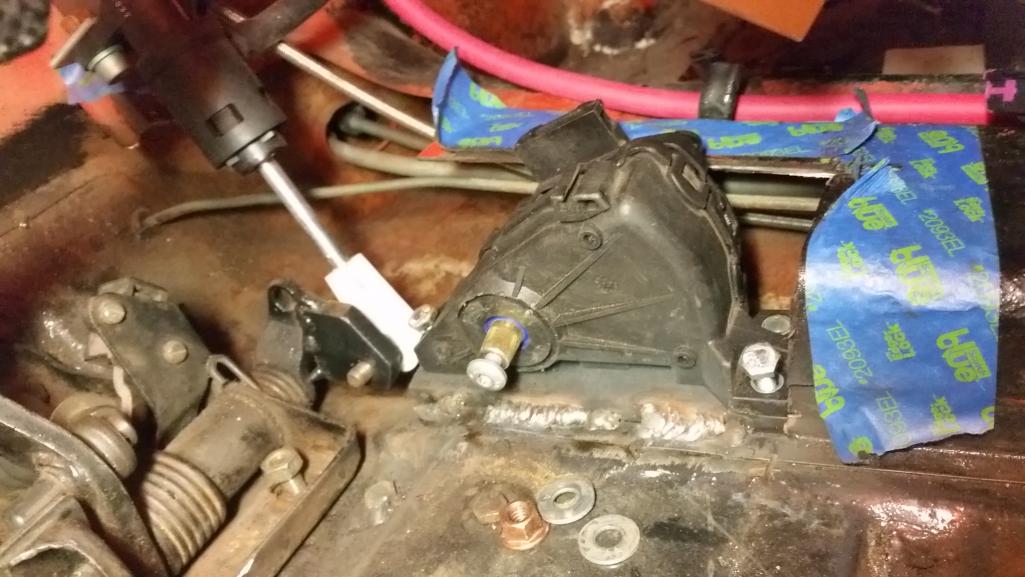
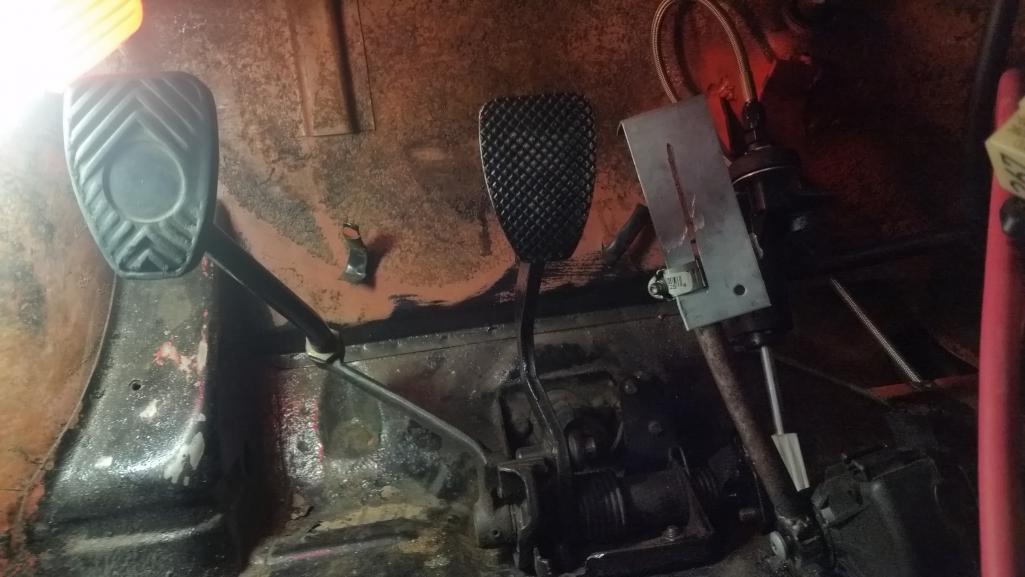
Its actually pretty much in line with the OE throttle pedal. If I could find it I might even be able to use it.. 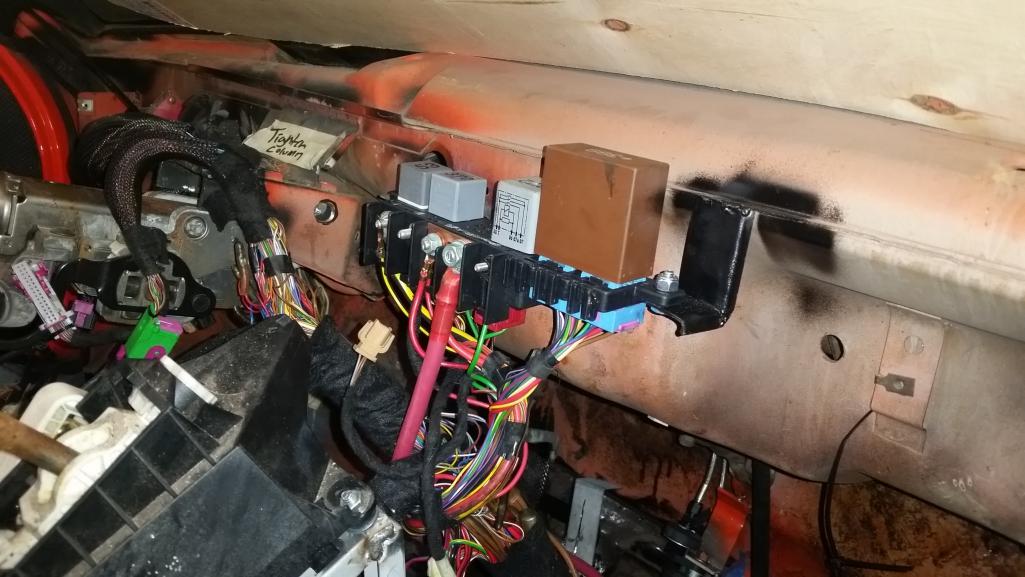
Also started mounting the wiring. Got the main relay harness mounted, this is where the fat battery lead goes. 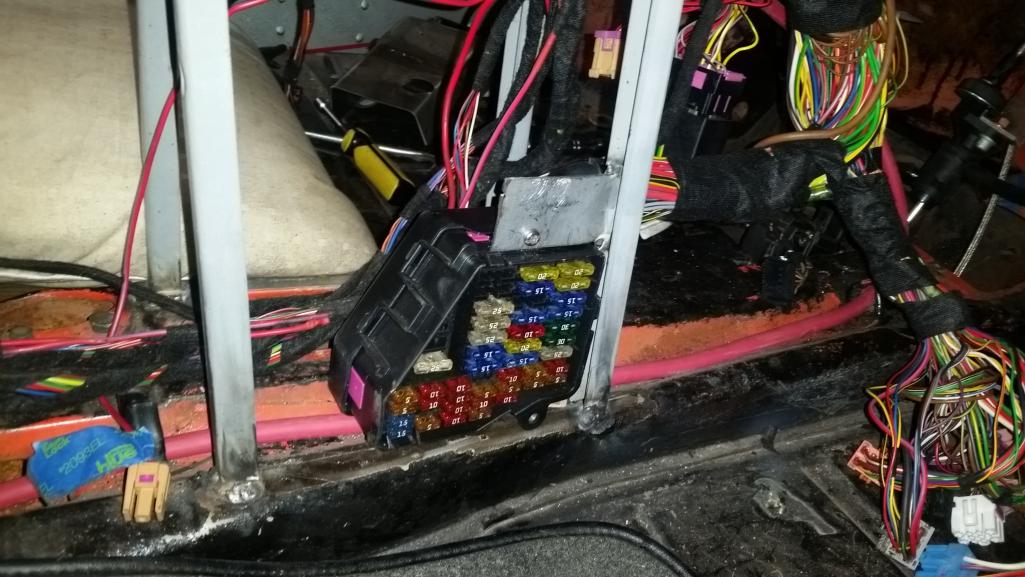
Also mounted the fuse box. I like it in this position. The panels will be easily removable so this can be accessible easily.
Im going to finish mounting the wiring tonight, hook up the ECU, put power to the system and see if I can connect to the ECU. I currently have a bunch of relays missing but thats just a pick n pull trip tomorrow morning if I cant get power to the ECU.
From there I will need to mount the dash cluster, mount a couple of my stanalone guages, wire up the water pump and boost controller, and wire up all the lighting.
I also dont know where the plugs are for the clutch/brake so I will have to research that. Its an automatic harness so I might need to do some wiring.
Posted by: Andyrew Jun 4 2016, 05:12 PM
One last fun thing
Attached thumbnail(s)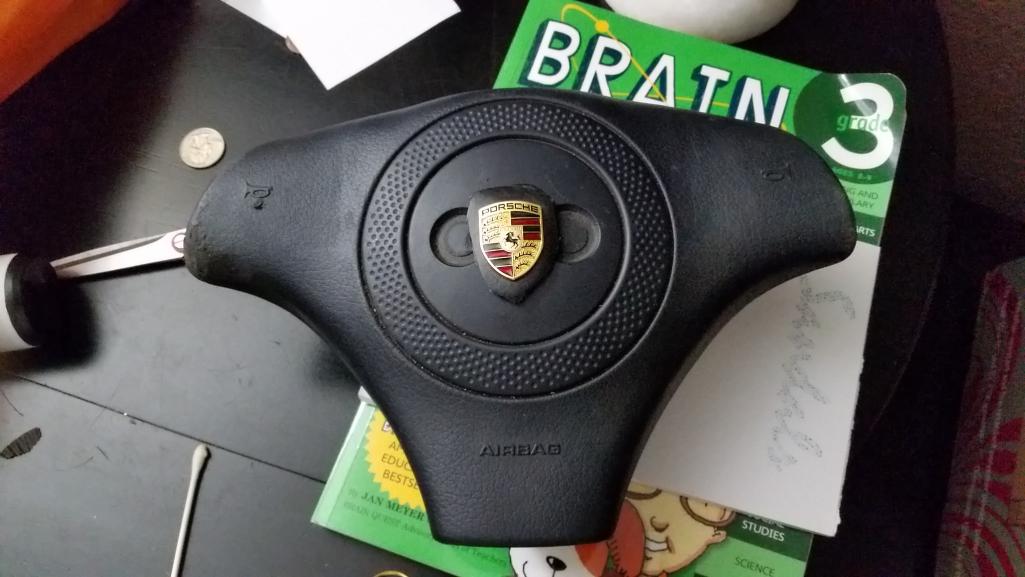
Posted by: dan10101 Jun 4 2016, 05:32 PM
The wiring looks really good! Not so sure about the gas pedal...
Posted by: Andyrew Jun 4 2016, 05:57 PM
Gas pedal is mock up to help me determine position and length.
The shaft will have a welded piece of steel to form the pedal similar to the current layout and I will either bolt on an aftermarket pedal or just rubber coat the steel.
Posted by: dan10101 Jun 4 2016, 10:42 PM
Gas pedal is mock up to help me determine position and length.
The shaft will have a welded piece of steel to form the pedal similar to the current layout and I will either bolt on an aftermarket pedal or just rubber coat the steel.
Looking forward to seeing your work. You impress me with your ingenuity.
I have to weld up some recessed brackets for the 944 seats. It's going to get ugly. They sit to high unless I leave the sliders out. Still they are nice seats and I can fit my fat butt in them. Always a good thing. So no sliders or sliders, I'm keeping them.
Since I brought it up, here's the seat I'm using. http://www.jegs.com/i/Scat/942/80-1606-61L/10002/-1
Posted by: Andyrew Jun 4 2016, 10:52 PM
I've seen your welds, It'll be fine
Why not cut out your factory brackets and bolt the sliders to the floor? I welded on some stubs for my sliders for the drivers seat onto the floor and I really like how it turned out (Pretty sure its the first page in this thread...)
Posted by: dan10101 Jun 4 2016, 11:02 PM
I may have to. But they are about an inch inside the factory mounts, I may be able to recess the mounts and keep the factory seat mount locations. I'm not opposed to cutting out the factory mounts but I want to try this first. I just need to get it done before the hill climb. I hope it cools down so I can get some work done.
Posted by: Andyrew Jun 8 2016, 11:28 PM
Extended the wires to the brake and clutch switches. 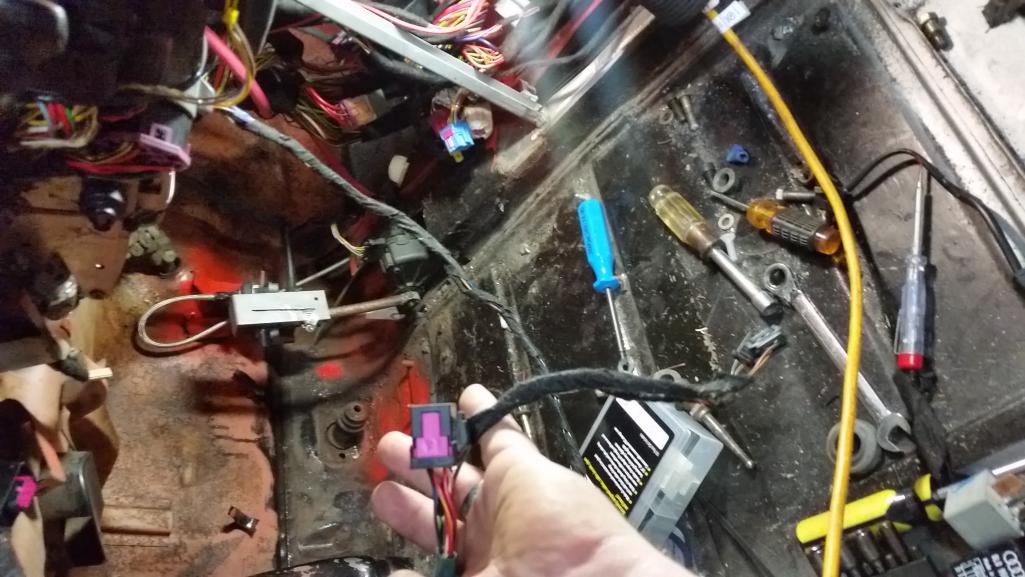
Redid the mounts for the sensors, this should get me a bit more foot room aftwr I make a new cover for it. It also keeps it on the pedal cluster.
I need to grab a couple relays and wire up the fuel pumps.
Posted by: Andyrew Jun 13 2016, 11:39 AM
Got a little bit of progress done,
Hooked up the ECU and got proper readings! Which means that the wiring job seems to be correct.
Pulled the spark plugs and put a little bit of oil down them as well as filled the engine up with oil and tightened the oil line.
I tried to crank the starter but it wouldnt do anything. After discussing it with my Audi buddies, its because I do not have the central locking system hooked up. I just need to ground the wire going to the central locking system.
So in the meantime I hooked up a test wire to the starter and then set it on the battery post to test to make sure the starter worked. Yup! So I gave it a good couple of 30 second cranks to start to prime the oil system and get the lubrication of the engine going good and ensure there was no strange noises. Everything seemed good!
Next step is getting the fuel working, a couple more little things and start this mama jama
Attached thumbnail(s)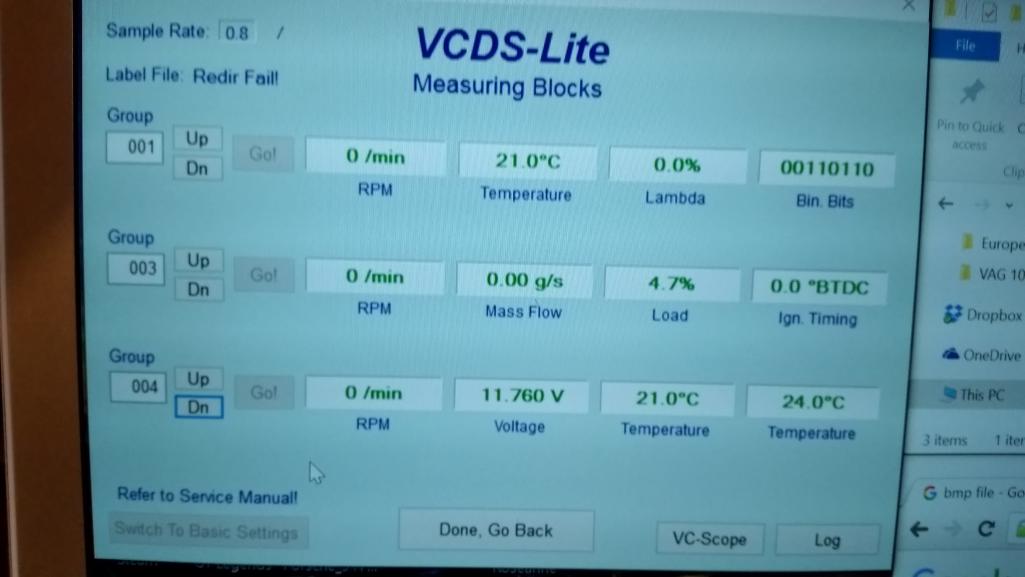
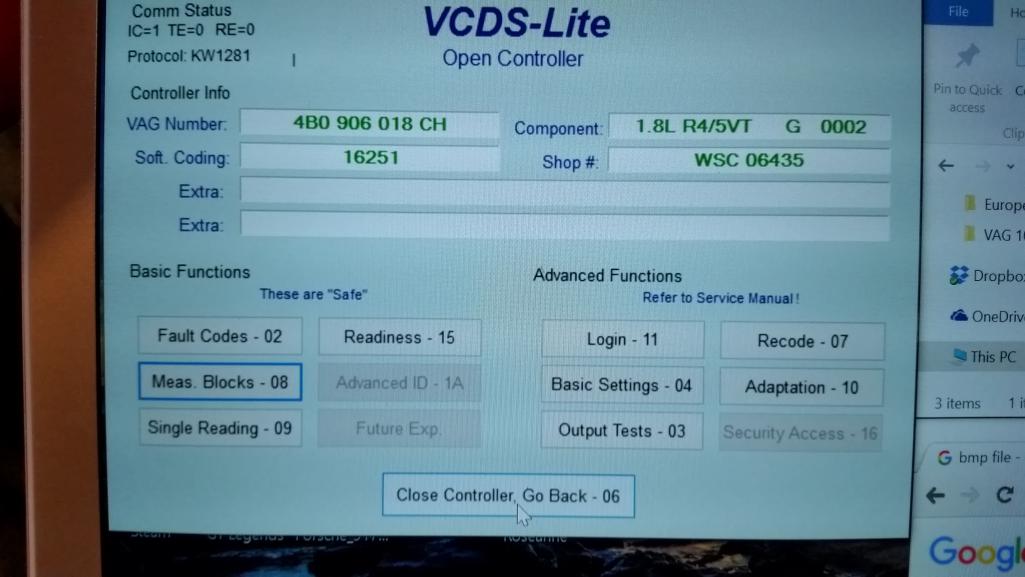
Posted by: Chris H. Jun 13 2016, 12:08 PM
Awesome. Nothing more exciting than when it fires up. If you have the electrical right it will .
Posted by: 76-914 Jun 13 2016, 02:03 PM
Awesome. Nothing more exciting than when it fires up. If you have the electrical right it will
.Uh, that's #2 on the list, Chris. Numero uno es when the ECU Fires and goes up in smoke. Andy, I'd be interested in your pre start diagnosis of your wiring job. In detail if you've time. I don't mind telling you that when I powered up mine the first time I was so nervous you couldn't have driven a ten penny nail up my ass with a sledge hammer. Kent
Posted by: Andyrew Jun 13 2016, 02:34 PM
Well, I double checked to make sure there were no loose /exposed wires, I read and re read how the system gets its power, and I hooked up my power wire accordingly.
I grounded all the grounds and installed all the relays per the manuals and what I found on the cars in pick n pull.
I left the key off and hooked up power to the system and inspected everything for hot or melting wires, then I hooked up the ECU and turned the key to the on position. Since I dont have the ABS hooked up the dash cluster beeped at me three times (The tuner said he turned that off.... but alas..) I then plugged in my ecu logging software and pulled up the ecu as well as any parameters that it could read at the moment. I also checked fault codes, but my software being the free version basically wouldnt let me check everything, so I left it at that.
Posted by: Chris H. Jun 14 2016, 09:17 PM
What usually causes a melted wire is accidentally electrifying a ground wire. I did it. Luckily it wasn't connected to anything important so I just replaced it. The melting started IMMEDIATELY. Within about 10 seconds the garage was full of magic smoke. I think you're clear of that hurdle.
I think you're in really good shape. You're getting readings from the ECU, everything powered up so its grounded correctly. Time to button up the fuel stuff and fire it up!
Posted by: Mike Bellis Jun 14 2016, 09:27 PM
I had to open the dash cluster and de-solder the buzzer. Otherwise it will keep beeping 3 times over and over...
The starter relay is interrupted by the clutch switch and central locking. Just remove the central locking interrupt wire/ bypass it. And if the clutch is not pushed in, it won't start.
I removed both of these and have the key control the starter relay directly. very easy to do.
Posted by: r_towle Jun 14 2016, 09:30 PM
When you figure all of this out, will you do my 4.2 conversion?
Posted by: Andyrew Jun 14 2016, 10:13 PM
I had to open the dash cluster and de-solder the buzzer. Otherwise it will keep beeping 3 times over and over...
The starter relay is interrupted by the clutch switch and central locking. Just remove the central locking interrupt wire/ bypass it. And if the clutch is not pushed in, it won't start.
I removed both of these and have the key control the starter relay directly. very easy to do.
I may have to kill the buzzer, but my tuner said he would tune that out... Hopefully the new guy can.
Starter has been taken care of. I grounded the central locking wire and the engine cranks over with the key
Next on the list is the fuel pump wiring, throw fuel in and fix what is likely a very leaky system.
Posted by: Andyrew Jun 14 2016, 10:18 PM
When you figure all of this out, will you do my 4.2 conversion?
Wiring would probably be similar, but no.. I have probably 3-500 hours into this conversion so far, and a good 50 of it in wiring alone with what is likely another 20 to go before the chassis is all wired.
In the future if this conversion gets popular I might entertain making kits or doing all the wiring mods, but its so much custom stuff it just doesnt make sense. You pretty much have to just fabricate everything.
Posted by: Andyrew Jun 18 2016, 10:03 PM
Ill fill in details later. Still issues, but this did happen.
https://www.youtube.com/watch?v=qSrB9kXreM4
Posted by: Chris H. Jun 18 2016, 11:05 PM
Congrats! That's a big payoff moment for hours of tracing wires, cross-referencing diagrams, fabricating, welding, etc, etc. Nice work.
Posted by: 914forme Jun 19 2016, 07:43 AM
Huge step, congratulations
Posted by: mgp4591 Jun 19 2016, 08:16 AM
Hell yeah! Congratulations!
Posted by: Mueller Jun 19 2016, 09:16 AM
Sounds good, I like!
Posted by: Mike Bellis Jun 19 2016, 11:28 AM
Awesome!
Now all you need to do is finish...
Posted by: dan10101 Jun 19 2016, 09:07 PM
I like the tune it plays wish I could have been there to hear it. But, I'd rather have it happen without me than not happen with me.
Is is it loud, 11 of 10 or 9 of 10?
I like it either way!
Posted by: Andyrew Jun 19 2016, 10:10 PM
Its louder than I expected. Its basically 3" straight pipe..
I dont think the mufflers do much at all I might need to put a chambered muffler in there somewhere. Cruising on the freeway may be a bit.. loud.
Posted by: 76-914 Jun 20 2016, 08:19 AM
Ill fill in details later. Still issues, but this did happen.
https://www.youtube.com/watch?v=qSrB9kXreM4
Congrats Andrew.
We need a Gene Wilder avatar that screams "It's alive".
Posted by: matthepcat Jun 20 2016, 10:02 AM
You might try some exhaust inserts. I used a brand called "car chemistry" on my old V8 and was able to reduce some drone. Not sure on a turbo car though.
Sounds great
Its louder than I expected. Its basically 3" straight pipe..
I dont think the mufflers do much at all
I might need to put a chambered muffler in there somewhere. Cruising on the freeway may be a bit.. loud.Posted by: Andyrew Jun 27 2016, 01:48 PM
Not much progress over the weekend, Worked on wiring a couple things and figuring out some other things. I dont want to start the car again until I am ready to put some load on the rings. I think I figured out why my 02 sensor and MAF sensor are not reading, I dont think they are getting 12v. I found out that wiring and will force them to get 12v with a keyed trigger.
I do know that the oil pan as well as I assume the front main seal or oil shaft seal is leaking. Not happy about that because all the seals are new. After I get some break in miles I'll pull the engine, finish off the rear engine shelf, check for other potential issues and clean things up some more.
Matt, thanks for the tip on inserts, That is certainly a good option. Since my exhaust is V banded I could possibly just make a new exhaust with more restrictive muffler. I'll get some sound charts later after some break in.
Posted by: Andyrew Jul 1 2016, 10:01 PM
Final June Update:
Finished up a bunch more little things like all the hose clamps I was missing and fixed my fuel leak that developed.
I am still not getting the car running with the MAF connected and I havent gotten a reading from the O2 but I havent forced power to it yet. I am going to try forcing that again before I get it on the road for some fuel correction but that will need to be next month.
I was able to hook up the boost controller and run my vacuum lines to my boost controller, solenoid, DV, and wastegate actuator. I just need to figure out my throttle angle sensor wire and tap into that for my boost controller.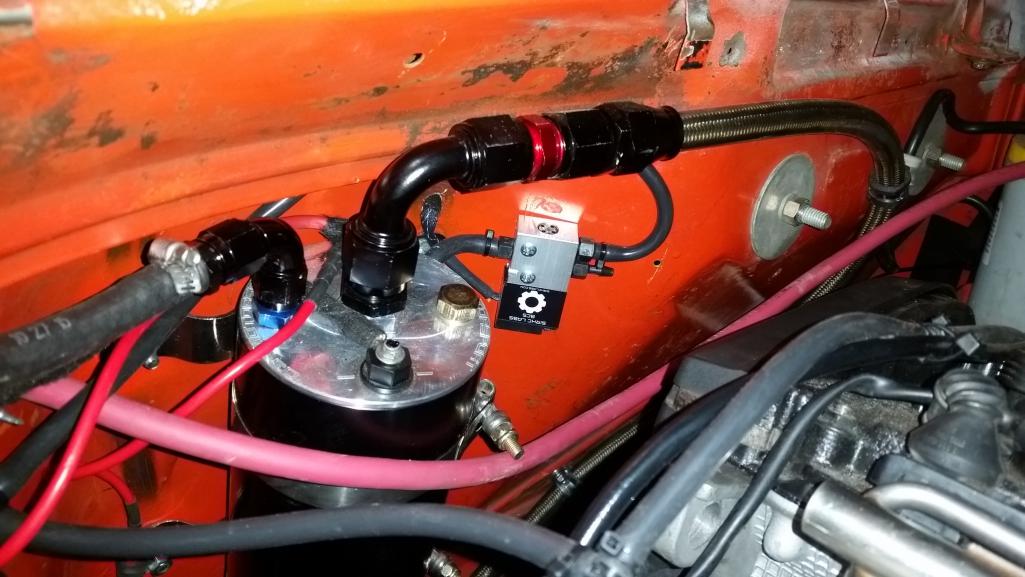
And here is the final engine bay layout. (EDIT: Just noticed the positive wire was hanging down. Put that back up tucked away..)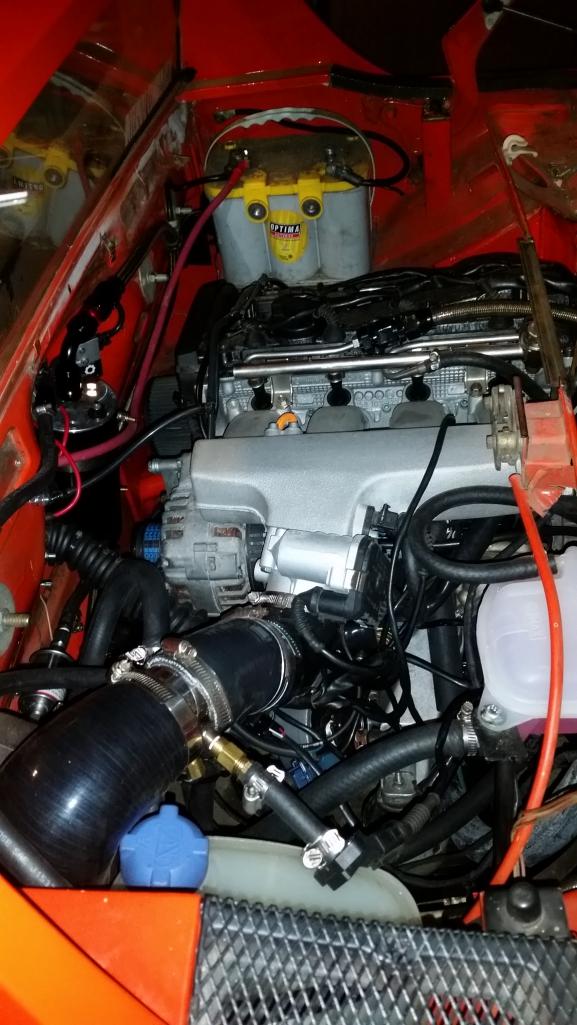
Stay tuned! In about 2 weeks you'll see it hit the road
Posted by: Mueller Jul 1 2016, 10:20 PM
Awesome!
Posted by: cali914 Jul 2 2016, 07:58 AM
Awesome you will have to get a chamber muffler I had to canister mufflers on mine and had to replace the drone was killing me at 3k rpm on highway.
Posted by: Mike Bellis Jul 2 2016, 10:50 AM
You might try some exhaust inserts. I used a brand called "car chemistry" on my old V8 and was able to reduce some drone. Not sure on a turbo car though.
Sounds great
I would be worried about back pressure with these. back pressure is good for a NA motor, not so good for a turbo application.
It may come down to muffler selection. I run a 4" Aero Turbine muffler and I like the sound. Not too much drone.
Posted by: Andyrew Jul 11 2016, 01:12 PM
This weekend was the beginning of the end of wiring the engine.
I got the MAF figured out. I had the power and voltage wire mixed up, swapped those around and it is running really well.
I finished wiring up the boost gauge as well as the water pump and fans with a relay.
However...
When I tested the coolant system I think there was either a design flaw with the water pump OR my water pump is not doing its job. I have/had the temp sensor mounted up near the radiator. It was supposed to cycle the pump from key on to move the water to the temp sensor but it was barely moving any water from what I could tell from the lines. I am now thinking that 8' is just to long for it to get to the sensor on a low speed pulsing cycle.
I am relocating the temp sensor on to the back of the engine right off the coolant flange. It takes a 1/4" NPT sensor so I found a galvanized steel NPT adapter and will weld it in so long as it takes a weld well. This way the radiant heat from the block should get to the sensor much quicker and should start actually cycling the water pump at full power, see image below. 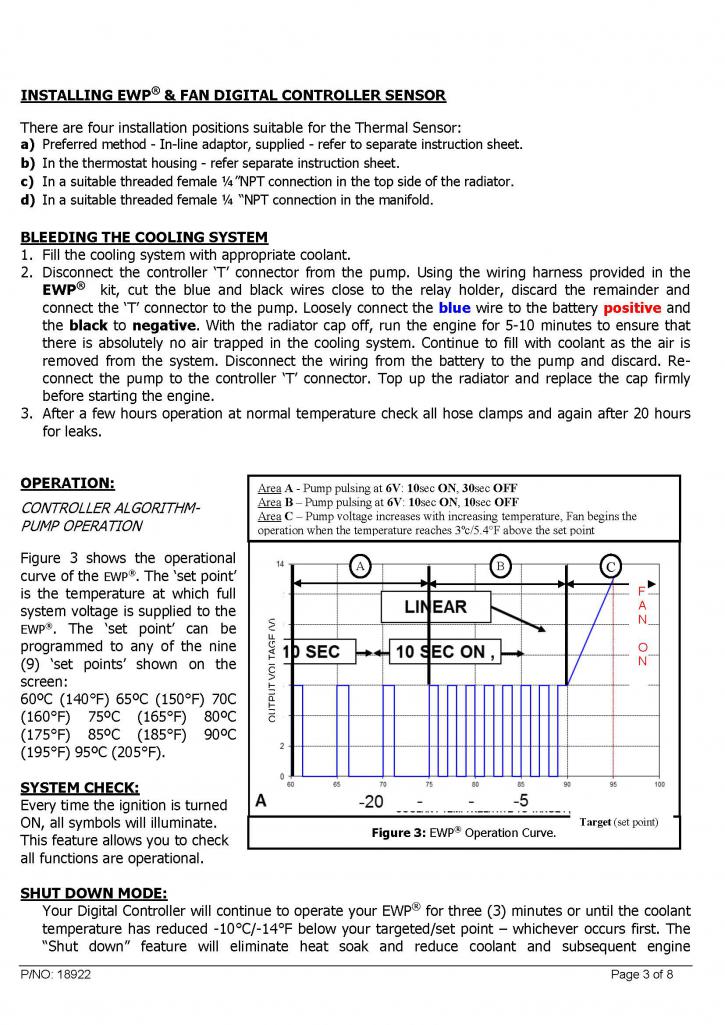
I am going to test the system again after moving the sensor and if it ends up the way I like it then I'll wrap up the wiring, drop the car on the ground and take it for a test drive. The oil leak is more of a concern now. I was hoping to put a couple hundred break in miles but I think that it might be dripping oil at a decent rate. It doesnt leak unless the engine is running which helps a bit.
Anyways, stay tuned.
Posted by: Mike Bellis Jul 11 2016, 01:30 PM
Sensor at the engine inlet might be better. Water temp at the engine is more important than at the radiator.
I notice on mine the fans kick on at 180° but the motor is running 190°. the water might heat back up a little as it returns to the motor due to heat soak in the hose.
Posted by: Andyrew Jul 11 2016, 01:44 PM
It'll be at its hottest point right off the back of the engine so thats a plus..
Once I get the damn thing working I'll just pick a temp I dont want it any higher than and go. I was thinking 185* should be good. I had it at 140* just to make sure the system cycles properly. And if I can get it to maintain 140* in my garage on a hot day then it should prove the system pretty efficient.
Posted by: Andyrew Jul 18 2016, 03:36 PM
So,
I finished off the radiator system, put the seals on the radiator and buttoned it up. Found a small leak on the turbo feed line and fixed it. Put the wheels back on and checked everything in that regard, backed it out of the driveway and took it for its first spin around the block
https://www.youtube.com/watch?v=Tl_GCoEC9-U
https://www.youtube.com/watch?v=YOCFI15nTfU
https://www.youtube.com/watch?v=36CBdqYQN-4
I'll be posting a youtube video weekly either as progress of the vehicle or myself driving the car
Findings of the first drive:
1. Steering needs to be fixed. Pretty sure the shaft got welded unevenly. I will be buying some new shafts and starting from scratch instead of trying to use mine. It works for now but who knows. You can see me struggling as the knuckle is binding. Everything is exactly in the same layout as factory its just 1/8" off center and I think that is causing the problem.
2. Clutch is on the floor. I will put some spacers behind the slave cylinder to get a bit more action out of the clutch. I'd like it to be an inch off the floor to halfway through the travel. Clutch is however very light and easy to modulate. Probably the reason why its all the way on the floor is I didnt give it enough travel thus making the action much easier. I will also re-bleed it and see if that helps.
3. The engine bar was loose after the run. I tightened it up with some red lock tight, It might not have been snugged down all the way the first time... If it keeps loosening up I might double nut them. I painted a line on the nuts like factory to determine if anything loosens up.
4. I need a smaller wheel and I need the wheel to be removable.
5. The water pump and controller work fantastic. I drove the car around for 5 minutes then let it idle. You can see in the video that it stays pretty cool. I had it set for a higher temp and dropped the controller down down in another video to see what would happen. The water pump turned on constant and the fans kicked on. Shut off the car and both the fans and water pump stayed on for one minute and then shut off
6. The turbo is not a low RPM turbo. I gave it 1/2 throttle a lot and fed into it a couple times and while the turbo will start spooling around 2500 it doesnt seem to really make much boost until about 3500. Similar to what I remembered, but the heavy weight of the Audi A4 made it hold the RPM's more thus spooling technically faster.
7. 1st gear is going to be a handful even at 10psi... You can see in one of the video's I give it about 3/4 throttle over 4k rpms (I had my hand in the way so I dont know what RPM I shifted..), I am pretty sure the tires spun because the RPM's climbed so quickly. I am really glad I have an 8500rpm redline because I am going to need that in first gear..
8. Its fast. Damn fast. I havent gone full throttle or even reved it out at all, but its going to be a monster.
9. Its F'in LOUD. The blow off valve is very loud and crisp. I know for a fact I cant drive it over 5k in the neighborhood or else I am sure the cops will be called. Im sure you can hear the blow off valve from a mile away. I'm going to have to route the blow off into the intake to quiet it down some.
Posted by: 76-914 Jul 18 2016, 03:58 PM
Good for you, Andrew. I foresee some speeding tickets in your future.
Posted by: 914bub Jul 18 2016, 06:55 PM
Andrew
If the car will be at any Modesto events, please let us know. I'd love to meet you and see the car. Looking GREAT, I've done several swaps, none were 914 and none so impressive.
Best, Erik
Posted by: Andyrew Jul 18 2016, 07:36 PM
Erik,
Your welcome to come by any time
Posted by: Chris H. Jul 18 2016, 07:41 PM
Sounds really good! It's running VERY cool for the first couple of runs. Never seen that before. Now the tweaking/adjustment period begins. But the basic conversion is DONE .
Posted by: 914forme Jul 20 2016, 07:14 PM
5. The water pump and controller work fantastic. I drove the car around for 5 minutes then let it idle. You can see in the video that it stays pretty cool. I had it set for a higher temp and dropped the controller down down in another video to see what would happen. The water pump turned on constant and the fans kicked on. Shut off the car and both the fans and water pump stayed on for one minute and then shut off
So nice to hear, sounds like it worked perfectly.
Posted by: Andyrew Jul 26 2016, 12:24 AM
All the lights now work
I spent WAY to much time on that... But hey its done!
I did a BUNCH of driving over the weekend and some tonight. Got a few logs in as well for my tuner. Hopefully we start to get to work on my tune soon.
I found out my rev limit right now is set to 7k, I'll have my tuner work on that I really cant wait to hear what it'll sound like over 8k
Below is a first and 2nd gear casual pull.
It may look at bit slow for you v8 guys but here are my gotcha's.
1. Baseline tune.
2. Only 9-10psi (out of 35...)
3. Breaking in the motor
4. Intercooler is not getting water through it yet, so IAT's are likely very high. Luckly big turbo and big piping with low boost mean its not detonating. Thats the goal for this weekend.
4. OLD gas, Trying to use it up some before I grab some new gas. Remember I will want to tune for E85 at some point which in and of itself has 35% more power potential.
(Apologies for the shaky video. My mount is not as good as I hoped. I'll start using the Gopro)
https://www.youtube.com/watch?v=MCwYBv_so_E
Side note, first gear typically rips off the tires, and its a one legger for sure. This car will need LSD and stickier tires for sure. Keep in mind they are relatively new 285's in the back.
Also of note, my front shock is rattling pretty bad I think its a good time for me to go Koni yellows up front instead of the worn out reds.
Posted by: 914forme Jul 26 2016, 06:49 AM
That car is going to be a beast
Posted by: 76-914 Jul 26 2016, 06:05 PM
Remember I will want to tune for E85 at some point which in and of itself has 35% more power potential.
Do tell..............
Posted by: dan10101 Jul 26 2016, 06:35 PM
I'm looking into this too, for my 944 turbo. I found this article that raised some possible issues.
The power potential is certainly there. The article mentions that manufactures of the E85 can vary the amount of ethanol from 51% to 85% which could pose issues. The article talks about doing it for cold starting issues in cold climates. For Andrew, not living in a snow country, they might not go to such extremes. I'm sure there's a way to check this chemically to make sure you don't hurt an engine.
$3 for E85 vs $8 for race gas certainly has it's appeal.
link
http://www.speedhunters.com/2015/04/everything-you-need-to-know-about-ethanol/
Posted by: Andyrew Jul 26 2016, 08:47 PM
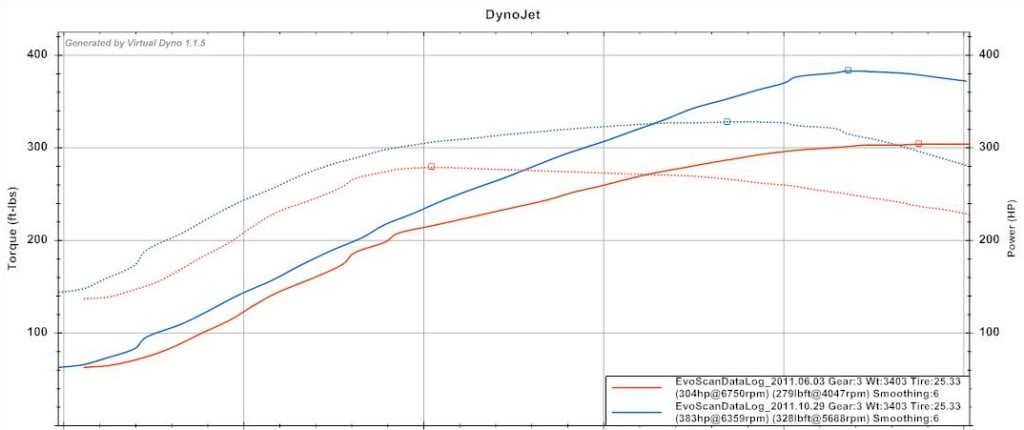
There are E85 calculators you can use and the MFR's report the e85 rating at that time as well.
What I wish is my ECU had the ability to modulate its AFR based on E85 rating. Ford has an E85 inline calculator that calculates the ethanol content. Many use it for monitoring the tune, but say the newer ford tuners can have the tune adjust for the ethanol content from say 40-85%.
The reason why E85 works SO well on a turbo car is that it does many things.
1. The stored energy is simply better, it will give a much bigger bang.
2. Its effectively 110-115octane.
3. You can increase timing significantly to help with throttle response as well as lowering the boost level at the same time to prevent a normal sized turbo from running out of steam at top.
This fun video may help some of you newbies to E85
https://www.youtube.com/watch?v=ltWcgiCm4NY
Posted by: 914forme Jul 27 2016, 04:23 AM
[quote name='Andyrew' date='Jul 26 2016, 10:47 PM' post='2376914'
What I wish is my ECU had the ability to modulate its AFR based on E85 rating. Ford has an E85 inline calculator that calculates the ethanol content. Many use it for monitoring the tune, but say the newer ford tuners can have the tune adjust for the ethanol content from say 40-85%.
[/quote]
Thus one of the reason's I spent so much time looking at MegaSquirt, as they can also do this using the GM sensor. Maybe I should have just done an LS swap
Posted by: Andyrew Aug 1 2016, 01:43 PM
Final update for July:
Finalized the finishing work to the motor side of things. I plumbed and setup the intercooler cooling. As I had mentioned I had been running on essentially no intercooler, which was pretty impressive that I didnt have any detonating up top at 10psi. If anything it put a good about of strain on the motor which is good, Thats how I like to break in rings . 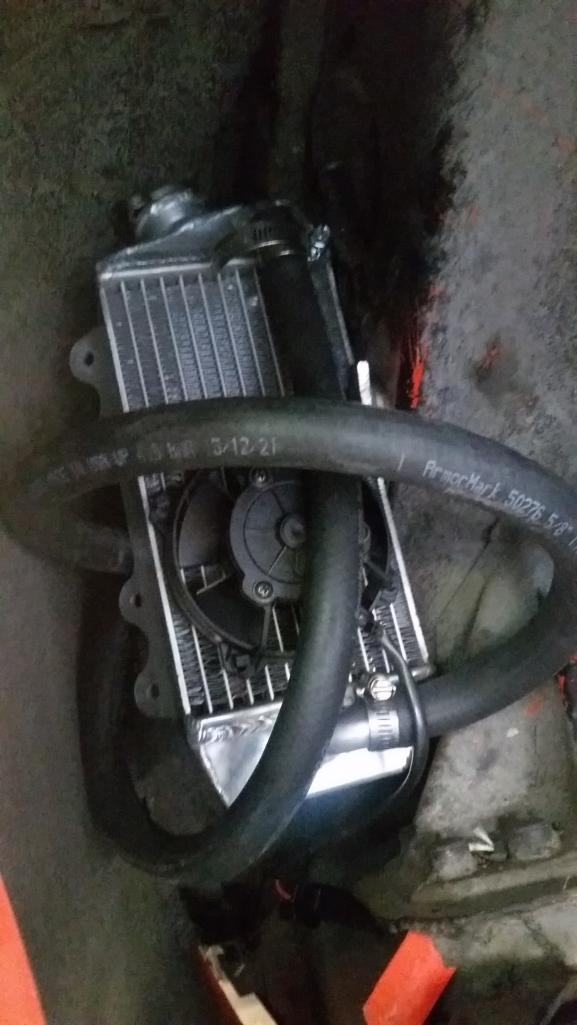
I modified the stainless joiner pipes I had made so that they take account for most of the "U" turn on the radiator coolant hoses. Im happy with this decision as it makes for a cleaner engine bay as well as shorter hoses. That being said it appears as if I have one leak as well as the pump itself appears to leak a little. Im going to leave it for now and re-address it after 4 months when I pull the motor to clean things up and finish the metal work on the body firewall (I will address the oil leak at the front as well at that time and probably pull the pan and check the internals for premature wear). 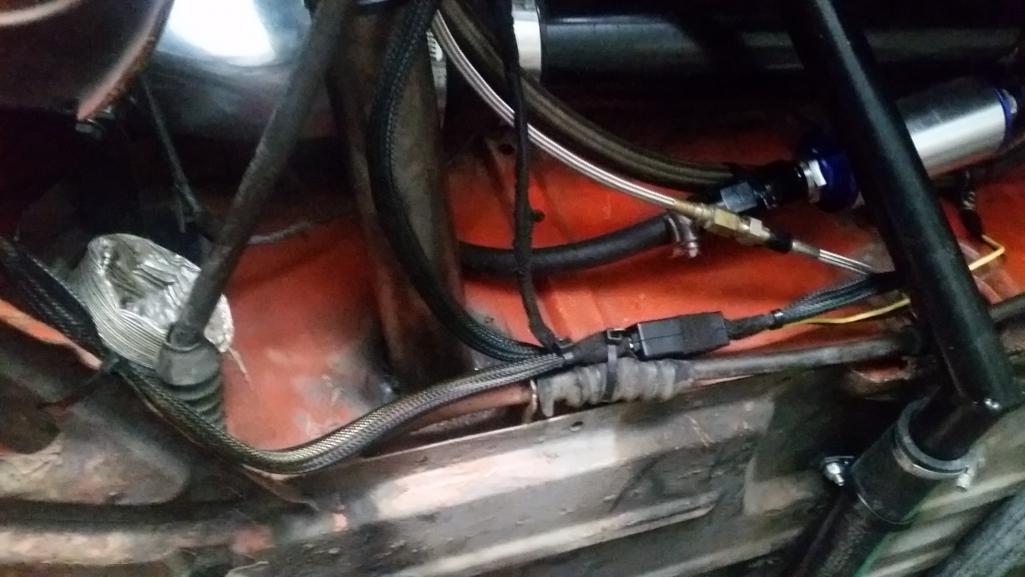
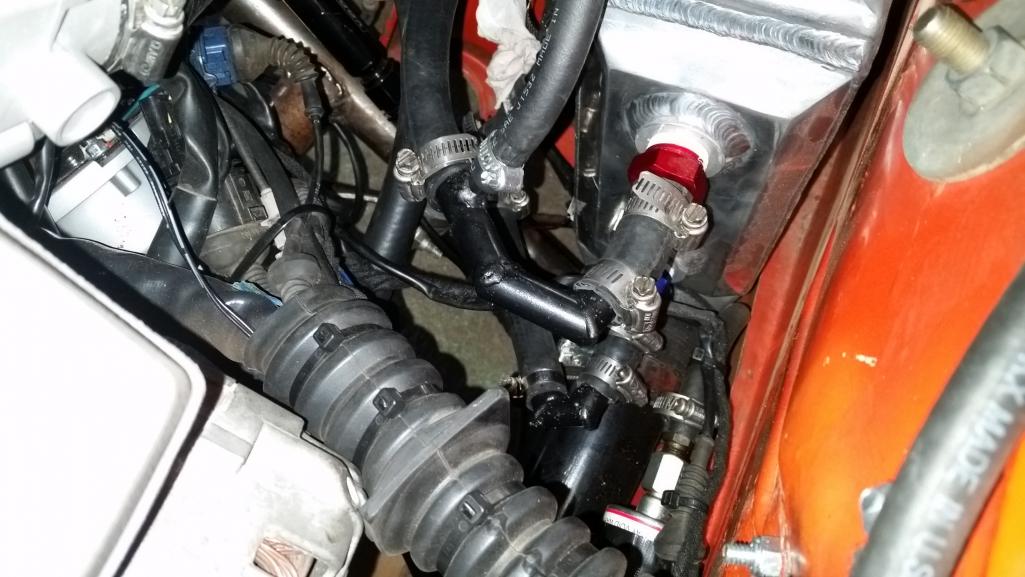
I wired the water pump on the Audi's factory fuel pump wire (I have a dedicated 12ga wire for the fuel pumps), so it runs when the engine runs. However I have the small 4" fan wired up to my fan controller I bought for $12. I have the temp sensor taped to the intercooler and it works pretty well this way.
https://www.youtube.com/watch?v=tXcIDlWkGk0
If I needed to just have this work for say my radiator fans I would hook it up to a relay, but the amp draw on the 4" fan shouldnt necessitate that. Something for you homebrew guys to think about. This would work great for a dual fan setup running twin controllers at different temps. I currently have the fan setup for about 115degF turn on and it'll turn off at ~ 110. Its a small radiator and thus I imagine it could get hot, but on a quick test drive with a 1-2 pull I didnt even see the intercooler go up 5 degrees. It also pulled much stronger with the colder dense air.
I tried all weekend and late last week for my tuner to get to work on my tune but he is responding once and then ignoring me.. I might have to go to my back ups soon. 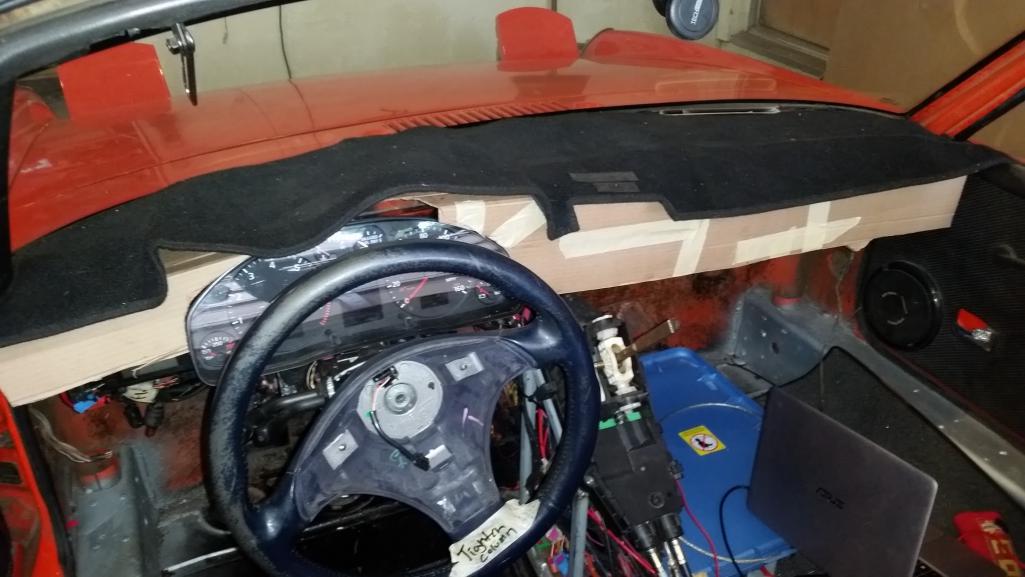
I also spent some time on the dash. I first worked on the "Mike Bellis Special" cardboard template but wanted a more solid foundation.. So I hacked up the stock dash base to fit.
The stock Audi dash cluster didnt have any provisions for bolting/mounting (apart from the front 2 flimsy ones) so I opened it up, clipped the noisy alarm charm, and put some bolts in the backside. 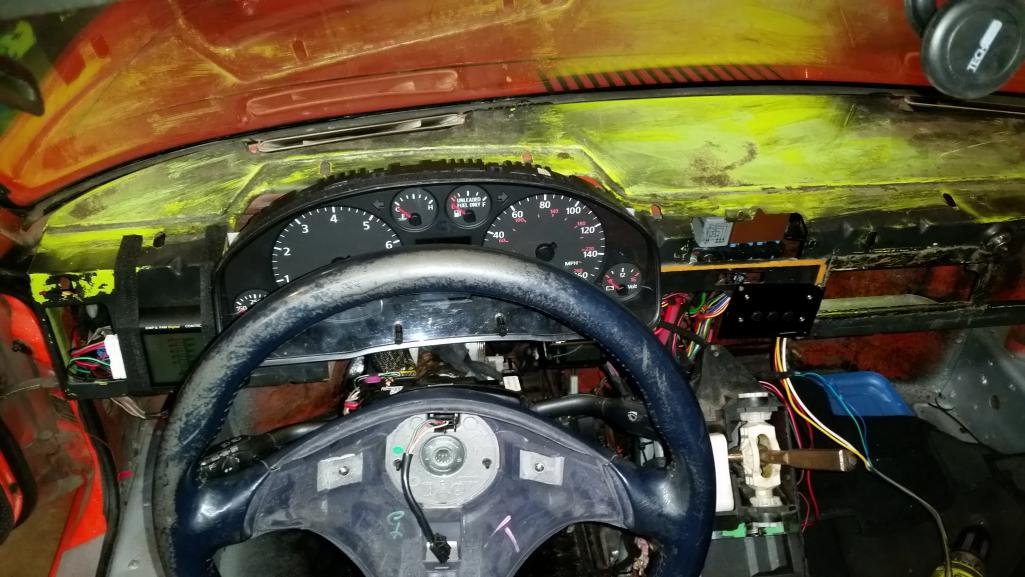
I'll grab some foam, tape, plastic, tin foil, and blades and start getting back to my "creative" side shortly. I hope to have the dash and center console completed by the time the competition is over. It would also be nice to have the rear firewall done but thats dreaming really tall....
Posted by: whitetwinturbo Aug 1 2016, 10:13 PM
Posted by: Mike Bellis Aug 1 2016, 10:17 PM
It's amazing how much stuff ends up in the engine bay with one of these conversions.
BTW, I think you can just put alcantera over the cardboard dash and be done. I'll drive it just like that...
Posted by: 914forme Aug 2 2016, 07:16 PM
The stock Audi dash cluster didnt have any provisions for bolting/mounting (apart from the front 2 flimsy ones) so I opened it up, clipped the noisy alarm charm, and put some bolts in the backside.
you could not turn it off in software with a Vagcom?
Posted by: Mike Bellis Aug 2 2016, 08:07 PM
The stock Audi dash cluster didnt have any provisions for bolting/mounting (apart from the front 2 flimsy ones) so I opened it up, clipped the noisy alarm charm, and put some bolts in the backside.
you could not turn it off in software with a Vagcom?
No. Vagcom only allows you to do "safe" things. You cannot flash out safety related features.
Posted by: Andyrew Aug 7 2016, 01:05 PM
Some bad pics today...
I spent some time chasing the front end clunking that had me worried. Turned out to be the front strut collar holding the shock in. I had a suspicion that was the issue but didnt get to fixing it till this weekend. Luckily with my wheel well cutouts I could do the repair without even removing the wheel Jacked up the suspension a foot, unbolted the nut, pushed the shock down and brought it to the cutout, removed the dust cover and bam, loose nut
Cleaned up the wiring with some loom I bought and made everything ready for the interior redo forthcoming. 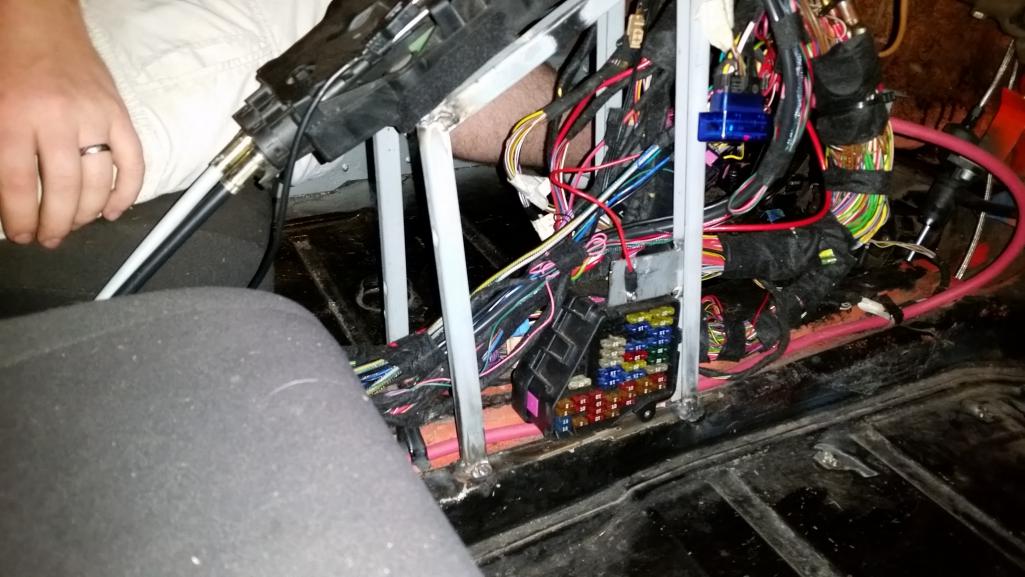
Mounted the passenger seat and seat belts and put the carpet dash cover on. Looks good enough I might just spend the next month driving it like it 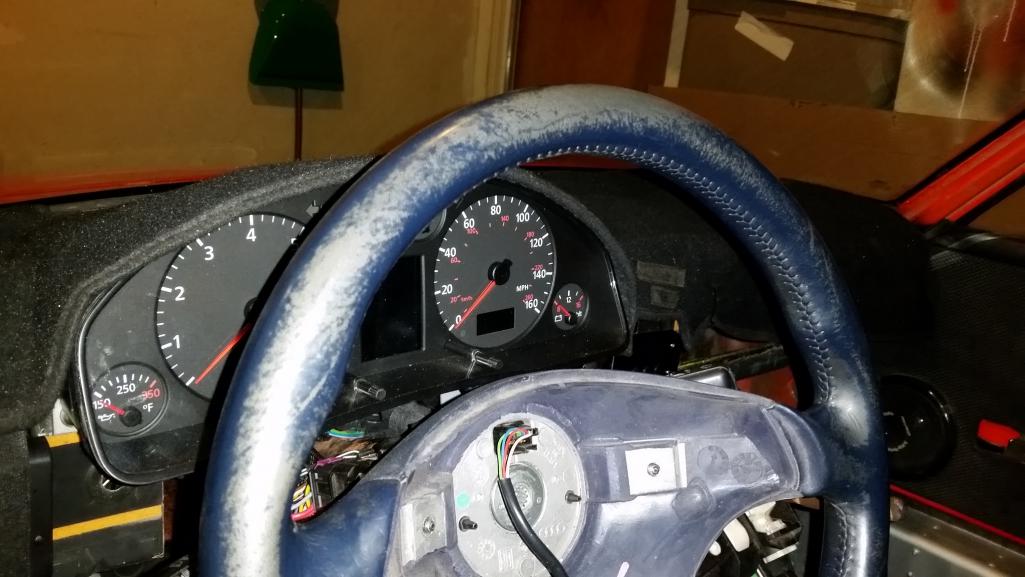
Nah, Hopefully I get some time tonight to prep and lay down my first layer of foam for the dash.
Had a good 10 minute drive with the wife last night after going to Jeff Strouds celebration party. I didnt take the car to the celebration as there was some clunking in the rear that I cant ID. Im thinking its RR CV joint as the mounts are all good and it only happens on minor accel/decel transitions, it SOUNDS like the axles are clunking. 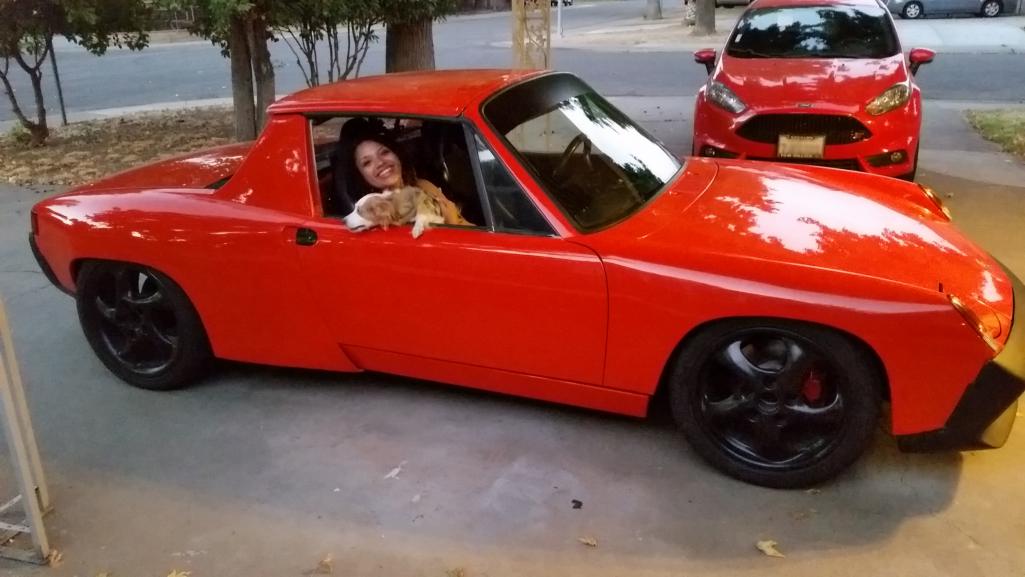
OH and heres a quick video from lunch Friday
https://www.youtube.com/watch?v=hoWTgs0JoP4
Posted by: Garland Aug 7 2016, 03:23 PM
runs nice.
Posted by: Mike Bellis Aug 7 2016, 03:23 PM
You took the long way to Taco Bell...
Posted by: Andyrew Aug 13 2016, 12:44 PM
Mid weekend update. NEED SOME ADVICE!
OK, so my tablet Idea was just to far fetched, I cant think of putting a tablet on this dash and it actually looking someone decent due to the size. That being said I am planning on having my phone on the dash to give me the same basic stuff but without the added bulk. That being said here is what were looking at. Am I just ruining the dash with the phone spot being where it is? Should I just have a little magnetic arm to put it on? The covered area gives it sun protection for glare as well as heat and IMHO gives it a more sleek uniformed look.
I'll put details on the build later but looking for anyone to comment on the current left side of the dash idea.
The right side will slope off the left side to be flat and will be separate for ease of installation. 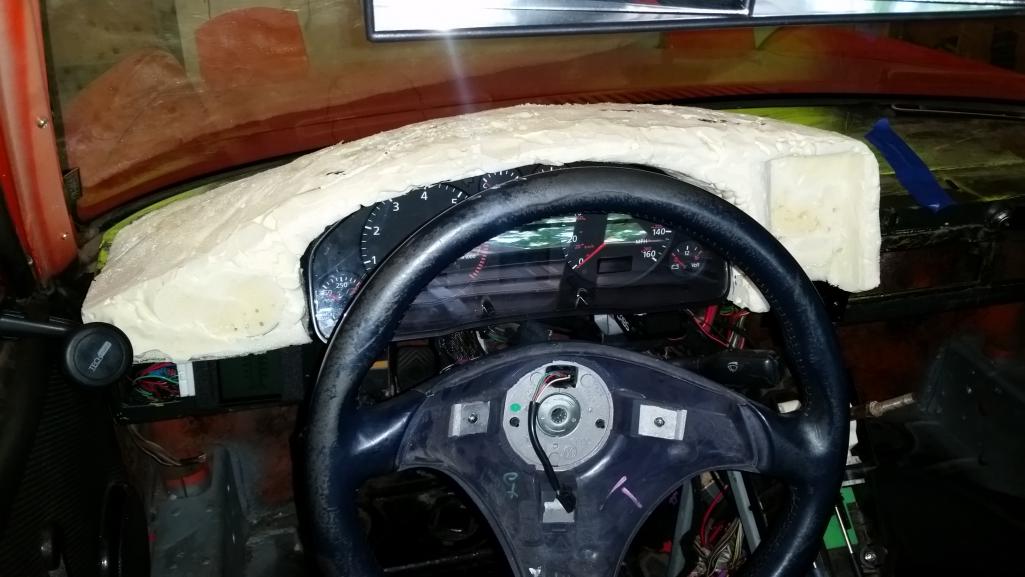
Old pic to show where the phone goes, My work iphone, my regular S5 is bigger .
Posted by: Darren C Aug 13 2016, 01:19 PM
Great project Andrew.
As your asking opinions (and everyone has one) mine would be to loose the bulk of all that foam. Great for a truck or bus.... but not a sportscar. Your dash mat a couple of post back looked better!
With the position of your gear lever I'd make a dash that has a pod/binnacle much leaner and similar to the original 914 or a Mazda Miata over your instruments and a sweeping centre console that looks like a Porsche Carrera GT.
http://images.gtcarlot.com/pictures/10017731.jpg
You could combine your i-phone insert in the centre console just below the gear lever in portrait or landscape above the gear lever. Audi TT style grab handles with combined knee pads either side of the i-phone insert (if fitted below the gear lever in portrait) would look real good.
http://justgermanparts.co.uk/ekmps/shops/69c0c0/images/audi-tt-mk1-98-06-grab-handles-knee-bars-screws-decorative-chrome-8n0857645-4021-p.jpg
Posted by: Andyrew Aug 13 2016, 01:40 PM
Darren,
Thanks for the advice.
This is my original design concept.
Center console will remain. The two raised areas around the phone will flow down around the shifter and form the center console starting point.
I also thought about trimming the fat on the left side.
I agree its a bit bulky and truckish, thus my posting for some help. Let me see what I can do from here.
Posted by: Darren C Aug 13 2016, 01:48 PM
Great sketch, thats exactly what I had in mind, but incorporating the TT kneepad grab handles for a little Homage to your donor.
Rather than re-inventing the wheel here, have you thought about cutting out the gauge pod/binnacle section of your donor dash and incorporating into your design rather than using the foam?
Posted by: Andyrew Aug 13 2016, 02:19 PM
Great sketch, thats exactly what I had in mind, but incorporating the TT kneepad grab handles for a little Homage to your donor.
Rather than re-inventing the wheel here, have you thought about cutting out the gauge pod/binnacle section of your donor dash and incorporating into your design rather than using the foam?
I have no donor dash.
Also the foam is just for me to template with, I will fiberglass the foam when done with the template an remove the inside foam, sand smooth and cover with vinyl.
Posted by: veekry9 Aug 13 2016, 03:23 PM
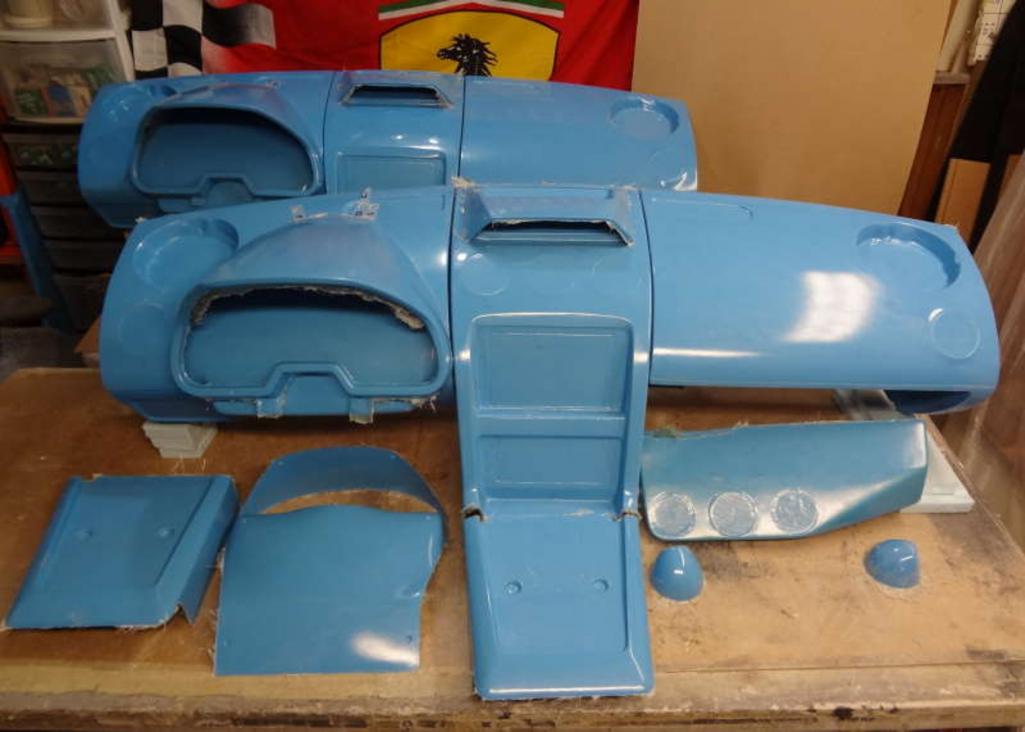
A huge job,one that is complex with many details to do right:
1 ) Attach polyurethane foam to naked dash base.
2 ) Shape,using surform and sandpaper to pleasing result.
3 ) Apply grp to create male 'plug'.
4 ) Attach 'returns' and mount details.
5 ) Finish to high polish,and apply 'release'.
6 ) Apply grp to build female 'mold'.
7 ) Detail and reinforce mold.
8 ) Apply epoxy grp/cf to create dash and console 'skins'.
9 ) Finish sand and built mounts,detail,aircons,defroster,iphone,satnav,stereo,instument cluster,switch panel and more.
10) Make patterns for padding and cladding in leather or synthetic materials.
11) Cut and sew the coverings,then staple,glue and screw over the multi layer foam underlay.
12) Design,fabricate and chrome or polish bezels and trim accents.
13) Install console and gear,ebrake,aircon,and the rest of it.
14) Install the wiring and switchgear with the trim bezels and panels.
15) Start on the doors,ceiling,floor and console.
16) Details that I've missed mentioning,and much more.
Here is the most beautiful custom work,done for mids,of an American origin.
The methods used,and demonstrated here are labor intensive,the results glorious and leather clad.
http://www.fiero.nl/forum/Forum3/HTML/000091-49.html
So,yeah,a custom interior is a ton of work,easy to get wrong,with crude results.
Sewing and stitching is involved.
This is nice,even the early dash that I prefer,tho done in the two tone,the console narrow like the 14's.
https://www.google.ca/search?q=porsche+944+dashboard&espv=2&biw=1280&bih=642&source=lnms&tbm=isch&sa=X&ved=0ahUKEwiMt-qnqL_OAhXEQyYKHcxWB3MQ_AUIBigB#imgrc=zfHtQht90OLqLM%3A
/
Posted by: Andyrew Aug 18 2016, 07:39 AM
Lots of things going on at once.
It appears my timing belt is off a tooth, not causing any mechanical failures just enought to loose torque and cause a code. Thus my tuner is being a B and telling me to fix it before he does anything. Luckily I think I can do that with the engine in the car comfortably if I jack up the rear and drop the trans to the floor. Should give me great visibility and room. 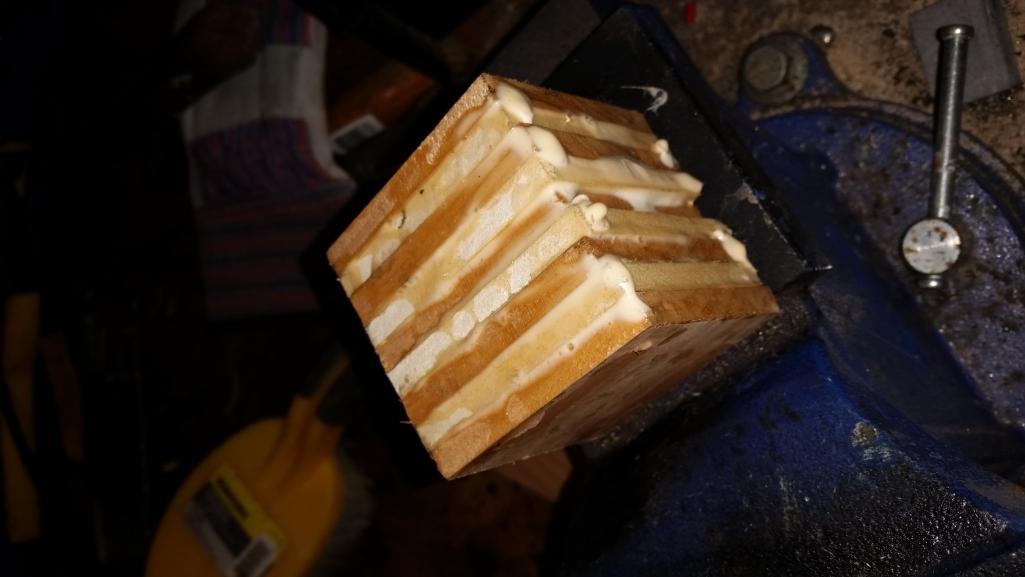
I started making a shift knob, but alas cant find anyone with a lathe to turn it for me. If anyone here has a lathe and can turn a shift knob let me know! 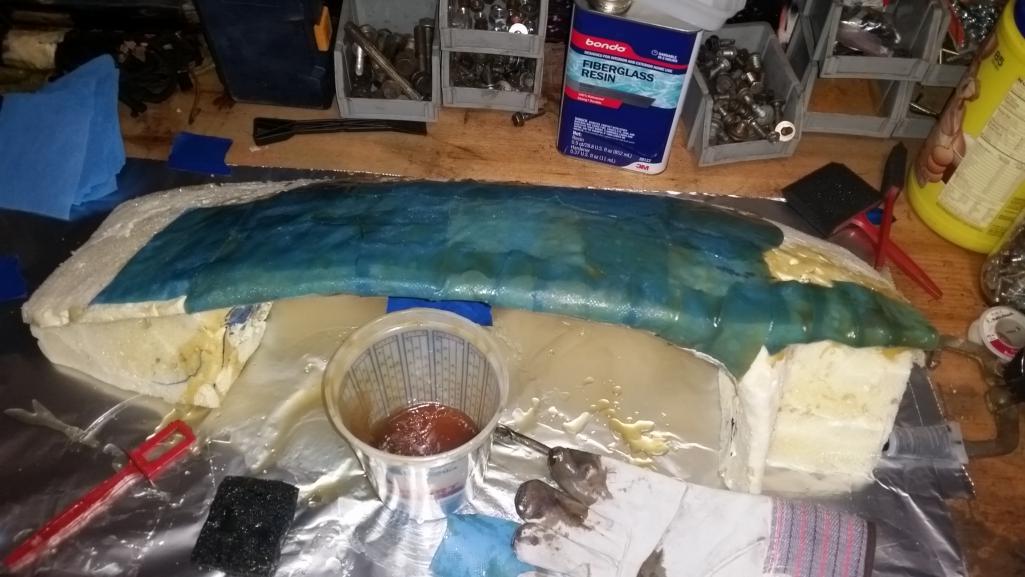
Finalized what I want to do with the dash. I bumped my dash design up 10 years to give me a smoother sleeker look. It just worked out better for the fit issues I was working with. I think you guys will like it when you see the final product.
Random gas fill up this week 
Posted by: 76-914 Aug 18 2016, 02:48 PM
Lots of things going on at once.
It appears my timing belt is off a tooth, not causing any mechanical failures just enought to loose torque and cause a code. Thus my tuner is being a B and telling me to fix it before he does anything. Luckily I think I can do that with the engine in the car comfortably if I jack up the rear and drop the trans to the floor. Should give me great visibility and room.
Damn it! I hate it when that happens. Only time that happened to me was on an Escort timing belt. It's more difficult to mis-match when dealing with timing chains, IMHO. Looking good kid. Keep it up.
Posted by: Andyrew Aug 25 2016, 01:56 PM
I'll post an update tomorrow, but heres a video of last nights ECU logging. My friend tagged along and took video while I logged.
https://www.youtube.com/watch?v=jk5V1cL0pbk
Posted by: Mike Bellis Aug 25 2016, 06:30 PM
Cool video!
Posted by: Chris H. Aug 25 2016, 09:41 PM
Did you fix the timing belt already? Hard to believe it was off a tooth when it was running so well. Nice vid. You got those wide tires to spin like a V8! Wait 'til you dial it all the way up .
Posted by: Andyrew Aug 25 2016, 10:10 PM
Did you fix the timing belt already? Hard to believe it was off a tooth when it was running so well. Nice vid. You got those wide tires to spin like a V8! Wait 'til you dial it all the way up
.Timing issue was the wrong timing sensor pick up. Timing was dead on.
Actually I didnt really try to spin the tires... It will 100% light up the tires in first.
Posted by: Andyrew Aug 29 2016, 10:31 PM
This past month has been full of a lot of driving. Im trying to get my tune going but Im still facing problems.
Lately it has been a hunting idle that my tuner is sure is a intake leak. I cant however seem to find it and its intermittent not consistent. Other tuners think its a tune issue.
Debating on working with another tuner or to tell my tuner to suck it up and leave the idle the way it is.
I've changed out my coils to a stronger type coil as well as changed out my plugs to plugs my tuner prefers. Also I installed a wideband AFR guage which is giving me a very lean idle reading which I can only imagine is incorrect (Calibrated correctly...)
On another note, I HAVE made some progress on the dash. See below. About 3 nights of fiberglass and 3 nights of bondo/sanding work to get it where I am OK with it. 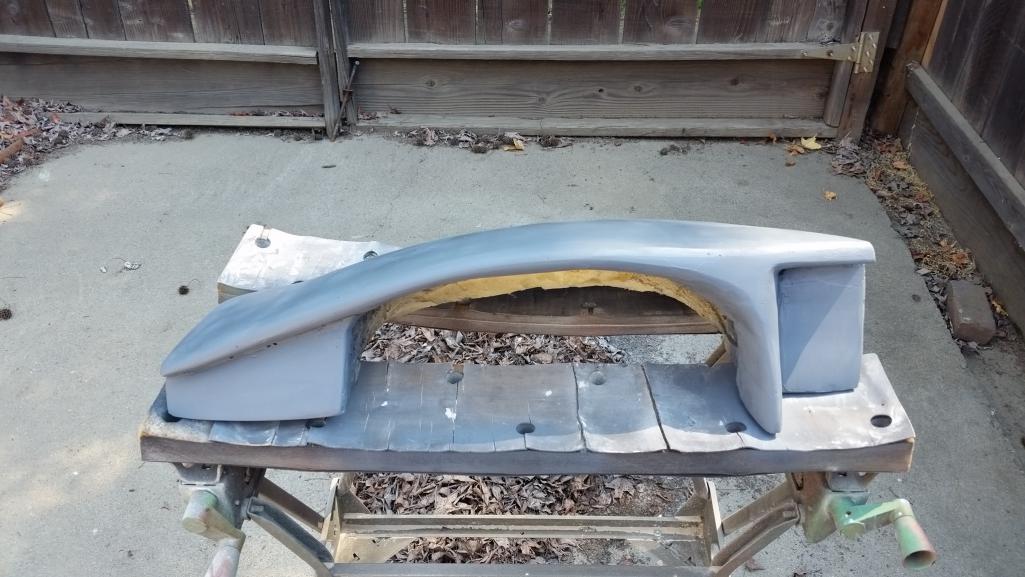
Im laying out some test pieces of vinyl and will start sewing/gluing it down.
I have some special stuff coming in tomorrow which I am super excited to reveal as well
And for those that like more video's. This is about 11psi in first (You can still hear it spin a bit) 13psi in 2nd and 3rd. I did a couple runs with ~16 just to test it out and it had a tire spinning all through second while pulling pretty hard (Not video'ed). Much faster than the v8 at this boost level I imagine that I will tune the boost for first at 10-11psi, second to ~15psi, and third/4th to about 20psi. 5th will probably be dropped down to about 15psi just for safety, but i'll tune the curve so passing rpm's still build enough boost to not have to have me drop a gear.
Also, I can assure you this vid was only up to the speed limit
https://www.youtube.com/watch?v=eyvYJuyYtDI
Posted by: 914forme Aug 30 2016, 05:46 AM
sounds very good. Your tests runs are done with gearing reduction boxes
On to the hunt.
Leak, yes very possible, but should also show up, when you apply boost, unless it seals under boost and then, opens under vacuum. Being said, 20 PSI will tend to pop somethings loose, If you have intake pressure tested plugs, I would install it, and run it up in PSI, and see what you get. Should have a noticeable leak, you can also draw vacuum on the test rig, if it holds vacuum and pressure, then no leaky. Pretty easy to see, a little shot of soapy water will clean the engine and tell you when you see bubbles you got a leak. Of course the huge sucking sound under vacuum might be a pointer also.
Beyond that, calibrate your wideband, and make sure it is not truly lean at idle. Your engine might be hunting for a real reason. Tuners are just like anyone else, they can be drawn in via their own biases, and not find the true answer. Or Ego steps in the way, and they do not want to admit their mistakes. Not a big deal, your just going to have to disprove all his issues first. Costing you time and money.
The flip side of the coin is like dealing with any contractor in the tech industry, we all have our opinions, and we are trained by the system to find whats wrong in others work, point it out, then do it our way. The true key is finding the tuner that can see the value in others work, and then add their knowledge to make the final product even better. Good luck with that hunt, these are a rare bird.
Posted by: Chris H. Aug 30 2016, 11:07 AM
Timing issue was the wrong timing sensor pick up. Timing was dead on.
Yeah I knew it. It was running way too smooth. And the turbo would amplify the problem. That's an interference engine. They don't tolerate much.
Hunting idle is the WORST. I still have it occasionally. Are you using the stock ECU? If so I would lean towards tune. A sensor needs to be deleted, something like that.
Posted by: Andyrew Aug 31 2016, 01:15 PM
Figured out my idle and top end fuel mixture issue... 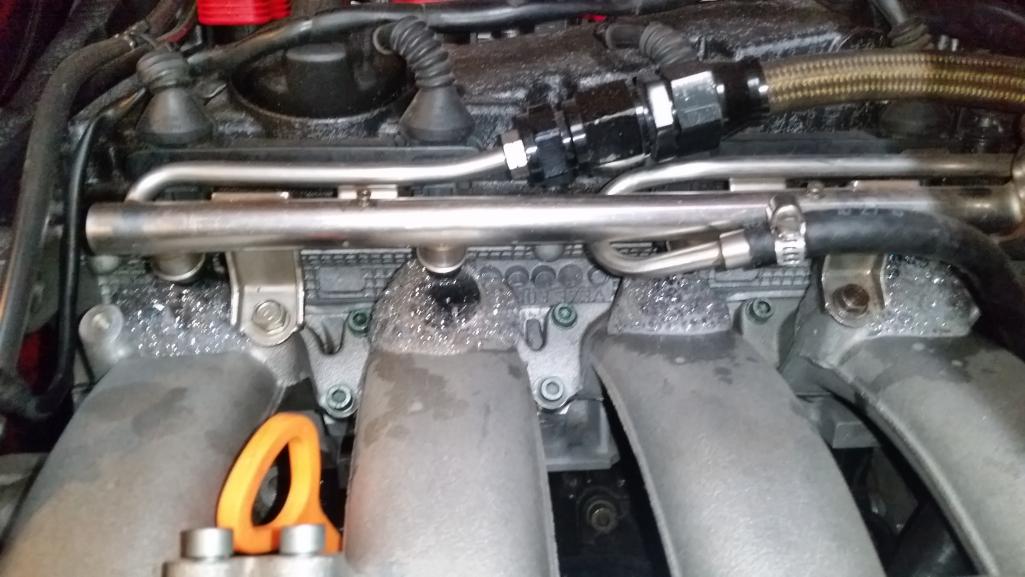
Going to get new fuel injector seats and o rings, teflon tape the seats and try again.
I should be back on the road by 9/14
Also this just came in. I am extremely excited about it Its my brown vinyl with the factory basketweave Mark @914rubber did a great job on this and it looks fantastic! I dont think the impression is lasting enough to use as a seat bottom or back but I'll get a test sample and do a stress test on it. Im going to do the door panels, the dash accent, the center console sides and possibly the seat backing/bottom in it. 

Posted by: Mike Bellis Aug 31 2016, 06:57 PM
The instructions for the billet seats call for red locktite and no tape. I have the hex socket to remove the seats if you need one. Socket comes in the billet kit I bought. I also used larger (thicker) O rings to seal better. I found with the stock O rings, the injector can go to far in and trap the injector and loose the seal. Then you have to fish out the injector and hope the O ring does not pop off in the process. BTW, the O ring will be ruined if this happens...
Posted by: Andyrew Aug 31 2016, 07:26 PM
Very interesting. Where did you get the larger O rings?
Posted by: Mike Bellis Aug 31 2016, 09:21 PM
Very interesting. Where did you get the larger O rings?
FLAPS
Posted by: Andyrew Aug 31 2016, 09:30 PM
Gotcha
Posted by: Andyrew Sep 8 2016, 02:04 PM
Replacement injector seats came in. Broke the very first one getting it out... Im now going to vacuum the intake and then make sure the valves are closed and punch the plastic into the intake. The rest of them I used some PB blaster to make sure they didnt snag and break. 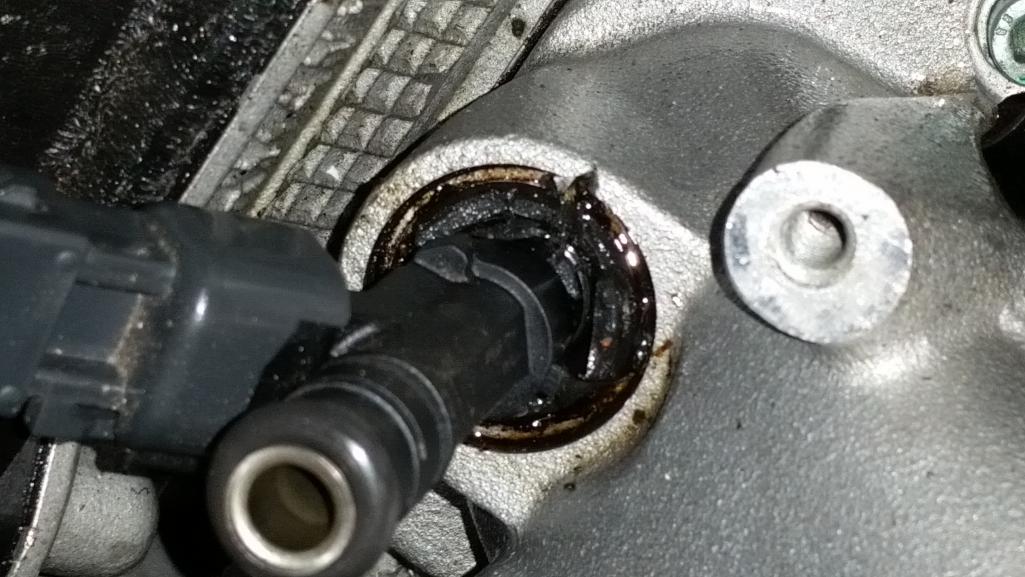
Side note, the dash is coming along. I got some glue coming in Monday hope to have it done for 9-14 presentation 
Posted by: Andyrew Sep 14 2016, 09:33 AM
Last update for the 2016 Build Off Challenge.
I tried to glue the vinyl to my dash down but the glue reacted with the primer I had down. It ate the primer thus making it a slipery mess.
I sprayed it with high temp spray paint and let it out to dry in the hot sun to bake, but I cant get call the dash as completed . Soon, but just not now.
I did get the injector seats fixed. I stuffed some rags in the holes and chipped away at it. Then I attached one of my fuel hoses to the vacuum and sucked all the little pieces out and finally blew it with compressed air and sucked it again. After replacing I let the car idle for about 5 minutes. I put gobs of teflon tape on the injector seats and that seemed to solve 99% of it. I still have a pinhole leak but its so minor Im not going to bother with it. There is no way thats going to have any affect on the drivability of the car.
I spent about 3 hours with my tuner last night trying about 7 different tunes. We found a couple of issues, but in the long run not a single one did any changes. He's now starting me on a fresh tune and we'll tackle it again today. I have a feeling my huge injectors are the root cause of my issues.
At this point it runs, drives, stops, and makes super loud noises. We'll keep going on it till its perfect. I have a track day at Thunderhill West for mine and my dads birthday in November and I want to make a local autox this month to shake down the car.
Happy 9-14 day all! 
Posted by: Andyrew Sep 20 2016, 08:04 AM
So the glue came in and I gave laying down the vinyl a try. It took a few coats till it wasnt just spreading the paint around. Im not 100% happy with the result, I thought I would be able to do the dash but this was an extremely complicated piece. I might have one more go at it as well as put some foam/padding under it but we will see.
Also took it to a local show again, big hit with lots of interested people.
I have a leed on a local tuner that might be able to help me. My current tuner is basically giving me the cold shoulder, he helps me once a week maybe...
Attached thumbnail(s)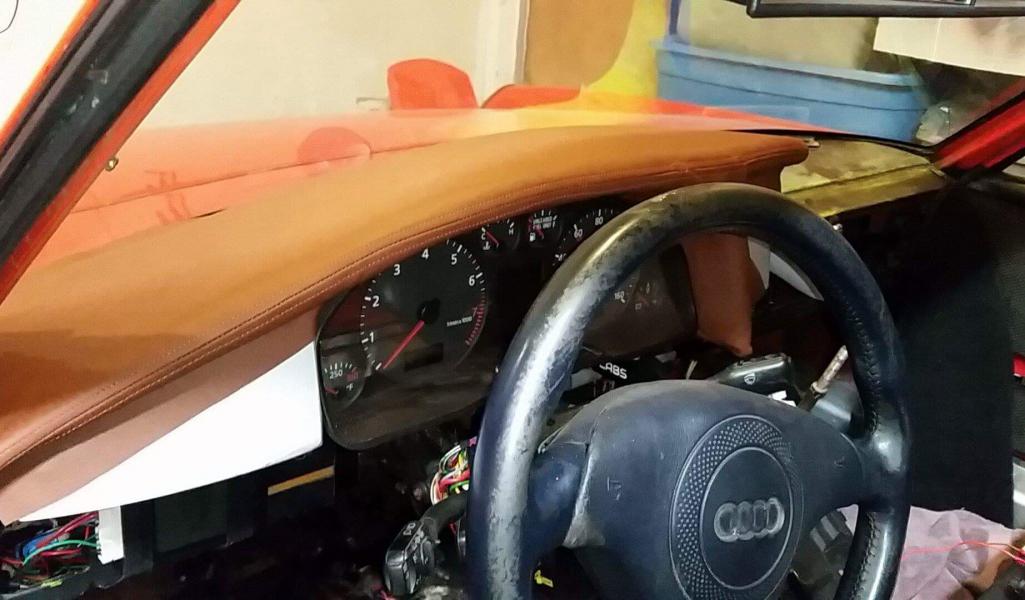
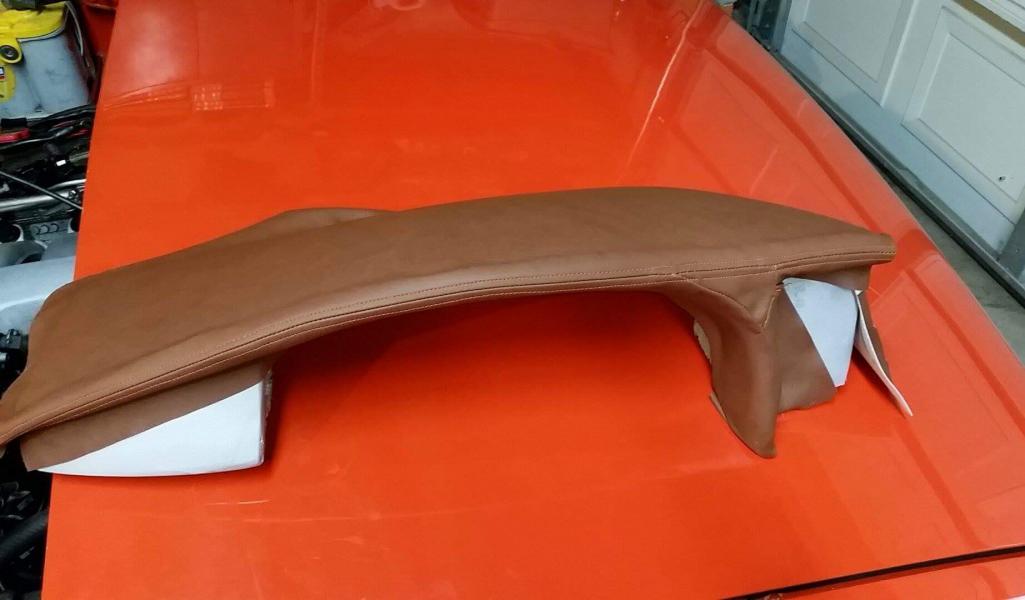
Posted by: Andyrew Oct 14 2016, 10:52 PM
Got a new development. Were pretty excited about it
Attached image(s)
Posted by: Garland Oct 14 2016, 11:20 PM
Congratulations!
Posted by: mgp4591 Oct 15 2016, 12:44 AM
This build thread is brought to you by PREGGO - the spaghetti sauce for expectant mothers...
Congratulations!
Posted by: rktmn247 Oct 15 2016, 01:44 AM
Congratulations!
Posted by: 914forme Oct 15 2016, 05:49 PM
Congratulations
Posted by: Andyrew Nov 17 2016, 08:28 AM
Past couple months have been spent working on tuning as well as getting the car ready for my track day last weekend.
Things I did:
Spent a considerable amount of time on the steering linkage trying to get the notchiness out. I improved it but its still not right.
Replaced the 6 year old rear 400tw tires with some new Federal 595rs-rr tires. Went down from 285 to 275 but the tires are half an inch wider per side..... This meant I had to trim the rear fenders to prevent rubbing.
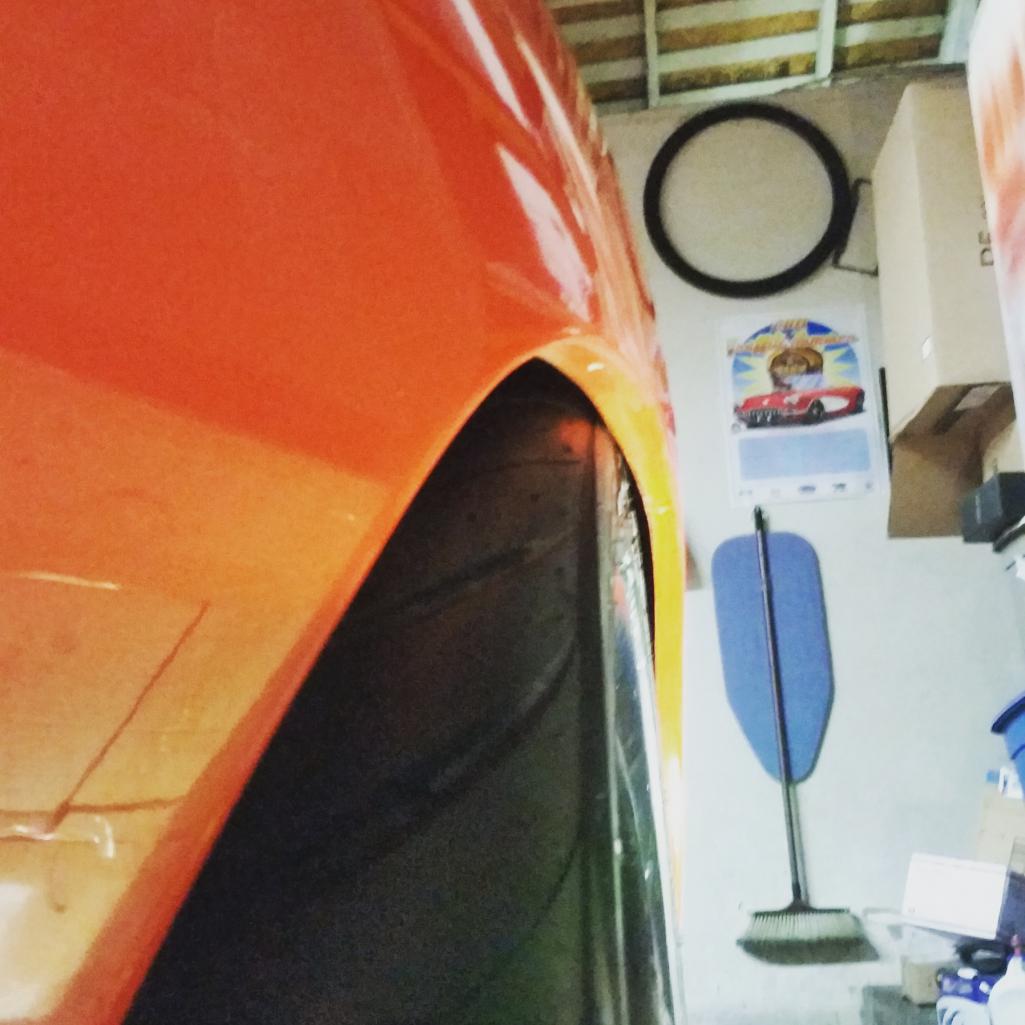
Before trimming
Got an alignment that didnt do anything
Replaced the pass side CV joint however to no avail, the knocking sound I feel and hear must be in the differential.
Tried as I could to help the trans shift better with adjustment and new fluid, but no luck. Im going to swap in my spare trani and open up this one. Not looking forward to the longer gears in the v6 trans. Its already really really tall gearing.
Did some more tuning on wastegate pressure, bumped up my redline to 7500. Going to bump it up to 8k as I feel the turbo still has lots of pull in it and it really likes the top end.
Changed the oil out from my break in oil to Royal Purple.
Nut and bolted it about 3 times..
Then I headed up to Thunderhill West with my dad coming down from oregon with his car. (I also brought 5 other drivers to the track day...)
Attached thumbnail(s)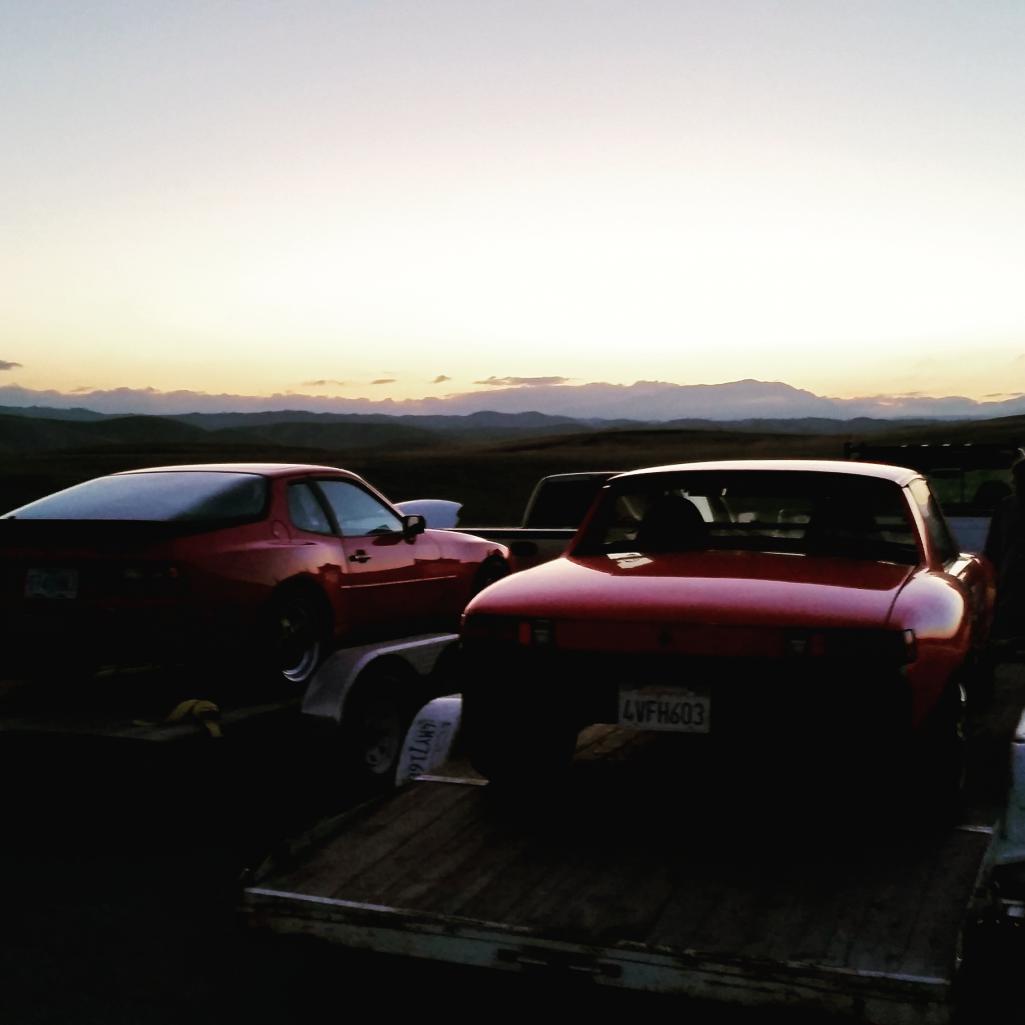
Posted by: Andyrew Nov 17 2016, 08:47 AM
Next we have some video of the track day. Remember I have an OBD2 port so I can pull live data to my phone. Used an app called Torque Track Recorder to record some of these. The data is delayed but it gives a good idea. Gforce data is on time though since the phone pulls that.
https://www.youtube.com/watch?v=Z30efFVRMwI
https://www.youtube.com/watch?v=pDDu7-iU92o
https://www.youtube.com/watch?v=ymyGqg5HoTE
https://www.youtube.com/watch?v=Mm5XFVJgrFs
Last run of the day, rear tires started to grip at this point. I believe they were designed for a much heavier car as I only have 20psi in them and they were not rolling over like they should. I had an inch of contact patch on each side of the tire that was not being used.
You can see the gforces are there, the car is decently quick, the braking and my lines could use work, but I really couldnt use any power through the turns as it would just spin the inside rear.
Note I have hankook street tires up front which are considerably less sticky than the rears, however I still felt the grip lacking in the rear vs the front.
Photos uploaded in a couple days.
Posted by: dan10101 Nov 18 2016, 01:24 AM
There are bad days, meh days, and good days, this was a Great day!
We need more Great Days!
The best part of the day was running with Andrew in the video above with his mother in my car going at it pretty hard for us. (we have a ways to go...) I thought I would have to baby it around a couple laps at best then she would call it quits. She didn't, I'm pretty sure she wanted to go faster. Next time we'll turn up the boost and see how she does.
Posted by: Andyrew Dec 1 2016, 02:28 PM
Recent track day pics from Thunderhill West 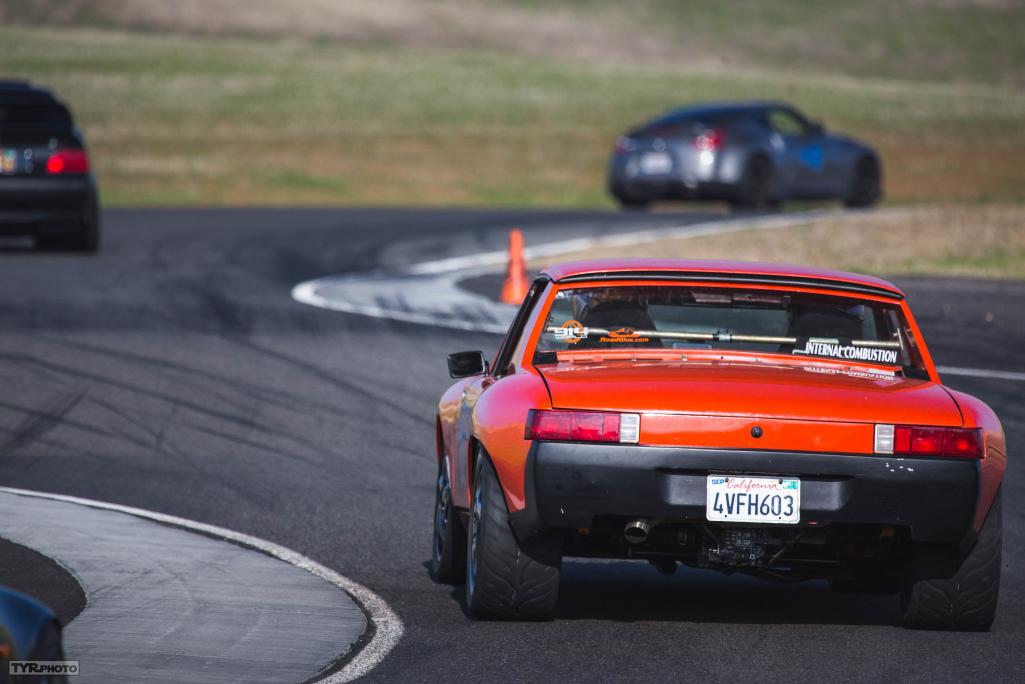
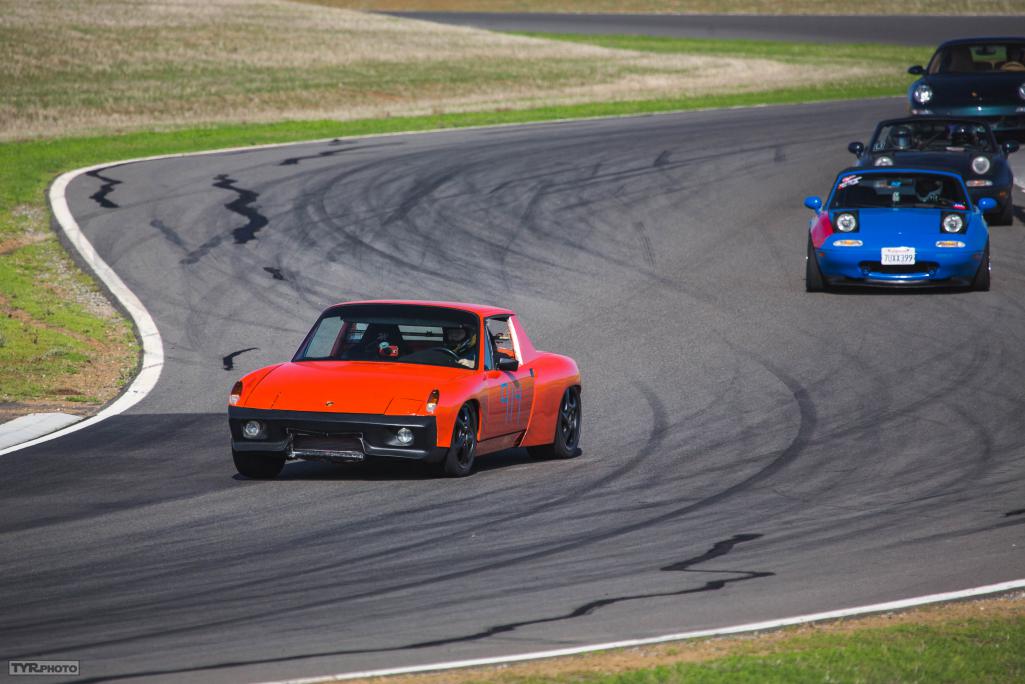
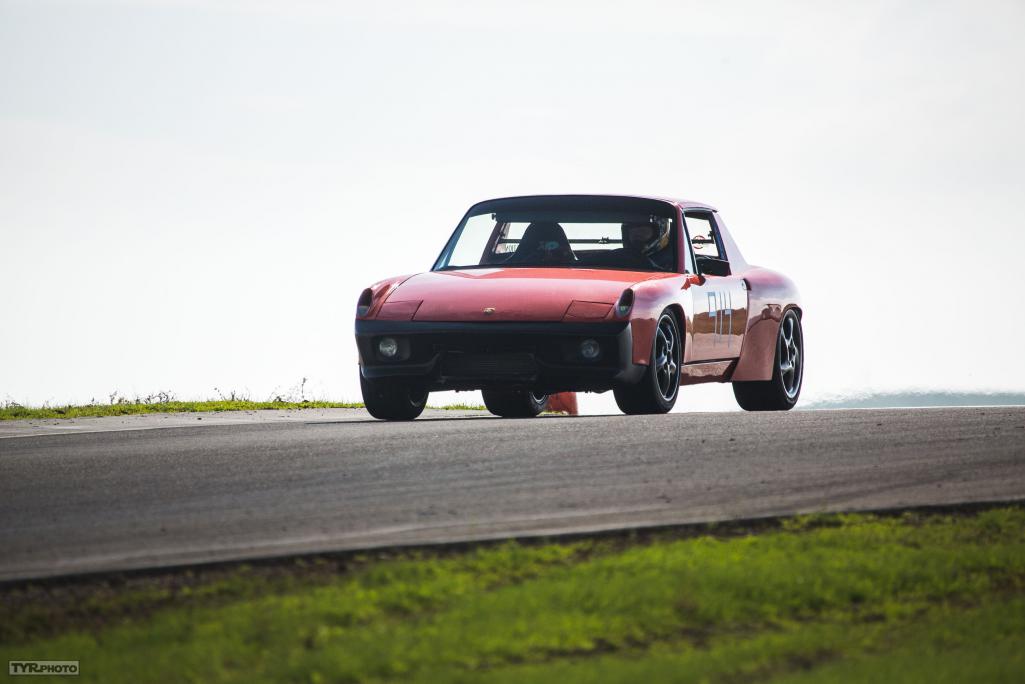
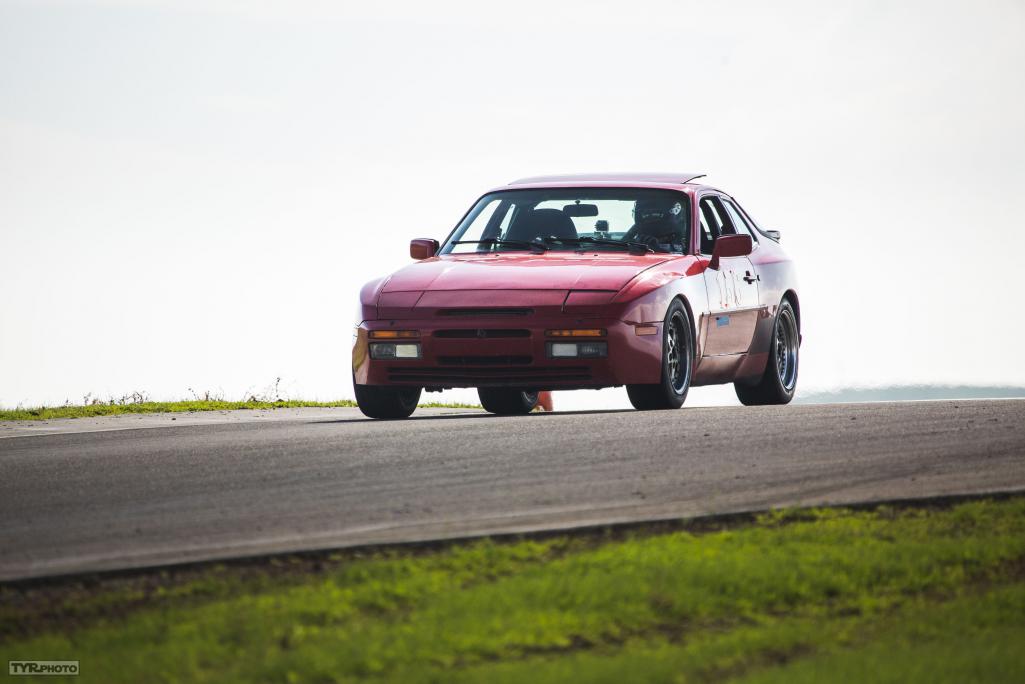
I thought this was cool, My car in the pic above and my dads car in this pic in the exact same spot. I've spent an hour going between the two cars looking at the difference in the tire widths, the angles of the car, ect ect. Its pretty interesting. 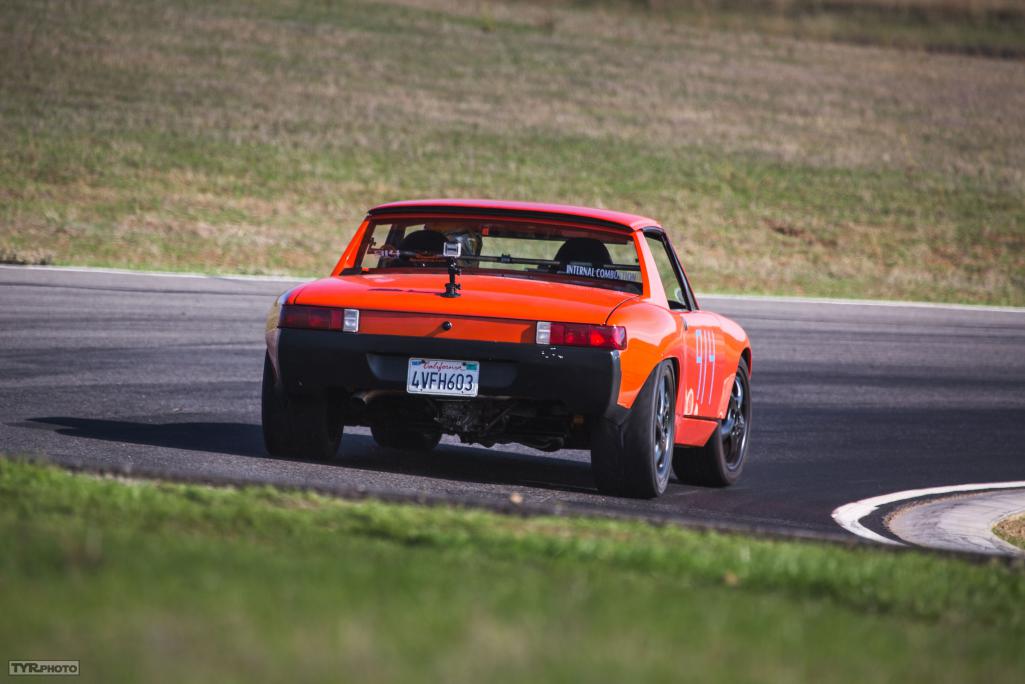
Posted by: Andyrew Dec 1 2016, 02:35 PM
Couple more. 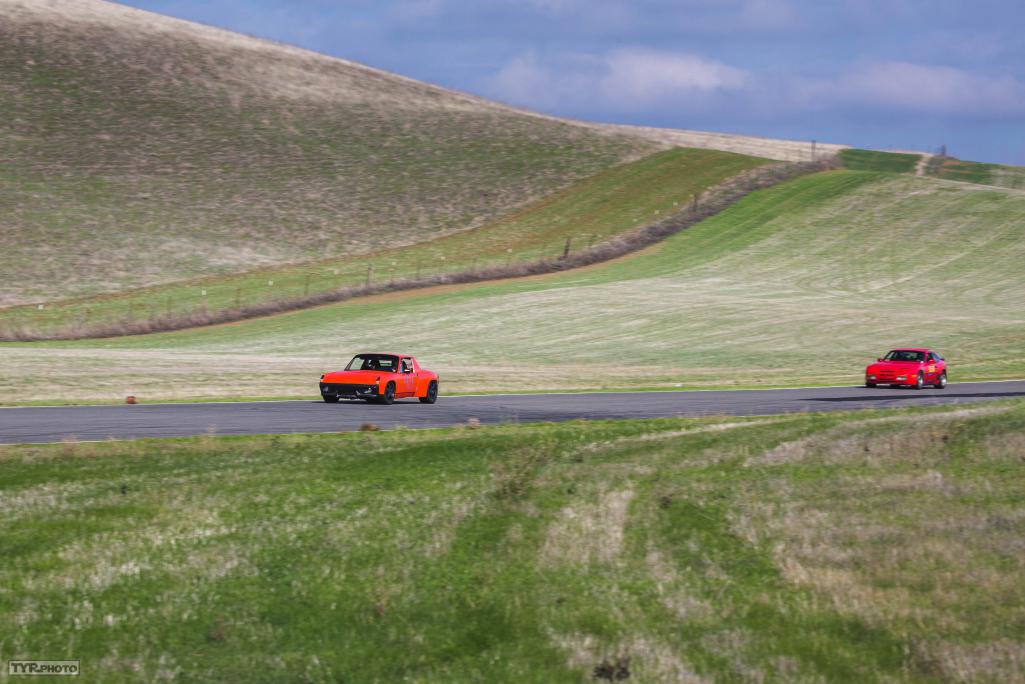
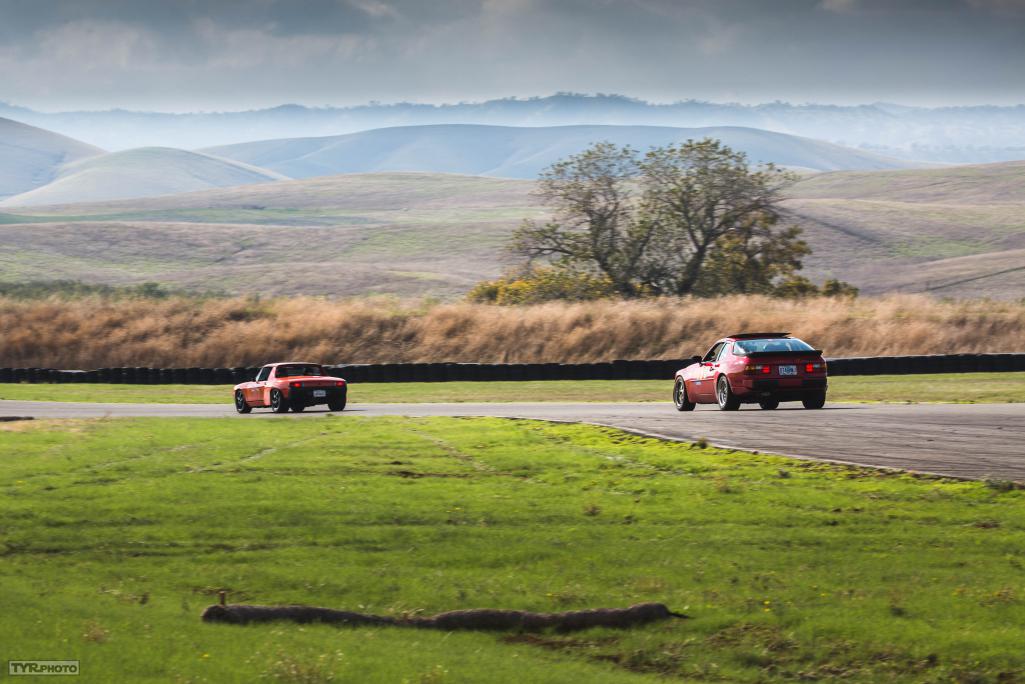
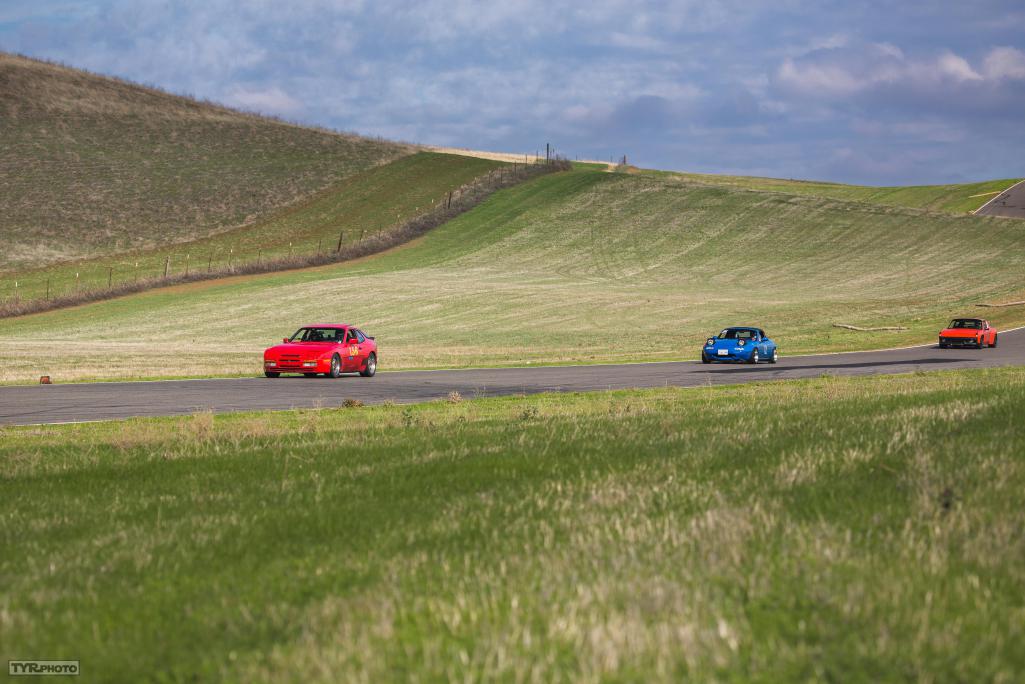
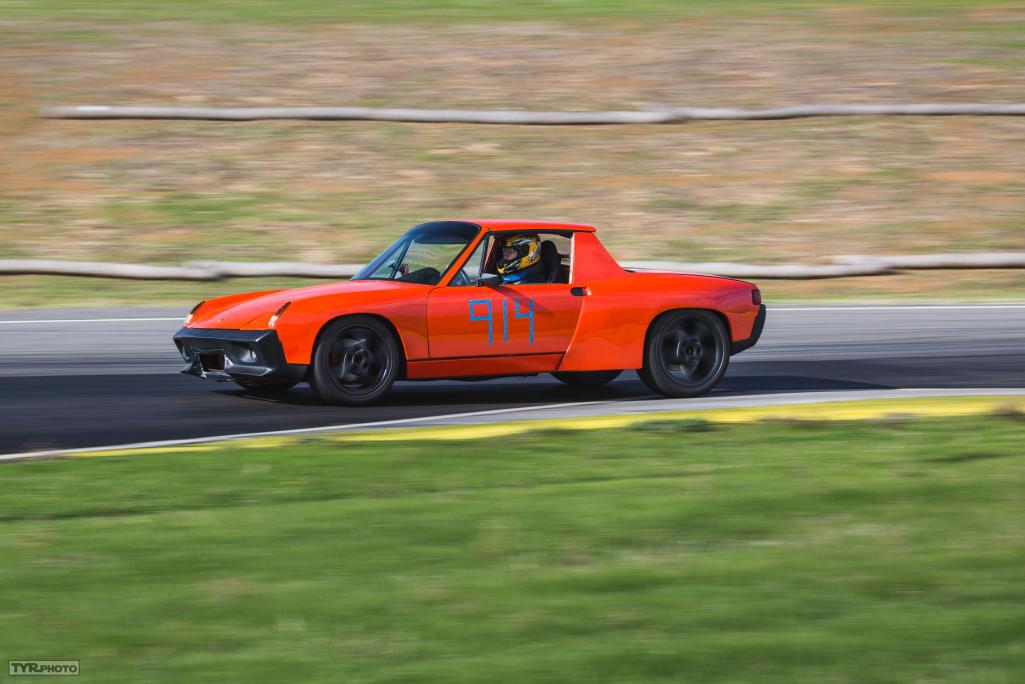
Shot from my friend with an old 35mm film camera.
Posted by: Andyrew Dec 1 2016, 02:40 PM
Last one for today.
Big reveal
Attached thumbnail(s)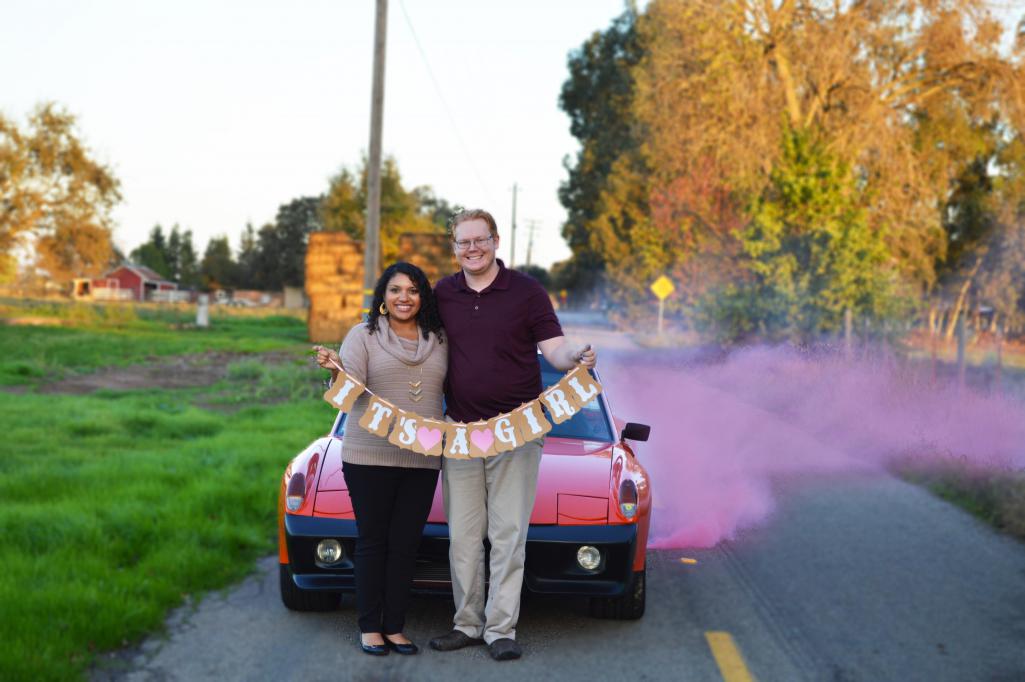
Posted by: tygaboy Dec 1 2016, 03:12 PM
Big CONGRATS
Posted by: timothy_nd28 Aug 14 2017, 01:52 PM
![]()
Page 8 is gold. I'm currently fighting the 916 bumpers and trying to emulate the techniques you used with yours
Posted by: Andyrew Aug 14 2017, 01:55 PM
Page 8 is gold. I'm currently fighting the 916 bumpers and trying to emulate the techniques you used with yours
At some point i'll finalize the bumpers.. For now, its all about the running gear. Fiberglass was just trial and error, work it till it works.
Posted by: timothy_nd28 Aug 14 2017, 02:54 PM
Trial and error is what I stand for! I do like how you painted the bumpers black. It may look good against my future yellow tub, a bumblebee effect. Are they flat or semi black?
Posted by: Andyrew Aug 14 2017, 03:42 PM
Trial and error is what I stand for!
I do like how you painted the bumpers black. It may look good against my future yellow tub, a bumblebee effect. Are they flat or semi black?Semigloss out of a can. Works really good, easy touch up. I really need to touch them up...
Posted by: 76-914 Aug 15 2017, 09:14 AM
You baited me! I had hoped it was an update.
Posted by: Andyrew Aug 15 2017, 09:27 AM
HAHAHA!
I do need to post updates of the 4 months of "Progress" I have been working on recently
Come back around 1pm
Posted by: Mike Bellis Aug 15 2017, 01:49 PM
***UPDATE***
Mine is sitting in the garage covered in boxes.
Posted by: Andyrew Aug 15 2017, 02:01 PM
I've got a few boxes on mine. But I just spent the weekend clearing out what felt like 100 amazon boxes (We prime pretty much everything...)
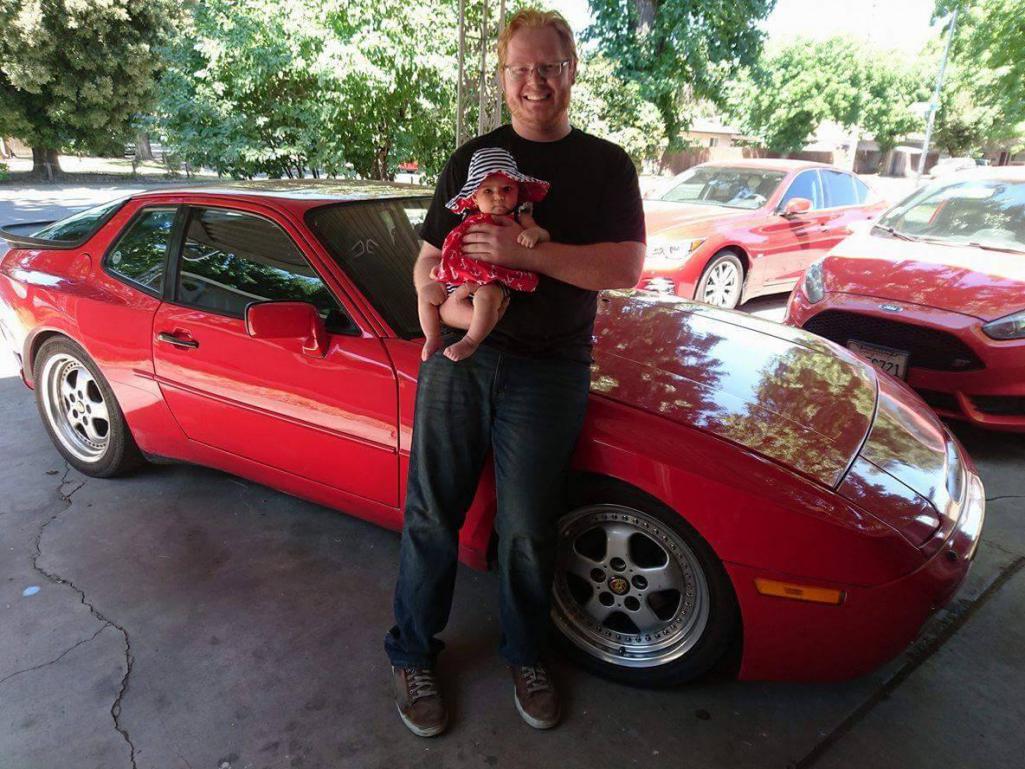
New Baby Girl Alina She is 4 months old now (Shows you guys how much I update you all)...
Also I picked up my dads 944 turbo. Love the car, and its got a back seat for Alina. Im working through some issues on the car but they are all fairly minor. This car will see mainly track time and canyon runs.
Posted by: 76-914 Aug 15 2017, 07:37 PM
Precious! Little girls are for Daddy's to spoil. I raised 2 girls. Wait until you see how aggressive you become once they hit dating age.
Posted by: burton73 Aug 15 2017, 07:50 PM
Andrew,
Congratulations on having your little girl. She is very cute!
I have three little girls that are now all grown up. They love their dad.
Clean your guns when they bring home a date. You have a long time till that time. You are a lucky man. Father hood looks good on you or your beard does.
Bob B
Posted by: oakdalecurtis Aug 15 2017, 09:53 PM
Just an experienced based tip for the future, Andy. When she's a teenager (sooner than you think), if she ever brings home a guy that makes you cringe, DO NOT follow your first instinct to grab his neck and throttle him! Instead, calmly go talk to the young man for a few minutes. Then go over and tell your daughter how happy you are that she finally found a guy you can relate to and become good friends with. She'll dump him in no time! Trust me on this, if dad likes him, it's the kiss of death!
Posted by: porschetub Aug 16 2017, 01:42 AM
First born a girl,now 23yr old ,left home 6mths ago,
still helping her when she comes home cause that's what u do.
My son has left too and living in the same city,when I crap out they will look after me ..
My job over that time when they were little was 6 months oversea's ,regrets not being for them ,make the most if you can.
Don't forget the stuff you enjoy when you have that small amount of free time...ok.
Posted by: mgp4591 Aug 16 2017, 01:51 AM
Wow, what a little cutie! And I second all of the comments made by the other dads - I've got 4 girls and three successful marriages so far. I count myself a very lucky dad in that I've never been to prison...
Posted by: Andyrew Apr 13 2018, 03:21 PM
OT Update, My little girl is now one
https://www.youtube.com/watch?v=qHeKtCKbqDw
And if you dont have 7 minutes here is the condensed version
https://www.youtube.com/watch?v=q2muqQ_PU1w
Posted by: oakdalecurtis Apr 13 2018, 03:31 PM
Good luck when she hits 13 Andy! You’ll be handing her the car keys before you know it.
Posted by: Andyrew Aug 12 2018, 11:10 PM
Alina update: Shes doing great!!! Learning so quickly! She loves reading books, dancing to music, running around chasing our dog, and grabbing my glasses off my face.
House update: I moved in January. My wife wanted a pool (Shes been in it 5 times... I've been in it 20..), I wanted a 3 car garage (minimum), and we both wanted more house, newer, and in a nice neighborhood. We looked 3 years ago and should have bought then, but you live you learn.
I spent a couple months decking out the garage and building some shelving and a bench and such till it was suitable for me to actually work. I have loads more to do but I've french cleated all the walls so everything is modular which is nice and my main bench I made is on locking casters so it rolls around pretty well. I still need another workbench but this and my collapsible 50's style sawhorses will work well.
On the car front I've done SOME stuff but not much. I drove it for the last time last weekend and said its time to put it down for a while. I have been facing a hot start issue for almost 2 years which has stopped by tuning as well as any real progress on the car or driving. The issue is the car will not start after its any bit warm (Im talking 1 minute started). I've thought it was a crank position sensor as it acts very funny and will start once every 20 cranks ish randomly when warm, but after replacing it multiple times this lead nowhere. At this point I think something is funky with the wiring.
So I've removed all the wiring on the car and I'll be consolidating, testing and cleaning it up as best I can (There are way to many wires in the harness right now). I have determined I will not be using ABS on this car or traction control from the AUDI computer.
Worst case scenario if I cannot figure out I'll do what I should have done from the start and go MS3-Pro EVO. This will give me a lot of cool features that I cant do with my current setup (E85 flex fuel, Traction control, Self tuning)
My current issues that need to be resolved before the car touches the road again.
1. Solve hot start issue.
2. Rewire car.
3. Replace transmission (Current one shifts very bad, Thought it was clutch engagement but after adjusting that it shifts no different).
4. Fix steering binding
5. Pull engine and find out why it leaks so damn much with all new seals. Reseal everything if necessary.
Things that I want to do.
1. Clean up engine bay fuel lines
2. Build better intercooler reservoir (Stainless)
3. Finish building firewall. Note targa top needs to still fit.
4. Clean up trans mounts a bit, paint.
5. Clean up shifter cable holders. (They keep popping out due to excess strain shifting).
6. Clean up the center tunnel. Possibly cut it open and replace it Its messy, sharp edges, and needs some attention.
7. Weld in roll bar and start working on full cage.
8. Figure out what I want to do with the seats so I can get the interior laid out better.
9. Figure out what I want to do with the dash and instruments (Depending on if I can get the Audi stuff to work properly)
10. Start the damn interior...
Pics and video's tomorrow during lunch. Gotta get some sleep now.
PS, I've written this post like 6 times over the past couple months..
Posted by: Mike Bellis Aug 13 2018, 07:02 AM
I was having starting/dying problems with mine at first. I tracked it down to a loose wire at the temp sensor plug. This is a known issue on these donor cars. Remove the rubber boots from your connectors and tug on the wires. Pull hard. If they (wires) come loose, there's your problem.
Posted by: Andyrew Aug 13 2018, 08:19 AM
I was having starting/dying problems with mine at first. I tracked it down to a loose wire at the temp sensor plug. This is a known issue on these donor cars. Remove the rubber boots from your connectors and tug on the wires. Pull hard. If they (wires) come loose, there's your problem.
Tried that, replaced the plug with no change. My coolant temp comes up like normal as well. Its all taken apart now ready for inspection/cleaning and continuity testing.
This is a video explaining the wiring. Note its a bit difficult to follow as it was about 12:30am and I was a bit tired.
https://www.youtube.com/watch?v=Q_oyBh3HwVU
Posted by: 76-914 Aug 13 2018, 08:26 AM
Good to see that your "going back in", Andrew. That can be difficult sometimes. Looking forward to seeing you AND your 914 at some upcoming events. Also, looking forward to seeing some posts on your progress. :beer2
EDIT: Can't help but wonder if your ECU is locking out the Start circuit because it isn't receiving an OK from some system such as ABS sensor or Collision sensor system not functioning .
Posted by: Andyrew Aug 13 2018, 08:26 AM
House and Alina
Attached thumbnail(s)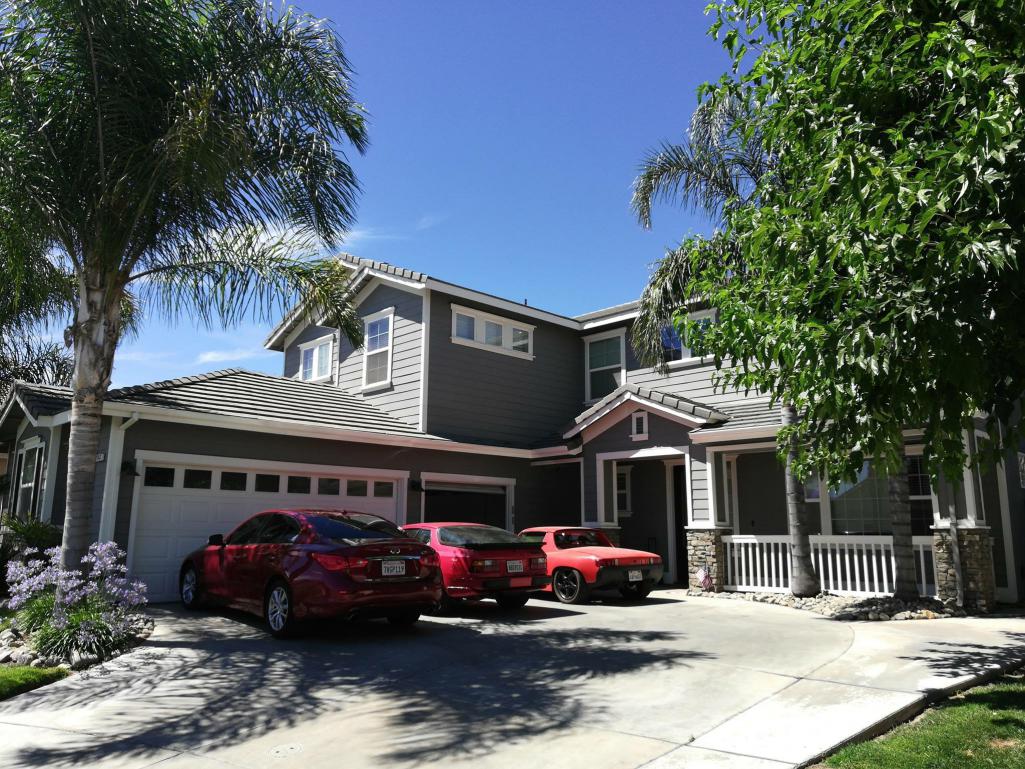

Posted by: Mueller Aug 13 2018, 09:26 AM
Alright, progress on the car!
She is too cute, everyone needs a spaghetti meal picture of their kid!
I think I know what the problem with your harness is:
https://www.youtube.com/watch?v=UOWquP1k6Oc
Posted by: Andyrew Aug 13 2018, 09:46 AM
EDIT: Can't help but wonder if your ECU is locking out the Start circuit because it isn't receiving an OK from some system such as ABS sensor or Collision sensor system not functioning
.Possibly, but it wasnt that way from the beginning, I had 6 months of starting 1st or 2nd crank rotation every damn time. This issue popped up as I was working on the cooling system and spilled a bunch of water near the crank position sensor, so I figured I had fried something there.
Its one of the reasons why my backup is just to go with a megasquirt system.
Posted by: oakdalecurtis Aug 13 2018, 10:41 AM
Hey Andy, I don't see how you can work on your car at all when you're wrapped around Alina's fingers so tight!
Posted by: Andyrew Aug 13 2018, 11:16 AM
Hey Andy, I don't see how you can work on your car at all when you're wrapped around Alina's fingers so tight!
Thats why getting this far has taken so long!
Posted by: 76-914 Aug 13 2018, 12:08 PM
EDIT: Can't help but wonder if your ECU is locking out the Start circuit because it isn't receiving an OK from some system such as ABS sensor or Collision sensor system not functioning
.Possibly, but it wasnt that way from the beginning, I had 6 months of starting 1st or 2nd crank rotation every damn time. This issue popped up as I was working on the cooling system and spilled a bunch of water near the crank position sensor, so I figured I had fried something there.
Its one of the reasons why my backup is just to go with a megasquirt system.
Ahh. We'll that's certainly logical. DNKT
Posted by: Andyrew Aug 16 2018, 08:34 AM
Got some new tools and consumables. Not pictured is more heat shrink (3:1), and a new butane torch.
Last night I spent an hour stripping the wires of tape(thread remover works great if your slow to avoid crossed wires) and cutting a couple unused plugs out. Probably a pound of wire removed. I'll weigh it all when done. I've got to do this real slowly to not cut anything critical out.
Attached thumbnail(s)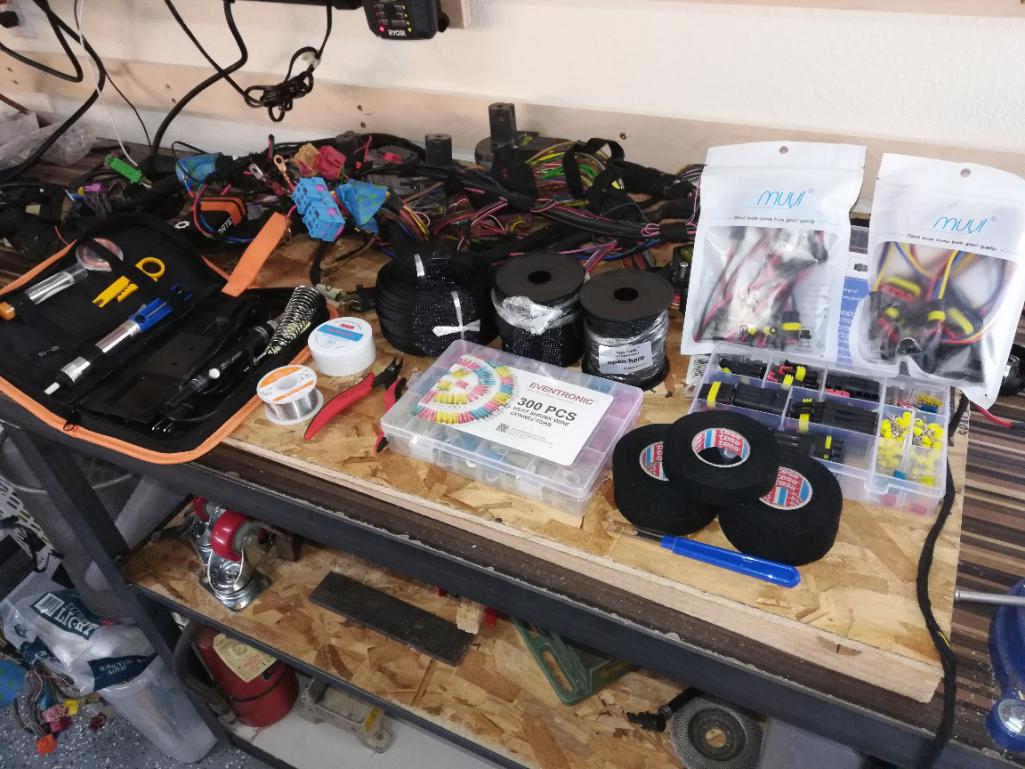
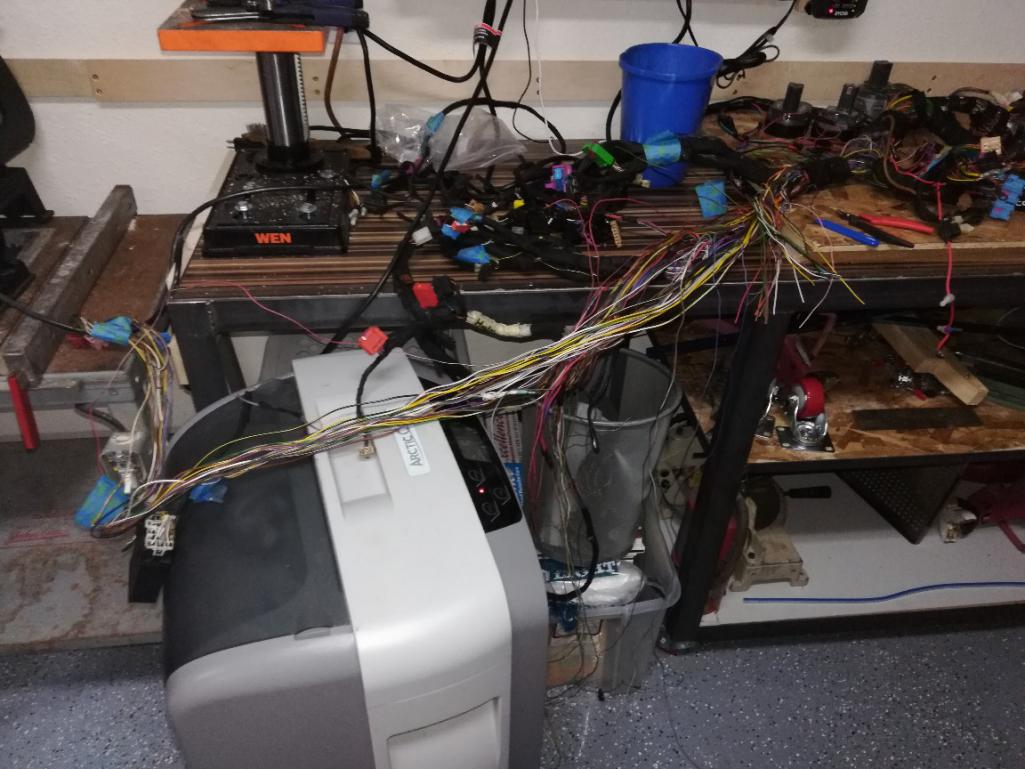
Posted by: Mueller Aug 16 2018, 08:51 AM
Got some new tools and consumables. Not pictured is a new 60watt soldering iron with orange case
, flux, solder, heat shrink terminal kit, and on the way is more heat shrink (3:1), and a new butane torch. Last night I spent an hour stripping the wires of tape(thread remover works great if your slow to avoid crossed wires) and cutting a couple unused plugs out. Probably a pound of wire removed. I'll weigh it all when done. I've got to do this real slowly to not cut anything critical out.
More tools...nice!
Things I don't see in the picture....safety glasses, a carbon filter exhaust fan and a "third hand"
Posted by: Andyrew Aug 16 2018, 08:56 AM
Got some new tools and consumables. Not pictured is a new 60watt soldering iron with orange case
, flux, solder, heat shrink terminal kit, and on the way is more heat shrink (3:1), and a new butane torch. Last night I spent an hour stripping the wires of tape(thread remover works great if your slow to avoid crossed wires) and cutting a couple unused plugs out. Probably a pound of wire removed. I'll weigh it all when done. I've got to do this real slowly to not cut anything critical out.
More tools...nice!
Things I don't see in the picture....safety glasses, a carbon filter exhaust fan and a "third hand"
Safety glasses are directly above the table.
That big ass fan isnt big enough for you? And nope, I dont have a "third hand" yet. Im thinking of putting a "T" track in the front of my table and putting a third hand in it. Havent gotten around to soldering yet, just thinning out the harness still (And probably for another couple weeks if I work on it every other night).
Posted by: dan10101 Aug 16 2018, 09:00 AM
Finnegan's garage is giving away a $2500 worth of tools for wiring etc.
https://www.youtube.com/watch?v=DNwjFWv3iNs
All you have to do is comment something that catches his eye or his heart.
What you have looks good. Good tools are the key...
Posted by: 76-914 Aug 16 2018, 02:36 PM
Something I found invaluable was the dual range heat gun from HF ($14.99) https://www.harborfreight.com/1500-watt-dual-temperature-heat-gun-5721112-62340.html and the helping hands tool ($4.99) https://www.harborfreight.com/Helping-Hands-60501.html
The dual range heat gun is perfect for the Heat Shrink. Find the perfect temp setting for whichever style your using then set it and forget it. IIRC, 730F was perfect for melting the silicone in the Marine grade. The helping hands is that 3rd hand but doesn't let the wires move as we do by hand. Rather than twist the wires together I like to slide the exposed ends upon each other then push any stray wires back in before soldering. This way I don't end up with a knot or bulge after soldering. It's not important but looks a lot neater and I don't need the next larger size of heat shrink for it to slide over the hump. Does that make sense? I know that you know this but many guy's don't. A perfect resin core solder joint will shine when set. If the soldered object is allowed to cool too quickly
(eg by blowing on it) or moves before it is set then the joint will appear cloudy indicating an improper solder joint. Before sure that you have a Cold Beer each evening afterwards so you can relax.
Posted by: Mike Bellis Aug 16 2018, 06:44 PM
Tried that, replaced the plug with no change. My coolant temp comes up like normal as well. Its all taken apart now ready for inspection/cleaning and continuity testing.
This is a video explaining the wiring. Note its a bit difficult to follow as it was about 12:30am and I was a bit tired.
My temp came up fine too. The water sensor is a dual element. One goes to the gauge and one to the ECU. It was the ECU wire that had an intermittent connection.
Check all the plugs for every system and try to pull out the wire from the metal terminal. Pull hard. Don't be afraid to yank on it. Like I said, failure at this type of connection point is a known point of failure and run problems. I've even seen some crimps where they crimp over the insulation. This works for a while and then wiggles out of contact.
Posted by: Mike Bellis Aug 16 2018, 06:45 PM
What does you VCDS say the problem is? When was the last time you did a throttle body calibration?
Posted by: Andyrew Aug 16 2018, 07:01 PM
What does you VCDS say the problem is? When was the last time you did a throttle body calibration?
I can no longer connect to the obd2. This happened about 3 months after the issue. Vcds showed bad crank position sensor, then it stopped showing an issue, then I could no longer connect to it. Another reason why I'm doing the wiring cleanup.
Posted by: Andyrew Aug 16 2018, 07:04 PM
Tried that, replaced the plug with no change. My coolant temp comes up like normal as well. Its all taken apart now ready for inspection/cleaning and continuity testing.
This is a video explaining the wiring. Note its a bit difficult to follow as it was about 12:30am and I was a bit tired.
My temp came up fine too. The water sensor is a dual element. One goes to the gauge and one to the ECU. It was the ECU wire that had an intermittent connection.
Check all the plugs for every system and try to pull out the wire from the metal terminal. Pull hard. Don't be afraid to yank on it. Like I said, failure at this type of connection point is a known point of failure and run problems. I've even seen some crimps where they crimp over the insulation. This works for a while and then wiggles out of contact.
I changed the sensor 3 times then changed the wiring twice. Another item I'll be checking while doing the wiring again. All the junkyard connectors we're junk. I haven't found a source for the connector new or else I would do that.
Posted by: Andyrew Aug 16 2018, 11:36 PM
Progress from tonight. More of the easy slow stuff. Removed about 10 connectors I don't need. Probably about 15 left to cut out throughout the harness, these were all in two simple clumps.
I am still leaving some wires to trim in case I find I make a mistake and need to solder one back. I'll power up the system and test it before I trim everything back and finish the looms.
Attached thumbnail(s)
Posted by: Andyrew Aug 18 2018, 02:25 AM
Cleared out some more wiring but as I was doing the light wiring I got worried that I was clearing out too much... So I removed the relay holder, the turn signal/wiper/headlight stalks and the ignition switch and my battery and set it all up on the bench. I was able to figure out the headlights but I didn't get the turn signals to work with a test light. So I'm going to finish up the wiring the best that I can tell for the lights and add some connectors at appropriate lengths and then I will put it in the car. I suspect that it needs more bulbs/resistance to work. The hazard switch works great and it's what holds the turn signal relay.
I spent a bit of time writing out all the wiring per the diagrams I have so I can confirm I did wire it up appropriately the first time. I have been having issues with one of the headlight fuses constantly going out so I suspect I have it on the wrong wire/ fuze/ something so that's one of my big things I'm working on solving with this wiring.
The loom is substantially thinner at this point, and I have a lot of wires I still can remove/trim.
Note I still have the engine harness to go through. I just decided to start with this as I'm going to be spending a considerable amount of time measuring and lengthening/shortening the wires for the engine harness.
Attached thumbnail(s)
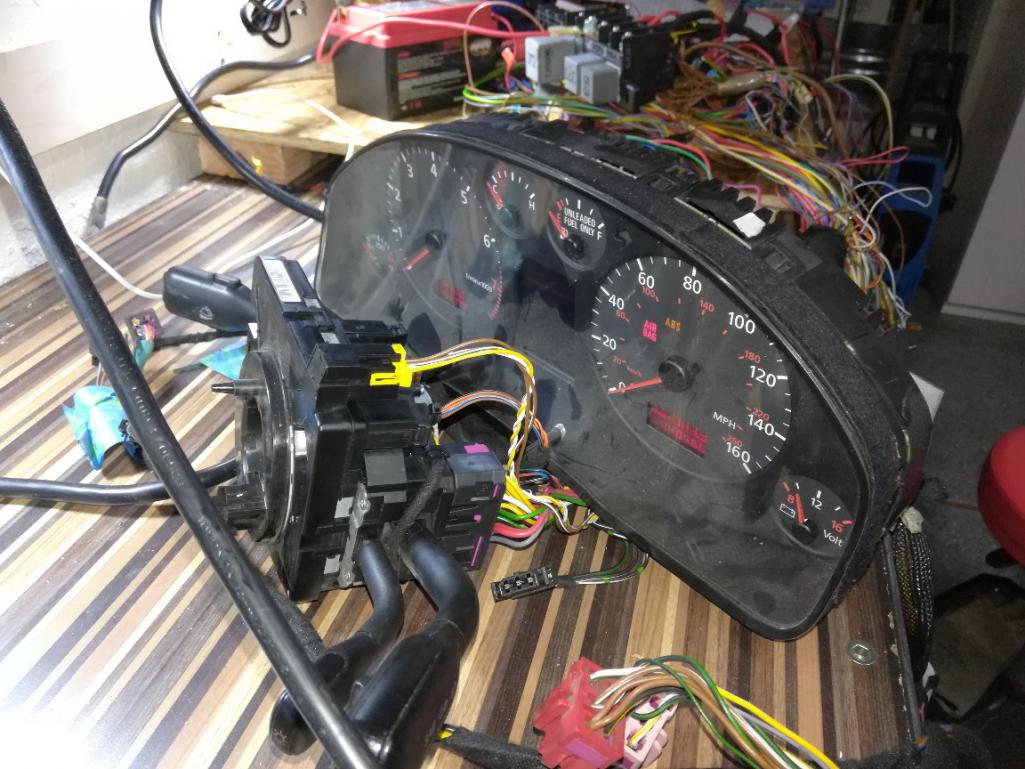
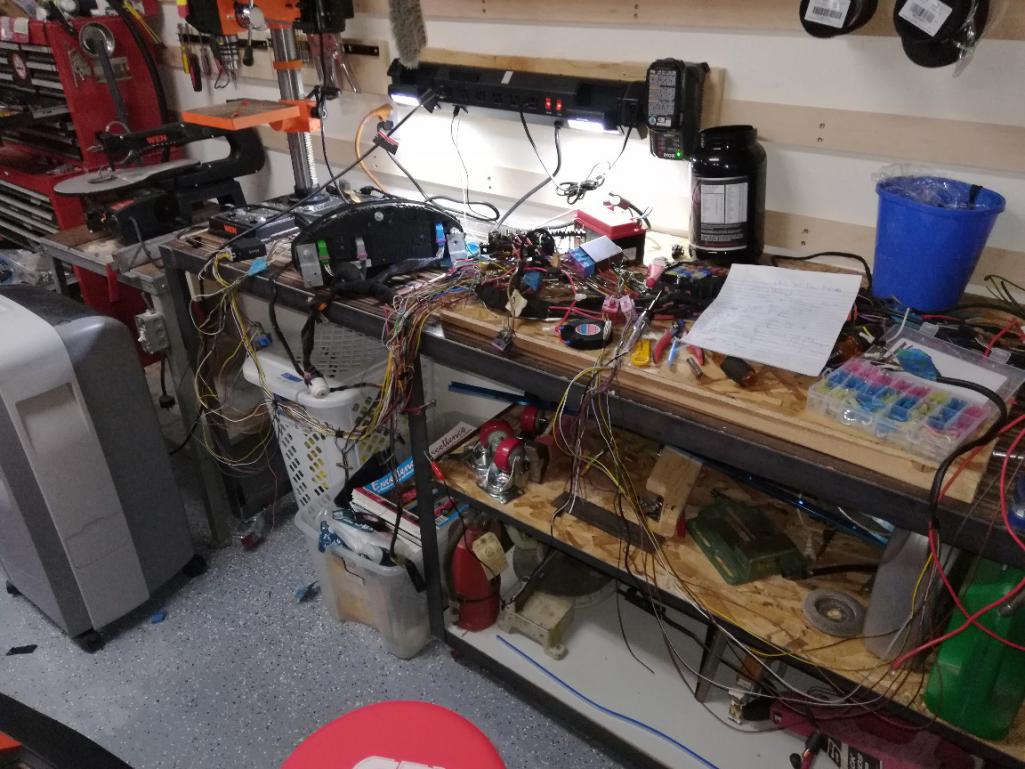
Posted by: Andyrew Aug 22 2018, 08:42 PM
I did someore trimming a couple nights ago, no pics. I went over the lights and turn signal situation and I have a bit more to do but I think I have it figured out. I am ready to start trimming the engine harness and in doing so I'll be able to trim the chassis harness a bit more as well. After all the triming I'll size everything to proper lengths and move from there.
Monday night I was modifying some steel frames for work (I rarely do this kind of stuff in my position, but I needed it done faster than my shop was going to be able to do it) and I got a piece of metal in my eye. I didn't notice it till yesterday after work and thus made an emergency trip to my optometrist, who luckily is a family friend and I can typically pull strings when needed like this. Got it out and after a hard night last night I am feeling better. Still blurry but I'm dialated pretty good and he took a bit of material out as there was a little rust.
However it's healing well (follow-up appointment) so no worries there.
Back on topic I decided to replace my failing welding helmet, and I took the advice of you guys and got a nice set of helping hands.
I should have a little bit more progress this weekend. I should be testing the system sometime in the next month and then wrapping it for good.
Attached thumbnail(s)
Posted by: dan10101 Aug 22 2018, 09:58 PM
Hmm, DejaView all over again.
Or was it me last time...
#Dadmodeon
Wear your safety equipment!!!
#Dadmodeoff
Glad you got it taken care of.
Posted by: Andyrew Aug 23 2018, 07:03 AM
I was wearing my good goggles.. damn dremmels just kick out a ton of debris. I'm getting a full face mask to use over my goggles. When I am using the dremmel it typically shoots the Sparks directly in my face, and I have to be very close to see perfectly
Posted by: 76-914 Aug 23 2018, 08:22 AM
Careful with those eyes. Replacement parts rival Porsche parts in price. Your heading down the right path. Should be a runner soon. Stay after it.
Posted by: worn Aug 23 2018, 12:47 PM
I was wearing my good goggles.. damn dremmels just kick out a ton of debris. I'm getting a full face mask to use over my goggles. When I am using the dremmel it typically shoots the Sparks directly in my face, and I have to be very close to see perfectly
Have used the dremmel a lot and find that wire brush wheels are extremely dangerous. To the point where I had a piece of stainless brush wire pierce through my nose. Not really that keen on jewelry and it could have been my eye.
Posted by: Andyrew Aug 23 2018, 12:52 PM
I was wearing my good goggles.. damn dremmels just kick out a ton of debris. I'm getting a full face mask to use over my goggles. When I am using the dremmel it typically shoots the Sparks directly in my face, and I have to be very close to see perfectly
Have used the dremmel a lot and find that wire brush wheels are extremely dangerous. To the point where I had a piece of stainless brush wire pierce through my nose. Not really that keen on jewelry and it could have been my eye.
Wire brush wheels are not my favorite thing either.. This was the tiny cutoff wheels with the EZ lock connector. I like them, they cut well, but when they wear down they just throw debris and finally explode.
Posted by: Andyrew Aug 26 2018, 01:10 PM
Cleaned up a bit more. Working on the connections to the 914 body harness/lights. Decided to try the new connector hardware. Works pretty good but it needs the special tool or else it's pretty difficult to install. I soldered them when I was done with crimping them.
Helping hands was nice
Attached thumbnail(s)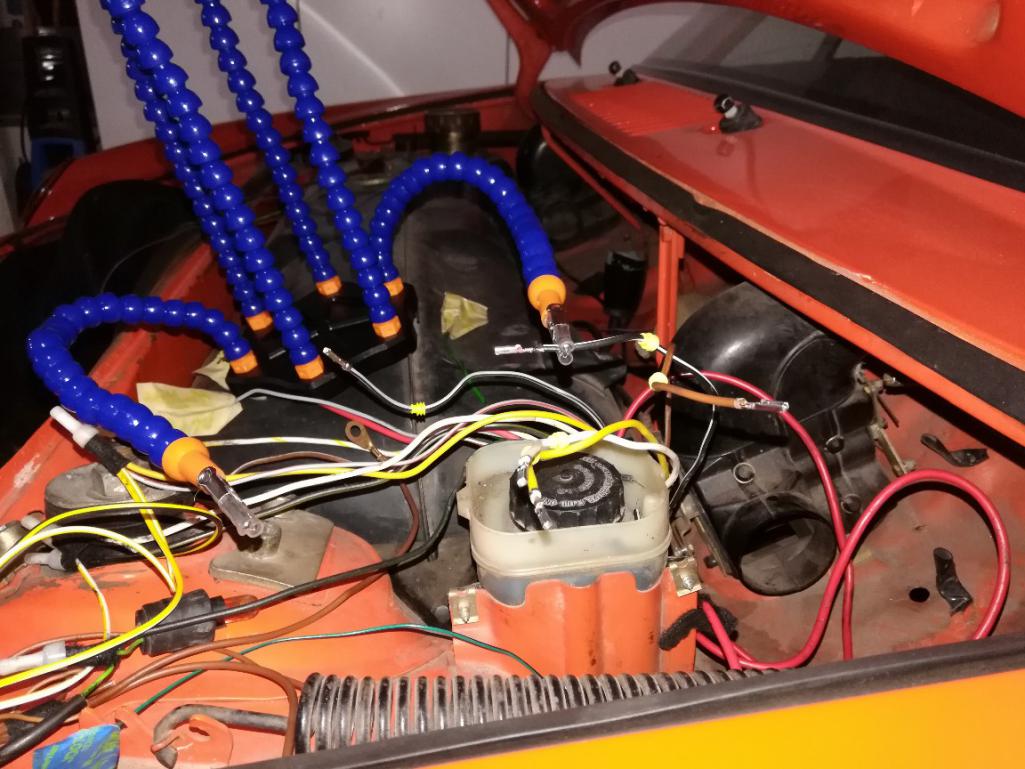
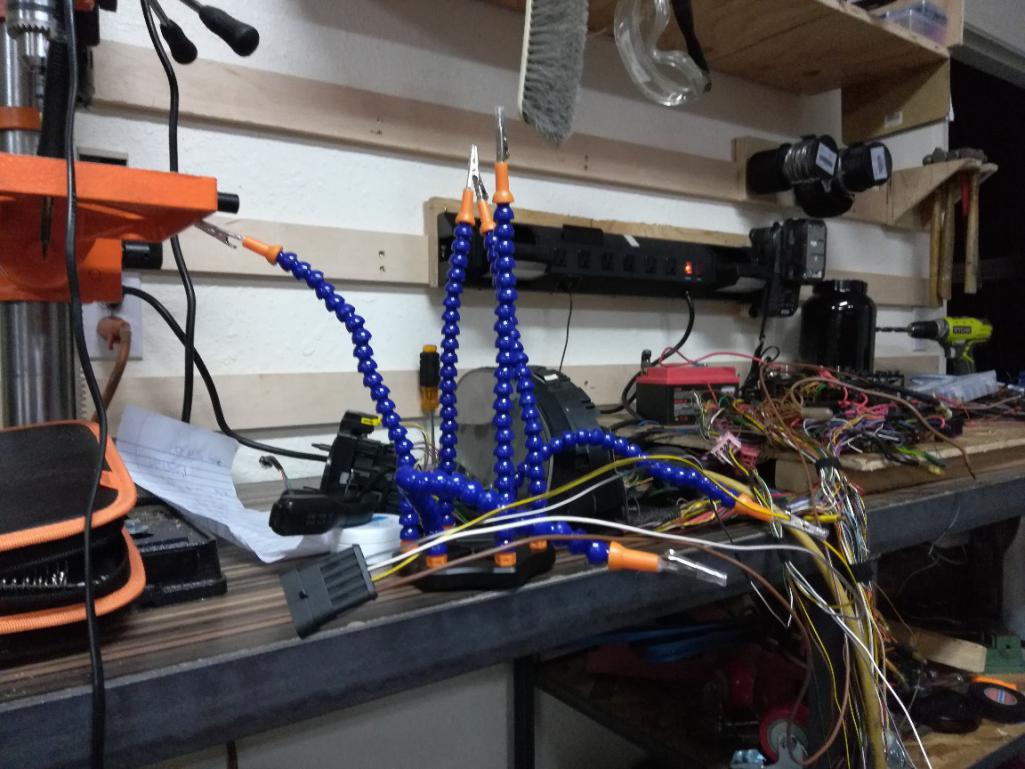
Posted by: Andyrew Sep 11 2018, 10:57 PM
Been busy! 

I made the mistake of cutting out two connectors that ran to the rear of the car for lighting. The thing is when I cut things out I also cut the wires back as far as possible. I do however leave enough room to connect to the wire in the future if need be and put some heat shrink on each wire.
So after 3 nights of research testing and scouring for like wire colors and size to splice back in I got it back... In the end the job will be cleaner. 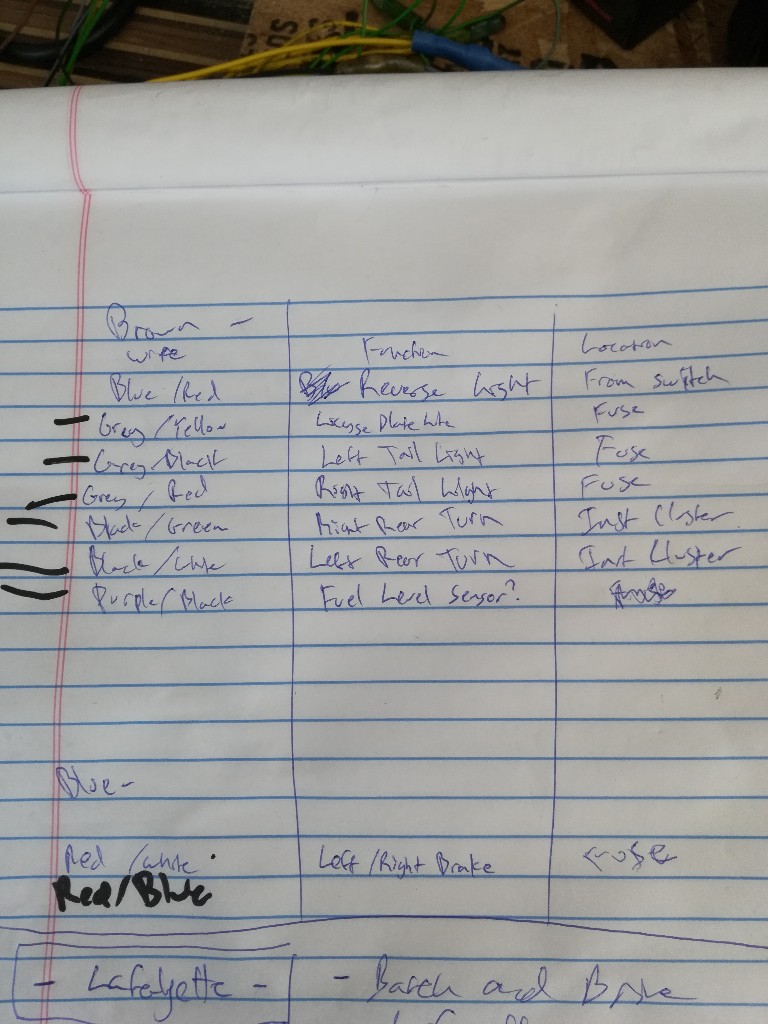
I got as far as air dare go on the main harness and went after the engine harness. 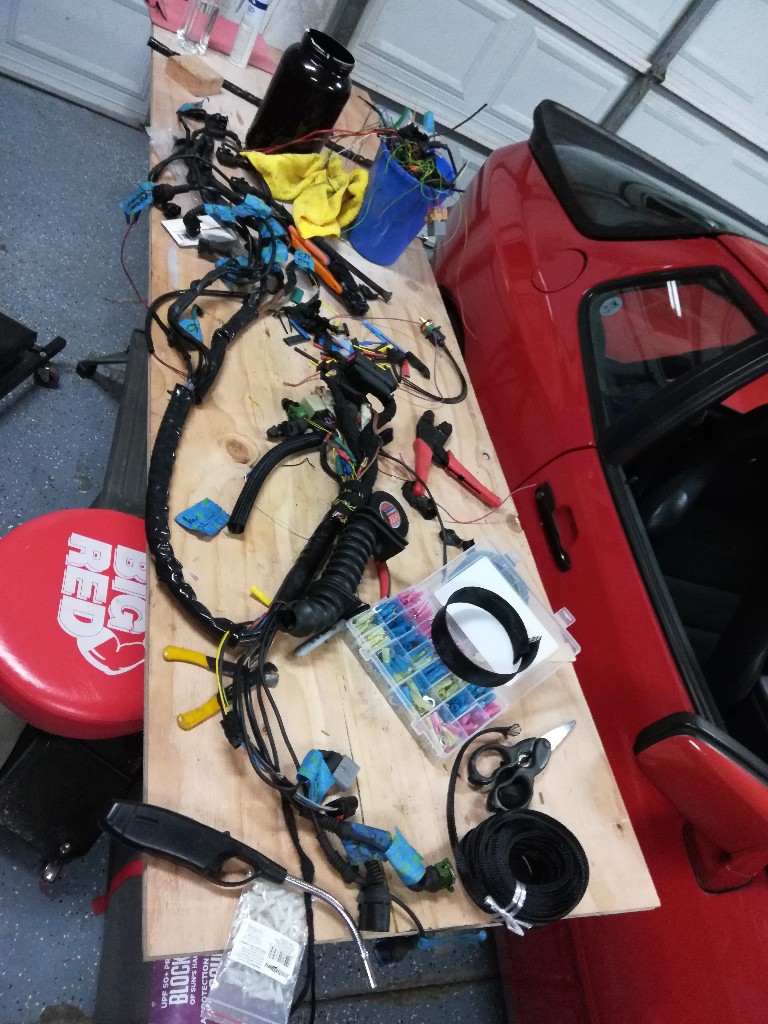
If you remember I wanted to extend the harness. Well I found a way of routing it that I don't need to. I'm going to put a couple extra inches Into the engine bay and maybe extend a wire or two but I think I'll be ok. If I need to extend it I'm extending it like 3 feet to wrap around the engine bay and be completely hidden.
The blue bucket is full of removed wires, relays and connectors from the engine bay harness. Not pictured are 3 sensors that have resistors that Ishortened and moved out of the engine bay.
A couple of pieces I got was a new temp sensor connector and sensor. I'm going to pray that this is the issue as I haven't found anything else wrong yet. I'll wire this in next. 
Next step is to cut the hole in the firewall out of plain sight (like I did last time) and confirm the wires are long enough. Then connect everying up and test it all and look for issues. I've been bench testing the lights and guage cluster but that's it so far.
Once everything is all good I'll finalize some connections run some wires for a pop up headlight switch, and finally wrap everything. I have some great wrap as well as some new super awesome heat shrink. This stuff is up to 2" wide!! When it's fully shrink it's about 1/8" thick! 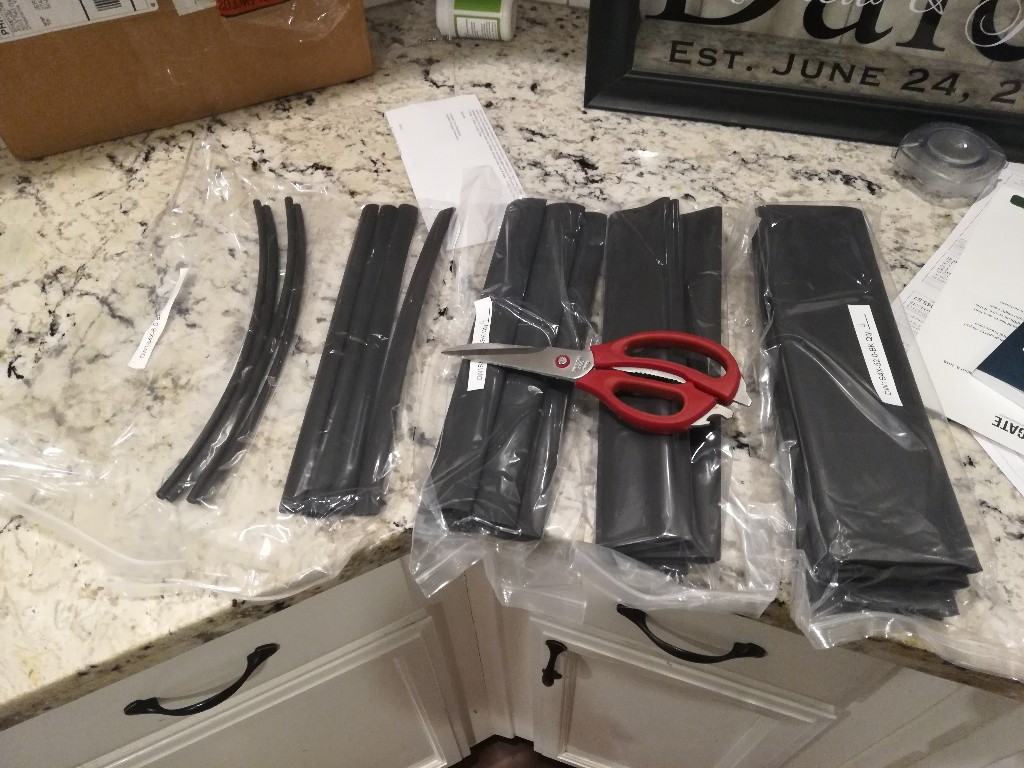
Some connectors I pinned up and heat shrunk below. 3:1 shrink ratio is also awesome. 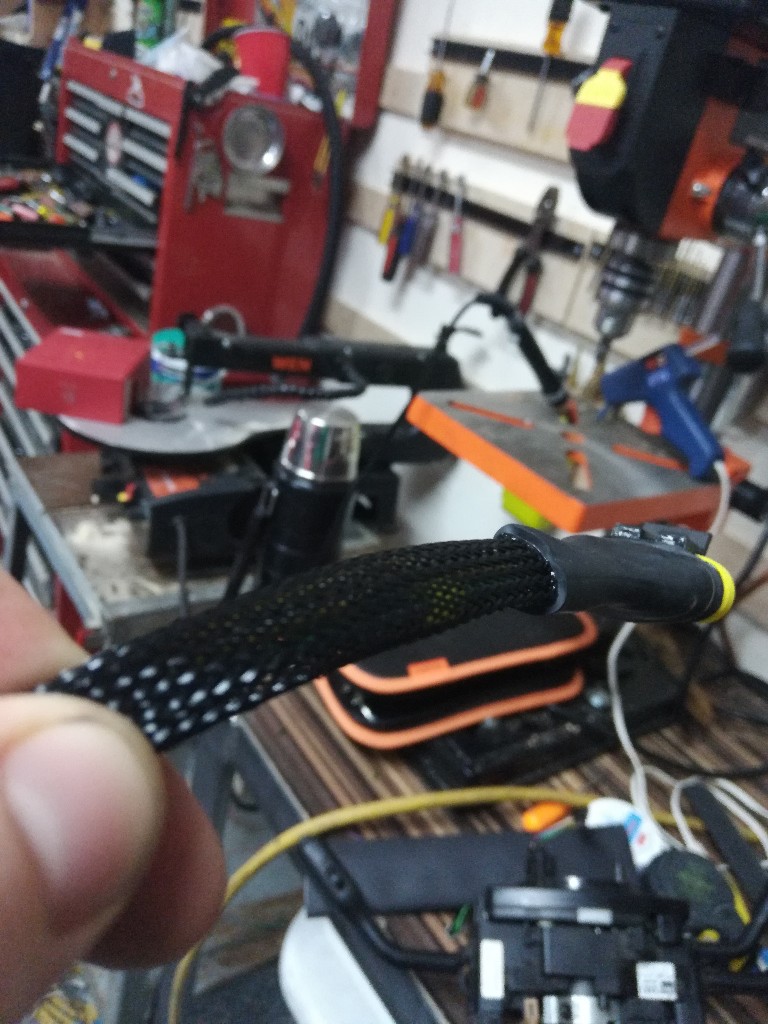
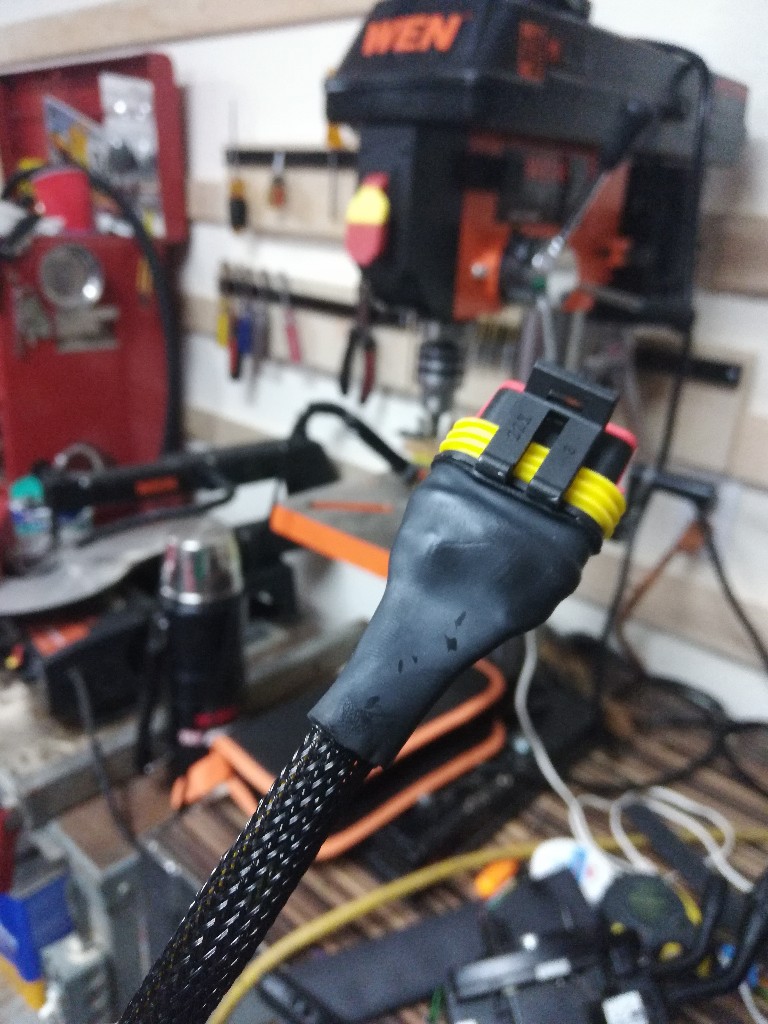
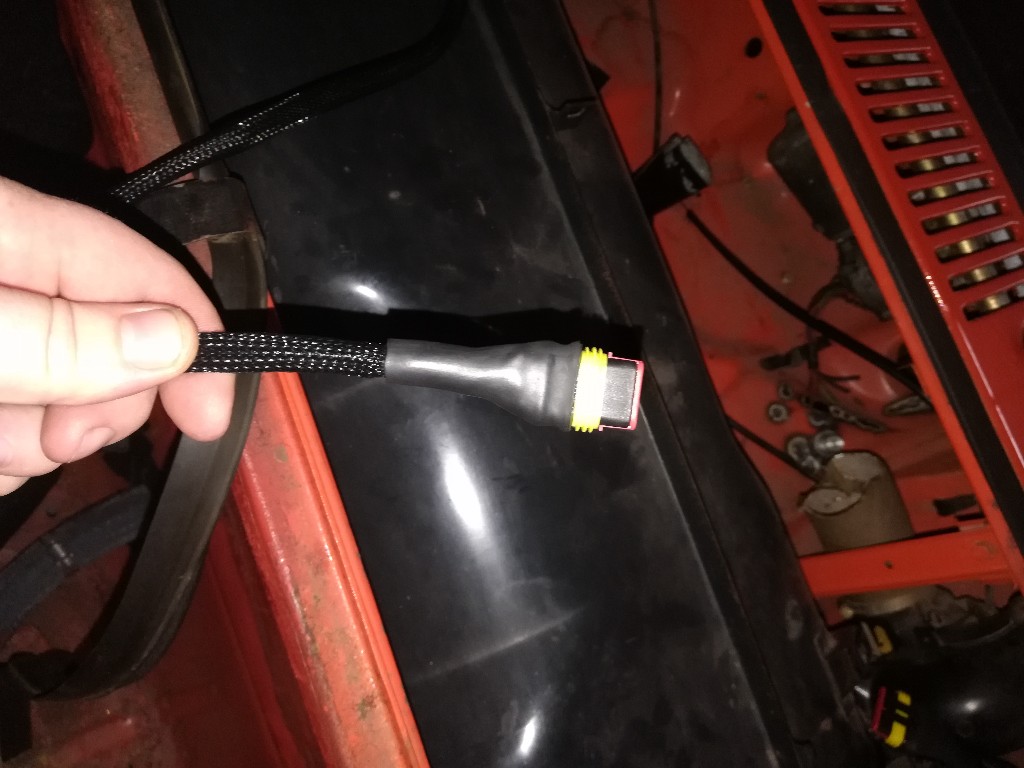
Posted by: 76-914 Sep 12 2018, 09:05 AM
The temp sensor is the suspect, correct? Post a link to the 3:1 heat shrink. Is it marine grade? Stay after it.
Posted by: Andyrew Sep 12 2018, 09:41 AM
The temp sensor is the suspect, correct? Post a link to the 3:1 heat shrink. Is it marine grade? Stay after it.
Temp sensor is what Bellis thinks it is, I've replaced it a couple times but never had a good connector in the harness so hopefully this ends up being the issue. If not, more spares
My other thought is the crank position sensor, I havent gone through and checked the wiring on it yet but its on my short TO DO list prior to wrapping both harnesses.
Sorry, its 4:1 shrink tube
https://www.amazon.com/gp/product/B07FNC7VW9/ref=oh_aui_detailpage_o04_s00?ie=UTF8&psc=1
This supplier has lots of sizes, I ordered 4 feet of each size I needed that should cover any size needed (4:1 is NICE) and shipping was only $6 total for a total order of $42.
So far REALLY happy with it, I just need to shrink it on LOW heat with my heat gun as it melted my wrap on one of my wire bundles. Also when its cooled its almost completely stiff. It should do an amazing job protecting my connector wiring. Lastly its adhesive lined so it wont move on the connector.
Posted by: Curbandgutter Sep 12 2018, 02:01 PM
OK now I know who to turn to when I get to wiring my car. Your work is top notch. I'll be calling you to find out where to get all those fancy connectors and sheathing.
By the way this is the mask that I use, it may be helpful for you as well.
Here is the link:
https://www.amazon.com/Uvex-Bionic-Polycarbonate-Anti-Fog-S8510/dp/B001VY3ACE?SubscriptionId=AKIAILSHYYTFIVPWUY6Q&tag=duckduckgo-d-20&linkCode=xm2&camp=2025&creative=165953&creativeASIN=B001VY3ACE
Posted by: Andyrew Sep 12 2018, 02:24 PM
OK now I know who to turn to when I get to wiring my car. Your work is top notch. I'll be calling you to find out where to get all those fancy connectors and sheathing.
By the way this is the mask that I use, it may be helpful for you as well.
Here is the link:
https://www.amazon.com/Uvex-Bionic-Polycarbonate-Anti-Fog-S8510/dp/B001VY3ACE?SubscriptionId=AKIAILSHYYTFIVPWUY6Q&tag=duckduckgo-d-20&linkCode=xm2&camp=2025&creative=165953&creativeASIN=B001VY3ACE
I put that one on my wish list
My welding helmet has a grind mode and I found one of my old face shields (stuck in a box from moving) so Im going to try that for now. But this is on the short list to buy . This is the connectors. The single review is from me
I bought a second box as they only came with 2 of each size and I was out of one of them (And liked them for the money). But for the money I like them a lot. I end up doing a tiny dab of solder on most pins. https://www.amazon.com/gp/product/B07FTRV25T/ref=oh_aui_detailpage_o05_s00?ie=UTF8&psc=1
I use this tool, but it still needs some persuasion which can be done with this too.
https://www.amazon.com/gp/product/B07G98DLB8/ref=oh_aui_detailpage_o08_s00?ie=UTF8&psc=1
The sleeving im using is this kind. (different sizes). Its OK. As mentioned the heat gun will melt it on hot, so I have to be careful with this thick heat shrink
https://www.amazon.com/gp/product/B074GM1PK1/ref=oh_aui_detailpage_o03_s00?ie=UTF8&psc=1
Posted by: Mike Bellis Sep 12 2018, 11:22 PM
I've had to commute in the 914 for the last 4-5 days. Today the car dropped into limp mode 4 times and has a check engine light. Each time I restarted and it came out of limp mode. Not sure what's going on. I'll hook my VagCom up to it tomorrow after work. Taking the wife's car tomorrow.
Posted by: Matty900 Sep 13 2018, 12:02 AM
Been busy!
I made the mistake of cutting out two connectors that ran to the rear of the car for lighting. The thing is when I cut things out I also cut the wires back as far as possible. I do however leave enough room to connect to the wire in the future if need be and put some heat shrink on each wire.
So after 3 nights of research testing and scouring for like wire colors and size to splice back in I got it back... In the end the job will be cleaner.
I got as far as air dare go on the main harness and went after the engine harness.
If you remember I wanted to extend the harness. Well I found a way of routing it that I don't need to. I'm going to put a couple extra inches Into the engine bay and maybe extend a wire or two but I think I'll be ok. If I need to extend it I'm extending it like 3 feet to wrap around the engine bay and be completely hidden.
The blue bucket is full of removed wires, relays and connectors from the engine bay harness. Not pictured are 3 sensors that have resistors that Ishortened and moved out of the engine bay.
A couple of pieces I got was a new temp sensor connector and sensor. I'm going to pray that this is the issue as I haven't found anything else wrong yet. I'll wire this in next.
Next step is to cut the hole in the firewall out of plain sight (like I did last time) and confirm the wires are long enough. Then connect everying up and test it all and look for issues. I've been bench testing the lights and guage cluster but that's it so far.
Once everything is all good I'll finalize some connections run some wires for a pop up headlight switch, and finally wrap everything. I have some great wrap as well as some new super awesome heat shrink. This stuff is up to 2" wide!! When it's fully shrink it's about 1/8" thick!
Some connectors I pinned up and heat shrunk below. 3:1 shrink ratio is also awesome.
Looking good Andrew.
One thing that caused me an issue on my Micro Squirt harness was the adhesive shrink wrap being too close to the plug at the main plugin. That had me replacing parts to try and hunt down the gremlin It put a lot of tension on the pins whenever we moved it in and out. It ended up opening up the pins at the outside (where the power wire was) just enough to cause a signal loss intermittently.
I hope that makes sense.
Anyway, keep up the good work
Posted by: Andyrew Sep 13 2018, 06:03 AM
Makes complete sense! I did however hot glue all the backsides of the pins so they won't move in the connector so I have a feeling that won't be an issue but you never know!
Posted by: Mike Bellis Sep 13 2018, 07:59 PM
You need your VCDS...
Figured out my limp mode. Still have to fix it but it's wiring somewhere...
See below. Low voltage and ABS are the normal codes. Throttle code was the cuase.
Posted by: Andyrew Sep 13 2018, 09:05 PM
Only a couple wires to it. I have it fully blown out now if you want me to sent you any pics.
Yes I need to get my vcds (Obd2 reader specific to VW/Audifor those following at home) working. Maybe I'll hook it up tomorrow and see what issues I'm having.
Posted by: Andyrew Sep 16 2018, 02:34 AM
I stopped working on the engine harness as it's ready for me to test it. I went back to the dash harness (main harness) and added some more connectors.
Just as a side note, I'm pinning all these connectors by hand. It typically takes me 45mins per side to do these for say a 5 wire connector. It involves making sure the wires are long enough, adding if necessary then taping the wire leading up to the connector so they don't move, cutting them all to the same length, stripping 3/8" off each one (if it's a thick wire I can use my strippers, else I use a razor blade on the thin wires.) I then put the pin on and butt the second prong to the wire sleaving. Work the connection pins over with my tool so they will fold under each other or wrap the wire when crimped and crimp with my tool. Repeat for the rear pin holding the wire. Then squeeze up the insulating grommet. If it's a thin wire I fire up the soldering gun and tin the wires in the connector really quick. Once that's good I repeat for all the wires. Finally I tape them together at the ends and feed in the wire sleaving I use and cut to length burning the ends so they don't split. I throw some heat shrink down in multiples as well as my new super awesome 4:1 shrink in about a 2.5" length. I shove the wires in the connector making sure they go in all the way and click (Sometimes pulling them into place with a needle nose). Then push the weather seal into place by hand followed by a special tool I made to get them as deep as possible. Check to make sure all the pins are in the correct angle and hot glue the remaining space in the connector (1/4"). I slip the wire sleeve up to the edge of the connector while the glue is still hot and run one layer of tape to make sure it stays while heat shrinking. I apply the smaller heat shrink (both ends of the sleeping) and finalize it with the big heat shrink around the connector which takes some time and careful work with the heat gun. At this point I test the connections wait for the shrink to cool and admire my handiwork.
Speaking of... this was 3 hours of work... 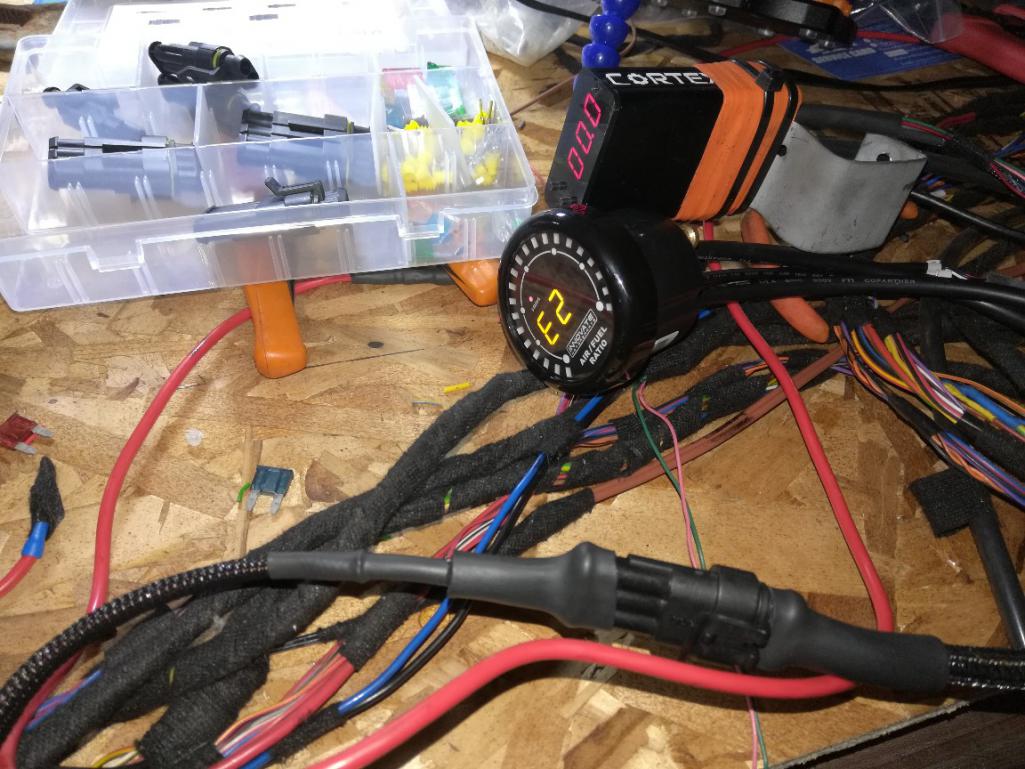
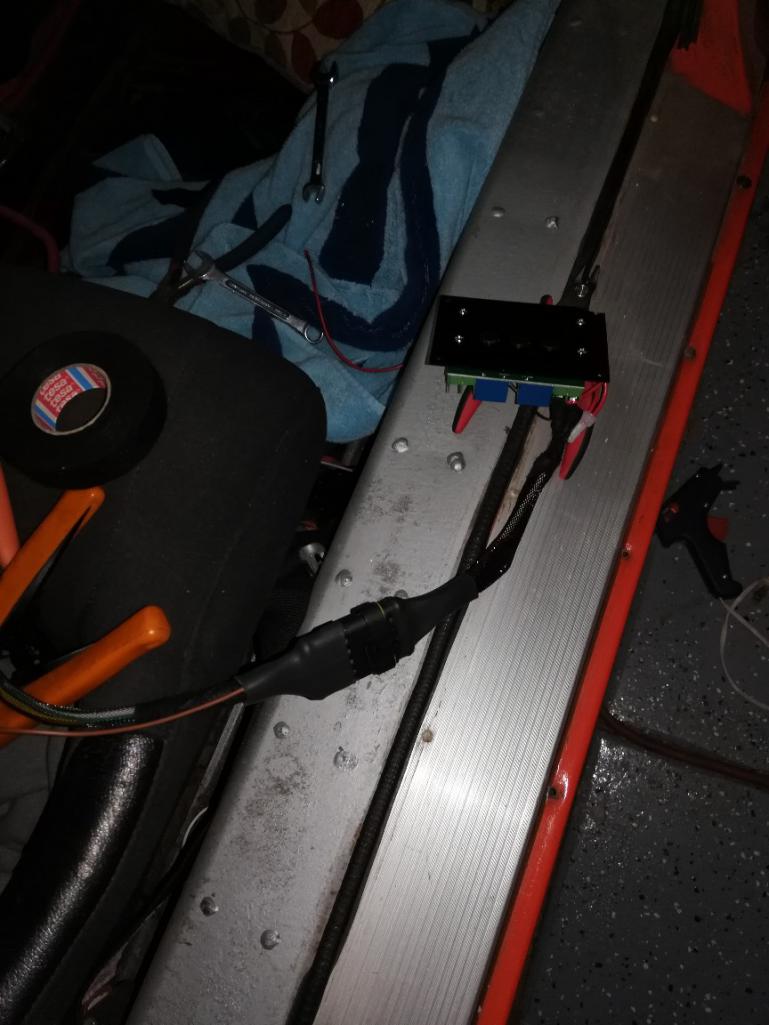
At this point I have been spending 10 hrs a week in the garage (typically from 9am to 1am, Friday and Saturday nights and a bit here and there. On this wiring for the past 5 weeks... I'm pretty tired of it now... It's relaxing and I can listen to some shows my wife and girl don't like but still.
Posted by: daytona Sep 16 2018, 05:28 AM
Hi Andrew,
You are doing a great job. Makes me want to redo the harness in my car. Got a question: the braided sleeve you are using; is that heat shrinkable as well?
Thanks,
Bill.
Posted by: bbrock Sep 16 2018, 08:41 AM
... and admire my handiwork.
As well you should! Fantastic work!
Posted by: Andyrew Sep 16 2018, 09:57 AM
Hi Andrew,
You are doing a great job. Makes me want to redo the harness in my car. Got a question: the braided sleeve you are using; is that heat shrinkable as well?
Thanks,
Bill.
Bill,
Not on purpose (it will shrink when it melts with direct high heat from the heat gun) ... The sleaving I'm using is the expandable sleaving, you push the ends together and it opens up, you pull it and it shrinks down. Think chineese finger traps.
My biggest issue with it I am often forgetting to put the sleaving on prior to the connector.. when that happens I have to use my split sleaving. I like the split a bit more, it's not as clean looking but it is so much more forgiving.
Problem is the split stuff is about 4x the price and hard to get it in long lengths. You also need more sizes as it only covers certain sized wires.
Posted by: daytona Sep 16 2018, 02:36 PM
Thanks for the info on the sleeve Andyrew.
Bill.
Posted by: dan10101 Sep 16 2018, 05:21 PM
Love love love seeing progress! Keep it up!
Posted by: Andyrew Sep 22 2018, 12:37 AM
I haven't been able to work on the car all week as I've been iching to do, and my wife is going to the Catalina Wine Mixer so I'm going to be with Alina this weekend and unable to make any progress.
So while I had half an hour I recorded a couple vids showing progress and another showing how I make these connections.
https://www.youtube.com/watch?v=S--X4WNd4p4
https://www.youtube.com/watch?v=UrMz2ymxUNg
Posted by: Andyrew Oct 19 2018, 01:29 AM
Odd I thought I posted about my repairing of the instrument cluster... I guess not..
I bought a $25 replacement LCD screen and installed it about a month ago when my daughter was asleep (perfect project for the kitchen counter).
Only drawback was I don't have a hot air solder.. so depinning the micro solder joints didn't go well.... However the pins I destroyed happened to be blank pins that went nowhere.
I was able to get the new LCD board on and installed. Flux was a big factor here to making this work.
Regardless the screen was fixed and I was pretty happy with the result. I should have gone with the OEM screen as if your not looking directly at it the screen doesn't show anything but those were tripple the price and difficult to find. It should work great though as the screen just shows diagnostic data and warning information.
Attached thumbnail(s)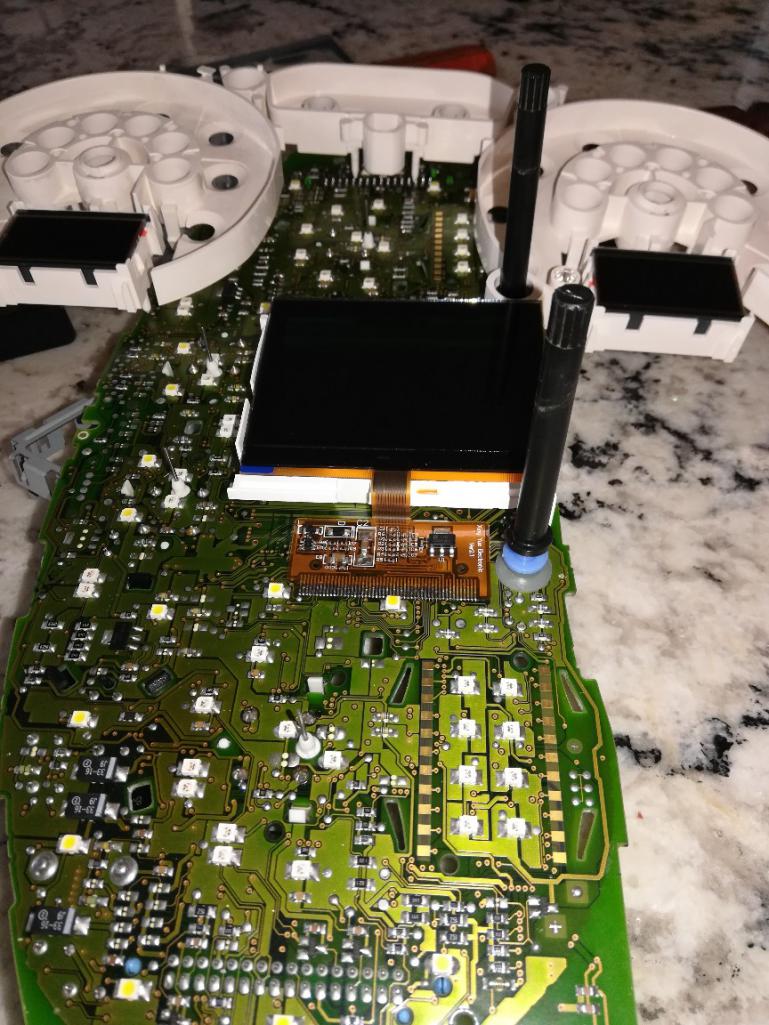
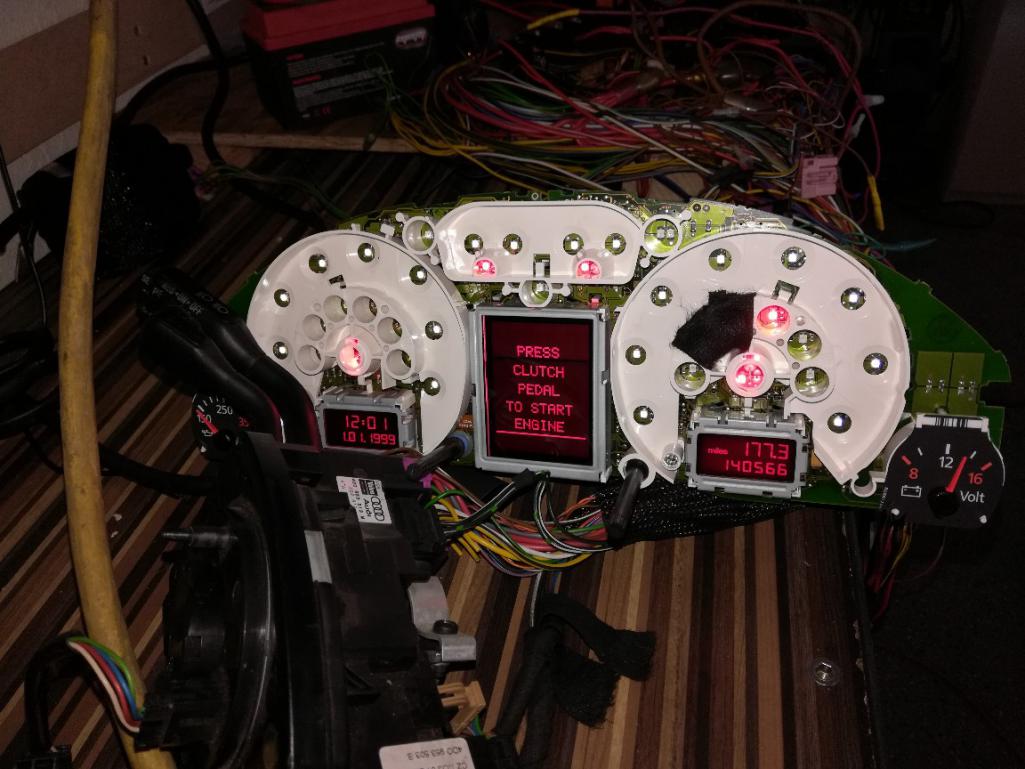
Posted by: Andyrew Oct 19 2018, 01:58 AM
Progress from tonight.
Pulled the windshield wiper motor and added a connector to it. I'll need to do some testing to see what wires ai need to hook up to it but I have the factory wiring connector to the Audi intact still and I have tested a couple signal wires so I shouldn't have any issues with it actually working. It's just a question of can I get multiple speeds out of the system. 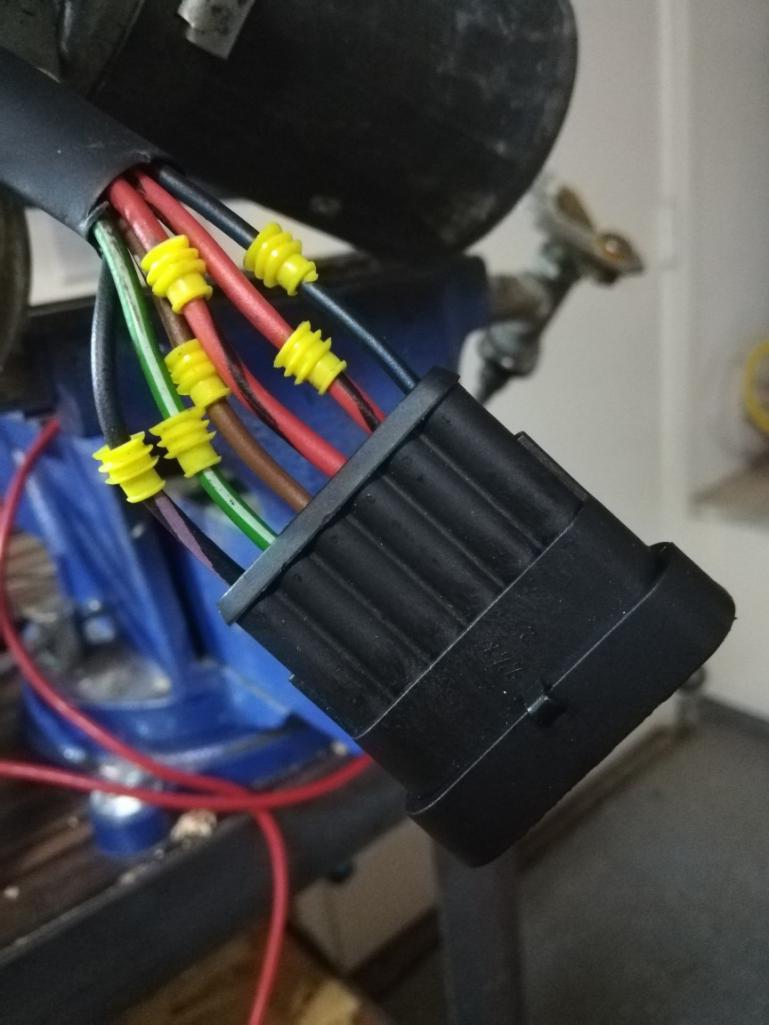
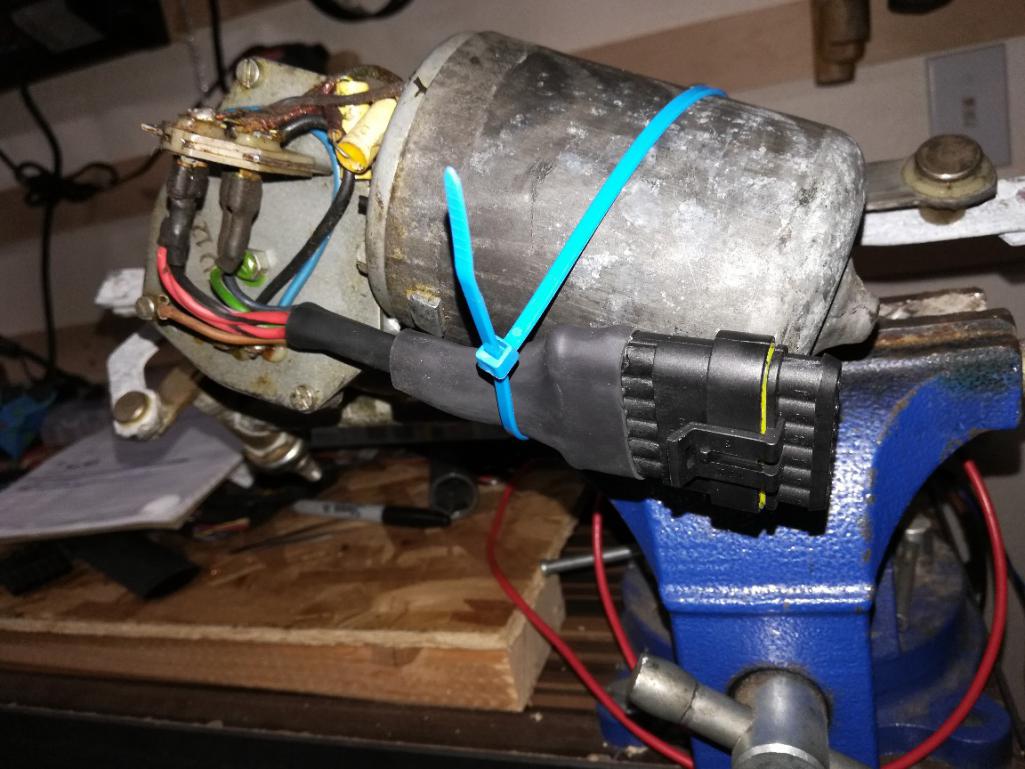
I then also connected up the rear lighting to the OEM connectors. I still need to trace the reverse light but everything else is tested correct. 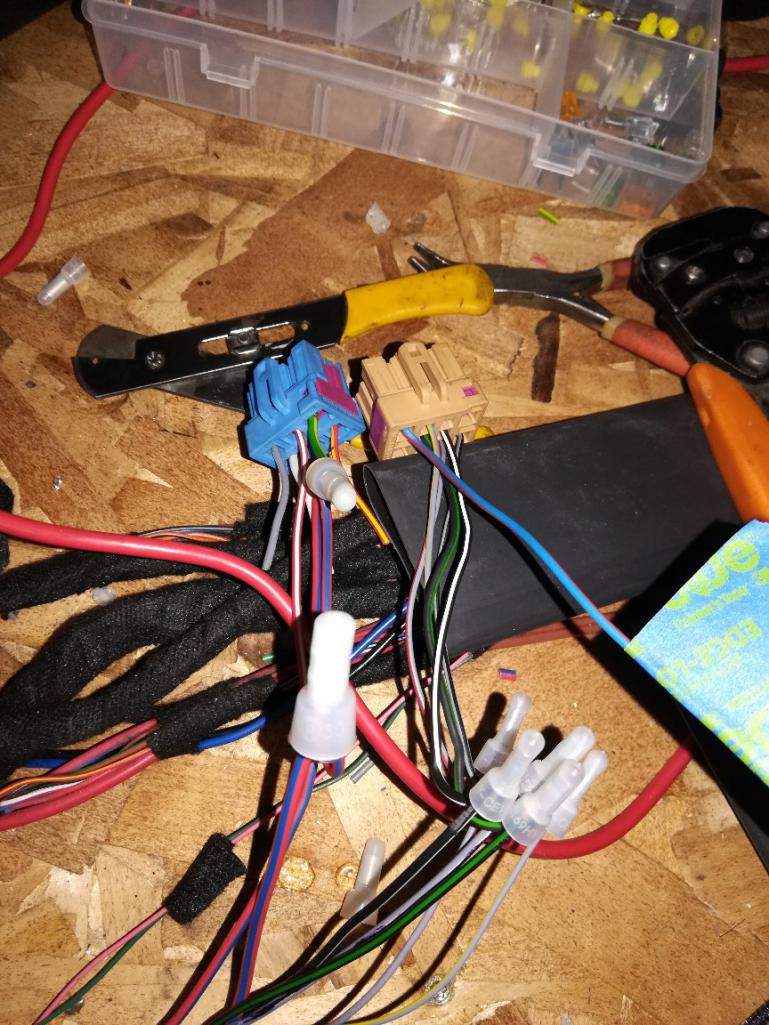
I hope to get more done this weekend. I'd really like to get the electronics testing in the car fully functional again by November.
This past month was busy with a vacation to New Orleans as well as a business trjp and a hell of a lot of stress at work.
Posted by: mb911 Oct 19 2018, 04:23 AM
I haven't been able to work on the car all week as I've been iching to do, and my wife is going to the Catalina Wine Mixer so I'm going to be with Alina this weekend and unable to make any progress.
So while I had half an hour I recorded a couple vids showing progress and another showing how I make these connections.
https://www.youtube.com/watch?v=S--X4WNd4p4
https://www.youtube.com/watch?v=UrMz2ymxUNg
There is such thing as the Catalina wine mixer? I thought that was just in step brothers.
Posted by: Andyrew Oct 19 2018, 08:51 AM
I haven't been able to work on the car all week as I've been iching to do, and my wife is going to the Catalina Wine Mixer so I'm going to be with Alina this weekend and unable to make any progress.
So while I had half an hour I recorded a couple vids showing progress and another showing how I make these connections.
https://www.youtube.com/watch?v=S--X4WNd4p4
https://www.youtube.com/watch?v=UrMz2ymxUNg
There is such thing as the Catalina wine mixer? I thought that was just in step brothers.
It was an event that was made from the show. In reality its just a wine party on the island. They did have a helicopter for people to take pictures with.
https://www.visitcatalinaisland.com/event/catalina-wine-mixer-2018
Posted by: ValcoOscar Oct 19 2018, 10:00 AM
Andrew, you’re a man with lots of patience…. 
![whistle[1].gif](style_emoticons/default/whistle[1].gif)
![yellowsleep[1].gif](style_emoticons/default/yellowsleep[1].gif)


I can appreciate fiddling with electronics and wiring but PATIENCE is king. 
Continue the good work and updates!!!
Oscar
Posted by: Andyrew Oct 20 2018, 01:30 AM
https://www.youtube.com/watch?v=Zoc0Mr5Kpkg
Figured out the wipers (I think)!
Posted by: 76-914 Oct 20 2018, 08:05 AM
Your having entirely too much fun.
Posted by: mgp4591 Oct 20 2018, 03:07 PM
So you're controlling your wipers from the stalks on the column, right? Do you have the intermittent functions and still using the stock 914 wiper motor?
Posted by: Andyrew Oct 20 2018, 07:39 PM
Yes, in the video I'm demonstrating me using the Audi wiper stall and controlling the 914 wipers with the 5 stages.
Off
Single sweep
Intermittent (delay variable)
Low speed
High speed
Posted by: Mike Bellis Oct 20 2018, 09:22 PM
Where's your Audi wiper relay? That's what I used on mine.
Posted by: Andyrew Oct 20 2018, 10:27 PM
It's the big brown(looked it up, and I can hear it clicking at the appropriate times) one with all the other relays. It's still there. The pink plug was to go to the chassis harness so there was no additional relay.
Posted by: Mike Bellis Oct 21 2018, 12:30 AM
Then you should be fine. I though the wiper connection would be harder to figure out when I went through this process. Glad you got it so quickly.
Posted by: Andyrew Oct 21 2018, 12:40 AM
Then you should be fine. I though the wiper connection would be harder to figure out when I went through this process. Glad you got it so quickly.
I had it labeled back from when I originally was tracing all the wire connections. Then I double checked it when I thinned down the dash harness.
Posted by: Andyrew Feb 4 2019, 02:57 PM
3 1/2 months since the last update. Let me tell you all how much I've not progressed
Winter has been busy for me and family things, so I havent spent much time in the garage. The 944 developed an oil leak that is leaking onto the header so I cant drive it now like I want to. So i'll need to take it apart after I get the 914 back up and running (I can still drive it now, just smokey.. and I dont like oil fires..)
914 rewire progress.
I completed what I believe to be everything on the dash and engine side of the rewire.
I cut a new hole large enough for the new wiring harness to go through. I have decided I am going to use a small CV joint, cut it in half and glue it back together, then sandwich it with a cover plate to the firewall. I couldnt find a firewall grommet large enough to put my large engine harness through oddly enough. I needed about 3" x 2" Nothing was large enough and this seems like the best solution.
I put the engine harness and connected it all up, then placed my interior/dash harness inside the car and started mounting and hooking things up to test.
So far my tests resulted in the following.
1. Horn is stuck on (steering wheel wasnt even on the car). I found the horn wire to the steering column and unplugged it. Looks like my clock spring is broken so I'll get a new one of those.
2. Intercooler pump is on with just battery power no key. It should be on keyed power. I will need to rewire that.
3. Intercooler controller has no power. Either I have the wrong power source, a fuse is blown, or I wired it to the fuel pump wire (Entirely possible) and it wont turn on without the car being on. I'll swap the wire source to the keyed on and try again.
4. Brake likes non responsive. I traced this down to it being wired incorrectly. (I cut this connector off accidently and had to refind all my wires. But in the process of that I added some connectors on the engine bay side to be able to unplug the rear lights from the dash harness (Good choice IMHO).
5. Tail lights non responsive. Same as above.
6. Key ignition doesnt turn the car over. Suspect its because I have the wire from the starter disconnected I have the car battery in the interior as its the really small one and I was thinking of relocating it to save on the engine bay clutter.
What I do know that works/powers on correctly.
Headlights
High beams
Turn signals
Hazard
Wipers
AFR guage
Boost controller
Water pump controller
My wife (Six Sigma blackbelt..) asked me how much longer to complete the car for it to be ready for WCR 2019 (Planning on trailering it down) and I told her probably 200 hours to which she gave me this look
So then she's tasked me with making a list of the items that I need to do prior to WCR. So next post will be that list along with my anticipated timeframe for completing each line. Im thinking the 200 hours is going to go by very fast...
Posted by: mb911 Feb 4 2019, 04:52 PM
Six sigma will get you every time.. Good luck
Posted by: dan10101 Feb 4 2019, 07:09 PM
I'm only a Six Sigma Green Belt. She can kick my ass all over the Project Management World... 
Posted by: Andyrew Feb 7 2019, 03:27 PM
914 to do list
**Mandatory total: 121 hrs
Non mandatory total: 214hrs
Electrical: 32
**Fix tail light issue. 1
**Fix brake light issue 1
**Fix intercooler controller 2
**Fix intercooler pump 1
**Fix Horn 1
**Finalize testing of electrical components Test drive setup and heat cycle. 5
**Remove harnesses 2
**Finalize engine harness cleaning 3
**Finalize dash harness cleaning 6
**Reinstall harnesses 10
Steering: 40
**Mill down new steering shaft for steering component retry. 10
**Remove steering components 5
**Fabricate steering joint mounts 10
**Reweld system and test 5
**Adjust system 10
Suspension: 23
Fabricate front sway bar arms 20
Install and adjust 2
Test 1
Brakes:7
Bleed brakes 3
**Rebuild pedal cluster 4
Transmission: 16
**Replace transmission with spare 15
**Inspect clutch 1
**Check for rear main seal leak 0
Engine:29
**Drain fuel 2
**Replace fuel filters 3
Replumb fuel system for cleaner look 10
Clean engine of oil residue 2
Look for source of oil leak. 2
Fix oil leak 10
Body: 75
Fabricate trunk firewall 20
Fabricate and install roll cage 30
Fix targa top knicks 5
Repaint bumpers 5
Clean up front trunk for new paint 10
Clean up rear Trunk and paint 5
Interior:84
Design Dash Layout 3
Foam up dash layout 1
Finalize Dashboard 20
Fiberglass and prep dash for upholstery
Design and build rear firewall 20
Design and build center console 20
Design and build door cards 20
Send dash, Seats, Door cards, Center console, and Rear firewall to upholster for finalizing. (My tests revealed I don't have the skill to do this…)
Spares for WCR:
Trans
Axle
Clutch Disk
Serpentine belt
Shift Cables
Relays
Fuses
Fuel Pump filter
Fuel pump
Oil
Plugs
Coil packs
Items to purchase:
Spare trans $200
Spare clutch disk 200
Serpentine belt 20
Shift cables 150
Fuel pump filters 150
Fuel pump 75
Coil pack
Fiberglass door cards 200
Houndstooth cloth orange 3 yards 200
Upholstery work 2500
Roll cage material 150
I'll come up with a game plan over the next week
Posted by: dan10101 Feb 7 2019, 06:05 PM


Posted by: Andyrew Feb 18 2019, 01:34 AM
Well everything was going really well. I kept finding minor things and fixing them but I got to the point where I ran out of minor things to fix.
I fixed all the electrical issues noted earlier with the tail lights and the intercooler pump and controller.
Today I decided to forgo my notion of replacing the fuel (2 years old?) With some good fuel and try and start it.
First there was no crank, solved that with the signal wire to the starter.
Then there was no fire.
Pulled #1 plug, loads of fuel. Checked spark and there was spark.
So now we have timing and compression. Ecu could be programmed wrong for a start condition but it started 6 months ago . Same goes for compression.
After checking the codes I found the predominant ones were the following:
Crank sensor
Cam sensor
Temp sensor.
Any of those being bad could cause a no start issue.
Now I've changed the crank sensor a good 6 times trying to solve this as it's the most likely culprit and the coolant sensor at least 3. The cam sensor could he bad but I just doubt it.
So I decide that I need to check the wiring again. Check the pins from the ecu and power/ground to the connectors and every connector shows good oms for each pin.
At this point I see a couple options
1. bad cam sensor
2. Bad fuel
3. Bad crank sensor (who knows, I could just be that unlucky...)
4. Bad coolant sensor (I have a new spare I bought with my new connector I had installed)
5. Bad ecu (I have 2 spares that will start the car and neither work)
6. ???
I'm going to start with bad fuel and also order a new cam and crank sensor.
I currently have the engine harness out of the car again (getting good at that... Only took half an hour). I'll clean it up a hair with some tape and maybe some loom/zip ties and reinstall it.
My wife has been giving me good garage time but she's counting down the hours... I told her I'm in troubleshooting mode now and didn't account for there to be this much issues with getting the car restarted... She seems to be ignoring that... funny, so am I... 
Posted by: tygaboy Feb 18 2019, 08:15 AM
Andrew - You have the patience of Job. Watching you with the wiring thing is giving me second thoughts about one of my latest hair-brained ideas.
If you'd like a break to bend some tubing, let me know!
Chris
Posted by: 76-914 Feb 18 2019, 09:04 AM
Hang in there. I know what it's like chasing down Gremlins. When I started my conversion I had planned on doing what you are doing. Steering column. dash, ignition switch, etc. One day reality smacked me in the face and reminded me that at this stage in life I shouldn't be piddling around so I deleted that section of the conversion. After reading thru your trial and tribulations I'm glad that I didn't pursue that phase.
Posted by: Andyrew Feb 18 2019, 12:43 PM
Andrew - You have the patience of Job. Watching you with the wiring thing is giving me second thoughts about one of my latest hair-brained ideas.
If you'd like a break to bend some tubing, let me know!
Chris
Chris,
Very much appreciate the compliment and offer. Next couple months I think would be a great time to come up and bend some tubing. I dont think I'll bring the car this time, yours is pretty much the same
The wiring part isnt bad, its the troubleshooting thats been the biggest headache and its probably all me doing it wrong...
Posted by: Chris H. Feb 18 2019, 02:07 PM
Man that is such a pain in the ass. Similar thing happened to me when I tidied up the wiring.
Are you getting ANY ignition at all? Does it even cough? If it's the temp sensor it will usually fire after a lot of trying and then run like crap for a few minutes until it gets some heat in it. Had to hold the gas pedal to the floor for mine to start when the temp sensor went bad.
Off the wall thing to check...is you battery good and fully charged? Some ECUs require a minimum amount of voltage to fire the engine up. Probably fine but good thing to check.
Posted by: Andyrew Feb 18 2019, 02:43 PM
Man that is such a pain in the ass. Similar thing happened to me when I tidied up the wiring.
Are you getting ANY ignition at all? Does it even cough? If it's the temp sensor it will usually fire after a lot of trying and then run like crap for a few minutes until it gets some heat in it. Had to hold the gas pedal to the floor for mine to start when the temp sensor went bad.
Off the wall thing to check...is you battery good and fully charged? Some ECUs require a minimum amount of voltage to fire the engine up. Probably fine but good thing to check.
Temp sensor is new, the Audi has a thing where it will shut off ignition after 5 seconds of cranking. I havent tried to touch the throttle with it cranking as it always lit at the first crank when it wanted to fire.
Battery just got a fresh charge.
It didn't cough or anything, which I found really odd since I have spark and fuel. I'm going to try my process and see if doing all that fixed the problem. If not I'm going to try starter fluid and then talk to my tuner about doing something with the start up tune to fix it.
Posted by: Chris H. Feb 18 2019, 04:22 PM
Yeah that's weird that you got nothing at all. Good call on the starter fluid. It should do SOMETHING if you blast it with that.
I forgot to add the wire from the ECU to the + side of the starter initially which tells the ECU it's cranking..again unlikely to be your problem but something to check.
Posted by: 914forme Feb 18 2019, 09:39 PM
unless your cam timing is way off, you sure this thing has not jumped a tooth or two? Might want to run a compression check just to make sure you're not chasing your tail. If you already done that, then I am out of options.
Posted by: Andyrew Feb 18 2019, 11:00 PM
unless your cam timing is way off, you sure this thing has not jumped a tooth or two? Might want to run a compression check just to make sure you're not chasing your tail. If you already done that, then I am out of options.
I'll give it a check. The biggest problem is the car would run perfect when running. So it makes most sense its a sensor issue. I mean the car obviously has ~ 350-400hp on only about 16lbs of boost (Its way way faster than the v8 has ever been) so for the cam timing to be that far off would be really suspect. Also its a manual tensioner and run a hair tight (new belt) so it really shouldnt jump.
But I really do appreciate all your guys thoughts
Posted by: Chris914n6 Feb 18 2019, 11:27 PM
If you have fuel and spark then all that is left is air... the ecu isn't seeing it via MAF or PS or whatever yours is.
Posted by: Andyrew Feb 19 2019, 12:00 AM
I was running my mafless tune (my most street able tune) so it basically has a map sensor for monitoring boost pressure and wideband 02 sensor. It actually works really really well.
I have a (very expensive) blow through MAF and a tune for it but that particular tuner never got it right before I had my issue that has put me down for the count.... It's apparently very difficult to tune with but once setup it's amazing. I have noticed more torque with this tune. Not sure it's a better AFR or the tuner just threw some bottom end timing at the setup.
I can log my MAF readings to see what we're looking at. Also I could check my 02 readings.
Posted by: Amenson Feb 19 2019, 07:52 AM
At this point it sound like you did all of the obvious trouble shooting. Next step should be to check the cam/crank sensors at the ecu with an oscilloscope.
Posted by: Andyrew Mar 3 2019, 03:42 AM
I FIXED IT!
Ugh.
I have successfully hot started the car. 5 times in a row full warm with no issues.
My course of action.
1. New gas.
2. New cam sensor
3. New crank sensor.
What fixed it? I don't know. I did one at a time and none of them did it. So I was looking around for new options and noticed I forgot to ground the ECU/engine harness. Ugh. Ground the harness and it fires right up.
So I'm going to swap the cam sensor back and if it doesn't start I'll know that's the issue. I never tried that option as I never got the codes for it.
Ran the engine for about 5 minutes without the water pump on so it got to temp faster, but at least one of the lifters didn't pump up so I'll need to get some miles on it or pull the valve cover and hit the lifter a couple times. Worse case pull the cams and clean out the lifters.
With the engine back in operational condition I pulled the dash harness out and began the final clean up on that. I pulled all the fused power wires that were not used, ran appropriate lengths of wire and cleaned it up for future use. I'll run things like the stereo, heater, lighting, ect off these wires.
I'll finish that up in the next couple nights and focus back on my laundry list of items to tackle.
Posted by: tygaboy Mar 3 2019, 08:42 AM
Woot, Woot! Hopefully, you're all done with this phase of the work. You deserve lots of credit for your "sticktoitism"!
The bad news is that you're first on my list to call when I start in on my wiring!
Big CONGRATS to you, Andrew! Way to keep after it.
Posted by: 76-914 Mar 3 2019, 08:46 AM
Freaking great news. When I saw your post this AM I thought to myself, "Man, I hope he gets to the problem soon". Looks like you did. I expect we'll see you at WCR this year young man. OH, BTW. CONGRATULATIONS!
Posted by: dan10101 Mar 3 2019, 10:45 AM
I FIXED IT!
So Cool!
Posted by: Andyrew Mar 12 2019, 08:15 AM
Spent a bit more time on the wiring, getting everything in place.
Video on that and my ADD explanation at 1am...
https://www.youtube.com/watch?v=LA80L7vFC8k
I picked up the following spares and parts.
Fuel pump $35
Clutch disk $60
Fuel filter and spare element $80
Shift cables $60
Transmission $200
Transmission was a great find. 30k mile trans that had been sitting forever and just had one rear bolt tab broken. I'm using that bolt for an exhaust mount on I'll JB weld and drill and tap it.
I spent some time last night tearing the axle flanges off (Trans Code EHV has 108mm stub axles.... I use 100mm.) And then pulled the diff cover and removed the diff. I couldn't get the dowl pin out with my tools so I have some punches on the way. I have a friction type LSD to go in and will need to machine my spider gears like Mike Bellis did but it's a great while I'm in there project....
I'm replacing the trans as my car won't shift for beans. I thought it was the clutch but after readjustment it doesnt seem that way, I'm going to rebuild the pedal cluster and but some new brass bushings in as it has a bit of slop and maybe that will help as well.
Progress is moving nicely
Posted by: Andyrew Mar 12 2019, 02:02 PM
Woot, Woot! Hopefully, you're all done with this phase of the work. You deserve lots of credit for your "sticktoitism"!
The bad news is that you're first on my list to call when I start in on my wiring!
Big CONGRATS to you, Andrew! Way to keep after it.
I'll hand over all my wiring tools/supplies to you as I have buttloads of stuff now and hopefully wont be needing it.
Whatever you dont use just give back
I'll bring it with me when we finishing up the cage (Any dates in the coming months work better than others?).
Posted by: dan10101 Mar 12 2019, 05:49 PM
Transmission was a great find. 30k mile trans that had been sitting forever and just had one rear bolt tab broken. I'm using that bolt for an exhaust mount on I'll JB weld and drill and tap it.
Don't forget I'm going to bring down that spool gun. I'll bring some scrap aluminum too if you want to practice.
Oh, I think you meant to reply to Chris in your last post. But we are all happy that your making such great progress.
Posted by: Andyrew Mar 12 2019, 08:35 PM
Thanks for catching that. I edited it for clarity
Posted by: tygaboy Mar 13 2019, 08:21 AM
Woot, Woot! Hopefully, you're all done with this phase of the work. You deserve lots of credit for your "sticktoitism"!
The bad news is that you're first on my list to call when I start in on my wiring!
Big CONGRATS to you, Andrew! Way to keep after it.
I'll hand over all my wiring tools/supplies to you as I have buttloads of stuff now and hopefully wont be needing it.
Whatever you dont use just give back
I'll bring it with me when we finishing up the cage (Any dates in the coming months work better than others?).
Being retired (don't hate me!), I can pretty much make anything work. Let me know when you're thinking is good for you and we'll get something on calendar.
Talk soon.
Posted by: Andyrew Mar 19 2019, 11:09 PM
Some progress.
Took apart the new EHV trans to remove the flanges and the diff. Added the LSD that I had been saving for a while for this trans after learning the hard way that a roll pin goes in/out only one way. 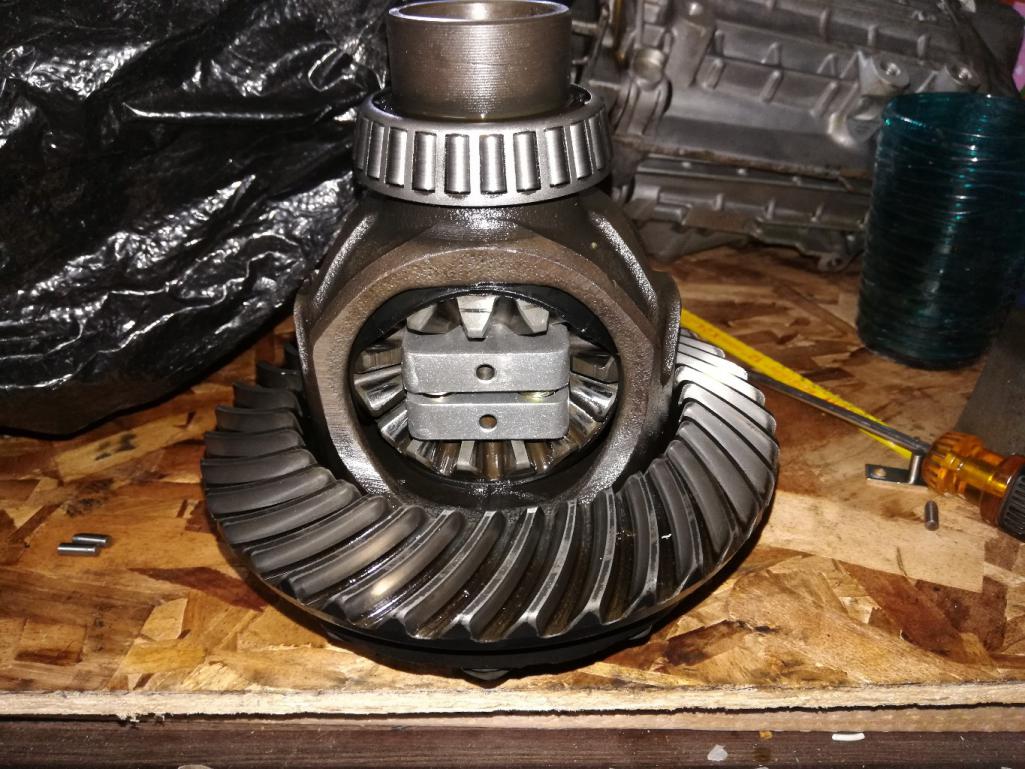
I still need to remove the 100mm flanges from the trans on the car. I'll do that when I swap the trans and put fluid in the new one. 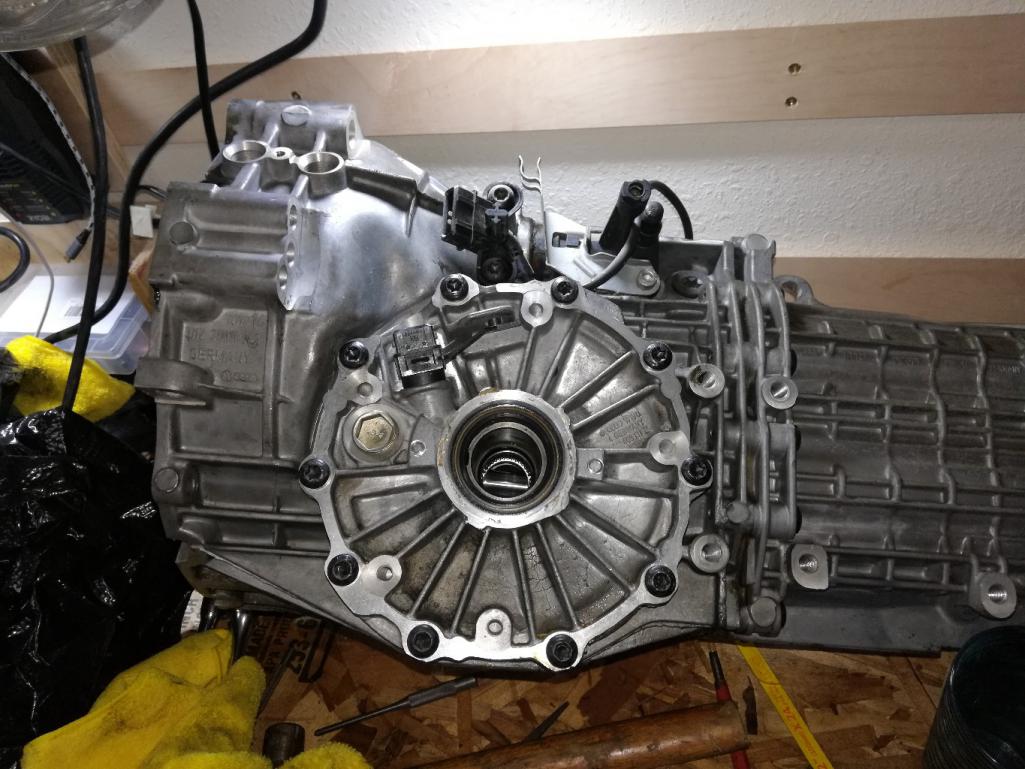
Also I checked the gearing on the new trans. First is slightly shorter and third is shorter as well which is good. Should make 3rd gear a bit more usable instead of just a "throw me to jail officer" gear. 
I finished the rebuild on the pedal cluster which just entailed replacing the outer two bushings on the clutch and bending the spring for the clutch. The OE clutch spring springs it the wrong way for what I needed.
https://www.youtube.com/watch?v=ze3HdJ-h7D4
I determined why my clutch didn't do anything for the first 1/8 of pedal movement, the spot where the roll pin goes in the clutch shaft was ovaled. So after fussing with it I decided to just fix it right now has perfect operation and zero slop.
Combine this with a little more adjustment and the spring and it feels like I have another 1/4 throw of the clutch. This might fix my shifting problem all by itself. I'll try it before I throw in the new trans so I know if the old one is a good spare or not.
Actually really excited to finally have a 914 that shifts well... Never ever have had that.
I plumbed in the new fuel filter in the old location just so I can do some driving around. Fiddled with some other stuff as well. Very close to testing it on the road and going through my long checklist and getting back to interior and suspension/brakes.
Posted by: 76-914 Mar 21 2019, 10:02 AM
You shouldn't need that return spring with the hydraulic setup. ![]()
Posted by: Andyrew Mar 21 2019, 01:14 PM
You shouldn't need that return spring with the hydraulic setup.
I would have thought the same thing, but its not true. The master cyl doesnt push on the clutch enough, again probably my shifting issue and I possibly could have adjusted it differently but I tested the full travel of the hydraulic slave and master prior to building my pedal system.
I'll give it a test drive this weekend and we'll find out for sure.
Regardless if this was my shifting issue or not, I like the gear ratios of the new trans better and it gives me a spare for when I start turning up the boost to blow trans levels.
Posted by: Andyrew Apr 9 2019, 08:26 AM
Hot start issue is back.
I have a workaround for the future. The car starts every 2-3 times if the throttle is held wide open. Vs starting every 20-30 times. So I'm Ok with that for WCR.
Test drive with more clutch throw was good in all gears except first which ground pretty good. I will swap new trans in before WCR.
I however have been busy... With what?
Dash.
Attached thumbnail(s)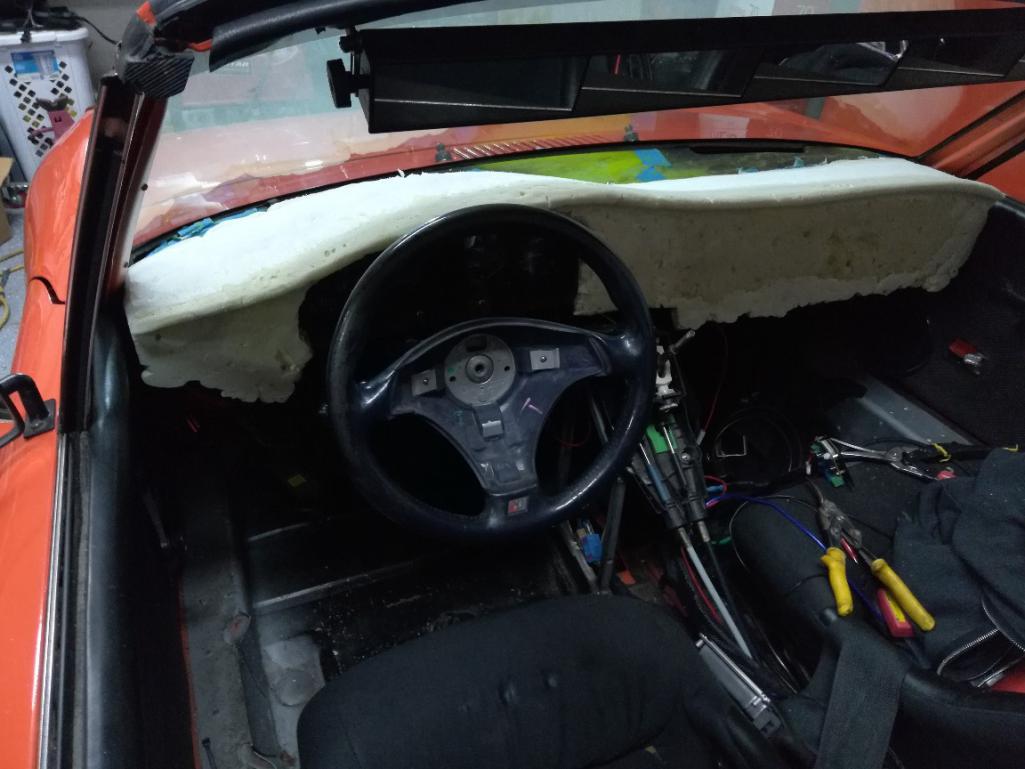
Posted by: Andyrew Apr 9 2019, 08:31 AM
Photo dump of dash progress.
Made with expanding foam, I'll be glassing over it. I have been running into issues with the dash warping so I need to glass the top for strength then I'll finish the front and guage area. Finally I'll work on the bottom as a separate piece. Blue tape line shows rough beltline
Attached thumbnail(s)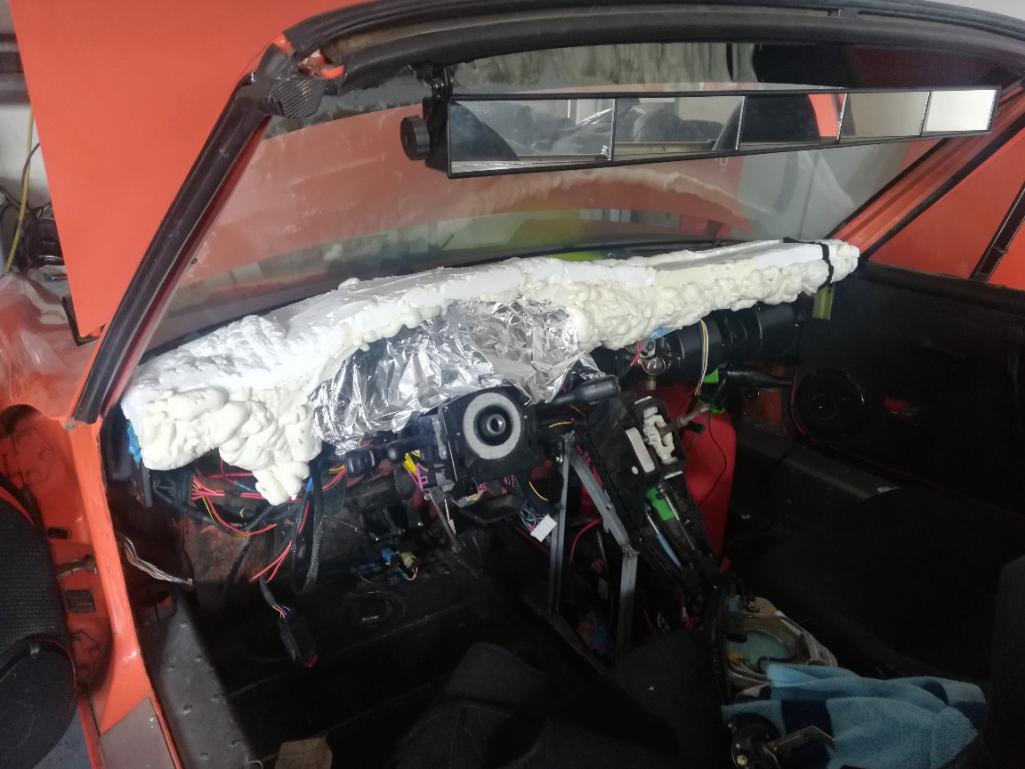
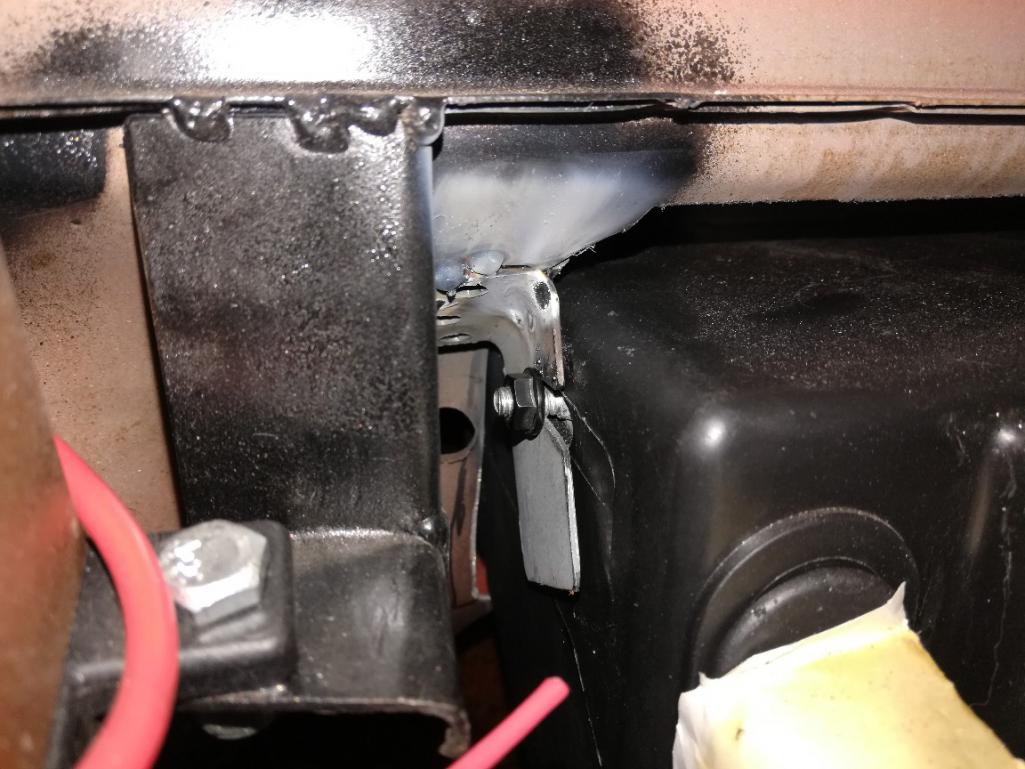
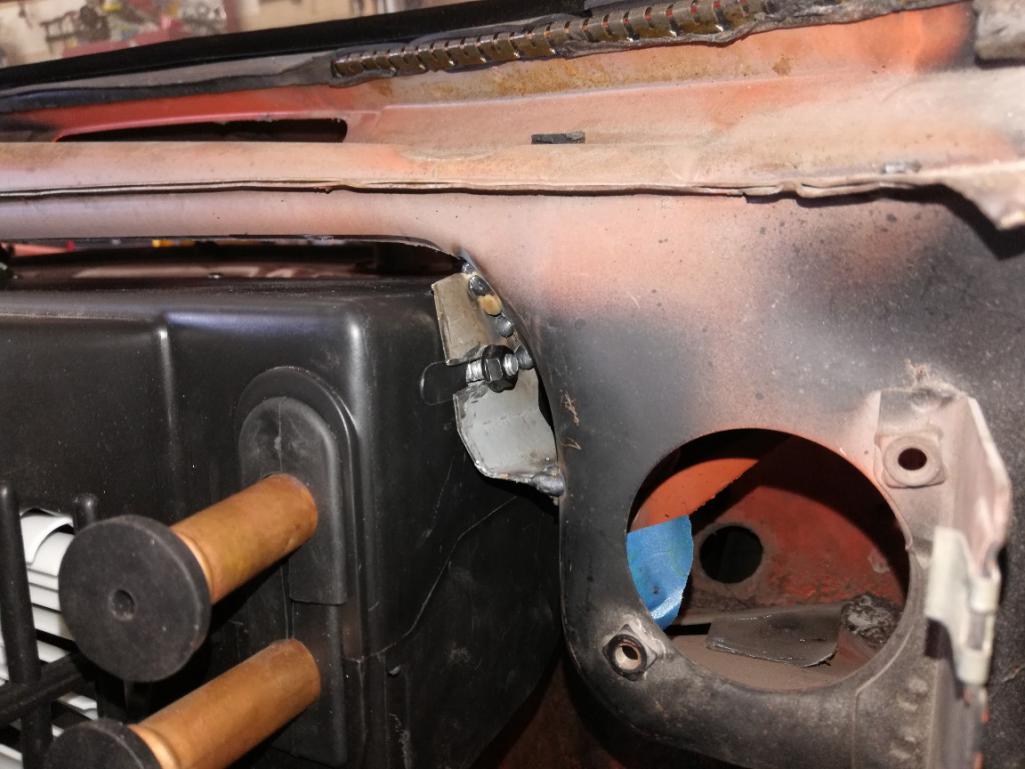
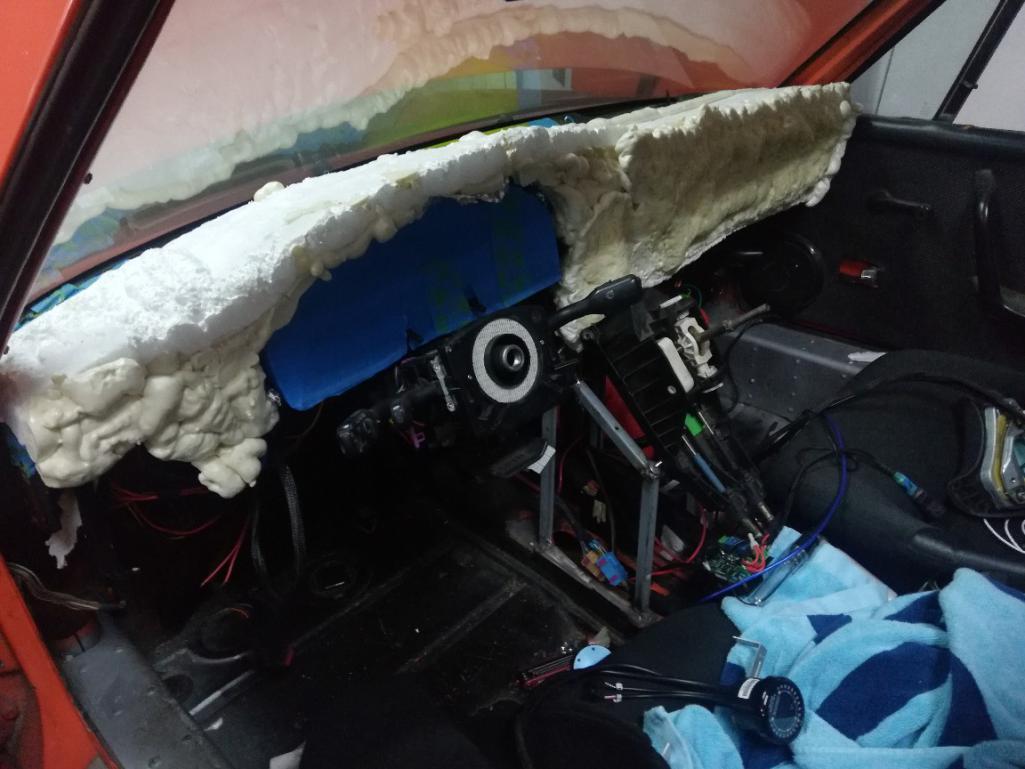
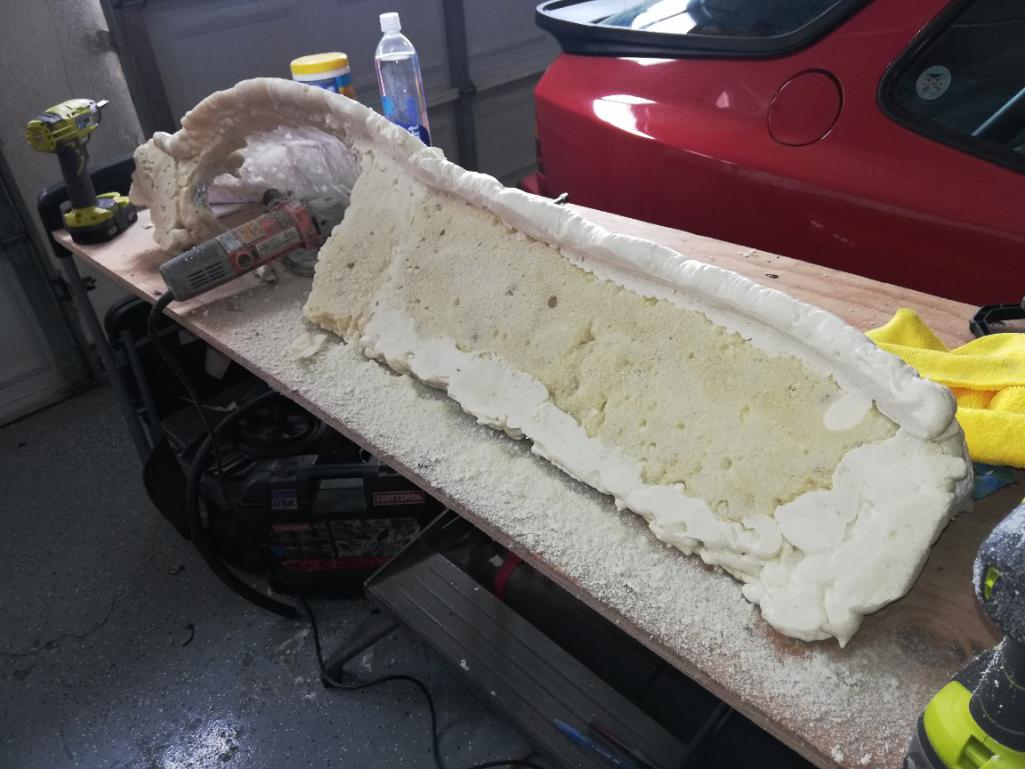
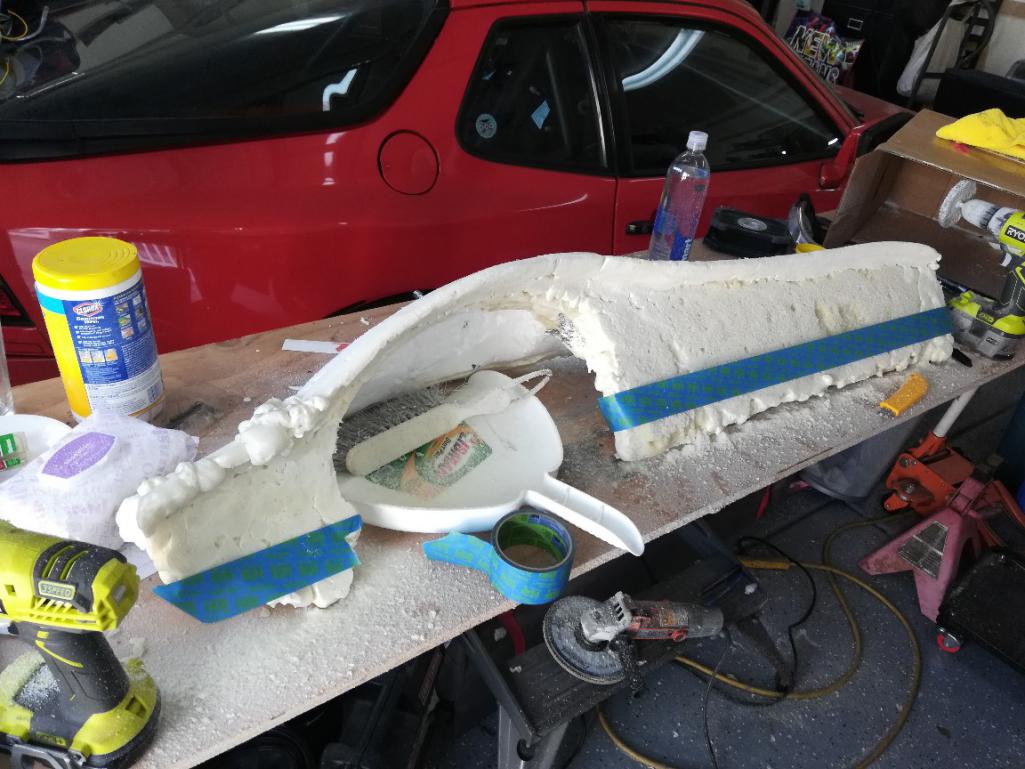
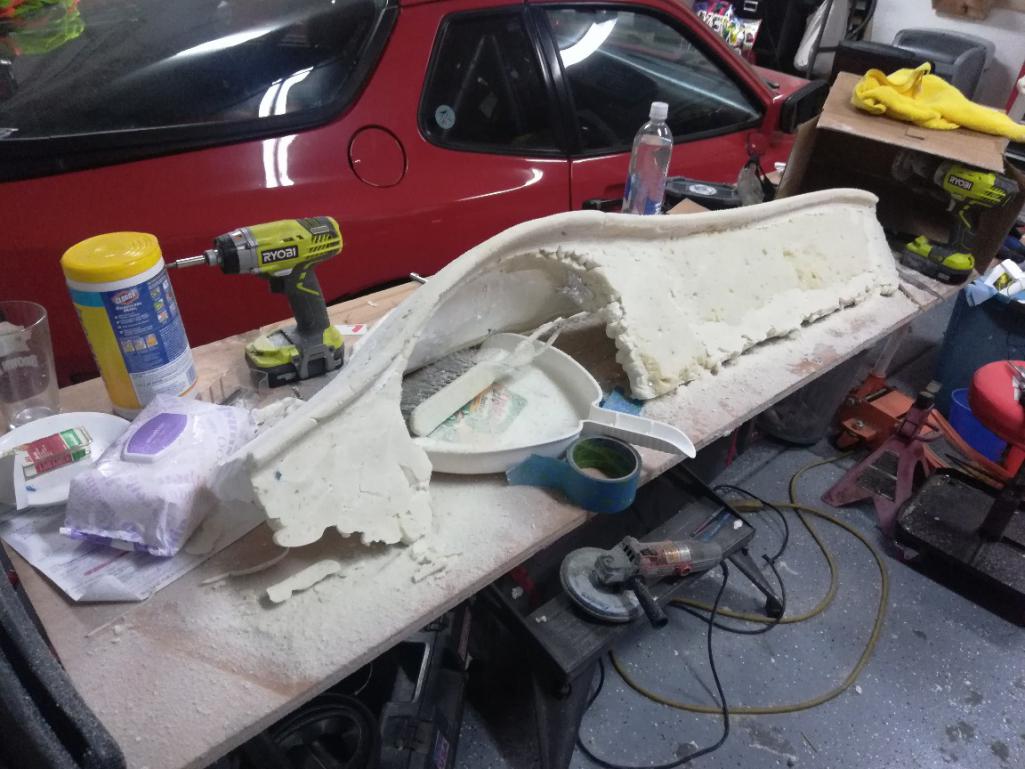
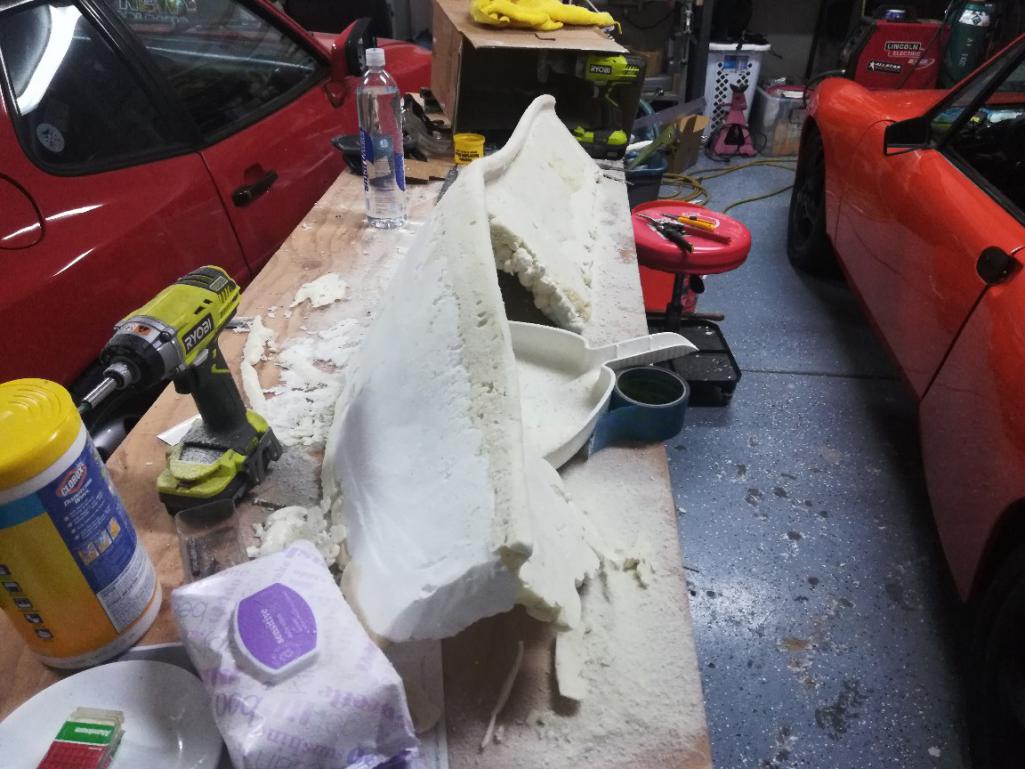
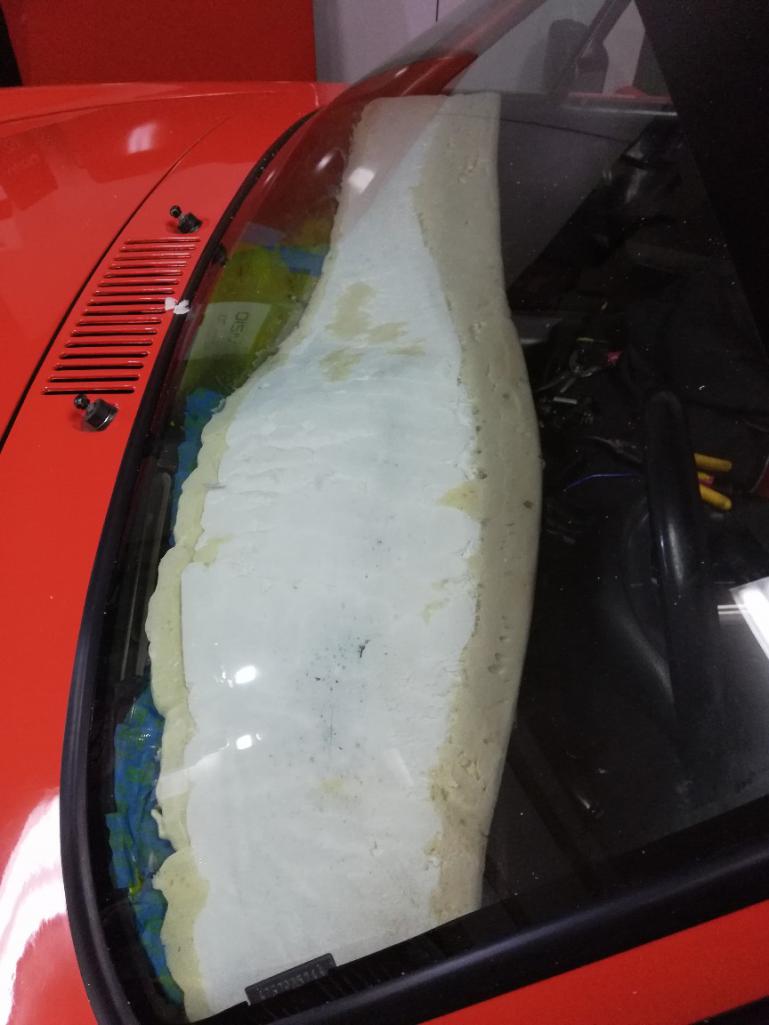
Posted by: Andyrew Apr 9 2019, 08:41 AM
Also
Climate system. Video shows it best. Sorry I tend to be wordy.
I needed to mount this before I could finalize the dash to ensure fitment.
https://www.youtube.com/watch?v=MEVlfUMLAd0
Posted by: Andyrew Apr 9 2019, 08:47 AM
I've been debating on my use of dash vents. I think I will need to fabricate some out of steel. I dont need the fins to move, but I do want something that GOES with the dash.
This pic goes over what my thoughts are for a custom vent.
Flat faced and 3 sides and a smooth contour with the dashline.
Not sure on my fin placement or quantity. Still thinking it out.
Posted by: ValcoOscar Apr 9 2019, 08:48 AM
Nice to see ingenuity....keep it up, see ya at WCR
Oscar
Posted by: tygaboy Apr 9 2019, 09:12 AM
Andrew - that's really coming along! Nice work...
Posted by: Andyrew Apr 16 2019, 01:17 PM
Alina turned 2 Saturday 
She likes cars, loves to buckle up when she sits in a seat, Here she is with my dad and sitting in the 944.
She also likes playing in the dirt. Not pictured is a couple hours later her playing with a tea set and pouring me "tea".
Posted by: oakdalecurtis Apr 16 2019, 01:21 PM
Good thing she looks like Jeruka!
Posted by: Andyrew Apr 16 2019, 01:35 PM
With the goal of my dad bringing his 914 to WCR and me bringing my 914 to WCR that means we both have to be running. He's much closer to me and I have a lot of work to do in general..
We spent Sunday morning trying to figure out a way to fix my notchy steering. We tried at first to make my double heim joint system to work better but couldnt get it any better than before.
One of the reasons for not going with the 914 steering column is the audi signal stalks and all the related electrical components. My dad having the blue parts car he brought down a bunch of stuff for us to consider using instead. This included the 914 steering column.
After a bunch of work we decided to give the 914 column a try, cut off the outer housing on the aluminum piece and with a bit of grinding we should be able to put the Audi column electrical bits on the 914 piece.
At this point since I moved the 914 mount AND my dash is pretty much formed up I'll mock it in place and weld a column mount to the body We tested the system with the wheels up moving the wheel checking for binding and did not find any. So with a bit more fabrication I'll be able to make this work.
This also means no more bulky Audi steering wheel. More details on that when parts come in.
Hopefully I can accomplish this and not have to modify my dash too much.
June is going to be tough to get the car ready... My list needs to be updated....
Posted by: Andyrew Apr 16 2019, 10:57 PM
A visual on the column modifications.
Attached thumbnail(s)
Posted by: Andyrew Apr 16 2019, 10:58 PM
Quite a bit removed. All non structural just for mounting the key switch. Which will remain Audi and be relocated to the dash.
Attached thumbnail(s)
Posted by: Andyrew Apr 21 2019, 03:24 AM
Trying to make steady progress.
But big hurdle out of the way that will affect the cars drivability by a long shot. Steering column swapped back to a 914. Relocated slightly but it's very smooth now. 
This meant I needed a new steering wheel and adapter. Quite happy with this one so far.
If you look back about 3 years I also tried my hand at making a shifter but couldn't find anyone to turn the wood. Well I still had the 3" block of glued wood but no lathe. I was sitting on the couch early last week and looking at knobs to buy to compliment the steering wheel and I said why don't I give finishing mine up a try? Well I have a new drill press now so I after cutting and grinding it to a really rough shape I put it on the drill, cranked up the speed and got my grinders out and started roughing up the shape with it spinnung. It started to really work with a cut off wheel then I cleaned it up with a flap wheel and finally some sandpaper by hand. Damn proud of it. I'll finish it with Danish oil.
All this interior work had been leaving me with deciding what to do with my seats. Another member found some eBay seats that worked for him and I figured I would try something similar. I bought them planning to use then for WCR and this year but when I got all the leather work done I would probably have them redone. I'm surprised by the quality of them... Foam is rock hard, their is a poorly designed sprung in the upper back that pops in and out when you sit down but for $350 delivered for the pair I was really happy with them. They are very tight on the butt but a bottle Jack should fix that like my current seats.
I'm confident they will require fab work to the car to replace my old ones. But that's easy enough. For now they will be a play place for Alina. Got to get more important things done first. 
Meaning I need to drop the trans and replace it. Working late means no power tools so what should be a 2 hr job is closer to 5. More on this next week. 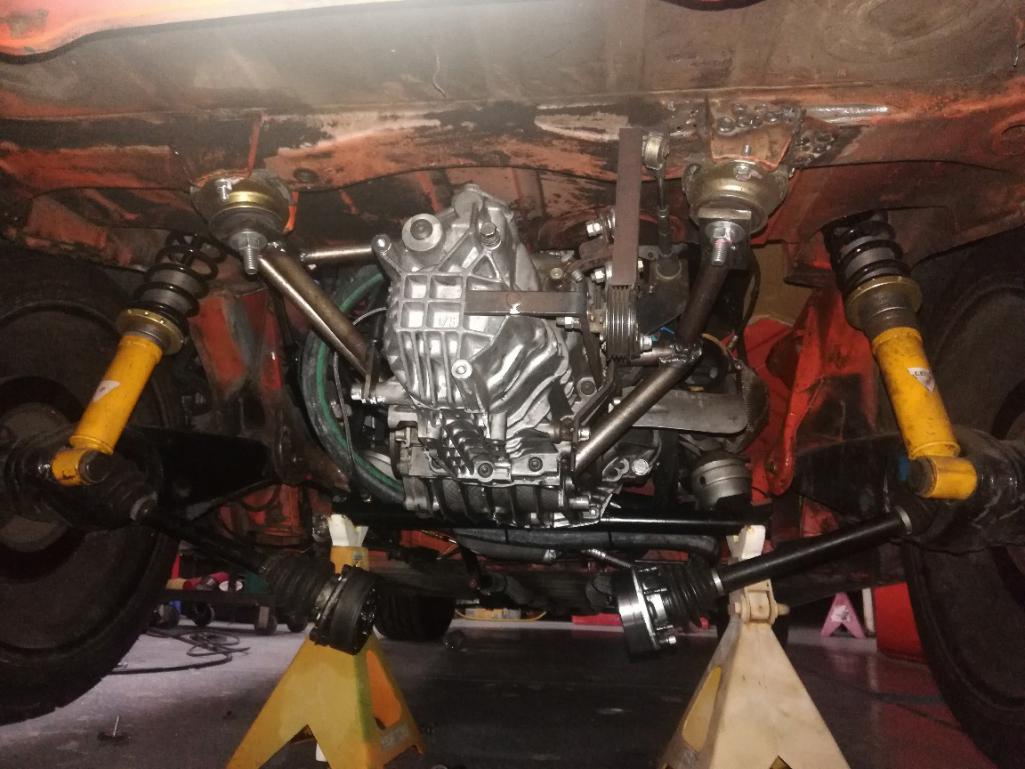
I have some more resin drying on the dash upper portion. Hopefully I can use this.... The steering column debacle meant some things are moving around and getting in the way more than anticipated. I'll redo it if needed. No pics. Just scratchy fiberglass... I needed the top done so it will actually hold shape so I can start really mocking things up.
Posted by: Mike Bellis Apr 21 2019, 07:58 AM
She's getting so big!
Nice seats and forward progress!
Posted by: tygaboy Apr 21 2019, 08:01 AM
Andrew - It's good to know I'm not alone in, what often seems like the "He's making it up as he goes along!" world.
I'd be curious to know how much of your design (dash/climate control, for example) do you actually have worked out before you jump in?
Are you "sure" it'll work? "Pretty sure"? Or, as seems to happen to me, are you in "I'll figure out a way to make it work!" mode?
Regardless, having met you and your dad, I believe I've found additional proof that the "defective car gene" (as my wife calls it), truly exists and doesn't skip generations! 
Keep up the tremendous work and let's plan another work day. I look forward to bouncing some build ideas off you.
Posted by: Andyrew Apr 21 2019, 10:23 AM
Andrew - It's good to know I'm not alone in, what often seems like the "He's making it up as he goes along!" world.
I'd be curious to know how much of your design (dash/climate control, for example) do you actually have worked out before you jump in?
Are you "sure" it'll work? "Pretty sure"? Or, as seems to happen to me, are you in "I'll figure out a way to make it work!" mode?
Generally I have an idea, I work it out on paper with a drawing and maybe measurements. I template it out somehow and then start fab. Most of the time it's "I'll force this to work" as I hate multiple attempts at the same project. Lots of times this forces me to rebuild other aspects.
More proof
Keep up the tremendous work and let's plan another work day. I look forward to bouncing some build ideas off you.
Sounds great! I thought about coming up before WCR but time is slipping by....
Posted by: Andyrew Apr 28 2019, 02:23 AM
Lot of work recently for not a lot of progress.
Replaced the trans with the spare I bought.Clutch, flywheel and pressure plate look good. This involved removing the stub axles and swapping them over. Only to find out I didn't grind the hole large enough for the stub axles in the LSD.
So I test fit the system and I was only off a strong 1/8.
Grinding of the stub axles it was! This portion of the axle is only for a guide. I left a hair on there. Should work well. Flanges are back in normal position.
I had to swap shifts cables as I bent the end of one slightly and it wouldn't operate nicely. Fixed it on the bench when I was done swapping it. Adjusted the shift linkage mounts a bit and gave them s coat of silver (couldn't find black...)
I test everything by hand and notice the clutch is weak. Seems like some air got in the system somehow. Go to bleed and the reservor cap is missing. Ordered a new one.
I test the dash in the car and it seems like it grew some more. The foam stuff just isn't working so I'm scratching this dash. The steering column modifications require it anyways.
Sigh
I'm debating how to make the new dash. I think I'm going to template it out in steel rod, then fiberglass cloth over it or just use steel. It's a simple design but if I don't fiberglass immediately after trimming the foam it will expand and ruin the design. I'm thinking more and more I'll use some 22ga steel and some rod. I can work with it the easiest. It will add weight, but at this point I have very few choices that I'm comfortable with.
Also Danish oil looks decent. Going to keep adding coats and do some fine sanding..
I need this thing running by next week so I can spend some time troubleshooting it. And this dash needs to be done to a level that I at least have the guages mounted.
Too tired to load up pics. Here is the knob.
Attached thumbnail(s)
Posted by: tygaboy Apr 28 2019, 07:18 AM
Andrew - if you haven't already, you may want to check with Tap Plastics to see if they have a foam that is more thermally/dimensionally stable. Or, consider starting with pre-made foam blocks. Google "modeling foam".
When I was doing this sort of thing for the carbon gas tank I made for my motorcycle, I used (please don't laugh) foam, bondo, Popsicle sticks and hot glue to make the plug. Whatever it took to get a stable (enough) substructure that supported being top coated so I could then get the final shape and finish I needed.
If there's anything I can do to help, please let me know.
BTW, I just checked the dictionary for "custom fabrication". It's defined as "Lot of work for not a lot of progress."
We are of a kind, your dad, you and me...
Posted by: 76-914 Apr 28 2019, 07:56 AM
Michaels, Hobby Lobby, etc stock the foam blocks that florist use. I hot glue them together and file or sand to shape. This type of styrofoam will not melt if you choose to use the styrene resin vs epoxy resin. If I need to make a small plug I will use modeling clay because foam can be a PITA to work with when going small. The downside is digging out the clay afterwards.
Posted by: Chris914n6 Apr 28 2019, 12:26 PM
^^ Wrap the foam in foil/tape and the resin won't matter.
You can also use sheet foam (couch cushions), glue in layers, and shape it with a carving knife. Coat in house paint & you have a decent base for fiberglass.
I'd fab a simple metal frame for the gauges and cover with a dash mat. Make it pretty after WCR....
Posted by: Andyrew Apr 28 2019, 02:02 PM
Thanks all for the advice
Got some steel strips and rods from the hardware store. I'm going to mock it up today and start going at it. I can get everything in place in steel much faster than fiberglass/foam since that's where my skills are at.
First thing will be a casing for the guage cluster for it to lie in. I have that 75% done. Pictures when I come back from lunch.
Posted by: Andyrew Apr 28 2019, 10:39 PM
Guage cluster holder turned out nice. Bent it by hand, welded some tabs tacked it in place and removed the metal dash. 
Wire framed the layout that I like. Added some supports and am mocking up placement of guages. 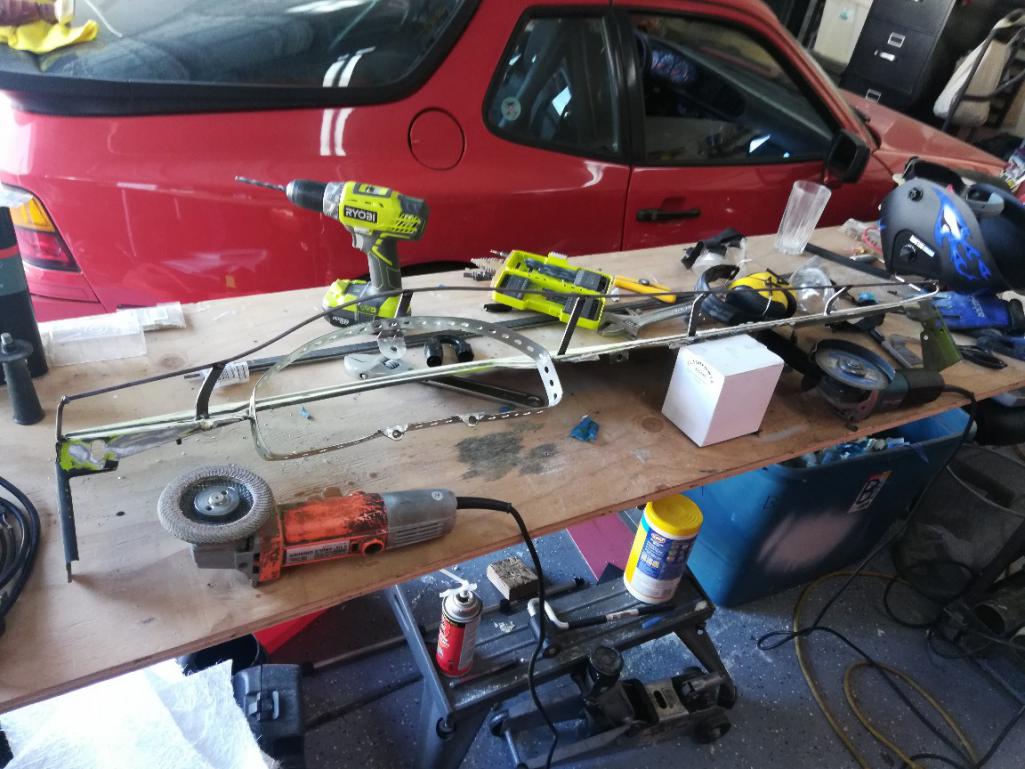
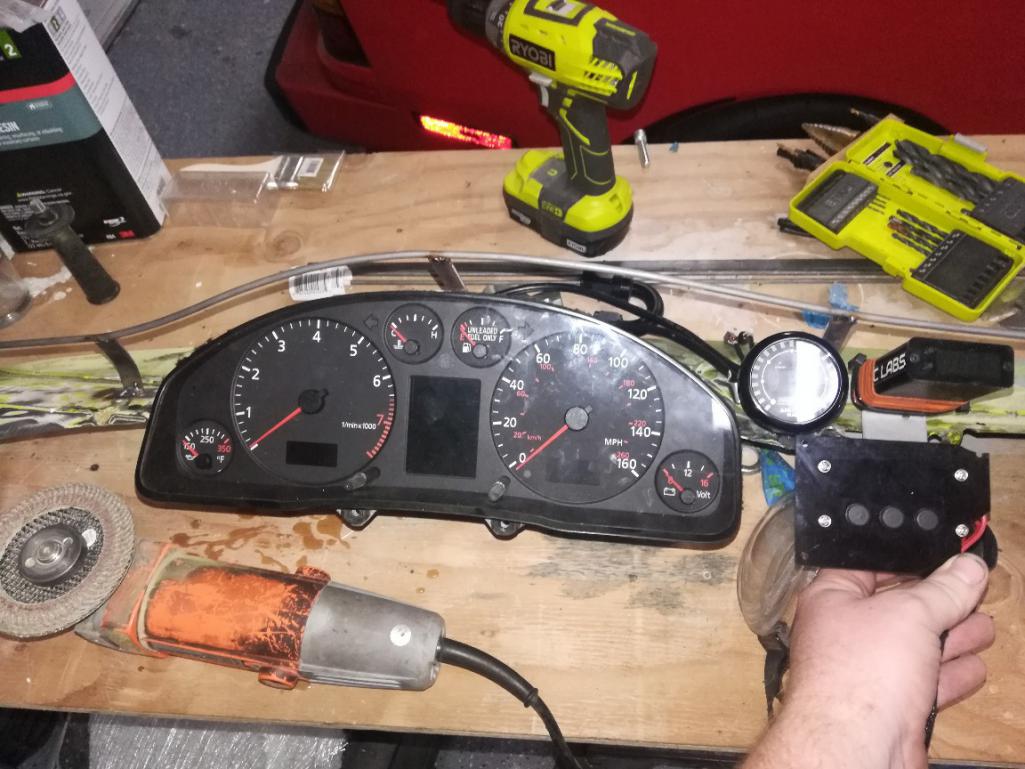
Nothing is set in stone. Thoughts on layout? The round one is AFR, small rectangle is boost, and large rectangle on the bottom is intercooler. I have another for water pump I am debating putting behind a door as I don't really need to watch it.
Kind of hard to tell from the pics but I intend to do the say beauty overhang on as on the fiberglass piece. Should help with sun shading as well as the overall look.
Posted by: Andyrew Apr 30 2019, 01:32 PM
As part of the interior redo I decided my "WINK" mirror was a bit out of place and went for a BMW unit. 20 mins of modifications and it fits great. 
Mounted 3 guages last night. Focused on placement and LCD location (all three are red). 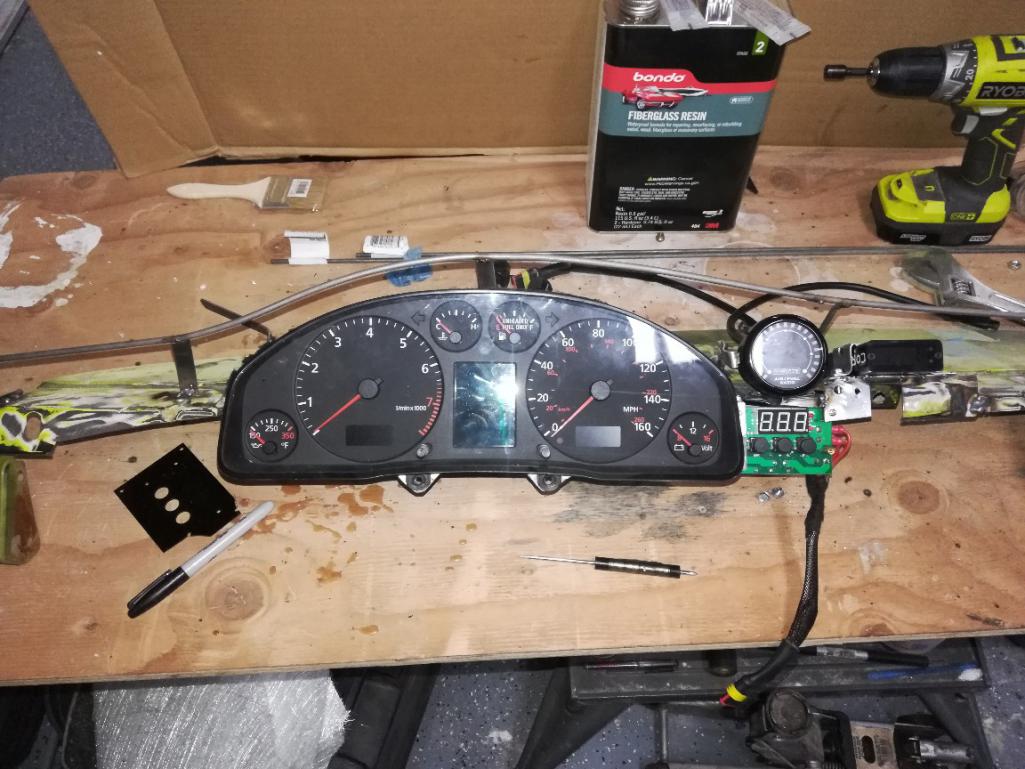
I've determined the best course for building this dash is to have the upper top removable for wiring and easy removal and then the front panel to be welded. Not 100% on that but it's what's in my head right now.
Next step is the backing for the front. I'd like about a1-2" lip. 
Posted by: tygaboy Apr 30 2019, 04:01 PM
Fab-ulous! I really enjoy watching you come up with ways of getting the results you want. Seems like we're in that same boat of "hmmm, I think I need to try that again!"
Looks really nice - keep up the great work and we'll see you on the 18th.
Posted by: 76-914 Apr 30 2019, 06:01 PM
I'm running the modified BMW mirror that lets me use the 914 visors. Same length as yours. It gave me a better field of view than the stock 914 mirror but I'm long waisted! See you at WCR.
Posted by: Andyrew Apr 30 2019, 11:08 PM
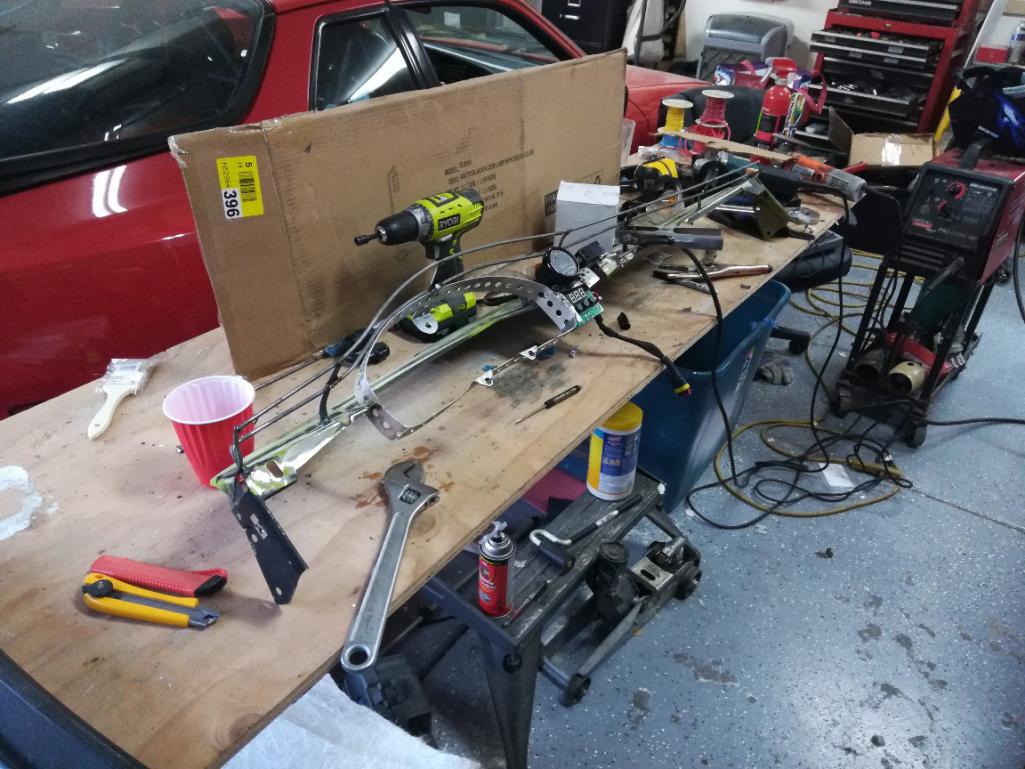
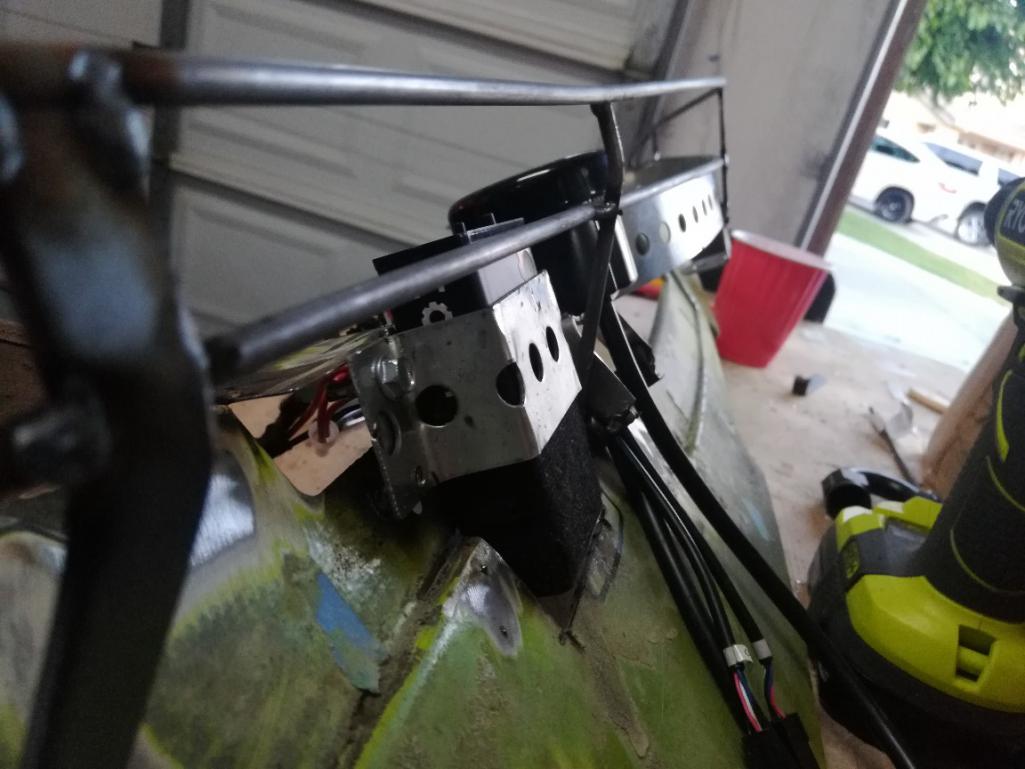
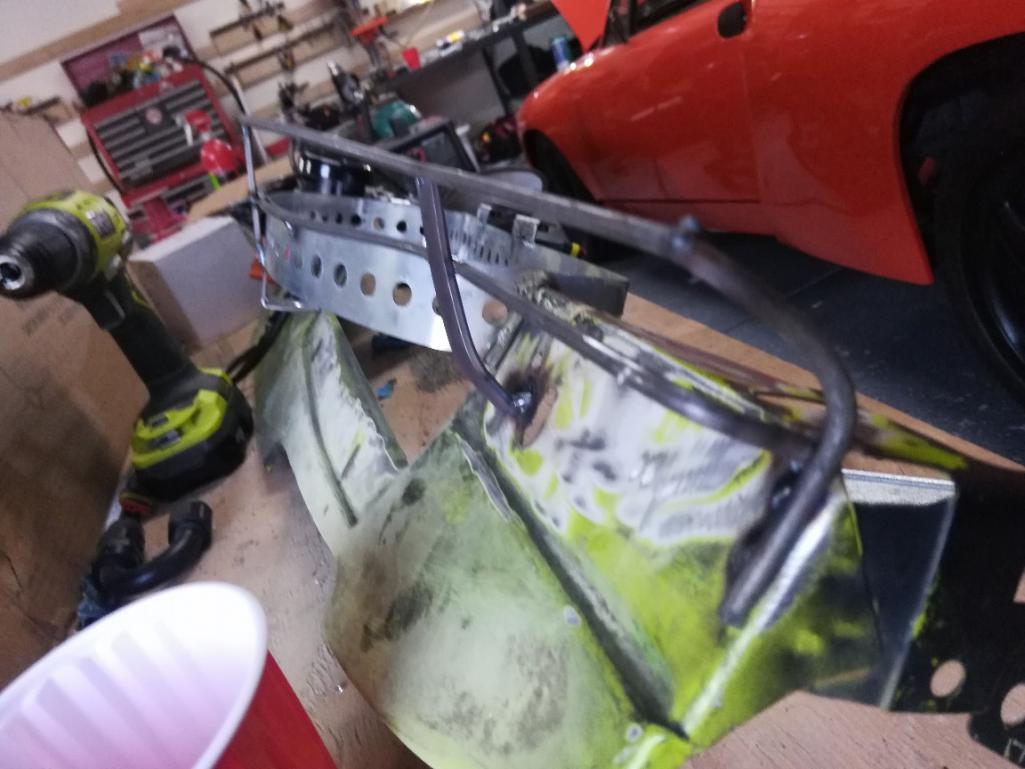
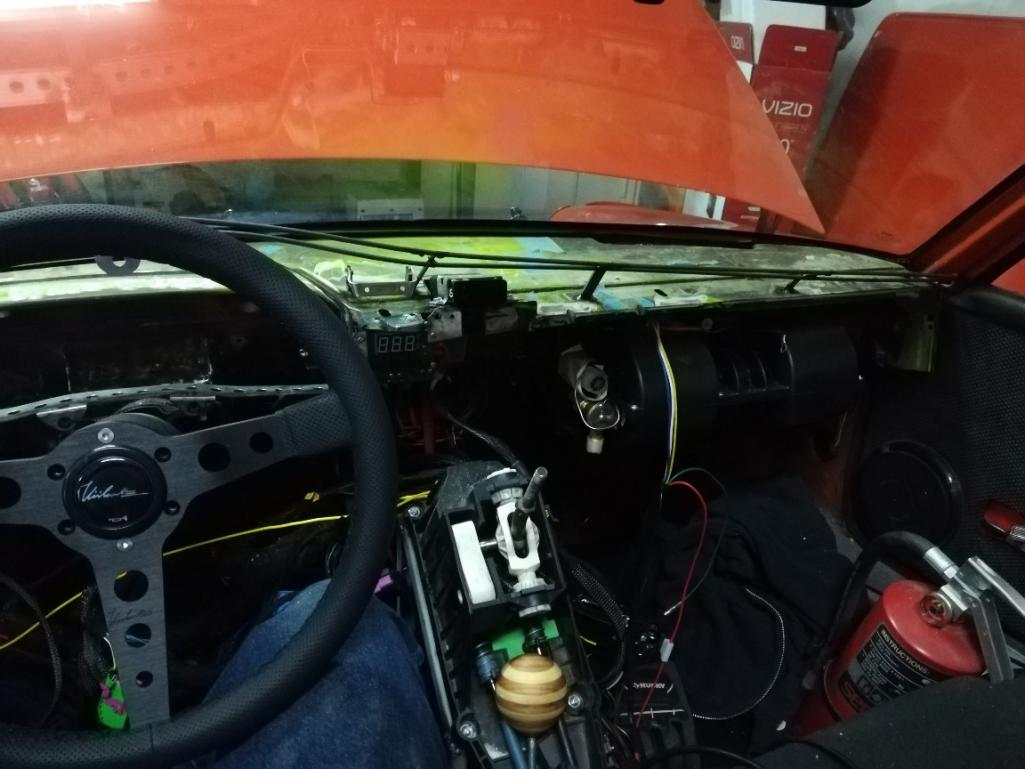
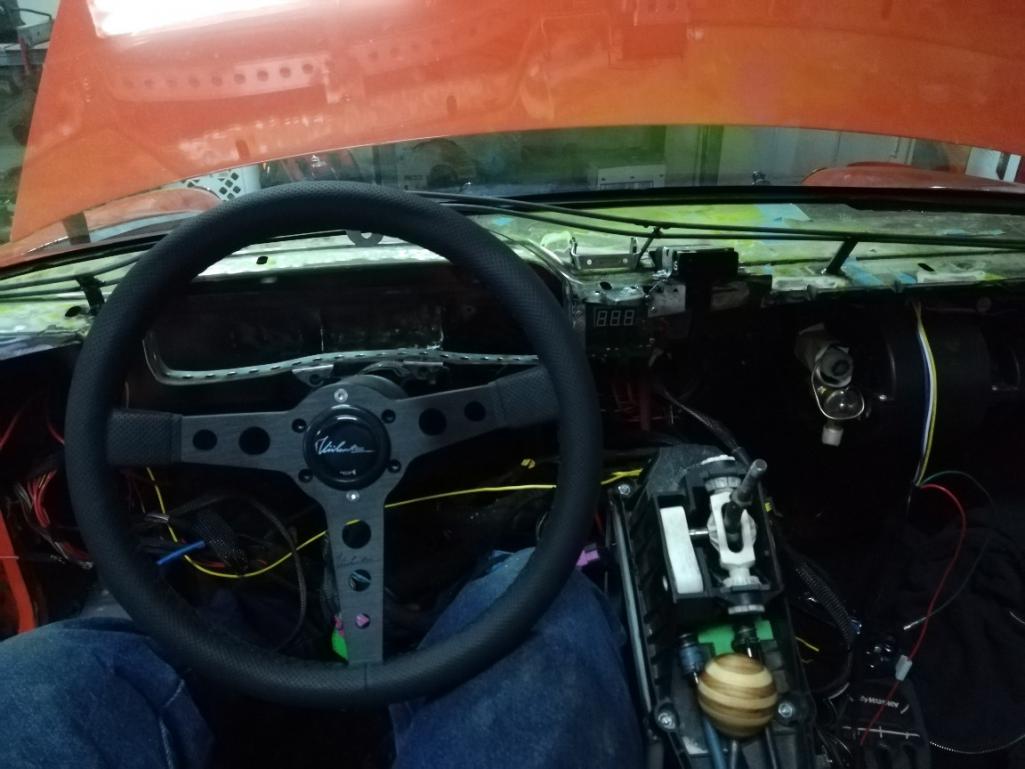
And my next challenge is moving the air box I made back a couple inches. 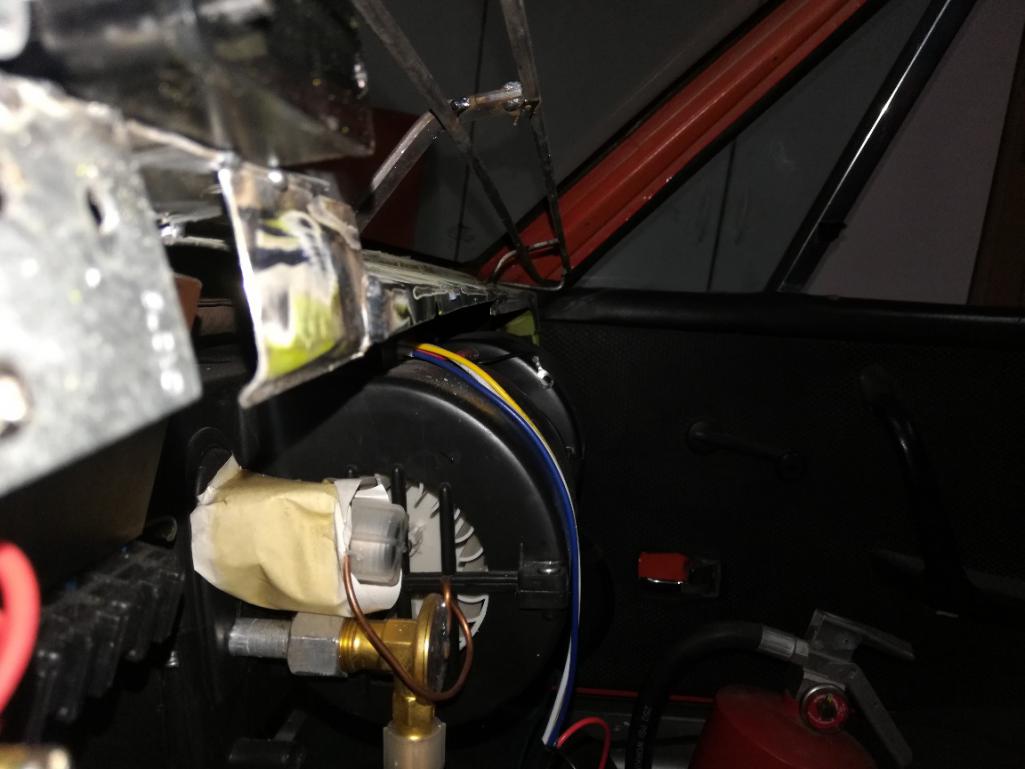
Posted by: Andyrew May 3 2019, 09:18 PM
I opened up the firewall a bit more on the bottom and removed the old mounting system I built for the ac/heater box. I built a cage for the box just like I did for the guage cluster but I haven't mounted it. I'll work on that later, I just wanted to make sure I could get it all to work at a later date. 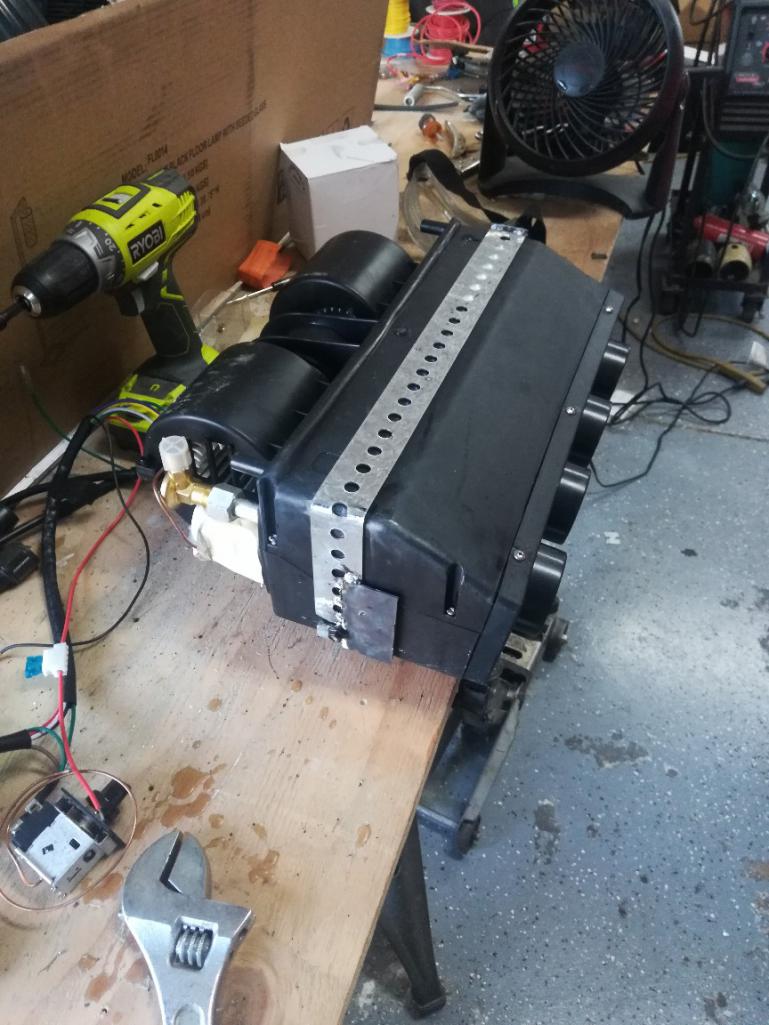

I designed a layout for how the dash pieces will work and it's very similar to the original dash. I'm making everything out of steel as I can work with it much easier. 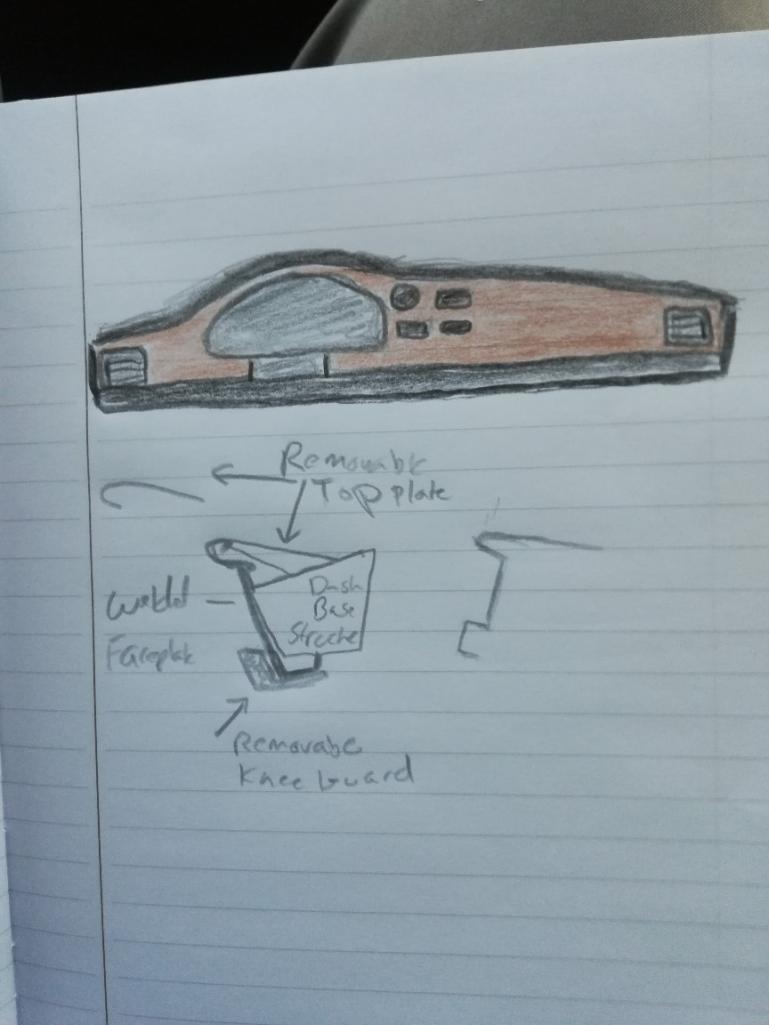
I mounted up the ignition switch and decided to put it on the left side just for fun. 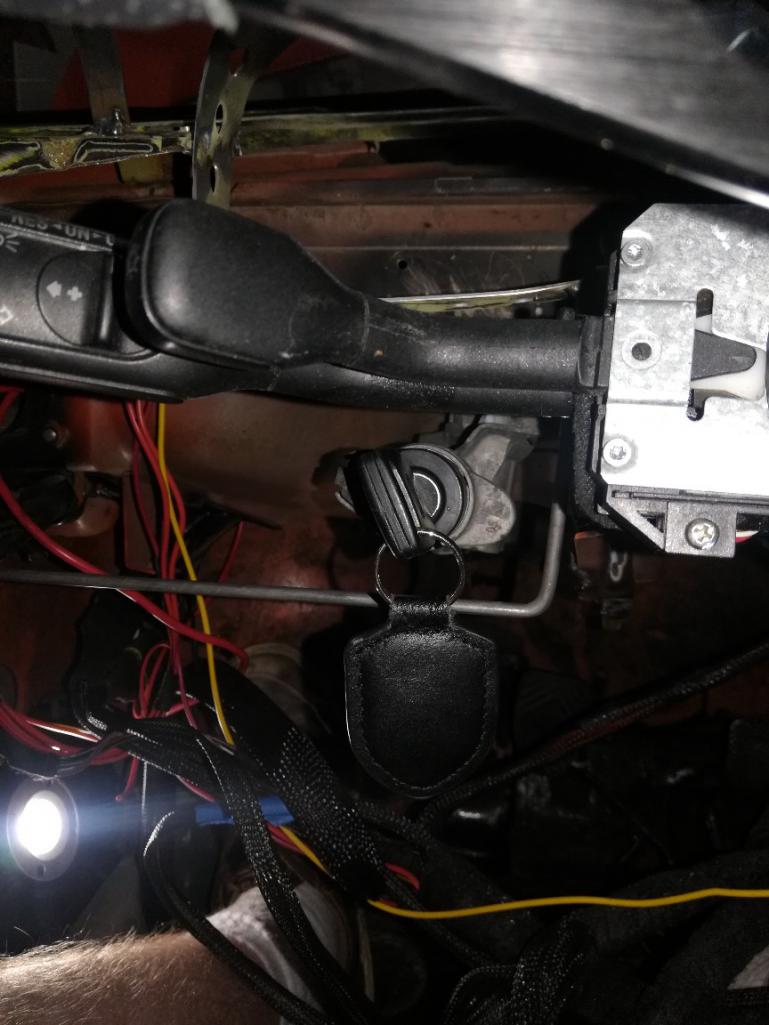
Working on the dash face I started with thin guage steel but thought against it and decided to go with thick guage steel to build a strong base for the dash. I'll go to thinner guage for the dash top and bottom. 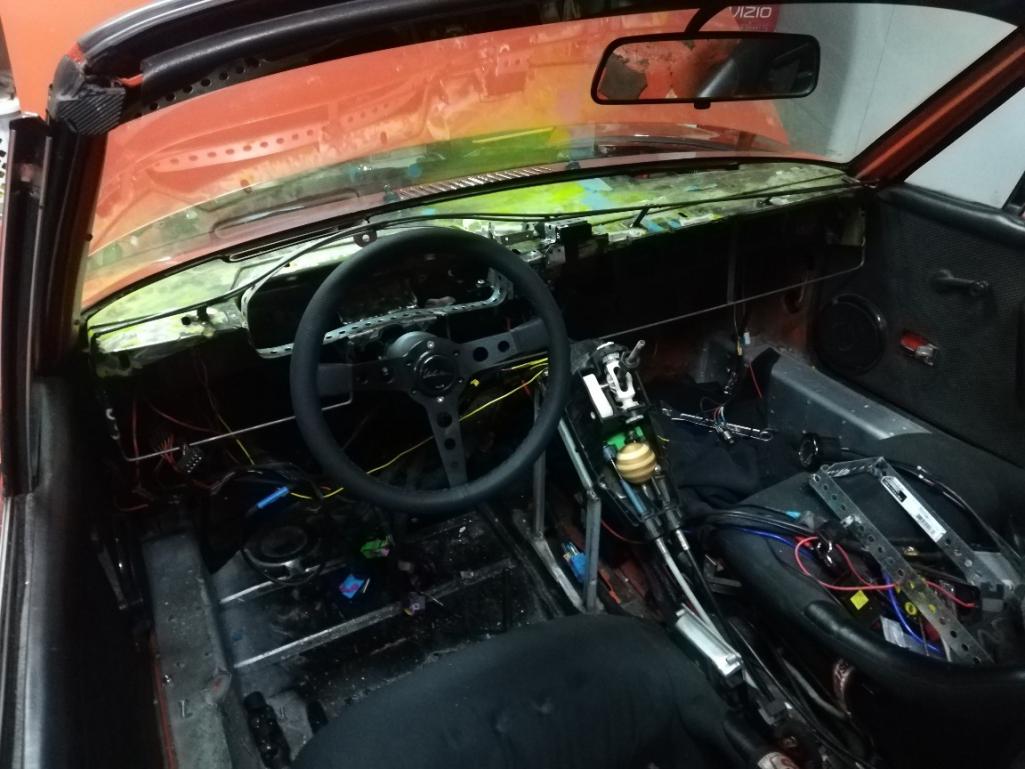
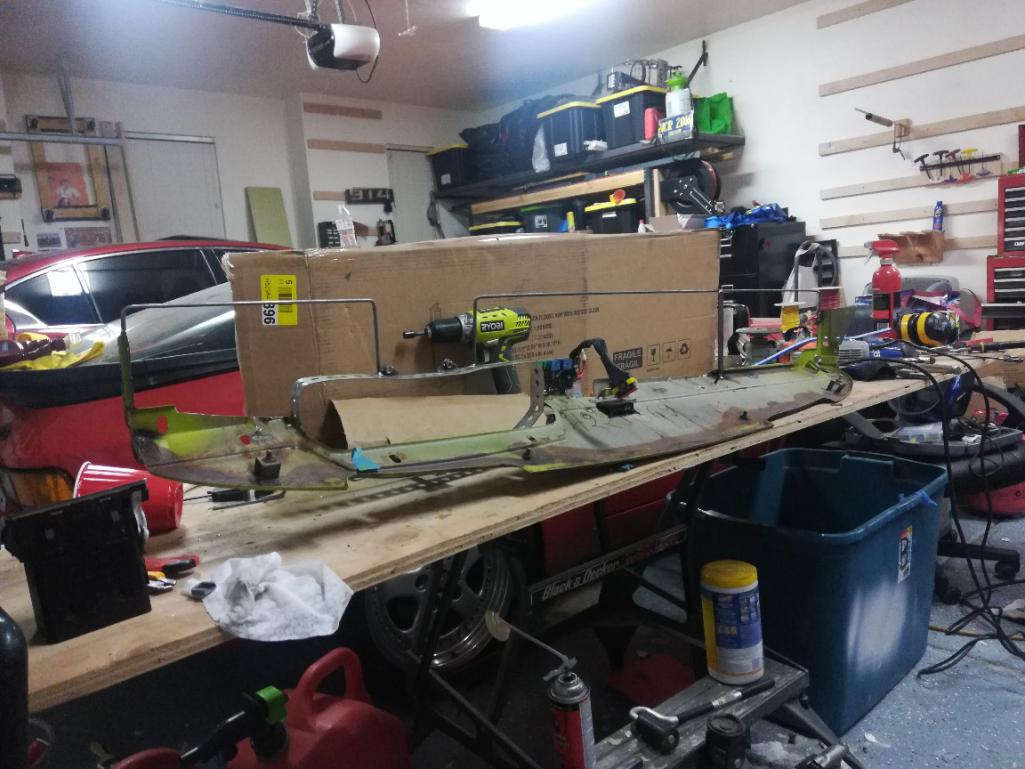
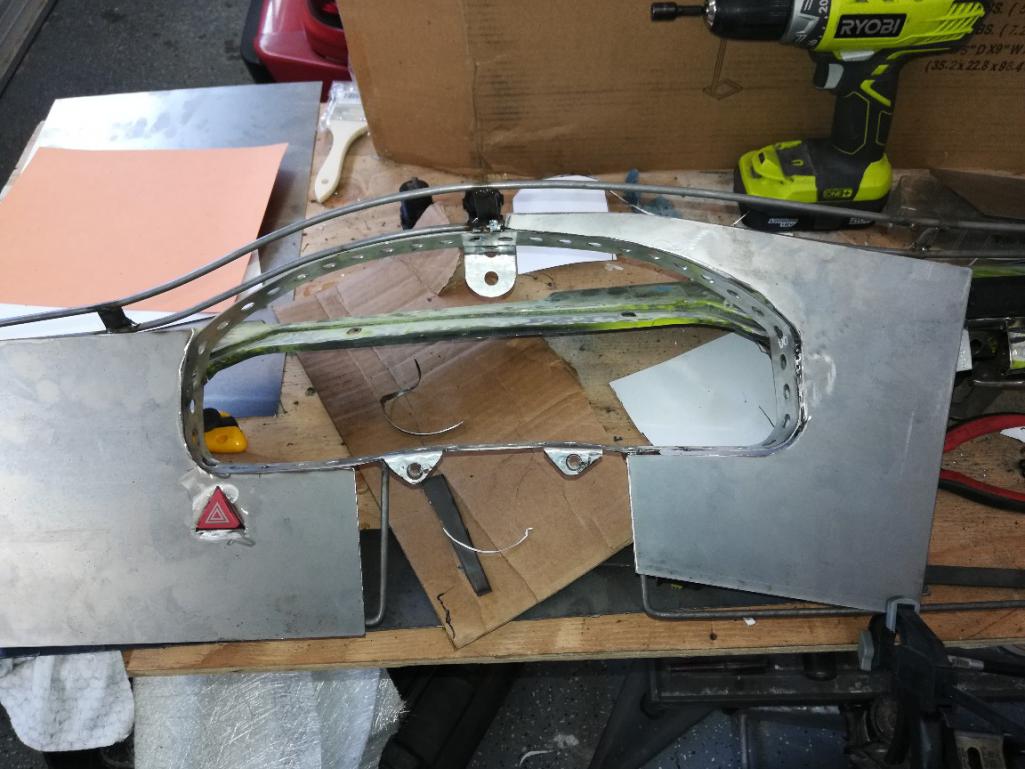
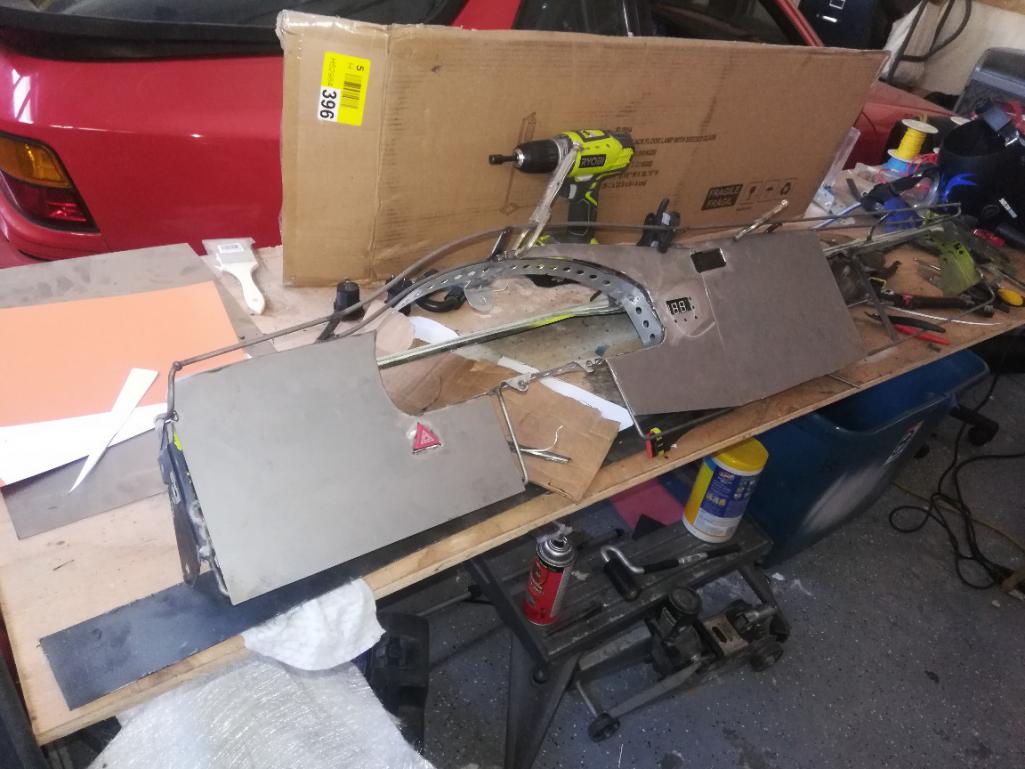
Posted by: Andyrew May 4 2019, 02:15 AM
And from the last photo to here was 4 hrs of fiddling.... 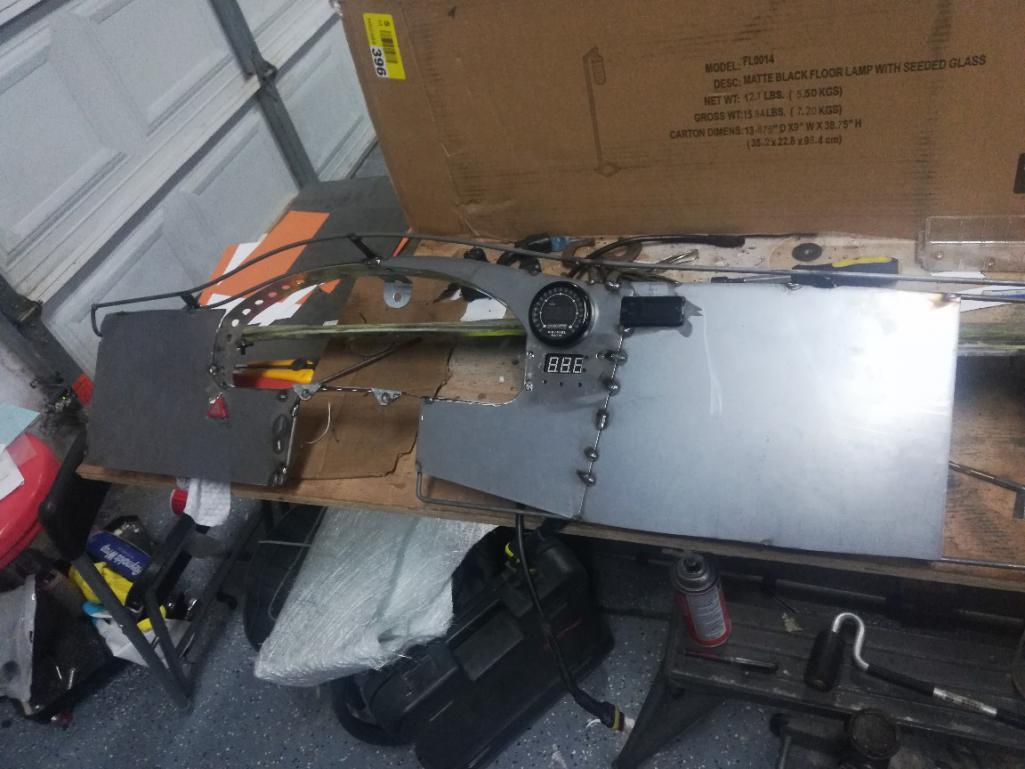
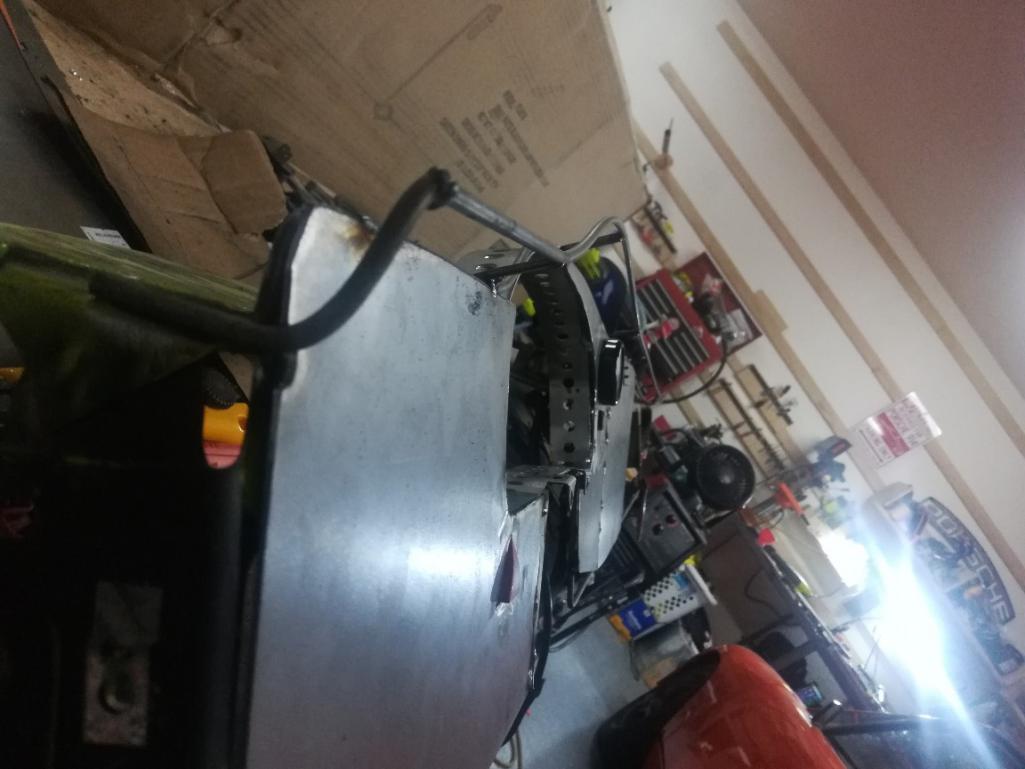
Figured out how I was going to be able to remove the intercooler fan controller
Adjust fit some items, lots of metal needed some massaging over the knee to get lined up like I wanted.
Cut in the hole for the AFR guage, and did a silly amount of trimming on the dash to get everything how I wanted. Also had to redo the mount. Dumb me thinks I can weld aluminum with steel....
Little things take a lot more time when a toddler is asleep....
Oh and in case your wondering... The holes on the bottom of the intercooler fan controller are for adjusting the temp the fan goes in. I wanted to be able to adjust it but knew I would rarely do so, so I added a small hole to be able to do so. I'll transfer the holes to the fabric when time comes. 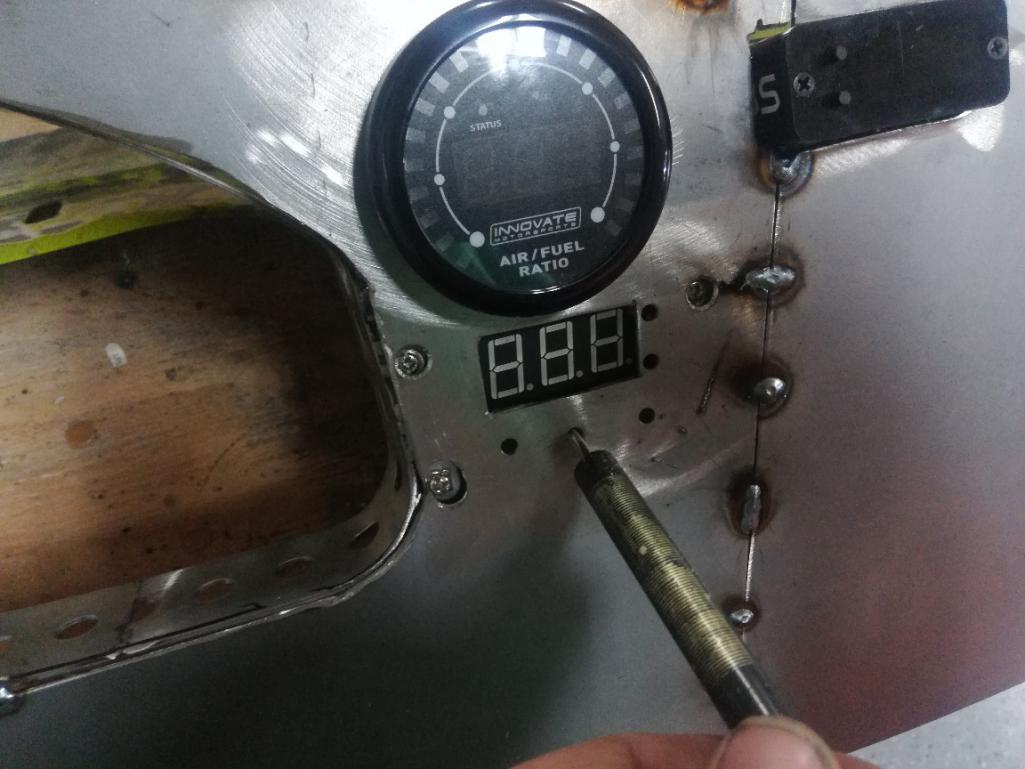
Posted by: sixnotfour May 4 2019, 02:28 AM
grinding noise was a lullaby for me.....dads home..
nice dash
Posted by: tygaboy May 4 2019, 07:16 AM
Andrew - Don't mean to hijack but:
If you'd like, bring the dash with you on the 18th and we (you!) can maybe give a go to measuring it out. We could translate that into a .dxf and we could cut you a face plate on the plasma table. I have some .050 aluminum and some 18 and 20 ga steel. Add some beading or a strategically placed break for some add'l strength?
I'd be happy to walk you through the process so you'd be making it.
Here's an example of some panels I did for the Lotus 7 replica.
Just a thought...
Attached thumbnail(s)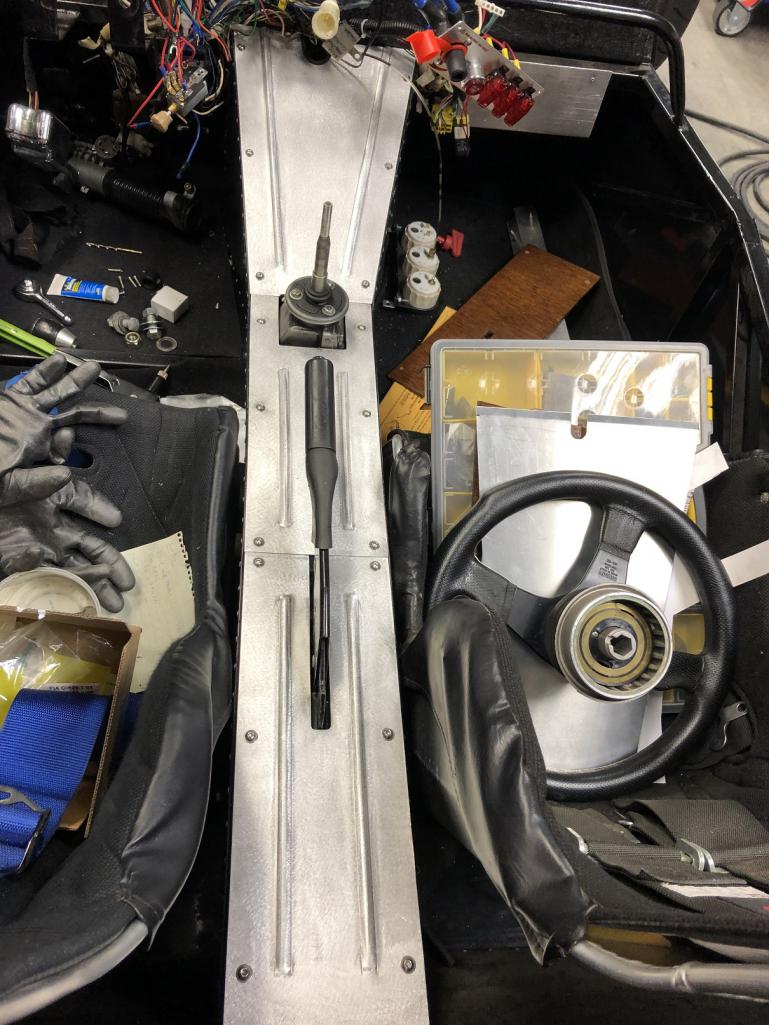
Posted by: Andyrew May 4 2019, 02:08 PM
I'll take you up on that offer for the center console Chris. The dash is pretty much doneand I don't need any additional features to it for my design concept.
The center console on the other hand could definitely use some design characteristics as right now it'll just be flat panels.
Posted by: Andyrew May 4 2019, 11:05 PM
Progress on the dash.
Drilled the cutout for the ignition. 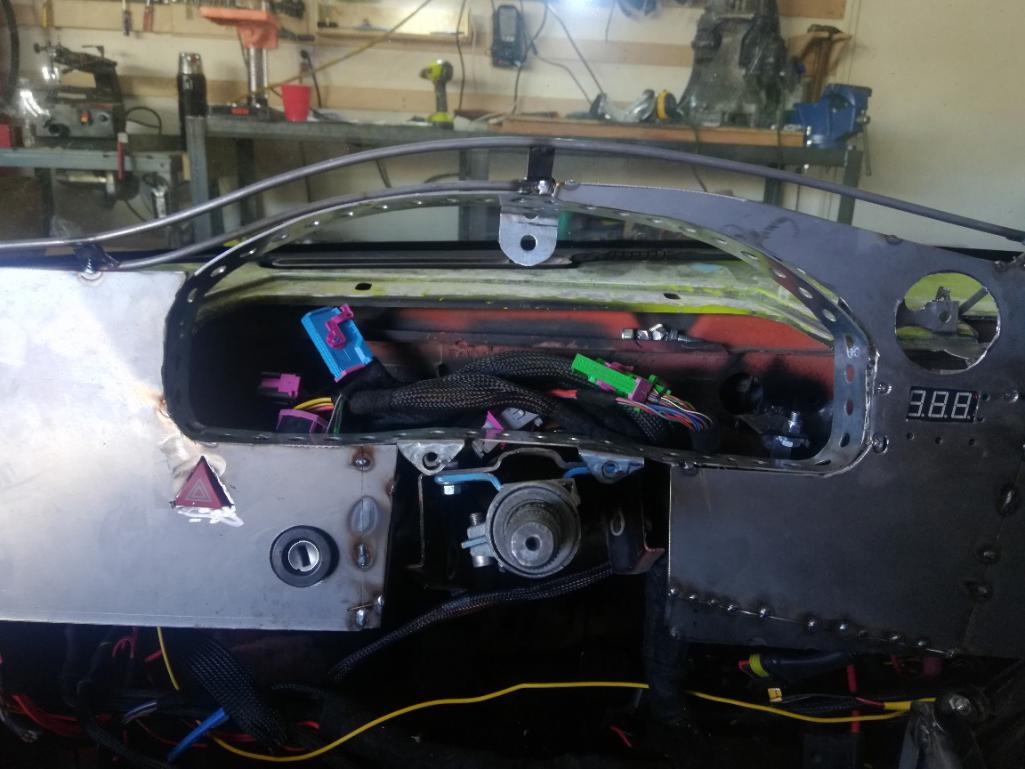
Dropped the relay box as the dash was resting on it. 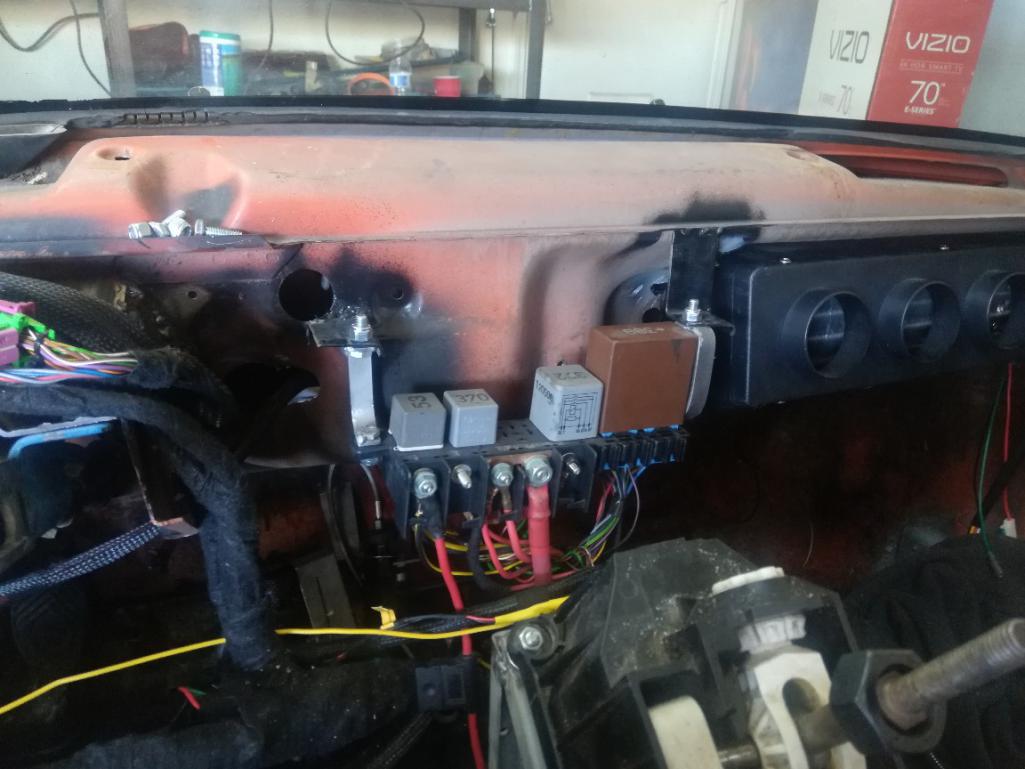
Added the rest of the dash face. 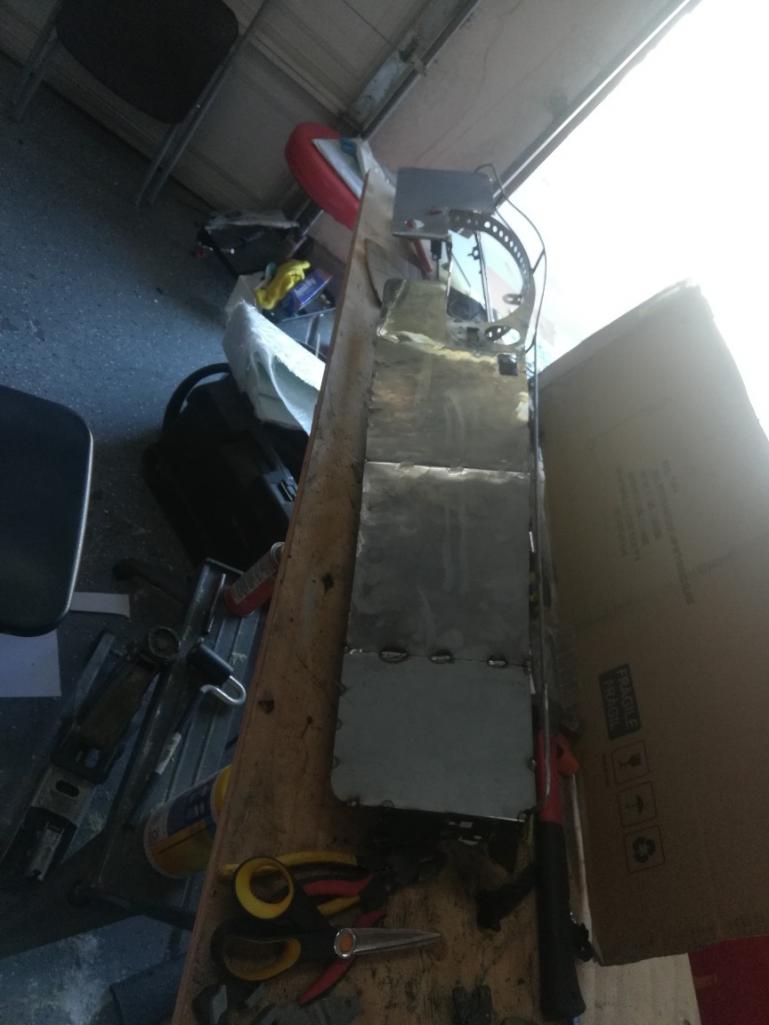
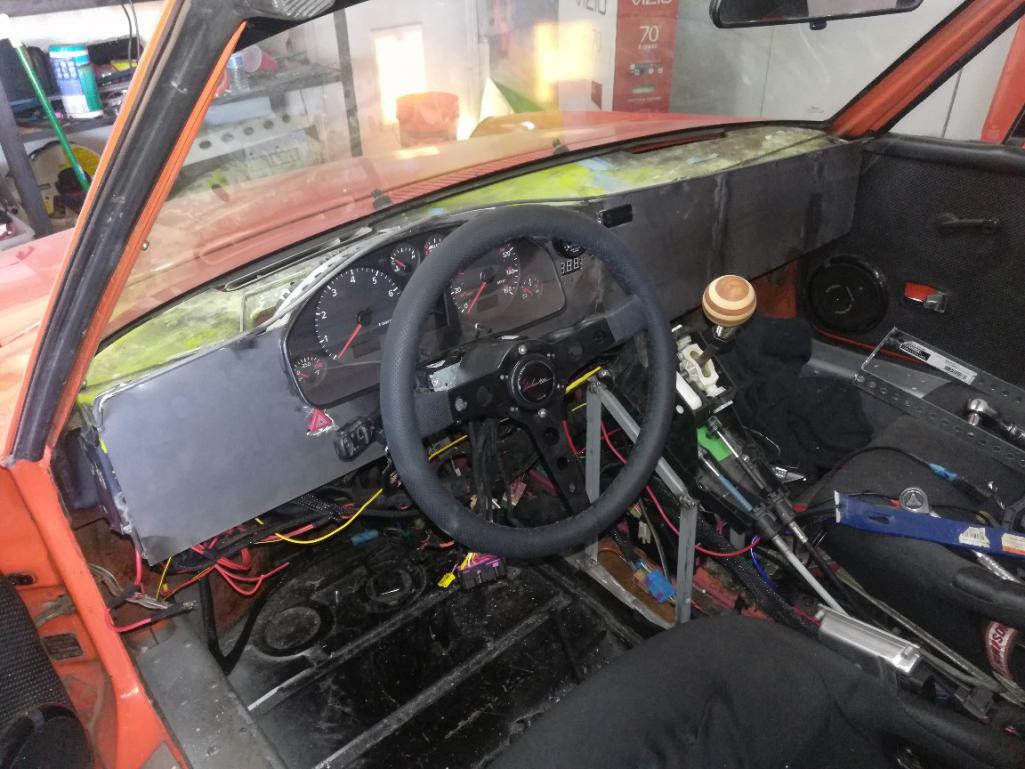
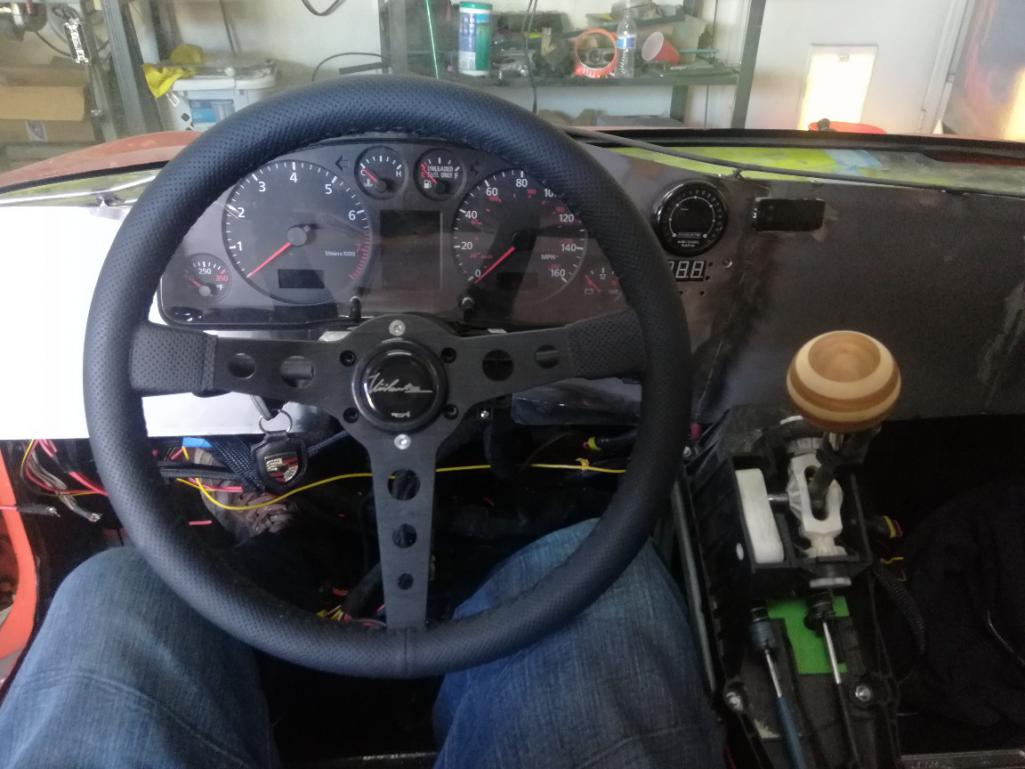
Figured out wire arrangements a bit and so far am pretty happy how things are laying out.
Next on the list is getting back to mechanical. I'll need to bleed the clutch to see if I just accidentally got air in the lines or why my clutch is to the floor.
Posted by: tygaboy May 5 2019, 07:08 AM
Isn't it "fun" as you try and bring to life the vision in your head?
It's so interesting for me to watch someone else go through this. Seeing the "first I tried X, then realized Y so redid things because of Z."
You're making great progress.
I may have missed it but are you planning to paint or upholster the dash face?
Posted by: Andyrew May 5 2019, 09:53 AM
Chris, these kind of moments when things work are what makes it all worthwhile.
For the dash face, when I learned that 914rubber had built a hot press that they used with vinyl for recreating the 914 basketweve I asked if they could press some fabric of mine. Some money exchanged hands (wasn't cheep) and I got my hands on enough material in my color to do the dash face and door panels.
I always wanted brown leather interior on a car so here we are... A couple posts up I updated my drawing of my dash concept. The brown is this material.
Attached thumbnail(s)
Posted by: tygaboy May 5 2019, 10:16 AM
I dub thee: "Factory over covered Custom"
Awesome!
Posted by: 76-914 May 5 2019, 05:04 PM
If you were going to leave it as is I would have dubbed thee "Mad Max".
Posted by: Andyrew May 5 2019, 10:35 PM
List is getting shorter
914 to do list
**Mandatory total: 15hrs
Non mandatory total: 207hrs
Suspension: 26
Replace front shocks 3
Fabricate front sway bar arms 20
Install and adjust 2
Test 1
Brakes:3
*Bleed brakes 3
Engine:30
Replumb fuel system for cleaner look 10
Look for source of oil leak. 2
Fix oil leak 10
* Dyno tune with tuner 8
Transmission: 2
*Reinstall slave cylinder and bleed clutch with power bleeder 2
Body: 75
Fabricate trunk firewall 20
Fabricate and install roll cage 30
Fix targa top knicks 5
Repaint bumpers 5
Clean up front trunk for new paint 10
Clean up rear Trunk and paint 5
Interior:87
Design and build center console 20
*Tighten all steering components 1
*Mount water pump controller 1
*Clean And mount wires 1
Install new seats 4
Finalize Dashboard 20
Design and build rear firewall 20
Design and build door cards 20
Send dash, Seats, Door cards, Center console, and Rear firewall to upholster for finalizing. (My tests revealed I don't have the skill to do this…)
Spares for WCR:
Trans
Axle
Clutch Disk
Serpentine belt
Shift Cables
Relays
Fuses
Fuel Pump filter
Fuel pump
Oil
Plugs
Coil packs
Posted by: dan10101 May 6 2019, 12:10 AM
You're a lot more realistic setting hours for repairs.
I was so far off I gave up putting times on mine.
Glad it's a shorter list...
Posted by: 914 Ranch May 6 2019, 12:50 AM
When my list is that long I just go do something. You just made a huge elephant that's going to take fourever to eat. If I thought that far ahead I would never get started. I have no plan or direction, I just turn wrenches.
But that's just me.
Posted by: 76-914 May 6 2019, 10:29 AM
Are you using the new plastic back pad from 914rubber or using the OEM cardboard. If the plastic one, what were you quoted? This info will help me decide if I want to be an upholsterer or not.
Posted by: Andyrew May 6 2019, 11:22 AM
Are you using the new plastic back pad from 914rubber or using the OEM cardboard. If the plastic one, what were you quoted? This info will help me decide if I want to be an upholsterer or not.
I havent bought/tried anything yet. I have a feeling Im going to make something out of fiberglass as I'll need to make some considerations. Not sure. I'll probably do that next year
Posted by: Andyrew May 9 2019, 07:02 AM
Progress!
Drove it yesterday! If your at all interested in a 5 min video of the sky and 11minutea of me looking around and diagnosing stuff your welcome to watch
https://www.youtube.com/watch?v=U2FqsUZ5pW4
In short.
The good:
The new trans shifts like a boxster, buttery and amazing.
The steering system feels fantastic.
The engine runs just like it always has.
Chassis feels much stiffer with the steering system improved. Feedback is much better.
Dash has a very usable layout.
The bad:
First gear was difficult, I didn't have enough throw in the shifter to engage it. A little 20second shifter adjustment and I think that's taken care of.
AFR guage needs calibration
Intercooler fan controller isn't working for some reason.
The Ugly:
I warmed it all the way up and tried restarting. No avail even with my modulating or full throttle work around. I let it cool down some and took some video of it struggling to start and what I was doing with the throttle to coax it to start. Myself, my dad and my tuner think it needs more fuel. My tuner says it has two fuel maps, one for enrichment and one for normal operation. He says we can add fuel to make it right. I'm going to get some starter fluid and see if adding starter fluid helps the hot starts. If it does we finally know what the problem is and can correct it.
I have a Dyno day I'm working on scheduling before WCR so I can get a bit more torque and clean up the map just to make sure I have my basis covered.
Posted by: Krieger May 9 2019, 08:00 AM
Congratulations!
Posted by: tygaboy May 9 2019, 08:01 AM
Progress, indeed! Happy to hear you're getting it there!
Posted by: dan10101 May 9 2019, 08:38 AM
Awesome progress!
Stacking um up and knocking them down!
Posted by: 76-914 May 9 2019, 09:46 AM
I hope that is the answer.
Posted by: 76-914 May 9 2019, 09:49 AM
duplicate
Posted by: Andyrew May 9 2019, 09:58 AM
I hope that is the answer.
Same
Posted by: Chris H. May 9 2019, 01:39 PM
I hope that is the answer.
Same
Yeah that is so WEIRD. Seems like it has to be fuel since you replaced almost all the senders/sensors. Normally I would say temp sensor but I think you checked it already. It would also likely be easier to start when warm vs. cold with a bad or miswired temp sensor. Sounds like you have the opposite problem. The starter fluid is a good idea.
Nice work on the new steering setup. Love the dash. That's going to be really nice.
Posted by: ValcoOscar May 9 2019, 02:00 PM
I enjoyed your video...
Oscar
Posted by: Andyrew May 9 2019, 10:23 PM
Starter fluid works.
More driving around video and me trying out the starter fluid.
https://www.youtube.com/watch?v=vlPDrgQBAmQ
Posted by: Chris914n6 May 10 2019, 12:28 AM
Are you losing fuel pressure when the car is off? Takes easily 2-3 seconds to build pressure with the pump on the other side of the car. Your cranks on film are too short.
BMW and likely a few others (like your Infiniti) actually trigger the fuel pump when the door is opened or other sign of pending use, like the remote is nearby, say in my pocket, as I replace an injector...
Posted by: jd74914 May 10 2019, 05:02 AM
I hope that is the answer.
Same
Yeah that is so WEIRD. Seems like it has to be fuel since you replaced almost all the senders/sensors. Normally I would say temp sensor but I think you checked it already. It would also likely be easier to start when warm vs. cold with a bad or miswired temp sensor. Sounds like you have the opposite problem. The starter fluid is a good idea.
It's not an uncommon problem actually. You typically have a one time starting pulse adder which is a function of engines temperature and also a startup enrichment table with pulse modifier which is on a temperature vs. crank number table. If you taper off too fast with temperature you can have issues. Sometimes, people also have the thresholds for starting engine speed too low so they car starts thinking it's running when it's cranking really fast and doesn't get any extra fuel. Lots of little nuances can cause a lack of hot start fuel unfortunately.
Hope you guys figure it out soon!
Posted by: Andyrew May 10 2019, 06:43 AM
Are you losing fuel pressure when the car is off? Takes easily 2-3 seconds to build pressure with the pump on the other side of the car. Your cranks on film are too short.
BMW and likely a few others (like your Infiniti) actually trigger the fuel pump when the door is opened or other sign of pending use, like the remote is nearby, say in my pocket, as I replace an injector...
Pump is literally next to the engine, and it's an 044.
I've tried letting it build pressure with no avail and letting it crank for a minute with no results. Audi kills ignition on cranking after 5 seconds.
JD is correct my tuner said the same thing. It's going to take some time to figure out but we'll get it.
Also quick note, I am running 1300CC injectors, so I have a strong feeling with them being so large its compounding this start issue.
Posted by: 76-914 May 10 2019, 08:39 AM
Hot Damn! Way to go. Why didn't Mike encounter these problems. Is he running an aftermarket ECU?
Posted by: Chris914n6 May 10 2019, 01:23 PM
Are you sure you're getting a start signal to the ecu? Usually it triggers batch fire as the air isn't moving fast enough for sequential to work right.
Injectors timed to spray into OPEN valves? 1300cc is going to have some latency.
Posted by: Andyrew May 11 2019, 01:18 AM
Are you sure you're getting a start signal to the ecu? Usually it triggers batch fire as the air isn't moving fast enough for sequential to work right.
Injectors timed to spray into OPEN valves? 1300cc is going to have some latency.
Interesting point. Very possible that its not getting start signal. Not really sure how I would test it, I'll bring it up to my tuner.
Injectors should be timed right, but who knows... I'll have my tuner check the existing tune and figure it out and we'll go from there.
Taco bell run for lunch. Ran pretty good. Transmission seems to be getting slightly worse. Not as slick as it was last night for some reason specifically getting into first. I'll try it again next week and see what I find. Some noises I didnt like, and the steering has a weird spot where something feels loose, I'll nut and bolt everything and check the bearings in the column.
Also did a 1-2 pull. For some reason the gearing seems much shorter than I remember. 2nd gear should be the same but it was shorter than I remember. Im only on wastegate so it wasnt very quick, first gear probably didnt make more than 6lbs or it spun (which with the new LSD it shouldnt) and 2nd gear was decent, then it seemed to get a bit more boost for some reason and felt OK. My frame of reference is my 350hp daily sedan... I think theres room for improvement in the tune
Cant wait till I get the boost in the 20's. Should feel like a rocket. My tuner says he's ran 25psi on 91 octane with no adders. Which would be deep in the 300whp range.
So to recap the items Im going to be focusing on during the week this week are:
1. Solving the hot start issue with my tuner remotely
2. Calibrating the AFR guage
3. Fixing the intercooler fan controller power issue
4. Wiring in switches for the electric water pump and fuel pump
5. Program in the new boost controller settings
6. Start figuring out what Im going to work on at the build day and get materials accordingly.
7. Mount and wire in the USB charger and stereo
8. Find a better permanent home for the water pump controller
Posted by: Andyrew May 11 2019, 01:34 AM
Messing around with the new boost controller programing. It's now closed loop capable
Im building an rpm x throttle position tune as I'm thinking this would be best for drivability.
Attached thumbnail(s)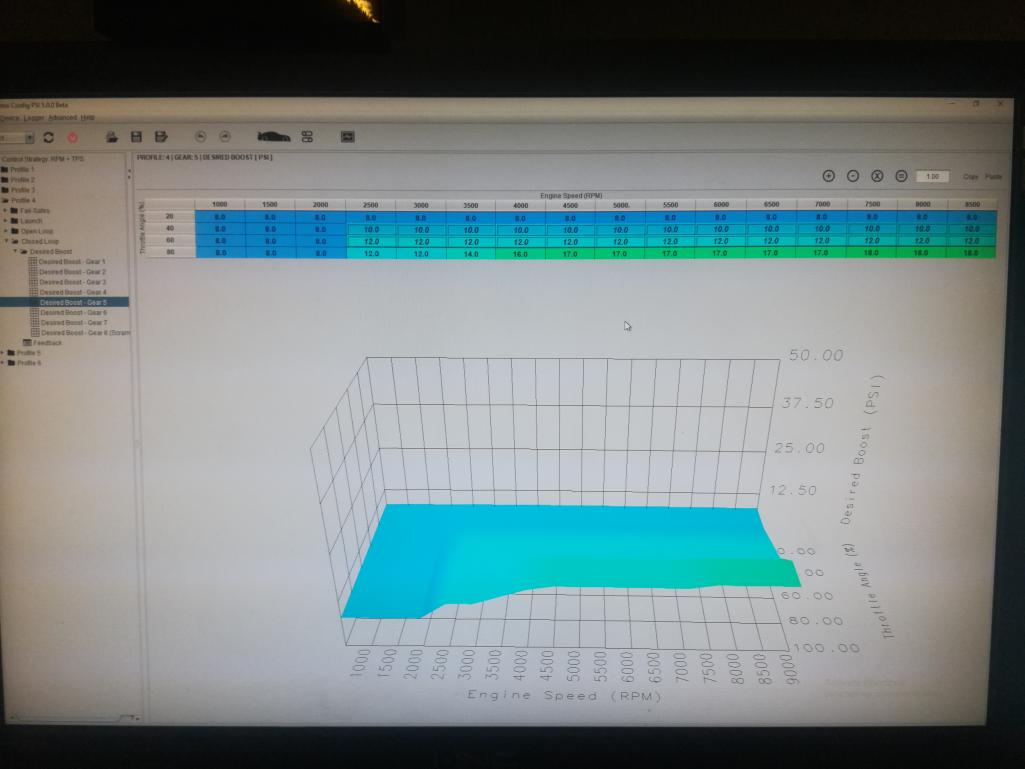
Posted by: tygaboy May 11 2019, 07:59 AM
Hi Andrew - Regarding how the shifting is feeling: I don't recall if you have a 5 or 6-speed but if it's a 6, I have the Numeric shifter and cables. You're welcome to borrow them to see if any/all of those components are the root cause.
Or, if you're planning to bring the car to my place on the 18th, we could swap it in for a quick test.
The Numeric site also has some nice vids on adjusting the cables. Not sure if this helps with non-Numeric parts but it may be worth a look.
https://numericracing.com/guides/
See you soon!
Chris
Posted by: Andyrew May 11 2019, 08:09 AM
Shifter assembly shouldn't be any different.
Doesn't feel like a shifter issue but heck who knows. It could be just crappy cables but I did just swap them out with my spares and they feel pretty good.
I'm now realizing that I didn't tie up my cables after I swapped then so they could have gotten some heat from the turbo and messed up. I'll have to check that.
Thanks for the offer Chris do you have the N100 or N400?
Posted by: tygaboy May 11 2019, 09:01 AM
Shifter assembly shouldn't be any different.
Doesn't feel like a shifter issue but heck who knows. It could be just crappy cables but I did just swap them out with my spares and they feel pretty good.
I'm now realizing that I didn't tie up my cables after I swapped then so they could have gotten some heat from the turbo and messed up. I'll have to check that.
Thanks for the offer Chris
do you have the N100 or N400?Mine's the NM100 and I have the Numeric standard length cables. I'm thinking it "should" be a straight bolt-in swap for yours?
Posted by: Andyrew May 11 2019, 09:51 AM
Shifter assembly shouldn't be any different.
Doesn't feel like a shifter issue but heck who knows. It could be just crappy cables but I did just swap them out with my spares and they feel pretty good.
I'm now realizing that I didn't tie up my cables after I swapped then so they could have gotten some heat from the turbo and messed up. I'll have to check that.
Thanks for the offer Chris
do you have the N100 or N400?Mine's the NM100 and I have the Numeric standard length cables. I'm thinking it "should" be a straight bolt-in swap for yours?
Shifter yes, cable maybe not due to length but I see no reason.
Fyi the cables are difficult to change for my car so if I brought the 914 I would just swap the shifter for a test.
Posted by: Andyrew May 20 2019, 01:14 PM
Lots went on this weekend!
Saturday was Build day at The Red Barn hosted by Chris @tygaboy!
http://www.914world.com/bbs2/index.php?showtopic=337633
As per usual I got a lot done but its never enough!
I should really go up there myself for a day and just work with all his tools... Just a killer awesome fab shop he has!
What I made! Center console pieces. They are just laying there right now, I'll be fabricating mounting points for them and trimming the pieces to fit then upholstering them. Not sure if black or brown yet or possibly both. 
Very comfortable arm position, Could be higher but uphostery pads will raise it some. As it sits now its a stretch to hold the wheel and rest the elbow at the same time, that will change.
Posted by: Andyrew May 20 2019, 01:30 PM
Dyno day on Sunday went pretty well.
Ended up making 8lbs of boost actual manifold pressure on the wastegate and that did 247hp/198tq at the wheels. This was about 50 more than I was expecting which was the highlight of the day
My boost controller was reading boost inaccurately so while I was showing 17+lbs of boost I was really only making 14psi. I had some spikes to 16psi but with a 7lb spring in the wastegate as we suspect right now we can only effectively double that and we didnt make any more power/boost after 14psi. So while the setup was ready for us to make 25psi yesterday we werent able to go over 14.
What did that net us?
282HP/258tq at the wheels. Its interesting, that 40ish hp delta between wastegate and max on this actuator feels way more than it actually is.
So whats next? I have a dual port internal wastegate actuator on order.
https://www.full-race.com/store/borg-warner-efr/turbos-efr-series/turbosmart-efr-twin-port-actuator/
I'll put the small 7lb spring in it and then I can run the same 7psi but it will let me bump up the spring to what I want to do (30psi). I figured I could get into the 20's before the wastegate would let me go anymore but we were absolutely wrong..
At that point what will hold me back is the intake manifold and cams. You can see my power curve rolls over about 6600. Which for an engine built to run to 9k and running this large of a turbo is wasted potential. Cams would bump my power curve up but it would also extend it out considerably.
This explains why It fell on its face after 7k. I'll do this next year. This year will be focusing on driving and finishing the majority of the car. Next year we'll go for power.
Side note, If I put cams and an intake on it, we would be into the 500whp territory...
Biggest thing about yesterday was the clutch though. Were having issues with the clutch dragging/ not fully disengaging when the engine is hot. This must be my shifting issue. When were doing back to back pulls with the engine hot we simply couldnt get it into gear... I had to force it in third gear to get the car rolling on the dyno then do the pull from there...
I'll try replacing the slave cylinder (I have a cast iron one on hand) and bleed the system again, then also extend the rod from the slave to as much as I can. The next option is the flywheel is a self adjusting unit and I've never reset it. I'll try that and put a new disk on. It might just be at the end of its travel and wont release any more even though its "released". Finally a new disk will just ensure its not the disk itself expanding when it gets hot.
And lastly, the starting issue is not fixed. But either starting works. We got it a bit better but it always starts with either.
Posted by: Andyrew May 20 2019, 01:39 PM
Posted by: dan10101 May 20 2019, 02:05 PM
Dynos
I personally like the 288/251 number myself. But that number will be surpassed in days to come. if it never does, it will still be a screamer..

Posted by: 76-914 May 20 2019, 02:21 PM
Sounds great Andrew!
Posted by: Andyrew May 20 2019, 02:26 PM
Dynos
I personally like the 288/251 number myself. But that number will be surpassed in days to come. if it never does, it will still be a screamer..
It was pulling some timing so we backed the timing off a hair. However Look at the dyno curve. the 282/258 had significantly more power under the curve. It has a more aggressive boost curve programed into it on the low end which is why... But it just wouldnt push more boost in the end.
Its ok. I've been told the tune is safe for 25psi on the street as it sits. Also its a hair rich so I can safely add a gallon of E85 on it and bump the octane significantly.
Side note on all the dyno runs. We didnt see intake air temps over 30deg C for the entire run. Which means the air hitting the cylinders after pressurization was only 85F.... If that doesnt push you turbo guys to air to water intercoolers I dont know what will...
Posted by: jd74914 May 20 2019, 03:19 PM
Ended up making 8lbs of boost actual manifold pressure on the wastegate and that did 247hp/198tq at the wheels. This was about 50 more than I was expecting which was the highlight of the day
So whats next? I have a dual port internal wastegate actuator on order.
https://www.full-race.com/store/borg-warner-efr/turbos-efr-series/turbosmart-efr-twin-port-actuator/
I'll put the small 7lb spring in it and then I can run the same 7psi but it will let me bump up the spring to what I want to do (30psi). I figured I could get into the 20's before the wastegate would let me go anymore but we were absolutely wrong..
Very nice!
Yeah, typically wastegate springs need to be about 1/2 desired boost in my experience. Easy change for you.
Side note on all the dyno runs. We didnt see intake air temps over 30deg C for the entire run. Which means the air hitting the cylinders after pressurization was only 85F.... If that doesnt push you turbo guys to air to water intercoolers I dont know what will...
Do you measure air temperatures at the compressor exit before the intercooler?
Comp Turbo is a bit sketchy since they don't publish compressor/turbine maps (claiming they are proprietary which is total BS), but I'm wondering if you're operating at a 75+% efficient point in the map with your current conservative pressure ratio and corresponding air flows. That might make your IC setup look a really good. It'll be interesting to see when you go to higher pressures.
Posted by: Andyrew May 20 2019, 03:26 PM
Ended up making 8lbs of boost actual manifold pressure on the wastegate and that did 247hp/198tq at the wheels. This was about 50 more than I was expecting which was the highlight of the day
So whats next? I have a dual port internal wastegate actuator on order.
https://www.full-race.com/store/borg-warner-efr/turbos-efr-series/turbosmart-efr-twin-port-actuator/
I'll put the small 7lb spring in it and then I can run the same 7psi but it will let me bump up the spring to what I want to do (30psi). I figured I could get into the 20's before the wastegate would let me go anymore but we were absolutely wrong..
Very nice!
Yeah, typically wastegate springs need to be about 1/2 desired boost in my experience. Easy change for you.
Side note on all the dyno runs. We didnt see intake air temps over 30deg C for the entire run. Which means the air hitting the cylinders after pressurization was only 85F.... If that doesnt push you turbo guys to air to water intercoolers I dont know what will...
Do you measure air temperatures at the compressor exit before the intercooler?
Comp Turbo is a bit sketchy since they don't publish compressor/turbine maps (claiming they are proprietary which is total BS), but I'm wondering if you're operating at a 75+% efficient point in the map with your current conservative pressure ratio and corresponding air flows. That might make your IC setup look a really good. It'll be interesting to see when you go to higher pressures.
IAT's were measured in the manifold.
Posted by: jd74914 May 20 2019, 03:58 PM
Sorry, should have been clearer, I meant did you measure before the intercooler too?
Posted by: Andyrew May 20 2019, 04:33 PM
No I did not. Ambient was about 70
Posted by: Andyrew May 23 2019, 12:39 AM
Tried the metal slave cyl. The quality on the unit looks great. But the damn bleed screw is metal on metal.... What idiot thought that would work? Won't hold pressure, bleed screw was cast so I cleaned up the castings and still no go. Damn thing needs a rubber seal. I might experiment with one sometime later but I have a spare plastic slave.
First things first was to try and get fluid to pull through the line... No luck. I'm going to need someone else to help me with this as this fkin thing is not working. I messaged a friend so hopefully tomorrow or Friday I'll have the clutch properly bled.
I can hear some air by the master so who knows.... the whole thing is not well layed out for a good bleeding. Really needs a power bleeder and not s vacuum bleeder.
If this doesn't work I suspect pressure plate needs alignment. If that doesn't work, new clutch/pp. If that doesn't work. Add more lever action to pedal assembly. If that doesn't work....... Pay someone smarter?
Ugh.
Posted by: 914 Ranch May 23 2019, 05:42 AM
Yeah, I hate that last step too.
Posted by: Cairo94507 May 23 2019, 07:18 AM
Andrew - Great meeting you at Chris' shop last weekend. I hope to see your car one of these times. It sounds amazing. Cheers, Michael
Posted by: tygaboy May 23 2019, 07:26 AM
@http://www.914world.com/bbs2/index.php?showuser=172 - Let's pick a date that works to have you come over and do more fab work.
Also, let me know if you want me to send the panel you left here or if you're OK waiting til you're here next.
Talk soon!
Chris
Posted by: 76-914 May 23 2019, 08:23 AM
I can hear some air by the master so who knows.... the whole thing is not well layed out for a good bleeding. Really needs a power bleeder and not s vacuum bleeder.
Ugh.
My reservoir is the highest point I'm my system. The lowest is where it exits the tunnel via the clutch tube. From there it is strapped up against the engine/trans, then level about 1' then up to the slave. In order to bleed the system I remove the strap at the engine/trans creating a temporary "new" low spot. Next I break the flare nut loose at the slave cylinder and wait to let gravity do it's job. The next morning I top off the reservoir then pump clutch and bleed the remainder of the air and clamp. Finally the tube is strapped back to the engine/trans.
I didn't plan or foresee this method. I just got lucky. There aren't any "peaks and valleys" in the line. It flows downhill from reservoir to MC to the low spot I "create" by removing a strap. And that low point is only 2' from and directly below the SC.
I'd say stay after it but I don't believe you need any encouragement at this point. See you at WCR.
Posted by: dan10101 May 23 2019, 08:29 AM
Tried the metal slave cyl. The quality on the unit looks great. But the damn bleed screw is metal on metal.... What idiot thought that would work? Won't hold pressure, bleed screw was cast so I cleaned up the castings and still no go. Damn thing needs a rubber seal. I might experiment with one sometime later but I have a spare plastic slave.
First things first was to try and get fluid to pull through the line... No luck. I'm going to need someone else to help me with this as this fkin thing is not working. I messaged a friend so hopefully tomorrow or Friday I'll have the clutch properly bled.
...
Send me a pict of your slave, I have a spare, it's a pull type.
I'll bring my Mityvac pressure bleeder down JIC. I just need to see your reservoir cap.
Posted by: Andyrew May 23 2019, 08:36 AM
Tried the metal slave cyl. The quality on the unit looks great. But the damn bleed screw is metal on metal.... What idiot thought that would work? Won't hold pressure, bleed screw was cast so I cleaned up the castings and still no go. Damn thing needs a rubber seal. I might experiment with one sometime later but I have a spare plastic slave.
First things first was to try and get fluid to pull through the line... No luck. I'm going to need someone else to help me with this as this fkin thing is not working. I messaged a friend so hopefully tomorrow or Friday I'll have the clutch properly bled.
...
Send me a pict of your slave, I have a spare, it's a pull type.
I'll bring my Mityvac pressure bleeder down JIC. I just need to see your reservoir cap.
Its tiny. Think motorcycle. Like 1.5" I was thinking I would get a spare cap, drill a hole in it and put a nipple on it so I can pressurize it.
https://www.ebay.com/itm/For-Audi-Porsche-Boxster-Volkswagen-Passat-Clutch-Slave-Cylinder-TRW-8E0721257M/152549321531
Posted by: Andyrew May 23 2019, 08:38 AM
I can hear some air by the master so who knows.... the whole thing is not well layed out for a good bleeding. Really needs a power bleeder and not s vacuum bleeder.
Ugh.
My reservoir is the highest point I'm my system. The lowest is where it exits the tunnel via the clutch tube. From there it is strapped up against the engine/trans, then level about 1' then up to the slave. In order to bleed the system I remove the strap at the engine/trans creating a temporary "new" low spot. Next I break the flare nut loose at the slave cylinder and wait to let gravity do it's job. The next morning I top off the reservoir then pump clutch and bleed the remainder of the air and clamp. Finally the tube is strapped back to the engine/trans.
I didn't plan or foresee this method. I just got lucky. There aren't any "peaks and valleys" in the line. It flows downhill from reservoir to MC to the low spot I "create" by removing a strap. And that low point is only 2' from and directly below the SC.
I'd say stay after it but I don't believe you need any encouragement at this point. See you at WCR.
I've got a decent amount of loops in the line and I tried that last night essentially. We will see what actually happened.
I really think pressure is required from the reservoir side.
Posted by: Andyrew May 23 2019, 08:39 AM
Andrew - Great meeting you at Chris' shop last weekend. I hope to see your car one of these times. It sounds amazing. Cheers, Michael
You to Michael! It was fun chatting with you and your brother
Posted by: Andyrew May 23 2019, 08:42 AM
@http://www.914world.com/bbs2/index.php?showuser=172 - Let's pick a date that works to have you come over and do more fab work.
Also, let me know if you want me to send the panel you left here or if you're OK waiting til you're here next.
Talk soon!
Chris
Agreed. I've been debating back and forth about what makes sense for me, to try and make another day up there or to just push forward myself here and have you ship it... I need another bend in it which is why it was on the brake, but I was trying to figure out the measurement and how to use your machine.
It really makes a lot of sense for me to come up there again with the car. I could get the center console done as well as the lower and possibly the upper dash pretty much in a day. (You know my quality standards so I would just bust through those things now that im familiar with many of your tools a bit more)
Posted by: Andyrew May 25 2019, 02:39 AM
Ok some progress. 
Wastegate came in. I took out a spring so it's 7psi now. It's a bit bigger so fitting it will be difficult. We'll have to work on that after WCR. Too bad, I was hoping to pump it up to 400whp when my dad came down so we could have some nice roll racing.
Another note. My tuner said he's going to tune another ECU of mine, I bought a tuner cable for dirt and I'll be able to tune like he does. He's a nice guy and has shown me a bunch. He'll be down tomorrow to set me up. We'll work on it a bit and do some remote tuning and editing. I told him I want an E85 file and I'll just get set up with whatever files I want and I can swap them whenever at a gas station or swap ecu's if something happens. Anyways I'm pretty excited about that
I removed the brake master and got the lines really flat. I removed the slave and left the line open to the vacuum. It still didn't pull anything so I suspect there was just to much air with me fiddling with it. I decided to cycle the master a bit and finally was getting somewhere. I kept cycling it and it seemed to just pull fluid from the reservor and push it out the line. I did this till the line seemed clear. Then connected the slave and installed it. 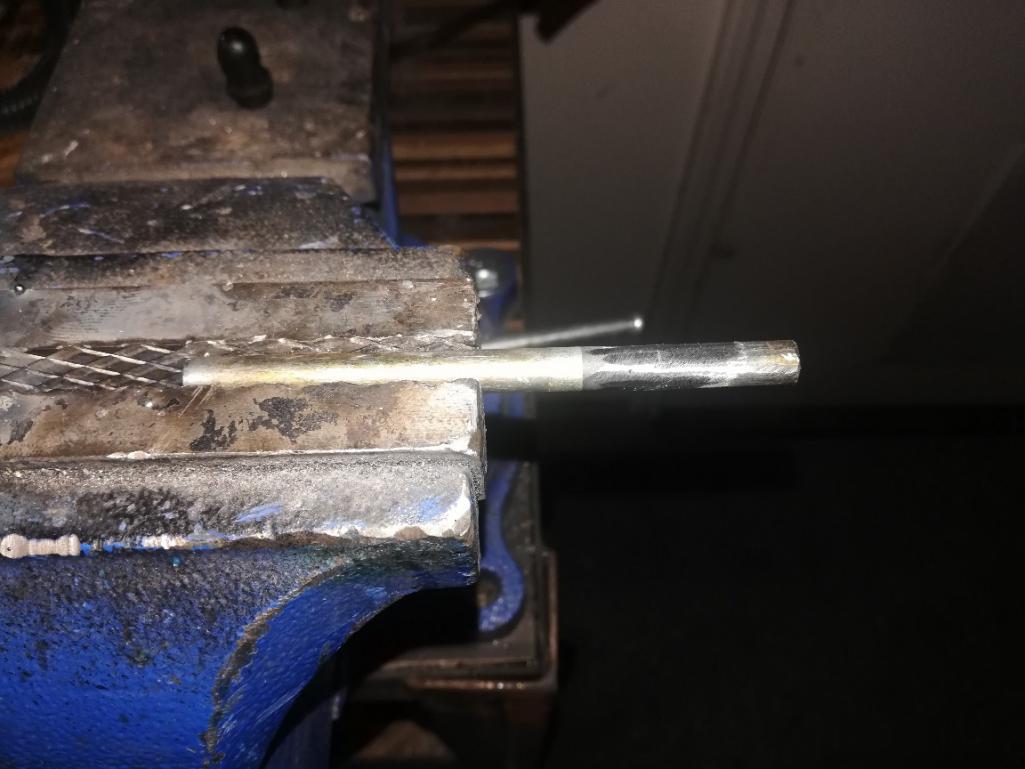
Side note I extended the rod for the slave a bit more than I had previously. Which required me to weld on an extension instead of just using some tiny nuts in the end caps. Added another 1/4". This means that I should have more total travel with my pressure plate. If it's too much and I get slipping I'll cut it down a hair.
Back to bleeding. Im going to do some more hand bleeding and then I'll be getting a friend, installing the master and trying it some more.
I can't get any more out of the pedal unless I redesign it and then it would only be an extra 1/8* of travel. So I don't think that's enough to worry about.
If this doesn't work then it's a new clutch/pressure plate. I have a couple available. 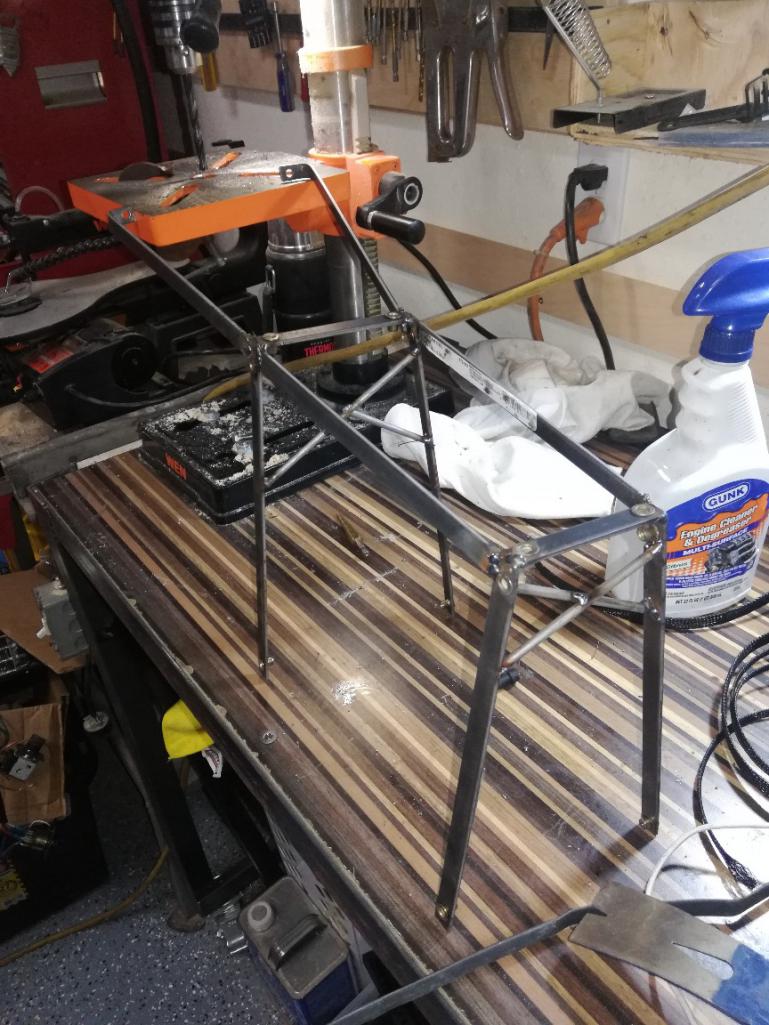
Back to actual progress... I started working on the center console. Biggest problem is I have all the wiring in the car and the new seats all mounted. So I needed to be very careful when handling the steel and any welding. But I got the center cage done. Dimensions based on my steel pieces. I also trimmed them a bit to fit, but more trimming will be necessary when I add carpet and such.. I'll have to redesign the top pieces or at least the back and I'm still figuring out the seam between the two as I'm debating on black sides and brown accent top. Still up in the air.
PS Chris I was trying to get the girls to go to 6 flags one of these days and I would just drop them off but that's looking like a no...
Posted by: tygaboy May 25 2019, 06:26 AM
Andrew - On planning some more time back at my shop, just give me a bit of a heads up and I can make most any date/time work.
Chris
Posted by: Andyrew May 26 2019, 02:20 AM
More progress on the center console... My friend to help me bleed the clutch and my tuner we're a no show. Probably do family things tomorrow and Monday but we'll see. I really need to get the clutch dialed in by Tuesday or know if I need a replacement. 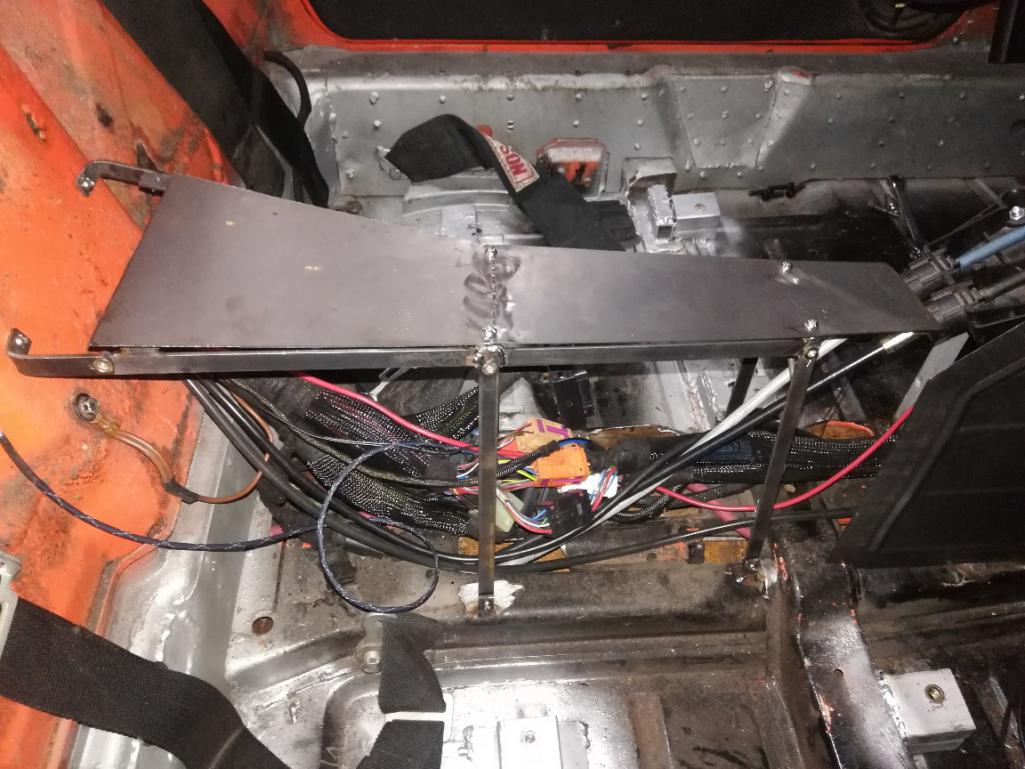
Finished the mounting of the center console base then trimmed the sides to fit. 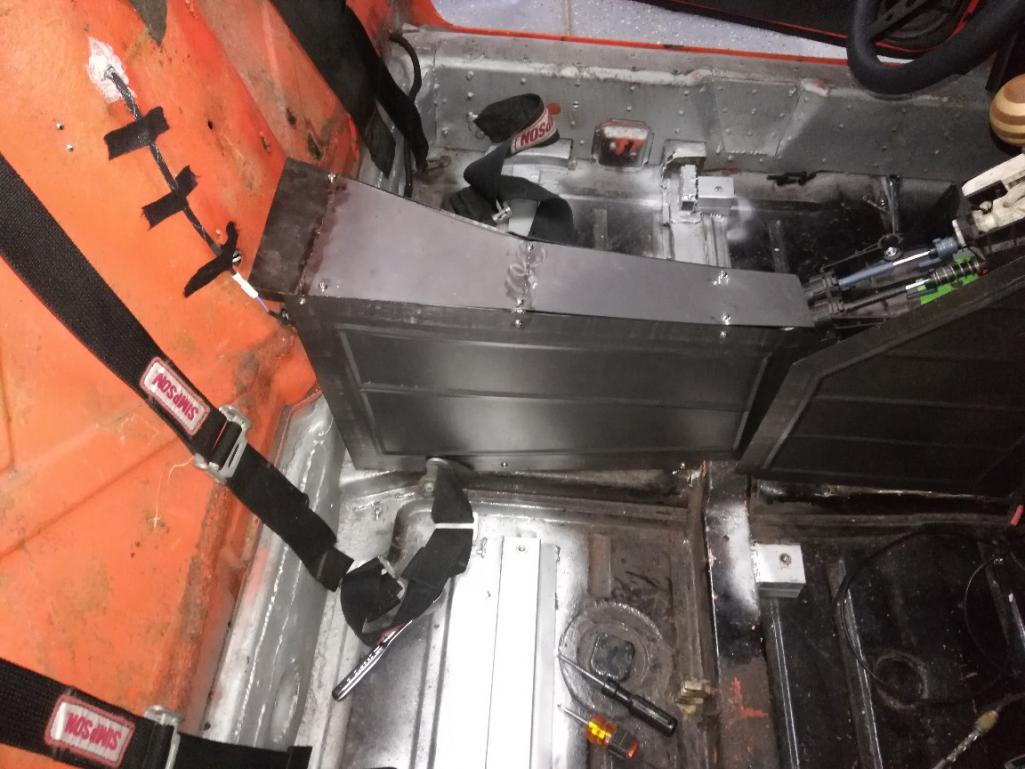
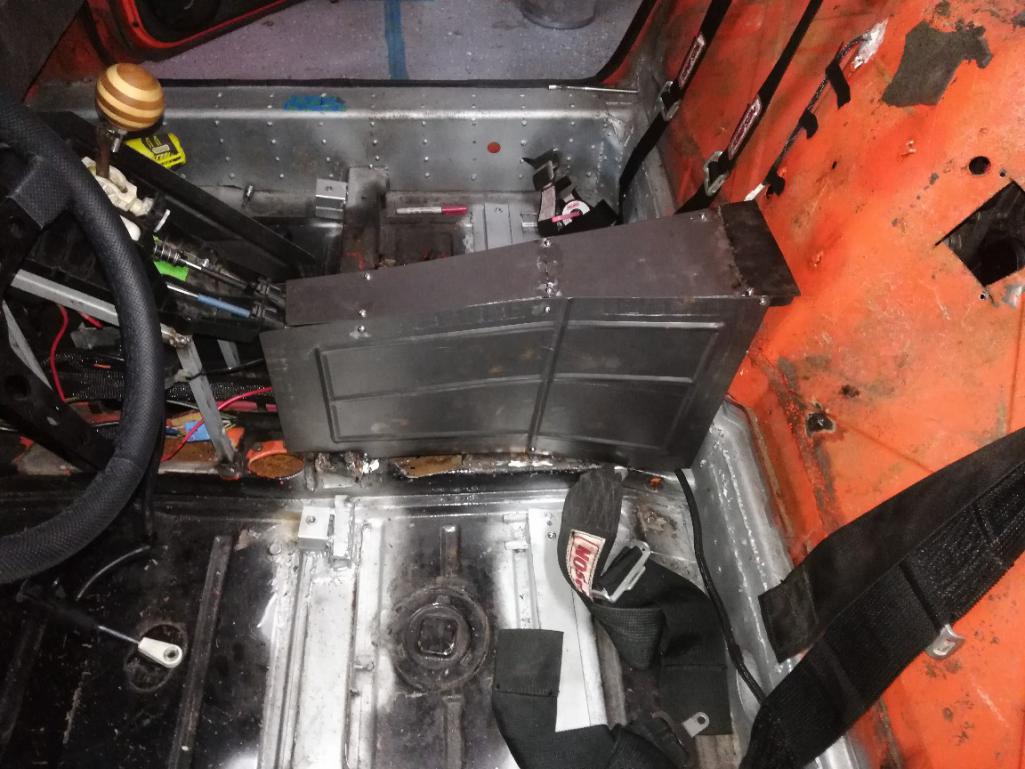
Then I worked on the top portion and got it squared away and fitting decent.
This was most of my day. Not a lot but the rear section is done as far as the sheet metal is concerned. I will probably drive it to WCR this way. 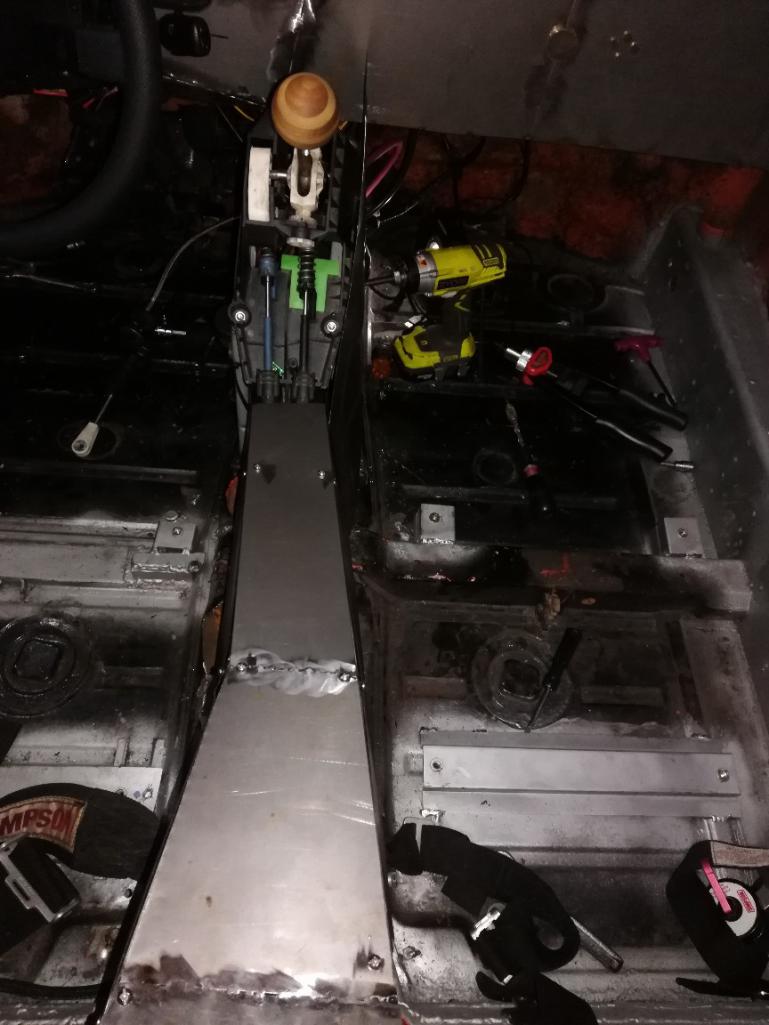
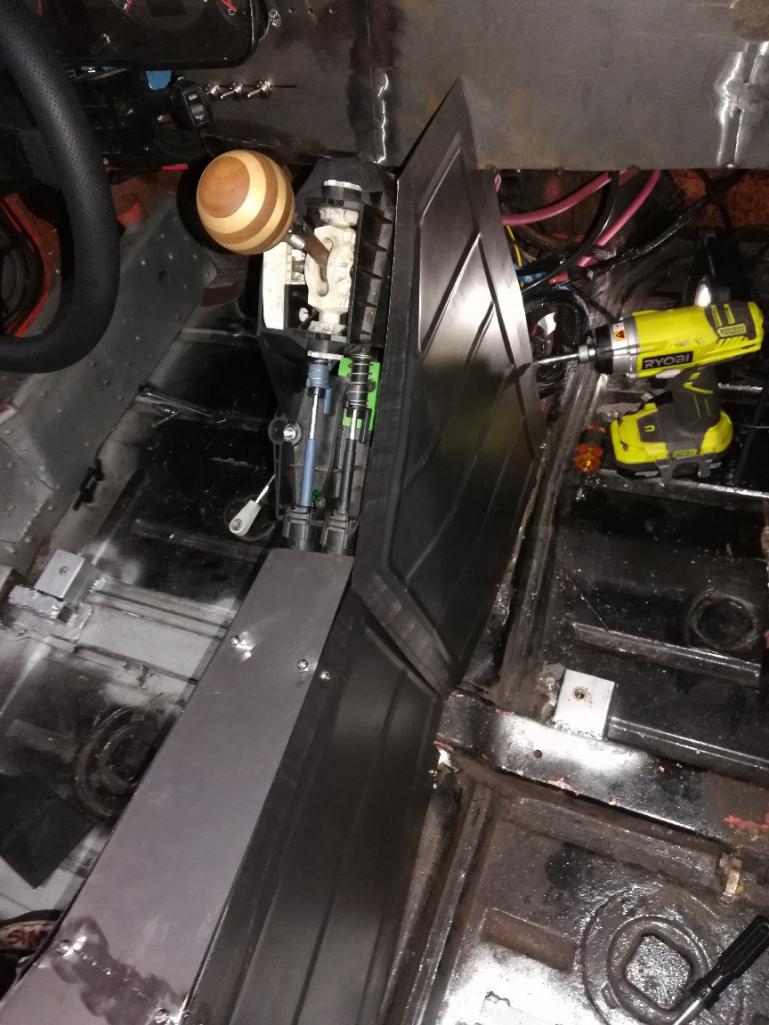
Frony/middle section with the shifter is difficult due to the curve in the top/base. After a couple tries I got the piece bent that I have and it looks good. I did the lower easy mounts but need to work on the upper mounts. Then I'll need the other side from Chris as well as to do the top portion.
Excited on the progress
Posted by: Cairo94507 May 26 2019, 07:25 AM
Hi Andrew,
I look forward to seeing your car at WCR. Michael
Posted by: tygaboy May 26 2019, 07:29 AM
Full custom fabrication!
Posted by: Andyrew May 27 2019, 01:20 AM
Alina hadn't had her nap and it was almost 3pm. So we decided to go drive. Her naps are about 2 hours... So where do we drive? Petaluma to grab the piece I left at Chris's. Thanks Chris for letting me swing by on such short notice!!
Alina went to sleep almost immediately in the car...
Had a nice dinner at a local Petaluma restaurant that had a great playground and had some nice BBQ.
Got home and couldn't resist myself I wanted to see where we were with fitment of the panel.
I knew this one would take some more work... We'll like the other one I needed to bend it and since I don't have nice press brakes I make do 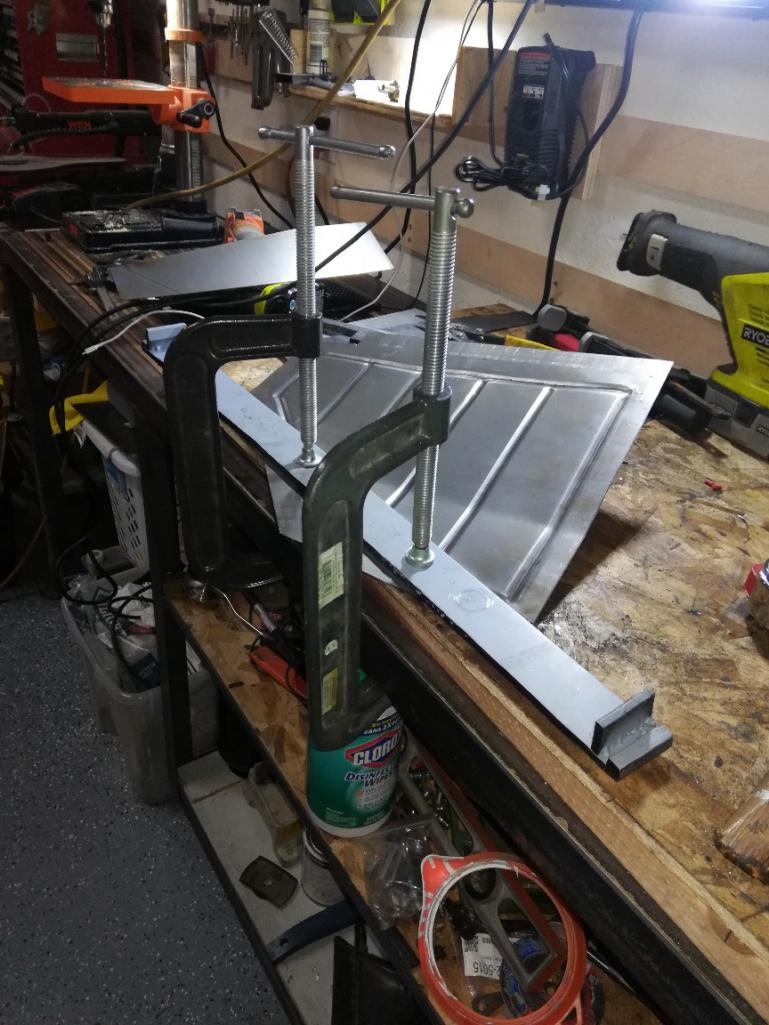
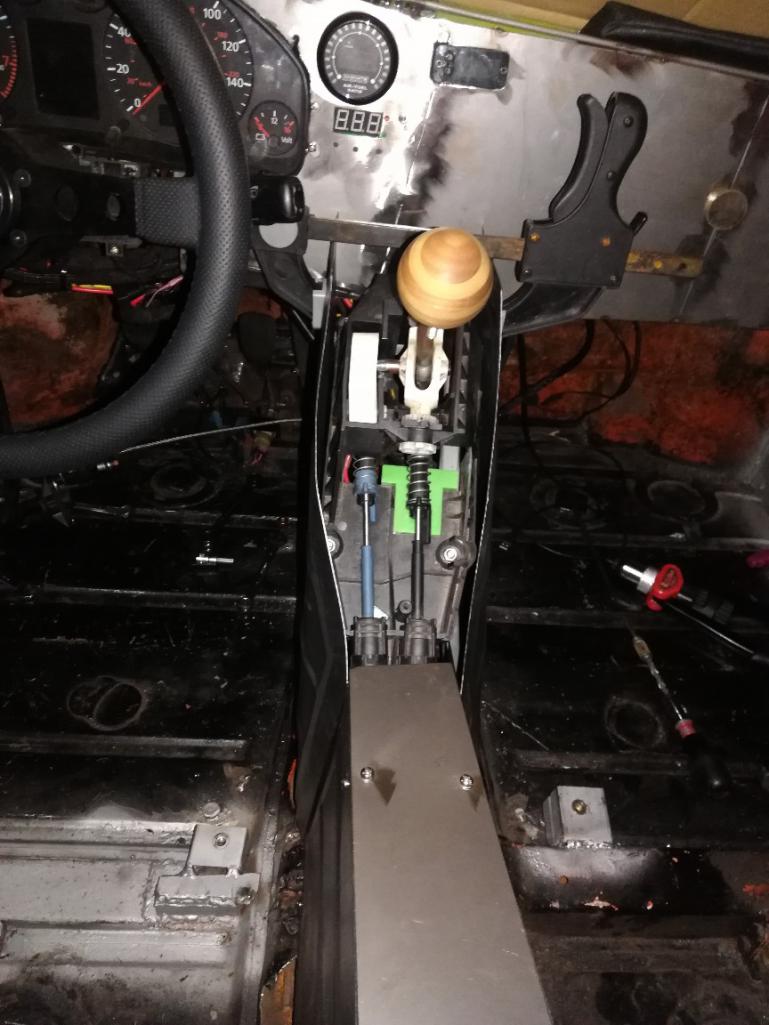
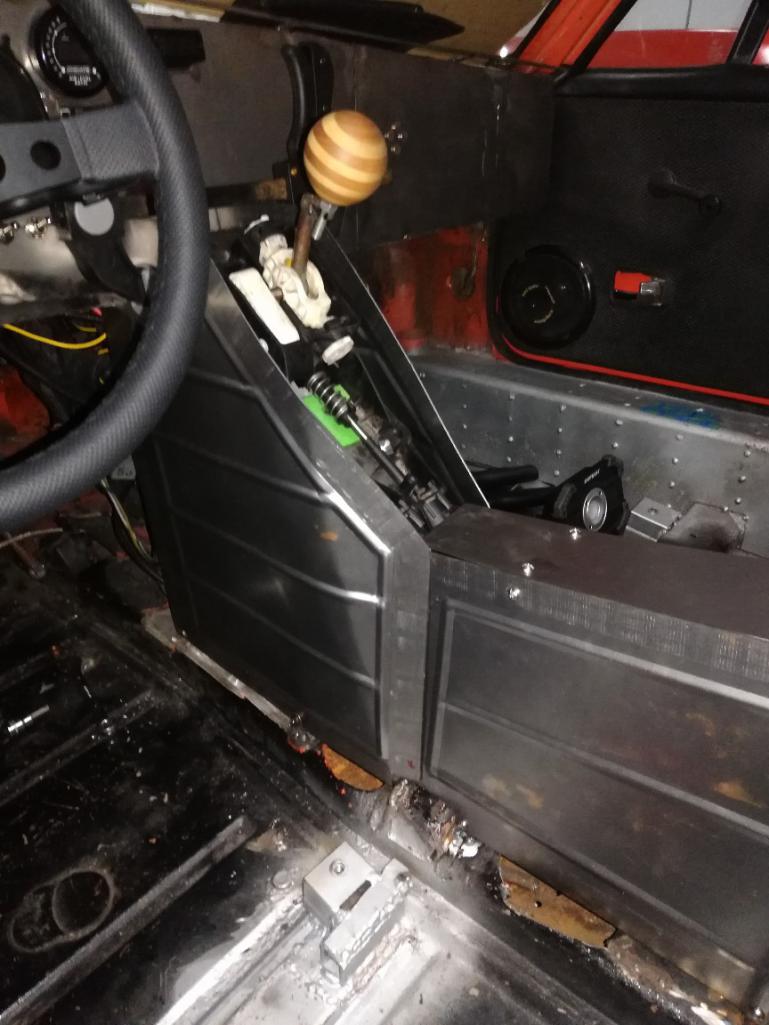
Couple go around to get this one right. But happy with it. I need to work on mounting it and the other side. But I pulled them together loosly and checked out the top. 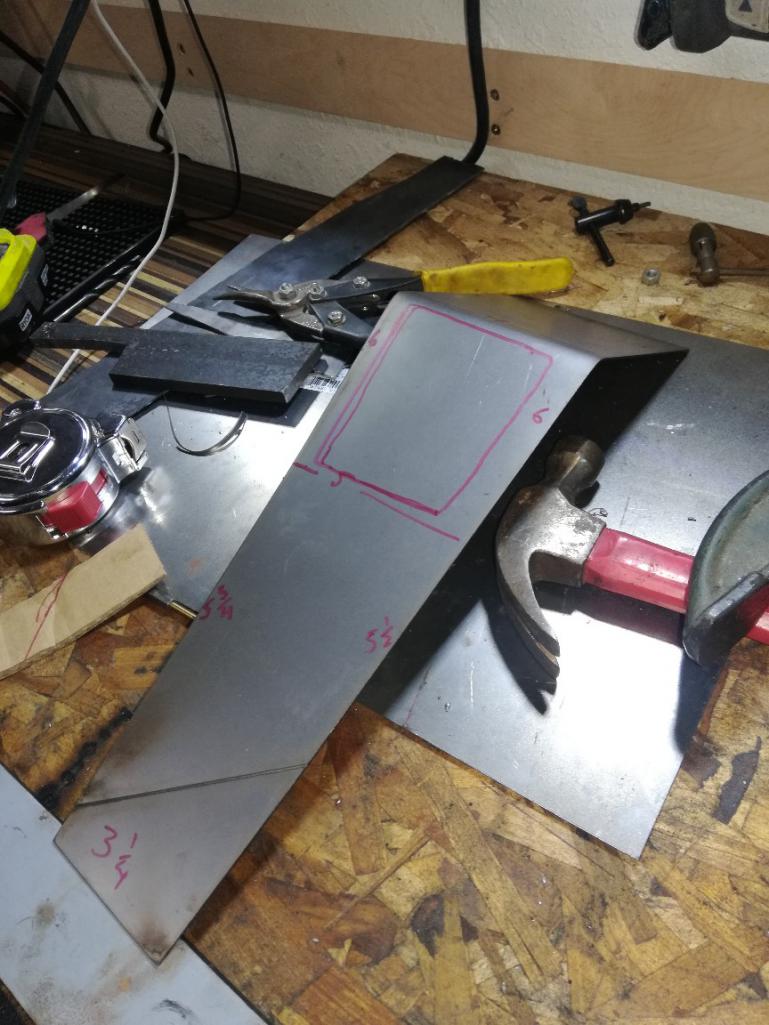
Some measurements and I'll need to make a new piece for the top I think. I'll cut out the shifter hole and see what I think. I also need to figure out how to mount this one. Outside the box thinking might be necessary.
Posted by: 914 Ranch May 27 2019, 02:27 AM
Andrew, you and I have been thinking outside the box so long that I forgot where I put that fucking box. Now I just toss the piescs at the car and some how they seem to guide me to the solution. I believe that is form fallowing function.
Man I want a bead roller.
Posted by: dan10101 May 27 2019, 08:49 AM
A man on a mission!
Posted by: Andyrew May 28 2019, 01:48 PM
Received my tow bar from @914werks. Nice looking product! Very heavy duty. 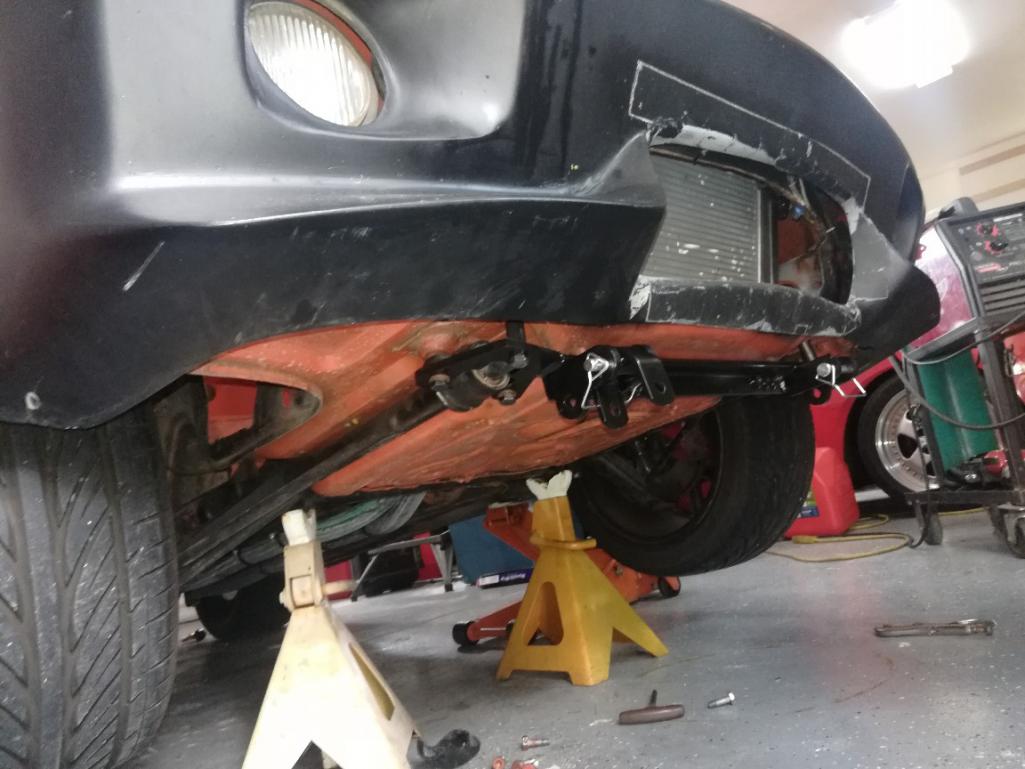
Not designed for a 916 bumper so I'll just trim my bumper to fit as its probably going to be changed at some point. 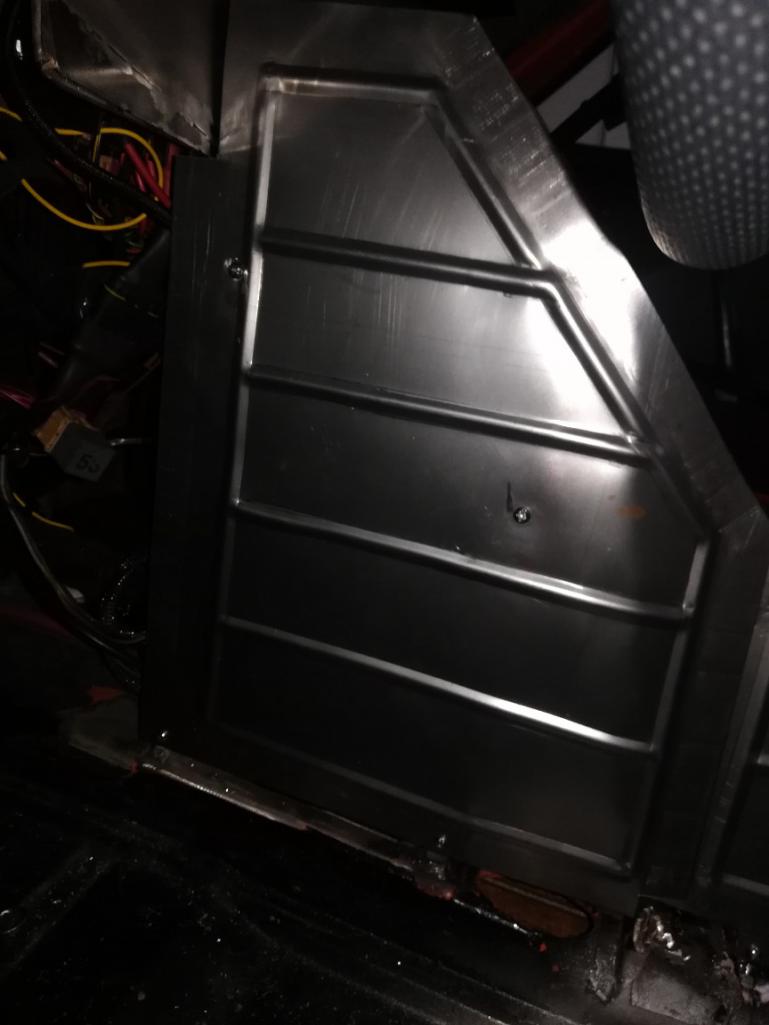
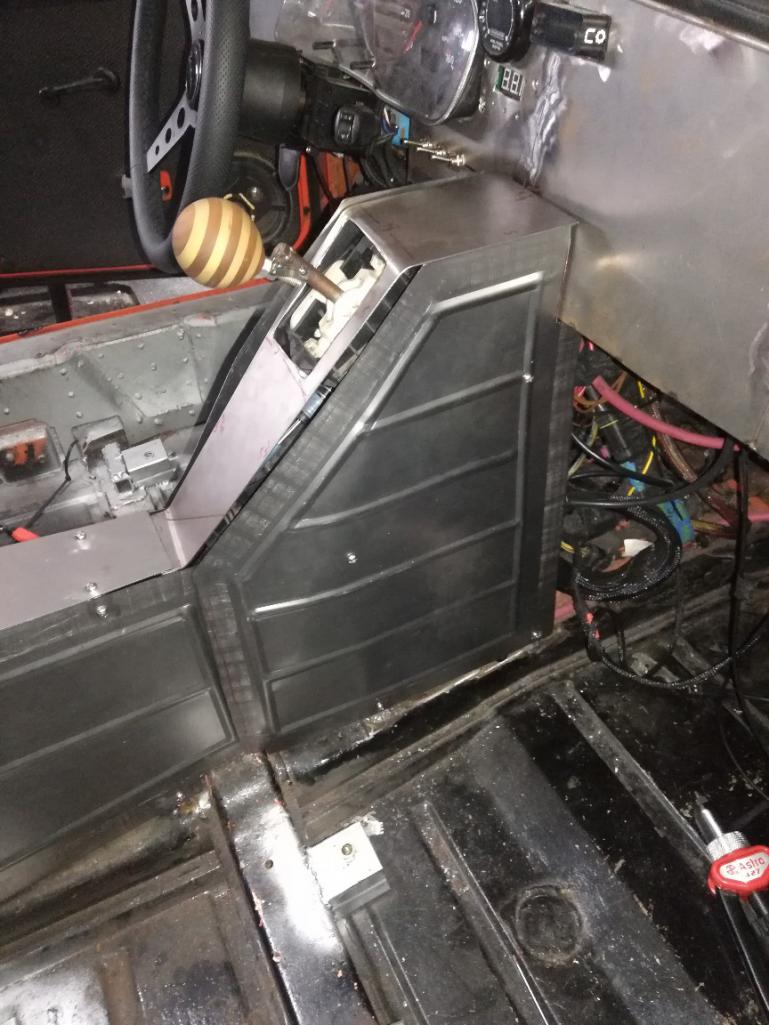
Mounting of the actual pieces. Some shims needed to be made to fit it right. But 4 bolts holding each piece firm. 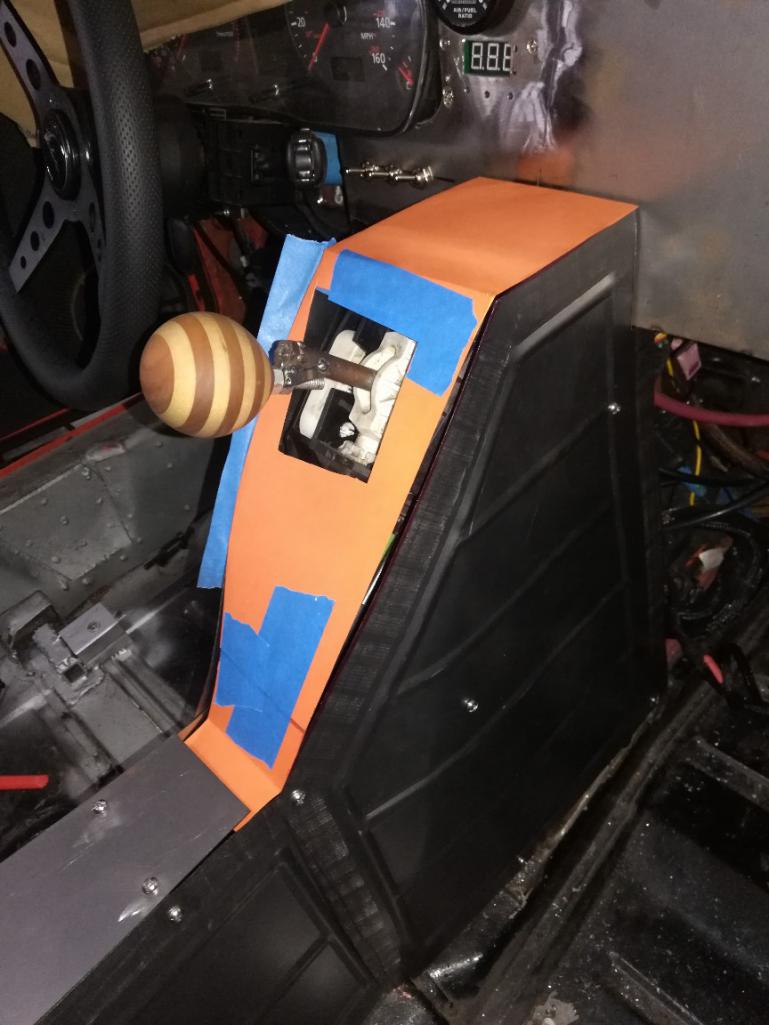
Construction paper to the rescue for the new shifter plate. 
And new shifter plate in place, not mounted.
I've determined im going to build a removable upper cage to hold the plate in place, Should be pretty simple to build, probably a couple hours.
Posted by: tygaboy May 28 2019, 03:39 PM
That there is some real progress! WCR, here it comes!
Posted by: Andyrew Jun 1 2019, 07:34 PM
The 914 and 951 have a different stablemate for the week
Stay tuned for fun progress.
Attached thumbnail(s)
Posted by: Andyrew Jun 3 2019, 12:01 AM
Dad and I redid the clutch reservoir and used a spare of his mounted next to the brake. This gave us an easier bleed and we could pressurize it with his system. Not that it helped. It was still a very difficult bleed.
We're going to try bleeding it again. Still difficult to get into first. But it does shift. 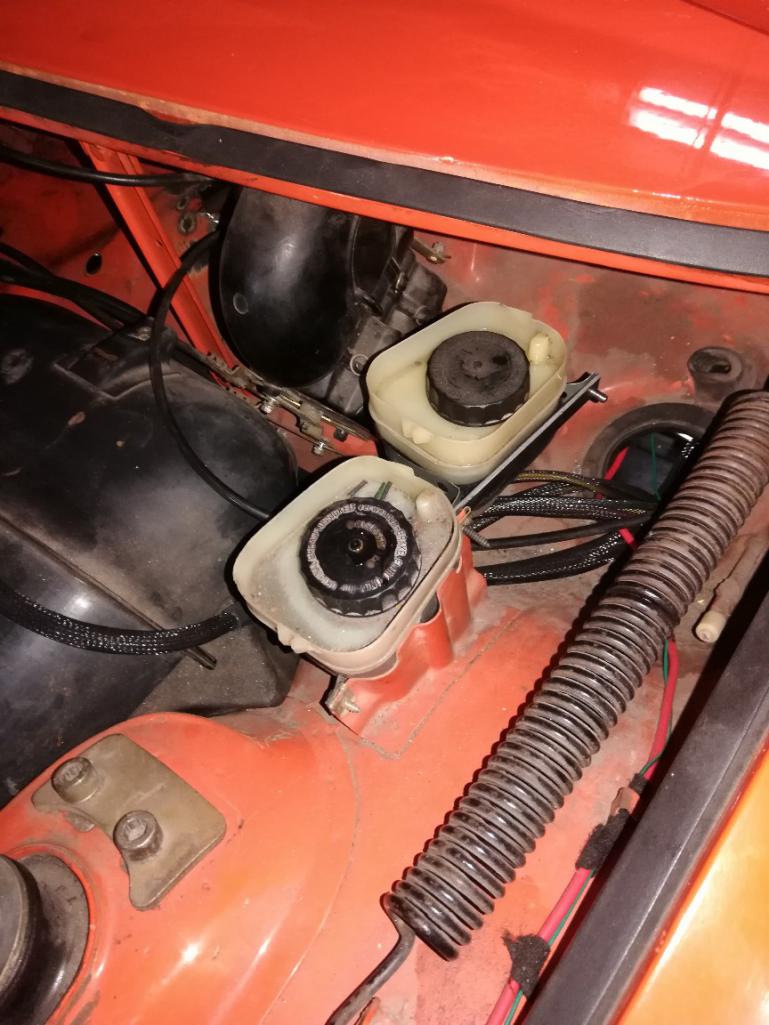
Changed front shocks to Koni Yellows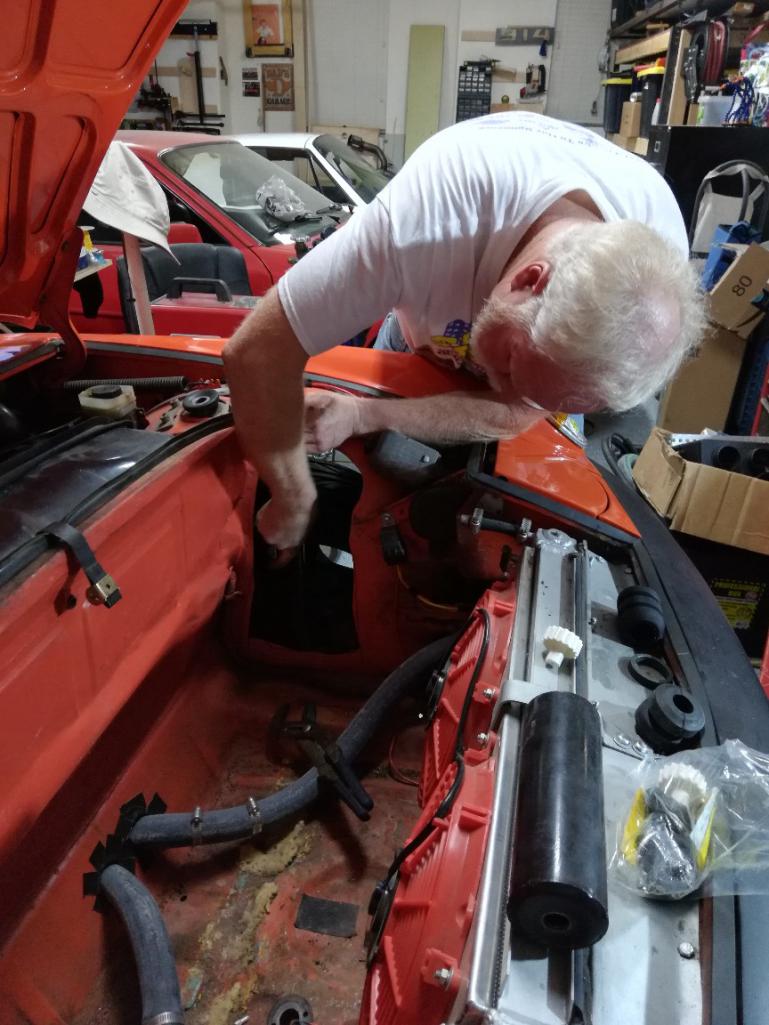
Changed the valve cover gasket. Hopefully this fixes the leak. 
Spent a lot of time on the center console. You can see the shifter solution I made. Really happy with it. 
And the big question is black or brown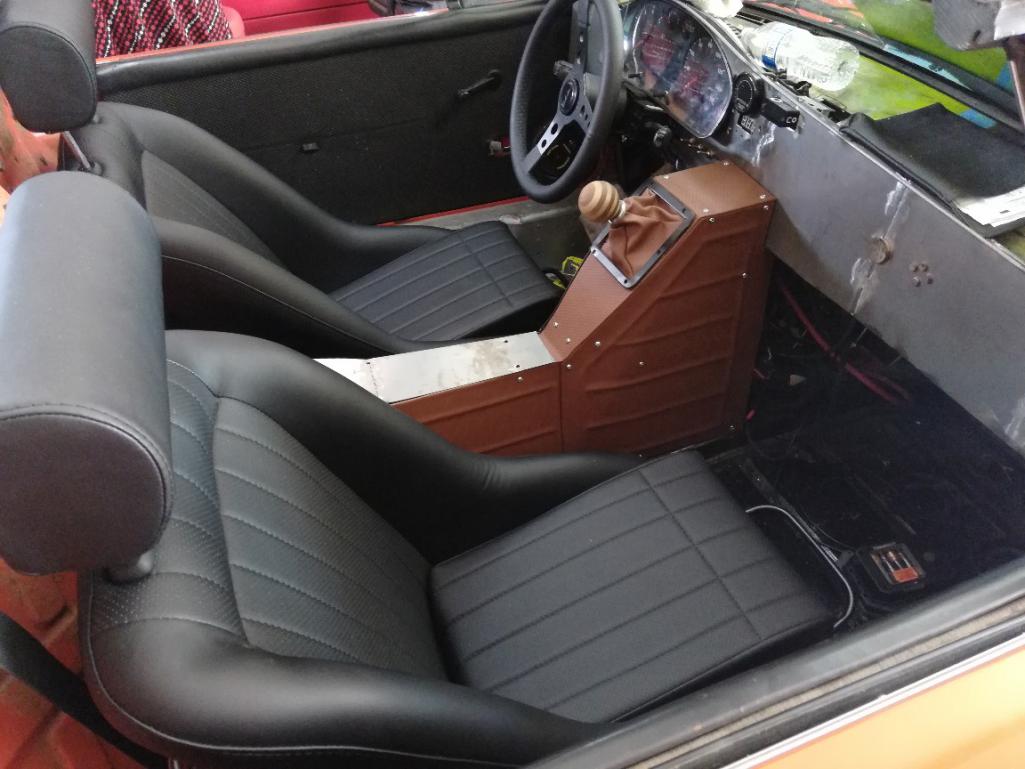
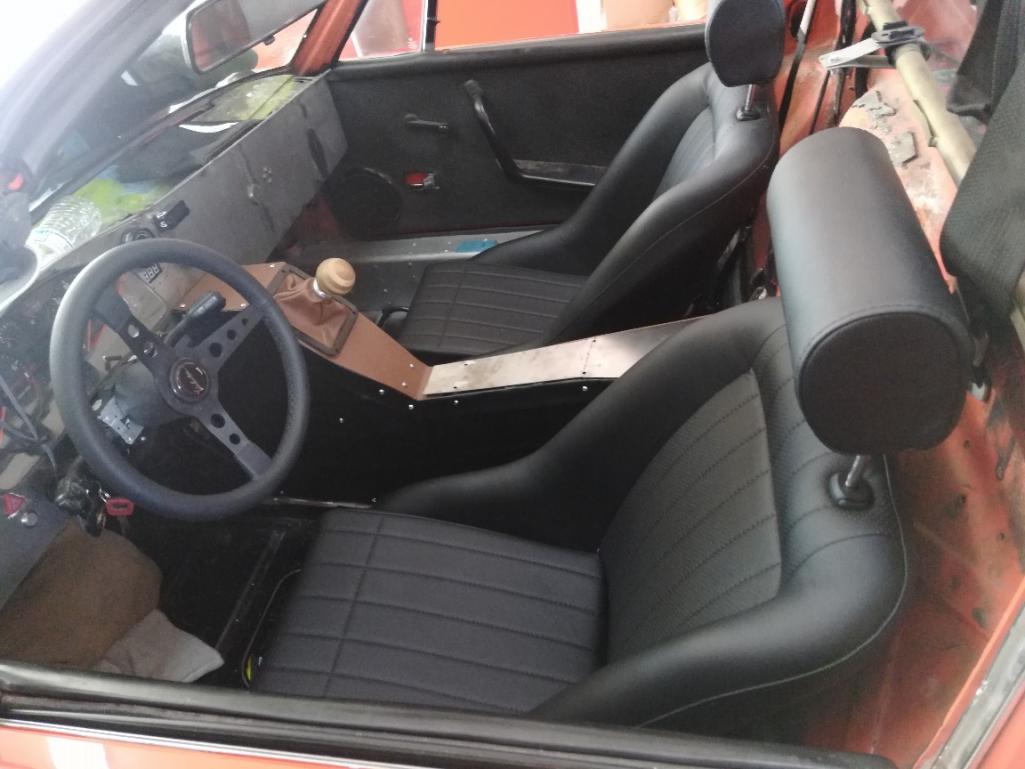
I'm leaning towards brown. But not sure. I'll powder coat the screws whatever color I need them. Shifter trim will stay black for contrast and the foam arm rest needs to be done still.
Also my tuner came by and set me up with the ability to change my tune myself.
My wife and I went for a quick drive. She liked it, but the clutch still needs work. LSD is working well though, put down good power in first!
Posted by: tygaboy Jun 3 2019, 06:50 AM
Andrew - Looking good! Also good to hear you're making progress on the drive-ability items.
On the console, it's totally a personal taste thing but the brown will likely make the beading detail more noticeable, which I happen to like!
Hi to your dad for me.
Posted by: Cairo94507 Jun 3 2019, 07:26 AM
I like the idea of the contrast with the brown. If you cover the console in black it might get kind of lost in all the black. It's nice piece and the brown will look nice. Love the seats BTW.
Posted by: Andyrew Jun 5 2019, 01:32 AM
Been a busy couple days.
Yesterday my dad worked and prepped the fabric for the dash, removed the dash, and put carpet on the car. Today we put the vinyl on the dash with the basketweve pattern. There is a seam in the middle but I'll figure something for that.
We also worked and tested the tow system. Lots of work to make it better needed. Not the happiest with how clunky flat towing is and we're working on streamlining it.
We also added a trans cooler to the Honda so it shouldn't have any issues pulling up the hill.
Pics. 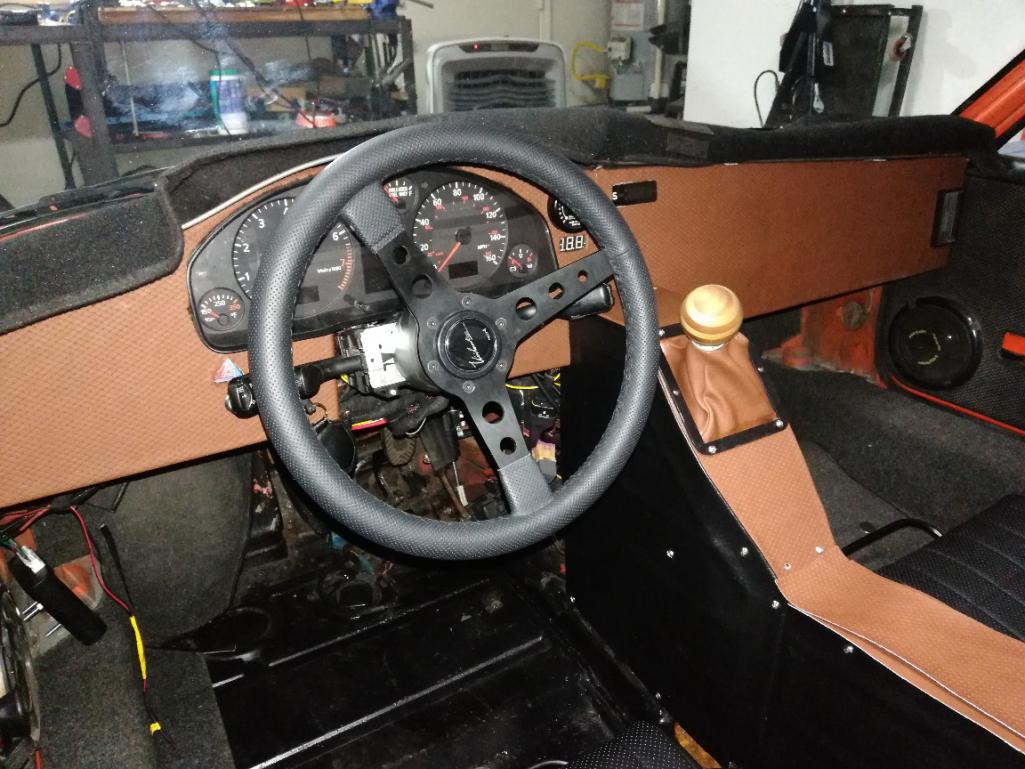
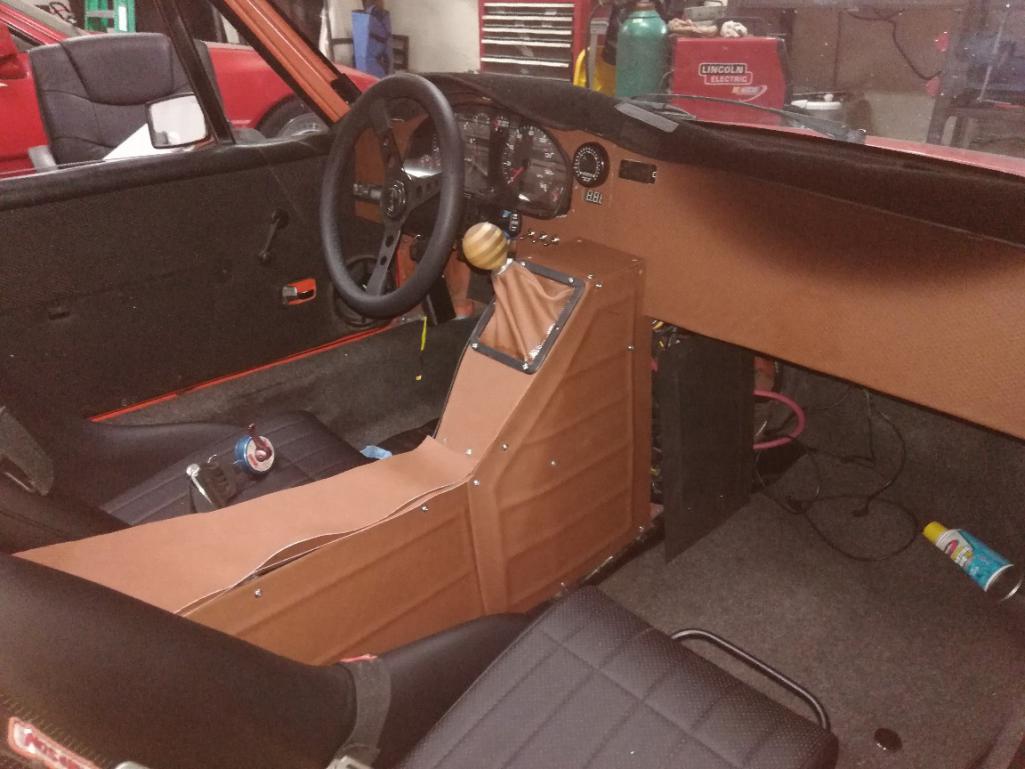
10 internet points if you can figure out what the metal pieces are for. 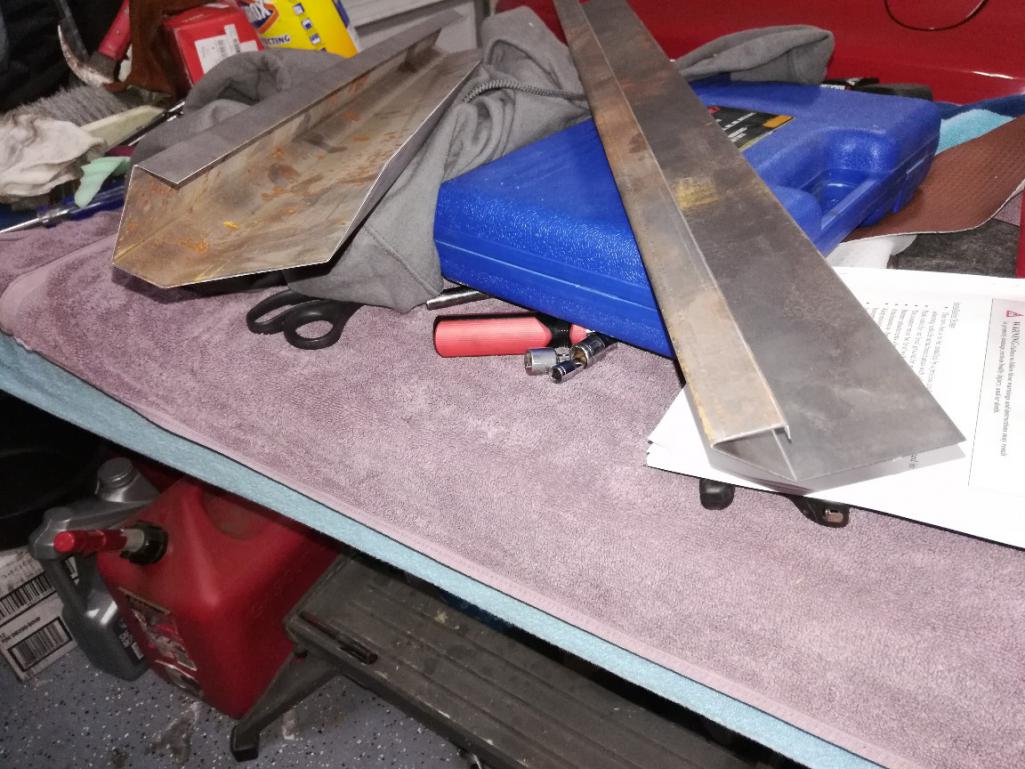
Posted by: tygaboy Jun 5 2019, 07:17 AM
Dash pad replication?
Posted by: Andyrew Jun 5 2019, 01:47 PM
Lower dash pad
Attached thumbnail(s)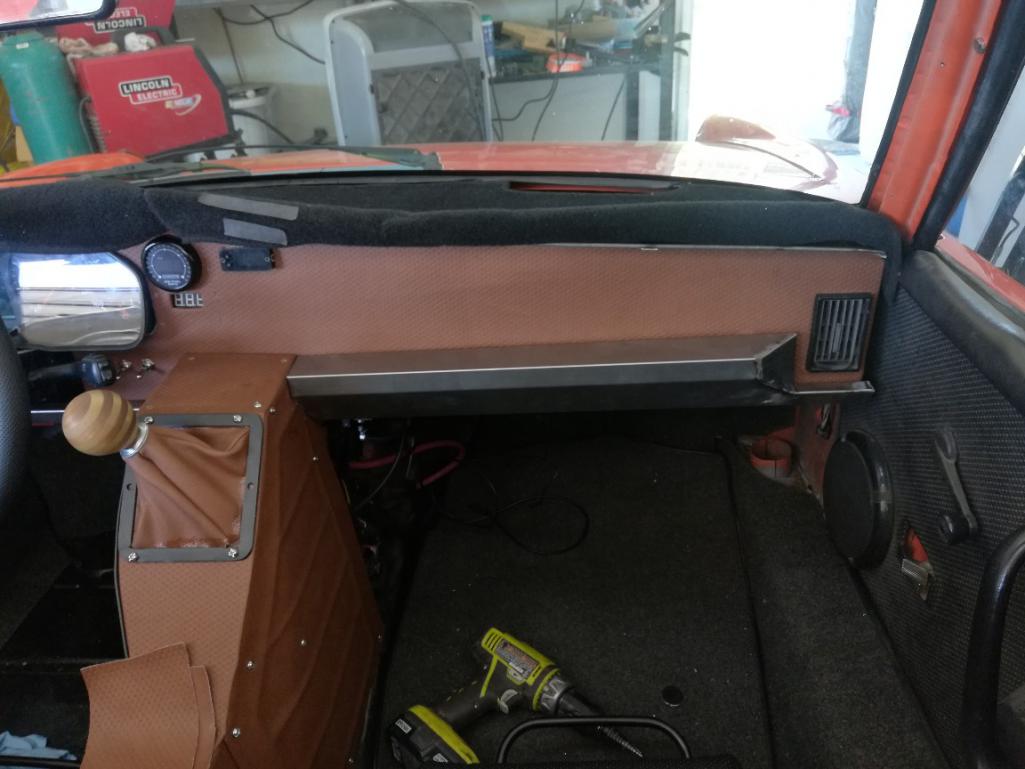
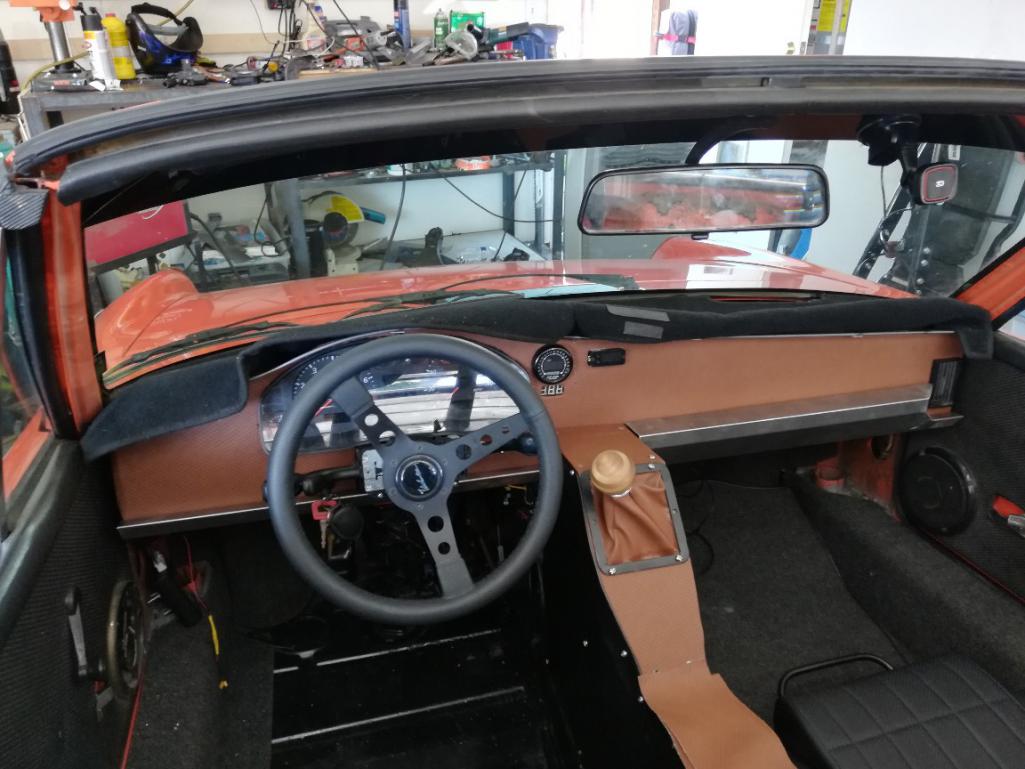
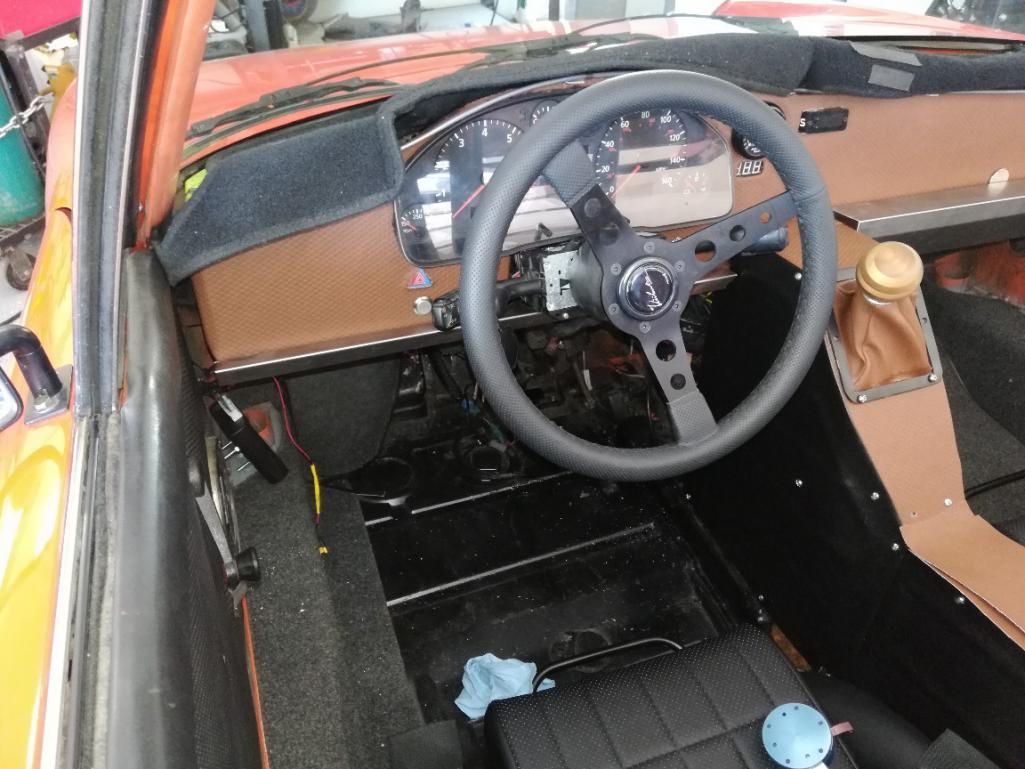
Posted by: Mike Bellis Jun 5 2019, 10:13 PM
Wow! Lots of fab in a short amount of time. Great job.
Posted by: Andyrew Jun 29 2019, 01:01 AM
WCR 2019 Came and went.
Nothing major happened except dads car almost falling off the trailer. Honda pulled the 914 incredibly well. I got 29mpg going to the event and got 24mpg back with a bit of city driving, both times up and over the grapevine. It might be slightly elevated, but I confirmed the 24mpg number on the way back when I filled up, didnt have a chance to confirm the 29mpg.
I had a great time driving around a couple of guys, some decent compliments on the car, especially the sound. It was really great getting together with everyone. So many familiar faces I was surprised I knew half or better!
The 914's hot start issue is better, It takes on average 3 times to start the car, sometimes when its warm it'll start right up, sometimes when cold it'll start right up. I think we can tune it out now. Clutch is MEH at best when warm. Odd bit is when the car is very cold or a cold morning it shifts really well. I have some ideas on it. Probably will redo the master cylinder with a universal master cyl maybe oversized to give me some extra throw and I'll adjust a clutch stop accordingly. Another possibility is its simply air in the lines still. I'll try bleeding it some more and see what we get.
Dad and I had a great time driving together and spending some good time together, It was a fantastic early fathers day! 
Some pics from the event. Some great photographers there! 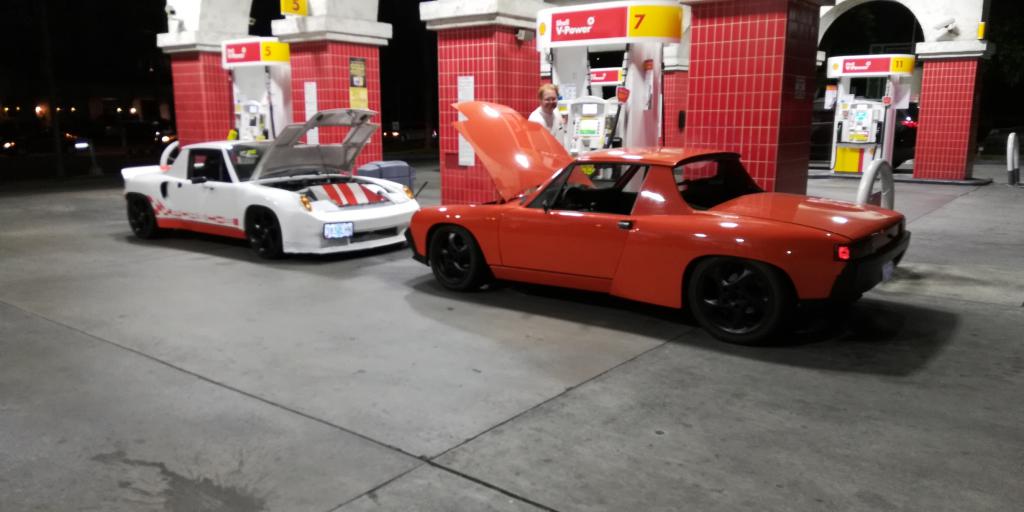
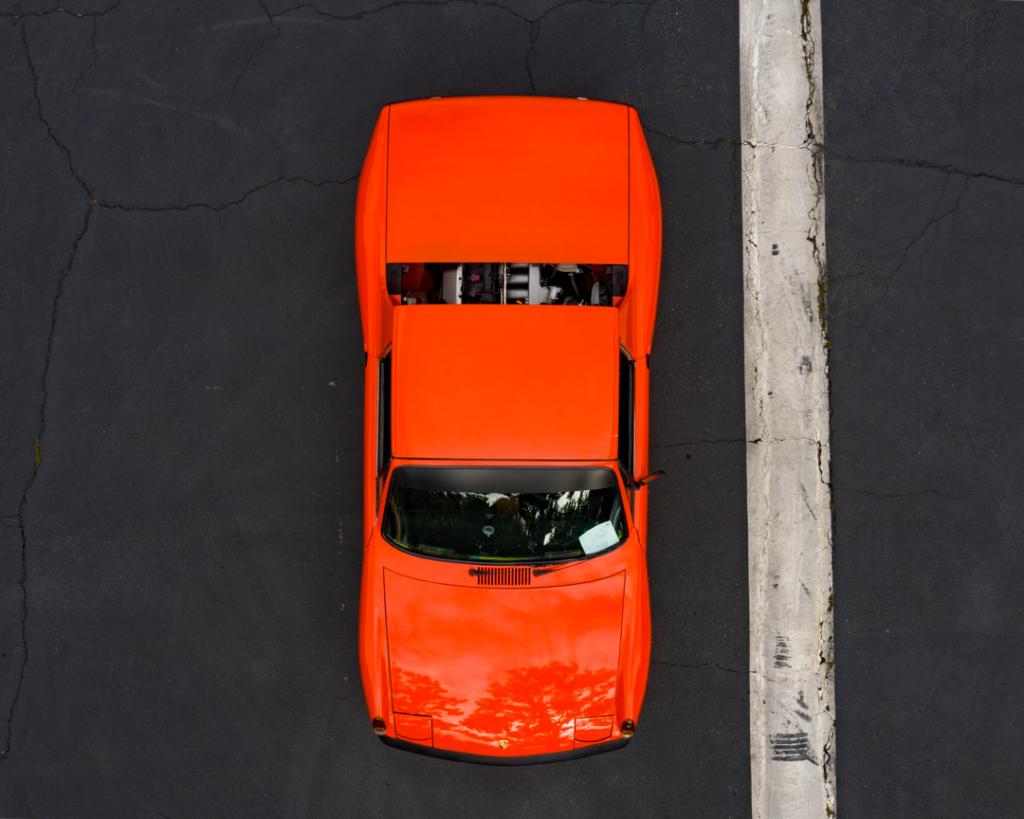
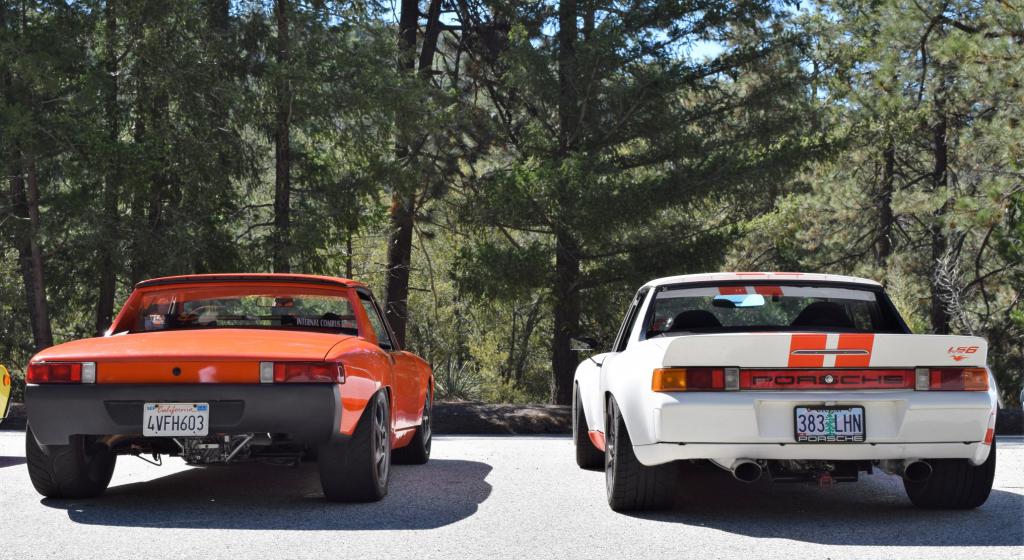
Interestingly, Magnus Walker took a couple pics of a few cars, including mine and my dads and posted it on instagram. Very nice guy, took time to say hi to anyone that wanted to.
https://www.instagram.com/p/BybZWVZJN0f/
Oh I also won the DIY award, which is pretty fitting given my DIY attitude towards the car.
Some shaky video. Note, Im on wastegate here just so I dont get into trouble, but we all took it really easy. Small pull at 19:55 and some decent views around 15mins.
https://www.youtube.com/watch?v=Rlm-4iVpzXI
Going to a local autox tomorrow, Swapped over to the 944 turbo track tires (Toyo Proxy RA1's) so I'll have a decent amount of grip. I normally bag the tires and swap them out at the track but Im going solo tomorrow so I just mounted them tonight. Im concerned about gearing, I dont think I'll be able stay in 2nd the whole track, the smaller tires and the fact my tuner turned my redline down at our last dyno event means I could have to go between 2nd and third or bounce off the rev limiter... Theres only a couple straights so we'll see. If I have to I'll just throw it in 3rd and stay out of the powerband most of the run.
Posted by: ValcoOscar Jun 29 2019, 06:53 AM
Andrew-
Your two cars at WCR side by side were quite the head turners
Great that you can share these 914 events with your dad but I wouldn't want to race him.
Until next time...
Oscar
Posted by: Cairo94507 Jun 29 2019, 07:20 AM
I love both cars. How cool that you and your dad share this passion.
Posted by: dan10101 Jun 29 2019, 10:23 AM
It was definitely a life event for us. Andrew getting his car road worthy after many years. Me bringing a car back to life after devastation. Many many thanks to our families for giving us the space and time needed to make this happen.
We will continue to develop our cars until they are ‘done’ and then do it some more…
Thanks to whoever took the picture of Andrew and I at the table. That doesn't happen a lot.
Andrew in his element…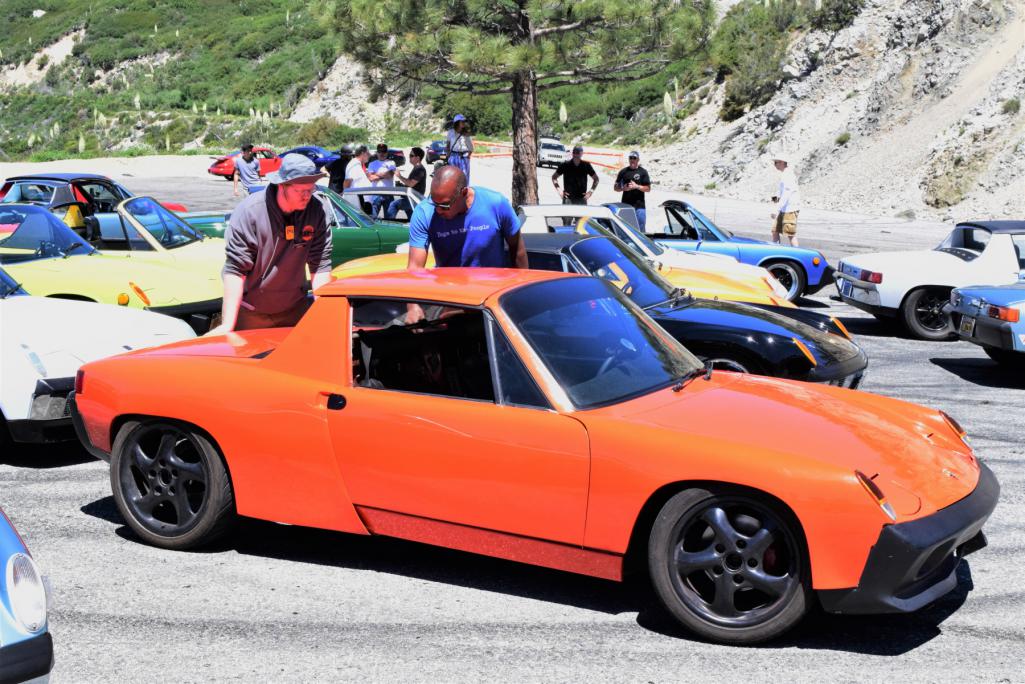
I like my angle better… 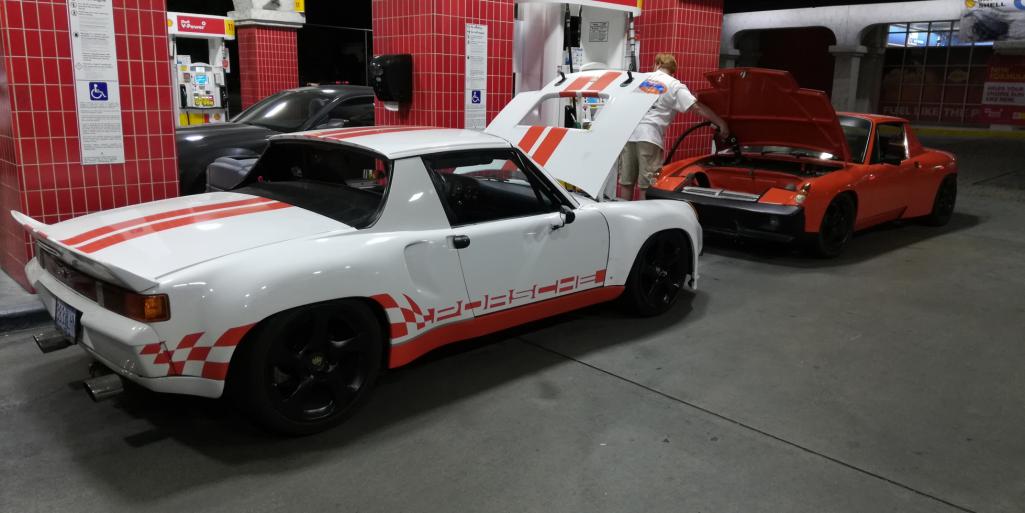
The best shot of the week.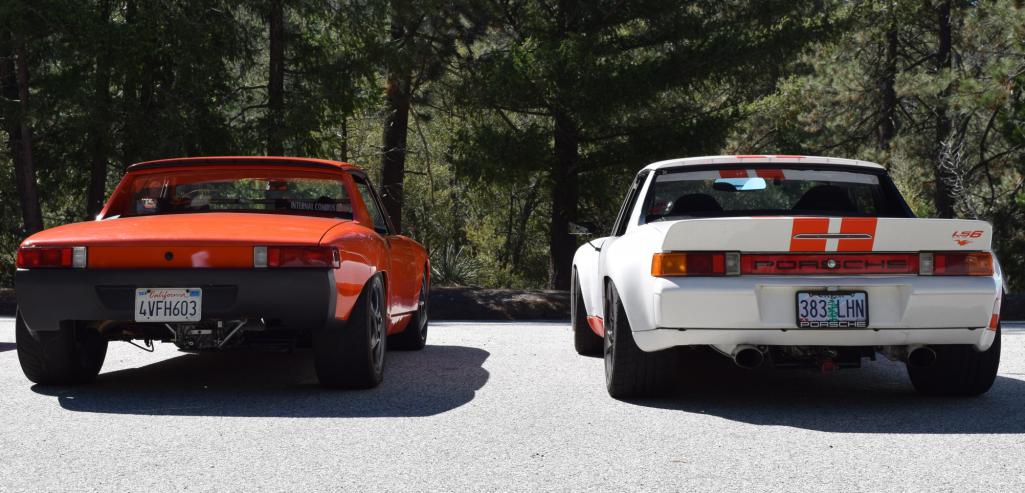
Posted by: Maltese Falcon Jun 29 2019, 11:24 AM
Love the center console treatment & shifter knob Andrew, a classy touch of the CGT right out of the Leipzig Factory
Posted by: Andyrew Jun 29 2019, 05:06 PM
Autox went well. Still having clutch issues and I was getting a pretty large amount of oil blowby but it is overfilled by about half a qt. Starting it was a pain a couple times but I'll fix that.
It's been a long time since I drove a 914 at speed and never a turbo. The engine seemed to be made for autox, I had amazing throttle response and tons of power. I was never ever lacking for power and I was just above wastegate pressure. I probably could have dropped it to the wastegate, but I was partial throttle 95% of the track just struggling for traction.... Hell the back straight through the lights I couldn't get it pointed straight fast enough almost every run and just put the hammer down and let the tires spin all the way through the lights.
https://www.youtube.com/watch?v=JXLC59RiHe8
At this point I need to work on:
1. Clutch
2. Starter
3. Catch can for the blowby
4. Balancing the car, maybe front bar.
5. Balancing both sets of wheels (death wobble in both but horrible on the Gotties)
6. Interior
7. More tuning for more power. (Barely beat a modified BMW 335i on the freeway)
Posted by: 76-914 Jun 30 2019, 09:11 AM
Autox went well. Still having clutch issues and I was getting a pretty large amount of oil blowby but it is overfilled by about half a qt. Starting it was a pain a couple times but I'll fix that.
It's been a long time since I drove a 914 at speed and never a turbo. The engine seemed to be made for autox, I had amazing throttle response and tons of power. I was never ever lacking for power and I was just above wastegate pressure. I probably could have dropped it to the wastegate, but I was partial throttle 95% of the track just struggling for traction.... Hell the back straight through the lights I couldn't get it pointed straight fast enough almost every run and just put the hammer down and let the tires spin all the way through the lights.
https://www.youtube.com/watch?v=JXLC59RiHe8
At this point I need to work on:
1. Clutch
2. Starter
3. Catch can for the blowby
4. Balancing the car, maybe front bar.
5. Balancing both sets of wheels (death wobble in both but horrible on the Gotties)
6. Interior
7. More tuning for more power. (Barely beat a modified BMW 335i on the freeway)
Is blowby a product of having a turbo?
Posted by: Andyrew Jun 30 2019, 09:44 AM
Autox went well. Still having clutch issues and I was getting a pretty large amount of oil blowby but it is overfilled by about half a qt. Starting it was a pain a couple times but I'll fix that.
It's been a long time since I drove a 914 at speed and never a turbo. The engine seemed to be made for autox, I had amazing throttle response and tons of power. I was never ever lacking for power and I was just above wastegate pressure. I probably could have dropped it to the wastegate, but I was partial throttle 95% of the track just struggling for traction.... Hell the back straight through the lights I couldn't get it pointed straight fast enough almost every run and just put the hammer down and let the tires spin all the way through the lights.
https://www.youtube.com/watch?v=JXLC59RiHe8
At this point I need to work on:
1. Clutch
2. Starter
3. Catch can for the blowby
4. Balancing the car, maybe front bar.
5. Balancing both sets of wheels (death wobble in both but horrible on the Gotties)
6. Interior
7. More tuning for more power. (Barely beat a modified BMW 335i on the freeway)
Is blowby a product of having a turbo?
Yes, specifically a big turbo. Typically means the rings aren't seated well when it's this much but the oil was overfilled in the engine so I'm going to blame that.
I've never done a compression test since the rebuild so I don't know if the rings are a problem but for now It's not worth me fixing since everything runs well.
Posted by: Andyrew Jul 7 2019, 10:39 PM
Drove it for about 2 hours on friday with a friend around the area. He said he noticed some black smoke on power which would mean raw fuel, not a worry. But I notice it seemed pretty down on power on low and high boost. It was a hot 95deg day so its possible it was pulling a bunch of timing... It runs good but just down on power on boost. I think its time to just check the vitals of the engine out before I go lean on it some more with more boost/better fuel.
Im going to do a compression test and a pressure test to see if I have a leak in the system maybe and then do some logs.
I bled the clutch some more but havent gone for an extended drive yet. I'll need to get the wheels balanced before I do that again (Both sets). I suspect one or both of the front wheels of the track set of tires are bent and might need to see a shop.
Posted by: 76-914 Jul 8 2019, 04:43 PM
At least you're driving it!
Posted by: tygaboy Jul 8 2019, 05:17 PM
At least you're driving it!
Exactly!
Posted by: Andyrew Jul 21 2019, 02:22 AM
Compression check was good enough. Numbers were 115, 112, 111, 111.
Below 100 is rebuild time. 120 is the low threshold for a new rebuild. So it's not perfect but let's just say for arguments sake I have low compression pistons and be done with it eh?
This just means I can run big boost numbers. Like 35+.
I bled the clutch but haven't driven it. I need to balance both sets of wheels still and there's a laundry list. But I think a pressure test next and a breather box. Then I'll test removing the line to the wastegate and seeing if we're actually maxing out the wastegate or not before I put the new one in. Gotta get some 100 in the tank and or maybe some E85 just to be safe. I'm ready to make some power with this car.
Dad's got his clutch working, Chris making some BIG numbers on his LS3, and with the new C8 coming out I have serious 500hp envy. 288whp was nice but it still feels slow to me. I need me some 400whp. Which should be no issues on high 20s boost and good gas. And if that still feels slow, well then cams and an intake and some more tune work and we're nearing 500whp....
Posted by: tygaboy Jul 21 2019, 08:27 AM
Ladies and Gentlemen:: Welcome to HorsePower WARS!
Andrew,
Just a heads up that if you end up with more than 518 hp, it'll be your fault that I had to upgrade my LS to twin turbos!
It's great to see you getting your car sorted. Keep up the great work.
Posted by: EdwardBlume Jul 21 2019, 08:57 AM
Wow. What a great build! Nice work!
Posted by: Andyrew Nov 13 2019, 12:15 AM
We'll work has been keeping me way to busy so no real updates.
I have been able to drive it a bit. I had a smoking issue that has been resolved with a catch can. I made a temporary one out of a oil can to have a proof of concept.
Worked great and no smoking. I turned the boost up to 14psi (wastegate max) and no visible smoke. (pulls great too... Damn things legitimately fast in 3rd. ).
https://www.youtube.com/watch?v=nJxDlkzOTRg
I went to @http://www.914world.com/bbs2/index.php?showuser=19241 over the weekend with @http://www.914world.com/bbs2/index.php?showuser=11426 and we worked on a couple projects.
I cut up some of his donor chassis to make the rear trunk firewall for my car and formed up an oil catch can.
The firewall is going to work great with about 30 hours
The catch can should be good in about 5. . But it's only a revision one... The dimensions i used don't work that great. But I'll keep with it to give me a better proof of concept for the design.
Attached thumbnail(s)
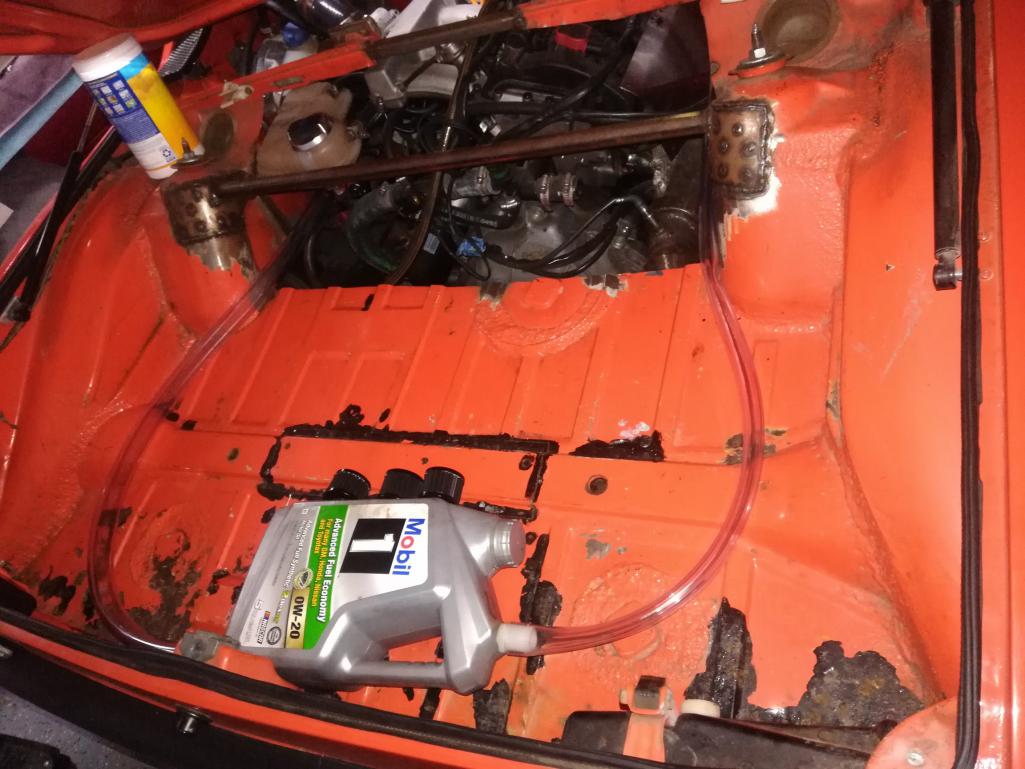
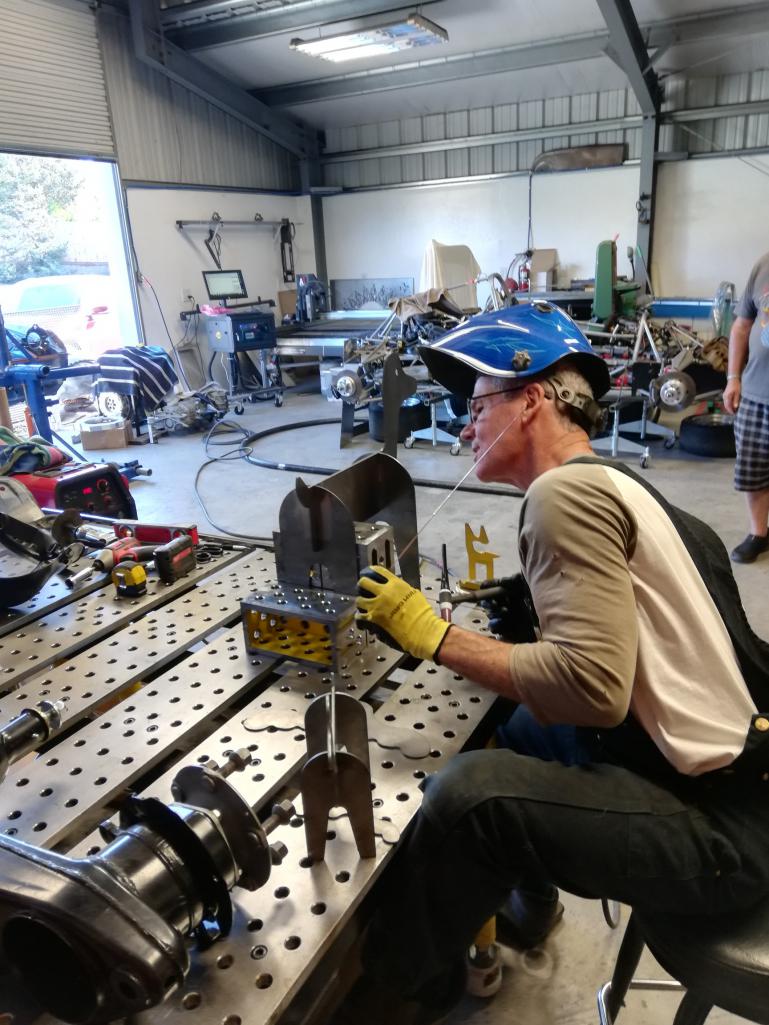

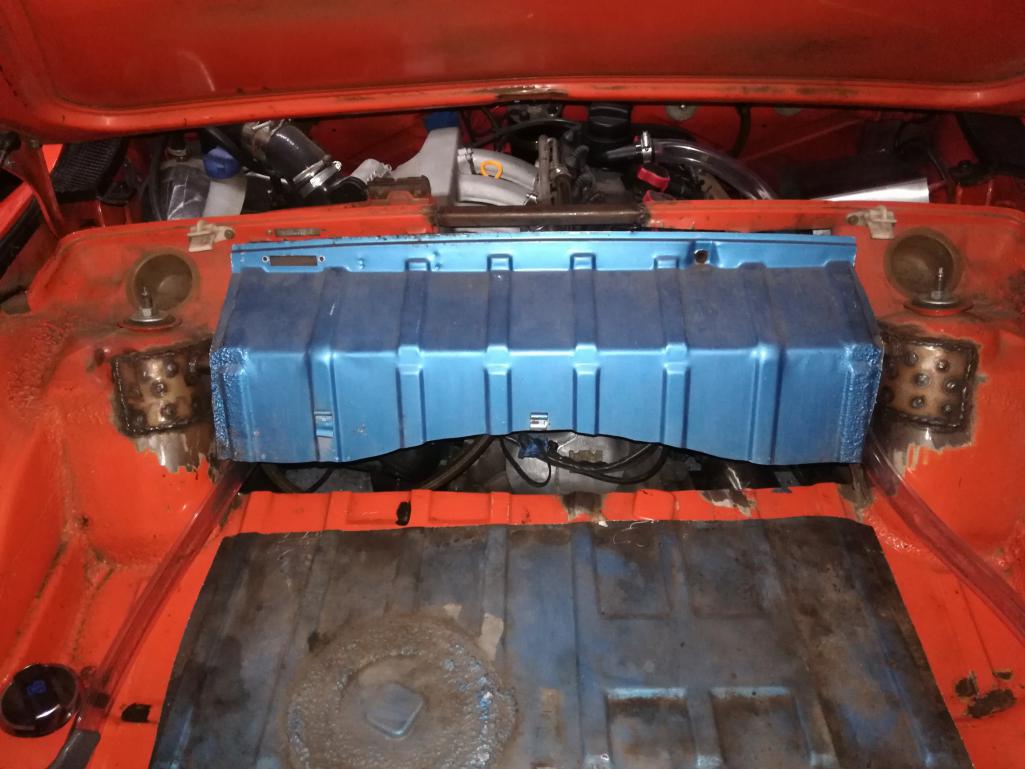
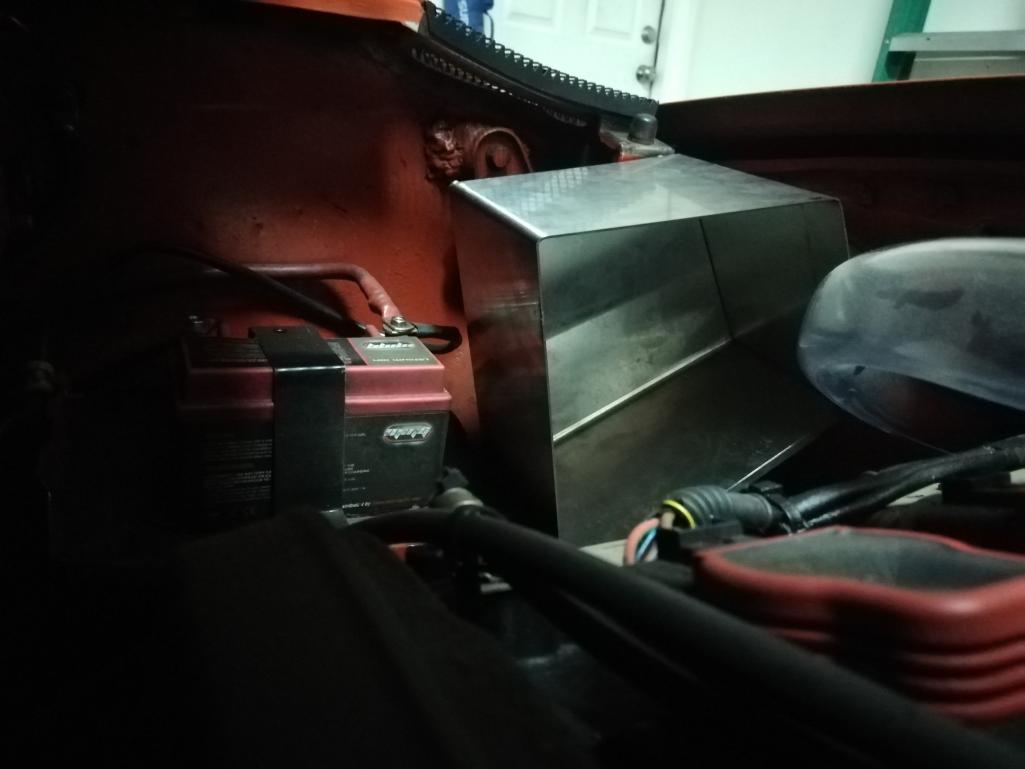
Posted by: Cairo94507 Nov 13 2019, 08:16 AM
Cool to see it moving along. I am sure you guys had a fun time.
Posted by: tygaboy Nov 13 2019, 09:13 AM
It's always a great time when Andrew comes by the Red Barn!
Fun seeing you and Dave. My shop is always open for you.
Posted by: dan10101 Nov 13 2019, 10:36 AM
We'll work has been keeping me way to busy so no real updates.
I have been able to drive it a bit. I had a smoking issue that has been resolved with a catch can. I made a temporary one out of a oil can to have a proof of concept.
Worked great and no smoking. I turned the boost up to 14psi (wastegate max) and no visible smoke. (pulls great too... Damn things legitimately fast in 3rd. ).
https://www.youtube.com/watch?v=nJxDlkzOTRg
I have to say it is definitely fast. And best of all it sounds like a proper sports car. Most of us have heard 4 cyl racing sports cars and this car reminds me of that every time I hear it. So cool.
Posted by: Andyrew Nov 20 2019, 08:12 AM
Been driving it every once and a while. It definitely likes the cold weather. But the shifter hasn't gotten any better. I'm contemplating a boxster trans so I can rule out my shift linkage setup, and at the same time replace the clutch. I'll likely redo the clutch master first though as I believe the angle it's at might be causing the issue.
I have been having an issue with not being able to connect to my boost controller since before WCR and I resolved that last night with a new USB cable.
This means I can finally log my pulls in my boost controller with it's onboard data logging and accelerometers (HP and Torque graphs tied to boost/AFR/Throttle). Now I know what the car did on the dyno with this setup so I can compare and make minor adjustments in the numbers so I can get back to tuning this car and bumping the power up.
The first thing I need to do is find my file I wrote for the new closed/open loop controller program (the boost controller mfr rewrote the software). I made a nice one about 6 months back that was tied into throttle values as well as the usual boost by gear.
Now I'm not expecting it to bump my power as I think I'm on the limits of my wastegate spring. But I want to test this out before I replace the wastegate with my dual port one. (one variable at a time).
Also I toyed around with the oil catch can some more. I don't like it where I planned on it. I'm going make it more hidden and smaller.
Oh and I think I'm going to put the 944 under the knife this winter. I either need to start driving it a lot or sell it. And I love driving it but it needs some work. I need to talk to Dad about that one
Posted by: tygaboy Nov 20 2019, 09:02 AM
Andrew - Once you spec the new catch can, you're welcome to come by for some cutting/bending/welding.
Or, send me the dimensions and I can cut the parts and ship them to you.
Better yet, maybe another "open house/fab day" at Red Barn?
Posted by: Andyrew Nov 20 2019, 09:34 AM

Id love to try out your tig welder
Posted by: dan10101 Nov 20 2019, 09:44 AM
Id love to try out your tig welder
I tried out my spool gun on some aluminum scrap. It's not too bad. It will take some practice. Tig is next.
Glad you're making progress.
Posted by: tygaboy Nov 20 2019, 09:53 AM
Id love to try out your tig welder
At your convenience, my friend!
Posted by: Andyrew Jan 10 2020, 05:40 PM
So @http://www.914world.com/bbs2/index.php?showuser=626 was over for Christmas and said to me "Hey lets make a video!"
I blew my nose (was getting over a cold at the time) and I said Sure!
So heres a fun video
https://www.youtube.com/watch?v=pzcUgDbnfdM
Posted by: tygaboy Jan 11 2020, 09:56 AM
I need to start spending a lot more time with @http://www.914world.com/bbs2/index.php?showuser=172 and @http://www.914world.com/bbs2/index.php?showuser=626 . I mean really fire up the bromance so that once they're world famous from doing these vids, they'll let me be part of their posse!
Seriously though. Words don't express how great it is to see a father and son with this sort of camaraderie. You both should be very proud. Thanks for sharing!
Posted by: dan10101 Jan 11 2020, 11:34 AM
You got that part right, If we did Hondas or Mustangs, we'd have a chance. But there are too few 914s left in this world.
But, you could make a name for yourself filming your stuff. Turn the video camera on, get some footage, add some pictures and then narration overlay and BAM!, you got a video of your build! (or 20 videos, you got a lot of good content) Post it on our channel or make your own!
Posted by: FL 000 Jan 11 2020, 12:30 PM
Been driving it every once and a while. It definitely likes the cold weather. But the shifter hasn't gotten any better. I'm contemplating a boxster trans so I can rule out my shift linkage setup, and at the same time replace the clutch. I'll likely redo the clutch master first though as I believe the angle it's at might be causing the issue.
Andrew, I have been thinking about this wrt my car also since I plan to start my trans swap soon. We're you are to confirm before or during installation that you got the expected throw from the clutch slave for your pedal movement?
Posted by: sixnotfour Jan 11 2020, 12:31 PM
Posted by: jb6000 Apr 2 2021, 03:05 PM
I have the 1.8t aeb 058 engine used assembled and it has been sitting. So if I want to first pump oil can I spin a front pully, which turns the oil pump? I would like to flow oil first.
I am checking if that is possible.
Posted by: Spocknasty Jun 17 2021, 09:05 AM
Awesome build! Thank you for documenting it!
Posted by: Andyrew Jan 15 2022, 09:15 PM
It’s been *looks at imaginary watch* a while since I’ve updated!
The biggest thing is that I’ve been driving the car. I have issues but so also have workarounds. Which means I can enjoy the car.
Now many of you follow the Budget Outlaws YouTube page and I thank you for that. But there is one thing you’ll notice from that page and that there really isn’t any content of me working on my car.
So my good buddy @http://www.914world.com/bbs2/index.php?showuser=19241 successfully guilted me into coming over to his shop and working on my car. If you’ve never seen his creative and problem solving process it’s really fun to watch.
https://www.youtube.com/watch?v=bU0-ZbLMCl4
Stay tuned as more updates will definitely follow
Posted by: Krieger Jan 16 2022, 11:17 AM
That looks really good and it only took 28 minutes! . It is a lot of fun working with Chris!
Powered by Invision Power Board (http://www.invisionboard.com)
© Invision Power Services (http://www.invisionpower.com)