Printable Version of Topic
Click here to view this topic in its original format
914World.com _ 914World Garage _ rotisserie
Posted by: scotty b Feb 1 2011, 07:28 PM
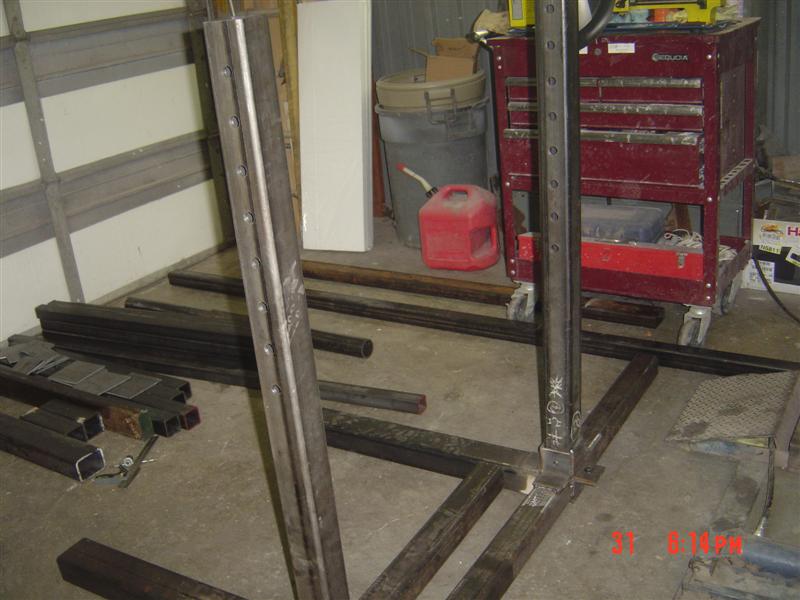
I waited as long as I could. I dropped the wad ( well chase credit card did temporarily ) and bought the steel. Most of it I got cut to length, but there was still a fair amount I got long because I knew I would end up altering things as I went....I usually do  641.40 worth on the floor. I saved over 120.00 by digging thought the drops for 2 hours, and refiguring my original plans on the spot in order to make use of the drop pile.
Now I should probably say, before you guys think I am totally nuts, I am building this thing to handle ANY car that comes to me. I do American stuff as well, so just in case someone shows up with a '59 Cadillac coupe Deville, I nned to know I can flip it safely 
Started out by marking and pilot drilling the uprights for the lockdown holes, then step drilled them out to 3/4 inch
Attached image(s)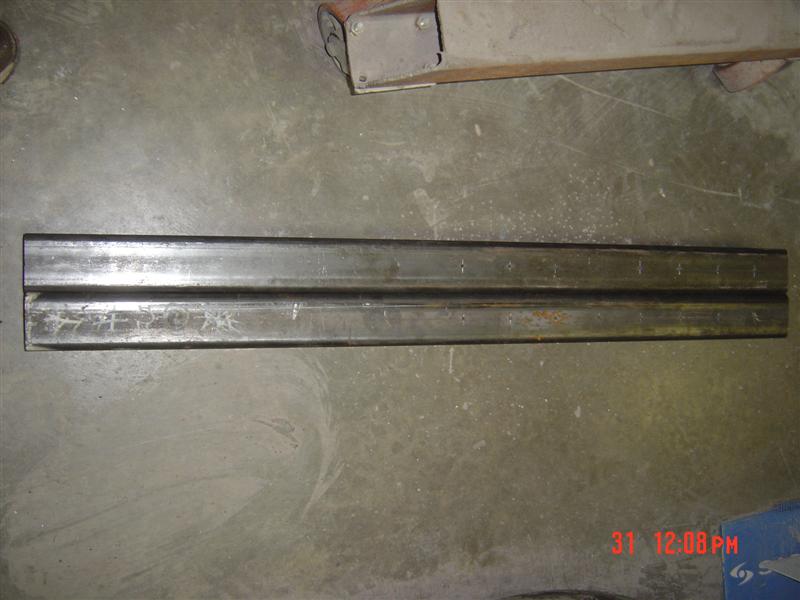
Posted by: scotty b Feb 1 2011, 07:32 PM
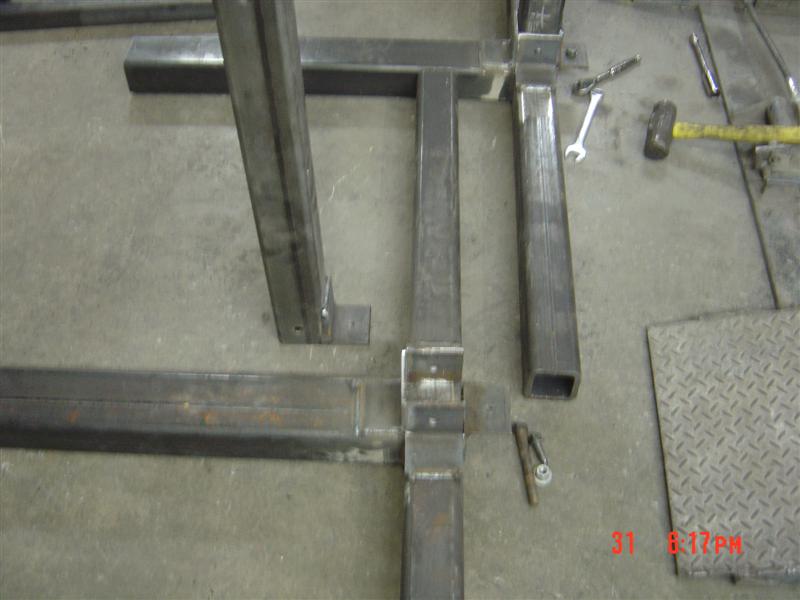
Welded the bottom legs together. Rear is 3x3 1/4 wall, front is 3x4 1/4 wall. This was the first change I made. There wasn't enough 3x3 in the drop pile but I found the 3x4. That kept me from having to buy 2 full lengths of 3x3. Cha CHING !!
Then I cut some 3x2 angle into short brakets to make a stable bolting setup in order to disassemble the whole thing for storage or moving. Drilled the tabs for bolt holes, and went back to welding 
Attached image(s)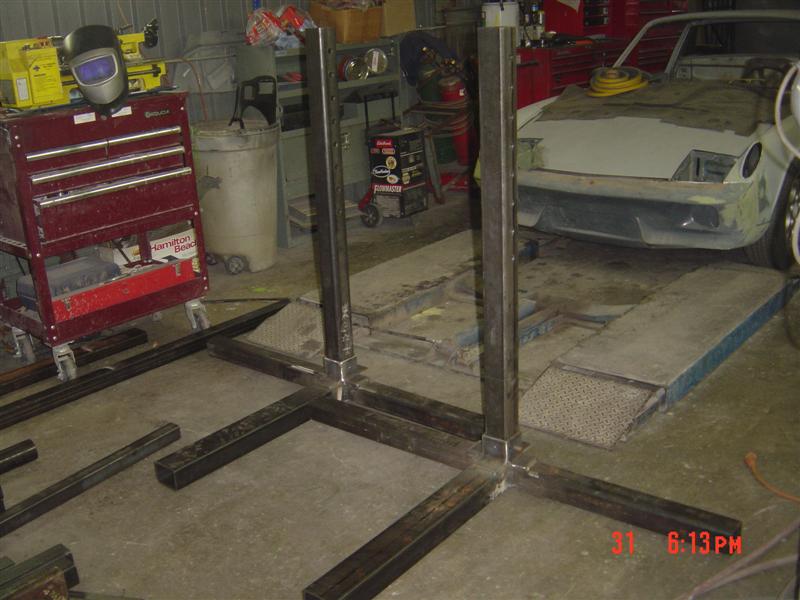
Posted by: scotty b Feb 1 2011, 07:39 PM
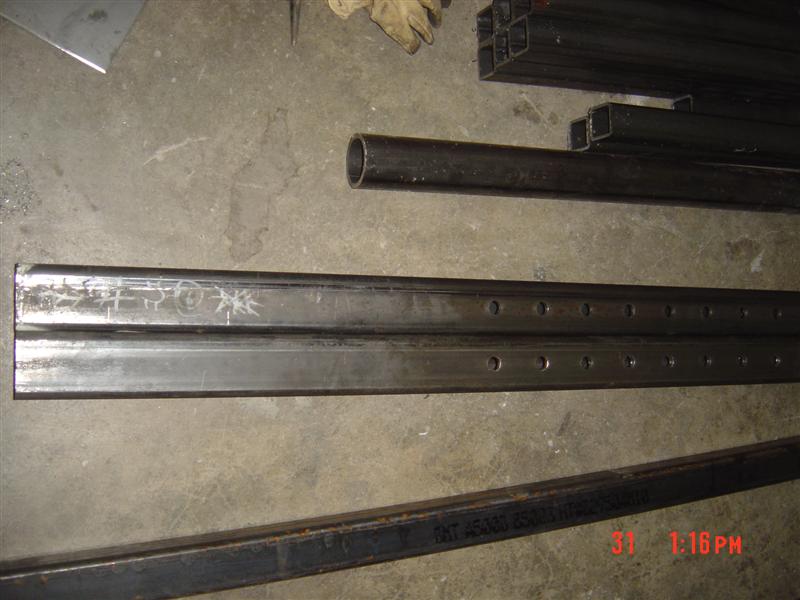
Cut and drilled some 4x4 box for the sliders
Forgot to take some pictures 
Ended up getting the master machinist down in the complex to line bore some schedule 80 [pipe out so I could slip fit a pice of 2 3/8" o.d pipe in it
Drilled a shartload more holes
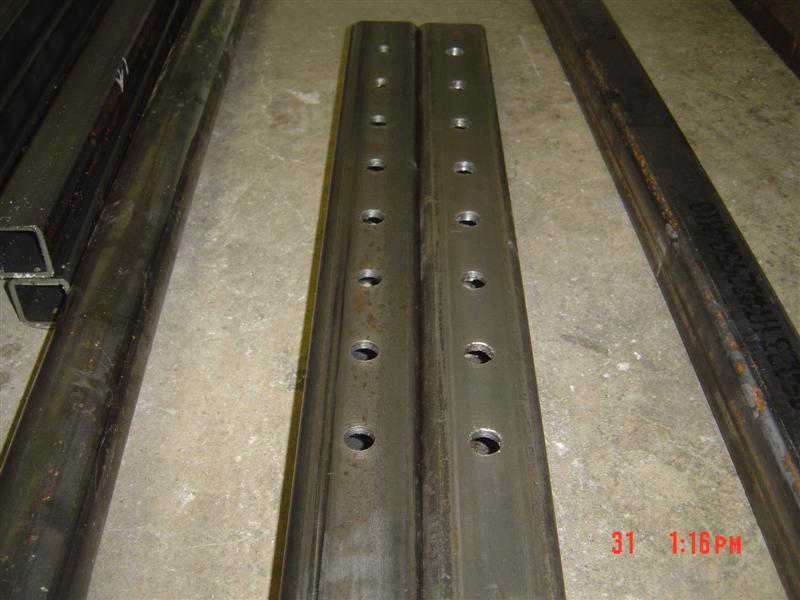
Tacked it all together, checked for fit and full welded the spinning section.
Welded a piece of 2 1/2 " box to the 2 3/8 pipe for the crossbars.
Cut, drilled and welded nuts onto some 3" box to act as positioning sliders on the crossarms
And ended up with this 
My cross bar sliders are too tight due to the weldment process, so I'm going to see if my machinist can skim one side of the cross bars for a better slip fit. More pics as things progress
https://www.youtube.com/watch?v=H7-dXXP2TIE
Attached image(s)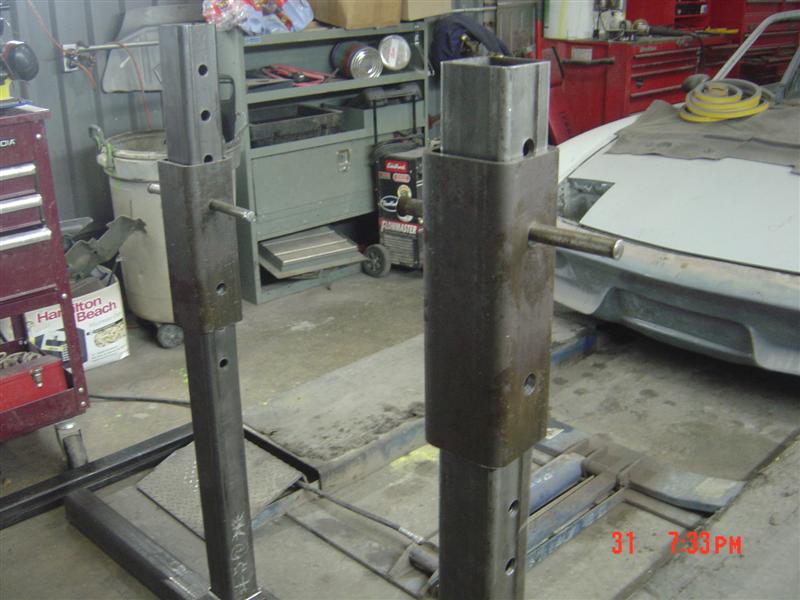
Posted by: Dr Evil Feb 1 2011, 07:40 PM
Man, I wish I could help
Posted by: scotty b Feb 1 2011, 08:34 PM

Man, I wish I could help
Yeah I could have used someone with experience in cleaning cutting fluid off of pipe

Posted by: mepstein Feb 1 2011, 08:43 PM
An electric winch with a remote would make it easy to pull cars over your lift.
Posted by: scotty b Feb 1 2011, 08:48 PM
A wench would make it easy to pull cars over your lift.
Quite true
Posted by: Vacca Rabite Feb 1 2011, 09:43 PM
Man, I wish I could help
Me too. I loved building the on that I built. Its a joy welding metal that has a little thickness to it.
Zach
Posted by: oldschool Feb 1 2011, 11:14 PM
Cut and drilled some 4x4 box for the sliders
Forgot to take some pictures
Ended up getting the master machinist down in the complex to line bore some schedule 80 [pipe out so I could slip fit a pice of 2 3/8" o.d pipe in it
Drilled a shartload more holes
Tacked it all together, checked for fit and full welded the spinning section.
Welded a piece of 2 1/2 " box to the 2 3/8 pipe for the crossbars.
Cut, drilled and welded nuts onto some 3" box to act as positioning sliders on the crossarms
And ended up with this
My cross bar sliders are too tight due to the weldment process, so I'm going to see if my machinist can skim one side of the cross bars for a better slip fit. More pics as things progress
https://www.youtube.com/watch?v=H7-dXXP2TIE
scotty is that a TC-25 i see (tire chief)

Posted by: hot_shoe914 Feb 1 2011, 11:28 PM
Will this thing hold a big ol Mercedes boat? 
Posted by: Andyrew Feb 2 2011, 12:08 AM
I love welding that thick stuff... Mmmmm..
ZZZzzzzzzzzzzzzzzzzzzzzz
Posted by: Valy Feb 2 2011, 01:59 AM
Man, I wish I could help
maybe you should try your bus on the rotisserie...
Posted by: scotty b Feb 2 2011, 06:28 AM
Will this thing hold a big ol Mercedes boat?
It should
Oldschool, it's a bendpak, not sure what model but pretty much the same thing
Posted by: Dr Evil Feb 2 2011, 07:25 AM
Throw that 300 boat on it
Posted by: anderssj Feb 2 2011, 08:19 AM
Will this thing hold a big ol Mercedes boat?
Or a Volvo station wagon?

Posted by: jd74914 Feb 2 2011, 09:21 AM
Nice!
One suggestion [for which I apologize in advance if you are already planning], but I would add gussets to the Sch80 pipe holding the arms in the last picture in post 3. As it is currently, that piece will shear before anything else breaks.
Posted by: bozo914 Feb 2 2011, 09:25 AM
I was thinking that a long screw (1" allthread) in the upright (would have to have more of a C section that square tube) with a set of gears on the top attached to a crank - like the jacks that came with later bugs and busses. Mount crossbars to car and crank away. Works in my head - not so sure it would be feasible in reality
Posted by: toon1 Feb 2 2011, 10:30 AM
Are those rear view mirrors on the primerd car from an Olds cutlass?
Posted by: maf914 Feb 2 2011, 12:42 PM
Man, I wish I could help
Yeah I could have used someone with experience in cleaning cutting fluid off of pipe
Man. Tough Crowd!

Posted by: FourBlades Feb 2 2011, 12:49 PM
Nice, but will it hold a 914 Limo???
Posted by: Archie Feb 2 2011, 03:17 PM
Nice one, Scotty! I wouldn't mind having a pop at one of these (If my welding improves, that is!)
Cut and drilled some 4x4 box for the sliders
Forgot to take some pictures :unsure:
Ended up getting the master machinist down in the complex to line bore some schedule 80 [pipe out so I could slip fit a pice of 2 3/8" o.d pipe in it
Drilled a shartload more holes
Tacked it all together, checked for fit and full welded the spinning section.
Welded a piece of 2 1/2 " box to the 2 3/8 pipe for the crossbars.
Cut, drilled and welded nuts onto some 3" box to act as positioning sliders on the crossarms
And ended up with this :)
My cross bar sliders are too tight due to the weldment process, so I'm going to see if my machinist can skim one side of the cross bars for a better slip fit. More pics as things progress :welder:
https://www.youtube.com/watch?v=H7-dXXP2TIE
Posted by: Dr Evil Feb 2 2011, 03:56 PM
Yes, mirrors off of an Olds something or other.
Posted by: toon1 Feb 2 2011, 06:59 PM
Yes, mirrors off of an Olds something or other.
That's what they looked like. I like em. gonna be looking for a pair soon
Posted by: scotty b Feb 2 2011, 07:21 PM
I was thinking that a long screw (1" allthread) in the upright (would have to have more of a C section that square tube) with a set of gears on the top attached to a crank - like the jacks that came with later bugs and busses. Mount crossbars to car and crank away. Works in my head - not so sure it would be feasible in reality
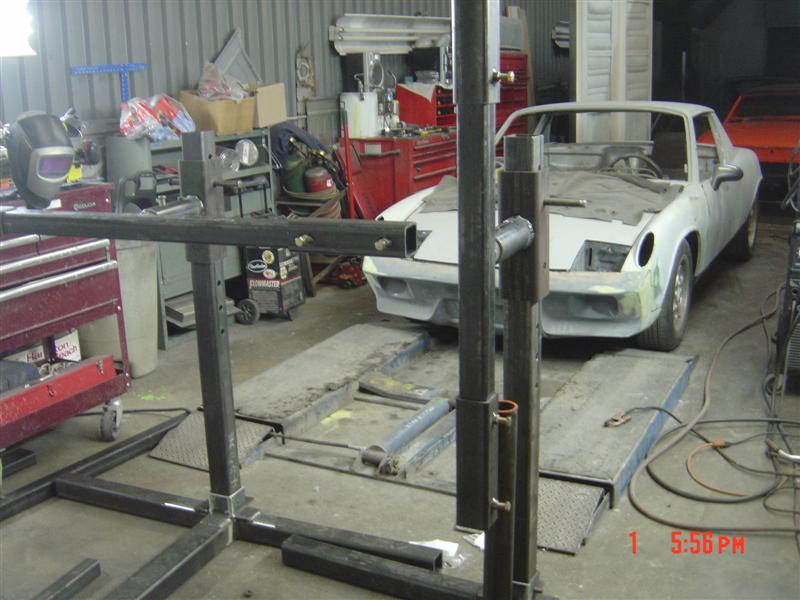
Hydraulic rams on each end. If you look at the last pic, you can see a piece of the pipe standing upright. That is my mockup for the ram
I got the back end finished up with a light duty mount like most of you have seen. (The one that bolts into the bumper holes. ) Once I get the front end finished ( tomorrow ) I will load a car on it and flip it. My next step is to make a complete carriage under the car that ties the front and rear suspension points together, and will make pickups for the rear points that can be removed and reinstalled to aid in proper placement. All this will not only give me proper locations, but will also completely brace the car front to back, so it won't move while I have it upside down
Posted by: trojanhorsepower Jun 25 2013, 06:45 PM
Scotty,
Remember this thread?
Any updates. I would like to see what you came up with.
Posted by: scotty b Jun 25 2013, 08:58 PM
Scotty,
Remember this thread?
Any updates. I would like to see what you came up with.
It's all in my head......allllll of it...........

Posted by: scotty b Jun 25 2013, 09:00 PM
Shut it Michelle 
and Dave
and Eric
and Brown E
and Evil
and Zachamabob
and the rest of ya'z
Posted by: scotty b Jun 25 2013, 09:01 PM
and especially you Terdduh
Posted by: jeff Jun 25 2013, 09:08 PM
I'm struggling posting a pic from my iPad but if you send me your email address ill show you a few things I've put on my rotisserie.. Yours look great so far..it's a time consuming project... Looks simple but it takes more material and time than people think...
Posted by: balljoint Jun 25 2013, 09:24 PM
[quote name='scotty b' date='Jun 25 2013, 11:00 PM' post='1885221'
and Dave
[/quote]
We all know why you really needed that giant rotisserie.
And the dump truck load of barbecue charcoal.


Posted by: scotty b Jun 25 2013, 09:27 PM
Emu = small
Camel = BIG
Posted by: MDG Jun 26 2013, 08:47 AM
Scotty,
Remember this thread?
Any updates. I would like to see what you came up with.
It's all in my head......allllll of it...........
So it's going to be like Stonehenge in Spinal Tap then?
Posted by: Spoke Jun 26 2013, 10:20 AM
Nice work as usual.
Posted by: jeff Jul 22 2013, 09:22 PM
Whet type of friction device are you using for your pivot ? I'm working on one and initially put two 7/16 bolts that would tighten on the inner tube but didn't feel that would hold the weight of the car...I have a ring with pins but really want a good friction device for more adjustment..
Attached image(s)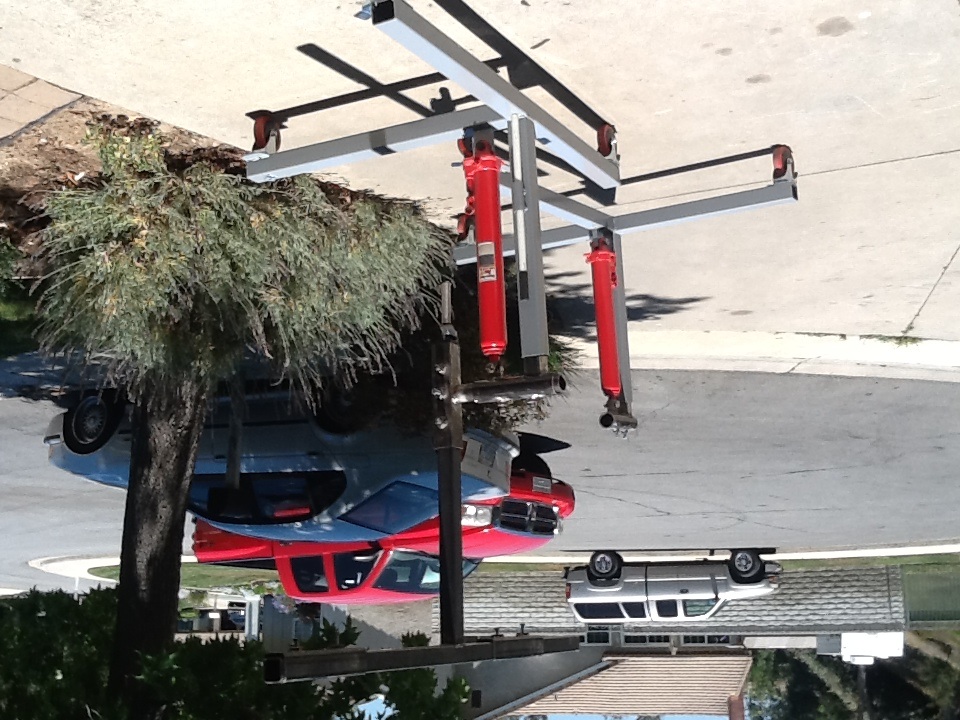
Posted by: scotty b Jul 23 2013, 05:17 PM
I drilled through the inside pipe at 90* increments on each end, and did the ends 45* off from each other. This allows me to drop a bolt in one end or the other, and gives 45* adjustments. A good pair of large vise grips will also do good job of holding it in place if you need a spot you don't have a hole set for.
Posted by: rick 918-S Jul 23 2013, 06:38 PM
Question. How much weight can one of those long ram cylinders dead lift? On an engine hoist they use the arm to carry weight reducing the force on the ram but as a single dead lift like lifting a car from under the center what can they lift?
Powered by Invision Power Board (http://www.invisionboard.com)
© Invision Power Services (http://www.invisionpower.com)