Printable Version of Topic
Click here to view this topic in its original format
914World.com _ 914World Garage _ 914.043.0945 - IMSA Race Car
Posted by: gms Feb 12 2011, 10:46 AM
Back in April 2009 I bought a real 914/6 that was raced in IMSA in 1979 and 1980.
This car was in storage since the late 1980s, in fact I had considered buying it back in 1990. Here is the car as it sat in Mark Kinnaman's (Bartlett 914) shop after I bought it. 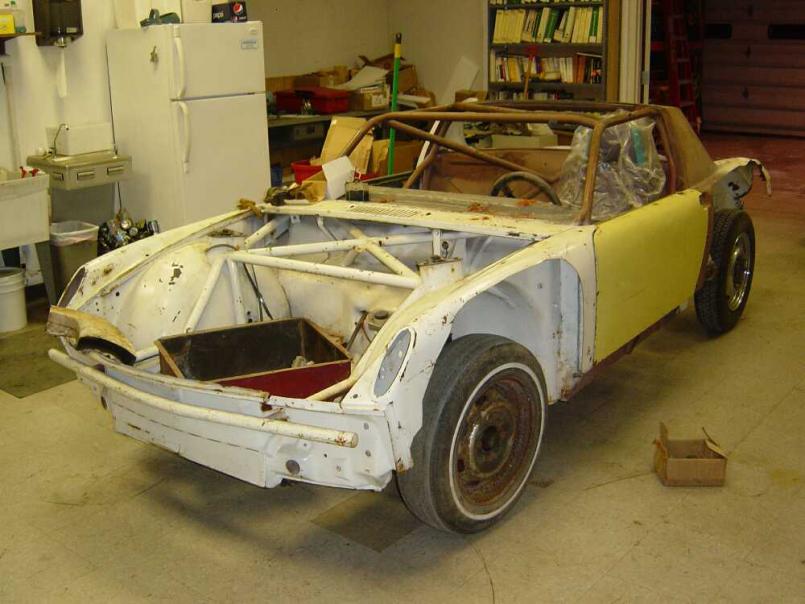
Posted by: gms Feb 12 2011, 10:52 AM
Back in November I finally started working on the car. Here is my other IMSA race car in the foreground and 0945 on the lift in Mark's shop.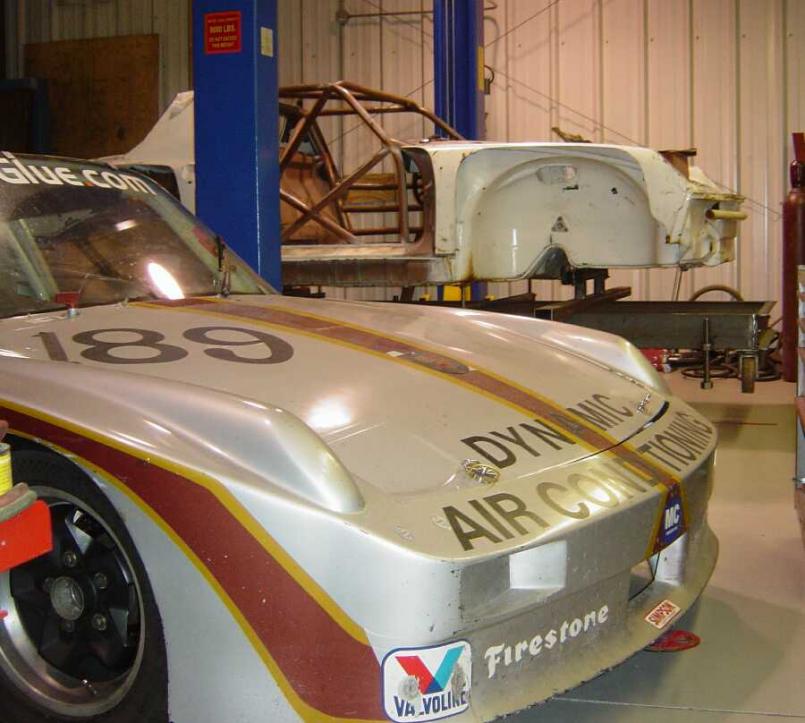
Posted by: ConeDodger Feb 12 2011, 10:59 AM
Nice... This is a preview of what you will see when the RoadGlue stuff gets integrated...
Posted by: gms Feb 12 2011, 11:05 AM

Nice... This is a preview of what you will see when the RoadGlue stuff gets integrated...
Hopefully I will have this going in time to race your Datsun Z friends this years Rob!
Posted by: gms Feb 12 2011, 01:31 PM
A little history on this racer… it started life as a standard 914/6 delivered in New Orleans LA in its original Light Ivory exterior color. It was damaged by a fallen tree and then acquired by Robert Overby. Sometime in the late 1970s it was sold to Sidney Smith, who was looking to build a race car to race in IMSA and SCCA.
The chassis was prepared by Chuck Gaa of GAACO, he was an accomplished fabricator of USAC, NASCAR and IMSA race cars. In 1981 Chuck took a 1972 911 and built the John Paul 935 (JLP-3) that won both 24 hrs of Daytona and Sebring in 1982.
This Photo was taken by Jan Hettler at the 1980 24 hrs of Daytona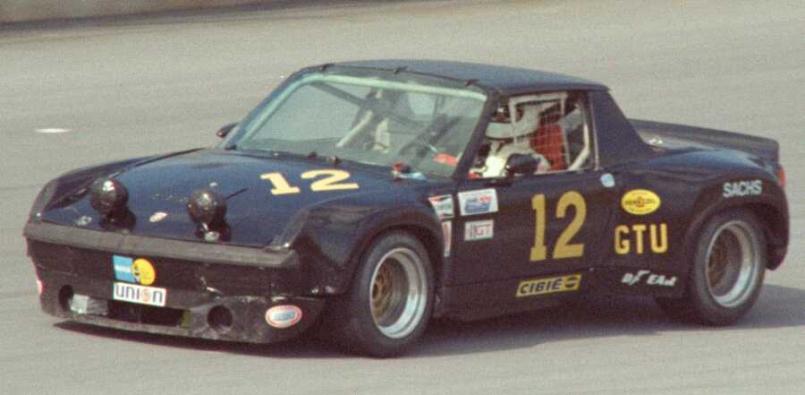
Posted by: GeorgeRud Feb 12 2011, 06:29 PM
Looks like a great project! I hope to see it at some events soon. We need more midwestern representation!
Can't let those left-coasters have all the fun.
Posted by: sixnotfour Feb 12 2011, 11:42 PM
Youve got quite a collection of race cars Glenn, what about the texas car ?
Posted by: gms Feb 13 2011, 04:33 PM
Youve got quite a collection of race cars Glenn, what about the texas car ?
If you are referring to the Stoddard GT, I have that on the back burner for now.
I finally have found all the missing pieces just need to build that. Then there is the proper restoration of #12 to do.
Posted by: gms Feb 13 2011, 04:35 PM
Looks like a great project! I hope to see it at some events soon. We need more midwestern representation!
Can't let those left-coasters have all the fun.
Mark Kinnaman and I have talked about having a BBQ at his shop at some point.
Then we can show off all the race cars too!
Posted by: gms Feb 13 2011, 04:55 PM
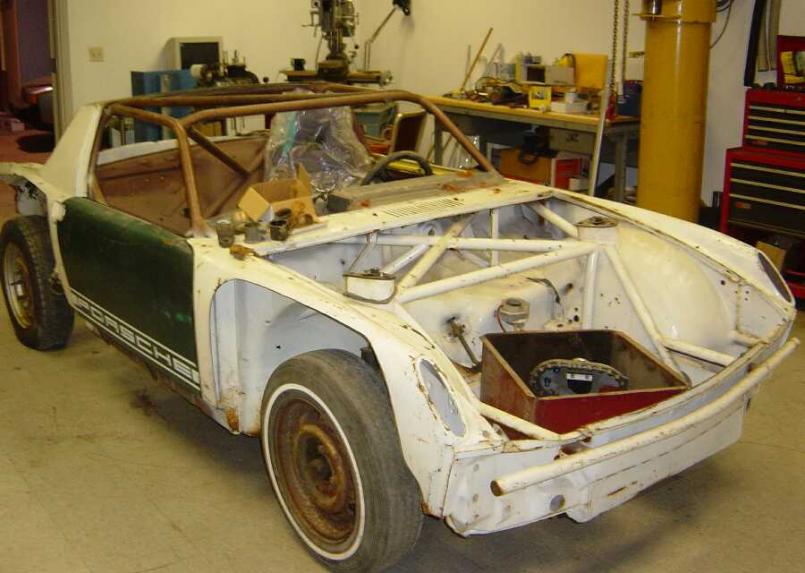
Here are more pix of the car as it arrived at the shop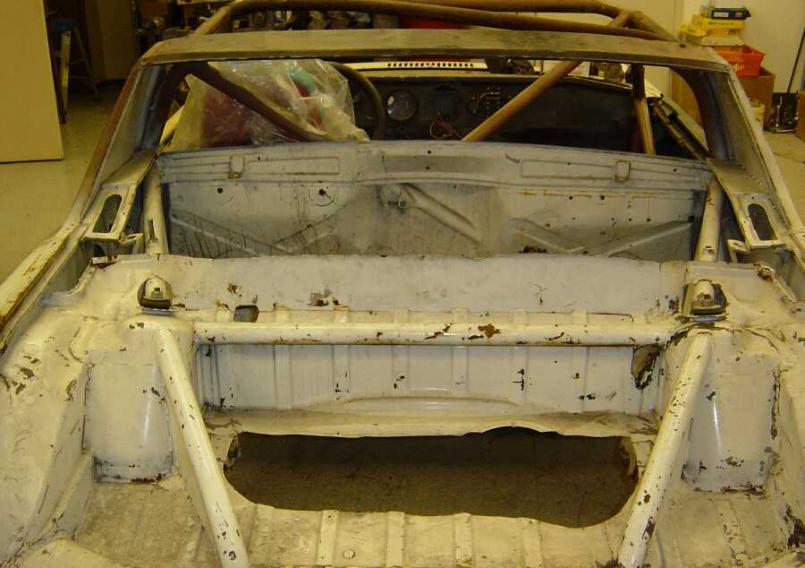
Posted by: gms Feb 13 2011, 05:03 PM
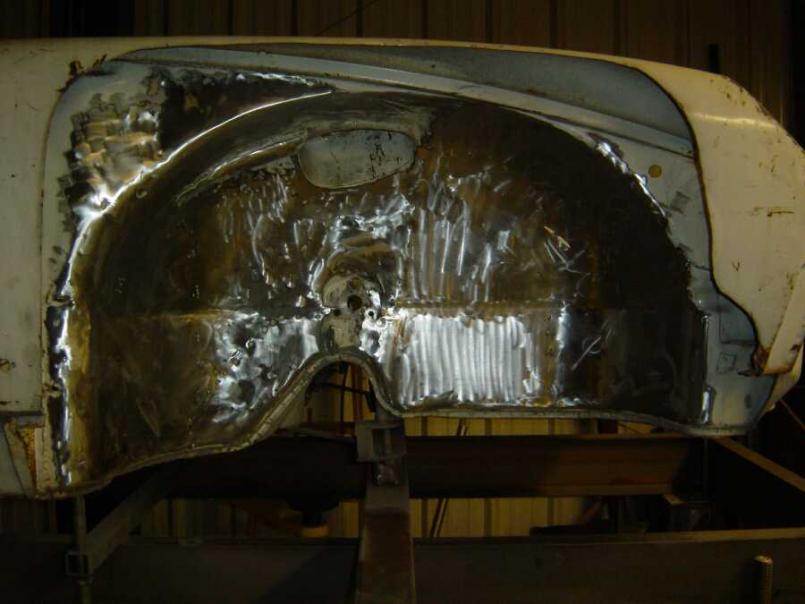
I started to strip the passenger front wheel haus and weld all the unnecessary holes (there are many)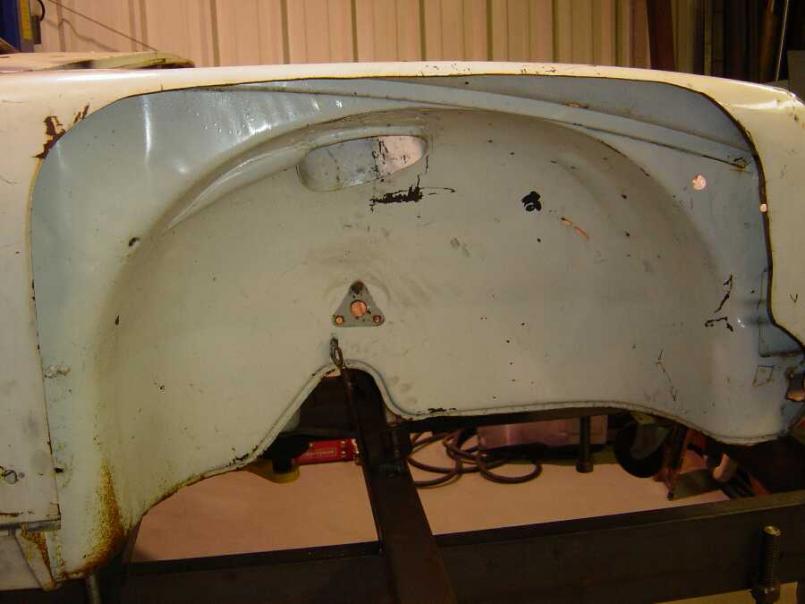
Posted by: J P Stein Feb 13 2011, 06:21 PM
This worked best for me....if you're gonna hand strip.
"Rice cakes" (2-1/2 or 3 inch) and a 90deg die grinder.
Were I in your shoes with all the weird/tight spots, I'd consider media blasting that thing. I'm some what of a gluton for punishment but that's too much for me.
Attached thumbnail(s)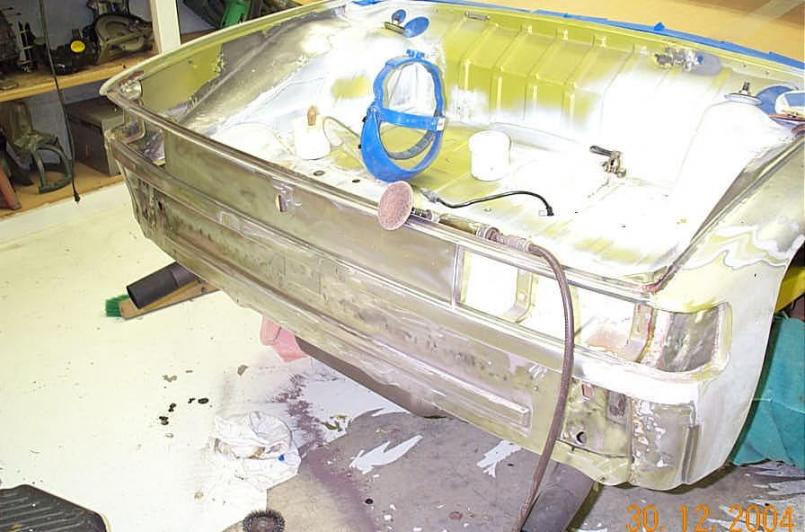
Posted by: gms Feb 13 2011, 08:39 PM
This worked best for me....if you're gonna hand strip.
"Rice cakes" (2-1/2 or 3 inch) and a 90deg die grinder.
Were I in your shoes with all the weird/tight spots, I'd consider media blasting that thing. I'm some what of a gluton for punishment but that's too much for me.
I am using 3 inch 3M rolock sp?, they work well since i am welding as i go.
I still might get it blasted but as long as I am working in the area I manually strip it.
Posted by: ConeDodger Feb 14 2011, 12:41 AM
I think as long as you are acclimated to the track and put enough 'six' power in the back of that thing my Datsun friends will not have a chance. But still, you will love Phillip Reith. Be sure to seek him out and have a beer. His car sports some parts of mine...
Posted by: gms Feb 15 2011, 08:54 PM
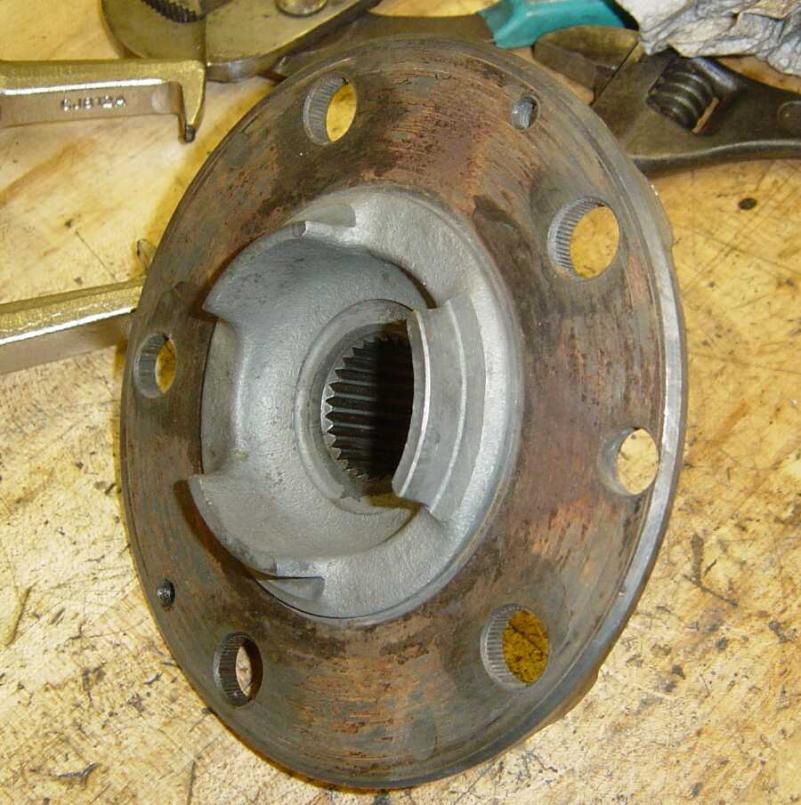
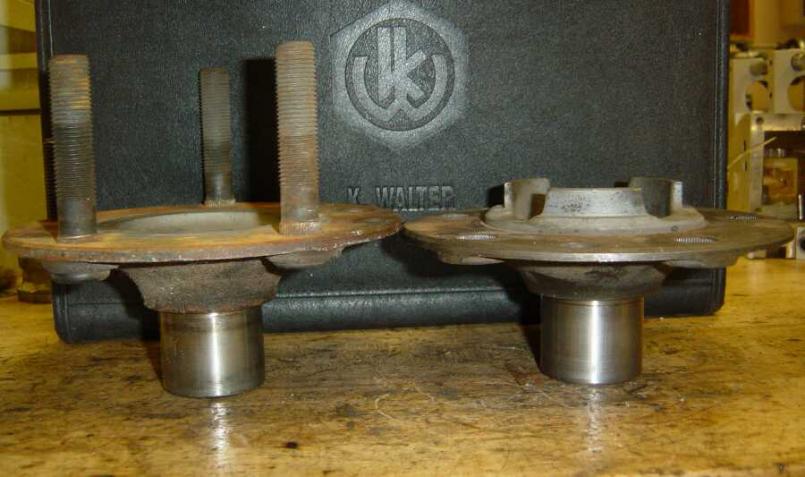
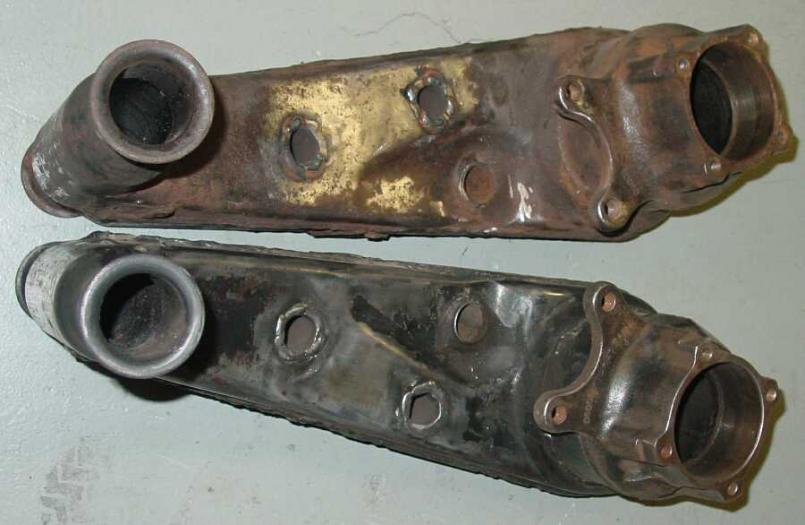
Mark cut down some 911 SC rear hubs to use in the race car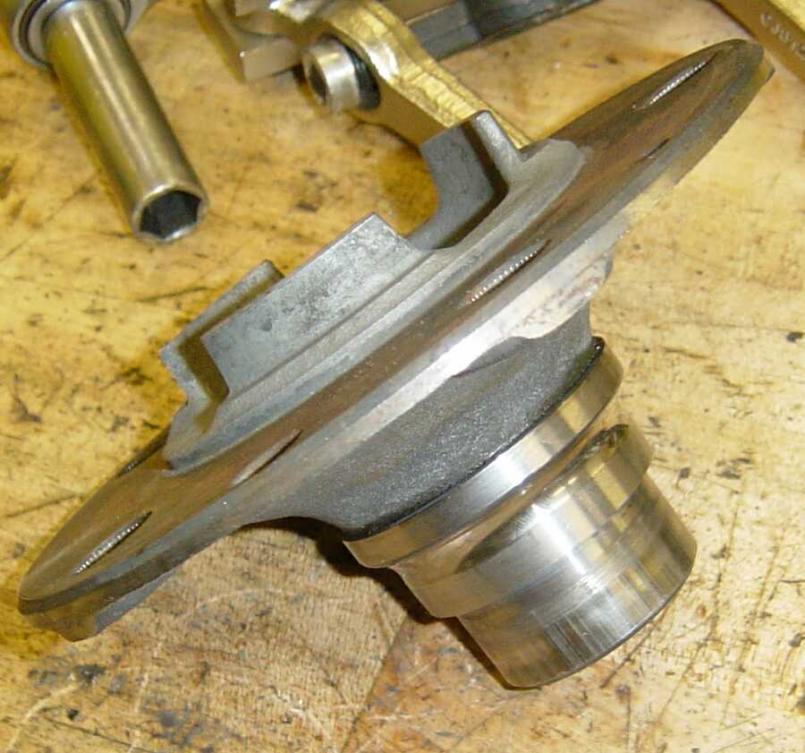
Posted by: gms Feb 15 2011, 08:57 PM
here is the original hub (L) and SC hub ® side by side
Posted by: gms Feb 16 2011, 09:47 PM
I finally found a Pepsi Challenge 24 hrs of Daytona sticker, this is the FIA event sticker that went on the door.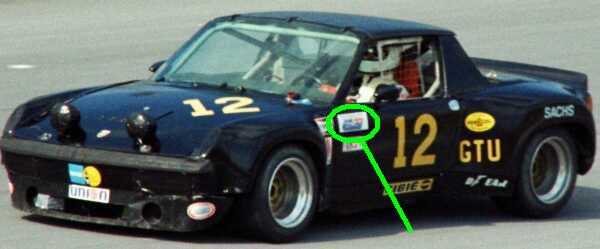

Posted by: gms Feb 21 2011, 02:01 PM
My powder coated 914/6 axles arrived today from Alan Gibson.
The 911 SC CV joints will be mounted after the axles are cut to fit.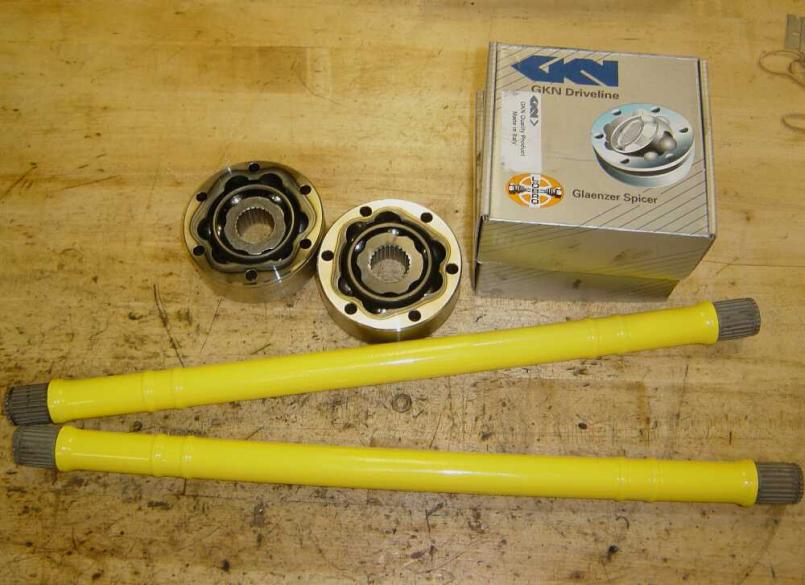
Posted by: gms Feb 27 2011, 09:47 AM
Here is the VIN
Attached thumbnail(s)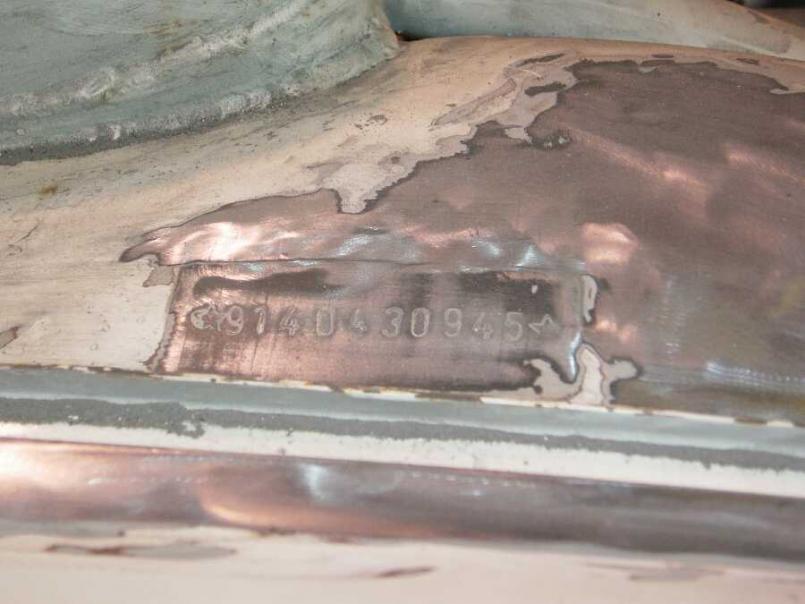
Posted by: gms Feb 27 2011, 09:49 AM
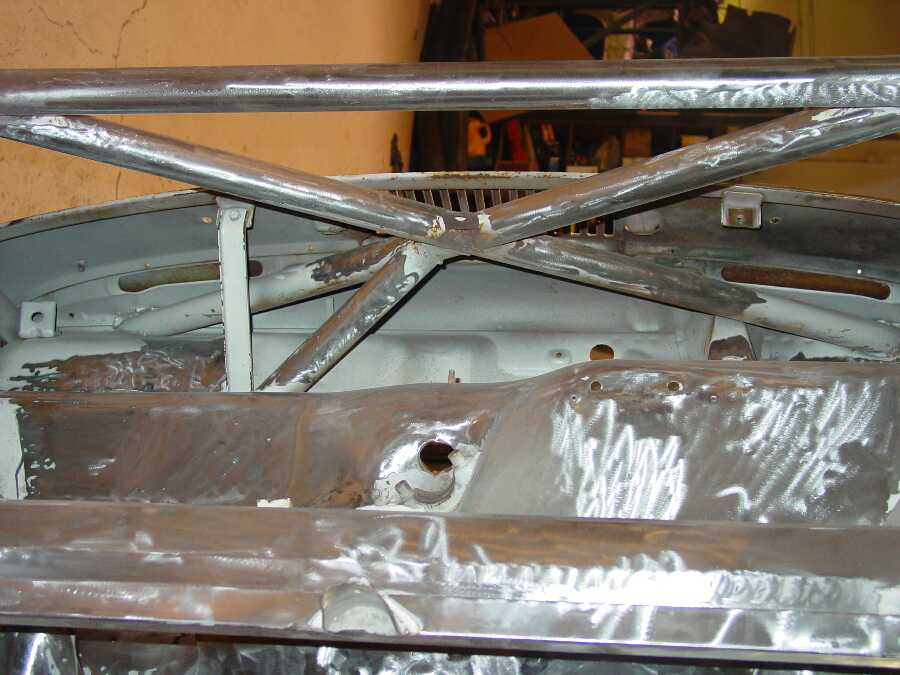
You can see where the cage ties into the front strut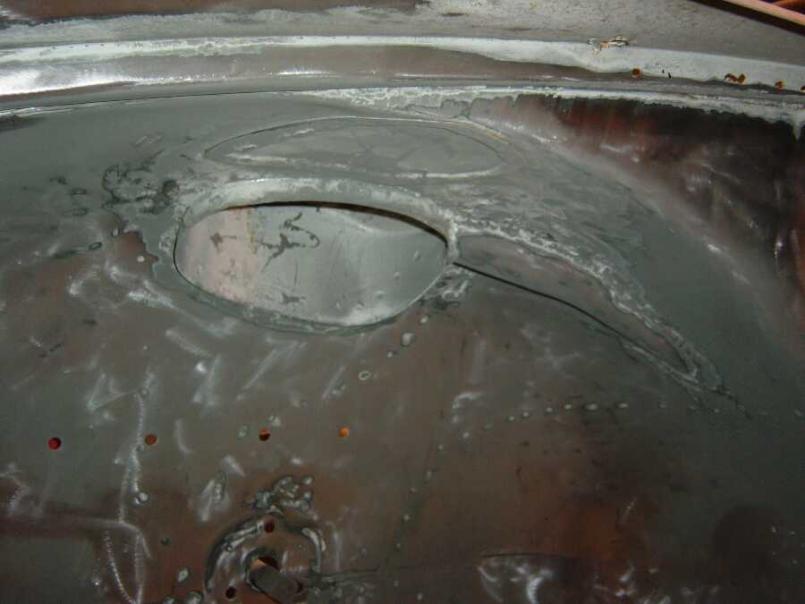
Driver's side wheel well needs some holes filled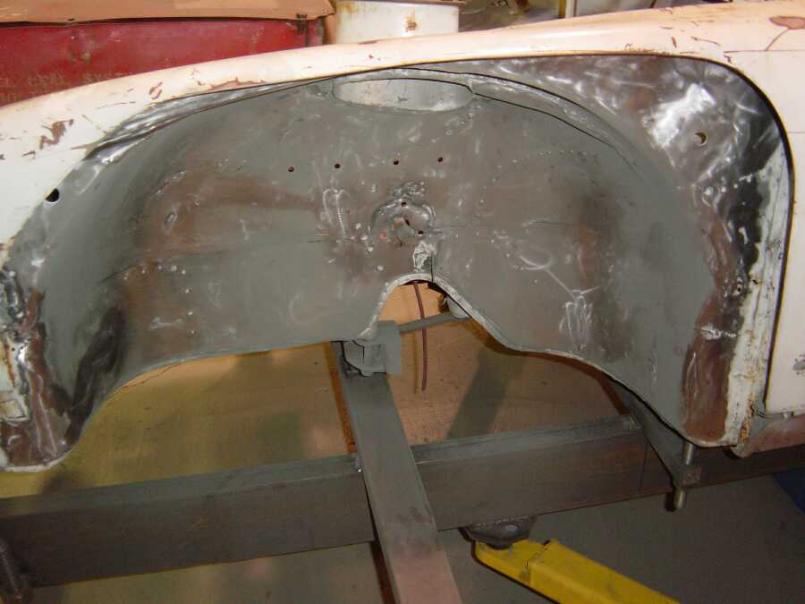
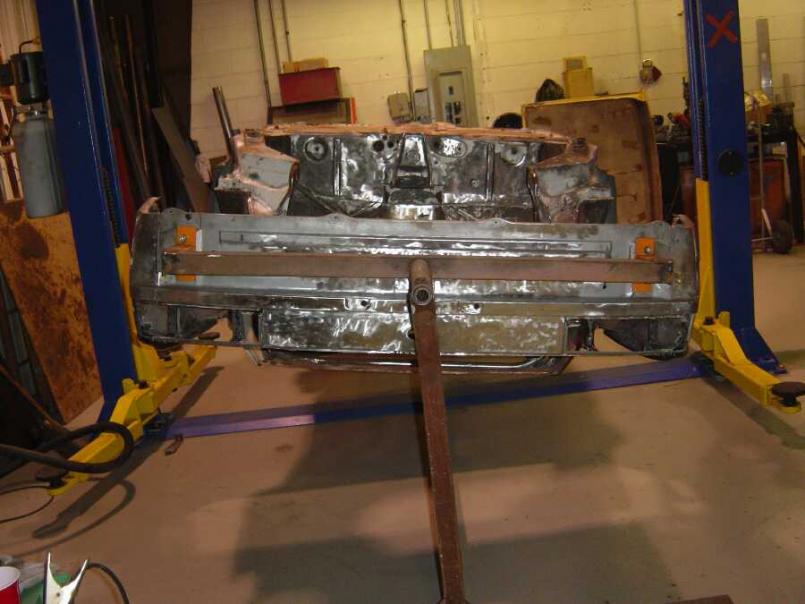
Posted by: gms Feb 27 2011, 09:51 AM
bare ass shot
Attached thumbnail(s)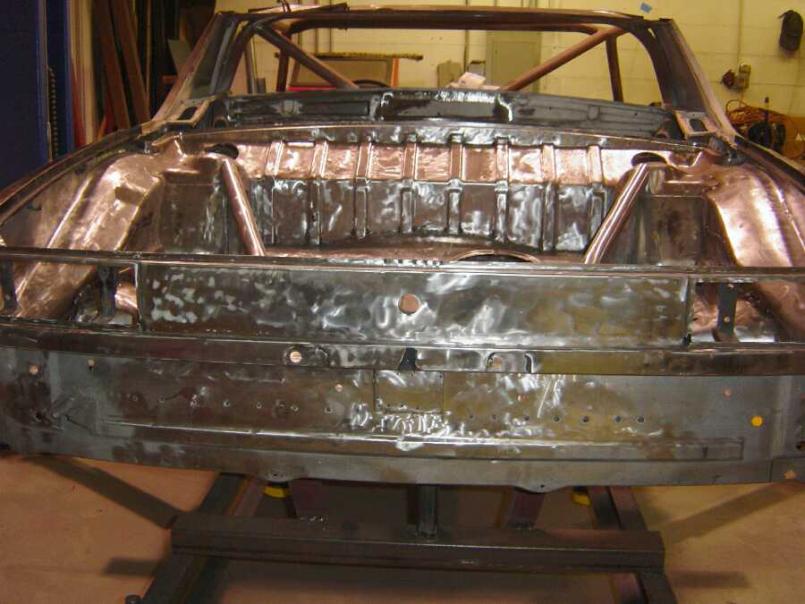
Posted by: J P Stein Feb 27 2011, 10:27 AM
Auggh.....that reminds me of how much work is involved there......but I admire your dedication. 
I see you've removed a seemingly redundant tube. I can't wait to see your cleanup of the engine room.
Posted by: gms Feb 28 2011, 10:34 AM
Auggh.....that reminds me of how much work is involved there......but I admire your dedication.
I just watch some of my race video and it keeps me inspired for hours.
I see you've removed a seemingly redundant tube. I can't wait to see your cleanup of the engine room.
The bar was removed to work on the trunk floor it will be reinstalled
Posted by: gms Feb 28 2011, 10:43 AM
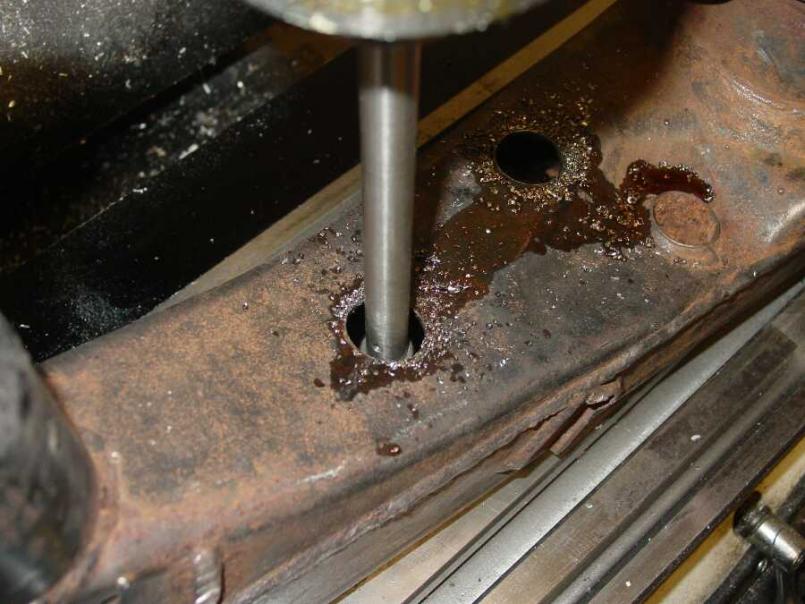
I did some work on the trailing arms a couple weeks ago, stole the idea from Eric.
Mark Kinnaman set the arm up in the mill and punched some 1 inch holes.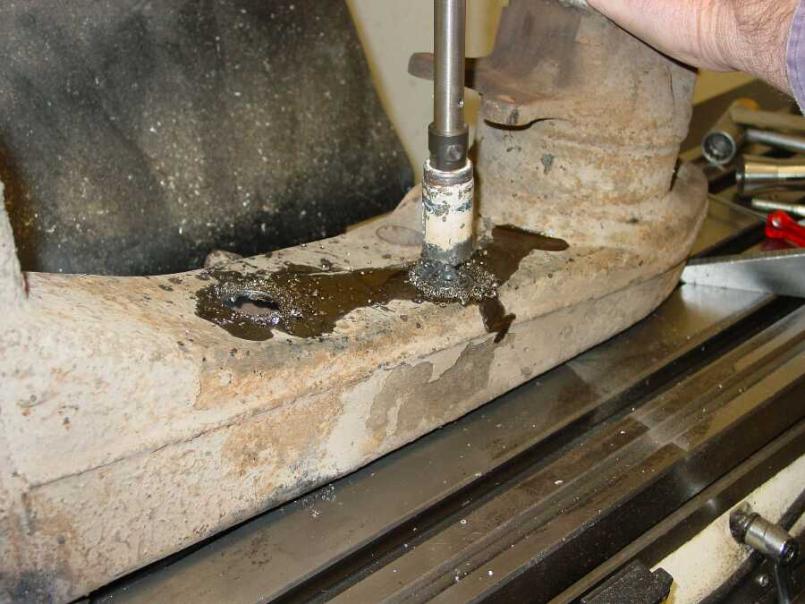
Posted by: gms Feb 28 2011, 10:46 AM
I found some 1" pipe at McMaster-Carr
Attached thumbnail(s)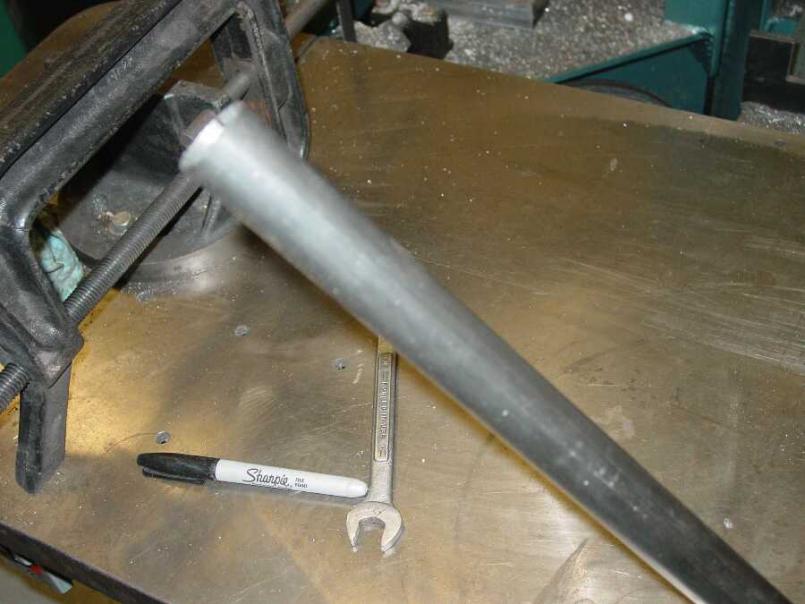
Posted by: gms Feb 28 2011, 10:48 AM
insert in the holes, weld and there they are.
I will do a little clean up before sending out for powder coating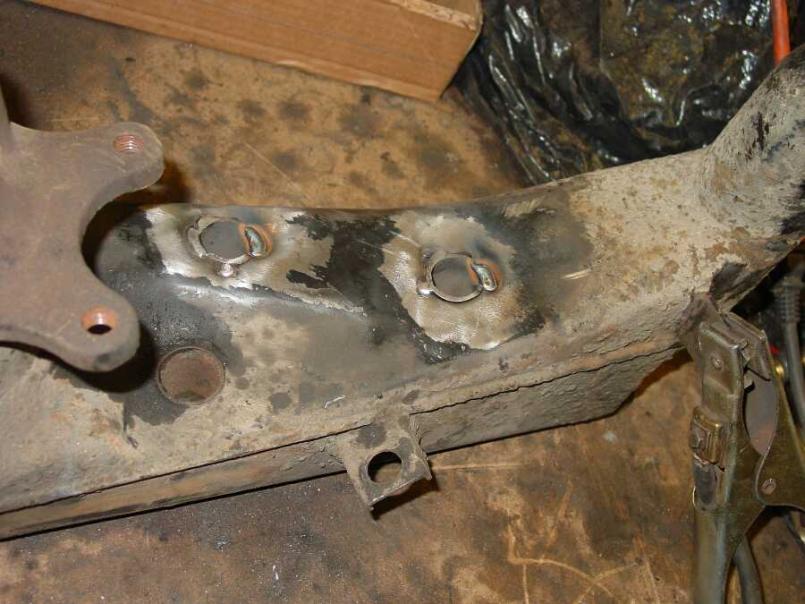
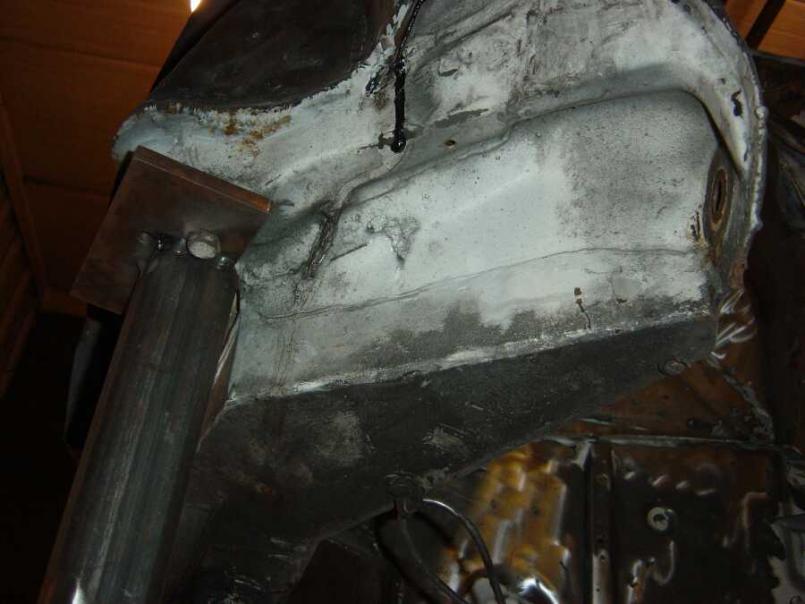
Posted by: gms Mar 8 2011, 11:12 AM
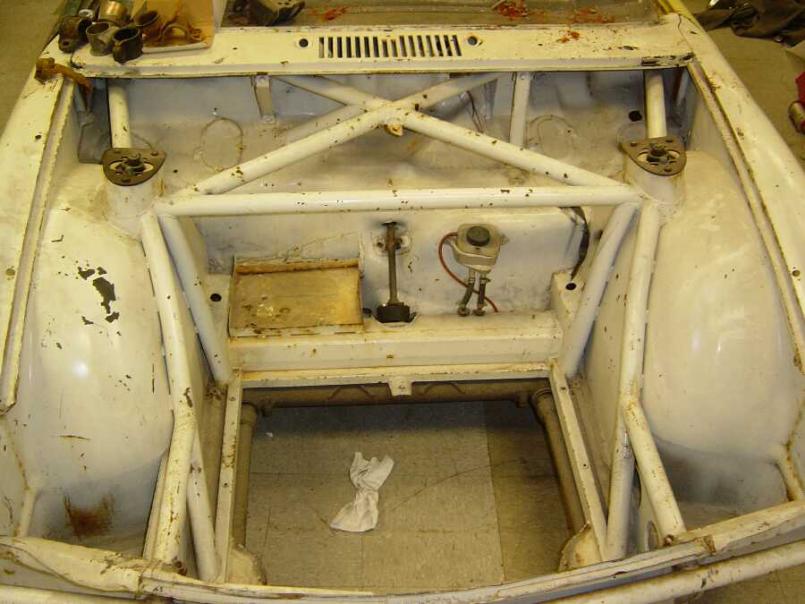
A picture from under the trunk into engine compartment
Attached thumbnail(s)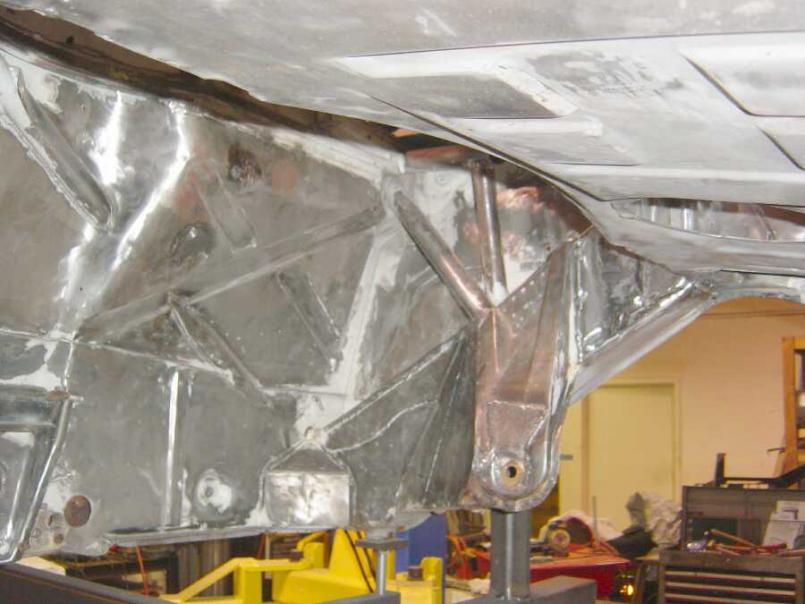
Posted by: stugray Mar 9 2011, 01:17 PM
"I started to strip the passenger front wheel haus and weld all the unnecessary holes (there are many)"
I need to weld some "unnecessary" holes in mine as well.
How do you do it?
I was considering holding a copper penny or a piece of aluminum behind the hole, then plug welding it.
The weld wouldnt stick to the backup that way, but would cause a lot of porosity.
Do you have any tricks to make it flat? I dont want to just keep making the holes bigger and have a mess on my hands.
Nice job on the trailing arms.
I just did that last weekend.
I used a 1" type of pipe that is architectural for handrails.
It has a perfect OD and no seam.
I used that pipe for the rear suspension ear heim joint support as well.
I am surprised that this car does not already have them.
Stu
Posted by: gms Mar 9 2011, 02:20 PM
"I started to strip the passenger front wheel haus and weld all the unnecessary holes (there are many)"
I need to weld some "unnecessary" holes in mine as well.
How do you do it?
I was considering holding a copper penny or a piece of aluminum behind the hole, then plug welding it.
The weld wouldnt stick to the backup that way, but would cause a lot of porosity.
Do you have any tricks to make it flat? I dont want to just keep making the holes bigger and have a mess on my hands.
I find that pulling the welder away from the work cools the weld, in other words i get a long wire pushing into the work in a circular motion. it helps to hit a couple quick tack weld and start from a thicker surface.
Posted by: gms Mar 9 2011, 02:22 PM
I used that pipe for the rear suspension ear heim joint support as well.
I am surprised that this car does not already have them.
The trailing arm inner mounts are hella strong, i will shot some pictures
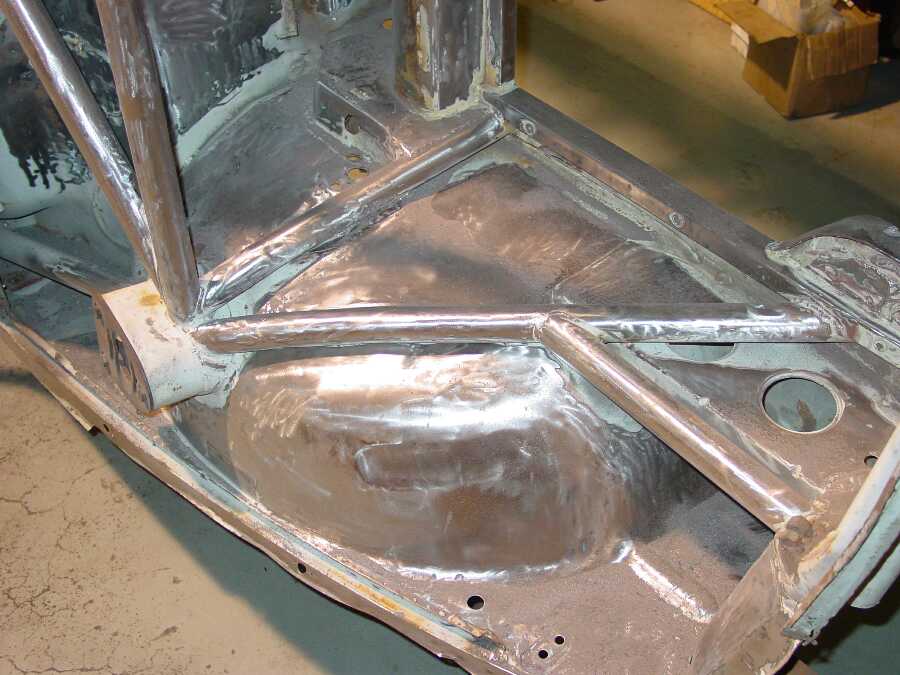
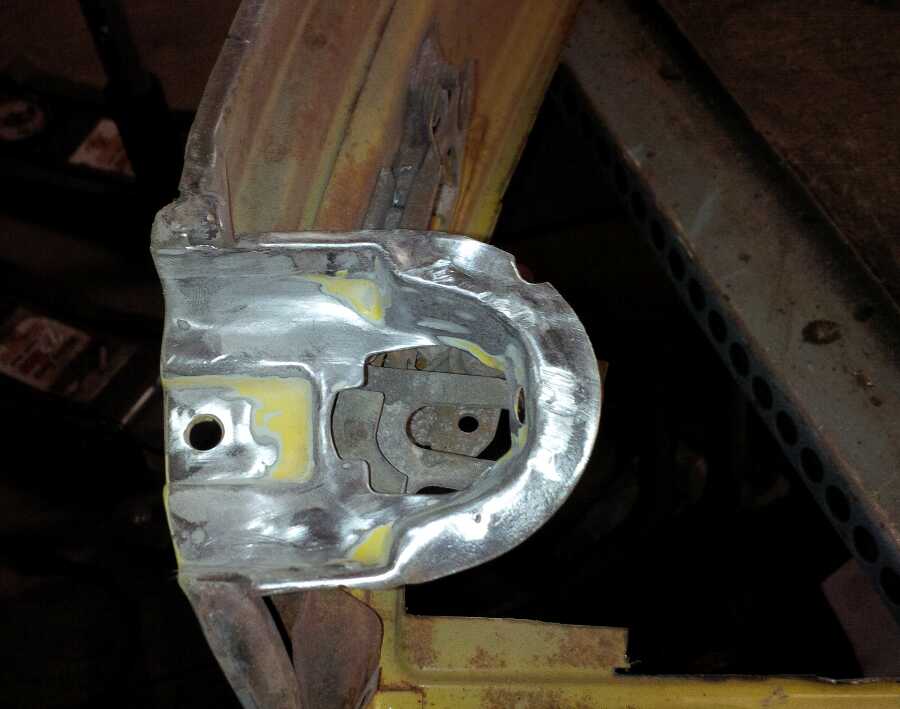
Posted by: gms Mar 9 2011, 02:43 PM
Here are the picture of the driver rear mount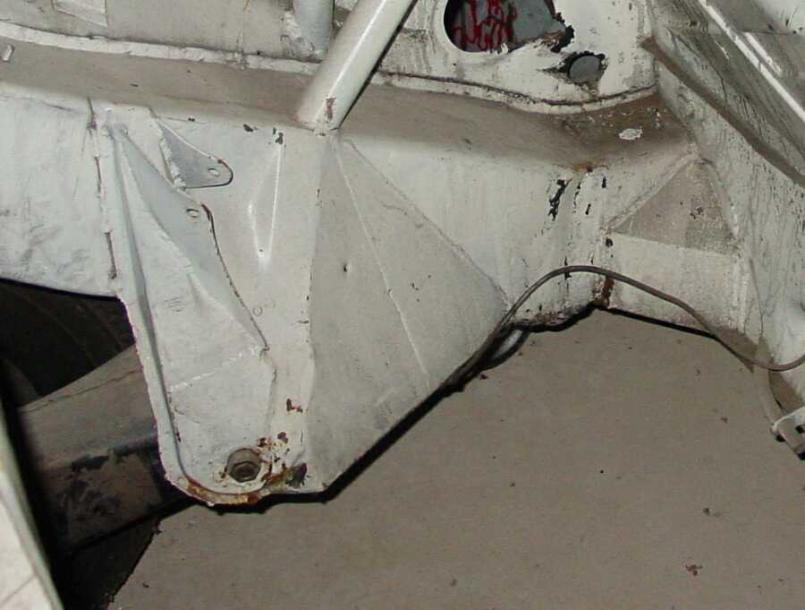
Posted by: gms Mar 10 2011, 01:29 PM
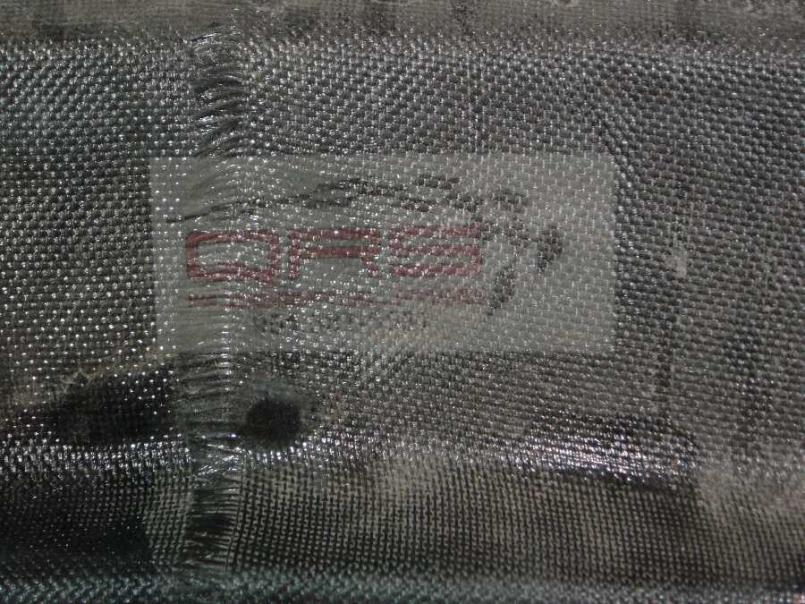
The QRS fiberglass bumpers came in this week, these are nice and light weight!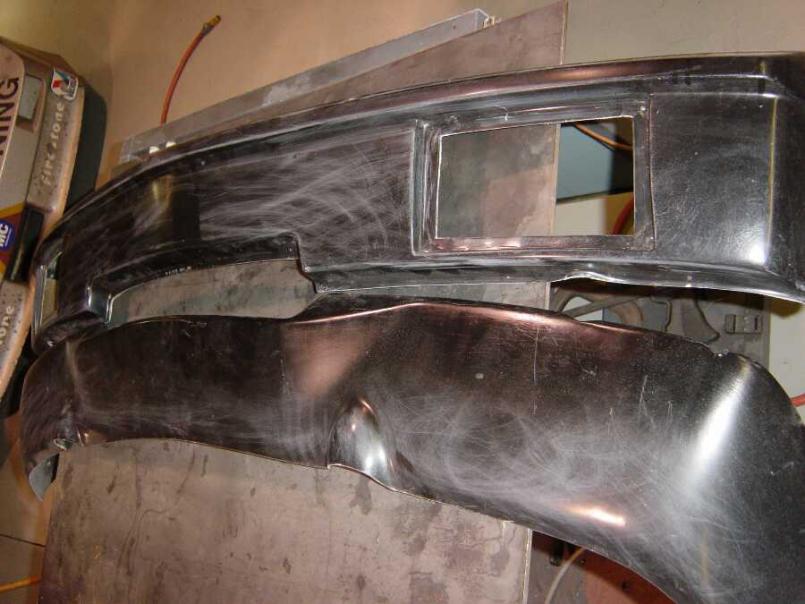
Posted by: gms Mar 15 2011, 01:40 PM
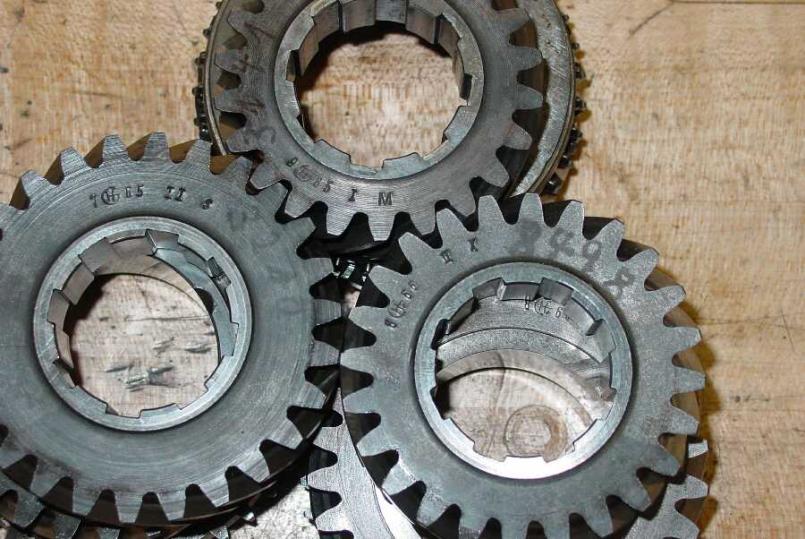
a tranny I bought came in today and I harvested M-S-X gears from it!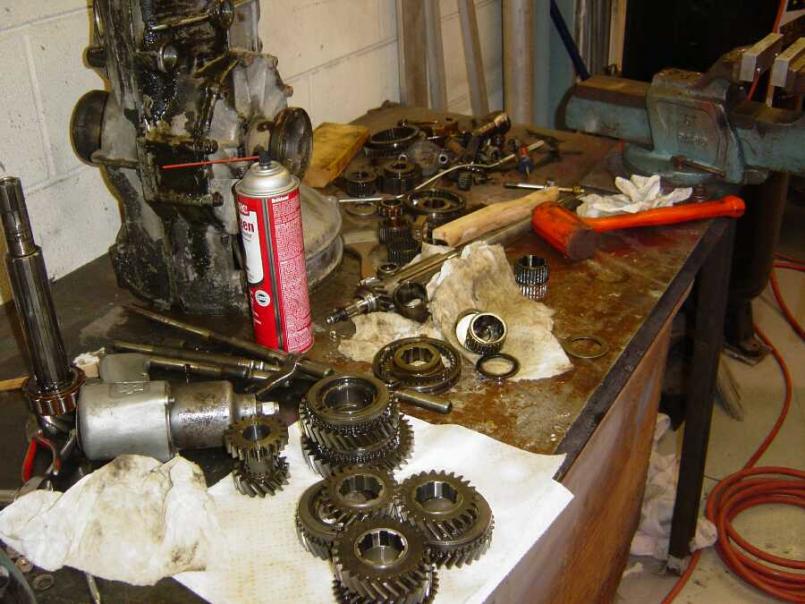
Posted by: gms Mar 25 2011, 10:25 PM
Mark and I got the car on the rotisserie tonight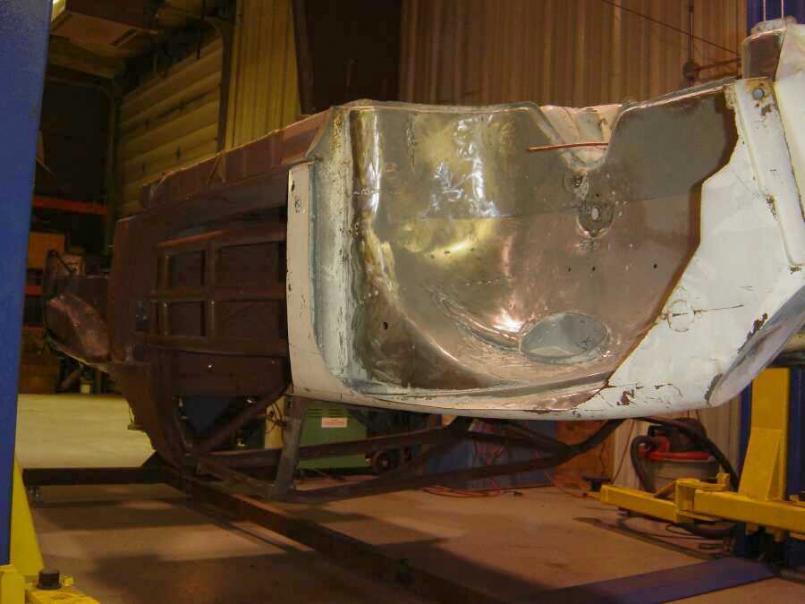
Posted by: gms Mar 25 2011, 10:34 PM
the oil tank arrived the other day
Attached thumbnail(s)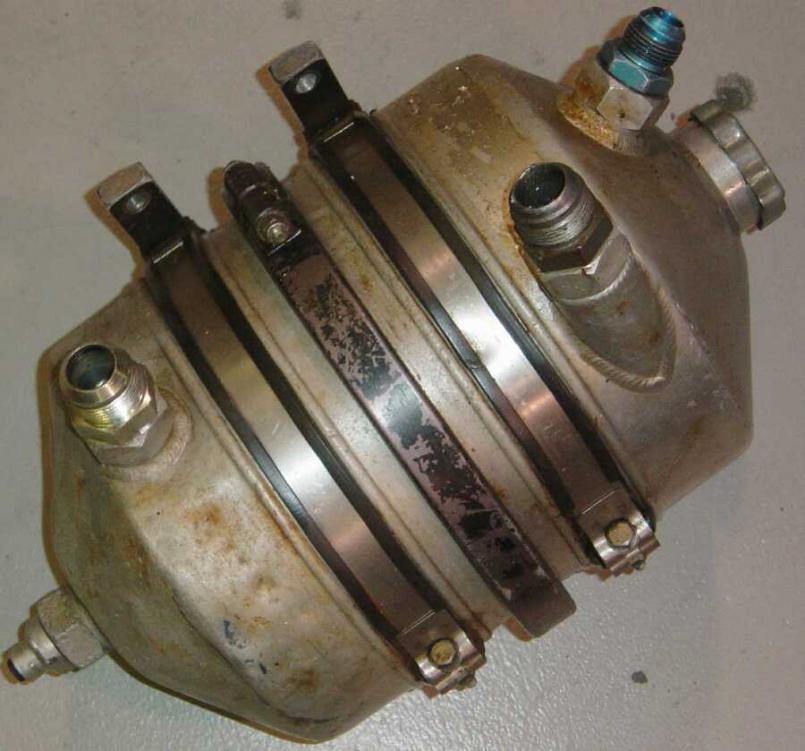
Posted by: gms Apr 4 2011, 03:01 PM
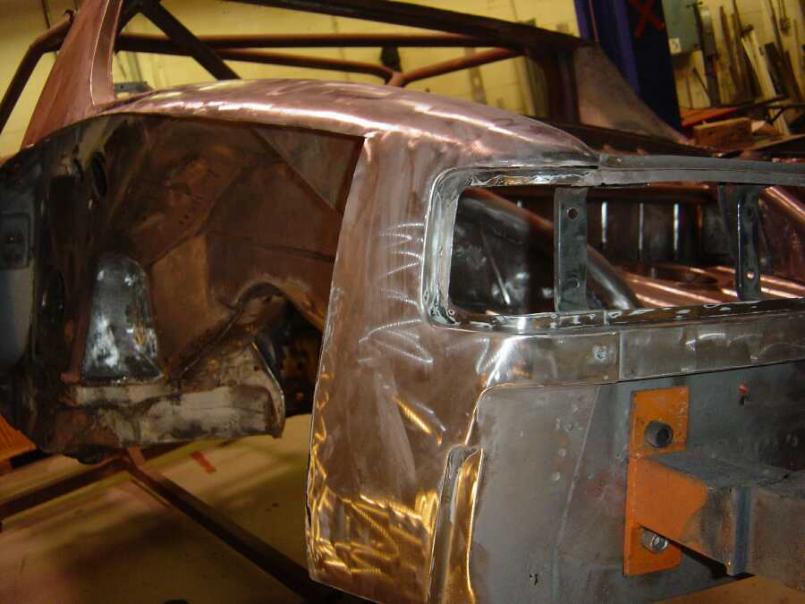
Here is a view of the front trunk area
it was 2 years ago today that i bought this car
Attached thumbnail(s)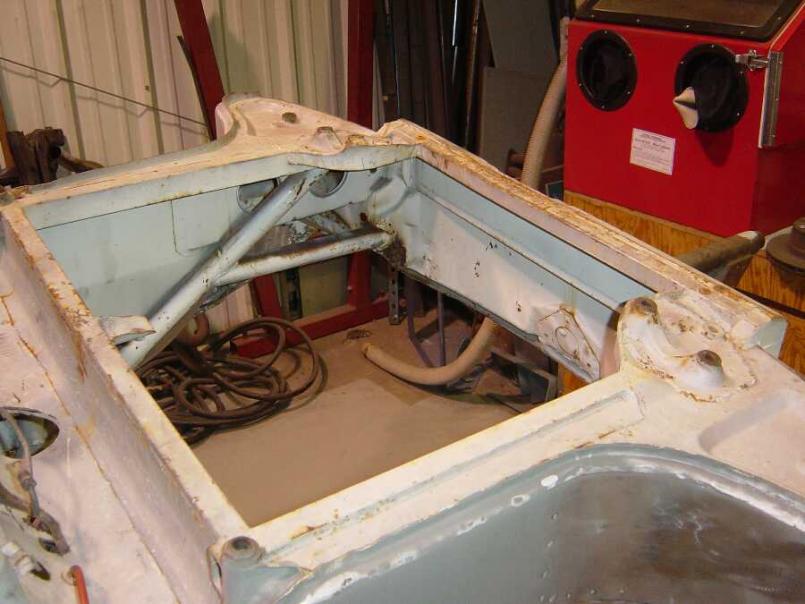
Posted by: gms Apr 4 2011, 03:03 PM
I did a little paint removal yesterday, very clean longs!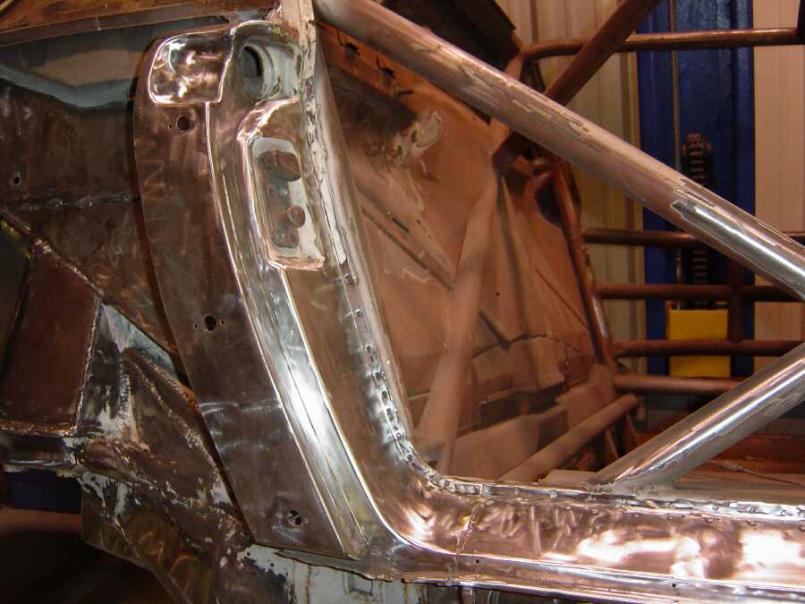
Posted by: McMark Apr 4 2011, 03:50 PM
![popcorn[1].gif](style_emoticons/default/popcorn[1].gif)
Posted by: gms Apr 4 2011, 03:58 PM
the long
Attached thumbnail(s)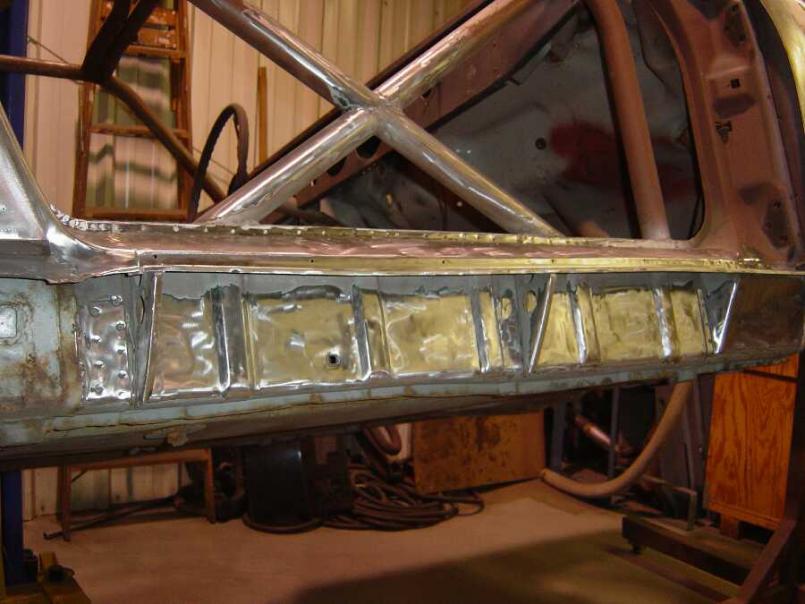
Posted by: RoadGlue Apr 4 2011, 04:02 PM
Looking great Glenn! Gonna drive it out to Cali when you're finished!? hehe, j/k.
Posted by: gms Apr 4 2011, 04:55 PM
Looking great Glenn! Gonna drive it out to Cali when you're finished!? hehe, j/k.
I would love to do a west coast track tour, not sure when that will happen
Posted by: gms Nov 7 2011, 10:08 PM
Racing season is over and it is time to get back to work on this racecar.
I finally had a couple of parts shipped back from CA...Thanks Dug!
First is the Ginther windscreen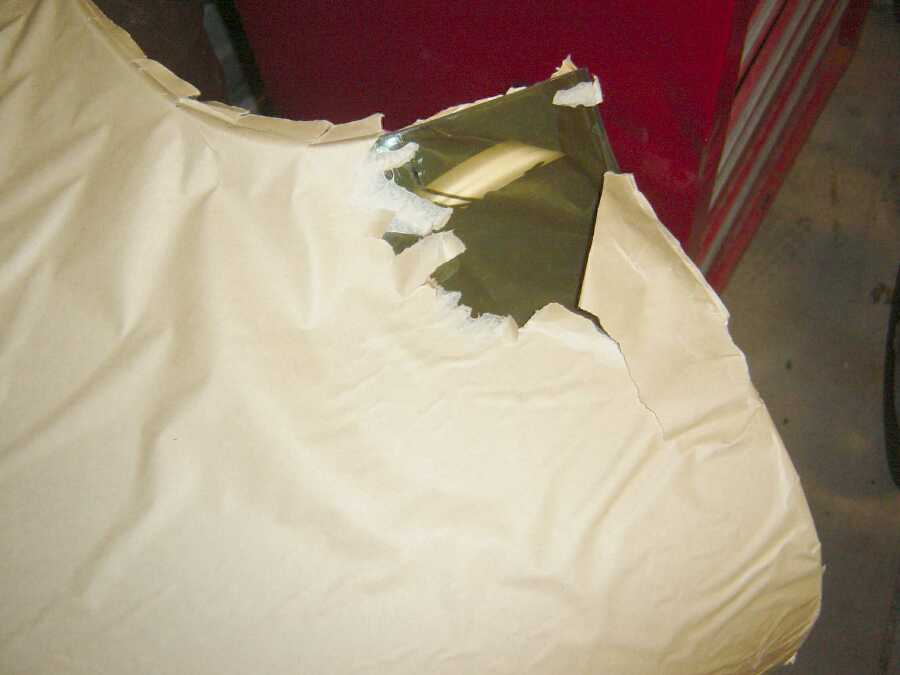
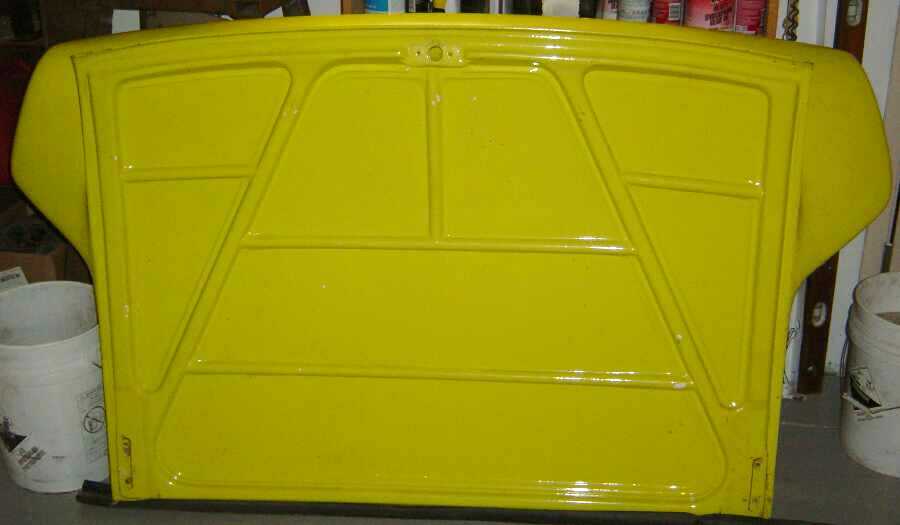
Posted by: gms Nov 7 2011, 10:10 PM
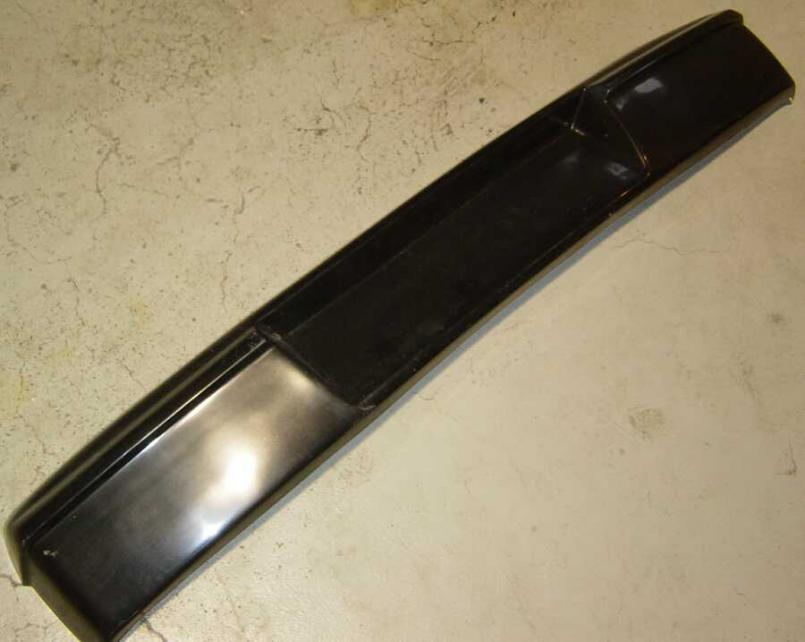
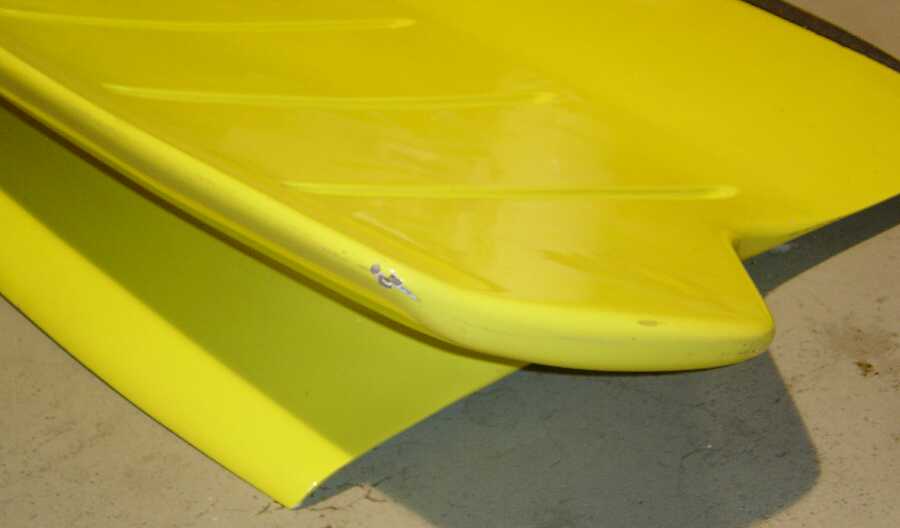
second is the whale tail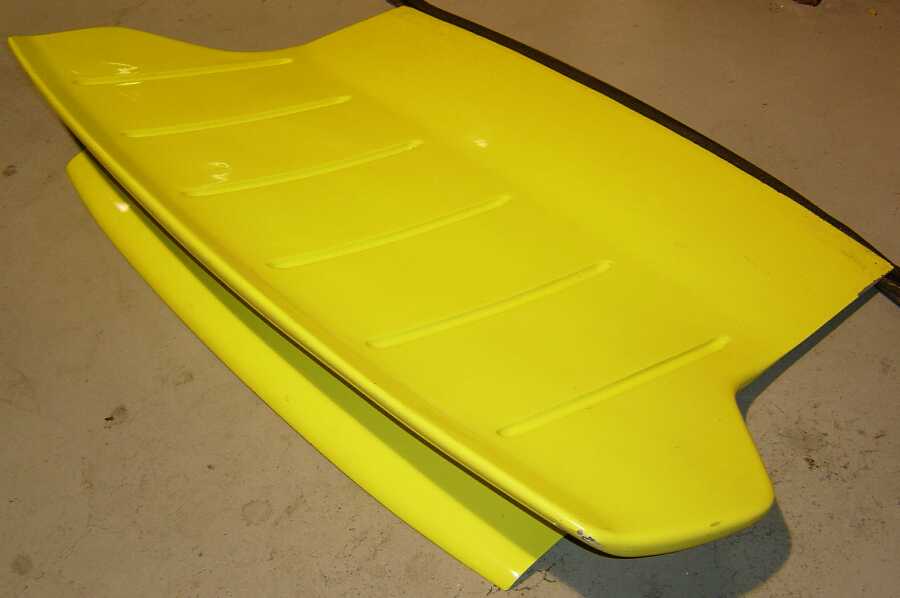
Posted by: J P Stein Nov 8 2011, 09:49 AM
The Ginther screen is tough to find....in my experience and un-cheep.
Be careful handling it while fitting. I was & still managed to crack it.
I've not seen one F/S for 4-5 years....extra careful.
Attached image(s)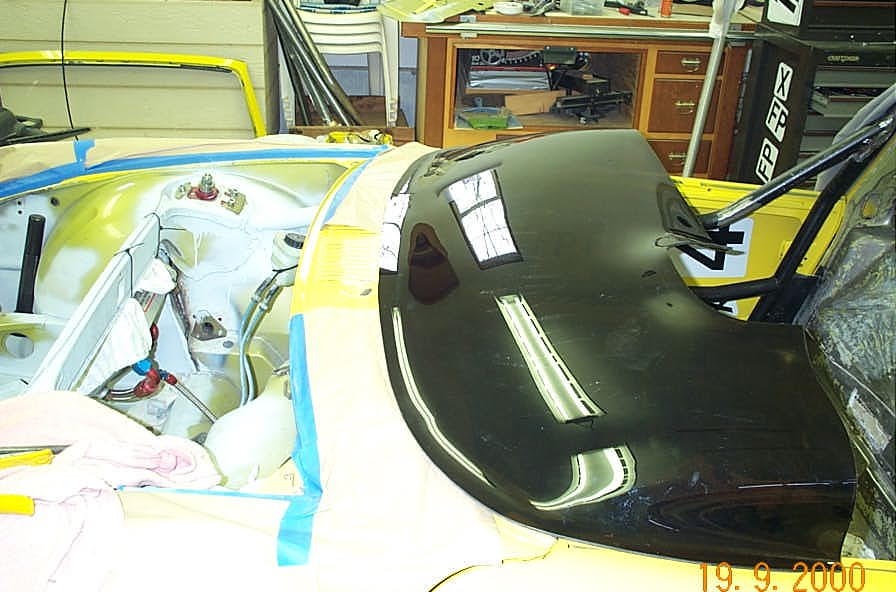
Posted by: 914340 Nov 8 2011, 10:29 AM
second is the whale tail
Hello, where did you find your 'whale tail'? I'd like to have one for my 914.
Posted by: strawman Nov 8 2011, 01:03 PM
I've got that exact same whale tail that I won't be using. PM me if you're interested. Located in Davis, CA (just outside of Sacramento).
Posted by: gms Jun 14 2012, 10:41 PM
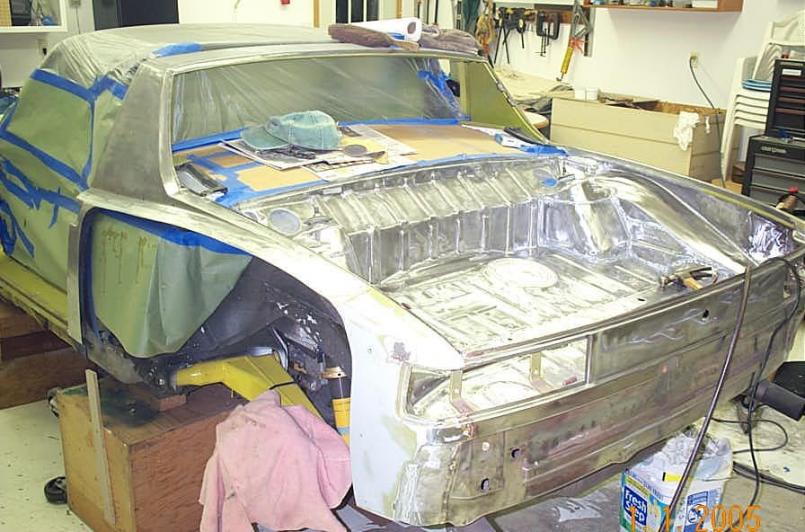
I started work on the car again, got most of the front trunk cleaned up tonight.
Lots of holes to weld up!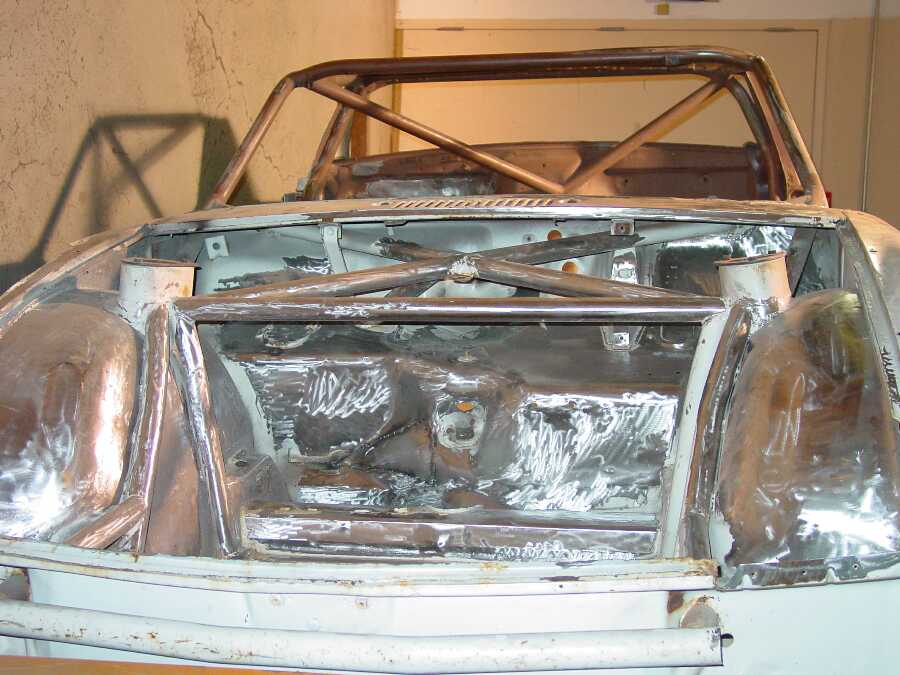
Posted by: Bartlett 914 Jun 15 2012, 09:04 AM
Your car is coming along great.
Glenn has spent countless hours prepping this car ans is very detail minded. The appearance of rust is a problem with the lighting. Most of what looks like surface rust is not. It is nice clean and shinny! The roll bars are painted brown.
Posted by: FourBlades Jun 15 2012, 12:06 PM
Looking good Glenn!
Love the Ginther windscreen.
John
Posted by: gms Jun 17 2012, 05:48 PM
Looking good Glenn!
Love the Ginther windscreen.
John
thanks!
Posted by: gms Feb 11 2013, 08:14 PM
Another photo of the car at the Daytona IMSA race November 25, 1979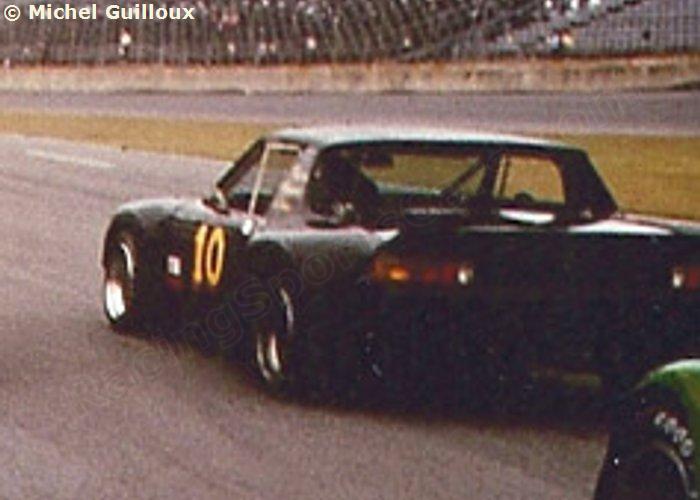
Photo by Michel Guilloux
Posted by: GeorgeRud Feb 11 2013, 08:55 PM
Looking good! I don't know if anyone around Chicago does it anymore, but I wonder if getting the chassis blasted (sand, walnut, glass bead, etc) wouldn't save a bunch of time on this project. Seeing all those TV shows where they send off the chassis and see exactly what they have to deal with makes it look quite tempting.
The local guy I had used on several projects ( Blastaway near O'Hare Airport) went out of business after they expanded the airport and took his property for the expansion.
Posted by: gms Feb 11 2013, 09:10 PM
Looking good! I don't know if anyone around Chicago does it anymore, but I wonder if getting the chassis blasted (sand, walnut, glass bead, etc) wouldn't save a bunch of time on this project. Seeing all those TV shows where they send off the chassis and see exactly what they have to deal with makes it look quite tempting.
The local guy I had used on several projects ( Blastaway near O'Hare Airport) went out of business after they expanded the airport and took his property for the expansion.
It will probably be blasted before I primer, I am cleaning areas to fill holes and other small changes...I don't want to have to blast it twice.
Posted by: gms Feb 13 2013, 09:36 AM
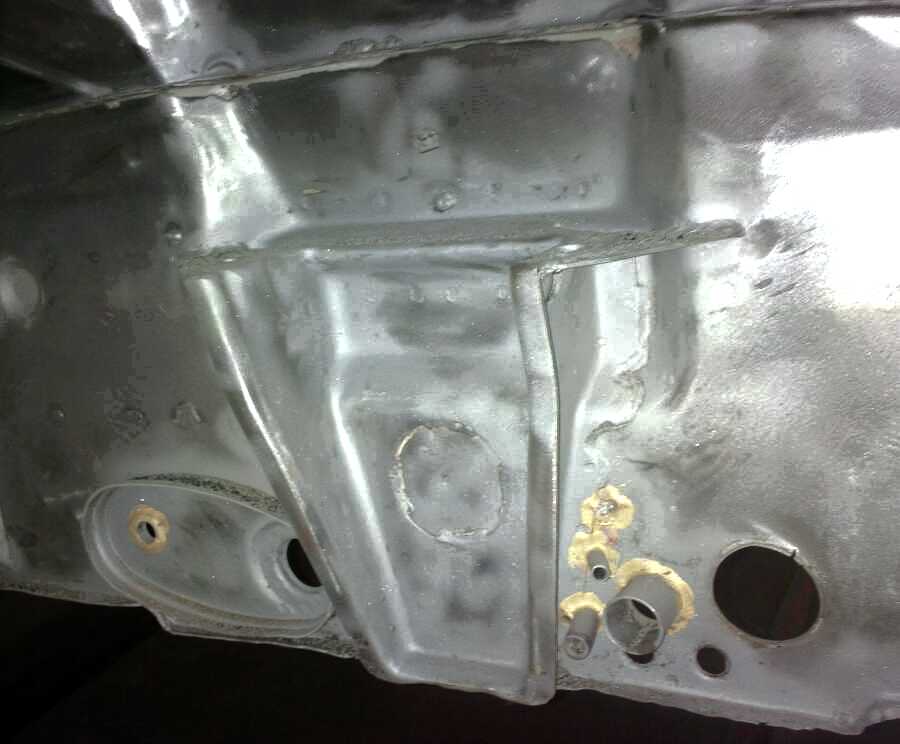
This is an example of some of the work I did yesterday.
I removed the horn and fog light mounts and filled the holes.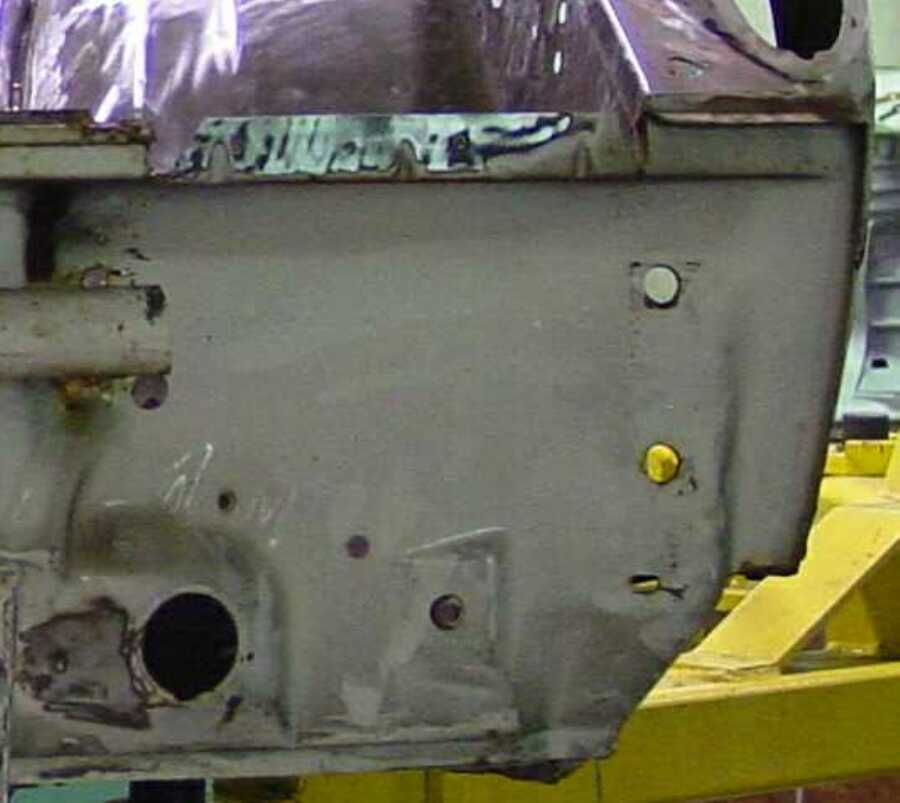
Clean the paint off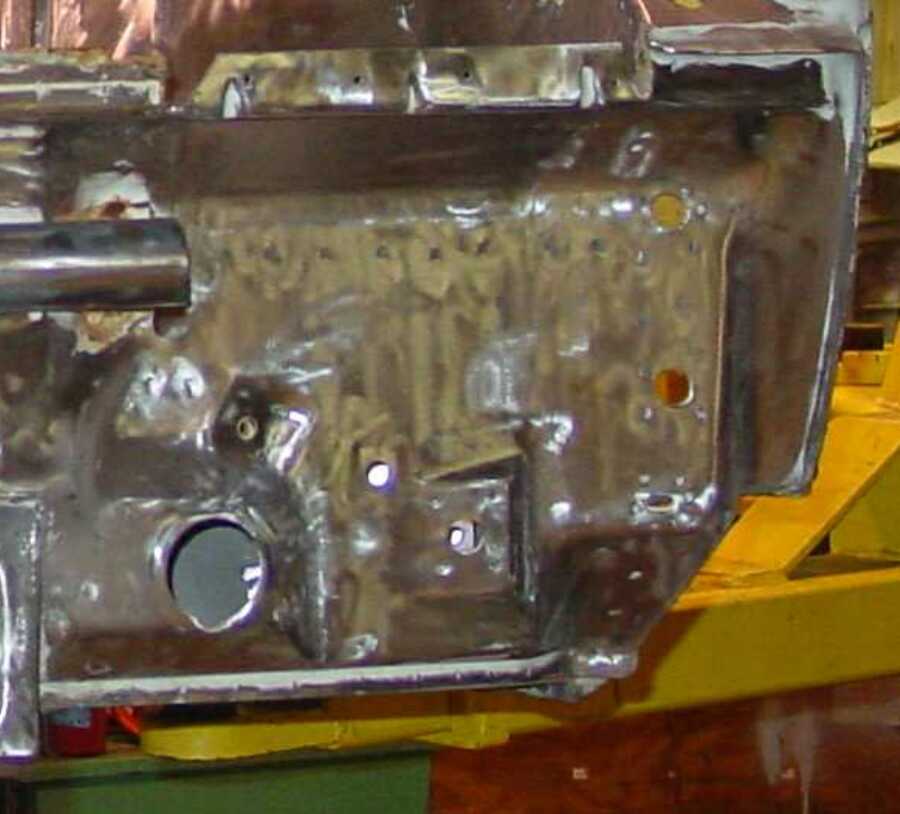
Weld up the holes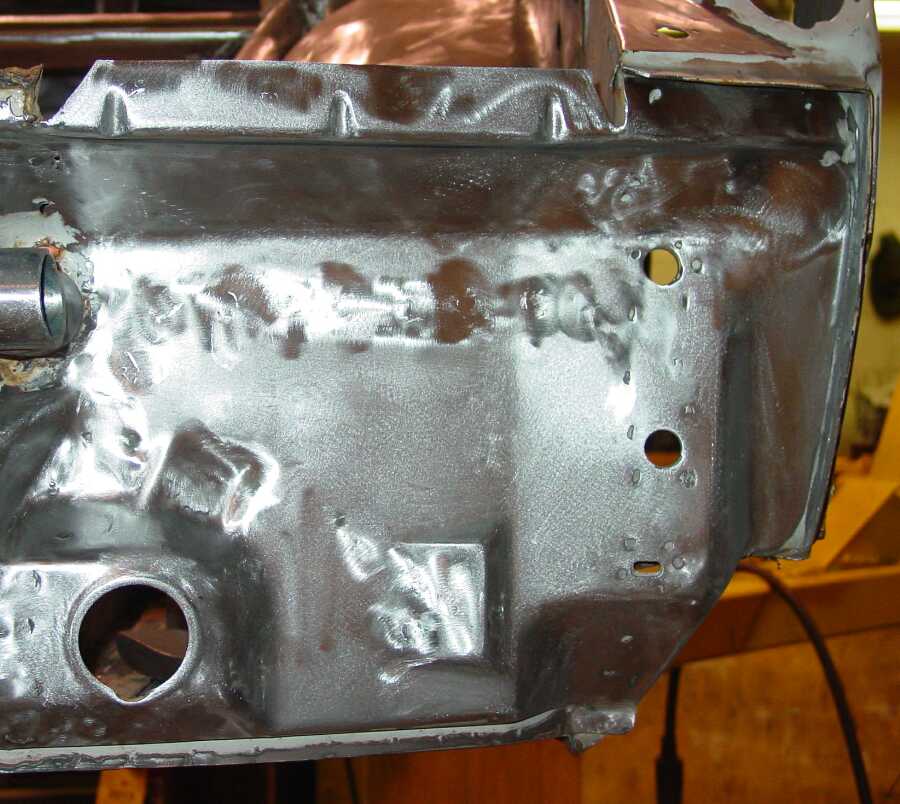
Posted by: gms Dec 8 2014, 11:05 AM
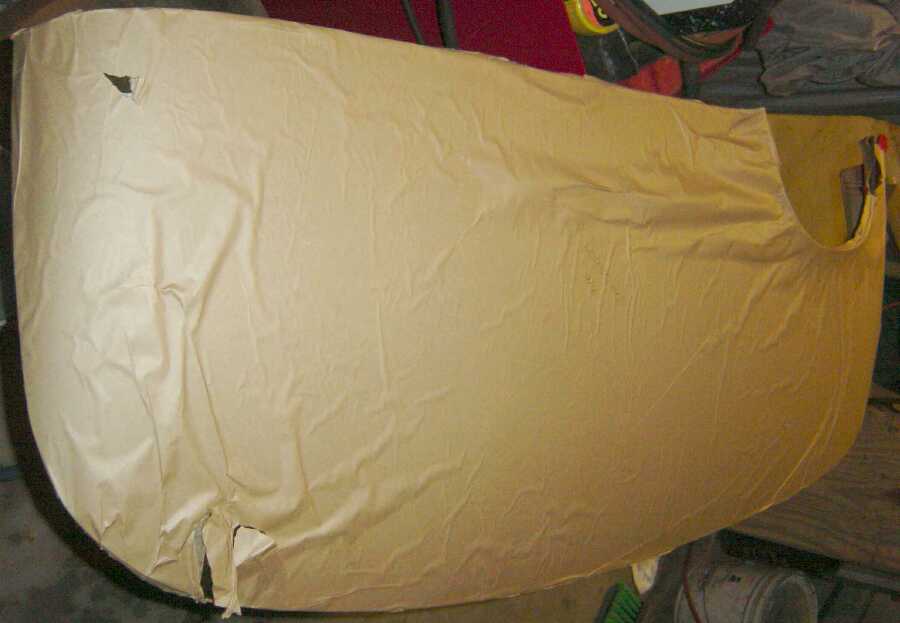
I had an early door with a bad door skin (rust & bondo) so I thought I would try and re-skin it with fiberglass.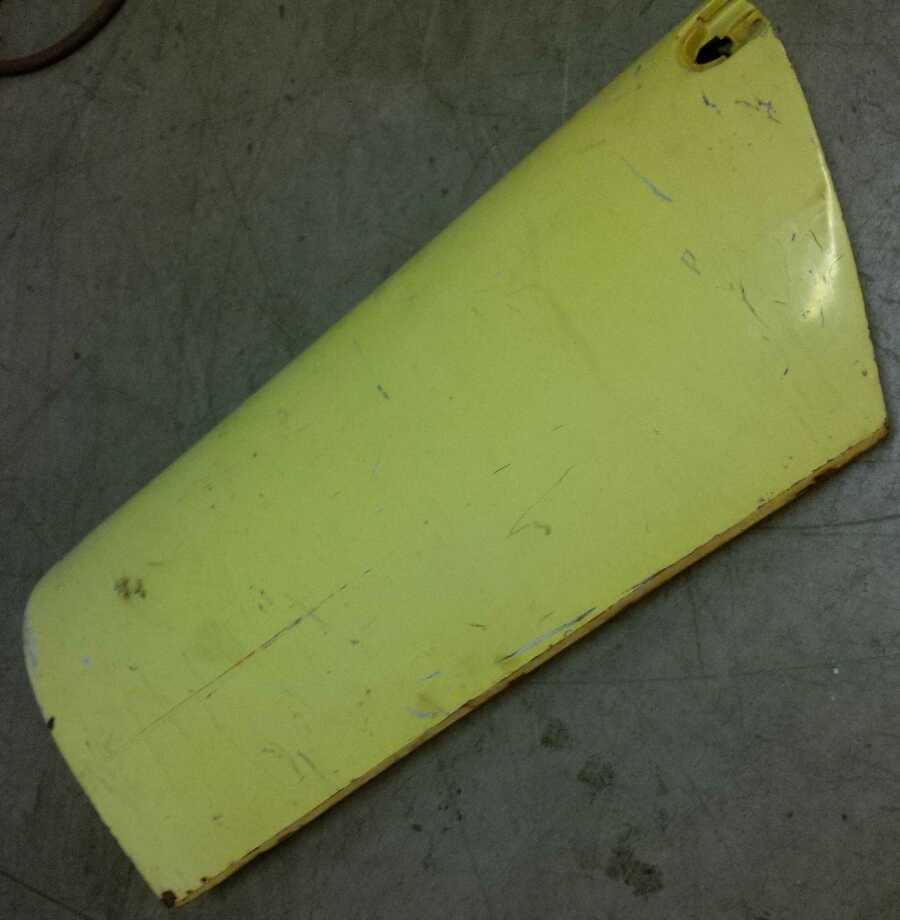
Posted by: gms Dec 8 2014, 11:07 AM
The skin came off easier than i thought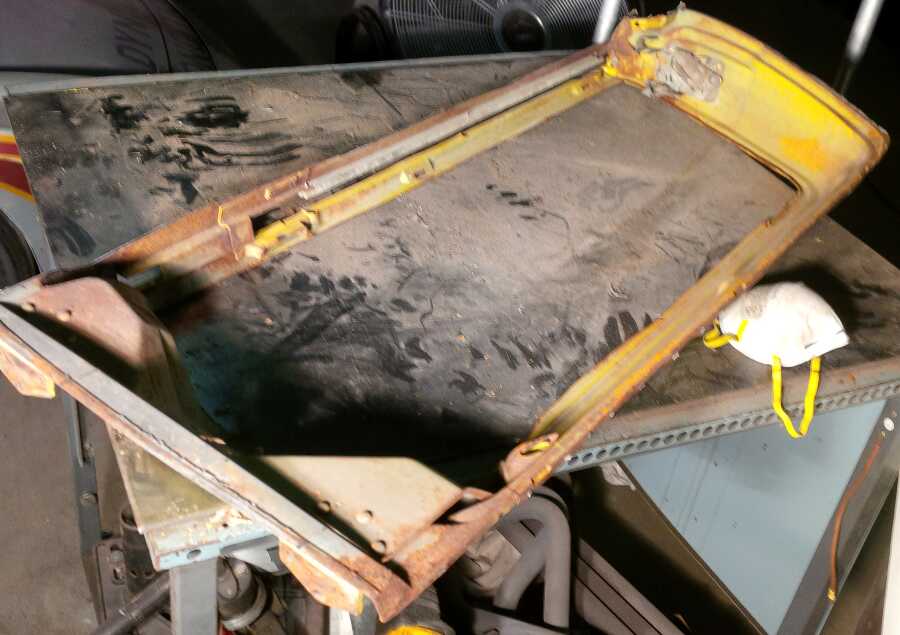
Posted by: gms Dec 8 2014, 11:08 AM
I will use a 3M glue to refasten the fiberglass skin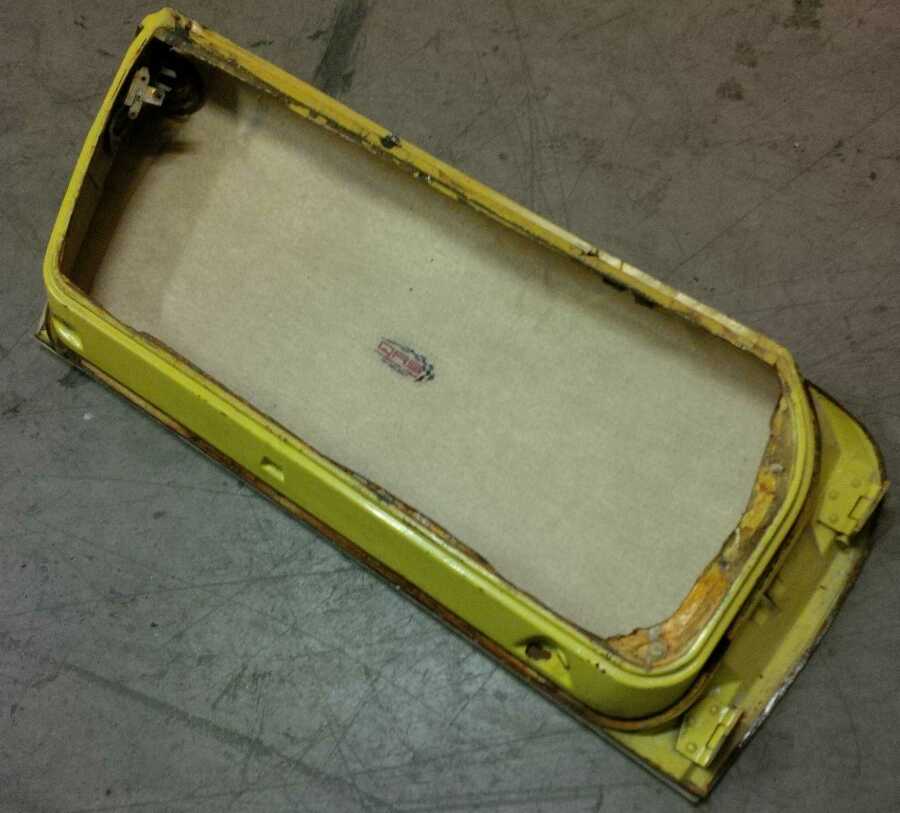
Posted by: gms Jan 18 2015, 02:50 PM
Not much new, just waiting for a nice day to do some sand blasting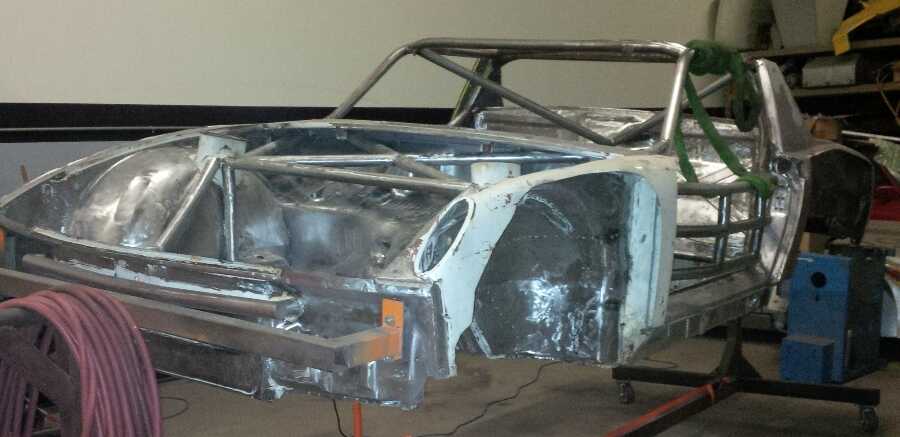
Attached image(s)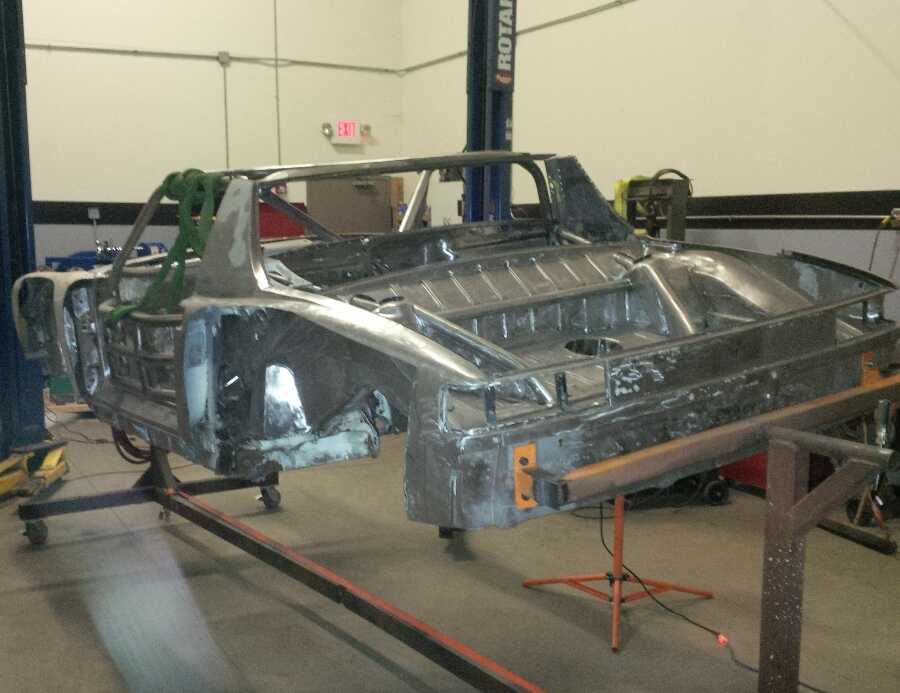
Posted by: gms Jan 26 2015, 10:13 AM
Finally had a warm (41 degrees) dry day on Saturday so I pushed the chassis out side and sand blasted some hard to clean areas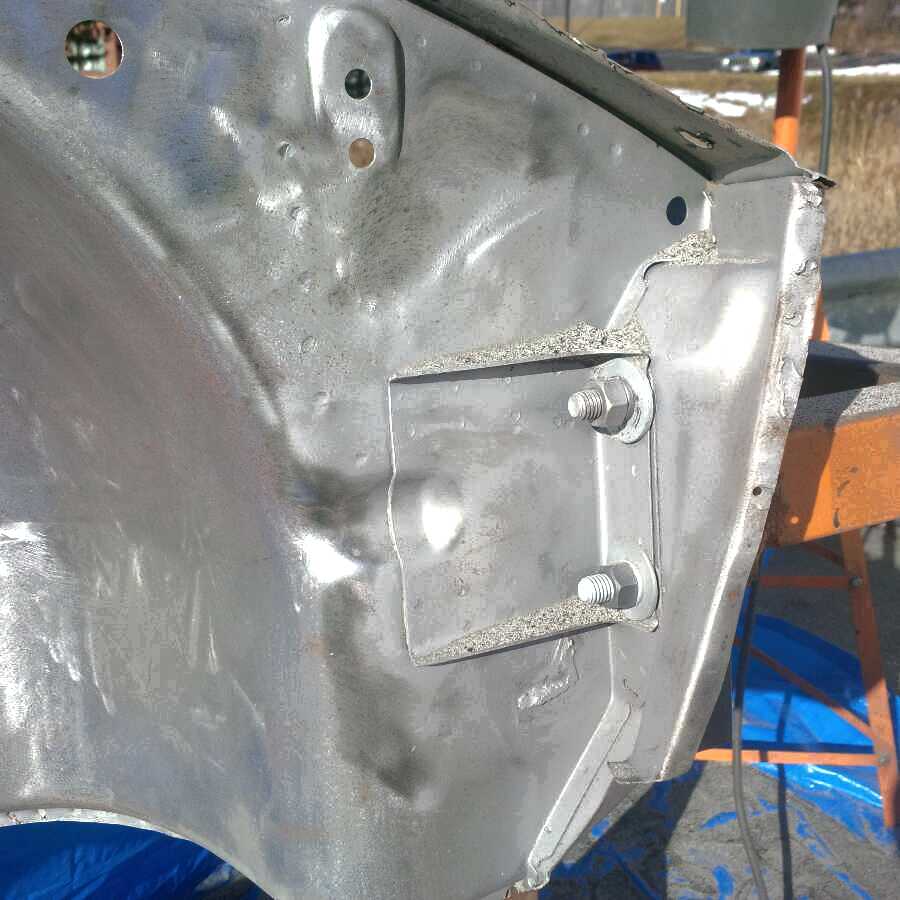
Posted by: GeorgeRud Jan 26 2015, 02:21 PM
It's hard to know what I dislike more, the cold or sandblasting outside of a cabinet! Dealing with both of them at the same time should get you some kudos for getting the job done!
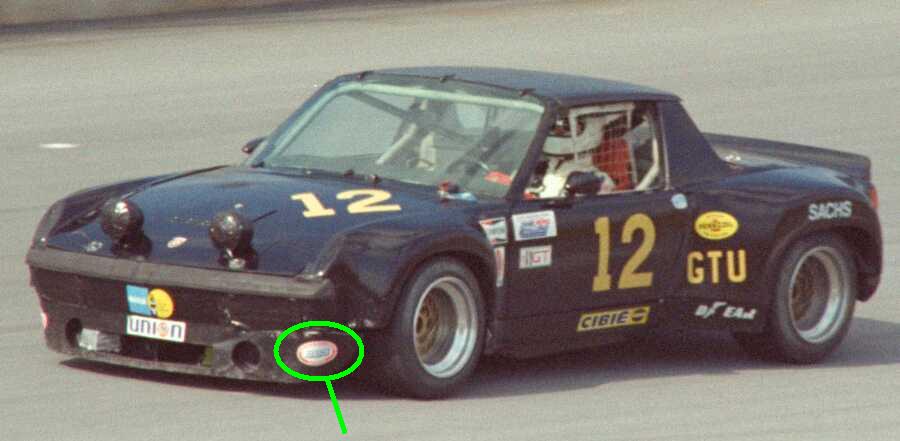
Posted by: gms Aug 27 2015, 11:37 AM
there is not any progress to report, I sold the business that allowed me shop space so this project is on ice.
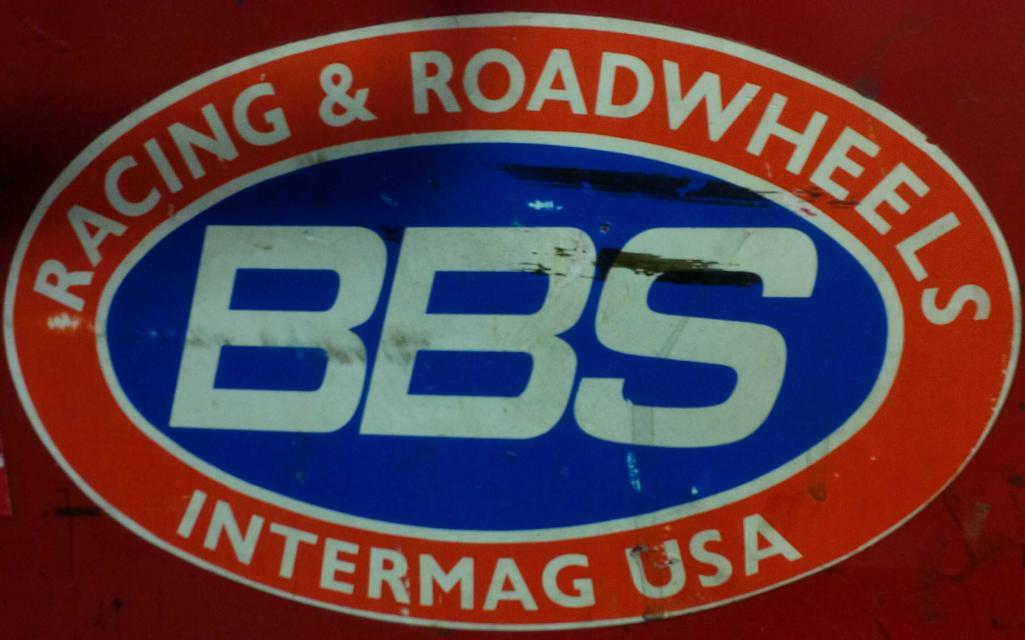
I was at a race shop yesterday working on a 914/6 when I saw the missing sticker on one of the mechanics boxes! 
Posted by: RoadGlue Aug 27 2015, 12:20 PM
You have a keen eye Glenn.
Posted by: gms Aug 27 2015, 12:26 PM
You have a keen eye Glenn.
Thanks
I have been looking for even a picture of the complete sticker for several years
and I thought the 24 hrs of Daytona sticker would be the hard one to find.
Posted by: dug Aug 28 2015, 04:28 AM
Your work on this is so inspiring!
cheers,
dug
Posted by: maf914 Aug 28 2015, 05:58 AM
What width wheels are those on the black #12 914 in the photo?
Posted by: dug Aug 28 2015, 12:19 PM
The Zulkowski car had 10s ans 12s. Those look like they are the 3 piece Gottis which came later. The red Garretsons car (apperently soon to be RIP) ran Gotti 11s and 13s. Either way FAT!
cheers,
dug
Posted by: gms Aug 28 2015, 04:58 PM
The Zulkowski car had 10s ans 12s. Those look like they are the 3 piece Gottis which came later. The red Garretsons car (apperently soon to be RIP) ran Gotti 11s and 13s. Either way FAT!
cheers,
dug
I would love to race one of these cars with slicks on those 11 & 13s with 300HP
now that would be fun!
Posted by: RoadGlue Aug 28 2015, 05:11 PM
The Zulkowski car had 10s ans 12s. Those look like they are the 3 piece Gottis which came later. The red Garretsons car (apperently soon to be RIP) ran Gotti 11s and 13s. Either way FAT!
cheers,
dug
I would love to race one of these cars with slicks on those 11 & 13s with 300HP
now that would be fun!
Yes please. I know the three of us would drive the living hell out of it too. Mmm, TROUBLE.
Posted by: FourBlades Aug 28 2015, 07:03 PM
Keep on trucking Glenn! 
This car will be sweet when it is done.
I am making a little progress on mine I need to post.
Working and health issues really taking up time that would be better spent on 914s!
John
Posted by: gms Aug 31 2015, 11:15 AM
Keep on trucking Glenn!
John
little by little
here is the finished product

Posted by: RoadGlue Aug 31 2015, 11:19 AM
Keep on trucking Glenn!
John
little by little
here is the finished product
Looks good!
Posted by: rgalla9146 Aug 31 2015, 05:32 PM
Keep on trucking Glenn!
John
little by little
here is the finished product
Glenn, the red needs to be redder
Just sayin'
Powered by Invision Power Board (http://www.invisionboard.com)
© Invision Power Services (http://www.invisionpower.com)