Printable Version of Topic
Click here to view this topic in its original format
914World.com _ 914World Garage _ Stripped CV Bolt
Posted by: rwilner Mar 3 2011, 09:16 PM
I was removing my half shafts to clean and repack my CV joints and replace the CV boots. Nothing wrong with them, more of a "while I'm in there" type of thing.
Well, the PO (or his mechanic) replaced the triple-square bolts with allen / inhex bolts, and stripped them while installing or attempting to remove them. Has anyone had any luck getting a stripped bolt out of the wheel side CV without removing the castle nut on the hub?
PO handiwork:
Posted by: McMark Mar 3 2011, 09:18 PM
Pulling the stub shaft isn't always horrible. You should try that first. Could be you spend 10 minutes and it pops right out.
Posted by: mgphoto Mar 3 2011, 09:19 PM
Remove the castle nut it is much easier than trying to fit a tool into the swing arm.
Mike
Posted by: rwilner Mar 3 2011, 09:22 PM
OK. Have not done this before -- any tips? (what size is the nut? looks like I will need to buy a new, big socket)
Posted by: RJMII Mar 3 2011, 09:38 PM
Hey, I thought you were going to drive your car last weekend. 
IIRC it's a 30mm.
Posted by: RJMII Mar 3 2011, 09:40 PM
Here we go:
http://www.pelicanparts.com/techarticles/914_five_lug_conversion/914_five_lug_conversion2.htm
There are a few good tips on there.
Posted by: rwilner Mar 3 2011, 09:43 PM

Hey, I thought you were going to drive your car last weekend.
IIRC it's a 30mm.
holy crap. I think i'll need a 3' cheater bar. Good thing I have some black iron pipe left over from my house addition.
Too much salt on the road to drive it yet here in lovely Boston. I did start and run it to make sure my Optima didn't give up the ghost during hibernation!
That counts, right...?
Posted by: MarkV Mar 3 2011, 09:45 PM
I would try one of these before I removed the stub.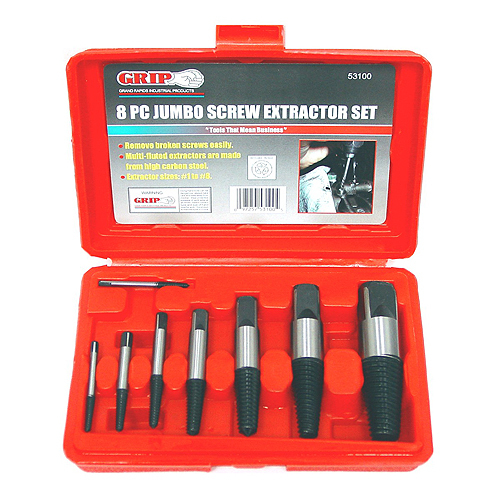
I had to use an impact to get the castle nut off my stub axle. 
Posted by: GeorgeRud Mar 3 2011, 10:02 PM
A good long pipe on the end of a breaker bar will work for the castle nut, even if you have to bounce on it. A good penetrating oil is also your friend, let it sit overnight.
I'd agree that it's easier to remove the axle stub and simply remove the cv bolt while it's easy to get at.
Posted by: McMark Mar 4 2011, 01:28 AM
I've had castle nuts and stubs that were MAJOR PITA. But I've also had them come apart quickly and easily. No sense in fretting before it's necessary. 
Posted by: charliew Mar 4 2011, 09:15 AM
Try to use the emergency brake as much as you can to avoid the stress on the tranny. A impact works a lot better than a cheater.
Posted by: rwilner Mar 4 2011, 09:25 AM
Try to use the emergency brake as much as you can to avoid the stress on the tranny. A impact works a lot better than a cheater.
Thanks for the tip. I was also going to depress the brake and lock it in place with a 2x4.
Posted by: r_towle Mar 4 2011, 09:25 AM
Take off the castle nut.
I use air and a cheater bar both...
Impact gun beats on it for a while and loosens things, then the cheater bar will get it loose...always does.
Car on the ground.. in gear, e-brake on, wedges under the tires if needed to stop them from rotating.
Remember, when you have removed the stub axle, you never set the weight of the car back on that open bearing (bearing without the stub axle in place) of you could wreck the bearing.
So, while you are getting the CV joint off, keep the car on jack stands.
Once you remove the cv joint, you can put the stub axle piece back in, tighten up the castle nut as much as you can to suck the axle in place...tap, tighten, tap tighten...
So long as that bearing has the stub axle in place, you can then set it back down.
if all you are doing is fixing the CV joints, leave it in the air and put it back the same way you took it out...with the CV attached...its a whole lot easier to get to the CV bolt heads in a vice versus in the car.
I have a whole bunch of tools to get it apart if you get frustrated.
Here most of the weekend.
Get your own socket and breaker bar...and be careful, I have broken a few of them with a pipe on them...
The rest of the tools you can borrow 
RIch
Posted by: rwilner Mar 4 2011, 09:38 AM
Take off the castle nut.
I use air and a cheater bar both...
Impact gun beats on it for a while and loosens things, then the cheater bar will get it loose...always does.
Car on the ground.. in gear, e-brake on, wedges under the tires if needed to stop them from rotating.
Remember, when you have removed the stub axle, you never set the weight of the car back on that open bearing (bearing without the stub axle in place) of you could wreck the bearing.
So, while you are getting the CV joint off, keep the car on jack stands.
Once you remove the cv joint, you can put the stub axle piece back in, tighten up the castle nut as much as you can to suck the axle in place...tap, tighten, tap tighten...
So long as that bearing has the stub axle in place, you can then set it back down.
if all you are doing is fixing the CV joints, leave it in the air and put it back the same way you took it out...with the CV attached...its a whole lot easier to get to the CV bolt heads in a vice versus in the car.
I have a whole bunch of tools to get it apart if you get frustrated.
Here most of the weekend.
Get your own socket and breaker bar...and be careful, I have broken a few of them with a pipe on them...
The rest of the tools you can borrow
RIch
Rich
To clarify sequence of events
1) put wheels on and get car on ground
2) loosen castle nut
3) raise car
4) remove castle nut, unbolt CV @ trans flange, remove halfshaft (with both CVs and stub axle attached)
5) remove CV from stub axle
6) do CV stuff
7) re-bolt CV to stub axle
8) reinstall half shaft and tighten castle nut (mostly)
9) lower car
10) snug up castle nut
11) drive away
Posted by: underthetire Mar 4 2011, 10:08 AM
I'd be a little concerned about those bolts. Silver is usually not the 12.9. whatever grade. Those are usually the softer ones. Black oxide socket head cap screws would be fine.
Posted by: rwilner Mar 4 2011, 10:13 AM
I'd be a little concerned about those bolts. Silver is usually not the 12.9. whatever grade. Those are usually the softer ones. Black oxide socket head cap screws would be fine.
I'm going to replace them with the proper triple-square ones and schnorr washers, I got them from pelican -- all ready to go.
Posted by: r_towle Mar 4 2011, 10:22 AM
Yes, proper sequence.
After you remove the nut and remove the inner CV joint...(this is just my method)
I use a small 2*4 block or a really short 4*4 block and hit the stub axle with a BFH...
Its in there...and it does not fall out.
Rich
Posted by: rwilner Mar 4 2011, 10:28 AM
Yes, proper sequence.
After you remove the nut and remove the inner CV joint...(this is just my method)
I use a small 2*4 block or a really short 4*4 block and hit the stub axle with a BFH...
Its in there...and it does not fall out.
Rich
Thanks Rich. Every time I go to Sears I've been looking for an excuse to buy a big a$$ breaker bar. Looks like I finally found it!
Sat night is girls night out for the wife, looks like it's Beers and Breaker Bars for me

Posted by: r_towle Mar 4 2011, 10:37 AM
a 3/4 inch drive breaker bar and 30mm socket.
I have broken 2 half inch breaker bars over the years on these nuts...beetles have the same nut.
The little stub piece snaps off in the handle...and its exciting when you are jumping up and down on a 6 foot pipe.
Before you go shopping, spray PB blaster on that nut.
Like Mark said...I have had more than a few just come right off with the impact gun and I tapped the axle out...5 minutes.
I have also had 3 hours ones....
Get craftsman...returnable if broken.
RIch
Posted by: tradisrad Mar 4 2011, 10:38 AM
I have always been under the impression that the wheel bearing can be ruined when the stub axel is removed. Am I wrong?
Why not try a bolt extractor first? Either an i.d. or o.d. extractor or both. While I have not used one on a CV (and the location is not ideal) I was pleased at how well it worked.
Posted by: r_towle Mar 4 2011, 10:40 AM
if the wheel spins and it wont stay still.
Put it back on stands.
Remove wheel.
Make a 3 foot bar with two lug bolt holes in it, near one end.
I use 2 inch angle iron.
Bolt that to the hub and it will rest against the floor at an angle.
It wont move anymore..
Rich
Posted by: rwilner Mar 4 2011, 10:42 AM
if the wheel spins and it wont stay still.
Put it back on stands.
Remove wheel.
Make a 3 foot bar with two lug bolt holes in it, near one end.
I use 2 inch angle iron.
Bolt that to the hub and it will rest against the floor at an angle.
It wont move anymore..
Rich
It's already up on stands (4 of them). Maybe i'll just do this first and skip taking it off the stands.
Posted by: r_towle Mar 4 2011, 10:43 AM
and for a good fight...make a little stand for the end of the socket that rests on the floor so the socket wont twist whil you are jumping on the bar....
I use a small jack I have that happens to have a half round cradle..
Just need to jack it up under the socket (no wheel in place...bar attached)
That holds the socket square and you can really get some power on the breaker bar.
Rich
Posted by: Richard Casto Mar 4 2011, 10:50 AM
You are getting good advice here. It may not be that difficult to get the nut off. I have found that a high torque impact gun is a great thing to have. If it doesn't come off easily this would be a great excuse to buy a nice gun. Also as mentioned don't mess up your threads if you have to use a BFH to get the stub out.
Good luck and get that car on the road soon!
Richard
Posted by: rwilner Mar 4 2011, 10:57 AM
Good luck and get that car on the road soon!
I could put the wheels on and drive away today, but I just can't stand knowing there is a stripped bolt in that stub axle...just my personality I guess.
Plus...I'm always looking for excuses to buy new tools...
Posted by: iamchappy Mar 4 2011, 11:07 AM
If the head is all that is stripped I've removed them fairly easily before with a tight vise grip or small pipe wrench.
If it's the threads drill and extract.
Posted by: Richard Casto Mar 4 2011, 11:17 AM
Good luck and get that car on the road soon!
I could put the wheels on and drive away today, but I just can't stand knowing there is a stripped bolt in that stub axle...just my personality I guess.
Plus...I'm always looking for excuses to buy new tools...
I am with you 100%. I know I said "beware" early due to the situation you are now in, but I don't always think everyone has the same sickness I do. If it was me, I would be doing the same thing. It will be some work, but once done hopefully you will feel good that it was done.

Richard
Posted by: yeahmag Mar 4 2011, 11:18 AM
One thing you can try if you *really* don't want to pull the stub axle (which I would, its easy) is to get a long, large drill bit and drill the head off. Then remove the other bolt and retainer plate. You should have just enough room to grab the remaining bit with a pair of needle nose vise grips and turn it out. It *should* come out easy once the pressure is relieved by removing the head.
Posted by: mskala Mar 4 2011, 11:39 AM
Only a few comments:
* I agree that the non-blackness of the bolts is suspicious and as long as you are
getting the axle out I would get new correct ones.
* Your list of operations misses one important early thing: Take the wheel off,
remove cotter pin thru the castle nut, then put the wheel back on.
* There is no way I would put hundreds of pounds of torque on the axle nut while the
car is up on stands and a bar is bracing the wheel from turning. Get the nut
broken with the wheels on and car on the ground.
Posted by: r_towle Mar 4 2011, 12:10 PM
* There is no way I would put hundreds of pounds of torque on the axle nut while the
car is up on stands and a bar is bracing the wheel from turning. Get the nut
broken with the wheels on and car on the ground.
Chicken
Posted by: rwilner Mar 4 2011, 01:09 PM
I am with you 100%. I know I said "beware" early due to the situation you are now in, but I don't always think everyone has the same sickness I do. If it was me, I would be doing the same thing. It will be some work, but once done hopefully you will feel good that it was done.
Richard
I'm ready to try out my newly refreshed transmission!! (now that I got the shifter adjusted)
Posted by: rwilner Mar 5 2011, 03:04 PM
Is it ok to use a 12 pt socket?
Posted by: 9146986 Mar 5 2011, 05:34 PM
I've broken a lesser quality 6 point 1/2" socket that I broke trying to get one of those nuts removed, so I'd say NO to the 12 point. I have a hardened 3/4" impact socket that I use with a 6 foot heavy wall pipe for a cheater bar. Sometimes they'll come right off, and sometimes I have to use the big cheater, and then yet sometimes I've got to add the smoke wrench (torch) to heat up the nut.
Posted by: rwilner Mar 5 2011, 05:43 PM
I've broken a lesser quality 6 point 1/2" socket that I broke trying to get one of those nuts removed, so I'd say NO to the 12 point. I have a hardened 3/4" impact socket that I use with a 6 foot heavy wall pipe for a cheater bar. Sometimes they'll come right off, and sometimes I have to use the big cheater, and then yet sometimes I've got to add the smoke wrench (torch) to heat up the nut.
Ok i got the nut off. I ended up using a 12 point without incident -- it was a 3/4 drive. Do I have to remove anything else to drive the stub axle out (dust shield, caliper, brake disc)? I have been hitting it with a hammer pretty hard (wood block in between) and it doesn't seem to want to budge.
Posted by: rwilner Mar 5 2011, 05:49 PM
I've broken a lesser quality 6 point 1/2" socket that I broke trying to get one of those nuts removed, so I'd say NO to the 12 point. I have a hardened 3/4" impact socket that I use with a 6 foot heavy wall pipe for a cheater bar. Sometimes they'll come right off, and sometimes I have to use the big cheater, and then yet sometimes I've got to add the smoke wrench (torch) to heat up the nut.
Ok i got the nut off. I ended up using a 12 point without incident -- it was a 3/4 drive. Do I have to remove anything else to drive the stub axle out (dust shield, caliper, brake disc)? I have been hitting it with a hammer pretty hard (wood block in between) and it doesn't seem to want to budge.
Nevermind. I got it out. Just had to be a little more "persuasive"
Posted by: 76-914 Mar 6 2011, 10:01 AM
If the head is all that is stripped I've removed them fairly easily before with a tight vise grip or small pipe wrench.
If it's the threads drill and extract.
That's what I thought he said, also. Did we both miss it or everyone else? I whole heartedly agree w/ the 4" pipe wrench.
Posted by: rwilner Mar 6 2011, 02:42 PM
I used this 2 foot slide bar with a 3/4" 12 point socket to get the nut off. This was after soaking the nut in PB Blaster 3 times over 36 hours or so. I stood on the slide bar and the nut broke easily. 
some persuasion with a hammer and a block of wood got the stub axle out of the hub. This is where I ran into some problems. Here's a picture of my swingarm:
The PO had Racer Chris weld in suspension console reinforcements (http://www.914world.com/bbs2/index.php?showtopic=57167. I'm not sure if the console reinforcements push the swingarms a bit closer to the center of the car, but I could not get the half shaft / stub axle out of the car.
I was faced with three options:
1) remove the pass heat exchanger
2) unbolt the trans and lower it, possibly having to remove it
3) unbolt the cv from the half shaft
I went for option 3 as it was the least invasive. I couldn't get the half shaft back into the hub, which would have made this easy. 
Instead, I used the other end of the CV to prevent the assembly from rotating by wedging the roll pins in some recesses of the transmission. This let me get he 2 stripped bolts out with the vice grips, and the 2 non-stripped ones with a 6mm allen wrench. I then carefully separated the CV from the stub axle by using a screwdriver on the gasket material only.
Here's the half shaft removed and one CV cleaned up 

I need a new circlip and this thing will be going back together. Next sunday will be my the first drive of the year -- can't wait!!
Posted by: iamchappy Mar 6 2011, 07:22 PM
If the head is all that is stripped I've removed them fairly easily before with a tight vise grip or small pipe wrench.
If it's the threads drill and extract.
That's what I thought he said, also. Did we both miss it or everyone else? I whole heartedly agree w/ the 4" pipe wrench.
I didn't realize until after i posted that it was the outer CV bolt that was stripped......
Posted by: mgphoto Mar 8 2011, 01:37 PM
I have always been under the impression that the wheel bearing can be ruined when the stub axel is removed. Am I wrong?
Why not try a bolt extractor first? Either an i.d. or o.d. extractor or both. While I have not used one on a CV (and the location is not ideal) I was pleased at how well it worked.
It is ok to remove the stub axle but if you remove the hub the bearing needs to be replace.
Powered by Invision Power Board (http://www.invisionboard.com)
© Invision Power Services (http://www.invisionpower.com)