Printable Version of Topic
Click here to view this topic in its original format
914World.com _ 914World Garage _ 916 FG Rear bumper, How is it supposed to sit?
Posted by: Andyrew Mar 23 2011, 07:38 PM
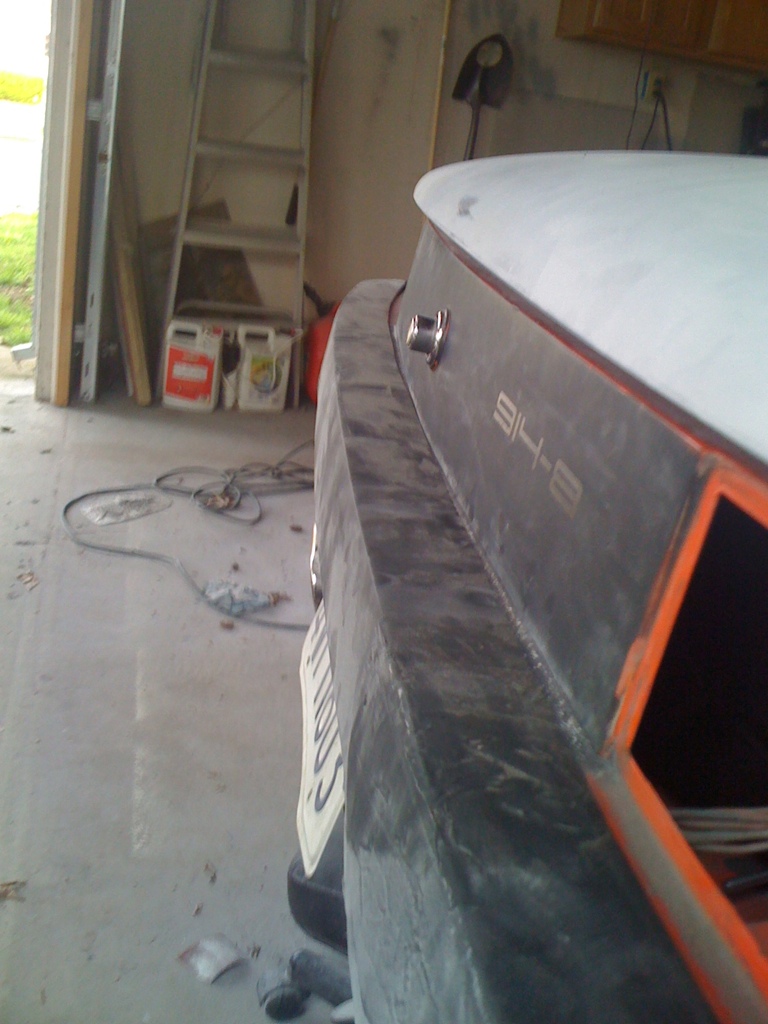
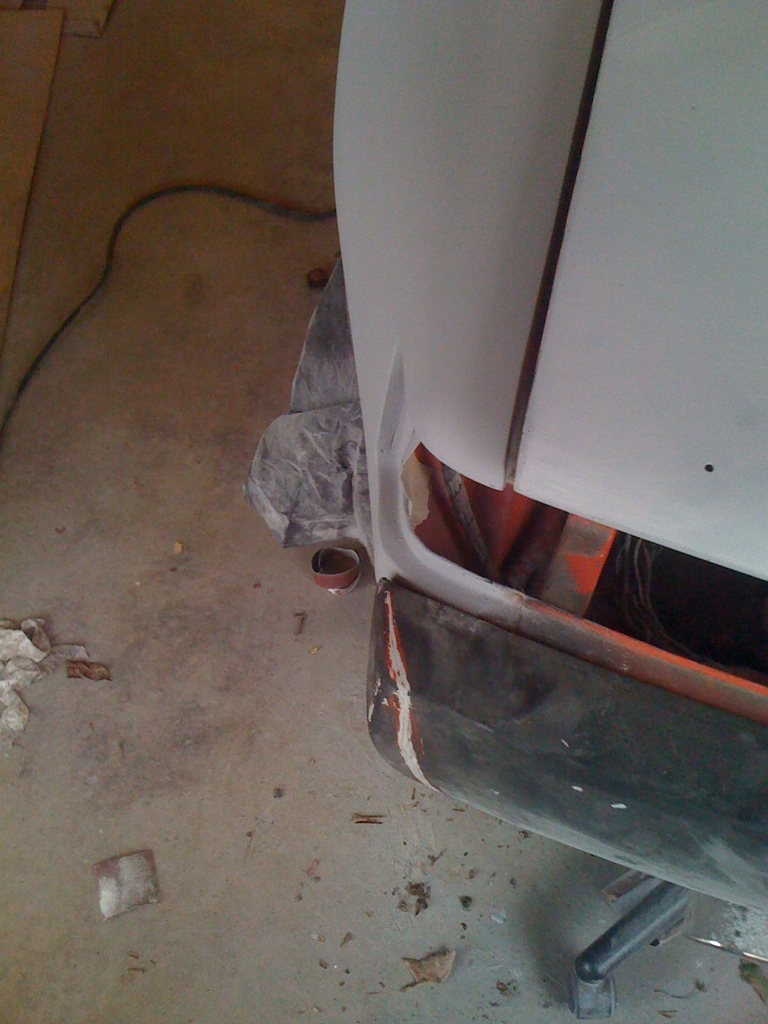
Im working on the fit and finish of the rear bumper and the current bumper I have has a, er, Nasty fit...
How is it supposed to be? Flush with the little lip, or on top of it? Anyone have any good install pictures?
Thanks!
Heres where im at... Lots of fitment to do.. yay......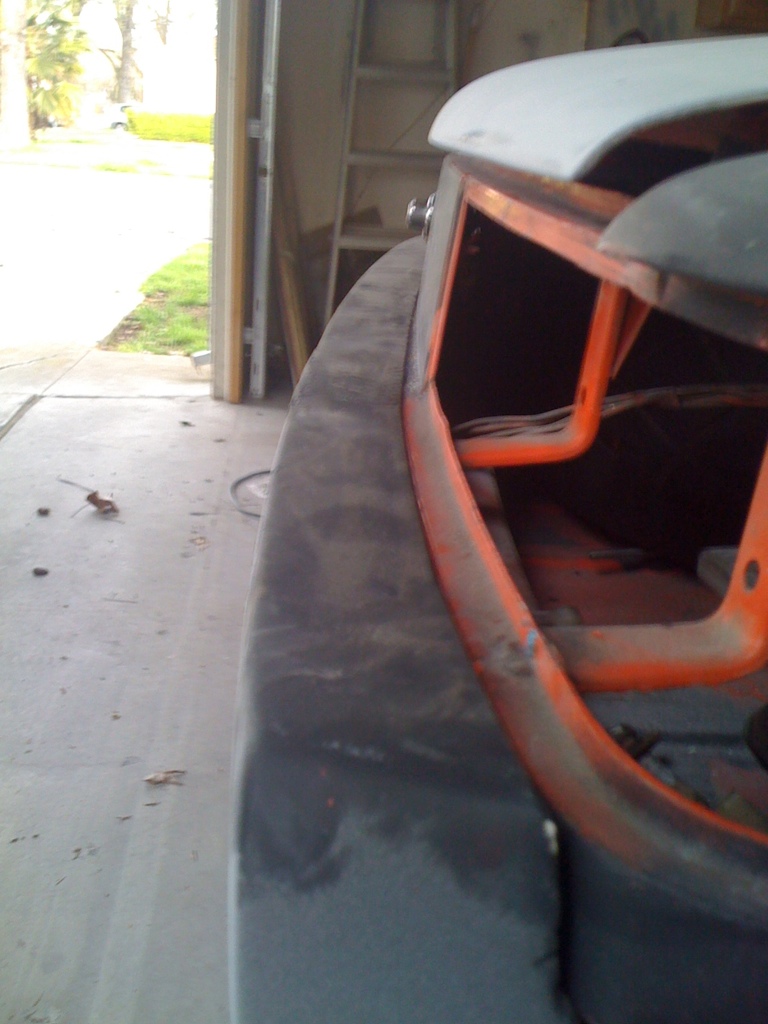
Posted by: rick 918-S Mar 23 2011, 08:23 PM
Flush with it. I ground down a hockey stick handle to shape of the curve of the back panel and bumper  and fibre glassed it to the inside of the top to hold the shape.
Posted by: bigkensteele Mar 23 2011, 08:31 PM
Rick, FYI - hockey sticks are a bit harder to come by in Modesto, CA than they are in Duluth, MN.
Posted by: Dr Evil Mar 23 2011, 08:32 PM
Roller hockey. Sticks available at any sporting goods store in CA 
Posted by: Rand Mar 23 2011, 08:35 PM
Or any good skating rink. Ah, the memories of league roller hockey.....
Or hit up HD or Lowes for some slats. Strong enough when fiberglassed in.
Posted by: bigkensteele Mar 23 2011, 08:40 PM

Roller hockey. Sticks available at any sporting goods store in CA
Geez, Doc! Can you not respect good-natured ball-busting? Either join in or sit out! My wife is from Minnesooooota, and I just can't help it.
Posted by: jt914-6 Mar 23 2011, 08:47 PM
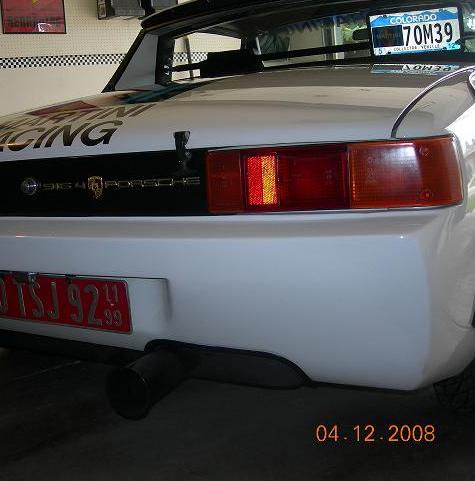
Right or wrong here's how mine fits......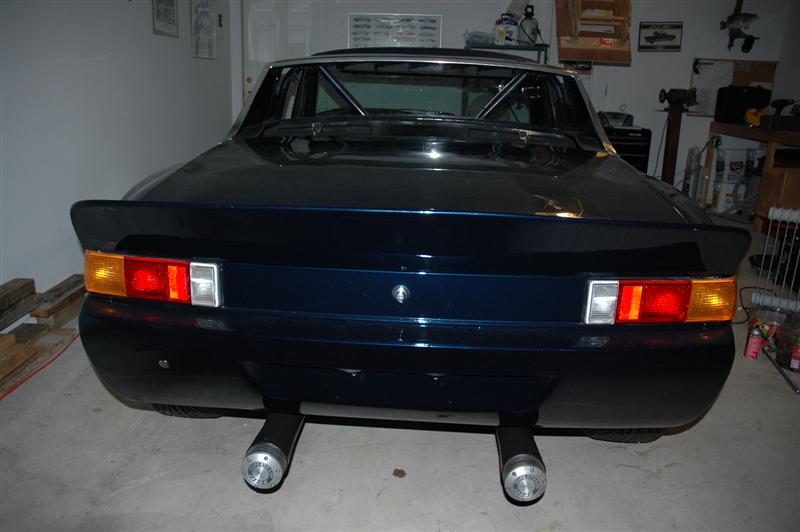
Posted by: Dr Evil Mar 23 2011, 08:50 PM
Roller hockey. Sticks available at any sporting goods store in CA
Geez, Doc! Can you not respect good-natured ball-busting? Either join in or sit out! My wife is from Minnesooooota, and I just can't help it.
Uhm, I am a Californian and you are implying that we have a hard time getting hockey sticks. You threw down the gauntlet!


Posted by: SirAndy Mar 23 2011, 09:01 PM
Mine looks very different ...

It is flush with the lip but has a angle down and not a flat top like yours.

Attached image(s)
Posted by: bigkensteele Mar 23 2011, 09:07 PM
Roller hockey. Sticks available at any sporting goods store in CA
Geez, Doc! Can you not respect good-natured ball-busting? Either join in or sit out! My wife is from Minnesooooota, and I just can't help it.
Uhm, I am a Californian and you are implying that we have a hard time getting hockey sticks. You threw down the gauntlet!
OK, I agree. Every conceivable consumer product is available in California. Bear traps, snow shoes, hash pipes and hockey sticks. I was not busting CA balls - I was busting MN balls, and as a fellow mid-westerner, I have a right to do so. Please keep your tanned and waxed CA balls out of this
 , and let Rick with his cold, pale, and shriveled MN balls respond with what I know will be something witty and wise.
Posted by: turnaround89 Mar 23 2011, 09:07 PM
I put mine on top of the ledge. Right or wrong, i like the way it looks
Attached image(s)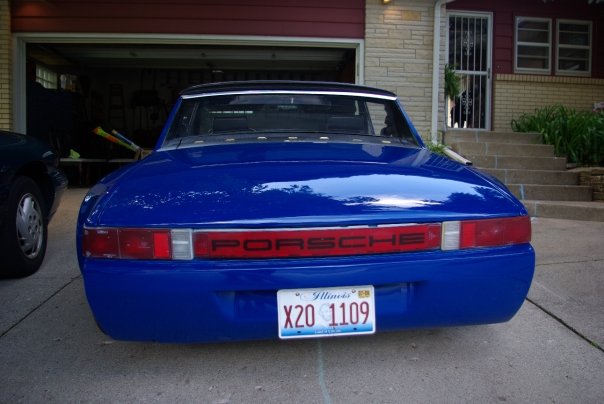
Posted by: Rand Mar 23 2011, 09:10 PM
Hover car.
Looks nice Andrew!
Posted by: kg6dxn Mar 23 2011, 09:21 PM
Put it where it fits best. Just make sure you can get the tail light assembly in and out.
Posted by: rick 918-S Mar 23 2011, 09:35 PM
Roller hockey. Sticks available at any sporting goods store in CA
Geez, Doc! Can you not respect good-natured ball-busting? Either join in or sit out! My wife is from Minnesooooota, and I just can't help it.
Uhm, I am a Californian and you are implying that we have a hard time getting hockey sticks. You threw down the gauntlet!
OK, I agree. Every conceivable consumer product is available in California. Bear traps, snow shoes, hash pipes and hockey sticks. I was not busting CA balls - I was busting MN balls, and as a fellow mid-westerner, I have a right to do so. Please keep your tanned and waxed CA balls out of this
, and let Rick with his cold, pale, and shriveled MN balls respond with what I know will be something witty and wise. Throw down your gauntlet and We'll throw down our fur lined chopper mits. and My balls aren't cold. We put on long underwear in September and don't take them off until the 4th of July.
Posted by: Scott Schroeder Mar 23 2011, 10:19 PM
Mine looks very different ...
It is flush with the lip but has a angle down and not a flat top like yours.
Hi Andy
Yours is actually the correct bumper with the correct shape and license plate recess (with the lip). I am not sure who or when the molds were changed, but the ones like yours are nearly impossible to find.
My car had a "good" one when I bought it. Later on, the car was tapped in the rear. When I picked it up from the body shop, I had the new "wrong" bumper. I didn't know the difference back then. Now, it drives me nuts....
Here is mine - it is about 3/16's below the lip. Like Ricks, it has been reinforced undernieth too
Attached image(s)
Posted by: turnaround89 Mar 23 2011, 10:20 PM
Looks nice Andrew!
Thanks for the compliment Rand, much appreciated
(sadly it does not look like that anymore, back in primer)

Posted by: Eric_Shea Mar 23 2011, 10:47 PM
Not a 916 but they are suppose to the flush with that lip not on top of it.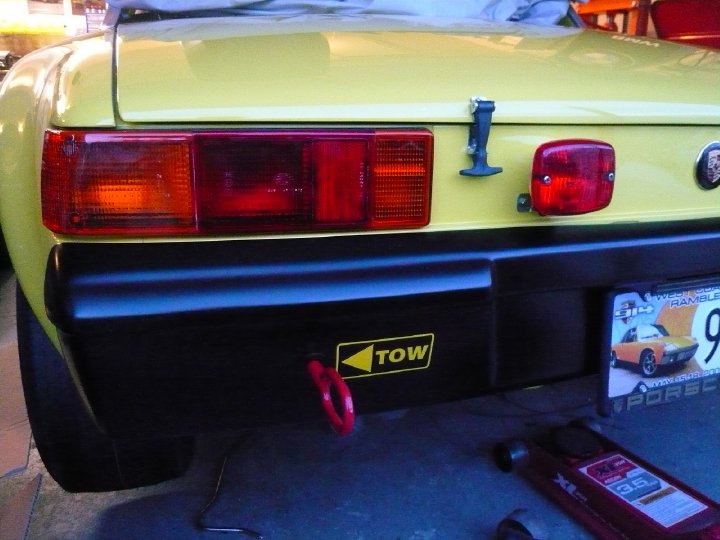
(ooooooo... Scotty has French lenses too) 
Posted by: Andyrew Mar 24 2011, 12:04 AM
Thanks all! I'll see what I can do to get this bumper to fit right... Its pretty damn off in every possible way (Not curved enough, doesnt line up with the body on the sides, bla bla bla..). I have a couple of ideas to fixing this bumper up.
One im going to cut it in the center and try and get the overall curve of the bumper better.
Two im going to possibly section the sides down at an angle so that it lines up with my fenders better. Take a look at the below pics, My idea is to remove the area in white. Thoughts? 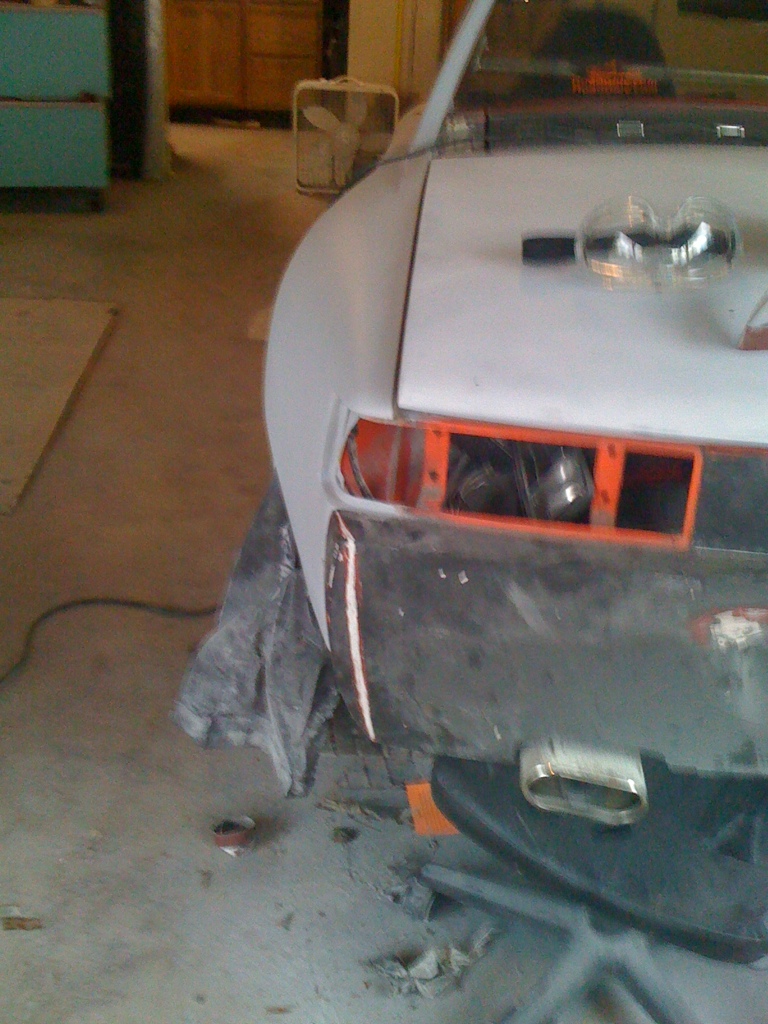
Posted by: Eric_Shea Mar 24 2011, 07:31 AM
Sounds like a Rennspeed bumper. They all need work. Dig in.
Posted by: Beach914 Mar 24 2011, 08:03 AM
![popcorn[1].gif](style_emoticons/default/popcorn[1].gif) I like this thread!!! More pictures please....
I like this thread!!! More pictures please....
I am facing the same problem. The upper lip of the FG bumper wants to sit on top of the body (ledge). This will cause some interference with the tailights.
I've got a lot of trimming to do on the upper lip if I want it flush with the ledge.
I'm also thinking about just going back to the standard front and rear bumpers as the front is presenting the same issues too. I'll take some pics on the weekend and add to the post for future reference.
Posted by: Eric_Shea Mar 24 2011, 08:38 AM
Gents, fiberglass takes a lot of skilled work to get it right. 
I have over 8 hours into my front bumper alone. You can buy better quality glass and that will eliminate "some" of the work needed but, it all needs work.
Also... if you're planning a future project, now's the time to buy your glass. It's best to let it sit as long as possible before you begin working it. It will settle. I had my glass bits for over 5 years before we worked the body and finally painted them.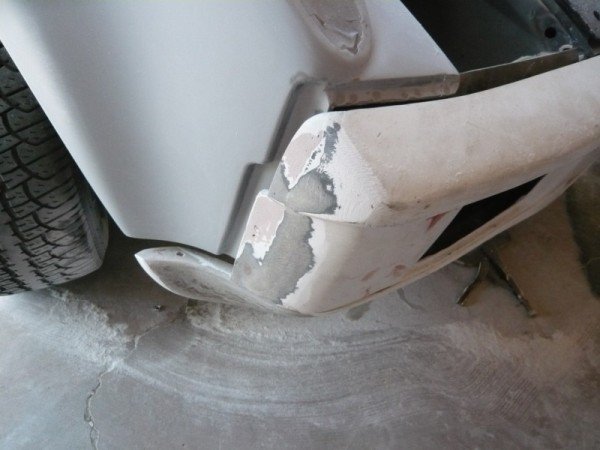
Posted by: scotty b Mar 24 2011, 12:39 PM
I have pics of Georges 916 at home I will try and remember to post tonight. Chris Foley and I were all over that thing taking pics of gaps and fitment. FWIW I probably will have 25+ hours on Mikes bumpers getting them to fit properly. Like Eric said, it is unfortunately a part of life when dealing with aftermarket parts. Makes no difference the make or model
Posted by: Dr Evil Mar 24 2011, 03:49 PM
I was waiting for Scott to chime in  Poor bastard
Posted by: scotty b Mar 24 2011, 05:55 PM
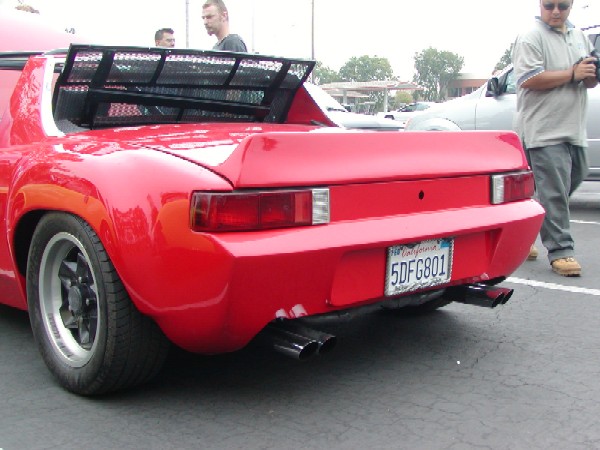
The real deal Mr Holyfield. This should f-up everypones plans for an authentic clone
Note how the real bumper is angled upwards, not a flat top like the fibreglass ones 
Attached image(s)
Posted by: scotty b Mar 24 2011, 05:56 PM
front
Attached image(s)

Posted by: scotty b Mar 24 2011, 05:58 PM
rocker fitment FWIW
Attached image(s)
Posted by: raw1298 Mar 24 2011, 06:10 PM
The real deal Mr Holyfield. This should f-up everypones plans for an authentic clone
Note how the real bumper is angled upwards, not a flat top like the fibreglass ones
That is just the angle I needed to see. Now I have an idea of how it is supposed to fit. Thanks!
Posted by: Eric_Shea Mar 24 2011, 06:49 PM
The fit on that is impecable.
Posted by: rick 918-S Mar 24 2011, 07:02 PM
The fit on that is impecable.
the glas fits better than the steel body panels. Check the headlight covers and the right door to quarter gap. I'm not picking on the car,just pointing out how these cars are hand fit. Some are better fit than others.
Posted by: Beach914 Mar 24 2011, 07:03 PM
I'm depressed now. Those pics are awesome. Mine won't be looking like that. Maybe time to rethink the bumpers and find some stock ones......
Posted by: Rand Mar 24 2011, 07:38 PM
I noticed that too. As superbly nice as that car is I can't help but notice some of the little things.
This has always bugged me too:
Attached image(s)

Posted by: Andyrew Mar 24 2011, 07:48 PM
Awesome pictures!!! This will help immensely
Keep em coming if you have em!!
Posted by: Eric_Shea Mar 24 2011, 09:49 PM
Don't look at a GT then.

Posted by: scotty b Mar 25 2011, 05:38 AM
Couple more fornt shots. Note the front bumper left vs. right fitment. Everything else I took was of the roof, I have a CD with a ton of Pics that everyone else took. I'll check it this weekend and see if theree are any more gap shots 
Attached image(s)

Posted by: jt914-6 Mar 25 2011, 05:51 AM
A couple more of the 916....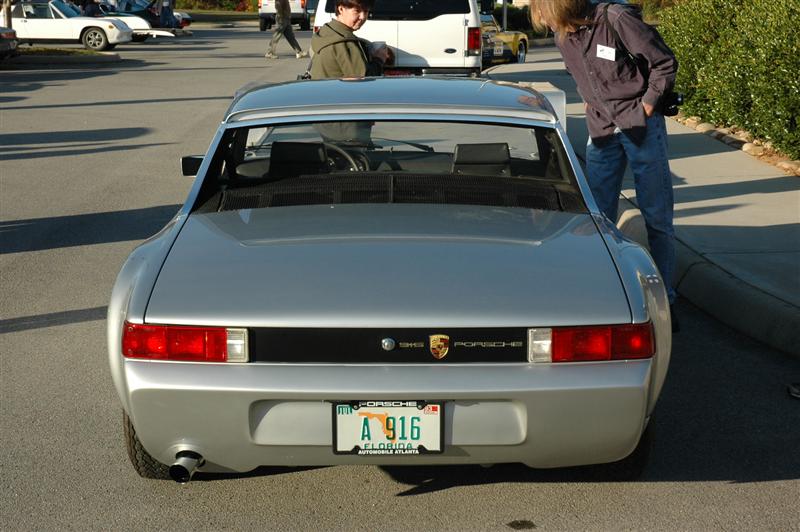

Fixed roof....note windshield radio antenna....
Posted by: Andyrew Mar 25 2011, 09:04 AM
Ahh see now that certainly looks way better and more natural.
Take a look at the following two pics. This confirms it for me that YES I will be angling the corners more, getting rid of the "square".
The only question is now, do I go full out and recreate the top angle? It might fit the body lines more..
Posted by: Scott Schroeder Mar 25 2011, 09:24 AM
Hi Andy -
I think i would try and fing the better bumper - the one that is on the "other" Andy's car. It will save you a ton of time. They are not easy to find, but they are definitely out there.
Here is a side by side comparison - both are aftermarket parts:
Attached thumbnail(s)
Attached image(s)
Posted by: Andyrew Mar 25 2011, 09:54 AM
Scott, I totally agree that some better fitting bumpers would be a faster solution, but I doubt i'll find that particular 916 rear.. Besides my budget is very limited.
At this point I have more time than money, and 30x5 feet of fiberglass mat waiting to be used (I was going to make a 944 turbo front bumper work.. but that no longer looks like a good idea.)
Ill throw an add on the classifieds and see what kinda hit I get.. If im going with something else I want the stock rear and the stock front w/ oil cooler cutout. I just think it will match the lines of my subtle flares better.
But for now I might just do a quick and nasty on these bumpers and paint them so I can get the car back on the road. They are in pretty beat up condition (Bondo EVERYWHERE, front bumper has 8 layers of paint and the "flare" on the sides were built up with bondo...)
Posted by: Scott Schroeder Mar 25 2011, 09:55 AM
On a side note - are you doing the 916 front as well? If so, there is another issue to watch out for with those too. it seems that like the rear, the molds have changed for the fronts too. The front "bumper pad" should be the same depth all the way accross the front of the car. many of the ones I have recently seen installed actuall get significantly narrower toward the center of the car, causing the entire bumper to rotate up. I am not a fan of the 916 bumpers in the first place, but this really looks bad in my opinion. Here are examples of each (the orange car is extreme, but you get the idea):
Attached image(s)


Posted by: Andyrew Mar 25 2011, 10:10 AM
Yes I have a 916 front, its the better quality one, but its built for a non flared car and needs a lot of work. Like I said in my above post, I was sanding it down and they "flared" it with 2" of bondo (That was cracking). 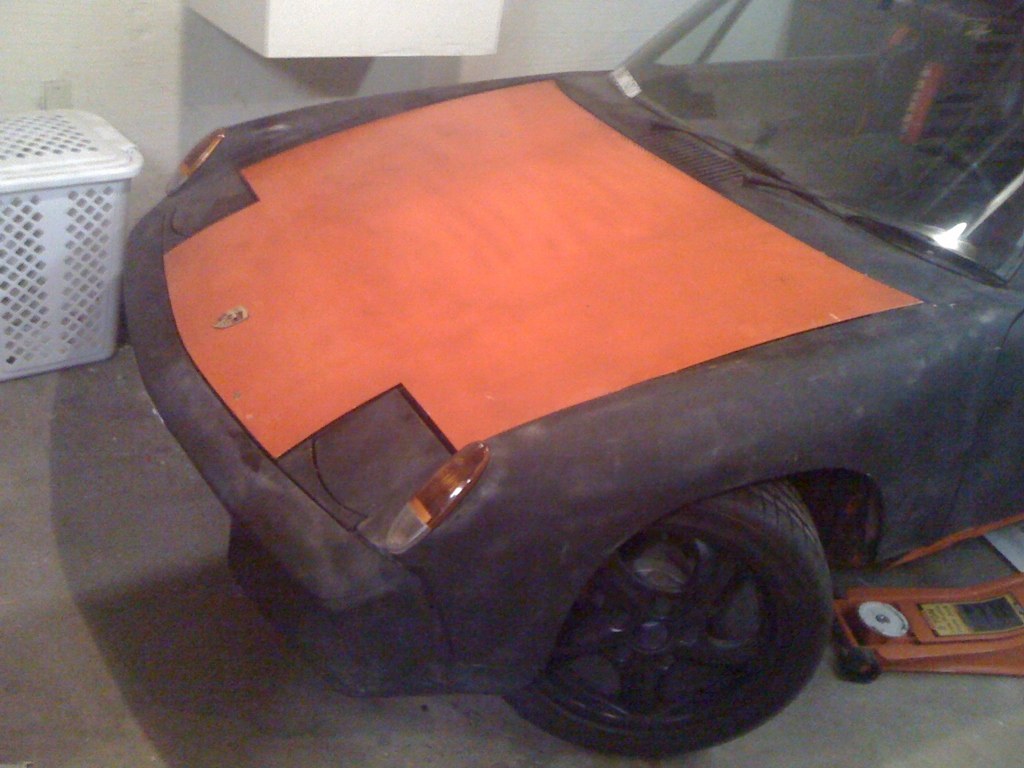
Posted by: PRS914-6 Mar 25 2011, 10:15 AM
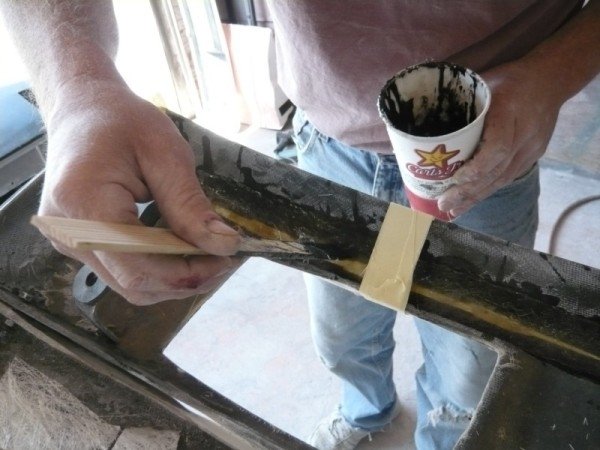
This is an area that I feel is way under-rated for payback. It's a ton of work to get all the glass parts to fit right. Let me repeat....a TON of WORK! They fit terrible and require a lot of touch up, filling, cutting and sanding.
However, I think this is where it really makes your car stand out. I always think it's a shame to see a nice paint job and the parts on the car don't fit properly. It takes away from the overall workmanship that was put into the car.
This area is where I spent most of my time. The area where I always notice....The bumper fit, the flair on the valances and uniform gaps.
Here is how I did mine......
I filled the front body "notches" at the corners where the bumper corners wrap. This was an easy chore with a little sheet metal and looks so much better eliminating the gap. The rear bumper notches were also filled, the bumper mounted a little higher and close to the body. The rear valance extensions were made from sheet metal and welded to the original so that it matched the fender flare.
The rockers are tough and I didn't like how the stock ones are inset since it made the rear flare match almost impossible so I pulled them out to be flush with the doors. The bottom of the doors and fenders have a 45 deg angle and the flares do not (poor stamping) To get a decent match requires a fair amount of work at the flare bottom to get a 45 deg so that when you sight down the car everything is straight and the rockers look proper and give a even gap to the rear flare.
Sorry for the reflections, it's tough on a black car.....The Rear.....


Posted by: PRS914-6 Mar 25 2011, 10:18 AM
The Front....Note how the notches have been filled

Posted by: Scott Schroeder Mar 25 2011, 10:23 AM
thats the way the factory should have shaped the fender recess to begin with! Very very pretty/clean - love it!

Andy, what front flair is that? That looks mean as hell.
Posted by: Rand Mar 25 2011, 10:28 AM
YES! Totally nails my point. Funny, Paul, I thought of your work when I was griping about the side/bumper lines.
Posted by: PRS914-6 Mar 25 2011, 10:35 AM
Here is the flare issue....
The Problem....
Note how we continued the line at the bottom of the door and body (the 45 deg) into the edge of the flare...

More cutting and shaping at the flare bottom.
And the payoff.....
Posted by: Andyrew Mar 25 2011, 10:40 AM
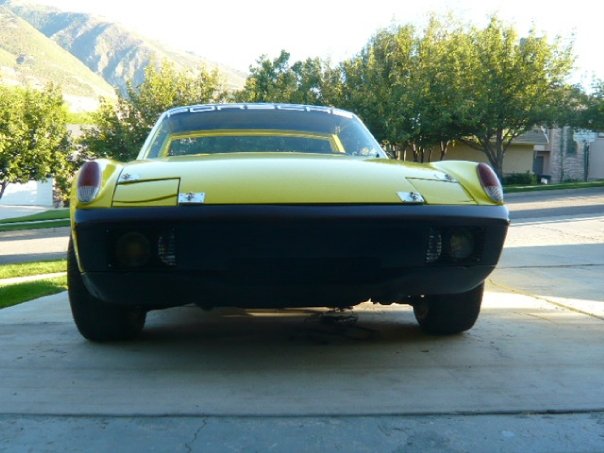
Wow Paul, I didnt even think about that! That looks really good! Hmm. Im not sure I want to redo this though... I'll have to think long and hard about that.
Scott,
HPH Bontempi flares front/rear. See my sig for my "Progress thread"
Heres a teaser, Old pic, car is primer sealed now on the drivers side, I just havent taken a pic to show how nice the lines look. 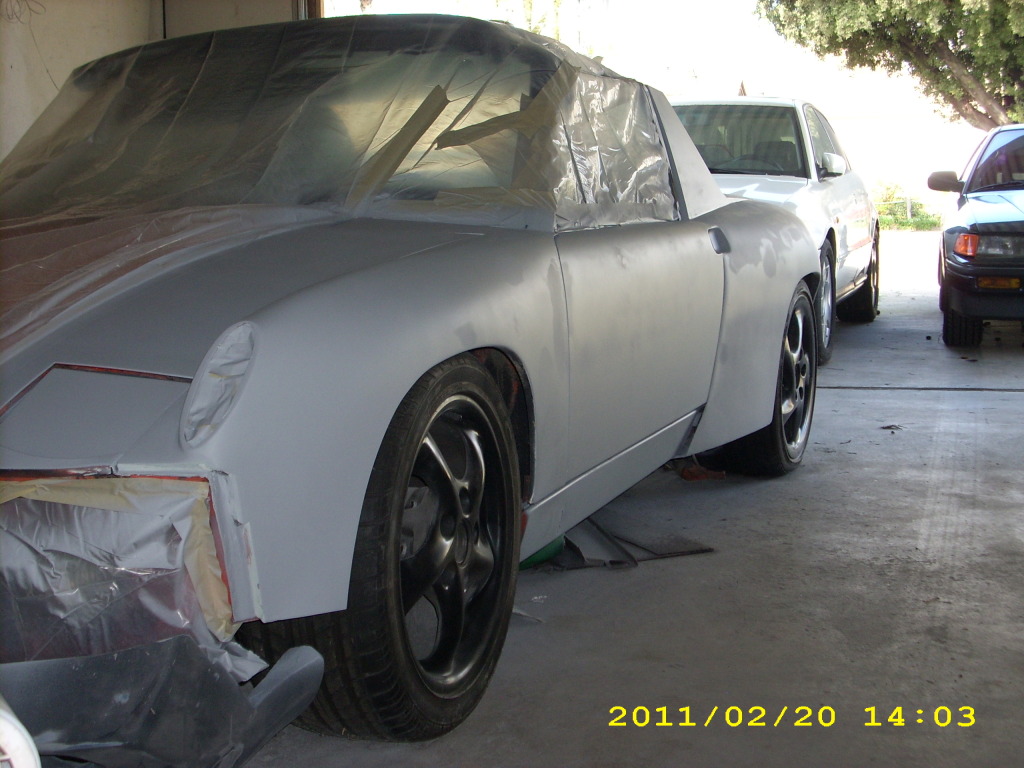
Powered by Invision Power Board (http://www.invisionboard.com)
© Invision Power Services (http://www.invisionpower.com)