Printable Version of Topic
Click here to view this topic in its original format
914World.com _ 914World Garage _ BUILD-OFF CHALLENGE: Another 914-GT Conversion Project
Posted by: jkb944t Apr 14 2011, 05:55 AM
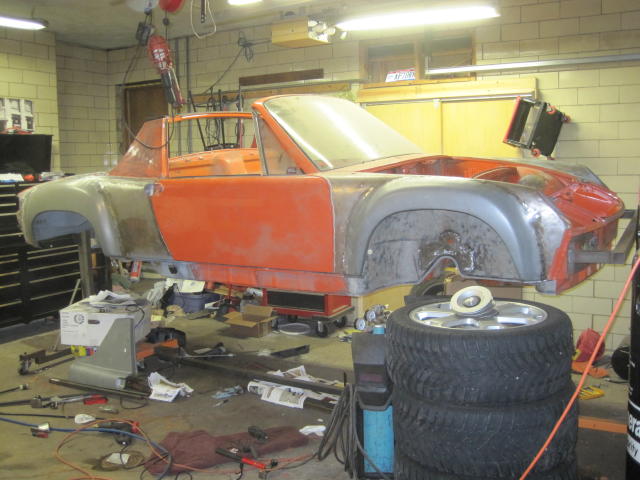
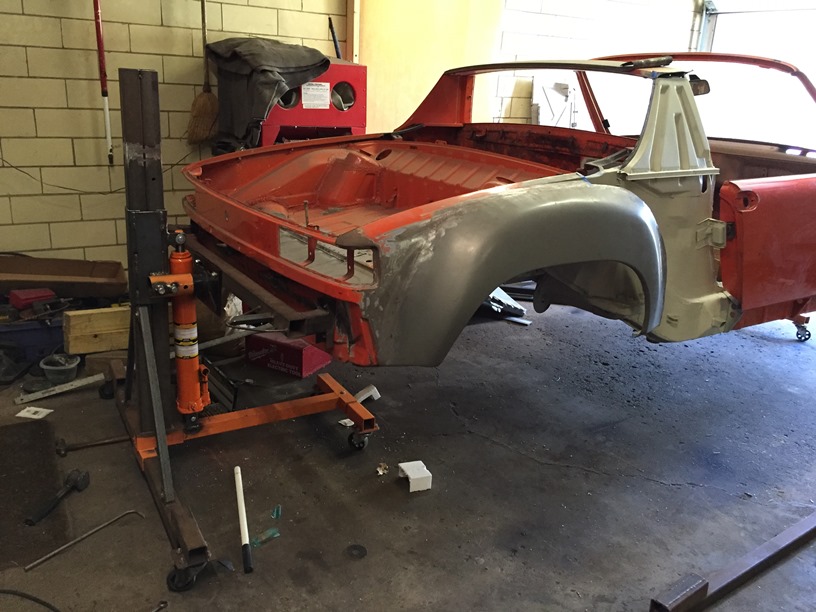
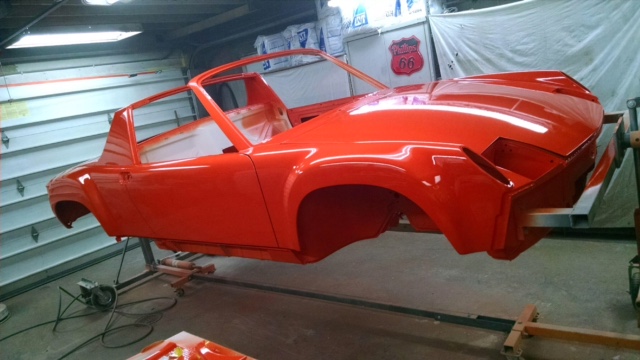
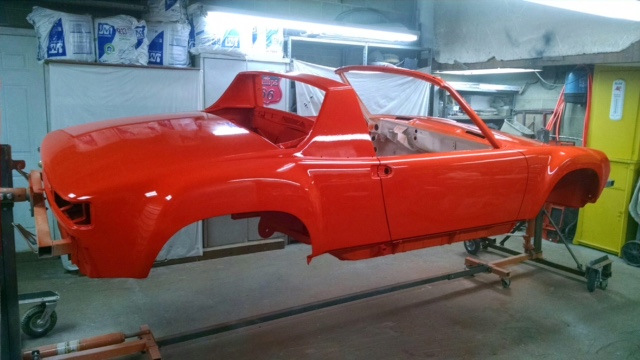
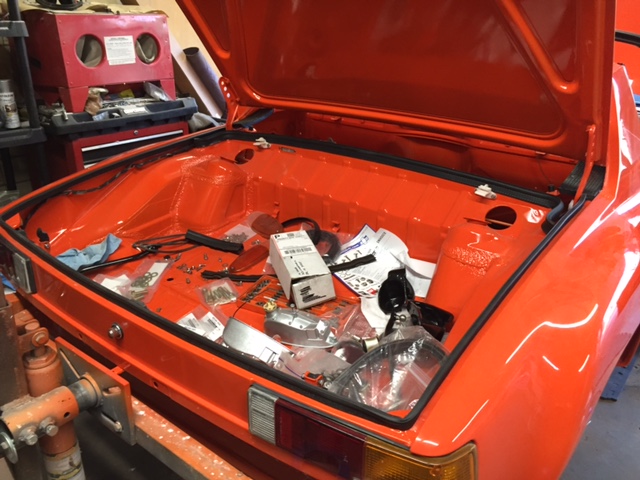
I am working on restoring a 1973 914 and converting it to a GT clone with the flares and chassis stiffening. Here is a picture of where I am on it.
Jeff B
Attached image(s)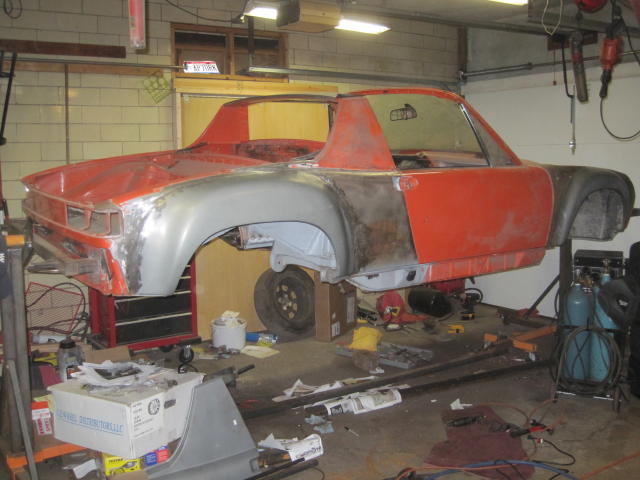
Posted by: jkb944t Apr 14 2011, 05:58 AM
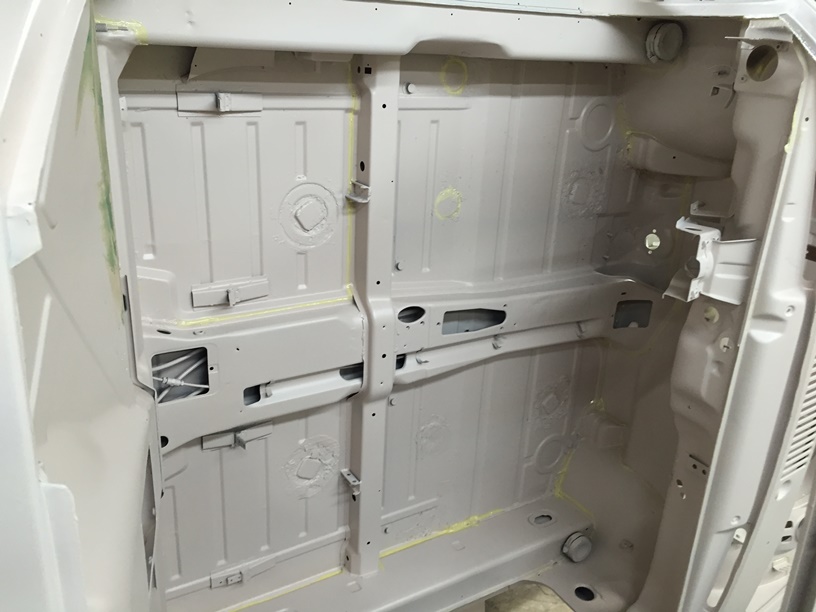
I removed the tar sound insulation on the floor panels per a suggestion I saw from Scotty and I am glad I followed his advice. I did find some rust but fortunately it was fairly minor with only one 1/8 hole that I welded up last night.
Jeff B
Attached image(s)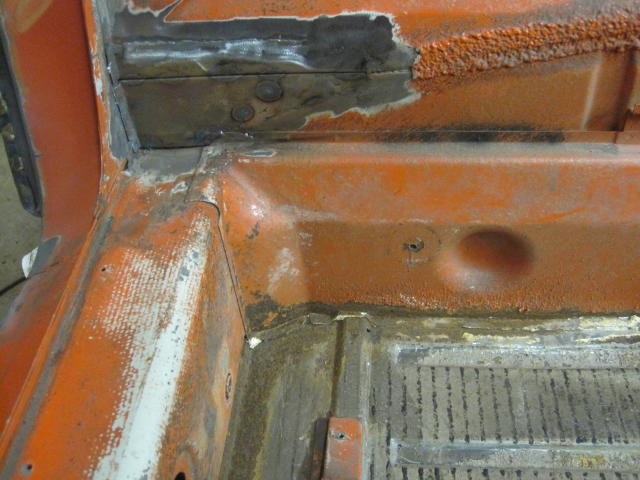
Posted by: jkb944t Apr 14 2011, 06:03 AM
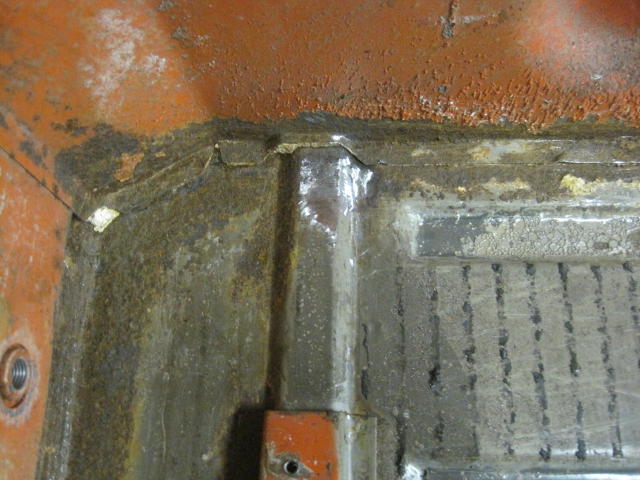
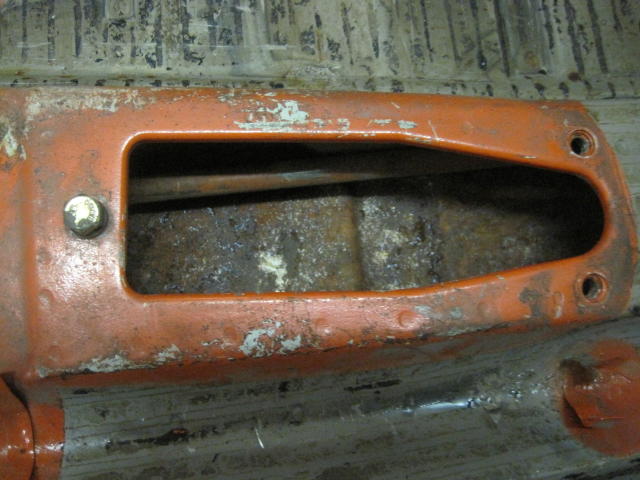
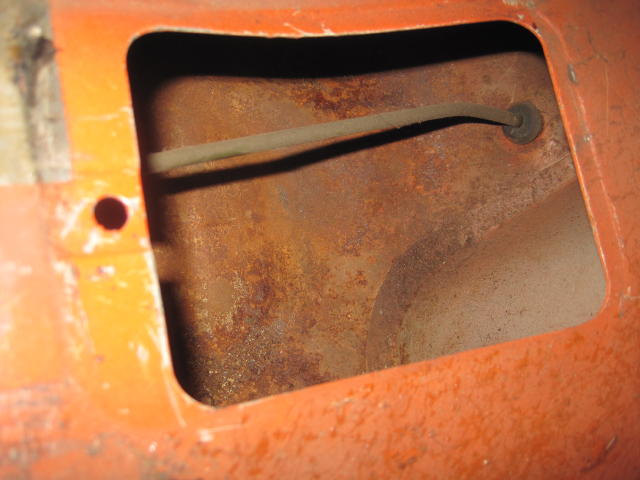
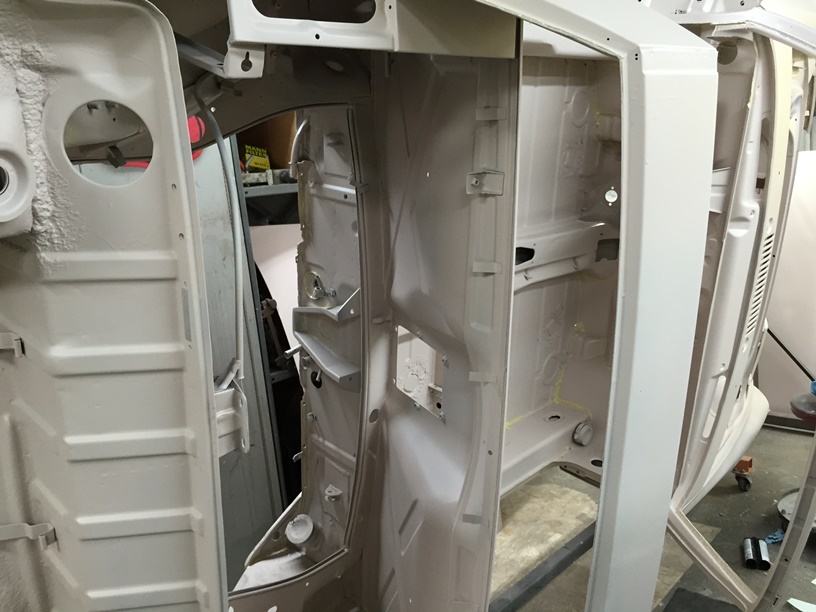
I can see rust inside the center tunnel but it is still solid. What would be the best way to approach addressing this rust so that it doesn’t get any worse? Here are some pictures of the rust that I have in the center tunnel.
Jeff B
Attached image(s)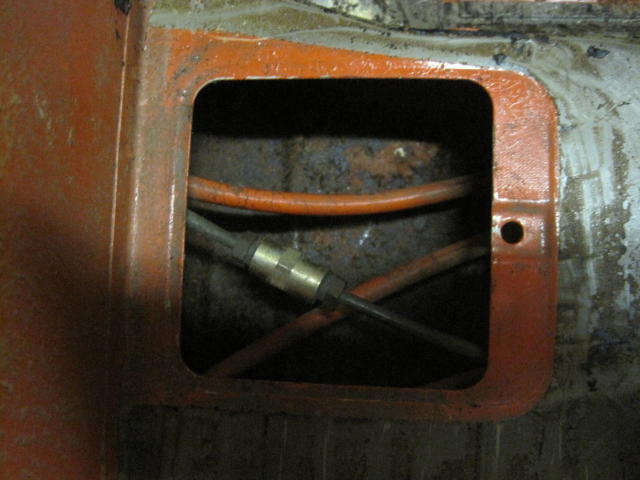
Posted by: type47 Apr 14 2011, 06:11 AM
I think Eastwood, probably among others, offers a rust converter that has a wand or hose to get into areas like the central tunnel. Maybe there was a thread here about it as this is where I read just about everything. (more caffiene needed...)
Posted by: proto31 Apr 14 2011, 08:06 AM
Nice start! Are you going to keep it Tangerine? This will be a fun build thread to watch 
Dan
Posted by: jkb944t Apr 14 2011, 09:24 PM
I am going to keep it the same color but it is actually Phoenix Red L32K. It sure looks orange to me too.
Posted by: jasons Apr 14 2011, 11:31 PM

I can see rust inside the center tunnel but it is still solid. What would be the best way to approach addressing this rust so that it doesn’t get any worse? Here are some pictures of the rust that I have in the center tunnel.
Jeff B
I don't know if its best, but I sprayed Ospho up down my tunnel. I had already cut an access hole to fix the clutch tube and that helped me get better distribution. Honestly, I'm not sure what else you can do?

Posted by: FourBlades Apr 14 2011, 11:51 PM
That is a very solid looking car.
Looks like you are off to a good start.
I would just get the inside of the tunnel damp with ospho or better yet, metal ready (which contains zinc). You are supposed to rinse ospho or metal ready off after it is done reacting, which is hard to do inside the tunnel. Getting a lot of moisture in there would be a bad idea.
I sprayed metal ready followed a few days later by eastwood rust encapsulator into areas I did not open up. Not perfect solution but it has to help.
John
Posted by: ellisor3 Apr 15 2011, 04:50 AM
I used the Eastwood Rust Converter followed by the Rust Encapsulator and it produced a very smooth finish. I used it in the floor pans as well. Not cheap, but I think it works well.
http://www.eastwood.com/rust-solutions.html
Posted by: nsr-jamie Apr 15 2011, 05:03 AM
need more pictures...looks very good for now. I hope to see more updates and pictures soon
Posted by: jkb944t Apr 15 2011, 10:34 AM
Thanks for the help and encouragement.
The car is very solid other than a few minor spots. Here are some pictures of the front trunk seal repair around the headlight. I had to grind out the rusty front channel.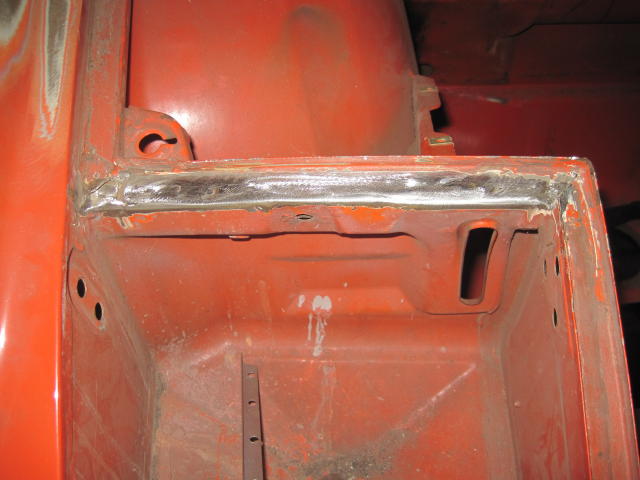
Then I made a new piece of channel and fit it. 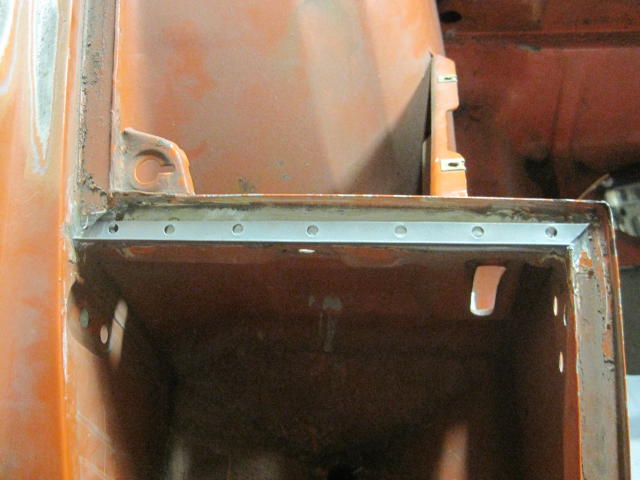
Then I welded it in and finished it.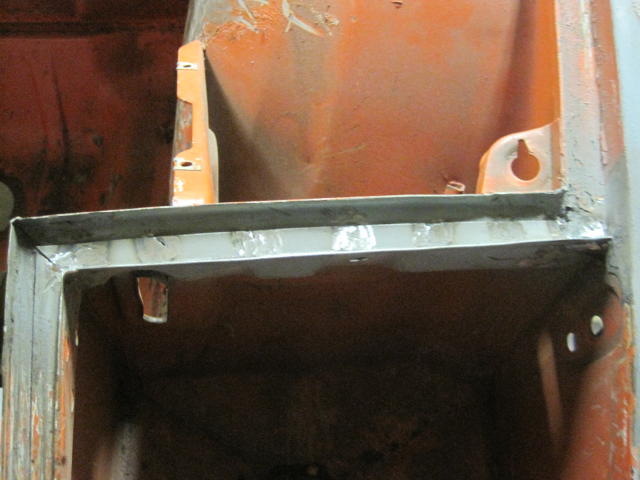
Posted by: stugray Apr 16 2011, 02:19 AM
You can spray the insides of some of the cavities with a tool like this:
http://professionalautomotivetools.com/husky-automotive-tools/engine-cleaning-gun-solvent-air-pressure-washer-sprayer/
You just hook it to pressure, drop the hose in the "paint", and spray away.
It can be used to apply paints/coatings as well, just wear clothes you never want to wear in public again if you restrict the flow with the nozzle too much ;-)
Stu
Posted by: jkb944t Apr 26 2011, 11:01 AM
Made some more progress on the front swaybar improvements. Here is the cutting open and fitting part:
Then welded it back together: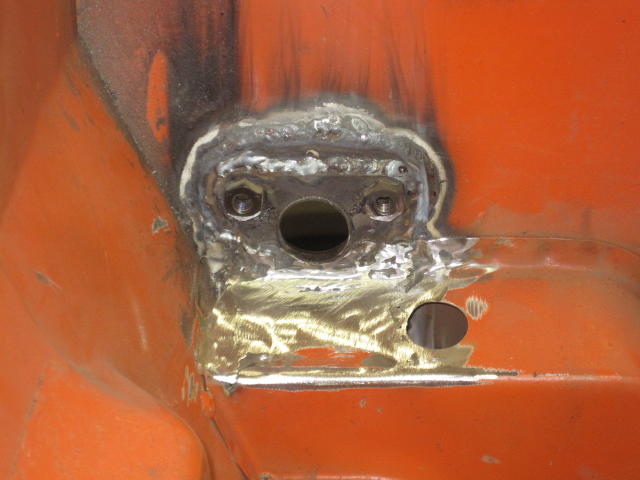
Then the fitting of the outside reinforcement pieces: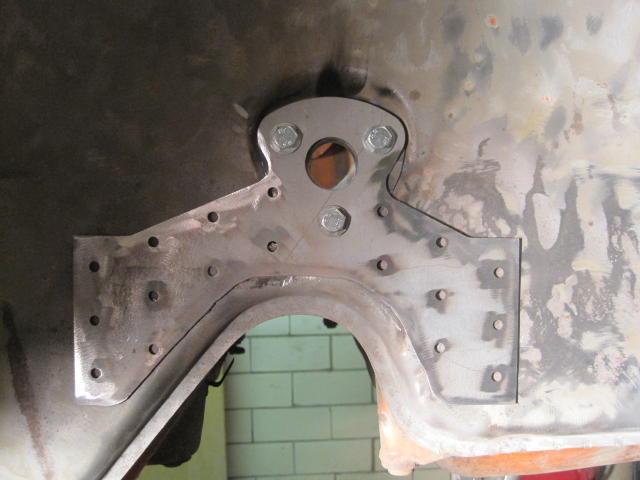
After welding and some grinding: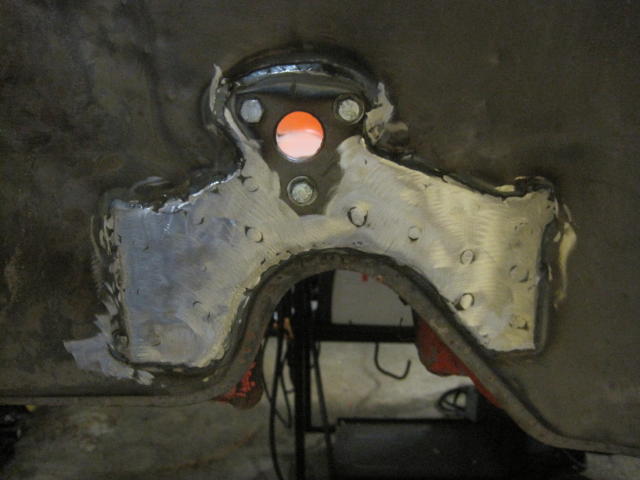
Then I worked on the rear of the car and did the dog ear supports.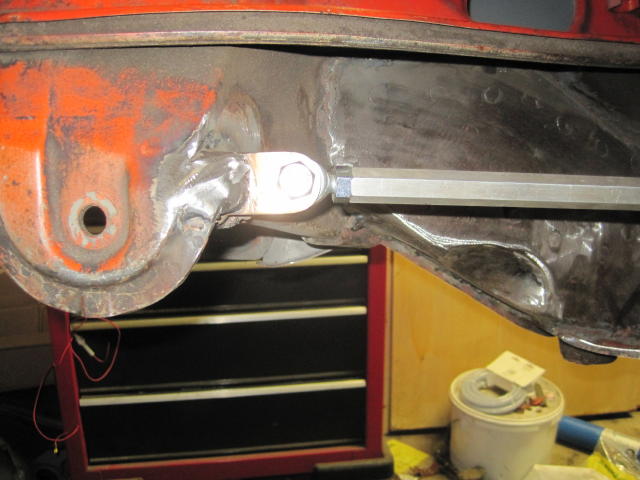
One of the next things I need to do is check some dimensions on my GT flares. Is there anyone anywhere near the Canton, Ohio area that has steel GT flares on their car?
Jeff B
Posted by: jkb944t Apr 27 2011, 05:31 AM
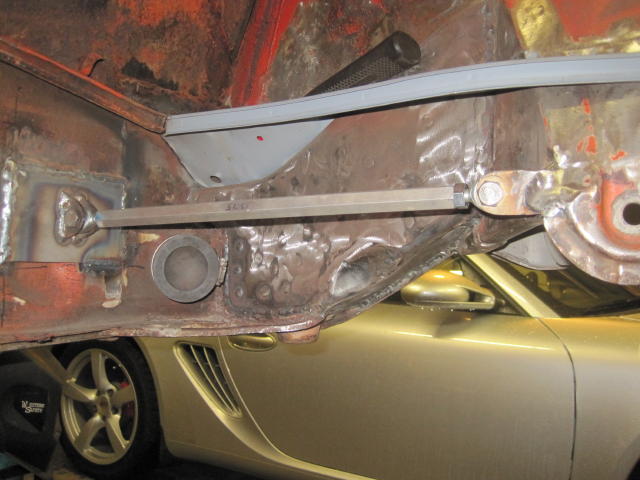
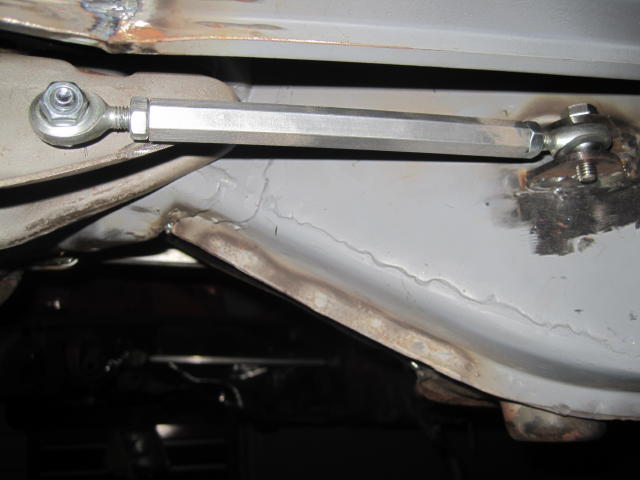
I am finishing up the rear camber adjustment links.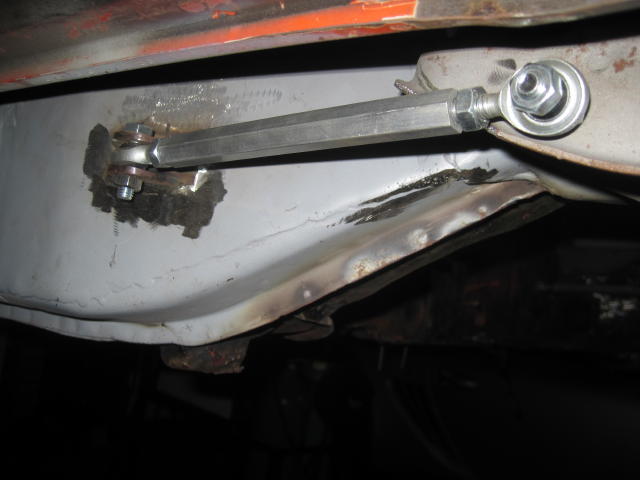
I also bought another 914 a week ago to get parts off of but it is already pretty well stripped.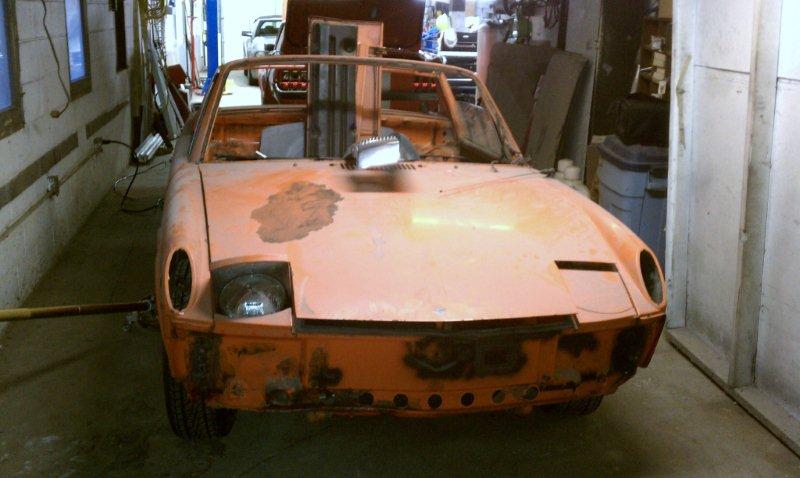
It is a 1973 with the 1.8 L motor. I plan to cut the parts off that I need and then part out the rest of what is left of it.
Jeff B
Posted by: jkb944t May 2 2011, 06:17 AM
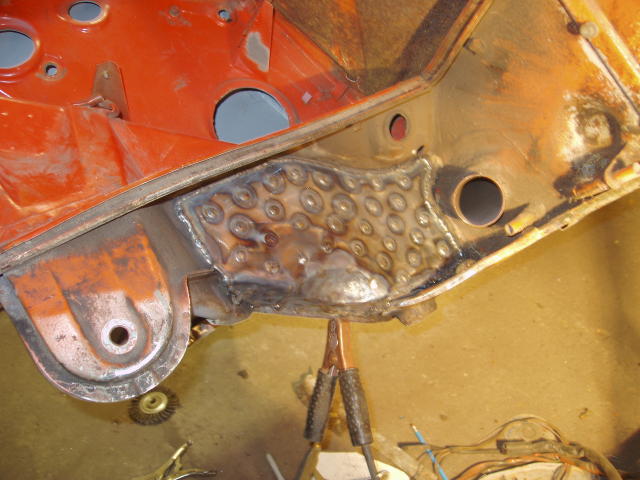
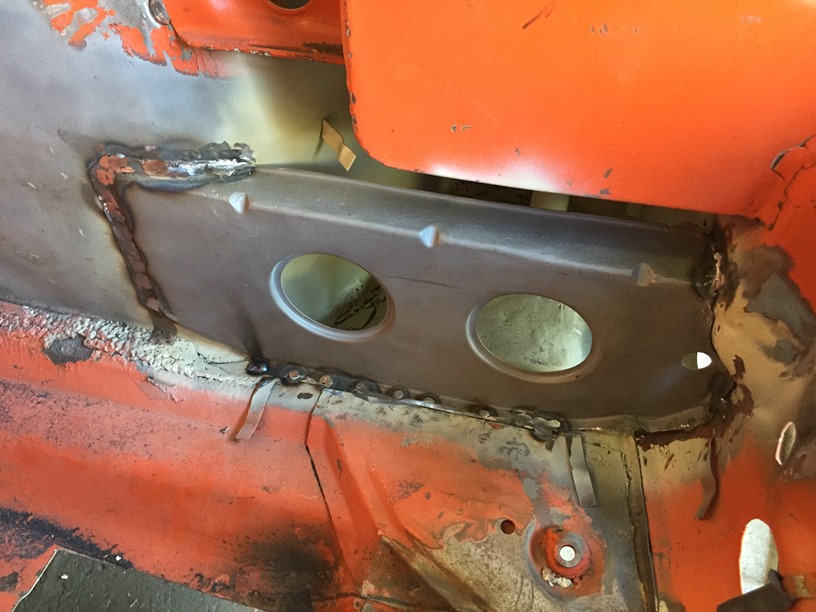
I thought that since I am converting a 1973 I would document how I reinforced the area where I cut out the 4 cylinder motor mounts for anyone interested. I ended up making custom reinforcement plates for this area. 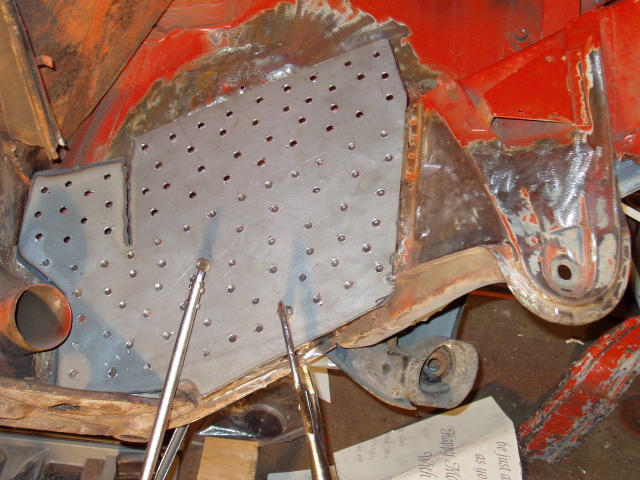
Then I tacked them and heated them up to form them around the rear suspension console.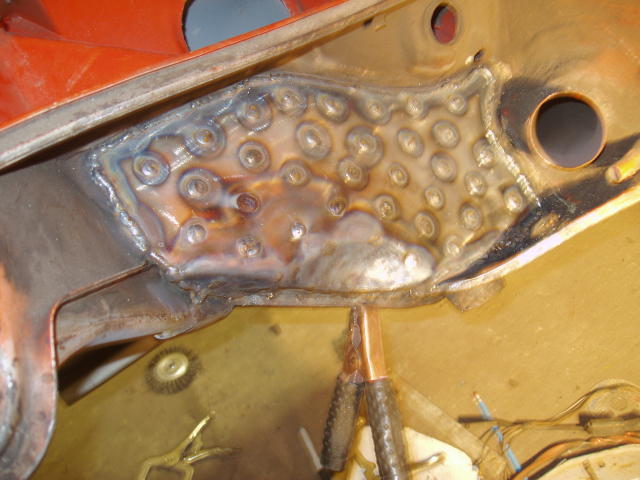
I also had to put in a new engine tray piece that I got from Restoration Design.
Next I have to weld the battery support bracket and the battery tray back in.
Jeff B
Posted by: 396 May 2 2011, 07:25 AM
very interesting project- good luck!
Posted by: Eric_Shea May 2 2011, 02:38 PM
Looking good... I'd say the Eastwood Internal Frame Coating w/Spray Nozzle would be the trick setup for your tunnel.
Posted by: PeeGreen 914 May 2 2011, 02:59 PM
I thought that since I am converting a 1973 I would document how I reinforced the area where I cut out the 4 cylinder motor mounts for anyone interested. I ended up making custom reinforcement plates for this area.
That looks very similar to what I did on my car when I removed the mounts

Looks nice. Actually a much cleaner job than I did as I had to get the car ready for the AX season

Posted by: fasthonda May 2 2011, 04:12 PM
Excellent work. I really like your approach and the quality of work done on the chassis. I'll be following your thread.
I would add a plate over the ears if your not already planning to.
This is a project I would buy if you consider selling at any point.
Regards,
Michael
Posted by: jkb944t Jul 18 2012, 12:03 PM
I have been travelling a lot for work over the past year but I have gotten some work accomplished that I thought might be worth documenting.
I have been working on the front of the car where the oil cooler will be going. I have studied all of the photos on Armando Serrano’s web site for many hours. This site is an amazing resource for GT info.
I cut open the front trunk area to get access to add the reinforcement bars and marked the area that needed to be opened up.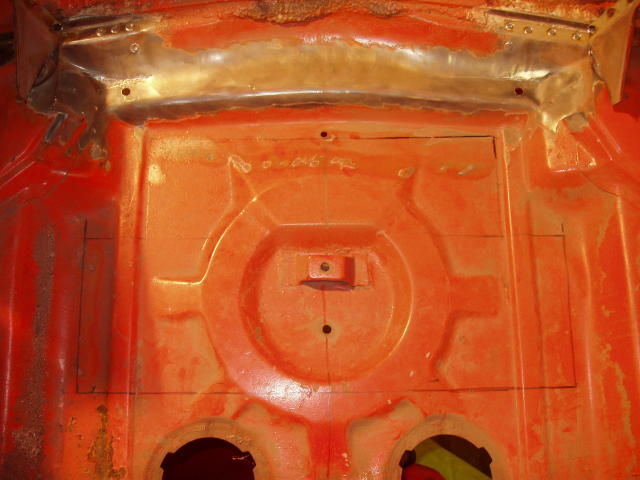
Then I custom fit the first reinforcement bar in.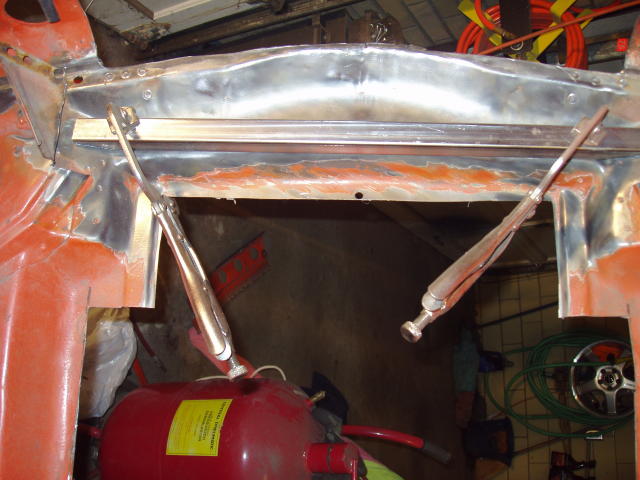
Next I fit the filler panel and the second reinforcement bar in. Then I welded the filler panel in place.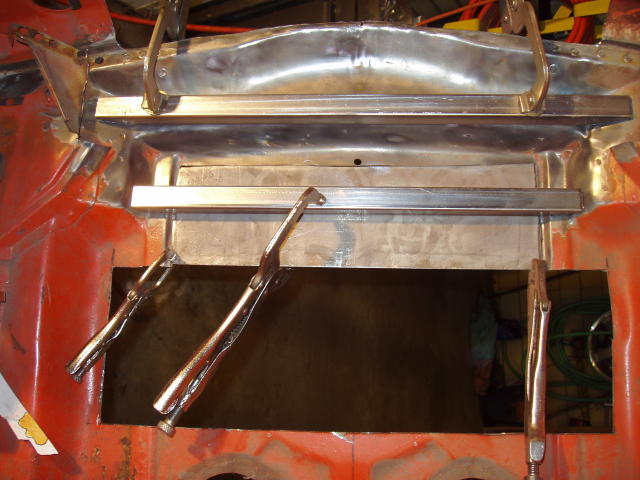
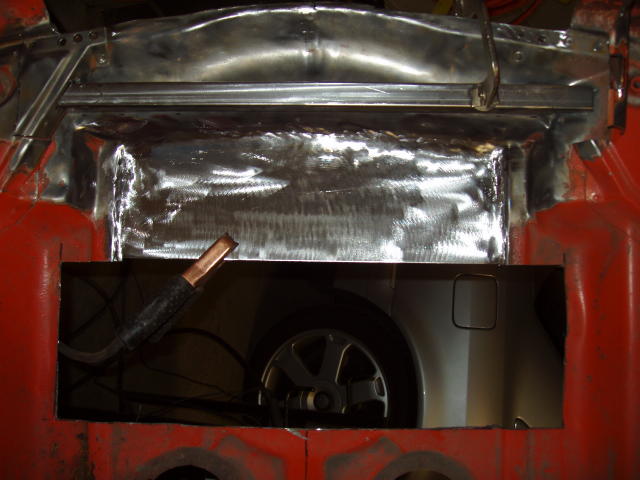
Next I fit the filler panel and the second reinforcement bar in. Then I welded the filler panel in place.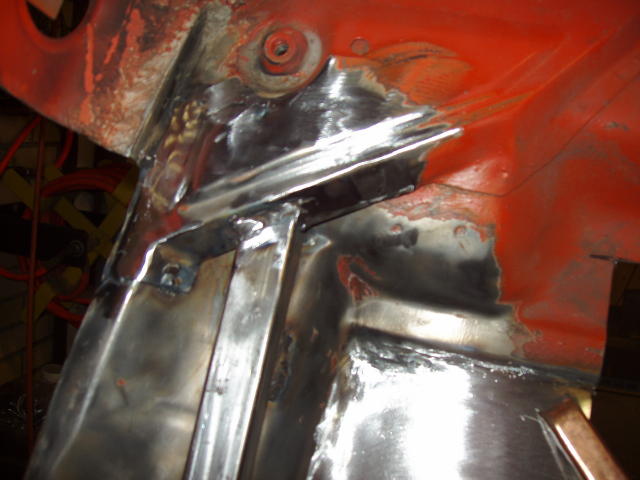

Next I have to fabricate the oil cooler shroud which I am not looking forward to doing. I may move to the back of the car to do some more work there.
Jeff B
Posted by: mepstein Jul 18 2012, 12:29 PM
Nice!
Posted by: jkb944t Jul 20 2012, 05:30 AM
I would like to find a good condition right rear fender section to replace the section that is outlined in the picture below. I already have the top section that I got from Restoration Design some time ago. I need to replace this area due to poor repair that was done sometime in the past.
Does anyone have the section of fender that is outlined in the picture that is in good condition? 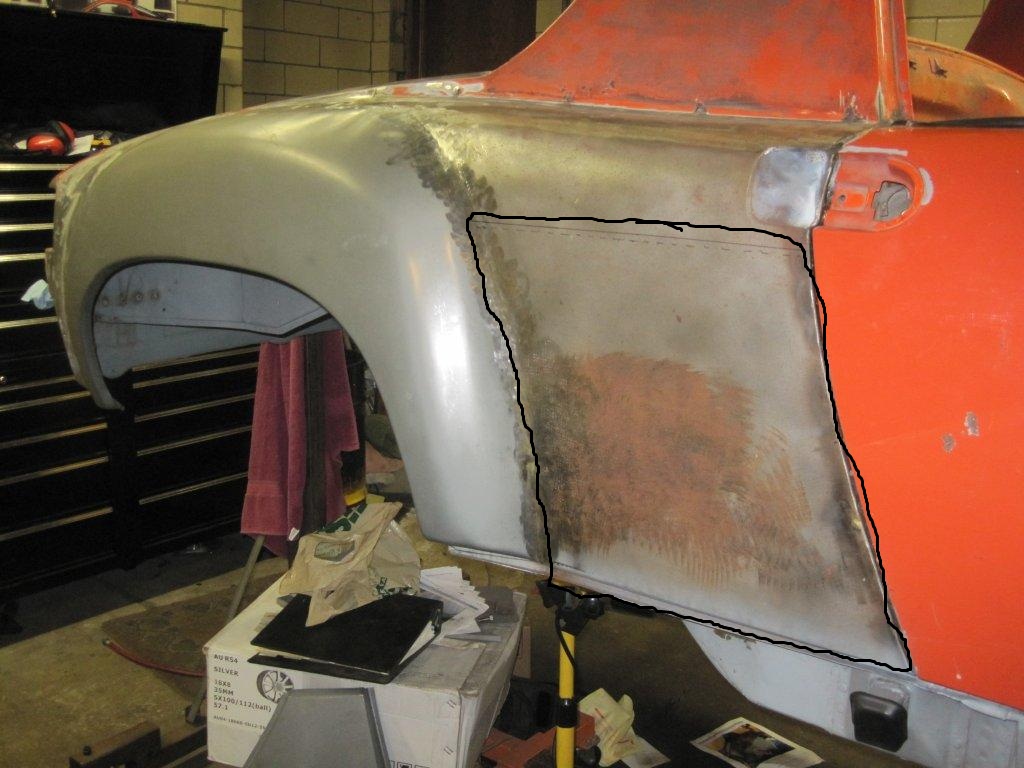
Jeff B
Posted by: speed metal army Jul 20 2012, 05:44 PM
I'm sure McMaster has to have a suitable replacement for cheaper.
I already looked. Get the 928 part.
When a bearing gets loose inside, replacement is the only fix.
Let me check one of my shitboxes.I probably have one you can have gratis, but you have to pay shipping from Canada( west coast )
Posted by: jkb944t Jul 23 2012, 05:41 AM
If you find a good one just let me know what the shipping will be. Thanks!
Jeff B
Posted by: gothspeed Jul 26 2012, 10:46 AM
Great thread and even better work! I too have a 1973 that will be getting the GT replica treatment ....... I will be following this thread 
Posted by: jkb944t Nov 1 2012, 02:55 PM
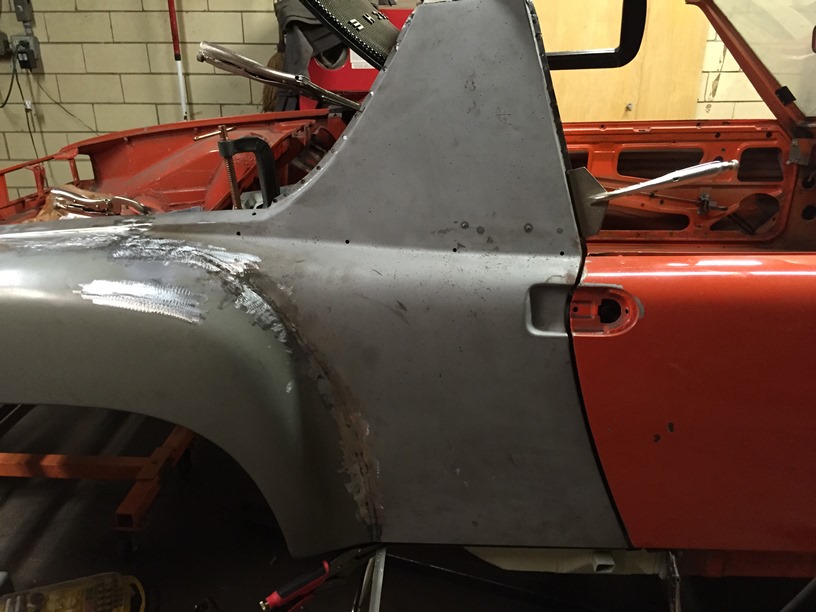
Well I am actually going backwards on this project now. I found that the inner right panel (marked with an X in the picture) was pretty rusted from the battery so I am replacing it now.
My question for others who have performed this repair is should I splice in the panel even with the bottom of the sail support (shown with an arrow in the picture) or should I go above that where the spot welds are?

Posted by: jkb944t Oct 10 2013, 05:59 AM
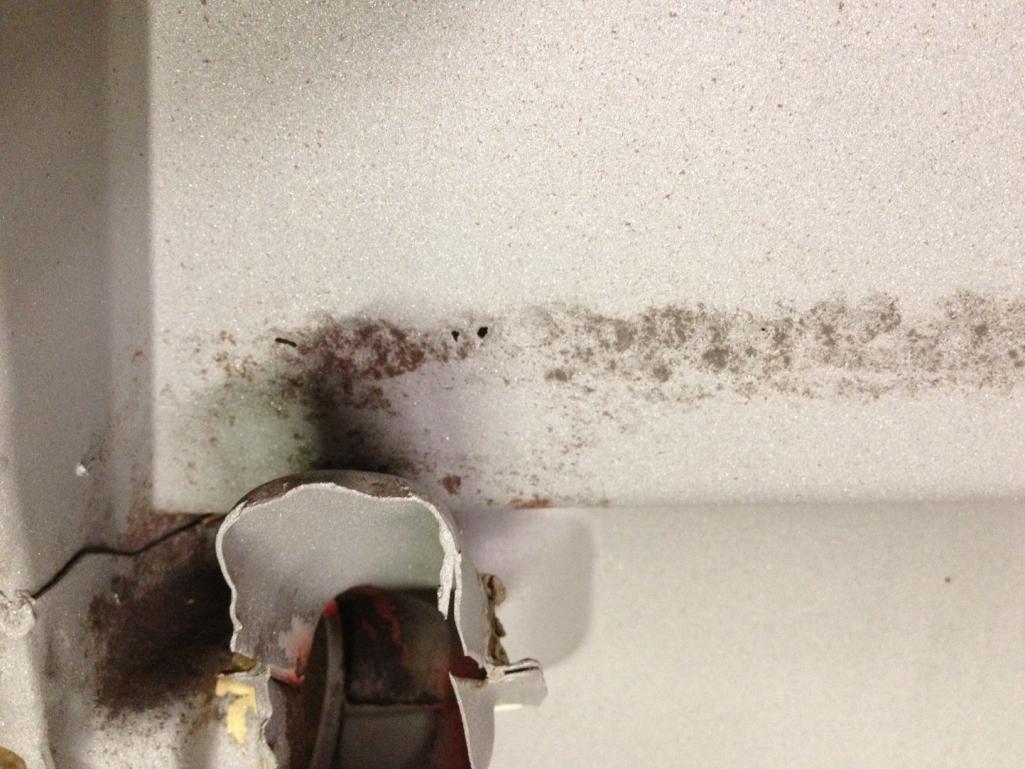
I am trying to get back to work on this project and need some advice. The only rust issue on this car is the upper section of the firewall due to the pad holding moisture. A club member hooked me up with a good upper firewall section a while back.
Can anyone give me some tips on installing the upper section of the firewall? It looks like it will be rather difficult so any ideas or experience would be appreciated.
Jeff B
Posted by: rick 918-S Oct 10 2013, 07:05 AM
Just spotted your thread. Post some photos of what your trying to do and I'll try to check in later. 
Posted by: sean_v8_914 Oct 10 2013, 09:16 AM
lookin good.
if you do not reinforce teh entire inner suspension pick up console it will rip at teh cross brace and or the 2 underside ribs
Posted by: jkb944t Oct 11 2013, 05:30 AM
This is a picture of the upper section of the firewall that has the rust on it, especially in both lower corner sections.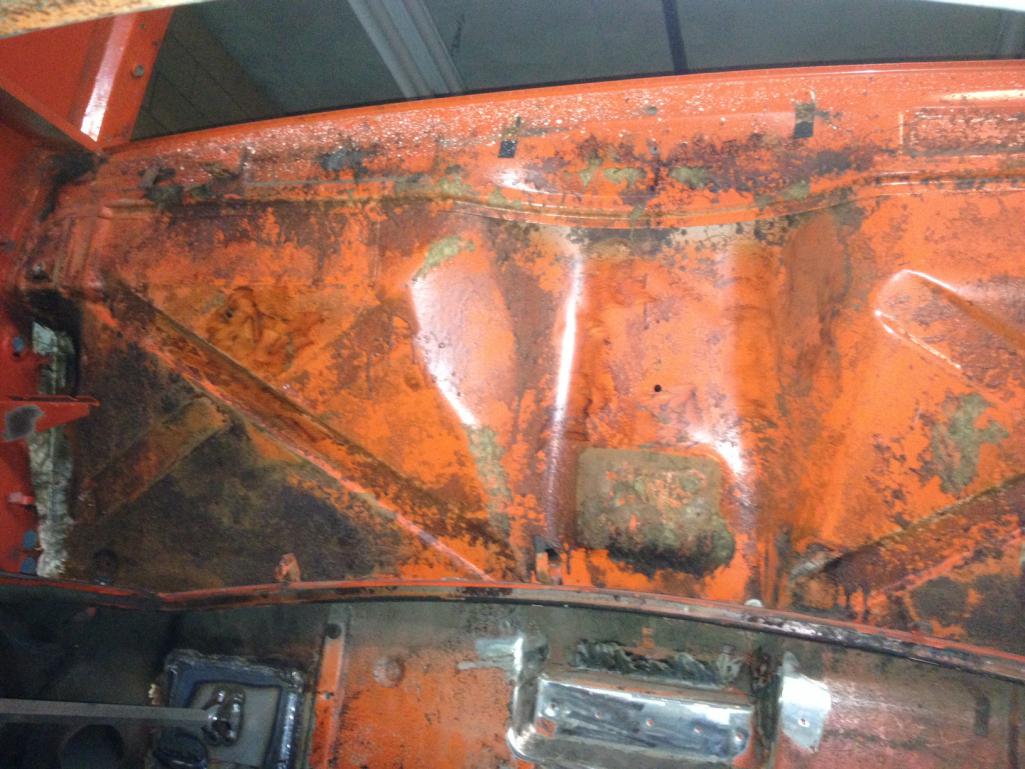
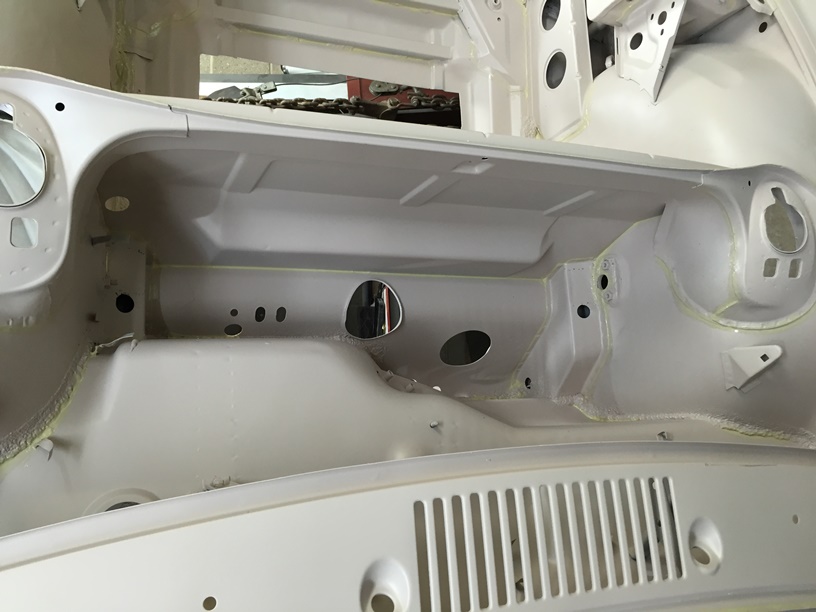
This is the piece that I am going to use to replace the bad section which has just been blasted to clean it up.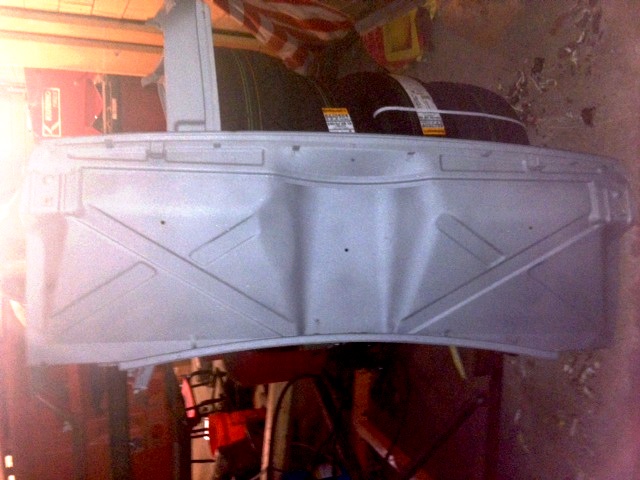
I am hoping that someone has replaced this panel before and can give me some advice on how to do it.
Jeff B
Posted by: OllieG Oct 11 2013, 06:18 AM
Do you really need to replace the entire Firewall? I'm making repairs to the Firewall on my car right now and just patching up the rusty sections.. Yours doesn't look that bad from the photo at least.
I personally would use a cup brush on an angle grinder and see just how bad it is before diving in and replacing the entire thing - I think that would be a big and possibly unnecessary job...
Just my 2 cents...
Posted by: OllieG Oct 11 2013, 08:25 AM
If you do decide to cut out the old one, I would definitely brace the opening...
Posted by: Eric_Shea Oct 11 2013, 08:53 AM
Loving this project. If love to watch it get kick started again.
I would soda blast the existing piece and see where you really are. I tend to agree with Ollie here.
We've replaced sections in the past. If it comes to that, it looks like you have good metal. I would simply lay out where you would like to cut and weld. That upper section you're talking about is fairly straight forward with the exception of the double walled bits and frankly... I don't see any issue that would make me cut there.
Again, if you "need" to, just cut and patch the areas of concern.
Posted by: Eric_Shea Oct 11 2013, 08:57 AM
Also... In reference to post#26. I'd just patch the areas needed.
Posted by: jkb944t Feb 3 2014, 06:55 AM
I am finally getting back to my project. My son and son-in-law are going to help me as well so it will be a family effort going forward.
I am getting ready to install a used sail panel/lower fender section. It is in good shape except for some internal rust from the internal foam weather stripping. There are only a few minor holes that extent to the outside of the panel.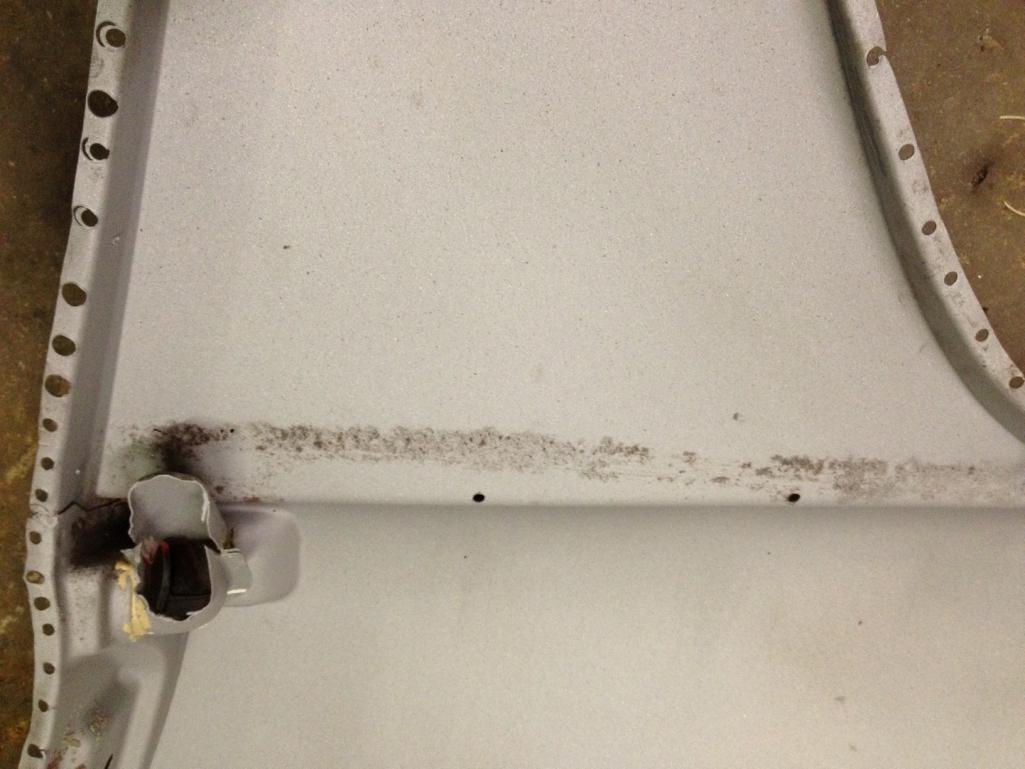
I need suggestions on repairing this before I install it. Should I weld or braze the minor pin holes shut and then use a fiberglass body filler to fill the rest of the imperfections?
Jeff B
Posted by: jkb944t Mar 10 2015, 06:56 AM
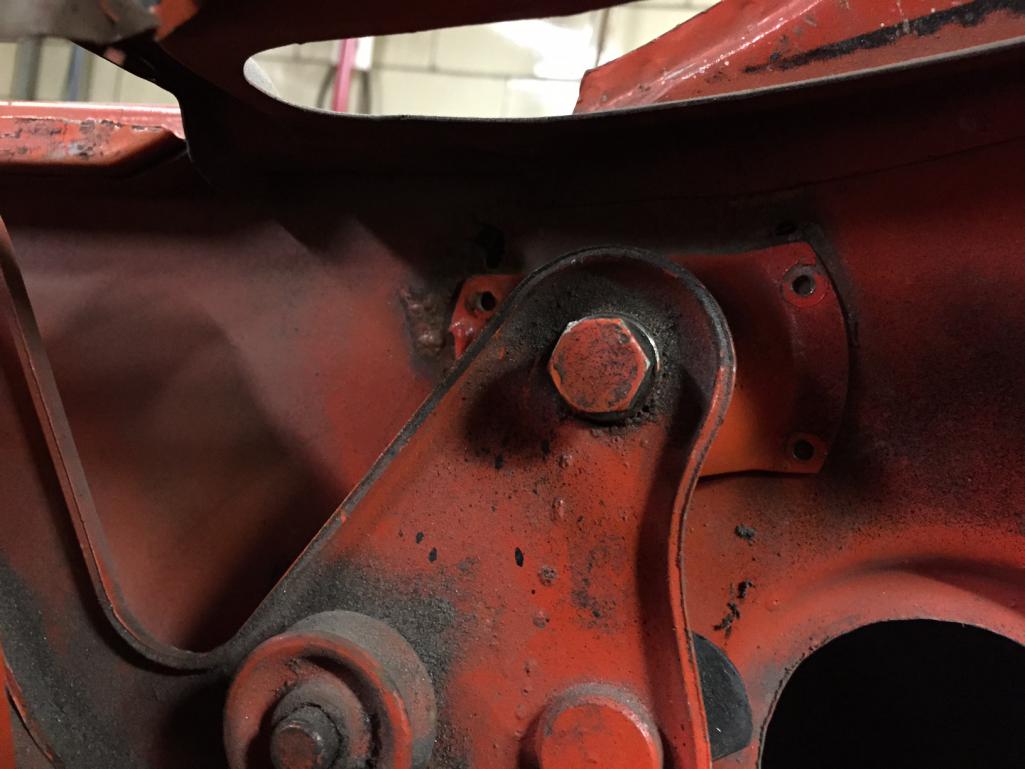
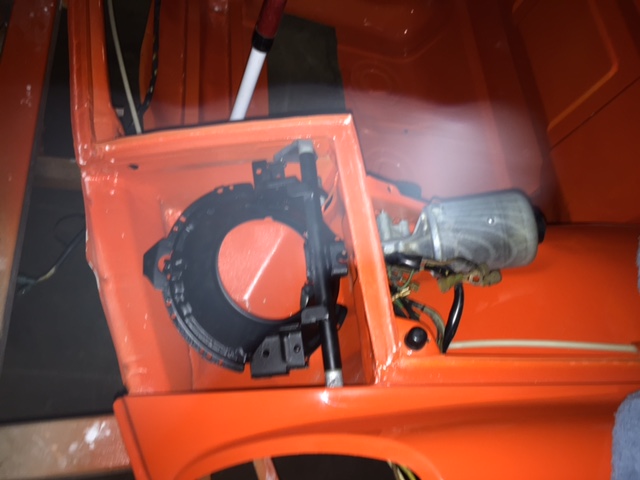
As you can see from the photo the mounting ear for my rear trunk was just screwed into the body. Both sides are screwed on but I would assume that they should be welded onto the body.
I don’t believe that that they are currently located correctly either. Does anyone know if there is a measurement for aligning these mounting ears?
Jeff B
Posted by: brant Mar 10 2015, 07:30 AM
I am finishing up the rear camber adjustment links.
Jeff B
These are actually to lock in the rear tow and not camber
If you eliminate enough rear flex with the right bushings and swing arms you can run zero rear toe. These bars help with flex but mostly help lock in your settings and prevent setting slip from side loading
Posted by: rgalla9146 Mar 10 2015, 08:12 AM
I don't know where you can get dimensions for location of the hinge bracket.
Maybe someone here knows a source.
What I've done is mount the hinges in the middle of their adjustment slots, put the lid on and adjust to proper fit starting at the latch/ receiver, then tack weld.
Obviously with no torsion bars.
Then operate the lid to verify that it is located well / that it is adjustable to uniform gaps and height.
Posted by: jkb944t Mar 12 2015, 06:01 AM
I was hoping to avoid reassembling the trunk and engine bay lid but that may be my only choice if these dimensions aren’t documented.
I did manage to get the hinges drilled for lightness but truthfully mostly just for the cool look!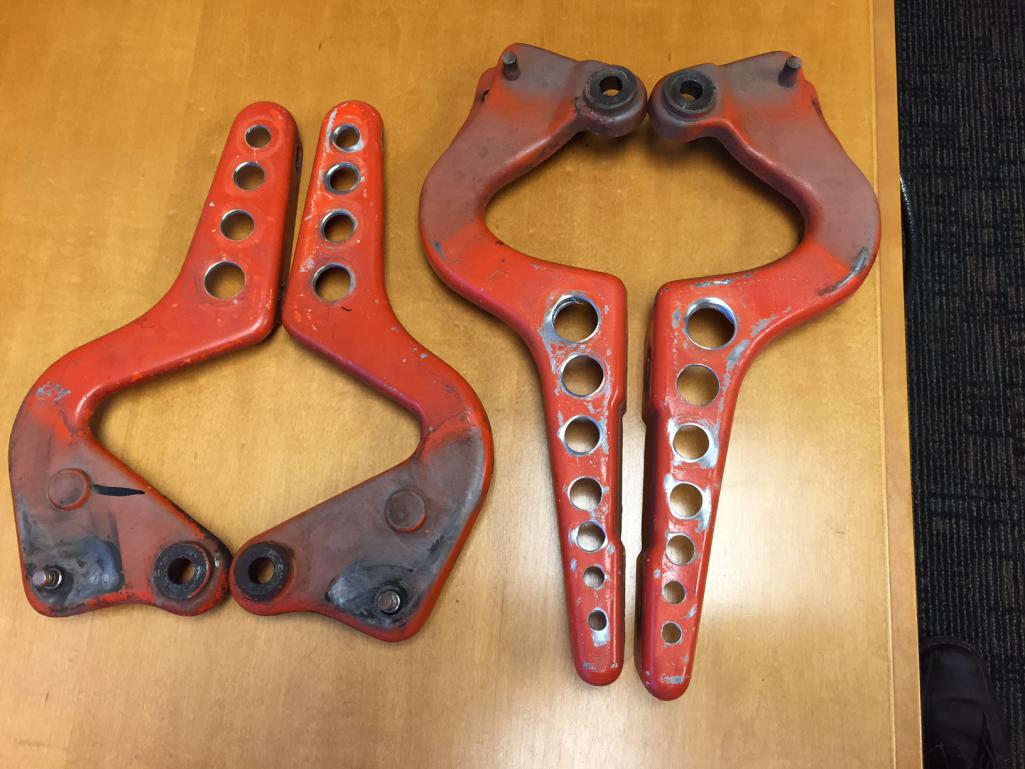
Jeff B
Posted by: OllieG Mar 13 2015, 01:51 AM
...put the lid on and adjust to proper fit starting at the latch/ receiver, then tack weld.

That's how I'm going to do mine. The PO had made a proper mess of the hinge mounts on mine so I had to cut them out and patch in new metal behind. Now I'll put the lid in place to find the right mount location.
I'm going to use gas struts on mine like those available from Camp914…eventually.
Posted by: jkb944t Mar 13 2015, 06:51 AM
Fortunately the PO just screwed them in so moving them won’t be too difficult. One of them may be located alright but I am positive the other one is incorrect since it binds when moving it up and down.
Since there doesn’t appear to be documented locations I will proceed with putting the trunk and engine bay lid back on as suggested to get the locations verified.
Jeff B
Posted by: jkb944t Apr 3 2015, 11:05 AM
I was able to finally get the inner wheelhouse welded in and the door latch reinstalled. That was a lot harder than I anticipated. It finally warmed up enough yesterday to epoxy prime that area so I can finally reinstall the outer fender section.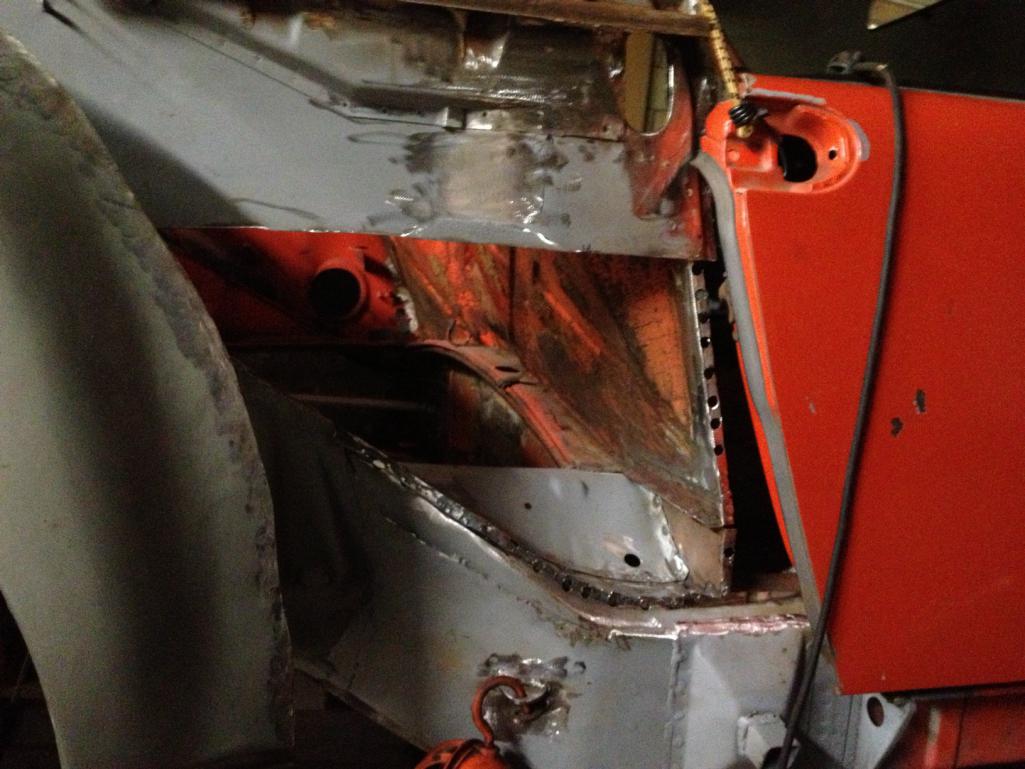
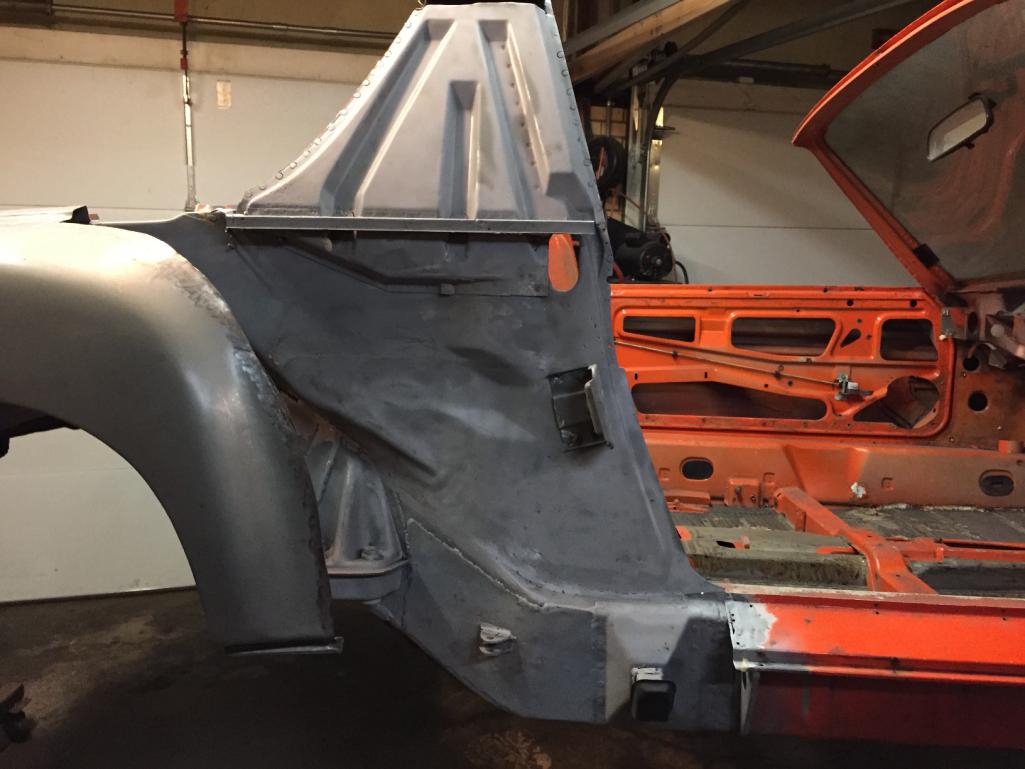
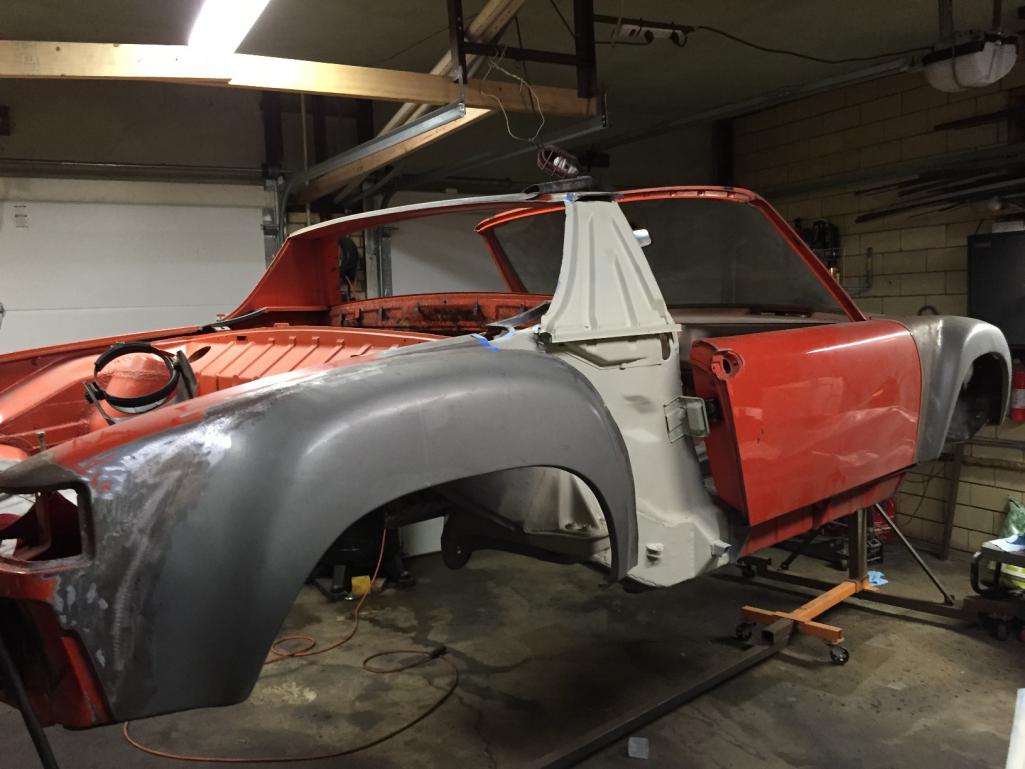
Jeff B
Posted by: OllieG Apr 3 2015, 02:15 PM
Nice neat looking job, but I'd get those door openings braced if I were you.
Posted by: pete000 Apr 3 2015, 02:53 PM
NICE WORK !
Posted by: Vysoc Apr 7 2015, 04:19 PM
I have many of the same issues...enjoying the photo's. ![popcorn[1].gif](style_emoticons/default/popcorn[1].gif)
Vysoc
Posted by: jkb944t Apr 30 2015, 10:40 AM
I am making some more progress and will hopefully be taking the 914 to get media blasted in the near future. My son said he could transport it to the blaster but not when it was so high on the rotisserie.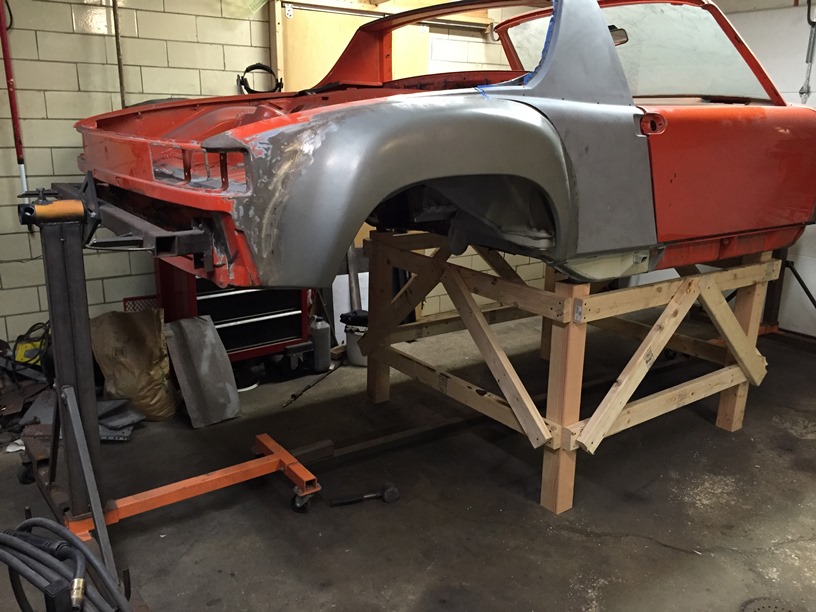
I built a wooden frame under it to support it while I redid the rotisserie ends to allow it to be lowered.
Do I get extra points for the highest homemade jack stand?
Anyway after some significant cutting and welding to the rotisserie I ended up with the modifications below. 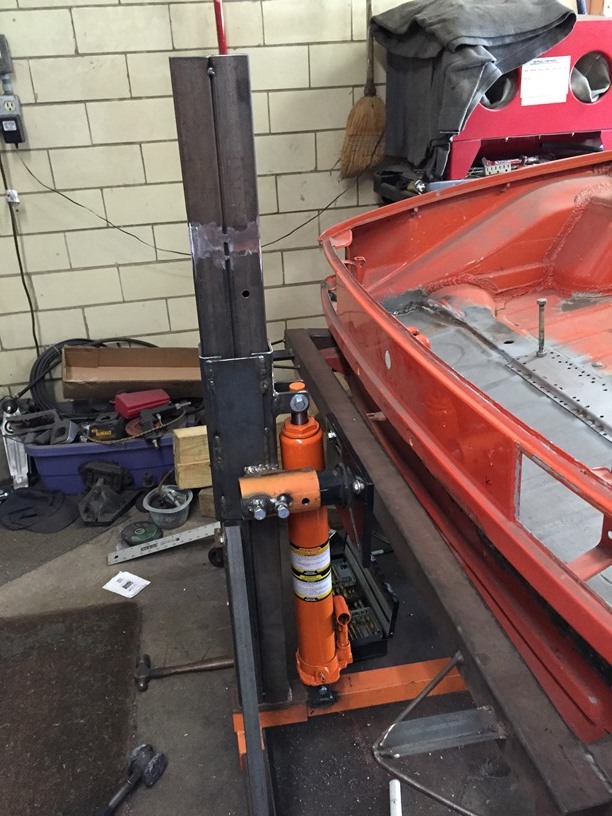
Now I am able to lower my 914 to transport it and then raise it back up to media blast the bottom of the car. As most everything we do this modification took me longer than anticipated but now I can get back to finishing the metal work up.
Jeff B
Posted by: trojanhorsepower Apr 30 2015, 06:38 PM
Oh man, that's cool!
Posted by: jkb944t May 1 2015, 05:16 AM
I finished up the clutch tube repair and closed up the hole. 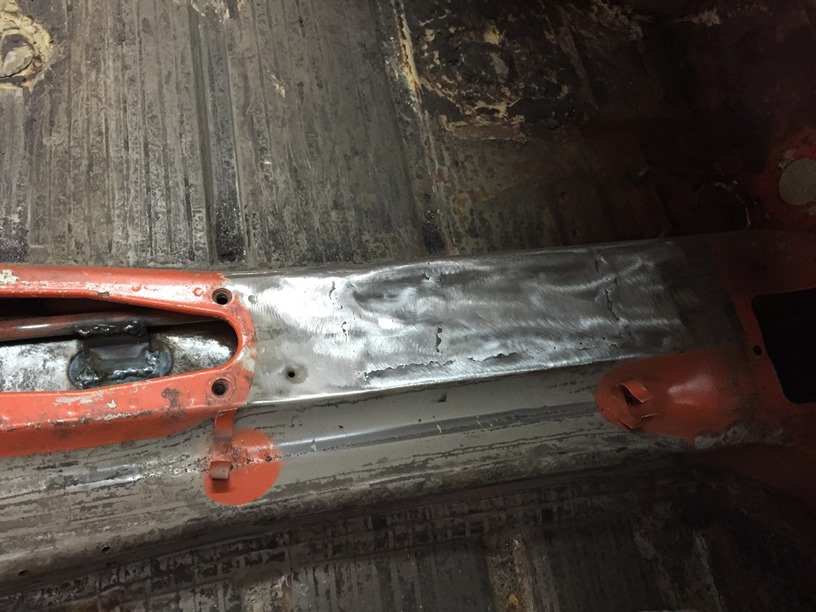
Then I added an additional support just to make sure it doesn’t flex.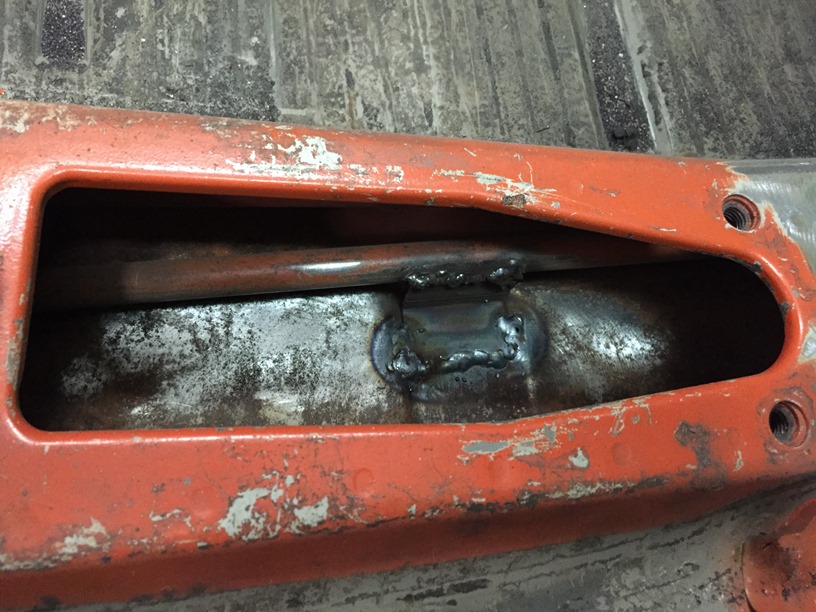
Last night I finished welding the trunk support plate in. We are finally having some nice weather that makes getting this work done a lot nicer.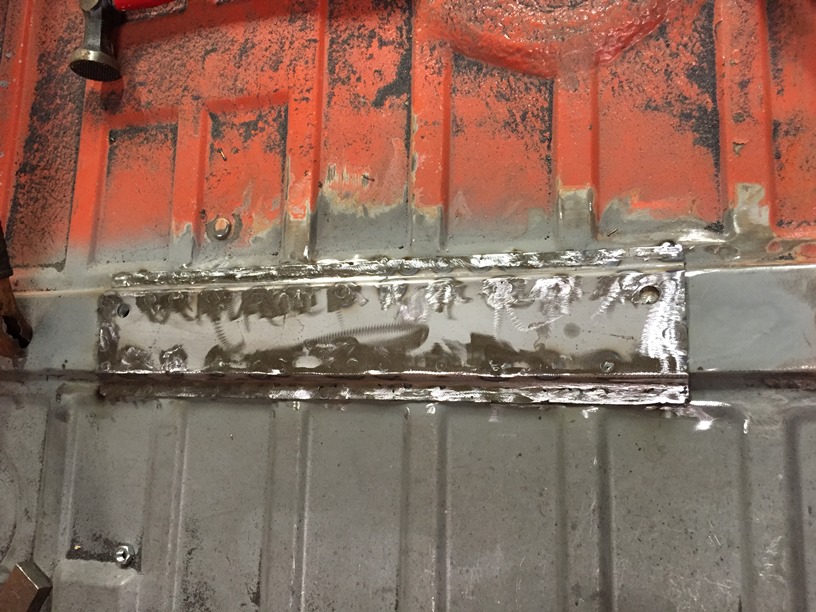
Jeff B
Posted by: PanelBilly May 1 2015, 08:48 AM
The sooner you get it blasted the better. It just makes it easier to see where rust has done its damage. Have it lightly painted with a decent coat of quality primer. You can grind it off where you need to weld and it will prevent the growth of surface rust
Posted by: jkb944t May 14 2015, 10:46 AM
I made some more progress this week. I finally got the front tow hook fabricated and welded the nuts in place.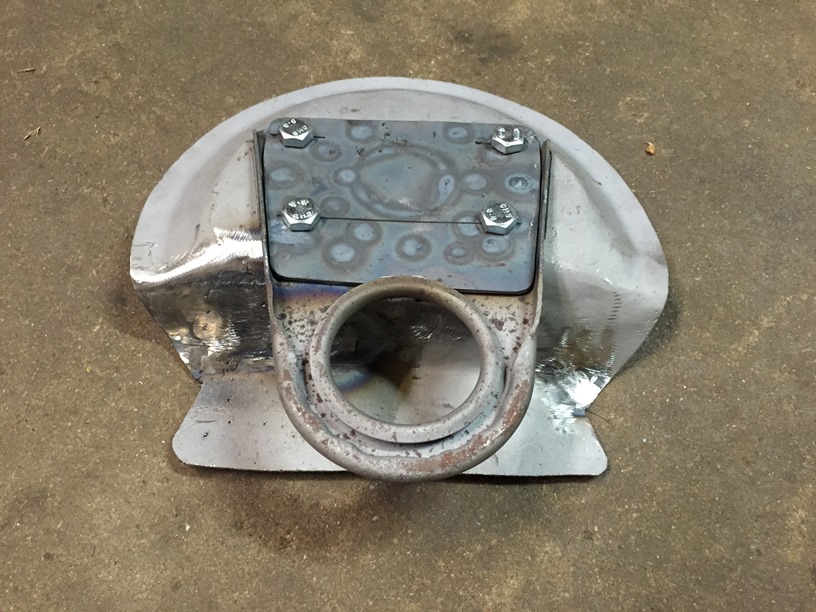
Then I welded it to the lower front valence that I had reinforced previously.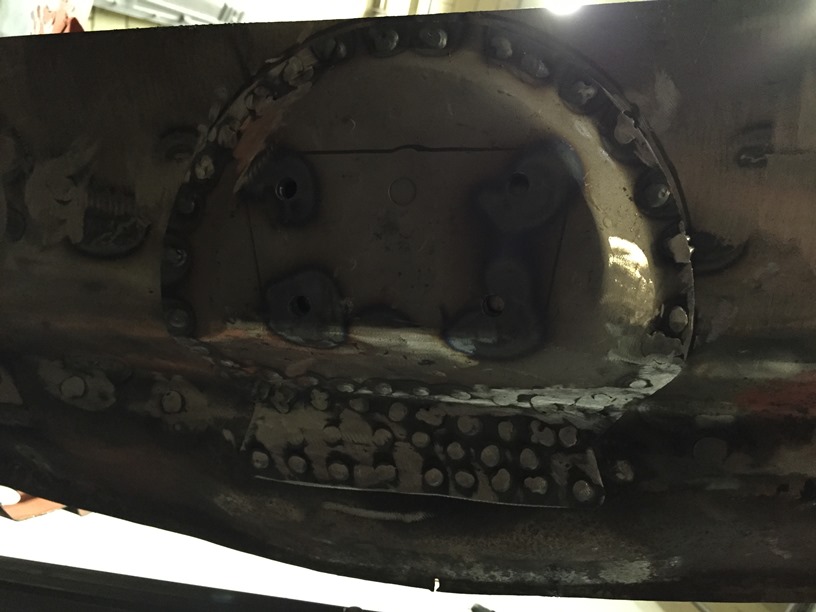
Test fit the modified tow hook in place and everything fit perfectly. 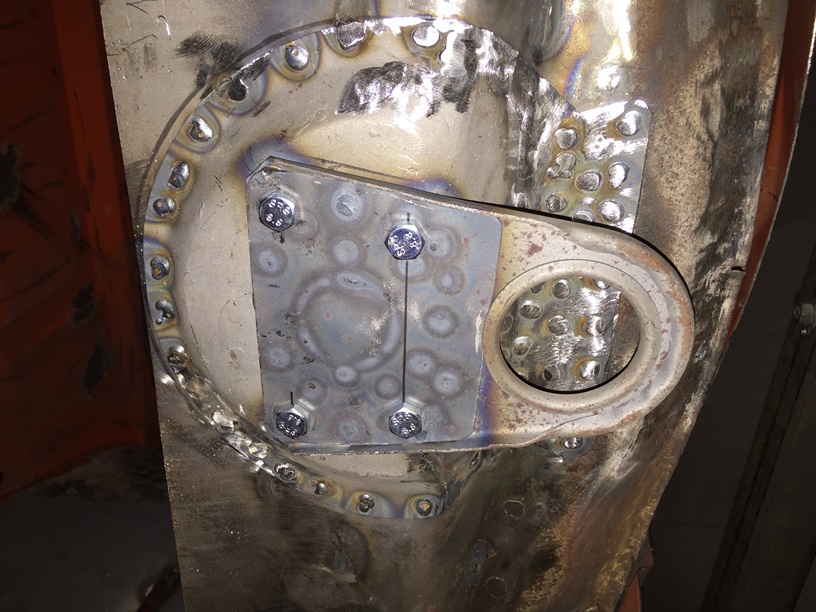
The next item to work on is the battery tray assembly. I think I will keep it in the stock location but modify it so that I can bolt it in instead of welding it in. That should make painting the area easier and allow me to remove it if necessary. I saw it was done this way on the 914-6 GT website. Any thoughts on this idea are welcomed.
Jeff B
Posted by: 3d914 May 15 2015, 10:02 AM
Jeff, nice solution to the tow hook. I often wondered if that stock one didn't need some extra reinforcement. Great job on the car. Keep the pics coming.
Posted by: jkb944t May 15 2015, 08:32 PM
I added a reinforcement plate inside the mounting housing too just to make sure it wouldn't flex too much.
Thanks for the encouragement. I plan the keep chipping away on this project until I get it finished.
Jeff B
Posted by: OllieG May 16 2015, 01:44 AM
The next item to work on is the battery tray assembly. I think I will keep it in the stock location but modify it so that I can bolt it in instead of welding it in. That should make painting the area easier and allow me to remove it if necessary. I saw it was done this way on the 914-6 GT website. Any thoughts on this idea are welcomed.
Keep up the good work Jeff!
I recently welded in the battery support on mine then epoxy primered it before I attach the tray itself. Hmmm, wondering about your bolted tray idea; might be a good idea for painting and cleaning behind later I suppose. I'm going to think about that for my build..
Posted by: jkb944t May 21 2015, 06:02 AM
I went ahead with the bolt in battery tray idea this week. I drilled and tapped five 6mm holes into the reinforced frame section of the car to mount the lower part of the battery box.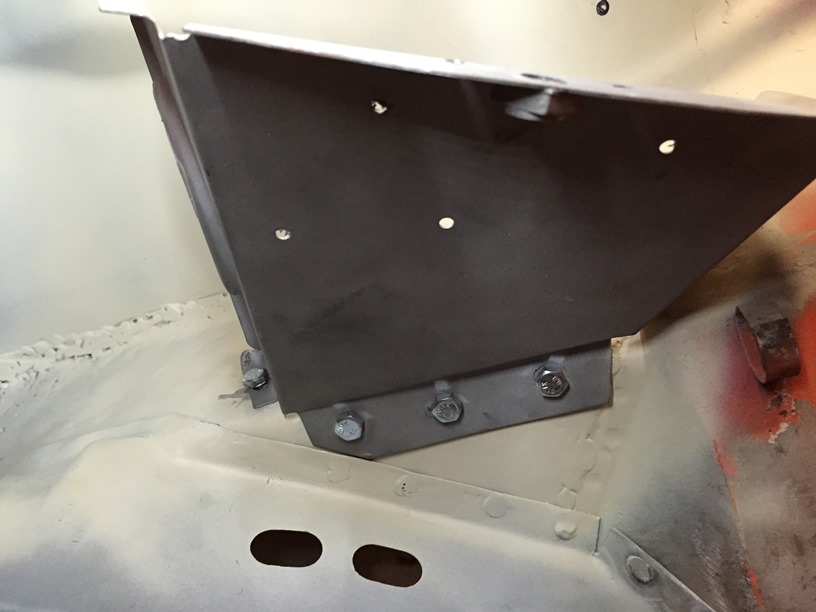
Then I drilled two holes through the top part of the battery tray for 8mm bolts and welded the nuts on the back side of the inner fender well.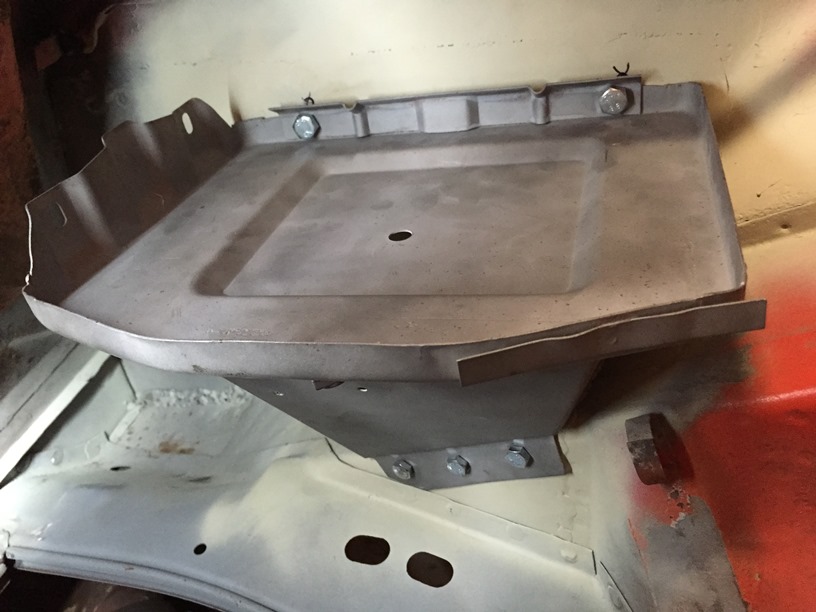
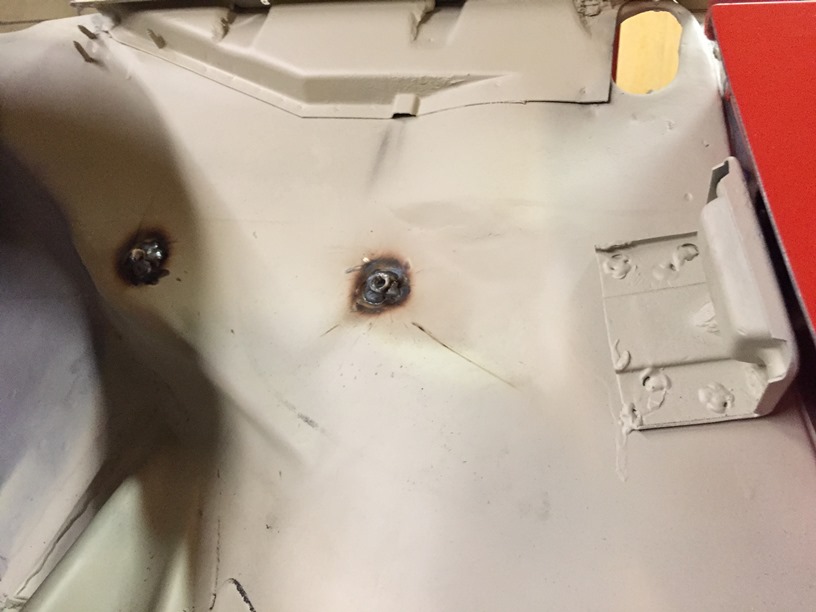
I added clearance holes in the top of the lower battery tray support to accept five 6mm studs that I had stud welded to the bottom of the battery tray.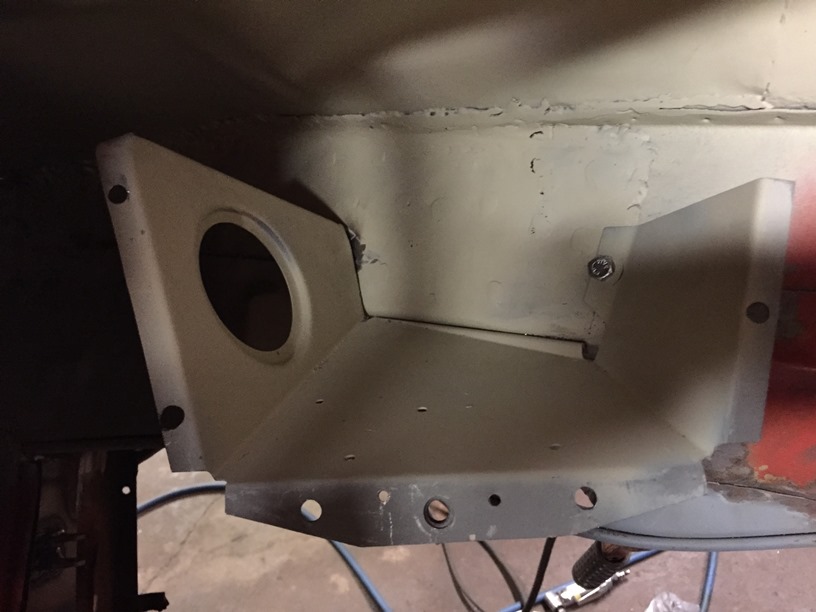
The test fit looks like everything will fit well once it is painted.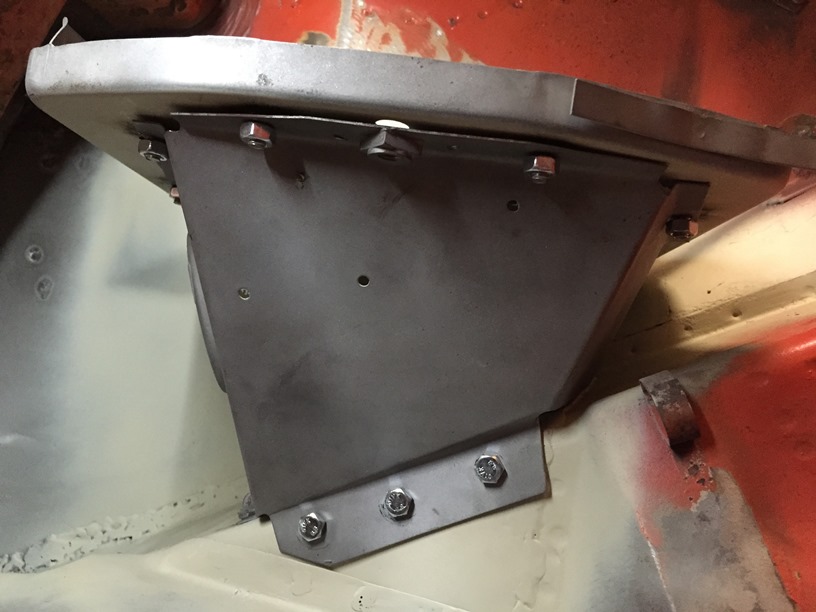
Jeff B
Posted by: jkb944t Jul 13 2015, 06:05 AM
Moved to the front of the car and removed the front bumper support that was slightly bent most likely from a previous fender bender. Media blasted the surface rust and then applied epoxy primer then welded the bumper support back in.
Applied epoxy primer to the inside of the new fender section before spending many hours lining it up with the door gap and fender flare. 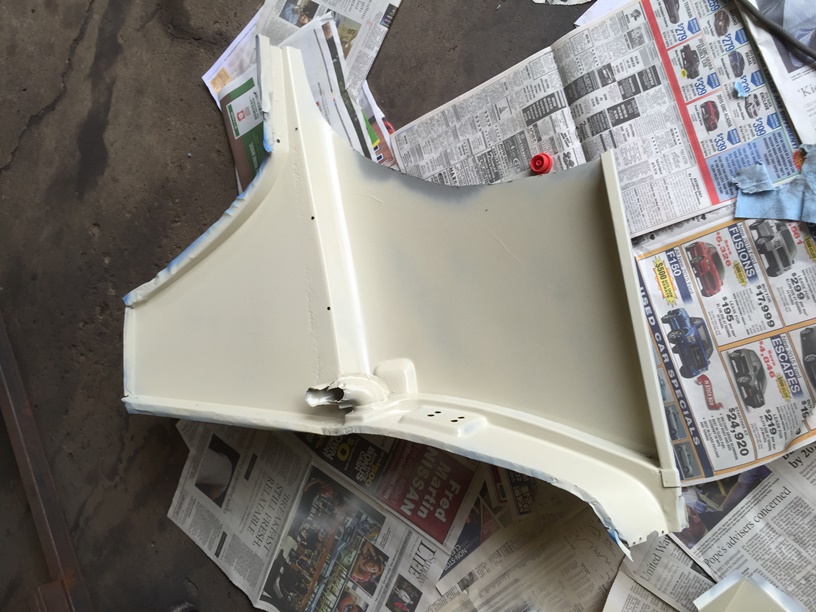
Thanks to everyone for their input on setting this gap. I finally welded the fender to the flare and finish ground the weld.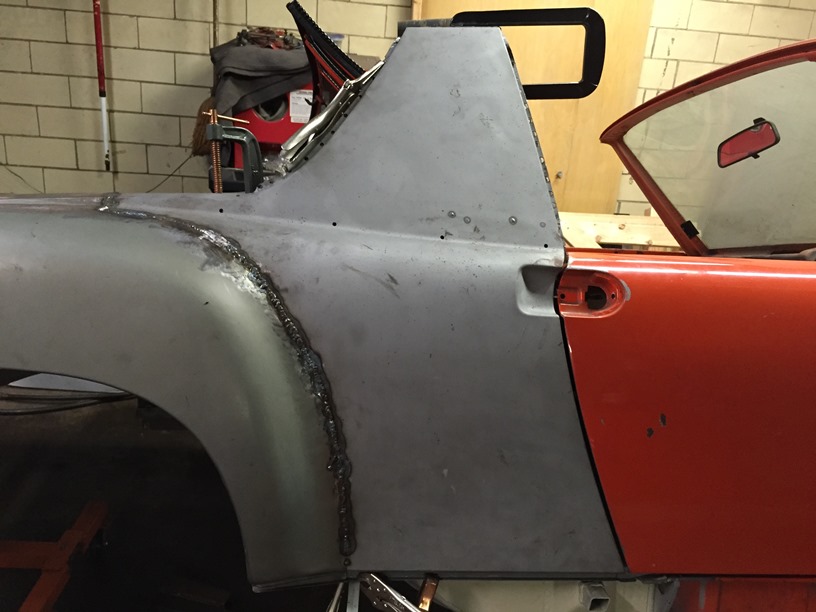
Still have to finish all the spot welds around the outside of the fender section.
Then the next step is to put the rear trunk back on and figure out where to locate the hinge support that is broken off. Not looking forward to this step for some reason.
Jeff B
Posted by: jkb944t Oct 5 2015, 03:27 PM
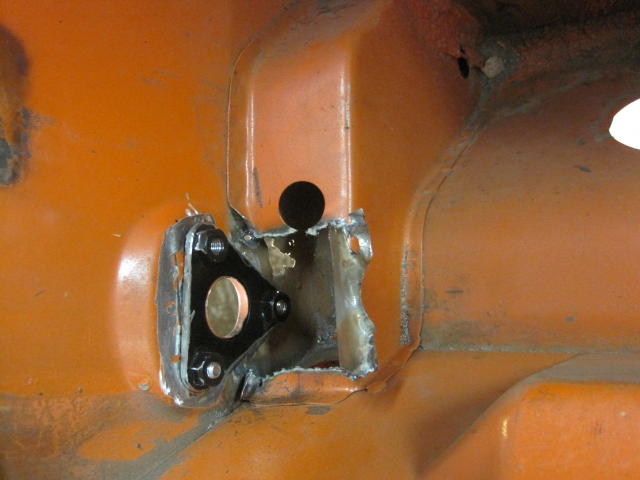
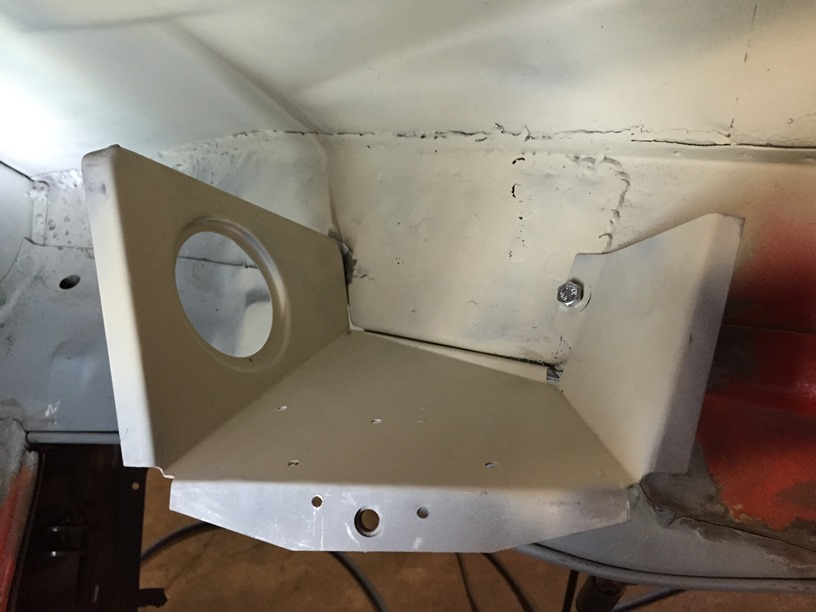
I fabricated an engine mount that was as close to the original as possible and then welded it in.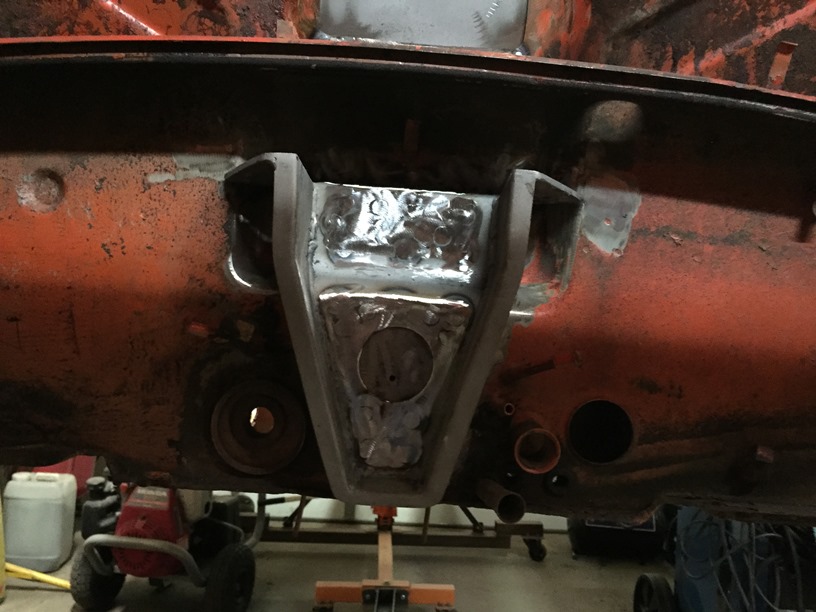
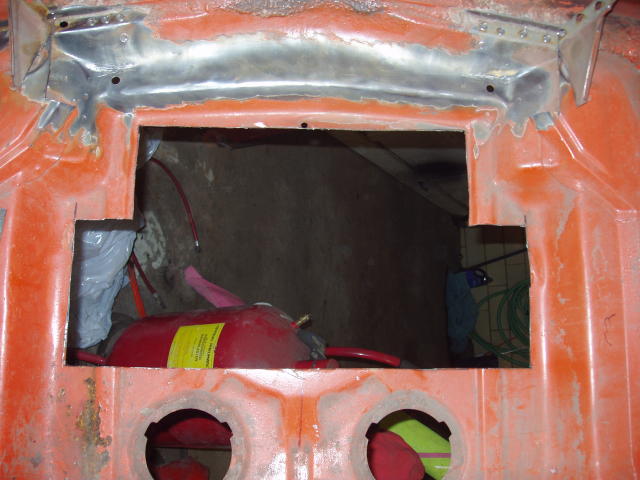
Somewhere along my cars history a PO modified the firewall for some reason.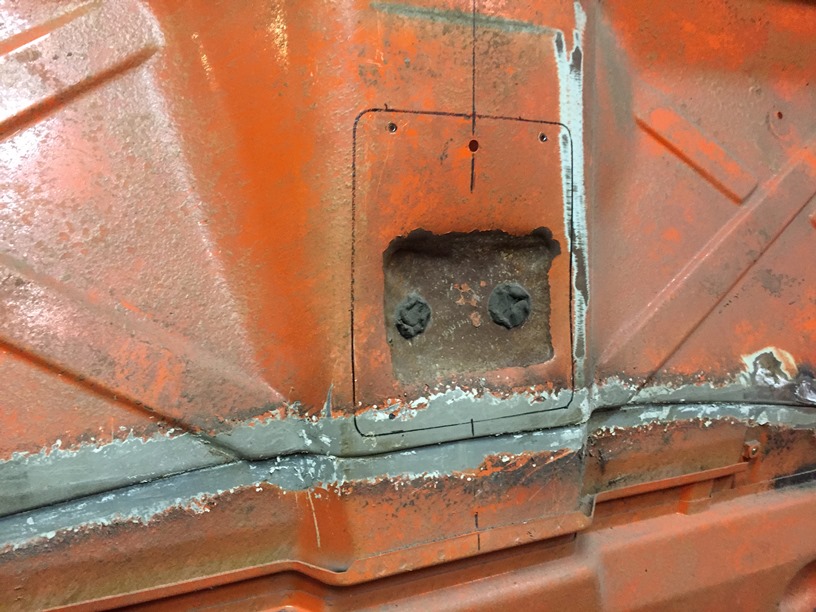
I decided that the best option was to cut the area out and put a plate over it so that I can service the 6 cylinder that will be going in the car.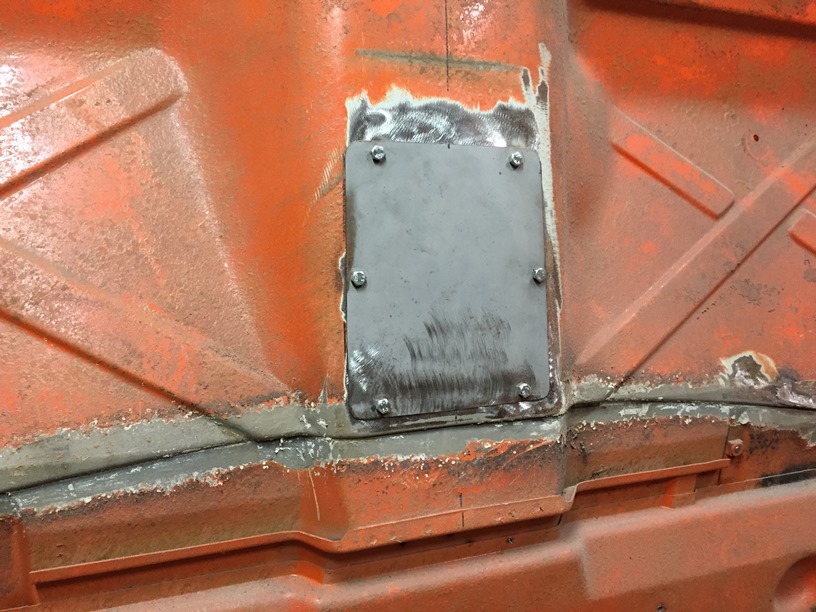
The top of the hole is 5.25 wide and the bottom of the hole is 5.62 wide. It hole is 6.75 high and the bottom edge of the hole is 10.12 up from the top of the center tunnel.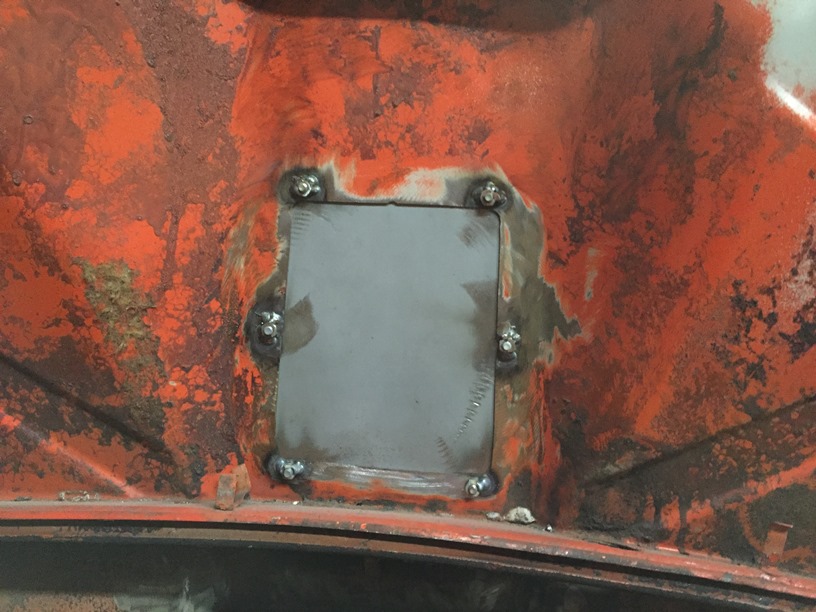
This weekend my granddaughter stayed with us and she helped me clean up the garage and get the car ready to go to the media blaster.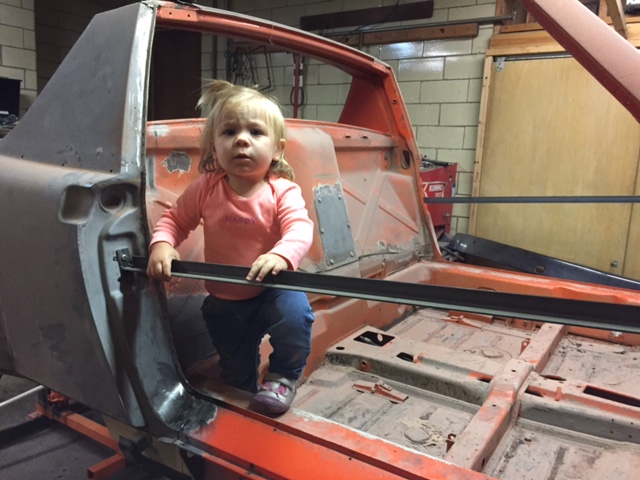
My son let me borrow a car hauler and we loaded the car up on the rotisserie.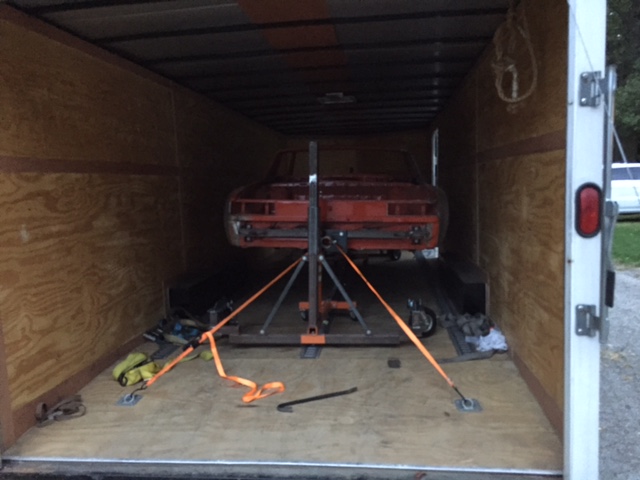
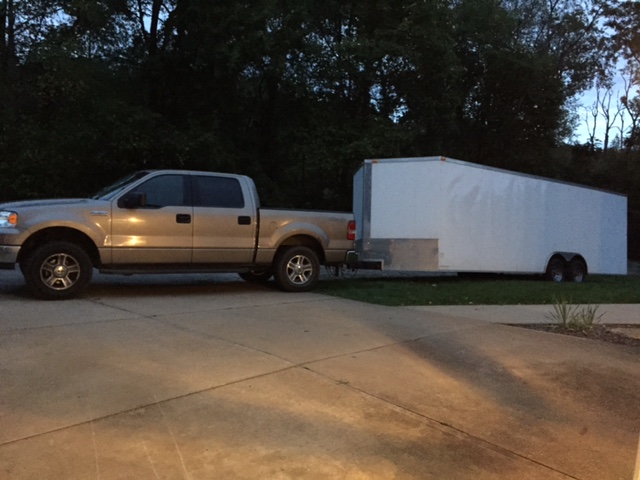
The car looks great after it was media blasted and then we dropped it off at the painter.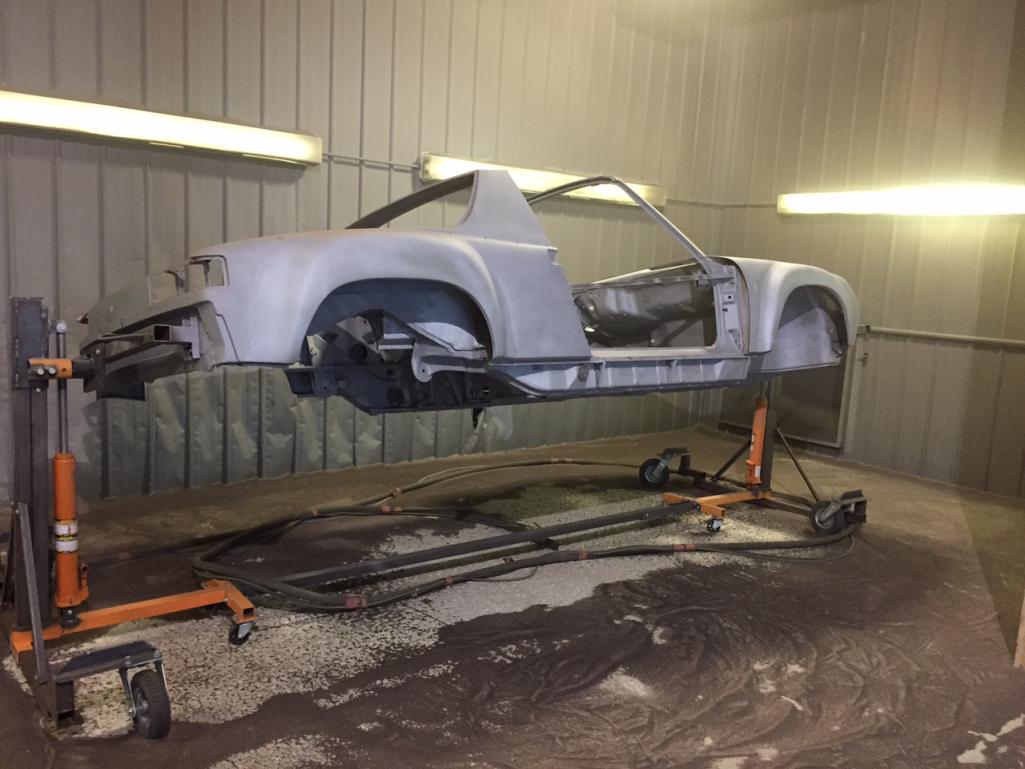
Now I just have to wait for it to get painted which from past experience may be a lot longer that what the painter estimates. I hope he gets it done since I have a lot of assembly time to get this done in time for the 914 Build Challenge!
Jeff B
Posted by: 914forme Oct 5 2015, 06:50 PM
Wow great build, and excellent work. Your ahead of me, and a few others.
Posted by: jkb944t Oct 6 2015, 06:51 AM
Wow great build, and excellent work. Your ahead of me, and a few others.
Trust me, I have a very long way to go!
Jeff B
Posted by: OllieG Oct 11 2015, 04:40 AM
Great thread, continuing to watch with interest...
Like the idea of removing the bumper supports to access under the headlight buckets..I was wondering how to clean-up under there.
Keep it up!
Posted by: falcor75 Oct 11 2015, 07:01 AM
Great work
Posted by: jkb944t Oct 20 2015, 05:56 AM
Since the last update the painter sprayed the car with epoxy primer. I have been going over a couple times a week and helping with it which has helped keep the painter on track. I have been doing the seam sealing while he works on the smoothing out the doors. There are about ten hours of work in the seam sealing so far and the rear trunk is not done yet. We are using a two part epoxy seam sealer.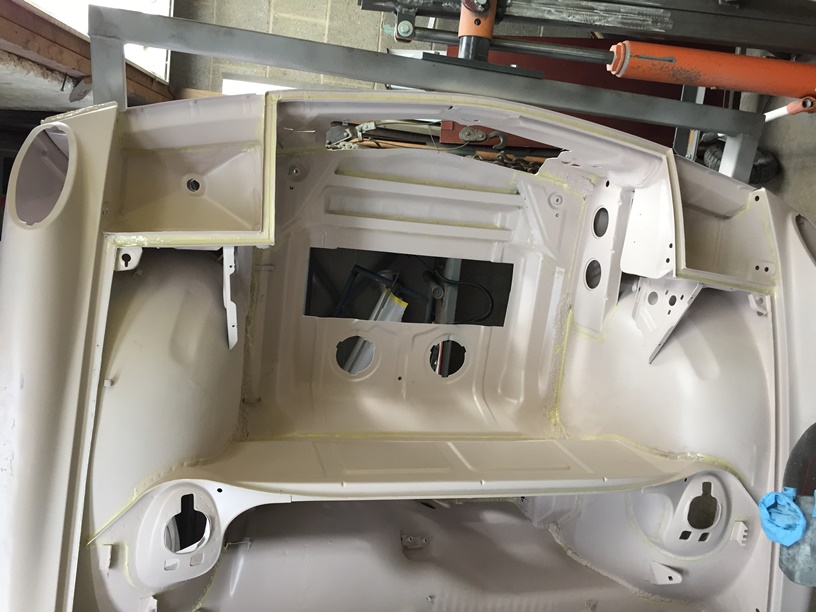
It is really getting exciting seeing it finally progress to this point!
Jeff B
Posted by: Cairo94507 Oct 20 2015, 06:10 AM
Terrific work.
Posted by: jkb944t Dec 21 2015, 06:57 AM
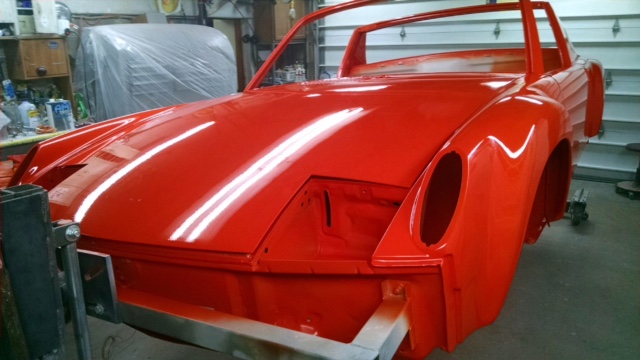
My car finally got painted this weekend. The interior still needs to be painted but ran out of paint. My painter did an amazing job on it. He really takes his time to make sure it is a great looking car!
I may even be able to get it back into my garage by Christmas or shortly after. I can’t wait to start reassembling it over my time off during the holidays.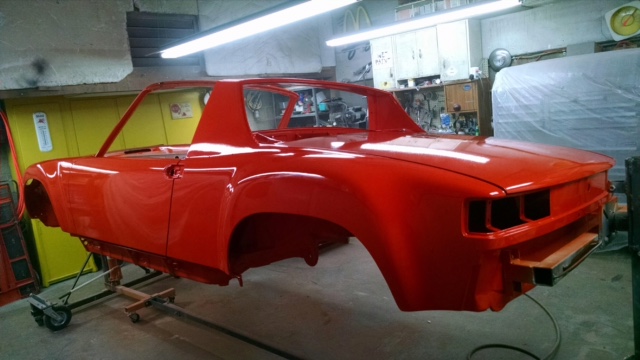
Happy holidays!
Jeff B
Posted by: altitude411 Dec 21 2015, 07:12 AM
Wow! Looks fantastic. Congratulations and enjoy reassembly. 
Posted by: Andyrew Dec 21 2015, 07:58 AM
What color? Looks great!
Posted by: jkb944t Dec 21 2015, 08:04 AM
What color? Looks great!
Thanks, it is Phoenix Red. It looks red in the pictures but it is sort of an orange color. It is basically somewhere between an orange and red in color depending on the lighting.
Jeff B
Posted by: Mikey914 Dec 22 2015, 01:18 AM
Very nice progress!
Posted by: SixerJ Dec 22 2015, 04:00 AM
Looking great, more pictures please ! 
Posted by: Cracker Dec 22 2015, 07:09 AM
Jeff - Looks fantastic...must make you feel great! Merry Christmas - what a Christmas present too! Hope you get it back quickly...
Tony
Posted by: Andyrew Dec 22 2015, 07:30 AM
What color? Looks great!
Thanks, it is Phoenix Red. It looks red in the pictures but it is sort of an orange color. It is basically somewhere between an orange and red in color depending on the lighting.
Jeff B
Very Familiar with Phoenix red
I thought thats what it was.
Posted by: sb914 Dec 22 2015, 10:12 AM
Wow, beautiful that's going to be really fast!
Posted by: lonewolfe Dec 22 2015, 03:01 PM
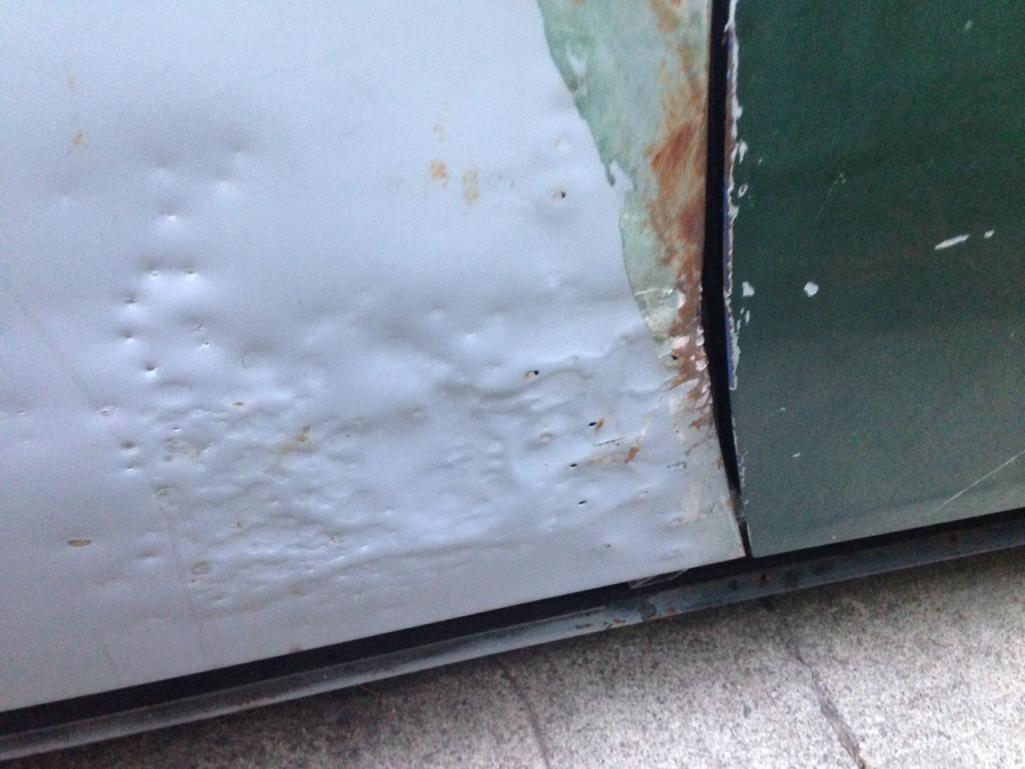
I would like to find a good condition right rear fender section to replace the section that is outlined in the picture below. I already have the top section that I got from Restoration Design some time ago. I need to replace this area due to poor repair that was done sometime in the past.
Does anyone have the section of fender that is outlined in the picture that is in good condition?
Jeff B
I have the exact same area behind the passenger door to replace. I do have a good quarter panel but I'm using it obviously. I look forward to seeing your repair work on this! Good luck! Here's my same damaged area.
Posted by: mbseto Dec 22 2015, 03:44 PM
Gorgeous
Posted by: trojanhorsepower Dec 23 2015, 01:00 PM
Looks great!
Posted by: jkb944t Dec 30 2015, 07:07 AM
Below is my car finally back in my garage the day after Christmas---Some assembly required!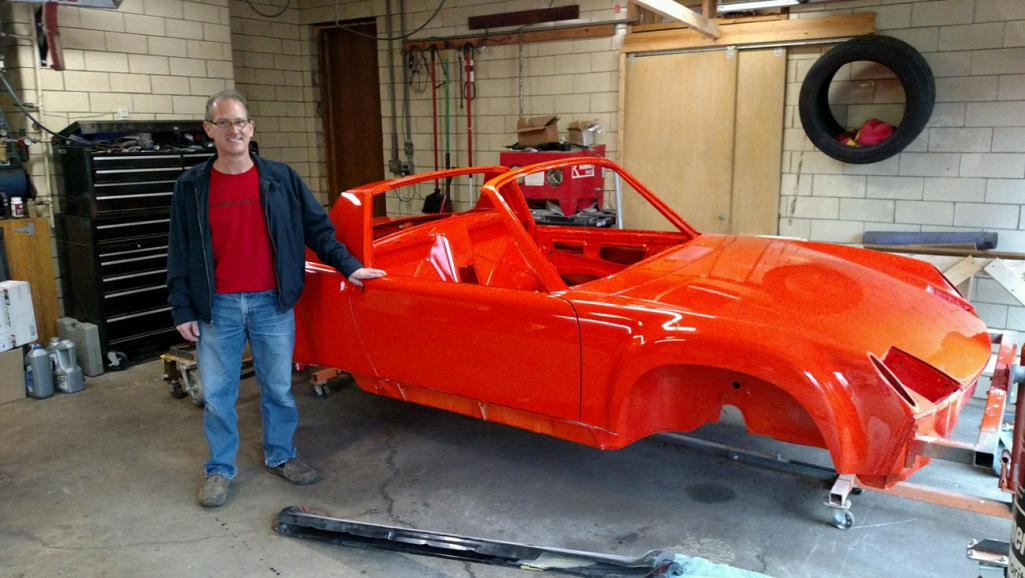
I welded new swaybar tabs on the 911 front control arms and then sent all of the suspension pieces out to be powder coated.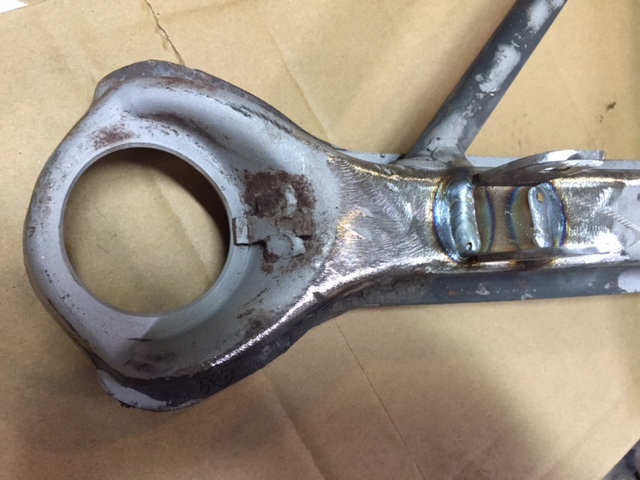
I am starting the reassembly process which entails cleaning and installing the wiring harness. 
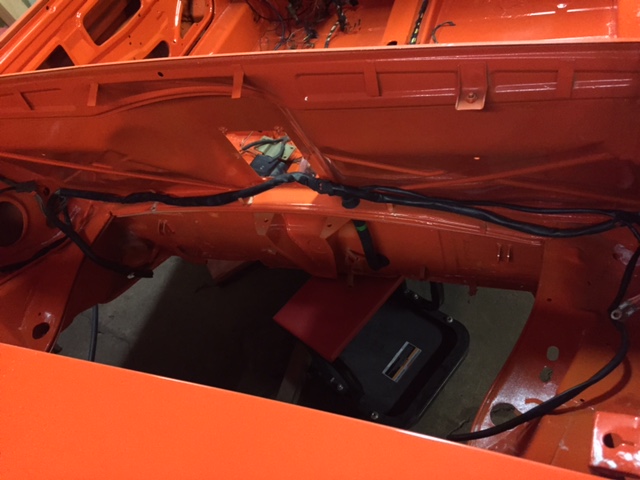
Cleaning parts is taking a lot longer than anticipated but it will be worth it in the end.
I am considering using all stainless steel hardware wherever possible except on suspension components.
Jeff B
Posted by: 914forme Dec 30 2015, 09:38 AM
 you are making great progress, love freshly painted cars. Time for some microfiber, and moving blankets to protect that fresh paint.
Posted by: jkb944t Jan 6 2016, 07:31 AM
I made some additional progress on my 914 project over the last week. Below are some pictures showing the dashboard and heater controls installation and a good start on the headlights.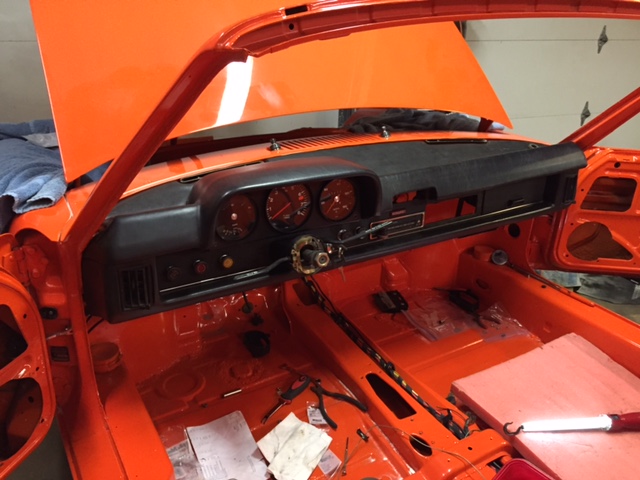
I am finding that the assembly time is only about 15% and that finding the parts and cleaning them is about 85% of the time for reassembling this project.
I really wish I had labeled things better and taken more pictures!
Jeff B
Posted by: jkb944t Jan 21 2016, 11:22 AM
I glass beaded some parts this weekend and dropped them off at Akron Plating on Monday.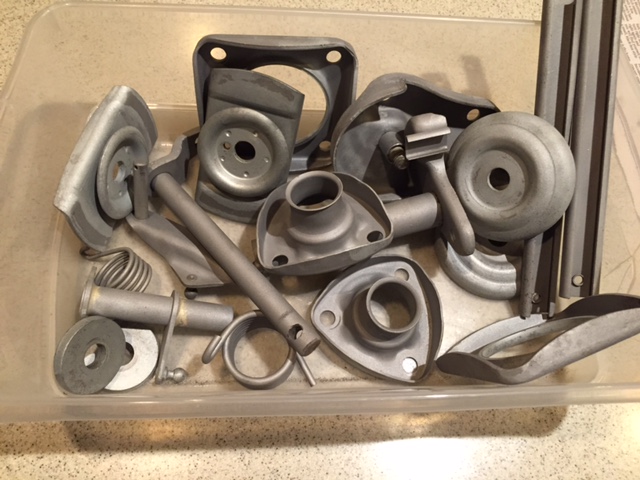
They had them finished by Wednesday so I picked them up this morning and I think they look really nice. 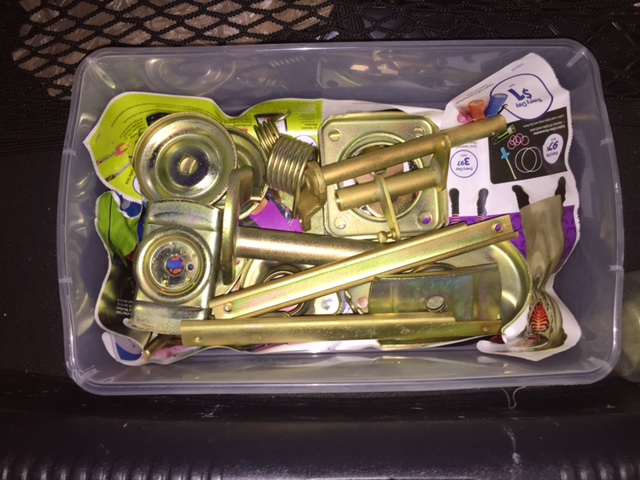
Jeff B
Posted by: jkb944t Feb 1 2016, 12:09 PM
I got back my suspension and other misc. parts from the powder coater last week and they came out really nice.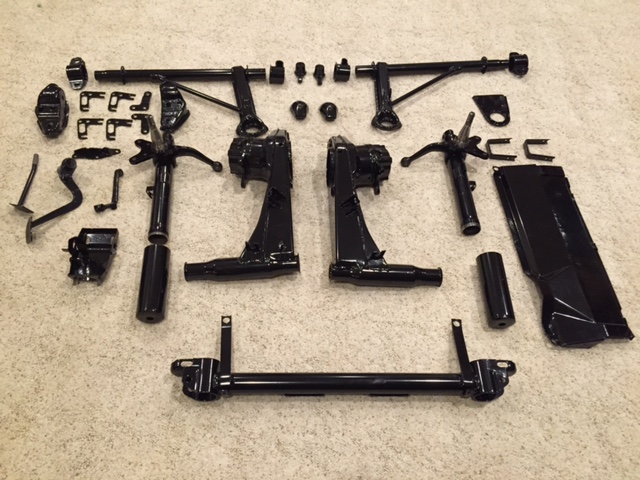
I was able to assembly the pedal assembly which wasn't too hard at all.
Attached image(s)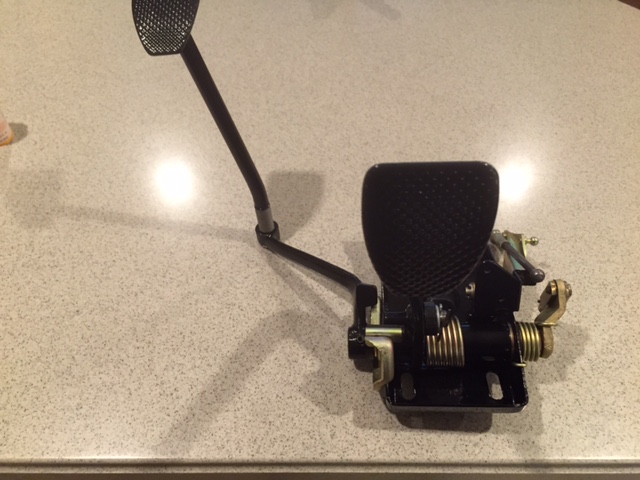
Posted by: jkb944t Feb 1 2016, 12:15 PM
So far I have been able to assemble everything in the right order until this post. Can you find the assembly error that I made?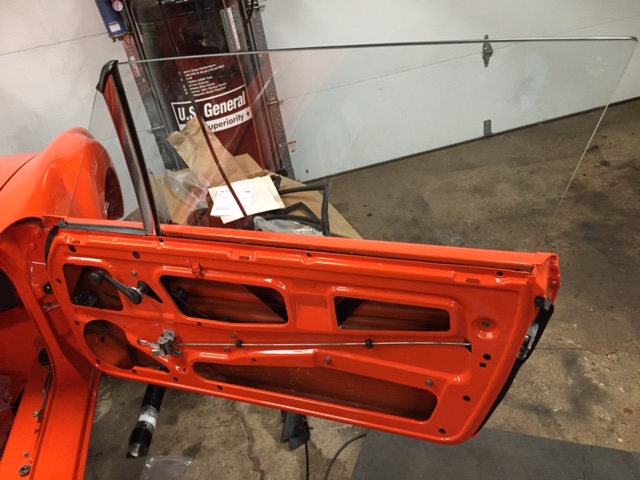
Jeff B
Posted by: Darren C Feb 1 2016, 12:24 PM
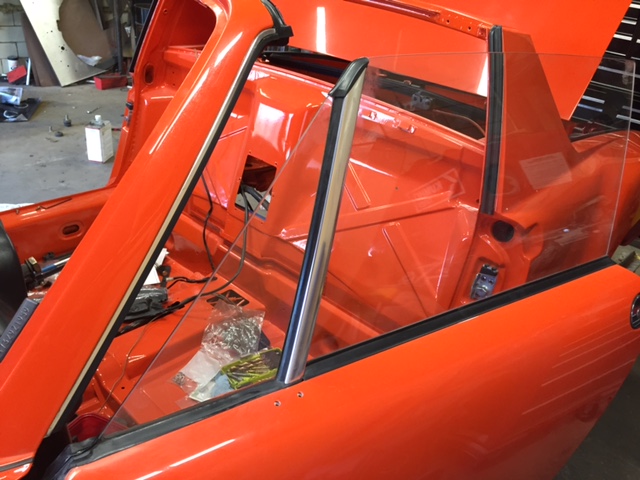
Not installing the outer weather strip aluminium holder and fuzzy before the door glass.
You wont drop the glass low enough to get the screws in!
Posted by: Larmo63 Feb 1 2016, 12:29 PM
This restoration/mod of yours is a joy to behold!
We love these kinds of builds!!
Kudos!!!!!!!!!
Posted by: jkb944t Feb 1 2016, 12:47 PM
Not installing the outer weather strip aluminium holder and fuzzy before the door glass.
You wont drop the glass low enough to get the screws in!
We have a WINNER! That didn't take long at all!
You are right that I am going to have to remove the window to fix this assembly error.
Jeff B
Posted by: rick 918-S Feb 1 2016, 01:08 PM
Nice progress. Nice detail. Your not going to want to drive it!
Posted by: Darren C Feb 1 2016, 01:31 PM
We have a WINNER! That didn't take long at all!
You are right that I am going to have to remove the window to fix this assembly error.
Jeff B
I'll take points as a prize on my Build-off Challenge, Jeff ;-)
Regards
Darren
Jokes aside you're doing a great job and get my vote!
Posted by: jkb944t Feb 1 2016, 02:18 PM
Nice progress. Nice detail. Your not going to want to drive it!
Thanks for the compliment but I assure you I can't wait to drive it. That is what these cars are all about!
Jeff B
Posted by: 76-914 Feb 1 2016, 08:51 PM
Nice progress. Nice detail. Your not going to want to drive it!
Thanks for the compliment but I assure you I can't wait to drive it. That is what these cars are all about!
Jeff B
You don't own a 914; you have a relationship with one. Nice work and Rick's right. You won't want to drive it.
Posted by: jkb944t Mar 17 2016, 05:36 AM
This month I have had a lot of help from Mark at 914Rubber both technical and financial with the discount. The discount has really helps since I have replaced almost every piece of rubber on the car. The most helpful tip when trimming the rubber strips to the correct length was to put soapy water on the knife blade. It cuts like butter with soap water but without the soap water it grabs and gives ragged edges.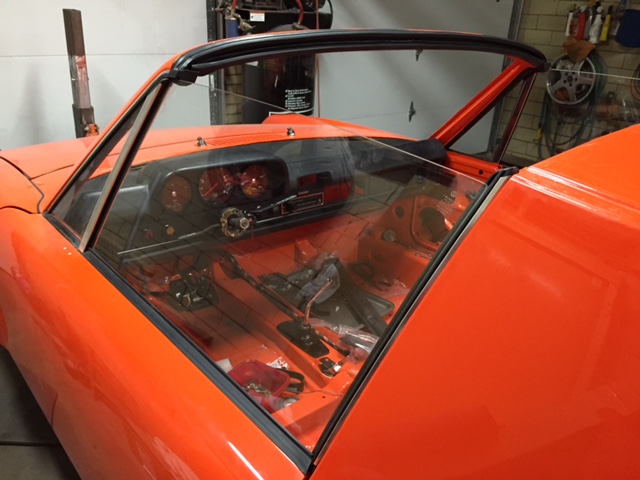
I got the new stainless fuel lines installed this weekend along with the clutch cable and speedometer cable.
I assembled some of the suspension components last week.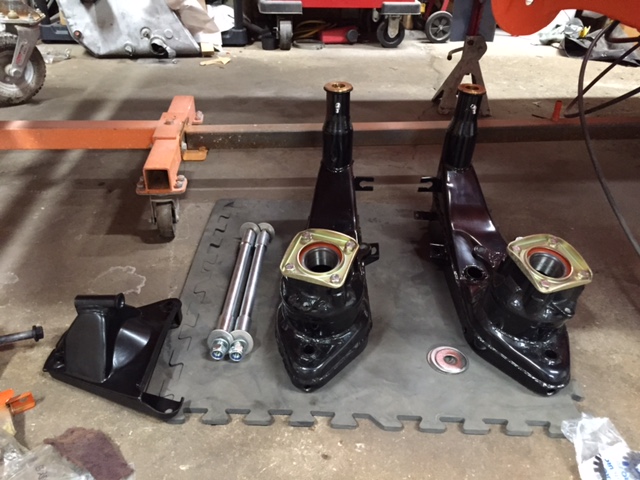
I have started to install the suspension this week along with the brakes that PMB upgraded so that I can run the wider vented rear rotor.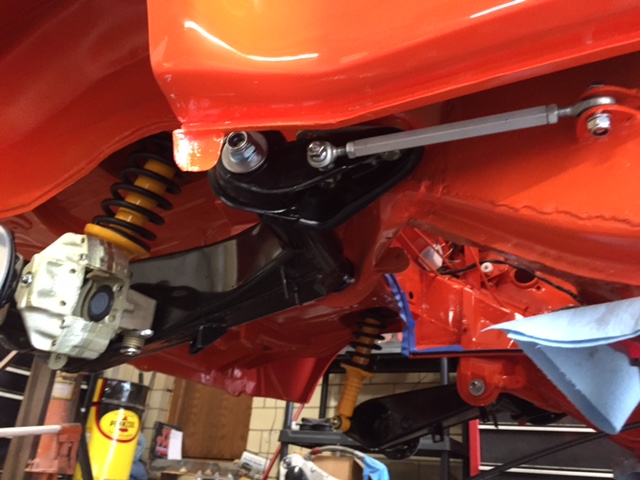
I also mounted my adjusting links to make tuning the suspension settings easier.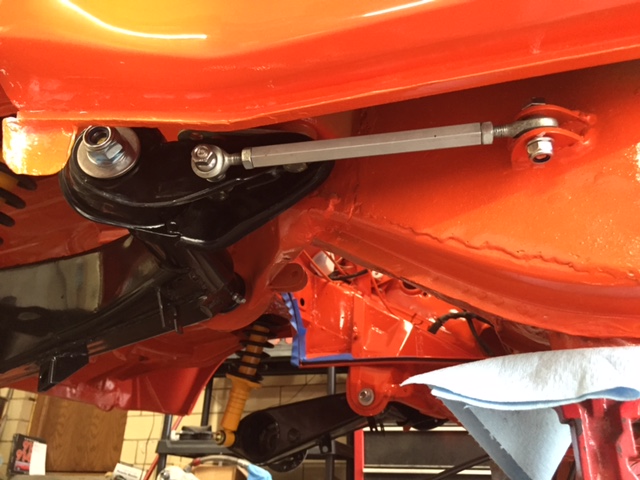
I was even able to test fit a wheel on the back of the car. 
I still have a lot of work to go but I am making some progress thanks to a milder than usual winter!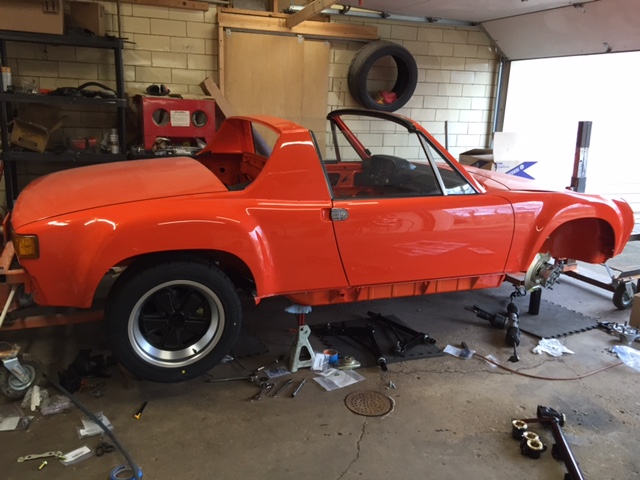
I am really getting excited to get this finished!
Jeff B
Posted by: 914forme Mar 17 2016, 12:45 PM
Posted by: iwanta914-6 Mar 17 2016, 01:03 PM
So shiny!
Posted by: pete000 Mar 17 2016, 04:36 PM
Impressive !!!
Posted by: jkb944t Apr 4 2016, 06:02 AM
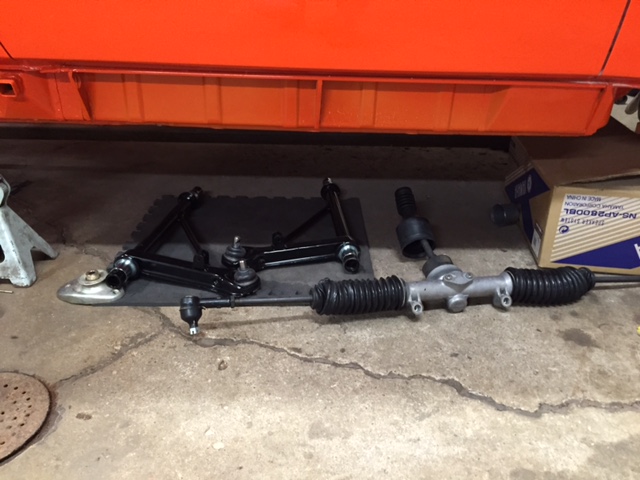
I have been making some good progress on the car this month. I have the front suspension mounted along with the steering rack. 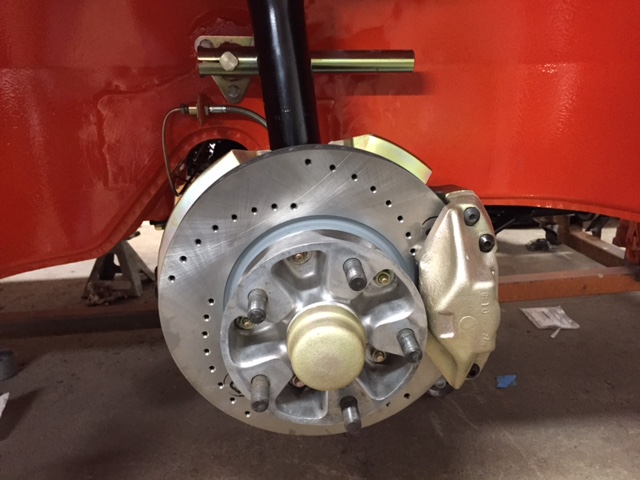
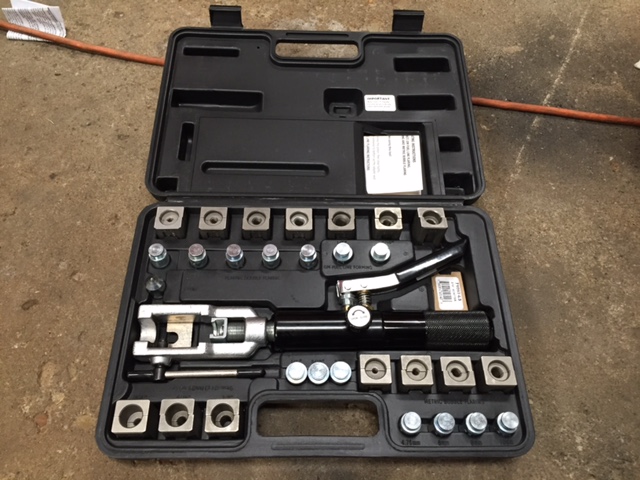
I also mounted the calipers and made all new brake lines. I used a NiCopp Nickel/Copper brakeline material since it is easy to work with and won’t corrode.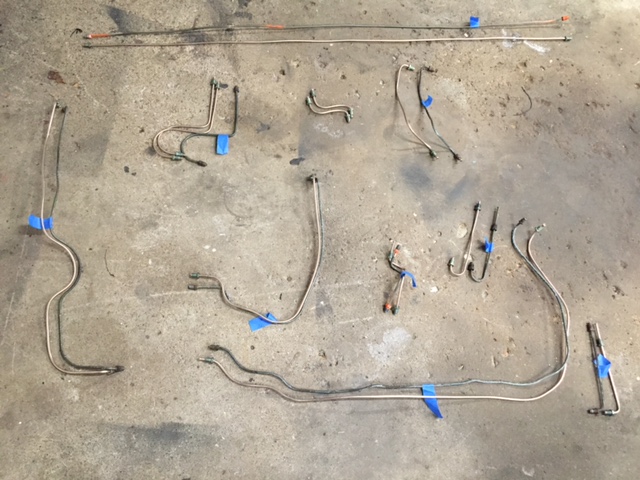
I borrowed this tool to do the ISO flaring and it work great and was easy to do.
I also got the front turn signal lights cleaned up and converted to the Euro style.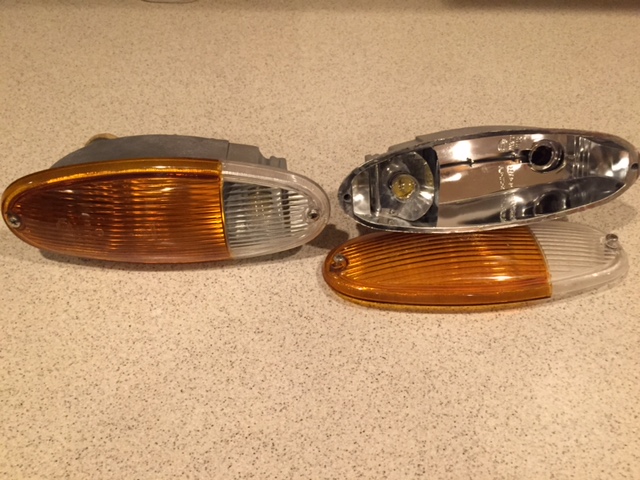
Jeff B
Posted by: mb911 Apr 4 2016, 05:44 PM
Wow looks great very similar to what I am doing..
Where did you get dimensions for the original firewall side of the engine mount?? Could you pm me them or provide a link?
Posted by: jkb944t Apr 5 2016, 05:45 AM
Wow looks great very similar to what I am doing..
Where did you get dimensions for the original firewall side of the engine mount?? Could you pm me them or provide a link?
I sketched up the mount from a friend's 914-6 and then made it about ten years ago. I would be glad to share the sketch but I have no idea where it is now. If I come across it I will let you know.
Jeff B
Posted by: jkb944t May 2 2016, 05:52 AM
The 914 is finally off the rotisserie!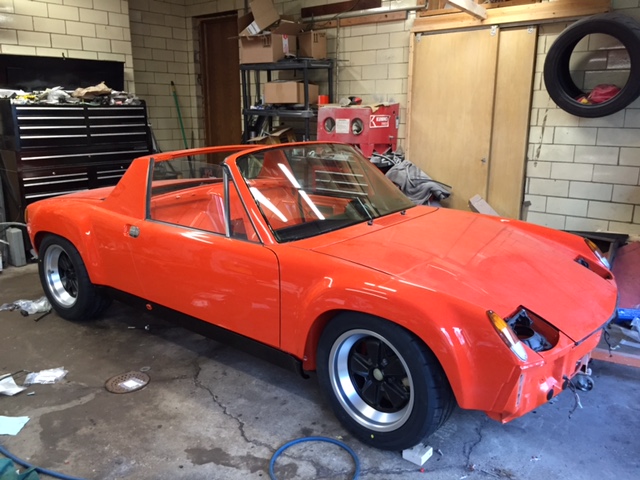
Jeff B
Posted by: mb911 May 17 2016, 08:09 AM
The 914 is finally off the rotisserie!
Jeff B
Did you ever find that mount drawing?
Posted by: jkb944t May 27 2016, 06:02 AM
The 914 is finally off the rotisserie!
Jeff B
Did you ever find that mount drawing?
Unfortunately I have not been able to find my sketches of the motor mount that I fabricated. I looked for over an hour last weekend but found nothing on my old computer or in my stacks of 914 info. If I do happen to find it at some point I will post it.
Jeff B
Posted by: mb911 May 27 2016, 01:28 PM
Thanks I appreciate it. I know a couple others are working on it.. Something will work out..
Posted by: jkb944t Jun 5 2016, 08:59 AM
I have started to reseal and clean up the engine.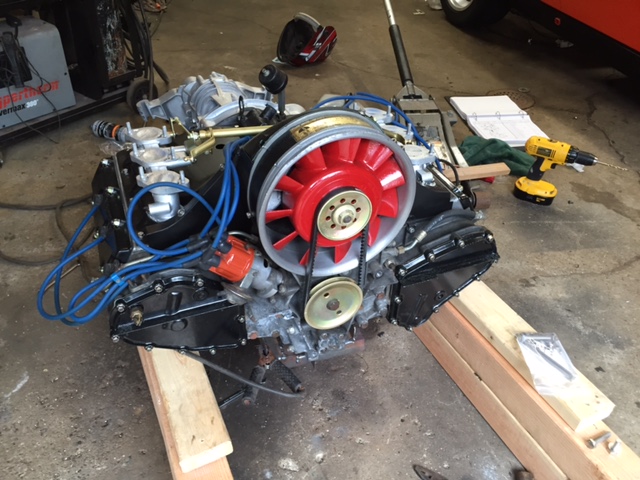
I test fit the transmission to the engine and found that I will most likely need to shim the pivot point based on some previous posts on this.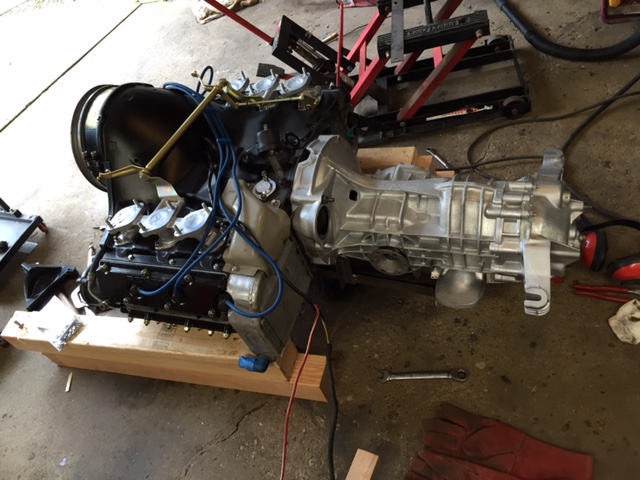
Unfortunately the clutch release bearing is frozen so I have to replace that too. They seem to be very expensive ($150+), are used release bearings worth considering?
Jeff B
Posted by: jkb944t Jun 22 2016, 06:04 AM
Even my granddaughter is helping me finish this project! We have to get them interested at a very young age. IMG_5995.MOV ( 1.41mb )
Number of downloads: 141
IMG_5995.MOV ( 1.41mb )
Number of downloads: 141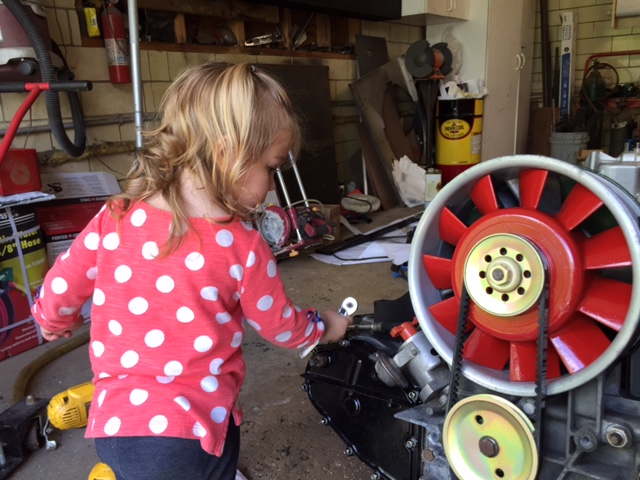
Jeff B
Posted by: Lucky9146 Jun 22 2016, 06:53 PM
I have started to reseal and clean up the engine.
I test fit the transmission to the engine and found that I will most likely need to shim the pivot point based on some previous posts on this.
Unfortunately the clutch release bearing is frozen so I have to replace that too. They seem to be very expensive ($150+), are used release bearings worth considering?
Jeff B
Your transmission looks amazing! How did you get it to look that good? If you don't mind.
Posted by: jkb944t Jun 23 2016, 06:31 AM
I painted it with the paint shown in the picture below: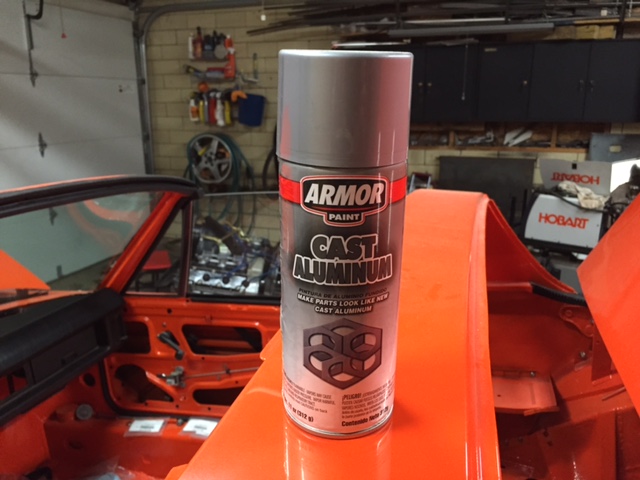
I should mention that it took a lot of prep work cleaning the transmission with a paint degreaser/wax remover. The paint itself went on very nicely once the transmission was cleaned up.
Jeff B
Posted by: jkb944t Jul 19 2016, 06:03 AM
Finally installed the motor and tranny! This is definitely a milestone in the build sequence. I never imagined it would take this much time and effort to get to this point.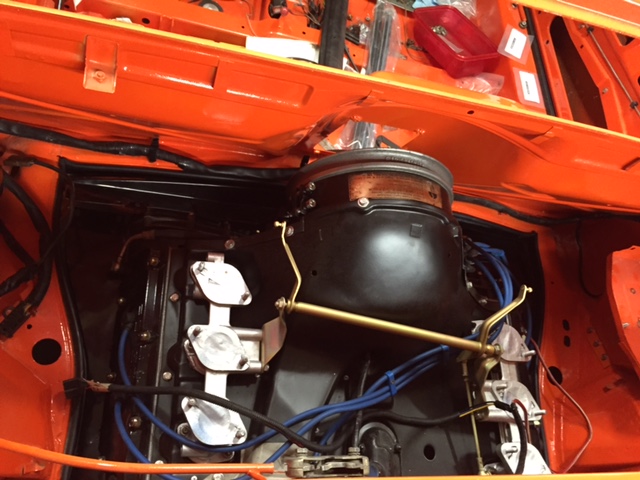
This is a picture of how the final battery tray came out once everything was bolted together.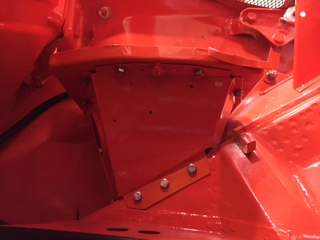
Still lots of work and small details to work through.
Jeff B
Attached image(s)
Posted by: jkb944t Jul 21 2016, 11:00 AM
Started to get everything hooked up underneath the car.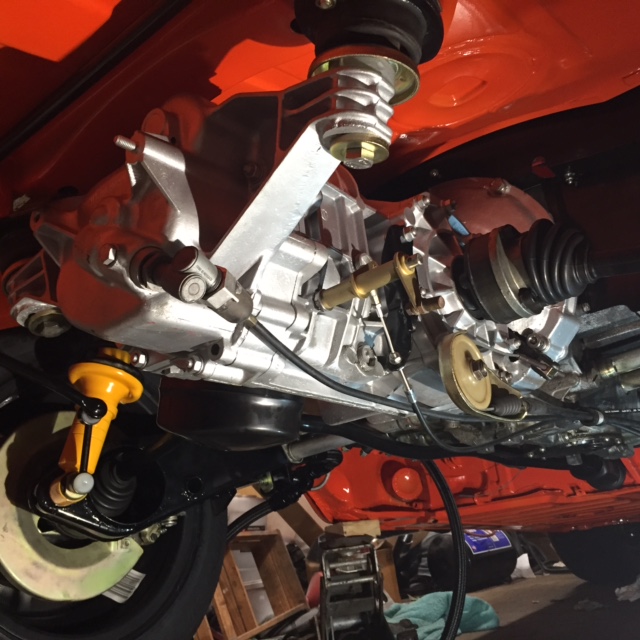
After spending so much time working out all the details on this car I now understand why people sell what I previously considered a nearly completed car!
Jeff B
Posted by: SixerJ Jul 21 2016, 11:35 PM
Don't give up your doing a sterling job & car is looking fabulous and soon be 
Posted by: altitude411 Jul 22 2016, 01:12 AM
Stunning...  Nice work.
Posted by: jkb944t Aug 3 2016, 10:11 AM
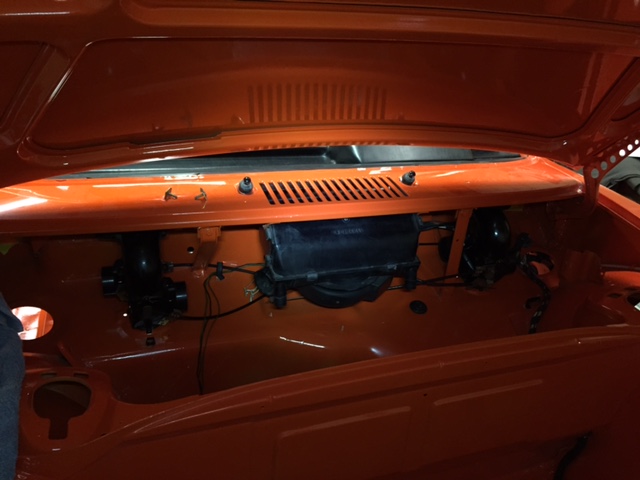
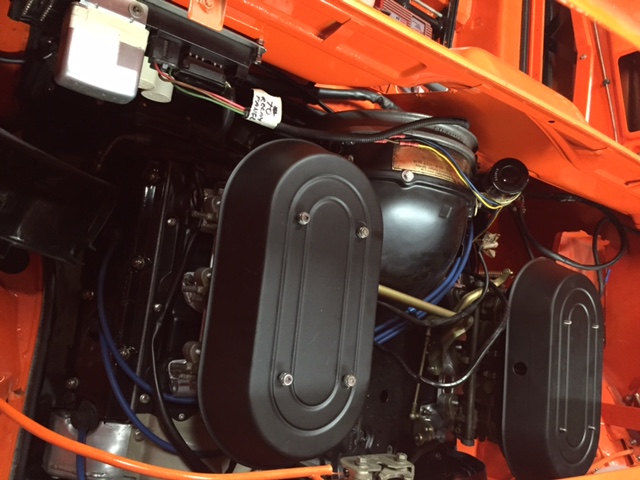
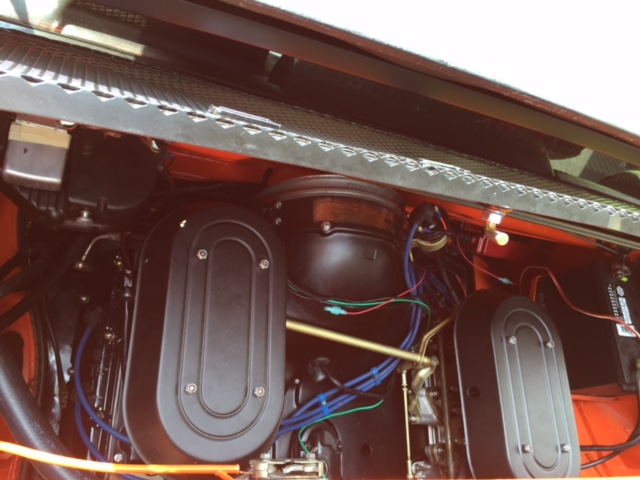
I started to mount the relay panel last night and test fit the carburetors. The passenger side rain hat is awfully close to the rear trunk bulkhead. Not sure if this tight clearance is normal or not.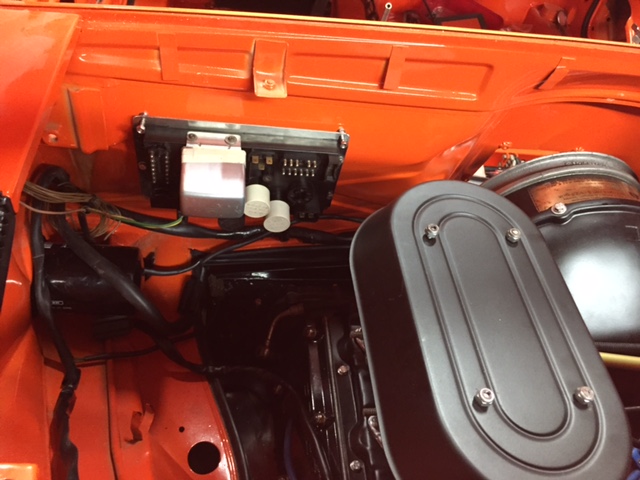
Jeff B
Posted by: Darren C Aug 3 2016, 01:58 PM
I started to mount the relay panel last night and test fit the carburetors. The passenger side rain hat is awfully close to the rear trunk bulkhead. Not sure if this tight clearance is normal or not.
Jeff B
Looking good Jeff, but gravity and vibration is NOT your friend with the relays and loom connector plugs if you mount that relay board vertical. That's why the 911 boys hate the OEM boards vertical in their front trunk
Posted by: SixerJ Aug 4 2016, 01:26 AM
The KN hats have a fairly large overhang, which is the point I guess. I had a set on the 911 running MFI and removed them as they (only just) rubbed on the the boot lid (I had about 6mm clear when stationary)
When you say tight, how tight? Maybe leave as and apply masking tape or duct tape to the bulkhead and see if it rubs while protecting paint. If it does then you can always give the rain hat a gentle whack for a bit more clearance. Or any opportunity to move the engine and gearbox forward a touch?
Keep the vertical board, very factory and not sure about the 911 vertical board comment, I've had the long hood 911 for 20 odd yard and never had an issue with anything shaking loose. Did you make the board? Pictures please
Posted by: jkb944t Aug 4 2016, 05:38 AM
The KN hats have a fairly large overhang, which is the point I guess. I had a set on the 911 running MFI and removed them as they (only just) rubbed on the the boot lid (I had about 6mm clear when stationary)
When you say tight, how tight? Maybe leave as and apply masking tape or duct tape to the bulkhead and see if it rubs while protecting paint. If it does then you can always give the rain hat a gentle whack for a bit more clearance. Or any opportunity to move the engine and gearbox forward a touch?
Keep the vertical board, very factory and not sure about the 911 vertical board comment, I've had the long hood 911 for 20 odd yard and never had an issue with anything shaking loose. Did you make the board? Pictures please
The rain hat is maybe .020 away from the trunk bulkhead if I slide the carbs forward in the bolt holes. I don't think the motor will move forward any more so slightly bending the rain hat probably makes the most sense.
I hadn't heard about the vertical relay panel issues either so I was just mounting it the way the other GT cars had it mounted. Maybe I can add some rubber washers to help isolate it from some vibration.
Jeff B
Posted by: mb911 Aug 4 2016, 10:17 AM
Looking good. I like the relay board in that spot.. I may try to do the same thing on my build
Posted by: Darren C Aug 4 2016, 01:54 PM
A major problem leading to vibration failures results from how a cars control unit's and circuit boards set relative to the vibration motion. The mounting method for control units which include components such as relays can be a source of intermittent problems. An example of this problem is the Bosch CDI unit used on the early Porsche 911s which was mounted on a bracket that transmitted vibrations to the unit resulting in intermittent running problems. A similar intermittent problem occurs with the Porsche cruise control ECU (911/928) the result of its mounting bracket.
Additionally, the larger power control relays, e.g. a 3.2 Porsche 911 DME relay, are affected by the mounting method (cantilever when the board is mounted vertically and the relay sits horizontally) and the resulting vibrations which can cause intermittent starting/running problems. Similar failures occur with early Porsche cabriolet top control units because of the large relays used and the cantilever vertical mounting used for this ECU also.
The gravity/vibration comment I made was for the above reasons and in relation to the loom plugs which aren’t great at the best of times and the cantilever effect on them with transmitted vibration and weight of the cables hanging off them. The relays albeit small can be less reliable when mounted on a vertical board.
Solid state PCB’s such as those used in ECU are best mounted vertically to avoid vibration cracking of the circuit tracks.
Relay and fuse boards are best mounted horizontally to stop cantilever vibration failures.
Trust me I’ve seen $Millions of dollars in research into this in the Automotive and Aerospace engineering business.
If you want to keep the “trick” look of the vertical relay board, make up a set of straps or clamps to hold in your loom plugs for peace of mind.
This is not meant as any kind of criticism, just helpful advice. The car looks great!
Regards
Darren
Posted by: jkb944t Aug 11 2016, 06:04 AM
This month I ran into a problem with the throttle linkage that had me stumped until I got some much needed help from the forum. The linkage bell crank on the transmission was located in the wrong place by the PO.
I was able to fabricate a new bracket that is very rigid and it relocated the linkage correctly. 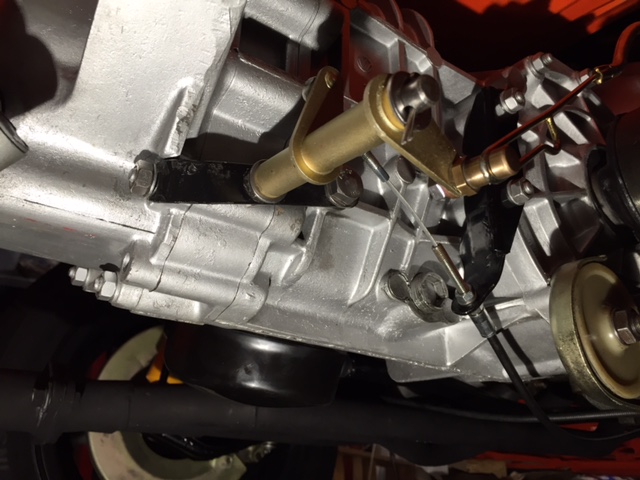
Now I can move onto the next hurdle which is mounting the MSD ignition unit and mount the fuel pump.
Jeff B
Posted by: jkb944t Aug 25 2016, 11:03 AM
I finally got to start it up last night!
IMG_6372.MOV ( 1.57mb )
Number of downloads: 245
Jeff B
Posted by: Olympic 1.7 Aug 25 2016, 11:11 AM
GREAT !!!
Sounds nice
Looks good.... 
Posted by: jkb944t Aug 29 2016, 11:01 AM
I got the front ventilation hoses installed and mounted the new fuel pump up front. I ran new fuel pump wiring from the rear of the car to the front.
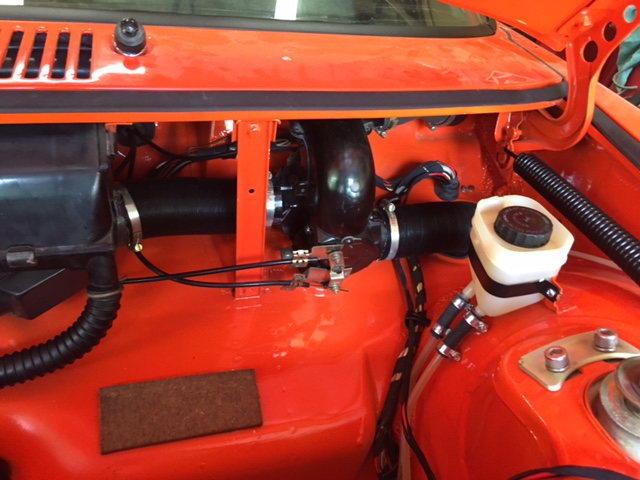
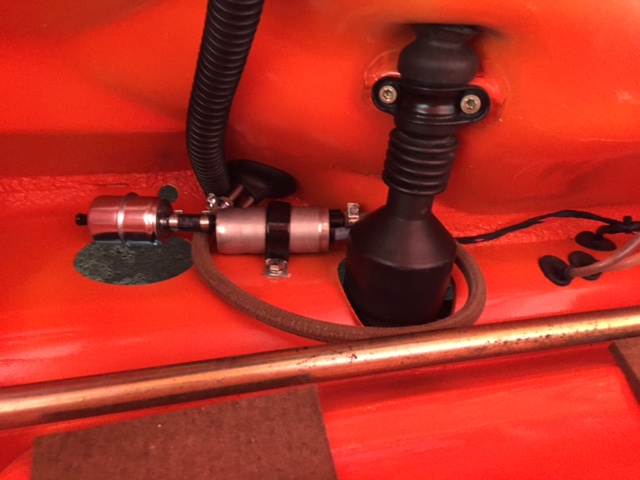
Now I have new SST fuel lines and hoses from the front to the rear of the car for piece of mind.
Jeff
Posted by: pete000 Aug 29 2016, 12:04 PM
Looks great.
Looks like access to your fuel pump will be difficult with the tank in place? 
Removing the tank to change a fuel pump is a lot of work IMHO...
I assume you are planning on accessing the fuel filter via the access hole?
Posted by: jkb944t Aug 29 2016, 02:48 PM
Looks great.
Looks like access to your fuel pump will be difficult with the tank in place?
Removing the tank to change a fuel pump is a lot of work IMHO...
I assume you are planning on accessing the fuel filter via the access hole?
Servicing the pre-pump filter should be fairly easy from the access hole. I left enough fuel line on both sides of the pump that by removing the one clamp bolt I should be able to slide the pump out of the access hole too.
Hopefully with a brand new fuel pump it shouldn’t be necessary to test this theory.
Jeff B
Posted by: jkb944t Sep 9 2016, 05:22 AM
Got the fog lights assembled last night and planning to get the interior in this weekend. Finally getting to the end of the assembly process!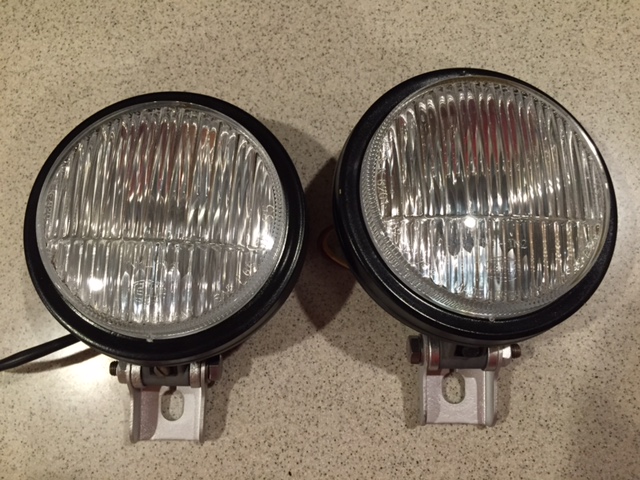
Jeff B
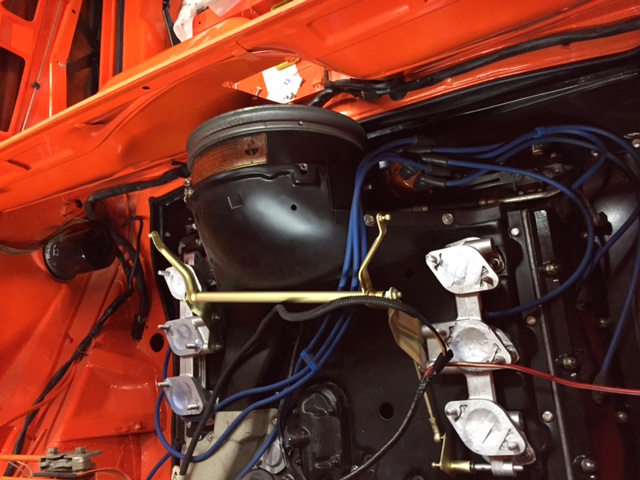
Posted by: jkb944t Sep 13 2016, 06:05 AM
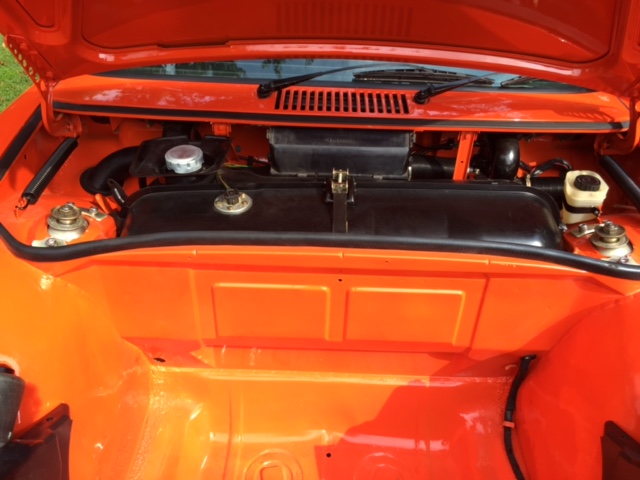
Wanted to document the engine access hole which makes working on the -6 engine a lot easier.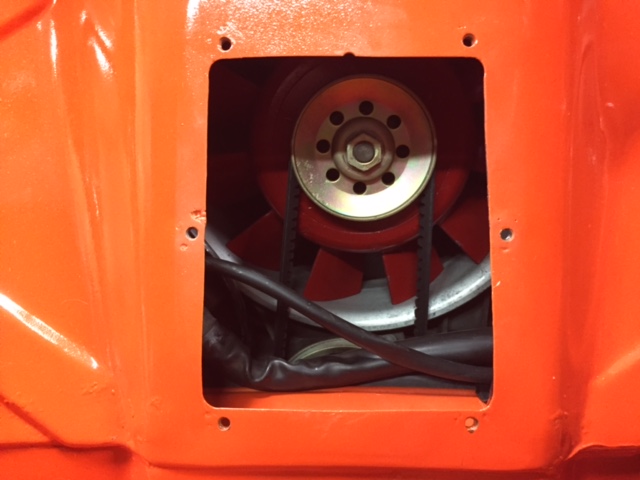
The top of the hole is 5.25 wide and the bottom of the hole is 5.62 wide. It hole is 6.75 high and the bottom edge of the hole is 10.12 up from the top of the center tunnel.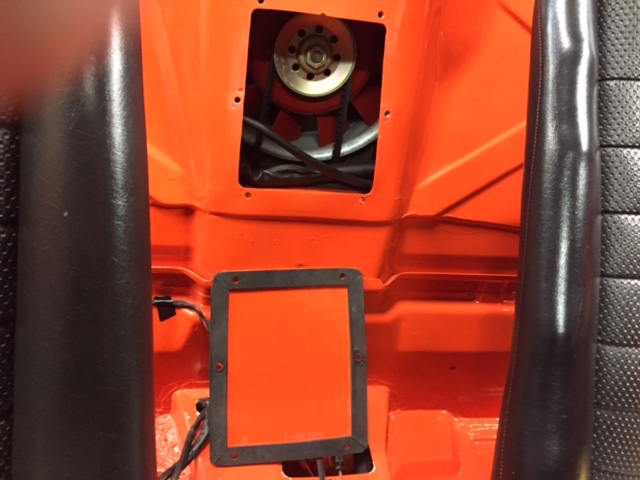
I made a cover that overlaps the hole by about 3/4 of an inch all around and added a closed foam gasket to it.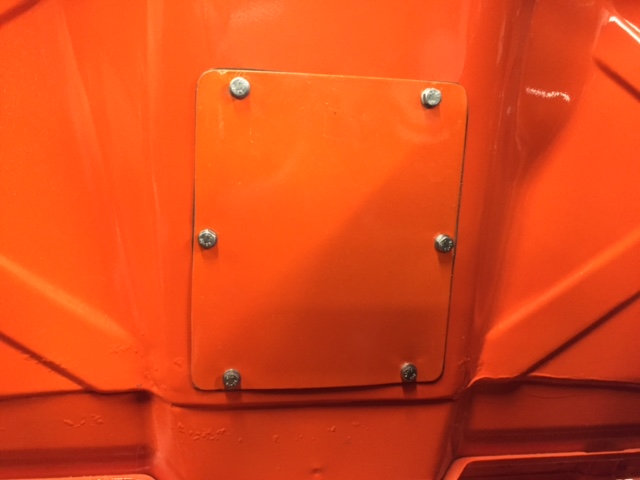
I made some progress on completing the interior this weekend but still lots of details to complete.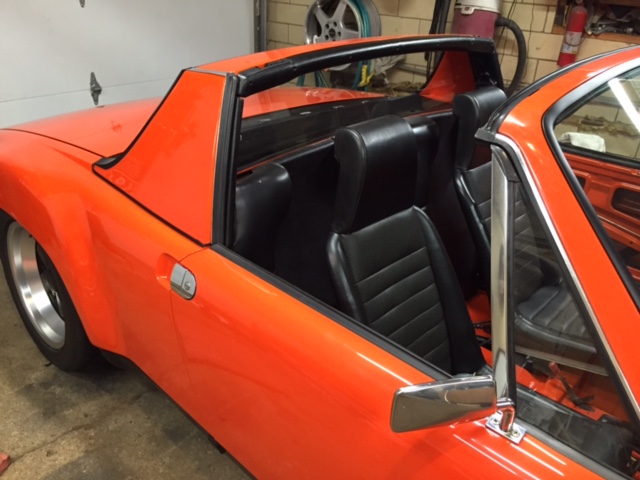
Finally put the engine cover on too.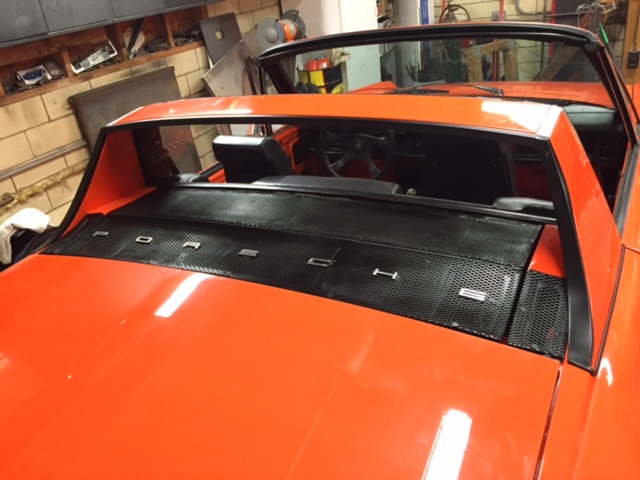
Jeff B
Posted by: jkb944t Sep 18 2016, 04:41 AM
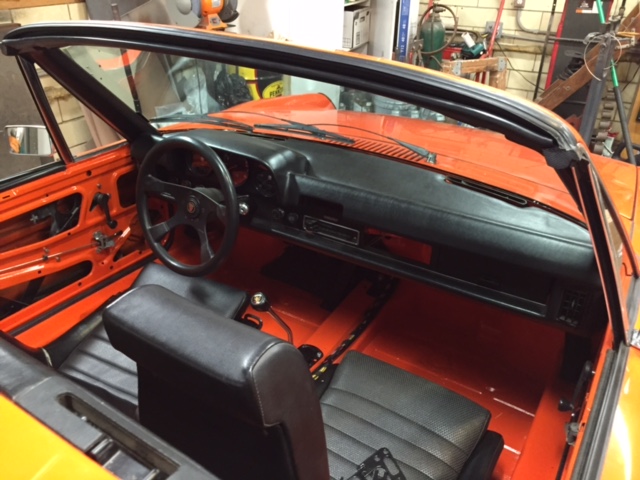
Here are some pictures of the completed car. Thanks to everyone who helped me in one way or another get my car to this point.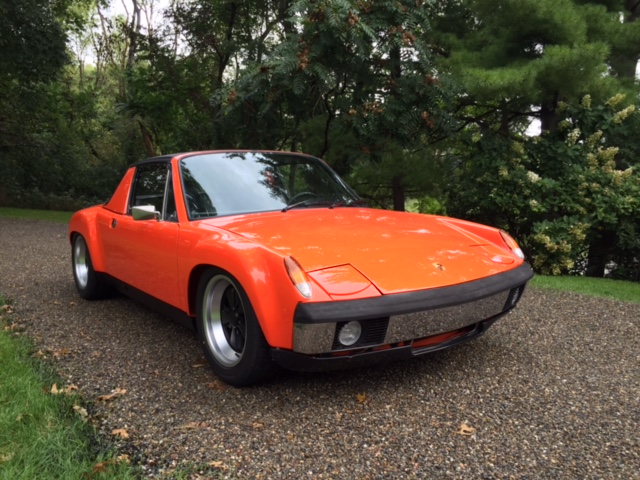
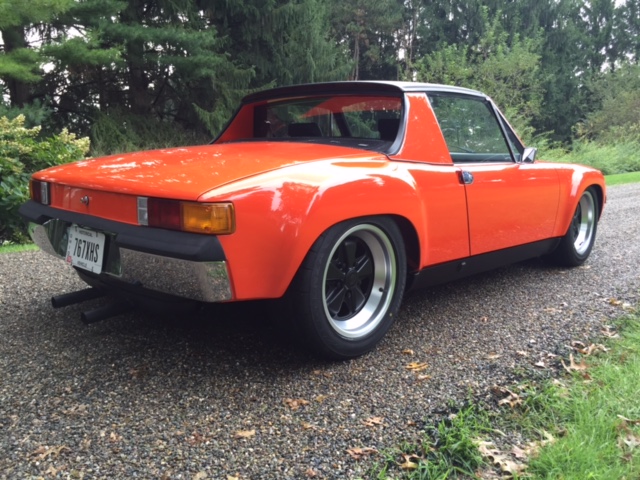
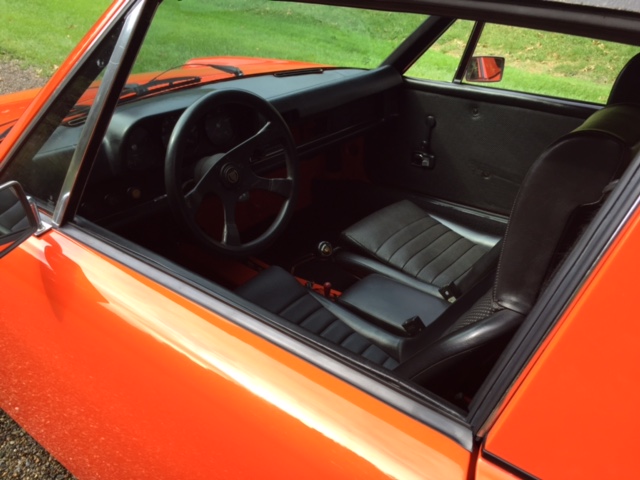
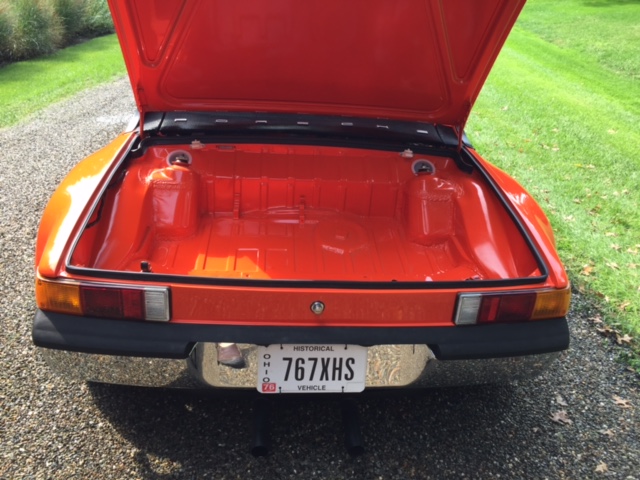
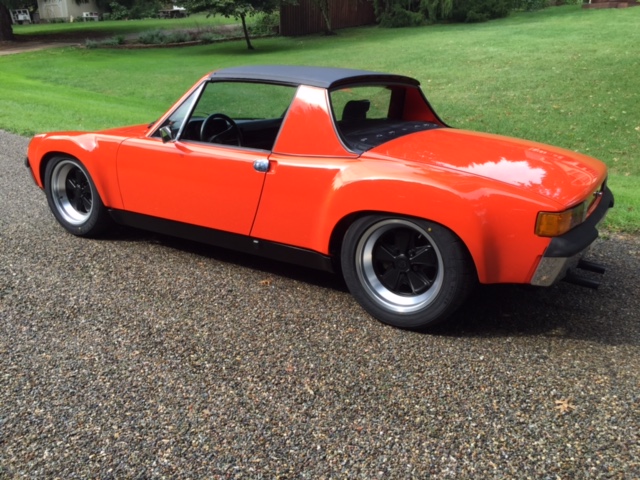
Jeff B
Posted by: mepstein Sep 18 2016, 06:01 AM
Looks great! 
Posted by: Coondog Sep 18 2016, 08:30 AM
Amazing build, thank you and congratulations
Posted by: jkb944t Sep 19 2016, 10:08 AM
Thanks, I really appreciate your compliments.
Completing this project has been a dream of mine for over 30 years. I started a different 914 project 33 years ago but then had to sell it to have the time and money needed to raise my kids.
To finally be able to get this 914 project to a state of completion was much harder than I ever imagined but now that it is done it is immensely satisfying.
Jeff B
Posted by: sb914 Sep 19 2016, 10:12 AM
Very nice job 
Posted by: OllieG Sep 22 2016, 05:30 AM
Really enjoyed following this thread...fantastic job!
Gets my vote for COTM....
Posted by: rgalla9146 Sep 22 2016, 05:34 AM
Great job !
A dream come true.
Posted by: Darren C Sep 22 2016, 05:47 AM
Congratulations on finishing the 5 year build.
Car looks great and a credit to you.
Posted by: rgalla9146 Sep 22 2016, 06:02 AM
Great job !
A dream come true.
Jeff what is the wheel /tire combination ?
Great look !
Posted by: jkb944t Sep 22 2016, 01:54 PM
Great job !
A dream come true.
Jeff what is the wheel /tire combination ?
Great look !
Thanks, the tires are 225/50-16 Bridgestone Potenza RE-11's mounted on 16 x 8" wide wheels on all four corners. I believe I used a 6mm or 7mm thick spacer behind the back wheels.
Jeff B
Posted by: keely444 Sep 22 2016, 04:46 PM
Nice work, great detail thanks for sharing the build
Posted by: Krieger Sep 22 2016, 10:53 PM
Congratulations! Your hard work was totally worth it. Your car looks amazing!
Posted by: AZBanks Feb 8 2017, 03:02 AM
Congratulations. Beautiful car. I love the black targa bar trim. I may steal that idea for my build.
Posted by: jkb944t Feb 8 2017, 06:54 AM
Thanks, I am really happy with how it is progressing.
I am spending the winter working on detailing the interior thanks to the specials that Mark at 914Rubber offered last month.
I'll have to post some updates eventually when I get some solid progress accomplished.
Jeff B
Posted by: Dion Feb 8 2017, 11:04 PM
Car looks fantastic Jeff. I think I'll use your dimensions of the firewall access for
my build. Looks like ample space. Really nice build.
Thanks for the great pics. Enjoy it!
Posted by: Larmo63 Feb 8 2017, 11:58 PM
Great looking car, and it IS a lot of work. I am in the throes of a /6 build too. I want to shit-can the whole thing weekly, but I persevere.
Awesome job!!!!
Posted by: tom.esh Feb 9 2017, 10:19 AM
Looks awesome. I hope to see it around town this summer.
Posted by: Cairo94507 Feb 10 2017, 08:06 AM
Beautiful car. Congratulations.
Powered by Invision Power Board (http://www.invisionboard.com)
© Invision Power Services (http://www.invisionpower.com)