Printable Version of Topic
Click here to view this topic in its original format
914World.com _ 914World Garage _ winsheild removal, rusty cowl
Posted by: sean_v8_914 Apr 19 2011, 07:18 AM
this project has a major case of the " while youre in there" syndrome. this started as a cowl rust repair and chrome delete.
Peter's chrome trim is in great shape. it is RARE to find 914 window trim that fits flush. it is soft AL and the shape is critical to a snug fit
after removign the wipers, we have to locate 20 plastic trim clips
Attached thumbnail(s)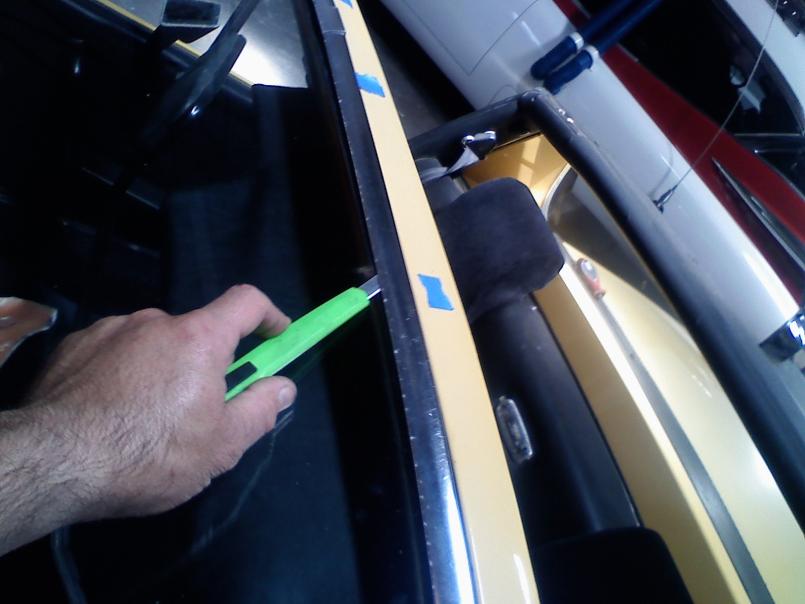
Posted by: sean_v8_914 Apr 19 2011, 07:22 AM
I marked their position with blue tape. you can feel the bump against the inside trim ledge. I use a single edge and a box cutter. depending on how tight the trim is, I go in from teh window surface or i go to the outside between teh trim and teh body
remember, this trim is SOFT so go gentle
Attached thumbnail(s)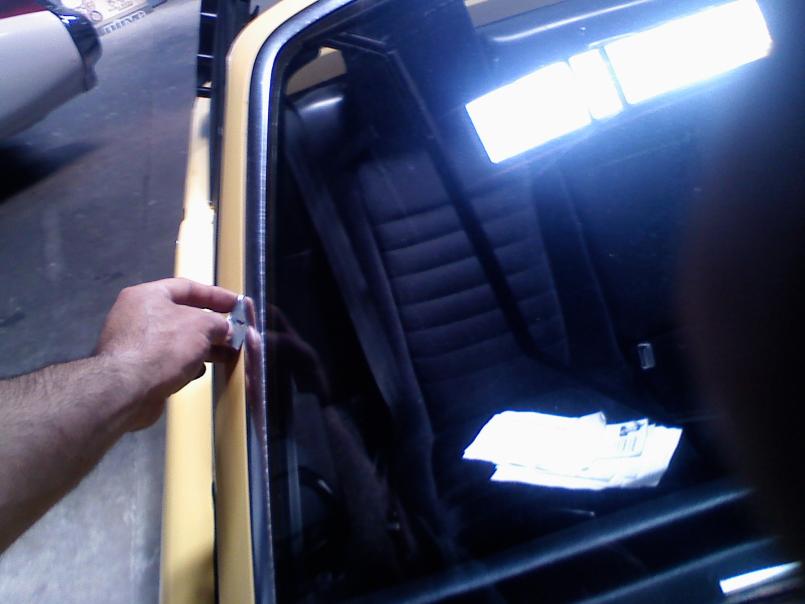
Posted by: sean_v8_914 Apr 19 2011, 07:28 AM
the 20 trim clips are little plastic things held in by a 1/8 plastic pin that goes into the body. all we need to do is cut the pin to release the clip.
all clips must be cut before you try to move the trim surround
it should come out in one pc without ANY force
I use a utility blade placed in teh gap between teh trim and the window frame perpendicular to the window
very gentle taps is all you need to cut that little pin. I use both hands to control the hammer. A rubber mallet would work and be safer
Attached thumbnail(s)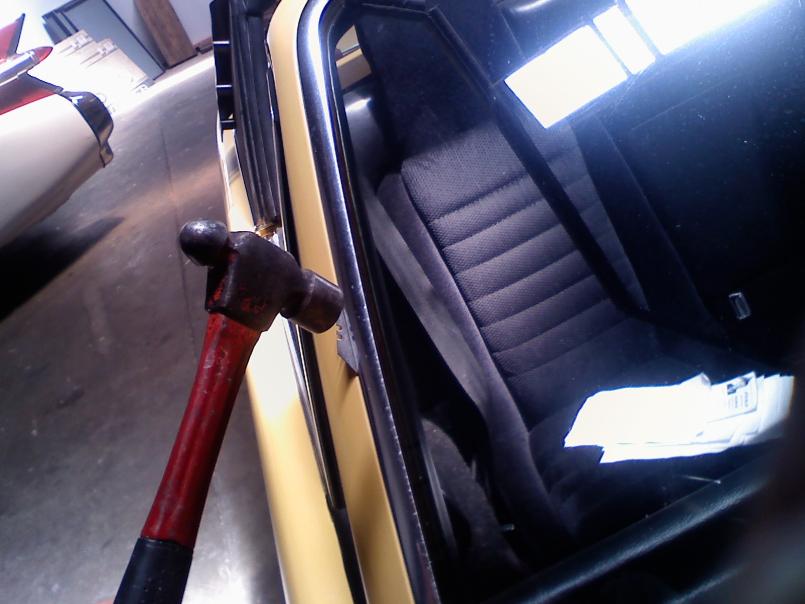
Posted by: sean_v8_914 Apr 19 2011, 07:34 AM
the single edge is thinner and great for locating the clips by feel but too fragile to tap on to cut the clips. it will break and require good needle nose plyers to remove
feeling out more clips...
Attached thumbnail(s)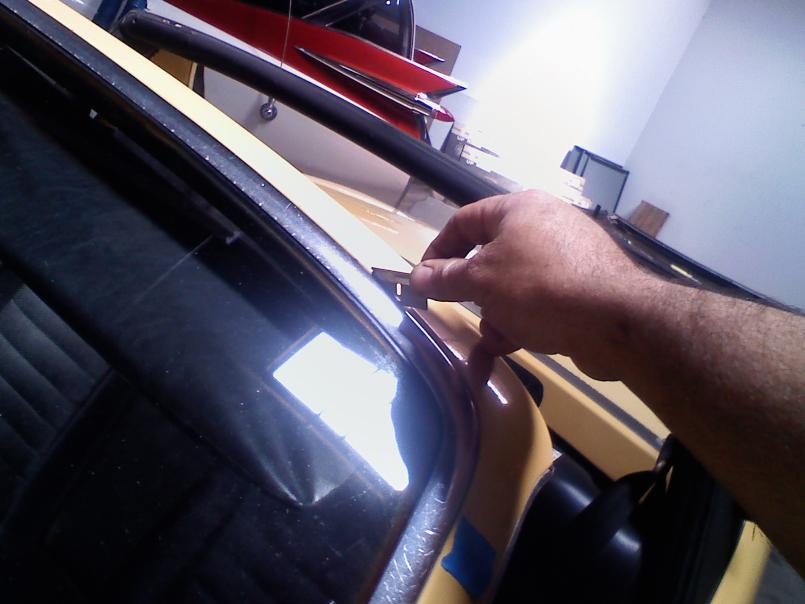
Posted by: sean_v8_914 Apr 19 2011, 07:35 AM
slow and easy taps
Attached thumbnail(s)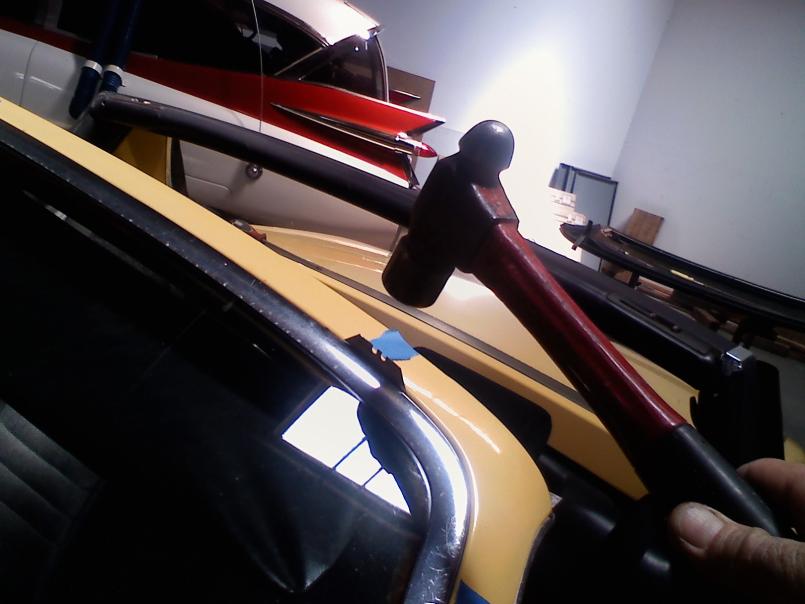
Posted by: sean_v8_914 Apr 19 2011, 07:36 AM
clip locations near blue tape
Attached thumbnail(s)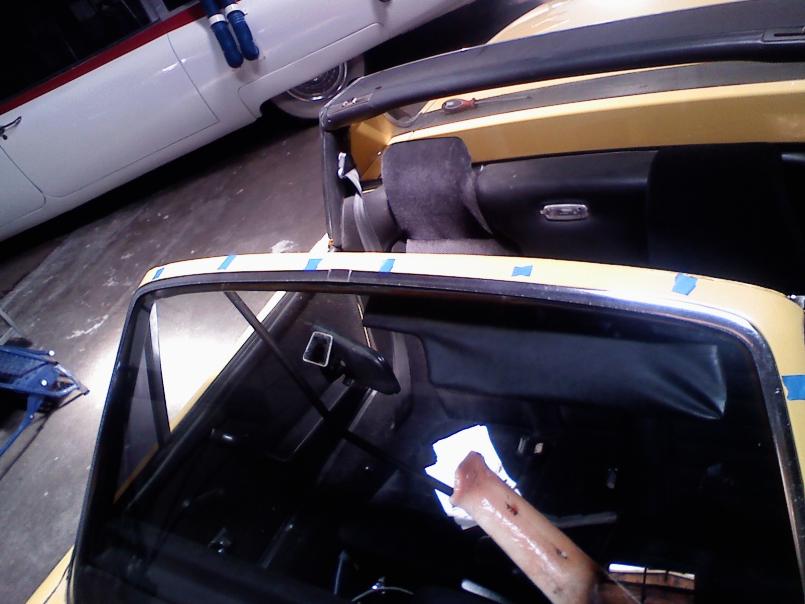
Posted by: sean_v8_914 Apr 19 2011, 07:39 AM
this one was too tight for the utility blade so i sacrificed a few single edge blades to get it without risk trim deformation
the lower trim is at a difficult angle to the windsheild and requires GREAT care when tapping on. I recommend some tape to protect the trim and teh body
Attached thumbnail(s)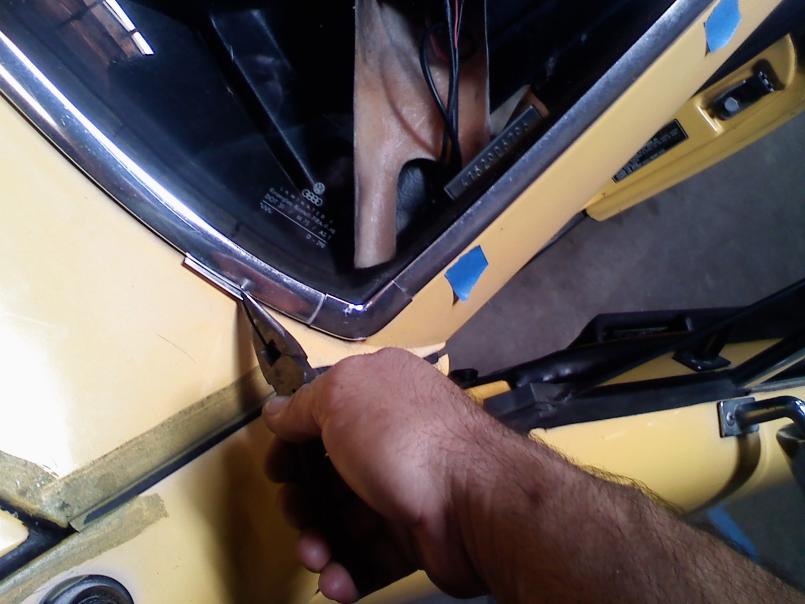
Posted by: sean_v8_914 Apr 19 2011, 07:40 AM
dftj
Attached thumbnail(s)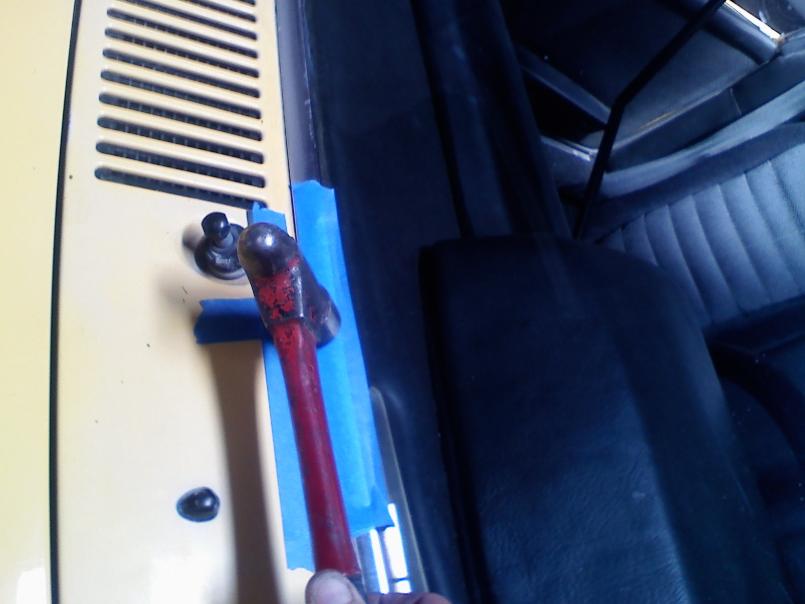
Posted by: sean_v8_914 Apr 19 2011, 07:43 AM
this lower corner has dirt and debris in teh crack confusing the locating "feel" the dirt also gave resistance to trim removal after all clips were cut
DO NOT PULL ON TEH TRIM. Did I mention how soft and easy it is to bend?
Attached thumbnail(s)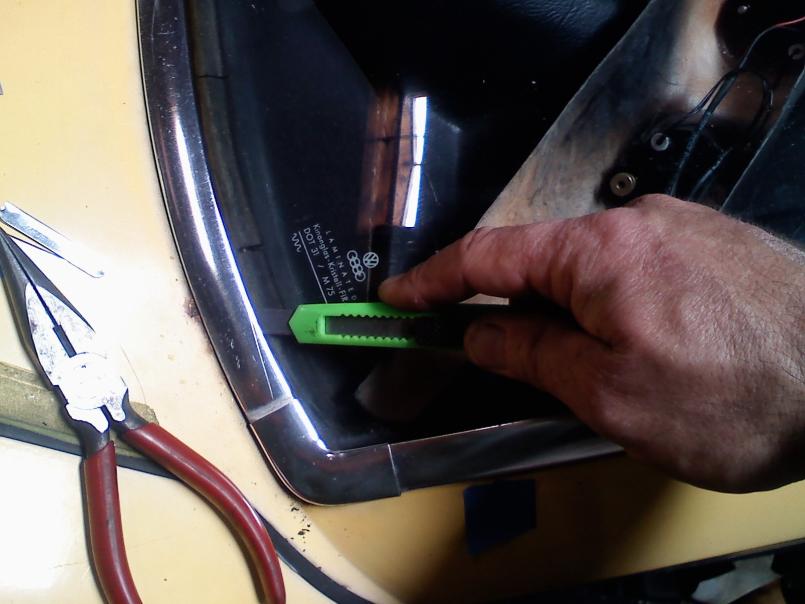
Posted by: sean_v8_914 Apr 19 2011, 07:45 AM
side clip locations
Attached thumbnail(s)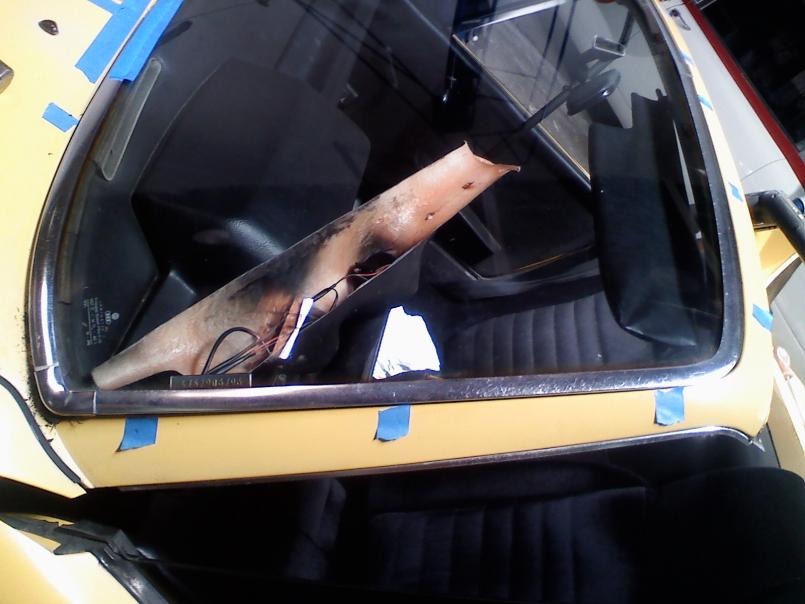
Posted by: sean_v8_914 Apr 19 2011, 07:46 AM
bottom clip locations
Attached thumbnail(s)
Posted by: sean_v8_914 Apr 19 2011, 07:48 AM
clip close up.
here you can see the size and shape. the thin plastic pin is in teh center and goes into the outer edge of teh window frame
Attached thumbnail(s)
Posted by: sean_v8_914 Apr 19 2011, 07:50 AM
the trim frame should coe out in one pc. if you get ANY resistance at all STOP. trace the edges with the razor to find the hang up point
Attached thumbnail(s)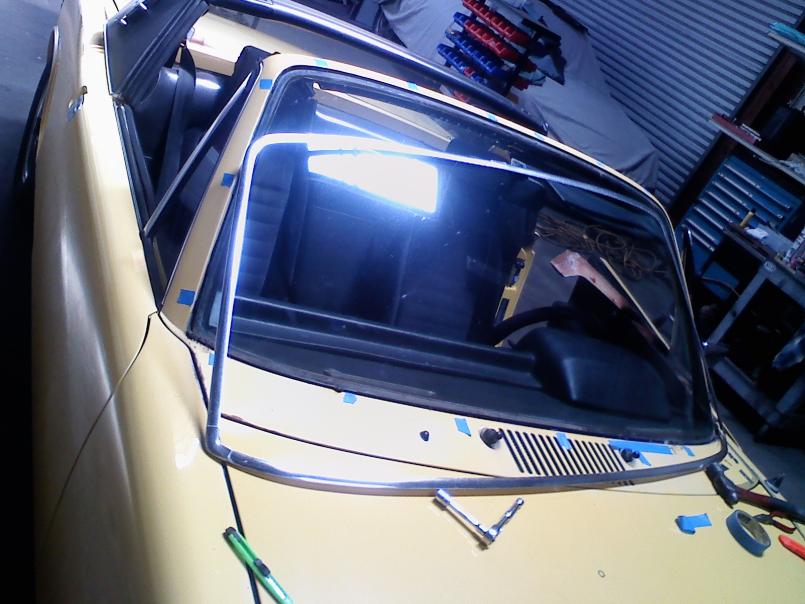
Posted by: sean_v8_914 Apr 19 2011, 07:54 AM
typical to many 914s is the rust in teh windsheild frame and teh cowl.
I will hit this with a wire wheel, then SEM rust MORT for a day or 2. then etch teh bare metal with Metal Ready or PPG DX 530 or Ospho, jasco metal prep
Attached thumbnail(s)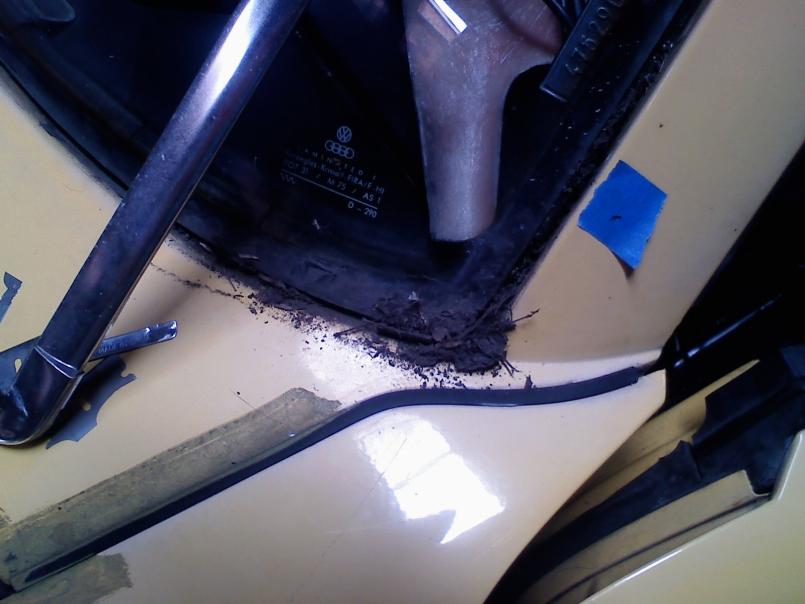
Posted by: sean_v8_914 Apr 19 2011, 07:56 AM
I found a pic of where the clip pin engages teh winsheild frame
Attached thumbnail(s)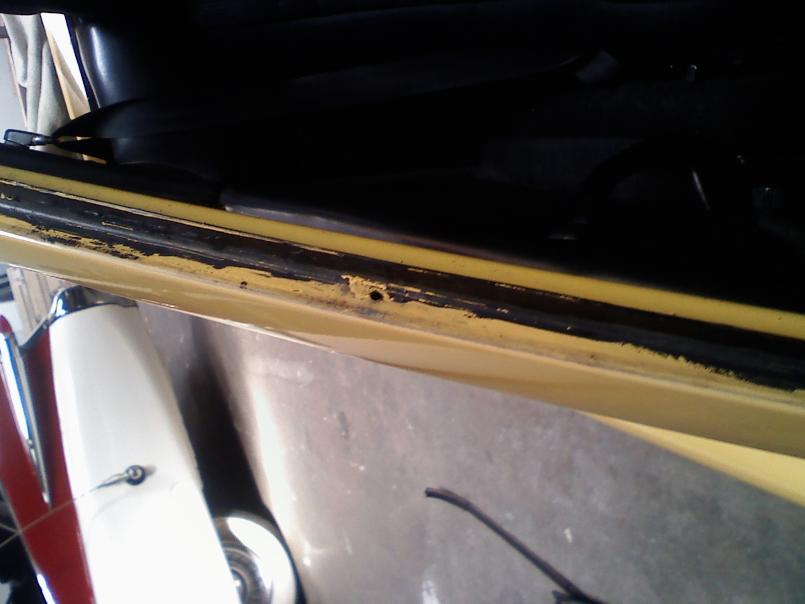
Posted by: sean_v8_914 Apr 19 2011, 07:56 AM
they all have rust in them
Posted by: sean_v8_914 Apr 19 2011, 08:03 AM
I guess you could remove the window with the interior trim in place. the glass man would not remove it but I cant do things like that. if I see rust I have to attack! if I do allt his work up to this point, I just cant stop short of sweetness so i press onward...
remove teh lower targa seal
remove visors
remove side window frame A pillar interior covers
remove top winsheild frame interior cover
there are a bunch of little phillips head screws under these plactic round plugs
these are EASY to strip. be sure you are fully inserted, at the correct angle to the screw and have the correct driver bit
Attached thumbnail(s)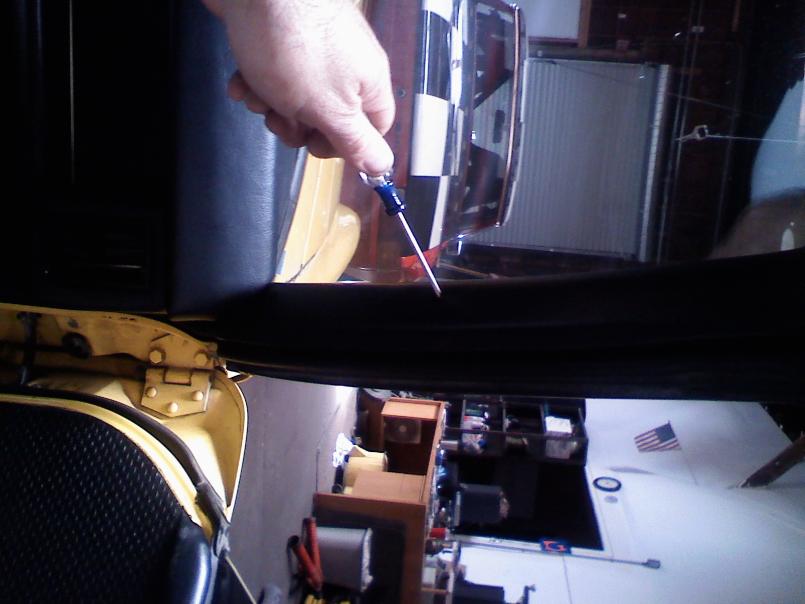
Posted by: sean_v8_914 Apr 19 2011, 08:12 AM
im so retarded...more coffee please
admins: please move this to the garage
Posted by: okieflyr Apr 19 2011, 10:21 AM
This is very relevant to what I want to do. I have the same aluminum trim and have been trying to build the courage to remove it for powdercoating. Cleaning out the dirt build up would be a good thing to. ![popcorn[1].gif](style_emoticons/default/popcorn[1].gif)
Posted by: silver74insocal Apr 19 2011, 10:47 AM
cool thread Sean. keep posting them pics 
Posted by: sean_v8_914 Apr 19 2011, 11:26 PM
I used to tie a guitar string onto two pc of broom handle or just wrap each end around a screw driver untill the Matco guy sold me this nifty tool for $30 bucks
Attached thumbnail(s)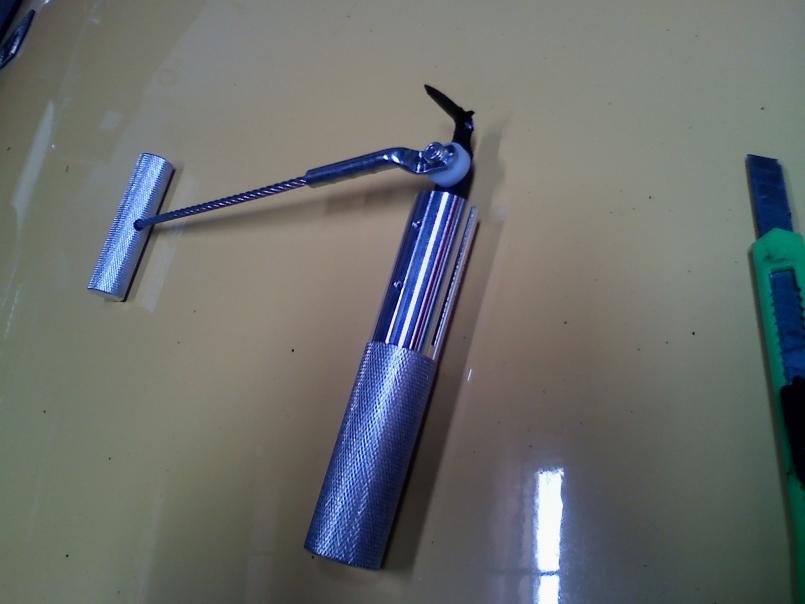
Posted by: sean_v8_914 Apr 19 2011, 11:28 PM
here is a pic of the trim hilding clip. you only need to cut the small round pin in the center
Attached thumbnail(s)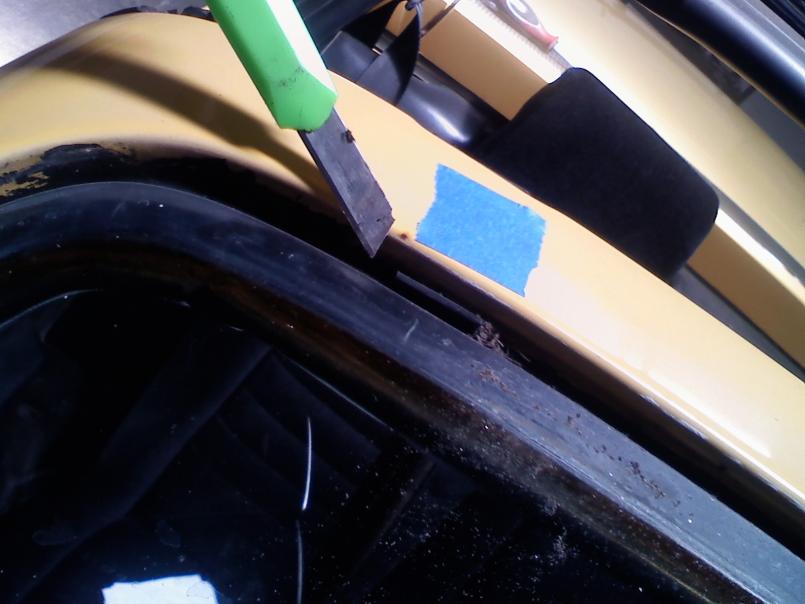
Posted by: sean_v8_914 Apr 19 2011, 11:29 PM
A pillar clip locations
Attached thumbnail(s)
Posted by: sean_v8_914 Apr 19 2011, 11:30 PM
bottom trim clip locations
Attached thumbnail(s)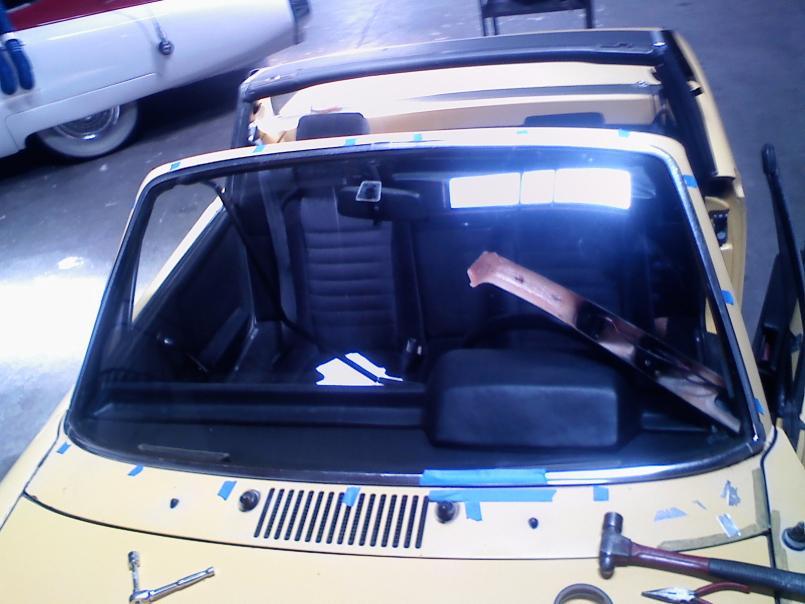
Posted by: sean_v8_914 Apr 19 2011, 11:32 PM
trim should just fall out in one pc still connected
Attached thumbnail(s)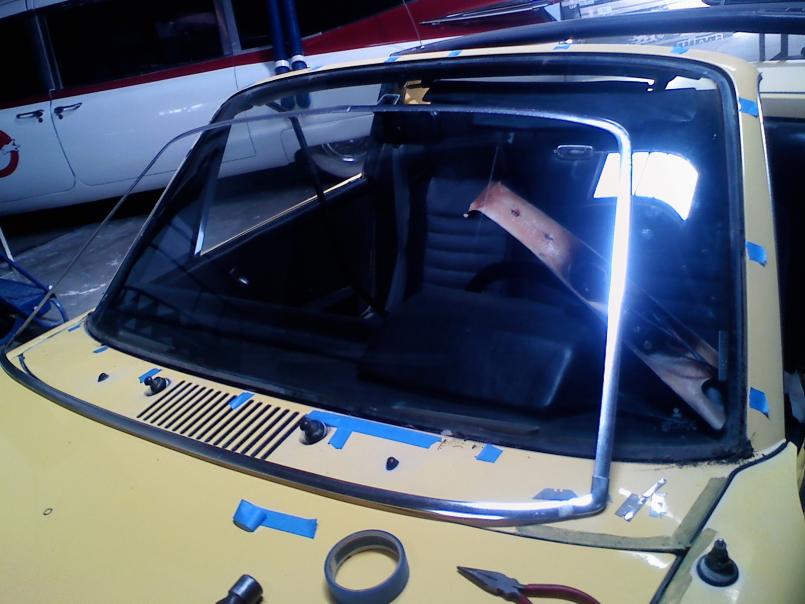
Posted by: sean_v8_914 Apr 19 2011, 11:35 PM
here is how that window cutting out tool works. your other hand goes on teh round vertical handle to hold it up straight as teh other hand pulls the "T" handle along the glue bead
putting the car in teh sun for a frw hours to get the butyl soft makes it easier
Attached thumbnail(s)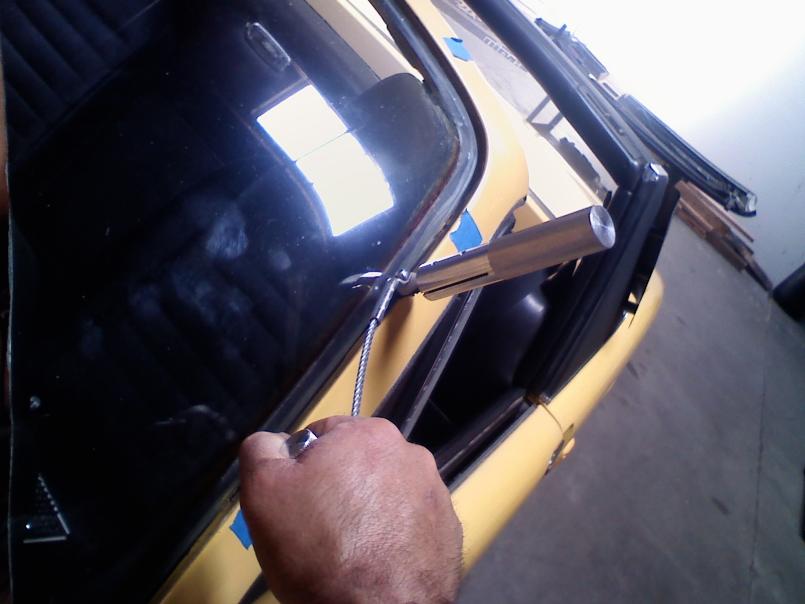
Posted by: sean_v8_914 Apr 19 2011, 11:37 PM
do not nick the glss or try to pull teh window out untill you have completely cut away teh butyl rubber seal bead. 914 windsheilds are very easy to crack. a chip on teh edge will start to crack if the glass is flexed
Attached thumbnail(s)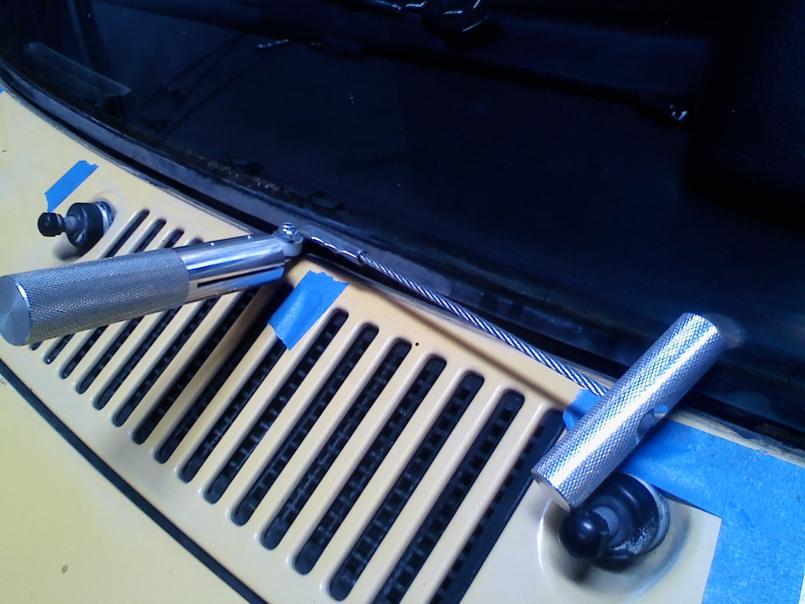
Posted by: sean_v8_914 Apr 19 2011, 11:58 PM
wire wheel...went a little crazy.I pick away at teh cowl gap fairly deep to remove rusty flakes first
the deep pitting rust must be neutrilized. I use SEM rust mort first. let it set on bare metal fro a day. keep it wet and out of teh sun. DO NOT ALLOW IT TO DRY. If you want to stop for teh day, wipe it off with a damp cloth.
once teh rust has turned black deep into the pits, i switch to Ospho or PPG DX 530. leave this on all night. teh metal will look dull grey when it is well etched then wipe with damp (almost dry) cloth. blow dry, let dry for a day, use some sunshine now is OK.
do not be tempted to grind down rust to clean metal. it will be too thin. let the chemicals do their job
POR 15 is applied ONLY on teh rough areas of rust pitting. POR 15 does not stick to clean metal but the etching process described above will make it stick if you get a little sloppy with its spread.
Attached thumbnail(s)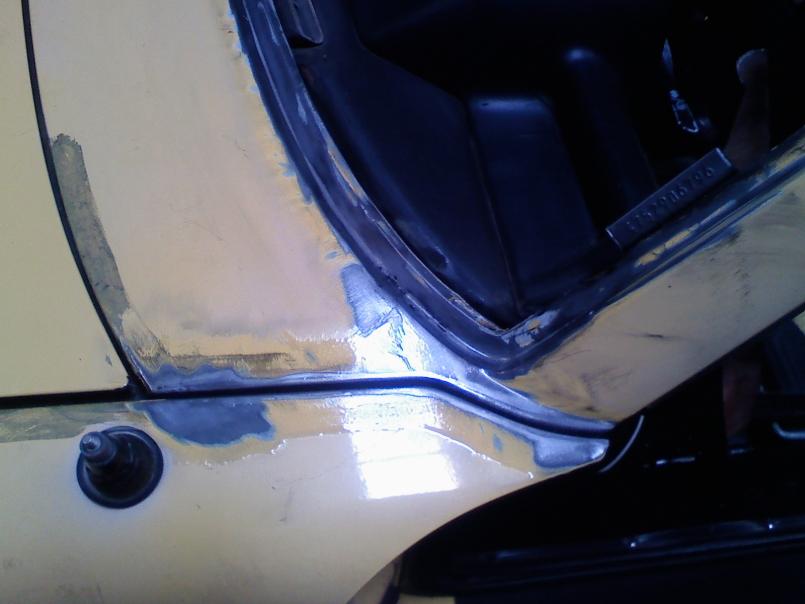
Posted by: sean_v8_914 Apr 20 2011, 12:01 AM
for some reason teh photos make it all look so clean. it was rusty and nasty. the stuff in teh pitted pores is what makes it bubble up in a year. I hate to see that crap.
Attached thumbnail(s)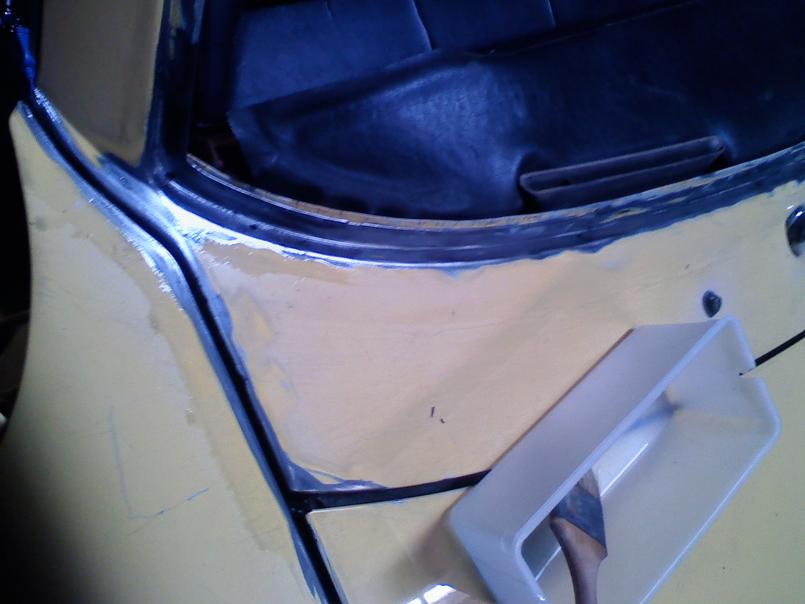
Posted by: sean_v8_914 Apr 20 2011, 12:06 AM
tape lines and over spray are so skanky. there are two 10mm bolts. one on each side of the ventilation box. remove then and you can drop the box and slip in a cardboard mask. the black mesh will make the fresh coat of yellow POP. I removed teh window squirters and wiper hardware. it really takes less time than sanding around it and masking it off.
Attached thumbnail(s)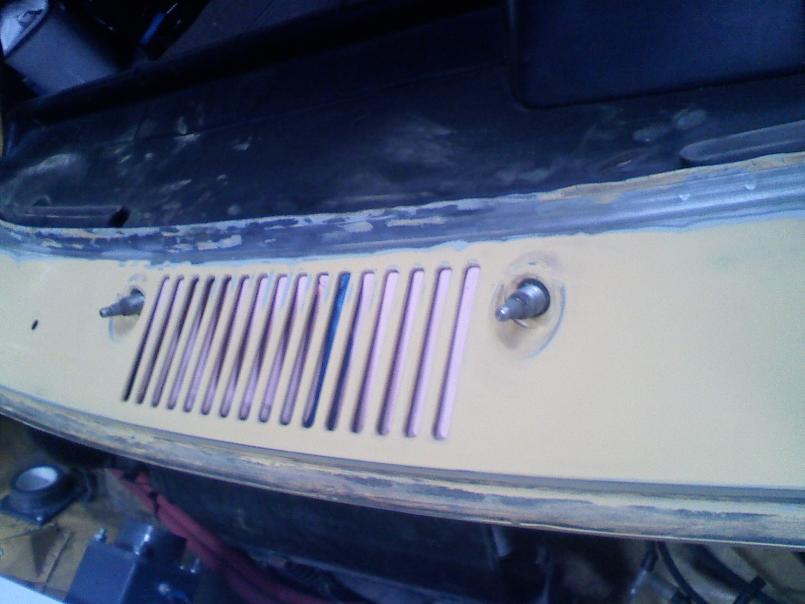
Posted by: sean_v8_914 Apr 20 2011, 12:11 AM
POR 15 is only on the rough metal. I did use it heavily in eh cowl crack. some cars need the cowl gap completely dug out. if you see rust or deformation of the cowl gap seam sealer from inside teh door jamb then you need to remove it to kill that rust also. Peter's car is OK so teh long 3 day soak of chemicals shoujld kill it all without removing the buttom of this seam
Attached thumbnail(s)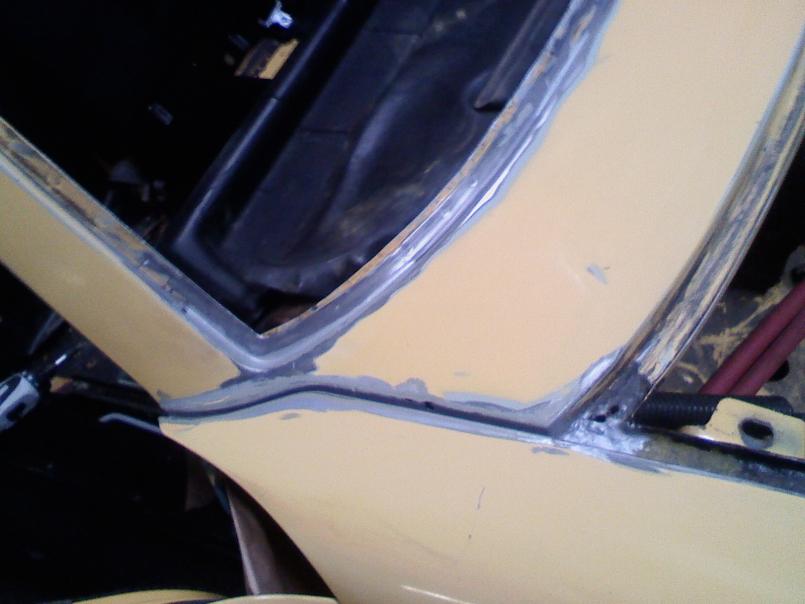
Posted by: sean_v8_914 Apr 20 2011, 12:12 AM
get under these corners with a mirror and teh above described chemical processes, then POR 15 the underside
POR 15 is nasty, mask any drip zones
Posted by: sean_v8_914 Apr 20 2011, 12:15 AM
under teh seal trough rust
little rust incubator. often missed
Attached thumbnail(s)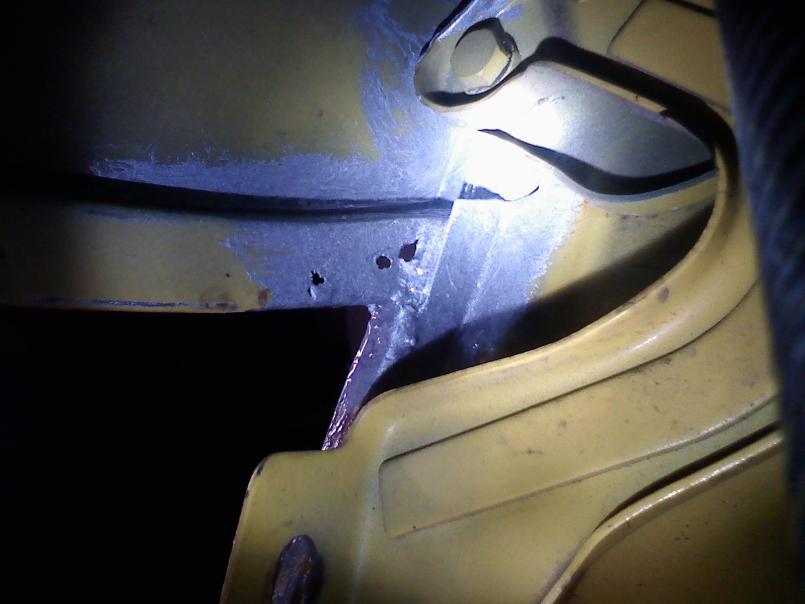
Posted by: sean_v8_914 Apr 20 2011, 12:16 AM
reg
Attached thumbnail(s)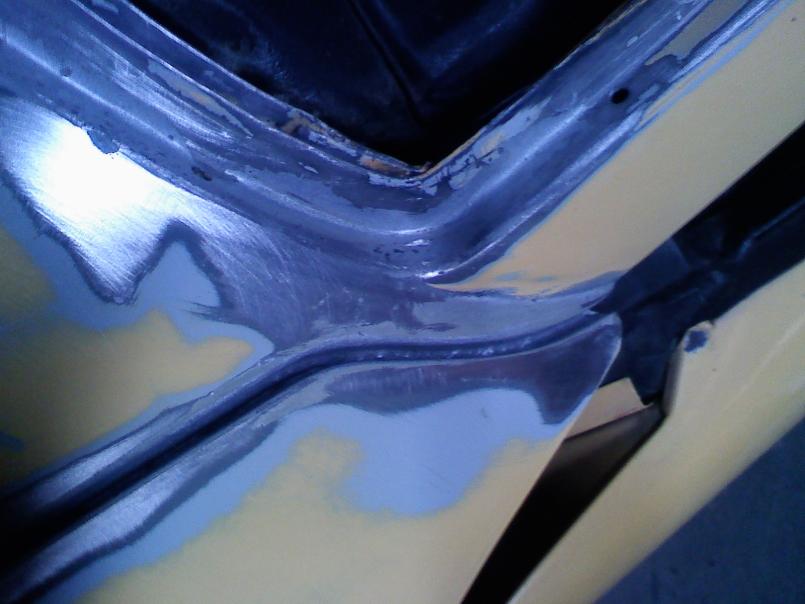
Posted by: sean_v8_914 Apr 20 2011, 12:23 AM
the seal from dash to window was petrified. 914rubber.com sent me a new one.
did I mention that this car is getting all new seals from mikey rubber guy AKA Mark Whitesell
since the cowl will be so nice, the rubber seals all new...how could I leave the dash so nasty.
remove steering wheel
remove dash gauge face with 3 gauges still in place
pop the 2 outer gauges from their rubber rings
this is to help remove teh dash topper
Attached thumbnail(s)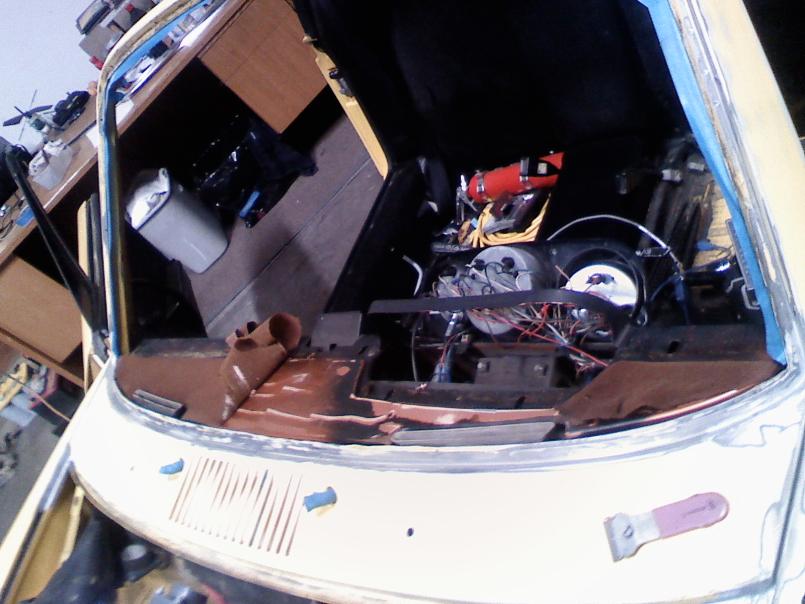
Posted by: sean_v8_914 Apr 20 2011, 12:24 AM
these 2 plastic dash nuts are a bitch. a short 13mm wrench is a blessing here
Attached thumbnail(s)
Posted by: sean_v8_914 Apr 20 2011, 12:27 AM
sand teh POR 15 with some 220.
then I use Wurth or SEM etching primer on bare metal and over POR 15.
Attached thumbnail(s)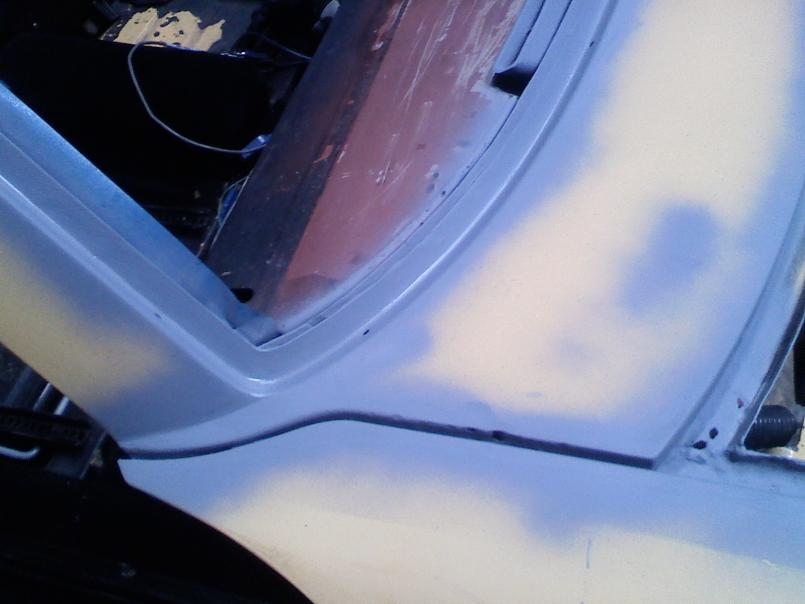
Posted by: sean_v8_914 Apr 20 2011, 12:35 AM
sand etching primer with 220 then I coat with 2 part epoxy primer then sand it again
Attached image(s)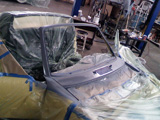
Posted by: Rusty Apr 20 2011, 06:51 AM
Sean, this is GREAT info!! 
Posted by: sean_v8_914 Jun 10 2011, 08:41 AM
sand epoxy smoooooth with 320. stay away from edges. do not sand thru. you must go back and add primer if you go thru.
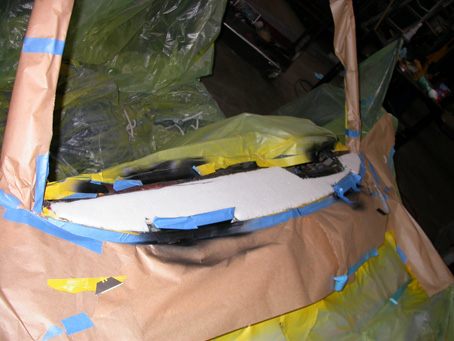
I maked off teh cowl to paint the defrost vents black.
then once dry mask them off to spray contact cement for dash pad foam and vinyl cover
Attached image(s)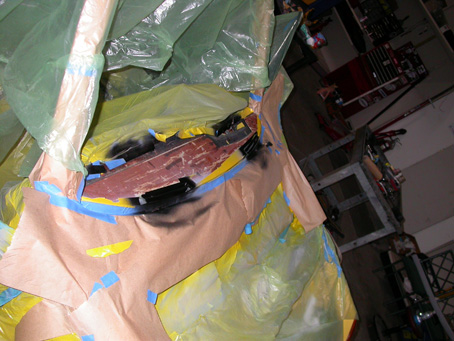
Posted by: sean_v8_914 Jun 10 2011, 08:50 AM
the black rubber window trim that replaces teh chrome does not cover as much window as teh metal trim. this windsheild has UV stains at teh edge where the chrome once covered. the smaller rubber trim also exposes the glue bead and the back of teh interior trim (the ugly side)
Modern cars have a black painted border on teh glass. this is teh FRIT primer/paint. I used teh width of the foam FRIT applicator as a guide . dont forget to leave an unpainted notch for teh VIN.
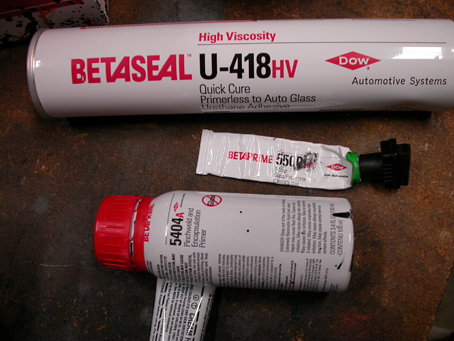
the pinch weld on teh car also gets a special primer for teh urethane window glue.
DONT TRY TO USE A HAND OPERATED CAULKING GUN FOR THE URETHANE UNLESS YOU HAVE ARMS LIKE POPEYE! this stuff is thick and HARD AS HELL to squeeze out.
Attached image(s)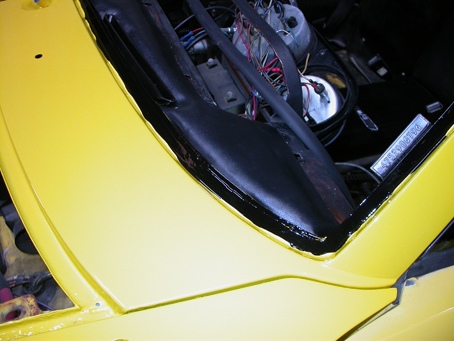
Posted by: sean_v8_914 Jun 10 2011, 09:07 AM
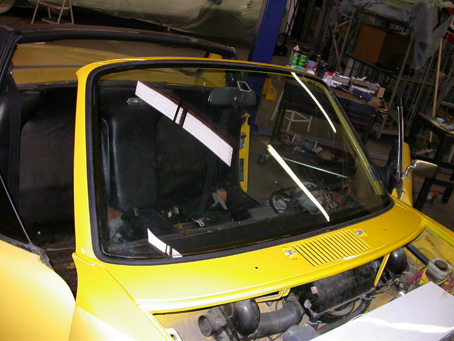
I was going to set the window by myself when a freind dropped by. normally I hate uninvited drive by visits but this day's visitor was an angel sent by god to save me from myself. all my prep work would have been ruined if I had tried this alone.
the rubber trim gets set onto the window before you stick it. 914rubber sendds you the rubber trim with glue already inside teh groove. the frit primer helps that glue stick better. I did the frit border but also primed the edge of teh glass
here you can see the UV staining I mentioned. this window is also pitted but still OK "servicable" as the owner put it. I would have liked to do this job with a new glass
Attached image(s)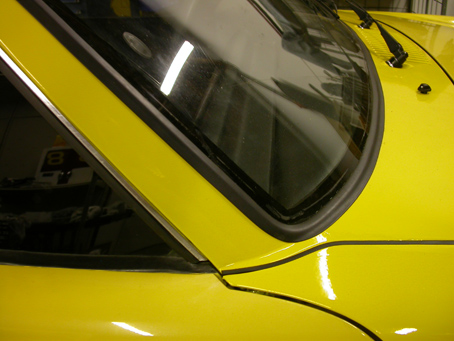
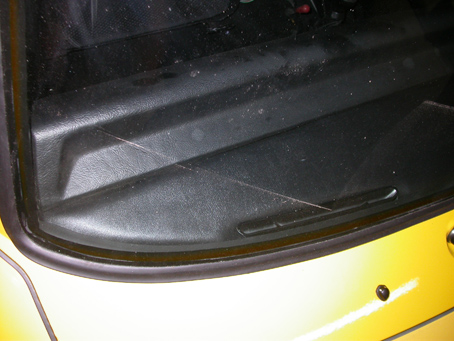
Posted by: sean_v8_914 Jun 10 2011, 09:12 AM
should I do a seperate post for the back wimdow? that turned into a major "while im in there"
loose rear window drips water down teh fire wall...rusty floor...
Posted by: sean_v8_914 Jun 10 2011, 09:14 AM
e brake still works...a miracle at best
Attached image(s)
Posted by: sean_v8_914 Jun 10 2011, 09:17 AM
OK. i didnt want to leave anyone with that horrid image in their brain till next week
go check your back window. is it loose? leaking? look under teh sound deadening near teh edges
Attached image(s)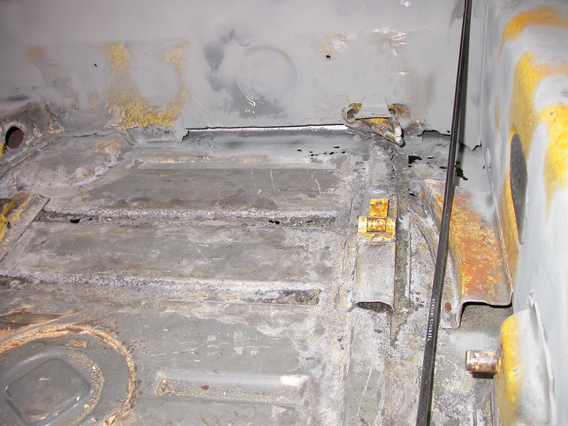
Posted by: saigon71 Jun 10 2011, 04:30 PM

OK. i didnt want to leave anyone with that horrid image in their brain till next week
go check your back window. is it loose? leaking? look under teh sound deadening near teh edges
I had the exact same problem with the one I bought...rear window was loose and the inner firewall paid the price! Any hell hole issues on your car?
Posted by: rick 918-S Jun 11 2011, 07:54 AM
Nice work Sean! There are many guys here that have never seen any of this stuff beyond what is on the surface. It takes alot of skill and patients.
Posted by: sean_v8_914 Jun 11 2011, 11:20 AM
thankyou for the kind words. I have learned so much from the 914club and now 914 world community. as I go beyond that I enjoy giving a little back. My hope is that I can help ya'll enjoy your cars as much as I enjoy mine.
interestingly, the hell hole was good but the left mini hell hole is a bit of a mess. since the car is electric, I passivated the rust, treat4ed and coated but did not patch the engine shelf
Posted by: sean_v8_914 Jun 13 2011, 12:02 AM
ta da! the end
Attached image(s)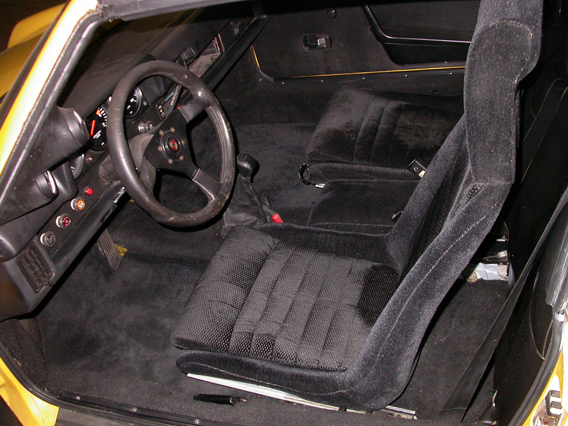
Posted by: sean_v8_914 Jun 13 2011, 12:08 AM
shhhh
Attached image(s)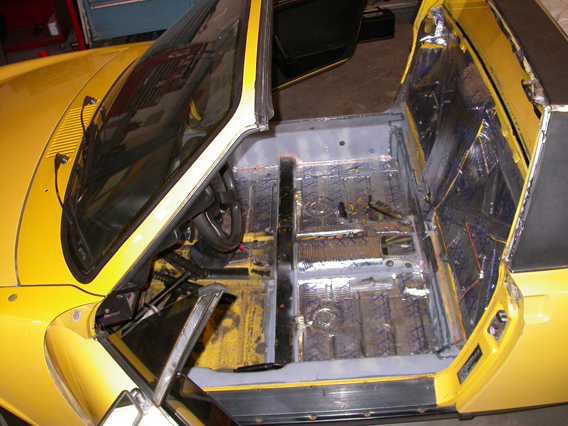
Powered by Invision Power Board (http://www.invisionboard.com)
© Invision Power Services (http://www.invisionpower.com)