Printable Version of Topic
Click here to view this topic in its original format
914World.com _ 914World Garage _ Restoration Part Trois!
Posted by: william harris May 29 2004, 05:34 PM
Finally able to get my project moving again! Friday I drove down to CT and picked up my rotissere from Chris Foley - he built this thing in three days! Couldn't resist putting it together yesterday and putting the car onto it by myself last night. Yeah, just me and two seriously big floor jacks and 2x10s to pick up the rear under the engine mounting bar. Well here it is. Chris, you are the man. 
Attached image(s)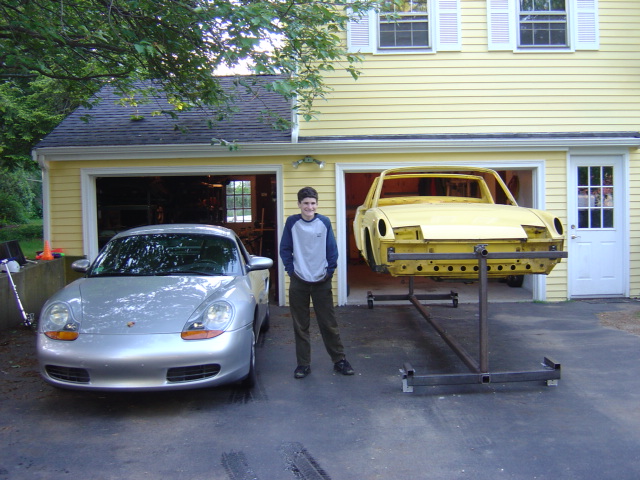
Posted by: william harris May 29 2004, 05:36 PM
My 12 year old son Nick is a full time Porsche apprentice mechanic, He loves the Boxster and the 914. He says the 914 will be his when he learns to drive. 
Attached image(s)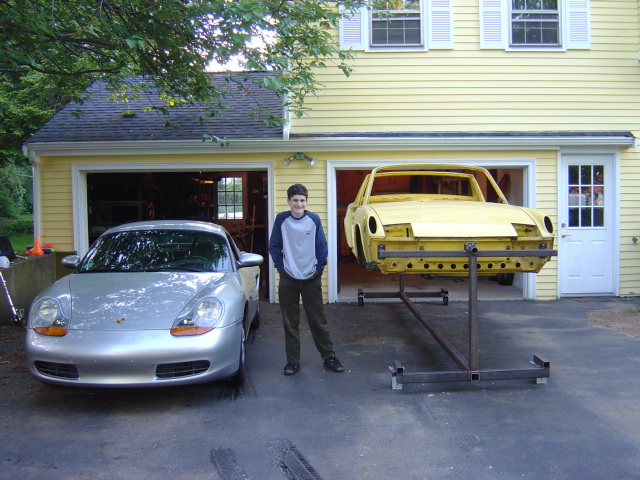
Posted by: william harris May 29 2004, 05:38 PM
The rotissere is incredibly strong and the best part is I can move the car around by myself - but it helps to have Nick handy to steer the other end. 
Attached image(s)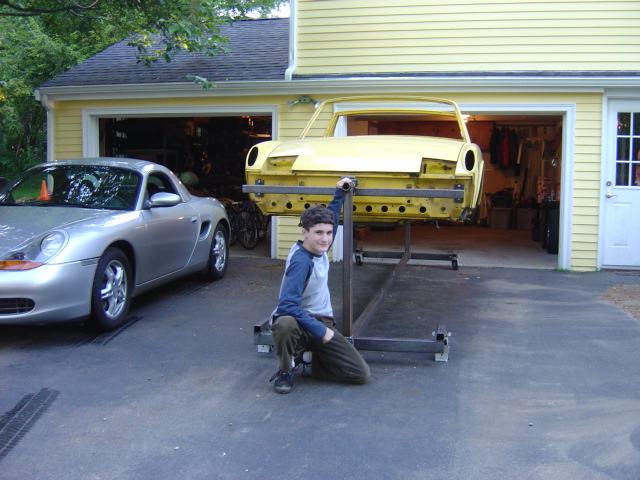
Posted by: william harris May 29 2004, 05:40 PM
Here's a side view of the 914. The next stop is to have the car media blasted and then shot into primer. 
Attached image(s)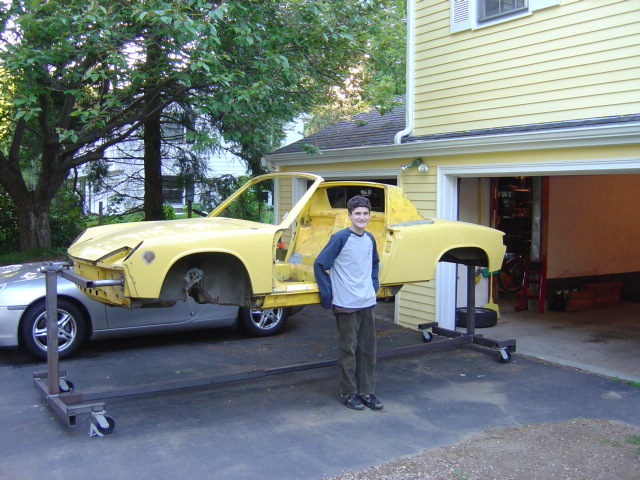
Posted by: william harris May 29 2004, 05:42 PM
Well, here's your truly with his rides. Damn, where's the photoshop software when you need it?
Attached image(s)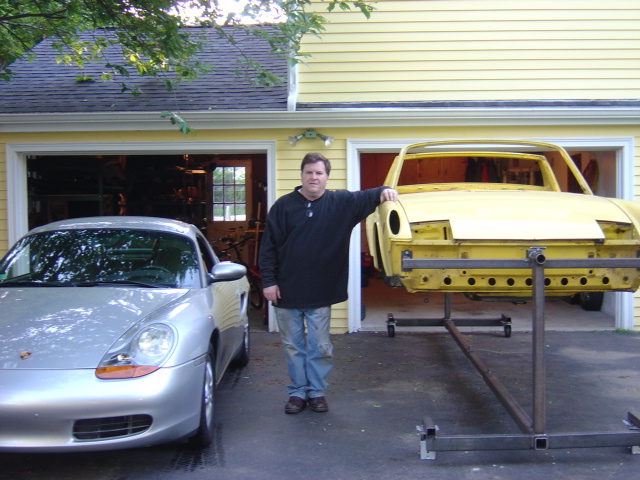
Posted by: URY914 May 29 2004, 07:05 PM
Very Nice!!!
Worth every penny. I've been leaning over my car for 25 years now. Much better than a lift.
Paul
(and my wife likes the color of your house.)
Posted by: McMark May 29 2004, 07:40 PM
If you can find an acid dipper in your area I highly recommend it. Much better results from the acid. Plus you're not cleaning out media for years to come.
Looks like an awesome rotisserie, nice job Chris and congrats William. 
Posted by: Eric_Shea May 29 2004, 07:52 PM
It won't be done by then!

Looks great. I'm thinking about having one of those made for my GT project while the 6 is there in the shop. Troy could probably weld one up might fast.
Posted by: djm914-6 May 29 2004, 08:35 PM
So, what are you going to do with that thing when you're done? Can I borrow/ buy it after your car is finished?
Posted by: william harris May 29 2004, 08:49 PM
Dave: After my car is finished, the rotissere will be available to all local 914 owners. I know my friend Eric wants to use it and I would be very happy to see it used by many others. That way I get my money's worth. 
Posted by: djm914-6 May 29 2004, 08:53 PM
Whoo Hoo! Thanks boss!
Posted by: elocke May 29 2004, 09:35 PM
William,
Congrats on the rotisserie! You're right, that was quick. My car will hopefully be off mine in 6 mo-1 yr so it will also be available.
Ed
Posted by: Racer Chris May 30 2004, 04:43 AM
So much for needing 3 strong men to help you. Way to go William.
When I lifted the silver car in my pics onto the rotisserie for testing I used a chain attached to the forward seat mounting brackets on the floor. The I-beam in my garage has a trolley with a chainfall, but an engine hoist would have done the trick too.
Posted by: skline May 30 2004, 07:05 AM
It looks too tall to fit back in the garage right side up, did you rotate it upside down to push it into the garage? Or does it actually clear the roof?
Posted by: 4WheelDrifter May 30 2004, 08:38 AM
Cool William.
How high does the garage ceiling need to be to do a full rotation?
Posted by: william harris May 30 2004, 10:02 AM
Appearances are deceiving. The car actually cleared the stardard garage door, complete with electric garage door opener, with the car upright. Clearance was probably one inch, but it made it. I have a relatively low roof on that side of the garage because there is a bedroom built over that side and a steel I-beam runs thru the garage for structural support of the upstairs. This afternoon I will measure and give you details. Haven't actually rotated it yet because I wanted to have two guys handy to deal with the weight of rotating the car. Will post pictures and measure for those who are interested.
Posted by: Racer Chris May 30 2004, 01:14 PM
I believe the center of the pivot is less than 44" off the ground.
The most exteme point away from center is the corner of the targa sail panel, which is close to 36" away. I also figured that a flared car might be on there someday. A 2 1/2" flare should clear the crossbar.
Therefore the highest point when rotating is about 6'8".
Posted by: william harris May 30 2004, 01:46 PM
Well here it is sideways. Not to bad to rotate by yourself, just take it nice and slow. When sideways, the highpoint is about 6'3" as I measured it. About 1 or 2 inches too high to roll it in and out the garage door. Sure gives you access to everything.
Attached image(s)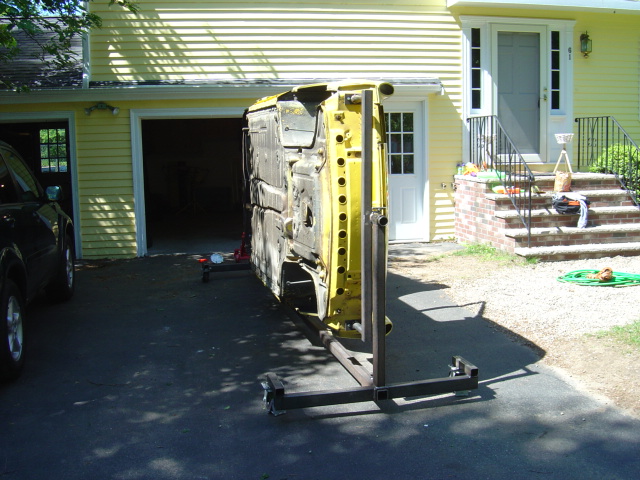
Posted by: william harris May 30 2004, 01:48 PM
I worked around a little with a wire brush just inspecting for any rusted areas. Not too much to find. Makes work on the underside a snap.
Attached image(s)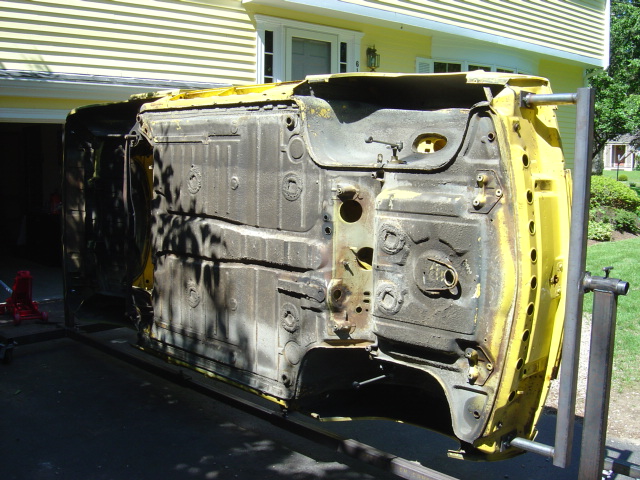
Posted by: william harris May 30 2004, 01:50 PM
Last one for the day. Got to go take a couple of the kids to "River Rave" for the Offspring. Oh My God! Why Me?
Attached image(s)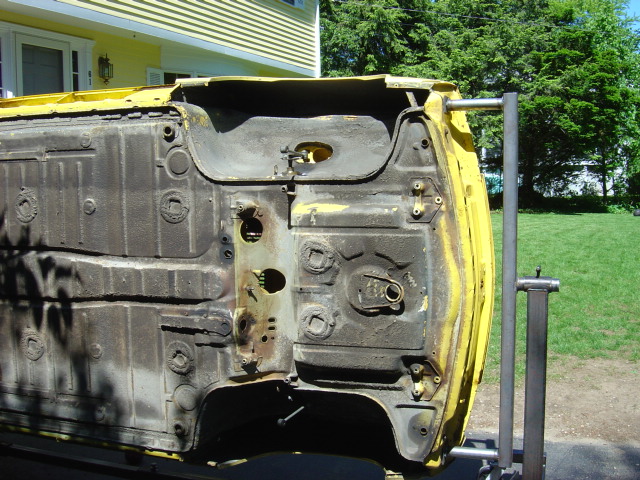
Posted by: william harris May 30 2004, 01:52 PM
Final Question for the Group: When I stripe all this undercoating stuff off and repaint the car, should I reapply undercoating? This will most definitely be a driver, and I sure ain't afraid of rain. This will not be a concours queen. I also will take the car off the road for the winter. So, is there a real need for the undercoating?
Attached image(s)
Posted by: seanery May 30 2004, 02:12 PM
seems like good paint should do the trick, huh?
Posted by: TimT May 30 2004, 02:48 PM
After you have the underside down to bare metal, I would prime it with a zinc rich primer, then paint it body color. For areas that will see rock impact etc, you could use that clear "anti-chip" paint.
Undercoating is evil...when it starts to fail, it holds water  so why put it back on?
After doing a resto such as your doing, youll know all the spots that need to be kept clean, and will probably maintain the car better than its ever been..
forget the undercoating 
Posted by: djm914-6 May 30 2004, 06:16 PM
With the road debris we have in this area, my plan was to paint the entire underside of my car with a POR15 kit.
Posted by: TimT May 30 2004, 06:22 PM
Dave I hear ya....
the por15 stuff is the shizzle... but
there are self healing zinc base coats out there, top coat it with a compatible color, and the semi-flexible "stone-guard" coatings to protect the obvious areas...
I guess any quality paint system will work... maintaining it is key
Posted by: ChrisReale May 30 2004, 06:52 PM
forget the undercoating
Wise man speaketh words of truth.
Posted by: 4WheelDrifter May 30 2004, 07:27 PM
William, thanks for the info.
Looks like I'll be in the need of a rotisserie starting summerish 2005 and for at least a few months if all goes to plan. If you or anyone has one to rent for that time frame, I'm interested. Gots ta start saving my pennies.
Posted by: william harris May 30 2004, 10:02 PM
Well I damn better be finished with my car by 2005. The rotissere will be available for all NE guys to use with my blessings.
Posted by: seanery May 31 2004, 07:27 AM
Talk to Doug Leggins before you do the whole underside in POR-15. I believe he had some problems with a test area.
Posted by: lmcchesney May 31 2004, 08:47 AM
That looks great William. Just looking at the rotissere makes my back feel better. Great job Chris.
L. McC
Posted by: william harris May 31 2004, 09:05 AM
Thanks for the comment Sean. I plan on media blasting down to bear metal. This is a relatively rust free car and Chris already has repaired the rusted areas around the hell holes, both sides. Media is baking soda. With bear metal the same shop will prime with a Dupont self-etching primer (Dupont 615S Variprime). Then its off to paint. Will paint entire body new color (thinking Adriatic Blue) and no need to POR that I can see. Just keep it clean and avoid all winter conditions. Well, we'll see how that goes. 
Posted by: maf914 Jun 1 2004, 07:49 AM
William,
This is the first time I've seen someone paint his house yellow to match his car! 
The rorisserie looks good. We all need one sooner or later. Thanks for the project updates and photos.
Mike
Posted by: william harris Jun 1 2004, 07:19 PM
Guys you just can't imagine how much the rotissere improves working conditions. This long weekend, my 914 buddy - Eric (parts guru at IRA Porsche who bears full responsibility for my 914 addiction) came over to help with a few last details to prepare the car for media blasting. With the car on its side, we removed the shift bar, heater control cables and then addressed removing the stainless steel fuel lines Chris Foley had fabricated and installed into the car. Removing the lines from the large grommet in the front firewall was basically impossible with the car in the normal orientation. But with the car on its side, I could pull the lines out from inside the car while Eric forced them down from the top of the car. It worked and in a few minutes they were out. Worth every penny. When I am finished the rotissere is in the public domain for all 914 owners to use for their projects.
Posted by: william harris Jun 6 2004, 06:06 PM
Well, while the guys out west were having a great time with track time, autocross and wall to wall 914s, there was very little to do here in Massachusetts except continue to prep for paint work. Next step was to degrease the area over the engine and transmission. Came out very nice.
Attached image(s)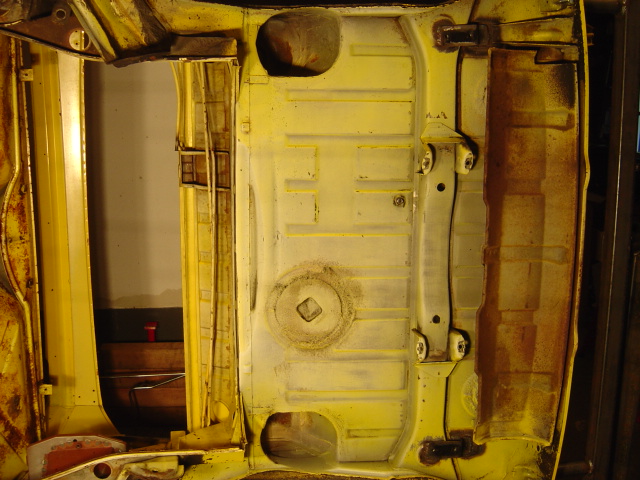
Posted by: william harris Jun 6 2004, 06:08 PM
I also spent some time cleaning up the firewall and gave some attention to removing as much of the undercoating from the car as possible. Check out the following pictures.
Attached image(s)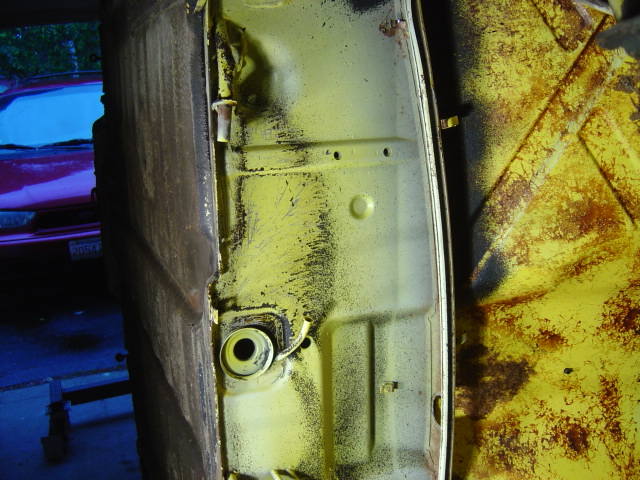
Posted by: william harris Jun 6 2004, 06:09 PM
I wanted to remove as much undercoating as possible to make sure there was good solid metal underneath. So far no bad areas.
Attached image(s)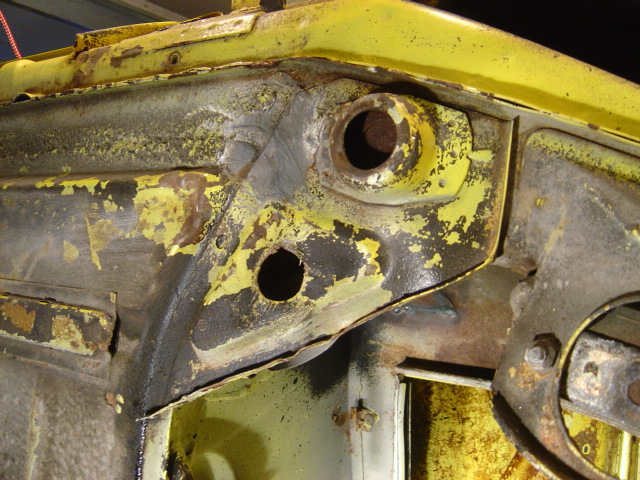
Posted by: william harris Jun 6 2004, 06:11 PM
Here's the other side.
Attached image(s)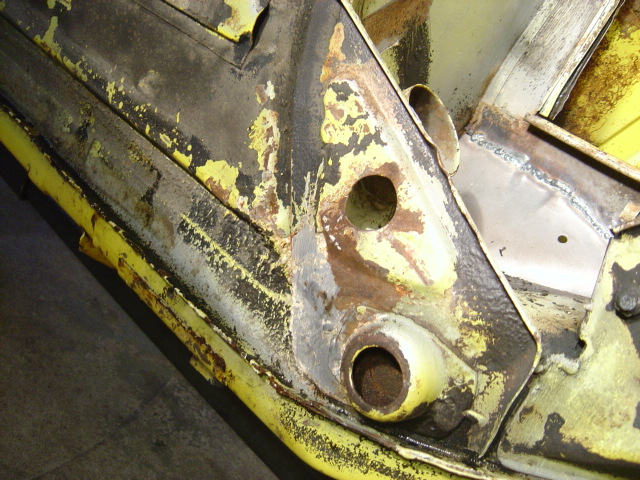
Posted by: william harris Jun 6 2004, 06:12 PM
The suspension ears were especially heavily coated with undercrap!
Attached image(s)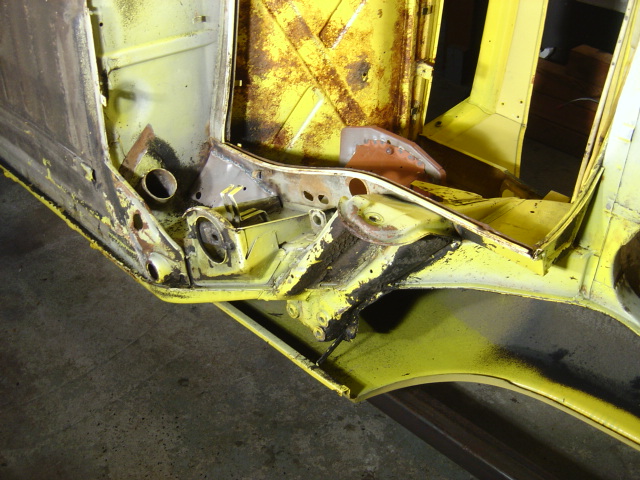
Posted by: william harris Jun 6 2004, 06:14 PM
The undercrap was also about one-half inch thick at the rear panel.
Attached image(s)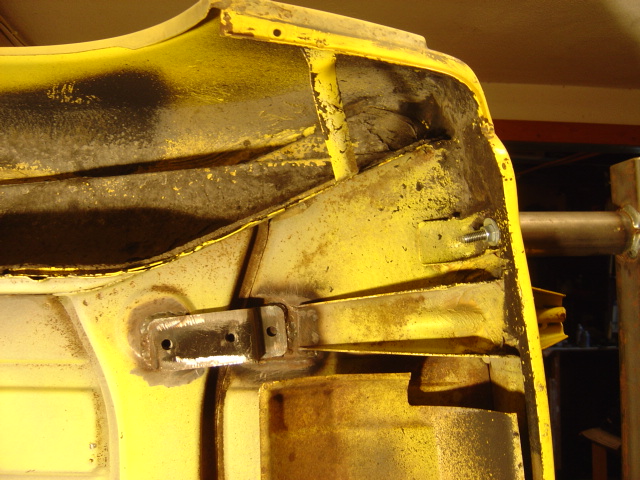
Posted by: william harris Jun 6 2004, 06:16 PM
I intend to strip every spot of this undercoating. Especially inside the fenders and up into the sail panel areas.
Attached image(s)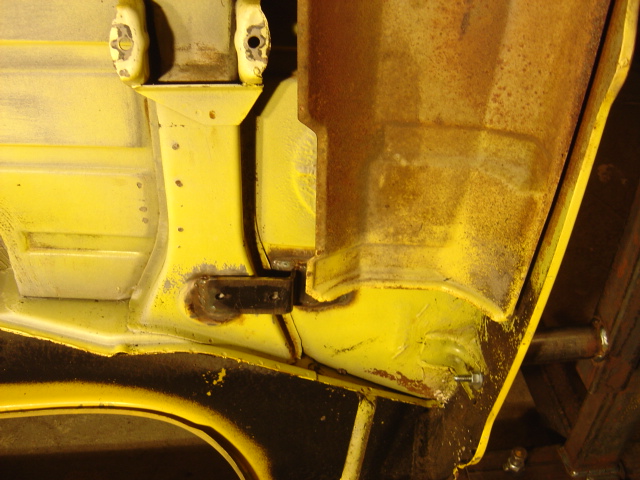
Posted by: william harris Jun 6 2004, 06:21 PM
Well, here's the general idea of what I'm working towards. By the way, anyone have any goods tricks for removing the torsion bar springs for the engine lid and springs for the front trunk. About all there is left to take off before the media strip. So, what do you think?
Attached image(s)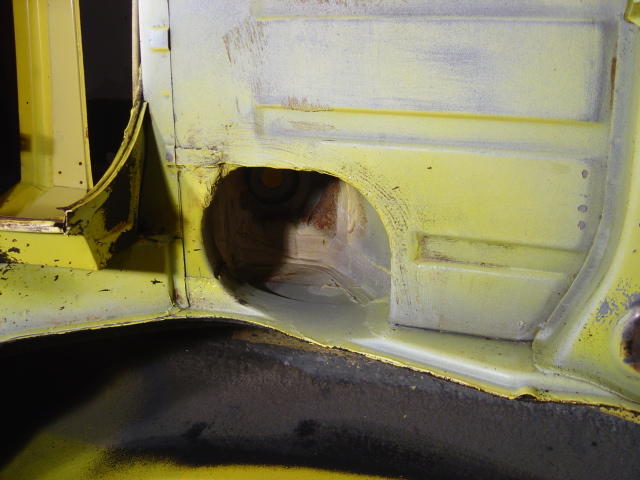
Posted by: Racer Chris Jun 10 2004, 06:51 PM
William,
I am impressed with your diligence at removing the undercoating! Good job!
Now where is that little metal piece located that you want replaced?
Posted by: william harris Jun 11 2004, 06:24 AM
Will post some pictures later this evening. Spot where located and close up of the broken tab. Thanks Chris. 
Posted by: dflesburg Jun 11 2004, 06:52 AM
That beats the crap out of dropping welds on your bald spot...
Posted by: william harris Jun 11 2004, 07:36 AM
Two questions: How the hell did you get the body up on the saw horses? Second question - how will you get if off? 
Posted by: Slowpoke Jun 11 2004, 07:49 AM
Come on, this is a gag, right???? You don't seriously get under this car with saw horses held together with nails. 
I'm not the safety nazi, but, keep a cell phone handy in case you can still call 911 after it falls. 
Posted by: william harris Jun 11 2004, 08:30 AM
Kinda reminds me of the picture posted of the fella working on his car in Mexico, the car was tilted up on its side and held up with a 2x8. Man, those are damn strong saw horses! 
Posted by: dflesburg Jun 11 2004, 11:20 AM
Don't be a bunch of sissy boys...
My neighbor and I picked it up and set it on there.
Yes it sat there until I picked it up and took it down, and put wheels on it.
Geez... 
http://www.longshipconsulting.com/valhalla/thumbs_porsche.htm
Posted by: william harris Jun 11 2004, 11:26 AM
You and your neighbor must be real he men. With my car as it sits on the rotissiere, four strong guys had all they could handle to try to pick it up. I'm sure the chassis must weigh at least 1,000 lbs. I used two massive floor jacks and 2x10s to lift the car onto the rotissiere, this involve a lift of approximately 8 inches. So, you need to tell the sissy boys how to "pump you up." As Arnold used to say.
Posted by: dflesburg Jun 11 2004, 12:04 PM
Alright, you got me.
I took me and 4 other men. But no kidding we did actually pick it up even after I welded in all the steel and fenders and roll cage and had my wife pull the saw horses out and put jack stands under it.
 See my link to my website....
http://www.longshipconsulting.com/valhalla/thumbs_porsche.htm
Posted by: Mueller Jun 11 2004, 12:11 PM
1000lbs?? hmmmm....I had to put a bare chassis on a trailer by myself, I drug the damn thing up onto it. I should have had some help or at least a come-along, but I was stubborn (no wheels, no suspension, just a bare chassis)
of course this could explain my lower back problems (which flared up again last weekend picking up a Boxster S motor with 3 other people at the Partsheaven swapmeet)
nice work as usual Chris
Posted by: dflesburg Jun 11 2004, 08:59 PM
Mueller,
I don't think Morrisey would make a good president, but Henry Rollins (Black Flag) would.
Posted by: rdauenhauer Jun 12 2004, 01:30 AM
Nice work and Good photos. Which brings up a question I have asked befor but never gotten an answer for. On the Muffler heat sheild on one end ther is a notch cut out ...Wat the heck is that for.
Its must be OE as Ive seen it on many cars
Posted by: william harris Jun 13 2004, 09:26 PM
Spent most of the weekend trying to clean up the rear trunk seam and floor area. Discovered the seam sealer by the taillights and latch was holding water like a sponge and causing rust. This is a chunk of the seam sealer after it has been pealed out and flipped over. More crap to remove. Everyone, what is your best technique to get rid of the seam sealer?
Attached image(s)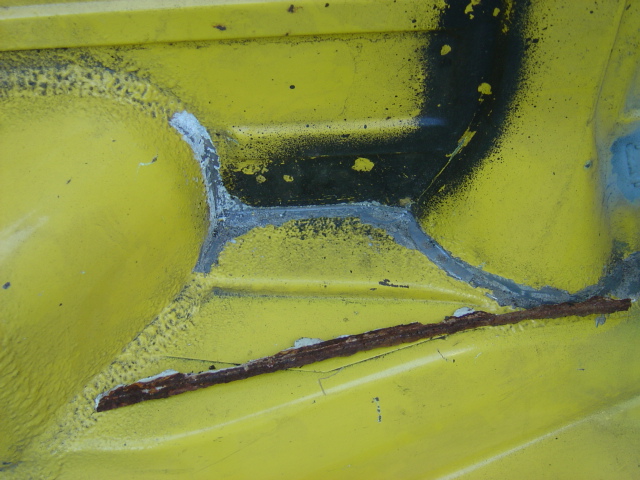
Posted by: william harris Jun 13 2004, 09:29 PM
I'm sure my techinque is a little different, I used a big, sharp Gerber knife (really sharp and strong blade) and just pealed this seam sealer stuff out like putty. Then I hit the seam with the wire brush. Here's the worst area where the water leaked in from the rear tail lights.
Attached image(s)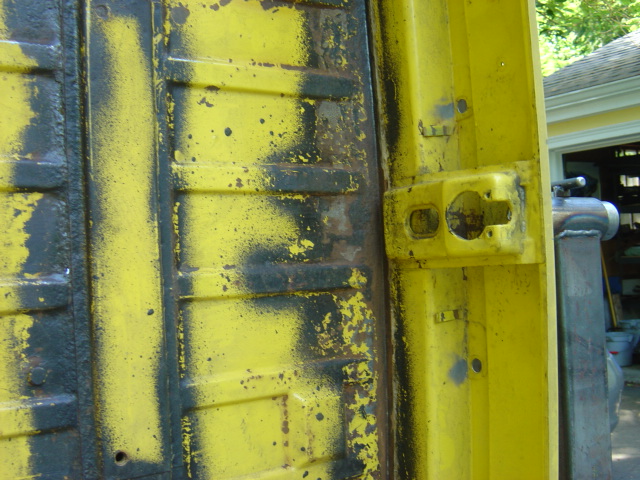
Posted by: william harris Jun 13 2004, 09:30 PM
I can't believe how thick this crap is! In the corners its about 1/2 inch thick or worse. Can imagine tackling this without the rotisserie.
Attached image(s)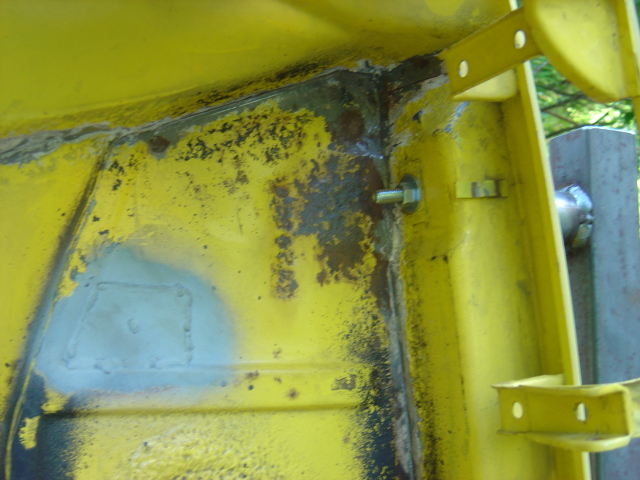
Posted by: william harris Jun 13 2004, 09:33 PM
I've learned that any place on the car with POR15 black paint is a problem area. Wire brush and scraping around this area revealed minute penetration thru the floor at the weld at the reinforcing piece. Racer Chris, what's the best repair here? Lay down and weld over these pin holes?
Attached image(s)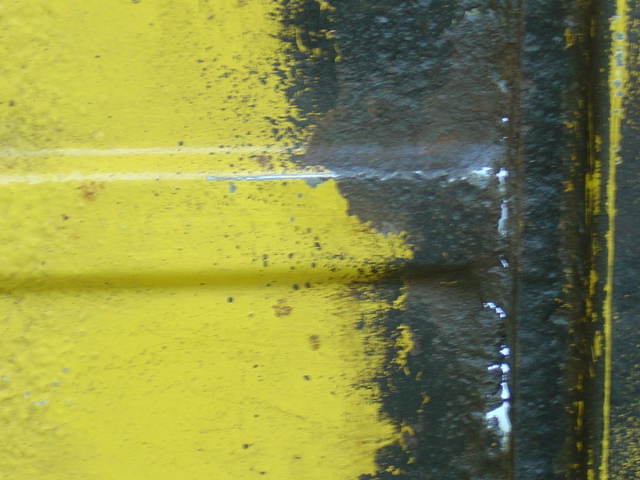
Posted by: william harris Jun 13 2004, 09:35 PM
Here's the same area from the other side. Racer Chris, please PM or call me with your recommendations.
Attached image(s)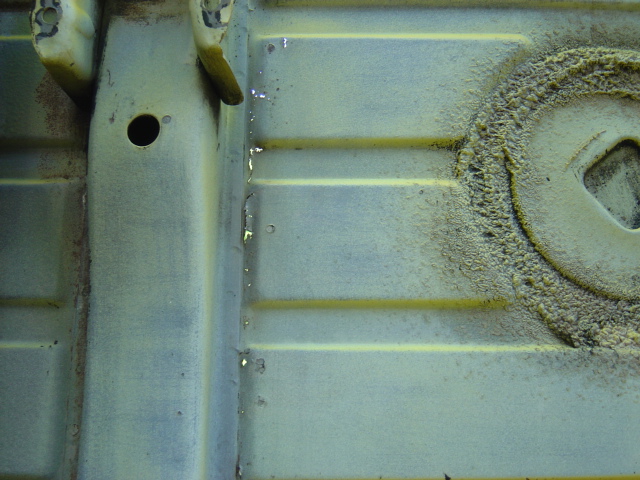
Posted by: william harris Jun 13 2004, 09:38 PM
Question for the group: how far should I go in removing this seam sealer? As you know it is everywhere. Most areas seem good, but I am now worried what is under this stuff. After about 2 hours here is what the trunk area looks like now.
Attached image(s)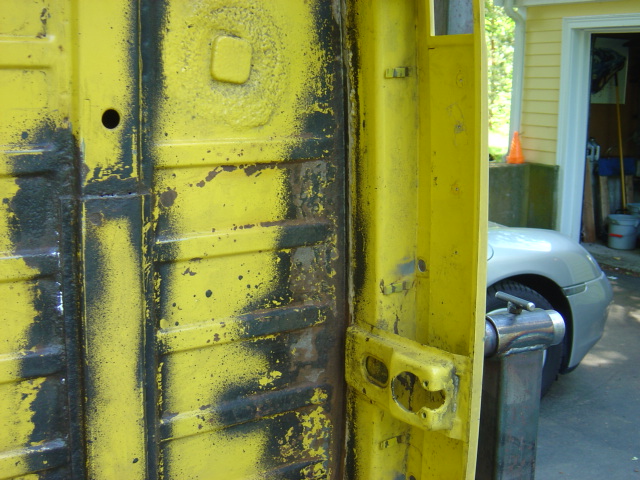
Posted by: Racer Chris Jun 13 2004, 09:41 PM
I'm looking William.
I'm surprised to see the perf ahead of the tranny crossmember.
Posted by: william harris Jun 13 2004, 09:42 PM
Since the weather was good, I also took the time to degrease the area around the gas tank and the front trunk. These areas really cleaned up nice.
Attached image(s)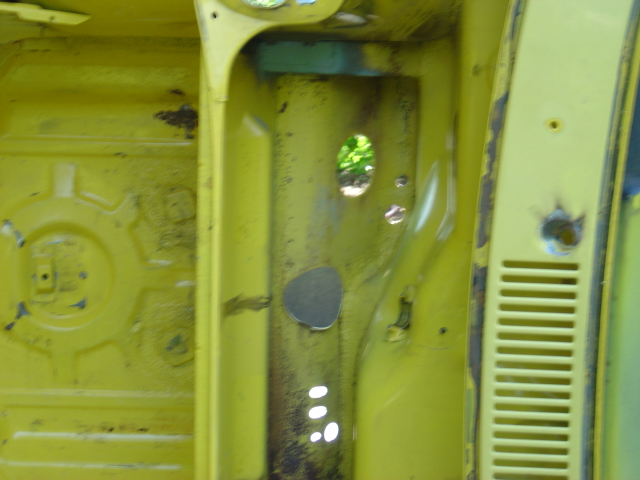
Posted by: Racer Chris Jun 13 2004, 09:50 PM
I say remove as much sealer as you can in as many areas as possible, unless there is really no chance of rust hiding behind an area.
As far as the trunk, wire brush and clean the area so no paint or rust is left around the pinholes. If they don't get much bigger then filling them with the mig is the best approach. I can use a backing bar of copper to help control the heat and fill the holes more easily.
Looks like I may be making a house call.
Posted by: McMark Jun 13 2004, 09:55 PM
Front trunk springs are easy. Get a ViceGrip or pliers and grab them. They're not very tight. You'll be surprised.
The rear are more tricky. I haven't found a great way yet myself. Stick a block of wood in its path or it'll bend the metal up real good.
Posted by: william harris Jun 13 2004, 09:56 PM
Here's the front trunk.
Attached image(s)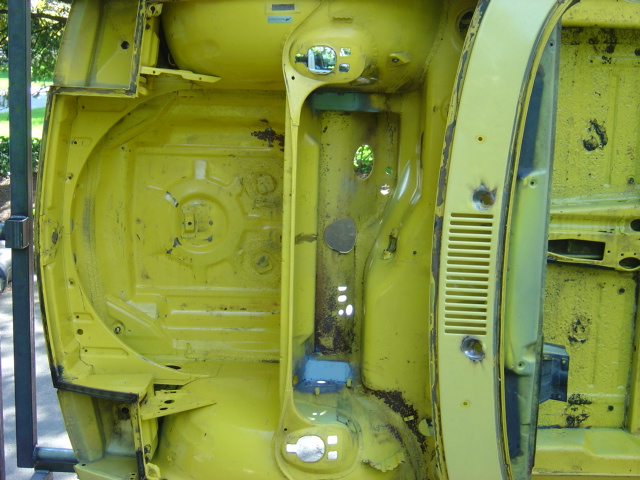
Posted by: william harris Jun 13 2004, 09:58 PM
I also cleaned inside the pedal box area. This was a real mess because the master clyinder was leaking hydralic fulid inside the car. Does a number on the sound deadening crap. Also dissolves paint.
Attached image(s)
Posted by: william harris Jun 13 2004, 09:59 PM
Here she goes back into the garage after another fun filled day.
Attached image(s)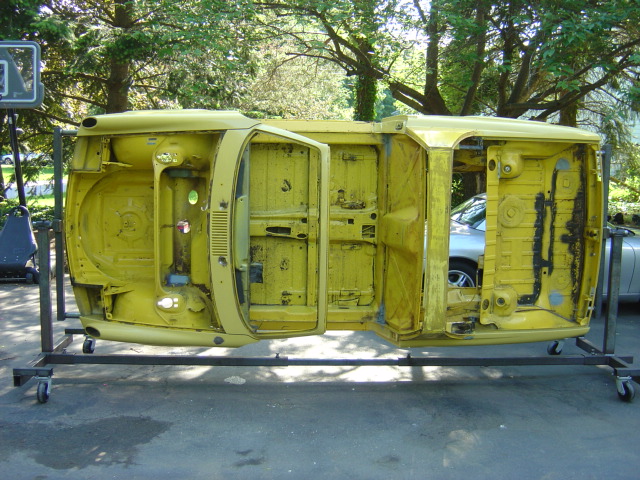
Posted by: william harris Jun 13 2004, 10:04 PM
Racer Chris: House call, house call! Let me finish scraping and wire brushing this trunk floor and get it all ready for you. I was thinking about using a wire wheel on a drill to clean it up, but I like the control with a small stainless steel brush. Don't want to be too agressive if it is not needed. The seam sealer looks OK everywhere else in the trunk. I'm exploring the area under the gas tank next. Glad to know your keeping watch.
Attached image(s)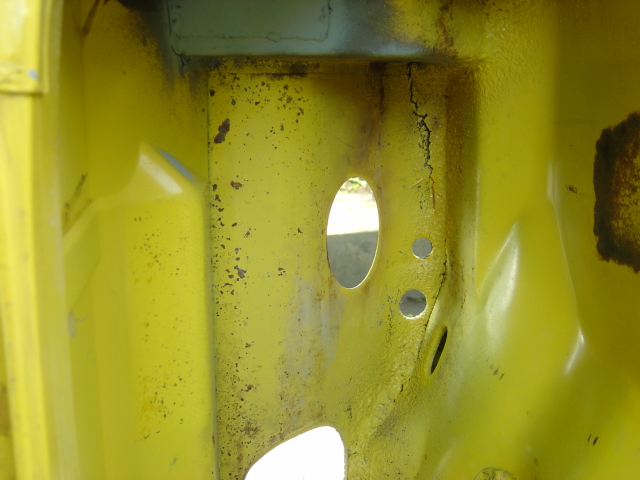
Posted by: william harris Jun 14 2004, 06:20 PM
6/14/04 at 8:18 p.m. EST: Racer Chris: After we talked today I decided to get very aggressive with the trunk floor to expose and remove all the rusted areas. Spent over an hour with a 3 inch coarse wire wheel to remove as much paint/rust debris as possible. Not really any big changes in appearance all though a few more small pin holes opened up. Here's a group of pictures taken from both sides.
Attached image(s)
Posted by: william harris Jun 14 2004, 06:23 PM
Pin holes don't vizualize very well inside the garage. Much better view from the inside.
Attached image(s)
Posted by: william harris Jun 14 2004, 06:25 PM
Another view from the bottom.
Attached image(s)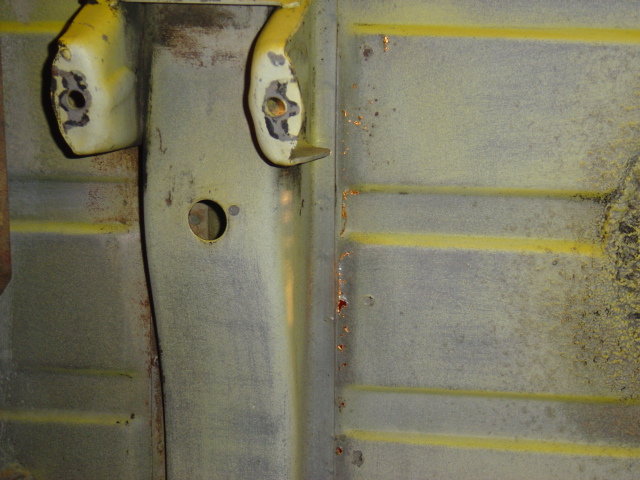
Posted by: william harris Jun 14 2004, 06:27 PM
Here's the last one from the inside of the trunk. Let's go ahead and plan for you to make the repairs. Bring your gear and lunch is on me. Early Saturday would be good. Call me at the office tomorrow.
Attached image(s)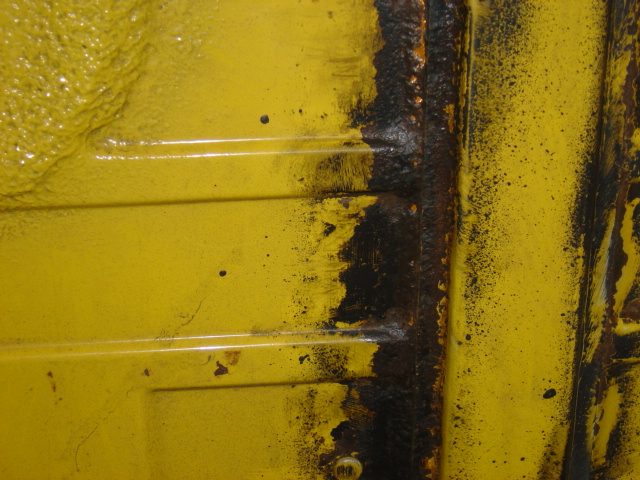
Posted by: Racer Chris Jun 14 2004, 07:51 PM
Re saturday,
I think I can get to your place before 11. With luck we'll be finished by noon.
I'll call you Tues. am to discuss.
Posted by: william harris Jun 26 2004, 12:44 PM
Chris Foley drove over 110 miles one way to come weld up my rusty trunk floor. He spent almost 2 hours with his MIG welder to give me a nice solid trunk floor. Guys here in NE, Chris Foley is our HPH. Support him with your business. Here's a view of the bottom.
Attached image(s)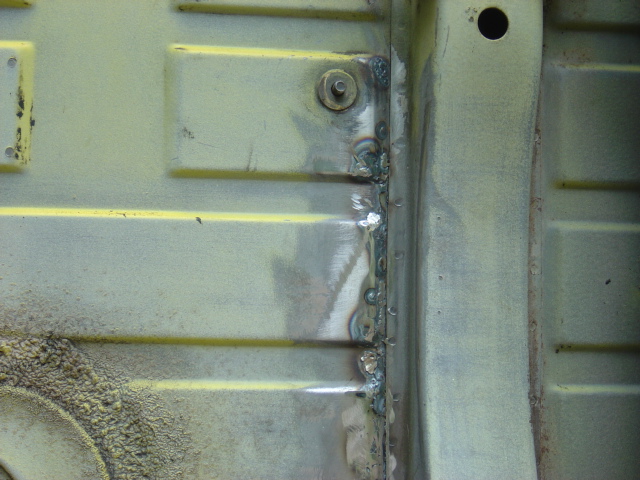
Posted by: william harris Jun 26 2004, 12:45 PM
As you might imagine, when Chris put the MIG welder on this rusty floor, more and larger holes opened up. He stuck with it and saved the panel. Lower view which was a much worse area.
Posted by: william harris Jun 26 2004, 12:46 PM
Damn, forgot to attach the picture. Duh
Attached image(s)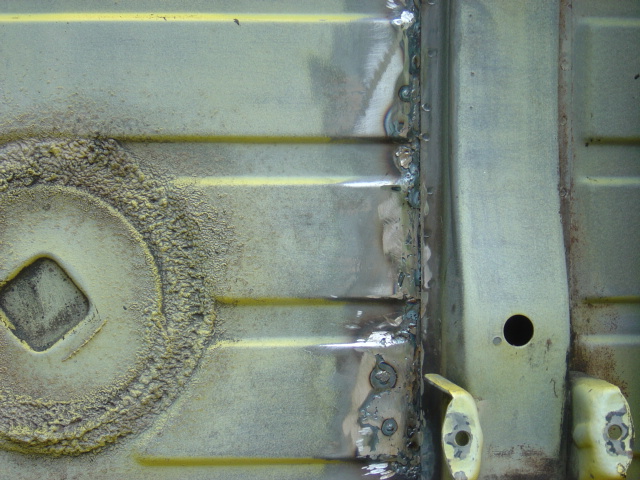
Posted by: william harris Jun 26 2004, 12:47 PM
Here's another view of the same area. Needless to say, this floor sorta looked like swiss cheese.
Attached image(s)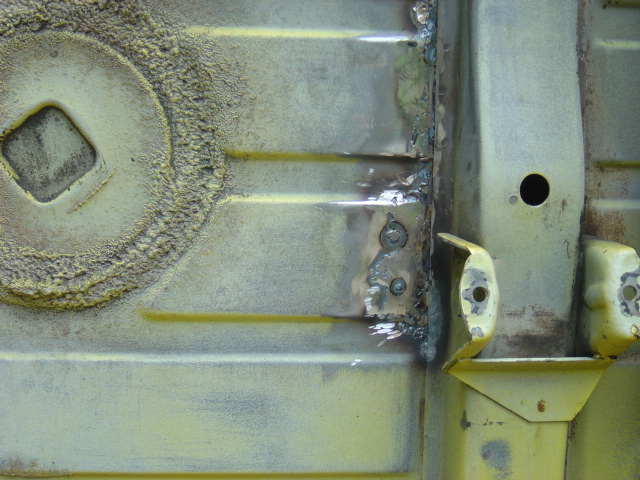
Posted by: william harris Jun 26 2004, 12:48 PM
Here's a view from inside the trunk. Compare this to the earlier ones.
Attached image(s)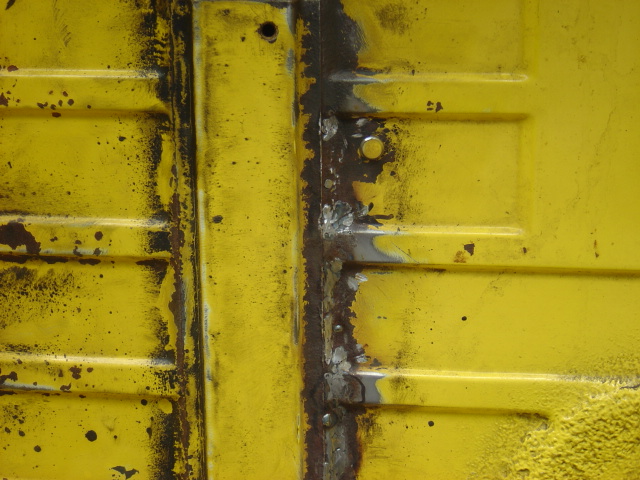
Posted by: william harris Jun 26 2004, 12:49 PM
Another view from inside the trunk. What a big improvement!
Attached image(s)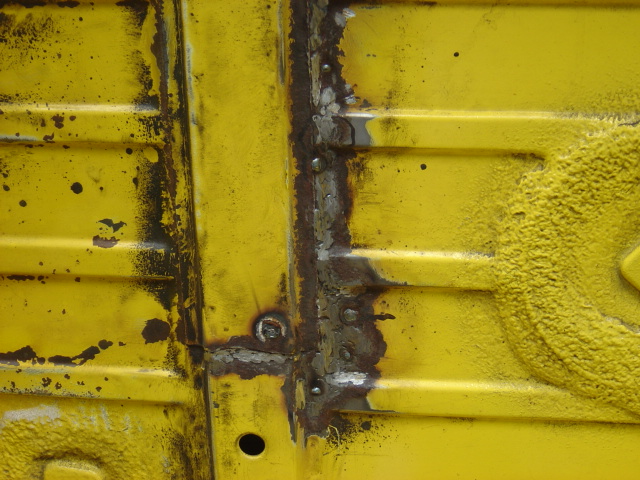
Posted by: william harris Jun 26 2004, 12:51 PM
So my next project has been to remove the undercoating so that I can inspect the bottom of the car for any hidden rust. Scraping this crap off is a slow job.
Attached image(s)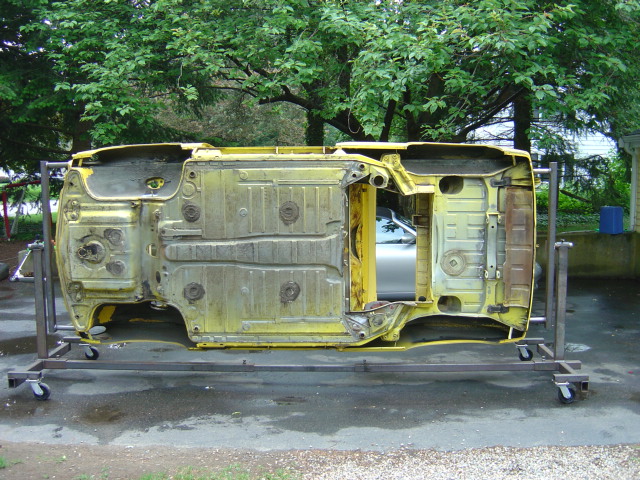
Posted by: william harris Jun 26 2004, 12:52 PM
I haven't tackled the wheel wells yet. It is really thick in there. The suspension ears were also heavily coated. Took a couple of hours for these areas.
Attached image(s)
Posted by: william harris Jun 26 2004, 12:54 PM
The good news is that the floor pan is absolutely solid. This is the proverbial california car.
Attached image(s)
Posted by: william harris Jun 26 2004, 12:56 PM
The front trunk area was a real bitch to clean up. Undercrap was very thick here. Chris also welded up to small tears in the floor pan where some idiot tried to jack the car up under the tow eye.
Attached image(s)
Posted by: william harris Jun 26 2004, 12:58 PM
Here she is ready to roll back into the garage. I'm going to tackle the large plugs next. Anybody know what these are for? Should I remove them? Brad? Chris?
Talk to me people.
Attached image(s)
Posted by: Aaron Cox Jun 26 2004, 12:59 PM
remnants of the tooling process i thought....
Posted by: kwales Jun 26 2004, 06:39 PM
Drains for the extra paint to run out of after they dipped it in the really big vat o' paint.
Ken
Posted by: william harris Jun 26 2004, 07:49 PM
My 914 buddies have speculated that the holes were used by jigs to hold the panels in place when the body was assembled. Does anyone really know? 
Posted by: Racer Chris Jun 26 2004, 08:41 PM
I'm not sure why those plugs are there but I recommend leaving the sealer alone unless it is already peeling and rust forming underneath. It's a royal PITA to clean all that stuff off.
Posted by: william harris Jun 27 2004, 01:18 PM
Now, this car is going to be media blasted, so I assume the media will eat this sealer crap off and then get down to the plugs. So, before the final paint work, what product should I use to replace/reinstall the seam sealer? Brad, when you guys out west take the cars for the acid dip, what do you do about the seam sealer?
Posted by: Brad Roberts Jun 27 2004, 01:24 PM
Several different companies sell a sealer that closely resembles the factory stuff (we even use a applicator/sponge setup to semi dupe what the factory did) I dont have the name here at the house. I'll have to call the body shop tomorrow and get the name of the product.
Lookin good Use a 4 inch hand grinder and a wire wheel attachment to RIP through any undercoating or seam sealer. It whips it off in minutes. We have to remove it all before the acid dipping.
B
Posted by: william harris Jun 27 2004, 01:29 PM
Brad: ThaNKS for the kind words. This project has moved along thanks in large part to your help and advice, parts from HPH and the welding from Chris Foley and CFR Welding. Hope to have the car ready for media blasting in another week. Will post pictures when stripped and before we shoot the primer. So, what the hell are the plugs for any way and how are they removed (what wrench or what the hell do you use to remove them). TTYL, William
Posted by: Brad Roberts Jun 27 2004, 01:42 PM
You have to remove ALL the seam sealer from around them. Once you get it all away.. they twist out fairly easy. I use a large pair of channel locks AFTER I get them moving with a small blunt chisel/hammer setup.
Honestly.. I'm not sure why you want to remove them. They can blast them place. The only thing I would be worried about is the undercoating. Remove it all.
B
Posted by: winterkornj Jun 27 2004, 02:04 PM
Anyone in the southern Ohio area with a rotissere to barrow or rent.
Thanks
Posted by: william harris Jun 29 2004, 08:37 PM
So today I found time to attack the globs of seam sealer around the six mystery plugs. Per Brad's suggestion, you really can cut right thru the stuff with a wire wheel. Here's the front end.
Attached image(s)
Posted by: william harris Jun 29 2004, 08:39 PM
Took about two hours to take car of all six plugs. The seam sealer was about an inch thick. But as you can see, basically virgin metal underneath. This was what I was looking to find.
Attached image(s)
Posted by: william harris Jun 29 2004, 08:40 PM
In case you ever wondered what these things were (I sure did) here's a good close up look. As you can see, there are three ears that can be rotated to grooves to remove them entirely. I'm gonna leave them in place for the media blasting.
Attached image(s)
Posted by: william harris Jun 29 2004, 08:43 PM
Damn, I'm running out of stuff to do with the body. Guess the next project will be to decide how to move it on a trailer (while still on the rotissiere) and not do any damage to the body. Chris, let me know when the pieces for the door jams might be available to borrow. Well, I'll just roll her back into the garage for now.
Attached image(s)
Posted by: Racer Chris Jun 30 2004, 05:51 AM
It looks like you forgot to do the big plug in the rear trunk! You're not done yet.
Posted by: kafermeister Jun 30 2004, 07:41 AM
Obviously the sign of someone in denial. This is a 914 right?
Seriously, good work. Keep the pictures coming.
Rick
Posted by: william harris Jun 30 2004, 01:00 PM
Hot Damn, I forgot one, now I have something else to do. So Chris, what about those braces for the door jams? Might you have them available soon? PM or call me. Thanks, William
Posted by: Korijo Jun 30 2004, 01:55 PM


Posted by: william harris Jul 15 2004, 06:40 PM
So after a couple of weeks hiatus, I am at least back to some small efforts to move the job along. My local Porsche shop was willing to help me sand blast all of the suspension parts (and complete the disassembly). Well, here's what the bits and pieces look like after 23 hours in the blasting chamber (small parts blaster).
Attached image(s)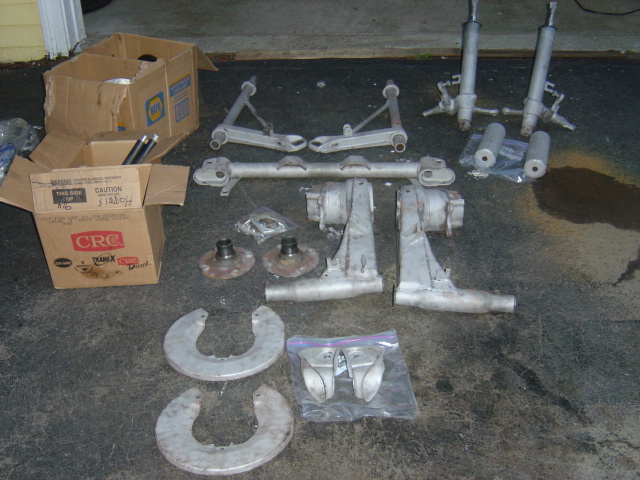
Posted by: william harris Jul 15 2004, 06:43 PM
Remember, these parts were so grimy and basically coated in road grime and gunk. I think they cleaned up real good. The plan now is to tape up the bearing surfaces and take them all to the local powder coater. Will powder coat them gloss black.
Attached image(s)
Posted by: william harris Jul 15 2004, 06:47 PM
My plan is to paint the underside of the car, no undercoating and a finely detailed and renewed suspension. I have also decided to go with Chris Foley's exhaust system and I am talking to Jake Raby about motor build using the new Kit Carlson system.
Attached image(s)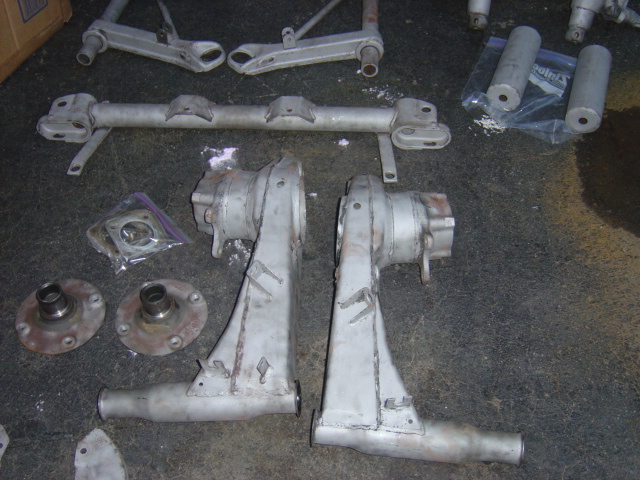
Posted by: william harris Jul 15 2004, 06:49 PM
By the way, I should be posting pictures soon of a one owner 1970 914-6 that has recently come up for sale. I have been trying to run down this guy for a couple of weeks now.
Attached image(s)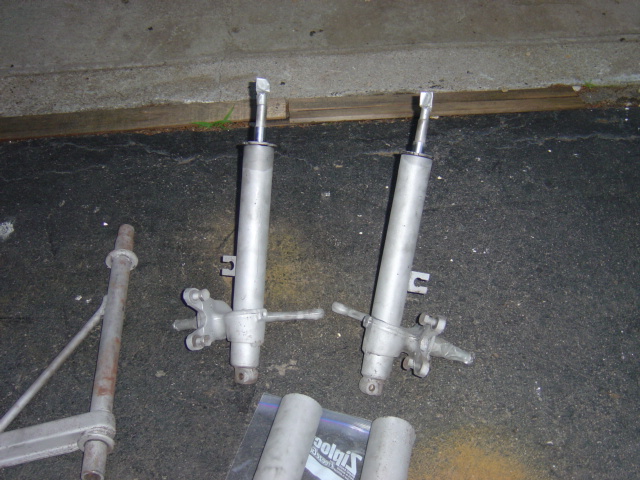
Posted by: william harris Jul 15 2004, 06:52 PM
Final note: my 914 enabler, partsman (parts manager at local Porsche dealer) was able to locate and obtain the last three trim tags (part PCG 701 105 00) in Germany. Well, they are in his possession now. One is mine, since I am doing a color change, I will stamp the tag with the new paint code. Two will be for sale. Interested? Excuse the bad photo, hard to get close up on such a small piece. These are blank.
Attached image(s)
Posted by: william harris Jul 15 2004, 06:53 PM
Slightly better pic?
Attached image(s)
Posted by: william harris Jul 15 2004, 06:55 PM
I guess not, well you know what this is, the tag/plate inside the door jam at the front, has the body number and paint code. Needed for that Porsche Parade restoration candidate.
Attached image(s)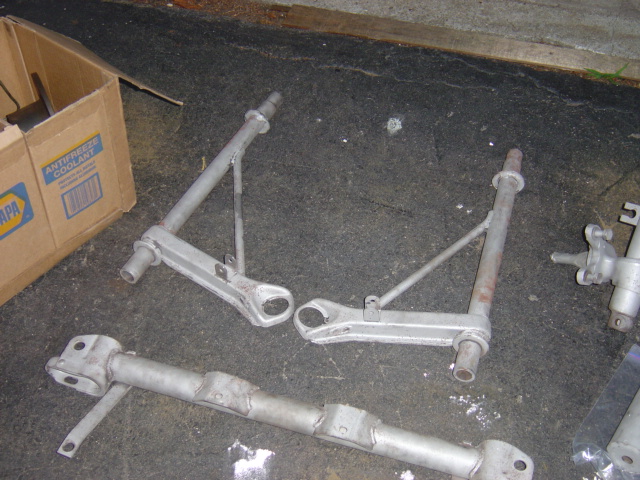
Posted by: Korijo Jul 15 2004, 11:19 PM
I want One 
Posted by: jandro62 Jul 16 2004, 08:27 AM
i'm interested in the other one
Posted by: partsman Jul 16 2004, 10:44 AM
I had to fly them out of Germany, so I will seel them for the abosolute cost to me: They had a list of $38.00 when they were available, when you factor in the cost of the Porsche air freight, they come in at $50. I know this might seem steep, but you'll NEVER see them new again. If either korijo or jandro62 are still interested, just pm me. Sorry the price is what it is, but I've got to cover the cost at least.
Eric
Posted by: Doug Leggins Jul 16 2004, 04:22 PM
Great job cleaning the car up!
I have recently gone through a lot of this and can not imagine being able to do this level of clean-up/prep with out using a rotisserie. Soooo nice to be able to rotate the car into a position that allows access to the area being worked! The rotisserie also allowed the painter to do a great job of getting the paint in some otherwise very hard to get to places.
You're on the way to having one great 914!!!
Someone asked earlier in this post if there was a rotisserie in Southern Ohio available to use. I'm located in Nashville, IN - about 2 hours west of Cincinnati. I have a rotisserie available for use. Anyone in this area - let me know if you want use it.
Posted by: william harris Jul 16 2004, 07:18 PM
Thanks for the kind words Doug. Like you, when my job is finished I will make the rotissiere available for other club members to use.
Posted by: hargray2 Jul 3 2005, 06:40 PM
How did you go about getting the car to the stripper while on the rotisserie?
Did you just pull it up on an open trailer?
Posted by: william harris Jul 3 2005, 08:12 PM
Dropped the car down on to a body dolly and then when delivered, used lift to reinstall. Don't think a car can be moved while still on rotissiere.
Powered by Invision Power Board (http://www.invisionboard.com)
© Invision Power Services (http://www.invisionpower.com)