Printable Version of Topic
Click here to view this topic in its original format
914World.com _ 914World Garage _ Nader's Nightmare...and mine too build thread
Posted by: 914coop Jun 20 2011, 10:23 PM
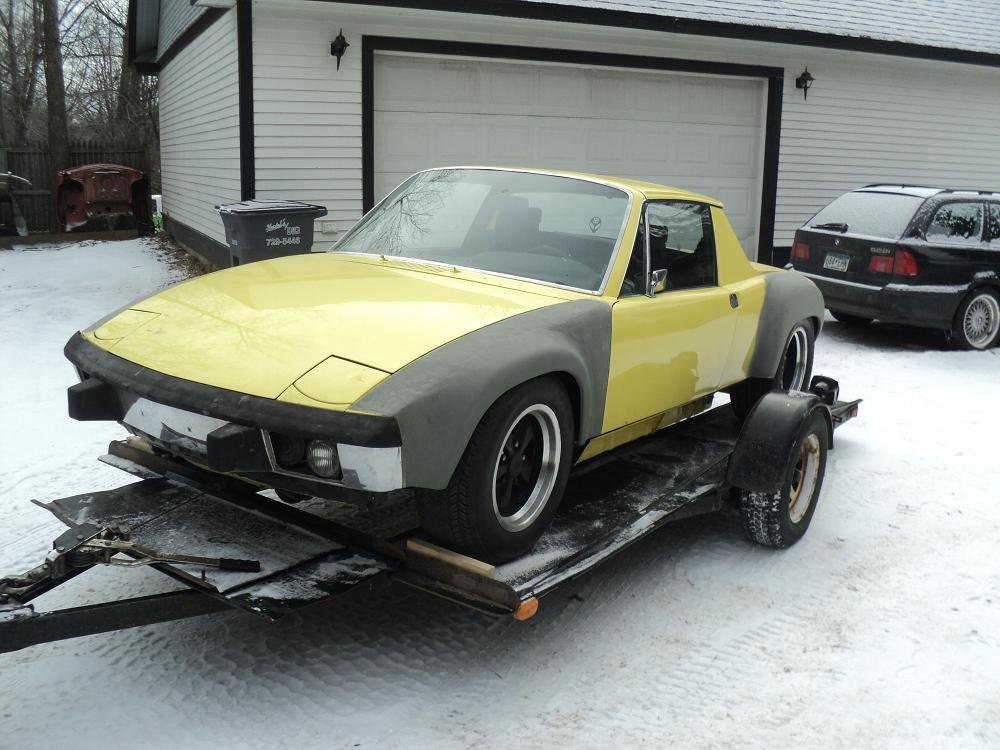
Well after over two months it has finally arrived.  Guessing a lot of you are already familiar with this car. Previous threads are http://www.914world.com/bbs2/index.php?showtopic=111004&hl= and http://www.914world.com/bbs2/index.php?showtopic=95381&hl=.
I bought this car for two reasons.
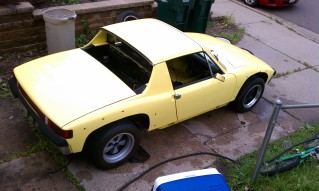
First, back on moaners day 2010 my 76' was rear ended. Got a rear clip for it and was going to have Area 51 Werks straiten it out and put on my AA steel flares. This car handled most of that need. (flares will still need to be done)
Second, I was planning on doing the five lug conversion. Had the parts to convert the 914 suspension to a five lug. (Modified 914-4 parts) This car was a huge upgrade as T.C. had converted it to a 911 setup both front and rear.
Those of you who know me already know this is a car for my son Dan, as I am legally blind and for some reason the stare of Minnesota would rather I not operate a vehicle on the roads..... 
After some thought and checking Dan's finances (Porsche Purists Skip this paragraph) We have decided to put a 1966 Corvair 180 turbo in it. This engine will be modified slightly. Heads will have stainless valves and angled exhaust ports. Cam has been custom made by Cower Cams for more torque in the mid range and high end. Just waiting on the rebuild kit from Corvair Underground. We also will be changing the draw through Turbo to a dual carb blow through system. We have asked Steve Goodman (Corvair Guru) for advice as we started down this path.
Set a goal to have it road worthy by the RRC this fall.
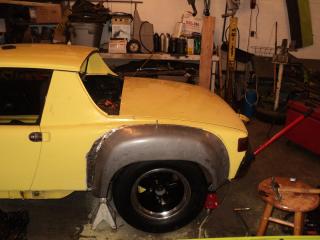
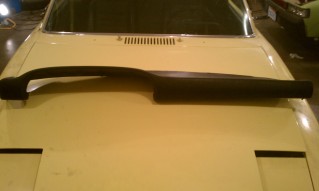
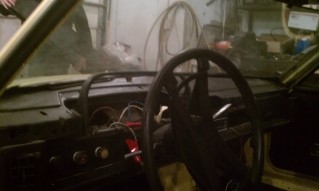
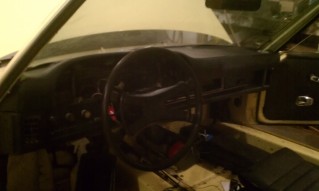
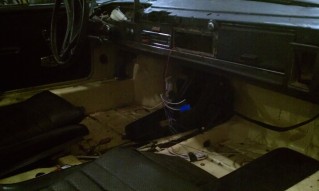
Here are some pictures, sorry my son took the pictures and can not seem to center the subject.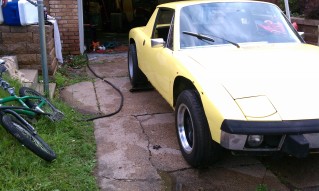
Still searching for a name, suggestions welcome.
Posted by: carr914 Jun 21 2011, 05:00 AM
Irv, since it's getting a Corvair engine, I'm thinking of a Nickname like Nader's Nightmare
T.C.
Posted by: kevin311 Jun 21 2011, 07:18 AM
Congrats on the car. I went to look at it and it was the cleanest shell i have ever seen. I just didn't have the time or money to do with it what it deserves.
Being blind never stopped any Florida drivers, maybe you should just move here! 
Good luck with the build
Kevin
Posted by: PanelBilly Jun 21 2011, 08:08 AM
What prompted the covair engine?
Posted by: 914coop Jun 21 2011, 08:47 AM

Irv, since it's getting a Corvair engine, I'm thinking of a Nickname like Nader's Nightmare
T.C.
Guessing if it it isn't his It may be mine......
, Kinda Like that one tho.Posted by: 914coop Jun 21 2011, 09:26 AM
What prompted the covair engine?
Few things, cost of doing a 911 conversion. Did not have the funds to do it with buying the car, doing the flares, etc. (engines are just plain pricey). So Far the Corvair Engine is at about $1600.00 and I only have Clutch, Pressure plate and the exhaust to finish it up. Thinking it will be just over 2K for a brand new engine, only things left over from the original engine will be the crank and case.
I have owned Cotvairs in the past and have did a reverse rotation engine before with a VW transaxle in a Dune Buggy. Never had a issue with those power plants, however this will be my first turbo.
Cost of parts was a big deciding factor as they are easily obtainable and fairly inexpensive if you shop for them. Example complete rebuild kit without crank, and head work ran $850.00. All gaskets, Rods, Pistons, cylinders, bearings, etc.
Last deciding factor was that I got a running Corvair Spider engine for disposing of the rusty car.
Posted by: Tom_T Jun 21 2011, 10:02 AM
What prompted the covair engine?
Maybe Doc Evil's Bus with a 'Vair motor & his spate of posts on them over the past year? Not bad powerplants & well supported parts-wise in the USA, plus the P-6 conversion could still be done later.
I remember the guy in the earliest post from IN who TC got it from. It turned out he lived a couple of blocks from one of my brothers in Brooklyn IN. Odd the way this car has made the rounds about the country in just a couple of years, bouncing from north to south!
Good Luck Coop & hope your son helps you out with it!
Posted by: 914coop Jun 21 2011, 02:21 PM
What prompted the covair engine?
Maybe Doc Evil's Bus with a 'Vair motor & his spate of posts on them over the past year? Not bad powerplants & well supported parts-wise in the USA, plus the P-6 conversion could still be done later.
I remember the guy in the earliest post from IN who TC got it from. It turned out he lived a couple of blocks from one of my brothers in Brooklyn IN. Odd the way this car has made the rounds about the country in just a couple of years, bouncing from north to south!
Good Luck Coop & hope your son helps you out with it!
Yes Dr. Evils posts got me thinking, however I was still looking for the 911 engine. When it was clear that that was not in the cards (Wallet) right now the Corvair seemed like the perfect choice. No cutting or adding radiators and was substantially less expensive and still had the benefits of the bigger engine. As you had mentioned it can be removed for a 911 engine if desired down the road.
Dan (My son) is the main worker on this car, I am just there to help and give advice since he has graduated this year and the car will be his when it is finished..
Hoping the next bounce down south will be because we drove it to a event instead of it being sold.
Posted by: chuckc Jun 23 2011, 05:38 PM
How fantastic! Congratulations. I wanted this one when it was selling a couple of years ago before I had saved enough to get my first teener. I was looking at one that was selling in Al. that had a corvair engine, but that had floor pan rust. Terry the owner simply loved the corvair power plant and had it to about 150hp carbed, no turbo. How much boost are you going to run?
I'm lookig forward to seeing this car beefed up.
Take care,
Chuck
Posted by: 914coop Nov 5 2011, 10:00 AM
Thanks T.C. for the nickname.
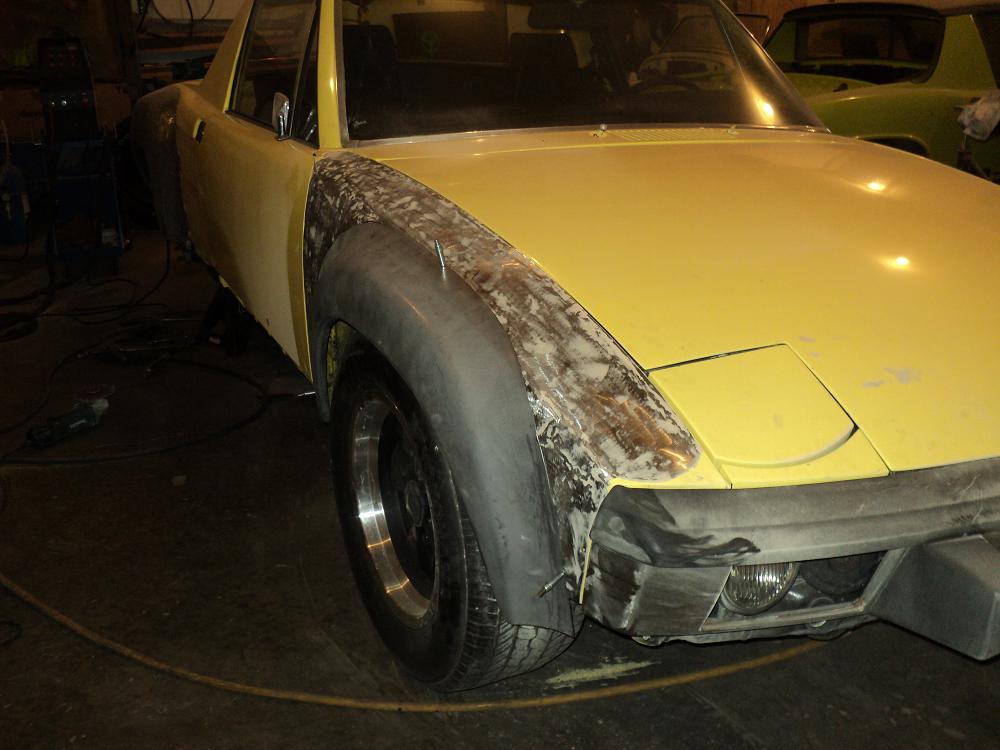
Well after 5 months and still waiting for engine parts. (Another story but if your looking for Corvair engibe parts, i can tell where mot to go) The car is up at Area 51 Werks to get the flares on. 
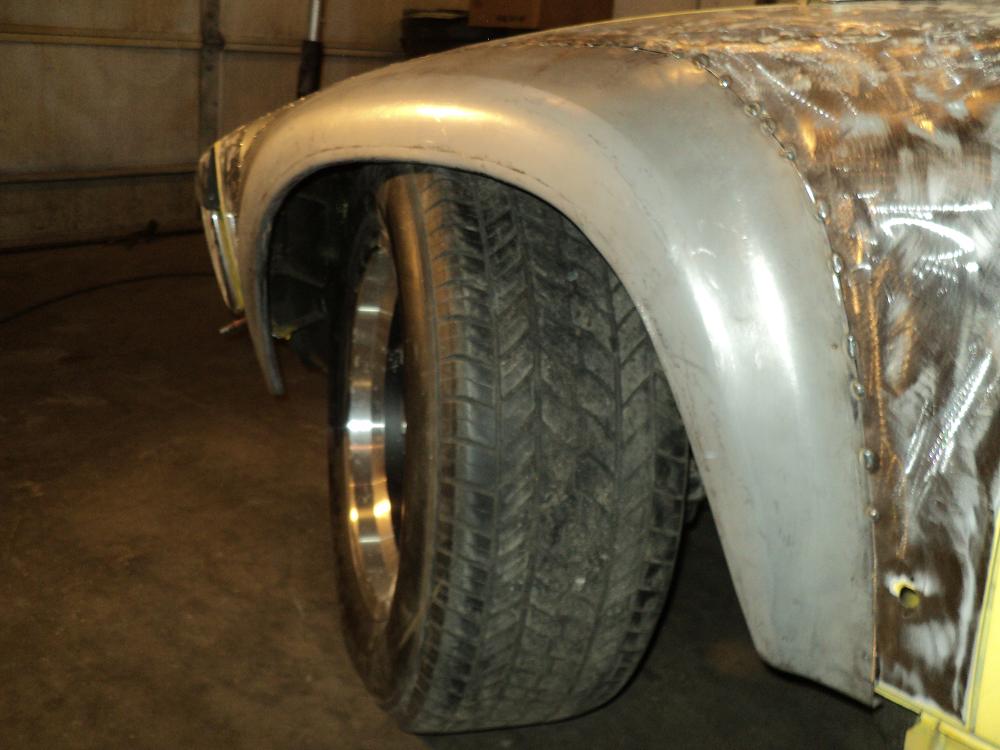
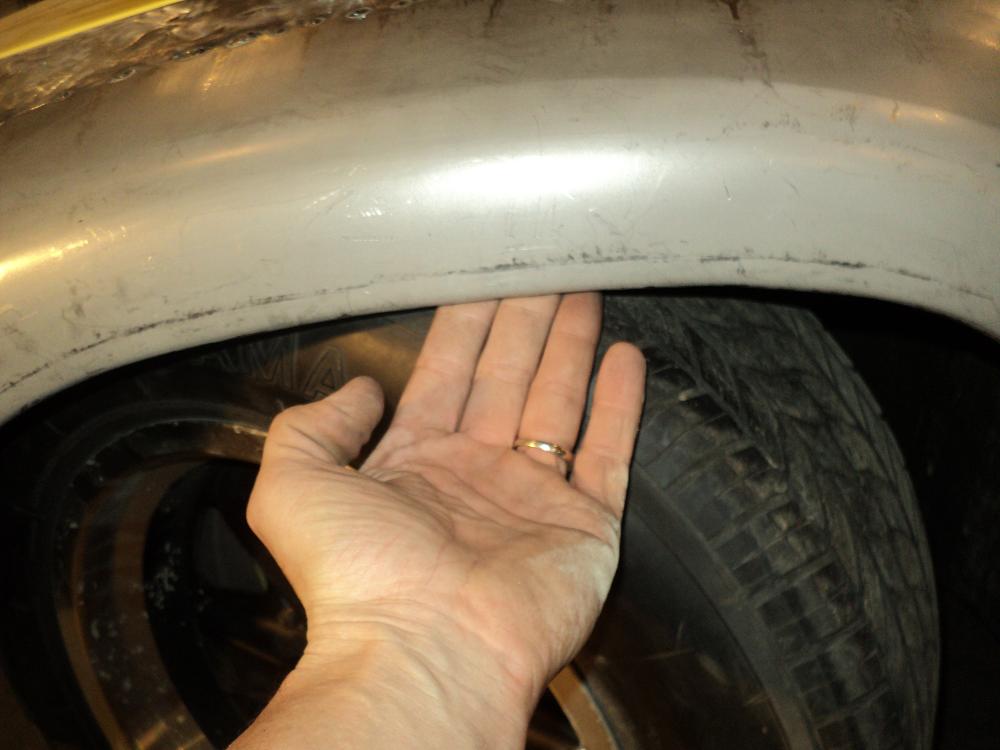
We found 255x60x15 to go on the 15x9 rims that came with the car. Well with that sized rubber and rim Rick had to add almost 2" to the rear flare's. 

We will need to modify or build new rocker covers 
Also when he placed the front ones up for fitment, noticed they will need to be modified also. Sloped nose car. so more 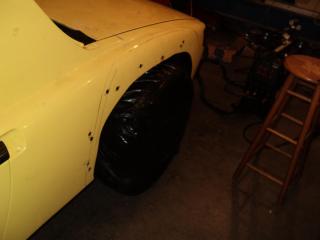
Posted by: rick 918-S Nov 5 2011, 10:41 AM
 I'll post some larger photos if Irv and Dan give me the OK. I would show you the work required to reshape these flares but inprogress photos would likely freak you out. They look really fuggly before they look good.
Posted by: Dr Evil Nov 5 2011, 10:56 AM

If I can offer info, advise, or links to good suppliers of corvair parts, let me know 
Posted by: 914coop Nov 5 2011, 06:08 PM
I'll post some lager photos if Irv and Dan give me the OK. I would show you the work required to reshape these flares but inprogress photos would likely freak you out. They look really fuggly before they look good.You do not even need to ask Rick, go ahead and post them.
Posted by: sixnotfour Nov 5 2011, 08:03 PM
hopefully it was a 1964 spyder so you got the 164ci engine,
Posted by: 914coop Nov 5 2011, 08:25 PM
hopefully it was a 1964 spyder so you got the 164ci engine,
Nope it was out of a very rusty 1966 Corvair Corsa sport 180 turbocharged.
Posted by: Dr Evil Nov 5 2011, 08:42 PM
That is a better engine. If you want to put more oomph behind ya, bore it out and add VW p/c like I did on the bus
Posted by: rick 918-S Nov 5 2011, 10:53 PM
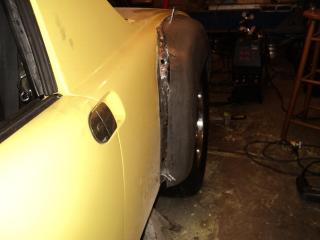
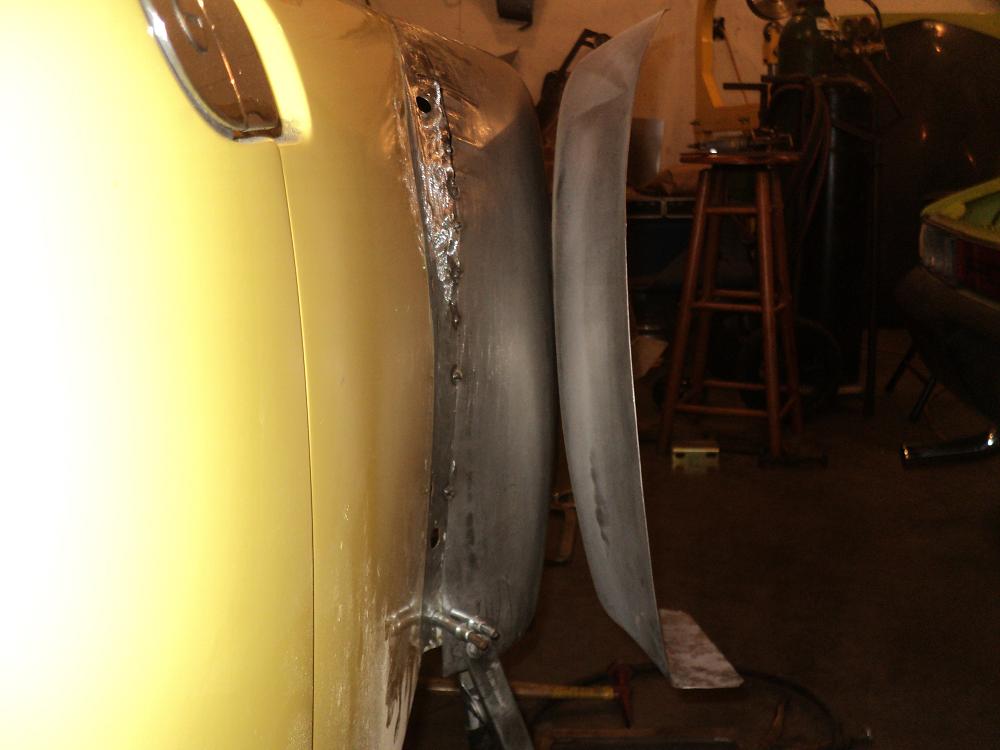
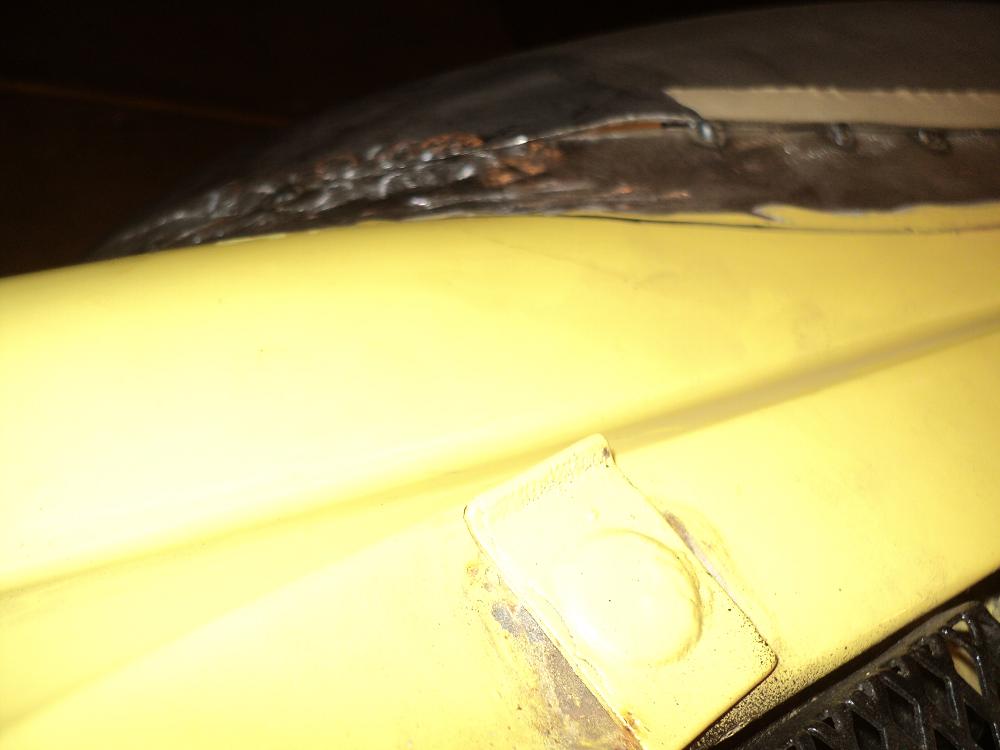
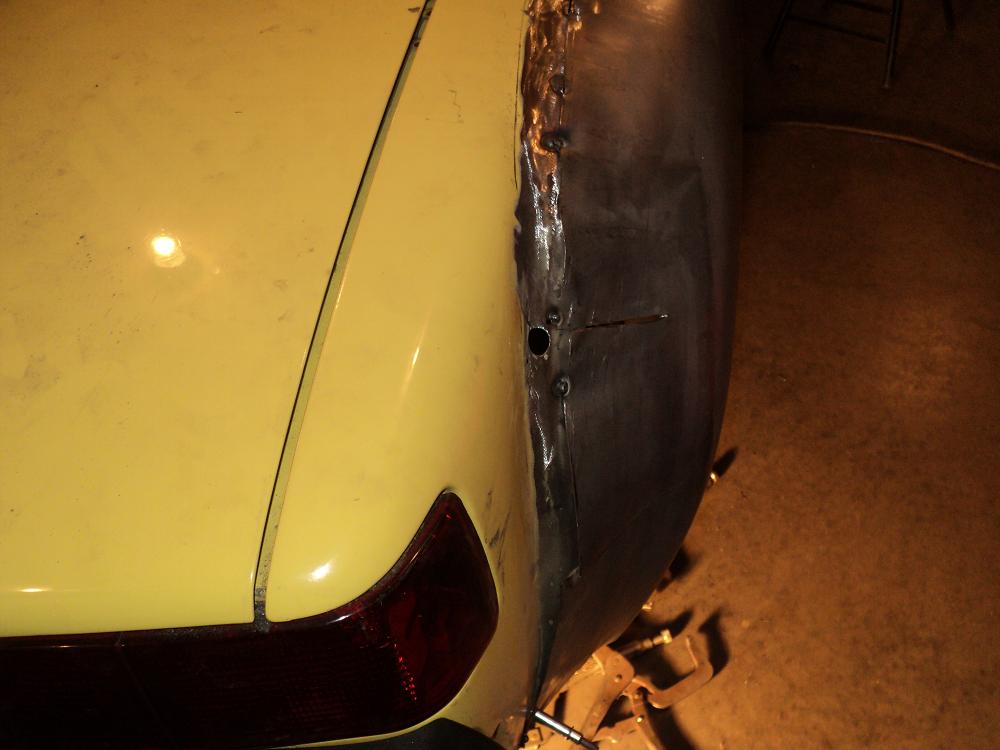
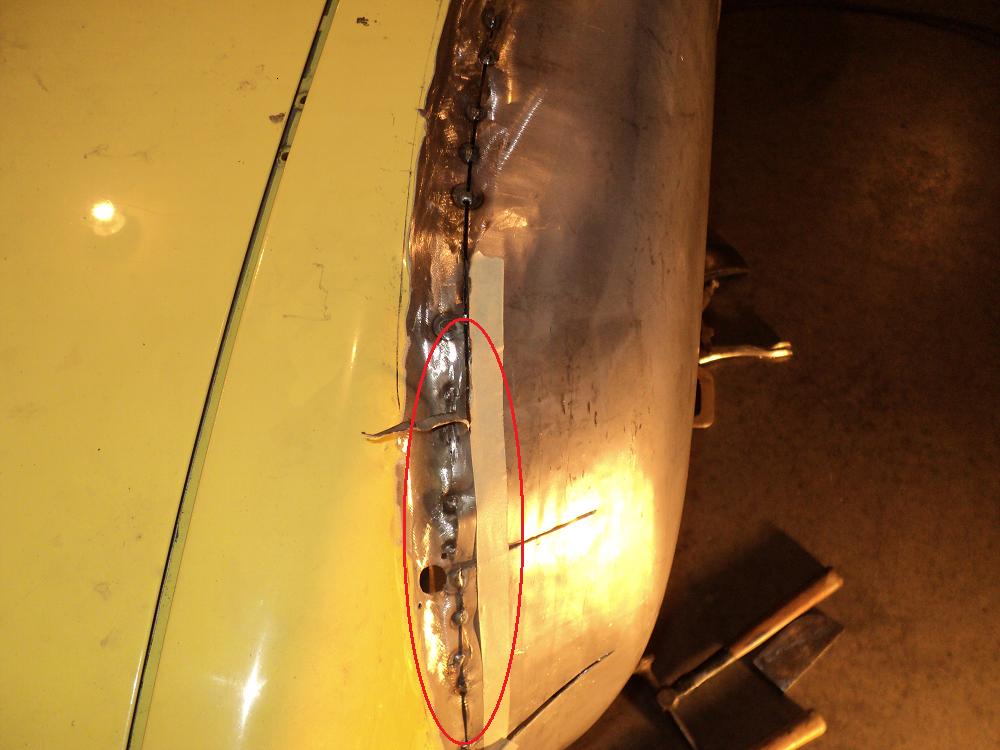
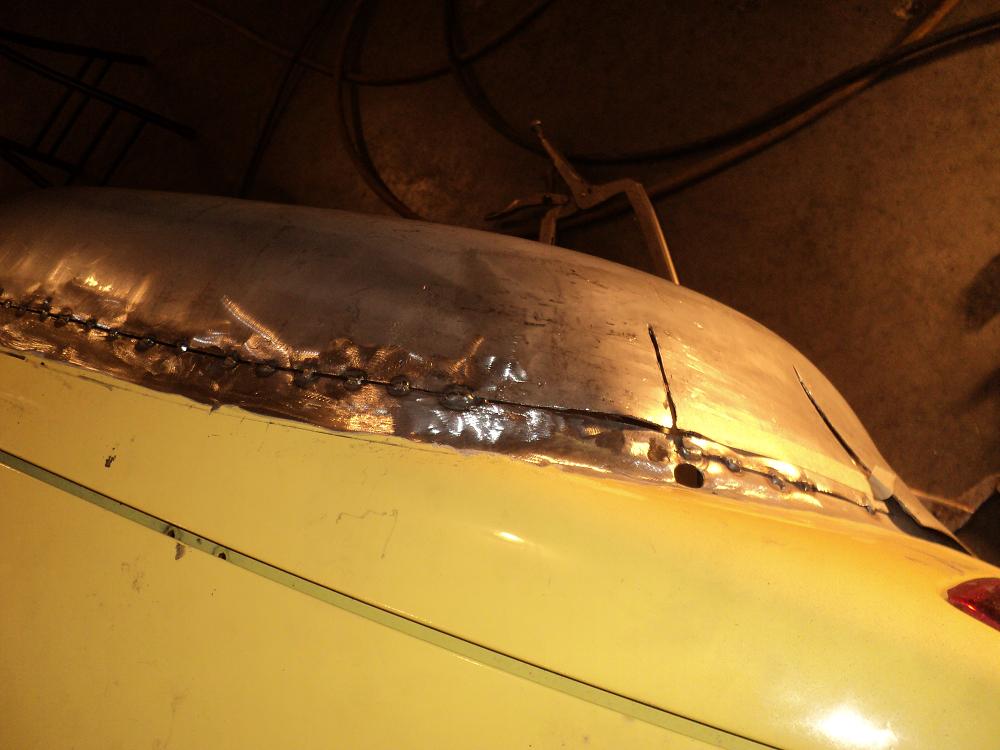
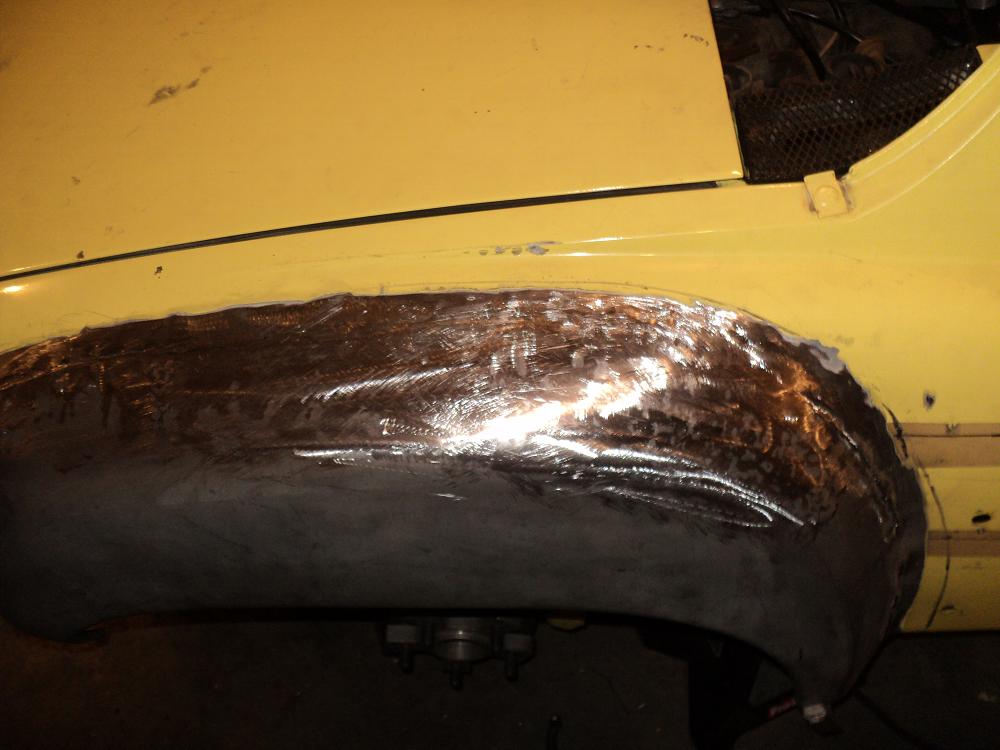
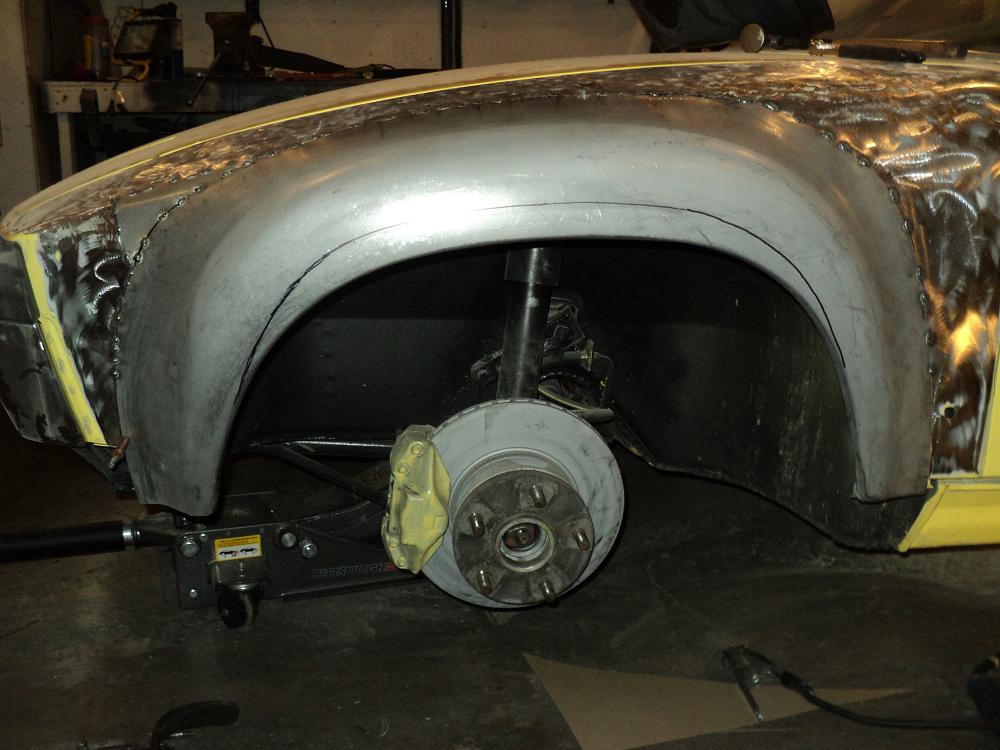
Here ya go guys. Here's a couple from the first day. The rear track is fat so I couldn't just install the flares as everyone else. The sharpie line is where the flares fit without modification. I moved them almost 2" out from the line. These first two photos will kind of give you the impression that I ruined a good set of flares and it will be a miracle if they are even useable anymore. No worries. 
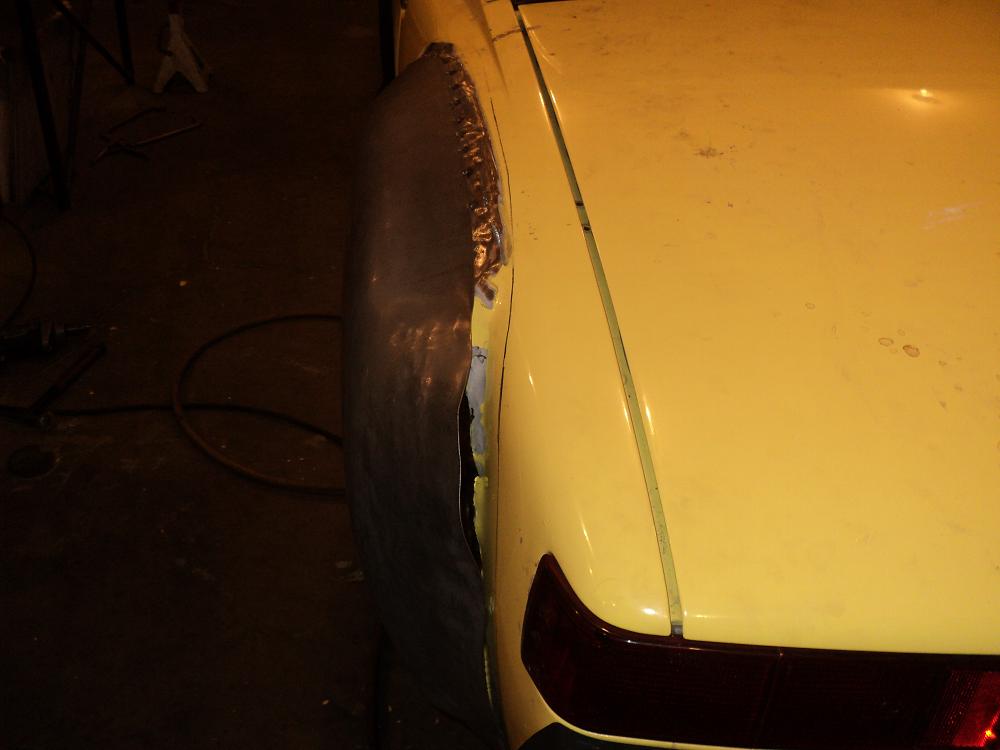

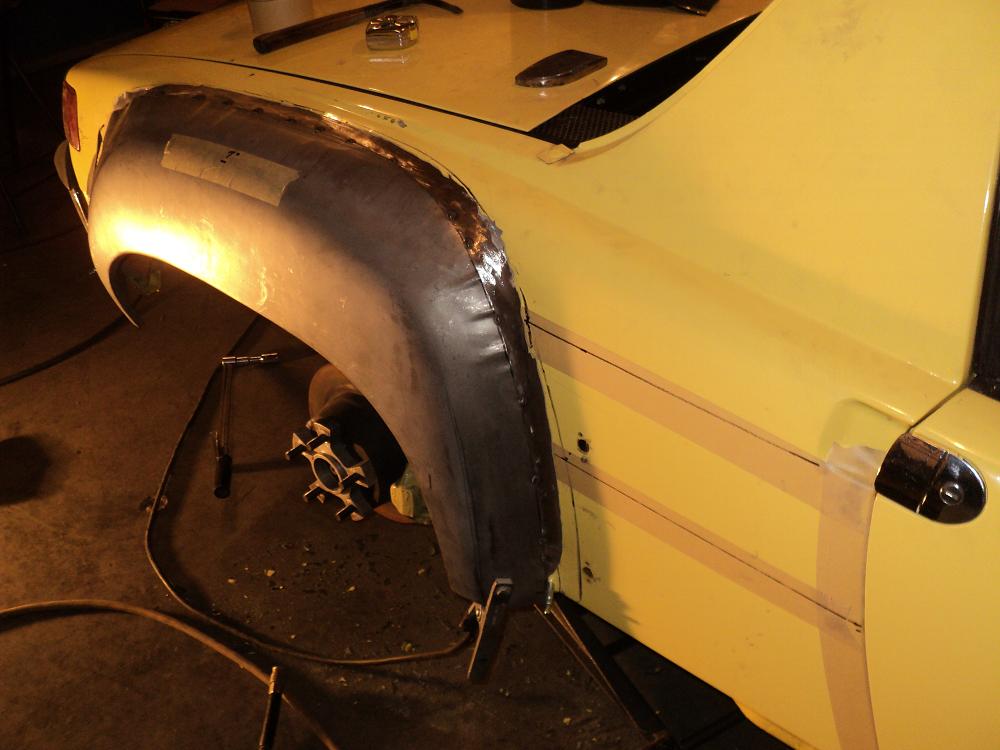
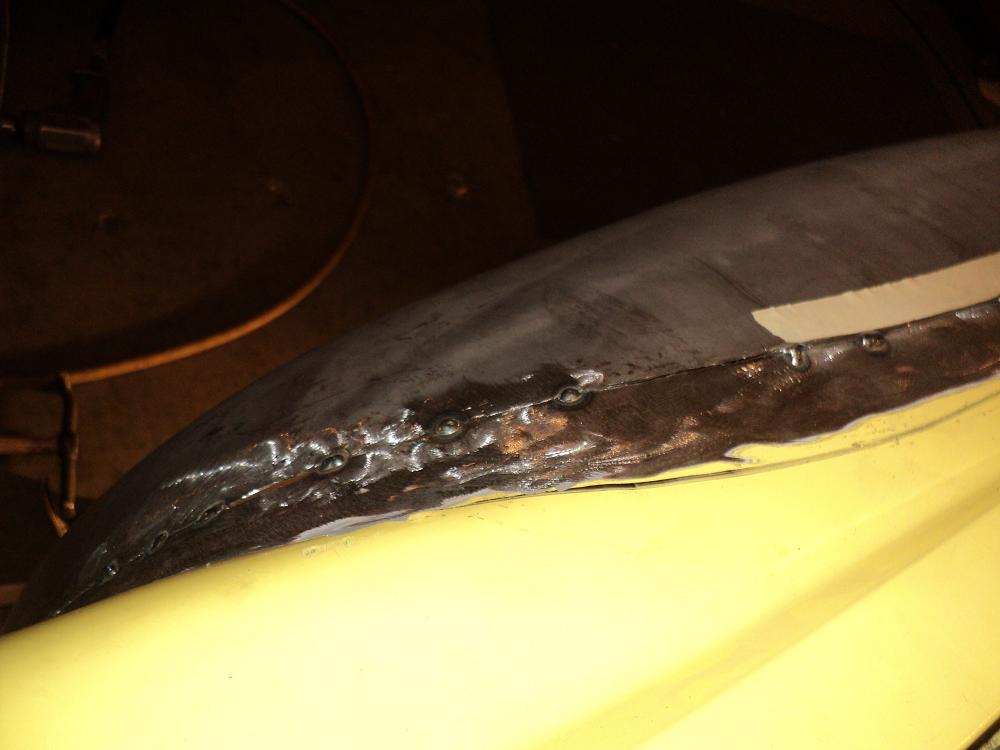
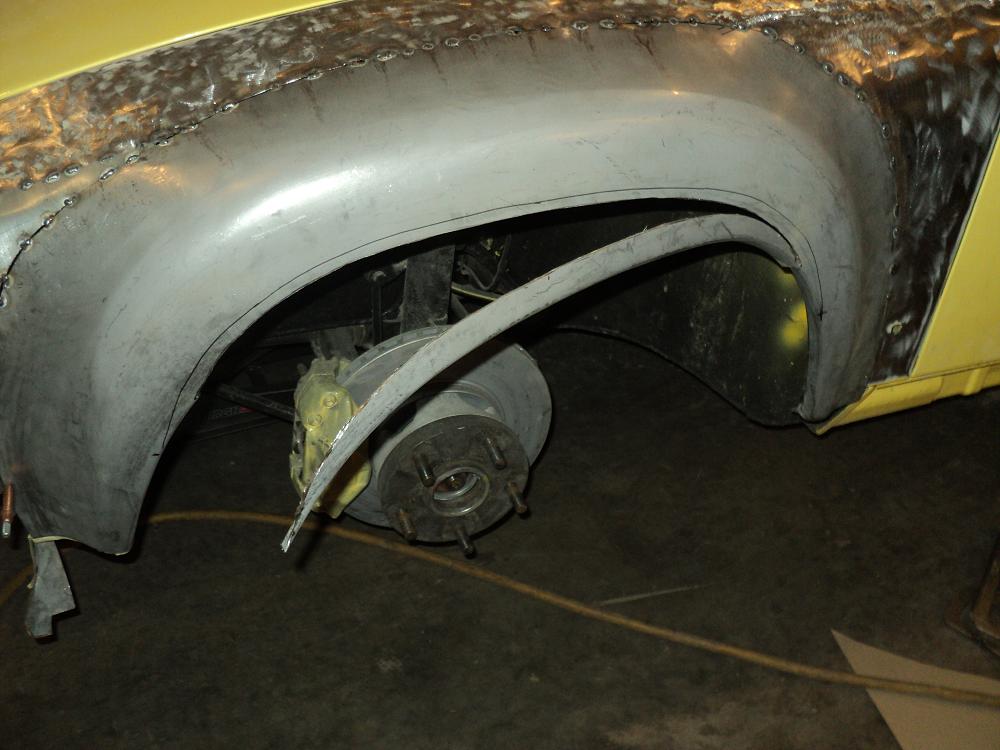
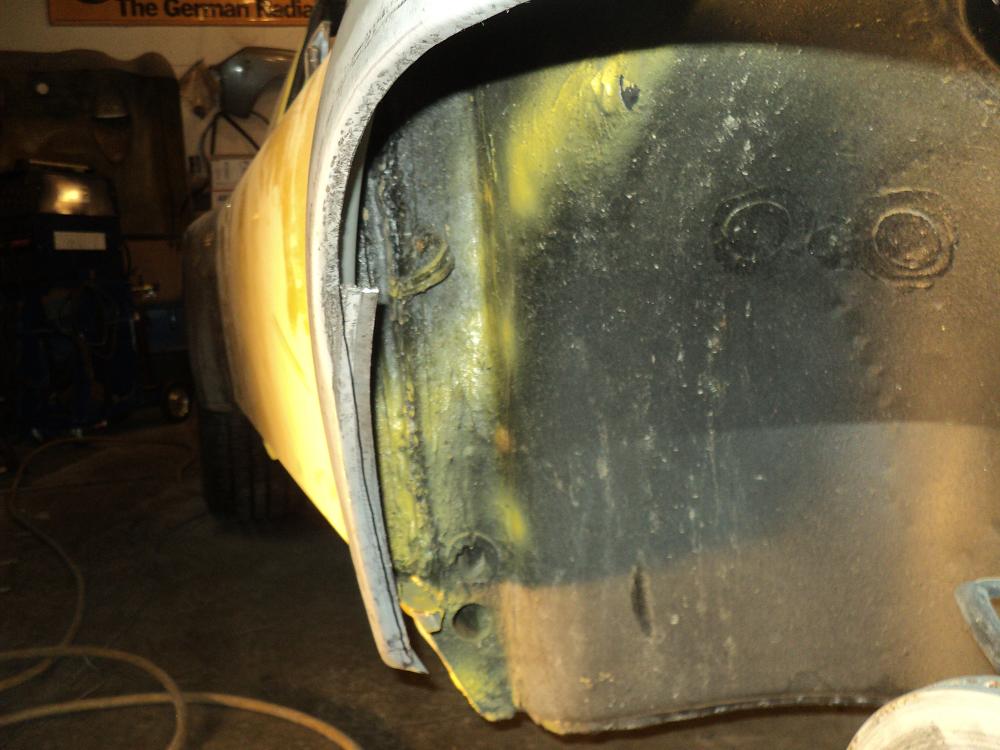
I am butt welding these and shaping them as I go. I find it easier to tack them over the stretched lip of the original panel then cut through and hammer and dolly the two edges to line them up, then weld the gap. Here's the underside showing the waste strip I pull down as I move about 3-4" at a time.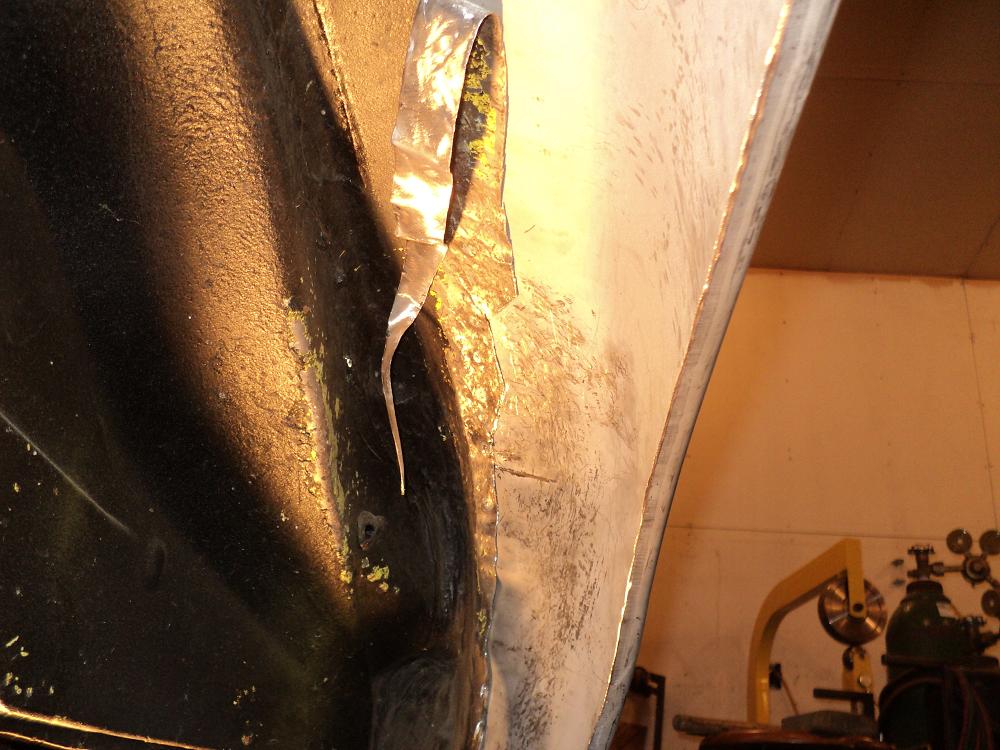
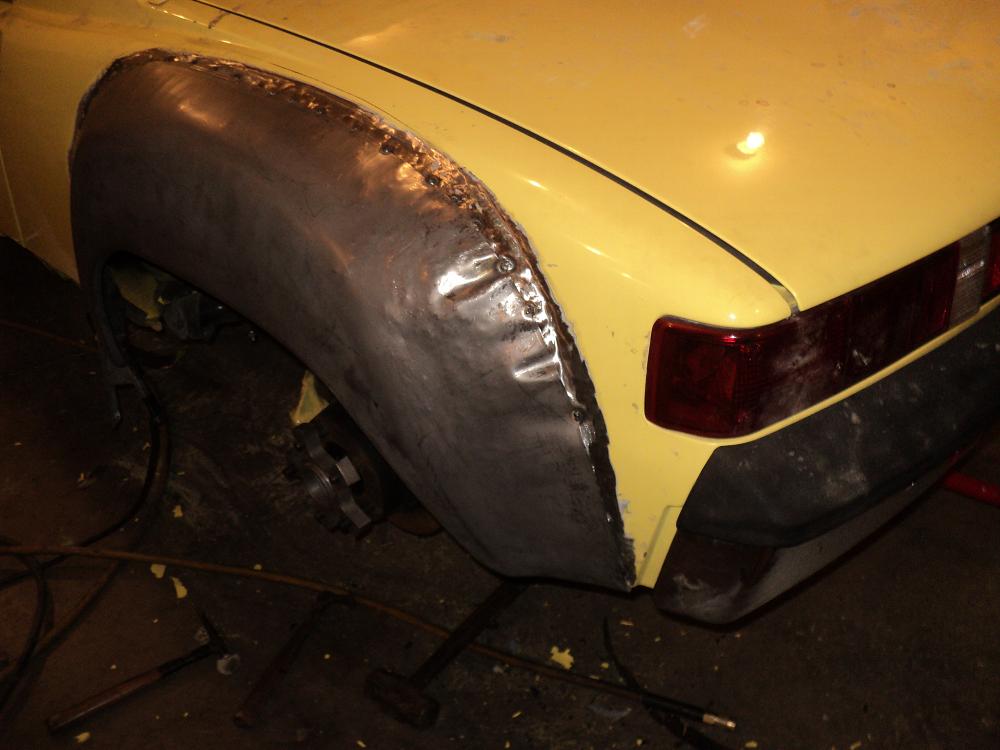
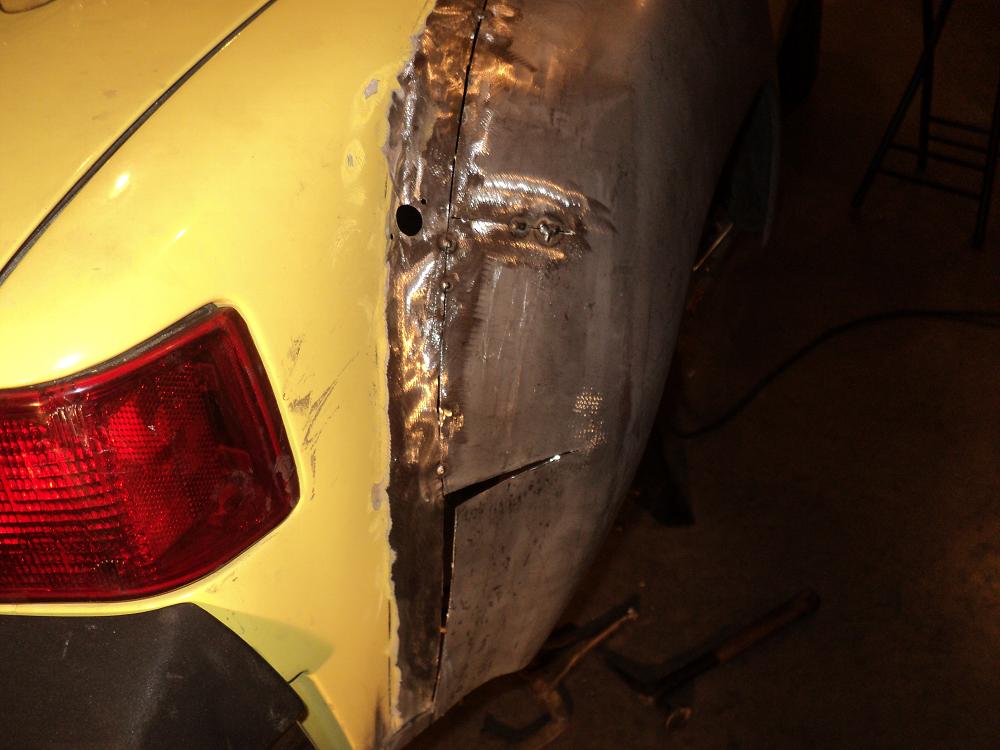
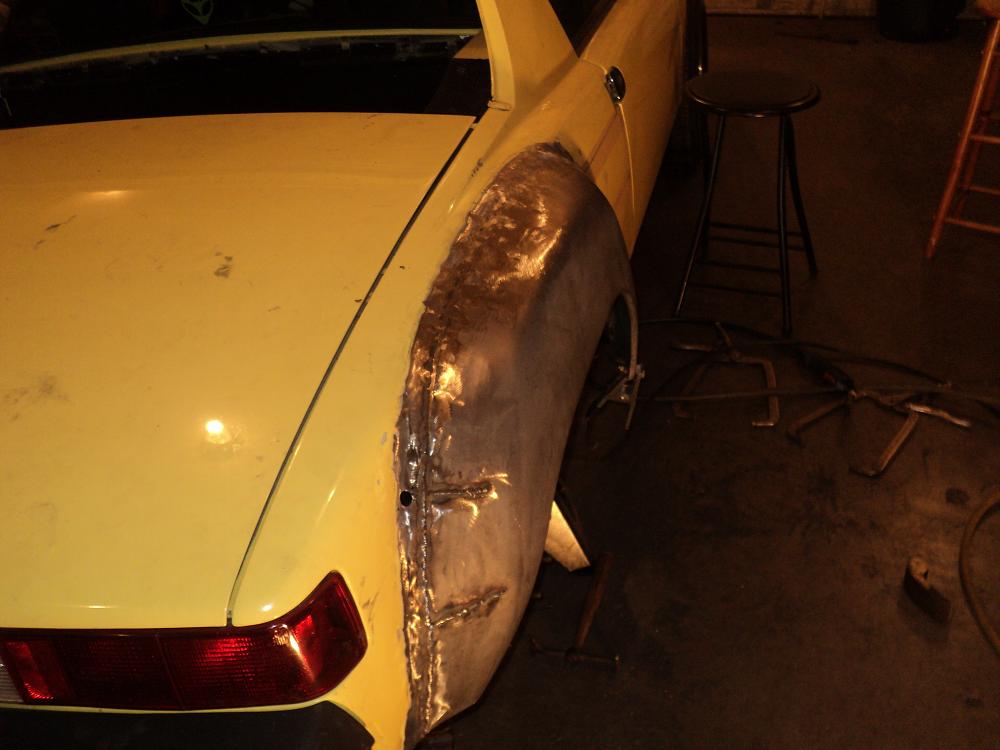
The next set is showing a bumping tool I use to shape the panel as I go. I bump the low spots with this tool and a pointed one I have, hammer and dolly the highs and file the panel. 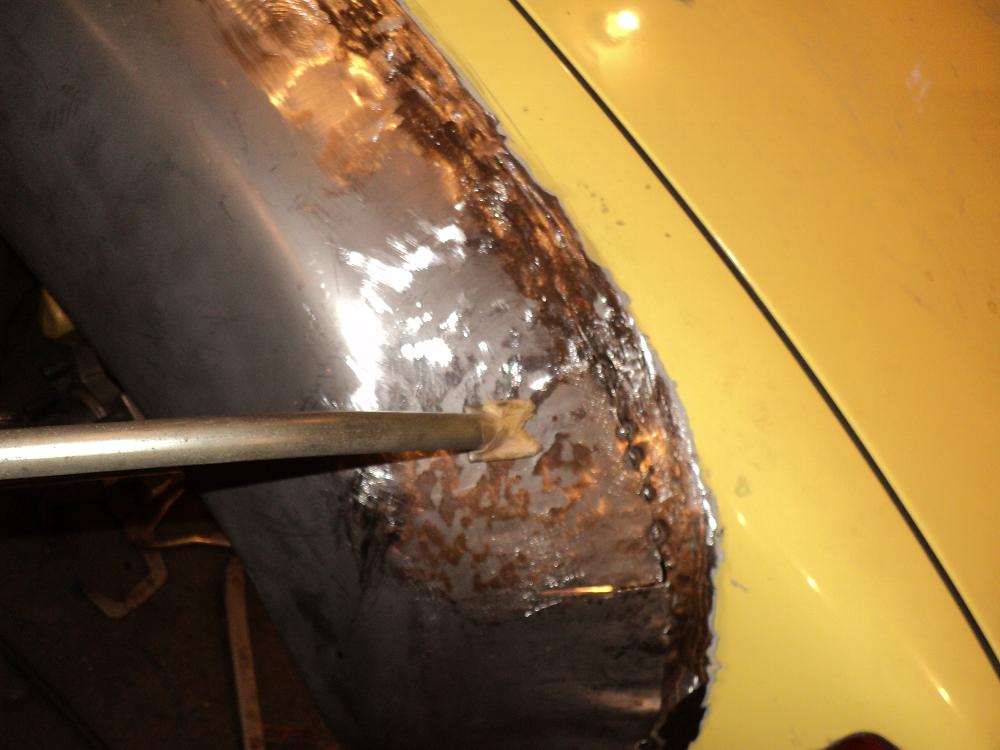
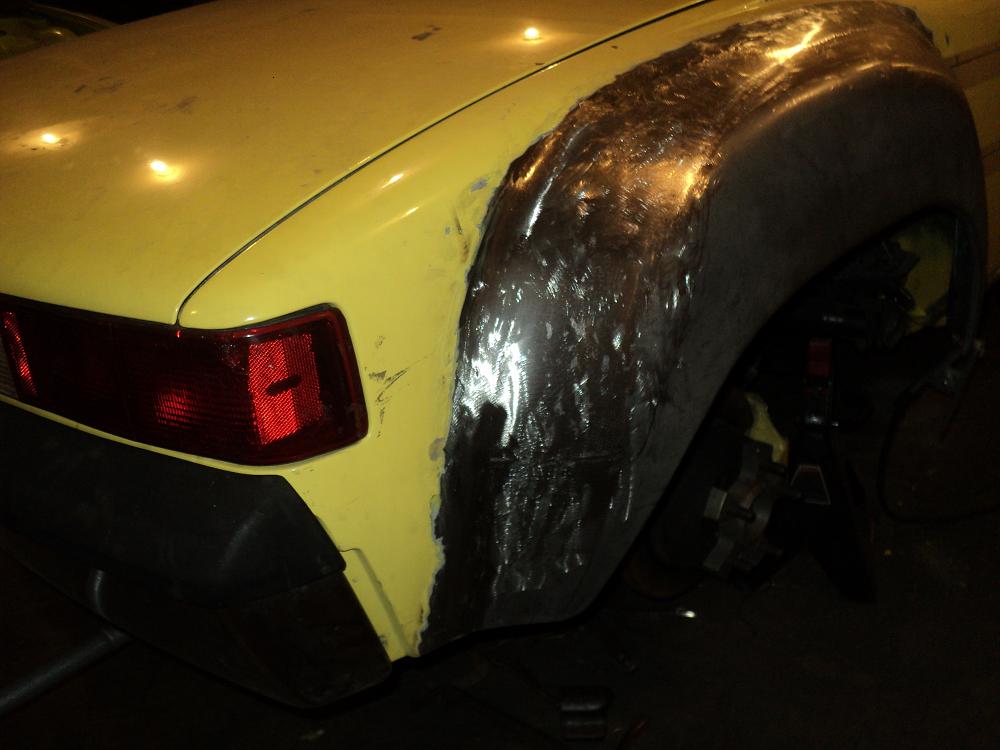
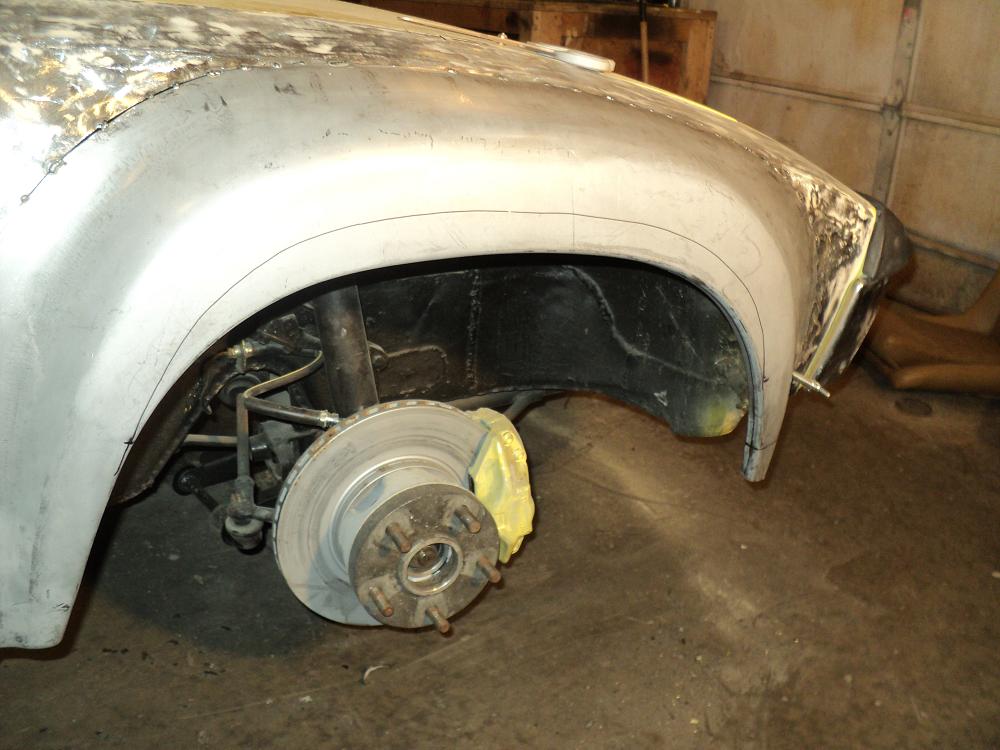
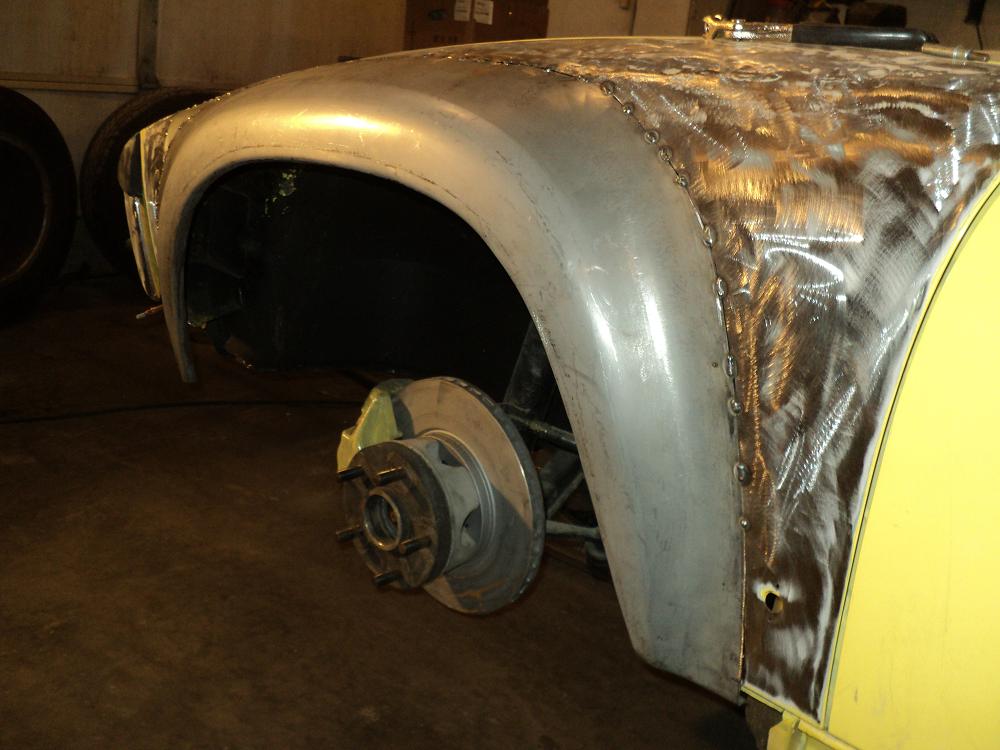
This is as far as I got today. It's starting to take shape.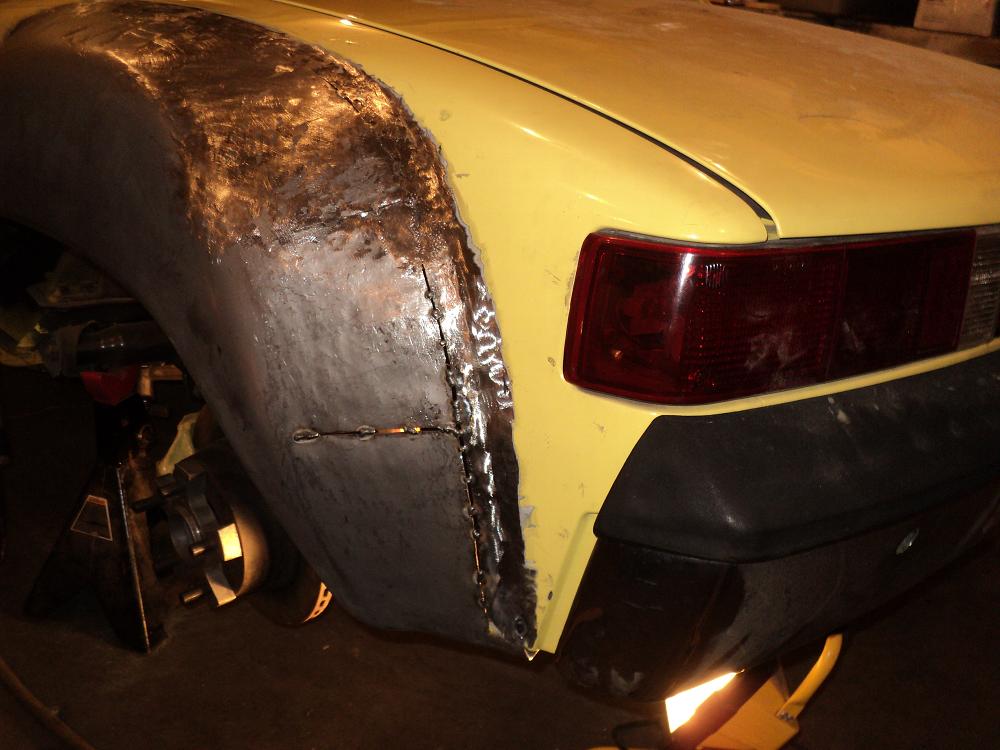
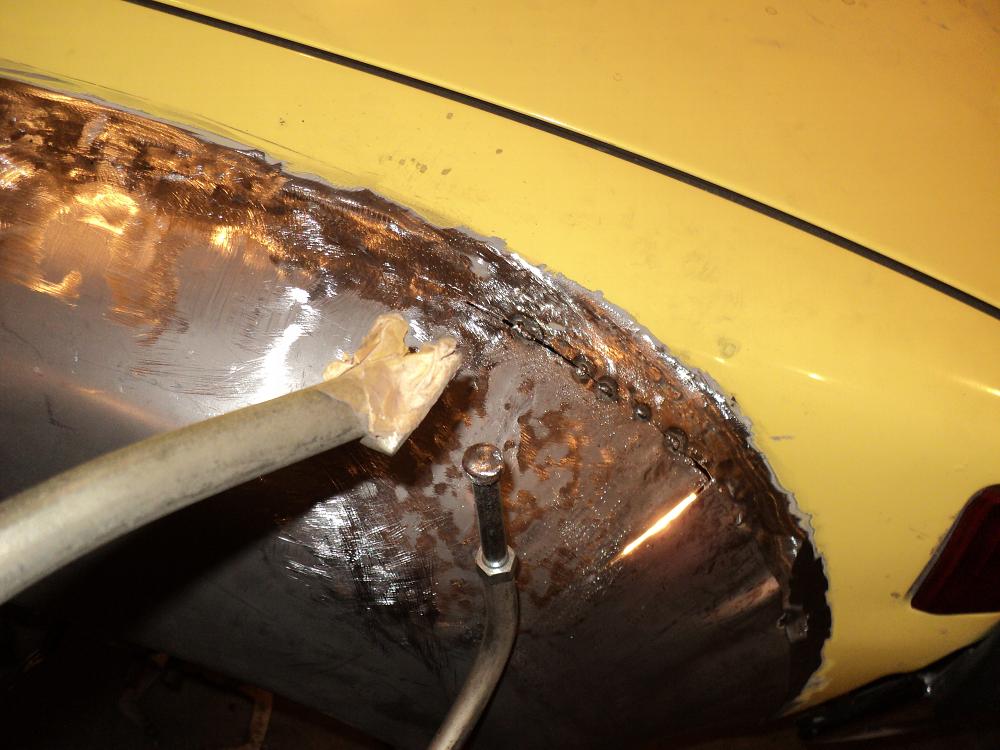
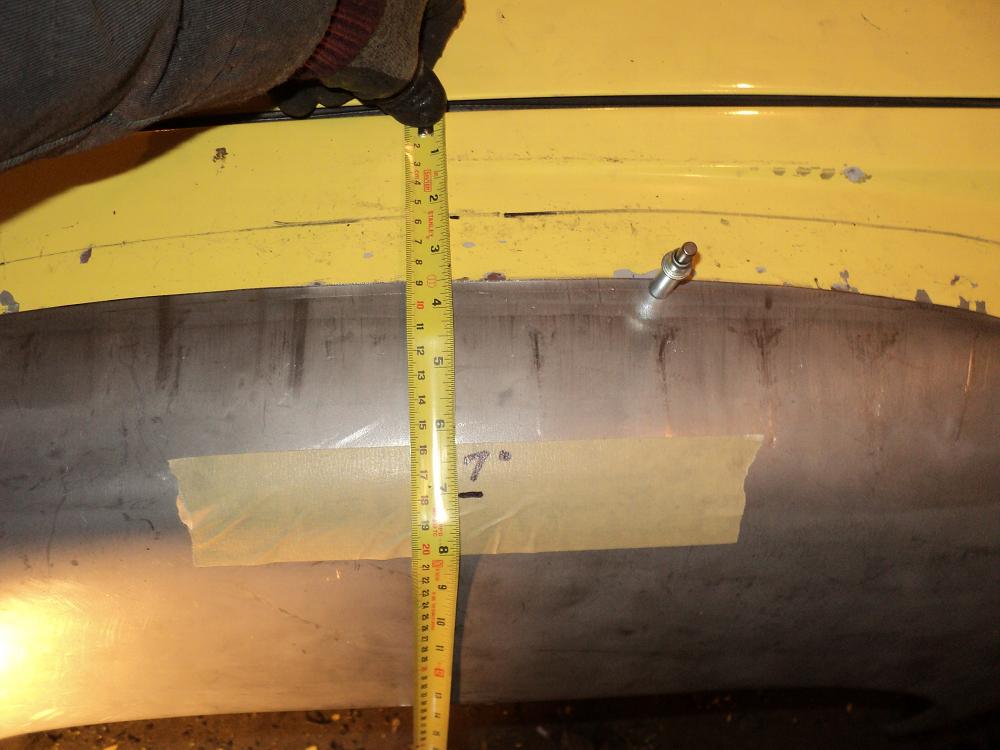
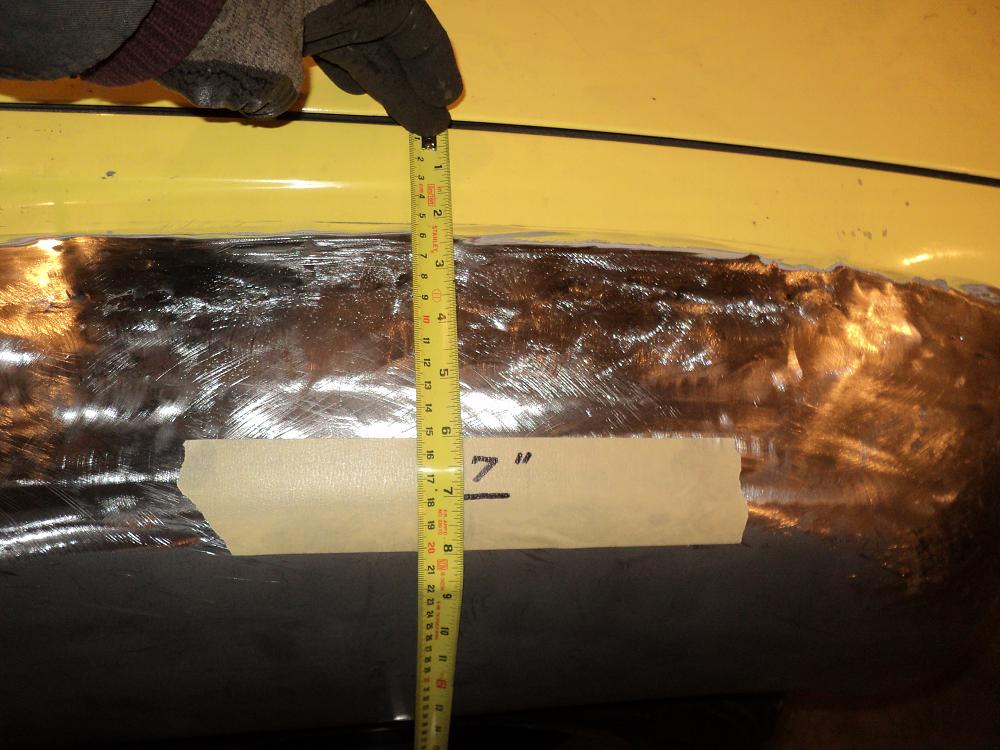
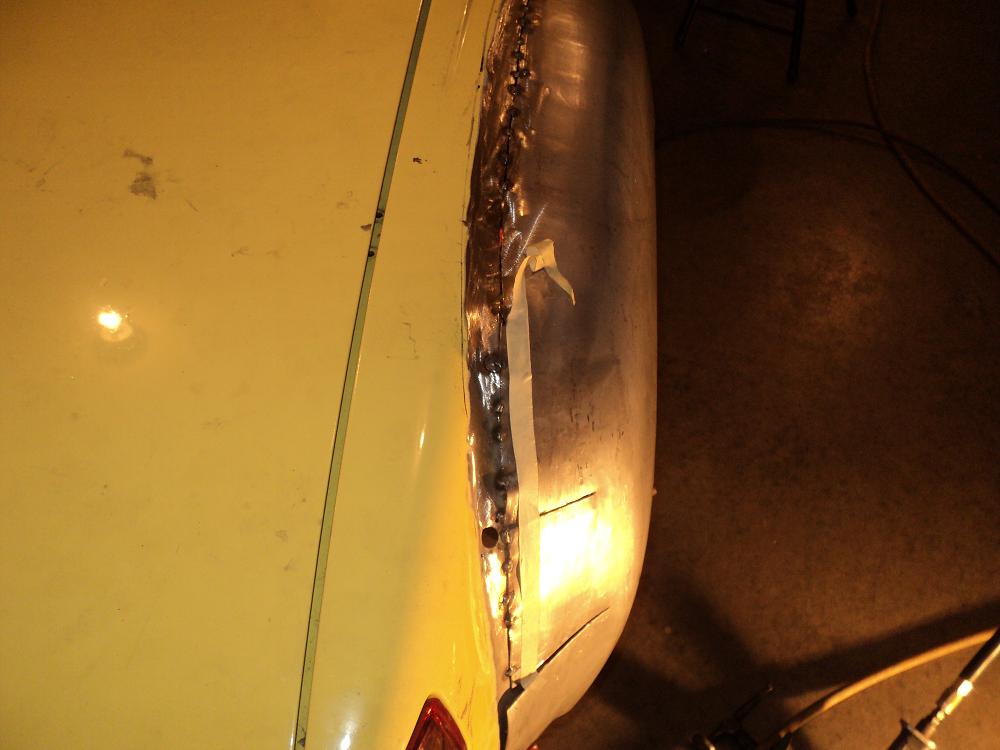
And here you can see how much I had to modify the flares to fit the fatness. Lots of welding, grinding, planishing and filing before it's done.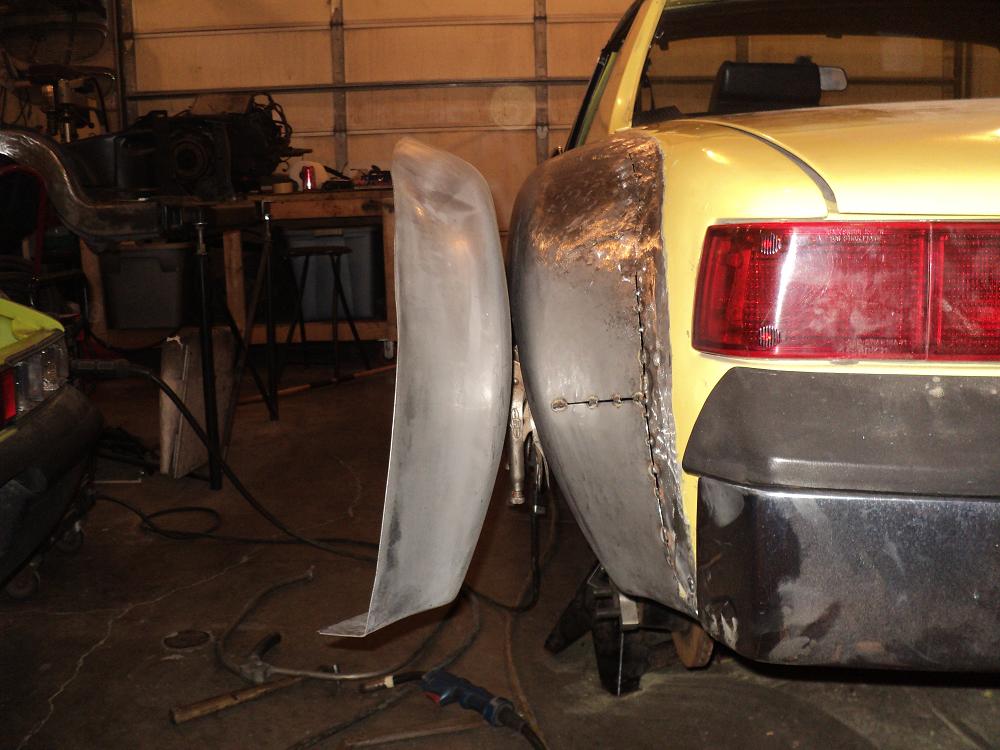
Posted by: 914coop Nov 6 2011, 08:40 AM
That is a better engine. If you want to put more oomph behind ya, bore it out and add VW p/c like I did on the bus
Looked at that, but it was more then I was willling to take on. Has a modified cam and .030 overbore being placed in it.
Posted by: Dr Evil Nov 6 2011, 09:33 AM
In a 914 that will be plenty fun and cheap to maintain
Posted by: sixnotfour Nov 6 2011, 10:22 AM
If you going to run the YH rochester carb spirited driving you will experience flooding and there is a simple vent trick to alleviate it.
I had to do it on mine when I autocrossed it when I was 16. I think it is in the how to hotrod your corviar book.
Posted by: 914coop Nov 6 2011, 05:05 PM
If you going to run the YH rochester carb spirited driving you will experience flooding and there is a simple vent trick to alleviate it.
I had to do it on mine when I autocrossed it when I was 16. I think it is in the how to hotrod your corviar book.
Yea that is also all over the web.
Going to avoid that by converting the turbo to a blow through system. Two 1960 signal barrel carbs with large jets. This will allow me to add alcohol injection and/0r waste gate if we have trouble with detonation.
Posted by: carr914 Nov 6 2011, 06:12 PM
Thanks T.C. for the nickname.
We found 255x60x15 to go on the 15x9 rims that came with the car. Well with that sized rubber and rim Rick had to add almost 2" to the rear flare's.
Glad you found some rubber for those wheels.
I've seen widen flares done before but not quite like that. But Rick knows what he is doing
Good to have it at somebodies shop that loves 914s 
Posted by: 914coop Nov 6 2011, 10:17 PM
Glad you found some rubber for those wheels.
Yea Dan is, Me not so sure.
Was up at Area 51 Werks today and it is looking great, however it is causing a lot of extra work for Rick.
As far as I am concerned he is a artist, if I tried that, the flare's would be scrap metal.
Posted by: rick 918-S Nov 6 2011, 11:00 PM
Irv and Dan were here today. We worked on the engine mounts. They were not in very well so we fixed them. We also fixed an inside door handle. I managed to get another 2 hours forming the rear side of the flare. The forward half needs forming and finishing with my bumping tools and file but the rear half is getting close.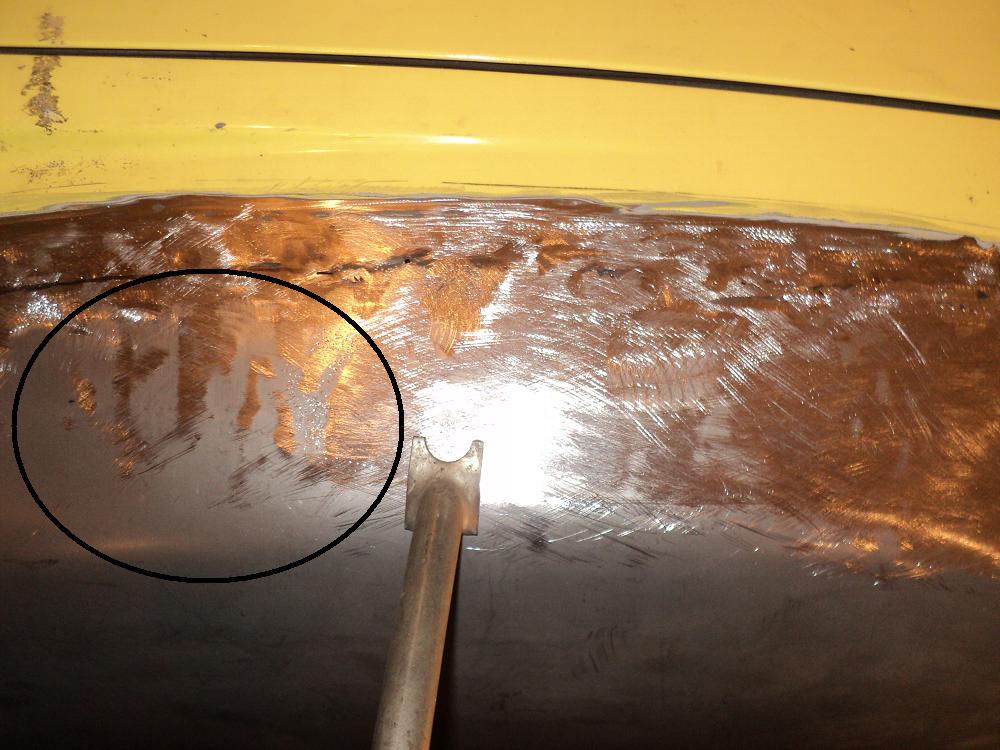
Posted by: SUNAB914 Nov 7 2011, 09:21 AM
Wow Coop, that thing has one fat ass! keep posting pics.
Posted by: 914coop Nov 7 2011, 07:06 PM
Looking very nice Rick!
Posted by: 914coop Nov 7 2011, 07:29 PM
Wow Coop, that thinghone at ass! keep posting pics.
Wide says I don't have one of those......
Maybe I am subconsciously over compensating to fill that void.
Darn That's right, Dan bought the tires so there goes that excuse.
Posted by: Drums66 Nov 8 2011, 05:47 PM
.......Ya, the Corsa turbo shits & gits.....but.
there is a problem with flooding?? (especially on cold start-up)

Posted by: rick 918-S Nov 12 2011, 02:10 PM
Starting to shrink the extra metal from reversing the shape of the flare to stretch it out.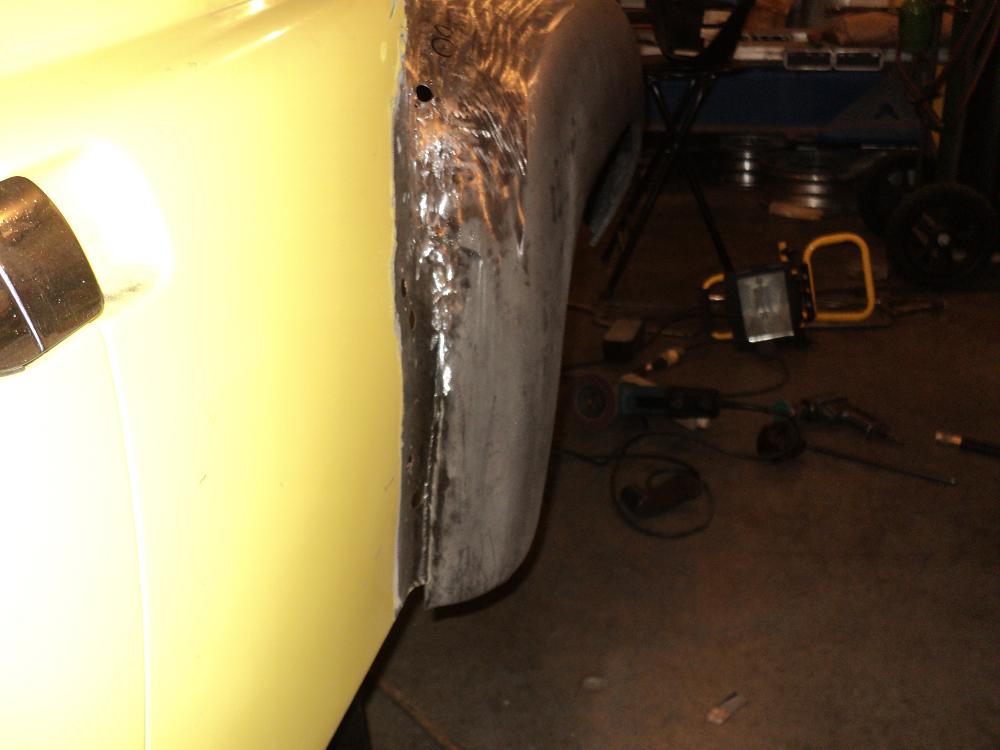
Tigging up the little pin holes left from stitching the flares on with the mig. some are so small you can only see them with a light shining from the back.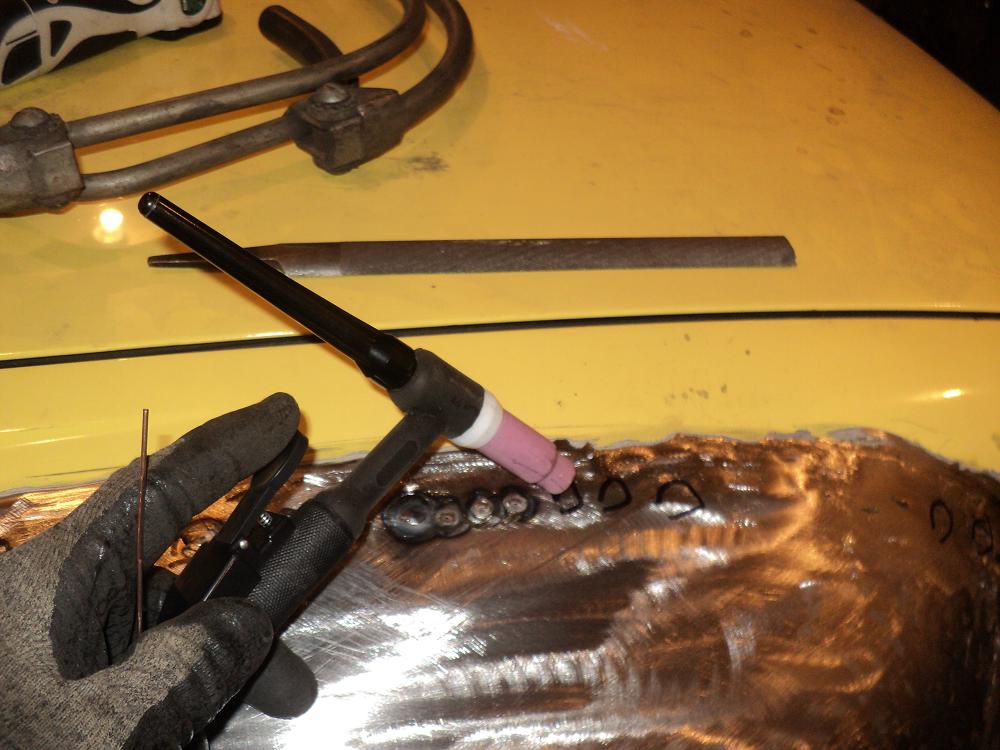
Oh, forgot to tell yous guys, I bought a tig... 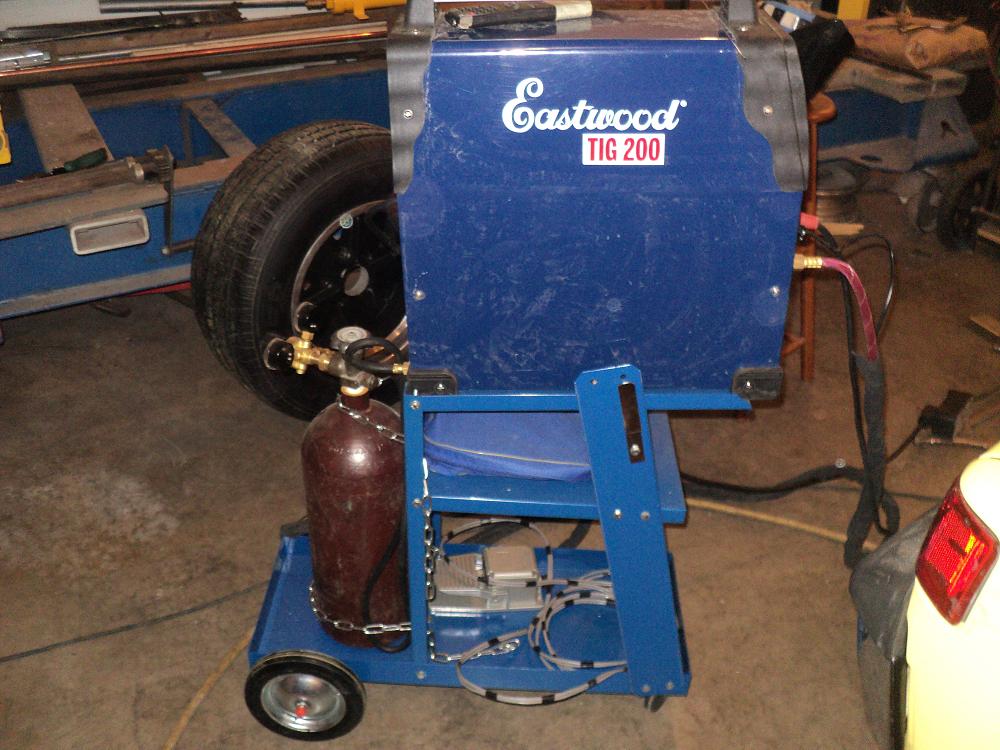
Posted by: 914coop Nov 15 2011, 12:14 AM
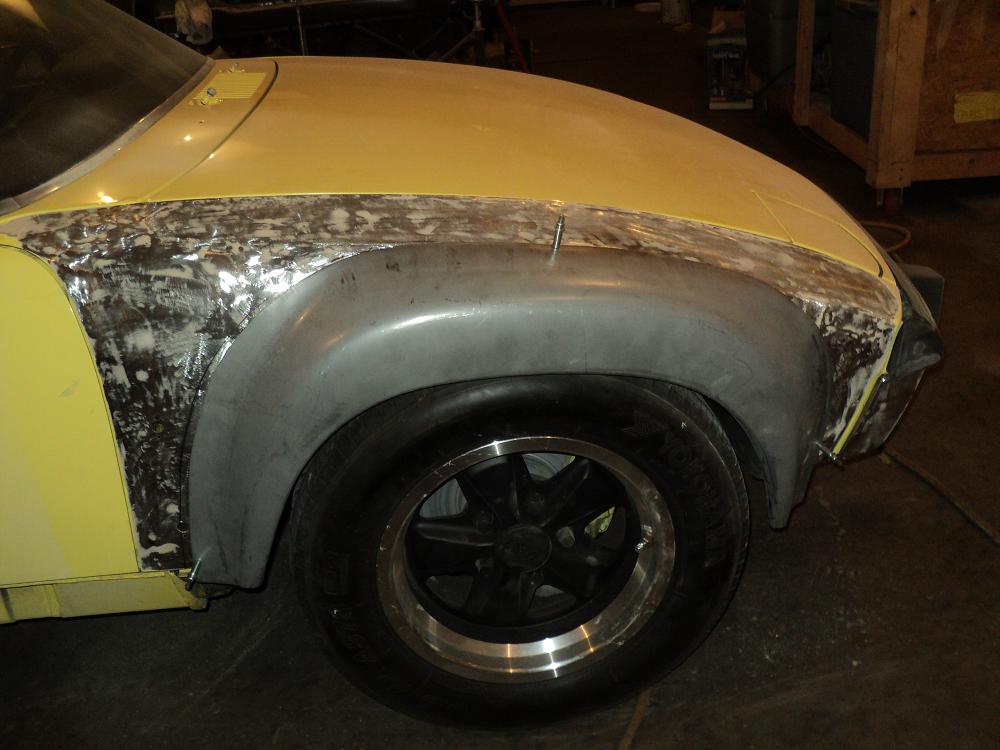
Dan and myself where up to Area 51 Weeks Sunday. Dan took some pictures of the flare Rick has been working on, beautiful work!!  A lot smoother then I could have imagined.

We also lowered the front suspension so the fronts can be fitted property.
Also installed the Getty dash. Unfortunitly we misplaced the gauge face plate  , so no pictures with the gauges at this time.
Last pieces to get the engine together are supposed to arrive this weekend, my fingers are crossed as I wait. ![popcorn[1].gif](style_emoticons/default/popcorn[1].gif)
Posted by: 914coop Nov 20 2011, 03:59 PM
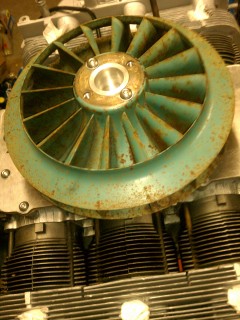
Engine pieces are shipped and should be here by Wednesday. In preparation I have installed the reverse rotation pieces. Hoping to have the engine together by the end of next weekend.
Posted by: rick 918-S Nov 20 2011, 06:18 PM
Engine pieces are shipped and should be here by Wednesday. In preparation I have installed the reverse rotation pieces. Hoping to have the engine together by the end of next weekend.
Cool!
 Just came in to eat. I'm out working on the right rear flare. I'll post photos late tonight.
Posted by: rick 918-S Nov 20 2011, 08:26 PM
Ran out of wire for my mig and gas for my tig so I'm done for the day. Got the right flare laid out and tacked. 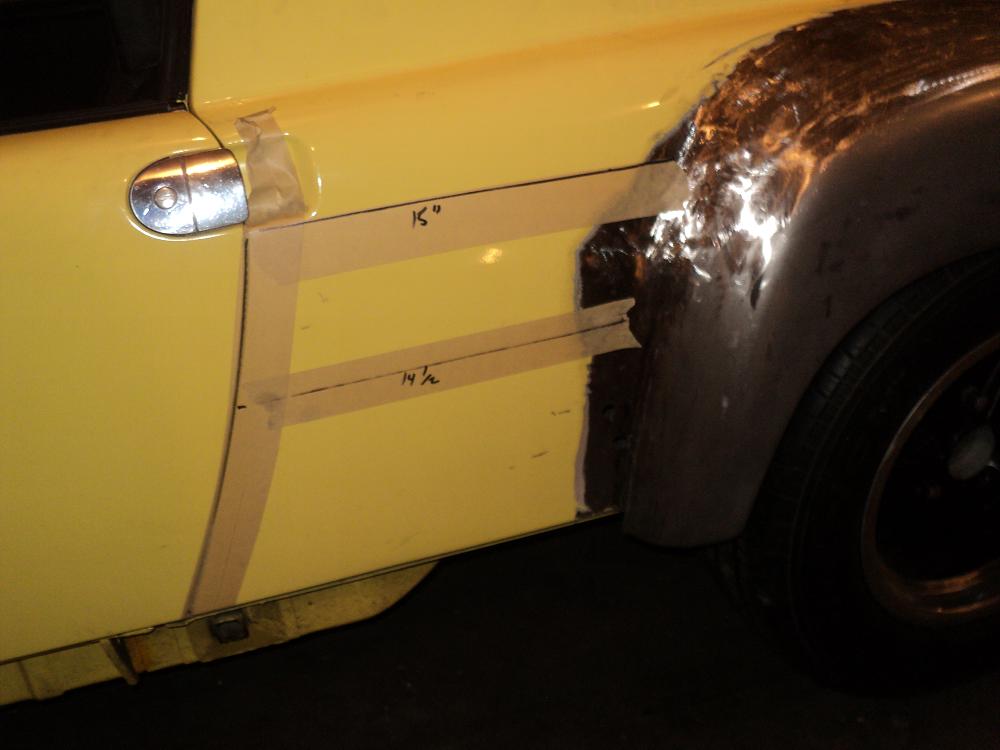
Posted by: 914coop Nov 21 2011, 12:08 PM
Looking great Rick! 
Irv
Posted by: 914coop Dec 5 2011, 09:00 PM
Engine parts arrived last Tuesday , although it was 6 days from when I expected them. 
Worked on it this weekend got the cam, crank and case together
Project came to a stop with the next step. Had to put the wrist pin in. Heated the rod end as I was told to do, wrist pin was supposed to slide right in, it didn't. I then I went the other direction. Picked up dry ice. Wrist pin slid through the rod and stopping before exiting the other side.
Have a 6 ton press, however since I have never did wrist pins, I can only see bad things happening. So off to local engine rebuilder to get this done.
Irv
Posted by: rick 918-S Dec 5 2011, 10:27 PM
Engine parts arrived last Tuesday
, although it was 6 days from when I expected them. Worked on it this weekend got the cam, crank and case together
Project came to a stop with the next step. Had to put the wrist pin in. Heated the rod end as I was told to do, wrist pin was supposed to slide right in, it didn't. I then I went the other direction. Picked up dry ice. Wrist pin slid through the rod and stopping before exiting the other side.
Have a 6 ton press, however since I have never did wrist pins, I can only see bad things happening. So off to local engine rebuilder to get this done.
Irv
Yes, bring them to someone that does that lots! I took a break from welding to put up some shelving, get my engines sorted and stored under the work bench and get Sandy's 914 running. Welding starts again this week. Nice to see you finally got your engine parts.
Posted by: 914coop Dec 11 2011, 03:04 PM
Well got the pistons and rods back Friday. Got rings on yesterday was trying to install them in the Cylinders. Will not go in 
 , stopped to think about it.
This morning I removed the rings and check fit. Can barely see light through the gap. Should be .007 to .040.
Need to take the cylinders in to take a bit more off.
Can't seem to catch a break!!!!
Posted by: rick 918-S Dec 11 2011, 03:48 PM
Well got the pistons and rods back Friday. Got rings on yesterday was trying to install them in the Cylinders. Will not go in
, stopped to think about it. This morning I removed the rings and check fit. Can barely see light through the gap. Should be .007 to .040.
Need to take the cylinders in to take a bit more off.
Can't seem to catch a break!!!!
Be sure to check the spec for the piston to wall clearance. If your piston to cylinder wall clearance is good you just need to file the ring end gaps.
I have been cutting and welding for two days. I'll post photos later. The right rear flare is tacked and fitted. Just need to weld it up and work the puckers out of the stamping on the flares.
Posted by: 914coop Dec 11 2011, 07:08 PM
Well got the pistons and rods back Friday. Got rings on yesterday was trying to install them in the Cylinders. Will not go in
, stopped to think about it. This morning I removed the rings and check fit. Can barely see light through the gap. Should be .007 to .040.
Need to take the cylinders in to take a bit more off.
Can't seem to catch a break!!!!
Be sure to check the spec for the piston to wall clearance. If your piston to cylinder wall clearance is good you just need to file the ring end gaps.
I have been cutting and welding for two days. I'll post photos later. The right rear flare is tacked and fitted. Just need to weld it up and work the puckers out of the stamping on the flares.
Yep did that, thats why the cylinders are going in. Close but a little to small. Figure a hone will do it, but will leave that up to the professionals to decide whats best.
Bringing piston and rings in so there is no question
Posted by: rick 918-S Dec 12 2011, 12:04 AM
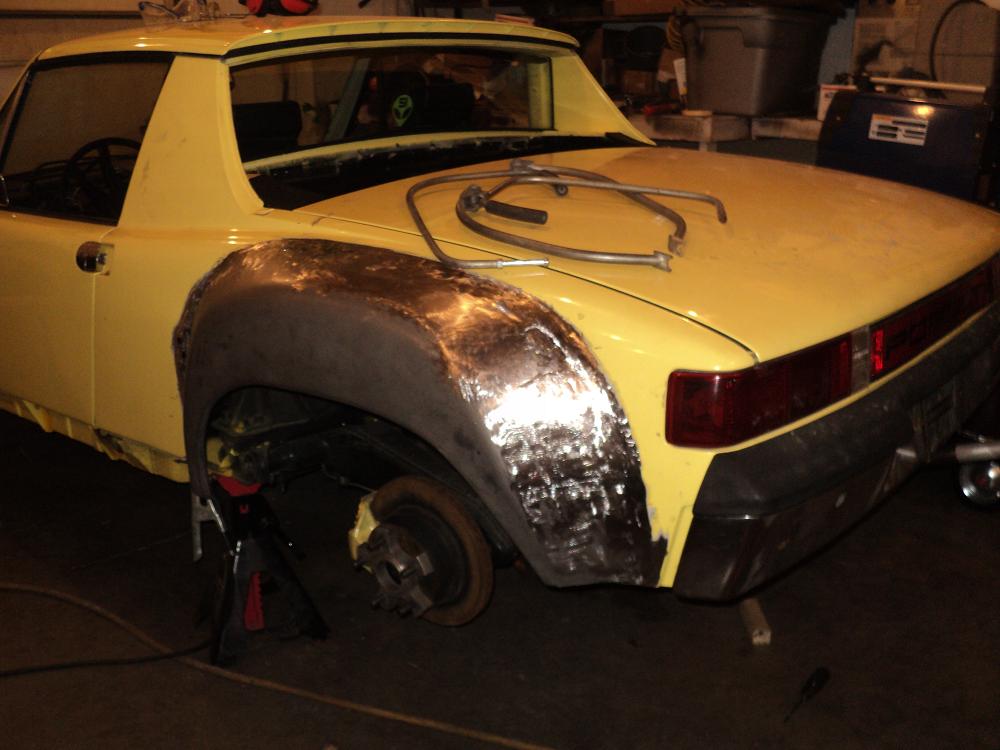
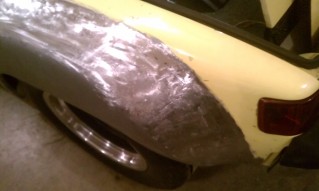
Lots of bumping and grinding yet but here's a couple hard days stretching, welding and filing.

Posted by: 914coop Dec 12 2011, 01:14 PM
Looking good Rick.
Cylinders at the engine shop to do a slightly bigger bore.
Posted by: rick 918-S Dec 15 2011, 12:07 AM
More bumping and shaping. the last couple nights. 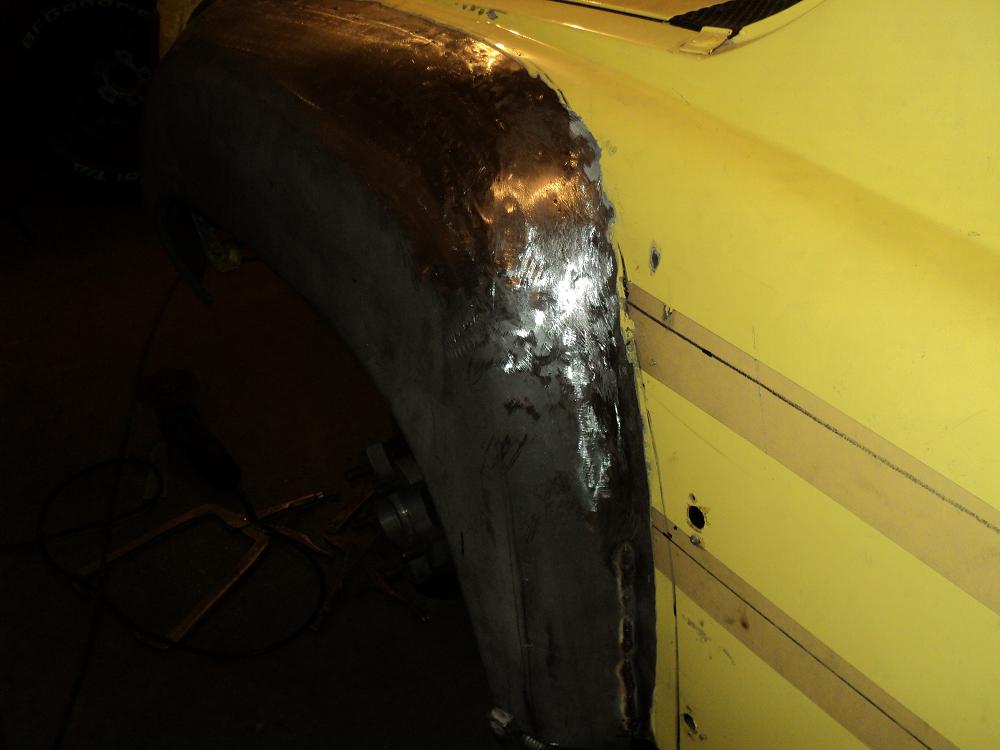
Posted by: 914coop Dec 15 2011, 01:51 PM
Engine shop call this morning and I stopped by on the way to work. No re boring..... I was sent the wrong piston rings for the Probe Pistons. They require a narrower ring.
Called the shop that had these pistons and they are checking to see if they have rings for these. Way things are going guessing they will not.
Looking good Rick.
Posted by: rick 918-S Dec 15 2011, 04:51 PM
What pistons do you have? Probe? Like in Ford Probe?
Posted by: Dr Evil Dec 15 2011, 05:43 PM
What pistons do you have? Probe? Like in Ford Probe?


Posted by: rick 918-S Dec 17 2011, 01:05 AM
Posted by: monkeyboy Dec 17 2011, 03:08 AM
What pistons do you have? Probe? Like in Ford Probe?
Probably Probe as in Coast High Performance. They own the Probe brand of pistons.
Posted by: 914coop Dec 17 2011, 12:15 PM
Sorry work was a ..... This week, everyone trying to get their projects in before year end.
Did not intentionally get Probe pistons, but yes that's what I have.
Was looking for a forged piston (not many out there anymore) and found these. Probe no longer makes these. I was right, he does not have the rings. However he is getting a set. May need to be made if they are nolonger available.
Wow, Rick the front looks great!!!! 
Posted by: rick 918-S Dec 17 2011, 01:02 PM
These fronts are going to be a bitch to fit. As I suspected the tires are really....Really close at full lock. I'll be massaging them all day.
Posted by: jmill Dec 17 2011, 04:23 PM
Progress looks great. It must be nice having a heated garage. The snow flew last night in my parts.
Posted by: 914coop Dec 17 2011, 05:01 PM
Progress looks great. It must be nice having a heated garage. The snow flew last night in my parts.
No snow in Minneapolis
, above 40 tomorrow . Duluth may have some.
Posted by: rick 918-S Dec 18 2011, 12:44 AM
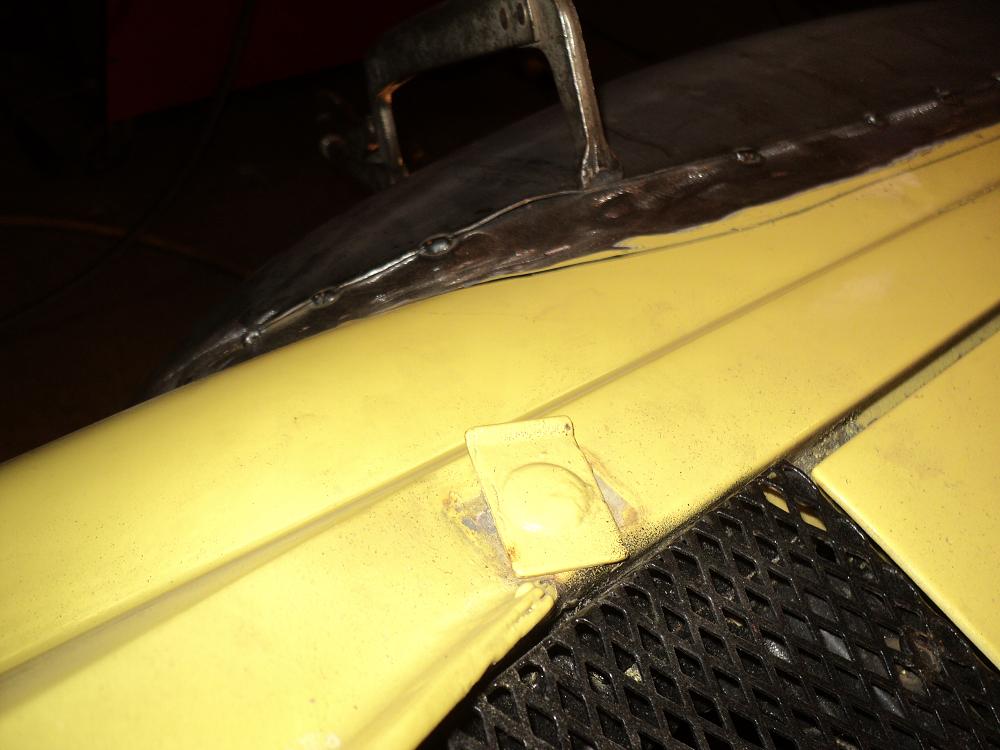
Yep, Very mild here. Here's a sample of the work for this weekend. I haven't decided if I am going to raise the wheel opening yet. At full lock the tire is very close to the lip.
I had to reshape the front of the flares. Here's my slapper and shot bag in action.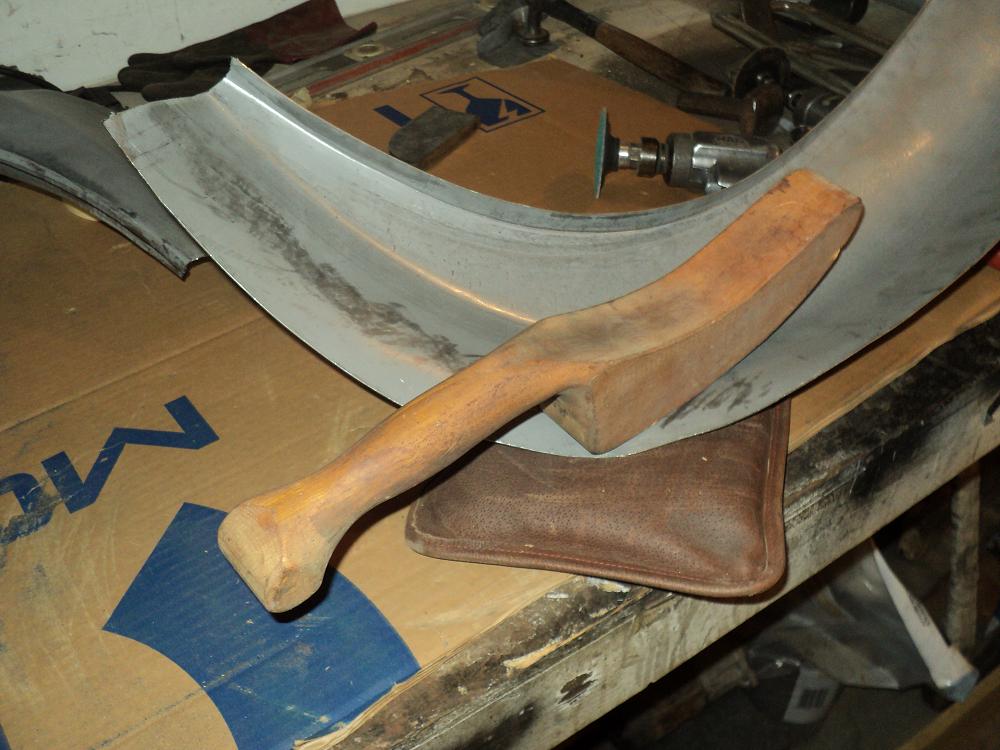
Here's the flare butt tacked to the slope nose. Notice how much I had to lower the flare to line up the top surface.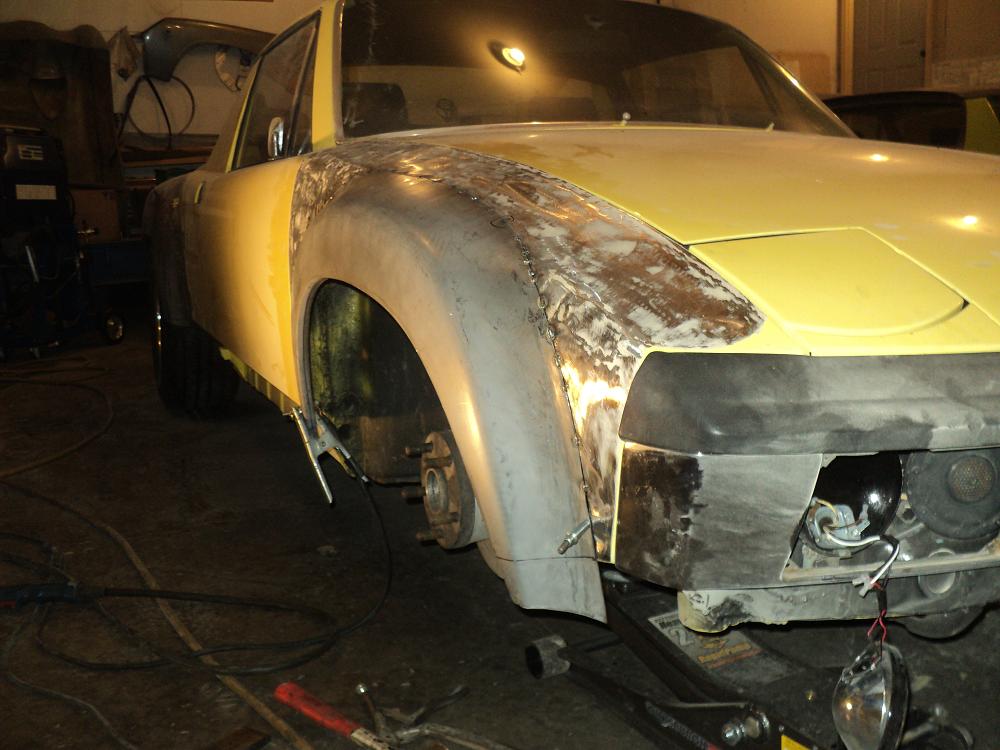
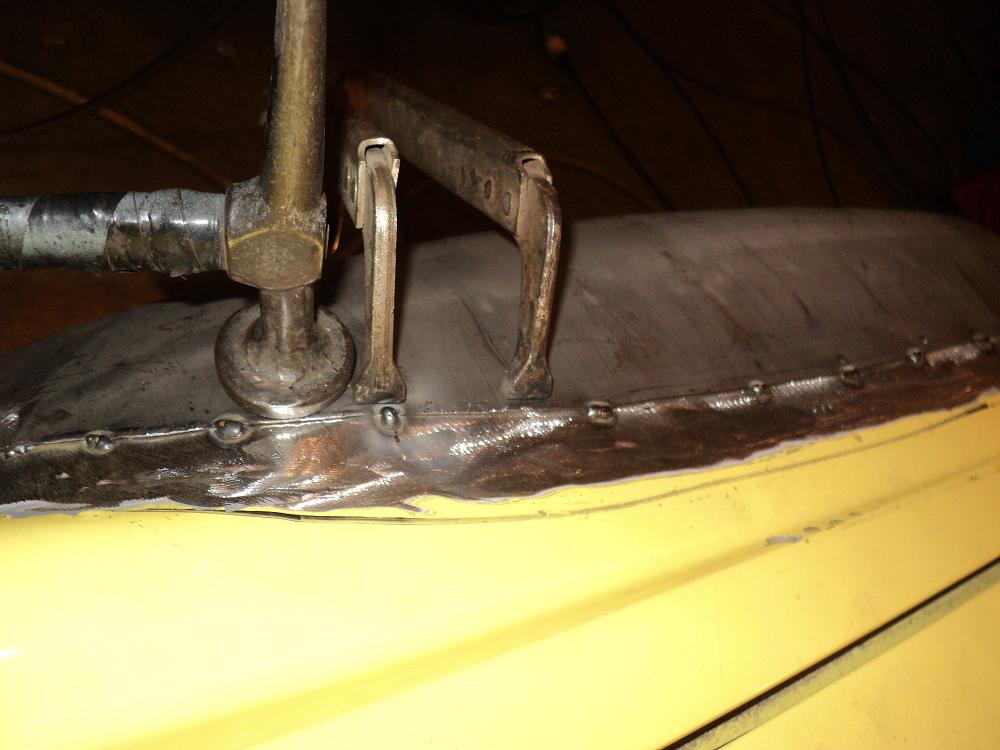
Posted by: rick 918-S Dec 24 2011, 12:28 AM
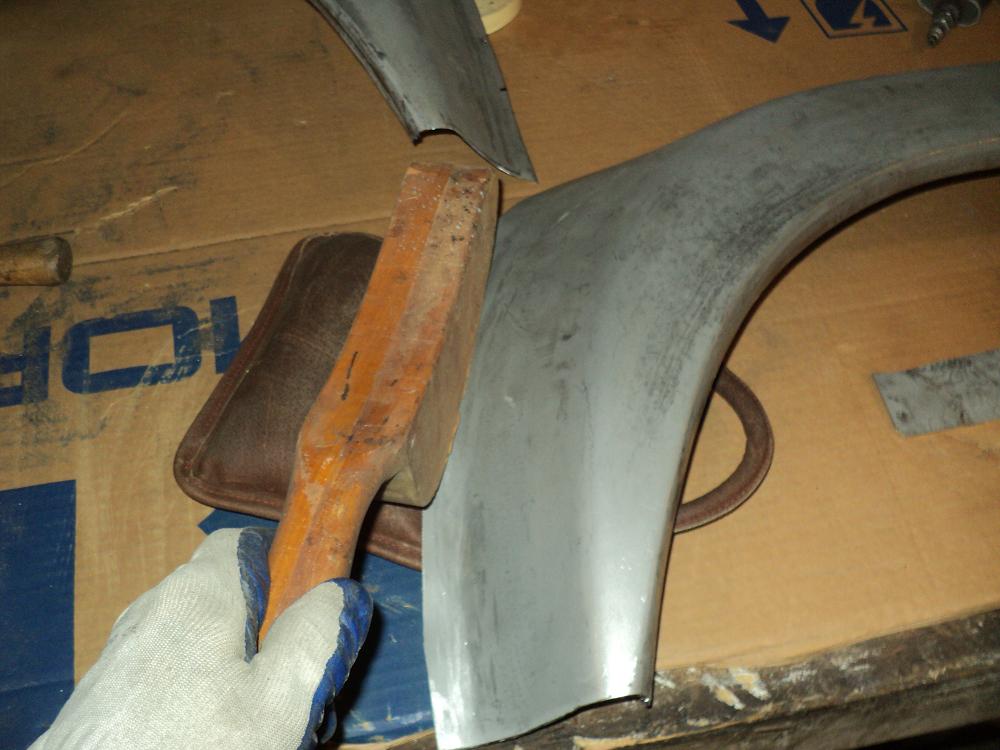
The flares were too close to the tires so I raised the lips.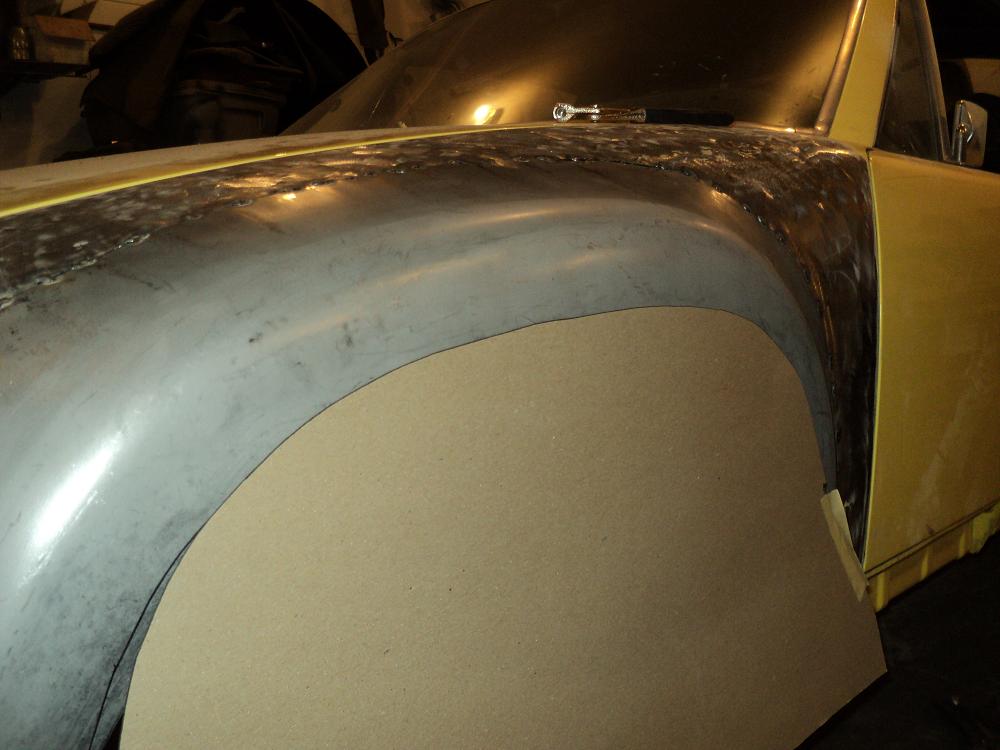

I made up a clamp with angle iron on both sides to hold the flare while hammering the new lip. This allowed me to give the flare a crisp lip with minimal distortion.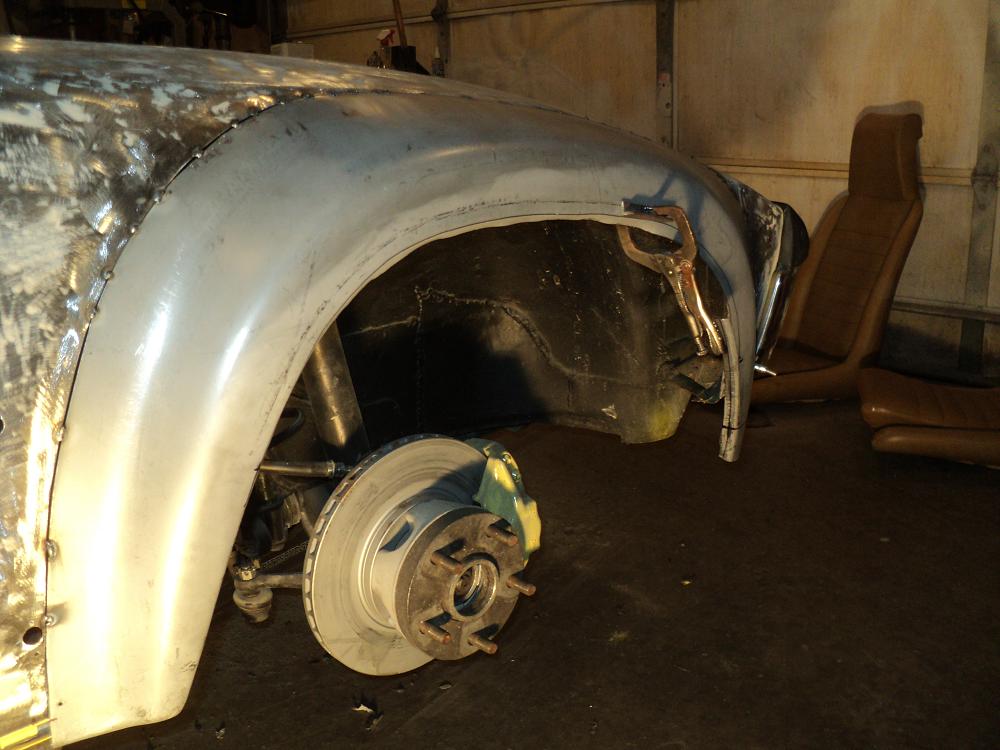
Posted by: Dr Evil Dec 24 2011, 09:39 AM
Wow!
Posted by: 914coop Dec 24 2011, 10:21 AM
Wow!
WOW!!!!
Posted by: sixnotfour Dec 24 2011, 11:27 AM
This angle is
Attached image(s)
Posted by: rick 918-S Jan 14 2012, 10:54 AM
Nader's Nightmare is going home! Nice day to do 914 stuff on the 14th!
Posted by: kevin311 Jan 14 2012, 11:02 AM
Thats the first time I've seen a slant nose conversion with flares. It looks awesome!
Great work, I cant wait to see this car done!
Posted by: dlee6204 Jan 14 2012, 11:05 AM
Nice job Rick!
Posted by: carr914 Jan 14 2012, 11:07 AM
Nader's Nightmare is going home! Nice day to do 914 stuff on the 14th!
Very Nice Rick, Coop's going to like it.
Wanna come back to Florida and put some Steel Flares on my Steel Top?
Posted by: KELTY360 Jan 14 2012, 11:10 AM
Never ceases to amaze me what I'll see @914World. Awesome job creating a new lip on the wheel opening. You da man Rick!
Posted by: 914coop Jan 14 2012, 11:29 AM
Nice job Rick!
Can't wait to see it in person!
Posted by: 914coop Jan 14 2012, 05:20 PM
Rick dropped the car off this afternoon, he went way beyond what I expected. Flares looks great!
Need to put seam dealer on these and paint the backside to protect them. Will start this process tomorrow. Good thing I have Monday off to finish this.
Sorry no pictures as it was snowing (weather man was wrong again) and I forgot to do pictures. Will post some when I work on it tomorrow.
Special thanks to Rick!!!, this turned out to be much more work then we expected.
Posted by: sixnotfour Jan 14 2012, 05:44 PM
Slope Nose Revival
I wonder how some up side down louvers would look in the fender tops? ( probably to much revival )
Posted by: rick 918-S Jan 15 2012, 05:06 PM
Nader's Nightmare is going home! Nice day to do 914 stuff on the 14th!
Very Nice Rick, Coop's going to like it.
Wanna come back to Florida and put some Steel Flares on my Steel Top?
Seriously? I had a great time doing the work. Irv is a great guy and much more of a car nut than many know. I can tell you if he could drive he would very likely be in another line of work.
Hey Irv. I think I should bring the Alien down next summer and we'll find a big parking lot someplace and you can go through the gears.
Posted by: rick 918-S Jan 15 2012, 06:03 PM
Hey Irv,
I sent you an email with the phone number of a guy that works out of his garage. He's in the metro someplace. Give him a call when your ready and have him at least look and see if he can get you back in paint.
Posted by: 914coop Jan 15 2012, 09:52 PM
Hey Irv. I think I should bring the Alien down next summer and we'll find a big parking lot someplace and you can go through the gears.
Defiantly will take a ride with you driving.
Keep telling Dan we need to find a track and check in to getting time on it when the car is done
 . My father keeps saying BIR, however I would bet that would be real $$$.
He keeps bringing up the movie Scent of a Woman....
Hey Irv,
I sent you an email with the phone number of a guy that works out of his garage. He's in the metro someplace. Give him a call when your ready and have him at least look and see if he can get you back in paint.
Yes, got the e-mail and will be checking with him, thanks for the possible contact.
Seam sealer on and primer tomorrow. Also stand in engine and the trans will be removed. i should have a good start to having the engine together by end of next weekend.
That is if the rings show up this week.
Posted by: Cairo94507 Jan 16 2012, 07:25 AM
Wow Wow Wow! Rick has some serious metal skills, no doubt. When this project got under way I was thinking "oh no" and now that I see the finish result I was thinking "that man has got skills". 
Posted by: 914coop Jan 16 2012, 10:59 AM
Wow Wow Wow! Rick has some serious metal skills, no doubt.
a 100%
Posted by: 914coop Feb 25 2012, 12:22 PM
Rings are here.....
Will be assembling the engine today and tomorrow. We will see how far I get as I will be taking my time and double checking everything.
Will post pictures later this evening
Posted by: 914coop May 20 2012, 02:27 PM
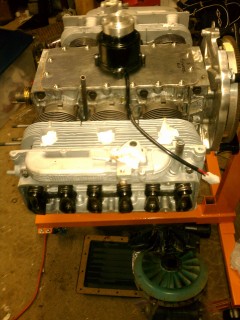
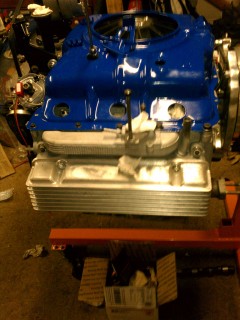
Been offline for a few months due to health issue. Was able to start working on it the beging of this month. Got engine just about ready to be put in the car, Hopefully will be ready by next weekend.
Balancer, dist, carbs, turbo, valve covers (haven't shown up yet) and clutch and in the car it goes.
Pictures

Posted by: Dr Evil May 20 2012, 02:43 PM
Nice!
If you have a need, I have some almost new rockers and swivels you can have. Since I went to roller rockers, I dont need them and there is about 1000mi on the old gear.
Posted by: 914coop May 20 2012, 04:07 PM
Nice!
If you have a need, I have some almost new rockers and swivels you can have. Since I went to roller rockers, I dont need them and there is about 1000mi on the old gear.
Guessing mine have more then that on them :
Interested in them,
Also where did you get the roller rockets? Will not be happening right away but could be a good winter project.
Posted by: Qarl May 20 2012, 04:21 PM
Really like the corvair motor. An American flat-six 911. LOL
Posted by: rick 918-S May 20 2012, 04:50 PM
Looking good Irv. Nice to see the progress!
Posted by: Dr Evil May 20 2012, 08:12 PM
Nice!
If you have a need, I have some almost new rockers and swivels you can have. Since I went to roller rockers, I dont need them and there is about 1000mi on the old gear.
Guessing mine have more then that on them :
Interested in them,
Also where did you get the roller rockets? Will not be happening right away but could be a good winter project.
Aw man, it has been so long that I dont remember. I shopped around, probably ebay.
Posted by: Chris H. May 21 2012, 09:42 AM
Wow Rick, that thing looks amazing. Must have been very challenging to get the flares to look right with the slant nose.
So...this car looks exactly like the one formerly owned by member 1bad914 out of Michigan... if so has anyone else noticed how many times it's changed hands in the last several years!? Nothing against the car or owners AT ALL, just a random fact. It's easy to spot with the color and slant nose.
http://www.914world.com/bbs2/index.php?showtopic=51574&hl=
Since its had a variety of drive trains and setups it's the PERFECT car for a Corvair transplant!
Good luck with it Irv! Your son will love it.
Posted by: carr914 May 21 2012, 10:38 AM
Wow Rick, that thing looks amazing. Must have been very challenging to get the flares to look right with the slant nose.
So...this car looks exactly like the one formerly owned by member 1bad914 out of Michigan... if so has anyone else noticed how many times it's changed hands in the last several years!? Nothing against the car or owners AT ALL, just a random fact. It's easy to spot with the color and slant nose.
http://www.914world.com/bbs2/index.php?showtopic=51574&hl=
Since its had a variety of drive trains and setups it's the PERFECT car for a Corvair transplant!
Good luck with it Irv! Your son will love it.
I had it before Irv. I had an opportunity to buy the Steel Roof 914, so that why I sold it. I did the 5 Lug Conversion. I did not buy it from 1bad914, but was told he really misrepresented the car. The guy I bought it from fixed all the Rust (there is a whole Thread about that)
T.C.
Posted by: Chris H. May 21 2012, 12:11 PM
I had it before Irv. I had an opportunity to buy the Steel Roof 914, so that why I sold it. I did the 5 Lug Conversion. I did not buy it from 1bad914, but was told he really misrepresented the car. The guy I bought it from fixed all the Rust (there is a whole Thread about that)
T.C.
Sorry TC I didn't know about that rust situation until just now...bummer. Well it sure looks great underneath today. Speaking of cars that have been changed hands..is Steel Roof the one that Root Werks built, then he sold it, bought it back, you bought it, sold it, bought it back? Love that car.
Sorry for the hijack Irv...
Posted by: carr914 May 21 2012, 01:24 PM
I had it before Irv. I had an opportunity to buy the Steel Roof 914, so that why I sold it. I did the 5 Lug Conversion. I did not buy it from 1bad914, but was told he really misrepresented the car. The guy I bought it from fixed all the Rust (there is a whole Thread about that)
T.C.
Sorry TC I didn't know about that rust situation until just now...bummer. Well it sure looks great underneath today. Speaking of cars that have been changed hands..is Steel Roof the one that Root Werks built, then he sold it, bought it back, you bought it, sold it, bought it back? Love that car.
Sorry for the hijack Irv...
Yes, the Steel Roof is the Dan Root x 3, TC x 2 car
If you look at the 1st Post of this Thread you will see a Link to the Rust Repair
Posted by: 914coop Jun 9 2012, 09:23 PM
Ok engine is together minus turbo and carb's. Will be coming off the stand tomorrow and clutch
and pressure plate going on. Attaching the transmission and getting ready for it to go in to the car.
Will take a bit to get it in as I will need to build Mount for it. Hopefully in a couple of weeks will be ready to start it up.
Posted by: Dr Evil Jun 9 2012, 09:31 PM
Nice. You are not moving the oil filter? I think I have a block that bolts on and you can put hoses to to move it away from the wall.
Making an engine mount for that will be real easy. That engine was built for transplanting.
Posted by: rick 918-S Jun 9 2012, 09:50 PM
Nice progress! I wanted to come down and help for a day but I'm working 7 days a week now. I agree, if you can move the oil filter console it will be easier to fit in the engine bay.
Posted by: 914coop Jun 10 2012, 11:20 AM
Have the adapter to replace the oil cooler and can cut and plug the oil filter mount off, however really would like to keep stock oil cooler. Seen others that have cut off the oil filter mount and tapped the holes to 7/16 with 1/4 18 pipe threads and ran a external oil cooler and remote filter setup. Leaning more that direction. Found one already on line setup this way to bolt on. He also has the correct 12 row oil cooler cover I need, however no reply from him yet. As with everything on this engine, nothing has come easy. Can construct my own cut off oil filter plate but really would like to get the oil cooler cover.
Posted by: r3dplanet Jun 10 2012, 12:12 PM
I have a Corvair motor that I bought for this conversion also. It's been staring at me in my garage for a year. Do you have more detail on your experiences getting the motor rebuild and 914 ready?
Posted by: 914coop Jun 10 2012, 02:42 PM
I have a Corvair motor that I bought for this conversion also. It's been staring at me in my garage for a year. Do you have more detail on your experiences getting the motor rebuild and 914 ready?
Most of my issues where with a particular vendor. Purchased his "ultimate Rebuild kit" about a year ago. Never got it and he still owes me money. Deal with Clark's, Raffee, California Corvairs , LS Corvairs, specialty Corvair parts and your build should go smoother. Also have a engine shop put the wrist pins in, the information on the internet was not as easy as they make it sound. Other issues I had where buying pistons that required special rings. After giving up on the original vendor and getting past the wrist pin and ring issues it has went fairly smooth. Cost so far is around $2,750.00 including new reverse rotation cam, adapter plate and flywheel, clutch and pressure plate. With the other vendors this would have been done 6 to 9 months ago.
If you need the name of vendor to avoid pm me.
Posted by: Dr Evil Jun 10 2012, 05:36 PM
The wrist pins are interference fit and different for us VW guys. Heat is your friend I like building the Corvair engine. Real easy
Posted by: 914coop Jun 10 2012, 07:40 PM
The wrist pins are interference fit and different for us VW guys. Heat is your friend
I like building the Corvair engine. Real easy Heat + speed maybe, tried heat and got half way and stopped. Then tried dry ice to go the other direction, no luck there either. Cheap and easy to let someone who knows what their doing.
Once got past the stumbling blocks I agree easy and fun to build.
See if I still feel that way when modifying the filter piece.
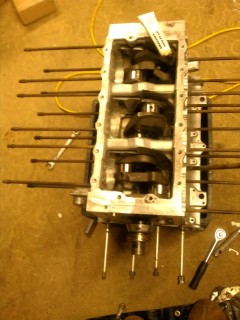
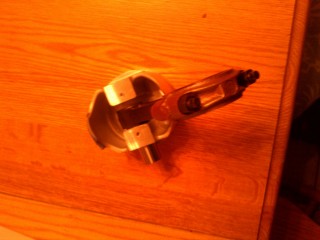
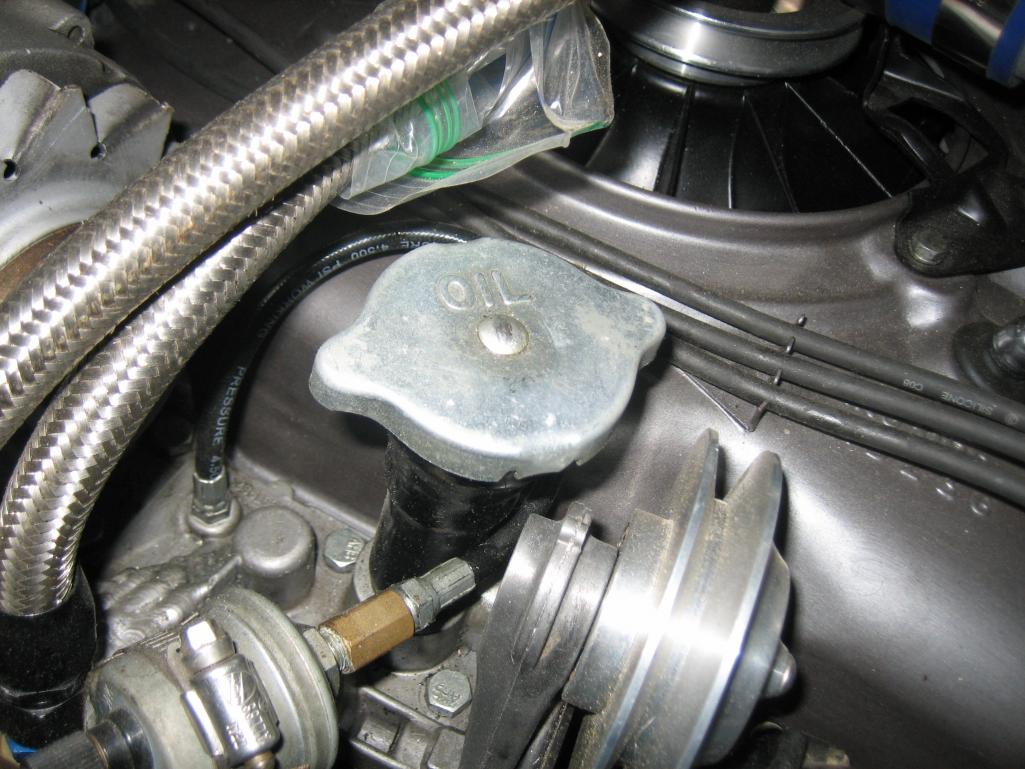
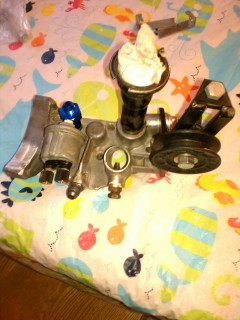
Posted by: 914coop Jun 30 2012, 11:04 AM
Well engine is in the car, not fully secure but in the car. Fits nice as long as you cut off the oil filter mount and remove the original Corvair engine mount plate..
Made monting it more difficult because of choosing a aluminum finned oil pan which took away a 1 1/4 inch of clearance from the enging mount bar, going to be a tight fit. May have to lower the bar a bit depending on final mount design.
Going to be a bit before it is started. Since I did not take the engine out I need to figure out what wires go where.
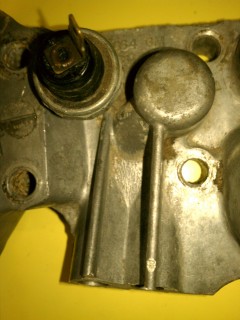
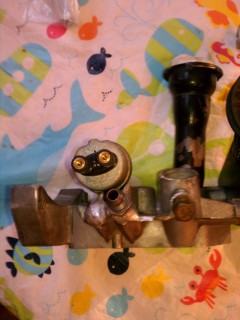
Also need to fab up the engine mount and there is the filter mount I cut. I think I have two options, Weld in AN fittings where I cut it off and do a remote filter and cooler. Will need to angle cut at least one of them to allow room to thighten fittings to them. Other option that may work is to weld the holes shut and remove the pressure switch, drill a hole at the other 90 degree angle and add AN fittings there. Then do a remote filter, cooler and pressure switch mount.
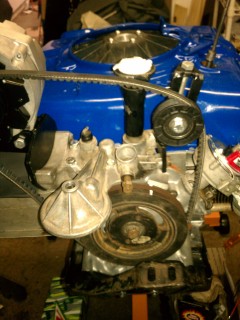
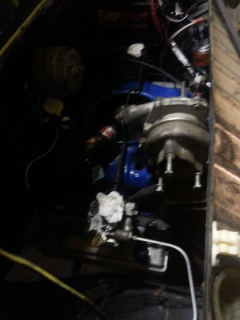
Here are pictures of the cut filter and mounting plate.
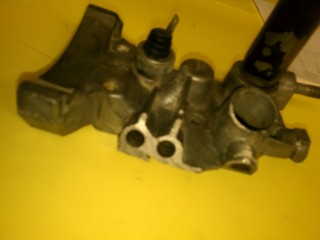
Here is the engine before it went into the car.
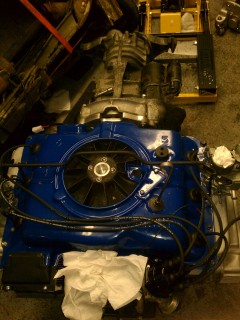
Need to find wiring digrams for the engine compartment, Haynes is to small for me to read.
Irv
Posted by: Dr Evil Jun 30 2012, 11:34 AM
I can take a pic of my oil setup if you like. Nice and easy. The pressure switch can be moved by using a grease gun hose (good to 3000psi ).
Posted by: rick 918-S Jun 30 2012, 11:38 AM
Try these diagrams.
http://www.pelicanparts.com/914/914_electrical_diagrams.htm
You can view them on your computer and maybe print large versions that you will be able to see. Wish I had some time to come and help.
Posted by: 914coop Jun 30 2012, 12:16 PM
I can take a pic of my oil setup if you like. Nice and easy. The pressure switch can be moved by using a grease gun hose (good to 3000psi
).Yes! Would like to see that.
Thanks Irv.
Posted by: 914coop Jun 30 2012, 12:23 PM
Try these diagrams.
http://www.pelicanparts.com/914/914_electrical_diagrams.htm
You can view them on your computer and maybe print large versions that you will be able to see. Wish I had some time to come and help.
Thanks Rick, that is what I am looking for can view them with my magnifying software..
May be up there over the 4th if everything works out to view the fireworks,. Duluth has a great show.
Posted by: rick 918-S Jun 30 2012, 01:14 PM
We should be around. Not sure you will have time to hang around but if call me if you get up anyway.
Posted by: Dr Evil Jul 1 2012, 06:52 PM
Here is my setup. I have the lines going to a thermostat and cooler.
Attached thumbnail(s)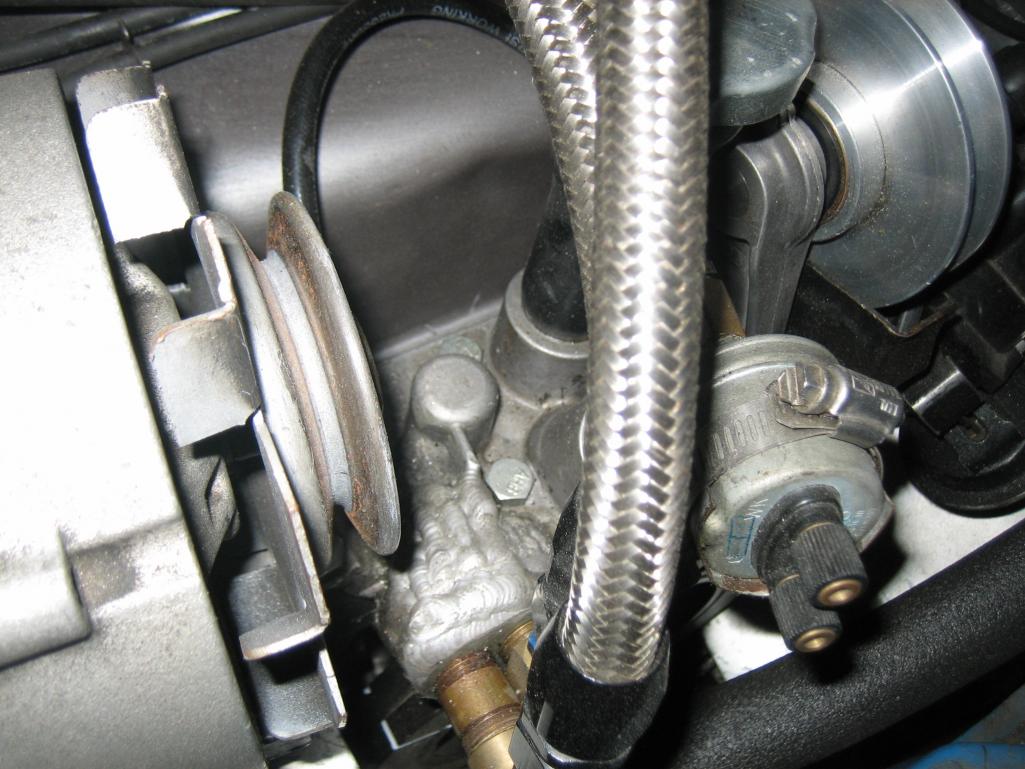
Posted by: 914coop Jul 1 2012, 09:48 PM
Thanks, basically what I came up with yesterday. I will be using AN fittings, should have it together tomorrow.
Thanks for confirming I am on the right track.
Irv
Here is my setup. I have the lines going to a thermostat and cooler.
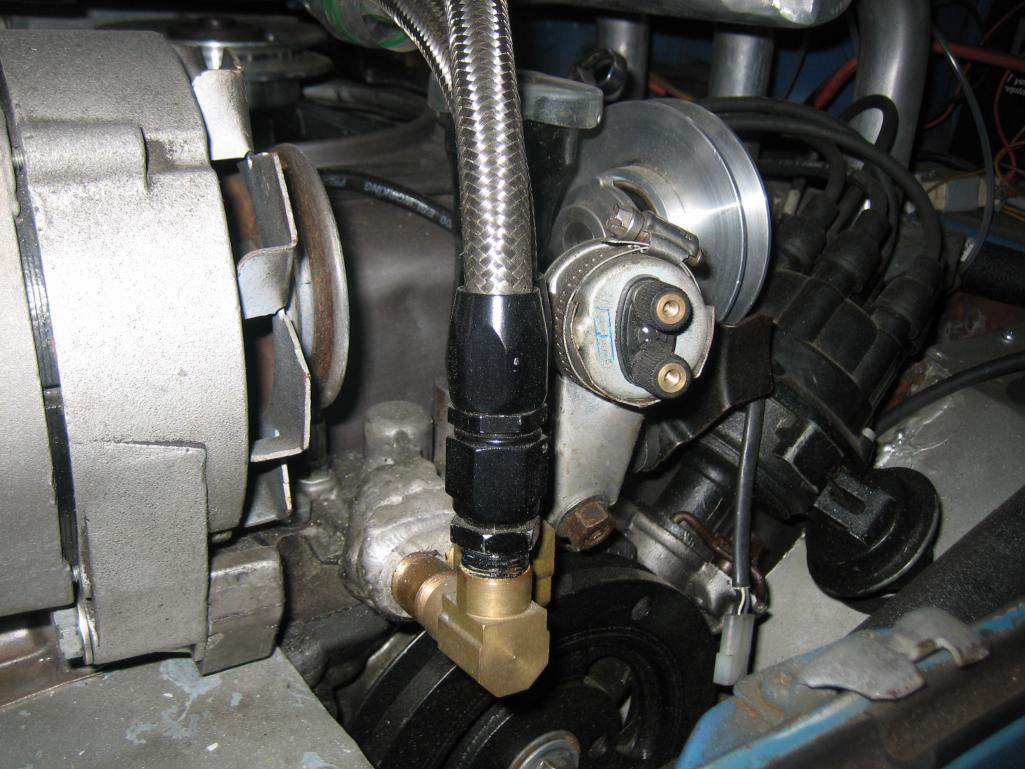
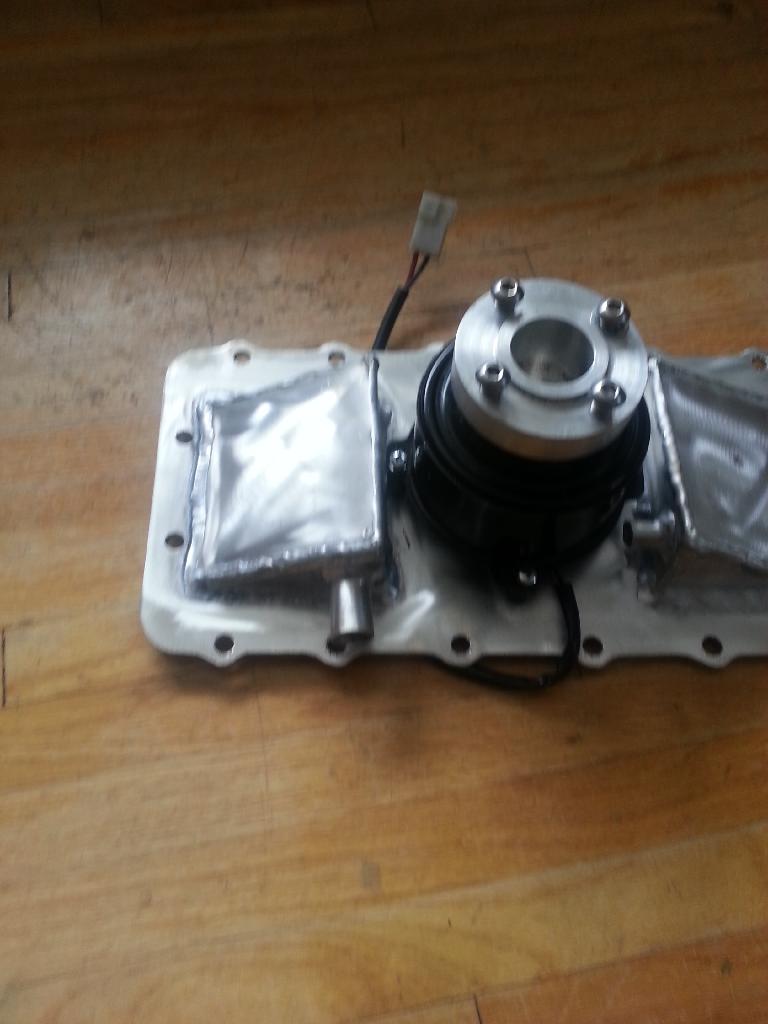
Posted by: 914coop Jul 16 2012, 09:07 PM
Oil filter mount modified.
Engine mount is just about done, hopefully will start it this weekend.
Posted by: Dr Evil Jul 16 2012, 09:10 PM
Where is your return going?
I may be turning the key on my science project this weekend as well. Good luck!
Posted by: rick 918-S Jul 16 2012, 10:21 PM
Posted by: 914coop Jul 17 2012, 06:20 AM
Where is your return going?
I may be turning the key on my science project this weekend as well. Good luck!
Feed is going out through where pressure sender was. I have added AN adapter with gauge fitting there. Welded shut the hole that went to the oil filter on that side. Return will come back from the remote oil filter and external cooler to the other hole left when I cut off the filter connection. Welded a AN fitting there also. Will verify the flow when I prime the system before attempting too start.
Posted by: Dr Evil Jul 17 2012, 06:30 AM
Ah, I didnt notice the blue adapter  Looking forward to it.
Posted by: 914coop Aug 8 2012, 08:04 PM
Did not fall off the face of the earth....
Did not get to a place to try and fire the engine yet. Ran into two issues I am working on solving.
-Engine mount. where it looks really nice, I built it just a hair to tight to get around the engine mount bar. Working on fixing that.
- Altenator mount. since I went with a electric fan the mount that does not require the 90 degree bend in the belt. That mount pushes it into the fire wall. Working on modifing this to be in the 911 position.
Metal work is not my strongest skill so struggling a bit with these.
Hopefully with in a week I can get it fired up.
Posted by: iamchappy Aug 8 2012, 08:32 PM
Irv, keep hammering...
Posted by: rick 918-S Aug 8 2012, 08:42 PM
Good to read your still going at it.
Posted by: 914coop Aug 8 2012, 08:46 PM
Irv, keep hammering...
Yep, thinking may have to pull out the sludge pretty soon...
Posted by: r3dplanet Aug 8 2012, 11:12 PM
Thanks for the update. I've been curious as can be about how it's going. I'm really on the fence about a 1911 or Corvair rebuild. I'm all Hypnotoad with attention.
Posted by: 914coop Dec 16 2012, 11:10 AM
Its heart stated beating 12:53 pm central time on 12/15/12. 
Been a while since I posted on this thread as I have ram into some issues that caused me to remove the engine from the car. The engine mount interfered with the shift rod. I also had the wrong ring gear on the flwwheel, 127 instead of the 130 that the Porsche starter needs. Knew I needed 130 and was sure I counted them. When I pulled it apart it had marks every 10 teeth. Must have came to that conclusion when counting them and took the short cut and multiplied the marks by 10.  Turns out it only had 9 teeth between 40 and 50, 80 and 90, 120 and 130.
I am getting really good at installing this engine.
Started it and held it at 2300 RPM's for about 25 minutes to break in the cam/valve train. Ran smooth and tach was steady. Needs to be timed still and I need to find the air leak as the lowest I could get the RPM's was 1900. Idle stop screw is not touching the arm and the idle mixture screw is at 1 1/2 turns that the manual calls for, so I am thinking a air leak that is leaning it out.
Also need to locate the correct senders for the oil temp gauge and oil pressurw gauge. Oil temp climbed quickly and pegged but my external oil cooler fan did not turn on. It has a 170 degree thremo switch on it. Oil pan was hot and you could olny leave your hand on it for about 5 seconds before it became uncomfortable. External oil cooler was cooler then the oil pan. Oil pressure gauge goes to zero with the ignition on and dummy ligjht comes on. when started the dummy light turns off but the gauge stays at zero. I can feel oil running though the external cooler lines so I know there is pressure there.
The thermostatically controlled electronic cooling fan I put on to get rid of the 90 degree belt, is impressive. To quote my friend who was helping me "It feels like a low pressure system was generated". You feel a noticeable breeze coming from under the car and if by the engine compartment you feel the air rush past you. I am going to have to put a safety switch on it so it shuts off when the engine lid is opened.
Irv
Posted by: carr914 Dec 16 2012, 11:46 AM
Alright!
Posted by: Gint Dec 16 2012, 11:52 AM
Posted by: Jmedeiros Dec 16 2012, 01:07 PM
Great job!!
Posted by: rick 918-S Dec 16 2012, 09:30 PM
Way to go Irv! 
Posted by: 3d914 Dec 16 2012, 10:58 PM
Congrats on the engine startup. You should get us some video - would love to hear it.
Posted by: 914coop Dec 17 2012, 05:41 PM
Congrats on the engine startup. You should get us some video - would love to hear it.
Will do a video of it when I work on it on Friday. Will be load as It doesn't have muffler yet.
Irv
Posted by: kevin311 Feb 21 2013, 03:40 PM
Any updates? This project is awesome!
I am seriously thinking about doing this...
Posted by: 914coop Feb 21 2013, 08:07 PM
Any updates? This project is awesome!
I am seriously thinking about doing this...
It is progressing, all though slower then I had hoped. I had been warned taking on something that is not done very often would have its challenges.
Engine is in and initial break in is done. The other break in steps will need to wait for the snow and salt are off the Minnesota roads.
Hopefully the rest is done by that time. Current status is engine mount is out for redesign due to it interfering with the shift rod.
I believe it is the third time. Hoping to get that back in this weekend along with the axles, shift linkage and the CV joints safety wired.Then it will be fitting the Turbo which is going to be a challenge as it is going to be really tight in its stock location. Then designing the engine surround tin.
It has been a fun and at times frustrating project. If you decide to do the Corvair I would go with the 140 hp and build it up. Turbo adds all kinds of complexity. although I am hoping it will be worth it in the end.
Irv
Posted by: rick 918-S Feb 22 2013, 08:24 AM
Another wave of snow Keep on going! Spring is coming.
Posted by: 914coop Mar 15 2013, 10:40 PM
Update....
Engine mount is complete.
Shift linkage installed.
Get all gears.
Clutch works and is adjusted.
Speedometer hooked up and working.
Accelerator hooked up.
Axles and CV joints in and safety wired.
Turbo is fitted and installed. 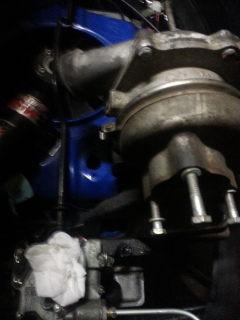
Car can move under its own power now! Have not tested it fully yet as it keeps snowing here. Engine tin and exhaust are next. Then some clean up of wires and then the interior. I can see the light at the end of the tunnel. (hopefully its not a train. )
Irv
Posted by: r3dplanet Mar 15 2013, 11:11 PM
Hoo! Excellent work!
Pictures or it didn't happen!
Posted by: iamchappy Mar 16 2013, 08:02 AM
Great job, cant wait till Spring!
Posted by: rick 918-S Mar 16 2013, 07:22 PM
Wooo! Great progress! Snow Sux!
Posted by: 914coop Mar 23 2013, 07:10 PM
plumbed the turbo to the cards today.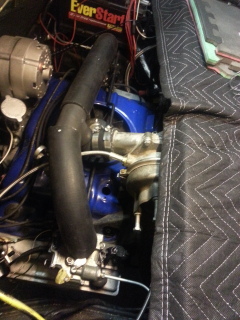
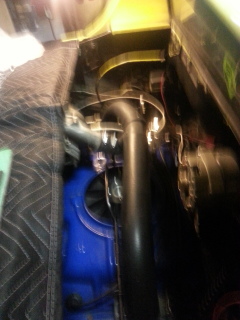
Pretty simple setup and not flashy but it should get the job done. It also allows me to get a air cleaner on it. will work on that tomorrow.
Still have the surrounding tin and exhaust to do but getting closer every day. Although it keeps snowing here , supposed to get a inch again tonight.
Irv.
Posted by: rick 918-S Mar 23 2013, 08:19 PM
No more snow in the forecast up here! Keep on going. I have that shroud material here if you end up needing it.
Posted by: 914coop Apr 6 2014, 03:55 PM
Well it has been forever since I posted on this thread. Seemed like every step I took forward on this project I ended up sliding back about 10 miles. I am at a point that I seem to be moving forward again at least until I try to drive it when all the salt gets washed off the roads here in Minnesota.
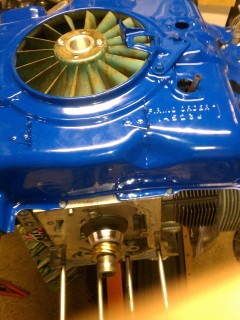
I had a huge crankcase ventilation problem that I caused by replacing the stock cooling system with an electric cooling fan that the builder forgot to take into account for the stock ventilation items he replaced. I have modified it to add oil separator and ventilation boxes.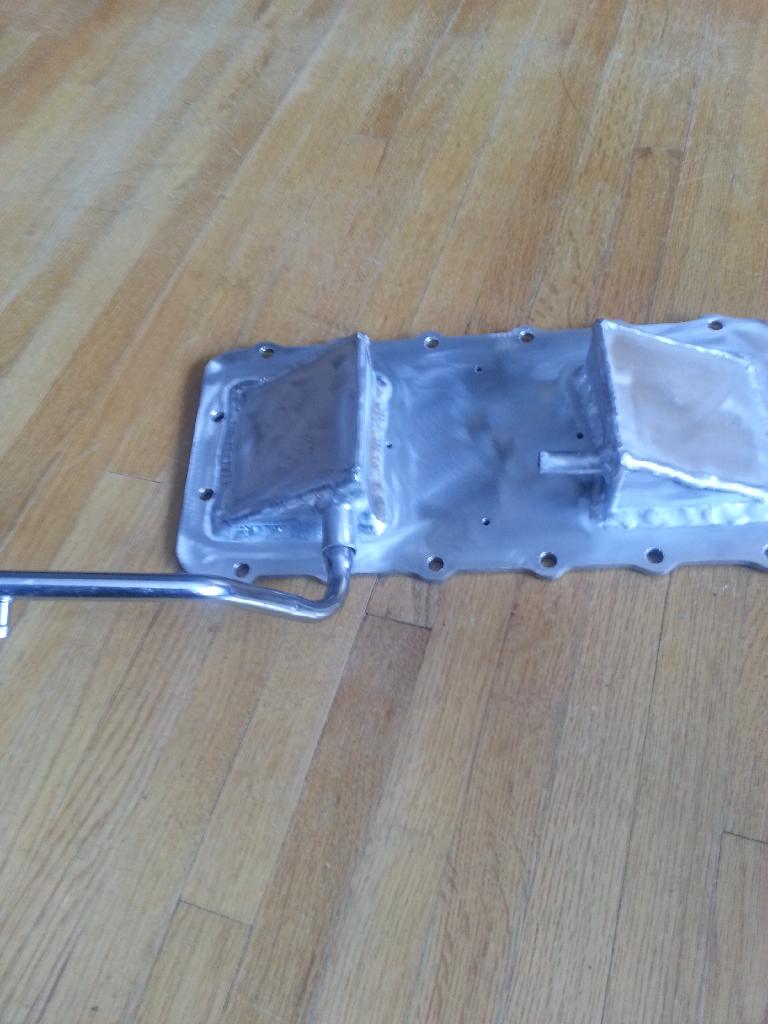
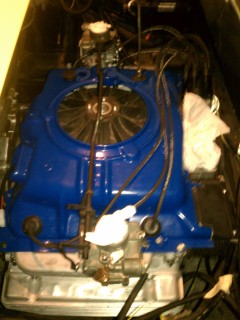
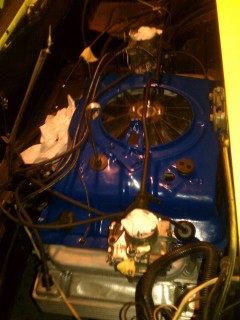
Mounted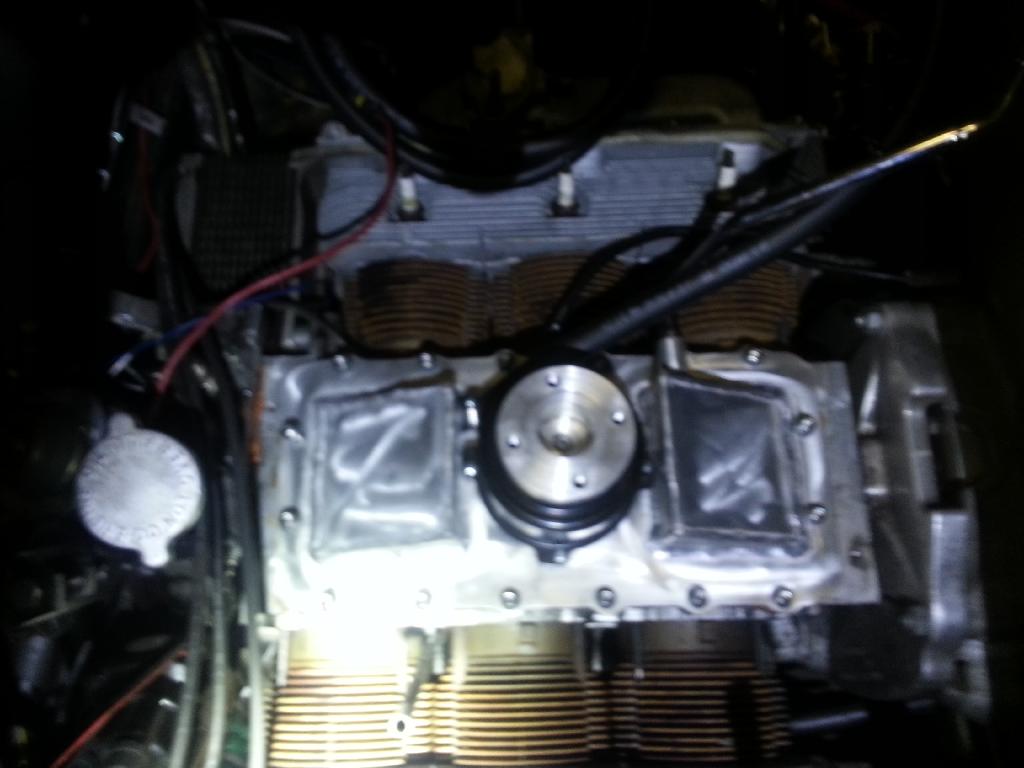
With shroud
I have hooked it up to a Bugpack breather box and have a drain hose from that to the valve cover if any oil gets up in that breather box, most likely over kill but the way things have gone, I am going the extra mile than having to back track.
Along with the crankcase ventilation problem the blow through turbo was pressurizing the carbs and shutting of the fuel under boost. After researching and talking with Steve Goodman (Corvair geru that has done the blow through system before), turns out I will need the mechanical fuel pump as well with the vent hole drilled and a hose barb attached to feed the turbo boost pressure so the fuel pressure increases as the boost does.
Snow is basically gone as of today but need some heavy rain to clean the streets before I test it out.
Irv
Posted by: r3dplanet Apr 6 2014, 03:59 PM
Where did you get that electric motor setup? Home made? Or maybe the one Corvair Specialties sells? I'm very, very curious to see how well it cools.
-marcus
Posted by: 914coop Apr 6 2014, 04:27 PM
Where did you get that electric motor setup? Home made? Or maybe the one Corvair Specialties sells? I'm very, very curious to see how well it cools.
-marcus
Corvair Specialties, Save your money and build it your self, as I stated, he removes all the stock ventilation and you need to modify it, so not worth his asking price.
With fuel issue I have only drove it for about 10 minutes an outing but turbo was producing boost (enough to stop the gas flow) and my aircraft CHT gauge never got over 366 so far.
Hopefully I will get longer runs in soon.
Irv
Posted by: r3dplanet Apr 6 2014, 04:46 PM
Yeah, no worries there. I'll never buy anything from him. His ideas are good but his way of having stuff manufactured overseas to very low quality and then selling them here never quite seems to work.
Just ask Dr. Evil about his roller rockers.
Anyway, I'd LOVE to have a cooling setup exactly like that if it works. And I suppose some kind of nutty 100 amp alternator to drive it. It's fantastic how one can lose the cooling belt and cleaning up the engine bay at the same time.
Posted by: 914coop Apr 6 2014, 04:59 PM
Yeah, no worries there. I'll never buy anything from him. His ideas are good but his way of having stuff manufactured overseas to very low quality and then selling them here never quite seems to work.
Just ask Dr. Evil about his roller rockers.
Anyway, I'd LOVE to have a cooling setup exactly like that if it works. And I suppose some kind of nutty 100 amp alternator to drive it. It's fantastic how one can lose the cooling belt and cleaning up the engine bay at the same time.
Yep, built a 135 amp for this, motor it draws 30 amps if I remember correctly.
Irv
Posted by: rick 918-S Apr 6 2014, 10:10 PM
Nice to here the snow is going away Irv! As soon as I can get my trailer out I will come get that clip. I bought a real truck now so I can actually tow it.
Posted by: aerokurt Apr 6 2014, 11:29 PM
Some of us in the 'vair world make 3100cc engines by using type IV pistons and cylinders. You can find u-tubes on it.
Great work,
Cheers,
Kurt
Posted by: r3dplanet Apr 7 2014, 12:21 AM
Hey Kurt,
Some of us do the same 3.1 liter conversion. You should check out these threads:
http://www.914world.com/bbs2/index.php?showtopic=214258&hl=marcus++corvair
http://www.914world.com/bbs2/index.php?showtopic=82750
Only 914coop seems to be bold enough to go for the turbo though. Fantastic stuff!
Some of us in the 'vair world make 3100cc engines by using type IV pistons and cylinders. You can find u-tubes on it.
Great work,
Cheers,
Kurt
Posted by: 914coop Apr 7 2014, 11:18 AM
Nice to here the snow is going away Irv! As soon as I can get my trailer out I will come get that clip. I bought a real truck now so I can actually tow it.
The way this year is going it will be discovered by scientists when the ICE age goes away...
Dan and I may be able to deliver it later this sping but I to make sure the snow will not be an issue when unloading it as well.
Irv
Posted by: veekry9 Apr 7 2014, 04:36 PM
I'm kind of bummed about the total fail of those CorvairSpecialties parts.
A costly learning curve.
I've read since that the Ford smallblock roller-tip rockers are a fit (with mods).
(CompetitionCams)
Investment-cast in steel,more ratios.
Made in America,like the GM Corvair.
Could be a solution.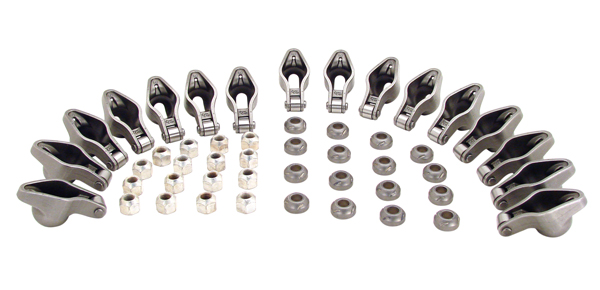
Magnum
Posted by: iamchappy Apr 7 2014, 06:53 PM
Nice to here the snow is going away Irv! As soon as I can get my trailer out I will come get that clip. I bought a real truck now so I can actually tow it.
I bought a real truck now so I can actually tow it.
Posted by: 914coop Apr 7 2014, 08:22 PM
I'm kindbut I will of bummed about the total fail of those CorvairSpecialties parts.
A costly learning curve.
I've read since that the Ford smalblock roller-tip rockers are a fit (with mods).
(CompetitionCams)
Investment-cast in steel,more ratios.
Made in America,like the GM Corvair.
Could be a solution.
Magnum
I have heard good reveiws on those. Once I am satisfied with the engine, I will be researching the rollor rockers.
Irv
Posted by: r3dplanet Apr 7 2014, 08:42 PM
Hey guys,
I have a set of these on my desk right this moment. I spoke with Ray Sedman about this a couple of days ago. He said that the trouble with SBF roller tips is not mechanical, that in fact they work extremely well. The problem is that they're very expensive to have modified by a machinist. You have to TIG weld the existing oil hole shut, drill a new oil hole in the stock location with several carbide bits ($22 each!) and then widen the stud hole. It's easily $200-$400 worth of machining time. For $350 you can buy GOOD full roller rockers from Clark's or American-PI. So unless you do your own machine work, it doesn't make sense dollar wise.
Food for thought.
-marcus
Posted by: 914coop Apr 7 2014, 09:00 PM
Hey guys,
I have a set of these on my desk right this moment. I spoke with Ray Sedman about this a couple of days ago. He said that the trouble with SBF roller tips is not mechanical, that in fact they work extremely well. The problem is that they're very expensive to have modified by a machinist. You have to TIG weld the existing oil hole shut, drill a new oil hole in the stock location with several carbide bits ($22 each!) and then widen the stud hole. It's easily $200-$400 worth of machining time. For $350 you can buy GOOD full roller rockers from Clark's or American-PI. So unless you do your own machine work, it doesn't make sense dollar wise.
Food for thought.
-marcus
I was thinking of American-PI version, I have done business with Ray before and both Ray and Steve have helped me me as I have modified the turbo setup to spool up quicker and get rid of the lag.
Own Ray's safegard system and got rid of the turbo distributor and added a 90 hp without the vacuum retard.
Posted by: Larmo63 Apr 7 2014, 11:12 PM
The name is probably taken......Porvair...?
Posted by: veekry9 Apr 8 2014, 10:02 AM
Hey guys,
I have a set of these on my desk.....
-marcus
Ah yes,I can't recall where I read of the adaptation,you are correct that those mods are needed.I had planned on installing spray bars to further dissipate heat over and above the hotspots in the vicinity of the exhaust valve.More power=more heat=more cooling=more oil capacity=larger oil cooler....ad infinitum.
https://www.youtube.com/watch?v=OZm4YQ3WkEw
Sounds good.
Posted by: rick 918-S Aug 20 2015, 03:53 PM
Had to bump this thread. Wondering how it's going!
Posted by: porschetub Aug 20 2015, 06:28 PM
Where is your return going?
I may be turning the key on my science project this weekend as well. Good luck!
Feed is going out through where pressure sender was. I have added AN adapter with gauge fitting there. Welded shut the hole that went to the oil filter on that side. Return will come back from the remote oil filter and external cooler to the other hole left when I cut off the filter connection. Welded a AN fitting there also. Will verify the flow when I prime the system before attempting too start.
Have enjoyed this thread,I knew a bit about these motors but googled for more info,great what you are doing,IMO with a bit of modern tech they could be made bulletproof,as much as it pains me to say probably stronger than a 911 motor,certainly a lot less complicated.....and cheaper
.What potential problems are there with turbocharging in regards to engine/oil temps,do they have a larger oil cooler than the n/a motor for instance.
Keep up the good work.
Posted by: 914coop Aug 20 2015, 06:47 PM
Had to bump this thread. Wondering how it's going!
Hi Rick,
It's going slowly, mainly backwards!
 I had to scrap the electric fan setup due to it warping when I added the beather pieces which ment dropping the engine and putting on the stock beather and fan, reinstalled the engine.
Now the altenator is hitting the fire wall as I try to install it. Need to modify something, either the firewall or the engine and trans moubts.
Hopefully next week can have it running again and take it out for another test run.
Irv
Posted by: vw505 Aug 20 2015, 07:21 PM
I would like to see some pics, I have a long term plan to do this.
Posted by: rick 918-S Aug 20 2015, 07:52 PM
Nice to see your still working on it!
Posted by: 914coop Aug 20 2015, 07:58 PM
I would like to see some pics, I have a long term plan to do this.
Of the fan, or whole engine install with mount?
Irv
Posted by: vw505 Aug 20 2015, 08:03 PM
The engine mount and exhaust mostly.
Posted by: 914coop Aug 20 2015, 08:53 PM
The engine mount and exhaust mostly.
Okay, I'll see if I have an mount only picture. Are you doing a turbo engine? My exhaust is for the turbo. If I were to do rhis again I would do a built 140 and add EFI. Had to make room for the turbo which makes moving the engine backwards almost impossiable. The Corvair with VW pieces also can get you extra hp but requires machining.
It most likely will be next week if I need to take pictures.
Irv
Posted by: vw505 Aug 20 2015, 09:05 PM
No, no turbo. Probably duel singles.
Posted by: rick 918-S Mar 20 2016, 09:32 PM
Hey Irv, Spring is coming! Time to get busy!
Posted by: 914coop Nov 2 2019, 08:37 PM
Bringing this thread back to life. My transplanted kidney failed 3 plus years ago. My friend finally got me working on the car again this fall. Once I get it moved to my garage I will post updates and pictures
Posted by: sixnotfour Nov 2 2019, 10:10 PM


Posted by: Olympic 914 Nov 4 2019, 09:39 AM
Nader's Nightmare is going home! Nice day to do 914 stuff on the 14th!
First I have seen this thread...
Looks strikingly similar to a friends car, Slant nose and flares.
Posted by: rick 918-S Nov 4 2019, 09:36 PM
I am really pulling for Irv. He is as tough as nails battling life's challenges everyday and building a bad ass Vair powered 14teener. Be careful Irv but keep it going when your able.
Posted by: 914coop Nov 4 2019, 10:14 PM
I am really pulling for Irv. He is as tough as nails battling life's challenges everyday and building a bad ass Vair powered 14teener. Be careful Irv but keep it going when your able.
Thanks, Rick. Need to get it moved shortly as that 4 letter word that starts with an S is coming which means the other 4 letter word that starts with an S will be put on Minnesota roads
Posted by: 914coop Nov 4 2019, 10:19 PM
Nader's Nightmare is going home! Nice day to do 914 stuff on the 14th!
First I have seen this thread...
Looks strikingly similar to a friends car, Slant nose and flares.
Looks great, hope mine looks that good when I am finished.
Posted by: rick 918-S Jan 3 2021, 09:22 PM
Bumping this thread for my friend Irv. Post when you can man!
Posted by: 914coop Jan 4 2021, 07:32 PM
Hi Rick, unfortunately this has been sitting way too long. My
buddy came over last weekend and stated we need to give it some time on it. It is now in a 3 car garage that is heated so I do not have any excuses. Although dialysis and my eyesight always are challenges. I'll PM you my # and new address
Posted by: rick 918-S Jan 5 2021, 03:10 AM
Hi Rick, unfortunately this has been sitting way too long. My
buddy came over last weekend and stated we need to give it some time on it. It is now in a 3 car garage that is heated so I do not have any excuses. Although dialysis and my eyesight always are challenges. I'll PM you my # and new address
So good to see you post Irv. Hey! I just had a long conversation with Chappy. His car is sitting for now also. Pull the cover off that bad boy slope nose and post a couple pix. I will give you a call.
Posted by: carr914 Jan 5 2021, 06:12 AM
Posted by: carr914 Jan 5 2021, 06:12 AM
Posted by: 914coop Jan 5 2021, 07:06 PM
Saturday plan is fire up the TV, turn up the heat, manually rotate the engine and if all goes well finish alternator and figures out the turbo oil lines. Charage battery, clean out the old gas, and try firing it up. i'll need to adjust the timing since it appears I'll have to remove the dist to get room to get it in.
. more to come Saturday .
Posted by: rick 918-S Jan 5 2021, 09:37 PM
Posted by: PanelBilly Jan 5 2021, 09:42 PM
Take a video
Posted by: 914coop Jan 6 2021, 06:59 PM
If Christine allows me to finish and it starts I will take a video.
Posted by: 914coop Jan 10 2021, 12:06 PM
Okay, Saturday rpdate a day late...
First the bad news, No video as Christine wins again and I did not get to a place where I could try and start the engine.
Good news is I got a bunch of things completed.
1. Moved that car out to the midile of the garage, Dollies are still working good.
2. Took the plugs out and the engine turned over by hand. (':Qarl:','smid_7') (':Qarl:','smid_7')
3. Got the alternator installed. Also reinstalled most everything I had to remove to get it installed.
4. Got the fuel tank drained, also discovered the fuel pump had died during this exercise.
5. Pulled the tank and did my best to clean it, looked great to a blind guy but my friend said I should add a filter to the fuel system before the pump just to be safe.
6. Picked up a new Fuel pump and installed it.
7. Battery got charged and put in the car, needs to be secured.
Last thing I needed to do that I could not get done was to reconnect the oil supply line. The Alternator is in the way of the setup I had so I need to redesign that which will need a couple of new connectors. I have ordered those and they should be here by next weekend so hopefully then I can try to fire it again.
Non 914 re;ated but needed in Minnesota, I installed a new carb on the snow blower, I at least got one project finished.
Tried to attach pictures but cannot seem to figure it out from my phone, I'll move them to my computer and try from there.
Posted by: rick 918-S Jan 10 2021, 08:34 PM
Nice to hear about some progress.
Posted by: 914coop Jan 30 2021, 09:04 PM
Work is still being done but finding much more to do...
1. The alternator bearing froze and needed to be replaced so pulled that and sent to a re-builder.
2. Redesigned the oil line setup, waiting on parts to finish it up.
3. Discovered all the bearings are shot on the fan/belt system. Ordered new parts to resolve those issues. Unfortunately this means taking the top off the engine but this extra work hopefully will help the belt stay put.
Tomorrow I start disassembly of the engine shroud ,fan, and blower housing to prepare for the arrival of the new parts.
Sorry no pictures as my eyesight has gotten worse and I will need to rely on my son to take pictures and post them. hopefully he will be back next weekend to assist putting it back together.
More to come next weekend.
Posted by: rick 918-S Jan 30 2021, 10:10 PM
Hey Irv,. Got your PM before I read this post. Have your son send me some photos as soon as he is able. PM me your address. Maybe I can break away for a day and help out.
Posted by: 914coop Jan 31 2021, 07:54 PM
Work done, waiting on new parts
Posted by: 914coop Jan 31 2021, 08:11 PM
dup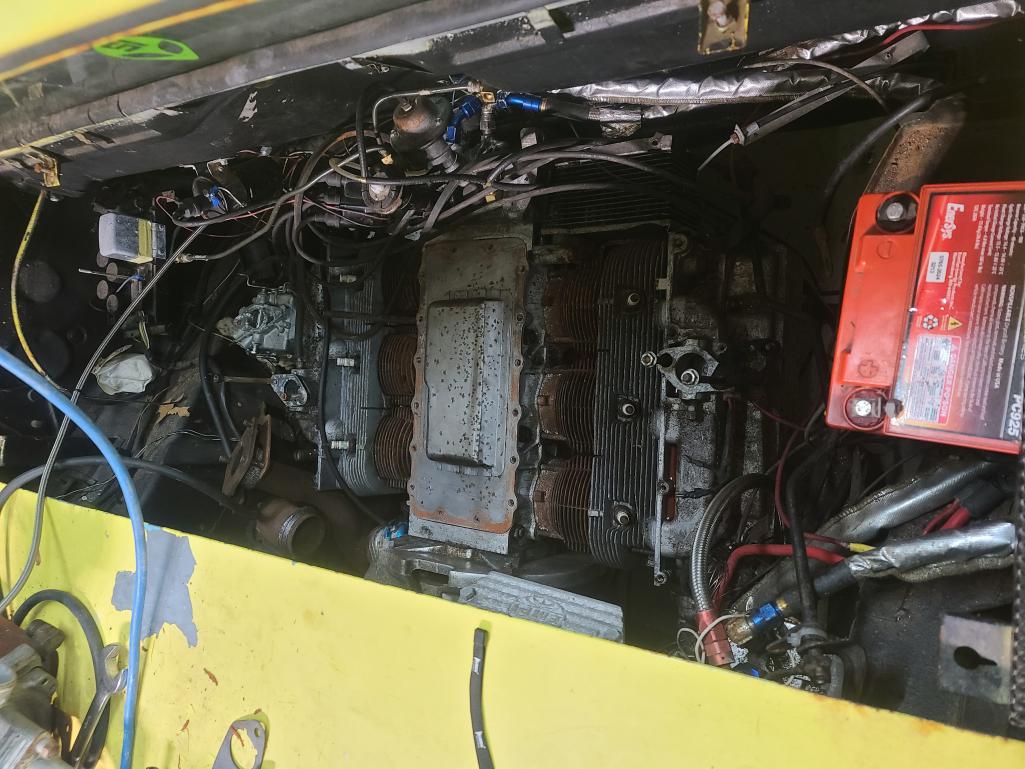
Posted by: rick 918-S Feb 13 2022, 08:59 AM
Time to check on Irv.
I tried to call him but his number is no longer working.
Anyone know how to reach him? Kind of worried about him.
Posted by: rick 918-S Aug 12 2022, 07:53 AM
Still no word about Irv. Last we spoke he was moving someplace around Milacs lake MN.
Posted by: rick 918-S Oct 24 2022, 06:24 AM
Found two phone numbers for Irv. Tried both but no longer in service.
Posted by: carr914 Oct 24 2022, 02:18 PM

Posted by: sixnotfour Oct 24 2022, 04:50 PM
Posted by: rick 918-S Apr 5 2024, 07:23 PM
Spoke with him about 8 months ago. i had his new number but my phone has been shedding contacts for some reason. Anyway his Son Dan now has the car. It may or may not surface again.
Powered by Invision Power Board (http://www.invisionboard.com)
© Invision Power Services (http://www.invisionpower.com)