Printable Version of Topic
Click here to view this topic in its original format
914World.com _ 914World Garage _ progress pics
Posted by: i love porsche Jun 17 2004, 08:55 AM
heres a few pics of what we did on my teener the other day, primed the trunk, took off the dash and started to strip the engine bay..its coming along =]
Attached image(s)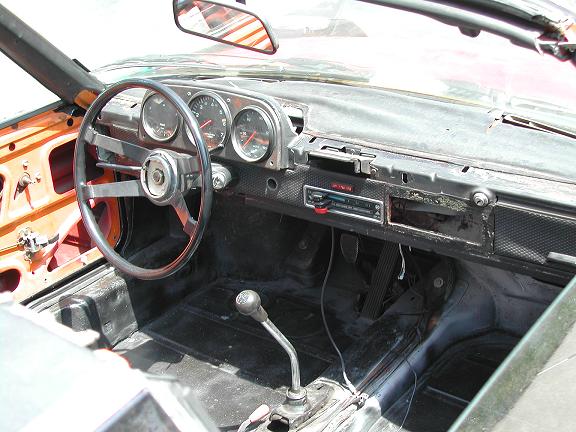
Posted by: i love porsche Jun 17 2004, 08:57 AM
nother
Attached image(s)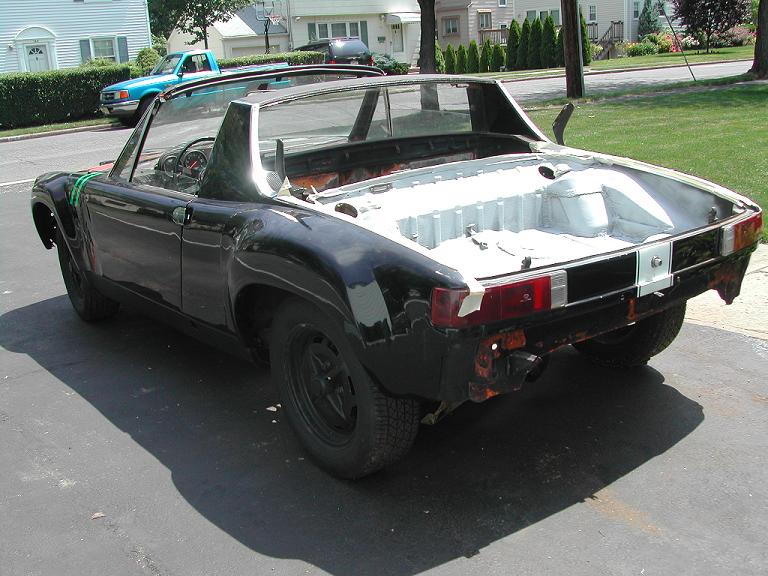
Posted by: i love porsche Jun 17 2004, 09:01 AM
another
Attached image(s)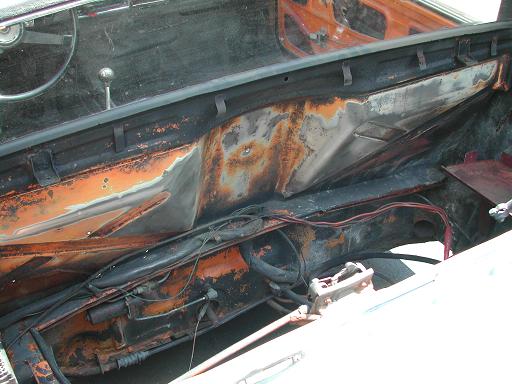
Posted by: i love porsche Jun 17 2004, 09:01 AM
another
Attached image(s)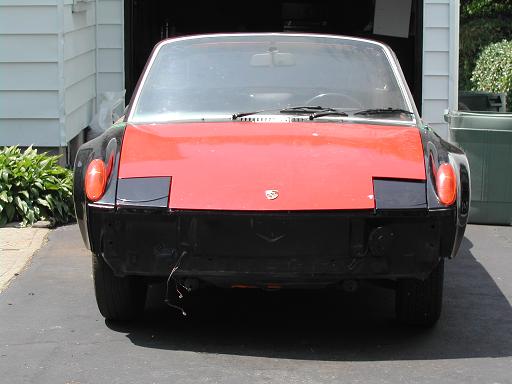
Posted by: i love porsche Jun 17 2004, 09:03 AM
another
Attached image(s)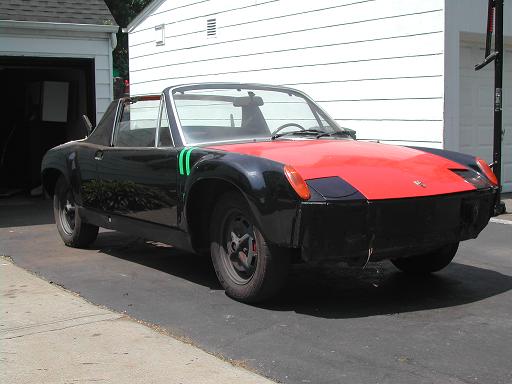
Posted by: i love porsche Jun 17 2004, 09:03 AM
last
Attached image(s)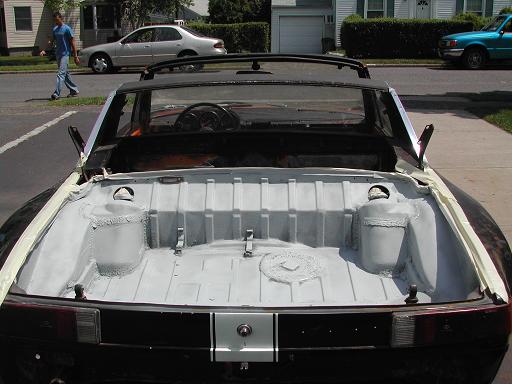
Posted by: AZ914 Jun 17 2004, 12:00 PM
Looks good! What are your plans for finishing the car?
Posted by: rick 918-S Jun 17 2004, 04:34 PM
WTG! 
Posted by: i love porsche Jun 17 2004, 08:33 PM
well first i am going to finish the chassis..by stripping it and repainting it and i am going to install the stiffening kit into the engine bay and paint that...then the interior and i will transfer the 1.7 from my 71 parts car over, and get a sideshift trans....then i start saving for the rebuild....while i do other minor things
Posted by: lmcchesney Jun 18 2004, 06:24 AM
That's great. Hopefully, you are having fun.
L. McC
Posted by: i love porsche Jul 5 2004, 03:45 PM
ok..well i began taking the engine out the other day, im gonna finish it tomorrow after i get the cv joint bit...but heres some pics of what got done..
Attached image(s)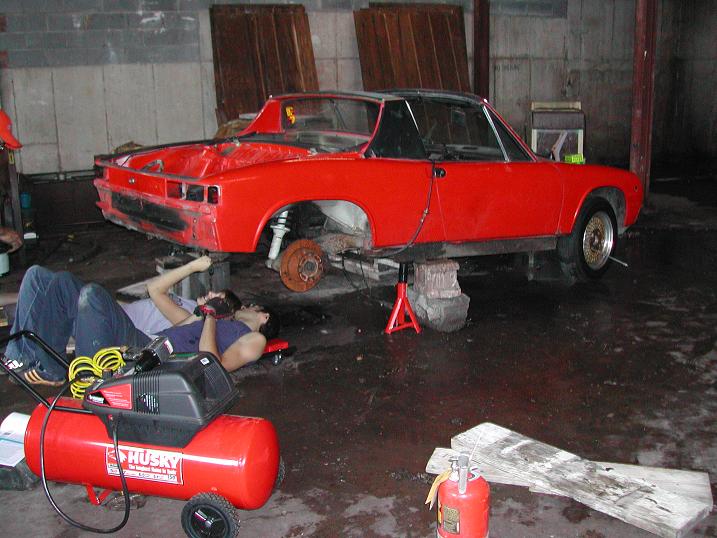
Posted by: i love porsche Jul 5 2004, 03:46 PM
more
Attached image(s)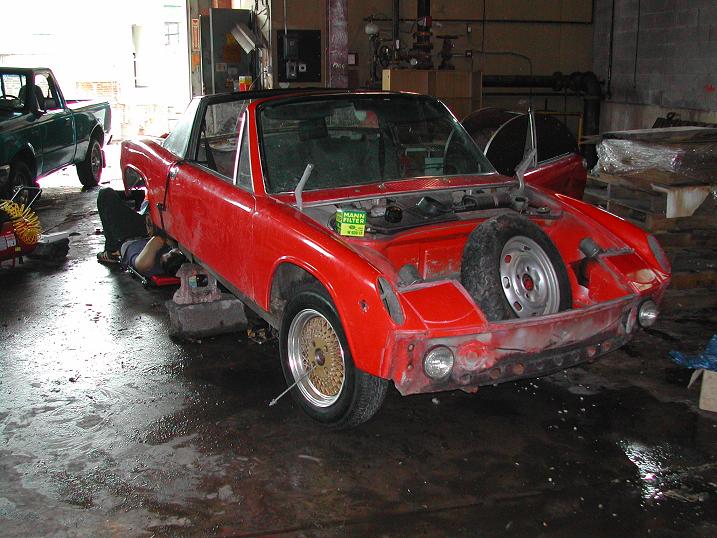
Posted by: i love porsche Jul 5 2004, 03:46 PM
more
Attached image(s)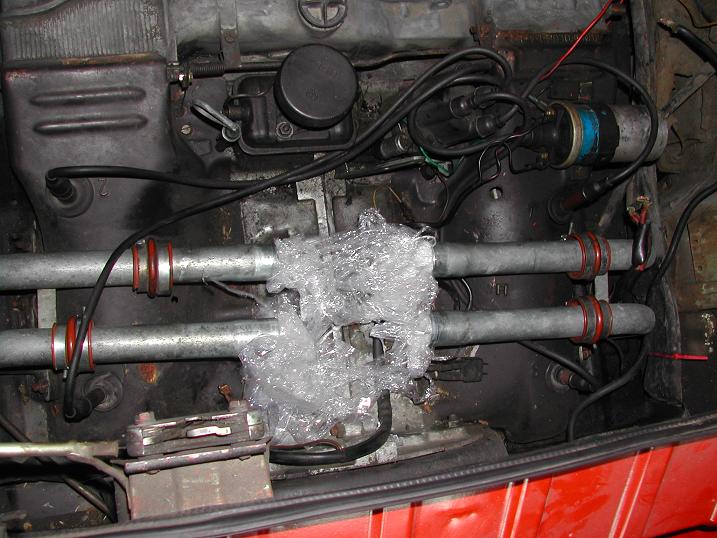
Posted by: i love porsche Jul 5 2004, 03:47 PM
more
Attached image(s)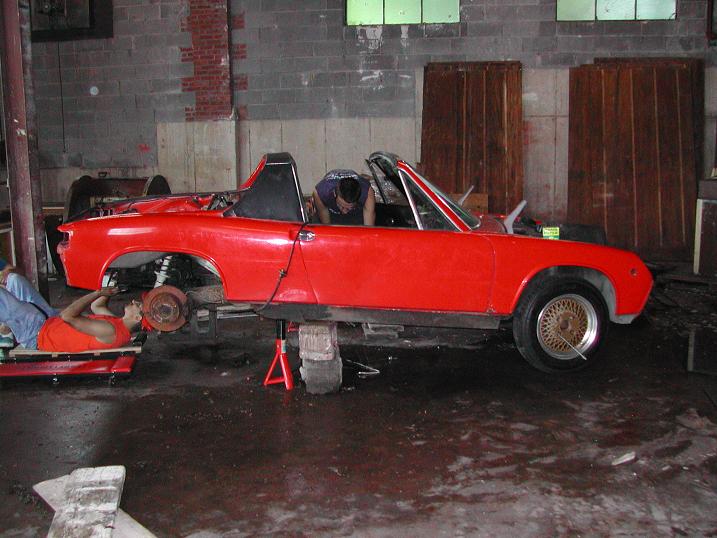
Posted by: i love porsche Jul 13 2004, 08:54 AM
finally got the engine out...doyou like my new floor jack? =]
Attached image(s)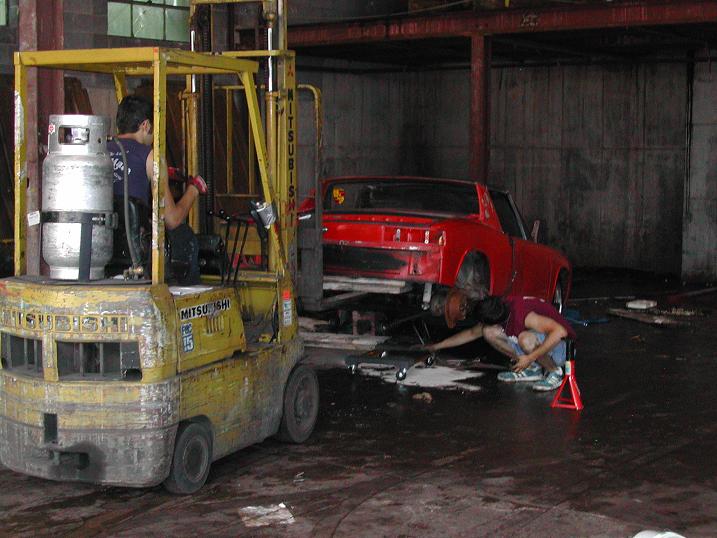
Posted by: i love porsche Jul 13 2004, 08:55 AM
more
Attached image(s)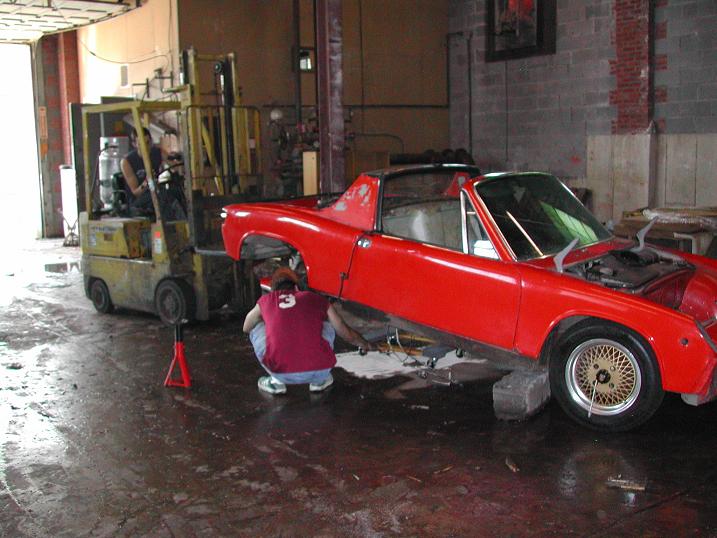
Posted by: i love porsche Jul 13 2004, 08:58 AM
ready to come out
Attached image(s)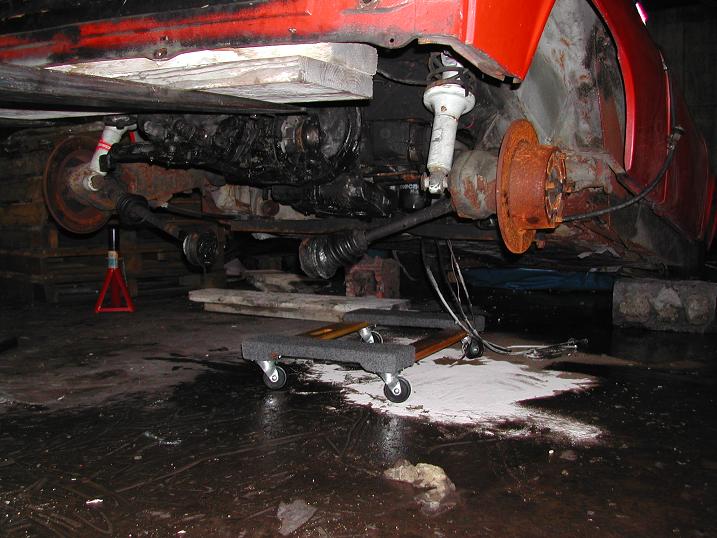
Posted by: i love porsche Jul 13 2004, 08:59 AM
finally out!
Attached image(s)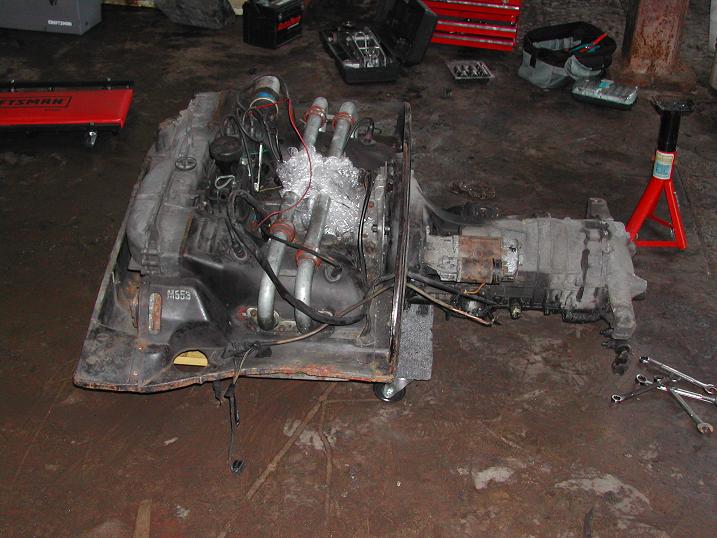
Posted by: i love porsche Jul 13 2004, 08:59 AM
the hell hole
Attached image(s)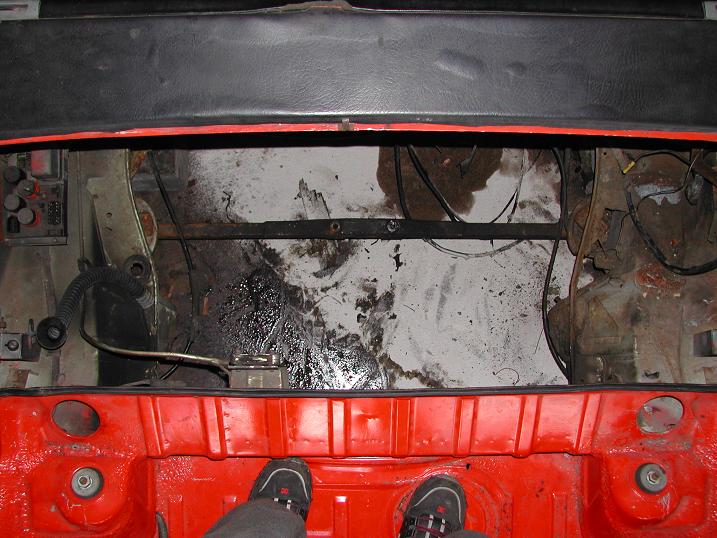
Posted by: i love porsche Jul 13 2004, 09:00 AM
packed and ready to go =]
Attached image(s)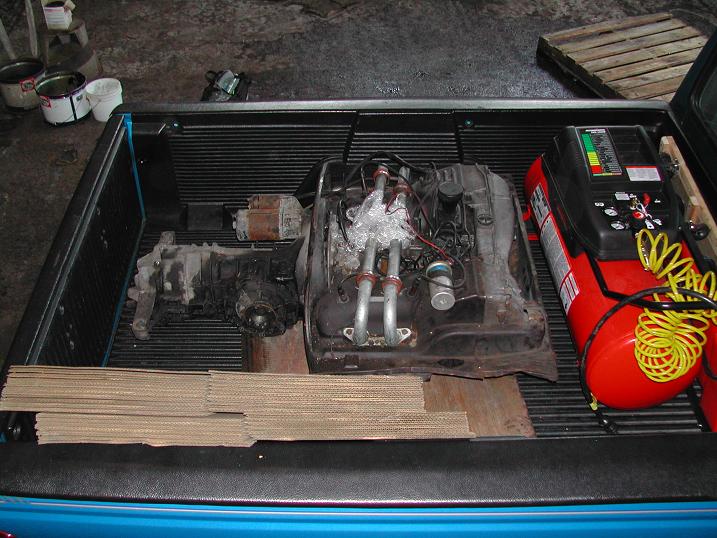
Posted by: seanery Jul 13 2004, 09:29 AM
where are you working? Why is the floor always wet? Radiator Leak? 
Posted by: i love porsche Jul 13 2004, 09:39 AM
ive got my parts car stored at an empty warehouse where my dad works..the place used to be a paint factory, but now its just a stock point, so there is alot of empty space...i dont have room at home..so i keep my parts car there...the roof leaks alot...and its a pretty nasty place so the floor is always wet and slimy hehe
Posted by: i love porsche Aug 20 2004, 09:55 PM
ok..so i began repair on a rust hole in the front trunk today. i cut out the hole..pretty generously, then i cut a piece from my parts car to fit it. i "persuaded" it to fit as best as possible, and i welded the top half, ill do the bottom next week and prime it
heres some pictures
the hole
Attached thumbnail(s)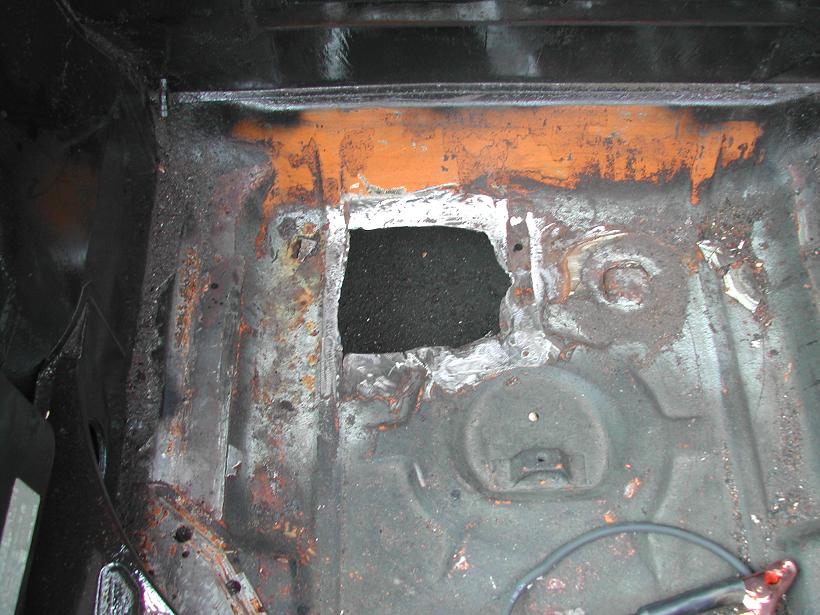
Posted by: i love porsche Aug 20 2004, 09:55 PM
the donor piece
Attached image(s)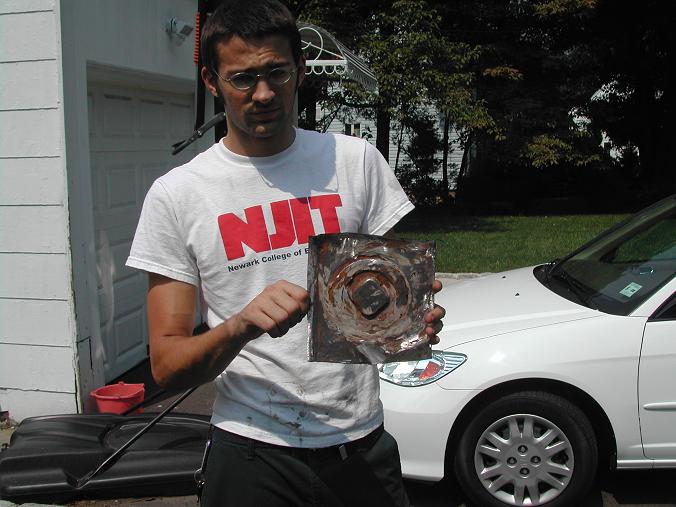
Posted by: i love porsche Aug 20 2004, 09:56 PM
all fitted up
Attached thumbnail(s)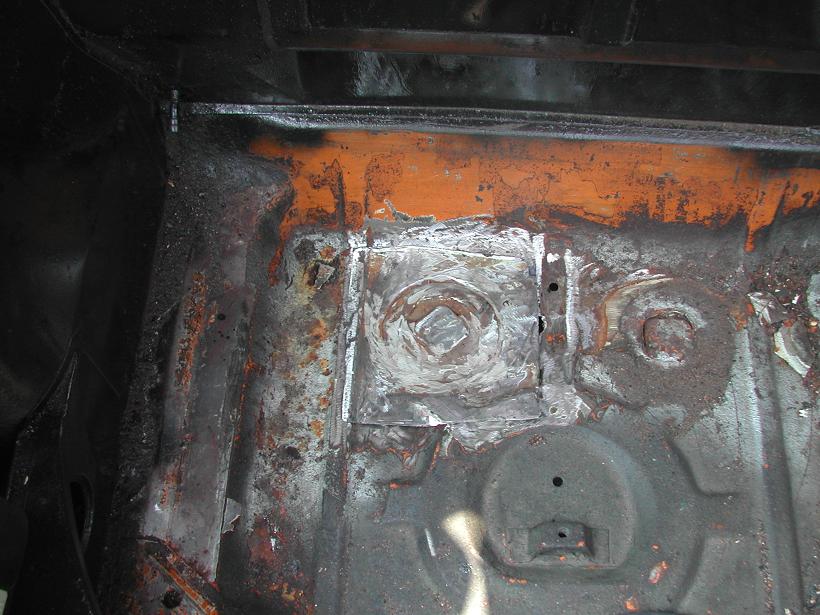
Posted by: i love porsche Aug 20 2004, 09:57 PM
all welded up 
not too bad for a first time..what do you think?
Attached thumbnail(s)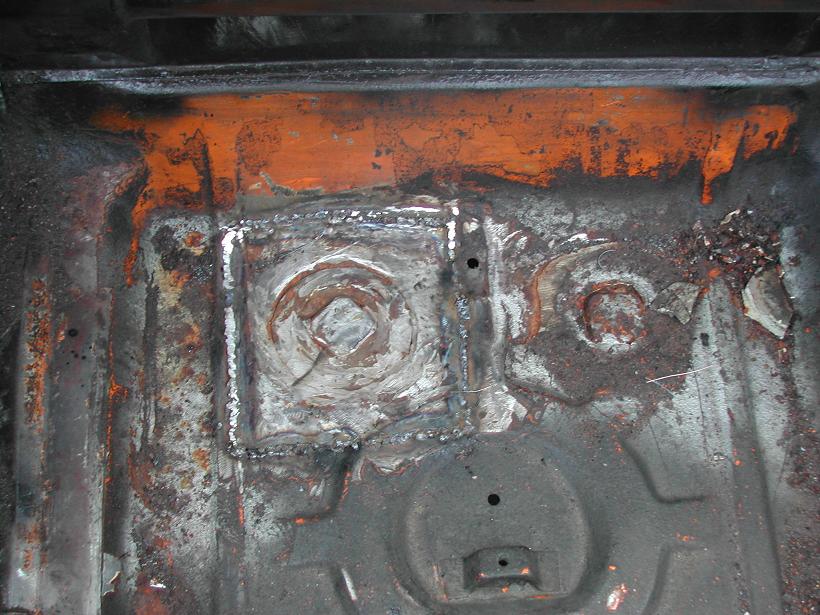
Posted by: jgiroux67 Aug 21 2004, 03:04 PM
Your black car looks incredible! I hope I can do even close to as good of a job as that. I have always wondered, why is the hood red?
Posted by: Aaron Cox Aug 21 2004, 06:23 PM
why is the sky blue?

Posted by: i love porsche Aug 21 2004, 10:30 PM
hehe, well the hood (and doors now also) are red because they are from my 71 parts car, i bought this as a roller, and have since been working on it =]
Posted by: i love porsche Oct 7 2004, 06:01 AM
more pics here, i cut out the rear piece from the parts car,
warning to everyone...if you dont know what youre doing when cutting apart a car..find out! otherwise it will end up looking like this!
Attached image(s)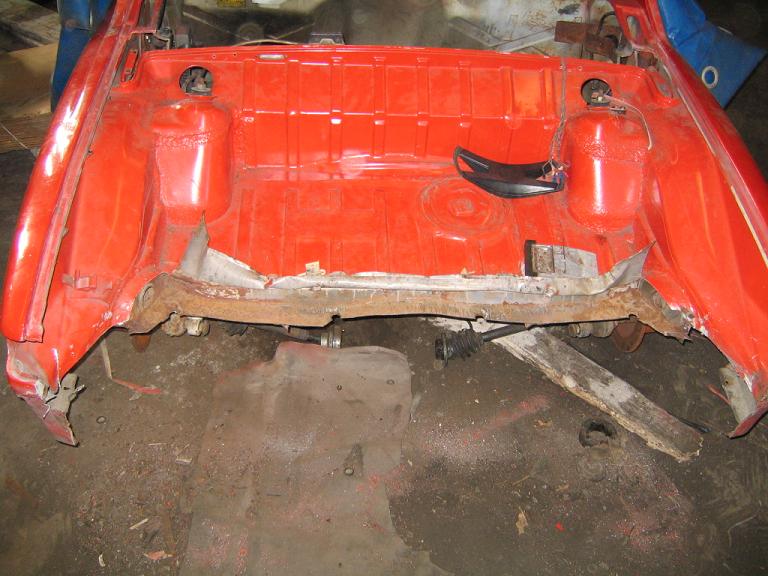
Posted by: i love porsche Oct 7 2004, 06:05 AM
heres the piece
Attached image(s)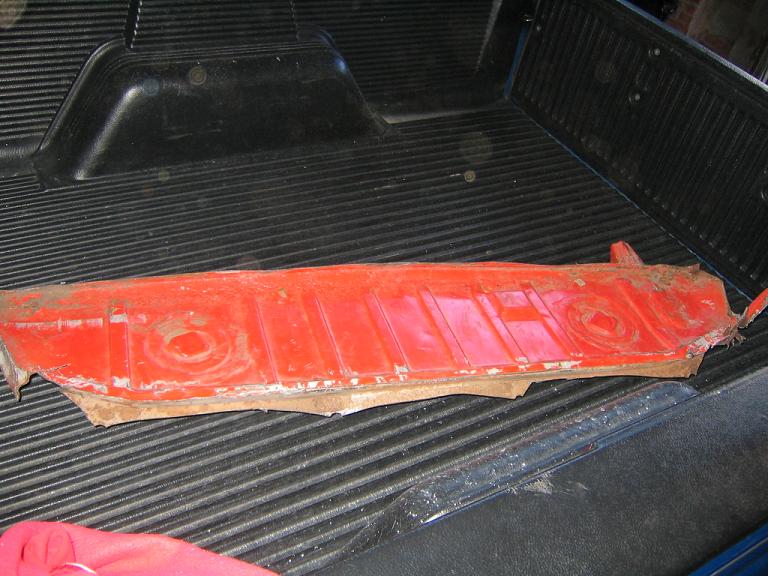
Posted by: i love porsche Oct 7 2004, 06:06 AM
other side
Attached image(s)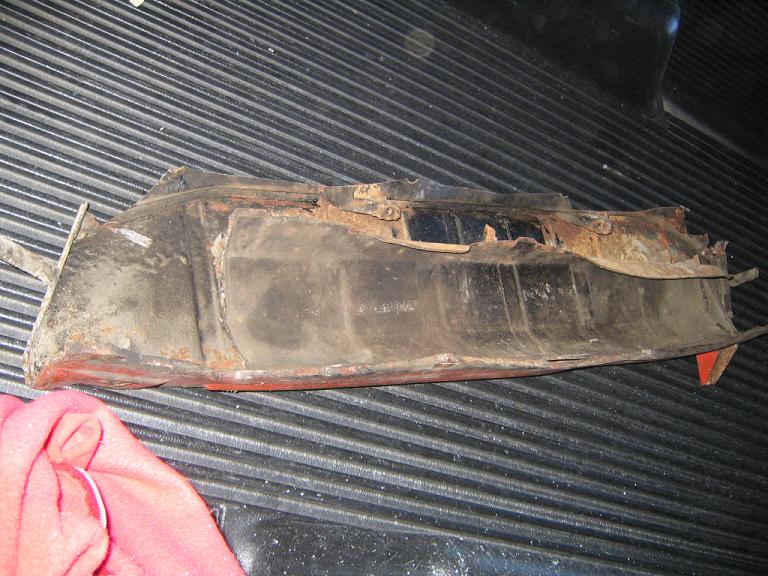
Posted by: i love porsche Oct 14 2004, 07:03 AM
the hole in my trunk
Attached thumbnail(s)
Posted by: i love porsche Oct 14 2004, 07:03 AM
and the piece thats going in
Attached thumbnail(s)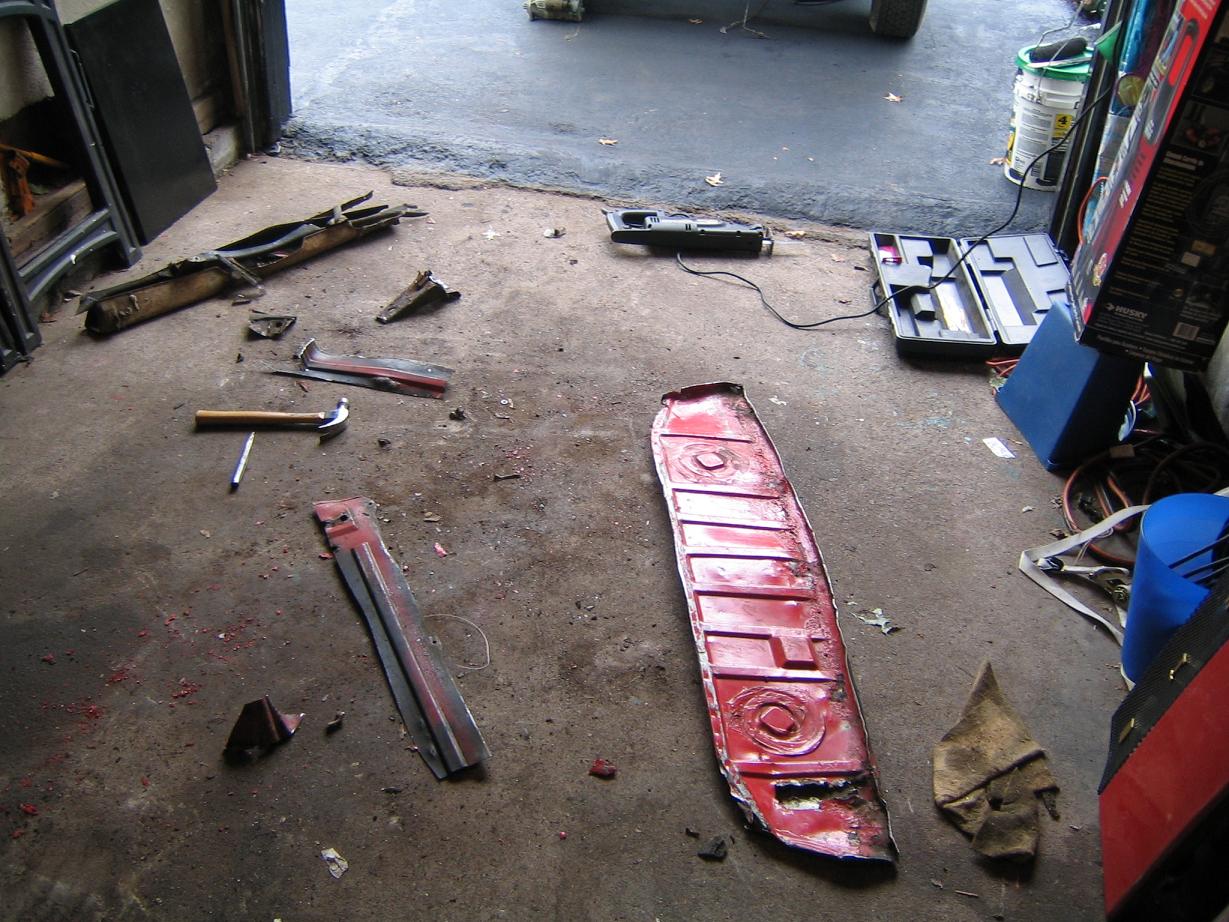
Posted by: bryanthompson Oct 14 2004, 09:07 AM
What did you use to get into the wee corners when you cut the old lower trunk piece out? Also... did you cut the braket out separately or did you just cut the whole shebang with the floor piece? From the pics, it looks like there's a bracket there, but I can't tell for sure.
Keep up the good work!
Posted by: i love porsche Oct 14 2004, 03:28 PM
in the corners of my car were actually thick chunks of some type of filler!
i think they may have been from the factory..because there was a layer of orange paint on them..for that part i just used a hammer and chisel...
i cut around the tow hook reinforcements and the bumper mount reinforcements, i dont trust my welding skills to weld those back on, so i cut out that part on the piece im putting in
thanks for posting your thoughts..i dont feel so alone now =]
Posted by: type11969 Oct 14 2004, 04:33 PM
Aaron-
I can't help but notice that you have a nice part car that you are hacking up here in NJ. What all are you going to use from that parts car? There is some sheet metal that I could really use on my 914, and not having to pay shipping from CA would be choice.
Specifically I am looking at the rear fenders, both of mine some PO did a real hot rivet and bondo job at the base of the sails.
Let me know, and let me know if you ever want some help, I'm only bout a half hour from you.
-Chris
Posted by: type11969 Oct 14 2004, 04:43 PM
Oh yeah I could also really use the trunk lock if you still have it, the fog lights, dunno if you have the bumpers, let me know what you want for this stuff if you are interested in selling it.
-Chris
Posted by: i love porsche Oct 14 2004, 09:17 PM
yeah we can definetly make a dea for the rear fenders, and you can help me take them off too...im not sure how to do that, foglights, im takin em for my car, bumpers too, sorry, and i have the rear trunk lock too...pm me and we can organize something =]
Posted by: i love porsche Oct 18 2004, 06:43 AM
installed the engine shelf this weekend..lots of metal fitting!
first some grinding, then some hammering and heating, then morehammering and heating and grinding, then cutting, then more hammering..finally some welding, then more hammering, and then more welding
Attached thumbnail(s)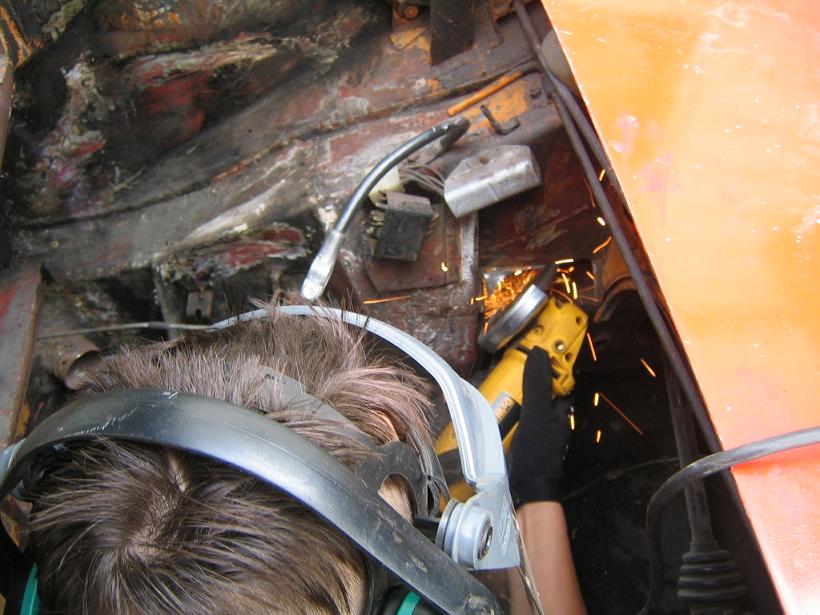
Posted by: i love porsche Oct 18 2004, 06:43 AM
now it fits!!!
Attached thumbnail(s)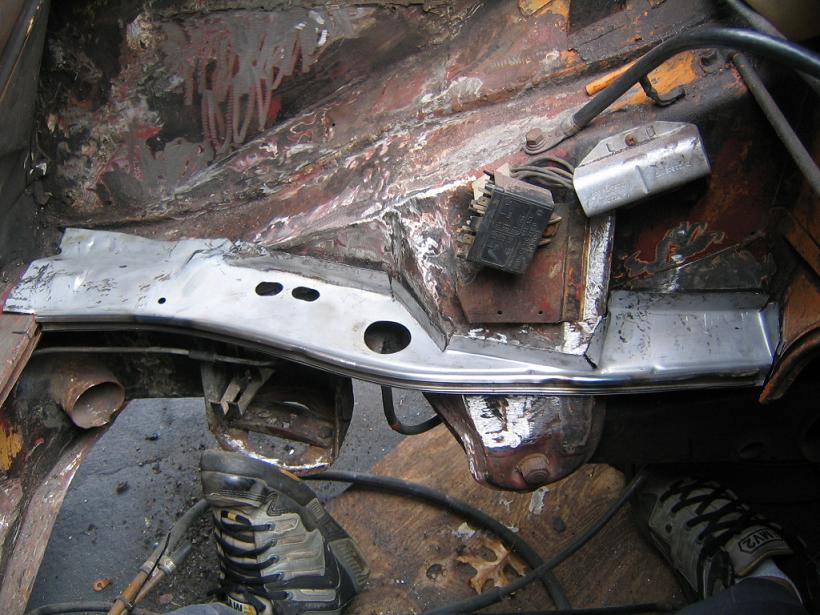
Posted by: i love porsche Oct 18 2004, 06:44 AM
then the welding!
Attached thumbnail(s)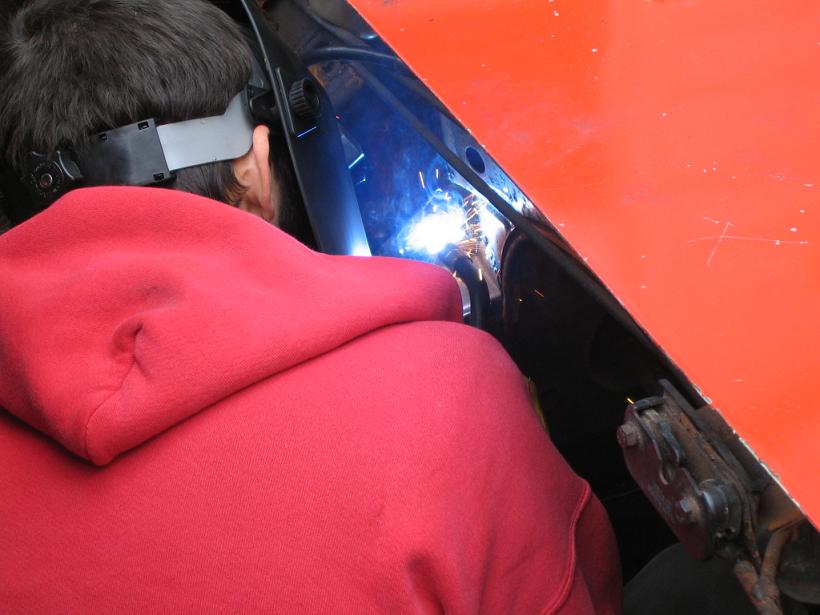
Posted by: i love porsche Oct 18 2004, 06:46 AM
and its in!
Attached thumbnail(s)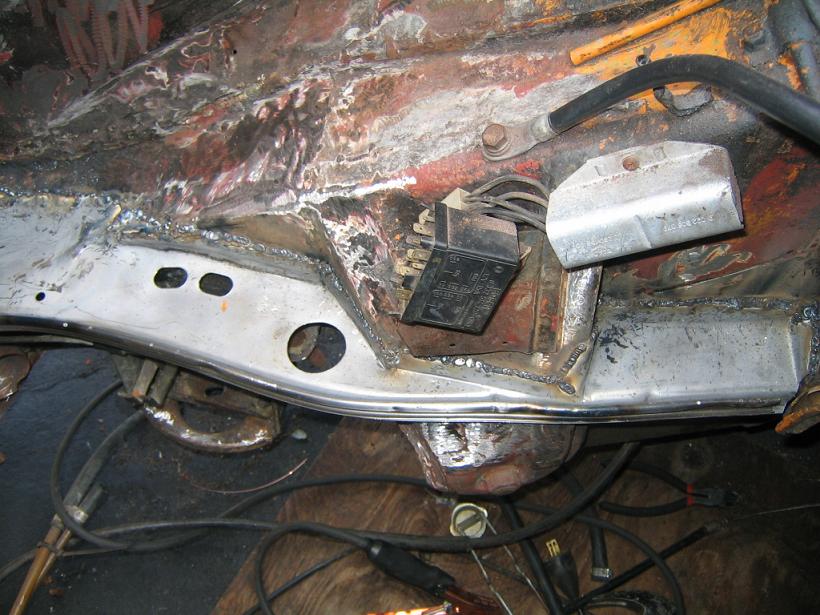
Posted by: sgomes Oct 18 2004, 08:05 AM
Great stuff man! Keep it coming! 
Posted by: watsonrx13 Oct 18 2004, 09:54 AM
Great job, I knew you could do. Hope my post helped.
Posted by: thesey914 Oct 18 2004, 10:11 AM
That red 'Hoody' looks much too nice to be welding in......My old welding jumper looks like its just been peeled off a tramp. 
Posted by: i love porsche Oct 18 2004, 12:43 PM
ehh...its an old hoodie =]
watson, your posts definetly helped alot! thanks a bunch..this saturday, i will fill the hole in the trunk
Posted by: i love porsche Oct 25 2004, 06:43 AM
did alot this weekend, lots of fun, filled in the holes in the engine bay, and started installing the peice for my trunk =]
Attached thumbnail(s)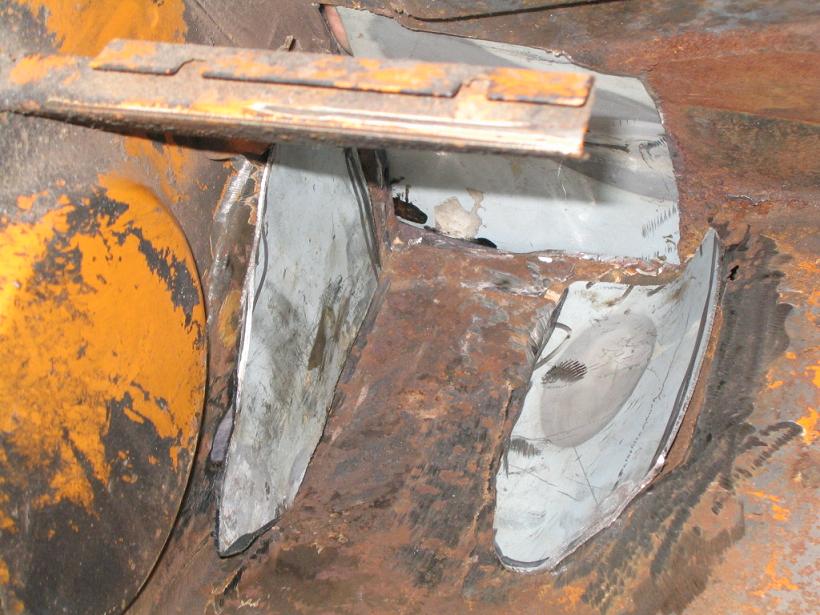
Posted by: i love porsche Oct 25 2004, 06:44 AM
a lil welding =]
Attached thumbnail(s)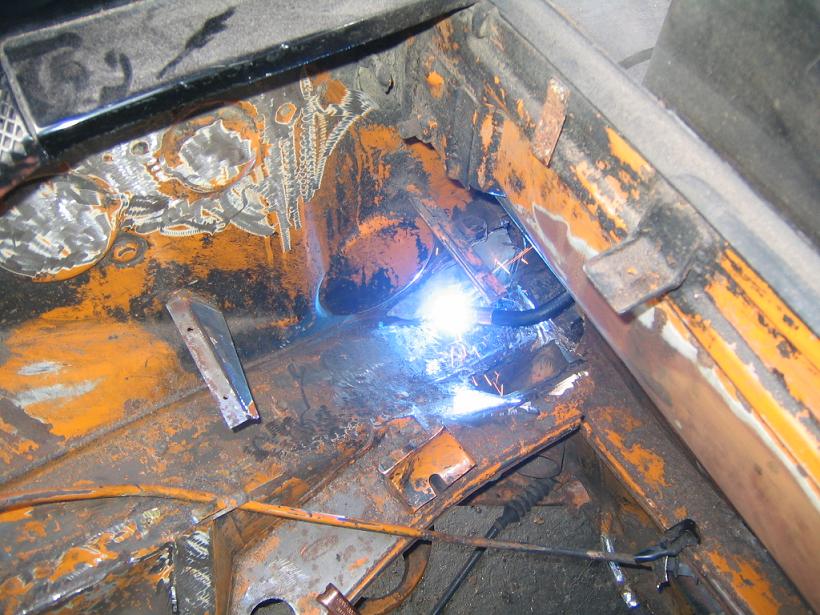
Posted by: i love porsche Oct 25 2004, 06:47 AM
so..who knows what i forgot to do?
Attached thumbnail(s)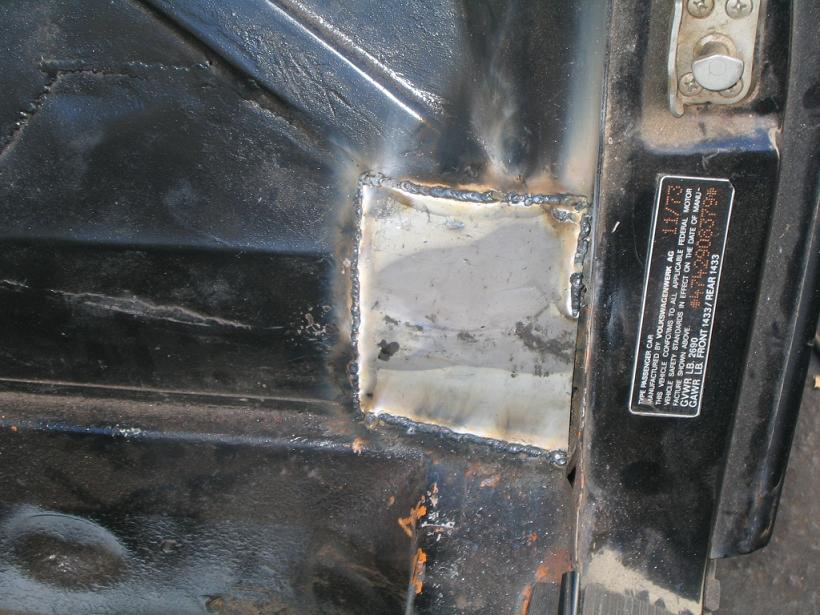
Posted by: i love porsche Oct 25 2004, 06:48 AM
and i tacked in the rear peice
Attached thumbnail(s)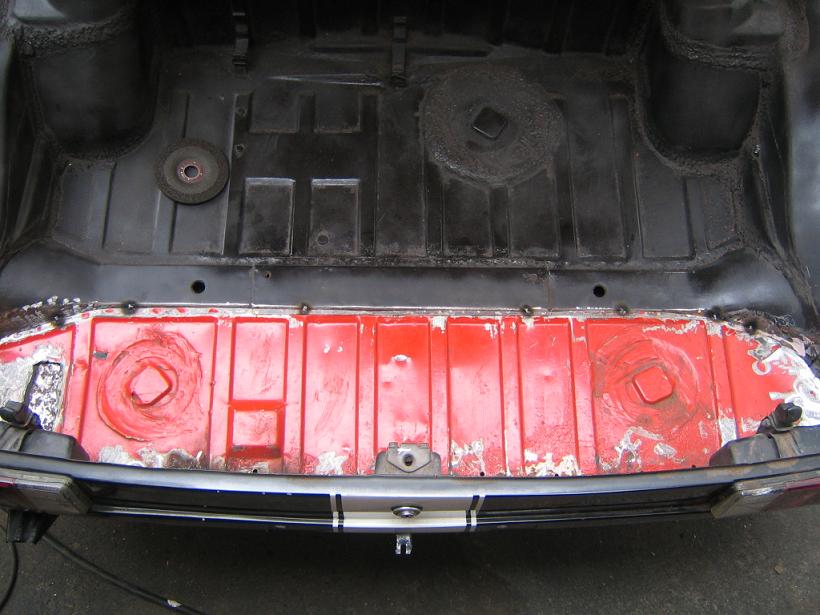
Posted by: 914GT Oct 25 2004, 11:50 AM
No drain hole in the engine compartment?
Posted by: MattR Oct 25 2004, 11:58 AM
Does somebody need a new backpad???
Posted by: i love porsche Oct 25 2004, 12:06 PM
nope...i forgot to put the engine lid release back in!!
stupid me
Posted by: jet1 Nov 4 2004, 09:34 AM
Hi,
Good post. I am doing the same repairs on my '73. I drive by your area all the time and was wondering if you were going to cut up the parts car. If so, let me know.
Keith
Posted by: scooter311 Nov 4 2004, 10:13 AM
Heya I love P,
I looked at that car last winter (I'm in Rochester, it was a whiteout on the way down to Angelica) and wish I bought it then. Was the seller good to you?
So do you have an idea of what color you're gonna paint it?
Awesome job so far, keep up the good work! Another 914 saved from death's rusty, leaky doorway.
Posted by: brant Nov 4 2004, 10:43 AM
good job man..
thats looking nice
keep it up
brant
Posted by: i love porsche Nov 19 2004, 02:05 PM
I looked at that car last winter (I'm in Rochester, it was a whiteout on the way down to Angelica) and wish I bought it then. Was the seller good to you?
So do you have an idea of what color you're gonna paint it?
Awesome job so far, keep up the good work! Another 914 saved from death's rusty, leaky doorway.
which car did you look at? the red one? i bought it up in vestal ny, the black 74 i got from a guy on the bird board in monkton md, nice guy
neways, the car is gonna be signal orange, original color =]
Posted by: scooter311 Nov 19 2004, 02:39 PM
Maryland??????  The black one was in New York over the winter, how about that! I'm in Rochester, it was an hour anda half south of me, just under Letchworth Sate Park.
I remember it because of the distinct paintjob. What did you do with the motor (When I looked at it there was a locked up 2.0 that was missing everything on top)? I like the stripe on it too. I was interested in the engine at the time, but he neglected to tell me things like "it's missing everything and was in a fire"
Keep up the pics, maybe I'll be inspired enough to do some weld-work to mine someday!
Posted by: i love porsche Nov 22 2004, 12:30 PM
work on the car in the rain!!!!
Attached thumbnail(s)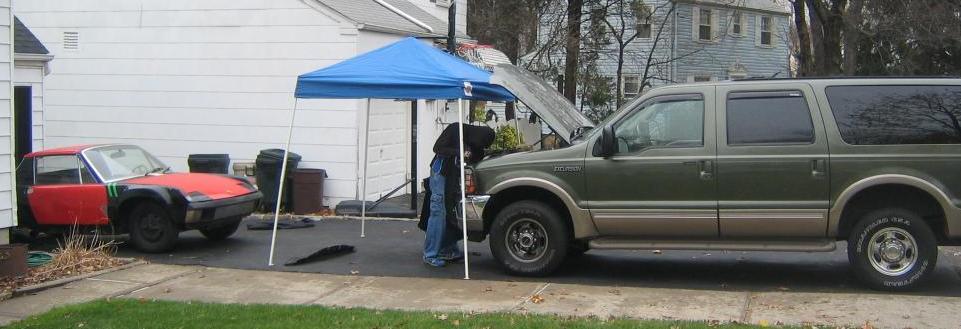
Posted by: i love porsche Nov 22 2004, 12:35 PM
you sure it was this car?
did it have a white racing stripe?
i was told..this guy bought it from his friend who bought it from an old lady...i dunno...
the doors were black when i got them..the red ones are from my 71
well anyways
heres my trunk, all finished and painted!
Attached image(s)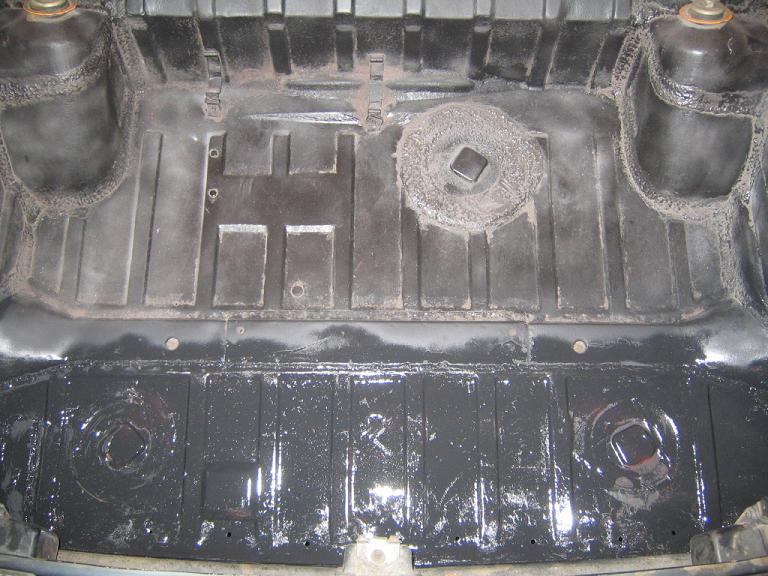
Posted by: i love porsche Mar 3 2005, 08:03 AM
alright, finally an update, i got my drivers seat back from the seat guy, he did a really nice job, im really happy
Attached thumbnail(s)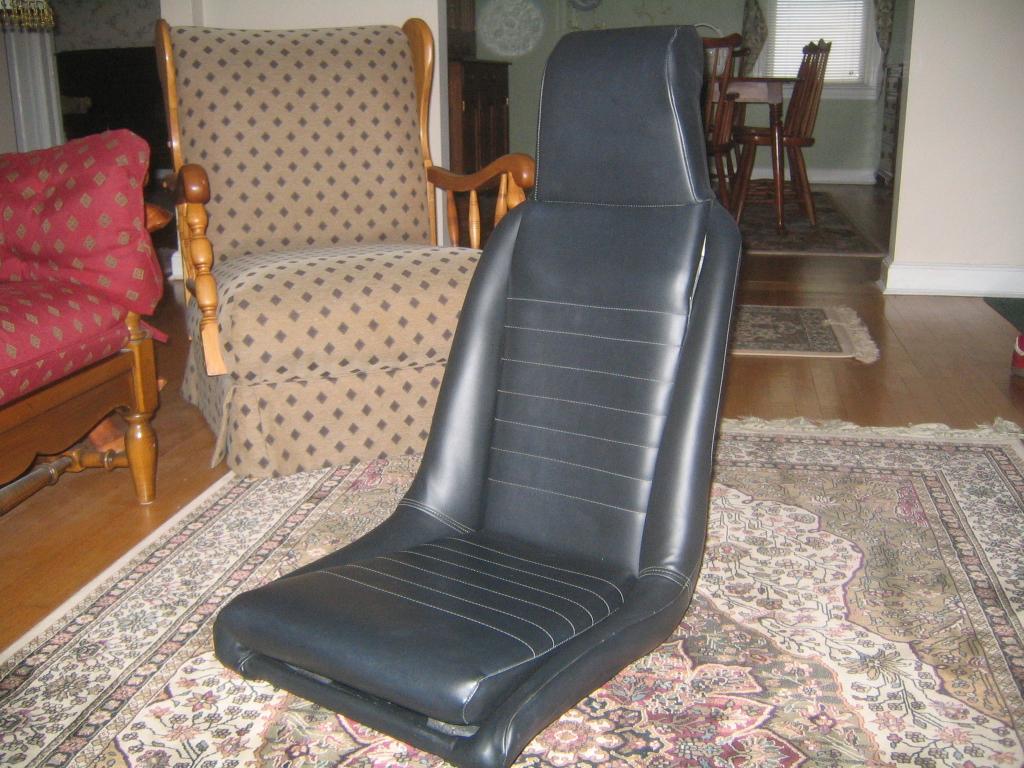
Posted by: i love porsche Mar 3 2005, 08:04 AM
oops forgot the pic
Posted by: i love porsche Mar 3 2005, 08:06 AM

Attached thumbnail(s)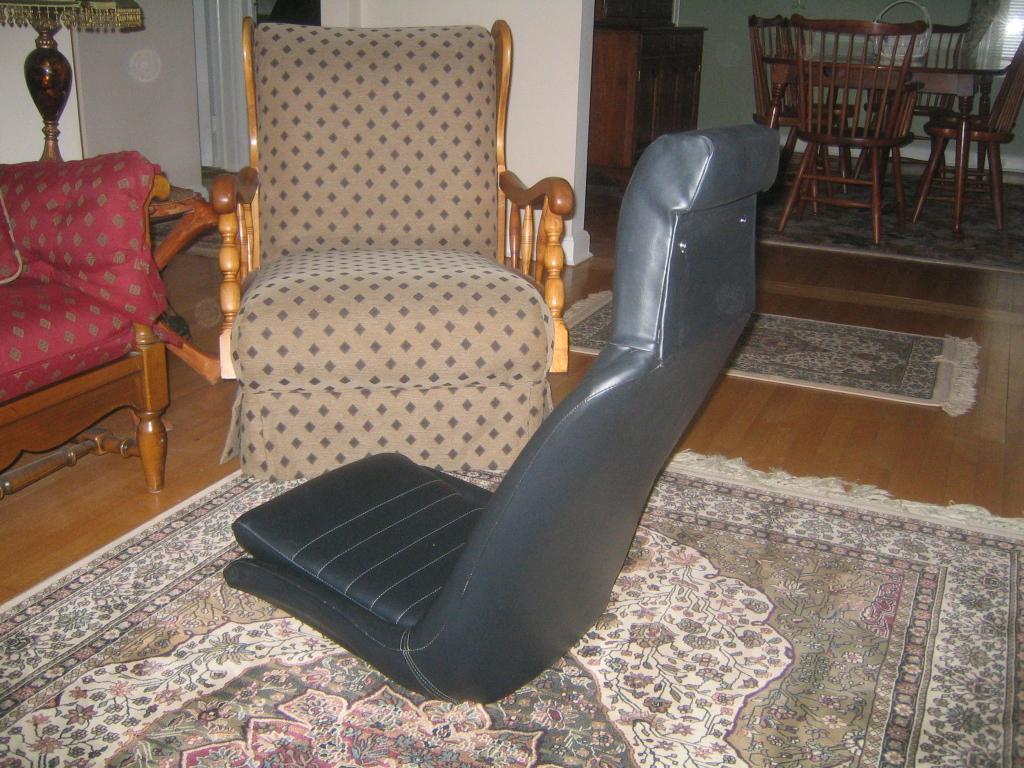
Posted by: i love porsche Mar 3 2005, 08:08 AM
i cant wait to drive her 
Attached thumbnail(s)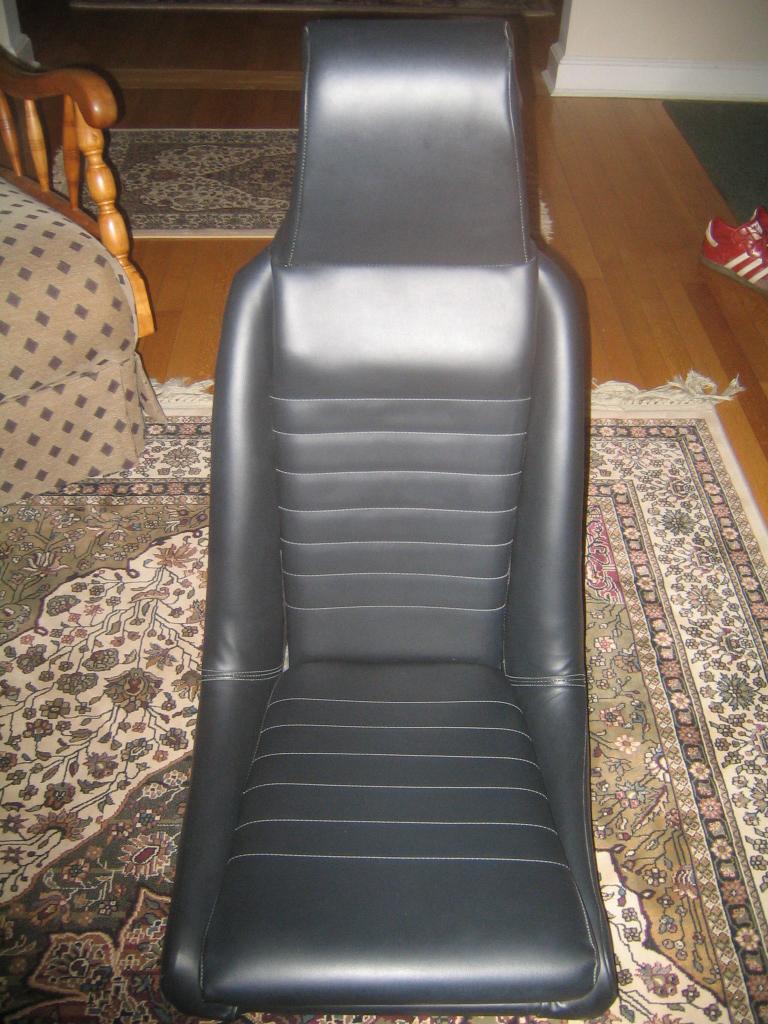
Posted by: Hi_Fi_Guy Mar 3 2005, 10:05 AM
Great progress update... looking good. U Got skills dawg!
Posted by: Root_Werks Mar 3 2005, 12:34 PM
Very nice job Aaron, I love that you are saving this teener!
Posted by: Lou W Mar 3 2005, 12:38 PM
Those seats look great.
Posted by: i love porsche Mar 15 2005, 10:00 PM
thank god for spring break, first time ive been able to do some work since fall
so, i pulled off the driver door to try and do a little body work, which i havent finished....
and i ended up stripping the whole thing, filler, paint and all, and i took off the doorpanel to find some treasures inside
to strip, first i used a torch and scraper, then i applied chemical stripper, scraped it, and then a second coat and scraped that, and it came pretty clean...and wow did i uncover alot of dents!!!
this is after the torch and scraper
Attached thumbnail(s)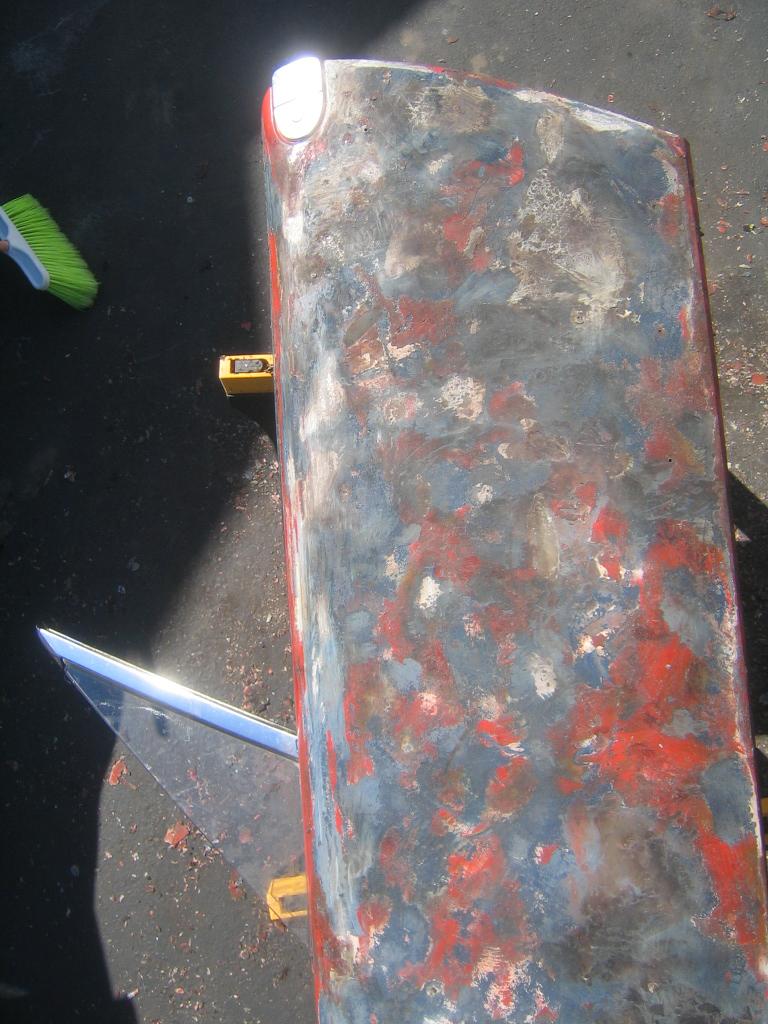
Posted by: i love porsche Mar 15 2005, 10:00 PM
after teh first coat of stripper
Attached thumbnail(s)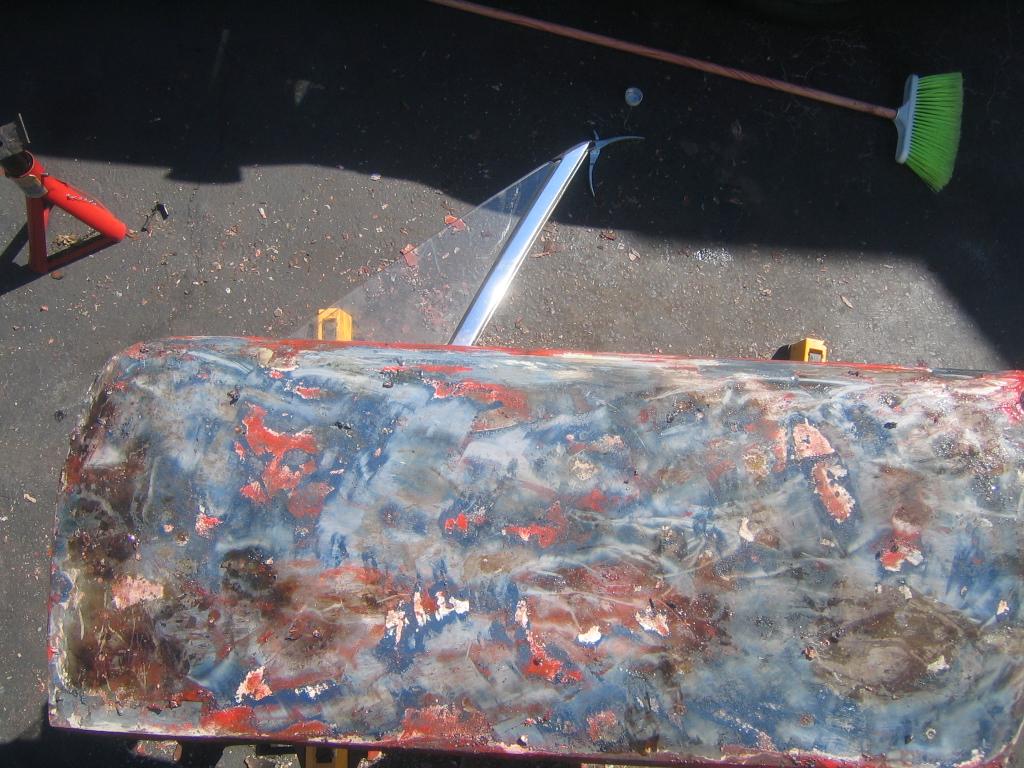
Posted by: i love porsche Mar 15 2005, 10:01 PM
after the second coat
Attached thumbnail(s)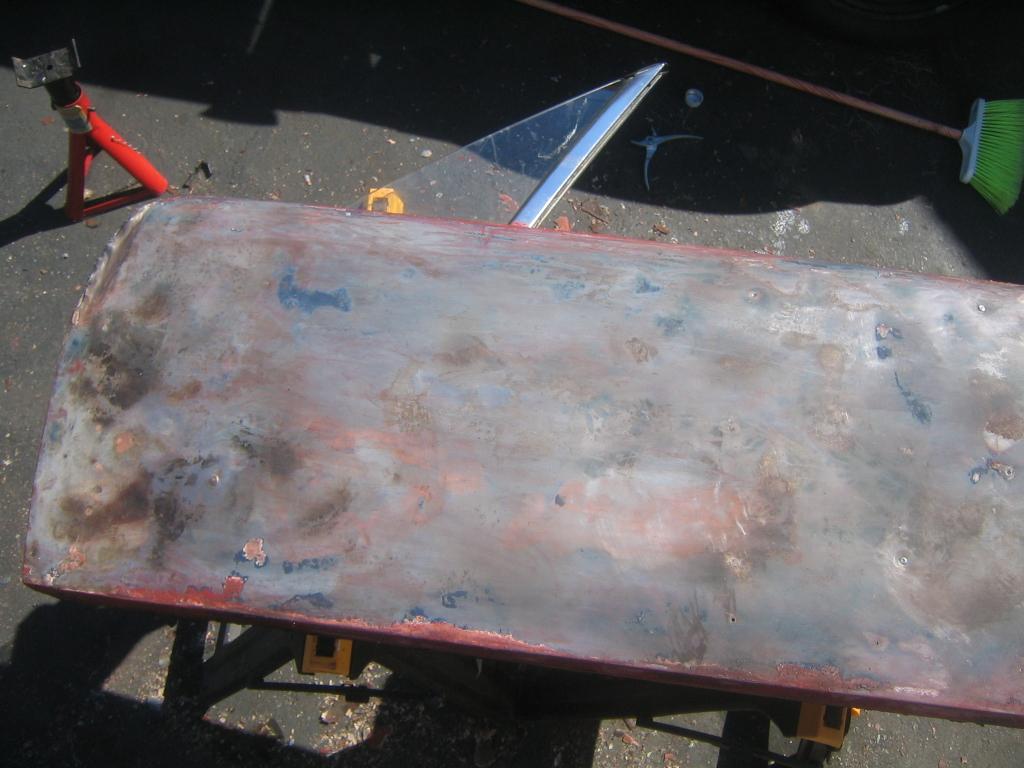
Posted by: i love porsche Mar 15 2005, 10:02 PM
so how do you guys suppose i should repair this?
Attached thumbnail(s)
Posted by: i love porsche Mar 15 2005, 10:03 PM
this is everything i took off
yummy, chips and dip 
Attached thumbnail(s)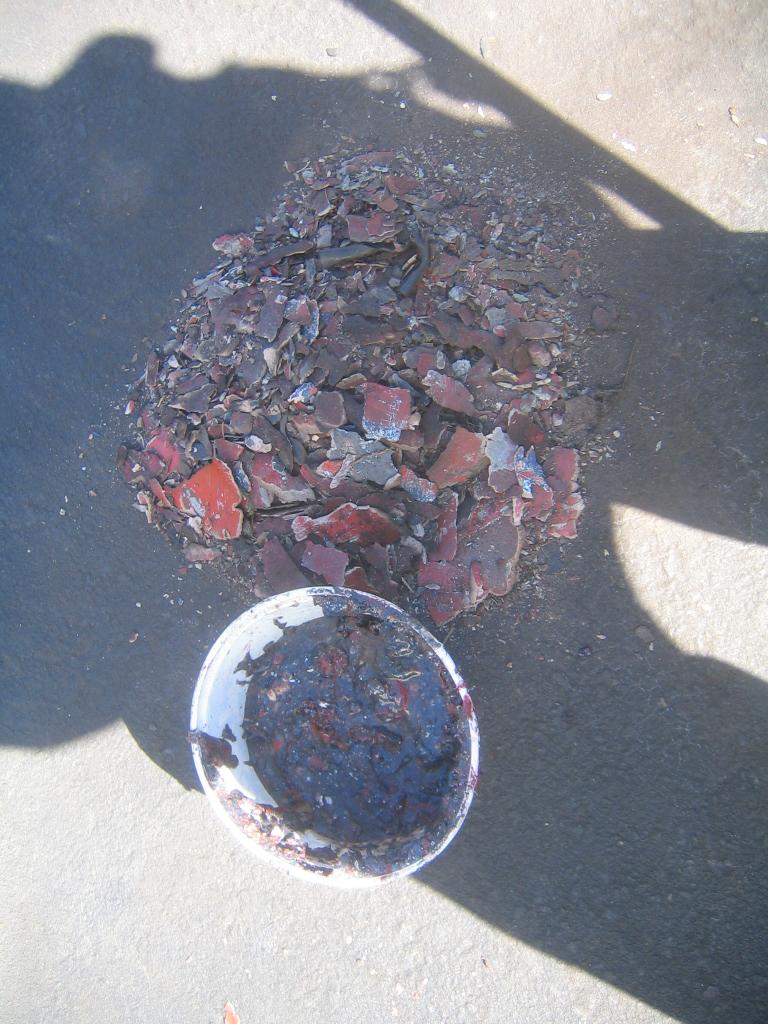
Posted by: i love porsche Mar 15 2005, 10:04 PM
heres what i found after i took off the door panel...i think someone tried to reinforce the door with this wooden stake!
Attached thumbnail(s)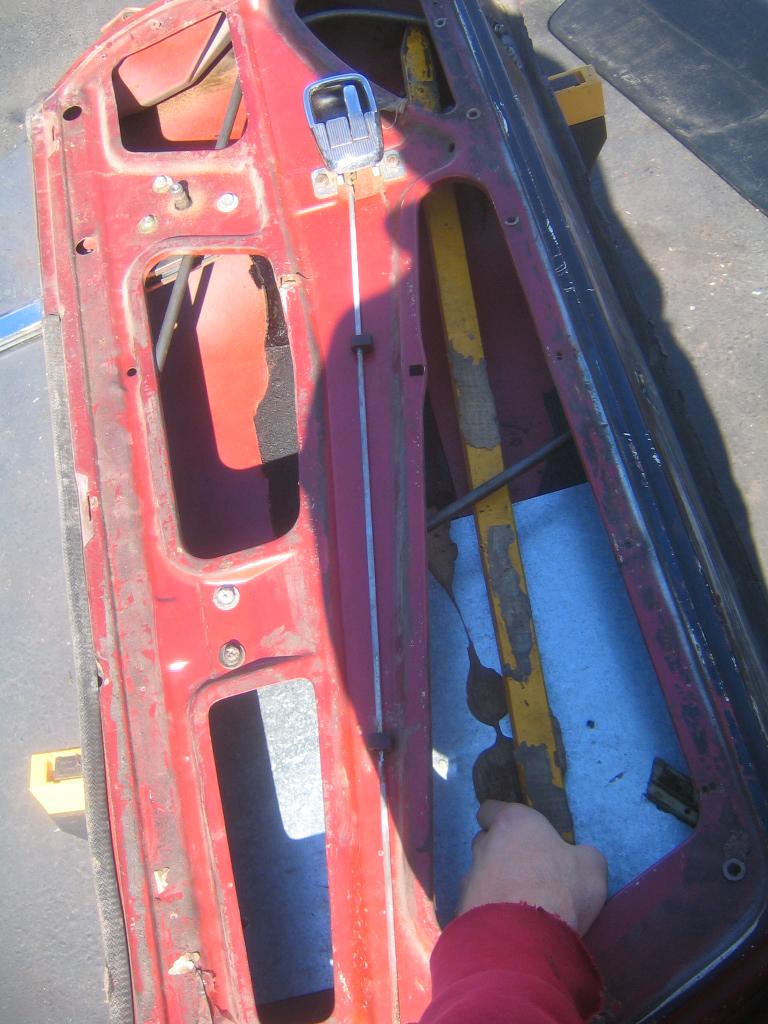
Posted by: i love porsche Mar 15 2005, 10:06 PM
ok and last, an important question, i took a peek behind the rear quarter paned on the driver side and saw this...not pretty, im not sure how bad it is though, i didnt see any holes. how should i repair it, do i have to cut apart my fender??
Attached thumbnail(s)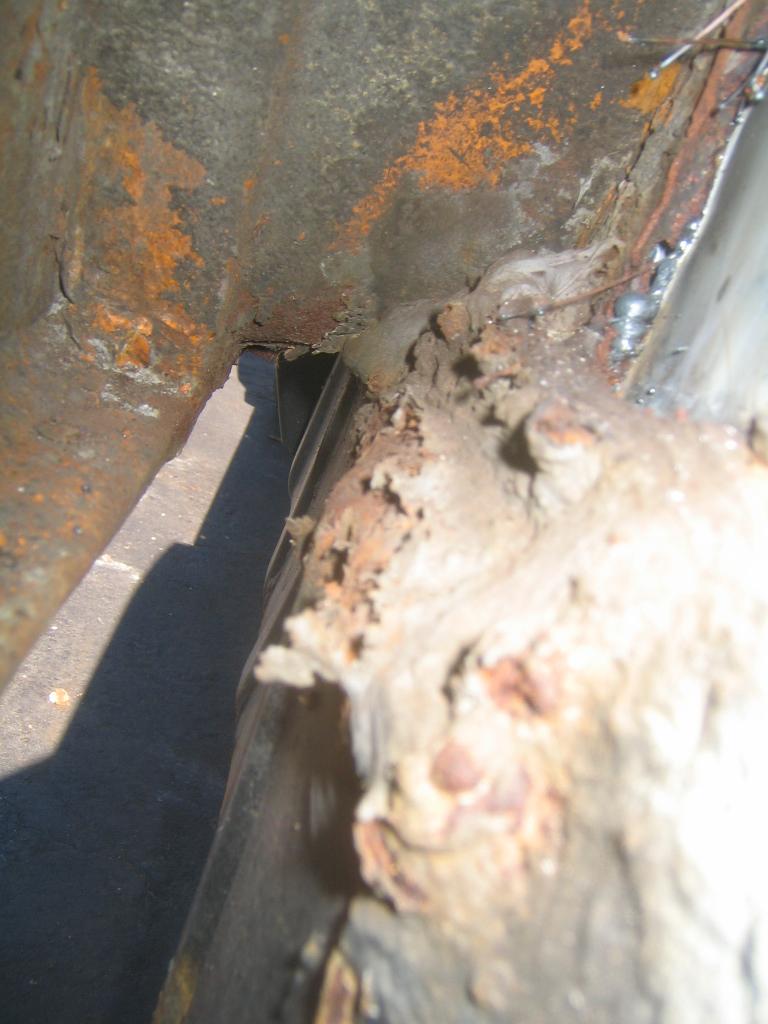
Posted by: i love porsche Mar 17 2005, 04:25 PM
awesome stuff, got some new electrical in my garage, hooked up my bench grinder and installed a vice, got some lights too..what a difference!
i also did a little rust body repair at the base of the driver sail panel, its my first attempt at a body repair..so no laughing....
Posted by: i love porsche Mar 17 2005, 04:27 PM
pics might help...
heres a before shot of the garage
Attached thumbnail(s)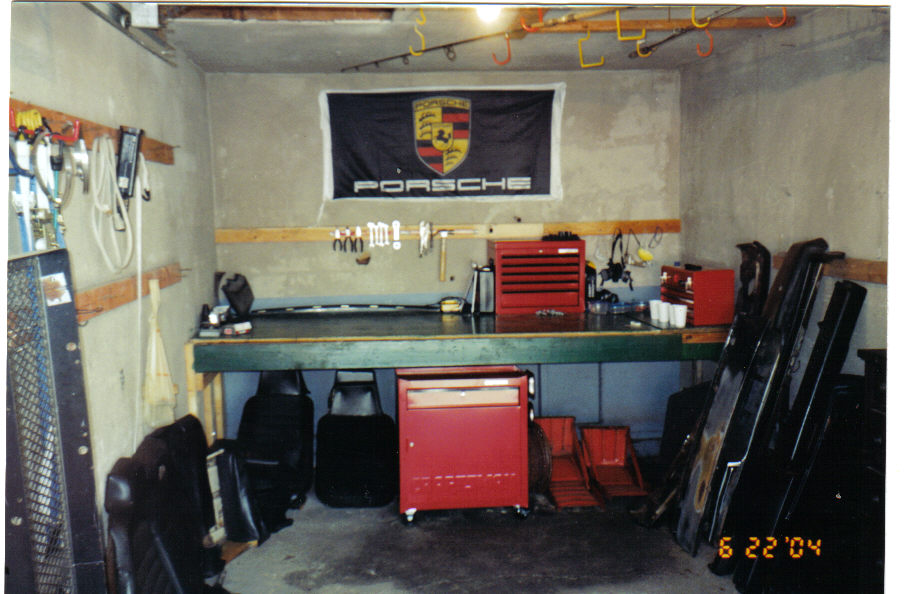
Posted by: i love porsche Mar 17 2005, 04:29 PM
ok..heres the garage now...shop lights above the bench, a strip of plugs on the back wall, and on the left wall is a separate outlet on its own breaker, its for the welder =]
and the bench grinder and vice
Attached thumbnail(s)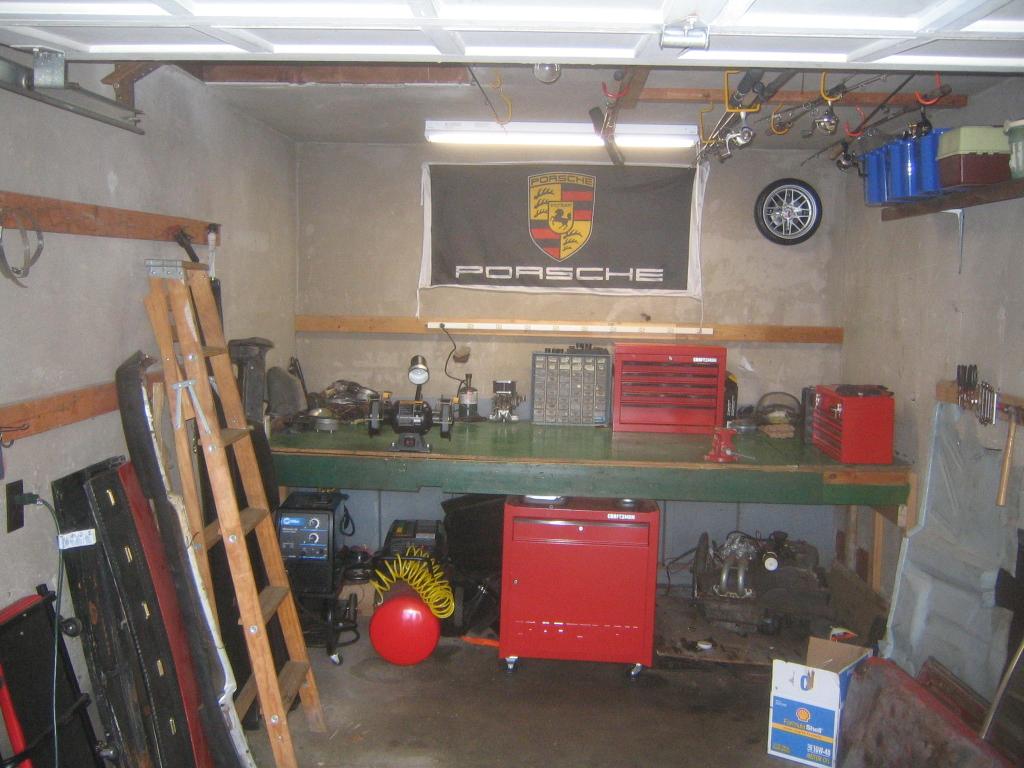
Posted by: i love porsche Mar 17 2005, 04:30 PM
ok..and my repair...remember, no laughing!
Attached thumbnail(s)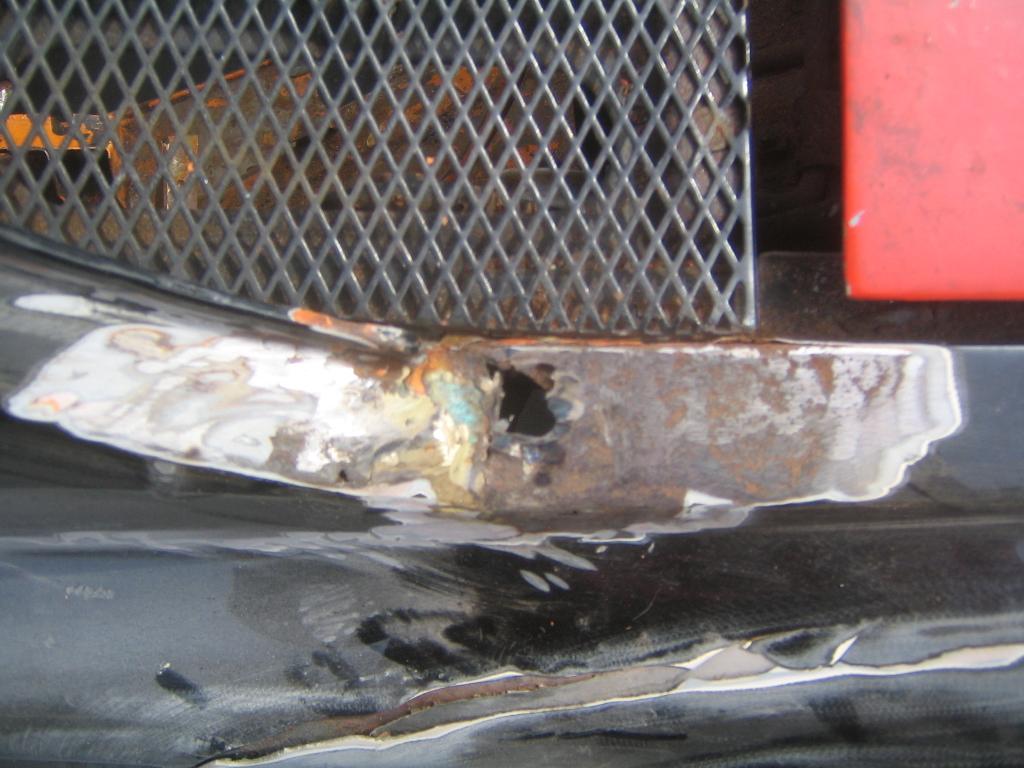
Posted by: i love porsche Mar 17 2005, 04:31 PM
after i cut out the bad
Attached thumbnail(s)
Posted by: i love porsche Mar 17 2005, 04:31 PM
and all fixed up, this is a pic before i primed it
Attached thumbnail(s)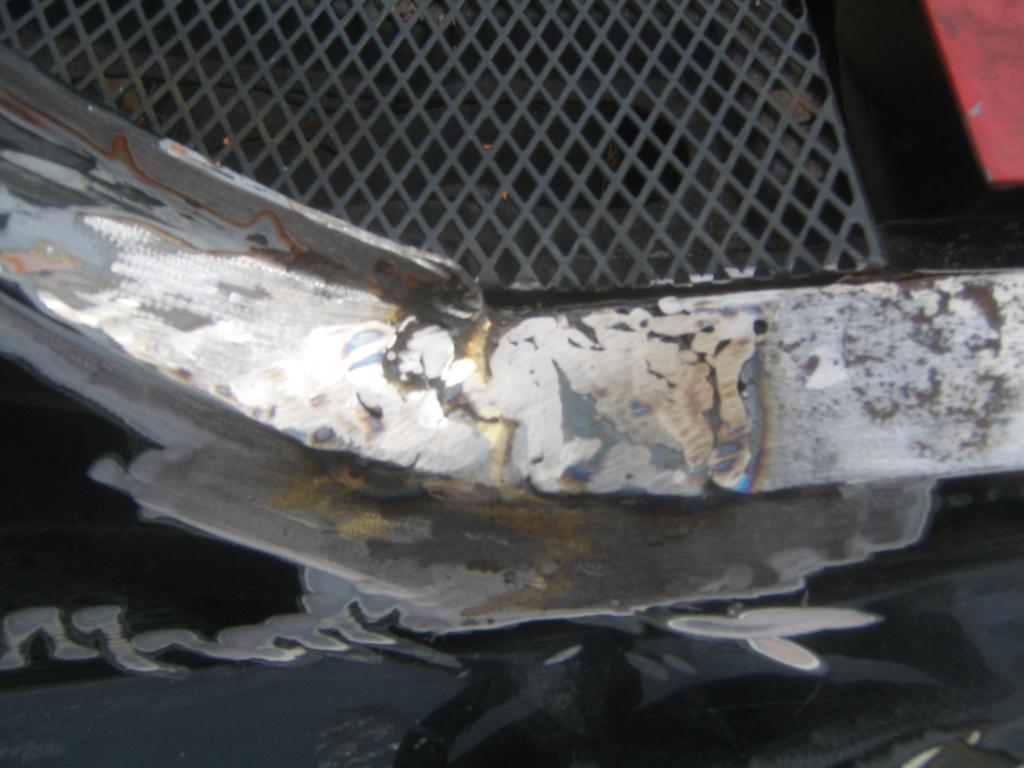
Posted by: root Mar 17 2005, 04:48 PM
Great work! Your catching up with me and I started 20 plus
years ago!  I actually started my restore in Princeton, New Jersey while working at PU. Did the engine rebuild in one of the labs in the Engineering school. Good to see another
814 being reborn in Jersey! 
Keep the progress reports coming 
Posted by: root Mar 17 2005, 04:49 PM
oops!  914, My sausage fingers did it again....
Posted by: i love porsche Mar 19 2005, 01:15 AM
alright, did some more....i reinforced the early model doors, because they dent in so friggin easy!!!, so i cut some strips of metal and bent them to the contour of the door, and tacked them in place, not too much weight was gained, but it worked out very well!
before
Attached thumbnail(s)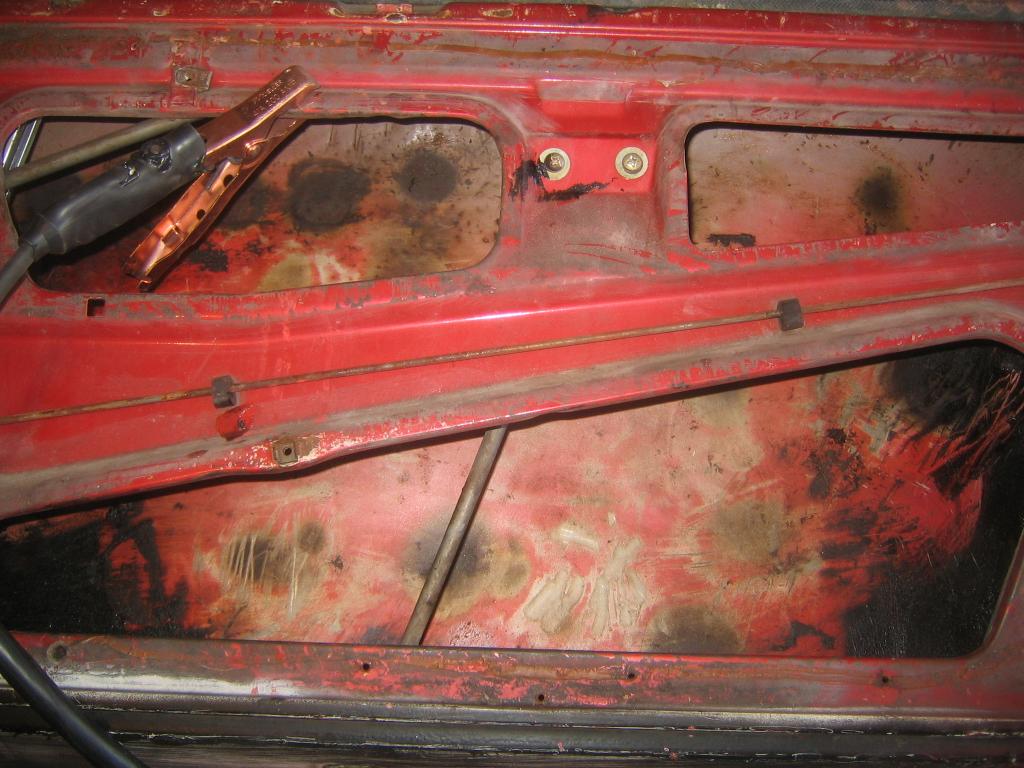
Posted by: i love porsche Mar 19 2005, 01:15 AM
after 
Attached thumbnail(s)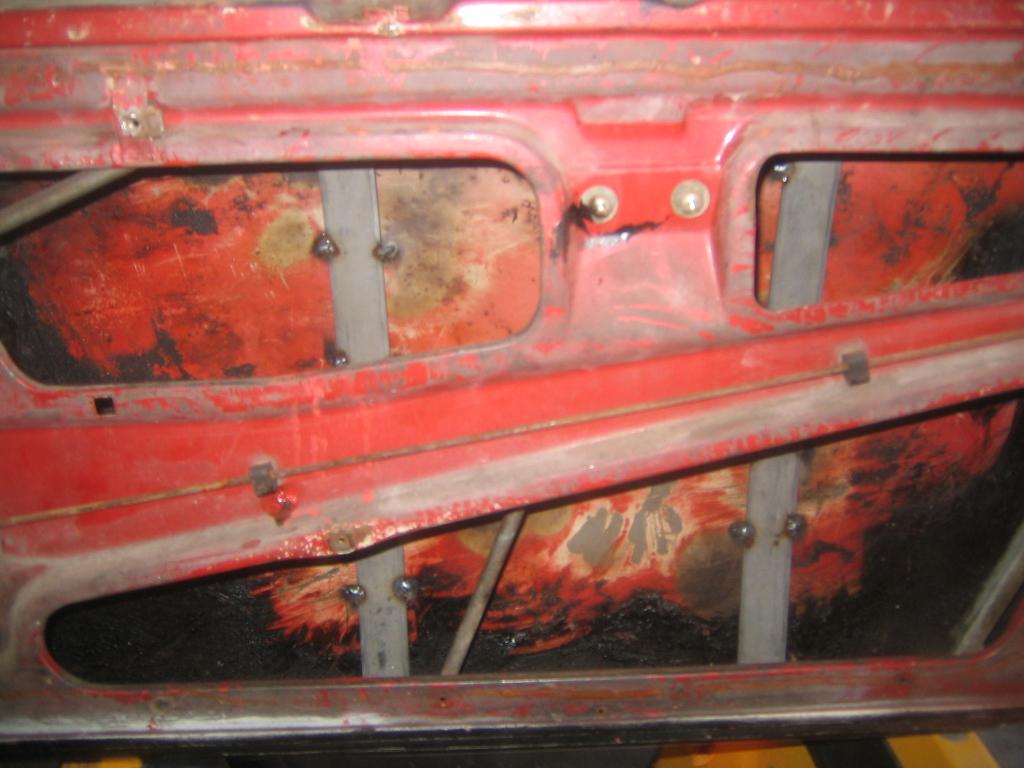
Posted by: i love porsche Apr 22 2005, 02:22 PM
so..in a little bit of drizzle today, i cut the panel behind the door jamb and in front of the rear fender to inspect the upper long...and it turned out ok after a little grinding!
i do have one hole...so im wondering how much should i cut out to replace with new metal?
Attached thumbnail(s)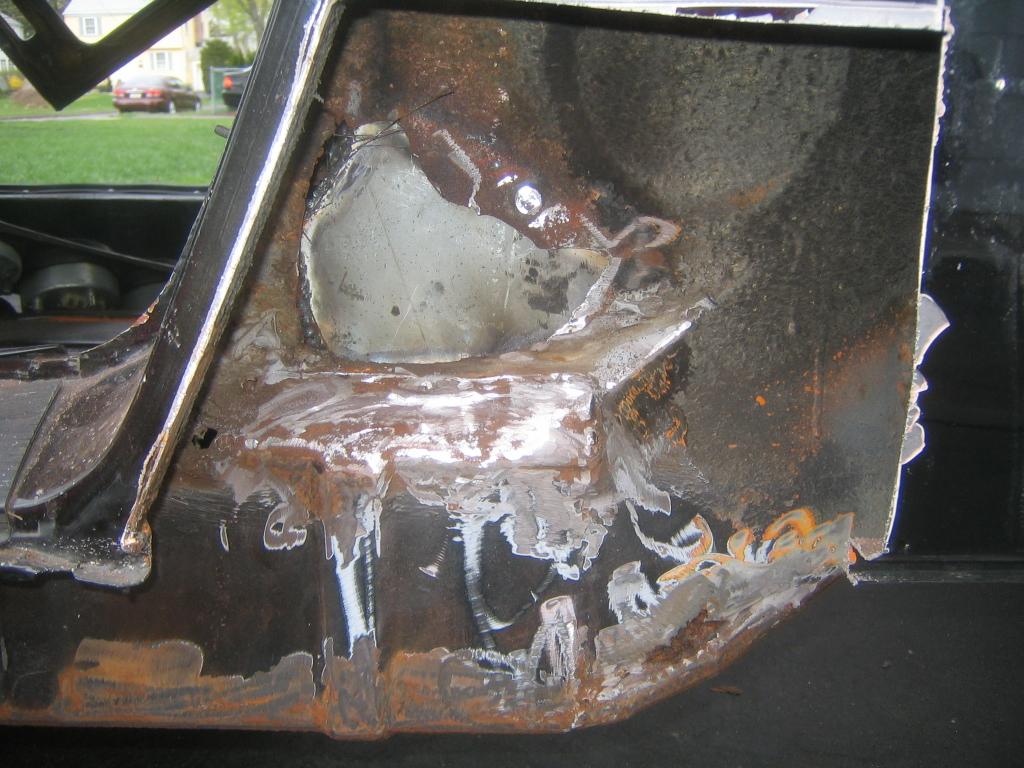
Posted by: i love porsche Apr 28 2005, 05:01 PM
do you think i can get by with taking this much out? or should i do more?
also, is the long in this area 2-ply?? because it seems there is more metal behind that, its not hollow
what is the best way to approach cutting this?
Attached thumbnail(s)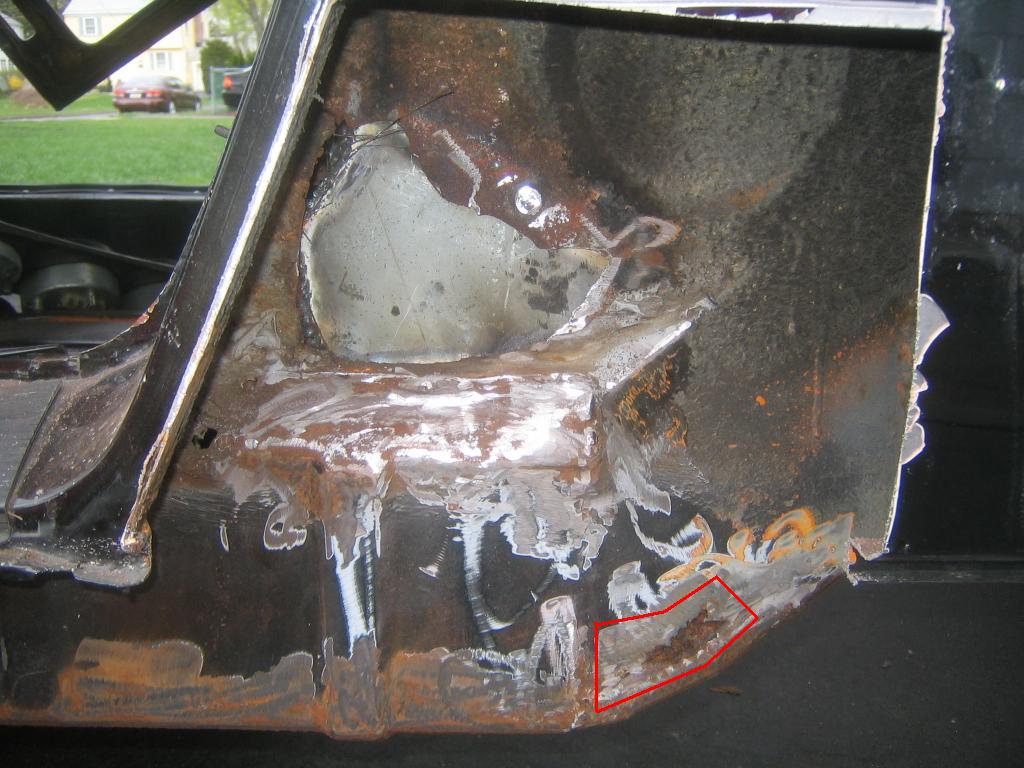
Posted by: i love porsche May 3 2005, 04:58 PM
ok..a few updates
finished (sorta) the driver side longitudinal...looks better
fixed the front part of the driver door (ill show before and after)
and found a whole new possible problem on the passneger rear long (ill tell you about it)
so first up is the driver long...lookin better
Attached thumbnail(s)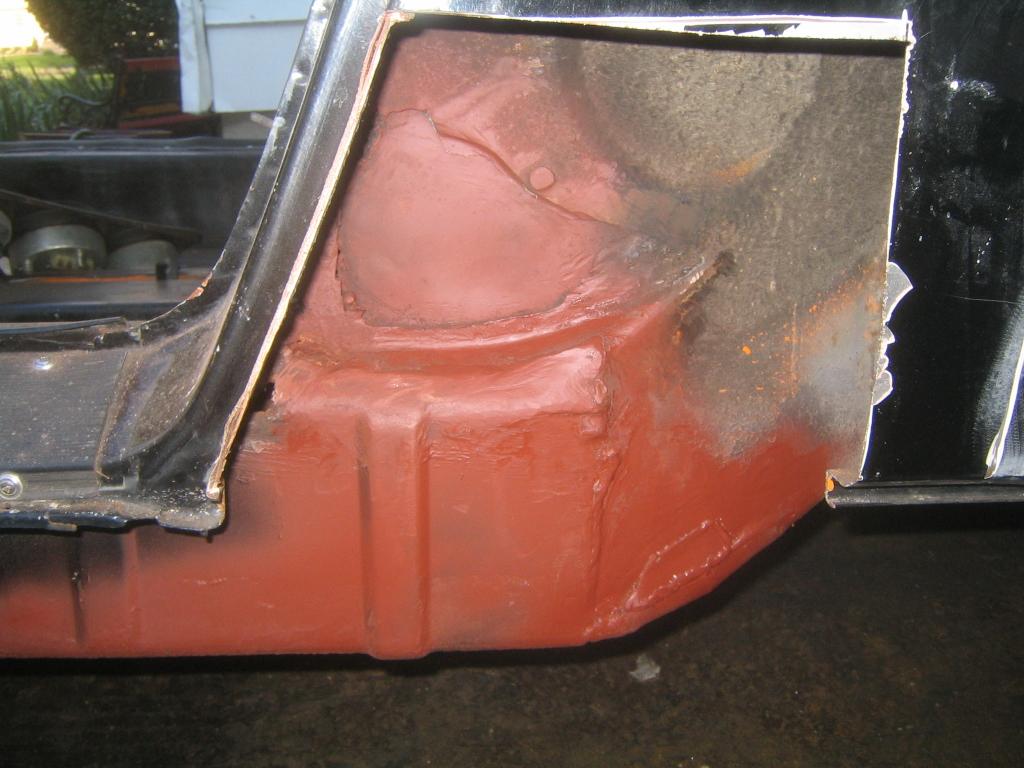
Posted by: i love porsche May 3 2005, 05:00 PM
heres the "before" of the driver door
Attached thumbnail(s)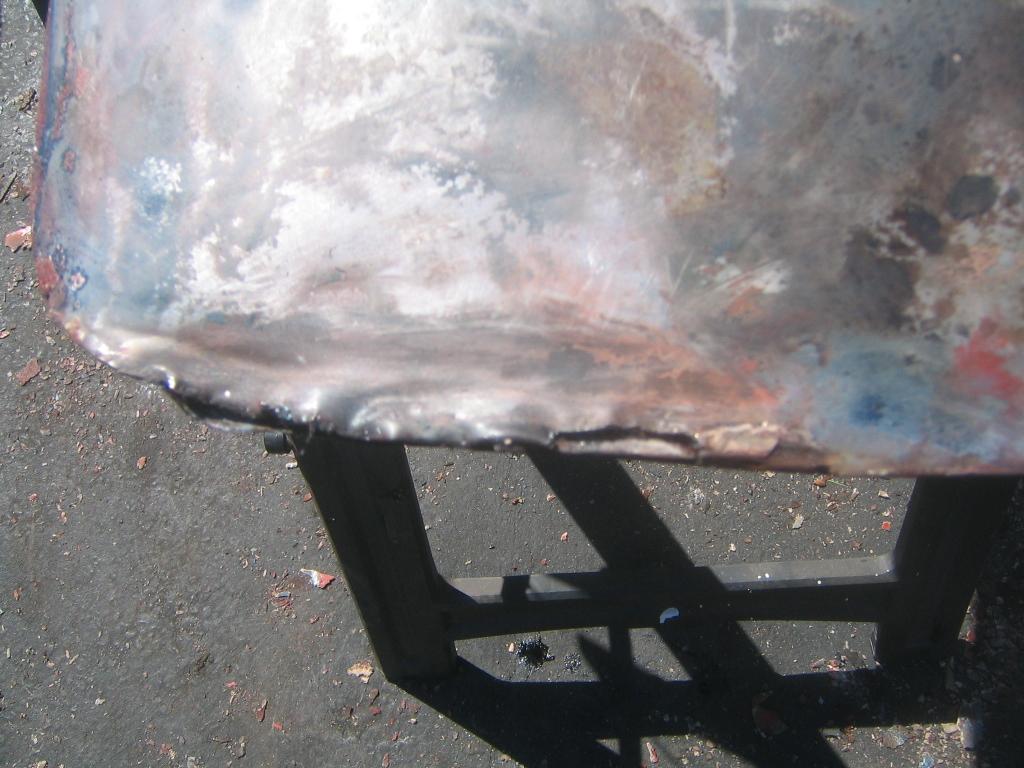
Posted by: i love porsche May 3 2005, 05:01 PM
after a little hammering and welding
(im getting better at my welding!!)
Attached thumbnail(s)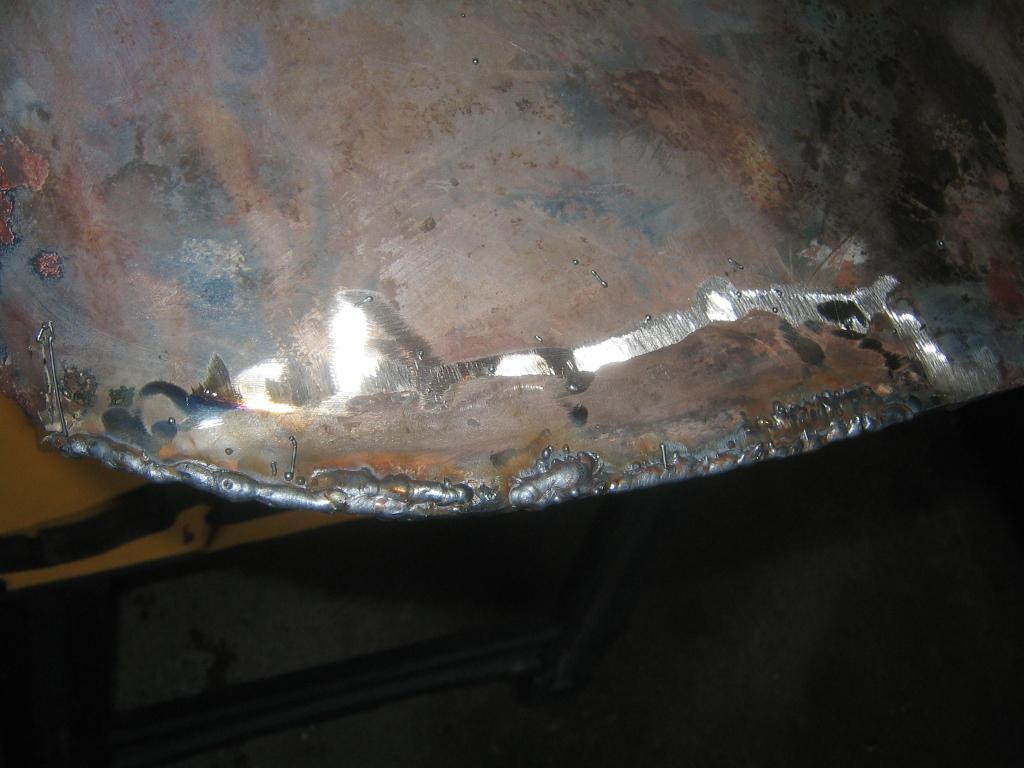
Posted by: i love porsche May 3 2005, 05:02 PM
ground down and shaped (sort of)
Attached thumbnail(s)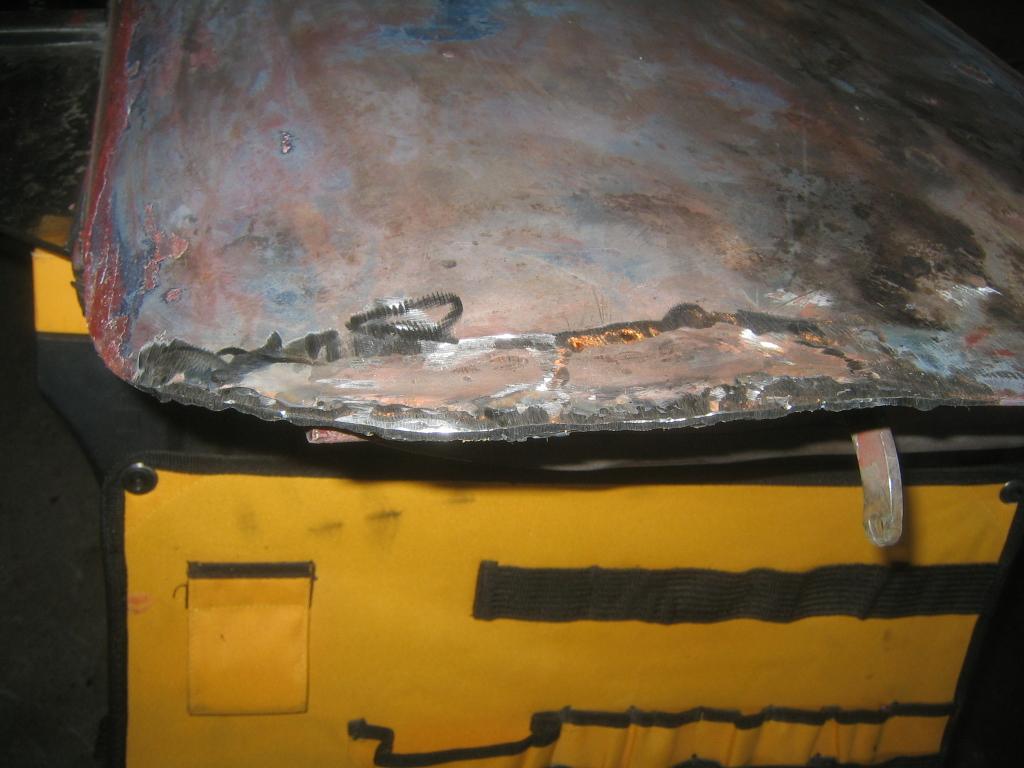
Posted by: i love porsche May 3 2005, 05:07 PM
and for the new problem
after my "discovery" of that nice little rust spot on the driver long, i decided to take a look at the passenger long again and see if i noticed anything more
well...now that ive been looking at longs so much, i realize that this thing doesnt really look like a longitudinal at all!
its flat, straight up, and looks like filler, so i go and get a magnet to test for metal....
magnet falls right to the ground
now im thinking...oh crap..what did the PO do to this car....so i get the grinder and do some grinding, and i see metal...its all metal..just with filler over it.
so i test the magnet again...nothing
oh crap, its a big ol sheet of aluminum...
so what do i do, im not sure if its tig welded on or just bonded..id assume the latter, because of the incompetence of not using the right piece
how big of a hole am i in...should i go sawzall happy and cut it all out and redo? or is it possible to trust the aluminum in this spot
HELP!!
Attached thumbnail(s)
Posted by: rick 918-S May 3 2005, 05:13 PM
Fix it right. You'll be happier in the long run. 


Posted by: i love porsche May 4 2005, 03:45 PM
ok, i finished up the driver long...all nice and tidy, and i tacked the body panel back on
i also cut out the body panel for the pass side, and will dive into that in the next few days
Attached thumbnail(s)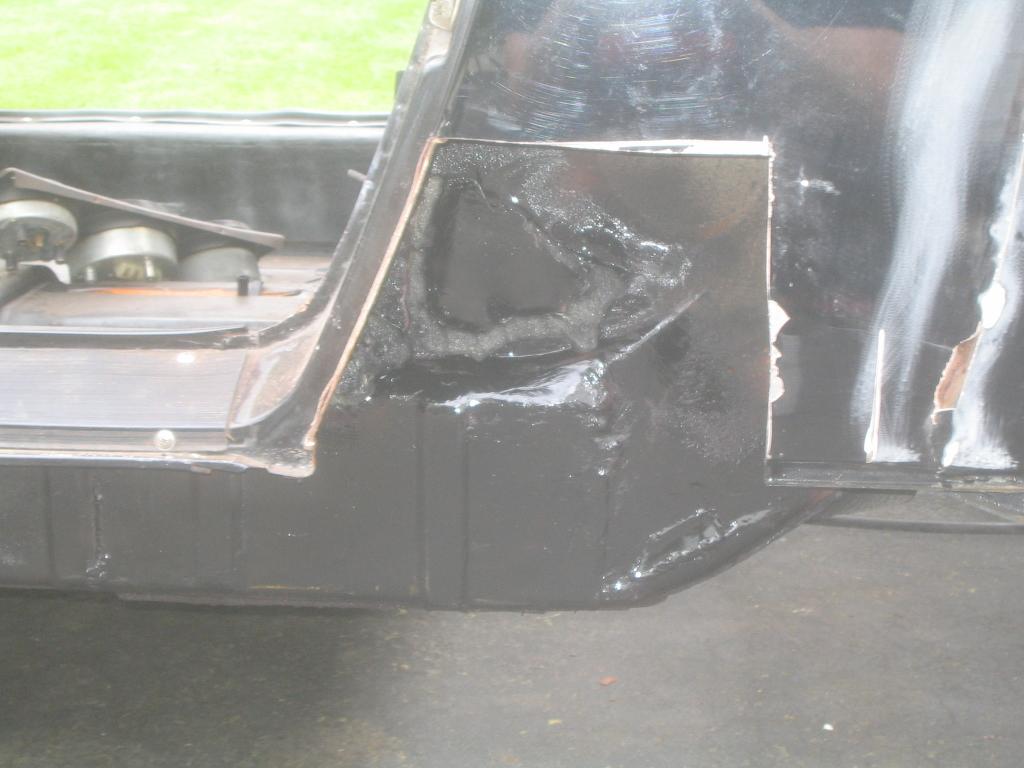
Posted by: i love porsche May 5 2005, 01:28 PM
well..it turns out what i thought was aluminum, was actually stainless steel.
i broke 2 sawzall blades trying to cut it out..and it took FOREVER to get through with a cutoff tool, so i went and asked an old metalshop teacher about it, and he said its stainless, ....so i welded up the slices i put in it
and good bye antenna hole 
i love out of focus pictures...sorry..
Attached thumbnail(s)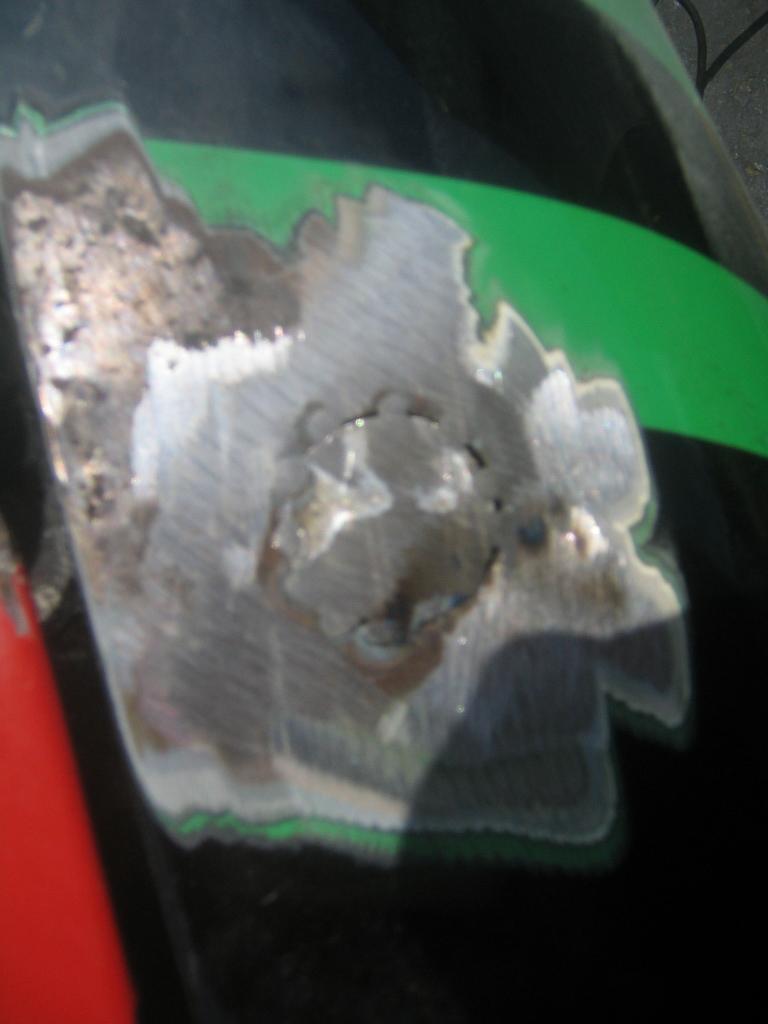
Posted by: i love porsche Jun 7 2005, 10:50 AM
ok...started stripping the front hood and fenders...and found a nice little suprise on my rear decklid
how far down should i take this?
Attached thumbnail(s)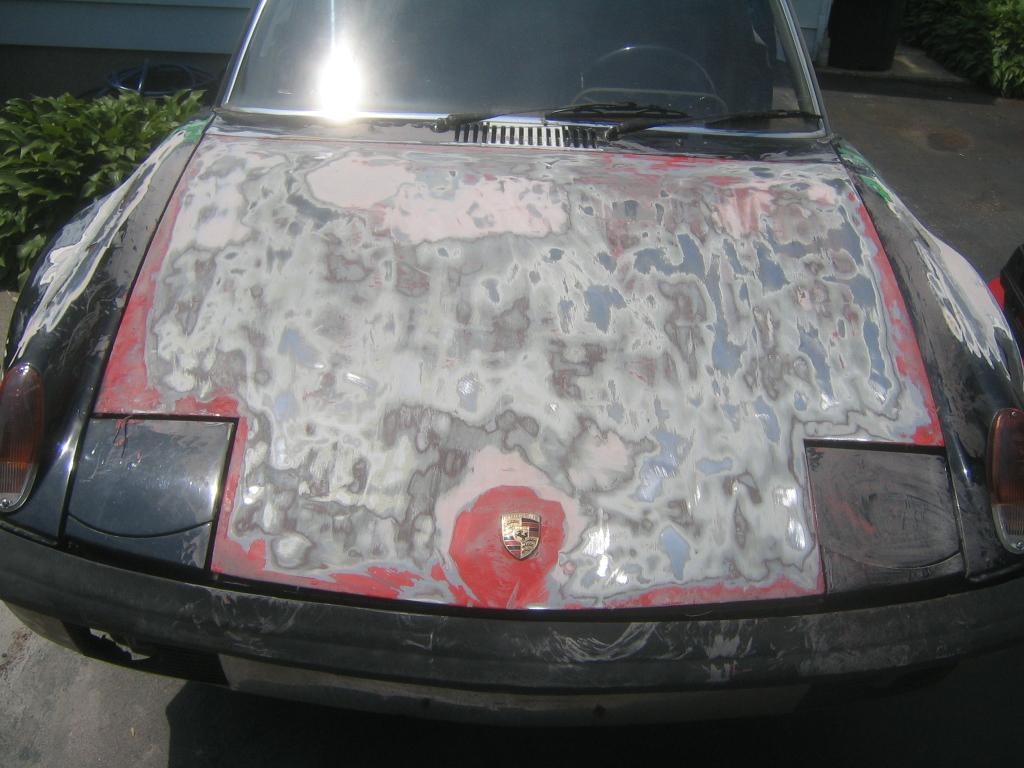
Posted by: i love porsche Jun 7 2005, 10:51 AM
rust is fun!
Attached thumbnail(s)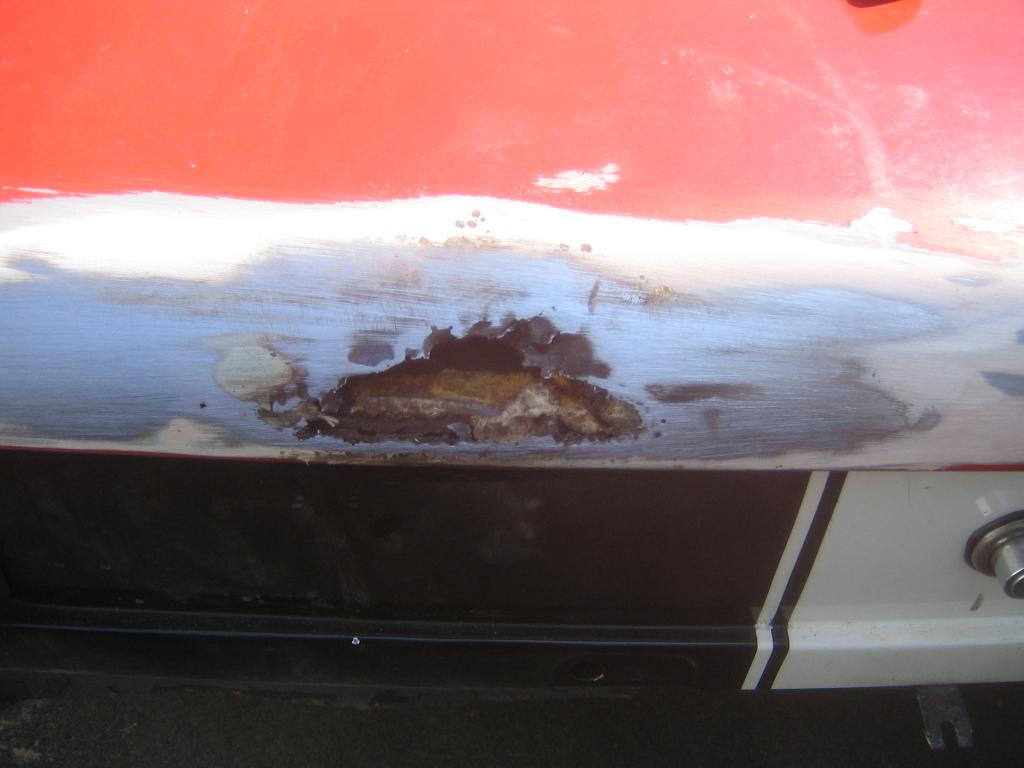
Posted by: i love porsche Jun 7 2005, 10:51 AM
test fit of the new piece
Attached thumbnail(s)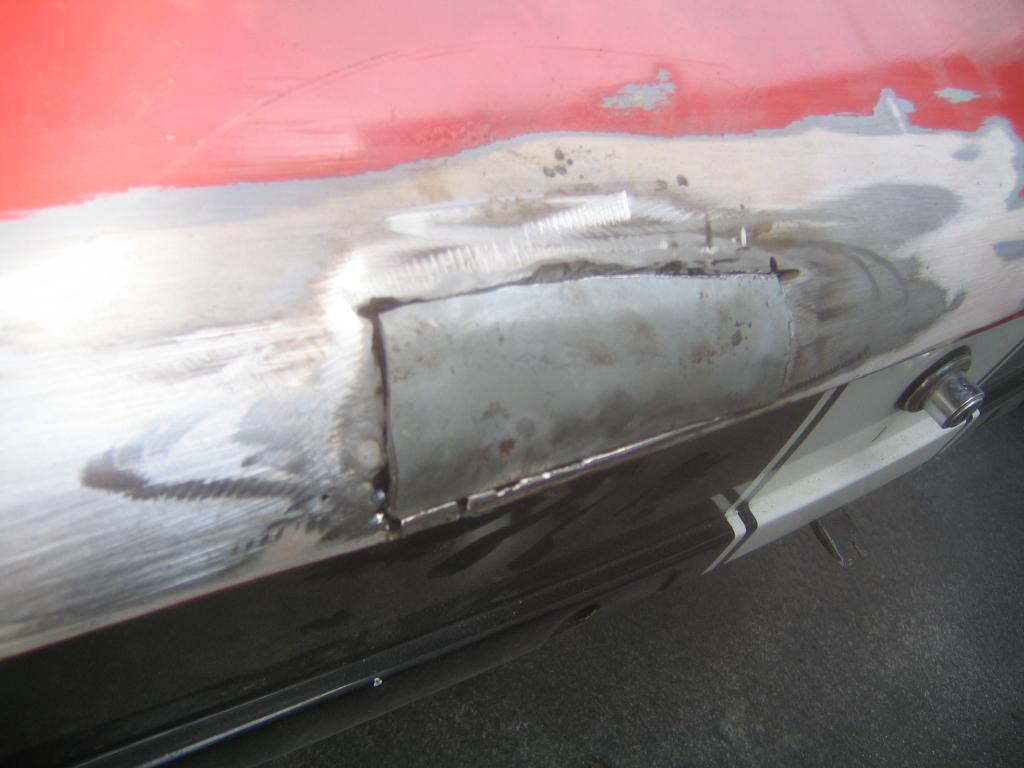
Posted by: i love porsche Jun 7 2005, 10:52 AM
all welded up
Attached thumbnail(s)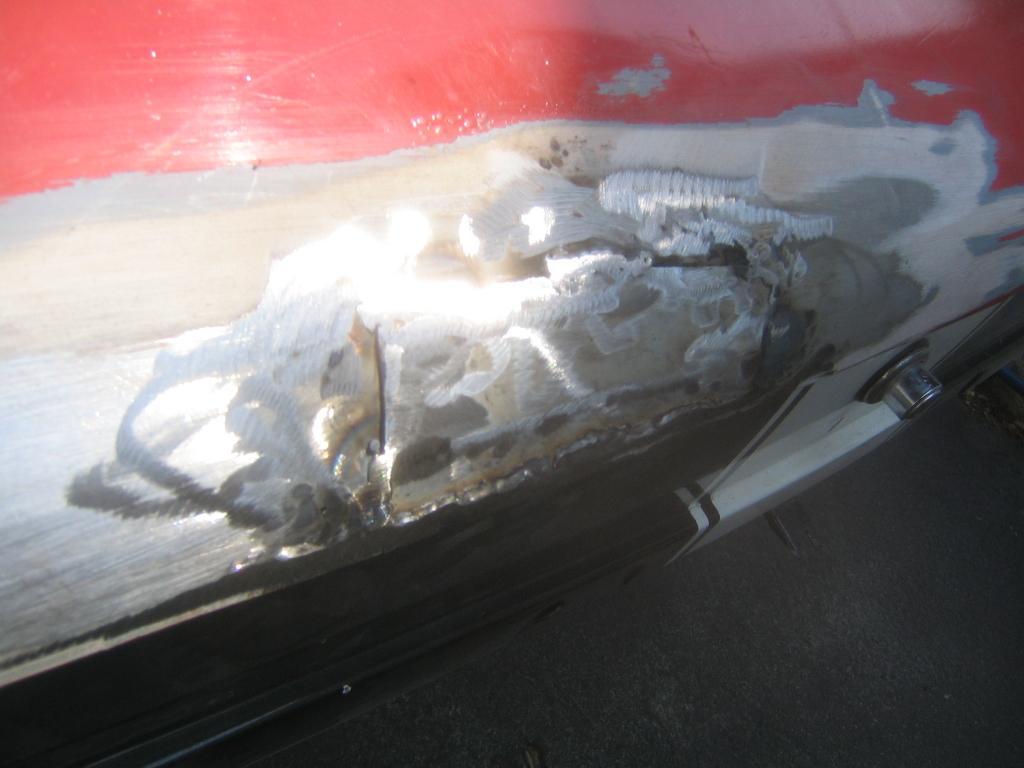
Posted by: i love porsche Jun 7 2005, 10:53 AM
it follows the curve pretty nicely IMO
Attached thumbnail(s)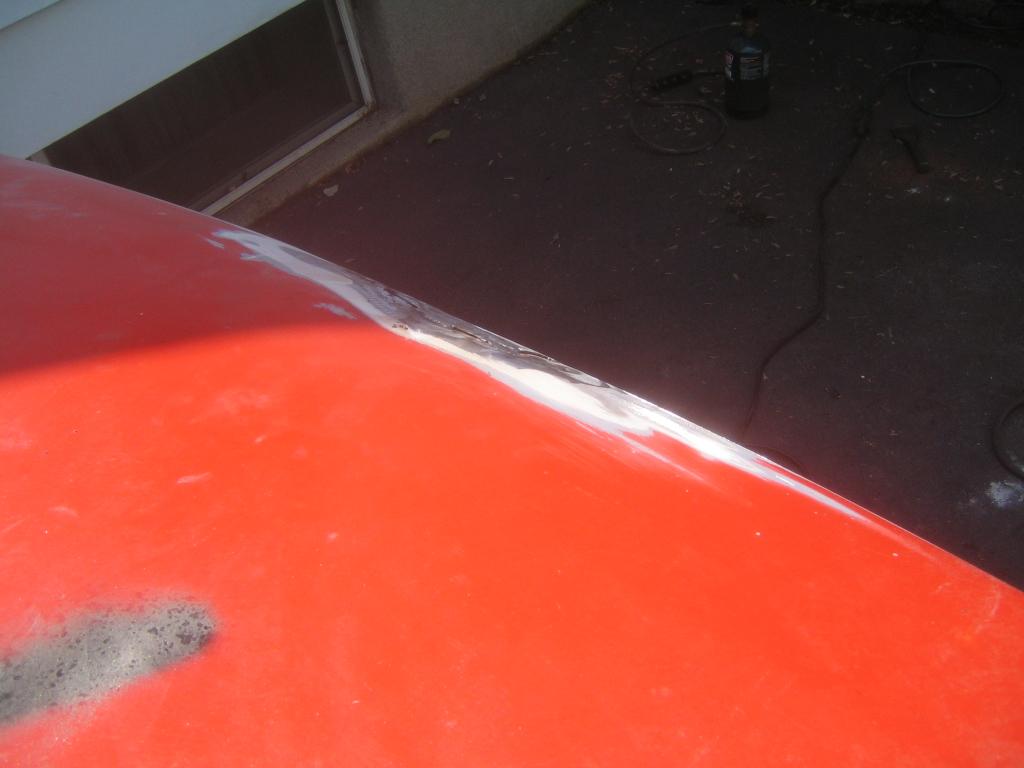
Posted by: i love porsche Jun 9 2005, 01:17 PM
i think this part needs to be replaced...im going to check my parts car..but does anyone have this?
Attached thumbnail(s)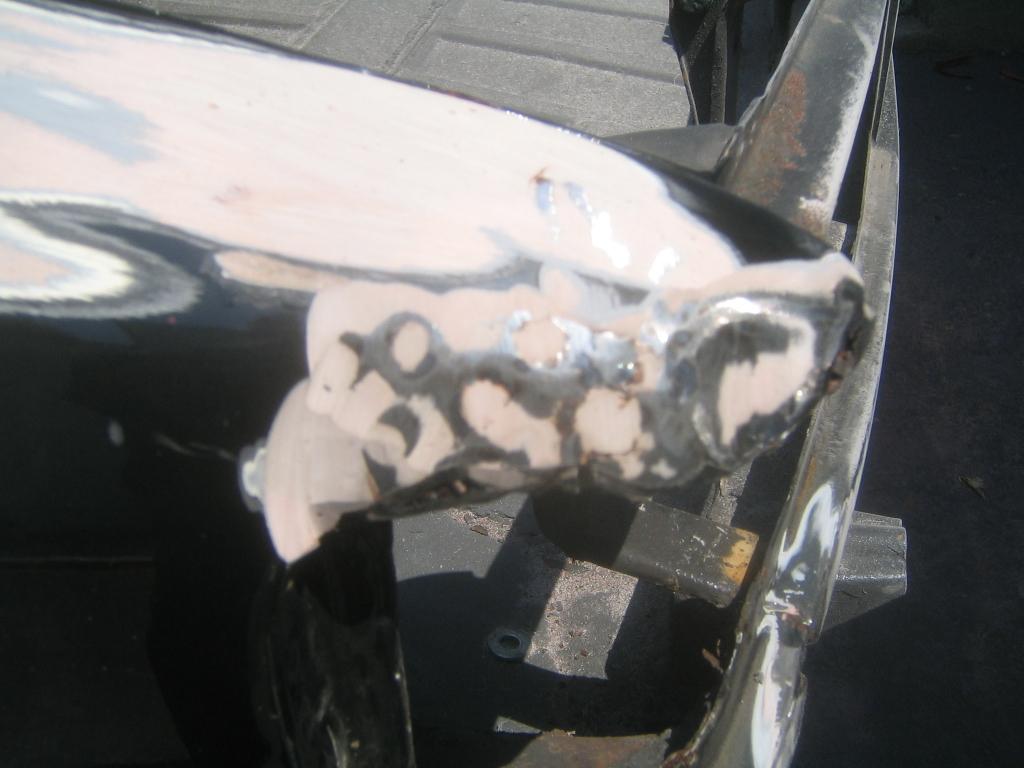
Posted by: i love porsche Jun 9 2005, 01:17 PM
got started on the top
Attached thumbnail(s)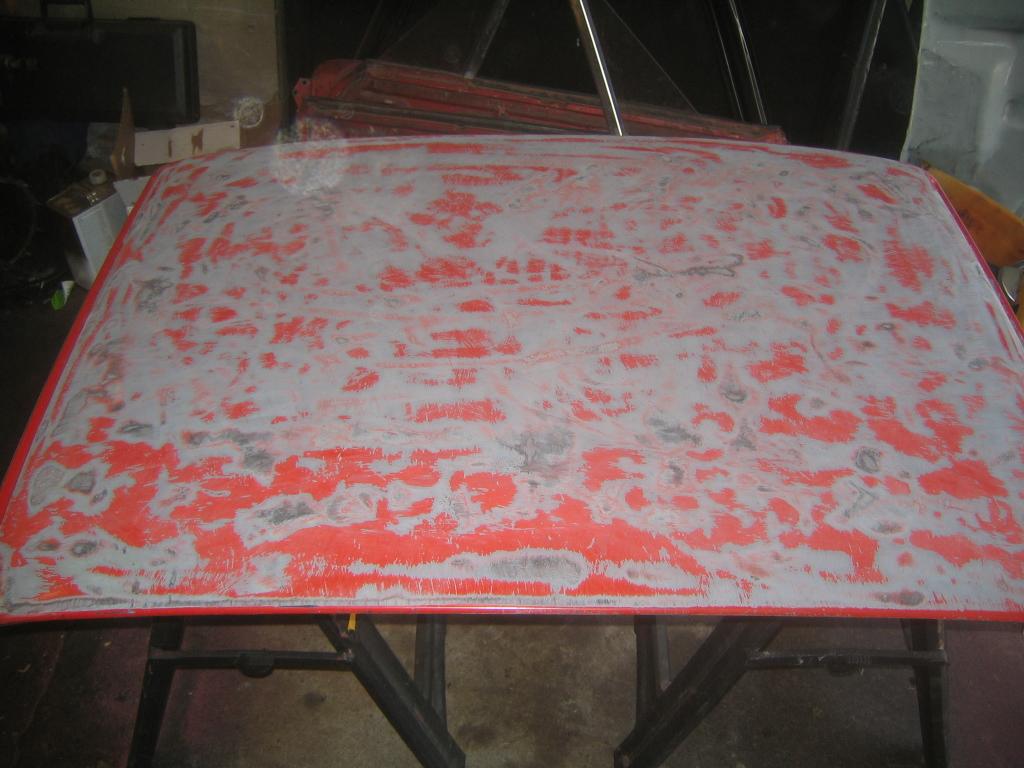
Posted by: i love porsche Jun 9 2005, 01:18 PM
the further i get, the worse it looks!
Attached thumbnail(s)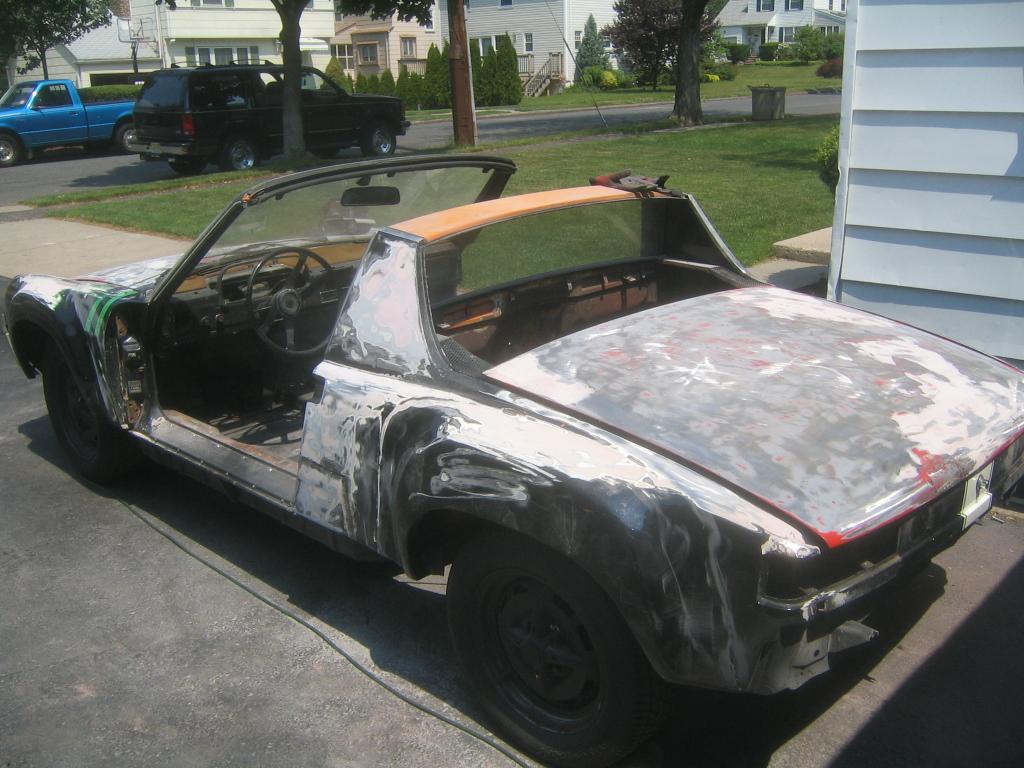
Posted by: Dead Air Jun 11 2005, 07:45 PM
Amazing!!
I can't remember but I think it was (member) gint who had a link to a metal shaping web site that had allsorts of info about how to identify diff metals using sparks off a grinding whell.
Maybe I put it in favorites. If I can find it I'll shoot it to ya!
Posted by: Dead Air Jun 11 2005, 07:47 PM
http://www.type2.com/library/body/wlsh.htm
There might be some other links near that one that will give you an idea or two!
Keep on keeping on!!
Posted by: i love porsche Jun 11 2005, 07:54 PM
thanks for the site...thats helpful!
Posted by: MattR Jun 11 2005, 07:56 PM
| QUOTE (i love porsche @ Jun 9 2005, 11:18 AM) |
| the further i get, the worse it looks! |
I think its PURDEY
It looks like its coming along well. What color are you going with? (sorry if you've already answered, but 6 pages is a lot to read during finals week...
 )
)
Posted by: i love porsche Jun 11 2005, 07:59 PM
im going with signal orange...its the original color i believe
Posted by: Headrage Jul 25 2005, 05:41 PM
![]()
Posted by: i love porsche Jul 25 2005, 09:37 PM
haha...thanks for the pity bump
i can actually post some pictures of the bondo ive been doing on the doors and the repair of that area...ill get those soon
Posted by: i love porsche Jul 31 2005, 09:40 PM
eh..i figure id post something
the 914 in the current state, and my somewhat newly acquired 924S =]
Attached thumbnail(s)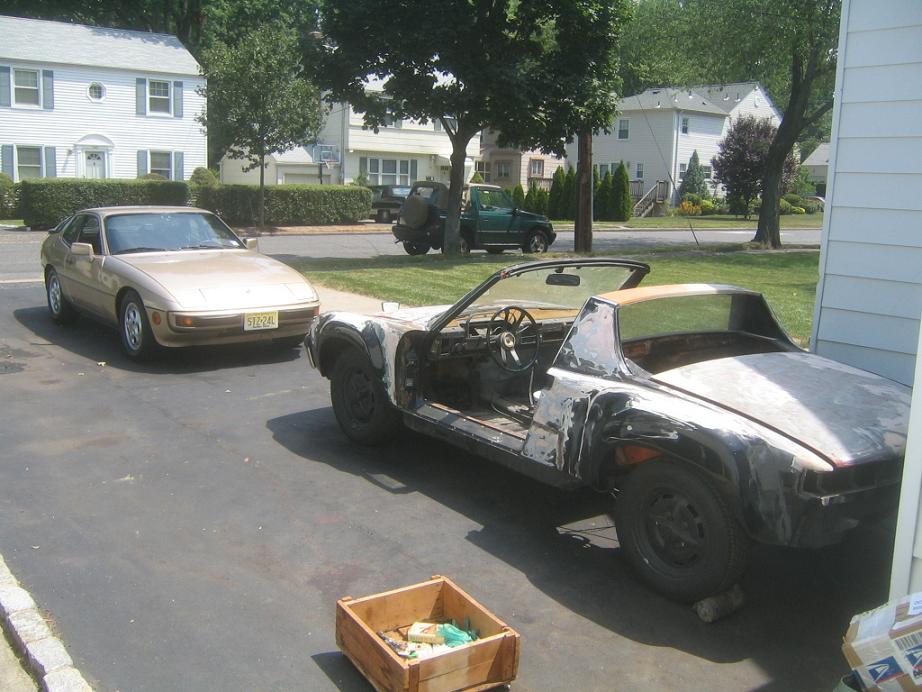
Posted by: thesey914 Aug 1 2005, 12:57 AM
aluminium V stainless
A good way to tell is with a magnet..
(although not all stainless is magnetic..  )
)
Posted by: i love porsche Aug 2 2005, 04:08 PM
i did the magnet test, and it was not magnetic..thats why i initially thought it was aluminum..but stainless turns out to work ok =]
Posted by: i love porsche Dec 19 2005, 02:08 PM
FINALLY an update!
i began installing the battery tray today, i had to make my own mount...(didnt come out that great, but it will get the job done) and started welding it in....its just toooo cold to be outside working on the car for more than a few hrs...its about 30 here
so i cleaned up the hell hole with a cable brush on my angle grinder a bit, you can see where the PO did the hell hole repair
Attached thumbnail(s)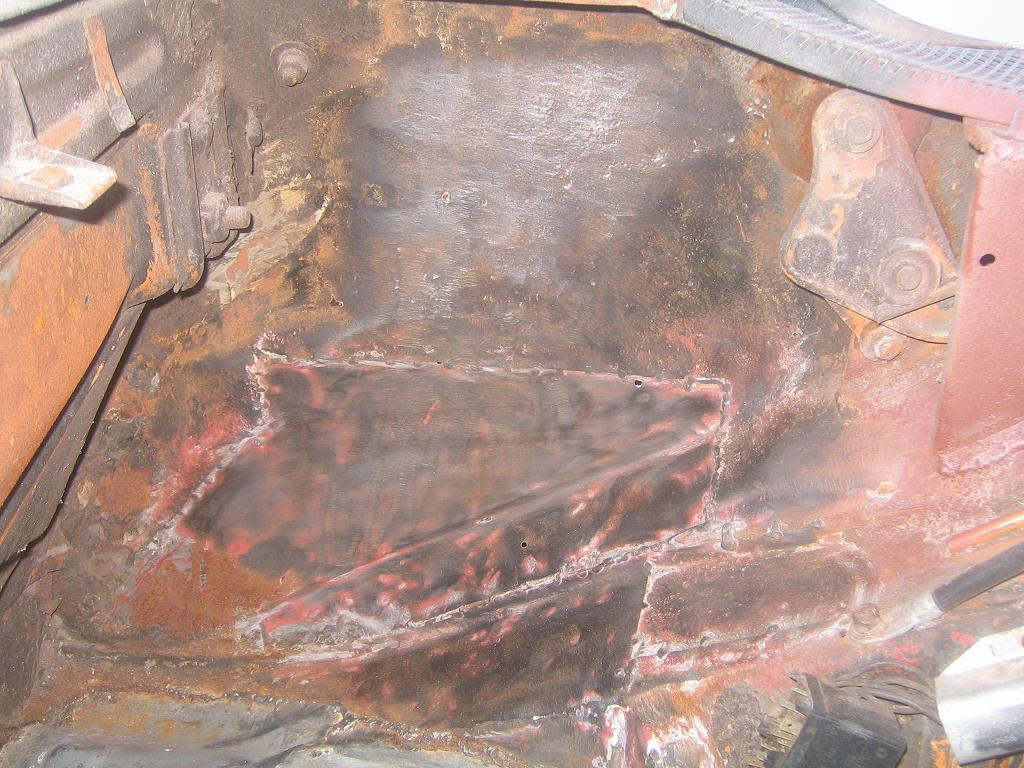
Posted by: i love porsche Dec 19 2005, 02:09 PM
heres the part i cut out of some metal i have, before i shaped and tweaked it to fit
Attached thumbnail(s)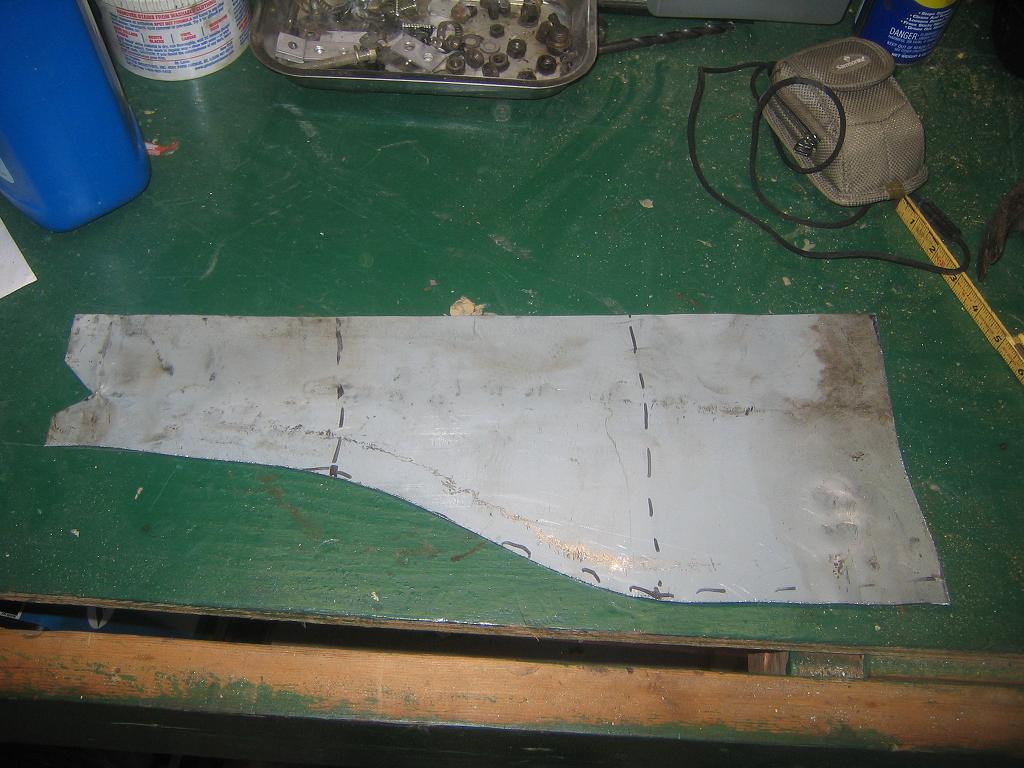
Posted by: i love porsche Dec 19 2005, 02:11 PM
and here is the battery tray and support, partially welded in
the paint is just to try and protect it a bit..i know there is surface rust everywhere else, but i am going to sandblast the whole engine bay this spring
Attached thumbnail(s)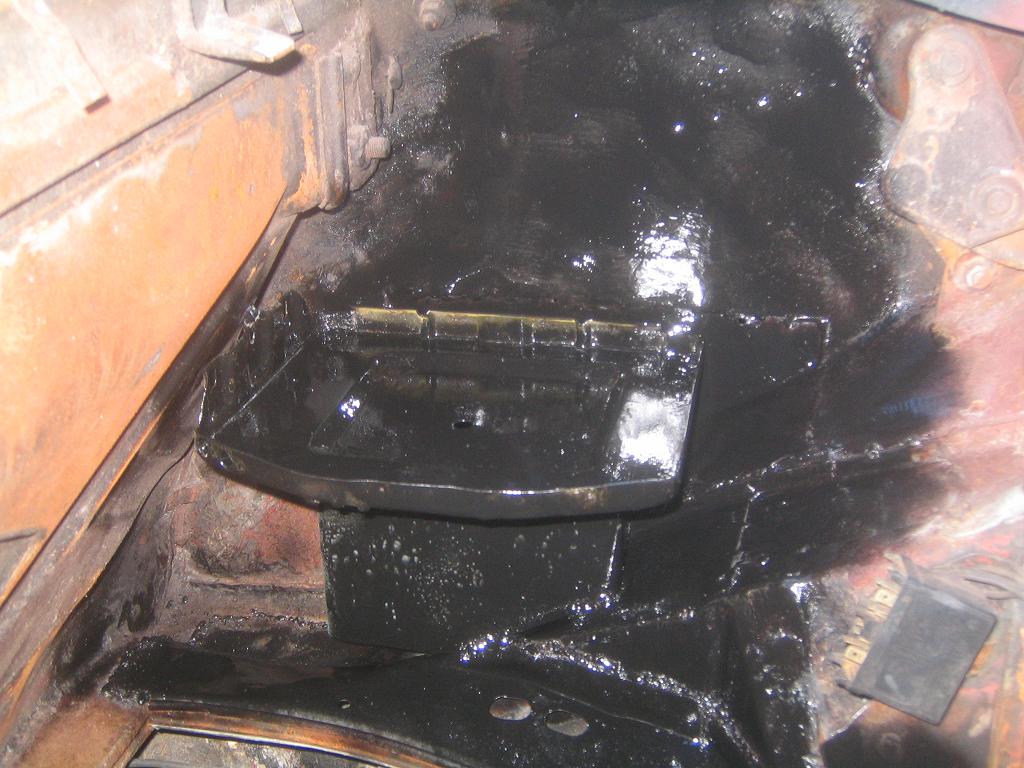
Posted by: i love porsche Jun 30 2006, 01:06 PM
finally am going to have some progress soon!!!
i recieved the Inner long reinforcement kit today in the mail..maybe ill put it in next week....
here it is all nice and pretty
Attached thumbnail(s)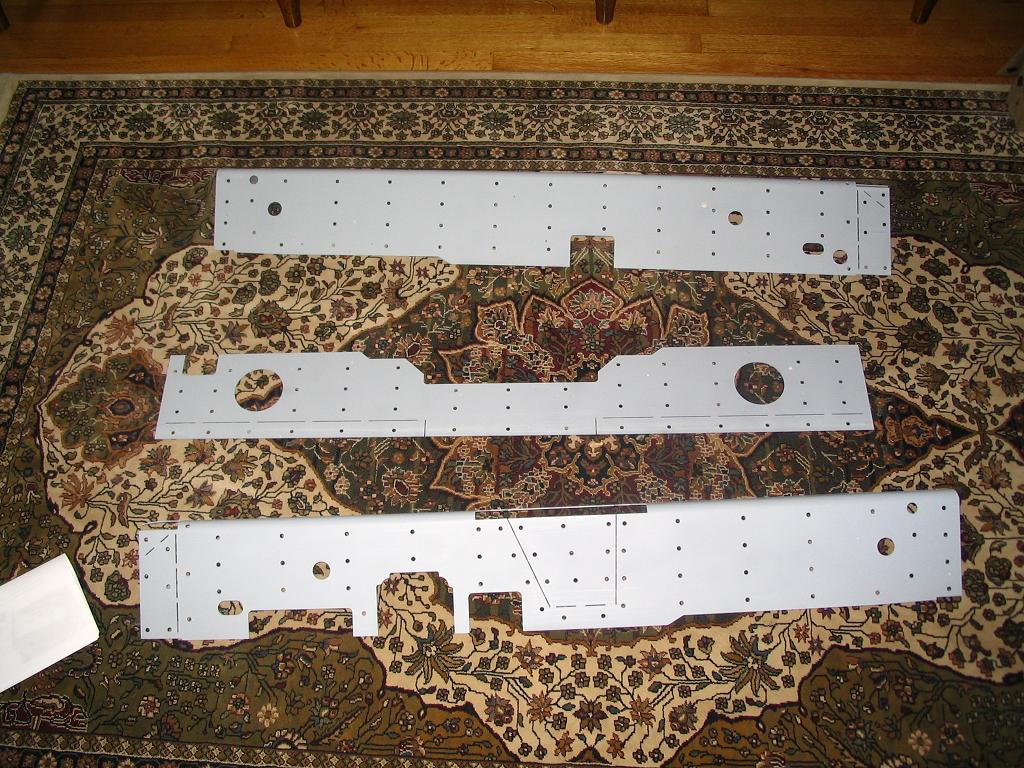
Posted by: i love porsche Jul 4 2006, 09:33 AM
i made a tool today to adjust and hold the doorgaps while the car is on jackstands with the stiffening kit put in,
one side goes to the door hinge holes, then to a threaded rod, to a turnbuckle, where the other side is reverse thread, and then is welded to the other side of the door jamb..so just turning the center turnbuckle will adjust and hold the gaps...
im counting on that the system will be in tension while its on jackstands, because i think it would probably buckle in compression....so we will see, and i made one for each side
Attached thumbnail(s)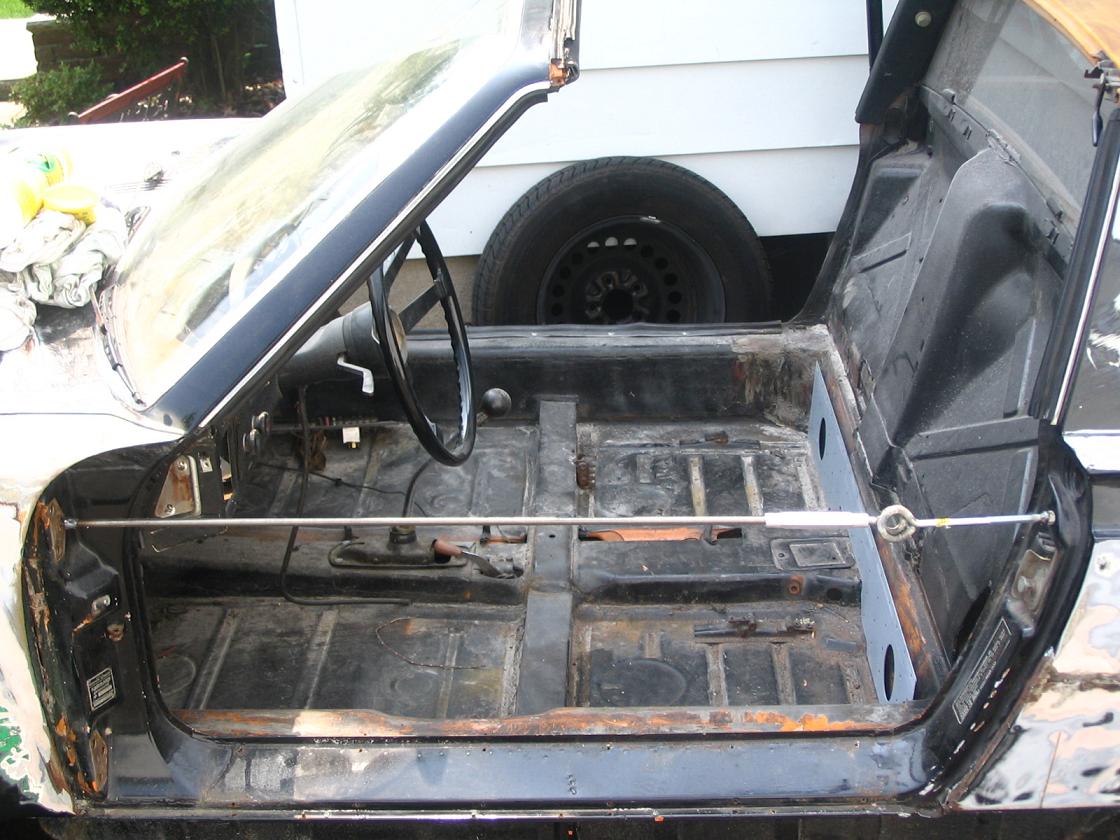
Posted by: i love porsche Jul 14 2006, 05:05 PM
yesss!!!
picked up a sideshift trans today and a sideshift engine mount bar!! and got 2 rear koni's that need to be rebuilt for free....
good stuff =]
Posted by: i love porsche Nov 21 2006, 03:49 PM
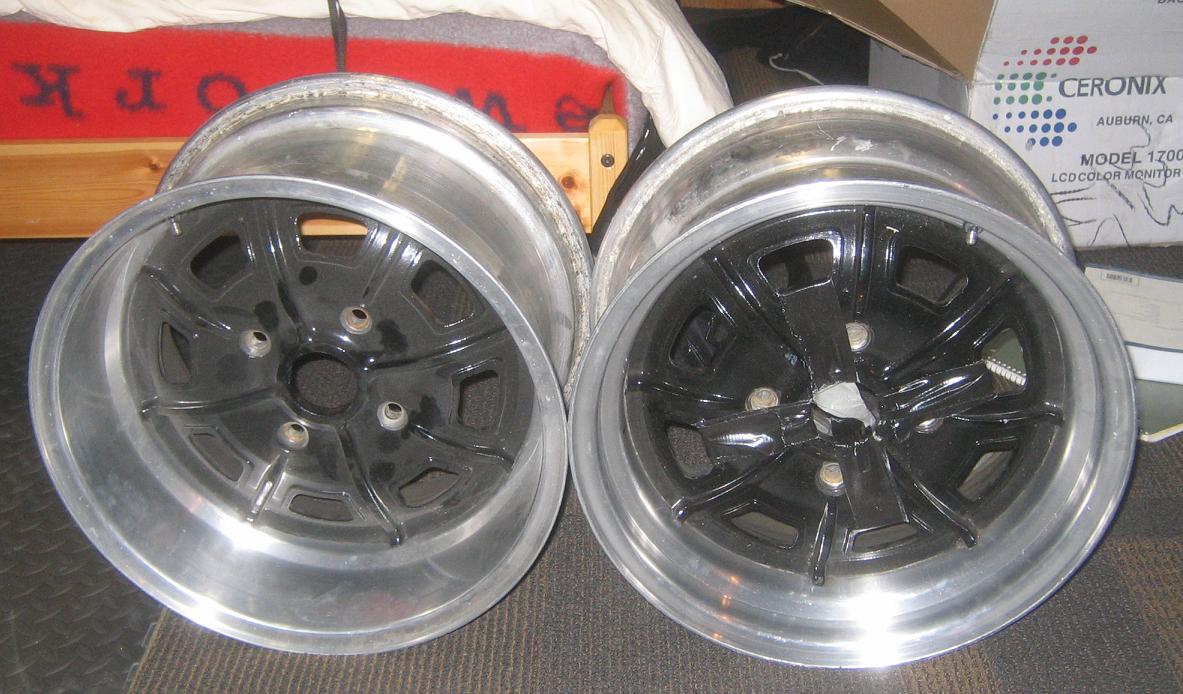
few and far inbetween but i got a nice present today when i came home..my new wheels were waiting for me!
16x8 and 16x9.5 pedrinis....oh they are nice... and DEEP
got them from a club member, thank you jason!
Attached thumbnail(s)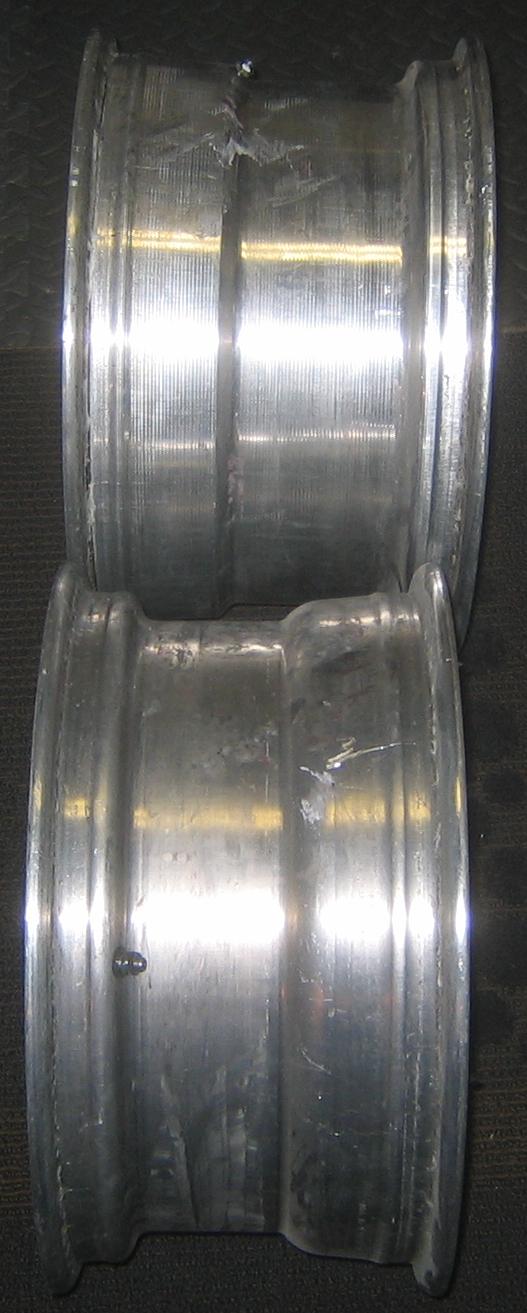
Posted by: jasons Nov 21 2006, 05:20 PM

few and far inbetween but i got a nice present today when i came home..my new wheels were waiting for me!
16x8 and 16x9.5 pedrinis....oh they are nice... and DEEP
got them from a club member, thank you jason!
Glad they got there safe and sound. Those wheels are F'n B-A-D.
Posted by: i love porsche May 14 2007, 03:31 PM
ok...well i spent a little bit of time with the 914 today after a LOOOONG period of not working on it...and i think i have a plan
this summer's goal is to get the bodywork and paint finished so that the reassembly can finally begin. i figure i will set a series of small, achievable goals for myself, so that i dont get overwhelmed..so heres the ideas
remove all glass and trim
strip each panel, one at a time to bare metal (if i can look at a bare quarter panel at the end of the day, instead of a quarter bare cfar..i think i will feel better about what got done)
save $$ and buy some real steel flares to replace the FG ones (This is a biggie)
strip underbody and repaint (hopefully we can get some time at movietime cars for this)
strip engine bay and repaint.
do nessicary body work on car ONE PANEL AT A TIME
when body work is finished...paint it and enjoy
hopefully that will conclude my summer...and i think ill need some help from the Northeast guys this summer...who wants in
-Aaron
Posted by: type11969 May 14 2007, 04:10 PM
NNNNNNNNEEEEEEEEEEWWWWWWWWWWWWWWWWW
Yeah, I'm in.
Posted by: greybeard50 May 14 2007, 04:34 PM
Great long term post! Most of us would not keep it alive for this long.
I do have one warning, however. NEVER EVER, EVER use concrete block for jacking or blocking. Build up some 2x4's or 2x6's, steal a RR tie, Or ???
Just DO NOT USE concrete blocks. Please....
Posted by: i love porsche Jul 9 2008, 09:10 PM
OH MY GOD PROGRESS!!!!!
dropped the car off at the media blaster today, next week it will be primed so i can install my engman kit and do some minor welding, then it goes back to the shop to get bodywork and paint....you have no idea how excited i am, things are finally going to start moving!
Attached thumbnail(s)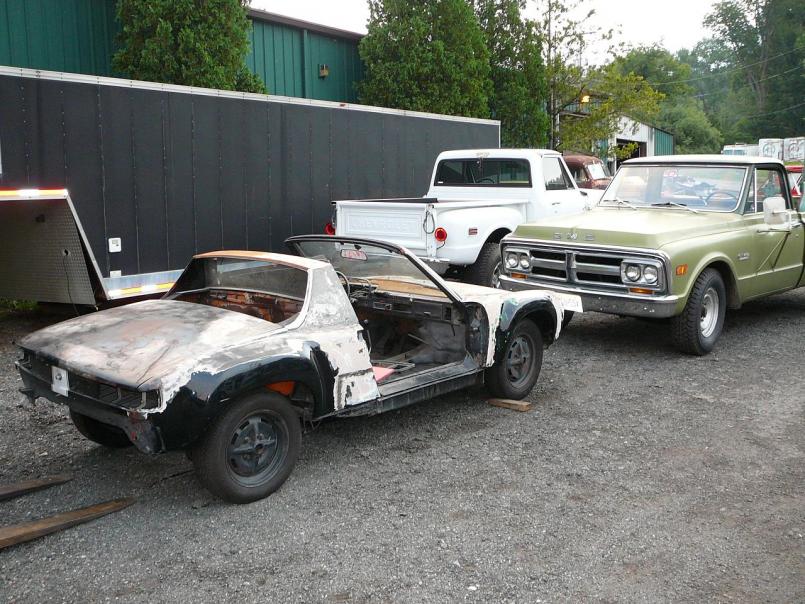
Posted by: turboman808 Jul 10 2008, 01:03 AM
Thats awesome. Who knows next year we will both have running cars and free time to use them.
Posted by: jd74914 Jul 10 2008, 06:38 AM
Nice Aaron!
If I may ask, about how much is the blasting costing? We are thinking of going that route with one of our cars.
Posted by: i love porsche Jul 10 2008, 07:12 AM
the guy was telling me between 600 and 800 for the blasting, and then primer was extra, im expecting to be under 1500 for everything
Posted by: i love porsche Aug 1 2008, 08:16 AM
brought the 914 home from the blaster last night, its all one color (primer white) and its lookin like i can finally make some progress!
pics will be up tonight
Posted by: sendjonathanmail Jan 25 2009, 05:19 PM
![]()
Aaron, you never posted those pics  Hows the progress coming along? You have a PM.
Posted by: i love porsche Jan 25 2009, 09:47 PM
yes lol i never posted the pics...never took them either...the car is in the garage at the moment...i decided that i would rather save my money for a downpayment on a house, than to put it into the car....it was a really really tough decision....but....when im ready, the car will still be here
Posted by: rick 918-S Jan 25 2009, 09:58 PM
few and far inbetween but i got a nice present today when i came home..my new wheels were waiting for me!
16x8 and 16x9.5 pedrinis....oh they are nice... and DEEP
got them from a club member, thank you jason!
Dude those wheels are sic!
 What's the story behind them?
Posted by: ppetion Aug 5 2011, 09:56 AM
This project ended up in my backyard a few months ago. from what I heard, he gave up and sold it to someone else who sold it to me.
Here is the link for the new thread.
http://www.914world.com/bbs2/index.php?showtopic=138680&hl=
Powered by Invision Power Board (http://www.invisionboard.com)
© Invision Power Services (http://www.invisionpower.com)