Printable Version of Topic
Click here to view this topic in its original format
914World.com _ 914World Garage _ malaga_red75 Paint thread, by Andyrew
Posted by: Andyrew Jul 2 2011, 02:02 AM
Peter's (malaga_red75) awesome subaru conversion is now in for paint! This thread will be very similar to my thread in layout and I will go into detail about how and when everything takes place  . Peter will be helping me as much as he can as we are trying to work towards a 2 month deadline.
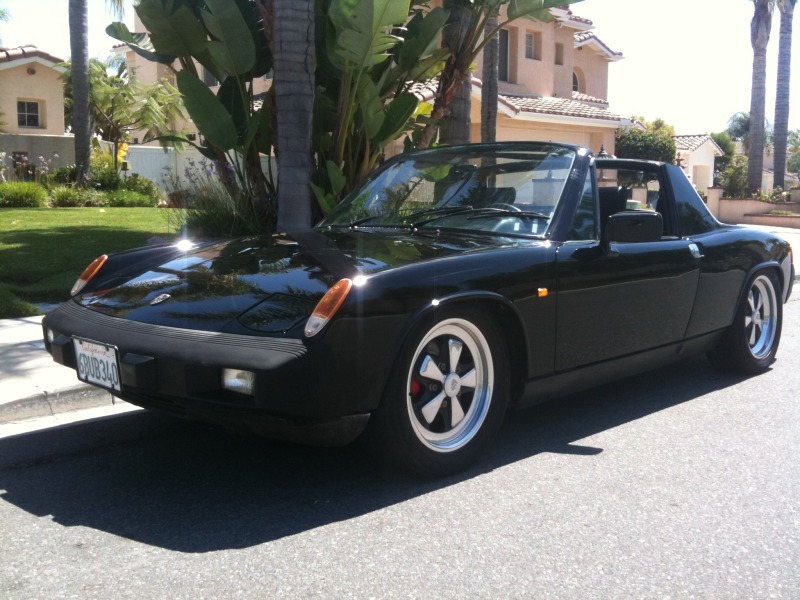
Here is his really nice conversion! I must say the radiator setup looks awesome!
http://www.914world.com/bbs2/index.php?showtopic=85845
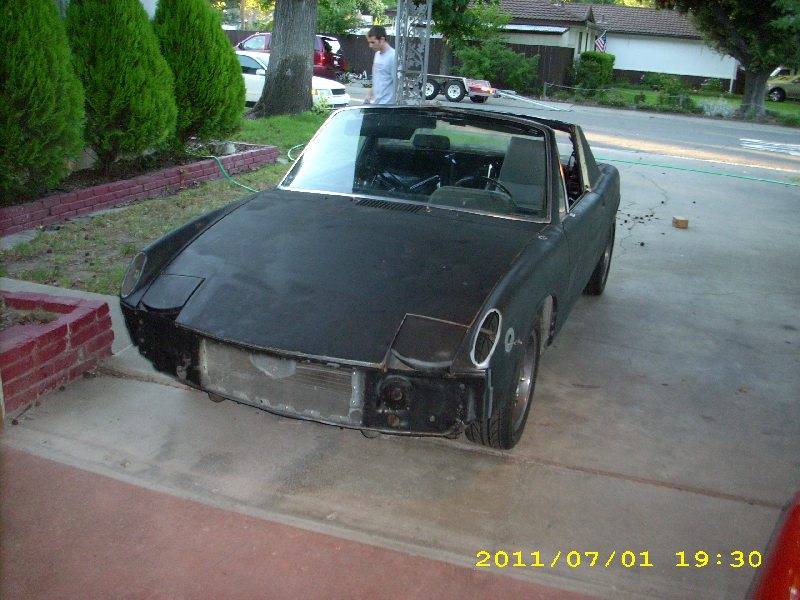
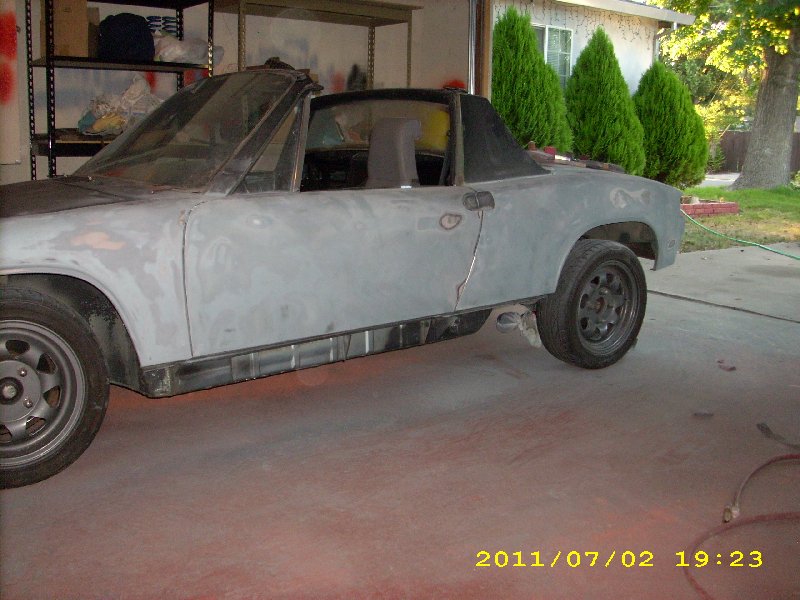
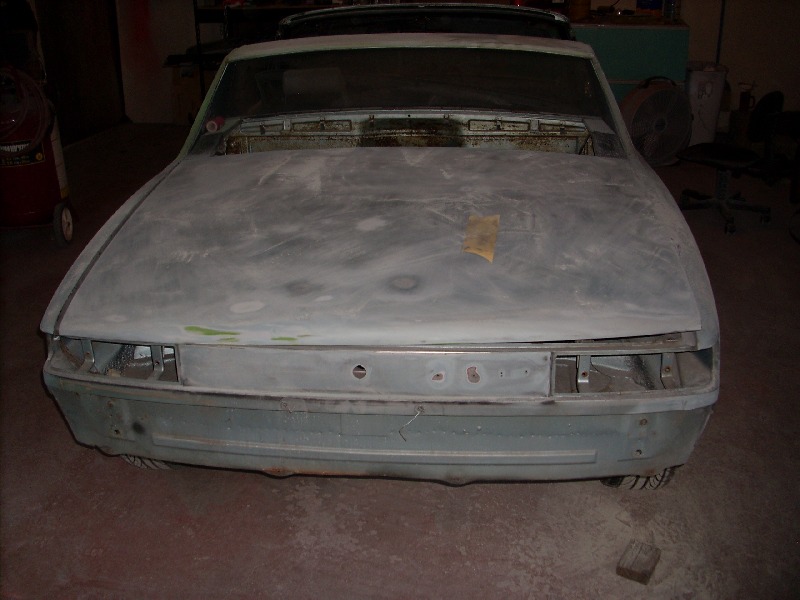
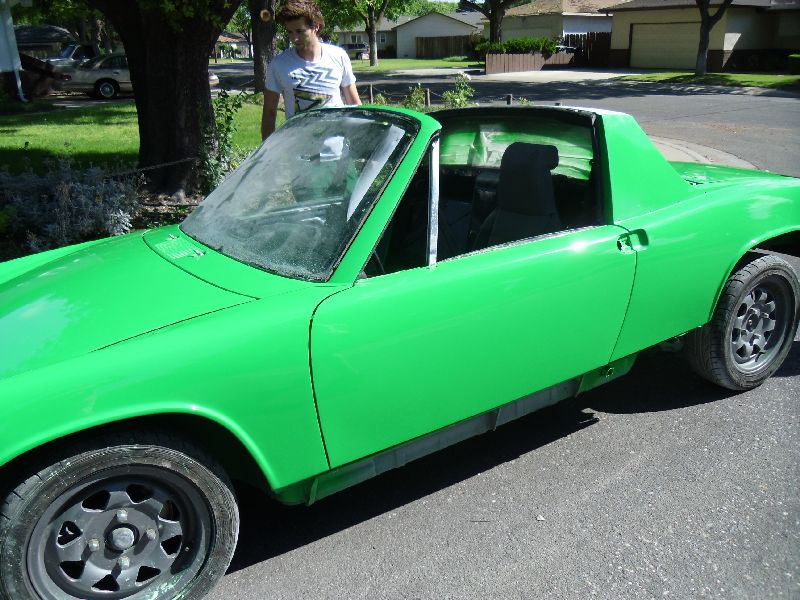
Here it is as delivered. 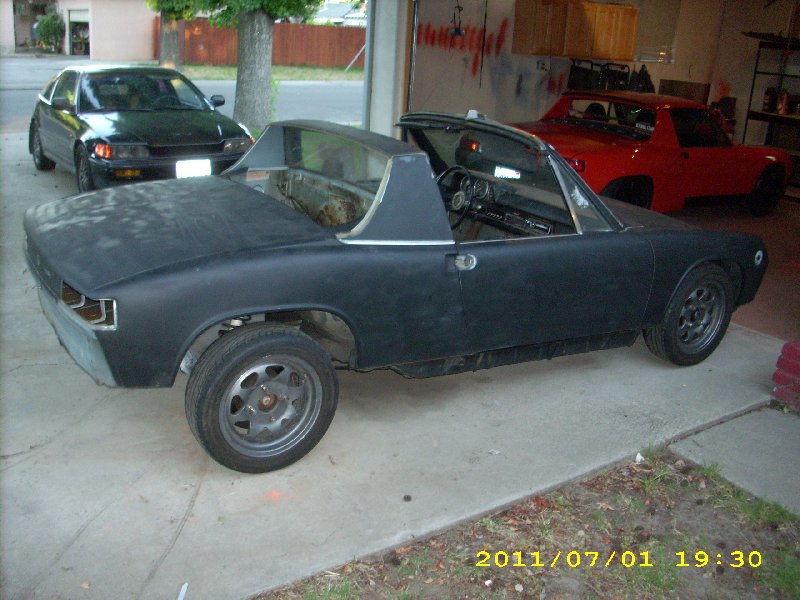
Posted by: Andyrew Jul 2 2011, 02:03 AM
Posted by: Andyrew Jul 2 2011, 02:06 AM
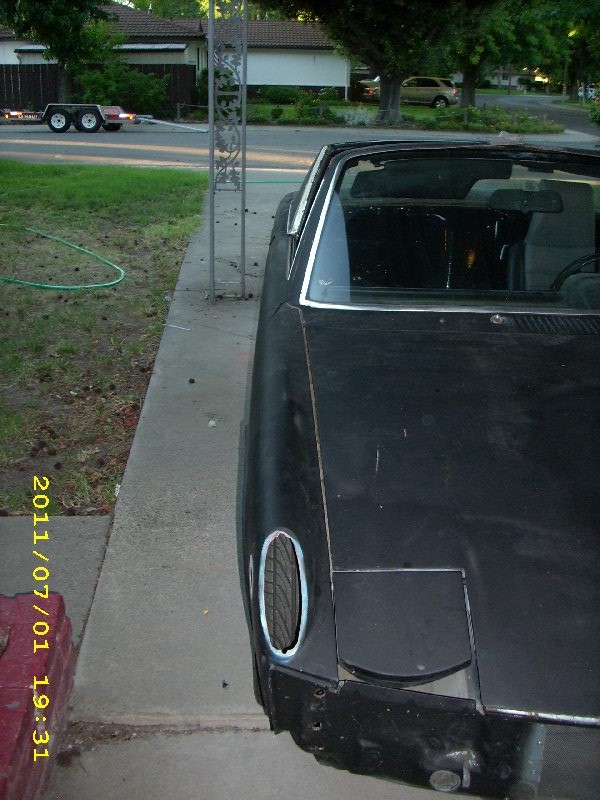
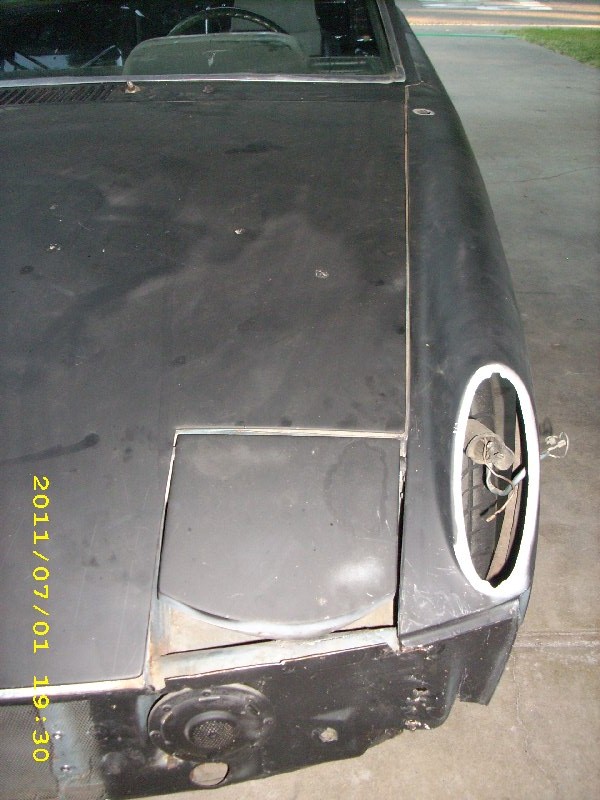
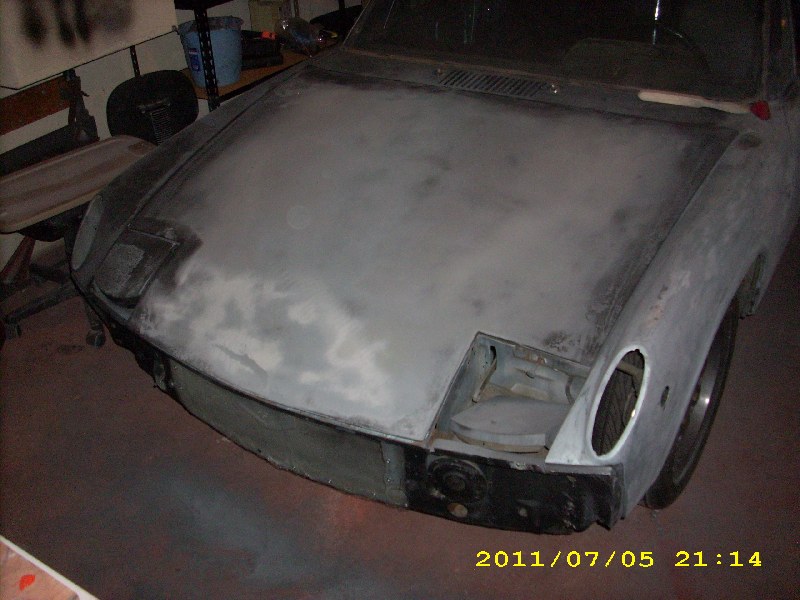
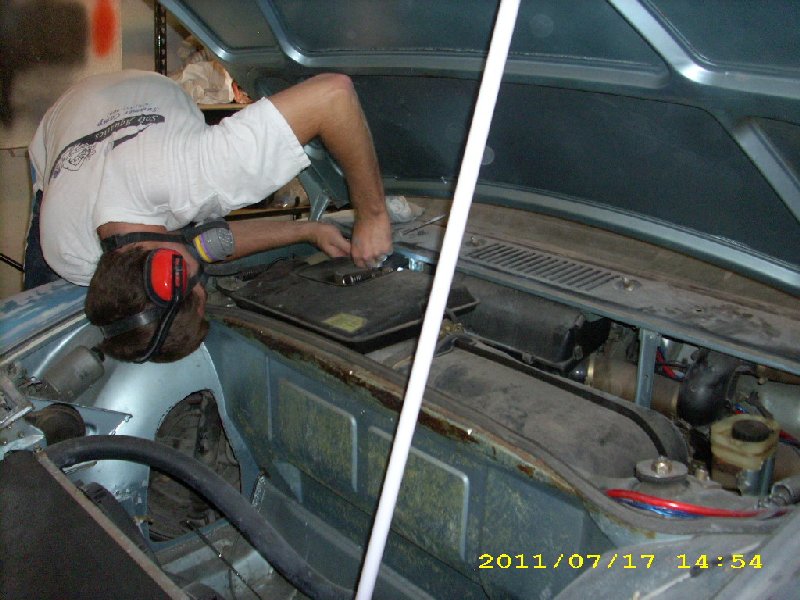
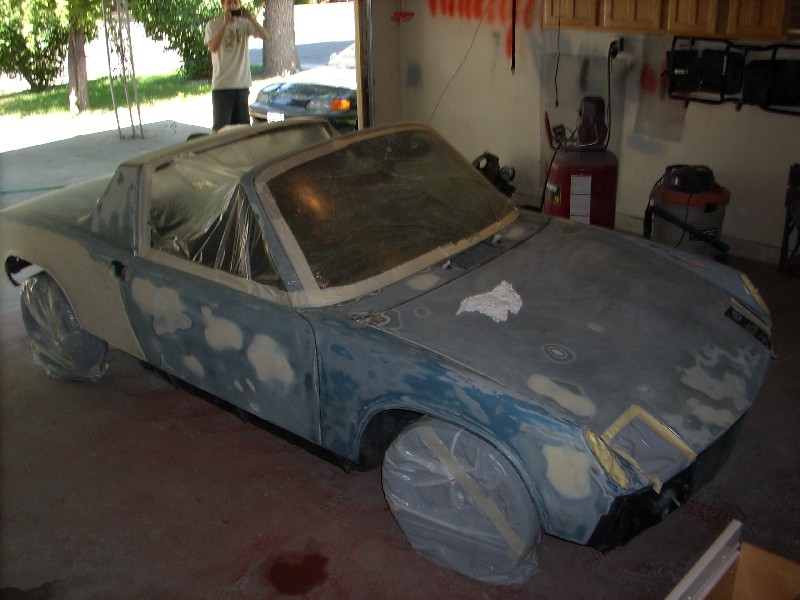
When Peter left I decided to get working on it to see what I had to work with. Started @ 8:30pm, finished @ 11:30am. 3 total hours
Not pictured, but I removed the trim along the front window. Then I filled the antenna hole 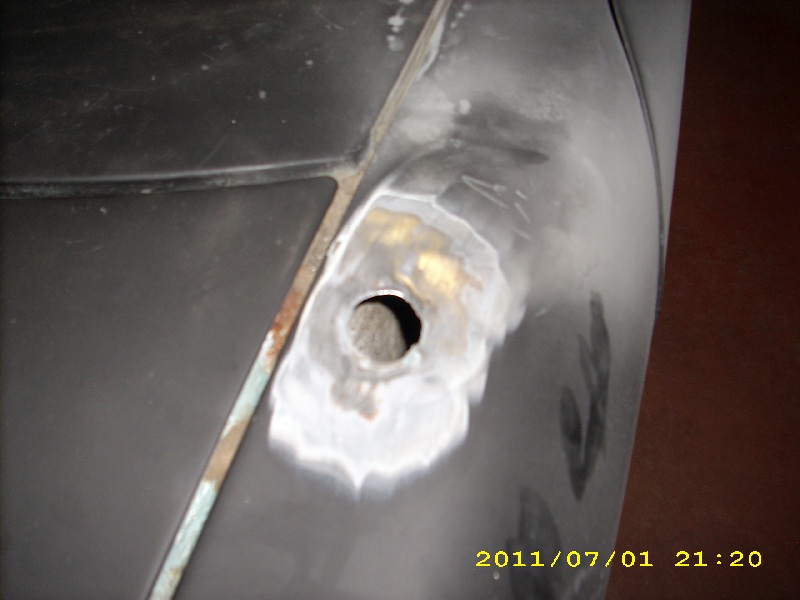
Posted by: Andyrew Jul 2 2011, 02:11 AM
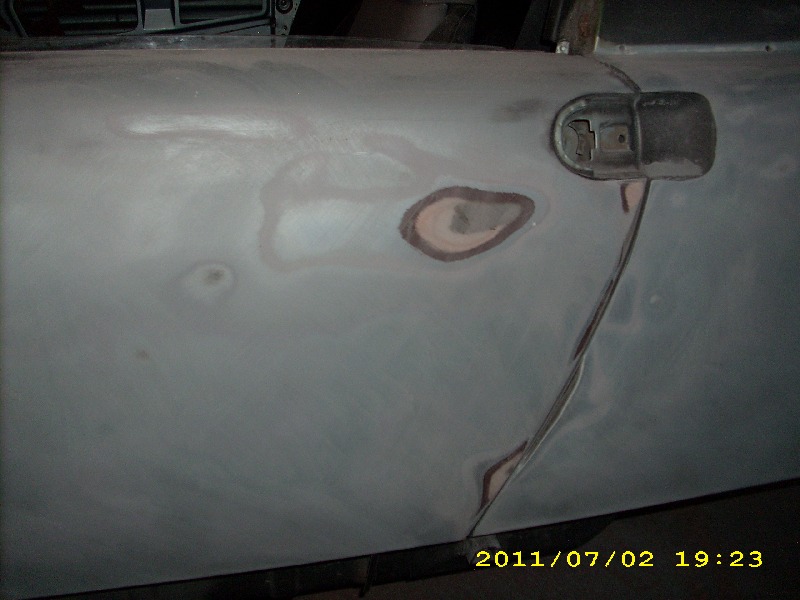
As I was grinding the hole down, I could see that there had been some repair to this area before where someone had gone to metal with the car and used a skim layer of filler over the car. It looks like good work, and in fact there is only that layer of filler, then a basecoat/clearcoat, then in some area's primer over that (probably from dents as I can see in Peters subaru swap thread), and then obviously the rattle can primer. 
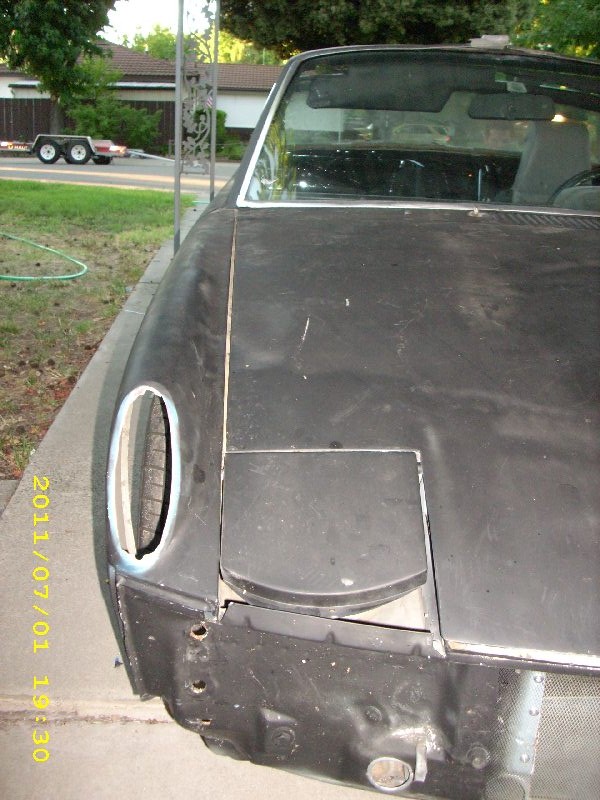
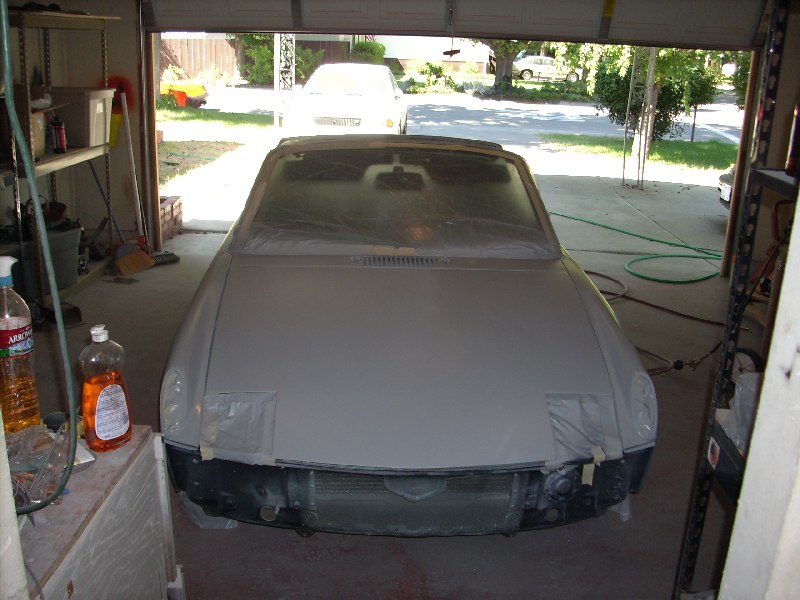
Removed the headlight as well, Picture is for refference on wiring.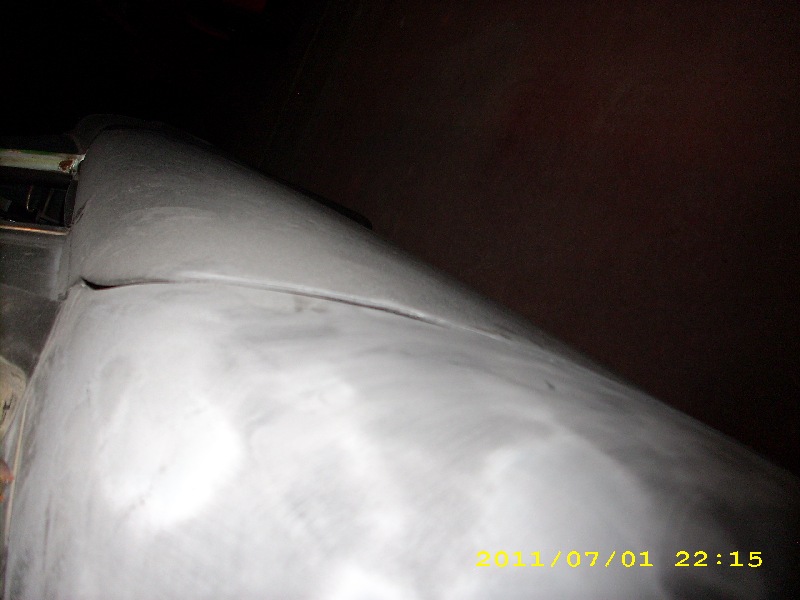
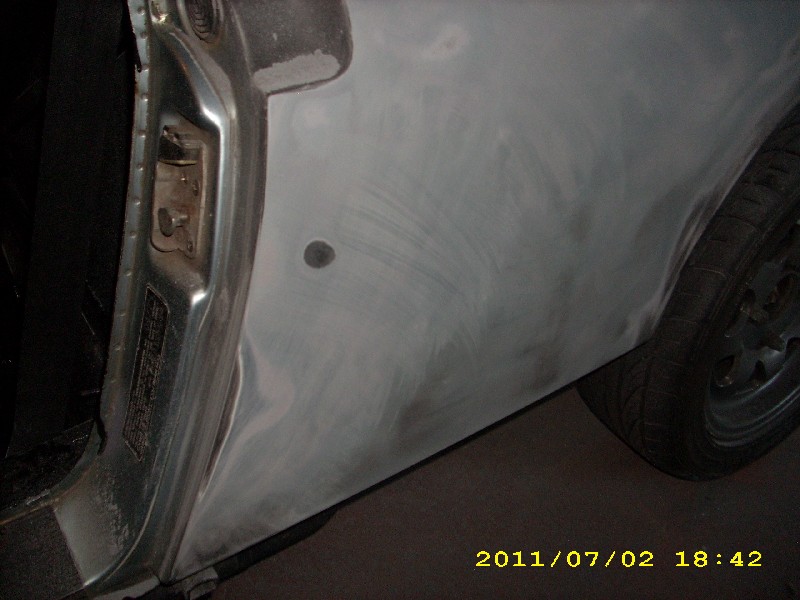
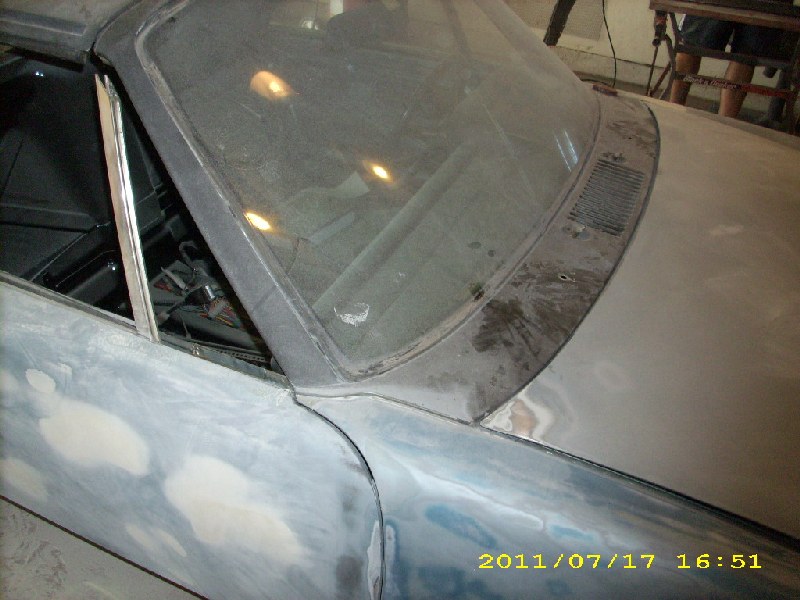
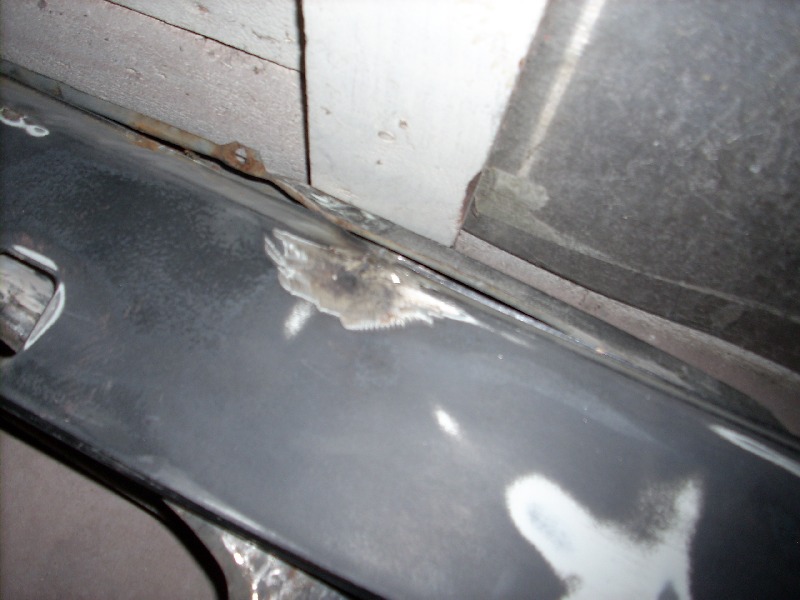
There is a little bump on the edge of the door, I cant get behind it with a dolly, so this will probably have to be fixed with the door off the car.
Posted by: Andyrew Jul 2 2011, 02:19 AM
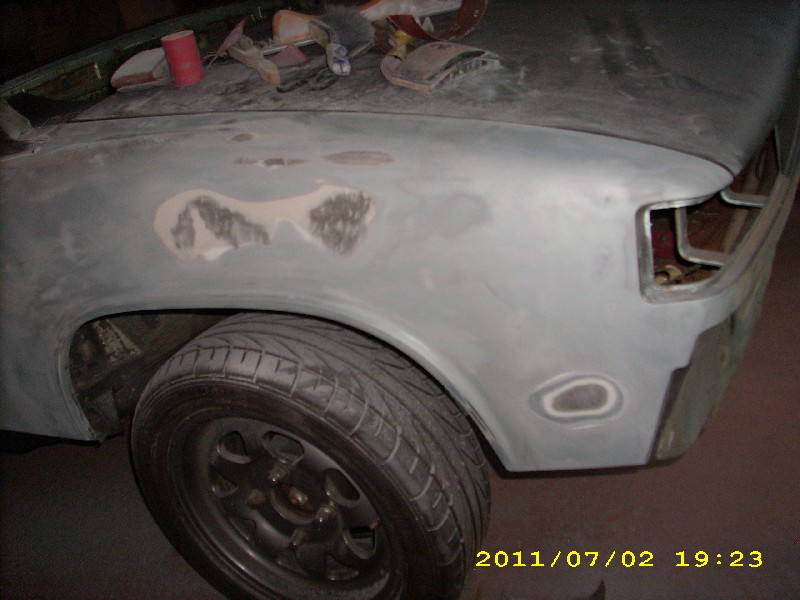
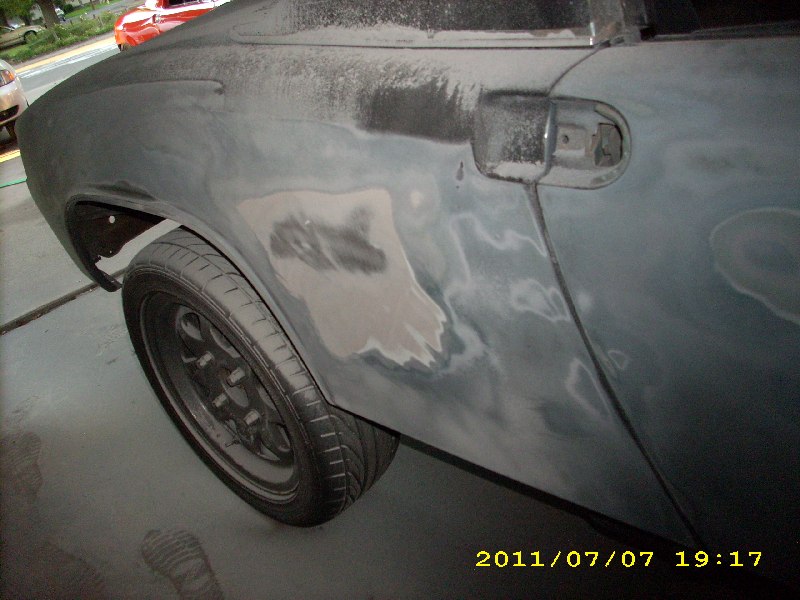
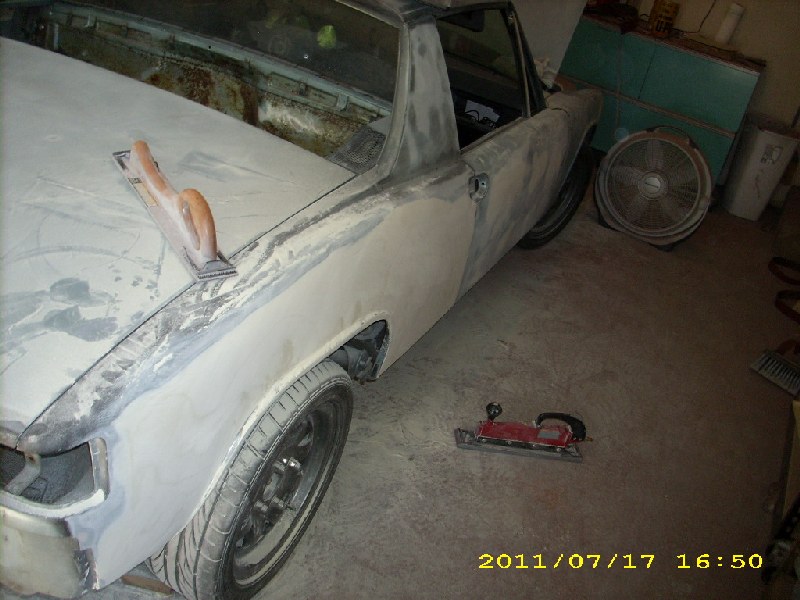
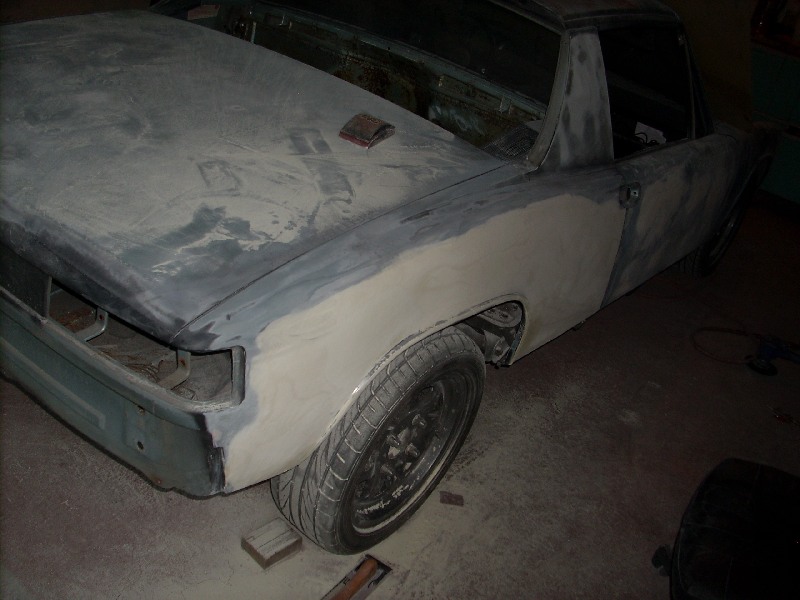
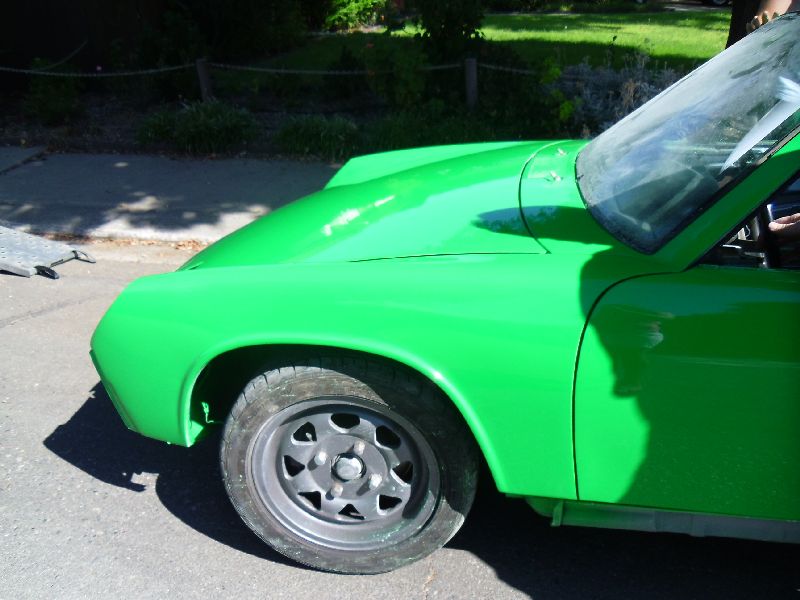
And then it had only been just over an hour so I spent some time getting the fender down. I used 180 grit, and on some area's where there was either chips or rust bubbles I went down to 80 grit. These will either get glazing filler or primer filler. 
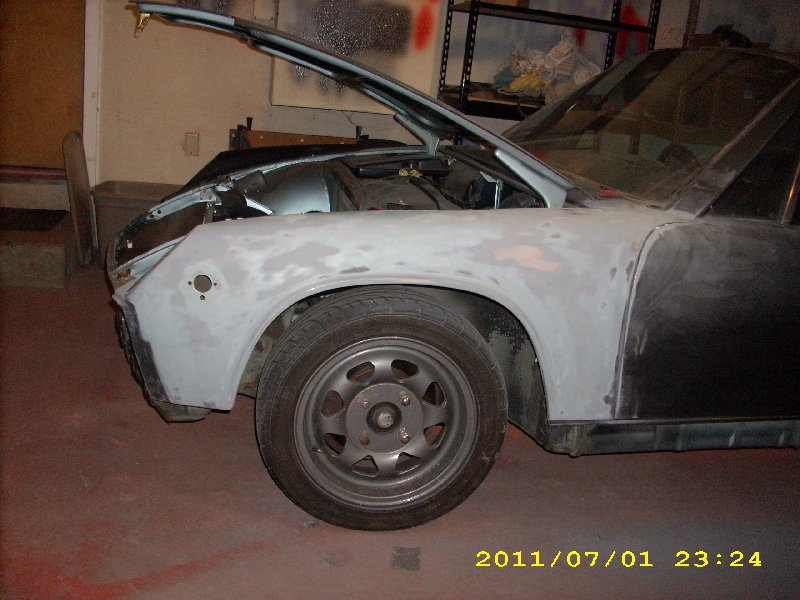
This fender is now ready for primer epoxy, It doesnt look like it needs any filler or even primer filler, So it'll be a thick layer of primer epoxy then we'll shoot primer sealer near bodycolor right before spraying color.
The whole car seems pretty straight except for the pass rear, which has an oilcanning issue in the front large section of it. I'll probably have to get the torch out for it and read up on the tricks to get rid of it. I'll detail this problem area later.
Posted by: malaga_red75 Jul 2 2011, 02:29 AM
Very excited about this!!!

Posted by: PanelBilly Jul 2 2011, 09:23 AM
Now would be the time to roll the fenders rather than just before you're getting ready to spray (like me)
Posted by: orange914 Jul 2 2011, 11:58 AM
I'll be watching this thread, yours had great pictured updates of the progress.
Can I talk you into painting our new vw pick up we just got?? very straight and original paint
Mike
Posted by: Andyrew Jul 2 2011, 12:46 PM
Mike,
You certainly can, but I have a full plate on other cars, so if you dont mind waiting maybe a year then ya! Send me a PM on when you are thinking and I'll send you the details on $$
Panelbilly, We will be rolling the rears at least, (However someone cut the lip off very professionally, I'll get a pic of it)
Posted by: kg6dxn Jul 2 2011, 02:49 PM
Cool! I'll be watching this one too. I think he did a great job building the subie. I'm glad all the cooling issues are dealt with.
Posted by: Andyrew Jul 2 2011, 10:49 PM
Not as good of a day as I had hoped in terms of time frame, but I did get enough done for me to be happy with the day. I had a 4 hour detour in the middle of the day delivering some wheels. That and I had expeced my fiance to return home sooner than she is (and she didnt keep me informed), so I stopped earlier than I really wanted.
Lets start with the morning push.
Worked on the door and rear fender for about an hour then had to leave. 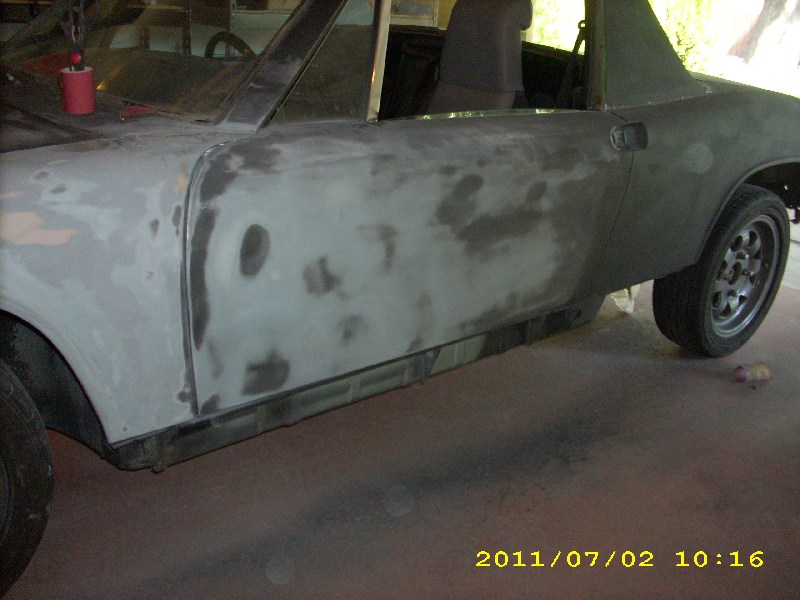
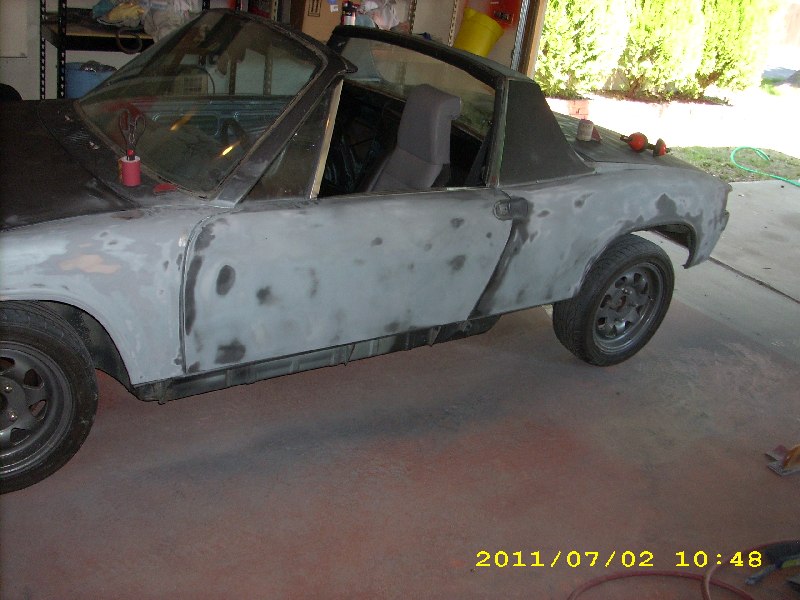
Started up again and worked for about 2 hours then I got hungry 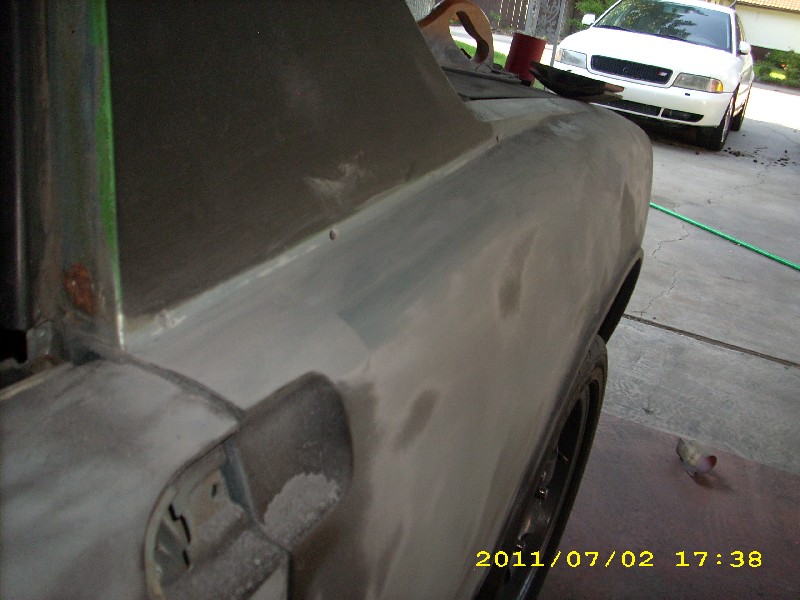
Posted by: Andyrew Jul 2 2011, 10:52 PM
Posted by: Andyrew Jul 2 2011, 10:56 PM
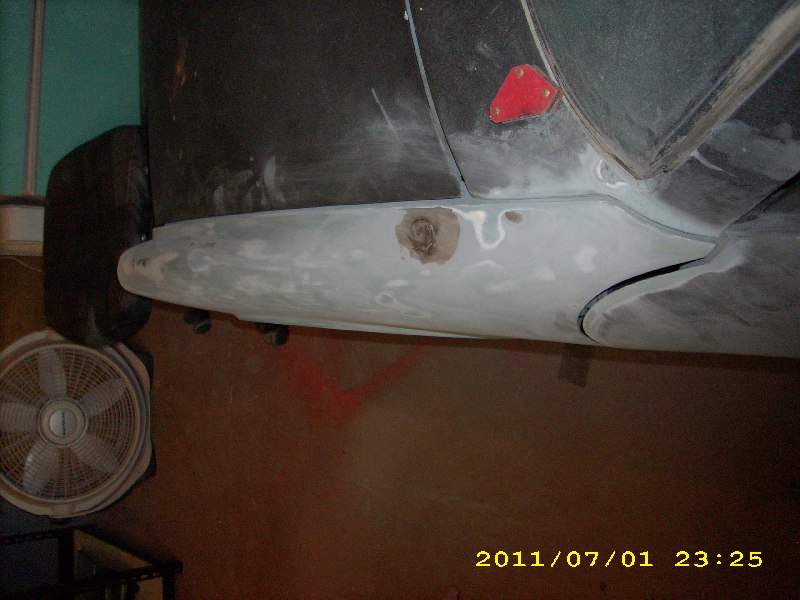
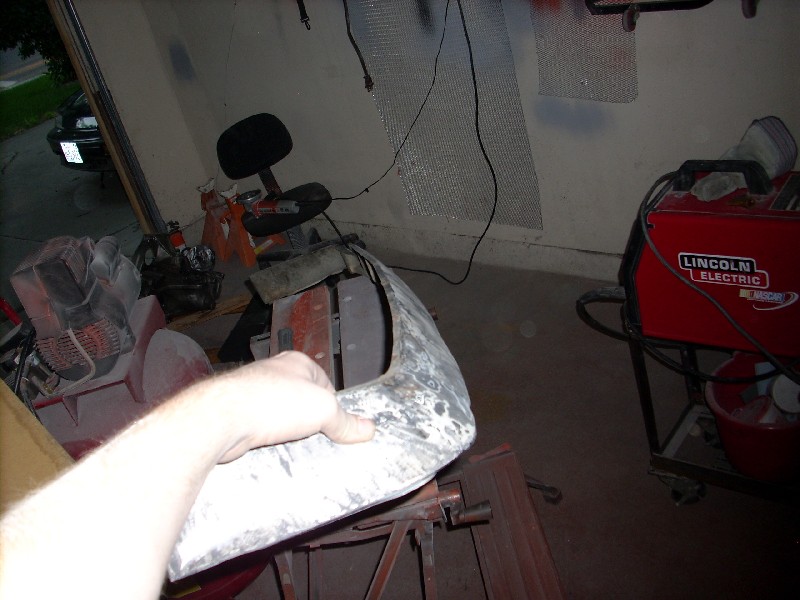
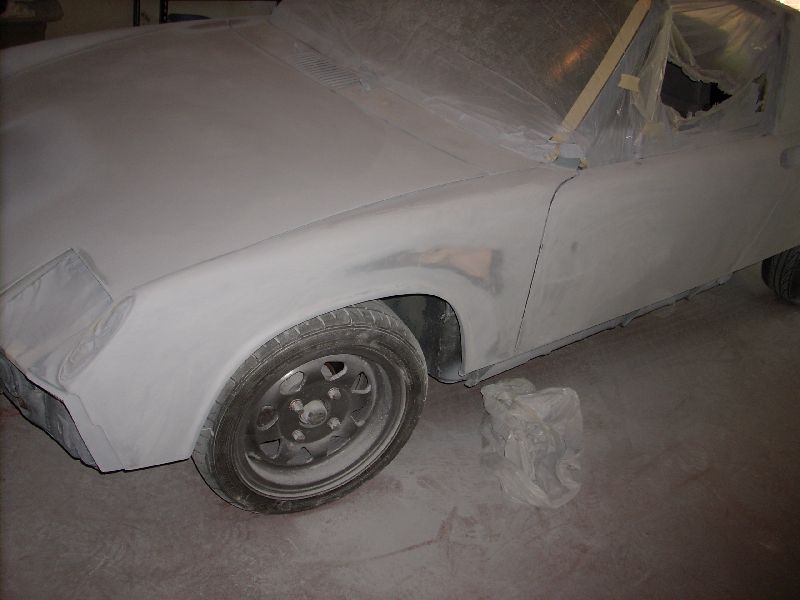
A LOT more nicks than I thought there would be, a couple of scratches, ect. Scratches, dings, and chips were brought down to metal or to the end of the chip/scratch with 80 grit, then the area's around were feathered.
Next step is epoxy primer, and then i'll fill the low spots. 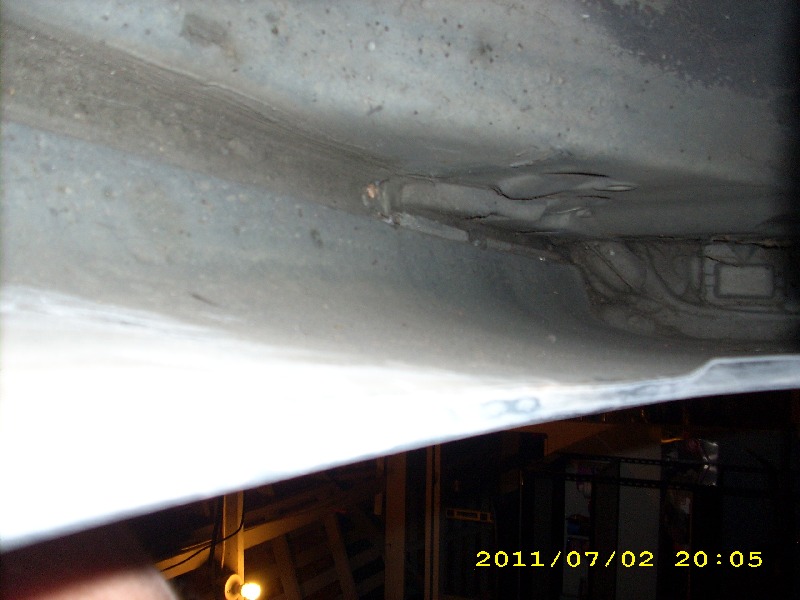
Here is a pic of the rear fender lip that was trimmed.
Posted by: Rand Jul 2 2011, 11:03 PM

......That and I had expeced my fiance to return home sooner than she is (and she didnt keep me informed), so I stopped earlier than I really wanted.
I hope you're good wit dat. Cuzn youz signin up for it. Long term.
 Or youz best be puttin' down some rulz fast like.
Just teasin'.
Seriously, nice work 'rew. Part of me is wishing you would finish the massaging of the flares pure metal. I love the Bontempi style bulges, and thought it was cool you stretched the metal that way early on. Would you try that again?
Posted by: Andyrew Jul 2 2011, 11:21 PM
Rand,
She was out with her friends at Great America so she was probably on rides and such
I would attempt those flares, but they just take so many hours. I think its less time consuming to cut the tops of the flares and then fill in extra metal and shape from there.
If time was no object, ya I would love to try it out. Maybe on my next 914. (Because I doubt someone will pay my labor rate @ 20-40 hours per fender...)
Posted by: malaga_red75 Jul 5 2011, 09:35 AM
Mike,
You certainly can, but I have a full plate on other cars, so if you dont mind waiting maybe a year then ya! Send me a PM on when you are thinking and I'll send you the details on $$
Panelbilly, We will be rolling the rears at least, (However someone cut the lip off very professionally, I'll get a pic of it)
I am still kind of new to the 'rolling the fenders' idea. Could you guys post some pics and methods of how you rolled your fender? I'd love to see what it looks like.. also, what size tire/wheel are you running under there.
My main reason for rolling th fender would be to fit a 195 (or 205 if possible) on the VW offset empi look-a-like wheels.
lets see what you got!!
-Peter
Posted by: RiqueMar Jul 5 2011, 10:12 AM
Mike,
You certainly can, but I have a full plate on other cars, so if you dont mind waiting maybe a year then ya! Send me a PM on when you are thinking and I'll send you the details on $$
Panelbilly, We will be rolling the rears at least, (However someone cut the lip off very professionally, I'll get a pic of it)
I am still kind of new to the 'rolling the fenders' idea. Could you guys post some pics and methods of how you rolled your fender? I'd love to see what it looks like.. also, what size tire/wheel are you running under there.
My main reason for rolling th fender would be to fit a 195 (or 205 if possible) on the VW offset empi look-a-like wheels.
lets see what you got!!
-Peter
Peter,
Attached are some pictures of the 3.6 with rolled fenders. It's slightly widened and you can definitely fit more tire in there, while still maintaining a very stock look. you can only tell it's been widened if your pretty familiar with the car and look closely. This specific car was done using the 'baseball bat' method.
Posted by: malaga_red75 Jul 5 2011, 10:19 AM
Mike,
You certainly can, but I have a full plate on other cars, so if you dont mind waiting maybe a year then ya! Send me a PM on when you are thinking and I'll send you the details on $$
Panelbilly, We will be rolling the rears at least, (However someone cut the lip off very professionally, I'll get a pic of it)
I am still kind of new to the 'rolling the fenders' idea. Could you guys post some pics and methods of how you rolled your fender? I'd love to see what it looks like.. also, what size tire/wheel are you running under there.
My main reason for rolling th fender would be to fit a 195 (or 205 if possible) on the VW offset empi look-a-like wheels.
lets see what you got!!
-Peter
Peter,
Attached are some pictures of the 3.6 with rolled fenders. It's slightly widened and you can definitely fit more tire in there, while still maintaining a very stock look. you can only tell it's been widened if your pretty familiar with the car and look closely. This specific car was done using the 'baseball bat' method.
Thanks! I didn't notice it in the first two pictures, but in the third one, it looks like there is a crease or flat spot on the upper part of the fender? Is this just the sun/picture playing tricks on my eyes? Because this is something that Andrew talked about.
Thanks again! That car looks great!
also, Andrew, I am going to call today about the paint. I have read online that the paint Porsche uses is a water-based paint. Are you going to be using water-based? Let me know
-Peter
Posted by: BIGKAT_83 Jul 5 2011, 10:28 AM
I'm running 215/16 tires with very little fender rolling. These are on 16/7 wheels
The opening you have in the front bumper will be fine if the rest of the cooling system is correct.
Thats about the same total size as I have on this EG33 powered car.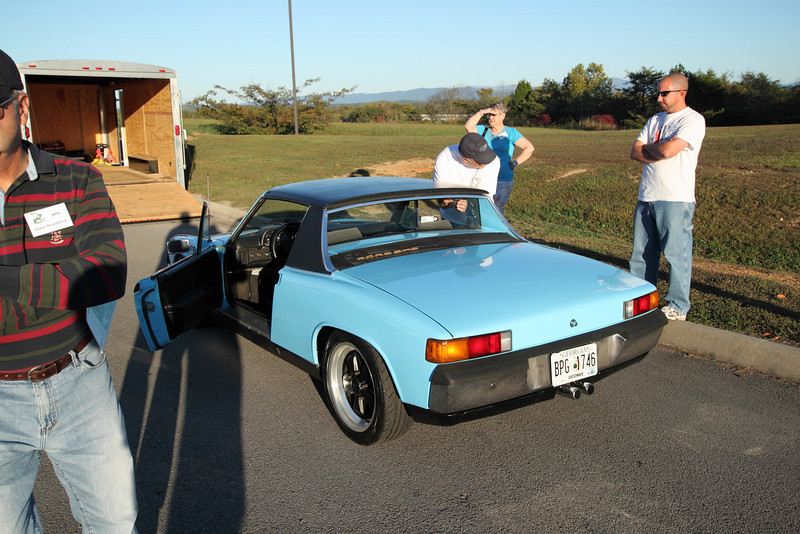
Posted by: RiqueMar Jul 5 2011, 10:41 AM
Thanks! I didn't notice it in the first two pictures, but in the third one, it looks like there is a crease or flat spot on the upper part of the fender? Is this just the sun/picture playing tricks on my eyes? Because this is something that Andrew talked about.
Thanks again! That car looks great!
also, Andrew, I am going to call today about the paint. I have read online that the paint Porsche uses is a water-based paint. Are you going to be using water-based? Let me know
-Peter
I think that's just a 'bad reflection' because it's the same side pictured in picture #2, but I see what you are talking about, it certainly does look like it in that picture.
I would really recommend the whole process!

Posted by: Andyrew Jul 5 2011, 11:02 AM
Peter, I was talking about larger rolling/stretching of the fender without stretching the metal. As big of a stretch as you are looking at/ thinking about wont affect this in any noticeable fashion.
Also I can go with any base material you want to paint with, The shop will just color match based on pigment mix #'s. Single stage Urethane is what I recommend going with and is what I went with on my car. Dont buy the actual paint till we speak again, I want to make sure the pricing is right and you buy the right reducer and such.
PS Feel free to text me
Posted by: kg6dxn Jul 5 2011, 01:08 PM
I'll loan you my Eastwood fender roller if you want to try it.
Posted by: malaga_red75 Jul 5 2011, 01:25 PM
I'll loan you my Eastwood fender roller if you want to try it.
Had to google that, but it looks awesome!!
Looks like a much more consistent way to roll the fender as opposed to the 'baseball bat' method.
What do you think Andrew?
Posted by: Andyrew Jul 5 2011, 01:26 PM
Thats probably a really good idea, With no weight in the back and wheels that are not what he wants to put on ( however we could probably space them out with washers) It will be a little difficult to use a baseball bat for rolling the fenders.
Posted by: RiqueMar Jul 5 2011, 01:40 PM
I'll loan you my Eastwood fender roller if you want to try it.
Had to google that, but it looks awesome!!
Looks like a much more consistent way to roll the fender as opposed to the 'baseball bat' method.
What do you think Andrew?
Thats probably a really good idea, With no weight in the back and wheels that are not what he wants to put on ( however we could probably space them out with washers) It will be a little difficult to use a baseball bat for rolling the fenders.
Hey guys,
Be careful with those rollers, as sometimes the polyurethane on them has a tendency to not push uniformly, causing waves and flat spots. We just went through this when my Father was lowering his Ferrari. I suppose if your using it on a stripped car it's cool, but on one that is already sprayed or semi-prepped, I would be concerned.
And yeah, the bat method is a bit more 'old school' and can certainly be a little difficult.
Posted by: jaxdream Jul 5 2011, 03:27 PM
There was a thread a few days ago on fender rolling. Also search on here will tuurn it up.
Jack
Posted by: kg6dxn Jul 5 2011, 10:43 PM
I used it on a local 914. No problems. I just used my heat gun to warm up his paint and it was good to go. You can change the tension at any point of the fender to fine tune it. If you guys want to use it, figure out how to get it from San Ramon to Modesto.
Posted by: malaga_red75 Jul 5 2011, 10:56 PM
I used it on a local 914. No problems. I just used my heat gun to warm up his paint and it was good to go. You can change the tension at any point of the fender to fine tune it. If you guys want to use it, figure out how to get it from San Ramon to Modesto.
I will probably go help andrew this weekend. I am coming from the peninsula and should be no problem for me to pick it up because it is only about 10 minutes off of 580. I will PM you and keep you posted
-Peter
Posted by: kg6dxn Jul 5 2011, 11:00 PM
I will probably go help andrew this weekend. I am coming from the peninsula and should be no problem for me to pick it up because it is only about 10 minutes off of 580. I will PM you and keep you posted
-Peter
Right on! If it is easier, you can pick it up from me at work in San Carlos...
Posted by: Andyrew Jul 5 2011, 11:07 PM
Awesome! We'll get these fenders rolled this weekend! Before and after pics and measurements will be posted! 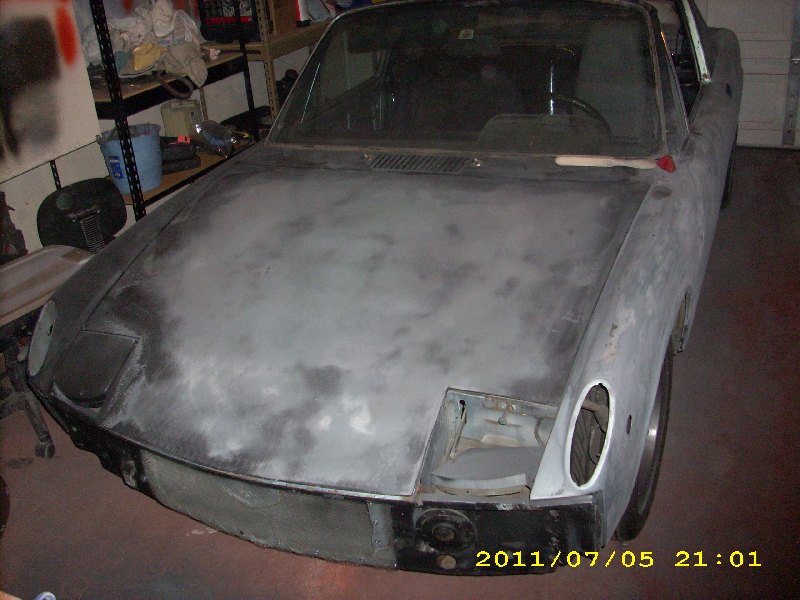
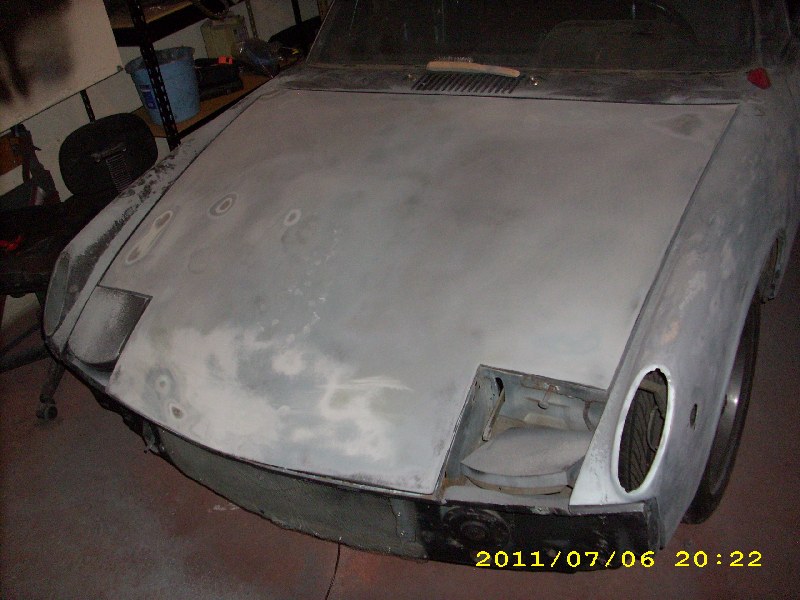
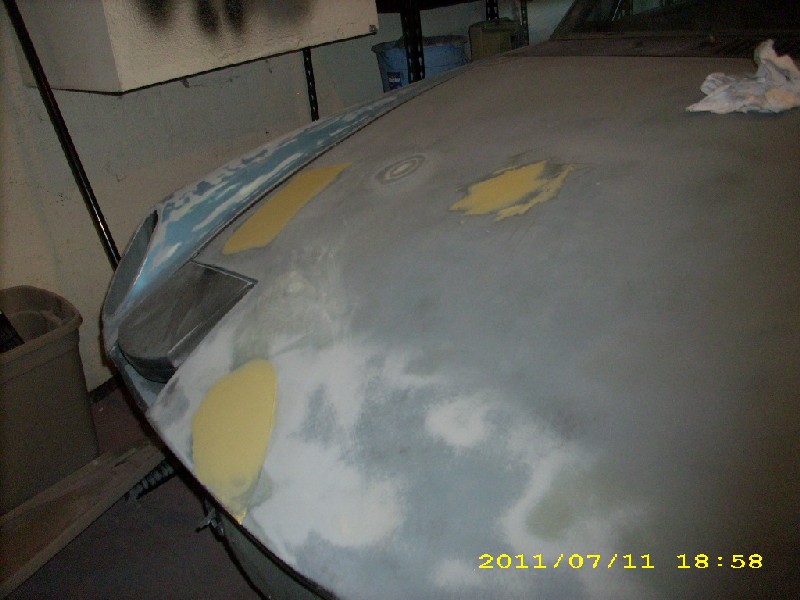
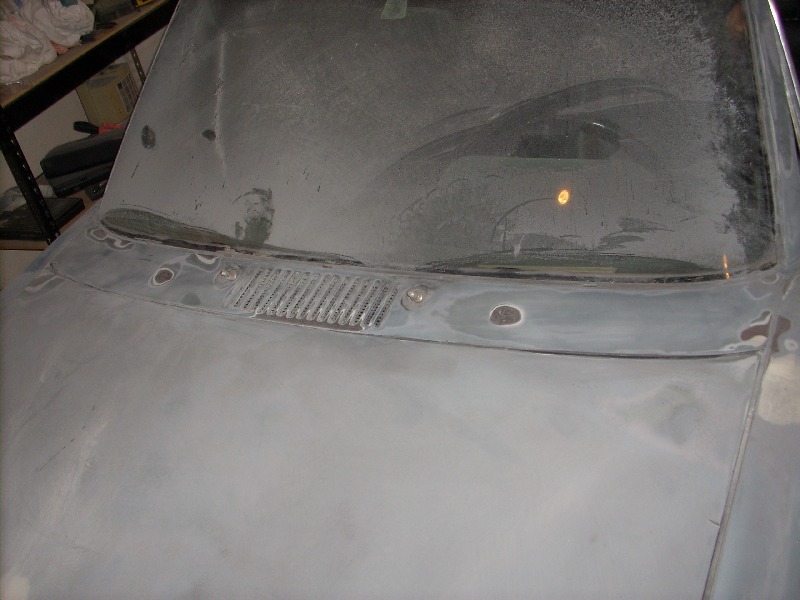
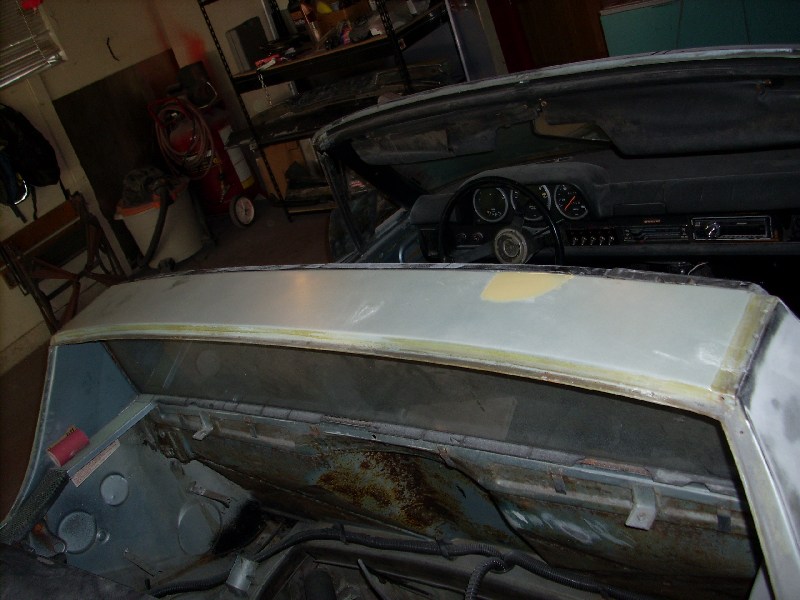
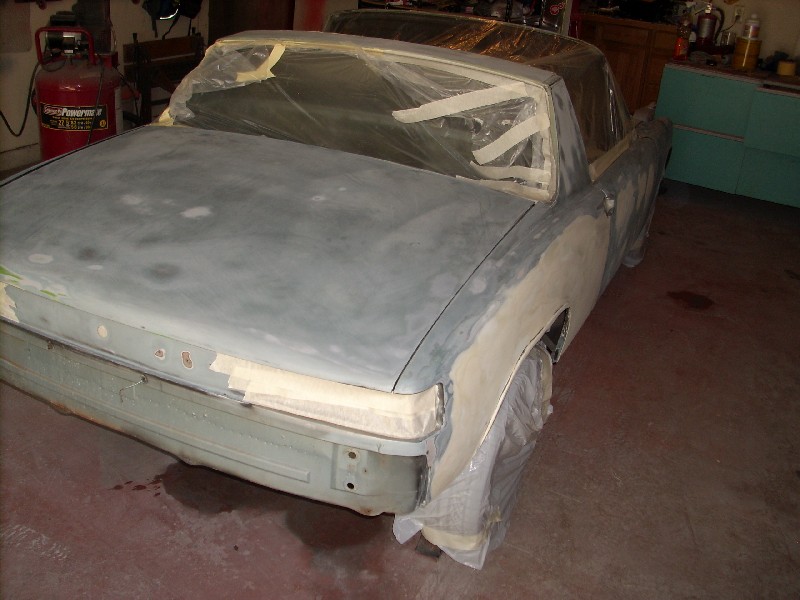
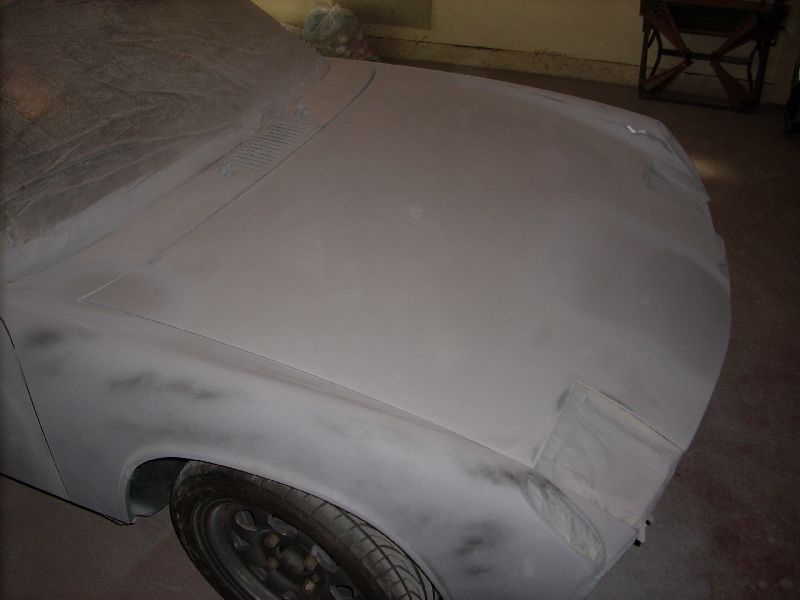
Got 1/2 hour of work in tonight and stripped the hood with 80 grit. There are two rock chips that need to be taken care of but the rest of the hood is nice and shouldnt take much work. 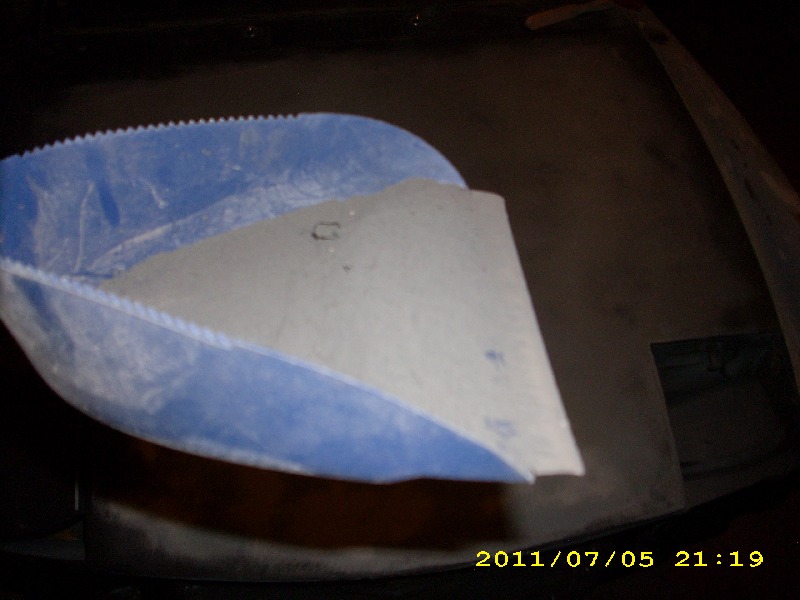
Loads of paint... I think the hood took a rattle can in itself.
Posted by: Andyrew Jul 5 2011, 11:17 PM
OH, and the Pass side headlight doesnt have a turn knob thing so I couldnt raise and remove the headlight. I probably have a spare knob in the back, but I didnt have time to look for it (and it was dark.. I dont like spiders..)
Posted by: jaxdream Jul 6 2011, 07:46 AM
OH, and the Pass side headlight doesnt have a turn knob thing so I couldnt raise and remove the headlight. I probably have a spare knob in the back, but I didnt have time to look for it (and it was dark.. I dont like spiders..)
Like this fuzzy fella ???
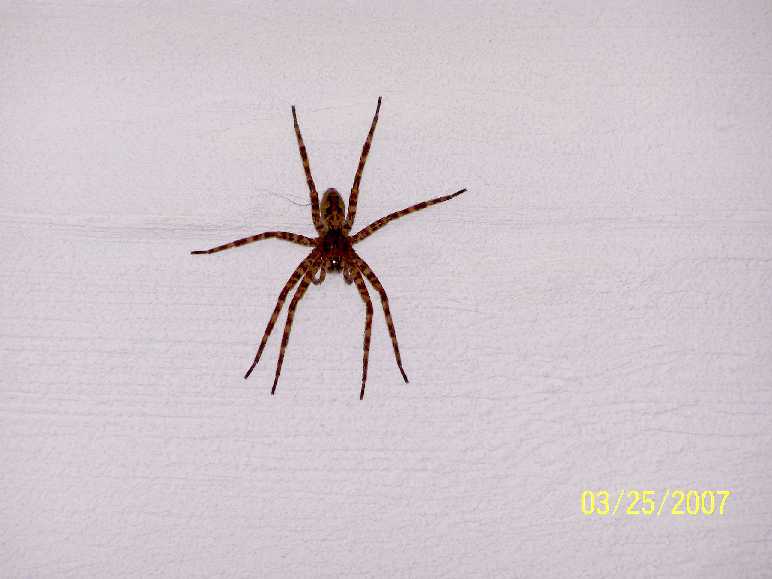 One of my friends that show up from time to time
Jack
Posted by: Andyrew Jul 6 2011, 09:02 AM
What are those, wolf spiders?
We have black widows over here.. Its been 2 months since I sprayed and the heat has gotten bad so they are comin out. I'll probably spray this week.
Posted by: malaga_red75 Jul 6 2011, 09:29 AM
Looks great andrew! I like how you are saving the right-rear fender for last  ... hopefully it wont be that bad when you start on it.
Posted by: malaga_red75 Jul 6 2011, 09:33 AM
also, did you notice the turned-up corner on the hood?
It should be passenger side all the way towards the windshield. I had a screwdriver laying on the car when i opened the front trunk one time and it bent up a little. SHould be just a little tapping to get it back down.
Posted by: Andyrew Jul 6 2011, 10:06 AM
Hadnt gotten to the edges yet (Except the front edge) so no..
If its just bent up a little it shouldnt be a big deal. I'll fix it tonight with more sanding on the edges of the trunk. However I have to either raise the trunk up and set it down it on 1' blocks or remove the trunk in order to get to the edges without sanding the fenders.
Im anticipating the worst for the RR, I think we have to go to bare metal for most of the fender. I believe there will be some time spent on this... But, its not impossible!
Posted by: Andyrew Jul 6 2011, 11:26 PM
Fixed that corner, didnt get a good pic of it so I didnt post it. Finished up sanding the hood down, Probably have to go over it with 180 prior to primer. I put sanding blocks on the corners and tied the hood down so I could get the edges. Also got some sanding done on the fender. Looks pretty good but will need a little bit of filler.
Just a little over an hour and a half tonight.
Posted by: malaga_red75 Jul 6 2011, 11:43 PM
Awesome Andrew!
I thought about it some more and I was thinking that we should go ahead and fill in the side markers.
what is better for you saturday or sunday?
Posted by: Andyrew Jul 7 2011, 12:07 AM
Saturday is much better for me, fiancee is out and about all day so Im free.
Im glad you decided to fill the side markers, that is a really good choice!
Posted by: Andyrew Jul 7 2011, 10:43 PM
Got in 2 hours today.
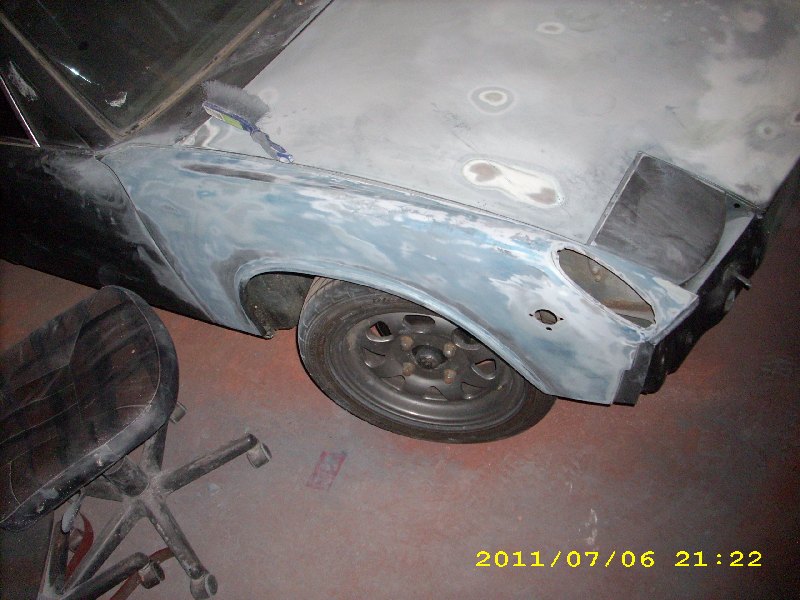
Not pictured, but finished up sanding the front fender, then proceeded to knock out a couple of low spots in the top of the door.
Door will need some filler due to some chips it had. (actually had a bunch of them..)
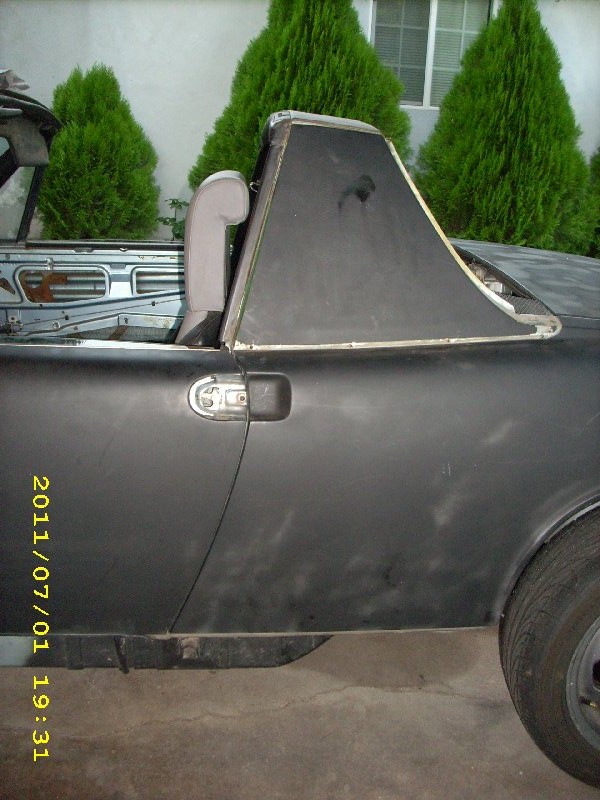
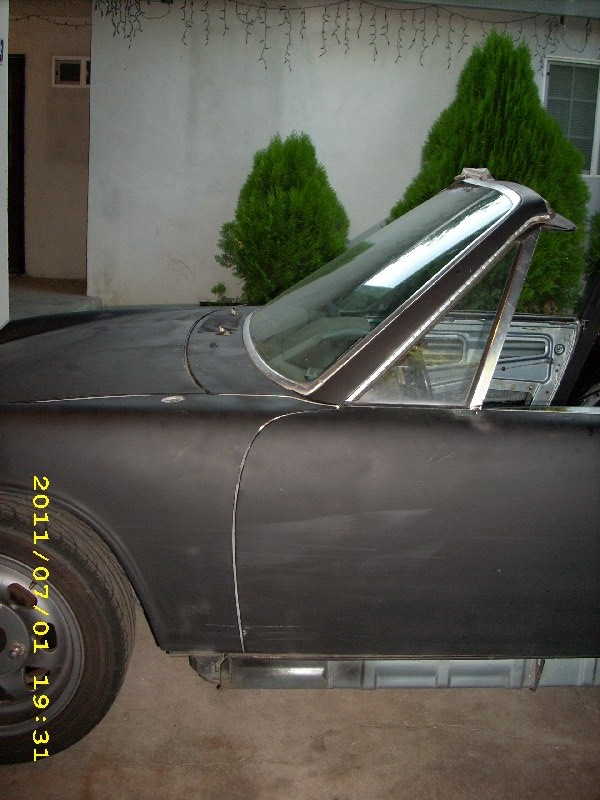
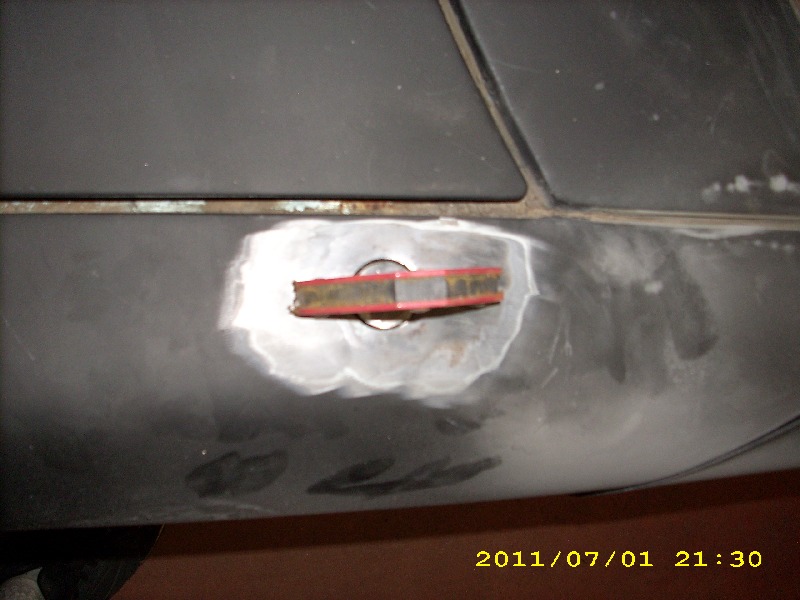
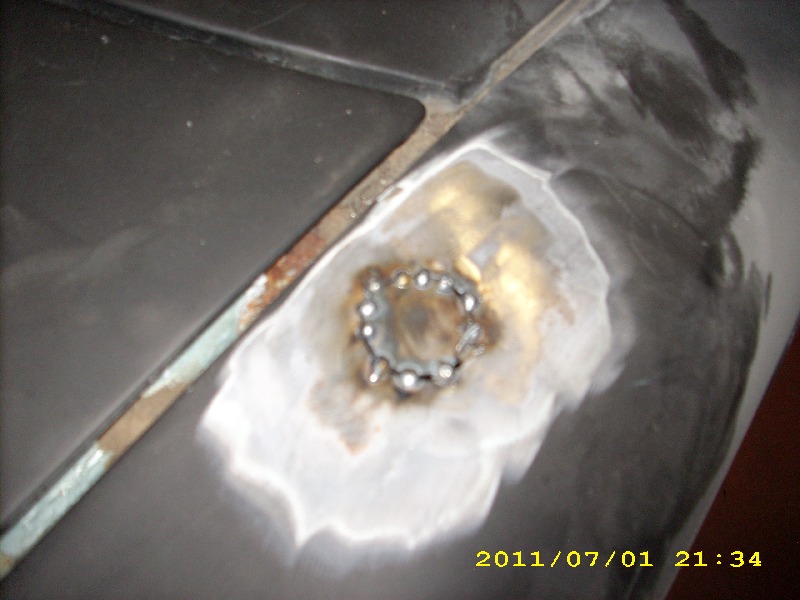
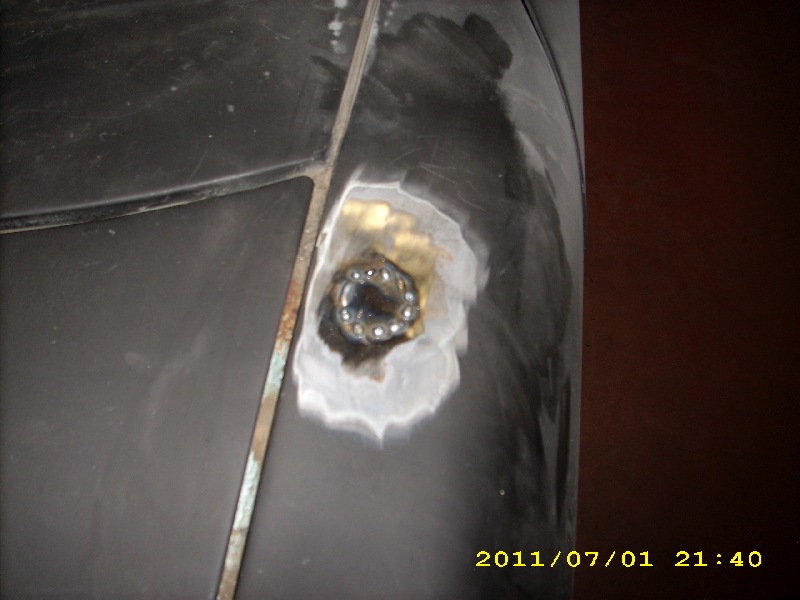
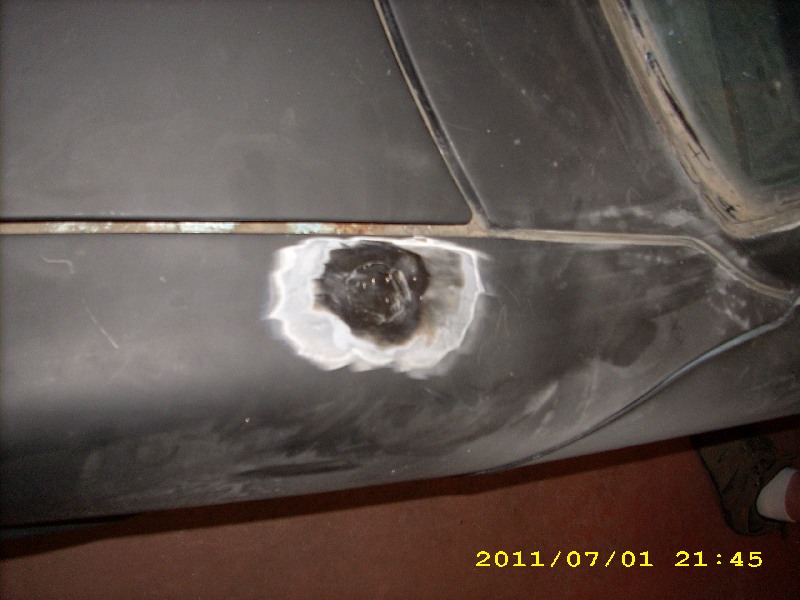
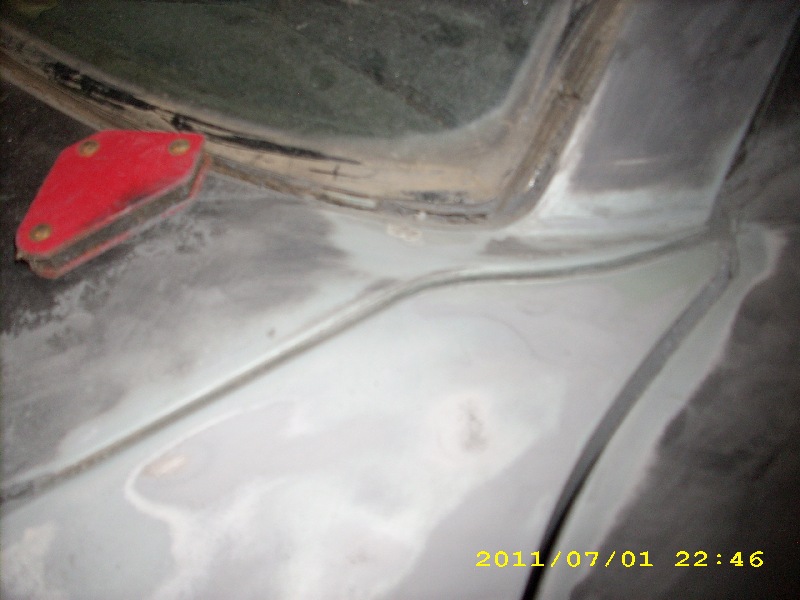
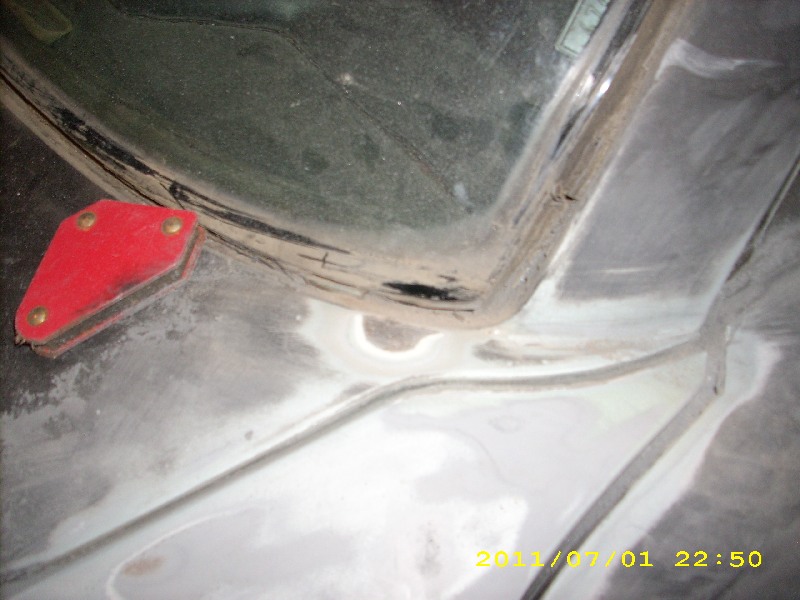
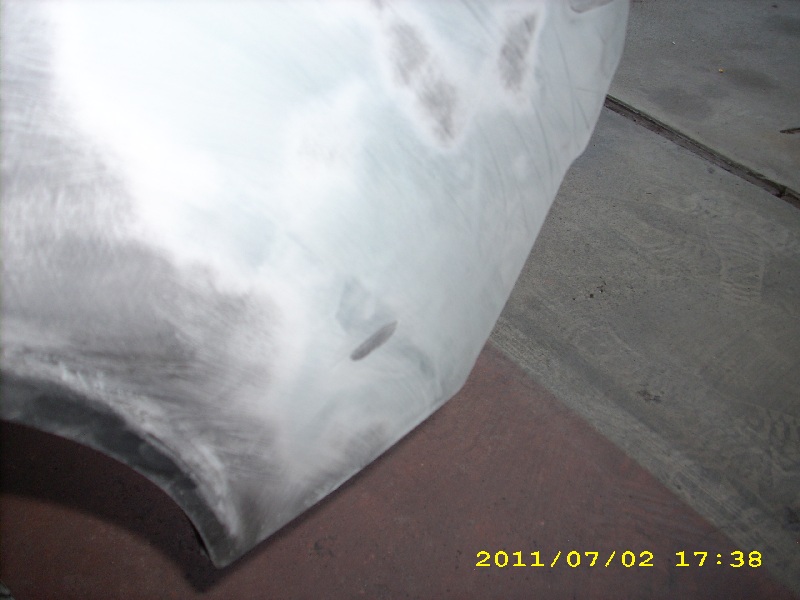
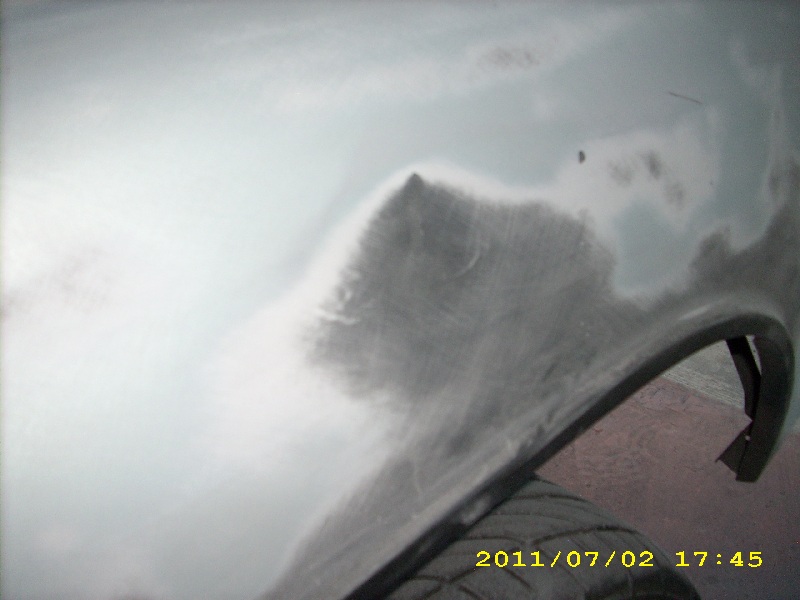
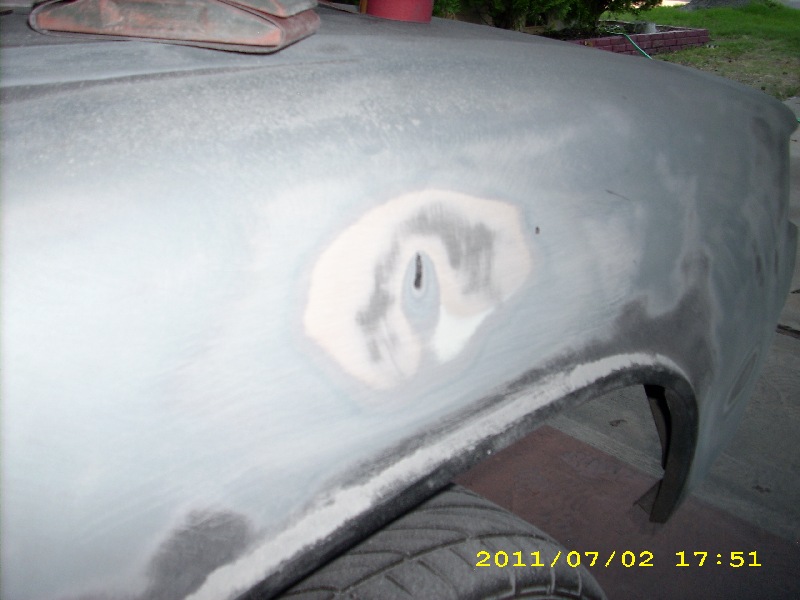
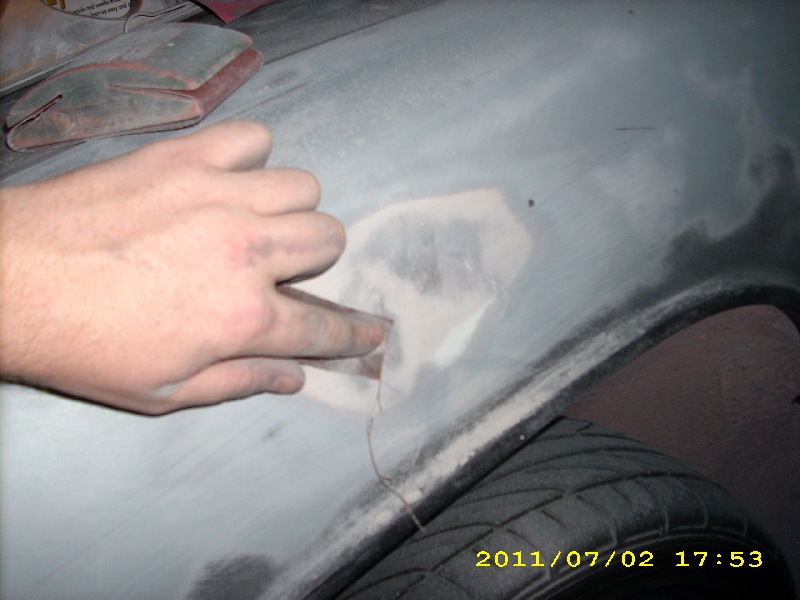
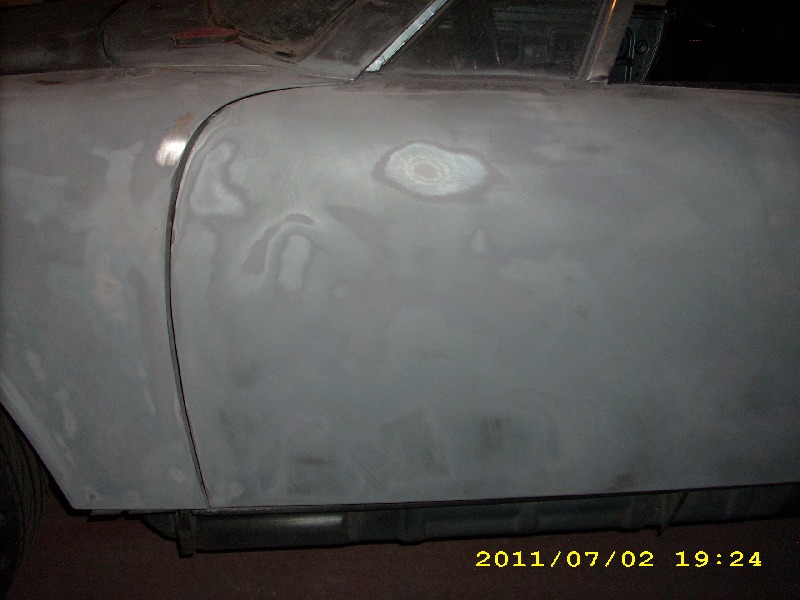
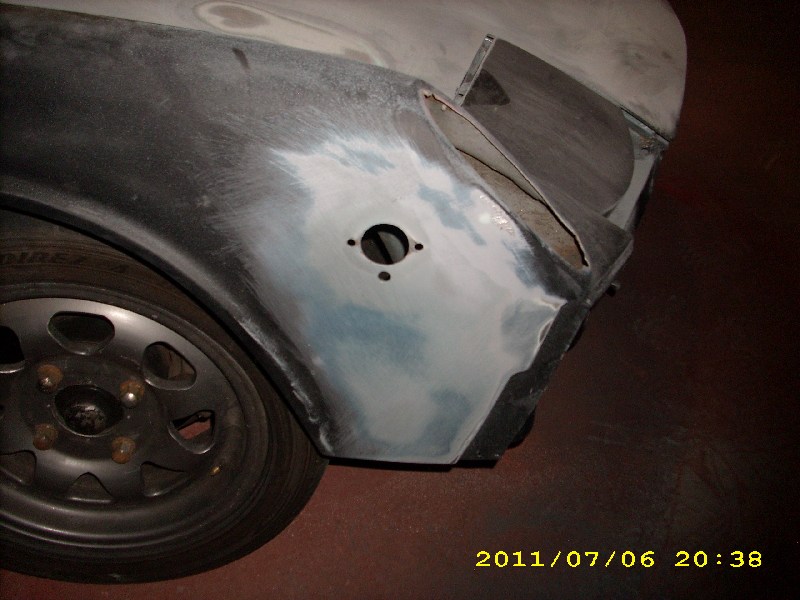
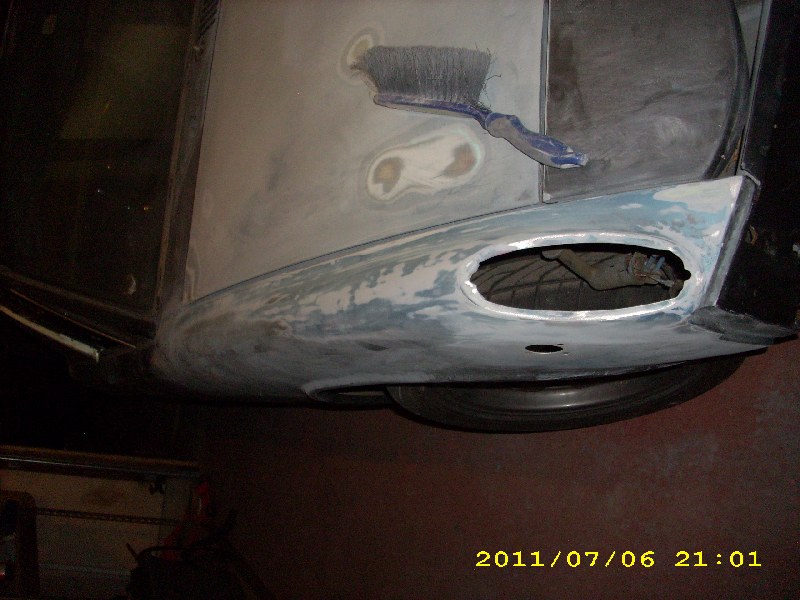
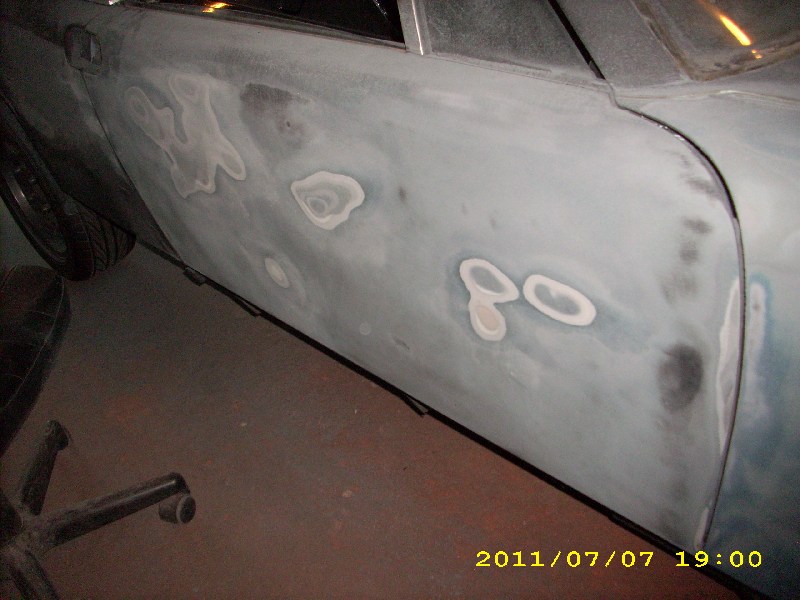
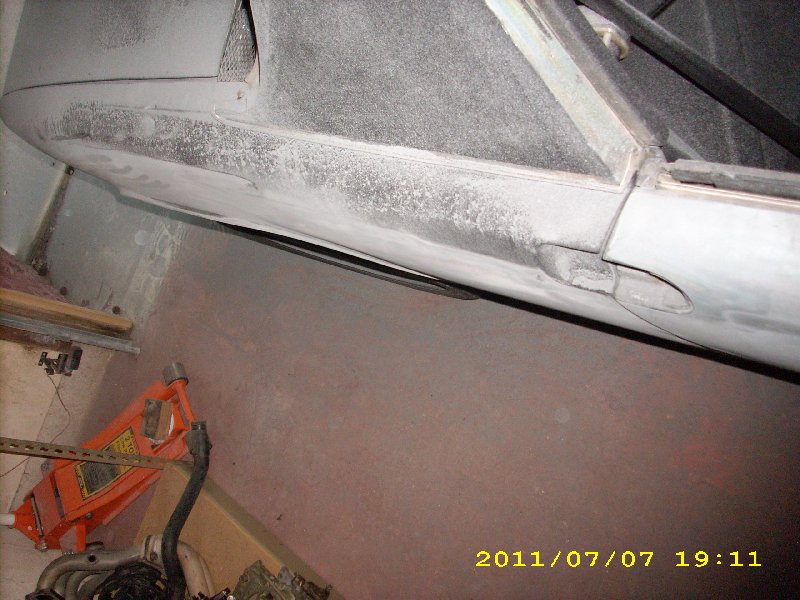
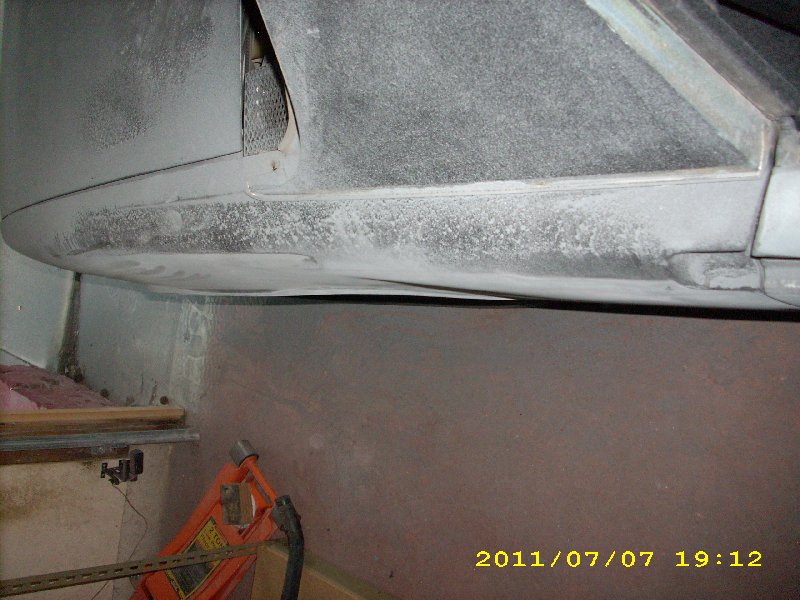
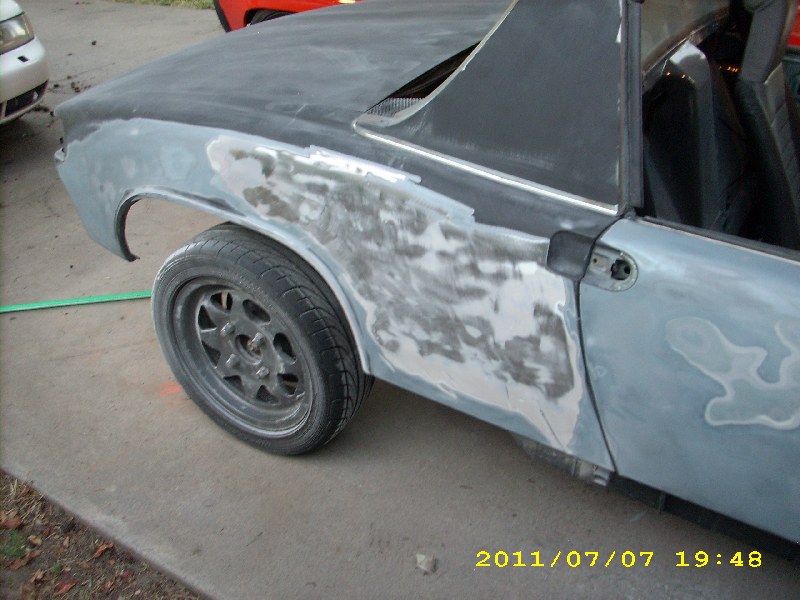
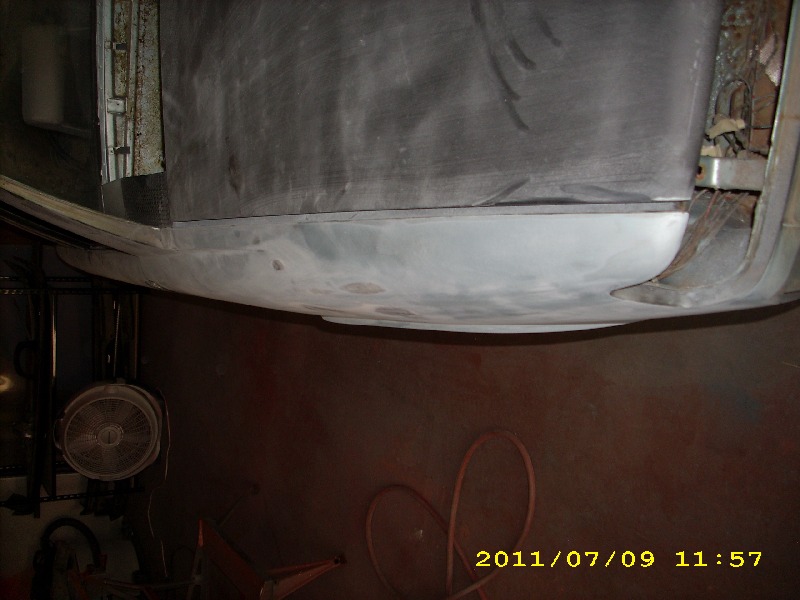
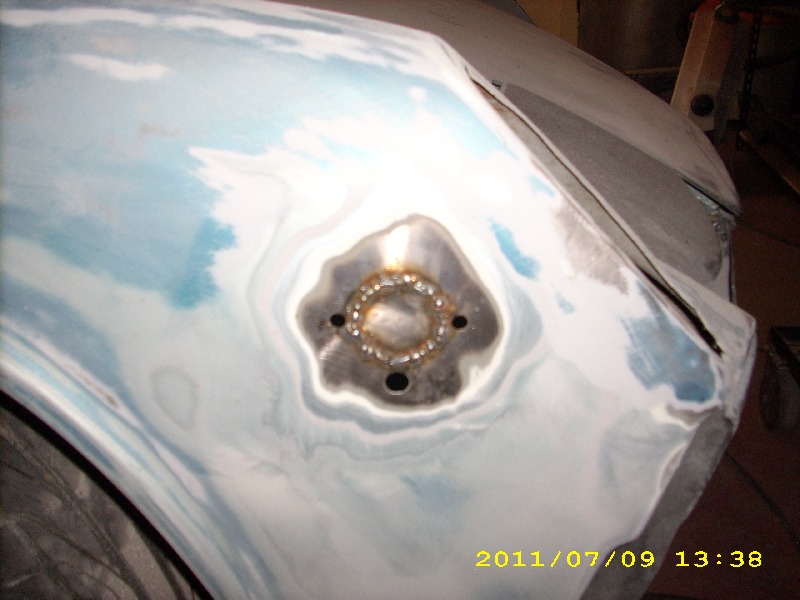
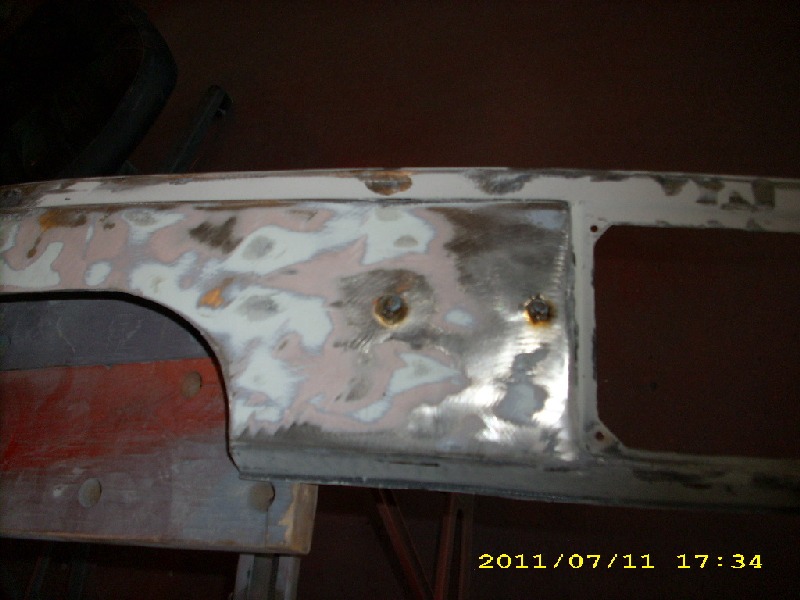
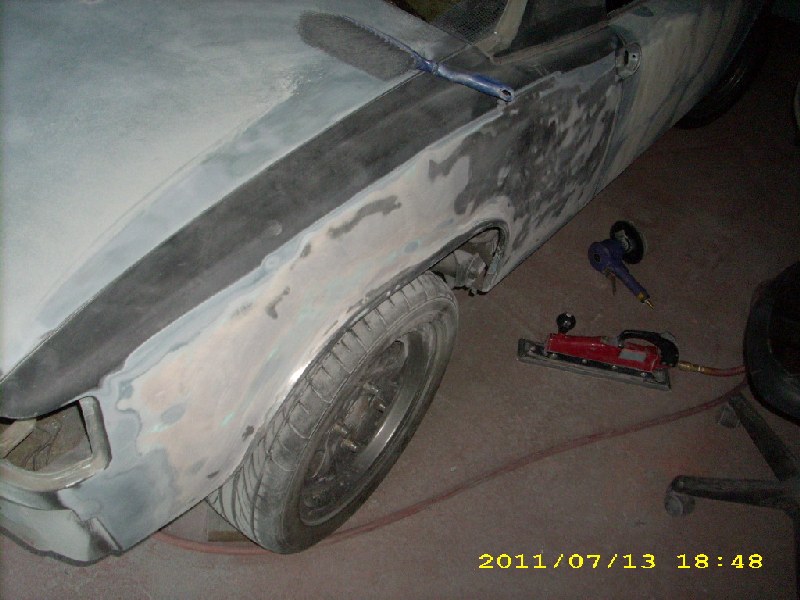
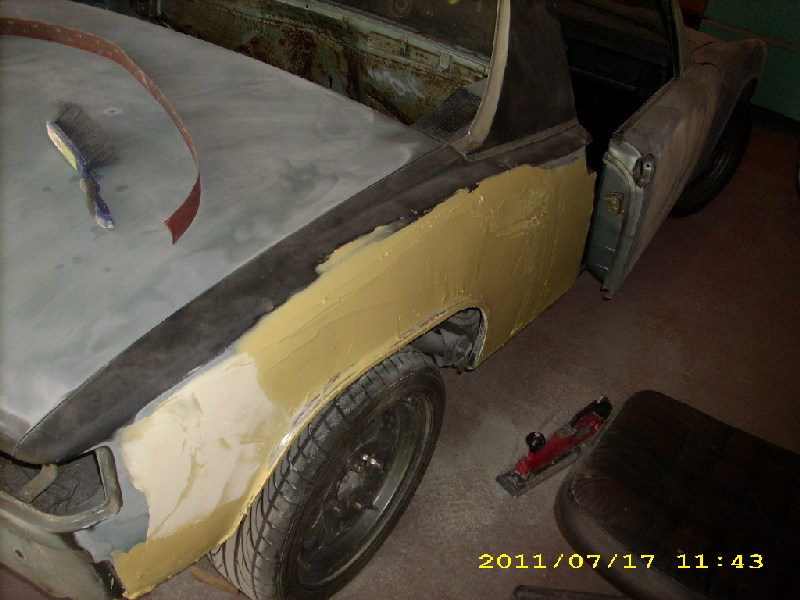
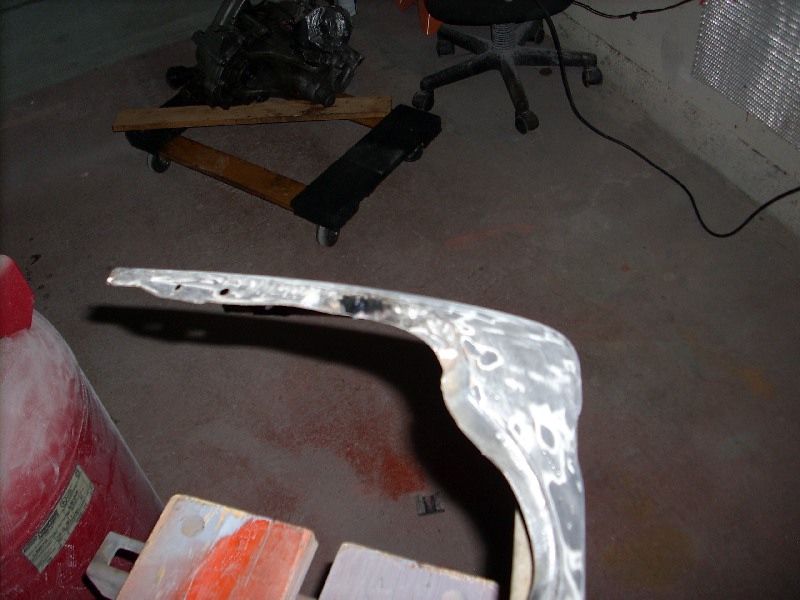
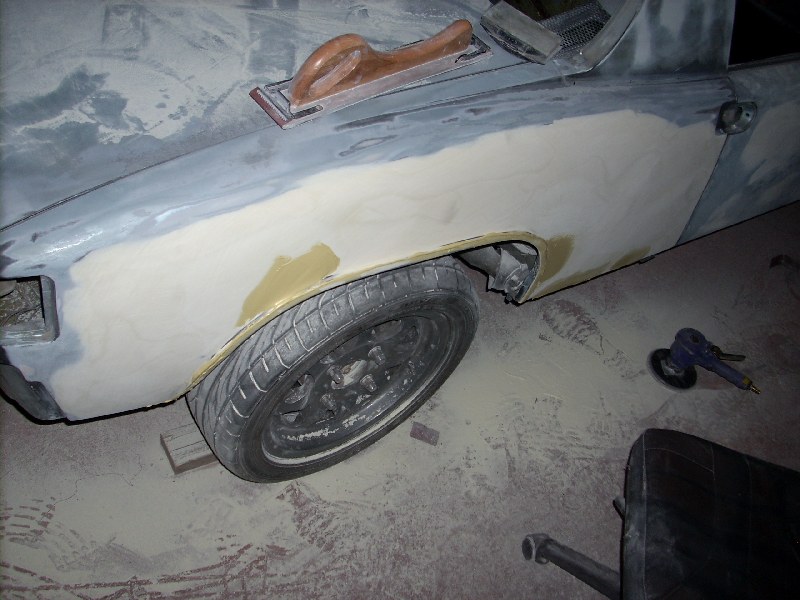
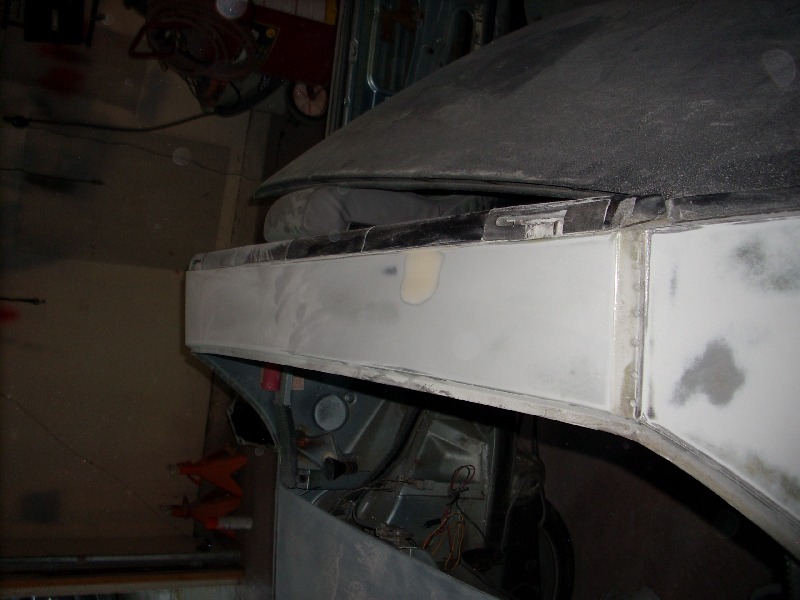
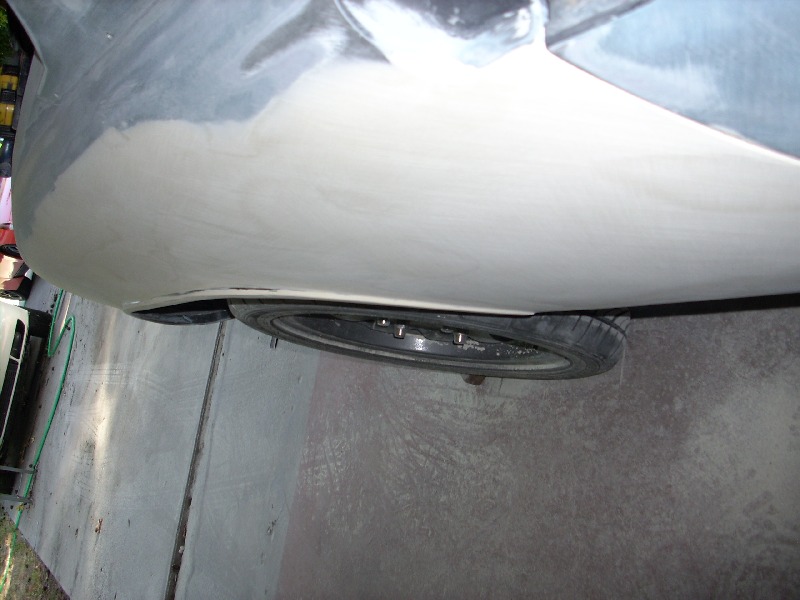
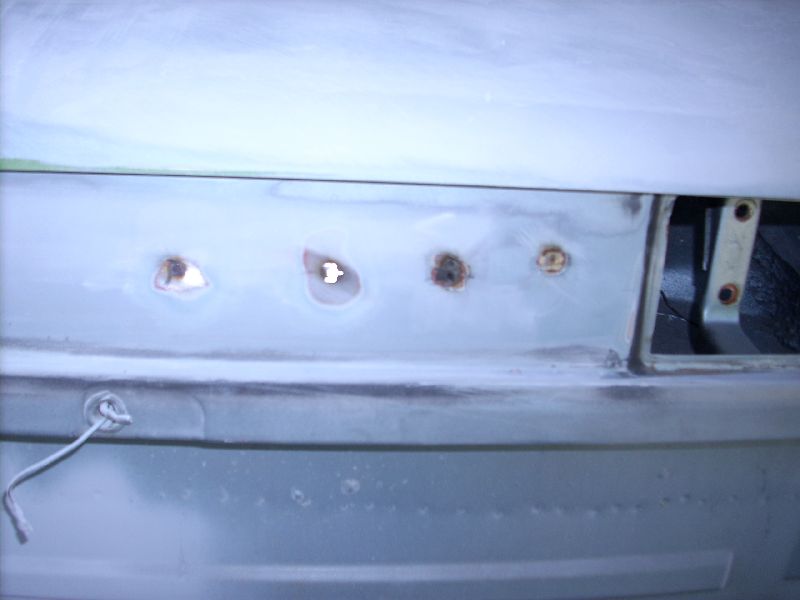
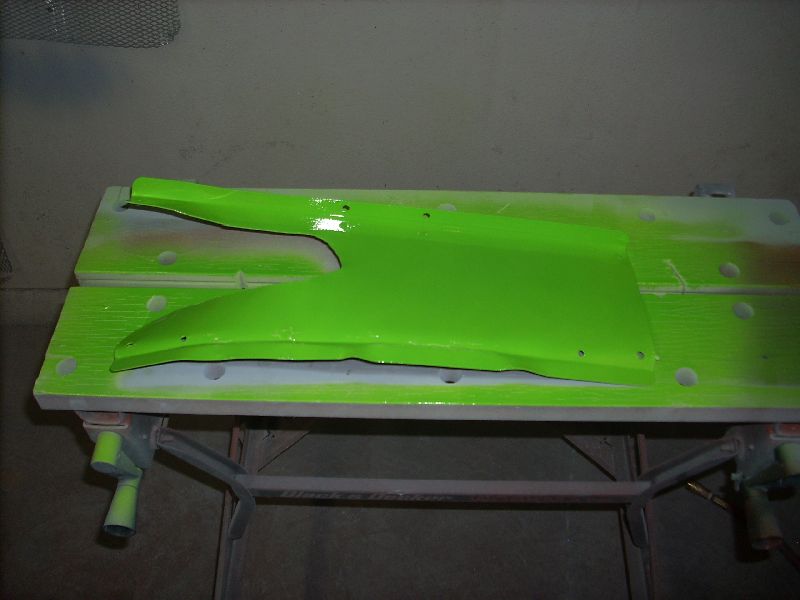
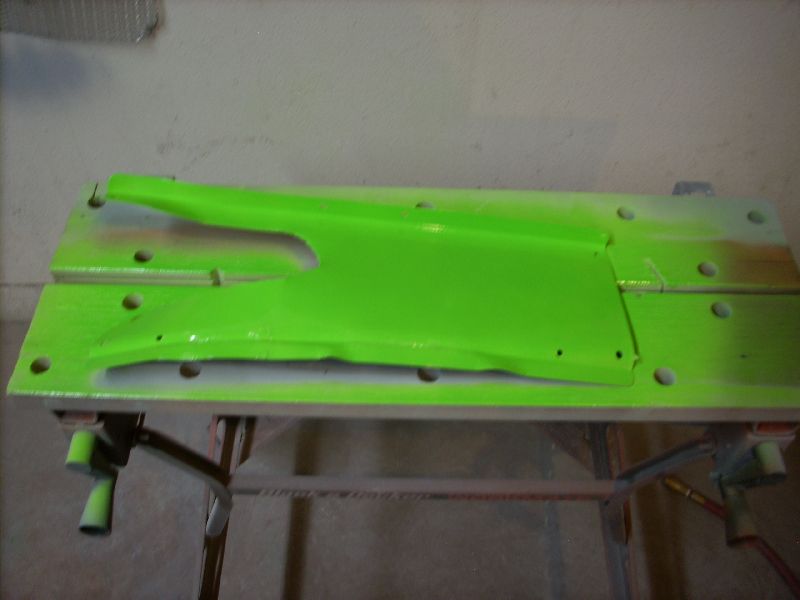
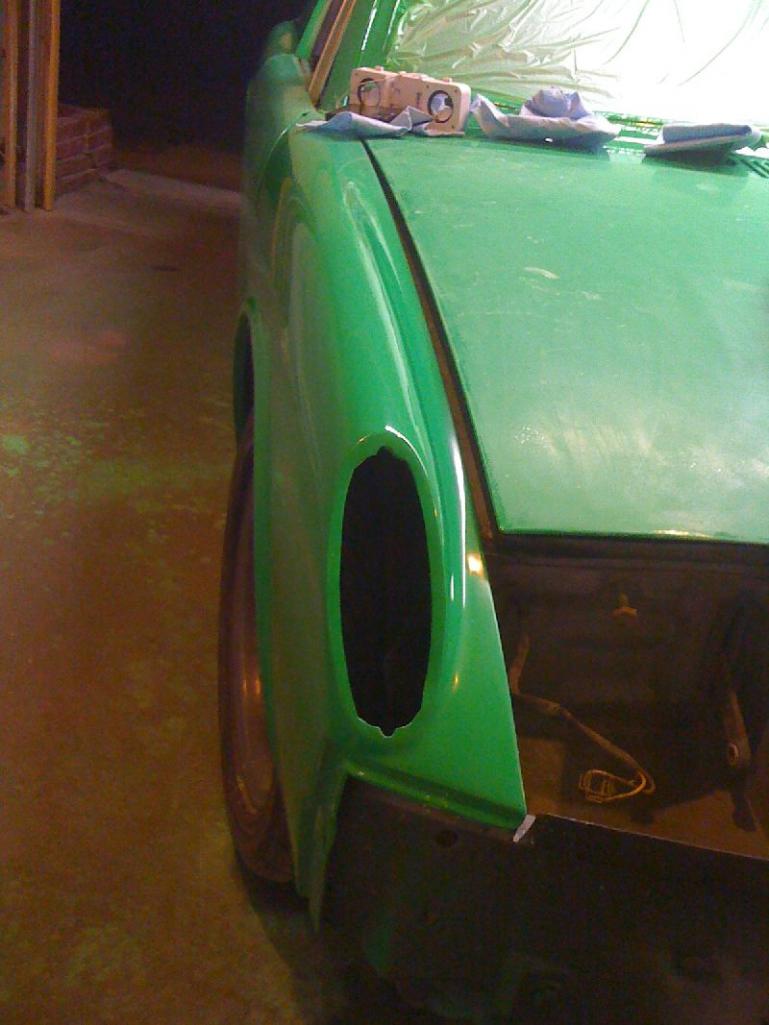
Started work on the rear 1/4 as well. Just under 1/8" of bondo the whole front portion of the fender, Looked at the oil canning and came up with a solution to fixing it, I'll go over that with Peter on saturday, it should be easy, but there still is a bunch of filler that I removed, even though it looks fairly straight, there are a lot of little dents in it, and it looks that at some point this area was hit causing the fender to be pushed in.
We might need to try to pull the fender out some more. I think i'll take some measurements of the drivers side and compare it to the pass side.
Pics. Pics 3 and 4 are the out and in of the oil canning.
Attached image(s)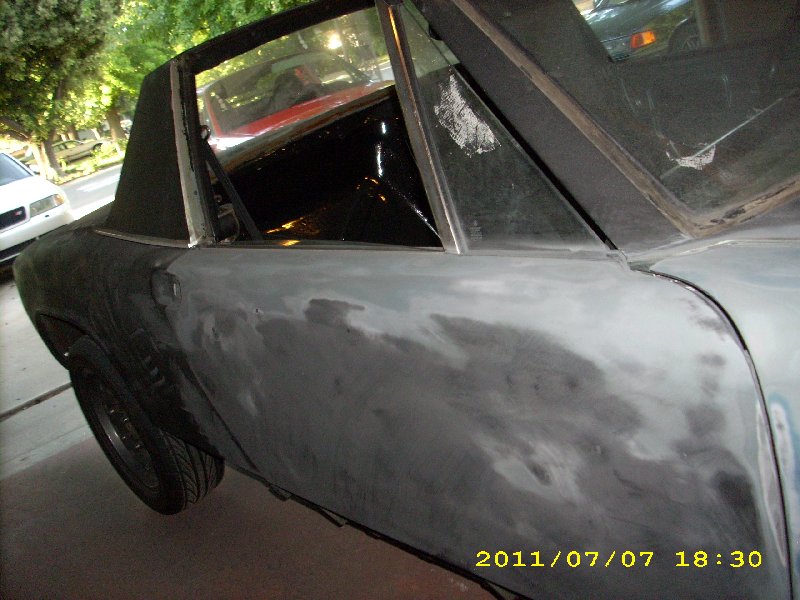
Posted by: Andyrew Jul 7 2011, 10:44 PM
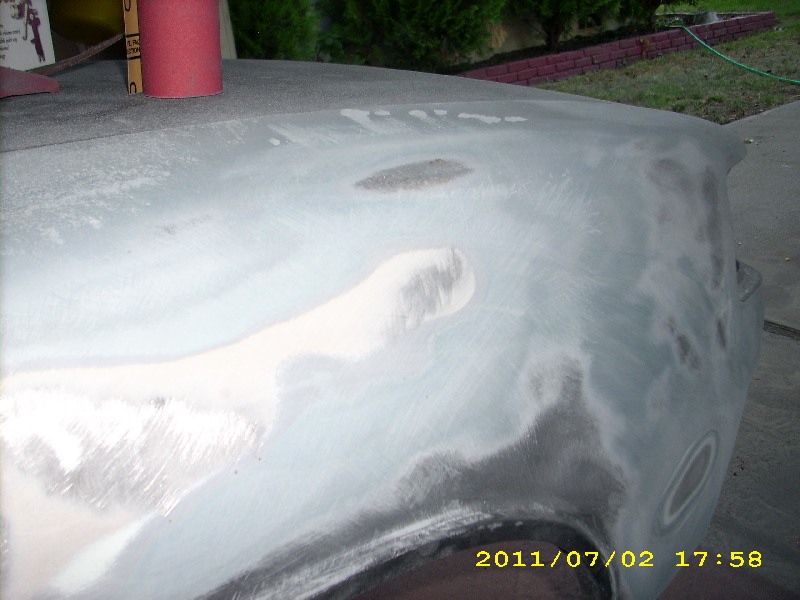
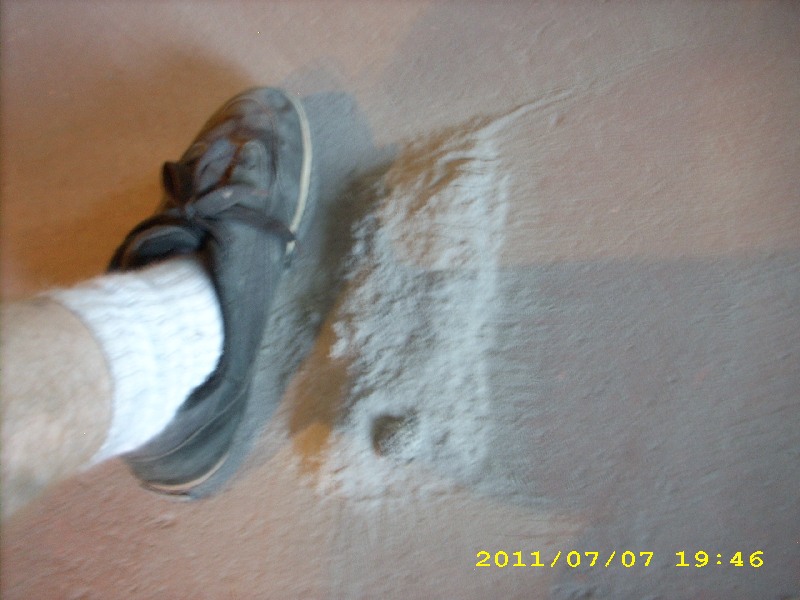
Lots of dust. Thats my size 13 for reference.
Attached image(s)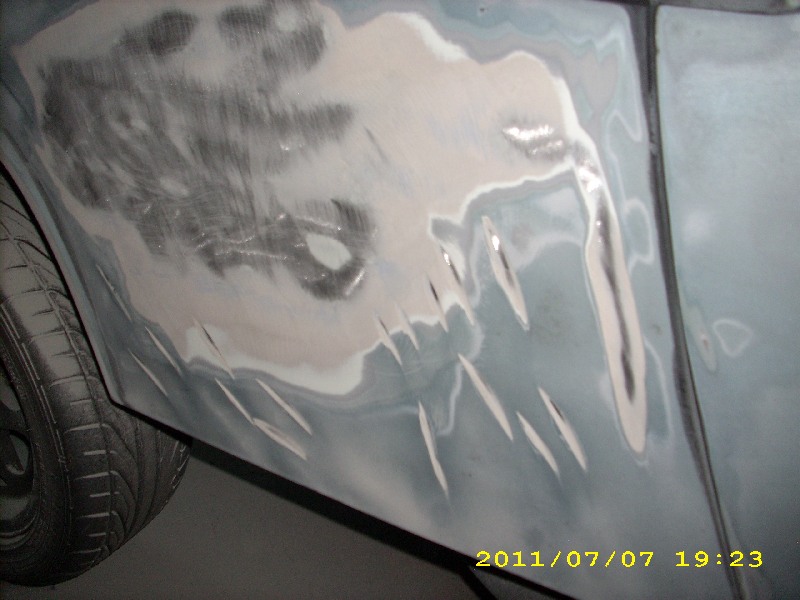
Posted by: malaga_red75 Jul 8 2011, 09:30 AM
Progress looks great! Excited about tomorrow. I'll PM you today about details. Ill also most likely bring over the rest of the parts tomorrow and just have you fill the bumpers. My uncle is on dissability for his back right now and can only work a little bit at a time.
Posted by: Andyrew Jul 8 2011, 10:12 AM
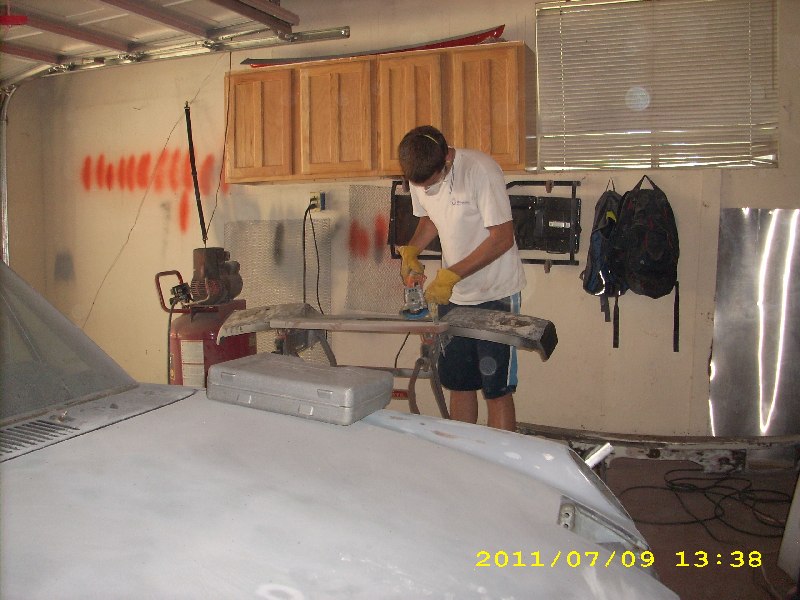
The bumpers should be easy. Should be no more than a couple hours for both.
Bring your checkbook Were going to have to go shopping for paint supplies. Its possible that we may lay down some primer tomorrow and I dont think I have enough primer epoxy.
Posted by: Andyrew Jul 11 2011, 09:18 AM
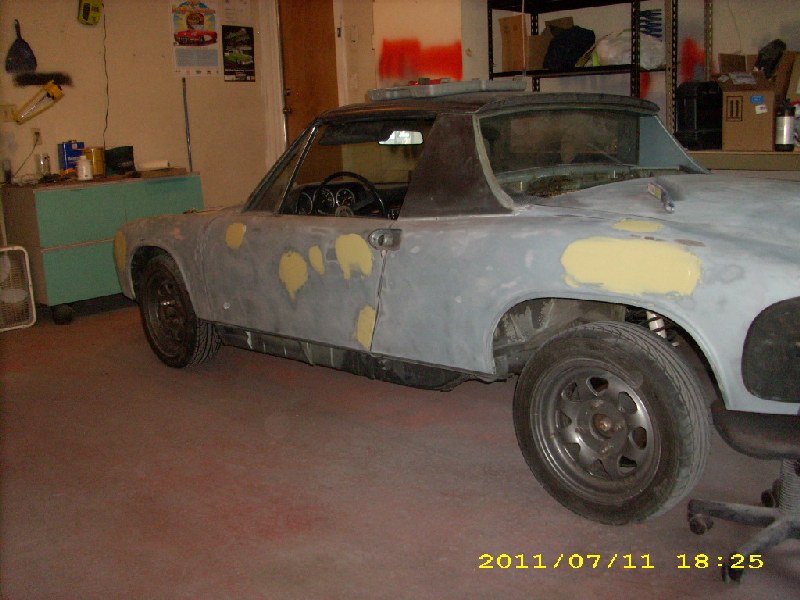
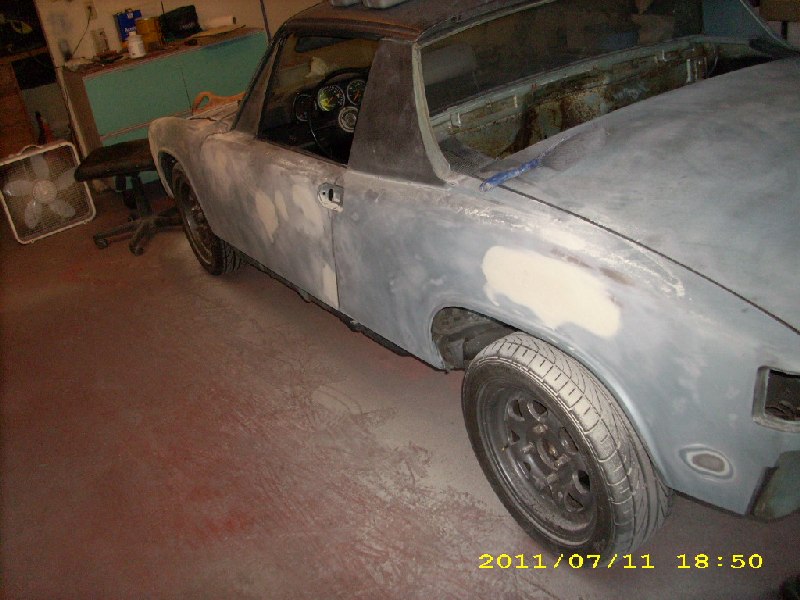
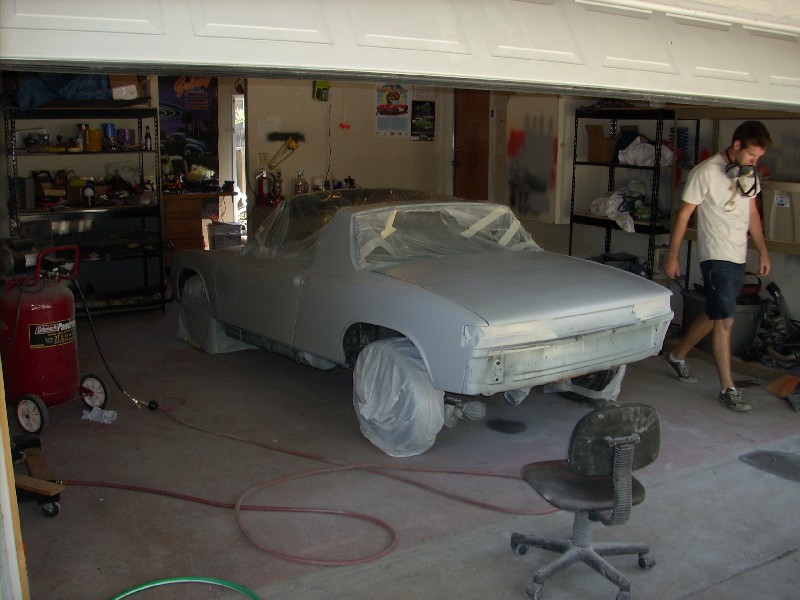
This work was from Saturday.
Peter came over, we went and picked up some supplies and talked about a gameplan.
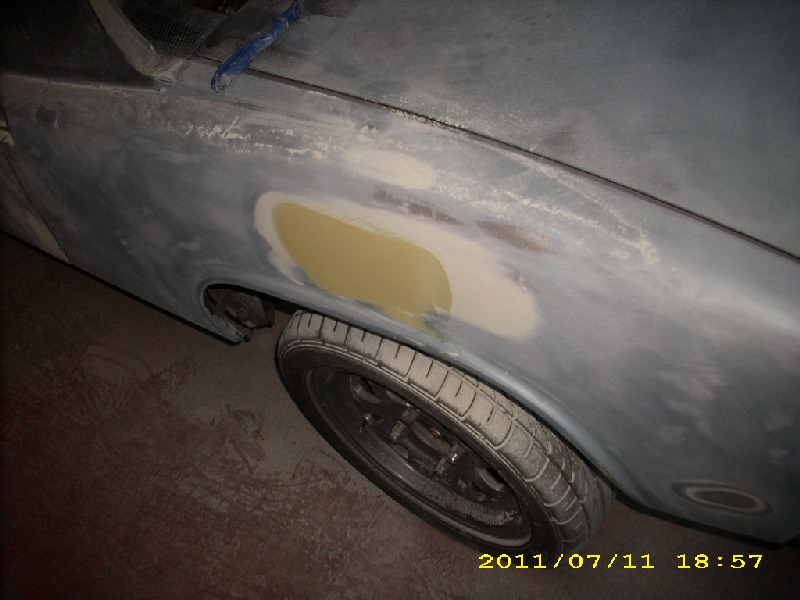
We successfully rolled the rear fenders, and in doing so it eliminated the oil canning issue that we were having. The fenders need a little hammer and dolly work, but i'll do that after stripping them a little more (Specifically the Pass side), Overall they really look good.
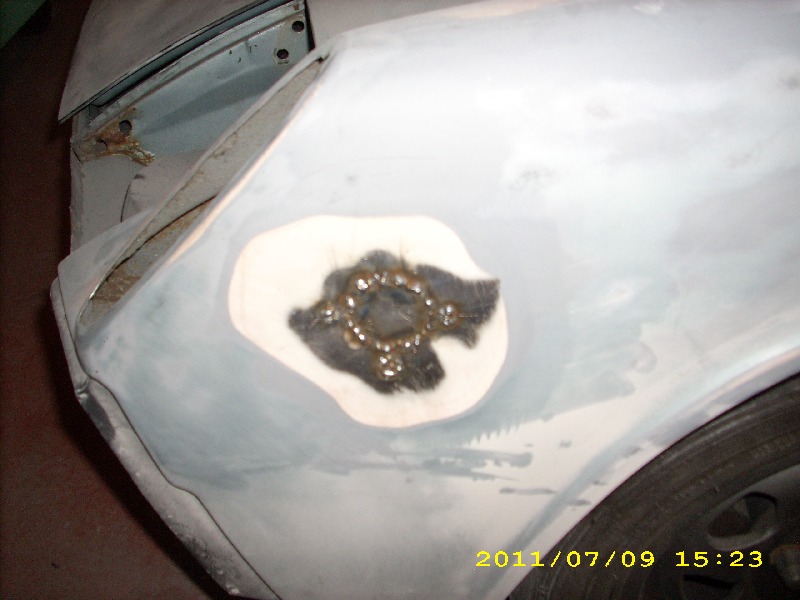
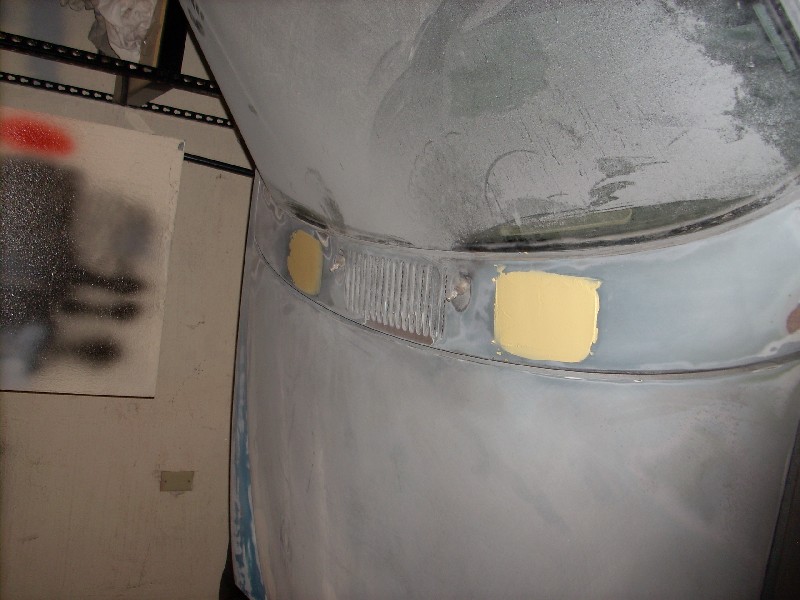
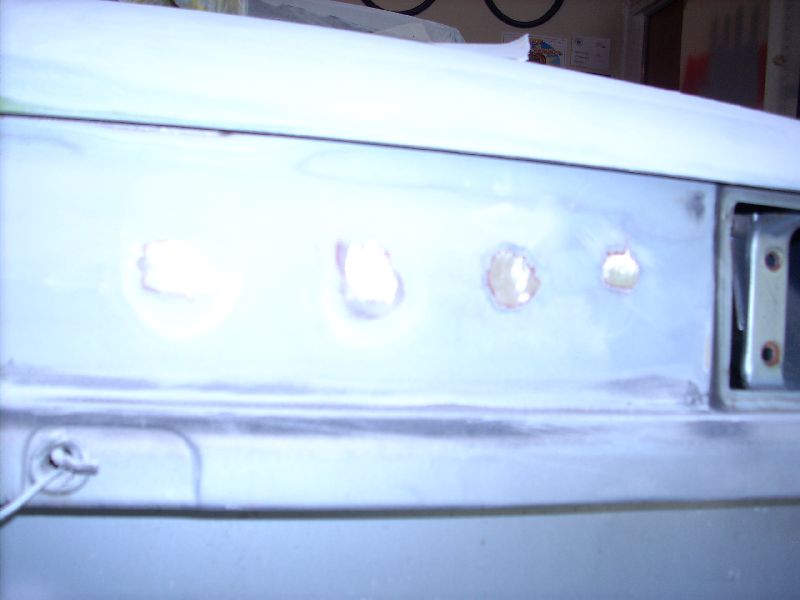
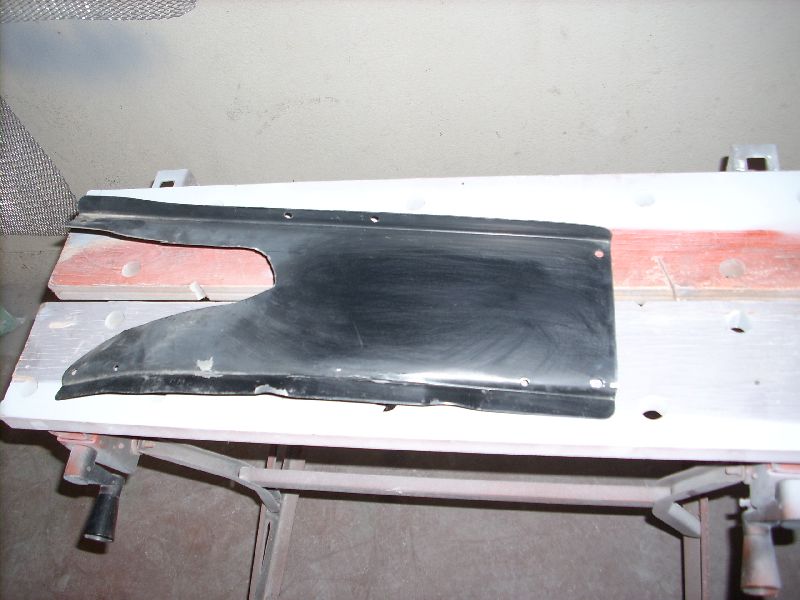
Front turn signal lenses are welded up and the bumpers are ground to metal and ready for me to finish welding the holes and then a little bit of filler and primer. They were tweaked pretty good, by the holes I welded, but straightened them.
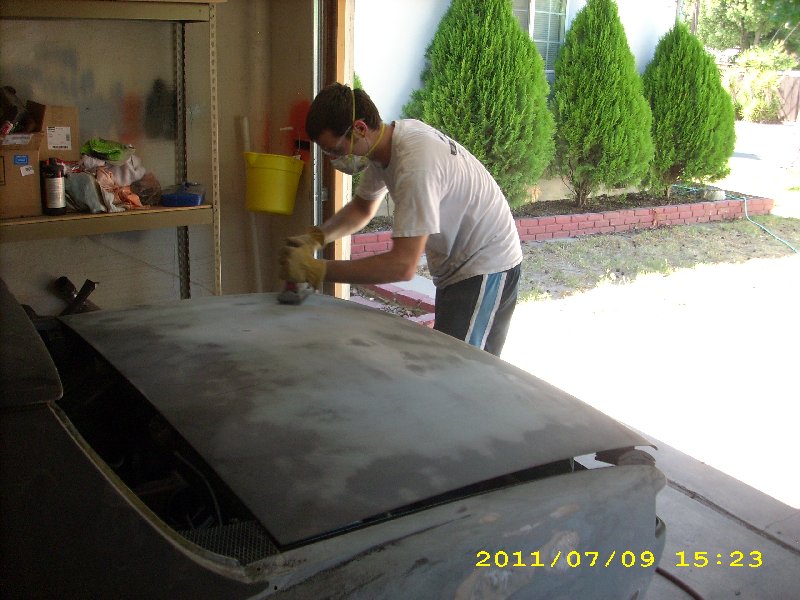
Peter also sanded the rear trunk down most of the way.
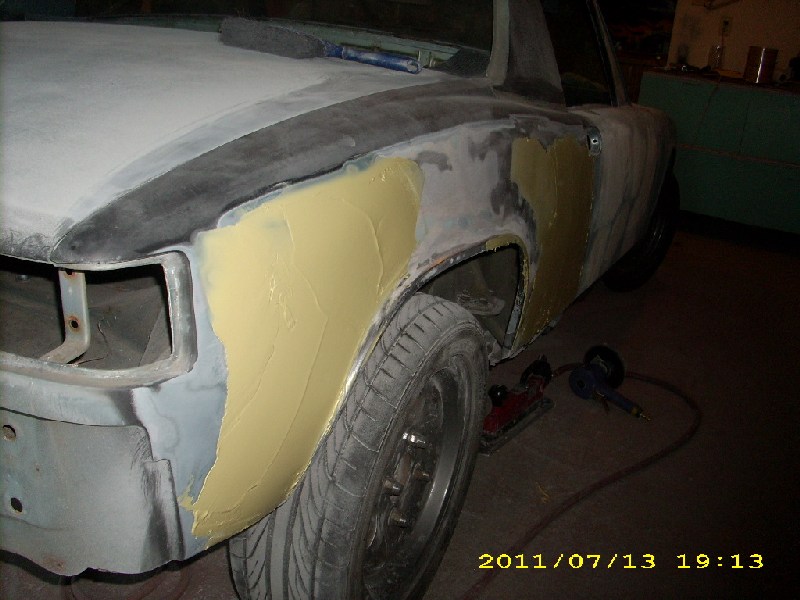
We decided to go ahead and lay the filler down now, then i'll lay primer filler and finish the bodywork, then i'll lay primer epoxy to seal everything up and then paint over that. This eliminates the first layer of epoxy I was going to do but then realized that there really is no point to it.
And here are the pics!
Attached image(s)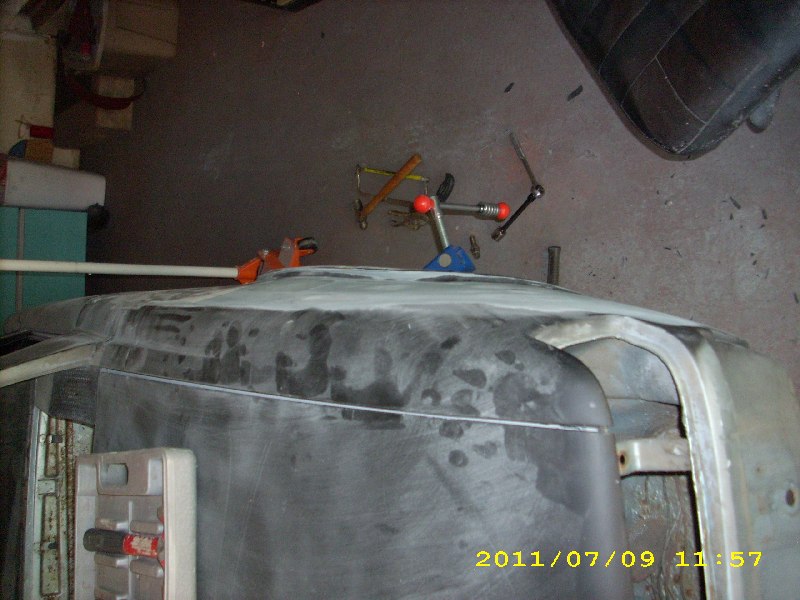
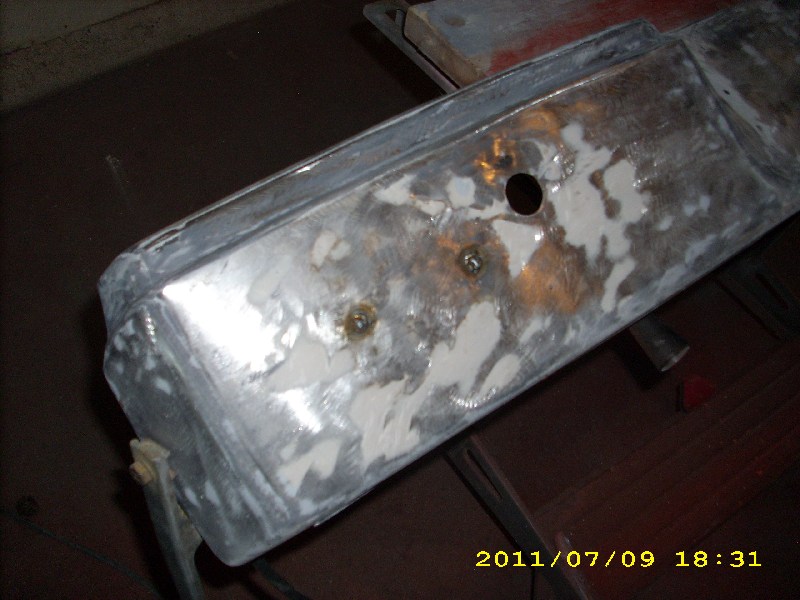
Posted by: Andyrew Jul 11 2011, 09:19 AM
Next
Attached image(s)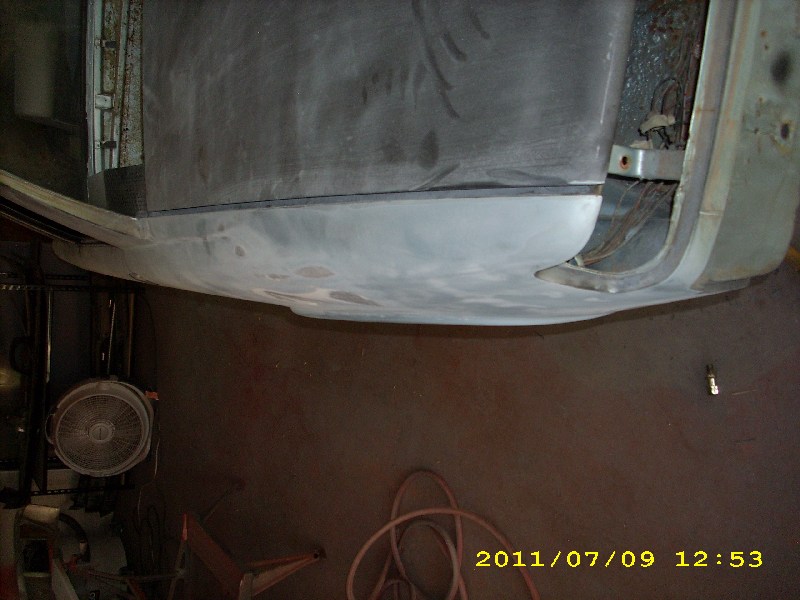
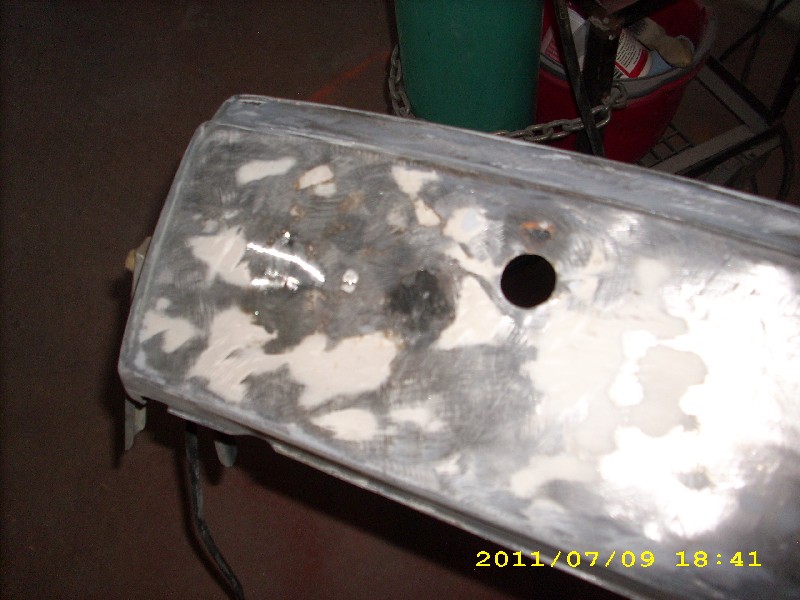
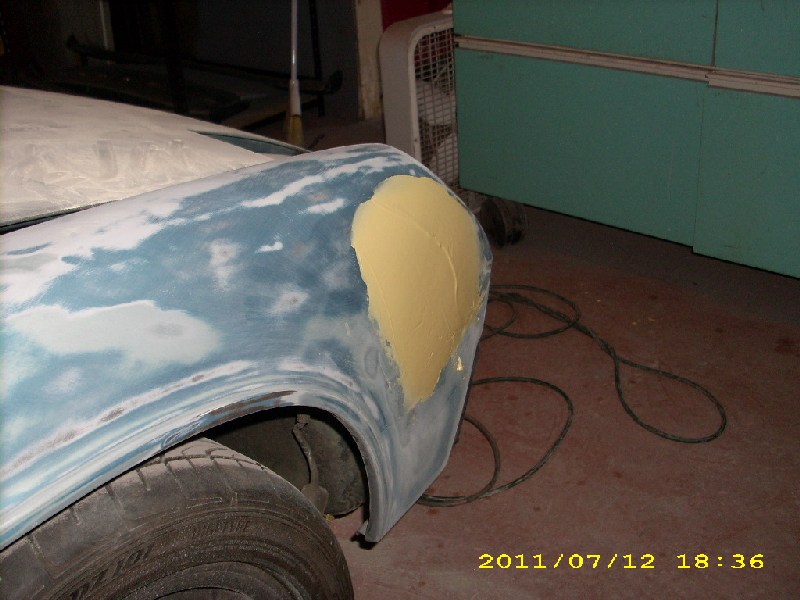
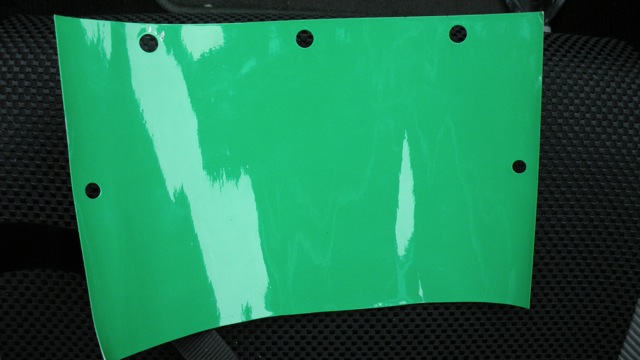
Posted by: Andyrew Jul 11 2011, 09:21 AM
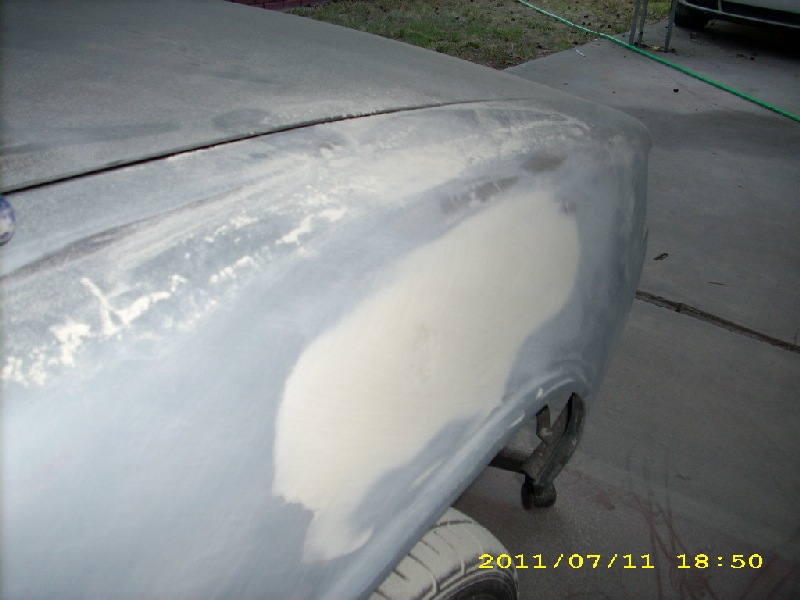
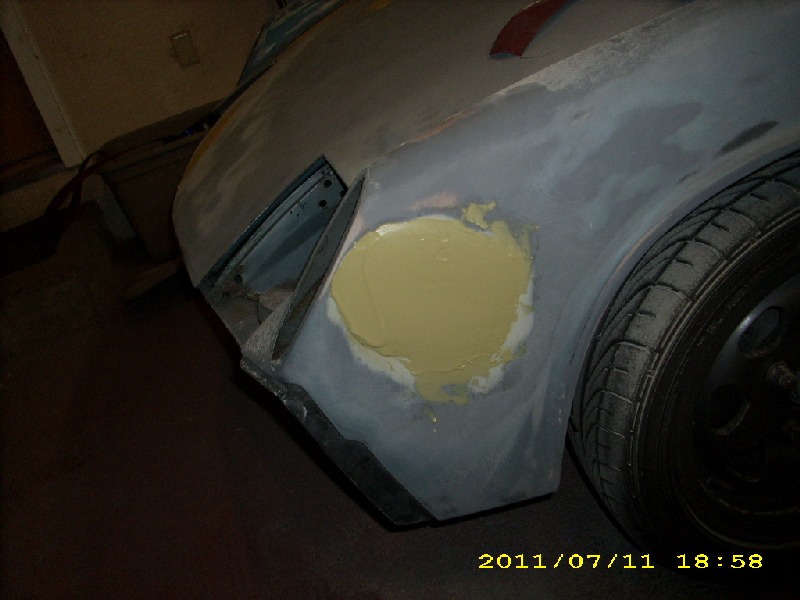
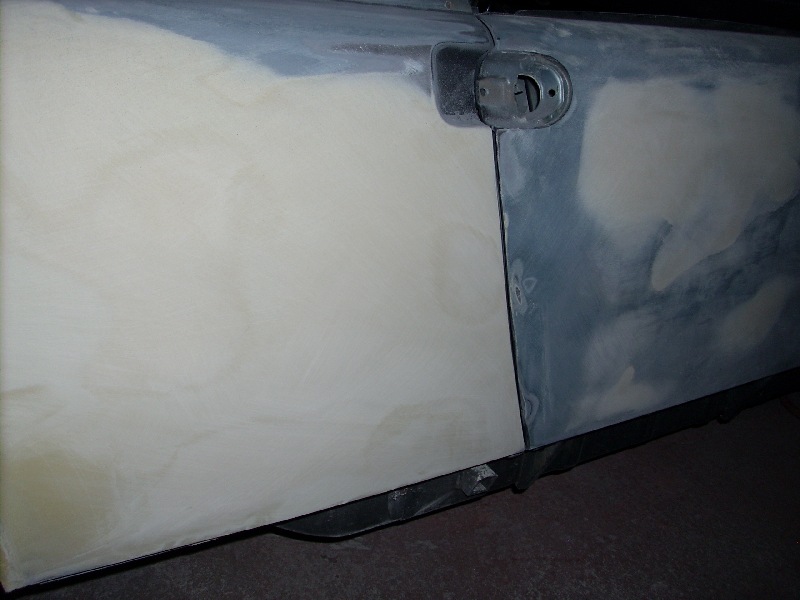
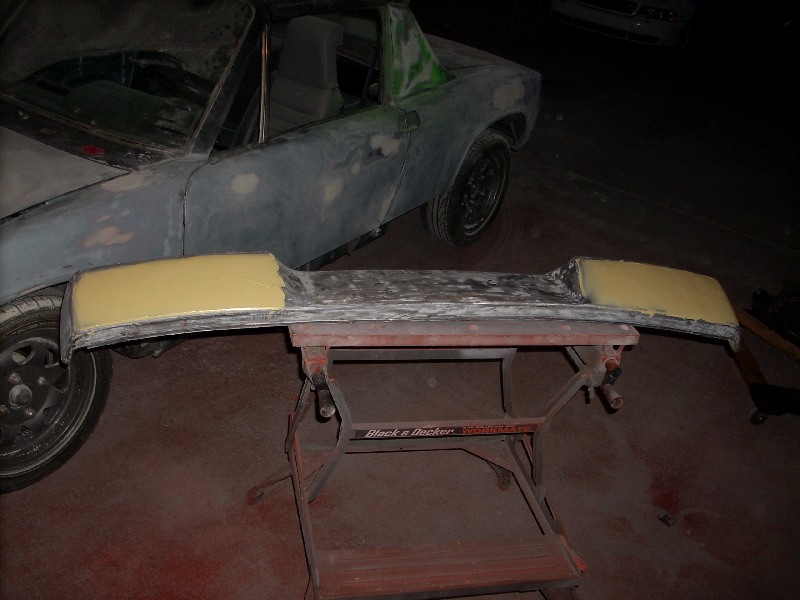
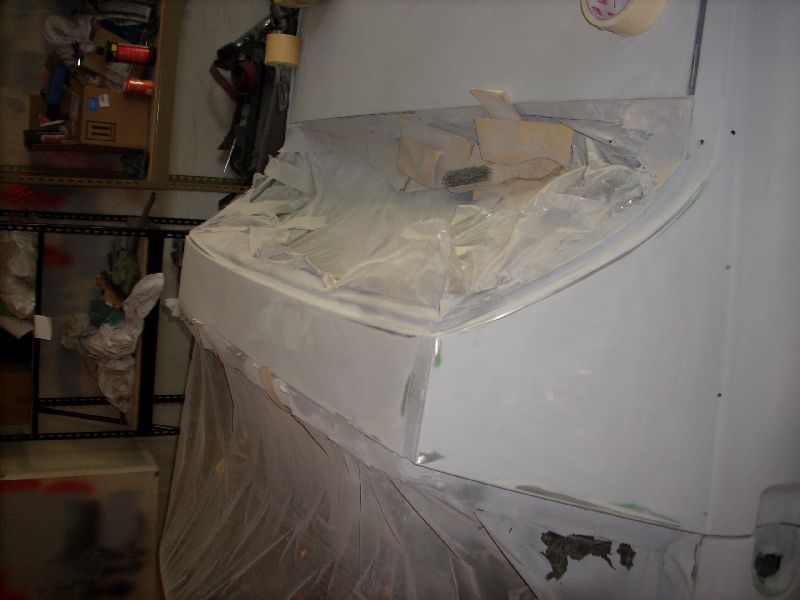
Last.
I started working on filling the bumper, but I got stopped when the fiancee came back from her dress shopping trip.
BTW, 4 holes are filled, I just only got a pic of one side. We decided to go ahead and fill the tow hook hole but i'll probably get to that tonight.
Attached image(s)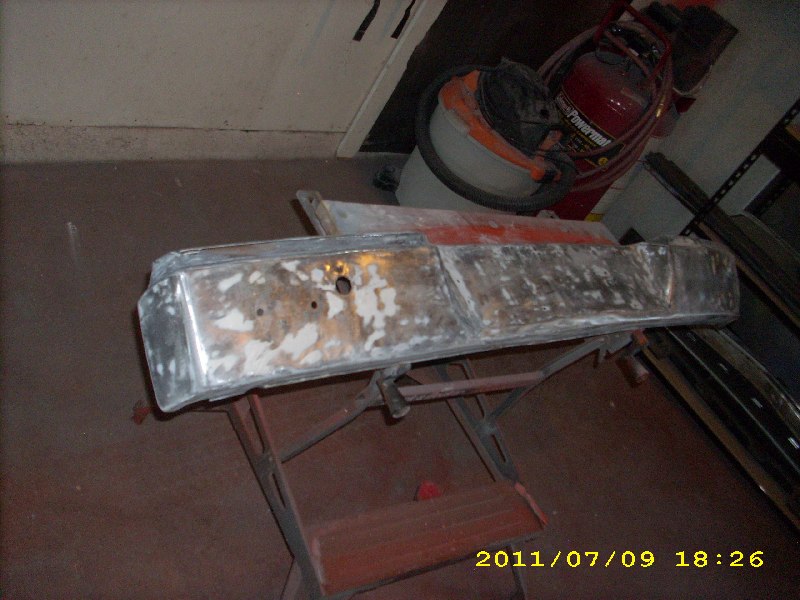
Posted by: RiqueMar Jul 11 2011, 09:33 AM
Looks good guys! Your making really good time!
Peter, I like that you decided to fill the front turn signal holes, I think you'll be really happy with it! Are you going with Euro turn signals between the door and wheel?
Posted by: Jon Fernandes Jul 11 2011, 10:14 AM
Great thread, and great work! Can't wait to see some paint ![popcorn[1].gif](style_emoticons/default/popcorn[1].gif)
Posted by: malaga_red75 Jul 11 2011, 02:36 PM
Looks good guys! Your making really good time!
Peter, I like that you decided to fill the front turn signal holes, I think you'll be really happy with it! Are you going with Euro turn signals between the door and wheel?
Thanks!! I am also very excited the progress. A lot quicker than I thought, but it is still getting done correctly. Andrew really knows his stuff (at least he makes me think that he does) haha.
I am also very excited about filling the holes. I realized that if I didn't I would need to get new lenses and seals and the cost of that was more than the cost of Andrew filling the holes, a no brainer decision. I will not be adding in the euro turn signals, it will just be smooth and flat. can't wait!!!
I will be sanding/grinding down the valences before next weekend, so i will post pictures when i do that, hopefully tonight or tomorrow.
also, andrew- I was going to start painting the chrome pieces, but I forgot what you said about prepping them. 180 grit? or scotch brite? primer then flat black? or just straight to black.
-peter
Posted by: Andyrew Jul 11 2011, 03:24 PM
Anywhere between 180-400 grit should be good, if you have scotch brite pads or some steel wool that should work.. They only need to be scuffed up just a tad to clean off any polish and give the paint somewhere to bite.
Just painting them with the black should be fine. Put a medium coat on them then let them sit in the sun for about a week, then bring them in the garage (aka let them cool off) and spray them again with another medium to heavy coat and let that sit out in the sun until your ready to put the pieces on. Oh and you should straighten them up as best you can. If you need help with that bring it with you and i'll help. This process should bake the paint on really good or show you if you'll have any issues with the paint bubbling after getting really hot in the sun. No need for primer with the rattle can paint as it sticks pretty good to aluminum, especially when baked on. At least I didnt have any problems.
Posted by: kg6dxn Jul 11 2011, 05:58 PM
I thought we were going to see detailed before and after pics of the rolled fenders? I'm glad I could help with the use of my roller. Progress looks good!
Posted by: Andyrew Jul 11 2011, 06:11 PM
Mike,
Thank you very much for the use of your roller! It was awesome!
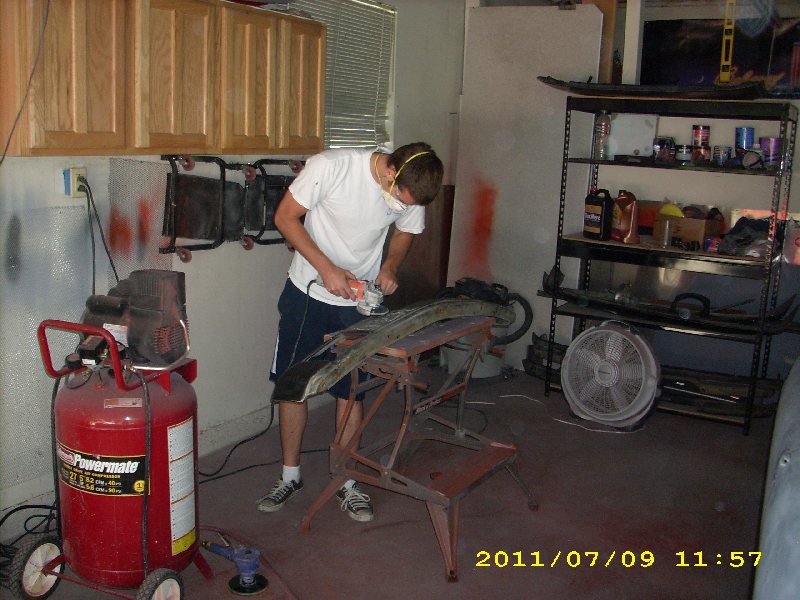
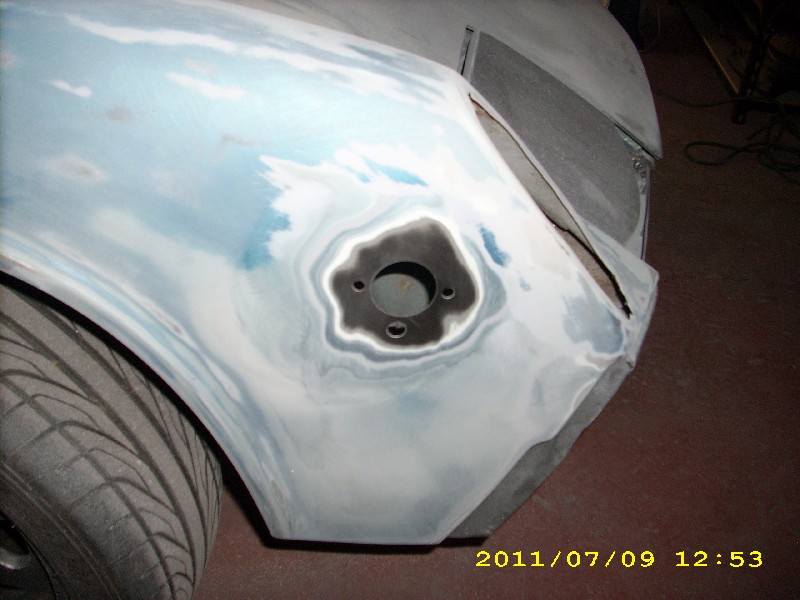
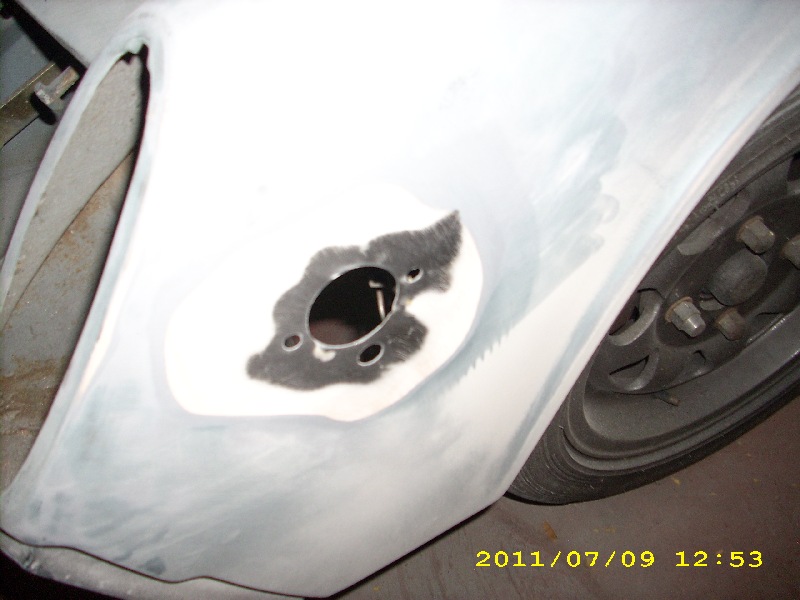
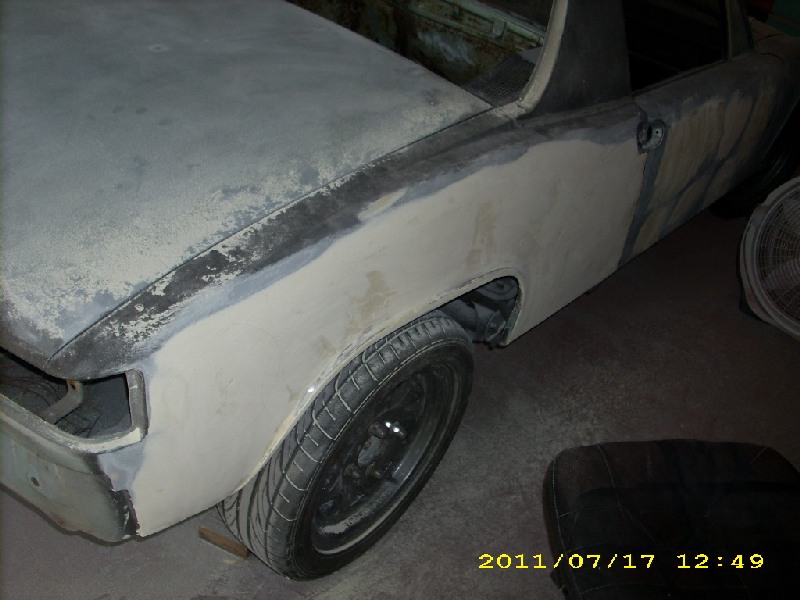
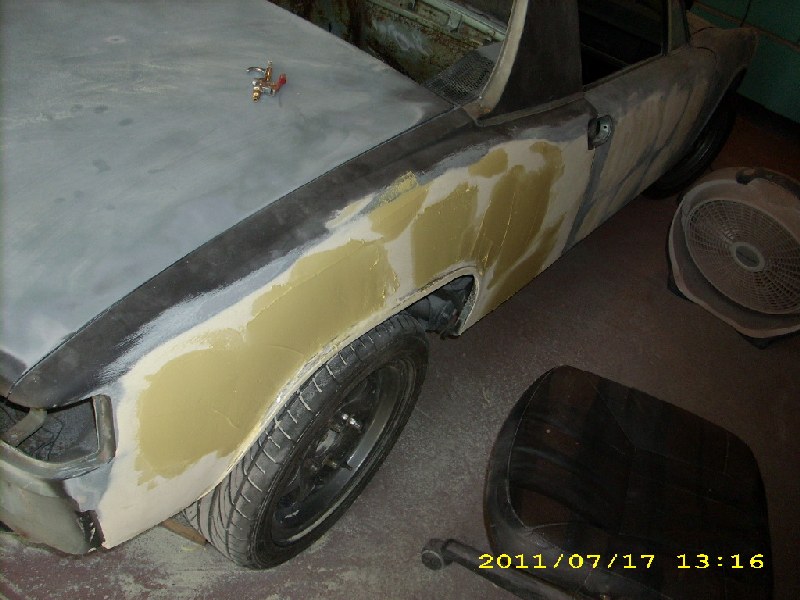
I didnt get as good of pictures as I had hoped... I deleted most of them. Time stamp 1157 is before on the DR side and time stamp 1253 is after.
I should have brought my camera lower to get a good profile shot. I'll get some shots tonight so you can see the stretch.. my little 1.8" screen on my camera doesnt show me much...
Also Mike thank you for the emblem!!! I owe you one!
Posted by: Andyrew Jul 11 2011, 11:14 PM
Aaaand progress from today
Got an hour and a half in.
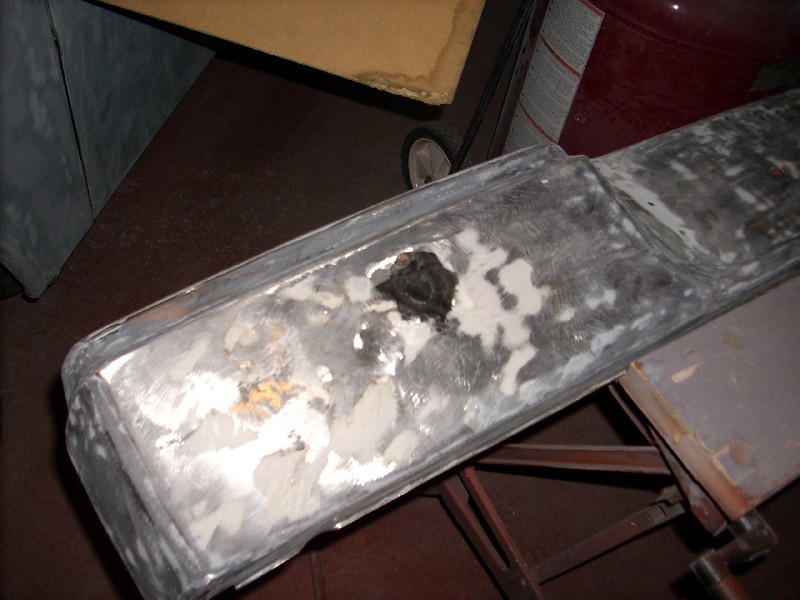
Bumpers are filled, I noticed some cracks in the back that need to be welded for strength, but im running low on gas so I decided to stop and move onto trying out the bondo (plastic filler). Its a lot thinner than the stuff im used to which im used to because I typically thin my bondo anyways!
I need some more sanding done, but the ruff work is done, maybe a hair more filler here or there.
Attached image(s)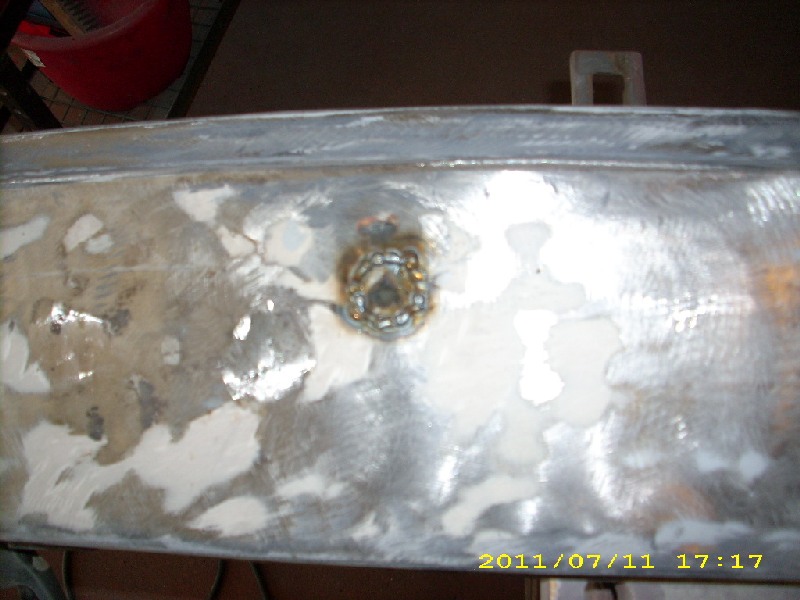
Posted by: Andyrew Jul 11 2011, 11:16 PM
Last pic shows the fender rolled.
Attached image(s)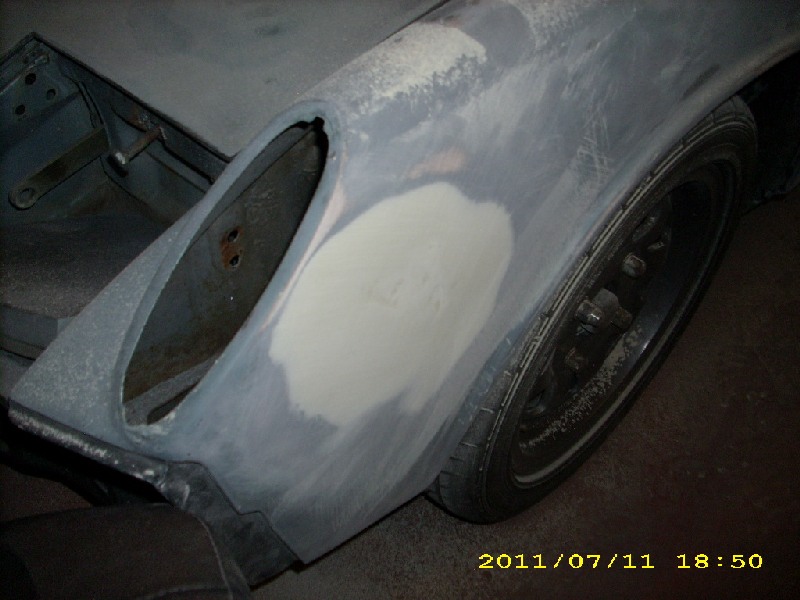

Posted by: malaga_red75 Jul 11 2011, 11:26 PM
looks great andrew!! I should be able to get to the bumpers tomorrow night.
keep up the great work!
Posted by: Andyrew Jul 12 2011, 09:24 PM
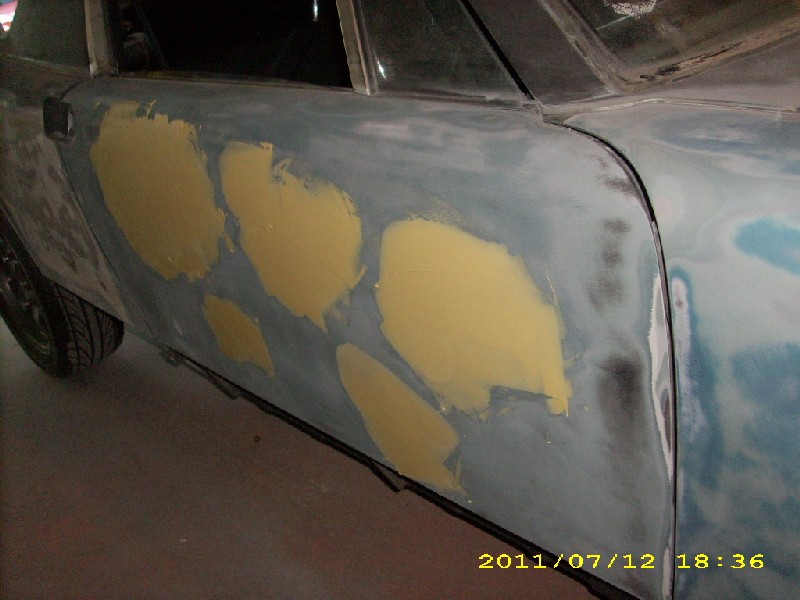
Spend another hour and a half tonight.
Sanded down the filler I put on last night and spent some time prepping the door some more then I put two applications of filler there (Sanded in between).
Overall it looks pretty good. Got some work ahead of me tomorrow, Goal is to get the rear fender 100% ready for filler.
Didnt get any pics of the middle or beginning of the process like yesterday.. But you guys get the drift.
Also I threw some more filler in the Dr rear by the tail light but didnt get a pic of it..
Attached image(s)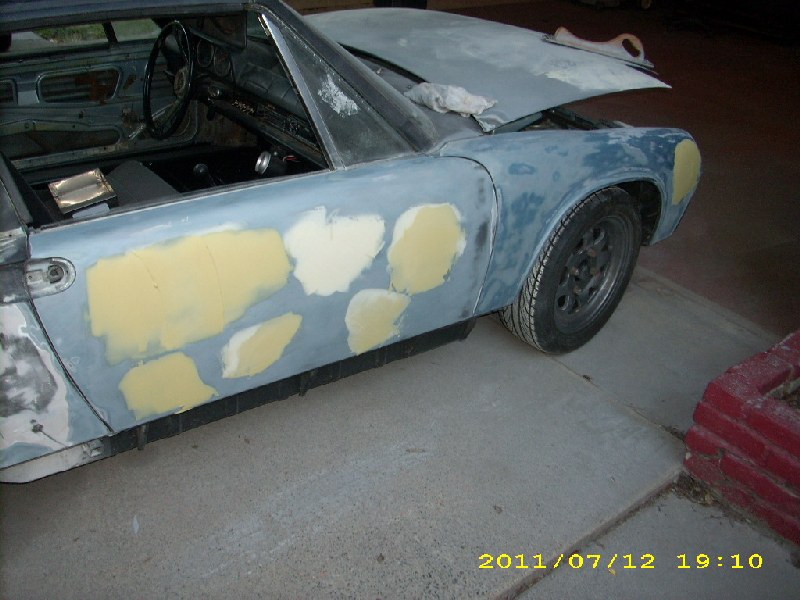
Posted by: nsr-jamie Jul 12 2011, 09:46 PM
Looking good !! 
Posted by: malaga_red75 Jul 13 2011, 01:04 PM
looks good andrew.
I stopped by the Porsche dealership after work yesterday and they didn't have a paint chip/color strip of the RS green. they just gave me the code, which I already knew.
Did you go back to the paint shop and talk to them? They should be able to match to that code (2D8). I would really like to make sure that it is truly that color and not something that they tried to match just because it is such a unique color.
Let me know.
Posted by: Andyrew Jul 13 2011, 01:07 PM
Havent talked with them yet. However I know the other paint shop in town DID find the code.. I dont know if they would be willing to work with them or not..
What about the paint shop that you know the owner of? Do you think you could look through his books? He'll probably be able to let you borrow that page or maybe the mix ratio?
I'll see what I can do on my end.
Posted by: Andyrew Jul 13 2011, 11:49 PM
Got an hour in.
Bunch of time sanding out what was in there. Took it down to metal on most places and then to the existing bondo everywhere else just because this fender has been worked on so much. The existing bondo looked really good in most area's.
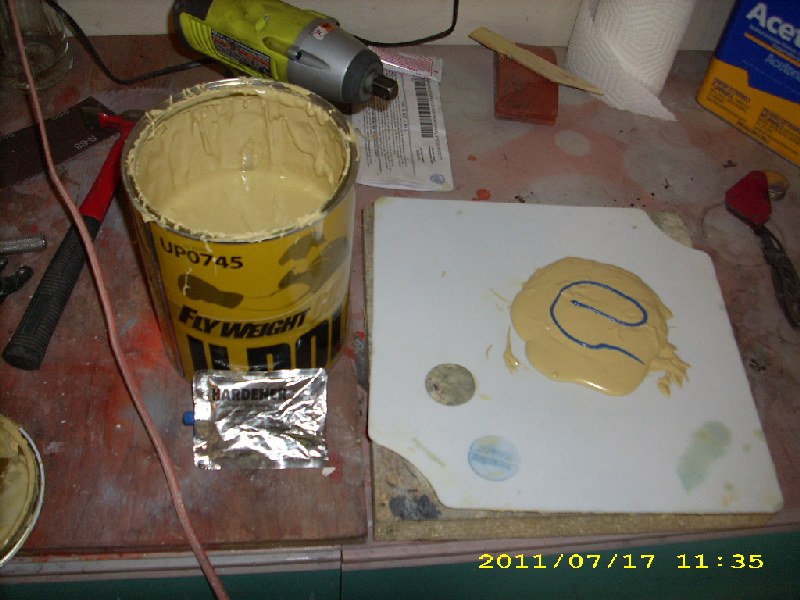
Threw some bondo on it as well. About 1/8 of a gal. This will probably take another 1/4 gal of bondo before its done. This filler is pretty thin so I can only really put it on 1/4" at a time which I really dont mind all that much.
Spent the rest of the night on my car, trying to swap carbs, but the other carb leaked like crazy... So swapped it back... yay, non progress....
Pics.
Attached image(s)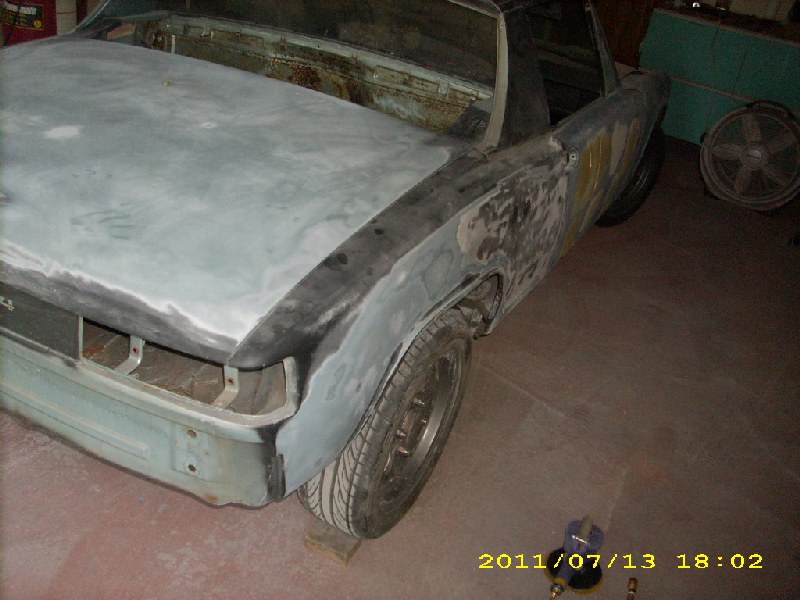
Posted by: malaga_red75 Jul 14 2011, 12:48 PM
looks good andrew.
we still on for this weekend? I am thinking same time as last weekend. let me know.
Posted by: Andyrew Jul 19 2011, 09:17 AM
This was the progress made on Sunday, I didnt do anything yesterday as I pulled the engine from my Honda.
Attached image(s)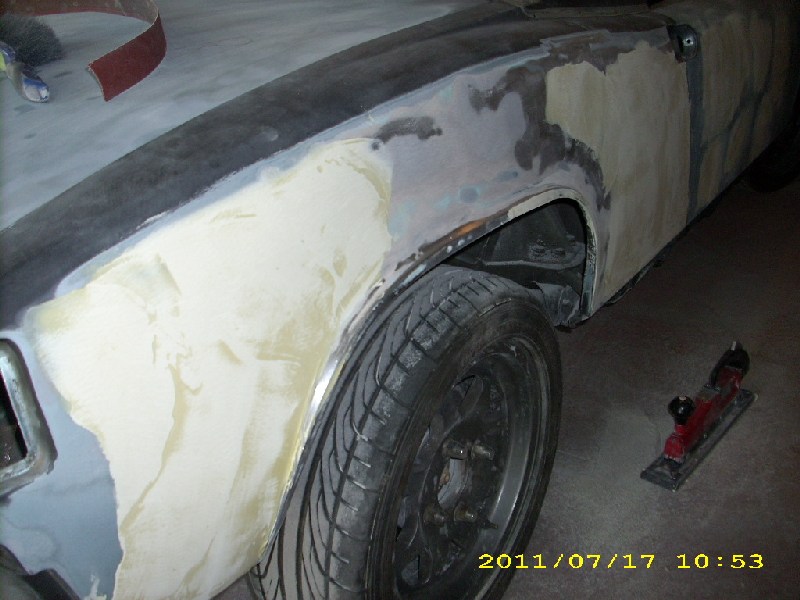
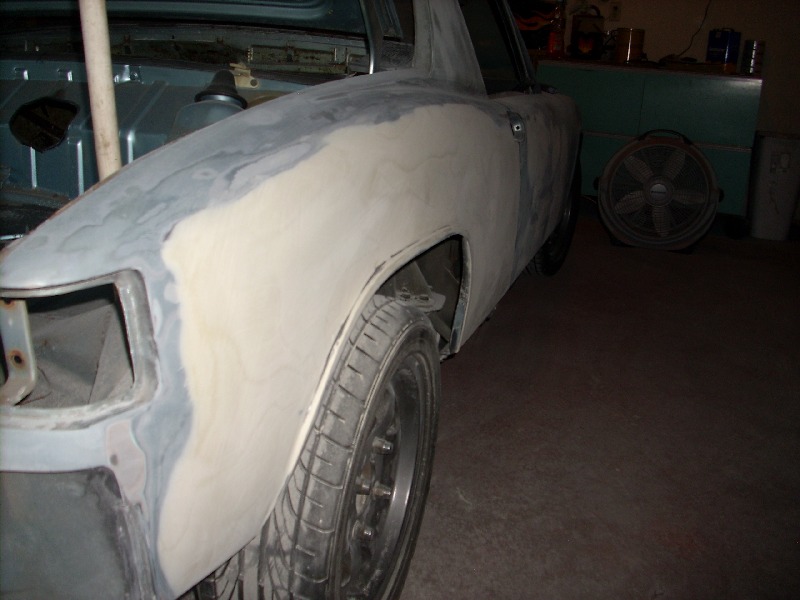
Posted by: Andyrew Jul 19 2011, 09:21 AM
Yes I used 1/2 a gallon of filler. That fender needed some love...
There is currently 1/8 to 1/4" over the whole pannel, I am now sanding it down to get the fender the way that I like it. Do have some low spots.
All the rockers and valences have been sanded down, the windshield washer nozzles have been removed and it has been decided to weld them up!
Also I JUST remembered how to take the vent window off and the seal off as I was telling Peter how I had no clue I then said "wait a second" and removed it in 30 seconds... I wish I remembered that for MY car... Arg.
Attached image(s)
Posted by: Andyrew Jul 23 2011, 09:42 AM
Made up for my non working this week with 3 hours last night!
Got to 75% done on the rear fender. Really dont have much time left on it and its looking really good. I have to go over it with 180 grit but it almost completely roughed in.
I also welded the holes for the window washers. I welded the rocker pannel crack and the rear valence crack. I straightened the rear valance (It will need some bondo...), and put a skim coat on the rear bumper.
Progress was great! Very excited about how much was done. I will be doing all the final work today so that primer can be done tomorrow.
Attached image(s)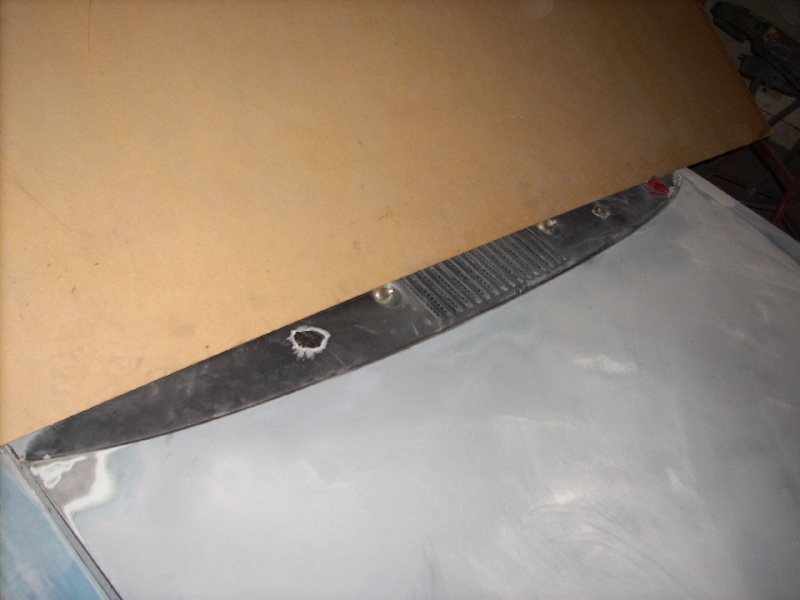
Posted by: Andyrew Jul 23 2011, 09:46 AM
Posted by: malaga_red75 Jul 24 2011, 12:56 AM
looks good andrew!!! see you tomorrow.
Posted by: Andyrew Jul 24 2011, 09:49 AM
Had a lot of erands to run yesterday but I still got most of the progress I wanted to accomplish before today.
Got 2 hours in.
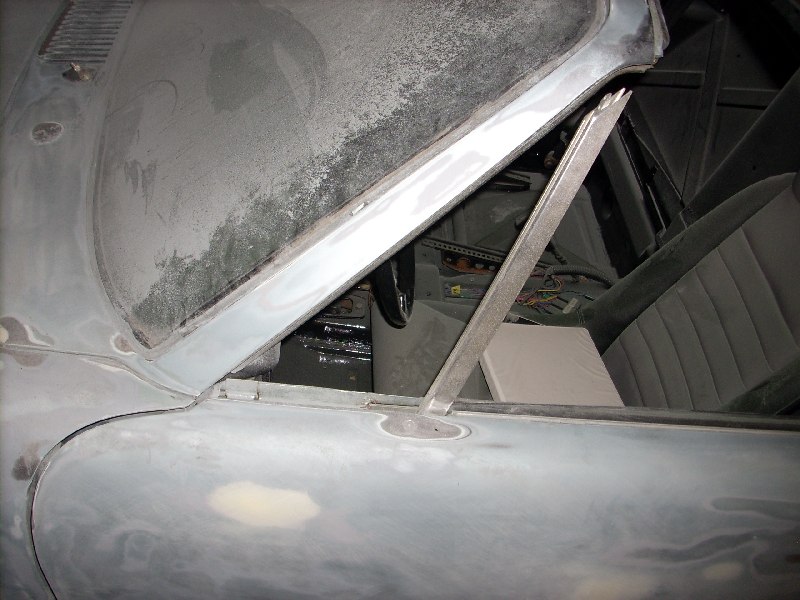
Pulled the vynal off the targa bar, used acetone to clean the glue off, filled a little dent, and sanded it down with 180 grit.
Sanded the cowl area down, Filled the dents where the washers were and sanded it down with 180.
Finished the fender area as well as most of the molding of the fender lip. I still have the front of the fender to go and that might be a little bit difficult.. But that will be finished today.
I still need to put some glazing puddy down to fill some pinholes and sand the fender down to 180 and then the whole car is ready for primer filler.
Pics
Attached image(s)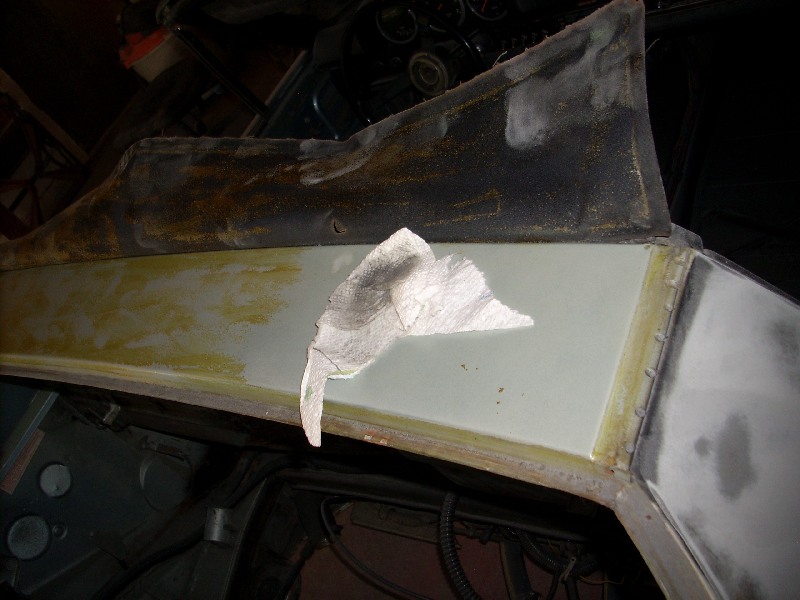
Posted by: Andyrew Jul 24 2011, 09:51 AM
Next
Attached image(s)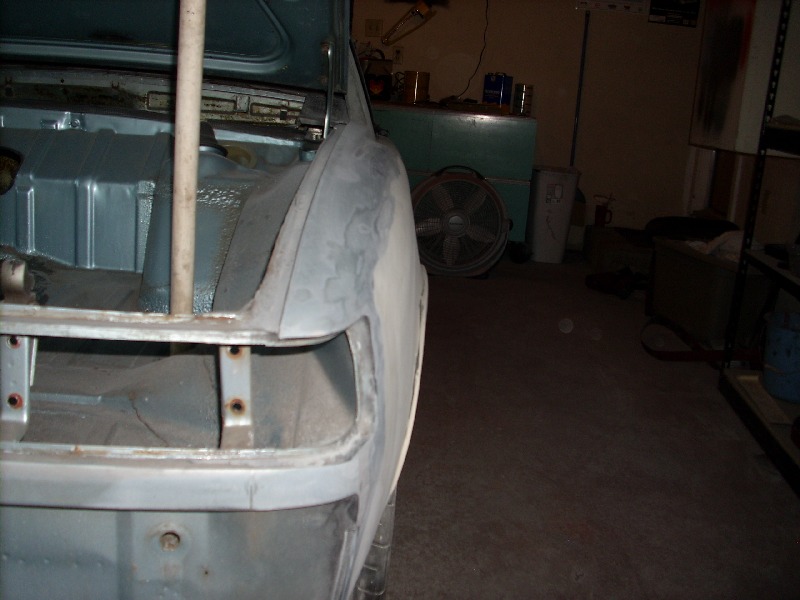

Posted by: Andyrew Jul 24 2011, 09:51 AM
Last
Also sanded the A pillar.
Attached image(s)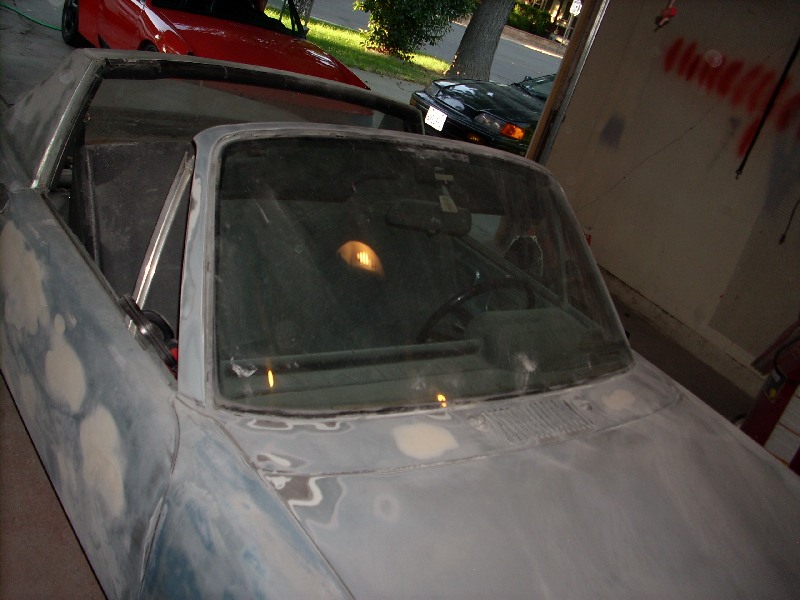
Posted by: Andyrew Jul 24 2011, 11:49 PM
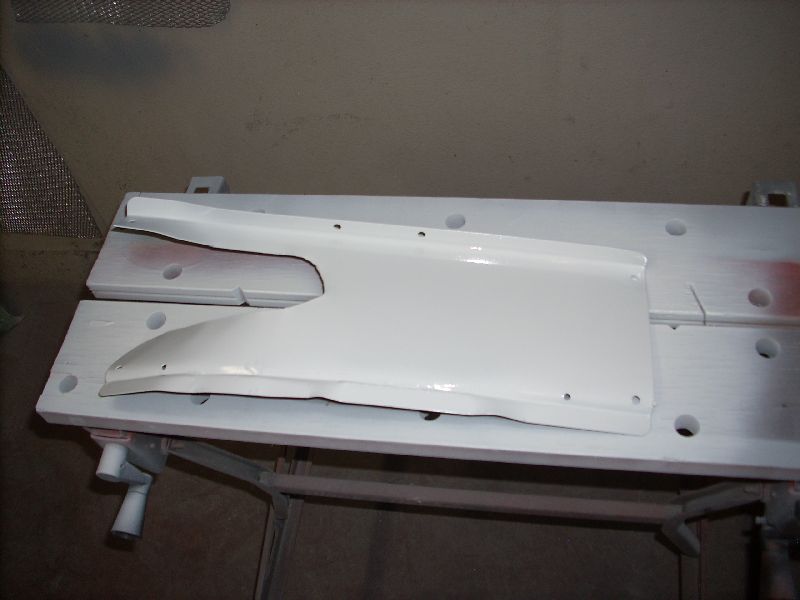
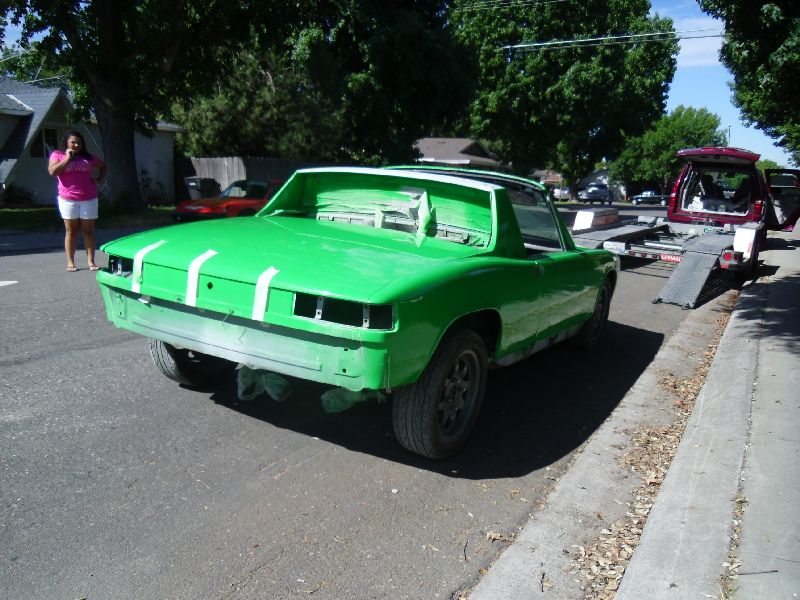
Long day today. Got the car in 3 coats of primer and 1 coat on the non trouble area's.
Looks pretty good!
For those keeping track, 7 hours in today.
Attached image(s)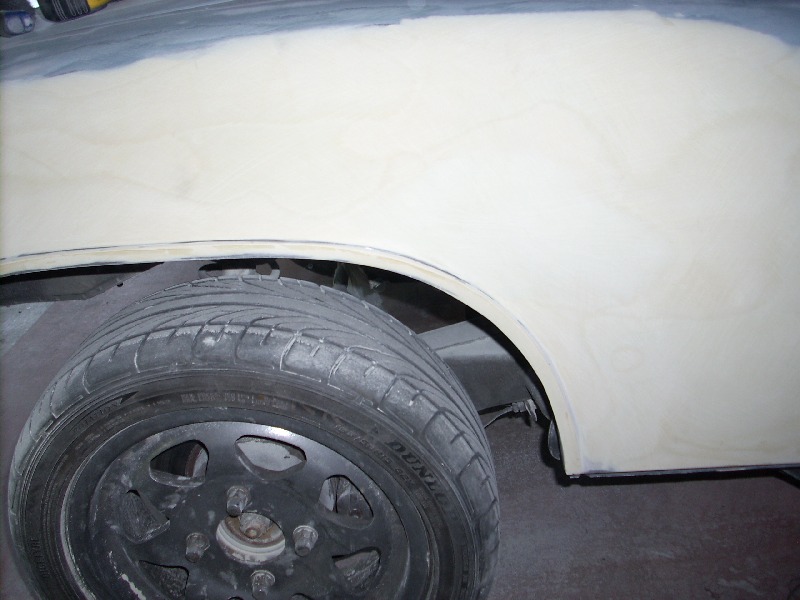
Posted by: Andyrew Jul 24 2011, 11:50 PM
Primer pics
Attached image(s)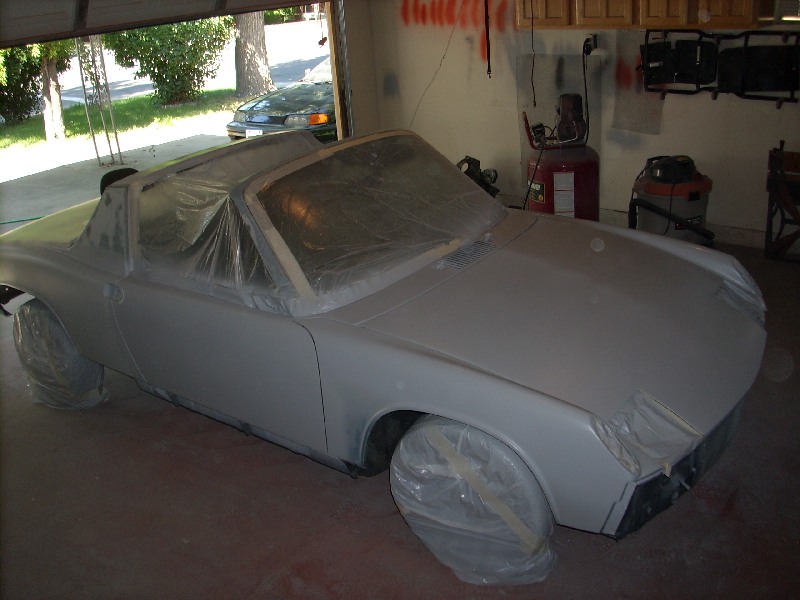
Posted by: Jon Fernandes Jul 25 2011, 09:36 AM
Looks smooooth! Great progress, keep it up!
Posted by: malaga_red75 Jul 25 2011, 09:59 AM
it was very cool to see some 'color' go on the car. It will still need a little bit of work, but it looks great!
Andrew thinks there will be roughly another 15-20 hours of sanding/prepping before we are ready for primer epoxy and color. so close!
-Peter
Posted by: Andyrew Jul 28 2011, 08:20 AM
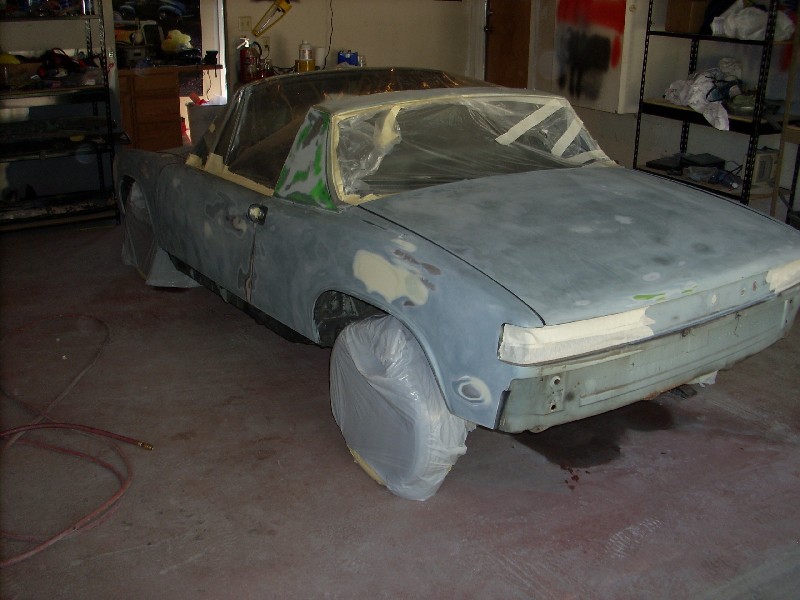
Spent a little over 2 hours block sanding yesterday. No pics, but the rear trunk is ready for another coat, there is only a small spot where it needed more primer. The front dr fender is 90% and doesn't look to need any more primer. The dr door has one low spot that needs. Bit of primer, I think I'm just going to throw 4 strong coats on this spot due to it being do low. The dr rear fender needs just a tiny bit more primer and it'll be perfect.
Damn this car is getting done quick!
Posted by: malaga_red75 Jul 28 2011, 09:51 AM
awesome andrew!
and you're right, the progress you have been making is amazing! Wish i could be there to help more.
amazing I dropped the car off only 4 weeks ago!
keep it up.
btw, that paint looks perfect. i sent you a pm about ordering it. let me know what you want to do.
-peter
Posted by: porsche_dreamer Jul 28 2011, 10:14 AM
What was the original color? And what color you planning to use?
Posted by: rnellums Jul 28 2011, 11:12 AM
My black car had slightly rolled fenders in the rear and I was able to get away with 205's tucked up under them. The strange thing was that one side almost rubbed and the other side had 1 1/2 fingers of clearance.
Posted by: Andyrew Jul 28 2011, 11:22 AM
I'm going to talk to the local paint shop and see if they will match the price. Also we have the signal green color now so they should be able to look up the color in a single stage stage layout
Posted by: malaga_red75 Jul 28 2011, 11:56 AM
Andrew, sounds good. let me know what they say and if they can match it.
Porsche_dreamer - I think the orginal color was alaska blue metallic. but I (or andrew) will have to look at the code to be certain.
the new color will be porsche signal green. (pretty much the gt3rs green of the 2007 model).
although, ive been doing some research, and that viper green looks good too. hmmmmm
its hard to tell the difference, but it looks to be a tad bit darker than the signal green. anyone have first hand experience with the two colors?
peter
Posted by: porsche_dreamer Jul 28 2011, 01:28 PM
Signal green (2d8)was the color I was gonna use on my next project, if I decide to go with flares. Its an awesome color! Cant wait to see some color. Im sure you cant either.
Posted by: barada Jul 28 2011, 01:39 PM
I have Viper Green on my Clone, love it, would look great on a 914.
Phillip
Attached image(s)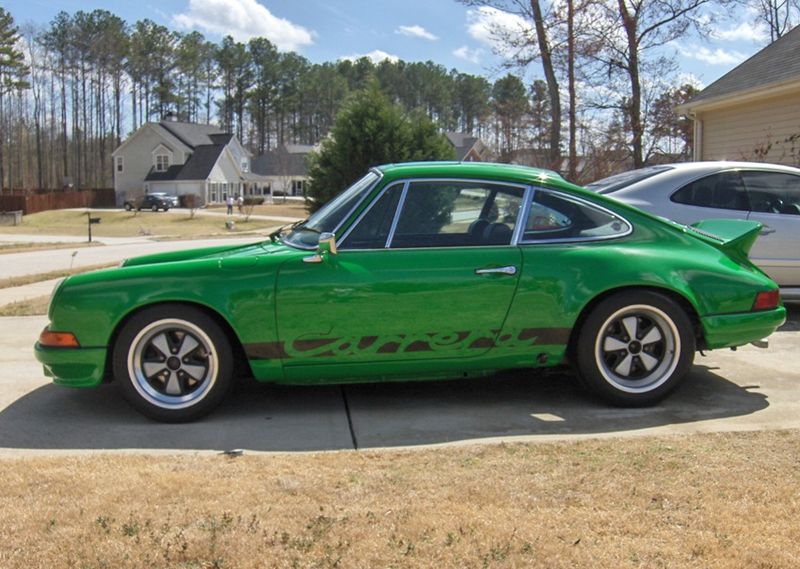
Posted by: malaga_red75 Jul 29 2011, 09:45 AM
your car is gorgeous!!!
However, I think that is a little too dark for what I am thinking. signal green should be just right!
Posted by: Andyrew Aug 1 2011, 02:47 PM
No pics again from this past weekend (Who wants to see block sanding? It never shows up in pictures...)
Friday and saturday spent 6 hours block sanding and on sunday spent 5.5 hours finishing the block sanding and doing some spot primer filler.
We are on track for paint next weekend, but peter is pushing for this weekend , At this point its a matter of everything going perfect and the Fiancee saying that its OK (She's busy next weekend so she already OK'ed it).
Posted by: Twise Aug 1 2011, 05:33 PM
Signal Green - 2D8
Very nice choice. I was planning on my next project to use the same exact color. I am looking forward to seeing this when done.
Posted by: Andyrew Aug 1 2011, 05:56 PM
Local paint store is having a hard time finding the factory color chip. We think we found it in another series of theirs. Im getting a small amount to test it with and will spray a test piece tomorrow.
Finding this color has been a PITA... LOL
Posted by: malaga_red75 Aug 1 2011, 11:00 PM
We are on track for paint next weekend, but peter is pushing for this weekend
, At this point its a matter of everything going perfect and the Fiancee saying that its OK (She's busy next weekend so she already OK'ed it).Haha... Sorry Andrew for wanting to push it to this weekend. The reason I want to push for this weekend is that it will give me a really good chance to get the car put back together before school starts. If we don't do it this weekend I realistically won't be able to get to the car until thanksgiving because of water polo season and school... And that is a looooong time to be away from a freshly painted car.
Looking forward to seeing the test coat tomorrow!
Posted by: Andyrew Aug 1 2011, 11:14 PM
So I sanded down the primer filler and there are still a couple of low spots... Damn these low spots, I should have done guide coat on them instead of filling them with primer filler. Now were pressed for time.
Tomorrow i'll spray the test piece and spray some more primer filler. Hopefully I can get the body hot enough to let the primer shrink so that down the road we dont have any shrinkage in the primer filler.
Posted by: Andyrew Aug 1 2011, 11:44 PM
I decided that I'll sand down the low spots a little bit and put in some guide coat. I dont want to put any more primer filler on these low spots without having a long time for it to properly shrink.
Here is the list of things to do by Sunday.
Guide coat low spots
Sand down guide coat
Primer filler and block sand
Fill pin holes with guide coat
Block sand car to 320
Prep area under targa bar
Clean garage a little
Mask for painting area under targa bar
Paint area under targa bar
Remove hoods and prep seal area
Blow off entire car
Mask entire car
Prep garage for paint.
Here is Sunday
Clean garage again
Wax and grease car 2x
Tach cloth car
Mix white base primer and spray car
Flash
Check for full hide and put second layer if necessary
flash
Mix paint and start spraying Goal, 3 coats for full hide, 6-7 coats total.
Ya.. Sigh, Im not sure were ready 
Posted by: malaga_red75 Aug 1 2011, 11:45 PM
So I sanded down the primer filler and there are still a couple of low spots... Damn these low spots, I should have done guide coat on them instead of filling them with primer filler. Now were pressed for time.
Tomorrow i'll spray the test piece and spray some more primer filler. Hopefully I can get the body hot enough to let the primer shrink so that down the road we dont have any shrinkage in the primer filler.
Ok, if you need my help one night this week, let me know. Keep up the great work!
Posted by: Andyrew Aug 2 2011, 12:39 AM
Add to this list that we have to do the jambs as well.
Arg.
Posted by: malaga_red75 Aug 2 2011, 12:57 AM
Add to this list that we have to do the jambs as well.
Arg.
Maybe friday night if we can get the booth done quickly. (if we end up working)
Posted by: malaga_red75 Aug 2 2011, 01:02 AM
Just saw list.
Yes that it is a lot. And I've said it before, id rather get it done right than rush it. So, we'll see...
Posted by: Andyrew Aug 2 2011, 11:06 PM
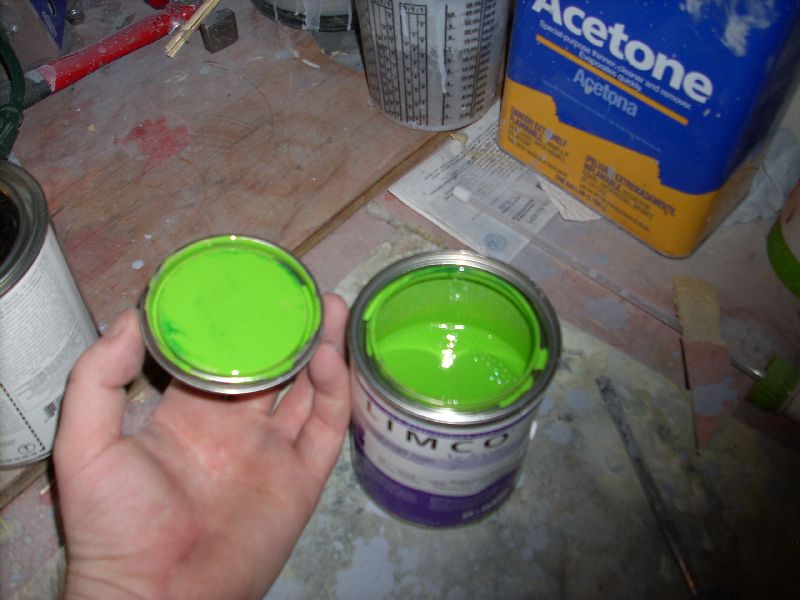
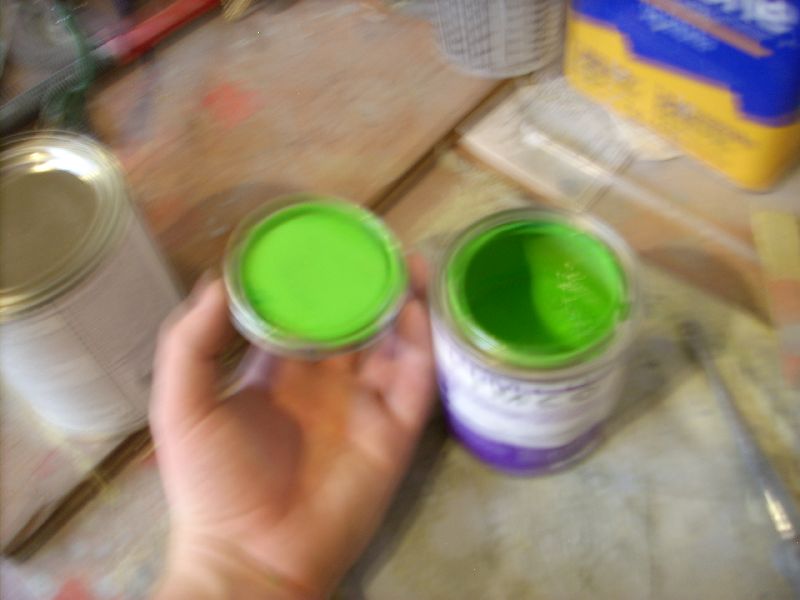
Laid the test color. Its hard to tell if its the right color. I really need to get it in the sun to see what happens.
Oh and im going to unload all the pics from my camera that I have been taking
Attached image(s)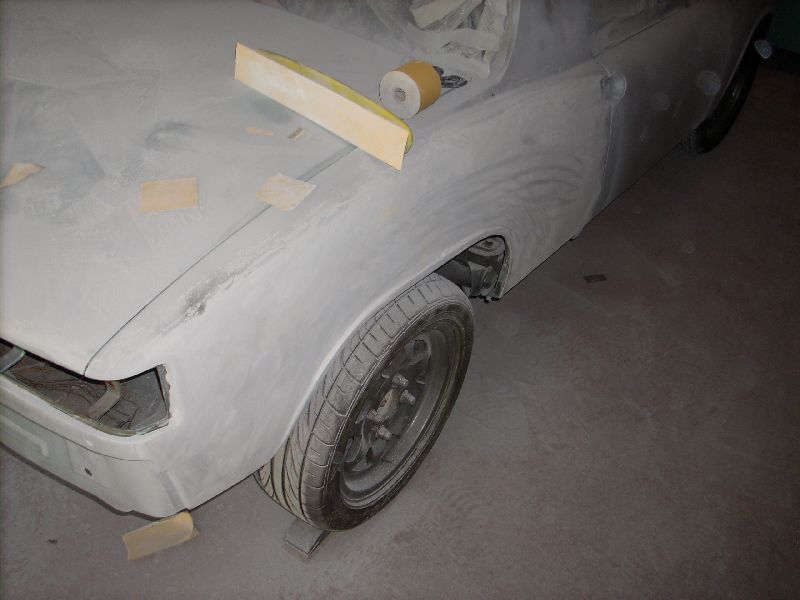

Posted by: Spoke Aug 3 2011, 02:50 AM
I like the color.
Posted by: porsche_dreamer Aug 3 2011, 07:50 AM
Don't know if its me or the flash on your camera making it look a tad to yellow? Here is a sample I mixed at work and did a spray out with.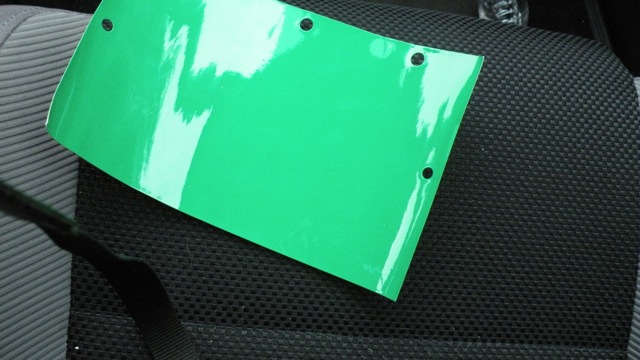
Posted by: Andyrew Aug 3 2011, 08:17 AM
It is a tad to yellow. We cant find the correct mix ratio. Do you have it?
Posted by: kg6dxn Aug 3 2011, 08:18 AM
I dig the bright breen!
Posted by: porsche_dreamer Aug 3 2011, 08:29 AM
Ah hell I knew I should of brought it with me home. No I don't have it and Im not going back to work, Im leaving on vacation in a few hours. I mixed it in sherwin williams bc/cc though. Ill see if I can manage to get it for you. Are you set with using limco? Just call a different supply store and see what they can do for you.
Posted by: Andyrew Aug 3 2011, 09:22 AM
We have tried calling but no one seems to have the ratio..
Yes were setup with Limco.
Heres it in the sun. This bluish effect is just my camera, the color is more green than the pic shows.
Attached image(s)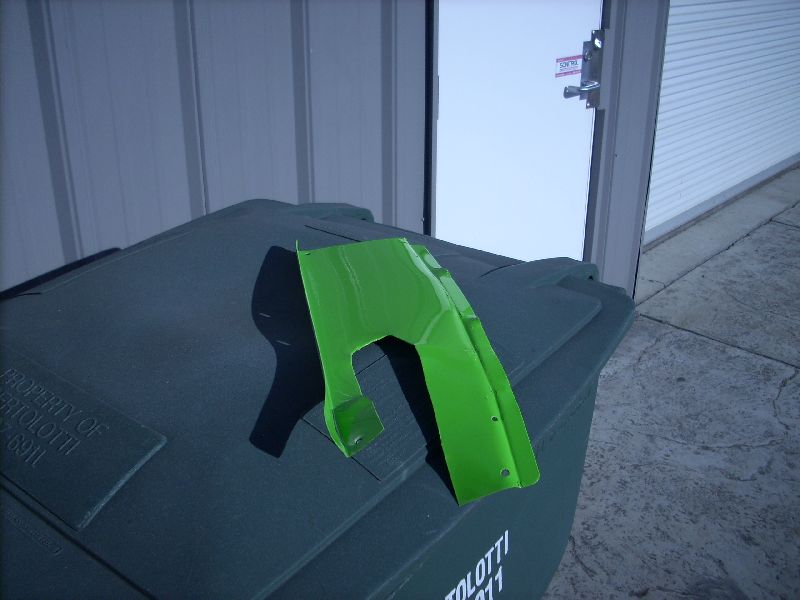
Posted by: porsche_dreamer Aug 3 2011, 10:01 AM
Try calling a bodyshop that mixes there own paint, they could probably do better than a supplier can.
Posted by: Andyrew Aug 3 2011, 10:12 AM
Thats who im dealing with, A bodyshop that mixes their own paint. They dont have the mix ratio, nor does anyone else. That little batch they gave me was a test sample.
Posted by: porsche_dreamer Aug 3 2011, 10:25 AM
Update with a toner list. Hope it helps.
This is ppg dbc bc/cc 8 oz.
D777 187.0 Transparent Green
D794 52.5 Verdant Yellow
D753 40.9 White
D780 3.4 Brilliant Yellow
Posted by: Andyrew Aug 3 2011, 10:35 AM
Awesome! Thanks!!
Andrew
Posted by: malaga_red75 Aug 3 2011, 12:19 PM
Update with a toner list. Hope it helps.
This is ppg dbc bc/cc 8 oz.
D777 187.0 Transparent Green
D794 52.5 Verdant Yellow
D753 40.9 White
D780 3.4 Brilliant Yellow
 Thanks!!!
 Andrew, do you think they will be able to make this?
Posted by: Andyrew Aug 3 2011, 12:42 PM
They cant make it in their non water based product line because the toner strength they use is different than PPG. However he is checking now to see if he can cross refference these toners to try and make a match...
He is mixing up a 4oz sample of what he can figure out from the above. I'll spray it tonight and compare it to the other green.
Posted by: Andyrew Aug 3 2011, 11:18 PM
Paint shop couldn't figure it out. Went to the more expensive paint shop and they were able to do it. I'll pick up the paint on Friday.
Spent 3 hour tonight.
Guide coat, sand, guide coat sand, sand, sand. Went over the car in detail and fixed a bunch of little things that could have been overlooked. Laid a bunch of guide coat and sanded lots of little areas. Still have to do under the targa bar, but that's it. Then it's 320 (the shop was out, yay...).
Also prepped the jambs, removed the thresholds and cleaned some surface rust, removed the door strikes, taped off the factory stickers, ect.
Posted by: malaga_red75 Aug 4 2011, 12:37 AM

nice job Andrew!! I also had another thought about the paint. I know that they already found the color, which is great, but like we talked about the color might be *slightly* off due to converting it from waterborn to urethane single stage. What about giving them the 1977 turbo signal green? L62Y this (i assume because it was 30 years ago) might get us closer to the actual signal green??

just spit-balling here. let me know...
so, all thats left is sanding the entire car down with 320 and then were ready for paint??
keep it up!
Posted by: malaga_red75 Aug 4 2011, 12:38 AM
and prep under the targa.
Posted by: Andyrew Aug 4 2011, 08:26 AM
I tried that color first and they couldn't find it. I'm pretty sure it's going to be really close. Again I'll look at the color beforehand. I have a really good idea now of what the color looks like in person.
And yes, 320 then jambs and targa bar. Well take the doors off and paint the underside of those at the same time and the underside of the trunks if you want that done.
Posted by: malaga_red75 Aug 4 2011, 09:33 AM
ahhhhh.... can't beleive we are almost there!
Are you still thinking about next weekend for paint? Or this weekend?
It seems like you knocked almost everything off that list last night. Awesome!
Posted by: Andyrew Aug 4 2011, 10:39 AM
If we had Saturday, no problem. But we don't and I don't want to spray under the targa bar the same day as the body. However this test paint dried pretty fast. You might be able to take the car home after a day.
Posted by: malaga_red75 Aug 4 2011, 11:40 AM
sounds good.
being able to take it home after a day or two would be great!
if you think we could knock out spraying under the targa bar and prepping the garage for paint in a couple hours, i could come tomorrow evening.
no worries if not, im just so excited!!!
almost ready for 

Posted by: Andyrew Aug 4 2011, 03:41 PM
Well we still have to block sand the car in 320 grit and that'll take a couple of hours so I dont think we can get the garage ready for paint after that. However if you want to come by early on sunday we could get a full day in, prep the garage, spray the pre area's mentioned and do our best for getting the garage prepped. Then next saturday we could spray it in the morning and you can take it home on sunday assuming the paint is hard enough.
How are you coming on your duty's? That engine lid is of primary concern as we will want to spray the underside of it on Sunday.
Posted by: malaga_red75 Aug 4 2011, 03:59 PM
sounds good andrew.
I finished sanding the one bumper that I bondo'd at your house and added bondo to the rear valence.
My girlfriend is now in Oregon for 6 weeks so I have the entire weekend to myself.
I am planning on putting a long day in on saturday and finishing all of the panels. So everything should be ready to bring back to you on sunday. Ill make sure to do the engine lid first if I can't get to all of the other panels by saturday night. I think I am also going to take the front valence down to metal. I have a feeling that just putting bondo in that one section wont be good enough.
I will be sure to bring the plastic for the paint booth too. I think I will have most of what we will need.
Did we find a place to get matte black?
-Peter
Posted by: Andyrew Aug 5 2011, 10:36 AM
We can get the flat clear from the shop and throw it on some of the black that I have. I probably only need like 8 ounces of my black paint.
Probably a good idea to take that valence down to metal. Just realize that it needs a lot of work.
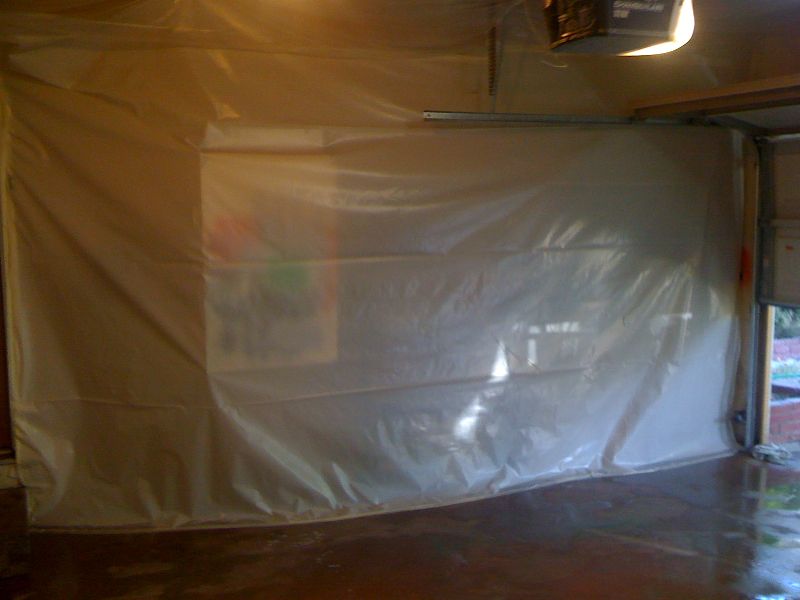
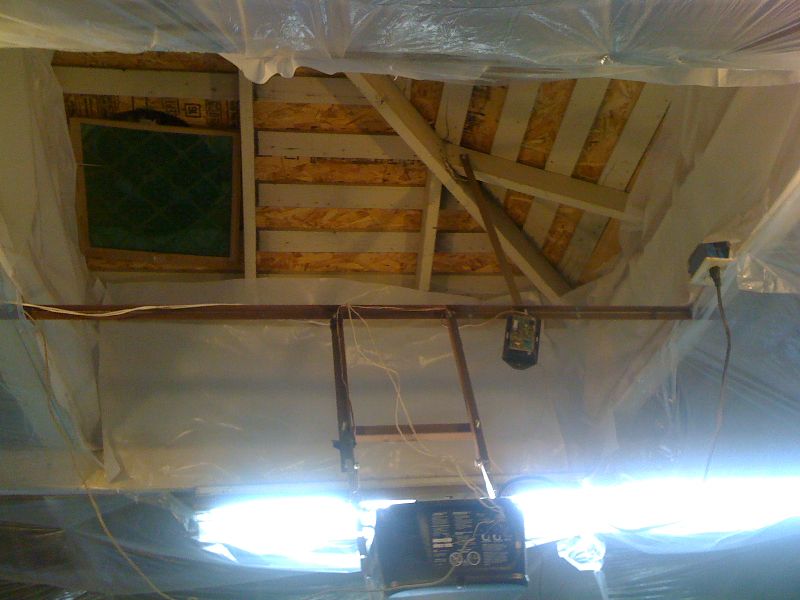
Posted by: Andyrew Aug 6 2011, 10:09 PM
Did some cleaning and organizing.
Blue gun = primer sealer gun
Silver gun = Paint gun
Materials bought
Attached image(s)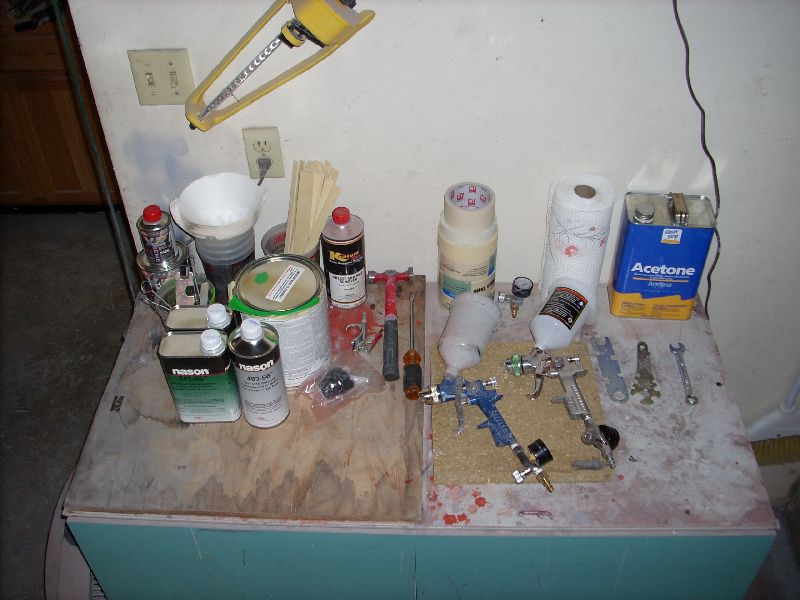
Posted by: CrashDown Aug 6 2011, 10:21 PM
Did some cleaning and organizing.
Blue gun = primer sealer gun
Silver gun = Paint gun
Materials bought
I see ya bought Nason single Stage...
A little advice from a painter.... with the hot weather, do alot of light coats. If you pound that stuff on thick it will solvent pop really bay, I'm talking like, 1 light coat, wait 10-15 minutes.... and get as many fans running in that garage as you can, the higher airflow will eliminate solvent pop along with an extended flash time between coats....
and good luck bro!!!
-Matt
Posted by: Andyrew Aug 7 2011, 12:16 AM
Good advice! We will be spraying the body probably closer to 10am next saturday. It will probably be mid 70's. However if we prep next friday and can spray @ 8am, then Im going to shoot for that as it will be probably 5-10 deg cooler.
Tomorrow will be a test day, spraying the jambs and under the targa bar. If we need to make any adjustments to flash time or anything we'll find out then.
When I sprayed my car I used cheaper quality paint and I only had 1 sovent pop
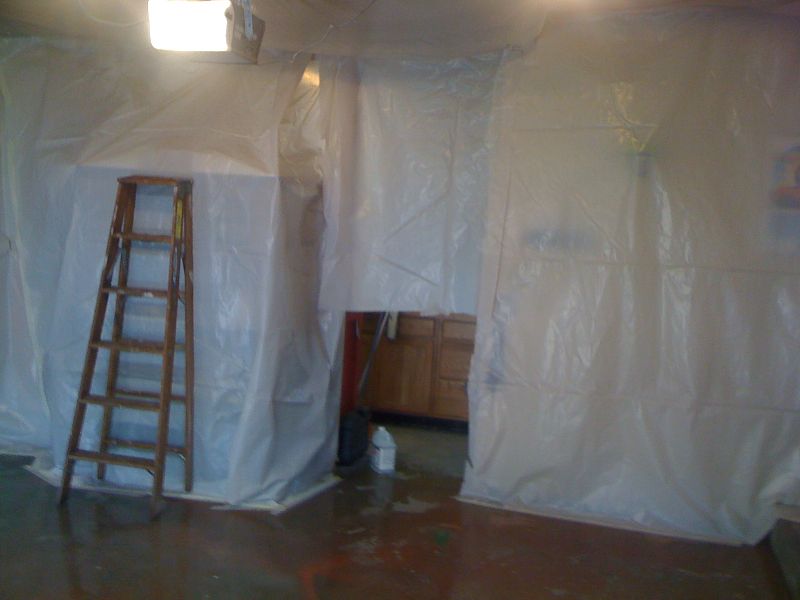
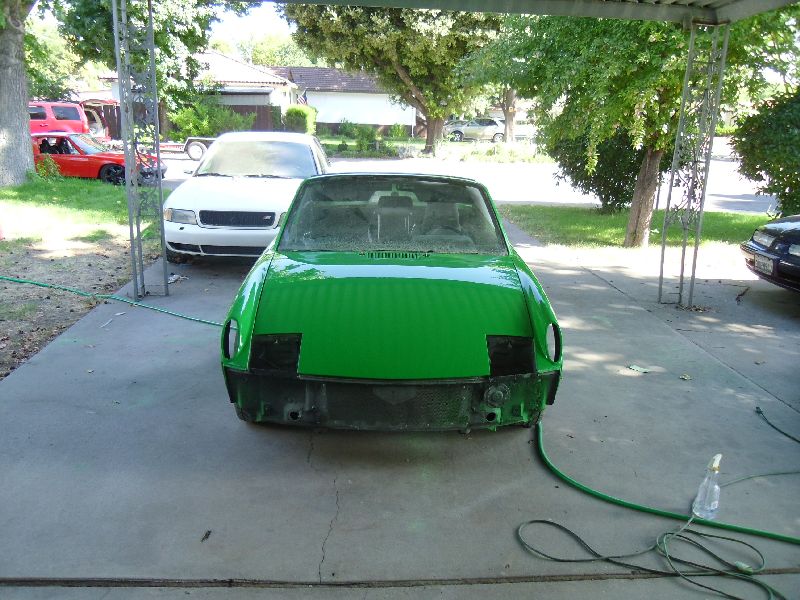
Posted by: Andyrew Aug 7 2011, 11:30 PM
8 hours in today.
Car is block sanded and 99% ready for paint. We have to clean the gutters out to make sure no crap flied up while spraying like what happened in my car . 
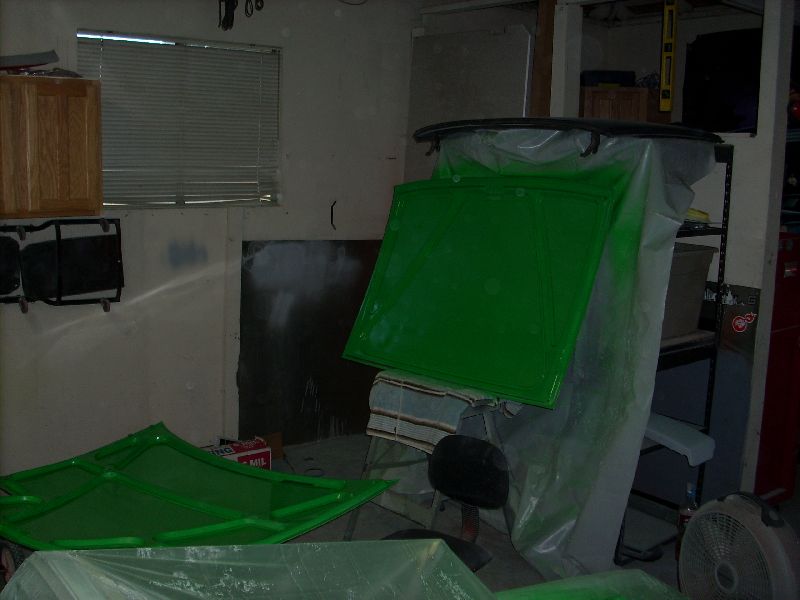
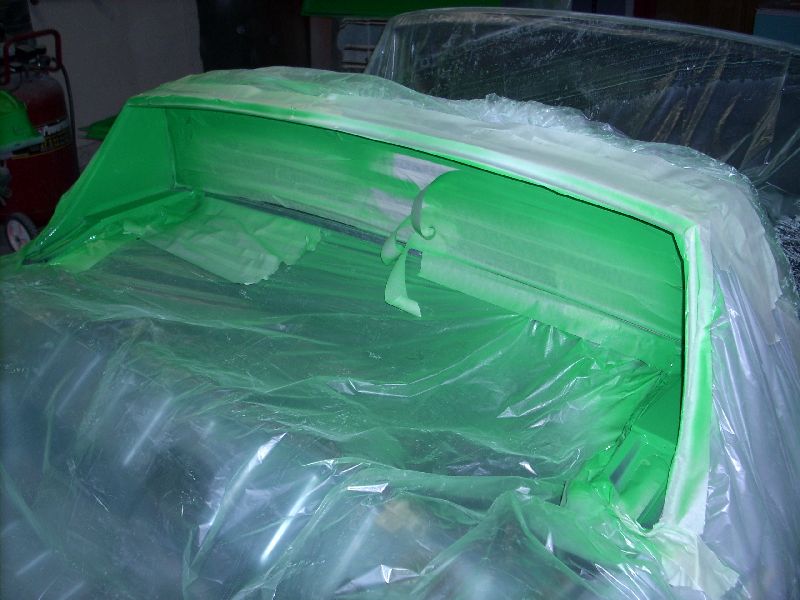
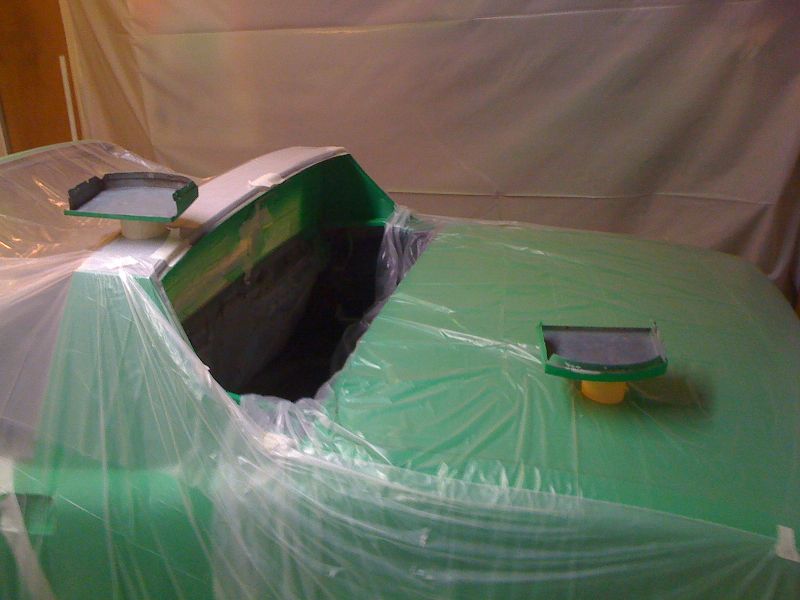
Sprayed under the trunks and engine lid, the jams, and under the targa bar.
The targa bar was a PITA and some of it came out dry. I'll be respraying this this week with my touch up gun.
Rest of it came out clean. Really wish I did the jambs for my car
The color is amazing and is the correct color no doubt.
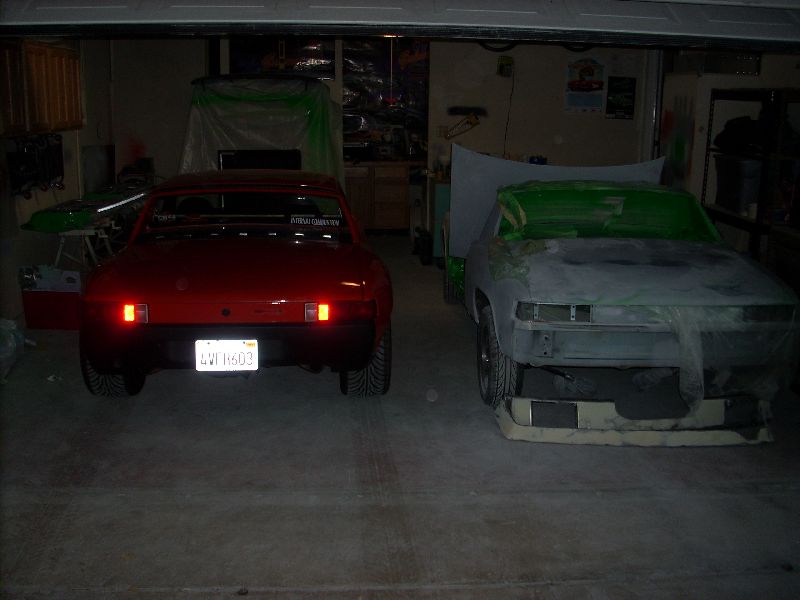
However getting the 914's both in the garage was a little bit of a task... But I managed.
Attached image(s)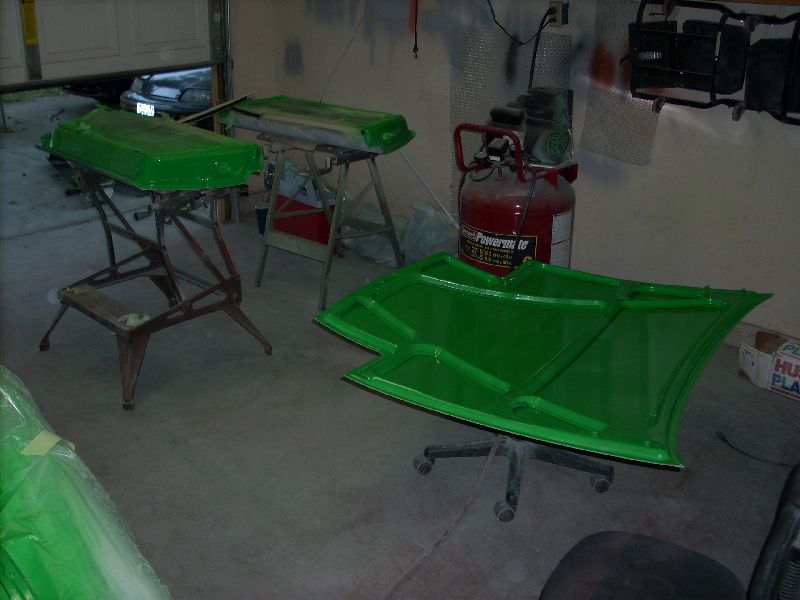

Posted by: ppetion Aug 8 2011, 06:26 AM
8 hours in today.
Car is block sanded and 99% ready for paint. We have to clean the gutters out to make sure no crap flied up while spraying like what happened in my car .
Sprayed under the trunks and engine lid, the jams, and under the targa bar.
The targa bar was a PITA and some of it came out dry. I'll be respraying this this week with my touch up gun.
Rest of it came out clean. Really wish I did the jambs for my car
The color is amazing and is the correct color no doubt.
However getting the 914's both in the garage was a little bit of a task... But I managed.
Great Job Andy, I am planing on painting my jambs Thursday and full paint Saturday.
You are almost there. What's next?
Posted by: malaga_red75 Aug 8 2011, 09:39 AM
the pictures do not do this paint justice. The difference between sunlight and shade is immense.
As far as what is next...
I'll do my best to create a list:
- prep/clean garage... and then clean it again.
- air blow car to get rid of all surface dust
- prep car
- de-grease car x2
Then primer base, and then paint it.
That is for the car; for the bumpers...
I think they are mostly done except the front valence which needs a little lovin' then matte black paint.
Im sure I forgot a few things, but that is a general idea.
Posted by: Andyrew Aug 9 2011, 09:59 PM
Today was full of anguish...
For those of you following along at home, there is a lesson to be learned. Harbor freight 1.4 spray guns do not do a good job at primer. They do an OK job at paint, but your money is well spent on a $100 dollar paint gun vs a $15 paint gun.
I was going to do a wet/wet with the sealer and paint on the engine lid and the doors today. However here are the issues I had in order.
1. I mixed up my spare hardner for my spare reducer when mixing the first batch of primer. Primer was ruined.
2. I mixed up to much harder in my second batch of primer (Doing a small quantity its hard to eyeball it in the larger cups that I had). Primer hardened as I was straining it in the gun aka it hardened in the gun as well. 30 minutes to clean out the damn gun.
3. I learned that the Harbor freight gun really is what has been causing my dry mist issue that I have been having on the car this whole time. As I was laying down the primer on the first door and seeing how dry the overspray was coming out, I decided to thin out the primer a tad bit, then proceed to use my good gun. HOLY CRAP! I forgot how much of a difference there was!! This gun immediately solved all my problems and laid out the primer perfectly.
However in my hurry to try and get door clean of the dust from the adjacent door spray I cleaned the door with wax/grease remover and didnt wipe it down with a dry towel afterwards. Thus creating a not so good layer of primer.
So, End of the day. Tomorrow I am going to sand down the primer sealer I just laid to 320 grit and proceed to laying color on those area's.
This is why we do test samples..
Sigh... At least I learned something...
Posted by: malaga_red75 Aug 10 2011, 12:03 PM
Glad you got it all figured out andrew. I'm sure it was frustrating but we can all relate to those evenings in the garage where nothing goes right.
keep at it! looking forward to this weekend.
Posted by: Andyrew Aug 11 2011, 06:33 AM
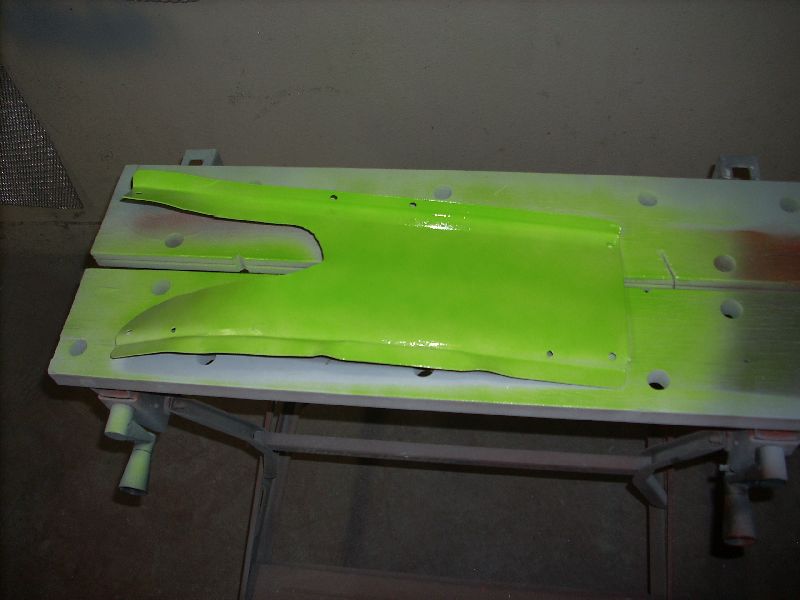
Last night I sprayed the engine lid, doors, and inside the targa sails.
Everything went off pretty much without a hitch. One thing to note is the top coat smoothed out really well however it looks like it has tiny dust particles or it evaporated quickly. I think this might have been because I left the fans running all night but I am not worried at all it looks really nice and will wet sand to a really nice finish.
5 coats.
Posted by: scotty b Aug 11 2011, 07:14 AM
Last night I sprayed the engine lid, doors, and inside the targa sails.
Everything went off pretty much without a hitch. One thing to note is the top coat smoothed out really well however it looks like it has tiny dust particles or it evaporated quickly. I think this might have been because I left the fans running all night but I am not worried at all it looks really nice and will wet sand to a really nice finish.
5 coats.
Unless you have too much draw the fans had nothing to do with it drying to quickly. You are more likely to have issues without fans than you are with. As the paint dries, the solvents rise to the surface and nee airflow to be carried away from the paint. Without that airflow you get solvent poping. Most likely what you have are small dust particles, a good wet sanding will knock them out. Again, you get what you pay for in this business, hence the 15.00 paint gun experience. Next time buy a small mixing cup, or a measuring stick, it's only a couple bucks and it makes mixing small amounts much easier
Posted by: malaga_red75 Aug 11 2011, 09:49 AM
nice andrew!
What are we going to do about the bumpers? Are you thinking rattle can or the flat black from home depot?
Posted by: Andyrew Aug 11 2011, 12:23 PM
Scotty, great advice! I didnt notice any solevent pop and it really look like its just small dirt particles. Im pretty sure itll polish out really nice! I think ill give it a try on monday before Peter takes it home.
Peter, its totally up to you, i think either will work just fine. If you want we can try the home depot stuff the. If that doesnt work topcoat it with rattlecan.
Posted by: malaga_red75 Aug 11 2011, 12:52 PM
Scotty, great advice! I didnt notice any solevent pop and it really look like its just small dirt particles. Im pretty sure itll polish out really nice! I think ill give it a try on monday before Peter takes it home.
Peter, its totally up to you, i think either will work just fine. If you want we can try the home depot stuff the. If that doesnt work topcoat it with rattlecan.
yea, that sounds good. We will probably get a better, even coat out of the spray gun. so lets try the home depot stuff. do you wanna shoot it the same day as the car? I thought we were going to shoot it a different day?
also, i think on friday night i want to acetone the engine bay and spray with rattle can or green (still debating). But I dont wan't to leave it as is. we can figure it out.
Posted by: Andyrew Aug 11 2011, 11:35 PM
Last night I sprayed the engine lid, doors, and inside the targa sails.
Everything went off pretty much without a hitch. One thing to note is the top coat smoothed out really well however it looks like it has tiny dust particles or it evaporated quickly. I think this might have been because I left the fans running all night but I am not worried at all it looks really nice and will wet sand to a really nice finish.
5 coats.
Unless you have too much draw the fans had nothing to do with it drying to quickly. You are more likely to have issues without fans than you are with. As the paint dries, the solvents rise to the surface and nee airflow to be carried away from the paint. Without that airflow you get solvent poping. Most likely what you have are small dust particles, a good wet sanding will knock them out.
Tested the engine lid with a wet sand and polish. Tiny holes were still there.
Wet sanded more, and the holes were more pronounced. Looked over the jambs and the rest of the car and there are these little holes all through it.
Im pissed. Nothing is going right in this final stage. I am going to take the engine lid to my material supplier and show them what their paint is doing. This is totally unacceptable. My paint was well more than 1/2 what I had to buy this paint for and I never had a single problem with the actual material.
15-20 minute flash time @ 75-80 deg. Pressure @ 35-40psi on the gun, Perfect pattern, 50% overlay, Mixed exactly per specs. Very little dust in the air at all (actually was really nice...).
Sigh.
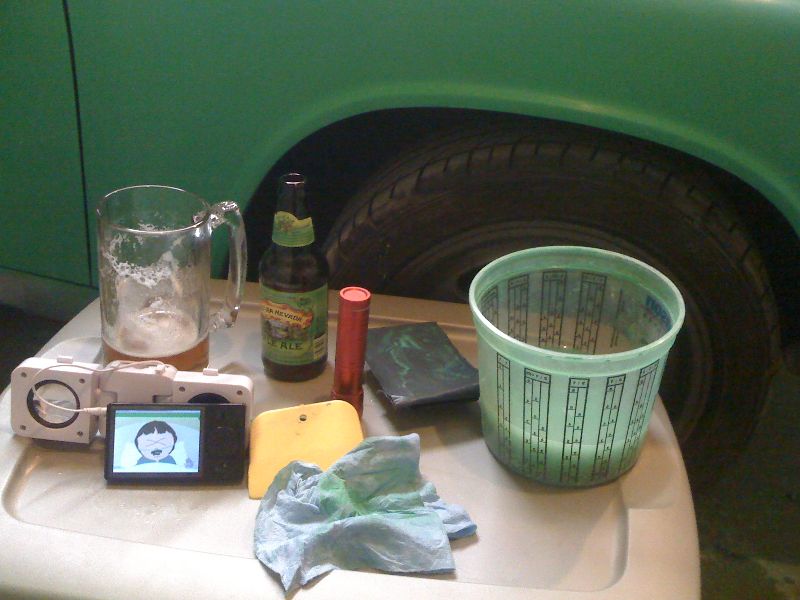
Im going to grab a beer now..
Posted by: Andyrew Aug 11 2011, 11:37 PM
Oh I forgot to mention, Tomorrow I will spray the engine lid again (If the materials do NOT turn out the be the problem) and make any changes I can think of. If this does not turn out, we are NOT spraying the car until I get this resolved.
Posted by: barada Aug 12 2011, 04:15 AM
Sounds like solvent pop. What temp reducer are you using?
Phillip
Posted by: scotty b Aug 12 2011, 05:21 AM
Sounds like solvent pop. What temp reducer are you using?
Phillip
 You can bitch at your supplier all you want, but the chance of the paint being the problem are slim to none. There is no reason for the paint itself to leave " holes" in the finish. You're using the wrong temp hardener, reducer or don't have enough airflow, or are applying coats too quickly.
What gun are you using ? You are shooting at 35-40 psi which is WAY too high for a HVLP. 35-40 is conventional gun pressure, you should have no more than 20 with a HVLP
Posted by: Andyrew Aug 12 2011, 08:31 AM
Im pretty sure its medium temp. The paint store didnt even ask me what I wanted.
Its a Huffy HDS590
No more than 20ps? Were talking at the regulator right? I think thats to low, im reading closer to 25psi right now. I sprayed my car at 30-35 iirc and it liked it much better when I was spraying at higher psi. My gun says 40psi max on the side of the gun. I think your right this could definitely be my problem. I will test spray tonight with all the recommendations I can get to see if I can fix these issues.
Thanks all!!!
Andrew
Posted by: barada Aug 12 2011, 08:35 AM
Im pretty sure its medium temp. The paint store didnt even ask me what I wanted.
Its a Huffy HDS590
No more than 20ps? Were talking at the regulator right? I think thats to low, im reading closer to 25psi right now. I sprayed my car at 30-35 iirc and it liked it much better when I was spraying at higher psi. My gun says 40psi max on the side of the gun. I think your right this could definitely be my problem. I will test spray tonight with all the recommendations I can get to see if I can fix these issues.
Thanks all!!!
Andrew
Andrew,
If you can get a photo the blemishes we can try and help.
Posted by: Andyrew Aug 12 2011, 09:13 AM
My camera's batteries were dead. I was charging them last night. Photos in a sec.
Posted by: Andyrew Aug 12 2011, 09:17 AM
The worst photo is where I wet sanded down quite a bit. Probably through a layer and a half. The other area is a typical surface wet sand.
Attached image(s)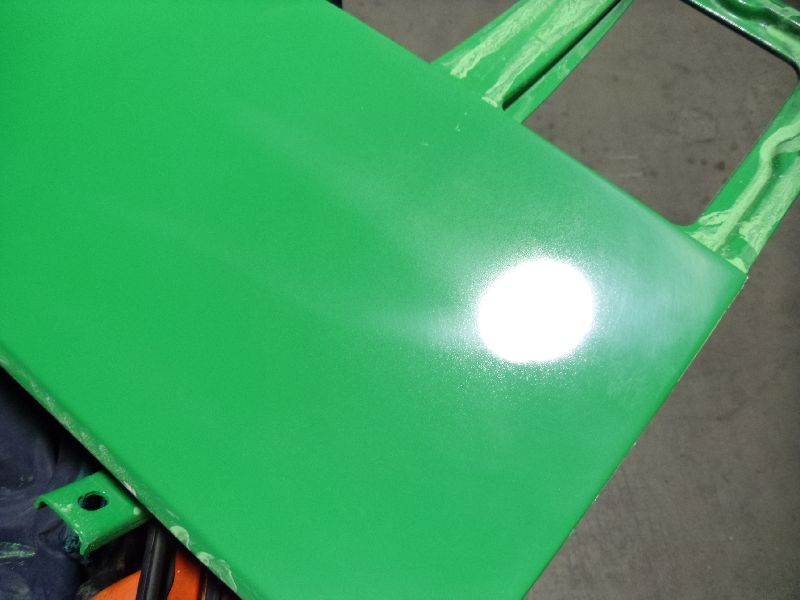
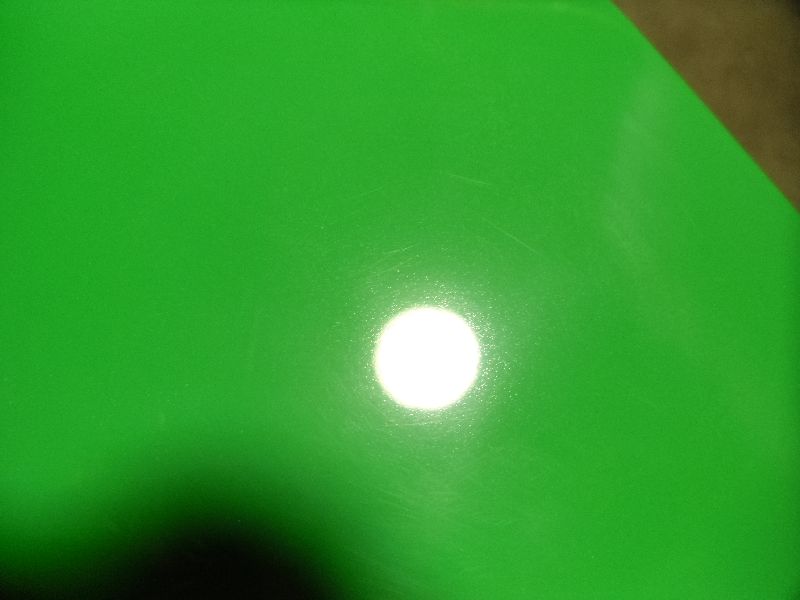
Posted by: barada Aug 12 2011, 09:25 AM
The worst photo is where I wet sanded down quite a bit. Probably through a layer and a half. The other area is a typical surface wet sand.
Awesome color. It does look like solvent pop. May need a higher temp reducer as a 1st step.
Phillip
Posted by: Andyrew Aug 12 2011, 09:41 AM
Now this was sprayed at 75-80 (Might have been 85 deg.. but that would have been on the first coat).
We still plan to spray tomorrow starting @ 9am. I can move that around however I want. I anticipate it taking 3 hours to actually spray and an hour to prep.
Here are the temps through the day.
7=64
8=67
9=71
10=75
11=80
12=82
1=85
2=88
My thoughts are to go to the paint store and swap out my full medium reducer for a high temp reducer.
If we start at 9, Spray at 10 and I use the high temp reducer then I will be in the high temp range throught the day, right? Or should I start out with the medium reducer and then go to the high temp reducer @ 11 or when the garage gets over say 78 deg?
Posted by: scotty b Aug 12 2011, 12:09 PM
I'd go with a medium reducer in the base and a slow hardener in the clear. If you reduce the clear, the medium will be fine, the hardener is what makes the real difference. Using the slow hardener will also allow the paint more time to flow out, you just need to adjust how soon you apply additional coats. 20 psi at the gun, the HVLP guns are designed to drop pressure internally so the 20 will get cut own to around 16 at the cap. Too much pressure will force air past the reduction points and you will get to much at the tip. It also has the potential to blow out seals with too much pressure.
Posted by: malaga_red75 Aug 12 2011, 01:04 PM
I'd go with a medium reducer in the base and a slow hardener in the clear. If you reduce the clear, the medium will be fine, the hardener is what makes the real difference. Using the slow hardener will also allow the paint more time to flow out, you just need to adjust how soon you apply additional coats. 20 psi at the gun, the HVLP guns are designed to drop pressure internally so the 20 will get cut own to around 16 at the cap. Too much pressure will force air past the reduction points and you will get to much at the tip. It also has the potential to blow out seals with too much pressure.
we are using a single stage urythane. So, still a medium reducer?
it sounds like pressure in the gun and time between coats might be the problem?
Posted by: Andyrew Aug 12 2011, 01:08 PM
Scotty,
Single stage.
The gun says 40PSI max. So I set the gun at full pressure on the compressor to 39psi. Then as the compressor lowers the tank it goes down to about 36 or so.
I spoke with my paint supplier and he showed me another gun that said 29psi max and he said for that gun he suggested 25psi. And that the gun pressure depends on the gun. He suggested 35psi on the gun. He also gave me slow reducer in exchange for the Medium as he thinks that that is the problem, and suggested I wait a longer flash.
He said solvent pop is typically a lot bigger.
They only have one stage of hardner.
Also He had never seen this issue before either and basically said to make sure the gun is clean (which is was), and spray the test pannel with the slow reducer. 2 mist coats then 2 medium coats (which is what I did). Then if the problem is still there bring the test panel in with the paint, and their spray expert will test the materials and give me advice, Or if there is still a problem then they will replace the paint.
Posted by: ppetion Aug 12 2011, 01:12 PM
I am on pin and needles, I have my boot set up. I was going to spray in the morning, but due to wheater change I will around 6, today. with all these issues, imagine me as a novice...
Posted by: Andyrew Aug 12 2011, 01:27 PM
Paul, what temp are you spraying in?
This is why you do test pannels
The engine lid is a great test panel. If that goes on without a hitch and looks good the next day then keep on spraying!
Posted by: ppetion Aug 12 2011, 02:06 PM
Paul, what temp are you spraying in?
This is why you do test pannels
The engine lid is a great test panel. If that goes on without a hitch and looks good the next day then keep on spraying!
It is 80 sunny right now @ 4pm, planning on doing it around 6:30 by then it should be arround 70-75 tops
Posted by: scotty b Aug 12 2011, 02:18 PM
Paul, what temp are you spraying in?
This is why you do test pannels
The engine lid is a great test panel. If that goes on without a hitch and looks good the next day then keep on spraying!
What brand paint are you using ? Everything I have always used single stage or two stage had various hardeners for differing conditions. IMHO 80 and up should use a slow hardener. Alot of painting is also feel, I shoot differently then everyone I have ever worked for. I run 20 psi into my gun and tend to over-reduce my paints. It lays down slicker for me. Other guys would run the hell out of it the way I mix. Just remember, the manufacturers mixing recommendation is just that...a recommendation. Ina 78 deg, zero humidity, perfectly clean booth that is what works best. In the real world things must be adjusted. I change the way I mix based on temp, humidity, and even the way I feel that day
Posted by: ppetion Aug 12 2011, 02:23 PM
Paul, what temp are you spraying in?
This is why you do test pannels
The engine lid is a great test panel. If that goes on without a hitch and looks good the next day then keep on spraying!
What brand paint are you using ? Everything I have always used single stage or two stage had various hardeners for differing conditions. IMHO 80 and up should use a slow hardener. Alot of painting is also feel, I shoot differently then everyone I have ever worked for. I run 20 psi into my gun and tend to over-reduce my paints. It lays down slicker for me. Other guys would run the hell out of it the way I mix. Just remember, the manufacturers mixing recommendation is just that...a recommendation. Ina 78 deg, zero humidity, perfectly clean booth that is what works best. In the real world things must be adjusted. I change the way I mix based on temp, humidity, and even the way I feel that day
Scotty I dont't want to highjack Andy's thread, but biefly, I am using a single stage. here is a link of my thread. I will post the paint info there.
http://www.914world.com/bbs2/index.php?showtopic=132582&hl=
Posted by: Andyrew Aug 12 2011, 02:30 PM
Scotty, See the pic. I dont have the actual paint on me so I cant check.
And I agree with you on on painting by feel. I am definitely still getting the feel of it.
Paul is using TCP global out of LA
Paul, 70-75 and you have the Med reducer right? You should be golden.
Posted by: ppetion Aug 12 2011, 02:34 PM
Scotty, See the pic. I dont have the actual paint on me so I cant check.
And I agree with you on on painting by feel. I am definitely still getting the feel of it.
Paul is using TCP global out of LA
Paul, 70-75 and you have the Med reducer right? You should be golden.
Yes, Thats what I have.
Posted by: Andyrew Aug 13 2011, 09:49 AM
Slow reducer, 25psi, 20 minutes+ flash time, Same shit (less of it... but its still there).
Going to bring the panel into the paint store when peter gets here.
I sprayed a bumper with some black paint I have and so far no issues. Same setup but different paint, reducer, hardner.
Posted by: orange914 Aug 13 2011, 03:21 PM
Thats not the H B spary gun hanging on the wall is it???
You're welcome to use a DeVebliss gun I have if you need/want. I hasn't been used for awhile but was cleaned thourouhly when put up.
Good luck spraying, Mike
Posted by: Andyrew Aug 13 2011, 04:22 PM
Mike,
Thats pretty funny!
Also I will take you up on that offer. I need to rule out my gun as the issue.
The bumper that I painted black had a few of the tiny holes, however they pretty much came out after wet sanding. However its not 100% perfect and I need to try and get it as good as I can.
Are you home now? I'll call you.
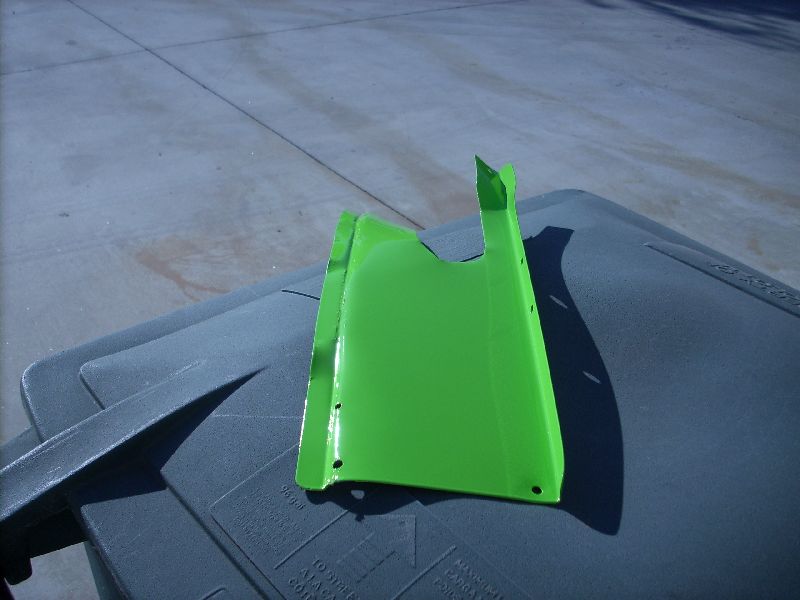
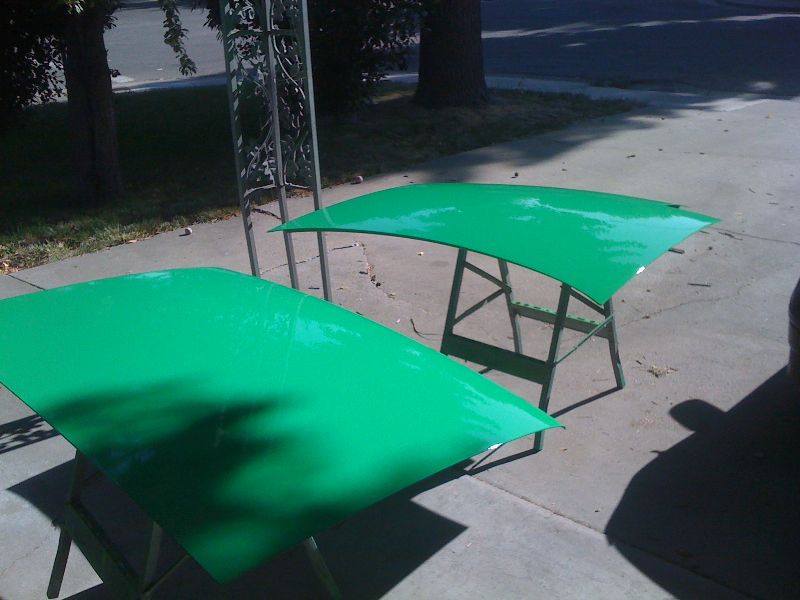
Posted by: Andyrew Aug 14 2011, 12:11 PM
So we sprayed the headight covers yesterday and after leaving it to bake all day I wet sanded and polished one side of it.
Im going to be honest here, It looks fantastic. I am going to try one of the doors today and cut and buff it tomorrow and see what happens.
I have high hopes.
Also I dont think im going to use Mikes gun as its a bottom feeder and it has a 1.8 tip. I am low on materials and I need to make sure I can retain as much materials as possible. Mike I do have interest in the gun as a primer gun, Let me know if you want to sell it
Attached thumbnail(s)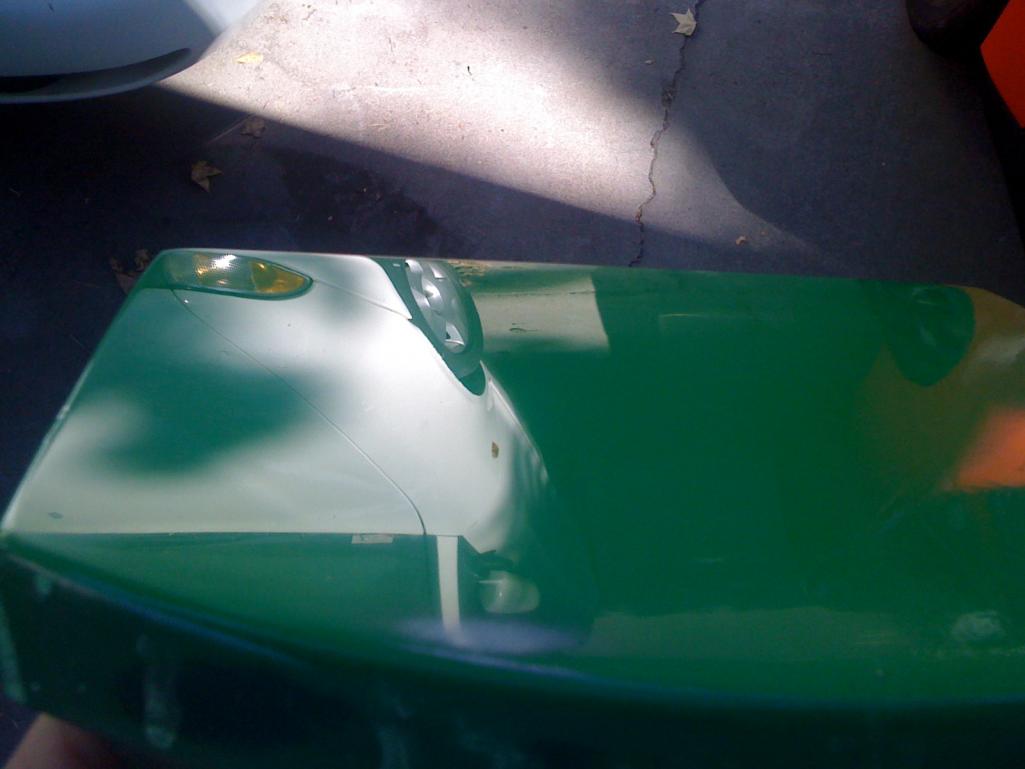
Posted by: Andyrew Aug 15 2011, 02:24 PM
Finally got in touch with the body shop tech. This is what he said.
10 minutes flash time
25-28psi
Closer spray (He said he sprays 6" from the pannel)
And therefore he moves faster.
Oh boy. What fun... I swear everyone has their own technique.
I'll try a respray tonight as well with these tips and see what happens.
This sure is some temperamental paint...
Posted by: scotty b Aug 15 2011, 02:27 PM
Finally got in touch with the body shop tech. This is what he said.
I swear everyone has their own technique.
This sure is some temperamental paint...
Yes
Headlight lid looks great
Posted by: Andyrew Aug 15 2011, 11:17 PM
Forgot how much I hate polishing with a buffer... Arg. So tedious.
Door is wetsanded and polished. Could use another go around as it still had some orange peel. But there are none of the little pinholes we were worried about.
I am very happy with it and very confident going forward. I am going to wetsand the engine lid (the one that I sprayed and gave to the tech but never wetsanded) tomorrow and spray the other door. Pretty confident that both will turn out.
Posted by: Andyrew Aug 17 2011, 12:17 AM
Other door is painted. 5 coats, It looks pretty good, less orange peal.
Differences:
1.Pressure raised to 23psi (For some reason thats all my regulator would give me).
2. Flash time reduced to 17 mins
3. Gun to pannel distance reduced to 6-9"
4. Speed increased slightly on spraying.
We are planning on spraying the body this weekend! (Again..)
We will either spray on Sat morn or Sun morn and spend the previous day prepping.
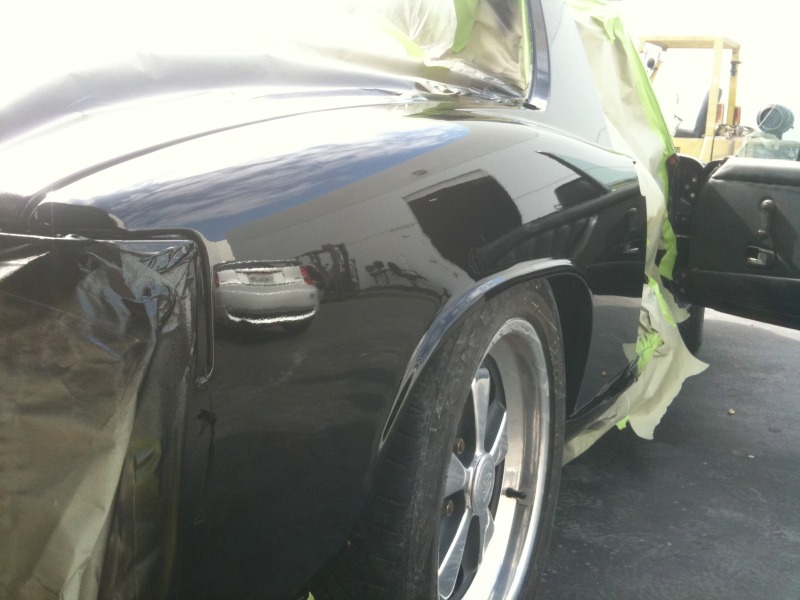
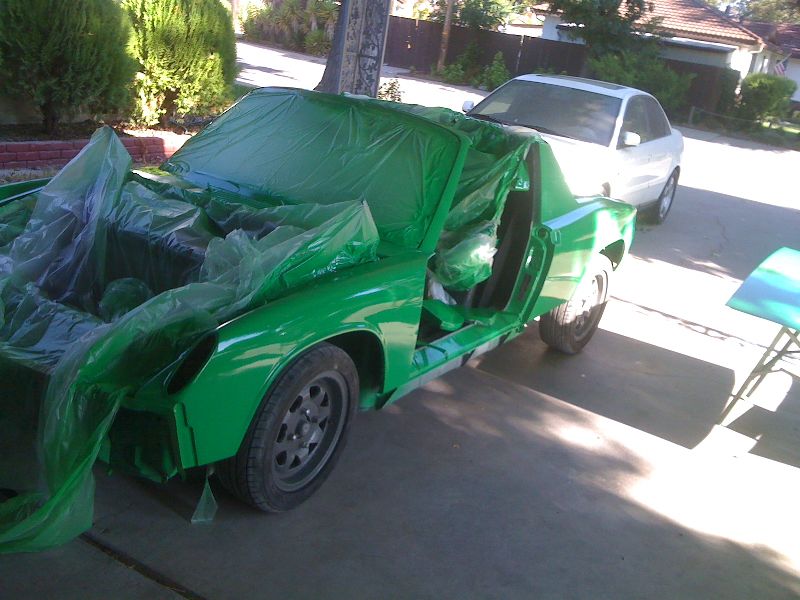
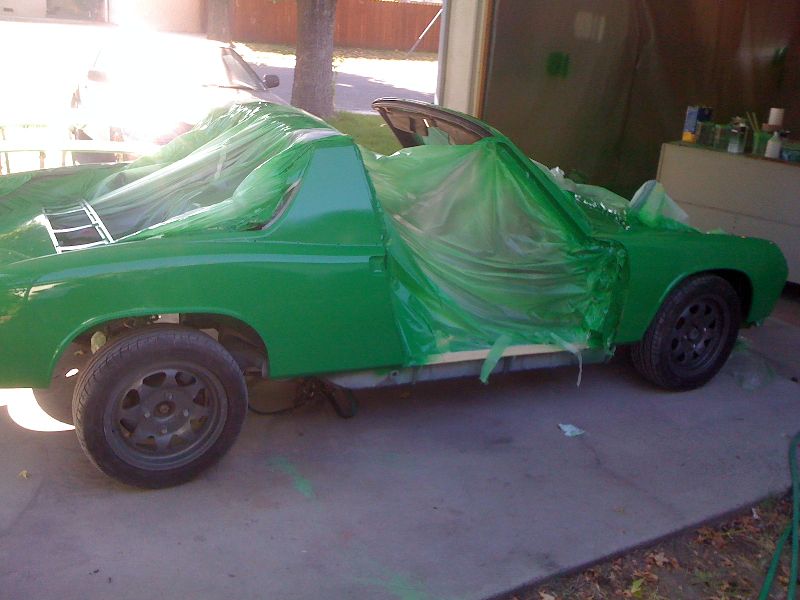
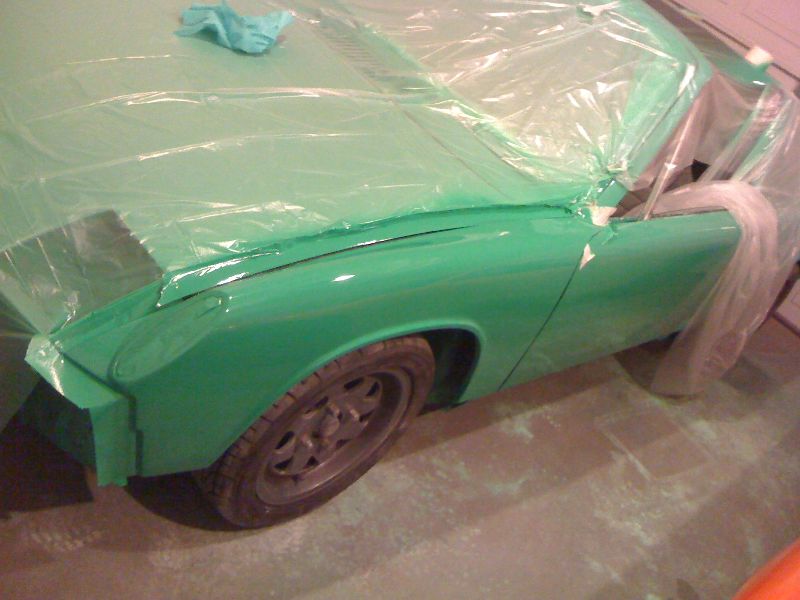
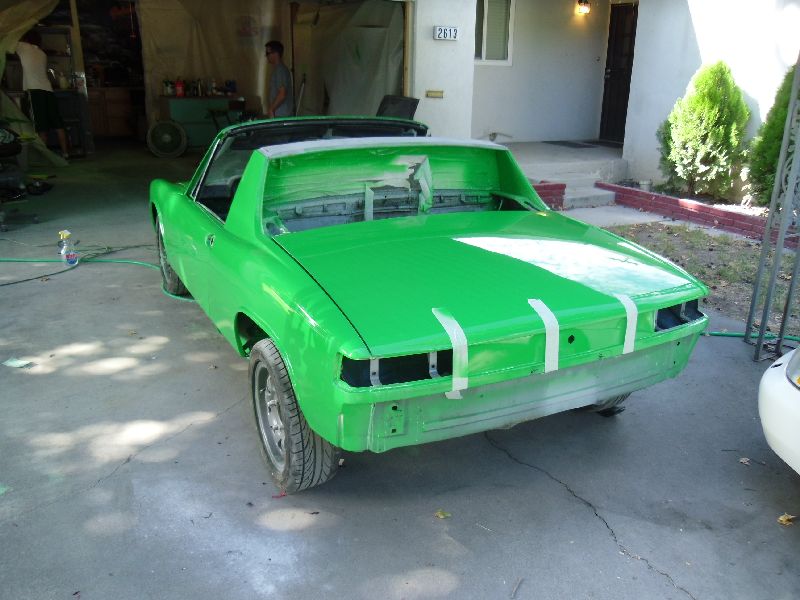
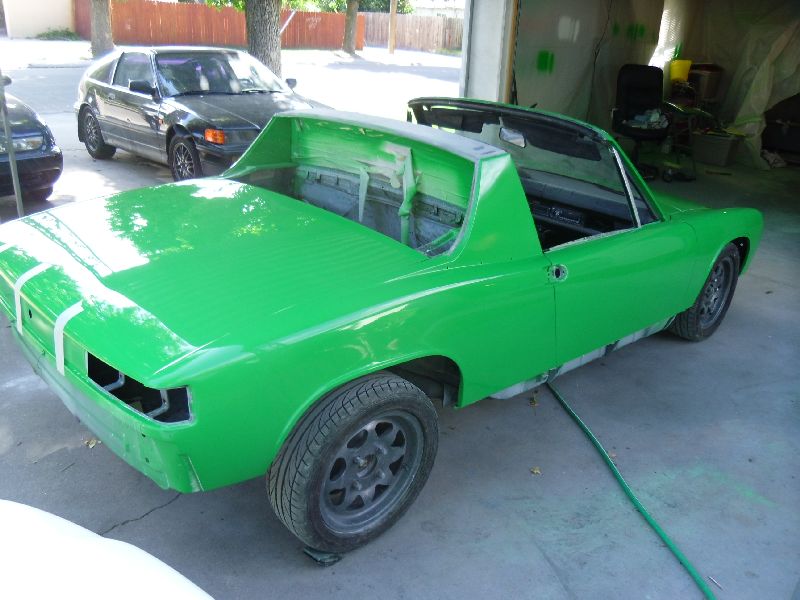
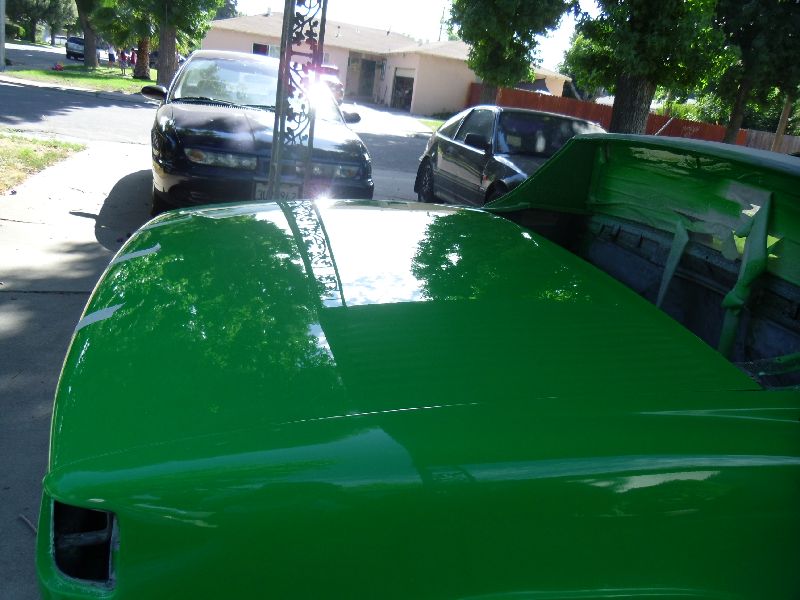
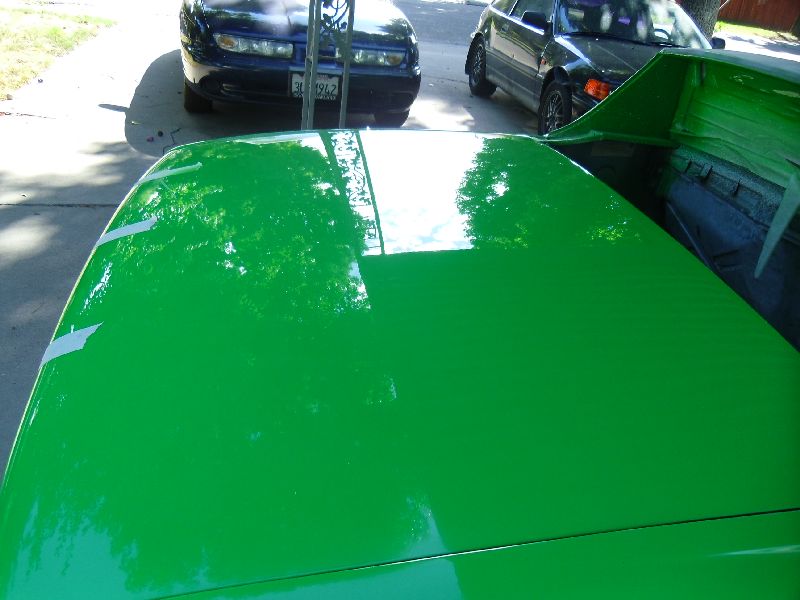
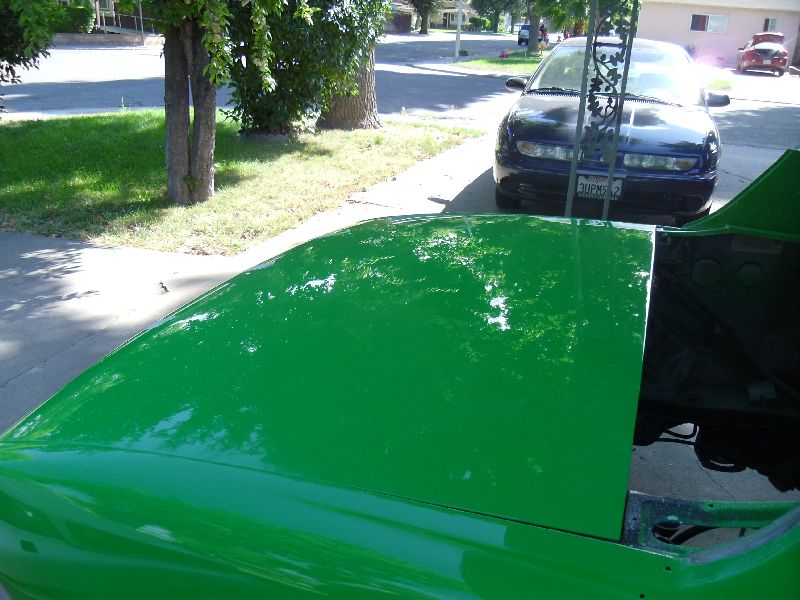
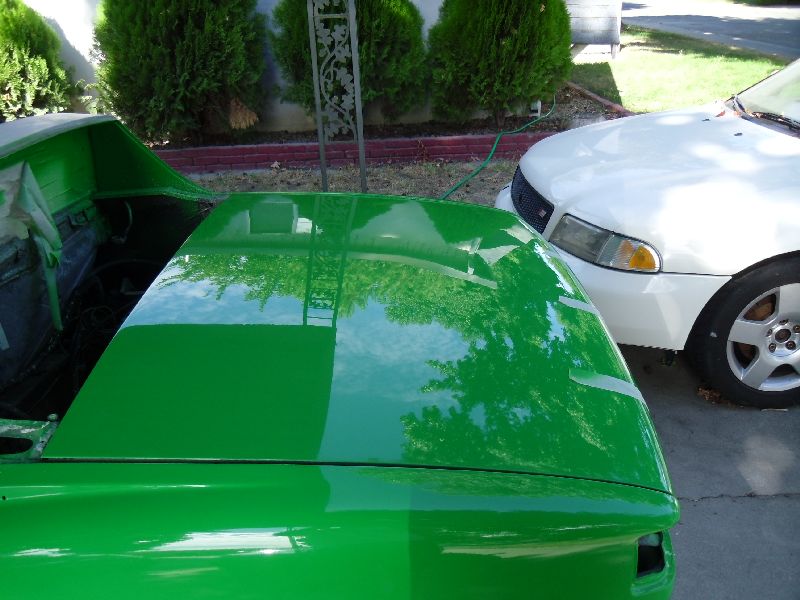
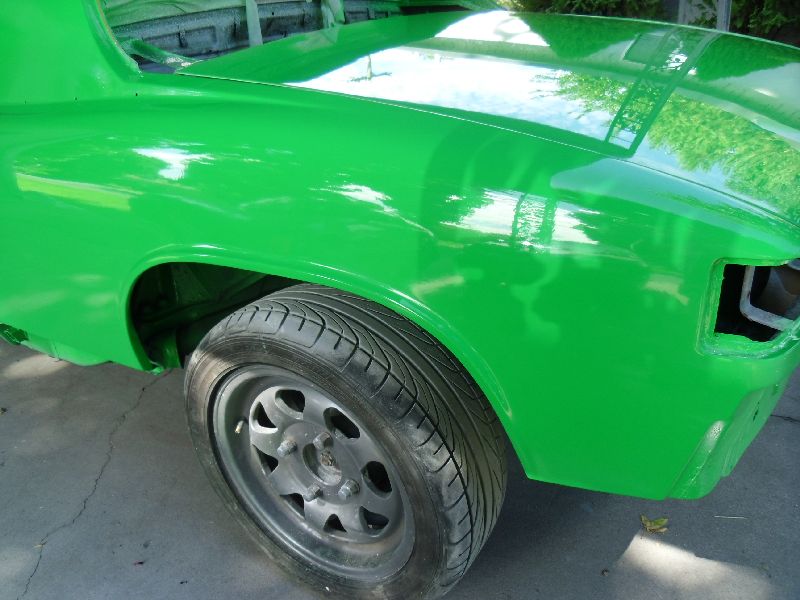
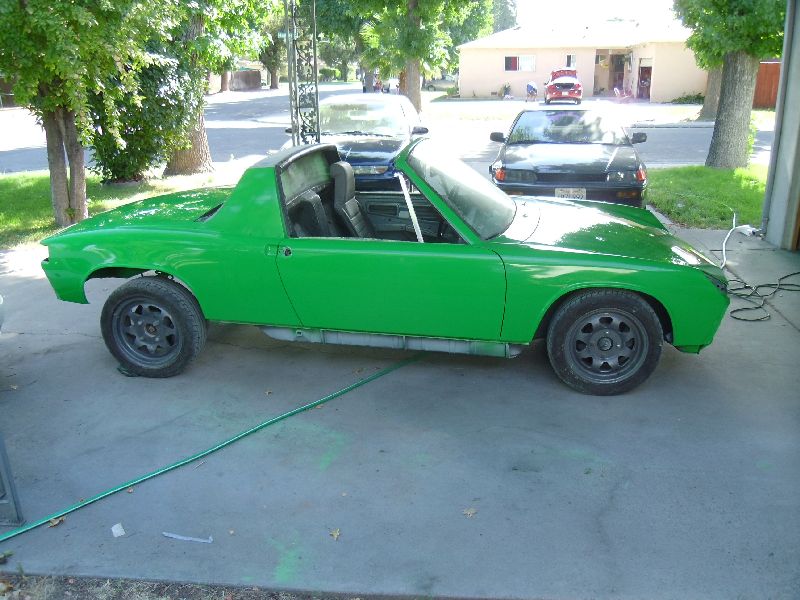
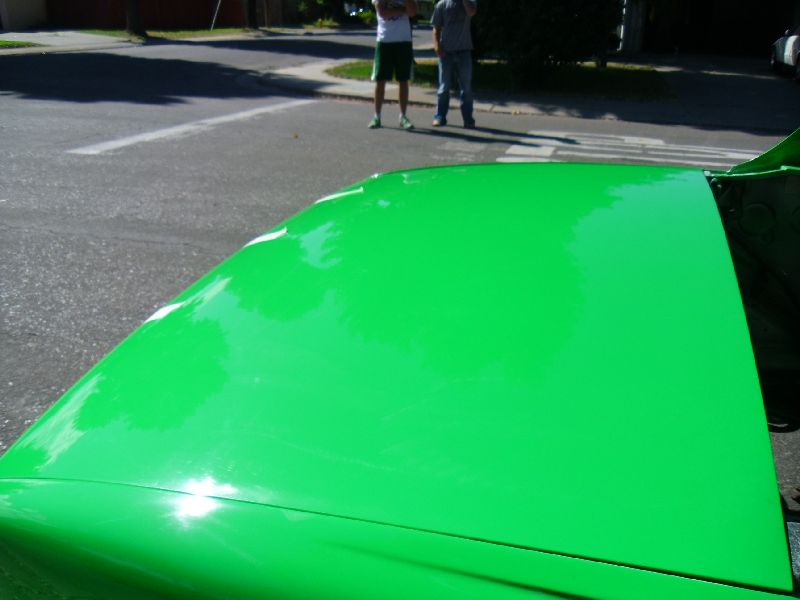
Posted by: Andyrew Aug 22 2011, 01:41 PM
Body and hoods are sprayed!
It looks really good! Im going to respray one small area and I have already wetsanded 80% of the car!
We did a damn good job of taping up the garage, Im really proud of it! I hate to tear it down!!!!
I'll let the pics do the rest of the talking. 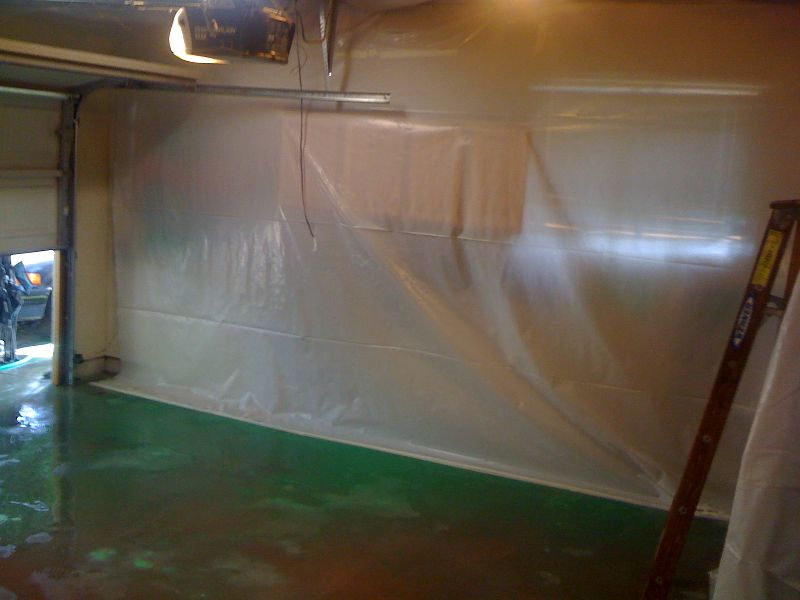

Posted by: orange914 Aug 22 2011, 02:04 PM
very nice, Andrew
Posted by: kg6dxn Aug 22 2011, 05:49 PM

Posted by: scotty b Aug 22 2011, 07:37 PM
Sounds like your bigest issue was gun distance. Nice job
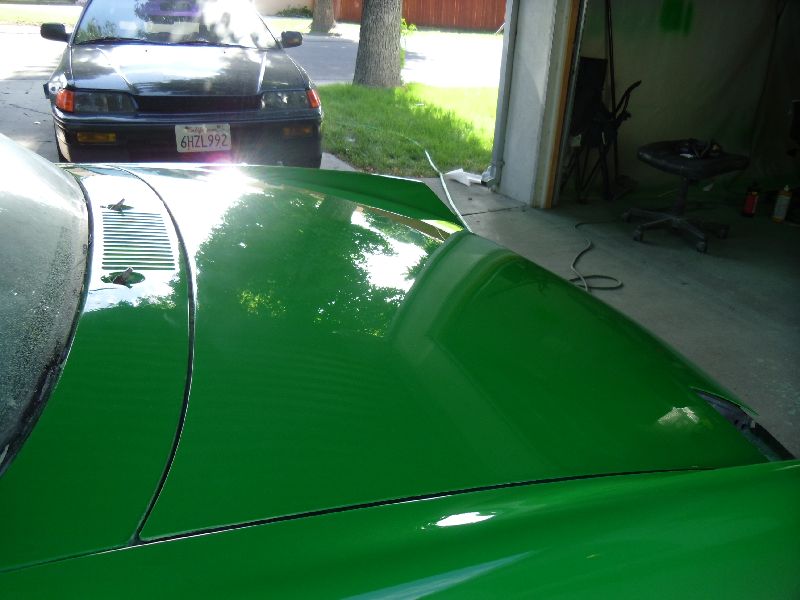
Posted by: Andyrew Aug 23 2011, 12:11 PM
I got 3 hours in last night. Finished up the wetsanding and started polishing.
Here is the front fender about 50% done. Also the reason why I like wetsanding much more then polishing.. I can listen to shit Polishing is to loud to do that with...
Attached thumbnail(s)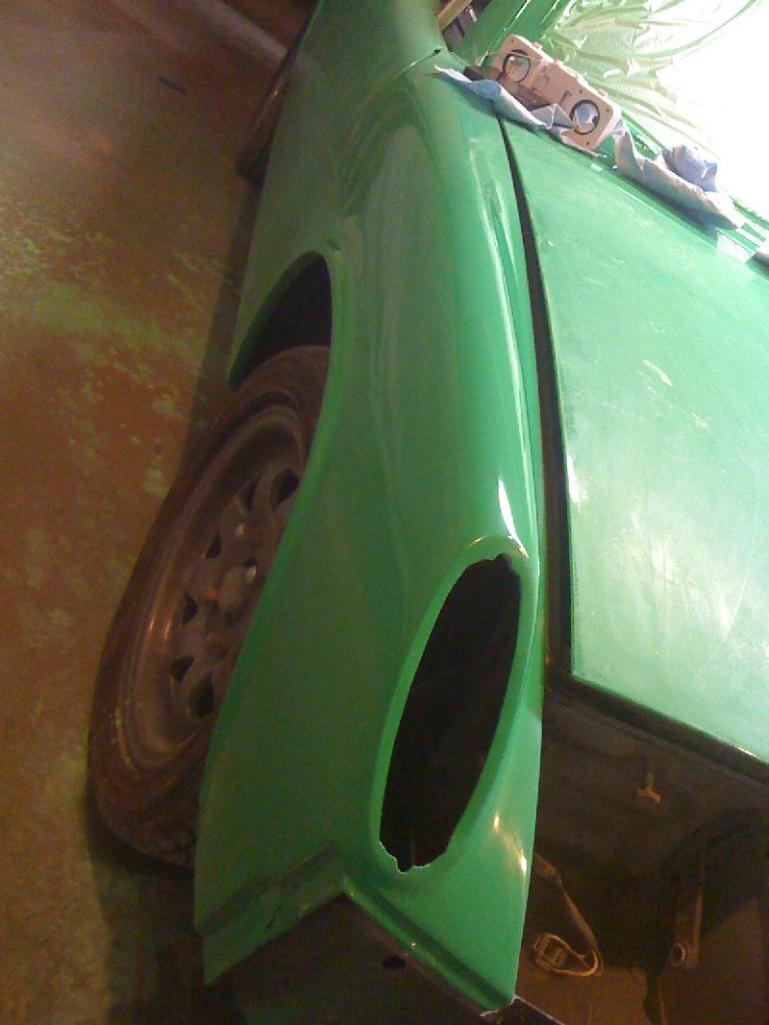
Attached image(s)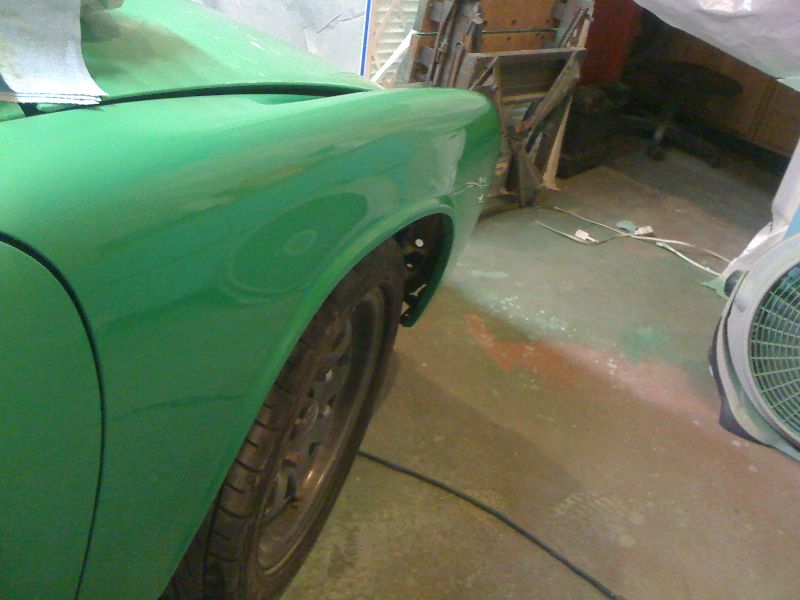
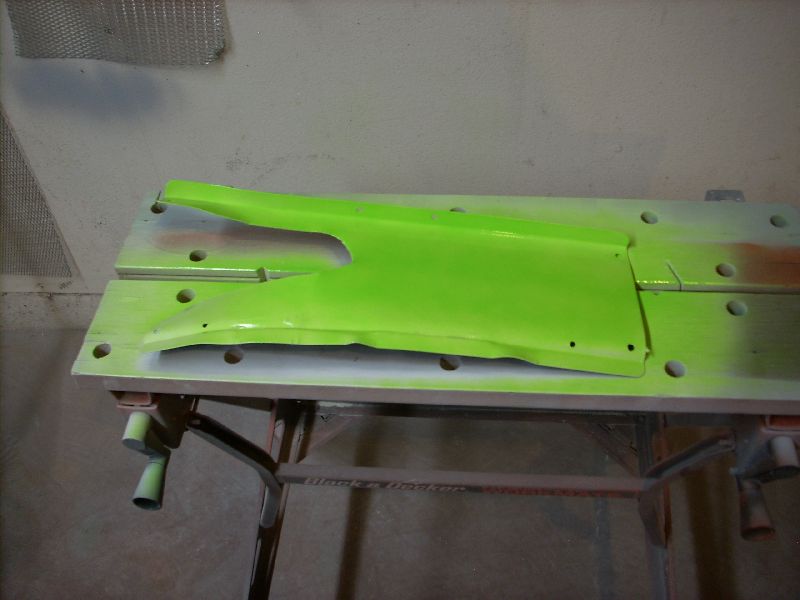
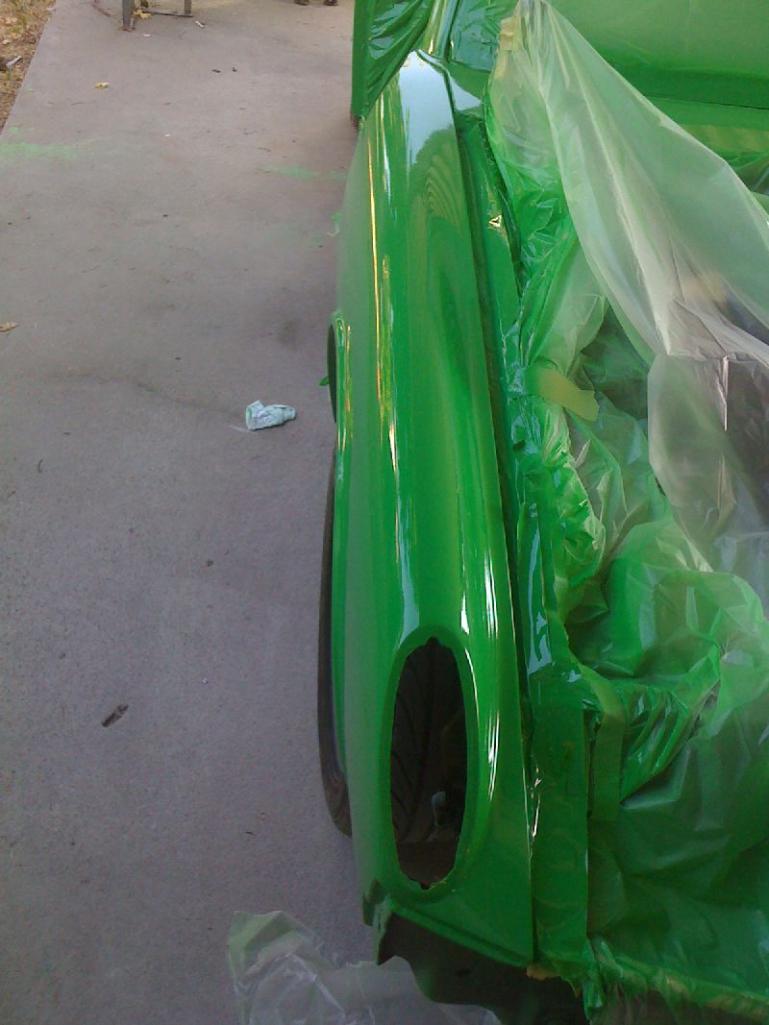
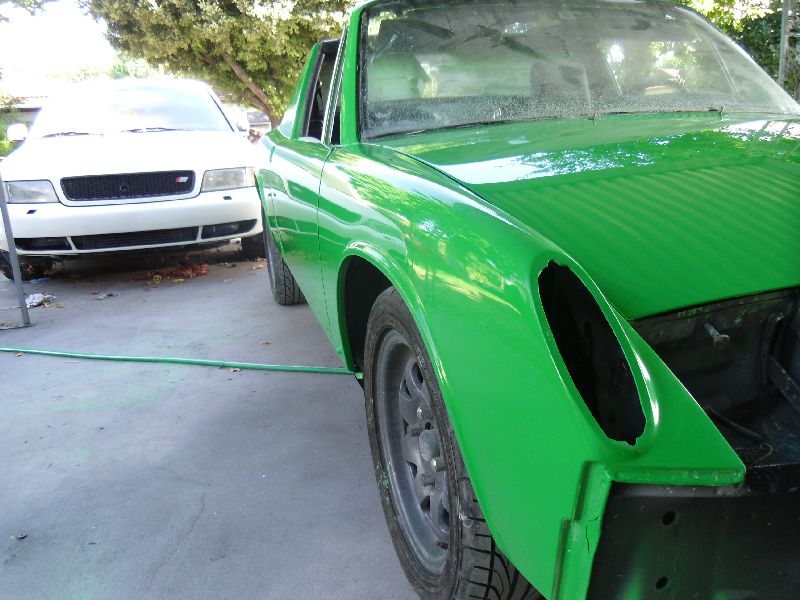
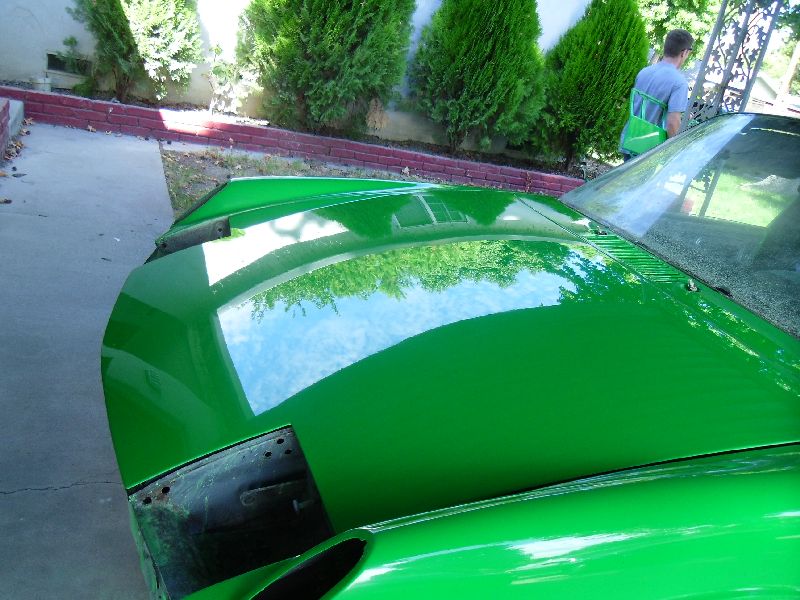
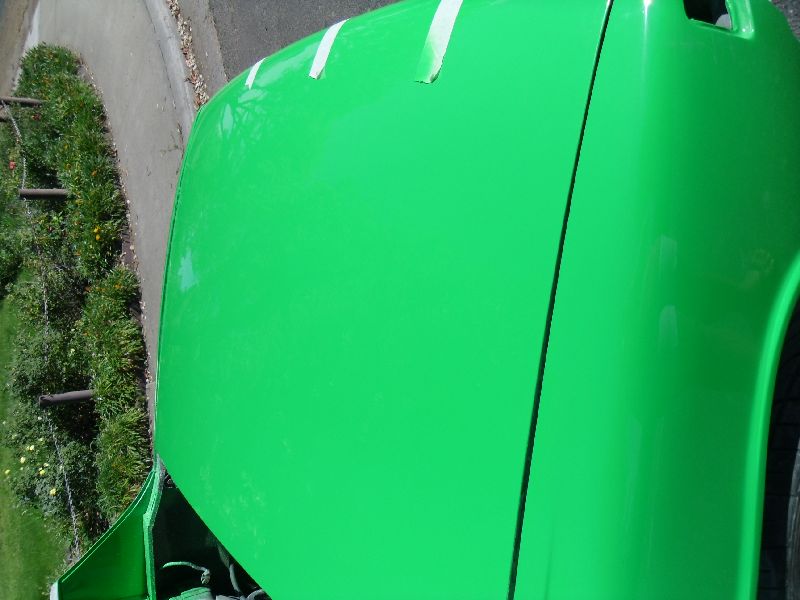
Posted by: Andyrew Aug 24 2011, 12:08 AM
Got another 3 hours in tonight.
Polished 75% of the rear fender although I still have a tad bit more wetsanding to do on it
Also prepped and painted the fender (Decided to spray the whole thing vs just one area.. It didnt use much paint and I still got 3 coats on it). Also sprayed under the targa bar again as it was a bit light and sprayed the sides of the headlight lids.. For some reason I missed that area on them.
Attached image(s)
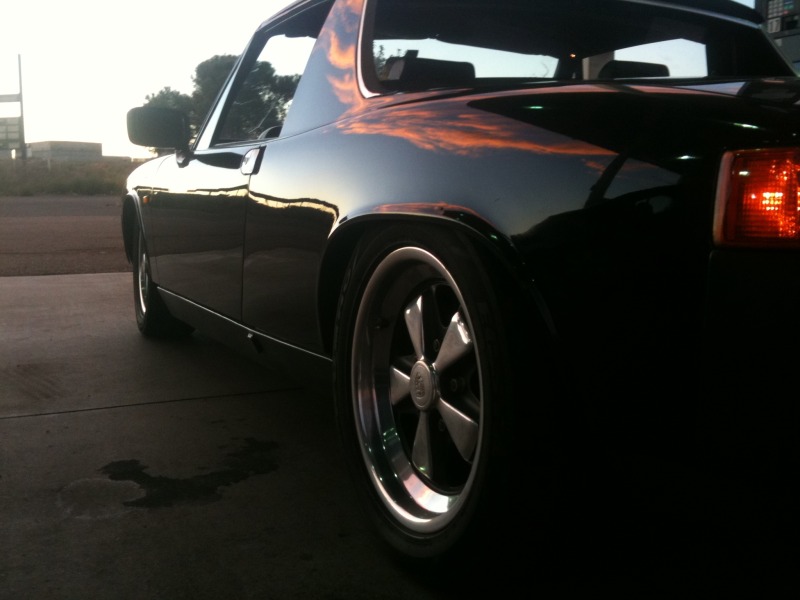
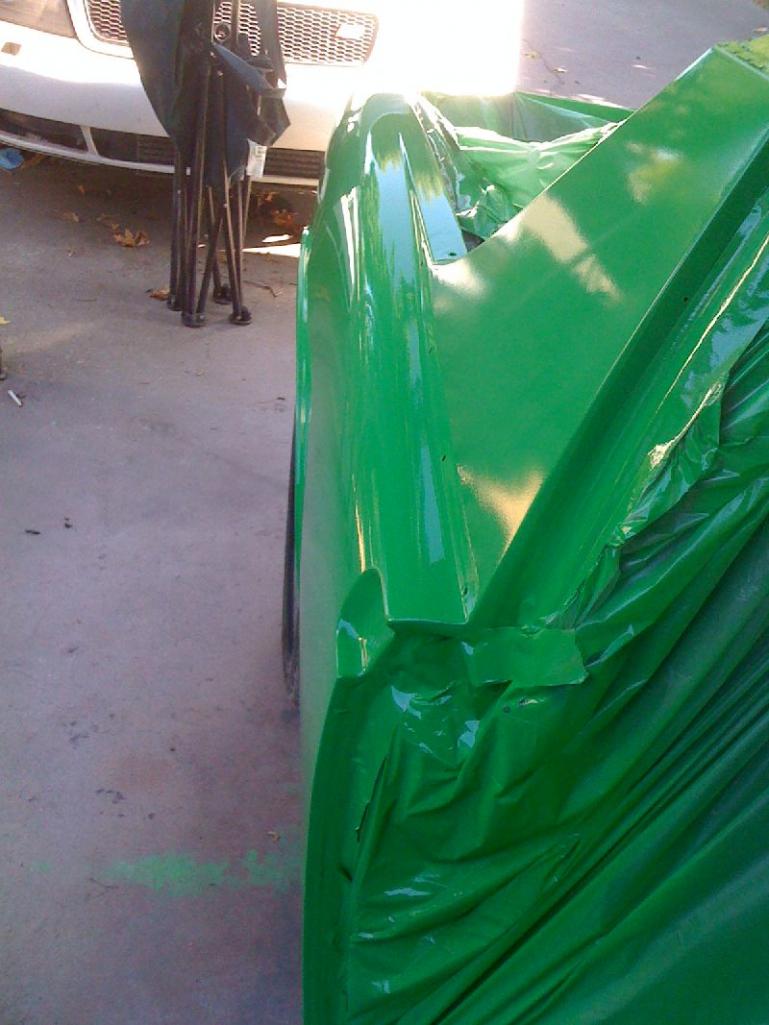
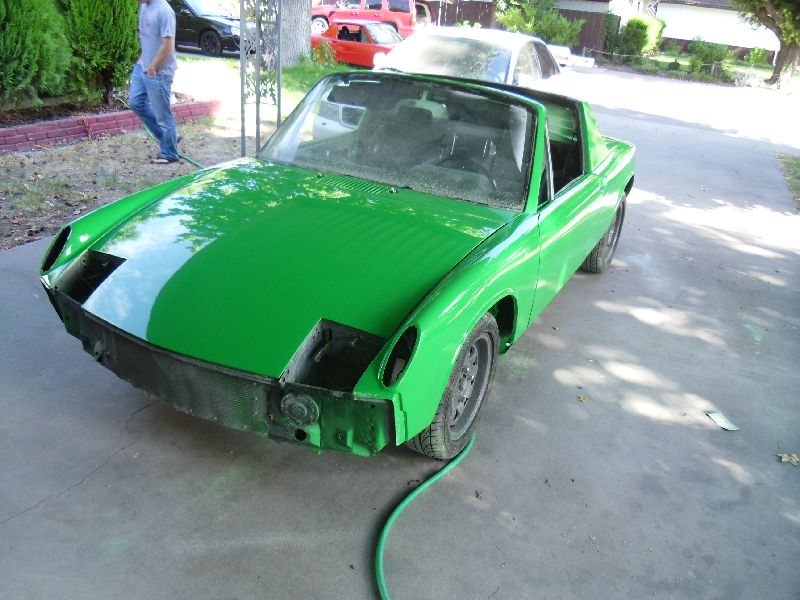
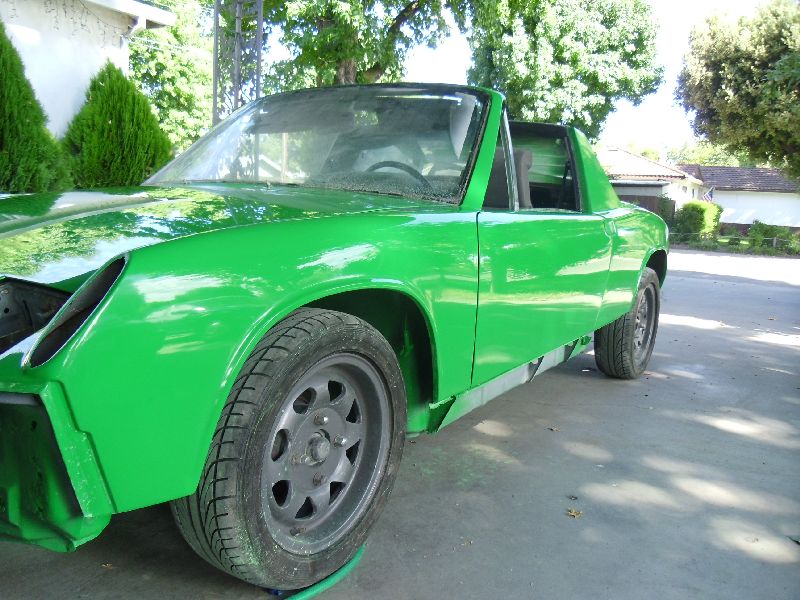
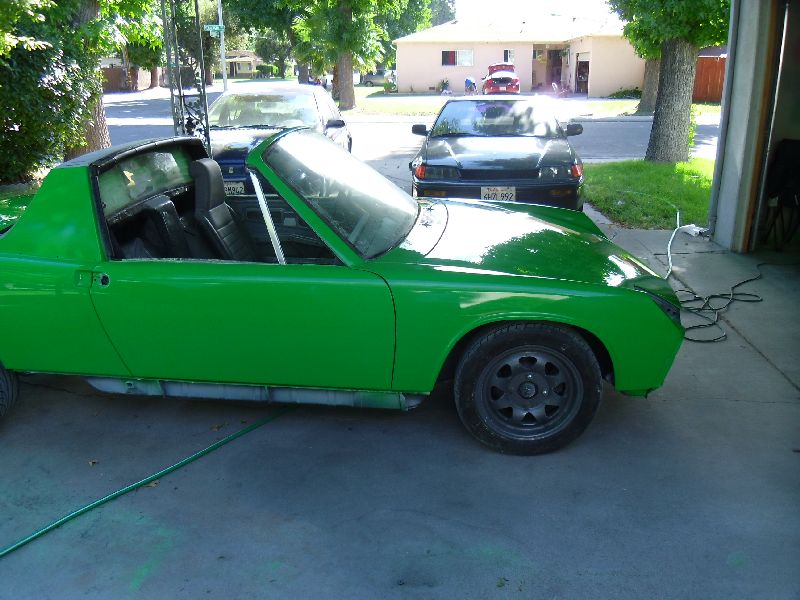
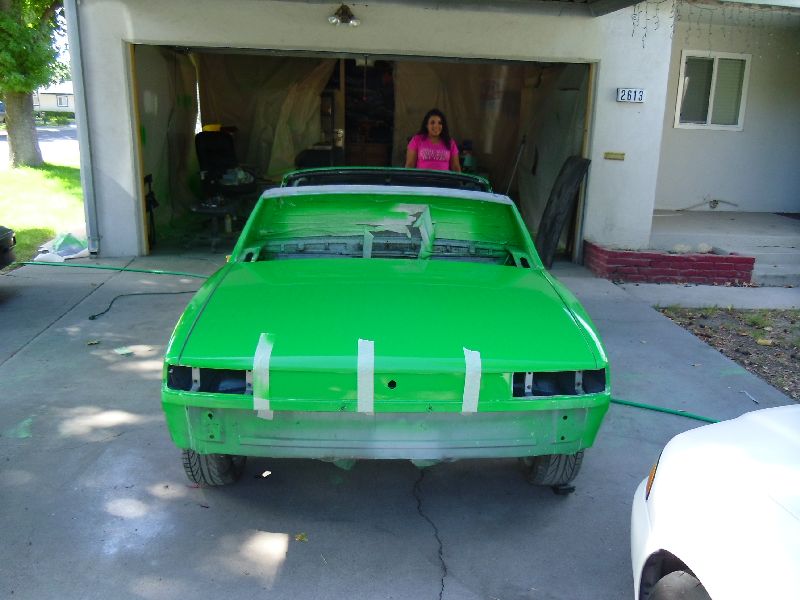
Posted by: Andyrew Aug 27 2011, 05:13 PM
Peter took the car home today, It was a great experience with some ups and downs, but overall were both happy with it. In a couple of months when peter gets some scratches in it we'll buff it out again and touch up some area's.
I'll let the pictures do the talking
Attached image(s)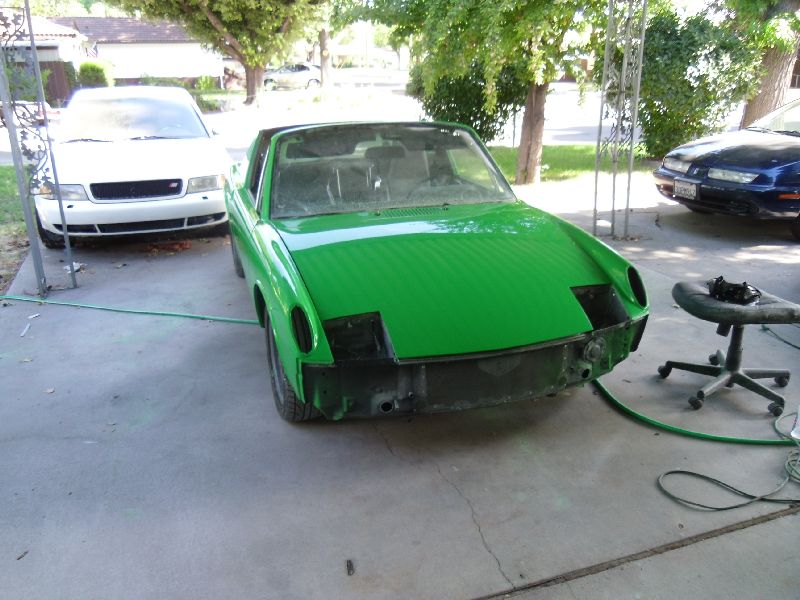


Posted by: kg6dxn Aug 27 2011, 05:43 PM
Very Nice!
Posted by: barada Aug 27 2011, 08:21 PM
Yes turned out nice. Liking the green.
Phillip
Posted by: malaga_red75 Aug 28 2011, 01:54 AM
I am one VERY happy customer.
working with andrew has been a great experience. Like he said, we had our ups and downs, but we got everything worked out and the car is fantastic!!
look for the re-build on my build thread.
I got the car home at around 2PM and had the motor in and fired up at 9... along with a few other odds and ends back on the car.
Thanks again Andrew!
-Peter
Posted by: AZ914 Aug 28 2011, 09:43 AM
Looks great!!!
Powered by Invision Power Board (http://www.invisionboard.com)
© Invision Power Services (http://www.invisionpower.com)