Printable Version of Topic
Click here to view this topic in its original format
914World.com _ 914World Garage _ Tuning with an air fuel ratio gauge
Posted by: 914Mels Jul 28 2011, 11:36 AM
Hey All,
I've had my new air fuel ratio gauge installed for a couple weeks now. If you don't have one yet, I would consider dropping $200 for the set up. I knew my stock F.I. could be improved on so this is the start of my experiment. The engine is a 1.7 with 1.8 P&C's and a close to stock hydraulic cam. With all the basics checked, fuel pressure, resistance readings, MAP sensor condition, tune-up etc, I'm ready to start.
Right off the bat, with all the engine sensors hooked up and working,the gauge showed a real lean condition across the board. The car ran OK but jerked and bucked under load. A quick disconnect of the temp sender 1 for the air temp, brought the readings to a more favorable range. Where it was running in the 18.0 to 16.0 range, now it's around 12.5 to 15.5. The difference in power is very noticeable and the bucking is gone. From here, I'm going to start playing with the sensor readings and see what changes work out. Mike
Posted by: scott_in_nh Jul 29 2011, 07:42 AM
I want to add an A/F gauge where my dead clock sits - maybe over the winter.
If you really want to tune your motor, IMO you can skip playing with temp sensors (band-aid) and go right to adjusting the MPS (tuning).
read this if you have not already done so:
http://members.rennlist.com/pbanders/manifold_pressure_sensor.htm#Index
Drill a hole in the MPS plug so that you can adjust the screws without removing the plug or the mps from the car.
After you have done that and you find you did not have enough adjustment, you can play with the temp sensors (but I don't believe you will need too).
What gauge/sender did you choose? where did you put the oxygen sensor? Pictures?
Posted by: 914Mels Jul 29 2011, 07:05 PM

I want to add an A/F gauge where my dead clock sits - maybe over the winter.
If you really want to tune your motor, IMO you can skip playing with temp sensors (band-aid) and go right to adjusting the MPS (tuning).
read this if you have not already done so:
http://members.rennlist.com/pbanders/manifold_pressure_sensor.htm#Index
Drill a hole in the MPS plug so that you can adjust the screws without removing the plug or the mps from the car.
After you have done that and you find you did not have enough adjustment, you can play with the temp sensors (but I don't believe you will need too).
What gauge/sender did you choose? where did you put the oxygen sensor? Pictures?
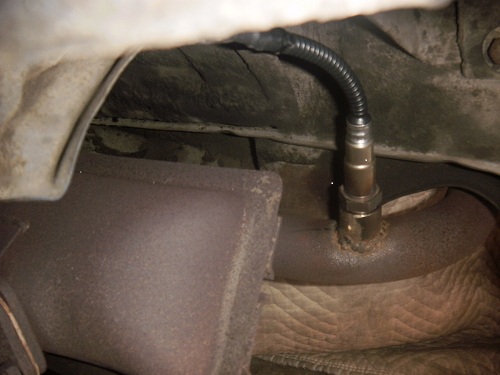
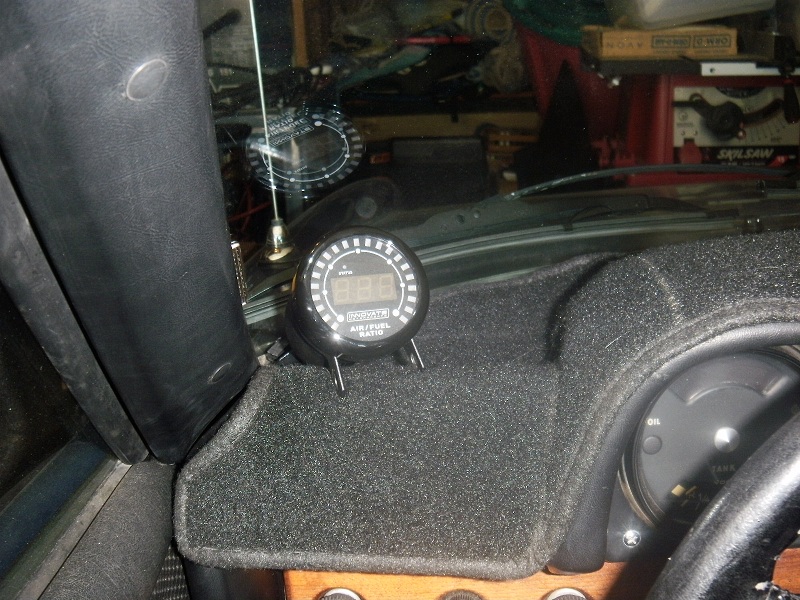
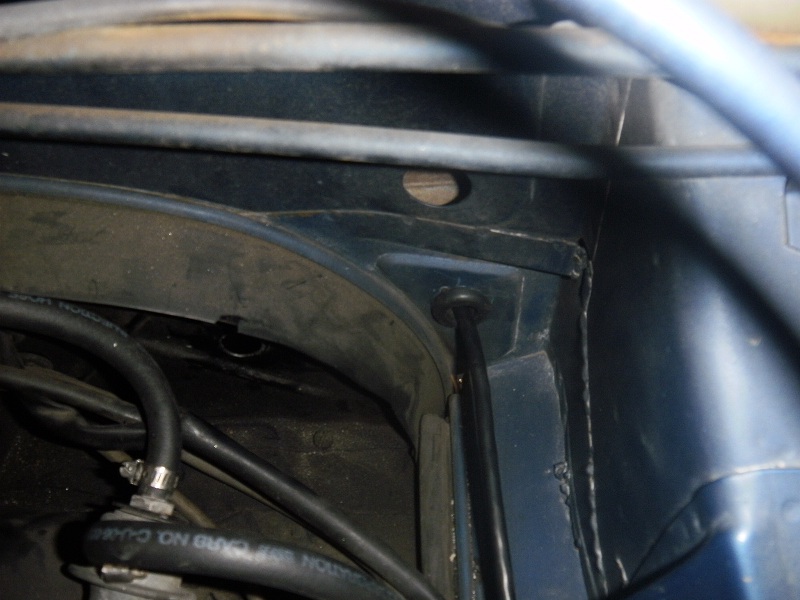
I ended up with the Innovate Motorsports MTX-L. It's all self contained in the gauge and seems to be pretty high quality. The hardest part was running the cable cleanly to the dash. On that note, there are two MTX-L models, the powersport model has a cable only three feet long. The other one, MTX-L3844 looks the same but has a ten foot long cable. Even that was barely long enough to reach the drivers side dash. They sell a 18 ft long cable as a $70 accessory. I put the O2 sensor in the tail pipe, a stock 1.7 muffler set up. It gave good clearance and was easy to take off for welding. The only draw back is the mixture gets diluted at idle with outside air and gives a false reading. It doesn't matter too much though, I just hold a rag over the tail pipe to see what the true reading is. The gauge is so light I have mounted it with some velcro to my dash cover. I used a 7/8th hole saw to get the cable through the body, it needs to be that big for the connector. I ran the cable through the body instead of the engine tin to avoid needing to unhook everything to get the engine out for future service. Otherwise it's just three wires to hook up, power, ground and headlights, to dim the gauge at night. I would take a piece of ten foot long wire and see if you can reach your console from the exaust to check cable lenght. Good luck with your install, Mike

 [attachmentid=268596[attachmentid=
268596][
Posted by: 914_teener Jul 30 2011, 02:24 PM

I want to add an A/F gauge where my dead clock sits - maybe over the winter.
If you really want to tune your motor, IMO you can skip playing with temp sensors (band-aid) and go right to adjusting the MPS (tuning).
read this if you have not already done so:
http://members.rennlist.com/pbanders/manifold_pressure_sensor.htm#Index
Drill a hole in the MPS plug so that you can adjust the screws without removing the plug or the mps from the car.
After you have done that and you find you did not have enough adjustment, you can play with the temp sensors (but I don't believe you will need too).
What gauge/sender did you choose? where did you put the oxygen sensor? Pictures?
I ended up with the Innovate Motorsports MTX-L. It's all self contained in the gauge and seems to be pretty high quality. The hardest part was running the cable cleanly to the dash. On that note, there are two MTX-L models, the powersport model has a cable only three feet long. The other one, MTX-L3844 looks the same but has a ten foot long cable. Even that was barely long enough to reach the drivers side dash. They sell a 18 ft long cable as a $70 accessory. I put the O2 sensor in the tail pipe, a stock 1.7 muffler set up. It gave good clearance and was easy to take off for welding. The only draw back is the mixture gets diluted at idle with outside air and gives a false reading. It doesn't matter too much though, I just hold a rag over the tail pipe to see what the true reading is. The gauge is so light I have mounted it with some velcro to my dash cover. I used a 7/8th hole saw to get the cable through the body, it needs to be that big for the connector. I ran the cable through the body instead of the engine tin to avoid needing to unhook everything to get the engine out for future service. Otherwise it's just three wires to hook up, power, ground and headlights, to dim the gauge at night. I would take a piece of ten foot long wire and see if you can reach your console from the exaust to check cable lenght. Good luck with your install, Mike

 [attachmentid=268596[attachmentid=
268596][
Thanks for that.
Did you set for WOT and part load yet? Or just idle.
Can you give a little bit more on your motor displacement?
Thanks
Posted by: Bleyseng Jul 30 2011, 05:36 PM
Don't drill the WOT stop plug, just use a heat gun to soften the epoxy and pick it out. Then unscrew it...to get access to the diaphram screws. Adjust those and then install the WOT stop and set the WOT air fuel mix....
Posted by: JimN73 Jul 30 2011, 07:52 PM
Thanks for posting what you've done and the link to Brad Anders work. Informative and maybe helpful. I didn't realize that the D-Jet could be adjusted to accomodate greater compression and displacement.
I understand that the D-jet won't work well with modified cams (Raby's 9530) but wonder if the changes to the MPS will help there. I sent Brad Anders an e-mail, but it bounced back. Any ideas?
thanks in advance.
Posted by: 914Mels Jul 30 2011, 09:15 PM

I want to add an A/F gauge where my dead clock sits - maybe over the winter.
If you really want to tune your motor, IMO you can skip playing with temp sensors (band-aid) and go right to adjusting the MPS (tuning).
read this if you have not already done so:
http://members.rennlist.com/pbanders/manifold_pressure_sensor.htm#Index
Drill a hole in the MPS plug so that you can adjust the screws without removing the plug or the mps from the car.
After you have done that and you find you did not have enough adjustment, you can play with the temp sensors (but I don't believe you will need too).
What gauge/sender did you choose? where did you put the oxygen sensor? Pictures?
I ended up with the Innovate Motorsports MTX-L. It's all self contained in the gauge and seems to be pretty high quality. The hardest part was running the cable cleanly to the dash. On that note, there are two MTX-L models, the powersport model has a cable only three feet long. The other one, MTX-L3844 looks the same but has a ten foot long cable. Even that was barely long enough to reach the drivers side dash. They sell a 18 ft long cable as a $70 accessory. I put the O2 sensor in the tail pipe, a stock 1.7 muffler set up. It gave good clearance and was easy to take off for welding. The only draw back is the mixture gets diluted at idle with outside air and gives a false reading. It doesn't matter too much though, I just hold a rag over the tail pipe to see what the true reading is. The gauge is so light I have mounted it with some velcro to my dash cover. I used a 7/8th hole saw to get the cable through the body, it needs to be that big for the connector. I ran the cable through the body instead of the engine tin to avoid needing to unhook everything to get the engine out for future service. Otherwise it's just three wires to hook up, power, ground and headlights, to dim the gauge at night. I would take a piece of ten foot long wire and see if you can reach your console from the exaust to check cable lenght. Good luck with your install, Mike

 [attachmentid=268596[attachmentid=
268596][
Thanks for that.
Did you set for WOT and part load yet? Or just idle.
Can you give a little bit more on your motor displacement?
Thanks
The engine is the original 1.7 that came with the car, it has been gone through a couple of times. Right now it has the stock crank and rods with a set of 1.8 pistons and cylinders which are 3mm bigger than the stock 90's. The heads were flycut to take the larger barrel. Other than pulling the air temp sensor plug, I haven't tried any adjustments yet. My mileage is up from around 24mpg to 27mpg and the power is noticeably improved. Mike
Powered by Invision Power Board (http://www.invisionboard.com)
© Invision Power Services (http://www.invisionpower.com)
