Printable Version of Topic
Click here to view this topic in its original format
914World.com _ 914World Garage _ Wires to cut in a 75 from under the passenger seat
Posted by: PeeGreen 914 Aug 2 2011, 04:46 PM
It is my understanding the everything that goes to the relay under the seat is not needed. The only wire to worry about is the big yellow wire. Is my understanding correct? I want to rid myself of all unwanted wires.
Attached image(s)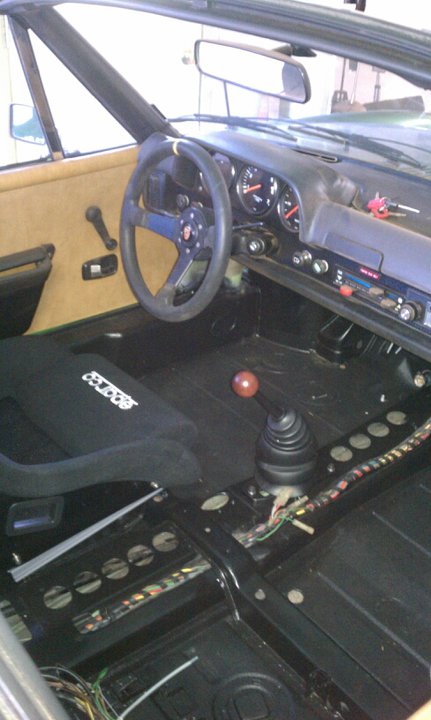
Posted by: PeeGreen 914 Aug 2 2011, 05:05 PM
Oh, and where is the best place to cut them? 
Posted by: Cap'n Krusty Aug 2 2011, 05:07 PM
It would probably be easier for us to answer you if the picture actually showed the wiring of which you are speaking. Unless, of course, you mean the bundle running through the tunnel ...............................
The Cap'n
Posted by: jt914-6 Aug 2 2011, 05:15 PM
On my '74 I connected the large yellow ones together. There is a small guage black with red stripe that is hot with the key. You'll need to "cap" off the end so it doesn't touch ground. The rest can be cut wherever you wish. On my '75 I put a off/on switch in the back of the center storage tray (hidden by the pad) and attached the yellow ones to it. Turn the switch off when not driving it and the car can't be started.
Posted by: PeeGreen 914 Aug 2 2011, 05:16 PM
You need to see pictures of the wires to know what wires go to the relay under the passenger seat of a 75?
Well then.... it is the bundle I have zip tied together in this picture.
Attached image(s)
Posted by: PeeGreen 914 Aug 2 2011, 05:18 PM

On my '74 I connected the large yellow ones together. There is a small guage black with red stripe that is hot with the key. You'll need to "cap" off the end so it doesn't touch ground. The rest can be cut wherever you wish.
Awesome, that is what I was told and thought but I wanted to double check before I begin. Thanks.

Posted by: Dave_Darling Aug 2 2011, 05:19 PM
Splice the big yellow wire to the big yellow wire. Leave the others in place, unless you are really desperate to get rid of little tiny bits of weight.
In which case you should look at wires that are already crimped together at the terminal under the seat. Crimp those wires together closer to the main wiring harness.
Cover all crimps with shrink-tubing. Unless you never get water or dirt inside your 914... 
--DD
Posted by: Cap'n Krusty Aug 2 2011, 05:37 PM
You need to see pictures of the wires to know what wires go to the relay under the passenger seat of a 75?
Well then.... it is the bundle I have zip tied together in this picture.
I merely wished to point out that a picture purporting to show the parts in question should actually show those parts. BTW, there are a lot of '75s out there that don't even have those wires or the logic relay itself.
The Cap'n
Posted by: Jeffs9146 Aug 2 2011, 05:50 PM
Splice the big yellow wire to the big yellow wire. Leave the others in place, unless you are really desperate to get rid of little tiny bits of weight.
In which case you should look at wires that are already crimped together at the terminal under the seat. Crimp those wires together closer to the main wiring harness.
Cover all crimps with shrink-tubing. Unless you never get water or dirt inside your 914...
--DD

If you just cut and cap them and not connect them together you will loose your Clock, Seatbelt Warning Light, Oil Pressure Switch, Oil Pressure Indicator Light, Key Warning Buzzer, Both Door Switches, Interior Light, Brake Warning Switch ect............

Posted by: PeeGreen 914 Aug 2 2011, 06:00 PM
Splice the big yellow wire to the big yellow wire. Leave the others in place, unless you are really desperate to get rid of little tiny bits of weight.
In which case you should look at wires that are already crimped together at the terminal under the seat. Crimp those wires together closer to the main wiring harness.
Cover all crimps with shrink-tubing. Unless you never get water or dirt inside your 914...
--DD
If you just cut and cap them and not connect them together you will loose your Clock, Seatbelt Warning Light, Oil Pressure Switch, Oil Pressure Indicator Light, Key Warning Buzzer, Both Door Switches, Interior Light, Brake Warning Switch ect............
Well, I'm not too worried about losing those things. This is an autocross car.
Posted by: Jeffs9146 Aug 2 2011, 06:55 PM
Ohhhhhhhh you didn't tell us that before!!
By all means Cut Away!!

Posted by: 7275914911 Aug 2 2011, 07:09 PM
If you just cut and cap them and not connect them together you will loose your Clock, Seatbelt Warning Light, Oil Pressure Switch, Oil Pressure Indicator Light, Key Warning Buzzer, Both Door Switches, Interior Light, Brake Warning Switch ect............
Not to hijack, Jon..
but can someone(Jeff) descibe the wire colors mentioned above. I assume the Color Wiring Chart will be my friend. Is that PP?? I have that bundle of wire and everything appears to have been hacked off. I have mysterious trouble with some of the above mentioned items. Possible ground issues too..
I hate electrical.....thats why I have not tackled this project yet
Posted by: PeeGreen 914 Aug 2 2011, 07:44 PM
Hijack away Ken
Posted by: Dave_Darling Aug 2 2011, 11:29 PM
Yes, Pelican has the full-color wiring diagram for the 74.
--DD
Posted by: Jeffs9146 Aug 2 2011, 11:54 PM
Yes PP has it for the 74 but it is hard to read! I have the Red Manuals for the 75 and the color diagrams on one large 4 foot page so it is a bit easier! I will try to help where I can!
Powered by Invision Power Board (http://www.invisionboard.com)
© Invision Power Services (http://www.invisionpower.com)