Printable Version of Topic
Click here to view this topic in its original format
914World.com _ 914World Garage _ Jim Kelly's V8 re-conversion
Posted by: scotty b Aug 29 2011, 07:12 PM
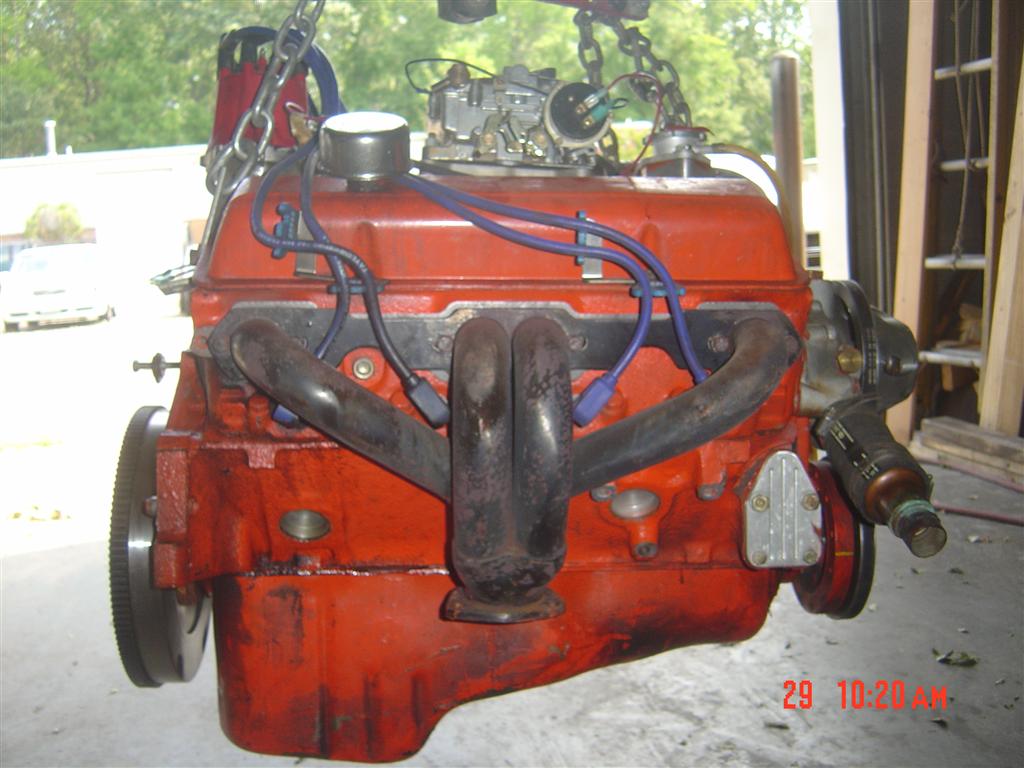
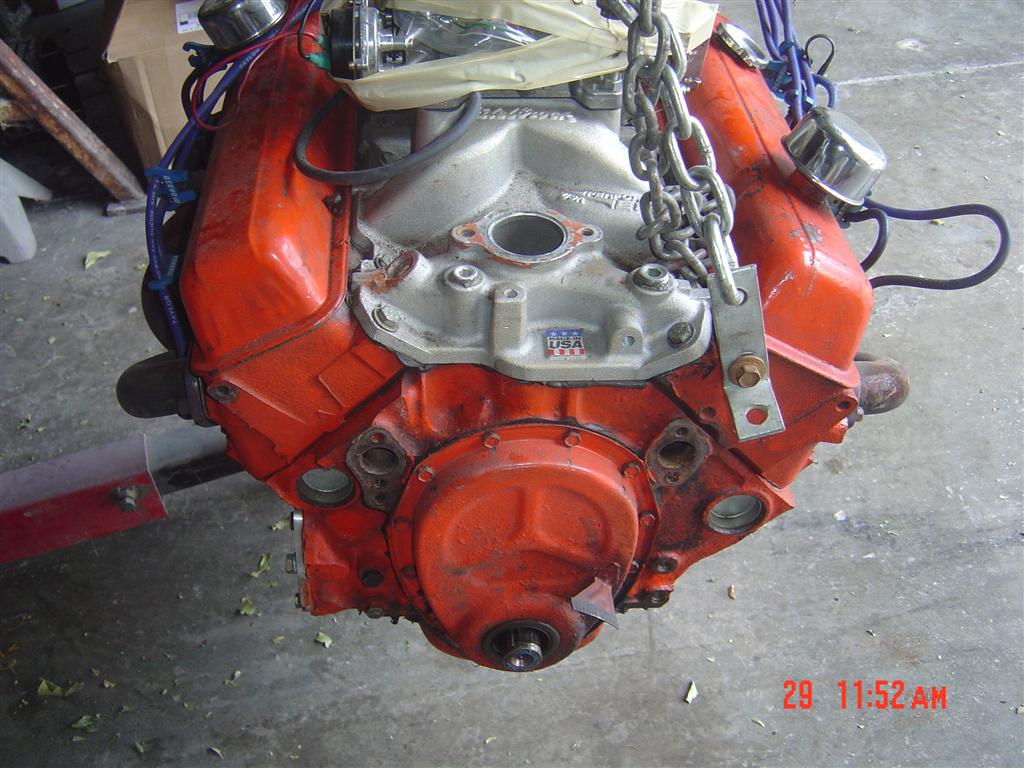
Jim dropped his car off to have me re-do the V8 ( 307 ) install he and Rod did a few years ago. This time around it will be getting the complete Renegade treatment, a new set of Dr. Sheas handi work. Elephant poly bronze bushings, sway bars, 108 c.v.'s. Some BIG ass sway away axles, and a lot of cleaning / detailing. I got started last friday pulling the engine and trans at the last minute before leaving for Matts party. Dr. Evil was going to do a quilie rebuild prior to the party's start. Once we opened up the box, the truth became known. Unfortunaely Jim's intermediate plate was shot. One of the worst Mikes has seen, so Mike took the stack back home to install a good plate, and do the gear swapping. I got to the shop today to find most of the area was tornm to shreds from Irene, so without power or water I couldn't do much other than tear the engine most of the way down. No way to get the flywheel ff until I have power back on so I can' mount it on an engine stand yet  I was in such a rush on friday I didn't get any pics of the whole car so you'll just have to deal with what I took today
I must say, this car IMHO has the PERFECT amount of horsepower. Enought to smoke the tires for the redneck in all of us, BUT it is very controlable, and can take off from a dead stop without lighting the rubber up. BOLTS in a straight line and still hangs onto the apex like a 914 should and sounds like a mythological beast in heat. This is the best of both worlds  I am hooked
Attached image(s)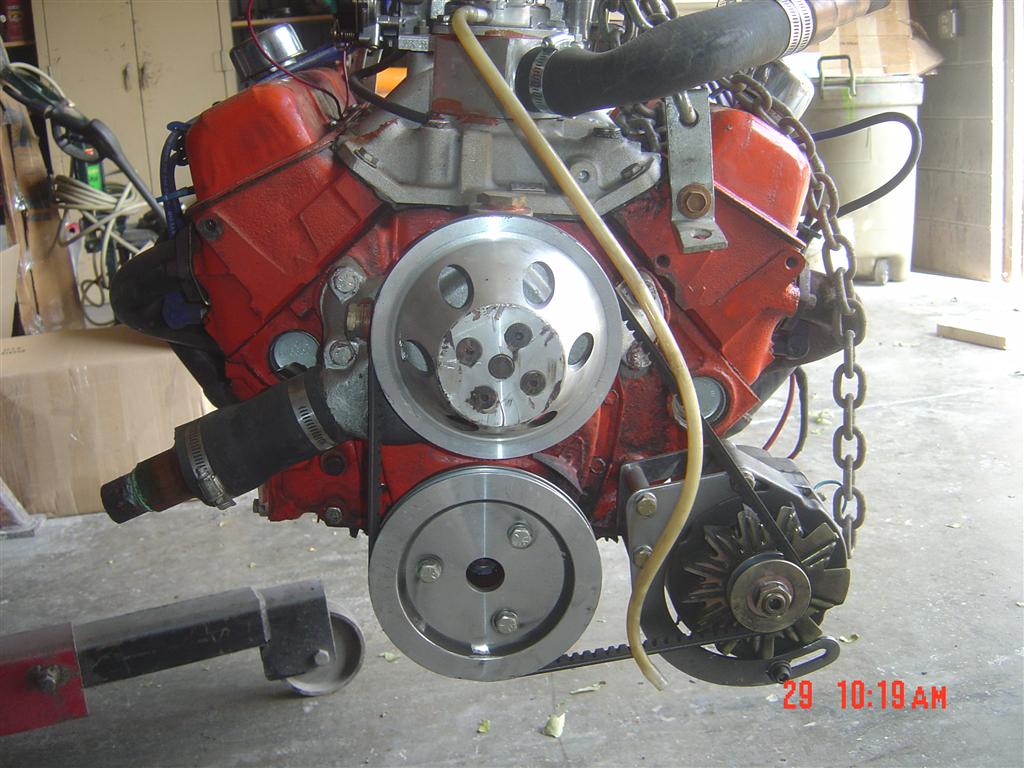
Posted by: JmuRiz Aug 29 2011, 07:27 PM
Sounds cool, I'll get a close-up look at it in Oct.
Posted by: mepstein Aug 29 2011, 07:29 PM
"I must say, this car IMHO has the PERFECT amount of horsepower. Enought to smoke the tires for the redneck in all of us, BUT it is very controlable, and can take off from a dead stop without lighting the rubber up. BOLTS in a straight line and still hangs onto the apex like a 914 should and sounds like a mythological beast in heat. This is the best of both worlds I am hooked"
TRAITOR 
Someone's been selling some houses. 
Posted by: bigkensteele Aug 29 2011, 07:30 PM
It can't be very fast - there is hardly any chrome.
Posted by: BajaXJ92 Aug 29 2011, 07:40 PM
While trying desperately to hide the fact that you've got the proverbial wheels in my head turning, how much weight does the motor and applicable trans add?
Posted by: Dr Evil Aug 29 2011, 07:48 PM
Tranz is 75-80lbs. I lighten the tranz a little 
Posted by: scotty b Aug 29 2011, 07:53 PM

While trying desperately to hide the fact that you've got the proverbial wheels in my head turning, how much weight does the motor and applicable trans add?
A STOCK small block is a bit over 500 lbs. Knock a bit off of that for the al intake, headers, and pullies, I would guess this one is closer to 500 even. Stock h.p. on a 307 was around 200. Add a few for the headers, intake, carb aand ignition and this one maybe closing in on 230+

Mark, I could change my mind once I drive a 3.2
Posted by: Dr Evil Aug 29 2011, 07:59 PM
Why not just go both ways, Scotty? We all know you do 
Posted by: scotty b Aug 29 2011, 08:14 PM
Why not just go both ways, Scotty? We all know you do
 Ken stuck HIS finger in MY ear unexpectedly and YOU enjoyed watching it. How did I become the switch hitter ? Let's not forget about you jamming your meat grips down Matts shirt either
Posted by: jimkelly Aug 30 2011, 06:24 AM
more than anything, i am looking forward to some good stopping power, oh yeah, and some nice suspension, and yeah, and some nicer steering, oh yeah, and and and ....................... you get the point : )
hopefully all the threaded holes on the front of the engine are ok? there is a heli coil in a few for sure. some might need ezlocks or other repair?
thanks for the pics : )
jim
Posted by: SUNAB914 Aug 30 2011, 07:10 AM
I'm hooked too. That's all I'm going to say.
Posted by: BajaXJ92 Aug 30 2011, 07:34 AM
more than anything, i am looking forward to some good stopping power, oh yeah, and some nice suspension, and yeah, and some nicer steering, oh yeah, and and and ....................... you get the point : )
hopefully all the threaded holes on the front of the engine are ok? there is a heli coil in a few for sure. some might need ezlocks or other repair?
thanks for the pics : )
jim
Jim,
Out of curiousity, do you have a ballpark figure of how much $ you have tied up in the conversion?
Posted by: jimkelly Aug 30 2011, 07:52 AM
it is definitley best to do it right the first time.
i'll be about about $12k into mine after scott is done.
look at this list - not of my car but in general to do a 914 v8.
numbers are a mess and do not include most labor.
$2000 914 roller
$2000 complete sand blast
$2000 metal work
$3000 paint and body
$2000 suspension and brakes parts
$1000 all new weather rubber
$300 front and rear sway bars
$500 fiberglass bumpers
$500 new tires
$500 polished wheels
$3500 complete crate sbc 350
$3000 renegade kit and cooling
$200 elec fuel pump and filter
$300-$600 headers exhaust and mufflers
$290 engman inner long kit
$500-$800 rebuilt trans
$21k+- total cost for narrow body, stock suspension
$26k+- total cost for wide body, 911 front suspension
for wide body add ... $3000 steel flares - or - (about $1500 fiber flares)
$1000 911 front suspension
$200 914 rear drilled for 5 lug
$1000 metal flares (plus install)
$500 5 lug wheels
+interior
+headlight mechanism rebuild
+new glass
+new lenses
+new harnesses - find fabricator
Posted by: pt_700 Aug 30 2011, 10:10 AM
in my many years of looking into the sbc conversions (i have a rod simpson kit, uninstalled...), i've read one can shave about 100 lbs. off a stock small block chevy with aluminun intake and heads.
yes, still heavier than the stock motor but, oh the possibilities!
Posted by: Scott Schroeder Aug 30 2011, 11:44 AM
Very cool Jim!
After riding in Bobs "Porschev", I will absolutely own a V8 car someday. It was simply fantastic. In fact, in hindsight, I wish I would have waited things out a bit before starting my -6 conversion. I absolutely would have sold my current car to buy the right V8 car.
I dont know what it is about them, but I just love em. I have never had any interest (at all) in any other muscle car/v8's (other than maybe the Pantera) - just the 914 conversions.
Look forward to watching the build! 
Posted by: Ductech Aug 30 2011, 02:30 PM
Just wondering ... and I don't think anyone asked but what about the conversion was done so wrong? you should post up picks of certain aspects of the conversion that are being redone and give reasoning as to why things are being changed....
The cheap sons o bitches wanna know ...
Posted by: Ductech Aug 30 2011, 02:31 PM
Just wondering ... and I don't think anyone asked but what about the conversion was done so wrong? you should post up picks of certain aspects of the conversion that are being redone and give reasoning as to why things are being changed....
The cheap sons o bitches wanna know ...
Posted by: jimkelly Aug 30 2011, 02:59 PM
1- the trans was rebuilt by first timers - and as it turns out it has problems - but functioned pretty decently - can't wait to slush thru the gears whent he project is done.
2- the other thing is that we could never get temps under control with stock water pump - thus had to take the thermostat out - and that is not good.
3- because i designed the engine bar without thinking geometry out, we had to make shift linkage twisted in a way that probably impacted operation.
4- i did not want to get a quite 2 into 1 exhaust custom fabbed until i had all else in its proper locations - meaning where renegade likes things.
5- that said - the car is 40 years old - and the brakes, steering, suspension - are 40 years old - i am sure of that. since these above tasks require the engine be pulled - i figured - hell - lets just do it right - and spend a few extra bucks at renegade.
for me - this is the poor mans 1969 camaro rs/ss and the pantera all rolled up into one : ) but it is not everyone;s cup of tea - and i write this with my pinky up high : )
jim
Posted by: Ductech Aug 30 2011, 03:43 PM
Nice Jim... With out any past knowledge on your car i was wondering what apects of the home spun conversion weren't working for you. I am getting to your point with my subaru. I already want to remove the motor and trans and build a new motor tranny mount brace. The stock water pump notion is interesting as i have similar issues with my suby swap. granted my radiator is currently above the motor in the engine bay. not mounted up front. Renegade offer a better pump for your motor that would better suit the front mounted radiator?
And good on you for going in deep
Posted by: Vacca Rabite Aug 30 2011, 04:42 PM
Jim's car was cool before getting reworked. I'm excited to see what it can do after. I actually hope you don't make it too pretty. I loved the rough edges.
Zach
Posted by: jimkelly Aug 30 2011, 04:50 PM
no budget for pretty - the car will look the same when it leaves as it did when it arrived - but don't tell that to the car : ))
primarily only suspension, brakes, steering and engine bay improvements currently in the plan.
jim
https://www.youtube.com/watch?v=9viaGK6NA7M
--
Jim's car was cool before getting reworked. I'm excited to see what it can do after. I actually hope you don't make it too pretty. I loved the rough edges.
Zach
Posted by: stewteral Aug 30 2011, 05:24 PM
it is definitley best to do it right the first time.
i'll be about about $12k into mine after scott is done.
look at this list - not of my car but in general to do a 914 v8.
numbers are a mess and do not include most labor.
$2000 914 roller
$2000 complete sand blast
$2000 metal work
$3000 paint and body
$2000 suspension and brakes parts
$1000 all new weather rubber
$300 front and rear sway bars
$500 fiberglass bumpers
$500 new tires
$500 polished wheels
$3500 complete crate sbc 350
$3000 renegade kit and cooling
$200 elec fuel pump and filter
$300-$600 headers exhaust and mufflers
$600 engman inner long kit installed
$800 rebuilt trans
$21.7k total cost for narrow body, stock suspension
$26.7k total cost for wide body, 911 front suspension
for wide body add ... $3000 steel flares - or - (about $1500 fiber flares)
$1000 911 front suspension
$200 914 rear drilled for 5 lug
$3000 metal flares $800 and installed properly.
$500 5 lug wheels
+interior
+headlight mechanism rebuild
+new glass
+new lenses
+new harnesses - find fabricator
Hi Jim,
It appears you're doing a great job on your conversion car and willing to invest the $$
A couple questions:
-with only 200 HP, aren't you itching to pump a few more out with a mild cam?
I've heard a rule-of-thumb that the 901 can take 300 - 350 reliably.
-Of course, the next question: do you have any idea how your trans plate was beat up so badly? I'm interested in your experience and what you think is the max safe HP (Torque, actually) that the 901 trans can take.
Also, if you've chewed up a stock plate, and say you want to do things right the first time, what about going for the much stronger after-market bearing plate?
Best,
Terry
Posted by: stewteral Aug 30 2011, 05:35 PM
Jim dropped his car off to have me re-do the V8 ( 307 ) install he and Rod did a few years ago. This time around it will be getting the complete Renegade treatment, a new set of Dr. Sheas handi work. Elephant poly bronze bushings, sway bars, 108 c.v.'s. Some BIG ass sway away axles, and a lot of cleaning / detailing. I got started last friday pulling the engine and trans at the last minute before leaving for Matts party. Dr. Evil was going to do a quilie rebuild prior to the party's start. Once we opened up the box, the truth became known. Unfortunaely Jim's intermediate plate was shot. One of the worst Mikes has seen, so Mike took the stack back home to install a good plate, and do the gear swapping. I got to the shop today to find most of the area was tornm to shreds from Irene, so without power or water I couldn't do much other than tear the engine most of the way down. No way to get the flywheel ff until I have power back on so I can' mount it on an engine stand yet
I was in such a rush on friday I didn't get any pics of the whole car so you'll just have to deal with what I took today I must say, this car IMHO has the PERFECT amount of horsepower. Enought to smoke the tires for the redneck in all of us, BUT it is very controlable, and can take off from a dead stop without lighting the rubber up. BOLTS in a straight line and still hangs onto the apex like a 914 should and sounds like a mythological beast in heat. This is the best of both worlds
I am hooked Posted by: Dr Evil Aug 30 2011, 05:39 PM
Aftermarket bearing plate is snake oil. The trans obviously suffered a loss of a forward input shaft bearing in the past that lead to the shaft warping the plate due to someone using it and not paying attention to the signs. All the Al plate would do is allow other stuff to break....like your wallet. I dont need them and I dont use them. I install them when asked, but only after I communicate my disbelief in them 
Posted by: stewteral Aug 30 2011, 05:44 PM
Jim dropped his car off to have me re-do the V8 ( 307 ) install he and Rod did a few years ago. This time around it will be getting the complete Renegade treatment, a new set of Dr. Sheas handi work. Elephant poly bronze bushings, sway bars, 108 c.v.'s. Some BIG ass sway away axles, and a lot of cleaning / detailing. I got started last friday pulling the engine and trans at the last minute before leaving for Matts party. Dr. Evil was going to do a quilie rebuild prior to the party's start. Once we opened up the box, the truth became known. Unfortunaely Jim's intermediate plate was shot. One of the worst Mikes has seen, so Mike took the stack back home to install a good plate, and do the gear swapping. I got to the shop today to find most of the area was tornm to shreds from Irene, so without power or water I couldn't do much other than tear the engine most of the way down. No way to get the flywheel ff until I have power back on so I can' mount it on an engine stand yet
I was in such a rush on friday I didn't get any pics of the whole car so you'll just have to deal with what I took today I must say, this car IMHO has the PERFECT amount of horsepower. Enought to smoke the tires for the redneck in all of us, BUT it is very controlable, and can take off from a dead stop without lighting the rubber up. BOLTS in a straight line and still hangs onto the apex like a 914 should and sounds like a mythological beast in heat. This is the best of both worlds
I am hooked Hey Scotty,
A word of caution: DO NOT USE THE CHEAP PLASTIC 90 Degree ELBOWS that Renegade supplies with their kit. From personal experience (happily, not on my car) I have seen that they soften from normal engine heat and then COLLAPSE!
On my car, I scrounged around plumbing houses and found the same parts in BRASS!
Best,
Terry
Posted by: scotty b Aug 30 2011, 05:47 PM
[quote name='stewteral' date='Aug 30 2011, 03:24 PM' post='1532342']
[quote name='jimkelly' post='1532123' date='Aug 30 2011, 06:52 AM']
A couple questions:
-with only 200 HP, aren't you itching to pump a few more out with a mild cam?
I've heard a rule-of-thumb that the 901 can take 300 - 350 reliably.
-Of course, the next question: do you have any idea how your trans plate was beat up so badly? I'm interested in your experience and what you think is the max safe HP (Torque, actually) that the 901 trans can take.
Also, if you've chewed up a stock plate, and say you want to do things right the first time, what about going for the much stronger after-market bearing plate?
Best,
Terry
[/quote]
Terry if you took a ride in Jim's car I doubt you'd feel the need for MORE h.p. With these cars as light as they are, and Jim running stock 4 bolt Fuchs on relatively skinny tires, much more power and you wouldn't get it to hook up. I am going to get Jims car on a dyno before it goes back to him because I am very curious as to the actual h.p. he has. I'm guessing it to be close to 230, maybe even a bit more. I'm also going to give it a shake down run with the go-pro so you guys will have some good video to judge by.
Posted by: jimkelly Aug 30 2011, 05:49 PM
really - i did not do any hard launches - at worst - i put it in gear got rolling - then peddle to the metal - no side stepping the clutch at 4000 rpm - and did not notice the plate problem when we were rebuilding it - probably did not know what to look for - that said, it shifted pretty damn good - but hey - i remember my wife sitting in copilot seat having to use a bungee cord to keep my car in 5th gear on the hwy on route to0 an ecc years ago : )
here is the deal - 901's are cheap an plentiful - if i like the gear ratios i asked evil to do for me - i will get him to build a few that way - as backups.
if i was goi to beat the shit out of my car - i would definitely do a 930 box - but even runnig that inverted is gonna cost $$$ $5000 +-
jim
Aftermarket bearing plate is snake oil. The trans obviously suffered a loss of a forward input shaft bearing in the past that lead to the shaft warping the plate due to someone using it and not paying attention to the signs. All the Al plate would do is allow other stuff to break....like your wallet. I dont need them and I dont use them. I install them when asked, but only after I communicate my disbelief in them
Posted by: stewteral Aug 30 2011, 05:57 PM
[quote name='scotty b' date='Aug 30 2011, 04:47 PM' post='1532356']
[quote name='stewteral' date='Aug 30 2011, 03:24 PM' post='1532342']
[quote name='jimkelly' post='1532123' date='Aug 30 2011, 06:52 AM']
A couple questions:
-with only 200 HP, aren't you itching to pump a few more out with a mild cam?
I've heard a rule-of-thumb that the 901 can take 300 - 350 reliably.
-Of course, the next question: do you have any idea how your trans plate was beat up so badly? I'm interested in your experience and what you think is the max safe HP (Torque, actually) that the 901 trans can take.
Also, if you've chewed up a stock plate, and say you want to do things right the first time, what about going for the much stronger after-market bearing plate?
Best,
Terry
[/quote]
Terry if you took a ride in Jim's car I doubt you'd feel the need for MORE h.p. With these cars as light as they are, and Jim running stock 4 bolt Fuchs on relatively skinny tires, much more power and you wouldn't get it to hook up. I am going to get Jims car on a dyno before it goes back to him because I am very curious as to the actual h.p. he has. I'm guessing it to be close to 230, maybe even a bit more. I'm also going to give it a shake down run with the go-pro so you guys will have some good video to judge by.
[/quote]
You have a point about skinny tires and limited suspension work that 200 HP is comfortable. Watching the video, the car seemed a bit slow to me.
However, in my car I have a built 383 with around 500 HP and EXTENSIVE suspension work, huge brakes, 930 trans and find it very stable when on-track or
out on Mulholland Hwy as I was last Sunday. It's a joy to hammer with!
So, it all comes down to prespective (or HP point of reference) and what one wants to drive.
Best,
Terry
Posted by: jimkelly Aug 30 2011, 06:23 PM
i got a buddy that drag races his 914 with 9" slicks and i think he had 400 hp in his at one time when he was running a 901 trans but they kept blowing up his trans's so he put a billet intermediate plate and built a girdle for it - to hold it together - did not work. finally he installed a powerglide and put FI and turbo on engine.
Attached image(s)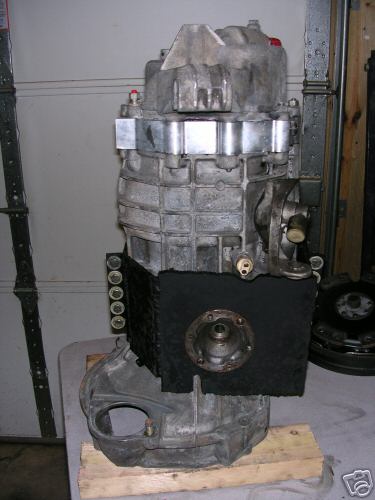
Posted by: mepstein Aug 30 2011, 06:25 PM
Delaware's only 14 miles wide at it's middle. If Jim goes too fast he'll be in the ocean.
Posted by: okieflyr Aug 30 2011, 06:58 PM
Delaware's only 14 miles wide at it's middle. If Jim goes too fast he'll be in the ocean.

Posted by: okieflyr Aug 30 2011, 07:09 PM
Jim you'll really enjoy having the refined mechanicals. It will continue to be a really cool sleeper until they see and hear the exhaust, and then it will be to late for them anyways. 
Posted by: gandalf_025 Aug 30 2011, 07:11 PM
Not looking to hijack the thread..
But I remember an old Hot Rod Magazine that had a big article on the 215 V8. They had a graph that showed what bore, stroke and heads to use to bring the 215 up to a 350.
I'm pretty sure they even used aluminum heads.. I have nothing against a SBC.. But I'd be curious about the weight difference of an Aluminum 350..
I have to try to find that magazine..
Posted by: TargaToy Aug 30 2011, 07:20 PM
More pictures!
Posted by: jimkelly Aug 30 2011, 07:32 PM
a less weight v8 - i have no doubt a lesser weight v8 would be sweet - but the bottom line is one can buy a complete crate engine online and the renegade kit online - and bolt the whole thing up ina weekend - that is the upside.
as for handling - because my car had 40 year old brakes, suspension, steering and no sway bars - it was like driving scott's chrysler 300 : ) - maybe worse.
i'll have more to say after i get it back - when it is more like a new stock 914 type 4 on a triple dose of nitro : )
honestly - i would not refuse another 50hp - but 200 more would be way overkill for my purposes. remember in delaware i have to get thru emissions. and i am just driving it - not racing it.
https://www.youtube.com/watch?v=nCRZ-BMejZs
Posted by: Dr Evil Aug 30 2011, 08:19 PM
Jim, what I found in your box was a time bomb, you would be hard pressed to detect it without opening the box up. There was no reason for it to shift poorly. The copious amounts of RTV was nice to deal with 
Posted by: jimkelly Aug 30 2011, 08:36 PM
my tool box has in it - a screw driver, a set of plyers, a roll of duct tape and RTV - do i need anything else : ))
Posted by: stewteral Aug 30 2011, 09:40 PM
[quote name='jimkelly' date='Aug 30 2011, 04:49 PM' post='1532357']
really - i did not do any hard launches - at worst - i put it in gear got rolling - then peddle to the metal - no side stepping the clutch at 4000 rpm - and did not notice the plate problem when we were rebuilding it - probably did not know what to look for - that said, it shifted pretty damn good - but hey - i remember my wife sitting in copilot seat having to use a bungee cord to keep my car in 5th gear on the hwy on route to0 an ecc years ago : )
here is the deal - 901's are cheap an plentiful - if i like the gear ratios i asked evil to do for me - i will get him to build a few that way - as backups.
if i was goi to beat the shit out of my car - i would definitely do a 930 box - but even runnig that inverted is gonna cost $$$ $5000 +-
jim,
I agree with your approach: the 901s can be had for a song and it is WAY cheaper to just replace one than buy a 930 or G50. Since you car is aimed at the "Reasonable" power range, you should have a very reliable ride.
I got a ride in a friend's 914 with a stock 350, so about 300 HP. He was slamming shifts and generally abusing the 901. When I commented that he was being a bit tough on the box, he said "That's ok, I have 2 more under the porch."
...It cracked me up!
Best,
Terry
Posted by: stewteral Aug 30 2011, 09:54 PM
a less weight v8 - i have no doubt a lesser weight v8 would be sweet - but the bottom line is one can buy a complete crate engine online and the renegade kit online - and bolt the whole thing up ina weekend - that is the upside.
as for handling - because my car had 40 year old brakes, suspension, steering and no sway bars - it was like driving scott's chrysler 300 : ) - maybe worse.
i'll have more to say after i get it back - when it is more like a new stock 914 type 4 on a triple dose of nitro : )
honestly - i would not refuse another 50hp - but 200 more would be way overkill for my purposes. remember in delaware i have to get thru emissions. and i am just driving it - not racing it.
https://www.youtube.com/watch?v=nCRZ-BMejZs
Jim,
I thought CA was the worst with smog checking, but here anything '75 or older gets a pass on inspections. This is the ONLY way I could drive my car on the street.
Sorry to hear the your oppressive fascist gov't is suppressing your God given right
to burn messy hydrocarbons!
When it comes to handling, I believe you can expect to find massive understeer!
That's where I started. To balance the car, the answer is stiffening the rear spring rates. Don't worry about going stiffer and ruining your ride comfort. I've had my car at 350# springs (410# per inch wheel rate) and found the ride was still comfortable. My guess would be 250# springs would be a good place to start.
Best,
Terry
Posted by: jimkelly Aug 31 2011, 04:50 AM
i'm hoping that new shocks all around and both sway bars will tighten things up - we'll see - thanks - jim
Posted by: zymurgist Aug 31 2011, 05:24 AM
my tool box has in it - a screw driver, a set of plyers, a roll of duct tape and RTV - do i need anything else : ))
Posted by: tradisrad Aug 31 2011, 07:52 AM
i'm hoping that new shocks all around and both sway bars will tighten things up - we'll see - thanks - jim
You will love the Elephant Bushing; they give a smooth ride and I hope you are installing them on both the front and rear. Have you considered a billet steering coupler while it's apart?
Posted by: Randal Aug 31 2011, 08:43 AM
Not looking to hijack the thread..
But I remember an old Hot Rod Magazine that had a big article on the 215 V8. They had a graph that showed what bore, stroke and heads to use to bring the 215 up to a 350.
I'm pretty sure they even used aluminum heads.. I have nothing against a SBC.. But I'd be curious about the weight difference of an Aluminum 350..
I have to try to find that magazine..
Not sure whether this link works anymore or not, but here is some basic information.
http://www.corvetteactioncenter.com/specs/ls1ls6.html
"2001 Totally Dressed Engine Weight"
Auto - 457.6
Manual (LS1 & LS6) - 497.2
Posted by: jimkelly Aug 31 2011, 09:07 AM
elephant - yes - front and rear
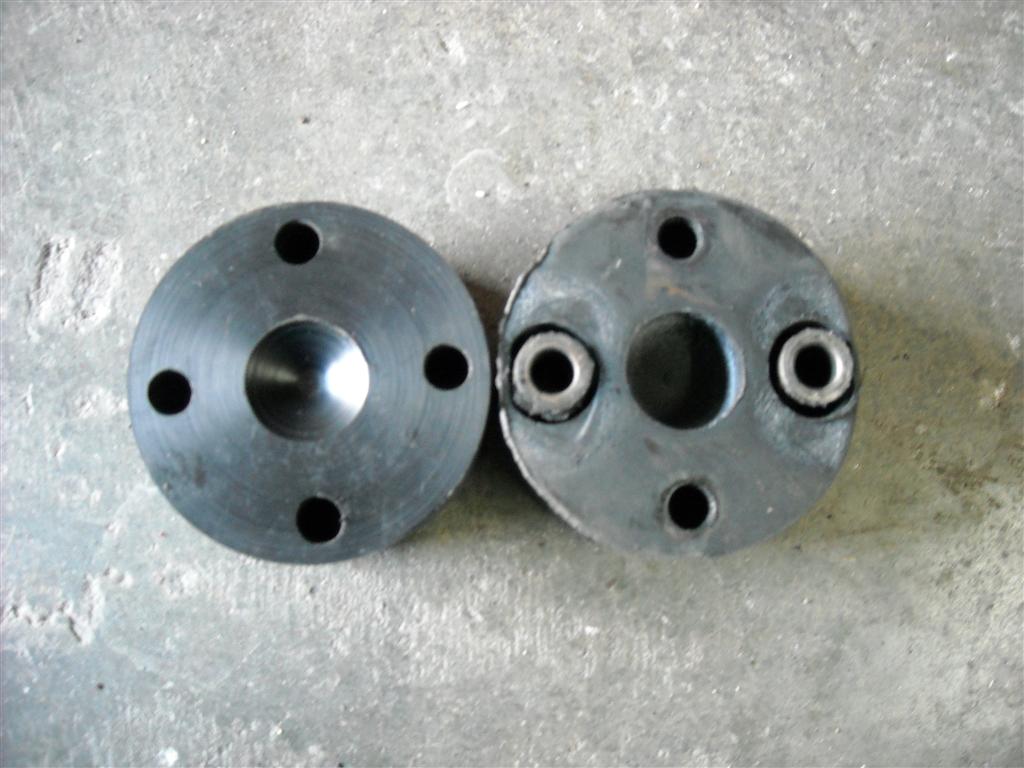
doughnut - not billet - but i did get a solid delrin one from
http://www.tangerineracing.com/
and it is going in : )
http://www.tangerineracing.com/SteeringUpgrades.htm
jim
--
i'm hoping that new shocks all around and both sway bars will tighten things up - we'll see - thanks - jim
You will love the Elephant Bushing; they give a smooth ride and I hope you are installing them on both the front and rear. Have you considered a billet steering coupler while it's apart?
Posted by: Eric_Shea Aug 31 2011, 09:50 AM
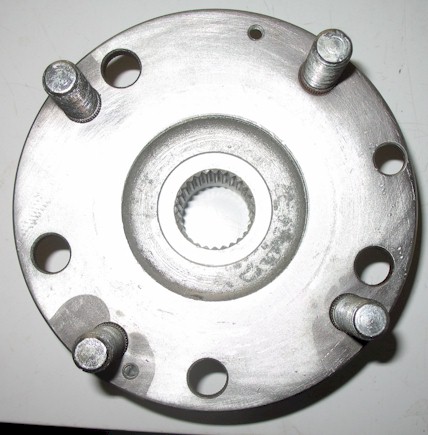
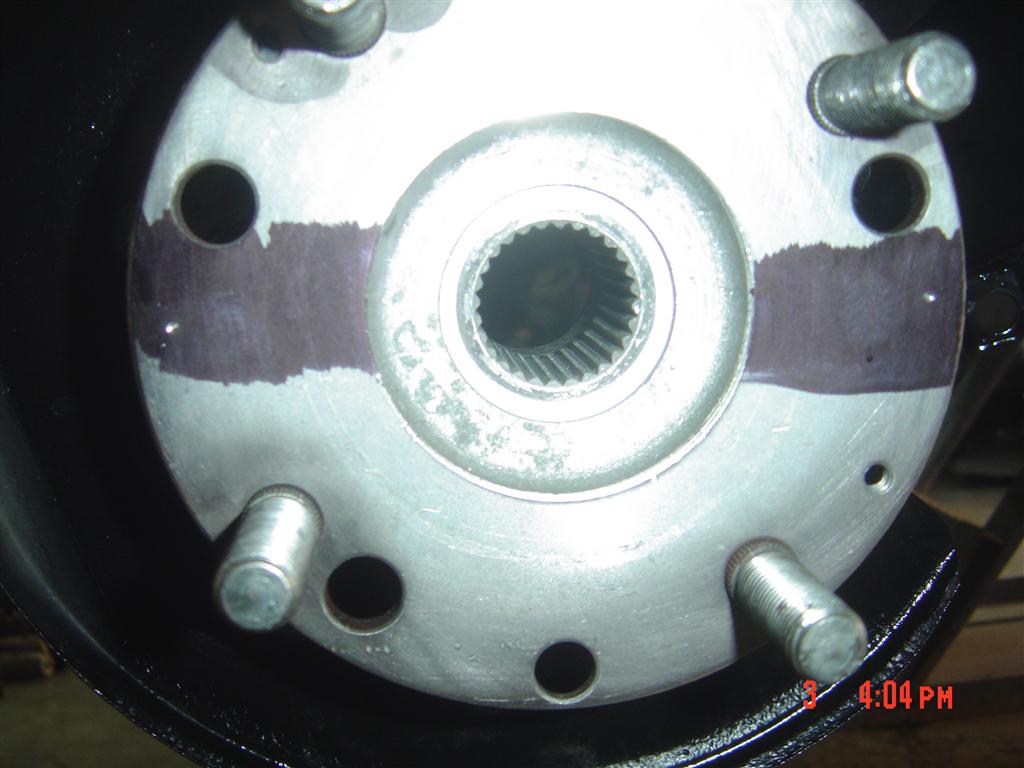
You know how most people drill 914-4 hubs to 5-lug? Jim drilled 911 hubs to 4-lug. Gotta love it! 
Posted by: jimkelly Aug 31 2011, 09:54 AM
just come right out and say it : )
JIM HAS ISSUES : ))
i'm sticking narrow body and 4 lug fuchs - so i can lay low - keep costs down.
when it is all done - it is getting a full sized muffler to be real quite - shsssh.
jim
a recent pic...
Attached image(s)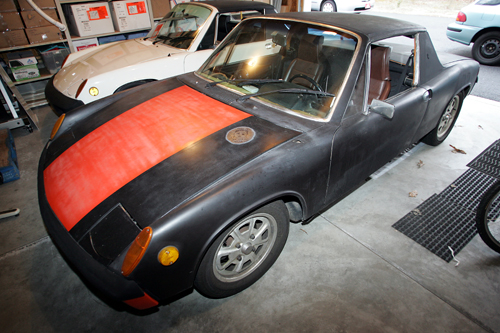
Posted by: budk Aug 31 2011, 12:33 PM
![popcorn[1].gif](style_emoticons/default/popcorn[1].gif)
Posted by: Eric_Shea Aug 31 2011, 01:42 PM
Not at all... I think you've got yourself a fairly robust drive line.
Posted by: JmuRiz Aug 31 2011, 02:07 PM
Sounds like a cool setup to me...I'll be interested to hear your impressions of the suspension and steering work.
Posted by: Ductech Aug 31 2011, 02:19 PM
Eric you crack me up. four lug from five lug  . But maybe there is something to not flamboyantly wearing your 914 wealth on your shoulders. A narrowed normal looking car is just the ticket. hell the paint even further's the notion of don't look at me I'm nothing special thing Jim has going.
Posted by: zymurgist Aug 31 2011, 02:22 PM
A narrowed normal looking car is just the ticket. hell the paint even further's the notion of don't look at me I'm nothing special thing Jim has going.
 and then through your windshield you see Jim take off and disappear like a motorcycle.
Posted by: jimkelly Aug 31 2011, 03:19 PM
not single out any one particular car - but it is one i am some what familar with.
what i am trying to do - is build a car that is 75% the fun of this one - at 25% the cost and 5% the time in labor.
http://www.914world.com/bbs2/index.php?showtopic=72941&hl
jim
Posted by: TargaToy Sep 4 2011, 06:41 PM
Hey, Jim. Did you budget for some door glass this go 'round? 
Posted by: jimkelly Sep 4 2011, 08:07 PM
you remembered : )
my plan is to install late model doors on it at some point and when it gets painted, replace all the worn out rubber seals.
** see related RTV thread
** http://www.914world.com/bbs2/index.php?showtopic=143216&st=0
jim
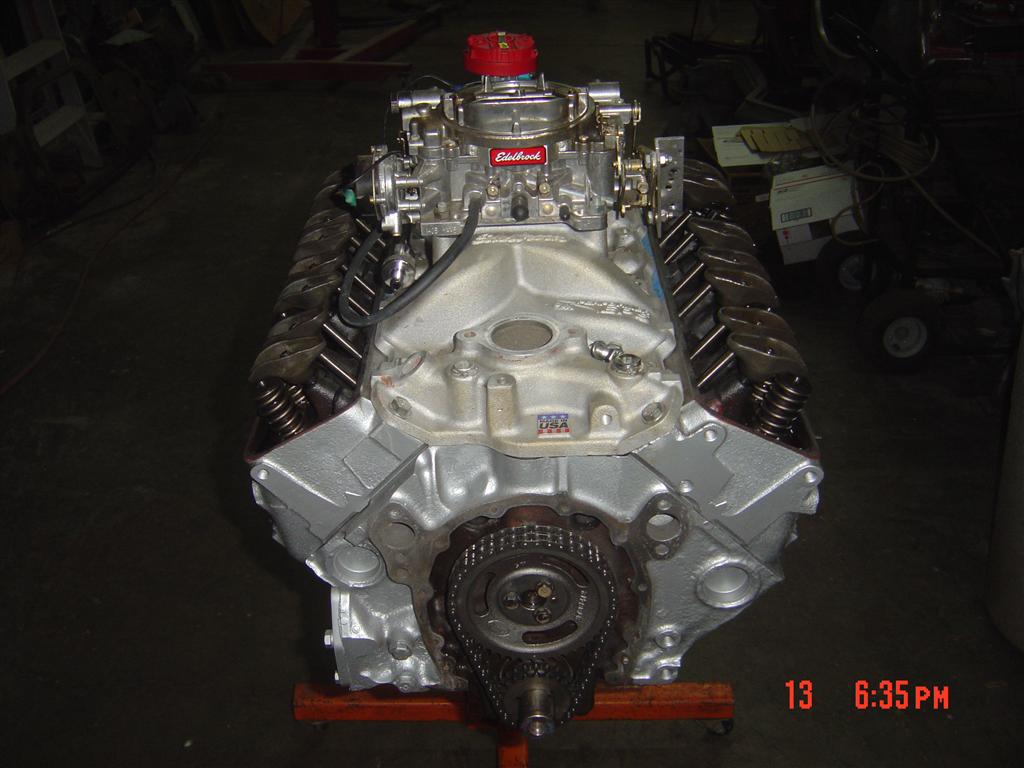
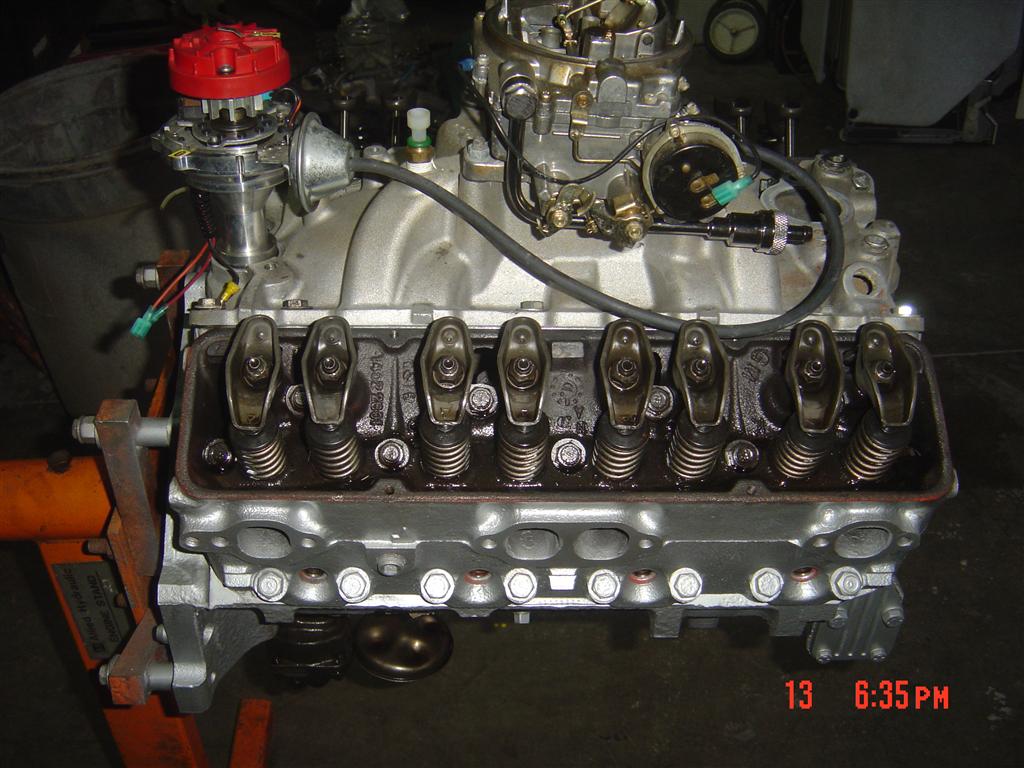
Posted by: scotty b Sep 6 2011, 06:59 PM
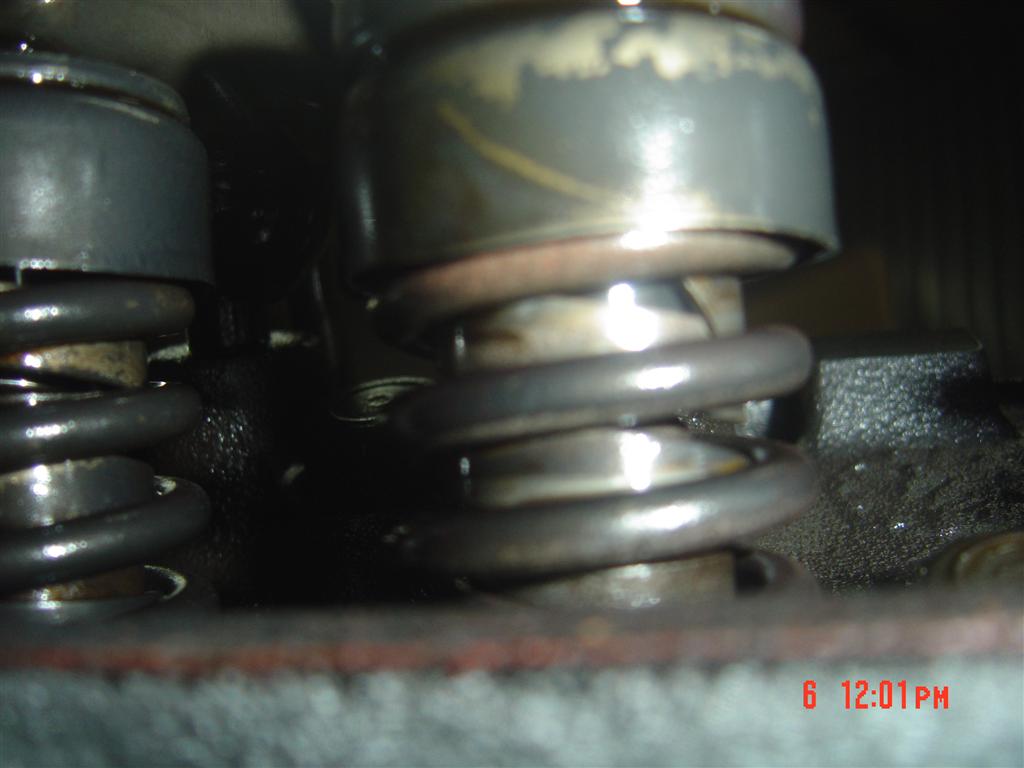
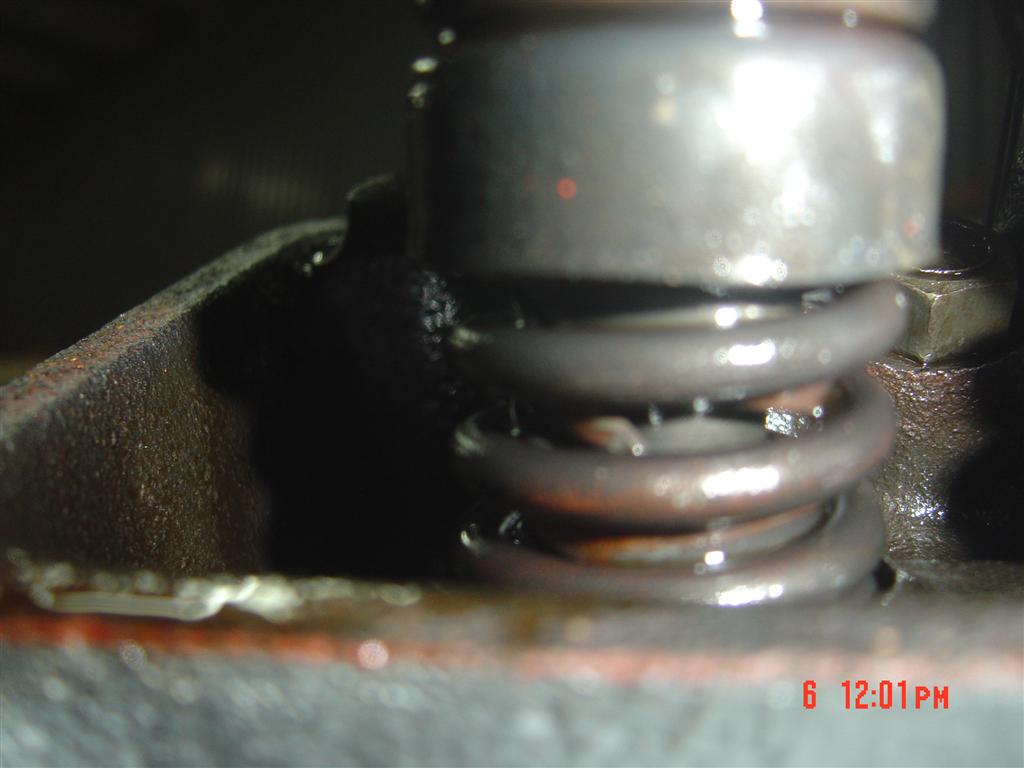
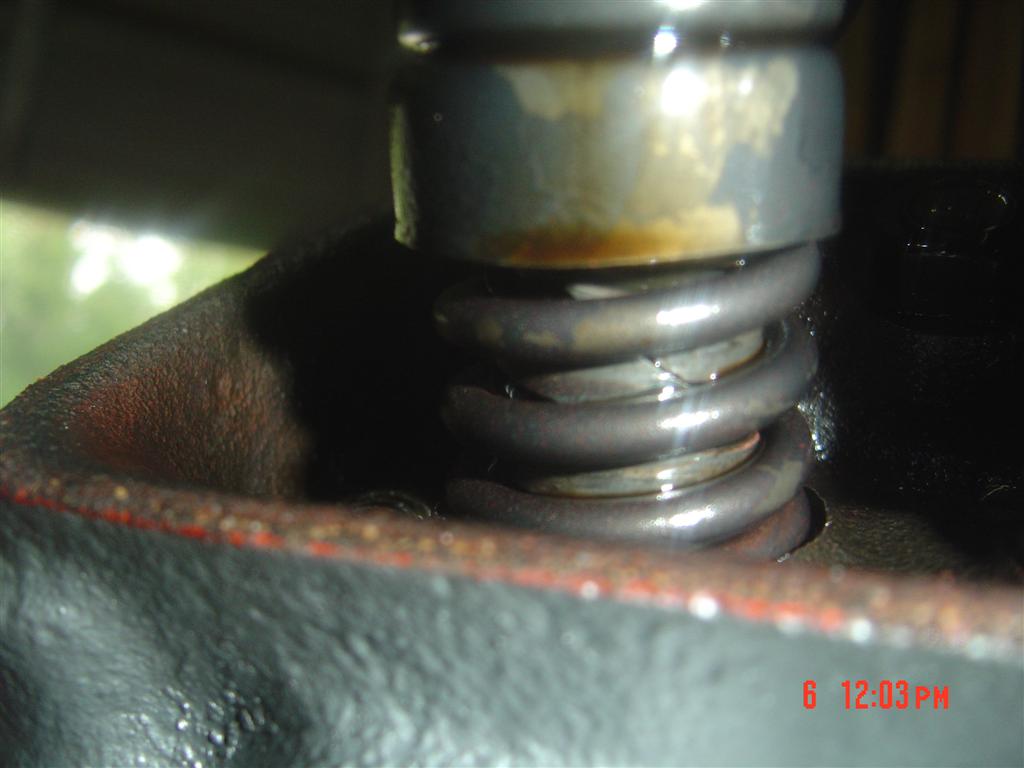
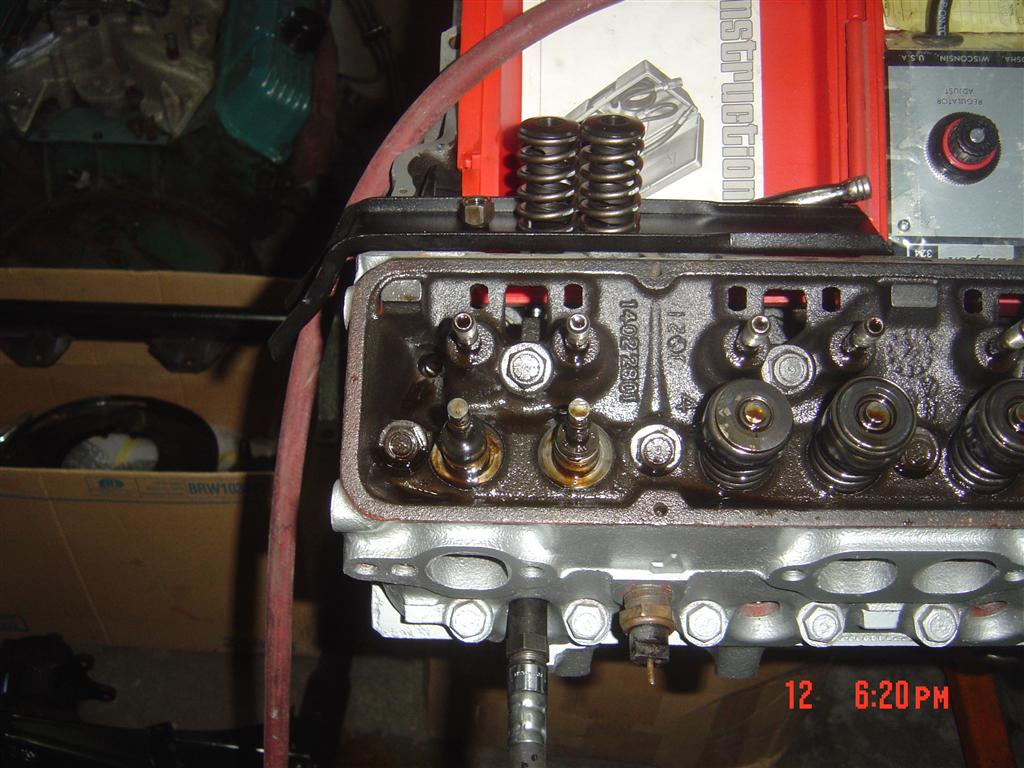
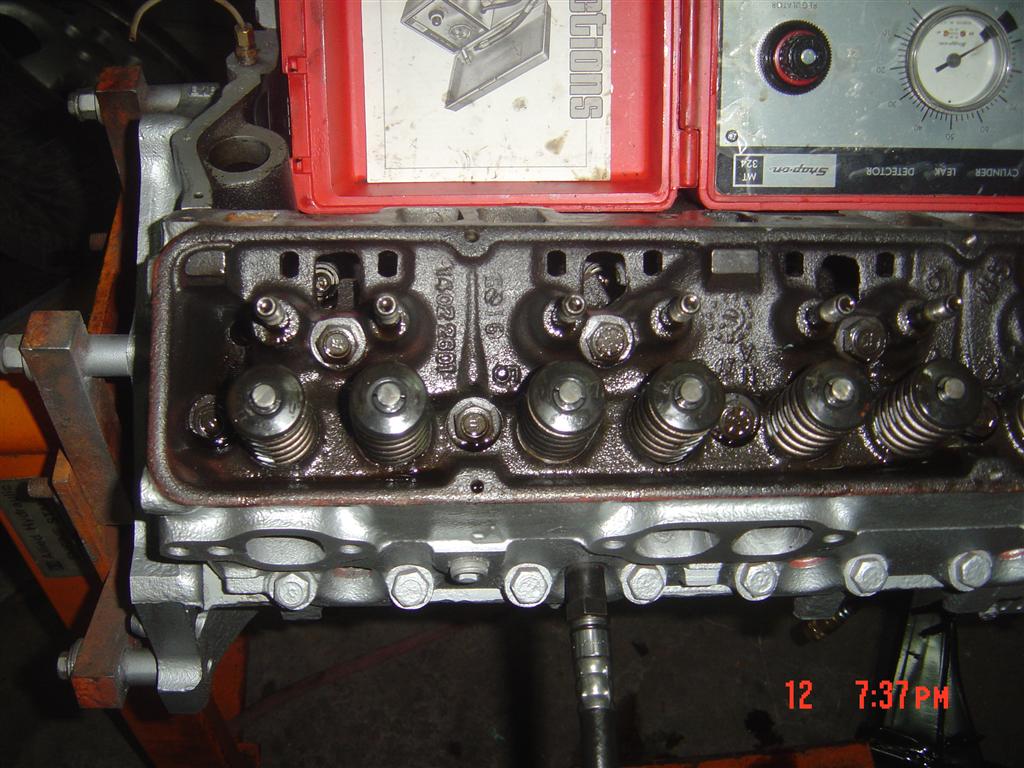
So onto the latest  EVERY oneof the inner valve springs on this engine is broken, most in multiplpe spots. I had a friend that builds race car engines come by and take a look at it. He said this is very common with the HCevy's that run a factory dual spring setup. The good news for Jim is the parts are fairly cheap, so I'll be replacing all of the springs, keepers, and caps, as well as the timing chain as it has a little play in it
Attached image(s)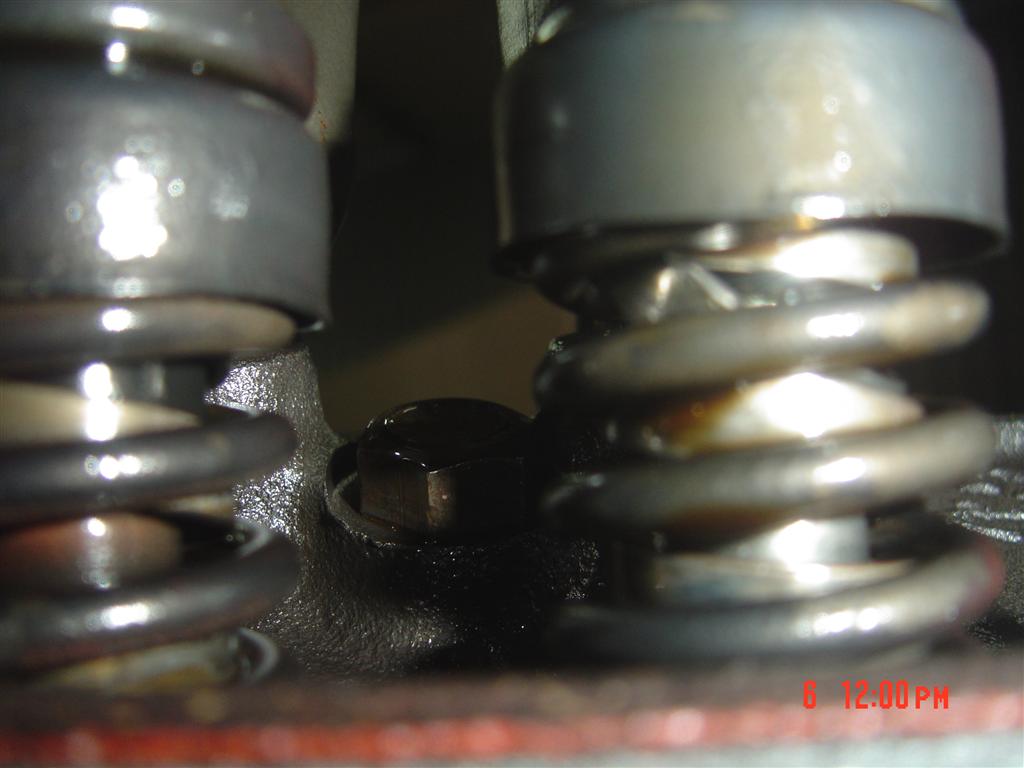
Posted by: scotty b Sep 6 2011, 07:09 PM
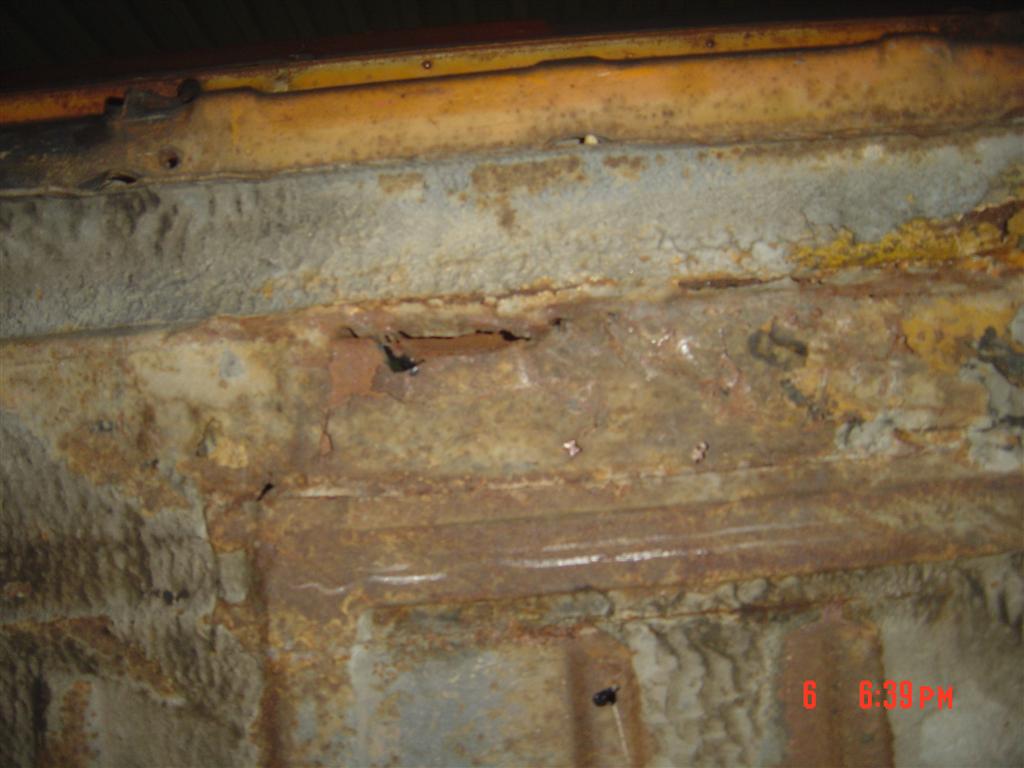
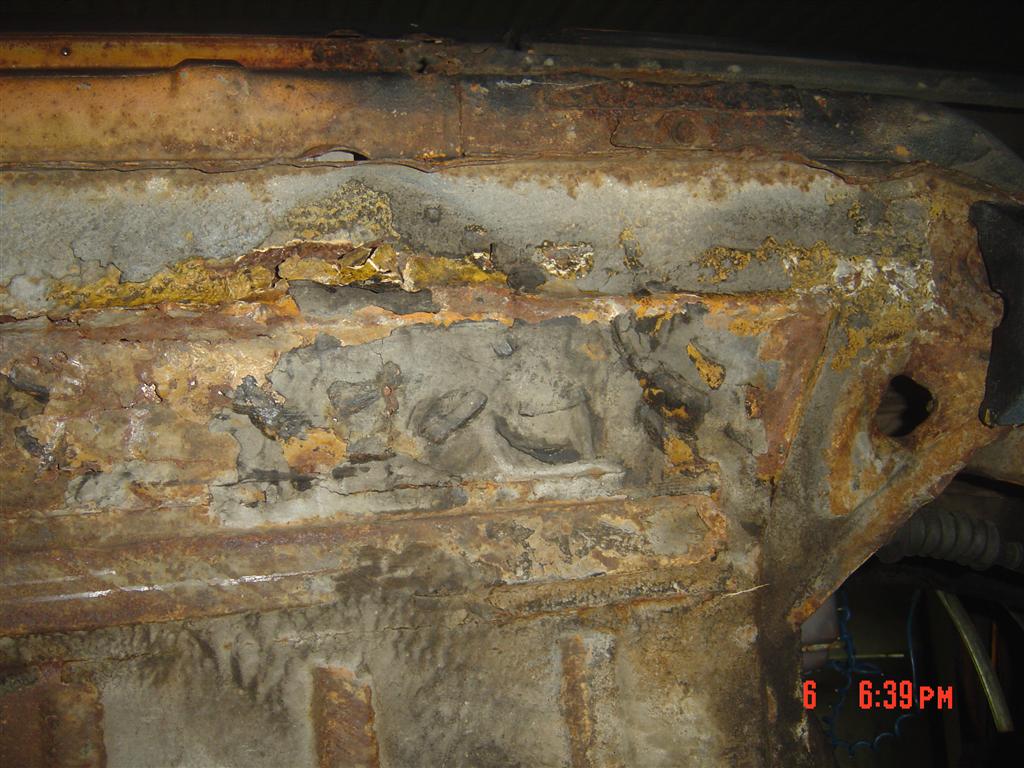
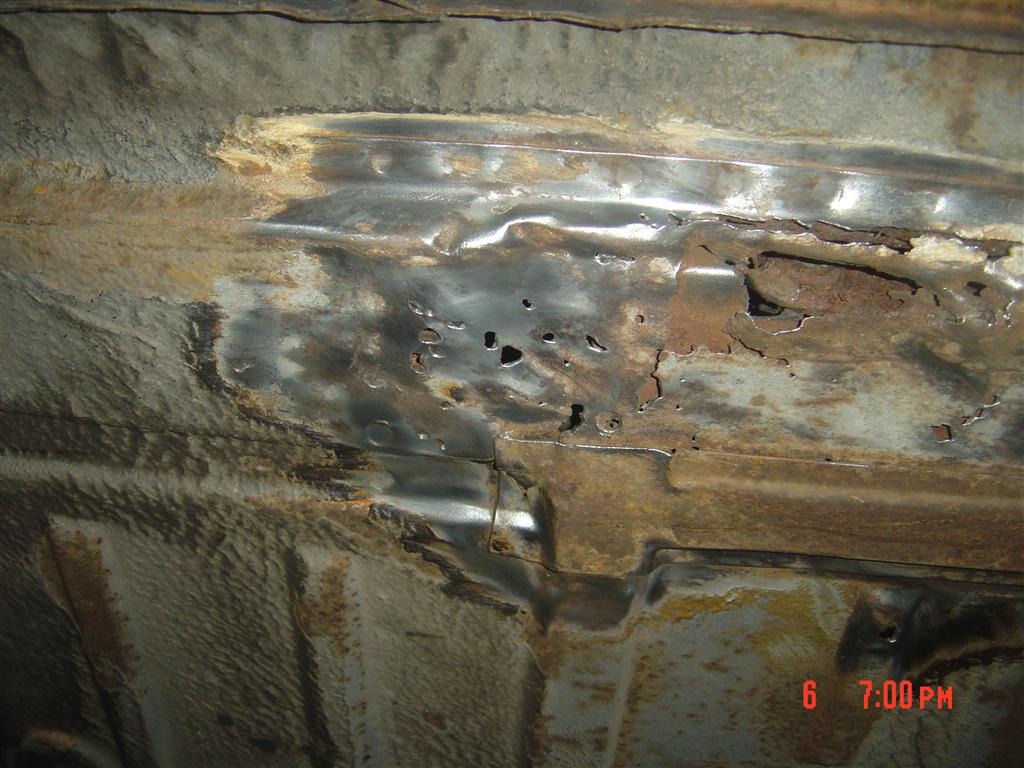
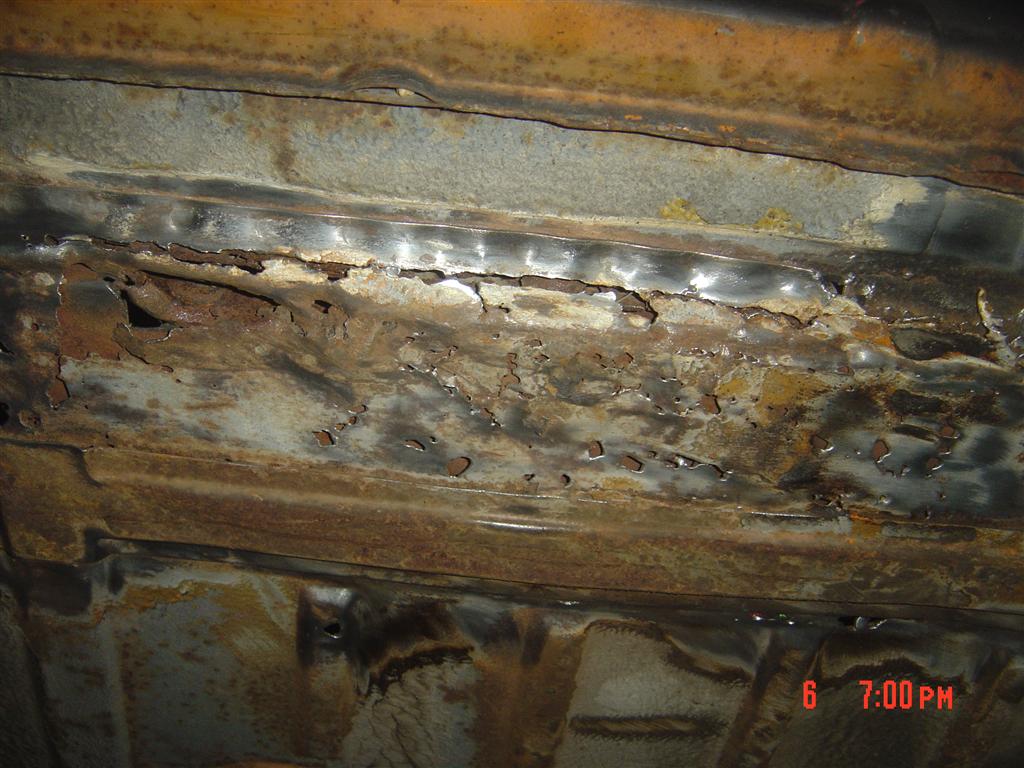
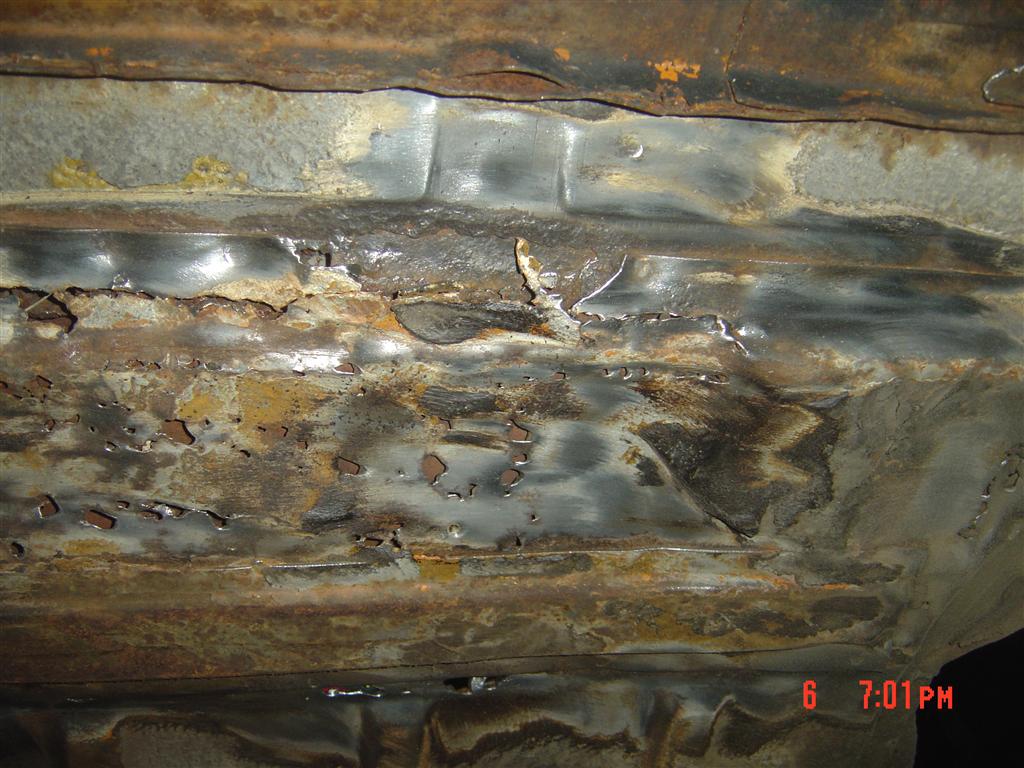
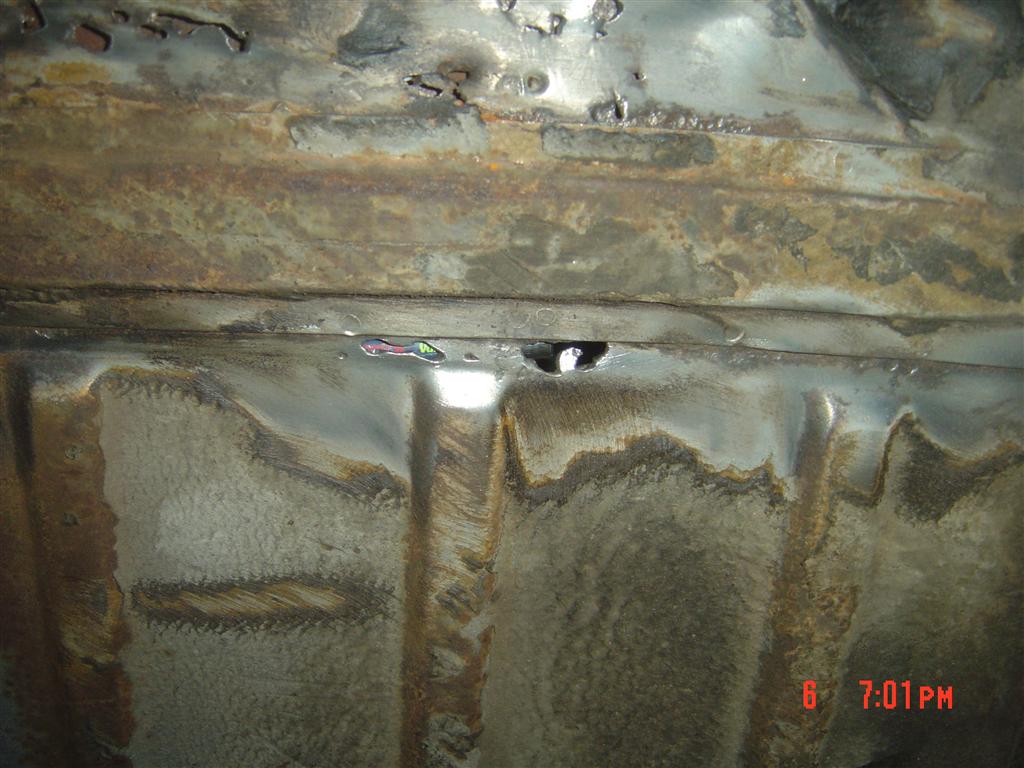
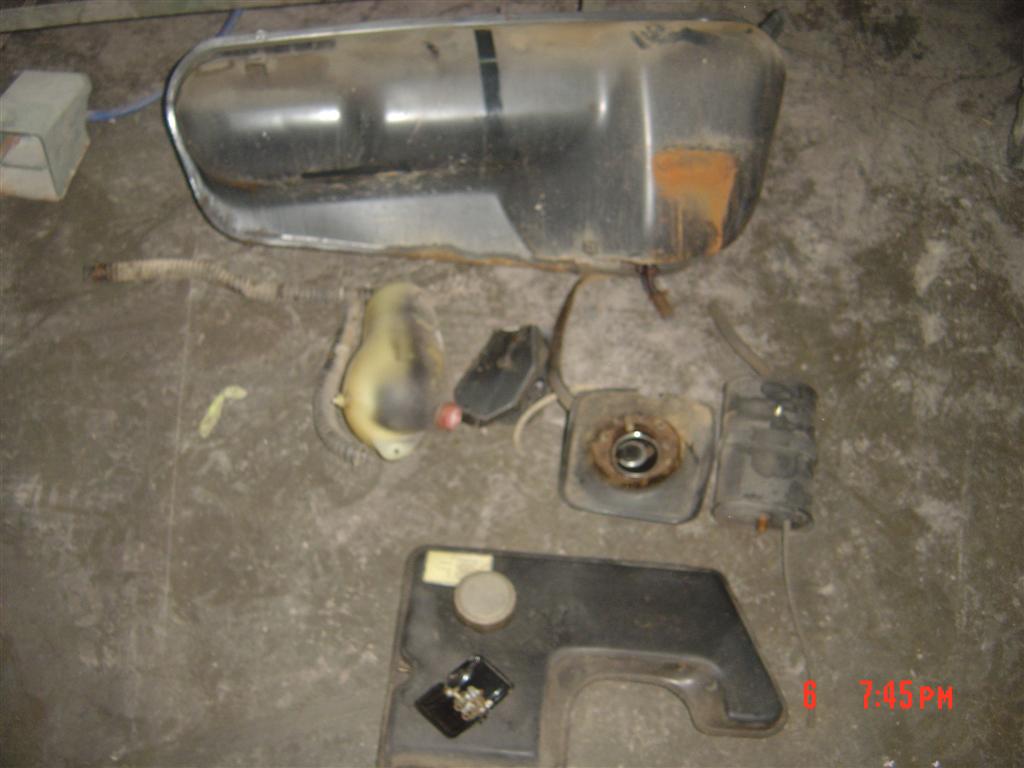
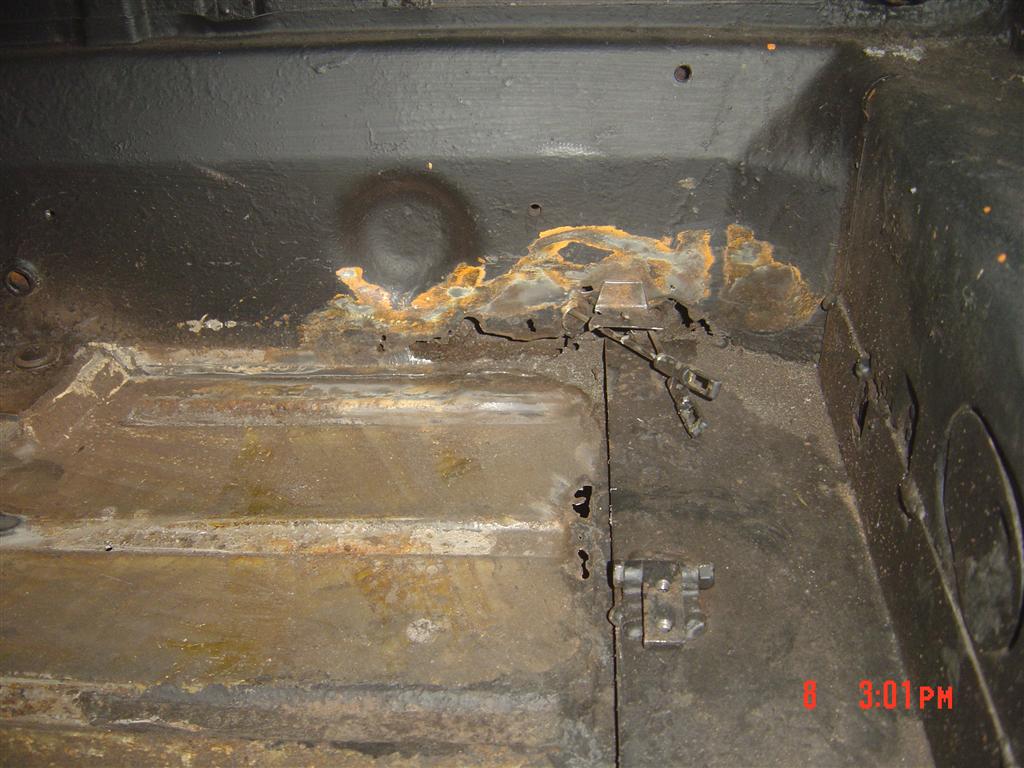
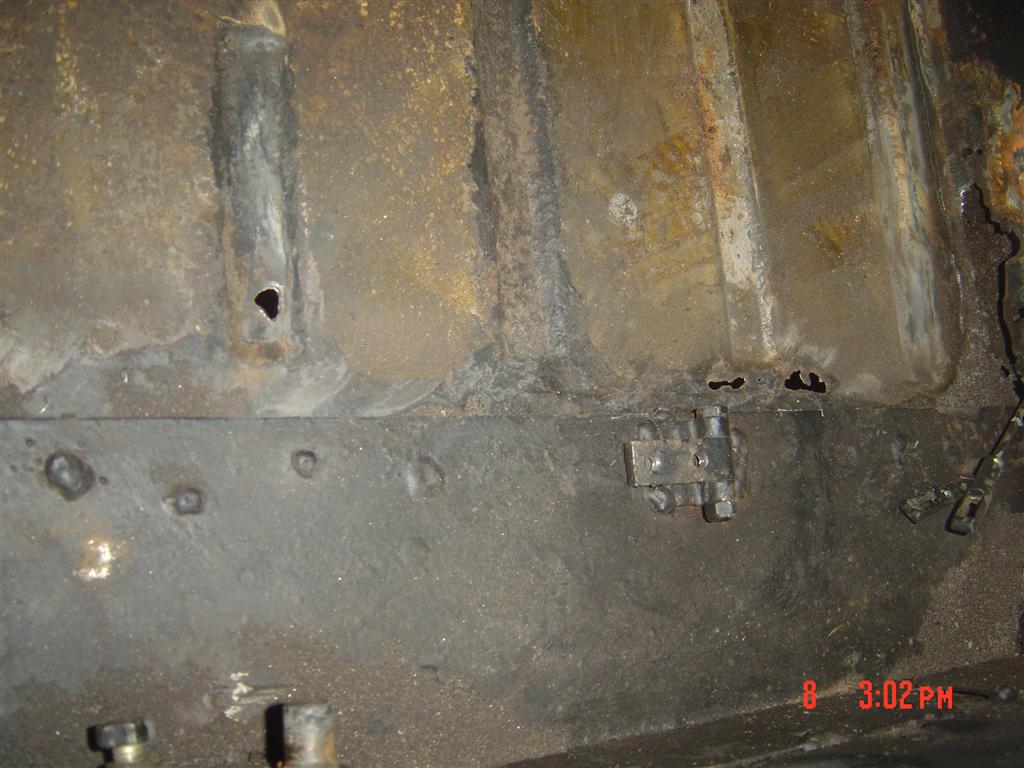
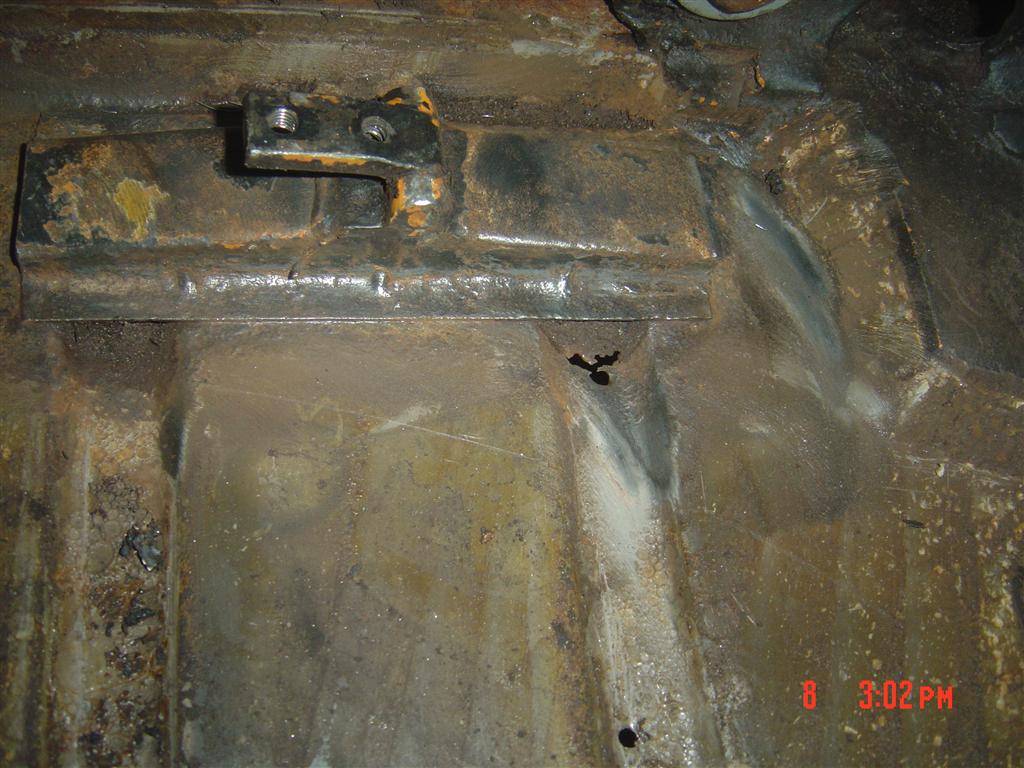
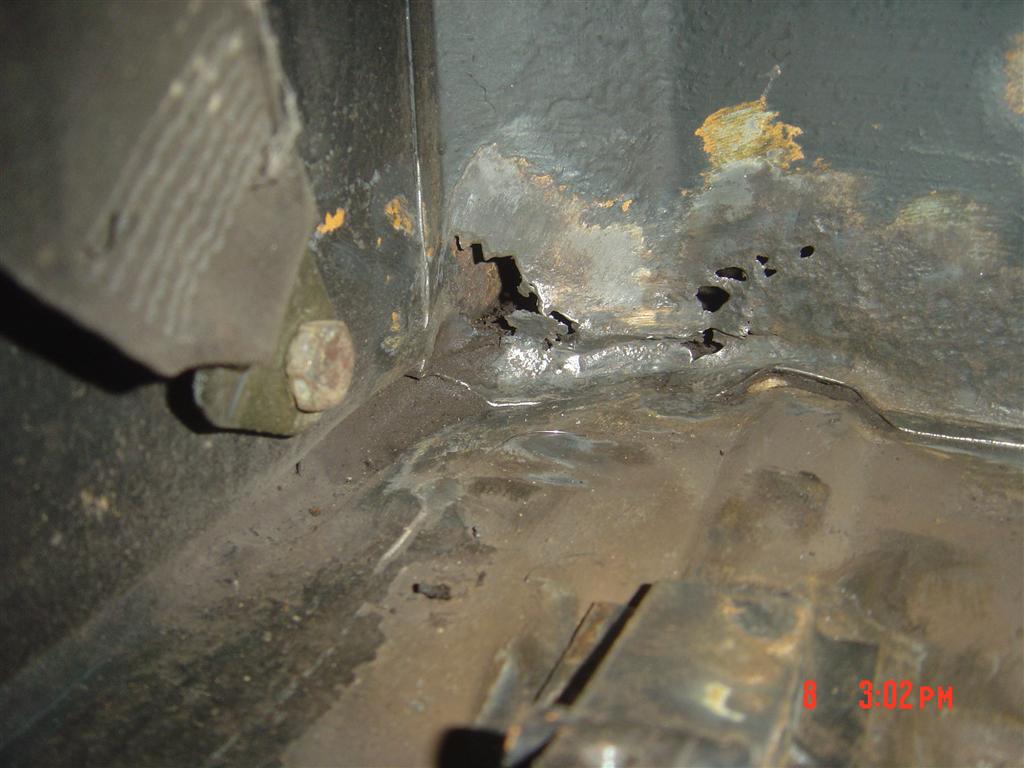
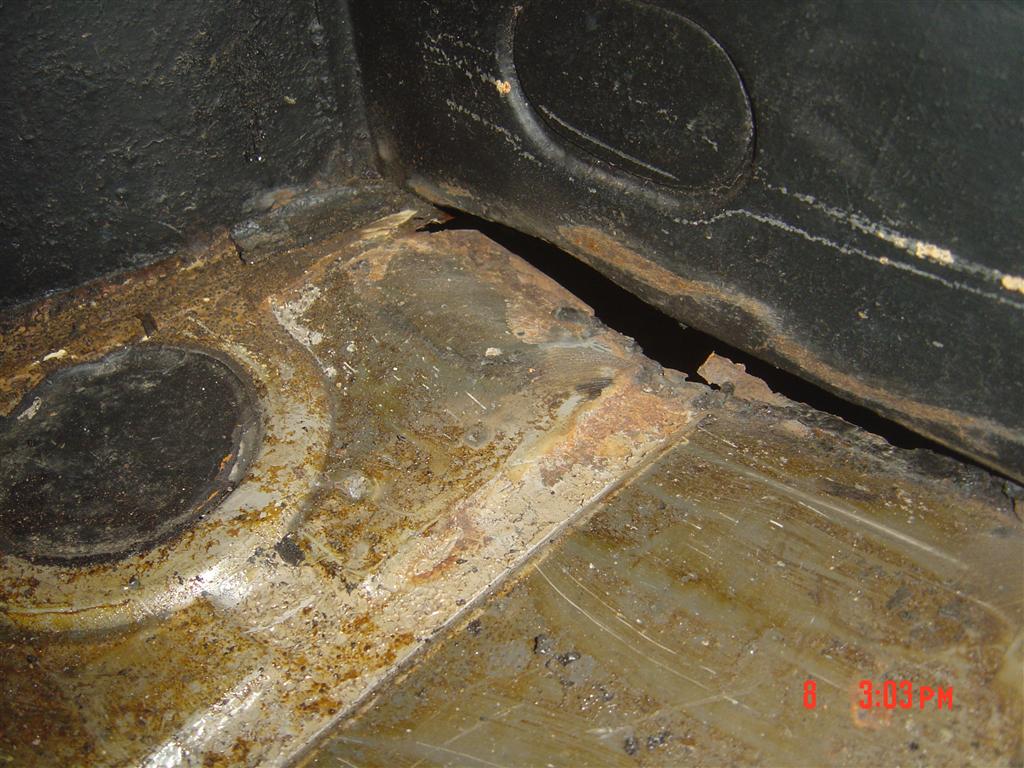
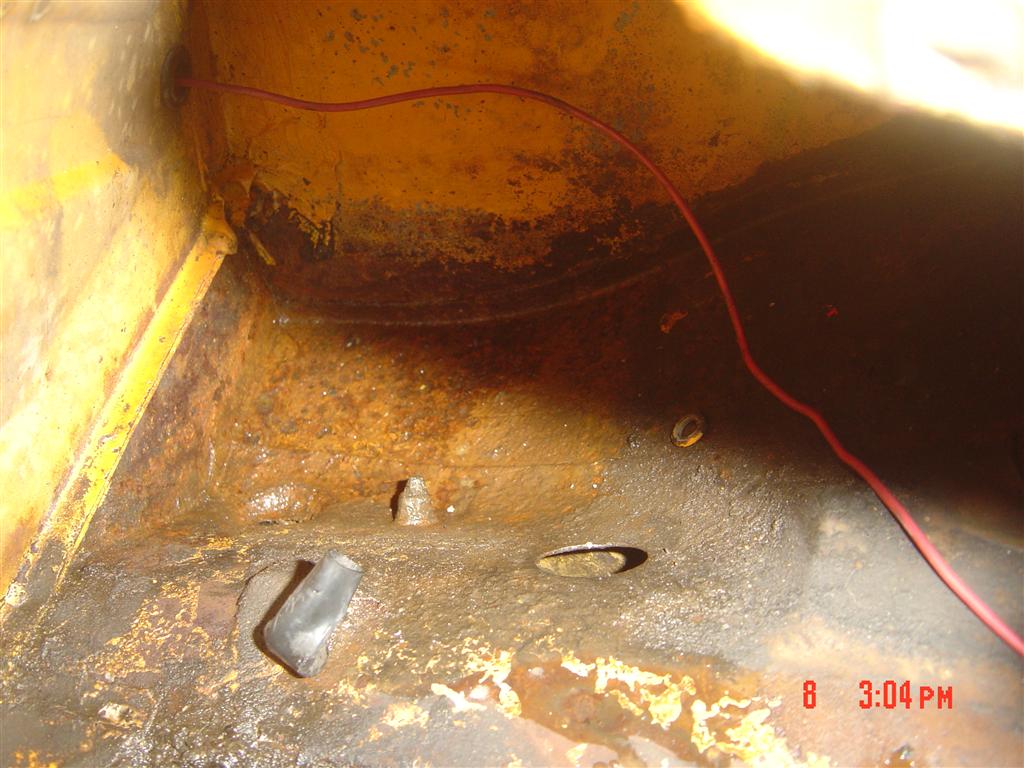
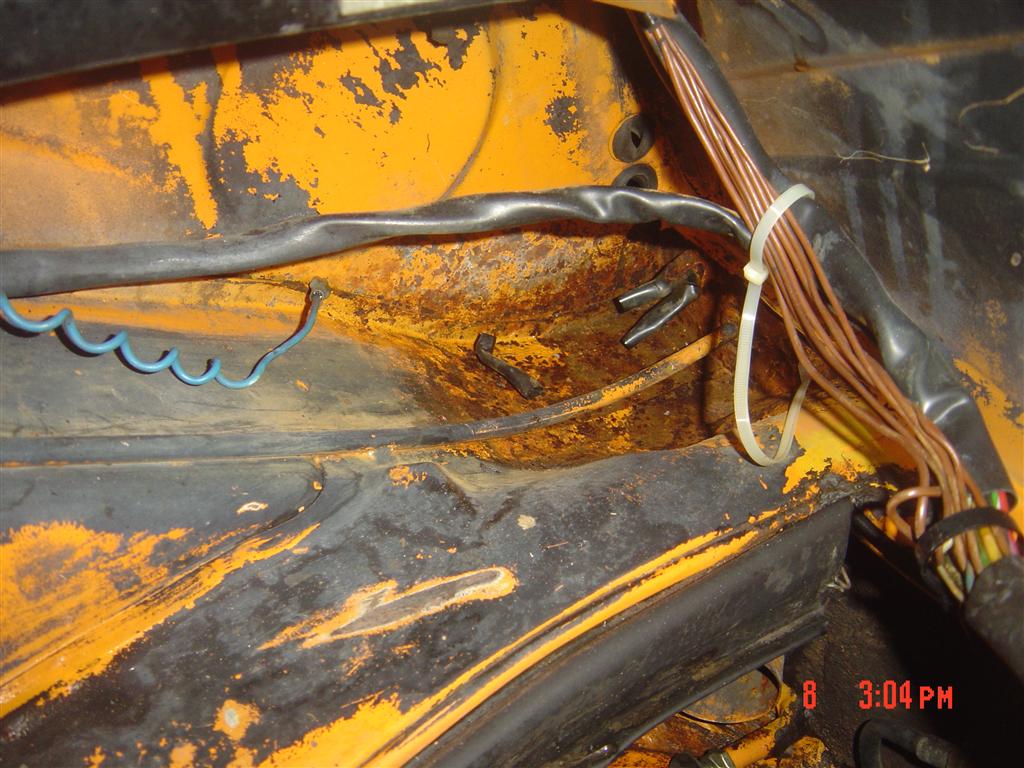
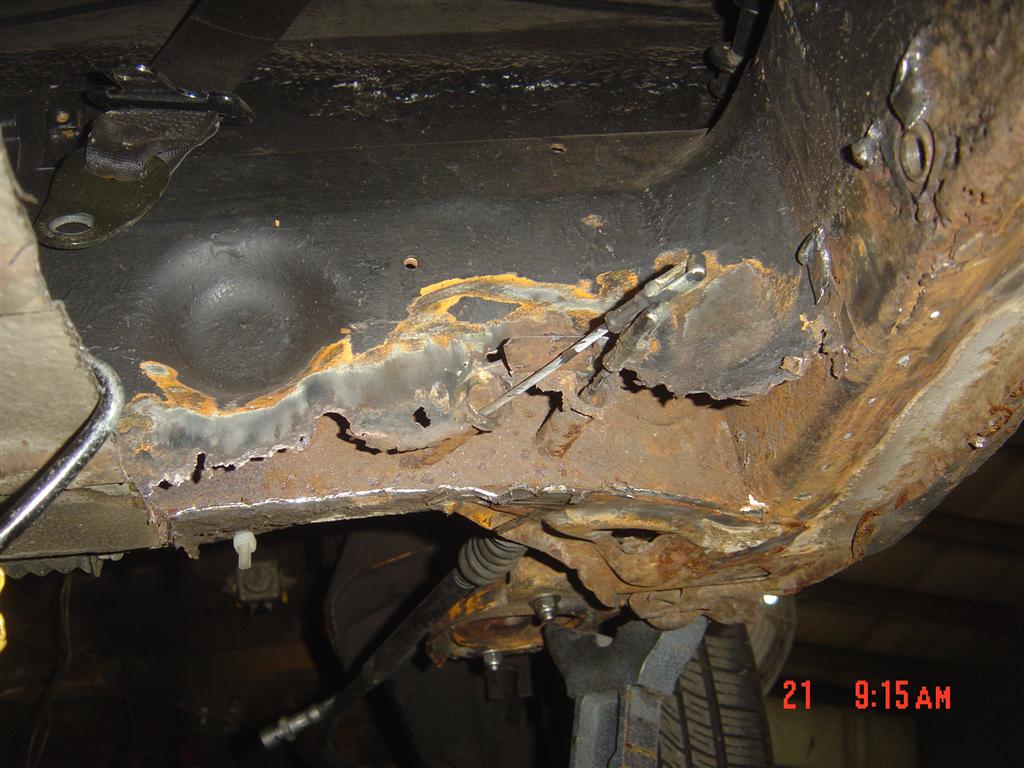
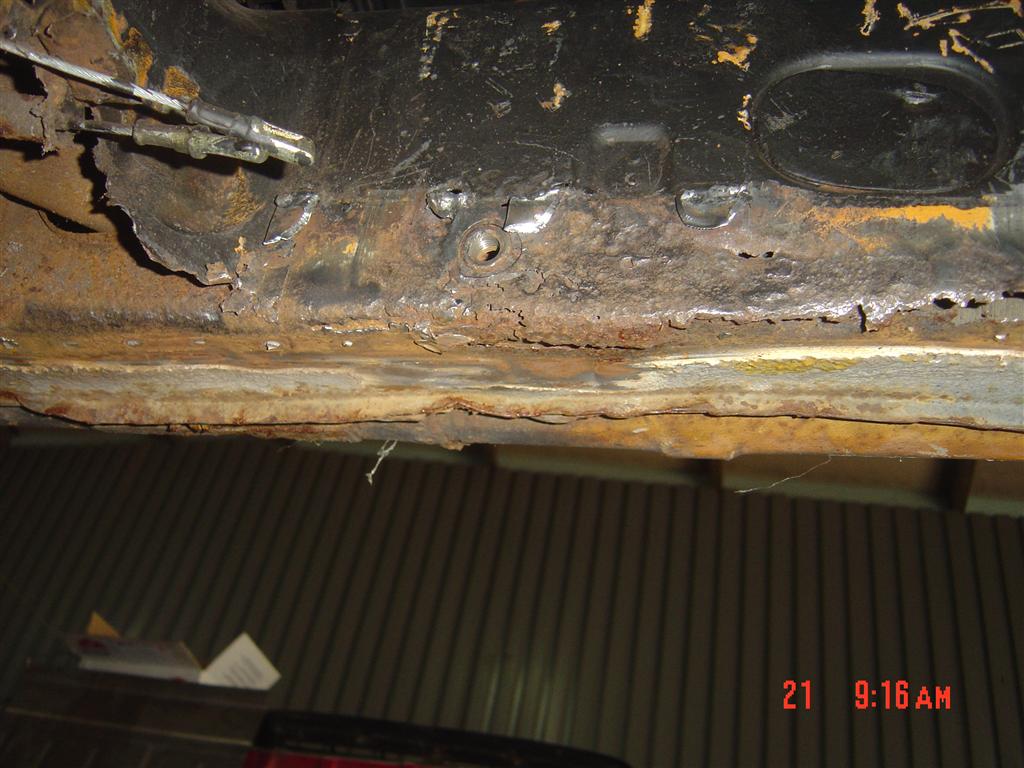
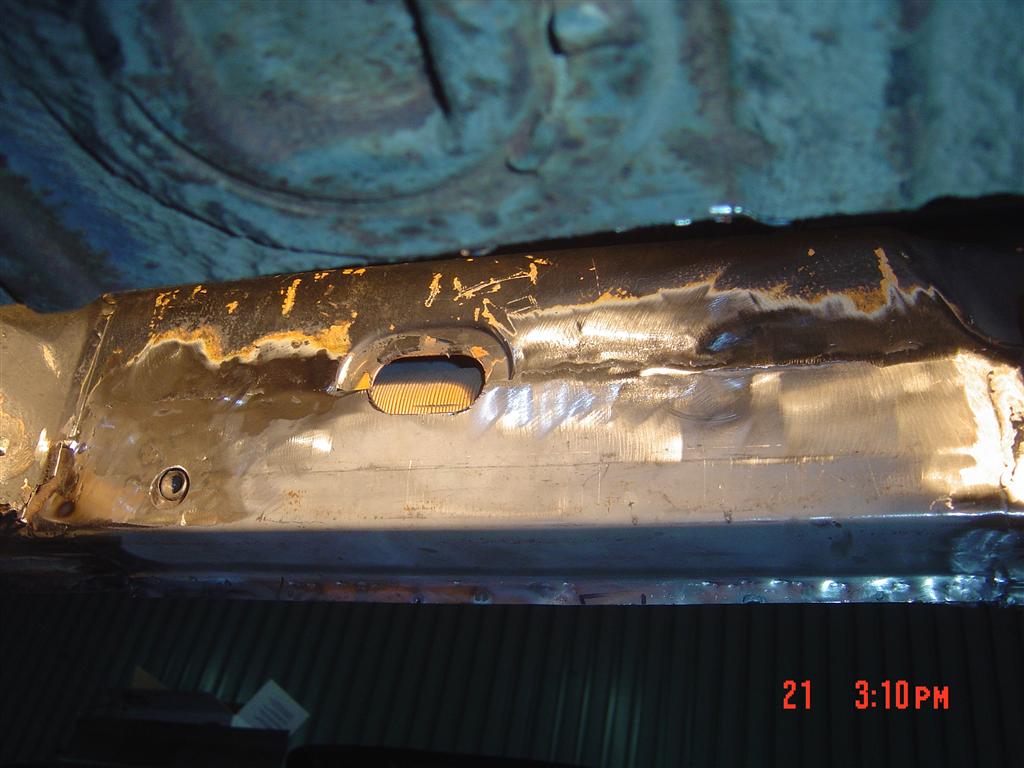
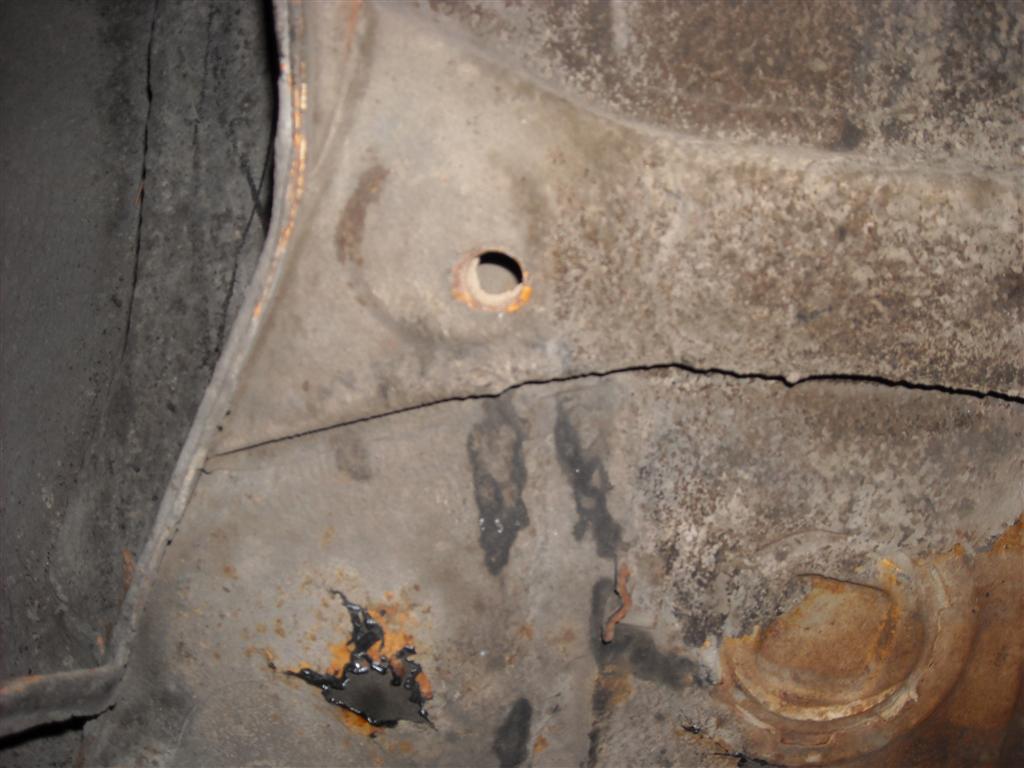
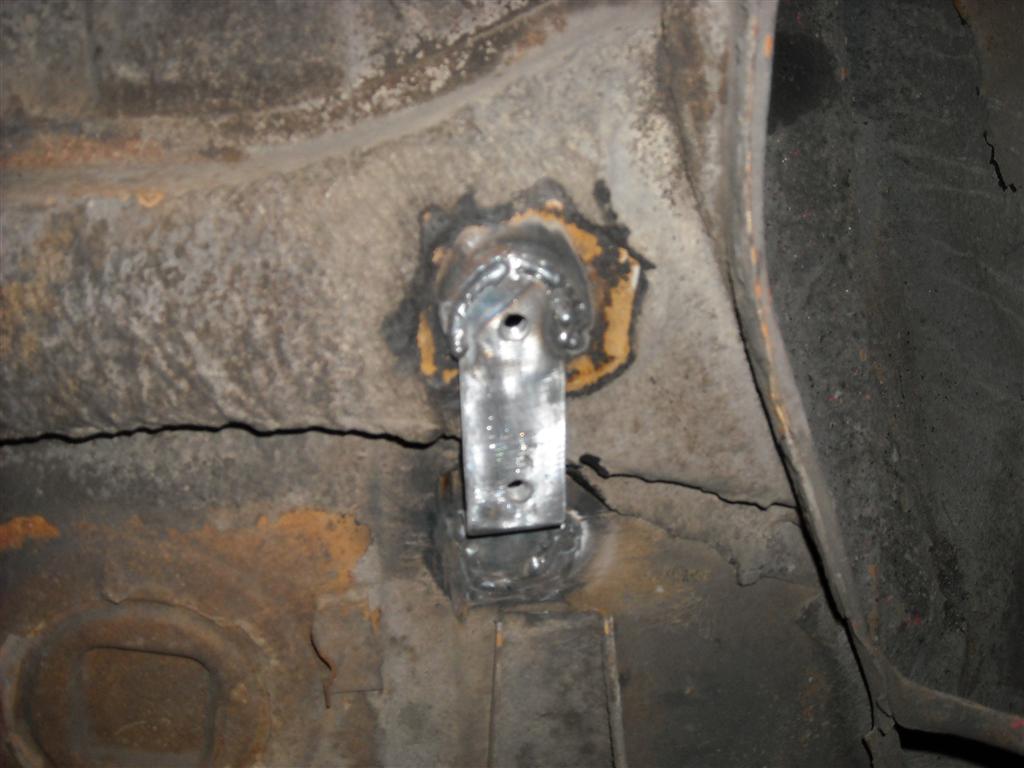
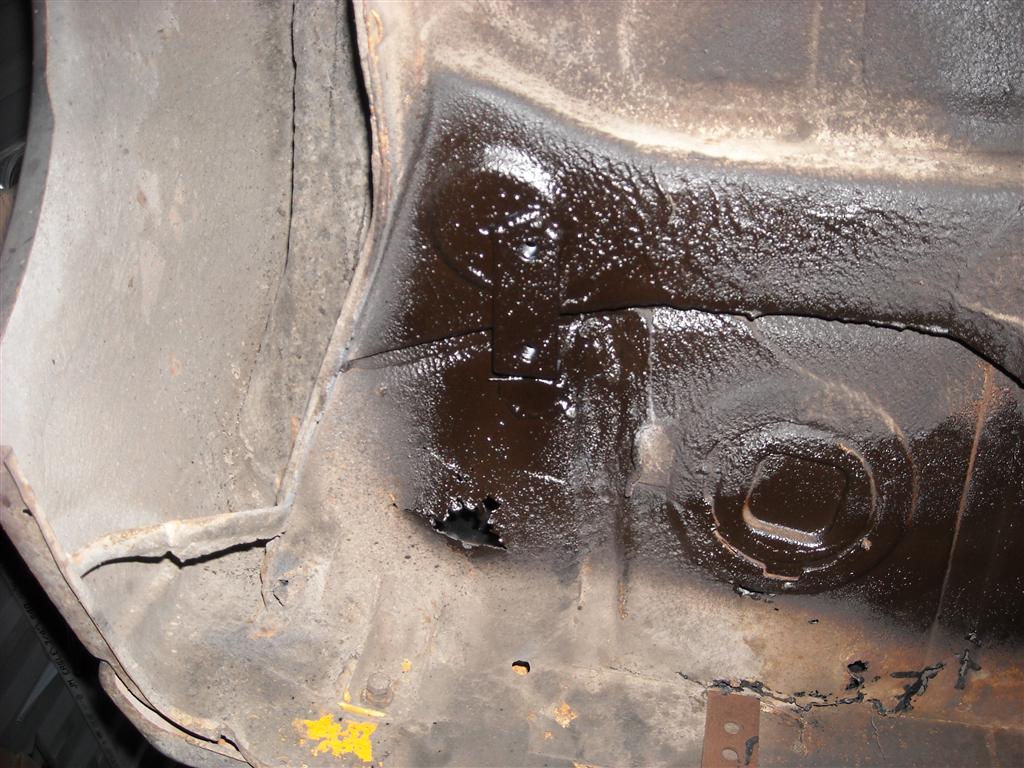
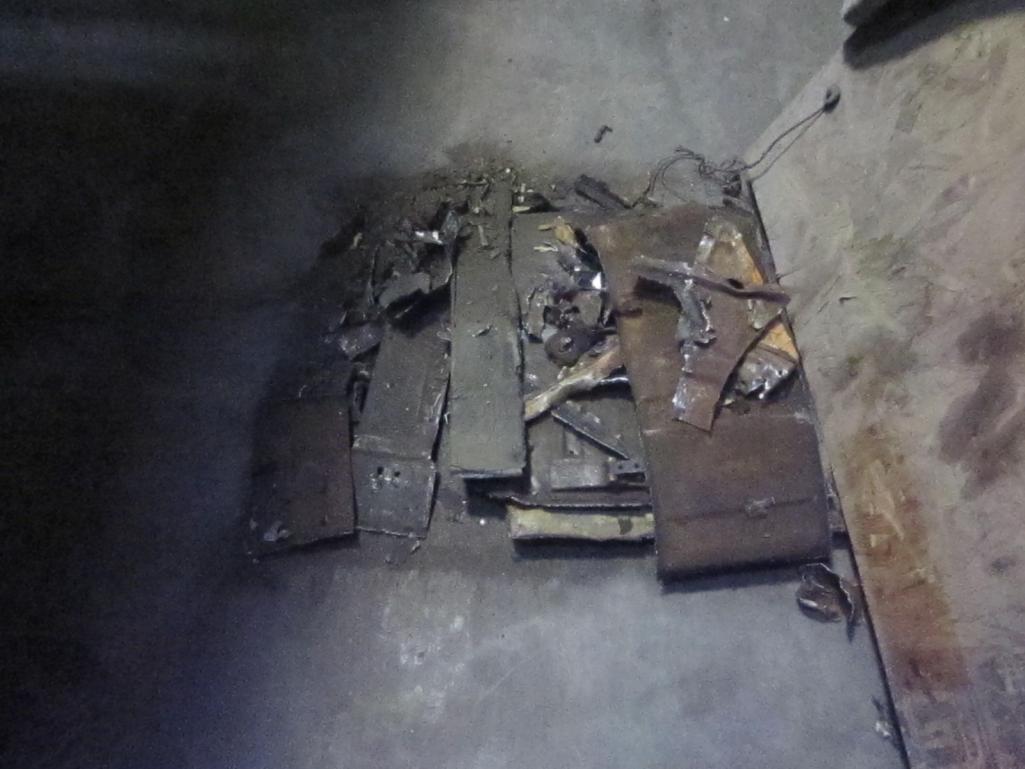
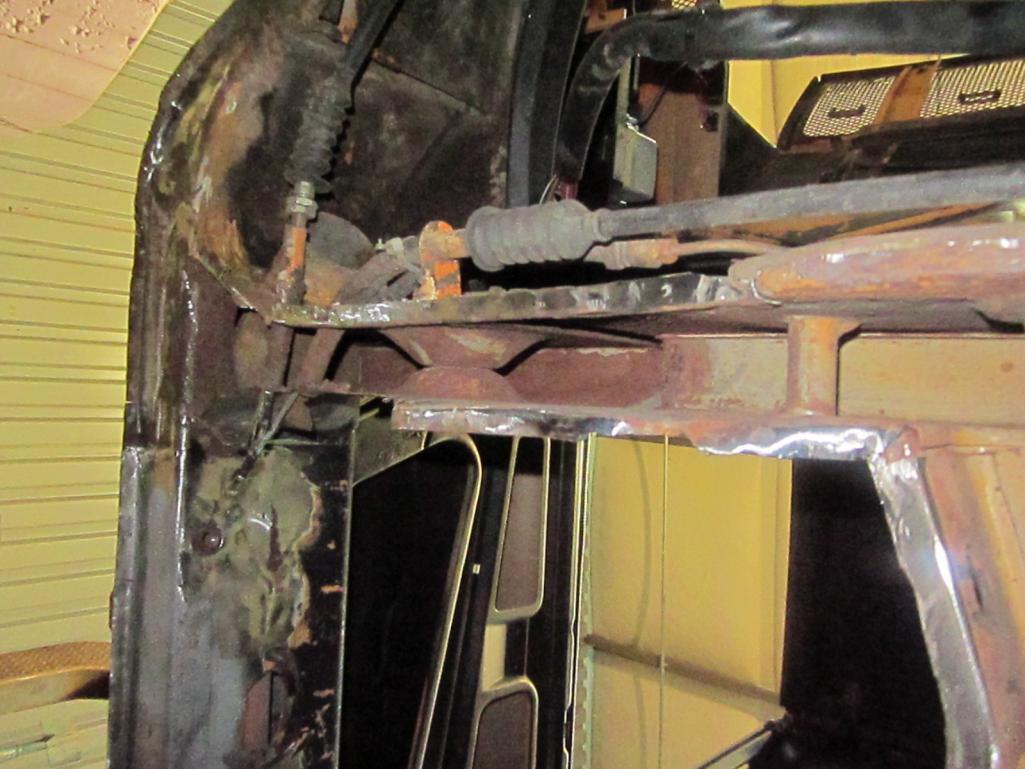
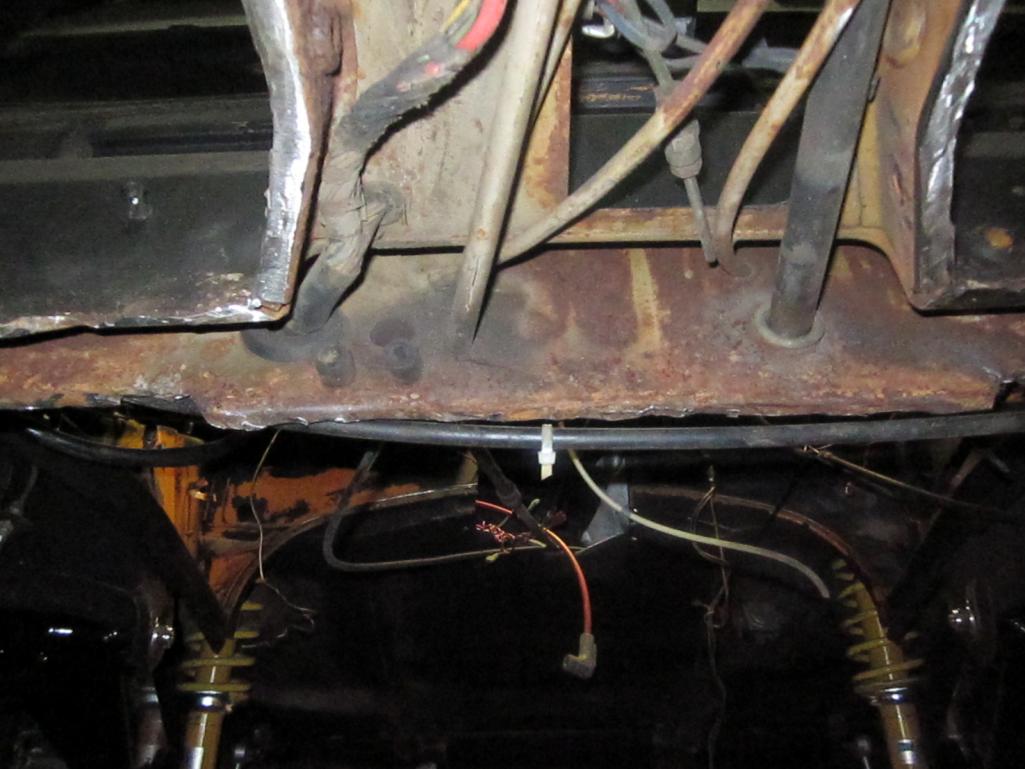
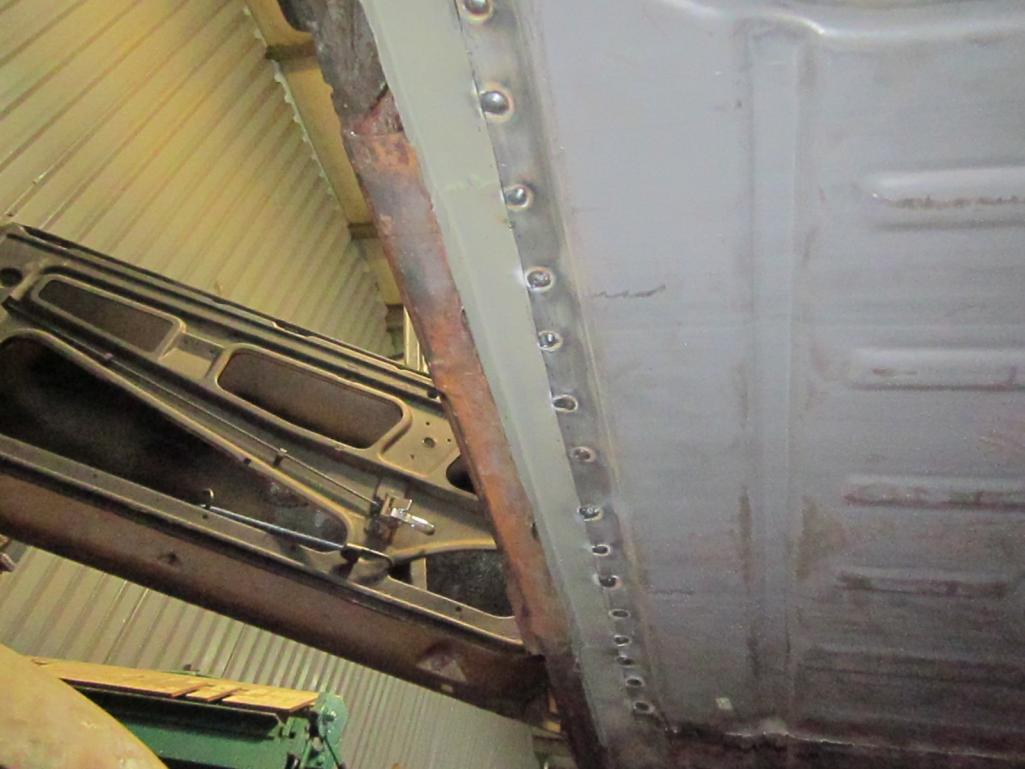
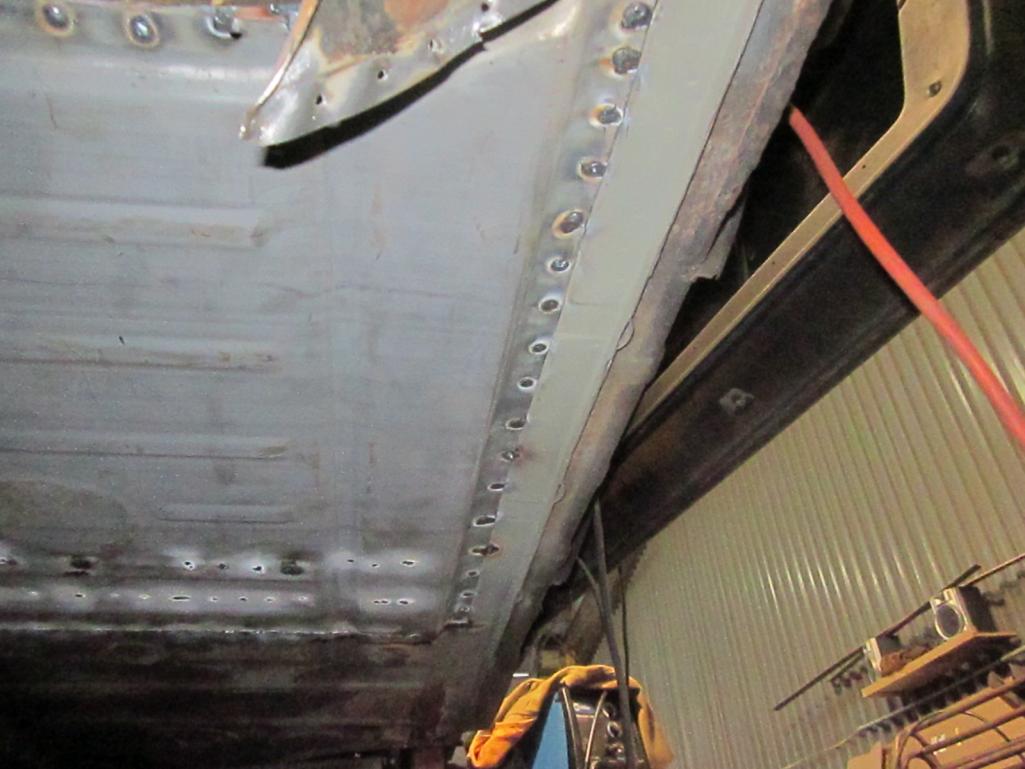
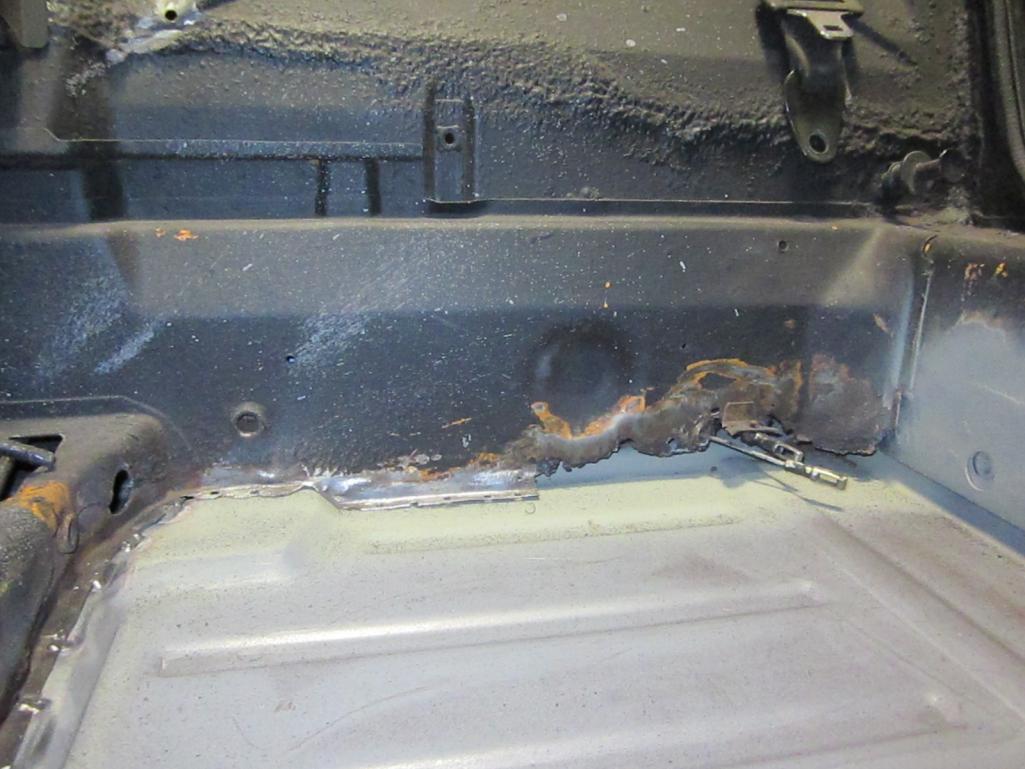
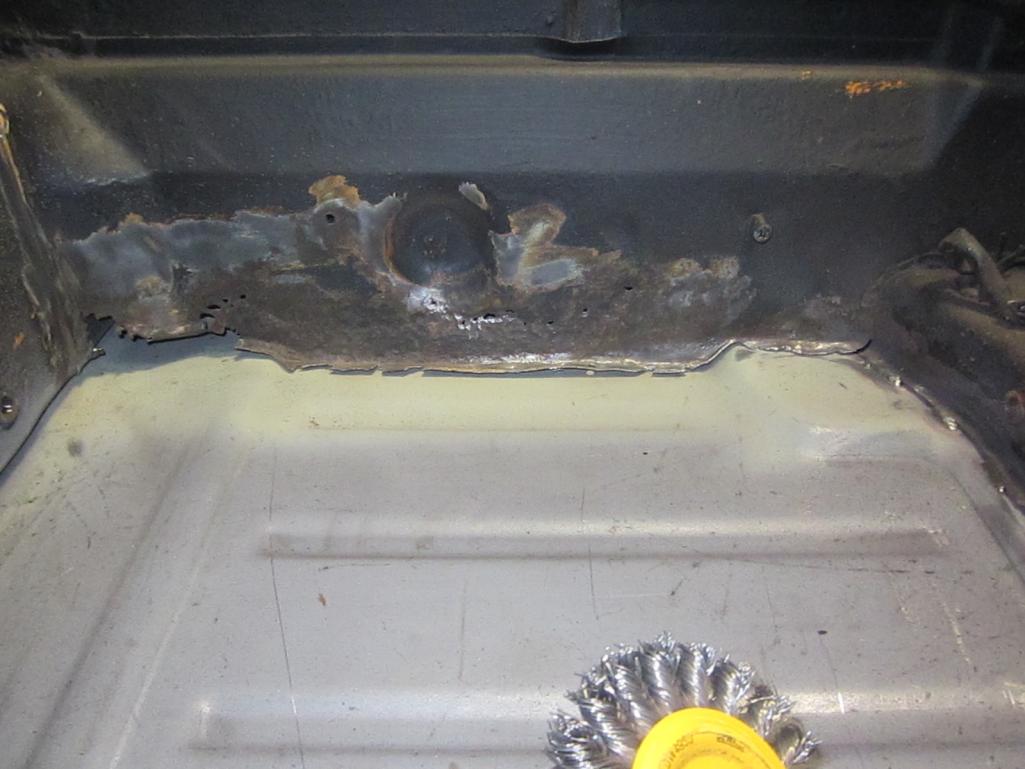
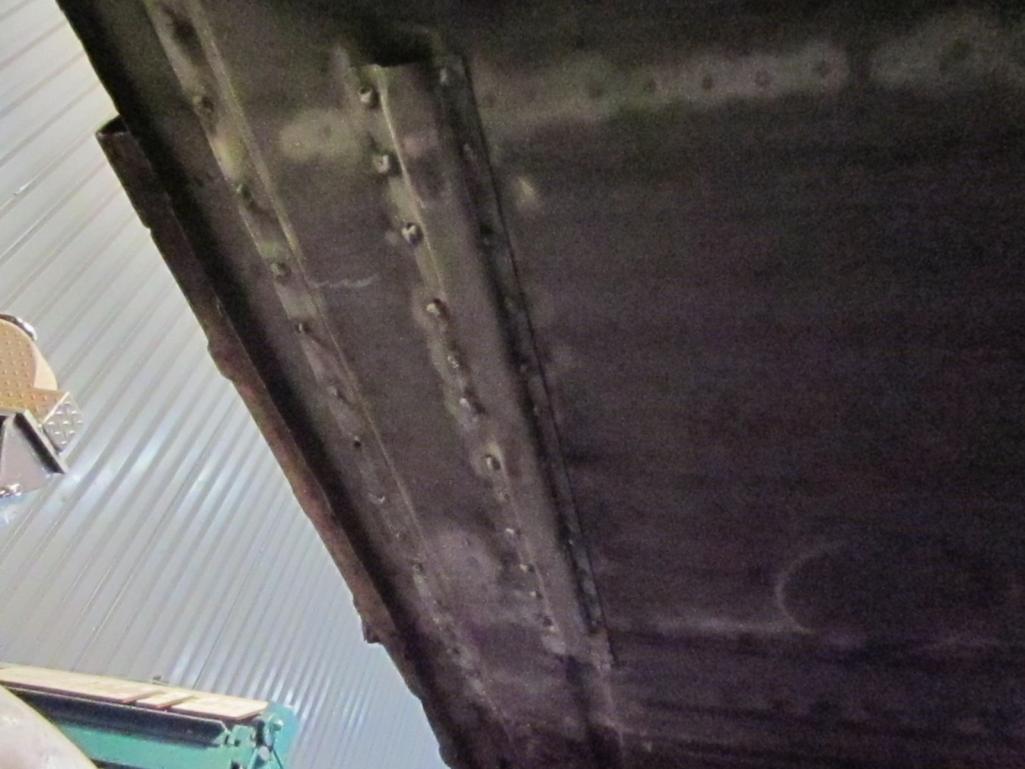
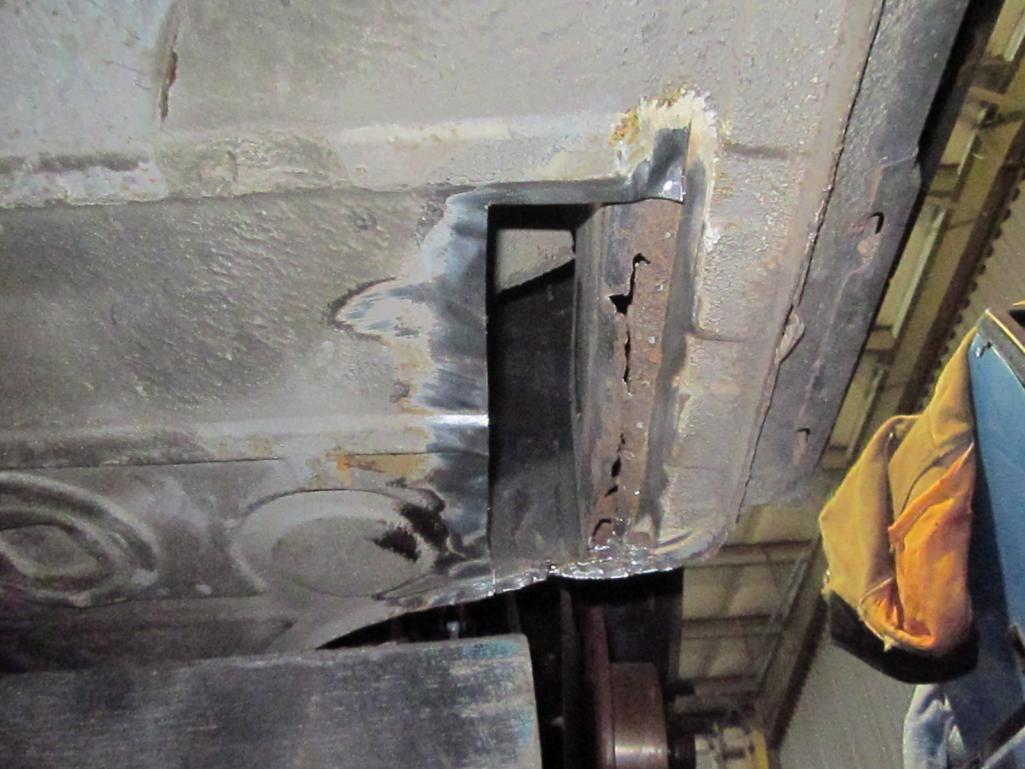
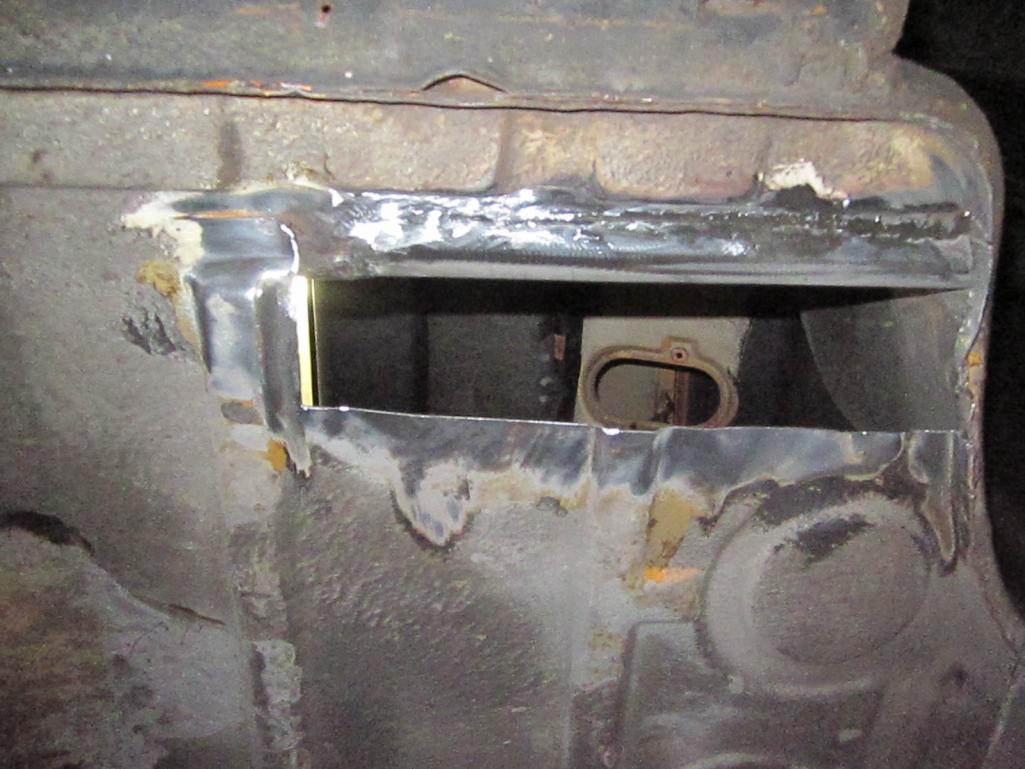
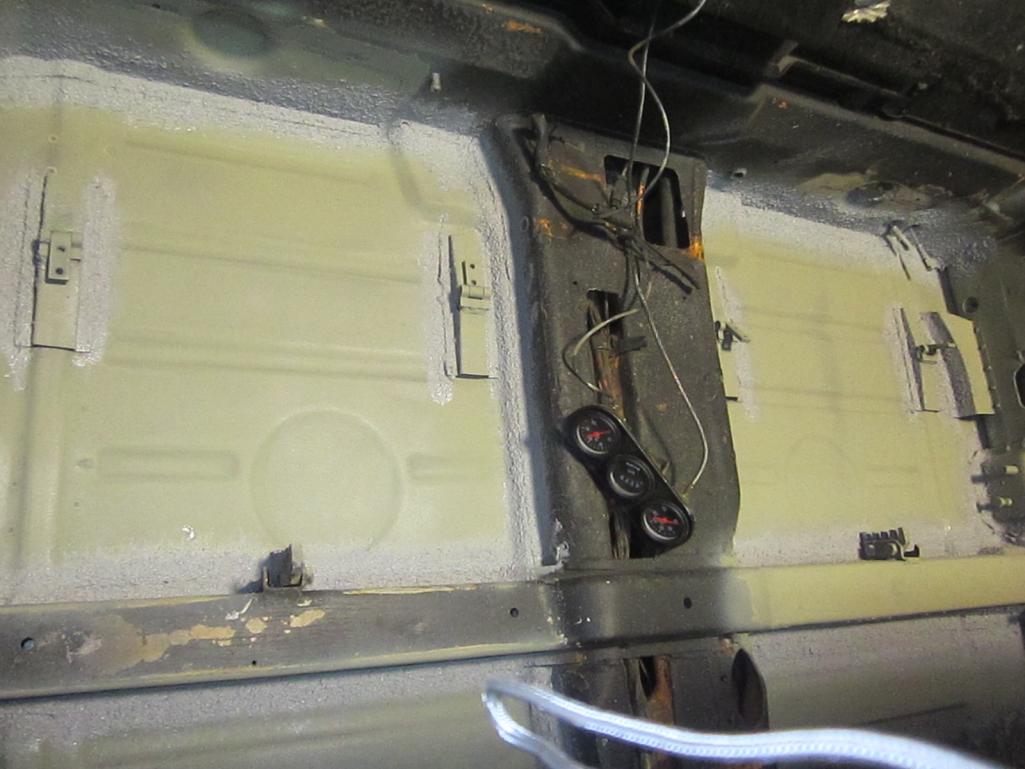
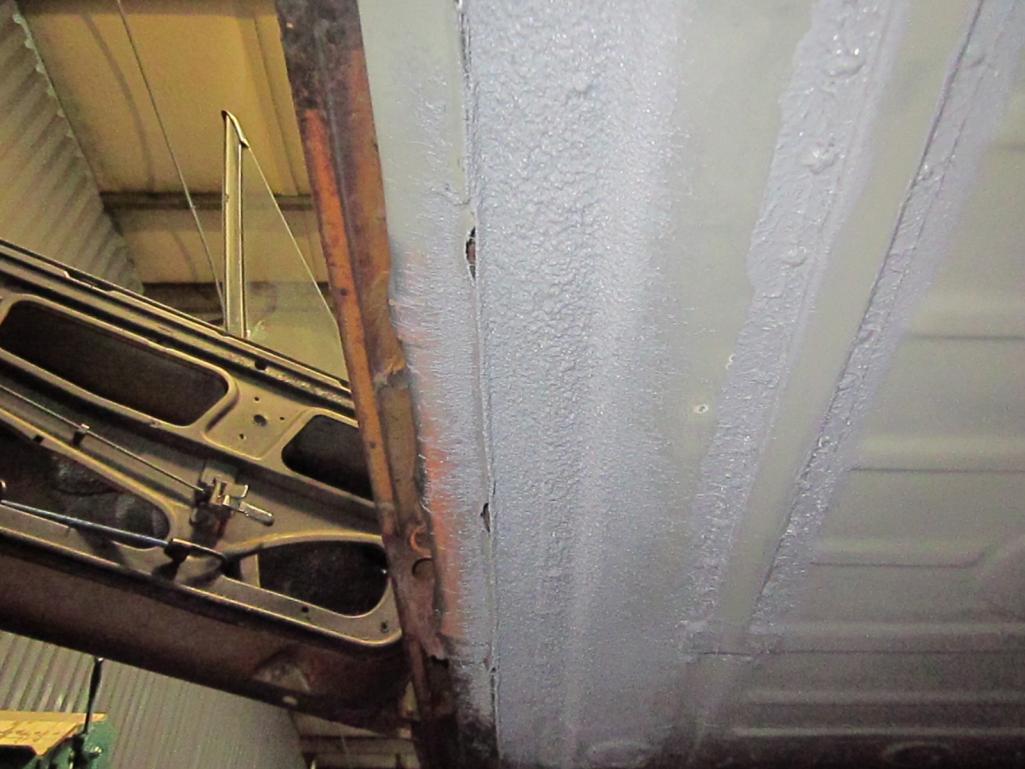
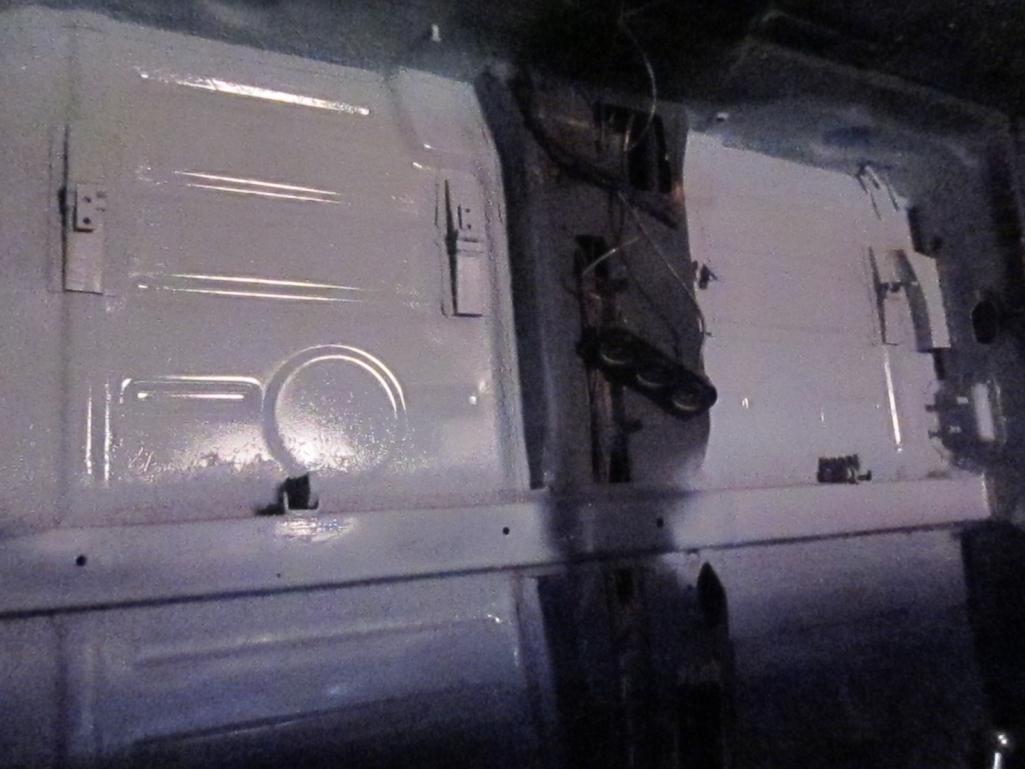
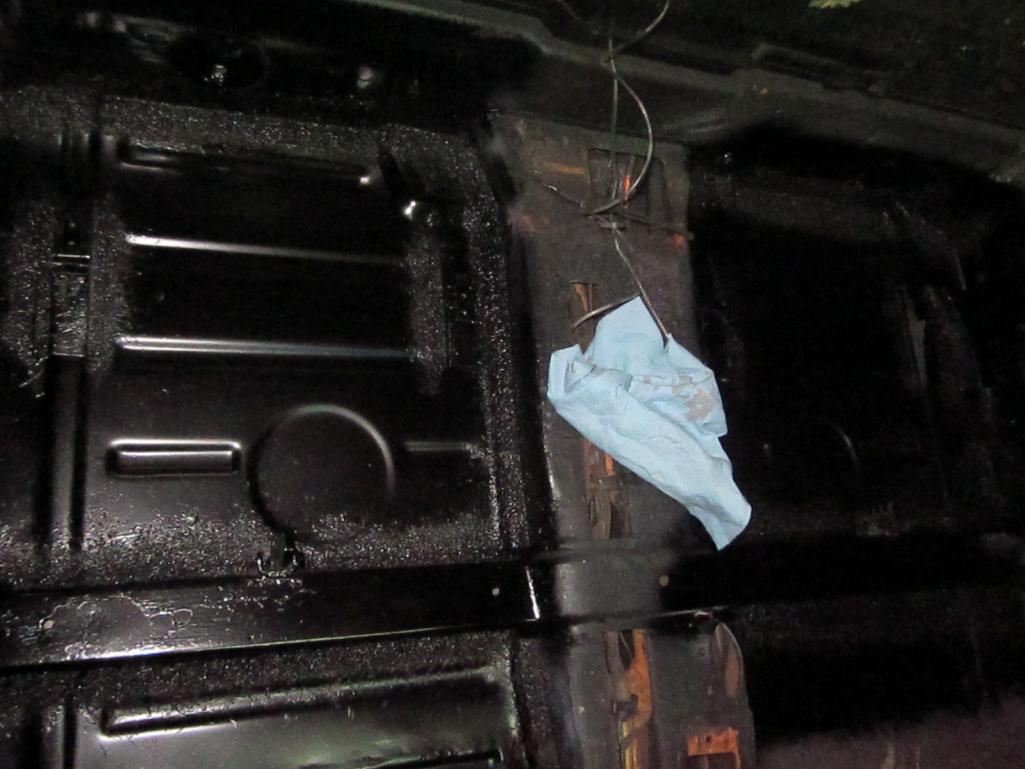
Drained the gas tank and pulled it. found Jim's washer bottle top and looked into some rust issues we knew about to see how bad they were
See Mark, it isn't just your car 
Attached image(s)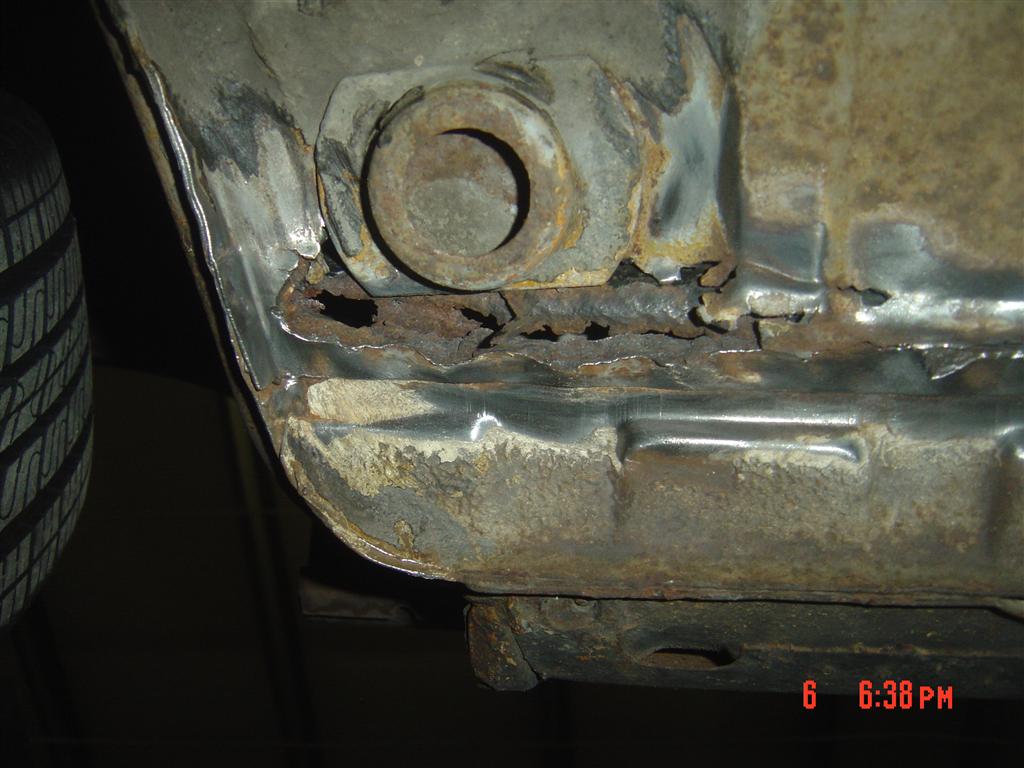
Posted by: messix Sep 6 2011, 07:09 PM
those aren't springs theyre dampers
Posted by: scotty b Sep 6 2011, 07:25 PM
those aren't springs theyre dampers
potato, potentate

Posted by: mepstein Sep 6 2011, 07:29 PM
Drained the gas tank and pulled it. found Jim's washer bottle top
and looked into some rust issues we knew about to see how bad they wereSee Mark, it isn't just your car
I see... but I sure wouldn't wish my cars rust on anyone else.
Posted by: jimkelly Sep 6 2011, 07:44 PM
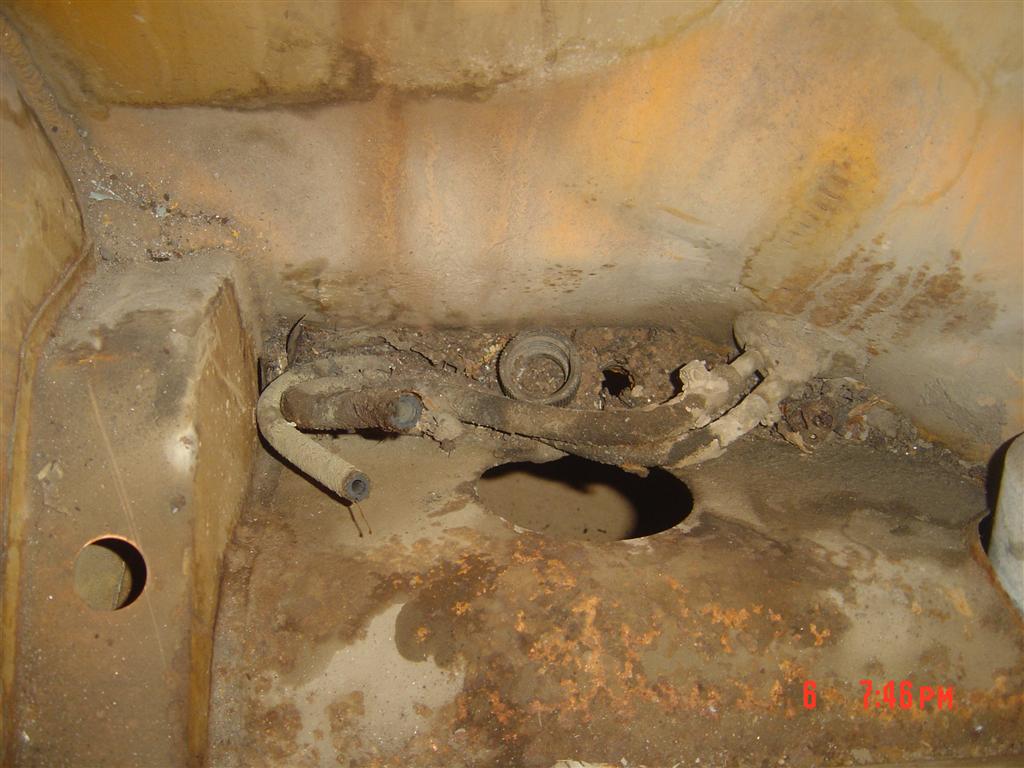
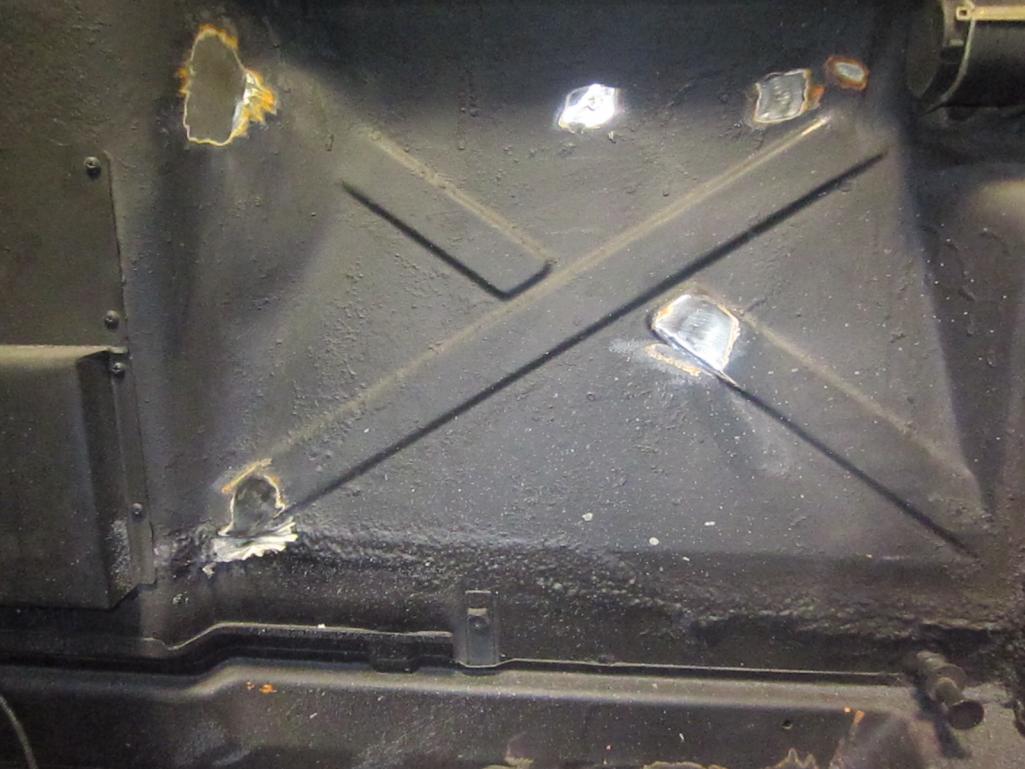
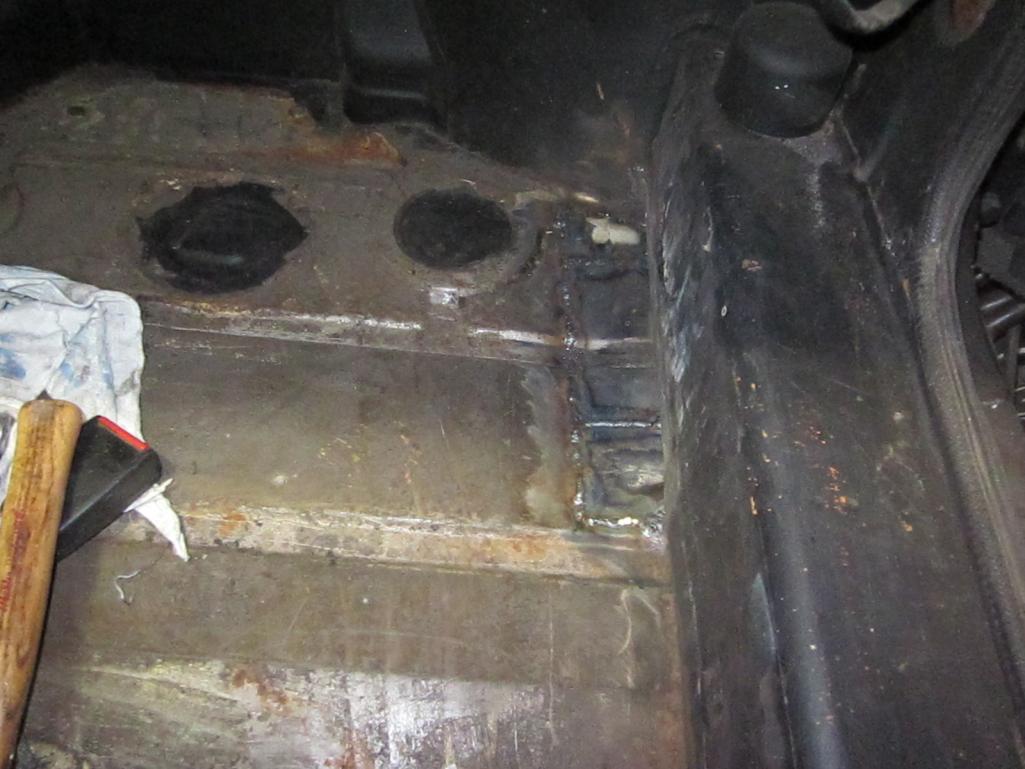
not sure what i am looking at - it appears one area is the drivers side rear pan area - quite a few holes : (
on the upside, i think i also saw some shiny metal in isolated areas : )
scott - thanks for the play by play imagery !!!
jim
Posted by: scotty b Sep 8 2011, 02:37 PM
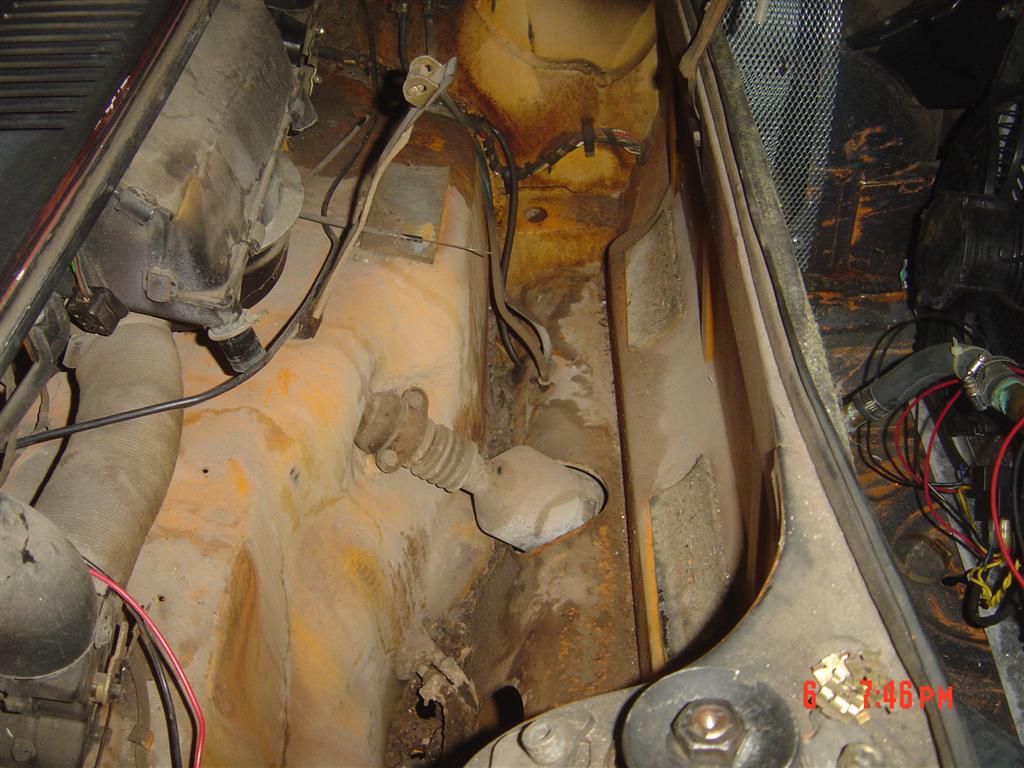
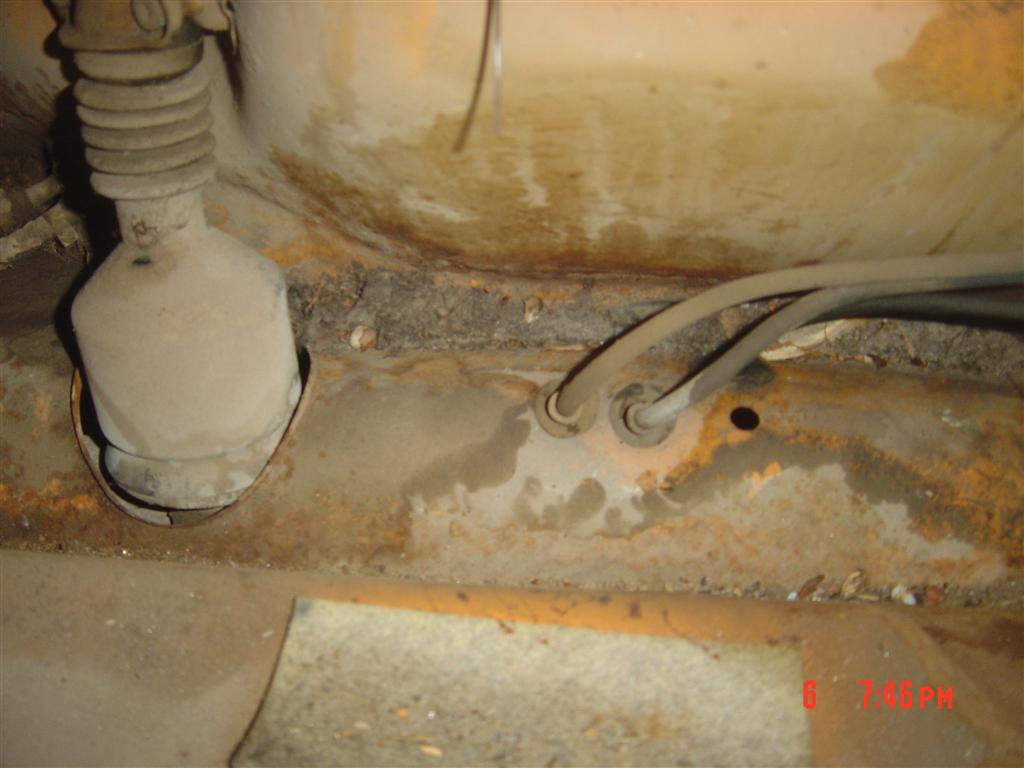
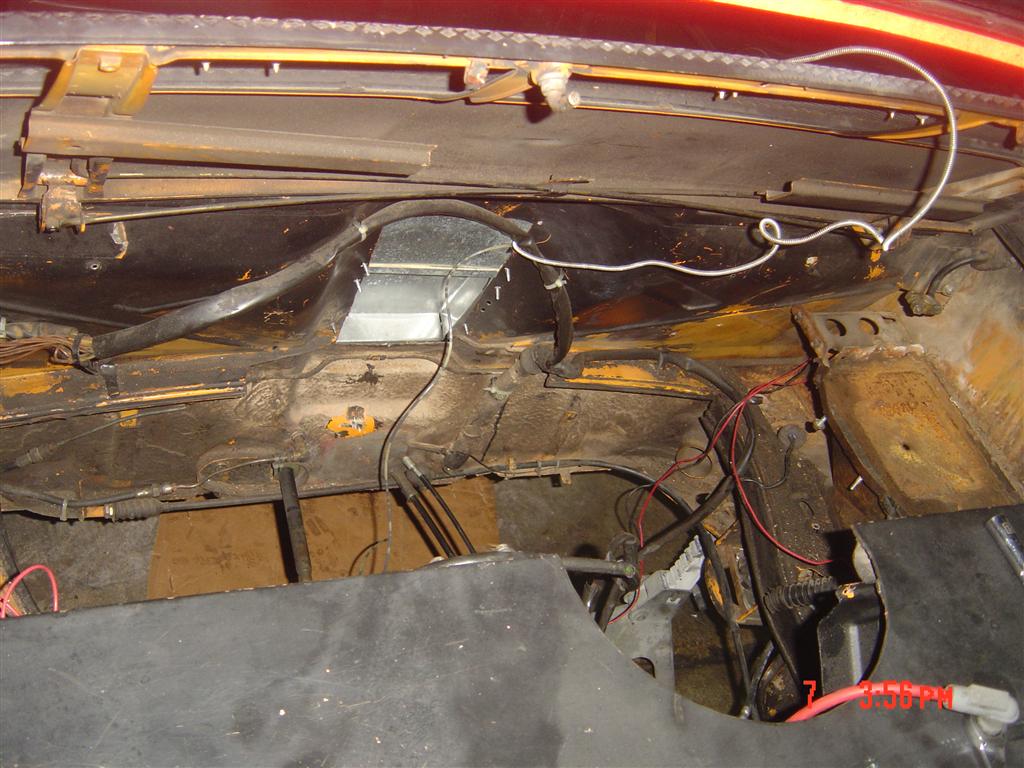
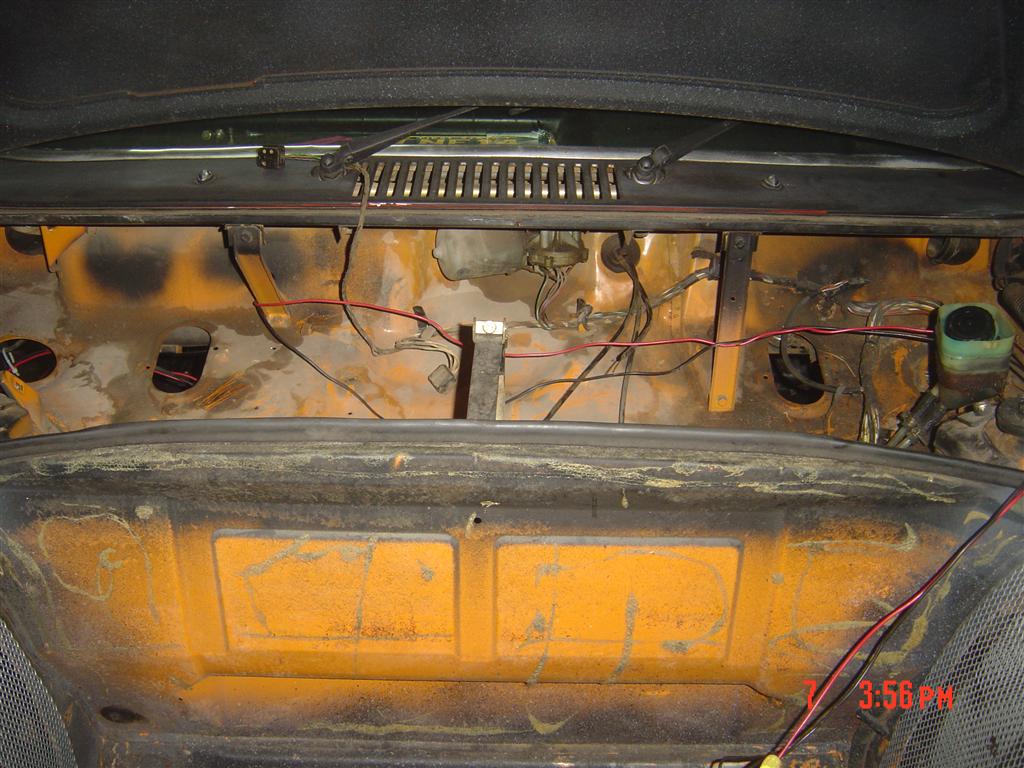
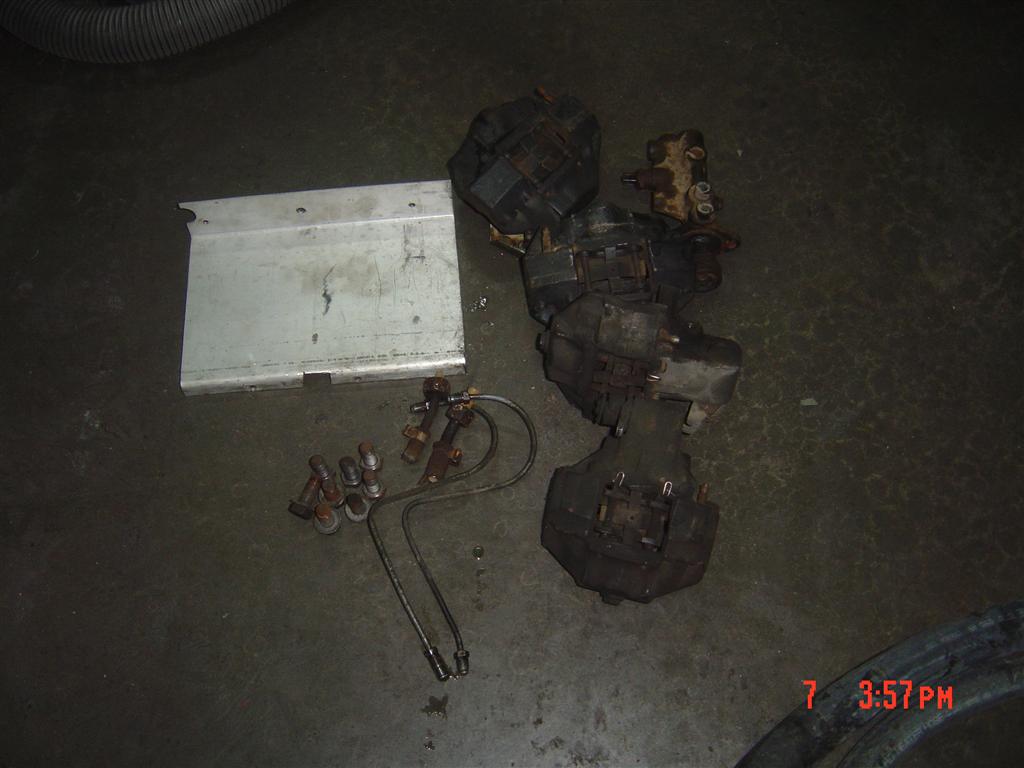
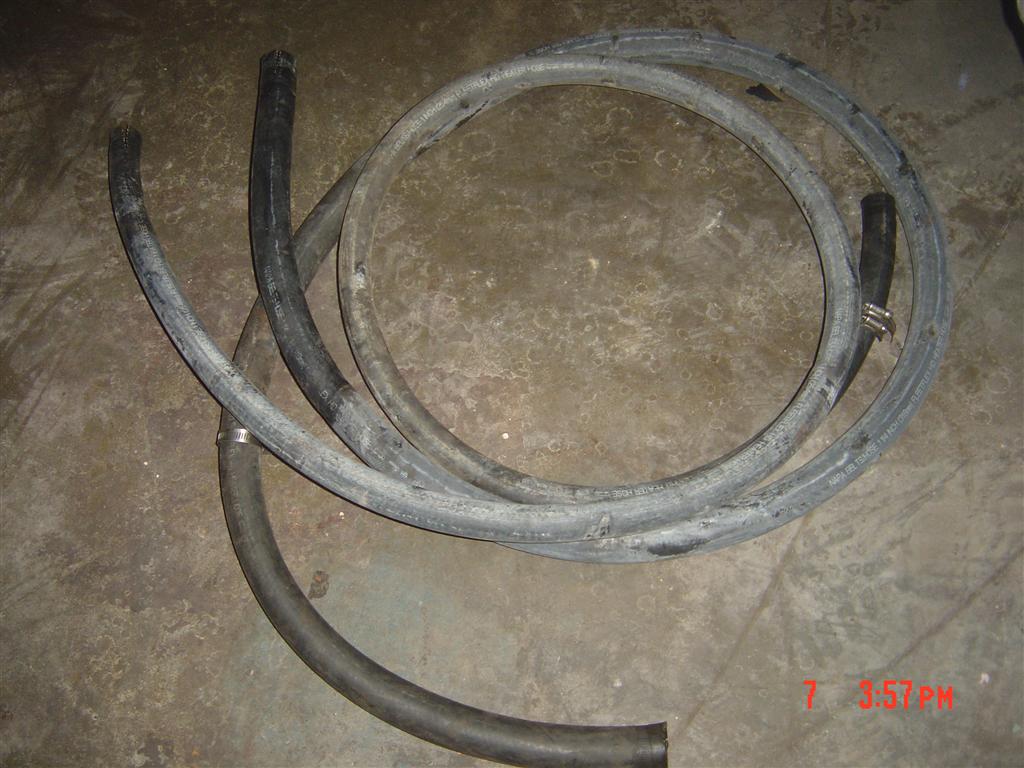
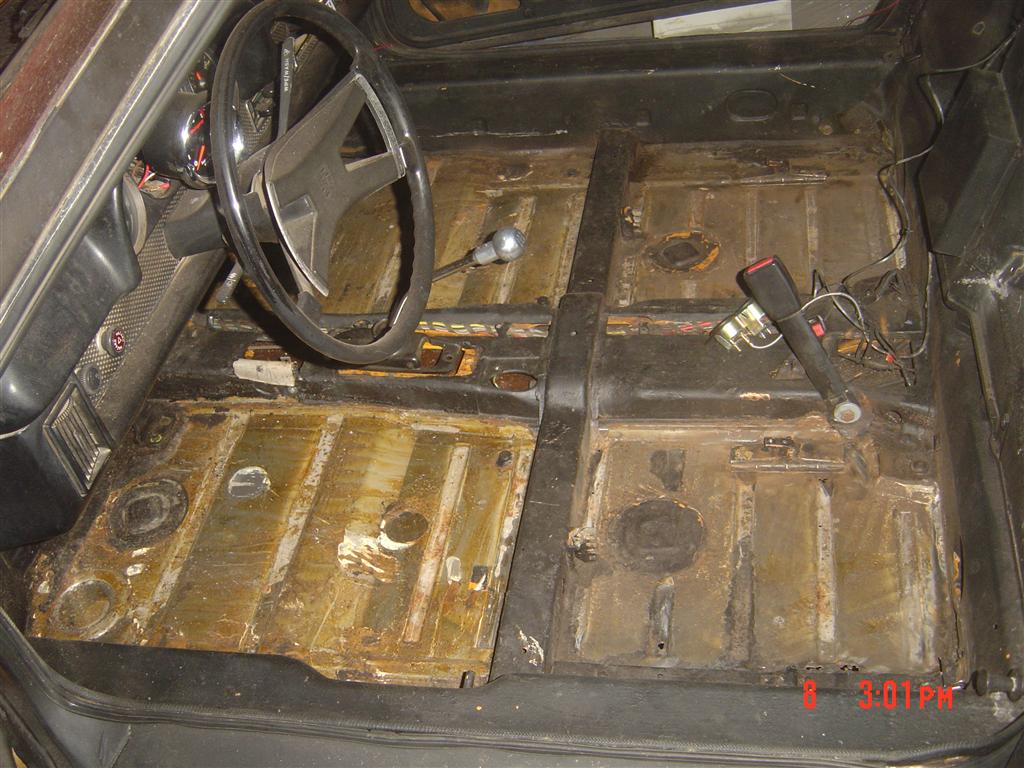
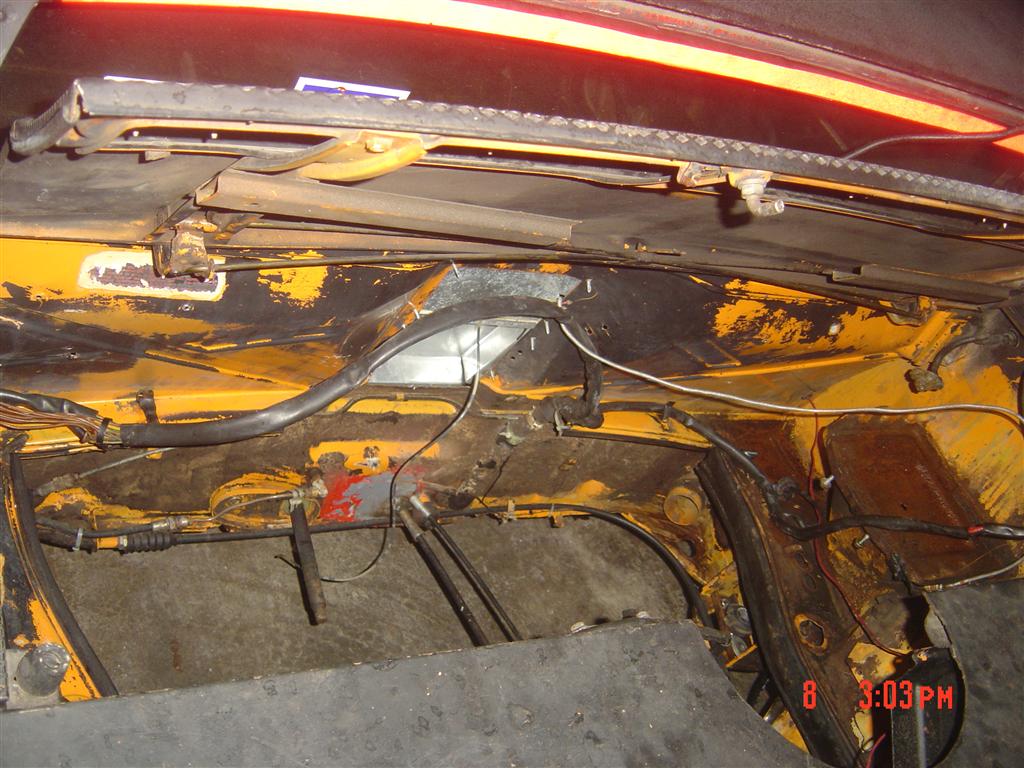
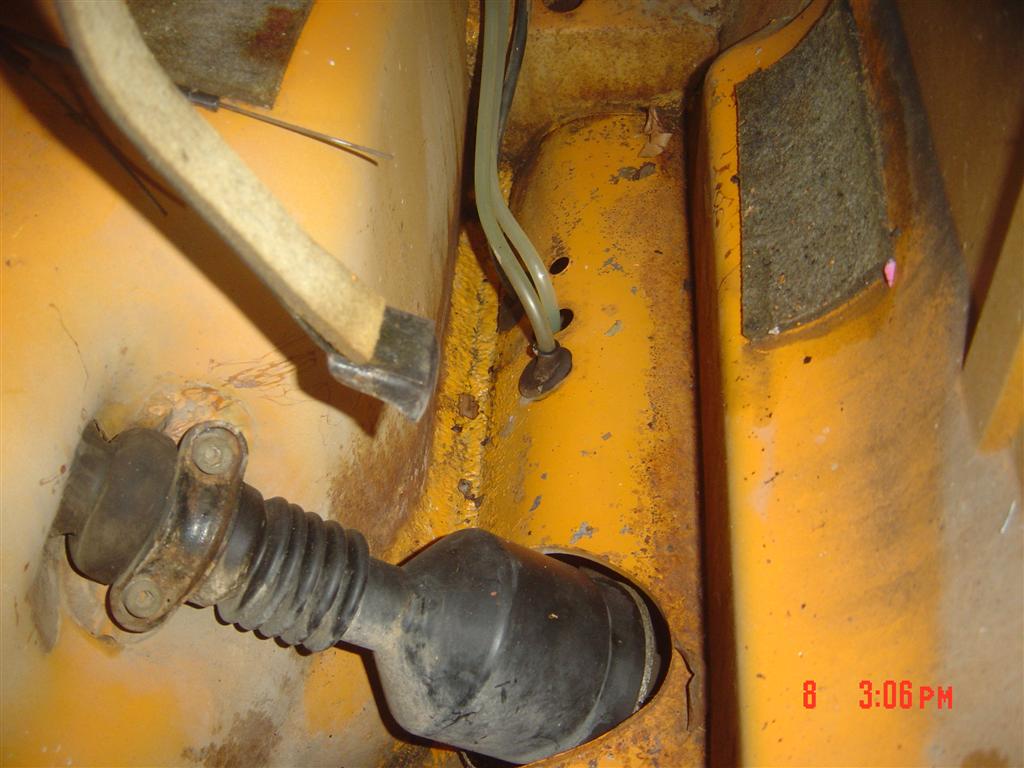
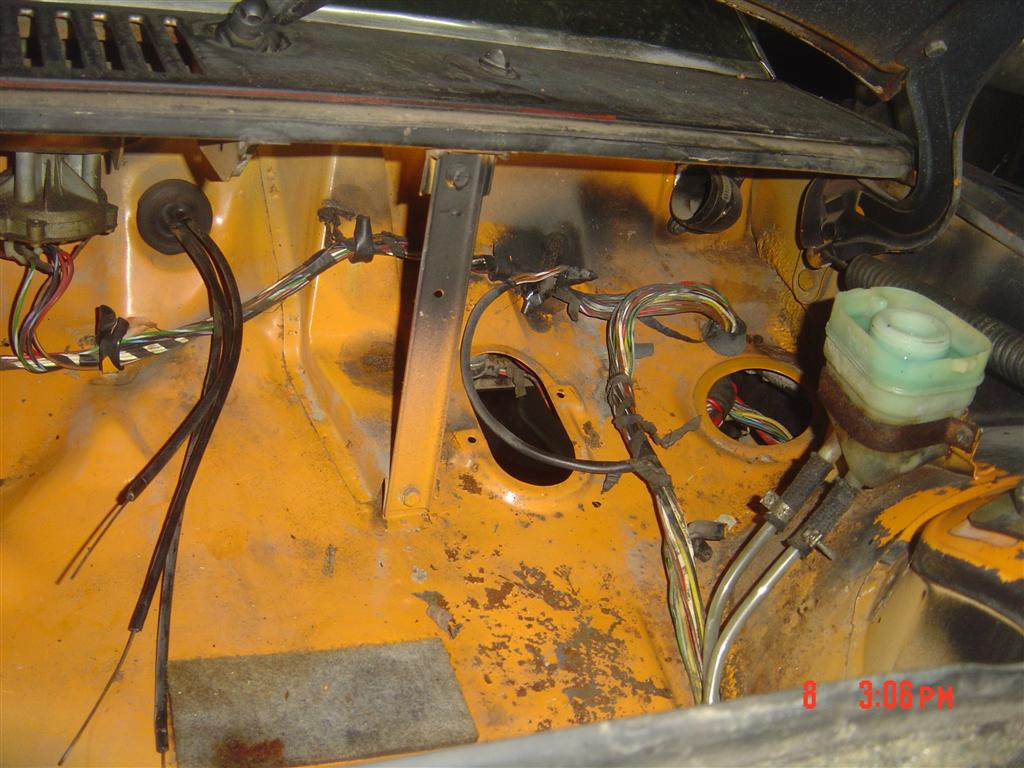
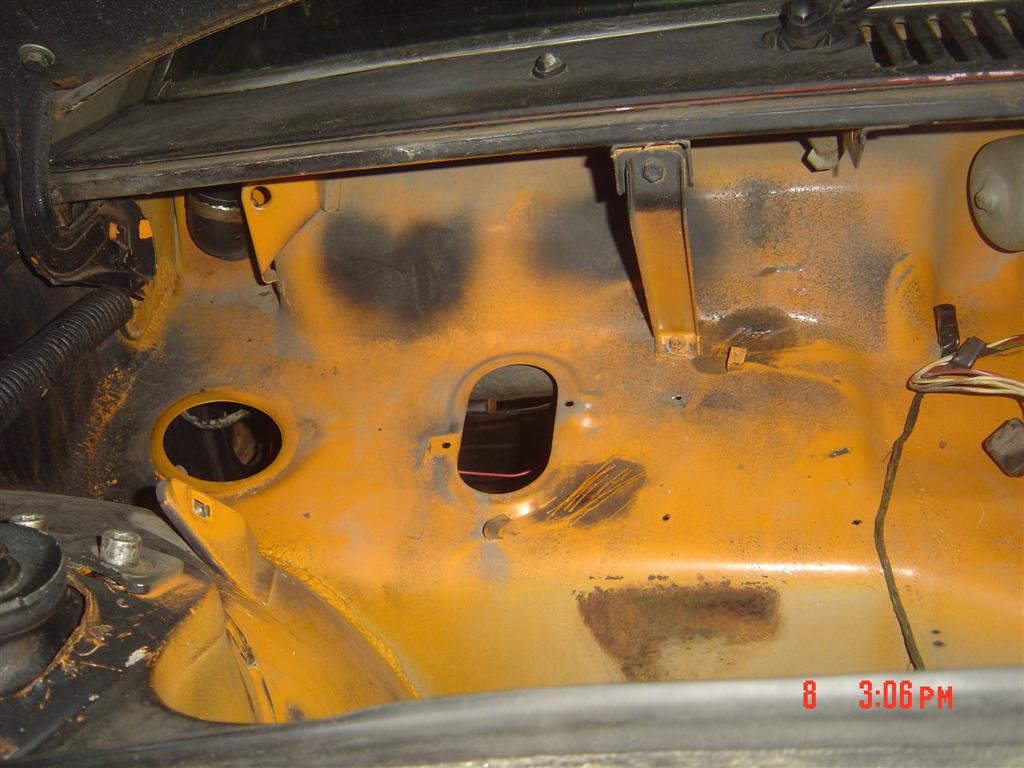
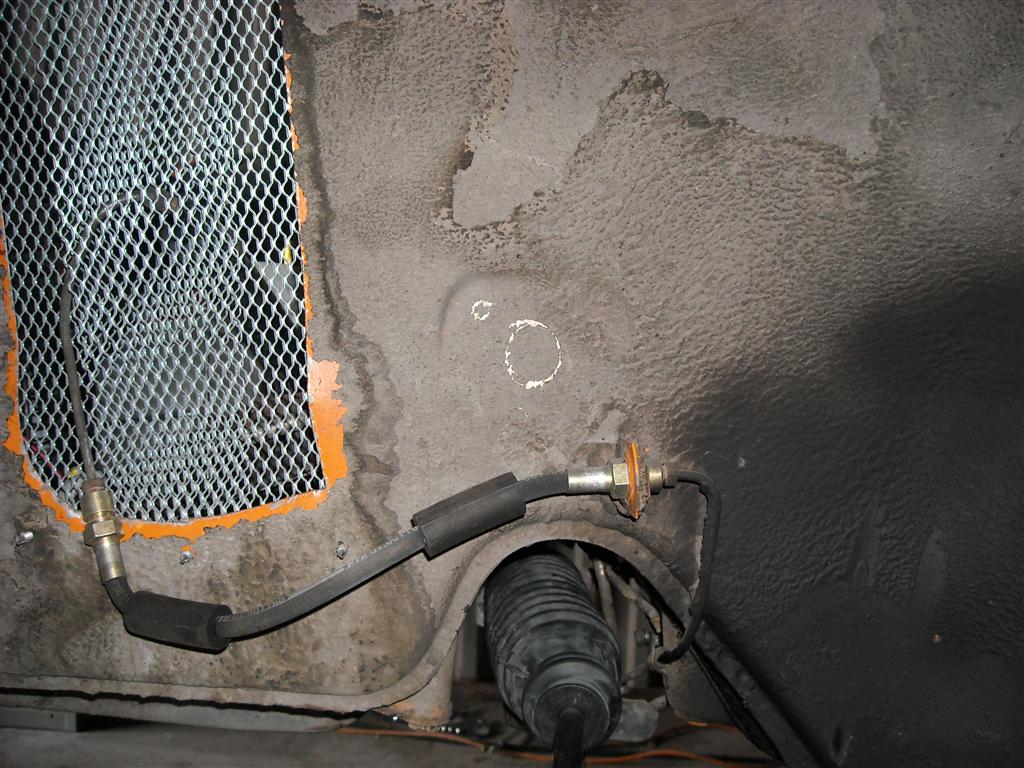
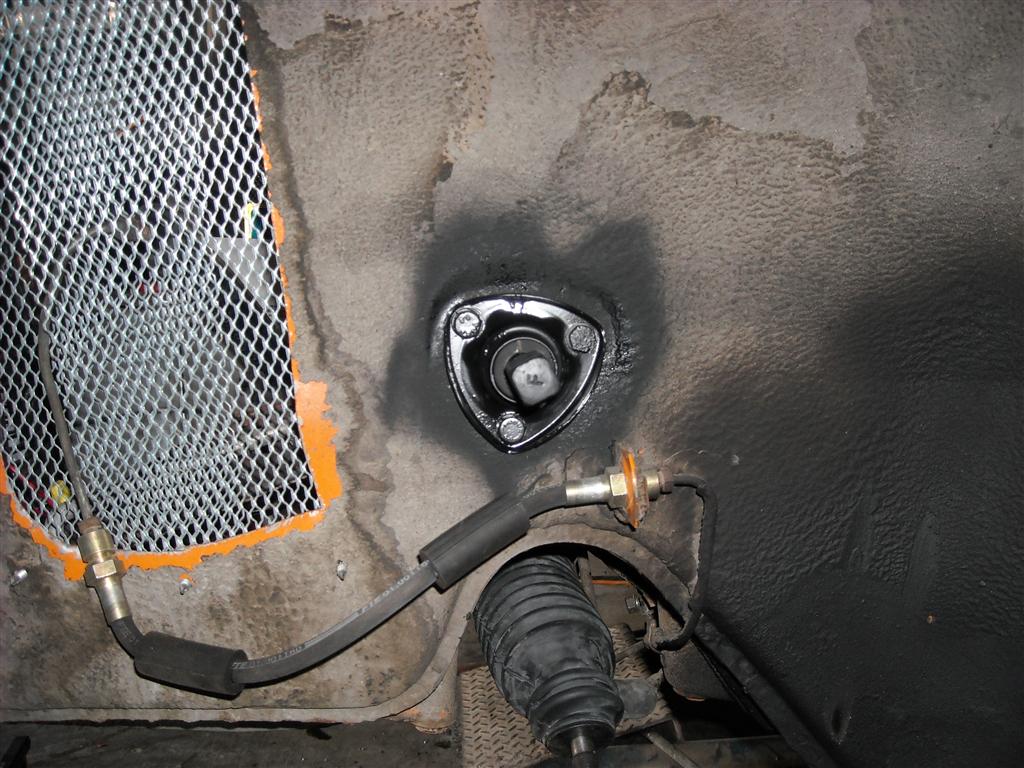
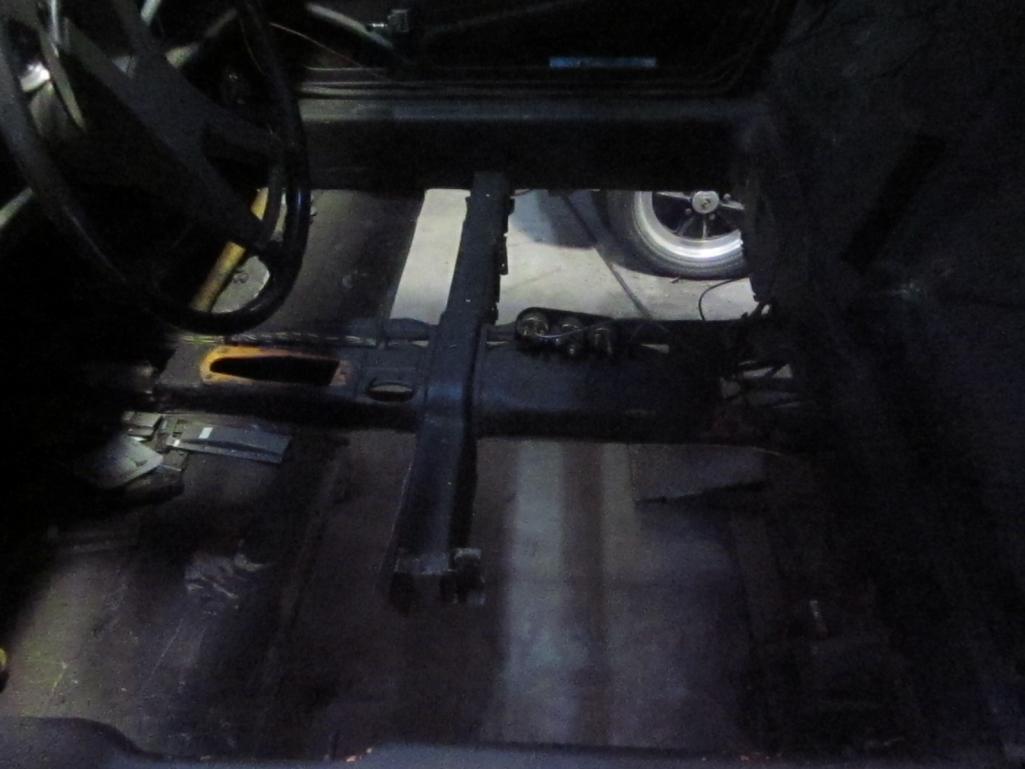
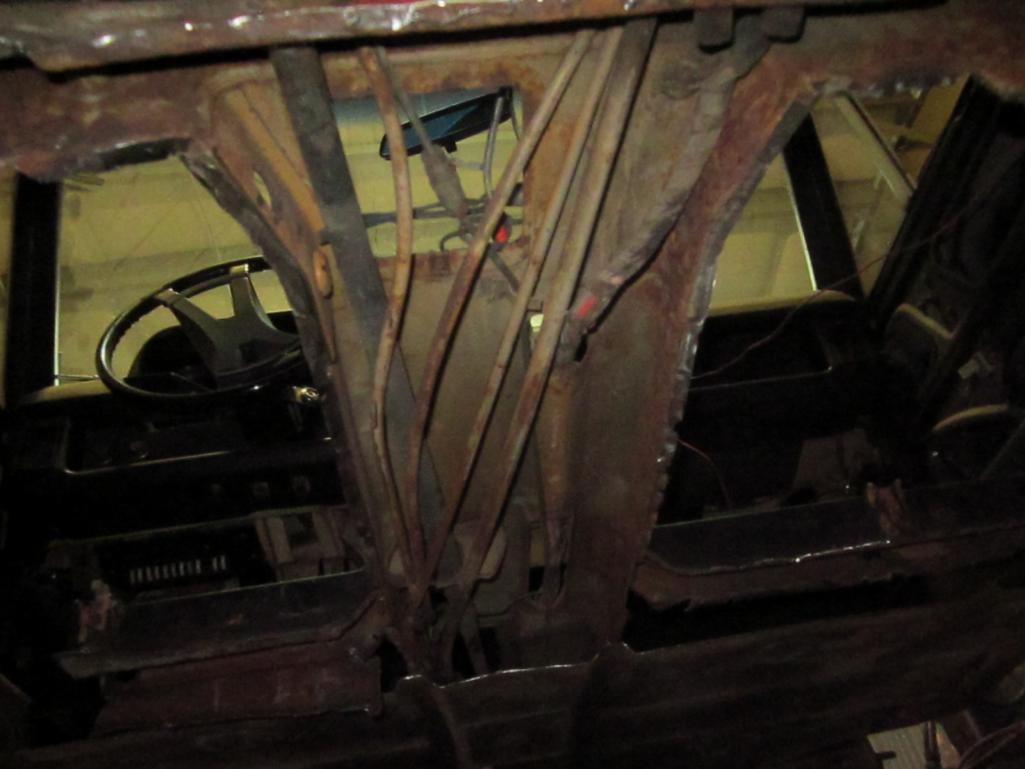
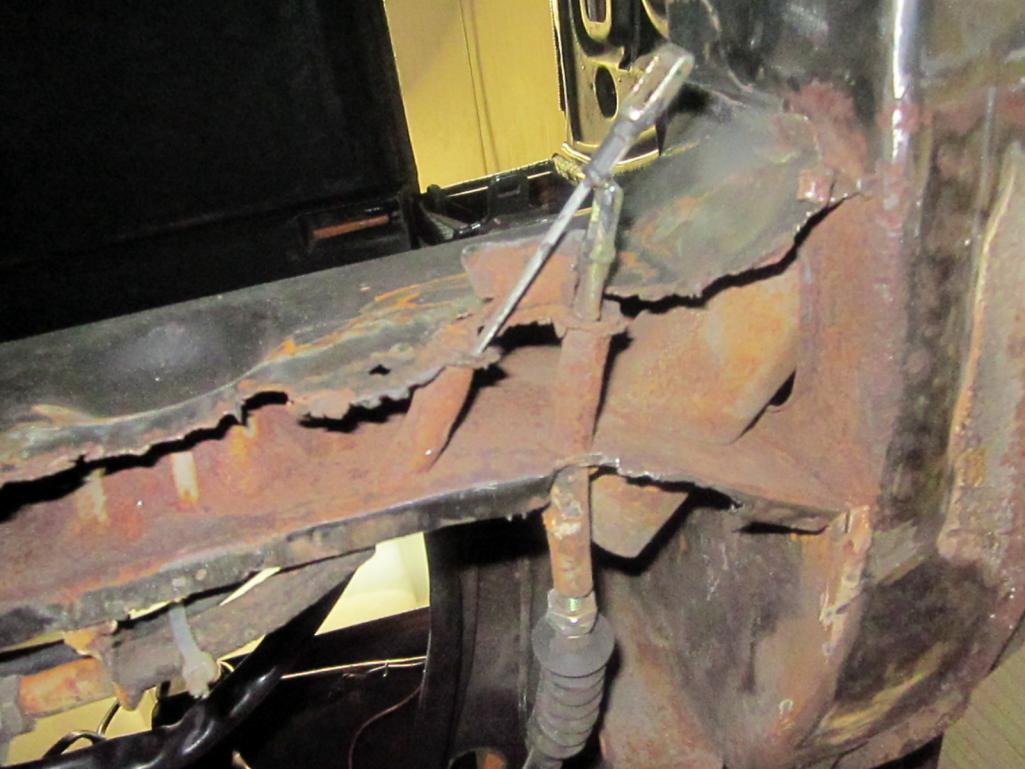
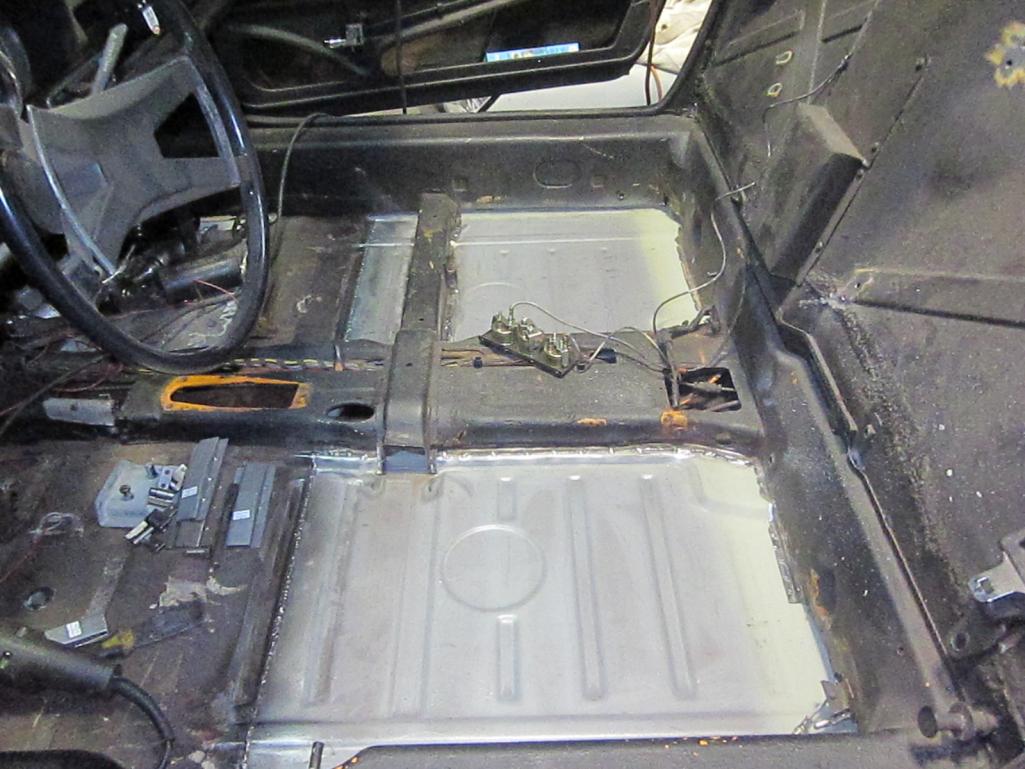
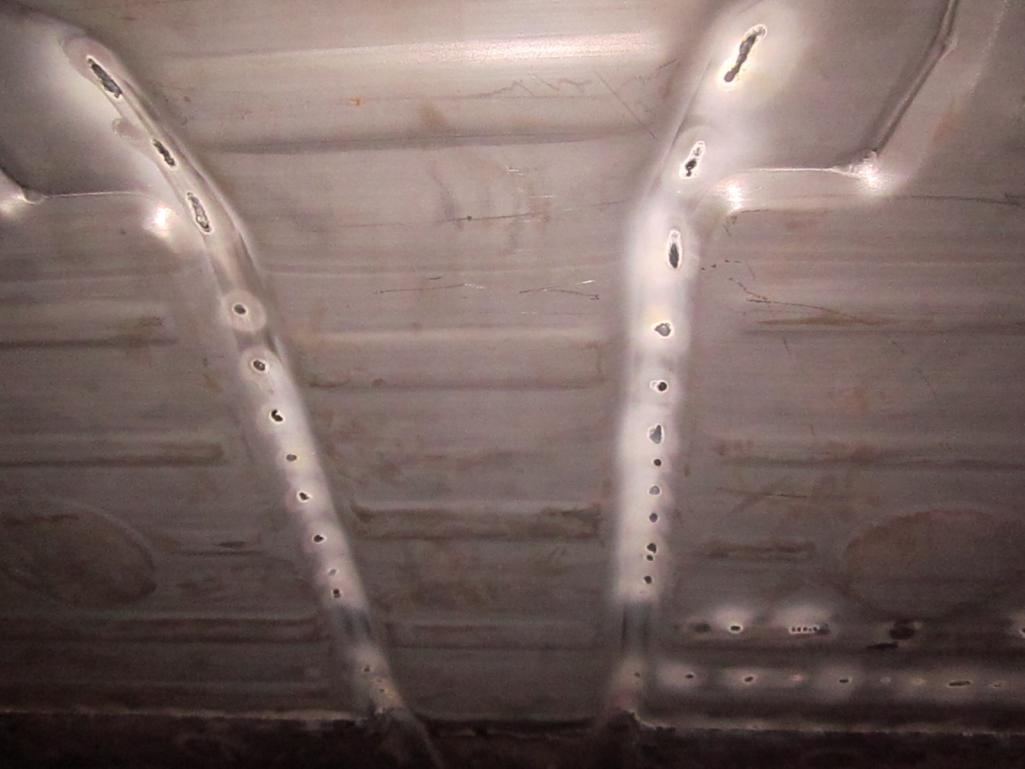
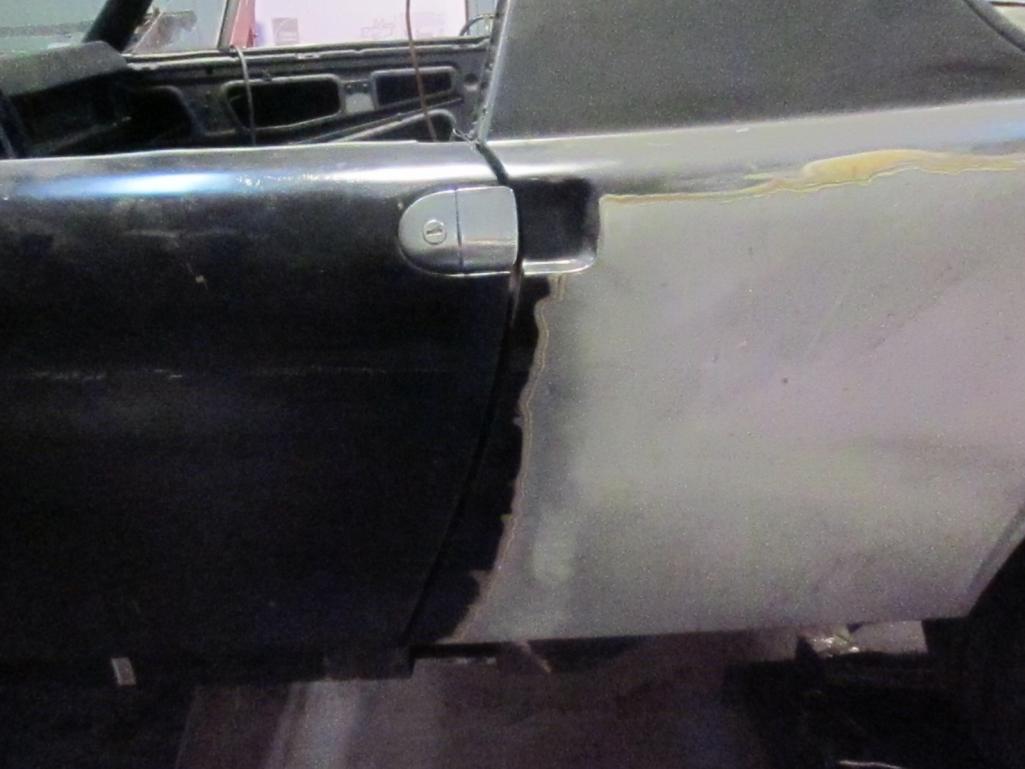
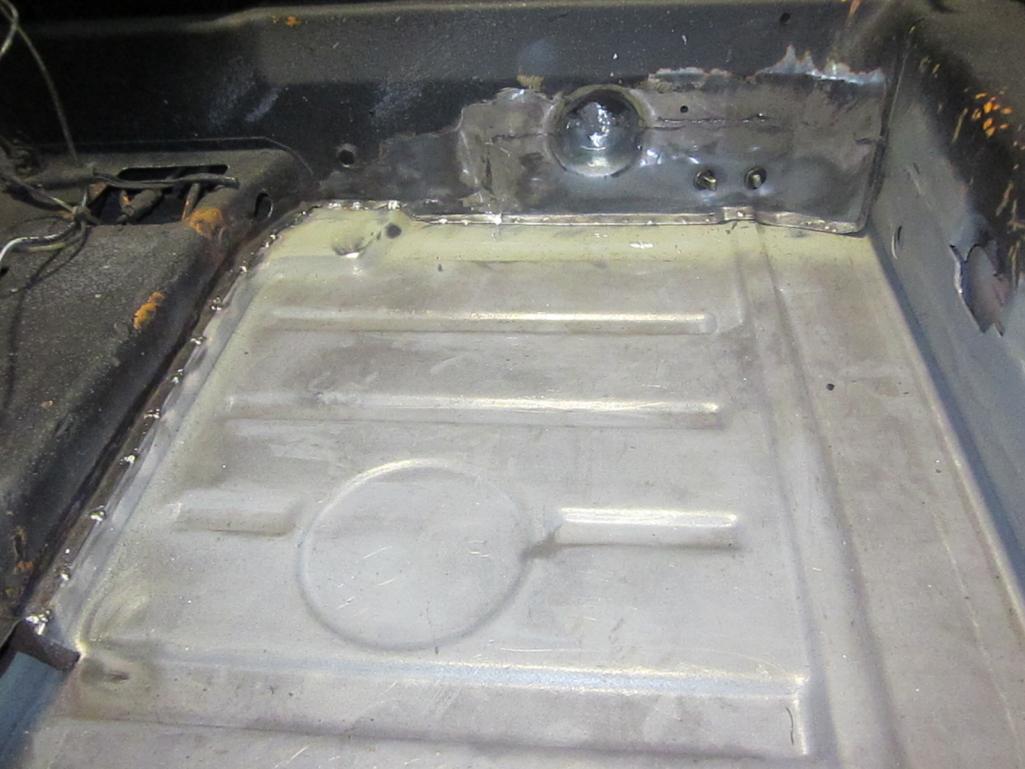
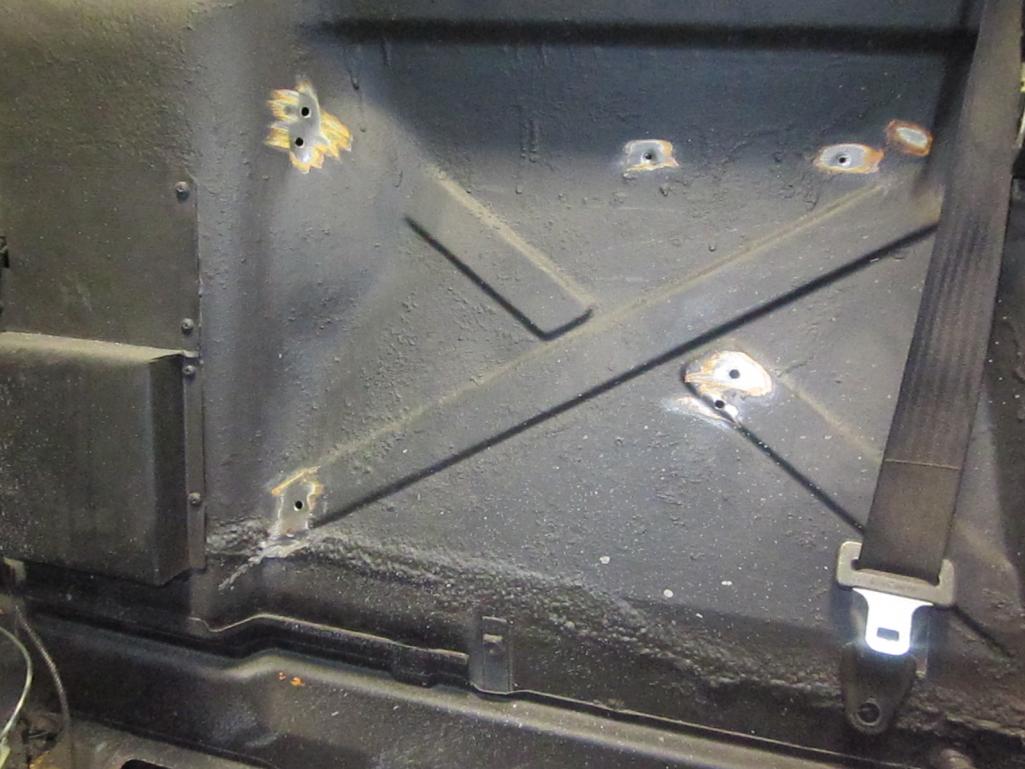
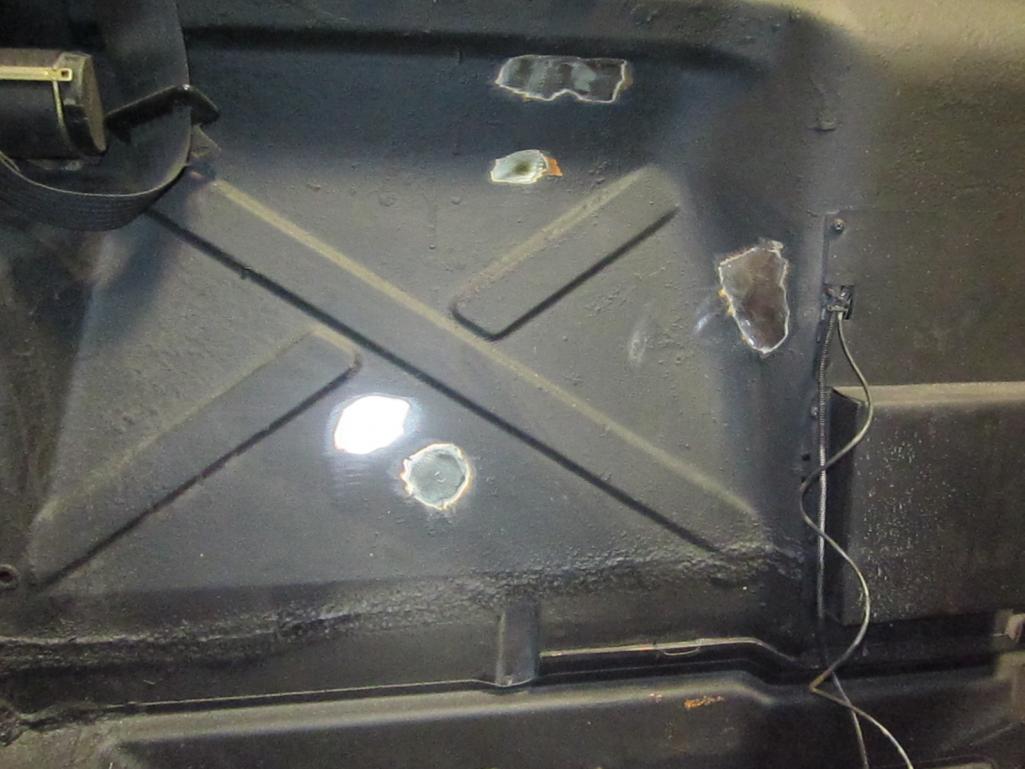
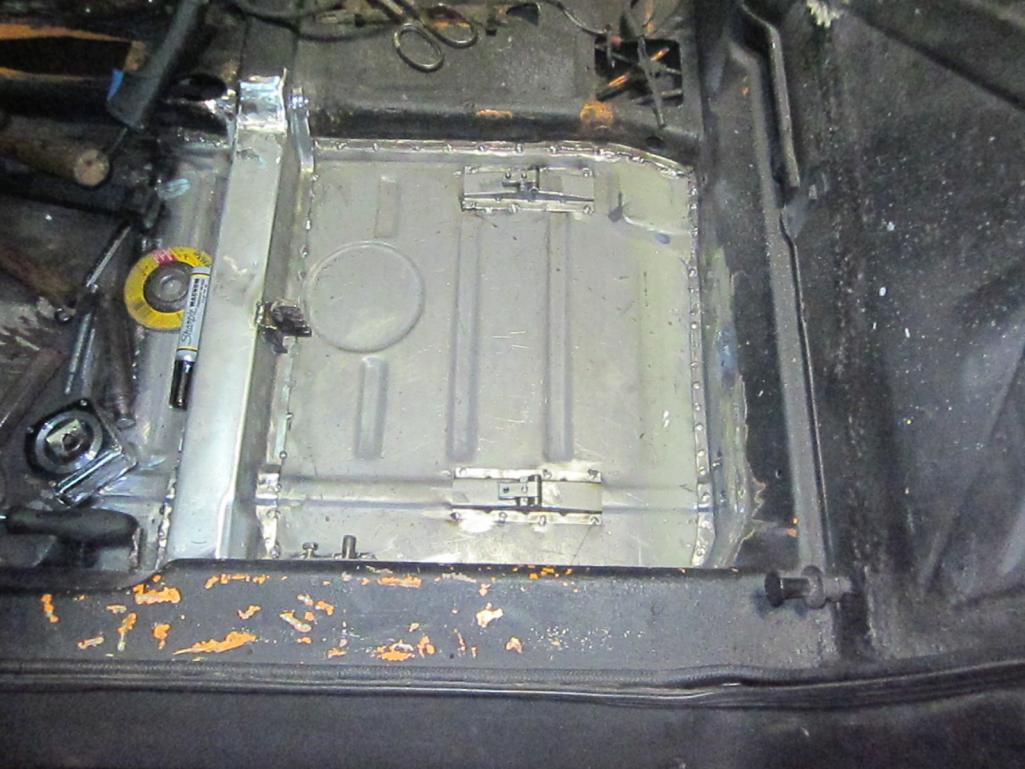
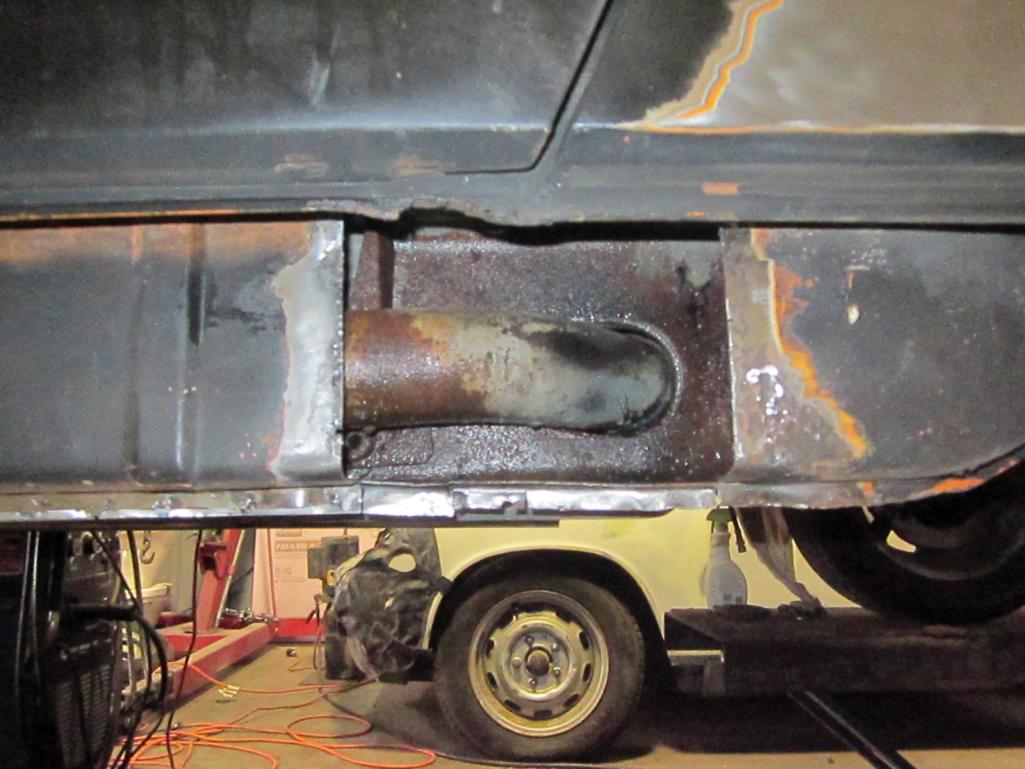
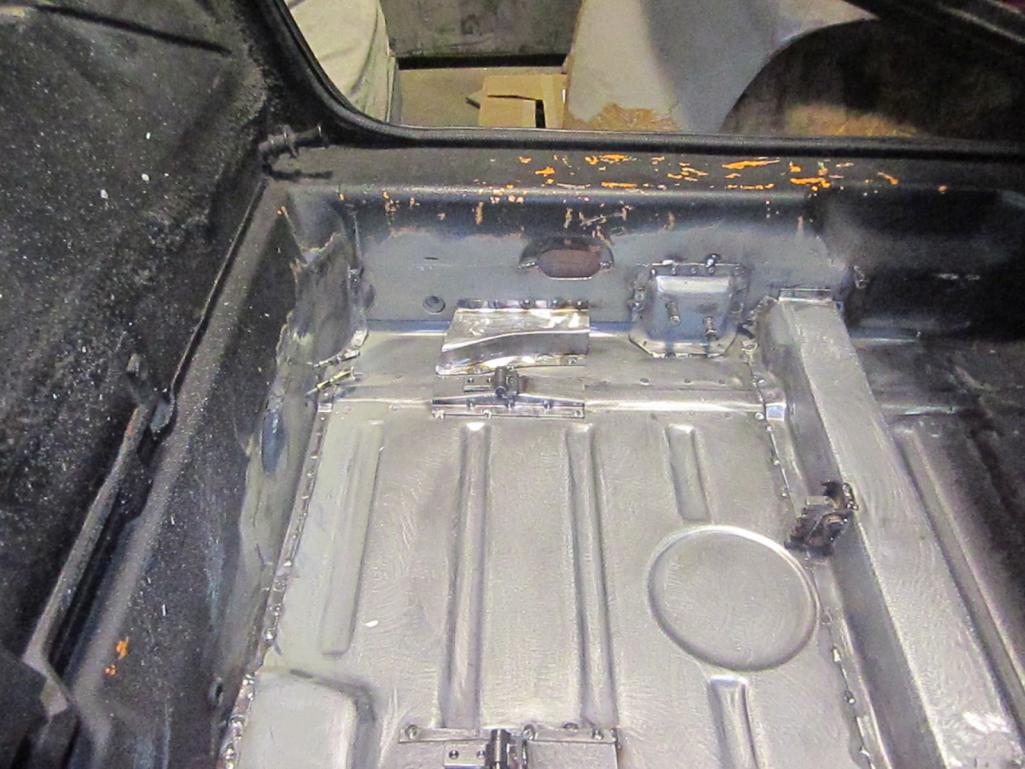
I found where O.J.'s knife went.  Removed the ventilation system, fuel system, cooling system and pretty much everything else that will be replaced or deleted. Popped out the seats, power washed the engine bay, underside ,and the front trunk. Removed the tar from the floor so we could see exactly what we have to deal with rust wise
Attached image(s)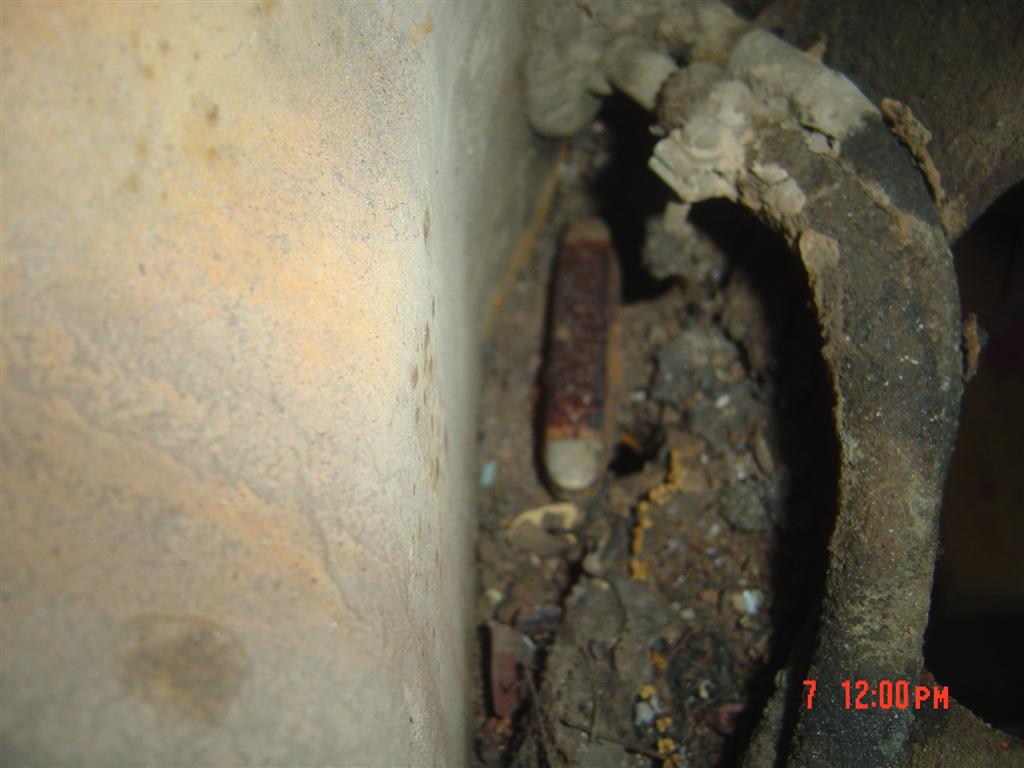
Posted by: jimkelly Sep 8 2011, 03:12 PM
anything from resto design needed - or is this all patch work?
how many hours are you estimating for this : )
she is gonna be pretty.
she has always been FINE in the dark : ))
jim
Posted by: JmuRiz Sep 8 2011, 04:45 PM
Question, are you keeping the black body color or going back to orange (my vote)?
Posted by: jimkelly Sep 8 2011, 04:55 PM
no budget for PRETTY and this time - so it will leave charles city as hideous as when it arrived : ))
i'm torn on color - stock signal orange is probably the right thing to do - but i like silver, black, and various shades of orange as well ???
when it is time for paint - i'll be also facing a big bill for all weather rubber as well, and maybe front and rear fiberglass bumpers.
at this moment - i am leaning towards this look ...
jim
Attached image(s)
Posted by: Eric_Shea Sep 8 2011, 05:48 PM
That's Blood Orange (Tangerine).
I like the look but it would be equally as cool with your stock color.
Posted by: jimkelly Sep 8 2011, 06:14 PM
i'm coming around to agreeing with you on this. i like the painted sails and smoothed/painted top. tire size seems to make or break our cars from a look standpoint. thanks, jim
That's Blood Orange (Tangerine).
I like the look but it would be equally as cool with your stock color.
Posted by: hot_shoe914 Sep 8 2011, 07:22 PM
no budget for PRETTY and this time - so it will leave charles city as hideous as when it arrived : ))
i'm torn on color - stock signal orange is probably the right thing to do - but i like silver, black, and various shades of orange as well ???
when it is time for paint - i'll be also facing a big bill for all weather rubber as well, and maybe front and rear fiberglass bumpers.
at this moment - i am leaning towards this look ...
jim
I have a set of wheels like that I will sell. Still have the original factory finish.
Posted by: jimkelly Sep 8 2011, 07:36 PM
thanks : )
i have 4 lug fuch on both my cars
i think at some point i will go for fully polished
Attached image(s)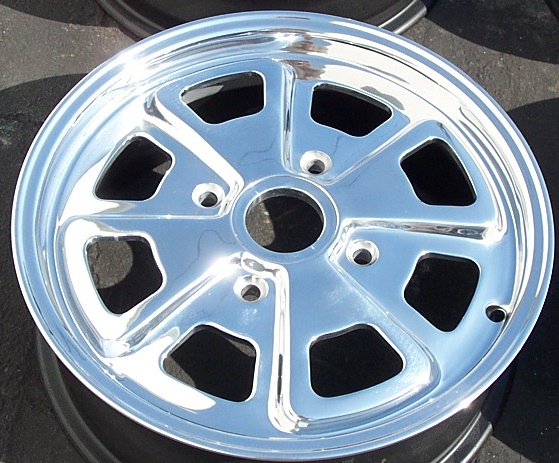
Posted by: stewteral Sep 8 2011, 07:48 PM
anything from resto design needed - or is this all patch work?
how many hours are you estimating for this : )
she is gonna be pretty.
she has always been FINE in the dark : ))
jim
Hi Jim,
No one seem to be answering your question: Patch or replace the rusted sheet metal.
The answer depends on you skills with forming sheet metal and welding it to the good sections in the frame.
For my '73 restoration car, I bought a cheap sheet metal brake from Harbor freight and bent mild steel to duplicate rusted section of the floorpan. Welding it to the existing floor was tricky, but turned out well after a lot of grinding.
So from my point of view, patch and repair. Since replacement parts are SO expensive, I'm OK with less than PERFECT patches as they will be under carpet.
As for time required, it is hard to predict, but plan on A LOT! It will be done when it is done.....CORRECTLY!
BTW: your photo of the red/orange 914 worried me: the car's paint looked great but it is severely lowered and thus, SCREWED up the Suspension performance at BOTH ends of the car.
Please do NOT lower your car very much, EXPECIALLY with a V8 engine. The tall mass of the V8 makes the car roll more and exaggerates the limitations of the suspension design.
My V8 finally handles GREAT after years of chassis development going very stiff in the rear + swaybar....and it sits at 5-1/2" ride height, measuring from the under chassis "bumps"
Best of luck,
Terry
Posted by: jimkelly Sep 8 2011, 07:56 PM
terry - thanks for those comments - behind the scenes : ) we decided to go with patches. i know some move the spindle location on the front struts and cfr offers a rear lowering kit as well - but for the street - too low is no good.
http://www.tangerineracing.com/chassis.htm#Raised Rear Pickup Points Kit
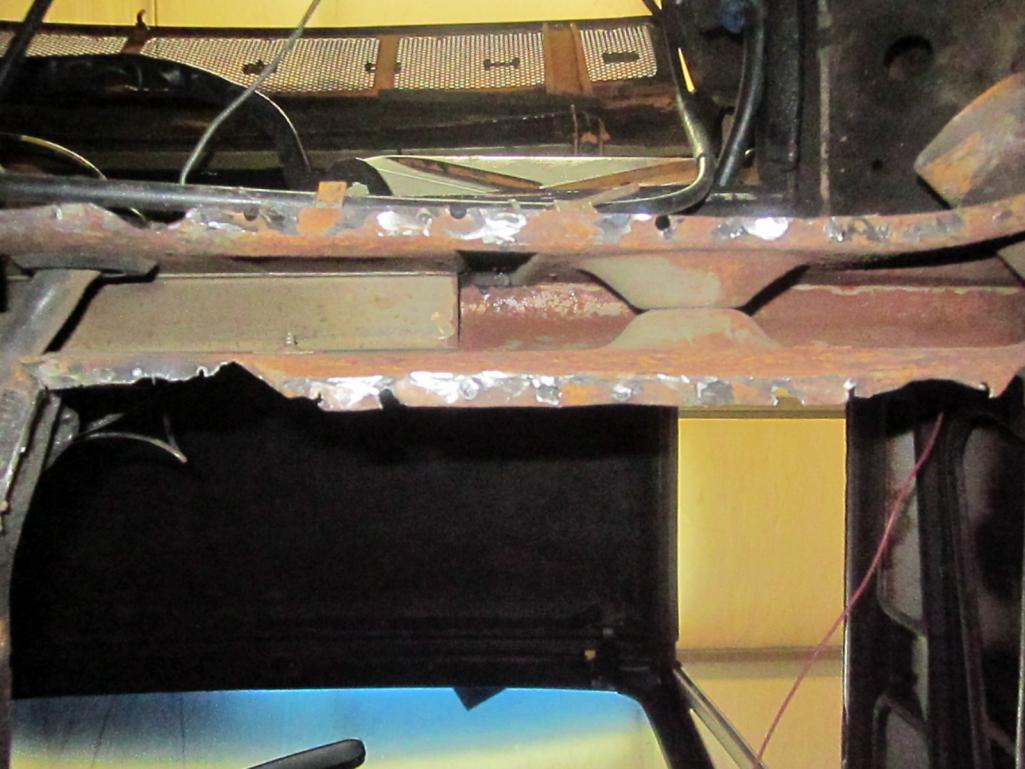
Posted by: scotty b Sep 13 2011, 05:38 PM
Attached image(s)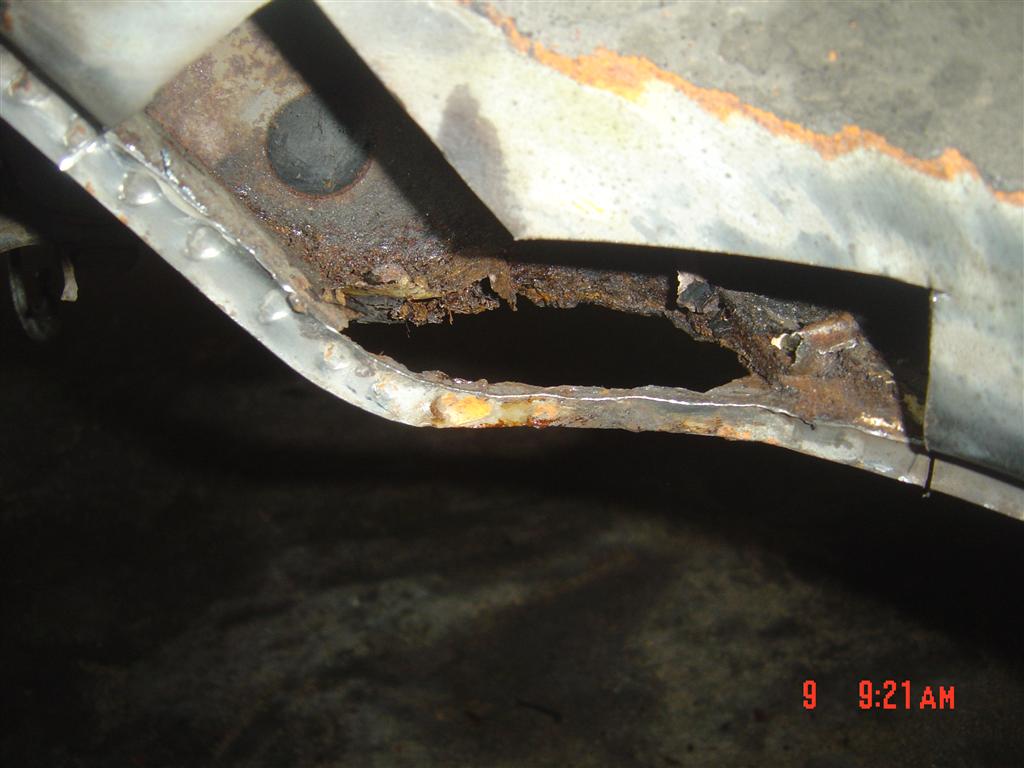

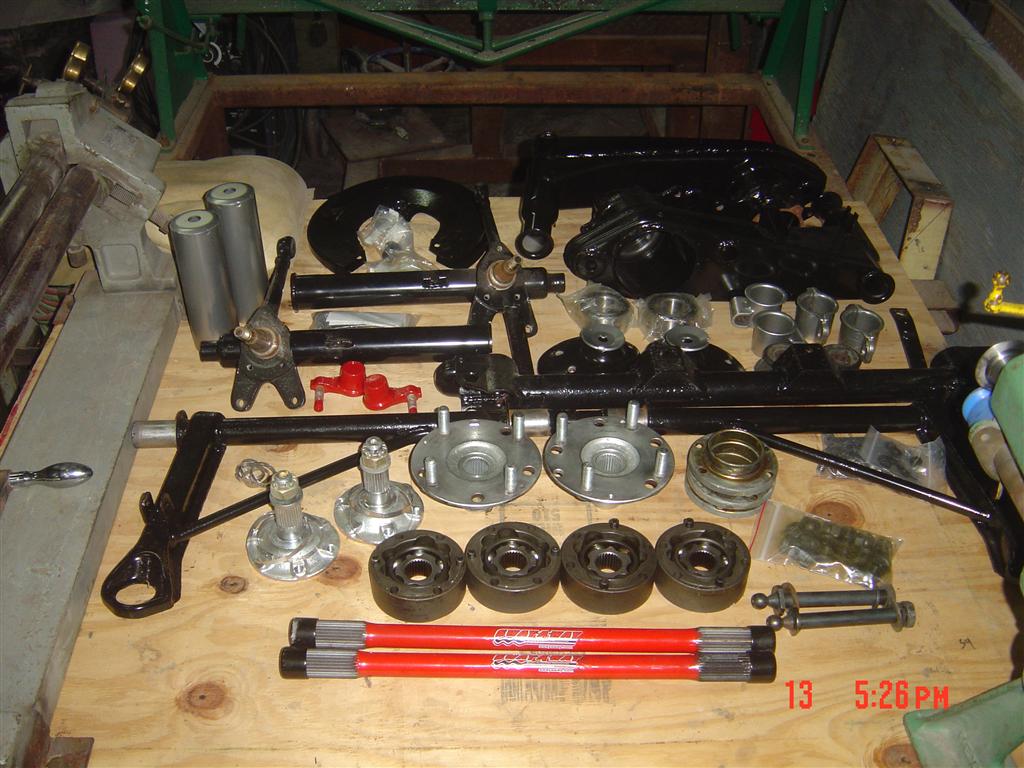
Posted by: jimkelly Sep 13 2011, 06:04 PM
scott
now that is what i call progress : )
i am having serious withdrawls - yet - i am stoked (california speak for happy) knowing that this damn car is going to GO better than ever and STOP better than ever.
this 40 year old car, full of 40 year old parts - has finally had its long neglected physical and the doctor has prescribed a lot of long overdue medicine : )
i have dreamed about this car since i was a kid - i am gonna drive the shit out if it knowing it will be safe and knowing all rust issues have been professionally taken care of.
see pic of empty parking space - it is hard to look at each day : (
jim
Attached thumbnail(s)
Posted by: Vacca Rabite Sep 13 2011, 06:37 PM
I love watching a Scotty Fix It thread.
Zach
Posted by: 914.SBC Sep 13 2011, 07:21 PM
Just wondering ... and I don't think anyone asked but what about the conversion was done so wrong? you should post up picks of certain aspects of the conversion that are being redone and give reasoning as to why things are being changed....
The cheap sons o bitches wanna know ...
If I did another one, I would do a full roller engine. My first engine was tough to time (can't get a timing light in there) and the cam went flat in a brand new engine. Built a remote starter stand and then timed the engine and broke it in outside the car. Then installed it. So I would at least think about a full roller set up. It is much more expensive but you dont have to worry about breaking-in a roller set up engine.
Posted by: stewteral Sep 13 2011, 07:38 PM
terry - thanks for those comments - behind the scenes : ) we decided to go with patches. i know some move the spindle location on the front struts and cfr offers a rear lowering kit as well - but for the street - too low is no good.
http://www.tangerineracing.com/chassis.htm#Raised Rear Pickup Points Kit
HI Jim,
Bravo X 2 for you:
-1st for committing to doing the welding and patching work. From one of your pics
it is obvious you can do a very good job!
-2nd for NOT lowering the car , since I'm always preaching on how that screws up
the "used section" of the camber arc. Again, my track 914 V8 handles GREAT
with a 5-1/2" ride height (measuring and the under chassis "bumps")
So best of luck and keep those photos coming!
BTW: I am going crazy with my Harbor Freight POWDER COATING SYSTEM and recommend it to everyone. While I paid $65, I just saw a lower price of $60 for the system. Since I'm doing a lot of Fab Work, I find it amazing to spray and cure
a part with an indestructable coating and have it ready to use in 30 minutes. Before, like you, I was spraying primer, WAIT to DRY, spray color, WAIT to DRY and have it take a week before I could bolt on a part (while be careful to not scratch the still SOFT paint). Then after a few track days, the paint is chipped badly.
Powder Coating takes a bit of learning , but it's not a long process. Harbor Freight has Flat Black, Red, White and bright Yellow in stock. For an incredible range of colors and coating type, Google Powder coat.
Another choice would be using the services of fellow 914 owner and Powder Coater
Barry Gallitin in NC at diehardcamaroguy@yahoo.com ....From photos I've seen he does very good work.
Best of Luck,
Terry
Posted by: jimkelly Sep 13 2011, 07:57 PM
i can't take the credit for the lovely metal fab and welding work : )
i am a driver : )
not a fixer : (
jim
Posted by: TargaToy Sep 13 2011, 08:41 PM
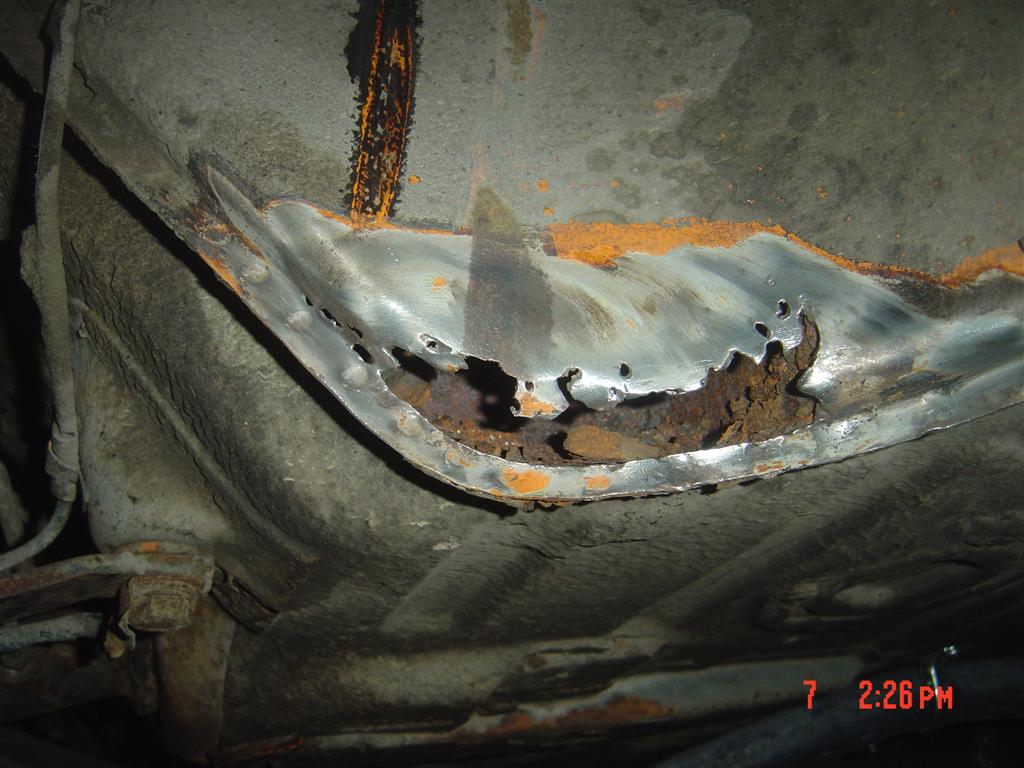
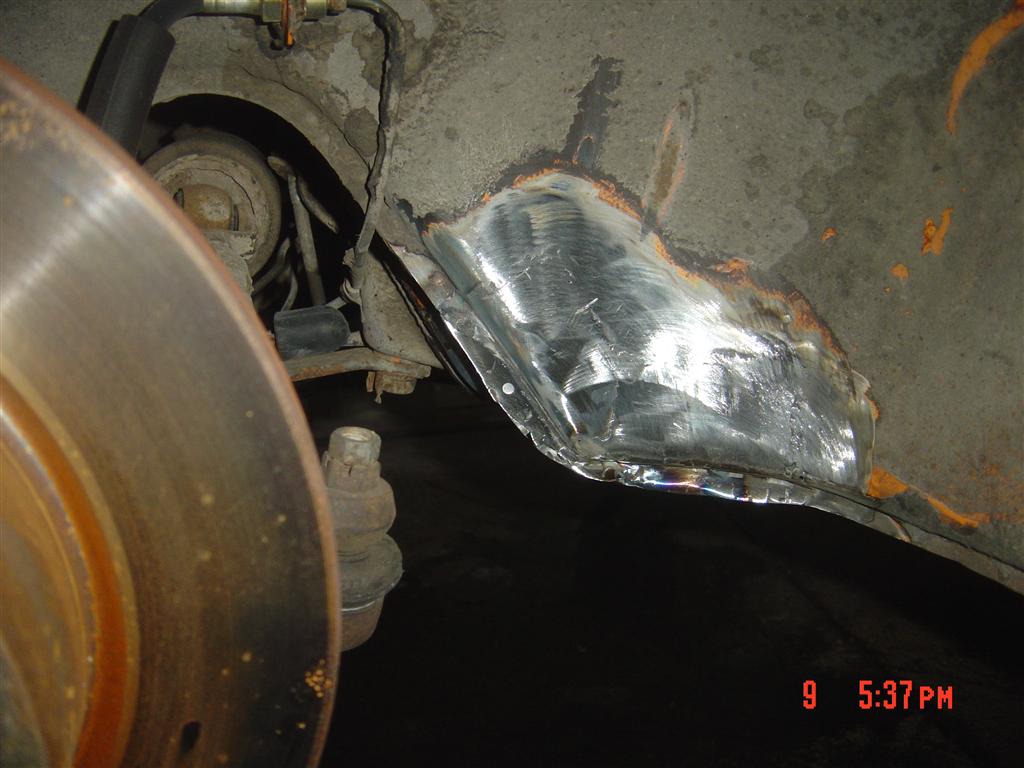
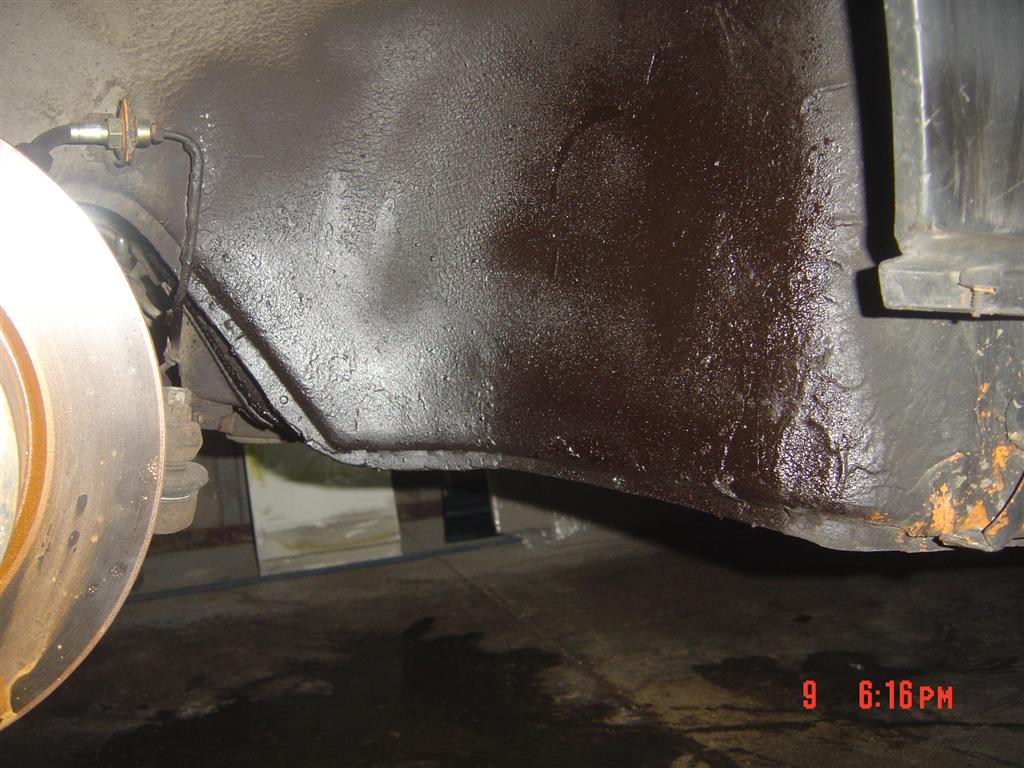
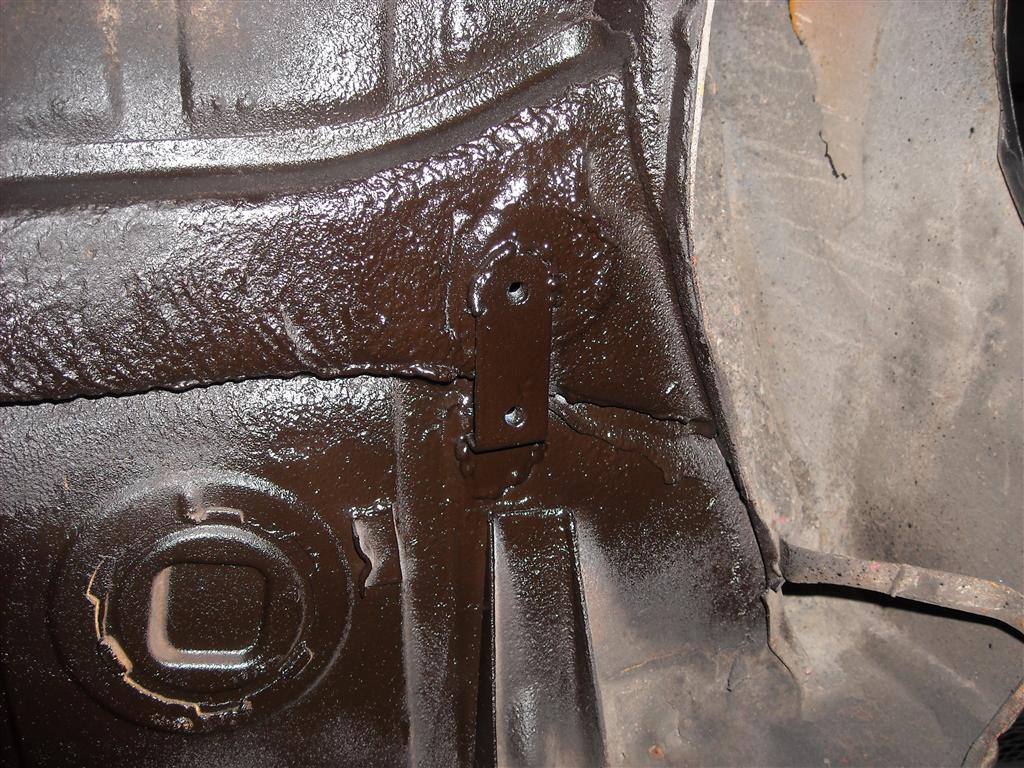
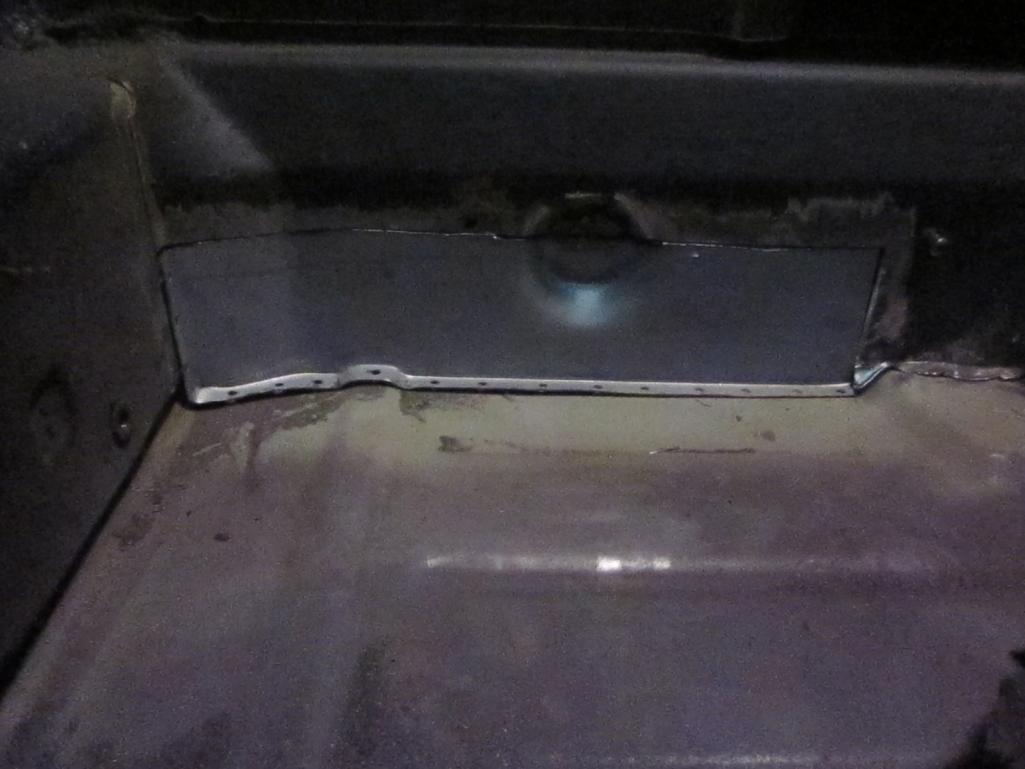
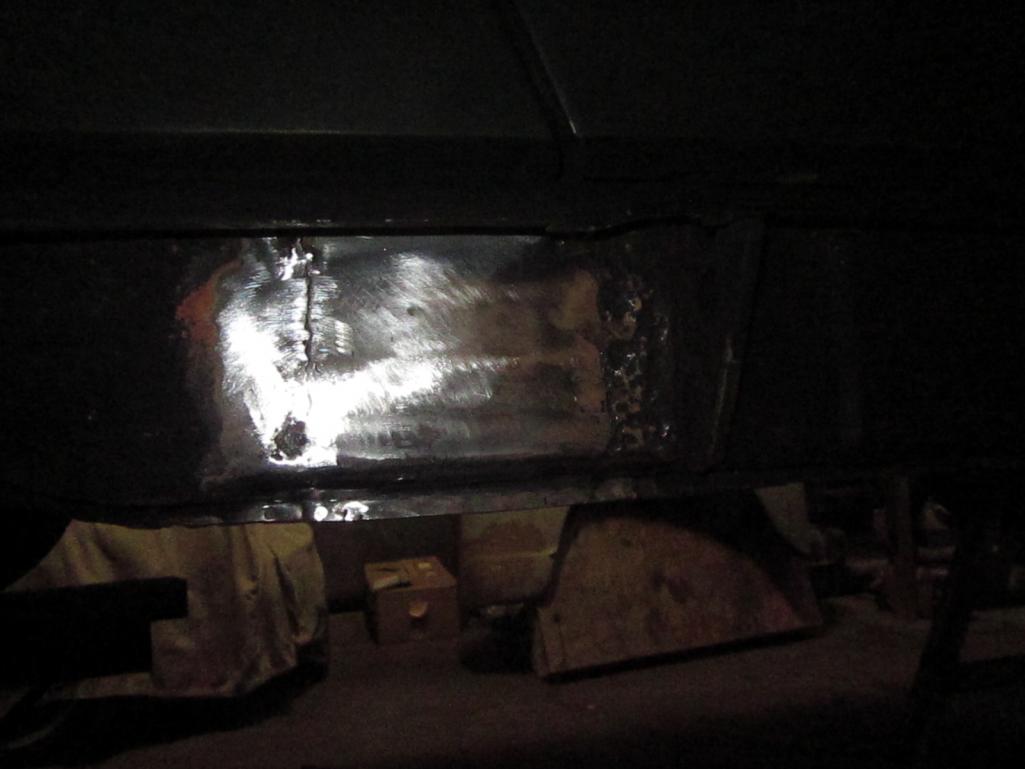
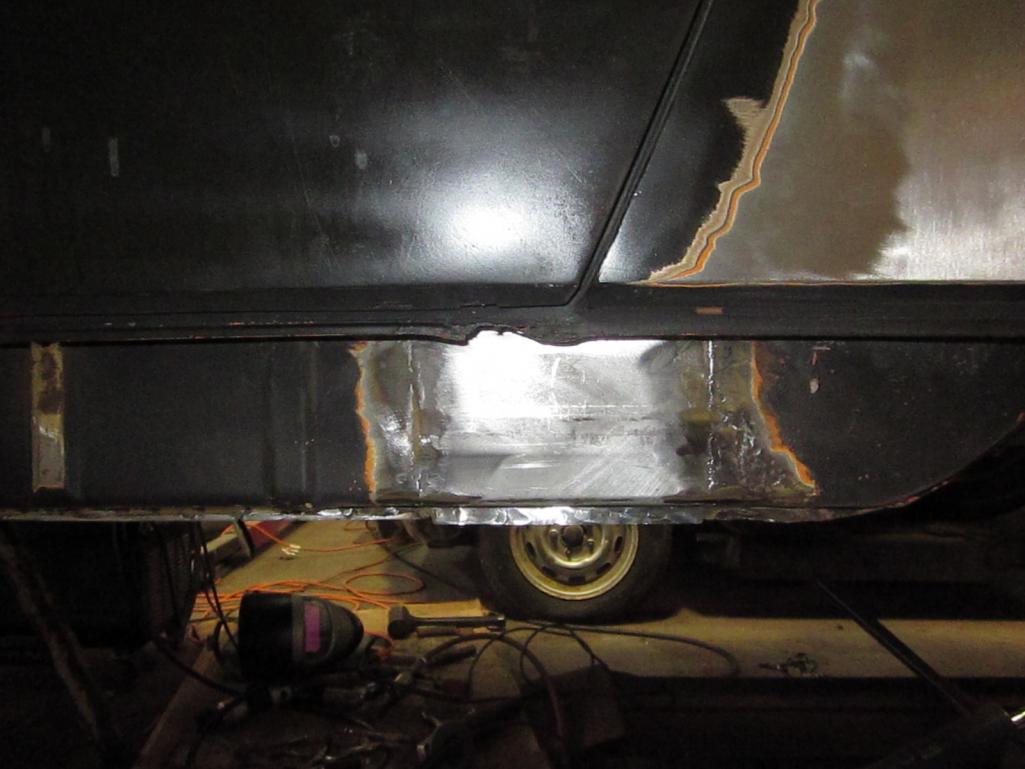
Scotty, what did you spray over the newly fab'd metal inside the fender?
Posted by: matthepcat Sep 14 2011, 12:41 AM
Looks like rubberized undercoating rattle can to me.
Posted by: scotty b Sep 14 2011, 05:06 AM
Scotty, what did you spray over the newly fab'd metal inside the fender?
Primer, seam sealer, black paint, then spray can undercoating. Same thing on the patch I put in the inside.
Posted by: jimkelly Sep 14 2011, 05:47 AM
now that all the RTV is gone - maybe i need to commemorate it : )
Attached image(s)
Posted by: Razorbobsr Sep 14 2011, 06:01 AM
Not looking to hijack the thread..
But I remember an old Hot Rod Magazine that had a big article on the 215 V8. They had a graph that showed what bore, stroke and heads to use to bring the 215 up to a 350.
I'm pretty sure they even used aluminum heads.. I have nothing against a SBC.. But I'd be curious about the weight difference of an Aluminum 350..
I have to try to find that magazine..
The alum 215 weight is about 50lbs less than an iron Triumph Spitfire 4 banger. In MI, theres a guy that did this to a spit!!!!! Sunbeam Tigers never had a chance, no hood scoops, no signs that it was other than stock.......... till he powered up. Bob
Posted by: jimkelly Sep 14 2011, 07:36 AM
what - no new pics : (
per these charts - the sbc is almost twice the weight of a buick 215 - 575 vs 318 - and the porsche 914-4 is 265 lbs - so a 300 lb increase - that's it - no more passengers : ) except for carmen electra : )
so a sbc doubles the engine weight over a stock 914-4 but adds @ 200 more hp - and increase the overall 914 weight by 10% or so - seems a reasonable compromise.
http://www.gomog.com/allmorgan/engineweights.html
http://www.carnut.com/specs/engdim.html
http://www.ultimatecarpage.com/forum/showthread.php?t=39353
jim : )
Posted by: sean_v8_914 Sep 14 2011, 09:09 AM
the nice thing about Porsche color Tangerene is that it can be swapped for Chevy hugger orange and its priced like a chevy color
if teh heads were not rebuilt I strongly recommend changing the valve guide seals now while its out and easy to do. they are VERY cheap and head removal it not required
Posted by: Razorbobsr Sep 14 2011, 09:15 AM
what - no new pics : ( Got nude!!]
per these charts - the sbc is almost twice the weight of a buick 215 - 575 vs 318 - and the porsche 914-4 is 265 lbs - so a 300 lb increase - that's it - no more passengers : ) except for carmen electra : )
so a sbc doubles the engine weight over a stock 914-4 but adds @ 200 more hp - and increase the overall 914 weight by 10% or so - seems a reasonable compromise.
http://www.gomog.com/allmorgan/engineweights.html
http://www.carnut.com/specs/engdim.html
http://www.ultimatecarpage.com/forum/showthread.php?t=39353
jim : )
Posted by: Andyrew Sep 14 2011, 09:34 AM
Jim, 575 would be with stock intake, all accessories and stock exhaust manifolds.
Your aluminum intake removes probably 40lbs and your headers probably 10lbs. If you had aluminum heads it would be another 50+!
Posted by: jimkelly Sep 14 2011, 09:37 AM
guess i could live with signal orange ???
Attached image(s)
Posted by: mepstein Sep 14 2011, 09:55 AM
guess i could live with signal orange ???
Tell Scott to start spraying so we can see it by the party.
Posted by: jimkelly Sep 14 2011, 10:08 AM
paint will be part of a to-be-scheduled phase 2, along with ...
body work
smoothed roof
paint
all weather rubber
fiberglass bumpers
polished 4 lug fuchs
vitaloni baby tornado side mirrors
late model doors
engman 3 piece inner long reinforcement kit
cabin heater - $199 - http://www.jegs.com/i/Flex-a-lite/400/640/10002/-1
Posted by: TargaToy Sep 14 2011, 04:03 PM
Jim, I forget and I'm too lazy to look back. Are you adding any stiffening components to the tub while you're doing phase 1?
Posted by: jimkelly Sep 14 2011, 04:07 PM
i was thinking about having scott weld in an engman inner long 3 piece kit but this was pushed onto phase 2. thanks for reminding me - i will add it to my phase 2 list above which is getting longer : )
Posted by: TargaToy Sep 14 2011, 04:19 PM
I've got 1/3 of the Engman welded into mine but....my phases are kind of running together (and taking really long, I might add).
This is great for you getting so much knocked out in one shot. Can't wait to read you're back on the road!
Posted by: matthepcat Sep 14 2011, 04:43 PM
Jim, 575 would be with stock intake, all accessories and stock exhaust manifolds.
Your aluminum intake removes probably 40lbs and your headers probably 10lbs. If you had aluminum heads it would be another 50+!
Aluminum heads....50 lbs savings...hmmm.
Wonder if you could do a head swap without removing the engine.. . .
Posted by: Andyrew Sep 14 2011, 05:46 PM
You could lower the engine down at the front and do it, but then your dead lifting 60lbs of cylinder head... each head..
Instead spending the 2 hours to remove the engine/trani would be the way to go..
Posted by: matthepcat Sep 14 2011, 06:15 PM
I hate when the logical answer is not instant gratification.
Posted by: jimkelly Sep 15 2011, 07:25 AM
gear stack pic
my plan is to ...
delete 1st gear - block it off.
2nd = stock F
3rd = flipped V ( equal to using an R )
4th = ZD ( move ZD from 5th to 4th position )
5th = H flipped ( as overdrive )
Attached image(s)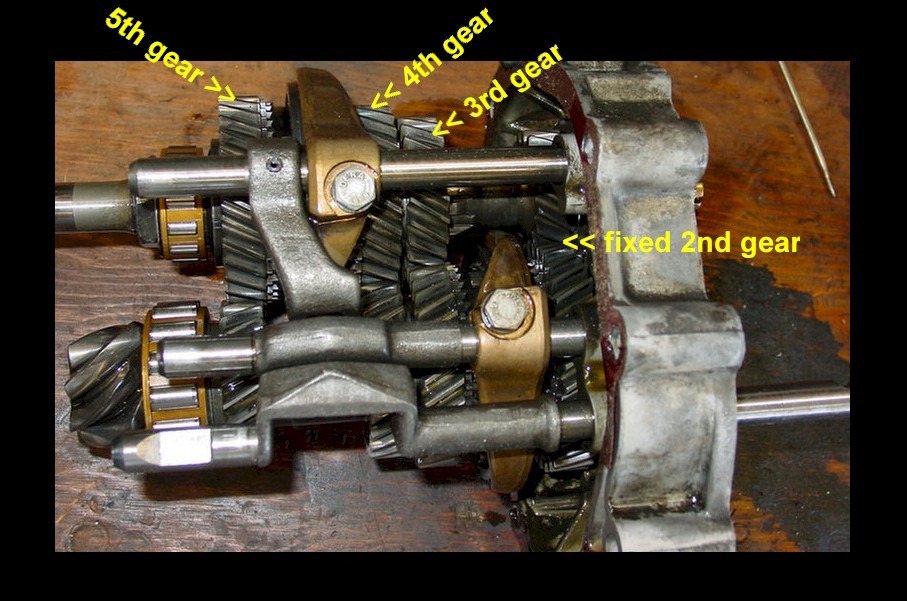
Posted by: BajaXJ92 Sep 15 2011, 07:30 AM
Jim,
What kind of RPM do you expect to see @ 60-70mph cruising in 5th with that flipped H?
Of course that also depends on tire size, which you're relatively close to stock IIRC?
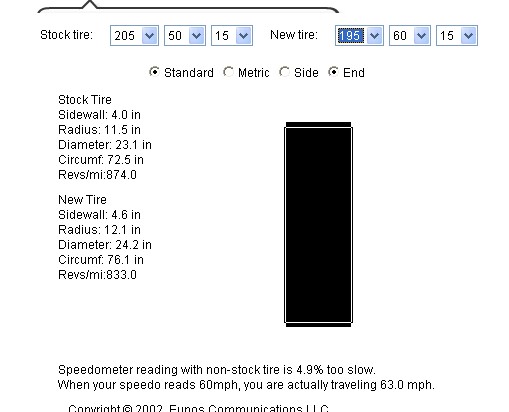
Posted by: jimkelly Sep 15 2011, 07:57 AM
according to this chart - using 205x50x15 tires - and HA gets
62 mph at 2500 rpm - vs - 55 mph for stock ZD
and
74 mph at 3000 rpm - vs - 66 mph for stock ZD
my tires are 195x60x15 - slightly taller - so speeds will be slightly higher if i was using a flipped HA and higher again due to i will be using an H
jim
Attached image(s)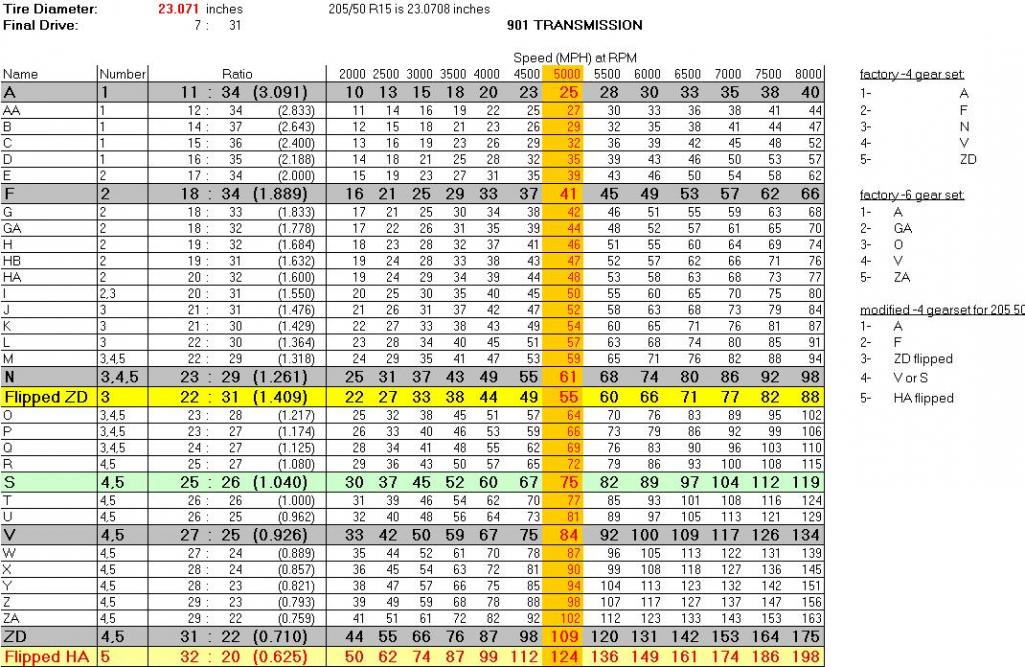
Posted by: computers4kids Sep 15 2011, 08:08 AM
gear stack pic
my plan is to ...
delete 1st gear - block it off.
2nd = stock F
3rd = flipped V ( equal to using an R )
4th = ZD ( move ZD from 5th to 4th position )
5th = H flipped ( as overdrive )
Jim,
I just run an H and the gears feel just right, with 16" rims with low profile tires. Will you have a higher ratio for 3rd and 4th than stock? It seems like your going have about the same hp and torque and as I do.
Mark
PS I was going to do something similar with the gears but evil talked me out of it.
Posted by: jimkelly Sep 15 2011, 08:23 AM
with stock gears - i feel that 2nd 3rd 4th just wind out too fast - so the plan was to replace 3rd and 4th with one gear ratio centered between 2nd and 5th - and then add H as more of an overdrive for highway use.
since this set up does not require buying any extra gears - i figured it is worth a try in my 225hp +- car.
Posted by: Andyrew Sep 15 2011, 07:34 PM
Throw some 285 35 18's on there (aka 25.9" tall), that'll help wind it upslower
I just did a couple of runs today and it really felt good. 3d gear was very nice and I had some good good power from 40-85mph.
And also why get rid of first? I use it all the time when for some reason im having a hard time getting it into 2nd..
Posted by: mepstein Sep 15 2011, 08:02 PM
I think the idea is to get rid of an unsupported gear that can cause a lot of damage to the box if it breaks. I'm a bit concerned I will have issues getting up my driveway and into the garage since I live on a steep hill but I guess I'll just drive it up fast. My first gear parts were shot anyway so doc evil took them out. He performed a gearectomy.
Posted by: computers4kids Sep 16 2011, 07:41 AM
Although I hardly ever use 1st, I chose to keep it. With the torque of a v8 you can put it in first gear on a hill and idle at a stop light without the clutch in.
I never use first for driving, up or downshifting.
Posted by: JRust Sep 16 2011, 08:22 AM
I also kept first & use it. If you get in stop & go traffic it is nice to have. Also my v8 does not have scary torque. I pretty much use it for normal driving. I do not hammer it period. If I am in a hurry & want to get on it I start in second. My only worry is if I let someone drive my car. I think the only chance it has of screwing up first is if some jackes revs the motor & pops the clutch . Which sorta happened when I let an unlce drive it. After repeatedly telling him abut 1st & not to launch if you use it  . I damn near kicked his ass right there. Still it survived just fine. Just scared the crap out of me as I was sure it would break
Posted by: mepstein Sep 16 2011, 08:48 AM
All good info and part of the reason I kept the trans from an 80K parts car in case I want to go conventional 5 speed.
My 4 speed trans has an H gear and the engine has a 6850 redline. I'm hoping to see 175+
Posted by: Rand Sep 16 2011, 11:01 AM
I know you can't abuse it, but why lose it rather than avoid using it? Geez I'm a poet and don't know it. Seems like it would be handy as an "underdrive" for going slowly in a parking lot, driveway, loading on a trailer, etc.
[edit]oops, I should have refreshed the page before responding, didn't see all the other responses to 1st.
Posted by: jimkelly Sep 16 2011, 11:40 AM
reasons to keep = parking lots, driveways, loading on a trailers, traffic /// reasons to not = letting others drive it /// i choose to be safe than sorry and will pray that when i do drive it that i don't get stuck in traffic. i also hate jambing my leg with the shifter every time i go into first : (
the other upside is the first reverse slider is $400 new. a crappy slider will work for this configuration.
Posted by: mepstein Sep 16 2011, 11:53 AM
Because all the cool kids do it.
Posted by: Andyrew Sep 16 2011, 12:21 PM
Jim,
Its plain and simple, You tell them its a 4 speed. Reverse is left-up. Simple.
Posted by: jimkelly Sep 16 2011, 01:07 PM
once complete - i will need to find someone to reengrave my BALL : )
Attached thumbnail(s)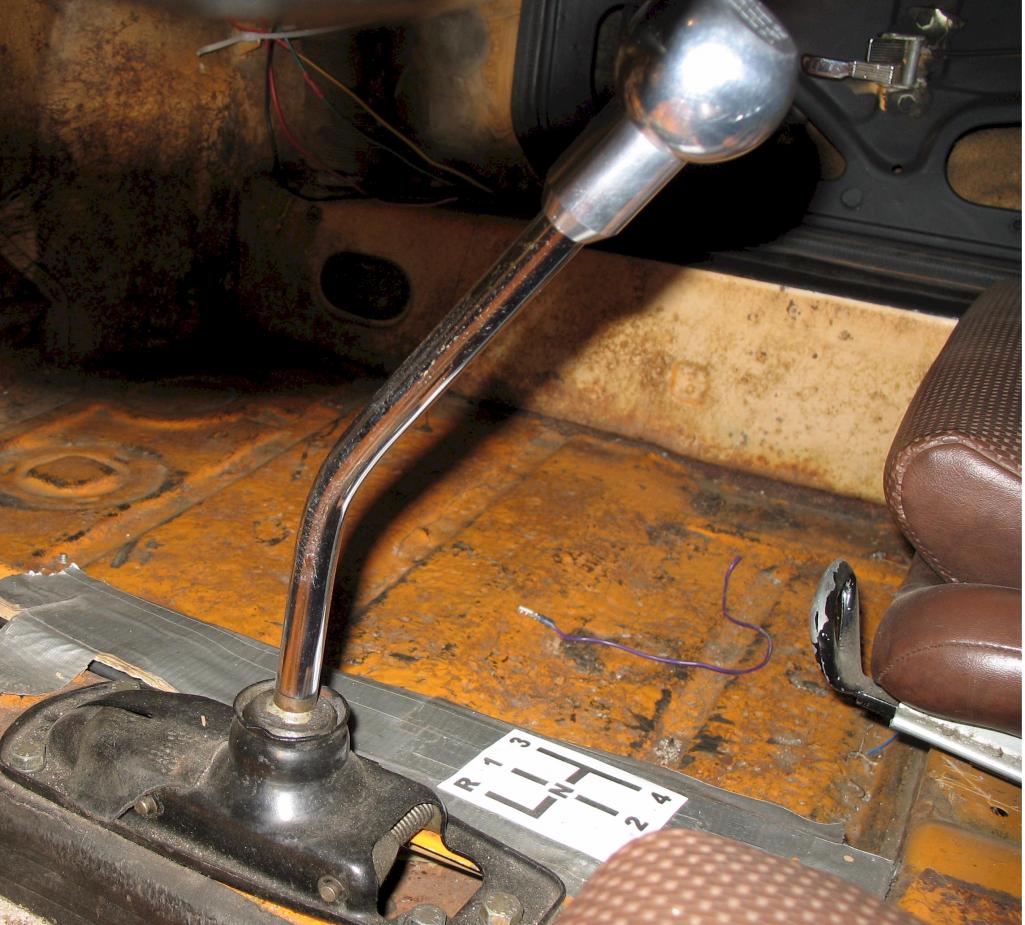
Posted by: TargaToy Sep 17 2011, 03:46 PM
When you clipped the purple wire, did the ticking stop?
Posted by: jimkelly Sep 18 2011, 05:25 AM
thankfully i am able to report that it did : ) ticking stopped : ))
an explosion would have been bad, especially since the metal work is well underway and the entire reassembly should being next weekend, once the final few parts ordered are received.
from a drivers stand point - the car should be better than new - from an onlookers stand point - it will look like the same old clunker it did 4 weeks ago : )
Posted by: TargaToy Sep 19 2011, 09:32 PM
New Scotty pix?
Posted by: scotty b Sep 20 2011, 04:32 AM
New Scotty pix?
Waiting on parts, and in the meantime I have a couple small things to take care of yesterday and today. Should be getting back on the rust repairs tomorrow.
Posted by: Razorbobsr Sep 20 2011, 05:53 AM
I think the idea is to get rid of an unsupported gear that can cause a lot of damage to the box if it breaks. I'm a bit concerned I will have issues getting up my driveway and into the garage since I live on a steep hill but I guess I'll just drive it up fast. My first gear parts were shot anyway so doc evil took them out. He performed a gearectomy.
Posted by: hot_shoe914 Sep 20 2011, 06:04 AM
New Scotty pix?
Waiting on parts, and in the meantime I have a couple small things to take care of yesterday and today. Should be getting back on the rust repairs tomorrow.
Slacker
Posted by: jimkelly Sep 20 2011, 07:42 AM
1st and reverse gears are cantilevered in trans
they are on the other side of the intermediate plate - from the other 4 forward gears. these 4 are on shafts that are supported by bearing on both ends.
jim
Posted by: jaxdream Sep 20 2011, 08:07 AM
once complete - i will need to find someone to reengrave my BALL : )
I think Hurst has been producing them for years .
Jack
Posted by: scotty b Sep 21 2011, 02:05 PM

Attached image(s)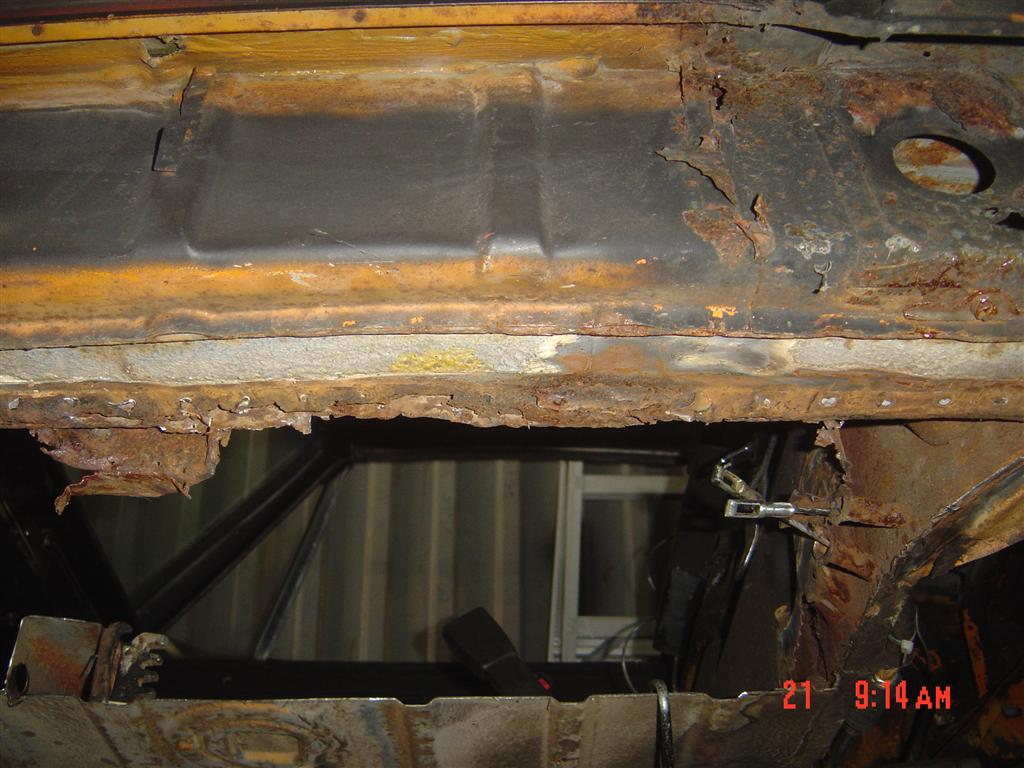
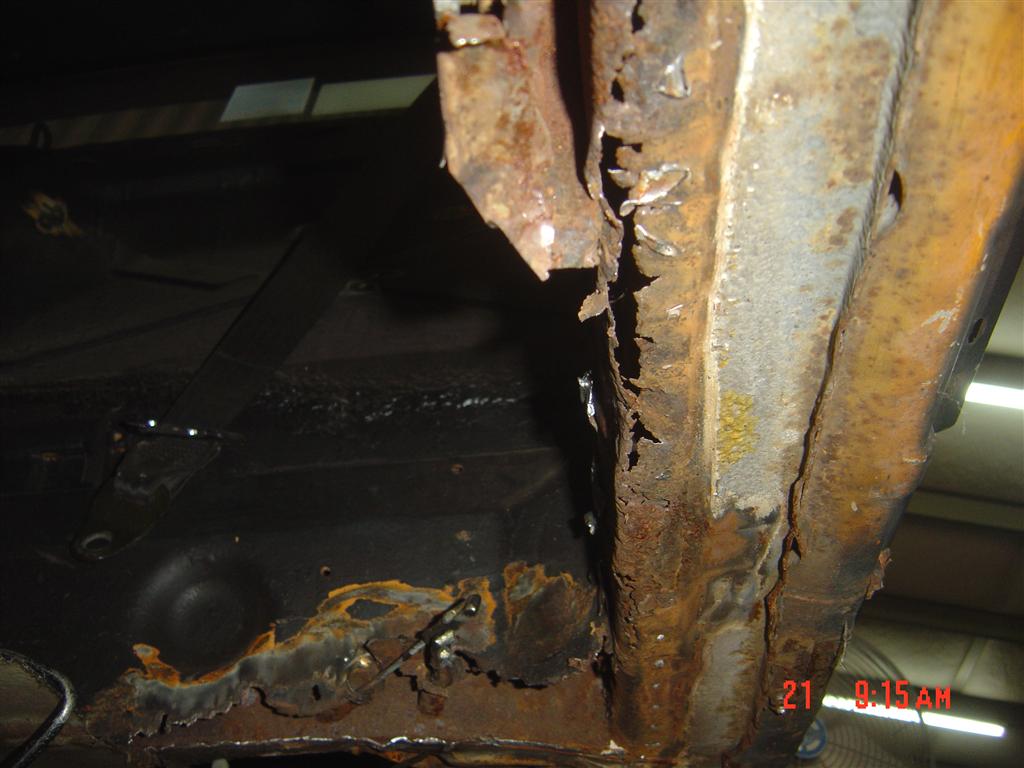
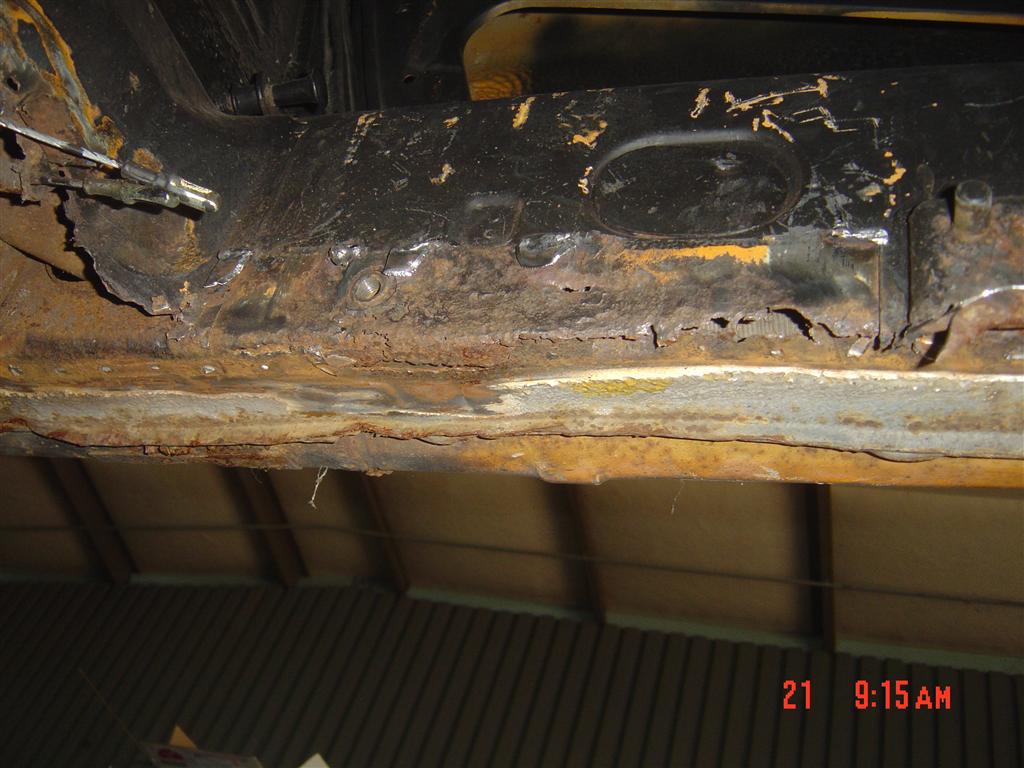
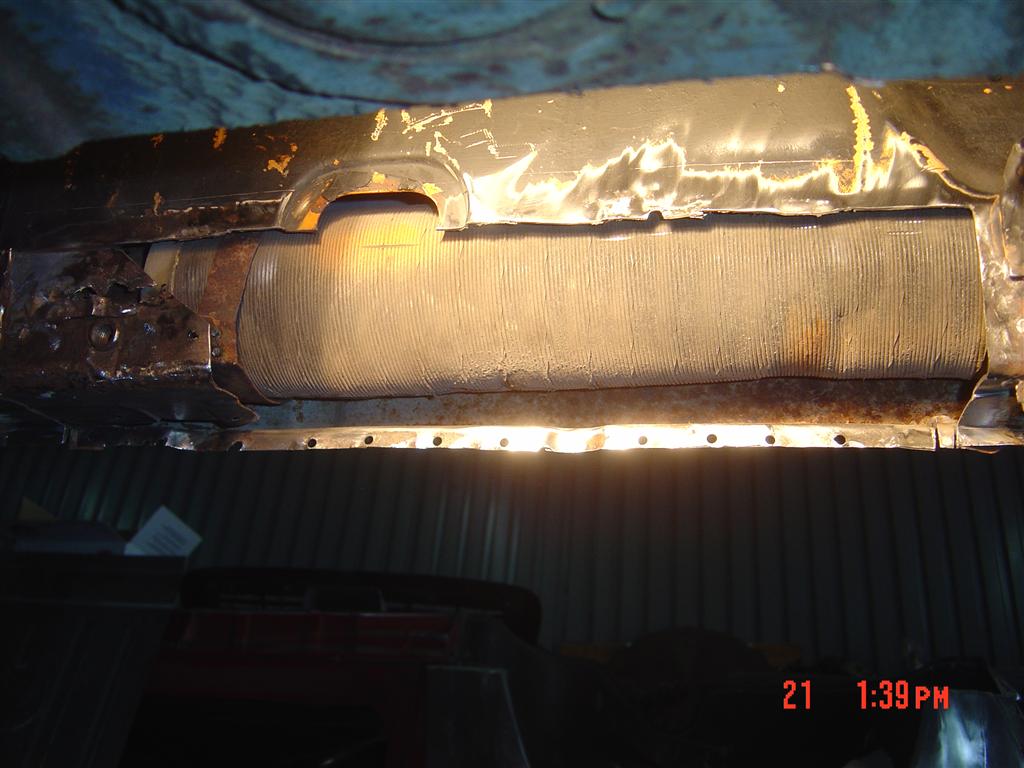
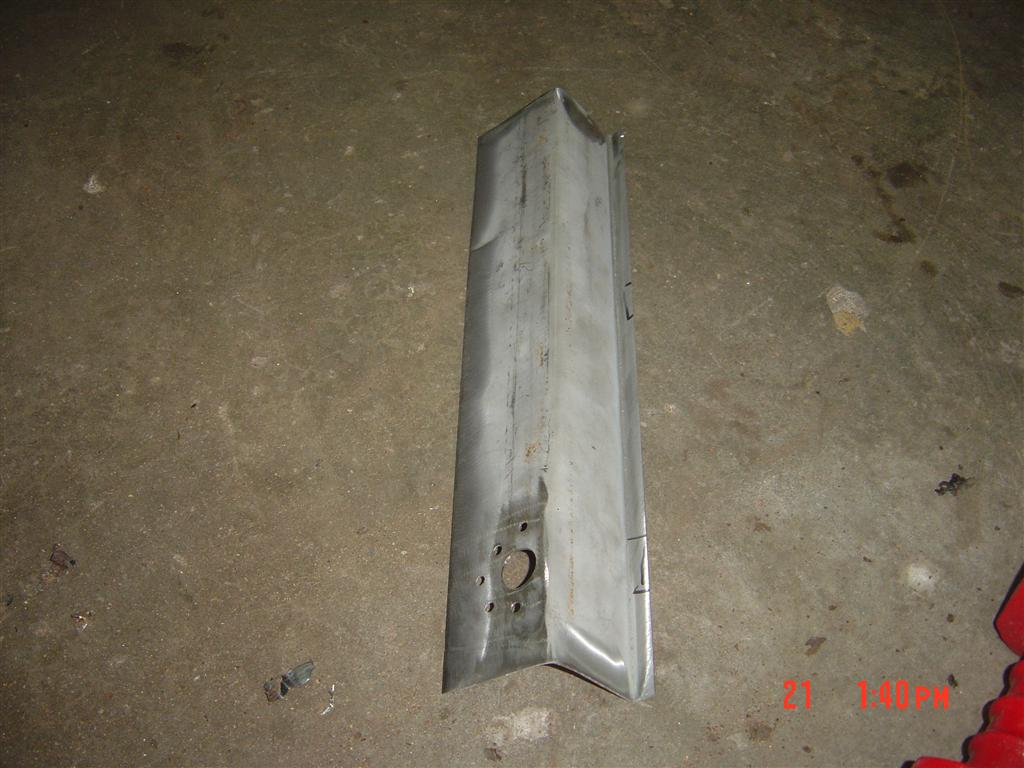
Posted by: jimkelly Sep 21 2011, 02:29 PM
i was blissfully unaware - but scott is pulling this car out of the jaws of death : )
wow!
jim
Posted by: mepstein Sep 21 2011, 02:49 PM
Welcome to the 914 rust club What kills me is the white car that I bought for $100 has way less rust and repair issues than the red car that Scott is repairing. But the white car came later and timing is everything. It's sort of amazing that these cars even hold together with all the rust that infects them.
Posted by: TargaToy Sep 21 2011, 05:12 PM
Mine's bad...but this was a real boost for my self esteem! Thanks, Jim!!
Now dems some good Scotty pix
Posted by: jimkelly Sep 22 2011, 09:05 AM
my rust bucket  just hit the pause button : (
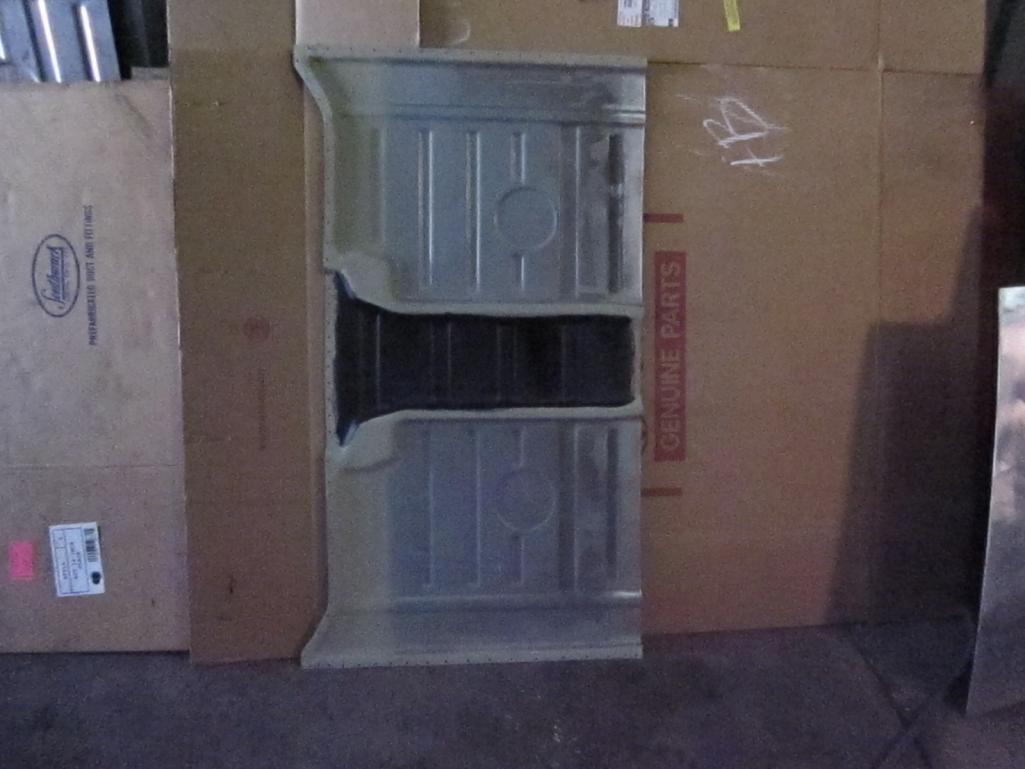
had to order some new metal thank god for restoration design : )
rear floor pan, 4 seat hinge brackets and hinges, and one emergency brake pivot.
waiting for some other parts to arrive as well - so it is time for a beer : )

maybe two or three
Posted by: Dr Evil Sep 22 2011, 09:22 AM
Love hurts, my friend
Posted by: jimkelly Sep 22 2011, 11:55 AM
hurts - yup - kind of like - one minute she is sitting there looking so sweet sipping on some wine with a ribbon in her hair - and - the next minute she is sliding her pants off only to reveal a tattoo on her butt of dennis rodman and 5 piercings on her $%^& : (
Posted by: scotty b Sep 22 2011, 02:24 PM
Love hurts, my friend
And it's expensive....sometimes it burns too............
Posted by: bigkensteele Sep 22 2011, 05:24 PM
hurts - yup - kind of like - one minute she is sitting there looking so sweet sipping on some wine with a ribbon in her hair - and - the next minute she is sliding her pants off only to reveal a tattoo on her butt of dennis rodman and 5 piercings on her $%^& : (
Posted by: ewdysar Sep 23 2011, 02:04 AM
Hi Jim,
I'm about to send my '75 in for conversion release 3.0. The first one was in the mid 1990s and the second round was seven years ago.
You'll like the 4 speed version of the 901, I have never missed first and the flipped H gives a reasonable cruise on the freeway. 70mph is around 2700rpm with 205/50/15s. It feels just like a '69 Camaro 4 speed, just smaller, a little quicker and handles way better.
But when I drive mine, it always seems like there should be one more gear at the top end. I was able to find a 915 trans with 3:10 gears, and I was able to match the first 4 gears to my Renegade 901 4 speed with an extra overdrive for 5th. 70mph should be around 2100 rpm with 265/45/16s. I'm adding fuel injection this time around because the carb never worked as well as I hoped.
I will be going through the rest of the car, a lot like you're doing. Sean in San Diego will be handling the metal work (rust, stiffening, steel flares, etc.) I'll be starting a thread of my own when the car goes in to the shop next month.
Congrats on going back and doing it right. You're an inspiration to the rest of us.
Eric
Posted by: pktzygt Sep 24 2011, 05:48 PM
Exactly how much repair is required for a car to classify as a whole new car. When I finally get my car together I've got to make it up there and see scotty's work for myself.
Looks great! I'm jealous as usual.
Posted by: Dr Evil Sep 24 2011, 06:40 PM
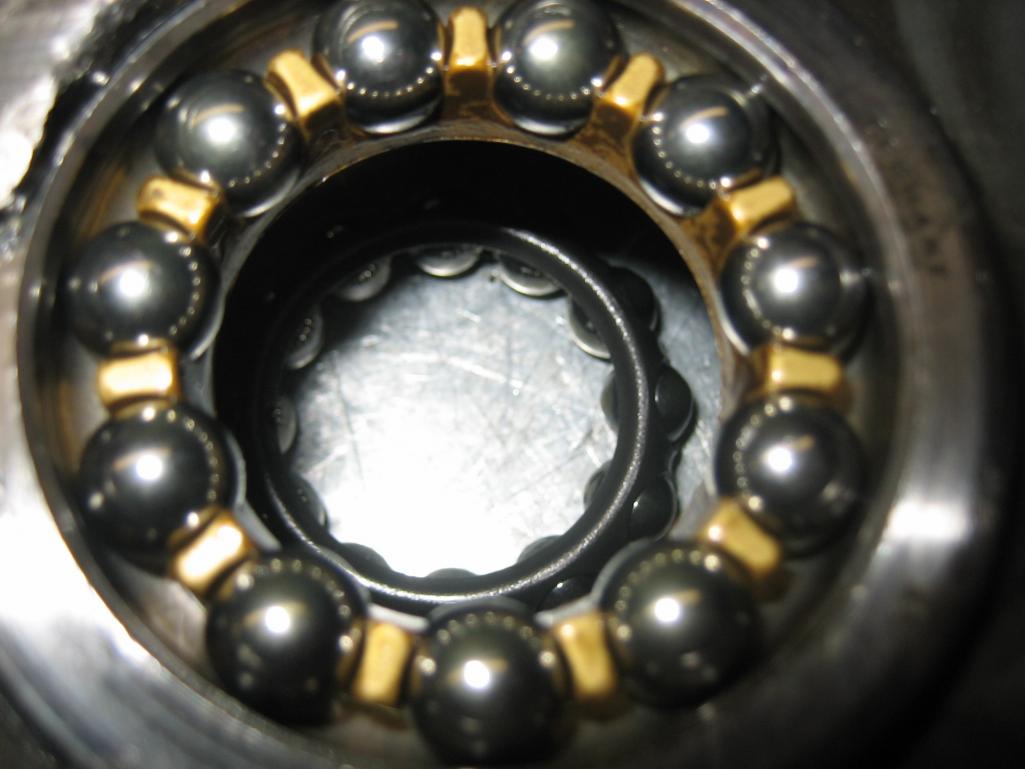
Here is the vid of why your intermediate plate was kah kah. The bearing should not move like that
https://www.youtube.com/watch?v=g3l04VUTY_4
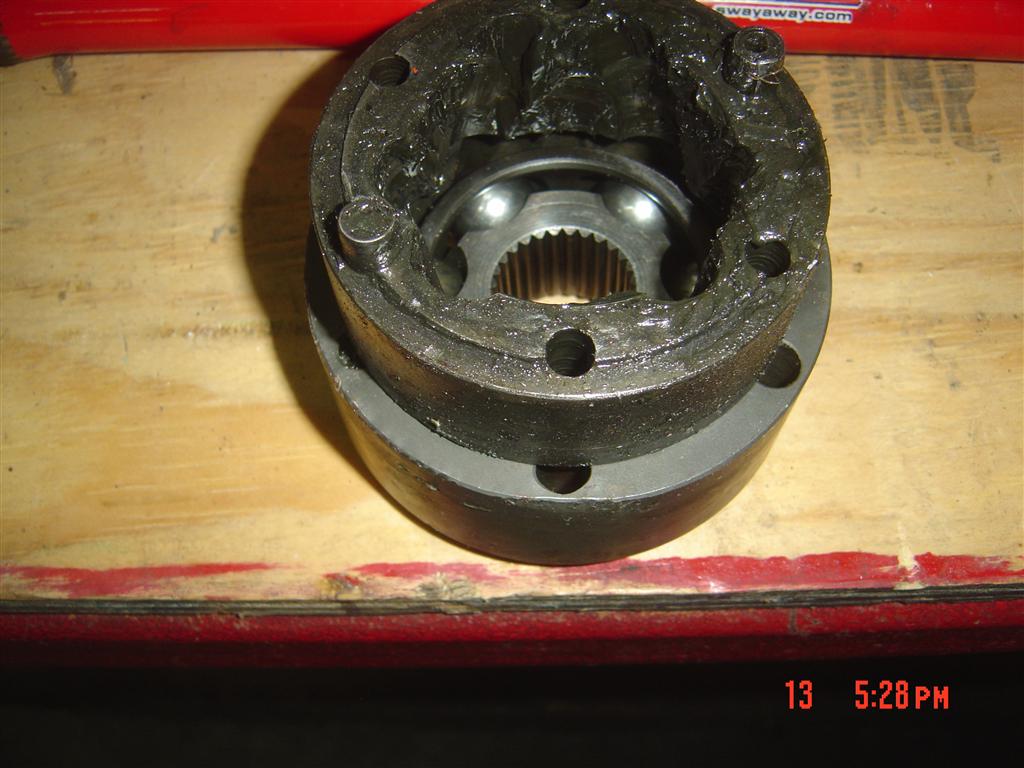
Posted by: Dr Evil Sep 24 2011, 06:58 PM
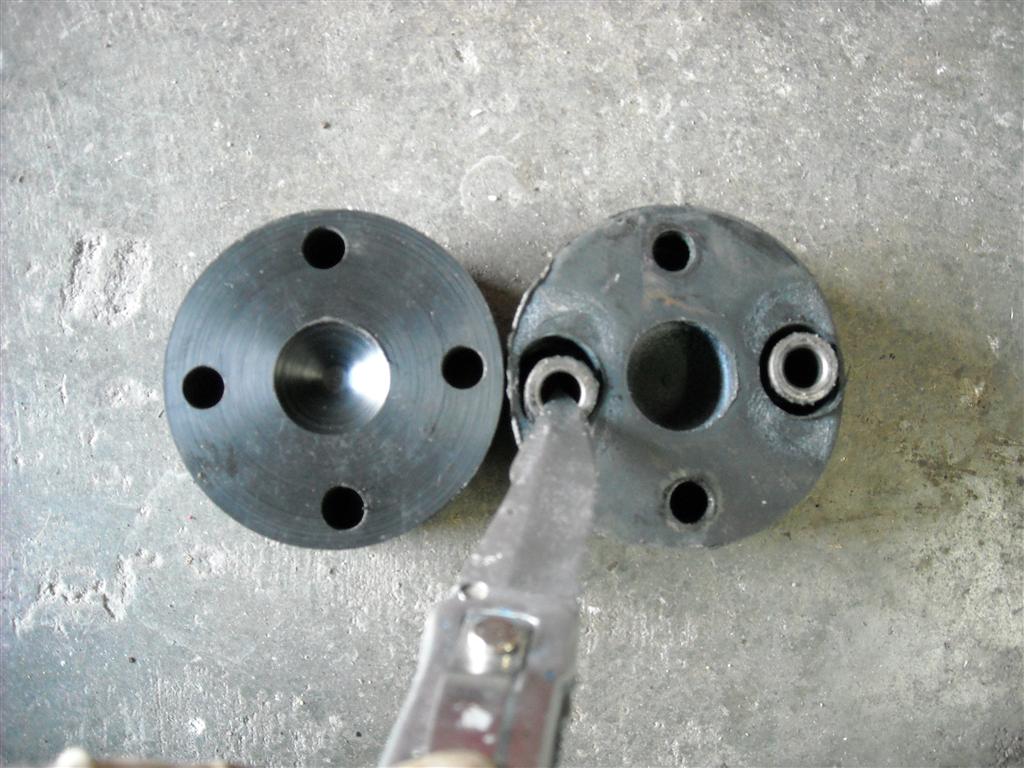
Wow, Jim, what kind of Frenken-turd did you send me? The large bearing spins freely in the int plate, the threads on the end of the input shaft are boogered (I can save this), and your input int plate bearing is made of TWO different bearings! Never seen that one I can fix....
Attached thumbnail(s)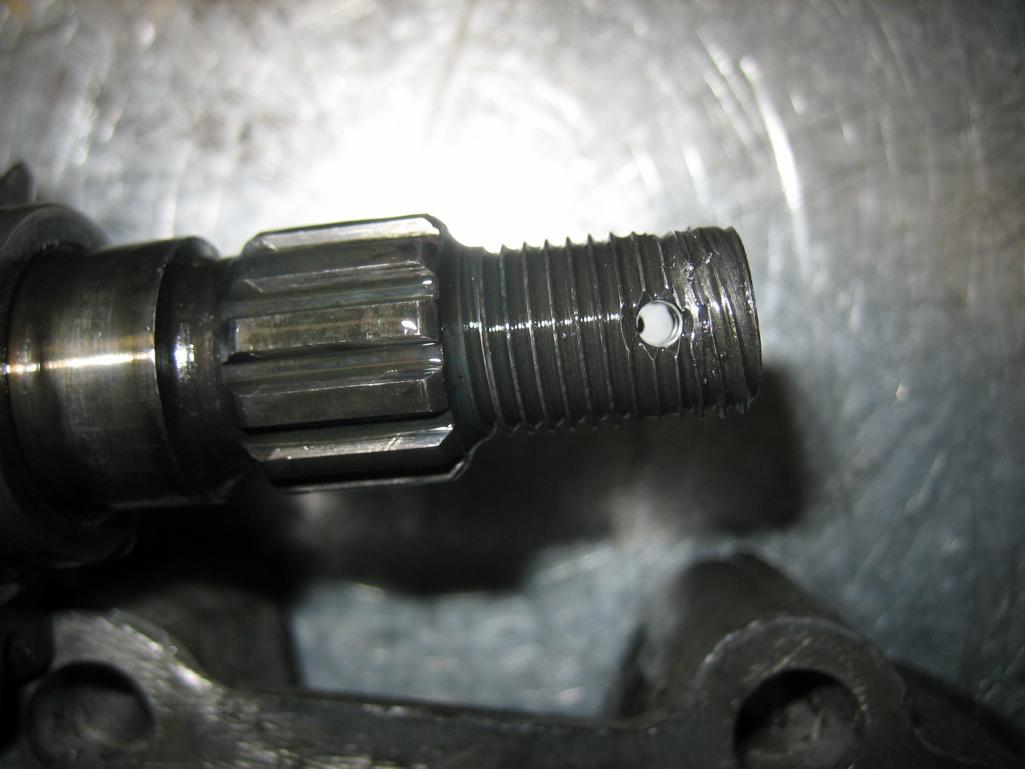

Posted by: jimkelly Sep 24 2011, 07:50 PM
mike - good catch - thanks for the video and pics : )
Posted by: Dr Evil Sep 24 2011, 08:45 PM
All done. You needed the bearing plate replaced as well.
Parts replaced:
- Input bearing
- Bearing plate
- Intermediate plate
- Nut lock down plate
- 1st gear nut
Good thing you wanted it stock. That H gear you sent with it is toasty. There is bad galling.
All ready to go together at Scottys. I have to go deliver a baby now, which is a good thing since she may have been due when I was to go to Scotty's and that would have been complicated
Kinda cool, a few minutes ago I was rebuilding your stack - took a shower - and now gonna deliver a baby. Ya, I am a stud
Posted by: Dr Evil Sep 24 2011, 11:07 PM
Turned into a c-section...still took too long But, I like cutting
Posted by: BajaXJ92 Sep 25 2011, 04:10 AM
Turned into a c-section...still took too long
But, I like cutting You mean you didn't try the salad spoons and/or a pry bar before hand?
Posted by: jimkelly Sep 25 2011, 05:41 AM
thanks doc : )
jim
i'll bring you a nice H to scott's party.
http://www.pbase.com/jimkellysells/image/138263782
the galled H we'll put into my next rebuild to see how long it holds up since the galling will be on the non contact side when run flipped.
Posted by: Dr Evil Sep 25 2011, 09:31 AM
Turned into a c-section...still took too long
But, I like cutting You mean you didn't try the salad spoons and/or a pry bar before hand?
She was stalled at 6cm, you need full dilation and station before you use the vag tools. The heart tracing was not reassuring, either, so onto the cutting board with her. She did well
I didnt tell her, "hey guess what my hands were just in before we did your surgery!"
Posted by: scotty b Sep 25 2011, 09:40 AM
Turned into a c-section...still took too long
But, I like cutting You mean you didn't try the salad spoons and/or a pry bar before hand?
She was stalled at 6cm, you need full dilation and station before you use the vag tools. The heart tracing was not reassuring, either, so onto the cutting board with her. She did well
I didnt tell her, "hey guess what my hands were just in before we did your surgery!" Somewhere in the deepest darkest bowels of Washington Pa, there is a newborn that stinks of gear oil. this child, soon to be known only as " gearstack" Shall someday, grow up to lead an army of smelly sub-humans that will change the world forever in an epic way.
Attached image(s)

Posted by: jimkelly Sep 27 2011, 04:13 PM
got the word from resto design that my rear pan, seat bracket pieces and emergency brake piece shipped today : )
soon i will be able to GO & STOP : ))
Posted by: moparrob Sep 27 2011, 06:59 PM
Somewhere in the deepest darkest bowels of Washington Pa, there is a newborn that stinks of gear oil. this child, soon to be known only as " gearstack" Shall someday, grow up to lead an army of smelly sub-humans that will change the world forever in an epic way.
Awesome...
Posted by: jimkelly Sep 28 2011, 01:23 PM
interesting engine thread.
http://www.hotrodders.com/forum/building-sbc-rev-8k-have-power-85571.html
http://www.thirdgen.org/techboard/tech-general-engine/439590-real-reason-dz302-sbc.html
jim
Posted by: zymurgist Sep 28 2011, 01:34 PM
"hey guess what my hands were just in before I rebuilt your transmission!"
Posted by: Johny Blackstain Sep 28 2011, 03:14 PM
Posted by: jimkelly Oct 2 2011, 07:33 AM
http://www.elephantracing.com/documents/914-polybronze-trailingarm.pdf
http://www.914world.com/bbs2/index.php?showtopic=87137&hl=elephant bushings install&st=0
scott - also - before you press my hubs into my trailing arms - pls make sure the hubs are fully machined to accept the rotor's lugs and retaining screws. i think they may still need drilling and tapping for retaining screws??
skline's exhaust pic in this thread
http://www.914world.com/bbs2/index.php?showtopic=110950&hl=skline+exhaust
Posted by: Dr Evil Oct 2 2011, 08:43 PM
The core traz you gave me pissed oil all over the back of the suby
Your rebuilt one is done and ready to install.
Posted by: BajaXJ92 Oct 3 2011, 08:30 AM
Your rebuilt one is done and ready to install.
And I was lucky enough to watch the good Dr. put it together.
Want me to test it out first for you Jim?

Posted by: Eric_Shea Oct 3 2011, 08:56 AM
911 hubs with 914-6 rotors should be fine.
***IMPORTANT***, augmentation to the Elephant instructions:
Instructions say - Use a 1/16th" bit. You will break that. I simply use a 5mm drill to tap for a 6 x 1 thread all the way through* ( use a 4.2mm if your kit does indeed have the M5 x .8 )
Instructions say - Drill and tap for M5 x .8. *I found the last kit I received (the ones for my car) came with M6 x 1 zerks. ( again, use a 4.2mm if your kit does ineed have the M5 x .8 )
Best to use a drill press if you have one that can get into those areas. Install the hubs "last" to accomodate access with the drill press.
Posted by: jimkelly Oct 7 2011, 06:09 AM
scott - stuff i will bring with me on next trip to your shop : )
also bringing some 1.7/1.8 exhaust stuff for sunab914
Attached thumbnail(s)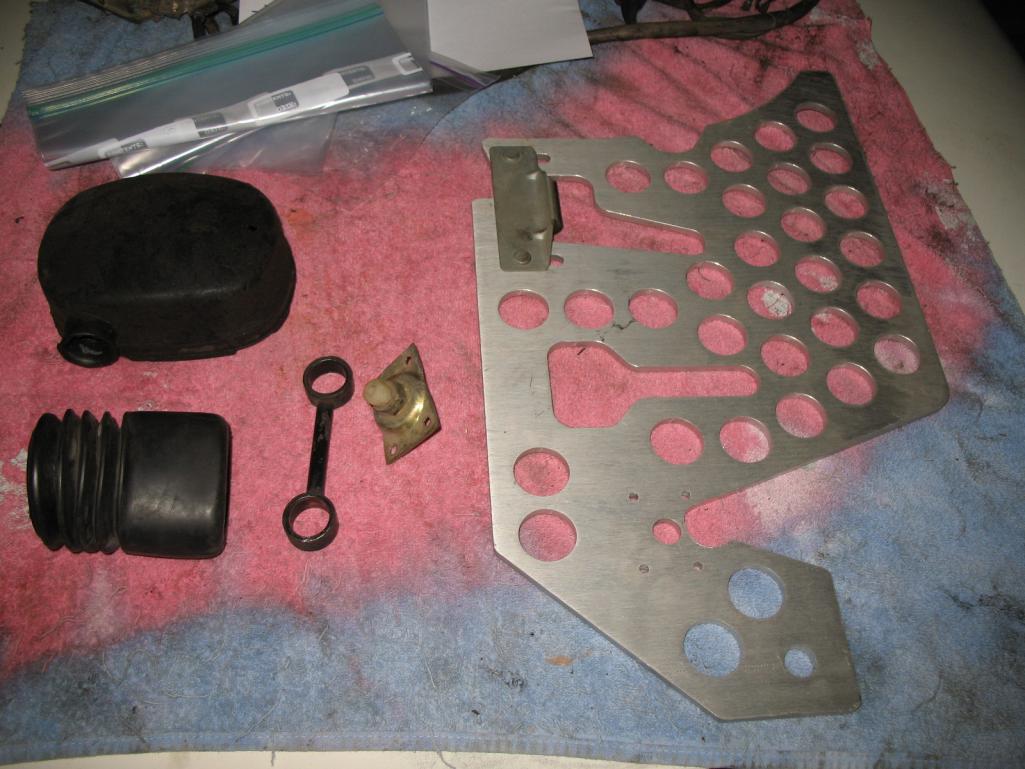
Posted by: scotty b Oct 28 2011, 10:53 AM
Attached image(s)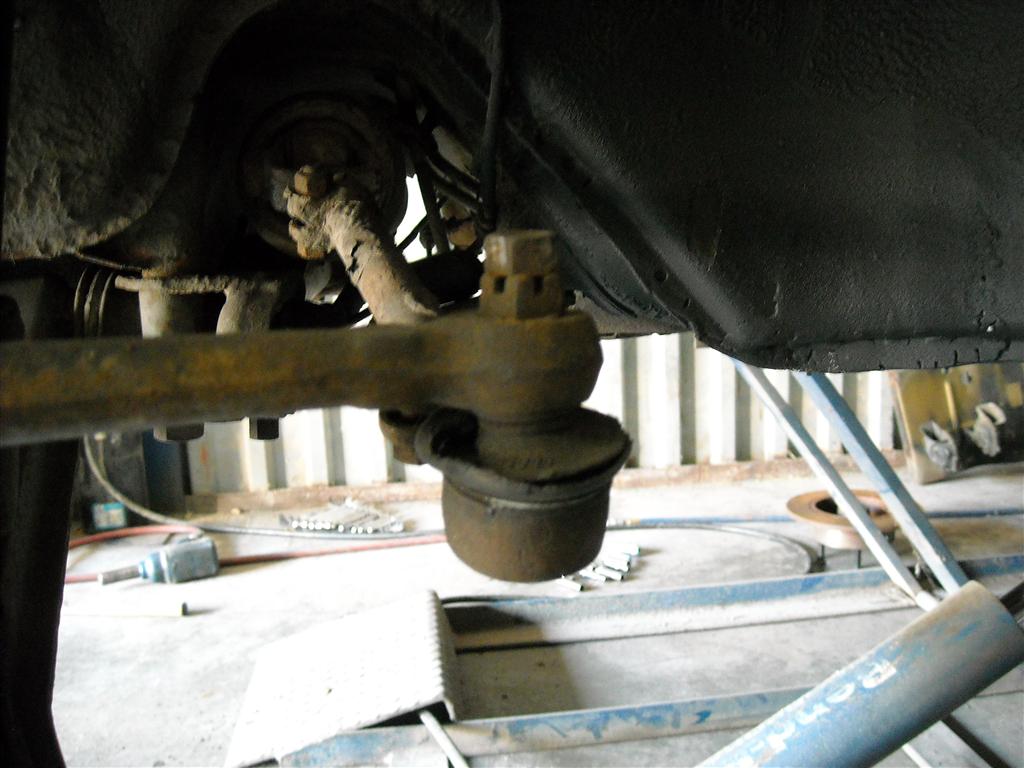
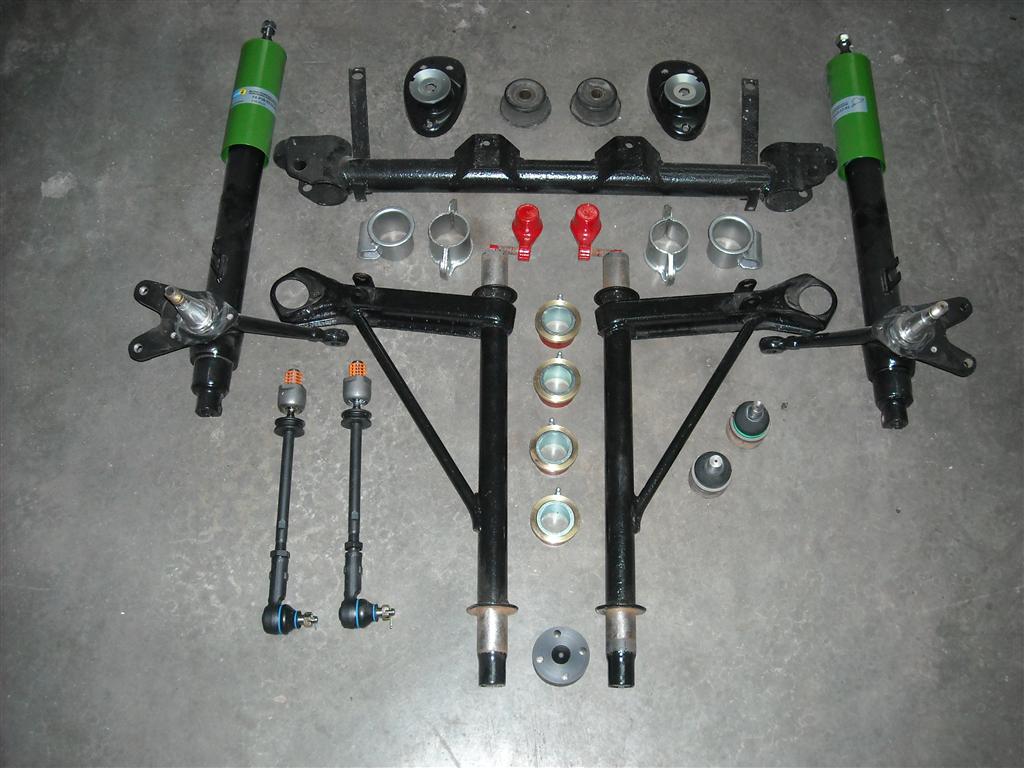
Posted by: scotty b Oct 28 2011, 11:00 AM
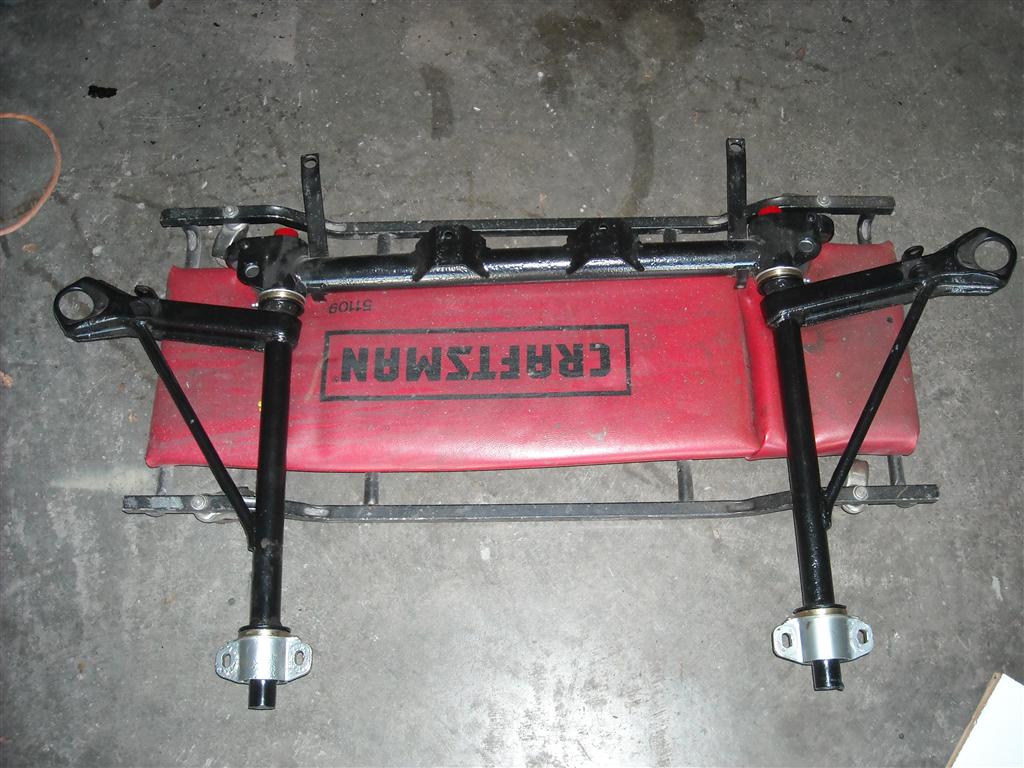
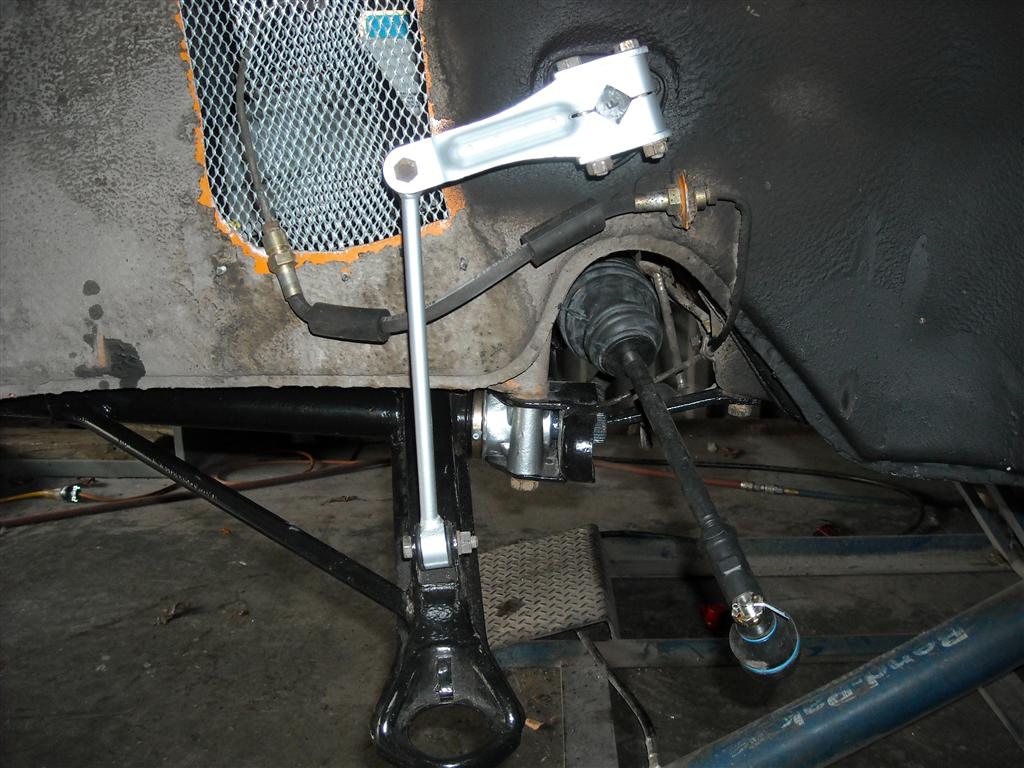
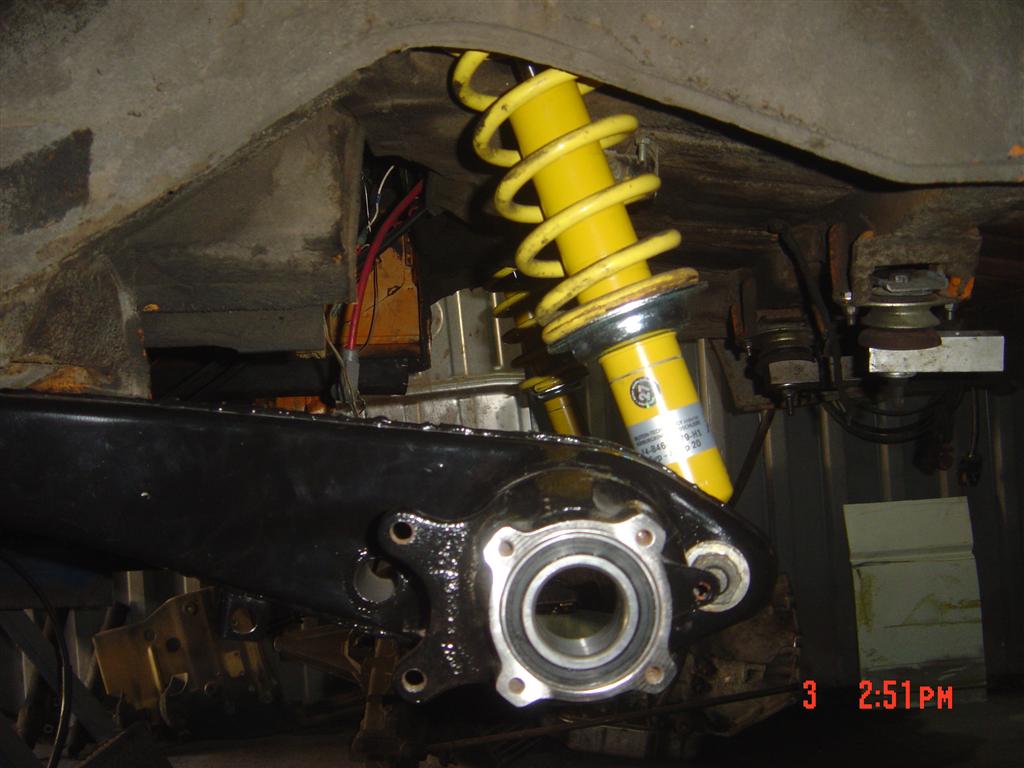
out with the old and in with the new. Powder coated parts, Elephant poly bronze bushings, sway bar, new drop link bushings, turbo tie rods, steering coupler from Dr Foley, and a little something from the Sheaman
Attached image(s)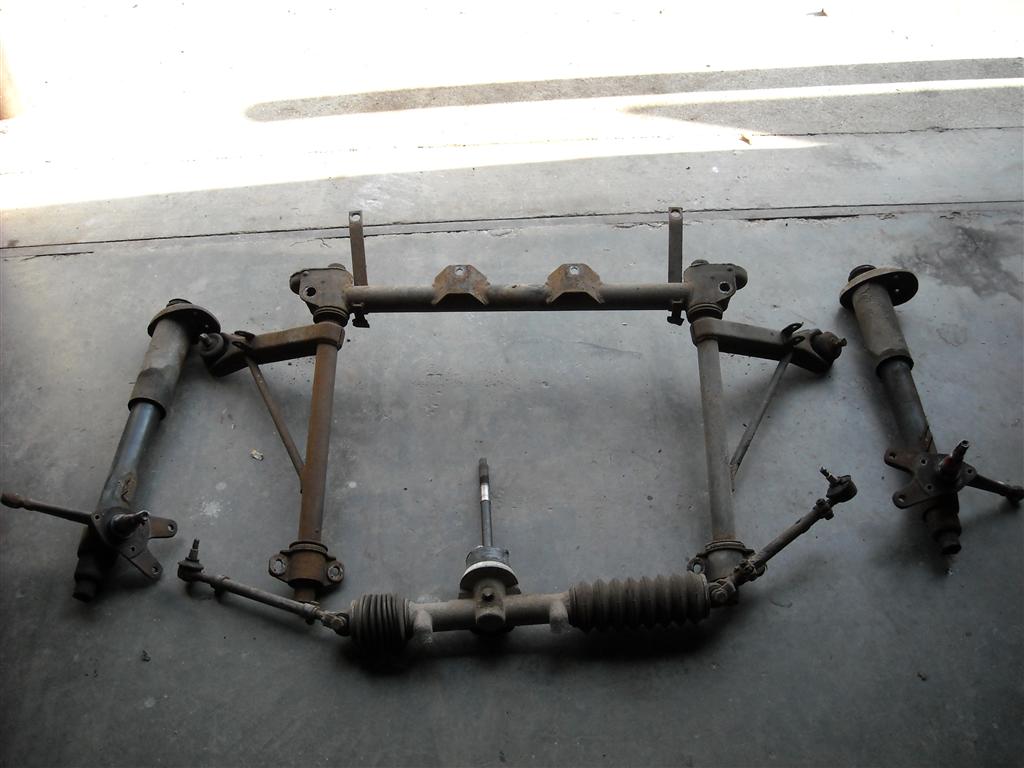
Posted by: BajaXJ92 Oct 28 2011, 03:18 PM

I want pretty suspension parts too 
Posted by: SUNAB914 Oct 28 2011, 03:32 PM
WOW, very nice!
Posted by: jimkelly Oct 29 2011, 10:57 AM
Posted by: sean_v8_914 Oct 29 2011, 01:07 PM
you are planning to radius the radiator exhaust posts in the fender wells, right?
Posted by: sean_v8_914 Oct 29 2011, 01:11 PM
...you could do a hammer welded fillet to create a radius
typing, sheesh.
Posted by: jimkelly Oct 29 2011, 01:14 PM
i notice that too - part of original installation - looks like a good place for a crack to be born. jim
Posted by: scotty b Nov 1 2011, 07:09 AM
911 hubs with 914-6 rotors should be fine.
***IMPORTANT***, augmentation to the Elephant instructions:
Instructions say - Use a 1/16th" bit. You will break that. I simply use a 5mm drill to tap for a 6 x 1 thread all the way through* ( use a 4.2mm if your kit does indeed have the M5 x .8 )
Instructions say - Drill and tap for M5 x .8. *I found the last kit I received (the ones for my car) came with M6 x 1 zerks. ( again, use a 4.2mm if your kit does ineed have the M5 x .8 )
Best to use a drill press if you have one that can get into those areas. Install the hubs "last" to accomodate access with the drill press.
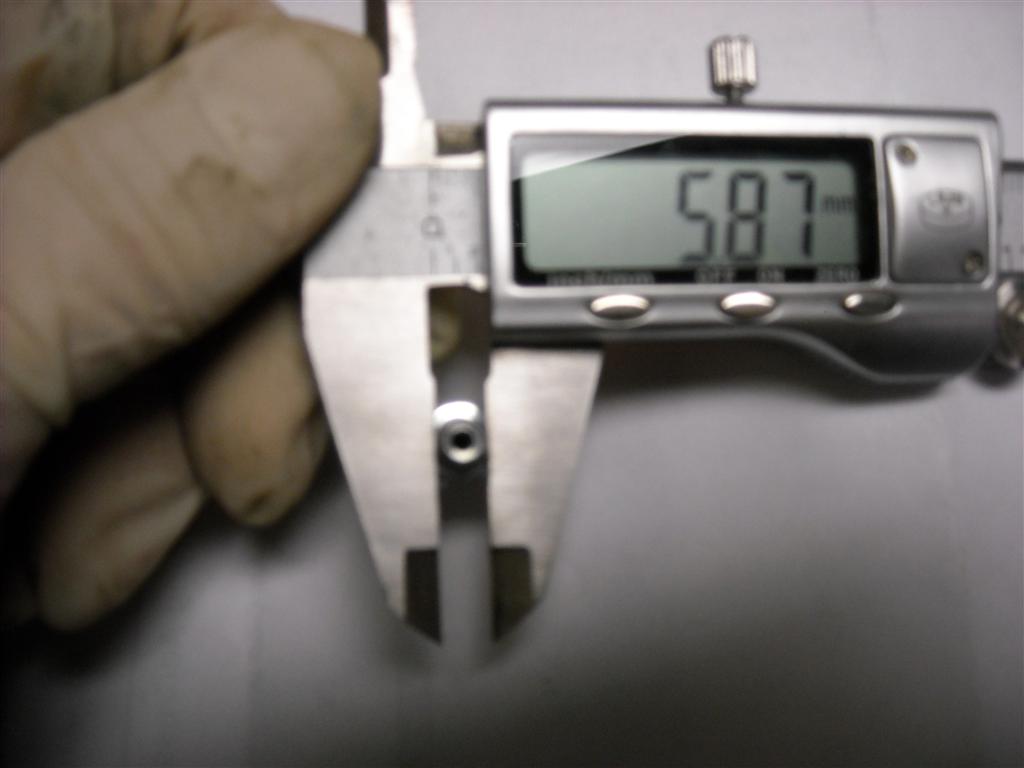
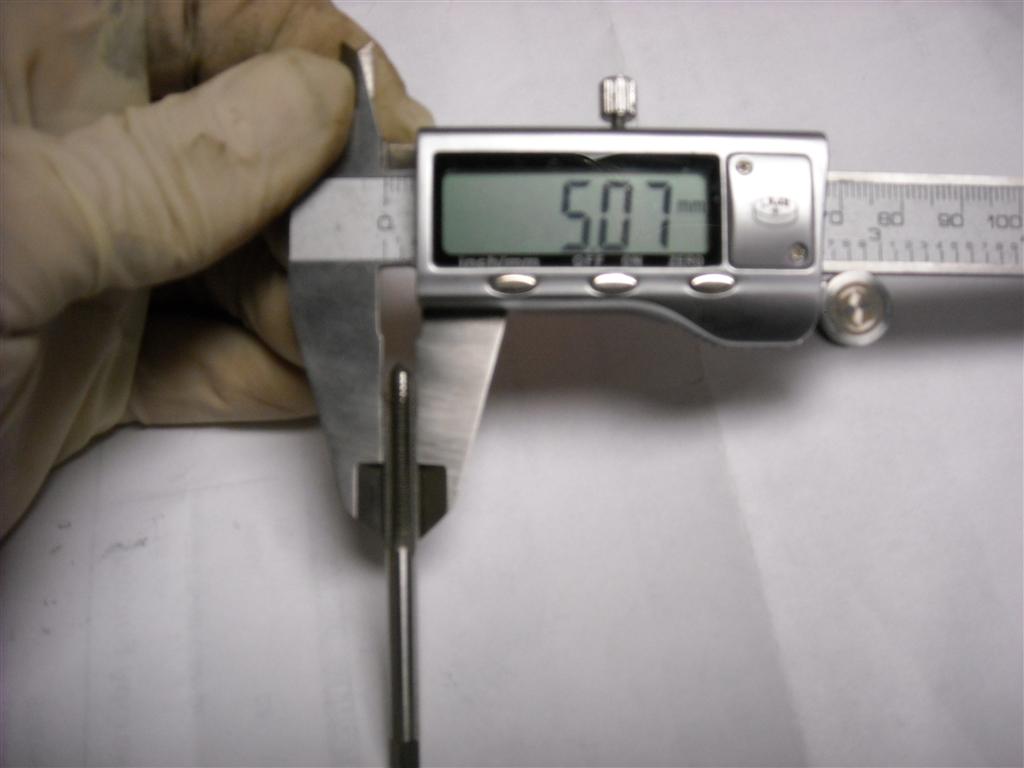
Well the zirks in Jims kit appear to be 6 x .8
calipers read out to a 5.87, so if I round up I get a 6m, if I round WAY down then I get a 5m My 5m x .8 tap measures out to 5.07. the only other option on these is they might be a 1/4 x 32 Neither of these taps are in my kit of course
Attached image(s)
Posted by: scotty b Nov 1 2011, 01:59 PM
The supplied and impossible to find 6m x .8 : 12-32 : 1/4-32 ( all I know is it is NOT a 6m-1.0) on the left, and the 1/4-28 that Lowes had a bin full of on the right, and most tap and die kits contain. Makes sense to me 
Attached image(s)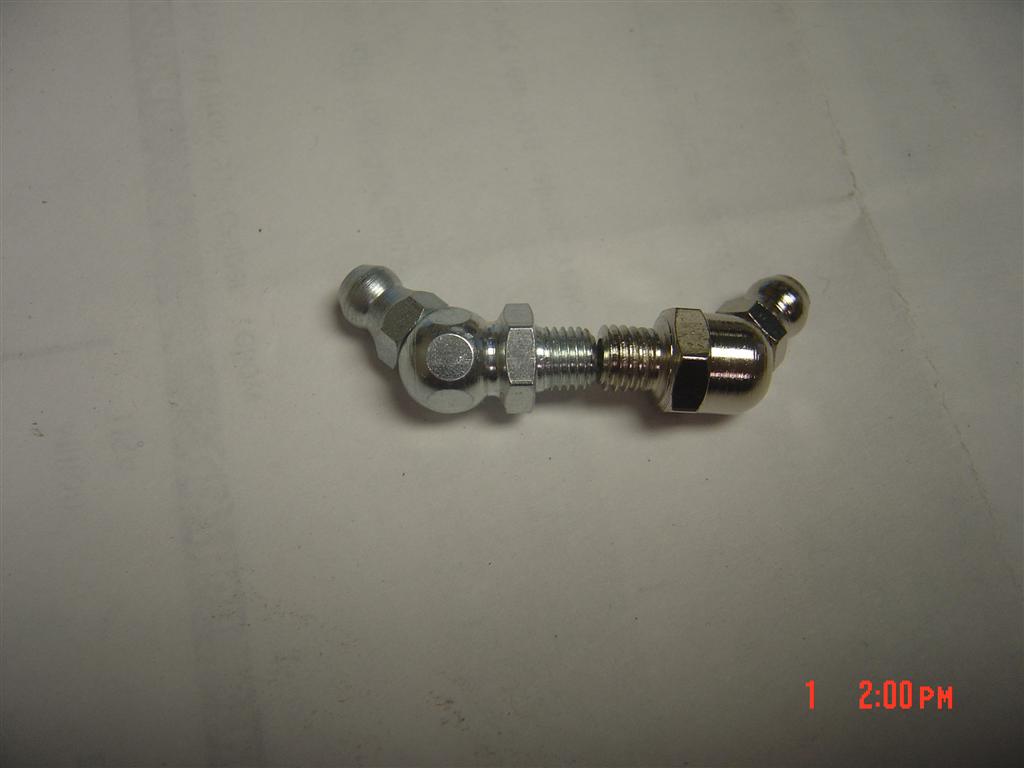
Posted by: jimkelly Nov 1 2011, 02:22 PM
more shiney - i like that one : ))
Posted by: type47 Nov 1 2011, 03:25 PM
Dang for the rest of us, there'll be no keepin' up with Jim with that front sway ... 
Posted by: jimkelly Nov 1 2011, 03:37 PM
that is damn right - getting smoked by you and rod over the blue ridge mountains - still causes me lingering pain ; ))
--
Dang for the rest of us, there'll be no keepin' up with Jim with that front sway ...
Posted by: strawman Nov 2 2011, 10:25 PM
The supplied and impossible to find 6m x .8 : 12-32 : 1/4-32 ( all I know is it is NOT a 6m-1.0) on the left, and the 1/4-28 that Lowes had a bin full of on the right, and most tap and die kits contain. Makes sense to me
Check with Elephant Racing -- last time I checked with Churck, he has upsized the zerk fittings to 6mm because the 5mm ones break too easily (ask me why I asked Chuck...). I upsized all of mine while everything was out and easy to drill/install.
Posted by: scotty b Nov 4 2011, 05:48 AM
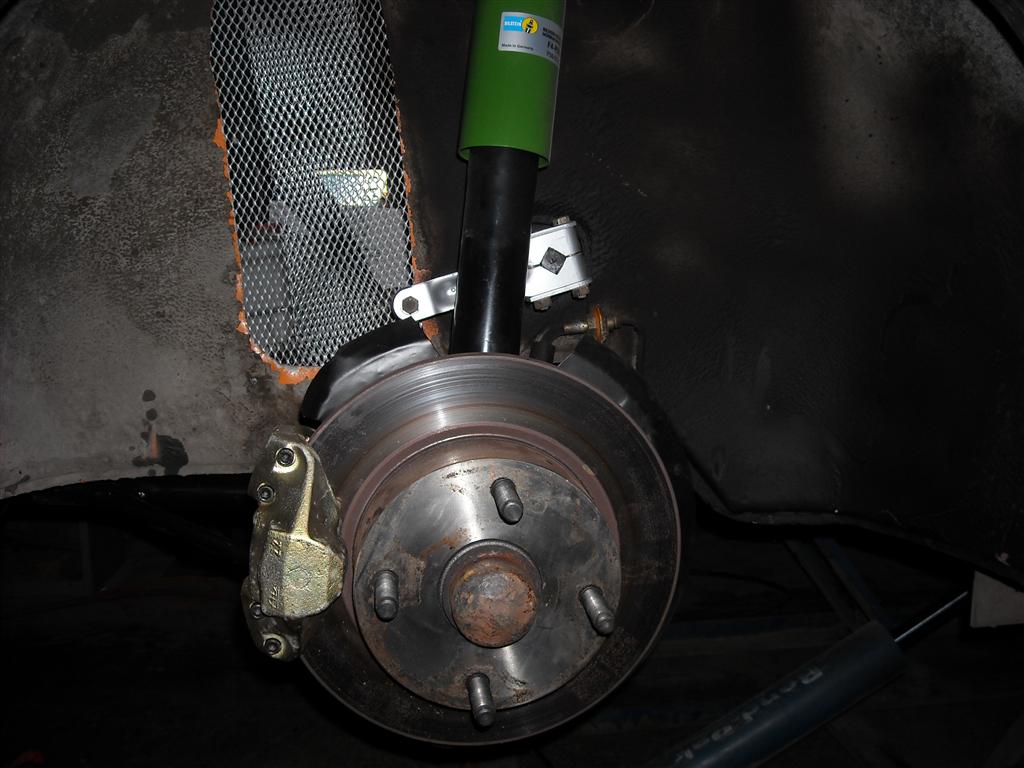
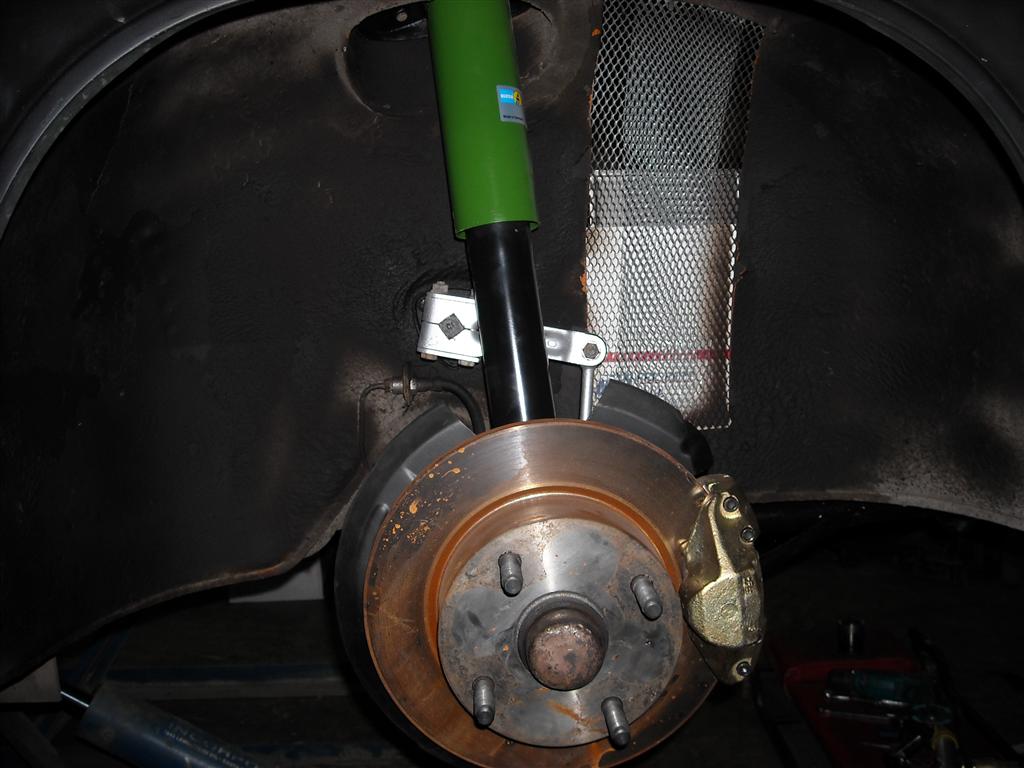
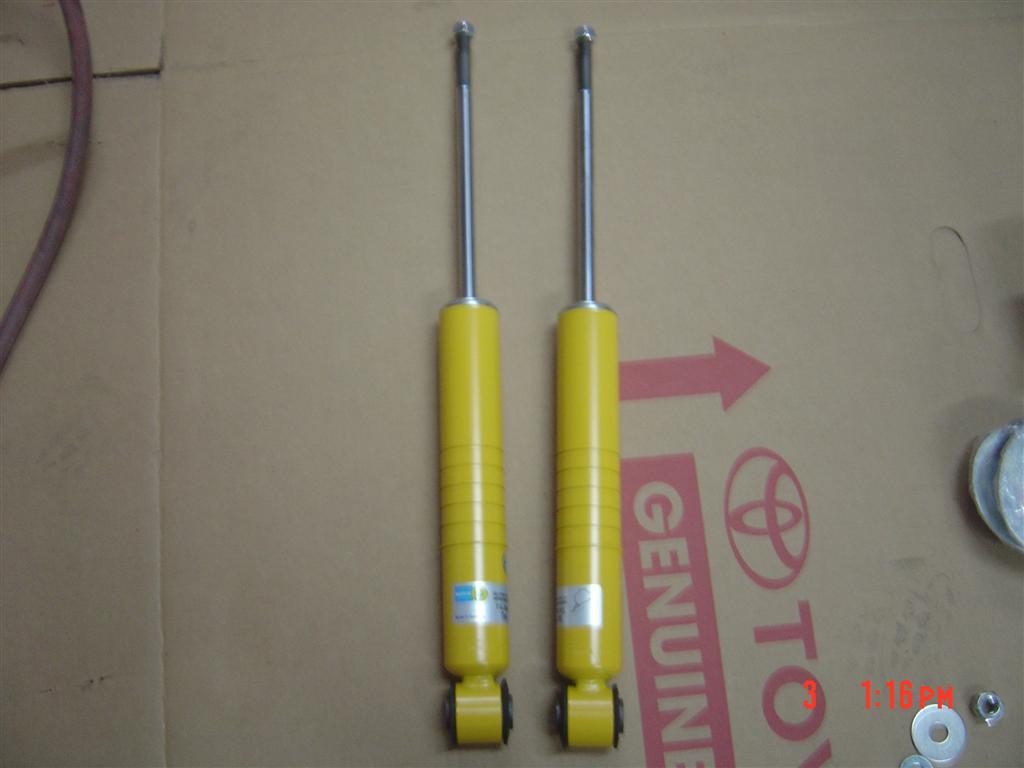
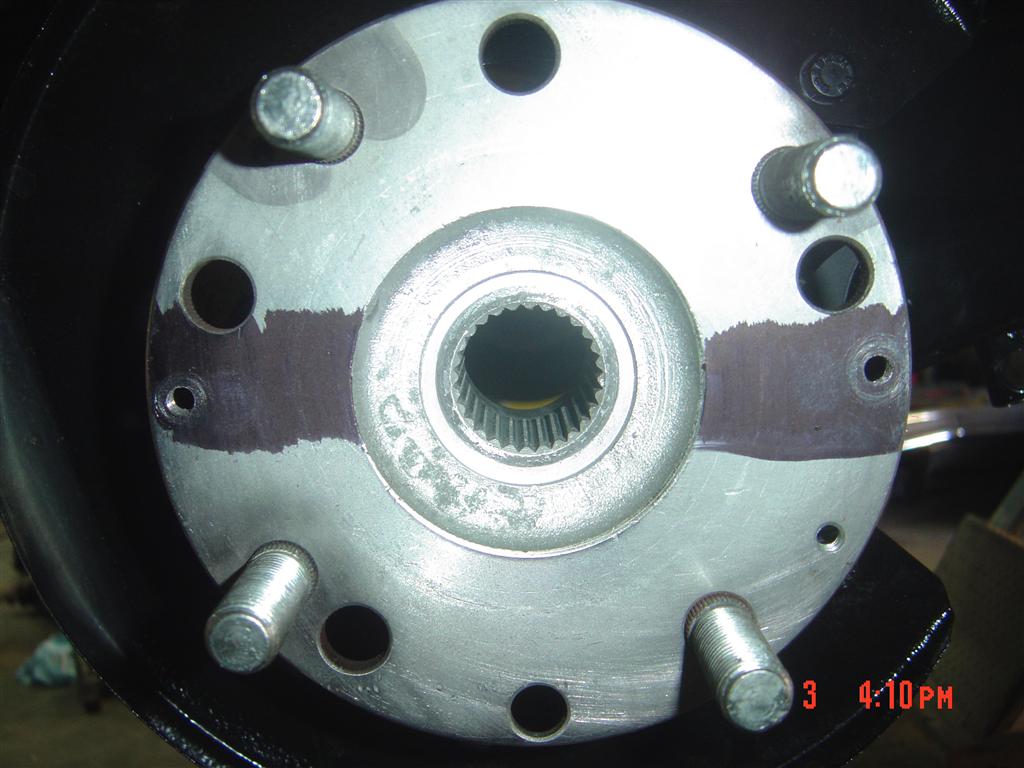
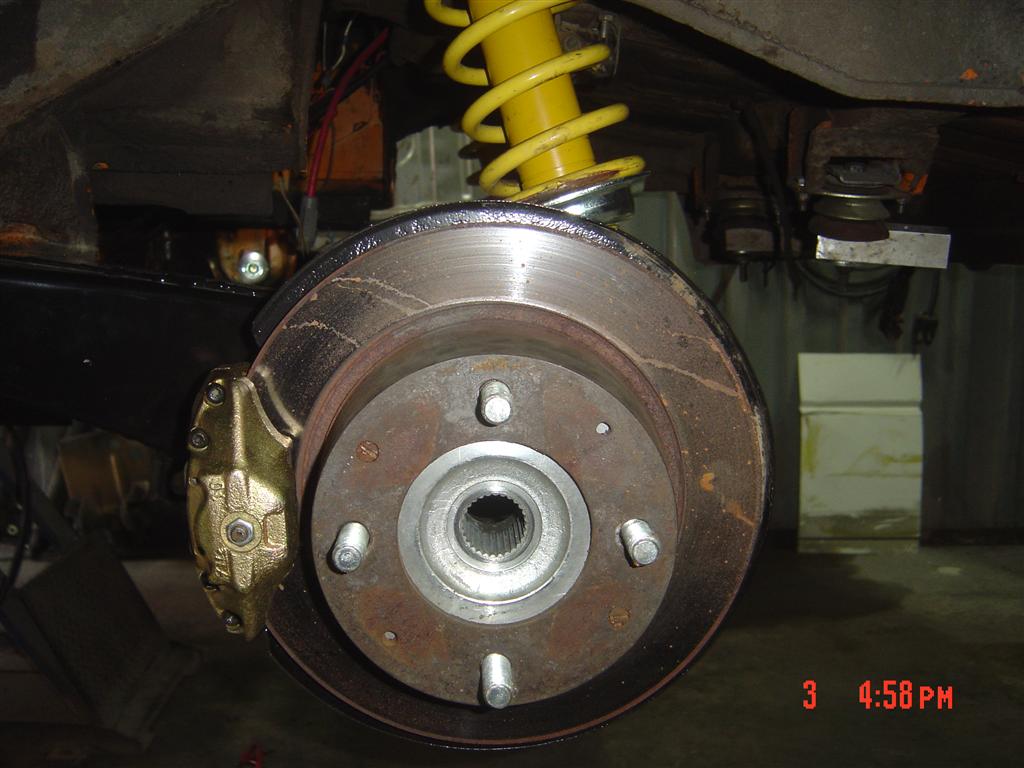
Drilled tapped and zerked trailing arms. New bearings, new Bilsteins. 911 hubs, had to be drilled and tapped for the 914 rotor retaining screws and new brakes by Mr. Shea completes the wardrobe. Next up is the rear sway bar
Attached image(s)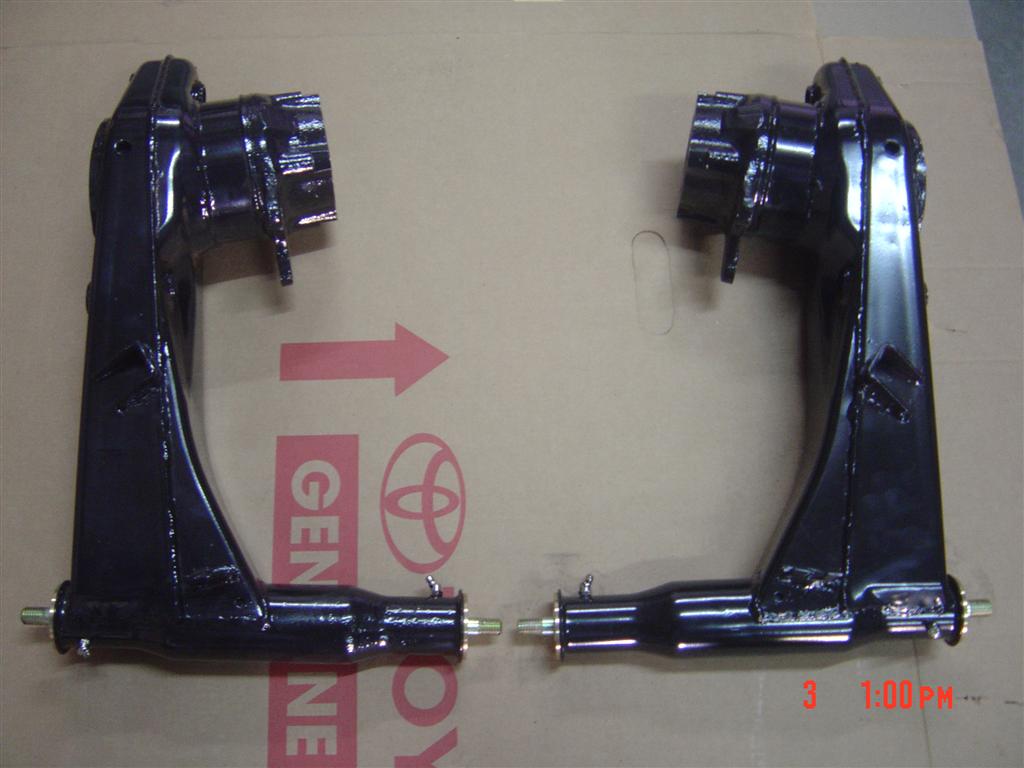
Posted by: jaxdream Nov 4 2011, 07:08 AM
911 hubs redrilled for 914 bolt pattern ??? Different path.
Jack
Posted by: BajaXJ92 Nov 4 2011, 08:14 AM
911 hubs redrilled for 914 bolt pattern ??? Different path.
Jack
The idea behind Jim's car is to keep the "stock sleeper" look to the car, including the original 4-bolt fuchs.
Posted by: scotty b Nov 4 2011, 07:43 PM
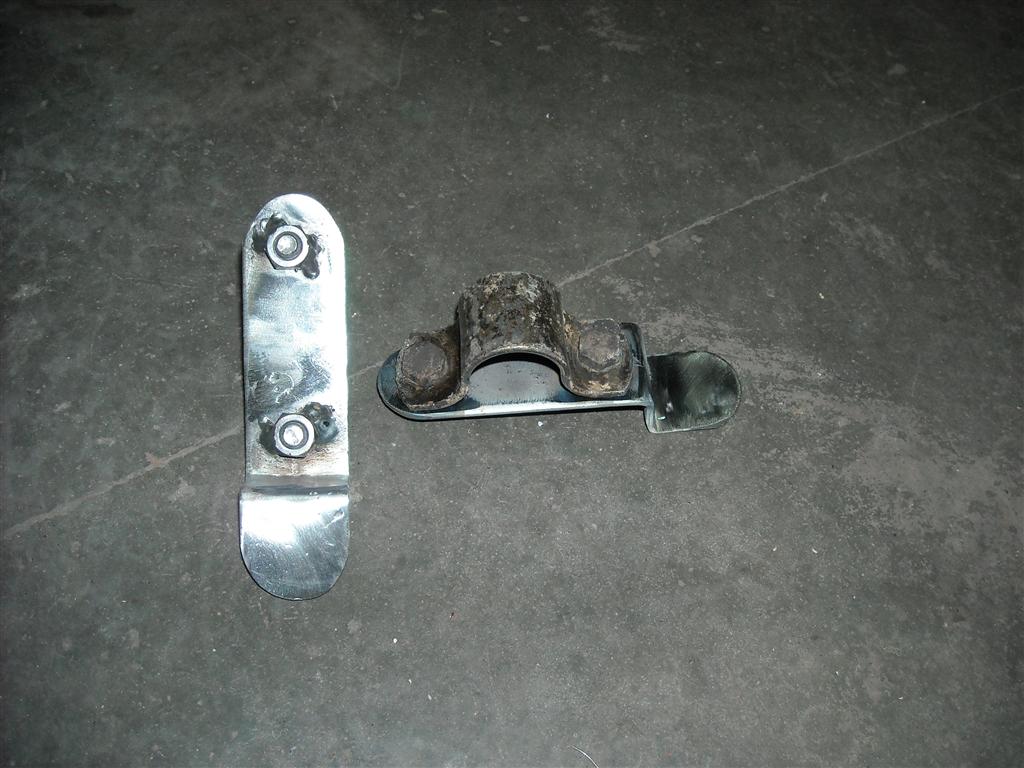
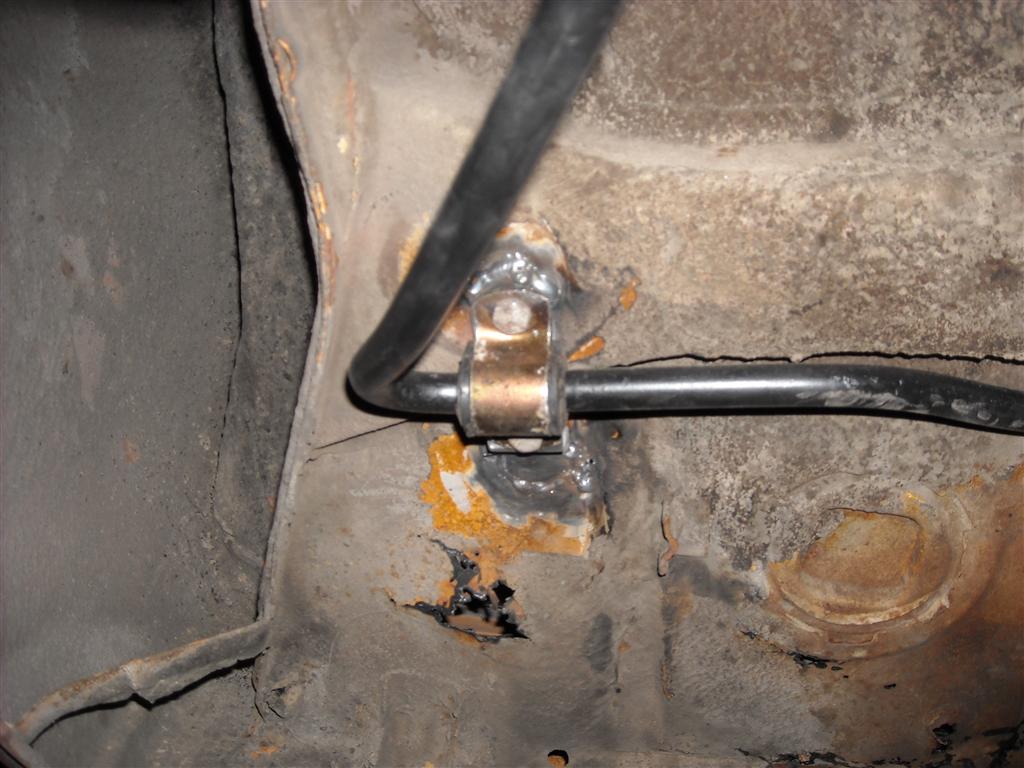
Got the swaybar bushing installed with a little help from our friends. Made some mounting brackets to look factory and installed all today.
Attached image(s)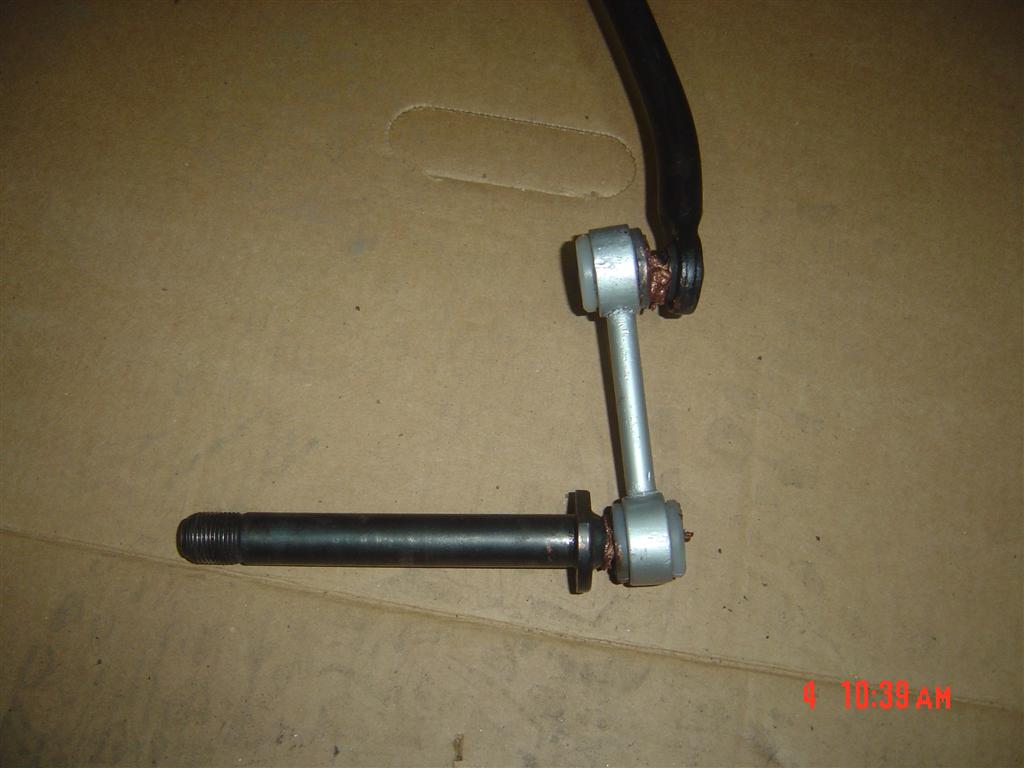
Posted by: scotty b Nov 4 2011, 07:45 PM
Factory setup for comparison.
Attached image(s)
Posted by: jimkelly Nov 5 2011, 05:37 AM
it's gonna drive like a different car : )
scott - how bad is my rear trunk rear pan? is it patchable?
Posted by: Vacca Rabite Nov 5 2011, 08:37 AM
You are damn right it is going to drive like a new car. Wow. This looks fantastic.
Zach
Posted by: scotty b Nov 5 2011, 12:03 PM
it's gonna drive like a different car : )
scott - how bad is my rear trunk rear pan? is it patchable?
Pretty bad along the back edge. Remind me to open it up next time you head this way so you can see it
Posted by: scotty b Jan 30 2012, 09:37 PM
So after 2 months + of painting and staying clean, it was kind of nice to get dirty again
Attached thumbnail(s)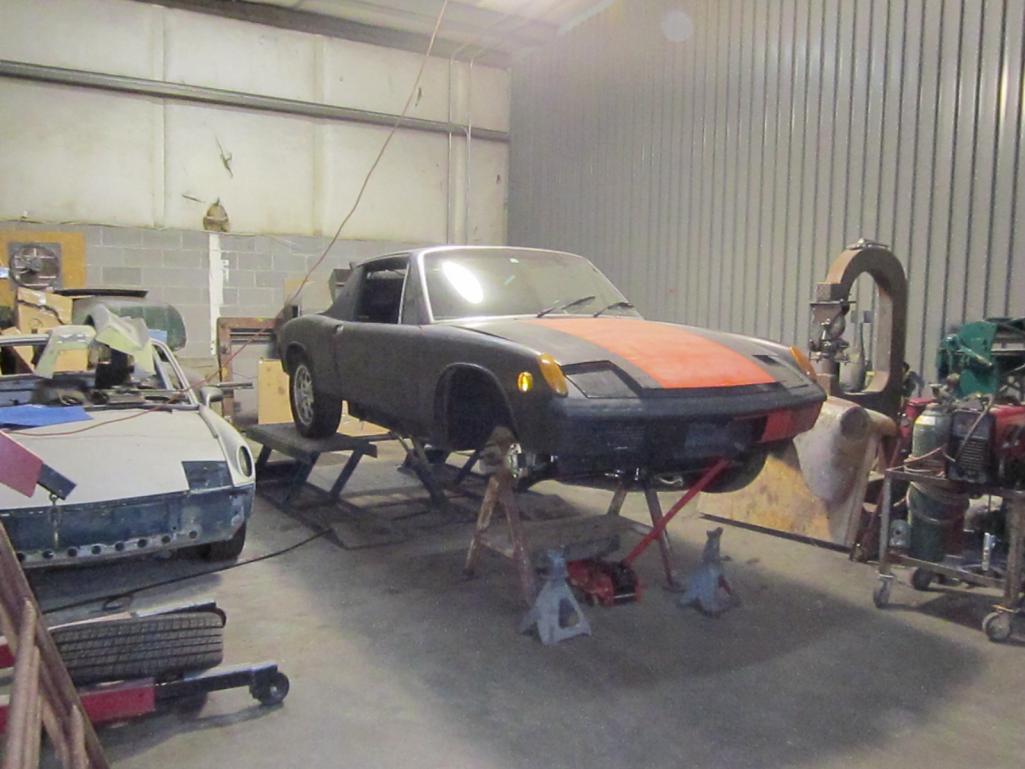
Posted by: scotty b Jan 30 2012, 09:39 PM
couple mo
Attached thumbnail(s)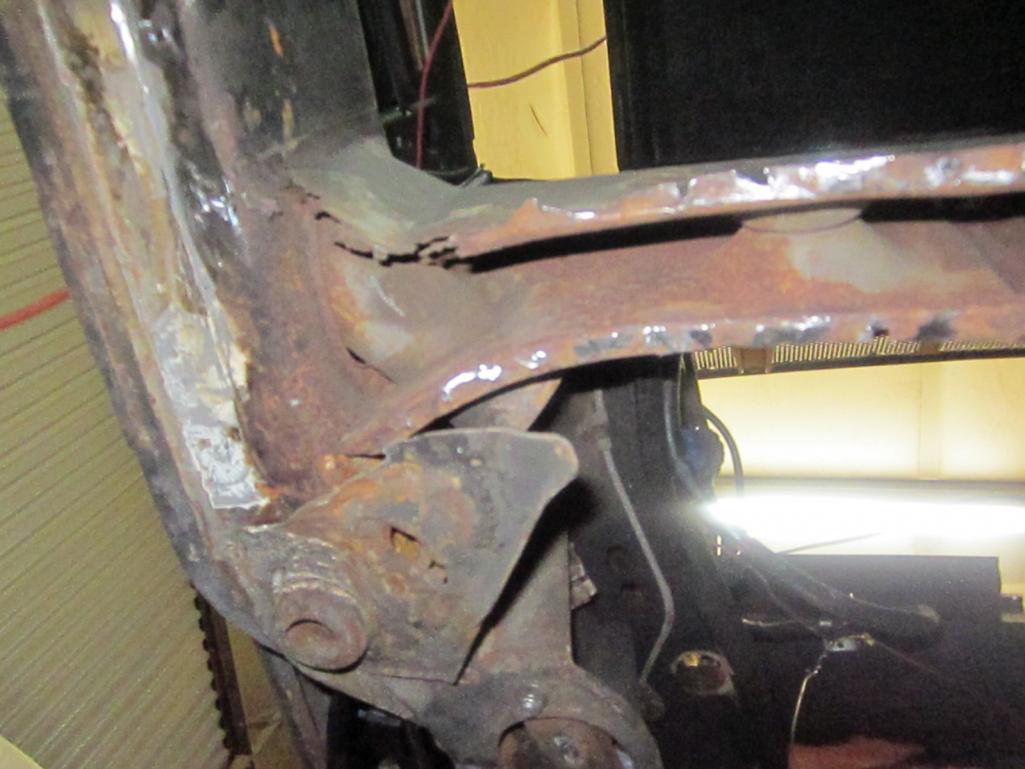
Posted by: JRust Jan 30 2012, 10:13 PM
Holy rust Batman . Go Scotty go
Posted by: Dr Evil Jan 30 2012, 10:19 PM
HE aint gonna have no car left after you cut out the rust.
Posted by: hot_shoe914 Jan 30 2012, 10:41 PM
Geez, I'm not even sure Christine has that much rust.
Posted by: computers4kids Jan 30 2012, 10:52 PM
Jim,
no offense but did you realize you needed that much rust repair going in? Seems it would have been easier to get a CA tub and transplant your running gear into it. At least you've got the master behind the torch.
Posted by: jimkelly Jan 31 2012, 05:27 AM
as long as i don't see scotty using the PUKE smilely - i'm good.
Posted by: zymurgist Jan 31 2012, 08:40 AM
Holy Swiss cheese, Batman! 
I almost dread seeing what horrors await when Scotty gets hold of Babydoll...
Posted by: mepstein Jan 31 2012, 12:31 PM
as long as i don't see scotty using the PUKE smilely - i'm good.
He wore that smilely out on my car
Posted by: Philip W. Jan 31 2012, 12:36 PM
After seeing that, i realize that mine isn't so bad after all! i mean, my rear longs and jackpoints have to be worked, but atleast my trunks etc are free of that kind of rot, WOW!
well, kudoz to saving and fixing, Jim. i'm afraid the were that car on the LEFT coast, it would be a zillion pieces by now .
Posted by: bozo914 Jan 31 2012, 01:12 PM
Jim, you're gonna love those see-thru floor pans. I had Scotty install a set for me. I still haven't quite got the hang of them, as my butt still drags the ground when I sit in the car and make vroom-vroom noises.
Posted by: jimkelly Jan 31 2012, 01:38 PM
not sure if they are less rust - or - less metal : ))
Jim, you're gonna love those see-thru floor pans. I had Scotty install a set for me. I still haven't quite got the hang of them, as my butt still drags the ground when I sit in the car and make vroom-vroom noises.
Posted by: scotty b Jan 31 2012, 01:41 PM
Jim, you're gonna love those see-thru floor pans. I had Scotty install a set for me. I still haven't quite got the hang of them, as my butt still drags the ground when I sit in the car and make vroom-vroom noises.
Your vroom vroom noises are about to get a lot louder
Posted by: jimkelly Jan 31 2012, 02:18 PM
that means right now you are and not
Posted by: MDG Jan 31 2012, 04:40 PM
that means right now you are
and not Not sure why you'd assume it's one or the other with Scotty?
Posted by: scotty b Jan 31 2012, 04:56 PM
that means right now you are
and not Not sure why you'd assume it's one or the other with Scotty?
Posted by: MDG Jan 31 2012, 06:05 PM
that means right now you are
and not Not sure why you'd assume it's one or the other with Scotty? Sorry pal - my bad. I thought this was the Resurrecting Evil thread.
Posted by: jimkelly Jan 31 2012, 06:19 PM
oh great.
so the reality in charles city va is probably more like this.

![yellowsleep[1].gif](style_emoticons/default/yellowsleep[1].gif) and repeat
and repeat
i am cool with that 
Posted by: mepstein Jan 31 2012, 06:40 PM
Just check out the shop web cam-
http://www.funnyordie.com/videos/6c3c8b386b/girls-gone-wild-bloopers
Posted by: westtexass2k Jan 31 2012, 07:01 PM
I think an L33 aluminum 5.3 would be a sweet motor for a swap. 315hp and 330 ftlb of torque. Just pop an LS1 intake on it. It saves you a good chunk of weight over a iron block and good hp.
Posted by: scotty b Feb 2 2012, 04:34 PM
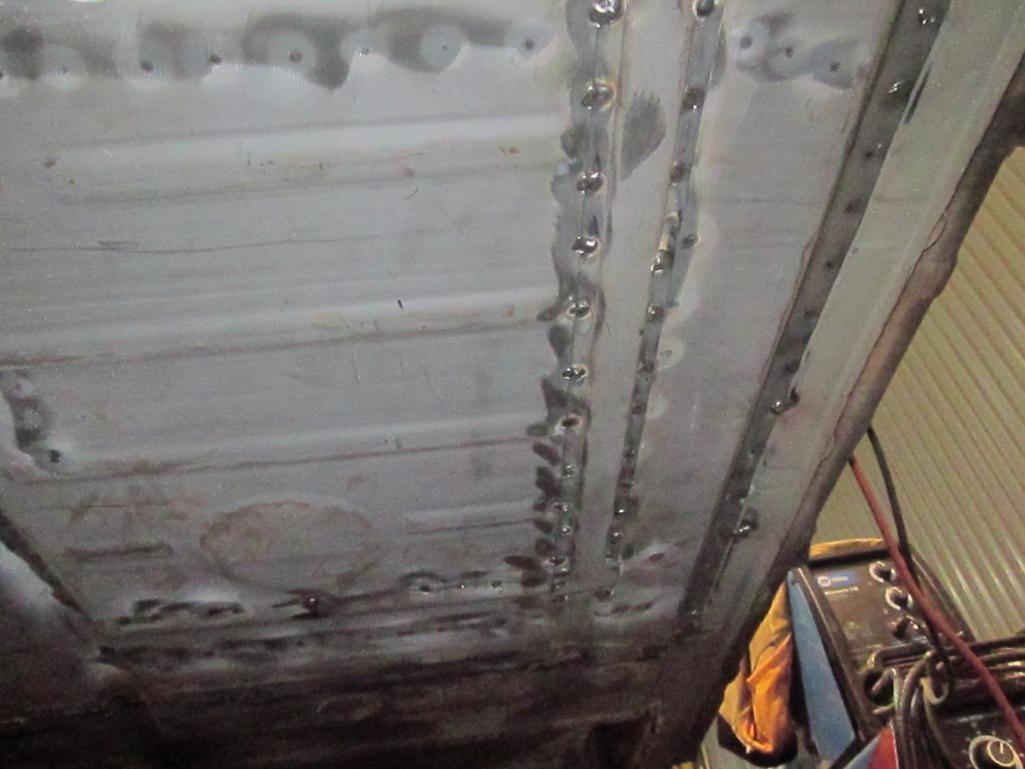
crevasse's  got wire brushed, Ospho'ed, and brushed with rustoleum. Floor pan got holes punched, weld areas got sanded and etched primed and the center section got brushed with rustoleum. The rustoleum really isn't necessary, but I had it out and the brush was still wet so why not Still have a little more welding to do, but the biggest part is done
Attached thumbnail(s)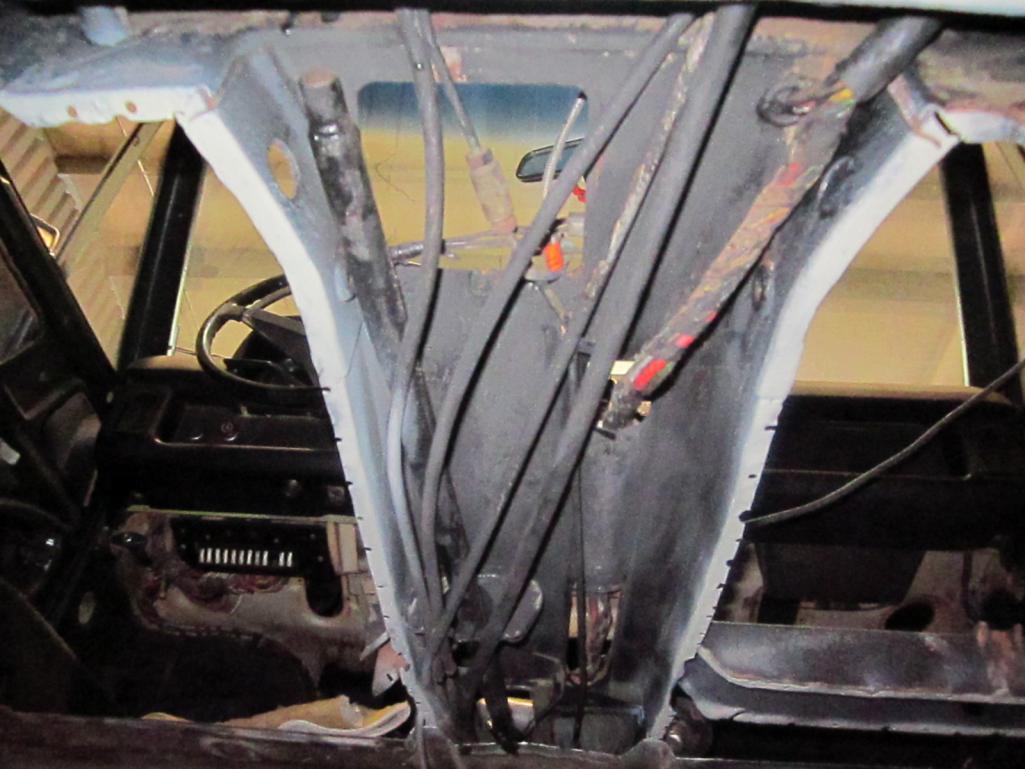
Posted by: MDG Feb 2 2012, 04:37 PM
You're a good'n Scotty B.
Posted by: scotty b Feb 2 2012, 04:37 PM
Attached thumbnail(s)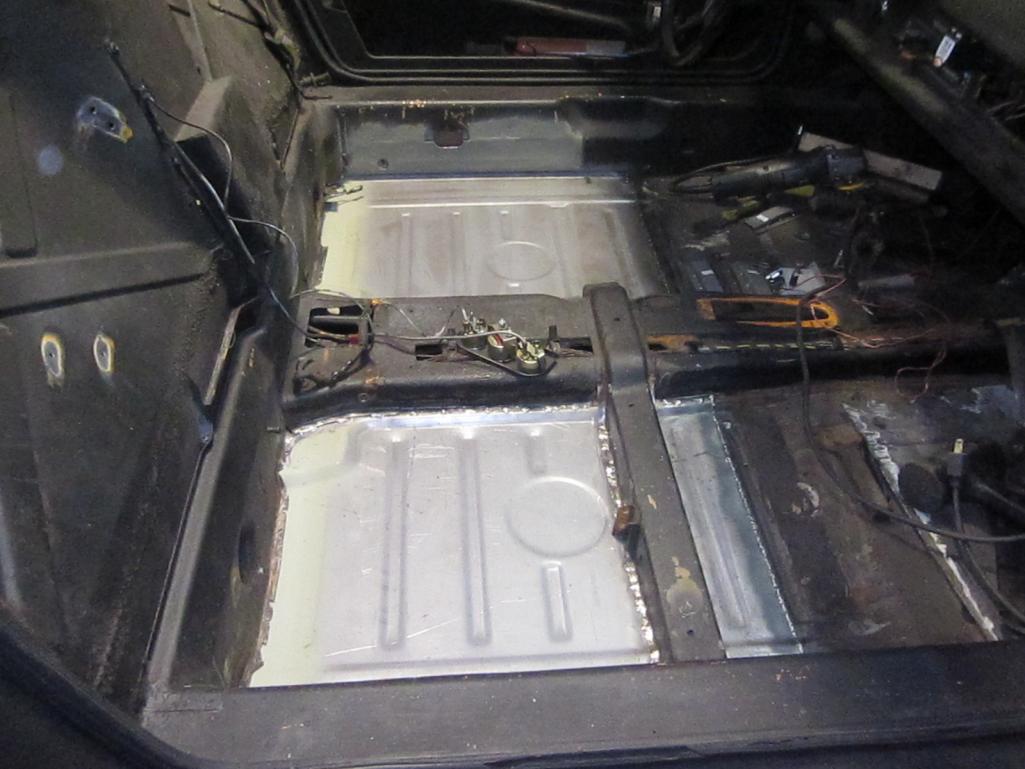

Posted by: bulitt Feb 2 2012, 04:41 PM
good time to run a couple of seamless tube heater pipes through that center section!
Posted by: scotty b Feb 2 2012, 04:53 PM
You're a good'n Scotty B.
Oh sure your all nice and friendly to me in public ( the garage ) but in the sandbox I'm your little mentally handicapped, basement dwelling clown
Posted by: jimkelly Feb 2 2012, 05:18 PM
NICE PROGRESS
is it possible to minimize the door gap by cutting a thin slice up and around the long - apply some downward pressure to realign the door gap - then weld the slice back up?
Attached image(s)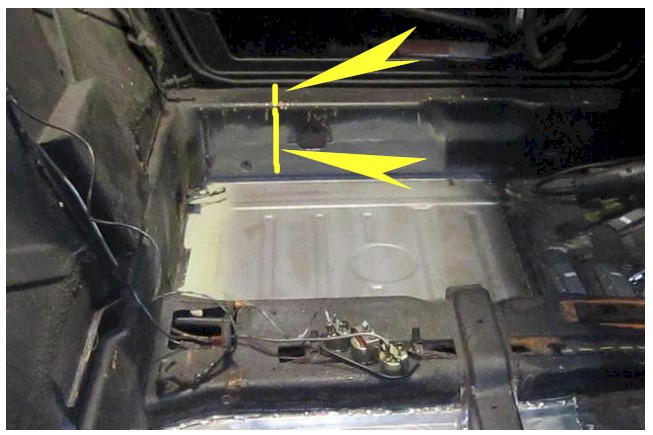
Posted by: MDG Feb 2 2012, 05:25 PM
You're a good'n Scotty B.
Oh sure your all nice and friendly to me in public ( the garage ) but in the sandbox I'm your little mentally handicapped, basement dwelling clown No - you're that here in the Garage too.
Ride the short bus long enough and someone is bound to compliment your talent for sitting sooner or later.
You do good work. Deal with it.
Posted by: saigon71 Feb 2 2012, 10:05 PM
Damn, those floor pans look awesome!
Posted by: jimkelly Feb 3 2012, 05:30 AM
also - the pan was installed WITHOUT a rotissere, which means the welder was under a rain of fire
how many spot welds does it take to get to the center of a tootsie roll tootsie pop ?? the owl wants to know
https://www.youtube.com/watch?v=Jhjb4P_jnKk
Posted by: zymurgist Feb 3 2012, 06:52 AM
Outstanding! Babydoll wants one too!
Posted by: SUNAB914 Feb 3 2012, 07:18 AM
Gosh Scotty, wish i lived a little closer, I would be there helping you as much as you needed.
Posted by: Philip W. Feb 3 2012, 09:55 AM
Gosh Scotty, wish i lived a little closer, I would be there helping you as much as you needed.
chris you should start your apprentice-ship now, so when you retire from the USMC in a couple years you can already have you OJT done and go to work FT with 914's- its your dream!!!! Scotty could use your help! especially since Bill H. keeps buying these projects- he's going to need the help!
pw
Posted by: jimkelly Feb 4 2012, 09:52 AM
Posted by: scotty b Feb 6 2012, 08:52 PM
I REALLY didn't feel like welding upside down under the car today so I did some of the on top work.
Attached thumbnail(s)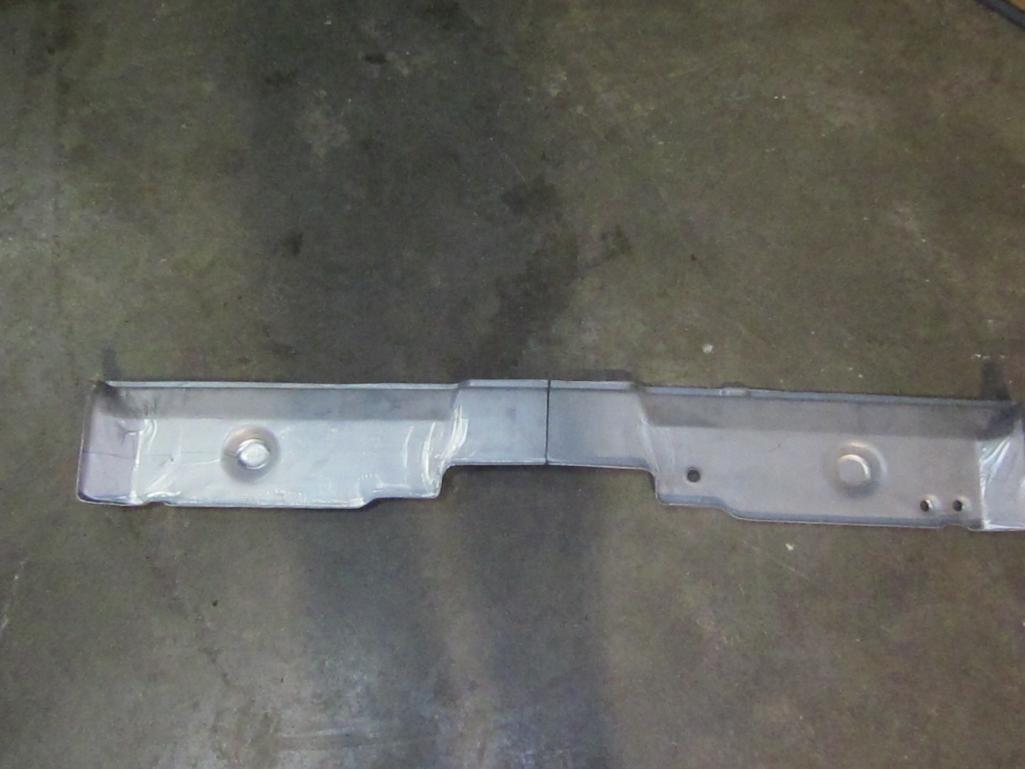

Posted by: scotty b Feb 6 2012, 08:55 PM
Attached thumbnail(s)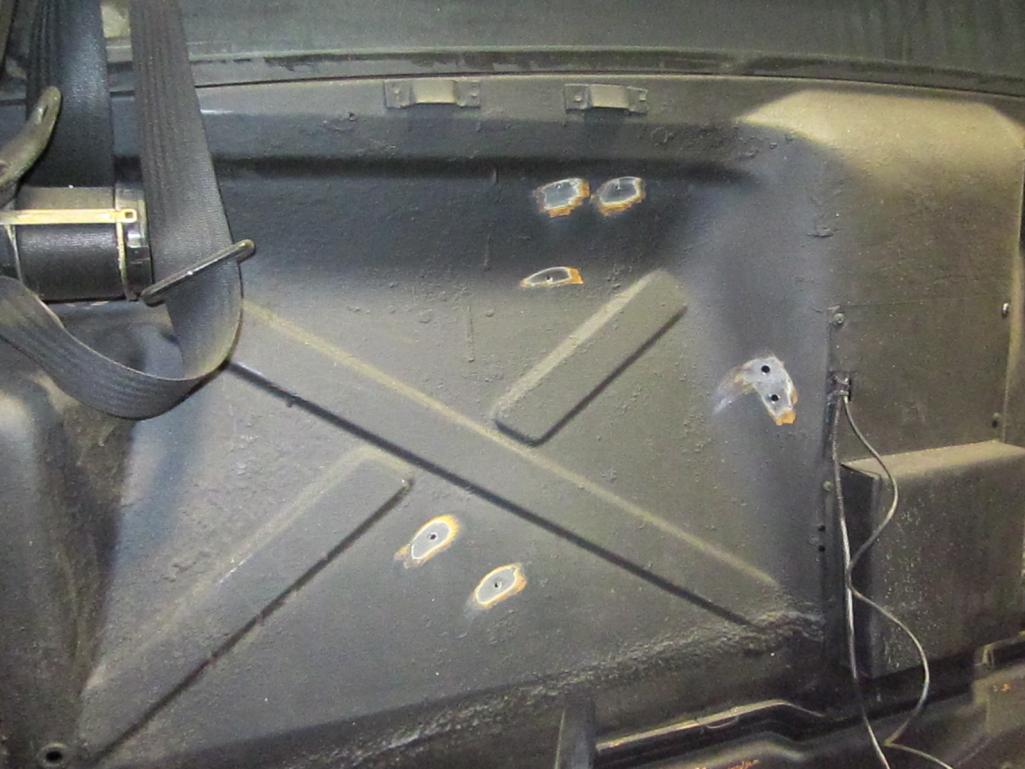
Posted by: jimkelly Feb 7 2012, 04:07 AM
HELL YEAH 
** note to self - must hit lottery - need inner long kit **
Posted by: scotty b Feb 19 2012, 02:37 PM
Rust repairs are done. Time to paint, undercoat and start the reassembly
Attached thumbnail(s)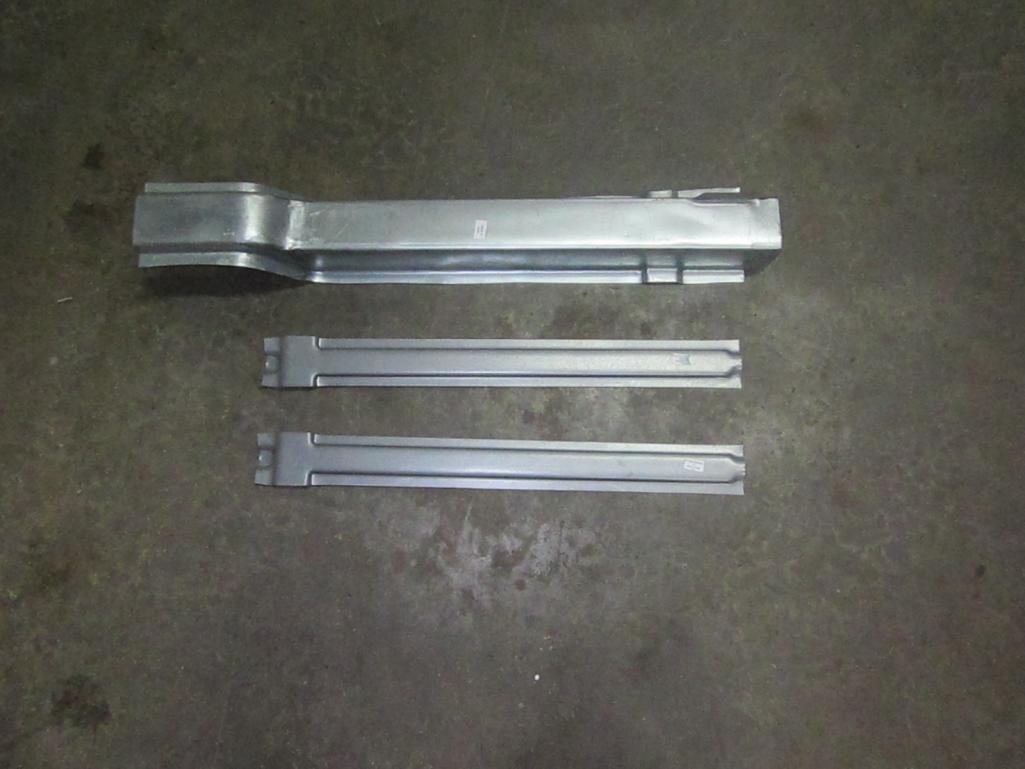
Posted by: scotty b Feb 19 2012, 02:39 PM
Attached thumbnail(s)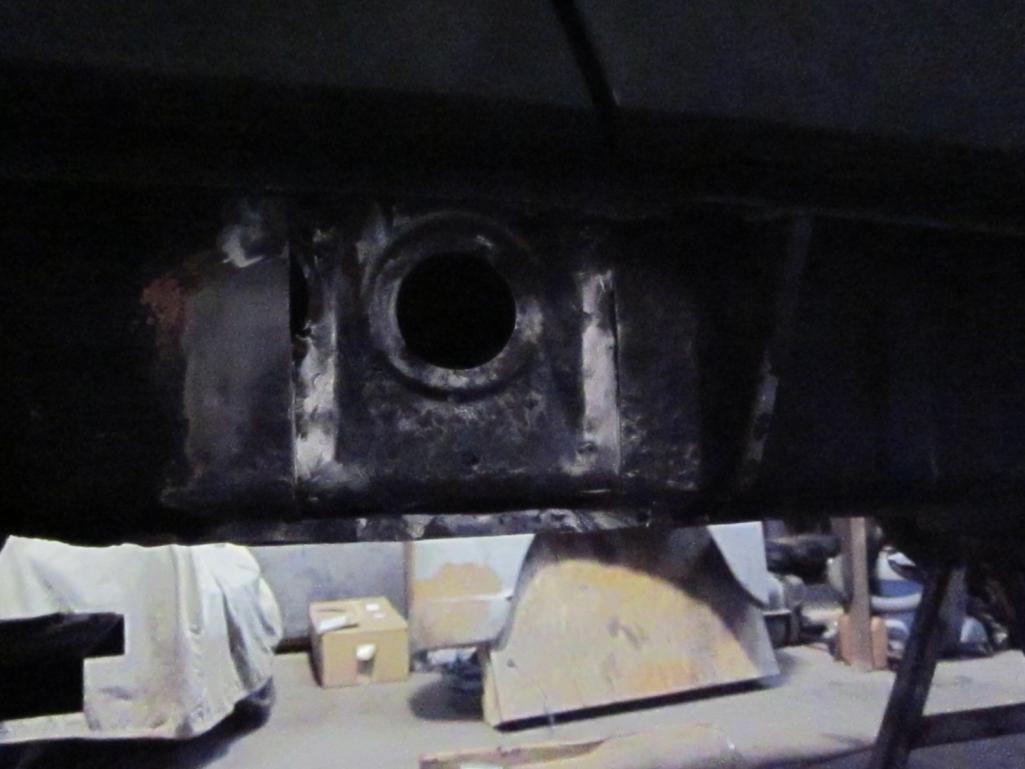
Posted by: jimkelly Feb 19 2012, 03:08 PM

Posted by: scotty b Feb 22 2012, 08:53 AM
DING floor is done Jim and I both orderd sheet metal form resto design and neither of us thought about the e-brake " tunnel" so I took a piece of his old floorpan and made one up. Not perfect, but not bad for 20 min and a piece of old metal Everything got sanded, wiped down, etch rimed, seam sealed, primed, and got a coat of black. Then the underside and longs got a couple coats of undercoating
Attached thumbnail(s)
Posted by: jimkelly Feb 22 2012, 09:11 AM
that's it METAL MASTER - now you're just showing off 
Posted by: MDG Feb 22 2012, 09:32 AM
. . . so I took a piece of his old floorpan and made one up. Not perfect, but not bad for 20 min and a piece of old metal
Not bad.
Of course . . . I whipped this up, made the base AND took a pic just while I was reading your post . . .
Posted by: scotty b Feb 22 2012, 09:33 AM
. . . so I took a piece of his old floorpan and made one up. Not perfect, but not bad for 20 min and a piece of old metal
Not bad.
Of course . . . I whipped this up, made the base AND took a pic just while I was reading your post . . .
Very nice Mike,
Could you whip one up for me? It would look very nice in the office. I can expect it by next week
Posted by: MDG Feb 22 2012, 09:42 AM
Very nice Mike,
Could you whip one up for me? It would look very nice in the office. I can expect it by next week You got it. I thought you'd like this one.
Posted by: scotty b Feb 22 2012, 10:16 AM
No thanks, I'd feel bad taking Daves gimp mask. The fish will be great
Posted by: Philip W. Feb 22 2012, 10:17 AM
that's it METAL MASTER - now you're just showing off
I stopped by Scotty's shop last week on thursday on my way to D.C. and saw this car, ( and M.Epstein's) and in just a few days i am amazed at how much he just got done on this , WOW.
keep the pictures coming, cant wait to see how much you have done on that thing by the tranny clinic in april!!! wow! keep it going.
Scotty- was great to meet you last week, thanks for the info, and see you in 2 months.
- i will be taking off my rockers so we can see how bad mine is- i've been in denial about it but, after seeing jim's car, i dont think it will be any worse that that! --
- thats a lot of and and 
Posted by: jimkelly Feb 22 2012, 10:41 AM
low rust expectations is "so cute"
it touches me right here - in my RUSTED heart
here are some pics from my 1975 914 - i got a feeling PO had someone cover rust with new metal ??
that said - all the best - remember - restoration design WILL be your best friend.
more pics of my LOW RUST 1975 914
http://www.pbase.com/jimkellysells/1975_914
Attached thumbnail(s)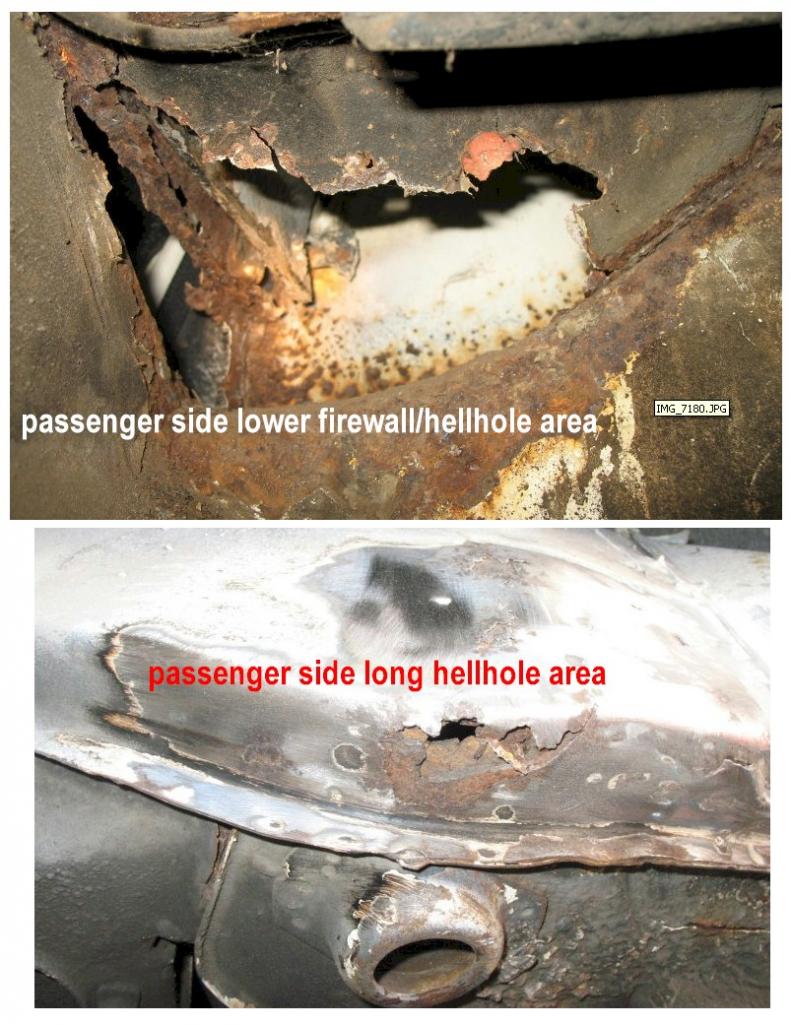
Posted by: bulitt Feb 22 2012, 11:18 AM
I find it amazing you can be looking at a piece of shiny metal and poke it with a screwdriver and it goes right through, or start jacking the car up and the top of the jack goes through...
Posted by: Philip W. Feb 22 2012, 12:07 PM
low rust expectations is "so cute"
it touches me right here - in my RUSTED heart
here are some pics from my 1975 914 - i got a feeling PO had someone cover rust with new metal ??
that said - all the best - remember - restoration design WILL be your best friend.
more pics of my LOW RUST 1975 914
http://www.pbase.com/jimkellysells/1975_914
maybe- but i think you should say Scotty will be my best friend, and Restoration design and close second
actually i know my jack points are as bad if not WORSE than yours- they are pretty bad. i thought our cars were made to flex when going around corners and over bumps to help absorb shock
but i guess not.
Posted by: balljoint Feb 22 2012, 01:38 PM
No thanks, I'd feel bad taking Daves gimp mask. The fish will be great
My mask is neoprene. Silly person.
Actually, I don't think Michael made any of those metal sculptures. His idea of metal work is choosing the stripper with the most sparkles on.
Posted by: MDG Feb 22 2012, 02:34 PM
No thanks, I'd feel bad taking Daves gimp mask. The fish will be great
My mask is neoprene. Silly person.
Actually, I don't think Michael made any of those metal sculptures. His idea of metal work is choosing the stripper with the most sparkles on.
It's called glitter, Dave - not sparkles, glitter.
Posted by: balljoint Feb 22 2012, 02:40 PM
No thanks, I'd feel bad taking Daves gimp mask. The fish will be great
My mask is neoprene. Silly person.
Actually, I don't think Michael made any of those metal sculptures. His idea of metal work is choosing the stripper with the most sparkles on.
It's called glitter, Dave - not sparkles, glitter.
I stand corrected.
Posted by: hot_shoe914 Mar 5 2012, 01:23 PM
No thanks, I'd feel bad taking Daves gimp mask. The fish will be great
My mask is neoprene. Silly person.
Actually, I don't think Michael made any of those metal sculptures. His idea of metal work is choosing the stripper with the most sparkles on.
It's called glitter, Dave - not sparkles, glitter.
I stand corrected.
Bump for a potential customer for ScottyB.
Posted by: scotty b Oct 7 2012, 01:42 PM
Put Jim's drivetrain back in. One of the issues I ran into was the trans adapters are actualy wider then the stock washers, so the slot needs to be opened up. Just another one of those unexpected time eaters
Attached image(s)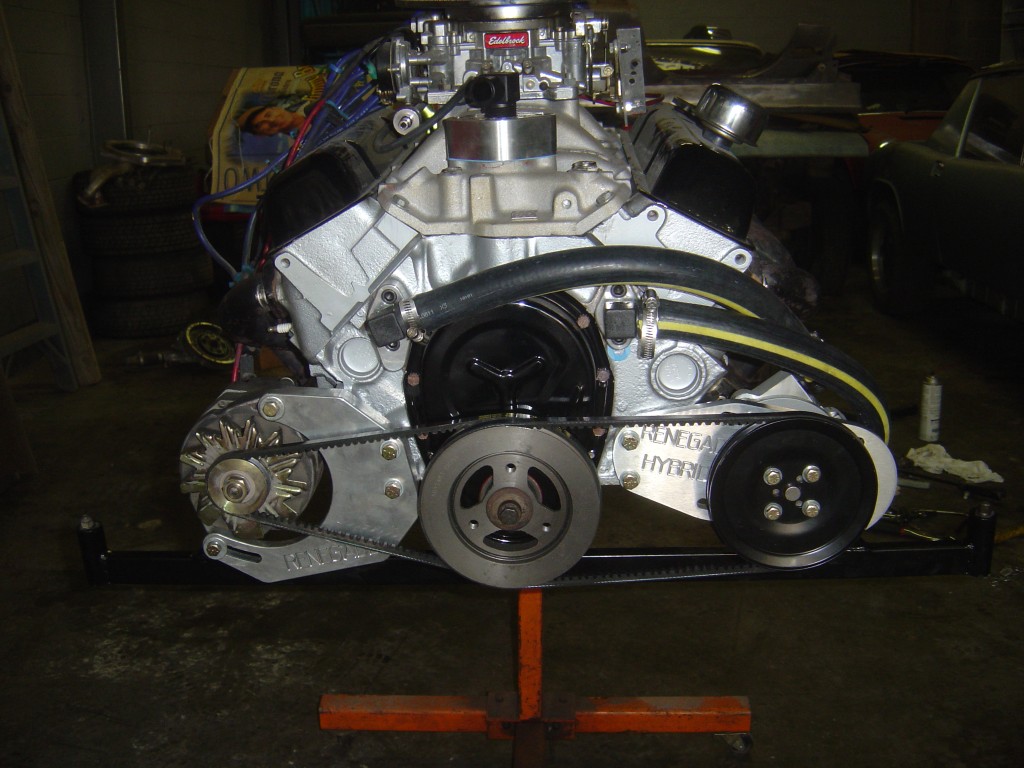
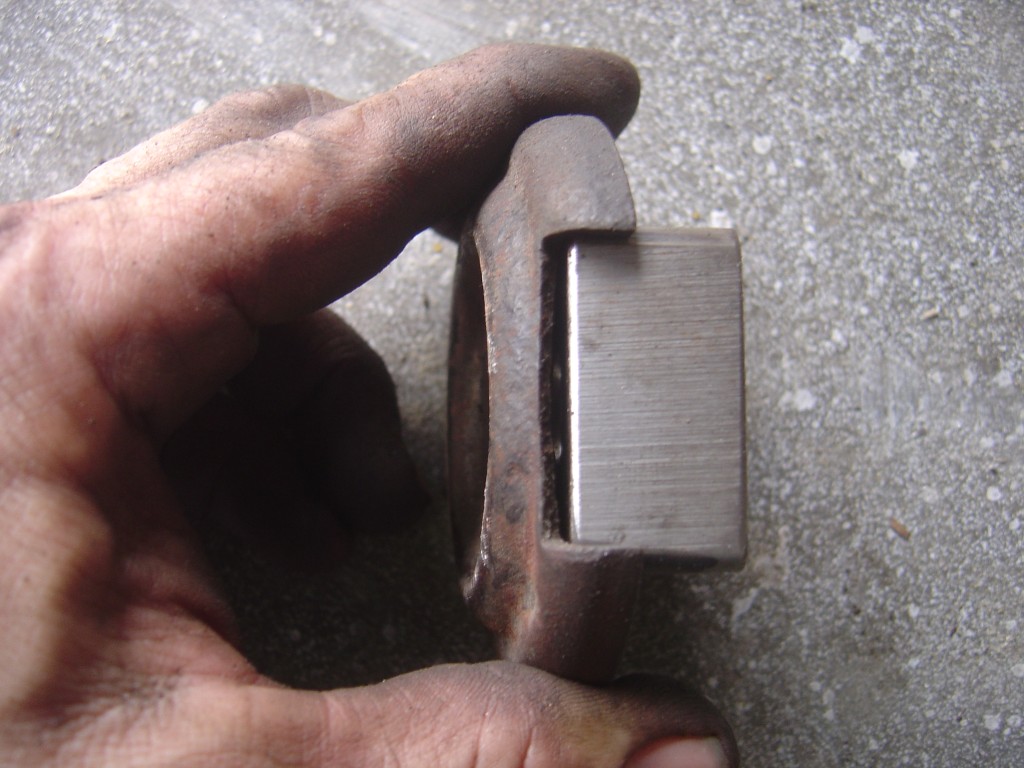
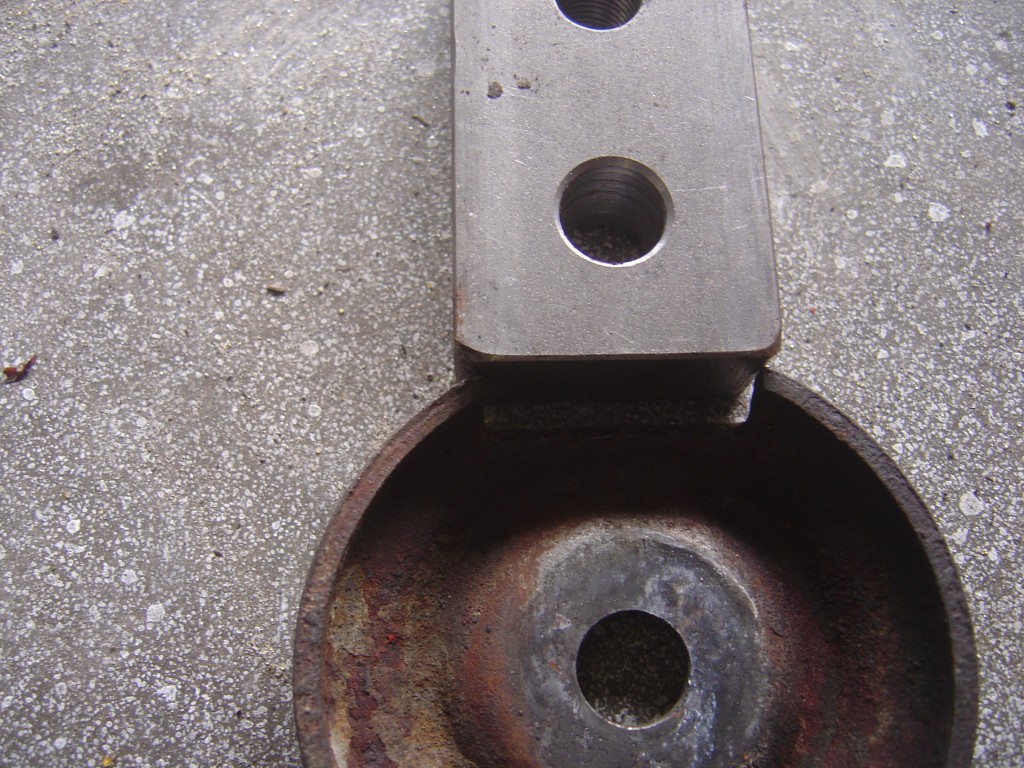
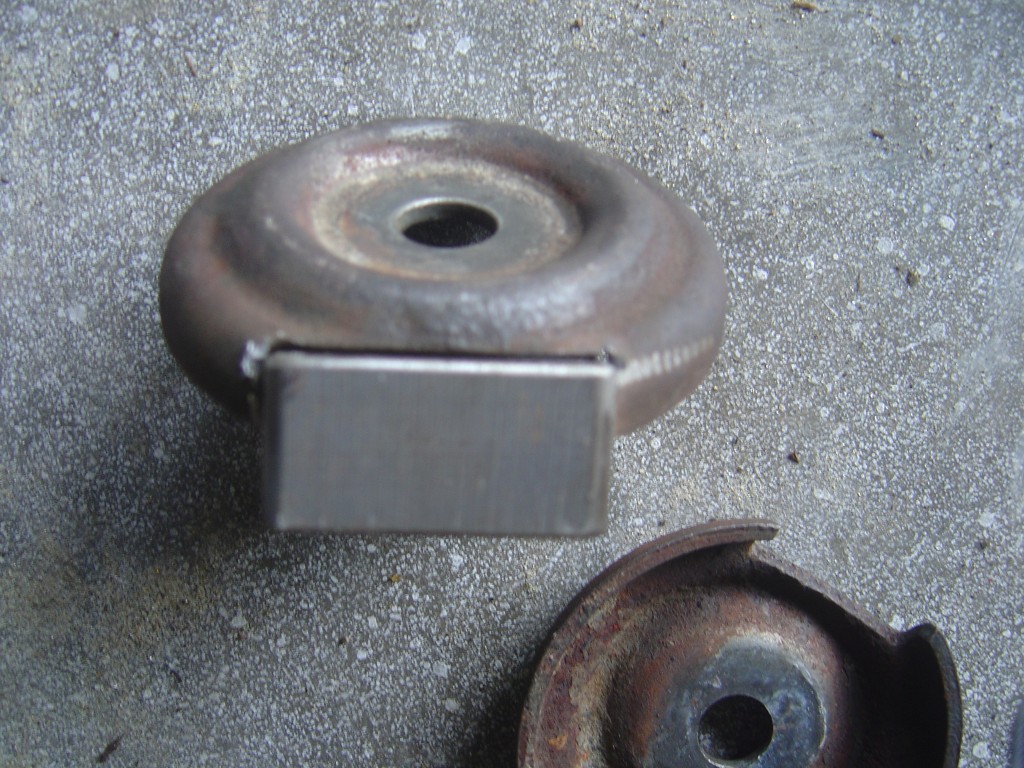
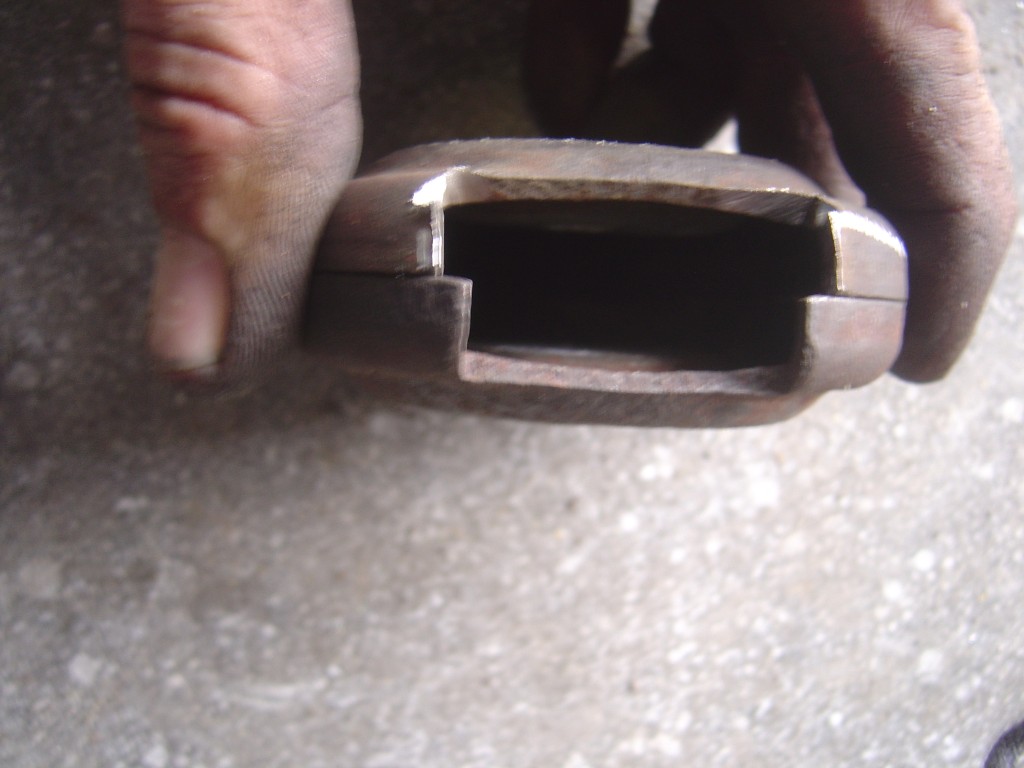

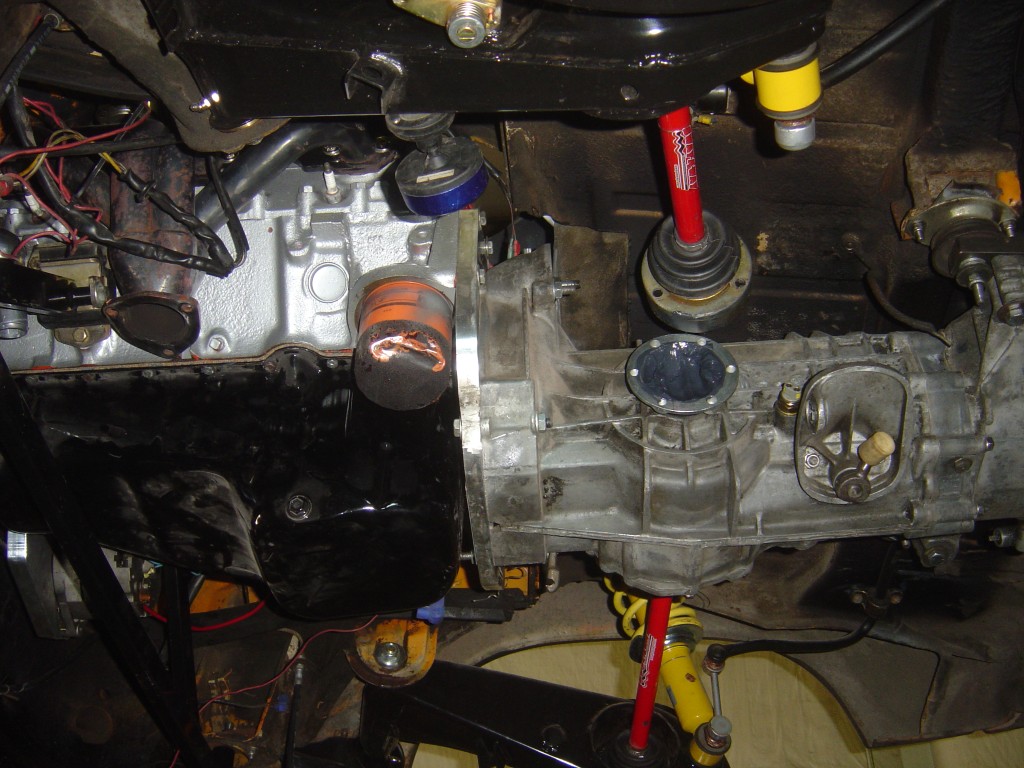
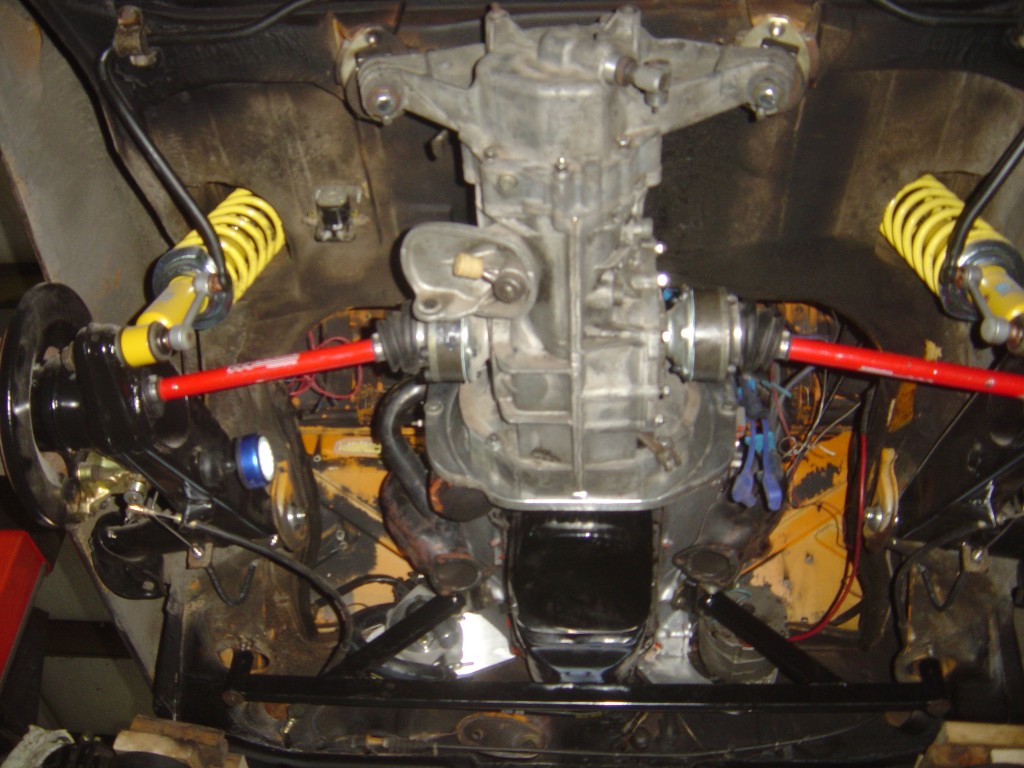
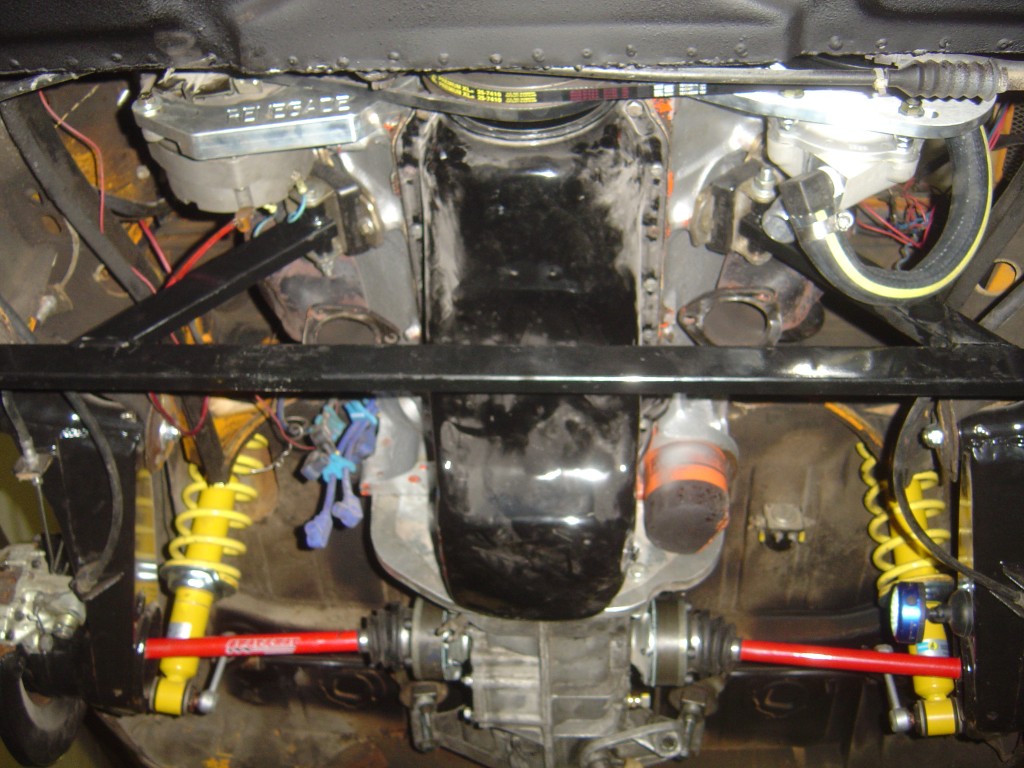
Posted by: bulitt Oct 7 2012, 04:41 PM
Very Nice! 
Posted by: jimkelly Dec 21 2012, 09:09 PM
finally got around to picking my car up at kahiko customs - need to button up a few things and get her back on the road. many thanks to scott for getting my car to where it is today.
(update jan 2019: i had some problems with scott but because he was so estemmed here, i chaulked it up to me running out of cash. it is now interesting to see others experience with scott. with me, scott got less pleasant and friendly as time went on and cost of metal work wasn't being advised prior to it being performed. that said, my car had far more rust than i expected. in the end he wanted to trade all my new suspension parts for the remainder of my metal work bill, so i paid cash and got my car back. shortly after getting my car back on the road it began leaking oil on engine he worked on as well. the rubber undercoat he used is not a long term product either, just rubs off.)
as for these cars and rust - all i can say is the best thing to do (for car owner and repair shop) is strip the car completely down - and blast the entire car. this is the only way you'll know what metal work your car really needs, in order to set a realistic resto budget.
if you need a tow ( of almost anything ), near or far, i can highly recommend ...
al hensel - out of elkton md
bad_kitty192 AT yahoo DOT com
cell: 410 nine two zero 3083
Attached image(s)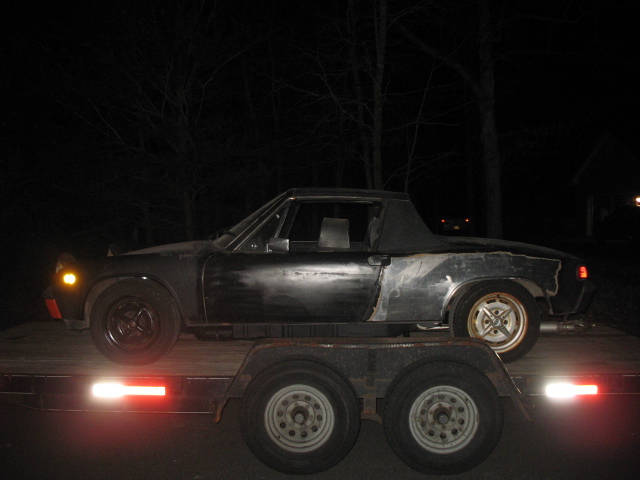
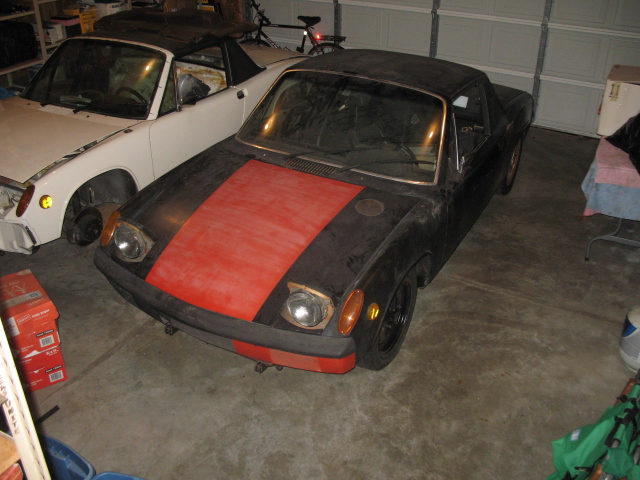
Posted by: jimkelly Dec 22 2012, 04:47 PM
looking at what i have left to do, i've decided to start with running fuel line from tank to engine, fuel pump, filter, and pressure guage.
looks like i'll need to get a pressure regulator to drop psi to 3.5 or so.
nice to see inside tank looks real good.
i assume its better to install pump close to tank?? on front trunk firewall behind radiator?
jim
Attached image(s)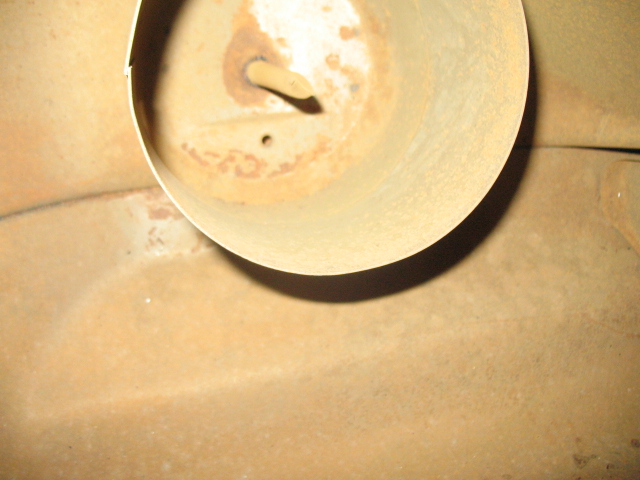
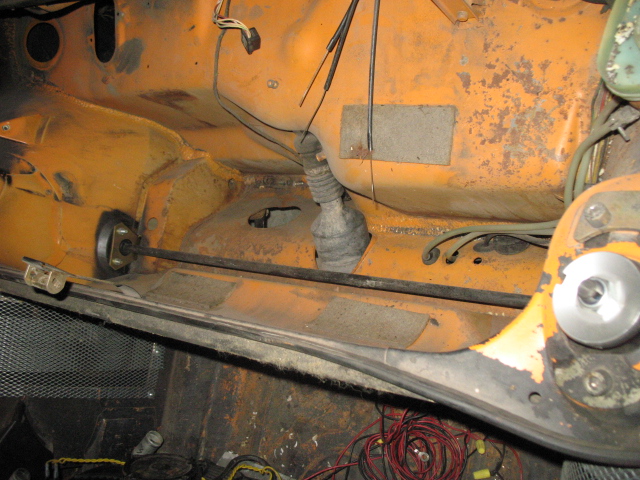
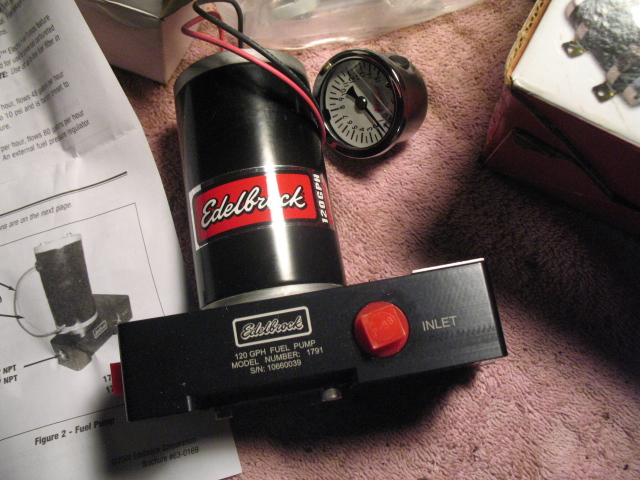
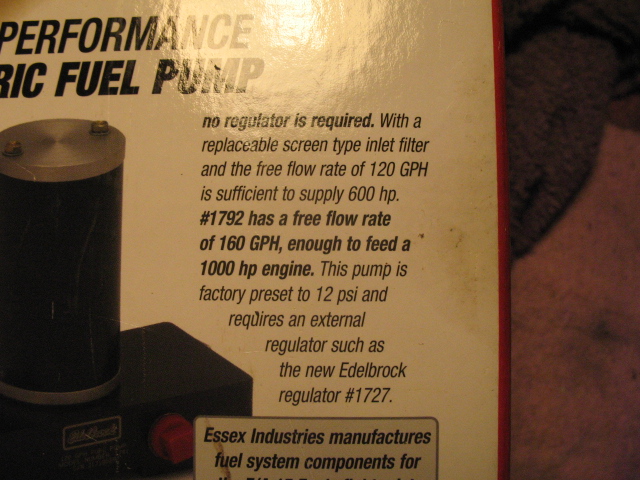
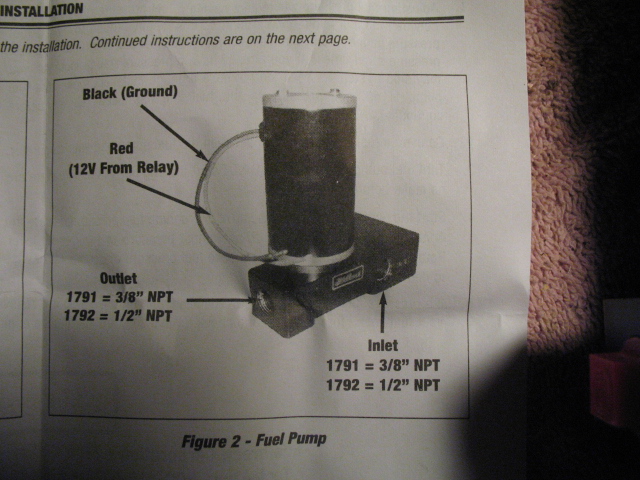
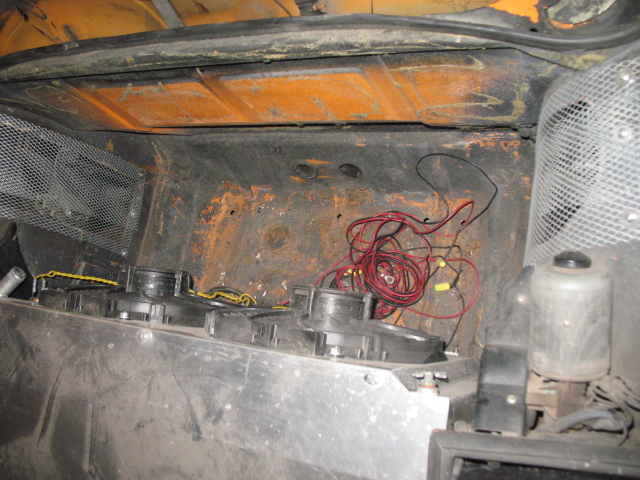
Posted by: mittelmotor Dec 22 2012, 05:25 PM
Lookin' good, Jim! I like the pump up front. I've heard the pumps are better at pushing than pulling, so maybe closer to the tank is better. On the other hand, tank is so high that you have the gravity feed thing going.
Nice shot of the inside of the fuel tank. What sort of camera did you use?
--Doug
Attached thumbnail(s)
Posted by: jimkelly Dec 22 2012, 05:53 PM
camera is a canon a620 - macro mode (many times with flash set to off) is neccessary for close up photos
Attached image(s)
Posted by: jimkelly Dec 22 2012, 06:02 PM
question - what do you guys prefer?
the multi barbed nipple (like above) or the single barbed flat nipple?
looks like the larger tank nipple is 9.5mm
and do NPT threads need any sort of thread sealant??
Attached image(s)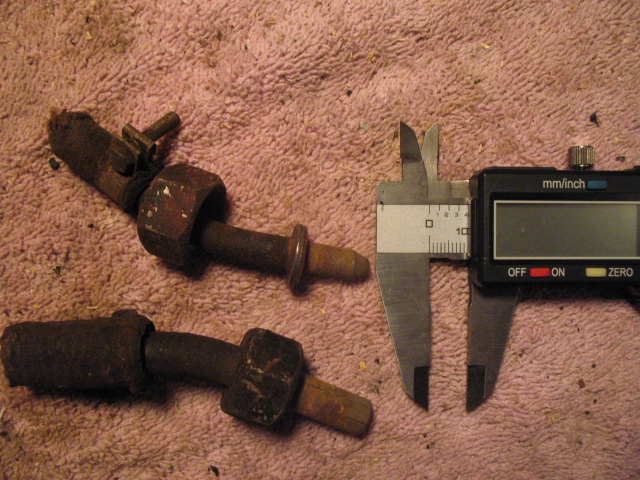
Posted by: mittelmotor Dec 22 2012, 06:30 PM
My engine's fuel injected with about 60 psi, so that explains multiple barbs. I double-clamped all of the supply-side connections, as I really don't want to pull the tank to make repairs.
I like a little dab of sealant everywhere, just for peace of mind!
Posted by: jimkelly Dec 22 2012, 08:21 PM
some things i am not looking forward to doing with engine in, are...
1- removing T and installing proportioning valve, will probably need to relocate PV.
http://www.914world.com/bbs2/index.php?showtopic=104464&hl=
http://www.914world.com/bbs2/index.php?showtopic=105705&hl=
2- running a new brake line thru tunnel. looks like straight shot.
3- running one fuel line thru tunnel for carbed engine. looks like straight shoot too.
note: supply line thru drivers side hole
http://www.914world.com/bbs2/index.php?showtopic=114666&hl=
(gromets) http://www.tangerineracing.com/stainlessFuelLines.htm
** since i will be going with a 9.5mm supply line - i'll order 2 engine shelf gromets for reserve lines and one 9.5mm firewall gromet. when i figure out how i am gonna layout my fuel pump, regulator and fuel filter, i may decide to order more gromets. i'll order a 10 pack of 9.5mm fuel clamps too.
4- installing master cylinder. seems there are several ways to do this.
http://www.914world.com/bbs2/index.php?showtopic=102498&hl=
http://www.914world.com/bbs2/index.php?showtopic=135177&hl=
5- bleeding brakes
http://www.914world.com/bbs2/index.php?showtopic=106681&hl=
pray for me.
Attached thumbnail(s)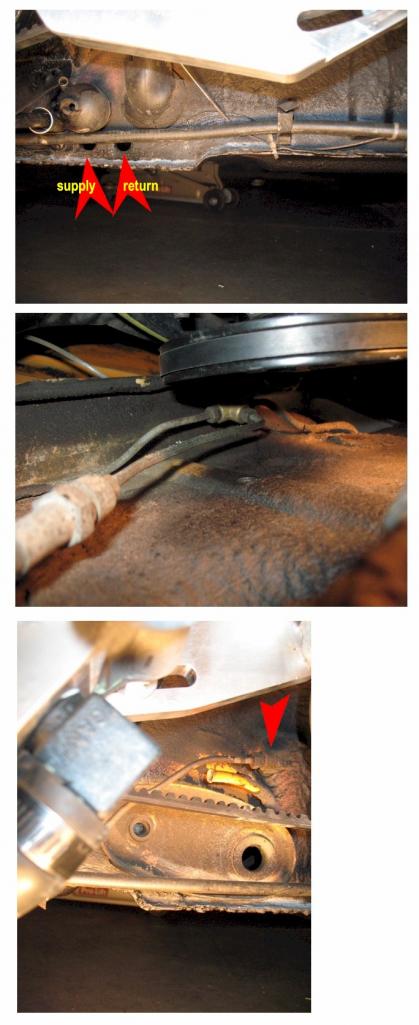
Posted by: jimkelly Dec 23 2012, 07:44 AM
ok - i have been dicking around with starting to install MC.
http://www.914world.com/bbs2/index.php?act=ST&f=2&t=7961&st=0#entry1788989
i removed reserve lines - and yes - pressing them into MC requires less pressure - not more - and i did put a drop of brake fluid in the gromet to slip things up.
don't forget to put washers under gromets. hope i did it right, seems thye just lay in there.
need to get some 8mm fuel line to replace the short peices of dry rotted braided line that connects the 8mm feed lines from the MC to reservoir.
BTW - the lines are metal at bottom 20% and plastic at top 80% - line fuel lines.
label the lines - FDF (front on reservior, driver side hole, front on mc) and BSB back on reservior, pass side hole, back on mc)
Attached image(s)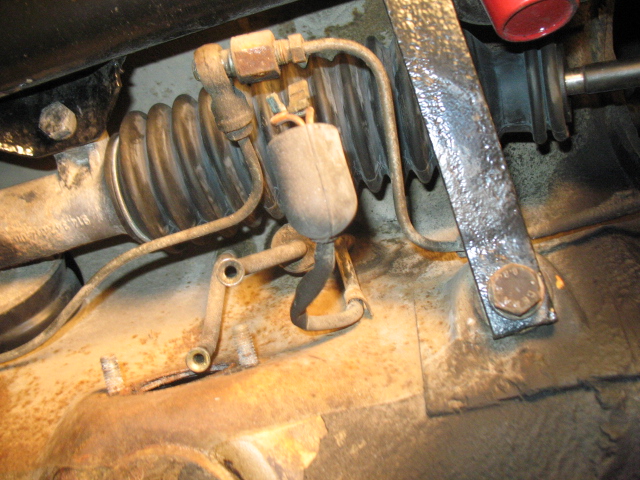
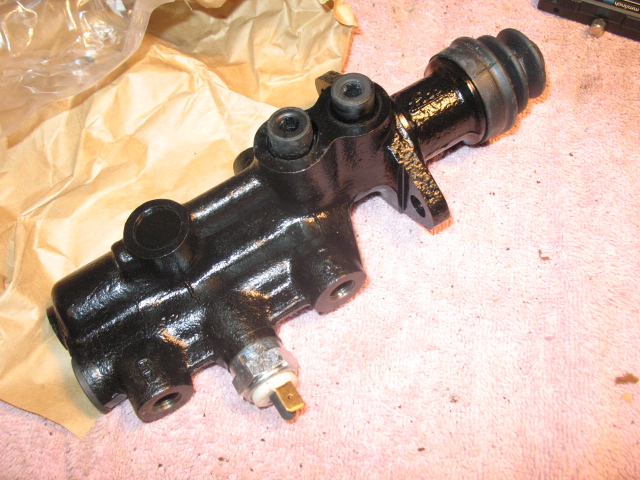
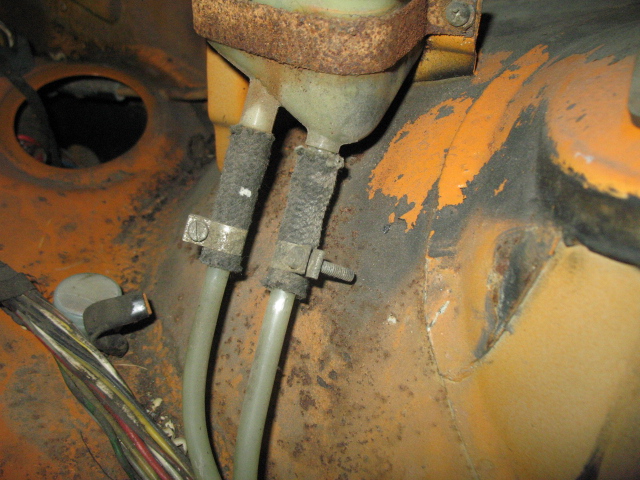
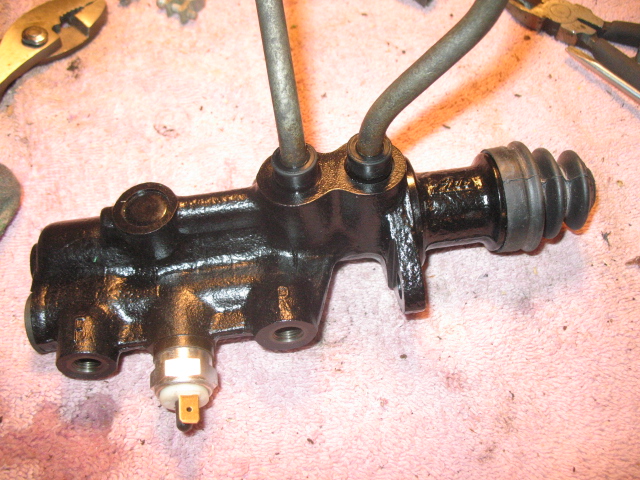
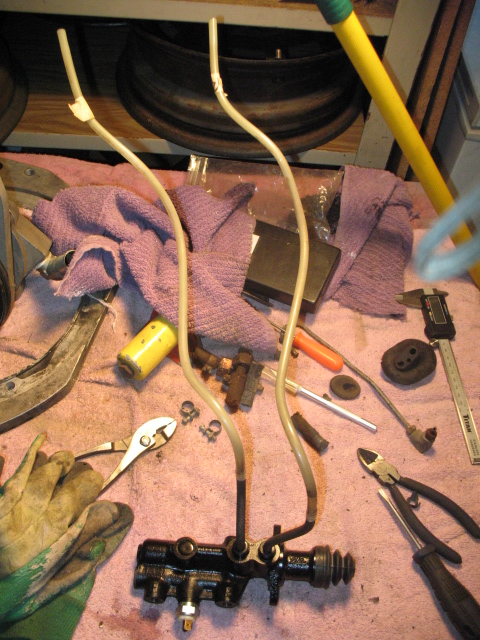
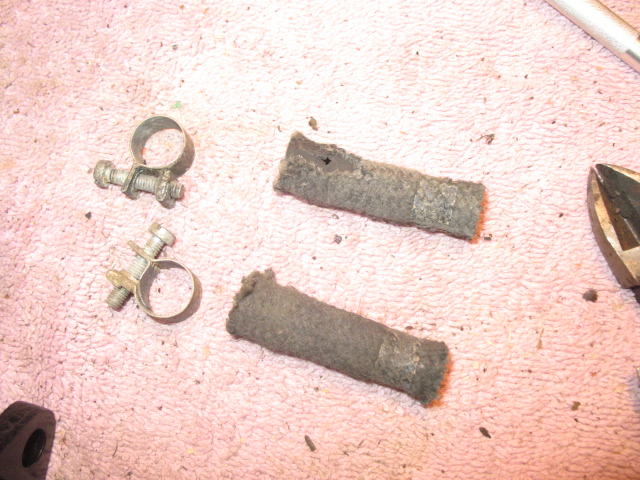
Posted by: SUNAB914 Dec 23 2012, 09:57 AM
Looks easier than the way I did it. Have fun with the car.
Posted by: jimkelly Dec 23 2012, 02:39 PM
reference pic of my 1975 to show where things should be.
i think i will run the new brake line, thru the firewall hole for the return fuel line.
and mount the prop valve up high on the passenger side of the firewall, near battery.
Attached image(s)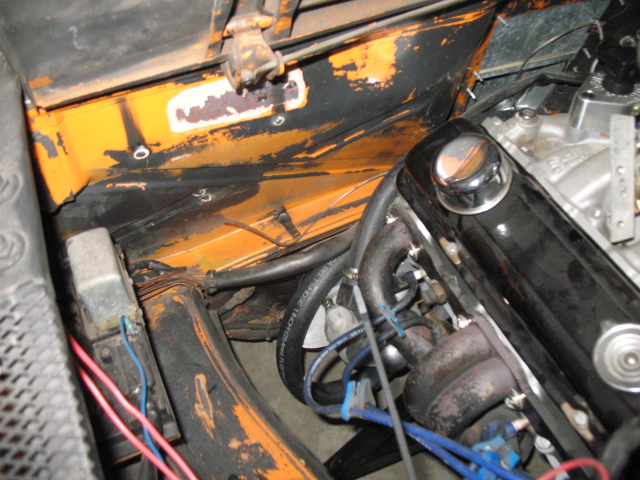
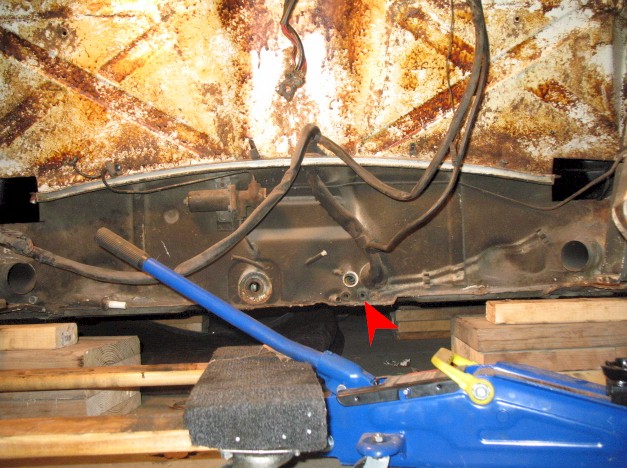
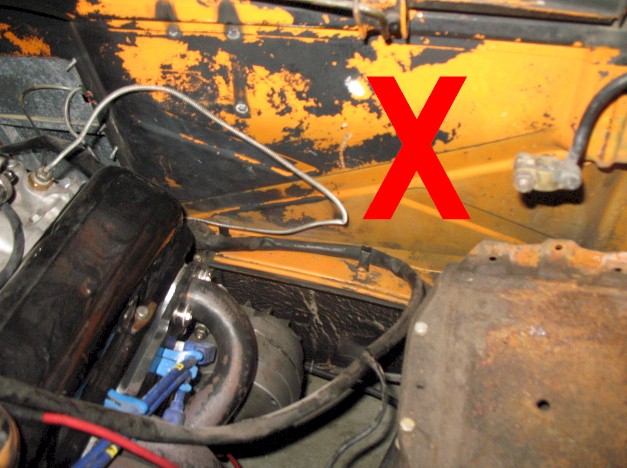
Posted by: bigkensteele Dec 23 2012, 05:23 PM
i think i will run the new brake line, thru the firewall hole for the return fuel line.
and mount the prop valve up high on the passenger side of the firewall, near battery.
I would worry about the p-valve trapping air if it is higher than the rest of the braking system. Unless, of course, you have one with a bleeder valve.
Posted by: jimkelly Dec 23 2012, 06:49 PM
good point. i just removed all the hard lines i'll be replacing and will make an effort to keep p valve low. i need to get me a second set of jack stands : )
Attached image(s)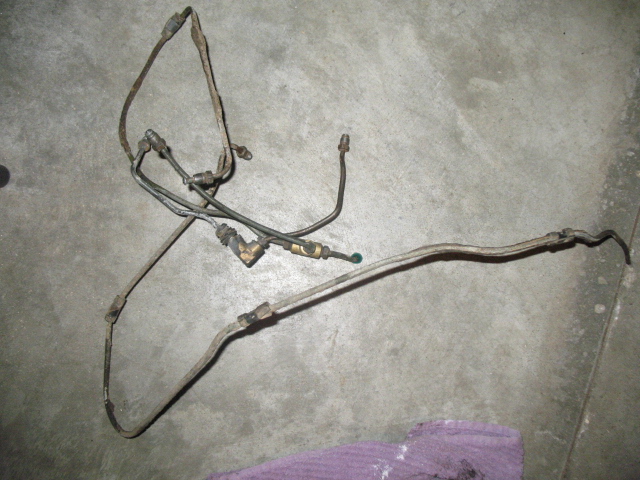
Posted by: jimkelly Dec 24 2012, 12:40 PM
new planned PV location. i may be able to get PV into its correct location but i'd have to plump it prior to install and i'd have to use more couplings than i want to, and if i have any leaks, they would be hell to access. so i have removed the T i used the replace the PV years ago, and will locat the PV behind passenger, low down.
Attached thumbnail(s)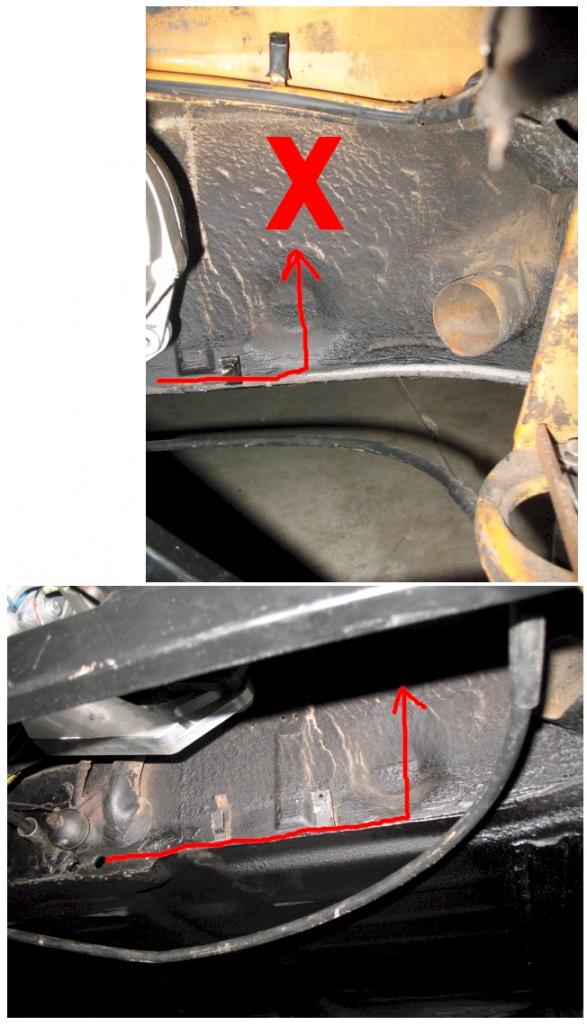
Posted by: kg6dxn Dec 24 2012, 03:31 PM
You should bite the bullet and drop the motor, do all the plumbing and check for leaks. It will be much easier to deal with...
Posted by: jimkelly Dec 28 2012, 04:48 PM
while i would have liked to do it right - i decided to install PV on passenger side.
and it seems i need to locate one washer for the banjo bolt on the master cylinder.
looks like i'll be doing just about everything at least twice : ((
ran all new brake lines thru tunnel and in engine bay today. look forward to getting brakes buttoned up, so i can move on to fuel lines and fuel pump.
and last pic was taken by my wife, right after she said "don't let that car fall on you." that really touched me : ))
Attached image(s)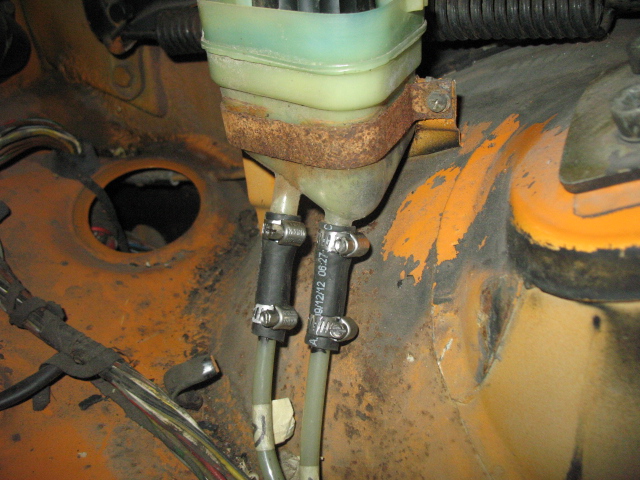
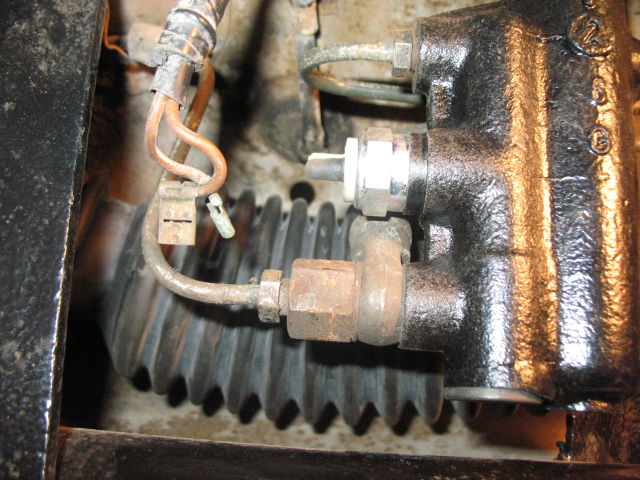
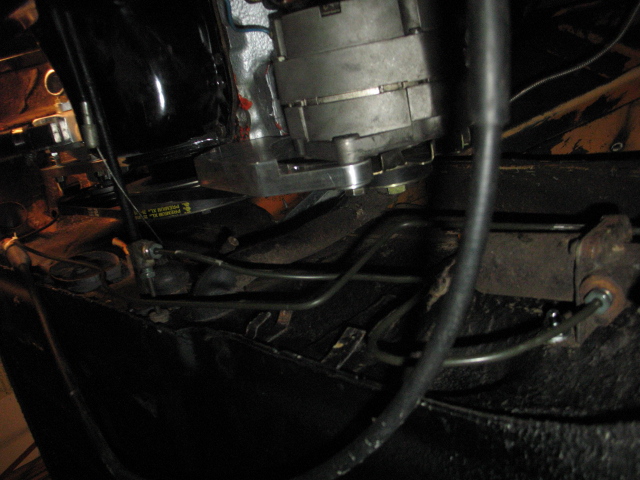
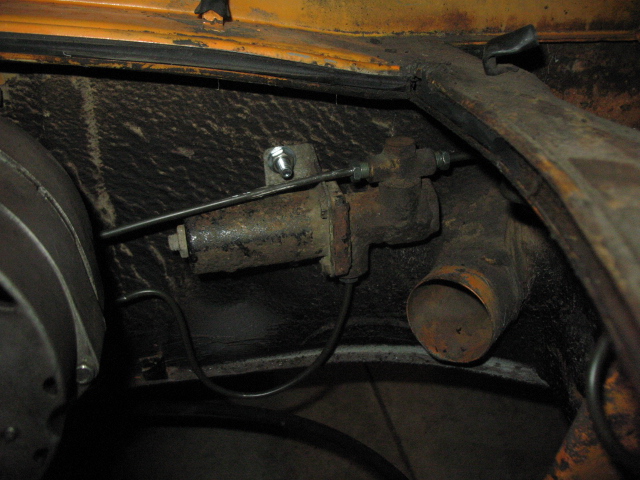
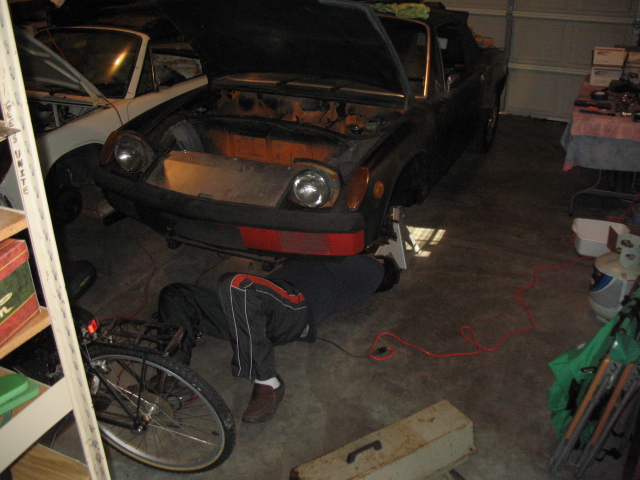
Posted by: jimkelly Dec 28 2012, 05:07 PM
and my new to me, kerosene heater : ))
just bought my first few gallons of kerosene today.
Attached image(s)
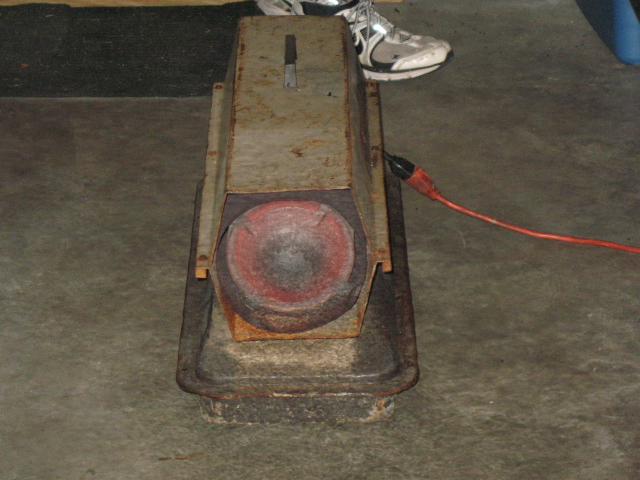
Posted by: bigkensteele Dec 28 2012, 08:55 PM
and my new to me, kerosene heater : ))
just bought my first few gallons of kerosene today.
That's a real looker, Jim!
Please tell your wife to tell you not to run that in a sealed garage. Not sure how much ventilation you will need, but I am guessing that will require some.
Posted by: jimkelly Dec 29 2012, 11:53 AM
ok - she IS ugly and rusty - but nice and warm : )) i'll be sure to allow some fresh air into my work area
i ordered today from AA, cause it is easier to find parts on their site than pelicans.
the 2 MC banjo metal gaskets, the fuel tank strainer and 2 gaskets, filler neck gasket. its the little things and ship time that cause delays.
i hope that i have no leaks at any of the 10+ brake line connections i made yesterday, we'll see. then i'll be on to installing fuel lines/pump.
Posted by: speed metal army Dec 29 2012, 12:00 PM
Jim have you run that fuel pump yet? Wondering how noisy it is...Looking for a quieter unit than my holley.
Posted by: Razorbobsr Dec 30 2012, 04:42 AM
Jim have you run that fuel pump yet? Wondering how noisy it is...Looking for a quieter unit than my holley.
Auto-zone sells a very quiet pump, I have them on several of my cars. Bob
Posted by: jimkelly Dec 30 2012, 11:53 AM
stopped by advance auto and ace hardware today to get a few bits.
i'm gonna initially go low tech with my fuel system to speed up the process.
ace does have a nice selection of small to medium grommets.
i'm looking at buttoning up/doing the following...
fuel system
brake system
shift linkage
electrical/ignition
loose rear suspension and full alignment
install seats and seat belts
etc
Attached image(s)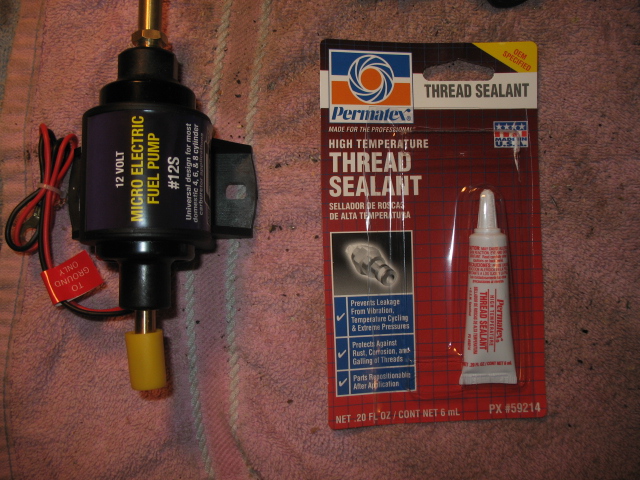
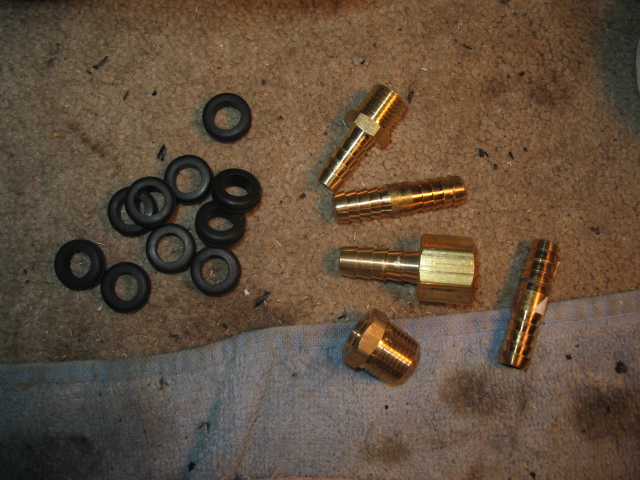
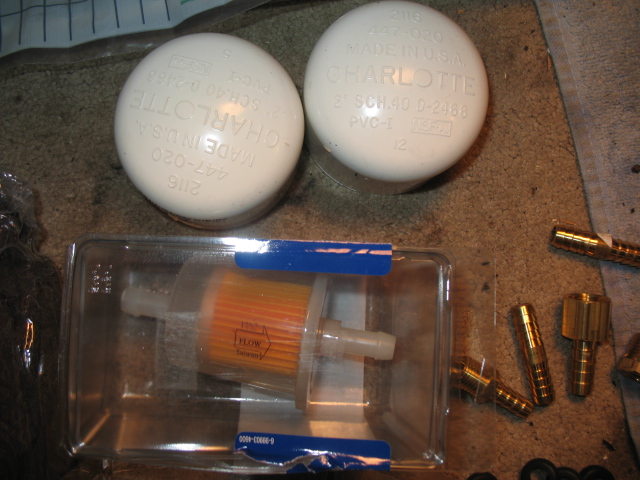
Posted by: jimkelly Jan 3 2013, 05:02 PM
still waiting on my banjo bolt waskers for the brake system, so i decided to get the engman block off plates installed and noticed i need a couple of correct brake line clips. looks like i'll need to replace one of the soft lines too, to the type that take the flat clip - later style.
i want to get the brakes completed and bleed before i move on to fuel lines/pump - so i don;t get ahead of myself
i rushed when originally cutting out the holes in the front wheel wells, so tomorrow i will clean them up a bit to more resemble each other
Attached image(s)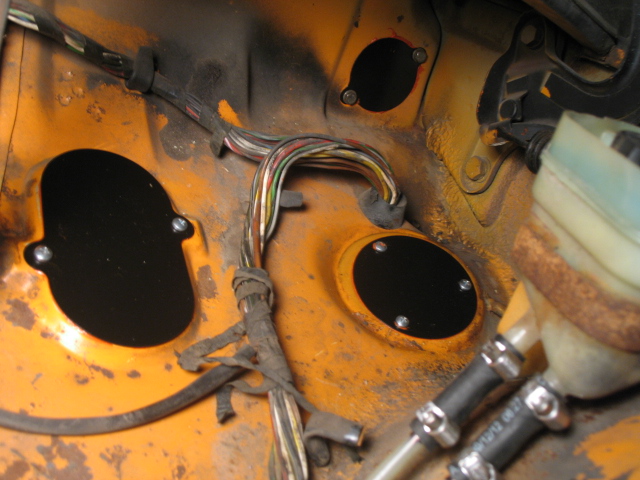
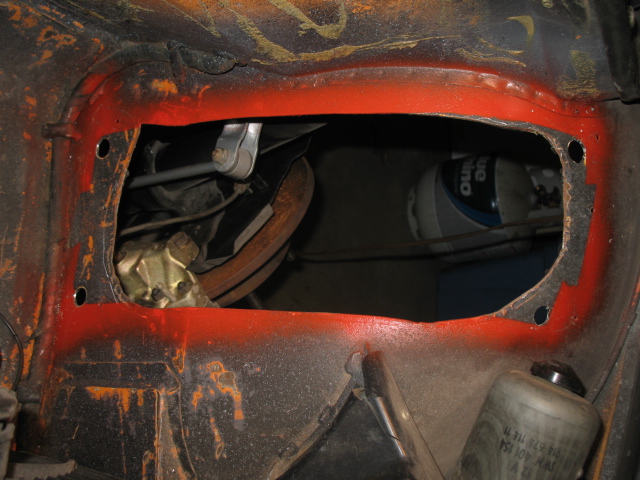

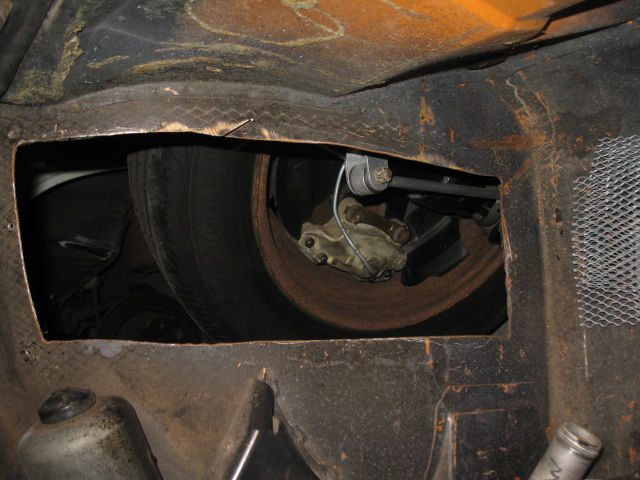
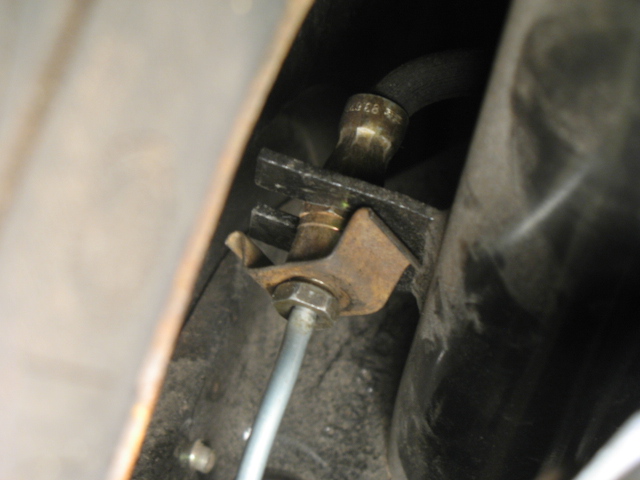
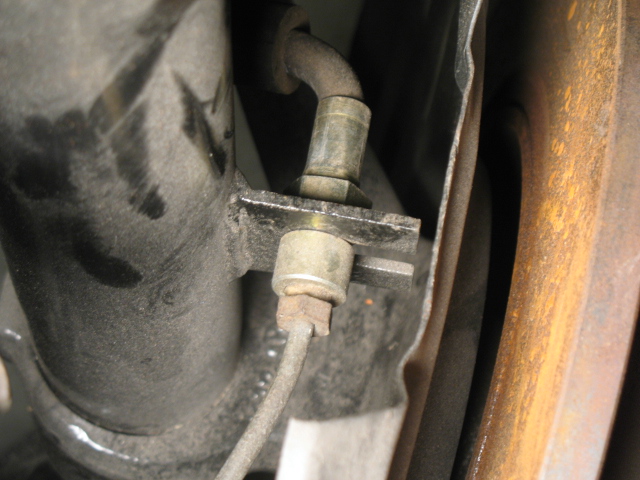
Posted by: jimkelly Jan 4 2013, 08:19 AM
cleaned up drivers side wheel well opening - they match pretty closely now.
think i will installed engman fuse panel this morning.
Attached image(s)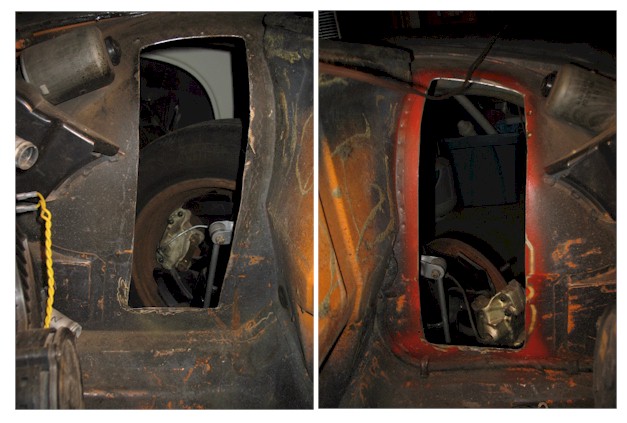
Posted by: jimkelly Jan 4 2013, 10:08 AM
engman fuse panel in.
the hardest part was mounting it back up once wires were all connected to it.
**also note where each relay was and which had the metal reay in it.
i think i will get 2 longer screws and drill some 1/4 inch plates to let the fuse panel rest 1/4 further into car. the wires there hinder easy peasey reinstall.
BTW - the right way would be to heat shrink wrap all the female connections.
see a different installed pic
http://www.914world.com/bbs2/index.php?showtopic=104969&hl=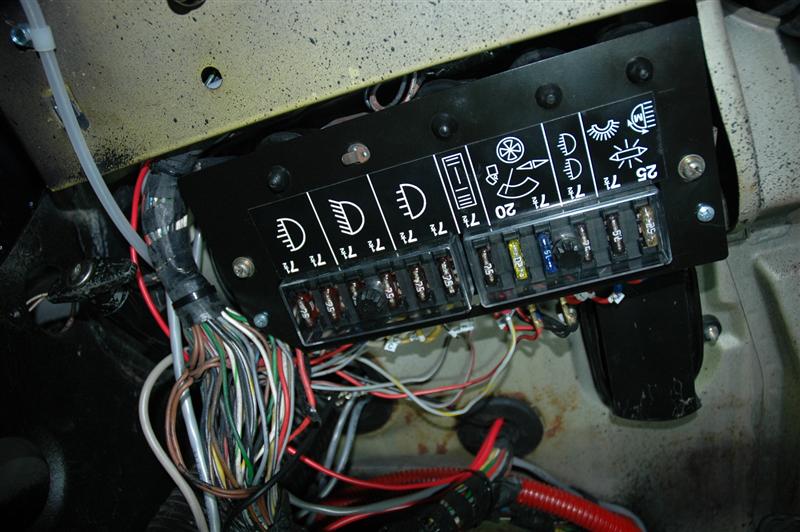
Attached image(s)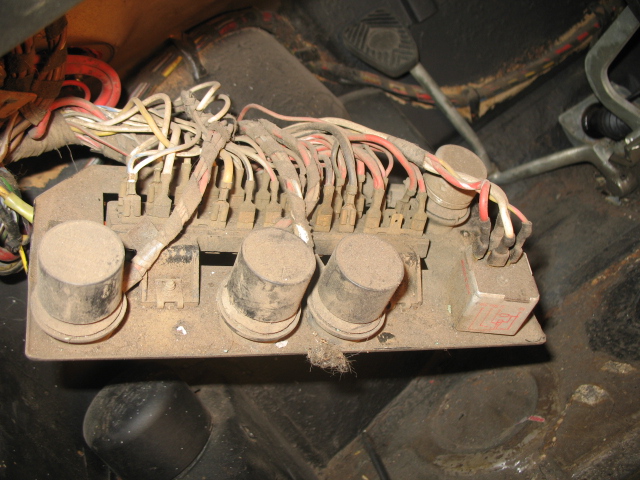
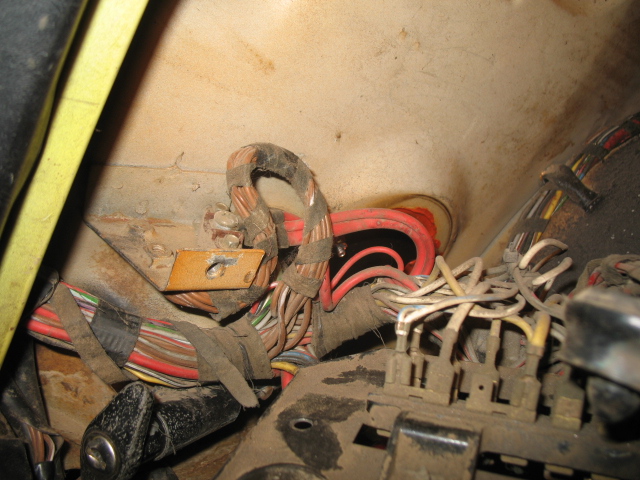
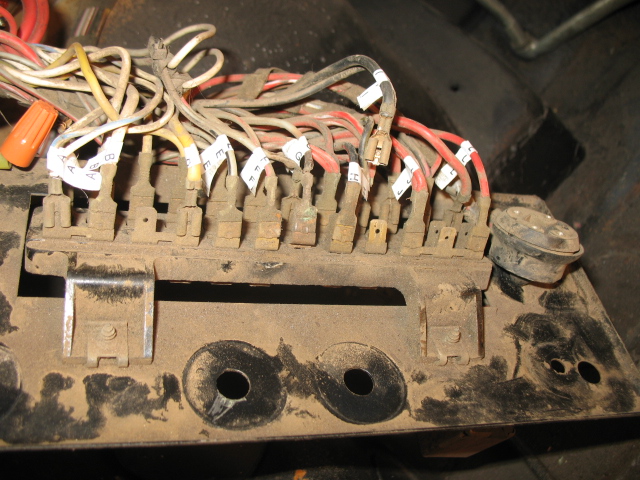
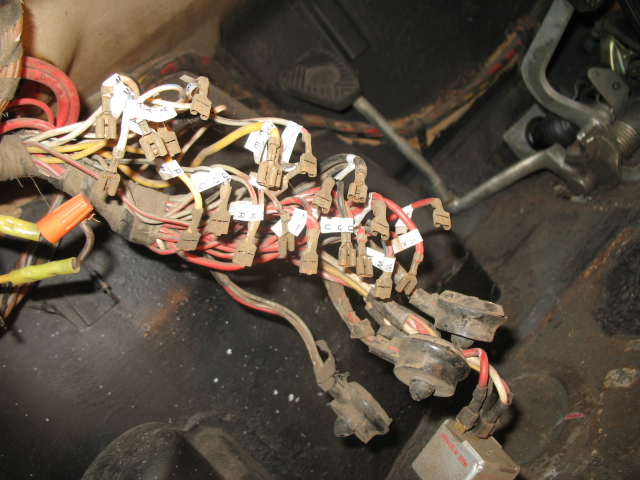
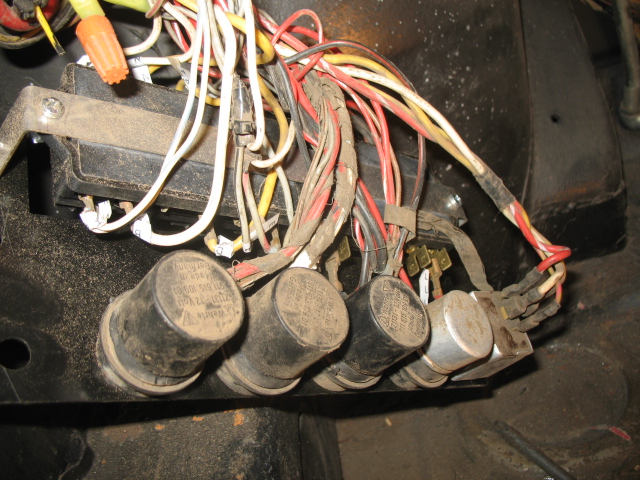
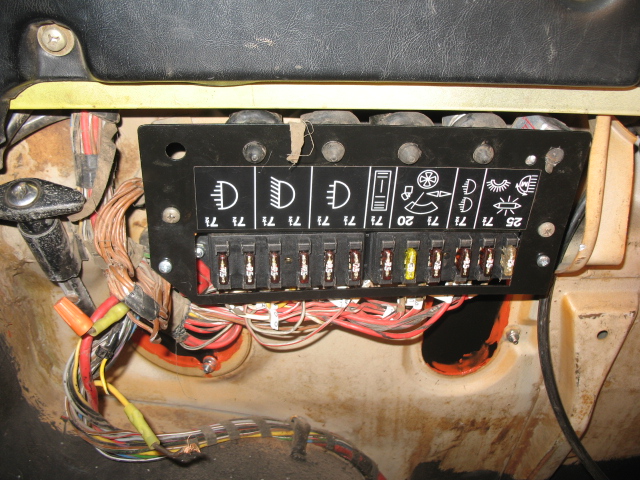
Posted by: jimkelly Jan 4 2013, 01:05 PM
went to ACE but could not find a suitable 1/4" thick piece of plastic to make a spacer out of - so i went with a grommet inside of a grommet. of course ACE had the longer metric screws needed.
question - the thick yellow wire under the dash - that is not connected on my vcar, what is it for??
and i have a thin yellow wire tapped into a black wire qwith brown stripe?
my car had an alarm system in it when i bought it, that i removed.
Attached image(s)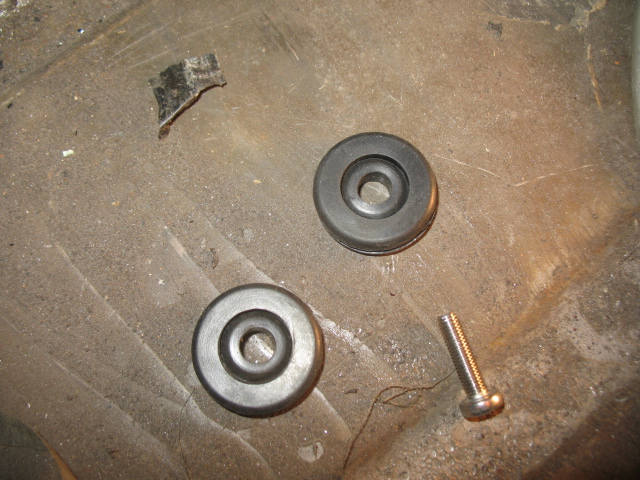
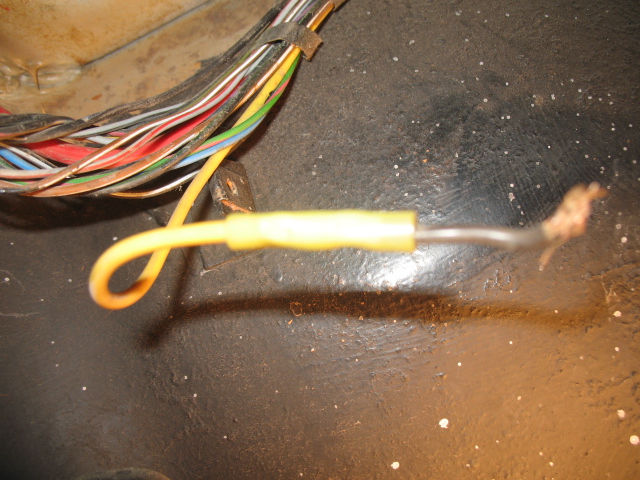
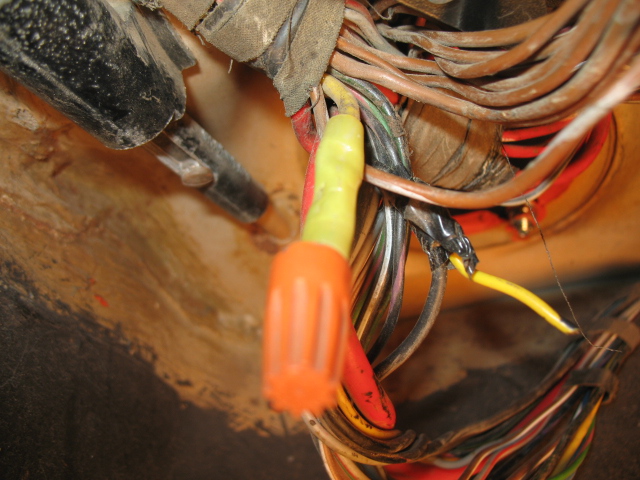
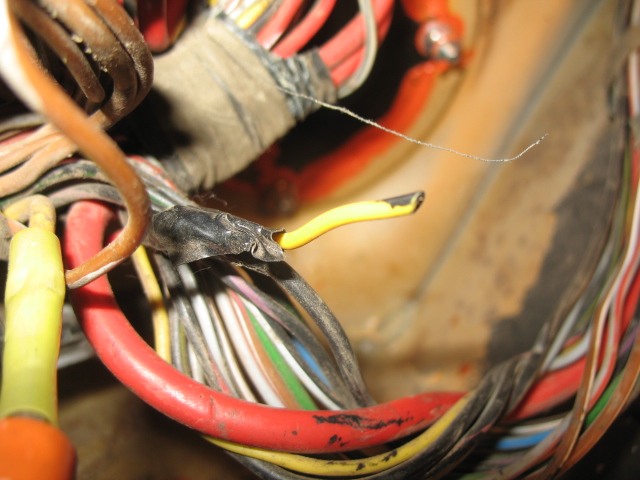
Posted by: jimkelly Jan 4 2013, 01:55 PM
pic of some bits i rcvd today from automobile atlanta.
the downside is i do not know which metal gasket is which : (
2 are for the fuel tank nipples and 2 are for brake MC banjo bolt.
i should be able to figure them out.
ordered some stuff today from PMB today.
http://www.pmbperformance.com/catalog.html
and ordered some hose clamps from bus depot - yet to arrive.
**update - just got email from bus depot - they are out of stock and have no idea when they will - canceled order - will check napa
Attached image(s)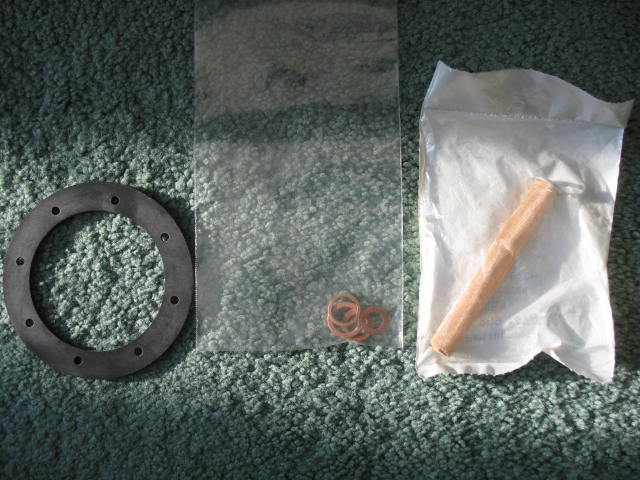
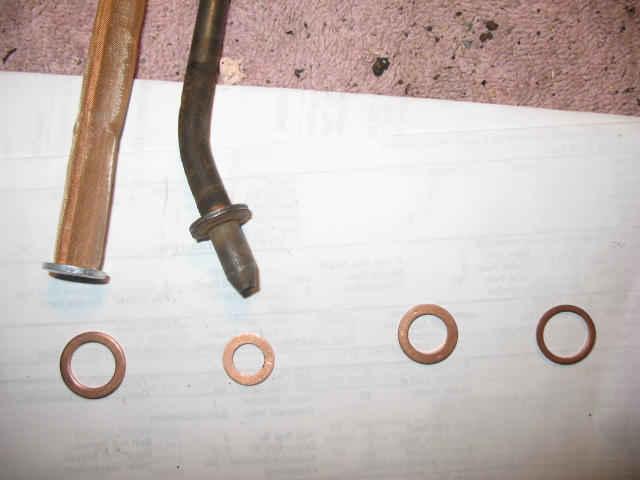
Posted by: jimkelly Jan 5 2013, 10:39 AM
i'm kinda liking this color combo these days.
thread continued here...
http://www.914world.com/bbs2/index.php?showtopic=219911
http://www.914world.com/bbs2/index.php?showtopic=219911
http://www.914world.com/bbs2/index.php?showtopic=219911
http://www.914world.com/bbs2/index.php?showtopic=219911
http://www.914world.com/bbs2/index.php?showtopic=219911
jim
Attached image(s)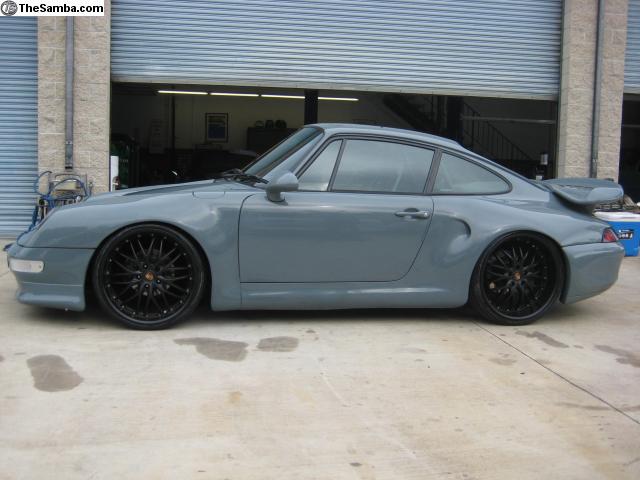
Posted by: kg6dxn Jan 5 2013, 10:42 AM
i'm kinda liking this color combo these days.
I like it too!
But, on that 911, the rear needs to be raised up 1/2". Looks like he rolling with fat chicks in the back...
Posted by: mittelmotor Jan 5 2013, 02:42 PM
i'm kinda liking this color combo these days.
I like it too!
But, on that 911, the rear needs to be raised up 1/2". Looks like he rolling with fat chicks in the back...
Agreed. And those rimz looks likes they came offa some rapper's Chrysler 300C.
But color scheme is good!
Posted by: jimkelly Jul 5 2015, 04:26 PM
been slackin and might get back to slackin again, who knows.
but my attempt at jerry rigging a throttle cable came out good : )
could not use the tunnel and it was not open all the way from end to end and I have no way to clear it out at the moment. so I ran a bicycle cable outside the tunnel.
next up I need to check clutch cable setting.
and I have decided to swap out proportioning valve for an adjustable unit cause I must have tons of air in my brake lines : (
pn's for lokar stuff:
http://www.summitracing.com/parts/lok-s-2412
http://www.summitracing.com/parts/lok-s-2411/overview/
https://www.youtube.com/watch?v=8SqM1mONOYs
Attached thumbnail(s)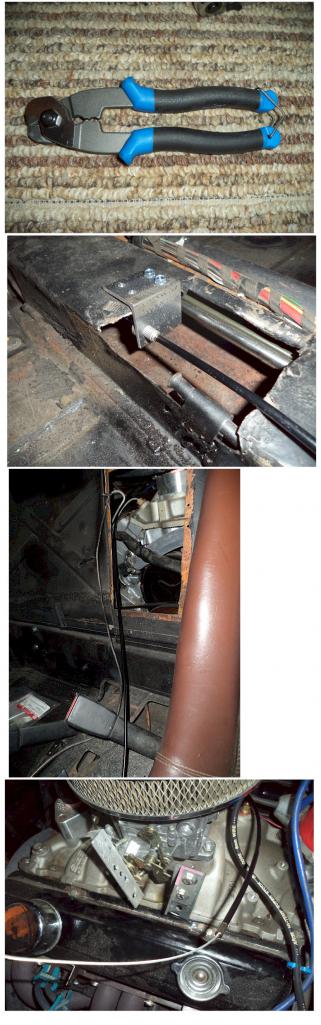
Attached image(s)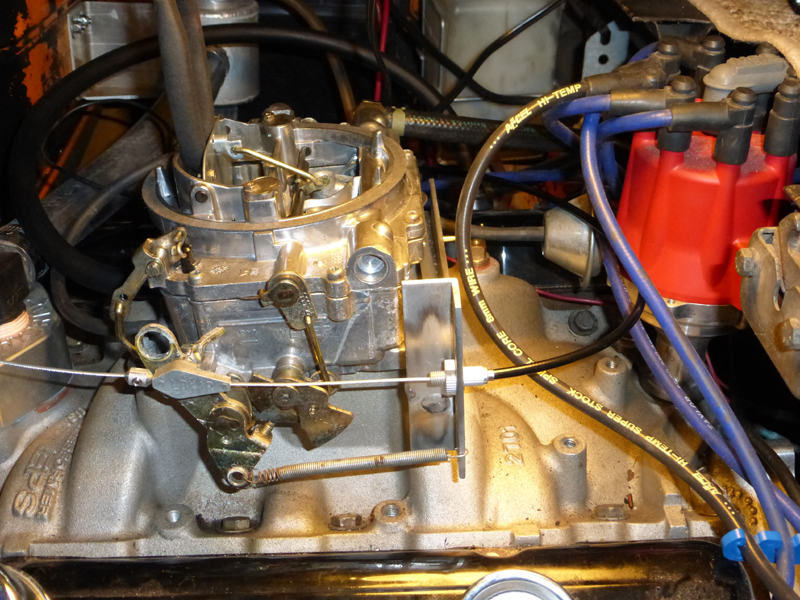
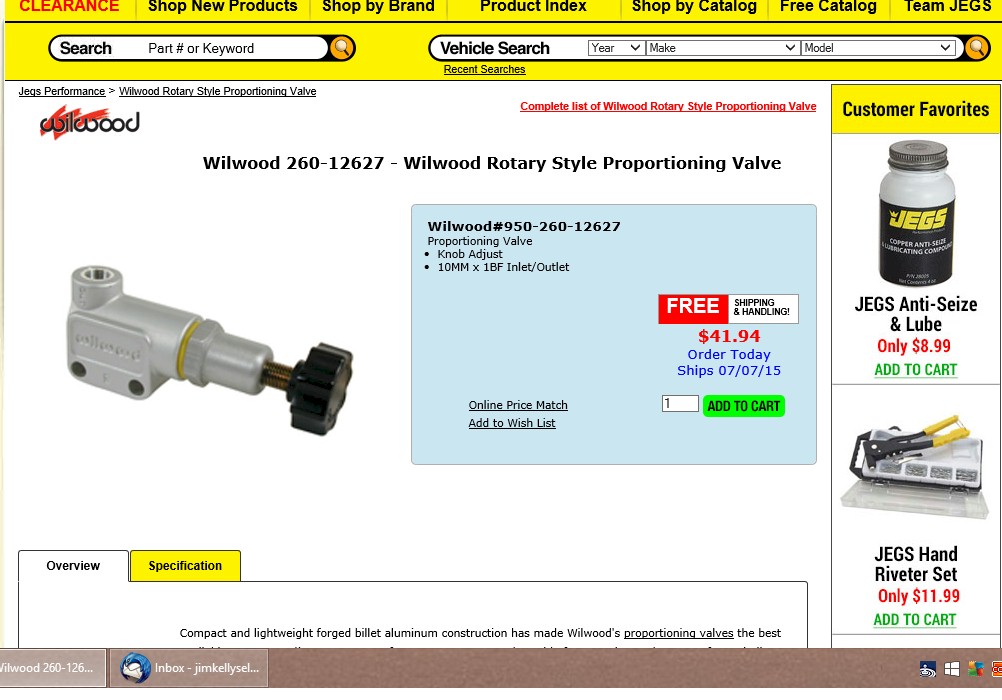
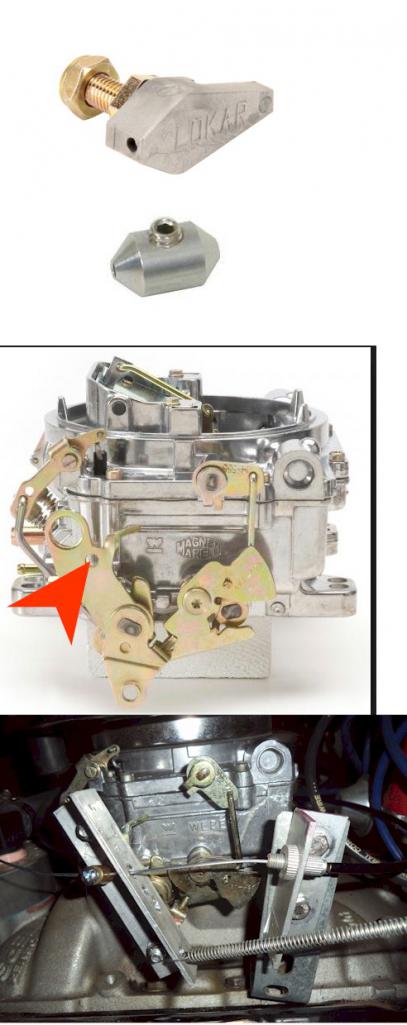
Posted by: jimkelly Jul 11 2015, 06:44 PM
bad gas but mostly rust in tank clogged my damn carb again : (
and working on getting bubblers out of my brake lines
https://www.youtube.com/watch?v=YcnA9XECgb0
https://www.youtube.com/watch?v=yD_buyDgT9g
Posted by: 76-914 Jul 11 2015, 09:02 PM
It's about time that you got off your dead ass and on your dying feet, Jim. Glad to see you back at it.
Posted by: bulitt Jul 12 2015, 01:34 AM
Same color as my HVAC unit... 
But I really like this color...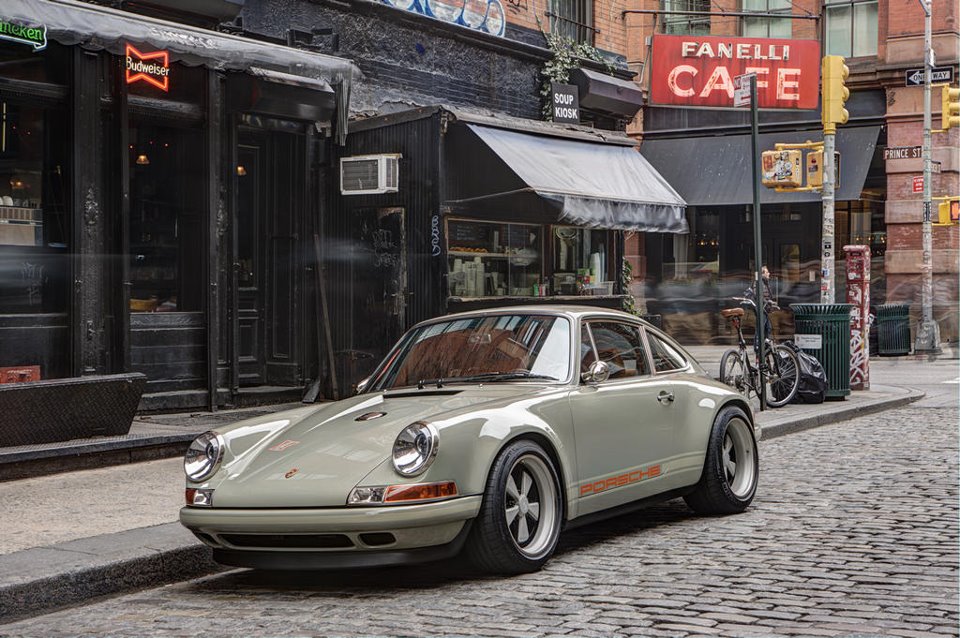
Posted by: jimkelly Jul 19 2015, 10:26 AM
starting to get some peddle. cracked the lines at the MC and let them drip a bit under pressure from my Motive Power Bleeder and going caliper to caliper several times. I think I need to drive it some to move the rest of the bubbles outward. one thing is my rubber hose on my Motive sprung a leak twice now, due to ???, it is a mess when the line springs a leak UNDER PRESSURE : (
Attached thumbnail(s)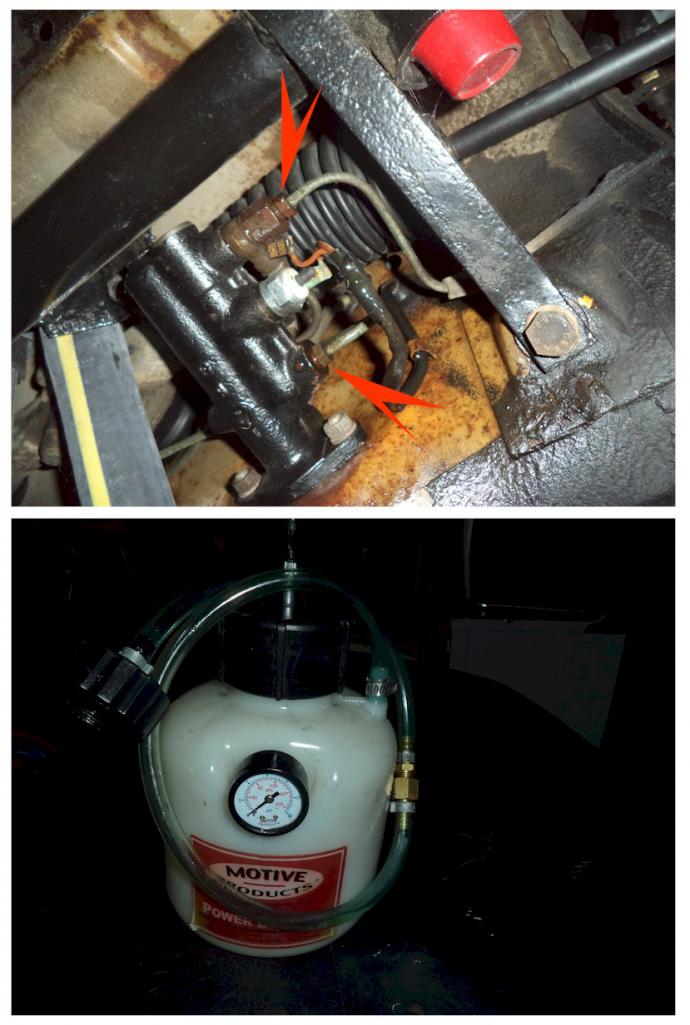
Posted by: jimkelly Aug 9 2015, 11:13 AM
got a video for you guys coming later today. it is of me taking my first PARTIAL test drive. anyway, my tank is rusty but iu have a 1975 tank that looks good, so I will swap them out. video to come.
better tank modified for my single carb set up.
https://www.youtube.com/watch?v=Mj3fsi33u7o
Attached thumbnail(s)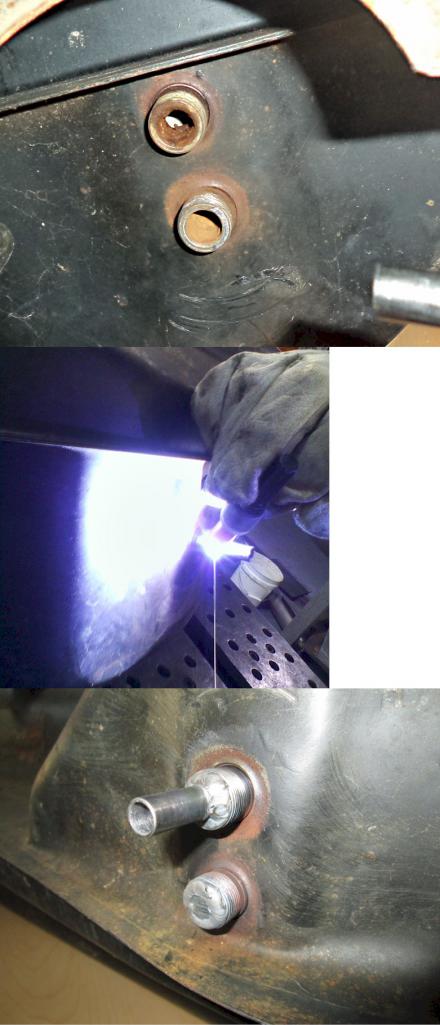
Attached image(s)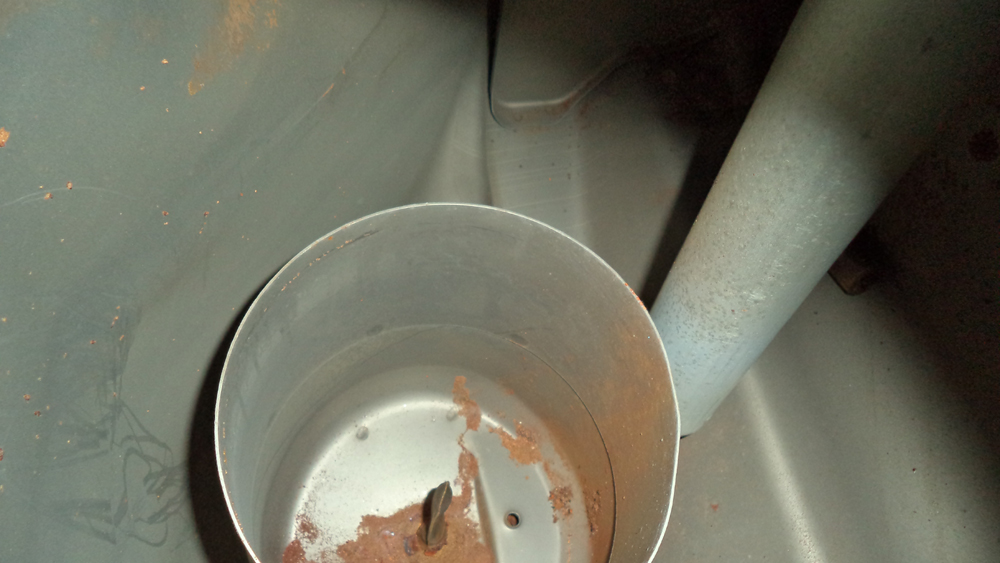
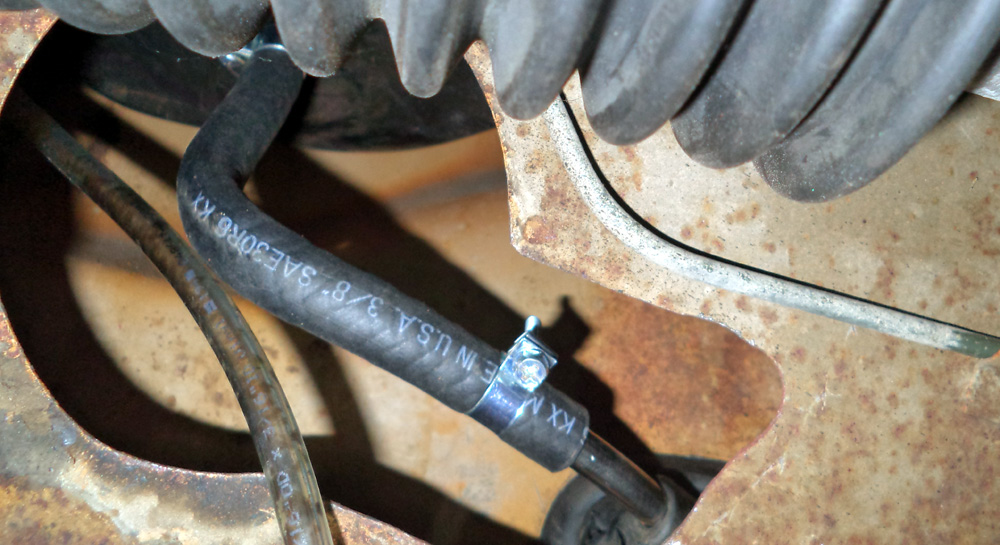
Posted by: jimkelly Aug 29 2015, 06:27 AM
doing a little more wiring today. adding to what I did last week. to get my horn and wipers working enough for inspection. latter I will try to fix correctly using car;'s harness. gonna run 10 guage wire to all fuse blocks so I can feed all relay pin 30's with 10 guage wire.
horn and wipers are now wired and working. also installed 2 emergency brake line clips on rear trailing arms, that I bought new at pelican cause my old ones were rotted.
carb has crap in it, so I must pull it apart and clean it out of any debris. then I should be able to take it for a spin and get it registered.
Attached thumbnail(s)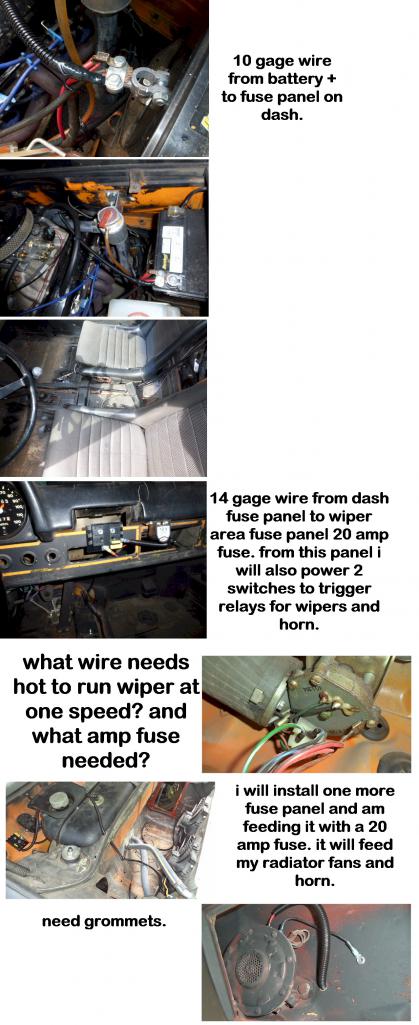

Attached image(s)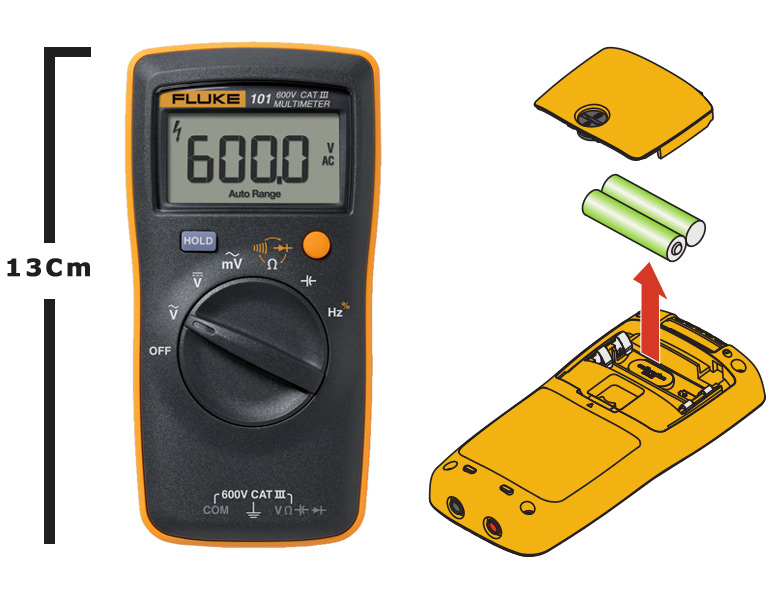
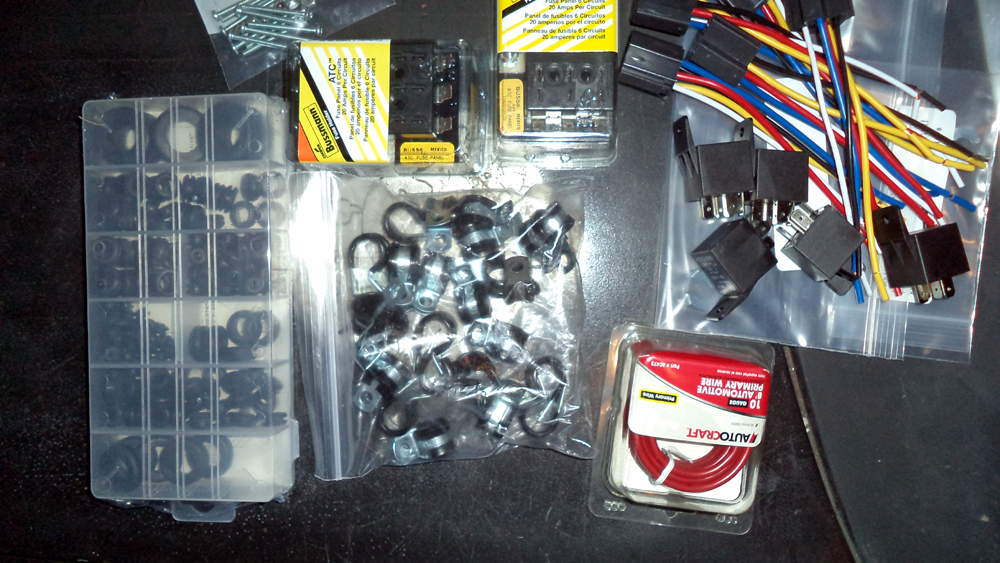
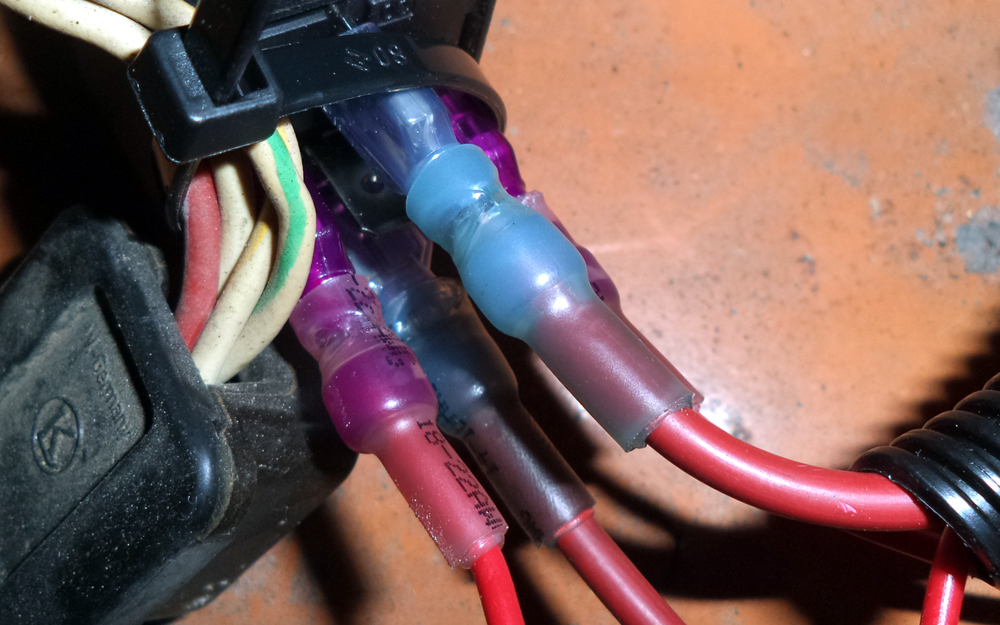
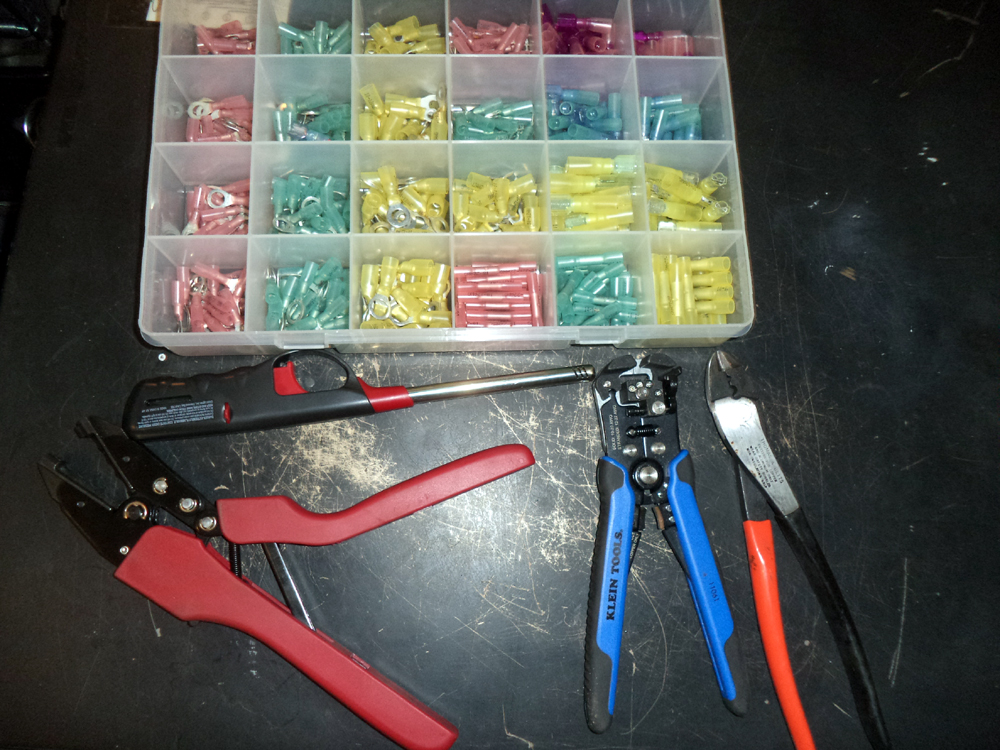
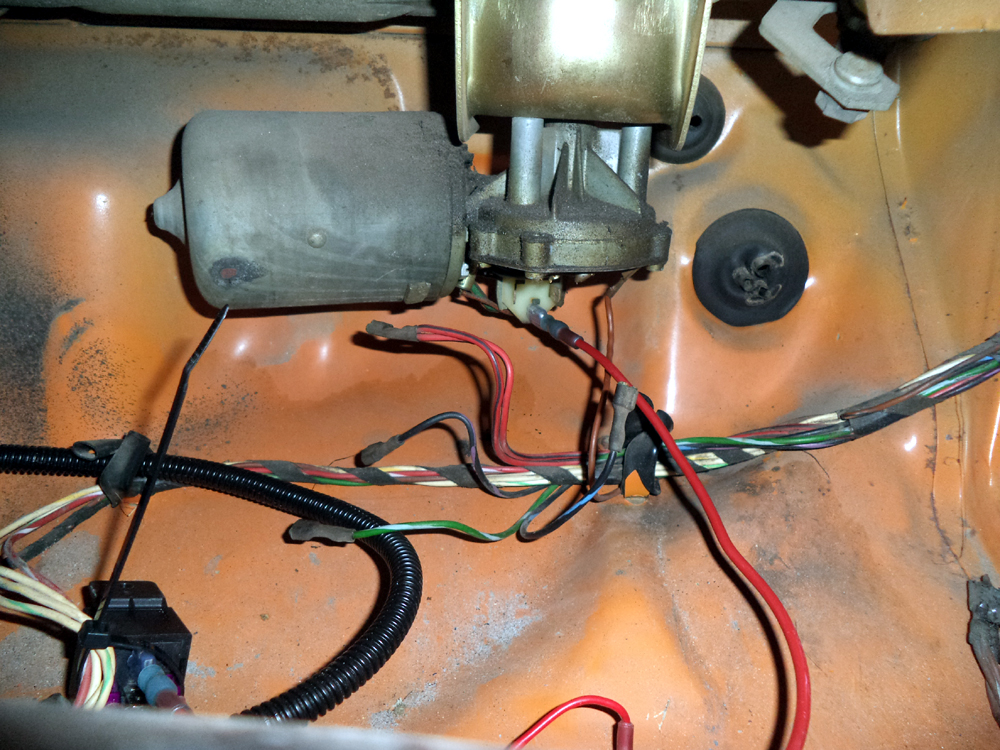

Posted by: jimkelly Aug 29 2015, 07:37 PM
tomorrow I put new tires on some ratty rims : )
update: tires on rims : )
decided to add a mcmark style starter relay, since I had a few extra.
seems my carb may not have crap in it, my filter between tank and pump was dirty, replaced it and my carbs squirt again. need to run it and test all I've done but want to give my neighbors a break, it's sunday : (
tires are on
Attached thumbnail(s)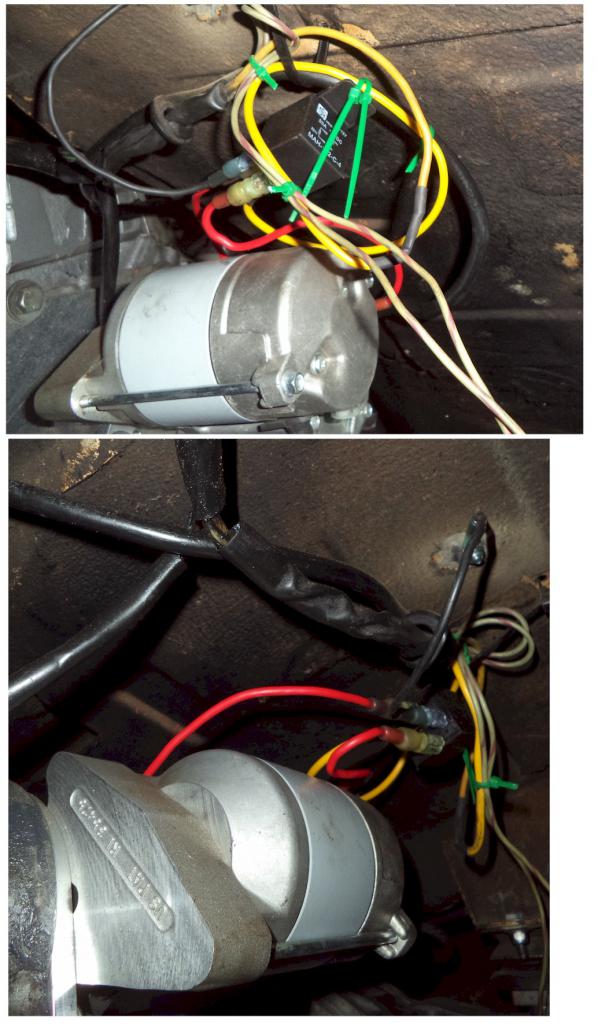
Attached image(s)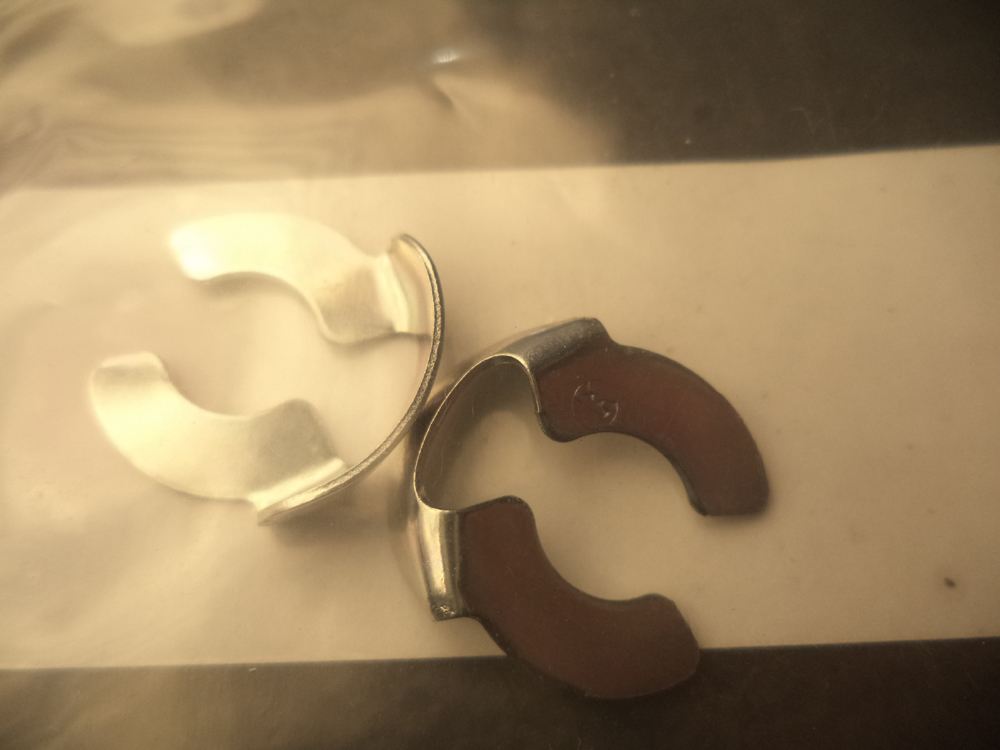
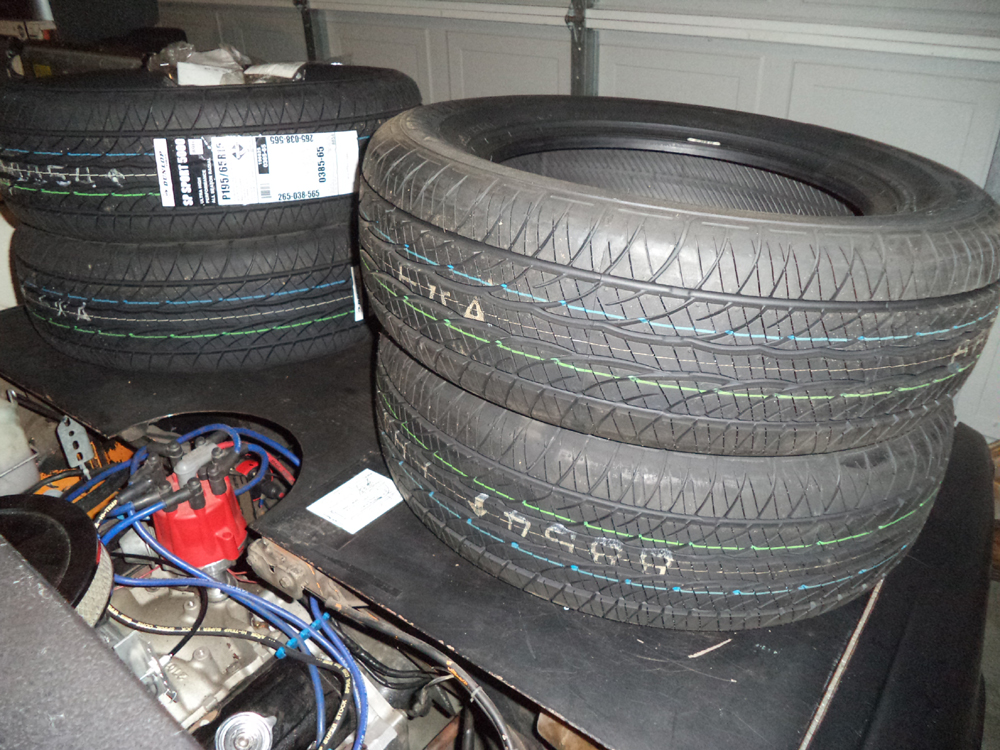

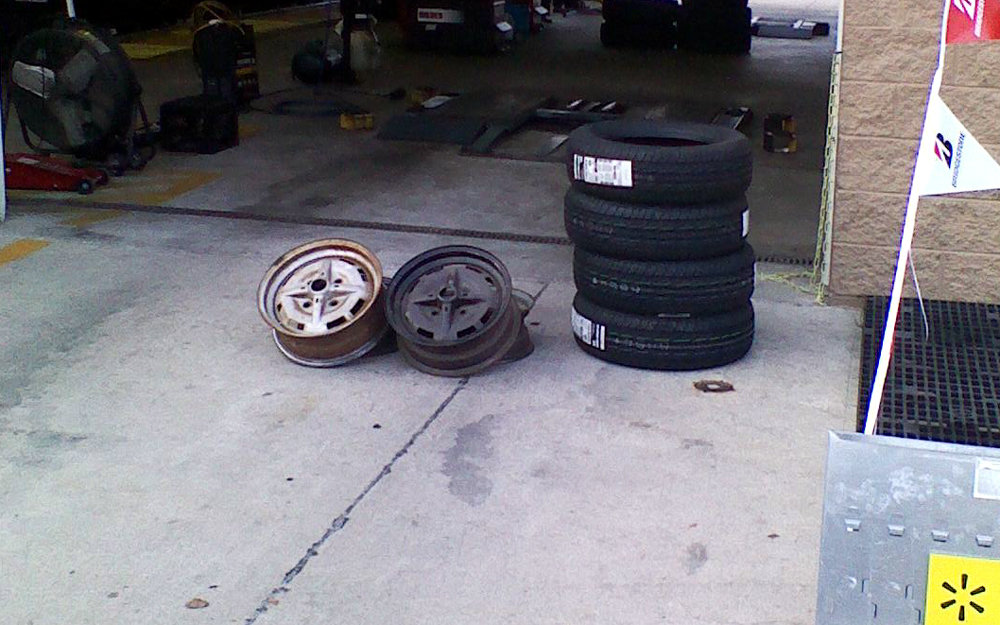
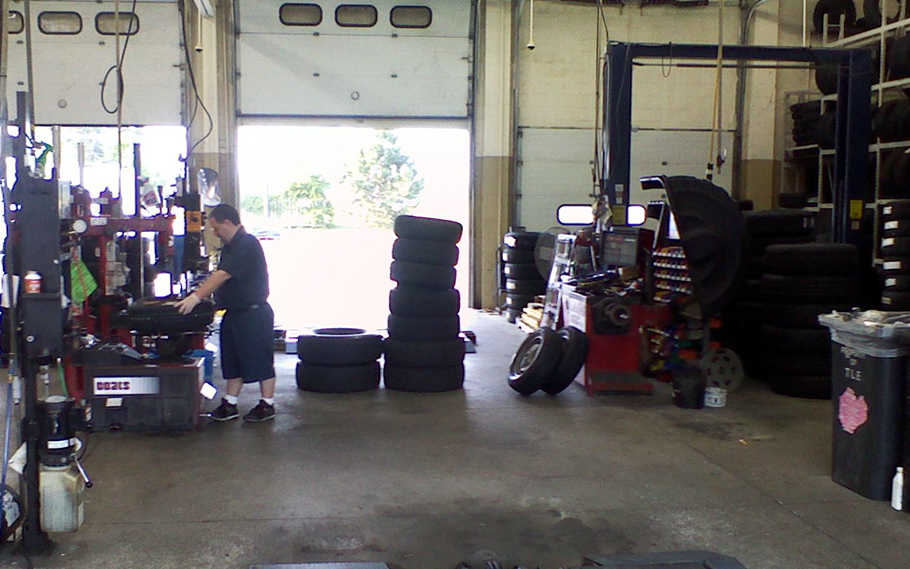
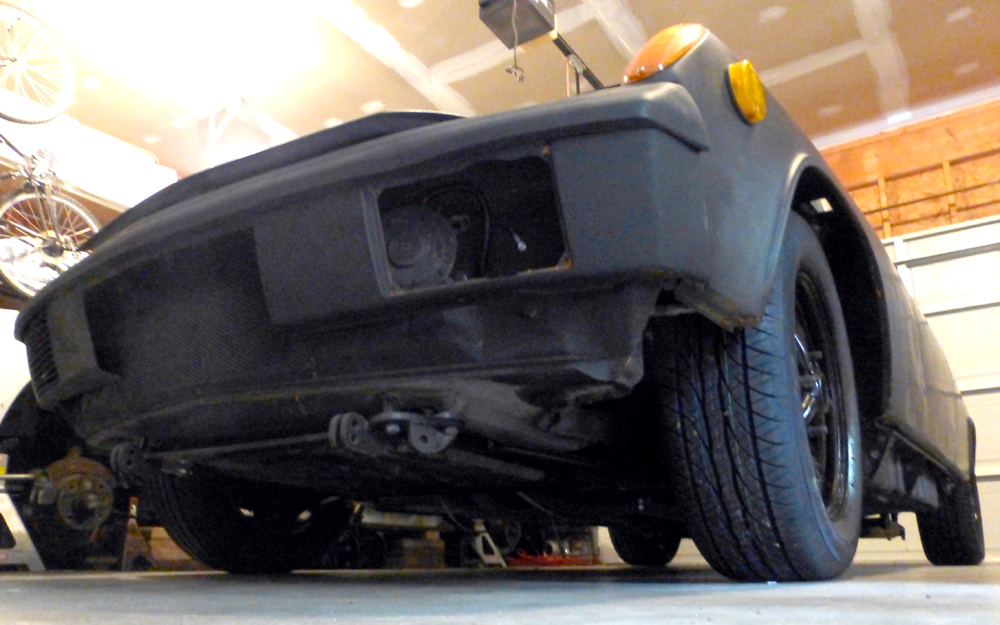
Posted by: jimkelly Sep 2 2015, 05:56 PM
I kept finding chunks of what appears to be rubber in my gas line to carb, most between tank and pump. started to think pump (edelbrock 1791) was clogged up with rubber bits, so I flushed it out as bets I could but pressure still dropped from 3.5 to 2.5, so I replaced the edelbrock with a freaking MR GASKET electric fuel pump s12. which seems to be putting a better amount of furl in my filter between carb and pump, than my edelbrock was.
here is a video of my dash while I was running it a bit and watching my fuel nearest my carb filter for gas quantity.
while car is not that loud, I think I want an almost silent exhaust? summit have mandrel U bends and short muffler. current muffler 24" long, tip to tip.
tomorrow I plan to install front spoiler, found it today, forgot I had it : )
https://www.youtube.com/watch?v=SMAN5ULaNVo
Attached thumbnail(s)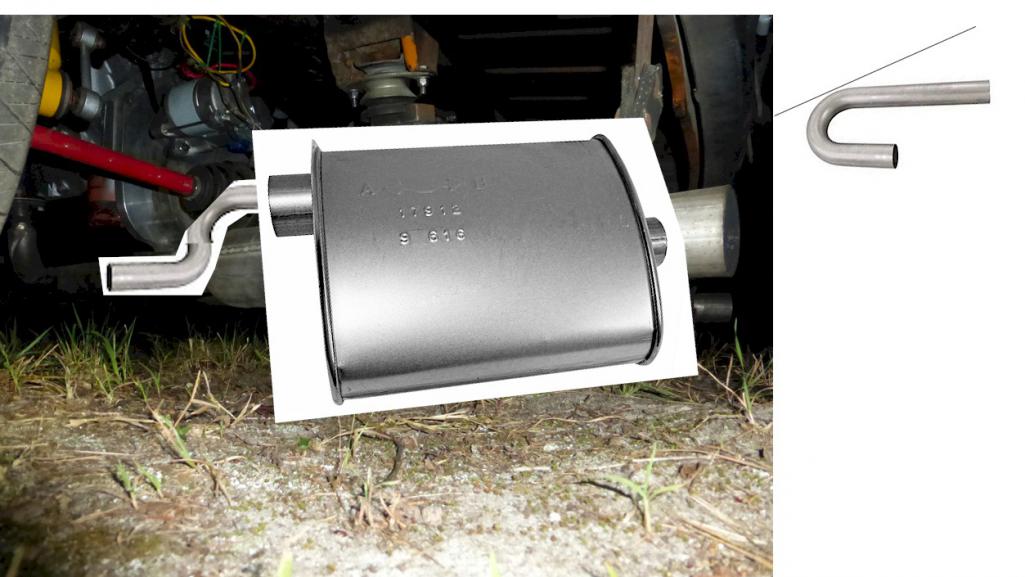
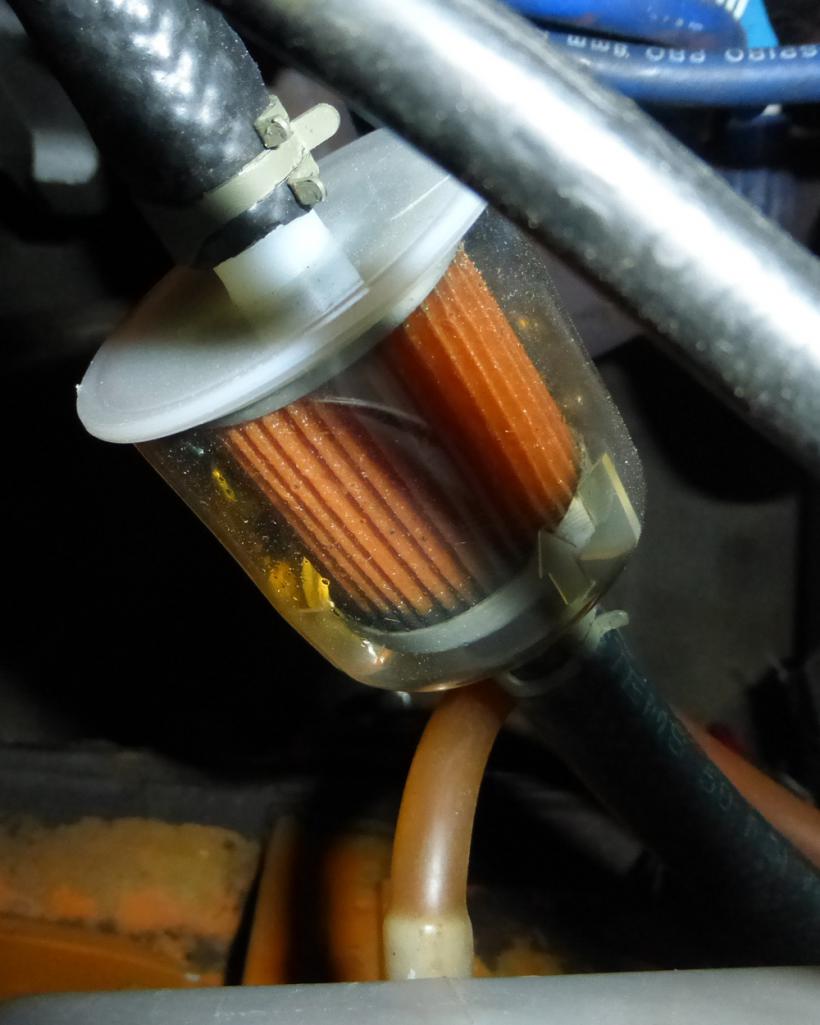
Attached image(s)
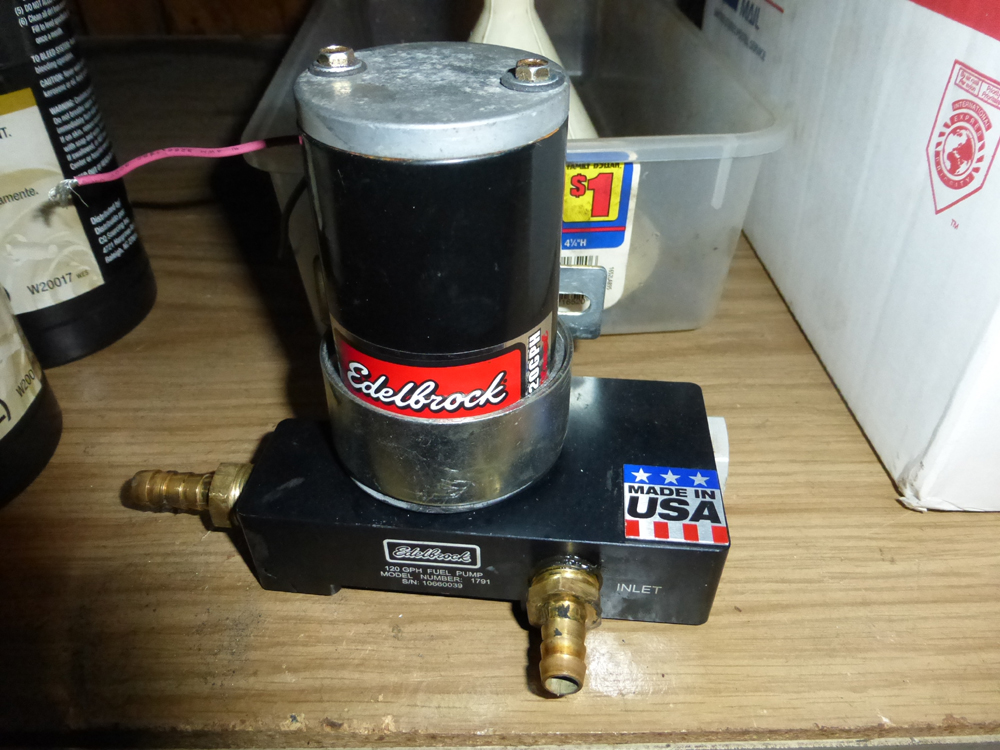
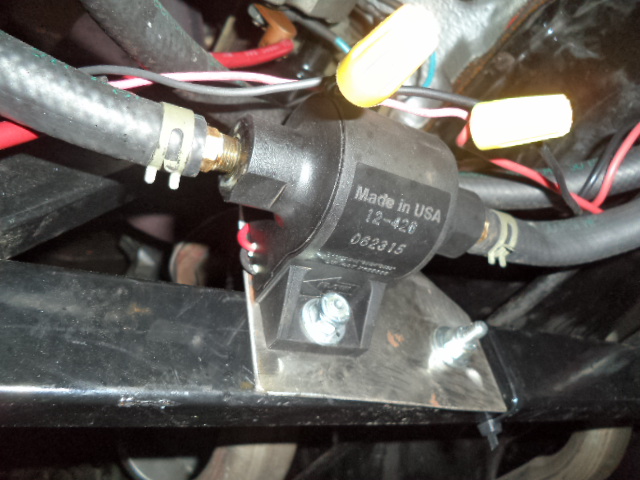
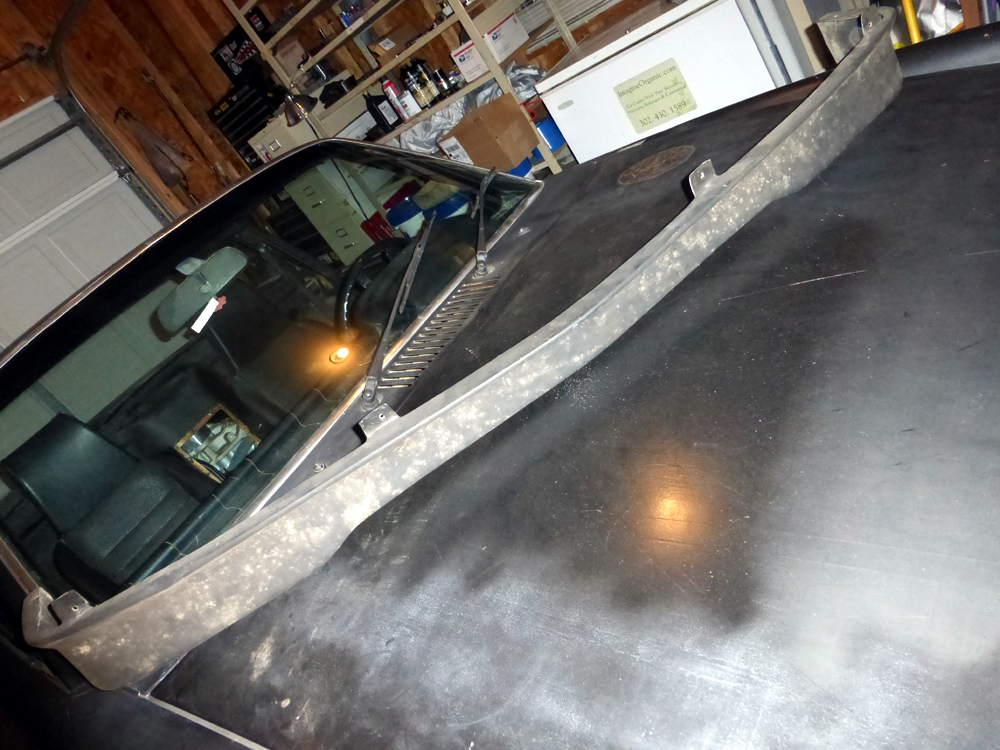
Posted by: jimkelly Sep 5 2015, 05:38 AM
took car to dmv yesterday, passed for everything except I had no door glass, did not think they would check.
installed a cheap plastic autozone door mirror, $10, works well.
new mr gasket fuel filter seems to be helping keep a good amount of gas in my filter.
got me a nice vintage creeper the other day.
added a spring to my mostly broken emergency brake handle to make it function.
today I rob doors from my 1975 for my 1972 so I can pass inspection on Tuesday for door glass being missing.
oh yeah, just order a speedo cable from pelican. wife says I was driving too fast yesterday.
got some more g3 plastic fuel filters, I am still needing to be able to see inside. will switch over to metal filters when I am 100% certain my fuel line is totally clean.
pic of my 100 amp circuit breaker (got it at advance auto) near battery. probably should down grade to 75 or 50 amps?
a crappy vid for you guys
https://www.youtube.com/watch?v=9xBW83Tuc94
Attached thumbnail(s)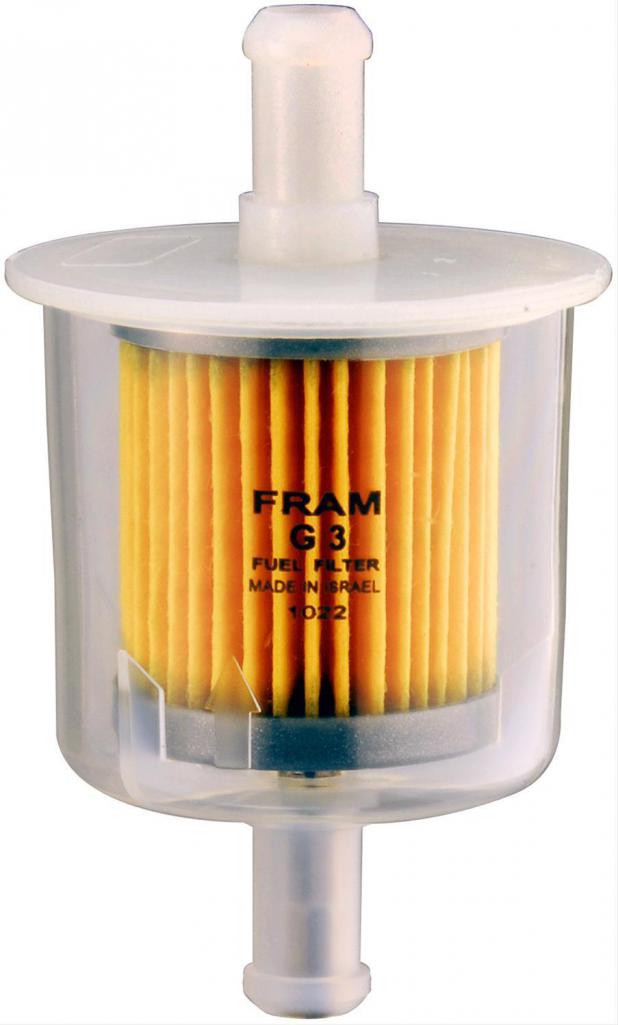
Attached image(s)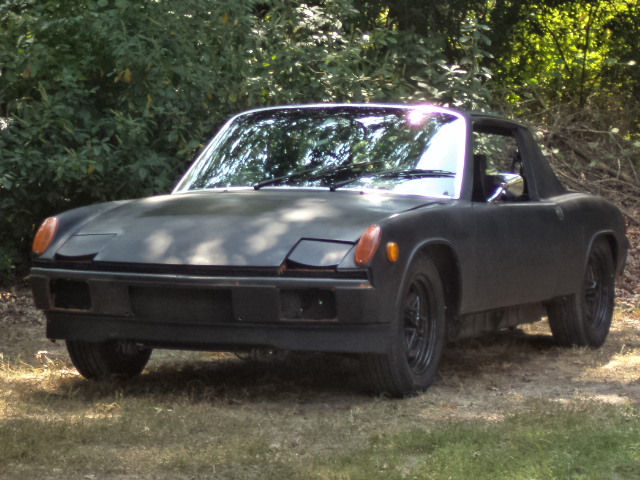
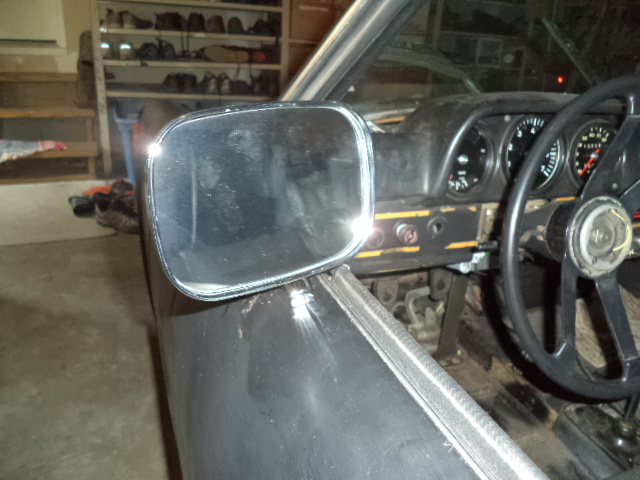
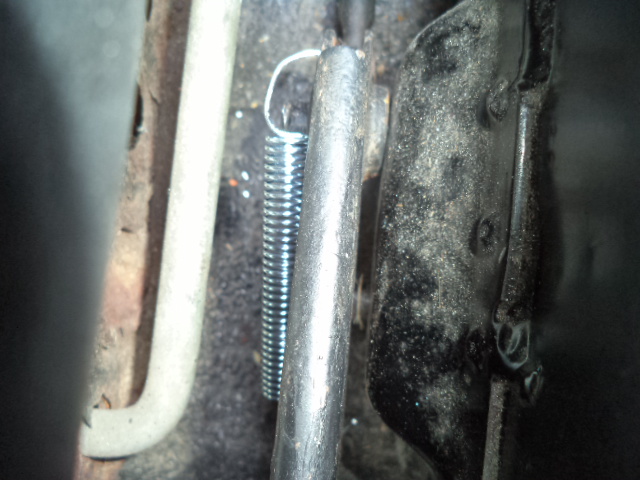
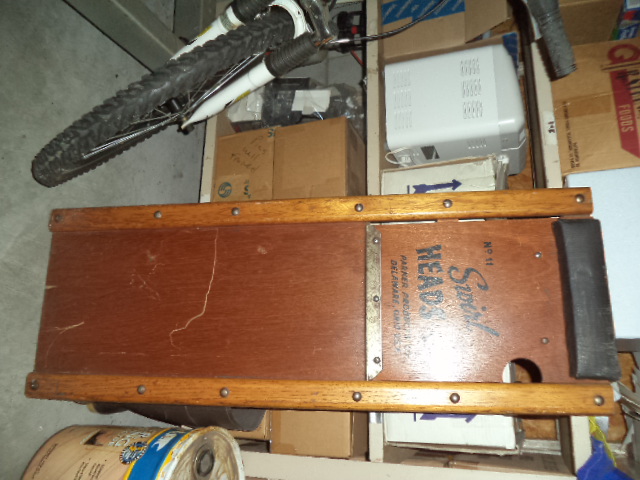
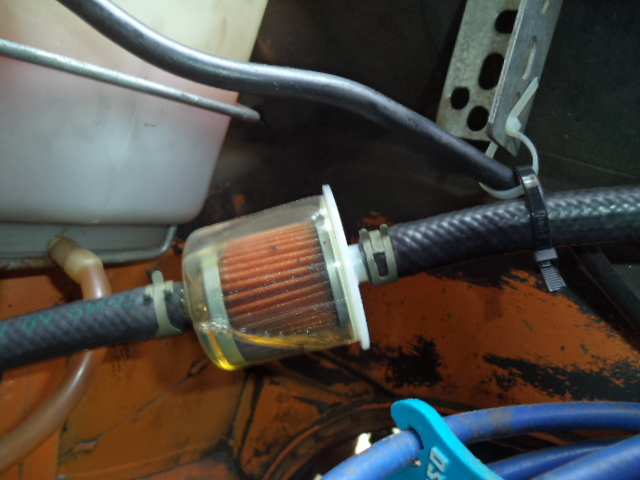
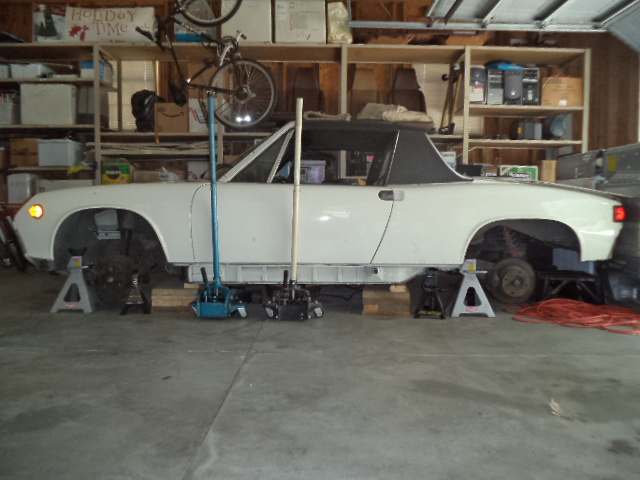
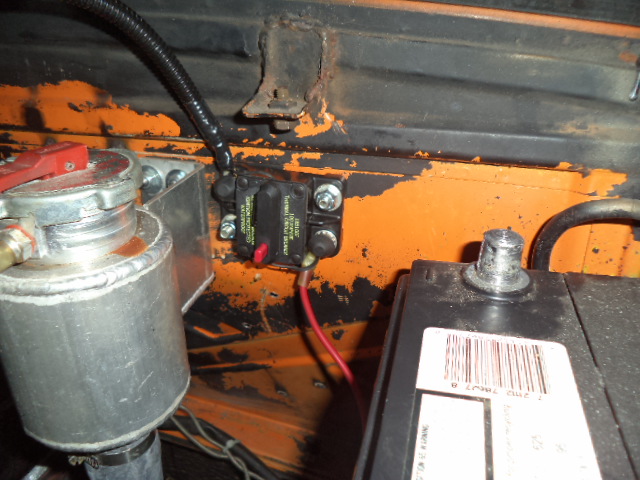
Posted by: mepstein Sep 5 2015, 06:58 AM
Ready to Suby the white car?
Posted by: jimkelly Sep 5 2015, 07:23 AM
almost. how nice will it be to have a car that is mild mannered and have a trans that can be shifted like a modern car and have high rpms too. yesterday I found myself wanting to take it easy on the v8 so I started off in 2nd, went to 3rd, then to 5th. don't really need 4th for crusing. 5th at 2500 rpm must be between 55-60, I will check with my gps. speedo cable on its way to me. tires are now 195x65x15 dunlops. v8 is too dang noisey, got to get it quieter, noise in cabin is worse than noise outside by FAR.
and this permatex is what I have been using on my npt fuel fittings, mostly cause I already had it.
well... my 1975 (to be subaruized at some point in future) has been robbed of its doors.
Attached image(s)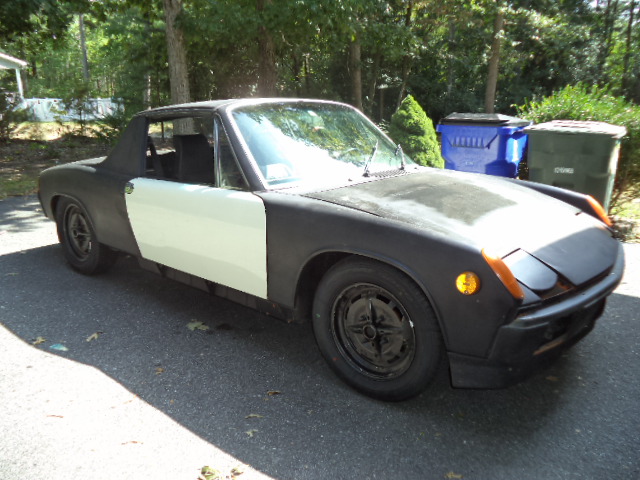
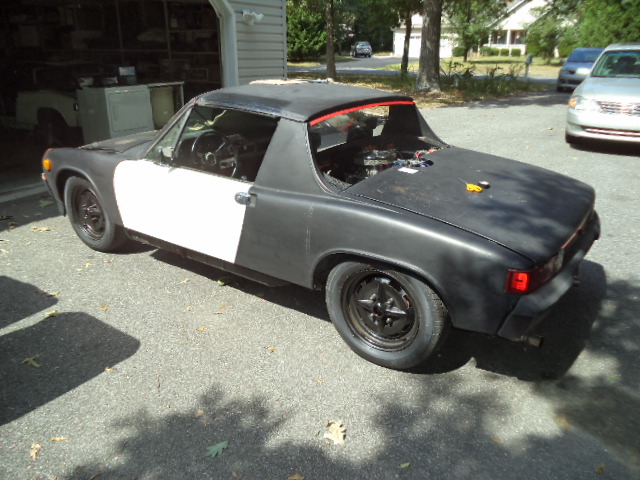
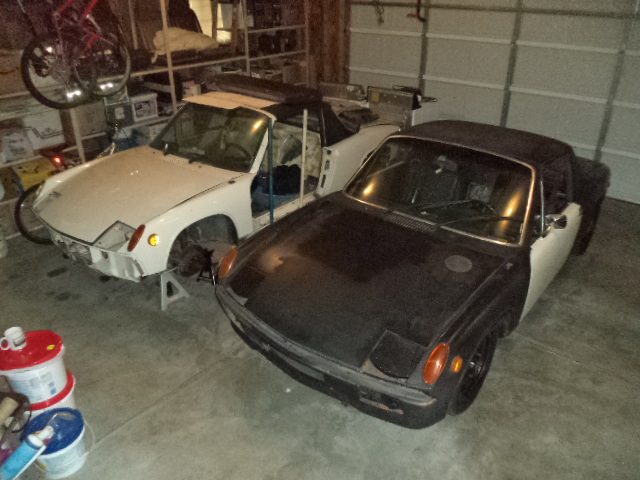
Posted by: Mike Bellis Sep 5 2015, 08:10 PM
The only way to get rid of V8 drone is to install a crossover tube before the mufflers.
Posted by: jimkelly Sep 6 2015, 07:31 AM
well, since I robbed the doors from my 1975 for my 1972, I figured I better reinstalled the vertical sail seal too, which meant I needed to rob my 75 of its vertical sail trim aluminum.
to make a long story short, I just ordered my first seals my 914rubber.
http://shop.914rubber.com/914-Vertical-Targa-Seal-Set-of-2-914VTSS.htm
Attached image(s)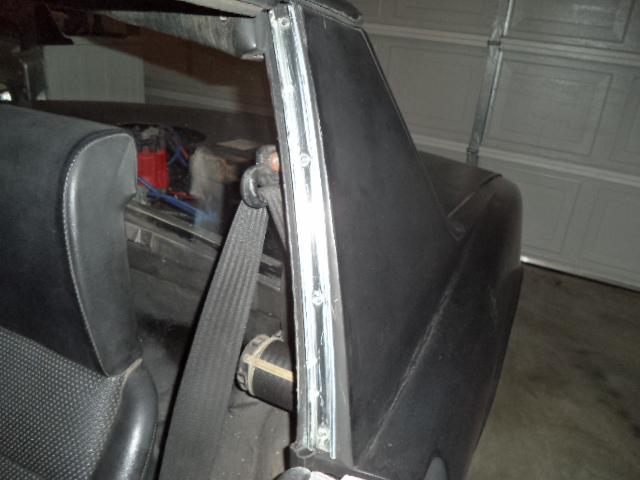
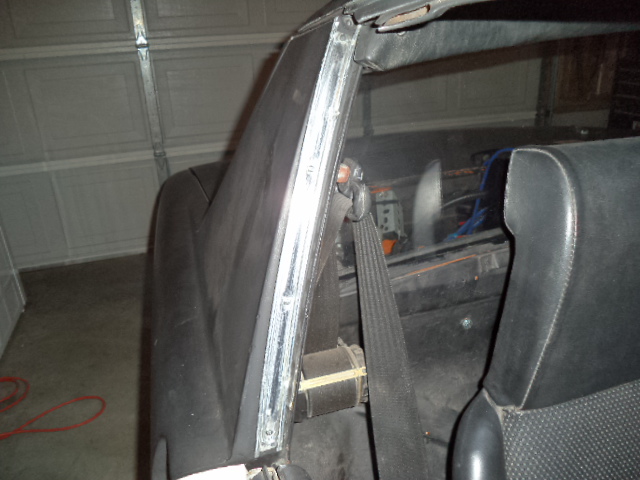
Posted by: jimkelly Sep 6 2015, 07:33 AM
I will look into where I may have space to add a crossover. the DRONE is killing me.
The only way to get rid of V8 drone is to install a crossover tube before the mufflers.
Posted by: 1stworks Sep 6 2015, 07:53 AM
I will look into where I may have space to add a crossover. the DRONE is killing me.
The only way to get rid of V8 drone is to install a crossover tube before the mufflers.
I just got 2 MagnaFlow no cross over installed on my ls conversion.
I really like them.There not strait through, they have cone inside.
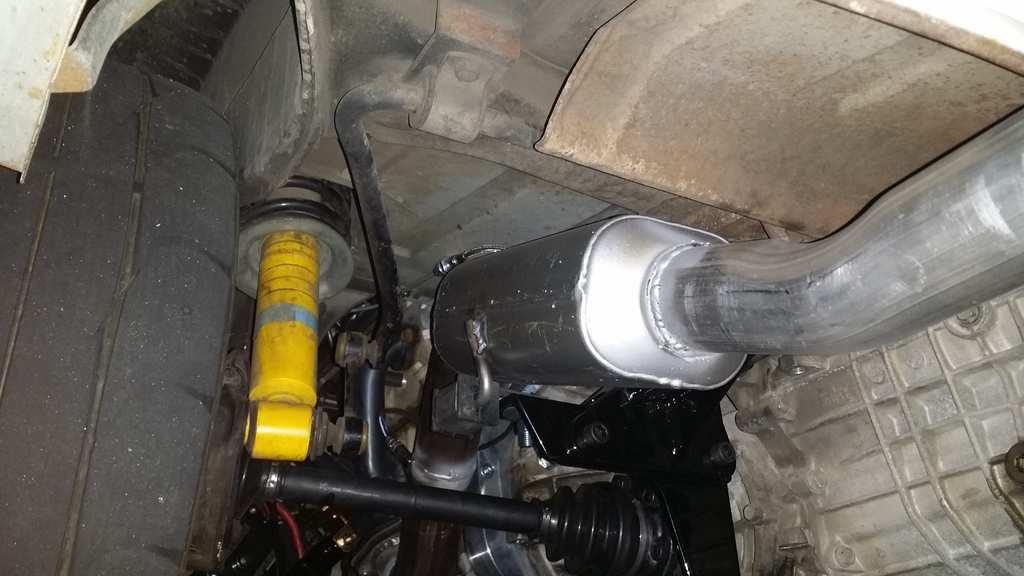
Posted by: jimkelly Sep 6 2015, 08:17 AM
i've been thinking of this style too. I do prefer to have two individual pipes but realize it is hard to conquer drone doing so.
Attached image(s)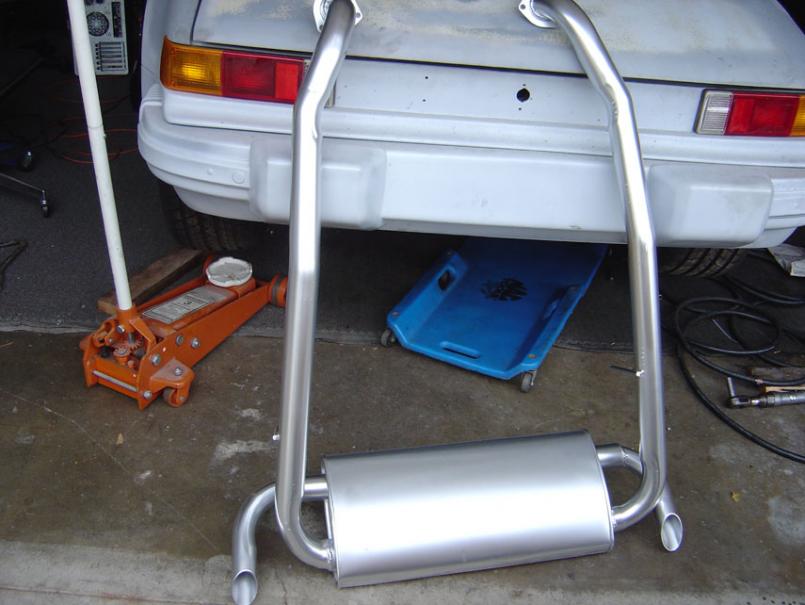
Posted by: Cracker Sep 6 2015, 11:44 AM
Allot of people do add a cross over pipe...I NEVER (300hp - 525hp) have had "drone" in any of teener conversions. I've also NEVER have had a cross over pipe too. My engines have all been LS based power-plants. I've seen it also being a function of your exhaust itself - the chassis and engine (and exhaust) are all operating individually based upon their own frequency range. Production cars have the chassis tuned to allow all of these to work together or to limit the effect. Best of luck - drone sucks and is unlivable in my book. For what its worth, I've always used magnaflow Stainless mufflers...the bigger the better for reducing the volume.
Tony
The only way to get rid of V8 drone is to install a crossover tube before the mufflers.
Posted by: jimkelly Sep 6 2015, 03:04 PM
i just bled the brakes one more time. the other day when I drove it, I noticed the peddle would sink at stop lights when holding it. I have a power bleeder and seem to not be getting any more bubbles at the calipers, but with bleeder connected to master cylinder, I press the peddle, and bubbles would come out, and fluid in hose from bleeder to MC would drop in level, thus filling void that bubbles previously occupied. just recently I noticed bleeder could be used this way with benefit.
as for exhaust, maybe my glasspacks are just too poor a match for my car, and maybe any other muffler would reduce or eliminate drone, and of course, loudness overall. maybe I will go with walker sound fx, they are $25 a piece at summit.
Posted by: BIGKAT_83 Sep 6 2015, 03:08 PM
I also have never had a drone with my V8 cars using Magnaflow and Borla mufflers. I've also never used a cross over pipe.
I had some Flowmaster 40 series and these were drone city. I ran them for less than a mile and took them off the same day I installed them.
Bob
Posted by: speed metal army Sep 6 2015, 10:04 PM
+10 on the Magnaflows. No drone, no crossover. Sound mint!
Posted by: Cracker Sep 7 2015, 05:51 AM
Jim,
I did a little looking and I believe this is the part I used on my old car...great sound but definitely not to loud (in my book). In fact, I used to be disappointed I couldn't heat the exhaust cruising down the road.
PART # 14148
MagnaFlow Product #14148
CONFIGURATION CENTER/CENTER
LENGTH 6 IN
OVERALL LGTH 12 IN
IN/OUT DIA 2.5/2.5 IN
FINISH POLISHED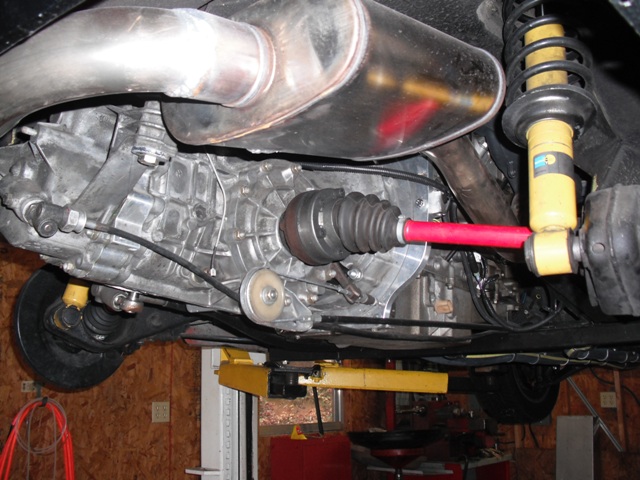
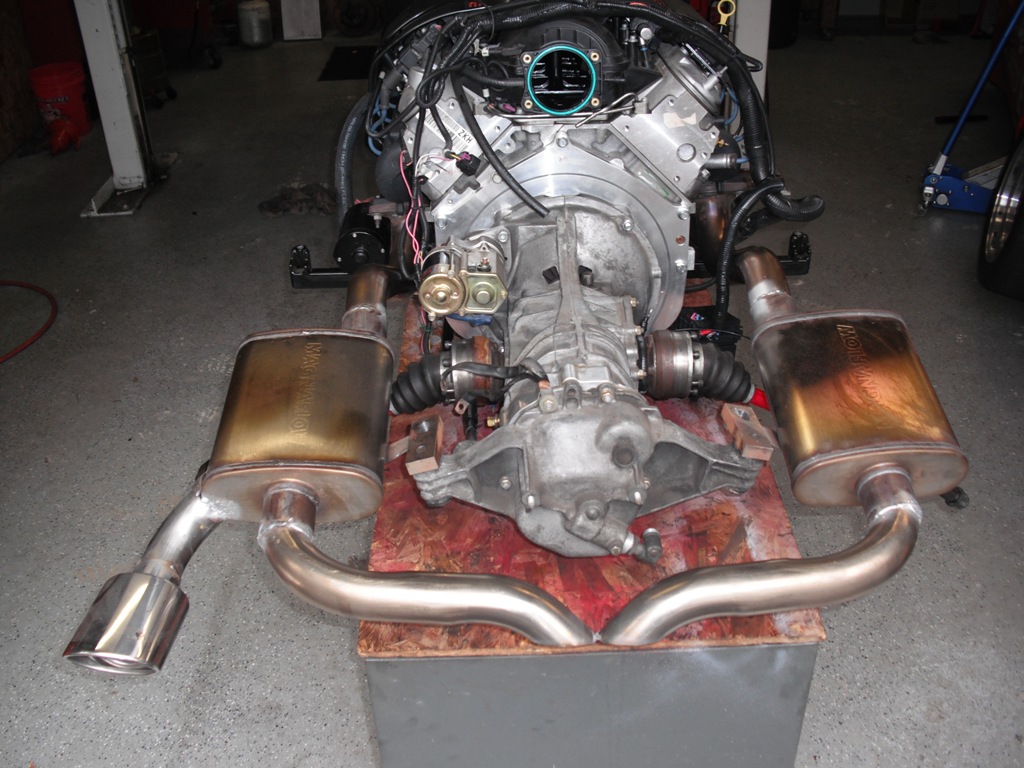
Posted by: Chris H. Sep 7 2015, 10:05 AM
Dummy exhaust tip for the stock opening or functional?
Posted by: jimkelly Sep 7 2015, 10:40 AM
next up is to replace
*emergency brake handle
and
*cover firewall hole
and keep bleeding brakes till I can no longer lightly pump repeatedly by foot and not have peddle drop slowly to floor.
oh yeah, my wife had AAA basic, we just upgraded to plus, for her, our son and myself.
also got a passenger side front bumper grill coming. pic of drivers side.
https://www.youtube.com/watch?v=N0yz9VTUDFk
Attached image(s)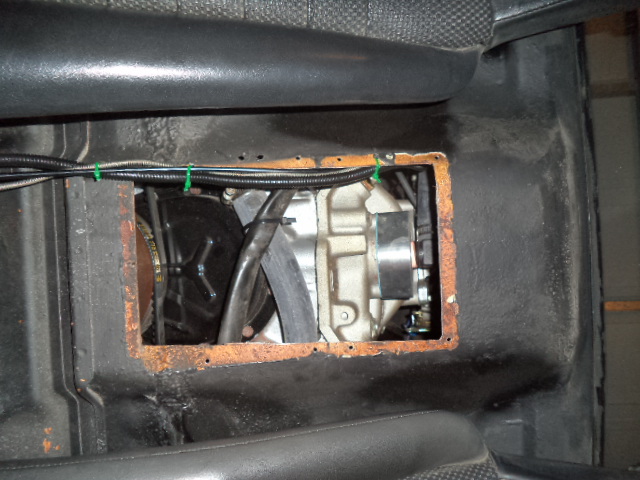
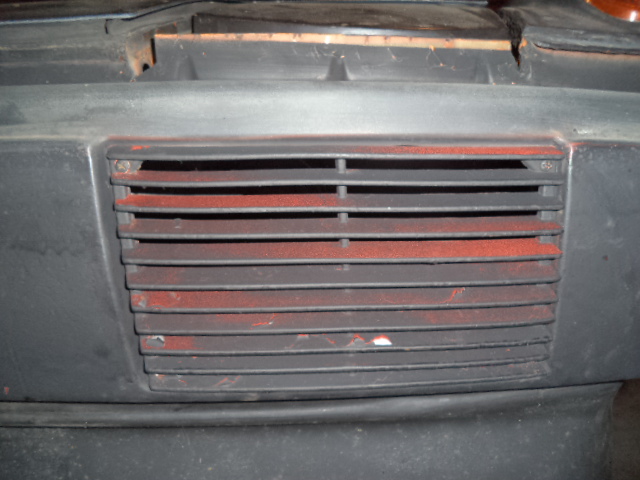
Posted by: mepstein Sep 7 2015, 11:36 AM
jim - do you need a firewall piece?
Posted by: jimkelly Sep 7 2015, 12:08 PM
I need a firewall piece, a late hand brake with cable (working), and 16 lug bolts (can be ugly - so i can roll whitey around my garage). thanks.
Attached image(s)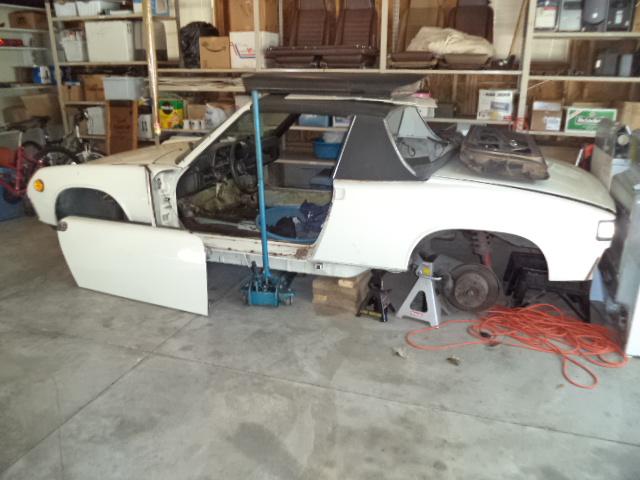
Posted by: mepstein Sep 7 2015, 12:38 PM
I have the firewall piece you can have for free. Best case senerio is next time your in Newark you drop by my shop. If you need me to ship I can but I would first have to trim the part since it's still most of the firewall.
Pm me if you want it.
I have lug bolts. Are the wheels steel or aluminum
Posted by: jimkelly Sep 8 2015, 05:32 AM
wheels are steel. see u this weekend. thank you!
Attached thumbnail(s)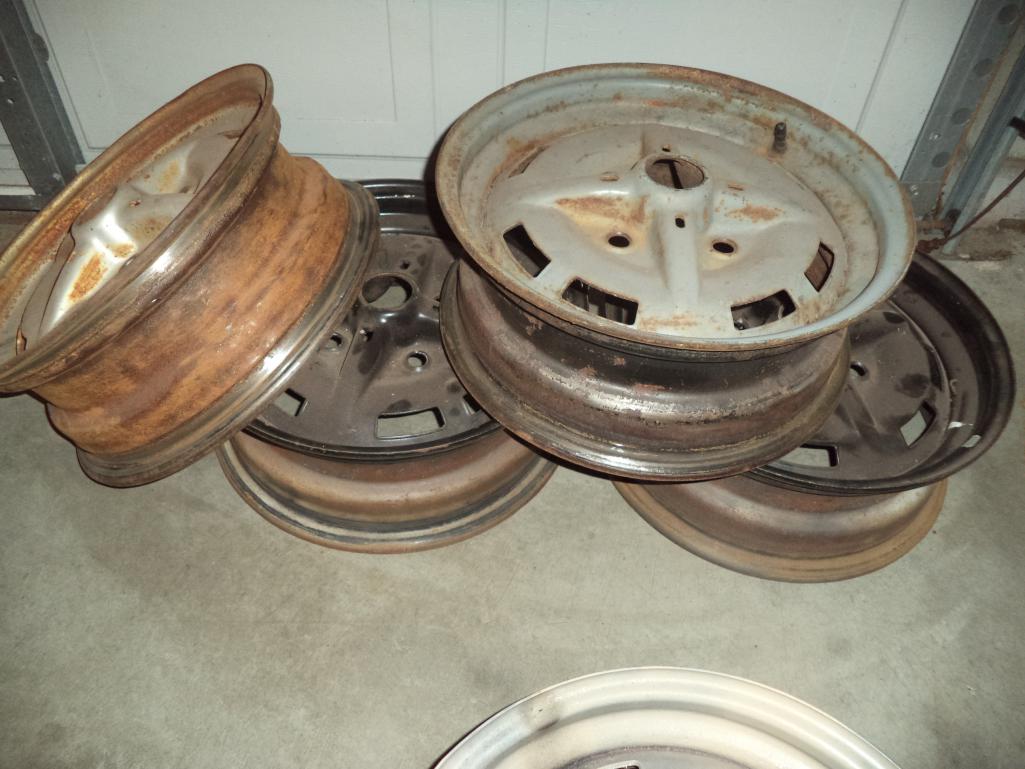
Posted by: jimkelly Sep 8 2015, 08:27 AM
good news for me. car is now registered for 2 years
just upped the pressure in my tires, 45 rear (chevy 350 engine), 40 front, let's see is that eliminates the suspension wiggle I was feeling.
need to straighten steering wheel, way off.
what remains next...
replace e brake handle (bdstone)
install pass side front bumber grill (kevinw)
install vertical targa seals (924rubber)
cover hole in firewall (mepstein)
replace these 2 wire nuts for crimped on connectors (spades)
I think I am going to probably replace all my spring ring hose clamps with worm gear type for peace of mind. certainly not ease and quickness of disassembly.
from pic below I see that I inadvertently clamped fuel pump to bracket, pinching the fuel pump's wires between it and bracket. must fix this.
Attached thumbnail(s)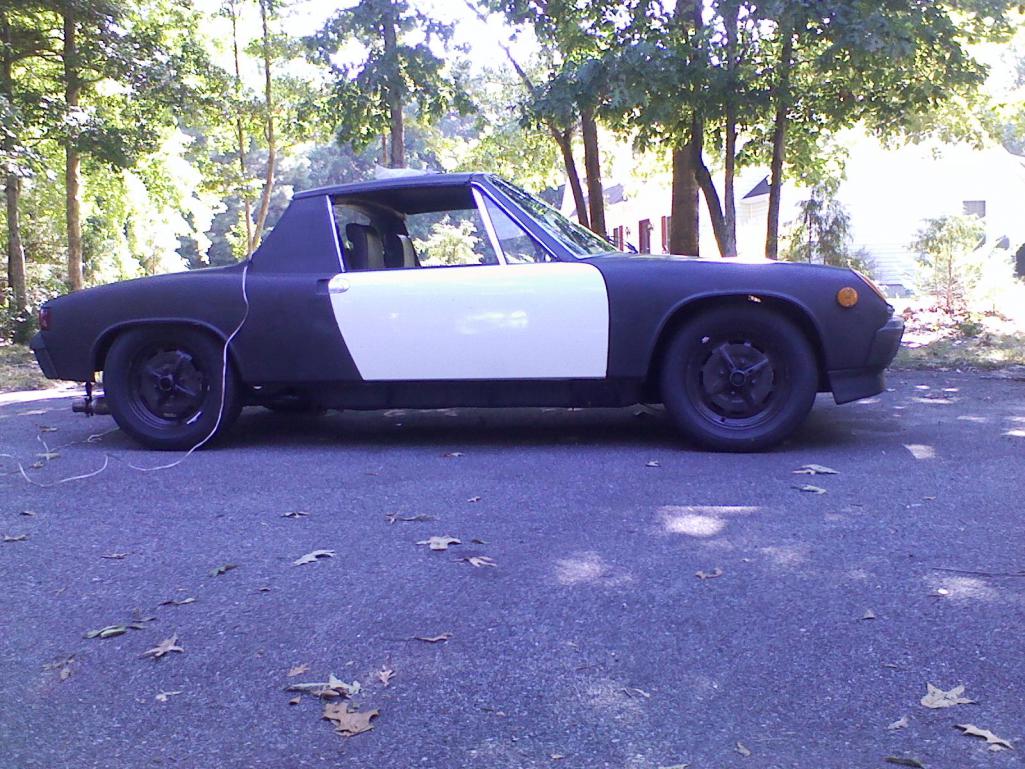
Attached image(s)
Posted by: Andyrew Sep 8 2015, 08:49 AM
45 in the rear? That must be one soft sidewall...
Posted by: jimkelly Sep 8 2015, 08:54 AM
I have not test driven it yet with new pressures. but at these pressures, when I push car side to side, by hand when standing next to it, I can still get it to move side to side, but less it appears. it is only a $70 tire with a tall sidewall 195x65x15.
her are the comparision videos - I do not see much of a difference : (
tires with 32 psi all around.
https://www.youtube.com/watch?v=aptbCK1rj6o
rear tires with 45 psi
https://www.youtube.com/watch?v=Q7PVeN9Lwsg
45 in the rear? That must be one soft sidewall...
Posted by: Andyrew Sep 8 2015, 09:03 AM
I guess that makes sense. You need some tall tires to keep the v8 happy on the freeway
Posted by: jimkelly Sep 8 2015, 09:18 AM
thus my next project is gonna be a suby conversion, matching engine tranny, can us all gears, can push rpms up high, fuel injection, modern shifting, and I can put some low profile tires. I will need a donor 5spd awd legacy 1995 or earlier as I want a non interference engine preferably.
but next up for v8 car is a quiet exhaust. I am NOW leaning magnaflows (due to above comments) starting right after the bend coming off the manifolds. then a s curve to get last foot or tow of exhaust pipe up higher, tight with under body. I may even put a second set of mufflers after axles, magnaflows before axles?
Attached thumbnail(s)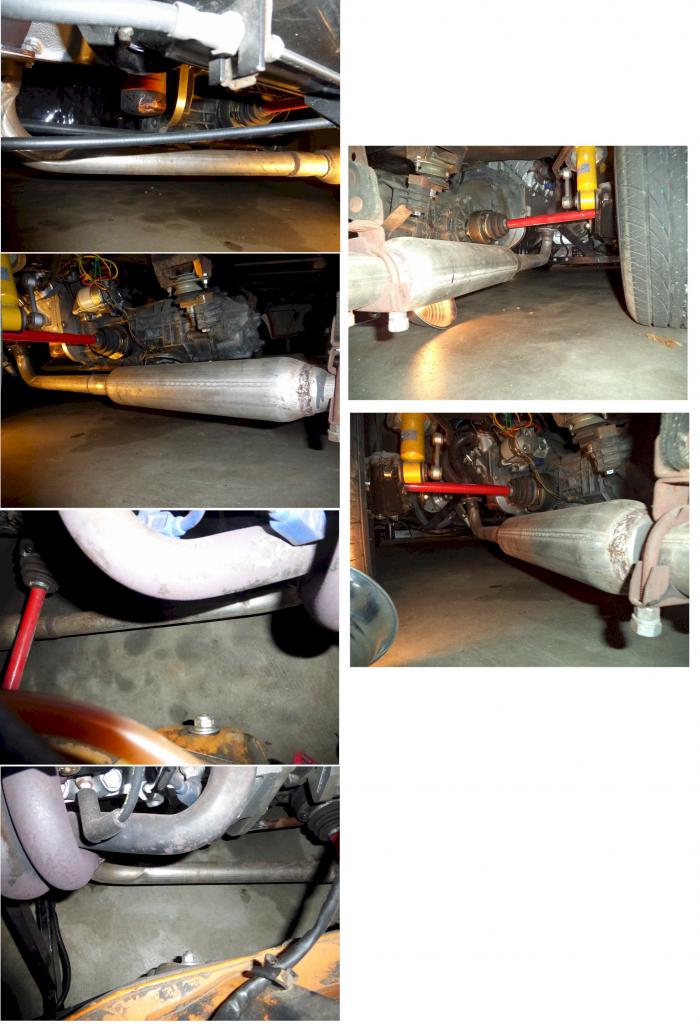
Posted by: jimkelly Sep 13 2015, 08:57 AM
buttoning some stuff up. fuel pump and fuel hose clamps.
got a firewall piece and lugs bolts from - mepstein - thank you mark !!
got a nice front bumper grill from kevinw - thank you.
got a pair of vertical targa rubber from 914rubber - thanks mike - need to find me some soap to slip those bitches up a bit for install.
swapped out all my regular fuses for easy id fuses.
and because I was still seeing black shit in my fuel filters, I decided to replace all my rubber fuel lines, with new. problem should be gone now.
oh yeah, rcvd a new speedo cable from pelican. I ordered it before I realized I have 2 old ones, but then said, fuck, new would be nicer.
even after adding pressure to tires, rear is sloppy when driving. I assume my alignment is way off, and I assume a way off alignment could be the culprit for sloppy handling???
those lug bolts from mark are the first step towards my 1975 becoming a suby conversion. the V8 is a blast (literally) to drive, but it is far from being a precision instrument : )
i'll be using my gps as a temporary speedometer. but today I realized my power port was not powered, so wired it to my new fuse box.
oh yeah, 2500 rpm is about 60 mph, 2200 is about 50 mph, 2800 is about 65 mph.
Attached image(s)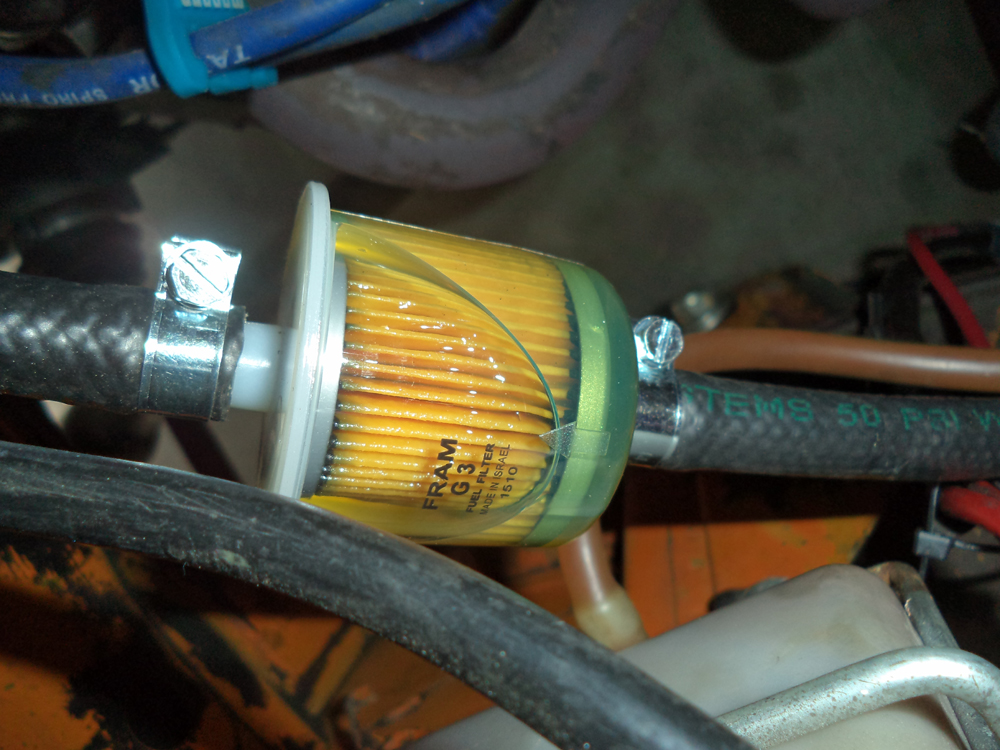
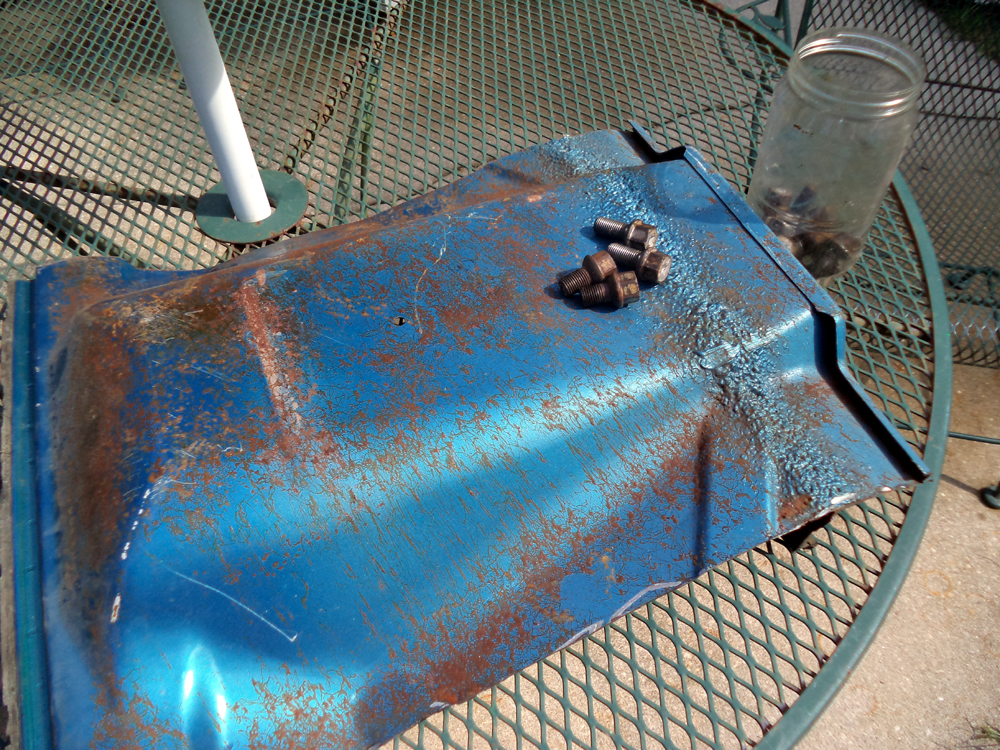
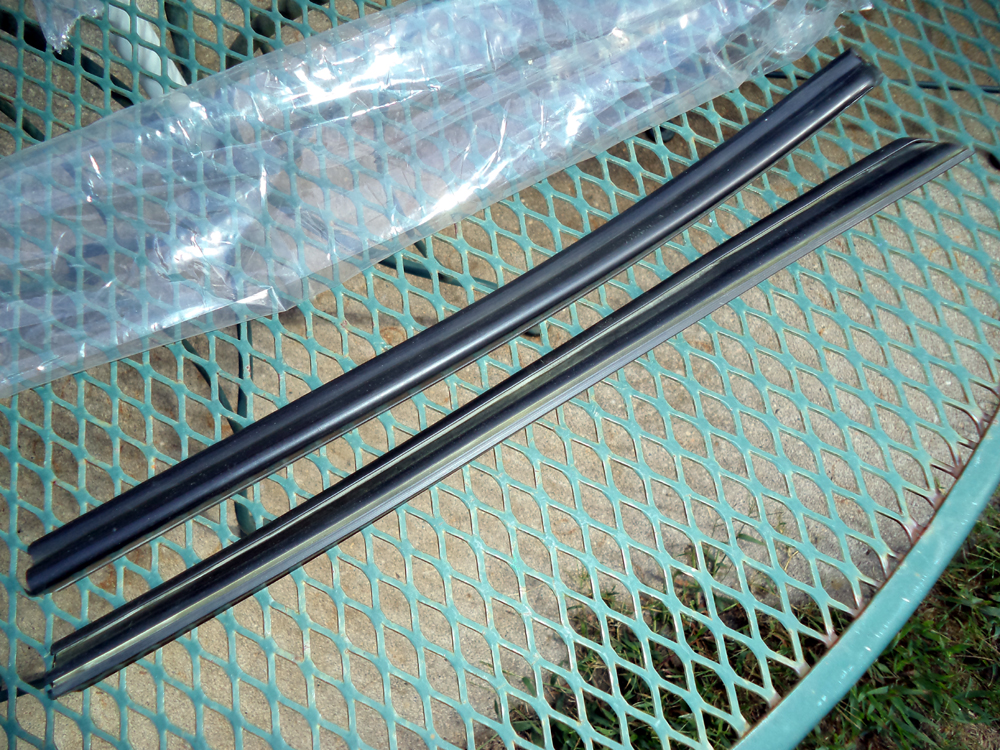
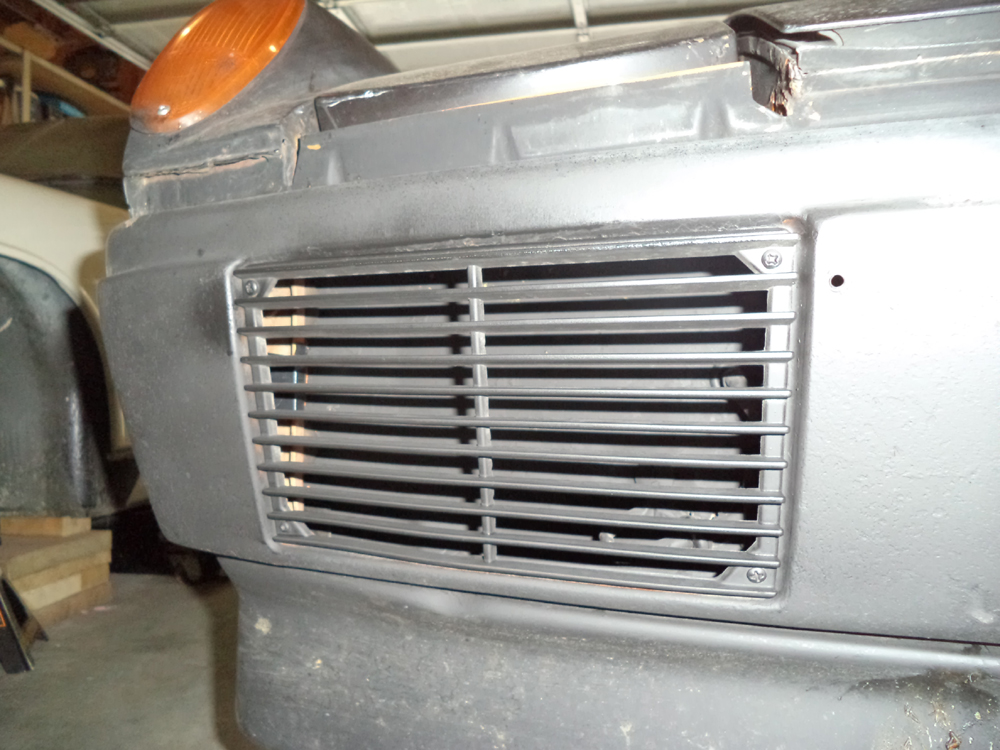

Posted by: jimkelly Sep 14 2015, 07:52 AM
drove it 3 hrs today : )
Attached thumbnail(s)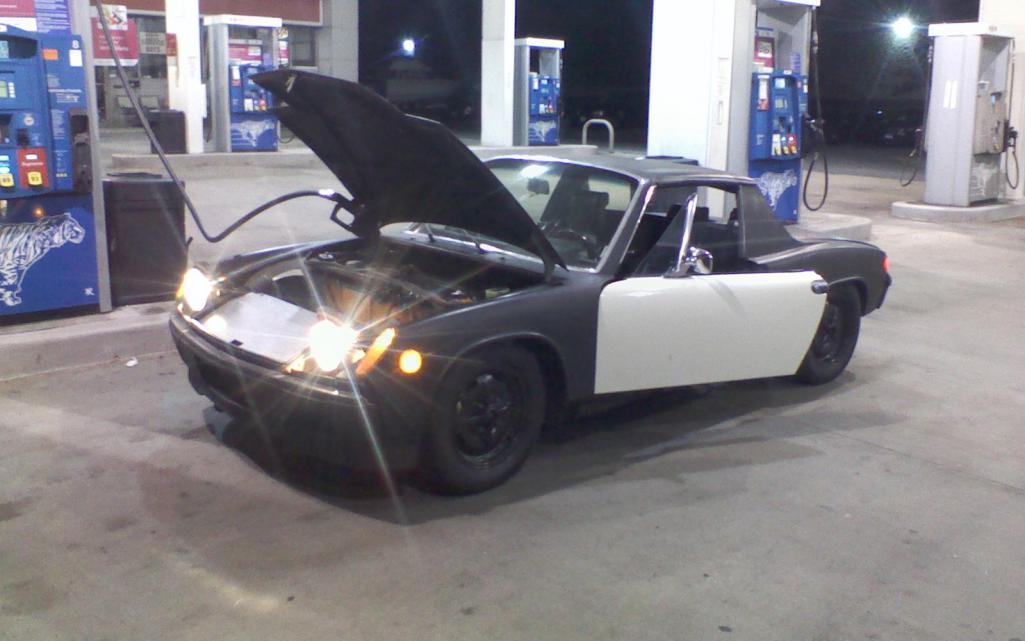
Posted by: jimkelly Sep 18 2015, 08:48 AM
she is gonna be a little quieter tonight : )
Attached thumbnail(s)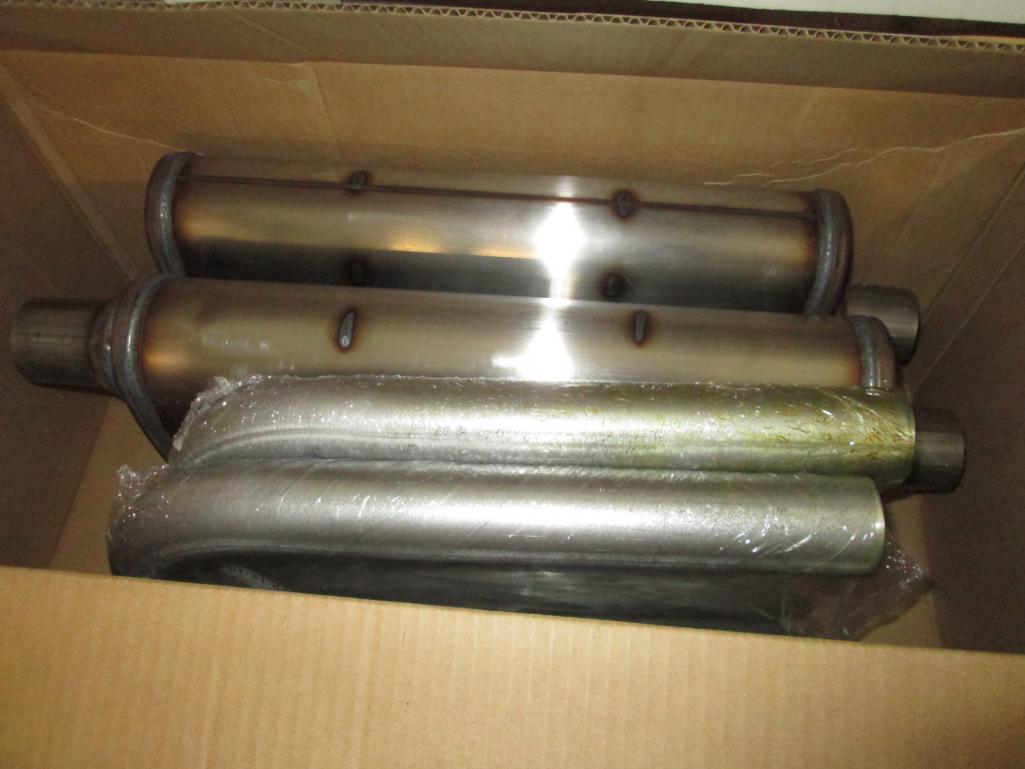
Posted by: Andyrew Sep 18 2015, 09:01 AM
What mufflers are those?
Posted by: jimkelly Sep 18 2015, 01:33 PM
Brand:MagnaFlow
Manufacturer's Part Number: 13254
Part Type:Mufflers
Product Line:MagnaFlow XL 3 Chamber Mufflers
Summit Racing Part Number:MPE-13254
Posted by: jimkelly Sep 18 2015, 09:07 PM
my first time with a car in a car show. and thanks to bdstone914 for sending me a nice ebrake handle assy : )
funny that I could not locate my 1975 ebrake handle, it turned out it (seeing what bruce sent me) was the one in my 1972 car, which broke. my 1972 ebrake must have been real crap. guess I will need a second ebrake assy for my 1975, to be subaruized soon, I hope.
I got 6 hours of drive time on the car and things are looking pretty good so far. gonna get to exhaust next week.
ebrake handle in : ) realized I did not have a hook to attach the spring to, need to weld a loop in.
Attached thumbnail(s)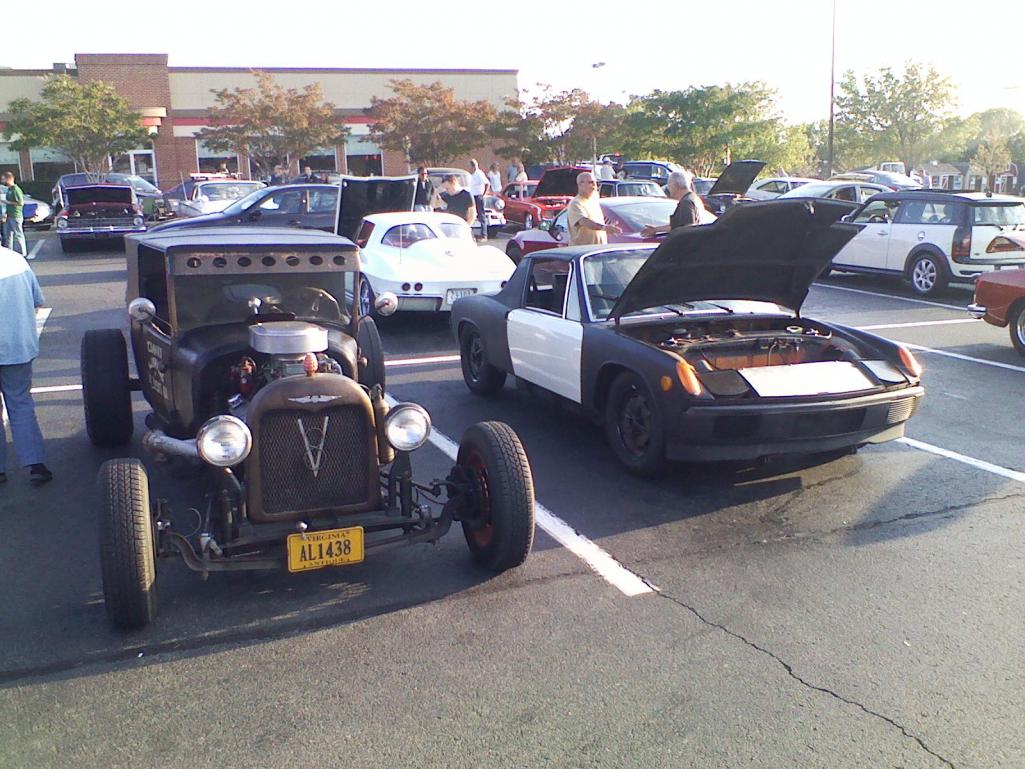
Attached image(s)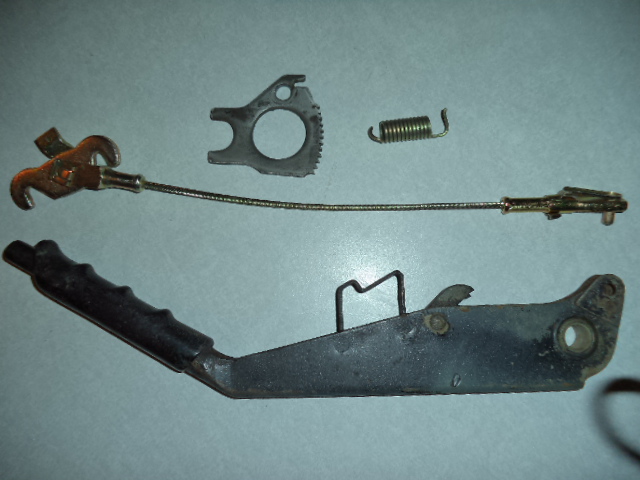
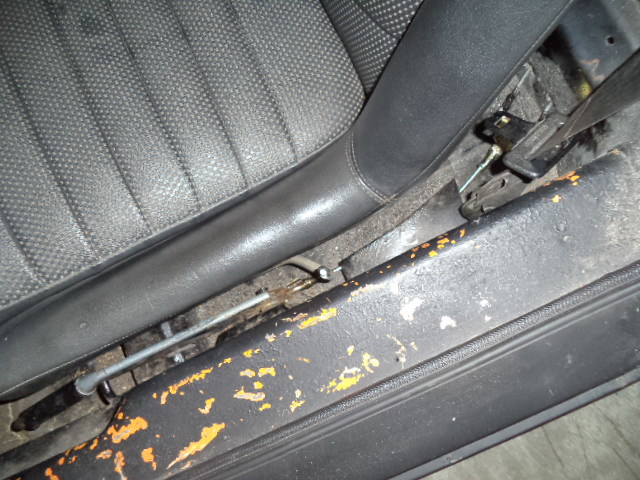
Posted by: arkitect Sep 20 2015, 07:11 AM
Jim,
Looks like you had a variety of company next to you, a rat rod (looks cool) and an older vette (classic). Glad to see you got the bugs out of it and driveable.
Dave
Posted by: puffinator Sep 20 2015, 07:27 AM
send a picture of how the handle is supposed to go together. I don't have a spring in mine.
Posted by: jimkelly Sep 20 2015, 08:24 AM
pictured is my removed broken handle with bruce's spring on the very end.
when you press the button it is clear to feel that there is a spring internal to the mechanism BUT the spring I am referring to is the one that connects the equalizer to the firewall.
Attached image(s)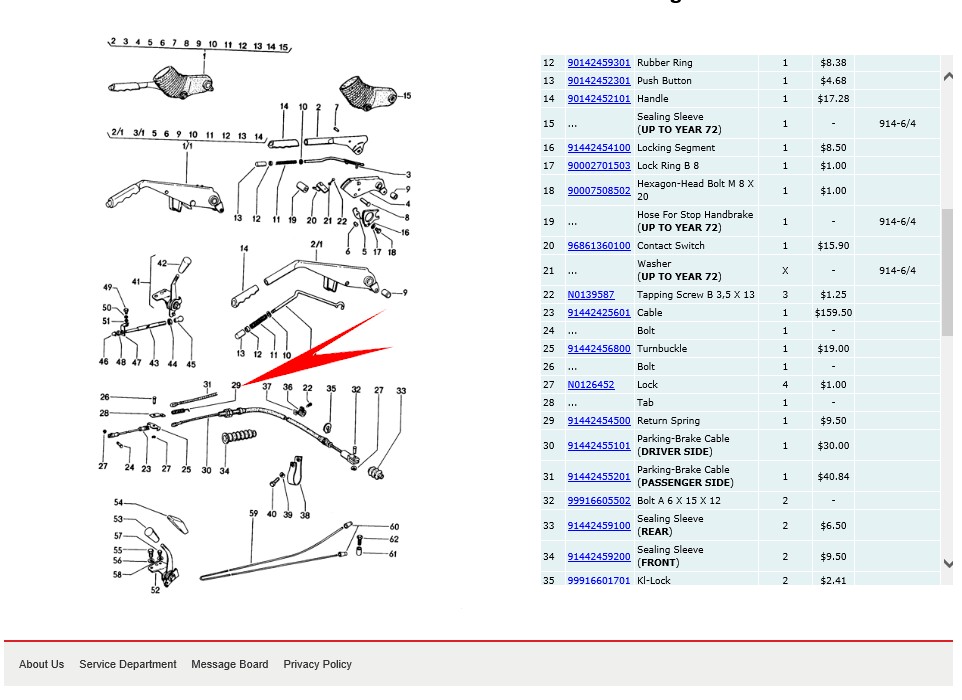
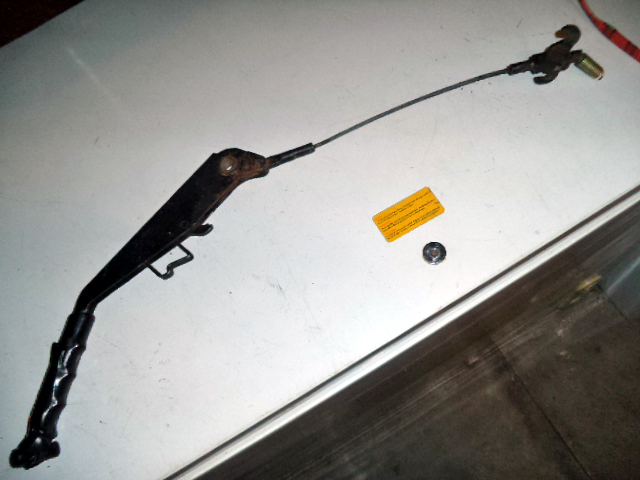
Posted by: 396 Sep 20 2015, 11:05 AM
I have not test driven it yet with new pressures. but at these pressures, when I push car side to side, by hand when standing next to it, I can still get it to move side to side, but less it appears. it is only a $70 tire with a tall sidewall 195x65x15.
her are the comparision videos - I do not see much of a difference : (
tires with 32 psi all around.
https://www.youtube.com/watch?v=aptbCK1rj6o
rear tires with 45 psi
https://www.youtube.com/watch?v=Q7PVeN9Lwsg
45 in the rear? That must be one soft sidewall...
I hope you have looked at the max pressure on your $70 tire.
Pushing it past the max on your low end tire, you might find yourself wrapped around a pole. At times, being safety minded is better than being cheap. What is your life worth?
Good luck
Posted by: jimkelly Sep 20 2015, 02:43 PM
max is 51 psi. I am hoping that tracking is much better after I get it professionally aligned and then I will take psi down a bit. the tires are DUNLOP, not a cheap brand, just a size that does not warrant a high price or much performance.
Posted by: jimkelly Sep 20 2015, 11:01 PM
nighttime timelapse
https://www.youtube.com/watch?v=YEz9C5QDQn4
Posted by: Andyrew Sep 21 2015, 08:57 AM
Quite a long trip! Even a fuel stop in the middle!
Posted by: jimkelly Sep 21 2015, 01:58 PM
i was trying the gopro with its internal battery but the battery ran out of power about 1/2 way (1.5 hrs) into trip. next time i will power it via a usb port and cigarette lighter outlet. seems i can travel about 4 hrs at highway speeds on a full tank.
Posted by: Andyrew Sep 21 2015, 02:06 PM
4 hrs is pretty decent, at 70mph average thats... 280 miles / ~ 15gal = 18+mpg.. Thats better than what I ever got!
Posted by: jimkelly Sep 21 2015, 03:03 PM
i just double checked the miles i drove on my last tank of gas. i went about 222 miles but can not remember how many gallons where left in tank when i filled up last, probably 1 or 2. i came up with 14.8mpg. if 2 gallons left in tank, then i was getting closer to 17.0 mpg. i will watch my mpg a little closer and report back. i'll check my bank acct tomorrow to see how much i spent on gas last time i filled up at $2.39 a gallon, and i will know what was left ion my tank for certain.
Posted by: jimkelly Sep 22 2015, 01:32 PM
glasspacks coming out and magnaflows going in. kinda nice having a car that i can call a hot rod, or a rat rod, or a sports car, at will
Attached thumbnail(s)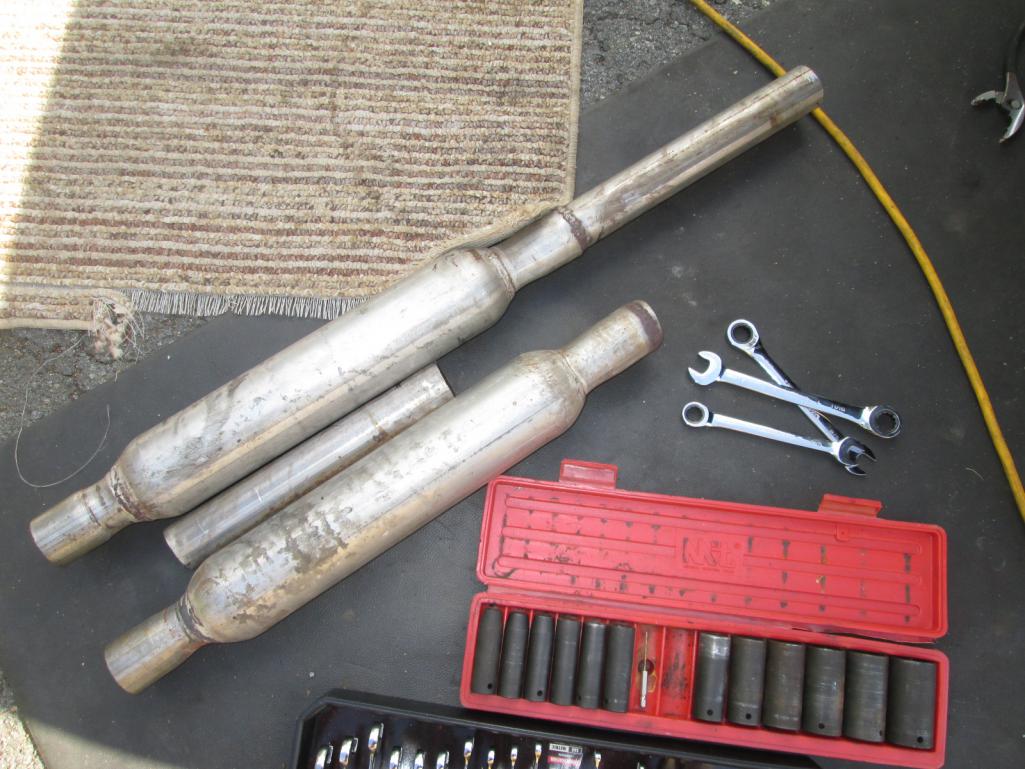
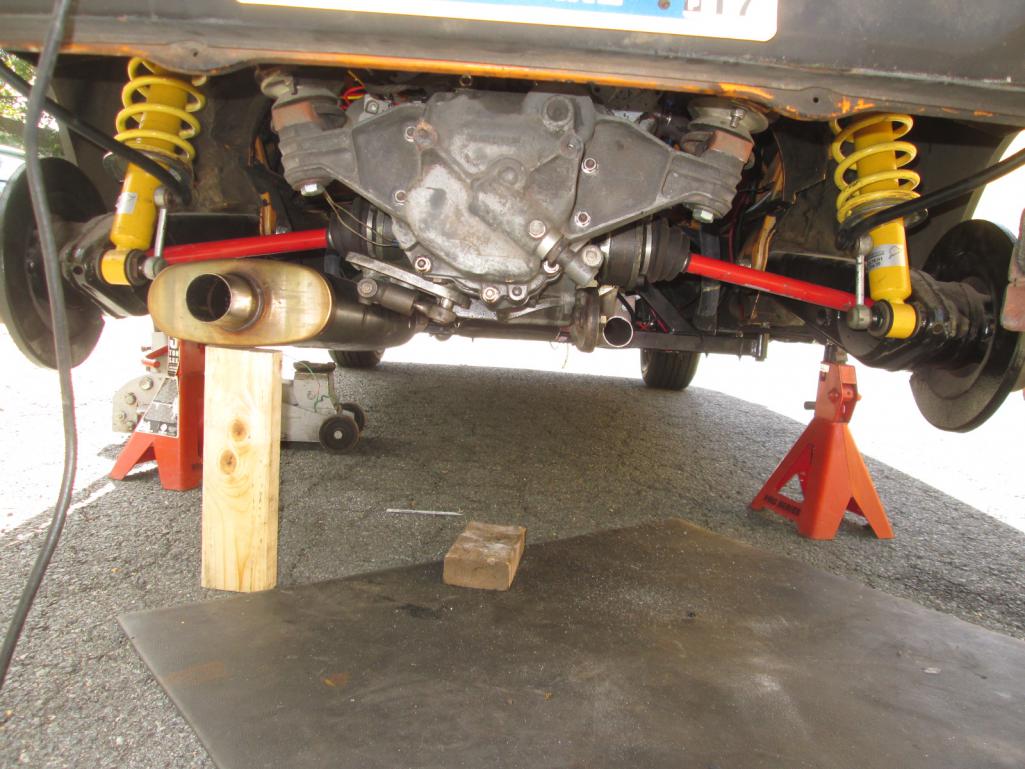
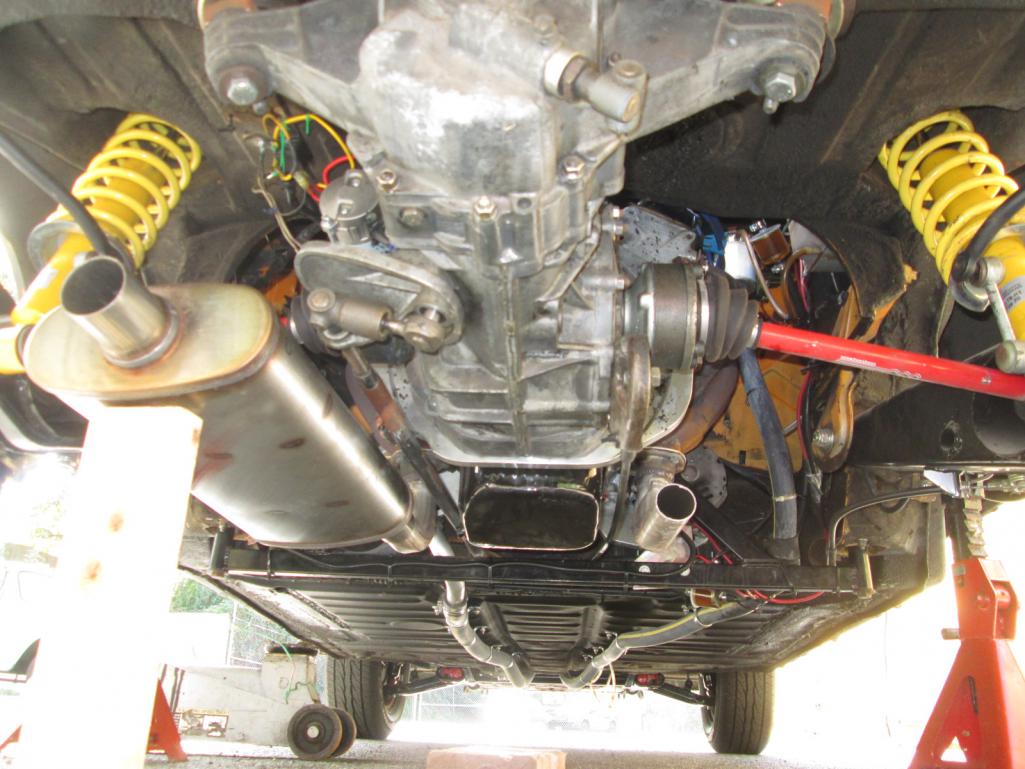
Posted by: jimkelly Sep 22 2015, 07:32 PM
magnaflows are in and NO MORE DRONE. you guys were right to guide to toward magnaflows, i almost bought walkers. exhaust is a lot quieter and the rear section is higher off ground. tomorrow i will decide how to fab up a hanger. i just got it on ground and wheels back on and took it for a drive, so much more pleasant to drive, almost civilized but now i can hear more squeaks and rattles
Attached thumbnail(s)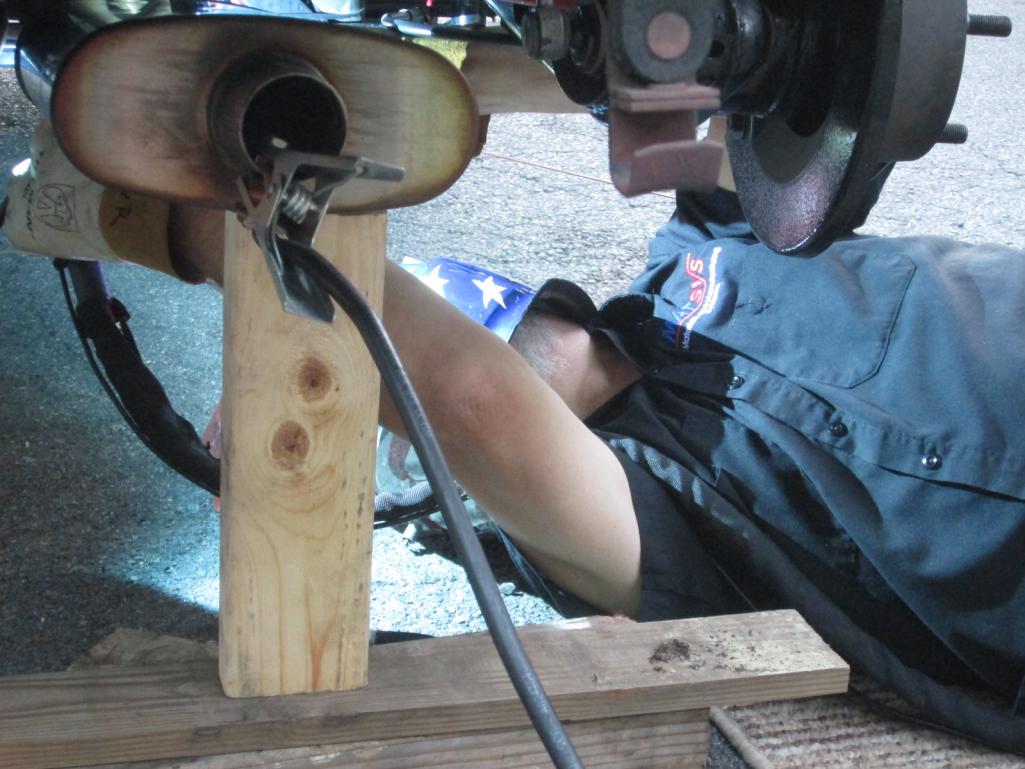
Posted by: okieflyr Sep 22 2015, 07:47 PM
Who is this Masked Man?
Posted by: jimkelly Sep 22 2015, 08:01 PM
rod, aka: root. he can tig like a madman these days
i owe him some Face Plant IPA, that is for sure.
Attached thumbnail(s)
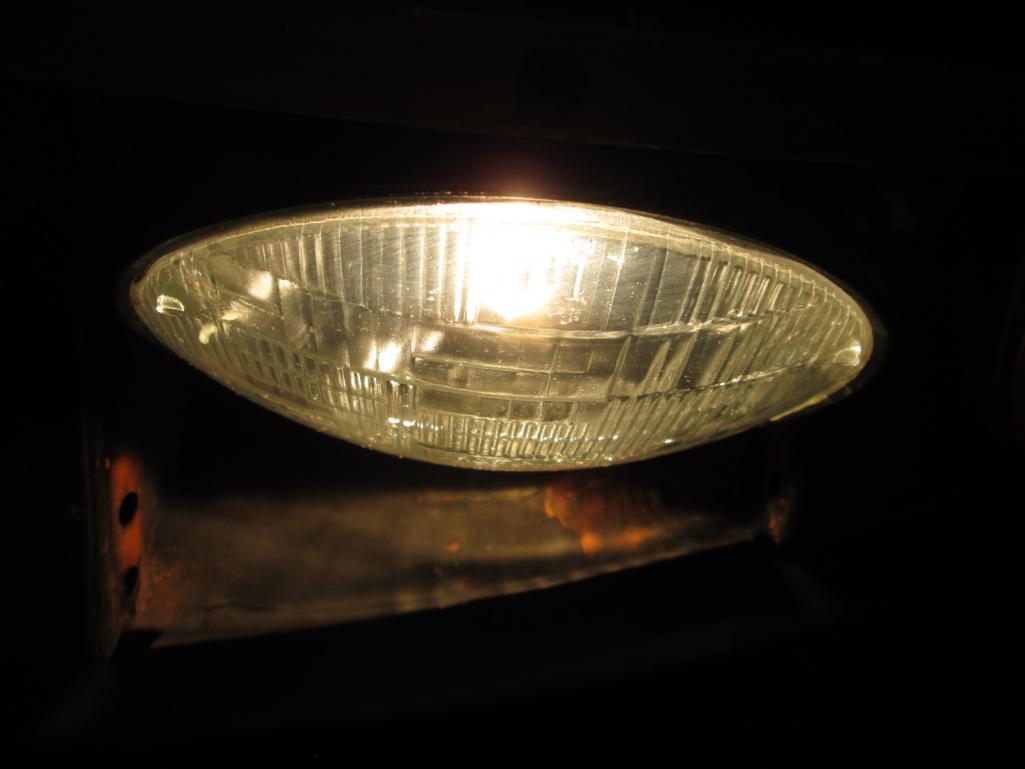
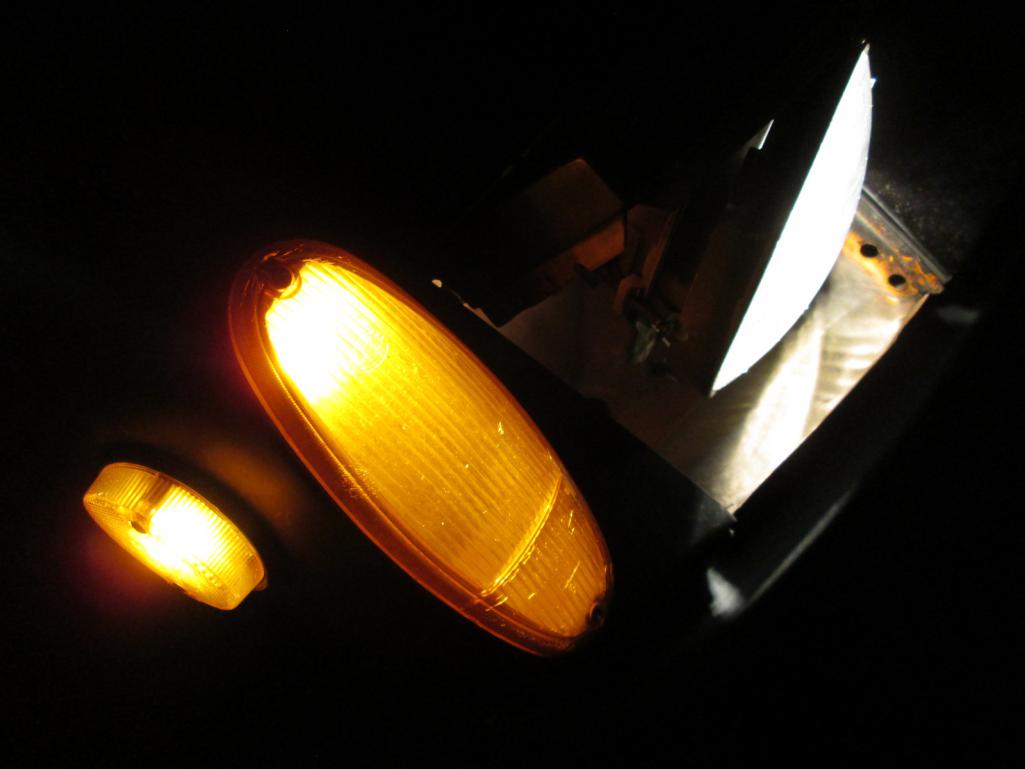

Attached image(s)
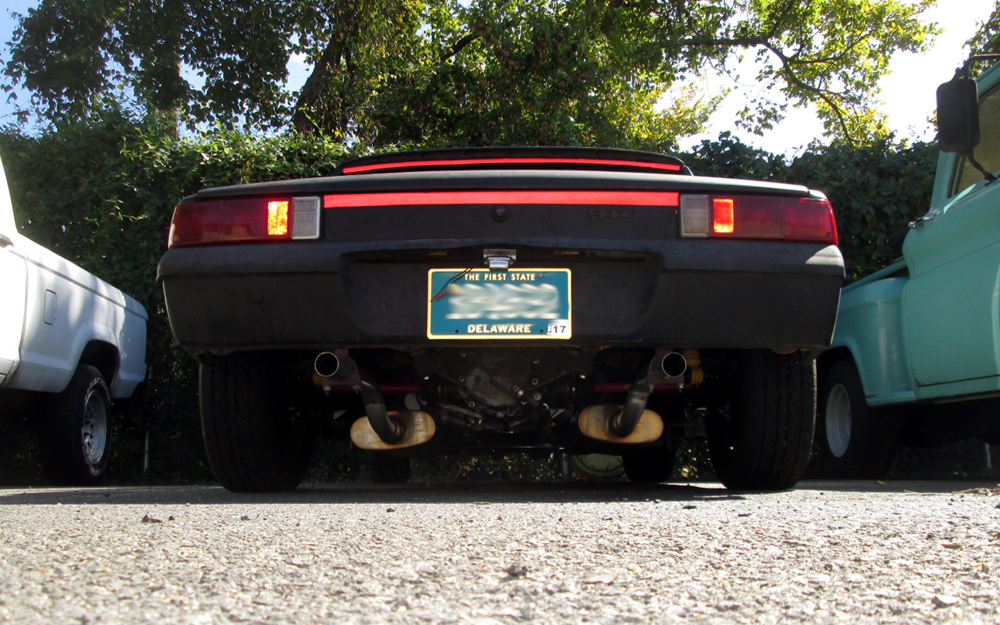
Posted by: jimkelly Sep 24 2015, 05:07 PM
today got steering wheel straight and tightened my ebrake cables a bit.
i expected steering wheel to resist removal but she jumped right off and said "thank you "
rigged up my GPS using some holes where my ashtray used to be. could not take the gooseneck holder i had before that bounced all over the place like and erection in an earthquake
Attached thumbnail(s)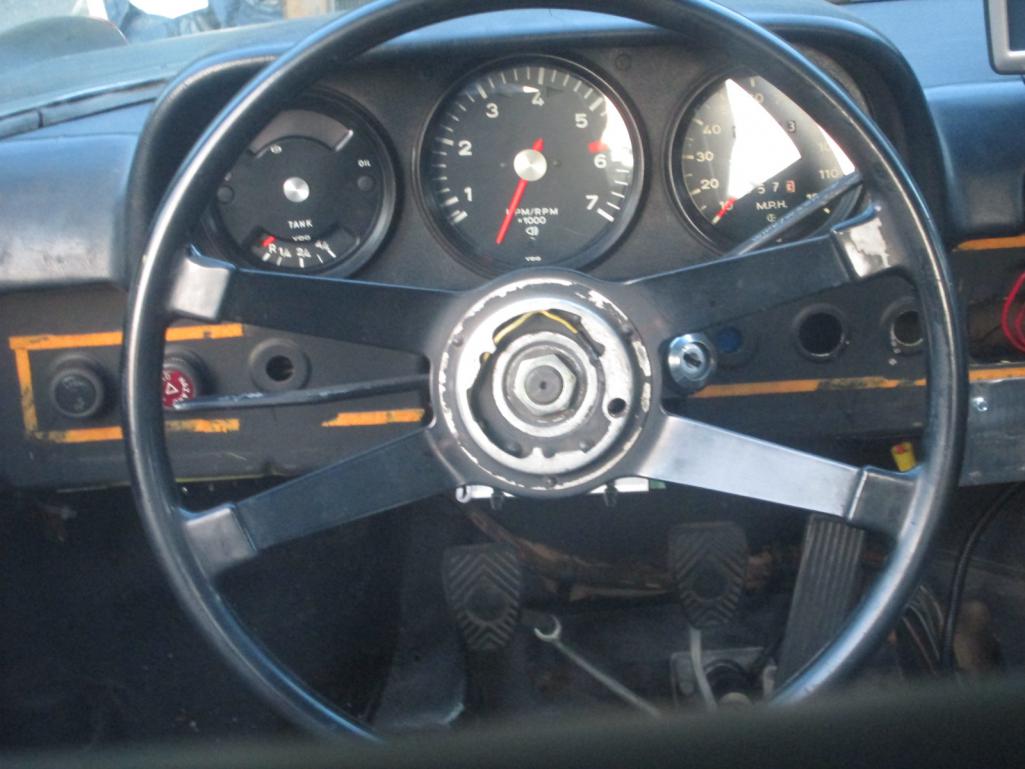
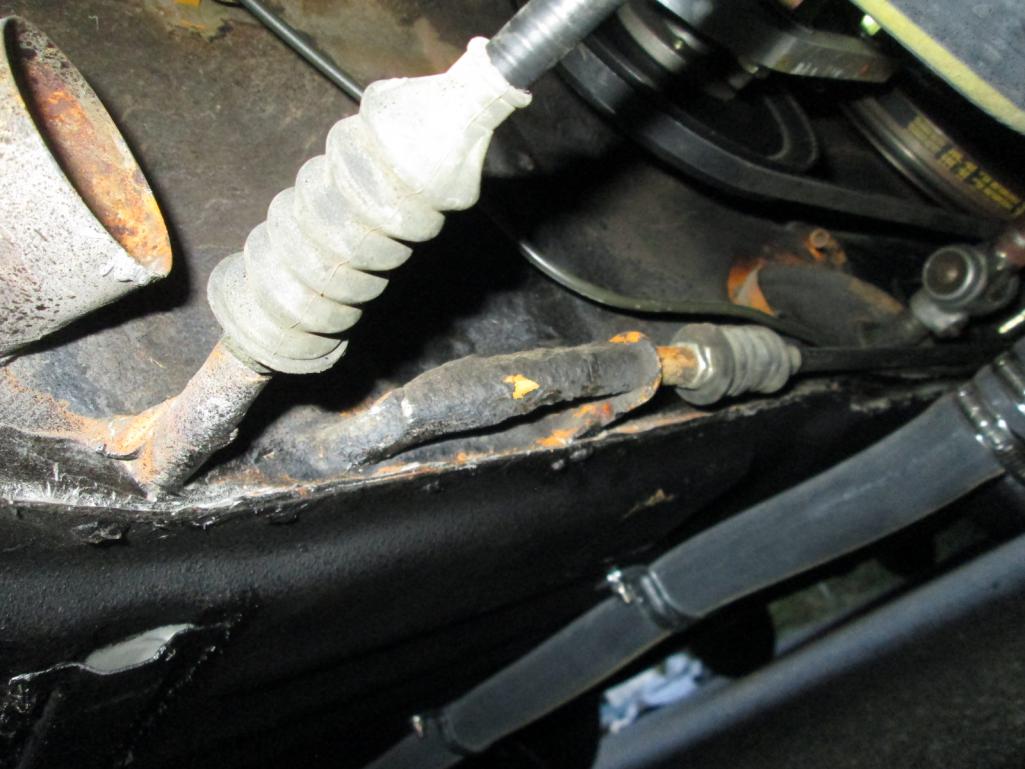
Posted by: jimkelly Sep 25 2015, 05:51 AM
hard to hear much improvement but believe me there is a big improvement over glasspacks using magnaflows.
old exhaust
https://www.youtube.com/watch?v=VdXDxG2QvaY
new exhaust
https://www.youtube.com/watch?v=_N0-a52Csdc
Posted by: jimkelly Sep 26 2015, 10:12 AM
speedo installed but I got a boots question. I thought big boot should be facing firewall? not angle drive? if this boot covers angle drive, what covers the hole in the firewall, the small boot? makes sense to me now. it is just when I rcvd it, the speedo nut was lodged in the smaller boot. my sbc 307 seems to hum all the way to ALMOST 5000 rpms. though I keep it around <3k most of the time. still trying to get used to driving a stick again.
https://www.youtube.com/watch?v=EsiCTh6Ql-k
Attached thumbnail(s)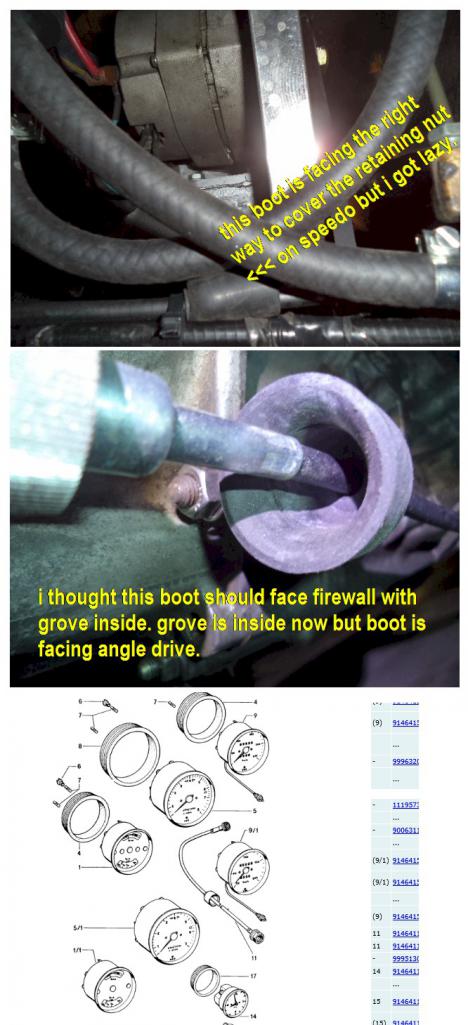
Posted by: jimkelly Sep 26 2015, 07:44 PM
found this. now I have to reread it a few times.
http://www.914world.com/bbs2/index.php?showtopic=241571&hl=
mine is like this. I will probably just put some silicone in the firewall hole and not try to slide the smaller boot all the way to the speedo gage.
Attached image(s)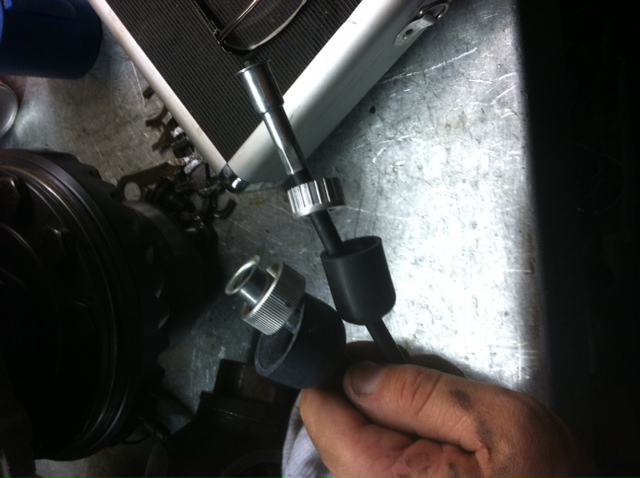
Posted by: jimkelly Sep 27 2015, 06:41 AM
pic of knob I need to get.
pic of 914rubber installed, looks so nice, new rubber could become an addiction
would like to add this sleeve at some point.
http://www.914world.com/bbs2/index.php?showtopic=81274&hl=first++sleeve
Attached image(s)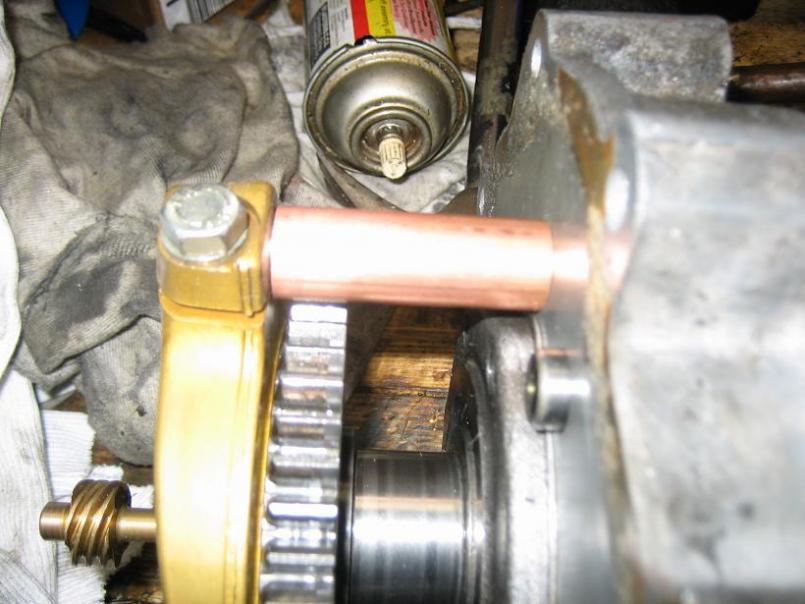
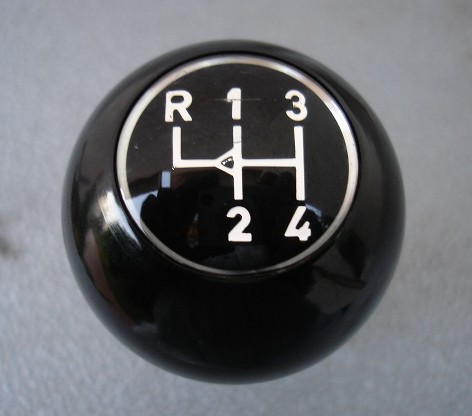
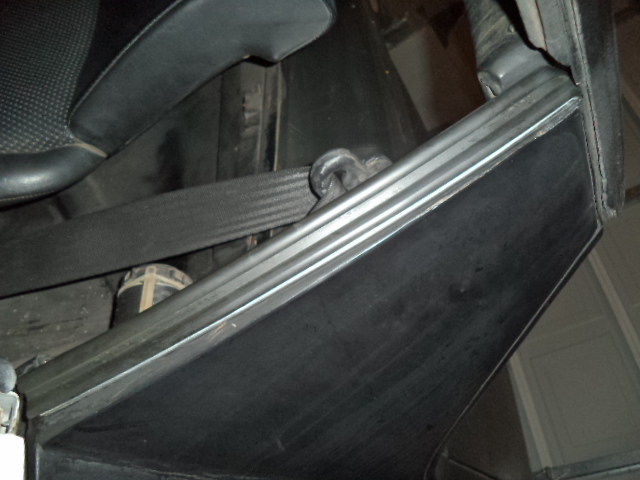
Posted by: jimkelly Sep 27 2015, 06:51 AM
turns out my shift linkage at firewall is loose. I assumed it was the ID of the bushing, BUT it turns out that it is the OD of the bushing OR the ID of the hole in firewall?
https://www.youtube.com/watch?v=nHndgluPlBc
Posted by: jimkelly Sep 28 2015, 02:51 PM
put a speedo cable in and guage seemed to work fine aftyer initial testing but then on a long drive it started making noise, then guage stopped working. put a drill on end of cable and guage did not move, pulled on fitting on trans end of cable and it cam off easily in my hand. seems it got hogged out during my drive. i think i did not have cable routed smoothly (least curves) enough? i'll try again with an old cable this time.
Attached thumbnail(s)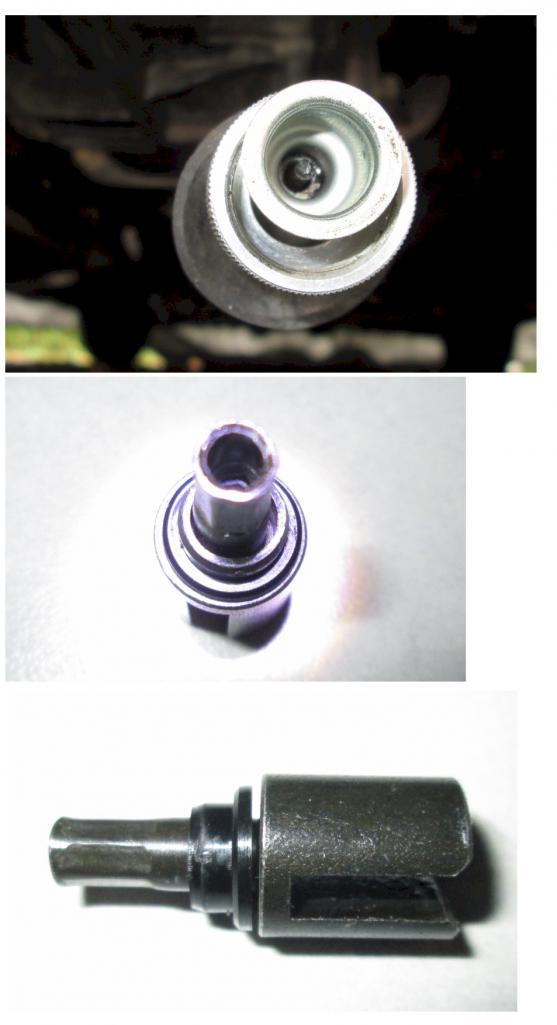
Posted by: r_towle Sep 28 2015, 05:50 PM
Get foleys firewall bushing and the ujoint that is right outside the firewall.
For the sleeve, use bronze not copper.
Posted by: jimkelly Sep 29 2015, 06:59 AM
thanks
Get foleys firewall bushing and the ujoint that is right outside the firewall.
For the sleeve, use bronze not copper.
Posted by: jimkelly Oct 5 2015, 10:05 AM
well, i removed my rear sway bar and my car seems to track a bit better then before. the rear is less stiff but for street/hwy driving, i feel it is better. so until i can have an alignment done, i will leave rear bar off.
also changed my fuel filter before pump, it had some crap in it from tank. having clear plastic filters has the advantage of being able to be visually inspected.
Posted by: jimkelly Oct 6 2015, 03:29 PM
i know that not many are doing sbc v8 conversions anymore AND that renegade is making only LS conversion kits BUT if these things were not the case, it would be far better if the water cooler belt was the rearward belt and the alt belt were the forward belt BECAUSE to remove the alt belt requires the coolant to be drained from car cause the neck on the water pump touches the motor mount and stops it from sliding lose thus requires the neck to be removed : ( at least this seems to be the case for me.
my alt belt won't stop fluttering, not matter how tight or loose i set it. seems like i need a tensioner?
i need to source a neck (made in china also) that comes down the other side i think.
note the leak, i was already removing neck.
Attached thumbnail(s)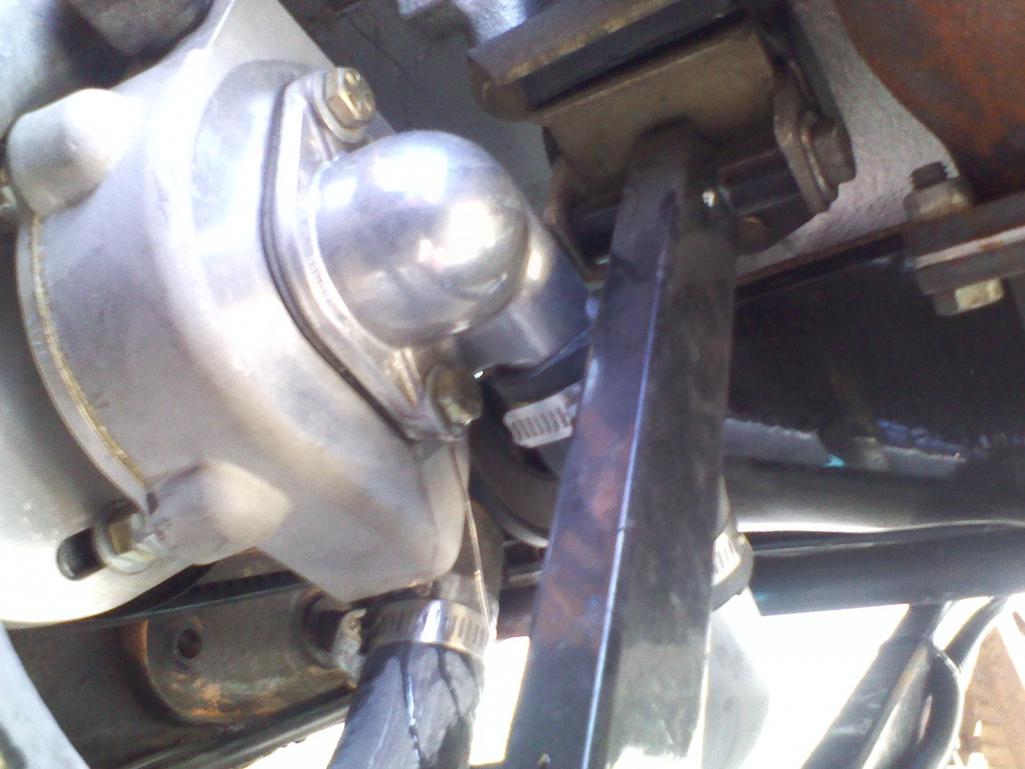
Posted by: arkitect Oct 7 2015, 06:12 AM
Jim,
Cool sbc build. I thought the face plant comment was something you're car did until i seen the beer pict. Good ipa name.
Dave
Posted by: jimkelly Oct 8 2015, 08:24 PM
my top issue now is that my alt belt is fluttering badly at some rpms above 2250 and especially at an rpm that I was to cruise at on hwy. I think I need to at a tensioner asap. I try various amounts of tighten first but I do not think it is only a setting issue of the belt.
Posted by: JP3 Oct 10 2015, 07:00 AM
Jim,
Did you get your speedometer fixed? I finally gave up on mine and bought a GPS speedo from Speedhut. You can customize just about anything on it to match the existing gauges.
Jerry
Posted by: bobo914 Oct 10 2015, 09:21 AM
Hi Jim. Cool seeing an old school sbc build, don't see them often anymore. I have one also and love it. I just crawled under mine to look at the belts for you. Maybe check your belt numbers? Both are Gates belts 7410 for water pump and 7355 for alternator. My alt belt flutters a little, not more than any other old style belt car.
Posted by: jimkelly Oct 10 2015, 10:45 AM
well, I finally know what all the fuss is about SPEED BLEEDERS. they are as awesome as everyone says and they should be on every car. if for no other reason that they have a larger hex on them and they seat in REALLY nice.
I raised the rear when bleeding the rear and front vice versa. and as per rtowle I added 2 drops of food color red to fluid to be sure I bled my lines completely. I found it took about 20-30 pumps of the peddle to fully clear out all old fluid. thus you can see pinkish fluid in my reservoir. I used only one qt to do the entire car BUT bought 3 expecting to need more (DOT4).
I just bled all 4 calipers and my peddle felt nice and high once done. I think I have a lingering problem in that my pads were never really bedded in properly.
Attached image(s)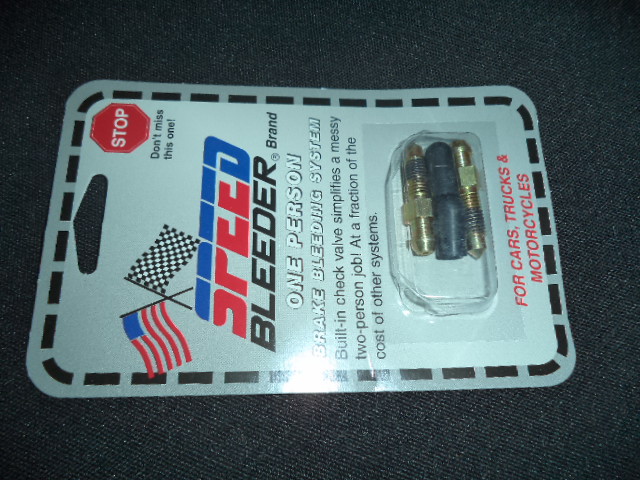
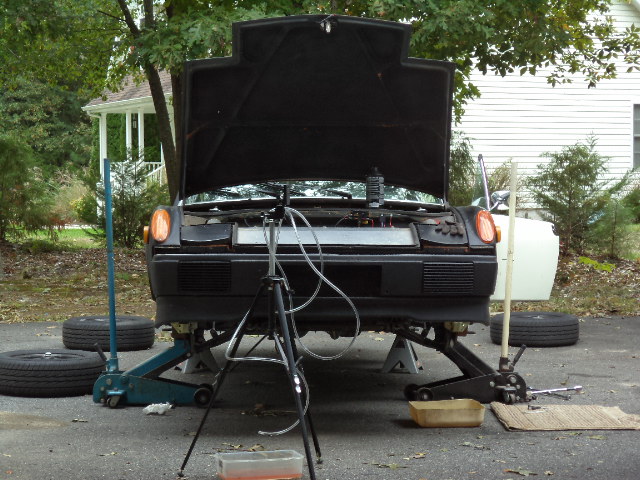
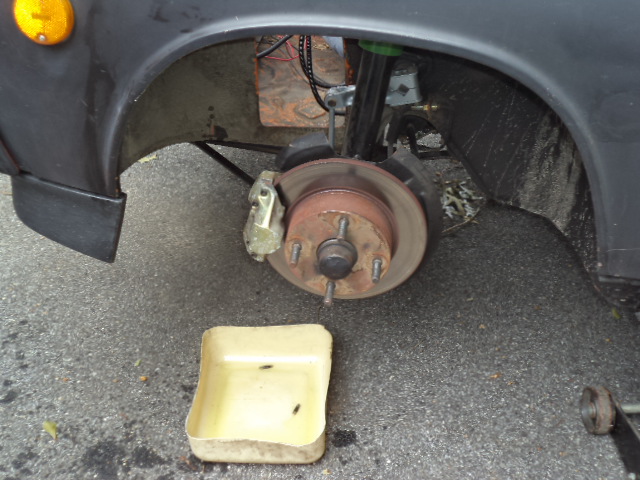

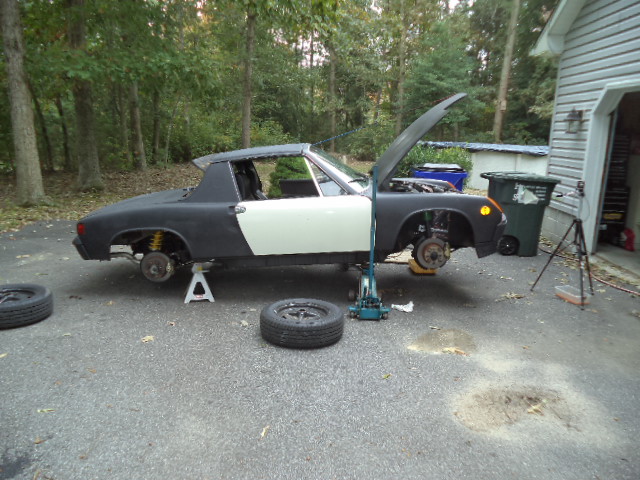
Posted by: jimkelly Oct 10 2015, 10:49 AM
I have the store covers for those belts and think I still have a 7410 on my car but my alt belt was too long to tighten down fully so I got one a bit shorter at advance auto the other day. but i still can't tighten it down enough to eliminate flutter, so I ordered a belt tensioner from ebay yesterday with hopes I can incorporate it onto mu alt bracket. thanks for checking on this for me
Hi Jim. Cool seeing an old school sbc build, don't see them often anymore. I have one also and love it. I just crawled under mine to look at the belts for you. Maybe check your belt numbers? Both are Gates belts 7410 for water pump and 7355 for alternator. My alt belt flutters a little, not more than any other old style belt car.
Attached image(s)
Posted by: bobo914 Oct 10 2015, 11:30 AM
It will be interesting to see if the tensioner solution fixes it. Make sure to post pics, like seeing the creative fixes people come up with.
Posted by: jimkelly Oct 10 2015, 11:53 AM
this is the one I went with, $13.41 shipped.
Attached thumbnail(s)
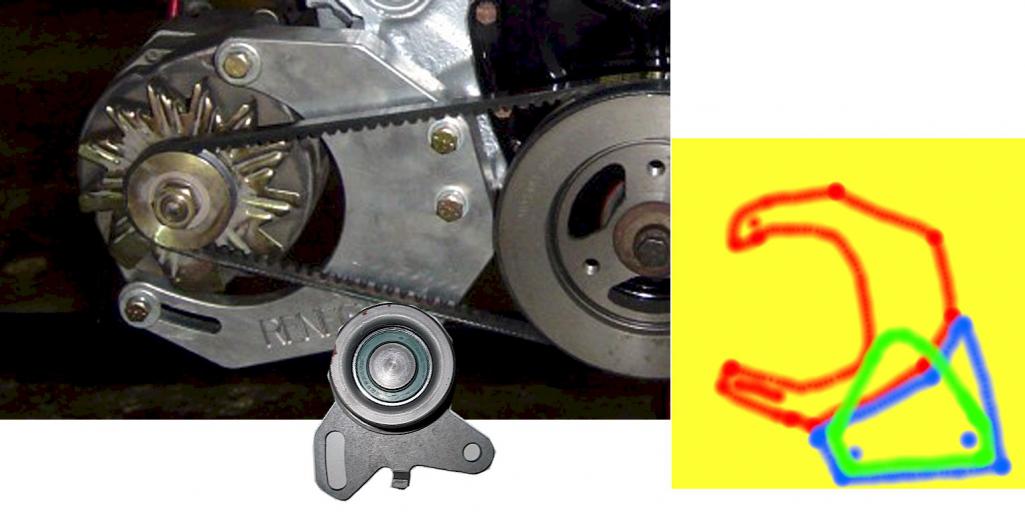
Attached image(s)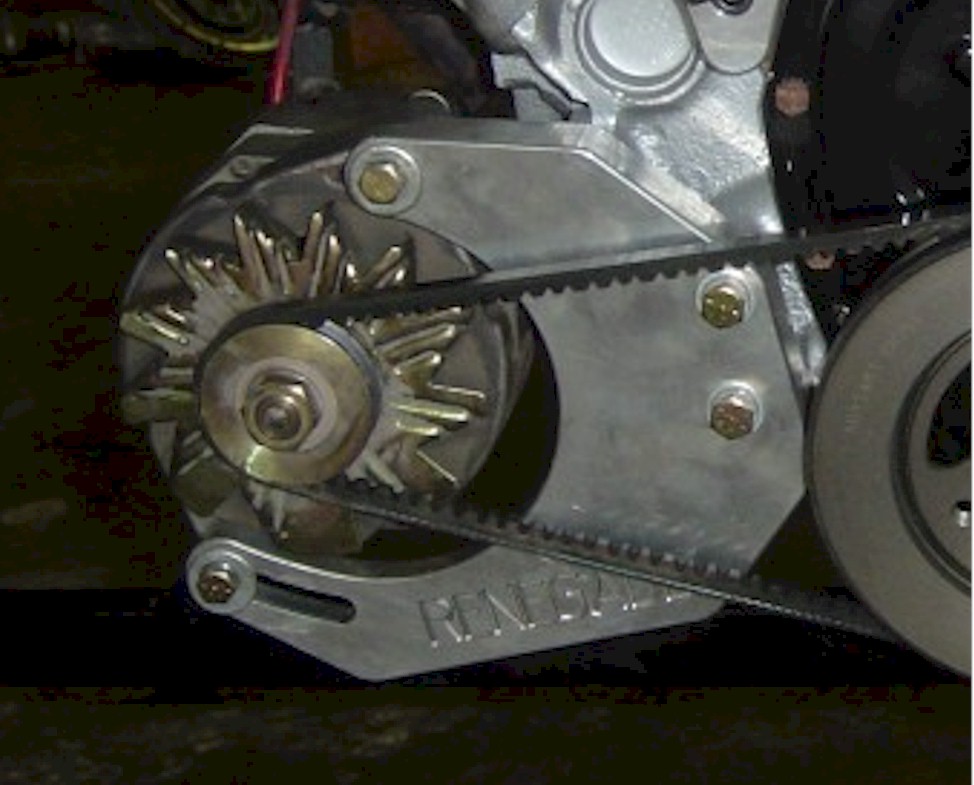
Posted by: bobo914 Oct 10 2015, 12:09 PM
Nice! Are you going to tension the back side of the belt? That would increase the amount of pulley wrap also.
Posted by: jimkelly Oct 10 2015, 02:55 PM
that is the plan. press on the flat of the lower belt loop upward.
Posted by: jimkelly Oct 13 2015, 04:28 PM
changed my oil, changed the filter, and put a 180 degree thermostat on it. engine temp guage seems to stay around 190 when car is parked and running BUT fans seem to stay on the whole time. need to take it for a spin to see if fans cycle a little bit. need to add a FAN ON light on dash so i can monitor them.
Posted by: Andyrew Oct 13 2015, 04:43 PM
What is your fan switch supposed to cycle at?
Posted by: 76-914 Oct 13 2015, 05:21 PM
changed my oil, changed the filter, and put a 180 degree thermostat on it. engine temp guage seems to stay around 190 when car is parked and running BUT fans seem to stay on the whole time. need to take it for a spin to see if fans cycle a little bit. need to add a FAN ON light on dash so i can monitor them.
Jim, that light will be a nuisance at nite. Not so much in Town but definitely in low light environments i.e., dark country roads. I placed mine on the side panel of the center console. Now my knee keeps the light from blinding me. If you don't have a console locate w/ that in mind.
Posted by: jimkelly Oct 13 2015, 05:44 PM
it's a renegade radiator and it is activated by a 180 degree thermo switch i believe.
What is your fan switch supposed to cycle at?
Posted by: timothy_nd28 Oct 13 2015, 06:53 PM
Instead of using the aux input on the led controller to monitor low fuel, you could wire the aux input to the fan relay. But, I agree that it would be annoying seeing the gauges turn red every 2-3 mins
Posted by: Andyrew Oct 13 2015, 07:50 PM
it's a renegade radiator and it is activated by a 180 degree thermo switch i believe.
What is your fan switch supposed to cycle at?
180deg thermo and a 180deg fan switch means it would be on all the time... In my head at least.
Posted by: jimkelly Oct 14 2015, 08:03 AM
until yesterday i did not have thermostat in my car. been driving it for about 2 months this way but the other night, it was chilly, and it took forever for my engine temp guage to show some heat. so it was time to put a thermostat in.
so the question is, might i be better of with a 160 degree or a 195 degree. first i will test drive with the 180 and see what happens.
Posted by: jimkelly Oct 15 2015, 07:38 AM
used the pickup today to take a washer, then a dryer, to the dump.
turns out my car weight about 2520, with me 220 in it, so car weighs 2300 lbs. wasn't expecting that.
oh yeah, I drove the car about 3 hrs last night, outside temp must have been 50-55 degrees. car stayed at about 190 degrees, almost rock solid. I do not know if my fans were on all the time. I need to install a light so i can know.
Attached thumbnail(s)
Attached image(s)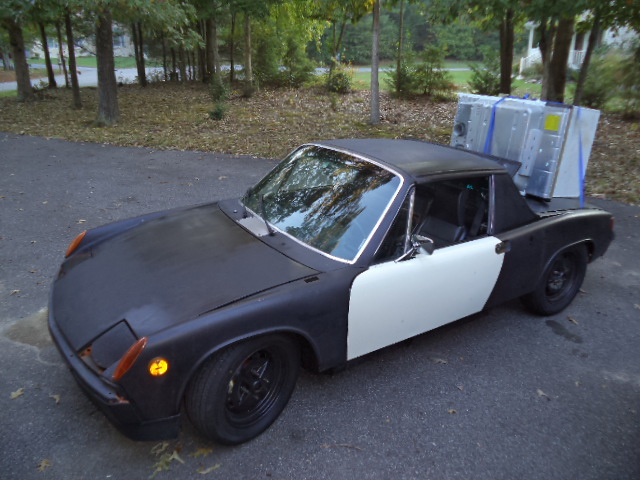
Posted by: 76-914 Oct 15 2015, 08:44 AM
So they didn't have a classification for a 914 so they called it a PICK UP Looks like you burned thru 2.5 gal of gas between trips. 
Posted by: Andyrew Oct 15 2015, 08:49 AM
used the pickup today to take a washer, then a dryer, to the dump.
turns out my car weight about 2520, with me 220 in it, so car weighs 230 lbs. wasn't expecting that.
oh yeah, I drove the car about 3 hrs last night, outside temp must have been 50-55 degrees. car stayed at about 190 degrees, almost rock solid. I do not know if my fans were on all the time. I need to install a light so i can know.
2300 sounds 100% right.
Only 7.50 for a dump? I have to pay $30 each trip.... (However old appliances like that scrappers come and get free)
Posted by: jimkelly Oct 15 2015, 09:29 AM
$7.50 is the minimum, if I had a pickup truck with more capacity, I could have dumped both for $7.50
I think the machines on the back of my car fucked with my aerodynamics a bit
my garage, free of broken washer and dryer, much better
Attached image(s)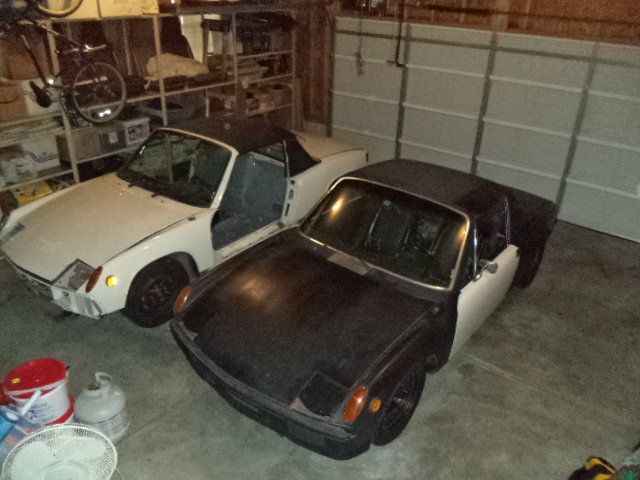
Posted by: 76-914 Oct 15 2015, 09:36 AM
Washing machine motors can be used to make a nice 12" sander for< $50 in parts.
Posted by: arkitect Oct 15 2015, 11:30 PM
Washing machine motors can be used to make a nice 12" sander for< $50 in parts.
That would be interesting to see...any picts?
Dave
Posted by: jimkelly Oct 16 2015, 12:17 PM
I am hesitant to stab it but will give it a go and report back as to what happens.
went to ace hardware to get some screws so i can attached my headlight surrounds. seems it helps to remove the front amber lenses when installing the surrounds, makes getting to the outer screws easier.
also popped my console tray in.
as you can see, my definition of INSTALLED, is quite different than most. in most cases I should probably say RIGGED
Attached image(s)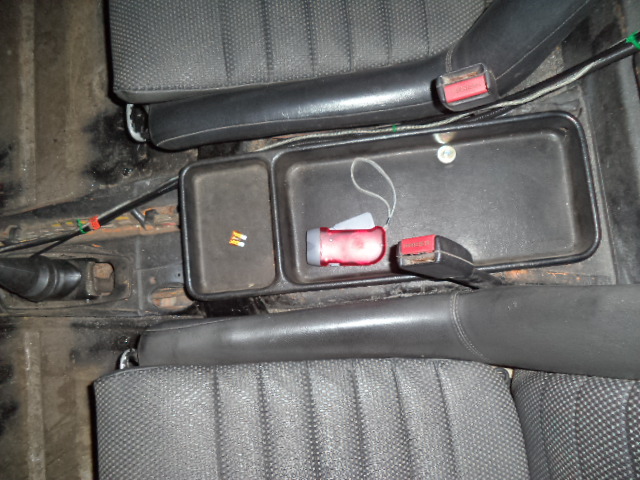
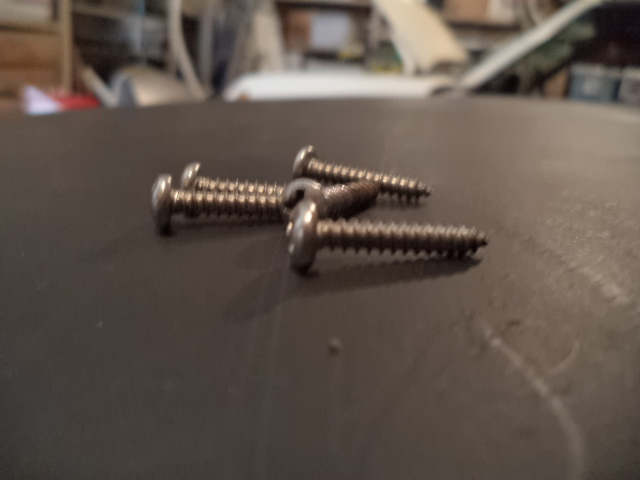

Posted by: 76-914 Oct 17 2015, 08:17 AM
Washing machine motors can be used to make a nice 12" sander for< $50 in parts.
That would be interesting to see...any picts?
Dave
Sure. Excuse the brief hijack, Jim. It even has 2 speeds as seen in one pic.
I burned up the first motor when I tried to use just 3 wires so the second time I keep the complete WM harness. That is the gob of wires beneath it. IIRC, I bought the disc from some company that makes large sanders. Just wrote them to say I had gouged mine and wanted a replacement. Just be sure the motor shaft size matches the disc. Hijack over. 
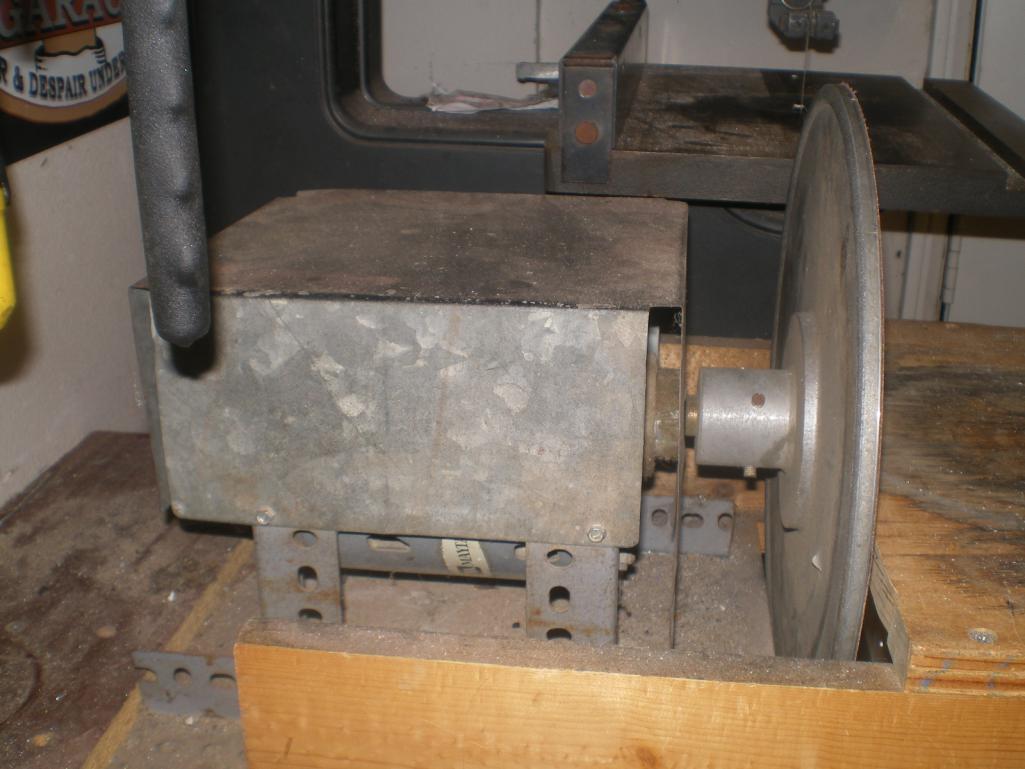
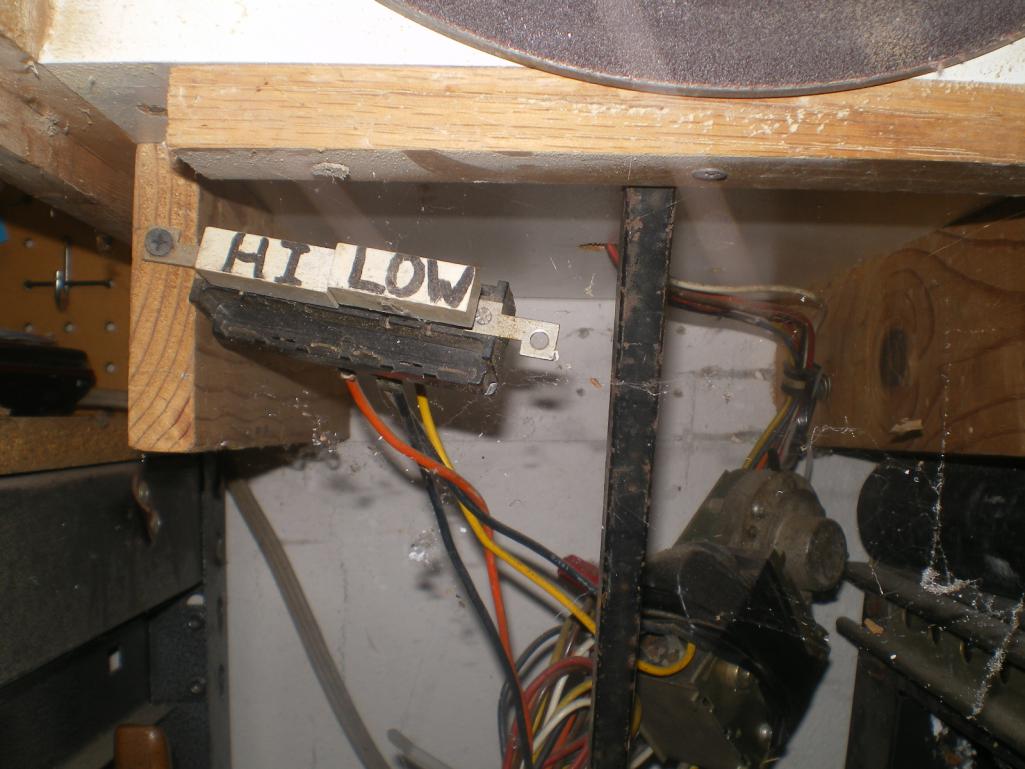
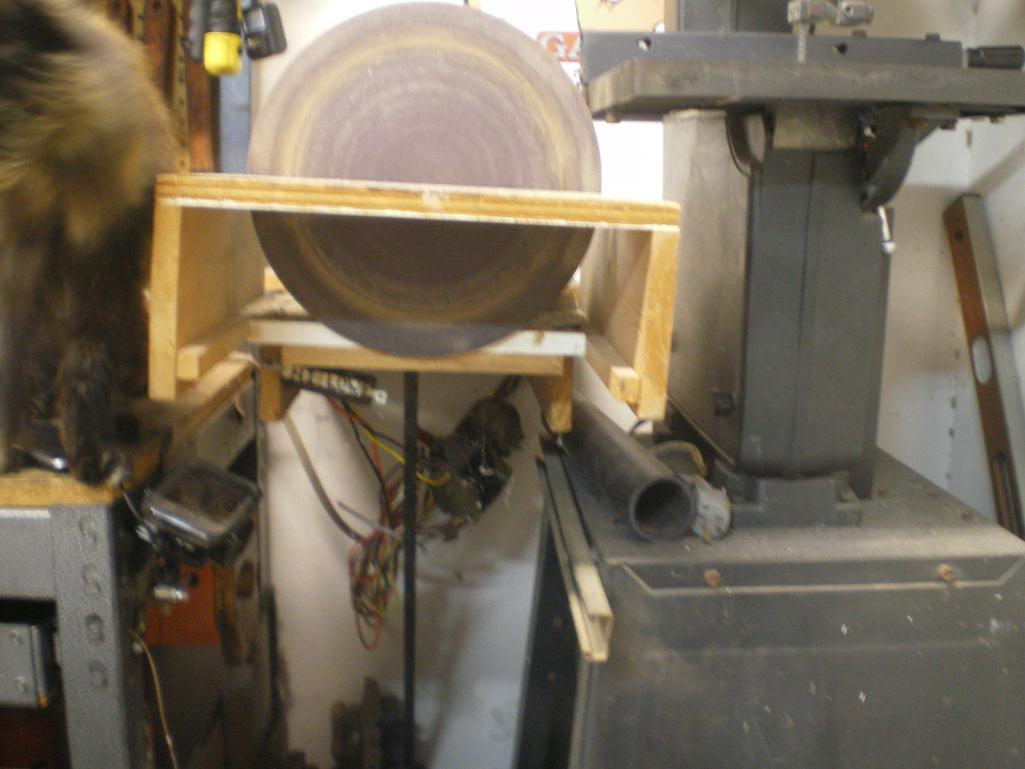
Posted by: jimkelly Oct 19 2015, 09:40 AM
added a temporary light so i can see when my fans are running. i think i need to replace the 180 degree switch on the radiator with a 190 degree switch. fans did not run all the time but ran for long periods despite outside temps being in the 30s. and got me a new shift knob for my V8 and some fuses for my suby build.
pulley in, sounds like i have a turbo, some bearing whine on tension roller i think.
buy shift knob inn 5spd or 4spd
http://nirvanamotorsports.blogspot.com/p/porsche-shift-knobs.html
Attached thumbnail(s)

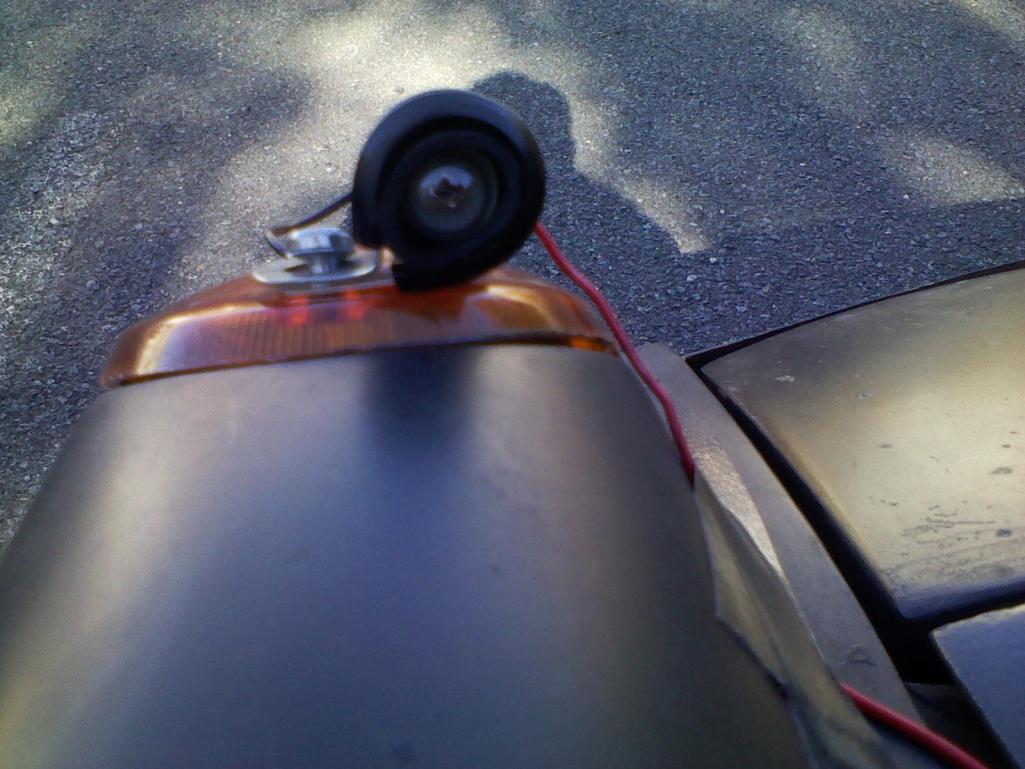
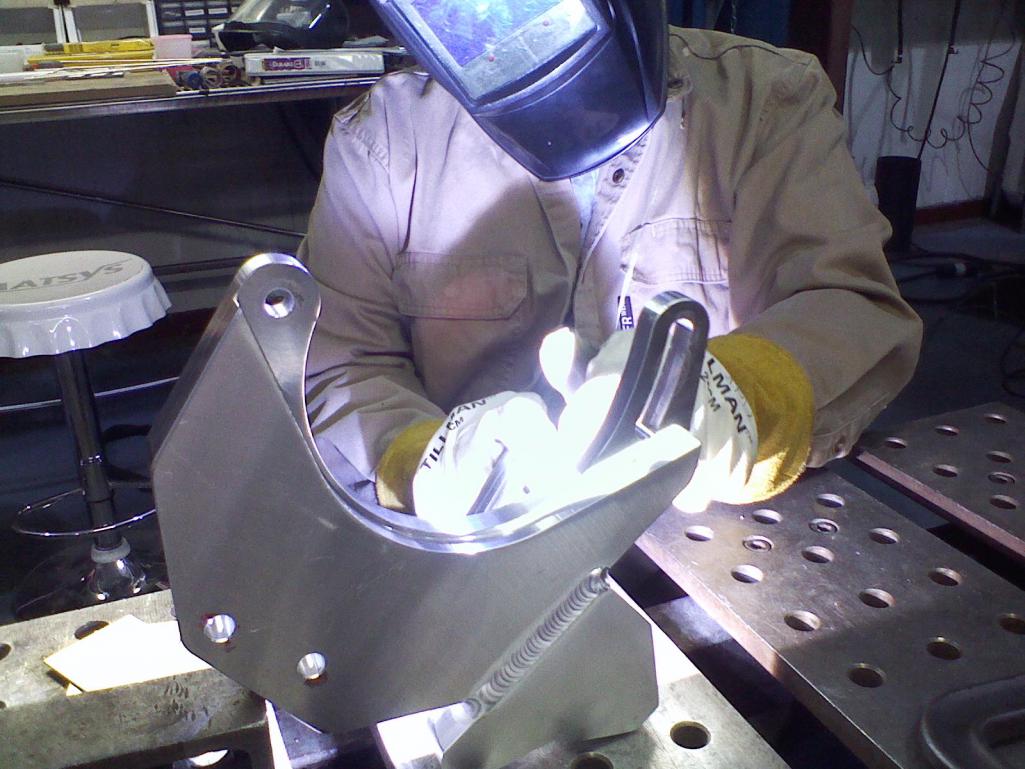
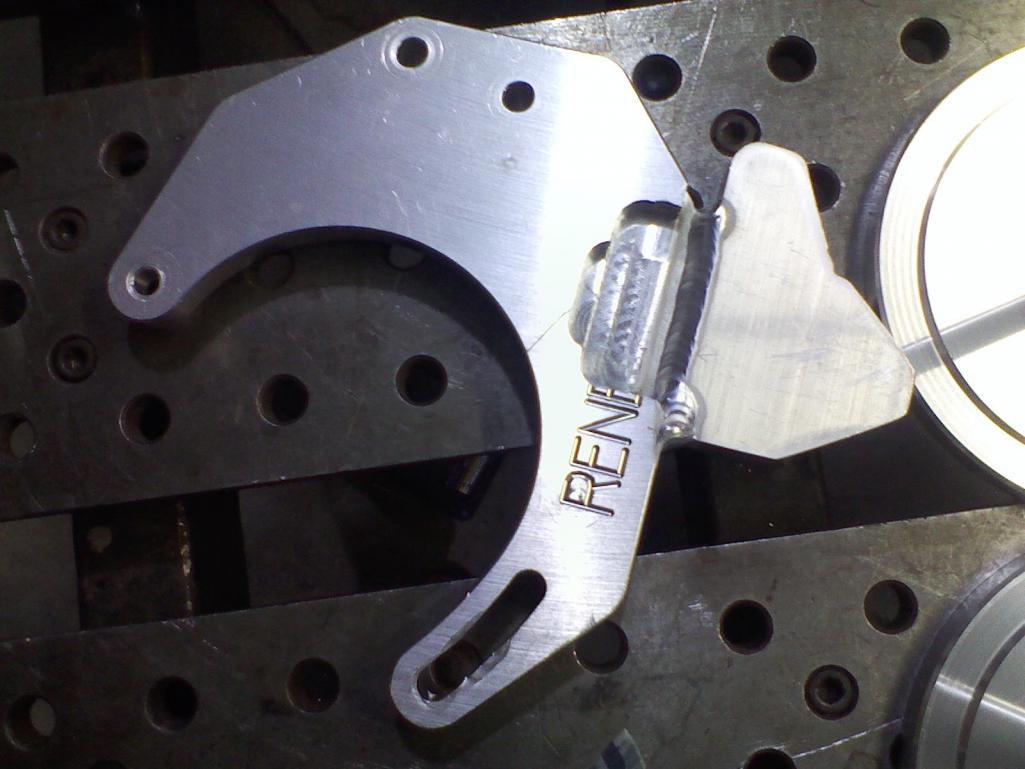
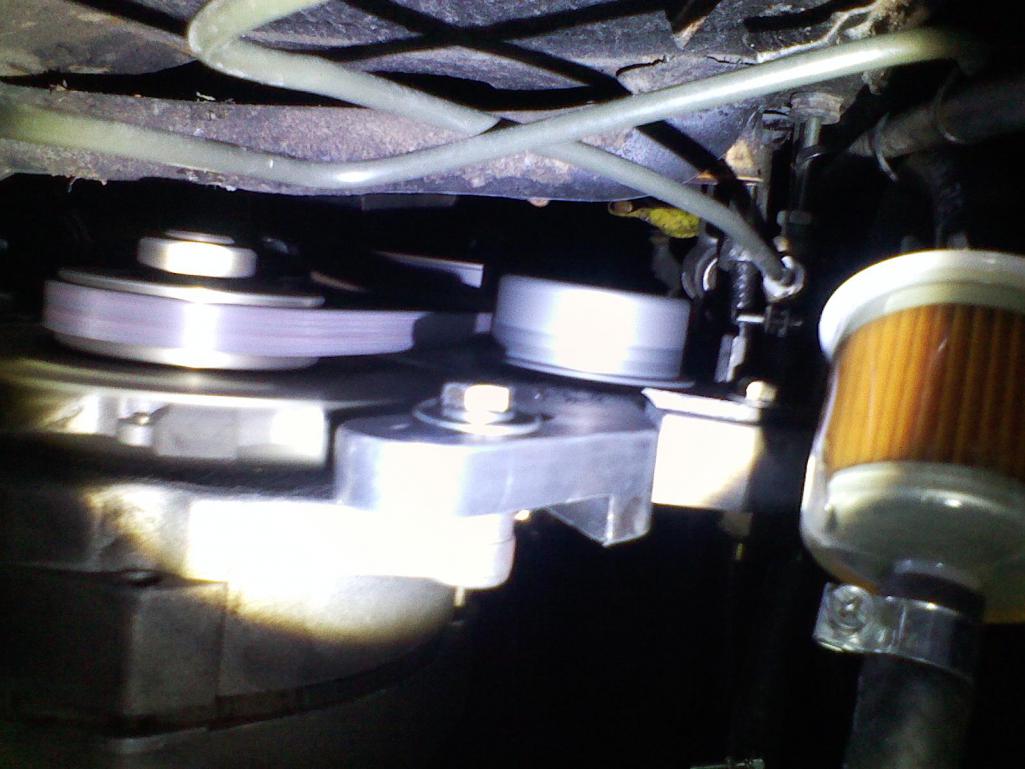
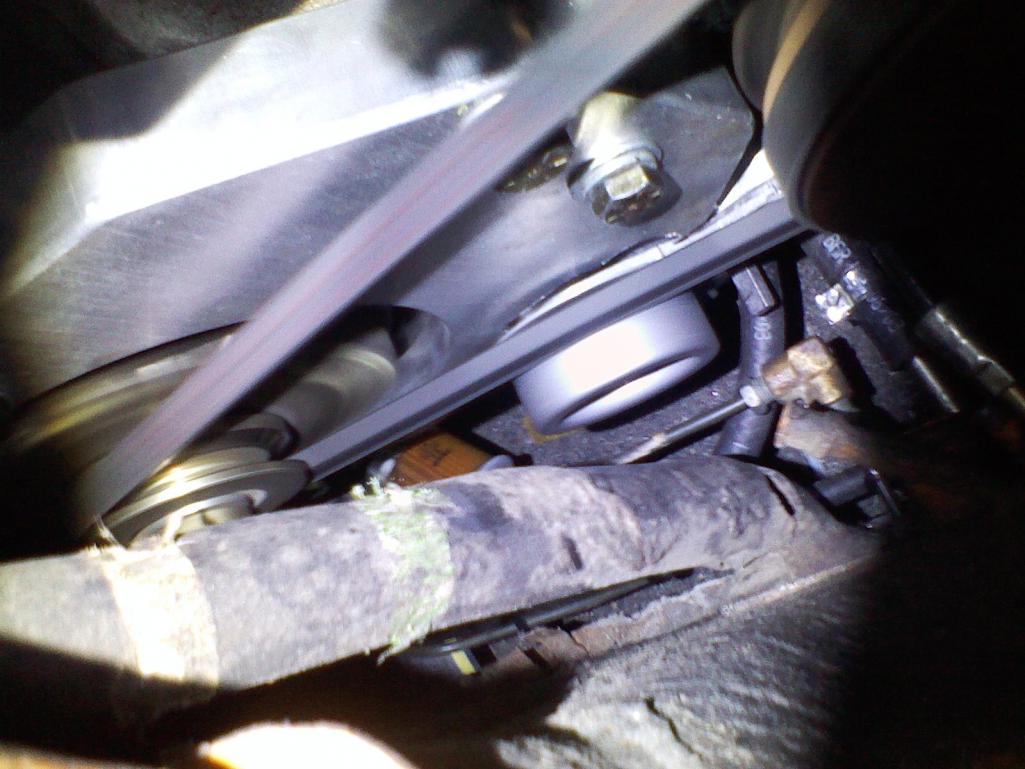
Attached image(s)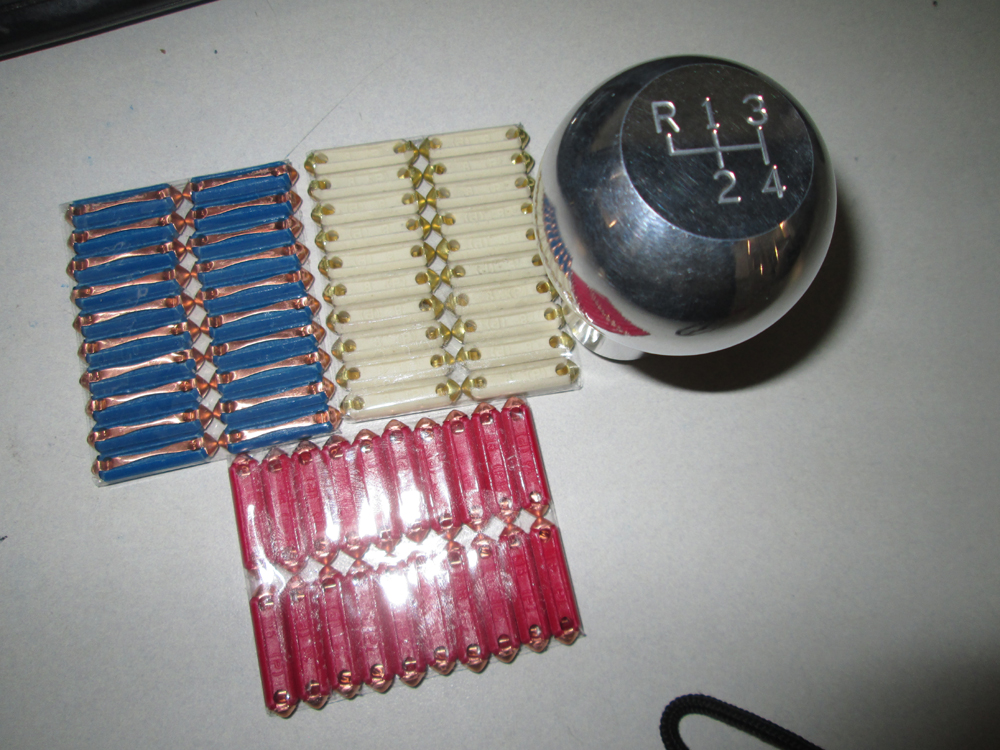
Posted by: jimkelly Oct 20 2015, 06:46 PM
well, just took it for a test drive with the new tension roller instally, and NO FLUTTER
i do have a while from either the new roller or the alternator, so maybe tomorrow i will lessen the tension on the belt, though i don;t think i went too tight 
nice to be able to drive at any speed and not get bad noises from the belt that forced me to adjust my gas peddle pressure for my entire drive.
2 unrelated pics.
Attached thumbnail(s)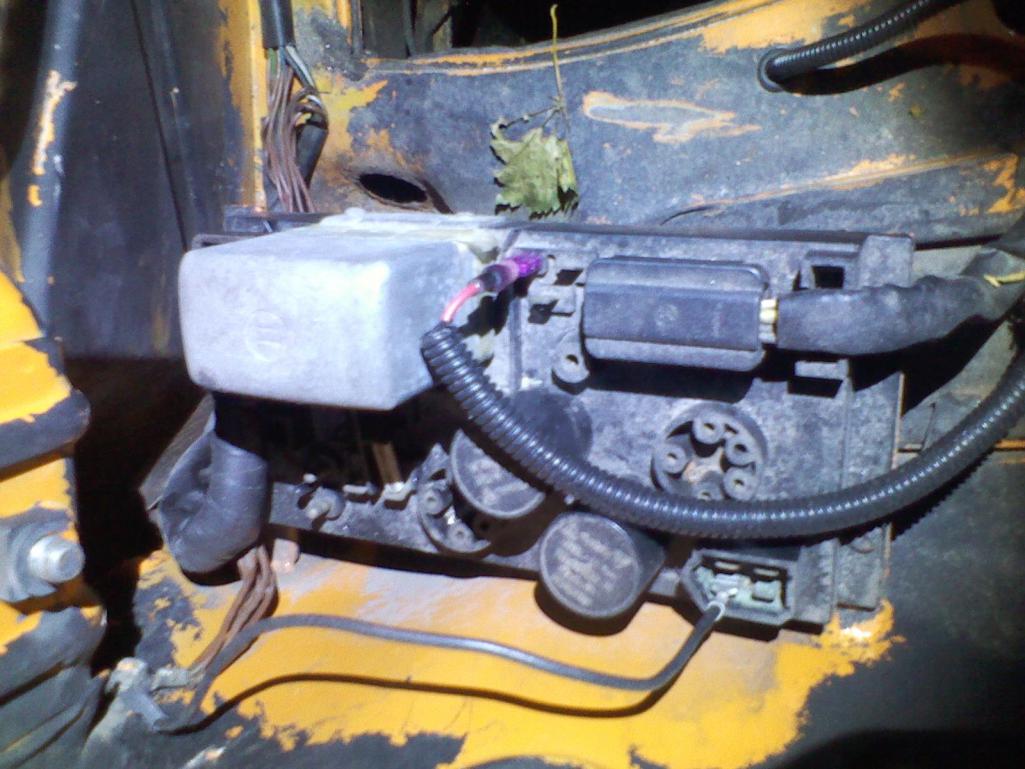
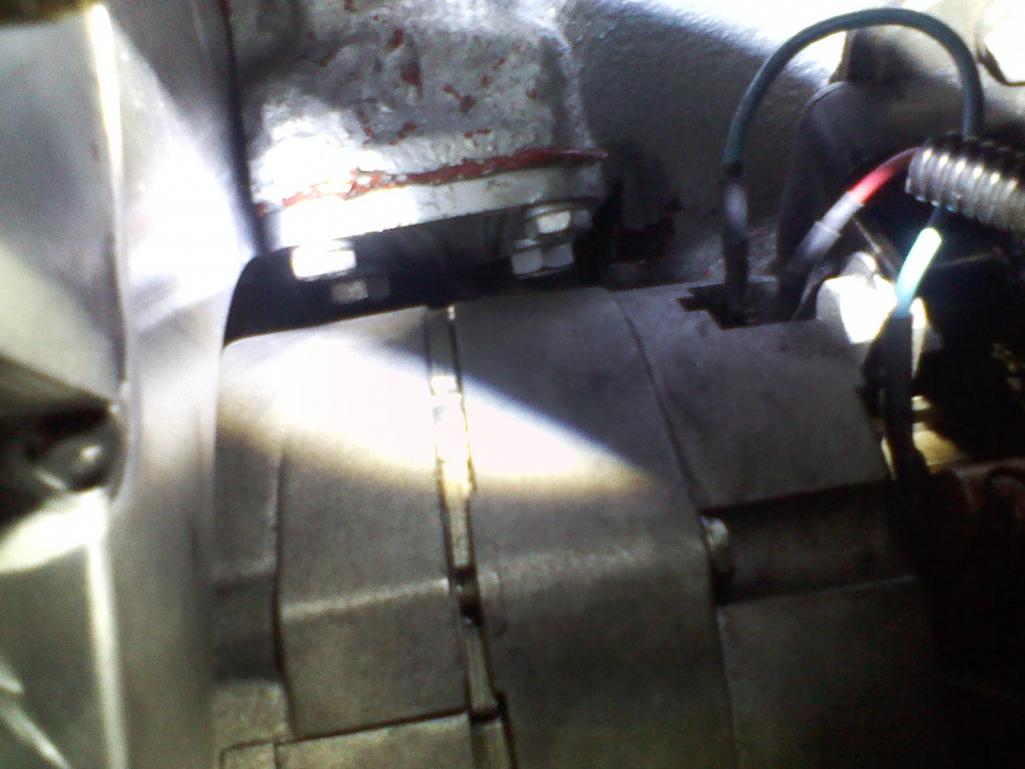
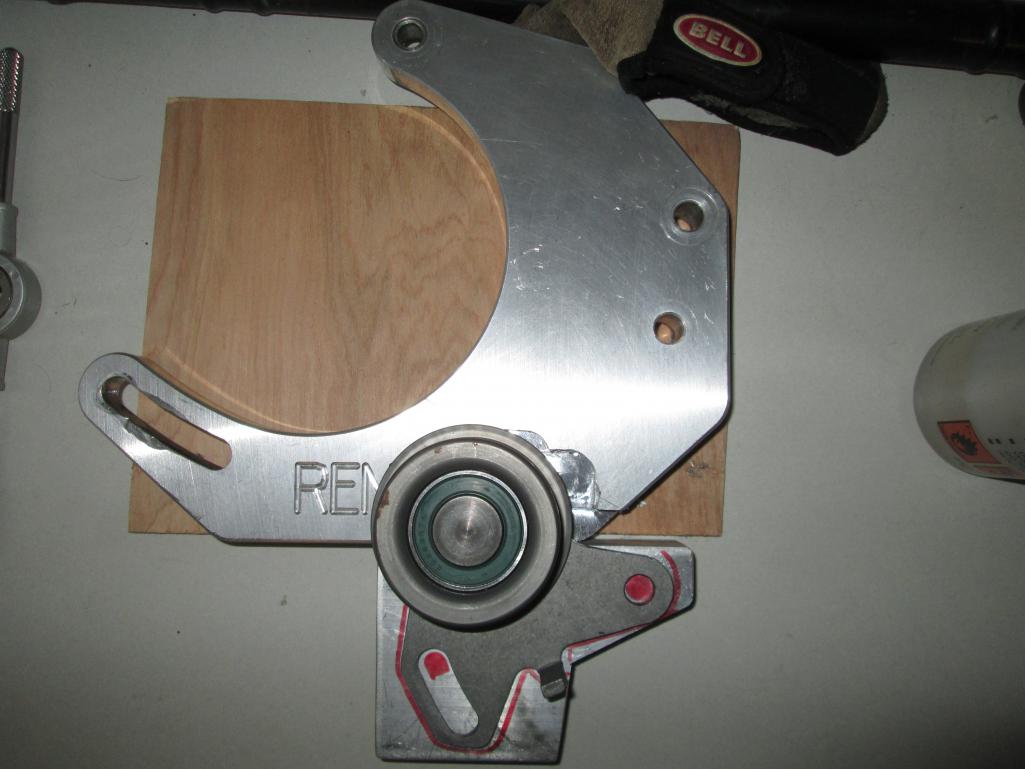
Posted by: jimkelly Oct 20 2015, 06:59 PM
anyone know how much a 3rd muffler like this might quiet down a V8?
Attached image(s)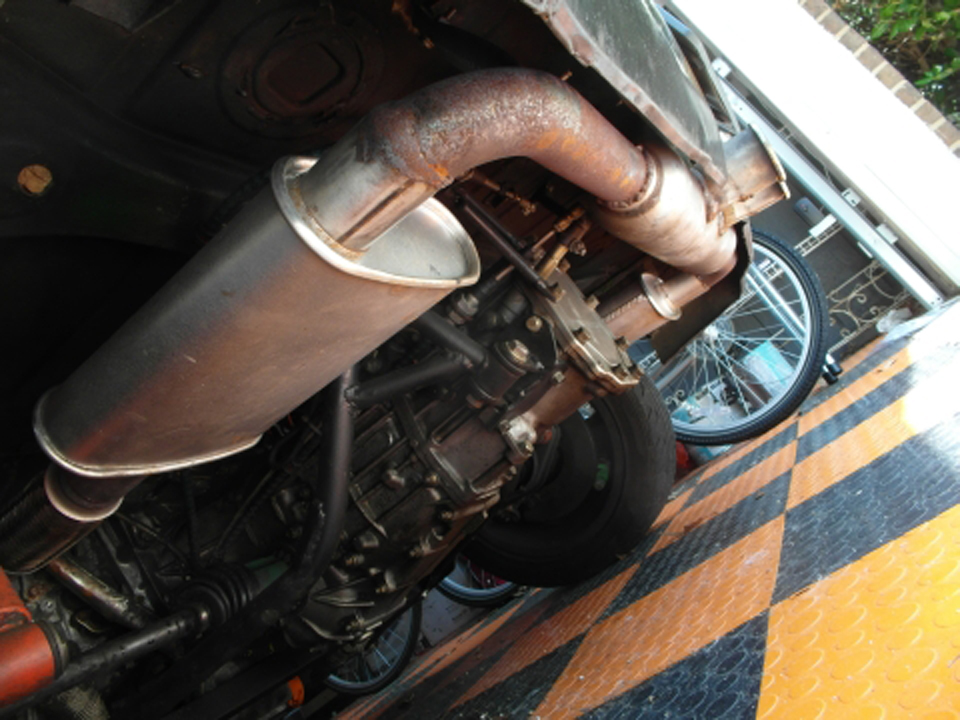
Posted by: Andyrew Oct 20 2015, 07:32 PM
Probably a good bit. The exhaust waves are going to hit each other and mellow out a lot.
Posted by: jimkelly Oct 20 2015, 07:36 PM
that would be good because i still feel my car has too much bark in relation to its bite. 200hp +- should not be this loud. although not having a cable driven speedo may be giving me a false sense of SLOWNESS
ran to walmart, love those low wages, oops, i mean prices.
Attached thumbnail(s)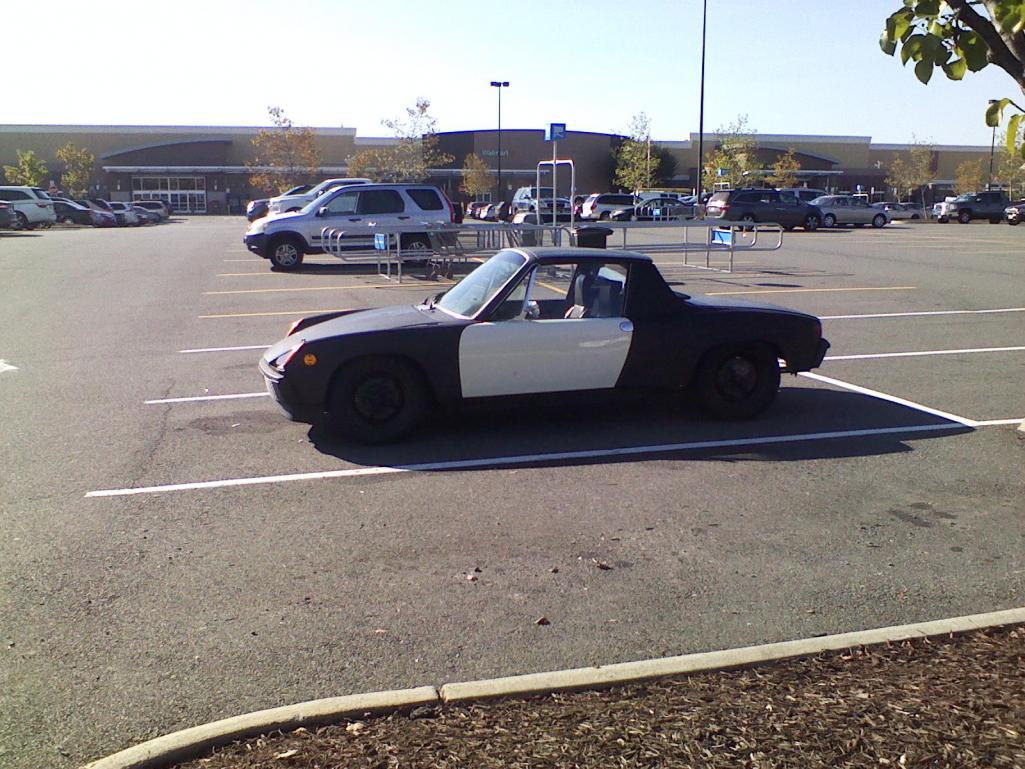
Posted by: mepstein Oct 20 2015, 08:26 PM
Download a speedo app to your phone. Plenty of free ones.
Posted by: jimkelly Oct 21 2015, 10:30 AM
I now have a whining noise from belt. far better than having flutter. I think it is from the belt riding on the lip that keeps belt from riding off of pulley? might recess pulley a bit more into bracket. and another dirty fuel filter. I have plenty of metal ones but need more plastic ones that I can see thru.
FWIW
https://www.youtube.com/watch?v=hAI2eJzjo20
Attached image(s)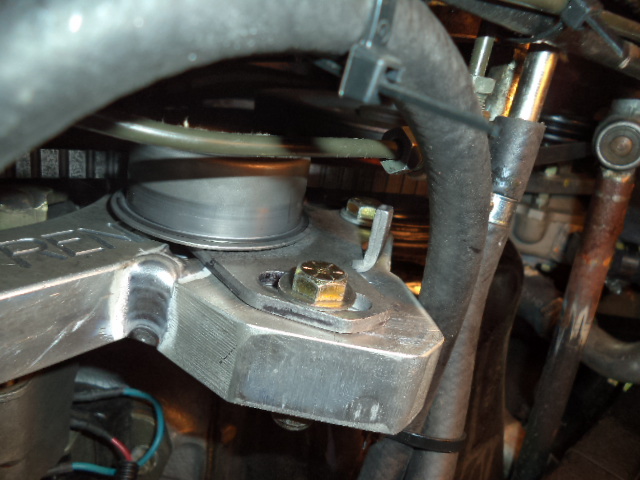
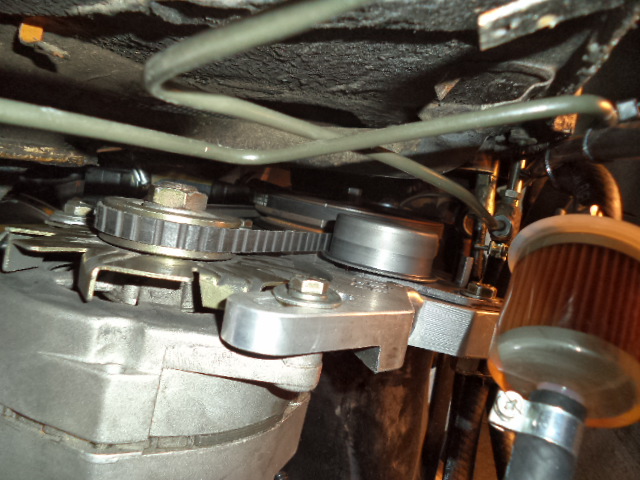
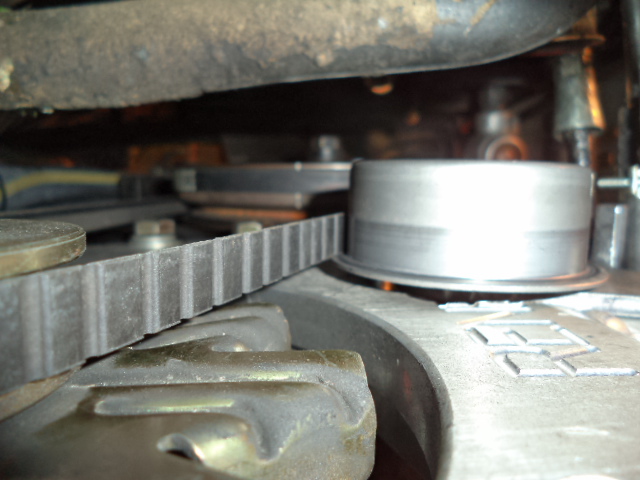
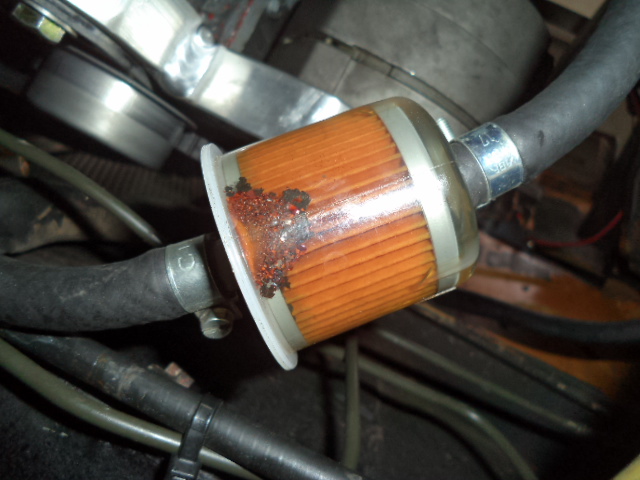
Posted by: bulitt Oct 21 2015, 10:54 AM
Speed Metal installed this single dualin/dual out magnaflow. Going this route.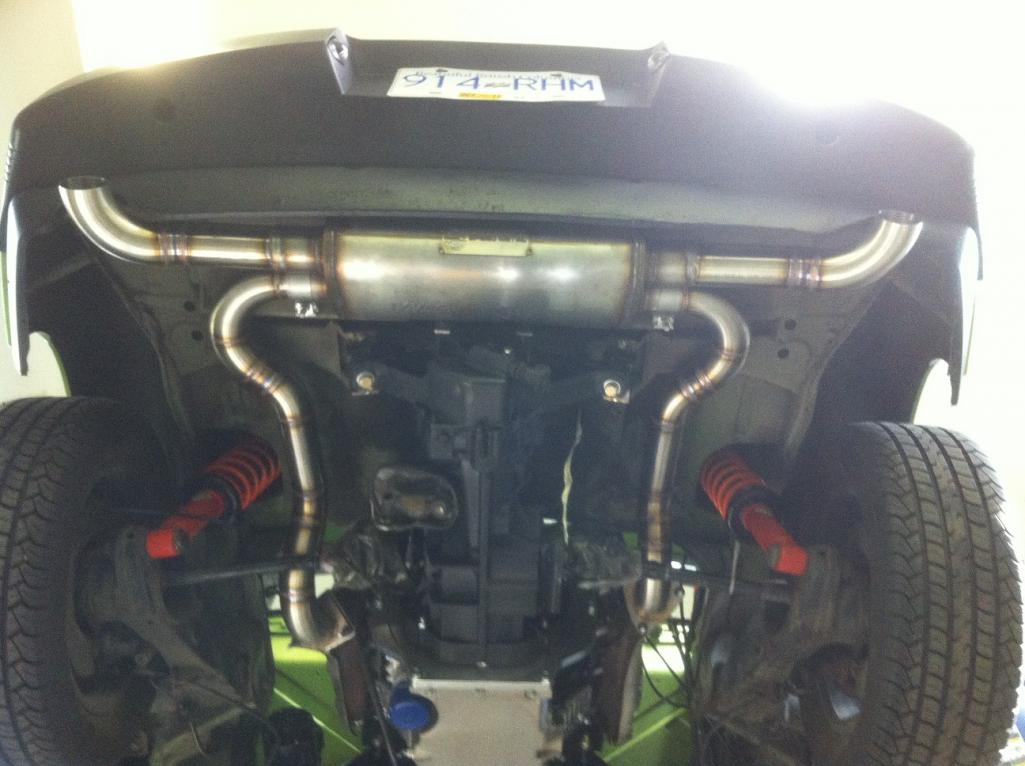
Posted by: jimkelly Oct 21 2015, 10:58 AM
that is real pretty. pls report back on quietness. video pls. i assume it can be removed with axles in? what is nice about one muffler in back is that it acts as a crossover too.
Posted by: BIGKAT_83 Oct 21 2015, 01:15 PM
Speed metals exhaust system would double the value of most 914's.
Posted by: jimkelly Oct 28 2015, 10:55 AM
i hate nature
Attached thumbnail(s)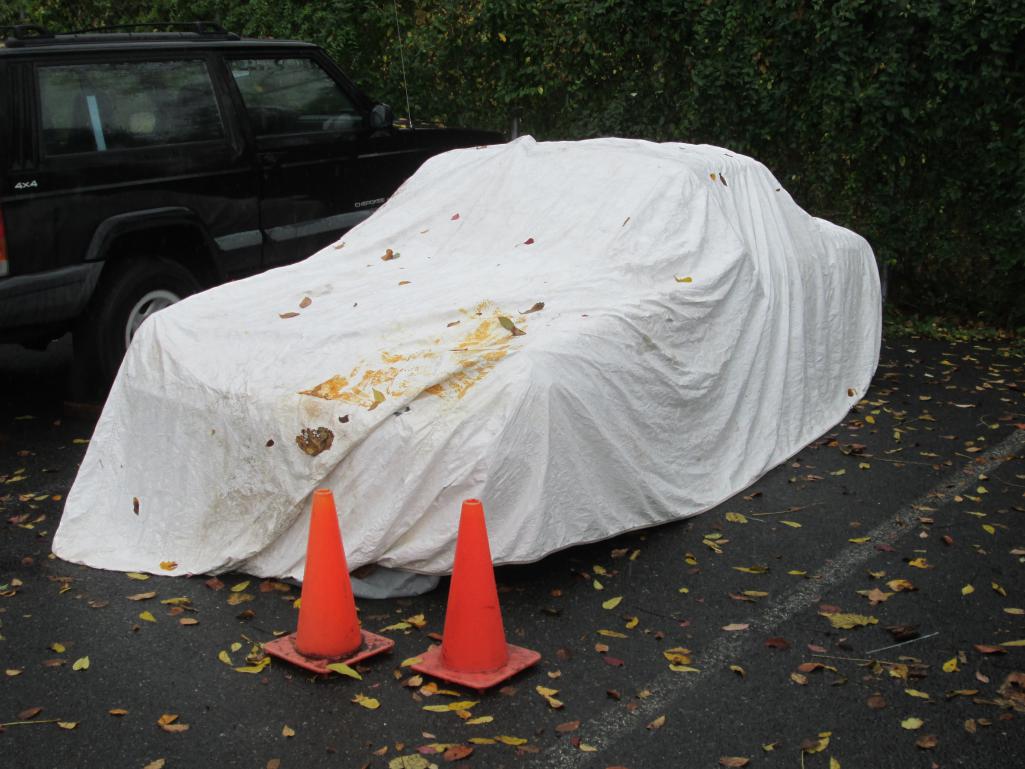
Posted by: jimkelly Nov 1 2015, 06:47 AM
white doors off, red doors on.
Attached image(s)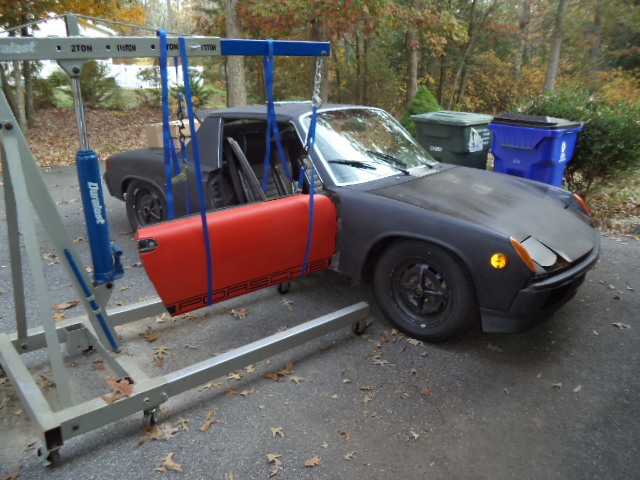
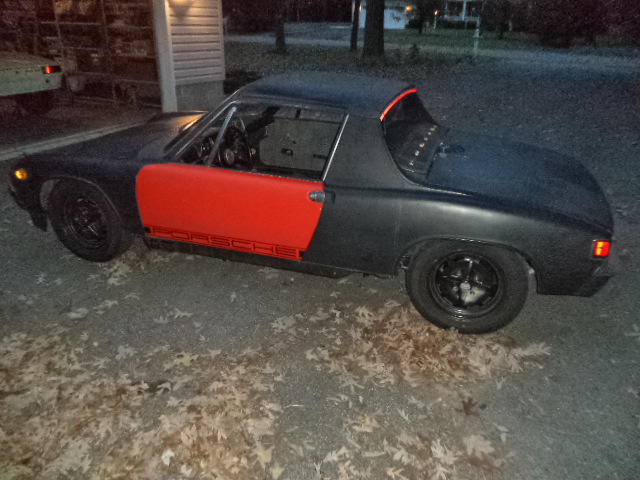
Posted by: Andyrew Nov 1 2015, 09:22 AM
Awesome technique BTW
Posted by: jimkelly Nov 1 2015, 04:43 PM
this is getting ridiculous. I really need a pickup truck. my hot water heater broke and I needed to replace it today. Porsche 914 to the rescue. even had to remove the trunk lid to pull this off.
Attached thumbnail(s)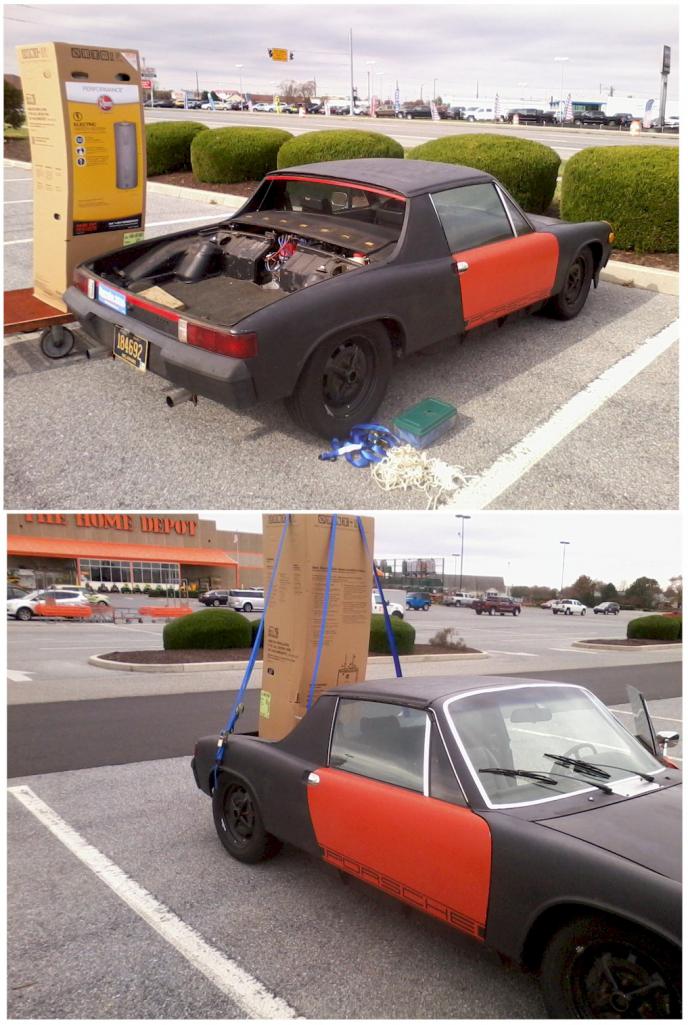
Posted by: Andyrew Nov 1 2015, 05:37 PM
That is nuts! I think I would have laid it on the roof myself... as in on the roof and in the trunk.
Posted by: bperry Nov 1 2015, 06:28 PM
this is getting ridiculous. I really need a pickup truck. my hot water heater broke and I needed to replace it today. Porsche 914 to the rescue. even had to remove the trunk lid to pull this off.
I'm curious if it made it home safely without falling out.
Around here in Dallas for $20 you can rent one of their trucks for a little over an hour.
I have done this many times over the years.
--- bill
Posted by: jimkelly Nov 1 2015, 06:32 PM
drove 45 in a 55 all the way home. got it into place and installed, but no heat this is my 3rd water heater install, never had any trouble before. just called a neighbor plumber.
today: 15 nov 2015, found 3 trans nuts loose.
Attached image(s)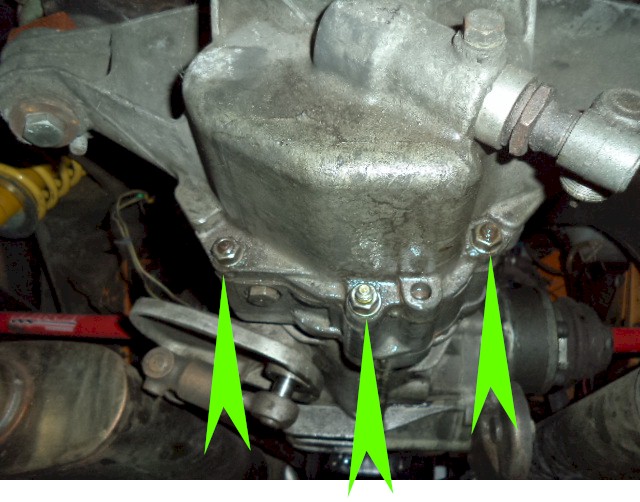
Posted by: jimkelly Nov 25 2015, 06:46 AM
too dang cold for my baby
Attached thumbnail(s)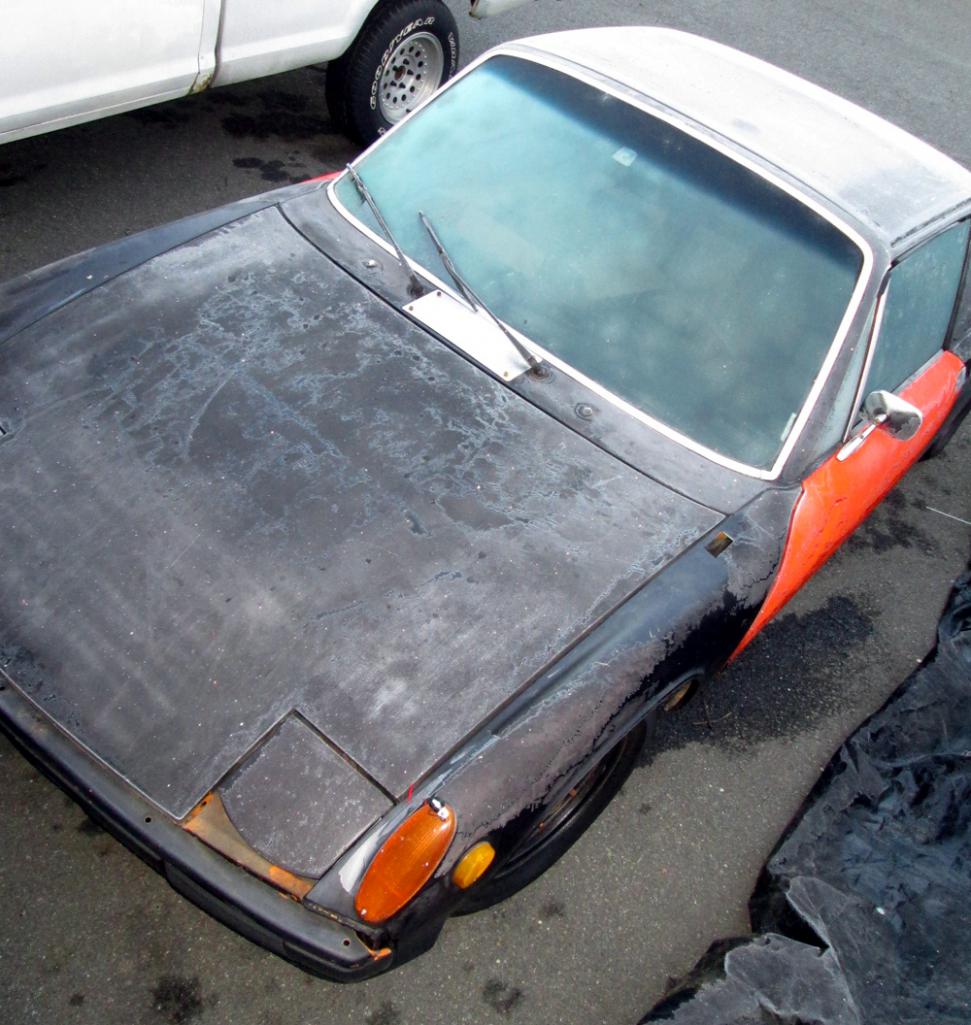
Attached image(s)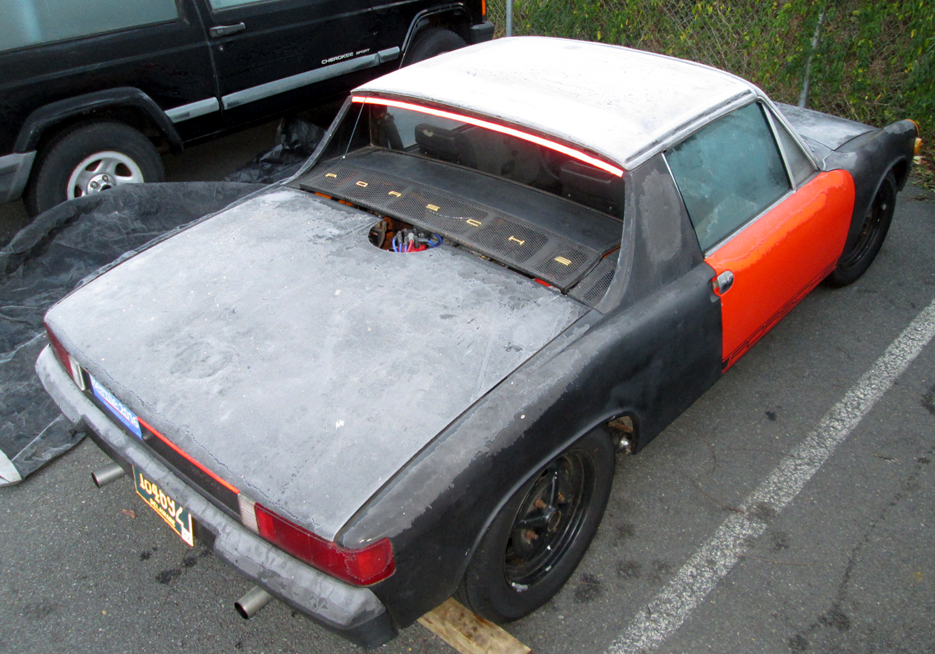
Posted by: jimkelly Nov 26 2015, 08:12 AM
crazed turn signal lenses gone, thanks to 914rubber, much better
from this to this or vice versa
Attached image(s)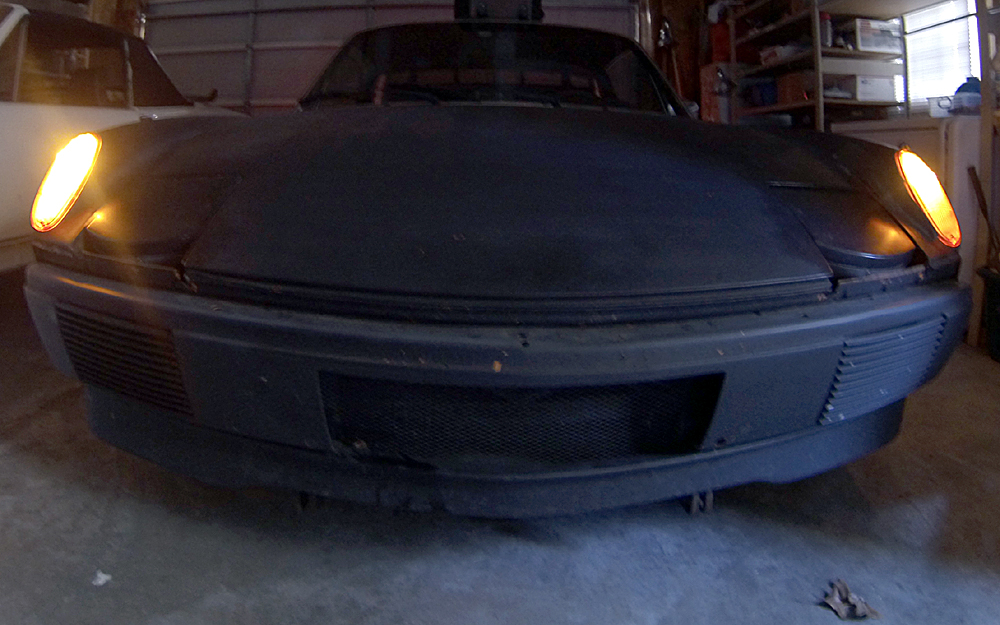


Posted by: jimkelly Nov 27 2015, 09:47 AM
there must be a trick to the eye brow grommets and eye brow install. seems the eye brow over laps the front vertical piece of metal, my eye brows were all bent up. put a strip of duct tape for added safety. looks better and worser : )
while I was fooling with this, I was using an ebay $5 fish tank pump to pump out the water from a cooler that I put in my crawl space to catch most of the water from my broken hot water heater that broke a few weeks ago. the little pump tricked the water out just fine
lastly, my radiator leaks, and my thread about this is here. probably going to go with a celica assy from ebay $140 shipped.
http://www.914world.com/bbs2/index.php?showtopic=270334
well, I just bought this kospeed/celica radiator off ebay for $131 shipped and two hose splices from jags that run.just ordered to splices from jags that run, a 1 to 1.5 and a 1.25 to 1.5, to I can mate up radiator to my existing hoses. per andyrew this radiator is pictured upside down.
http://jagsthatrun.com/Pages/Parts_Cooling...seSplicers.html
Attached thumbnail(s)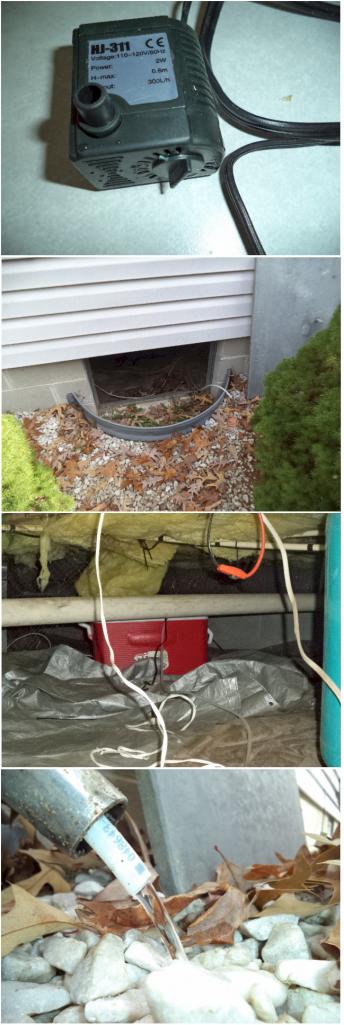
Attached image(s)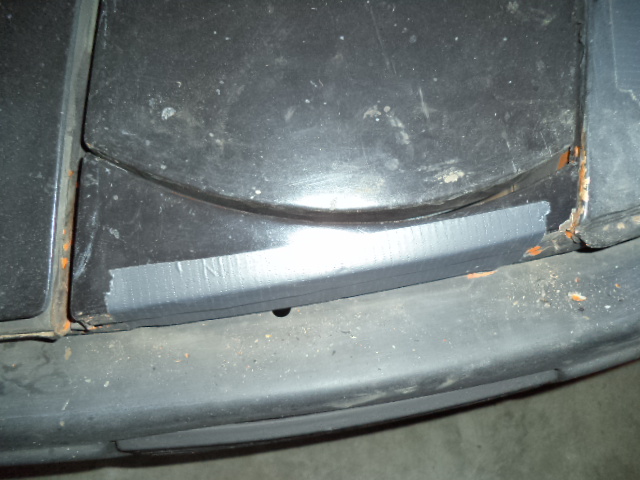
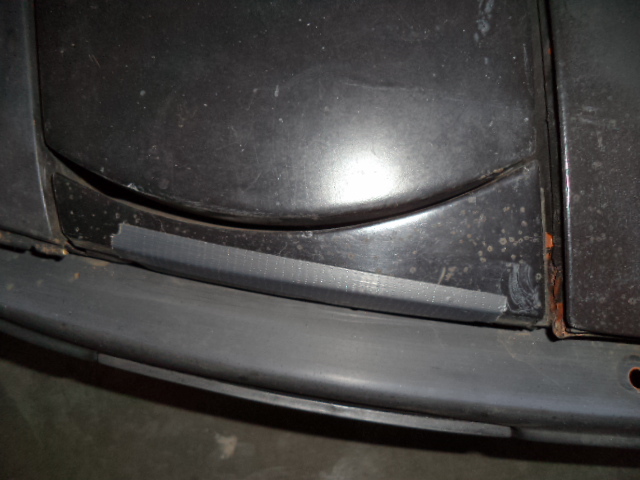
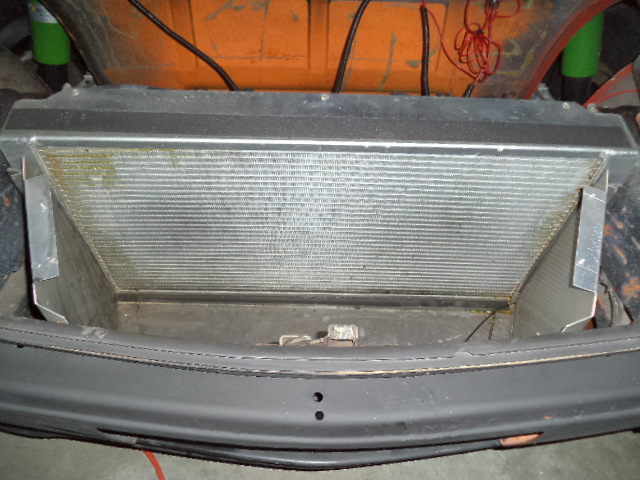
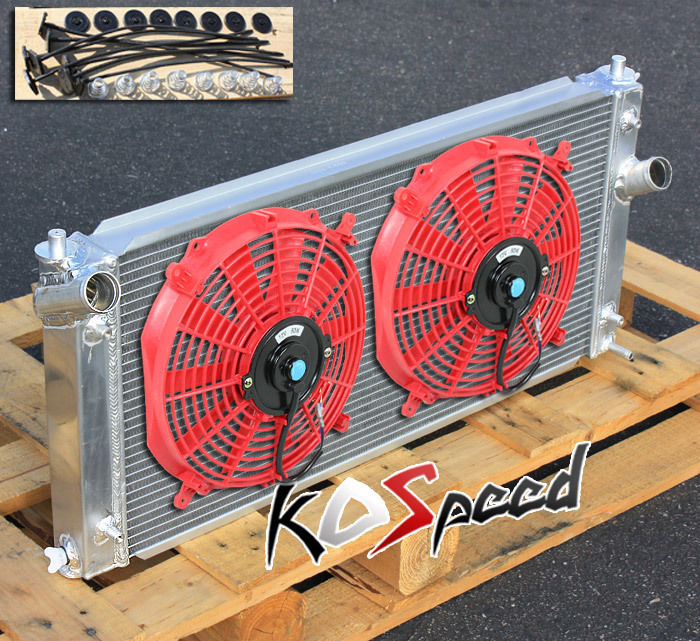
Posted by: jimkelly Dec 1 2015, 01:29 PM
still waiting on radiator to arrive BUT rcvd my 1" steel square tube today. two 6' lenghts so i can do both cars with same set up as A&P Mech has in his car.
Attached thumbnail(s)
Attached image(s)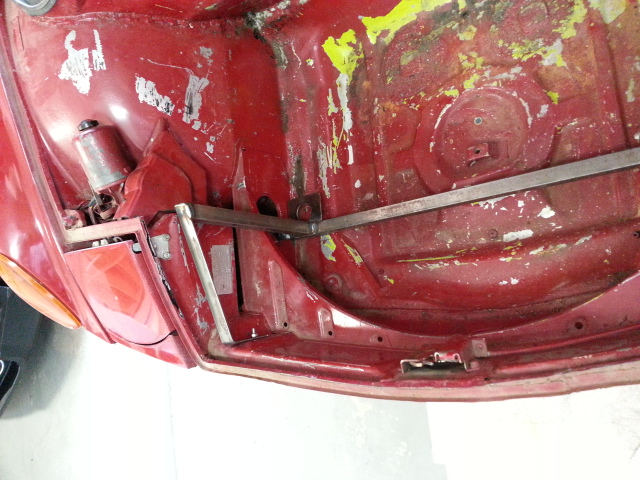
Posted by: Andyrew Dec 1 2015, 02:11 PM
still waiting on radiator to arrive BUT rcvd my 1" steel square tube today. two 6' lenghts so i can do both cars with same set up as A&P Mech has in his car.
Should work well.
I used a U channel for the radiator to sit in, and then 1/8"x2" flatbar for the radiator to sit against, with foam rubber seal floating everything.
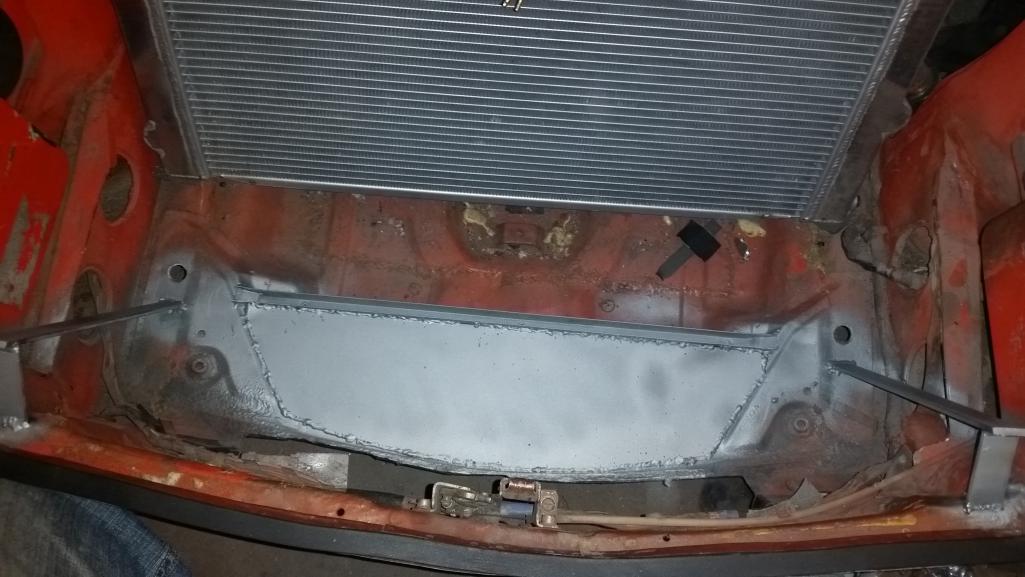
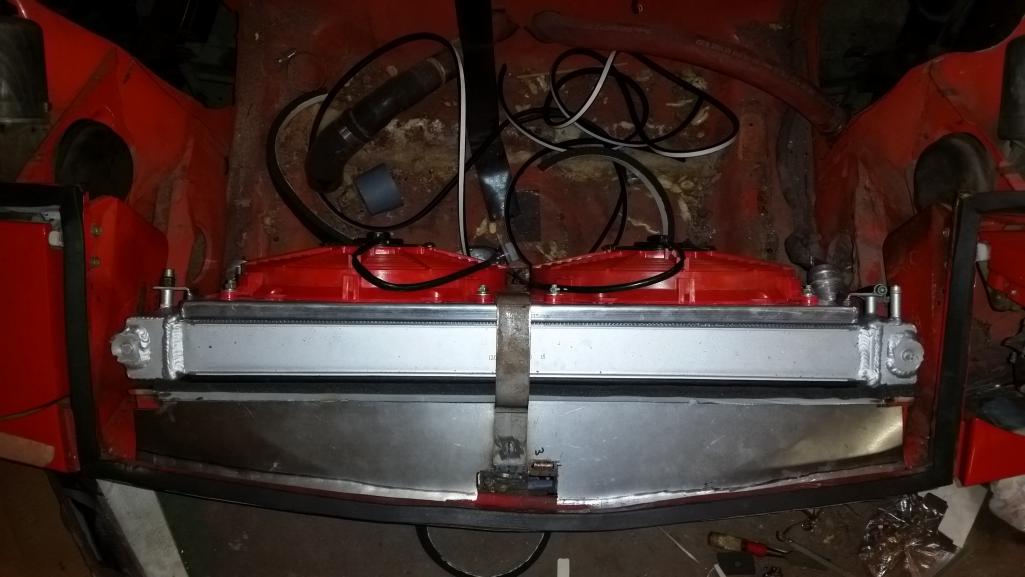
Posted by: jimkelly Dec 1 2015, 09:12 PM
drove my car the other night in the rain and my windows fogged up real bad, so I visited harbor freight and got me one of there little 12V heaters and I think it helped greatly for my drive tonight. at first I only had a clear small area in front of driver but over 2-3 hours, almost my entire window was clear. though it was not raining and the roads were mostly dry. when I first turned it on, it blew my 5amp fuse, but was fine with 10amp subsequently.
Attached thumbnail(s)
Posted by: 76-914 Dec 2 2015, 10:02 AM
Jim, be careful with upsizing those fuses. The fuses are sized to protect the size wire that is used on that circuit. Not the appliance it serves. Probably best to run a dedicated circuit for that heater sized for the heater.
Posted by: jimkelly Dec 2 2015, 10:59 AM
I will. I have this fuse panel on my dash feed via 10g wire from my battery. it was part of my temporary fix to get my horn and wipers working enough for inspection, and to feed my radiators. it also feeds my gps or my harbor freight defroster.
thanks, I really appreciate you guys looking out for me and my half assed ways that i can't seem to shake
Attached image(s)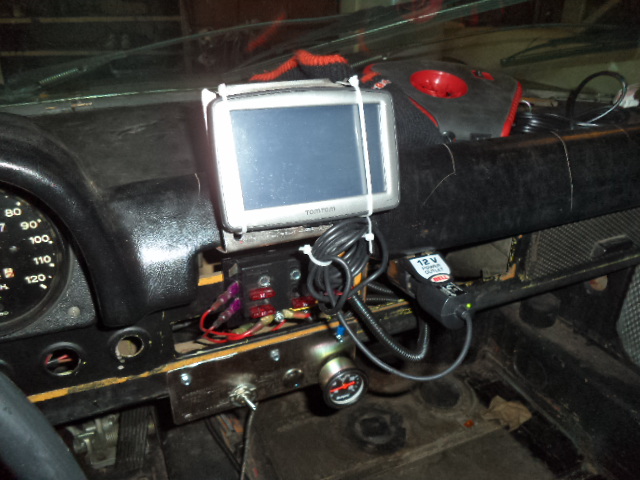
Posted by: jimkelly Dec 5 2015, 08:28 AM
still waiting on my celica radiator to arrive. my leaky radiator is holding up just enough to keep me moving but I have to top it off every few days and refill my overflow as well regularly. looking forward to swapping out my radiator this coming week
I also need a second 12v plug so I can run my gps (for its speedo) and my heater at same time. i'll probably cut wires to heater and hard wire into my fuse box.
Posted by: sixnotfour Dec 5 2015, 09:31 AM
while waiting for the new rad, why not install something like this for some real comfort ??
http://www.ebay.com/itm/NEW-UNIVERSAL-SMALL-CAR-AND-TRUCK-UNDERDASH-HEATER-12V-UNDER-DASH-Heat-/262160204056?hash=item3d09f74118:g:-EsAAMXQydtTKgy~&vxp=mtr
Posted by: jimkelly Dec 5 2015, 10:30 AM
that is nice. i really do need something like that. was a little chilly last night, burr.
still getting chunks of crap (deteriorated rubber hose I think) in my 1st fuel filter but less and less. though I still prefer transparent fuel filters over metal ones.
began getting gas BEFORE I run out and get stranded. makes good sense.
Attached image(s)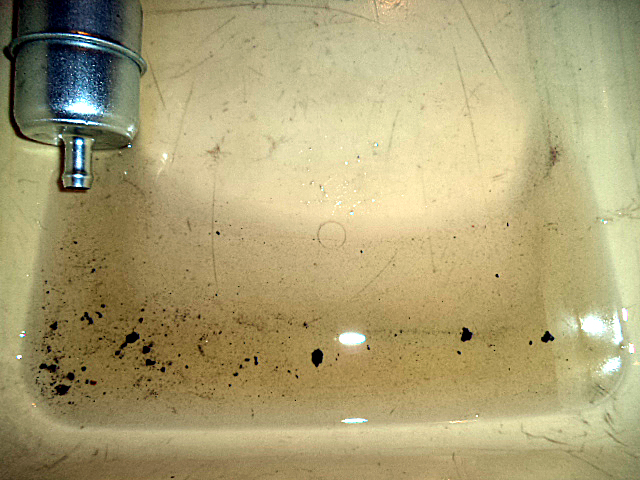
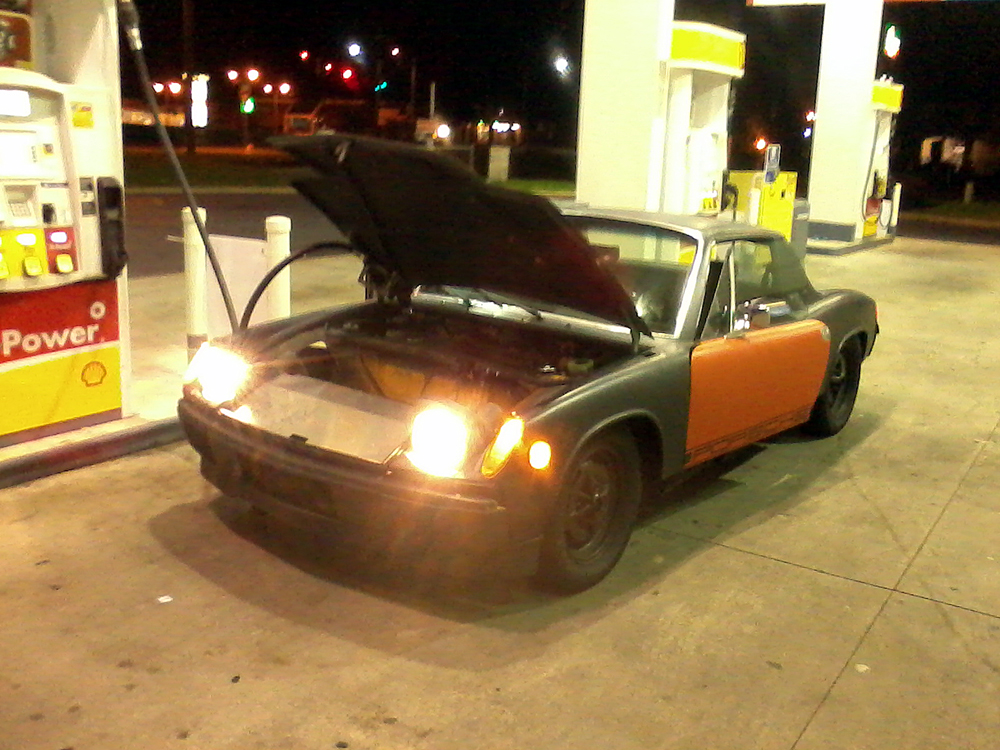
Posted by: jimkelly Dec 7 2015, 07:23 PM
my bad radiator thread..
http://www.914world.com/bbs2/index.php?showtopic=270334&hl=
my 10 year old renegade radiator leaks in all 4 corners. can't believe i made it to work today
i can tell you those bottom vibration dampener grommets are hard as rocks, no dampening happening with these.
for a while i did not have my fender openings screened off, so mice found a home
now it is a mouse debris free zone.
https://www.youtube.com/watch?v=Hb2e14fdSFU
Attached thumbnail(s)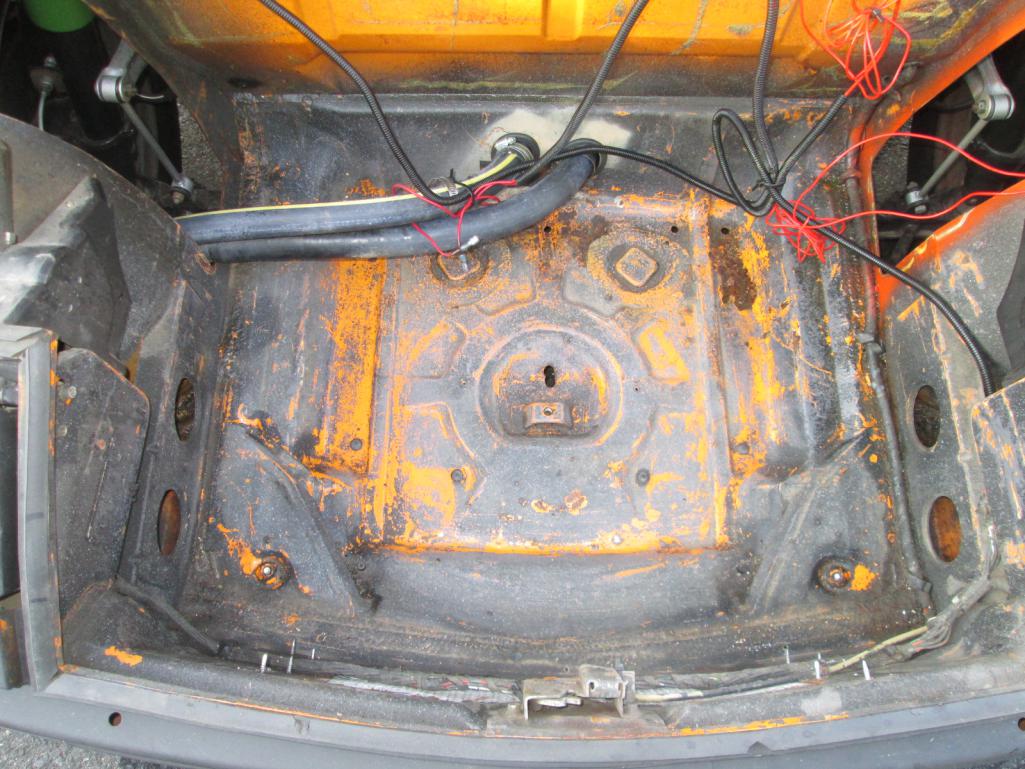
Attached image(s)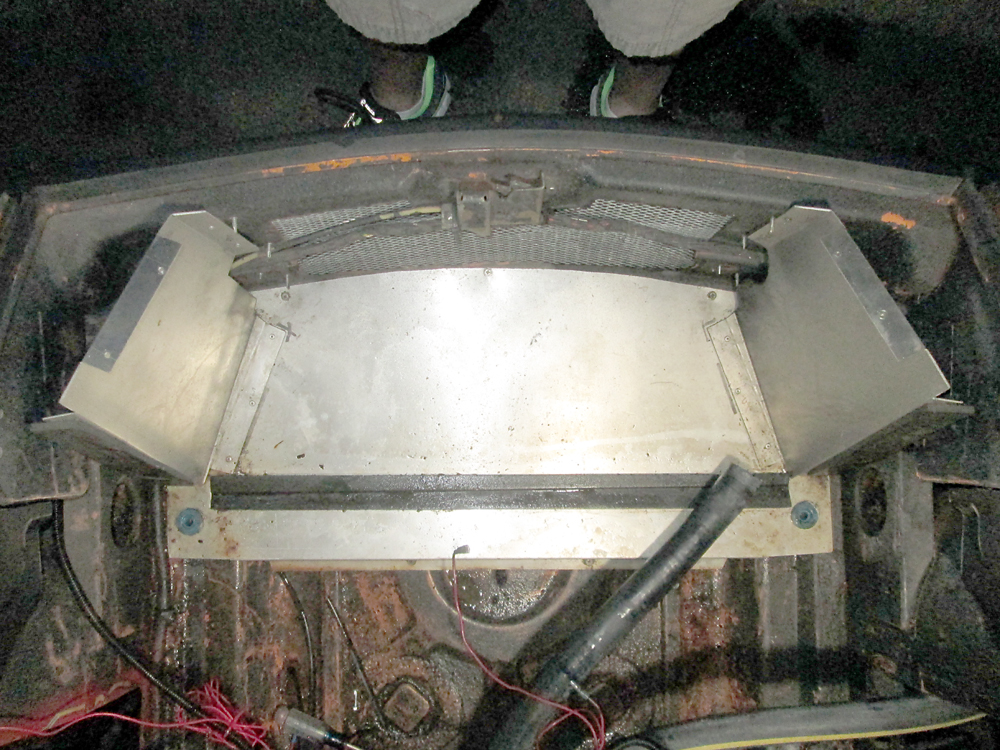
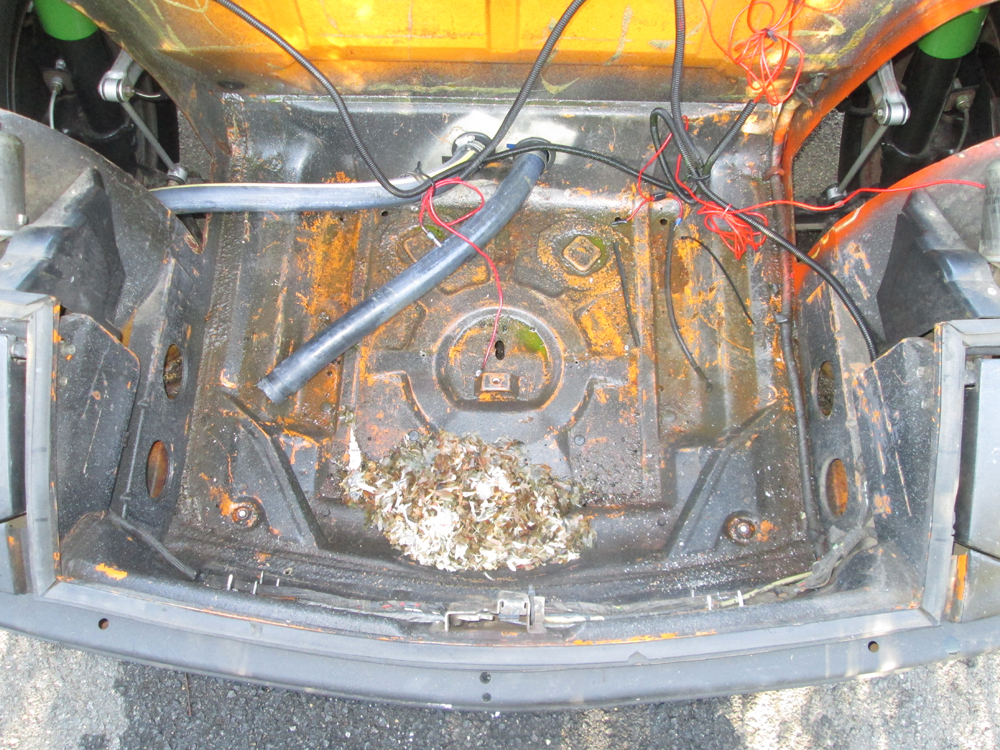
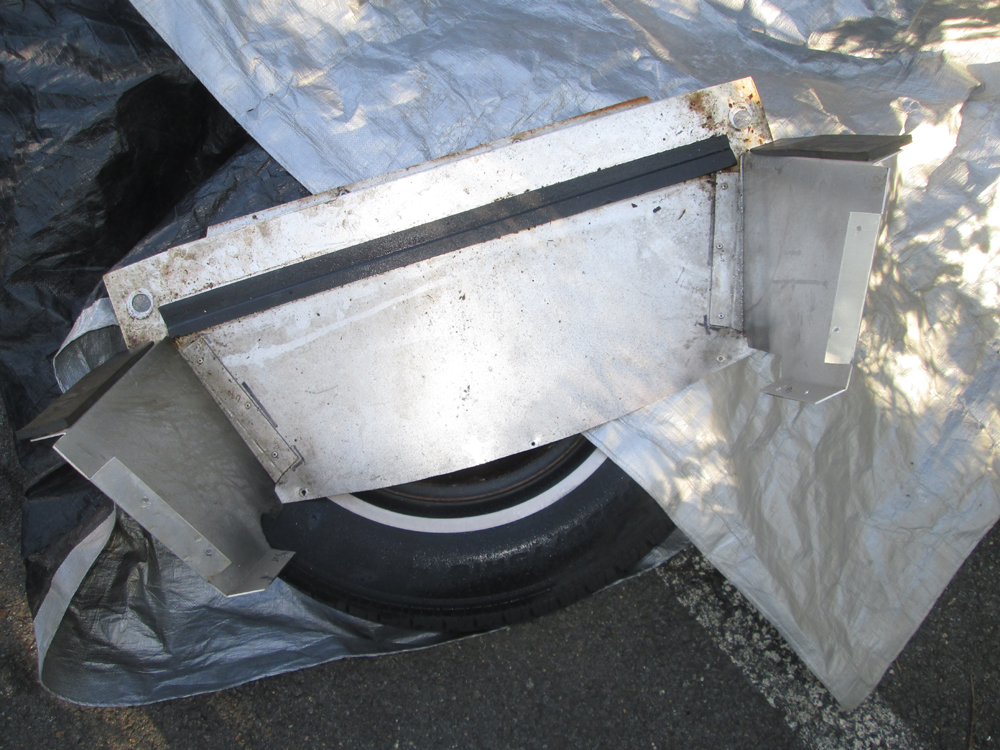
Posted by: jimkelly Dec 8 2015, 07:35 PM
my radiator arrived
and we started to fab up the mount (i made the pieces and my buddy tacked them together) like a&p mech did in his car.
used rivnuts (for first time ever), hope they last long term?
not sure if this is gonna work BUT i am trying to add some EZ BRUSH to the top and ID of some rubber grommets to use as my bottom vibration dampers. i'll know if it was a reasonable success in the AM, when i will remove the outer and inner molds
they came out decent but i need to get over to home depot and get the right sized ID grommets (5/8 ID).
Attached thumbnail(s)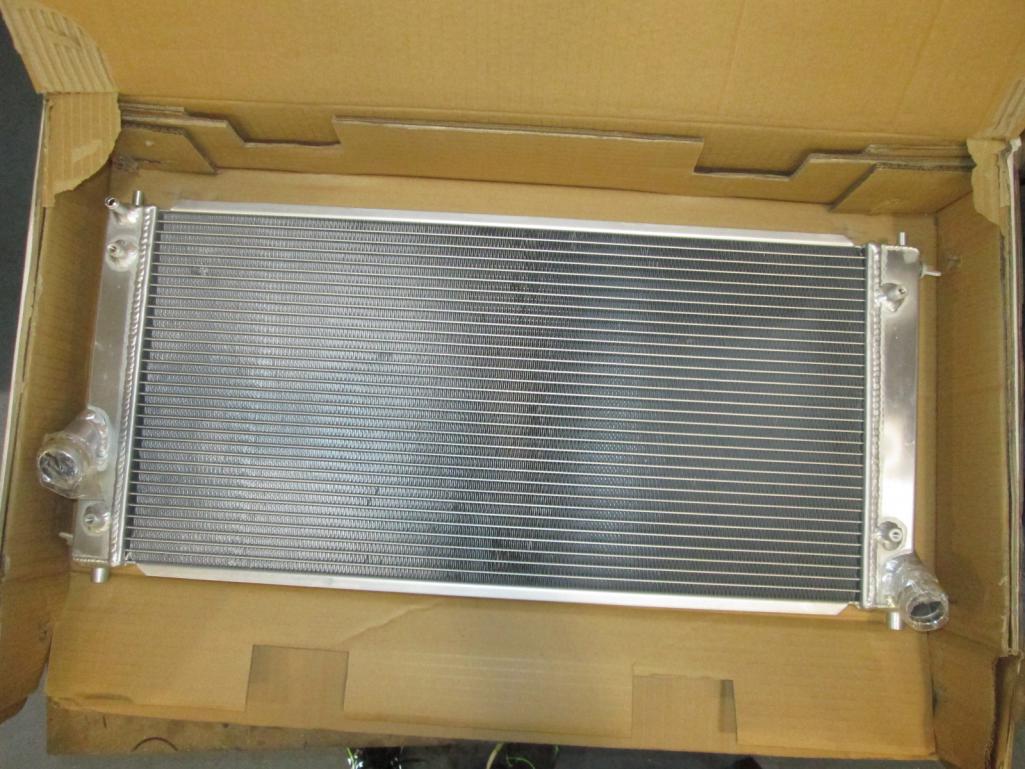
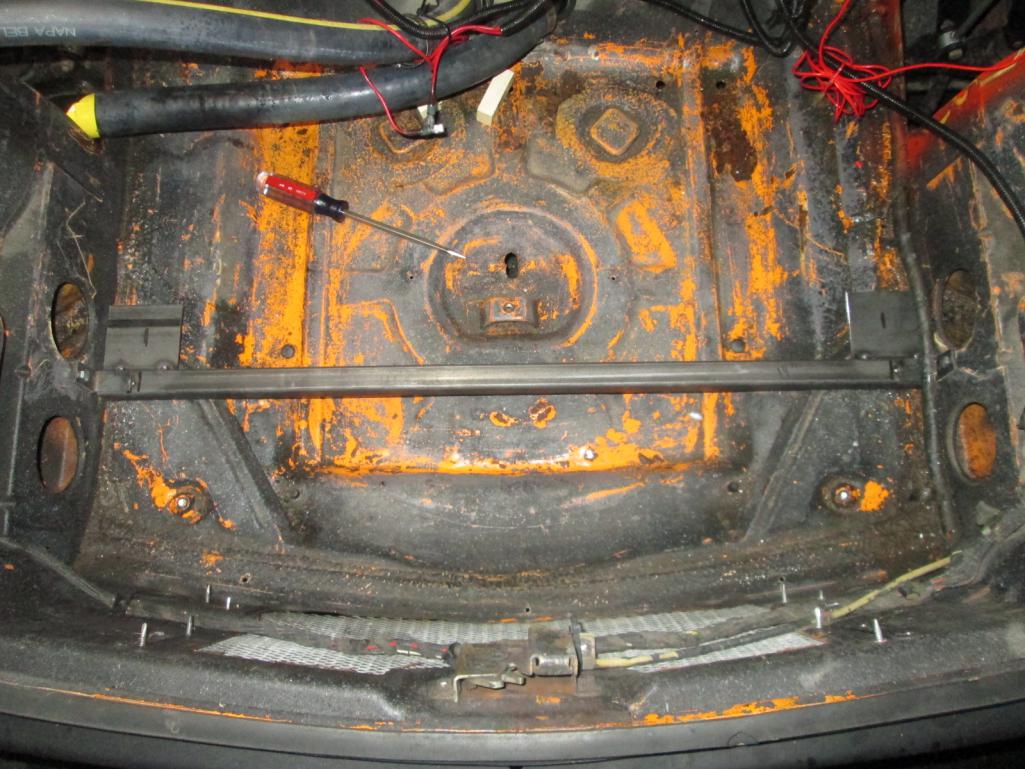
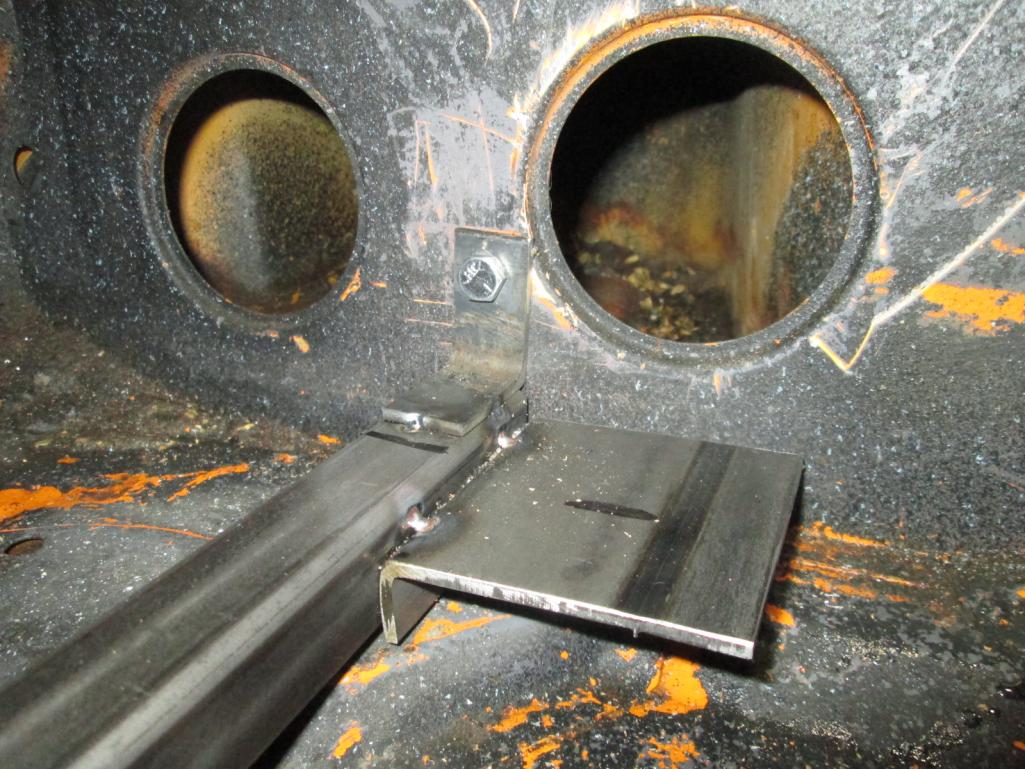
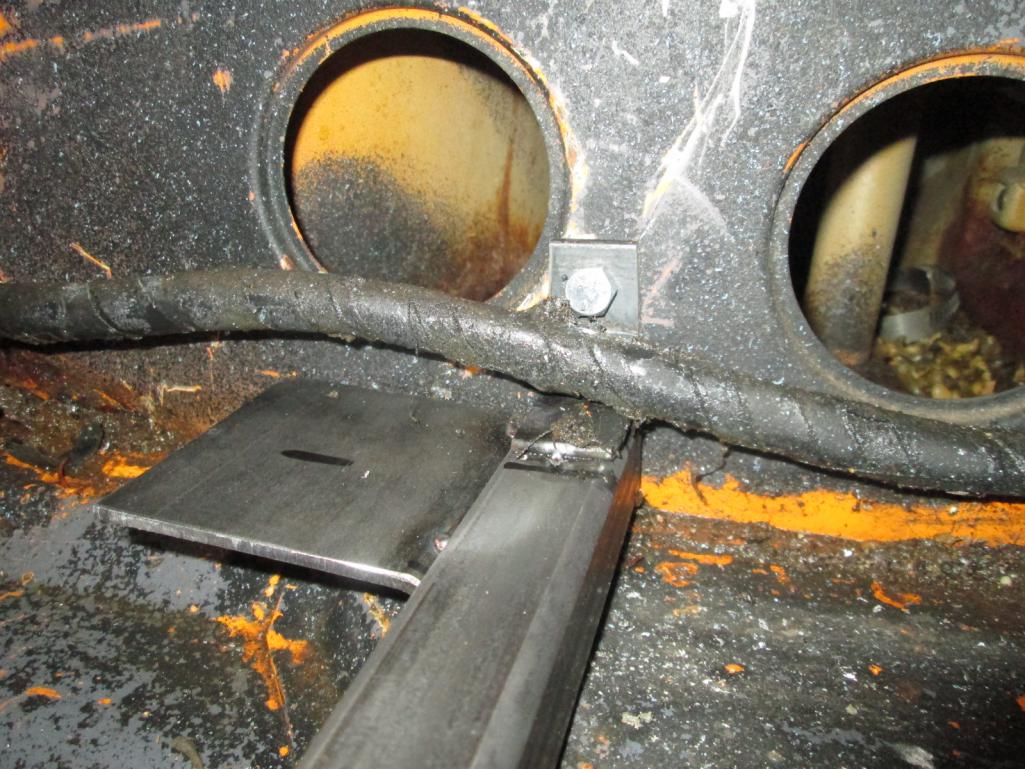
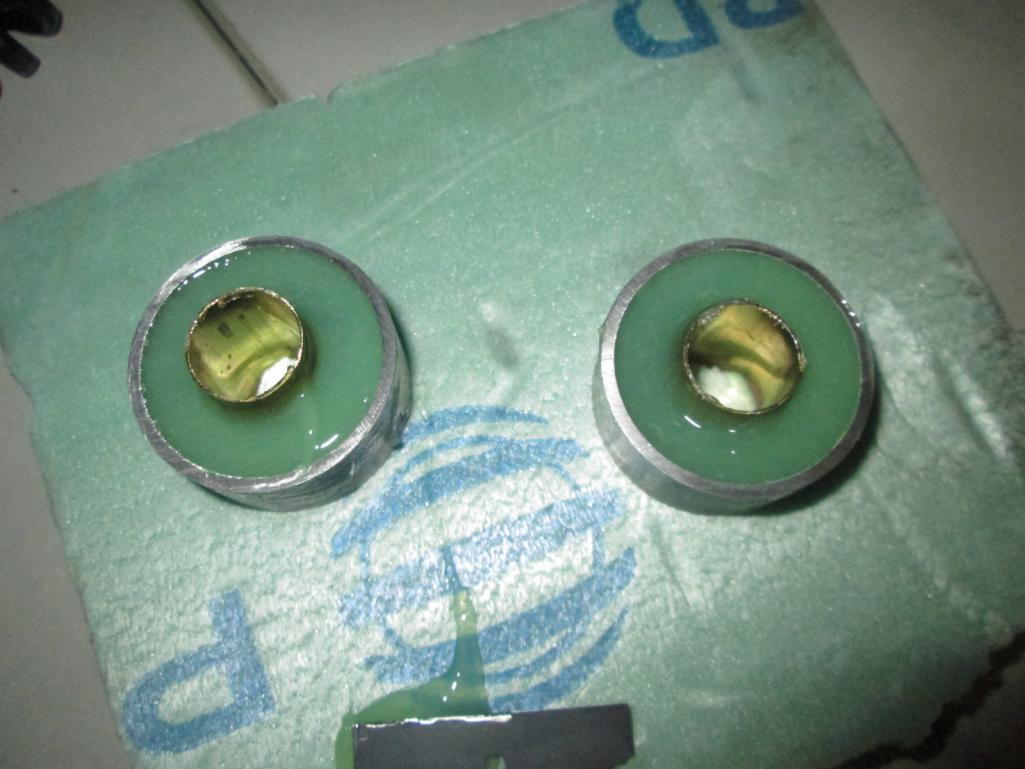
Attached image(s)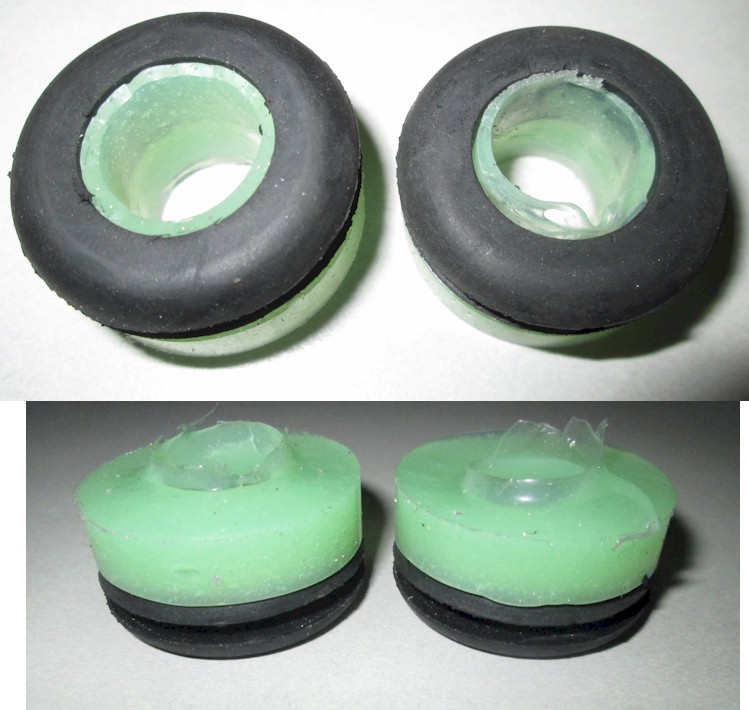
Posted by: Andyrew Dec 9 2015, 10:29 AM
Whats the green stuff made from?
Posted by: jimkelly Dec 9 2015, 10:54 AM
company: smooth on
green product: ez brush
blue product: smooth sil ( a different product we use sometimes)
i thought making a mold was gonna be cake walk, realized it was not gonna be, so i will be suing a standard grommet on bottom and top.
Posted by: mepstein Dec 9 2015, 11:22 AM
After mice chewed wires on my car after a winter storage, I was told to throw in some dryer sheets around the car. Seemed to do the trick last year.
Posted by: jimkelly Dec 9 2015, 04:13 PM
few more pics of progress.
end tabs (made from angle iron) should have had a shorter welded horizontal section (maybe 3/4 inch), vertical section is fine as is.
got the bottom grommets (5/8 ID from lowes) in, dead nuts, whew 28 11/16 center to center.
Attached thumbnail(s)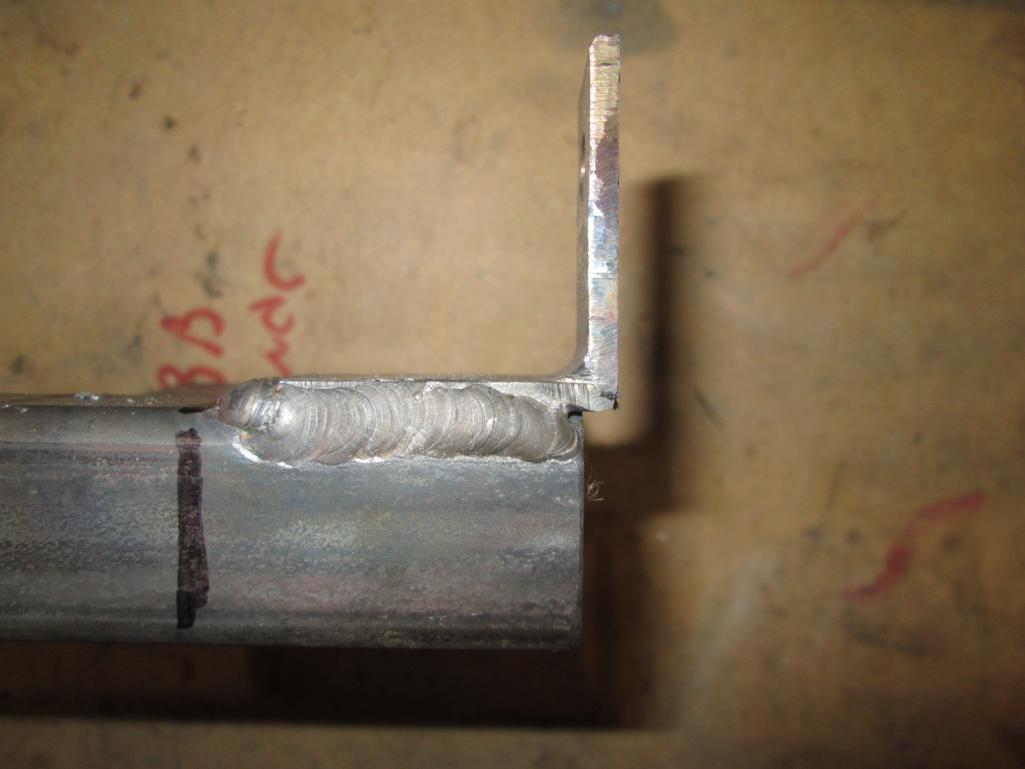
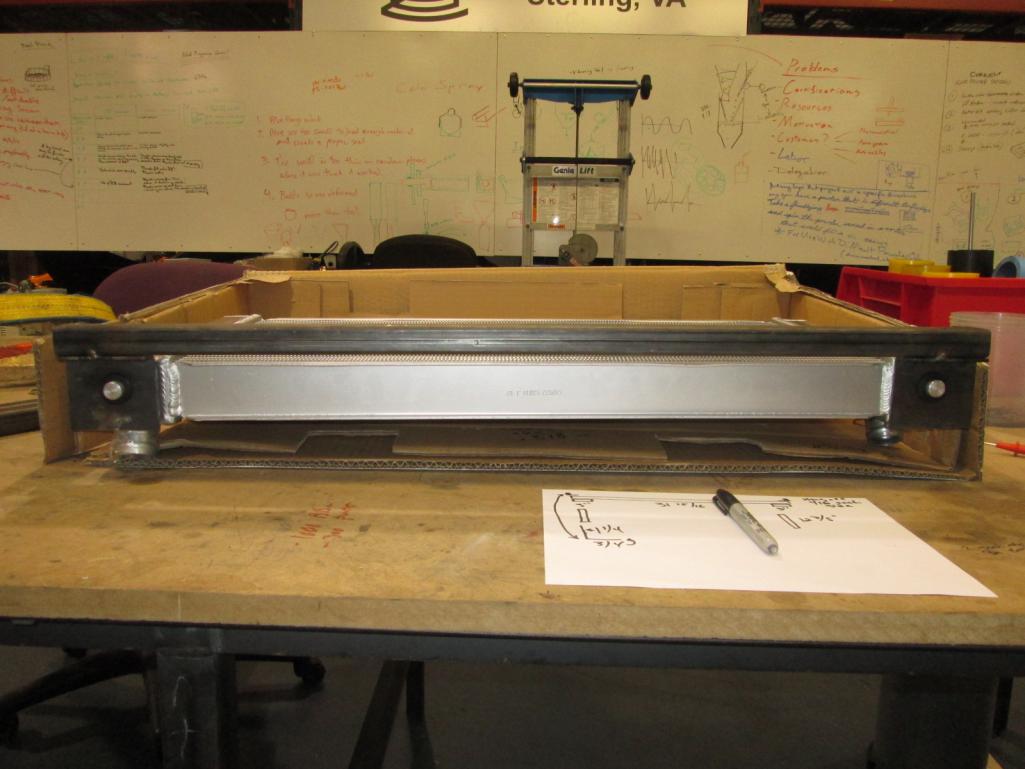
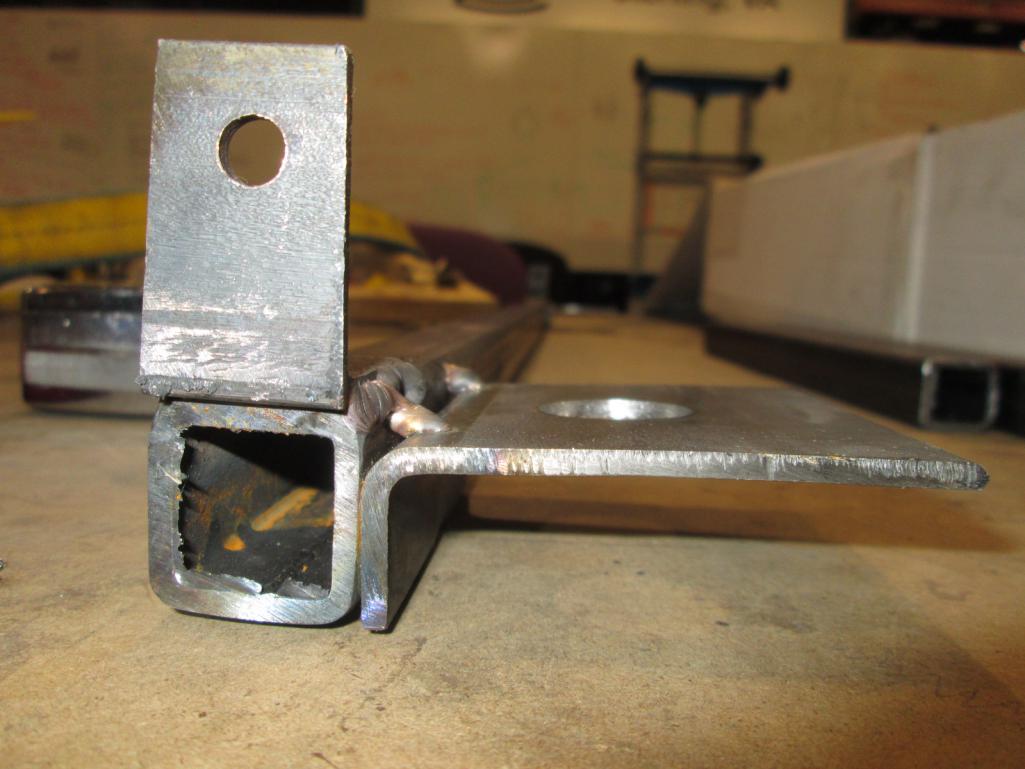

Posted by: Andyrew Dec 9 2015, 04:43 PM
Those tacks look pretty cold, See if your welder buddy can put a vertical tack on the end of the bar going to the piece that holds the radiator. If not just a 1" bead on the top.
Grommet looks great!
Posted by: jimkelly Dec 9 2015, 04:45 PM
that's all me. i've taken over the welding on this project : )
that said, i agree, but they are enough for test fit purposes. later i will heat the shit out of it when i tig it for long term use
more pics of ugly welding to come
i gotta do a little something different at the front then a&p mech did as i wound up in a slightly different location then he did. could be cause i do things half assed
Attached thumbnail(s)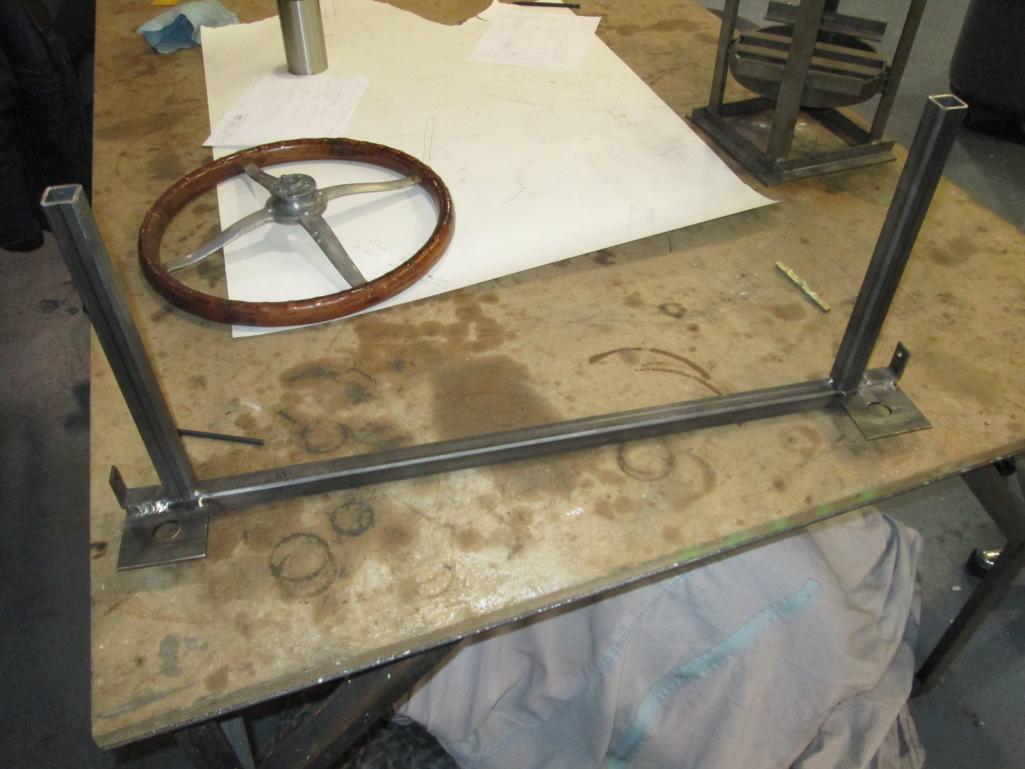
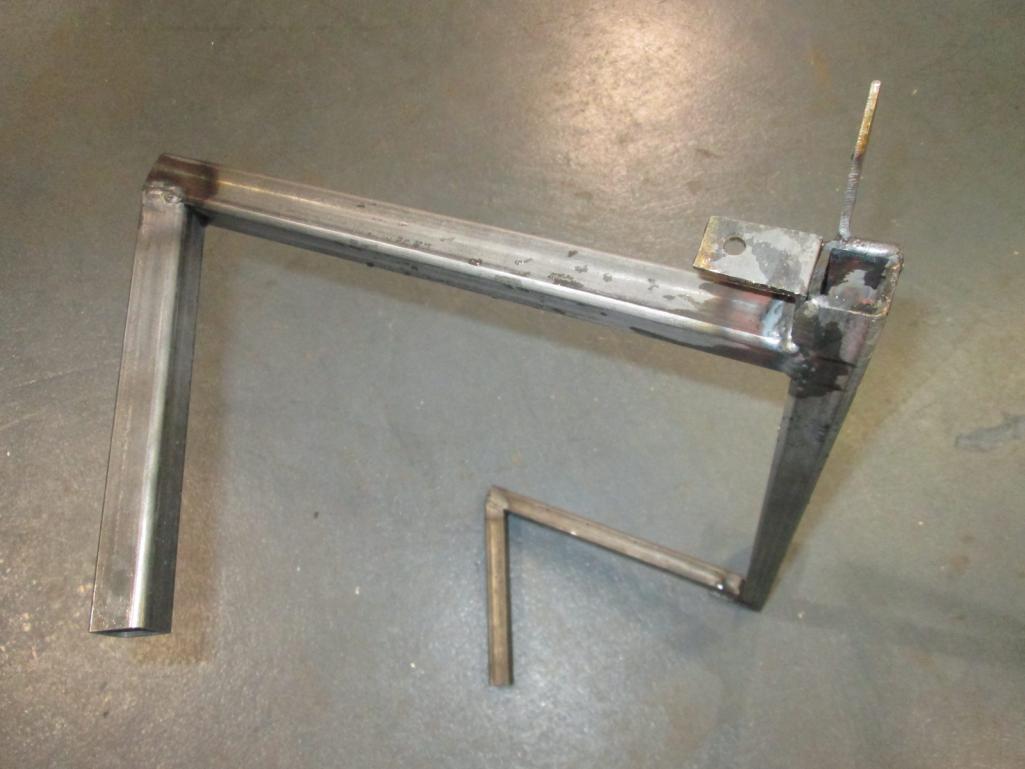
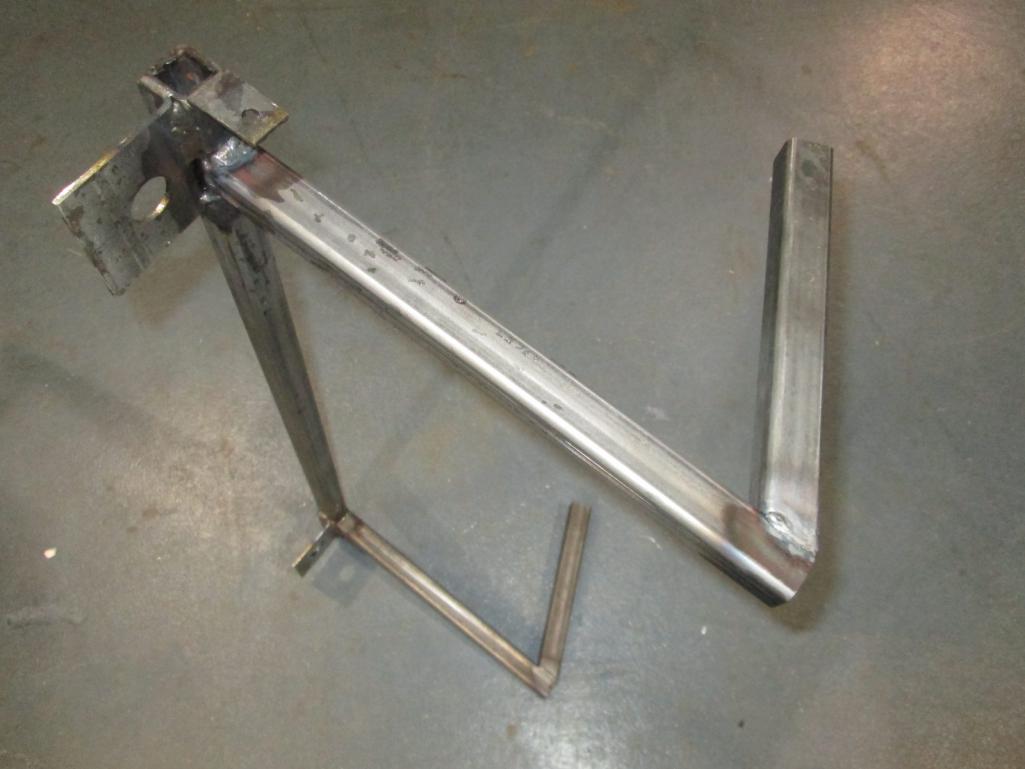
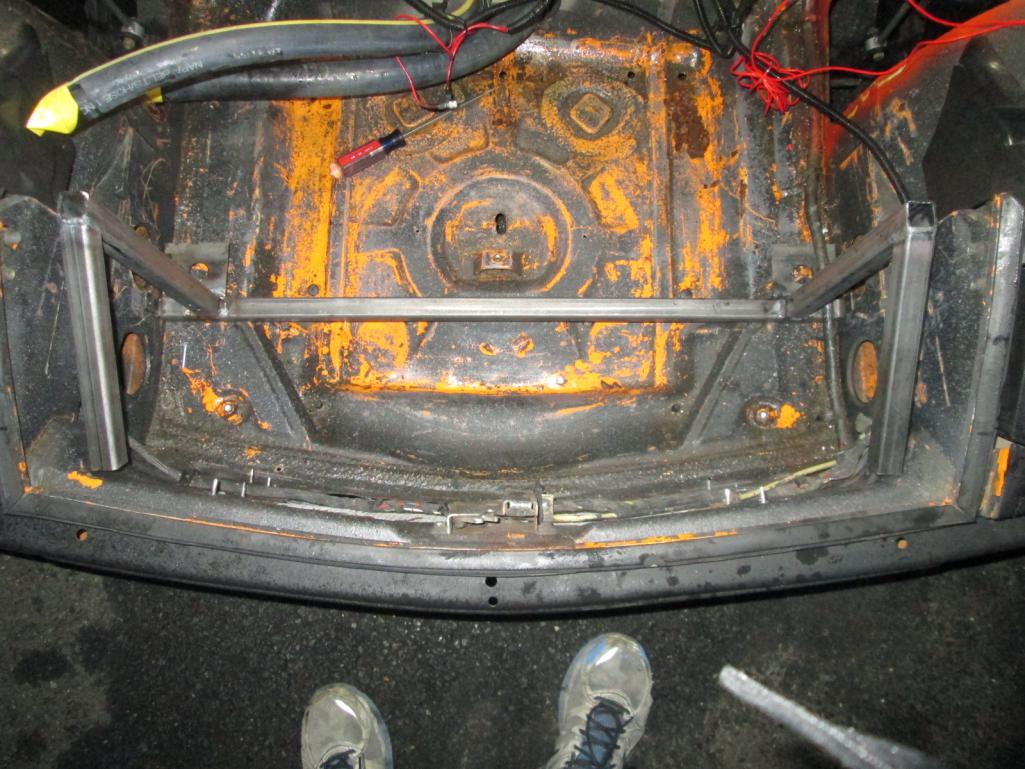
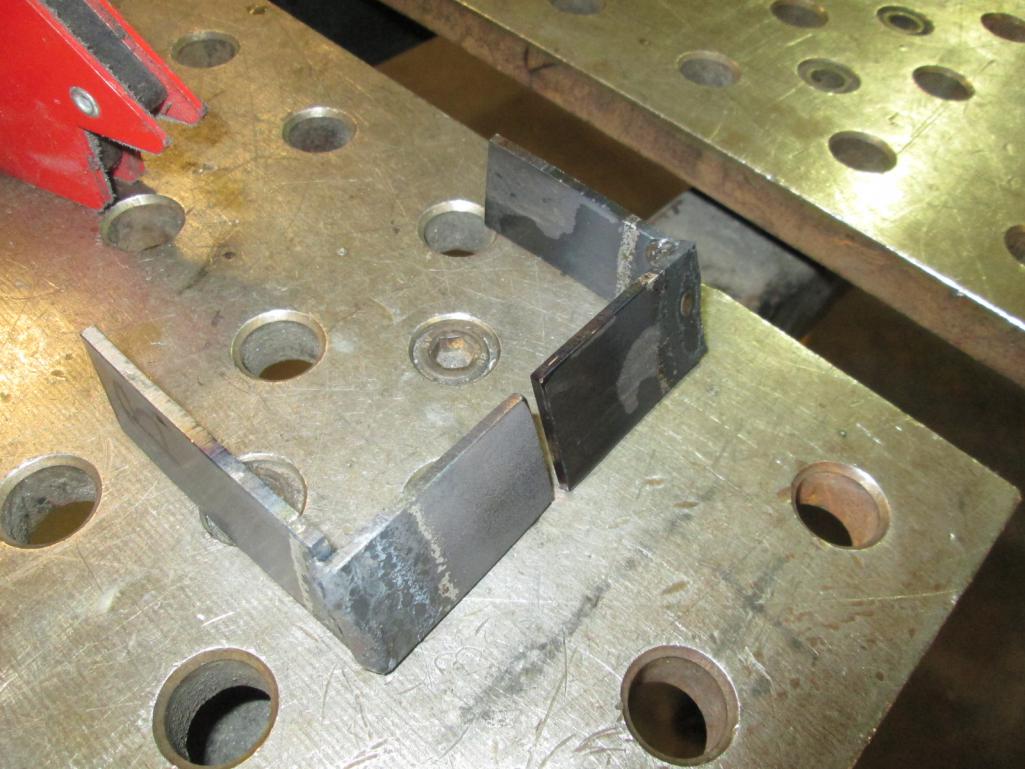
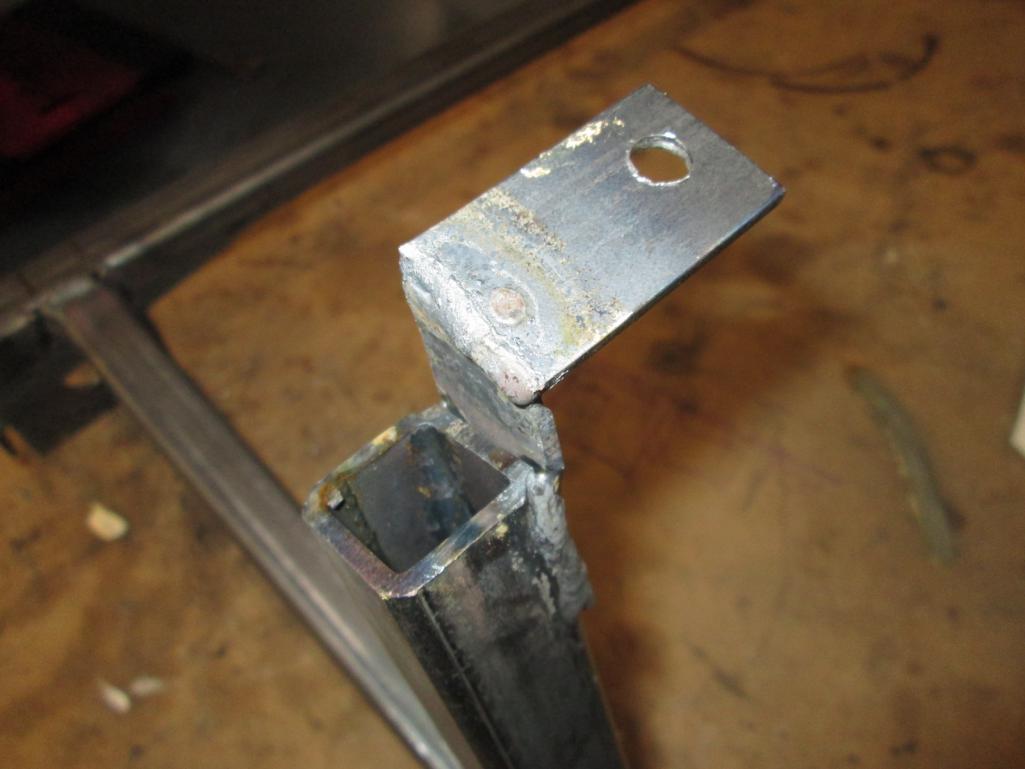
Posted by: jimkelly Dec 9 2015, 08:30 PM
few more pics. not bragging BUT my welds are unique
well, radiator sits in there real nice it seems IN its bottom grommets. tomorrow i will start on installing the ducting, i'm reusing my renegade duct work aluminum if i can.
my first fab job, and my first real weld job, i'm happy with it so far.
it is 10pm, i started this at 3pm i think and did a piece of it yesterday. many hours to go.
if i was good with angles and if i were doing the welding in the car, i could have done a few areas a bit nicer.
Attached thumbnail(s)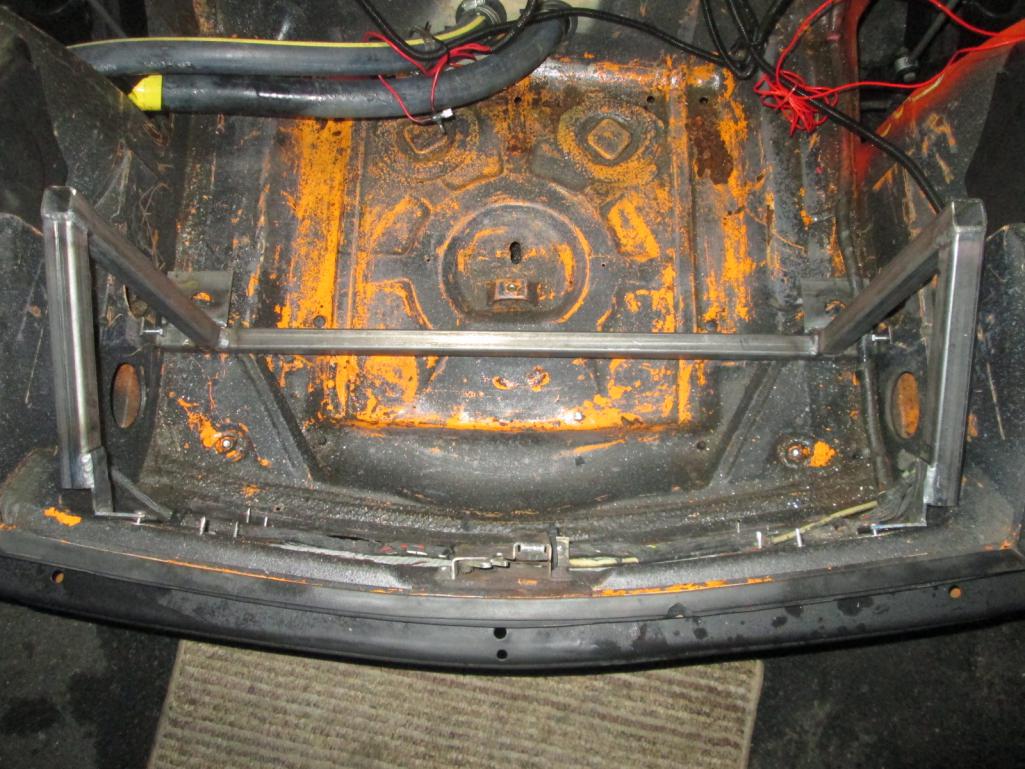
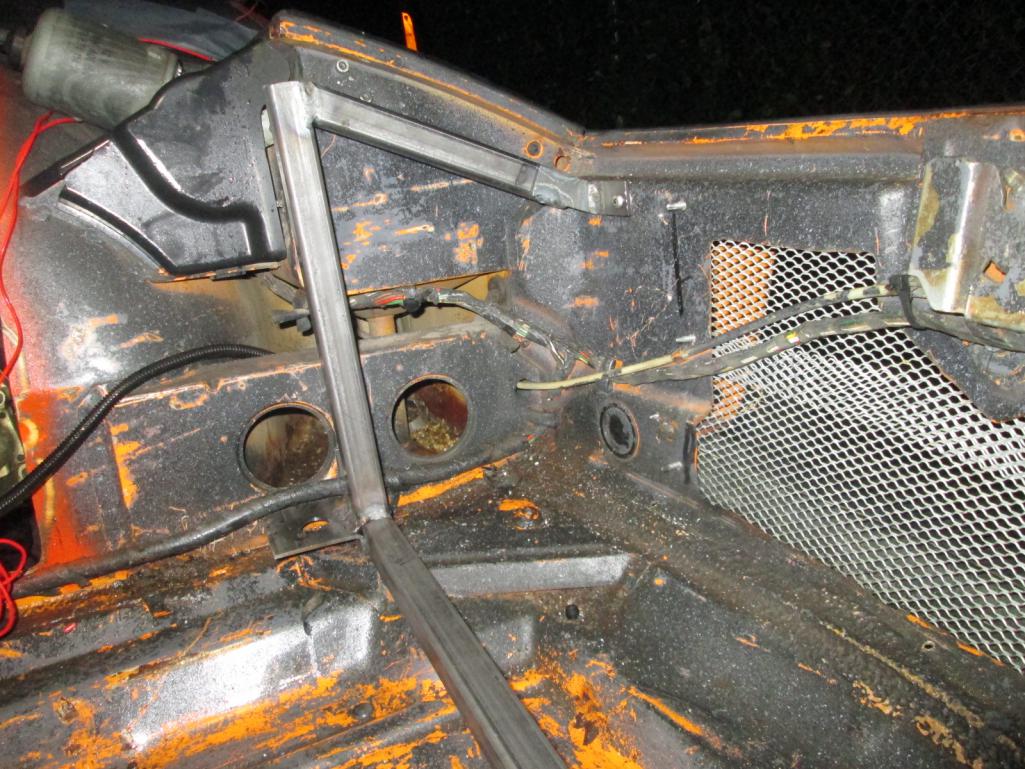
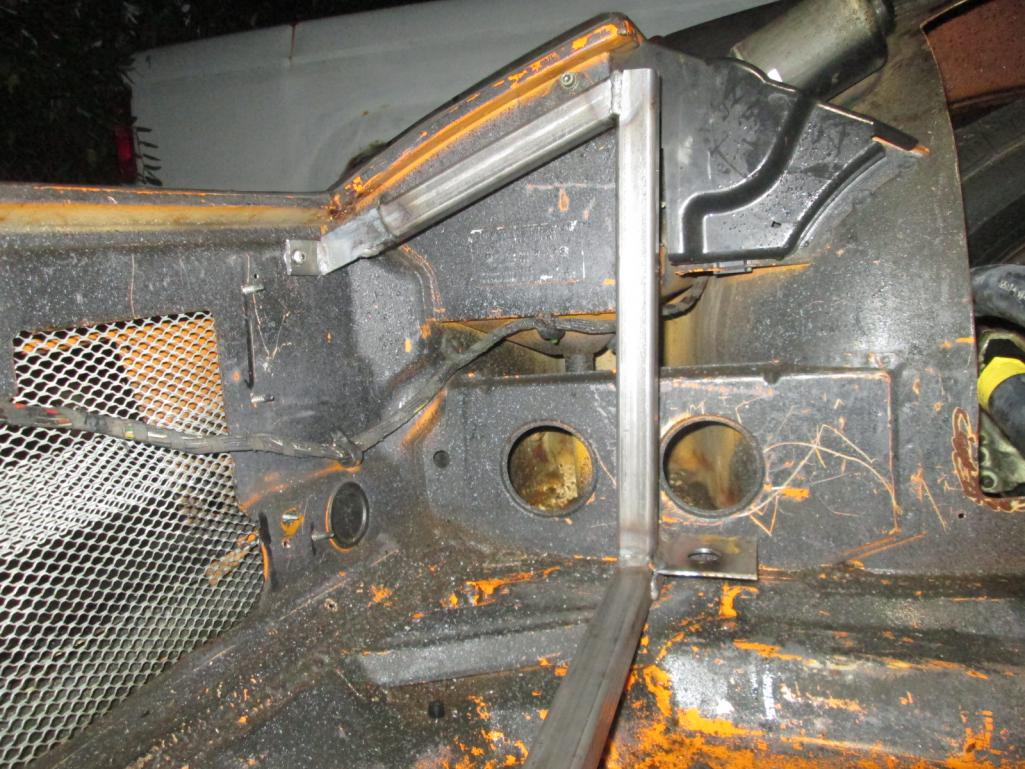
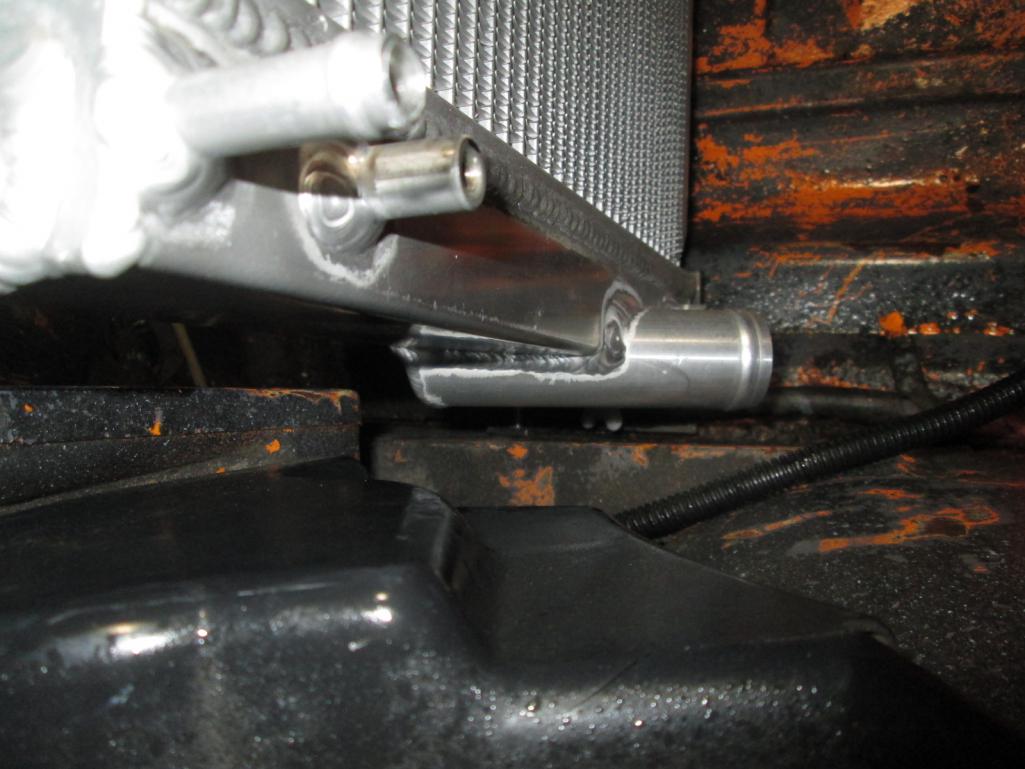
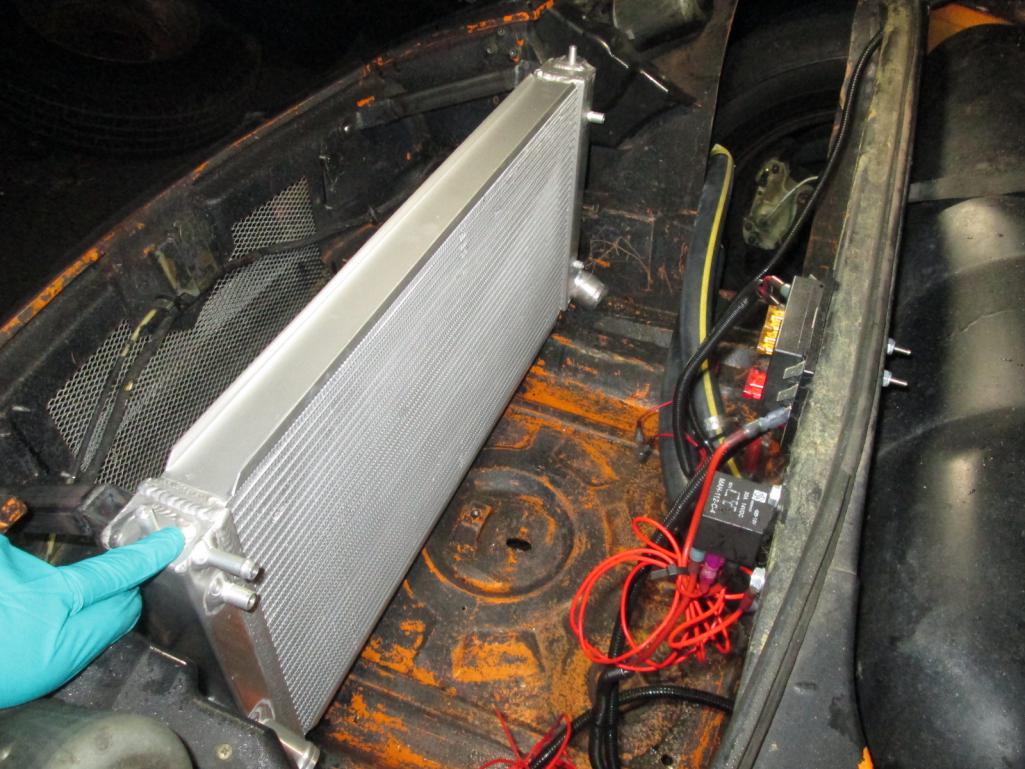
Attached image(s)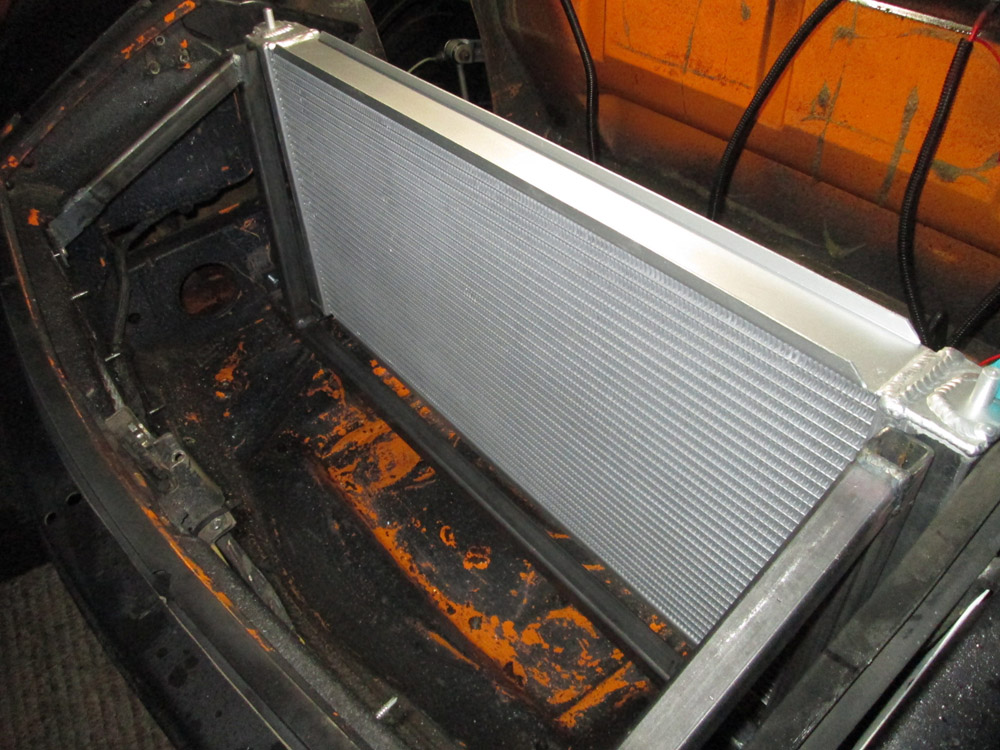
Posted by: A&P Mech Dec 9 2015, 10:01 PM
It's looking good. I am curious what made you decide to abandon the OEM Toyota lower radiator vibration mounts? They appear to be very well engineered.
Posted by: jimkelly Dec 9 2015, 10:10 PM
i'm cheap, and the best priced place only had one in stock, so i thought i could make something decent but later realized i should have sprung for the toyota part. time constraint then led me to use a simple rubber grommet.
Posted by: mgp4591 Dec 9 2015, 11:00 PM
while waiting for the new rad, why not install something like this for some real comfort ??
http://www.ebay.com/itm/NEW-UNIVERSAL-SMALL-CAR-AND-TRUCK-UNDERDASH-HEATER-12V-UNDER-DASH-Heat-/262160204056?hash=item3d09f74118:g:-EsAAMXQydtTKgy~&vxp=mtr
This site looks like they have answers for some of my problems- anyone have any experience with this company, the heaters or the a/c units? If they work like they say, I'll probably pick up a combination of their products to make my ride more comfortable.
Posted by: jimkelly Dec 10 2015, 06:59 AM
what site?
reusing all my renegade aluminum, working well.
Attached thumbnail(s)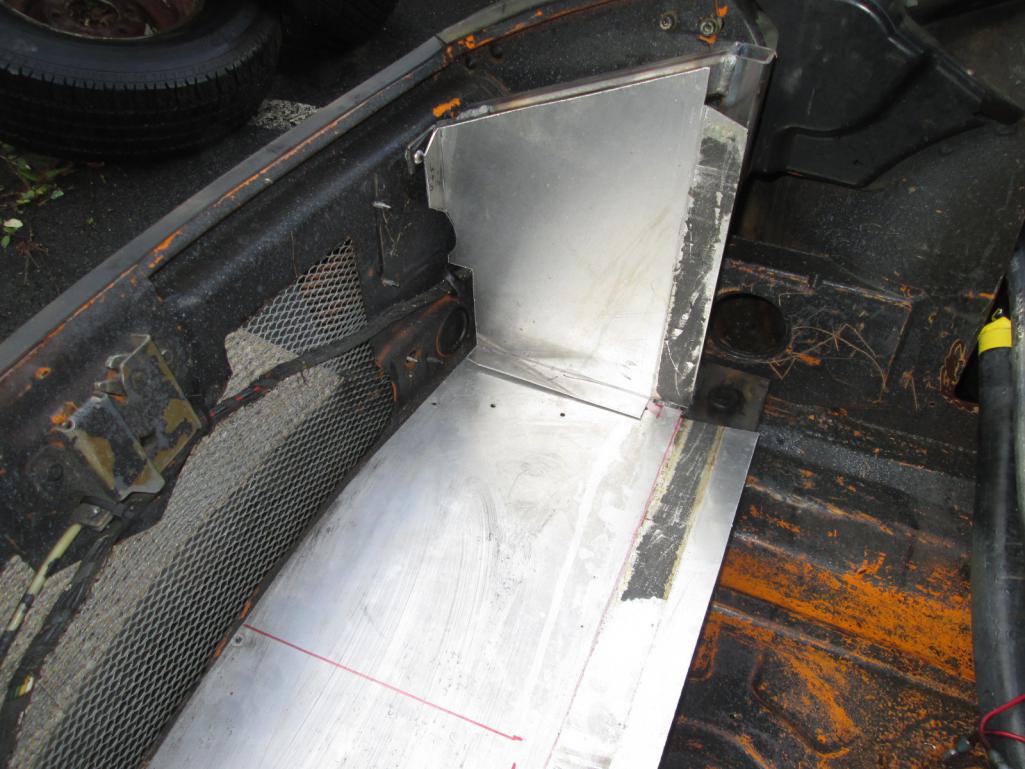
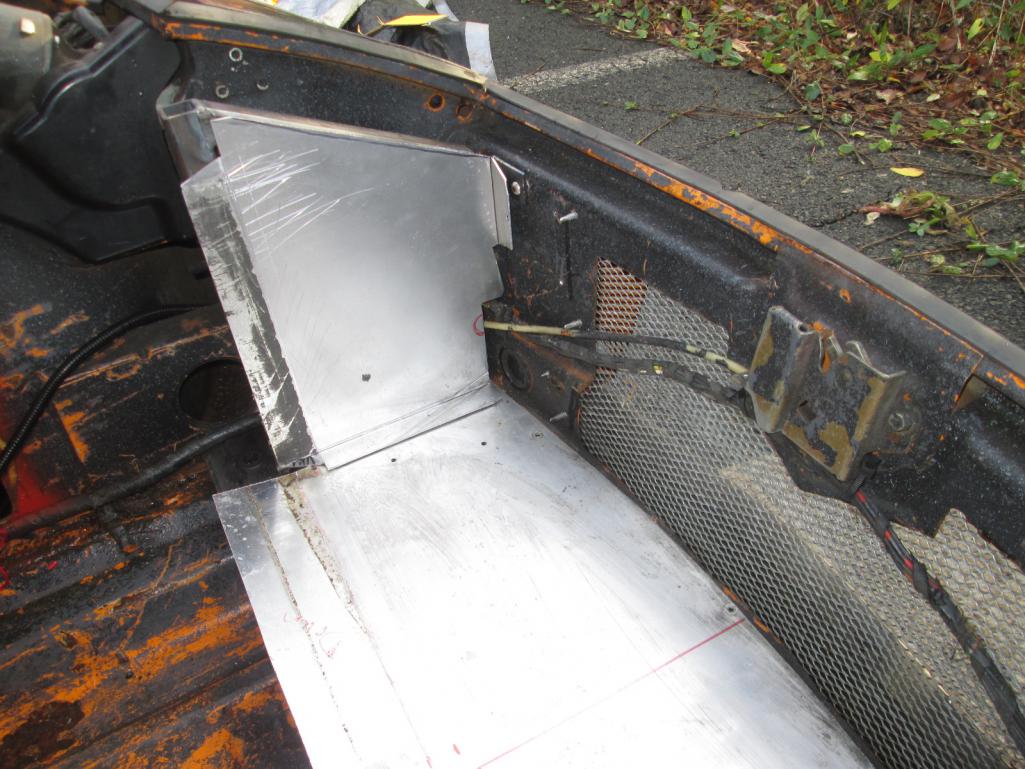
Posted by: mgp4591 Dec 10 2015, 12:59 PM
The link to the Ebay site for a heater. Found some info on a/c units too. They're small enough to fit in a stack where many have a console coming down from the dash. Looks like just the ticket for us waterboxer folks...
Posted by: jimkelly Dec 10 2015, 06:51 PM
well, radiator is mostly in, using renegade's radiators and shroud. notice it is about 1.5 inches too tall and i take my welding comment back, for aluminum, i had rod and dave take turns. seems neither of my existing hoses, 1" and 1.25" fit my new radiator. tomorrow i need to buy some 1.5" hose and make some transitions. also, my new radiator does not have a build in temp sensor to trigger radiators, so i need to rig something up.
Attached thumbnail(s)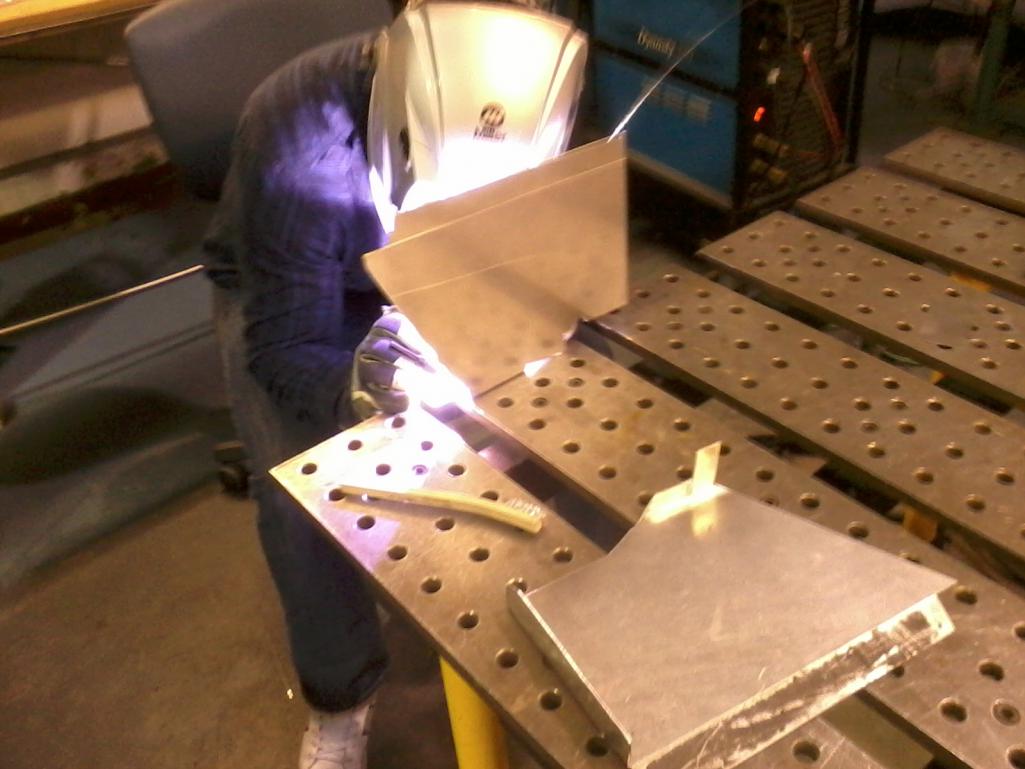
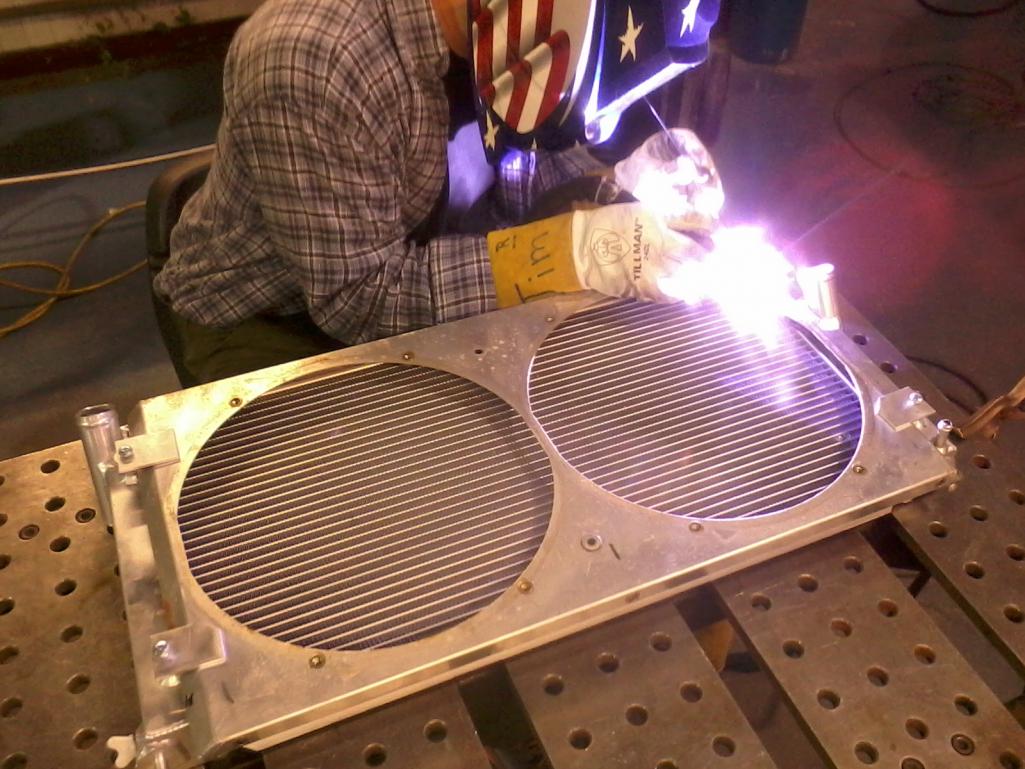
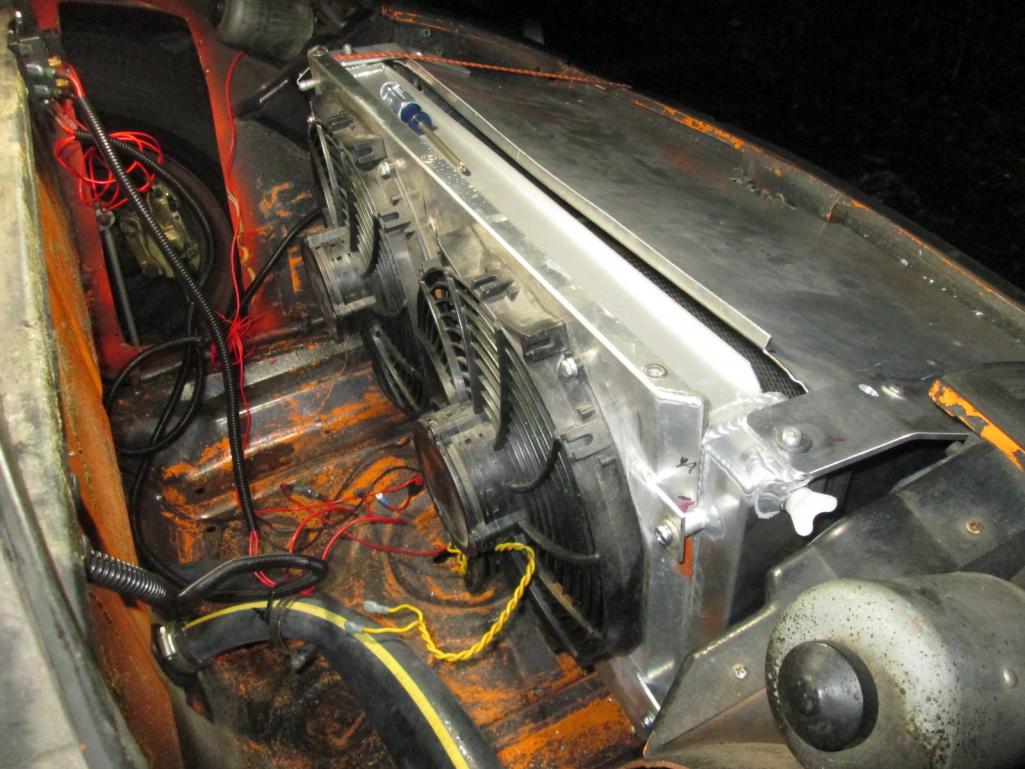
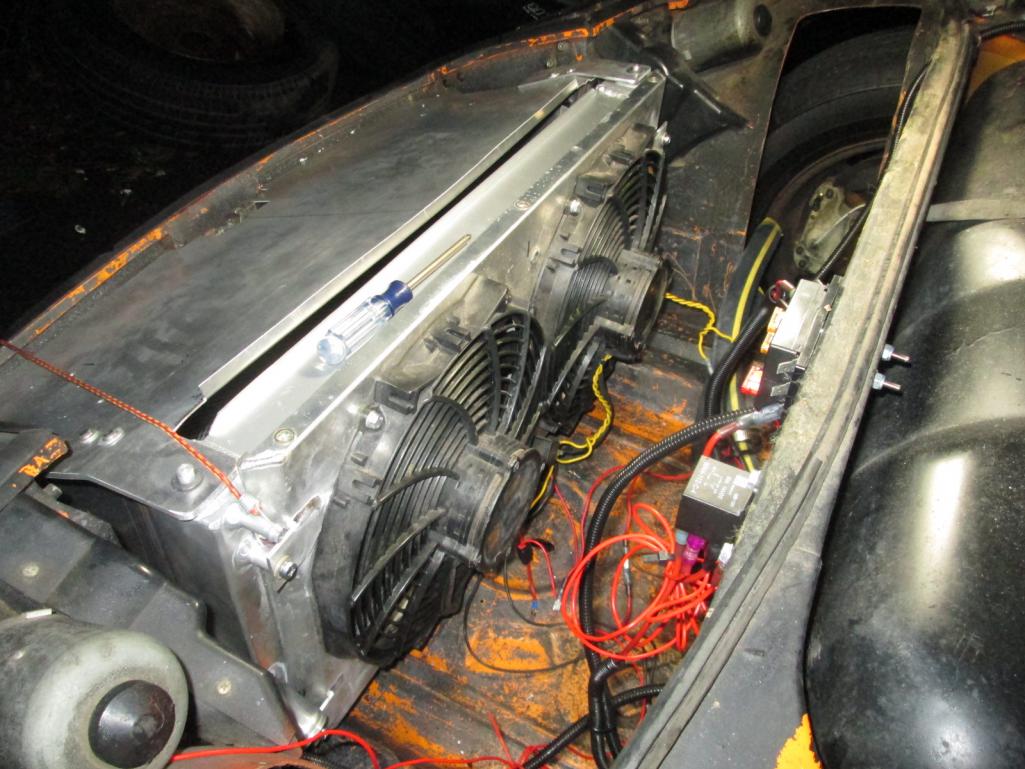
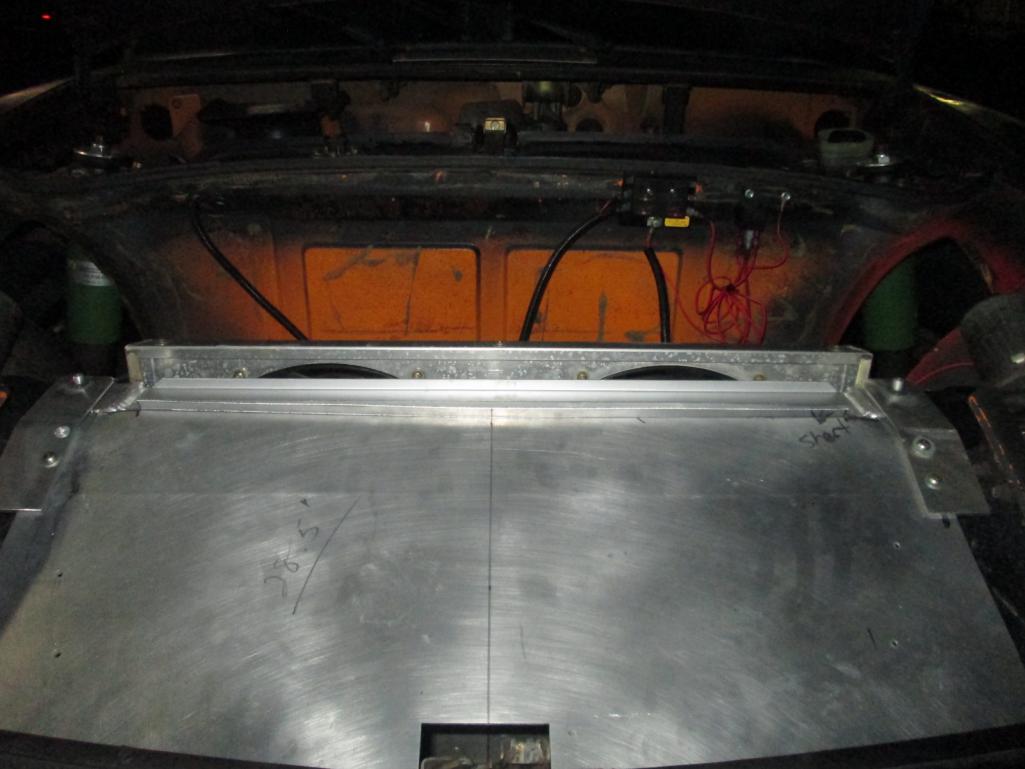
Posted by: jimkelly Dec 11 2015, 06:46 AM
stumbling block. the coolant spouts on radiator are both 1.391" OD. my car has one coolant hose that is 1.00" ID and the other is 1.25" ID, dead nuts. so i turned these (temporary stainless steel) transitions last night. one is 1" OD to 1.390"+- OD with 3/4" passage, and, the other is 1.25" to 1.390"+- with a 1" passage. now i need to get me some toyota celica 2000-2005 radiator hose, assuming it will be very close to having a 1.390" +- ID ???
oh, the coolant spouts on the renegade radiator were dead nuts ODs, 1" and 1.25". no dramatic hose stretching required for it.
((UPDATE: I wound up NOT using these transitions. see below ))
Attached thumbnail(s)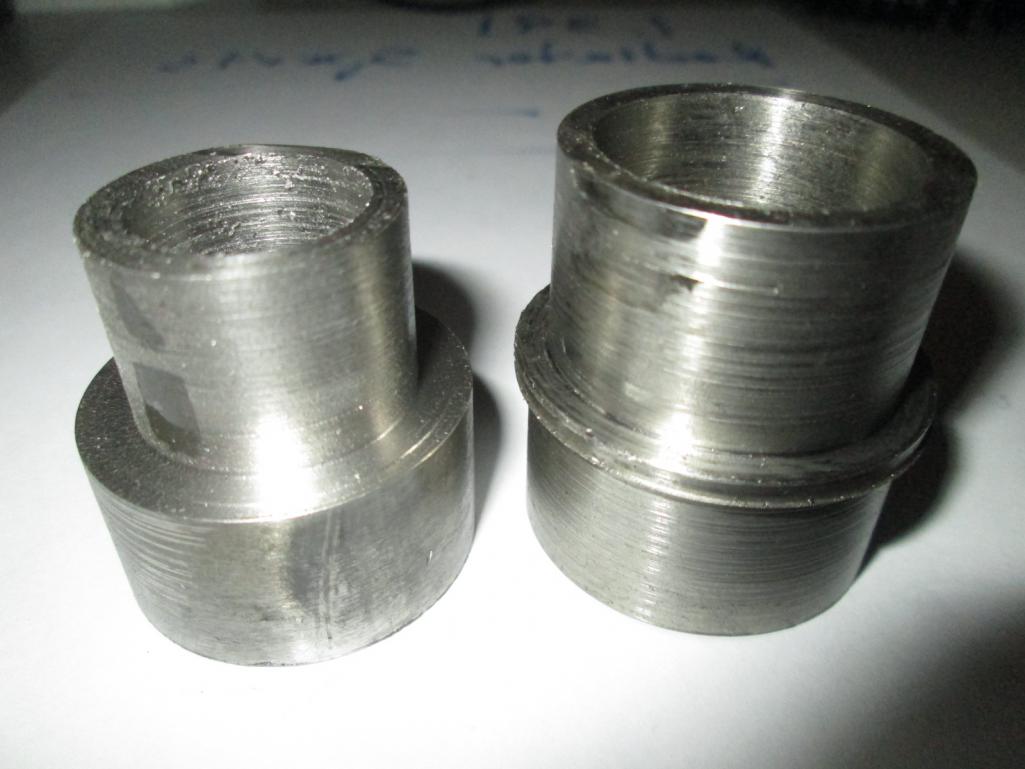
Posted by: jimkelly Dec 11 2015, 08:11 AM
guess i will just put a hose and plug on this? .400 OD nipple.
Attached image(s)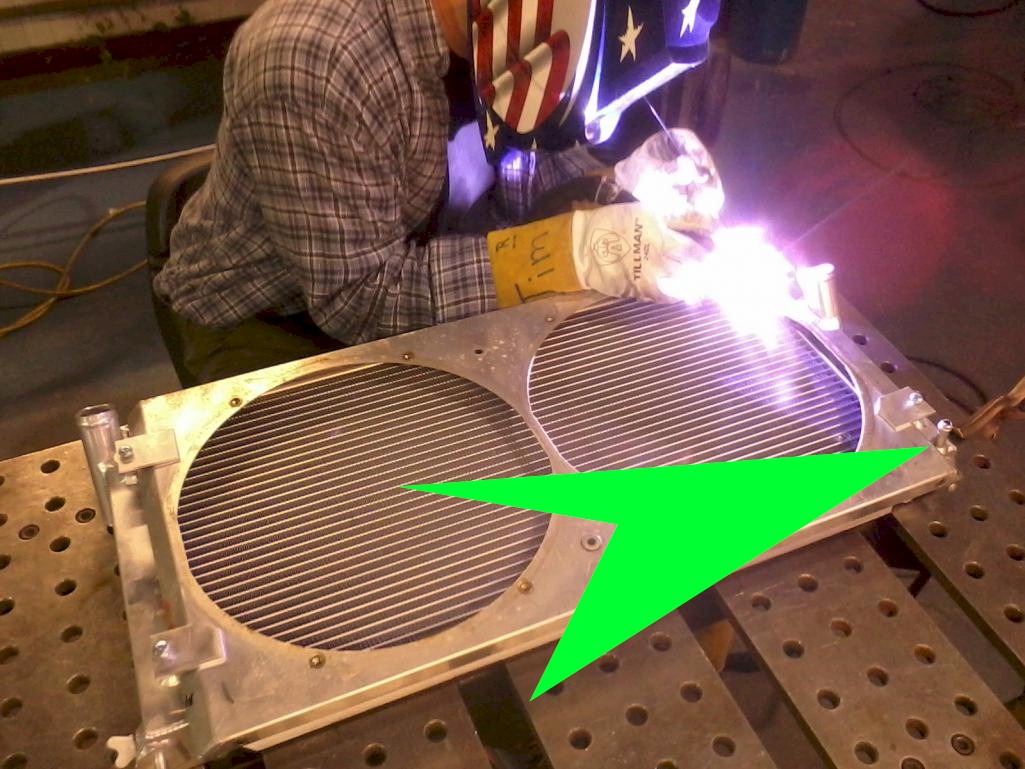
Posted by: Andyrew Dec 11 2015, 08:23 AM
Why not tig the adapters to the radiator? Thats what im going to do....
Posted by: jimkelly Dec 11 2015, 08:32 AM
i canceled my order with jags that run ( for 2 transitions with 1.5" ODs on one side with in hindsight are probably too large for the radiator side, 1.391") because i was under the impression that my 1.25 hose would fit the radiator but i am now thinking it won't. but even if it did i would need a solution for my 1" hose. but i was confused and wanted to wait till i got the radiator to decide what i really needed. i do not think an american fraction will work well with this radiator?? 1-13/32 = 1.391
Posted by: Andyrew Dec 11 2015, 09:15 AM
Thus the exact reason I am welding on some 1 1/4" pipe on my in/out. I happen to be running 1 1/4" lines so this works out for the best.
Attached thumbnail(s)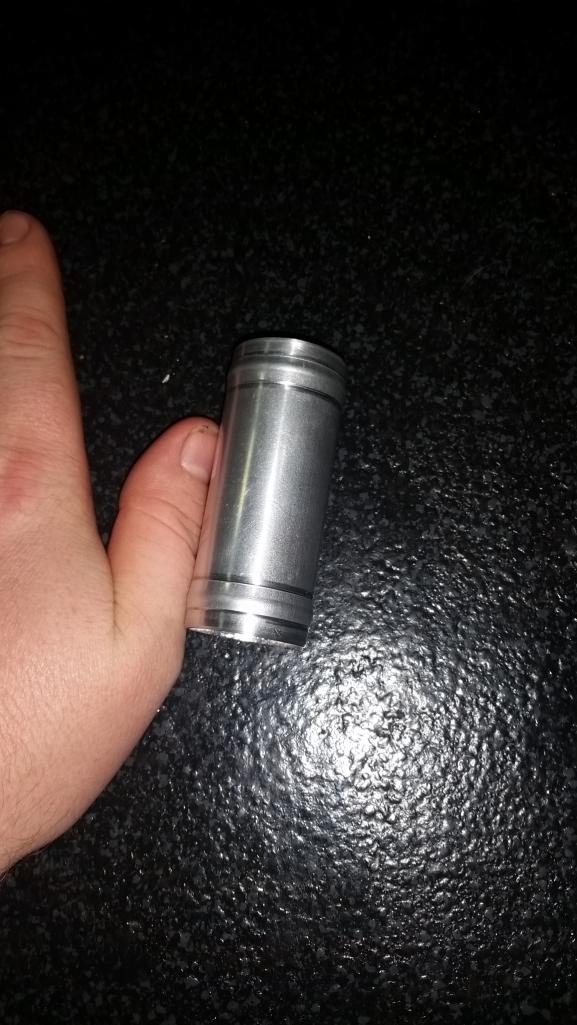
Posted by: jimkelly Dec 11 2015, 09:45 AM
that's nice.
remember that one radiator outlet is kinds close to floor pan.
does it matter which radiator port is used as the outlet (cooler water to engine) and which is used as inlet (hot water from engine)?
Posted by: Andyrew Dec 11 2015, 09:53 AM
Water typically flows down, so in our case I think the drivers side is the hot side.
Posted by: jimkelly Dec 11 2015, 09:54 AM
i completely forgot i had these on my renegade radiator.
Attached thumbnail(s)
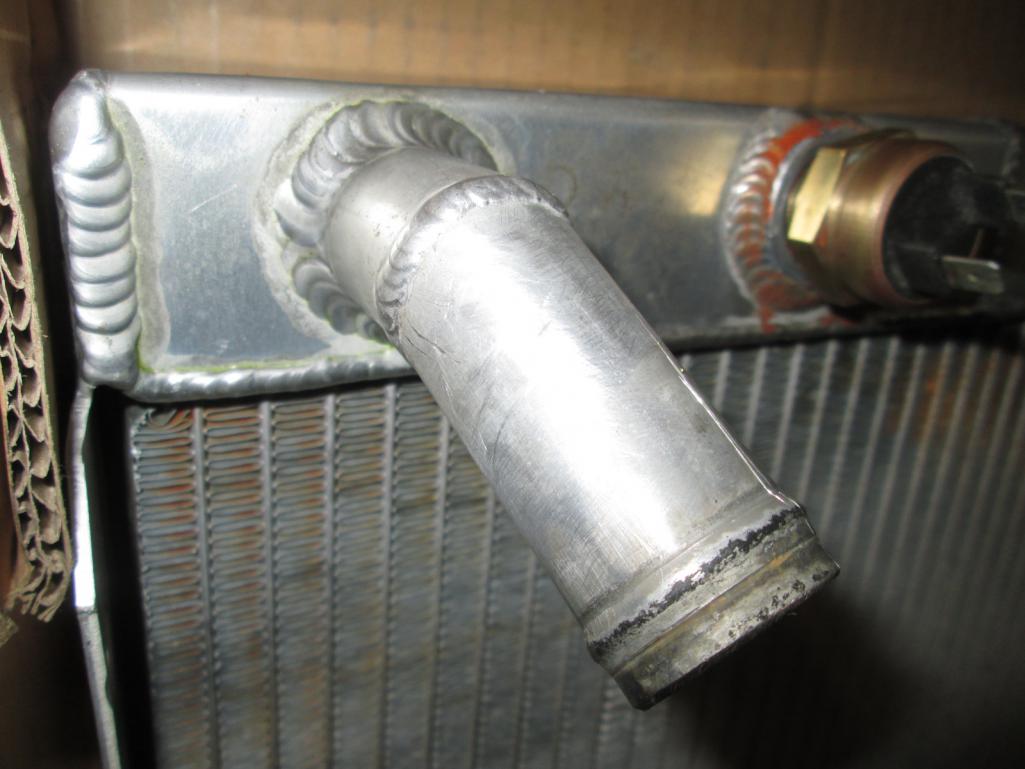
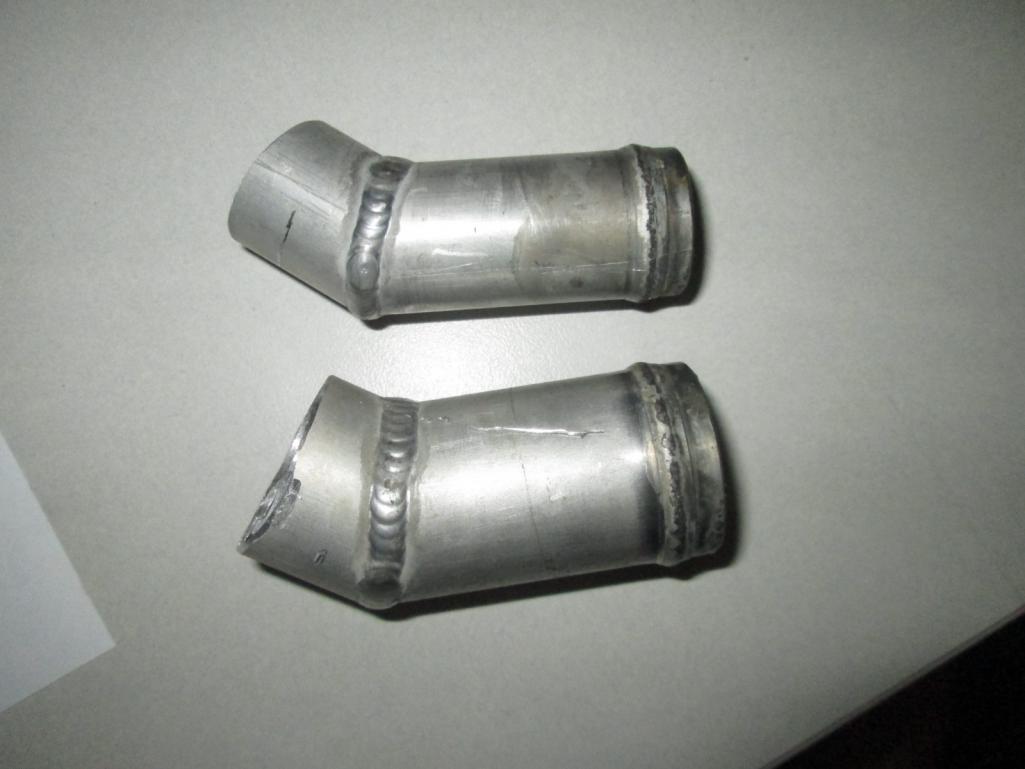
Posted by: Andyrew Dec 11 2015, 11:07 AM
Hah! Thats awesome. Simple solutions are simple
Posted by: jimkelly Dec 11 2015, 12:09 PM
the green arrow is pointing towards the, inbound/hot/high pressure side, of the radiator. I simply put a capped hose on the small nipple at top (see green arrow).
Attached image(s)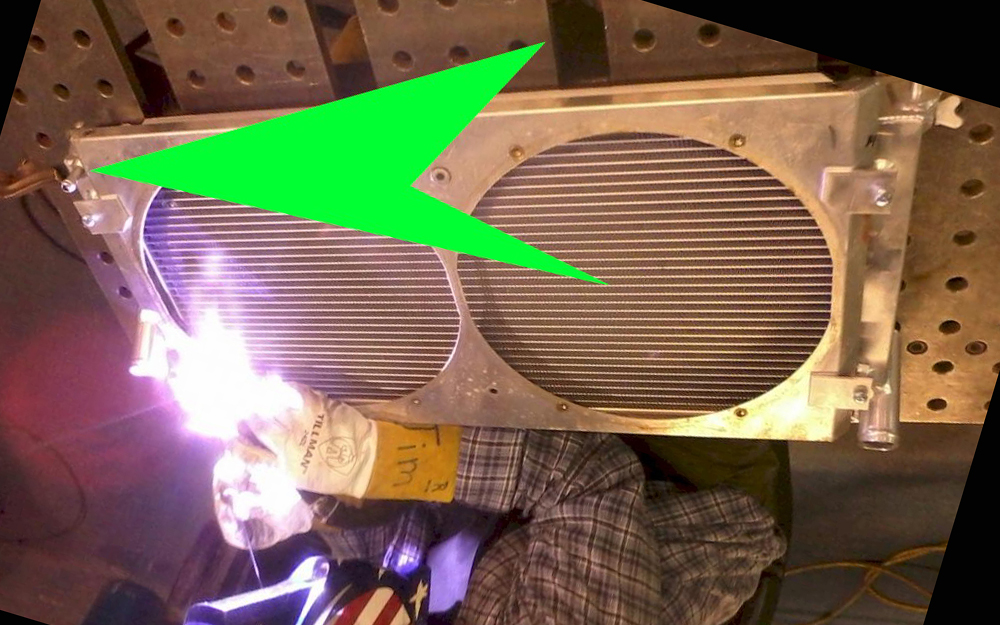
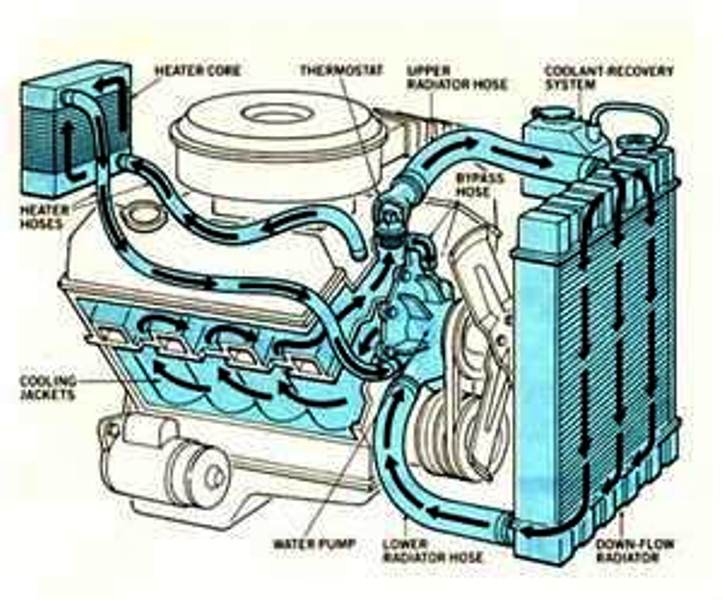
Posted by: Andyrew Dec 11 2015, 12:29 PM
Correct. Thats what I would believe as well.
Posted by: jimkelly Dec 11 2015, 01:10 PM
note: on the renegade system the wider 1.25" hose (to water pump from radiator) goes to the lowest/widest radiator port... and the narrow 1.00" hose (thermostat to radiator) goes to the top/narrowest radiator port.
see pic, mount tabs on renegade radiator are at its bottom.
Attached thumbnail(s)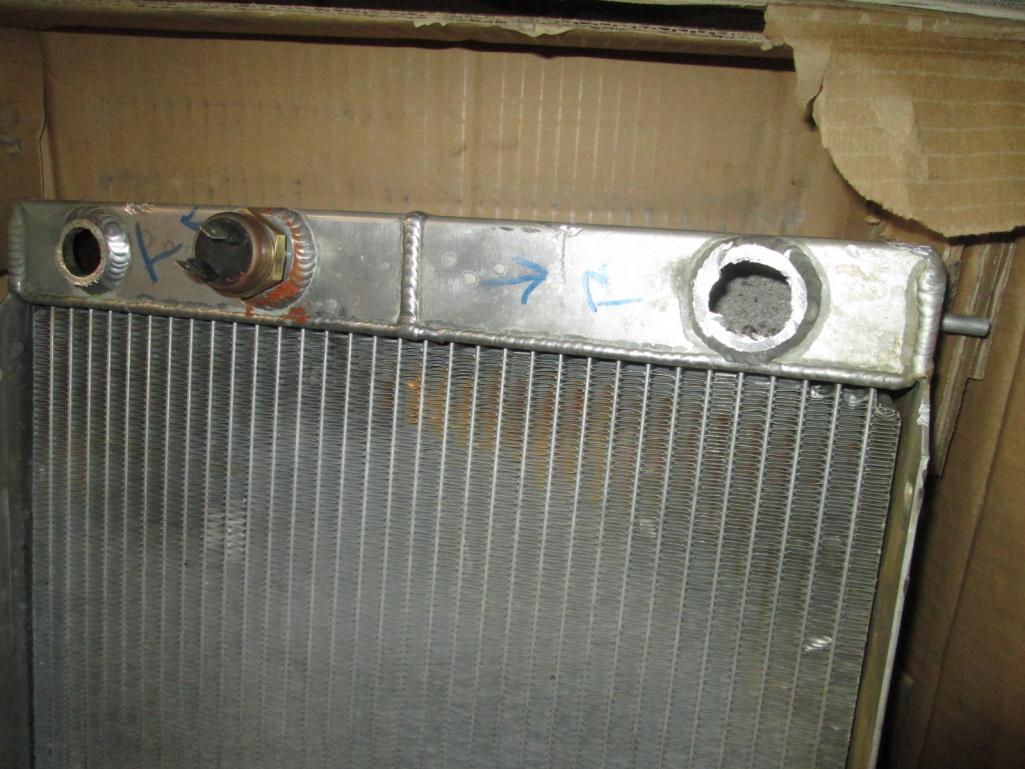
Posted by: Andyrew Dec 11 2015, 01:15 PM
Quote from RH's web site.
$120 RADIATOR HOSE: High quality hose, Gates Green Stripe or equivalent. Routed from the radiator to the engine compartment in the recesses beneath the floor of the car; 1-1/4" I.D. from lower radiator to pump and 1" I.D. from upper radiator to the thermostat housing. Very reliable and durable for this application - will easily last several years.
So I guess your right. Large is the outlet. I read it wrong the first time.
Posted by: BIGKAT_83 Dec 11 2015, 01:18 PM
The larger hose is the suction side of the radiator (return to water pump)the high pressure is the one that comes from the thermostat on your SBC. arrow above goes to the high pressure side
Posted by: jimkelly Dec 11 2015, 01:34 PM
so i will be having the (aluminum) 1.25 port welded to bottom of rad on pass side (low pressure side(cooler/outbound to engine)) -- and 1" port to mid level of rad on drivers side (high pressure side(hot/inbound from engine)). this pic has radiator in it correct orientation (top and bottom ) with radiators facing rear of car. i now realize the rad is nothing fancy, it simply passes water from one side to the other, and cools it down a bit in the process, from drivers side to pass side..
Attached image(s)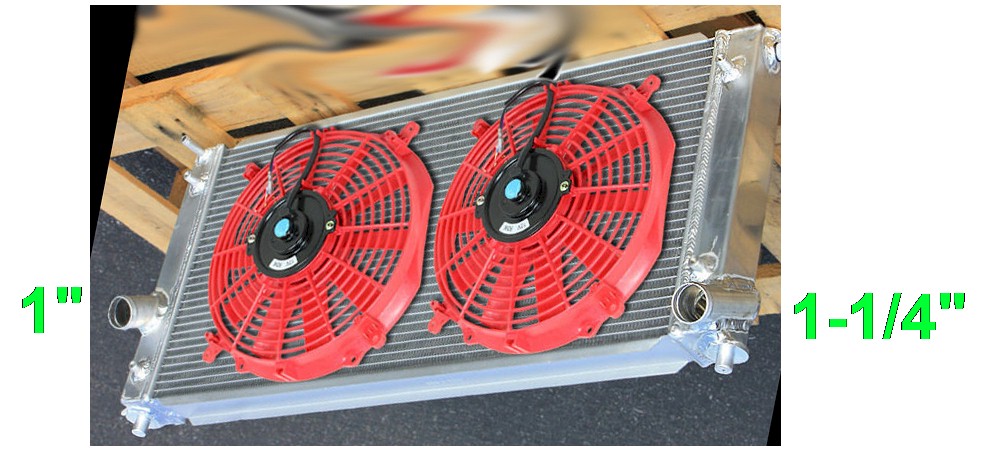
Posted by: jimkelly Dec 11 2015, 01:56 PM
thanks - i comprehend it now. and a big thanks to you, bigkat, for figuring out and sharing, that this radiator is a good option for our 914 cars
The larger hose is the suction side of the radiator (return to water pump)the high pressure is the one that comes from the thermostat on your SBC. arrow above goes to the high pressure side
Posted by: jimkelly Dec 11 2015, 04:25 PM
hoses connected. fans are manual ON until i get a sensor installed. ran car for about 10 mins, letting it cool down, will recheck water level then. my welding resulted in one upright not being perfectly symetrical to the other, thus the larger gap at top on the drivers side
Attached thumbnail(s)
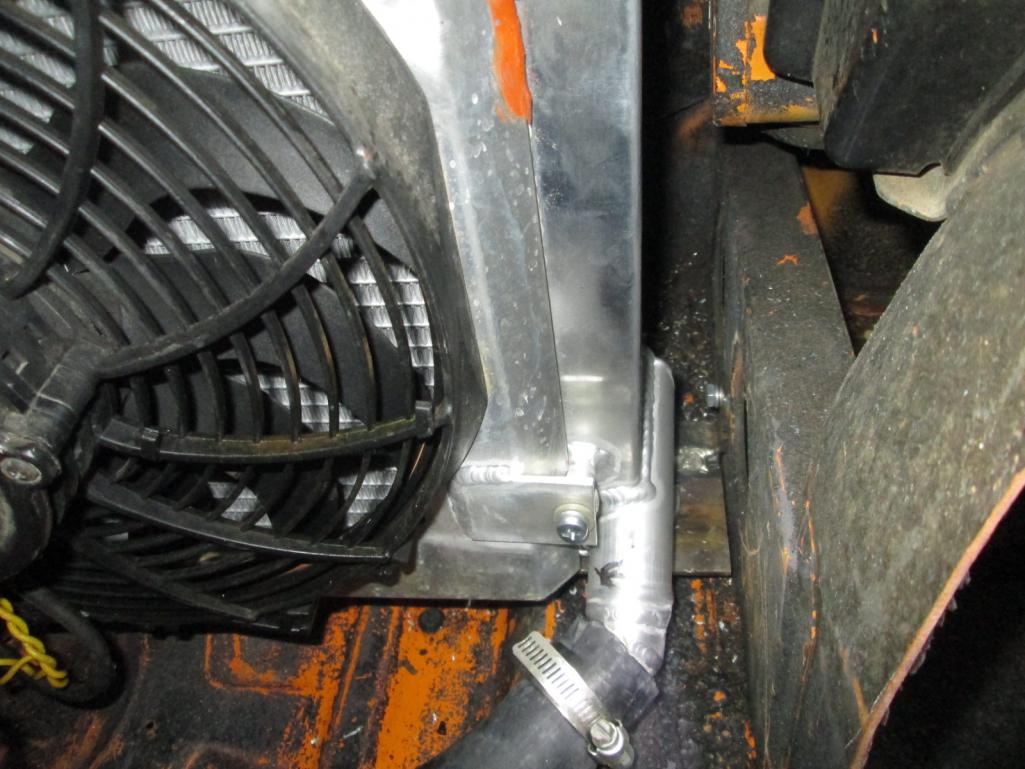
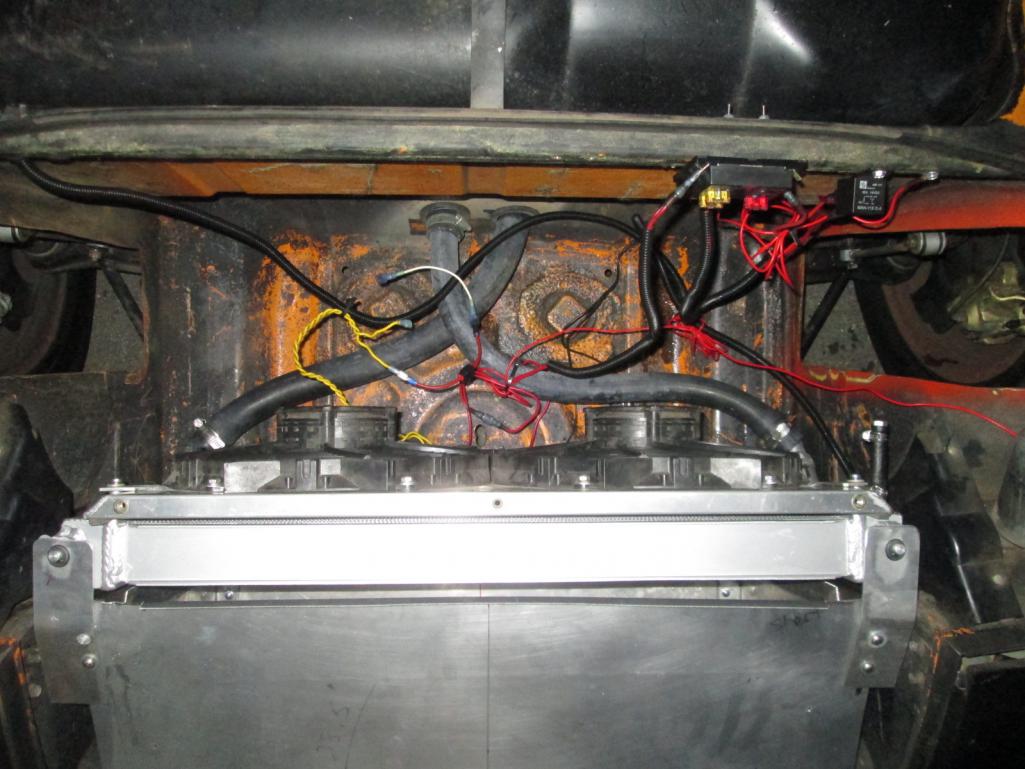
Posted by: Andyrew Dec 11 2015, 05:59 PM
What are you going to use to fill the gap?
Posted by: jimkelly Dec 11 2015, 06:22 PM
i think i will bend some aluminum to shroud the top gap, using the 3 rivnuts in the renegade shroud. there are other gaps but i do not think they are substantial enough to need filling.
Posted by: jimkelly Dec 12 2015, 07:47 AM
traffic was so bad in one spot I had no choice but to use 1st gear. the hwy went from 4 lanes to 1 lane for construction, but thankfully the STOP AND GO congestion only lasted about a mile, but I was on the upside of the crest and had no idea of the extent of the congestion, so I called my wife and she checked the internet and told me it was brief. this was a 3 hr journey, immediately after getting my new radiator installed, hoses connected, water in my system, and then letting it idle for about to 2 hrs, while checking for leaks, and checking my temp guage for over heating, to be MORE certain I could pull the trip off. whew.
and i will be getting these inline adaptor and switch to control my fans.
https://www.youtube.com/watch?v=mE0Skdtlwx0
Attached thumbnail(s)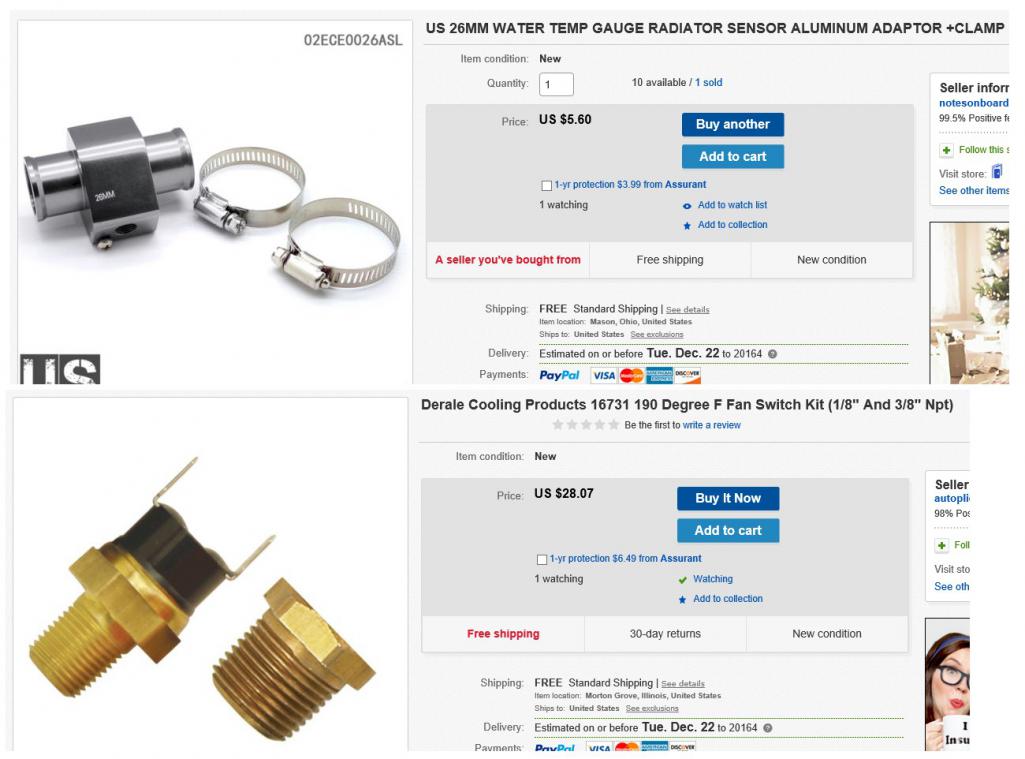
Posted by: Andyrew Dec 12 2015, 05:38 PM
Looks like a good switch
I've got the attached that I'll be using for my water to air intercooler. But Im only doing it because I want to run it down to about 120deg. As I ordered it I figured it could actually be a really nice fan switch for a radiator.
http://www.ebay.com/itm/271731547643?_trksid=p2057872.m2749.l2649&ssPageName=STRK%3AMEBIDX%3AIT
http://www.ebay.com/itm/301806832466?_trksid=p2057872.m2749.l2649&ssPageName=STRK%3AMEBIDX%3AIT
Posted by: jimkelly Dec 12 2015, 06:21 PM
wow and for about only $20, that is amazing! no fear ordering stuff from Chinese sellers??
seems the type I am looking at has a 15 degree gap between OFF (175) and ON (190), (per summit site) which is not bad.
http://www.summitracing.com/parts/der-16731
but if it turns off any lower than 175, i'll want one that has better control of off and on.
Posted by: Andyrew Dec 12 2015, 08:22 PM
I figured I'd give it a try, Worst thing i'll get is heat soak and my meth injection will be working extra hard... I'll have performance logs of everything including intake air temp so I can see when its not working.
I've ordered quite a lot of Chinese stuff so far. In fact I've got parts from China, Japan, Australia, Indonesia, a bunch others and I am waiting on some wiring loom tape from Lithuania.
Posted by: Andyrew Dec 12 2015, 08:24 PM
There are other cheaper one's available on amazon for about $5, but I liked the way this one mounted, and it looked like they all the options out there use the same $5 board and just have different cover plates/mounts.
Posted by: 76-914 Dec 12 2015, 08:55 PM
I figured I'd give it a try, Worst thing i'll get is heat soak and my meth injection will be working extra hard... I'll have performance logs of everything including intake air temp so I can see when its not working.
I've ordered quite a lot of Chinese stuff so far. In fact I've got parts from China, Japan, Australia, Indonesia, a bunch others and I am waiting on some wiring loom tape from Lithuania.
Chris at Tangerine sells that loom tape
Posted by: jimkelly Dec 14 2015, 06:47 AM
since the celica radiator has a small nipple on the hot/high pressure side for a header tank, i was wondering if we should be installing a header tank? what are the benefits/drawbacks? and what is a header tank : )
Posted by: jimkelly Dec 15 2015, 08:13 PM
this one is for mepstein. i oopsed on the length of the horizontal bar but this is easily rectified by a longer overhang of the tabs that attached it to the car.
Attached thumbnail(s)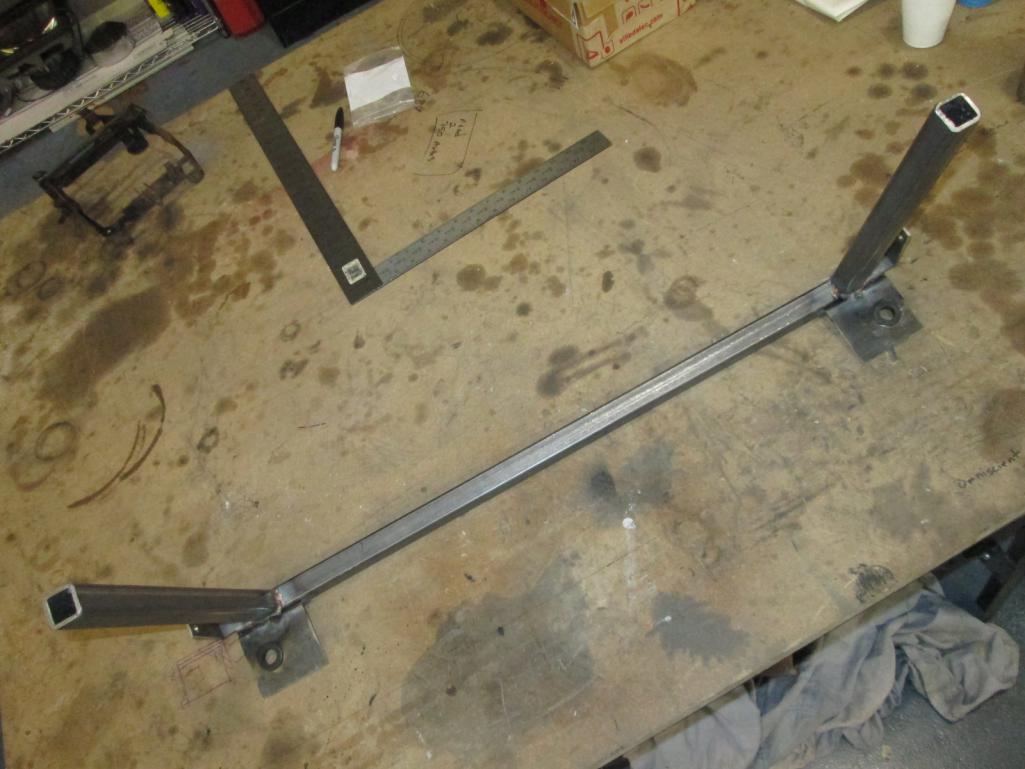

Attached image(s)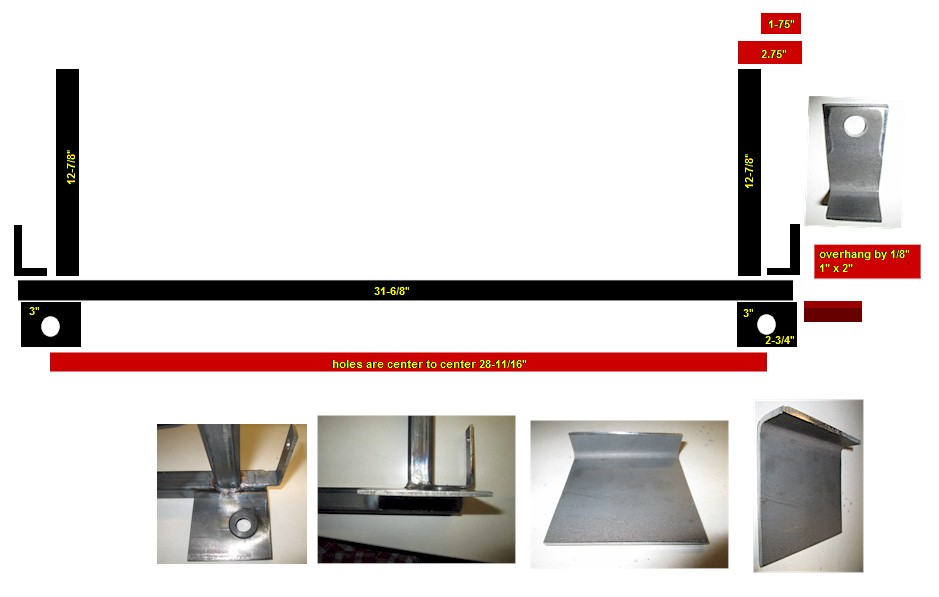
Posted by: jimkelly Dec 22 2015, 09:22 AM
finally got a 190 degree thermo switch and my housing. will install this week. my thermostat is 190 degree, so my fans should run much less then ever before.
Attached thumbnail(s)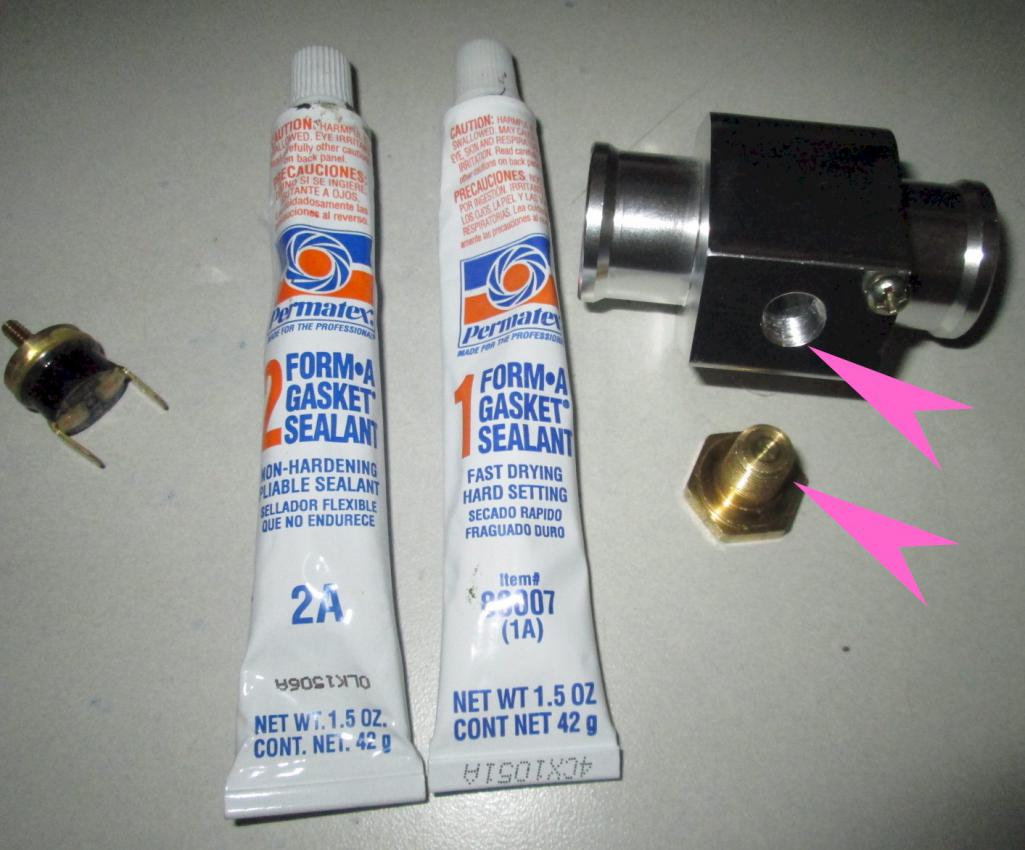
Posted by: jimkelly Dec 28 2015, 11:19 AM
switch is in but twice when i ran the engine the fans did not come on before engine reached 230 degrees. turned out the 2 part thermo switch was coming unthreaded thus losing thermo conductivity, we think. my buddy them put copper gasket between the two sections to hold them together and improve thermo conductivity. my buddy also added some DUM DUM he calls it to help additionally.
thursday evening was in the 60s and my car ran between 195 and 205 degrees on hwy and fans for the most part did not come on. today was probably around 50 degrees and my fans never came on except when i stopped for gas with engine running and engine ran about 190+- most of the time.
i'm thinking that when the summer rolls aroubnd, i will need to seal up any gaps in my radiator ducting and may need to go to a 180 degree thermo switch?
right now i have a 190 thermostat in engine and a 190 thermo switch on radiator hose.
i did end up using pipe tape to make the seal in the npt thread between thermo switch and the aluminum radiator hose housing. the tape though may have contributed to keeping the switch from going in deep and keeping it more away from the main water flow then had i not used it. though i did not think the switch would be deep enough to be in the flow no matter what i did.
best of all, i do not need to manually plug my fans into power every time i drive.
Attached thumbnail(s)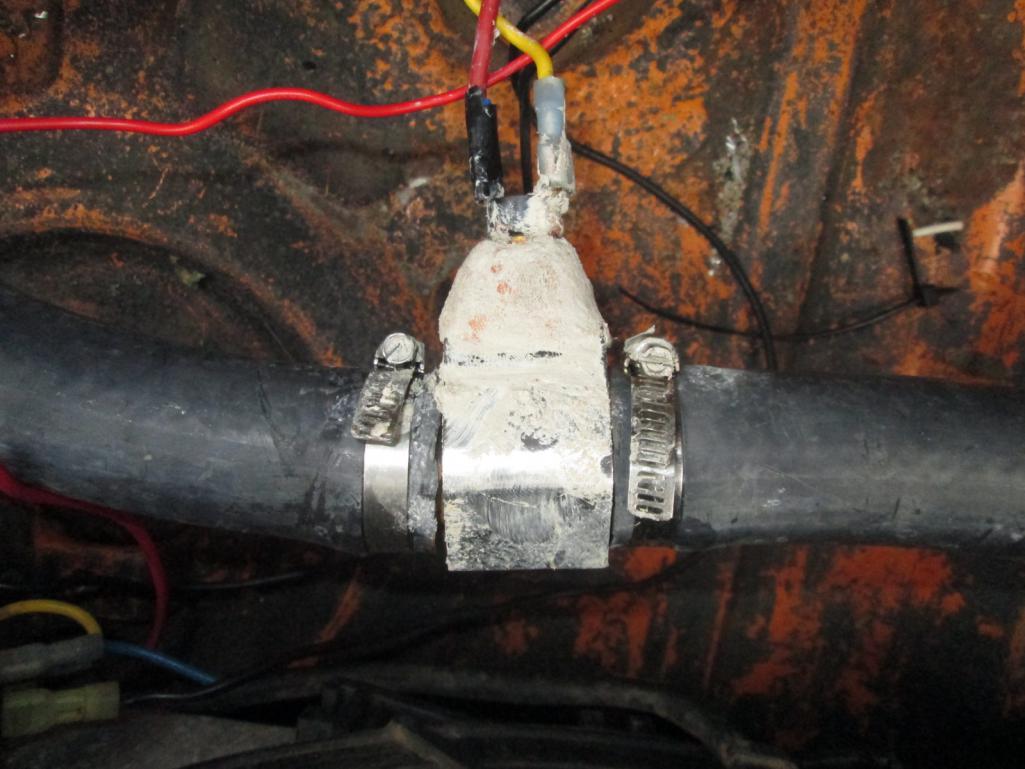
Attached image(s)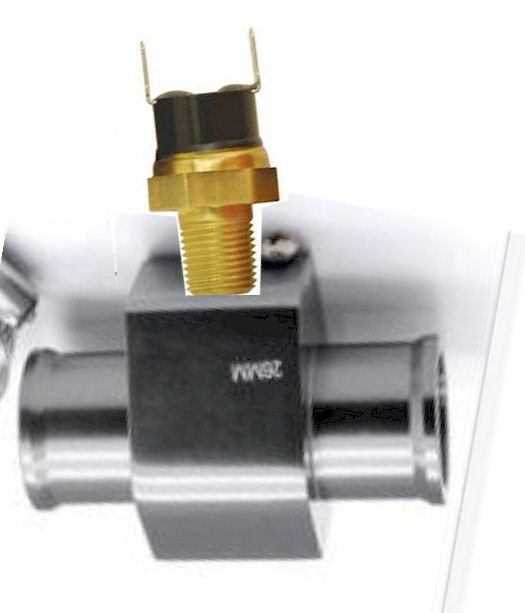
Posted by: 76-914 Dec 28 2015, 11:28 AM
switch is in but twice when i ran the engine the fans did not come on before engine reached 230 degrees. turned out the 2 part thermo switch was coming unthreaded thus losing thermo conductivity, we think. my buddy them put copper gasket between the two sections to hold them together and improve thermo conductivity. my buddy also added some DUM DUM he calls it to help additionally.
thursday evening was in the 60s and my car ran between 195 and 205 degrees on hwy and fans for the most part did not come on. today was probably around 50 degrees and my fans never came on except when i stopped for gas with engine running and engine ran about 190+- most of the time.
i'm thinking that when the summer rolls aroubnd, i will need to seal up any gaps in my radiator ducting and may need to go to a 180 degree thermo switch?
right now i have a 190 thermostat in engine and a 190 thermo switch on radiator hose.
i did end up using pipe tape to make the seal in the npt thread between thermo switch and the aluminum radiator hose housing. the tape though may have contributed to keeping the switch from going in deep and keeping it more away from the main water flow then had i not used it. though i did not think the switch would be deep enough to be in the flow no matter what i did.
Are those HF hose clamps? If so, you are the first person to ever get one of those to tighten up without stripping out.
Posted by: jimkelly Dec 28 2015, 11:33 AM
they came with the housing but i did over tighten one and had to replaced it. i think i'll order a few nicer ones from mcmaster carr the next time i place an order from them.
jan 22 2016 wintery mix drive
https://www.youtube.com/watch?v=LkLs0AxzgrM
Posted by: jimkelly Feb 3 2016, 01:46 PM
leaky stamped steel valve covers. so i got me a vintage set of aluminum valve covers that arrived today. will install on next nice day, raining like crazy today. cleaned them up and used form a gasket 2A on the seal surface between covers and gasket, setting up now. gonna try no sealant between gasket and engine.
Attached thumbnail(s)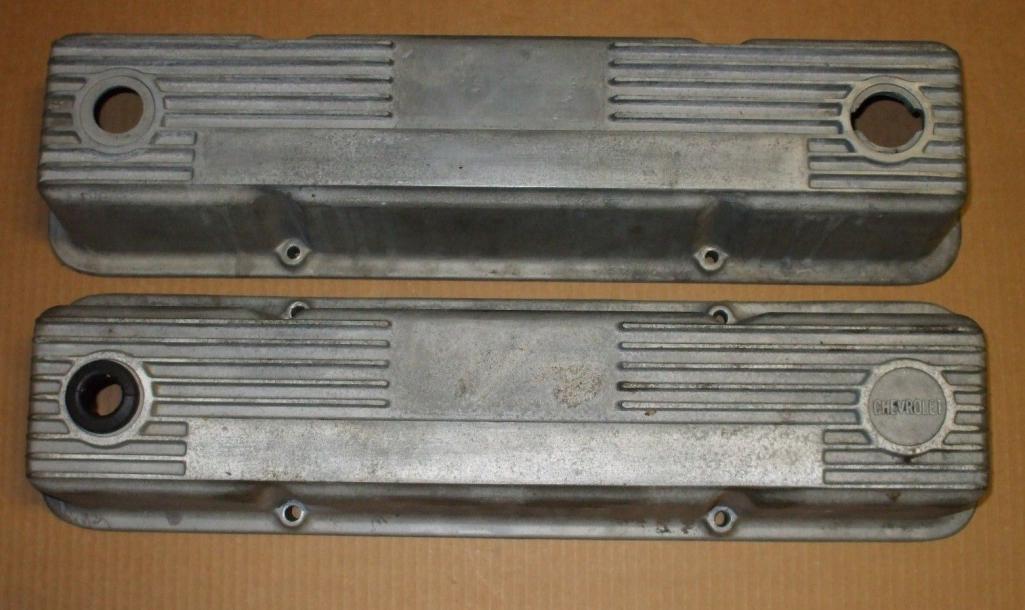
Posted by: Andyrew Feb 3 2016, 02:24 PM
I've had good luck with Valve cover->sealant->gasket->engine. Thin layer of sealant is basically there to keep the gasket in place.
Posted by: jimkelly Feb 3 2016, 04:45 PM
that's what i am doing. thanks. dropped screws in holes to keep them in place while setting up.
Attached thumbnail(s)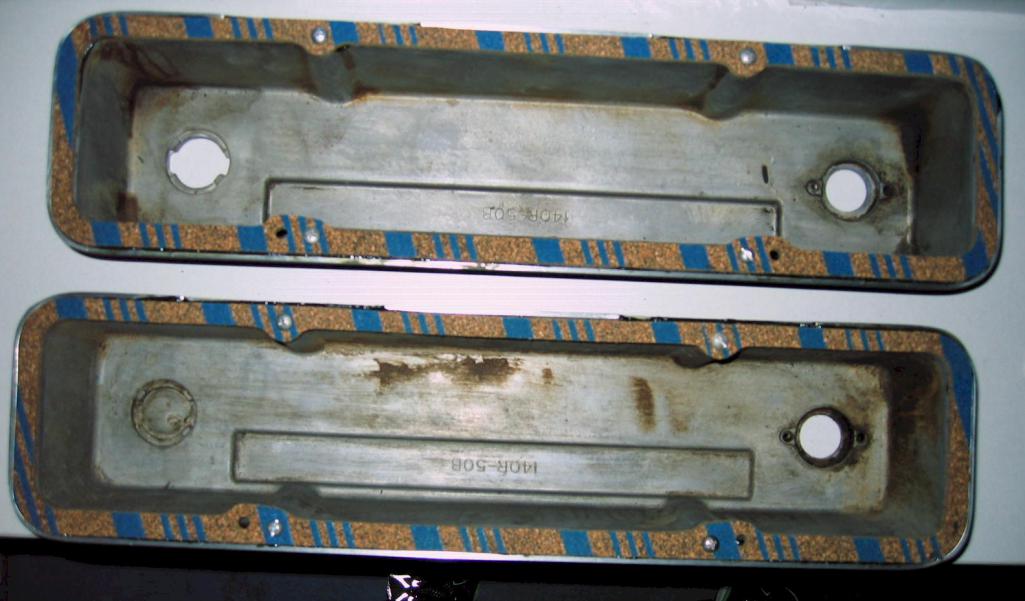
Posted by: jimkelly Feb 6 2016, 06:42 PM
wound up putting valve cover replacement on hold. after further analysis with my coworker, it turned out that the 2 inner bolts holding my intake manifold on were seeping oil thru their threads. added some sealant and got 3 taken care of and redid the 4th today. further turns out that I have other oil leaks, maybe front crank seal. gonna have to pull the engine when the weather gets better and blow a weekend getting dirty.
Attached image(s)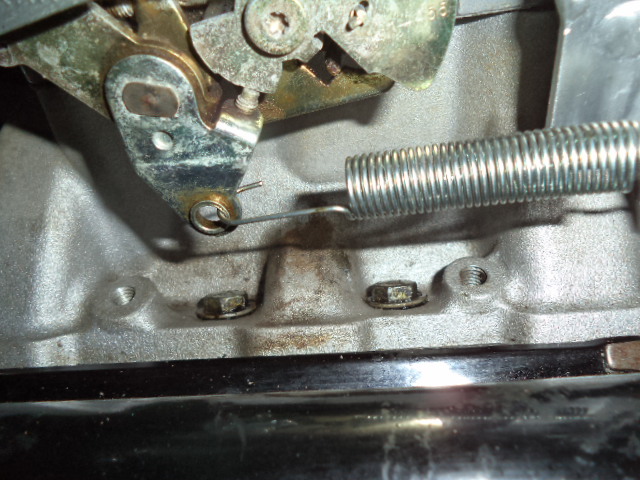
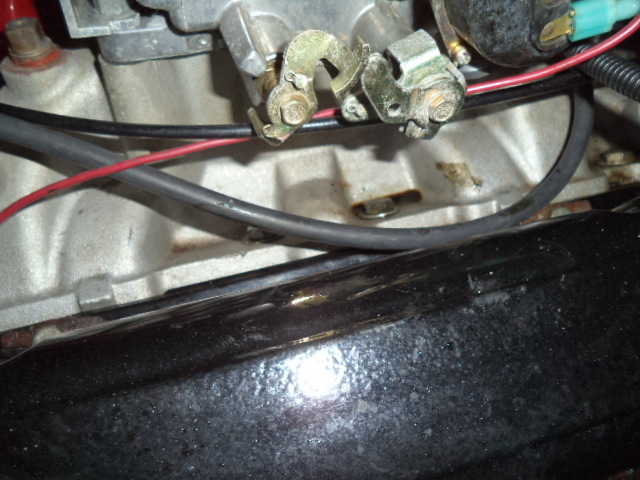
Posted by: jimkelly Feb 14 2016, 04:28 PM
some of this has its own thread...
http://www.914world.com/bbs2/index.php?showtopic=276017
last week we determined that some of my oil leak problem was 4 bolts holding my carb intake to the heads, so we applied sealant and 3 stopped leaking. on Saturday I thought i'd address the last one that did not stop leaking, so not only did I add sealant to it again, I decided to use a longer bolt because the other 3 were longer. I used a 1.5" bolt but it turns out the other were probably 1.25", the max that should be used. so anyway, monday go for a drive but power is weird, I figured it had to do with engine being cold and I just changed the fuel filter and thought maybe there was some starving going on, but 30 minutes later I decided to go back home and figure out what was wrong. anyway, yesterday I pull the valve cover off to find a cracked valve rod that I retrieved from the head with a magnet on a stick but I had to remove the intake to put the lifter back in the head. anyway, it is all back together but it revs ok in neutral but under load it is either valves or knocking. what you think? anyway, why does a guy with so little mechanical prowess own a 914, who the hell knows. i'd like to think the noise is due mostly to timing cause I of course had to pull the distributor. and I never put a tdc mark on my flywheel or crank balancer, need to, asap. I first thought it was vacuum advance problem but vacuum is pulling thru hose.
and i have an 8360 msd distributor and am thinking about addind a msd 8728 soft touch rev limiter to it, 3900 rpm limit.
today i took my car to rightpedal's (aka: steve) house and he located TDC, adjusted valves, timed engine and it is once again running like it should. one thing new is that my belt pulley was hitting my timing belt cover, steve tweaked this, to be fixed properly another time. gonna order a new pulley and spacer (from renegade) and timing chain cover. thank you steve : ) oh, pics of valve are supposed to show some mushrooming but pics sucks.
Attached thumbnail(s)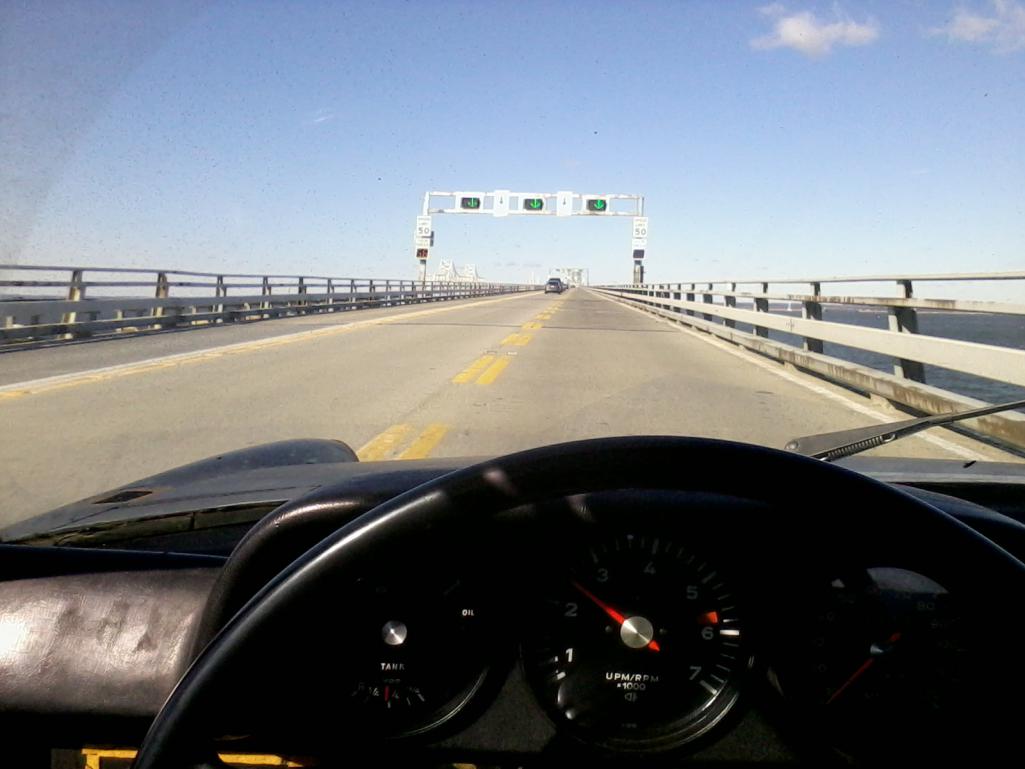

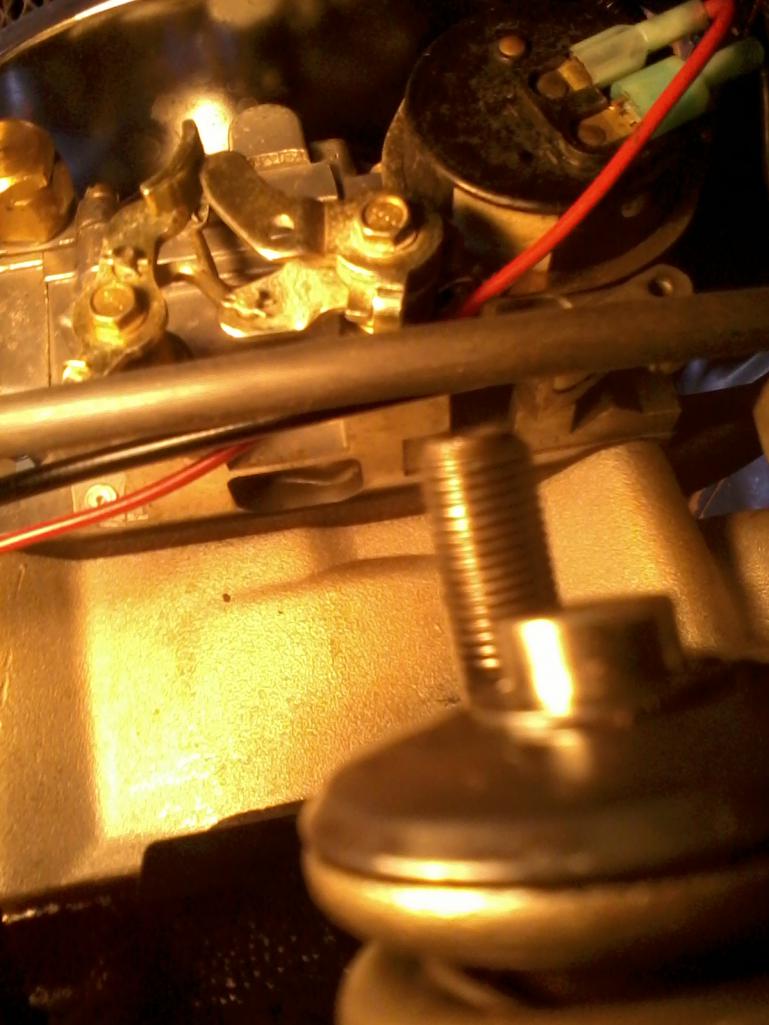
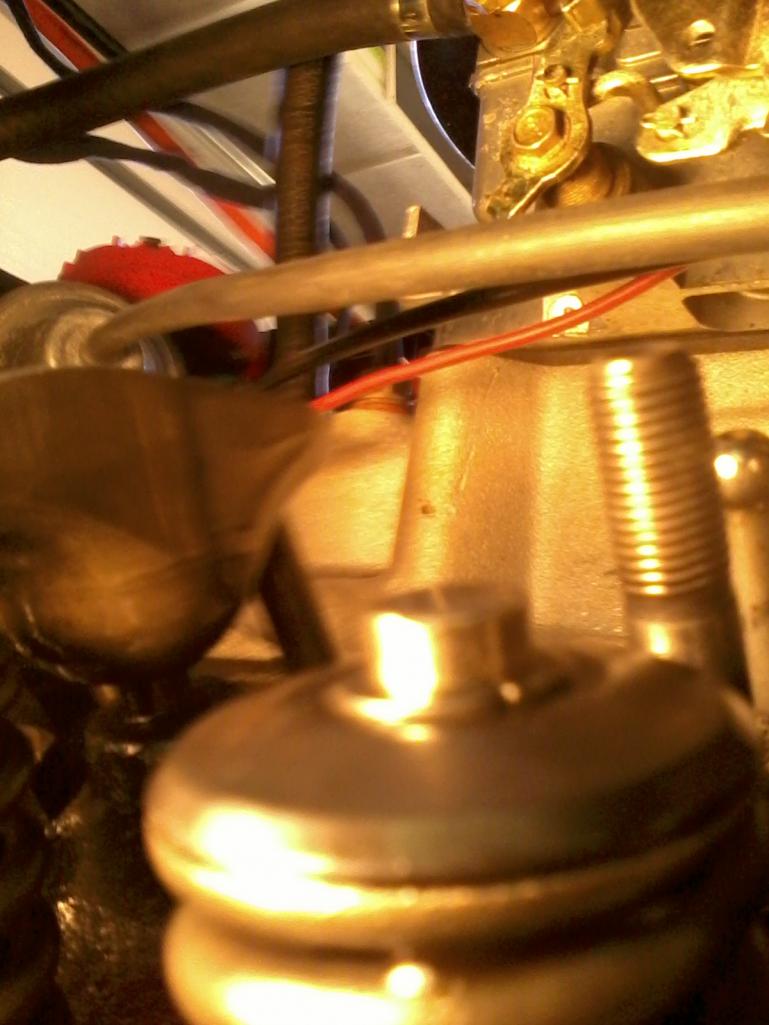
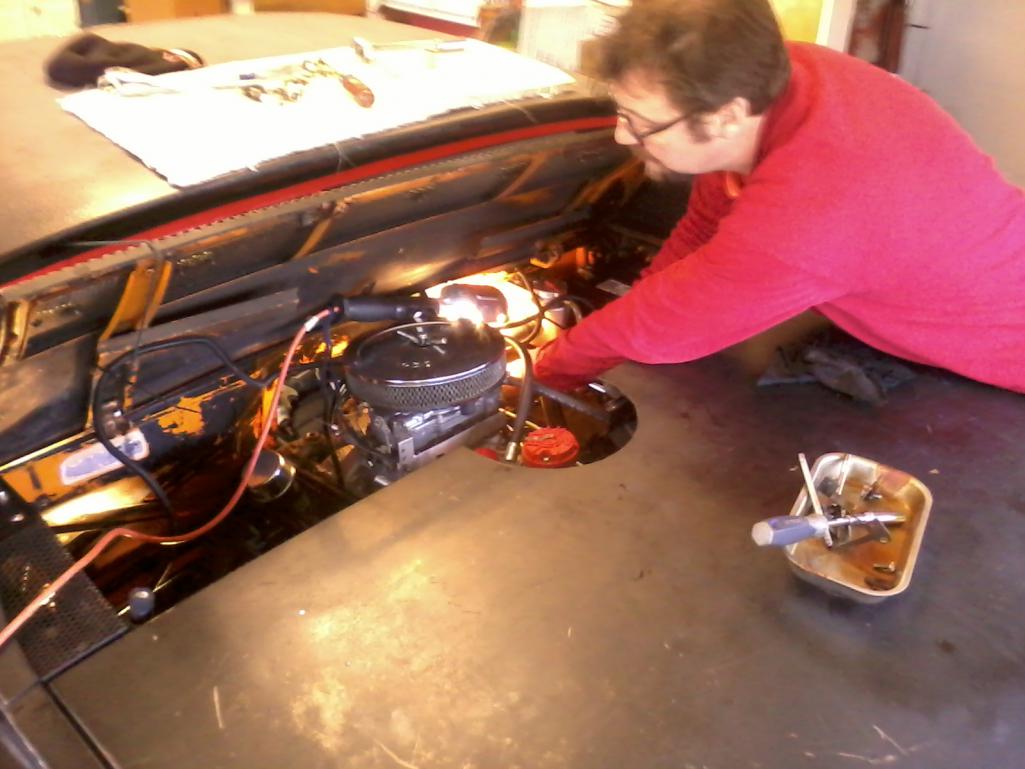
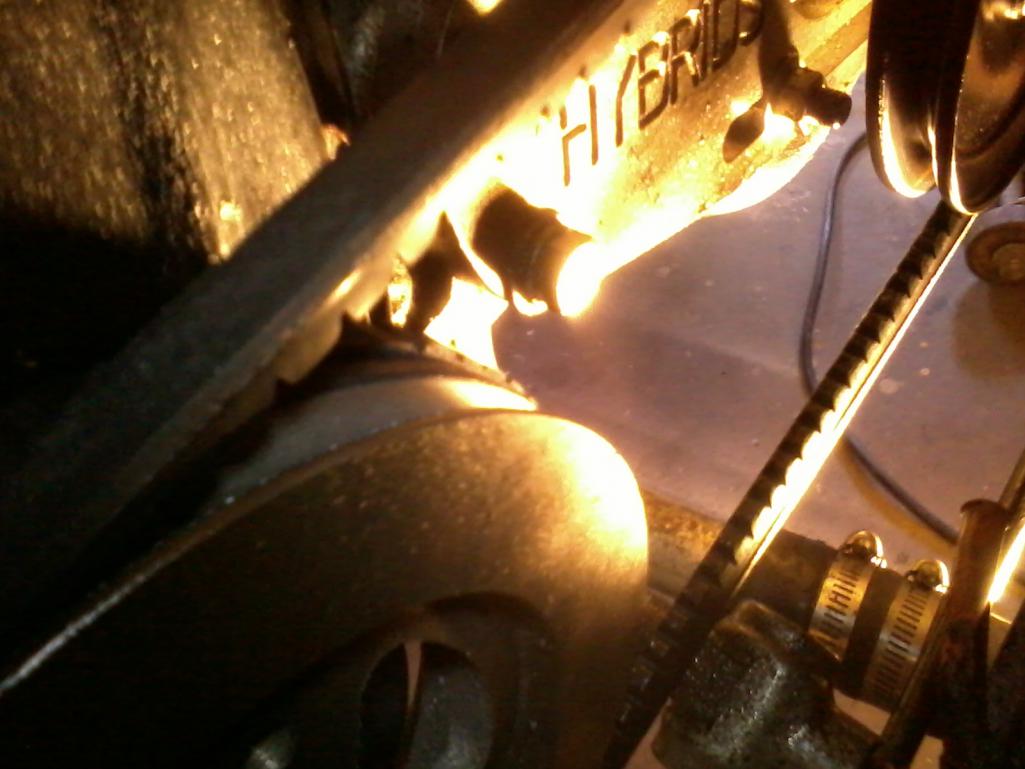
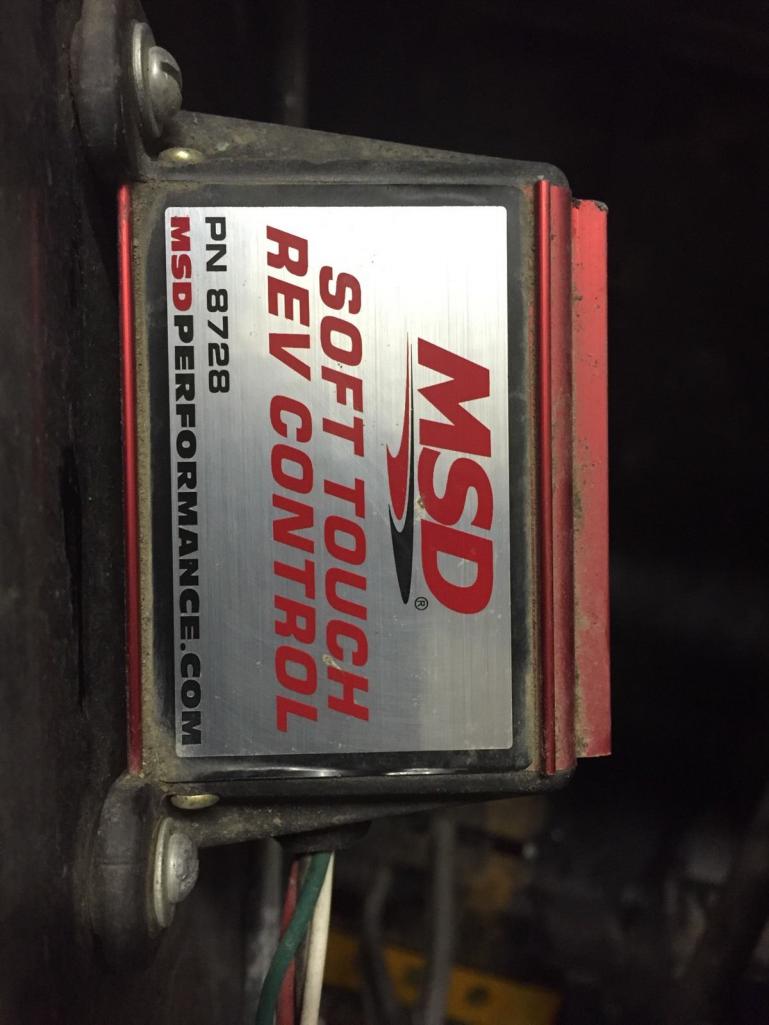
Attached image(s)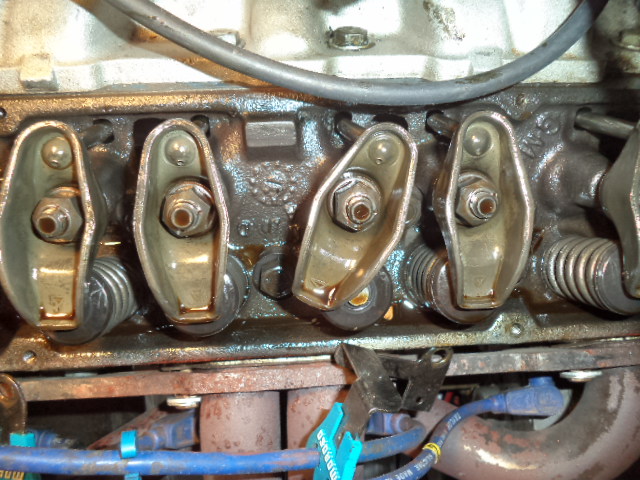
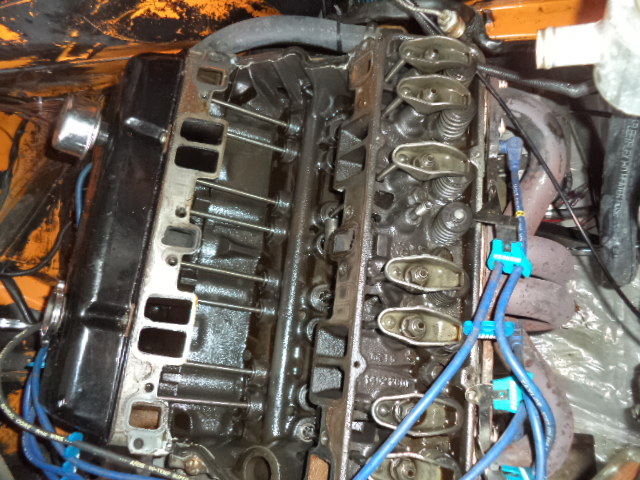
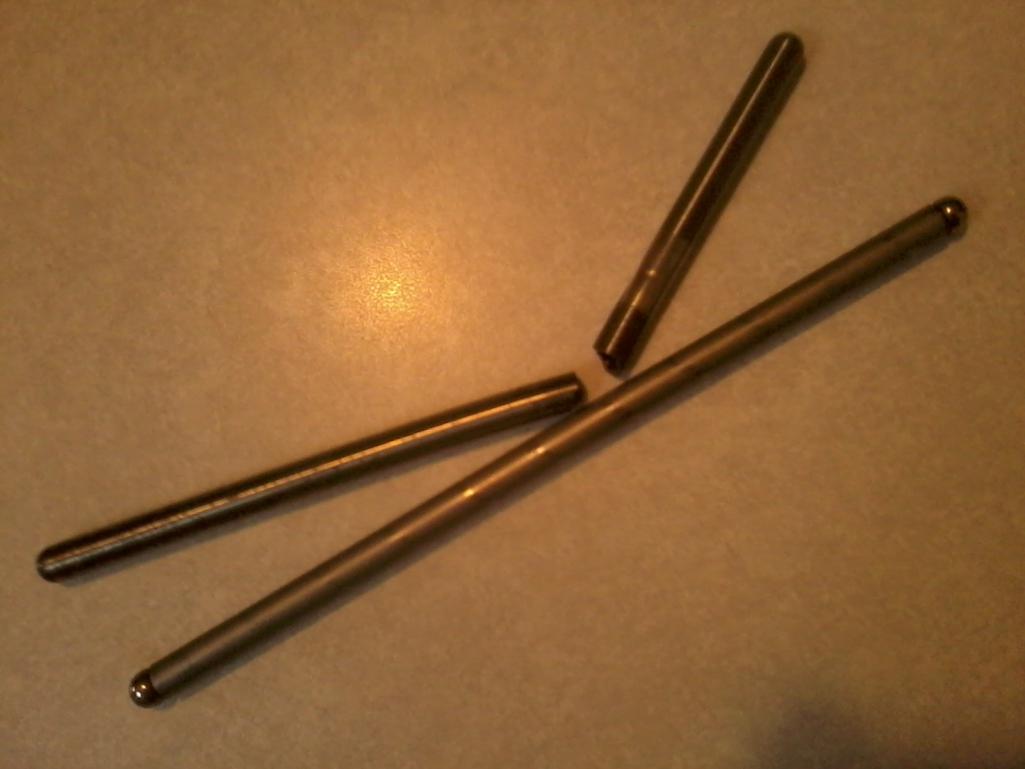
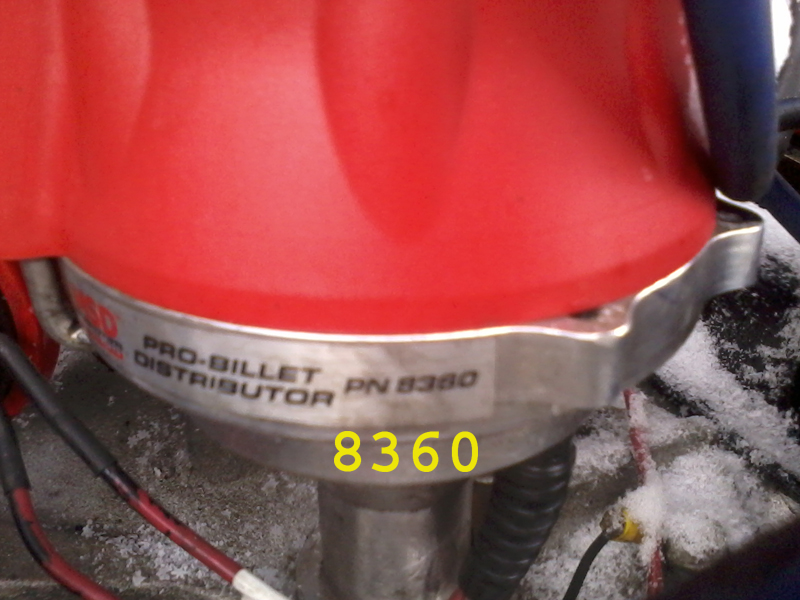
Posted by: Andyrew Feb 15 2016, 10:43 AM
The last paragraph ehould be first, right?
You and steve solved the issues and its running good now?
Posted by: jimkelly Feb 15 2016, 11:32 AM
yes. i changed location of that paragraph.
yes. running good now. which gave me an opportunity to park in the snow
The last paragraph ehould be first, right?
You and steve solved the issues and its running good now?
Attached image(s)
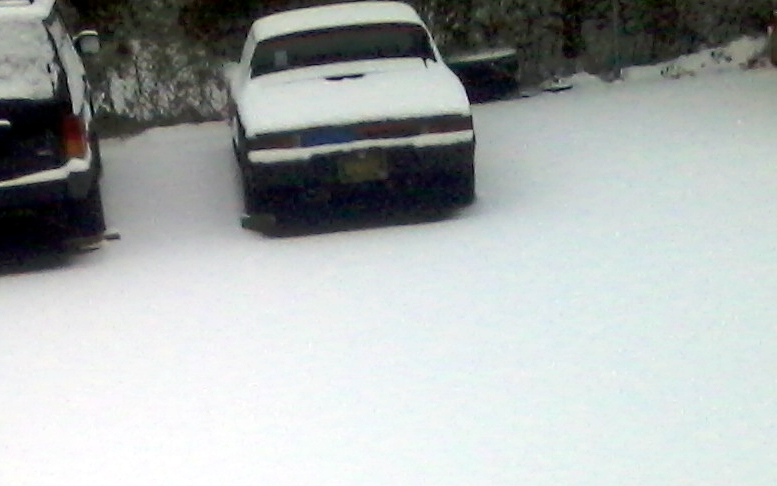
Posted by: rightpedal Feb 15 2016, 11:34 AM
Wow I really am thinning out on top. Time for poor person rogaine... A hat.
We didn't solve all the problems, but yes running much better. I'm sure Jim will chime in and lay out the list.
Steve.
Posted by: jimkelly Feb 15 2016, 12:01 PM
gotta get me some of these in SAE : ) especially nice for removing the spark plugs that hide behind my shorty headers.
funny thing is that when i woke up on sunday, my wife said, happy valentines day. i said, oh shit, sorry babe, gotta work on car : ) many thanks to steve's lovely wife for setting him free for most of the day to get greasy with me
Attached thumbnail(s)
Posted by: Justinp71 Feb 15 2016, 05:38 PM
So... You had a good Valentine's day then?
Posted by: jimkelly Feb 18 2016, 11:08 AM
while i have not driven my car IN much snow, i have driven it on wet salted roads and my throttle cable started feeling like shit, not smooth and i can see it was starting to get some corrosion on it where it was not sheathed in engine bay. so i applied this stuff on liberally, hope it makes a difference in peddle feel.
Attached image(s)
Posted by: jimkelly Feb 18 2016, 11:20 AM
yes... yes i did
So... You had a good Valentine's day then?
Posted by: jimkelly Mar 11 2016, 02:34 PM
got a bad oil leak in the front of my 350. lose about a quart for every 450 miles i drive. gonna take a peak at it in the near future. i am sure it is fixable, but if not, $1500 new engine. gonna have to put a rev limiter on my car either way, as it is hard not to put my foot into it and get to redline and beyond, too damn quickly.
Attached thumbnail(s)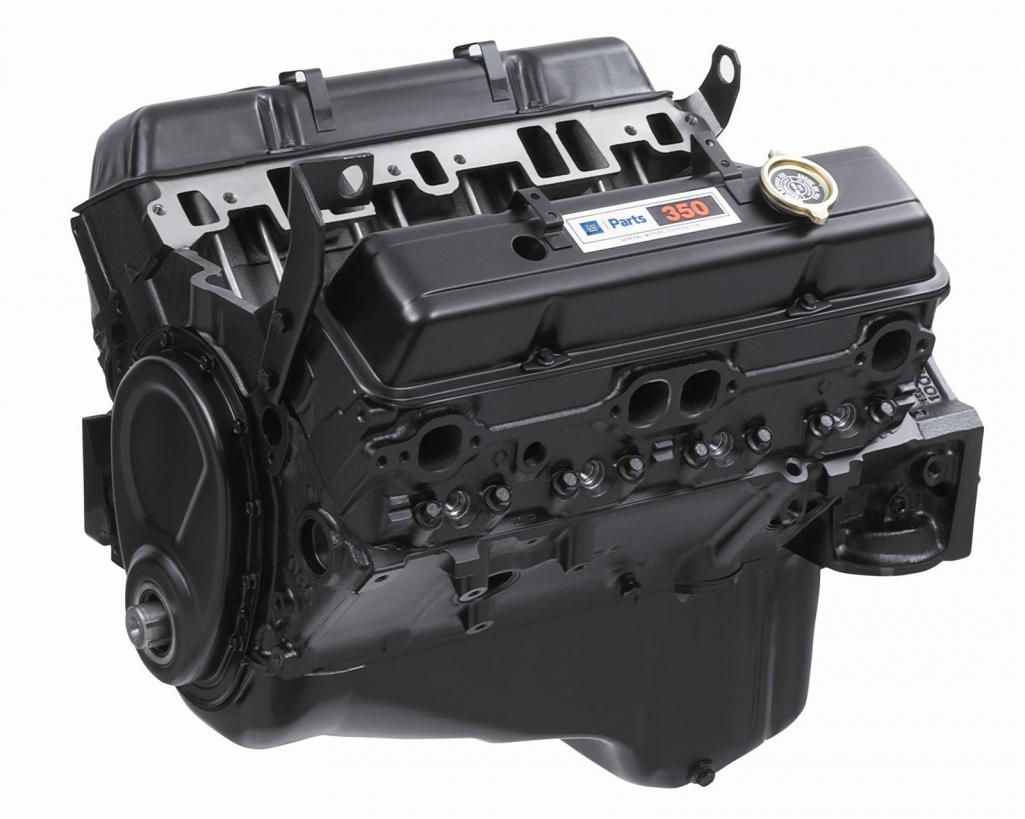
Posted by: Mueller Mar 11 2016, 02:52 PM
got a bad oil leak in the front of my 350. lose about a quart for every 450 miles i drive. gonna take a peak at it in the near future. i am sure it is fixable, but if not, $1500 new engine. gonna have to put a rev limiter on my car either way, as it is hard not to put my foot into it and get to redline and beyond, too damn quickly.
Damn you and your brand new $1500 engines!
j/k....so tempting to have something with 0 miles at that price..
Posted by: jimkelly Mar 11 2016, 02:54 PM
i paid $1000 for my 307, 4 barrel carb to pan, though she is well used, she pulls fine. but new for $1500, gosh, seems attractive, especially when a new set of LE heads from hoffman run, what $2000. i'm guzzling gas and can't go to your rpms either : (
Posted by: Andyrew Mar 11 2016, 05:15 PM
Why not drop the engine, put a new front crank seal and check the oil and timing chain seal? Probably $20 worth of parts, 6 hours of work..
Posted by: jimkelly Mar 11 2016, 05:20 PM
that is the plan. just always itched for a brand new engine and like pissing everyone off with the sbc low low low price : )
rightpedal is located about 1 hr from my house and has volunteered to do this repair with/for me : ) i look forward to not having a wet oily engine bay one day till then i'm gonna drive it like it is s brand new BRZ 
Why not drop the engine, put a new front crank seal and check the oil and timing chain seal? Probably $20 worth of parts, 6 hours of work..
Posted by: Andyrew Mar 11 2016, 05:48 PM
Your going to drive it like its slow, horrible tires, and no has torque?
(Attacks from a Fiesta ST owner)
Posted by: jimkelly Mar 11 2016, 05:58 PM
alright alright, i take it back,
Your going to drive it like its slow, horrible tires, and no has torque?
(Attacks from a Fiesta ST owner)
Posted by: jimkelly Mar 30 2016, 04:11 PM
as clayperrine said in another post, the two spades do connect to starter solenoid, i just tried it finally. red wire.
http://www.914world.com/bbs2/index.php?showtopic=279375&hl=
Attached thumbnail(s)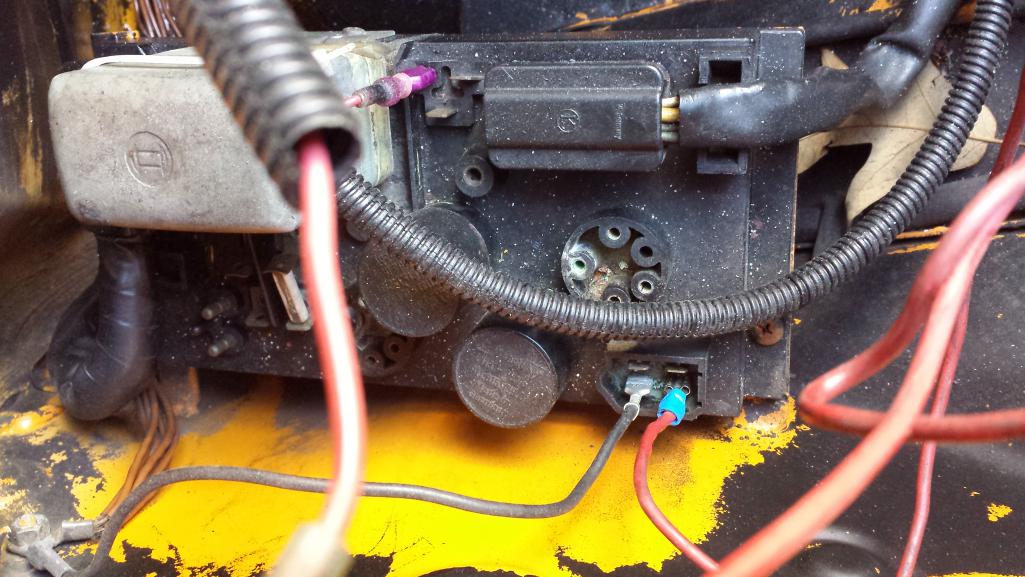
Posted by: jimkelly Mar 30 2016, 04:14 PM
finally closed up the air gaps in my radiator install. you know, half assed like normal.
last week i was driving in nicer weather, not sure the actual temperature BUT IT WAS NOT A HOT DAY and my fans were on most of the time on hwy driving and my engine was running a slightly above the 190 degree thermostat i have in the engine. hopefully this - sealing up - will improve things???
oh, i found some silver tape at work, hope it is flue tape. we'll see.
Attached thumbnail(s)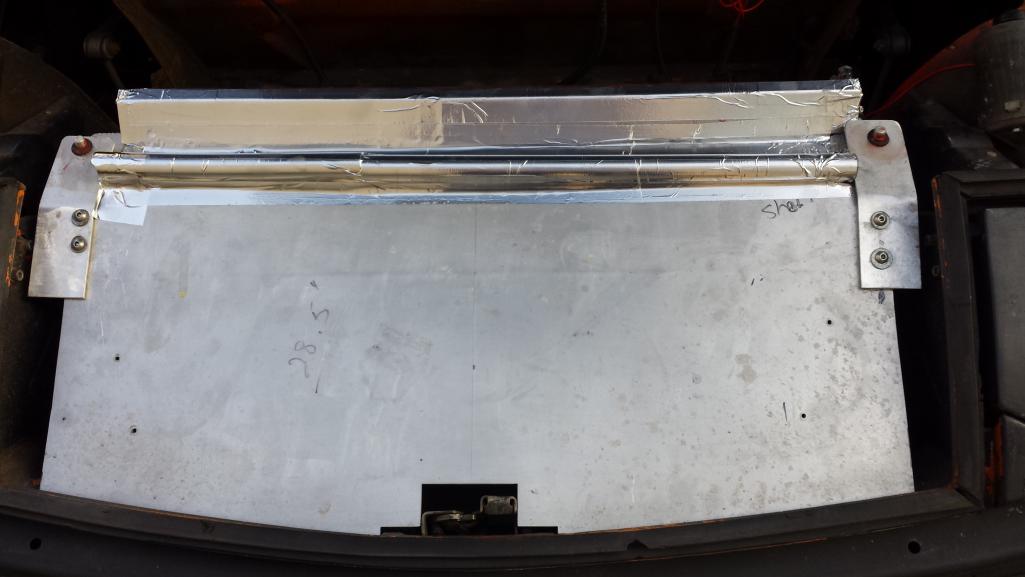
Posted by: LowBridge Mar 31 2016, 08:22 AM
![]()
Posted by: jimkelly Apr 8 2016, 03:04 PM
nope, taping up gaps did not fix cooling problem, luckily weather has not been hot yet. also i am trying gel bicycle seat covers under my seat cushion for comfort and reduced aching butt. update to follow.
Attached thumbnail(s)
Posted by: Andyrew Apr 9 2016, 05:24 AM
Sounds like you have air in the system. Check for leaks?
Posted by: colingreene Apr 9 2016, 11:05 AM
3900 rpm? why so low.
Posted by: Chris H. Apr 9 2016, 11:10 PM
Sounds like you have air in the system. Check for leaks?
Seems like it's gotta be air in the system. If you don't have a leak you might want to run it through a few warm up/cool down cycles and see if it works its way out.
Posted by: jimkelly Apr 27 2016, 06:18 PM
no leaks. i have been running it for months and never need to add coolant.
Posted by: matthepcat Apr 27 2016, 06:48 PM
Air in the system can happen without visible leaks. Air can get in during the cooling off of the system.
If you open the radiator cap when cool, does it need additional fluid added?
Does it stay warm all the time or only when stop & go driving?
I don't think 190 is a problem temperature. You probably run more efficient at that then lower.
Posted by: jimkelly May 3 2016, 02:51 PM
today i noticed my water level was about 1" lower than normal but in pic below engine has been running for some minutes and level is higher then when fully cold.
but aside from this i have a funny story. not ha ha funny really.
i see my car in the work parking lot, but it is not were it was, it was about 5 feet forward and touching a fence pole. seems no one did it but i could not figure out that happened. later in the day a coworker says, jim your car is making a funny noise. i get out there and it sounds like a dead battery trying to start a car. turns out my alternative momentary switch that runs to relay board got wet among other things cause i had the car in a big rain storm UNCOVERED, and this caused my starter to get power and it SELF DROVE itself forward and into a fence pole. it is all dry now and all is fine and battery is charged back up.
bottom line, got to keep car dry, or less wet.
jim
Attached thumbnail(s)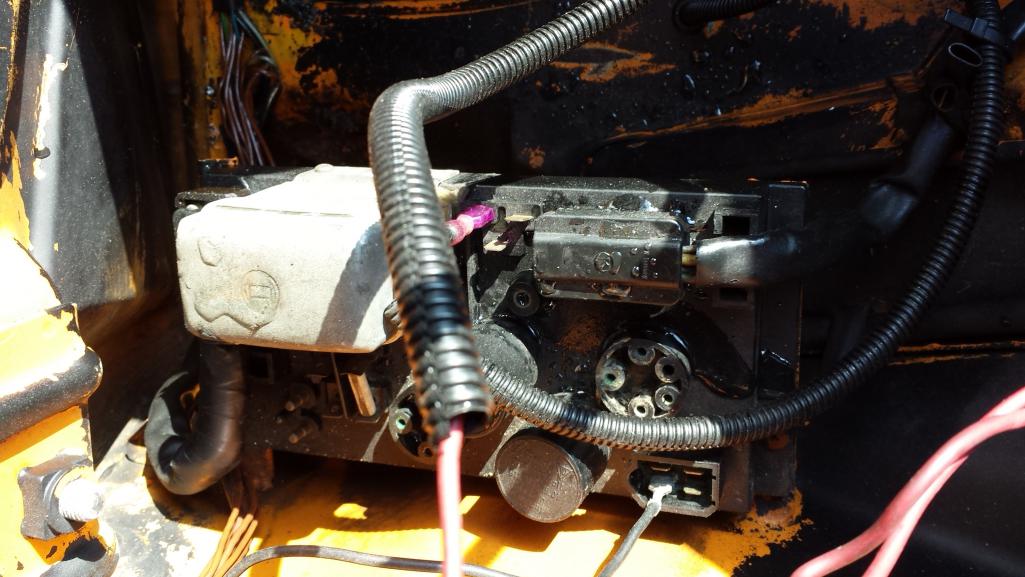
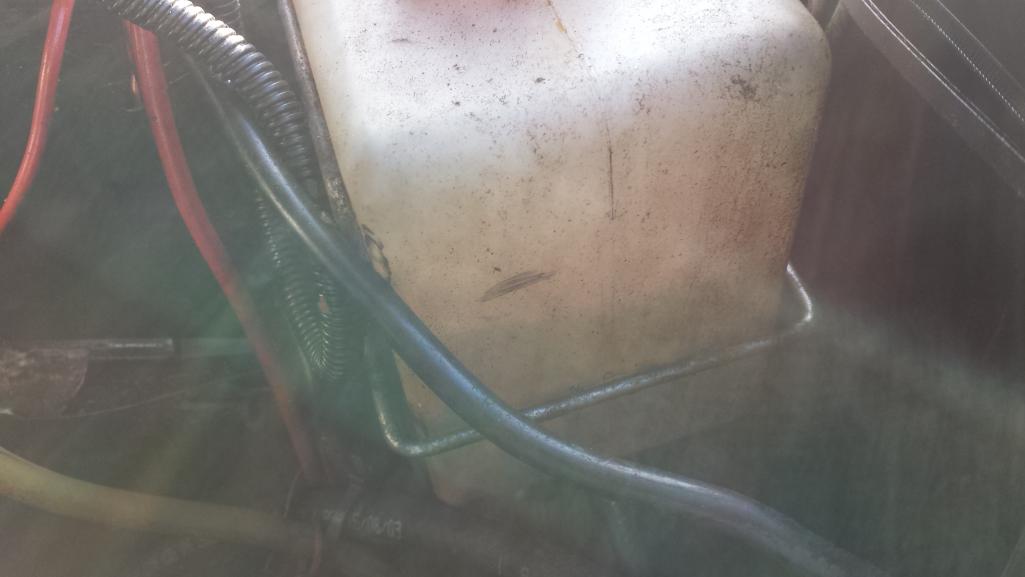
Posted by: sixnotfour May 3 2016, 03:10 PM
That's Funny !!
Posted by: jimkelly May 3 2016, 04:08 PM
i fully expect that one day a PORSCHE rep is gonna show up at my door and say THAT"S IT, we are pulling your porsche card and banning me from owning a porsche of any kind for life
Posted by: 76-914 May 3 2016, 05:30 PM
If your plenum has any gaps your pissing in your mess kit, Jim. #1; Seal it up properly then you can begin to diagnose and address your over heating problems. It helps to stick a drop light inside the plenum then turn off the garage lights. If you see light it ain't sealed. #2; Bleed the air out. Trapped air gets the blame a lot and I don't know why. I have 6 up/downs and never had that problem. Very easy to bleed the system once and then your done. #3; When, if ever have, you done a thorough flush of the block and radiator. I assume that radiator cooled your SBC sufficiently prior to this.
Ditto to what Andy said about sealing up the SBC. Very easy but don't over tighten & warp the cover when you put it back together.
Posted by: siverson May 3 2016, 05:47 PM
> my alternative momentary switch that runs to relay board
What's that?
-Steve
Posted by: jimkelly May 3 2016, 06:17 PM
the momentary function of my ignition switch sometimes does not work, so i put a momentary switch that is wired from battery, to switch, to relay board, to starter solenoid, for emergencies. just another one of my half assed temporary solutions
> my alternative momentary switch that runs to relay board
What's that?
-Steve
Posted by: jimkelly May 18 2016, 05:05 PM
today i hoped into the car to pick up some things for work right after talking to rightpedal and i was taking a cloverleaf to enter the highway when i hear a ZING noise like a cable snapped but my throttle felt ok and my clutch felt ok and my water temp was fine, so i chauked it as being something on the road that i ran over on the road. but when i reached my destination about one mile later, i shut the engine down, and then noticed my water temps were out of control. my guage said 240-250 +-. turns out my water pump belt flung off probably due to the massive amount of leaked oil that protects my entire engine and engine bay (thus my talking to rightpedal today) so while it was cooling down i called some coworkers but cell phone reception sucks here in this steel building, so it took me many calls before i reached anyone. finally i reached root and he came to my rescue with his 1965 chevy pick up loaded with tools and jacks and jack stands. we went to carquest who gave me the wrong belt at first, requiring a second trip to them for the correct one. gates 7410. anyway, after UP TO elbows covered in grease and coolant, we got it back on the road, and went to lunch : ) this is the second time i almost COOKED this engine. i'd be remiss to not mention how great the guys at roberts oxygen where with helping me out today.
Attached image(s)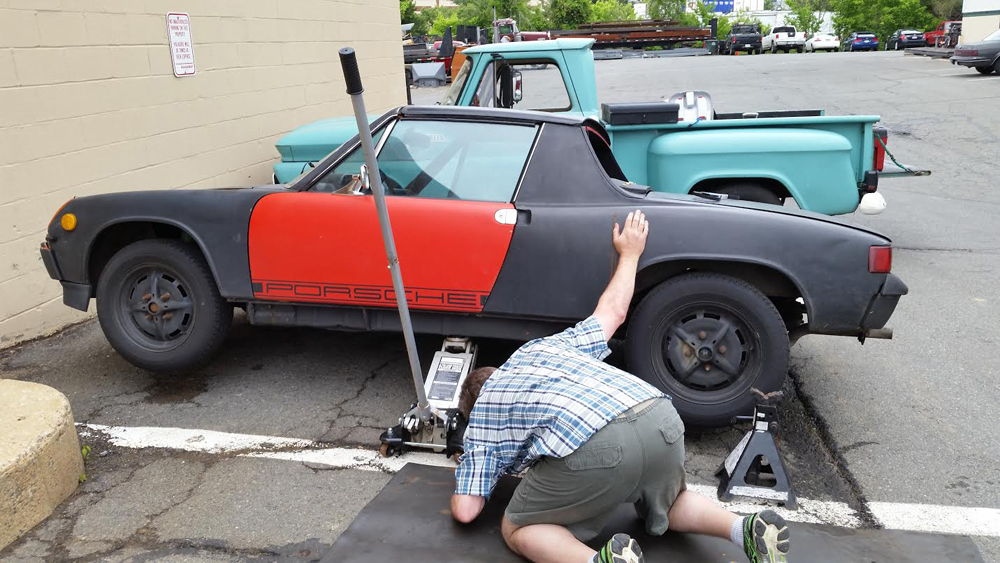
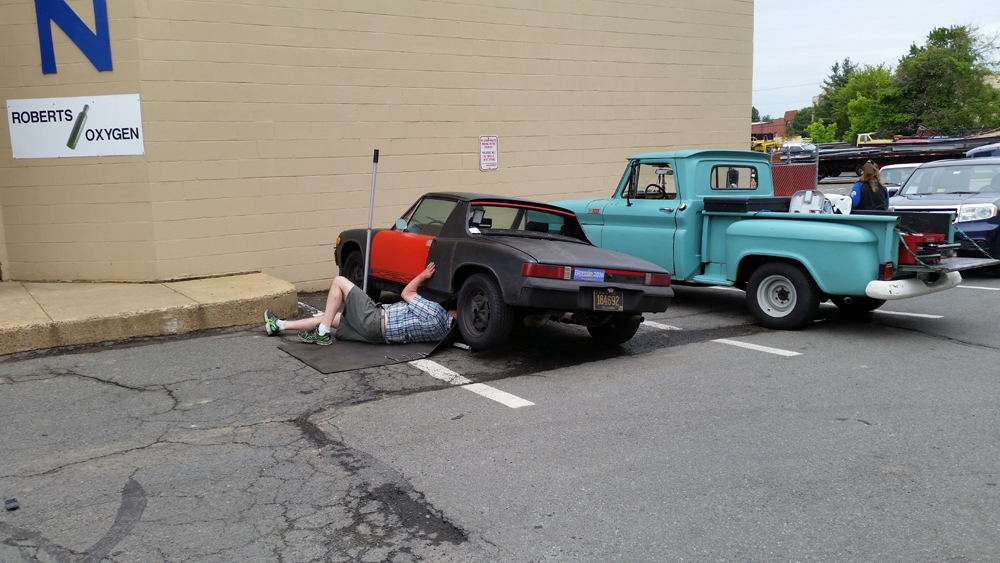
Posted by: jimkelly May 28 2016, 12:16 PM
well. yesterday I had the opportunity (I use the term loosely) to drive my car in 85 +- temp and on the highway at 65mph my car was running 210 degrees with fan on the whole time.
today I decided that for summer driving, I need to do it without a thermostat, so it is out. I just ran the engine, at idle, it is 90 degrees and the car came down to 190 with fans on, fans are triggered by a 185 degree thermos switch that did not come on till engine hit 205+-
later today or tomorrow, I will take it for a drive to see how it does at 65mph steady.
a debate..
http://www.chevytalk.org/fusionbb/showtopic.php?tid/296111/
when temps are 80 and above, I NEED to get my water temps to safe levels , and thus the thermos must come out in summer, or I need to replace my radiator for something with more capacity I guess.
Attached thumbnail(s)
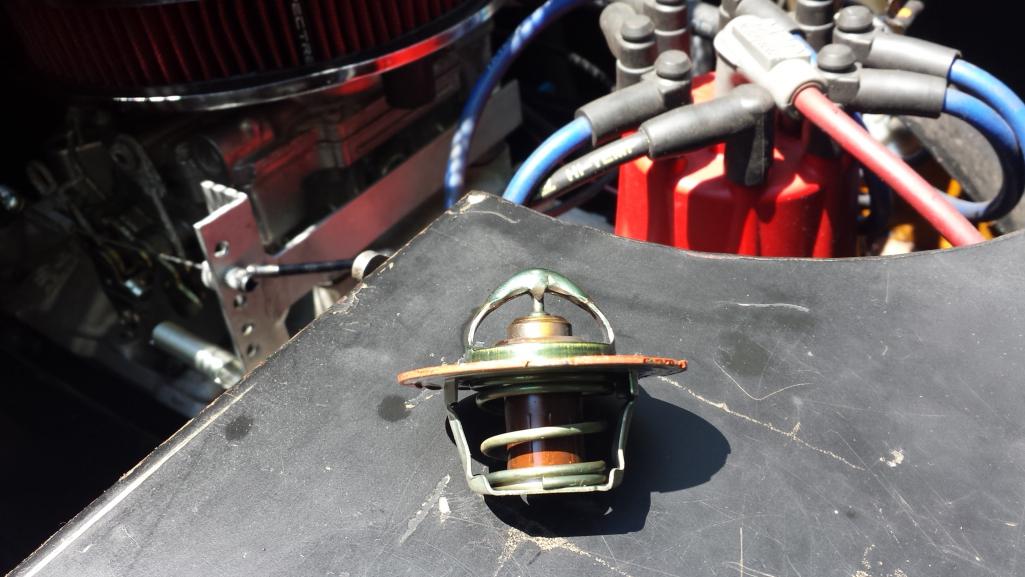
Posted by: jimkelly May 29 2016, 10:23 AM
ok, 190 degree thermostat out, and local temp is about 82 degrees, and at 65mph and at idle while getting gas, engine water temp stayed pretty solid at 190 degrees WITH FANS RUNNING ALMOST NON STOP. probably should also replace my 180 degree thermos switch for a 190 degree in summer so fans will run less.
bottom line: 20 degree improvement and at ideal temp of 190 also. curious to see what happens when outside temps hit 95+-.
Attached thumbnail(s)
Posted by: jimkelly May 30 2016, 04:25 PM
finally relocated my light that tells me when my radiators are running. and that is my engine idleing at 190 in my garage with door open. want to change over to electronic oil pressure and water temp gauges at some point.
Attached thumbnail(s)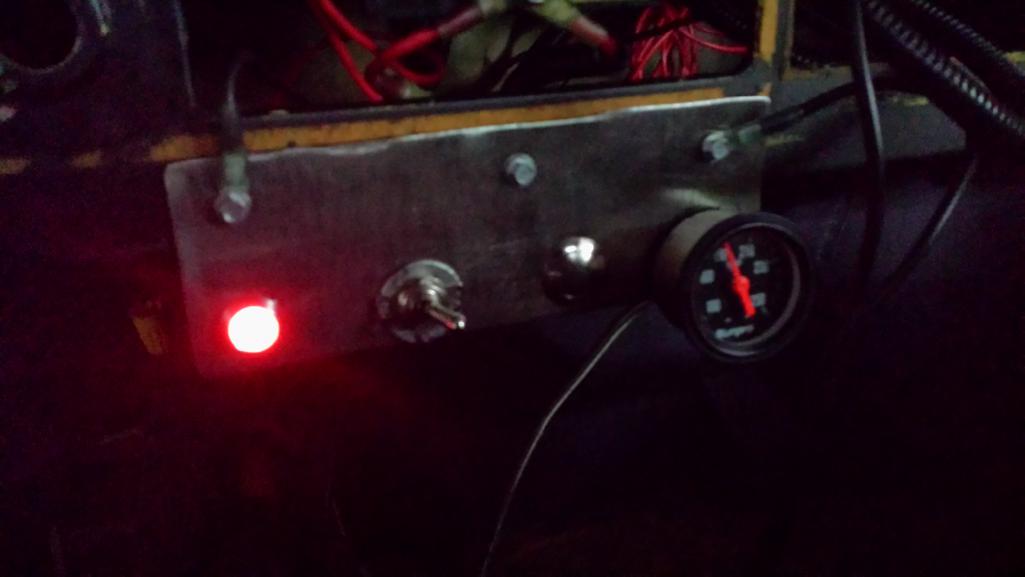
Posted by: jimkelly May 31 2016, 05:10 PM
rightpedal gave me one job to do when he fixed my car back in feb. to mark TDC more permanently on my flywheel. i finally got to it today. new problem, ticking sound when starting car. almost sounds like sparking but i think it may be a broken tooth on the flywheel or starter?
Attached thumbnail(s)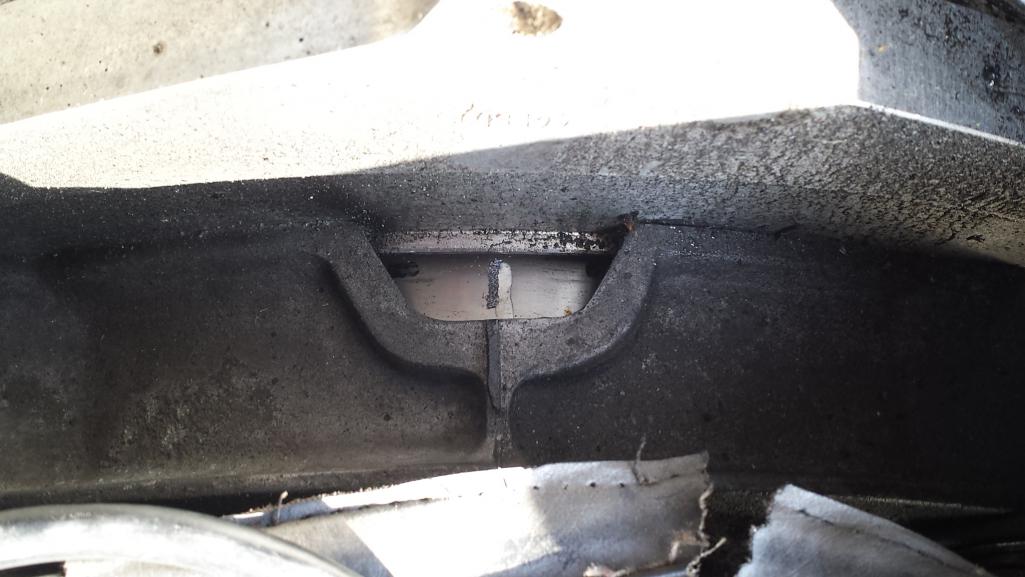
Posted by: jimkelly Jun 19 2016, 09:09 PM
took my car to rightpedal's home today, as he offered to swap out timing cover and timing cover and oil pan gaskets, in an effort to stop my oil leak. during the job, he discovered that my harmonic balancer had a crack in it so i have to order a new one and this coming weekend we will be able to button it up. i can't thank steve enough for giving my car some much needed attention
Attached thumbnail(s)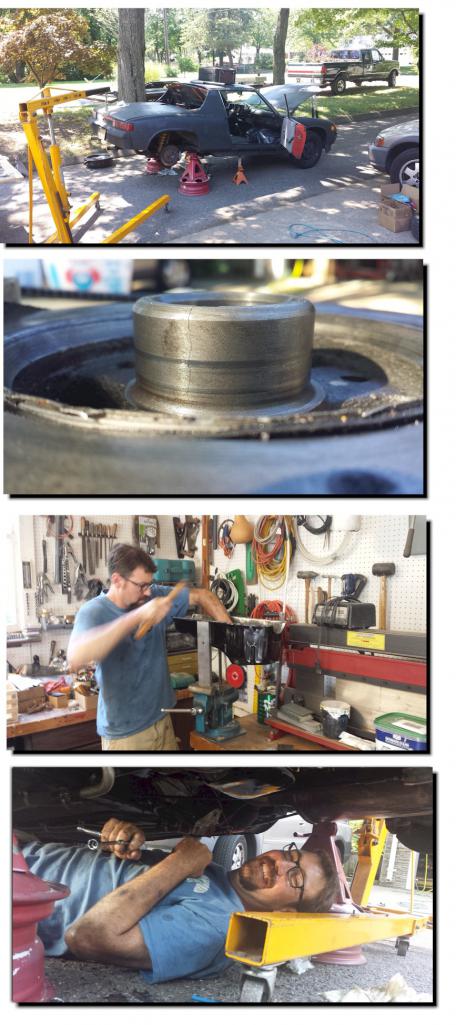
Posted by: al weidman Jun 19 2016, 09:59 PM
Although I hardly ever use 1st, I chose to keep it. With the torque of a v8 you can put it in first gear on a hill and idle at a stop light without the clutch in.
I never use first for driving, up or downshifting.
BTW, Mark has the sweetest V8 conversion I have seen or ridden in. Quiet enough, powerful enough and a very good looking narrow body.
Posted by: Andyrew Jun 19 2016, 10:30 PM
Had. He sold it to a fellow member who won best conversion with it at WCR. Agree its a fantastic car.
Posted by: jimkelly Jun 20 2016, 01:35 PM
my next purchase. to fix my loose engine bay shift rod.
http://www.tangerineracing.com/transmission.htm
Attached image(s)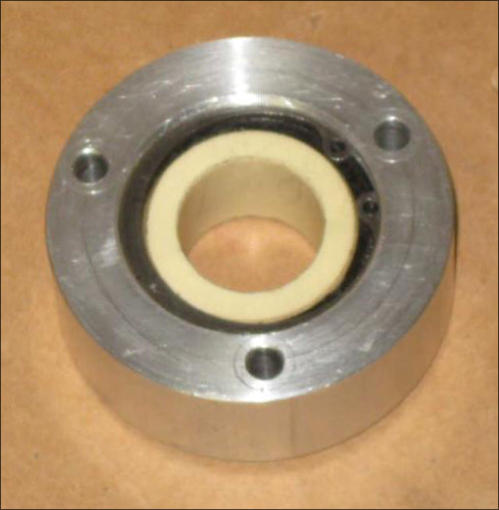
Posted by: jimkelly Jun 23 2016, 06:09 PM
just spoke to steve at renegade hybrids and my balancer should be getting picked up by fedex tonight. i should be back on the road sunday thanks to rightpedal and renegade hybrids.
Posted by: jimkelly Sep 27 2016, 03:12 PM
my 1990 suby legacy is acting up so i am back to driving 914 for now.
turns out that despite best efforts, it is not very easy to uninstall and reinstall a timing cover and oil pan, and completely seal them both, with engine in car. my engine still leaks, more than before, thus i am now looking at removing engine from car, so i can repair this with engine upside down on engine stand. just wish i had my hoist here at work : (
watching steve do it has given me the confidence to give it a shot myself, along with a few youtube videos. we put a one piece felpro got at his local advanceauto on it and they are reusable, is that is good.
while i am in there i will check the teeth on my starter and flywheel to make sure non are missing as i have a weird sound when i start my engine.
also, one other problem with my car is the trans. i think i have end play. noticeable when i let off gas and then get back on it with a foot a tad bit more then very mild.
lastly, i've bleed my brakes to death and they are still pathetic : (
miserable drive to work this week, they were repairing the road and had all traffic standing still for about 30 mins. a ridiculous number of cars pulled u turns but i had no alternate route possibility : (
Attached image(s)
Posted by: Mueller Sep 27 2016, 03:20 PM
I think the guy in front of you was taunting you!
Posted by: jimkelly Sep 27 2016, 03:29 PM
you noticed that
Posted by: jimkelly Sep 28 2016, 09:50 AM
my excuses are running thin. looks like the wife won't be seeing much of me this weekend
don't need hoist to get engine out BUT do need it to get engine on stand, so i can work on engine upside down.
Attached image(s)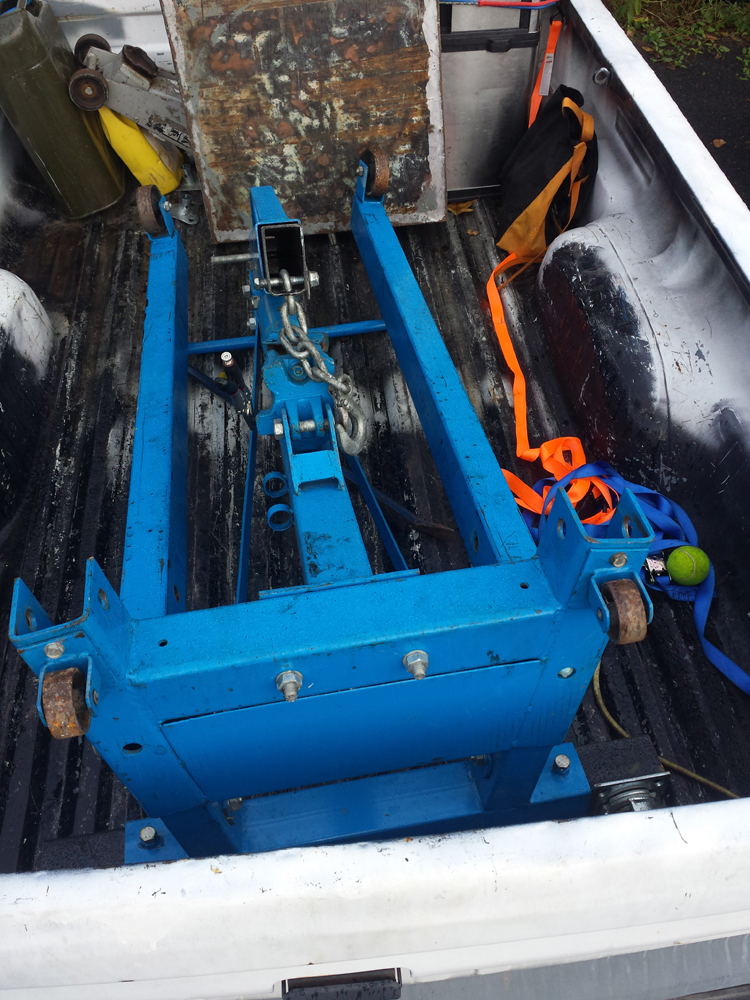
Posted by: jimkelly Sep 30 2016, 02:54 PM
decided to tackle this over the weekend at home in the comfort of my garage and closeness of my tools. bringing home an engine stand and made this lift bracket from some scrap laying around the shop.
and the removed for cleaning iacv from my 1990 legacy, could be causing my stalling issues?
Attached thumbnail(s)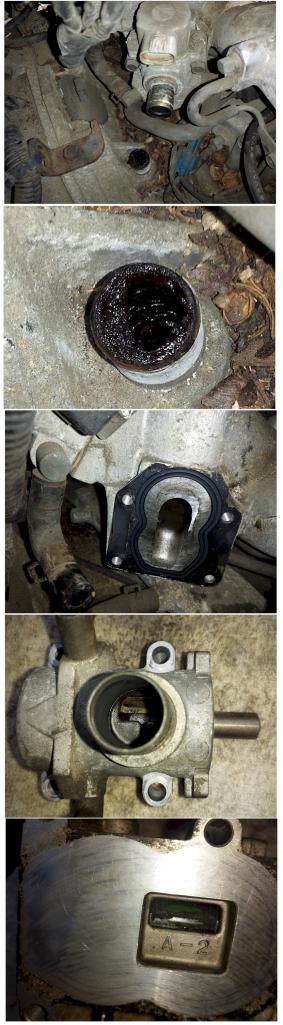
Attached image(s)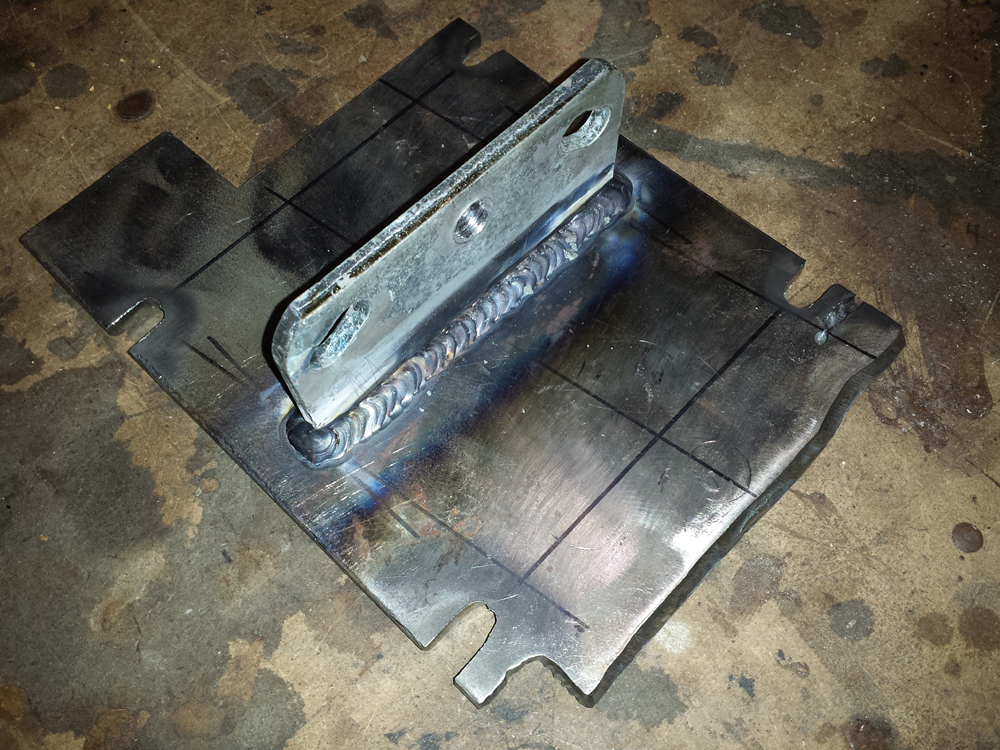
Posted by: jimkelly Oct 2 2016, 10:28 AM
the weather is rainy and overcast here in DE this weekend. I jacked car up yesterday in an attempt to actually see the source of the leak BUT holy shit, my car looks like it was deep fried, southern style, oil every where. add to this I just started wearing progressives, vision sucks, and being in the dim light does NOT help.
though I was fucked with suby and 914 not being driveable. checked some online threads for suby stalling (at idle and while driving) and found a few, one suggest fuel filter, and being the easiest, I bought a new one an popped it in.
http://www.ultimatesubaru.org/forum/topic/48233-1999-subaru-legacy-22l-stalling-at-idle/
http://legacygt.com/forums/showthread.php/engine-dies-while-driving-138323.html
well, first for the oil pics.
Attached thumbnail(s)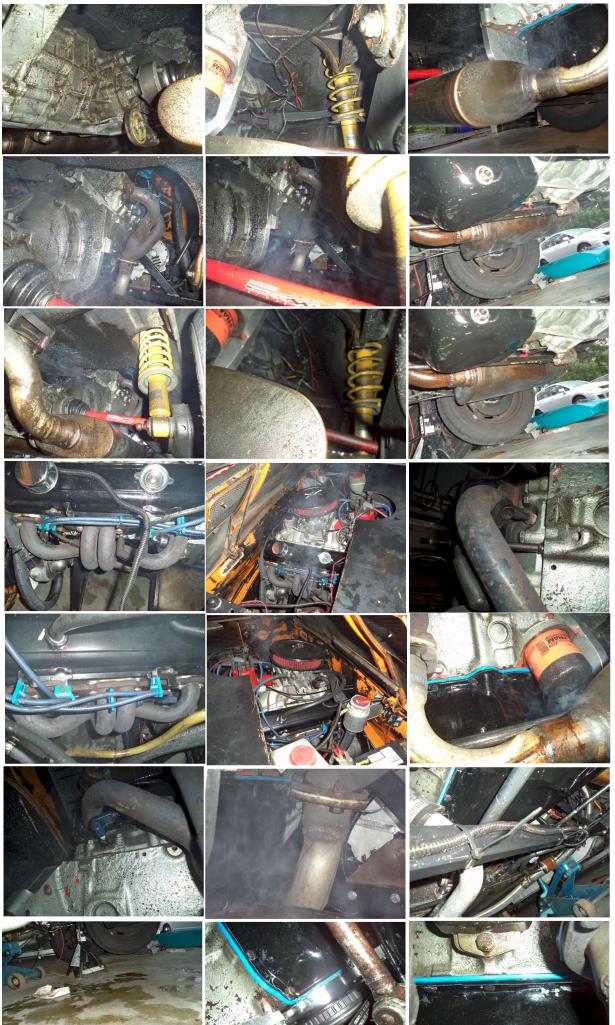
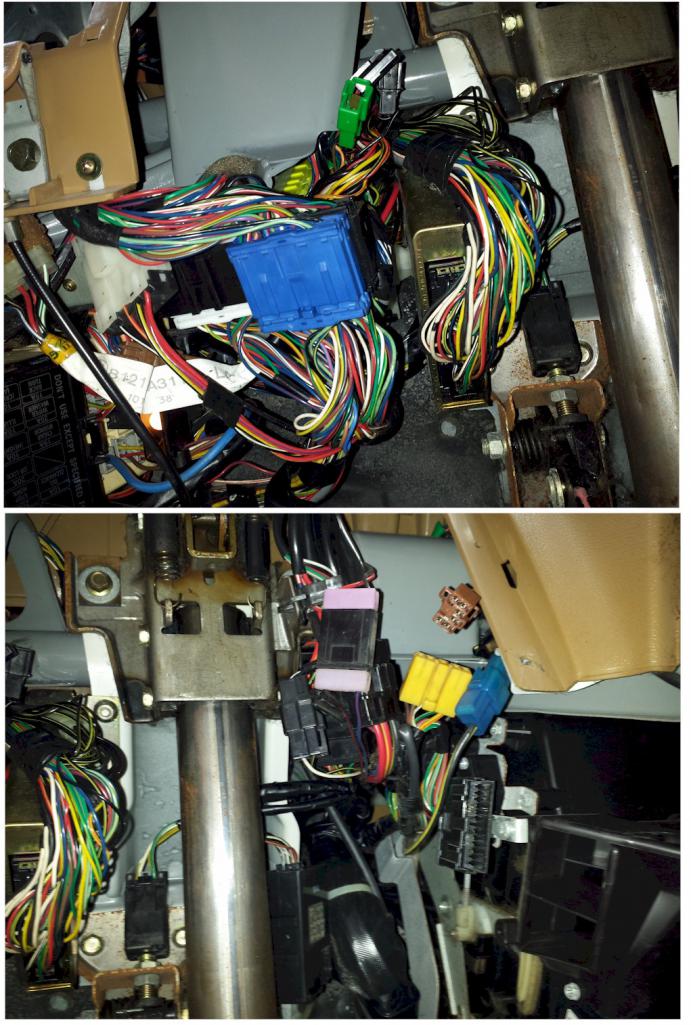
Attached image(s)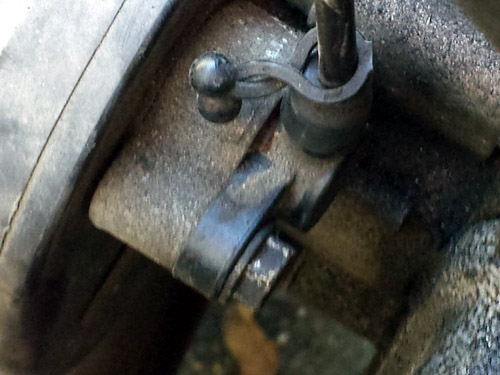
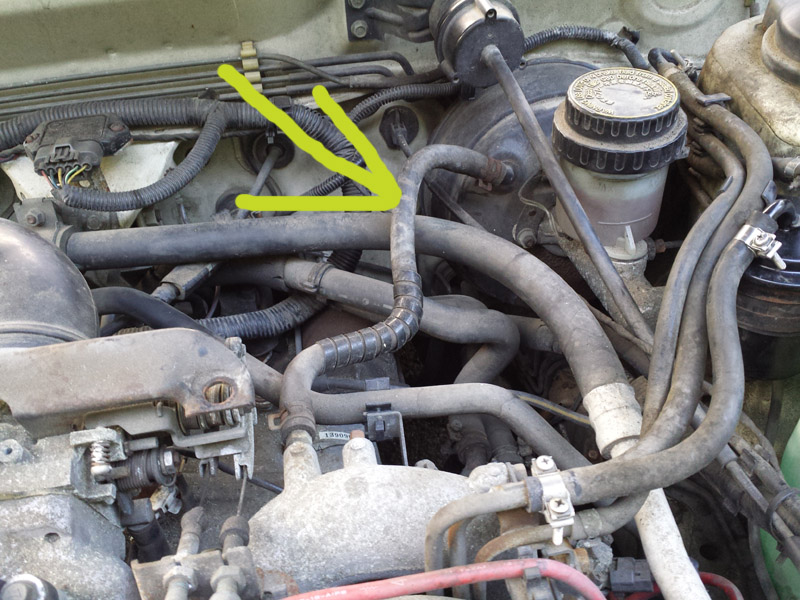
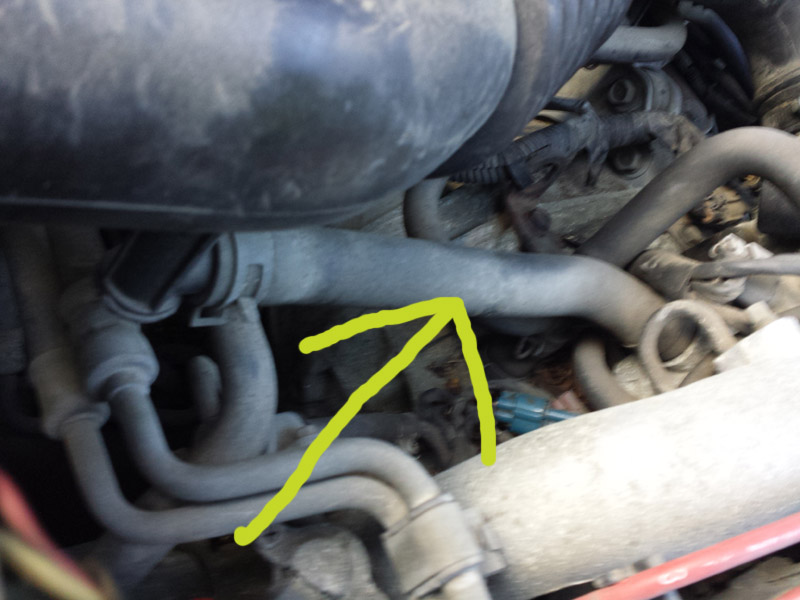
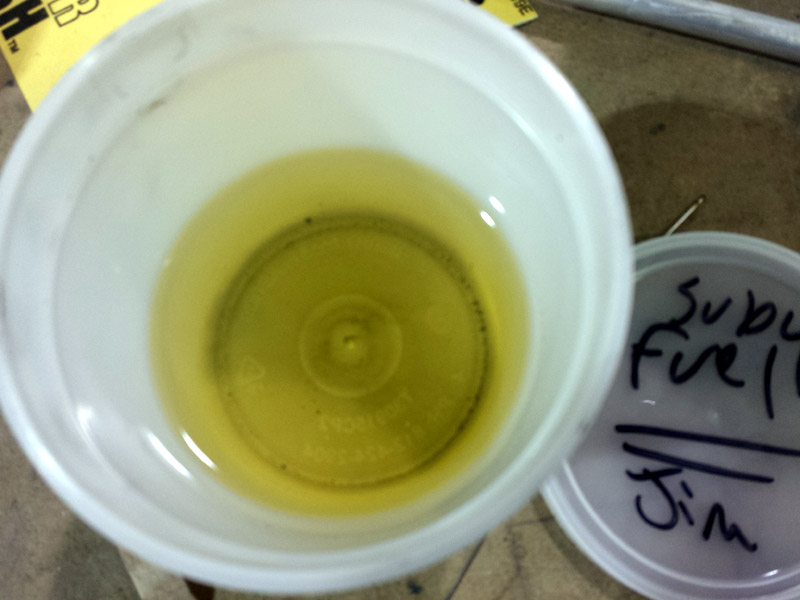
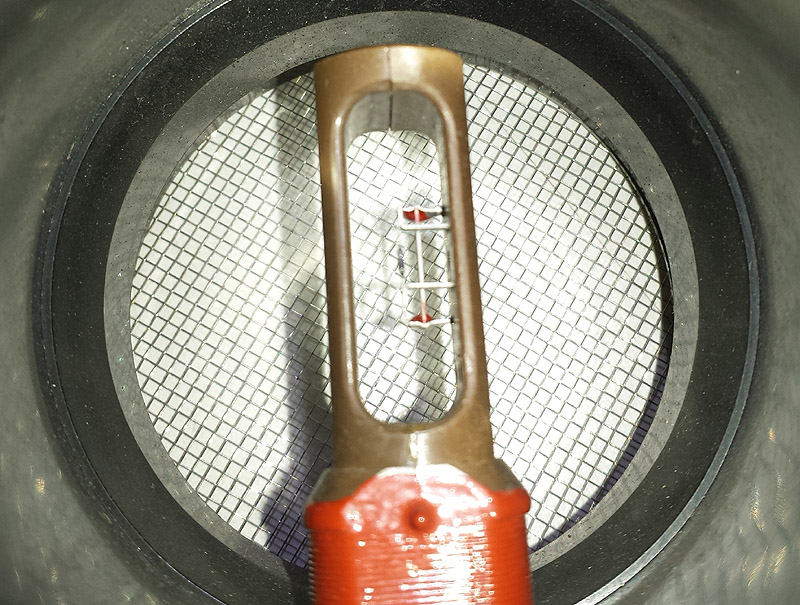
Posted by: jimkelly Oct 2 2016, 10:30 AM
and now for the dirty gas in the OLD suby fuel filter. $47 for new filter at advancedauto, the only one they had in stock. I have suby running right now in driveway, idleing and no stall so far. drove it up street and all seemed smooth. looks like I have a car to drive to work this week, and more time to deal with 914. I did later in day drive it to gas station to fill up and on way home it did act up. and then again when idleing in driveway. not nearly as bad as last week, before filter change. may have to try a bottle of water remover in tank and injector cleaner in tank too??
I realized that I do miss driving my 914 v8. can't wait to get it buttoned up and driving it everyday again.
saga continues thus the plethera of suby pics. even with new fue3l filter, car still acted up. so i did a seafoam thru idle air control valve proceedure which seems to have helped some too. but then i discovered that my car was throwing a code 23, which is manifold air flow valve, so i ordered one from ebay, threw it in and car ran FAR WORSE, so i reinstalled orig MAF. i tried a swap of my cam sensor, but no change. i will do a maf sensor cleaning next, and may install a fuel pressure guage to be certain i have the expected 36 psi. lastly, the tranny is doing the suby binding thing again. hate simultaneous issues : (
Attached thumbnail(s)
Attached image(s)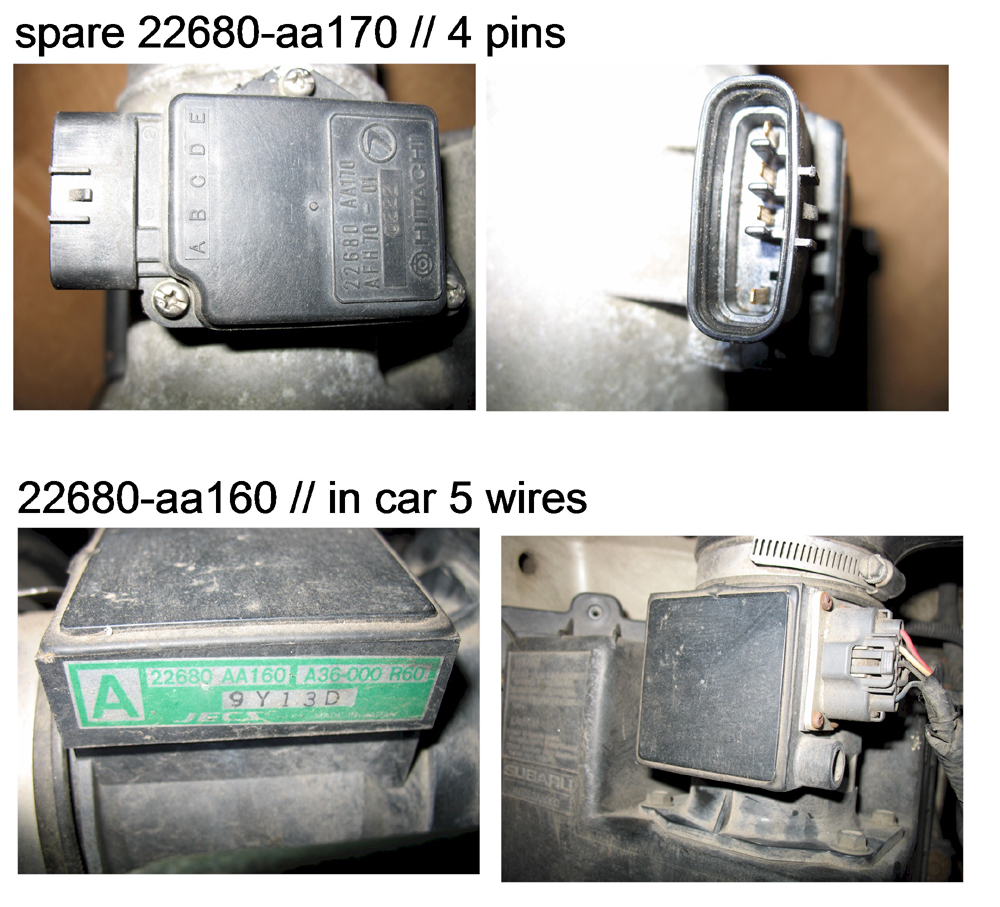
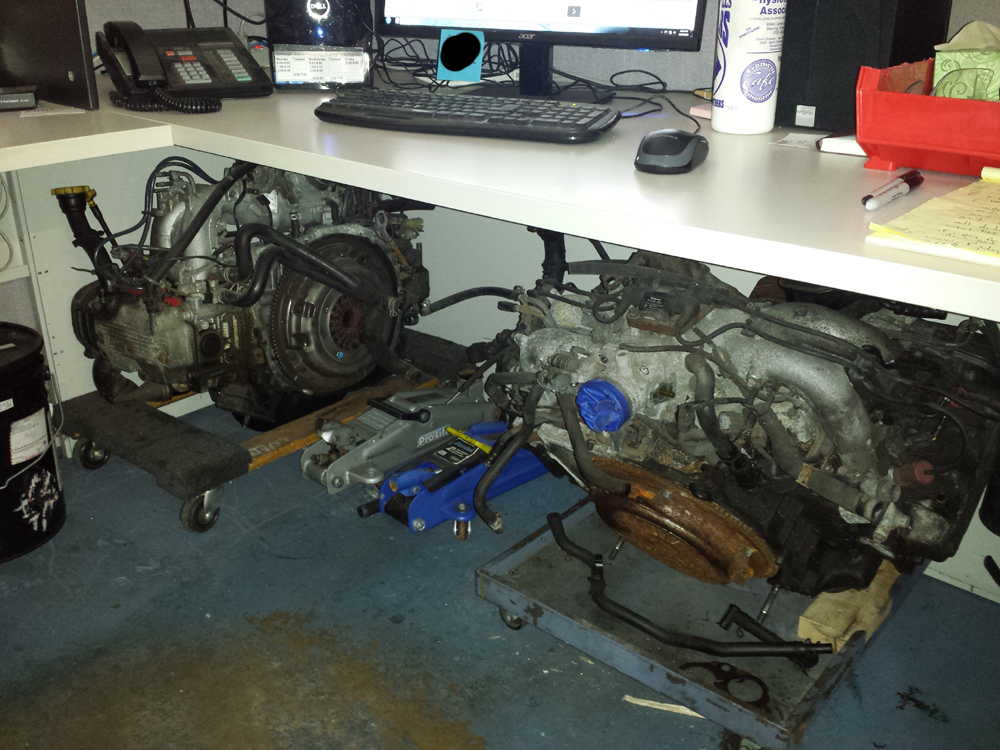
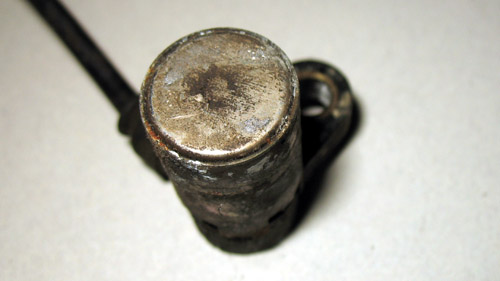
Posted by: jimkelly Oct 14 2016, 12:21 PM
my 1967 283 arrives. seller tore it down and basically rebuilt and ran it. gonna replace my 307.
still need to pull my oil covered 307 out and then swap all needed parts over, trans, renegade trans conversion parts, carbs, etc etc etc.
and update on my 1990 Subaru, my SUPPOSED daily driver till me 914 gets back on the road. started stumbling again, so I have iacv out and will clean it and the maf. hoses so hard that they cracked, and I cracked a tee as well
Attached thumbnail(s)
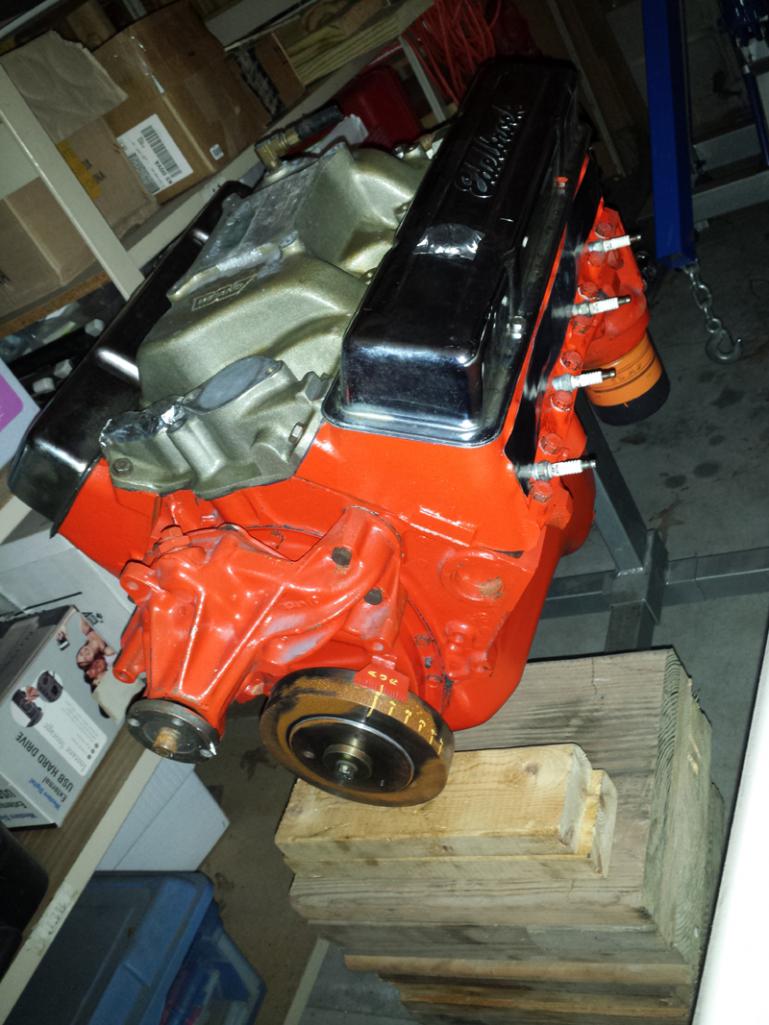
Posted by: 76-914 Oct 15 2016, 11:20 AM
Jim, I'm guessing that you do not have the factory engine manual. If not, your chasing your tail. The factory manual will give you the diagnostic procedure to follow up on the error code. It will be something like; check pin 1 for "X" volts when key is on; pin2 will have "X" volt with key off, etc, etc. Informative and easy to follow. Kent
Posted by: jimkelly Oct 16 2016, 09:21 AM
I do have the factory manuals but until last week I thought my suby was missing one of its two green diagnostic plugs. turns out someone removed the tcu in the past, I could tell cause one of the two nuts holding it in place was missing, when I removed it, I discovered that the other green diagnostic plug had been pushed up and buried where it could not been seen normally. so I will do the green plug testing one I have the iacv back in. got to replace a bunch of heat brittled hoses to do this. thanks : )
Jim, I'm guessing that you do not have the factory engine manual. If not, your chasing your tail. The factory manual will give you the diagnostic procedure to follow up on the error code. It will be something like; check pin 1 for "X" volts when key is on; pin2 will have "X" volt with key off, etc, etc. Informative and easy to follow. Kent
Posted by: JRust Oct 16 2016, 09:34 AM
my 1967 283 arrives. seller tore it down and basically rebuilt and ran it. gonna replace my 307.
still need to pull my oil covered 307 out and then swap all needed parts over, trans, renegade trans conversion parts, carbs, etc etc etc.
Man I hope you are running a different Water pump on the 283. Reminds me of my buick v8 with how far that water pump sticks out. LOL! Can't remember what you were running on your 307
Posted by: jimkelly Oct 16 2016, 02:20 PM
yes. I have renegade water pump to swap onto this 283, from my 307. the guy I bought this engine from just tossed this water pump on in case I needed one. great guy. though I've seen some colling problem threads that say the renegade pumps get corroded, etc, and need replace from time to time.
though I am thinking about electric pump and dedenbear manifold instead.
http://www.dedenbear.com/TXTwHead.htm
Posted by: rightpedal Nov 26 2016, 06:56 AM
Hey Jim any progress on the 307?? I am dying to know where the leak is. I have ten bucks says it is the timing cover at the oil pan from our second "fix".
Steve
Posted by: jimkelly Nov 26 2016, 08:48 AM
rigthpeddle, contact me the day you decide to pack the moving van. as for 914, I knew for sure but the thought of taking the OIL SATURATED engine out and attempting to fix the leak and putting it back in with the potential of not fixing it, has me unmotivated. so I bought a refurbished 283 for $350 delivered, a from a really nice guy, whose wife's it turns out is seriously ill and he was down sizing his toys. I need to pull my 307 and get this 283 in, which is something I can do myself, except for getting the distributor back on properly. cause I did not have a reliable daily driver, I bought a Honda fit (perfect timing cause our nissan versa just got paid off), and it has HEAT, which is actually pretty nice in the winter and is automatic in traffic. the problem with my 914 is that it is a money pit, i'm pretty sure it has some UNGOOD backlash in the trans, needs a new starter, and the alt belt vibes its ass off though the old cracked harmonic dampener could have been partly to blame? aside from that, I bleed the shit out of the brakes and they still suck, guess I have air in master or proportioning valve. and then there is the costly alignment a 914 needs. my wife was, justifiable so, getting tired of the unexpected 914 expenses. so for now, she is back on jackstands, not the wife the 914
Attached image(s)

Posted by: Andyrew Nov 26 2016, 10:38 AM
Good looking honda! I am surprised you were able to drive a 914 daily for so long!
Posted by: jimkelly Jun 17 2017, 02:10 PM
finally getting around to removing oily v8.
might convert both my cars to suby engine/trans?
starting with this one cause it already has a radiator in it?
my son being home for the summer helped me out. the two of us being about equally unmechanically inclined worked pretty hard in tandem getting the mufflers off using wrenches and big pipe
if my wife didn't have somewhere to be, we would have had engine out in about one more hour. will do tomorrow.
Attached thumbnail(s)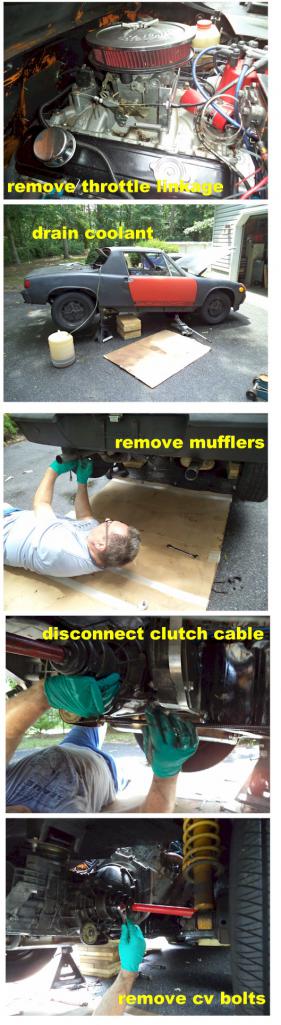
Posted by: jimkelly Jun 18 2017, 10:55 AM
engine out.
Attached thumbnail(s)
Attached image(s)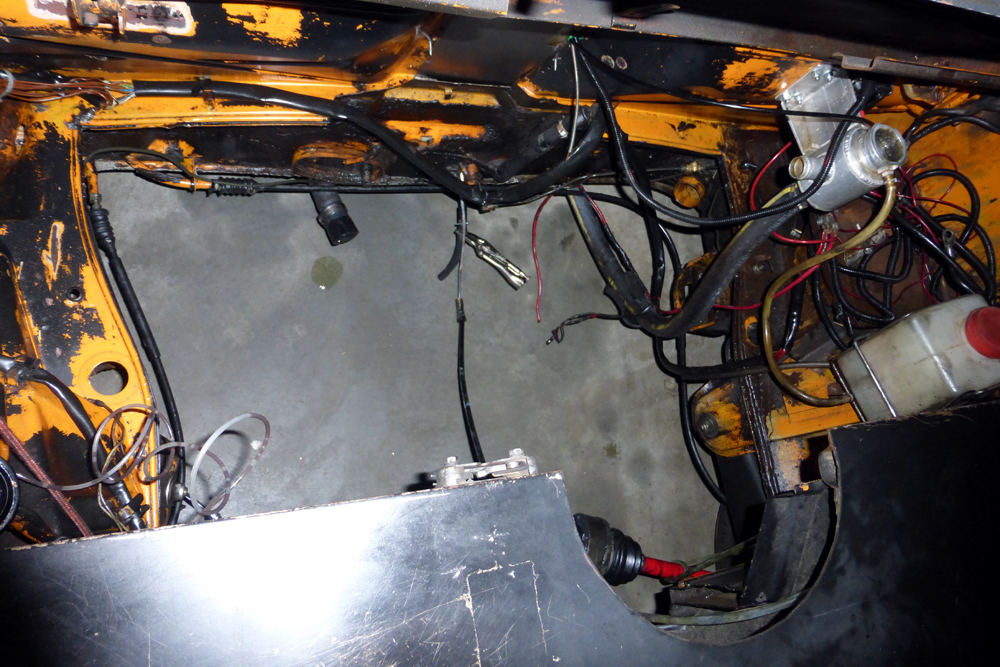
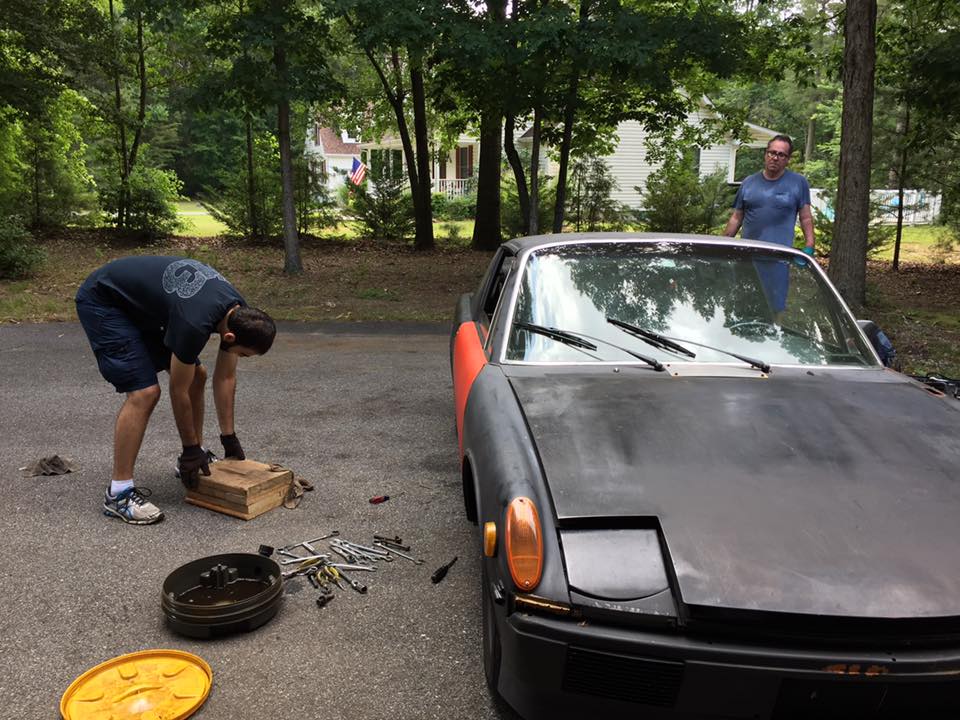
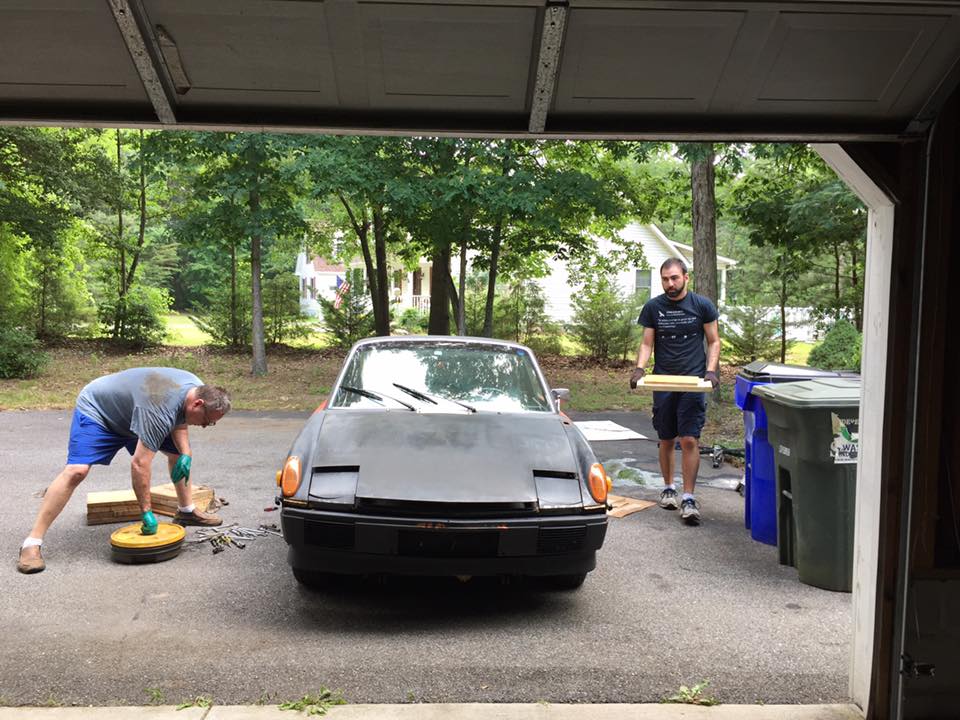
Posted by: jimkelly Dec 15 2018, 04:12 PM
planning to get my 914 back on the road. someday : )
http://www.nastyz28.com/sbchevy/sblock.html
note to self.
sealant on thru hole.
heads >> http://www.competitionproducts.com/World-Products-S_R-Stock-Replacement-Cast-Iron-Chev-SB-Head-170cc_58cc-Straight-Plug-Assembled-Pair/productinfo/4265KA/#.XB7j71xKjcs
decided to lose some of the renegade stuff, and not do dedenbear components after all, to minimize cost and the number of components and hose connections on the front of my engine. going back to heavy stock water pump as i had it before, since i already have a hole in my firewall. gonna go with mechanical fuel pump too, to limit how many things that need 12v also. and plan to get rid of the headers which makes access to spark plugs less pleasant, and replace with iron exhaust manifolds. mostly i want reliability and i plan to make exhaust real quiet.
nice little rams horns discussion.
https://www.jalopyjournal.com/forum/threads/ram-horns-vs-block-huggers.825134/
i'm willing to give up some performance for simplicity.
i did pick up cheap, a modified dedenbear expansion tank which i hope to be able to use.
http://www.dedenbear.com/Cool_cat.htm
https://www.fillernecksupply.com/search.php?search_query=joiner&search_submit=Search§ion=product
https://www.youtube.com/watch?v=8EzxmVG7hlU
https://www.youtube.com/watch?v=LuNuv6y2css
https://www.youtube.com/watch?v=VrMa_OM1tMQ
https://www.youtube.com/watch?v=dFv7WcrGFY4
https://www.youtube.com/watch?v=O4WRL513Gx4
https://www.youtube.com/watch?v=EQNooaW6g74
https://www.youtube.com/watch?v=NBxgDbvoeqE
5200rpm rams horns
https://www.youtube.com/watch?v=qe9ke0rQlT8
Attached thumbnail(s)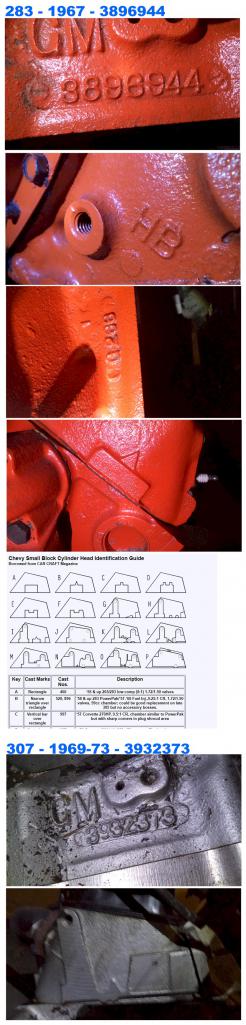
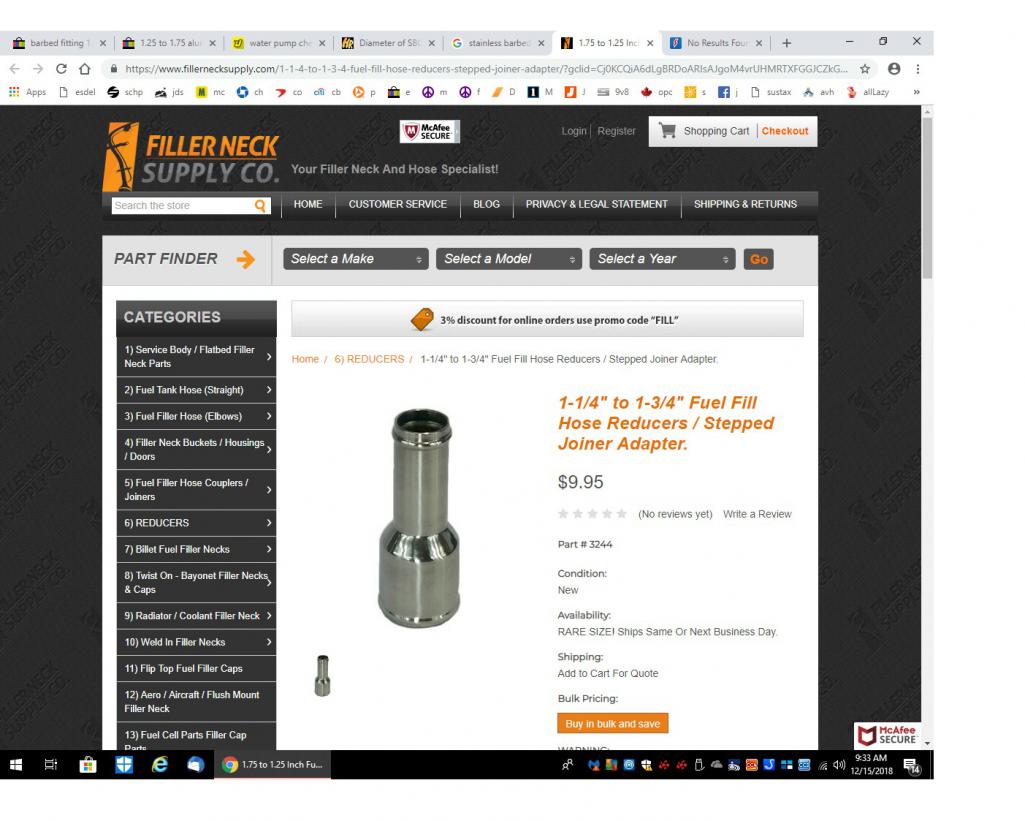
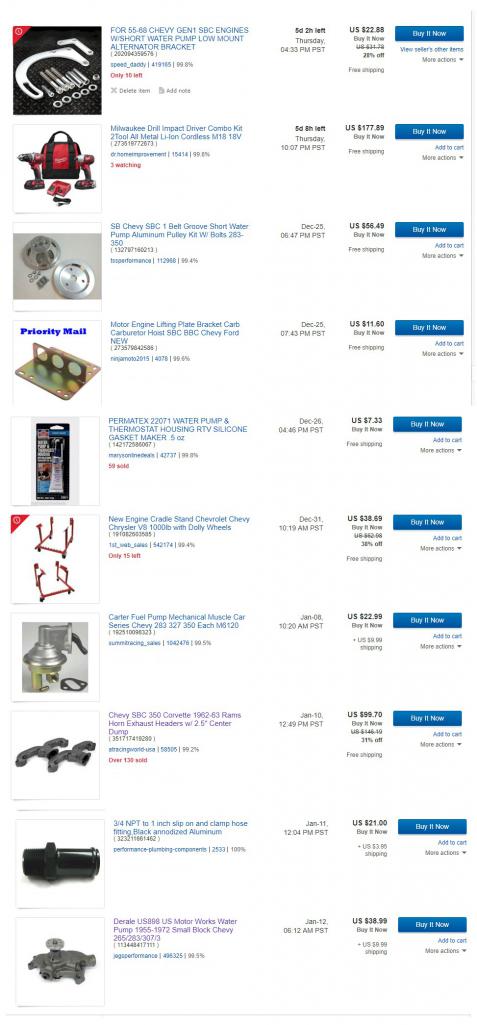
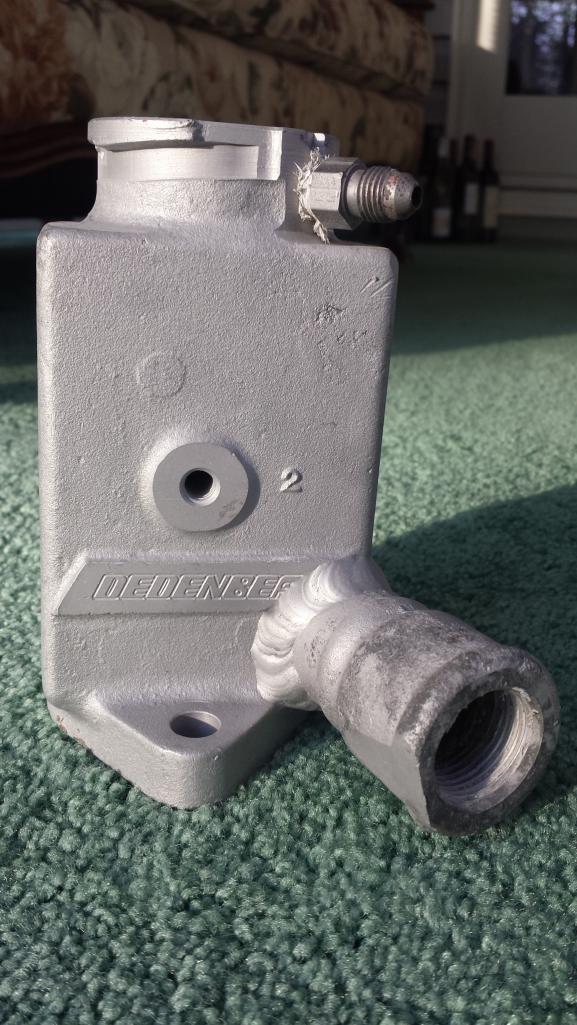
Attached image(s)
Posted by: burton73 Dec 15 2018, 05:23 PM
this is getting ridiculous. I really need a pickup truck. my hot water heater broke and I needed to replace it today. Porsche 914 to the rescue. even had to remove the trunk lid to pull this off.
I'm curious if it made it home safely without falling out.
Around here in Dallas for $20 you can rent one of their trucks for a little over an hour.
I have done this many times over the years.
--- bill
LA larger area as well.
You could build a 914 v8 pick up. Rod Simpson hybrids had one a few years ago when I was last there. Silver over BK
Bob B
Posted by: jimkelly Dec 15 2018, 07:50 PM
but i finally got a pick up truck : )
Attached thumbnail(s)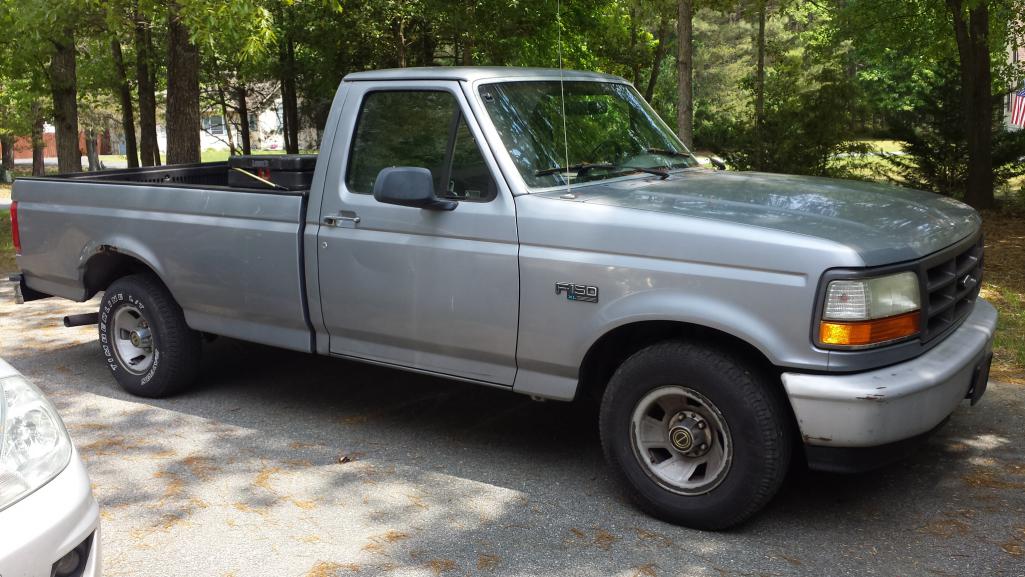
Posted by: Dion Dec 15 2018, 08:01 PM
Glad to see ya back at it Jim!
Posted by: sixnotfour Dec 15 2018, 09:25 PM
I also totally blame my wife for .......
Posted by: 76-914 Dec 16 2018, 10:21 AM
Where in the Hell ya been?
Posted by: jimkelly Dec 16 2018, 12:18 PM
besides visiting the urologist every 6 months : )
mostly just working and raising two boys : )
pics of them, and the wife who always asks me the same question : )
Attached image(s)

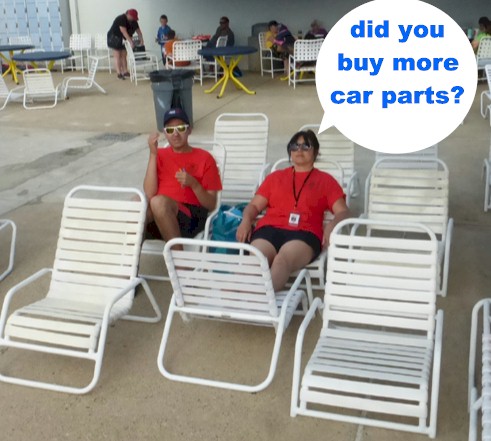
Posted by: jimkelly Dec 24 2018, 04:10 PM
pulled carb and distributor as to not crush them with chain on hoist. put my brand new milwaukee cordless drill torque tools to work : ) clutch arm was right up against trans nut, didn't remember this. my flywheel has 3 teeth that are chipped. and how do i loosen flywheel? it seems to be still on tight even with bolts removed. almost got to use my new harbor freight engine stand but need to get flywheel off first. guess i should have gotten a few dead blow hammers.
Attached thumbnail(s)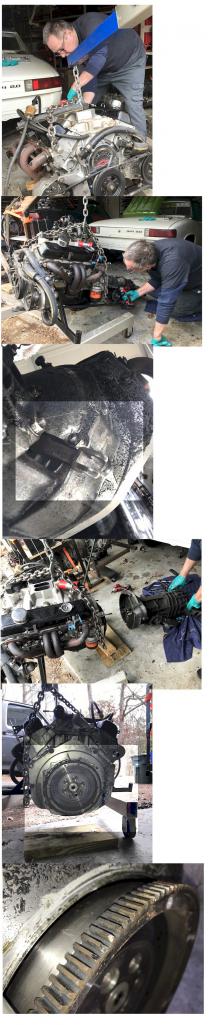
Posted by: Spoke Dec 24 2018, 10:31 PM
clutch arm was right up against trans nut, didn't remember this.
Same with the trans on my 2056. Had to engage the clutch to get to the bolt.
Posted by: jimkelly Jan 4 2019, 10:55 AM
made a LITTLE progress today. removed flywheel (by banging it all around with a 2x4) and a bunch of other stuff from my removed 307 and got it on a cradle vs engine stand. engine stand did not mate up perfectly, so expect that if you buy one.
one thing i am concerned about, know should not be an issue, is the flywheel bolt pattern on the 307 vs the 283. once i get the 283 on a cradle too, i will be able to see it directly, but it seems smaller?
thought i would use the cradles as run stands too.
can i remove the pilot bearing from the 307 crank and reusue it? how to remove?
Attached thumbnail(s)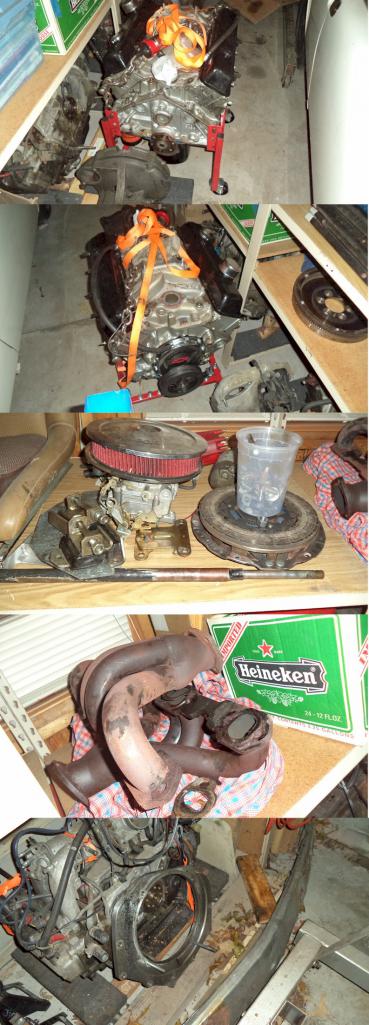
Posted by: 1970-1914 Jan 4 2019, 01:03 PM
Best (easiest) way to remove pilot bushings is:
Fill the bushing with white lithium grease.
Find something round, solid, metal and just smaller than the bushing ID - a piece of round bar, bolt anything not hollow.
Insert the round rod into the bushing and tap it in with a hammer
The grease will hydraulically remove the bushing.
It is pretty satisfying to do.
Pierre
Posted by: jimkelly Jan 4 2019, 01:19 PM
thanks for the tip.
here is a youtube video showing the technique.
https://www.youtube.com/watch?v=OScJ2QKpV_k
Posted by: 76-914 Jan 4 2019, 08:05 PM
Same bolt pattern. IIRC, that Pilot Shaft bushing is just a cheap oilite bushing! Git after it Jimmy.
Posted by: PatrickB Jan 5 2019, 03:55 AM
Best (easiest) way to remove pilot bushings is:
Fill the bushing with white lithium grease.
Find something round, solid, metal and just smaller than the bushing ID - a piece of round bar, bolt anything not hollow.
Insert the round rod into the bushing and tap it in with a hammer
The grease will hydraulically remove the bushing.
It is pretty satisfying to do.
Pierre
And if you can't get it don't sweat it. They're cheap. Anyone that works on these engines probably has a couple in their toolbox. I haven't had a smallblock chev in years and I know there's at least one in my toolbox.
The right GM parts guy should be able to come up with a bearing that fits there instead of a bushing too. I'm not sure what they were used in anymore, but I'm thinking it was the 350 olds diesel. I used to have the factory part number but it's long gone.
Posted by: jimkelly Jan 5 2019, 08:25 AM
pic of pilot bearing in 307. seems like it is a 2 piece set up, a bushing surrounding a roller bearing.
and some good starter info. since i plan to run the engine out of car first, i'm gonna get me a 168 tooth flexplate and starter. pic of my 283's block starter mount holes (3) for either a 153 tooth flexplate starter or a 168 tooth flexplate starter.
https://www.chevyhardcore.com/news/chevy-starter-fitment-is-not-a-one-size-fits-all-situation/
Attached thumbnail(s)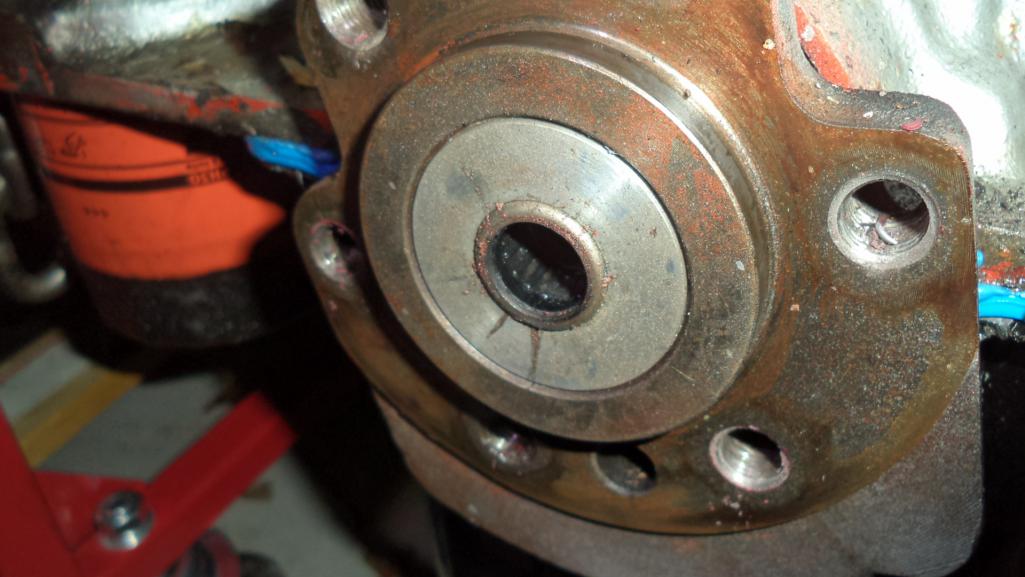
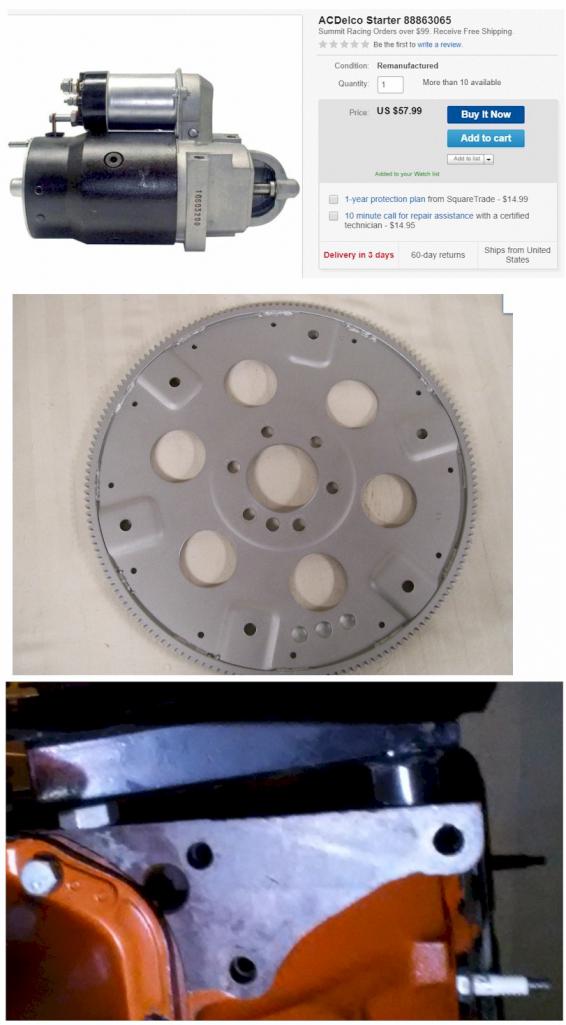
Posted by: PatrickB Jan 6 2019, 05:27 AM
pic of pilot bearing in 307. seems like it is a 2 piece set up, a bushing surrounding a roller bearing.
and some good starter info. since i plan to run the engine out of car first, i'm gonna get me a 168 tooth flexplate and starter. pic of my 283's block starter mount holes (3) for either a 153 tooth flexplate starter or a 168 tooth flexplate starter.
https://www.chevyhardcore.com/news/chevy-starter-fitment-is-not-a-one-size-fits-all-situation/
You'll really like how fast it revs with the flexplate, like a bike. Don't be fooled, it will pick up rpms a lot slower with a flywheel. Been there done that a lot of years ago with a 350 that went in a firebird!
Posted by: jimkelly Jan 6 2019, 06:14 AM
good point, thanks.
Attached image(s)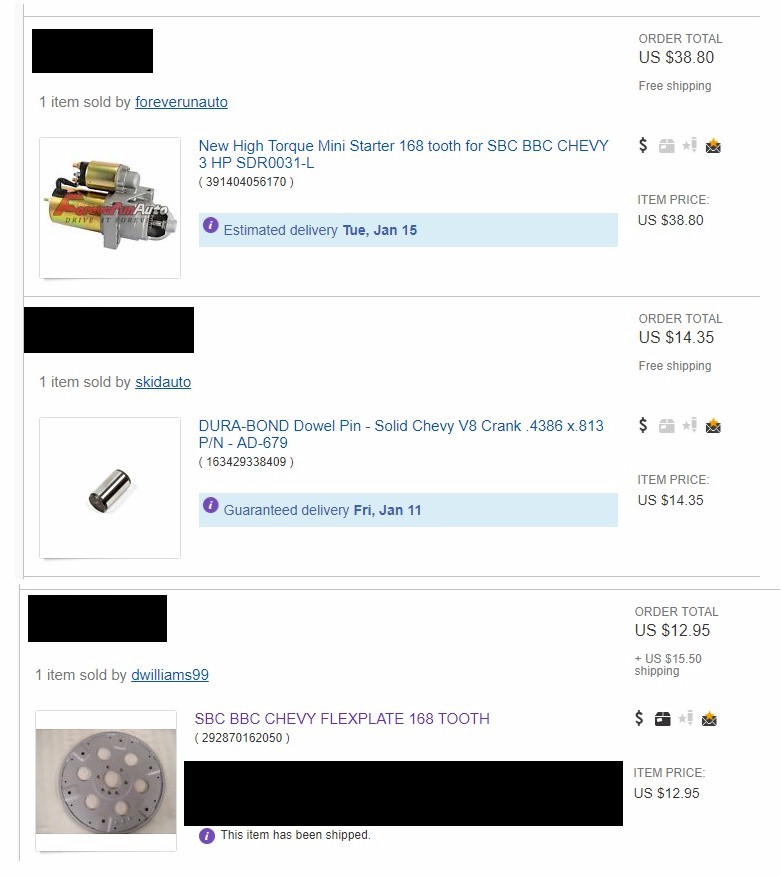
Posted by: dwillouby Jan 7 2019, 09:32 AM
pic of pilot bearing in 307. seems like it is a 2 piece set up, a bushing surrounding a roller bearing.
and some good starter info. since i plan to run the engine out of car first, i'm gonna get me a 168 tooth flexplate and starter. pic of my 283's block starter mount holes (3) for either a 153 tooth flexplate starter or a 168 tooth flexplate starter.
https://www.chevyhardcore.com/news/chevy-starter-fitment-is-not-a-one-size-fits-all-situation/
Don't think that bearing will come out. That's a Renagade adapter/ bearing assy. Pressed in. Tried to remove mine when changing to the Boxster trans setup.
Used the grease method & removal tool. No luck just pressed in too tight.
Might be able to rig up a puller but I learned I did not need to remove due to the new flywheel design.
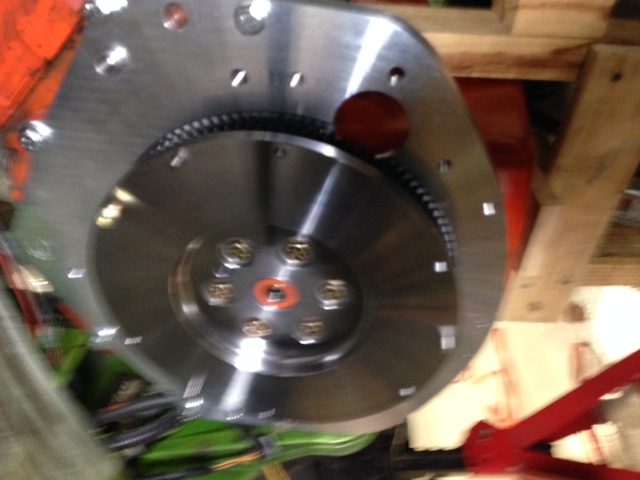
Posted by: jimkelly Jan 13 2019, 12:13 PM
might have to buy a new bushing/bearing from renegade.
got to remember this too..
https://www.youtube.com/watch?v=lMYqdU_2GnE
Posted by: jimkelly Mar 14 2019, 05:29 PM
pic of my garage. need to get something running soon. got 2 sbc v8 engines, 4 suby ej22 engines, 2 suby 5 spd transeseses, a 914 ss trans, and two 914 motors, BUT two 914 with empty engine bays. cleaned up some today, gonna clean out garage some more tomorrow and weather is gonna start getting reasonable very soon.
Attached thumbnail(s)
Posted by: Larmo63 Mar 14 2019, 06:41 PM
pic of my garage. need to get something running soon. got 2 sbc v8 engines, 4 suby ej22 engines, 2 suby 5 spd transeseses, a 914 ss trans, and two 914 motors, BUT two 914 with empty engine bays. cleaned up some today, gonna clean out garage some more tomorrow and weather is gonna start getting reasonable very soon.
Seems like to could cobble something together with all of that that would be fun to drive once in a while.
Posted by: sixnotfour Mar 14 2019, 07:34 PM
Dart Board,,,you cant make a choice..run with it.....


Posted by: jimkelly Mar 15 2019, 06:24 AM
the plan is to install the sbc 283 in the 1972 to replace the perpetually leaking 307. then put a suby eng/trans in the 1975, probably with microsquirt. i have one suby engine with a bad cylinder on test stand for the purpose of getting it running with microsquirt out of car. i'm also fooling with the idea are dual dellorto's on one of the suby engines with megajolt ignitiontion, making carb manifolds now. if i can get microsquirt car thru emissions, i can then swap in carbed suby engine. one step at a time, better weather, sbc 1972 car first. thought i would be organizing my garage some more today but my son is home under-the-weather, so that is on hold for today.
https://www.youtube.com/watch?v=VdUo-Ts4Acw
https://www.youtube.com/watch?v=8EzxmVG7hlU
https://www.youtube.com/watch?v=onpUtFlOrMc
https://www.youtube.com/watch?v=ZcODCwpyjEk
https://www.youtube.com/watch?v=lQdEMqg3ZdY
alternator and relay board pics from this thread
http://www.914world.com/bbs2/index.php?showtopic=340751
Attached thumbnail(s)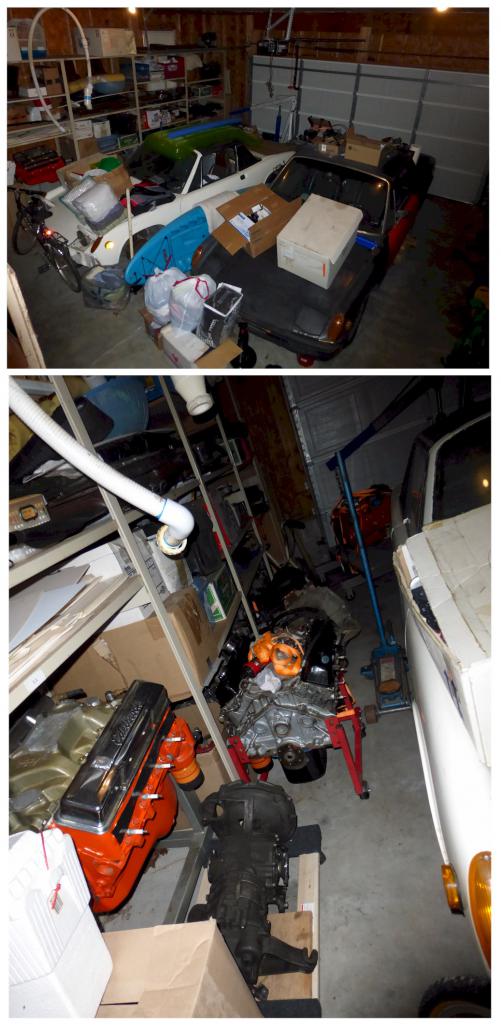
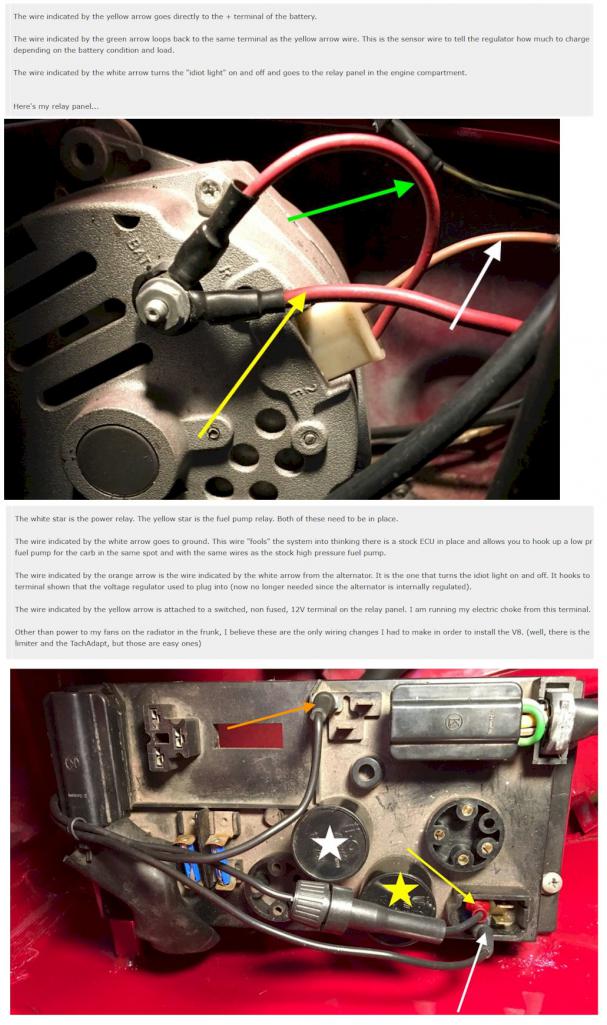
Posted by: jimkelly Oct 18 2019, 01:34 PM
made a little bit of progress today. donated a few things from my garage to the thift store to make some room. went to the local large liquor store to get my wife some boxed wine to save money for my hobby. last week at work i started on wedling up a run stand for my sbc based on mrhevyshevy. this week i will finish welding the bell housing mount i simply had to mark today for alignment. next i got to get engine on engine stand so i can flip it over and redo oil pan gasket, which is what grounded me a year or more ago : (
also, i am not looking forward to all the carbs i need to rebuild, 2 edlebroks, 2 dell 40s, 1 single weber 32/36, and if i am feeling extra wonderful, i got several sets of dual 34s.
https://www.youtube.com/watch?v=9_uLAJcsrLw
and a little carb cursing : )
https://www.youtube.com/watch?v=Gh3KZsPpJGA
Attached image(s)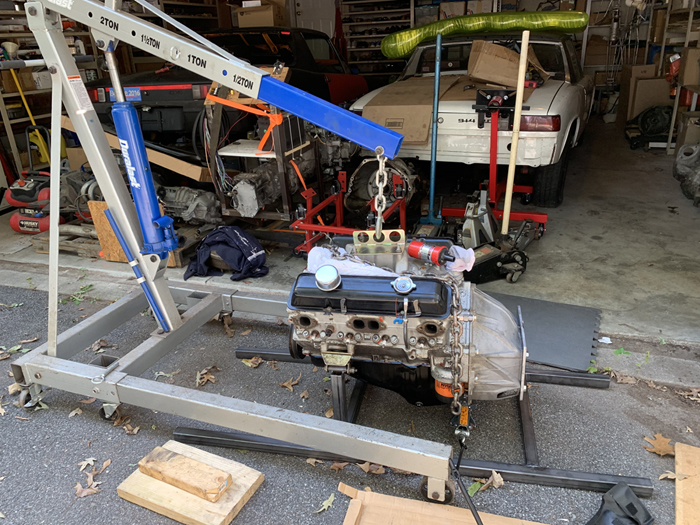
Posted by: Andyrew Oct 18 2019, 06:08 PM
I hate rebuilding carbs.... I feel like I have to rebuild them 3 times before they are truely clean...
Posted by: 76-914 Oct 18 2019, 06:42 PM
I hate rebuilding carbs.... I feel like I have to rebuild them 3 times before they are truely clean...
You need a Vat.
Posted by: Coondog Oct 18 2019, 07:37 PM
Your Thread post are some of my favorite
Posted by: mepstein Oct 18 2019, 07:50 PM
Keep the Delaware 914's on the road.
Posted by: jimkelly Oct 19 2019, 07:14 AM
thanks guys for the words of encouragement
i have a few subaru radiators (with fans) that have 1.5" inlets and outlets, and they have nice nipples at bottom for mounting, i'll make a mount frame and use these.
also, ordered me a rtv tube squeezer, should make doing oil pan gasket more FUNNER
Attached thumbnail(s)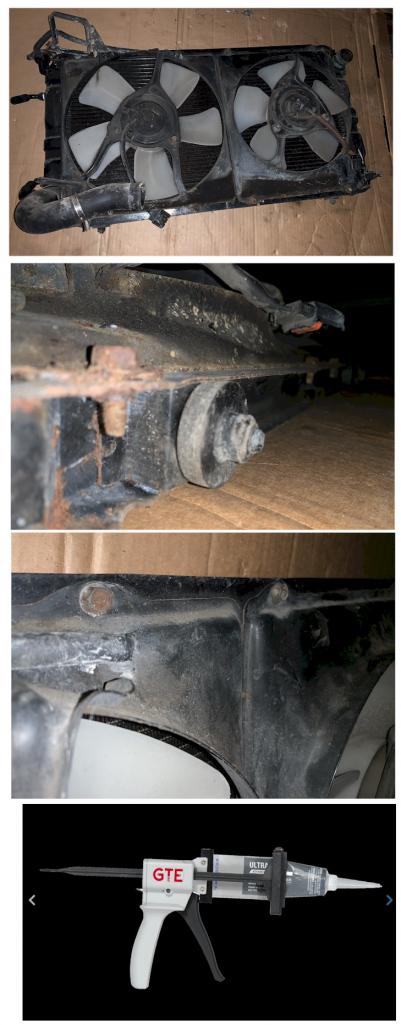
Posted by: jimkelly Oct 19 2019, 11:29 AM
went to ace and got some 3" 3/8-16 bolts and now its on engine stand. the rotate pin is real tight. i when i hoist engine up, pin becomes loose. i am concerned when i try to rotate this thing, it will be seriously top heavy and uncontrollable. never did this before.
pretty good video until he doesn't remove rotate pin or show his center point works well
engine stand balance pics for comparision.
https://www.youtube.com/watch?v=vztAJB1r6nI
Attached thumbnail(s)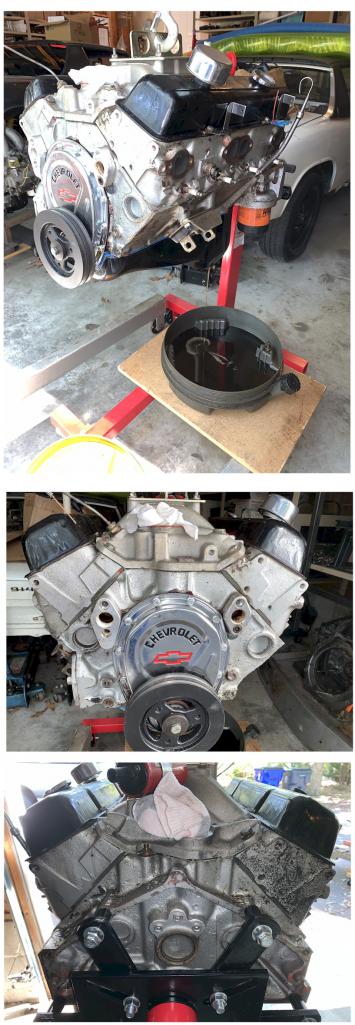
Attached image(s)
Posted by: jimkelly Oct 22 2019, 06:38 PM
one step closer to hanging that engine a bit lower/balanced on my engine stand so i can flip it over without any drama - and got me some grade 5 and 8 3/8-16 hardware from mcmaster carr.
Attached image(s)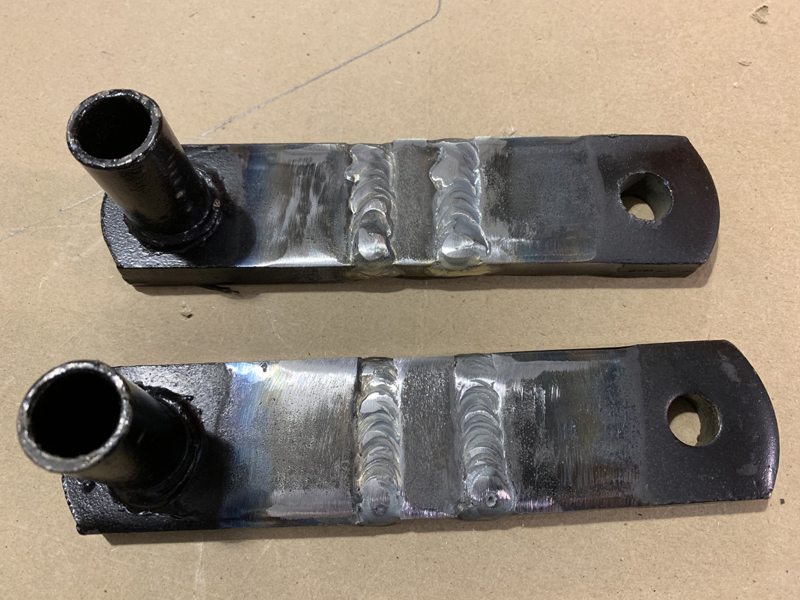
Posted by: rhodyguy Oct 22 2019, 06:42 PM
Do you leave it hooked to the hoist.? Looks dangerously close to the white car.
Posted by: jimkelly Oct 23 2019, 06:20 AM
i have not attached engine to stand yet cause i needed to lengthen 2 arms, so engine would be more balanced on it. engine is solely on hoist right now, and yes, dangerously close to my white one for the next few days only.
Posted by: jimkelly Oct 25 2019, 08:28 AM
whew, lengthened engine stand arms seem to have done the trick to balance engine on stand. i rotated engine up side down, uneventful. i was sweating it a bit. time for a beer even though it is only 1030 am east coast
Attached image(s)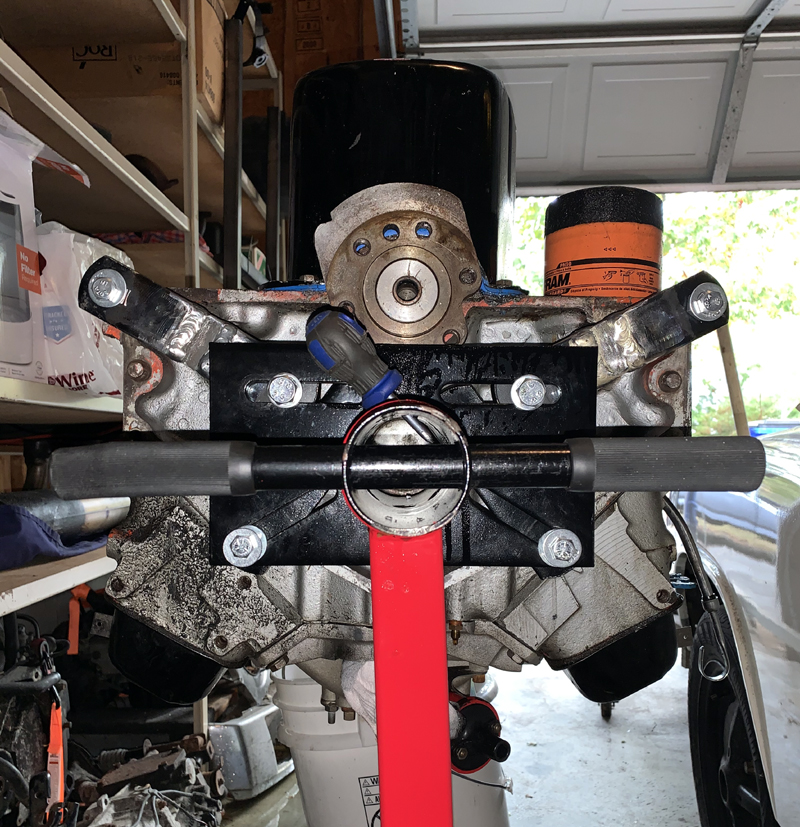
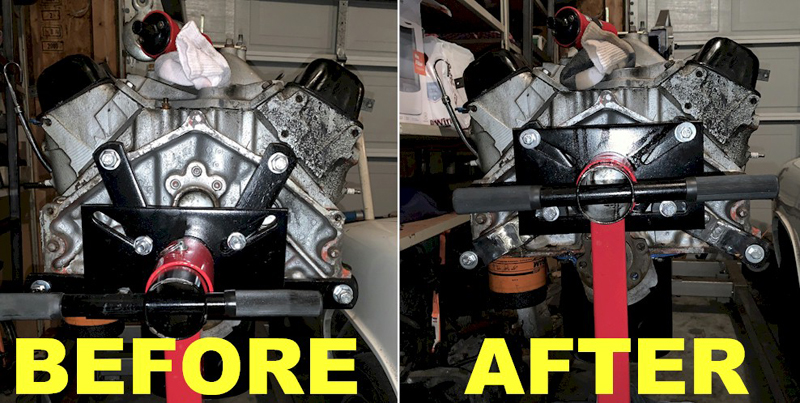
Posted by: DickSteinkamp Oct 25 2019, 09:20 AM
It is tough to flip it on an engine stand with the heads and intake in place. Your solution is great. I just don't attach (re attach?) the heads until I'm done on the lower end and the pan is back in place and the engine is right side up for the last time.
Posted by: jimkelly Oct 25 2019, 09:45 AM
thanks dick : ) once the oil pan is reinstalled, i'm gonna put onto engine: short chevy water pump like i had originally (one less belt), mechanical fuel pump too (one less thing hooked to electricity) , and iron ram horn exhaust manifolds (easier to get to plugs and more compact than the shorty headers i had on before). especially since i already have a nice big hole in my firewall for the pump : ) (old pic attached)
next week i am gonna weld up a frame for the radiator for my run stand and put some harbor freight wheels on it too.
Attached image(s)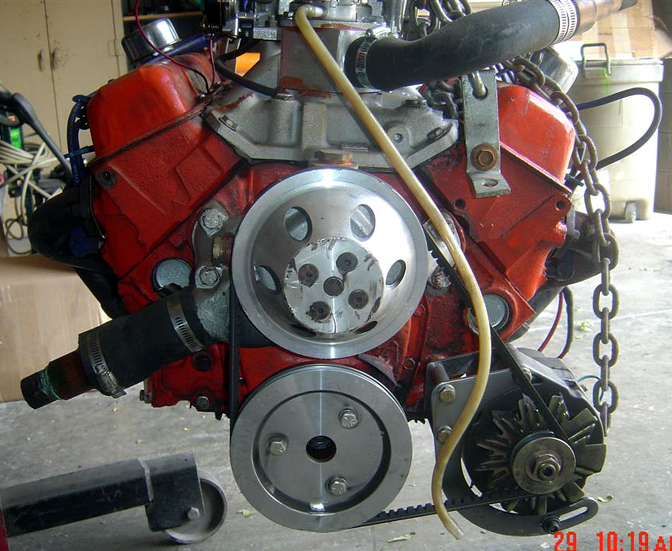
Posted by: DickSteinkamp Oct 25 2019, 10:11 AM
The mechanical pump is a great idea! Far safer than an electric.
Posted by: worn Oct 25 2019, 05:15 PM
thanks dick : ) once the oil pan is reinstalled, i'm gonna put onto engine: short chevy water pump like i had originally (one less belt), mechanical fuel pump too (one less thing hooked to electricity) , and iron ram horn exhaust manifolds (easier to get to plugs and more compact than the shorty headers i had on before). especially since i already have a nice big hole in my firewall for the pump : ) (old pic attached)
next week i am gonna weld up a frame for the radiator for my run stand and put some harbor freight wheels on it too.
Looks like an exciting build. How much weight of motor is on the stand?
Posted by: jimkelly Oct 25 2019, 05:27 PM
dont know but assume around 525 lbs cause intake is aluminum not iron (575).
https://www.corvetteforum.com/forums/c3-general/2016453-how-much-does-a-small-block-weight.html
https://www.youtube.com/watch?v=O4WRL513Gx4
Powered by Invision Power Board (http://www.invisionboard.com)
© Invision Power Services (http://www.invisionpower.com)