Printable Version of Topic
Click here to view this topic in its original format
914World.com _ 914World Garage _ rebuild after Willow Springs bump
Posted by: siverson Sep 2 2011, 09:41 PM
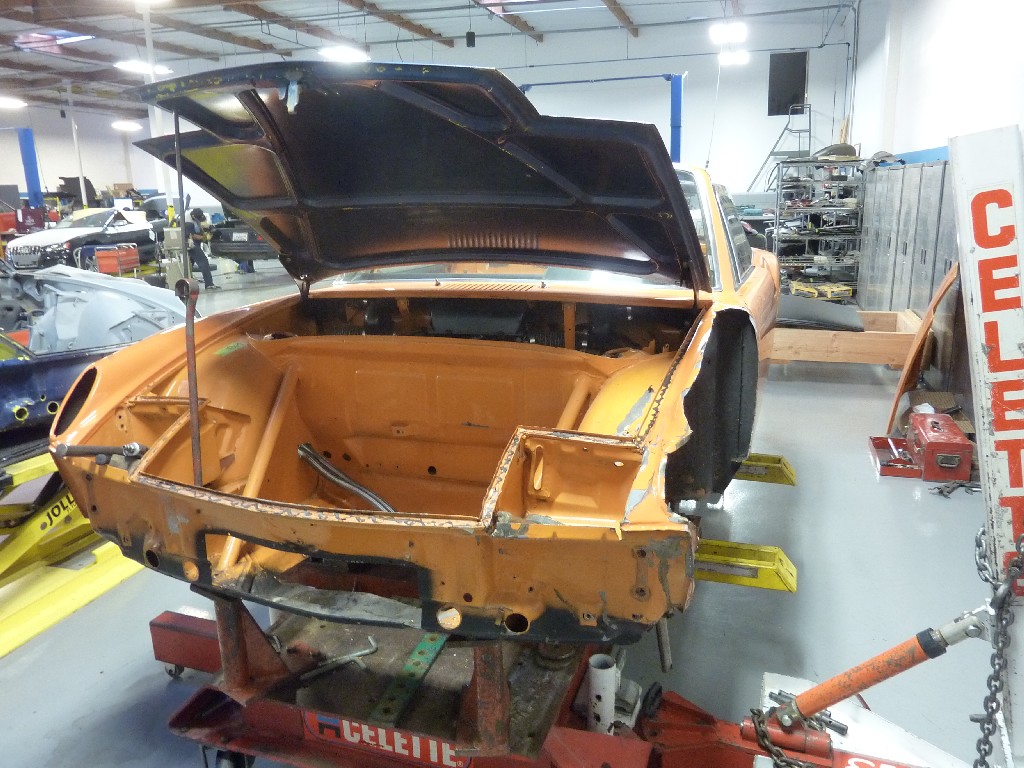
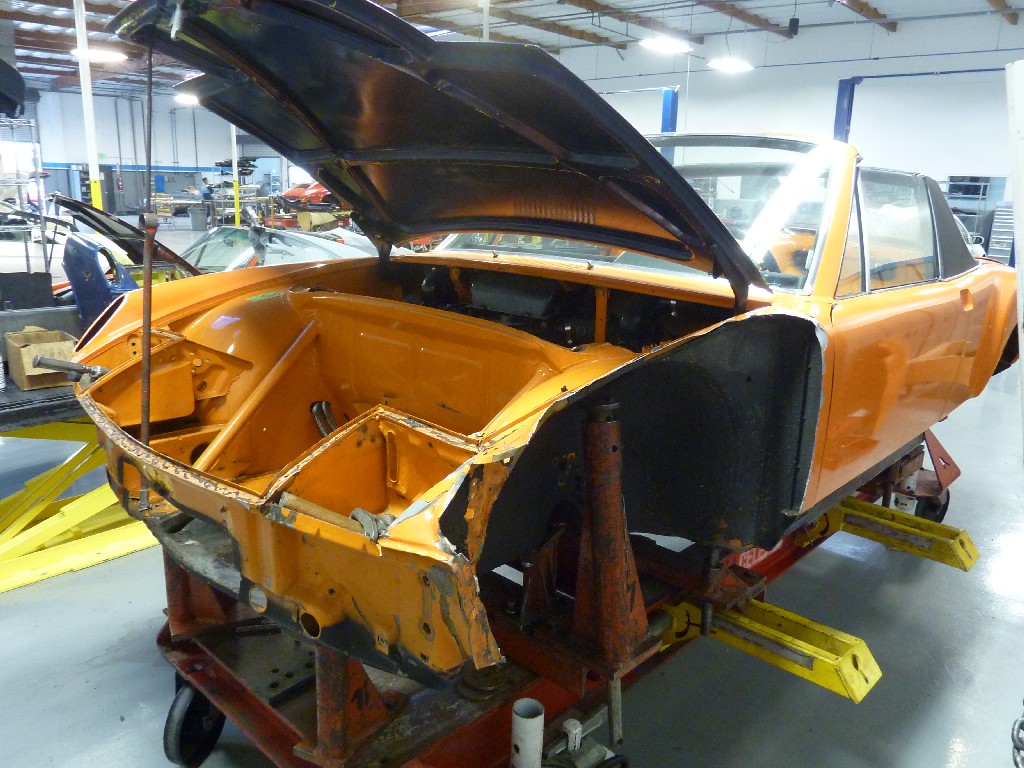
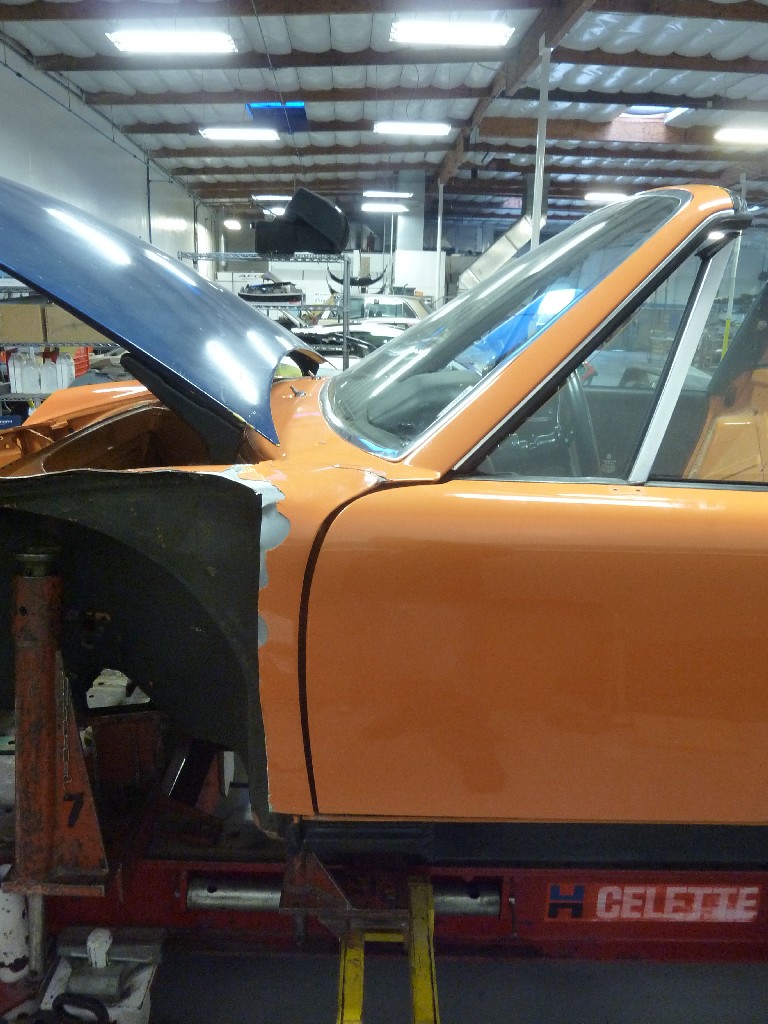
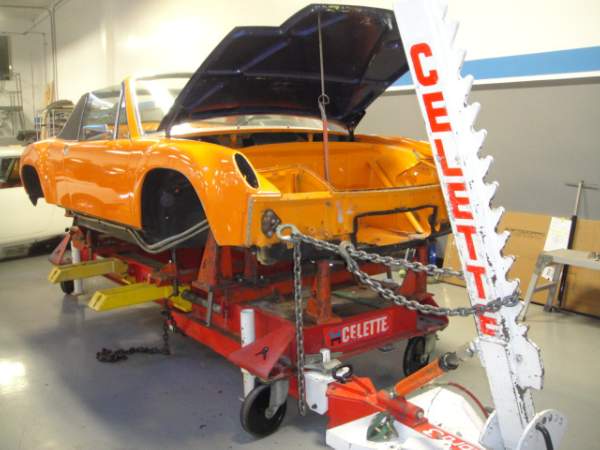
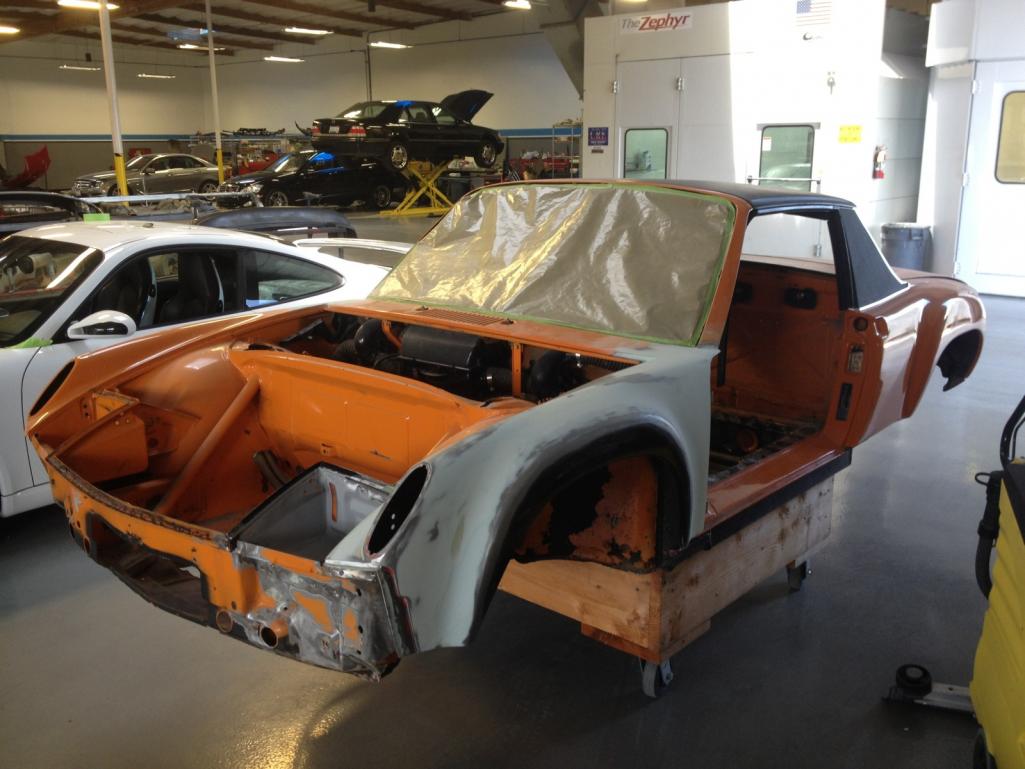
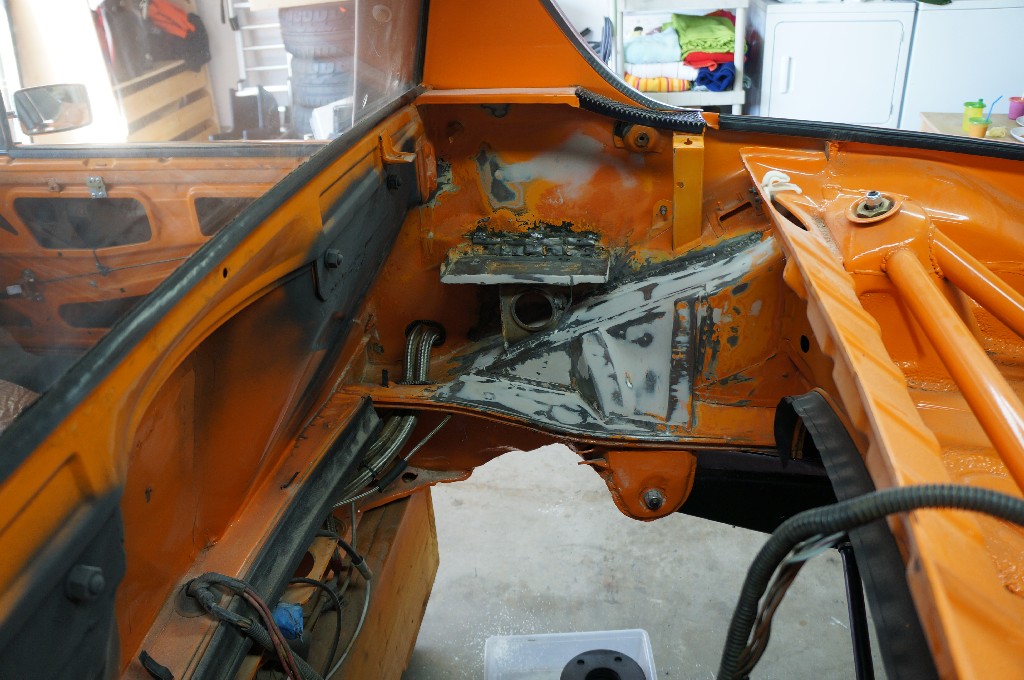
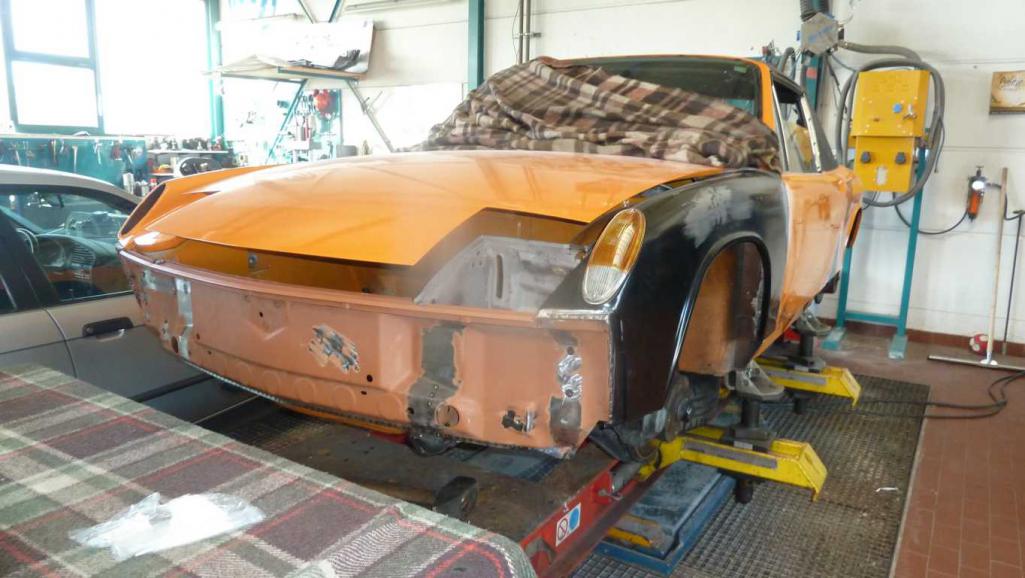
I've been slowly sorting through the mess I made for myself about a month ago at Willow Springs, and have 1 quote to fix the dent.
I'm trying to decide between (A) repairing my chassis, and (B) getting a new chassis and moving all my parts over.
I feel ridiculous even considering scrapping my chassis when I see some of the crazy "rustoration" threads here, but the fact is it's probably going to be about the same cost to straighten this chassis versus buying a donor chassis/car and building it back up.
I'm going to take this "opportunity" to fix/improve some other things on the car while I have it all apart, but I need to figure out my chassis plan first. Here are my options:
A: If I repair my current chassis ($10k - $12k):
- Find front clip
- Remove Brad Meyeur kit (to be replaced with Engman kit)
- Remove/cut existing reinforcing tubes
- Celette bench, weld new clip
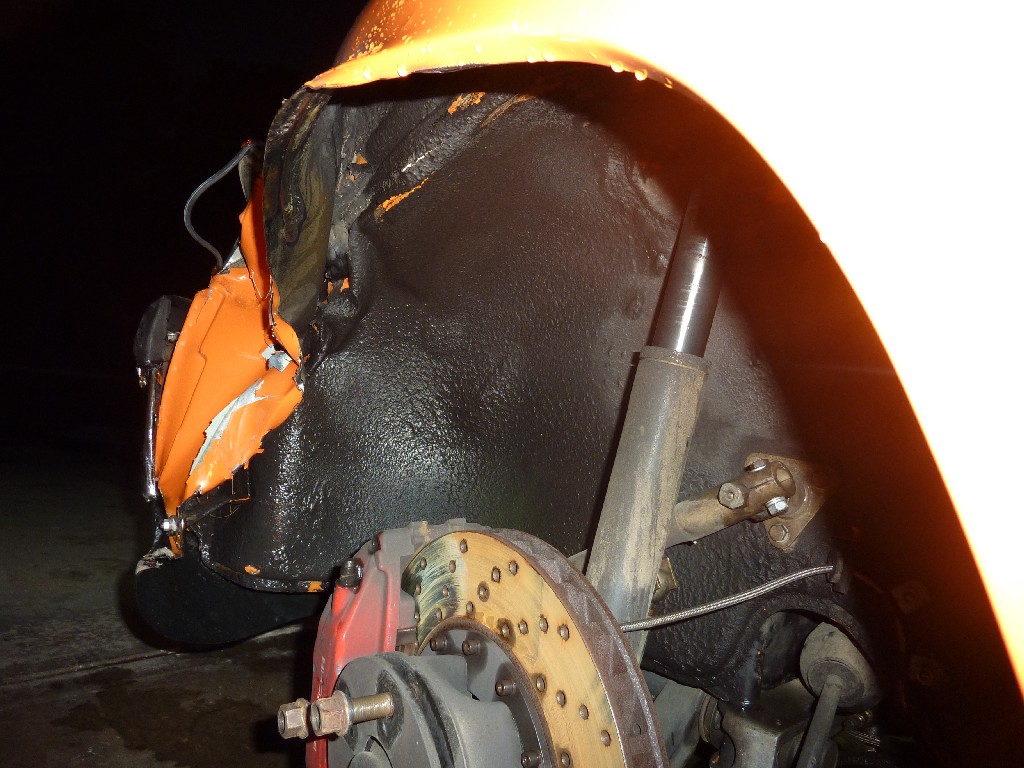
- Fix front right fender/flare (it was also damaged, that strut broke)
- Add Engman kit
- Add back reinforcement
B: Build up a donor car/chassis and move over all my parts ($10k - $15k):
- Find a donor car/chassis
- Remove all rust/prep chassis. Rust repairs.
- Add 4 steel GT flares
- Maybe also put this one on a Celette bench first too to make sure it's straight.
- Add Engman kit
- Add chassis reinforcement
- Lots of small modifications I had already made: lower drivers floor/seat, close up a bunch of unused holes/make it cleaner, lots of seam welding, dash modifications, etc, etc
... plus full R&R on the front suspension/etc, but I need to do that regardless of my chassis plan.
With A it "my" original car, but with B I actually think I might end up with a nicer end result because I'm going through almost everything again, but it's probably a little more money and A LOT more work for me (versus 95% of A is just me writing a check). Am I off on my prices?
So, what do you think? A or B?

-Steve
p.s. And... the other strange factor is that this car/chassis was my first car and I've had it for almost 20 years. But, given how much I've already modified the car, most of those "original" parts aren't there anyways. I think if I got a new chassis and moved over all my parts, it would still feel pretty much like "my" car... I'm not super attached to that specific VIN... Or am I? 
[attachmentid=272618]
[attachmentid=272617]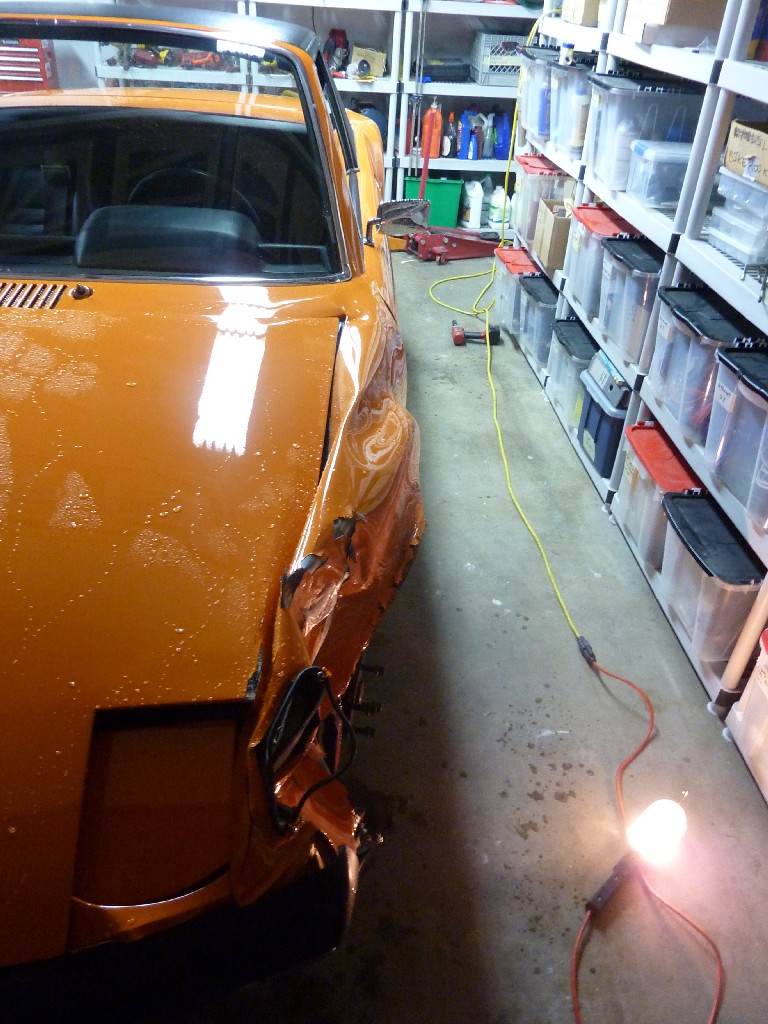
Posted by: siverson Sep 2 2011, 09:44 PM
914
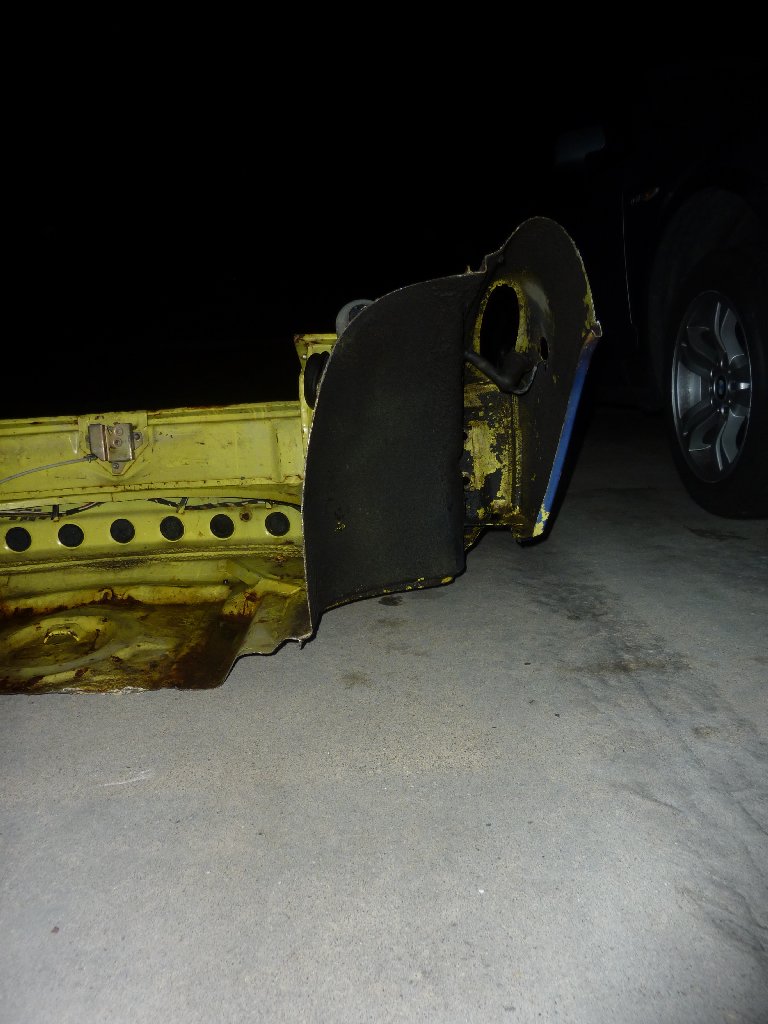
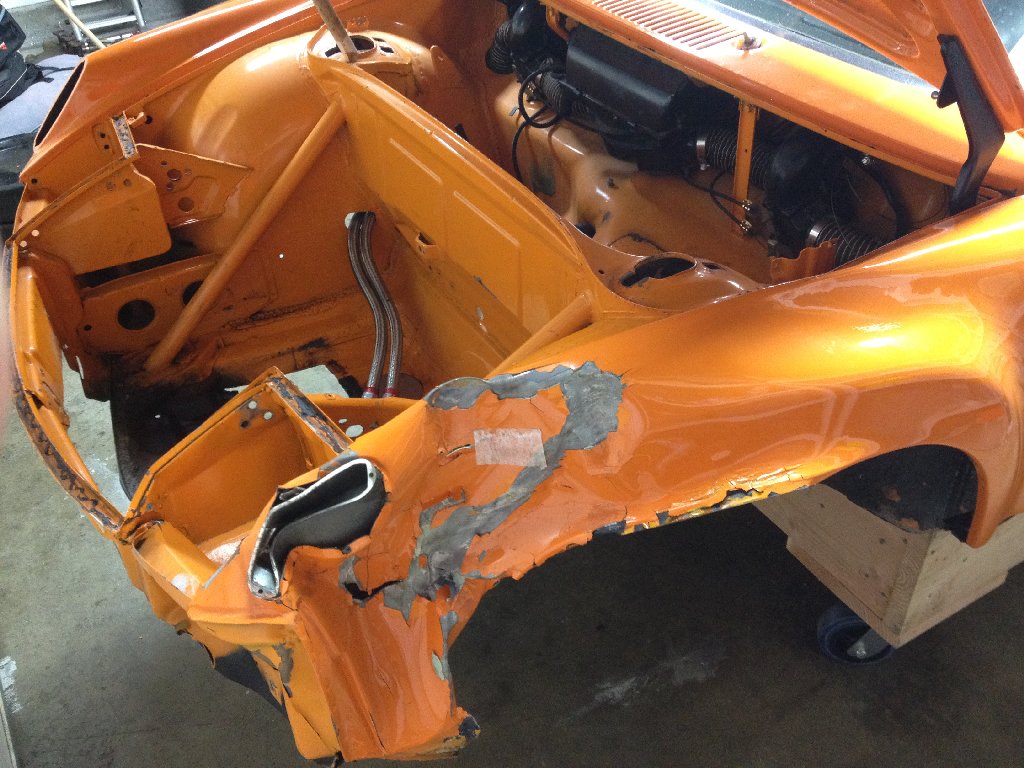
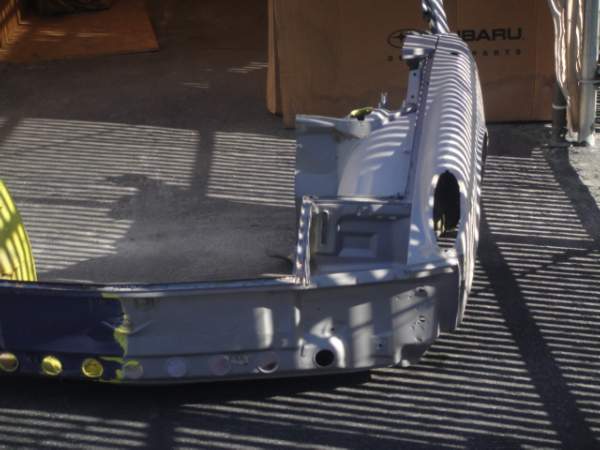
Posted by: siverson Sep 2 2011, 09:46 PM
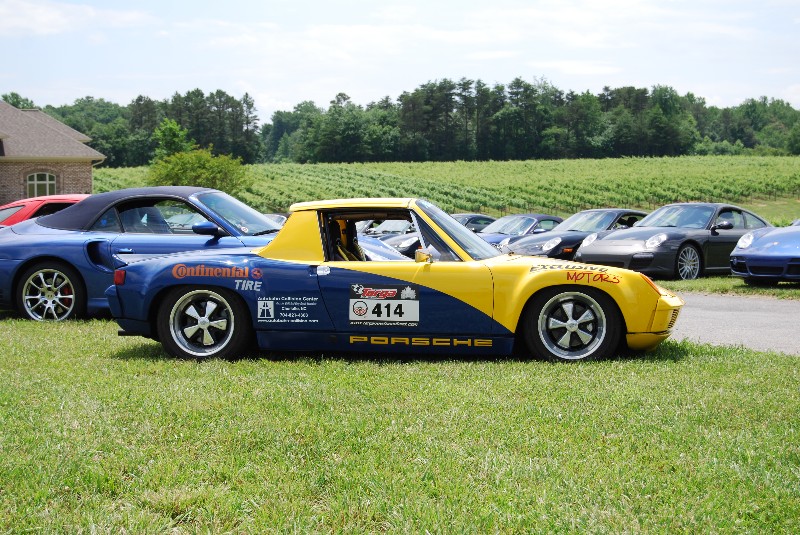
A couple hours earlier...
That front bumper had been built and chromed about 4 months ago...
Attached image(s)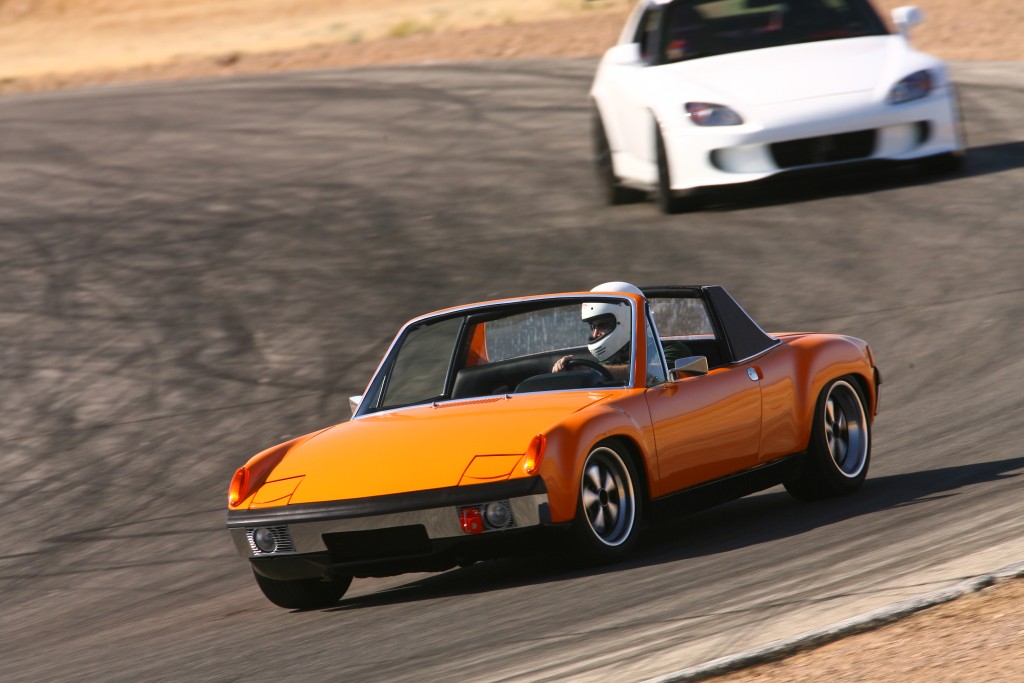
Posted by: Loser_Cruiser Sep 2 2011, 09:47 PM
I have been facing the same dilemma, unfortunately my original chassies wasn't as nice as yours. I decided to just start with a new chassies.
Is that a 915 and what shifting mechanism is that?, sorry for the ot question.
Posted by: siverson Sep 2 2011, 09:51 PM
> Is that a 915 and what shifting mechanism is that
Yes, 84 915 w/ factory LSD and Vellios "916" kit. It was the best option at the time (1997), but I think their are better options now (Wevo, etc).
-Steve
Posted by: shuie Sep 2 2011, 09:51 PM
A.
You know for sure what you are dealing with, you know your $$$ estimate is solid, and you know that the rest of the car is already done. And, it wil make for a better story 
Posted by: 1970 Neun vierzehn Sep 2 2011, 10:05 PM
If you have 100% confidence in a proper, correct repair under scenario "A", then I would go that route. That car has history, will now be resurrected and put right, and will then continue to provide pleasure (and frustration to a degree) and just add to the cars' "provenance". Yeah, that's a sentimentalist point-of-view, but you must admit that you are somewhat attached to the car after all those years.
Paul
Posted by: Valy Sep 2 2011, 10:52 PM
Sorry to see your car.
Been through something similar.
Your biggest problem are the reinforcements that passed the stress to the rest of the car so everything is off.
It's _very_ difficult to fix and it will never have the same stiffness again. Best you can expect from the fixed car is a crippled DD.
I see that you like to race/AX/enjoy the car so, if you have the patience and time, buy a new chassis.
Also consider that you'll have to strip the care to the bone anyway. I bet that fixing your chassis will be more expensive then painting a new one.
Posted by: ellisor3 Sep 3 2011, 03:14 AM
I like A too. It's the devil you know vs. the one you don't. Beautiful set up.
Posted by: rick 918-S Sep 3 2011, 08:10 AM
That's a tough call and toss of the coin. If you decide to strip your chassis and transfer the parts to another car. I will buy your bent shell. I have a trailer and can come and get it.
Posted by: siverson Sep 3 2011, 08:56 AM
> It's _very_ difficult to fix and it will never have the same stiffness again.
The shop that would do the work (European Auto Body in Escondido) knows 914s and I think would do great work.
I had that same concern. What do others think on this? Does a straightened chassis lose a lot of its strength? I was thinking that by adding reinforcement (and maybe more than before for a semi-tube frame build) that the car could get be even stiffer than before. But would those same reinforcement on a new chassis be even better...
Hmmmmm...
-Steve
Posted by: mepstein Sep 3 2011, 09:18 AM
Remember, once this is all fixed up, there is nothing preventing it from happening the very next time you get on the track. At least accidents on the road are usually covered by insurance. You might want to decide how much you can afford to write off on a racecar when you plan the next build/rebuild.
Either way, best of luck. mark
Posted by: tscrihfield Sep 3 2011, 09:34 AM
Steve,
1st of all. Sorry about the car!
Just my $.02... This car can be repaired... You are going to need a frame puller and a lot of jig building. Judging by how far that the roof is tweaked makes me think that the damage is further into the car than the nose. Inspect the longs and see if there are kinks in them or creases. If there are post photos of them. If they are ~ shaped than that means you have some shrink, that means somewhere else you have stretch... Not the end of the world because folks have been fixing that sort of thing since the beginning of auto repair... But it may mean replacing some pieces that you didnt anticipate. I do agree with your statement of strength though. After an impact it is very hard to get the car back to the rigid piece it once was, not that these 914's are super rigid to start....
I would say rebuild if you can! That car is very nice!
Thomas
Posted by: Brett W Sep 3 2011, 10:04 AM
W are talking steel here. If the chassis is properly pulled by someone who understands these chassis there is no reason it can't be pulled back to where it should without overworking the metal. Once the chassis is in line on the Cellete and it has been checked to make sure the chassis is straight, then putting it back on the Cellete and welding in the reinforcements will pose no problems and you can make the chassis stronger than it was before. The cost difference is pretty much irrelevant. The chassis swap would be easier, because your not having to go backwards, but there would be more work involved in getting the chassis back to where the current one is.
To me it seems like a toss up. If I were doing the work I would find starting with another chassis easier, but either way can be done.
Posted by: siverson Sep 3 2011, 10:38 AM
> You are going to need a frame puller and a lot of jig building.
Yes, we know we have to put on on a Celette bench with the 914 fixtures.
> Remember, once this is all fixed up, there is nothing preventing it from happening the very next time you get on the track.
Yup, as much as I love driving this car on the track, I think this accident has ruined it for me. I don't do track days often, but if I go again I'm going to get a $15k boxster (or something) that can be my simple "track car". Not that I want to throw $15k away crashing a boxster either, but in retrospect I'd feel A LOT better about wrecking a $15k boxster than causing $15k of damaged to this car. This car was too nice for the track (nice paint, leather, etc) and I drive it 99% of the time on the street anyways.
-Steve
Posted by: BajaXJ92 Sep 3 2011, 12:16 PM
Steve,
Sorry to see this. As stated before you've got one of my favorite 914s around.
I guess your tough situation comes down to the question of how sentimental you are about this chassis? If you're confident in your shop's work that they can straighten this one back out, go for it. As you stated before, you'd be putting the rolling chassis on a cellette anyways. Keeping it seems like a whole lot less work.
One thing I didn't see you mention in your approx. cost is paint. I can't imagine it'll be easy paint matching panels, but I guess that depends on how old your paint is. Would you repaint the whole chassis?
If you do get a wild hair, Racer Chris has a Ravenna Green chassis located in CT: http://www.914world.com/bbs2/index.php?s=&showtopic=141802&view=findpost&p=1533132
I'm not sure how fond you are of Ravenna Green, but I think it'd look awesome if you swapped everything over.... 
Good luck!
Posted by: computers4kids Sep 3 2011, 12:17 PM
Steve,
I'm so sorry to hear about your car--I've always admired your sense of detail and perfection for afar.
Question: Your dime or insurance? I ask because, will you end-up with a "salvage" title? To me that is a deal breaker for fixing the car. I know it really doesn't mean a thing for those who understand, but it just becomes a dark cloud that follows the car.
I know your car will be awesome once again even if you fix it.
Mark
Posted by: sean_v8_914 Sep 3 2011, 01:31 PM
man, this sucks big rotten goose eggs! Professional consult is required here to make a sound descision. call Trever! let him look it over with his experienced eyes. he loves 914s like us but he will give a fair dose of reality about this chassis...good or bad.
Posted by: sean_v8_914 Sep 3 2011, 01:34 PM
the bend may be at the A pillar and forward only. this woujld affect B pillar door gap and could be isolated damage forward of the B pillar...
Trever AKA "TWISE" will know as soon as he sees it (European Auto Body)
Posted by: Als914 Sep 3 2011, 02:17 PM
Sorry to see such a nice specimen in any accident. IMHO, do all you can 

 to save it since you've owned that vin number for twenty years...not many can say that about their 914's.
Posted by: siverson Sep 3 2011, 02:26 PM
> Trever AKA "TWISE" will know as soon as he sees it (European Auto Body)
Yup, it's there now and where I got my quote. Their advice is pretty much the same - they can definitely straighten it, but they can also build a new chassis/flares and the cost will be about the same...
So we know it can be straightened, and also think they do great work, but what's the right decision. I am leaning towards fixing this chassis, but I'm not in a huge rush to make a decision either.
-Steve
Posted by: siverson Sep 3 2011, 02:28 PM
> Question: Your dime or insurance? I ask because, will you end-up with a "salvage" title?
My dime, and no, there would not be a salvage title.
Posted by: Lou W Sep 3 2011, 02:37 PM
Wow Steve  what a bummer, I've always been impressed with your car. It's funny, initially, I felt B, but since you mentioned that you probably won't do the racing as often once you rebuilt it, I'd probably go with A. There is a sentimental attachment to the car for you.....just like I have with mine. Now if you were going to continue racing it, then that attachment kinda goes away, then I would have said B.
Posted by: sean_v8_914 Sep 3 2011, 03:54 PM
I have helped several guys find a clean donor chassis. it is getting harder to find low rust donors
Posted by: siverson Sep 3 2011, 03:59 PM
> initially, I felt B, but since you mentioned that you probably won't do the racing as often once you rebuilt it, I'd probably go with A
Why do you think that?
Honestly, I think I'd want a car that I'm going to track to be even stiffer and safer than a street car. I've never quite understood that... ?
And... I'm still not convinced that the repaired chassis with reinforcement still wouldn't be very, very stiff.
I'm been toying with the idea of building some sort of "half cage" this time around (door height and lower, and as easy as possible to get into (with a cage)). I'm still not likely to track the car again, but want the car to be stiff and correct.
-Steve
Posted by: siverson Sep 3 2011, 04:09 PM
> it is getting harder to find low rust donors
No kidding, I have been looking around just to see what's available (even if just for a front clip), and so far... not much!
Posted by: siverson Sep 3 2011, 04:11 PM
old photos...
Posted by: Valy Sep 3 2011, 04:26 PM
Maybe this point of view will help:
Let's assume you want to buy a 914. You found 2 identical cars that are just what you were looking for and priced the same. The only difference is their history:
- One car was completely rebuilt using some beautiful parts from a concurs car that was damaged in an accident.
- The other car was severely crashed, cut in two and a front clip from some other damaged car was welded in. The combined chassis was measured and aligned using the best available tools.
I would pick the first one without blinking and I'm sure all those who commented on this thread will do the same.
Why would anybody prefer something that was damaged when a perfectly good alternative costs the same ?
And from my past experience, trust me, that old car of yours will never be the same.
Sorry about the old car but I believe it's for your own benefit.
Posted by: Lou W Sep 3 2011, 04:55 PM

Maybe this point of view will help:
Let's assume you want to buy a 914. You found 2 identical cars that are just what you were looking for and priced the same. The only difference is their history:
- One car was completely rebuilt using some beautiful parts from a concurs car that was damaged in an accident.
- The other car was severely crashed, cut in two and a front clip from some other damaged car was welded in. The combined chassis was measured and aligned using the best available tools.
I would pick the first one without blinking and I'm sure all those who commented on this thread will do the same.
Why would anybody prefer something that was damaged when a perfectly good alternative costs the same
?And from my past experience, trust me, that old car of yours will never be the same.
Sorry about the old car but I believe it's for your own benefit.
Good Point, maybe that's the way to go, can I revote?
Posted by: siverson Sep 3 2011, 09:43 PM
> cut in two and a front clip from some other damaged car was welded in.
I'm not sure if that's exactly the plan, but I'll find out more details next week. I think the idea is to graft in a corner, but regardless it still could be ugly.
Posted by: Brett W Sep 3 2011, 09:58 PM
How do you deal with the glass?
Posted by: siverson Sep 3 2011, 10:16 PM
> How do you deal with the glass?
Have new glass made? I really have no idea, but I'm sure it could be done...
I'm just brainstorming, but it is interesting.
Posted by: rick 918-S Sep 3 2011, 11:56 PM
Seriously, Repair the chassis you have. You know the car, You just had it painted so color match shouldn't be an issue.
The car looks worse than it is. Really, I would leave all the welded body panels on the car, drop the engine and front and rear suspension, gas tank, dash, ect.
Get it up on the Celette and pull the car. You will need to remove the tubing stiffeners. It will pull easier with them cut out. One the chassis is stress relieved and the front sheet metal is as pre-dimensioned. THEN remove the left fender, both headlight buckets and front nose panel. The rest is simple.
If your not putting the car back on the track forget all the extra tubing. You won't need it. Besides, it's dangerous in a street car. Just check over the chassis spot welds for signs of stress. If the spot welds were stressed you will see it. Seam weld the area or drill and plug weld the area and you'll be fine.
That was a beautiful and it can be just as nice again.
Here's a thread I have started on Sandys Ravenna car. The one was headed for a sawsall party. I saved the fenders. They werte totally kinked.
Posted by: cwpeden Sep 4 2011, 01:50 AM
What does your little girl think?
.....Remembering 914 day, July 26th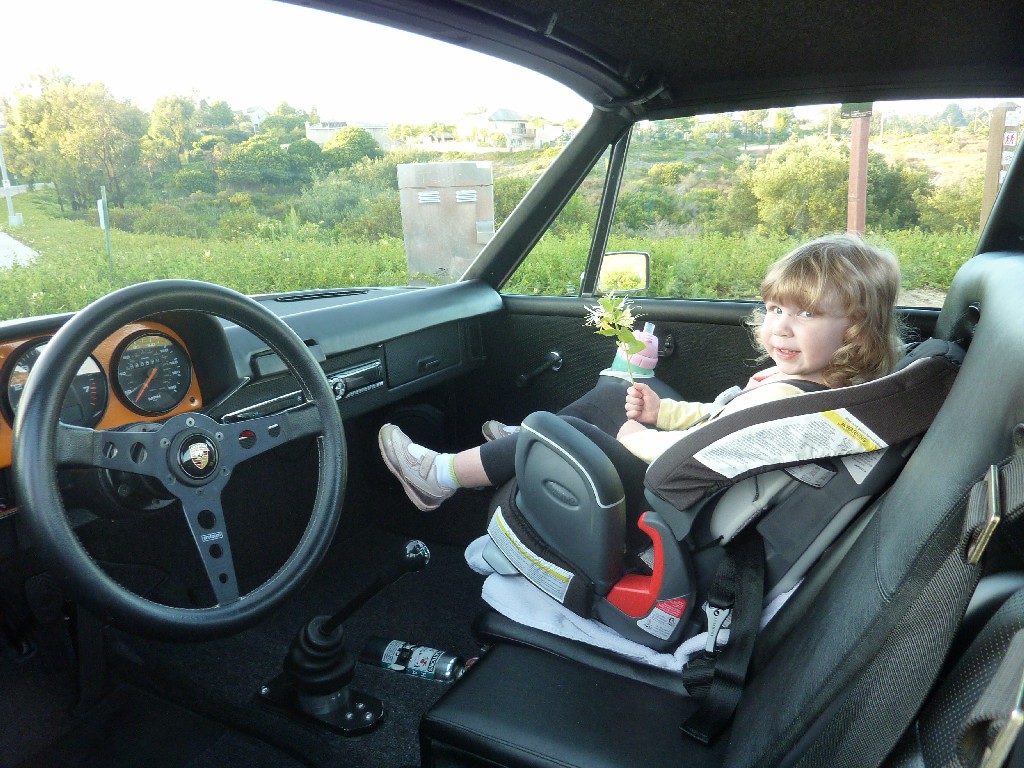
Good choice, whatever you decide. The only bad desicion I've ever made was to not drive my 914 when I could have.
Conrad
Posted by: nsr-jamie Sep 4 2011, 06:12 AM
Whoa, I am so sorry to see that and shocked...you car was seriously beautiful and kind of like how I wanted to build my car if I had the money...I am very sorry but I hope you decide to rebuild it and not swap parts to another chasis...good luck to you.
Posted by: rick 918-S Sep 4 2011, 07:18 AM
Here's a walk down memory lane.
Attached image(s)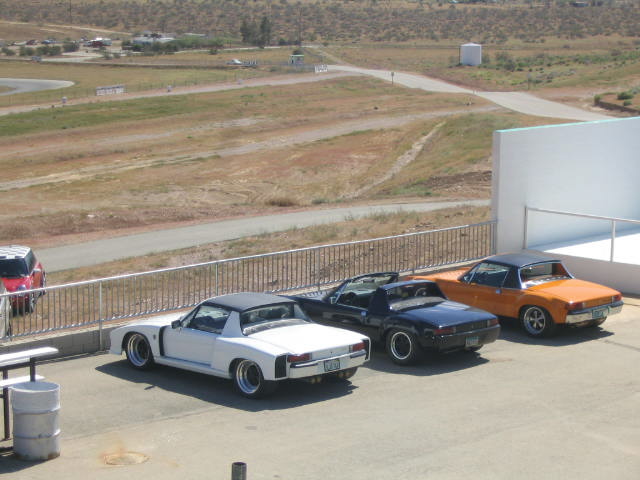
Posted by: veltror Sep 4 2011, 10:49 AM
> it is getting harder to find low rust donors
I assume my car is out of the question then...
Posted by: sean_v8_914 Sep 4 2011, 12:43 PM
I would fix it. while a celette bench would obviously be best I do not think it is a mandatory tool to get it straight.
those diagram/pics show alot of extra steel being added that dont do you any favors street or track.
a street car should be allowed to crush to manage deceleration of impact. this absorbs energy that will not be transfered to the ocupant
Posted by: siverson Sep 4 2011, 04:59 PM
> veltror
> I assume my car is out of the question then...
You are exactly who I was thinking of when I've been considering a chassis swap. I mean, how could I give up my this chassis when I look at what you are working with?!?!
> Sean
> those diagram/pics show alot of extra steel being added that dont do you any favors street or track
Several of those pictures/reinforcement designs are from pretty well respected builders. Do you really think they are worthless additions or ? What about the Engman kit?
-Steve
Posted by: sean_v8_914 Sep 4 2011, 11:01 PM
each example must be discused in context of the car its in. whats good for a car with a cage is different than what is needed in a non caged car. we should optimize based on how we will use our car.
Posted by: gopack Sep 5 2011, 09:48 AM
Steve, I sent you a PM
Posted by: r_towle Sep 5 2011, 02:11 PM
Fix it.
You never had a straight chassis to begin with...so some TLC on a cellete will deliver you a really straight chassis.
If its apples for apples, I would invest in the time on a bench to adjust a few other things (aside from fixing the damage) and you will end up with a better car in the long run.
Rich
Posted by: 396 Sep 5 2011, 11:29 PM
All the best with either decision...It was great seeing you at the event...maybe next time I will be running with you in the fast group.
Posted by: siverson Sep 5 2011, 11:32 PM
> I would invest in the time on a bench to adjust a few other things (aside from fixing the damage) and you will end up with a better car in the long run.
Hmmm... That makes sense but there sure are conflicting opinions on this. It does seem to me that that the fixed car could be even straighter/stronger than a stock car that never had any damage or extra work done, but there others who say the opposite is true (it will never be "right").
Sort of like "blue printing" a factory engine... A blue-printed and rebuilt engine can be better than a 100% stock factory engine, right?
-Steve
Posted by: poorsche914 Sep 6 2011, 08:37 AM
Talk to Bob Saville about Huey...
Wrecked at Targa Newfoundland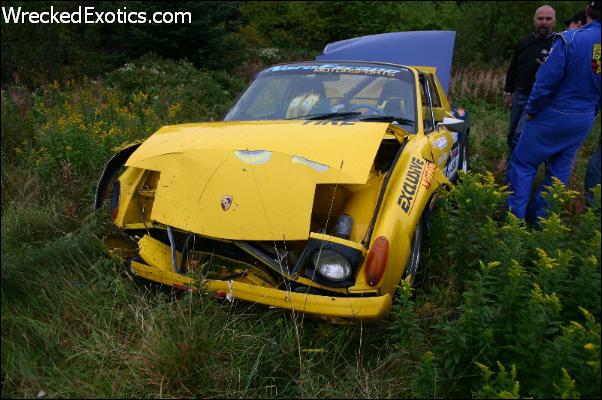
Now autocrosses and shows
Posted by: Dave_Darling Sep 6 2011, 09:12 AM
1- It wasn't "right" from the factory. Or at least, it wasn't perfect. These cars were made by hand on a production line, and none of them is exactly right.
2- It looks like you have extra tubes; a car with those in place will be stronger than any original 914 if the tubes are in a reasonable place. If you're worried about strength, then put in more tubing in the right places.
3- If you do the work on a bench with the correct fixtures, it will be at least as straight as when it rolled off the showroom floor.
I say fix what you have. In the end, it will be straighter and stronger than a fresh shell, as long as the people doing the work know what they're doing.
And this is also time to pick a good shop to do the work, and then listen to them. If a good place digs into the body and tells you it would be better to get a new shell, then ignore all of us "experts" who haven't actually seen the car and get a new shell.
--DD
Posted by: sean_v8_914 Sep 6 2011, 09:23 PM
I sure hope ya fix it.
did Trev see it yet?
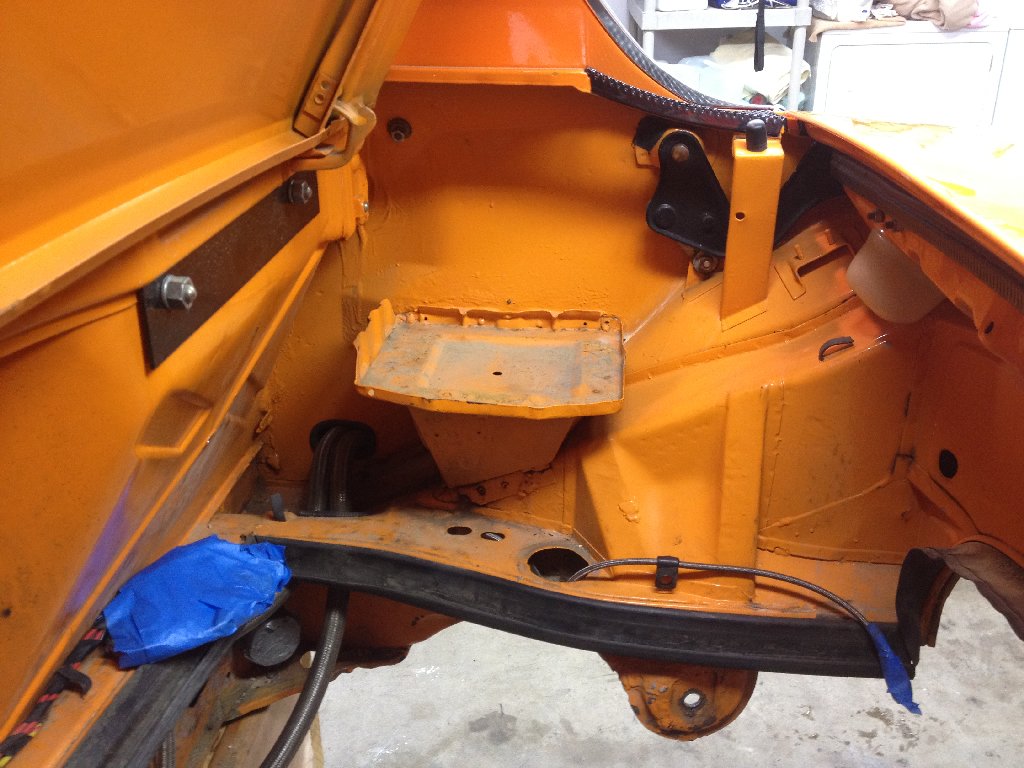
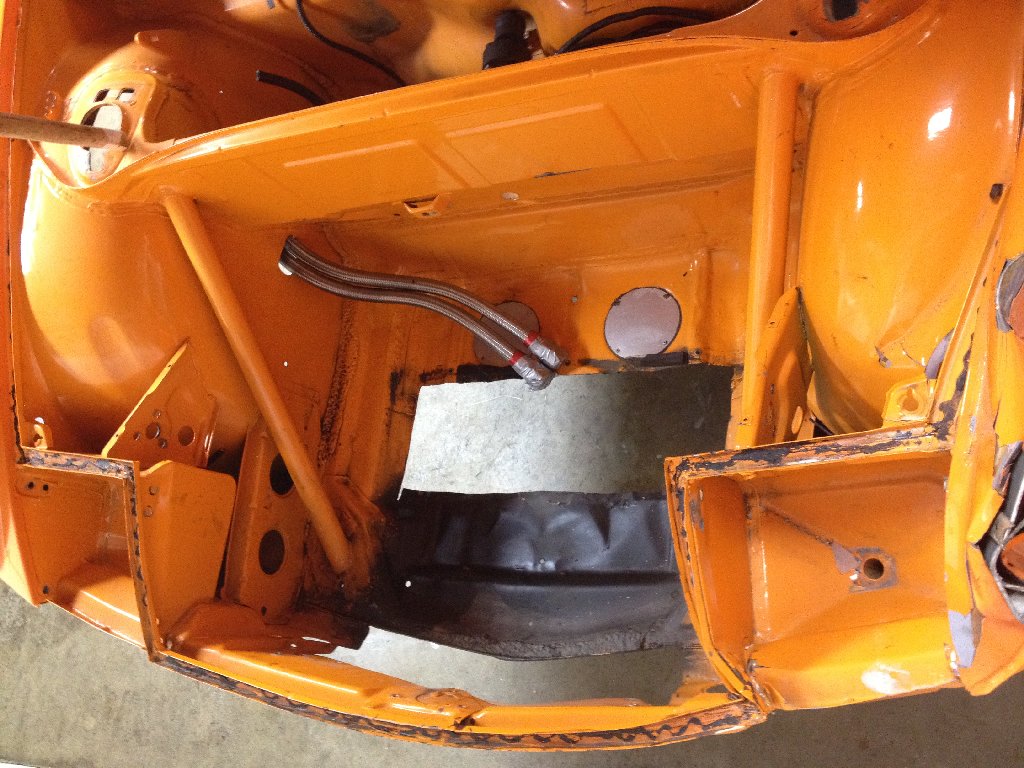
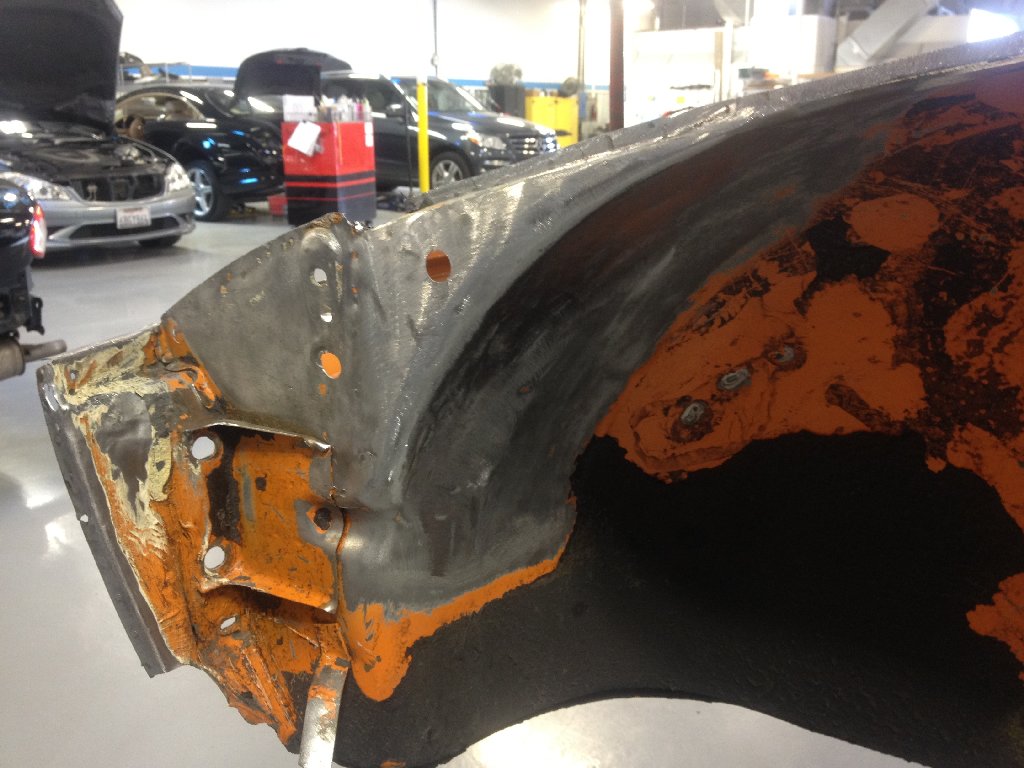
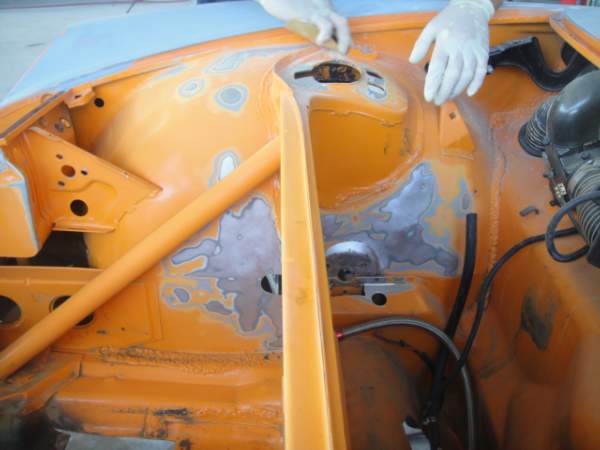
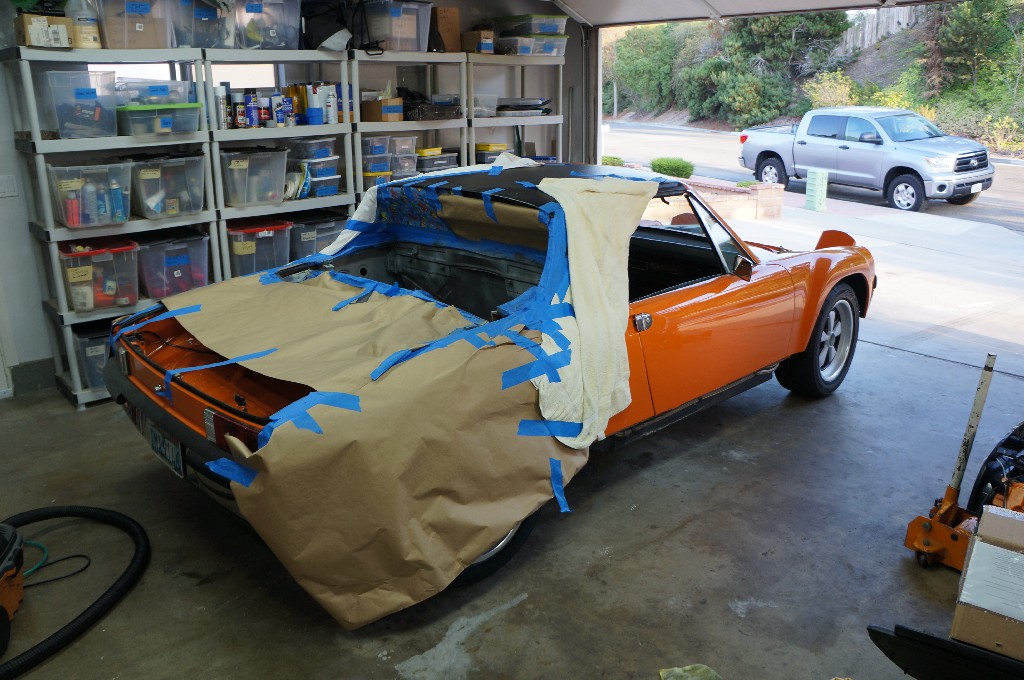
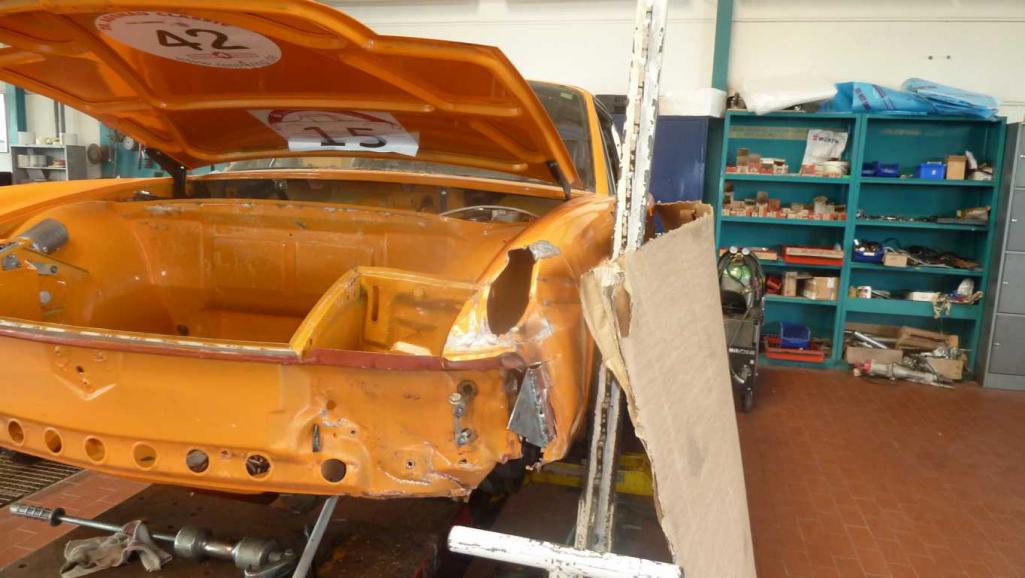
Posted by: siverson Oct 4 2011, 10:50 PM
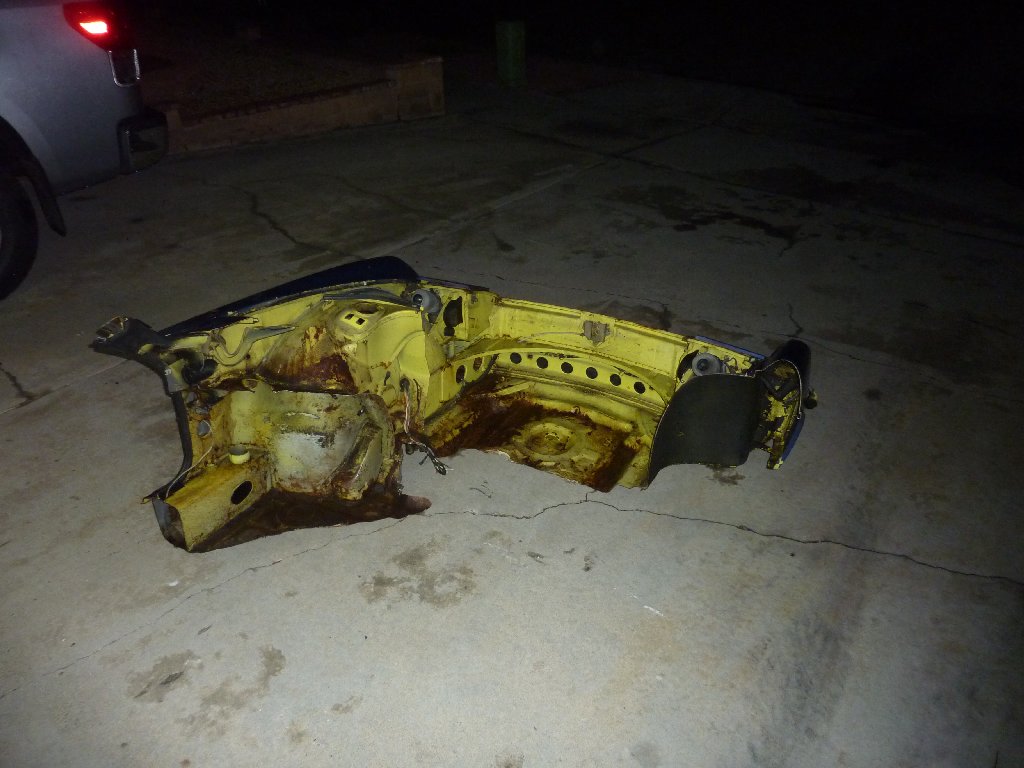
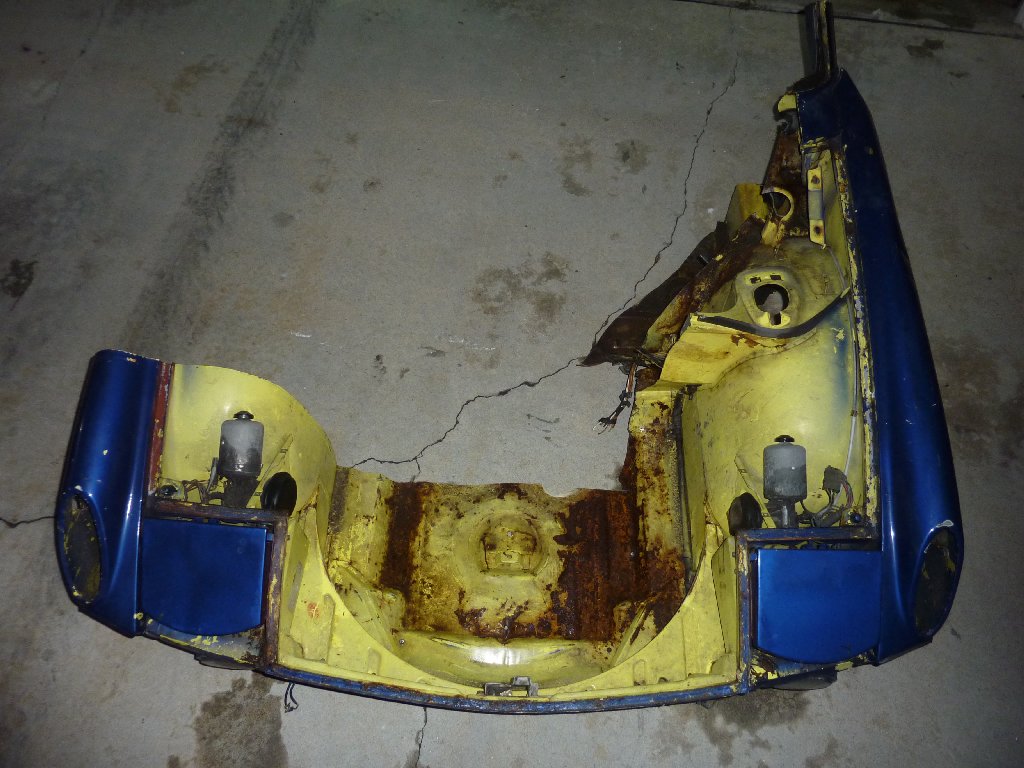
I've decided I'm going to try to repair the car first and see how it goes. If it can't be 100% straight and strong, then I'll look at replacing the chassis.
I found some of the parts I need from Glenn in LA via Craigslist. Really nice guy and I'm surprised we've never met before (at least I don't think I had met him). He had 8 914s in his backyard, and was pretty knowledgeable about the cars. I don't think he's on the forum...
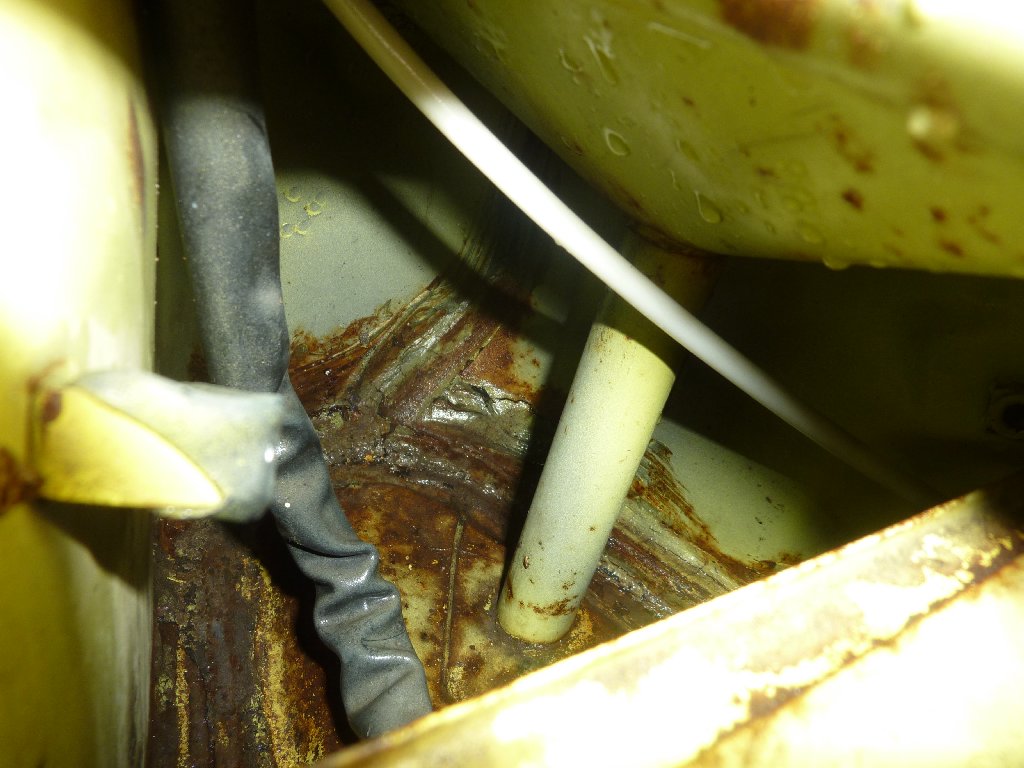
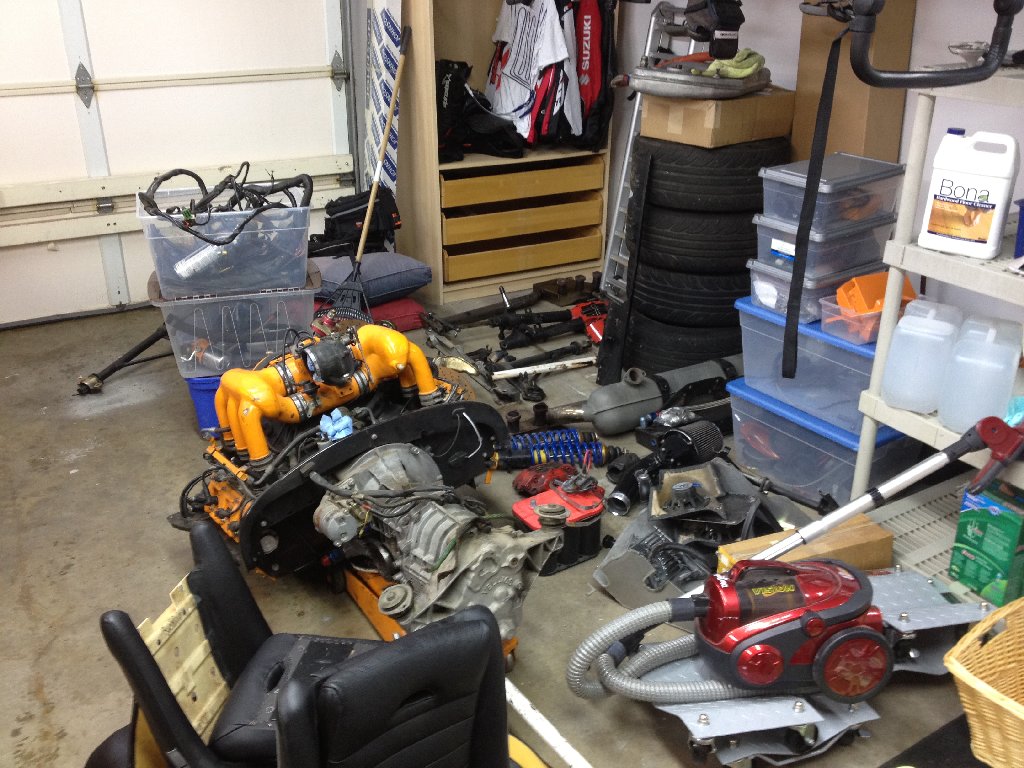
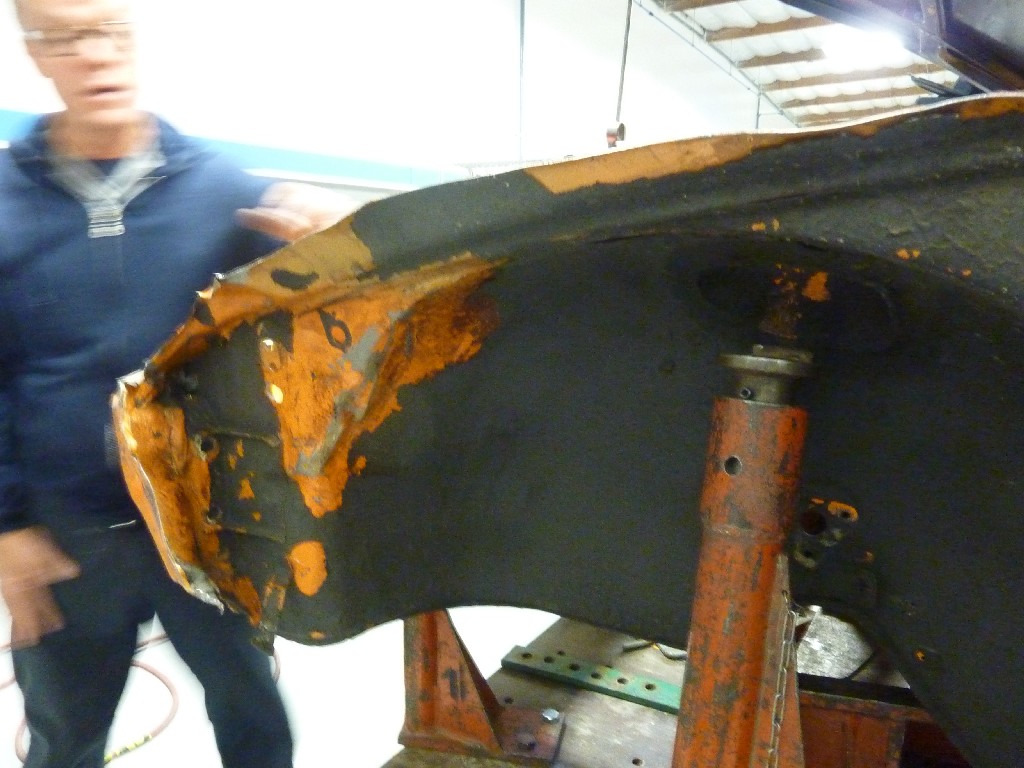
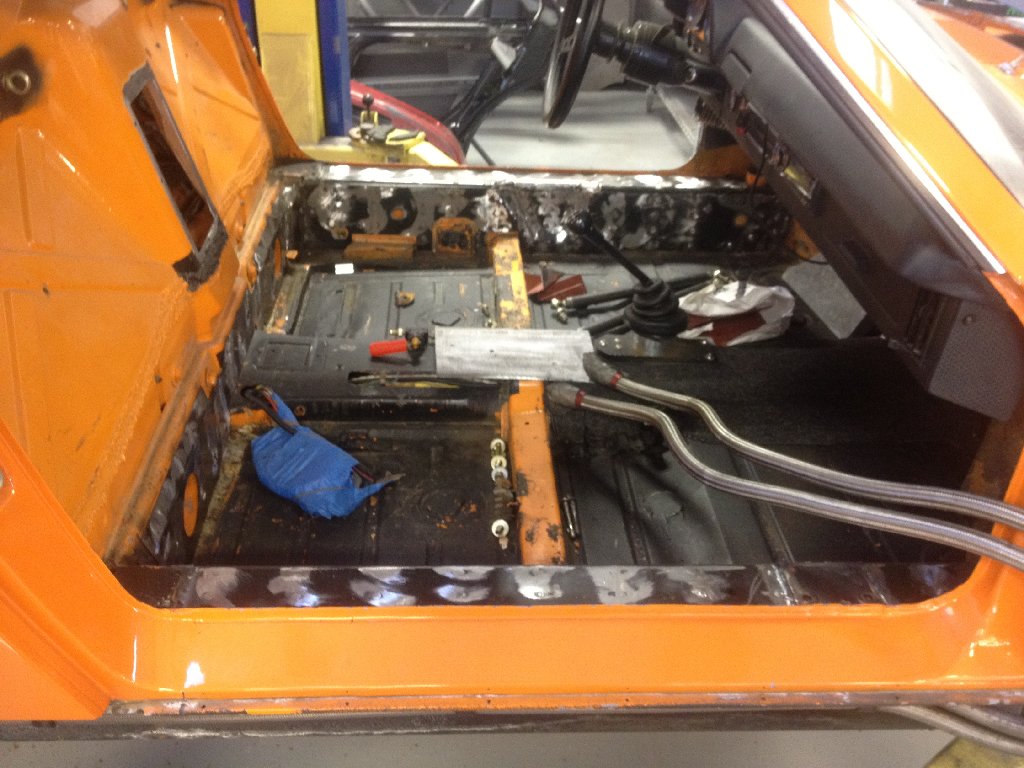
I've never cut apart a 914 like this before. I certainly got a new perspective on areas of the car I hadn't seen before.
The rust looks worse in the photos than it really is. It should clean up well.
-Steve
Attached image(s)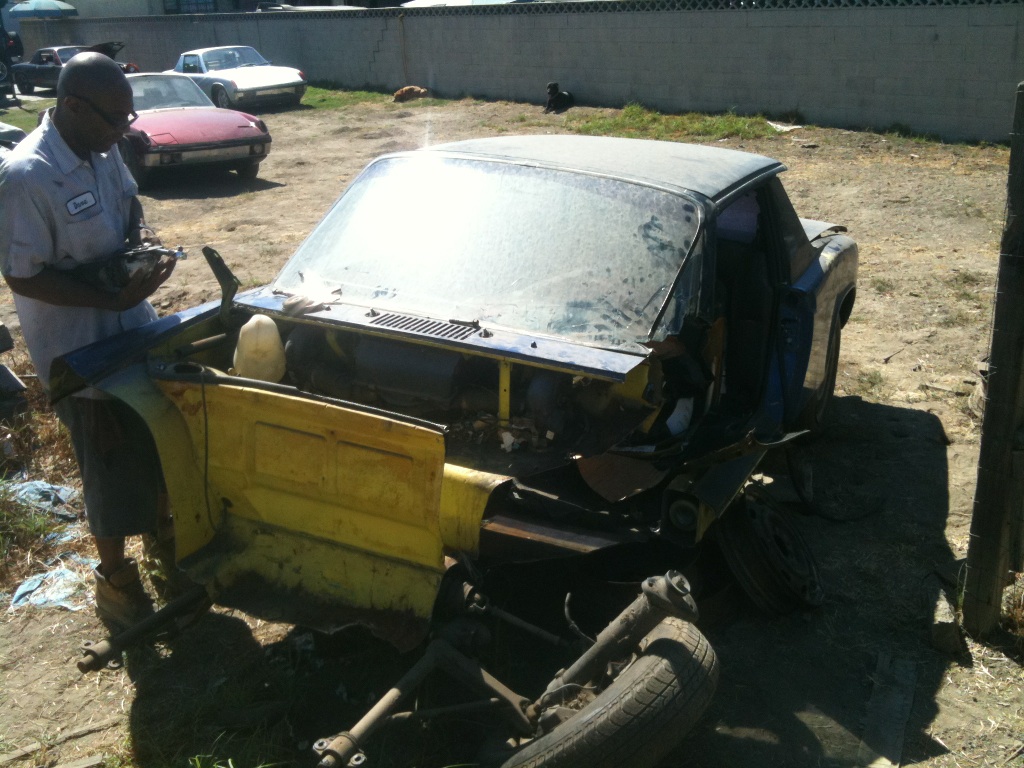


Posted by: sean_v8_914 Oct 5 2011, 11:00 AM
thats great news. I think he will turn out just as fine as he ever was
Posted by: SirAndy Oct 5 2011, 11:23 AM
Did you get the VIN? 
Someone with experience can work magick with a Celette bench.
Glad you're making progress.

Posted by: RiqueMar Oct 5 2011, 11:34 AM
Did you get the VIN?
Someone with experience can work magick with a Celette bench.
Glad you're making progress.
Steve! When you said Compton, I didn't know you meant Glenn! I sold a car to a guy about 6 months ago, and Glenn was the one that was going to be doing all the work on it. Small world.
Posted by: Twise Oct 5 2011, 12:59 PM
Maybe this point of view will help:
Let's assume you want to buy a 914. You found 2 identical cars that are just what you were looking for and priced the same. The only difference is their history:
- One car was completely rebuilt using some beautiful parts from a concurs car that was damaged in an accident.
- The other car was severely crashed, cut in two and a front clip from some other damaged car was welded in. The combined chassis was measured and aligned using the best available tools.
I would pick the first one without blinking and I'm sure all those who commented on this thread will do the same.
Why would anybody prefer something that was damaged when a perfectly good alternative costs the same
?And from my past experience, trust me, that old car of yours will never be the same.
Sorry about the old car but I believe it's for your own benefit.
This is the sort of misconception I have to deal with on a daily basis. It sounds like you had a bad experience in the past, or someone close to you had a bad experience. Collision shops like mine fix cars all day long. We are well trained at what we do and we do it correct. I would not attempt to fix something that was not going to be in better condition when I was completed. Steves car looks alot worse than it is. The forward section of the apron needs replaced including the headlamp bucket and front body panel. The rest of the pieces can be straightened on a celette bench with RIGID fixtures. Rigid fixtures are just that they are rigid, you cannot manipulate, adjust or fudge them in any way. You must make the car fit the fixtures, not vice versa. I am by no means going to cut another car in half and weld it to the front of Steves car. All metal replaced will be done so along the factory lines and in the same fashion in which it was placed there to begin with. When the job is completed, it will be very difficult to tell what if any repairs ever took place. I know there are many operations out there that perform the type of work you are basing your bias on, but we are not one of them. I would urge all of you to strongly investigate any shop you would have perform collision repairs for you. Are they certified (ICAR, ASE, Manufacturer)? How long have they been in business? Do some homework. I will be the first to admit that in my industry, I am a rarity. I have over 150 years of experience under my roof. All of them specializing in GERMAN collision repair. We are certified by Porsche, Mercedes and Audi. Most important thing is reputation. We value ours and will not compromise it.
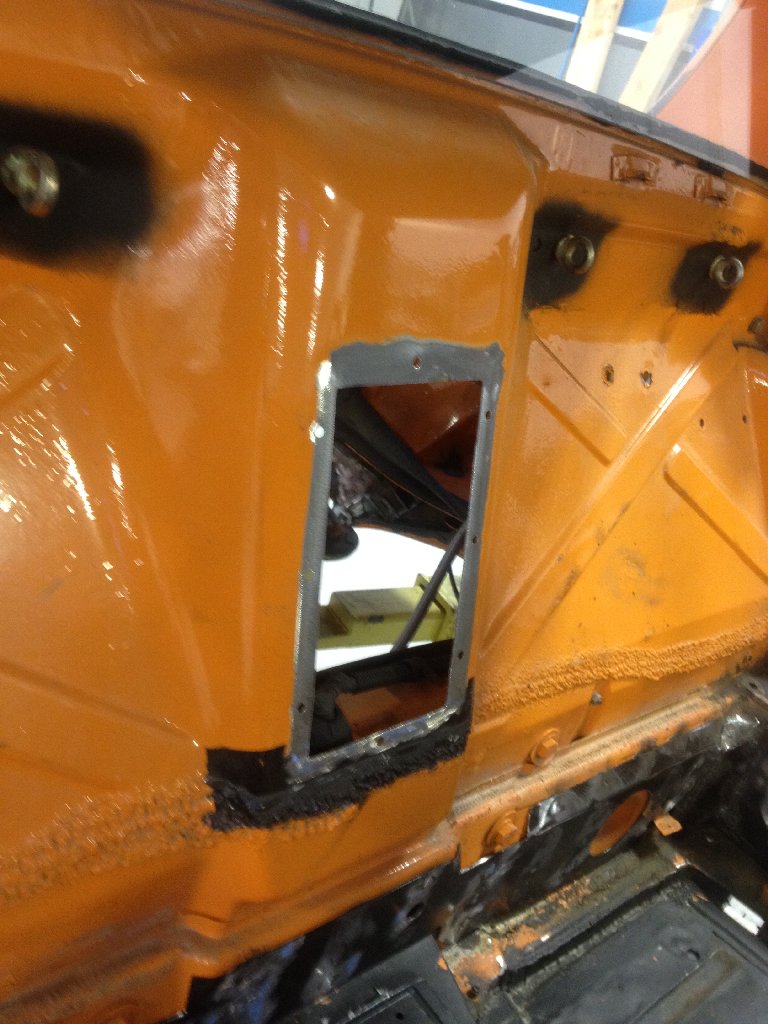
Posted by: siverson Nov 19 2011, 11:36 PM
We'll I'm almost done tearing the car done for my "re-build" and came across this surprise tonight. The inside of the drives side longitudinal is cracked. That is a crack in the metal, there is no tar (removed long ago). Anyone ever seen that?
-Steve
Attached thumbnail(s)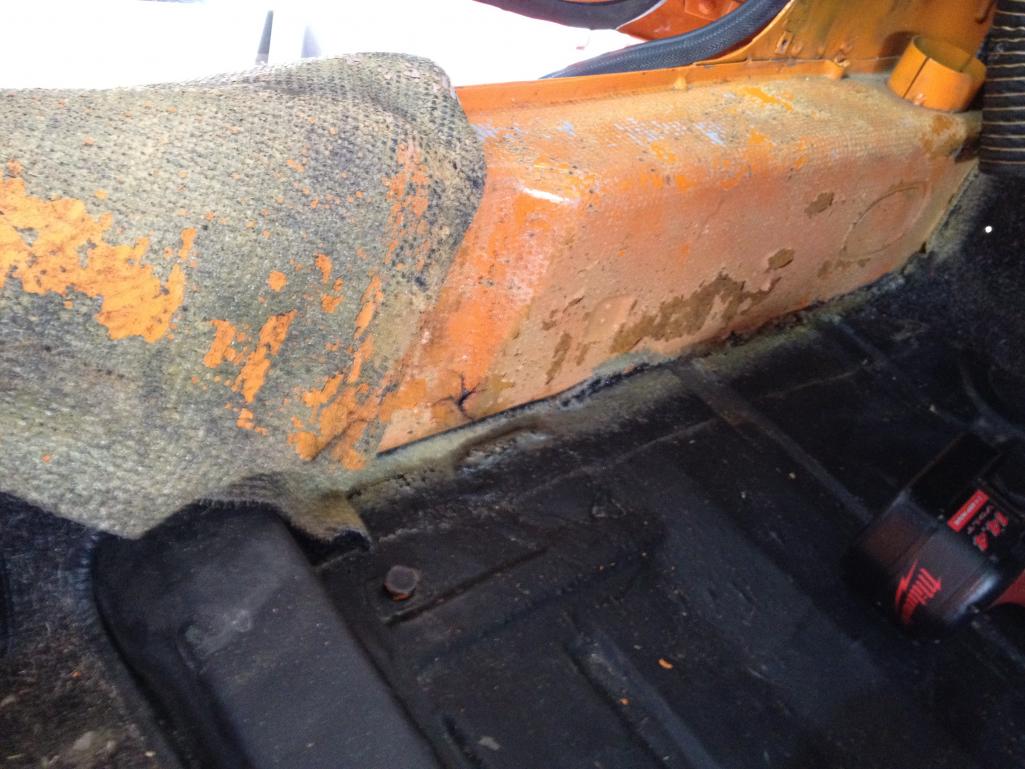
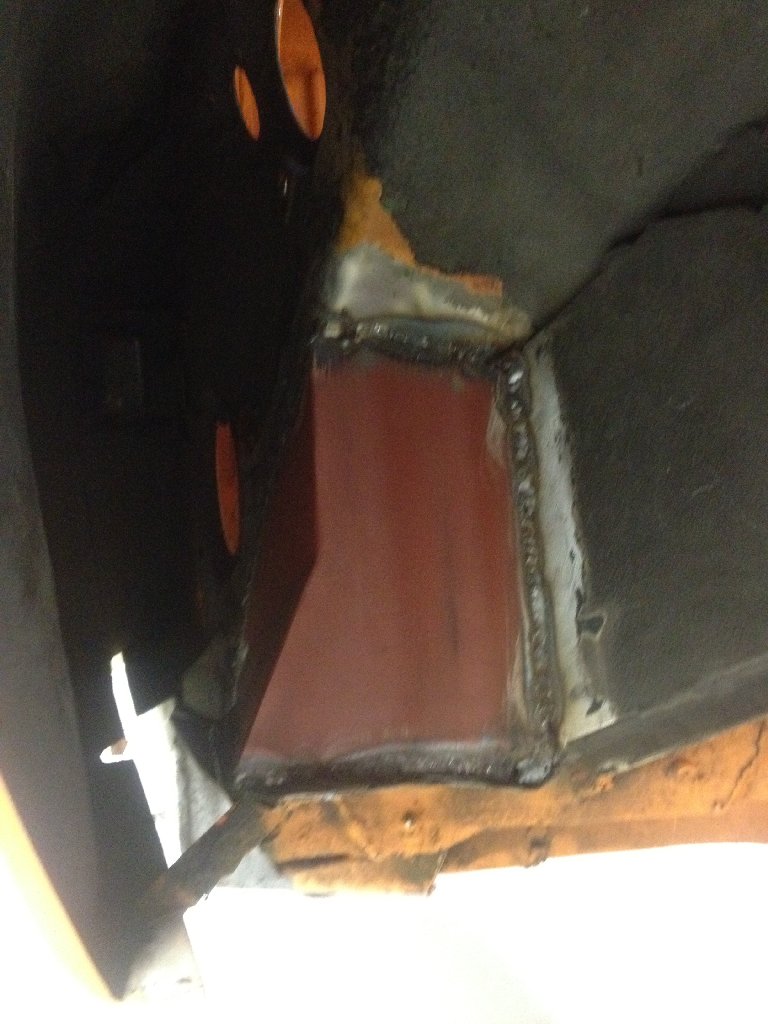
Posted by: siverson Nov 19 2011, 11:38 PM
close up
BTW - the crack looks sort of old and the metal is solid there (no rust). I don't think this was caused by my off track excursion (but who knows).
-Steve
Attached thumbnail(s)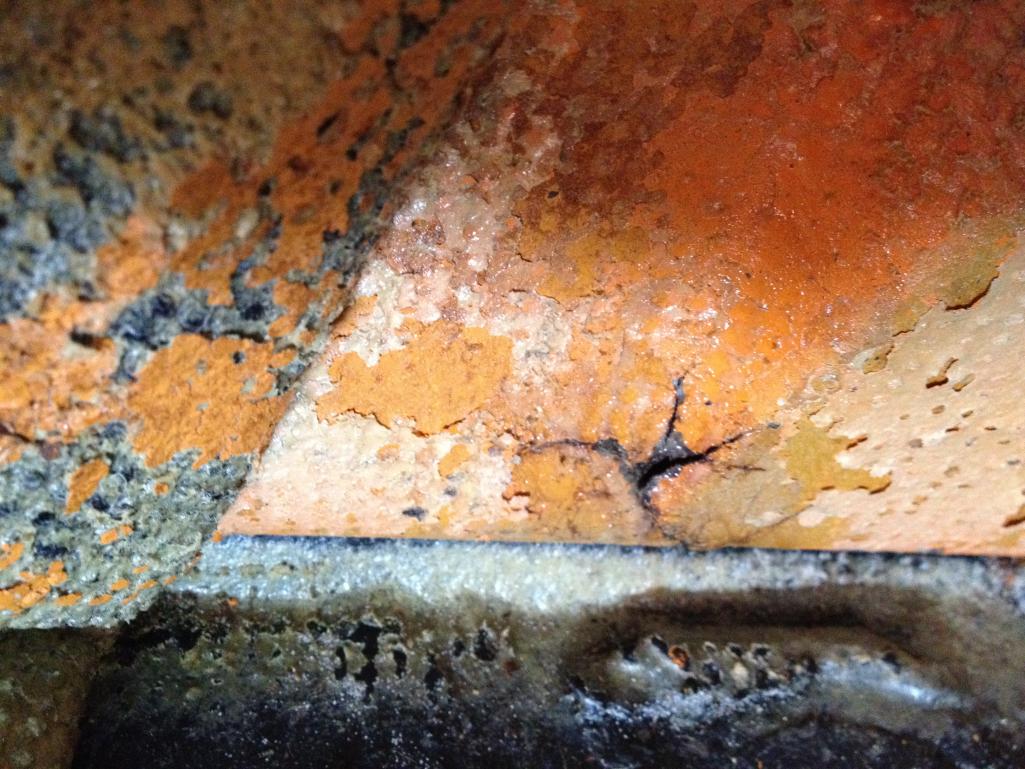
Posted by: rick 918-S Nov 19 2011, 11:44 PM
That crack is very very common. Good to see progress!
Posted by: sean_v8_914 Nov 20 2011, 12:15 AM
common, most crack there. I could come up with 5-6 pics of 914 ive fixed that on in the last 2 yrs alone
Posted by: siverson Nov 20 2011, 01:47 PM
Thanks for the input. Glad to hear it shouldn't be a problem...
Posted by: Steve Nov 20 2011, 02:04 PM
That's another good reason for the Engman kit. I think Sean mentioned mine was also cracked there before he installed the Engman kit. That spot is pretty much the fulcrum point for the chassis and has the most stress on it, besides the firewall.
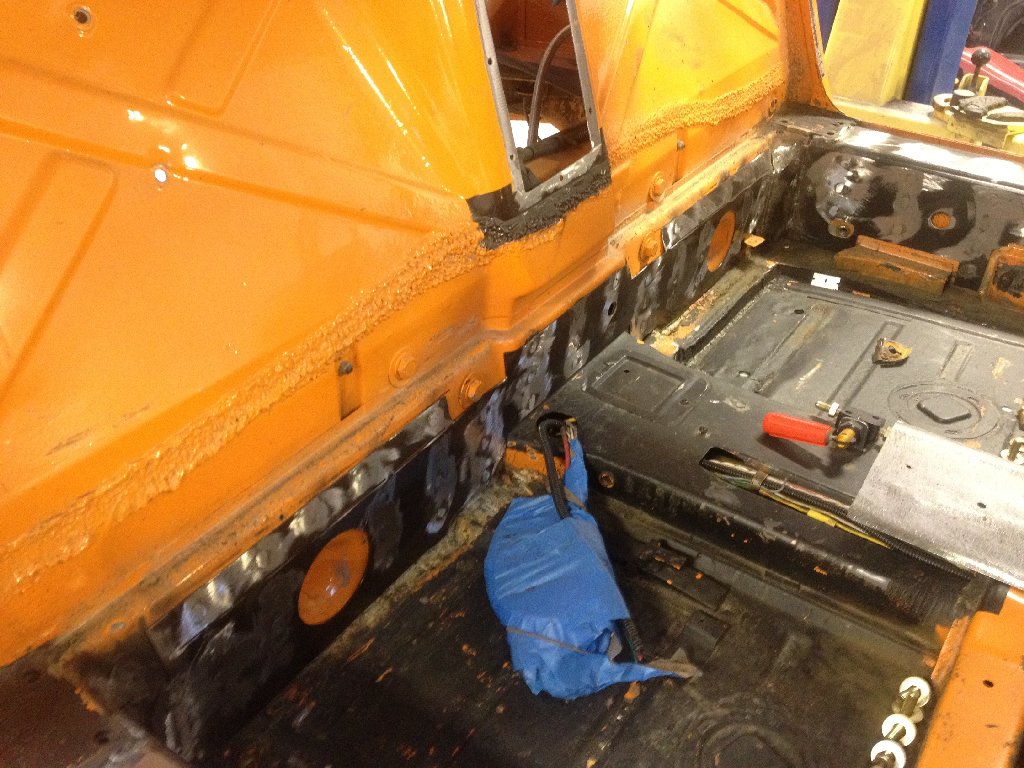
Posted by: siverson Nov 20 2011, 10:57 PM
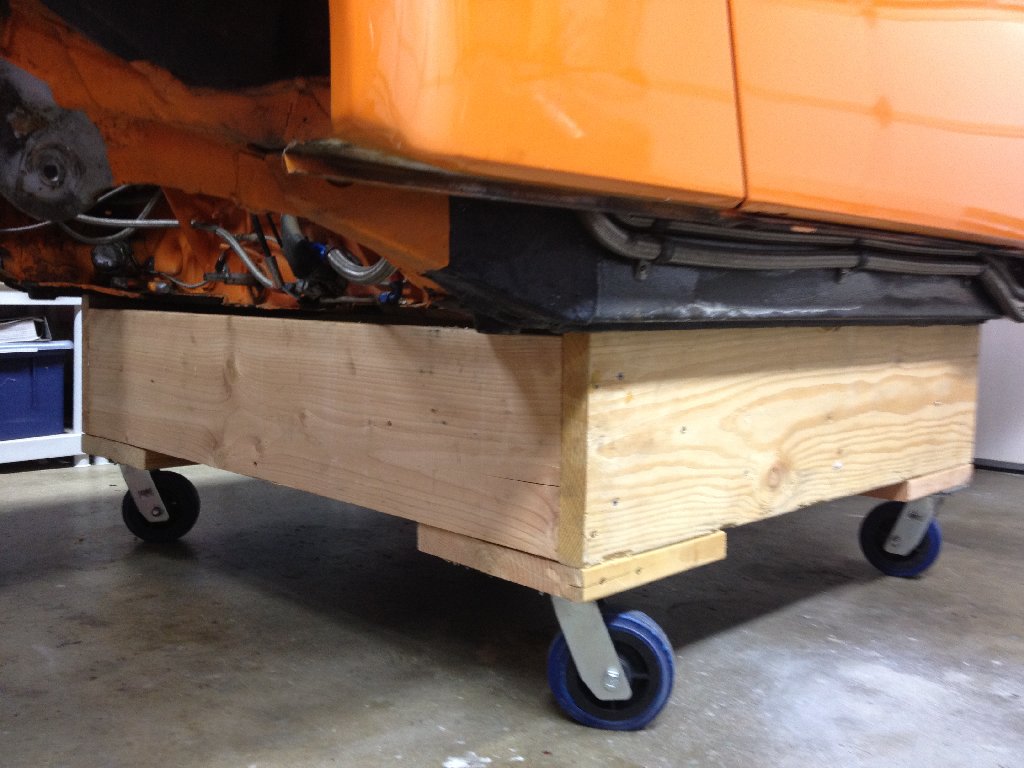
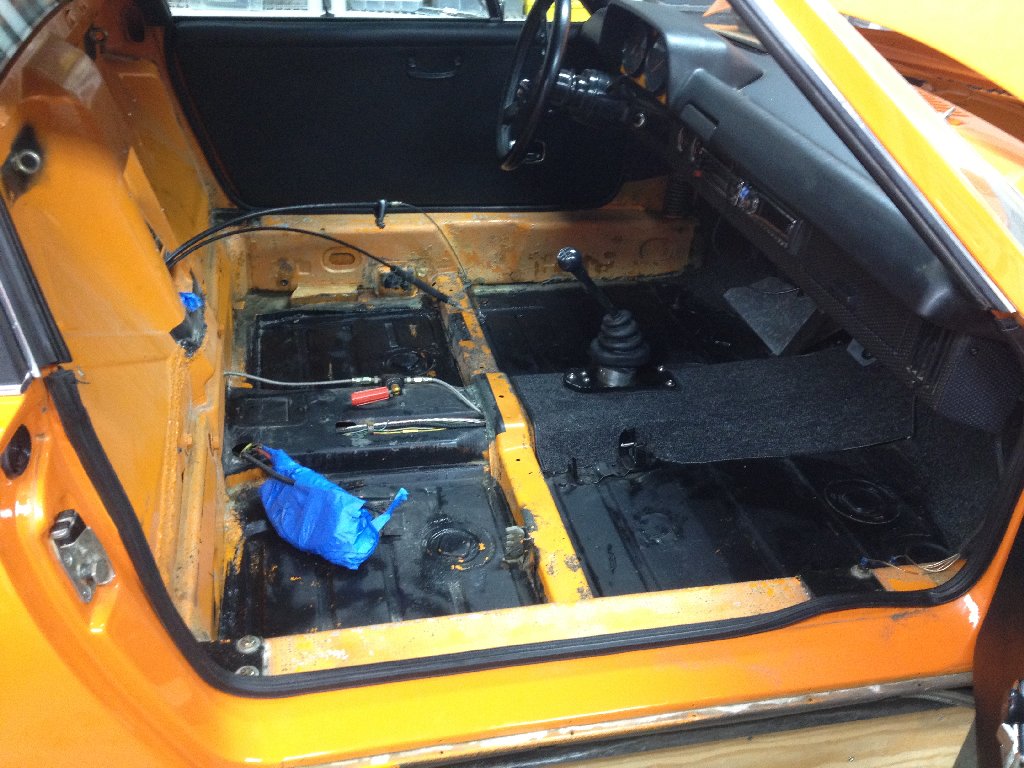
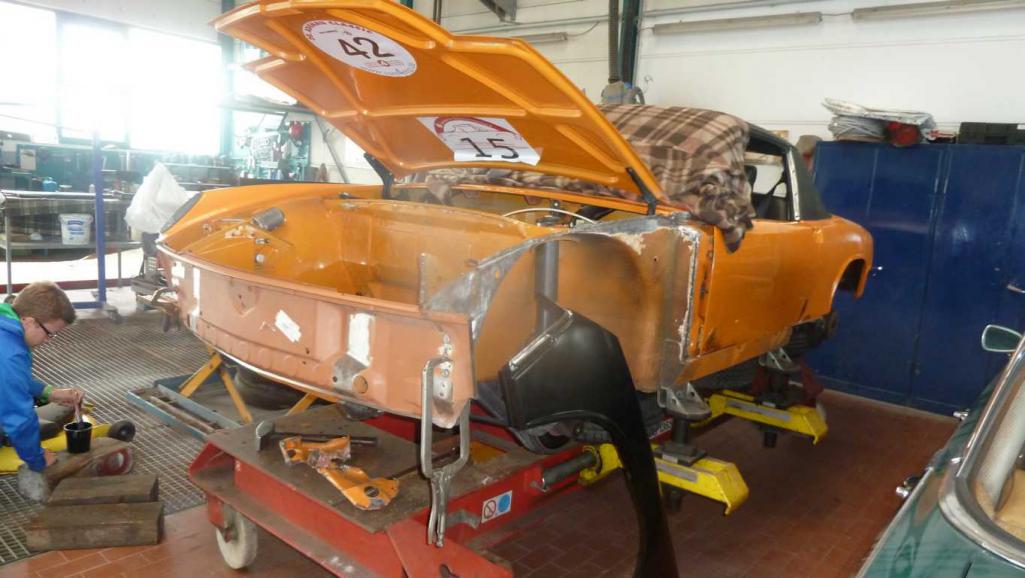
Well, I think 914 torn down as far as it needs to go. Probably a little more than was really necessary, but I plan on cleaning some things up "while I'm in there".
I made a wooden dolly to move the car around that works great in the garage, but I'm not sure if the casters are going to be strong enough to handle moving the car on a flatbed to the body shop. Hmmm... I may have to rethink that...
-Steve
Attached image(s)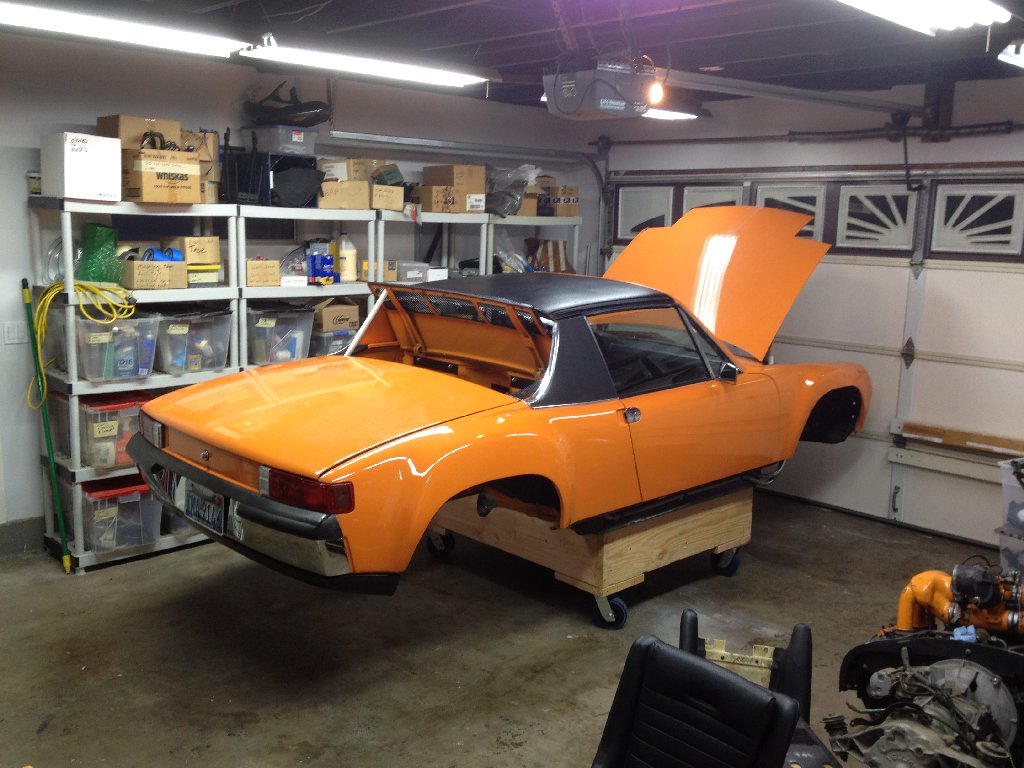
Posted by: siverson Nov 20 2011, 10:58 PM
914
Attached image(s)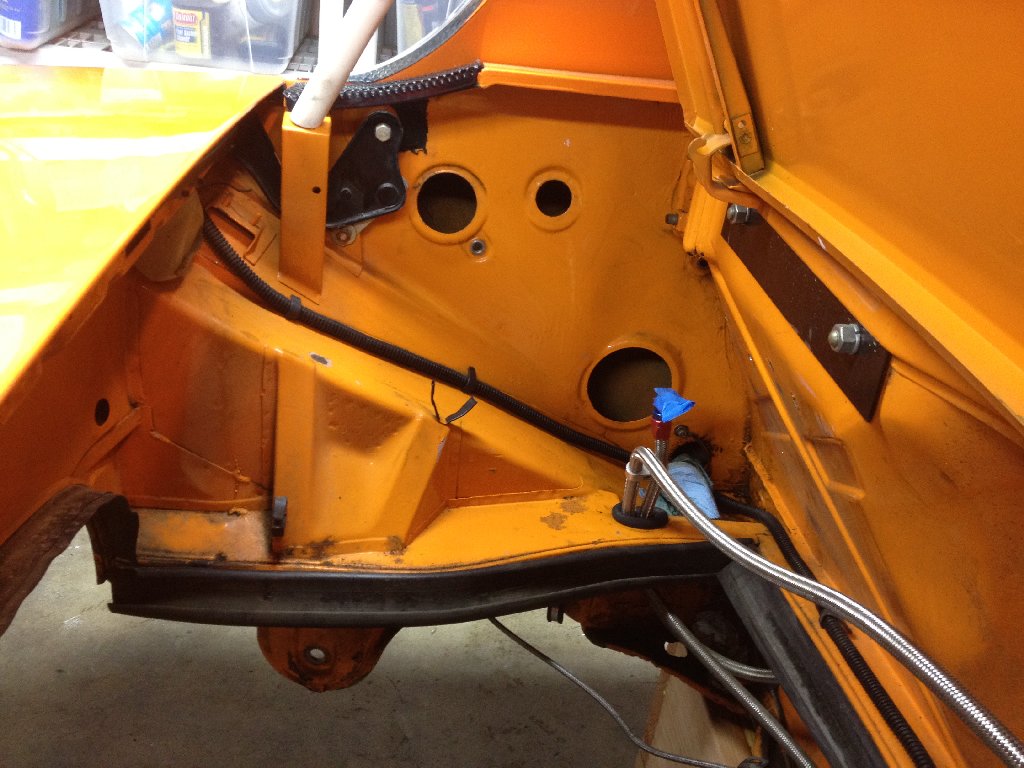
Posted by: siverson Nov 20 2011, 10:59 PM
914
Attached image(s)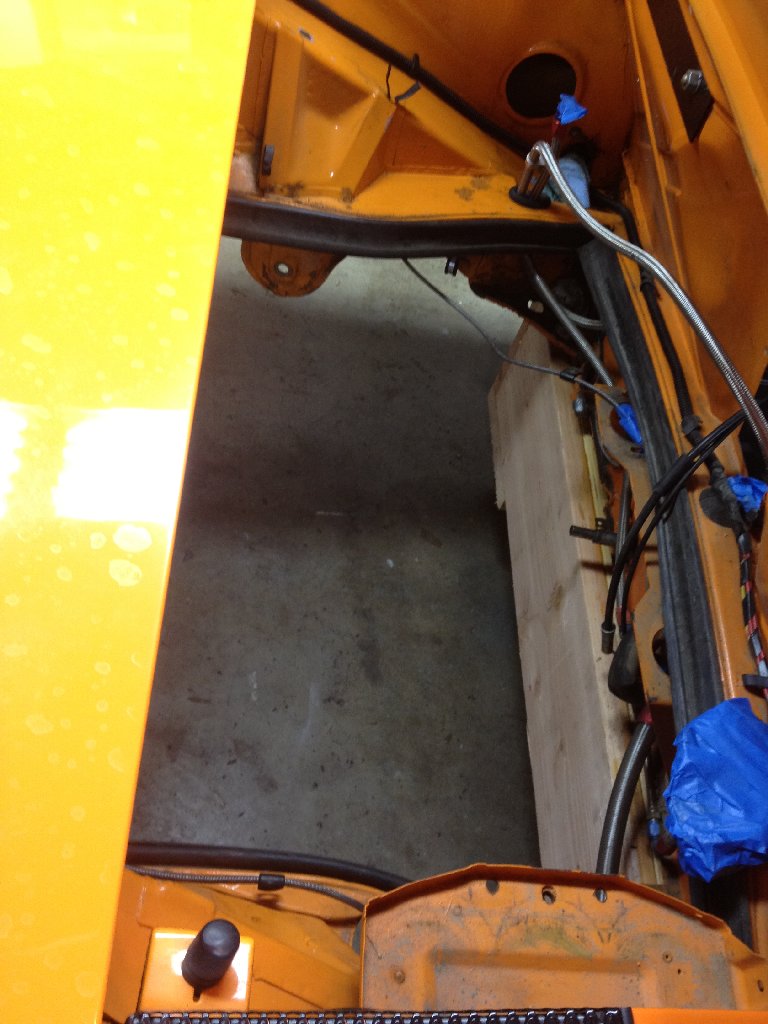
Posted by: cwpeden Nov 21 2011, 01:19 AM
Good luck with the fix Steve. Mine looked like yours for 4 years after metal work. Dont loose momentum.
Dolly should be strong enough. Mine went about 15 miles and it looks weaker than yours. The hard part was moving it up the Flatdeck on 4 casters.
Posted by: get off my lawn Nov 21 2011, 05:57 PM
When I opened this thread I was hoping it wasn't about Steve's orange 914 that I remembered. But it was, and that sux. Does it still have the 3.6?
There's an old saying: "if you can't afford to push it off a cliff, don't put it on a racetrack".
Note to self, get an old beater for track days.
Posted by: ewdysar Nov 21 2011, 07:45 PM
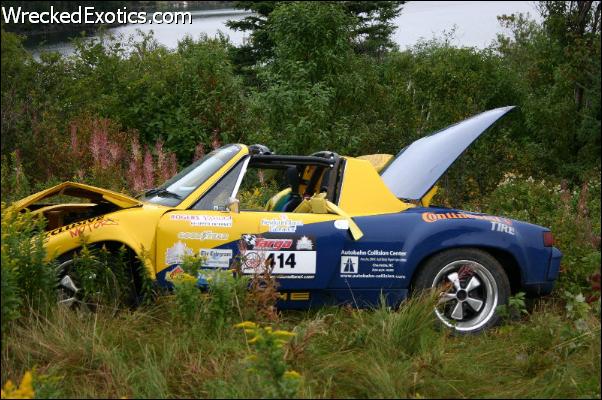
Not trying to derail your thread.
I just met the owner of this car that broke the inside front upper control arm just going into turn 1 at Willow Springs last month. He walked away (well, got checked out at the hospital) with no broken bones or lacerations. This is more the "push it off the cliff" type of accident. The car rolled multiple times and then went end over end. Very scary and pretty amazing. It turns out that the little roll bar is surprisingly effective.
Attached image(s)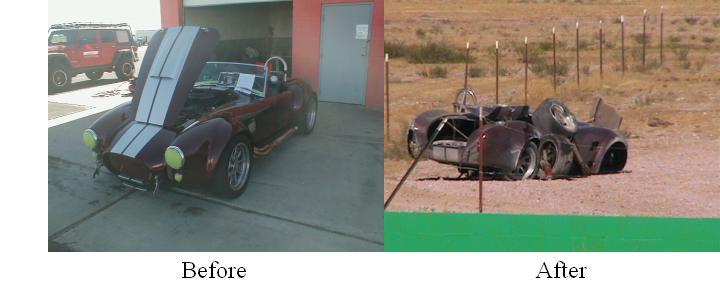
Posted by: John Nov 21 2011, 08:08 PM
914
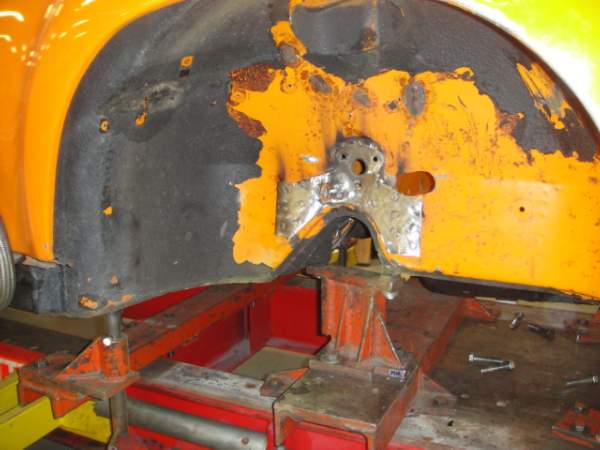
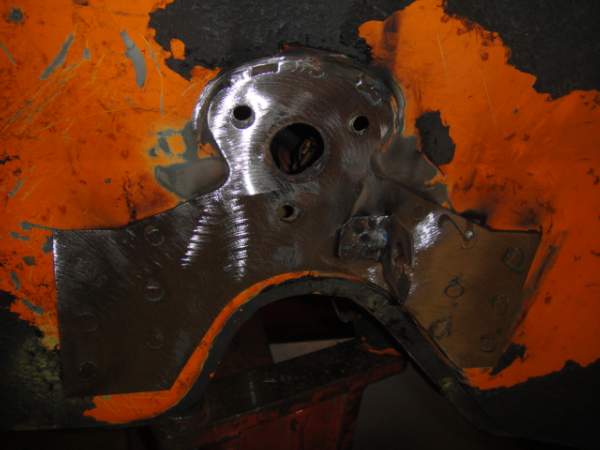
With all the metal cut out in the front end, If I were you, I would put a brace across the front between the front suspension pick-up points similar to what was installed in the GT cars when they added the front cooler and cut out a large portion such as you have. The ones I have done, I have used tubing. The factory actually had a sheet metal piece formed that created a box structure.
Just my free advice...
Posted by: sean_v8_914 Nov 21 2011, 09:42 PM
good progress!
Posted by: Elliot Cannon Nov 21 2011, 09:45 PM
Not trying to derail your thread.
I just met the owner of this car that broke the inside front upper control arm just going into turn 1 at Willow Springs last month. He walked away (well, got checked out at the hospital) with no broken bones or lacerations. This is more the "push it off the cliff" type of accident. The car rolled multiple times and then went end over end. Very scary and pretty amazing. It turns out that the little roll bar is surprisingly effective.
"A man's got to know his limitations".

Posted by: siverson Nov 21 2011, 10:38 PM
> With all the metal cut out in the front end, If I were you, I would put a brace across the front between the front suspension pick-up points
Yeah, I was thinking the same thing and several other improvements, "while I'm in there".
Posted by: RobW Nov 22 2011, 06:55 AM
Good luck with your journey... I think you are going down the right path.
BTW - there is a 914 / 6 GT build with a million pictures on the bird site. Just in case you are looking for some inspiration.
Posted by: 396 Nov 22 2011, 04:45 PM
Steve. Glad your coming along with the " fix". Hope to see you out at the track in 2012.
Posted by: siverson Nov 22 2011, 04:54 PM
> Hope to see you out at the track in 2012.
Maybe in some un-loved Boxster than nobody cares about!!!
-Steve
Posted by: RiqueMar Nov 22 2011, 05:36 PM
> Hope to see you out at the track in 2012.
Maybe in some un-loved Boxster than nobody cares about!!!
-Steve
Looking good Steve! Great progress!
PS and a little off-topic:
I saw you're on the same Boards as my Dad! I recognized your name when he pointed out 'some guy with an Orange 914' commented on his progress thread! Small world!
Posted by: Socalandy Nov 22 2011, 06:02 PM
Thats what this site is about, Saving these cars
Go Steve ![popcorn[1].gif](style_emoticons/default/popcorn[1].gif)
Posted by: Series9 Nov 22 2011, 08:29 PM
Thats what this site is about, Saving these cars
Go Steve

I just saw Jim Patrick at Daytona and we talked about your car. I'm glad you're going to save it.
Posted by: 1970 Neun vierzehn Nov 23 2011, 08:24 PM
Good to see that you chose option A. 
As was stated previously, it's good to save these cars.
I'm sure we will see the progress on your rebuild.
Posted by: siverson Nov 28 2011, 10:03 PM
Finished the tear down this past weekend and got the car to EAB today. Adding some straps and 180 pounds of concrete (still in the bags ), helped alot to make the car more balanced on the dolly.
I've also emailed Toyota and suggested they re-brand their bed options as: (a) long bed, (b) standard bed, and © 914-width bed. I haven't heard from them yet.
-Steve
Attached image(s)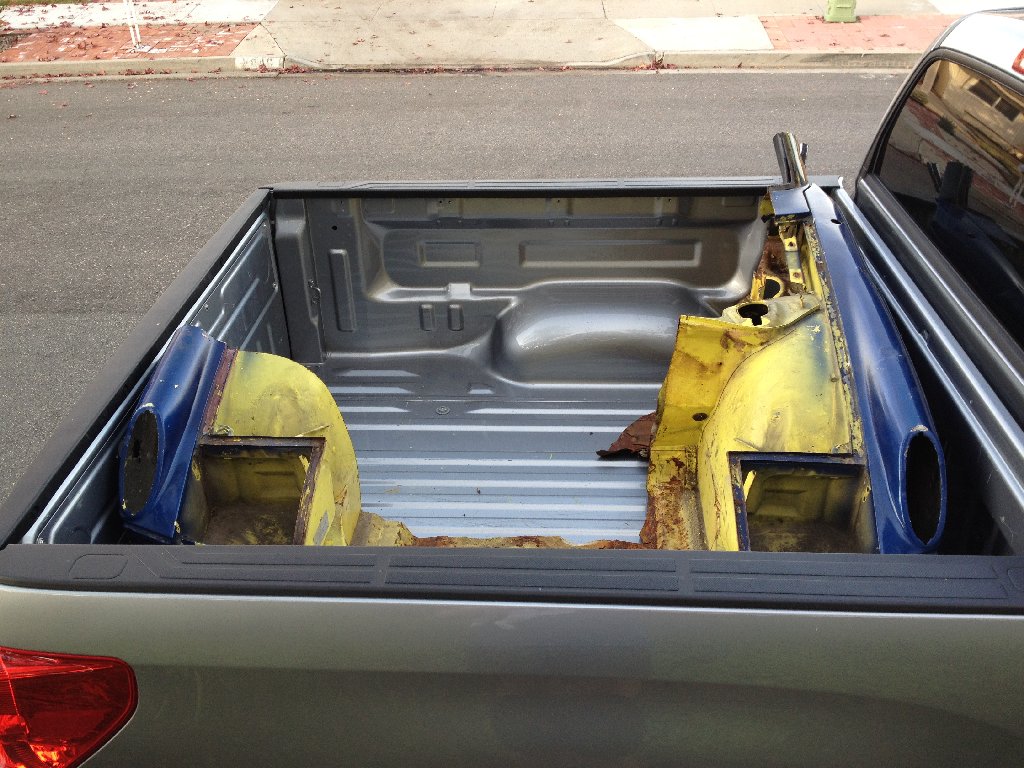
Posted by: siverson Nov 28 2011, 10:05 PM
At this point, I was 70% sure I was going to show up on fail blog tomorrow morning...
Attached image(s)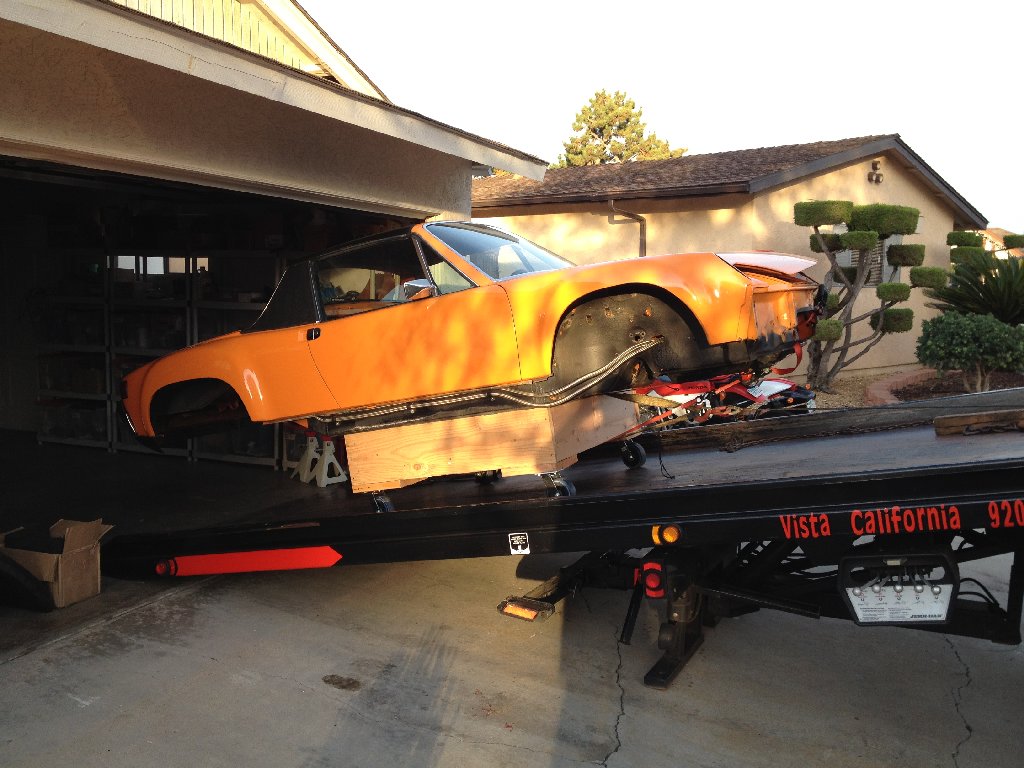
Posted by: siverson Nov 28 2011, 10:06 PM
But it worked out ok.
-Steve
Attached image(s)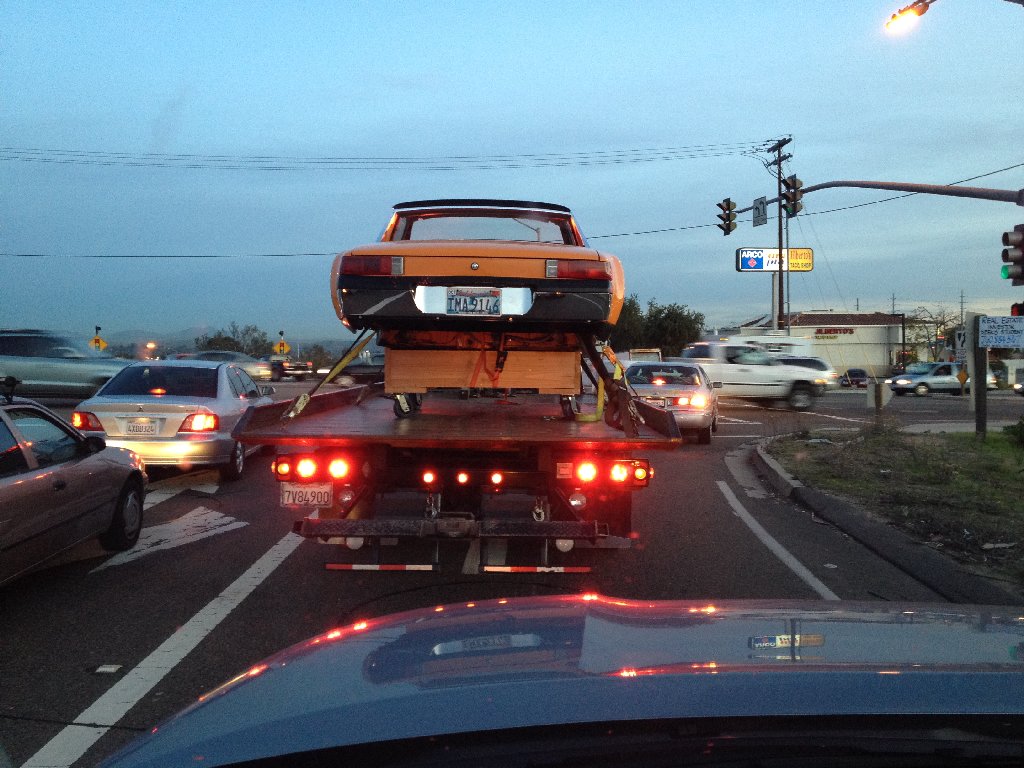

Posted by: siverson Nov 28 2011, 10:08 PM
Hopefully it will be back together when he's ready to face forward in the car seat...
-Steve
Attached image(s)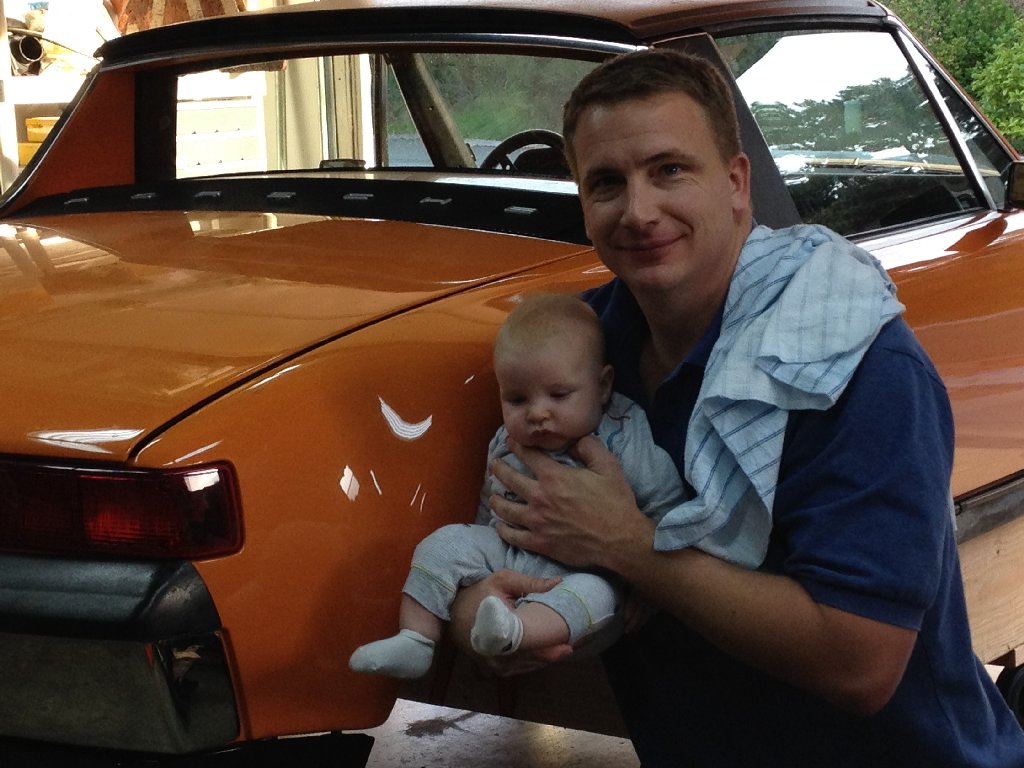
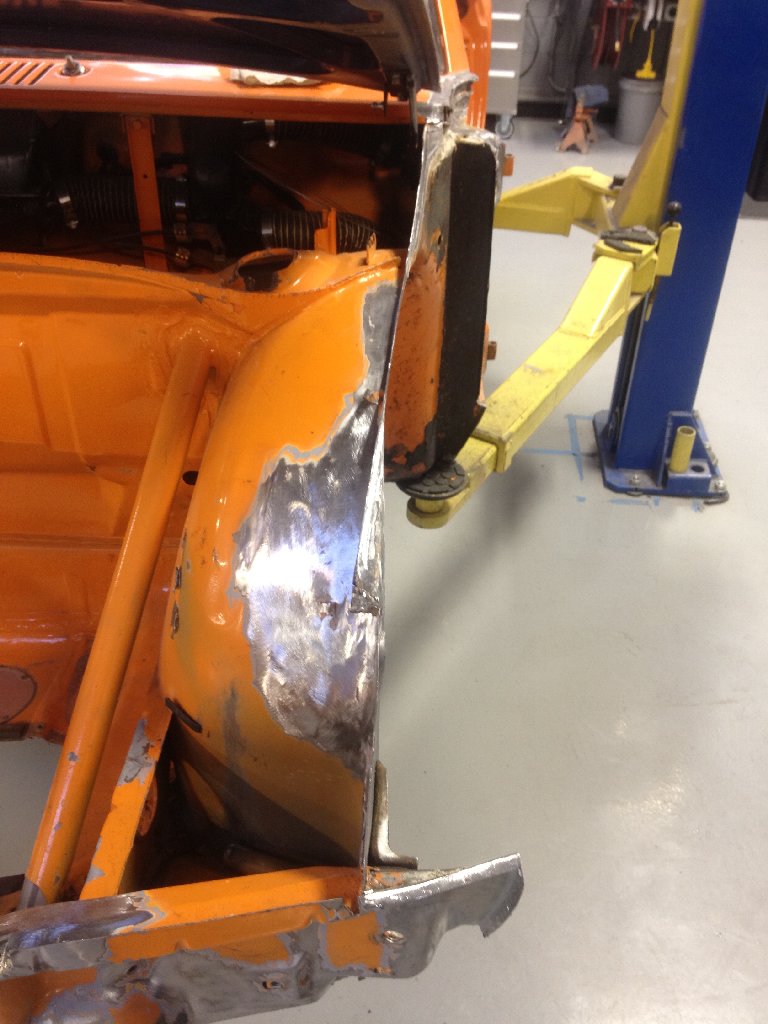
Posted by: siverson Feb 17 2012, 01:55 PM
Slow progress at the shop, but it should be on the Celette bench in about 2 weeks. The front end cleaned up ok, and a lot of the bad spots on the fender are going to be removed for the flare anyways...
-Steve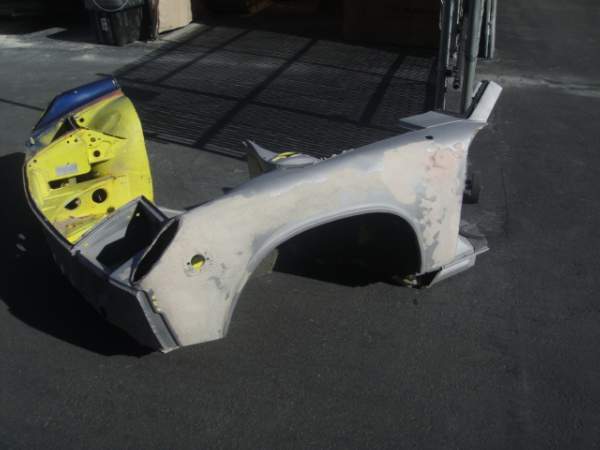
Posted by: campbellcj Feb 18 2012, 08:39 PM
I feel your pain Steve! My car has been in the shop almost months now...hang in there!
Posted by: siverson Mar 16 2012, 02:22 PM
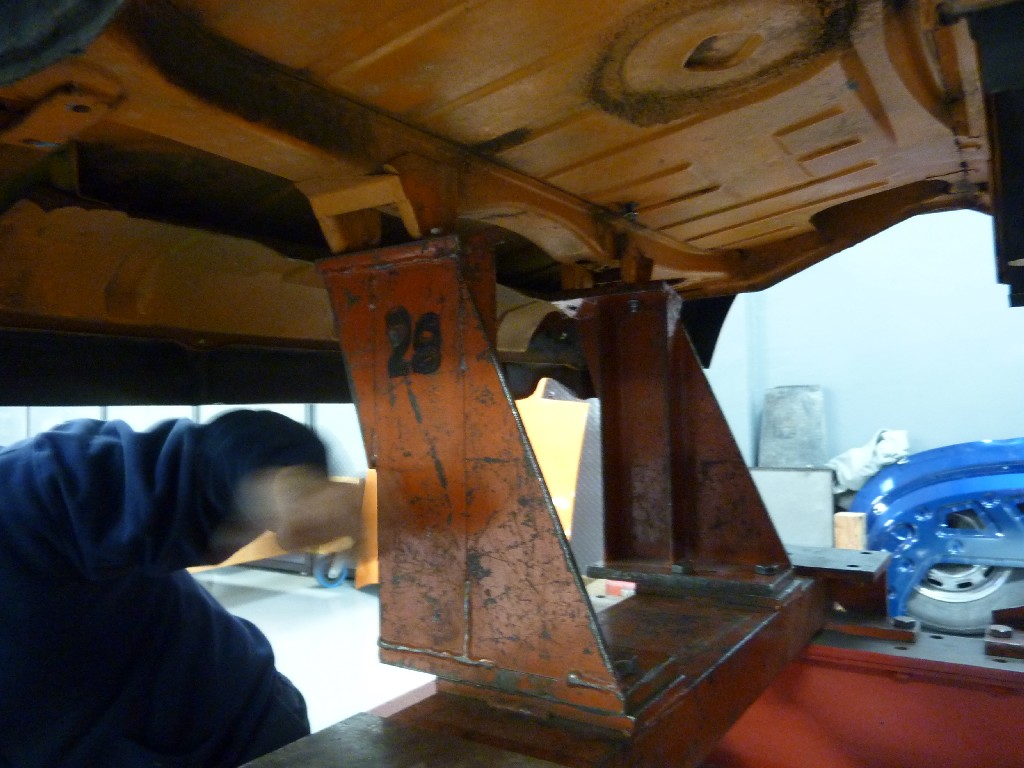
Some progress was made this week.
First, the Celette jigs arrived, but they only work on the "old style" Celette bench. The shop's bench is from the late 80s, and evidently that isn't old enough. So then we had to rent an old bench too (which was remarkably less expensive than the jigs - go figure).
Anyways, it's all bolted up and the suspension points were quick to line up. The rear was correct to start, and once the front fender got pulled out, all the suspension points are perfect, except for the top front left shock tower (where the main impact was) is forward on the car by about 1/4". That should be easy to dial-in, but where there is still a significant gap is the between the top of the door and windshield frame. Larry @ European Auto Body is working on it more today, so we'll see what happens...
-Steve
Attached image(s)
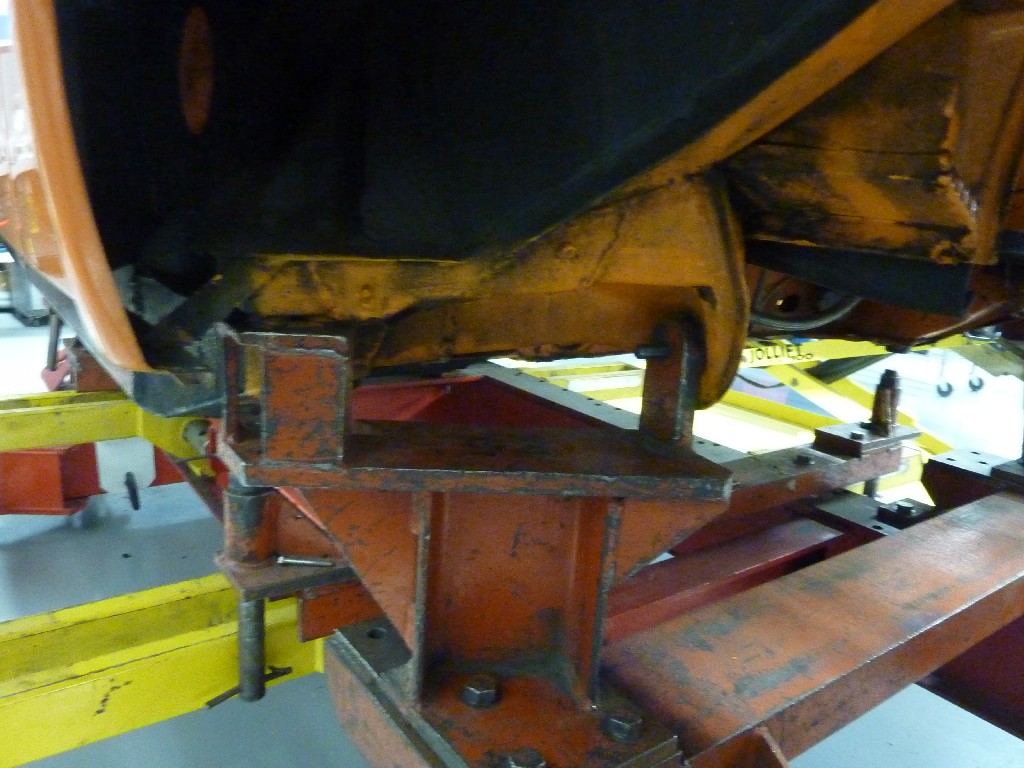
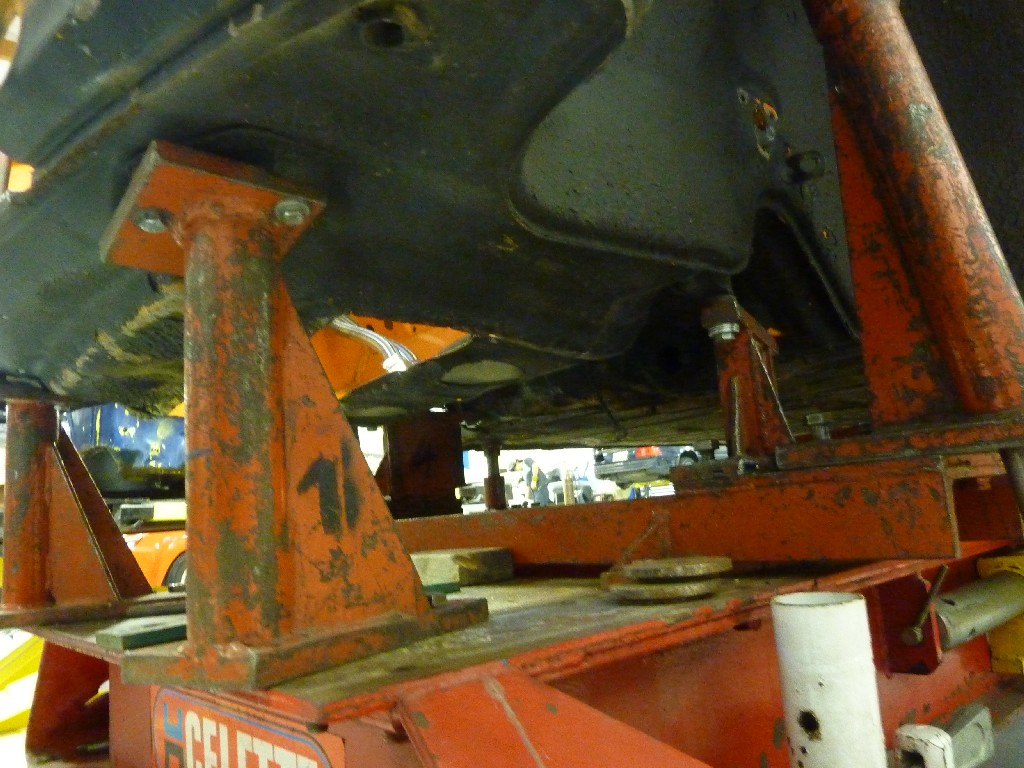
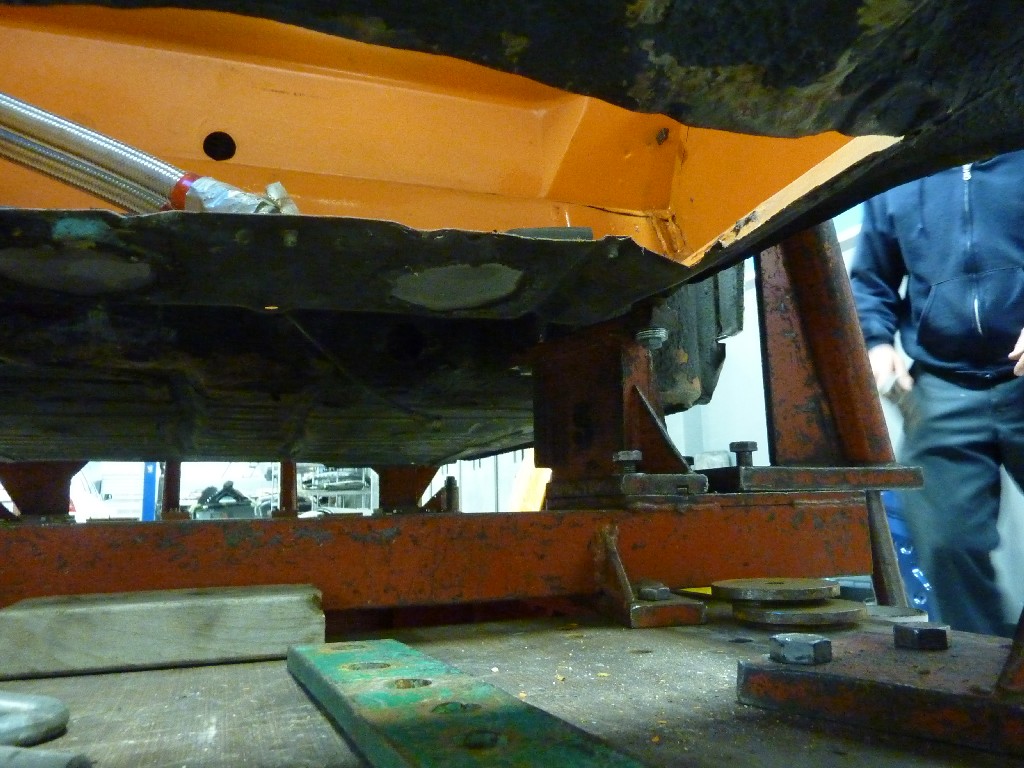
Posted by: siverson Mar 16 2012, 02:23 PM
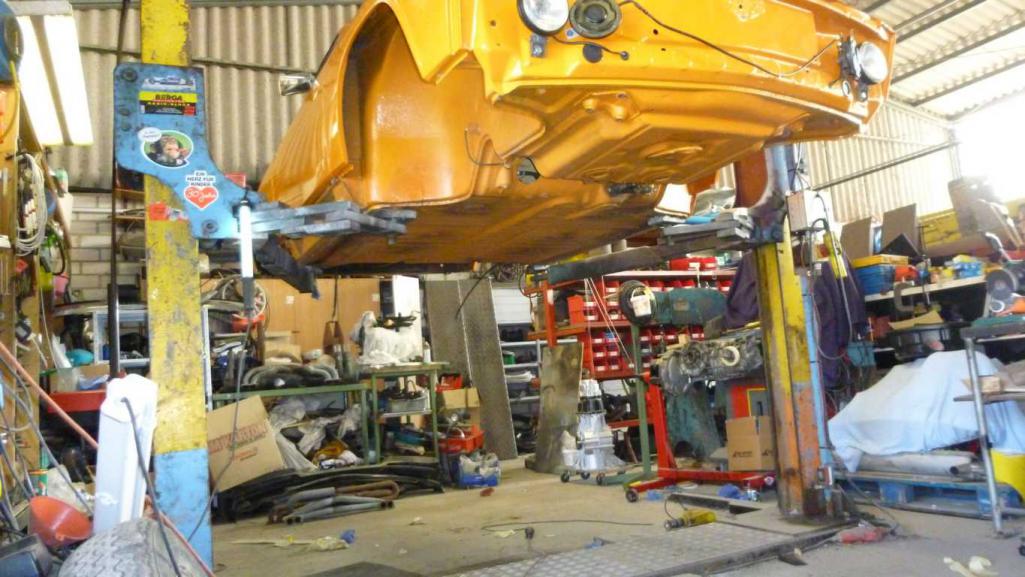
And some shots from the bottom if you're curious how this all bolts up:
Attached image(s)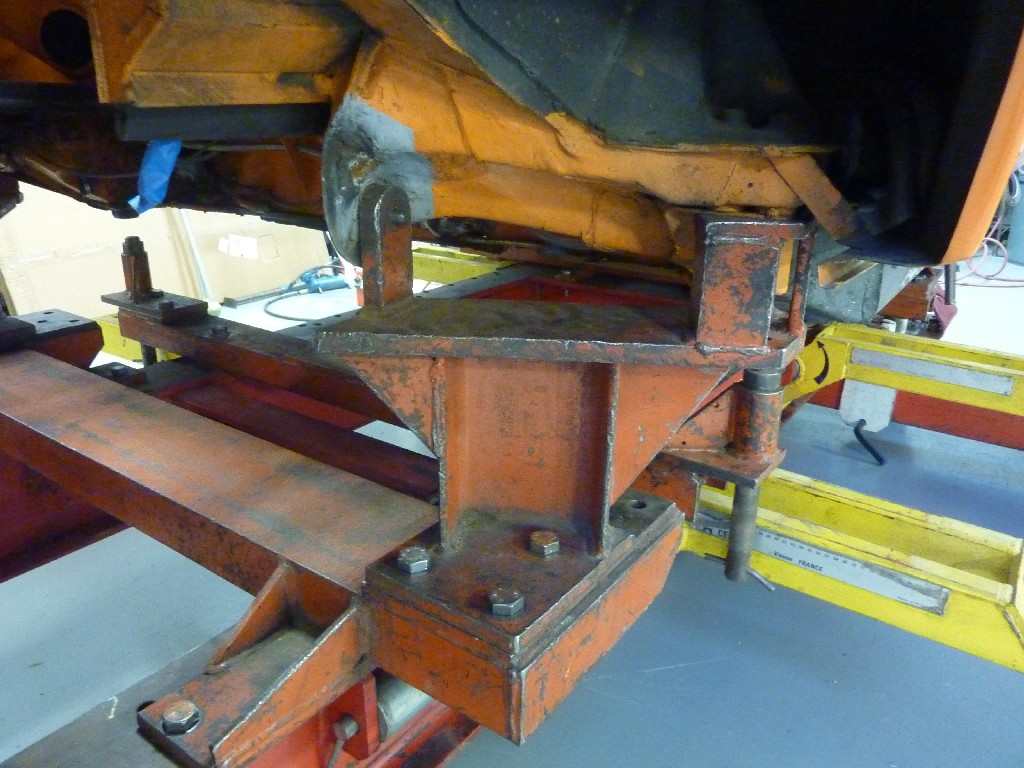
Posted by: siverson Mar 16 2012, 02:24 PM
And another patient that 914 is sharing the room with:
Attached image(s)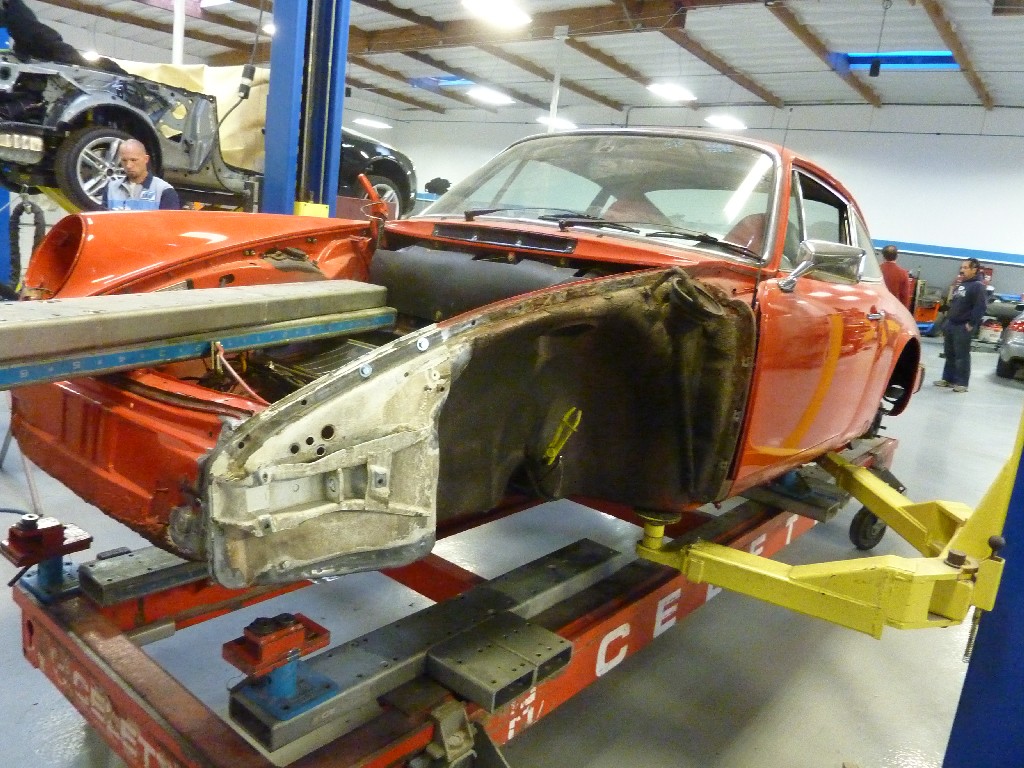
Posted by: siverson Mar 22 2012, 12:45 PM
And it's straight again. Lots of strange pulls, but things line up really well again - susp points, doors, lids, and the top all look nice and square. Whew. Hopefully it stays that way once off the bench...
Now just lots of body work - I am looking for a better front left fender and headlight bucket than what I provided the shop with. The clip I got is pretty rough...
-Steve
Posted by: siverson Mar 22 2012, 12:47 PM
914 torture chamber.
Attached image(s)
Posted by: Randal Mar 22 2012, 01:03 PM
Glad to see you didn't swap out the chassis. In the end you'll know exactly what you have and that is IMPORTANT.
Your orange machine is going to be perfect again.
Keep up the great work!
Going to do any more cage work?
Posted by: SirAndy Mar 22 2012, 01:04 PM
This looks familiar ...
Posted by: mepstein Mar 22 2012, 01:15 PM
And it's straight again. Lots of strange pulls, but things line up really well again - susp points, doors, lids, and the top all look nice and square. Whew. Hopefully it stays that way once off the bench...
Now just lots of body work - I am looking for a better front left fender and headlight bucket than what I provided the shop with. The clip I got is pretty rough...
-Steve
Put out another WTB. There's got to be some east coast guys who have parts that can be donated. If they bring them to Hershey, I will pack and ship to you for $n/c. Gotta get this teener back on the road!
Posted by: siverson Mar 22 2012, 01:40 PM
> Going to do any more cage work?
Not planned at the moment, but I am putting on the Engman inner long kit in addition to the Brad M. outer kit that is already on the car. We'll see how flexy it is once off the bench...
> Put out another WTB.
Yup, done, and thanks!
Posted by: Aaron Cox Mar 22 2012, 01:54 PM
Wow Steve! Sorry this happened! Looks like you made the right choice to fix the original tub. Keep up the good work!
Posted by: JRust Mar 22 2012, 03:30 PM
Looking good Steve! I'm sure a good front corner will present itself soon
Posted by: siverson Mar 22 2012, 05:06 PM
And these photos just in from European Auto Body... (real time updates here!):
-Steve
Attached image(s)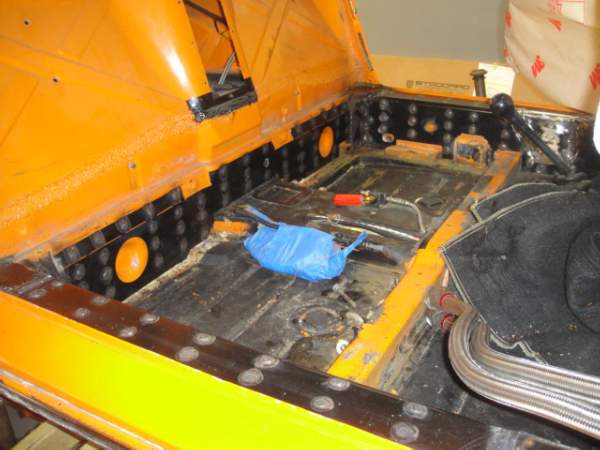
Posted by: brer Mar 24 2012, 01:16 PM
one of my favorite cars.
hope to see ya on the road again soon!
Posted by: 1970 Neun vierzehn Mar 24 2012, 09:01 PM
Really nice to see good celette pics. It appears the "worst" is over. I too am happy that you decided and were able to preserve the original chassis. It'll be better than ever when finished.
Paul
Posted by: larryM Mar 25 2012, 12:32 PM
.
it's a race car - not a garage queen
just fix it and race it again
.
Posted by: Joe Sharp Mar 25 2012, 01:43 PM
.
it's a race car - not a garage queen
just fix it and race it again
.
Wrong. Best of show West Cost Ramble 2009
Posted by: Steve Mar 26 2012, 12:44 PM
.
it's a race car - not a garage queen
just fix it and race it again
.
Wrong. Best of show West Cost Ramble 2009
This build has always been one of my favorite dream cars.
Posted by: rick 918-S Mar 26 2012, 02:03 PM
.
it's a race car - not a garage queen
just fix it and race it again
.
Wrong. Best of show West Cost Ramble 2009
This build has always been one of my favorite dream cars.
It's a fully detailed show quality car that gets driven.
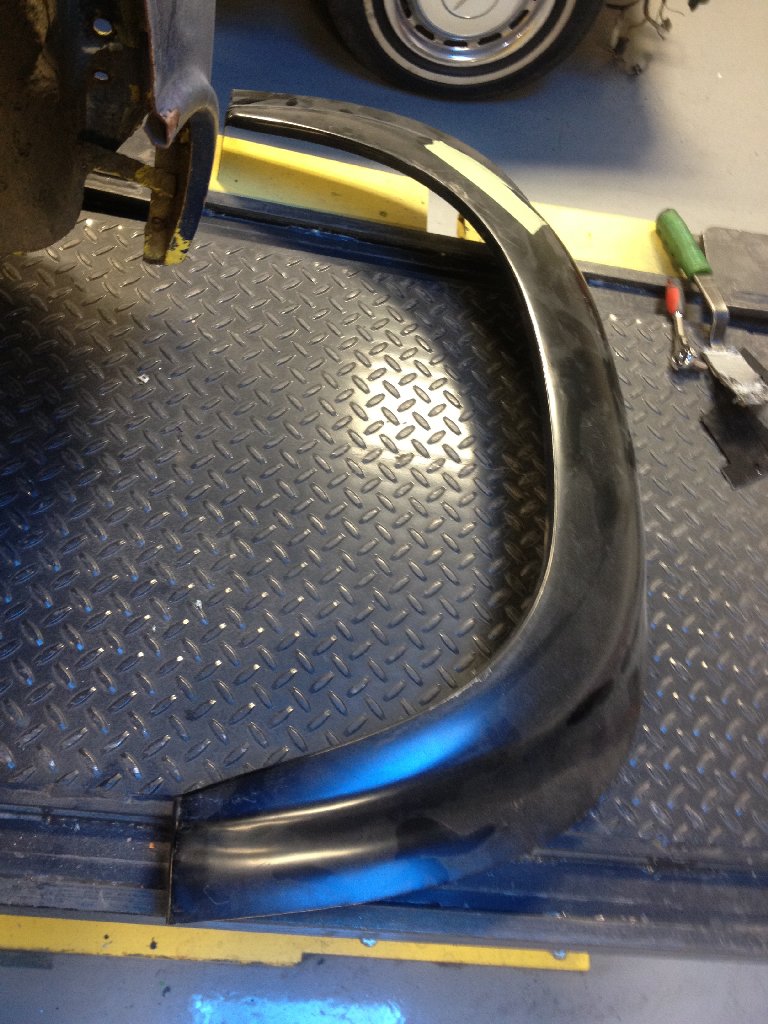
Posted by: siverson Apr 3 2012, 09:12 PM
More progress photos.
And last call looking for a really nice front left fender, otherwise we'll use the one we have (which needs a bit of work itself).
We did get an OEM front left flare to match the others - the only corner that we could find anywhere. I guess I was "lucky" to scrunch that corner.
-Steve
Attached image(s)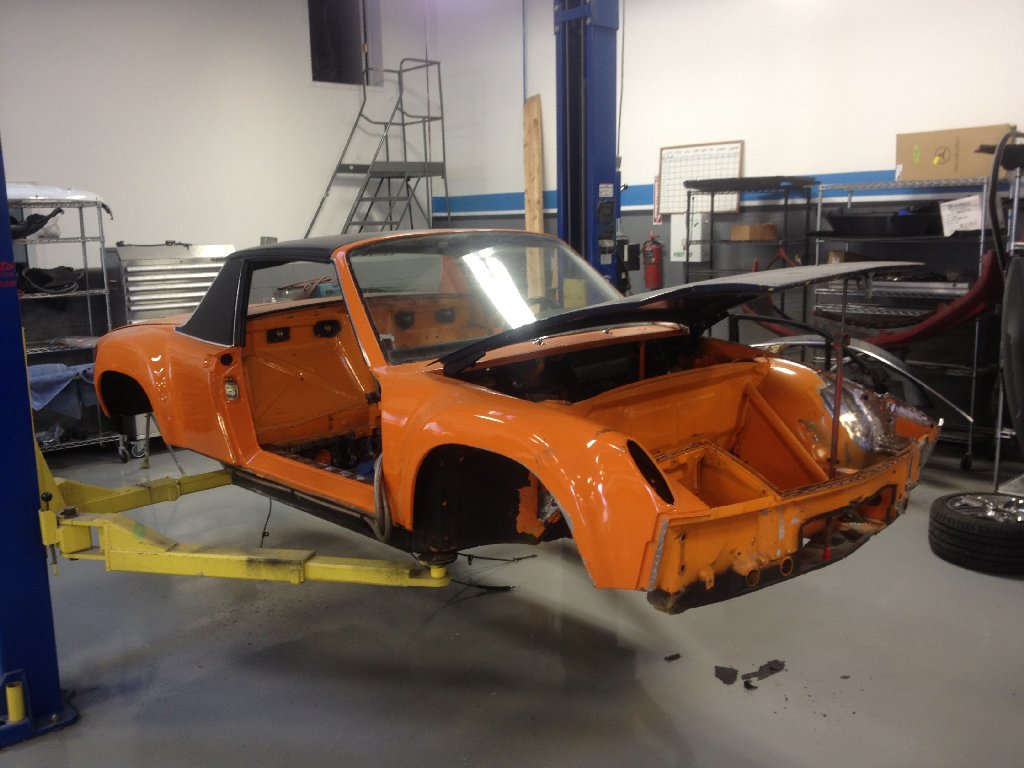
Posted by: siverson Apr 3 2012, 09:13 PM
pics
Attached image(s)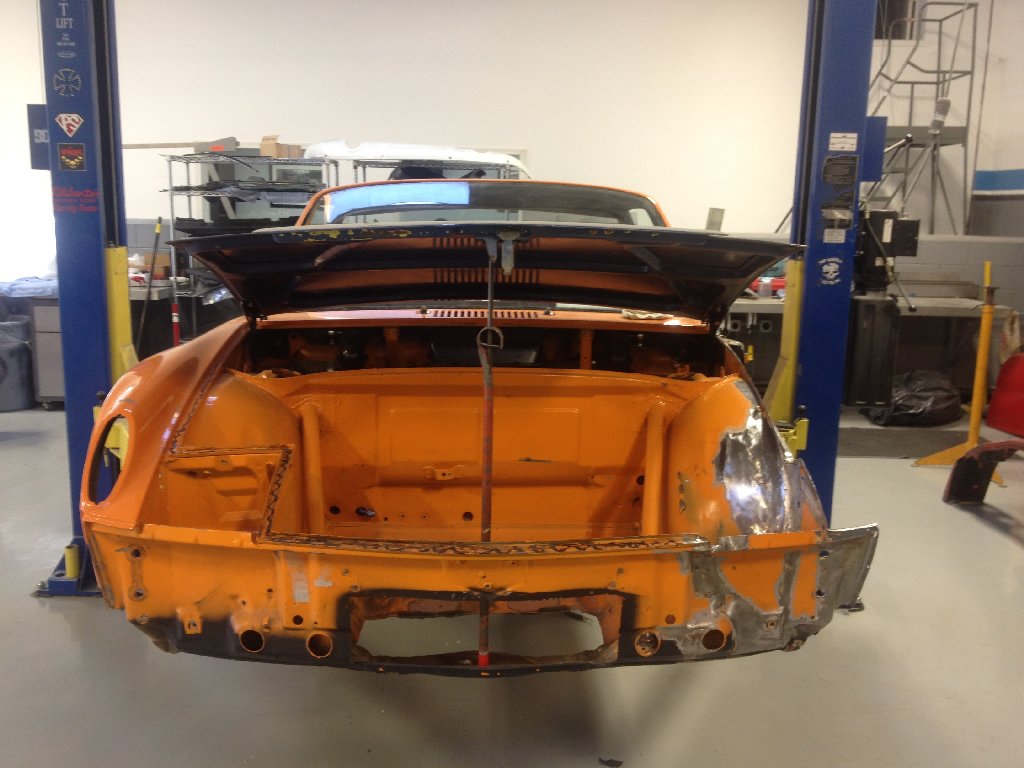

Posted by: siverson Apr 3 2012, 09:13 PM
more
Attached image(s)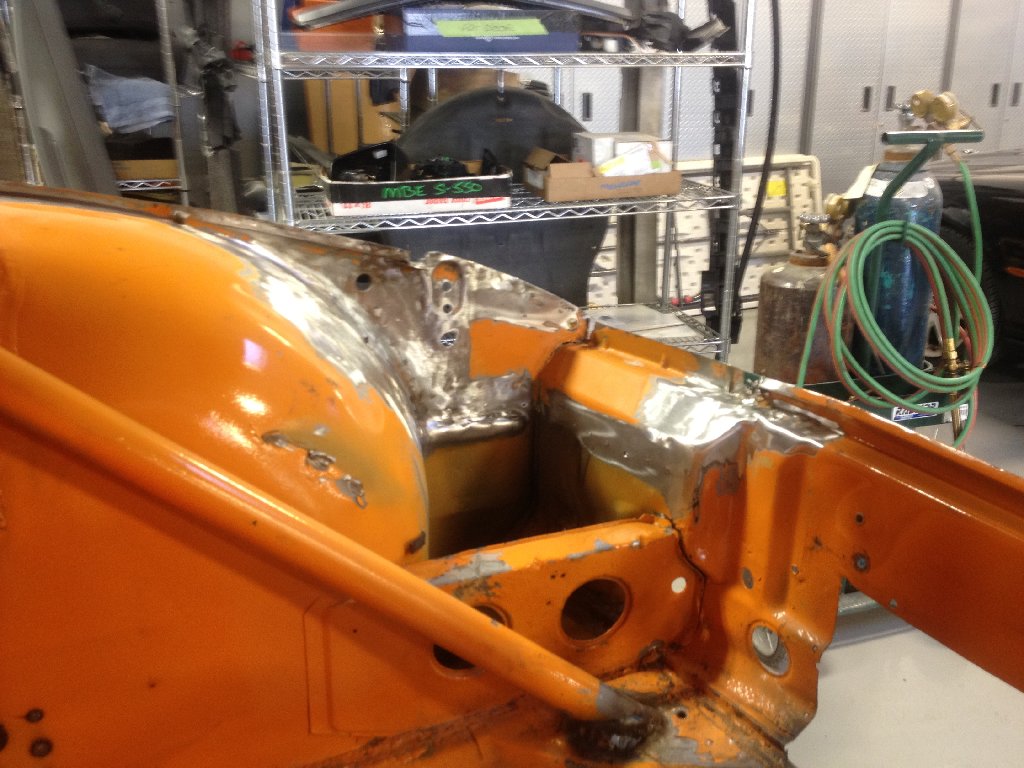

Posted by: siverson May 16 2012, 09:11 PM
Lily thought 914 needed a hug.
Making some more progress. Headlight bucket and fender should be going on soon...
-Steve
Attached image(s)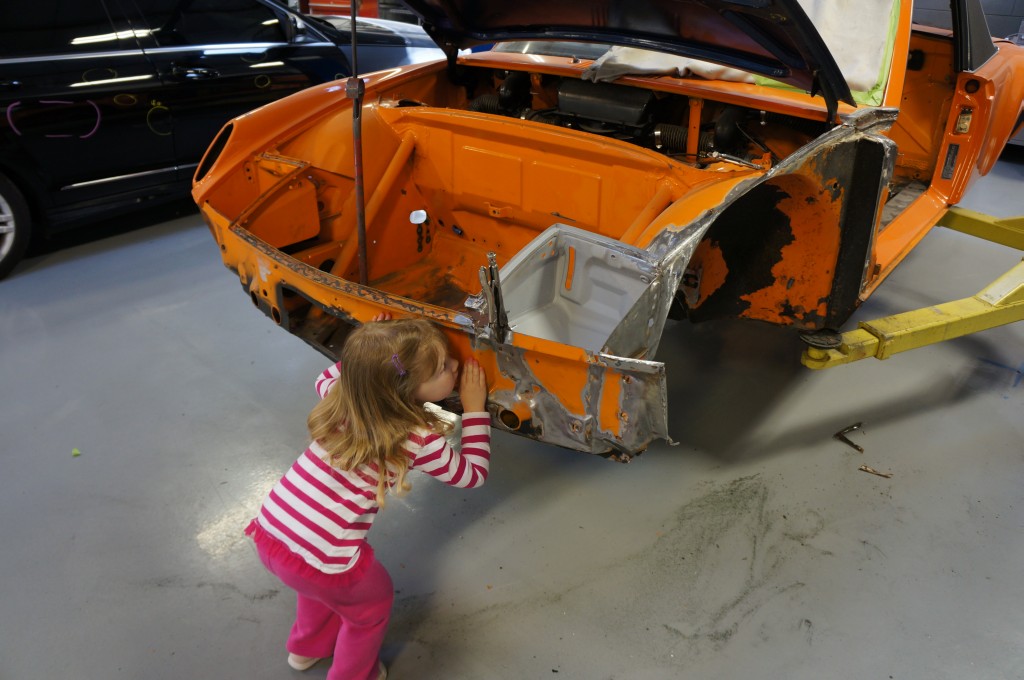
Posted by: Andyrew May 16 2012, 11:26 PM

Posted by: sixnotfour May 17 2012, 03:39 AM
Nice Save !
Posted by: stuttgart46 May 17 2012, 06:38 AM
That pic of your daughter with the car is priceless.
Hopefully she'll be driving it someday (with you of course). LOL
Posted by: rick 918-S May 17 2012, 07:06 AM
Looking good Steve! Glad you decided to save the shell you have. Once they pulled it it's not as bad as it looked is it. These cars are pretty repair friendly.
Posted by: 396 May 17 2012, 07:26 AM
Glade to see your toy is recovering from that Streets boo boo.
Posted by: siverson Jun 5 2012, 05:24 PM
Getting closer... Paint next week perhaps...
-Steve
Attached thumbnail(s)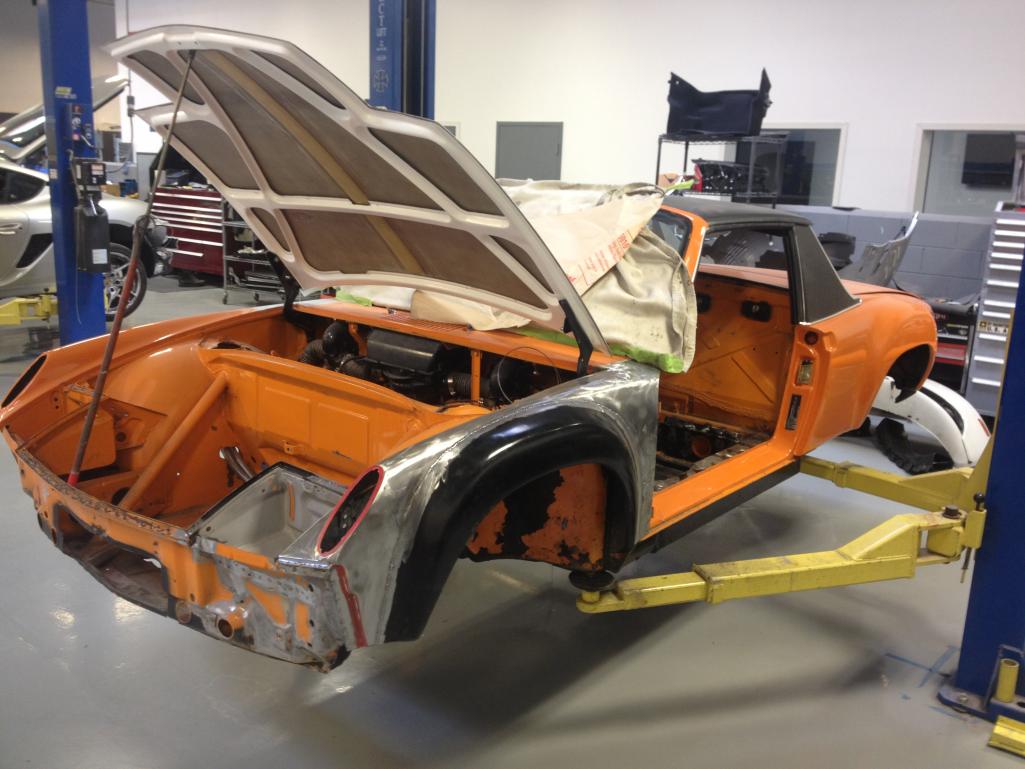
Posted by: Mr.242 Jun 5 2012, 05:28 PM
Put a tilt front end on it. Anklebiter is going to have one....
 Looking good~
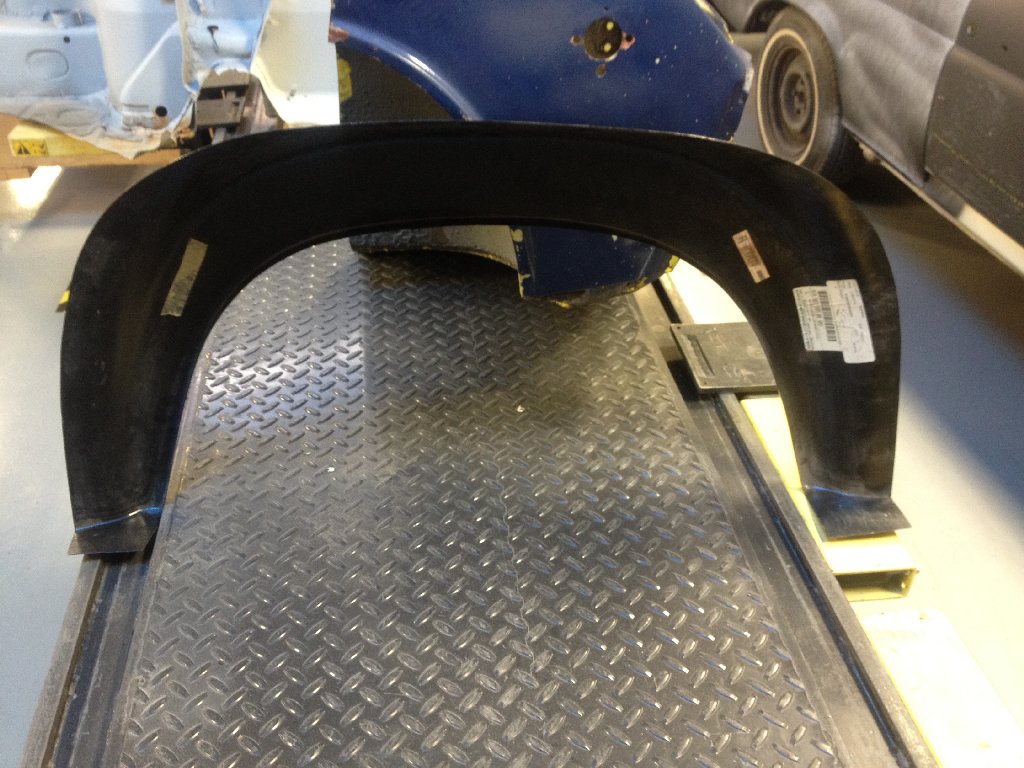
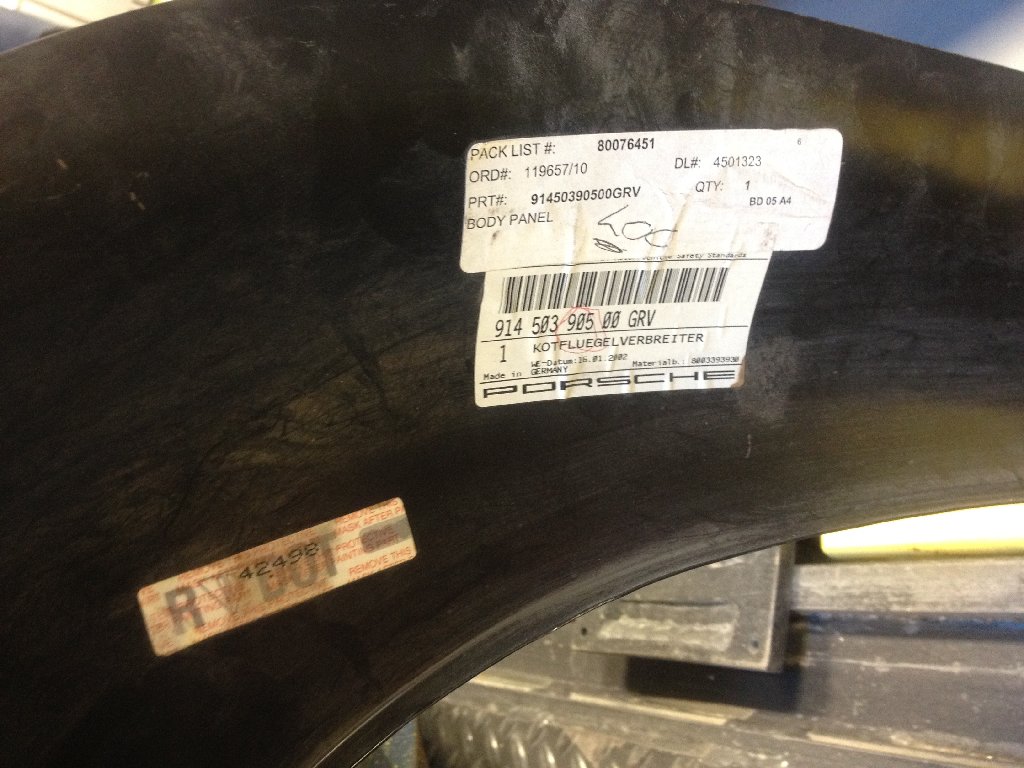
Posted by: siverson Jun 5 2012, 05:28 PM
OEM flare to match the other 3 OEM flares.
I got lucky in that the only OEM flare we could find just happened to be the corner I needed.
-Steve
Attached thumbnail(s)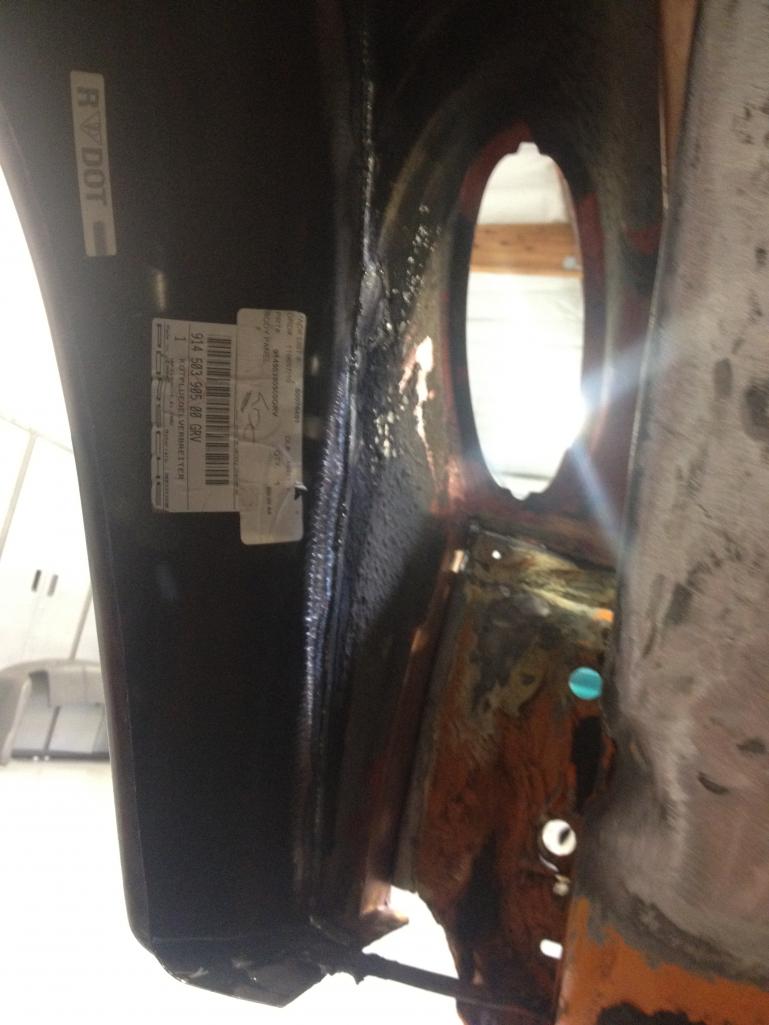
Posted by: ThinAir Jun 5 2012, 10:51 PM
Congrats on your progress! It's been a long road, but you are getting closer to the end. It made me cry to see the initial damage, so this is great to see.
Posted by: Cairo94507 Jun 6 2012, 06:26 AM
Excellent repair. I was very sad to see the damage too. Glad you are fixing this car.
Posted by: JRust Jun 6 2012, 08:01 AM
Excellent Steve! Congrats on getting it back together. It will look great again very soon  . Thats going to feel so good once it is finished. Can't wait to see you again
Posted by: rwilner Jun 6 2012, 08:30 AM
just read through this thread...amazing transformation and beautiful car. You had/have what 95% of teener owners would build if they had the $ and time.
Bonus points for doing this with 2 young kids!!
Can't wait to see it back on the road!
Posted by: siverson Jun 6 2012, 09:12 PM
Thanks everyone. Hopefully it does turn out nice. So far so good...
Plus I have a few extra new treats for 914 going in too... Photos coming shortly. (Crash your car on the track? More horsepower!!! )
-Steve
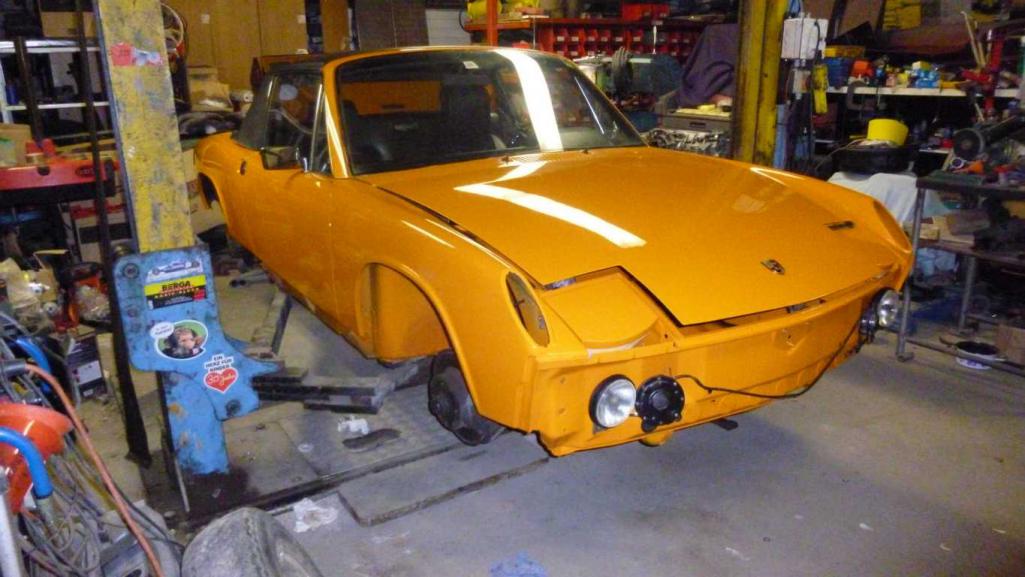
Posted by: siverson Jul 16 2012, 06:33 PM
He's back on 4 wheels!
There was a bit of a delay, but in theory he's heading into paint this week...
-Steve
Attached thumbnail(s)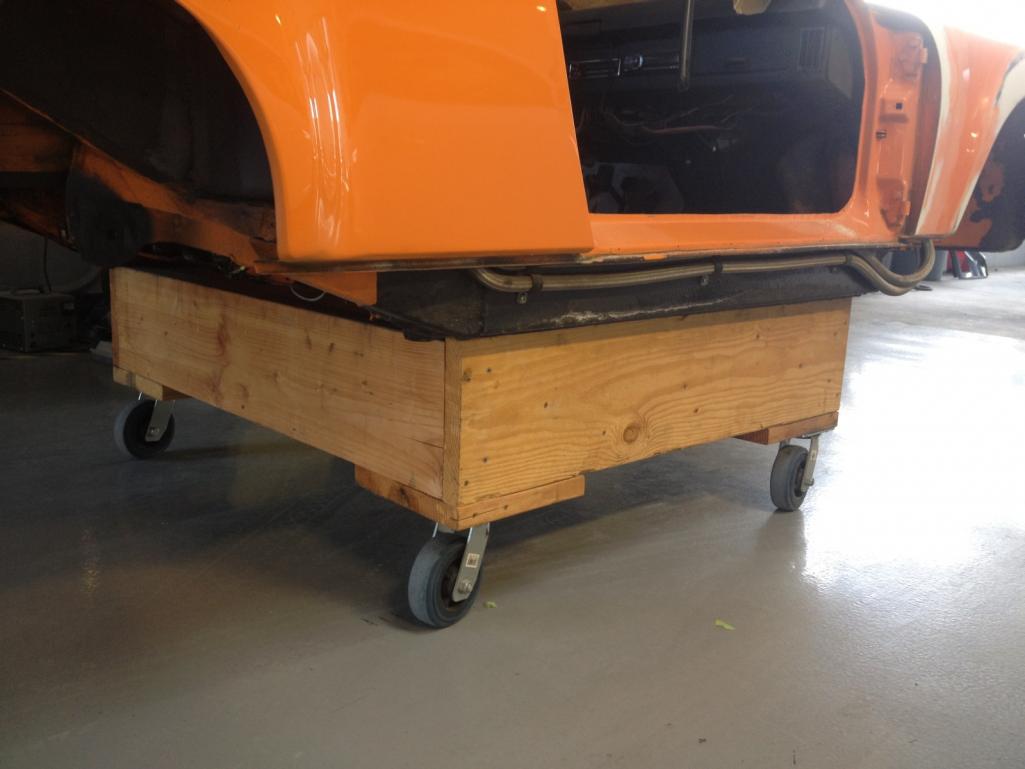
Posted by: ThePaintedMan Jul 16 2012, 09:26 PM
Are they shooting the whole thing or just blending? Would like to have pics of that as well!
Posted by: championgt1 Jul 16 2012, 09:41 PM
Nice!
Posted by: Socalandy Jul 16 2012, 10:19 PM
it will be like it never happened, Great work!!!
Posted by: siverson Jul 16 2012, 11:33 PM
> Are they shooting the whole thing or just blending? Would like to have pics of that as well!
Just blending. The whole car was repainted about 6 months prior to this... :/
-Steve
Posted by: siverson Jul 16 2012, 11:41 PM
A question:
Should the long edges of the Engman kit be welded to the body as well? A stitch weld? As it's currently installed, just the holes were welded (I think).
-Steve
Attached image(s)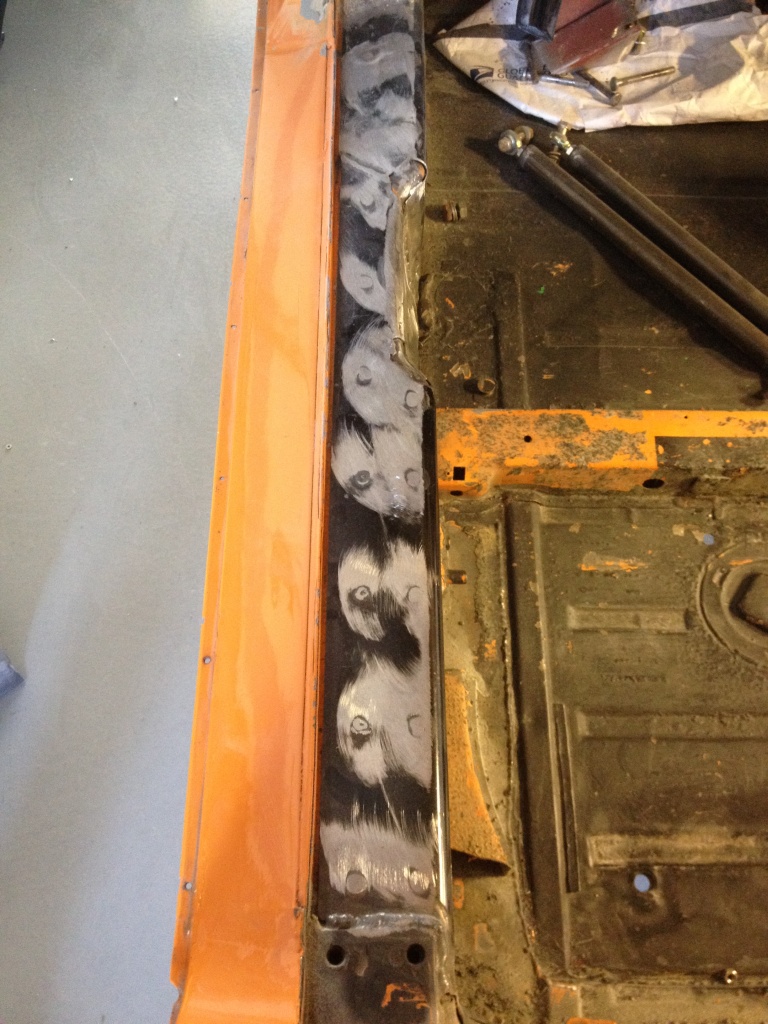
Posted by: sean_v8_914 Jul 17 2012, 09:27 AM
i stitch teh edges top and sides but NOT the floor. i also use a self leveling seam sealer on top edge and a firmr seam sealer on vert seams
SEM 39??377. i dont recall teh exact part hnumber
Posted by: siverson Jul 17 2012, 11:25 AM
> i stitch the edges top and sides but NOT the floor
Hmmmm, ok. I'll see what their body guy says.
Thanks,
Steve
Posted by: siverson Jul 18 2012, 10:31 PM
Slowly getting closer...
Attached image(s)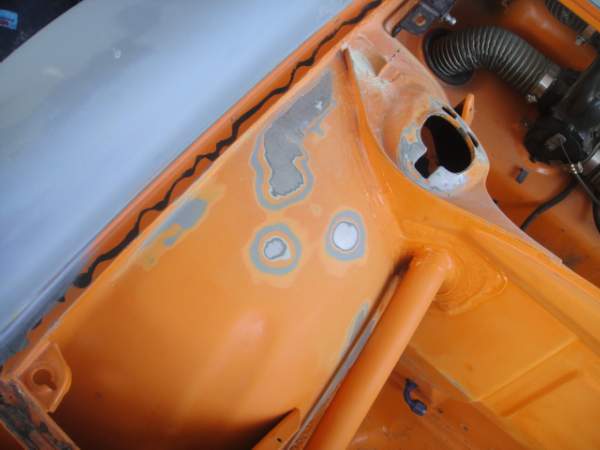
Posted by: siverson Jul 18 2012, 10:31 PM
more
Attached image(s)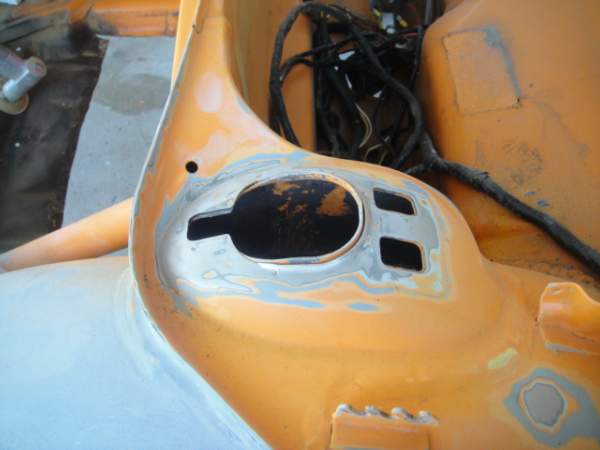
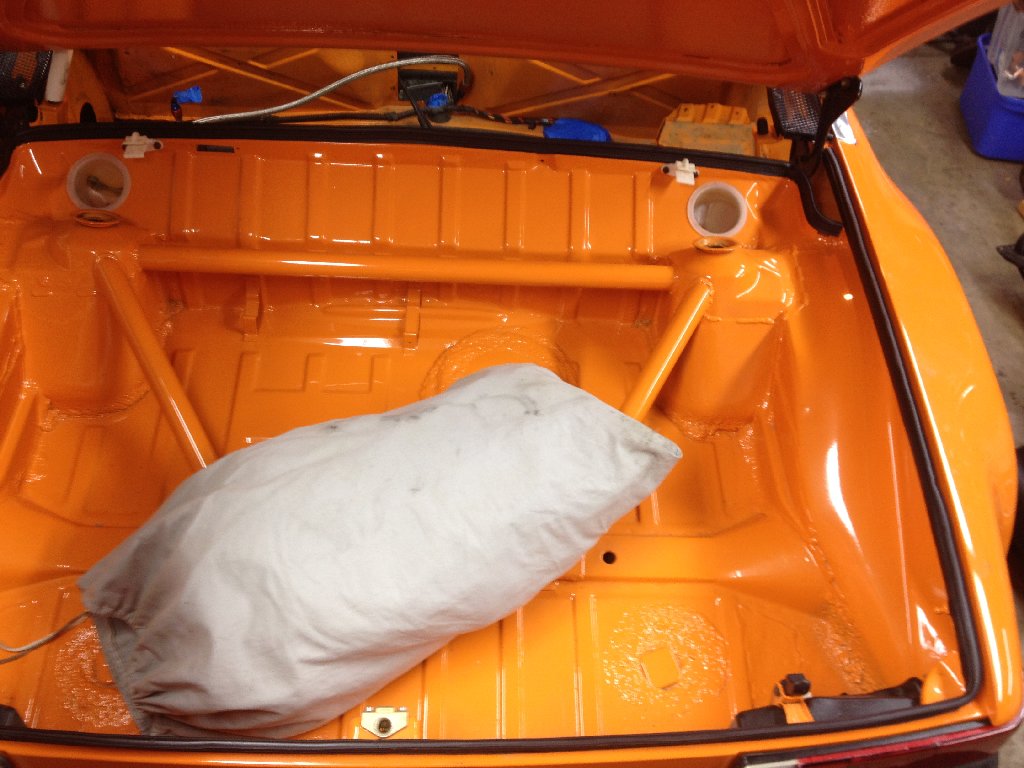
Posted by: siverson Aug 3 2012, 10:25 PM
Getting closer... (trunk painted)
Attached thumbnail(s)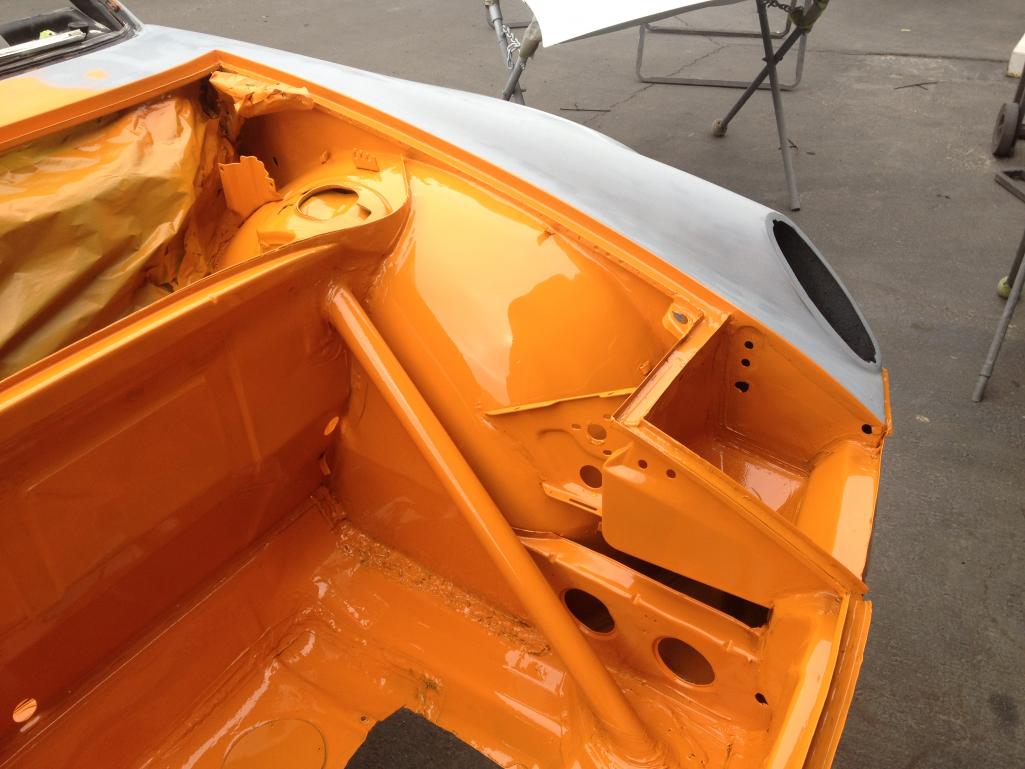
Posted by: siverson Aug 3 2012, 10:26 PM
another
Attached thumbnail(s)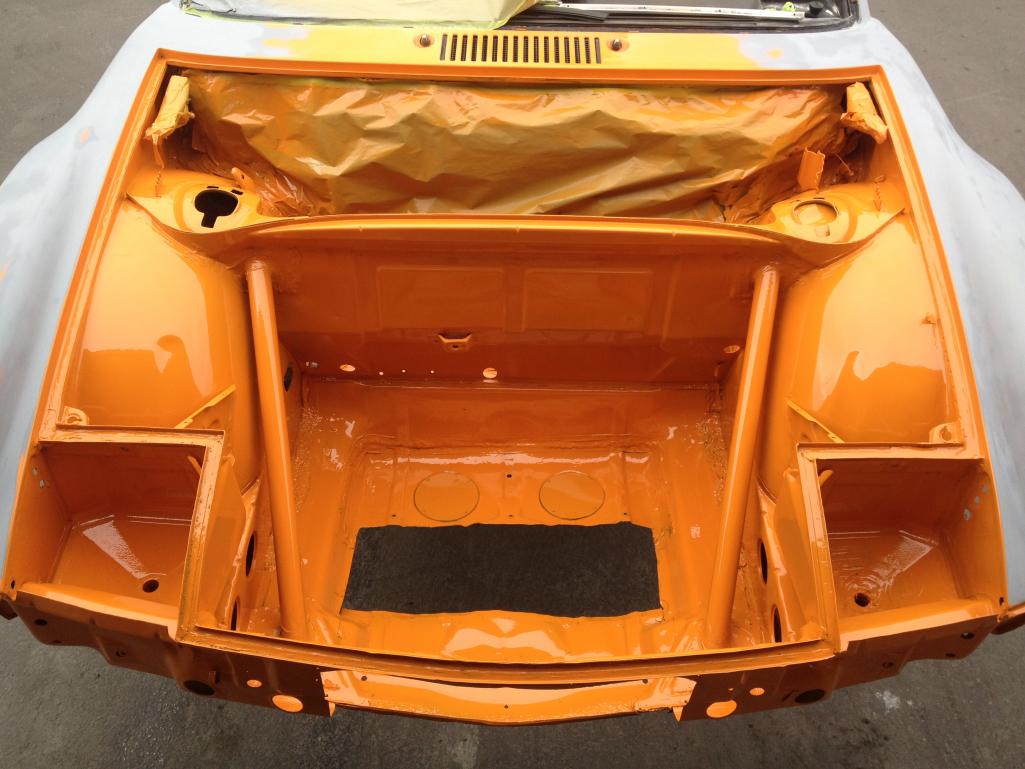
Posted by: siverson Aug 3 2012, 10:26 PM
A little less smunched looking now.
Attached thumbnail(s)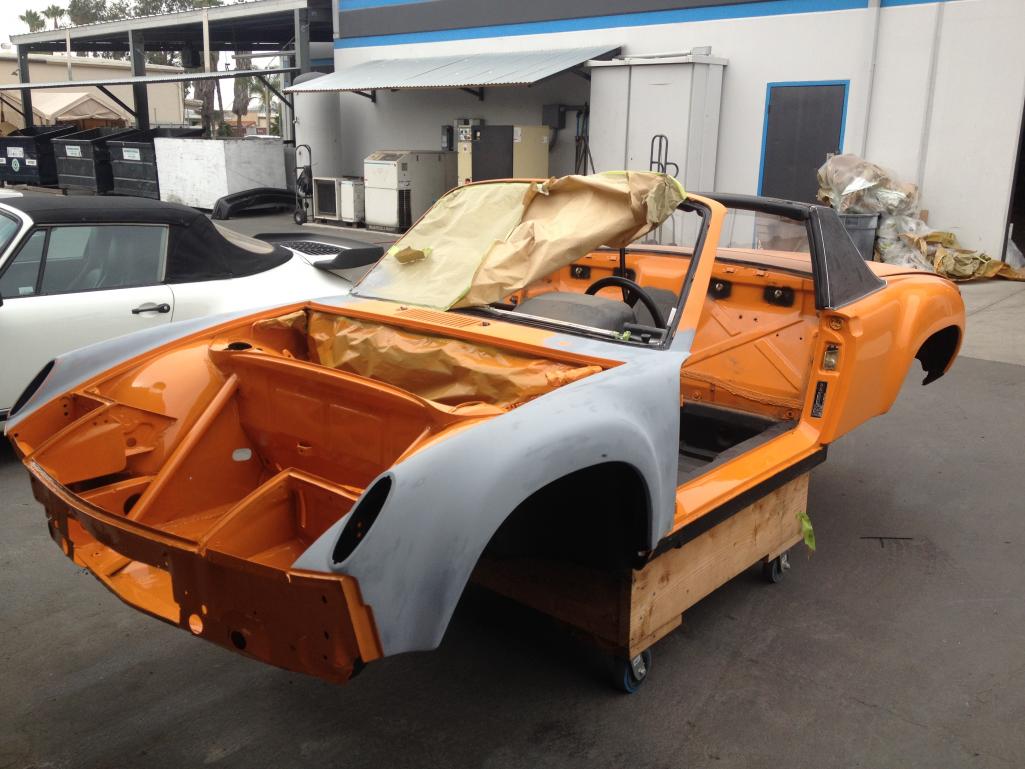
Posted by: 396 Aug 4 2012, 12:15 AM
Congrats! Your -6 is coming along just fine.
Posted by: ottox914 Aug 4 2012, 08:11 AM
Just read thru most of this- great recovery. The pic with your daughter- priceless.
Posted by: siverson Aug 10 2012, 05:29 PM
Getting closer...
-Steve
Attached image(s)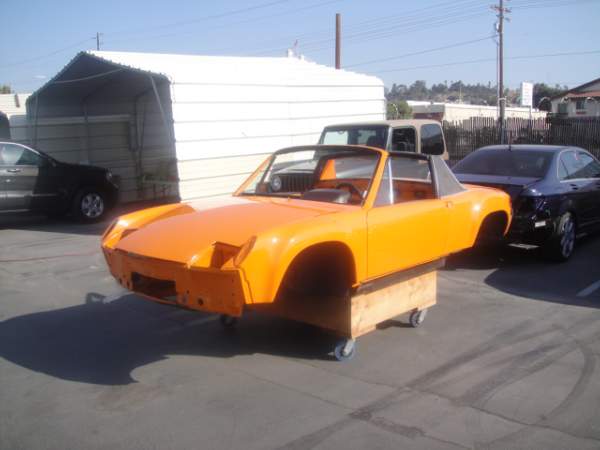
Posted by: siverson Aug 10 2012, 05:30 PM
It is funny how toy-like they look like up on dollies or jackstands like that.
-Steve
Posted by: rick 918-S Aug 10 2012, 08:32 PM
Lookin good!
Posted by: JRust Aug 10 2012, 10:37 PM
That is looking great!Be awesome to see it on the road again. So glad you saved it .
Posted by: siverson Aug 15 2012, 10:43 PM
I should have another update tomorrow...
Posted by: siverson Aug 15 2012, 10:44 PM
Makes me wonder how those builders on TV seem to do EVERYTHING in 2-4 weeks sometimes...
Posted by: championgt1 Aug 15 2012, 10:46 PM
Posted by: Dave_Darling Aug 15 2012, 10:52 PM
Makes me wonder how those builders on TV seem to do EVERYTHING in 2-4 weeks sometimes...
Bondo and three shifts. It only has to look good enough for the camera, and only for one shoot.
--DD
Posted by: get off my lawn Aug 16 2012, 06:03 PM
Several times over the past decade I found myself saying, I wonder whatever happened to that really tall guy I met at Pomona with the bitchen orange teener that used to eat 901s for breakfast.
Now I know. 
Posted by: siverson Aug 16 2012, 09:28 PM
> that used to eat 901s for breakfast
The 901 was replaced with a 915, but now he eats portable lights.
Posted by: siverson Aug 16 2012, 09:29 PM
Back in the garage now... Hopefully I'll have him back together in a couple or 6 months...
-Steve
Attached thumbnail(s)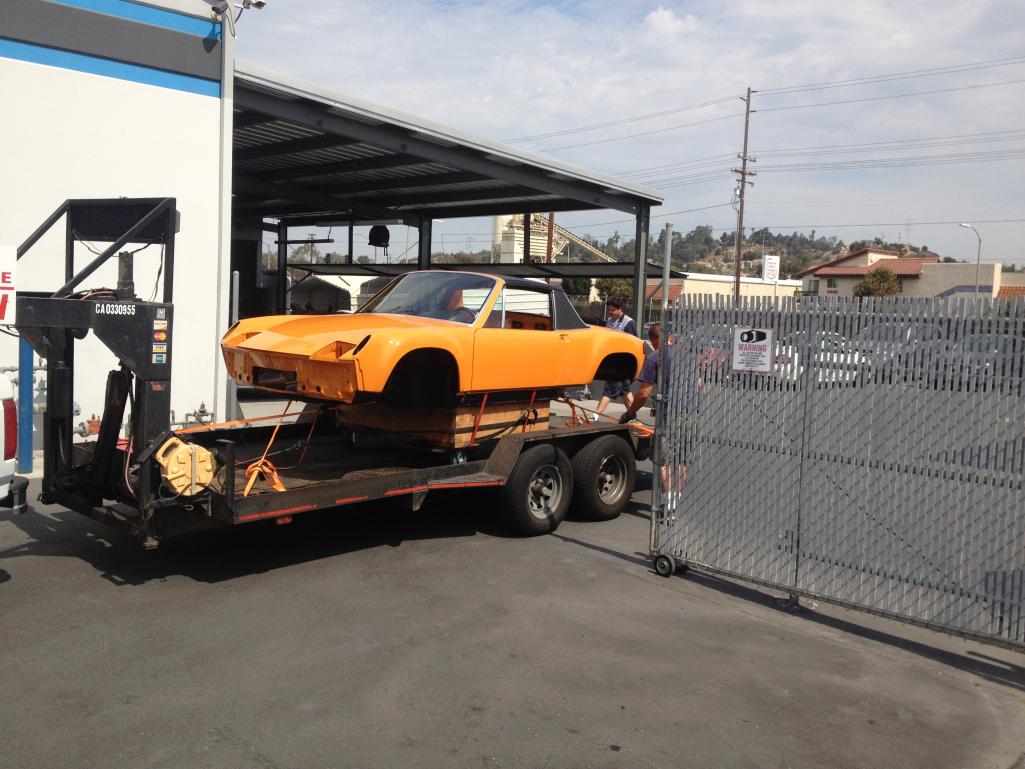
Posted by: siverson Aug 16 2012, 09:33 PM
Of course I had my helper with me to inspect things.
Attached thumbnail(s)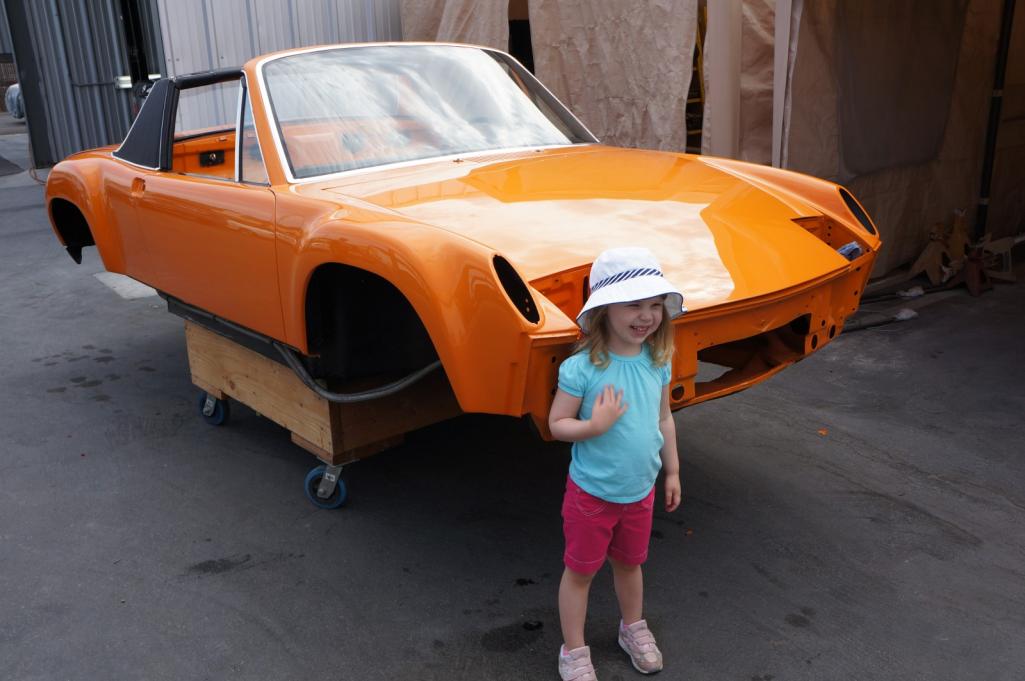
Posted by: Steve Aug 17 2012, 07:23 AM
> that used to eat 901s for breakfast
The 901 was replaced with a 915, but now he eats portable lights.
Are portable lights going to be the norm now for Streets of Willow? I wouldn't race there with those lights, Murphy is alive and well!!

Glad you got your car back, it looks great!!! I would love to do a ground up restoration on my car some day.
Posted by: mepstein Aug 17 2012, 07:33 AM
Congrats on rebuilding the car. Looks great. 
Posted by: FourBlades Aug 17 2012, 08:21 AM
Fixing the car was a good call.
John
Posted by: jsayre914 Aug 17 2012, 09:37 AM
Great Thread
Posted by: euro911 Oct 4 2012, 03:47 AM
Awesome rebuild
Posted by: siverson Jan 2 2013, 07:09 PM
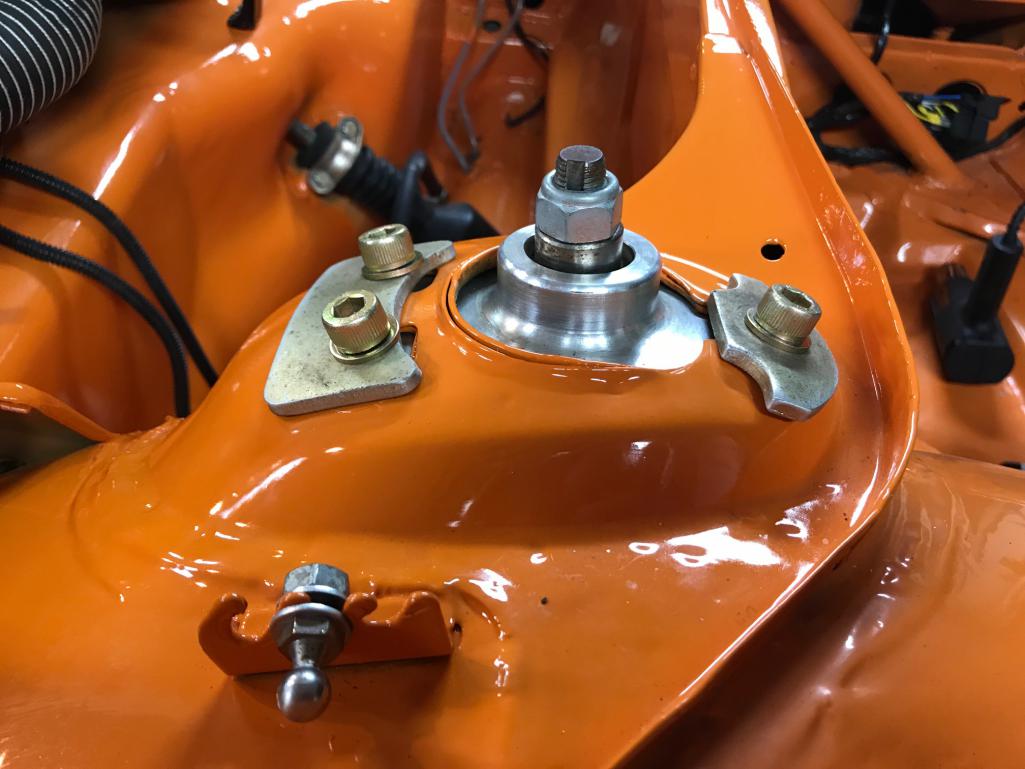
The last couple months I've had basically had zero time to work on the car, but I did actually have a couple hours over the new years break to start on a couple of things. I got the new Tarrett sway bar installed to replace the Weltmeister. The build quality and parts are 1000x better than the Weltmeister, but I hate the ugly color the parts are anodized in. Oh well...
-Steve
Attached thumbnail(s)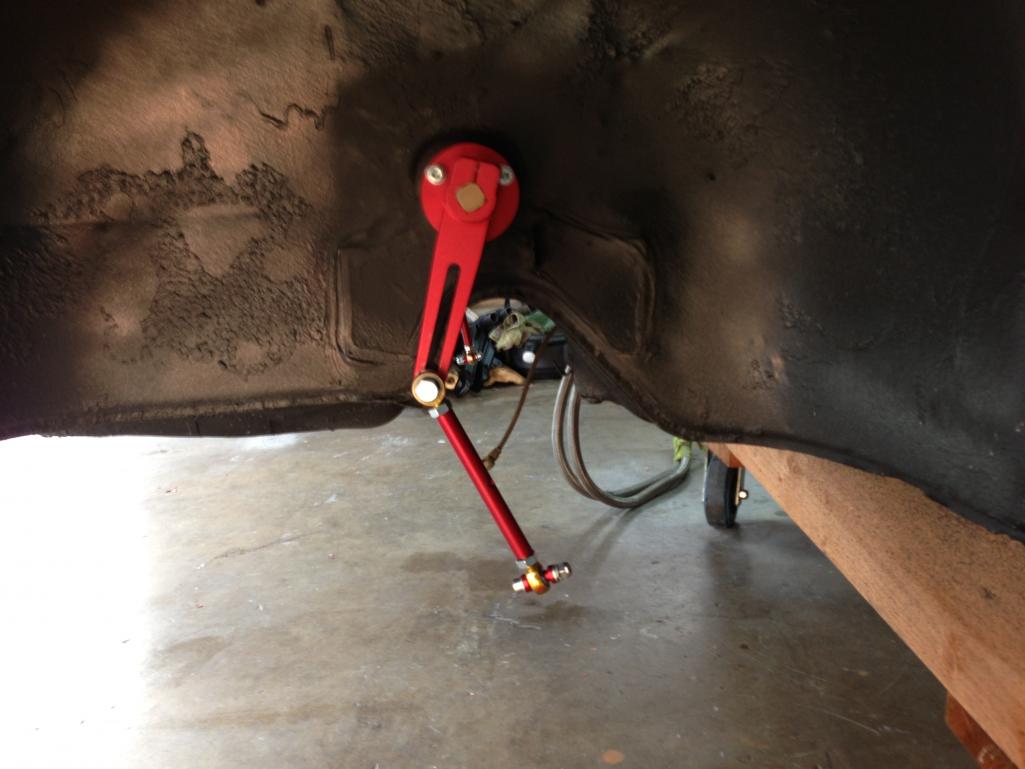
Posted by: siverson Jan 2 2013, 07:22 PM
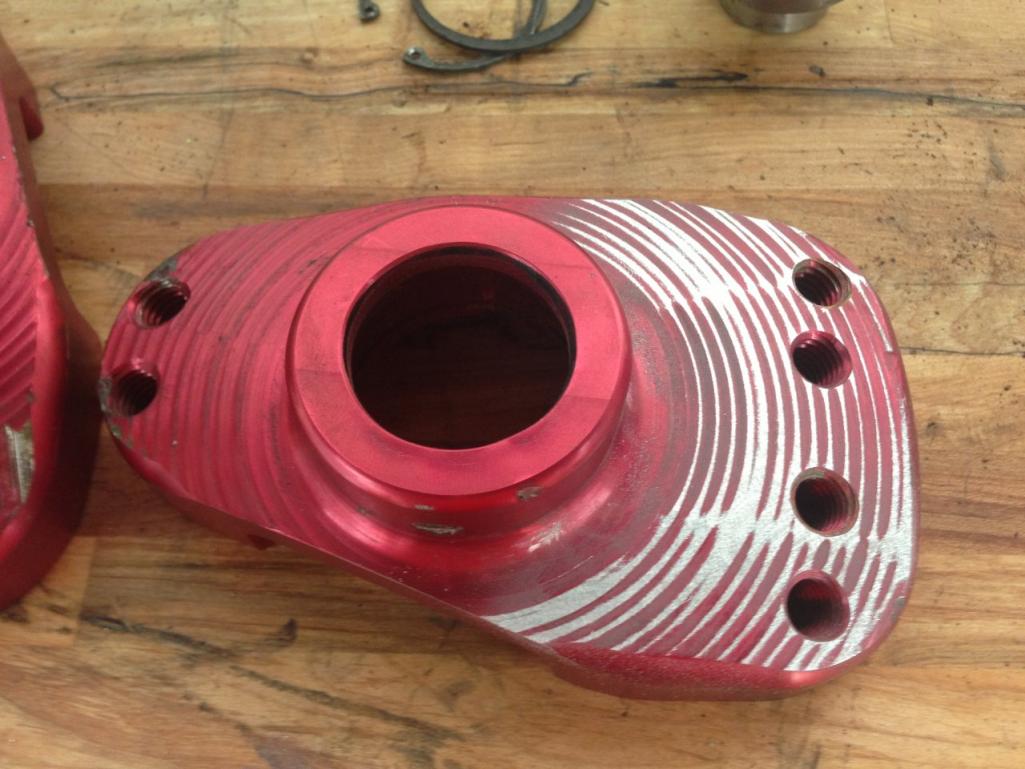
I can live with the ugly color under the car, but the monoballs on the top drove me crazy - pink/red in the trunk was quite ugly.
Plus, these parts weren't finished that great as the CNC marks were clearly visible on the top part. So, I sanded them smooth and plan on powder coating these silver or something.
Unless I really screwed something up and those marks were intentionally put there to put some "bite" into the parts when they are tightened against the body. But I don't think the stock part has that... ?
-Steve
Attached thumbnail(s)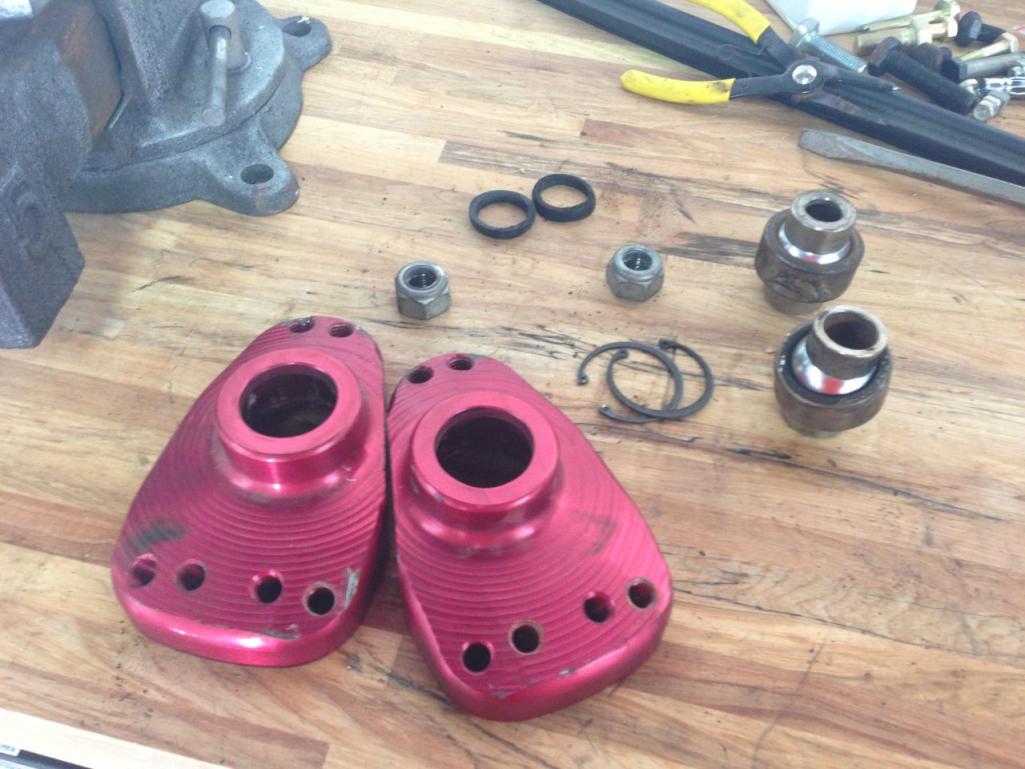
Posted by: Eric_Shea Jan 2 2013, 10:28 PM
Ut Ohhhh...  Shouldn't-a-done-that!!
Posted by: '73-914kid Jan 2 2013, 10:39 PM
I think most people pay extra for the anodizing because they think it looks cool...haha
Posted by: 914_teener Jan 2 2013, 11:06 PM
Ut Ohhhh...
Shouldn't-a-done-that!!Hey those might flex now!
The build looks great....been following this thread. I am glad you saved the car.
Posted by: sixnotfour Jan 3 2013, 07:07 PM
Looks like they forgot the Finish Pass
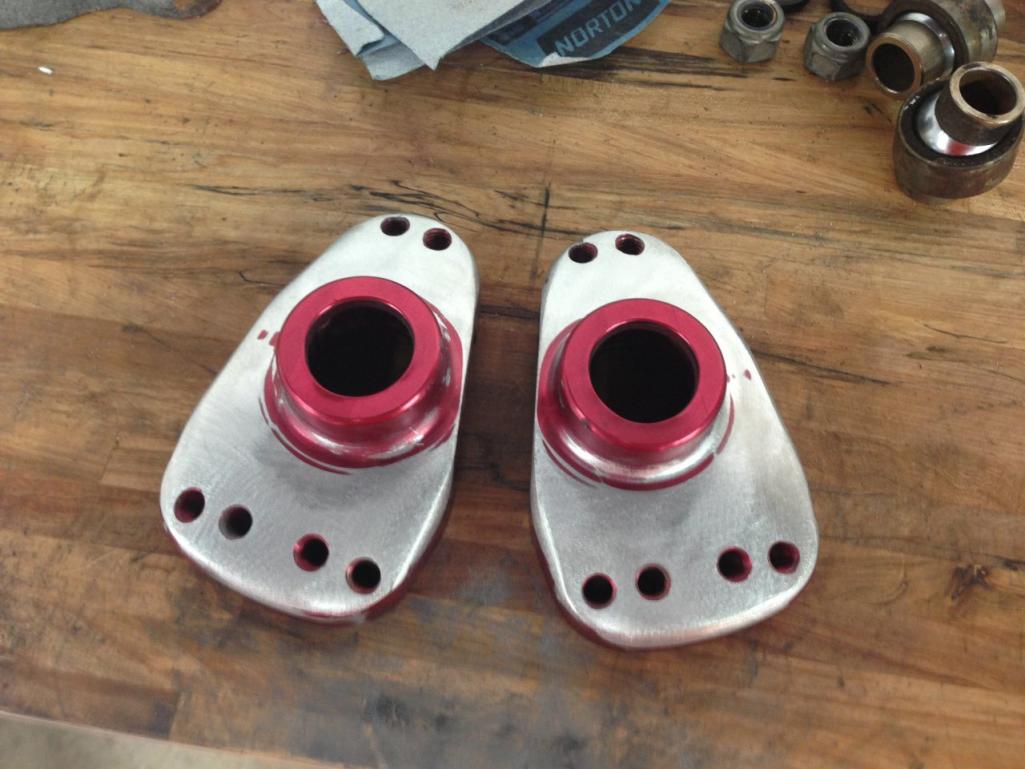
Posted by: siverson Apr 16 2013, 11:34 PM
Doesn't this look much better now?
-Steve
Attached thumbnail(s)
Posted by: siverson Apr 16 2013, 11:36 PM
"While I was in there" I put a light coat of black paint on the air box (and sanded off the BEHR logo (no idea why that always bugged me too)), and also had the clips cad plated with everything else. Not factory, but looks much nicer than the tarnished grey clips that were there.
Too blingy?
-Steve
Attached thumbnail(s)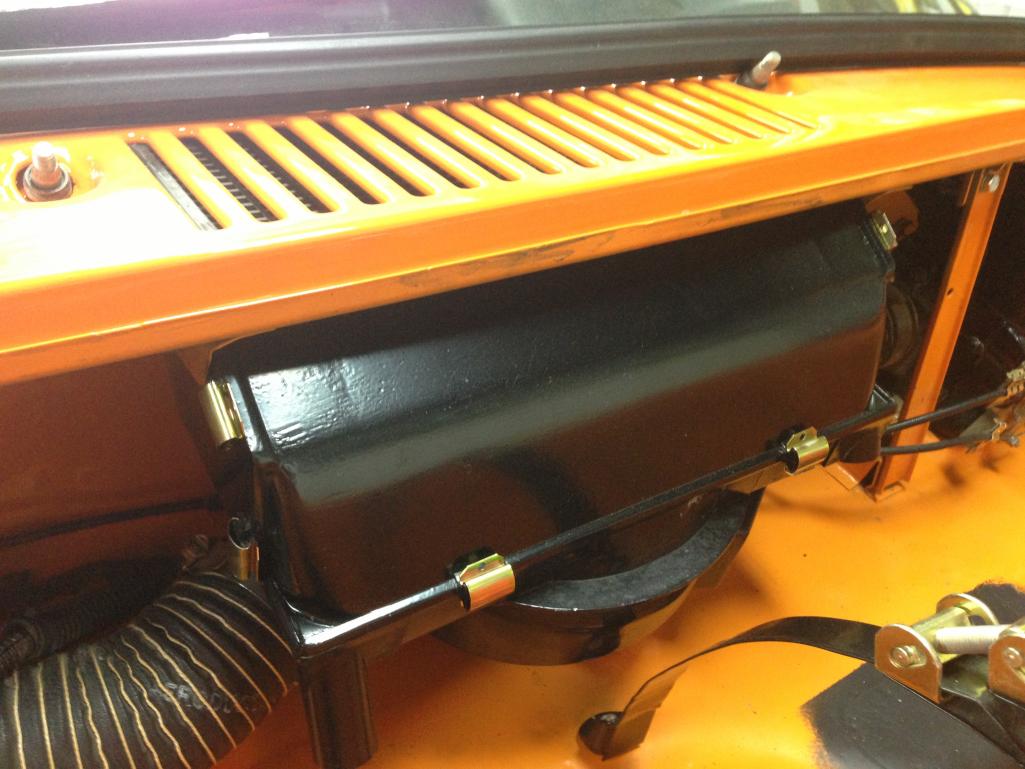
Posted by: Cairo94507 Apr 17 2013, 06:46 AM
Very nice. Glad to see progress on this exceptional car.
Posted by: rick 918-S Apr 17 2013, 09:07 AM
Like!
Posted by: siverson Apr 17 2013, 09:22 AM
And I just got my wheels back from Weidman's. He had them for 7 months, but I guess he's still faster than I am. 2 were bent in my offroad adventure but no more.
I went for an RSR finish this time instead of polished spokes.
-Steve
Attached thumbnail(s)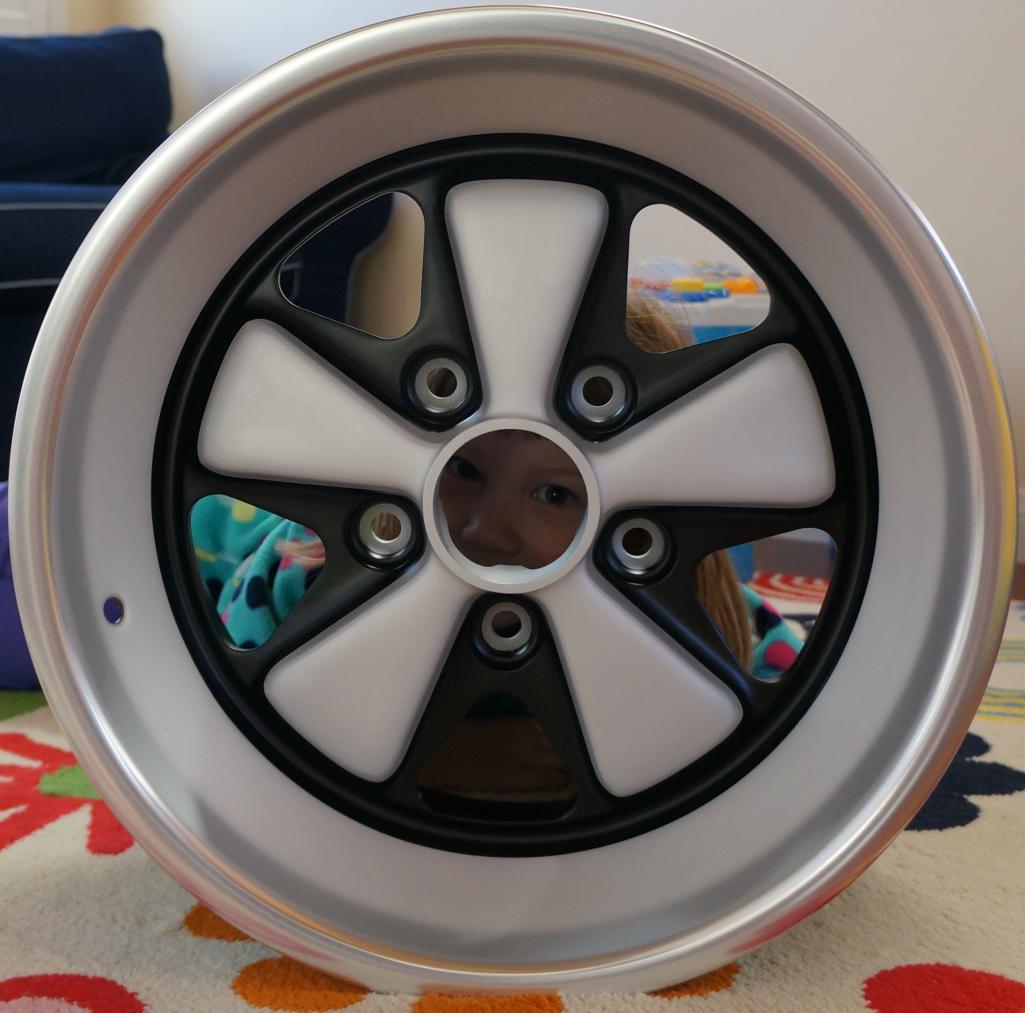
Posted by: Java2570 Apr 17 2013, 04:10 PM
Those wheels turned out beautiful; love that finish!
Posted by: Cairo94507 Apr 17 2013, 08:59 PM
Love the wheel. Note to self: gotta get mine to Weidman.
Posted by: Derek Seymour Apr 17 2013, 09:32 PM
A fix it. And get her back on the track too. If she could talk that is what she would say.
Posted by: siverson Apr 29 2013, 12:33 AM
I have the suspension back on all four corners now, and I've started the brakes.
And... I learned some 911s have 16mm front spindles, and some are 18mm. My old struts were 16mm (one broke), and the replacements are 18mm. The old wheels bearings work fine, but the washer and lock nut thing at the end of the spindle need to be replaced.
Strange that wheel bearings are the same, but the nut is not.
-Steve
Posted by: sixnotfour Apr 29 2013, 12:42 AM
Koni's early versus late
Posted by: siverson May 2 2013, 11:06 AM
Starting to get parts back on the previously ugly corner...
Two questions:
1. I've never figured out exactly how tight to make front axle nut/wheel bearing. I tightened these and then backed them out only 1/8th of a turn or so. The wheel spins fine, but it is possible to "wiggle" the top of rotor on the axle just a little. So... how tight?
2. Both rotors are new, but there is a *very* slight wobble when spun. It's only detectable when the you look closely at the distance between inside of the caliper and rotor. That tolerance is very tight to start, and you can see the rotor move back and forth slightly within the caliper. I've never noticed this before. Is this normal?
-Steve
Attached thumbnail(s)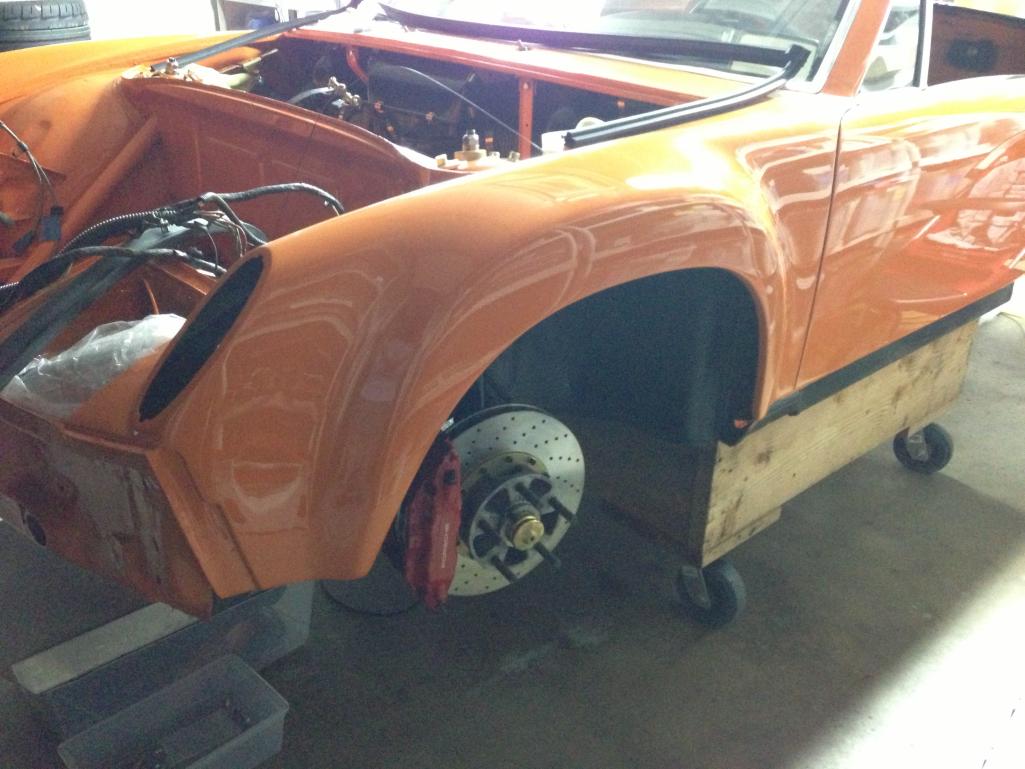
Posted by: Dave_Darling May 2 2013, 03:26 PM
Spec for the axle nut is "until you can just barely move the washer with a screwdriver". Seriously.
I'm not sure how the rotor is attached to the hub on your setup. The four-cylinder front rotors obviously have it as one solid cast piece, so there should be no wobbling.
The rears have a separate rotor and hub (like most cars do), and in that case it is normal for the rotor to be a little bit loose. Remember that the rotor is in those cases sandwiched between the hub and the wheel, which is put on with 90 lb-ft of torque...
So, uh, I guess I'm not sure about your wobble.
--DD
Posted by: '73-914kid May 2 2013, 05:21 PM
You have the same setup in the front that I just recently installed.. It's a coleman racing products brake rotor, with an aluminum hat, bolted to the aluminum hub. There are now 2 interfaces that must be bolted up almost perfectly, and they are sometimes hard to get lined up. I'm fighting some brake pedal pulsing becasue of the "wobble" you speak of. It's just run-out in the brake rotor from things not being seated in the right position.
If I were you, I would remove the caliper and start unbolting, and rotating things until you find a position that it is all happy. Check run-out with a dial indicator.
Did you disassemble the rotor/hat/hub assembly after the crash? you might have gotten things seated back properly...
Posted by: john rogers May 2 2013, 06:54 PM
Years ago when I installed the "Brad" 4 bolt alloy hubs and vented rotors with M calipers there was some wobble when at rest with the wheels off the ground. After the first practice session there was no more. If the hub spins true with a dial indicator I would then check the hat and then finally the rotor. My guess is the rotor mating surface is machined a bit off or possibly the bolts are not torqued evenly.
As for tightening the spindle nut, I always tightened it so there was wheel drag, then loosened it, then tightened it again and finally loosening it just enough so there was no wobble at the outer edge of the tire. When the wheel/tire on it gave an old guy like me more leverage.
Posted by: siverson May 2 2013, 09:30 PM
Thanks for the tips.
> Did you disassemble the rotor/hat/hub assembly after the crash?
Yes, it's been a bad case of "while I'm in there" and have basically rebuilt everything. Actually, in regards to the front suspension, I have rebuilt everything.
New Tarrett sway bar to replace the Welt, Elephant bushings to replace the plastic, new von struts to replace the Bilsteins, etc.
> finally loosening it just enough so there was no wobble at the outer edge of the tire
Thanks - that's sounds about like what I did. I'll try again and check.
-Steve
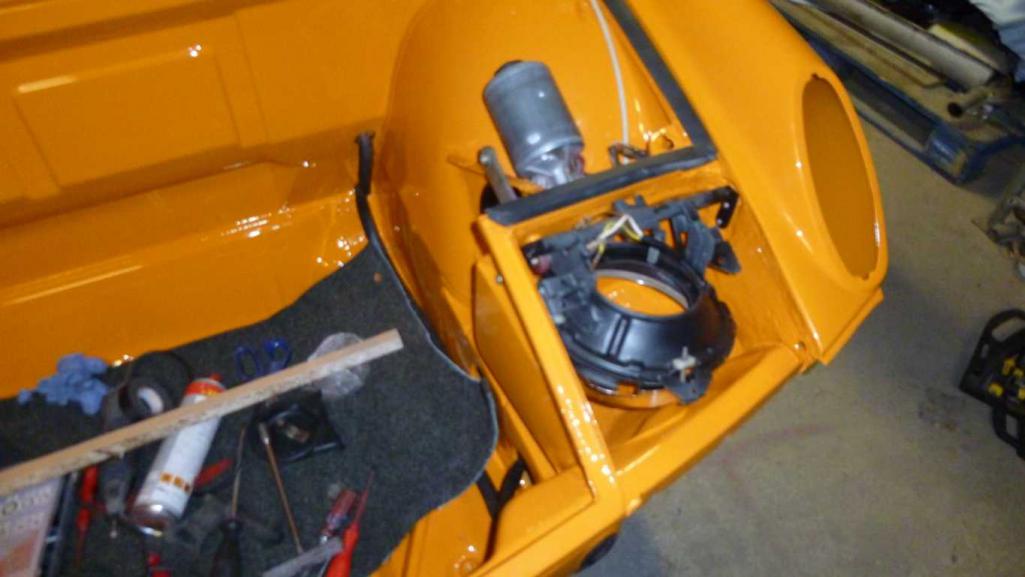
Posted by: siverson Aug 5 2013, 05:03 PM
I think I'm the worldest slowest car mechanic, but I am making progress. Headlight mechanics and wiring are done now, but I probably put everything together 5 times before I got things right.
The headlight mechanism is tighter and better fitting than before.
One weird bug is that sometimes (5% of the time) the passenger side headlight motor cycles and makes an extra trip before it stops closing. I think there is a dirty internal microswitch or something.
Another strange problem I've seen is that the wiper relay is warm to the touch, even when off. All other relays have no temperature to them, even when being used. Maybe I'll just replace it.
-Steve
Attached thumbnail(s)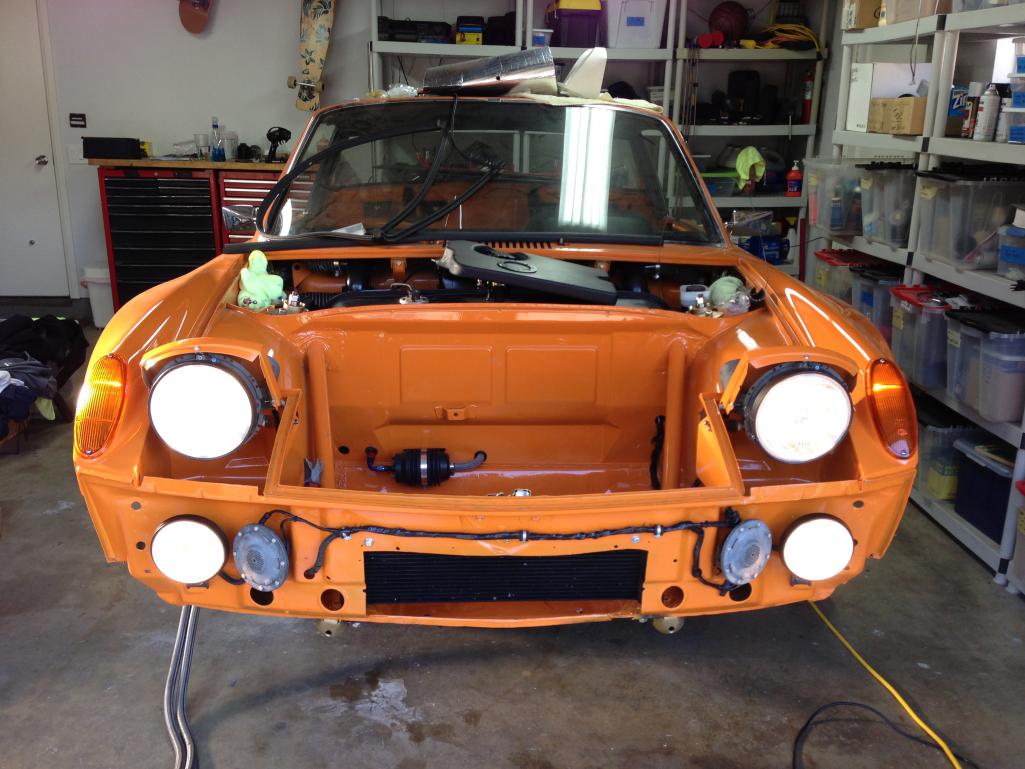
Posted by: siverson Aug 5 2013, 05:04 PM
I also cleaned up the driving light wiring a little. "While I'm in here..."
-Steve
Posted by: tscrihfield Aug 5 2013, 05:09 PM
car looks wonderful steve! I am glad you saved it!
Thomas
Posted by: Elliot Cannon Aug 5 2013, 05:47 PM
Spec for the axle nut is "until you can just barely move the washer with a screwdriver". Seriously.
I'm not sure how the rotor is attached to the hub on your setup. The four-cylinder front rotors obviously have it as one solid cast piece, so there should be no wobbling.
The rears have a separate rotor and hub (like most cars do), and in that case it is normal for the rotor to be a little bit loose. Remember that the rotor is in those cases sandwiched between the hub and the wheel, which is put on with 90 lb-ft of torque...
So, uh, I guess I'm not sure about your wobble.
--DD
I had a 1960 VW bug and the front axle nut adjustment was exactly the same technique. The way I have done it is to tighten it fairly tight to seat everything, then loosen it till like Dave said, "until you can barely move the washer with a screwdriver". It doesn't seem very technically sophisticated but it works great. The car looks fantastic. Now finish it up and get started on that single seater.
Posted by: Matt Romanowski Aug 5 2013, 05:51 PM
It looks like you're doing a great job. Even if it takes longer than planned, you'll know everything was done right.
Posted by: chad newton Aug 6 2013, 11:12 AM
I'm glad you fixed it. If you want a track car get a shitty one like I did and only do what u have to do to it. Single stage garage paint, fiberglass flares, cheaper.... Your drivetrain will always have to be good, but that's something that can be moved to another body without worrying about scraping the other. No attachments.
Posted by: siverson Aug 13 2013, 10:04 PM
And while I was in there, I filled in some unused holes, and made the battery box a little narrower to fit lightweight battery.
I think the stock battery location is a good spot for a street/track car, and I'm hoping this cleans up the engine bay a little by keeping the battery "tucked in" on the side more and not such a large eye sore.
Or maybe I should start watcher fewer American Hot Rod re-runs and just put my car back together and drive it...
-Steve
Attached thumbnail(s)
Posted by: Jeff Hail Aug 14 2013, 12:43 PM
And while I was in there, I filled in some unused holes, and made the battery box a little narrower to fit lightweight battery.
I think the stock battery location is a good spot for a street/track car, and I'm hoping this cleans up the engine bay a little by keeping the battery "tucked in" on the side more and not such a large eye sore.
Or maybe I should start watcher fewer American Hot Rod re-runs and just put my car back together and drive it...
-Steve
Looking great!
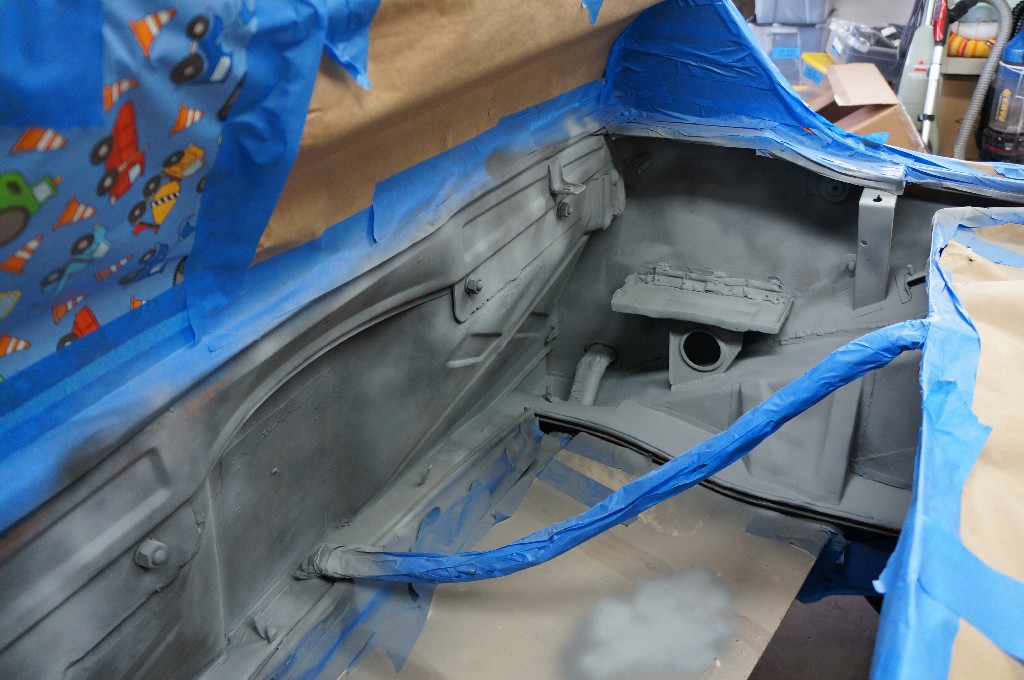
Posted by: siverson Sep 14 2013, 11:15 PM
I had two helpers with me on 9/14 today...
Attached image(s)
Posted by: siverson Sep 14 2013, 11:30 PM
I got the car on four wheels for the first time in 18 months or so.
The primary motivation is I wanted to re-spray the engine compartment. When it was last shot they did so with a lot less care than the rest of the car - I think they were just assuming it was an "engine compartment" and not a place to worship wonderful flat 6 sounds.
Anyways, there were some runs in the paint (ugg), and I decided to make a custom, small battery box for my new smaller battery, and I've always wanted to close up some of the extra holes in the engine shelf that were no longer used. Very anal retentive, but whatever...
The problem is that I'm a pretty welder, and an even worse painter. Fortunately, plenty of grinding can make welds looks decent, so that's done.
But in regards to paint, I'm looking for some advice. Any tips on exactly what steps I should do next to have this turn out nice? What's the easiest way for someone who can't even paint a bedroom wall well?
As the photos below show, I've completed the primer. I was planning on letting this dry for a week (I should have a couple hours next week free), and then I plan to:
1. lightly sand the primer to get rid of some of the big bumps. I'm not going for anywhere near a perfect/mirror finish here, I just didn't want ugly paint runs like I had before.
2. blow out the dust with the air compressor, and clean up further wet a damp rag. Is that right? ok to get the primer slightly wet again? (again, I told you I really have no idea what I'm doing with paint).
3. then, I have an extra pint of paint from when the car was refinished. That pint is about 9 months old now. Think it's still ok? I have a cheap LPHV spray gun from the home depot that I used for a furniture project several years ago. I was planning I just using the paint straight (it seems quite thin/liquid). maybe spray 2-3 coats and then I'm done?
do I need to sand the paint as well? color coat? Any other tips?
Or should I just try and get some signal orange spray cans made up?
-Steve
Attached image(s)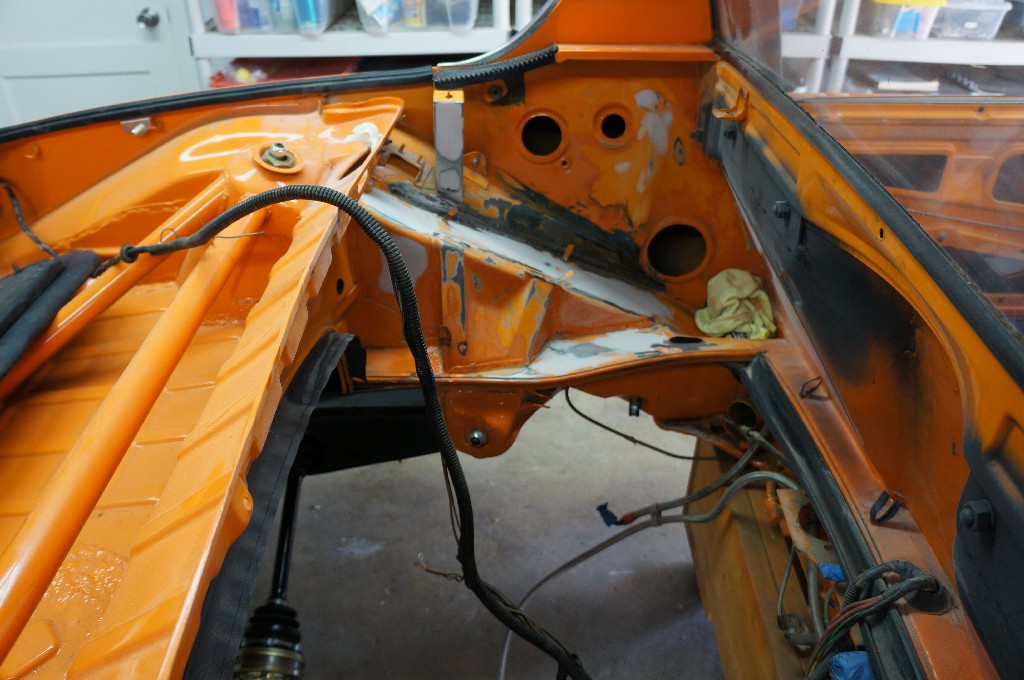

Posted by: siverson Sep 14 2013, 11:31 PM
Yes, that's birthday wrapping paper. And towels. My paper roll ran out.
Posted by: siverson Sep 14 2013, 11:32 PM
My paint gun looks something like this. I've never really been able to get good results with it.
-Steve
Attached image(s)
Posted by: siverson Sep 14 2013, 11:34 PM
And yes I also realize this is horribly out of order (painting the engine compartment now?!?!), but I bought some new toys for the engine and it's going to look quite nice, so I'm hoping the engine compartment can step it up a notch as well.
Posted by: 74914LE Sep 15 2013, 09:26 PM
I actually did a respray on my engine compartment over the last two weekends. It is not too hard if you do your research, and take the time to prep everything correctly. First I bought a couple of books on the topic, then went to the local Auto Paint supply store and asked a lot of questions. Told them what I was looking to do, and they helped me select everything I needed. This is what I ended up doing.
1. Fixed all the rusted areas with a wire bush and rust converter. Patched any holes in the normal way with new sheet metal.
2. Sanded out all the rough spots with progressively finer sand paper until I ended up with 400 grit Wet/Dry
3. Masked and papered everything so that the overspray would not be a problem.
4. Cleaned the whole compartment with De-greaser/wax remover.
4. Went over eveything with a tack rag after I had blow it out with air.
5. Shot the compartment with Sealer/Primer. Let dry for 24 hours.
6. Sanded the primer with 400 Wet/Dry, then cleaned, and tacked as before.
7. Used Urethane Paint to shoot the compartment, using a $40 HVLP Gun I picked up at Harbor Freight. The key is to practice and get the spray correct before you start on the car. I used a large cardboard box. The Paint was a 2:1 20% mix.
Paint/Hardner/Reducer. Be sure you use all the right safety set up, respirator, including goggles, as you are going to get lots overspray when painting that compartment.
8. I sprayed a tack coat, waited 15 minutes, then cover coat, 15 more minutes, then final coat. Let it cure for 24 hours.
9. The great part about Urethane Paint, is that if you have a nib or run, you can color sand it right out, and polish to get it back to a high gloss.
Very impressed with the work I did on my first try. The key is to get your gun set up correctly, and to paint with proper technique. 6-8 inches from the surface, with the proper setup and pressure, and you will do a great job.
IMHO, it is all about taking your time, and asking lots of questions at the paint shop. Modern Paint is much easier to deal with than the old enamels.
Best of luck!
Posted by: siverson Sep 25 2013, 11:41 PM
74914LE, thanks for the tips. I'll give that a try this weekend.
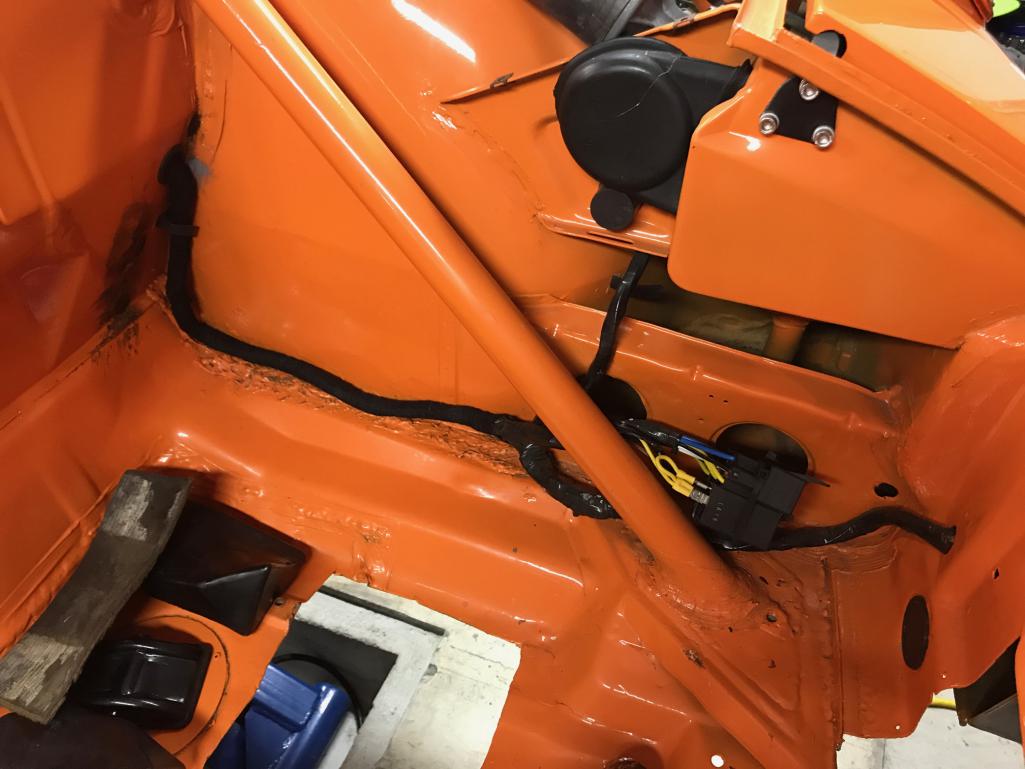
And... I think I've solved another long term problem with my car. Actually, I didn't solve it but Sean at SD Autosport had some good advice on the phone this afternoon. The background and theory:
Now that I have the car on the ground, I noticed that the passenger side door gap is changing - even without the engine in the car! And it now has an outer Brad Meyeur kit AND inner Engman kit.
But, to make a long story short, I installed the Brad Meyeur kit long ago (~10 years?) and when I did it, I removed the front "box" on the front end of the long to run my oil lines through. I had entirely forgot that I even did this, until I compared the left and right sides (photos below).
Sean's theory, and it sounds about right to me, is that the front of the car may be flexing, not the rear, and that's causing the change in door gap. And the passenger side (where the box was removed) changes much more than the drivers side, which is barely measurable.
Plus, as a test this evening I just jacked up the front passenger side of the car from the front donut just lifting the front wheel off the ground but leaving the rear on the ground. So there is still weight on the rear (and I guess even a little more weight), but the nose "drops down" (the car is flexing) and the door gap opens up. That is, if I just jack up the front, the gap opens back up and all is well.
So, what does 914world think? Does this sound about right? Am I my own DPO for removing that box? (yes)
Now to figure out how to fix this...
-Steve
Posted by: siverson Sep 25 2013, 11:42 PM
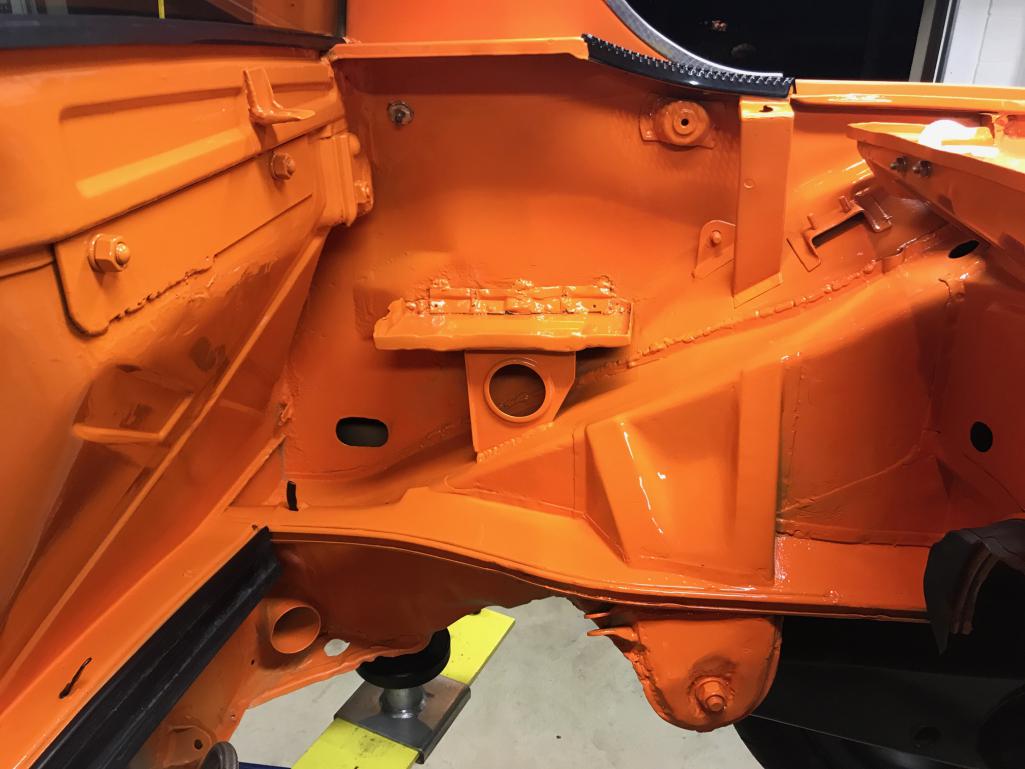
Passenger side with box removed:
Attached thumbnail(s)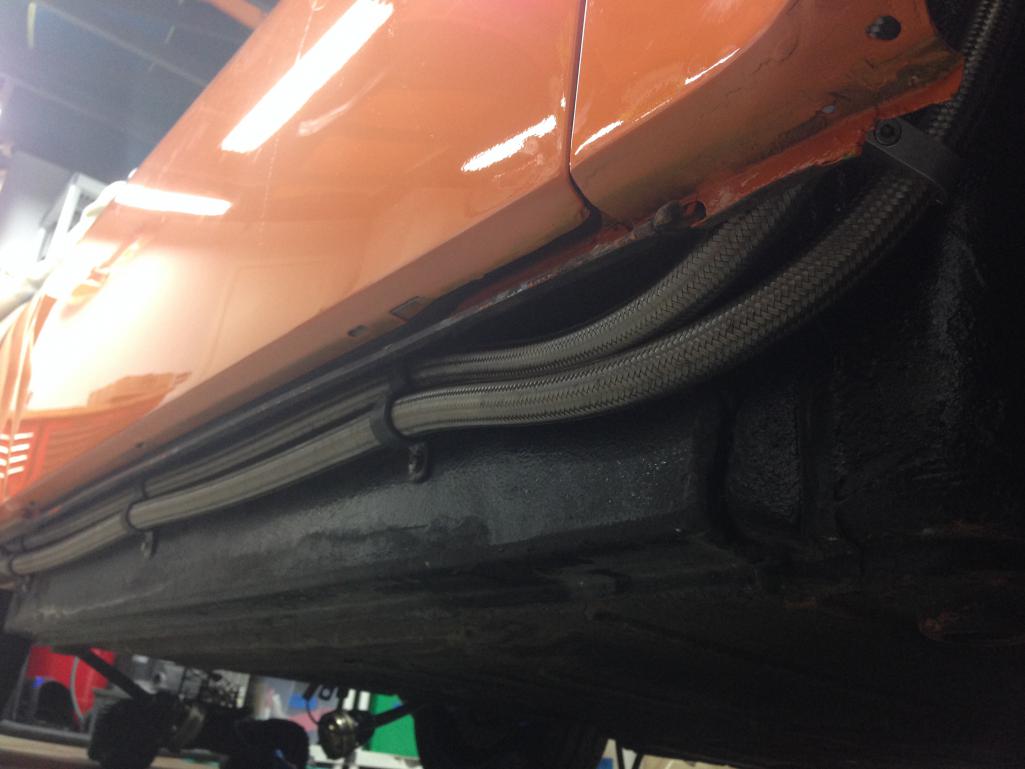
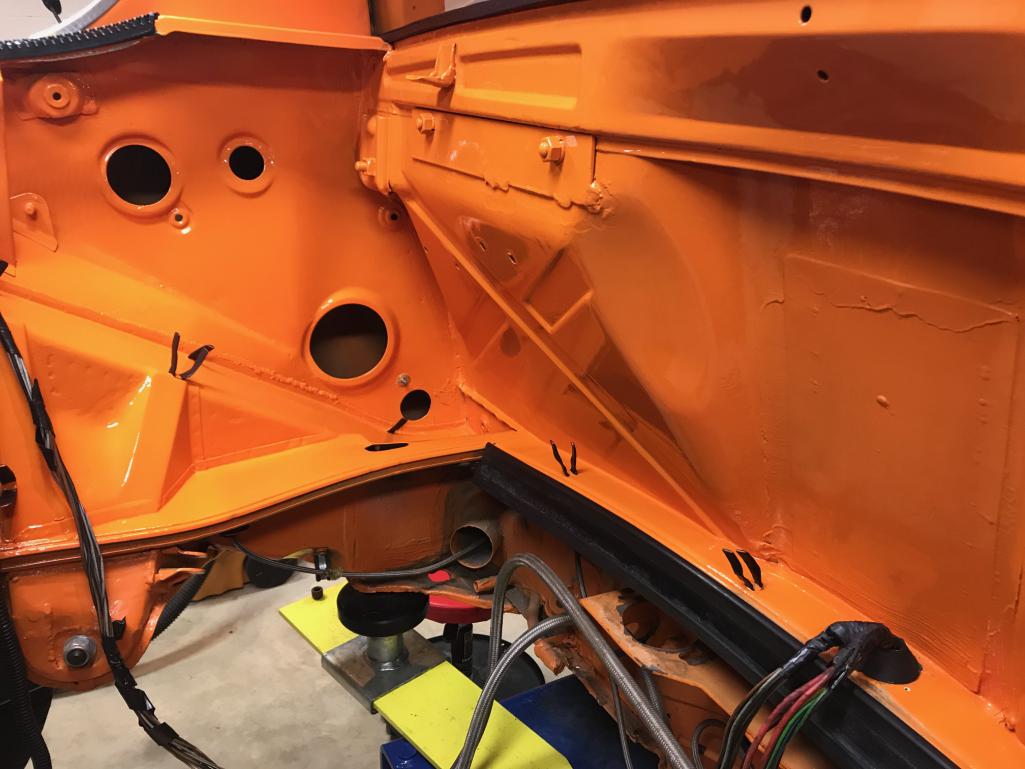
Posted by: siverson Sep 25 2013, 11:44 PM
Drivers side with box still there (Brad Meyeur kit cut short, as I think it supposed to be done):
Attached thumbnail(s)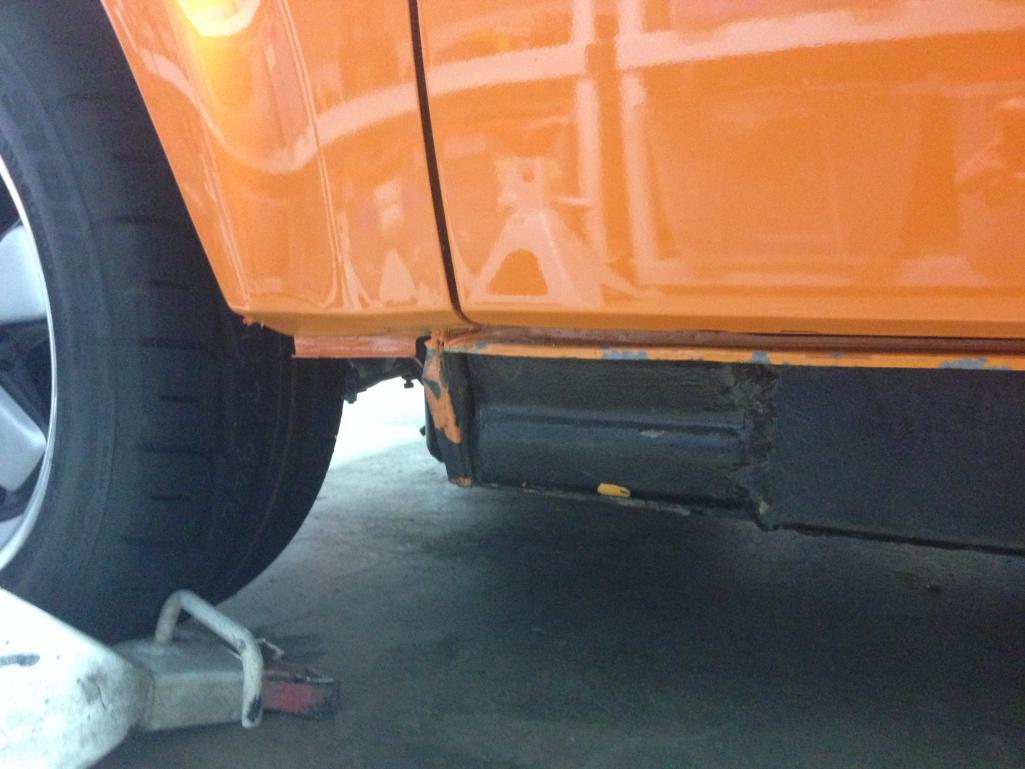
Posted by: siverson Sep 28 2013, 07:51 PM
Bump... Is it a bad idea to remove that front "box"?
-Steve
Posted by: rick 918-S Sep 28 2013, 09:08 PM
Torque box. Helps prevent cowl shake or flex. Early Mustang convertibles had a floor stiffener welded in the foot well. If you have the Engman kit and it extends to the location of the dead peddle I would think you could run a 14 ga. plate on the back side of the "A" pillar where the speaker is located from the door to the inner wheel house. This will make a vertical "L" shape from your Engman kit and support the cowl.
Let me see if I can diagram what I'm referring to.
EDIT: Hope this works.
My sketch is crude but the idea is to transfer the weak cowl section into the stiffener to carry the rear stiffness through the cowl. Short of cage with NASCAR door braces This could be a solution.
Posted by: siverson Sep 30 2013, 11:24 AM
Thanks for the idea Rick. I'll give that some thought...
-Steve
Attached thumbnail(s)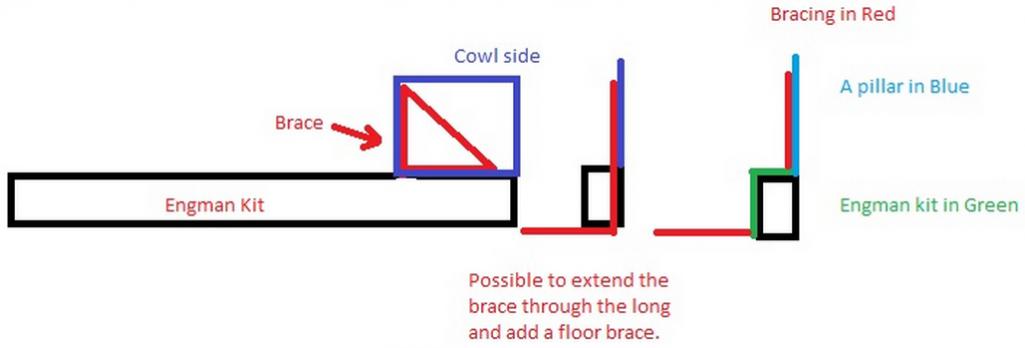
Posted by: Racer Chris Sep 30 2013, 11:38 AM
I wouldn't have expected to see that much movement from removing the outer section at the base of the a-pillar but your explanation and observations seem to bear it out.
Most times I've seen oil lines in that area the box was simply cut open at the front and rear for the lines to go through.
Posted by: siverson Nov 27 2013, 01:43 AM
> simply cut open at the front and rear for the lines to go through
Yeah, that's what I'll do *next time*. I think the accident and straightening exacerbated the problem though.
-Steve
Posted by: siverson Nov 27 2013, 01:48 AM
What's taking me so long on this project? Besides having a busy job and two little kids, I've also been adding to it with projects like this. I'm switching over from the factory motronic to ITBs/Pectel.
After I polished and cad plated the intake horns, they were too pretty to cover up so I made a lexan cover for the air filters. The air filter base is just powder coated. Next is to make a small trim to cover up the ugly glue/gasket I used to attach the lexan.
A bit blingy, but oh well, I've always loved the look and sound of ITBs.
-Steve
Attached thumbnail(s)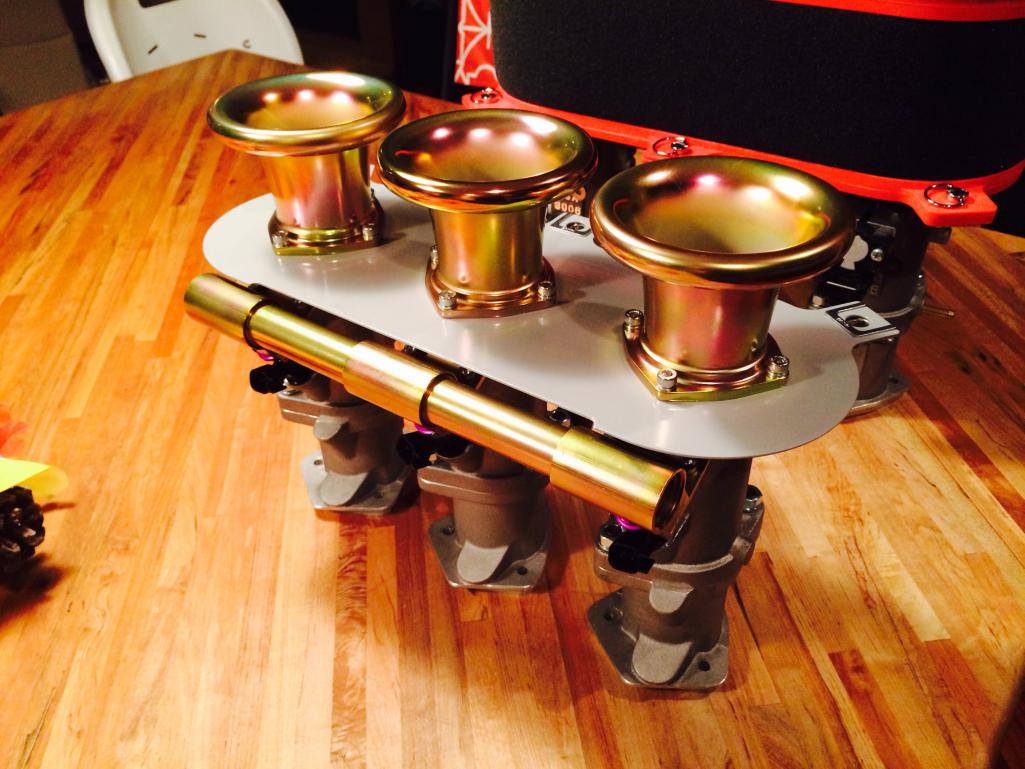
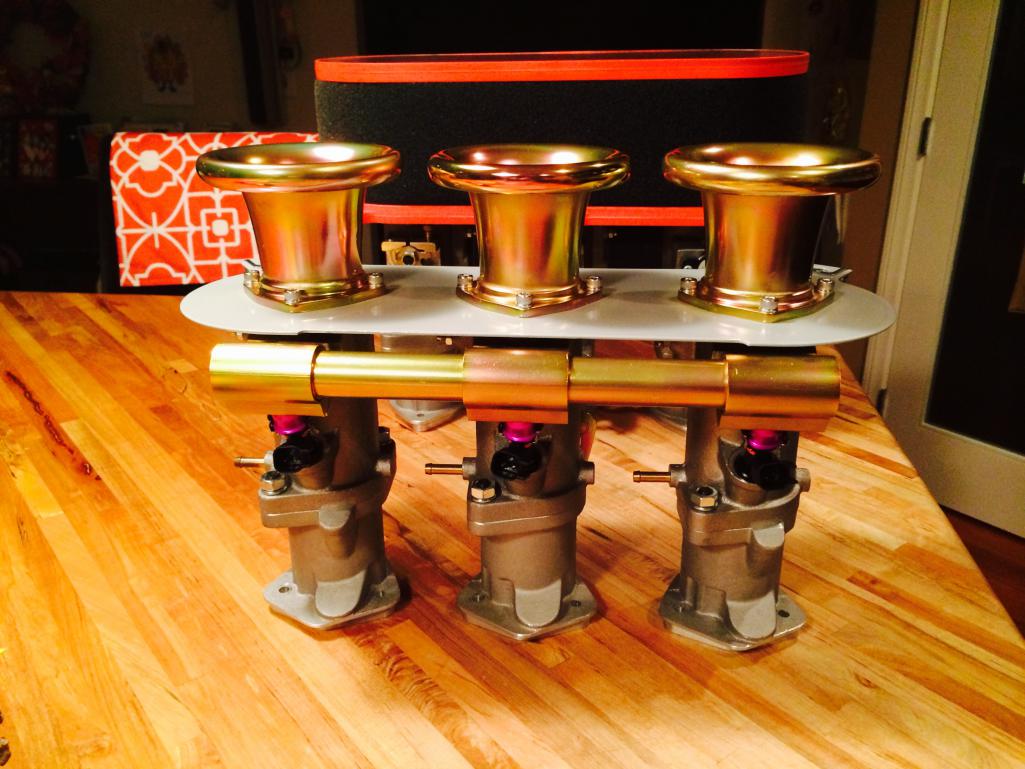
Posted by: siverson Nov 27 2013, 01:48 AM
From the top.
Attached thumbnail(s)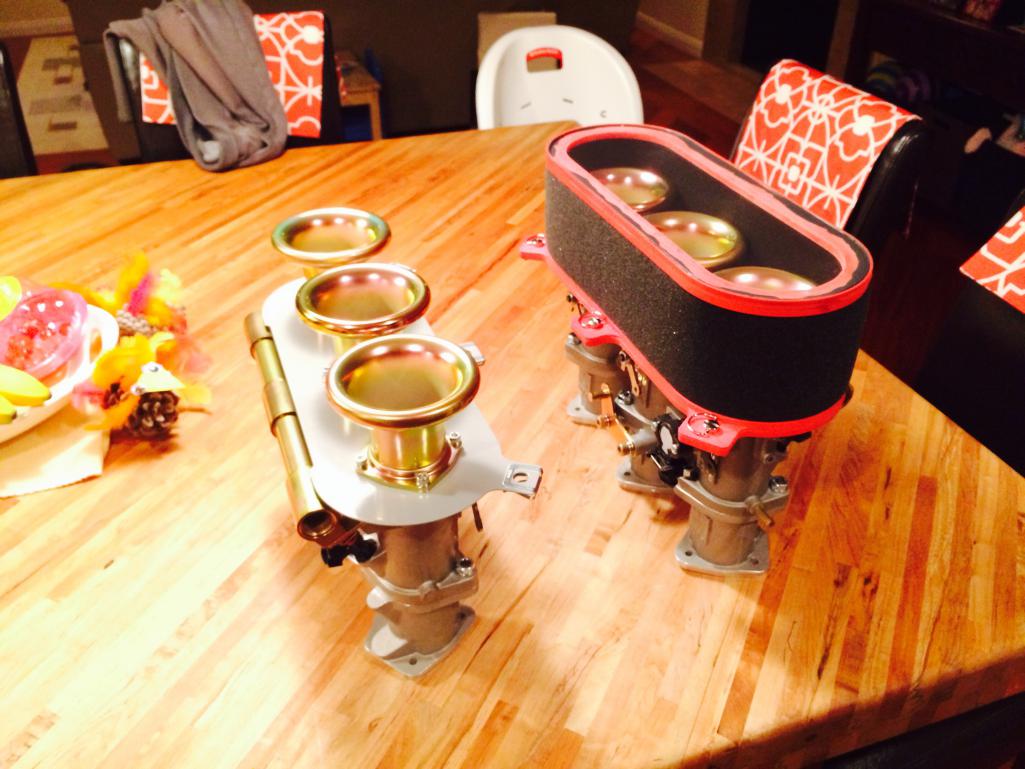
Posted by: bulitt Nov 27 2013, 05:23 AM
Nice! I would paint a black edge around that lexan. Might be easier than an edging.
Posted by: siverson Dec 9 2013, 11:43 PM
> Most times I've seen oil lines in that area the box was simply cut open at the front and rear for the lines to go through.
Yup - that's what I'll do next time!
> Torque box. Helps prevent cowl shake or flex.
Rick, yes, I think this is in general what I'm up against. Sean thinks it may be something around the inner front fender/gas tank area (as I understood how he described it), but he hasn't seen it yet.
Having said that, short of shipping my car to Rick ( ), anyone have other suggestions on who might be able to fix this in Southern California (stiffen up my car)? Sean likely can do it, but he has been quite busy and unavailable lately. I called a couple well known mechanics, but this is too far down the body work/chassis work for their comfort level.
Posted by: siverson Dec 11 2013, 12:54 AM
Anyone? Recommended chassis / roll cage shops in Southern California?
-Steve
Posted by: 396 Dec 11 2013, 09:55 AM
What's taking me so long on this project? Besides having a busy job and two little kids, I've also been adding to it with projects like this. I'm switching over from the factory motronic to ITBs/Pectel.
After I polished and cad plated the intake horns, they were too pretty to cover up so I made a lexan cover for the air filters. The air filter base is just powder coated. Next is to make a small trim to cover up the ugly glue/gasket I used to attach the lexan.
A bit blingy, but oh well, I've always loved the look and sound of ITBs.
-Steve
Congrats on your progress.. ITBs, verrrry nice, who makes them?
Posted by: 396 Dec 18 2013, 02:50 PM
Bump for response on ITB. -
Posted by: siverson Dec 19 2013, 06:01 PM
ITBs are TMW 3006, and I'll be using a Pectel SQ6 ECU.
UPDATE: Decided to use Vi-PEC i88 instead.
-Steve
Posted by: 396 Dec 19 2013, 08:14 PM
ITBs are TMW 3006, and I'll be using a Pectel SQ6 ECU.
Thanks for the info..they look pretty! Hope to see your car on the road in spring of 2014.
Posted by: gothspeed Dec 19 2013, 08:32 PM
What a beautiful car ..... great job on bringing it back .....
Posted by: siverson Dec 19 2013, 10:32 PM
> Hope to see your car on the road in spring of 2014
Me too! I'm really close now, but this flexy front end problem has set me back again. I'll get it resolved shortly.
Posted by: siverson Jan 16 2014, 08:27 PM
914 is on his way to SD Autosport Sean's to resolve the flexy front end problem.
-Steve
Posted by: rick 918-S Jan 16 2014, 09:01 PM
Good choice. Sean will get it handled.
Posted by: Sven914 Mar 6 2014, 09:09 AM
I am also rebuild my 914 after an accident on the Nürburgring Nordschleife in July 2013.
he will be back on the road in April
-Sven-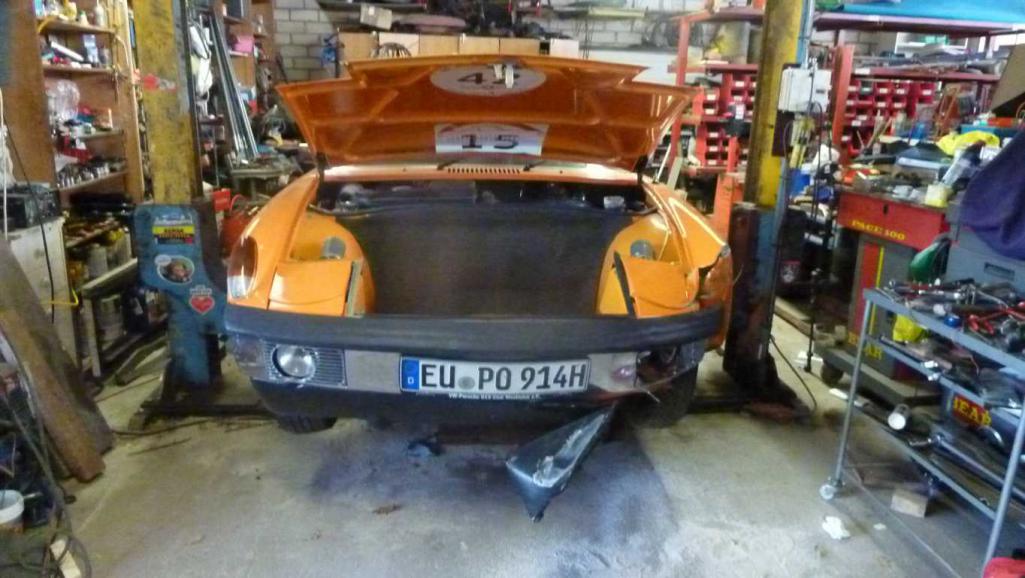
Posted by: John Jentz Mar 6 2014, 07:15 PM
Nice Job!
Posted by: siverson Mar 7 2014, 09:40 PM
> Sven914
Thanks for posting - your crash and repair looks very similar to mine. Except I think mine was pushed in another 8 inches or so...
-Steve
Posted by: siverson Mar 7 2014, 09:40 PM
My car is still at Sean's place, and I think he's making some progress...
Posted by: siverson Mar 7 2014, 11:29 PM
Vroooom
Attached thumbnail(s)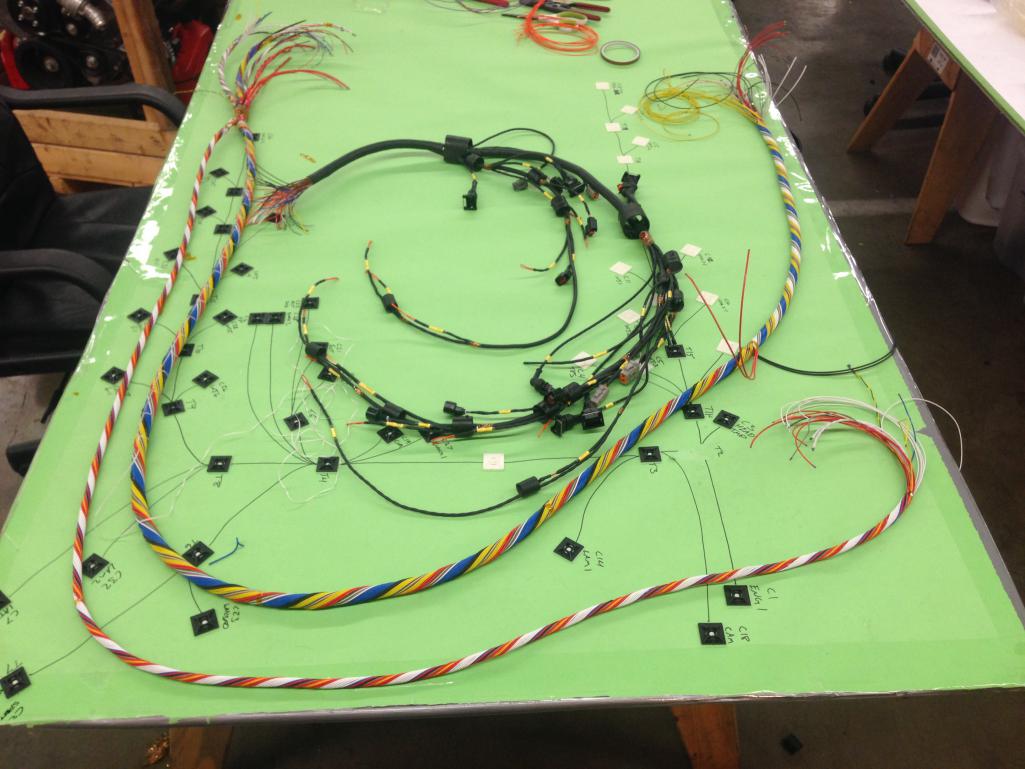
Posted by: rick 918-S Mar 8 2014, 08:13 AM
What the "H" "E" double tooth picks is that?! 
Posted by: bulitt Mar 8 2014, 08:22 AM
Your son and daughter look concerned!
Posted by: siverson Mar 8 2014, 10:08 AM
> What the "H" "E" double tooth picks is that?! unsure.gif
Wiring harness for this:
http://www.vi-pec.com/ecus/i88
-Steve
Posted by: siverson Mar 8 2014, 10:09 AM
> Your son and daughter look concerned!
Yes, they miss him. My son is 914 crazy now. He loves them. I'm not sure how that happened...
-Steve
Posted by: siverson Mar 23 2014, 10:13 AM
Has anyone heard from Sean lately? I haven't been able to get a hold of him for a couple weeks...
Posted by: Steve Mar 23 2014, 11:52 AM
Try to PM him. Unless something has changed, he is a one man band with no voice mail or receptionist. He had my car for six months. Rarely answered the phone. Most communication was over PM from this site. Since you are local, I would just swing by.
Posted by: siverson Mar 30 2014, 11:44 PM
Yup, I know he's normally hard to get a hold of, but this is much longer than normal. He's been radio silent for about a month now. PM has been sent as well.
I'm getting nervous, so I will "swing by" his shop sometime this week, but it's about 45 minutes away for me.
-Steve
Posted by: siverson May 13 2014, 05:40 PM
Still at Sean's place, but he's got some time now and we're aiming to have in done in a month (at least less flexy and ready for re-assembly).
The ITBs and the Vi-PEC i88 is ready and just waiting now. Stay tuned...
-Steve
Posted by: siverson Sep 12 2014, 09:17 PM
Repairs have taken a LONG time at Sean's, but might be done on 9/14... Could it be... ?
Vroooomm!
-Steve
Posted by: 396 Sep 12 2014, 09:42 PM
Great. .still going to see you 'run' at Willow in the future?
Posted by: siverson Oct 15 2014, 11:51 AM
> Great. .still going to see you 'run' at Willow in the future?
I'll be there at some point for sure, but I'm not sure about with this car again. I think I'd rather get a beater 914 or maybe a stripped down Boxster for my next off road adventure.
-Steve
Posted by: siverson Oct 15 2014, 11:52 AM
The 914 is still at Sean's, and he's been radio silent for the past week or so now. Has anyone heard from him?
-Steve
Posted by: SirAndy Oct 15 2014, 12:15 PM
The car has been what, a year, at his shop now?
Posted by: Racer Chris Oct 15 2014, 12:55 PM
He called me last week...
was asking if my cable throttle linkage can be adapted to a six.
Posted by: siverson Oct 17 2014, 05:00 PM
> The car has been what, a year, at his shop now?
Unfortunately, almost a year - a little over 10 months now. This is exactly what I was hoping wouldn't happen when I dropped it off, but here we are 10 months later. And it's really not clear to me if it's going to take another 10 months (or more), so I'm just going to move on and find another shop to finish the work.
It's just been way too long and we've been "a week away" from finishing the project since June. Argh.
My hunch is there is probably only 20 hours or so (or less?) to finish the car, but its just been impossible to find time in Sean's schedule for some reason.
-Steve
Posted by: siverson Oct 20 2014, 10:56 AM
Sean is still radio silent on me. If anyone hears from him, I'd appreciate it if you would ask him to give me a call or email or PM.
-Steve
Posted by: siverson Oct 20 2015, 05:41 PM
Wow - it's been a year since I last posted.
I did eventually get my car back from Sean. If I remember correctly, I was only billed for ~40 hours of work but he had the car for 11 months. That was really frustrating.
I had been hoping to get it back together before I moved, but that didn't end up happening. But now the new garage is mostly unpacked and ready to go, and I hope to find some time in the next several months to get him back together...
-Steve
Posted by: siverson Oct 20 2015, 06:28 PM
914
Attached thumbnail(s)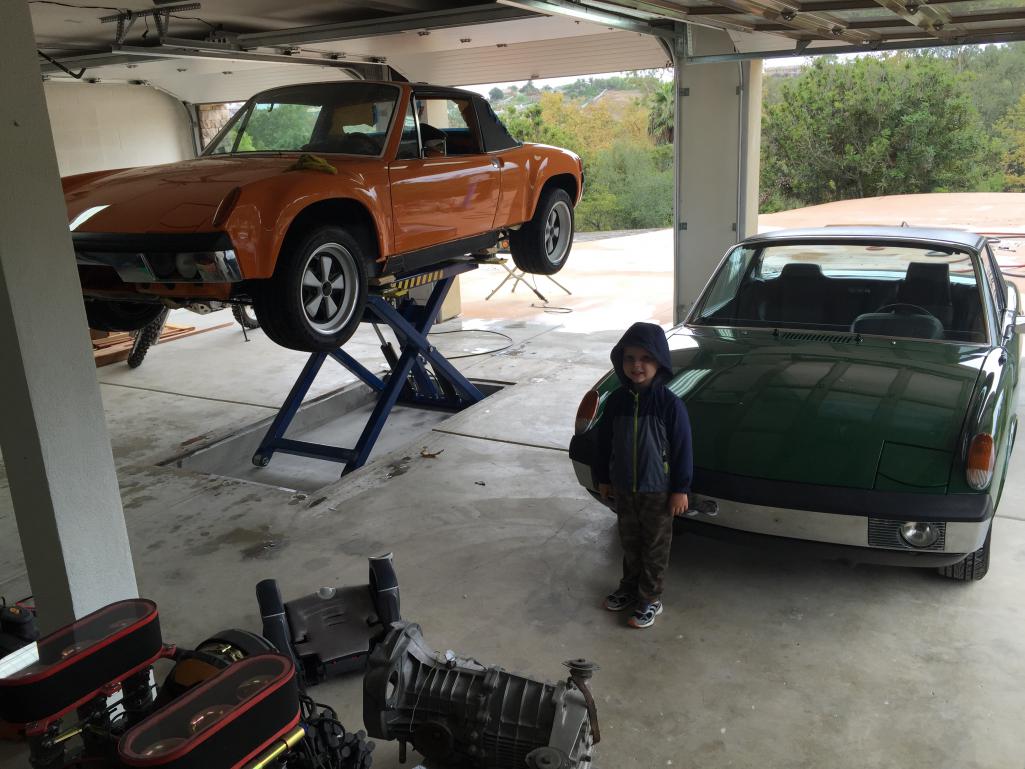
Posted by: siverson Oct 20 2015, 06:37 PM
Ha. Reposting this photo from earlier in the thread (he is above; now 4 years old).
-Steve
Attached image(s)
Posted by: Larmo63 Oct 20 2015, 07:49 PM
It seems like he would be a sophomore in high school by now….
Jeez…. 
Posted by: altitude411 Oct 20 2015, 07:54 PM

Posted by: horizontally-opposed Oct 20 2015, 10:15 PM
So, so glad you saved this car. It was beautiful before, and is again.
Too cool.
pete
Posted by: stugray Oct 20 2015, 11:16 PM
Ha. Reposting this photo from earlier in the thread (he is above; now 4 years old).
-Steve
That is an Amazing Baby Pic!!
And the infant is beautiful as well!
Posted by: jd74914 Oct 20 2015, 11:32 PM
Vroooom
Wow, that's quite the harness build! Someone has some skills; that concentric twisting looks really good. Do you have pictures of the final product and Vi-Pec install?
Posted by: siverson Dec 12 2015, 08:55 PM
This is sort of what it looked like:
https://www.youtube.com/watch?v=iXbQKstN4j8
-Steve
Posted by: siverson Jul 4 2016, 12:52 AM
now that my green 914 is 99% and the new garage is mostly functional, its time to get this 914 back on the road. its been almost five years.
i spent the evening cleaning out the cobwebs - literally.
Attached thumbnail(s)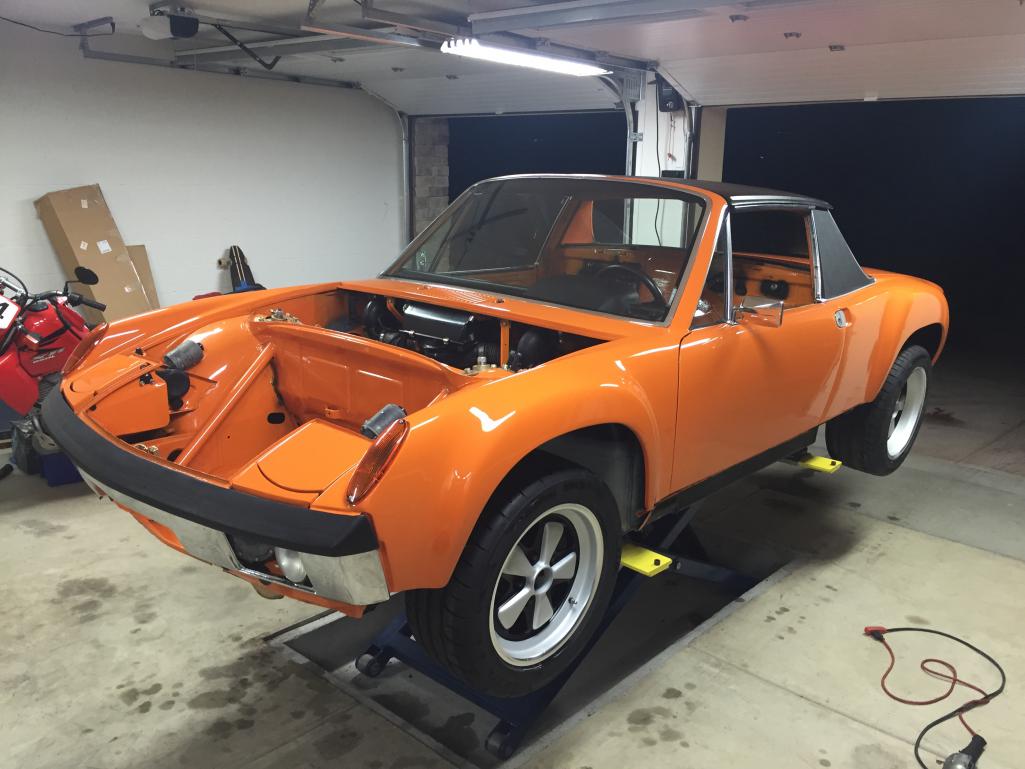
Posted by: siverson Jul 4 2016, 12:54 AM
914
need to spray the engine compartment and wheel wells after the metal repairs and then hopefully is a fairly straightforward reassembly.
Attached thumbnail(s)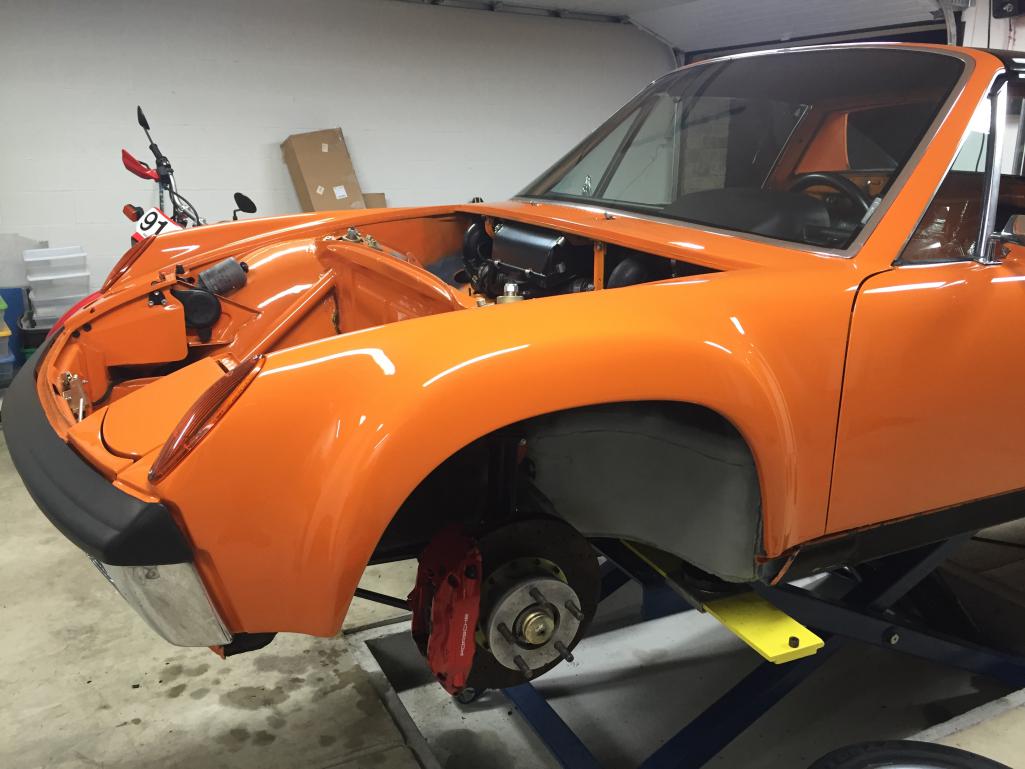
Posted by: Cairo94507 Jul 4 2016, 06:50 AM
Glad to see this car moving forward.
Posted by: siverson Jul 24 2016, 09:31 PM
Surface rust cleanup done for the welding done, and black paint to protect things.
-Steve
Attached thumbnail(s)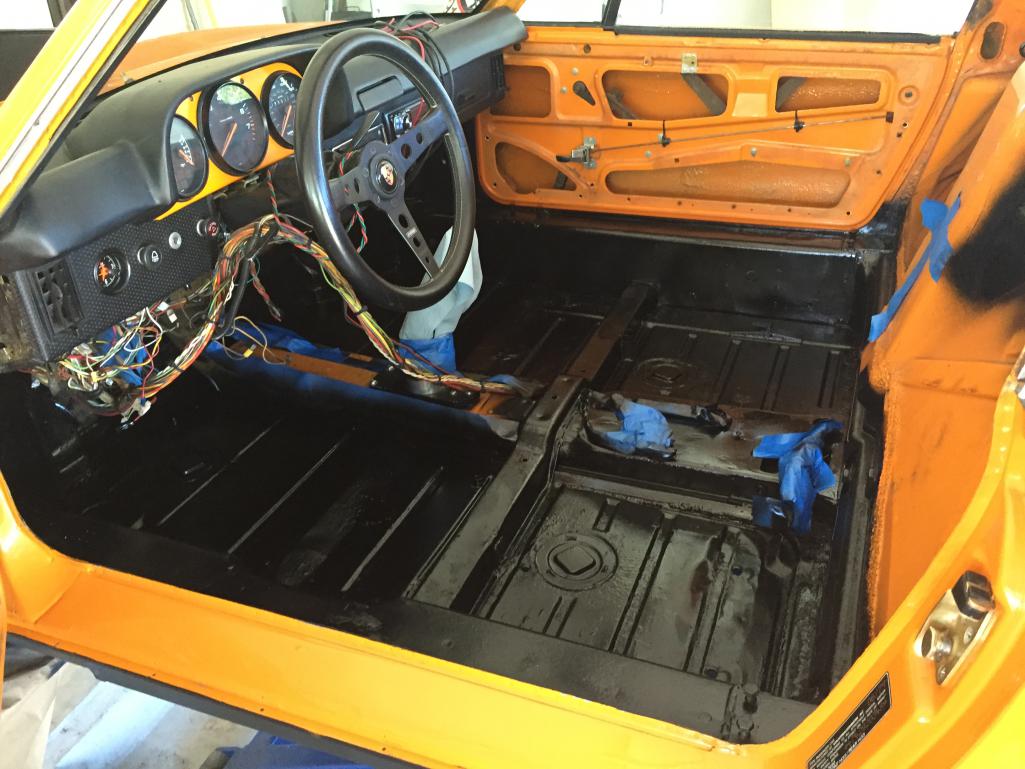
Posted by: siverson Jul 24 2016, 09:32 PM
Yes we clean the inside of the car and the outside...
-Steve
Attached thumbnail(s)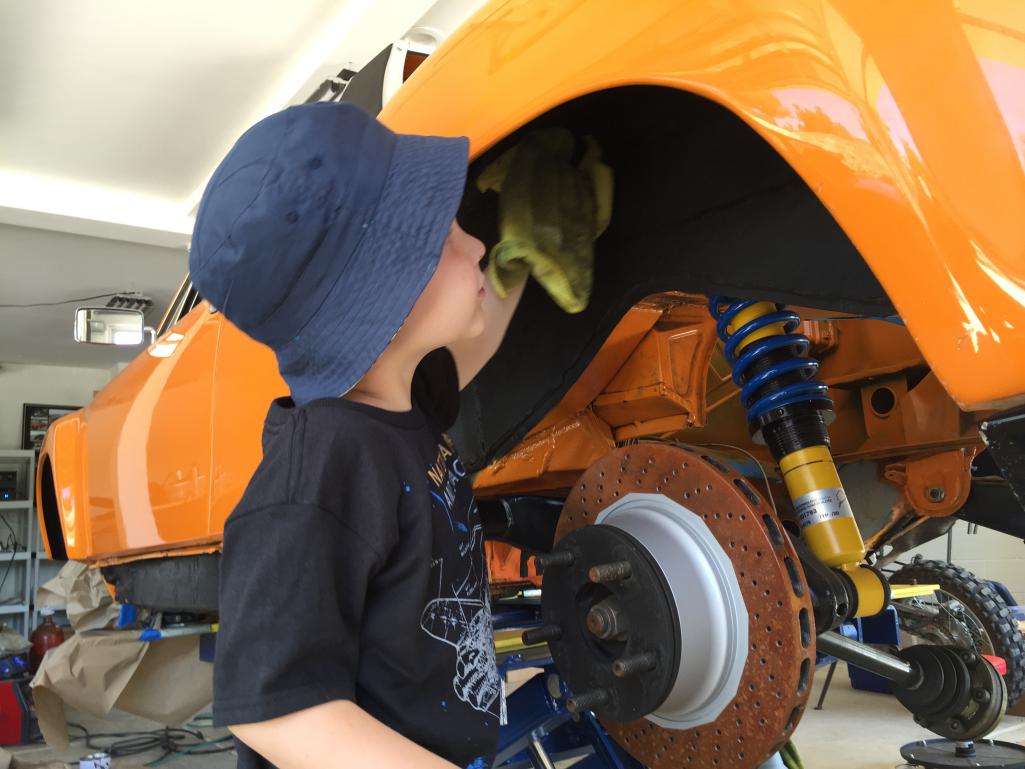
Posted by: siverson Jul 24 2016, 09:33 PM
And sorting out the engine harness...
Attached thumbnail(s)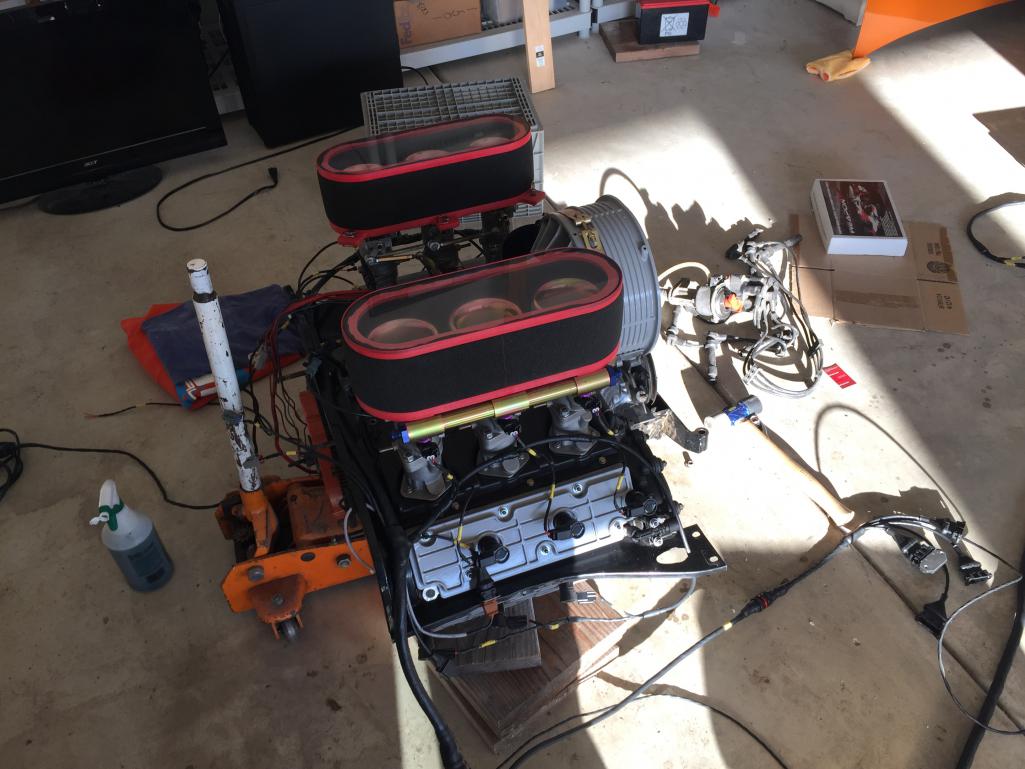
Posted by: Elliot Cannon Jul 24 2016, 09:45 PM
What does this say about Sean? Have you heard from him at all? Is he OK?
Posted by: siverson May 17 2017, 01:23 PM
Almost 6 years (!!!) into this and still not back together. Amazing how much having kids, a house remodel, and a job get into the way of 914 time.
Anyways... I really want to get him back on the road and I've found a couple hours in the evening lately to resume re-assembly.
A ton of cleanup and redo-ing and detailing after the car has spent time in three different shops. Here are some photos of the small stuff (over spray cleanup, wire harness hold downs, fuel pump wiring, etc, etc).
-Steve
Attached thumbnail(s)
Posted by: siverson May 17 2017, 01:24 PM
914
-Steve
Attached thumbnail(s)
Posted by: siverson Nov 28 2017, 12:09 AM
Very little progress for most of the year but I got back into him over the long holiday weekend. oil tank in, rear brakes, sorted out a lot of wiring, front sway bar in, gas tank in, front hood back on...
Attached thumbnail(s)
Posted by: siverson Nov 28 2017, 12:10 AM
oil tank and cleaned up the wiring harness
Attached thumbnail(s)
Posted by: siverson Nov 28 2017, 12:12 AM
hmmm... i forgot pictures of the front trunk where most of the work was.
anyways, i also put my led light kit in. big difference in the front.
https://youtu.be/mbeliMwJF3c
-steve
Posted by: Ferg Nov 28 2017, 10:13 AM
Posted by: Lucky9146 Nov 28 2017, 01:56 PM
Caught your thread for the first time the other day and pretty much read the whole thing. Was sorry to see what happened. I can relate to your project and the time it is taking to get er done. Your doing great work and I am happy to see it is coming along so well. I live in Poway.

Posted by: siverson Nov 28 2017, 09:19 PM
Replaced the new repro trunk seal with a new OEM seal. It fits much better, but unfortunately, I think it's an old OEM seal and some of the corners are coming unglued. Anyone know whats a good glue to re-glue the corners of these rubber seals?
Also, I'm pretty sure this is an Porsche OEM rubber seal (purchased from Pelican Parts), but it is not marked "Germany" as the OEM seal on my green car is. Hmmm...
-Steve
Posted by: siverson Nov 28 2017, 09:20 PM
repro seal
Attached thumbnail(s)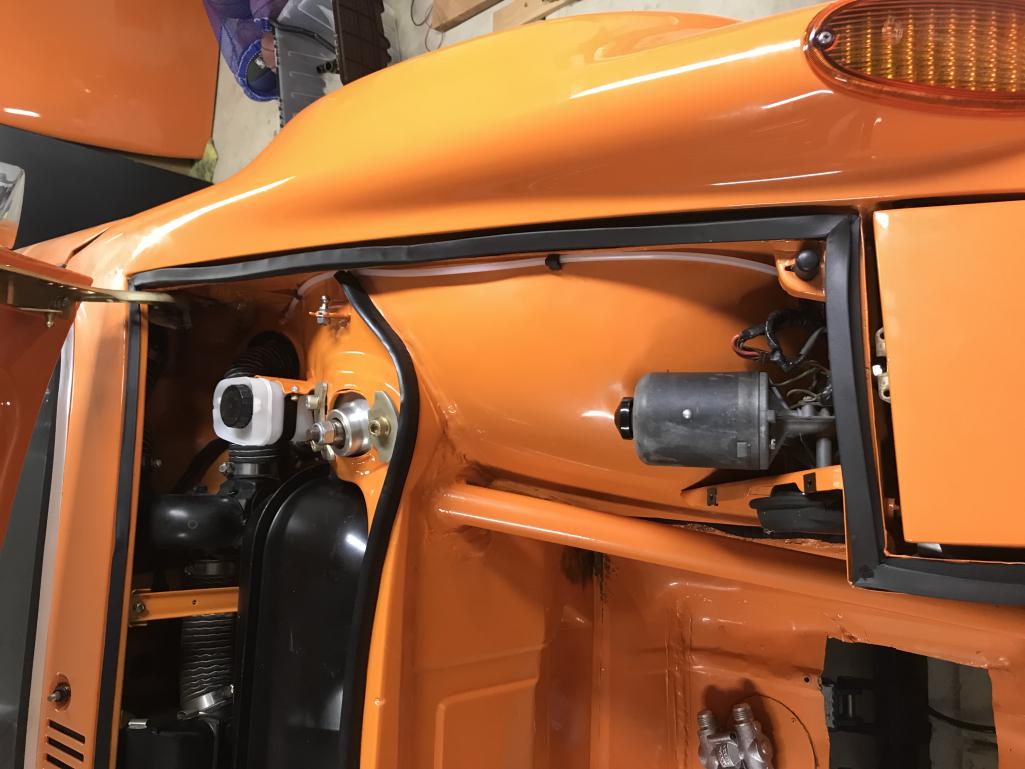
Posted by: siverson Nov 28 2017, 09:21 PM
comparison
Attached thumbnail(s)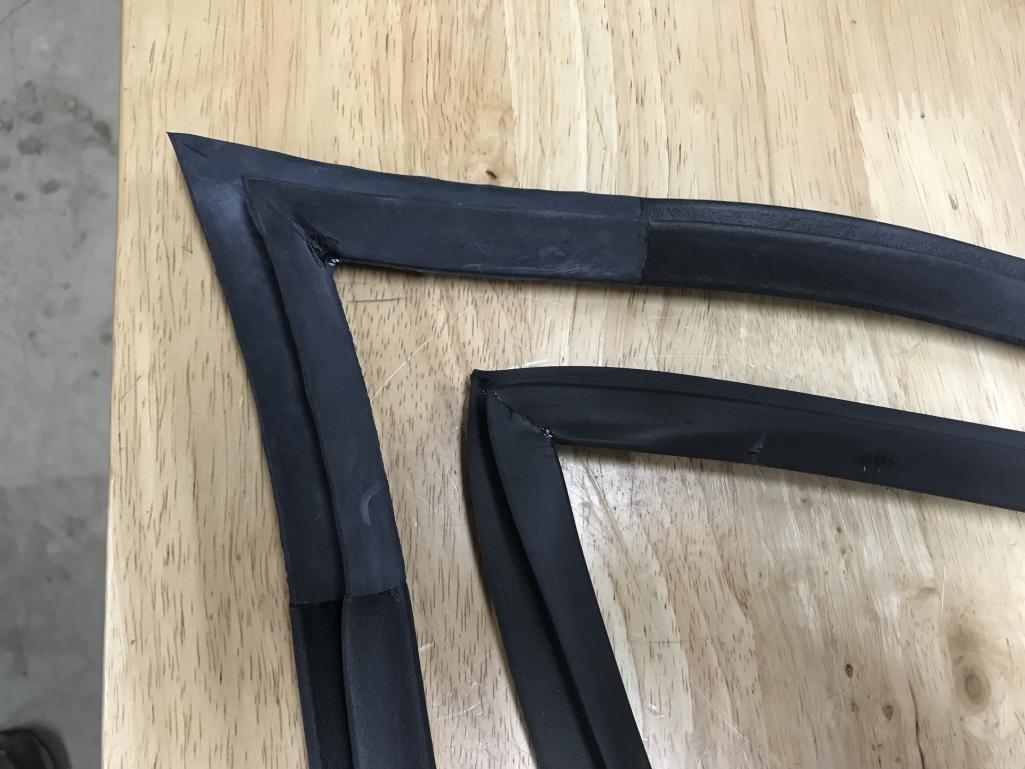
Posted by: siverson Nov 28 2017, 09:22 PM
no “germany”
Attached thumbnail(s)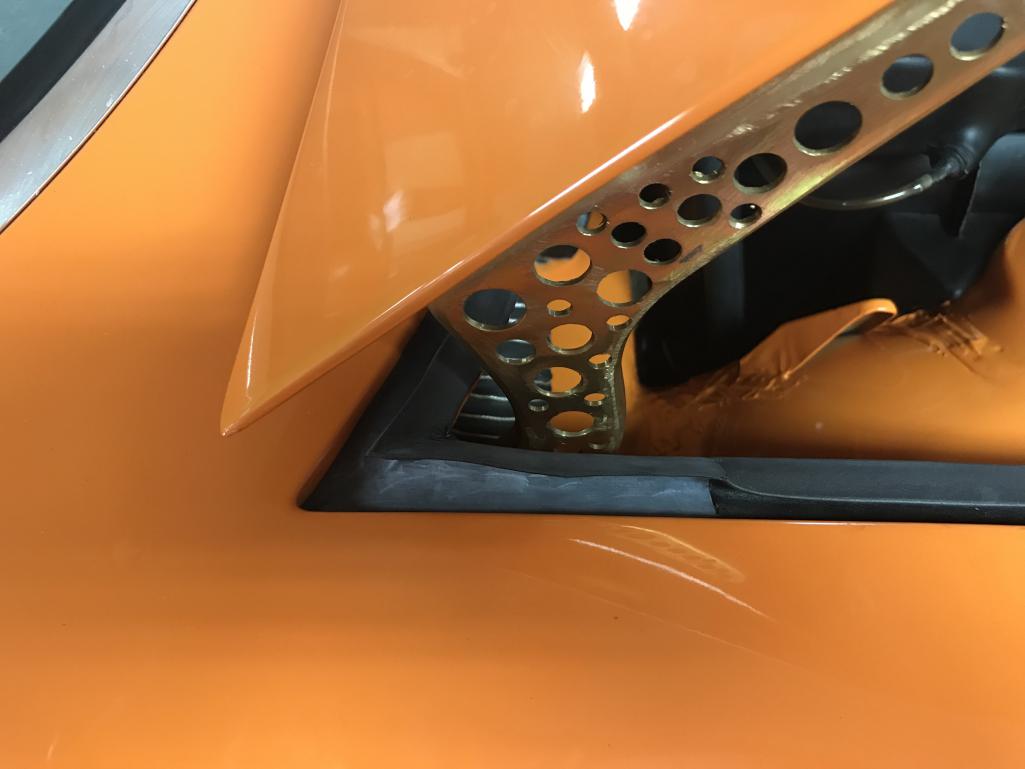
Posted by: siverson Nov 28 2017, 09:22 PM
green car still has it visible even after many car washes
Attached thumbnail(s)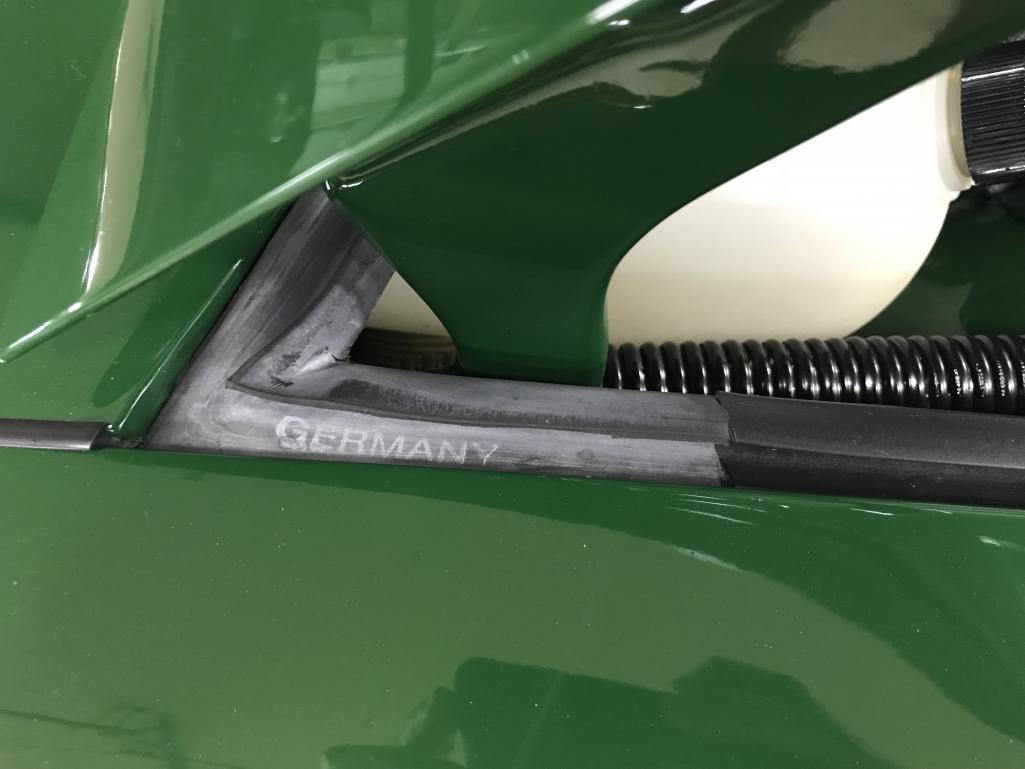
Posted by: siverson Nov 28 2017, 09:23 PM
other side
Attached thumbnail(s)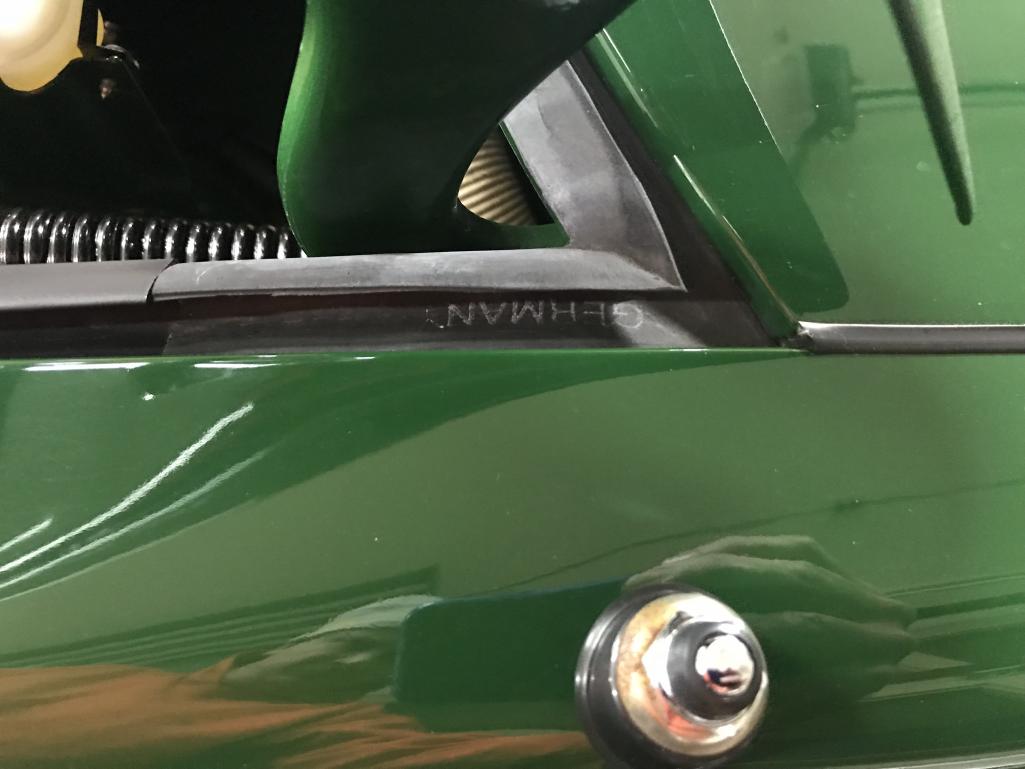
Posted by: Lucky9146 Nov 28 2017, 10:00 PM
Replaced the new repro trunk seal with a new OEM seal. It fits much better, but unfortunately, I think it's an old OEM seal and some of the corners are coming unglued. Anyone know whats a good glue to re-glue the corners of these rubber seals?
Also, I'm pretty sure this is an Porsche OEM rubber seal (purchased from Pelican Parts), but it is not marked "Germany" as the OEM seal on my green car is. Hmmm...
-Steve
I used 3M super Weatherstrip and Gasket Adhesive yellow. Sometimes lovingly referred to as "snake snot". Worked great! Best of luck.
Posted by: siverson Feb 28 2018, 11:39 PM
Got the oil lines mostly done now.
Attached thumbnail(s)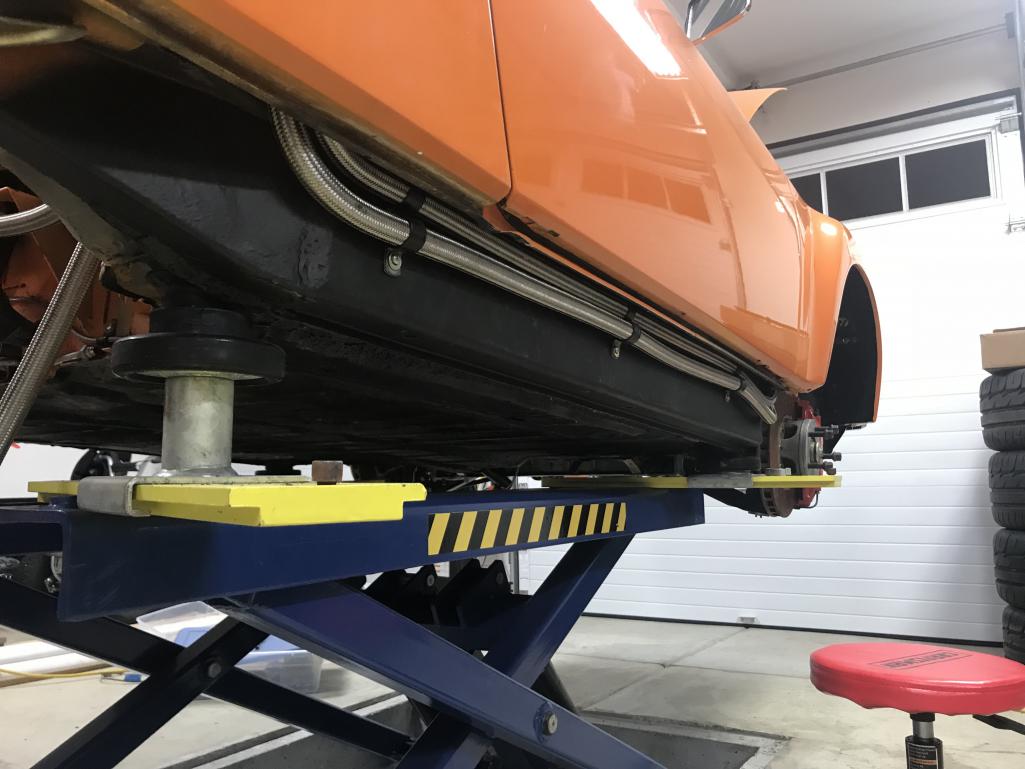
Posted by: siverson Feb 28 2018, 11:39 PM
Another
Attached thumbnail(s)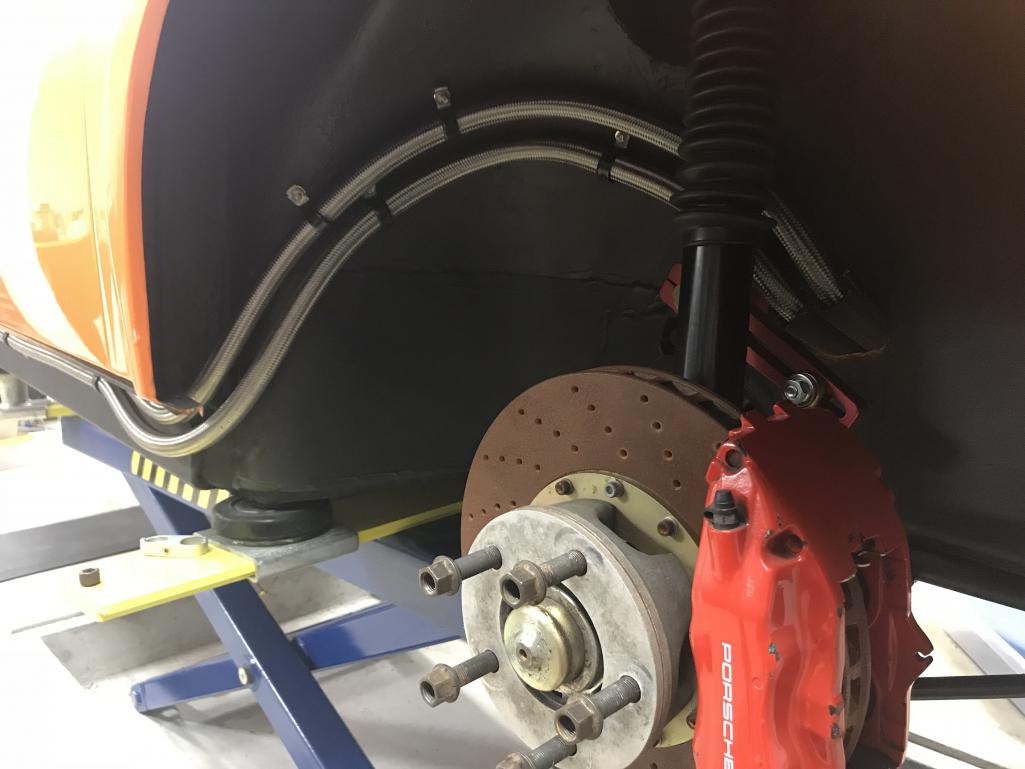
Posted by: siverson Feb 28 2018, 11:40 PM
914
Attached thumbnail(s)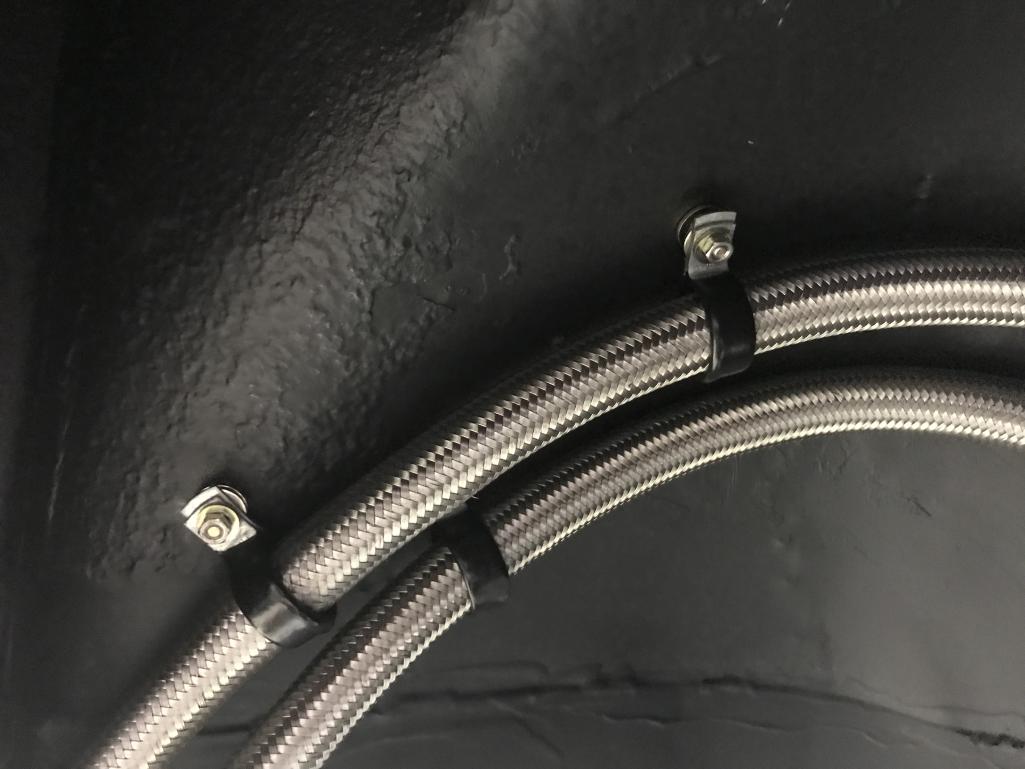
Posted by: siverson Feb 28 2018, 11:40 PM
914
Attached thumbnail(s)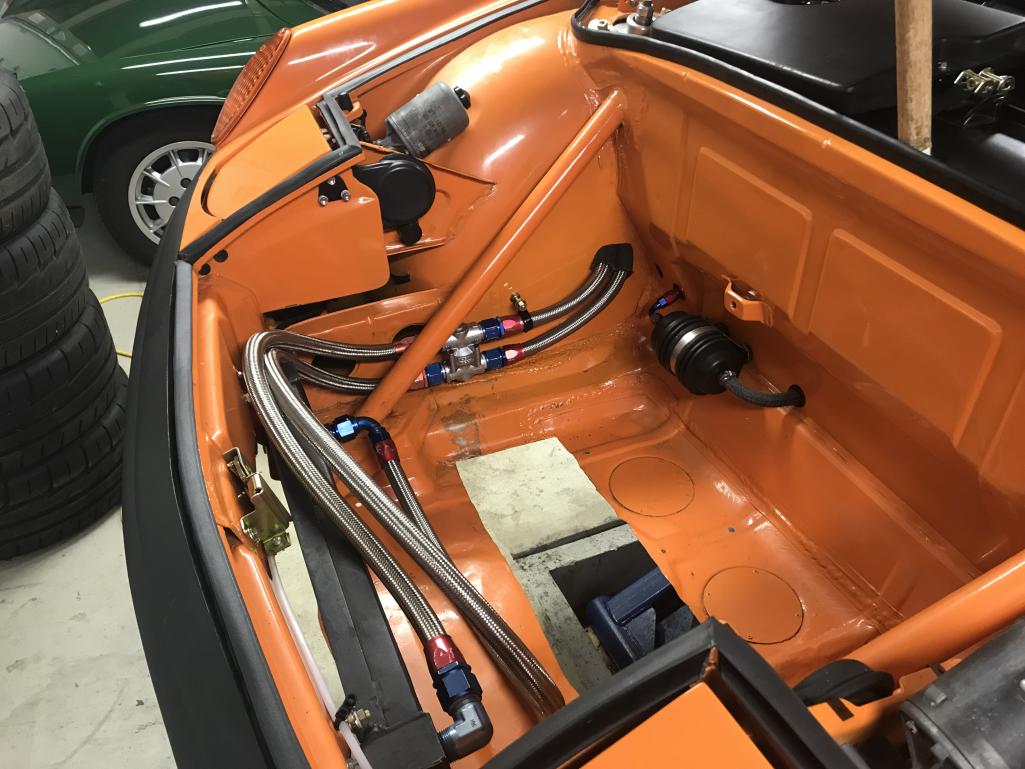
Posted by: siverson Feb 28 2018, 11:41 PM
914
Attached thumbnail(s)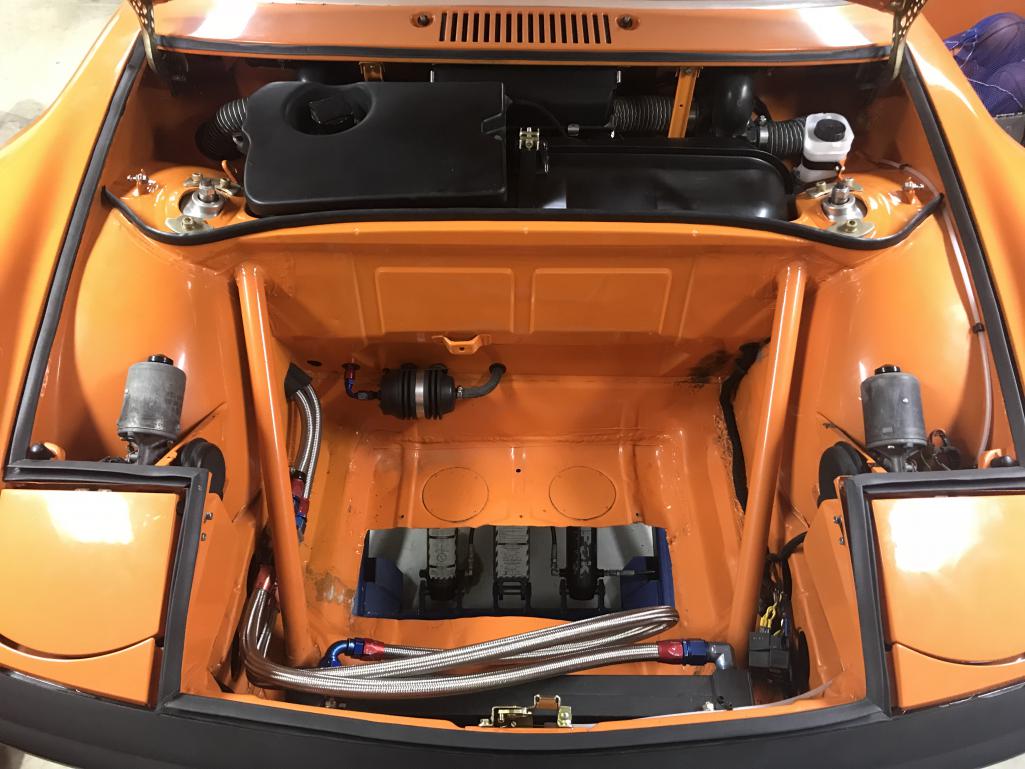
Posted by: Cairo94507 Mar 1 2018, 07:39 AM
Nice to see it coming along.
Posted by: Dave_Darling Mar 1 2018, 06:06 PM
What's up with the big loop in the front trunk oil line? Looks like it is folded or kinked from this angle...
--DD
Posted by: get off my lawn Mar 1 2018, 06:28 PM
Wow, I guess that wouldn't buff out.
But at least you were using it for what it was intended for.
Posted by: Maltese Falcon Mar 1 2018, 07:46 PM
Looking awesome
Posted by: siverson Mar 1 2018, 08:21 PM
> What's up with the big loop in the front trunk oil line? Looks like it is folded or kinked from this angle...
Yeah I made that line last night to try something new. It's not kinked, just looks like it from the photo.
I used to have a short 8" line or so go from the bottom of the cooler too the thermostat, but it was very tight and always a huge pain to get on. I just made this long line to make it easier, and it gets covered by the shroud anyways.
-Steve
Posted by: siverson Aug 12 2021, 08:32 PM
Well… I’m back on this project and I think I may have the momentum now to get this finished. Its actually amazing how little HOURS are actually required to finish this project, but now how many YEARS its been.
I crashed him just over 10 years ago. Yikes. In the last ten years a lot has happened that delayed things (to say the least).
- had my second child (he turns 10 next week!). daughter is 12 now.
- coached 7 seasons of kids basketball and a little soccer. i really miss this…
- started another company (adtech), operated it for 7 years and sold it. this also involved a 4 year lawsuit (went to trial) with some unethical partners (i won, yay; but honestly the lawyers are really the only ones who one in that drama).
- moved to encinitas and remodeled the entire house and yard.
- bought and sold 2 (3?) other 914s including completing a full restoration on the 1970 irish green six.
- got divorced and starting dating again.
whew. i cant believe its been 10 years since i crashed. i have owned this 914 for 30 now - since i was 15.
-Steve
Posted by: RiqueMar Aug 12 2021, 08:36 PM
@http://www.914world.com/bbs2/index.php?showuser=654 - Glad to hear you're back on it, cannot wait to see the progress and the car on the road!
Posted by: siverson Aug 12 2021, 08:36 PM
And to restart this project I’m just making myself go to the garage (I actually love spending time there) and do *something*. So I’m just getting anything done because eventually it all has to be done. So I’m working on this that dont really matter (rubber trim) and things that do (eg brakes) as I find parts.
fitting the wiring harness…
Attached thumbnail(s)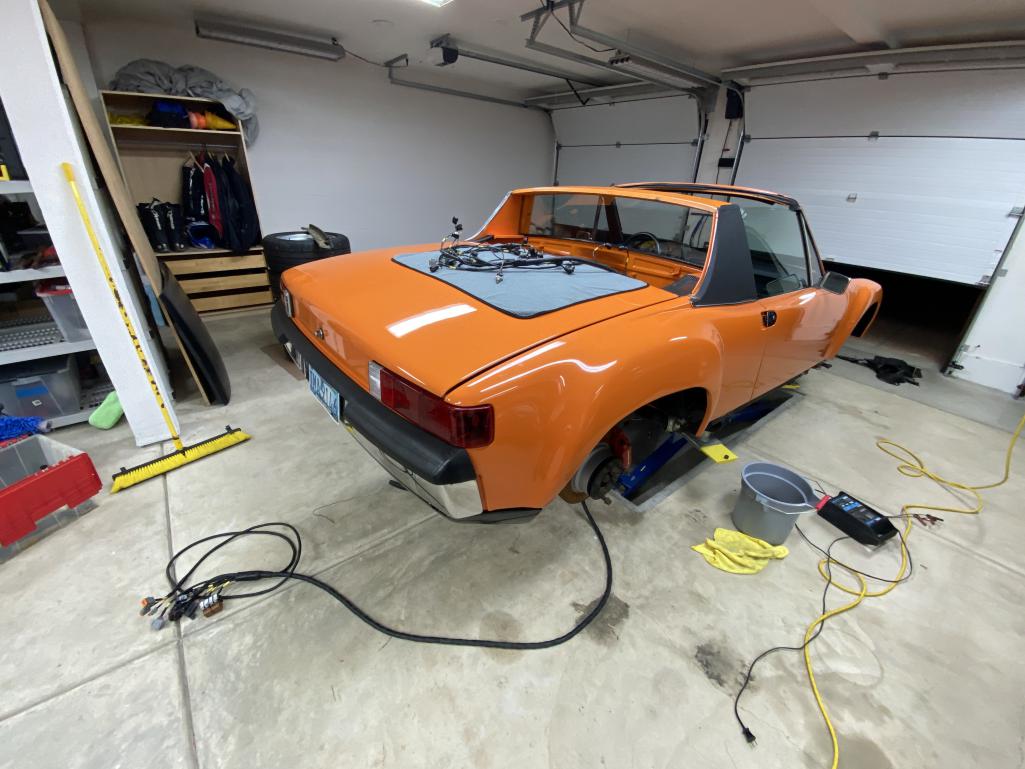
Posted by: siverson Aug 12 2021, 08:39 PM
And another decision I’ve made is to just get it done and it doesnt need to be perfect. This car is a very odd assortment of generations of Porsche parts and repairs so will never be a show car. So I’m just putting it together as-is and not worrying about things being perfect.
Done is better than perfect for this car now.
-Steve
Posted by: siverson Aug 12 2021, 09:50 PM
targa vinyl and some rubber
Attached thumbnail(s)
Posted by: siverson Aug 12 2021, 09:51 PM
mounting some bits
Attached thumbnail(s)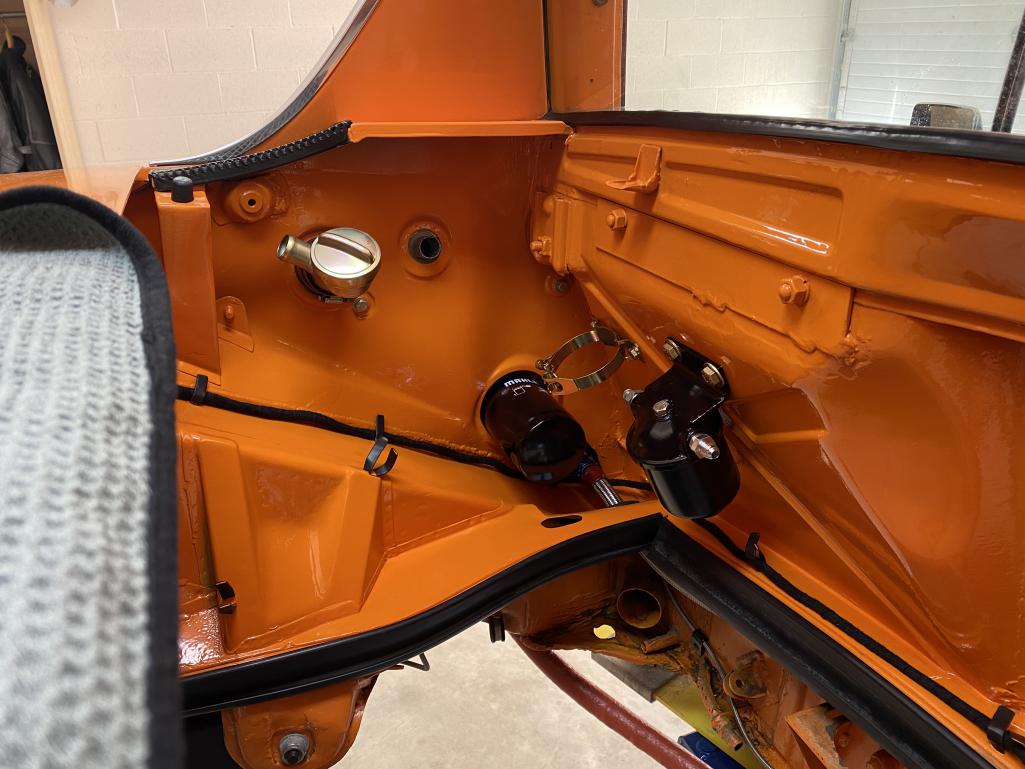
Posted by: VegasRacer Aug 12 2021, 10:37 PM
Well… I’m back on this project and I think I may have the momentum now to get this finished.
Great to hear it Steve.
You deserve it.
And the Car deserves it.
Posted by: siverson Aug 12 2021, 11:09 PM
holes
Attached thumbnail(s)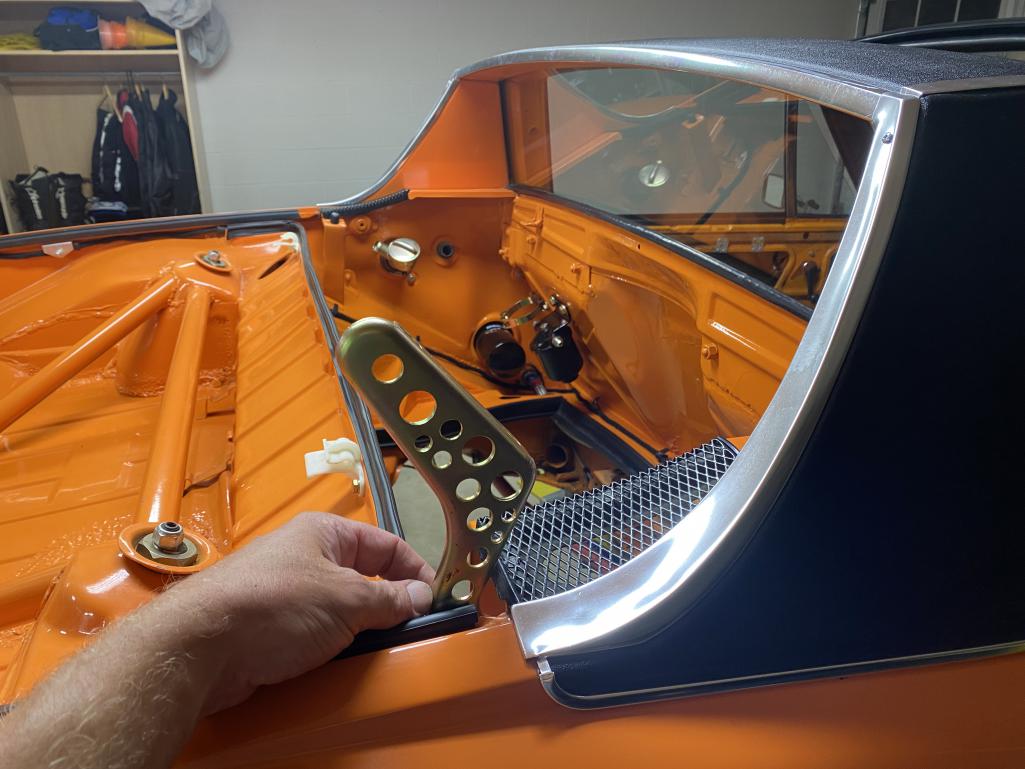
Posted by: Montreal914 Aug 12 2021, 11:47 PM
You are very close!
Words of wisdom from my good friend: A little work every day!
I try to apply this rule, but it certainly is not easy.
Very good looking car!
Posted by: Montreal914 Aug 13 2021, 12:18 AM
A few questions on your oil lines:
How close are the lines in the sway bar lever area (potential interference)?
Are these -10 or -12 size?
Can you post a picture of the lines going up in the rear fender. I also have a Brad Mayer kit and it seemed tight to get lines past the kit's top fold that reaches the rear suspension pick up point. (non flared car though).
Also planning on running oil lines on the passenger side. I still have the front box, not sure yet how to go through it. The Brad Meyer kit sitting on these vertical ribs on the outer long actually ends on the rear part of the box covering part of it preventing the lines to go through it, unless maybe going in the box via an opening on the back and side (back corner) provided the lines will not protrude too much and touch the rocker panel. 
Comments welcomed
Thank you!
Posted by: siverson Aug 13 2021, 12:37 AM
half way in…
i installed the itbs ~5 years ago but have never had the engine running with them. thats going to take a bit of tinkering.
-steve
Attached thumbnail(s)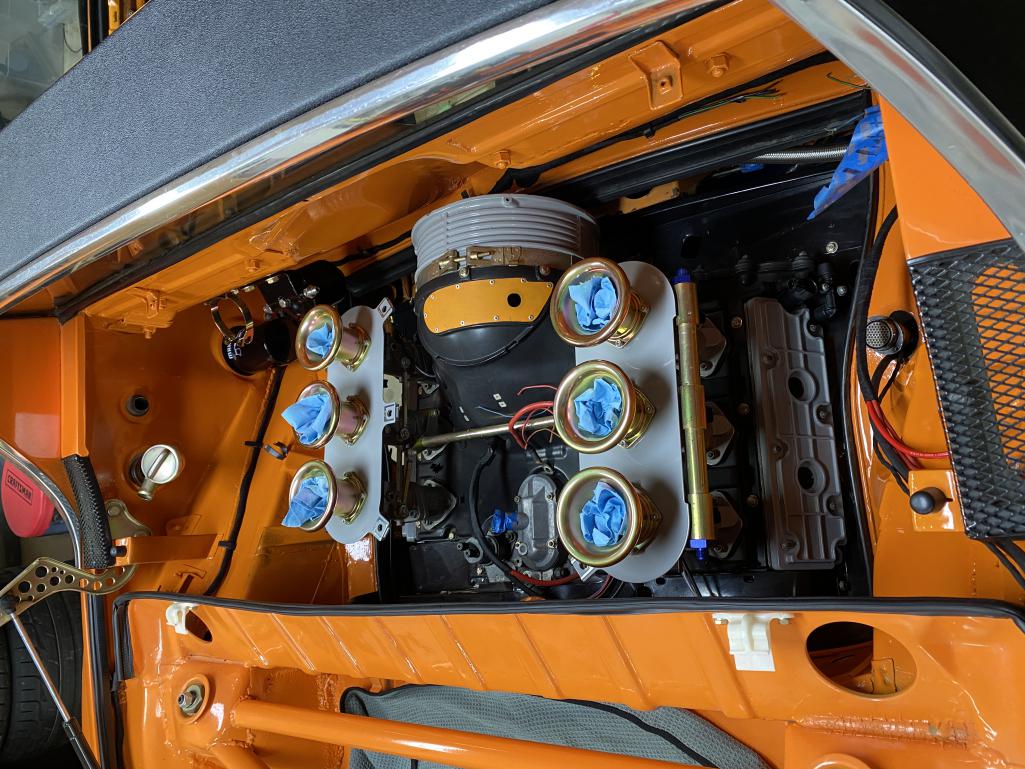
Posted by: stownsen914 Aug 13 2021, 05:23 AM
Good to get back to resurrecting the car. Life does get in the way sometimes lol, but sounds like you had the priorities right. And there is life after divorce!
Posted by: rick 918-S Aug 13 2021, 05:55 AM
Nice! Keep it going 
Posted by: Dion Aug 13 2021, 06:37 AM
Amazing. Talk about Tempus Fugit!
Posted by: autopro Aug 13 2021, 04:23 PM
That engine  wow, Great job on the rebuild.
Posted by: jim_hoyland Aug 14 2021, 02:15 PM
Nice work Steve
Won’t be long before your on—the—road again….
Attached image(s)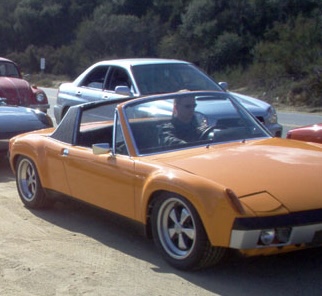
Posted by: siverson Aug 16 2021, 07:29 PM
engine is fully bolted up and i rolled it out to readjust it on the lift.
Attached thumbnail(s)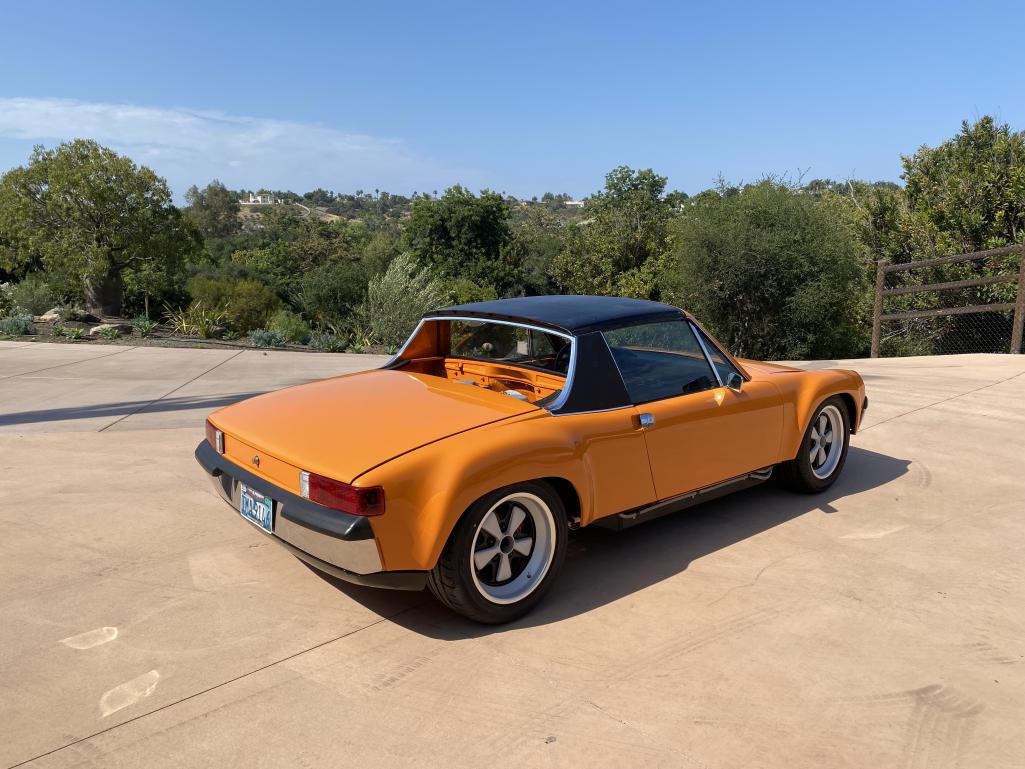
Posted by: siverson Aug 16 2021, 07:29 PM
914
Attached thumbnail(s)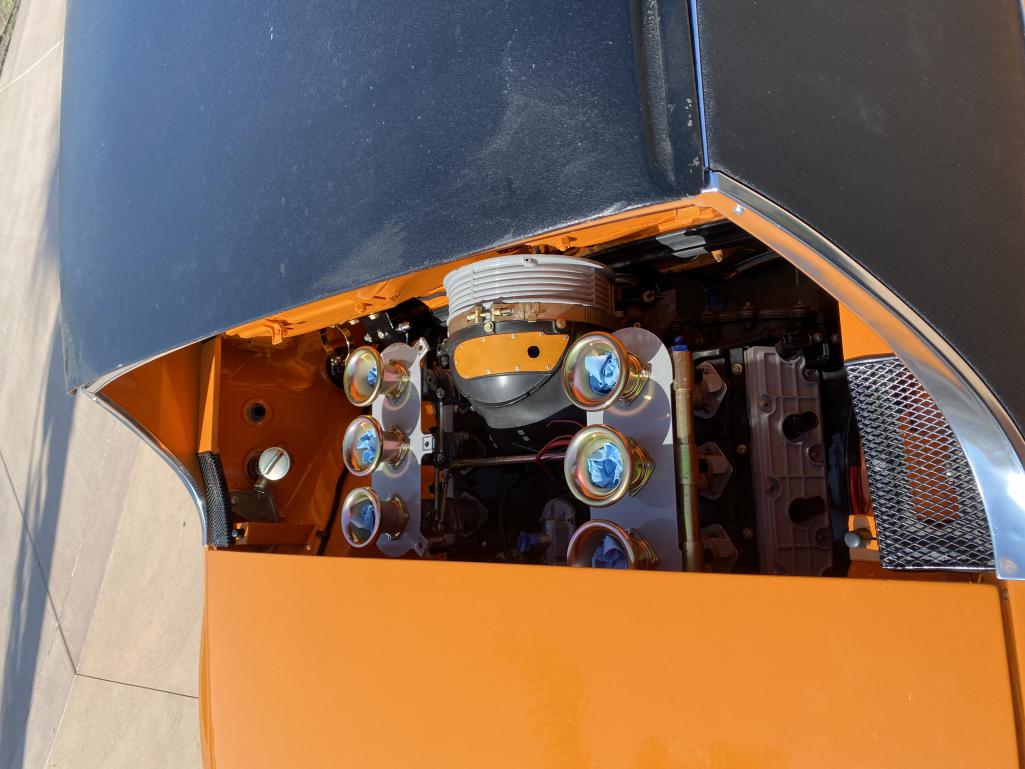
Posted by: siverson Aug 16 2021, 07:32 PM
there is zero clearance between the velocity stacks and rear trunk. ooops. i thought this would fit better.
im considering just cutting that one stack at the rear so its just a 270 degree circle. any thoughts? obviously not ideal but would the different airflow really matter that much?
-steve
Attached thumbnail(s)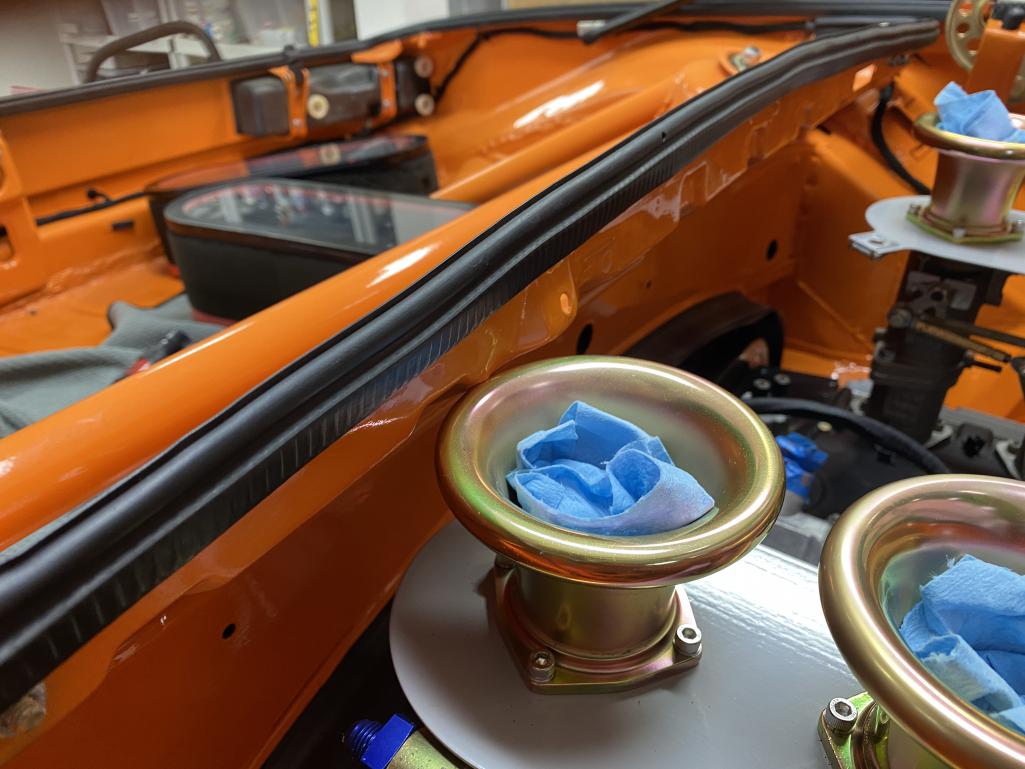
Posted by: siverson Aug 16 2021, 07:35 PM
“factory seconds” fog light grills arrived today and they are just fine. 9.5/10 and not perfect but way better fitting than my carbon fiber hood.
Attached thumbnail(s)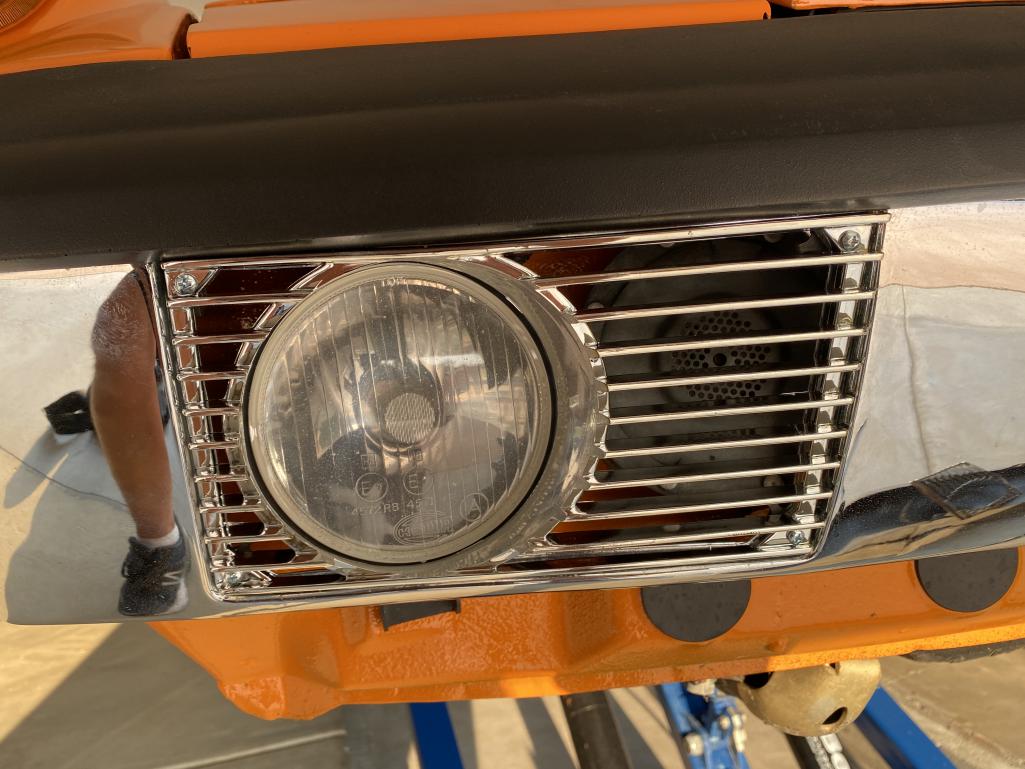
Posted by: siverson Aug 16 2021, 07:38 PM
and in the “not pretty but get it done” category is this hacked together battery strap. seems to work but… 
-steve
Attached thumbnail(s)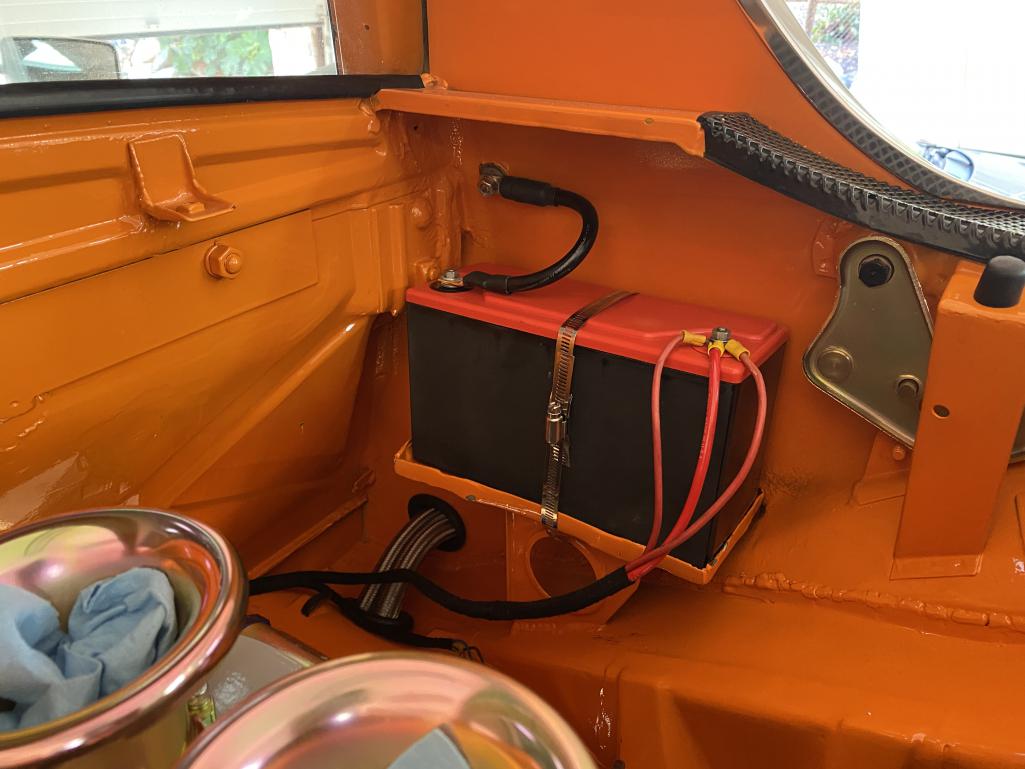
Posted by: siverson Aug 16 2021, 08:44 PM
A few questions on your oil lines:
How close are the lines in the sway bar lever area (potential interference)?
Are these -10 or -12 size?
Can you post a picture of the lines going up in the rear fender. I also have a Brad Mayer kit and it seemed tight to get lines past the kit's top fold that reaches the rear suspension pick up point.
(non flared car though).Also planning on running oil lines on the passenger side. I still have the front box, not sure yet how to go through it. The Brad Meyer kit sitting on these vertical ribs on the outer long actually ends on the rear part of the box covering part of it preventing the lines to go through it, unless maybe going in the box via an opening on the back and side (back corner) provided the lines will not protrude too much and touch the rocker panel.
Comments welcomed
Thank you!
hi - here are some oil line photos…
having said that, i would just use the hard line kits that duplicate the factory lines. i did this in ~1996 when none of that was around (easily). all the lines are -12.
-steve
Attached thumbnail(s)
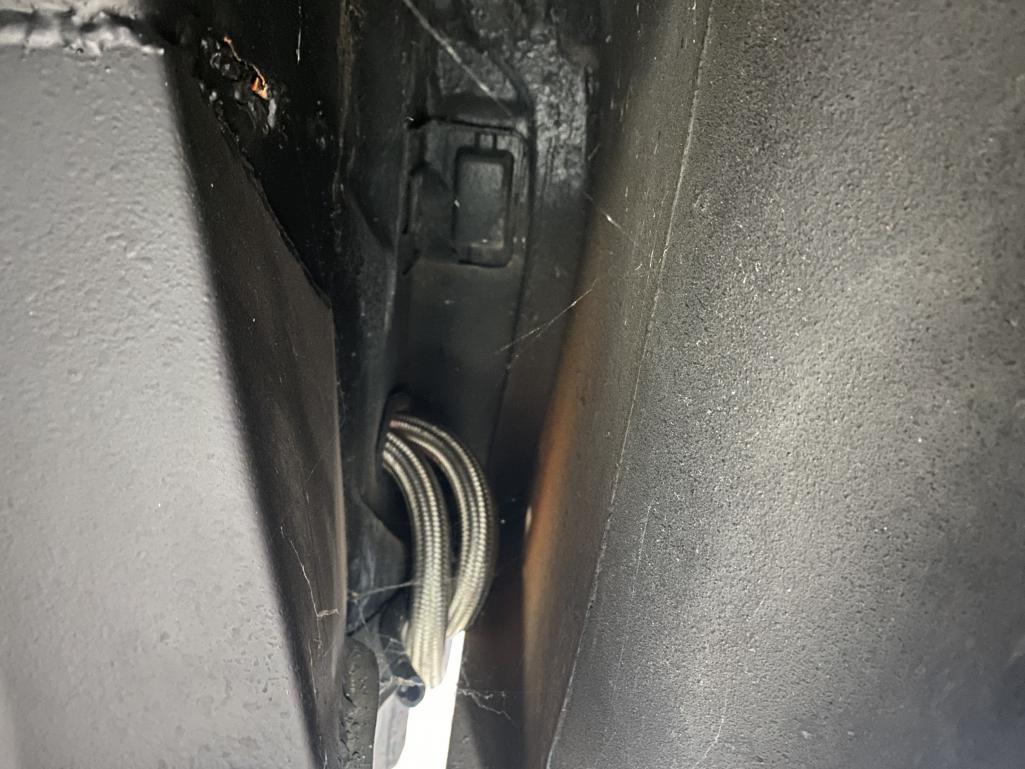
Posted by: siverson Aug 16 2021, 08:45 PM
914
Attached thumbnail(s)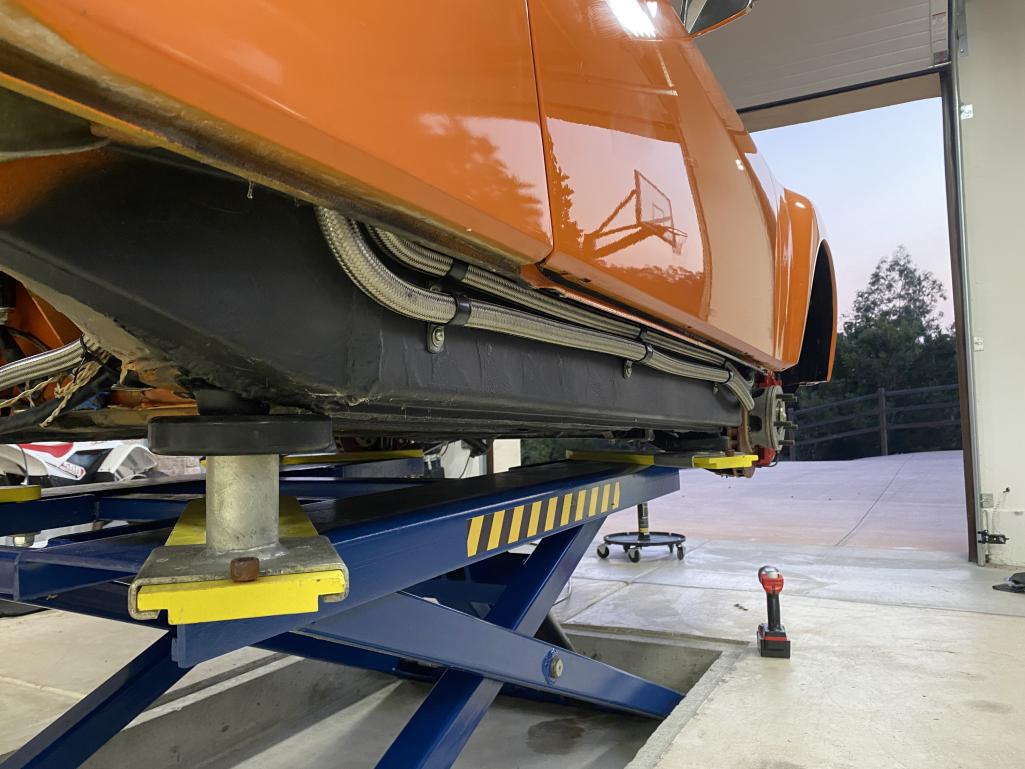
Posted by: siverson Aug 16 2021, 08:45 PM
914
Attached thumbnail(s)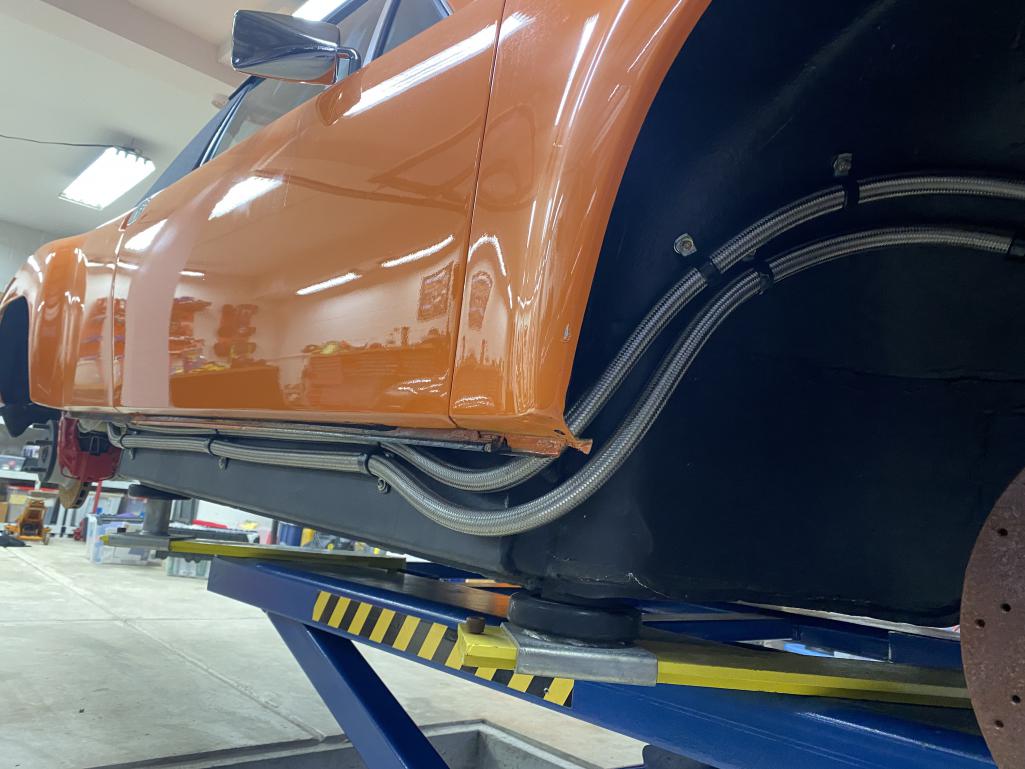
Posted by: siverson Aug 16 2021, 08:46 PM
914
Attached thumbnail(s)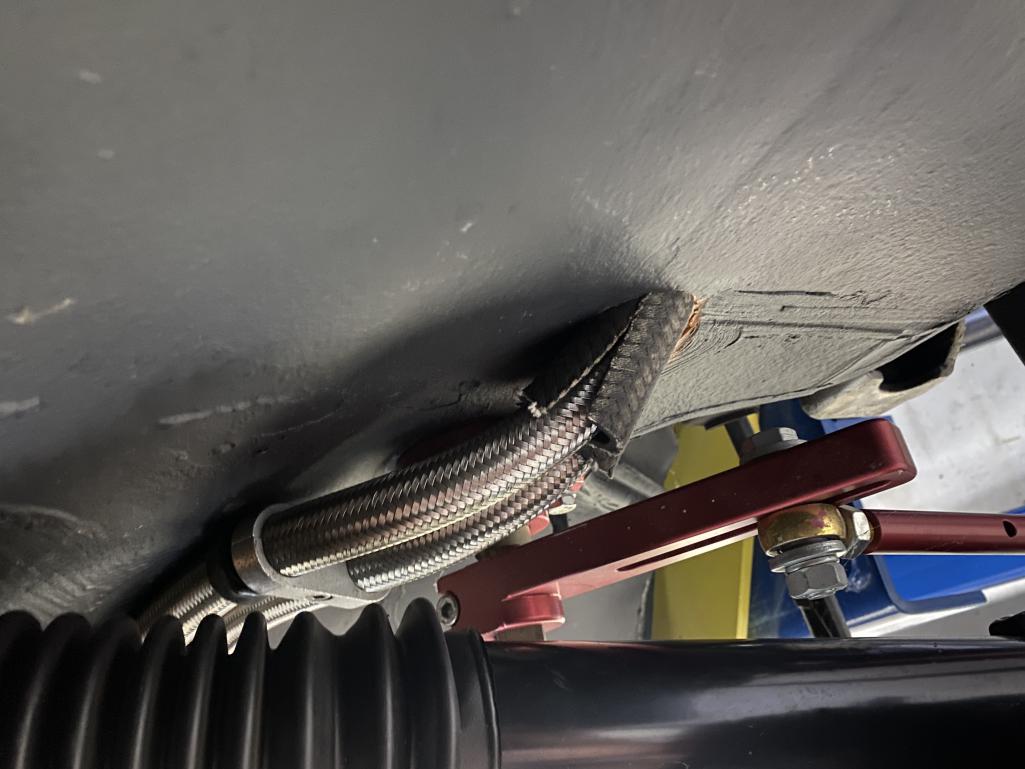
Posted by: siverson Aug 16 2021, 08:47 PM
914
Attached thumbnail(s)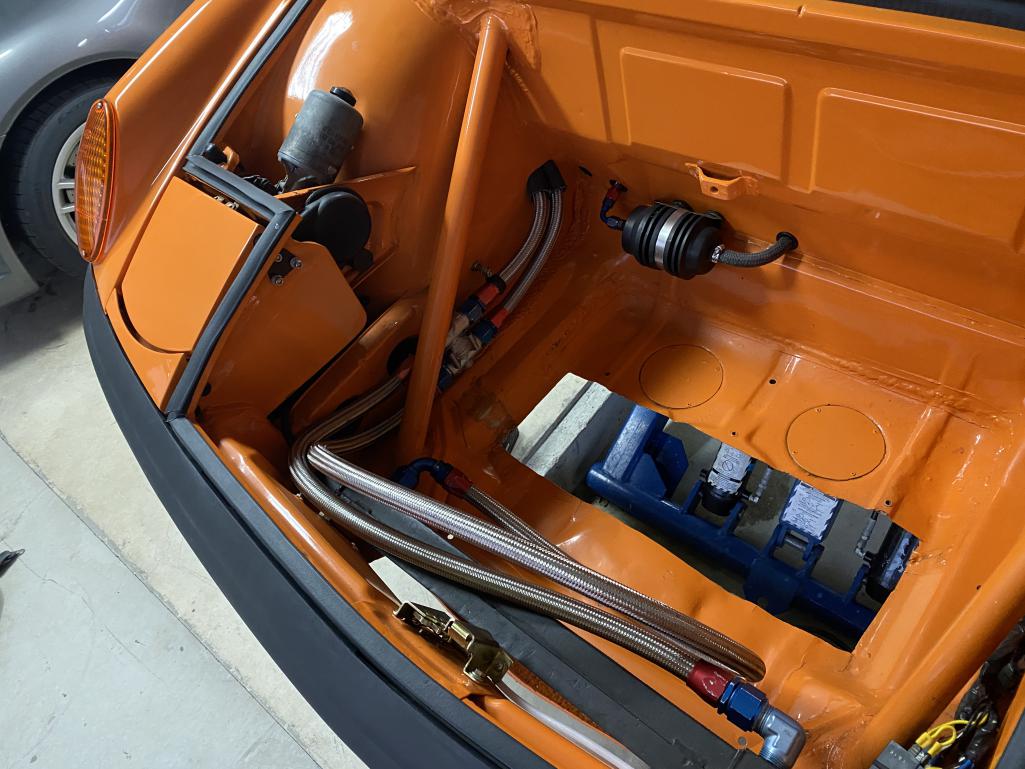
Posted by: siverson Aug 19 2021, 07:11 PM
more little things finished.
side valance… b- fit
Attached thumbnail(s)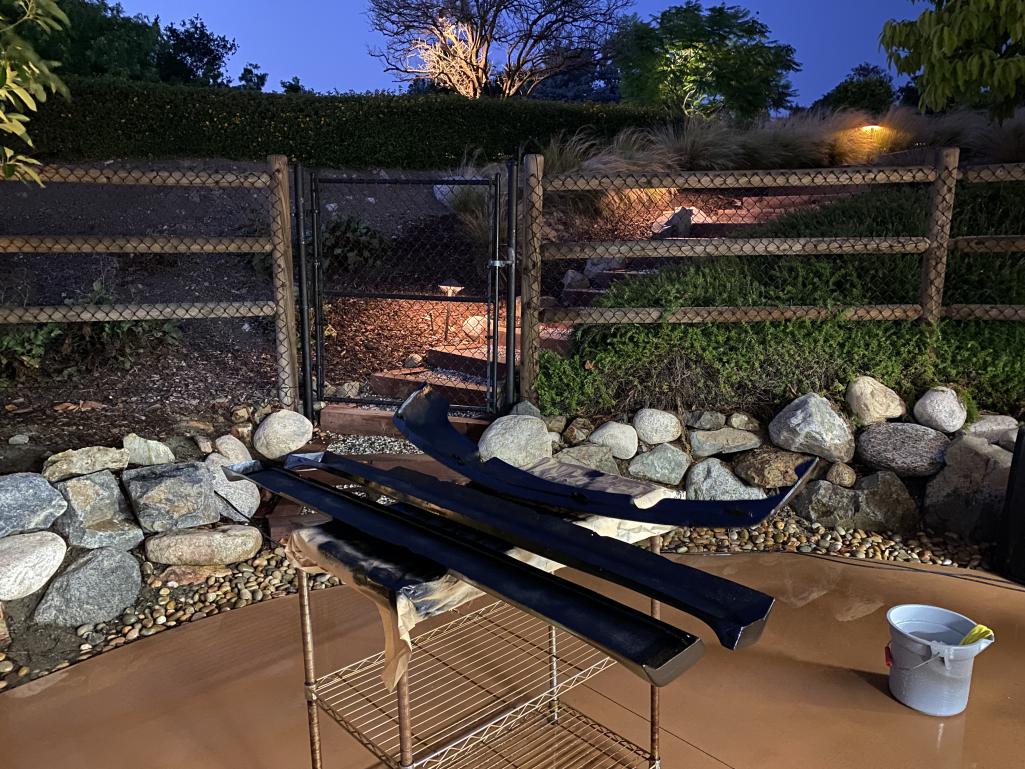
Posted by: siverson Aug 19 2021, 07:12 PM
914
Attached thumbnail(s)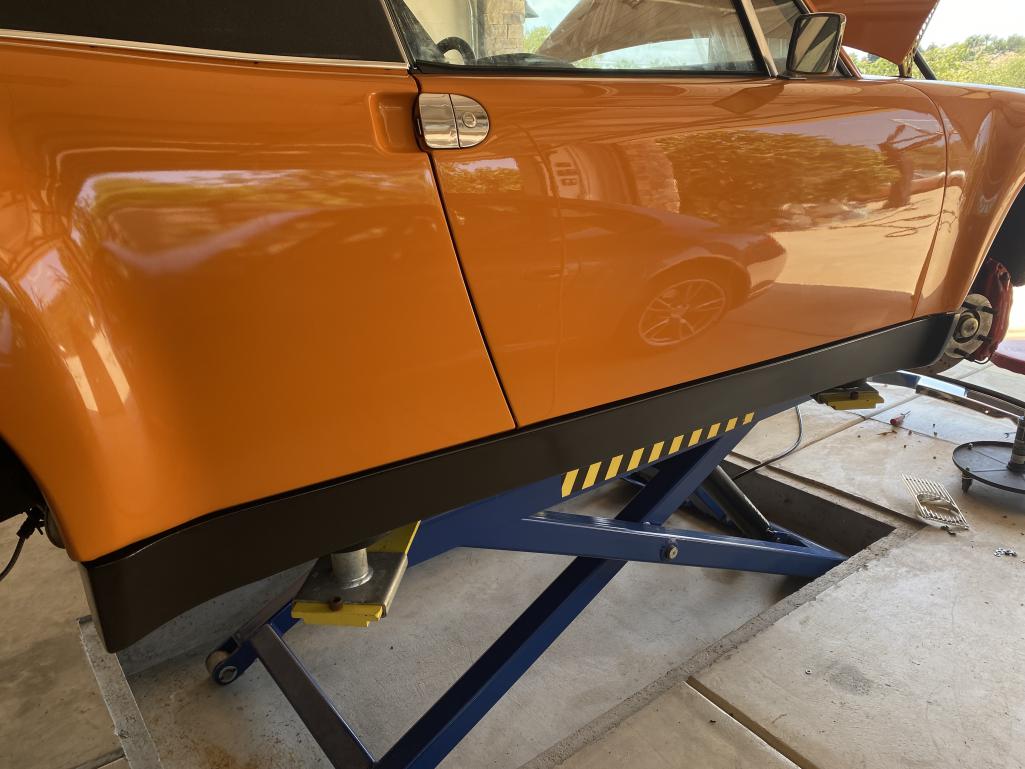
Posted by: siverson Aug 19 2021, 07:13 PM
front valence. this is a d- fit but oh well. im in get it driving mode and maybe will pay someone to make nice metal valences at some point. but this works for now.
-steve
Attached thumbnail(s)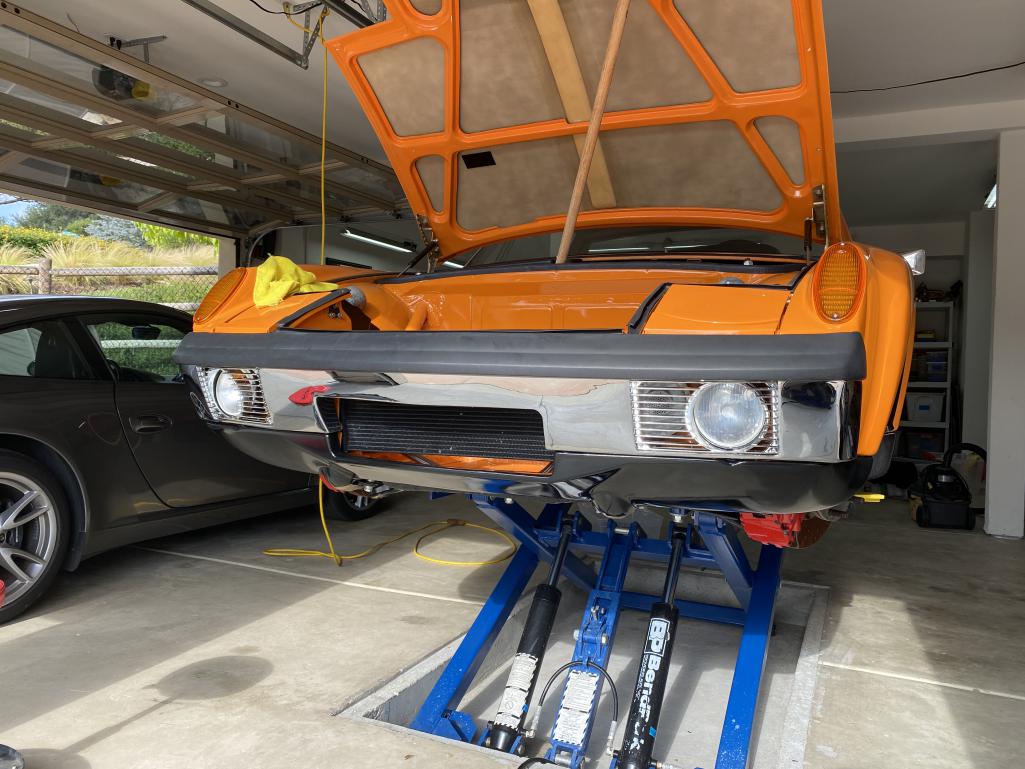
Posted by: siverson Aug 19 2021, 07:15 PM
pedal box in progress
Attached thumbnail(s)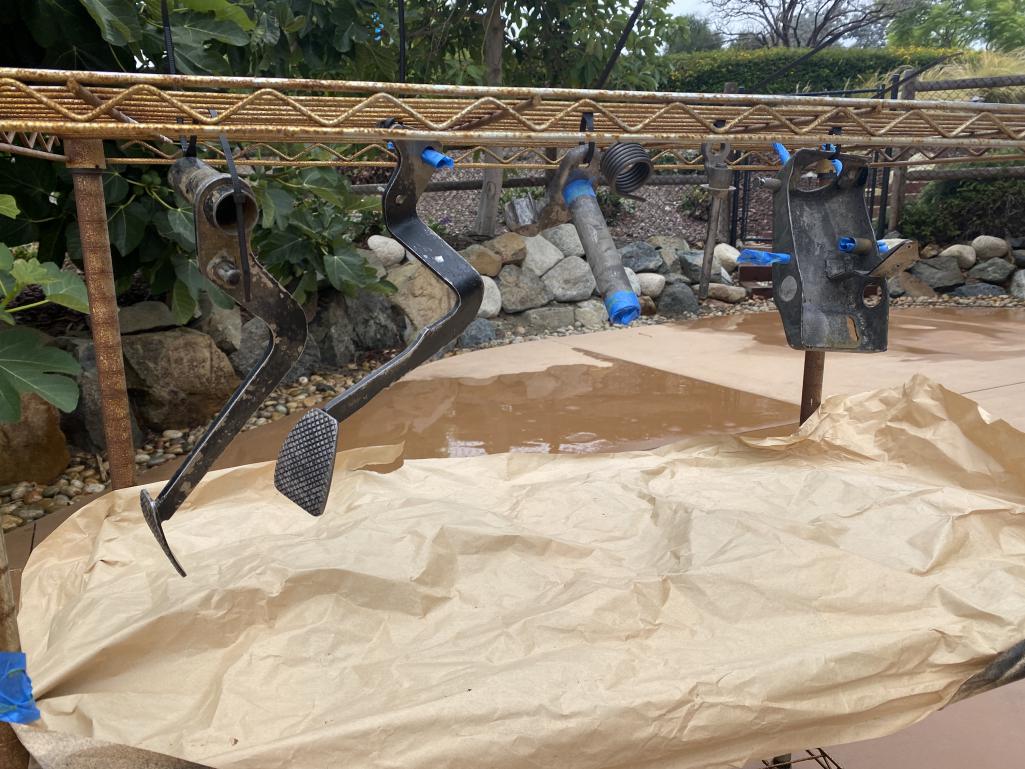
Posted by: siverson Aug 19 2021, 07:16 PM
new front brake pads
Attached thumbnail(s)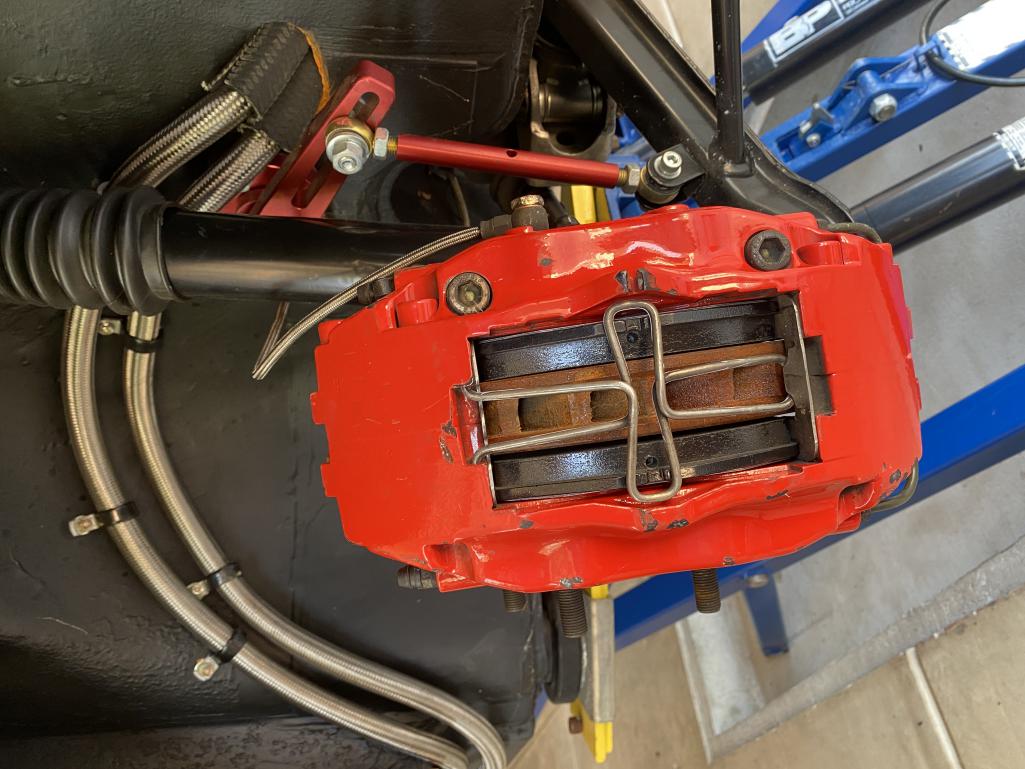
Posted by: TRS63 Aug 20 2021, 04:50 AM
Nice progress and what a beautiful car
Antoine
Posted by: Cairo94507 Aug 20 2021, 07:28 AM
Great progress. Looking forward to seeing this beauty soon.
Posted by: Shivers Aug 20 2021, 07:52 AM
Beautiful
Posted by: siverson Aug 20 2021, 08:46 AM
pedals back together
Attached thumbnail(s)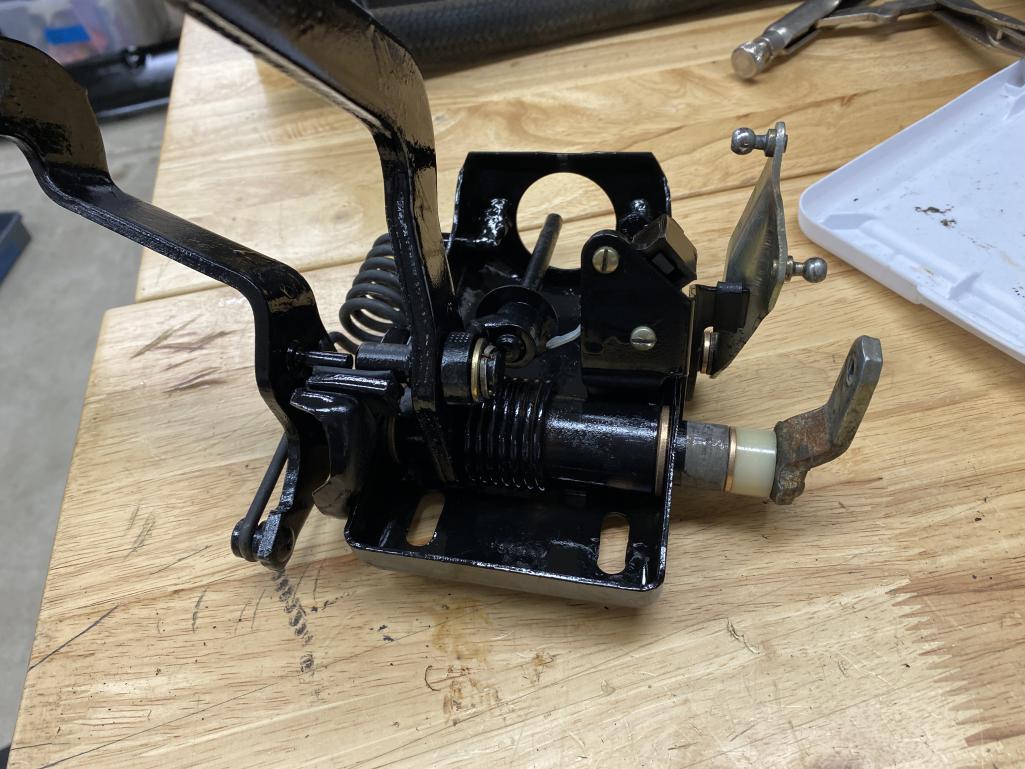
Posted by: siverson Aug 20 2021, 08:48 AM
Does anyone know where this extra small bushing goes that came with the pedal rebuild kit?
Posted by: siverson Aug 20 2021, 08:49 AM
Does anyone know where this extra small bushing goes that came with the pedal rebuild kit?
Attached thumbnail(s)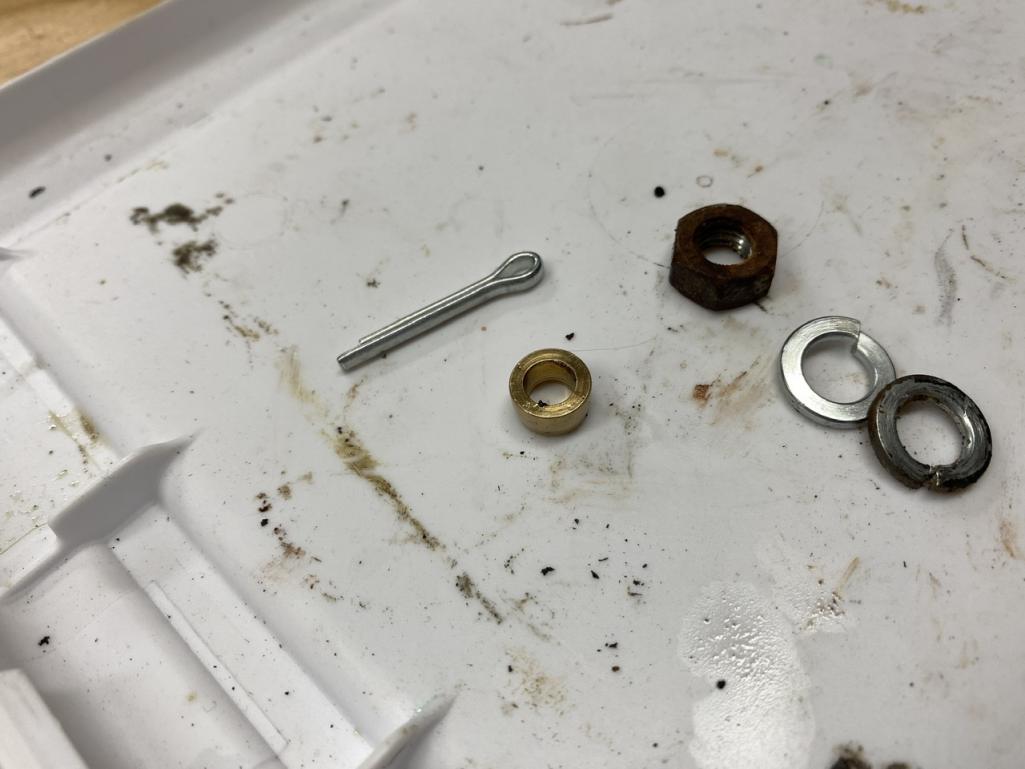
Posted by: BENBRO02 Aug 20 2021, 03:09 PM
@http://www.914world.com/bbs2/index.php?showuser=1319 should be able to help.
Posted by: Cairo94507 Aug 20 2021, 03:27 PM
No hand throttle?
Posted by: sixnotfour Aug 20 2021, 03:42 PM
Clutch arm
Posted by: bdstone914 Aug 20 2021, 06:40 PM
Does anyone know where this extra small bushing goes that came with the pedal rebuild kit?
Extra?
In the clutch arm.
@http://www.914world.com/bbs2/index.php?showuser=654
Attached thumbnail(s)
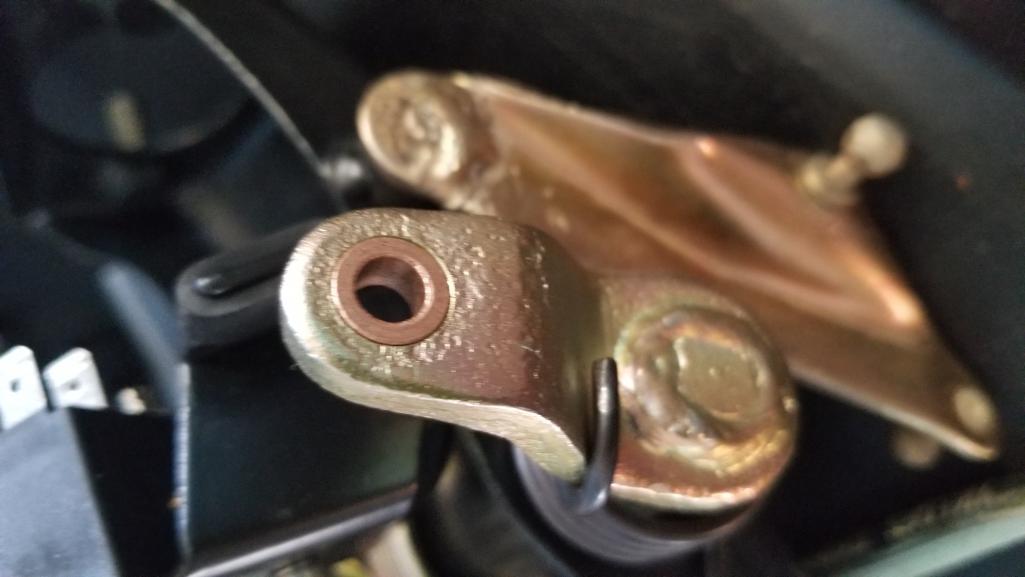
Posted by: Montreal914 Aug 20 2021, 08:29 PM
Thank you for the oil lines pictures.
Yes, I am thinking about rigid lines, homemade. 
BTW, nice clean look of the rockers sans square jack hole.
Beautiful car!
Posted by: siverson Aug 21 2021, 01:45 PM
Ah, thanks! That's it.
Does anyone know where this extra small bushing goes that came with the pedal rebuild kit?
Extra?
In the clutch arm.
@http://www.914world.com/bbs2/index.php?showuser=654
Posted by: flyer86d Aug 21 2021, 04:05 PM
and in the “not pretty but get it done” category is this hacked together battery strap. seems to work but…
-steve
It’s fine!
Charlie
Posted by: siverson Aug 21 2021, 06:46 PM
pedals in with working (led) brake lights.
-steve
Attached thumbnail(s)
Posted by: siverson Aug 21 2021, 06:46 PM
vrrrooooooom
Attached thumbnail(s)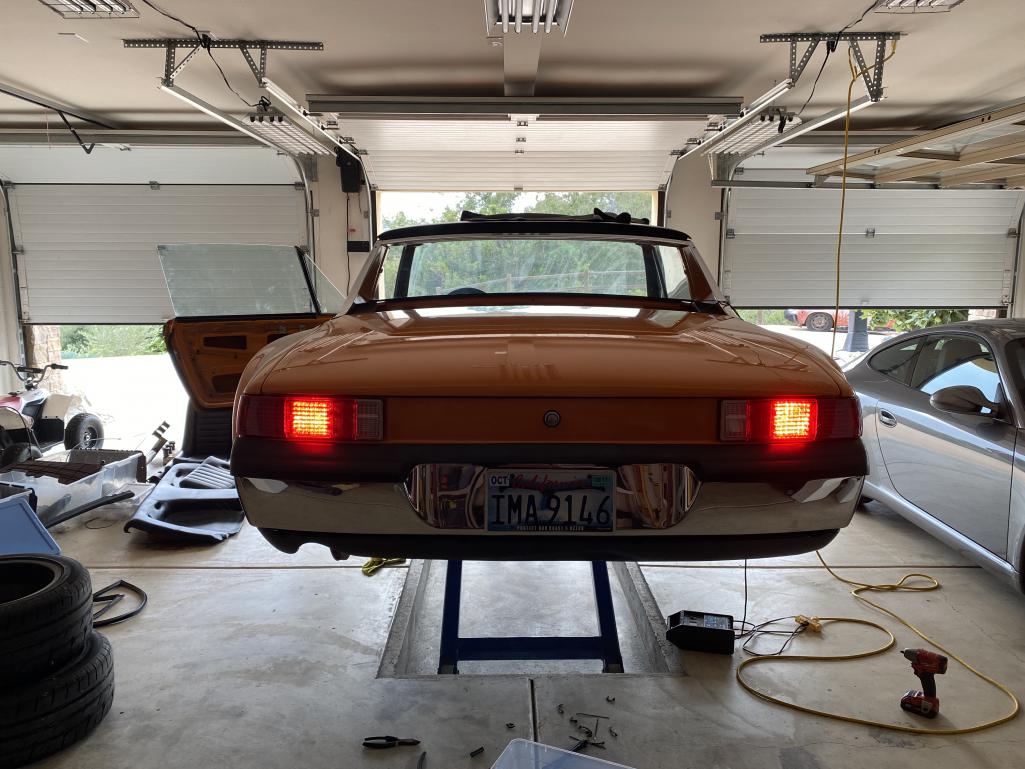
Posted by: siverson Aug 21 2021, 06:47 PM
chopped the velocity stack (“air horn”?). massive hp loss?
-steve
Attached thumbnail(s)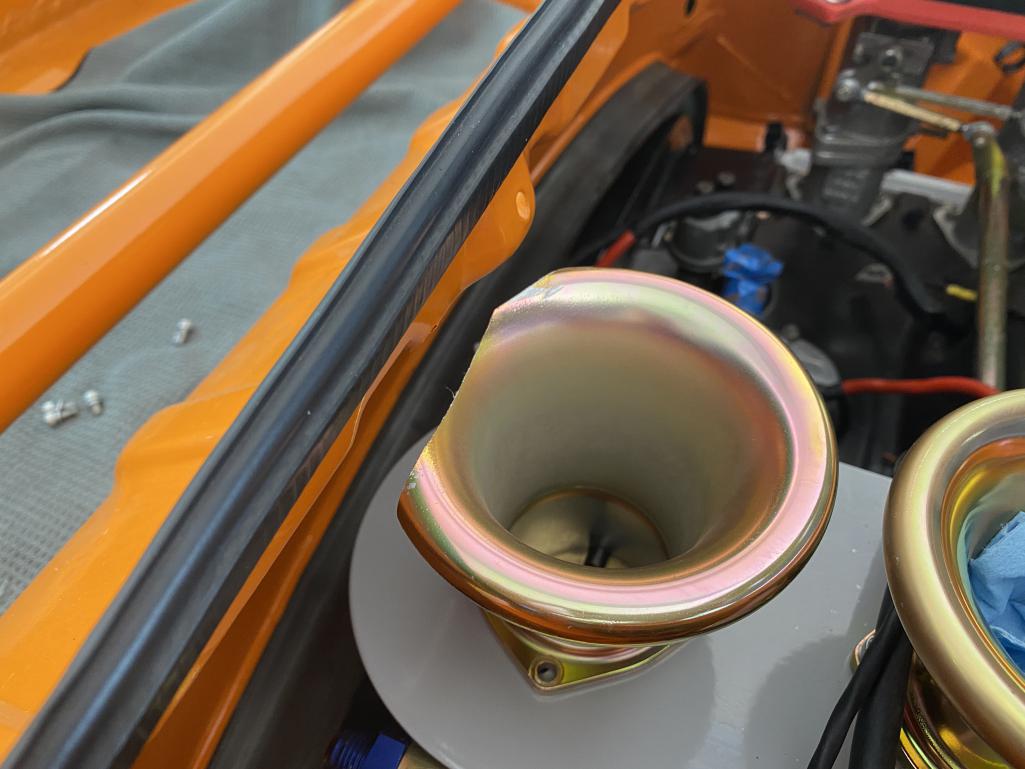
Posted by: siverson Aug 21 2021, 06:48 PM
sort of looks like the velocity stack graphic asset is still loading…
-steve
Attached thumbnail(s)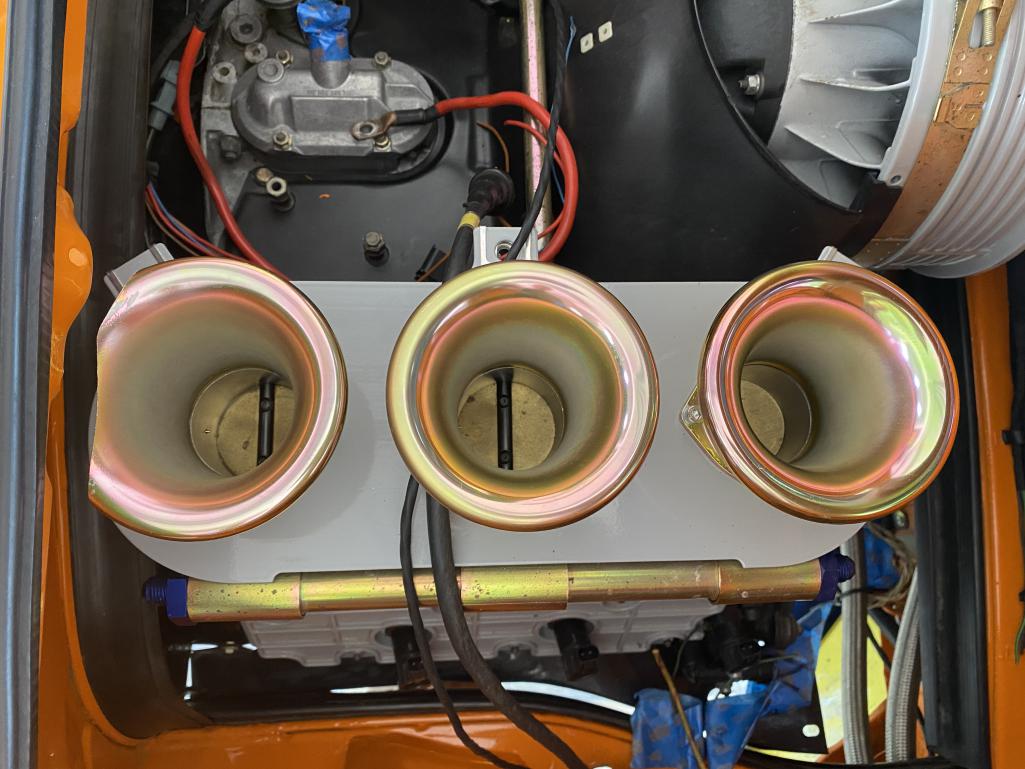
Posted by: siverson Aug 22 2021, 04:42 PM
Brakes bled…
Attached thumbnail(s)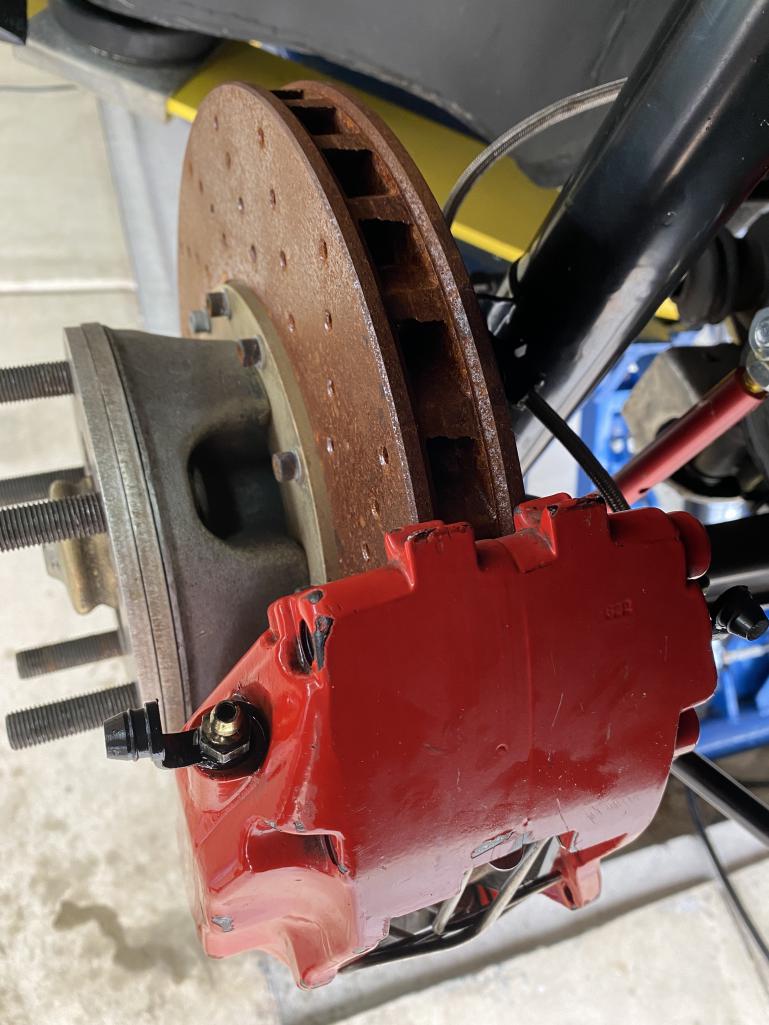
Posted by: siverson Aug 22 2021, 04:43 PM
Bleeding the brakes took me FOREVER because I forgot these calipers have two nipples each. Oooops.
Posted by: siverson Aug 22 2021, 05:25 PM
driving light switch replaced.
i committed the ultimate sin and took a couple parts from my orange car when restoring others. sorry orange 914. now he has a driving light switch again.
-steve
Attached thumbnail(s)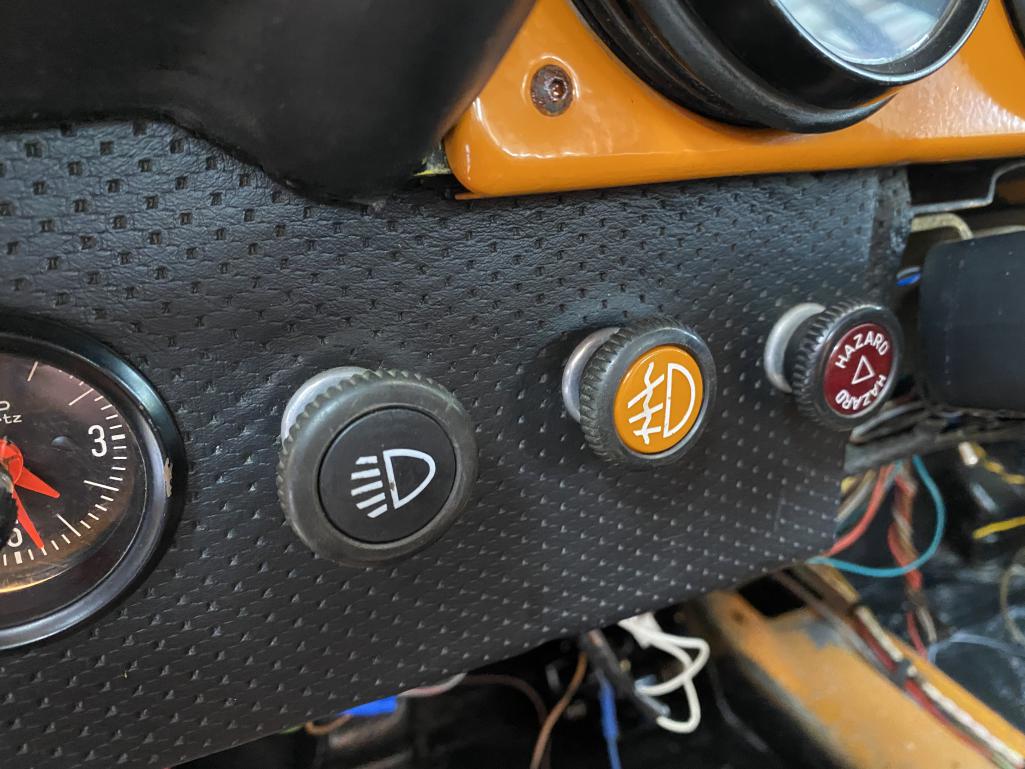
Posted by: siverson Aug 22 2021, 05:25 PM
914
Attached thumbnail(s)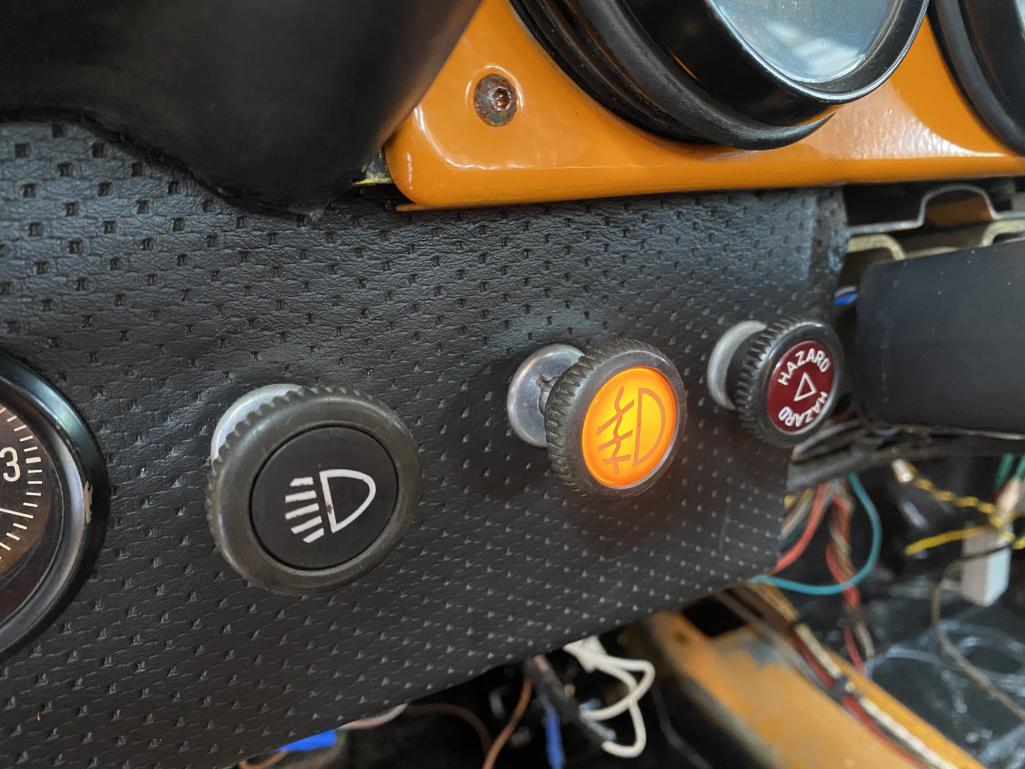
Posted by: siverson Aug 23 2021, 06:52 PM
some pretty parts have been gathering dust
Attached thumbnail(s)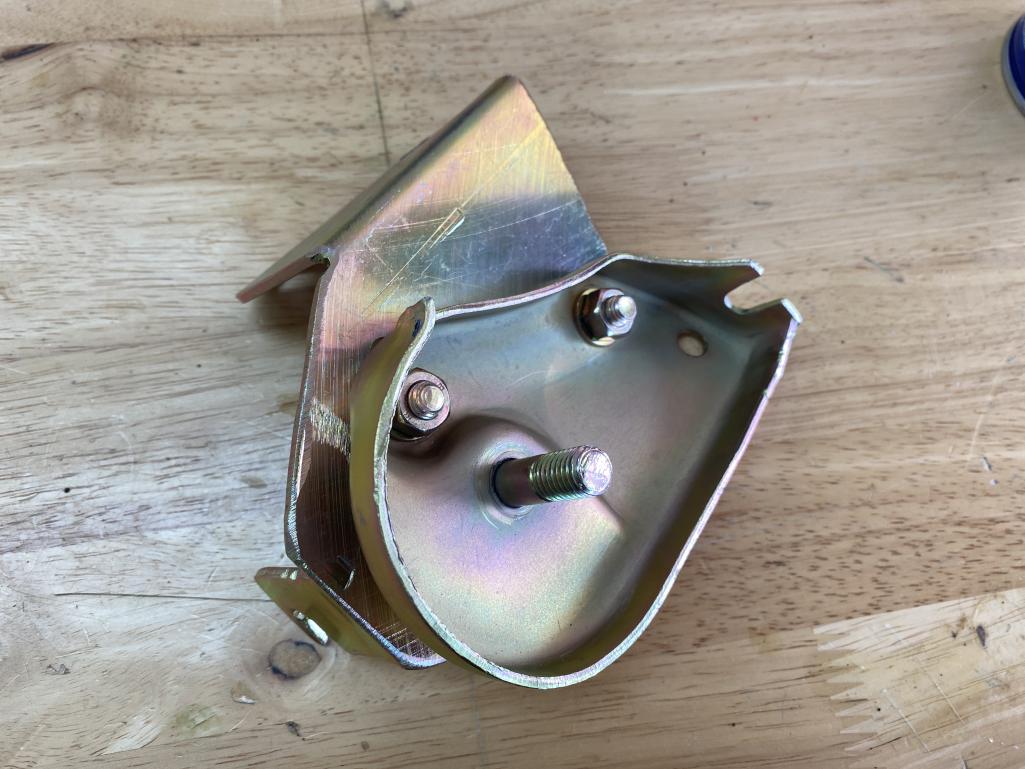
Posted by: siverson Aug 23 2021, 06:54 PM
this rube goldberg machine is assembled. i think. its like springs fighting springs fighting springs fighting springs.
Attached thumbnail(s)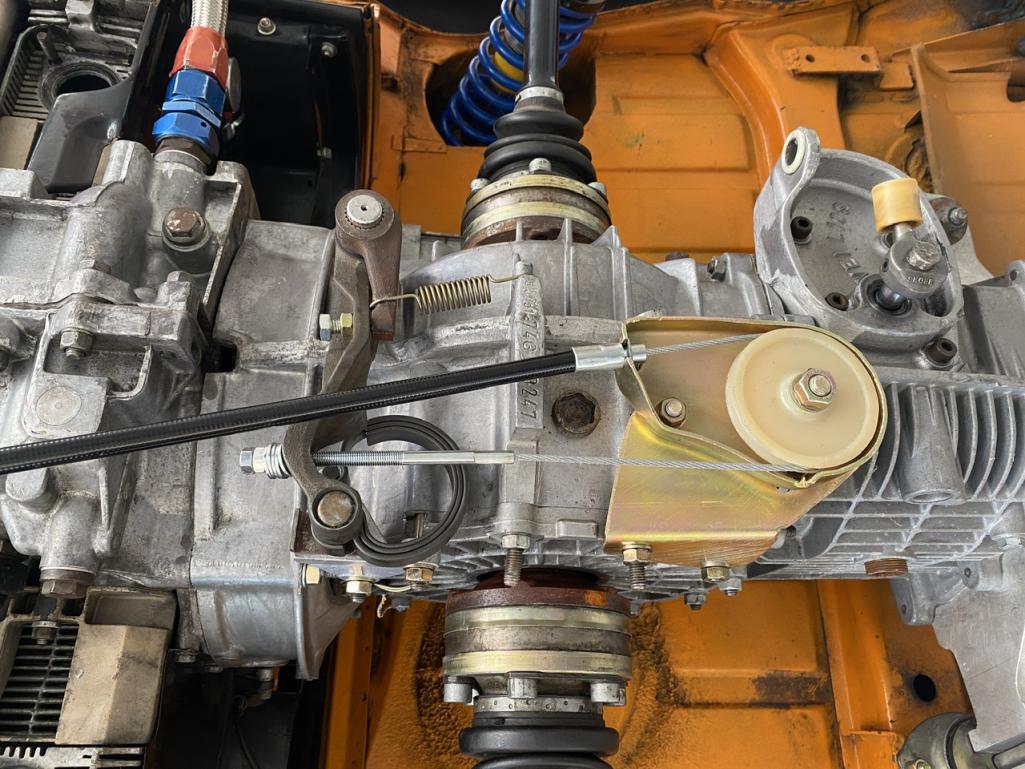
Posted by: siverson Aug 23 2021, 06:56 PM
914 clutch action!
https://youtube.com/shorts/fZYkHk4By8U?feature=share
Posted by: siverson Aug 28 2021, 03:42 PM
new seatbelts from seatbeltplanet are in. ive bought these before and they work well.
i do need to refurb my latch or get new ones or something. hmmmm.
-steve
Attached thumbnail(s)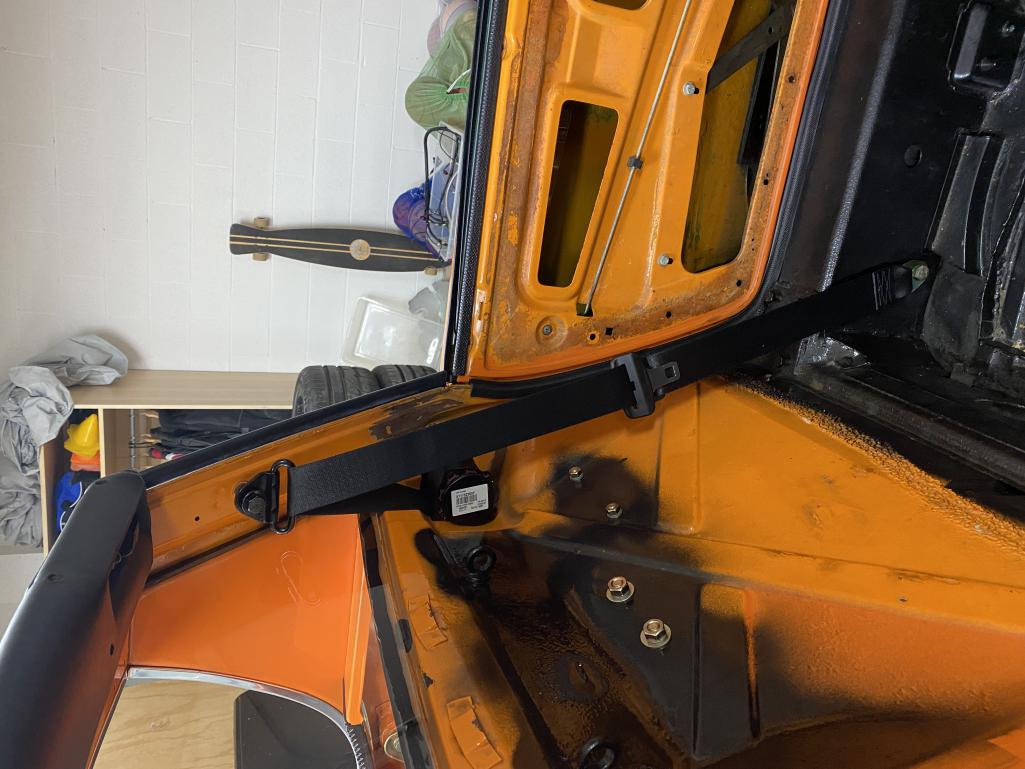
Posted by: siverson Aug 28 2021, 03:44 PM
914. floor has been lowered about 3/4 of an inch and seat is bolted to the floor. this works really well for tall people.
-steve
Attached thumbnail(s)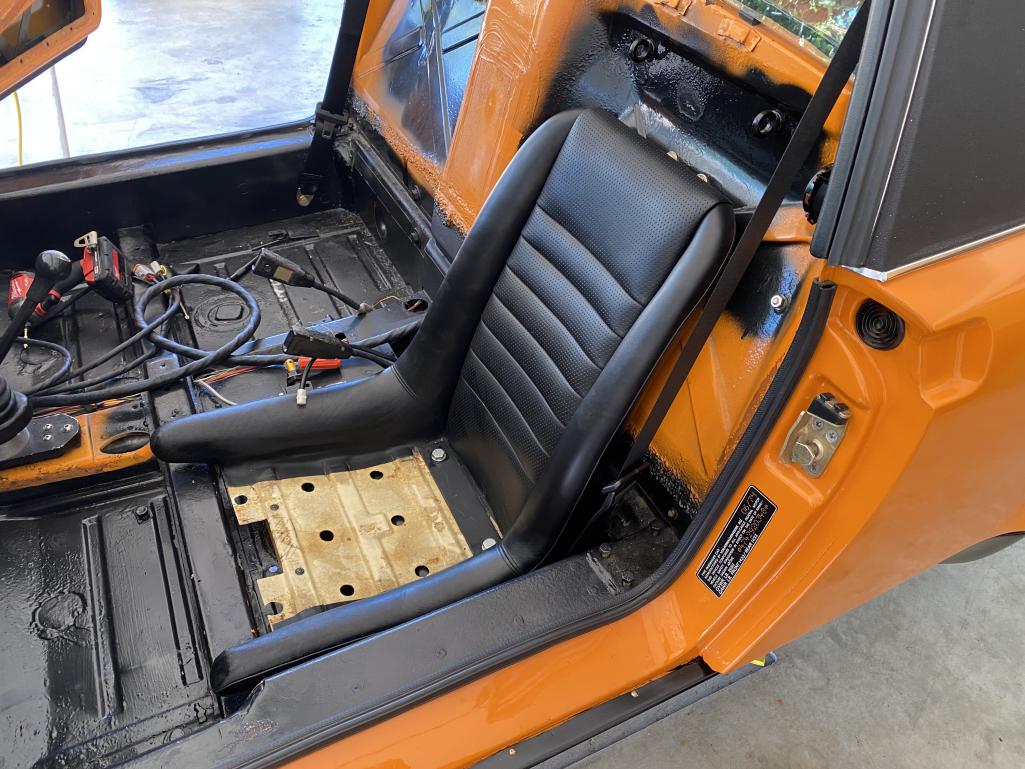
Posted by: siverson Aug 28 2021, 03:44 PM
914
Attached thumbnail(s)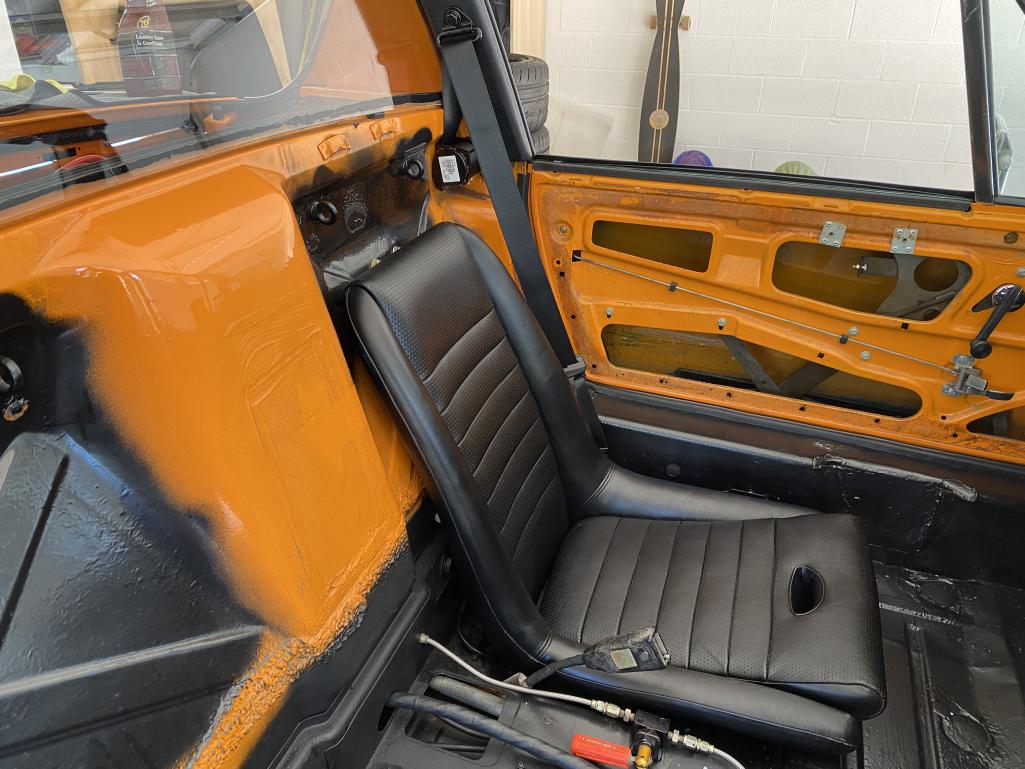
Posted by: siverson Aug 28 2021, 03:55 PM
And the OBC is working again.
https://youtu.be/yHRcrnXf-8U
-Steve
Posted by: Montreal914 Aug 28 2021, 05:13 PM
Nice added modern features.
Posted by: siverson Sep 13 2021, 11:28 PM
well im not going to get it running by 9/14 but maybe by the wcr…?
shift rod is in and working
Attached thumbnail(s)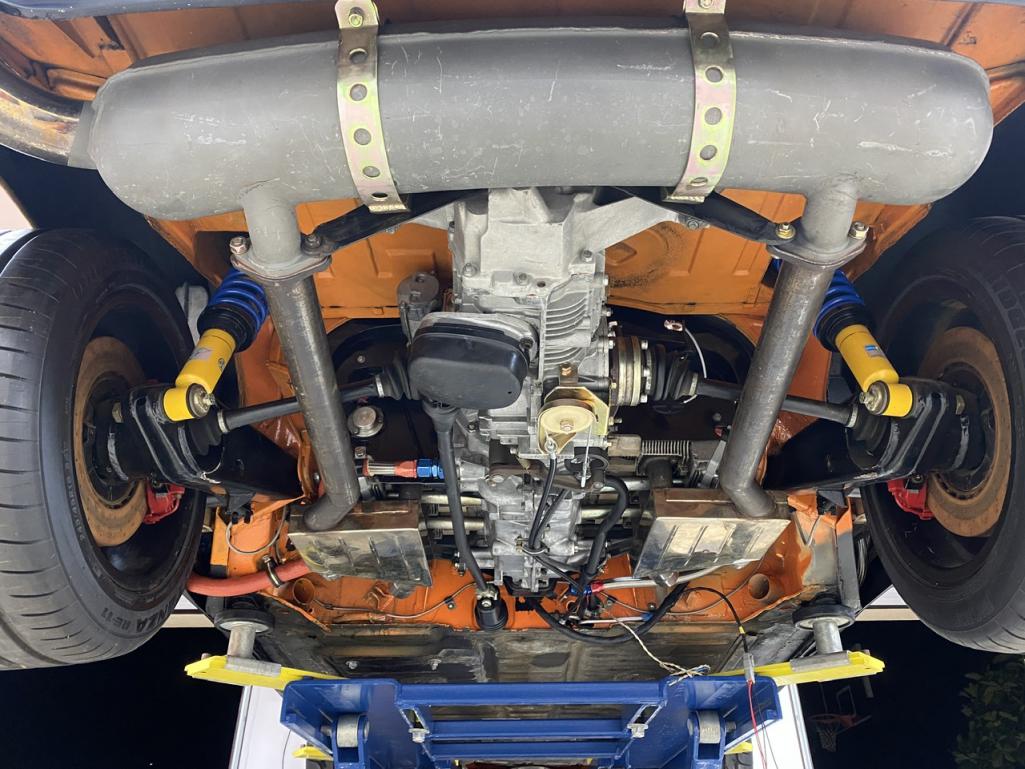
Posted by: siverson Sep 13 2021, 11:31 PM
throttle cable is in and working
i got an amazingly nice set of headers from ben/mb911 but im having clearance issues with my vellios transmission/cvs and the shift rod. so for now im going to put on the old
b&b headers.
-steve
Attached thumbnail(s)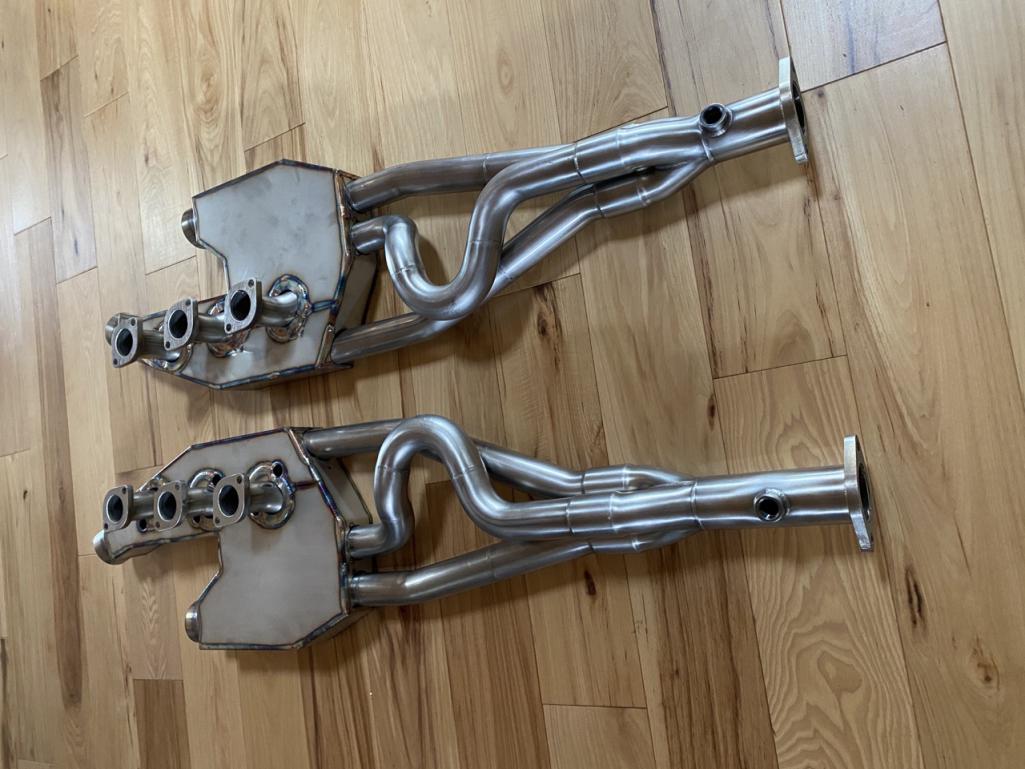
Posted by: siverson Sep 13 2021, 11:32 PM
i wonder how much worse these are…?
Attached thumbnail(s)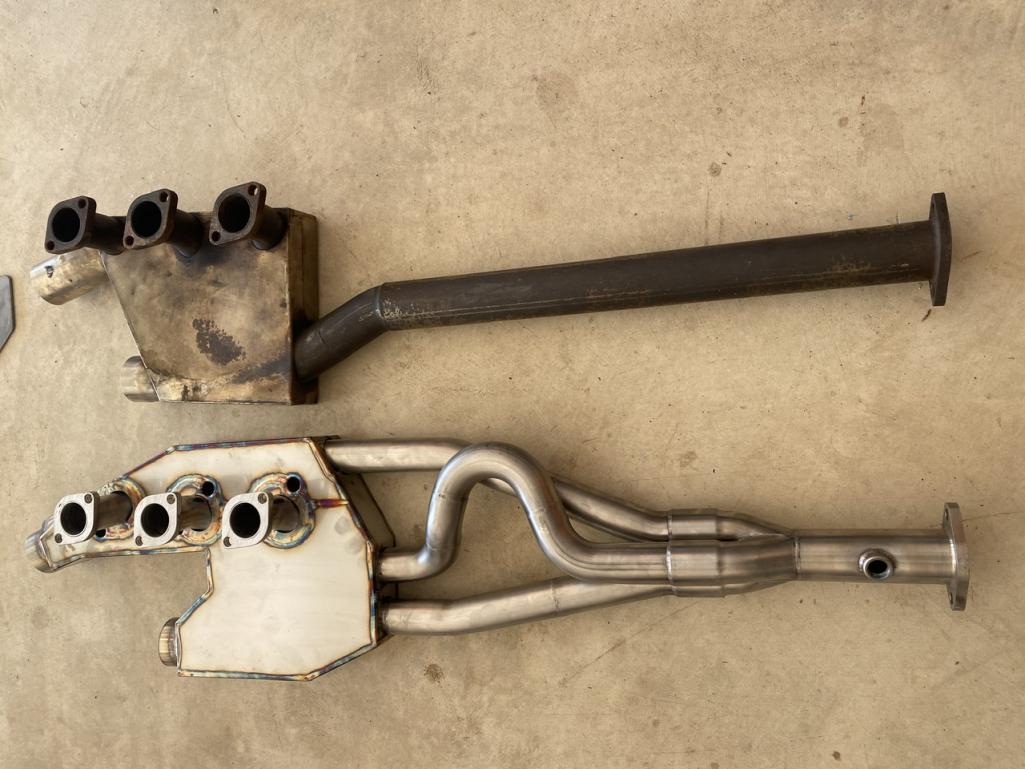
Posted by: siverson Sep 13 2021, 11:34 PM
made a little heat sink for the ignition modules.
-steve
Attached thumbnail(s)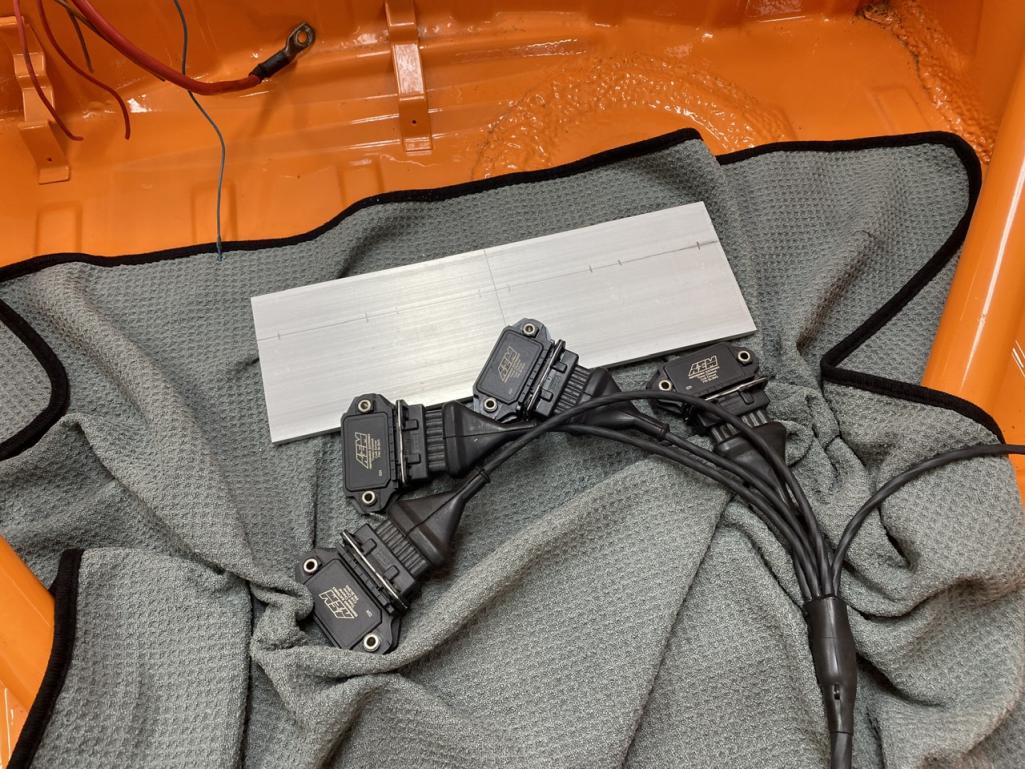
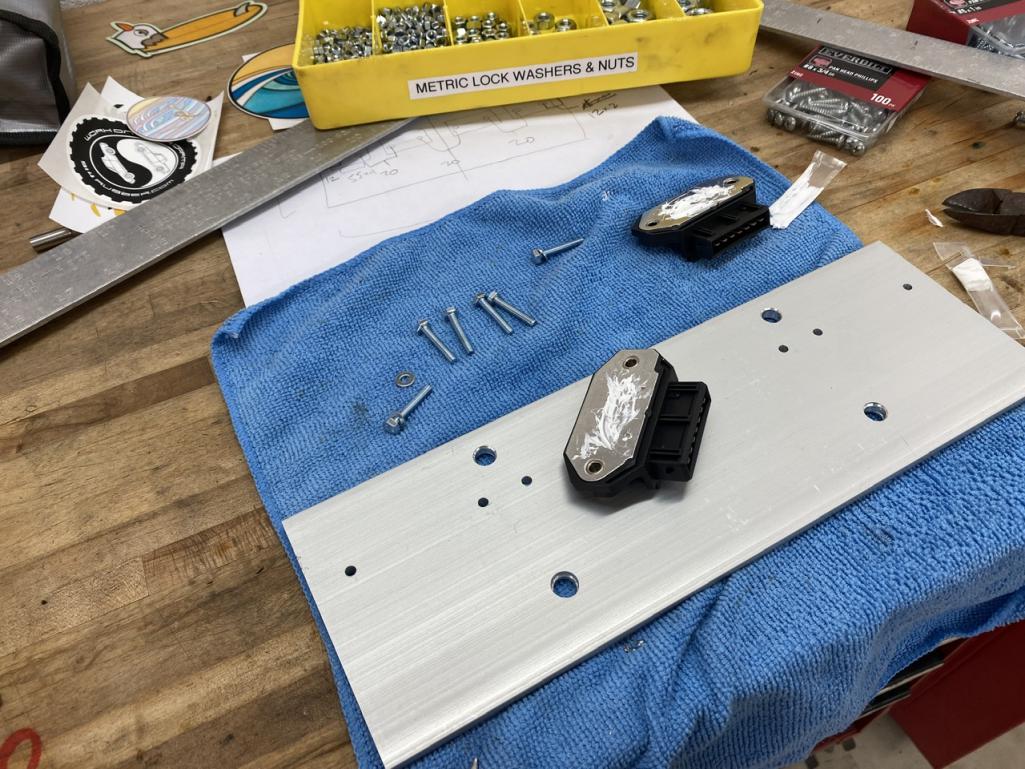
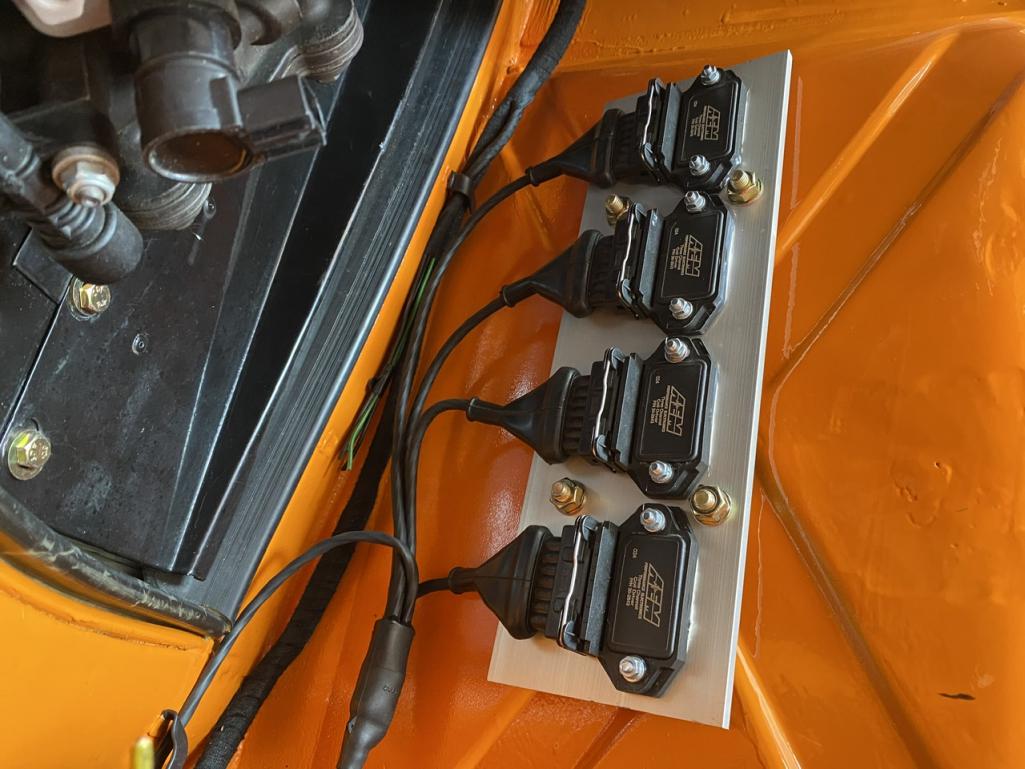
Posted by: SirAndy Sep 13 2021, 11:36 PM
i wonder how much worse these are…?
That's one way to make them equal length ...
Posted by: pete000 Sep 14 2021, 08:04 AM
Coming along nicely ! Loving the lowered seat setup !
Posted by: Steve Sep 14 2021, 08:26 AM
i got an amazingly nice set of headers from ben/mb911 but im having clearance issues with my vellios transmission/cvs and the shift rod. so for now im going to put on the old
b&b headers.
-steve
The B&B do not look like equal length headers. The B&B is also known for crappy heat.
I have Bens heat exchangers on my six with 915 gear box. Great heat and no fitment issues. Curious if its his new collector that is interfering with the CV's? I do not have any issues with the 1st gen collector that is flat, like the factory six heat exchangers.
Posted by: siverson Sep 14 2021, 02:14 PM
Coming along nicely ! Loving the lowered seat setup !
me too. i just got the passenger seat in and forgot how well this works. its about 3.5 inches lower. and i have a thin/no pad that can give me another inch or so.
-steve
Attached thumbnail(s)
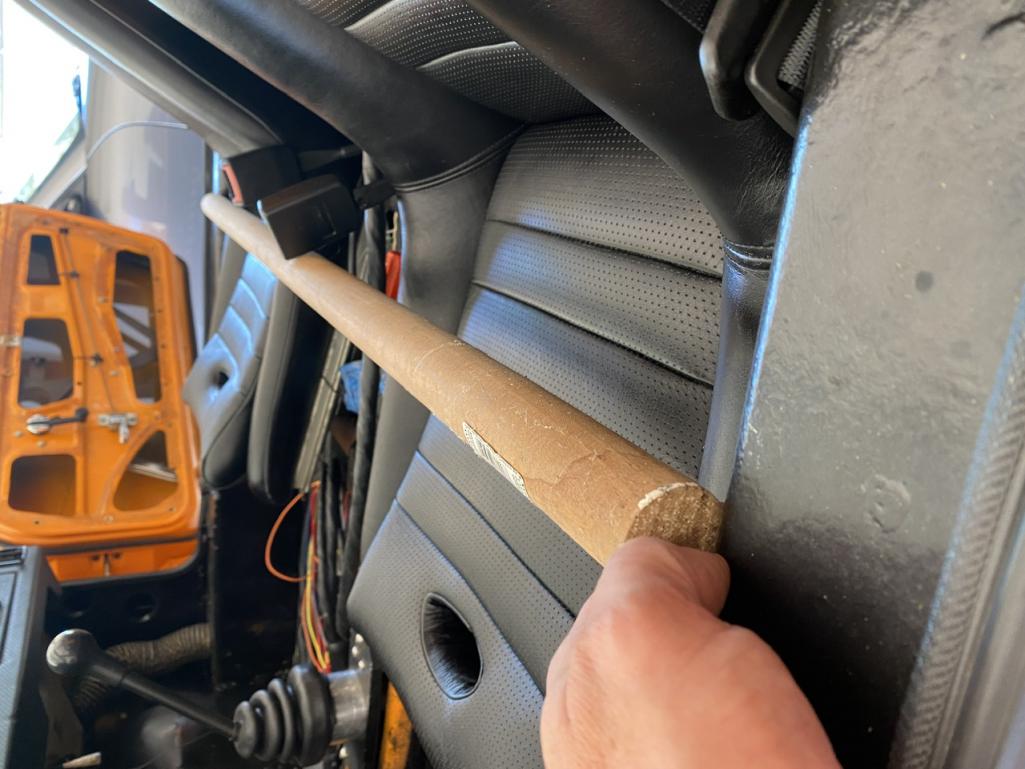
Posted by: siverson Sep 14 2021, 02:14 PM
914
Attached thumbnail(s)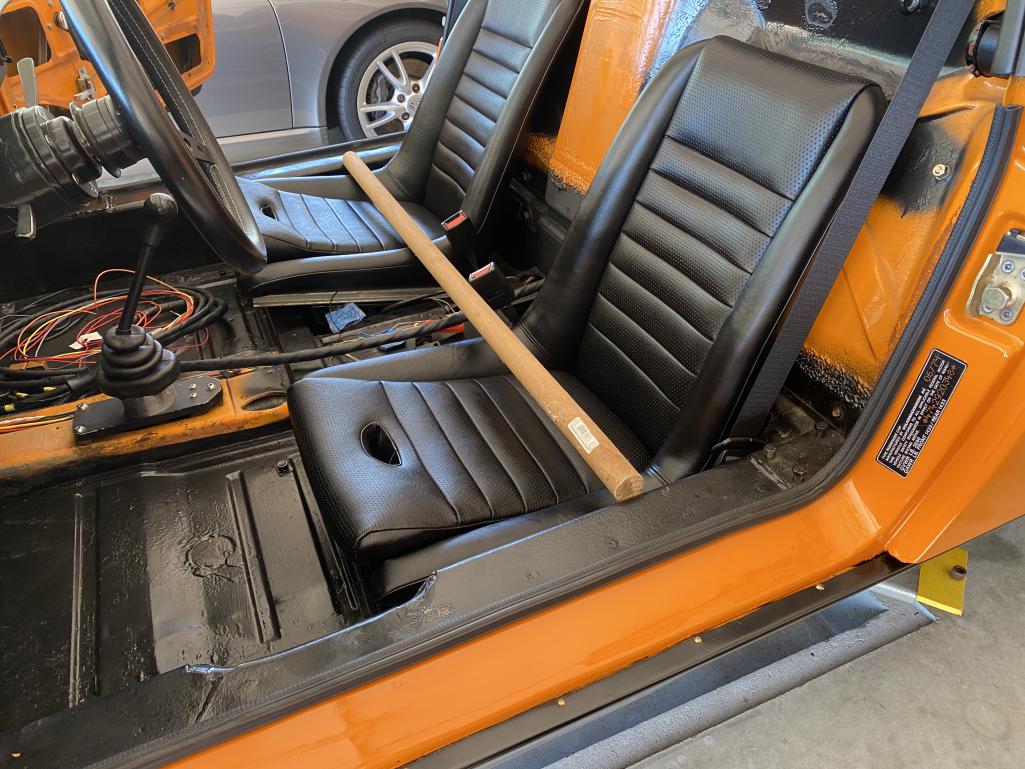
Posted by: siverson Sep 14 2021, 02:17 PM
ive talked with ben about and we are going to try to lower them a little with a thicker flange.
but then i found i need to redo the shift rod too. that wont be a problem but im going to get it running and together as is before tackling new projects.
-steve
Attached thumbnail(s)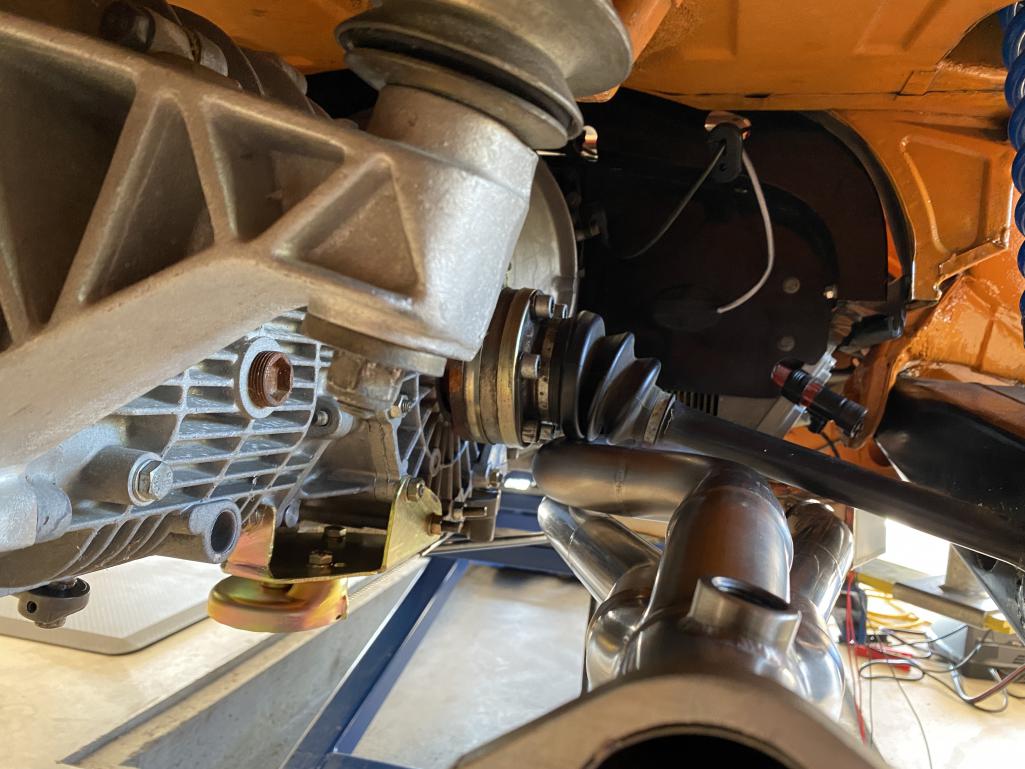
Posted by: siverson Sep 14 2021, 02:18 PM
weird how this happened. two worn, two not… fronts? left side? who knows.
-steve
Attached thumbnail(s)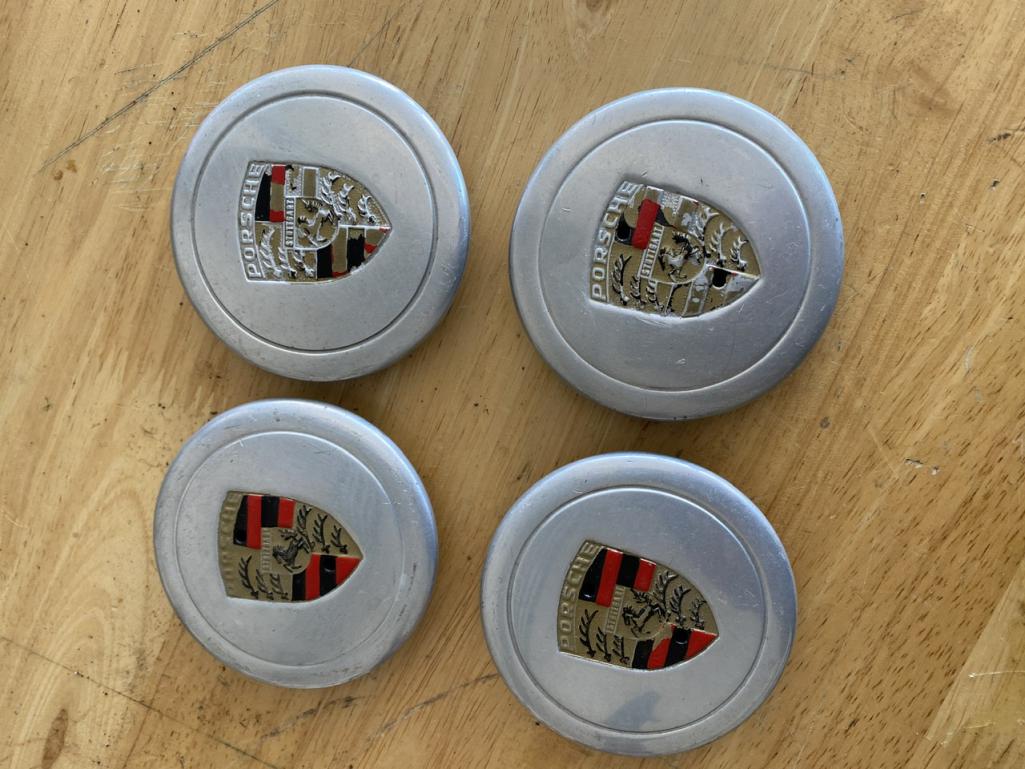
Posted by: siverson Sep 14 2021, 02:19 PM
anyone know what hood shocks these are?
-steve
Attached thumbnail(s)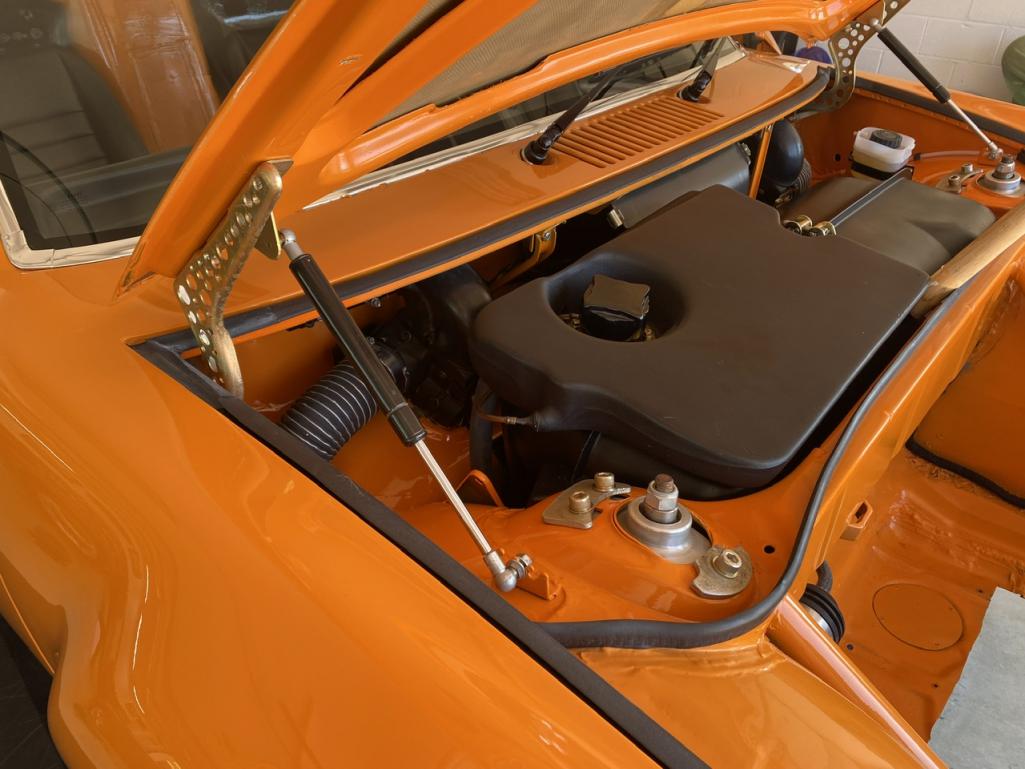
Posted by: RiqueMar Sep 14 2021, 02:31 PM
anyone know what hood shocks these are?
-steve
I have the same set, believe they are from Camp914
Posted by: siverson Sep 21 2021, 01:29 AM
Still at it... Got some of the engine wired up and some sensors working. The engine has oil pressure and the computer sees it too!
-Steve
Attached thumbnail(s)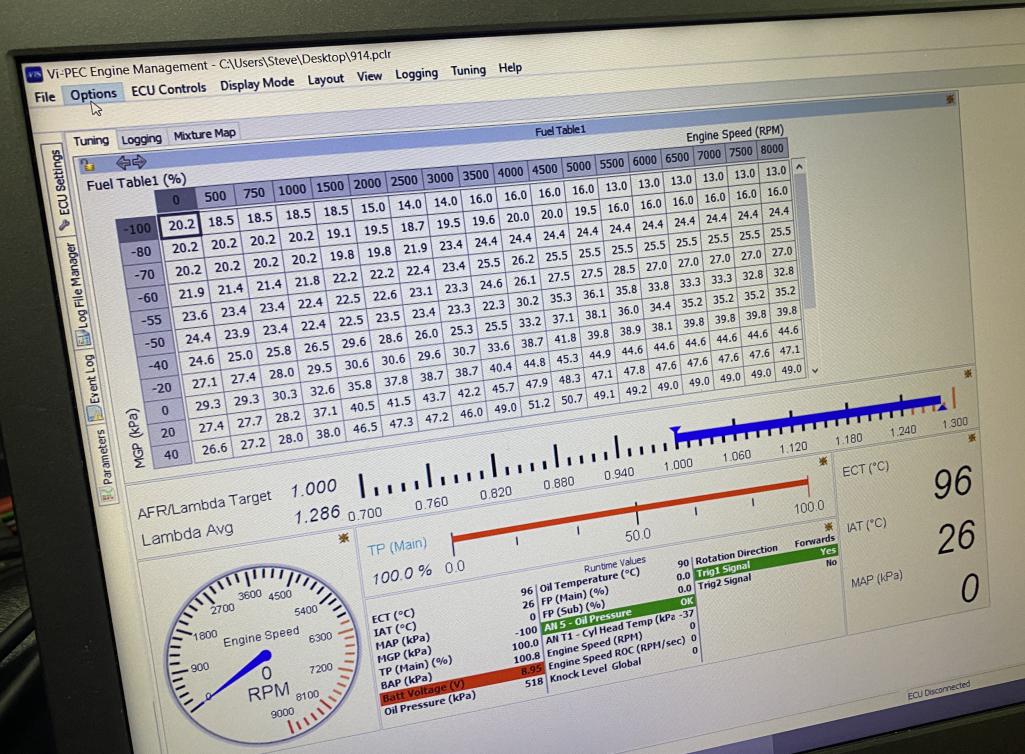
Posted by: siverson Sep 21 2021, 01:30 AM
Was a nice sunset tonight...
-Steve
Attached thumbnail(s)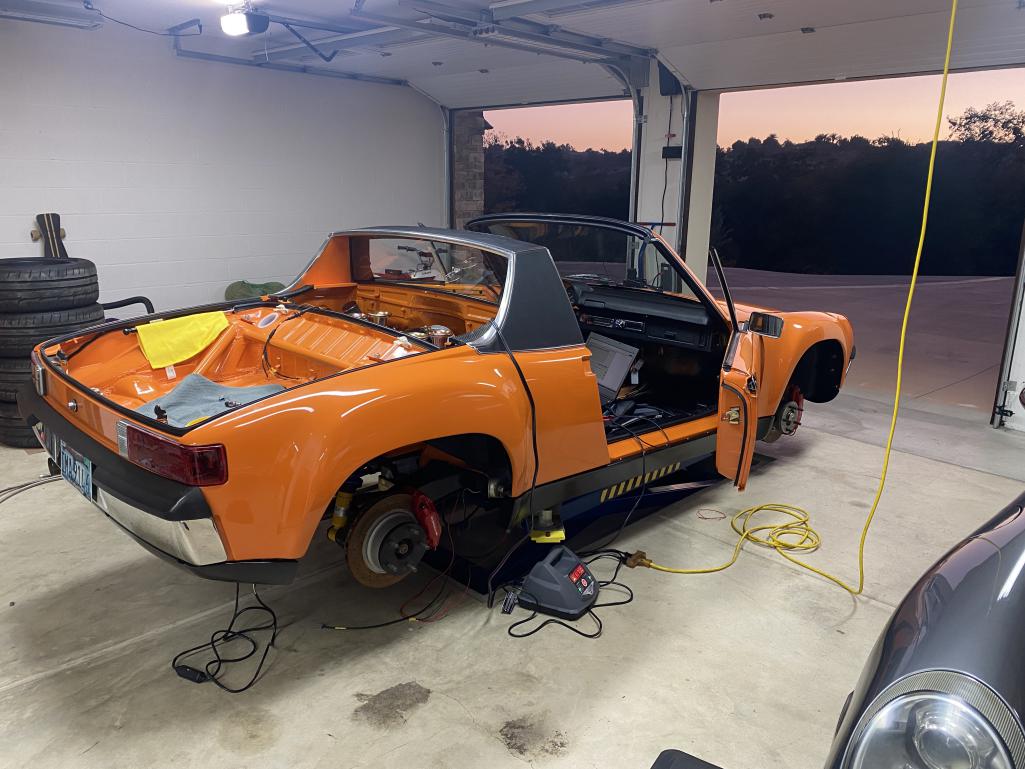
Posted by: Cairo94507 Sep 21 2021, 06:56 AM
Hi Steve - Your car is looking good and coming along quickly. I totally agree with getting it together and running/driving before tackling additional issues re exhaust.
I spoke with Ben about his Gen. II heat exchangers and he told me if I were to swap out the Gen. I for Gen. II I would likely have issues with the oil lines, and the shift rod. I am going to hold off and see if there is an adjustment to the design. My Gen. 1's are perfect, but I do admit to loving his new collector design.
Posted by: siverson Sep 29 2021, 08:29 AM
getting closer…
Attached thumbnail(s)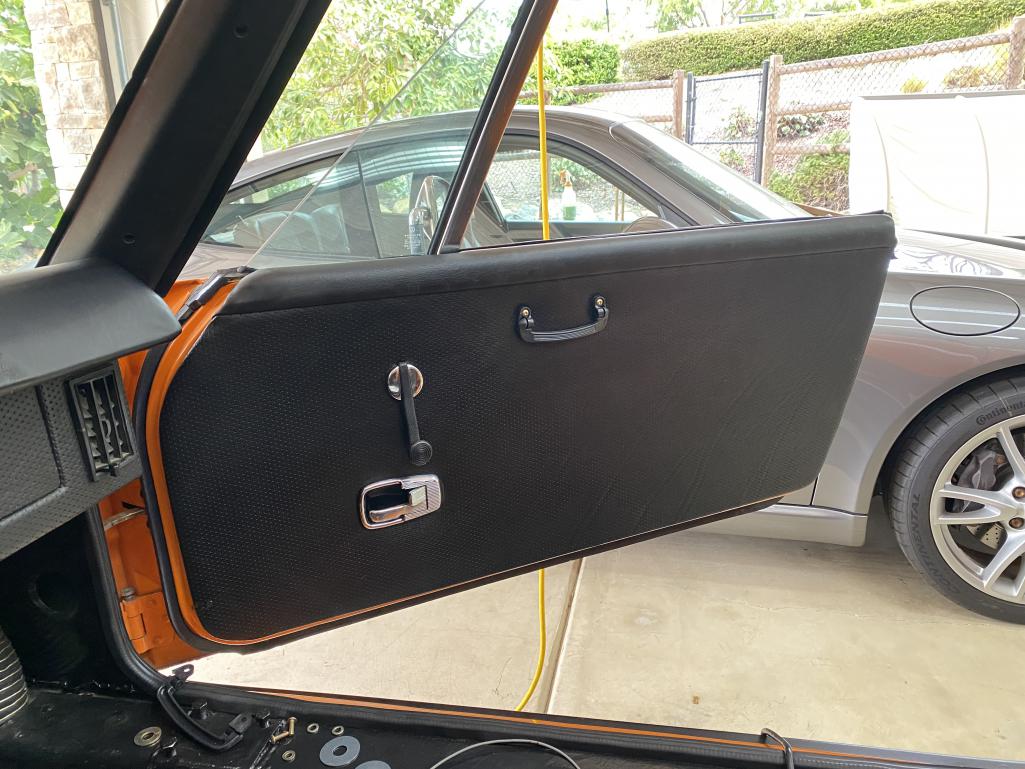
Posted by: siverson Sep 29 2021, 08:31 AM
is there a difference between the chrome and all black interior door handle cup things?
im 99% sure i had these early/chrome door handle cups on this car but…. the interior door handle does not work with these installed. weird. i just wont open all the way. without them it works fine. hmmmm.
Posted by: siverson Sep 29 2021, 08:33 AM
and a ton of work on the new fi ecu. nearly all the sensors are hooked up now.
Attached thumbnail(s)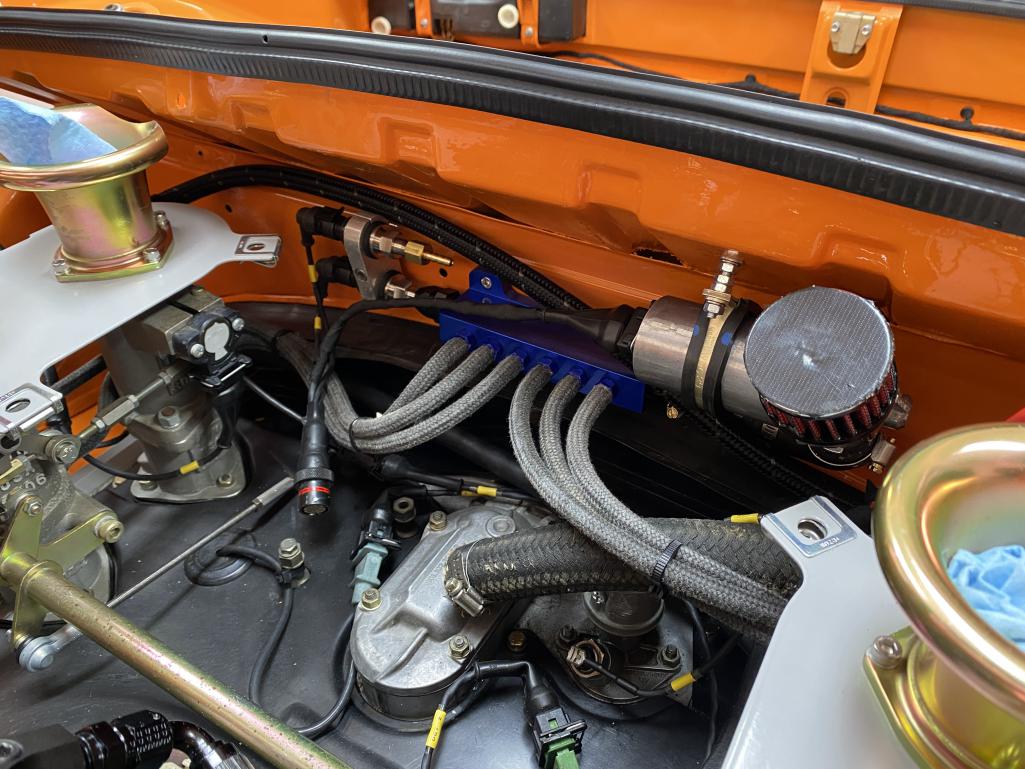
Posted by: Jett Sep 29 2021, 08:40 AM
is there a difference between the chrome and all black interior door handle cup things?
im 99% sure i had these early/chrome door handle cups on this car but…. the interior door handle does not work with these installed. weird. i just wont open all the way. without them it works fine. hmmmm.
Those are early, but I have them in our 73 because we like the look. The only issue we found was that the screw length matters… should be very short as to not catch or it binds like you are reporting. These screws are unexpectedly short.
Posted by: 914werke Sep 29 2021, 08:50 AM
There is also a "glider" difference. On late its a disc that mounts tween the winder & the door card vinyl. On early its more of a ring.
Posted by: rhodyguy Sep 29 2021, 08:53 AM
The door looks great. The chrome surround and handle base 'pops'.
Posted by: Steve Sep 29 2021, 09:19 AM
and a ton of work on the new fi ecu. nearly all the sensors are hooked up now.
Love your build since it showed up at PMS way back when in the late 90's? I was there when you were trying to figure out a fuel leak?
Curious who's ITB kit is that? Also when you get it running, you will have to let us know the pro's and con's versus the stock DME injection.
Posted by: siverson Sep 30 2021, 06:28 PM
is there a difference between the chrome and all black interior door handle cup things?
im 99% sure i had these early/chrome door handle cups on this car but…. the interior door handle does not work with these installed. weird. i just wont open all the way. without them it works fine. hmmmm.
Those are early, but I have them in our 73 because we like the look. The only issue we found was that the screw length matters… should be very short as to not catch or it binds like you are reporting. These screws are unexpectedly short.
hmmm… thats a hood suggestion but i tried even without a screw and it interferes. ill have to make a video…
Posted by: siverson Sep 30 2021, 06:30 PM
and a ton of work on the new fi ecu. nearly all the sensors are hooked up now.
Love your build since it showed up at PMS way back when in the late 90's? I was there when you were trying to figure out a fuel leak?
Curious who's ITB kit is that? Also when you get it running, you will have to let us know the pro's and con's versus the stock DME injection.
really? did you work there or something? because if not thats a really strange coincidence because ive only been there for about 2 hours ever. and yes now that you mention it it was to get an adapter for the 964 fuel pump to AN fittings. they just welded something up.
-steve
Posted by: siverson Sep 30 2021, 06:31 PM
A - isnt it great when the right hardware arrives?
B - I think this is the only m12 x 1.5 nut i have ever needed (weird threads). what is up with that?!?!?
Attached thumbnail(s)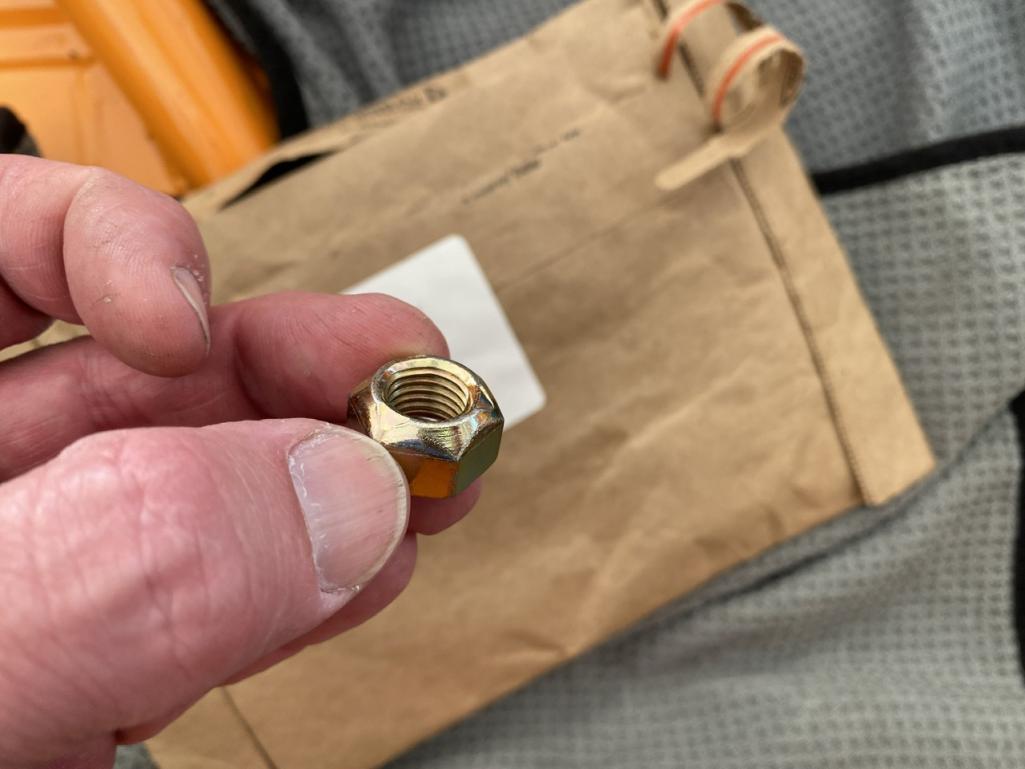
Posted by: siverson Sep 30 2021, 06:32 PM
vvvrrroooooooooommmm!!!
Attached thumbnail(s)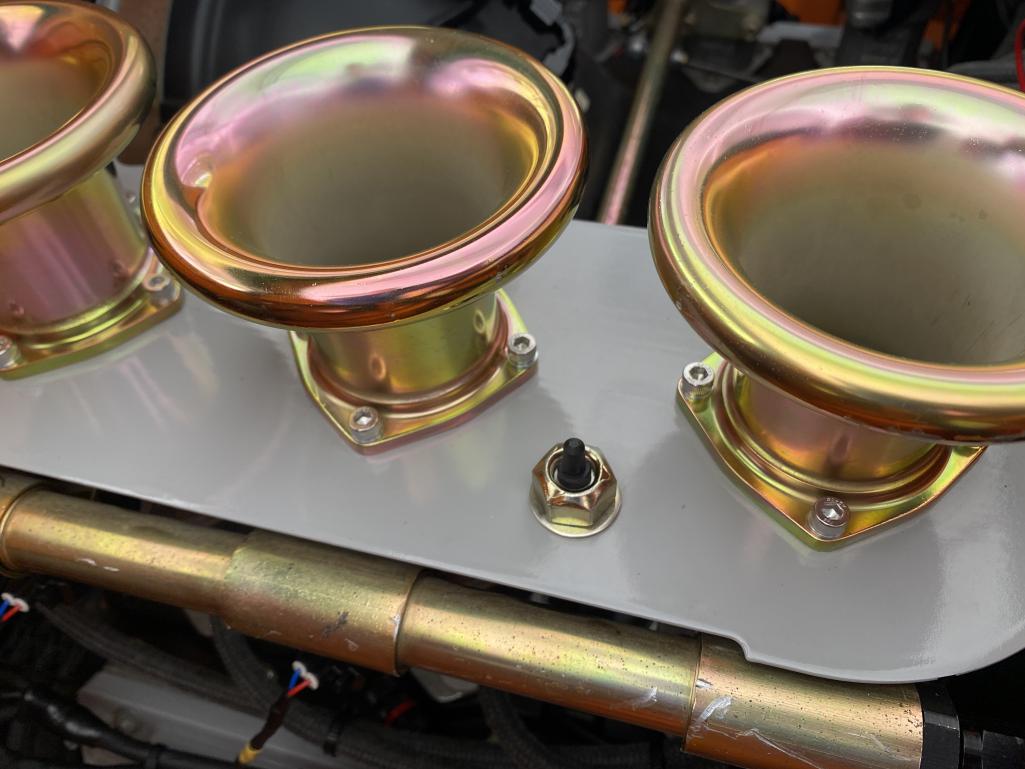
Posted by: siverson Sep 30 2021, 06:32 PM
thats a bosch intake air temp sensor.
Posted by: Spoke Sep 30 2021, 06:42 PM
anyone know what hood shocks these are?
-steve
I have the same set, believe they are from Camp914
I had a set of those on my 914 and removed them. The geometry is wrong as at a certain low open angle the shocks do nothing and the hood can come crashing down like mine did when refueling and a high wind from the rear pushed the hood down to the point of no return.
I replaced the shocks with 914rubber springs. With springs no matter how low the angle of open is the springs resist the hood falling.
BTW, beautiful car. Love the headers.
Posted by: Steve Sep 30 2021, 10:41 PM
and a ton of work on the new fi ecu. nearly all the sensors are hooked up now.
Love your build since it showed up at PMS way back when in the late 90's? I was there when you were trying to figure out a fuel leak?
Curious who's ITB kit is that? Also when you get it running, you will have to let us know the pro's and con's versus the stock DME injection.
really? did you work there or something? because if not thats a really strange coincidence because ive only been there for about 2 hours ever. and yes now that you mention it it was to get an adapter for the 964 fuel pump to AN fittings. they just welded something up.
-steve
Yep, I lived in Chandler from 95-99. My 914 back then was silver and had a 2.7 six in it. I didn’t work for PMS, but I would hang out there all the time. You just put the 3.6 in your car and you were having problems with the motor. Can’t remember what the problem was but it was a quick fix and you were in and out pretty quick.
Posted by: siverson Oct 3 2021, 05:05 PM
hi. whats the best way to remove this seemingly pressed in round cam cover? im adding the cam position sensor here.
Attached thumbnail(s)
Posted by: siverson Oct 3 2021, 05:07 PM
and here is my interior door latch problem in all its glory.
its a 1974 car, but with early 73 doors (late window mechanism but no safety bracing).
https://youtu.be/F7BavNNqkHA
Posted by: siverson Oct 3 2021, 05:11 PM
and getting closer, but a couple small steps backwards. for whatever reason my fuel pump started leaking badly while sitting for the last 10 years. or maybe the accident caused this?
https://youtu.be/IHpxFlYUa34
Posted by: ndfrigi Oct 3 2021, 05:35 PM
@http://www.914world.com/bbs2/index.php?showuser=654
try removing the cover of the passenger side latch, my experienced before I have a longer screw to hold the cover, and it won’t open all the way.
Your driver side does not have the cover yet and that is why it opens.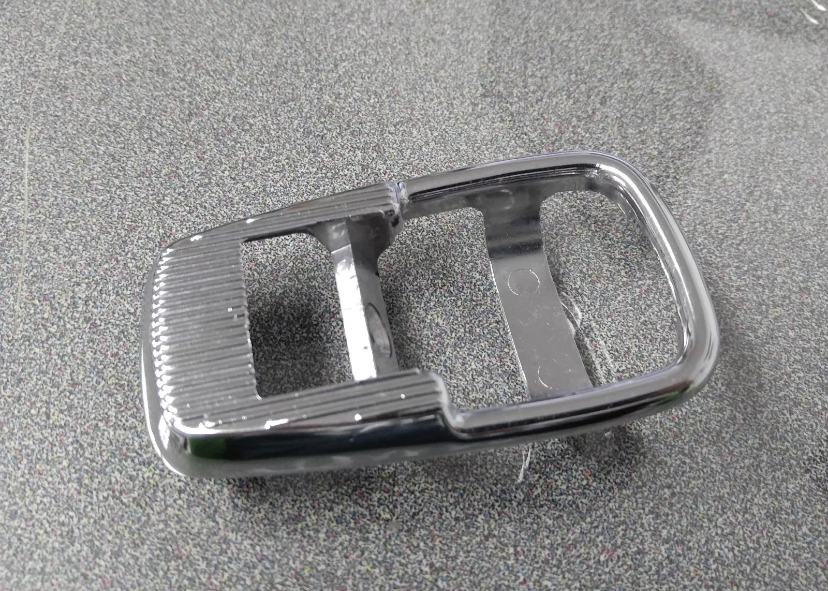
Posted by: siverson Oct 4 2021, 01:05 PM
Hi - correct. It is the cover that is interfering as I mentioned in a previous post. And it interferes even if I just hold it there (no screw). Very strange...
-Steve
Posted by: siverson Oct 4 2021, 03:18 PM
that worked.
Attached thumbnail(s)
Posted by: siverson Oct 4 2021, 03:19 PM
914
Attached thumbnail(s)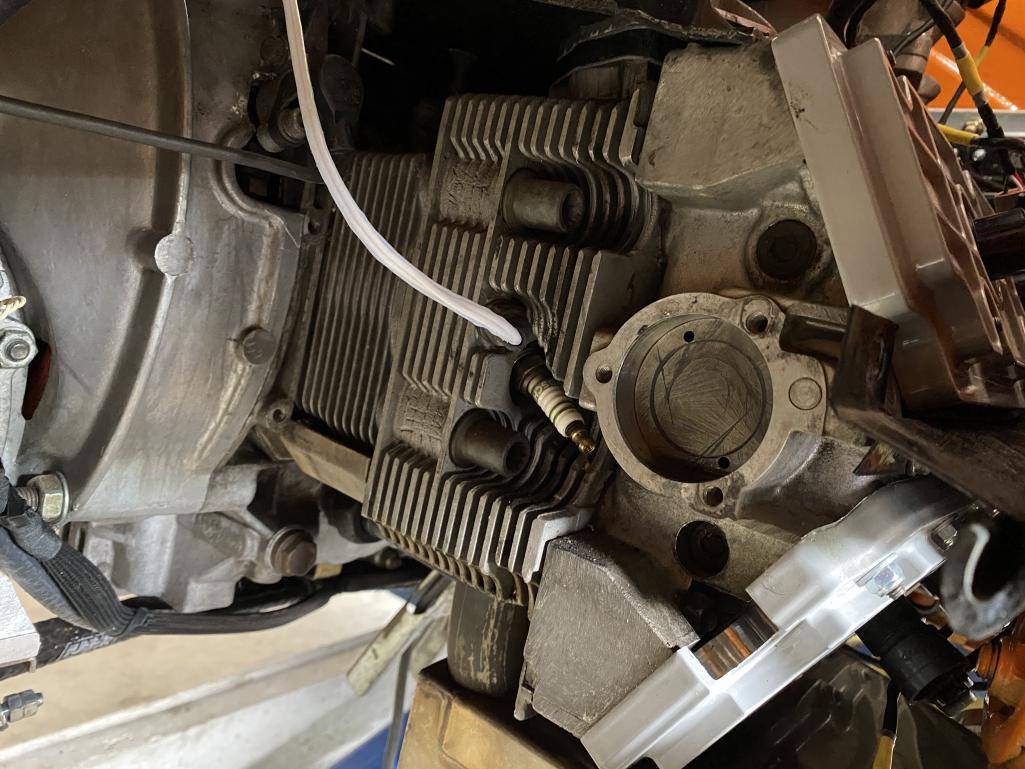
Posted by: infraredcalvin Oct 4 2021, 08:10 PM
is there a difference between the chrome and all black interior door handle cup things?
im 99% sure i had these early/chrome door handle cups on this car but…. the interior door handle does not work with these installed. weird. i just wont open all the way. without them it works fine. hmmmm.
Those are early, but I have them in our 73 because we like the look. The only issue we found was that the screw length matters… should be very short as to not catch or it binds like you are reporting. These screws are unexpectedly short.
I had this same issue on my 71 with late handle cups, it’s the screw, I forget exactly what happens, but I think the end of the screw prevents the final action you need to pull the handle. I ground the screw shorter and solved the issue.
Posted by: siverson Oct 8 2021, 07:00 PM
thanks all - i will test the screw theory again on the door handle…
getting closer - the fuel lines are all new and i had some leaks. all sealed up now.
Attached thumbnail(s)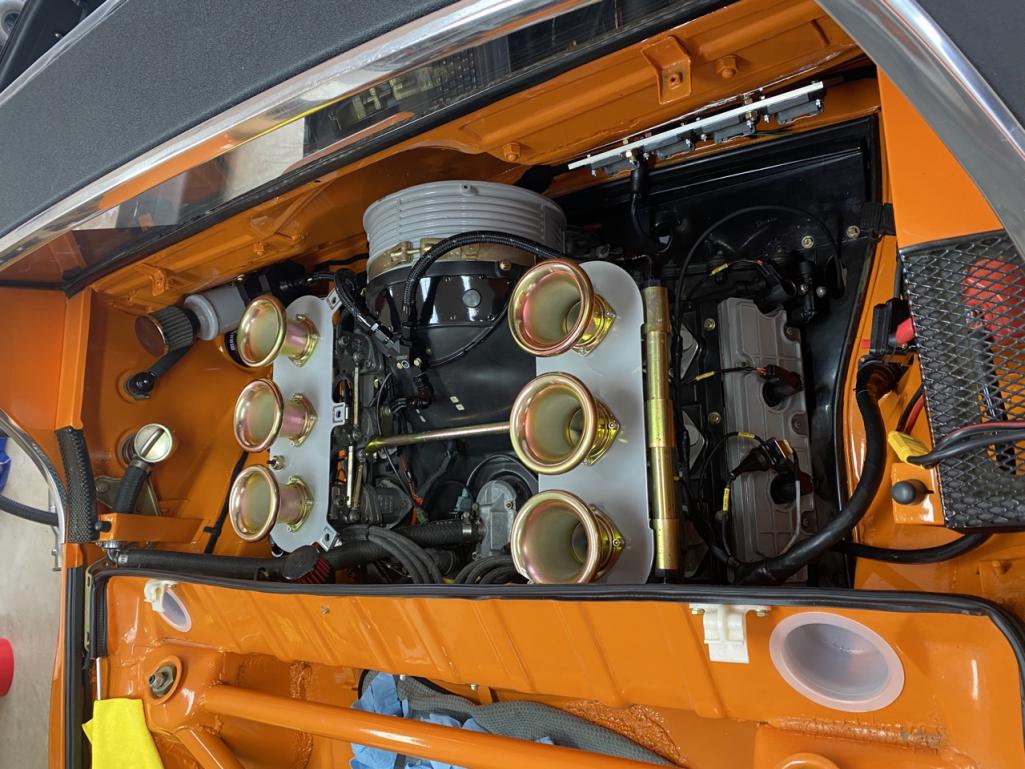
Posted by: siverson Oct 8 2021, 07:05 PM
this y was seeping at the bottom but i added some gasoila thread sealant and that worked. but honestly not sure if its the right fitting - maybe i need an o-ring there?
-steve
Attached thumbnail(s)
Posted by: siverson Oct 8 2021, 07:07 PM
had to hack into the harness again to extend some sensors.
-steve
Attached thumbnail(s)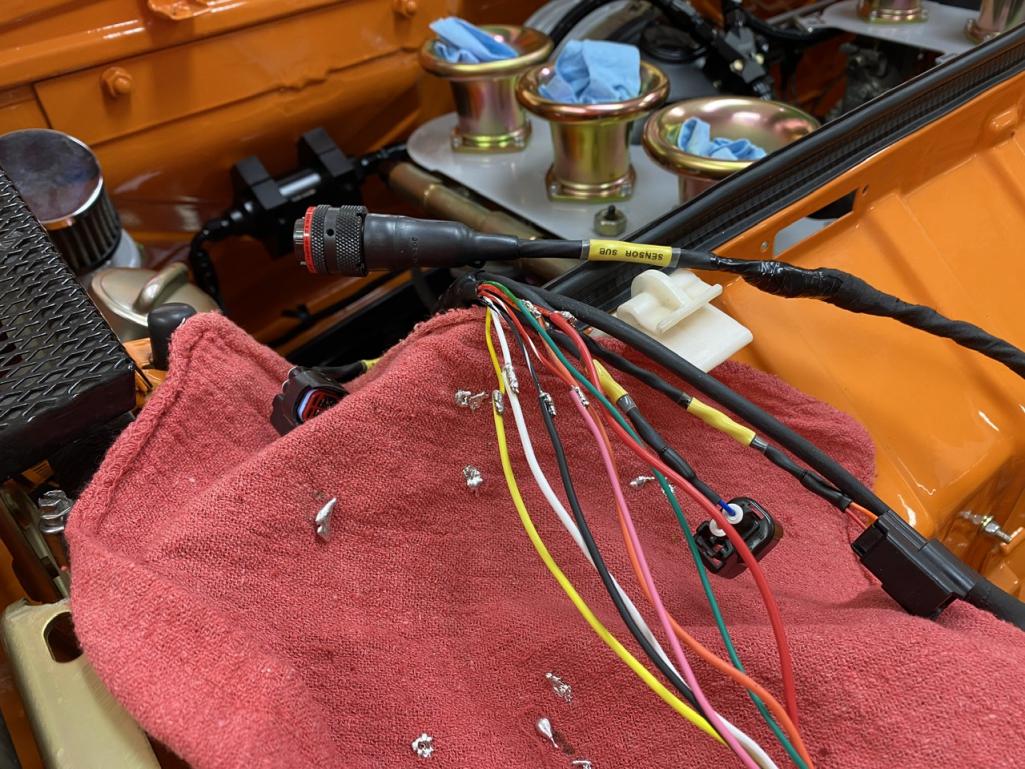
Posted by: siverson Oct 8 2021, 07:09 PM
got the clewett cam sensor installed. why didnt i do
this with the engine out of the car?!?!?
-steve
Attached thumbnail(s)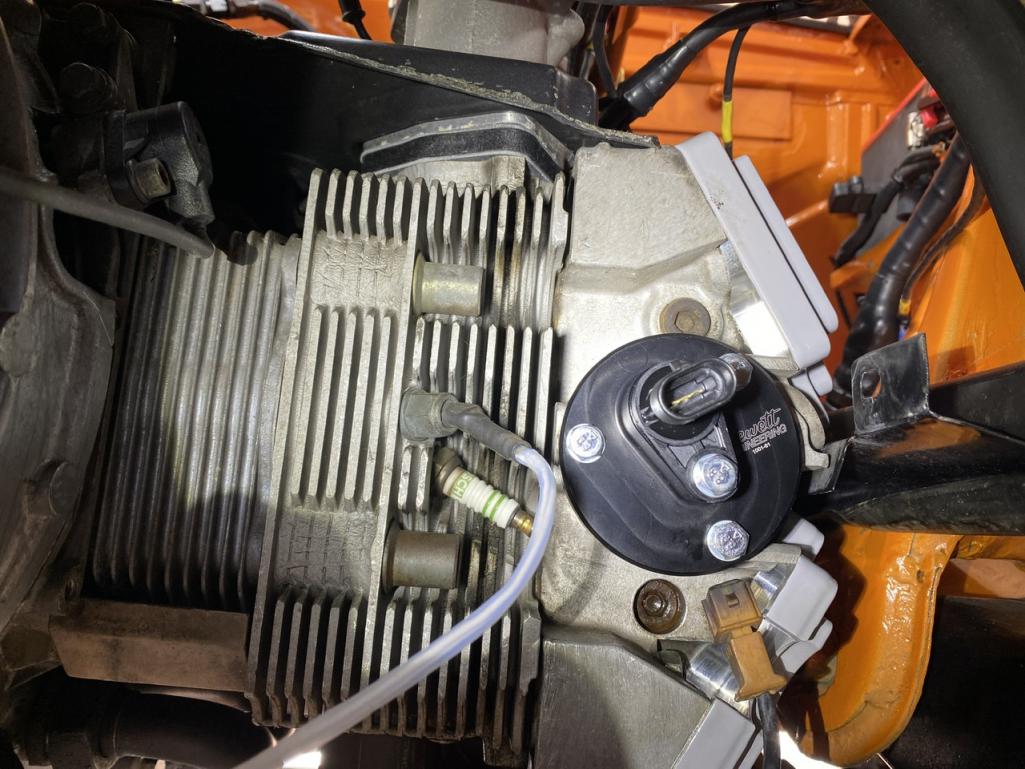
Posted by: siverson Oct 8 2021, 07:11 PM
and… it idles! (sort of)
https://youtu.be/D30ioB0K5wk
-steve
Posted by: ndfrigi Oct 8 2021, 07:46 PM
and… it idles! (sort of)
https://youtu.be/D30ioB0K5wk
-steve
Yehey! Congratulations Steve!
Posted by: Montreal914 Oct 8 2021, 07:58 PM
this y was seeping at the bottom but i added some gasoila thread sealant and that worked. but honestly not sure if its the right fitting - maybe i need an o-ring there?
-steve
From the looks of the fitting, the 2 outputs of the "Y" have adaptors threaded all the way to the body which lets us assume there is an o-ring in there. That being said, at the inlet your fitting doesn't go all the way. Is the Earl's fitting really a female NPT thread at that end? Seems to me it probably is the same setup as the 2 outlets. Also, your male NPT doesn't seem to be threaded very deep in for an NPT, another sign that these might not be matching.
Actually, just found this. O-ring is your answer!
https://www.holley.com/products/plumbing_an_fittings_and_hose/adapters/distribution_and_y_block/parts/100176ERL
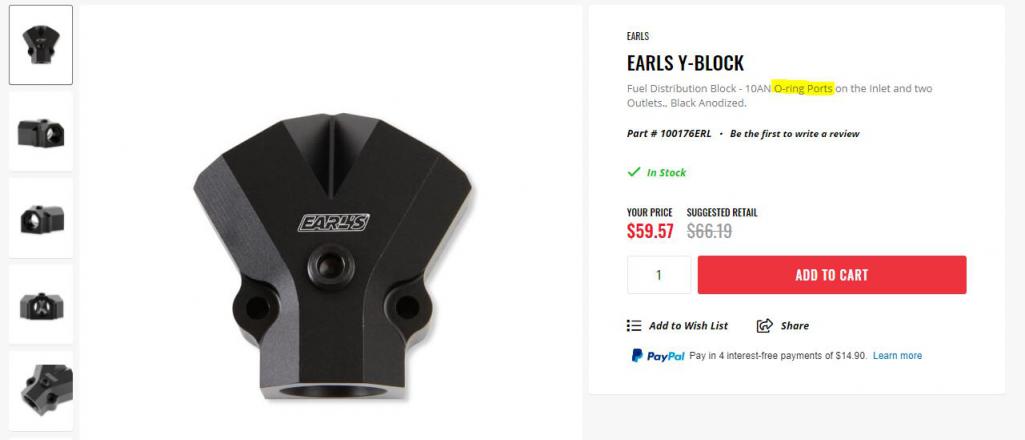
Posted by: siverson Oct 9 2021, 08:34 AM
@http://www.914world.com/bbs2/index.php?showuser=12023 good idea - read the instructions!
This is the one I have:
https://www.holley.com/products/plumbing_an_fittings_and_hose/adapters/distribution_and_y_block/parts/100181ERL
So it is an NPT fitting on the bottom. And I guess they never use orings then... ? I really was just looking for AN -6 all around and this is as close as I could get. Hmmm.
-Steve
Attached thumbnail(s)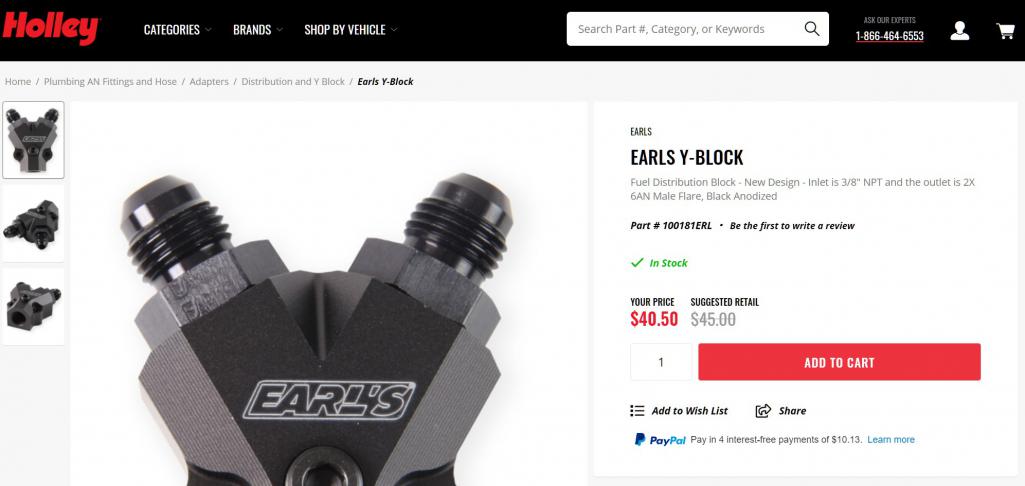
Posted by: RiqueMar Oct 9 2021, 09:52 AM
and… it idles! (sort of)
https://youtu.be/D30ioB0K5wk
-steve
‘Bam-Bam-Bam!’
Congrats!
Posted by: siverson Oct 14 2021, 09:57 PM
well i had hoped to get him running for the wcr but i didnt make it. pretty close and i actually drove out of the garage for the first time in 10+ years today, but still a lot of sorting out to do. i got the oil to temperature and turned it around.
a short video:
https://youtu.be/Is1f_RtVD94
i was a but nervous about the brakes (and clutch and shifting and alternator and thermostat) but all that stuff seems to be working fine.
ill be taking the 997 to wcr tomorrow so ill see some of you there.
-steve
Posted by: RiqueMar Oct 14 2021, 10:05 PM
well i had hoped to get him running for the wcr but i didnt make it. pretty close and i actually drove out of the garage for the first time in 10+ years today, but still a lot of sorting out to do. i got the oil to temperature and turned it around.
a short video:
https://youtu.be/Is1f_RtVD94
i was a but nervous about the brakes (and clutch and shifting and alternator and thermostat) but all that stuff seems to be working fine.
ill be taking the 997 to wcr tomorrow so ill see some of you there.
-steve
Super cool, glad to see it moving! As unfortunate as it is, it's the right decision to give the car a proper-shakedown. Best of luck Steve, keep at it!
Posted by: siverson Nov 3 2021, 11:15 PM
Still lots to sort out but I took him on his first short drive with no problems - 9.14 miles around the neighborhood.
dyno tuning day and an alignment are scheduled for the next week or two.
-steve
Attached thumbnail(s)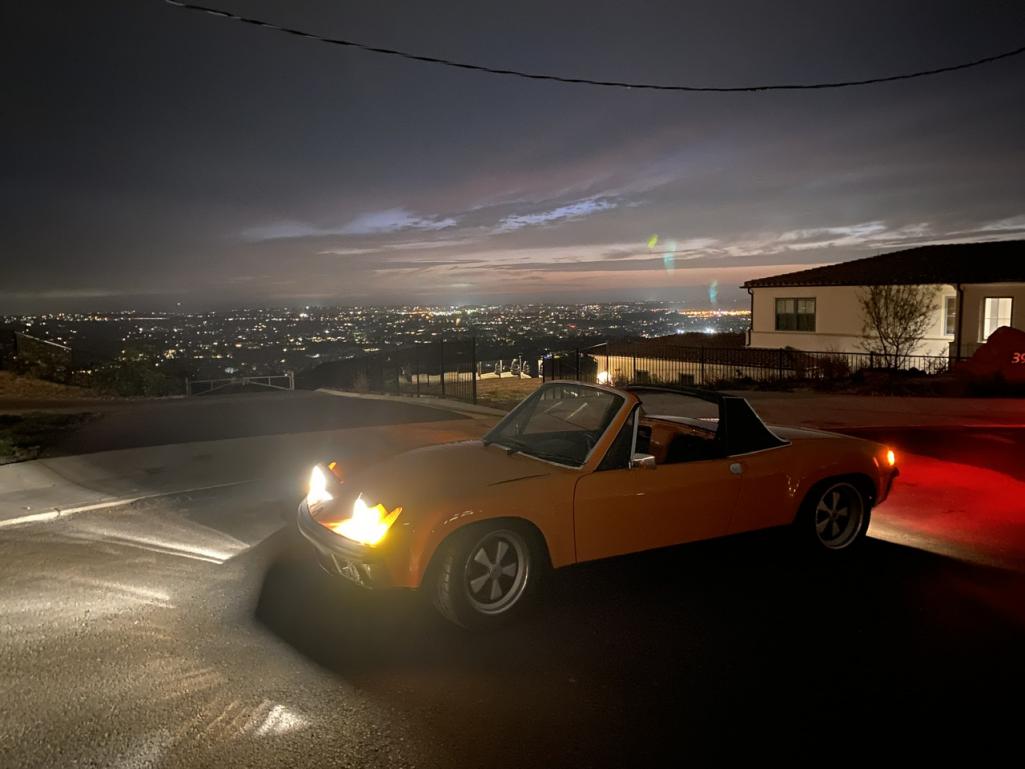
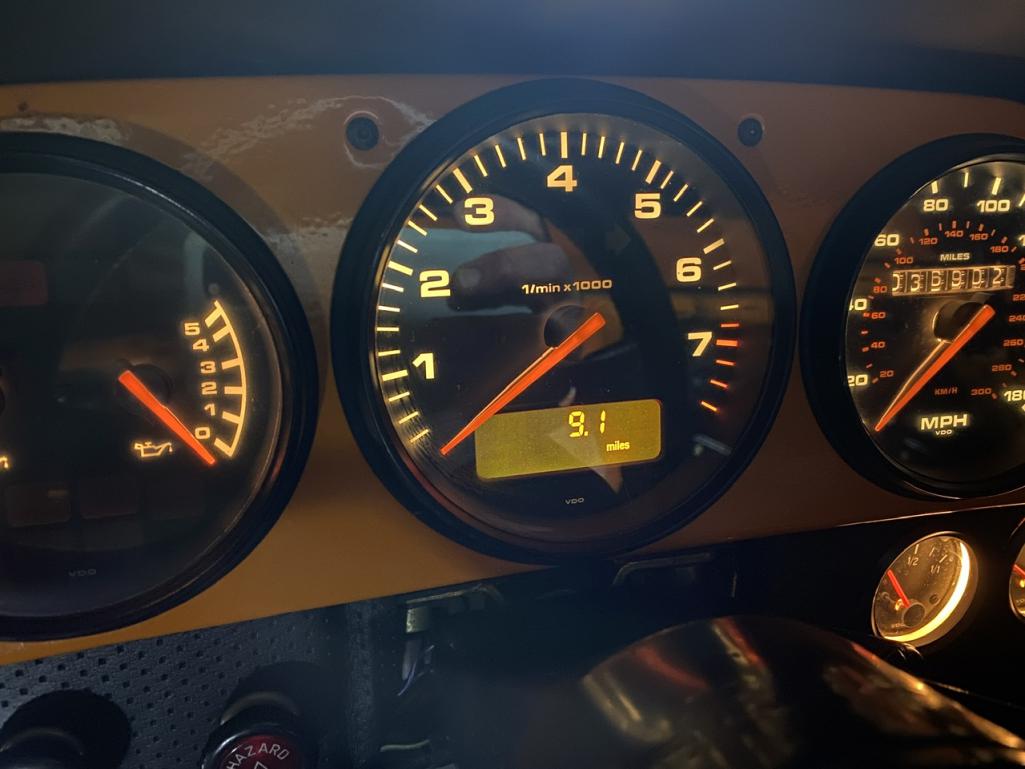
Posted by: Justinp71 Nov 4 2021, 09:39 PM
Very Nice!
I bet it feels good to get it on the road.
Where are those gauges from??
Posted by: siverson Nov 4 2021, 10:42 PM
those are all 964 gauges (same as engine). the tach has the obc (on board computer) which was an option on some 964s and standard on others (the turbo i think).
-steve
Posted by: siverson Nov 4 2021, 10:44 PM
no leaks up here so i put the shroud back on.
i didnt even realize it, but this was bent too from the accident. fortunately was fairly easy just to bend back…
-steve
Attached thumbnail(s)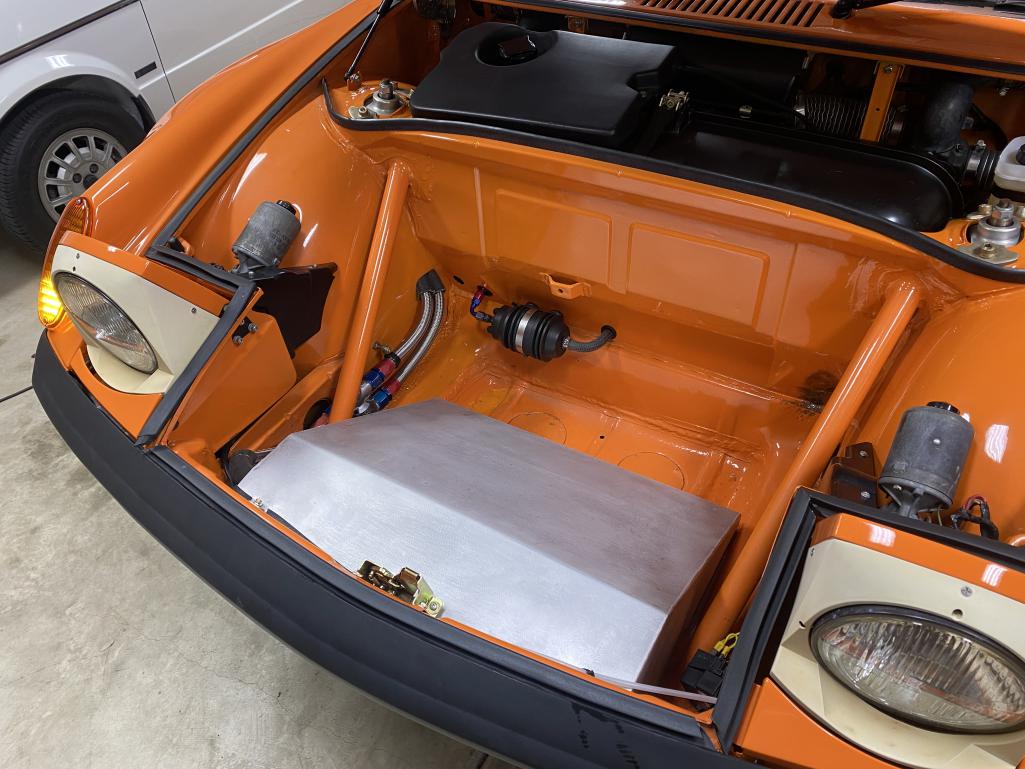
Posted by: siverson Nov 4 2021, 10:44 PM
914
Attached thumbnail(s)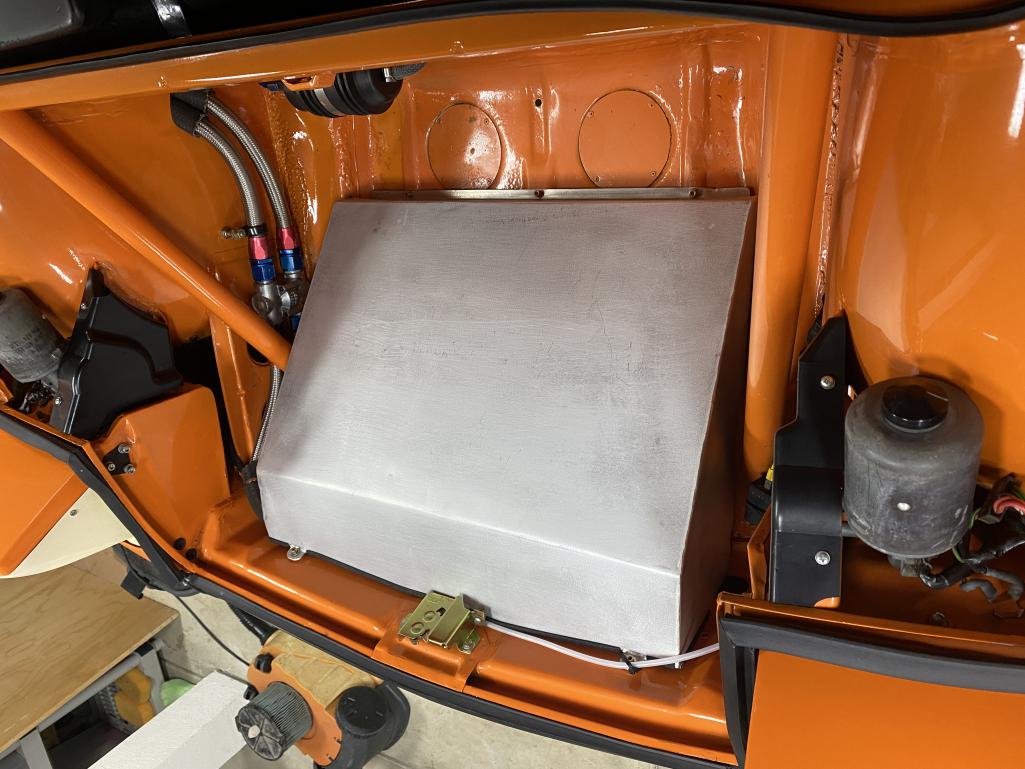
Posted by: autopro Nov 5 2021, 09:43 AM
Awesome, glad you were finally able to get this back on the road. If you don't mind me asking, were are you taking it for the alignment and tuning? Just to keep it in mind for when I get mine to that stage. Thanks
Posted by: Root_Werks Nov 5 2021, 03:14 PM
Yay! Back on the road again!
Posted by: Justinp71 Nov 5 2021, 03:20 PM
Awesome, glad you were finally able to get this back on the road. If you don't mind me asking, were are you taking it for the alignment and tuning? Just to keep it in mind for when I get mine to that stage. Thanks
You can do a home alignment, there is a write-up below. I did this basically on my racecar and its been doing great. You don't really even need any fancy tools.
I aligned my 914 with a tape measure and a level about 10 years ago and its been good, I do plan to redo it soon with the string method. It is a little tedious if you'd rather just take it somewhere they are a bit quicker. My problem is its hard for me to get my car anywhere during the week. You can easily tell if an alignment is bad the car will have bad tire wear, pull on the highway or not have very good turning.
http://www.914world.com/bbs2/index.php?showtopic=202671&hl=alignment
Posted by: autopro Nov 5 2021, 04:11 PM
You can do a home alignment, there is a write-up below. I did this basically on my racecar and its been doing great. You don't really even need any fancy tools.
I aligned my 914 with a tape measure and a level about 10 years ago and its been good, I do plan to redo it soon with the string method. It is a little tedious if you'd rather just take it somewhere they are a bit quicker. My problem is its hard for me to get my car anywhere during the week. You can easily tell if an alignment is bad the car will have bad tire wear, pull on the highway or not have very good turning.
http://www.914world.com/bbs2/index.php?showtopic=202671&hl=alignment
Awesome, I just downloaded the document, thank you very much!
Posted by: siverson Nov 28 2021, 09:52 PM
Getting aligned and sorting out the ride height and rake. As is, front is 11mm lower than front. What do you think... ?
-Steve
Attached thumbnail(s)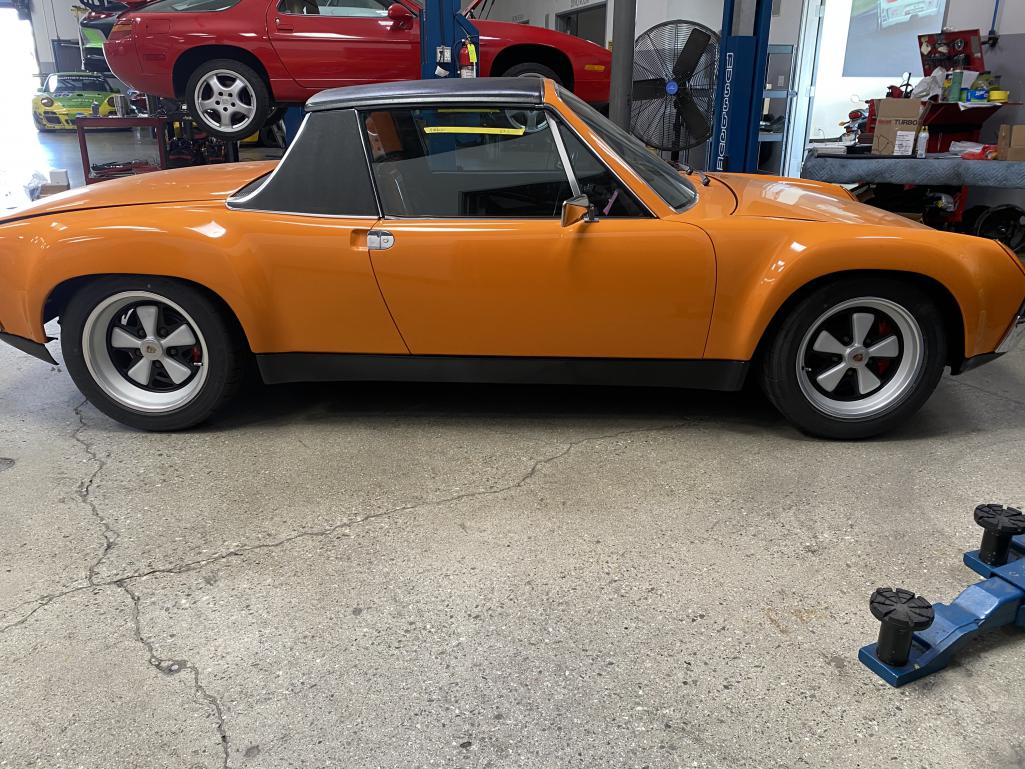
Posted by: siverson Nov 28 2021, 09:52 PM
914
Attached thumbnail(s)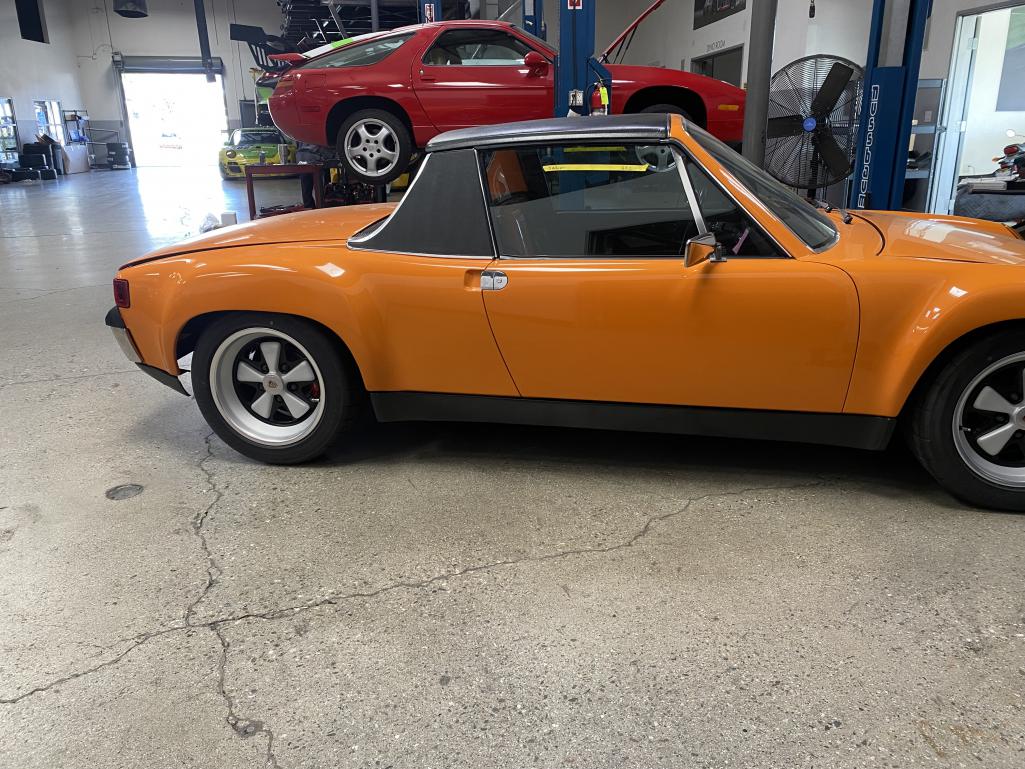
Posted by: siverson Nov 28 2021, 09:52 PM
914
Attached thumbnail(s)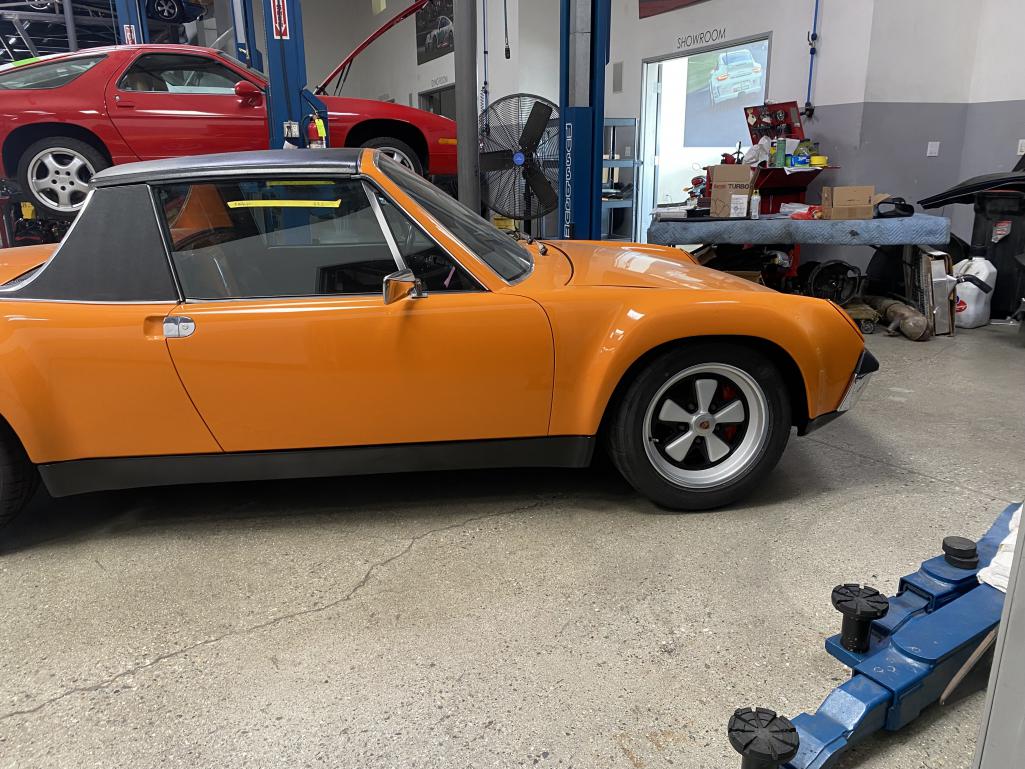
Posted by: Cairo94507 Nov 29 2021, 07:36 AM
Is the rear 11mm lower than the front? Looks high in front. Love the car though.
Posted by: siverson Nov 29 2021, 09:57 AM
Yes - front is 11mm lower as-is...
-Steve
Posted by: siverson Feb 3 2022, 12:48 PM
An update, still not done... Car was aligned and after a bit of fiddling it came out great.
Next up was a dyno day to get the new ECU (Vipec/Link) fully tuned and sorted. To make a long story short, leak down was bad on all cylinders. Upon further inspection, the cylinders are way out of round.
So... I took about 20 steps forward but now 3 big steps back. So the engine is out and I'm having it fully rebuilt by 911 Design in Montclair (outside LA). It was rebuilt in 2002 by Andial, but now I'm at it again I suppose.
"While I'm in there" (argh, again?!?!?) I'm going to upgrade from 3.6 to 3.8 (only about $2500 more in parts and machine work needed) and probably going to upgrade the Vipec/Link ECU to the latest model since now the one I've purchased is about 7 years old.
So... stay tuned... Aiming to be all done April 1, but we know how that goes. The biggest lead time is machine shop has a massive backlog due to employees out with Covid or something.
-Steve
Posted by: siverson Feb 3 2022, 12:50 PM
Dyno day...
-Steve
Attached thumbnail(s)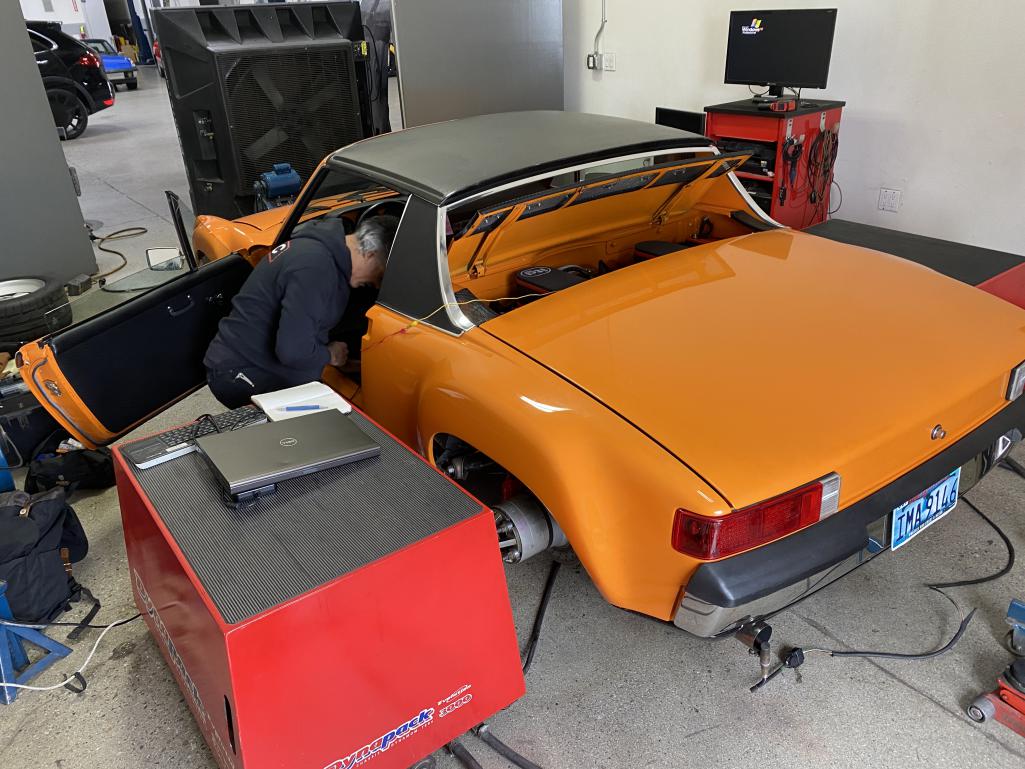
Posted by: siverson Feb 3 2022, 12:51 PM
Shop photos...
Attached thumbnail(s)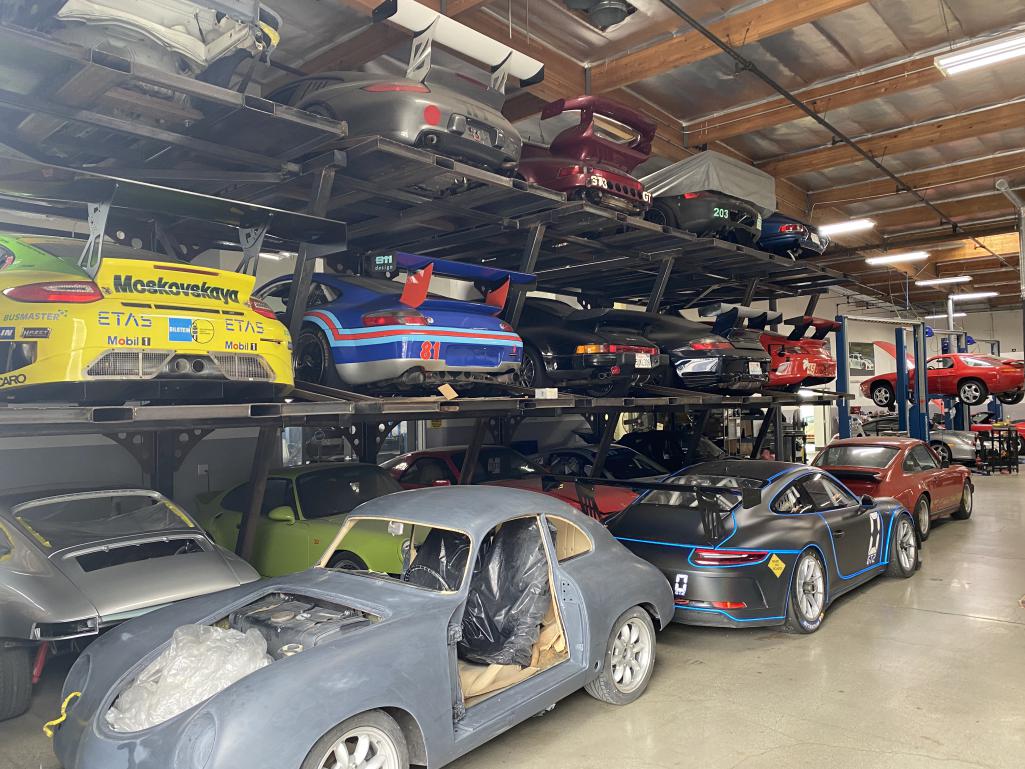
Posted by: siverson Feb 3 2022, 12:52 PM
This one looks fast.
Attached thumbnail(s)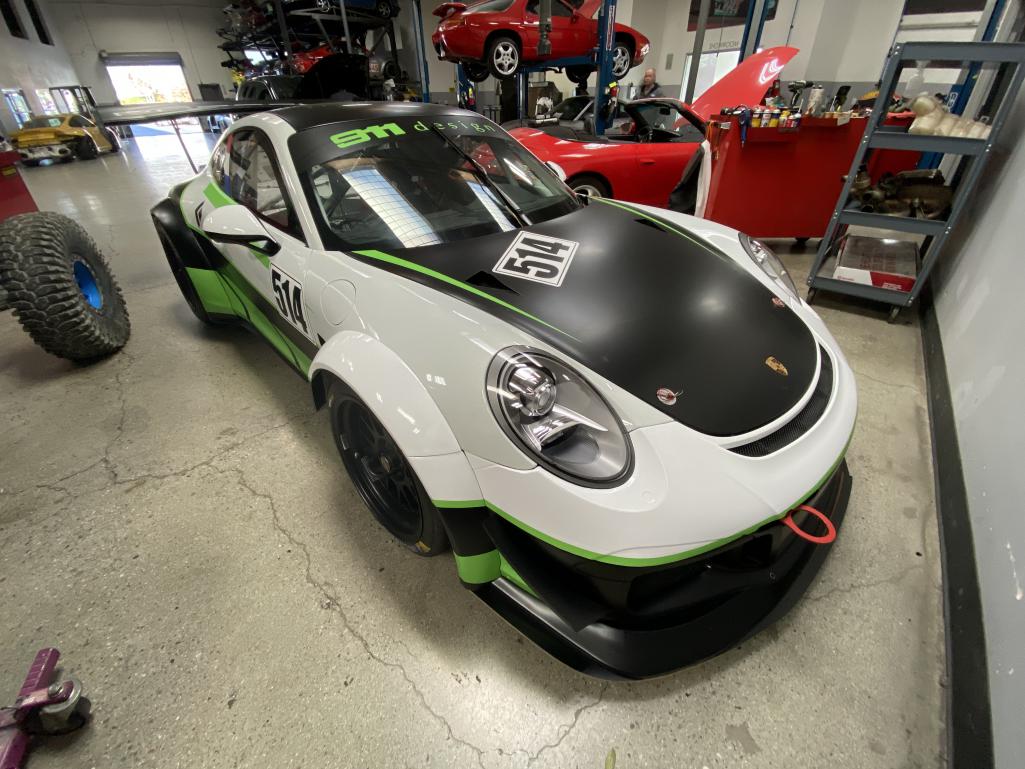
Posted by: siverson Feb 3 2022, 12:53 PM
One of the owner's cars.
Attached thumbnail(s)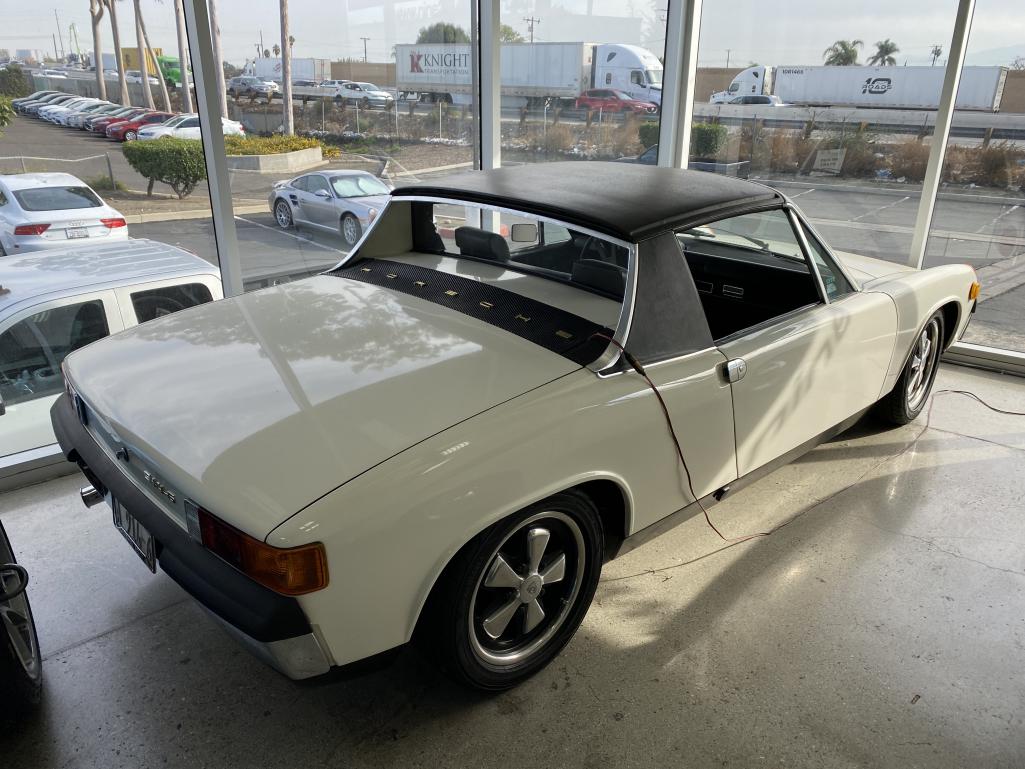
Posted by: Cairo94507 Feb 3 2022, 02:12 PM
Sorry to hear about the rebuild Steve, but going to 3.8 will be amazing and it will all be fresh then. Looks like a pretty serious shop with a nice 914-6 hanging around.
Posted by: campbellcj Feb 5 2022, 09:07 AM
Best of luck with this next leg of the adventure Steve! My car's return to action is now looking like late spring as well - getting anxious
Posted by: siverson Apr 4 2022, 02:04 PM
Machine shop was backlogged, but making some progress again now. Bottom end is assembled.
-Steve
Attached thumbnail(s)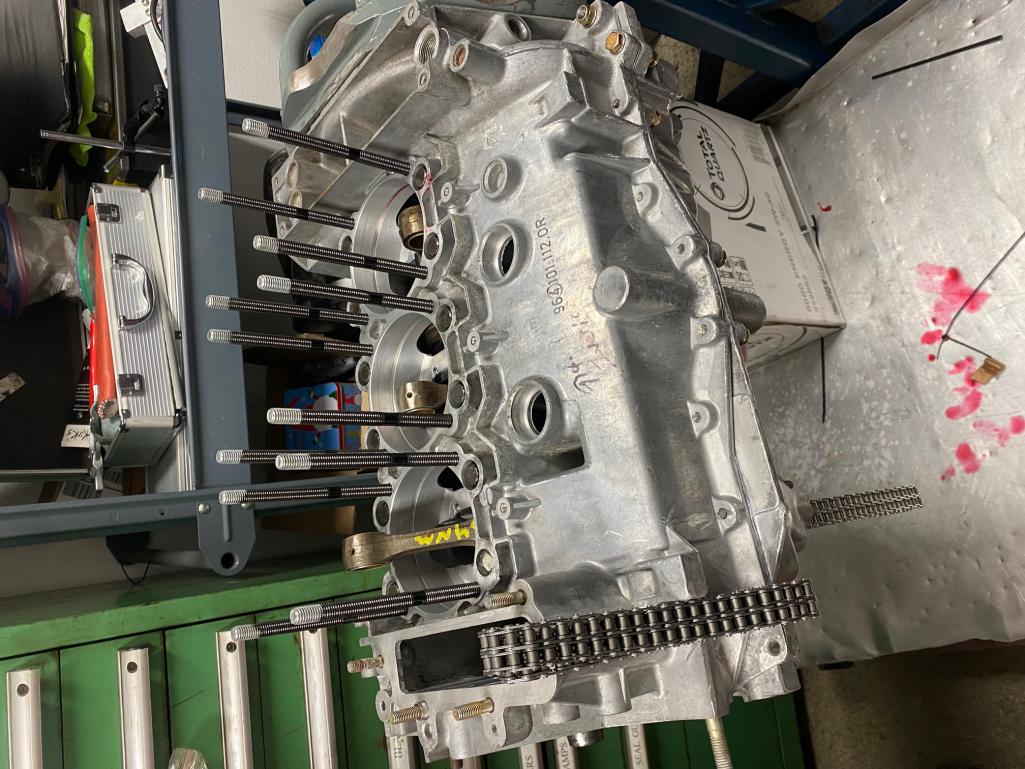
Posted by: Steve Apr 5 2022, 11:50 AM
Curious did you look at the cost of going to 4.0? Pro's and cons? I asked PMS about the 3.8 and they said its not that much of a power difference over a 3.6.
Posted by: siverson Apr 11 2022, 09:38 PM
> Curious did you look at the cost of going to 4.0? Pro's and cons? I asked PMS about the 3.8 and they said its not that much of a power difference over a 3.6.
Right. It's not much more power but it's "only" a $1,500 difference on an expensive rebuild. And at the time 3.8 was available and 3.6 was who knows when.
I think going to 4.0 was a lot more because a lot more machining was required.
-Steve
Posted by: siverson Apr 11 2022, 09:39 PM
A little closer...
-Steve
Attached thumbnail(s)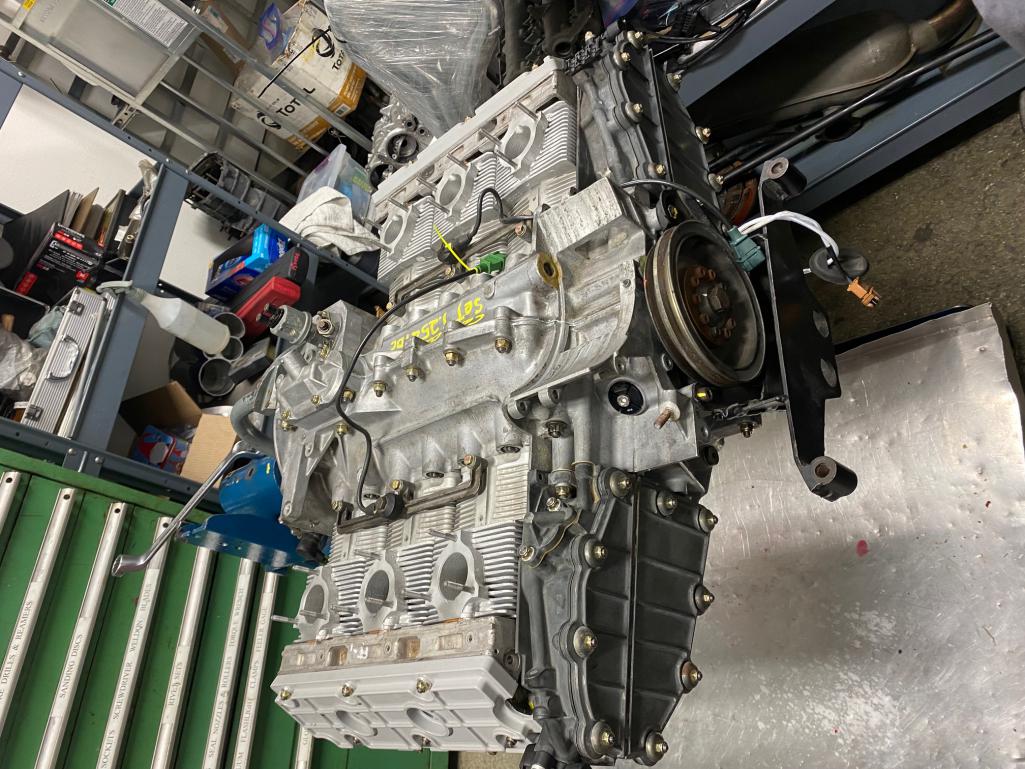
Posted by: ClayPerrine Apr 12 2022, 07:41 AM
> Curious did you look at the cost of going to 4.0? Pro's and cons? I asked PMS about the 3.8 and they said its not that much of a power difference over a 3.6.
Right. It's not much more power but it's "only" a $1,500 difference on an expensive rebuild. And at the time 3.8 was available and 3.6 was who knows when.
I think going to 4.0 was a lot more because a lot more machining was required.
-Steve
Going 4.0 requires machining the spigots to get the cylinders to fit. So there is that extra cost.
Steve... what cams are you running?
Clay
Posted by: ClayPerrine Apr 12 2022, 07:48 AM
Also, if you want to make it much easier to change the alternator belt, get one of these: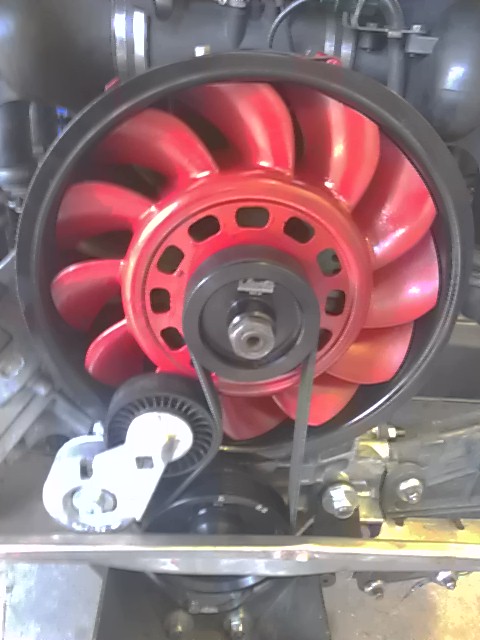
Clewett serpentine belt kit. It makes life much easier.
Posted by: siverson Aug 24 2022, 10:12 PM
Well... like everything else, that took longer than expected but I drove home yesterday with a fresh 3.8.
I'll post more details and photos once I get things sorted and cleaned up a bit.
Next up is the interior and... I think that's it! Oh maybe new tires...
-Steve
Attached thumbnail(s)
Posted by: siverson Aug 24 2022, 10:12 PM
914
Attached thumbnail(s)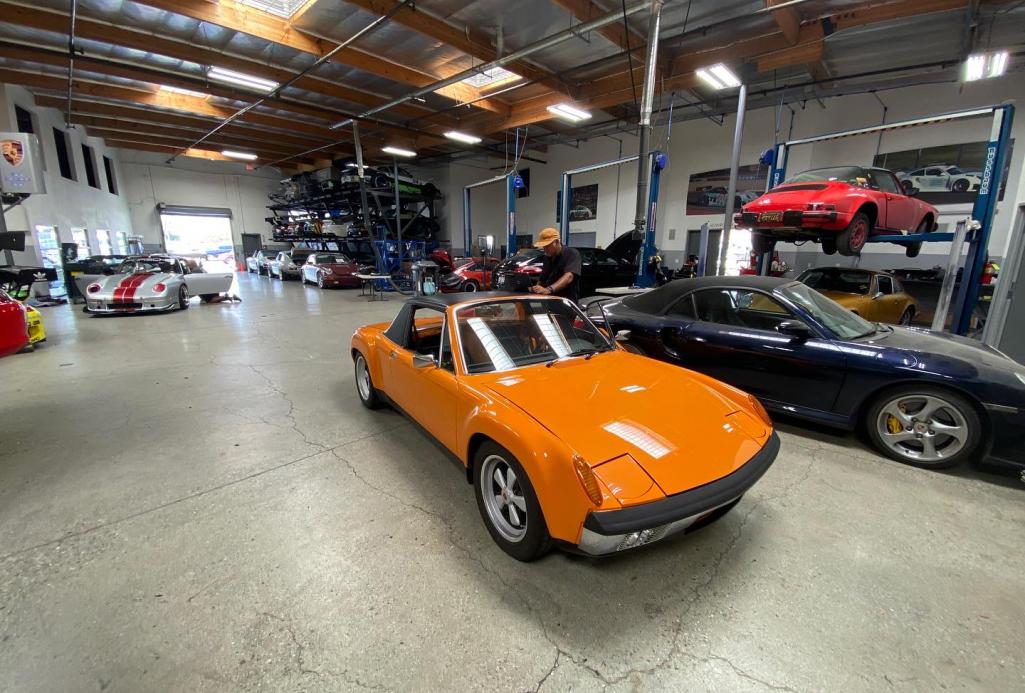
Posted by: siverson Aug 24 2022, 10:13 PM
914
Attached thumbnail(s)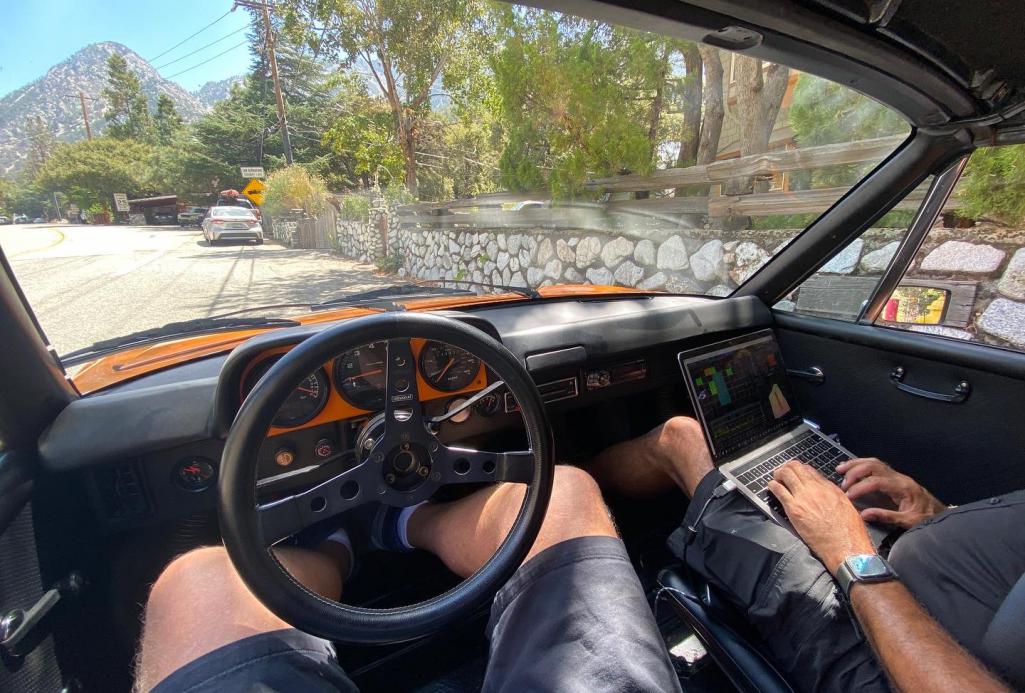
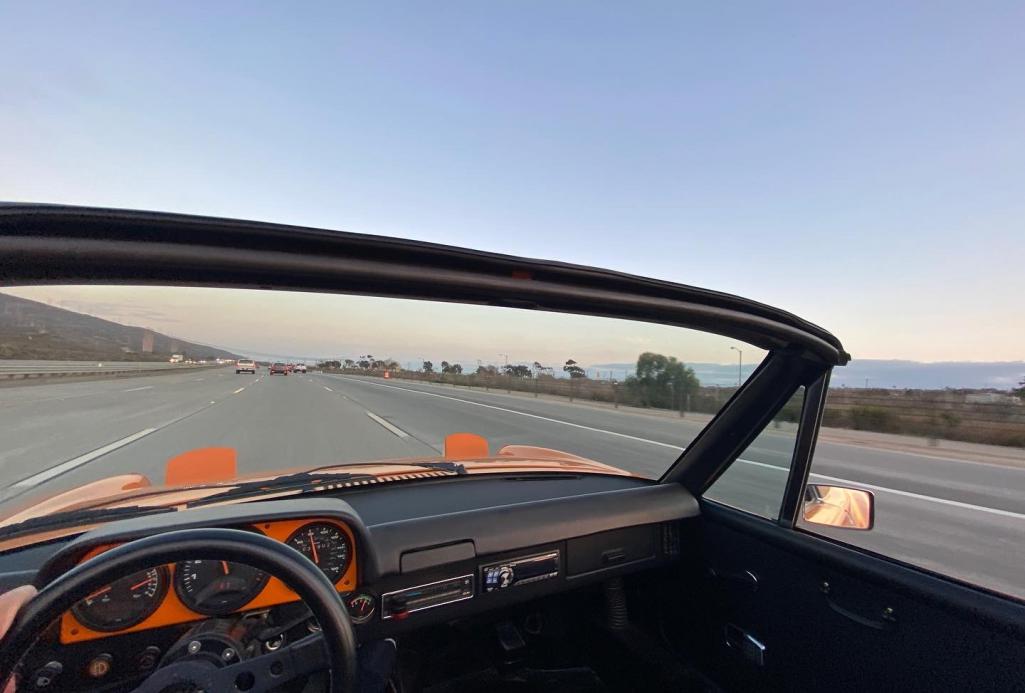
Posted by: siverson Aug 24 2022, 10:13 PM
914
Posted by: infraredcalvin Aug 24 2022, 11:31 PM
Been watching this since the “bump”, hits close to home. Bravo on bringing her back the right way! Nice job!
Posted by: Cairo94507 Aug 25 2022, 06:22 AM
Congratulations Steve. Looking forward to seeing pics of the fresh 3.8 and hearing how it runs.
Posted by: siverson Aug 25 2022, 04:13 PM
277 wheel horsepower
Attached thumbnail(s)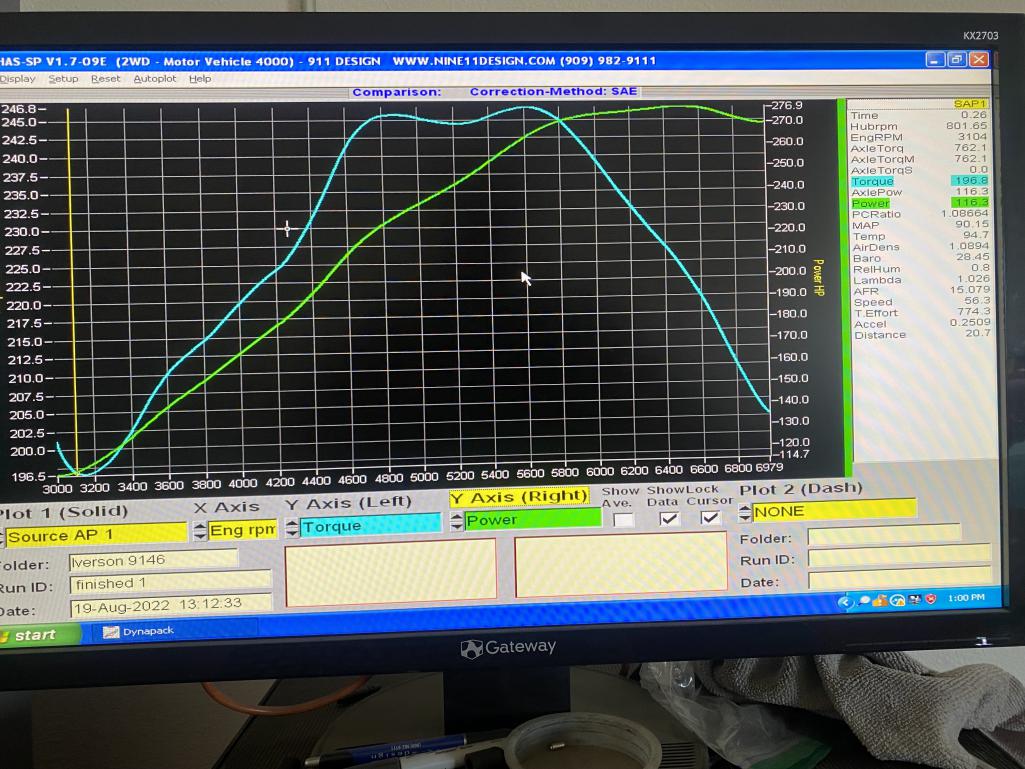
Posted by: r_towle Aug 25 2022, 05:03 PM
I’m learning.
What Piston/Rod/crank makes a 3.8?
What case can be used?
What heads can be used?
How big can I build a 3.0, reasonably ?
Posted by: flyer86d Aug 25 2022, 05:31 PM
Nice!
Charlie
Posted by: autopro Aug 25 2022, 05:42 PM
Great to see that you are back on the road!
Posted by: campbellcj Aug 26 2022, 09:37 AM
Woohoo, great to see it back in action again!
Posted by: siverson Aug 26 2022, 10:45 AM
I’m learning.
What Piston/Rod/crank makes a 3.8?
What case can be used?
What heads can be used?
How big can I build a 3.0, reasonably ?
This is a 1991 964 3.6 engine with stock crank but 102mm pistons to make it 3.8 liter.
For your other questions on the other engines - I have no idea! I do know a solid, reliable, totally stock 3.0 in a 914 in plenty and super fun to drive and way better than a non-running project car!
-Steve
Posted by: slivel Aug 26 2022, 11:55 AM
I’m learning.
What Piston/Rod/crank makes a 3.8?
What case can be used?
What heads can be used?
How big can I build a 3.0, reasonably ?
When I freshened my 3.0 liter, I kept the SC case and put in a Carerra 3.2-liter crank. At the same time, I bought Mahle Max Moritz style high compression 98 mm pistons and cylinders. The 74.4 stroke of the 3.2 l crank and the 98 mm bore yields 3.4 Liter. I also had the heads machined for twin plug. I use an Electromotive crank fire ignition and with open exhaust and race fuel the engine made 290 hp at the wheels or about 335 crank hp. Now that I'm running a muffler, I'm probably down 30 hp. I think there are P's and C's available that can get you to 3.5 liter.
Posted by: siverson Sep 6 2022, 03:39 PM
Getting the interior back in... It is crazy what a difference a little sound deadening and the back pad makes in the interior volume.
-Steve
Attached thumbnail(s)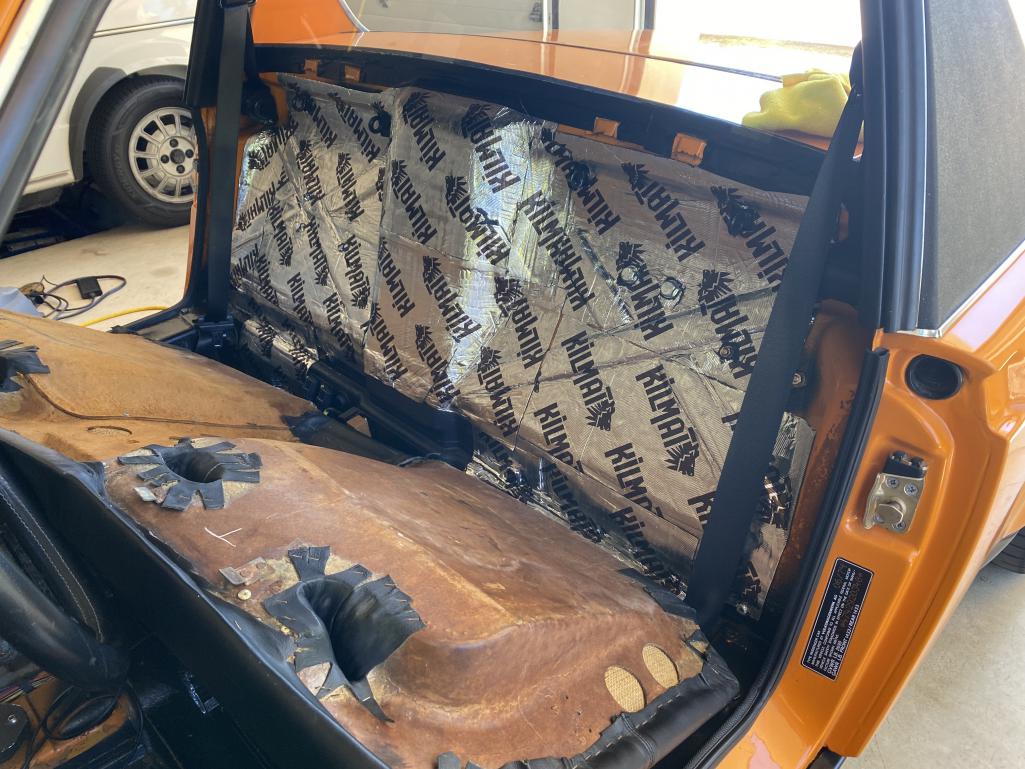
Posted by: siverson Sep 6 2022, 03:45 PM
914
Attached thumbnail(s)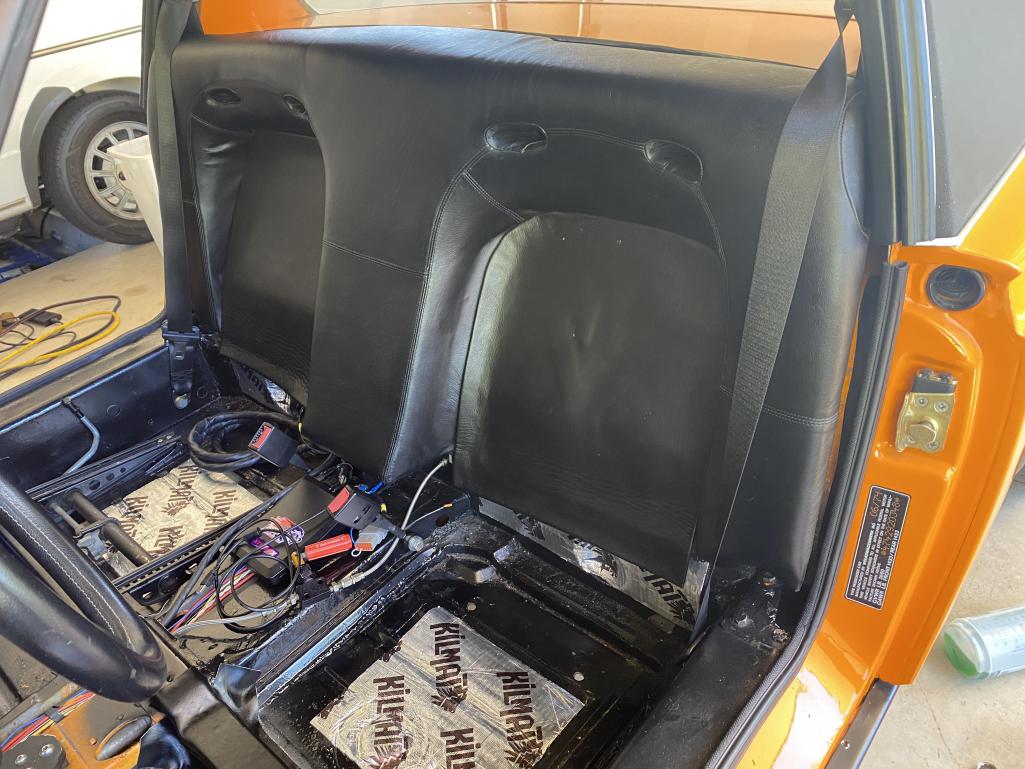
Posted by: siverson Sep 6 2022, 03:47 PM
Seats in. Can also see how my drivers seat is a bit lower than the passenger seat (I'm 6'6").
-Steve
Attached thumbnail(s)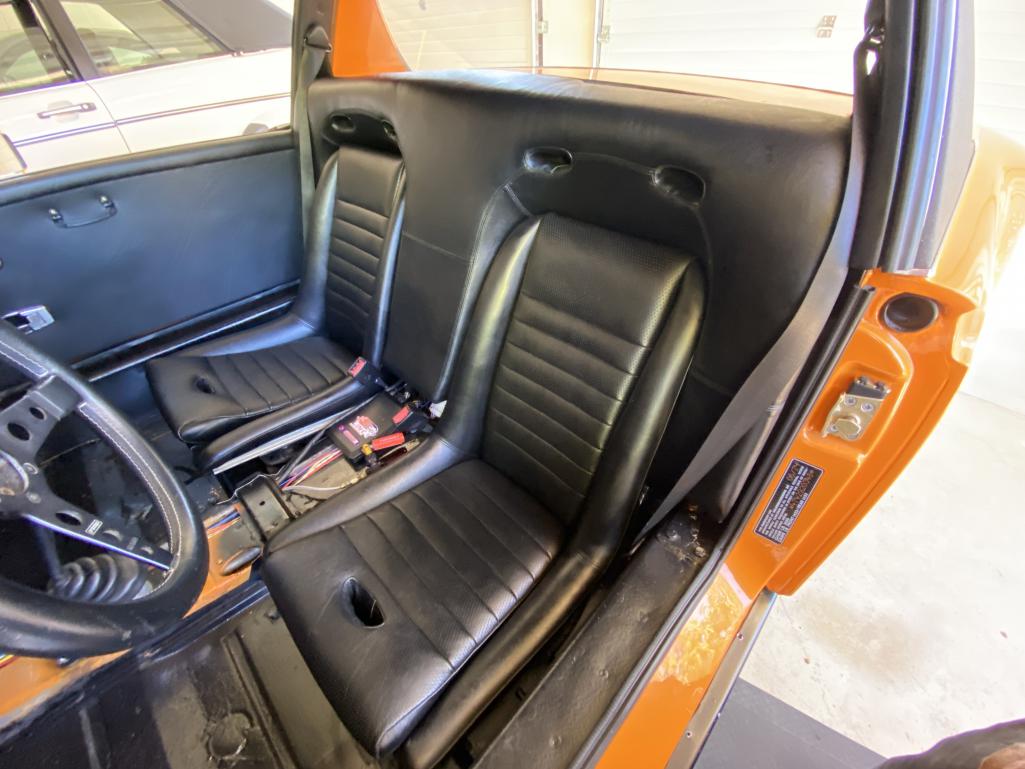
Posted by: siverson Sep 6 2022, 03:47 PM
914rubber carpet kit. I was dreading having to install this but it was actually pretty easy.
-Steve
Attached thumbnail(s)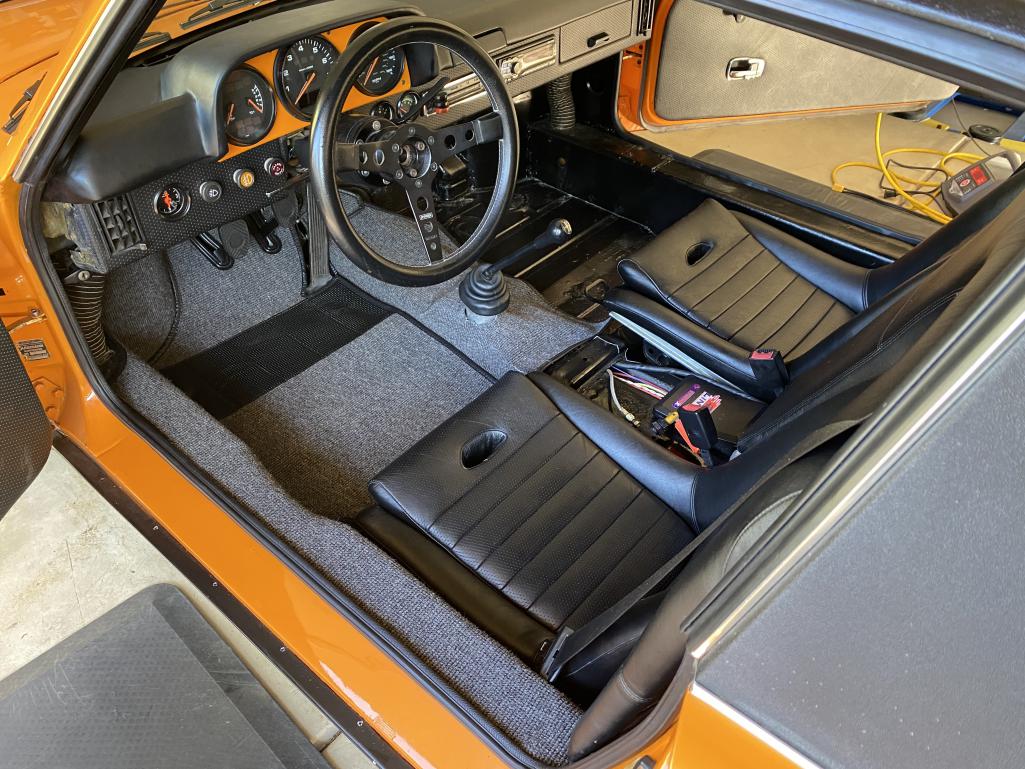
Posted by: siverson Sep 6 2022, 03:50 PM
And the first repair. Ha. The clutch cable broke for some reason. Was new. Really strange. Everything appears to be working right and aligned and no binding/etc. Hmmm....
-Steve
Attached thumbnail(s)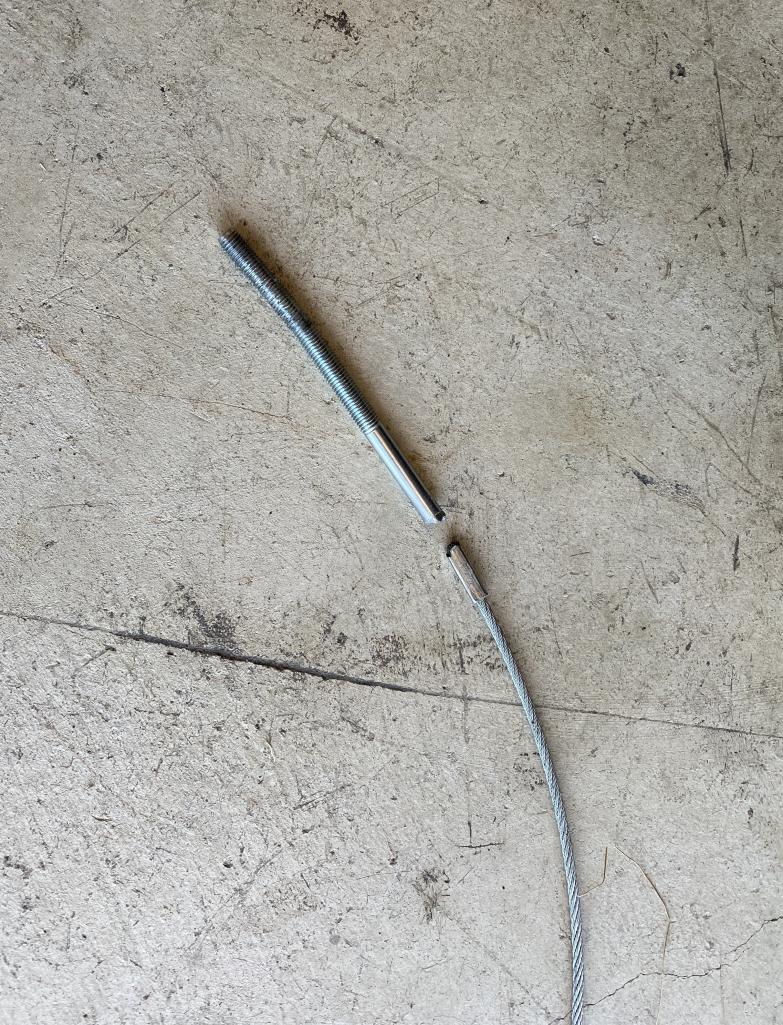
Posted by: siverson Sep 6 2022, 03:51 PM
New clutch cable in.
And showing off Marty's headers. They were jet hot coated and look great.
-Steve
Attached thumbnail(s)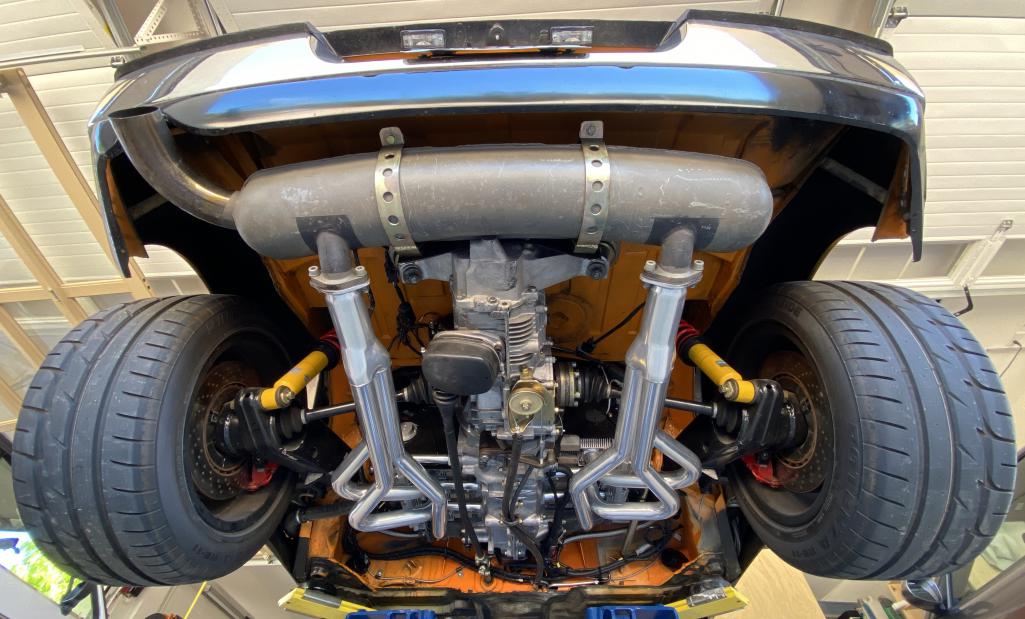
Posted by: siverson Sep 6 2022, 03:56 PM
And a test run... Vroooom!
-Steve
Attached thumbnail(s)
Powered by Invision Power Board (http://www.invisionboard.com)
© Invision Power Services (http://www.invisionpower.com)