Printable Version of Topic
Click here to view this topic in its original format
914World.com _ 914World Garage _ Joes 2056 build thread
Posted by: jsayre914 Sep 12 2011, 04:32 PM
I have been searching all the 2056 threads. Their should really be a 2056 for dummies thread 
I plan on building a 2056 D-jet from my stock 2.0 1973 motor. I have been collecting parts since 2009 
Here is what I got so far:
2.0 motor (havent split it yet)
D-Jet system off my 73
4 cleaned & Tested injectors
new wiring harness from bowlsby
new tps board
new hoses
rabby 9550 cam kit
1.8 rockers and swivel feet
aa 96mm cylinder & pistons
I might be forgettin a few things, it has been a while. 
The heads should be sent out within the week to be checked and prepared with new seats, valves, etc. And I will be splitting the case open this week also. All the cool kids are doing it 
What other thing do I need to purchase as I begin???
gaskets, bearings, flywheel ??? 
also what tools are required other than the basic tools?
I never done this before

thanks
Joseph
Posted by: Valy Sep 12 2011, 05:46 PM

1.8 rockers and swivel feet
I think you want the 1.7 rockers to go with the Rabby cam.
What other thing do I need to purchase as I begin???
Beer, sealant and tools. I would also plan for a new clutch.
And those injectors... if they've been waiting too much time, you may have some surprises.

Posted by: yeahmag Sep 12 2011, 06:10 PM
I think these days you will need to buy a "cam kit" from Jake. That will include everything you need to do the job. You will also need to budget for lot's of machining. You may consider things like:
* Full flow
* Type I oil pump
* External Oil Cooler
* Complete Gasket Kit
* Cam and Main Bearings
* Rebuild the heads with SS valves, upgraded springs, and keepers
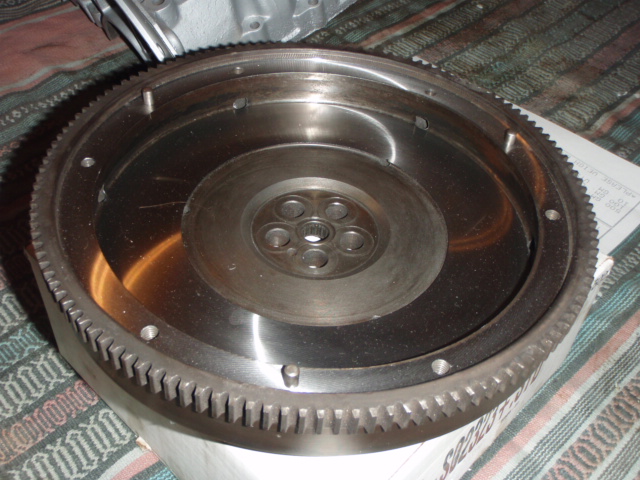
* Dynamic balance of all components
* Resurface flywheel
* Replace clutch and pressure plate (prior to balance job)
* Does your MPS hold vacuum?
* Got all the tools to do the job?
- Head CC'ed
- Valve train geometry
- Deck Height
- Torque wrenches (including inch pound)
No wonder my garage is so full...
Posted by: Vacca Rabite Sep 12 2011, 07:36 PM
I think Joe got the cam kit, not just the cam.
You need an engine seal kit.
I'd not bother with the external cooler now. That can be added later, if needed.
You need an engine stand with a VW/Porsche adapter. If you don't have one, you can borrow mine as I am not using it.
You will probably need new main bearings. If cam bearings did not come in the cam kit, you need them too.
If Jake still offers this service, consider sending your rotating mass to Jake to have it dynamically balanced. Also, I had Jake fit the bearings properly to my case. You can do this yourself, but I felt better having a pro do it for me.
If you don't want to spend the money to ship everything to Jake, or he no longer offers this service, call Mark at Warrior Motors in Red Lion. I've had him do a bunch of work for me and he is a good machinist and an honest dude.
If you need special tools, ask me before you buy anything. I may have it. I also have Jakes engine video. Swing over and borrow it if you don't already have it.
Lots of shop rags and carb cleaner. Lots.
Zach
Posted by: jsayre914 Sep 14 2011, 02:03 PM
I think you want the 1.7 rockers to go with the Rabby cam.
Yup, thats what I meant.

I just shipped my heads today, Now I need to watch Jakes video. I bought it a few years ago. Havent watched it yet

![popcorn[1].gif](style_emoticons/default/popcorn[1].gif)
I am excited now

Posted by: jsayre914 Sep 21 2011, 01:36 PM
adding to the list...
victor reinz gasket set for a 2.0
engine stand (40 bucks) harbor freight 
Yoke (borrowing from Zach)
I also stripped the engine down last night on the floor of the garage. I have to still remove the pistons, and the oil pump, but thats it. Its basically ready to split. I figured I should wait to put it on the stand before i split the case. But what do I know.
once split, what is my next move?
ship the case crank rods flywheel off to get them balanced and new berrings put in??
...remember.... i am learning.....
Posted by: HAM Inc Sep 21 2011, 02:22 PM
Joe when you get your rotating assembly balanced be sure to have your clutch pressure plate balanced too. It will likely be out more than the other components.
BTW, your heads look great now that the blue paint has been removed. There actually was a very nice pair of castings under all that paint and grime!
Posted by: Vacca Rabite Sep 21 2011, 02:24 PM
you dont need an engine stand. my yolk is welded to an engine stand. Save yo dough yo!
Zach
Posted by: vsg914 Sep 21 2011, 02:48 PM
You'll need a dial indicator for setting the valve train geometry, and an adjustable pushrod. You'll need a calculator, and pen and paper for recording everything. You probably don't have a screwdriver wide enough to tighten the oil relief valve (I didn't). I made one from the end of an old file. You'll need lots of patience. Clean your glasses, cause you're gonna do lots of reading. And that beer? Leave it in the frig till you put the cover back on the engine after each time you work on it.
I spent a year building your exact engine. It now has 300 miles on it. It has no oil leaks, and just screams compared to the 90 hp, 2.0. 3rd gear acceleration is more than I ever dreamed of. My bro says it rivals his 78 911. I really doubt that, but it is quick.
Good luck. Hope ya have as much fun as I did.
Posted by: jsayre914 Sep 21 2011, 03:00 PM
Joe when you get your rotating assembly balanced be sure to have your clutch pressure plate balanced too. It will likely be out more than the other components.
BTW, your heads look great now that the blue paint has been removed. There actually was a very nice pair of castings under all that paint and grime!
I am sooo glad they came out good. I was nervous sending them to you in such
 condition.
Cant wait to see them. (insert picture here)
Posted by: jsayre914 Sep 21 2011, 03:04 PM
You'll need a dial indicator for setting the valve train geometry, and an adjustable pushrod. You'll need a calculator, and pen and paper for recording everything. You probably don't have a screwdriver wide enough to tighten the oil relief valve (I didn't). I made one from the end of an old file. You'll need lots of patience. Good luck. Hope ya have as much fun as I did.
1) what kinda dial indicator? harbor freight mabey?
2) i have the adjustble pushrods from Jake
3) borrow a calculator from my daughter

4) My wife thinks I have a very large screwdriver
5) Patience... I started collecting parts for this build 3 years ago
Thanks for the advise
Posted by: DNHunt Sep 21 2011, 04:48 PM
I don't know if anyone mentioned a rear main seal. They aren't in the gasket kit. I can't remember if the front seal is in there or not.
Dave
Posted by: vsg914 Sep 21 2011, 05:01 PM
I bought mine at hf, but I got the better one.
Posted by: Vacca Rabite Sep 21 2011, 07:47 PM
I have an adjustable push rod and dial indicator. Borrow them when you borrow the engine yolk and stand. You will also need my ring compressor.
Zach
Posted by: jsayre914 Sep 22 2011, 07:33 AM
I have an adjustable push rod and dial indicator. Borrow them when you borrow the engine yolk and stand. You will also need my ring compressor.
Zach
I can stop by Sunday Morning about 10:30am on my way to work. Cant stay long though.
Thanks Neighbor

Posted by: jsayre914 Sep 22 2011, 07:33 AM
I have an adjustable push rod and dial indicator. Borrow them when you borrow the engine yolk and stand. You will also need my ring compressor.
Zach
I can stop by Sunday Morning about 10:30am on my way to work. Cant stay long though.
Thanks Neighbor
Posted by: Vacca Rabite Sep 22 2011, 08:52 AM
See you then my double posting friend.
Zach
Posted by: jsayre914 Sep 23 2011, 01:55 PM
I don't know if anyone mentioned a rear main seal. They aren't in the gasket kit.
Dave
Got it ! thanks for the heads up, it was not in the kit.
More items to add to my collection:
1) Keith Black Hypereutectic Cast 2.0 2056 96mm Pistons

2) Rear main Seal
3) Cap / Rotor / WR-7s
4) Magnecor Wire Set
sounds like my next step is to box up all my rotating pcs and send them off to Jake for balancing. And send my case off to Rimco to have it inspected and the galley plugs tapped. I will also check with local shop to measure my AA jugs for roundness. I might get the phone number of your guy Zach.
Does this sound like I am going in the right direction??
comments welcomed
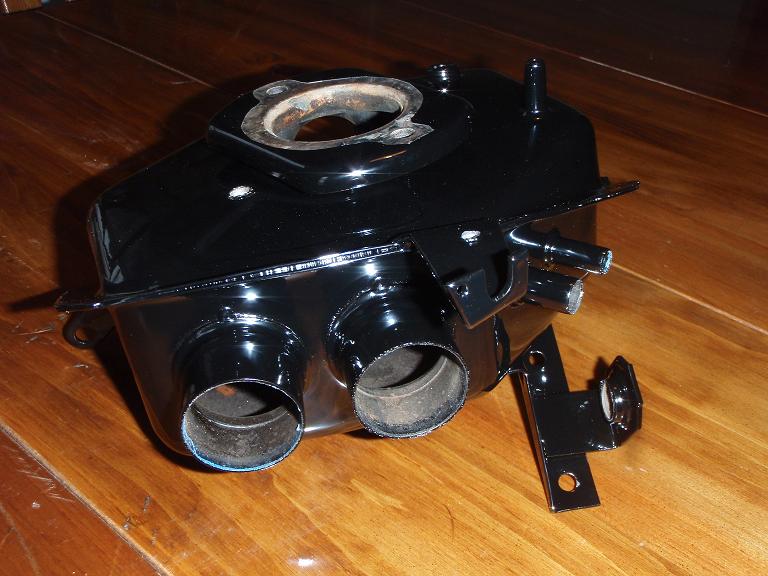
Posted by: jsayre914 Oct 6 2011, 11:08 AM
These just came today
Sure r purdy
Attached image(s)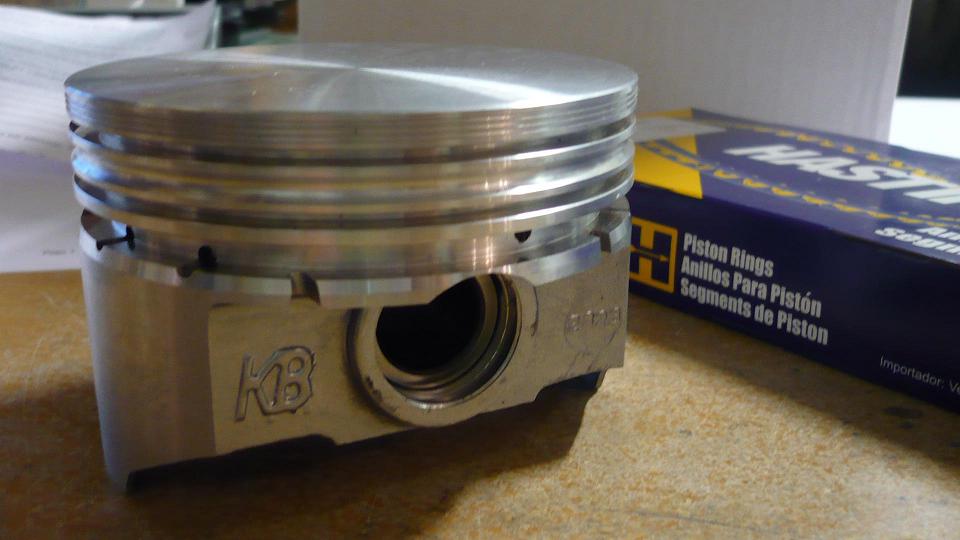
Posted by: type47 Oct 6 2011, 01:24 PM
These just came today
hmmm
, from Jake?
Posted by: jsayre914 Oct 6 2011, 02:38 PM
These just came today
hmmm
, from Jake?YUP !

Posted by: Vacca Rabite Oct 6 2011, 05:25 PM
I'm glad you decided tO get them.
Posted by: jsayre914 Oct 7 2011, 05:23 PM
Sooo, when I send my case off to Rimco.
I tell them I want it Cleaned, Inspected, and then assuming everything is good... galley plugs drilled and tapped???
Everybody says Rimco is good to deal with right???
I am trying to do everything right the first time.
Thanks
Posted by: Vacca Rabite Oct 7 2011, 05:27 PM
NO!
Send your case to Mark at Warrior Motors in Red Lion. NO NEED to ship it to CA.
Tell mark what you want done, and make sure to have him check the cylinder registers.
Zach
Posted by: jsayre914 Oct 7 2011, 05:29 PM
NO!
Send your case to Mark at Warrior Motors in Red Lion. NO NEED to ship it to CA.
Tell mark what you want done, and make sure to have him check the cylinder registers.
Zach
I assume I should also bring the 96MM jugs to be checked before putting the KB pistons in them.
Anything eles I should bring... flywheel, etc ???
Posted by: Valy Oct 7 2011, 07:09 PM
NO!
Send your case to Mark at Warrior Motors in Red Lion. NO NEED to ship it to CA.
Tell mark what you want done, and make sure to have him check the cylinder registers.
Zach
I assume I should also bring the 96MM jugs to be checked before putting the KB pistons in them.
Anything eles I should bring... flywheel, etc ???
camshaft (if not new)
lifters
crankshaft
rods
heads
get everything balanced
Posted by: jsayre914 Nov 9 2011, 03:04 PM
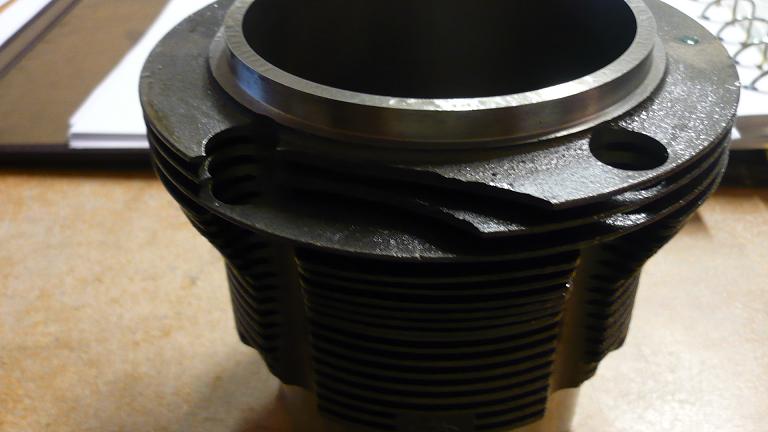
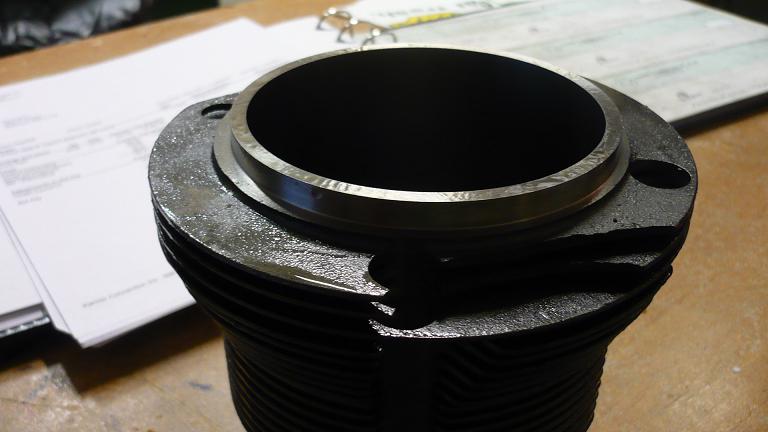
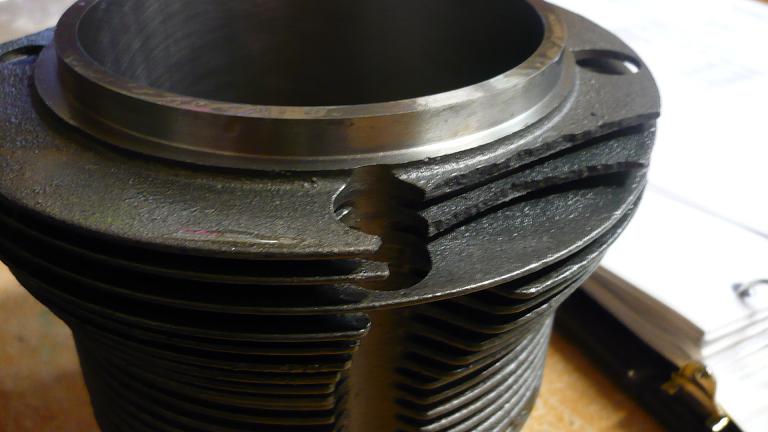
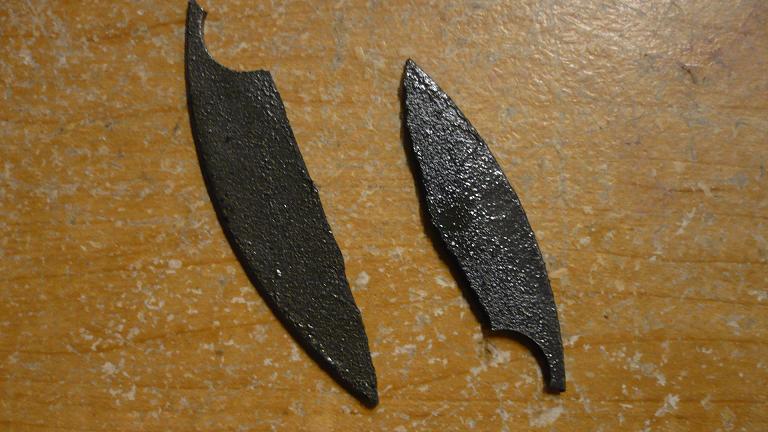
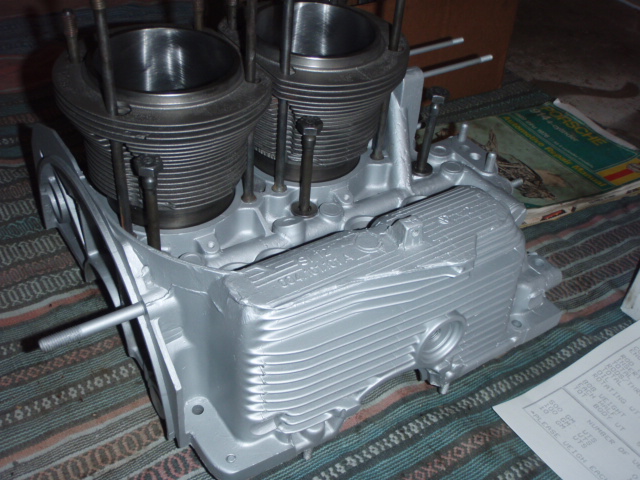
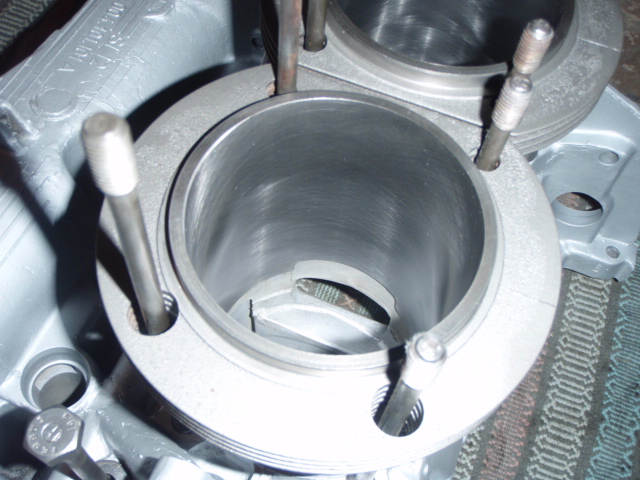
Minor Setback. I was pulling out my stash of parts and found this on my brand new 96mm AA jug. 3 are fine and one is missing a coulple of fins 
I assume this is not O.K. to use ??? So now i can bore out 1 of the stockers, or hell... bore out all four of the original jugs???
Please Help me.
I am putting the KB pistons inside these. Such a waste if I cannot use this new set I purchased 2 years ago. It was just sitting in the box and I never checked them
Posted by: scotty b Nov 9 2011, 03:40 PM
It's toast, and the AA's are a crap shoot anyway. My inclination would be to bore out the stockers, and have the AA's checked. If they are a good batch you have 3 decent ones you could sell if anyone needed one or 2
Posted by: 914rat Nov 9 2011, 05:05 PM
You can buy just 1 jug from AA.The stock jugs are a higher quality steel and come highly recommended for boring out for 96mm pistons.
Posted by: Vacca Rabite Nov 9 2011, 06:03 PM
Yep, bore the stock ones. They are better then the AA jugs. Sell the AA jugs off.
Zach
Posted by: jsayre914 Nov 9 2011, 11:13 PM
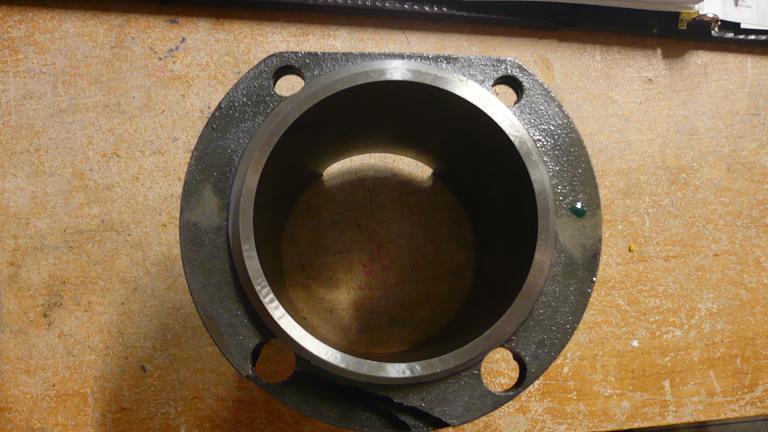
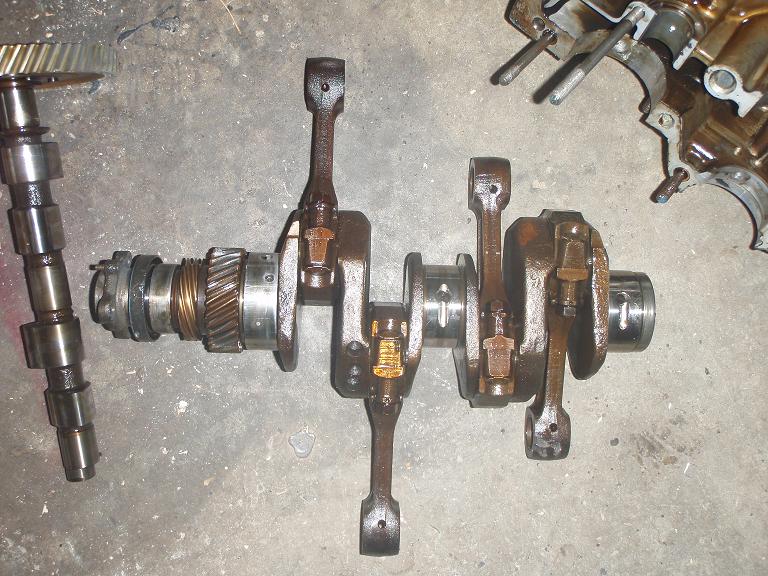
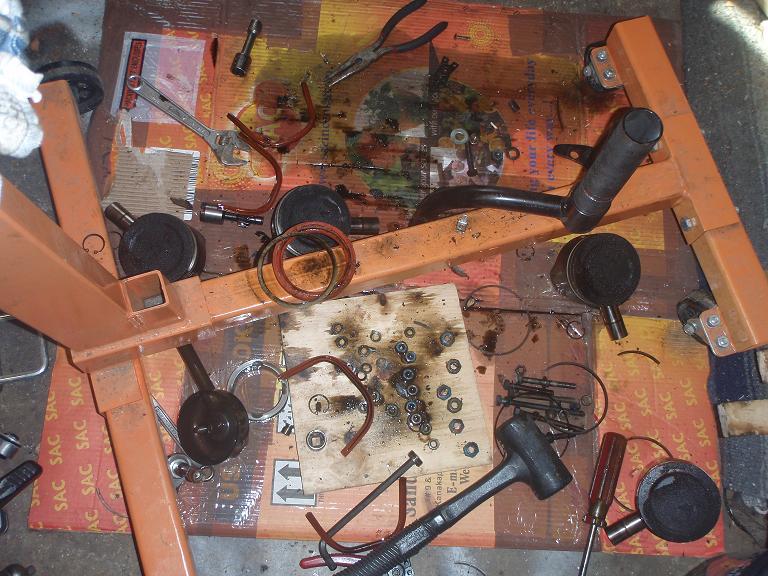
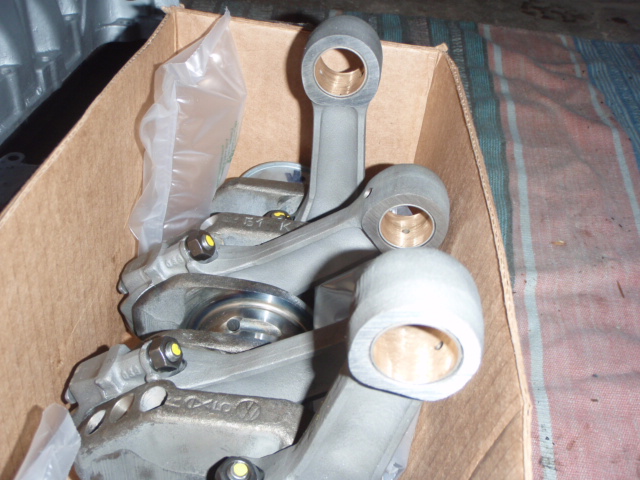
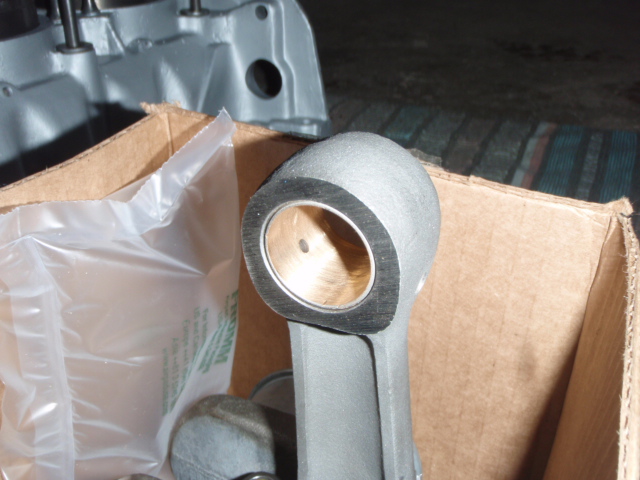
Few more pics of the guts before bed 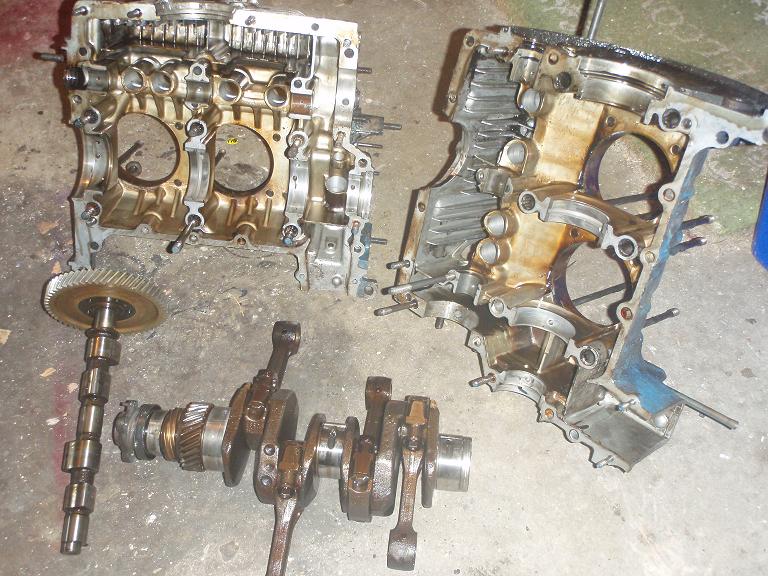

Posted by: jsayre914 Nov 16 2011, 03:55 PM
Dropped the case off with Mark @ Warrior yesterday Very nice guy ! I also gave him the stock cylinders and 96mm KB pistons. He will bore them and check the fit. He did not want all my spinning parts yet.
Without my case I decided I needed somthing eles to work on so I got to cleaning engne tin, fan shroud, intake runners etc. etc.
Just dropped all that off at the local powdercoaters

Im almost on the home stretch
Posted by: Vacca Rabite Nov 16 2011, 04:04 PM
I'm a big fan of Marks work. Not only does he work with you to get what you want, he does not set out to break your checking account.
Zach
Posted by: draganc Nov 16 2011, 08:01 PM
Dropped the case off with Mark @ Warrior yesterday
could you please provide some details (webpage, phone, adress) about mark at warrior? I'm looking for a "local" machine shop in or around south/central NJ.
Thanks!
Posted by: Vacca Rabite Nov 16 2011, 08:08 PM
Warrior Motors in Dallastown PA (near York). Probably a good 2 hours from S/C New Jersey. He does a LOT of v8 stuff, but always has VW stuff in his shop as well. he did my T4 case, and has done all the machine work for the 350 I'm building.
At one point Mark talked me out of the more expensive option as it would not have added benefit from my configuration. That alone save me ~$500. He is a stand up guy.
Zach
Posted by: draganc Nov 16 2011, 08:11 PM
Warrior Motors in Dallastown PA (near York). Probably a good 2 hours from S/C New Jersey. He does a LOT of v8 stuff, but always has VW stuff in his shop as well. he did my T4 case, and has done all the machine work for the 350 I'm building.
At one point Mark talked me out of the more expensive option as it would not have added benefit from my configuration. That alone save me ~$500. He is a stand up guy.
Zach
thanks zach!
Posted by: jsayre914 Dec 14 2011, 01:20 PM
Called Warrior motors once a week for the last 3 weeks, never got a call back 
I am swampped at work (Christmas) and have not had time to go check on the progress of my case or cylinders. I got a call from Mark this morning... He smashed his hand a few weeks ago hasnt worked on anyones engines and has not even looked at mine yet. He did apologize and told me he will get to it as soon as possible

Now I wait some more.
Posted by: Vacca Rabite Dec 14 2011, 04:43 PM
Dude, I am very sorry.
Mark was always really fast at returning my calls and always was willing to work with me about timelines. His shop is always full.
Zach
Posted by: jsayre914 Dec 27 2011, 08:54 PM
Cant be long now....
any day....
In the mean time, I have still been collecting parts, painting parts, drinking beer.
Will post some pics when I am not drinking great beer
Posted by: Vacca Rabite Dec 28 2011, 08:08 AM
Next tuesday stop by marks shop to see if he is in. Ask him if his hand is better and when your stuff will be done. I he does not know then take it home. He will understand and probably has a huge backlog now.
Ask around. I know there is another VW place but don't know how much aircooled work they do. Call the guys over at Broadway Autoparts on 74 in Red Lion and ask them for a machinist. They have one on staff but he is not set up to do your work. He knows other guys though.
Also email some of the SPVWC guys. There are lots of VWs in the York area, and lots of machinists. Some will know VW stuff.
You could also call Translog, Peek Performance in MD. or Bus Depot outside Philly or Aircooled Racing just north of us and ask for a reccommdation.
Sorry Mark messed up his hand. He is good, but should be good in letting his customers know what's going on when they call too.
Posted by: saigon71 Dec 29 2011, 07:44 AM
Joe:
I hope everything works out with Marks shop. If not, here is some info for a "local" guy I used in the late 80's for air cooled VW engine work. He did affordable, top notch work.
Wagner's Vw Service 144 S Fair Lane
Grantville, PA 17028-8814
717-469-0123
His name is Luke Wagner.
Bob
Posted by: 76-914 Dec 29 2011, 09:57 AM
I also have Jakes engine video. Swing over and borrow it if you don't already have it.
Zach
Maybe it's just me, but isn't this the same thing as stealing?? People that make these videos deserve to be paid for their services; in full. I think that many here have greatly benefited from other members "how to videos" and when we "loan" our copies we are basically stealing from the guy's that made it possible for the rest of us. Just saying............
Posted by: mepstein Dec 29 2011, 10:13 AM
I also have Jakes engine video. Swing over and borrow it if you don't already have it.
Zach
Maybe it's just me, but isn't this the same thing as stealing?? People that make these videos deserve to be paid for their services; in full. I think that many here have greatly benefited from other members "how to videos" and when we "loan" our copies we are basically stealing from the guy's that made it possible for the rest of us. Just saying............
Borrowing a video is not stealing. Duplicating and selling copies would be stealing.
Posted by: Vacca Rabite Dec 29 2011, 10:46 AM
I also have Jakes engine video. Swing over and borrow it if you don't already have it.
Zach
Maybe it's just me, but isn't this the same thing as stealing??
No, loaning is not stealing. If it was, libraries, video rental places, etc. would not be able to function. The ability to loan out books, music, movies and other art is protected under law.
Under fair use I can loan a copy of anything I buy so long as I don't duplicate the work in the process.
If you don't like it, you don't need to share. But I was brought up that friends help their friends. Its also not stealing if I loan out my engine stands or anything else that I don't happen to be using at the time.
Posted by: jsayre914 Dec 29 2011, 01:11 PM
Since we are heading off topic anyway, and I am waiting forever....
I did purchase Jakes video last year. I think everyone should buy one, its a great video. It dosnt have the cool intro like the great Dr. Evils video. I put the video in the garage and it has been lost ever since.
Thanks for the offer Zach
Thanks for the video Jake
Joseph Sayre
Posted by: 76-914 Dec 30 2011, 09:34 AM
I also have Jakes engine video. Swing over and borrow it if you don't already have it.
Zach
Maybe it's just me, but isn't this the same thing as stealing??
No, loaning is not stealing. If it was, libraries, video rental places, etc. would not be able to function. The ability to loan out books, music, movies and other art is protected under law.
Under fair use I can loan a copy of anything I buy so long as I don't duplicate the work in the process.
If you don't like it, you don't need to share. But I was brought up that friends help their friends. Its also not stealing if I loan out my engine stands or anything else that I don't happen to be using at the time.
You either get it or you don't and you didn't. The disc is just a piece of plastic. What is sold is the intellectual property. At least you are able to justify this within your moral framework.
Posted by: mepstein Dec 30 2011, 09:42 AM
I also have Jakes engine video. Swing over and borrow it if you don't already have it.
Zach
Maybe it's just me, but isn't this the same thing as stealing??
No, loaning is not stealing. If it was, libraries, video rental places, etc. would not be able to function. The ability to loan out books, music, movies and other art is protected under law.
Under fair use I can loan a copy of anything I buy so long as I don't duplicate the work in the process.
If you don't like it, you don't need to share. But I was brought up that friends help their friends. Its also not stealing if I loan out my engine stands or anything else that I don't happen to be using at the time.
You either get it or you don't and you didn't. The disc is just a piece of plastic. What is sold is the intellectual property. At least you are able to justify this within your moral framework.
I just lent a book to my son that I bought for myself. I guess it's time to call the thought police.

Posted by: jsayre914 Dec 30 2011, 12:03 PM
So I got a call from the powder shop. Everything is ready for pickup.
I also picked up a few more parts:
Narrow band air/ fuel guage
oil pressure guage
Posted by: jsayre914 Jan 2 2012, 04:30 PM
Going to Warrior tommorow. (wish me luck)
will post pics of my tins tommorow, they are
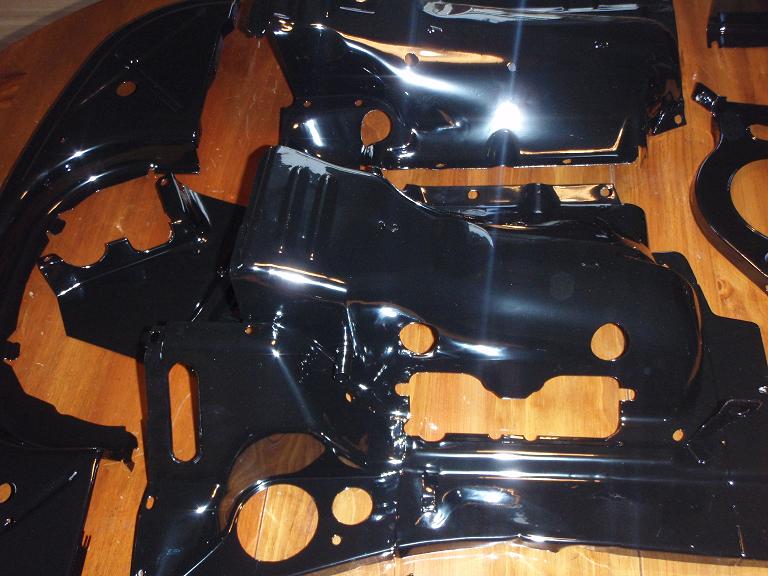
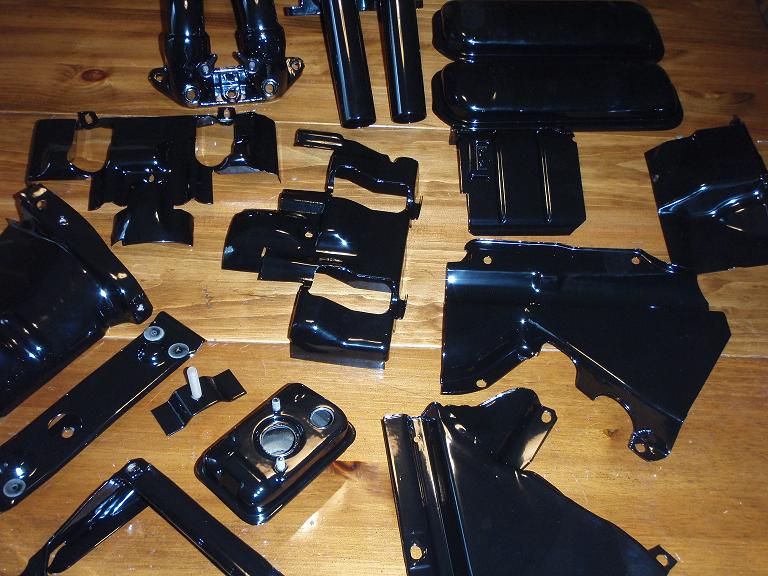
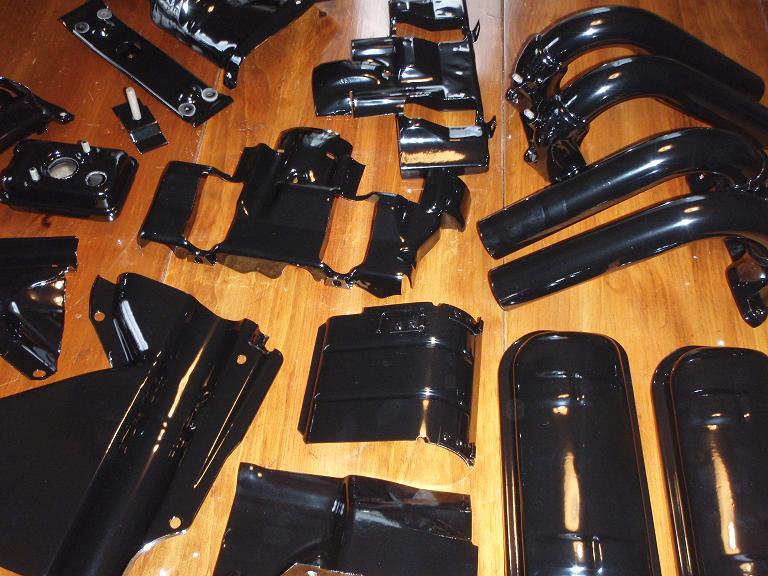
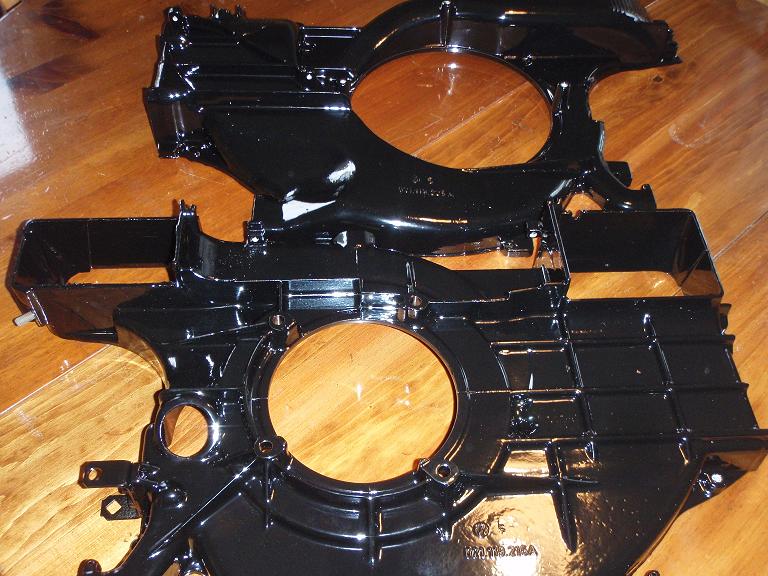
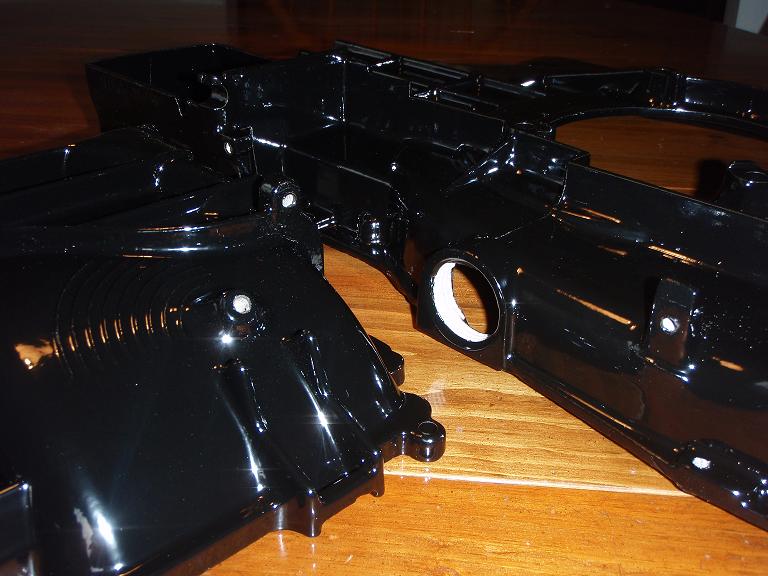
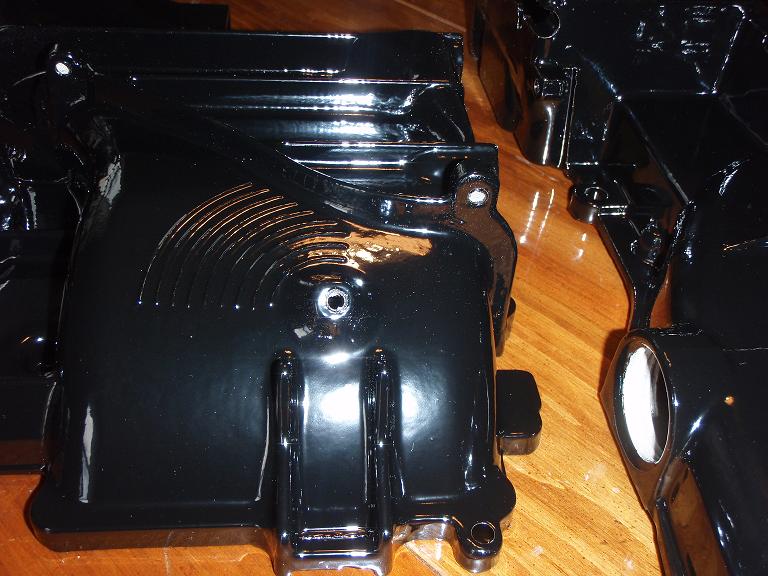
Posted by: jsayre914 Jan 3 2012, 10:20 AM
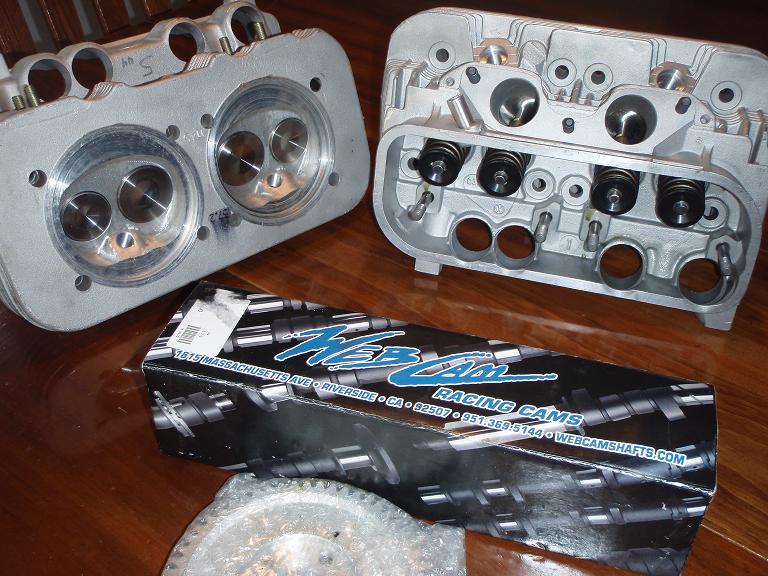
As promissed
I think they did an outstanding job, considering the condition I dropped them off in 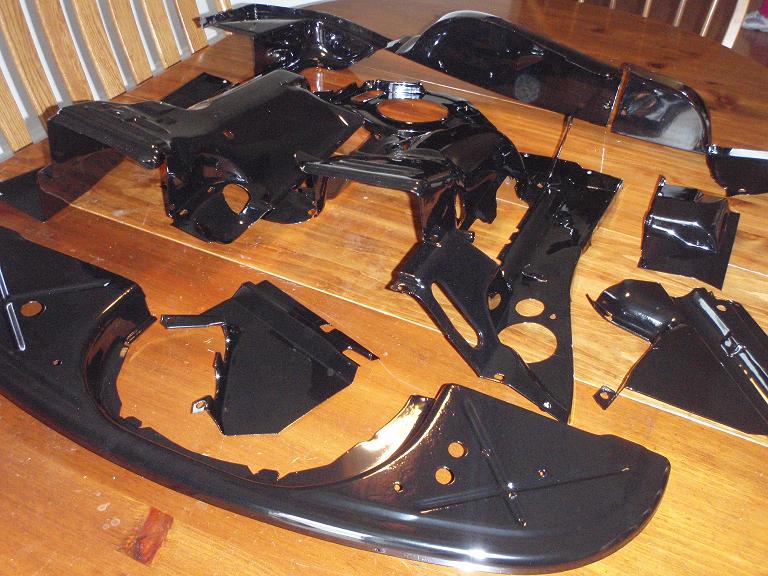
Posted by: jsayre914 Jan 3 2012, 10:23 AM
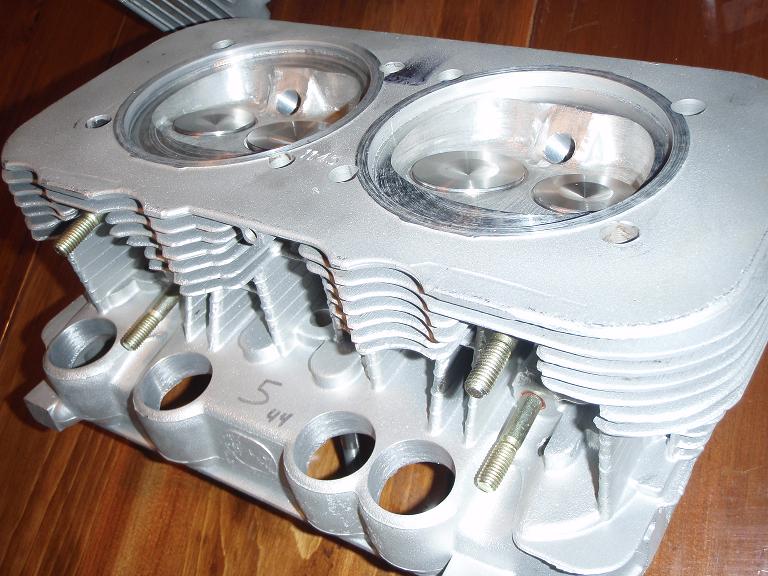
And the original Heads brought to life by Len 
Posted by: jsayre914 Jan 3 2012, 10:25 AM
Next stop....
WARRIOR ENGINE
to see if my 94mm are now 96mm
Posted by: hot_shoe914 Jan 3 2012, 09:00 PM
Would you quit Fuching around and finish this thing already?  I need something to
  in the AX in Hershey this year!
Posted by: jsayre914 Jan 4 2012, 12:26 PM
Would you quit Fuching around and finish this thing already?
I need something to in the AX in Hershey this year! I really am workin on stuff.... really
I stopped by the shop yesterday, and my case was bueatiful
The jugs were finished and he showed me the fit with the KB pistons. Fantastic. The job was so well executed, I gave him the crank and the flywheel to work on while i order the bearings.I just called Dean @ Rabby Enterprises about 7 times
, and placed my order for the bearings. You can,t be too careful ordering parts. The only interesting thing in my build is gonna be the rods. The small end of the rods is shot, the machinest told me. They need to be rebuilt and the bushings available according to Dean are crap. They dont sell them, they just sell new performance rods. Mark @ Warrior engines insists that he can build the bushings himself better than anything money can buy. He manufactures his own bushings and uses them in Engines pushing 1600 horses. He gave me a price of 196 for all for rebuilt and balanced. I cant wait to see what they look like.
I trust all the experts here and I trust Mark, I figure Im not just saving money, but I am getting 30+ years of this guys reputation in the heart of my motor.

The finish line is in sight. I should have everything back in my garage, ready to build with 2 weeks


Posted by: SirAndy Jan 4 2012, 12:31 PM
Is it done yet?
Posted by: jsayre914 Jan 4 2012, 12:49 PM
Is it done yet?
Do you west coast guys know it was 7 degrees last night
Posted by: type47 Jan 4 2012, 01:07 PM
And there's a problem with that? 7 degrees outside gonna warm up to mid 40's later in the week. Sounds like an excuse for an engine build party 

Posted by: Jake Raby Jan 4 2012, 01:55 PM
Dean told you the truth about the bushings... The material for them is now crappy and for the cost it takes to rebuild a set of OE rods we can replace them with a new H beam that will hold 400HP, already has ARP rod bolts.
Not to mention that the rods weigh 300 grams less than OE.
Posted by: Vacca Rabite Jan 4 2012, 08:42 PM
Those heads make me jealous.
Zach
Posted by: jsayre914 Jan 11 2012, 11:23 AM
Talked with Mark just now. He said I can pick everything thing up by the end of the week.
YYYAAAAAAAAAAAAAYY !!
Lookin like a great day today
Posted by: mepstein Jan 11 2012, 11:39 AM
Those heads make me jealous.
Zach
Joe - Give Zach some head.
Posted by: jsayre914 Jan 12 2012, 04:25 PM
And those injectors... if they've been waiting too much time, you may have some surprises.
I just called Rich @ cruzin performance to check when I had the injectors cleaned. It has been 2 years and a month
 Wow time flys
Since they are still in the sealed packages, and numberd
Rich said he will re-check them for free Nice Guy.
If you havent heard of Cruzin.... check them out.
http://www.cruzinperformance.com/fuelinj.html
p.s. thanks for the tip Valy
Posted by: jsayre914 Jan 12 2012, 04:26 PM
Those heads make me jealous.
Zach
Joe - Give Zach some head.

Posted by: saigon71 Jan 12 2012, 09:15 PM
Talked with Mark just now. He said I can pick everything thing up by the end of the week.
YYYAAAAAAAAAAAAAYY !!
Lookin like a great day today :
Excellent!Posted by: jsayre914 Jan 17 2012, 12:43 PM
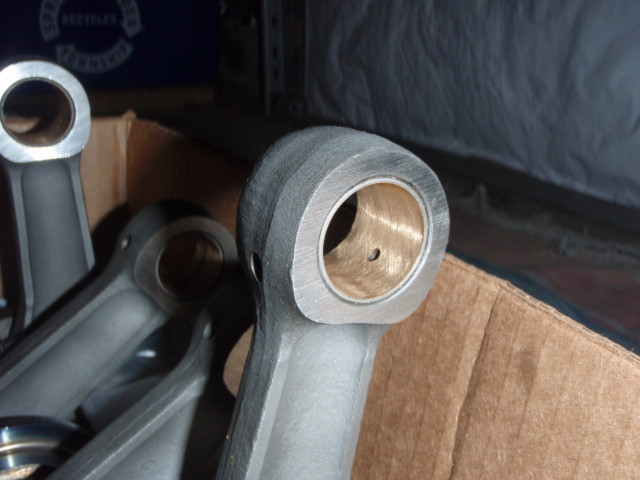
Everything is ready to go back togeather
Now I just need to figure out wtf im doin
The rods look great, i am very happy with the work mark has done, I would reccomend his services if you have time to wait.

Posted by: Dr Evil Jan 17 2012, 04:33 PM
Please dont mess this up
Posted by: hot_shoe914 Jan 17 2012, 11:39 PM
Please dont mess this up
Help him doc.
Posted by: Vacca Rabite Jan 18 2012, 07:14 AM
Just ask questions and if I can I will swing over after work. Would have come over yesterday but you had some "birthday party." who puts of ahead of thier car?
Your case and rods look great. I am glad that mark came through for you.
Posted by: Dr Evil Jan 18 2012, 08:09 AM
Please dont mess this up
Help him doc.
I already have a day job, and a night job.
Posted by: saigon71 Jan 18 2012, 08:43 AM
Looks good Joe...glad you finally got all the parts.
You will have this thing back on the road before you know it.
I have heard that the MPS needs to be tweaked to work well on a 2056. Have you found anyone to do this yet?
Posted by: Racer Chris Jan 18 2012, 10:11 AM
Joe,
I'm expecting to ship your new exhaust and AFR gauge late this week or first of next week.
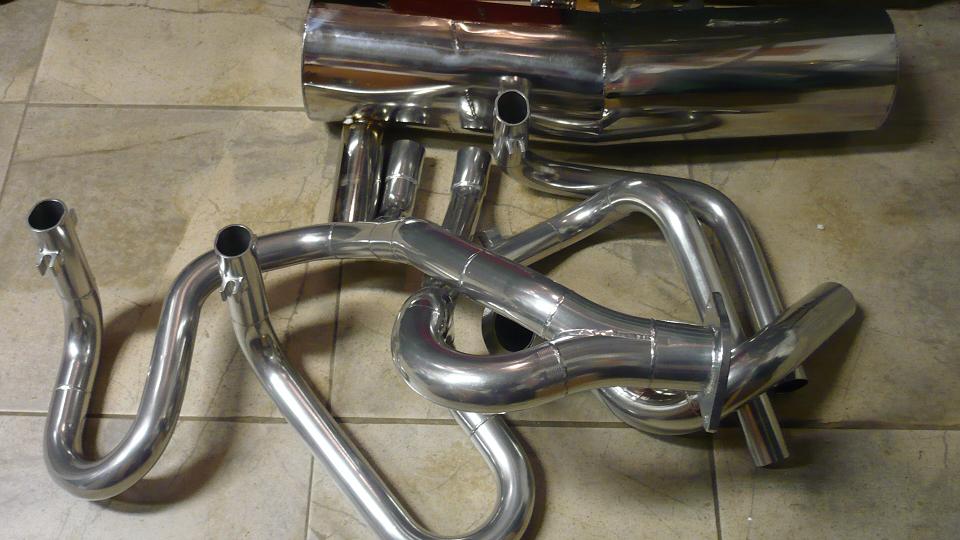
Posted by: jsayre914 Jan 18 2012, 10:38 AM
Joe,
I'm expecting to ship your new exhaust and AFR gauge late this week or first of next week.
Oh Snap !
The secret purchase has been revield
I have Tangerine Headers
Thank you Chris !
Iam so excited to hang your work of art, onto my brand new 2056
Posted by: Vacca Rabite Jan 18 2012, 07:35 PM
THAT!
YOU BUM! Its never going to reach your door, Sayre. It will go, shall we say, up in smoke.
*jealous*
Zach
Posted by: scotty b Jan 19 2012, 10:41 AM
That may be the cleanest engine I hve ever seen
Attached image(s)
Posted by: jsayre914 Jan 19 2012, 10:46 AM
I now have a case of Loose cannon waiting for the Brave souls that help me out
Next question, What other than assembly lube do I need to purchase from the FLAPS
Posted by: bozo914 Jan 19 2012, 10:49 AM
Mmmm - Nice jugs........Looking very sanitary 
That may be the cleanest engine I hve ever seen
Posted by: yeahmag Jan 19 2012, 10:59 AM
Oh man! I love that beer!
I now have a case of Loose cannon waiting for the Brave souls that help me out
Next question, What other than assembly lube do I need to purchase from the FLAPS
Posted by: jsayre914 Jan 19 2012, 11:01 AM
Thanks to whomever told me to recheck my injectors
The email I recieved today:
Hi Joseph,
Your injectors arrived and it's a good thing we checked them. Three of the four were indeed stuck closed from sitting. I ran them on the bench and within a couple of minutes, they all freed up. I backflushed them and ran them on the bench for about 10 minutes. They are now flowing fine once again.
Posted by: Gint Jan 19 2012, 06:54 PM
That bead blasted case is beautiful!
Posted by: Dr Evil Jan 19 2012, 07:06 PM
Bead blast! Ah yes, make sure you clean the case out thoroughly! All the passages and such. You dont want that grit getting into your running parts.
Posted by: tscrihfield Jan 19 2012, 07:11 PM
Bead blast! Ah yes, make sure you clean the case out thoroughly! All the passages and such. You dont want that grit getting into your running parts.
I would spend a ton of time cleaning that thing to avoid any loose grit getting into the engine when complete!
I used to use pipe cleaners that are really long or take out all of the oil galley plugs and run a 22 cal barrel brush through it!
Posted by: Vacca Rabite Jan 19 2012, 07:47 PM
Mark painted that case, didn't he. Is it really that clean?
Zach
Posted by: Dr Evil Jan 19 2012, 08:36 PM
Maybe time to put in threaded galley plugs so you can access the oil galleys for cleaning?
I have been doing this stuff with my Moto Guzzi parts that I have been blasting
Posted by: Porschef Jan 20 2012, 08:49 AM
I now have a case of Loose cannon waiting for the Brave souls that help me out
Next question, What other than assembly lube do I need to purchase from the FLAPS
That's a fine IPA. Engine looks good too
Posted by: jsayre914 Jan 20 2012, 02:30 PM
I now have a case of Loose cannon waiting for the Brave souls that help me out
Next question, What other than assembly lube do I need to purchase from the FLAPS
That's a fine IPA. Engine looks good too
Thanks,
I fogot to mention the Beer was bottled a week ago
I got a connection

They actually brew it right near my work
Posted by: jsayre914 Jan 20 2012, 10:30 PM
anybody wanna put my engine togeather sat evening??
engine buid party at joes.
Posted by: Vacca Rabite Jan 22 2012, 10:11 AM
I was over Sat night...
Joe is going to have a very nice engine, no doubt. He needs to clean the case interiors before he does any assembly, but that goes without saying.
He needs input for case sealant though. Is Loctite 474 still the stuff to use for sealing case halves? Is there another product that people prefer these days?
What about for the case bolts and jug bases? What is the sealant that people like for those areas these days?
NO LEAKS!
Zach
Posted by: tscrihfield Jan 22 2012, 11:05 AM
I was over Sat night...
Joe is going to have a very nice engine, no doubt. He needs to clean the case interiors before he does any assembly, but that goes without saying.
He needs input for case sealant though. Is Loctite 474 still the stuff to use for sealing case halves? Is there another product that people prefer these days?
What about for the case bolts and jug bases? What is the sealant that people like for those areas these days?
NO LEAKS!
Zach
I use permatex aircraft sealant.
http://www.permatex.com/products/automotive/automotive_gasketing/gasket_sealants/auto_Permatex_Aviation_Form-A-Gasket_No_3_Sealant_a.htm
You can buy it at napa or Oreily auto. I have used it for a while and have yet to have a leak. I have also seen folks use a strip of dental floss along the bottom edge of the case to prevent leaks out the bottom. Hope this helps.
Posted by: Dr Evil Jan 22 2012, 11:40 AM
Permatex is fine. Anaerobic sealant is what you are looking for.
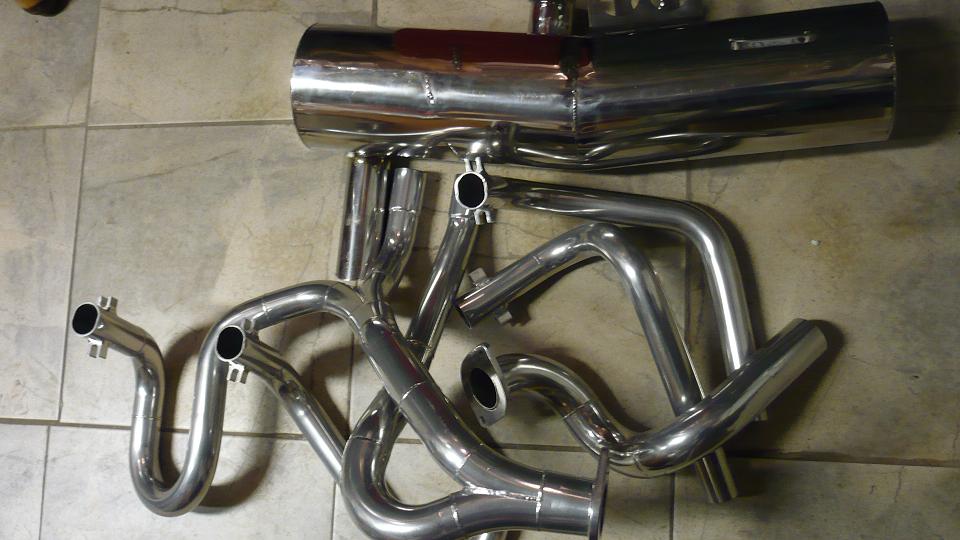
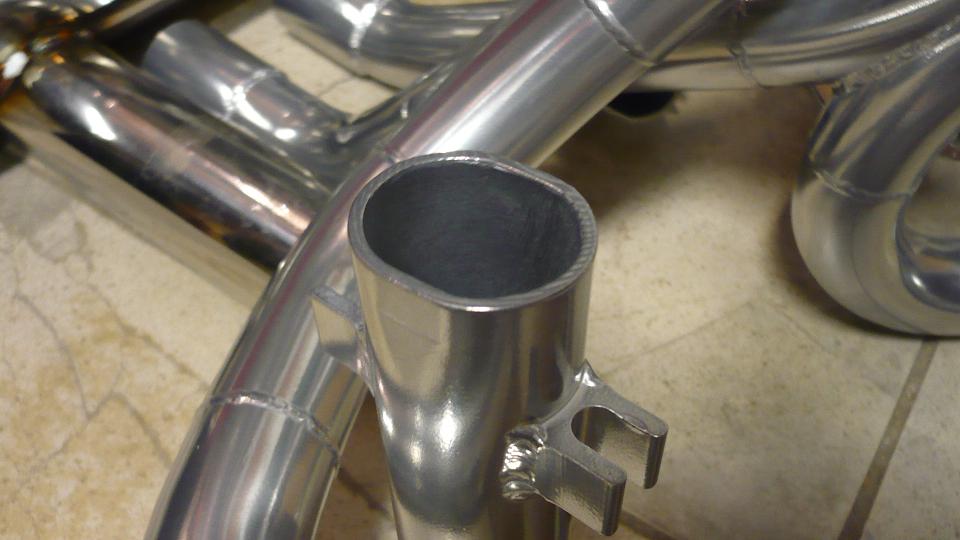
Posted by: jsayre914 Jan 23 2012, 03:00 PM
OMFG
These pipes are excellent Chris. Did I mention that tommorow is my Birthday. Excellent timing

As far as the engine build party, Zach did come and brought Theo So we watched movies with our kids and played Wii while eating pizza and drinking beer. We never actually made it to the garage. But it was worth it.
Fun times
Posted by: Vacca Rabite Jan 23 2012, 06:12 PM
Yep, that's art. :jealous:
And we did make it out to the garage. We just didn't build anything. Clean your case so we can build stuff next time!
Zach
Posted by: hot_shoe914 Jan 23 2012, 06:46 PM
Joe, I'm beginning to think you robbed a bank, or maybe harvested a crop.
Posted by: jsayre914 Mar 6 2012, 06:15 PM
Waiting to move foreward on my engine.... I figured I needed to work on somthing.
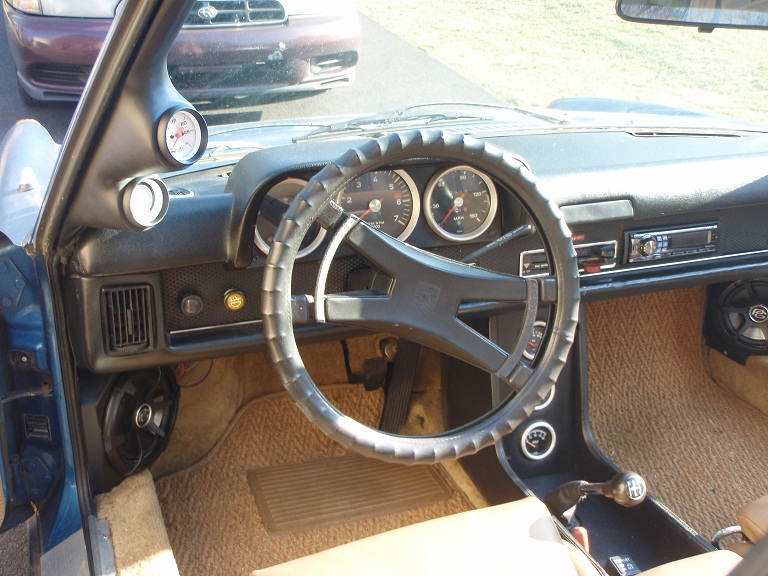
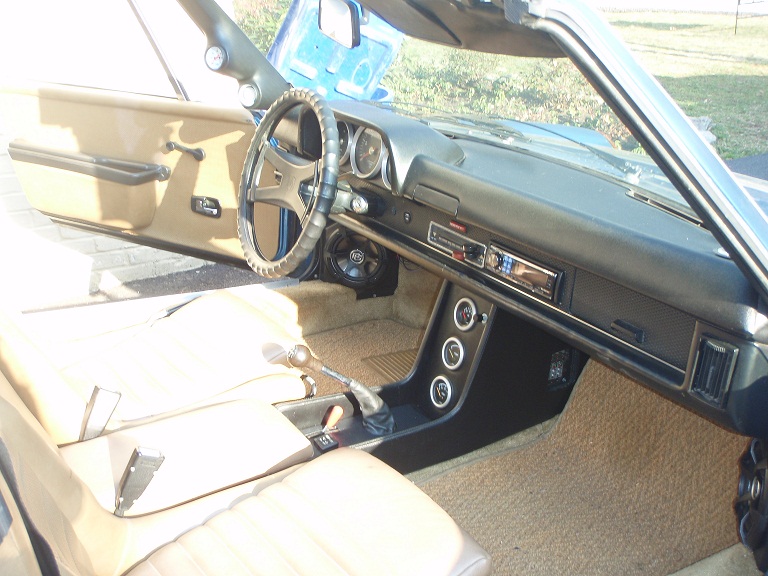
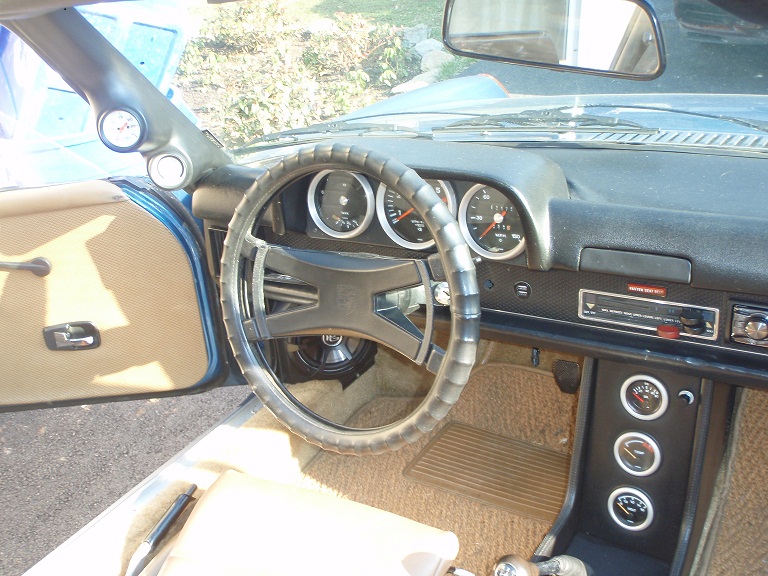
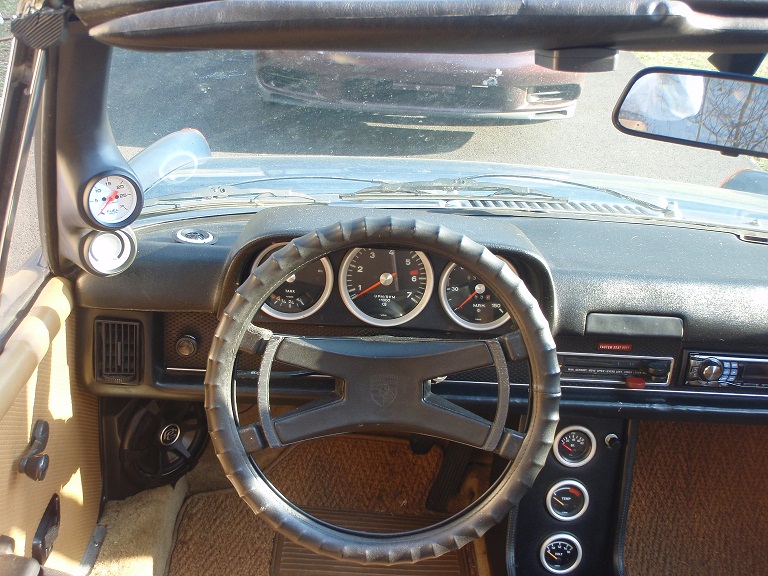
I went ahead and added some gauges to the teener today. (3) to be exact. I got rid of the clock and replaced it with an oil pressure gauge. It is smaller than the stock gauge, so I used a bit of superglue and managed to get my aluminum ring to fit pretty well. I didnt want to loose the uniform look with the trim rings I purchased.
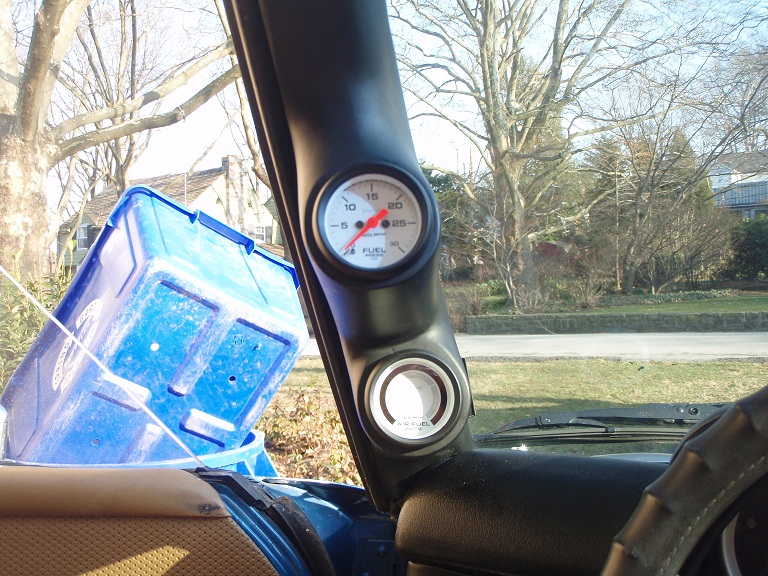
The other 2 went on the pillar, a fuel pressure gauge to monitor the D-Jet, and a Air Fuel gauge to keep in tune. I did not want to install the pillar at first, but bit the bullet when i saw the alternatives. I actually really like it

Posted by: scotty b Mar 6 2012, 07:52 PM
Attached image(s)
Posted by: Dr Evil Mar 6 2012, 08:16 PM
Joe doesnt care about looks, its obvious
Posted by: jsayre914 Mar 6 2012, 08:22 PM
is it the white thats buggin you guys ??
Its not like i added neon underneath the car....

Posted by: scotty b Mar 6 2012, 08:28 PM
Joe doesnt care about looks, its obvious
Very true, I've seen him
Posted by: scotty b Mar 6 2012, 08:29 PM
is it the white thats buggin you guys ??
Its not like i added neon underneath the car....
Don't you mean undAneath ?
Posted by: jsayre914 Mar 6 2012, 08:35 PM
Delila says it makes my car a "REAL" racecar
Attached thumbnail(s)
Posted by: jsayre914 Mar 29 2012, 11:18 AM
I should have the engine back this weekend from Tony @ Translog GT. Once I pick it up, I just need to dress it with my D-jet. I pulled everything out of the box to make sure I didnt lose anything I did. Cant find that damn head temp sensor, no worries cause Tony has one for me. I purchased the resistor to richen up the mix so I could at least break in the engine. Then I may need help with adjusting the MPS, not sure yet. I do have an 02 sensor and I will be able to tell if its close.
Here is my stash as it came from hibernation
Attached image(s)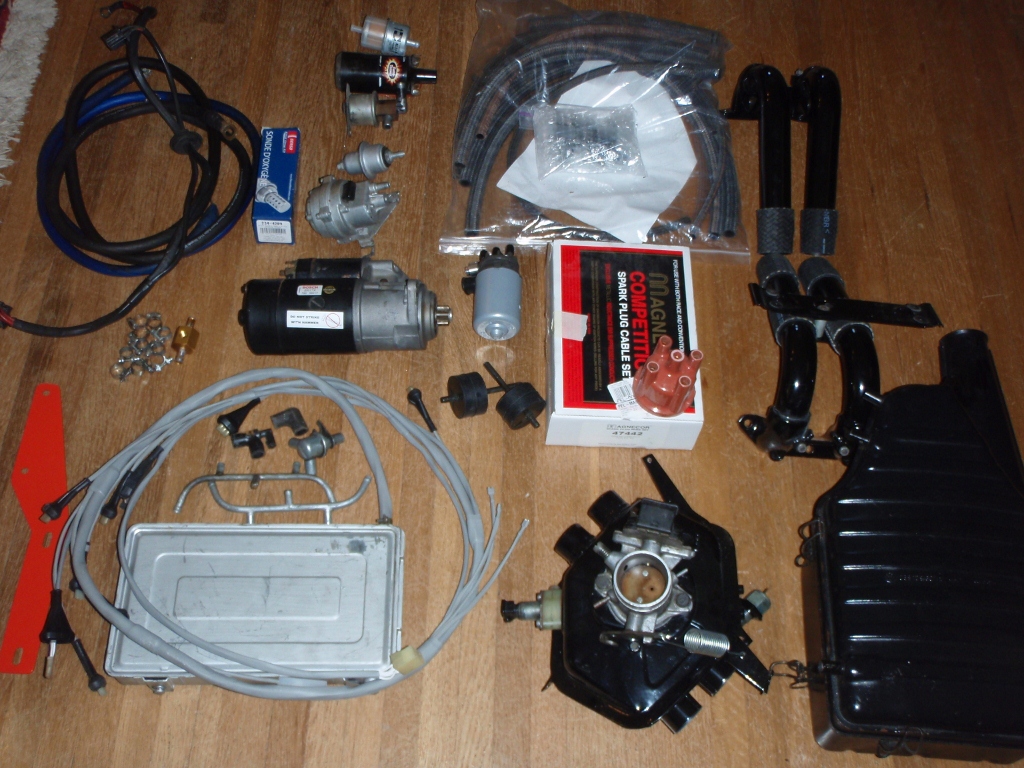
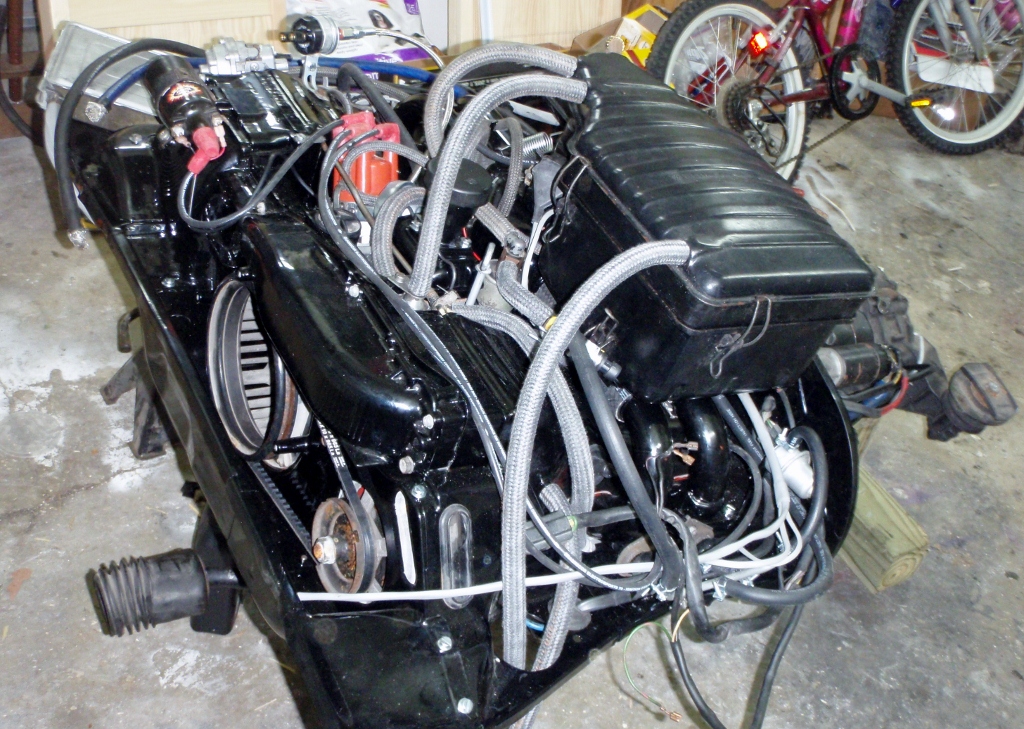
Posted by: jsayre914 Apr 4 2012, 09:27 AM
Great progress Yesterday, NO pics
Picked up the engine, got it into the garage. Started to dress the engine with the D-jet. Got all the vacume hosees on, fuel lines (ran out of high pressure hose ) got the alternator hooked up, runners, intake, dual pressure sender.
Had a question on the sender. It is a metal hose that sticks up and the end of the hose has a small coupler then the sender threads to that. The question is, why is there almost 1/4 inch gap when the sender is threaded all the way till it is tight. Is that normal? I used a tiny amount od red gasket maker on the thread. is that good?
next question
I am missing the decel valve, and I remember that it is not necessary. What is the correct way to bypass this, connect the two larger vacume hoses togeather and plug the smaller hose that come off the intake?
next question
I can find the firing order but i forget if the distributor spins clockwise or counterclockwise I dont want to get the plug wires wrong
Next question
What gauge wires to run for the oil pressure sender to the gauge and same thing from the fuel pressure sender to the gauge up front?
last question
Do I use a sealent when putting the sensor on the bung from the tail pipe, if so what type. This is for the oxygen sensor
More questions to come.
I am very very close

Posted by: vsg914 Apr 4 2012, 10:06 AM
No decel? Just plug all the ports on the plenum that you don't use.
clockwise. 1-4-3-2
Edited: cause I'm a dumbass sometimes
Posted by: Valy Apr 4 2012, 10:33 AM
Had a question on the sender. It is a metal hose that sticks up and the end of the hose has a small coupler then the sender threads to that. The question is, why is there almost 1/4 inch gap when the sender is threaded all the way till it is tight. Is that normal? I used a tiny amount od red gasket maker on the thread. is that good?
Is that the oil pressure sender? Is it original or are you trying to fit a non metric thread into a metric thread?
Posted by: jsayre914 Apr 4 2012, 11:05 AM
Had a question on the sender. It is a metal hose that sticks up and the end of the hose has a small coupler then the sender threads to that. The question is, why is there almost 1/4 inch gap when the sender is threaded all the way till it is tight. Is that normal? I used a tiny amount od red gasket maker on the thread. is that good?
Is that the oil pressure sender? Is it original or are you trying to fit a non metric thread into a metric thread?
Its the dual sender, not original. I bought the kit wich relocates the sender away from the distributor so i can use the idiot light and the gauge
Posted by: rwilner Apr 5 2012, 07:55 AM
Great progress Yesterday, NO pics
Picked up the engine, got it into the garage. Started to dress the engine with the D-jet. Got all the vacume hosees on, fuel lines (ran out of high pressure hose
) got the alternator hooked up, runners, intake, dual pressure sender.Had a question on the sender. It is a metal hose that sticks up and the end of the hose has a small coupler then the sender threads to that. The question is, why is there almost 1/4 inch gap when the sender is threaded all the way till it is tight. Is that normal? I used a tiny amount od red gasket maker on the thread. is that good?
This is what mine looks like, I think the gasket sealer is OK but wasn't needed as these are NPT tapered threads that should be self-sealing.
What gauge wires to run for the oil pressure sender to the gauge and same thing from the fuel pressure sender to the gauge up front?
I used 18 gauge hook up wire. There's no current going through these wires so you could probably use 22 gauge with no problems.
last question
Do I use a sealent when putting the sensor on the bung from the tail pipe, if so what type. This is for the oxygen sensor
No sealant necessary -- there should be a crush washer on the O2 sensor (just like your spark plugs) -- but I would put a dab of antiseize on the O2 sensor threads (again, just like your spark plugs).
Posted by: jsayre914 Apr 5 2012, 11:02 AM
got it!
Thanks for the replys.
Next question:
Initial startup is confusing to me. I put the break in oil in. Pull the plugs and disconnect the coil. Crank the engine till i get pressure. Then put the plugs back hook up the coil and start the car up from the cockpit for 2500 rpm for 20min.
No problem
Except
How do i check for oil leaks when i am sitting in the car holding the gas. AND How do I setup the initial timing while doing all of this.
Should the timing be set right away??
Seems like a lot to do for 1 guy, almost impossible
Posted by: bohalrantipol Apr 5 2012, 02:03 PM
Get a 2nd guy?
got it!
Thanks for the replys.
Next question:
Initial startup is confusing to me. I put the break in oil in. Pull the plugs and disconnect the coil. Crank the engine till i get pressure. Then put the plugs back hook up the coil and start the car up from the cockpit for 2500 rpm for 20min.
No problem
Except
How do i check for oil leaks when i am sitting in the car holding the gas. AND How do I setup the initial timing while doing all of this.
Should the timing be set right away??
Seems like a lot to do for 1 guy, almost impossible
Posted by: jsayre914 Apr 5 2012, 04:02 PM
Get a 2nd guy?
So it cannot be done with 1 guy?
Posted by: Vacca Rabite Apr 5 2012, 07:17 PM
Start the car with the deck lid open. Get out and walk to the engine bay.
Hold open the throttle while looking at the tach through the rear window to ~2500 rmp. clamp it just strong enough to keep it from slipping with some vise-grips or a C-clamp.
Zach
Posted by: Black22 Apr 5 2012, 08:34 PM
I'm doing this in the next week or so too. What about the timing issue? I was wondering that too Joseph.
Posted by: Vacca Rabite Apr 6 2012, 08:09 AM
for timing, hold timing at 3500 rpm from the engine bay (you will get to know when the rpm is right by the sound of the engine) and shoot your timing light down the hole. Adjust timing, and do it again. Faster with 2 people, but most of the time I have done it its just been me.
Zach
Posted by: jsayre914 Apr 6 2012, 11:11 AM
for timing, hold timing at 3500 rpm from the engine bay (you will get to know when the rpm is right by the sound of the engine) and shoot your timing light down the hole. Adjust timing, and do it again. Faster with 2 people, but most of the time I have done it its just been me.
Zach
I was told to keep the rpm at 2500 but the timing on my engine is 3500, is it O.K. to hold the engine at 3500 for a few min? And I was thinking, the clamp idea is a cool idea, but, when I adjust the position of the distributor as I remember it affects idle pretty good.
I am gonna try it, but Id love to hear some more of these tricks.
Oh yeah, after you start the car, you would have to let go of the throttle to jump out and grab the cable in the engine bay. Is it O.K. to idle for that min also, right after initial startup?
I know i am begining to get a little anal
Thank you
Posted by: Vacca Rabite Apr 6 2012, 01:07 PM
Once you have done the 20 minute cam break in, you should be fine. Just make sure break the cam in first.
Zach
Posted by: Racer Chris Apr 7 2012, 07:20 AM
Take a minute to set the timing approximately. You don't need it to be right on - only close.
That will also give you an opportunity to check for big leaks.
Then move right on to the cam break-in phase.
Posted by: jsayre914 Apr 8 2012, 12:22 AM
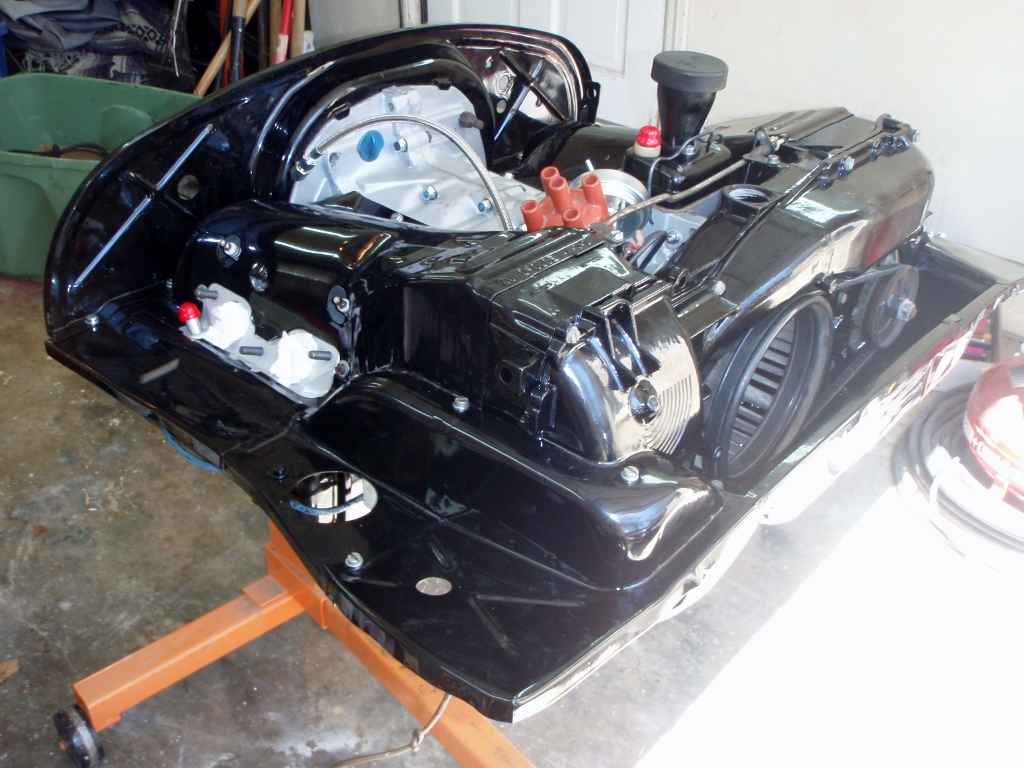
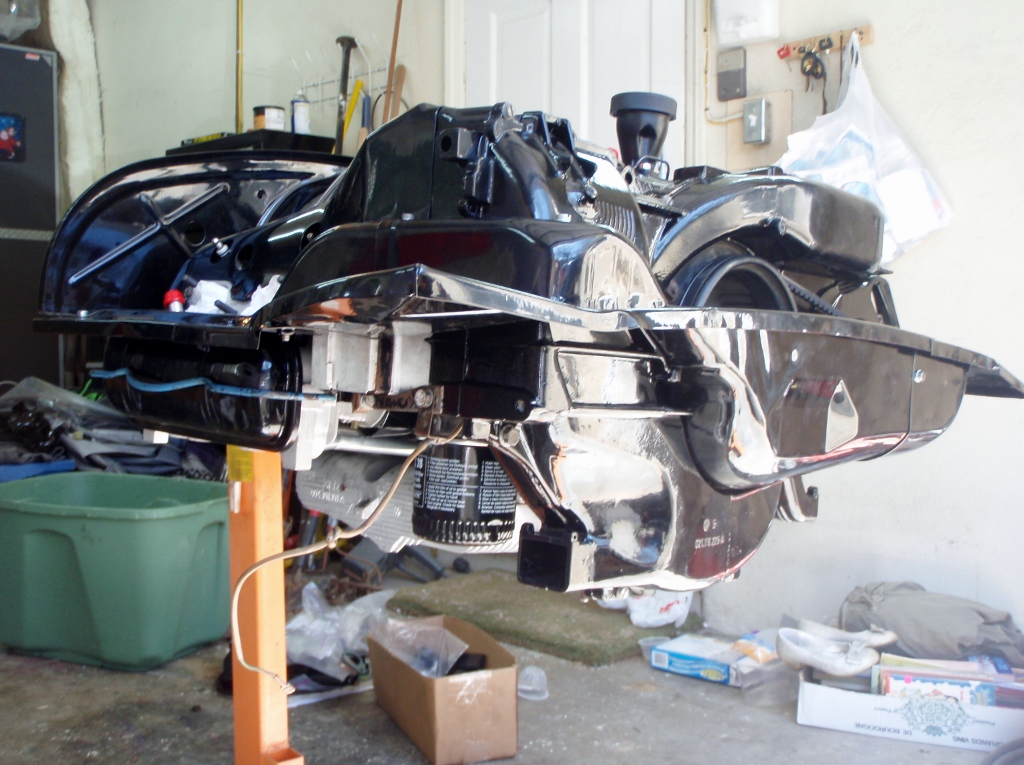
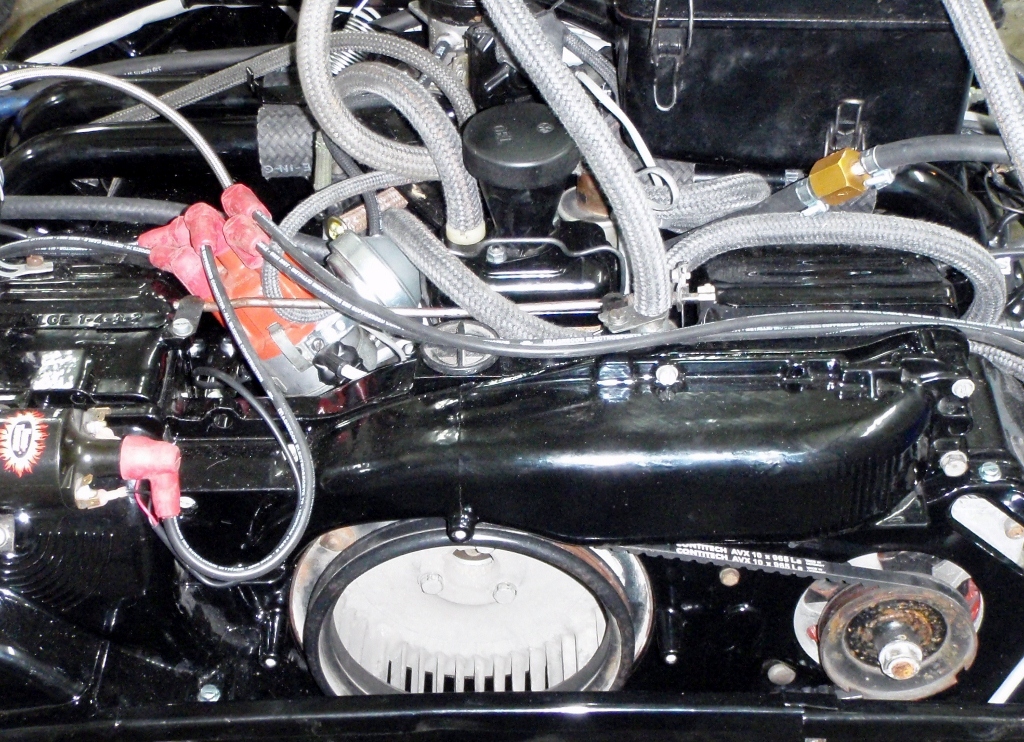
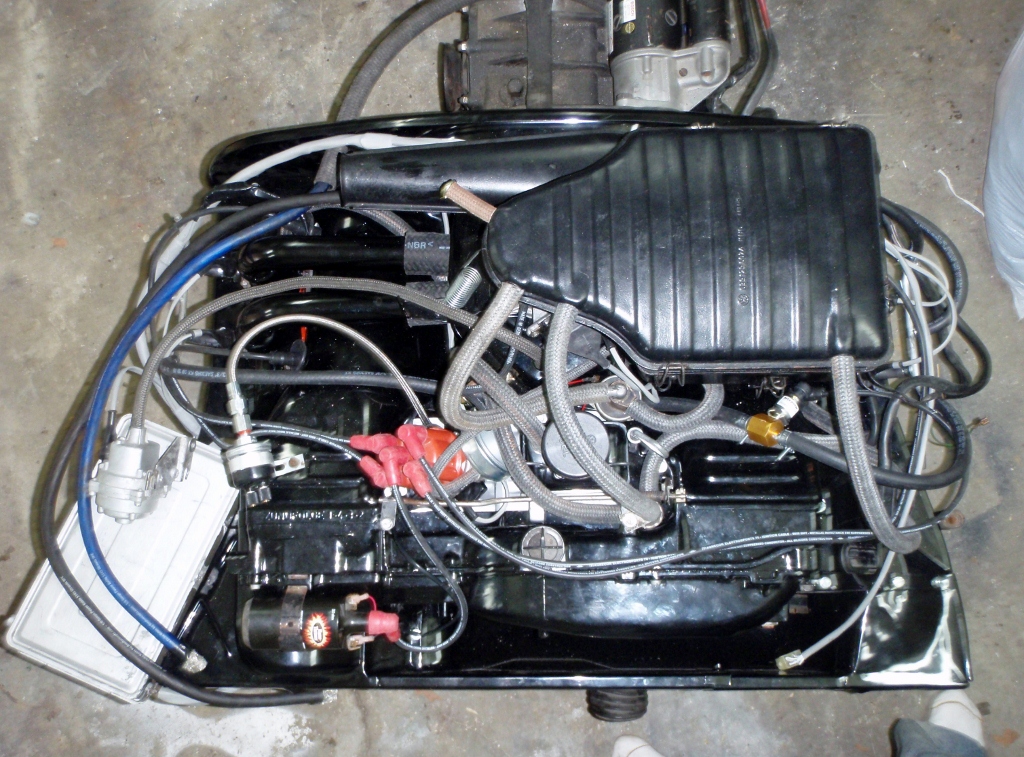
Few Pics for Ya.
The engine is ready to go back in.
I have been busy doing other projects on the house. so no start yet. Tommorow is a new day 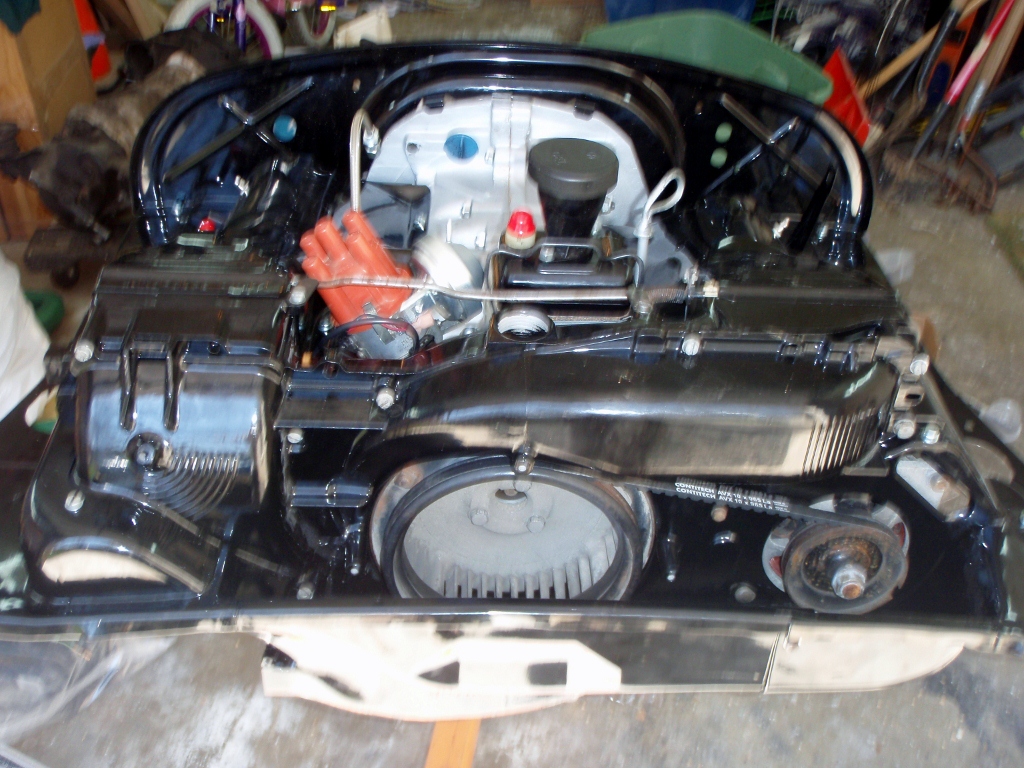
Posted by: Bleyseng Apr 8 2012, 08:17 AM
Looks nice! Start it up!
Posted by: jsayre914 Apr 16 2012, 09:57 AM
First Drive !!!!
WWWWEEEEEEEEEEEEEEEEEEE
I have adjusted the timing valves etc. Car runs very smooth at idle. There is some bucking at high speeds, I forget what causes that. TPS? its a brand new board. And I noticed that I cant keep idle after engine is hot, keeps stalling. 
I was gonna adjust the bypass screw, but why does it idle perfect when cold? I did try the ecu knob fully in both direction with no change.
I love this engine, it has power in every gear, thats insane 
Posted by: FourBlades Apr 16 2012, 10:15 AM
Congratulations on the first drive!
That is a great looking engine, I am sure folks here will help you get your idle under control.
I have been following this build since you started.
John
Posted by: rwilner Apr 16 2012, 10:53 AM
Car runs very smooth at idle.
[...]
And I noticed that I cant keep idle after engine is hot, keeps stalling.
I was gonna adjust the bypass screw, but why does it idle perfect when cold? I did try the ecu knob fully in both direction with no change.
What's the idle rpm when cold?
This could be a few things.
It could be your idle adjustment screw. Your idle could be good when cold because the AAR is open...when it closes, the screw could be so tight that there's not enough air getting in.
Another cause could be your CHT. You have a 73 2.0L which has several one-year-only DJet parts. Do you have the correct -017 CHT with the spacer and resistor? The correct ECU? The correct -037 MPS?
If it runs good cold and not right warm, look at the temperature-dependent parts.
I'm sure others with more experience will chime in...might want to start a separate tweaking / tuning thread.
Posted by: saigon71 Apr 16 2012, 12:25 PM
Joe:
Congrats on your build...just in time for Hershey!
I look forward to hearing this beast run.
Catch you Saturday,
Bob
Posted by: vsg914 Apr 16 2012, 12:38 PM
Ecu knob won't affect idle speed, just mixture, but it will cause it to hunt for idle. If it doenst hunt when leaned out with the knob them the tps is suspect. I installed one of those new boards and had the exact problem. Switched tps and it ran great. And you are right the 2056 is a fun driver. I love mine so much I wanna do a 2270 now.
Posted by: hot_shoe914 Apr 16 2012, 03:26 PM
Way to go Joe, look forward to my 3 laps around the parking lot. I know you are loving all that extra power. Hell, you have enough power now to haul around some more stereo components.
Posted by: jsayre914 Aug 7 2013, 12:02 PM
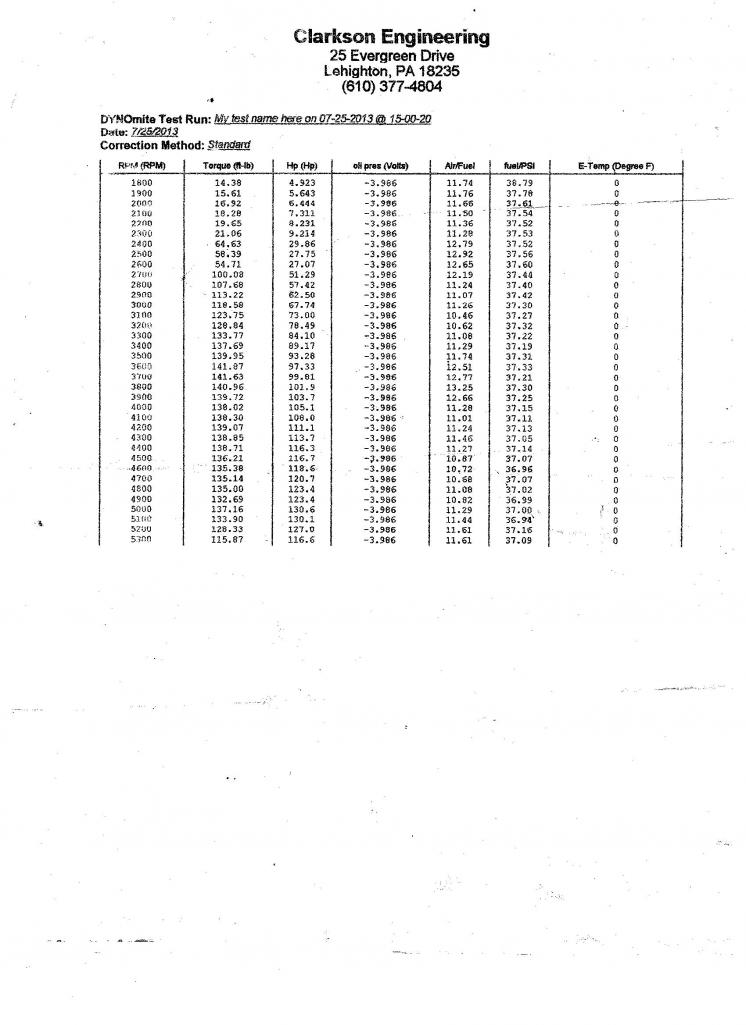
Dyno Results. (not Bad)
I got 2 pages from Tony, but no graph
I did a search for a stock 2.0 d-jet Dyno graph, then I added my numbers to the chart by hand and connected the dots for comparison.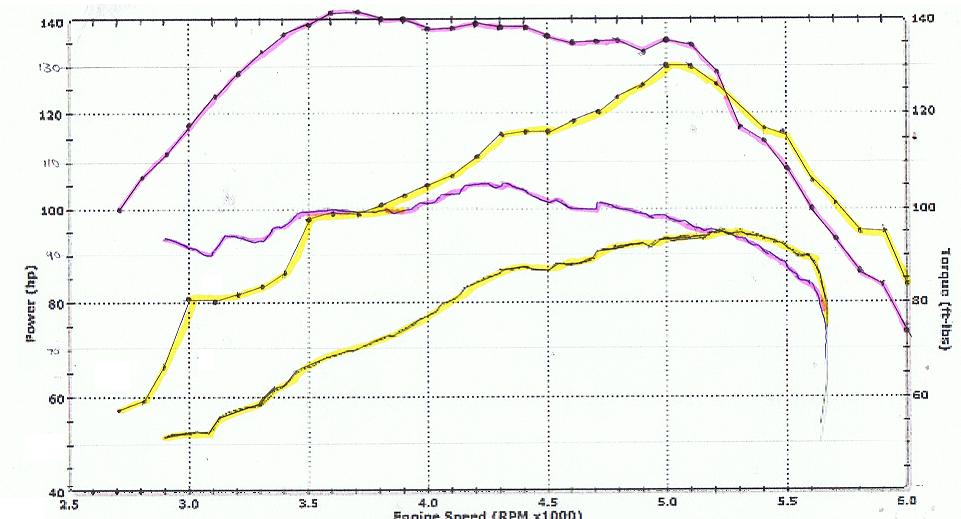
Yellow =HP
Purple = Torque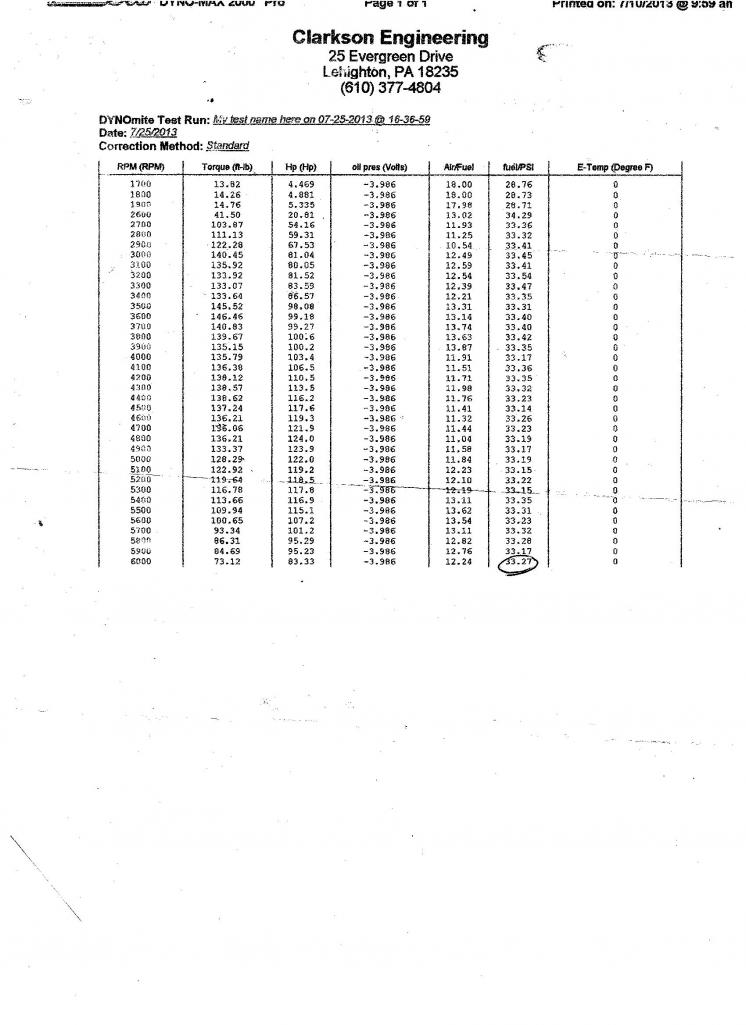
Posted by: jsayre914 Aug 7 2013, 12:04 PM
You could even say that this motor is OFF THE CHRTS !
Posted by: Vacca Rabite Aug 7 2013, 03:14 PM
That is fantastic.
Zach
Posted by: saigon71 Aug 7 2013, 07:10 PM
Welcome back Joe!
Awesome DYNO results!
Posted by: mepstein Aug 7 2013, 09:22 PM
When's the six going in?
Powered by Invision Power Board (http://www.invisionboard.com)
© Invision Power Services (http://www.invisionpower.com)