Printable Version of Topic
Click here to view this topic in its original format
914World.com _ 914World Garage _ Inner long Chassis Stiff Kit install
Posted by: trekkor Jul 18 2004, 11:44 PM
O.K. folks, here it is from start to finish:
First you must remove the seam sealer and body tar from the inside corner of the longs.
Attached image(s)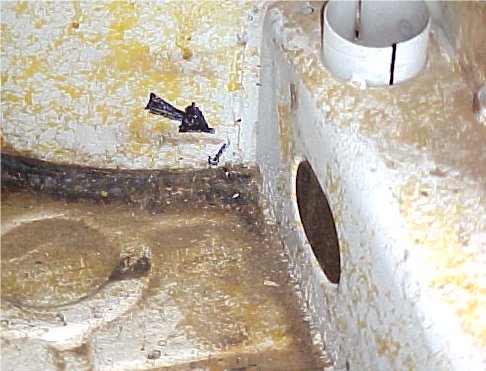
Posted by: trekkor Jul 18 2004, 11:45 PM
It is very thick in the corners.
Attached image(s)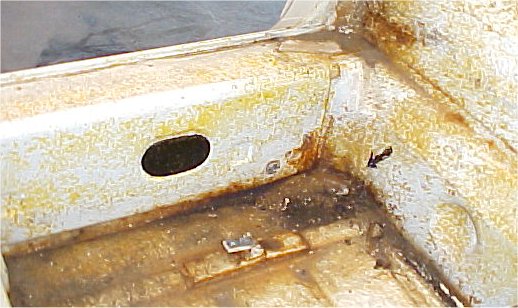
Posted by: trekkor Jul 18 2004, 11:48 PM
notice the bead of seam sealer that must come out so the sheet metal can fit to the floor pan tight.
Attached image(s)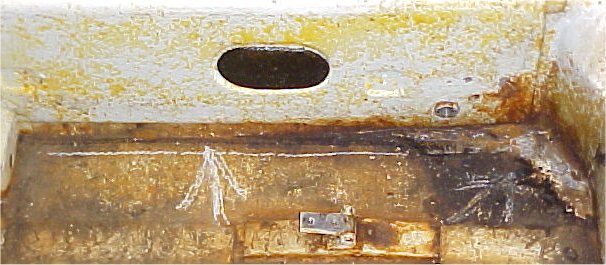
Posted by: trekkor Jul 18 2004, 11:49 PM
another
Attached image(s)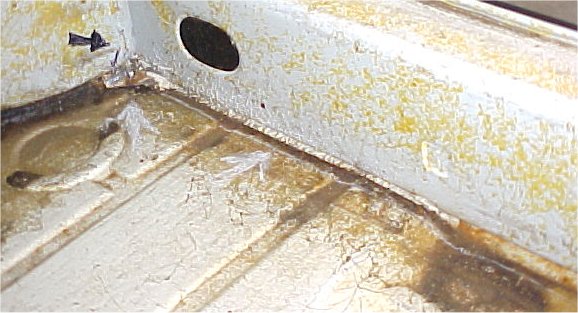
Posted by: trekkor Jul 18 2004, 11:51 PM
an air chisel works very well to remove the material
Attached image(s)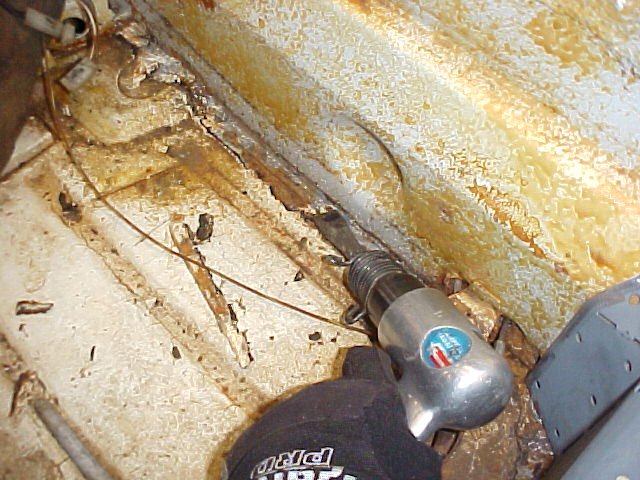
Posted by: trekkor Jul 18 2004, 11:53 PM
the width of the chisel point using careful, short bursts will quickly break out the tar.
Attached image(s)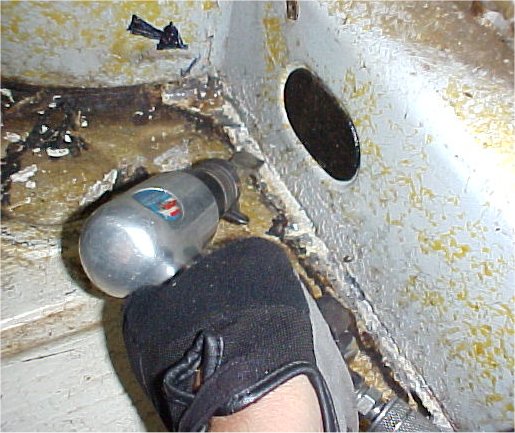
Posted by: trekkor Jul 18 2004, 11:54 PM
tar out
Attached image(s)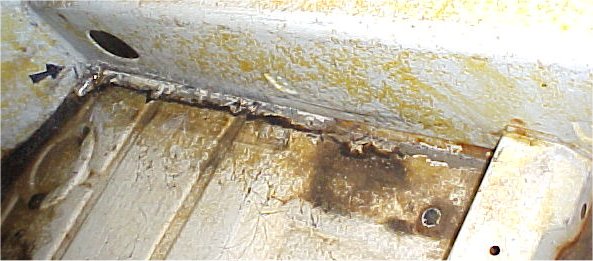
Posted by: trekkor Jul 18 2004, 11:56 PM
without removal of the seam sealer and tar the sheet metal panels will not fit properly.
Attached image(s)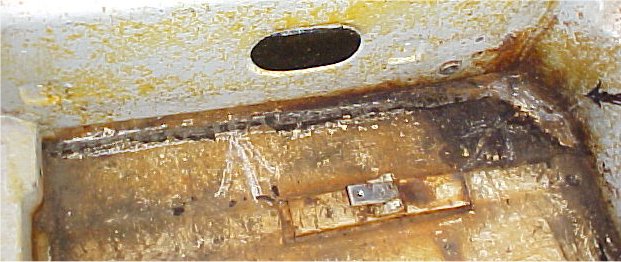
Posted by: trekkor Jul 18 2004, 11:57 PM
passenger side drops right in.
Attached image(s)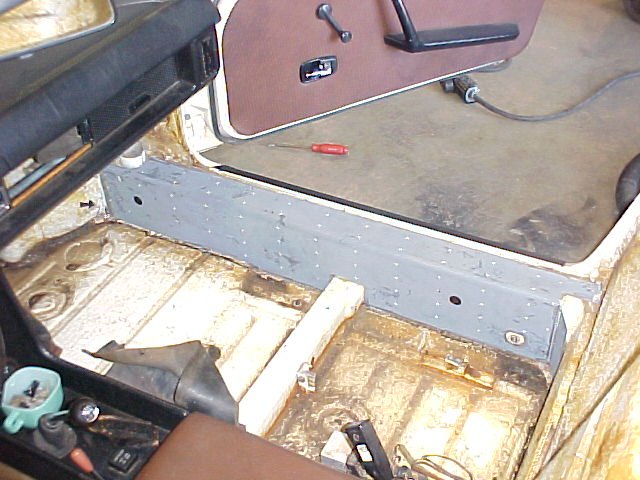
Posted by: trekkor Jul 18 2004, 11:59 PM
driver side in. the area around the e-brake handle needs to be worked to fit the contour 
Attached image(s)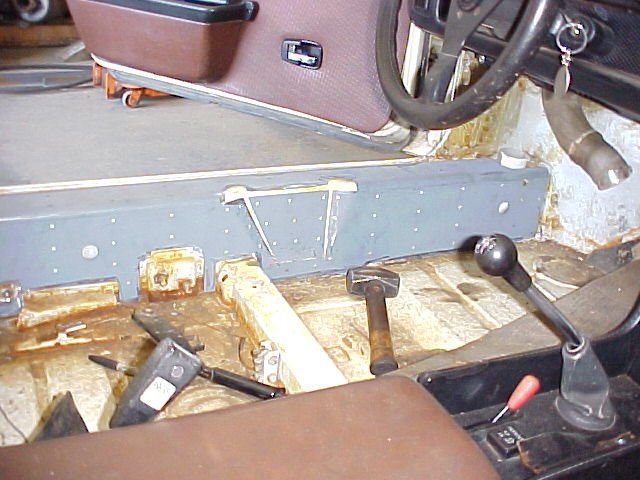
Posted by: trekkor Jul 19 2004, 12:01 AM
more
I like to grind the edges for a good bite with the welder
Attached image(s)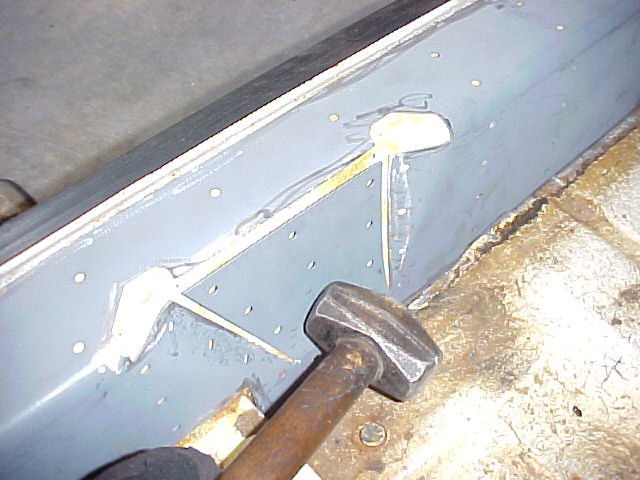
Posted by: trekkor Jul 19 2004, 12:03 AM
the inside corners need to be bent and worked into place
Attached image(s)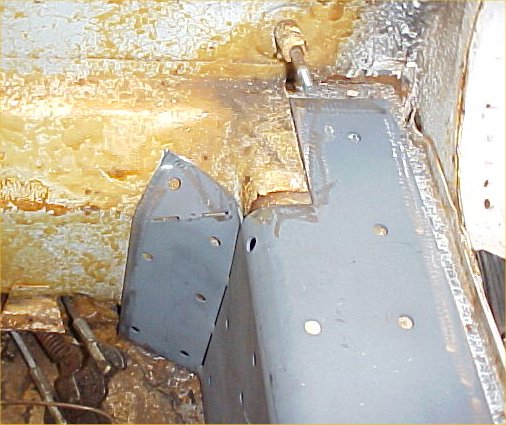
Posted by: trekkor Jul 19 2004, 12:04 AM
other side
Attached image(s)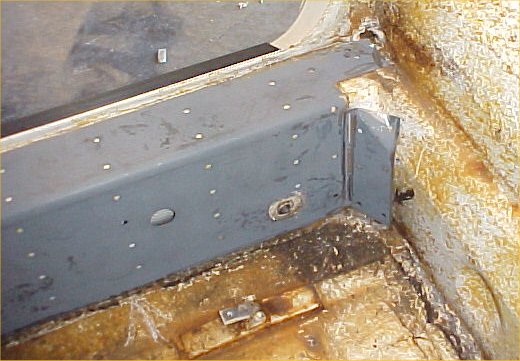
Posted by: trekkor Jul 19 2004, 12:06 AM
back piece in .
3 sided dry fitment. Make sure it fits tight before any welding begins.
Attached image(s)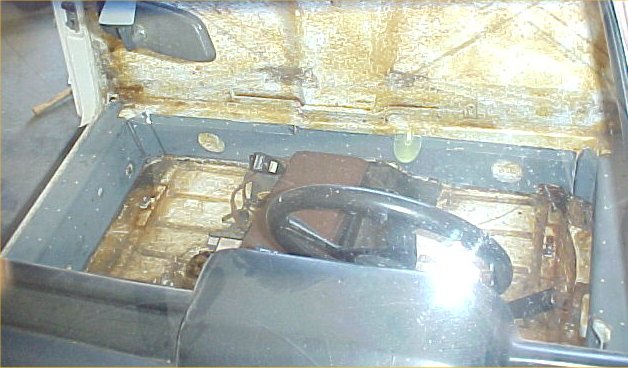
Posted by: trekkor Jul 19 2004, 12:11 AM

put the weld in the hole and burn into the car's long. then back fill the holes and make good contact into the long sheetmetal.
It takes practice. Use low voltage and fast wire speed.
Attached image(s)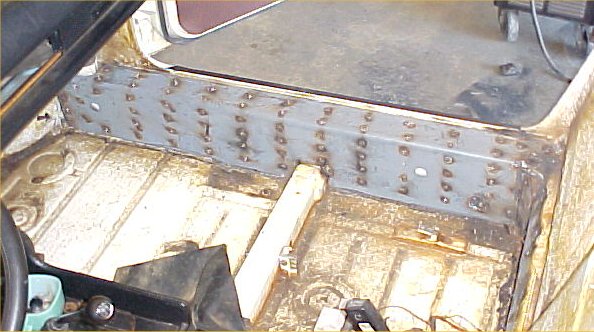
Posted by: trekkor Jul 19 2004, 12:13 AM
mask off the interior and windows so as not to damage them. Ask me how I know 
grind your work
Attached image(s)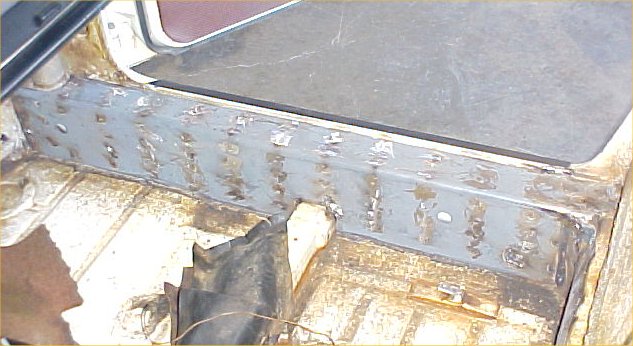
Posted by: jgiroux67 Jul 19 2004, 12:13 AM
What are the black ovals for that are on the passenger side long's? Are they for access to the heater hose or what?
Posted by: trekkor Jul 19 2004, 12:17 AM
driver side and ground down
Attached image(s)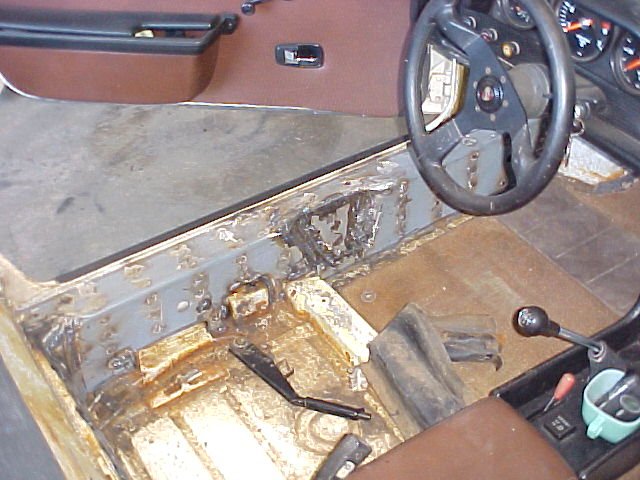
Posted by: trekkor Jul 19 2004, 12:18 AM
back plate
Attached image(s)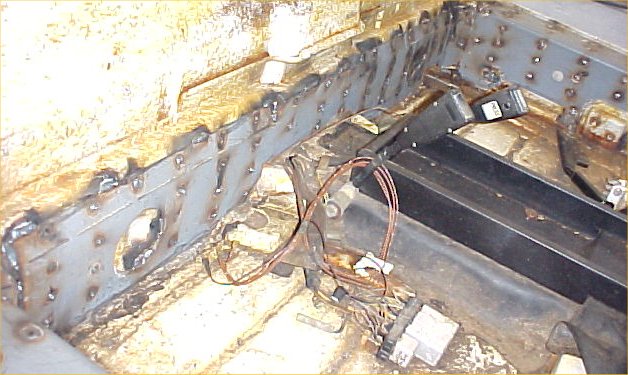
Posted by: trekkor Jul 19 2004, 12:20 AM
all three sides tied in
Attached image(s)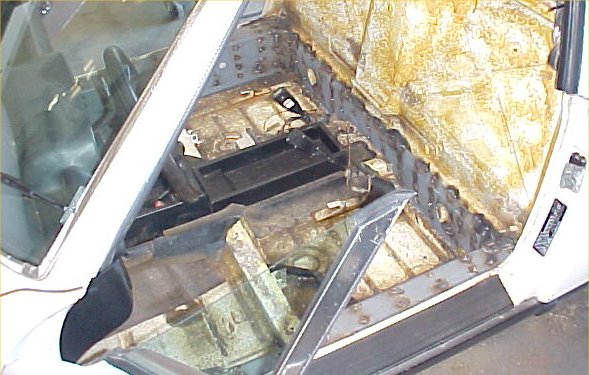
Posted by: trekkor Jul 19 2004, 12:21 AM
corner detail shot
Attached image(s)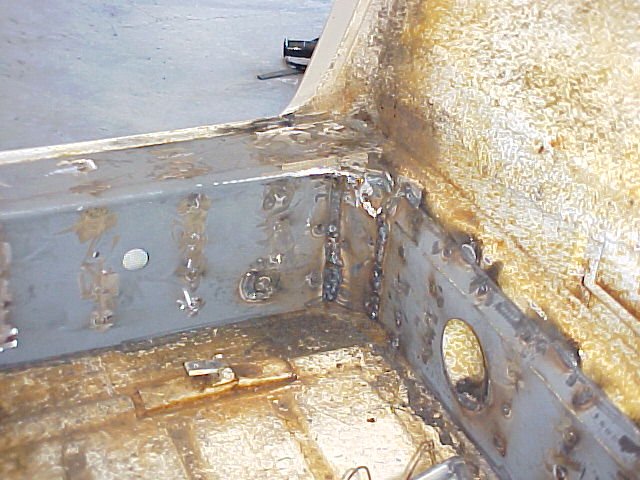
Posted by: trekkor Jul 19 2004, 12:23 AM
ready for paint
Attached image(s)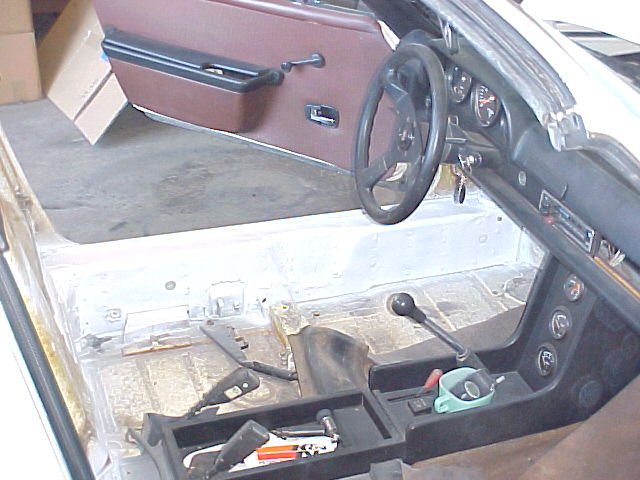
Posted by: trekkor Jul 19 2004, 12:24 AM
paint
Attached image(s)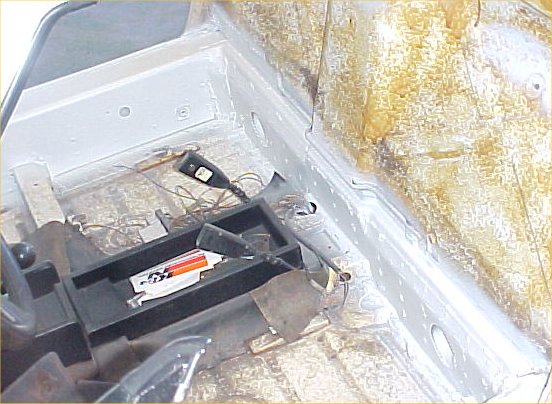
Posted by: trekkor Jul 19 2004, 12:26 AM
rattle can , daddy 
Attached image(s)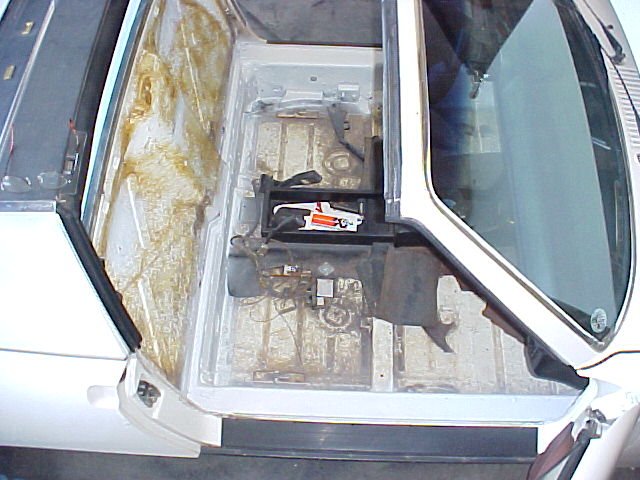
Posted by: trekkor Jul 19 2004, 12:27 AM
spray it
Attached image(s)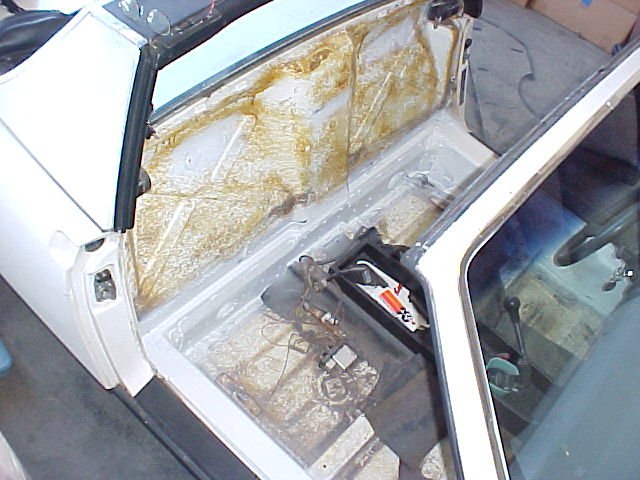
Posted by: trekkor Jul 19 2004, 12:28 AM
bird's eye
Attached image(s)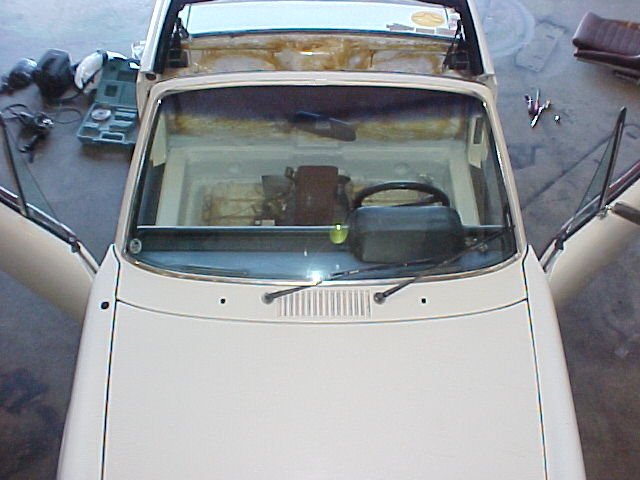
Posted by: trekkor Jul 19 2004, 12:40 AM
The black ovals are tar pieces that cover access holes to the paper air tubes.
This install took about six hours.
Why do it?
Simple...It makes an instant, noticable differance in all around handling and steering response.
Obvious stiffening and strengthening can be had for 18#'s of metal.
Take out and leave out the sound deadening matte behind your back pad and it's a three pound investment.
The car will stay flatter and turn in smoother in the fast turns. My car does not lift the front wheels anymore.
I also added a rear stock sway bar to go with the package.
I believe that my car is now very well balanced for me and now I must gain experience to drive it well.
No understeer at all to speak of. Oversteer is only present when throttle induced ( the good kind ).
Come to Marina and feel the car.
Trekkor
Hope you enjoyed my little show
Posted by: RON S. Jul 19 2004, 04:58 AM
Great job, 
That is a great documentary on your install.
At bare minimum,you've given someone else an education,and some encouragement to tackle their own job.
You should let us know where you got your kit,and for how much$$$$.
Ron
Posted by: sgomes Jul 19 2004, 06:38 AM
Awesome job both with the welding and the pictorial! (I think that is the first time I've seen someone add the arrows ON THE CAR and not with photoshop!)
I vote for "classic" status! Anyone second the nomination? 
Posted by: seanery Jul 19 2004, 08:10 AM
The kit is Engman's Inner Long Reinforcement kit http://www.914world.com/bbs2/index.php?act=ST&f=4&t=12376
Posted by: nebreitling Jul 19 2004, 01:19 PM
I vote for "classic" status! Anyone second the nomination?
I second that!
Trekkor just showed me this at the AX in Alameda. I must say that just jumping up and down on the longs, one can notice a substantial improvement.
i'm thinking about it now...
Posted by: buck toenges Jul 19 2004, 01:33 PM
How do you think that this "inner" kit compares with those "outer" longitunal kits? Same amount of stiffness? Less weight?
Posted by: bperry Jul 19 2004, 04:55 PM
Out of curiousity, which welder did you use and did you use gas
or just flux wire?
--- bill
Posted by: kwales Jul 19 2004, 05:19 PM
I'm still trying to figure out how he welded all those little holes...... 
to a painted metal chassis....... 
Without going through a paint strip step.
Ken 
Posted by: trekkor Jul 19 2004, 05:26 PM
Miller wire feeder mig welder.
When the wire hits the metel kit it burns right through the painted surface, then you swirl a puddle of metal to fill the hole. Very simple. You'll be a pro in ten minutes. 
Attached image(s)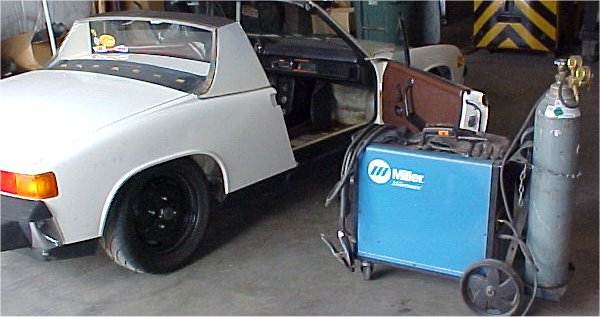
Posted by: trekkor Jul 19 2004, 05:32 PM
The secret to good welds on thin material is low voltage and fast wire speed.
Here's the settings I used.
Attached image(s)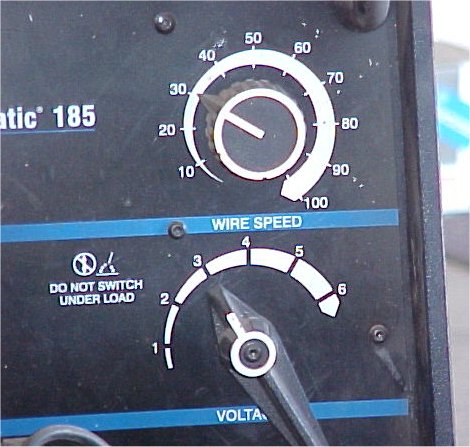
Posted by: seanery Jul 19 2004, 05:35 PM
Does that have clickstops at each # for power? Mine has an infinite adjustment rheostat.
Posted by: trekkor Jul 19 2004, 05:45 PM
I know it clicks at each interval. I've never tried it between 'em. Not my machine.
Trek
Posted by: Qarl Jul 19 2004, 05:46 PM
I have a question...
Is there a reason why you didn't weld all edges of the stiffening piece?
It appears from the photos that you welded the holes, and then only did a stitch weld around the outside perimieter of the stiffening kit.
Posted by: trekkor Jul 19 2004, 06:11 PM
Good question. 
My understanding is that a deep spot weld every 3 inches and perimeter stiches are enough.
I don't know if full beads around the edges would do anything but add time...and weight!  \
\
KT
Posted by: Engman Jul 19 2004, 06:20 PM
Wow - great pics on the install and testing! The one I am working on is gonna take awhile.
On the welding of the edges - it depends upon the quality of the metal you are welding to. If the floorpans and top and front areas are solid I recommend a 1/2" weld every 3-4". Watch the ones on the top to make sure your door gasket will still fit correctly.
Trekkor - great job!
M
Posted by: Qarl Jul 19 2004, 06:22 PM
I was concerned more in the event that water got in your car, that water would run in between the panels causing rust... unless it were all sealed shut with welds!
Posted by: trekkor Jul 19 2004, 06:35 PM
You could use silicone.
I'm going to do that, thanks.
KT
Posted by: 9146986 Jul 19 2004, 06:37 PM
Are these pieces made of coated steel?
My personal/professional preference is 3M Weld through primer on the car steel and "galvanealed" steel. I don't know if galvaneal is the trade name or what, but it's a non-rusting coating that can be welded through with minimal fumes. This would help prevent any future corrosion, even if it got wet. I also use the SEM two part catalyzed seam sealer, which is expensive but very good. When you think about it, what's another $28 for seam sealer, after you've spent hours doing this sort of work?
The other thing to consider is the fact that most of these cars will not see the exposure that they did, say with the 2nd or 3rd owner, ie as a daily driver or whatever.
What about an L at the bottom to tie it to the pan a little easier? Just my .02. I made some very similar pieces about a year and a half ago to put on a car that needed some structural help, but I made them so it turned inboard 90 at the bottom, to weld to the pan. This looks like a great kit. (howbout a thumbs up smilie?)
PK 
Posted by: Engman Jul 19 2004, 07:27 PM
These have a zinc phosphate coating and then are primered with a weldable primer. I am trying to stay away from galvanized steel. Welding galvanized is just plain nasty. I always have to drink a glass of milk after I do much of it. (helps get rid o the taste).The fumes generated by welding galvanized are just horrible for you, steel is bad enough.
The 'L' at the bottom has been talked about. Most people do not relize that the front area goes has a slight incline follwed by a flat area followed by a \ to another flat area. It may be better to make a piece just for this.
M
Posted by: seanery Jul 19 2004, 07:47 PM
Hey Mark, what about the ecoating, does it need to be removed before welding?
Posted by: Engman Jul 19 2004, 08:06 PM
No ecoat on these puppies. I do run it through the cleaning system and zinc phospate them. Then a weldable primer coat. You can weld the ecoat - it will weld after you get a ground to it, it is just not for this product.
M
Posted by: seanery Jul 19 2004, 08:09 PM
I was referring to the other stuff-rear sway bar mounts in particular.
Posted by: Engman Jul 19 2004, 08:13 PM
Rear sways - ground to the car (make sure battery and ECU are disconnected) and just wire wheel or gring the edges were you want to weld. You really only need one to start, the others will burn thru after you start to weld. Be sure to touch up with some paint after you are done welding and it has cooled.
M
Posted by: Brad Roberts Jul 19 2004, 09:54 PM
Great job Trekkor  Sorry I didnt have time for a writeup. I highly recommend this setup for V8 cars and 6 conversion cars or anyone who runs a track car. Tying these pieces together is more important that slapping on the exterior kits. The chassis flexes most directly below the windshield hoop. The other kits out there weld onto a COVER for the frame rail. This kit actually attaches TO the frame rail.
Thanks Mark for another quality product. Hopefully the 914 community will reward you with some sales.
B
Posted by: soloracer Jul 19 2004, 09:58 PM
If one is going to install a roll cage would this kit be necessary? Or is it redundant at that point?
Posted by: Brad Roberts Jul 19 2004, 10:02 PM
redundant at that point...
This is for people who *might* install a hoop with a petty bar.
The whole idea is to hide it beneath carpet.
B
Posted by: Engman Jul 19 2004, 10:55 PM
A big thank you to Brad and Trekkor! This is a 914 club Exclusiveitem and will be so for some time. I could not have made this without Brads input. These are generation 4 parts - this means there were 3 different protos run that did not pass muster. Now if we could only get that ecomm thing going.........
Seriously Brad had a LOT of input on these. This fall we hopefully will meet again to discuss some 'other' things that we can do.
Brad - if you need these - you have my number.
M
Posted by: Brad Roberts Jul 19 2004, 10:59 PM
Sooner or later I will build myself a AutoX/track car and come calling. The ecomm is really up in the air right now while I decide what I'm going to do with life.
B
Posted by: Randal Jul 20 2004, 10:38 AM
Great Work Mr. T.
Now we know why your car was going so fast on Saturday!
Hope to see you on Sunday.
Posted by: maf914 Jul 20 2004, 11:09 AM
KT, Thanks for the great photos and description. That looks like it worked out really well.
Mark, Very nice product! Looks like another "gotta have" item.
Posted by: J P Stein Jul 20 2004, 12:13 PM
You gonna come calling on Portland?
I'll try to be ready:D
Posted by: matrixops Jul 20 2004, 12:43 PM
Great presentation, very well done.
Now, it appears that this modification is more for a track/autox car, but would this also be suitable for a daily driver/mild autox with weak longs? I am asking in the even that I get ahold of a 914 with questionable longs.
Once again, great work.
M O
Posted by: Eric_Shea Jul 20 2004, 02:46 PM
Fuch... something else I need to buy. 
Great job Trekkor
Posted by: Brad Roberts Jul 20 2004, 05:38 PM
This kit is for anyone wanting some more strength in a 30 year old tub. You will notice a difference the first time you pull out of your driveway. The factory didnt do a real good job of tying the frame rails together at the firewall... this helps BIG time.
B
Posted by: trekkor Jul 20 2004, 05:55 PM
You will notice a difference the first time you pull out of your driveway.
Forget that...I noticed as soon as I plopped my fat butt down on the seat.
KT
Posted by: nsyr Jul 20 2004, 07:30 PM
how about this made them myself from 14 gauge.
Attached image(s)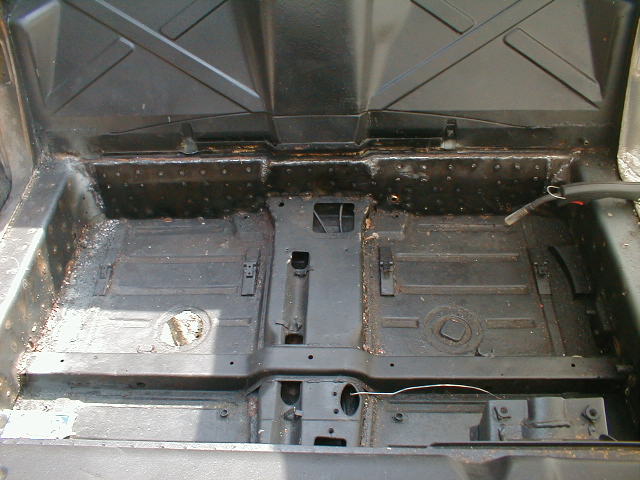
Posted by: trekkor Jul 20 2004, 10:26 PM
Yep. That's the stuff!!
Good job
Tell us all how smootha-stiffa ride it is. <_<
It's awesome. You'll love it.
Mr.Wills
Powered by Invision Power Board (http://www.invisionboard.com)
© Invision Power Services (http://www.invisionpower.com)