Printable Version of Topic
Click here to view this topic in its original format
914World.com _ 914World Garage _ Apollo Racer Build Thread
Posted by: rnellums Sep 28 2011, 07:01 PM
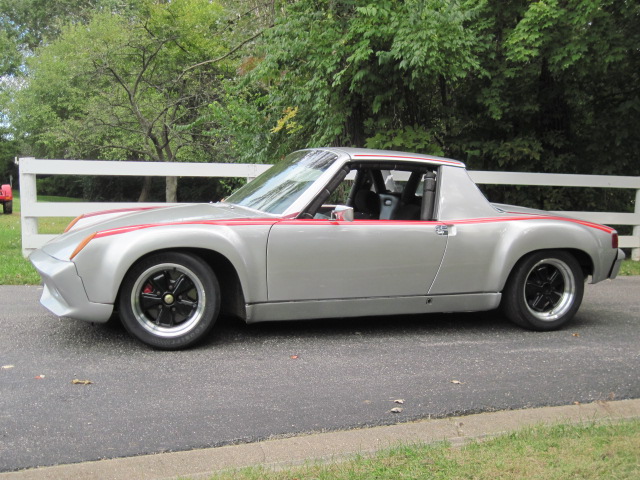
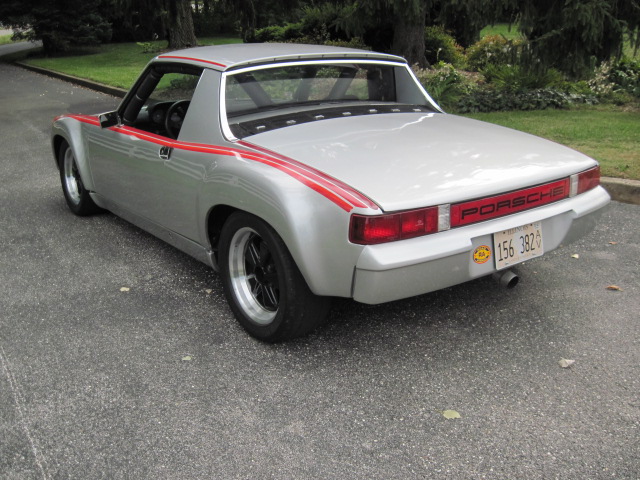
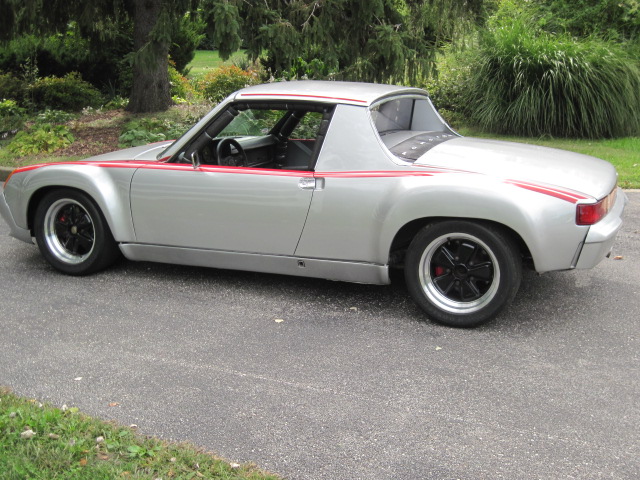
I am starting this thread to document the build of my recent acquisition of a car I am going to name Apollo. It was previously owned by a fellow out in Illinois and was sold to me via 914 LTD. From what I know It was a purpose built Auto X car, but only has about two hours of run time on the engine.
Here are the specs as I received it:
Exterior Mods:
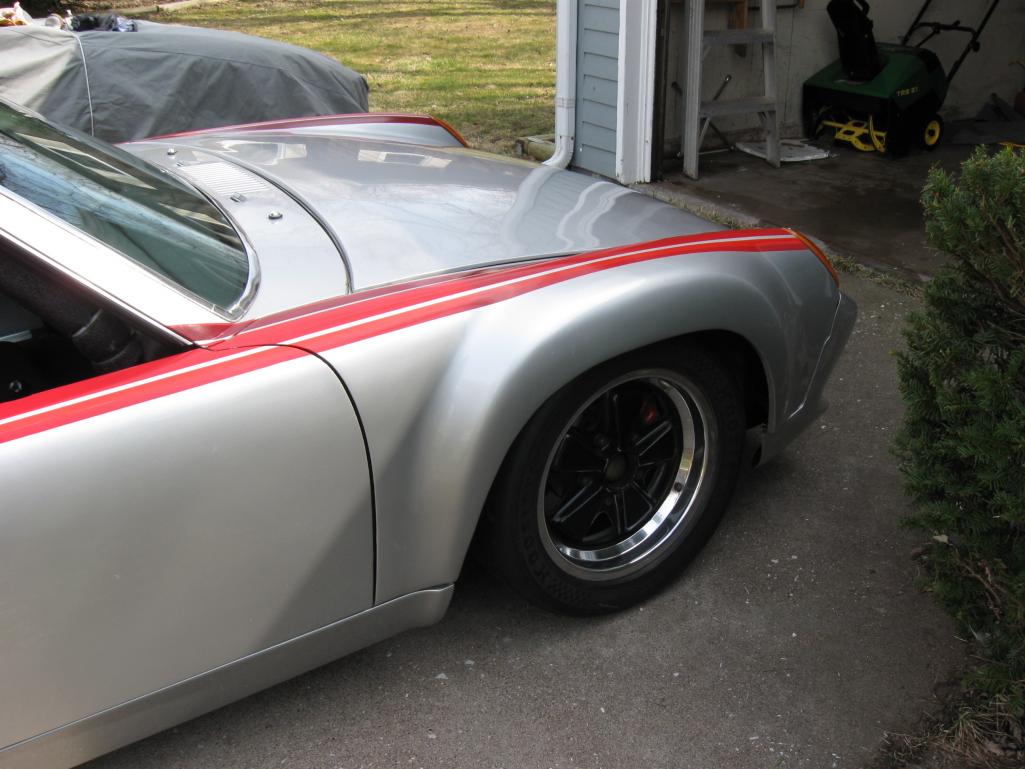
- Factory Steel Flares
- Newish Silver Base/Clear
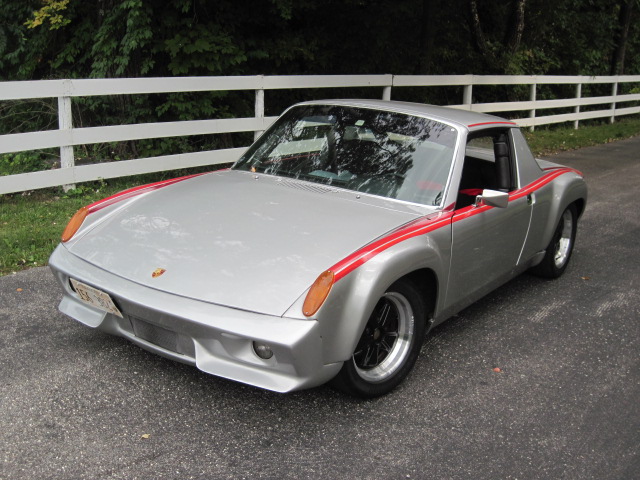
- Fiberglass 916 Style Front Bumper
- Fiberglass Stock Style Rear Bumper
- Fiberglass Hood With Headlight Delete
- Fiberglass Trunk
- Fiberglass Painted Rocker Panels
- Painted Targa Top
- Lexan Rear Window
- Lightened Door Skins
- Original Doors, Hood, Trunk
- No Wipers, Headlights
- Rear Porsche Reflector
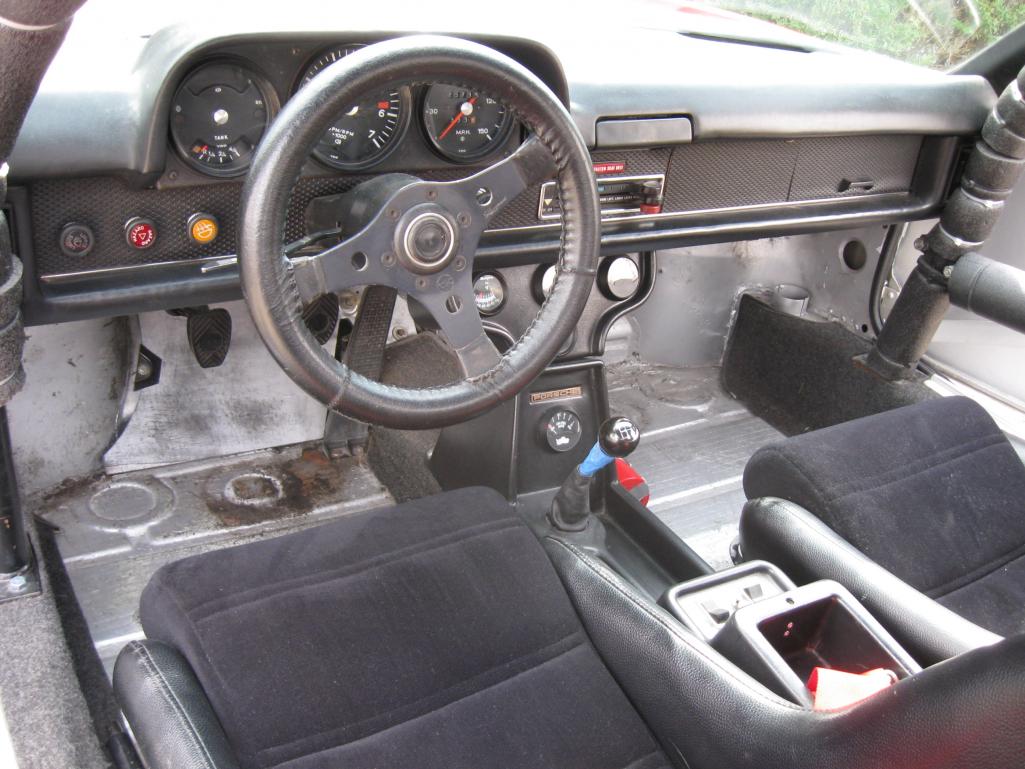
- Koenig Race Seats
- RaceTech Leather Wheel
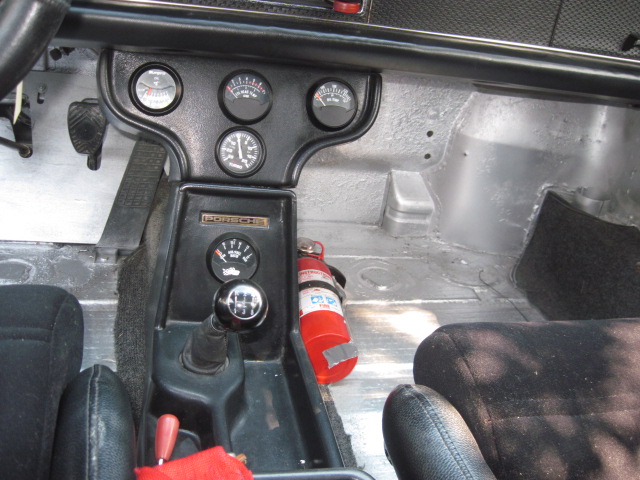
- Amco Console with Assorted Gauges
- Welt. Short Shift Kit
- Bolt in Cage with Door Bars
- Simpson 4 pt. Harnesses
- Rich Johnson 5-Lug Conversion
- Front Volvo Big Brakes
- Front Vented Rotors
- 911 Front Struts
- Koni Adjustable Shocks
- 914-6 Rear Rotors With Stock Front Calipers
- 22mm Front Torsion Bars
- Welt. Adj. Front Sway
- 180 lb Springs w/Adjustable Perches
- Hoosier Road Race Radials
- Front Mounted Oil Cooler
- 2.4 L 4-cyl built by ROCS auto
- 103mm J+E Forged Pistons
- 1.8L Stroked to 2.0 Specs
- 48mm Intake
- 38mm Exhaust
- Chromoly Pushrods
- High Flow Oil Pump
- MSD Ignition w/ Adj. Rev. Limiter
- 44mm Dual Webers
- Lightened Flywheel
- Kennedy Engineering Stage IV Clutch
- Ported, Polished Heads with 10:1 Compression
- Port Matched Manifolds
- Kerry Hunter Headers
- Claimed 180 HP
- Claimed 170 ft-lbf Torque
- Recent Rebuild by 914 LTD
- Quaffe Torque Bias Diff
- Shortened 5th Gear
- 5 Gal Fuel Cell
- New Bearings and Bushings
- Blue Brake Fluid
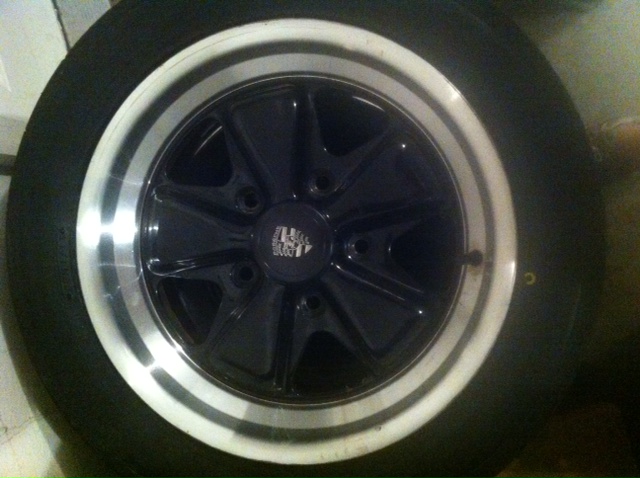
- 8x15 Fuchs
- Claimed 1600 lb Weight
Posted by: rnellums Sep 28 2011, 07:05 PM
Exterior
Attached thumbnail(s)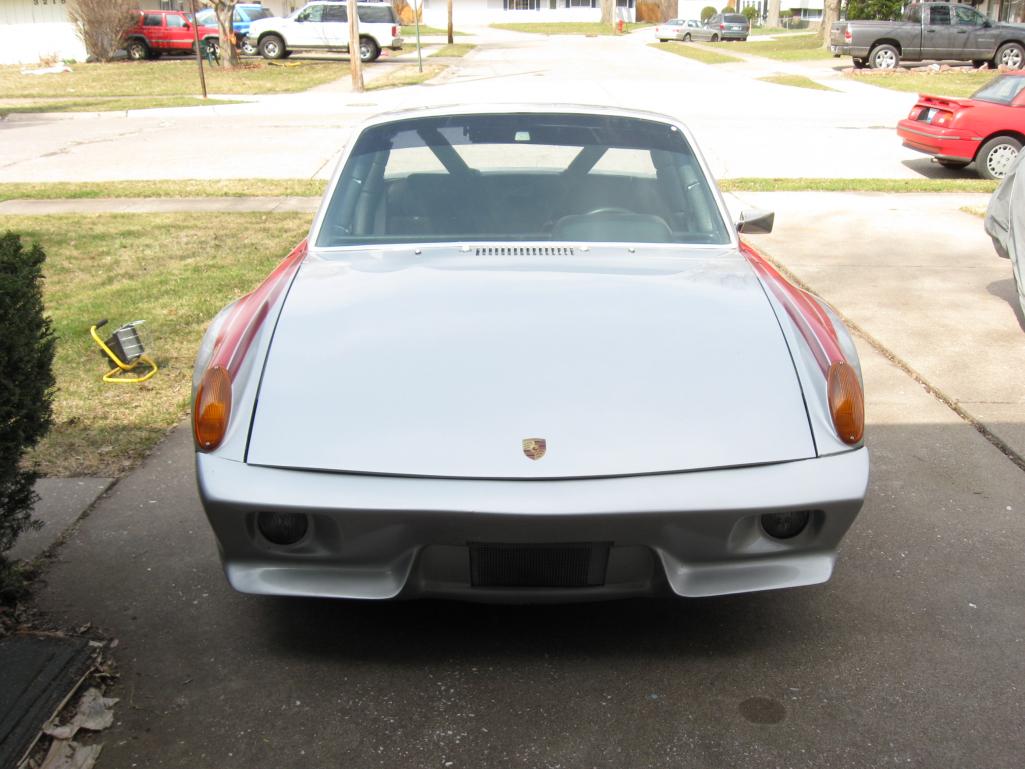
Attached image(s)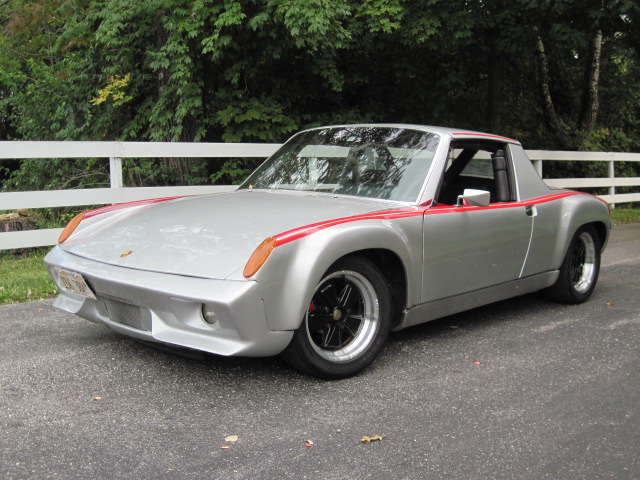

Posted by: rnellums Sep 28 2011, 07:07 PM
Interior:
Attached thumbnail(s)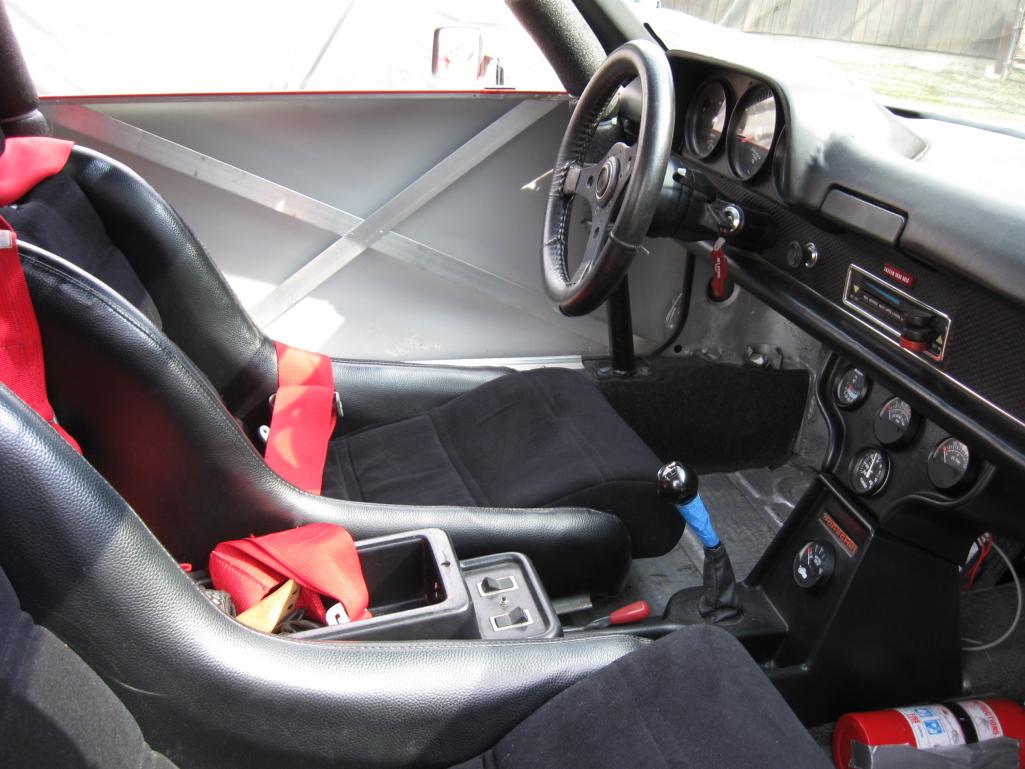
Attached image(s)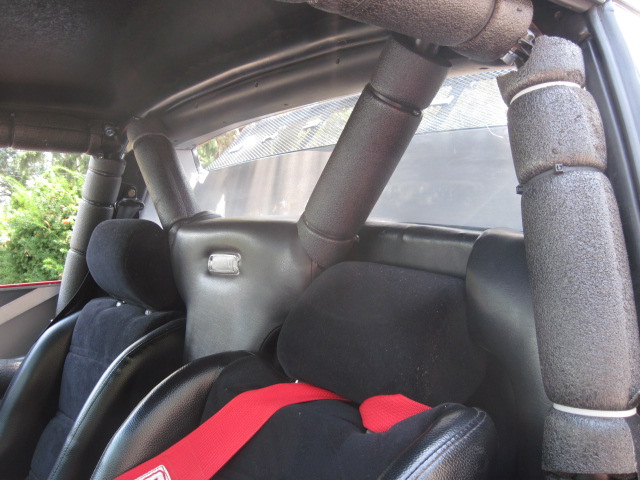
Posted by: rnellums Sep 28 2011, 07:09 PM
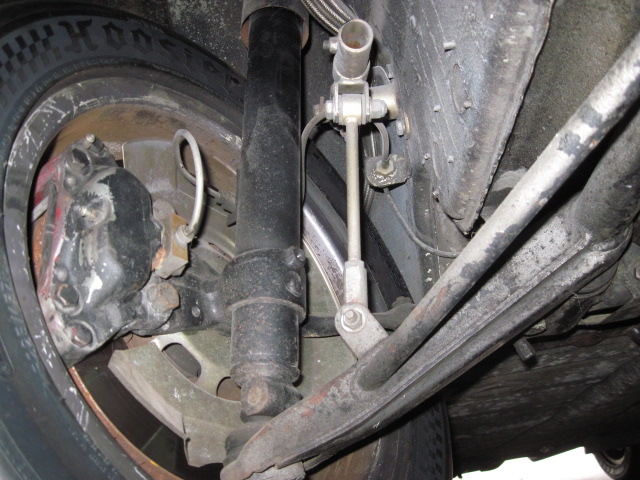
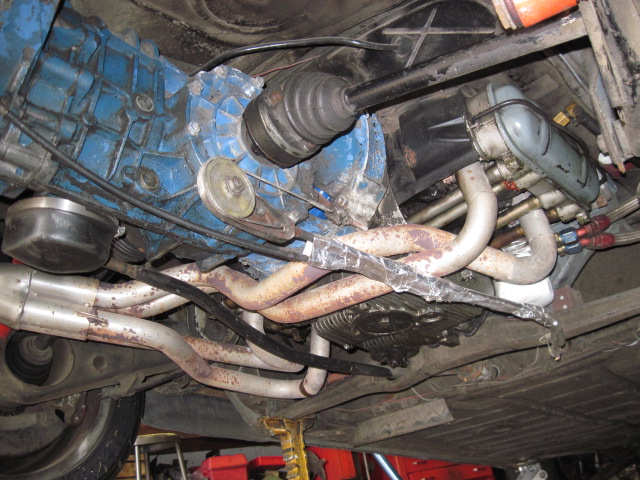
Suspension:
Attached thumbnail(s)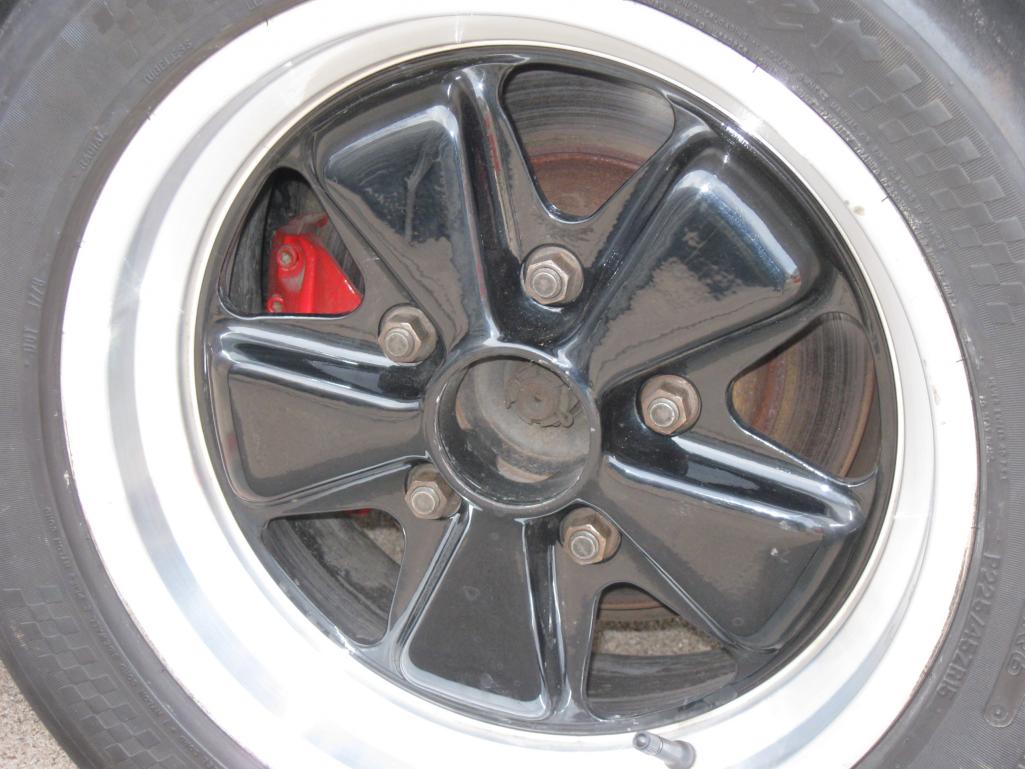
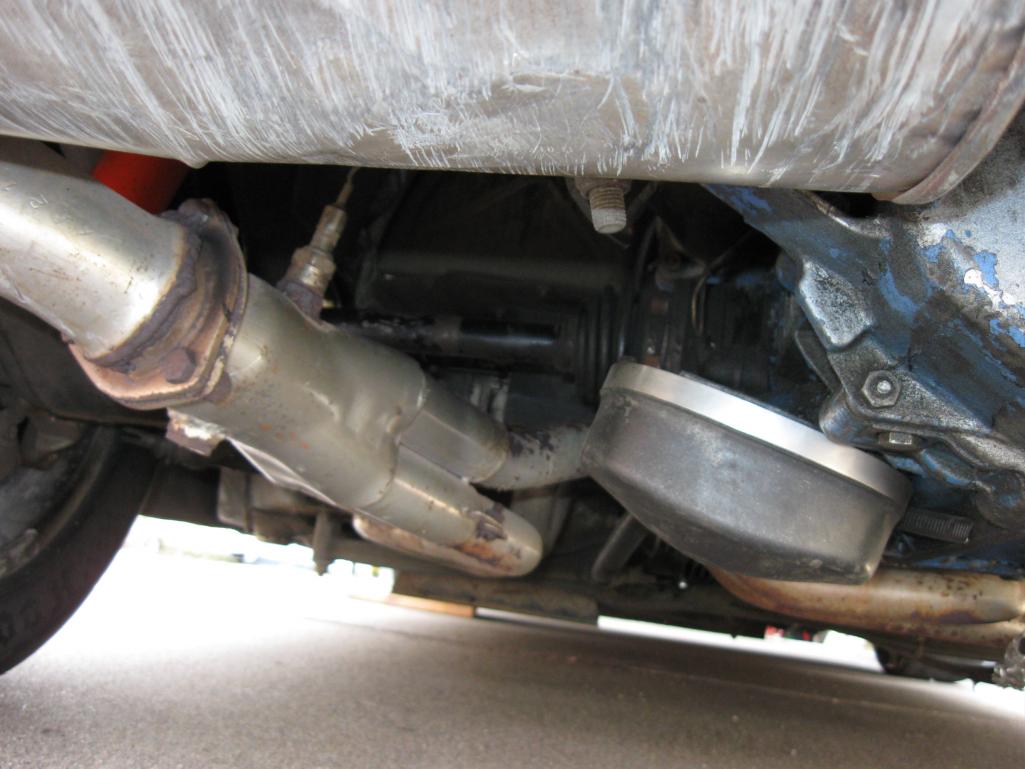
Attached image(s)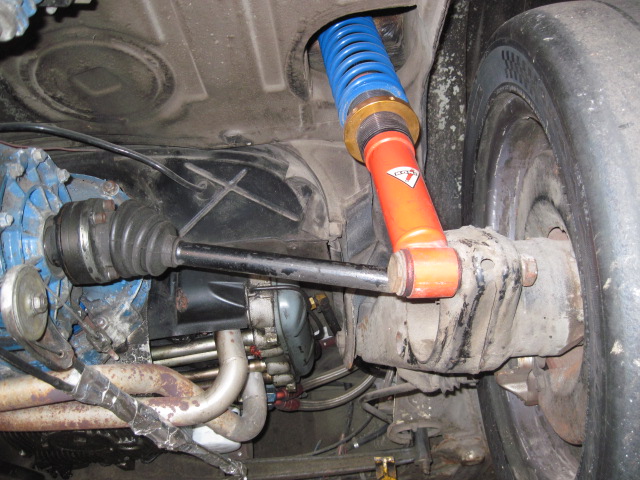
Posted by: rnellums Sep 28 2011, 07:11 PM
Engine:
Attached thumbnail(s)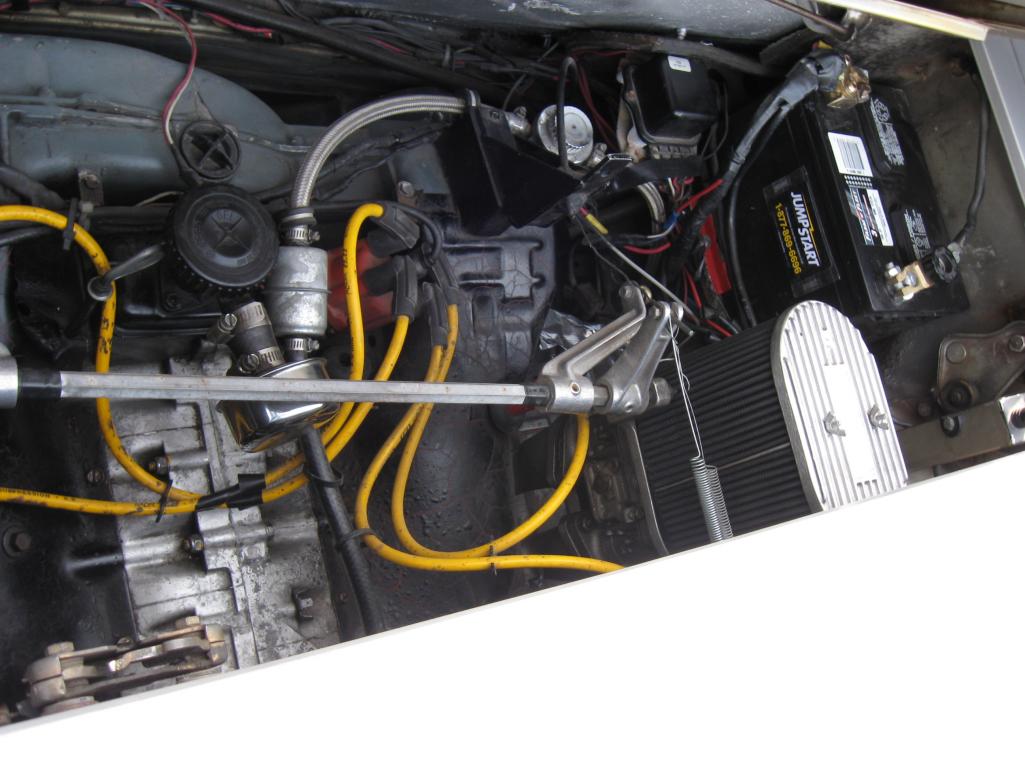

Attached image(s)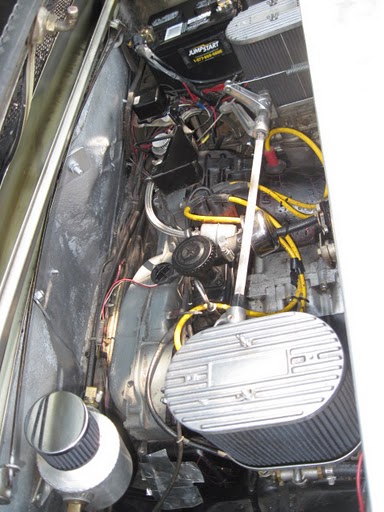
Posted by: rnellums Sep 28 2011, 07:13 PM
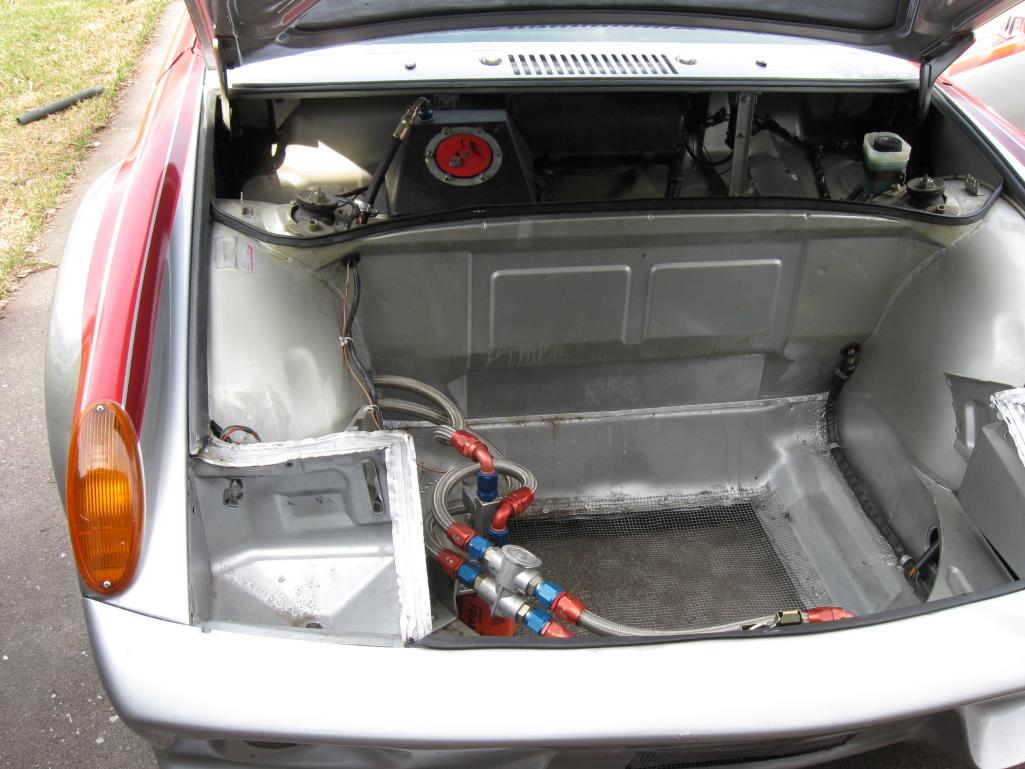
Trunks:
Attached thumbnail(s)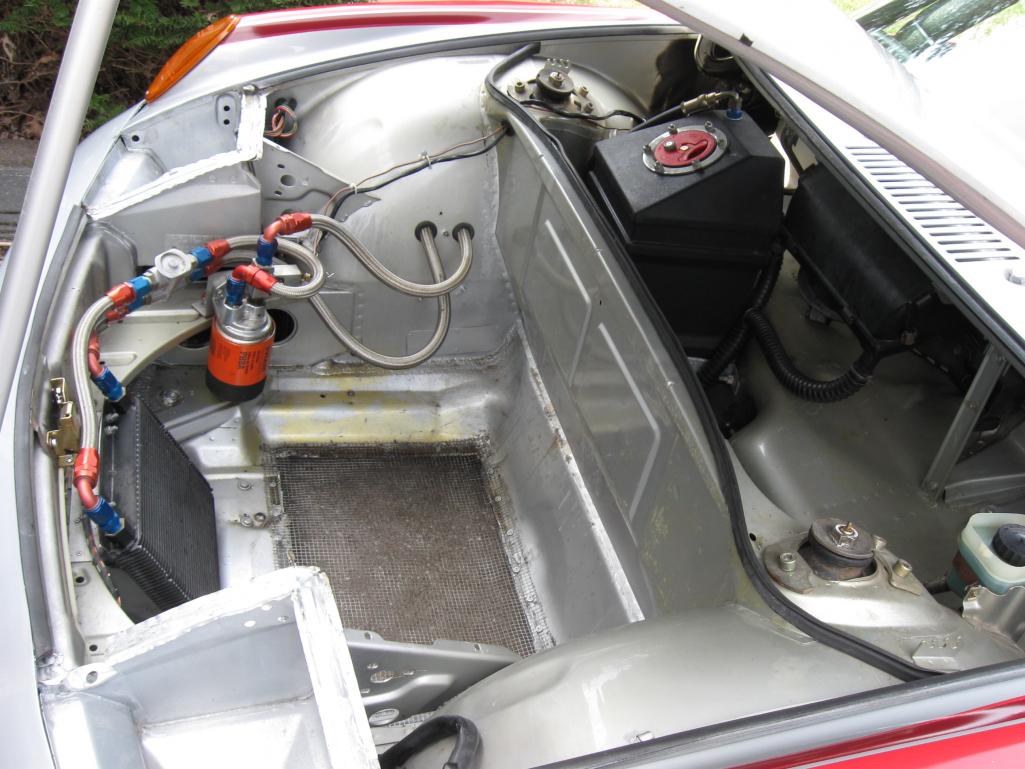
Posted by: Cap'n Krusty Sep 28 2011, 07:25 PM
Nice car. I'm not up on current PCA classes, but those mods are gonna have you maxed out and runnin' with the big boys. Better get used to them having a LOT more money than you, and having cars that may be a LOT faster. The rules are available on line, I think. Dave Darling may know what's what.
The Cap'n
Posted by: jcambo7 Sep 28 2011, 07:34 PM
Drop a big 6 in it! 
Posted by: rnellums Sep 28 2011, 07:36 PM
I think I may plan for a 2.7 build when the 2.4 gets closer to giving up
Posted by: Cairo94507 Sep 28 2011, 07:48 PM
With all that car I would plan for a 3.6 or 3.8 build-up. Nice looking car begging for a six.
Posted by: tscrihfield Sep 28 2011, 08:42 PM
Ross, Nice Buy! Hopefully get to see it in person!
That looks like a fun one. Have you flogged it yet? How does that 2.4 pull?
Thomas
Posted by: rnellums Sep 28 2011, 08:49 PM
I haven't pushed it past 3000 RPM yet since it has such high compression that I feel insecure on pump gas. I put three gallons of 92 octane premium in and drove it around the block, miles of grip, tons of stopping power, and lots of pull. The clutch is really harsh. I just located a supplier for 110 octane race gas locally, so hopefully I'll get some real drive time on it. Need to get a few days without rain first though.
Posted by: campbellcj Sep 28 2011, 10:39 PM
Nice car, congrats!!! I think the weight estimate is 'optimistic' though.
What group and type of events are you looking to do? I have no idea what is available in your area but am looking forward to hearing your plans and progress.
Posted by: campbellcj Sep 28 2011, 10:39 PM
dupe
Posted by: Racer Chris Sep 29 2011, 12:00 AM
Nice buy, lots of potential there.
Do you know what camshaft was installed?
RPM limit?
A few things I see:
Your header is way too small for a 2.4L.
I guarantee it's holding the engine back - a lot. There's at least 10 more hp & 10 lb-ft torque available just by replacing the exhaust.
You should have 4 EGTs to monitor the fuel mixture of each cylinder at WOT.
Single O2 sensing doesn't have much value on a race car.
I don't understand why the oil thermostat would be placed in the front trunk so close to the cooler.
It should be closer to the engine to shorten the route when the oil is cold.
Also, IMO hoses that long should be -12, not -10 (definitely not -8).
No tuna can, or accusump? The engine won't last long once you start pushing it around at a competitive event.
You should consider moving up to a dry sump oil system right away.
5 gal fuel cell isn't going to get you far. Fine for an AX toy but not big enough for even one on-track session.
I'd lower the rear another half inch.
Where's your adjustable brake bias control?
Front anti-sway bar is too small.
Stage 4 clutch is overkill. Your leg's gonna get a work out.
Posted by: Brett W Sep 29 2011, 07:57 AM
If you start doing much in the way of track events the cage will need to be updated. You need a modern main hoop with SCCA/NASA legal Diagonal and cross brace. You will also need legal door bars as well. Best bet is to have a custom cage built if you intend to seriously track the car. The four cylinder will put you in the virtually unlimited classes and you will really be running against some full out well sorted race cars. You can run the car in SCCA ITU/ITO/ITE. That is a catch all class that requires a DOT tire, but beyond that its mostly free.
You could build the car to run in HSR. Most of the mods you have minus the engine could allow you to run in the 2.0 Challenge class. You would have to swap in a 2.0 six, but you could at least show up and run for a while until the 2.4 gives it up. No one will complain because you will still be down about 50+hp. But you will have tons of people to race with in 914s and 911s. Plus they run a treaded vintage tire.
Looks like you could have a good trackday package to start out with. That would at least let you run some open track events to decide if that is what you really want to do. Chris makes good suggestions. I would add to that:
Get some ducting for that oil cooler.
You need to exhaust the air properly to ensure efficiency.
Also toss the clutch and get a decent clutch. No sense in destroying the thrust bearings on the engine with a massive clutch. Your not making enough torque to warrant anything more than a stock pressure plate, maybe an aluminum S pressure plate for racing. I would use a sprung hub clutch just to help keep the transmission alive.
Get a proper breather can on there and toss that crappy filter stuck on the side of the oil filler neck. It will keep the oil off the engine and engine bay.
Your fuel cell is not legal for anything beyond autox. You will need a road race legal fuel cell to run head to head and maybe even some time trials.
Posted by: mark21742 Sep 29 2011, 08:12 AM
If you want it and end up out this way I have a stock fuel reno I'll give you.....has some rust in it.
Beautiful car!
Posted by: rnellums Sep 29 2011, 10:24 AM

Your header is way too small for a 2.4L.
I guarantee it's holding the engine back - a lot. There's at least 10 more hp & 10 lb-ft torque available just by replacing the exhaust.
You should have 4 EGTs to monitor the fuel mixture of each cylinder at WOT.
Single O2 sensing doesn't have much value on a race car.
I don't understand why the oil thermostat would be placed in the front trunk so close to the cooler.
It should be closer to the engine to shorten the route when the oil is cold.
Also, IMO hoses that long should be -12, not -10 (definitely not -8).
No tuna can, or accusump? The engine won't last long once you start pushing it around at a competitive event.
You should consider moving up to a dry sump oil system right away.
Where's your adjustable brake bias control?
Stage 4 clutch is overkill. Your leg's gonna get a work out.
I think I am at least going to keep the headers for now, but need to be thinking about upgrading to better flowing. I know you are biased, but are there any other high flowing header systems out there besides yours?
What would I use EGT data for? just determining which cylinders were lean under load?
I am planning on getting an Accusump system ASAP, what is the preferred size for this application? 3 qt? I had heard some talk about the front trunk being the best mounting location for an accusump for weight distribution, which would only work with a front mounted thermostat. but then you have some excessive pumping distance.
If i were to relocate the thermostat, where would the preferred location be?
I have switched the 5 gal race tank out with the stock tank since 5 gal on this engine isn't worth much anywhere but autoX.
I have not seen any adjustable brake bias control, so I am operating under the assumption that it has a stock proportioning valve.
I have cam specs somewhere and will post later. the heads have stiffer return springs so I place the true redline around 6500.
You could build the car to run in HSR. Most of the mods you have minus the engine could allow you to run in the 2.0 Challenge class. You would have to swap in a 2.0 six, but you could at least show up and run for a while until the 2.4 gives it up. No one will complain because you will still be down about 50+hp. But you will have tons of people to race with in 914s and 911s. Plus they run a treaded vintage tire.
Get some ducting for that oil cooler.
Also toss the clutch and get a decent clutch. No sense in destroying the thrust bearings on the engine with a massive clutch. maybe an aluminum S pressure plate for racing. I would use a sprung hub clutch just to help keep the transmission alive.
Get a proper breather can on there and toss that crappy filter stuck on the side of the oil filler neck. It will keep the oil off the engine and engine bay.
I'm working on the ducting bit.
Am I right that you are essentially saying I should revert to a stock clutch and pressure plate?
HSR looks pretty awesome
If you want it and end up out this way I have a stock fuel reno I'll give you.....has some rust in it.
Beautiful car!
What is a stock fuel Reno?
Posted by: mark21742 Sep 29 2011, 10:36 AM
Damn auto correct and me not paying attention.....stock fuel tank lol
Posted by: rnellums Sep 29 2011, 10:45 AM
It'll get ya. I realized that after I posted. I already had one out of my older car that got totaled. Thanks for the offer though!
Posted by: Racer Chris Sep 29 2011, 11:05 AM
I think I am at least going to keep the headers for now, but need to be thinking about upgrading to better flowing. I know you are biased, but are there any other high flowing header systems out there besides yours?
Primary lengths are ok on your header, just the diameter is too restrictive.
1 5/8" MSDS 4 cyl header (KHH clone) would be a better choice for about the same investment as the KHH was.
I don't like the long length of European Racing Headers for an engine with higher than stock power band.
Too lean spells disaster at WOT. Also, if you have any problem with only one cylinder (or one bank), your O2 readout isn't going to help with the diagnosis.
3 quart, yes. As close to the engine as you can within reason. A check valve in the accusump circuit prevents backfeed to the cooler.
Firewall in the engine compartment if possible. You want your oil to reach the thermostat cracking temp quickly.
You can put a knob style prop. valve in place of the stock regulator. It just means you won't have cockpit adjustability.
Single springs with such large valves may prevent you from reaching 6500. As long as you have the 1 1/2" header it won't matter much, you're losing power before 6000.
I'd look for a 911S aluminum pressure plate and matching clutch disc. It will handle your power and is easy to operate.
Posted by: rnellums Sep 29 2011, 12:04 PM
I just checked the engine build sheet. According to specs it has dual valve springs, chromolly retainers, and a cam with .521/286 duration. It also states the headers are 1-5/8 but perhaps that has been changed.
Will the 911s equipment bolt right up?
-Ross
Posted by: Racer Chris Sep 29 2011, 01:11 PM
Kerry Hunter never made a 1 5/8" header. You should measure the dia of your primaries to be certain.
If I was selling a Tangerine Header for an engine such as yours I would recommend 1 3/4" primaries.
You should be able to rev past 6500, and your HP peak may be above that anyway. Its hard to tell without more detailed cam info and empirical test data (dyno runs).
I used to have a short stroke x 103mm engine (2.2L) with 48/38 valved heads and dual springs that revved to 7500 rpm and with a 1 3/4" Tangerine header it made 180 peak hp.
The pressure plate is a direct bolt on and uses the same throwout bearing.
Posted by: gms Sep 29 2011, 02:57 PM
Very Nice, Congrats!
See you in spring at driver's school?
Posted by: rnellums Sep 29 2011, 03:20 PM
Yeah, what do you run in?
Posted by: gms Sep 30 2011, 10:49 AM
Yeah, what do you run in?
http://www.mcscc.org/
in the Vintage Historic class
http://www.mcscc.org/files/GCR2011.pdf
The roll cage might be in question for wheel to wheel but you could run the full track autocross as is
Posted by: rnellums Sep 30 2011, 12:16 PM
Yeah, what do you run in?
http://www.mcscc.org/
in the Vintage Historic class
http://www.mcscc.org/files/GCR2011.pdf
The roll cage might be in question for wheel to wheel but you could run the full track autocross as is
The cage does have door bars, I'll just have to check if it satisfies all the requirements for the vintage class. I get the feeling that my engine mods disqualify me from running in the vintage class, or am I just reading things wrong?
High-Speed auto cross seems like the perfect way for me to ease into this! Too bad I'll miss the one this weekend. Is there anything I need to do to join MCSCC? should I even try?
-Ross
Posted by: Brett W Sep 30 2011, 01:33 PM
I don't know about SCCA vintage, but in HSR, it won't matter. The four cylinders are not really a concern of the HSR rules guys. You won't be out running the front runners with it, so I wouldn't worry about it. Just get the cage legal and show up for the Mitty in April and have some fun on track.
Posted by: rnellums Sep 30 2011, 02:16 PM
Looks like I better start looking out for an inexpensive aluminum trailer so I can haul with my diminuitive subie 2.0L forester.
Posted by: ChrisNPDrider Sep 30 2011, 02:41 PM
What class was it built for? 
If I were in your shoes, I would build for Historic rules. SCCA with less than 2.0 liters as a second option. Perhaps even try to go street-legal and drive to track or AX events the first year. Once you have a full-blown racer, a solid tow vehicle is needed.
Good luck. Awesome 914 
Posted by: brant Sep 30 2011, 02:47 PM
inexpensive and aluminum trailer, are not 2 words that go together...
I have a light weight trailer (not aluminum) that is inexpensive I'm selling, but used aluminum trailers start at around 5k
Posted by: gms Sep 30 2011, 05:45 PM
The cage does have door bars, I'll just have to check if it satisfies all the requirements for the vintage class. I get the feeling that my engine mods disqualify me from running in the vintage class, or am I just reading things wrong?
High-Speed auto cross seems like the perfect way for me to ease into this! Too bad I'll miss the one this weekend. Is there anything I need to do to join MCSCC? should I even try?
-Ross
Your engine will be fine, people cheat like mad on engines.
There is a race on the 16th but I am not sure what is needed for autocross
I will be at Rennsport IV
Posted by: rnellums Oct 3 2011, 10:23 AM
The 16th I'll be in AR for MUSR, but the lapping days at Putnam Park is a possibility.
Posted by: gms Oct 4 2011, 09:19 AM
The 16th I'll be in AR for MUSR, but the lapping days at Putnam Park is a possibility.
Ross,
I have contacted a friend who is familiar with the Midwest Council autocross registration process. I am can send your info to him so he can help,
shoot me your email and i will forward it.
Posted by: timgreen Oct 5 2011, 09:08 AM
If you have time come to Blackhawk Farms Raceway Sunday, October 16. I will be racing my 1971 914-6 in the MCSCC Vintage Group race (weather permitting). We can discuss items that will be required if you want to go wheel-to-wheel racing. You can find me near the gas pump and my car is white/green "POLIZEI" number 43.
Hope to see you then,
Tim Green
PS. We will have at least 4 914's racing in the Long race for MCSCC the last weekend in October - Saturday and Sunday 10/29-30. Plan on attending this race also and get to talk to as many owner/racers as you can.
Posted by: rnellums Oct 5 2011, 09:39 AM
If you have time come to Blackhawk Farms Raceway Sunday, October 16. I will be racing my 1971 914-6 in the MCSCC Vintage Group race (weather permitting). We can discuss items that will be required if you want to go wheel-to-wheel racing. You can find me near the gas pump and my car is white/green "POLIZEI" number 43.
Hope to see you then,
Tim Green
PS. We will have at least 4 914's racing in the Long race for MCSCC the last weekend in October - Saturday and Sunday 10/29-30. Plan on attending this race also and get to talk to as many owner/racers as you can.
The weekend of the 16th I'll be in Arkansas at the MUSR, the last weekend in October is more doable, although my parents may be visiting then. If not you can expect to see me out there. The more I think about it the more I am leaning away from wheel to wheel my first year. I feel like getting driver education first is the safest and best choice for me. I look forward to meeting you!
-Ross
Posted by: tscrihfield Oct 5 2011, 06:54 PM
inexpensive and aluminum trailer, are not 2 words that go together...
I have a light weight trailer (not aluminum) that is inexpensive I'm selling, but used aluminum trailers start at around 5k

Aluminum Trailers are $$... Trailex has a nice open trailer you can usually find a used one around 4-5K....
Anyway, no matter what you try to race in you'll enjoy it. I have heard that SCCA is a bit rough on cars, but that is by what I have heard. No first hand experience. I have been around many PCA events and they are always a good group. Are you wanting to AX or full track DE?
Posted by: timgreen Oct 5 2011, 07:02 PM
If you have time come to Blackhawk Farms Raceway Sunday, October 16. I will be racing my 1971 914-6 in the MCSCC Vintage Group race (weather permitting). We can discuss items that will be required if you want to go wheel-to-wheel racing. You can find me near the gas pump and my car is white/green "POLIZEI" number 43.
Hope to see you then,
Tim Green
PS. We will have at least 4 914's racing in the Long race for MCSCC the last weekend in October - Saturday and Sunday 10/29-30. Plan on attending this race also and get to talk to as many owner/racers as you can.
The weekend of the 16th I'll be in Arkansas at the MUSR, the last weekend in October is more doable, although my parents may be visiting then. If not you can expect to see me out there. The more I think about it the more I am leaning away from wheel to wheel my first year. I feel like getting driver education first is the safest and best choice for me. I look forward to meeting you!
-Ross
Ross -
I have been racing since 1984 when I bought my 944. I think a year of MCSCC Autocrossing and Porsche Club Drivers Ed events will help prepare you for wheel-to-wheel. Both clubs offer driver instruction and are very helpful. For now I wouldn't do anything to your car unless it involved a safety item like Nascar Bars in the drivers door. All the talk about your engine, clutch etc. --- wait until you have driven it for a while, have some fun and learn how to drive a race course (it’s not like the street). You do need to meet with someone from one of the clubs technical inspection departments so they can tell you if there are any safety items that would prevent you from participating. It would suck to show up and be denied access to the track because your seat belts were out of date. By the way I am one of the instructors for MCSCC wheel-to-wheel racing so when you are ready I would be happy to have you as a student. MCSCC holds an Indoor Drivers School at Autobahn, I strongly recommend you attend that. If you don’t already belong to both MCSCC and PCA I think you should consider them both. I belong to North Suburban Sports Car Club within MCSCC but any of the clubs are ok to join.
Regards,
Tim
Posted by: rnellums Oct 5 2011, 07:02 PM
Both? As much as I can afford. I was passenger in a few DE's back in Colorado. Plenty of fun and friendship, no competition.
Posted by: rnellums Oct 5 2011, 07:10 PM
Is the best place to meet the tech inspection guys at the events like those you mentioned earlier?
Posted by: timgreen Oct 5 2011, 07:19 PM
Is the best place to meet the tech inspection guys at the events like those you mentioned earlier?
Yes, that is the easiest - just bring it to an event. The Long Race weekend is a real family event with Trick-or-Treat and Big Wheel races for the kids. I don't know if an Autocross Tech Inspector will be there but the Wheel-to-wheel guys will be there both days.
I am sure you will join both eventually, I would start with MCSCC to get as much experience as possible.
This year with PCA I raced at Sebring, GingerMan and Road America, with VSCDA Blackhawk and Road America and with MCSCC three time at Blackhawk -- I LOVE RACING.
Posted by: rnellums Oct 5 2011, 07:34 PM
Trailering it up there seems like the best choice from Lafayette, I hope to see you then!
Posted by: rnellums Oct 7 2011, 01:21 PM
My boss has an 18' trailer he'll give me for 500$, I figure that will be too heavy for my subie to pull well, but it is also probably built for much heavier vehicles than the racer. would lightening of the trailer be a bad idea? I have a small mig that I could use for some light welding of bracing...
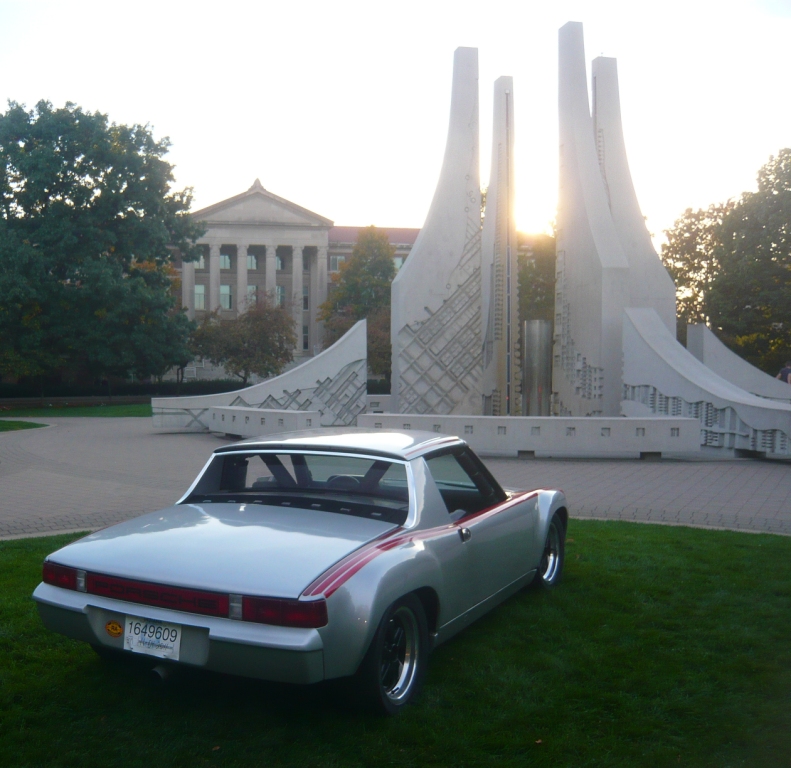
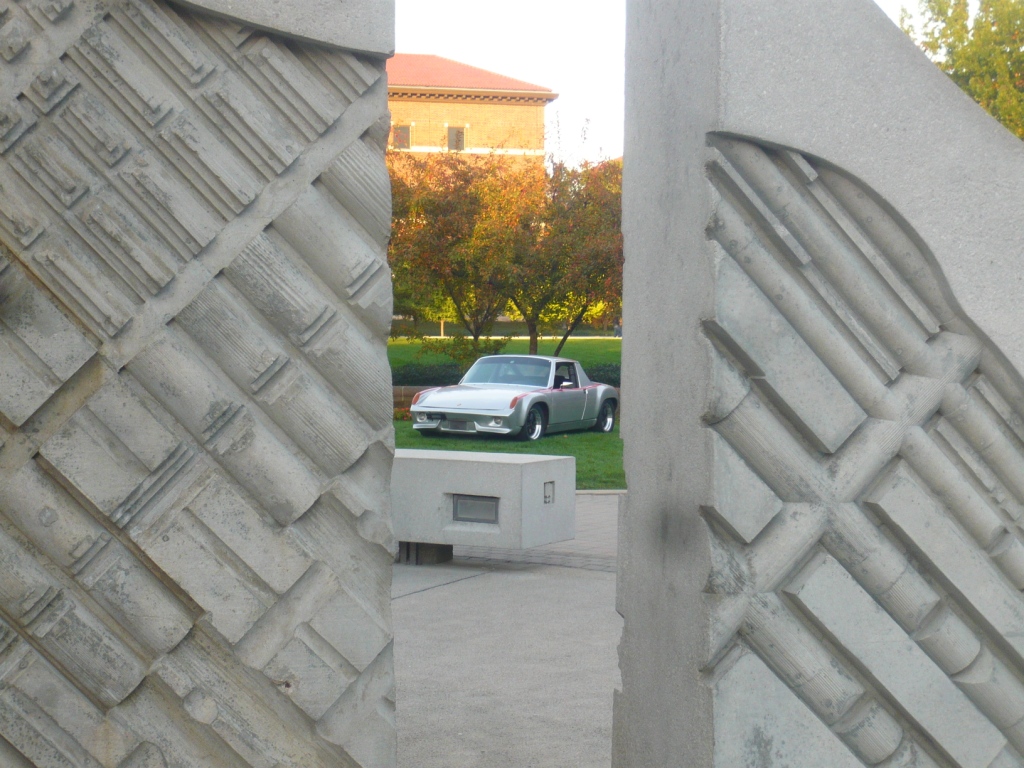
Posted by: rnellums Oct 8 2011, 03:21 PM
Some photos from a car show on the Purdue Mall
Stupid Bicyclist
With bike removed...
Attached image(s)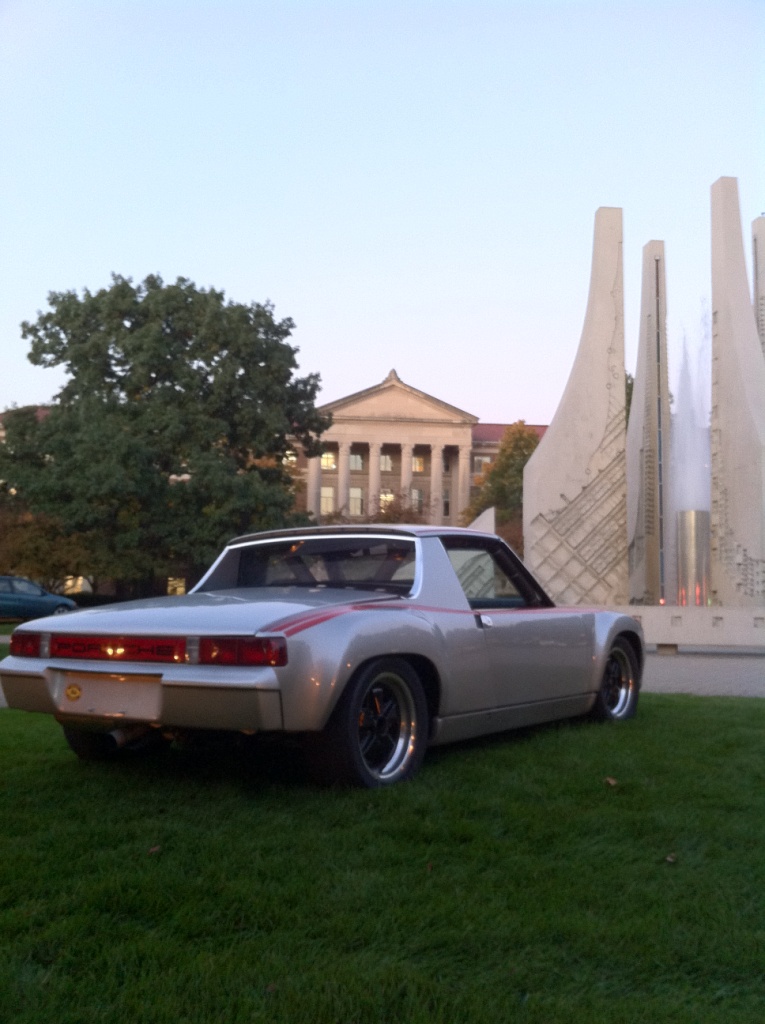
Posted by: timgreen Oct 8 2011, 05:27 PM
My boss has an 18' trailer he'll give me for 500$, I figure that will be too heavy for my subie to pull well, but it is also probably built for much heavier vehicles than the racer. would lightening of the trailer be a bad idea? I have a small mig that I could use for some light welding of bracing...
Boy am I the wrong person to ask about trailers -- I buy them and use them but not modify them. I have a 18' open car trailer and a 24' enclosed trailer, it's an extra two feet tall because I tow it behind my 36' motorhome. When I started racing we flat towed our car to the track - an old set of tires and wheels makes that possible as long as you don't 'crash'. If the car is street legal, drive it up.
Posted by: BigDBass Oct 8 2011, 06:50 PM
![popcorn[1].gif](style_emoticons/default/popcorn[1].gif)
Posted by: rnellums Oct 8 2011, 07:41 PM
I can make it street legal enough, but poor fuel economy and race fuel would be cost prohibitive. I need to determine if I can drive it on premium without knocking.
Posted by: rnellums Mar 16 2012, 06:01 PM
Its been a while since I put anything up here, but last weekend I put in new lemforder turbo tie rods, installed a stainless line in the tunnel,, installed a spherical firewall bearing, and replaced the weltmeister short shift kit with a stock shifter (the shifting is so much smoother now!). I also hooked up all the gauges, installed a new sender(oil temp) and removed the console completely. I really like how open the cabin is with no console, especially with long legs.
I also decided that my first year with the car I am only going to AX with perhaps a few DE's, so I re-installed the 5 gal fuel cell. I also cleaned up some of the ratsnest of aftermarket wiring in the engine compartment. The first time I pull the engine I will sort it properly.
No pictures for now, but I may snap some tomorrow.
-Ross
Posted by: gms Mar 16 2012, 06:58 PM
Its been a while since I put anything up here, but last weekend I put in new lemforder turbo tie rods, installed a stainless line in the tunnel,, installed a spherical firewall bearing, and replaced the weltmeister short shift kit with a stock shifter (the shifting is so much smoother now!). I also hooked up all the gauges, installed a new sender(oil temp) and removed the console completely. I really like how open the cabin is with no console, especially with long legs.
I also decided that my first year with the car I am only going to AX with perhaps a few DE's, so I re-installed the 5 gal fuel cell. I also cleaned up some of the ratsnest of aftermarket wiring in the engine compartment. The first time I pull the engine I will sort it properly.
No pictures for now, but I may snap some tomorrow.
-Ross
Very good, hope to see you at the track one of these days!
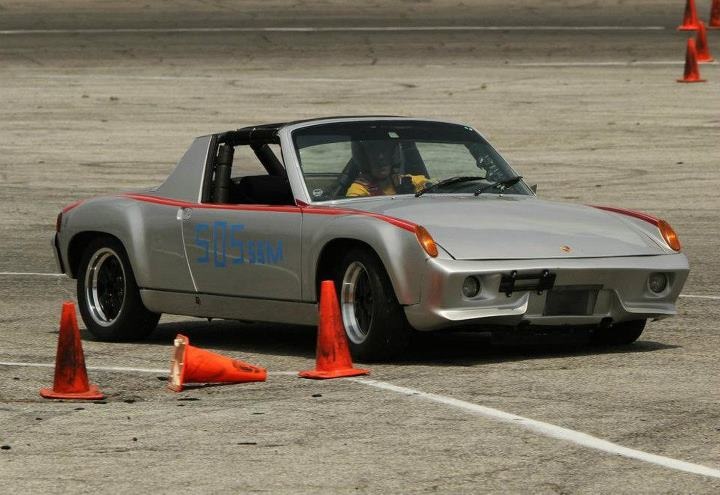
Posted by: rnellums May 17 2012, 01:37 PM
Some fun photos of my first autocross. I came in second of 6 in my class, SSM, and 16th of 74 overall.
Posted by: gms May 17 2012, 07:54 PM
Some fun photos of my first autocross. I came in second of 6 in my class, SSM, and 16th of 74 overall.
Good job!
Posted by: rnellums Feb 19 2014, 04:40 PM
Wow! It has been a while since I have updated this thread!!
Fast forward two years and I am now out of grad school and working in Denver! After a few seasons of auto crossing and a few track days I decided I wanted a power plant with similar power to my 2.4L big 4 but with better street ability so I could enjoy driving it at places other than the track!
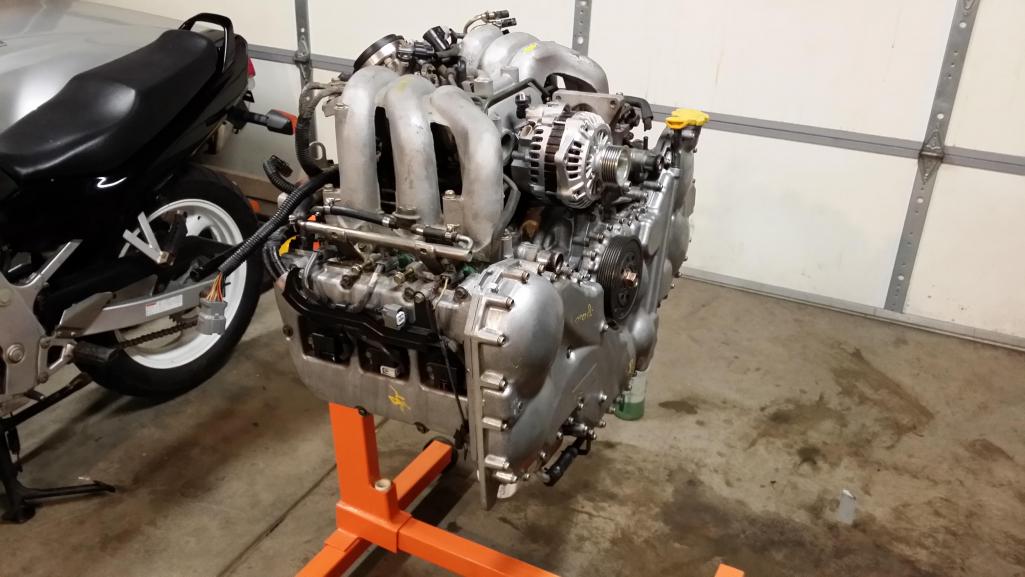
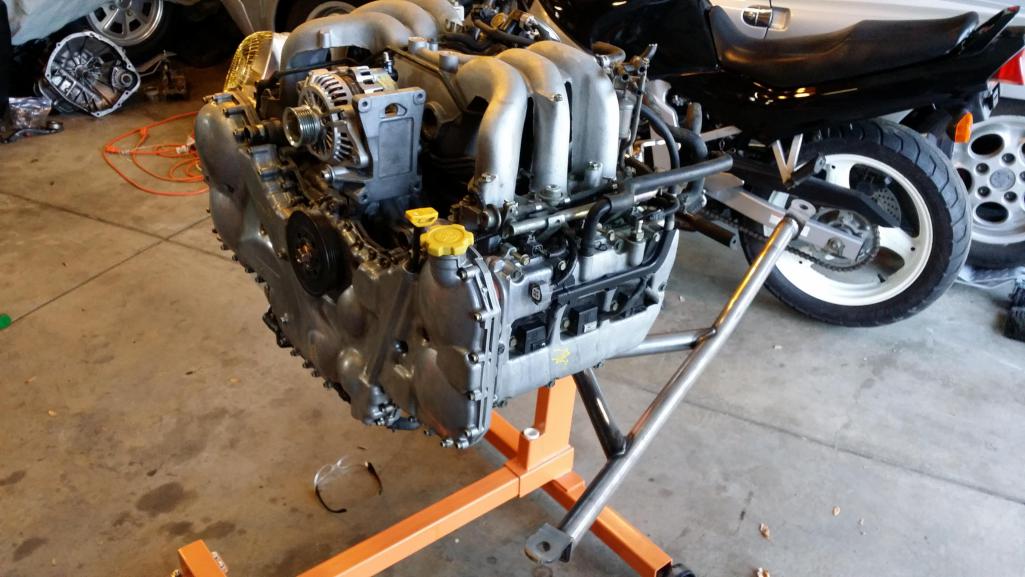
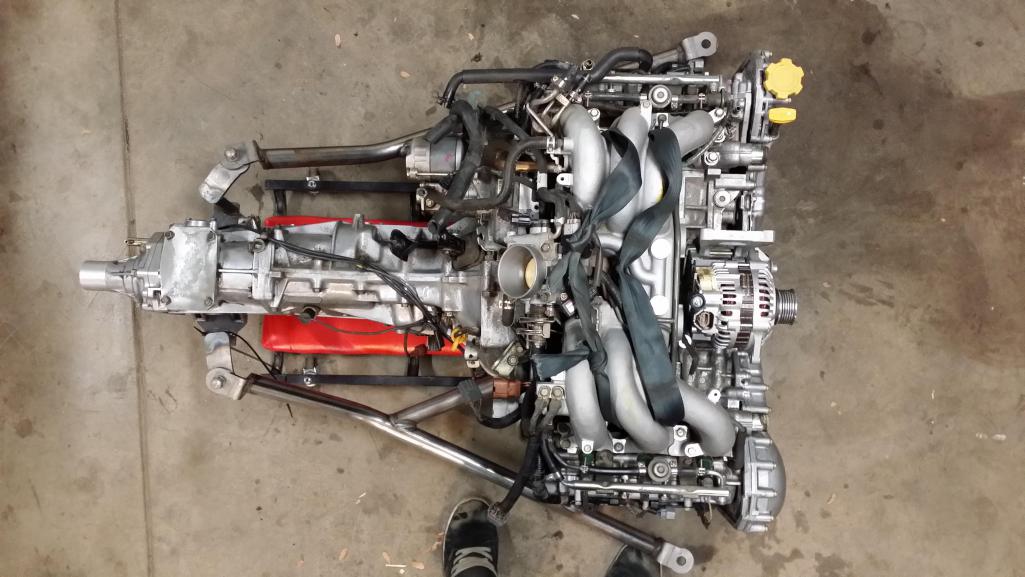
After much deliberation I settled on this. The Subaru EZ30. I'm intending to base my build heavily on 76-9 14's because of the phenomenal level of documentation included on every step of the process!
76-914's thread: http://www.914world.com/bbs2/index.php?showtopic=201776&hl=
So far I have acquired the engine and a temporary inexpensive transmission, along with Ian s engine Cradle.
Hopefully my car won't be out of commission for to long!
Attached thumbnail(s)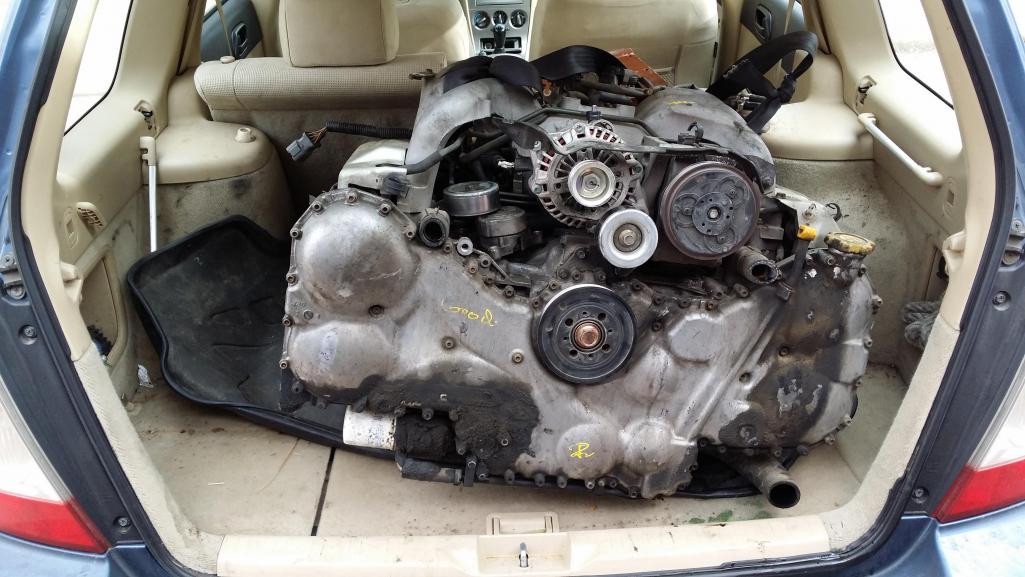
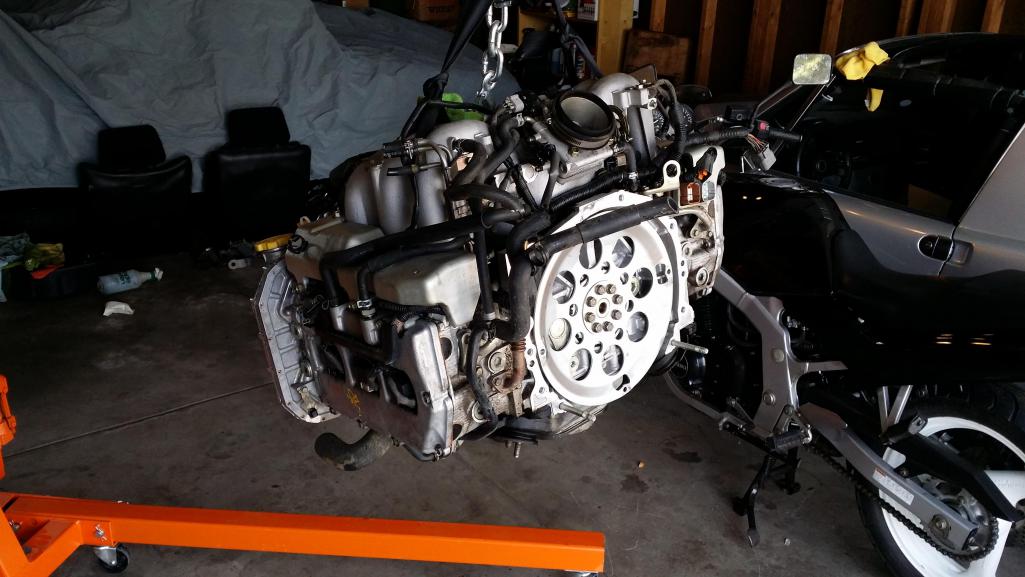
Posted by: rnellums Feb 19 2014, 04:43 PM
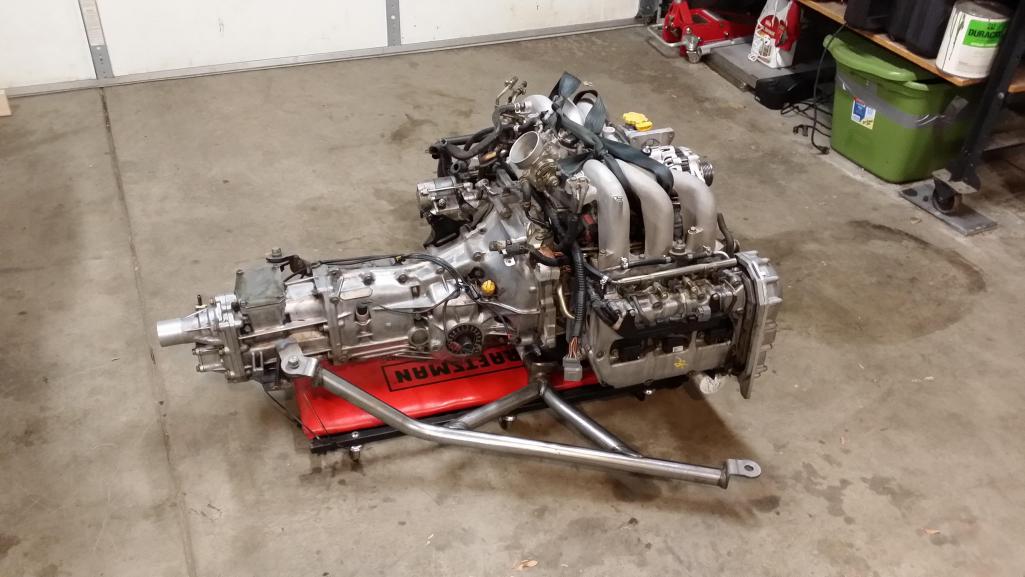
It's coming together!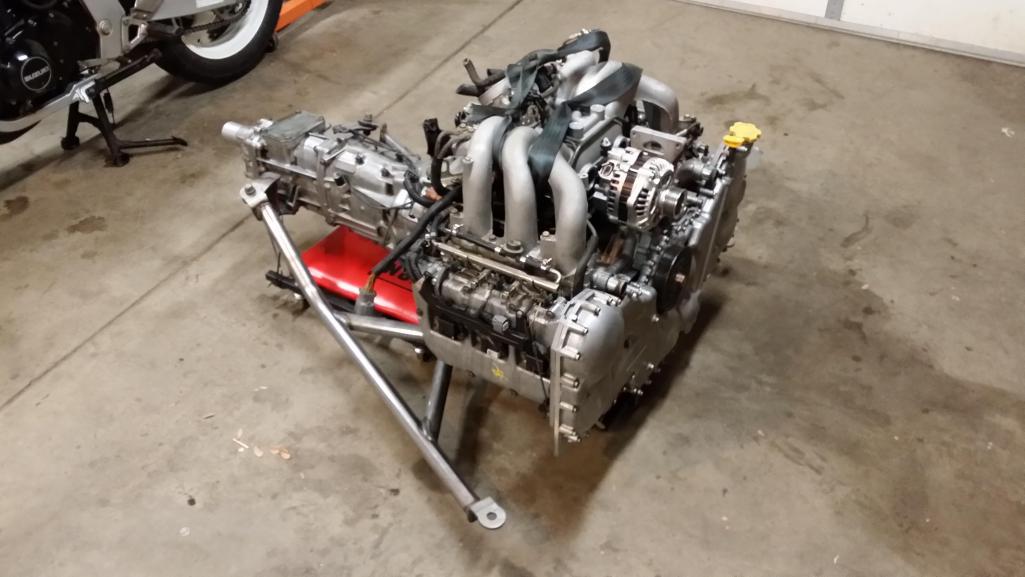
Posted by: Chris H. Feb 19 2014, 05:26 PM
Sweeeeet! Looks like a nice clean engine to start with. Did you get the ECU or are you going aftermarket?
Posted by: rnellums Feb 19 2014, 06:01 PM
Sweeeeet! Looks like a nice clean engine to start with. Did you get the ECU or are you going aftermarket?
I should be getting the ECU delivered today along with some other goodies like the harness and fuel pump etc!
Posted by: brant Feb 19 2014, 06:12 PM
fun....
I want a ride when its finished
Posted by: rnellums Feb 19 2014, 06:20 PM
fun....
I want a ride when its finished
I'll give you a call in 5 years!! But seriously, I'm am ambitiously hoPing to have her running in about three months!
Seems impossible At the moment though!!
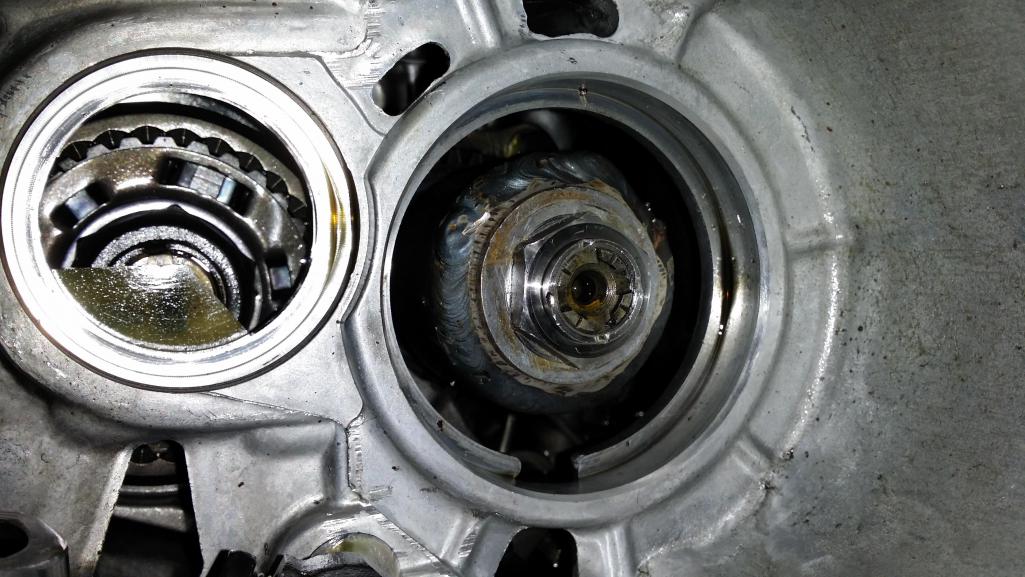
Posted by: rnellums Feb 19 2014, 10:04 PM
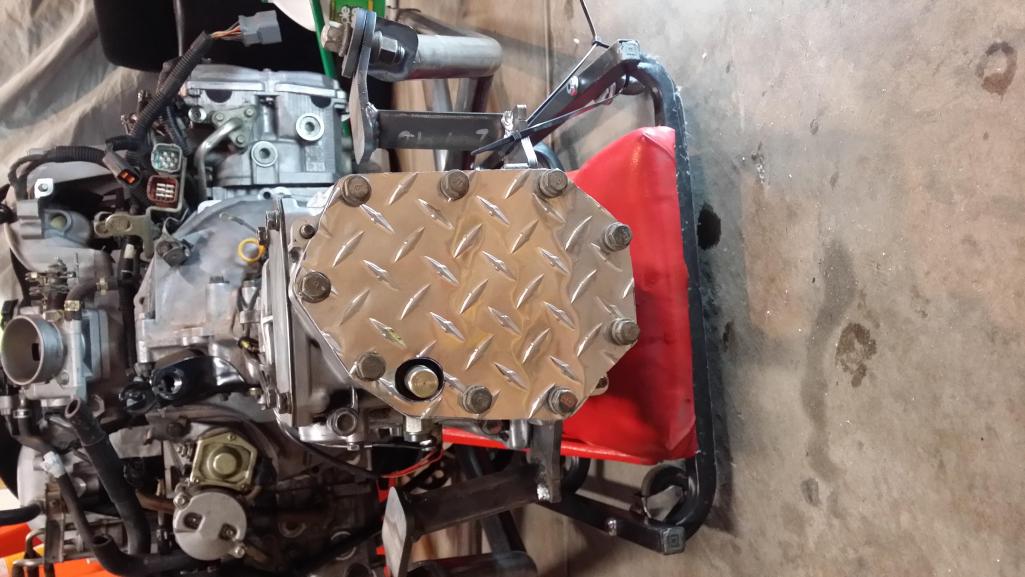
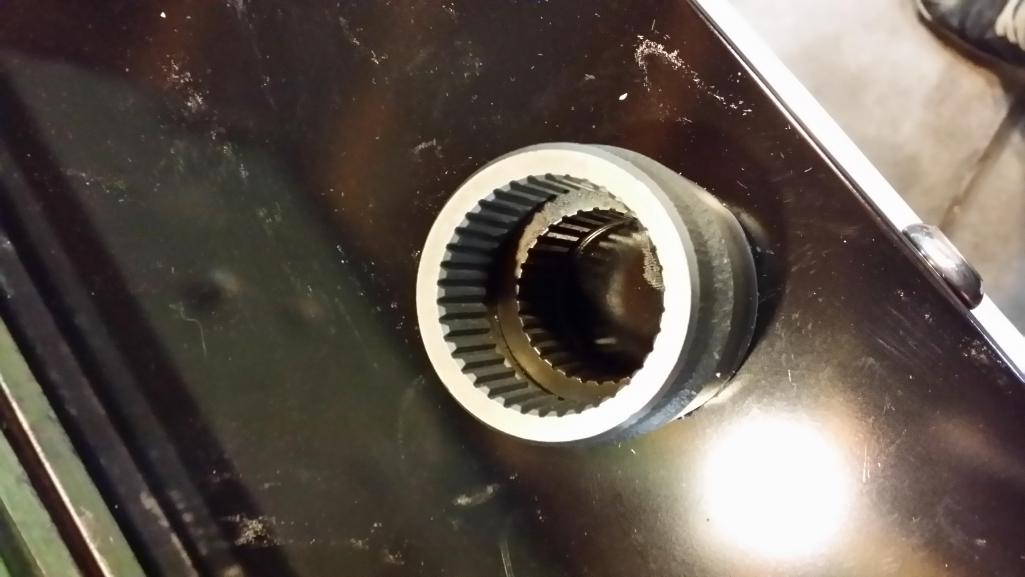
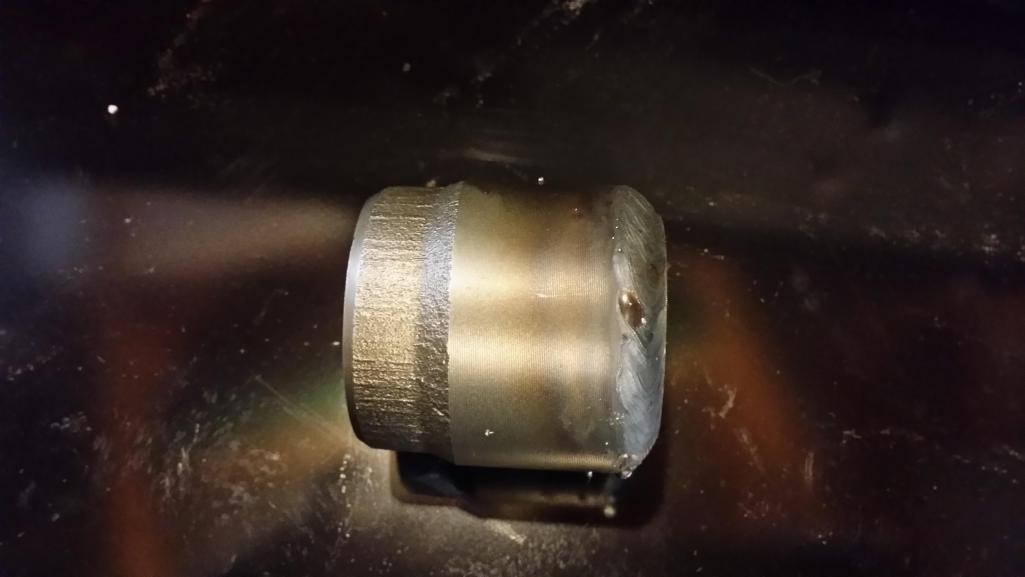
I spent some time tonight working on the 2nd subaru conversion lock. Using directions from here: http://www.914world.com/bbs2/index.php?showtopic=104513 . I know it's not that expensive to just buy the locking sleeve, but this was free. What do you guys think? Will it hold?
Posted by: 1stworks Feb 20 2014, 08:23 AM

Sweet!!!!!!!
Posted by: rnellums Feb 20 2014, 07:55 PM
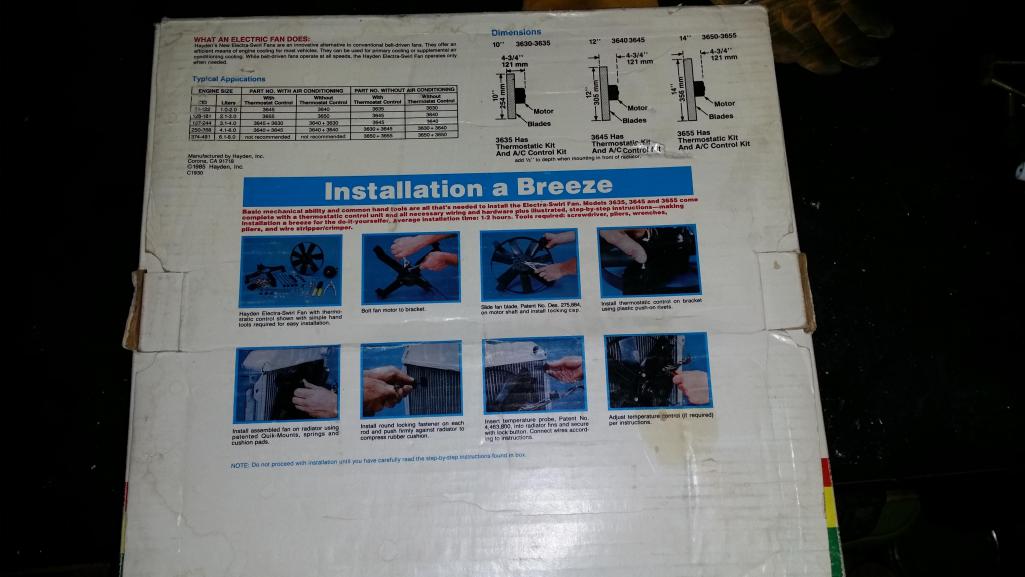
Today my neighbor stopped by and dropped off an old fan he wasn't using. It's massive, but it also came with an adjustable temperature Controller which might be useful. It's an old Hayden model, made in Canada circa 1986, and the box says it's rated to cool up to a 4 L engine.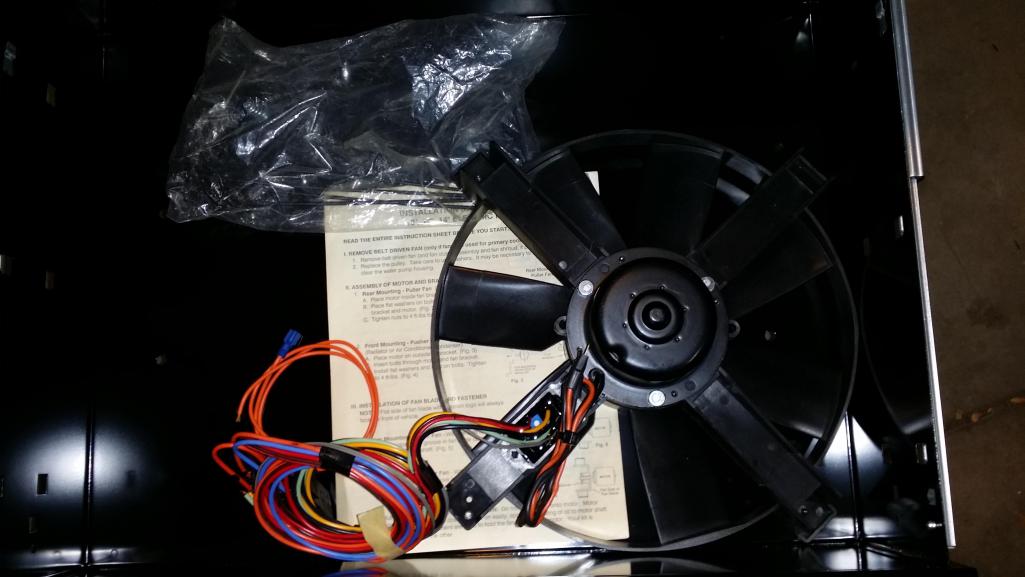
Posted by: 76-914 Feb 21 2014, 06:40 PM
Nice welds! Maybe you can flip that fan around and power the car with it.  Should work fine with a tight fitting plenum. I'm glad your going a different path here. We can eventually come up with a good combination of known working components by trying new/different techniques when possible.
Posted by: rnellums Feb 22 2014, 12:01 AM
I'm laying my plan out for the accessory belts. I don't plan to run A/C, and I have no need to run the power steering pump, so I plan to remove those from the system. The idea is to attach the alternator on the swinging end to a turnbuckle type strut connecting it to the engine case, and using the alternator itself as the tensioner, much like the layout on the 914. I've drawn my anticipated layout on this image.
Anyone see anything that looks absolutely terrible?
Attached thumbnail(s)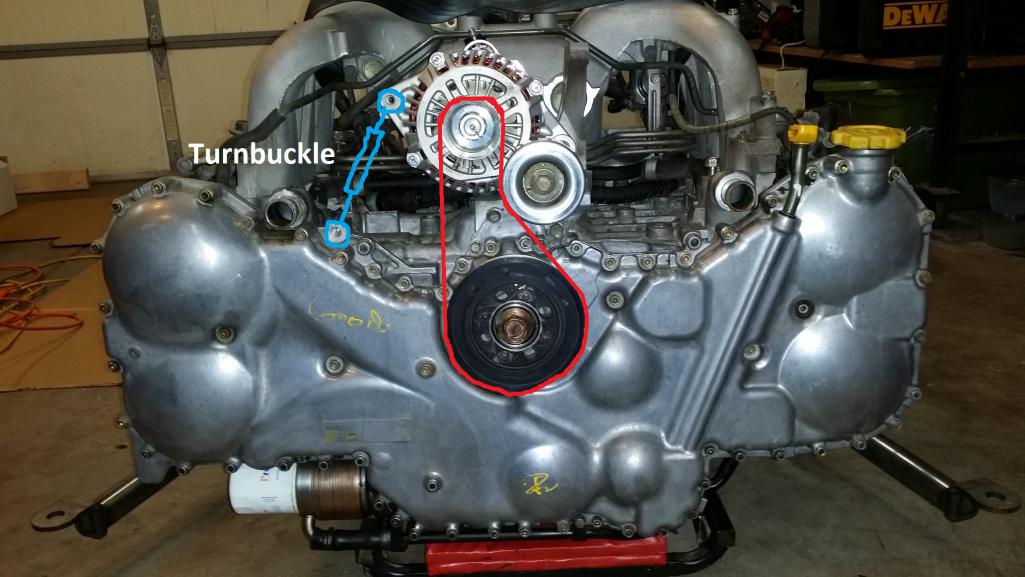
Posted by: rnellums Feb 22 2014, 12:05 AM
Nice welds! Maybe you can flip that fan around and power the car with it.
Should work fine with a tight fitting plenum. I'm glad your going a different path here. We can eventually come up with a good combination of known working components by trying new/different techniques when possible. My neighbor(same one with the fan) was kind enough to lend me some time on his 240 Miller for that welding. What a nice machine! I'm headed to the junkyard tomorrow to scope out what radiators fit the dimensions I'm looking for. My current fall back is the 00-05 Toyota Celica radiator, but tomorrow will be eye opening.
Monday marks the start of the wiring work!
Posted by: skeates Feb 22 2014, 12:24 AM
Check out the Toyota MR2 Radiators. I got an aftermarket one, but the dimensions work really well in there. The MR2 Turbos were something like 200 HP which puts it in the right range for the EZ30D.
Posted by: 76-914 Feb 22 2014, 09:41 AM
 Pls excuse the quick Hijack Ross but it seems a good time to mention this. I like your belt lay out for the omission of the PS pump and A/C. I mentioned this to you; I found that my method of removing the PS pump will NOT work because the geometry just isn't there. i.e., not enough swing in the tensioner from it's new angle. I will post this later in my thd but wanted to mention this in case anyone was going that route. Hijack over.
Posted by: Gary Feb 22 2014, 09:56 AM
I'm laying my plan out for the accessory belts. I don't plan to run A/C, and I have no need to run the power steering pump, so I plan to remove those from the system. The idea is to attach the alternator on the swinging end to a turnbuckle type strut connecting it to the engine case, and using the alternator itself as the tensioner, much like the layout on the 914. I've drawn my anticipated layout on this image.
Anyone see anything that looks absolutely terrible?
The 818 kit car guys have this option: http://www.replicaparts.com/818%20parts%20page.htm if you don't want to do your own design/fab work.
Posted by: rnellums Feb 22 2014, 10:26 AM
The 818 kit car guys have this option: http://www.replicaparts.com/818%20parts%20page.htm if you don't want to do your own design/fab work.
That's looks pretty handy! Thanks. I think mine should be able to bolt on without any fabrication, but that will make an excellent backup.
Posted by: 76-914 Feb 22 2014, 11:18 AM
I'm laying my plan out for the accessory belts. I don't plan to run A/C, and I have no need to run the power steering pump, so I plan to remove those from the system. The idea is to attach the alternator on the swinging end to a turnbuckle type strut connecting it to the engine case, and using the alternator itself as the tensioner, much like the layout on the 914. I've drawn my anticipated layout on this image.
Anyone see anything that looks absolutely terrible?
The 818 kit car guys have this option: http://www.replicaparts.com/818%20parts%20page.htm if you don't want to do your own design/fab work.
Being a CSOB, and I hate to say it, that is a good deal. He has $40 in hardware and materials, alone; plus paint, labor, etc.
Posted by: rnellums Feb 22 2014, 07:11 PM
I picked up a radiator from the Junkyard today for fitting and mockup. It's off a 1982 Volvo. I understand that by doing a conversion I have to make some sacrifices, but I don't really want to give up the front trunk.
To that end, since my car already has the front trunk floor cut out, I am going to try mounting the radiator flat on the front trunk floor, mounting my pusher fan above it, and sealing it up with a floor panel similar to the stock panel. Hopefully that will a allow it to form some kind of duct!
The oil cooler will be removed as well.
If it doesn't work I'll switch to the more traditional vertical radiator.
Attached thumbnail(s)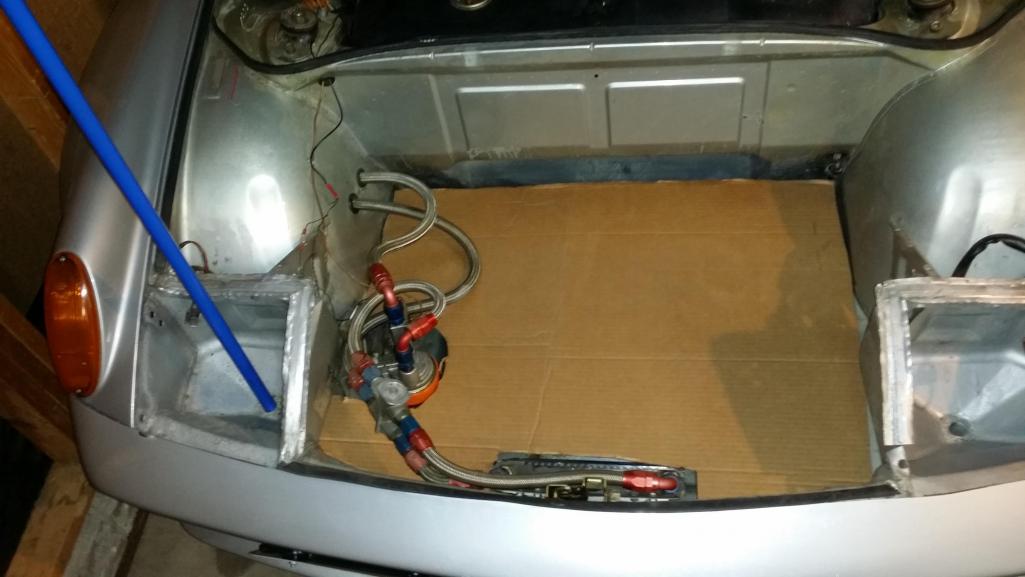
Posted by: 914forme Feb 23 2014, 04:32 PM
Fans work better pulling air than pushing. I am also not a huge fan of giving up the front trunk yet, I am also not a fan of putting air under the front of the 914. If your going to do it. Run a deep front spoiler to create a negative pressure area under the front to gel hold the front down, maybe. As never ducting under the car tis is not first hand knowledge. I am sure Brant has thought long and hard on cooling of 914s. While they are oil coolers much of his finds would translate into a radiator setup. Especially since you want to see the track with this car.
I will be watching this thread though, looks like a great build.
Posted by: rnellums Feb 23 2014, 04:49 PM
Fans work better pulling air than pushing. I am also not a huge fan of giving up the front trunk yet, I am also not a fan of putting air under the front of the 914. If your going to do it. Run a deep front spoiler to create a negative pressure area under the front to gel hold the front down, maybe. As never ducting under the car tis is not first hand knowledge. I am sure Brant has thought long and hard on cooling of 914s. While they are oil coolers much of his finds would translate into a radiator setup. Especially since you want to see the track with this car.
I will be watching this thread though, looks like a great build.
I agree that I would prefer to dump the air to the wheel wells. What is not visible in those photos is the large hole already cut into my front trunk by the PO for the oil cooler exit, making this a relatively low-risk experiment. I picked up an enourmous 14" puller fan from the junkyard while I was there getting the radiator, but the ducting is going to be much easier for the pusher fan, so I may try that first and see if it cools adequately, and if no, switch to the puller fan.
Posted by: rnellums Mar 3 2014, 09:04 AM
I got a bit distracted last week while hanging out with a friend in his garage! It's enough to make anyone jealous!!
I got back to it this weekend. I spent close to 6 hours outside in 15 degree temperatures and snow pulling the wiring harness or of the donor car! I had no idea how much work that was going to be.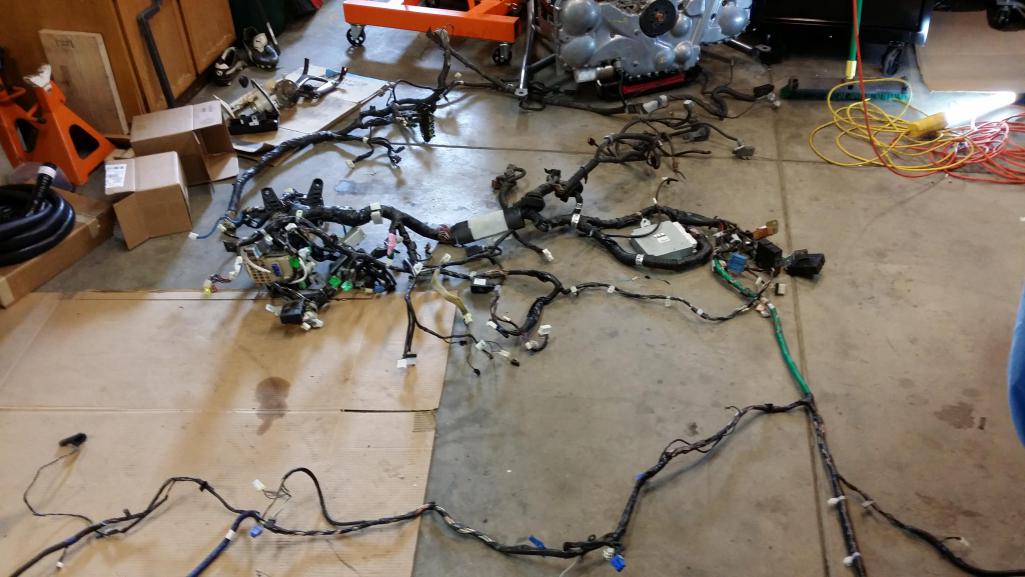
I shop potent last night adding flags to the connectors on the harness preparing to start cutting.
Before I do, are there any systems that seem like they should get cut but are essential?
Posted by: 76-914 Mar 3 2014, 09:25 AM
I don't envy you sorting that maze out! Your brain will want some recess at the end of each evening. 

Posted by: rnellums Mar 3 2014, 10:50 PM
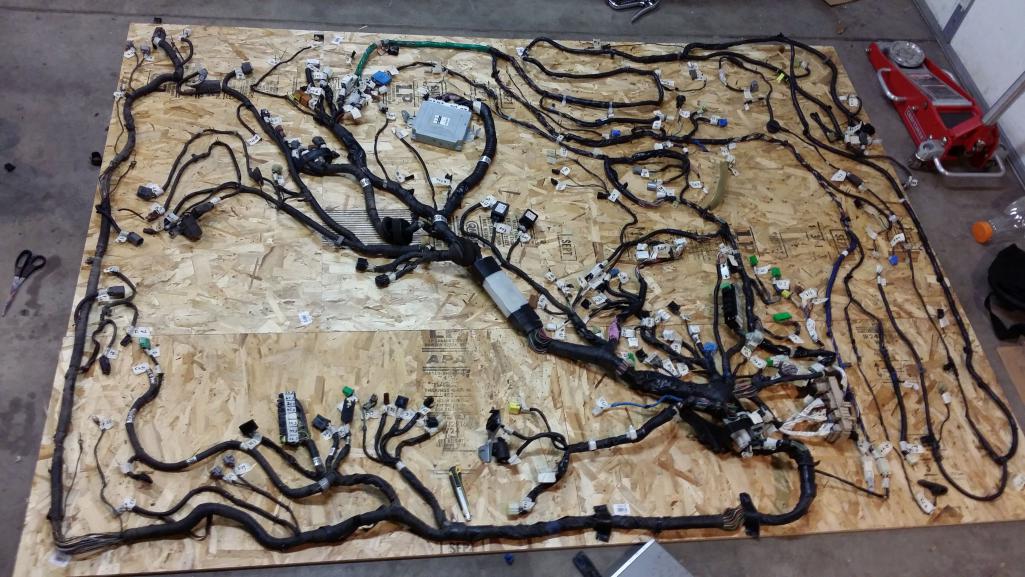
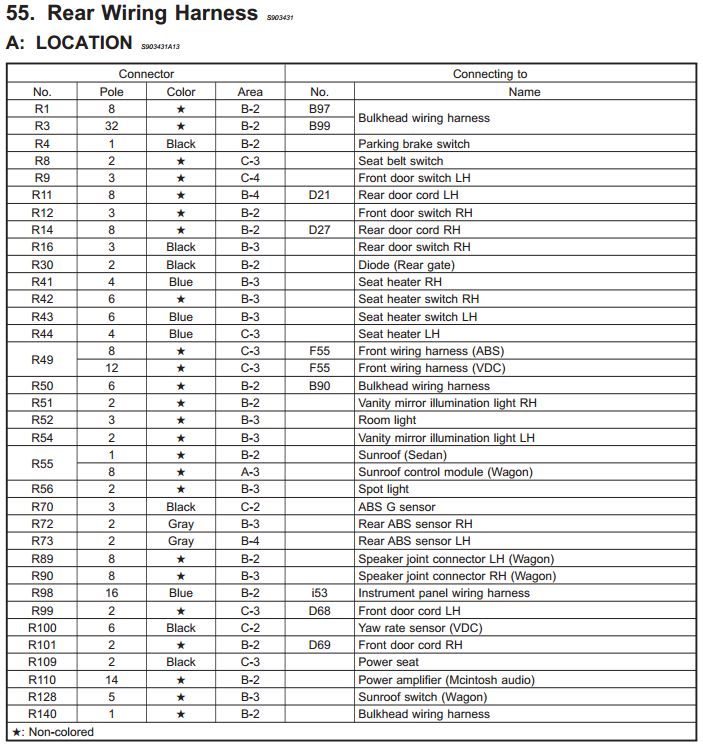
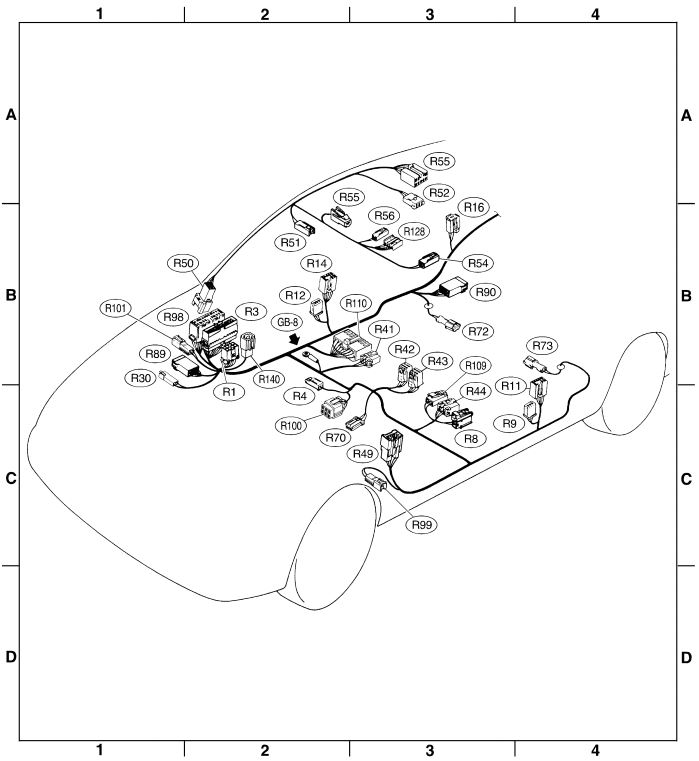
I finally got every connector flagged according to the manual tonight (manual downloaded from this sweet source: http://jdmfsm.info/Auto/Japan/Subaru/).
Then I spent a few hours carefully nailing it to a piece of plywood to keep things organized when I start to cut!
It was a ton of work on the front end, but pretty much everything should go smoothly from here out (I hope).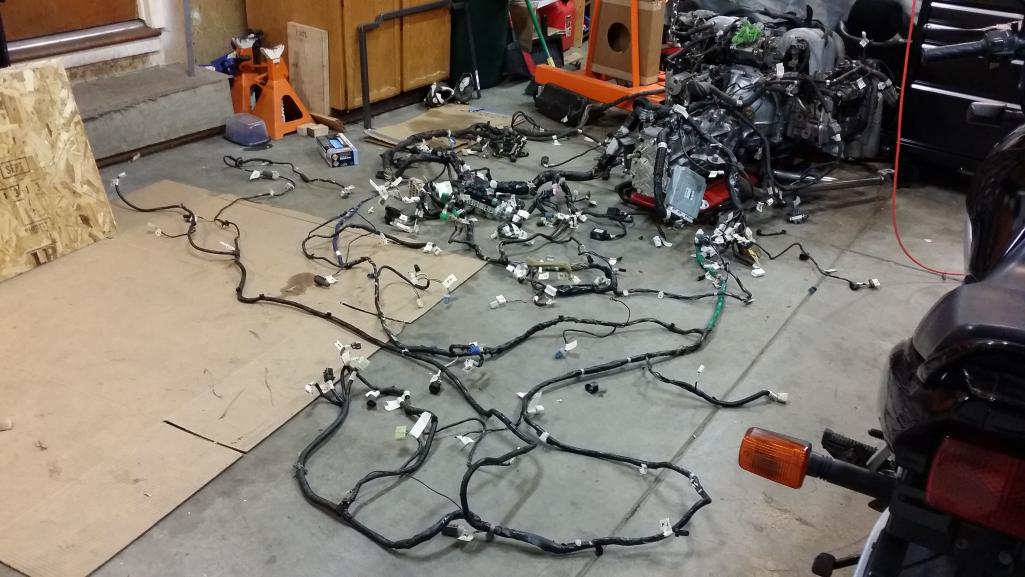
Posted by: 76-914 Mar 3 2014, 11:37 PM
Ross, is the pump controller in there? Shit, I just remembered that you needed some #'s off mine.  Anyway, have fun and keep a clear head while working on it.
Posted by: rnellums Mar 3 2014, 11:38 PM
Where would it have been in the car? I pulled the entire loom and didn't see anything like that.
Posted by: 904svo Mar 4 2014, 08:18 AM
The fuel pump controller is located in the trunk, right side over the wheel well.
Posted by: rnellums Mar 4 2014, 08:47 AM
The fuel pump controller is located in the trunk, right side over the wheel well.
I don't remember anything like that. hmm. Looking at my harness guide, I don't see anything labeled like that either. Any chance it is integral to the H6 fuel pump?
Posted by: scotty b Mar 4 2014, 09:09 AM
I'm laying my plan out for the accessory belts. I don't plan to run A/C, and I have no need to run the power steering pump, so I plan to remove those from the system. The idea is to attach the alternator on the swinging end to a turnbuckle type strut connecting it to the engine case, and using the alternator itself as the tensioner, much like the layout on the 914. I've drawn my anticipated layout on this image.
Anyone see anything that looks absolutely terrible?
source the turnbuckle from a 944 r 928. they used that setup for the belt tensioning Very simple, and very effective

Has anyone found a wiring schematic as to what is and is NOT needed for our conversions ? That is the part of this I really dread doing. I hate wiring

Posted by: scotty b Mar 4 2014, 09:13 AM
Also if it helps you or anyone else, I have factory service manuals 2-6 for '92 SVX. No wiring, but it does have the fuel, emmisions, engine, trans etc. Looks like everything BUT the wiring
Scratch that I DO have the wiring book. Let me know if you need any pics from it.
Posted by: 76-914 Mar 4 2014, 09:47 AM
That looks like the sch from an Outback. If so it was located on the back seat,left side and half way up by the antennae/stereo junction. I thought it was part of the stereo and looked like a small amp to me.
Posted by: 76-914 Mar 4 2014, 10:03 AM
I'm laying my plan out for the accessory belts. I don't plan to run A/C, and I have no need to run the power steering pump, so I plan to remove those from the system. The idea is to attach the alternator on the swinging end to a turnbuckle type strut connecting it to the engine case, and using the alternator itself as the tensioner, much like the layout on the 914. I've drawn my anticipated layout on this image.
Anyone see anything that looks absolutely terrible?
source the turnbuckle from a 944 r 928. they used that setup for the belt tensioning Very simple, and very effective
Has anyone found a wiring schematic as to what is and is NOT needed for our conversions ? That is the part of this I really dread doing. I hate wiring
For an 3.0 or 3.3?
Posted by: rnellums Mar 4 2014, 11:47 AM
That looks like the sch from an Outback. If so it was located on the back seat,left side and half way up by the antennae/stereo junction. I thought it was part of the stereo and looked like a small amp to me.
So my harness matches the diagrams above perfectly, I don't have a connector on the LH above the wheel well. Harness and engine are out of a 2001 legacy outback if that helps.
Scotty, I'm going to make a list of which connectors I cut and which I keep as I go.
Posted by: Chris H. Mar 4 2014, 04:52 PM
On the radiator setup, you might want to look at PJ Haun's website if you want to put it in the floor.
http://members.rennlist.com/bluethunder/engine.htm
Definitely want the fan to pull the air through the radiator, not push it as Stephen said. PJ has a fan under the rad and a lip to a create low pressure area.
I was dead set on doing mine that way til I saw Mike (Ruby914)'s setup. 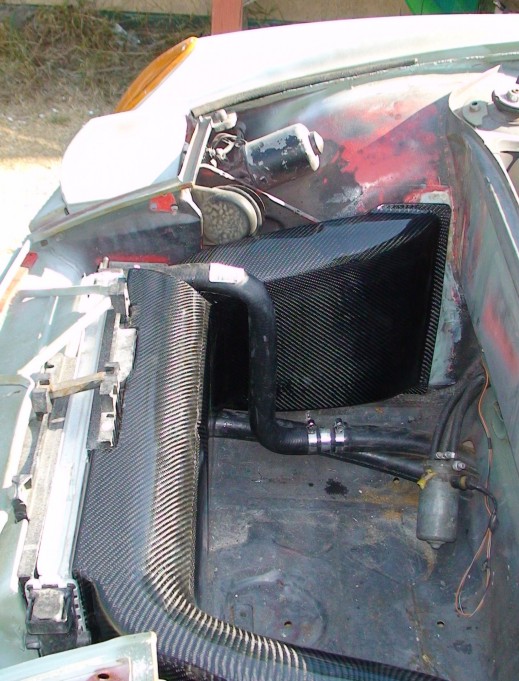
He put the radiator a lot closer to the front of the car than most and then made that awesome carbon fiber ducting. Could be done in fiberglass too, which I might try.
Posted by: 76-914 Mar 4 2014, 05:19 PM
That looks like the sch from an Outback. If so it was located on the back seat,left side and half way up by the antennae/stereo junction. I thought it was part of the stereo and looked like a small amp to me.
So my harness matches the diagrams above perfectly, I don't have a connector on the LH above the wheel well. Harness and engine are out of a 2001 legacy outback if that helps.
Scotty, I'm going to make a list of which connectors I cut and which I keep as I go.
My mistake. I saw the hatchback lid and.....duh. Go with SVO's input then. I remember the pump being in the trunk behind the R seat. It will be close to the pump. BTW, do your homework before selling the copper scrap. A lot of hustlers in that trade.
Posted by: scotty b Mar 4 2014, 07:48 PM
On the radiator setup, you might want to look at PJ Haun's website if you want to put it in the floor.
http://members.rennlist.com/bluethunder/engine.htm
Definitely want the fan to pull the air through the radiator, not push it as Stephen said. PJ has a fan under the rad and a lip to a create low pressure area.
I was dead set on doing mine that way til I saw Mike (Ruby914)'s setup.
He put the radiator a lot closer to the front of the car than most and then made that awesome carbon fiber ducting. Could be done in fiberglass too, which I might try.
that's the nicest setup IMHO. I also plan to do something similar 
Posted by: rnellums Mar 4 2014, 10:43 PM
My mistake. I saw the hatchback lid and.....duh. Go with SVO's input then. I remember the pump being in the trunk behind the R seat. It will be close to the pump. BTW, do your homework before selling the copper scrap. A lot of hustlers in that trade.
Now I'm all confused. I can seem to keep all the models straight. It came out of a 2001 H6 wagon. But I still don't have the connector.for the pump in the harness. Is it labeled in the wiring diagrams?
Posted by: rnellums Mar 4 2014, 10:48 PM
On the radiator setup, you might want to look at PJ Haun's website if you want to put it in the floor.
http://members.rennlist.com/bluethunder/engine.htm
Definitely want the fan to pull the air through the radiator, not push it as Stephen said. PJ has a fan under the rad and a lip to a create low pressure area.
I was dead set on doing mine that way til I saw Mike (Ruby914)'s setup.
He put the radiator a lot closer to the front of the car than most and then made that awesome carbon fiber ducting. Could be done in fiberglass too, which I might try.
That definitely looks awesome. That's the route I think I'll take if the flat radiator doesn't cool enough. The floor has already been chopped out on mine by the PO, so it doesn't cost me anything to try it. If cooling is insufficient, then I'll switch to the fender well ducted setup.
Thanks for the pointing link!
Posted by: Andyrew Mar 4 2014, 11:02 PM
On the radiator setup, you might want to look at PJ Haun's website if you want to put it in the floor.
http://members.rennlist.com/bluethunder/engine.htm
Definitely want the fan to pull the air through the radiator, not push it as Stephen said. PJ has a fan under the rad and a lip to a create low pressure area.
I was dead set on doing mine that way til I saw Mike (Ruby914)'s setup.
He put the radiator a lot closer to the front of the car than most and then made that awesome carbon fiber ducting. Could be done in fiberglass too, which I might try.
This is what I have been wanting to do for years...
Posted by: 76-914 Mar 5 2014, 05:32 PM
My mistake. I saw the hatchback lid and.....duh. Go with SVO's input then. I remember the pump being in the trunk behind the R seat. It will be close to the pump. BTW, do your homework before selling the copper scrap. A lot of hustlers in that trade.
Now I'm all confused. I can seem to keep all the models straight. It came out of a 2001 H6 wagon. But I still don't have the connector.for the pump in the harness. Is it labeled in the wiring diagrams?
First, I posted 2 pic's re: the controller and plug but listed them in my thread.
 IIRC 11 month's later, after the harness comes alongside the psg door it continues past the R back seat. At that point it split. Some of it continued to the back lift door, some of it went behind the R rear wheel well and onto some senders around the gas tank and the branch you want went directly behind the rear seat.Once it is behind the L rear seat it winds it way around and beneath the L rear seat and continues back to the psg side where it connects to the pump. The harness that the controller connects to is sheathed in grey and went from the harness behind the L rear seat then back about 2 feet and up about 1 foot off the floor. I think it is directly below the antennae junction on the L rear glass behind the L rear seat. But then again, I can't even remember what I ate for breakfast this morning.
  Kent
Kent
Posted by: rnellums Mar 5 2014, 07:51 PM
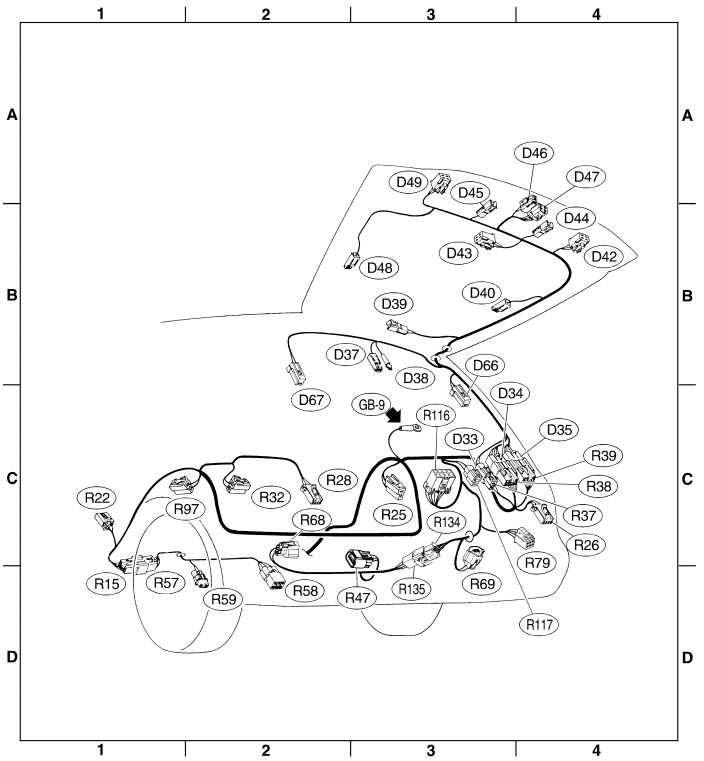
So this may sound like I am taking crazy pills Kent, but there is no wire like that in my harness (at least not back by the rear seats). The schematic I have doesn't even list an R-122!
I looked up the schematic from a 2003 outback legacy than there it is, wire R-122! Looks like they made a change in the harness between those years which is disappointing in that I can't just go though and cut what you cut!
Posted by: rnellums Mar 6 2014, 08:51 AM
I am trying to get a couple more day of driving in before I take the car down for the rest of the conversion! Also, my current engine and tranny package is going to be up for sale soon! 2.4L high comp with MSD, remote oil cooler, and weber 44s, and my built 901 with quaiffe TBD. Looking for around 40 for the package! 
Posted by: 76-914 Mar 6 2014, 09:11 AM
In your factory manual; is there a page in the wiring sch's section that reads "Fuel System" or Fuel Pump" at the top of the page? Should be 2 of them. One for the 6 and one for the 4 cyl. Also, Look for two yellow wires. One with a blk stripe and one with a red stripe. Those are the + & - to the fuel pump. Maybe work backwards from there. Do you still have the car available to you? If so, can you shoot some pic's?
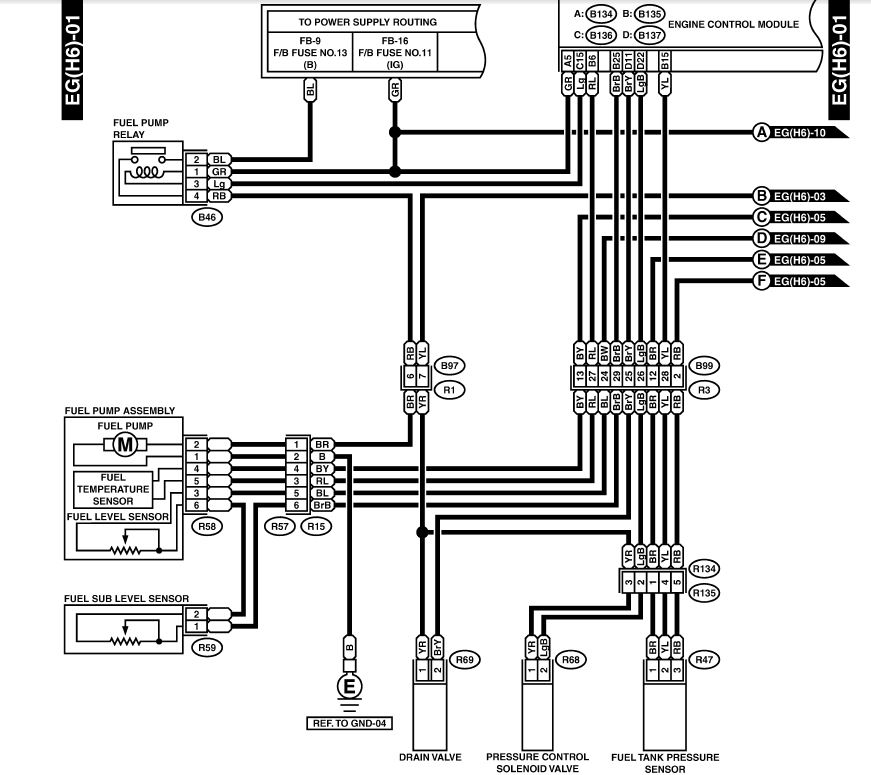
Posted by: rnellums Mar 6 2014, 10:12 AM
In your factory manual; is there a page in the wiring sch's section that reads "Fuel System" or Fuel Pump" at the top of the page? Should be 2 of them. One for the 6 and one for the 4 cyl. Also, Look for two yellow wires. One with a blk stripe and one with a red stripe. Those are the + & - to the fuel pump. Maybe work backwards from there. Do you still have the car available to you? If so, can you shoot some pic's?
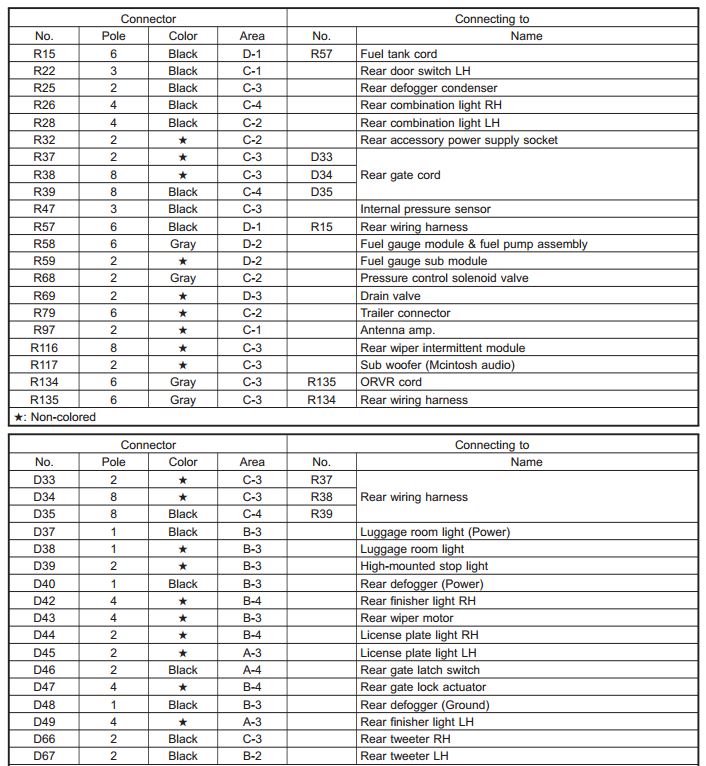
No access to the car I am afraid. The closest thing to fuel system is "fuel gauge", but still no controller.
In the 2001 engine wiring harness it shows more connections to the fuel pump, but they all go to the ECU or the fuel pump relay, which is controlled by the ECU as well.
2001 Schematic
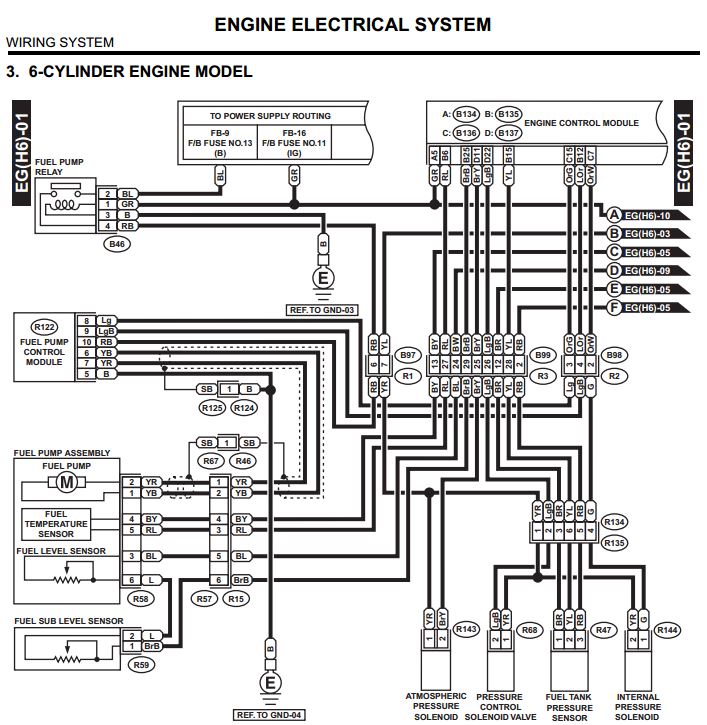
In the schematic I have for the 2003 model, it does indeed show a fuel pump control module. I'm thinking maybe I don't need it after all?
2003 Schematic
Posted by: 76-914 Mar 6 2014, 10:29 AM
Yup, looks like your right and I may have over thought this entire thing. Because after looking at both I see no difference, essentially. After all, I have cut most of the wires out of R-122 and the only ones necessary are those to the pump and pump relay. The relay needs to be on a switched and fused circuit and as I see it the rest will follow. Which brings me to: what the Hell does it do, exactly? If it controls anything it must be on/off. Because as I understand it the pressure is regulated at the rail, not at the pump. What say's the collective on this matter? Might have to take this one to a Suby board and get flamed. 
Posted by: Chris H. Mar 6 2014, 05:35 PM
Yup, looks like your right and I may have over thought this entire thing. Because after looking at both I see no difference, essentially. After all, I have cut most of the wires out of R-122 and the only ones necessary are those to the pump and pump relay. The relay needs to be on a switched and fused circuit and as I see it the rest will follow.
Which brings me to: what the Hell does it do, exactly? If it controls anything it must be on/off. Because as I understand it the pressure is regulated at the rail, not at the pump. What say's the collective on this matter? Might have to take this one to a Suby board and get flamed. Yeah I'd be surprised if there is a separate "controller" for the fuel pump, what R122 might do is monitor the tank sensor, solenoids and stuff shown in the diagram which you won't use. Maybe the pump won't run if the tank pressure is too high which R122 is in charge of monitoring
 ? Ya know, stuff like that.... On the SVX the power to the pump is controlled by the ECU. You run it through the relay then to the pump. Simple, just need "on" or "off" I think but you have a different car so I could be wrong. If you still want to ask about it 25RS is a much kinder place than NASIOC. They do swaps there too.
Posted by: Chris H. Mar 6 2014, 05:45 PM
Double post! Dang ipad!
Posted by: AE354803 Mar 6 2014, 07:17 PM
Yup, looks like your right and I may have over thought this entire thing. Because after looking at both I see no difference, essentially. After all, I have cut most of the wires out of R-122 and the only ones necessary are those to the pump and pump relay. The relay needs to be on a switched and fused circuit and as I see it the rest will follow.
Which brings me to: what the Hell does it do, exactly? If it controls anything it must be on/off. Because as I understand it the pressure is regulated at the rail, not at the pump. What say's the collective on this matter? Might have to take this one to a Suby board and get flamed. Yeah I'd be surprised if there is a separate "controller" for the fuel pump, what R122 might do is monitor the tank sensor, solenoids and stuff shown in the diagram which you won't use. Maybe the pump won't run if the tank pressure is too high which R122 is in charge of monitoring
? Ya know, stuff like that.... On the SVX the power to the pump is controlled by the ECU. You run it through the relay then to the pump. Simple, just need "on" or "off" I think but you have a different car so I could be wrong. If you still want to ask about it 25RS is a much kinder place than NASIOC. They do swaps there too.I was doing some reading on the LGT forum, it looks like the fuel pump control module adjusts duty cycle based on engine demand, but not in order to maintain a given pressure like the on demand fuel system, just to cut the pump duty (I'm pretty sure the Subarus still had a FPR at this point, mine is older). Looks like they swapped over to a compatible STI module because their legacy fuel pump control modules were limiting the fuel pump at max demand.
anyway, here's a 40 page forum thread if you have nothing better to do.
http://legacygt.com/forums/showthread.php/fuel-pump-control-module-143860p11.html
Posted by: Chris H. Mar 7 2014, 10:07 AM
Great work man! I
Makes perfect sense once you figure it out doesn't it ? This wiring stuff will make you crazy... So R122 just cycles the pump to preserve it when not needed I guess. Kent you're not even using the original pump for that engine right ? Sounds like you MIGHT be able to eliminate that "controller" but you'll want to be careful with the wiring if you take it out...that's a complicated setup and it goes into the ECU it looks like. I'd do some searches on the Subie sites before you decide. Also might want to start the car once before you do that...
Posted by: AE354803 Mar 7 2014, 11:35 AM
Great work man! I
Makes perfect sense once you figure it out doesn't it
? This wiring stuff will make you crazy... So R122 just cycles the pump to preserve it when not needed I guess. Kent you're not even using the original pump for that engine right ? Sounds like you MIGHT be able to eliminate that "controller" but you'll want to be careful with the wiring if you take it out...that's a complicated setup and it goes into the ECU it looks like. I'd do some searches on the Subie sites before you decide. Also might want to start the car once before you do that...It doesn't cycle the pump operation, but it does cycle the pumps power supply. It's a Pulsed Width Modulator, it basically drops the voltage that is delivered to the pump by supplying different length bursts of voltage that average out to whatever lower voltage they are aiming for (12Volts pulsed to average out to 8 volts).
My guess is they did it to extend the life of the pump/pump motor, maybe reduce evaporative emissions slightly?
I didn't find out what happened if the R122 was removed, I'm guessing the computer may get upset, possibly go into limp mode assuming it has no or little fuel? It looked like they grabbed some STI R122's and plug and played them, allowed them to get higher output from their pumps. Their whole issue was that the voltage the pump was receiving was reduced by the R122 to only 12 volts (even at max demand) instead of battery voltage (13.5 ish) so the fuel pump was not delivering as much as it could and became a limiting factor for systems that were at the upper end of what the fuel pump could deliver (they were pushing injectors to 100% pulse).
For whatever reason the STI R122's would give them a high maximum demand voltage than the Legacy GT R122's and that allowed them to deliver more fuel.
Posted by: ruby914 Mar 7 2014, 01:10 PM
First off, thanks to all for the good words on my shroud. I am flattered.
From what I understood of the FP controller is it was there because the fuel demand at idle and WOT is quite different. No need to have the system at full pressure at idle.
I thought it had 3 different duty cycles. Could be only 2?
I had a fuel pressure gauge on my car, in the start, but it is no longer on the car.
Best I remember is 45 PSI at idle. It may ramp up near 100 PSI at WOT?
Edit: (I just found the old gauge, it's stuck at 20 PSI. So there is no telling what pressure at idle was.)
I was going to go get a new pressure gauge last week because my car suddenly just quit.
It was dark but everything seemed fine . Air, fuel, spark??
Sitting in the drivers seat, I reached under the glove box and wiggled the wires to the controller, they all felt fine. Originally my controller plug was cut from the harness so I used individual spade plugs, figured that could be the problem.
It started so I started driving home. It died again on the way home. I wiggled it again. It felt fine, started, drove home.
Still no pressure gauge but I have not had a problem with it.
My thought on yours. With out a turbo, it's just not needed.
Posted by: rnellums Mar 12 2014, 09:34 PM
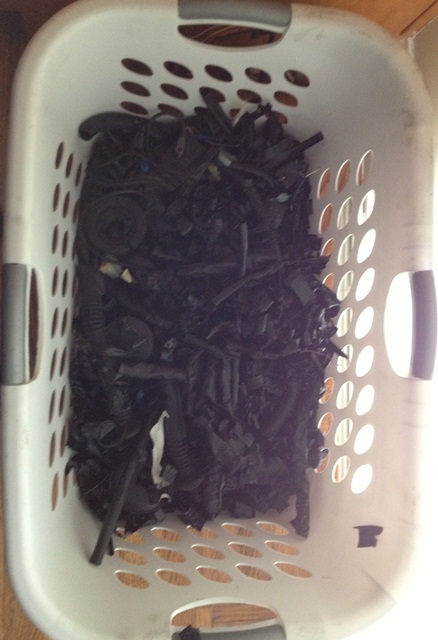
I am continuing on with the harness, I have finally gotten all the wrap off it and will begin stripping it down tomorrow! Holy cow my fingers hurt!
Attached thumbnail(s)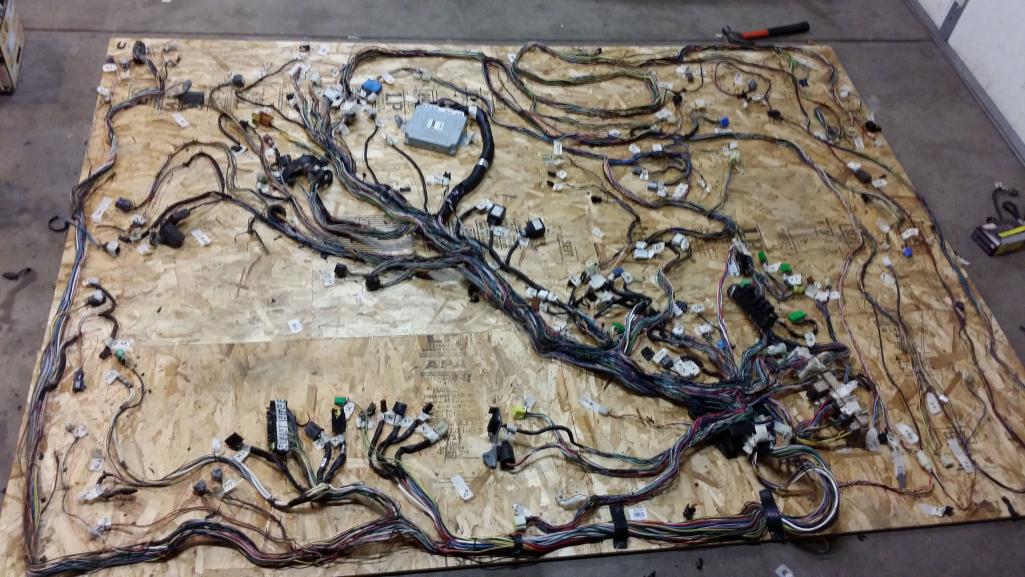
Posted by: 76-914 Mar 13 2014, 07:05 AM
I for got how long it takes just to strip the sheathing. FWIW, I as reading some Suby stuff the other nite and apparently it was used on '03 sixes. I didn't see any mention of it's use on any other 6 so................. who knows?
Posted by: rnellums Mar 13 2014, 09:16 AM
I used a bit of filter magic on an earlier post of mine.
Posted by: Chris H. Mar 13 2014, 09:39 AM
I for got how long it takes just to strip the sheathing. FWIW, I as reading some Suby stuff the other nite and apparently it was used on '03 sixes. I didn't see any mention of it's use on any other 6 so................. who knows?Yeah I'm getting flashbacks...that was mind-numbing.
Whatever you do don't take the wires off the hooks! Leave it organized like you have it. I had a spaghetti mess. Totally my fault.
Hey Ross I keep forgetting to mention an idea for a floor vent air exit when I was going that route...just to minimize the water situation in the trunk and the air directed back instead of down I was going to try some louvered panels in the floor. This link just shows an example, not the ones I was planning to use...not sure if that would be enough holes but there are a lot of sizes and widths you can pick from. Or you could get a custom set punched in a flat panel (no idea what that costs...
).http://www.ebay.com/itm/1-Pair-Straight-Louvered-Panel-Rat-Rod-Hood-7-louvers-/181149339635?pt=Motors_Car_Truck_Parts_Accessories&hash=item2a2d578ff3&vxp=mtr
Posted by: rnellums Mar 15 2014, 08:12 AM
It's getting there! Hopefully just a couple more days of work!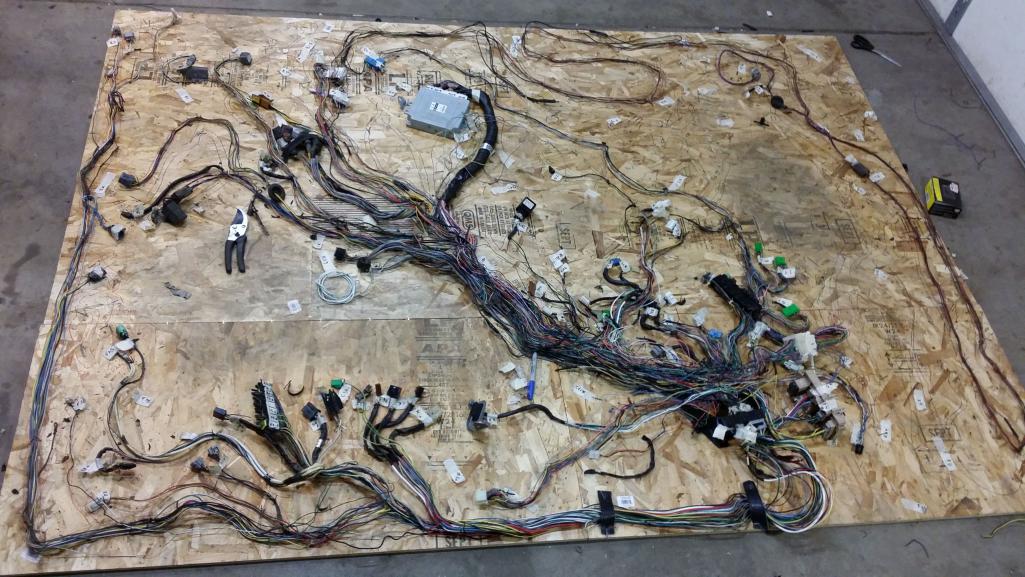
Posted by: rnellums Apr 2 2014, 08:30 PM
I've finally gotten the harness trimmed to about there I want it. It will need a few more wires removed, but I'm going to make sure it starts first!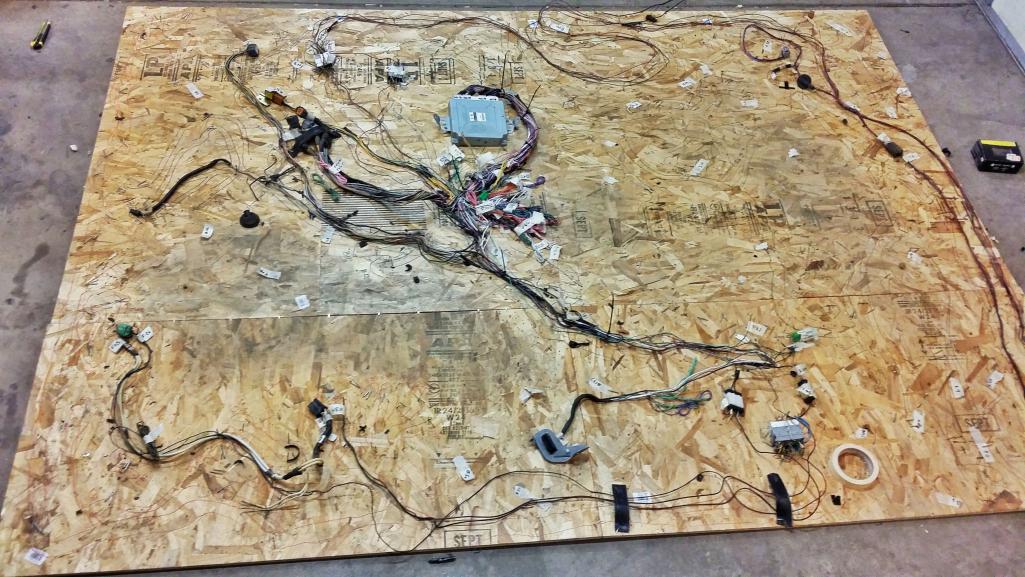
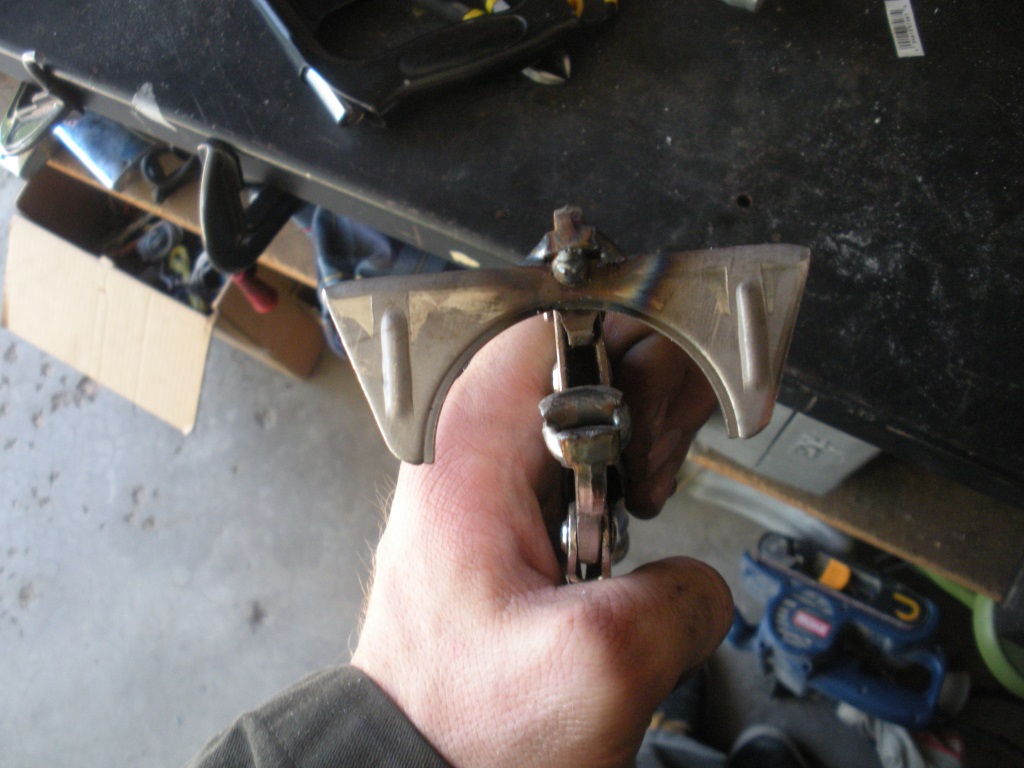
I also got the turnbuckle belt tensioner working. I tested the fit tonight, tomorrow I'll cut off the eye loops and weld on flat brackets in their place. It should work with cars running AC too, just a slightly different belt routing. 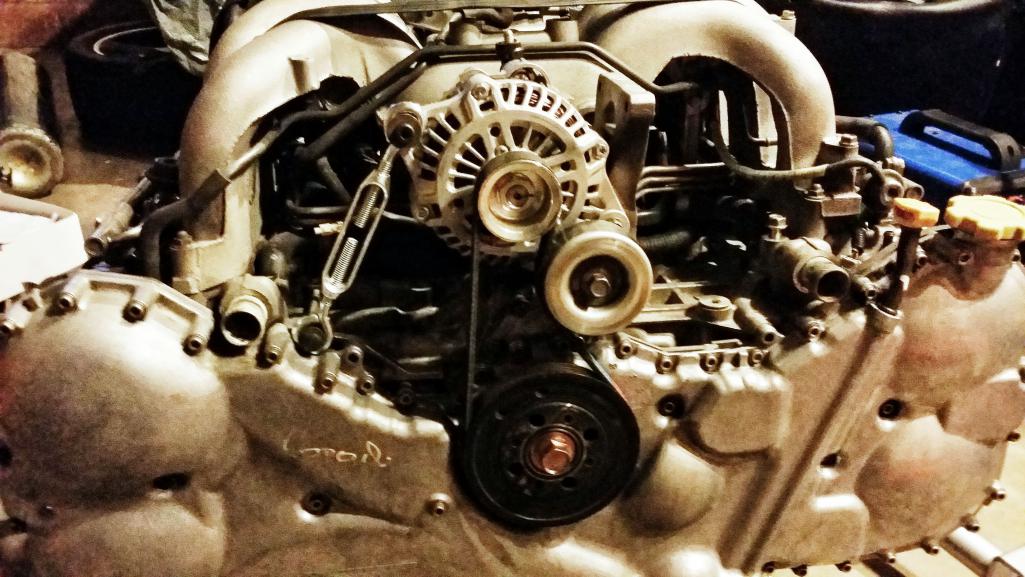
Posted by: 76-914 Apr 3 2014, 08:52 AM
Once you finish that harness you want to go get drunk. Good job, Ross. 
Posted by: Chris H. Apr 4 2014, 06:35 AM
Hey thanks for posting that tensioner! I need to make one of those. Tried to find a belt that was exactly the right diameter but it still slipped and squeaked like crazy.
Posted by: rnellums Apr 4 2014, 08:13 AM
It works pretty well! The belt I used is a Dayco 6PK0730. 29.4 in outer diameter. I'll let you know about the squeaking once I get it started up!
Posted by: 2mAn Apr 4 2014, 10:57 AM
Amazing how much extra crap there is in a wiring harness!
Posted by: ruby914 Apr 4 2014, 01:09 PM
[quote name='rnellums' date='Apr 2 2014, 07:30 PM' post='2019776']
I've finally gotten the harness trimmed to about there I want it. It will need a few more wires removed, but I'm going to make sure it starts first!
Is that the SUPER MULTIPLE JUNCTION (SMJ) with just one wire going through it?
From 40 wires down to one. Almost there
Posted by: 76-914 Apr 4 2014, 02:58 PM
No SMJ in that pic. It gets tossed.
Posted by: rnellums Apr 20 2014, 08:28 PM
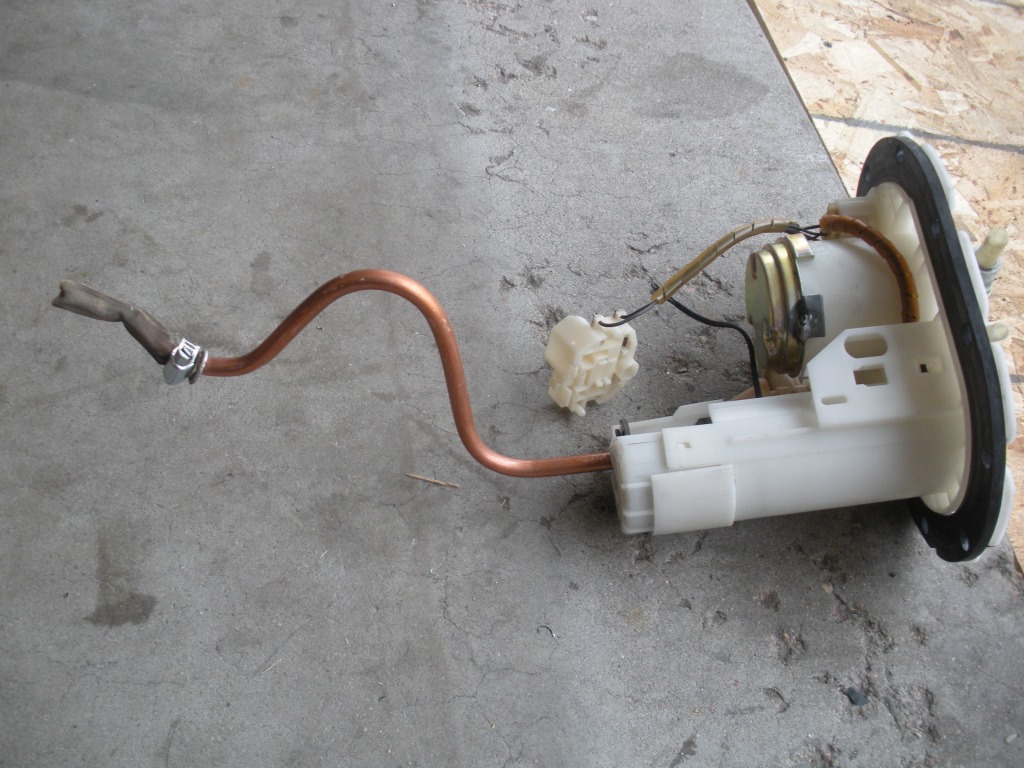
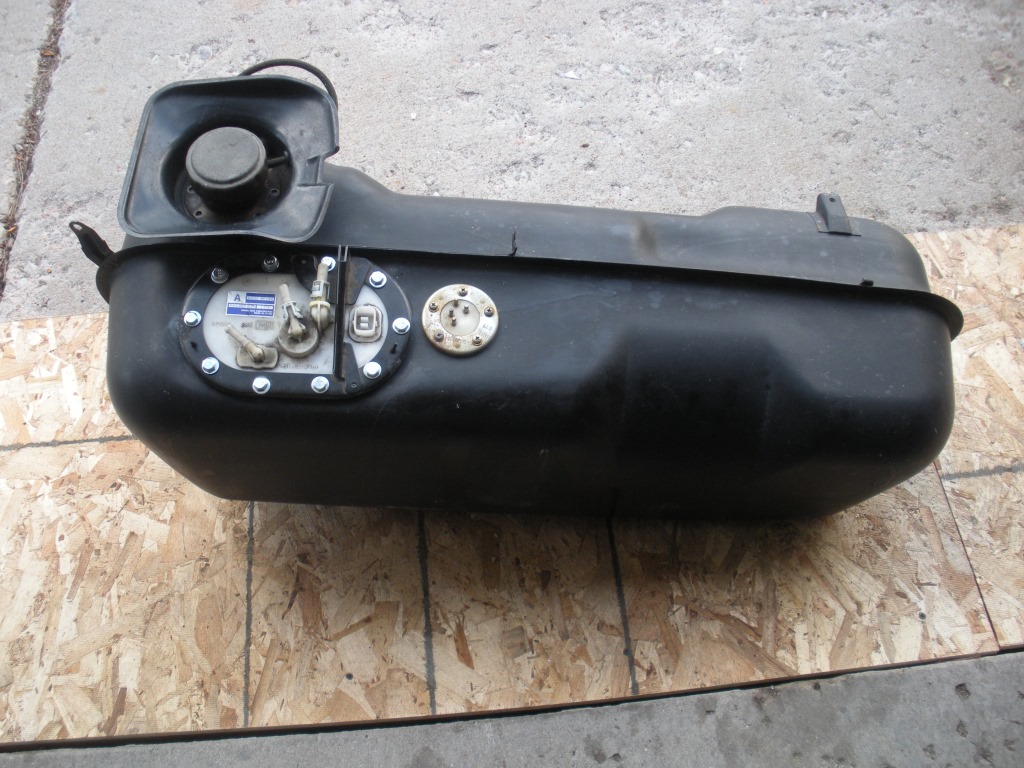
Made lots of progress this weekend! I have gotten the gas tank pretty much buttoned up, and am starting to get the engine in position so I can figure out what I'll need to do to get it to fit.
So first: the gas tank.
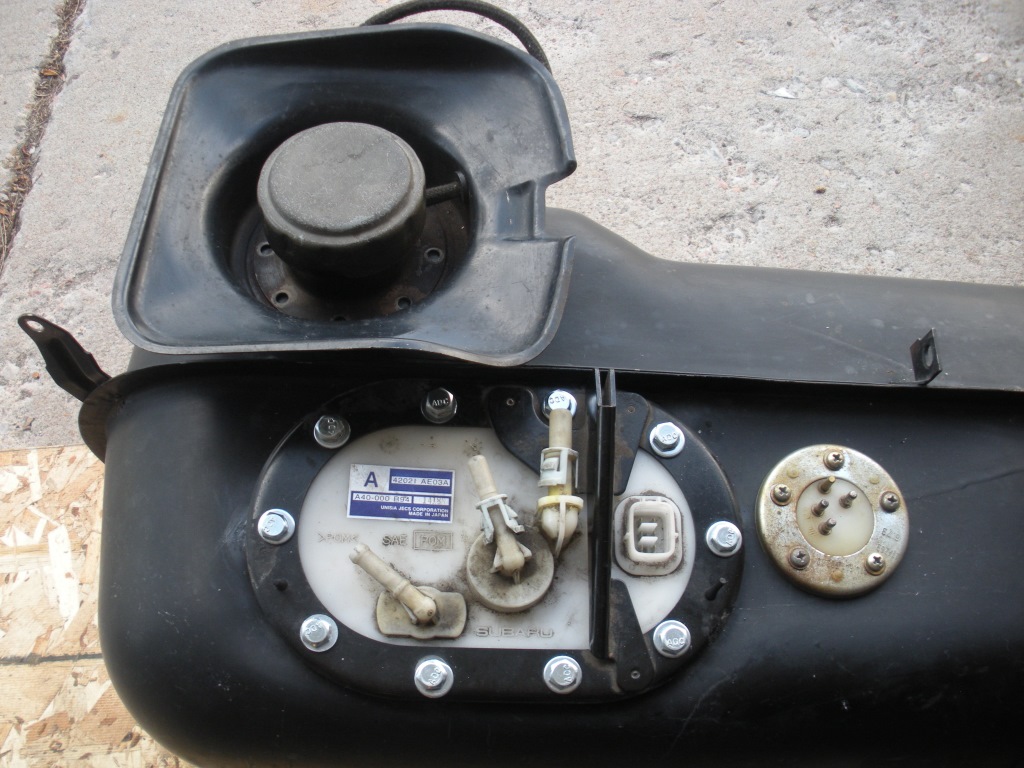
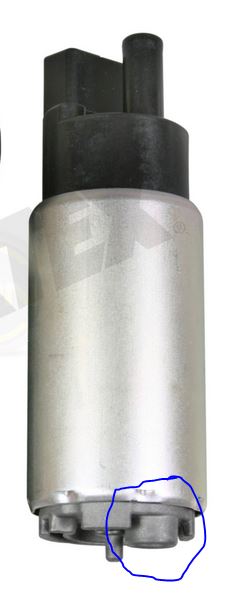
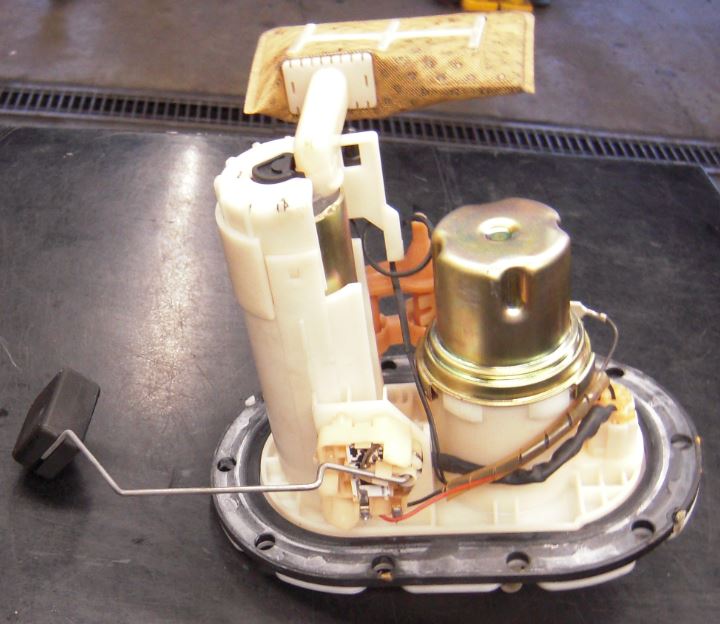
I borrowed pretty heavily from Kent's thread on his install of the subie fuel pump (from a legacy I think?) the biggest difference in mine is that I wanted to use the EZ30 fuel pump, but the pickup was too short. 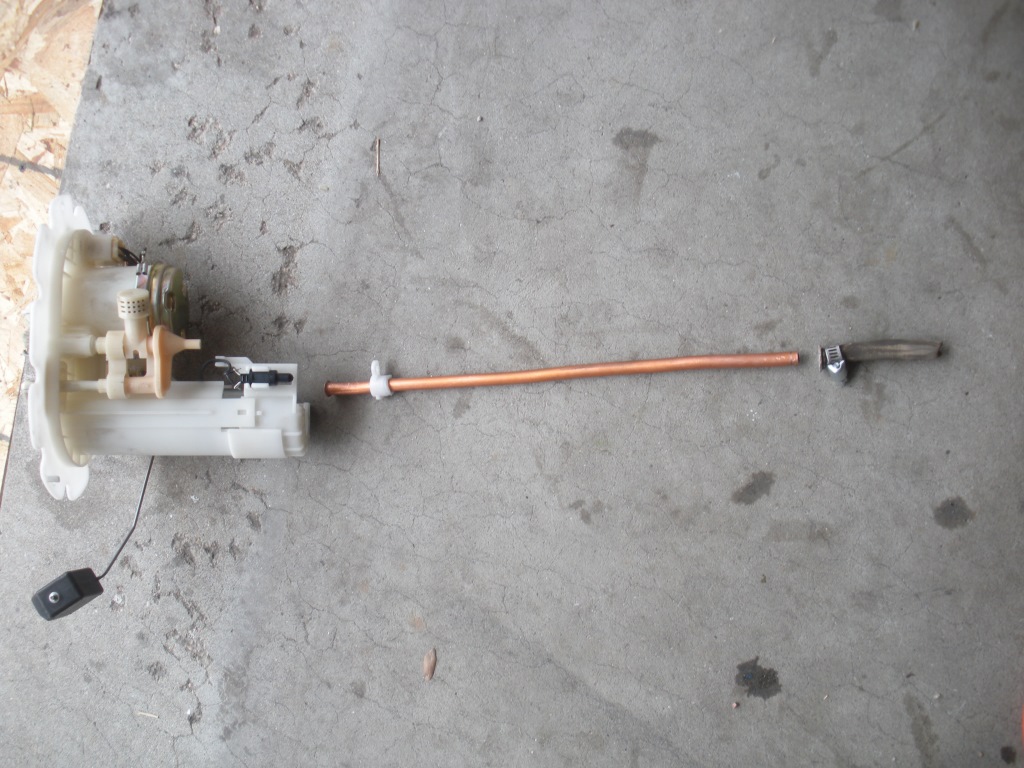
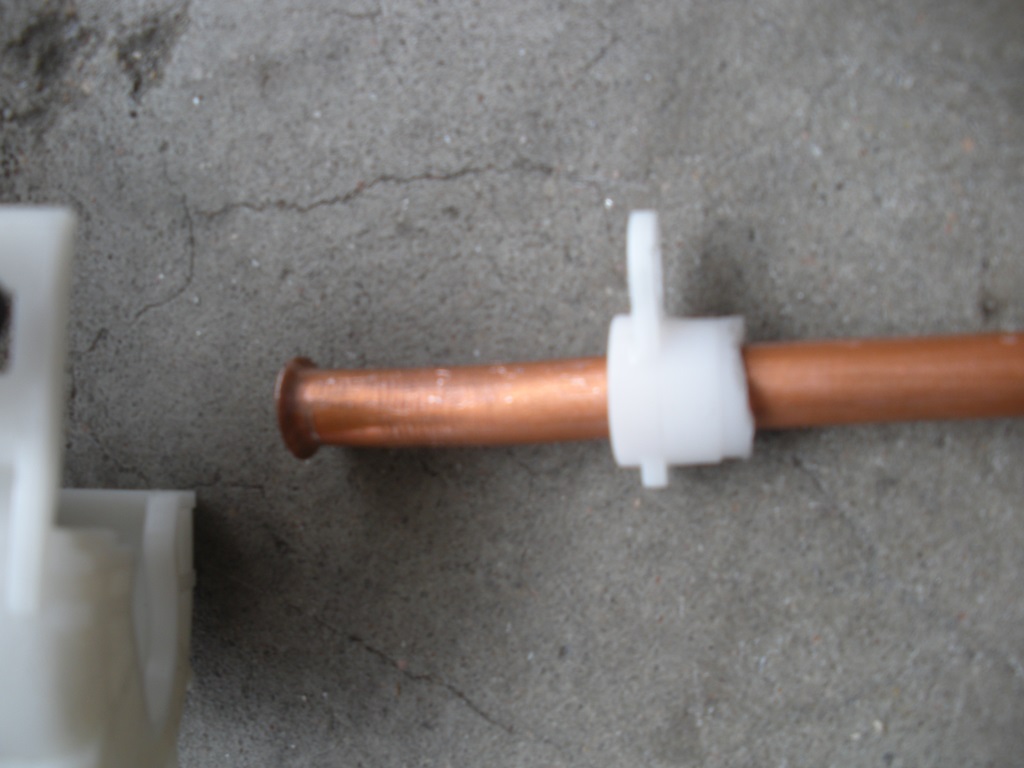
I ended up modifying it with a bit of flared copper tubing to extend the pickup and place it where I wanted it. I'm using the stock 914 fuel screen clamped to the end of my copper pipe as a strainer.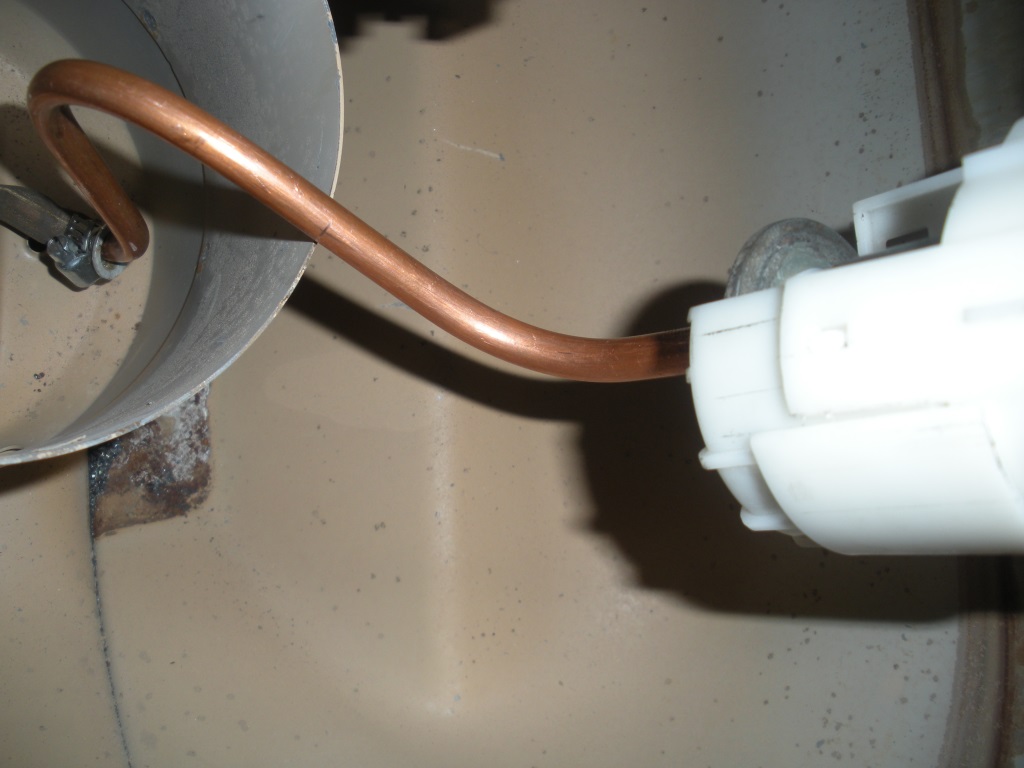
When I started fitting the pump to the tank it was wide enough that the side of the tank started to round off, making installing the rivnuts difficult. I ended up bending and pounding the mounting area flat before installing the pump.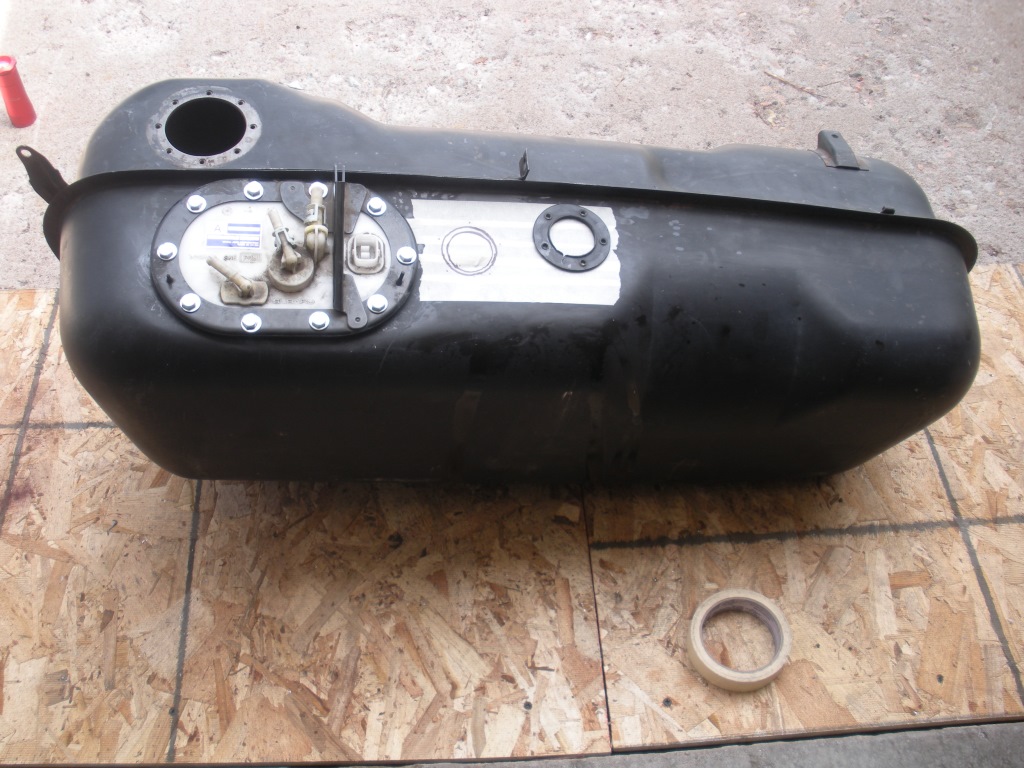
Posted by: rnellums Apr 20 2014, 08:50 PM
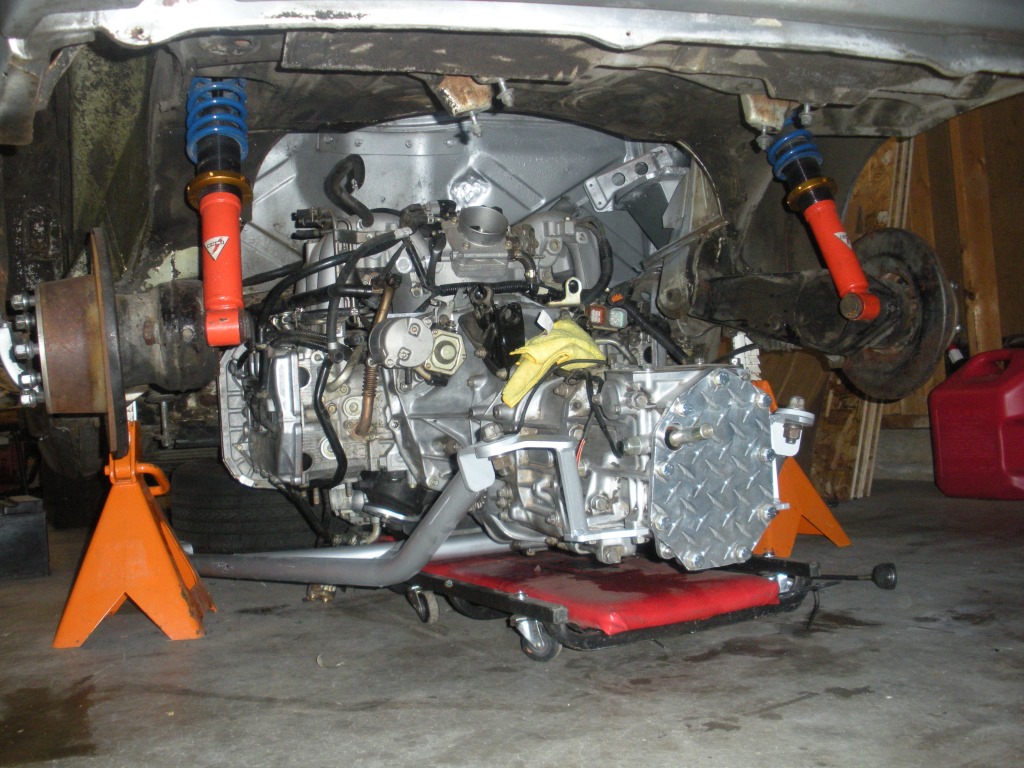
Also, a glamour shot of the "Heaven hole" and the engine getting into position for the first trial fit!
Posted by: Chris H. Apr 21 2014, 06:33 AM
You're working fast! The tank looks great. Hey if you're planning to copy Kent's hose sizes like I am (which are a copy of Bob's) let me know. I have 50 FEET of 7/8 Gates green stripe indestructible hose that I got for very little. Can send you 15 feet or so if you want.
Posted by: 76-914 Apr 21 2014, 02:59 PM
Looks good, Ross. Did you get a pic of how you tied the copper in at the pump? I'm trying to remember what the problem was with it when I tried to use that same pump. IIRC, I was planning on using some surgical tube to connect their plastic sock to the pick up tube. As a matter of fact, I still have that tube in a glass jar filled with gasoline. I wanted to see if there was any degradation of the tube in gas. That was Sept 1, 2013. I'll pull it on it's anniversary to check again. It was fine after 3 mo's., though. Does that fuel sender need to be spun 180? Did you finish your wiring? If so, where did you connect the WL wire tagged "starter cranking"? Yellow starter wire or switched ign?
Posted by: rnellums Apr 21 2014, 10:23 PM
You're working fast! The tank looks great. Hey if you're planning to copy Kent's hose sizes like I am (which are a copy of Bob's) let me know. I have 50 FEET of 7/8 Gates green stripe indestructible hose that I got for very little. Can send you 15 feet or so if you want.
I'm afraid I already bought some hose (wish I hadn't now!) but I appreciate the offer!
Looks good, Ross. Did you get a pic of how you tied the copper in at the pump? I'm trying to remember what the problem was with it when I tried to use that same pump. IIRC, I was planning on using some surgical tube to connect their plastic sock to the pick up tube. As a matter of fact, I still have that tube in a glass jar filled with gasoline. I wanted to see if there was any degradation of the tube in gas. That was Sept 1, 2013. I'll pull it on it's anniversary to check again. It was fine after 3 mo's., though. Does that fuel sender need to be spun 180? Did you finish your wiring? If so, where did you connect the WL wire tagged "starter cranking"? Yellow starter wire or switched ign?Kent, I dont have a great photo of it, but I'll attempt to explain with these. The stock fuel pump has a tiny outlet nub, too short to reliably attache a fuel hose to IMO. The stock fuel strainer is a fitted plastic cap with an elbow headed to the strainer. In Subaru's wisdom the tube headed to the strainer is U-shaped so you can't attach a hose to that either. What I did was cut the strainer fixture at the elbow, insert it over the copper before I flared it, and then use the stock strainer fixture to clamp the flared copper in place. I added a spring washer as well to improve the clamping force.
For the fuel sender, I am contemplating shorting it and eliminating the float and sender circuit altogether. Do you see any issues with that? I haven't finished up the wiring yet, but I'll probably go to the yellow starter wire, I'm not aware of any other connections that are only hot in the "start" key position.
Posted by: 76-914 Apr 22 2014, 07:53 AM
I don't see any issues with shit canning those two items. You have the stock sender to use. I thought that the WL wire might go to that tab on the ign switch that goes dead when cranking but is otherwise hot in the on position.  I guess the ECU interprets that signal.
Posted by: rnellums Apr 29 2014, 07:36 PM
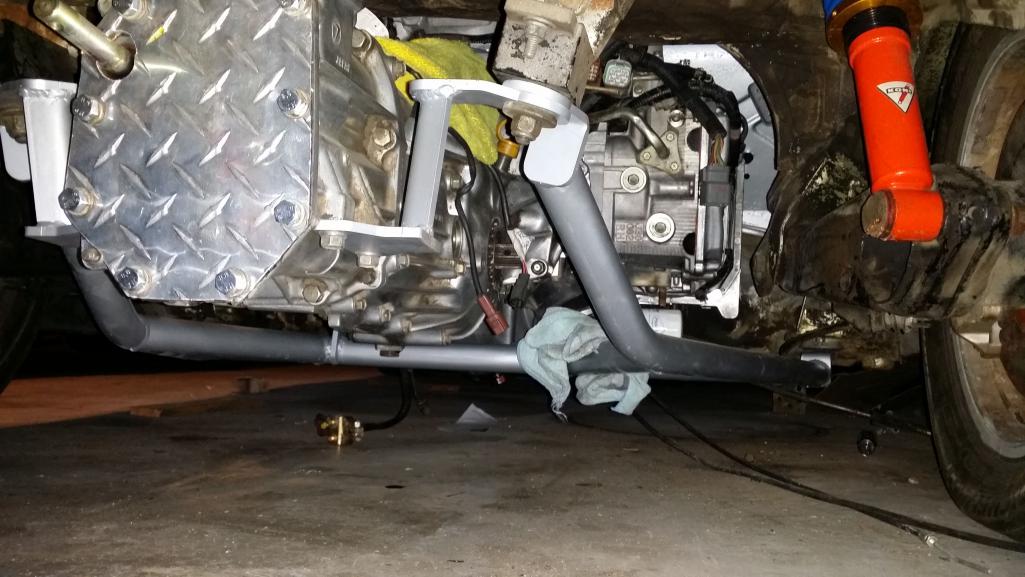
I finally got the engine in! No clearance issues to speak of as far as fit goes. I'll have to cut some space for the intake, and likely a bit of the top of the cable clutch fork, but the engine is in! Only 4 inches of ground clearance though, and even less once the exhaust is hung below it.
Is there a minimum clearance for lowered cars?
Attached thumbnail(s)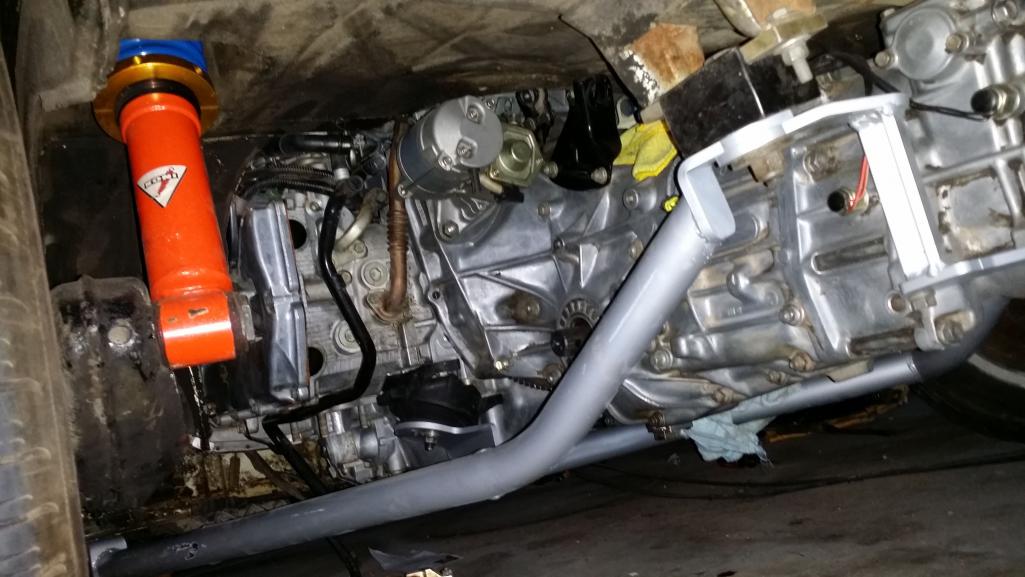
Posted by: rnellums Apr 29 2014, 07:41 PM
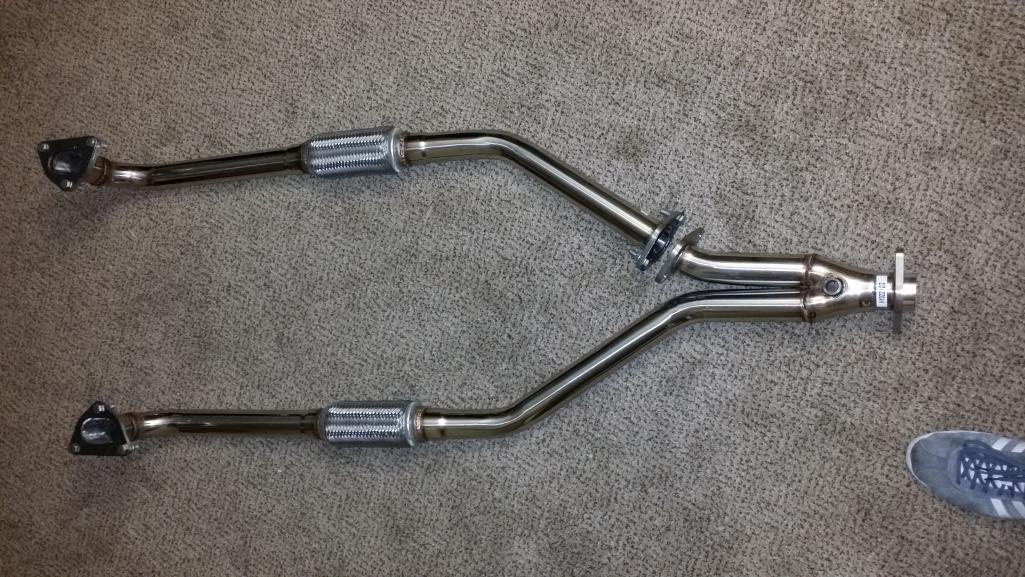
I also got an OBX exhaust in today. It's SS, and I'll probably end up cutting it after the flex joints and going straight into supertraps instead of all the way to the collector. what about cutting it before the flex joints? Thoughts?
Attached thumbnail(s)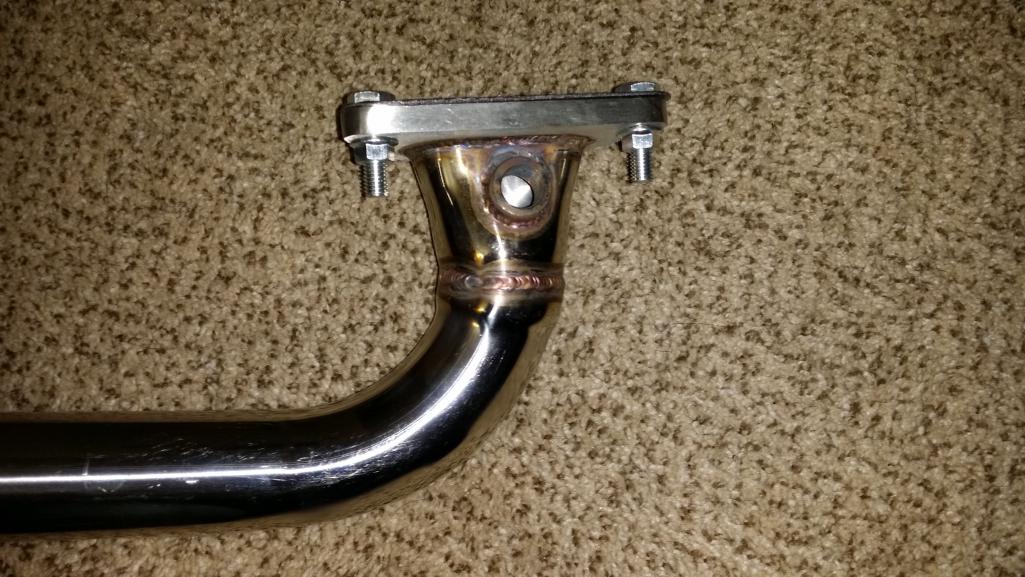
Posted by: 76-914 Apr 30 2014, 08:33 AM
Ross, would you mind adding another pic like the first one but with a ruler next to it. I'm interested in the distance between the top of the flange and the bottom and top of the pipe once it goes horizontal. IOW, I want to see how close to the ground the bottom of the exhaust would be on my car. We have different cradles so I need to measure to see if theirs would work for me. BTW, how much ground clearance did you end up with? TIA, Kent
EDIT: Never mind on the clearance. I went back one page and read your comment on this. I ended up w/ 5" as I believe Chris' was, too. This is what the distance from the old cooling flap to ground clearance was, also. Have you adjusted your shock perches, yet?
Posted by: rnellums May 1 2014, 08:24 AM
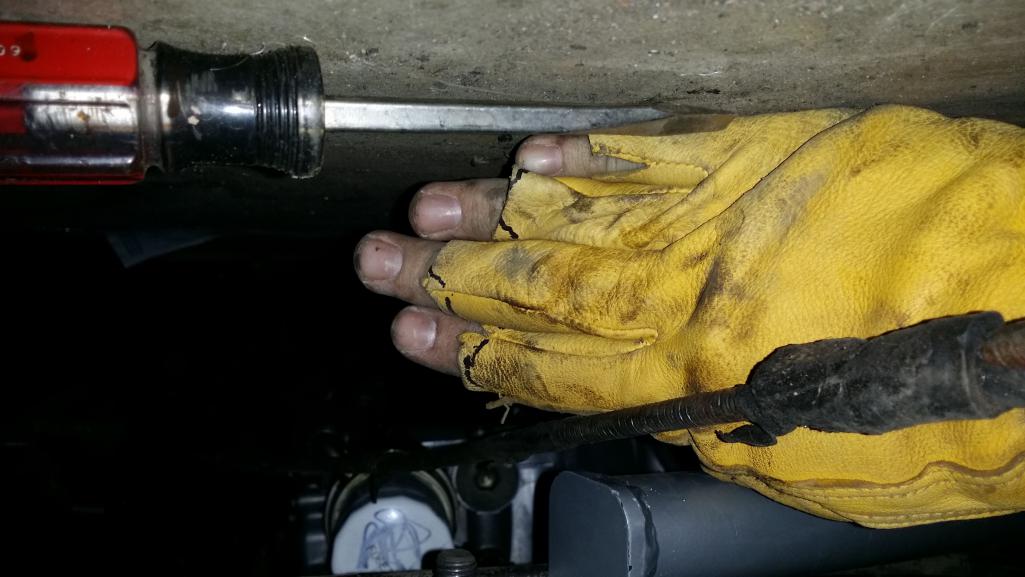
I have attached the pic with a measure. These headers are pretty tall. If I go ahead and use them what is currently about 4.5' ground clearance will be reduced to 3". I checked ride height compared to my stock -4 and the two car are pretty similar (although the race car is much stiffer).
Attached image(s)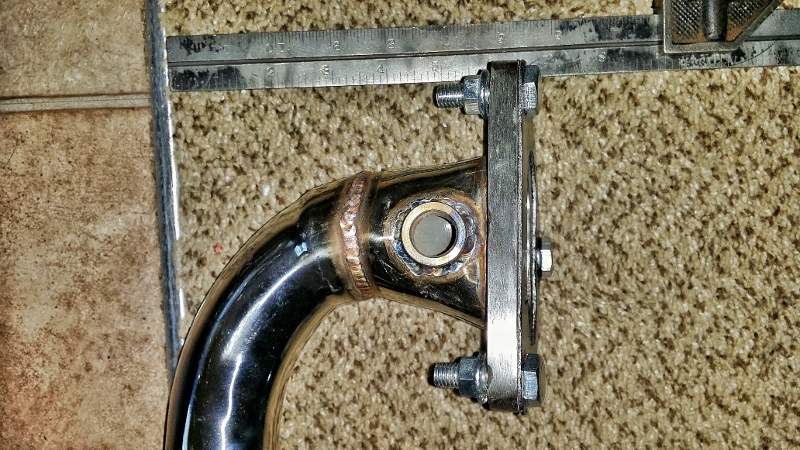
Posted by: 76-914 May 1 2014, 08:46 AM
Ross, that looks to be about 6" from the top of the flange to the bottom of the pipe, yes?
Posted by: rnellums May 1 2014, 09:28 AM
Ross, that looks to be about 6" from the top of the flange to the bottom of the pipe, yes?
Really its nearly 7, I plan on ovaling the bottom of the pipe a bit to get more clearance.
Posted by: 76-914 May 1 2014, 09:50 AM
I wonder if they will sell the flange w/ the oval to round piece that has the O2 bung welded in. That would help me a lot. I want to go over the cradle with my exhaust for ground clearance and ease of removal when dropping the drivetrain. I think I could make those work if sold separately. High Jack over and out.
Posted by: rnellums May 1 2014, 09:57 AM
I wonder if they will sell the flange w/ the oval to round piece that has the O2 bung welded in. That would help me a lot. I want to go over the cradle with my exhaust for ground clearance and ease of removal when dropping the drivetrain. I think I could make those work if sold separately. High Jack over and out.To be honest that's why I ordered the exhaust in the first place. I figured there would be some customization. I'd like to run the exhaust over my subframe, but am a bit worried about driveshaft interference.
Posted by: 76-914 May 1 2014, 10:19 AM
I don't think that will be an issue but I haven't seen one of Ian's cradles either. FWIW, they make exhaust fittings in 45, 90, 180 and even 360 degree (full circle). I want to use a 2.5" dia 360 degree cut it to give me two 165 degree fittings which will bring me up and over my cradle as well as a bit towards the outside.
Posted by: BIGKAT_83 May 1 2014, 09:52 PM
Made some more of these up. 2.5" tubing . These turned out to be 4" high from the base of the flange to the bottom of the tube. Going to use these on my turbo install.
Its no trouble to weld O2 sensor bungs into the pipes.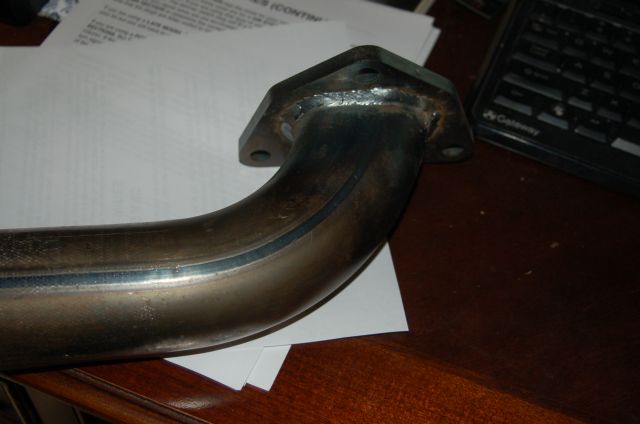
Bob
Posted by: rnellums May 7 2014, 09:27 PM
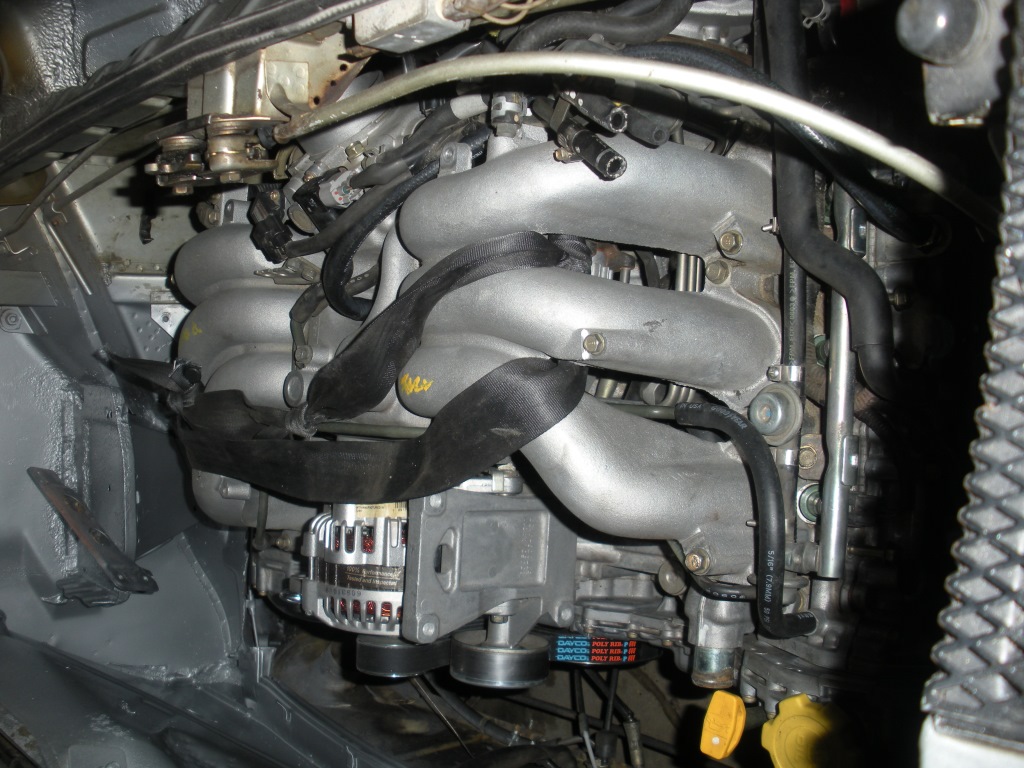
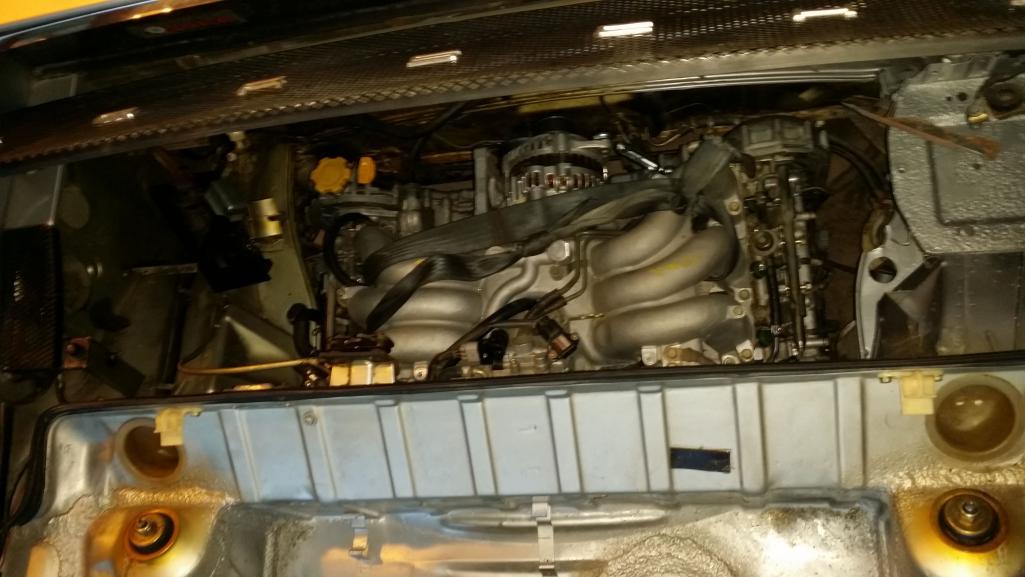
So I have seen in a couple places that the intake on the EZ30 can't be flipped, which makes it a pain since the intake then rests right next to the trunk firewall, but this image seems to say differently. And anyone here tried flipping it? I gather there might be some casting lugs that need to be ground off, and the alternator will need to be relocated, but any other reasons?
Attached image(s)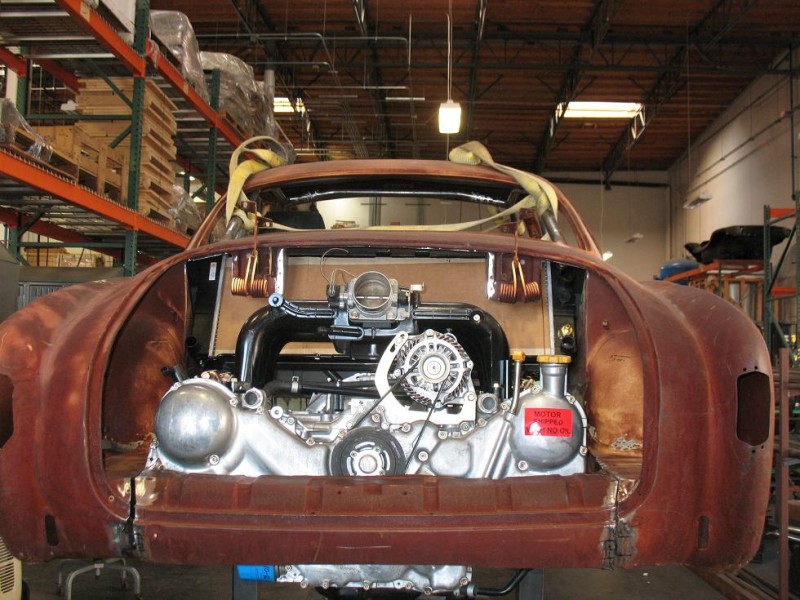
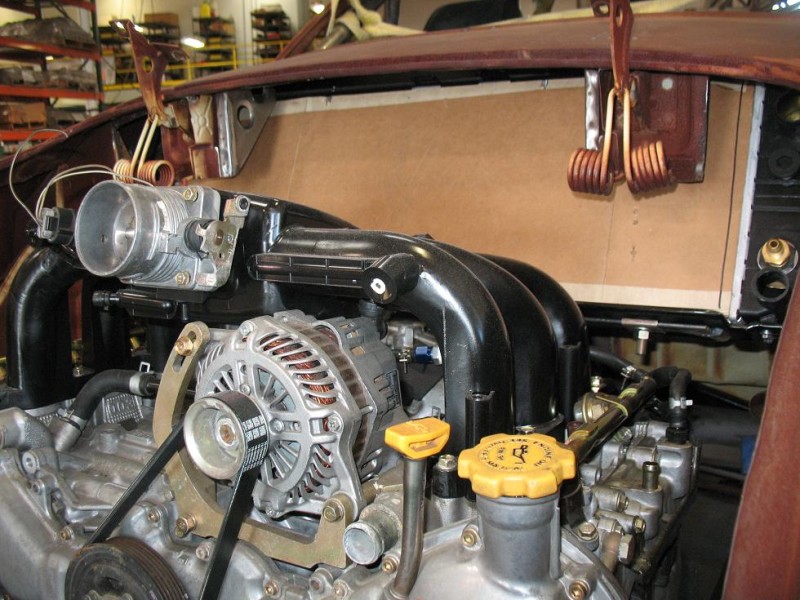
Posted by: 76-914 May 8 2014, 09:56 AM
So I have seen in a couple places that the intake on the EZ30 can't be flipped, which makes it a pain since the intake then rests right next to the trunk firewall, but this image seems to say differently. And anyone here tried flipping it? I gather there might be some casting lugs that need to be ground off, and the alternator will need to be relocated, but any other reasons?
Isn't yours a "D" model? I don't think that is a D in the pic.
Posted by: rnellums May 8 2014, 10:21 AM
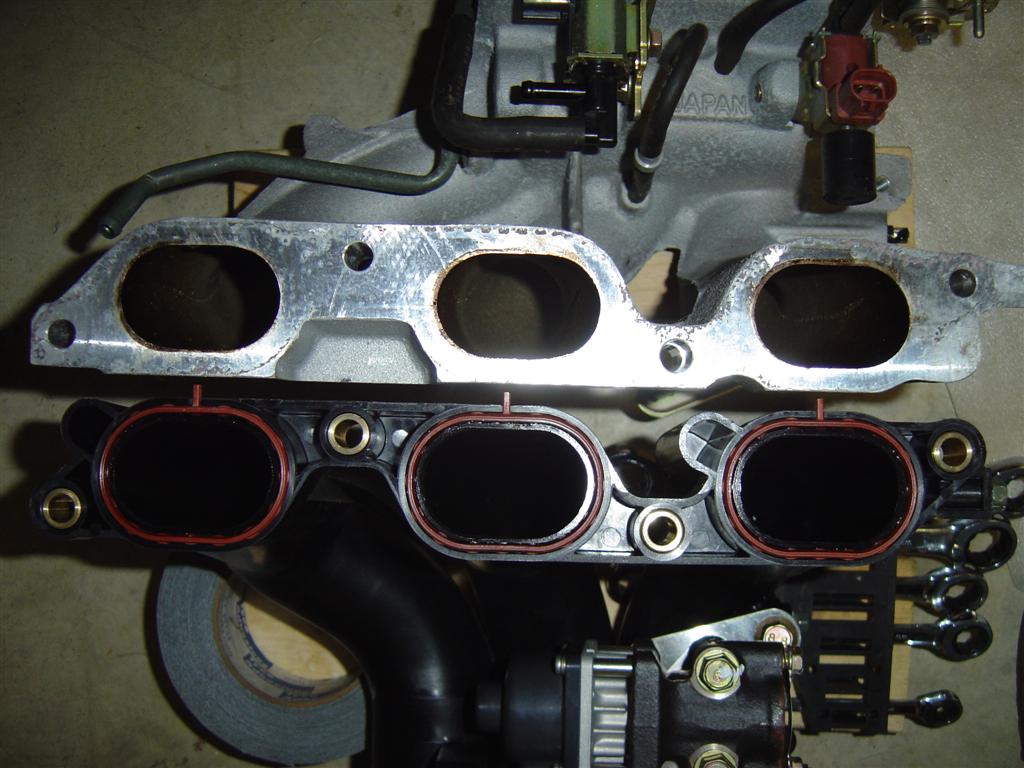
So I have seen in a couple places that the intake on the EZ30 can't be flipped, which makes it a pain since the intake then rests right next to the trunk firewall, but this image seems to say differently. And anyone here tried flipping it? I gather there might be some casting lugs that need to be ground off, and the alternator will need to be relocated, but any other reasons?
Isn't yours a "D" model? I don't think that is a D in the pic.
Yes, Pictured is an "R", but the ports are similar enough. I'm thinking It may be possible to flip the Aluminum manifold as well. It may just require grinding down the extraneous casting on the aluminum manifold at top right.
Attached image(s)
Posted by: 76-914 May 8 2014, 11:39 AM
I decided against it for some reason that I can't recall, now. Either it was not worth the effort of I saw something that said no-way. It's hard to cut on a nice body but once you do the next cuts are easy. It should not protrude into the rear trunk too far. Maybe 3"? Maybe BIGKAT 83 will chime in.
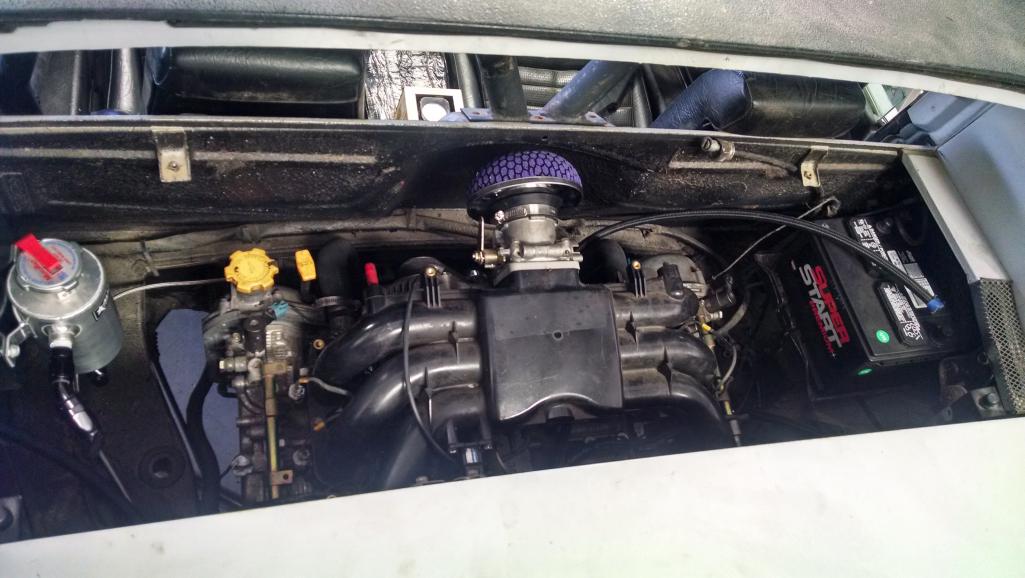
Posted by: Porscharu73 May 19 2014, 11:48 PM
This was done with a eg33 also by Brody from 914s gone wild with a clean cut 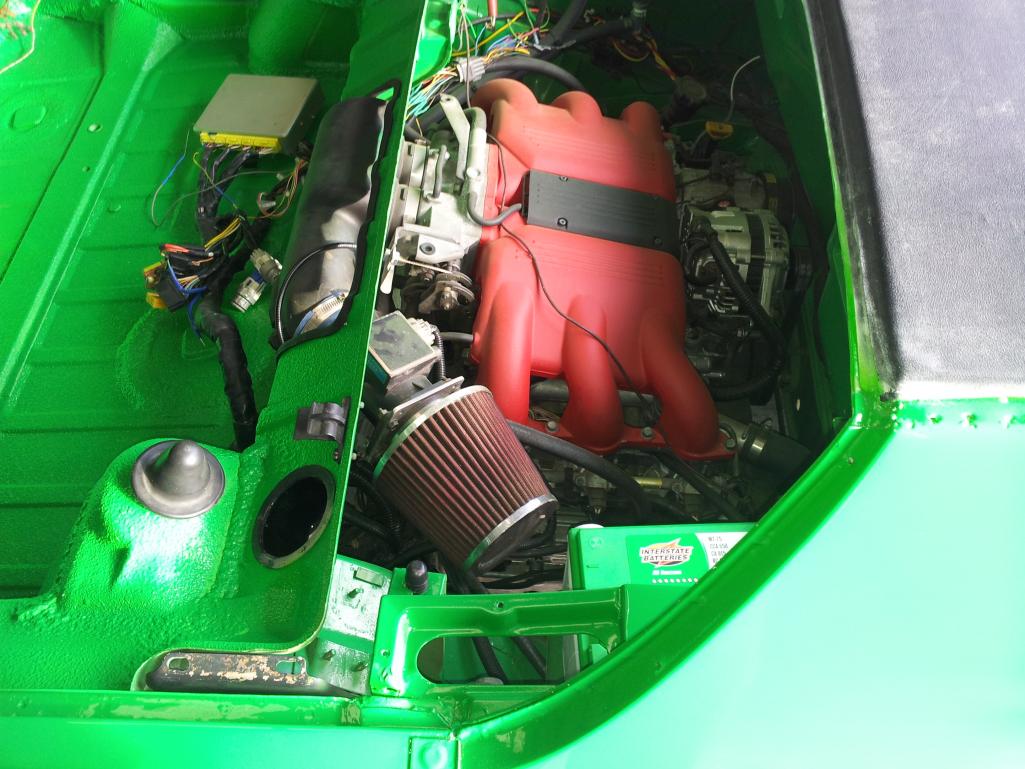
Here's my set up with the ez30r with it flipped same guy who is helping me build mine built the eg33
Posted by: 76-914 Jun 4 2014, 08:59 AM
 Hey Ross, I figured you went to shit and the Hogs gotcha! Then I read where you are polishing Calypso for the show. When are you going to get back on your conversion?
Posted by: rnellums Jun 4 2014, 09:39 AM
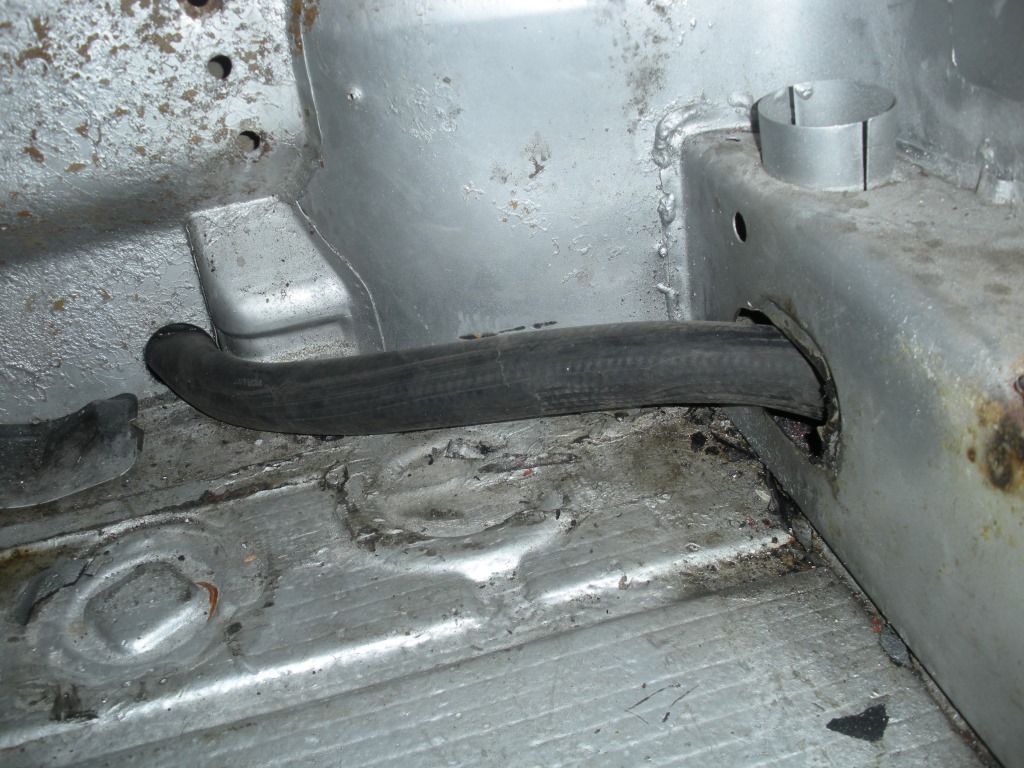
Hey Ross, I figured you went to shit and the Hogs gotcha! Then I read where you are polishing Calypso for the show. When are you going to get back on your conversion? I've been working, just not photographing! I've built up the fan shroud and radiator mount and completed running the fuel lines (using the same bent hardline technique you used). The fuel pump and tank are totally in now, and all I need to do to finish up the coolant system is to bend up some aluminum tube (which I already have) in the locations where the rubber hose is kinking!
I'll see if I can snap some photos tonight and get them up!
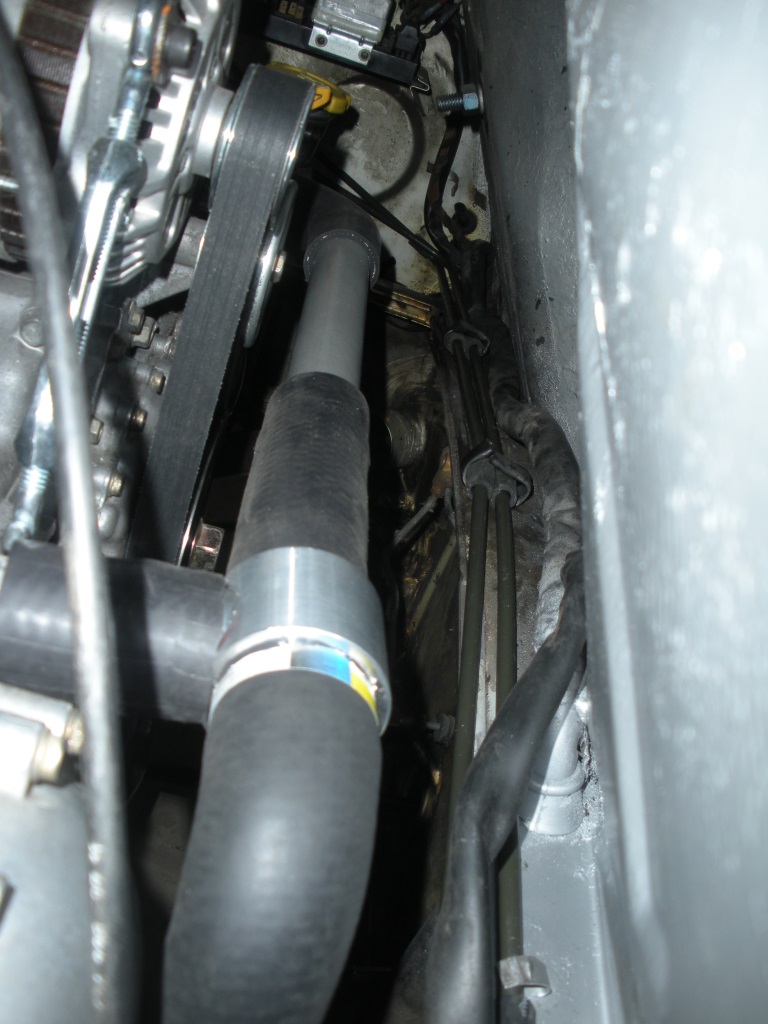
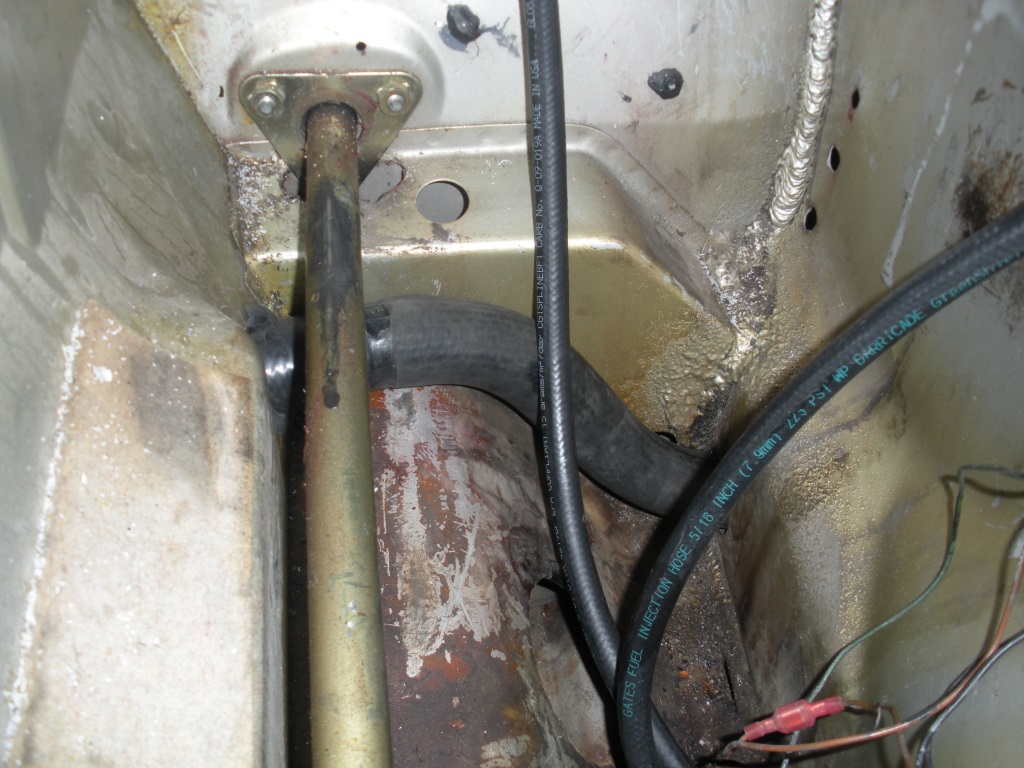
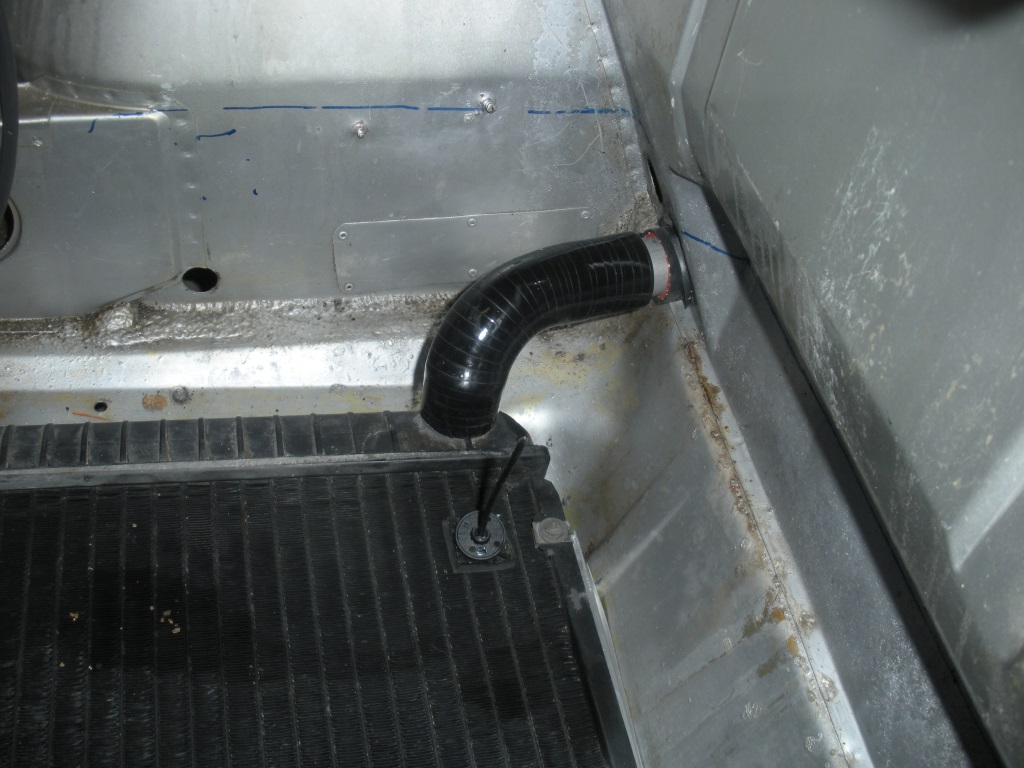
Posted by: rnellums Jun 18 2014, 07:59 PM
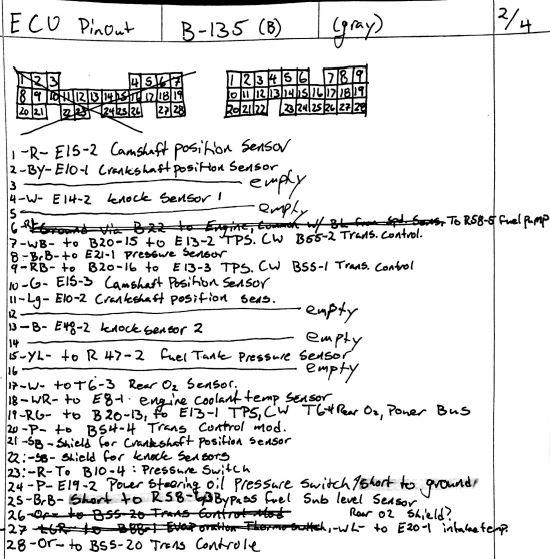
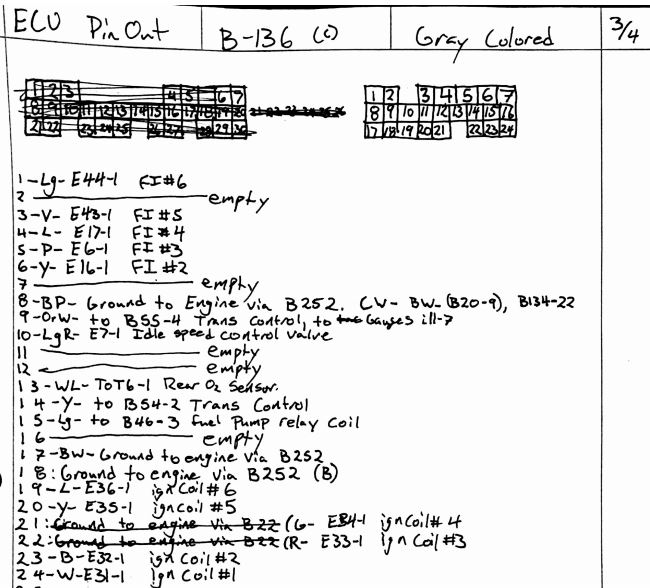
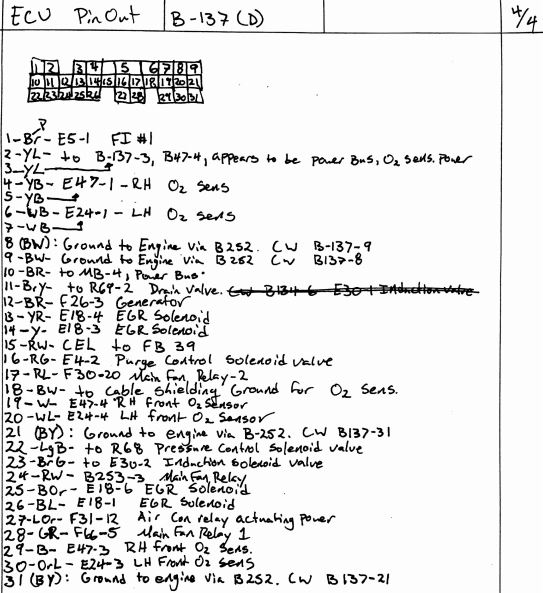
About time for an update. I am finally starting the final wiring process. I hooked it up and turned it over just powering the starter last night. Then I hooked up the fuel pump and I can't seem to build pressure, I suspect due to a leak at the sketchy pickup I cobbled together. I've new parts for that en route, but decided to take some spare time and make note of the ECU pin-outs.
Attached image(s)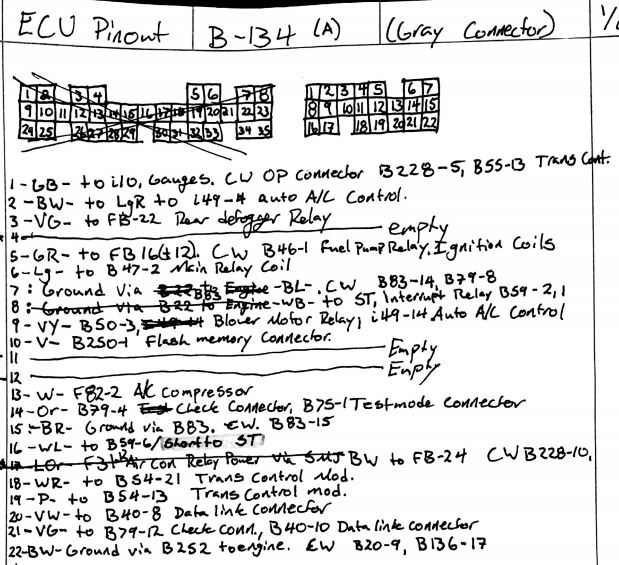
Posted by: rnellums Jun 18 2014, 09:28 PM
Here is my intended engine wiring circuit for power distribution!
Attached image(s)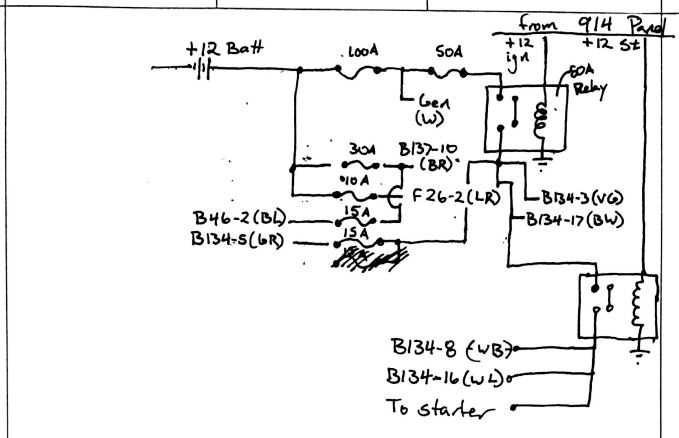
Posted by: rnellums Jun 19 2014, 07:09 AM
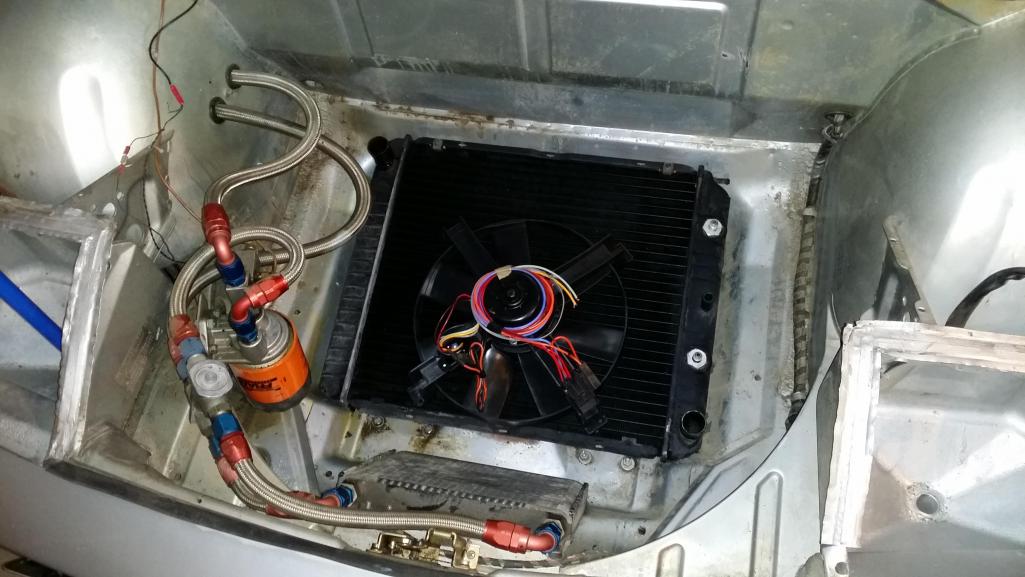
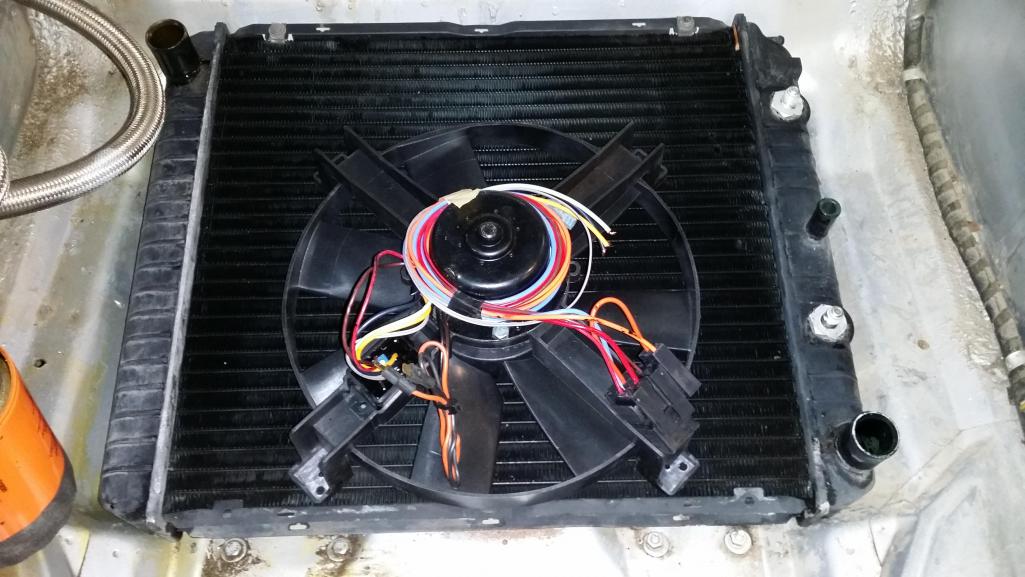
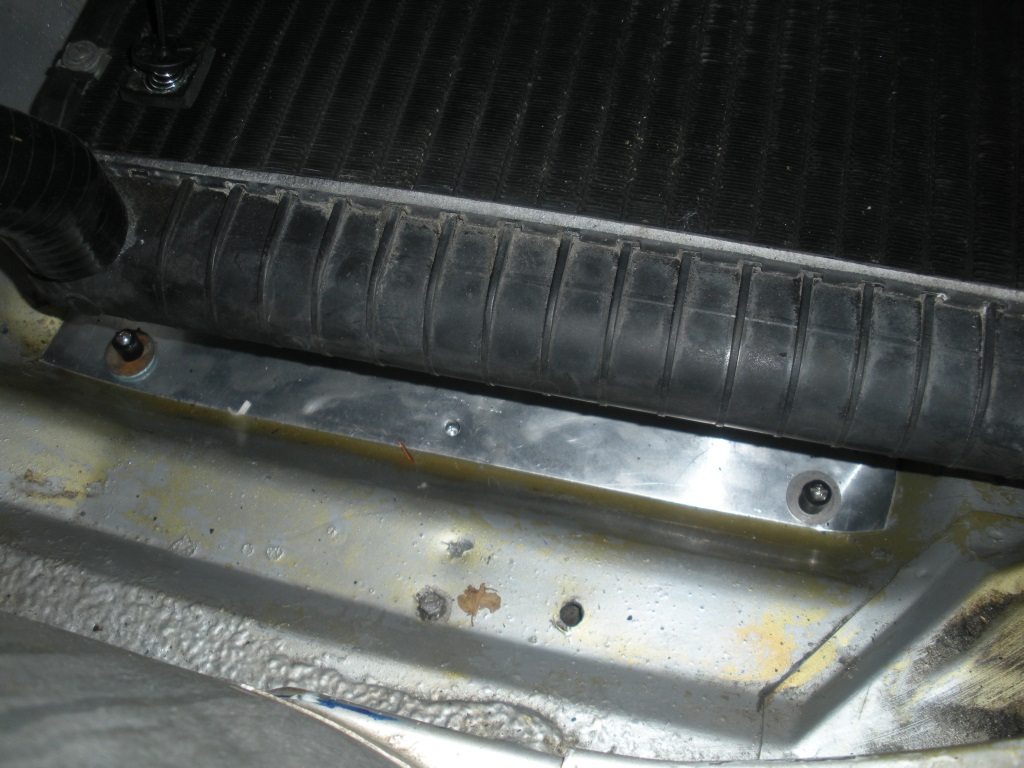
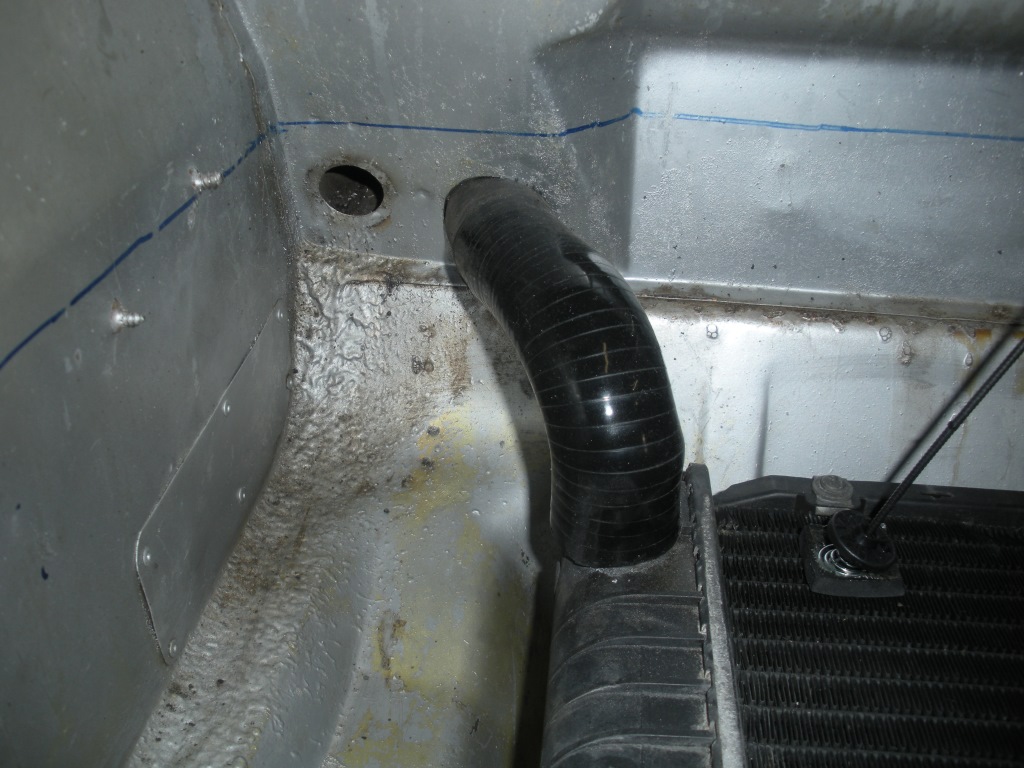
A couple of photos of my cooling setup. I made up an aluminum shroud that sits directly under the radiator, and have bolted the high flow SPAL fan to the other side, so I'm afraid you can't see much.
I know the cons of venting through the floor, and would prefer to vent into the wheel arches, but I already had a hole there from the PO, so I'll use it for now.
The radiator is a clean Volvo unit. I think out of the 240's. Its small, but thicker than stock. Hopefully The fan is able to pull enough air!
The coolant hoses will both return under the gas tank and then be routed back through the longs. I have more robust elbows coming for the tight bends so it won't kink as ween in the last photo and rubber edge protector for everywhere i basses through bulkhead.
Attached image(s)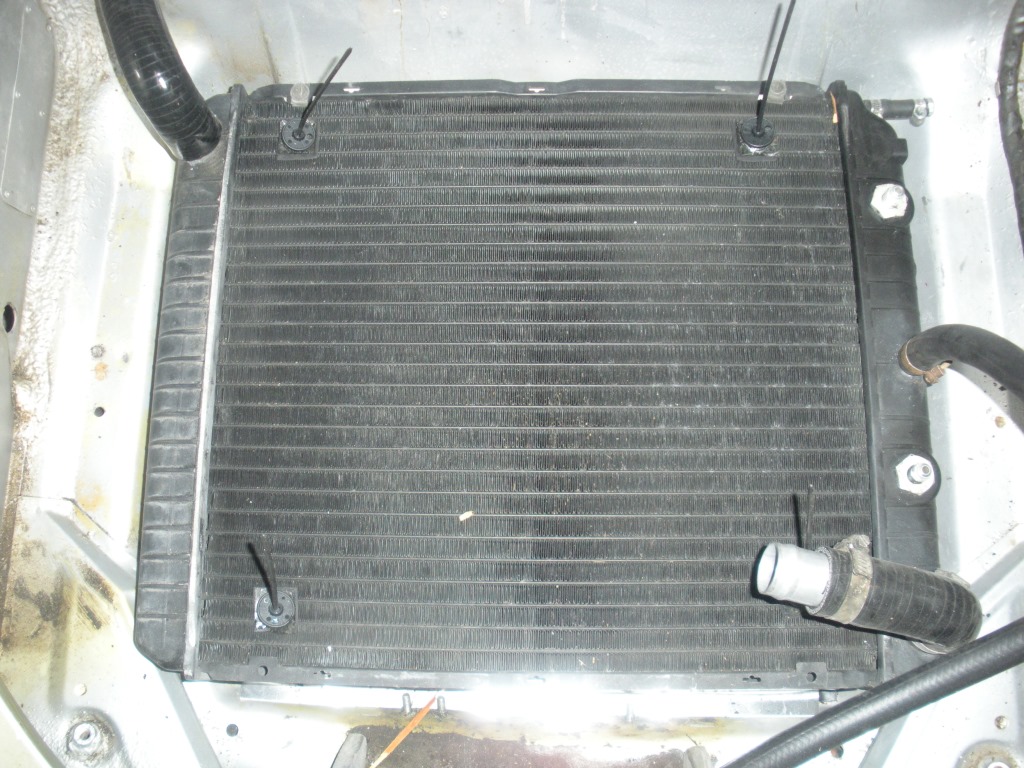
Posted by: 76-914 Jun 19 2014, 08:10 AM
You have been working! FWIW, flaps have these small spring thingies that slip over the hose and will keep it from kinking. Or, use old pieces of wet vac hose which will also guard against abrasion.
Posted by: rnellums Jun 19 2014, 08:17 AM
You have been working! FWIW, flaps have these small spring thingies that slip over the hose and will keep it from kinking. Or, use old pieces of wet vac hose which will also guard against abrasion.
The wet vac hose is an excellent idea. It may also add a bit of insulation and keep the passenger compartment from getting so hot!
Posted by: rnellums Jun 22 2014, 01:41 PM
BIG WEEKEND!!
I started it up for the first time! I only ran it for a few seconds ad everything is only halfway hooked up, but it still felt like a big step!
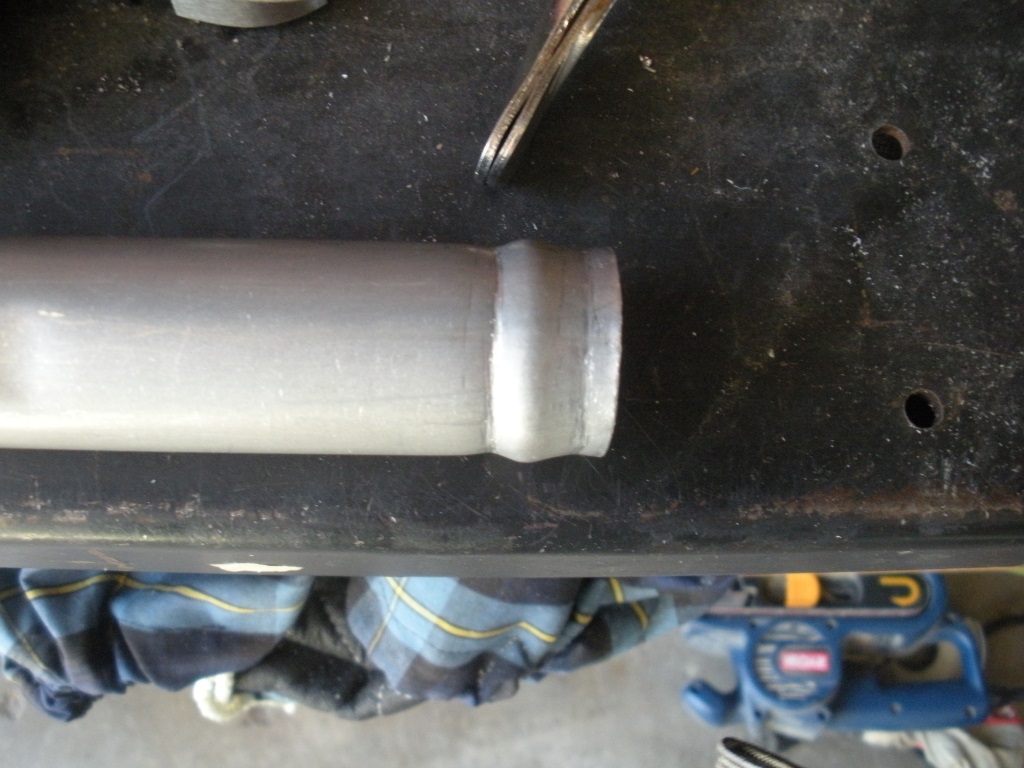
In other news I starting to finalize the cooling system routing. found that it makes sense to run solid aluminum lines in some places, but the cost for pre-flared pieces with a bead was exorbitant and a bead rolling tool is a couple hundred.
I saw on a Shelby forum that someone made a manual bead-maker out of a pair of vice grips, and I gave it a try. I feel like it was a huge success, now if I could only get the cramps in my hand to go away!
Attached image(s)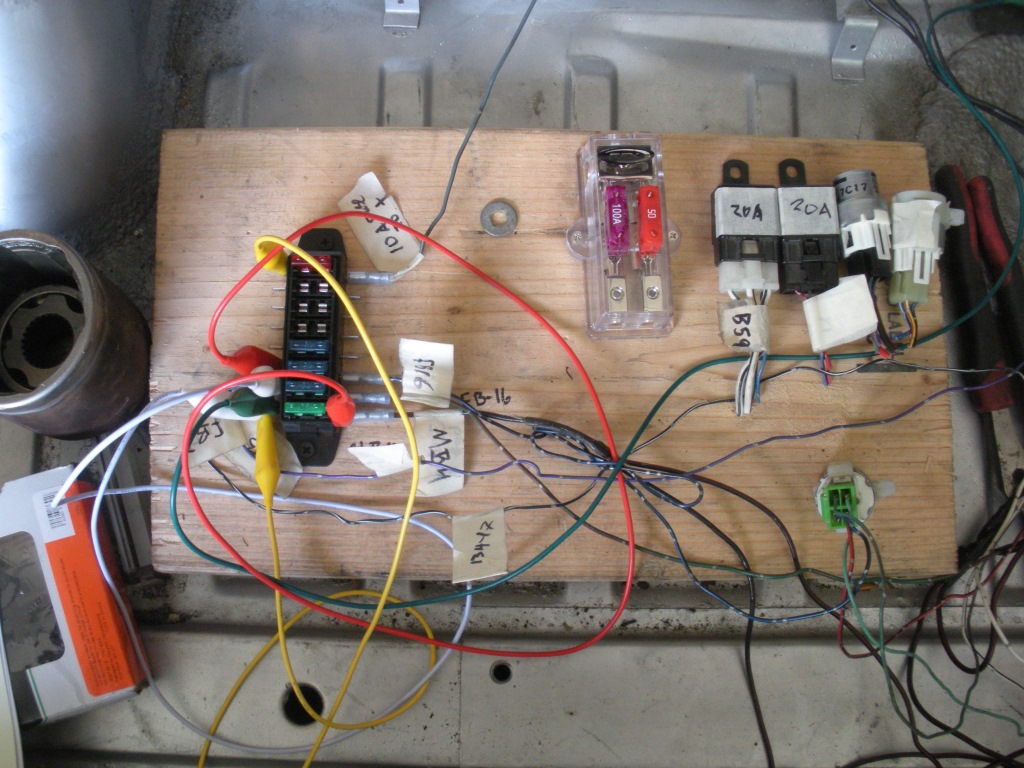
Posted by: Chris H. Jun 22 2014, 08:17 PM
Wow you're really moving on this one. Nice work.
Posted by: 76-914 Jun 22 2014, 09:11 PM
Wahoo Congrats
Posted by: JRust Jun 22 2014, 09:14 PM
I'm not a big fan of the radiator laying down in the from trunk. My v8 was setup that way & it would not cool. The forced air is lessoned quite a bit that way. Having said that my suby setup barely has an air inlet & it cools fine. So it will probably work just fine even if it isn't really my thing. Great progress on your car. Getting it started for the first time is huge. Congrats
Posted by: 76-914 Jun 22 2014, 09:27 PM
Hey Ross, I just ran into this today so thought I'd ask you. How much tranny oil did you use. Book called for 3.8qt's but if the center diff is removed and some other mass is also removed how much gear oil should we use? Also, when level the dip stick said full with only 1.5 qt's. If I tilt the tranny down enough the dip stick reads closer to true. I'm going to go with the recommended amount and read the dip stick when it's in the car and pretty level. It really is sensitive to for/aft angle when measuring the tranny fluid. High jack over.
Posted by: rnellums Jun 22 2014, 10:41 PM
I'm not a big fan of the radiator laying down in the from trunk. My v8 was setup that way & it would not cool. The forced air is lessoned quite a bit that way. Having said that my suby setup barely has an air inlet & it cools fine. So it will probably work just fine even if it isn't really my thing. Great progress on your car. Getting it started for the first time is huge. Congrats
I agree that laid flat definitely won't be as efficient, but my car was already cut for AC so I figured I might as well try this first. Plus if it does work I can still use my front trunk!
Posted by: rnellums Jun 22 2014, 10:47 PM
Hey Ross, I just ran into this today so thought I'd ask you. How much tranny oil did you use. Book called for 3.8qt's but if the center diff is removed and some other mass is also removed how much gear oil should we use? Also, when level the dip stick said full with only 1.5 qt's. If I tilt the tranny down enough the dip stick reads closer to true. I'm going to go with the recommended amount and read the dip stick when it's in the car and pretty level. It really is sensitive to for/aft angle when measuring the tranny fluid. High jack over.I haven't filled mine yet, but I'll probably use the recommended amount or until the dipstick says full, whichever is more fluid.
Also, with regards to the speed sensor issue, I'm buying a 2001 2.5rs 5MT that has a 3 wire sender for the ECU. I'll let you know if that works !
Now I'm trying to figure out how high to mount the shifter. Pics to follow soon.
Posted by: rnellums Jun 29 2014, 09:12 PM
I finished up the coolant plumbing this weekend! Everything from the windshield forward is complete for initial test driving!
I also hit up the junkyard Saturday and found a 2003 legacy outback H6 in there, apparently I had just missed the engine, but I grabbed the gauge cluster to use in the interim while I decide how I want to do my dash gauges.
I also pulled the engine back out and swapped in the 2001 2.5RS transmission with the correct speed sensor. I made up some custom axle lockers out of some old CV's and driveshafts too.
Speaking of driveshafts, my coldwater 914 order came in with the sway away axles and I should be able to get those put in by next week. The biggest hurdle I have this week is the clutch actuation - I'm hoping to stick with a cable clutch and run a bellcrank linkage near the rear of the transmission.
My list of things I need to finish up is getting smaller and smaller!
Attached image(s)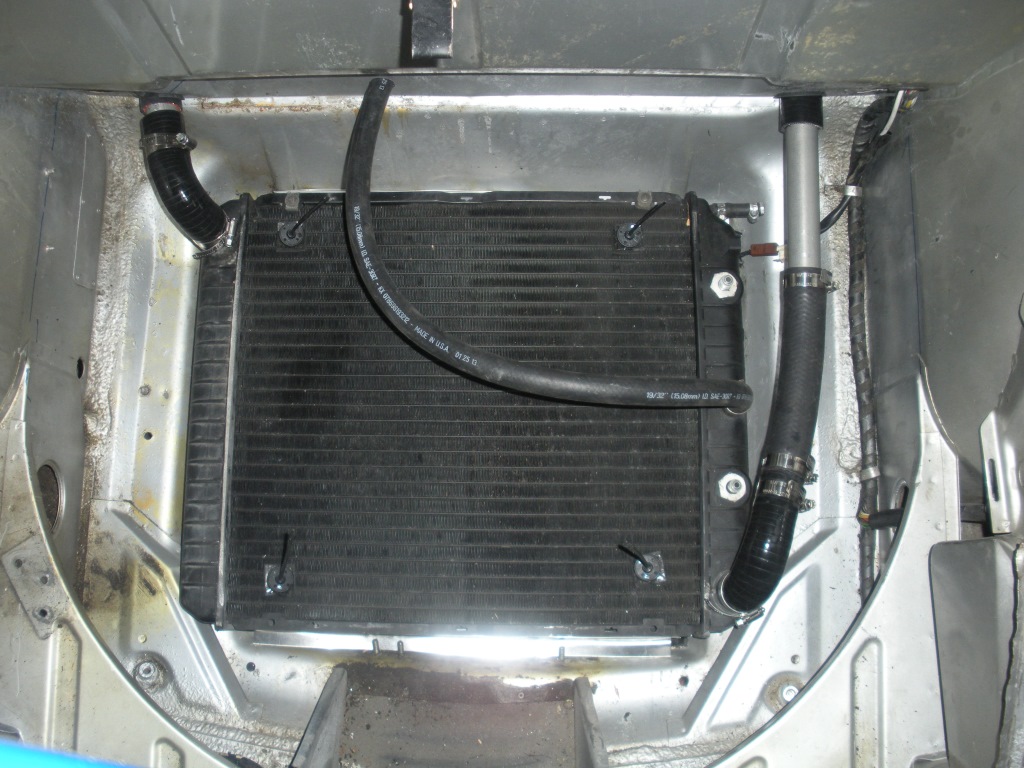
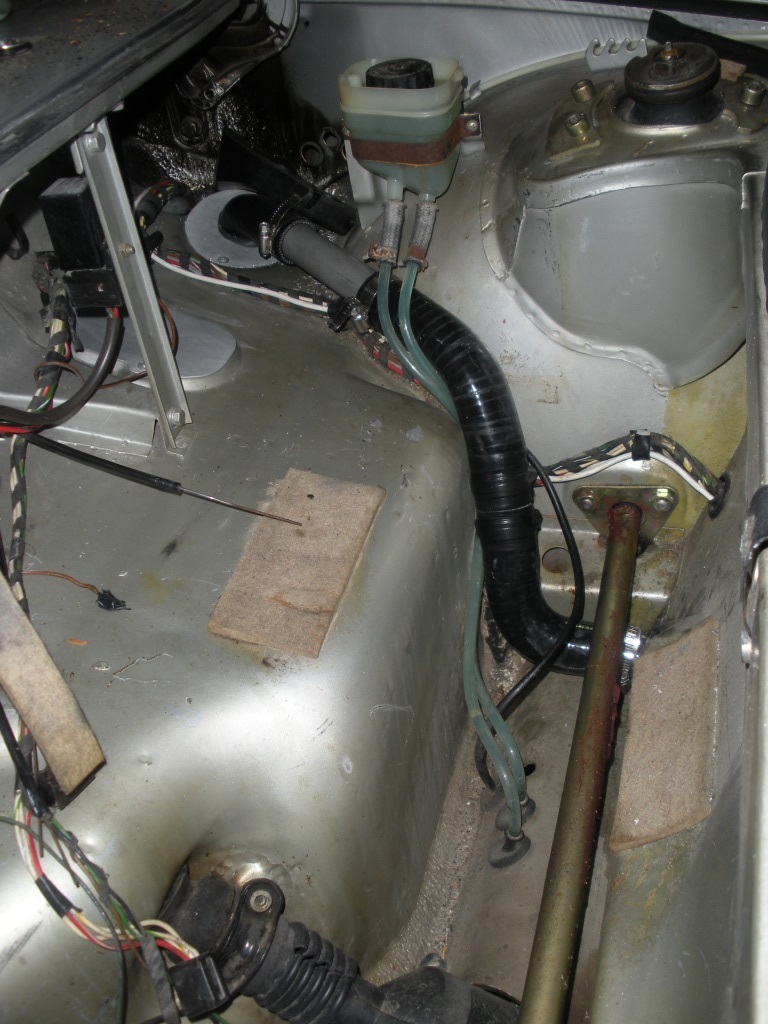
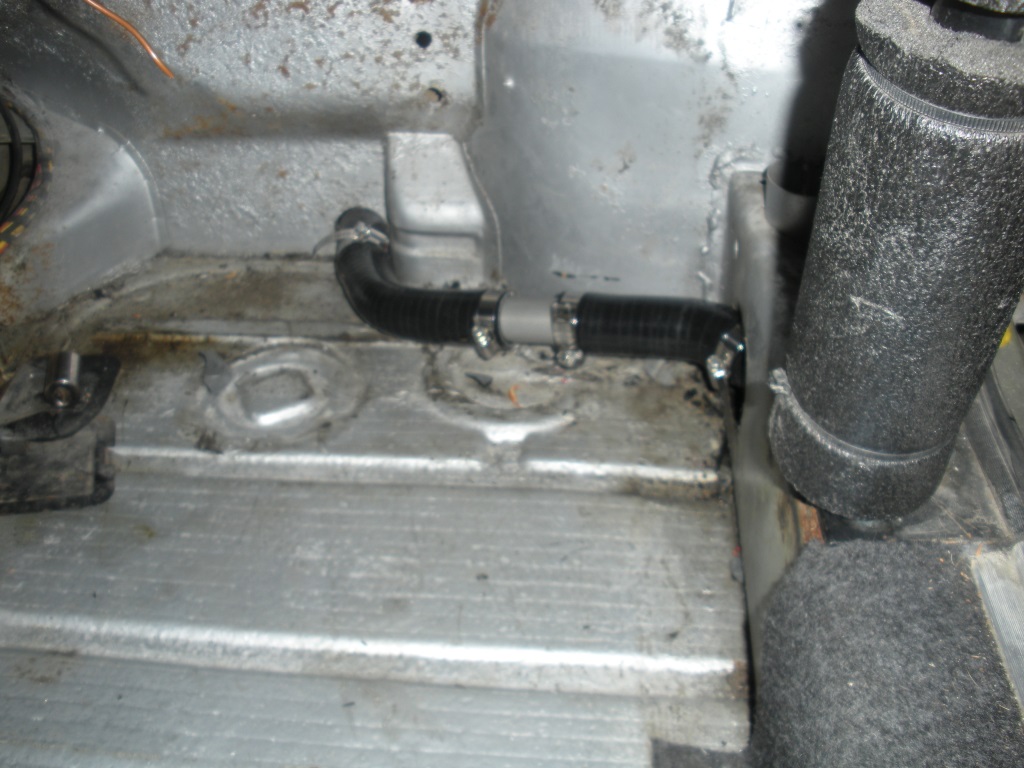
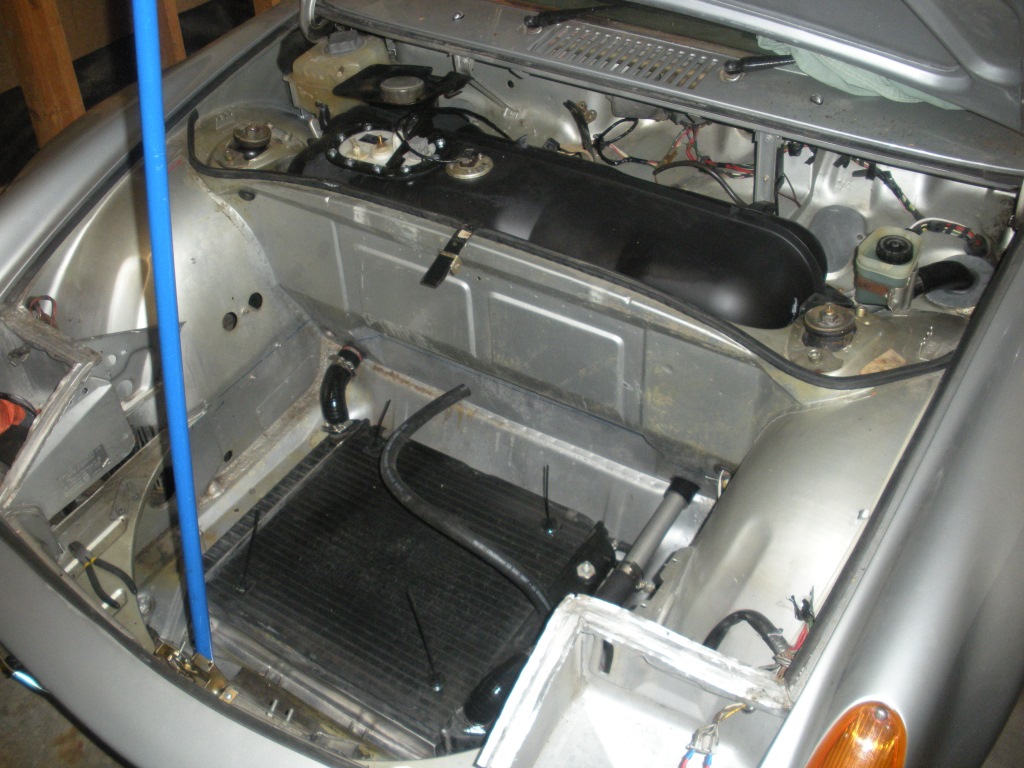
Posted by: 76-914 Jun 29 2014, 09:32 PM
Way to go Ross. I know where you can get a couple of gages ready to go if you want to remote that board.  Yours for the shipping.
Posted by: Mike Bellis Jun 29 2014, 10:02 PM
I had a flat radiator on my first V8 conversion. It cooled just fine. I built a shroud to force the air through the bumper and down. It looked like a raised trunk floor after I covered it with perlon.
The down side was driving slow on a dirt road. The fan under the radiator would kick on and blow dust all over the place. If the top was off, I would get covered in dust.
I had a radiator shop add a tall sideways filler neck and the hose connections were under the car. The hose on that car ran through the tunnel and made the cabin really hot.
I did love the partial front trunk in that car. I've got no front trunk now. My next conversion will have Boxster radiators grafted in and a usable front trunk.
Posted by: rnellums Jun 29 2014, 10:49 PM
Way to go Ross. I know where you can get a couple of gages ready to go if you want to remote that board.
Yours for the shipping.What do you mean remote the board? Like plug the subie gauges into stock cans like you did? That would be pretty much ideal.
Posted by: rnellums Jun 29 2014, 10:53 PM
I had a flat radiator on my first V8 conversion. It cooled just fine. I built a shroud to force the air through the bumper and down. It looked like a raised trunk floor after I covered it with perlon.
The down side was driving slow on a dirt road. The fan under the radiator would kick on and blow dust all over the place. If the top was off, I would get covered in dust.
I had a radiator shop add a tall sideways filler neck and the hose connections were under the car. The hose on that car ran through the tunnel and made the cabin really hot.
I did love the partial front trunk in that car. I've got no front trunk now. My next conversion will have Boxster radiators grafted in and a usable front trunk.
That's kind of what I'm hoping to do! Eventually a shelf will go in that will double as ducting and the front trunk floor. I am worried about how hot the cabin will get though. My hope is that since the houses are in the longs I'll get a bit of an insulation bonus.
I'm going with a pressurised reservoir (next to gas tank) that will function as a filler, bleeder, and reservoir!
Posted by: 76-914 Jun 30 2014, 08:24 AM
Way to go Ross. I know where you can get a couple of gages ready to go if you want to remote that board.
Yours for the shipping.What do you mean remote the board? Like plug the subie gauges into stock cans like you did? That would be pretty much ideal.
Yep. Run 4 wires from the board to the gage. LMK
I had a flat radiator on my first V8 conversion. It cooled just fine. I built a shroud to force the air through the bumper and down. It looked like a raised trunk floor after I covered it with perlon.
The down side was driving slow on a dirt road. The fan under the radiator would kick on and blow dust all over the place. If the top was off, I would get covered in dust.
I had a radiator shop add a tall sideways filler neck and the hose connections were under the car. The hose on that car ran through the tunnel and made the cabin really hot.
I did love the partial front trunk in that car. I've got no front trunk now. My next conversion will have Boxster radiators grafted in and a usable front trunk.
That's kind of what I'm hoping to do! Eventually a shelf will go in that will double as ducting and the front trunk floor. I am worried about how hot the cabin will get though. My hope is that since the houses are in the longs I'll get a bit of an insulation bonus.
I'm going with a pressurised reservoir (next to gas tank) that will function as a filler, bleeder, and reservoir!
If the longs get too warm I'd try to vent the longs. Wouldn't be difficult to do.
Posted by: Chris H. Jun 30 2014, 10:37 AM
Bob was telling me the EG33 at precisionchassis is vented through the floor.
Looks like it runs well:
https://www.youtube.com/watch?v=Fe_vWc87e1c
It'll cool fine. I only veered away because I want to drive the hell out of my car and could see a dust storm situation happening or some water getting in the trunk. Probably won't happen to you on the autocross circuit. Plus you have TWO 914s .
Posted by: rnellums Jul 1 2014, 10:28 PM
Way to go Ross. I know where you can get a couple of gages ready to go if you want to remote that board.
Yours for the shipping.What do you mean remote the board? Like plug the subie gauges into stock cans like you did? That would be pretty much ideal.
Yep. Run 4 wires from the board to the gage. LMK
Yeah! I'll go for that! PM sent!
Posted by: rnellums Jul 1 2014, 10:29 PM
It'll cool fine. I only veered away because I want to drive the hell out of my car and could see a dust storm situation happening or some water getting in the trunk. Probably won't happen to you on the autocross circuit. Plus you have TWO 914s
.I hope it cools well! And you are right, having a backup 914 really takes the pressure off!!
Posted by: rnellums Jul 1 2014, 10:37 PM
Well, it aint pretty, but I think I have an exhaust setup that is good enough to get the car on the road. Its definitely not optimized, and I'm sure I'll get around to a nice exhaust eventually, but this was pretty cheap to fab up. the resonators are Harley pipes from a local bike salvage yard for 30 and they fit perfectly into the OBX 2" SS pipes.
It will be interesting to see how close they sit to the ground when I put the car back down!
Attached image(s)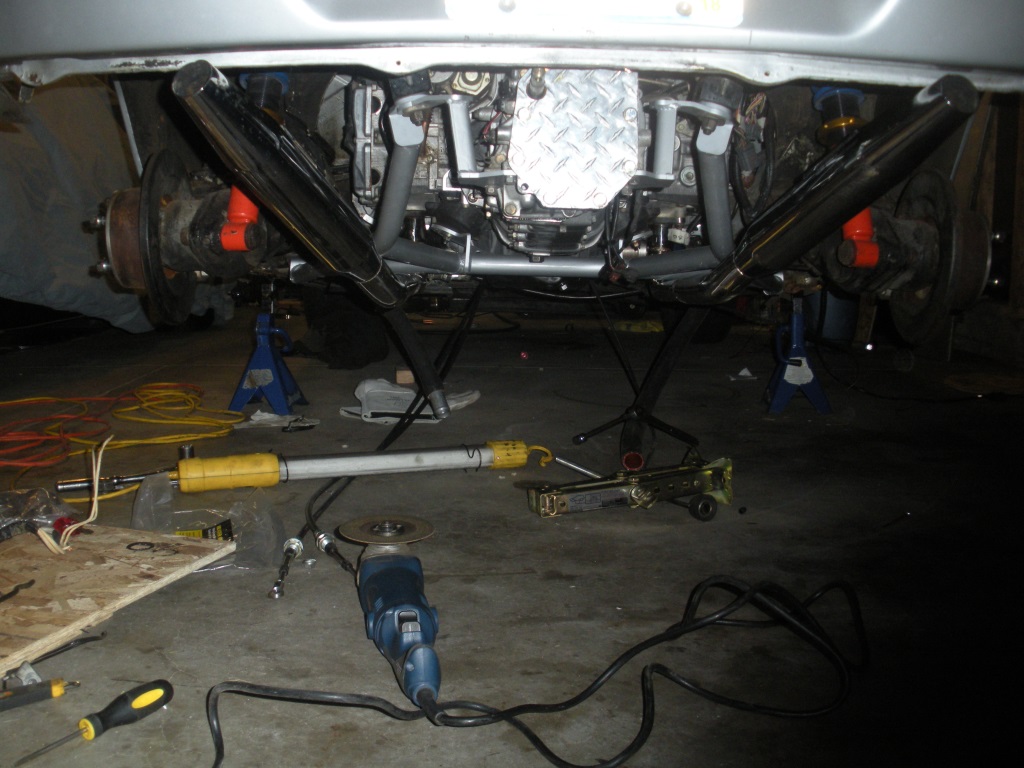
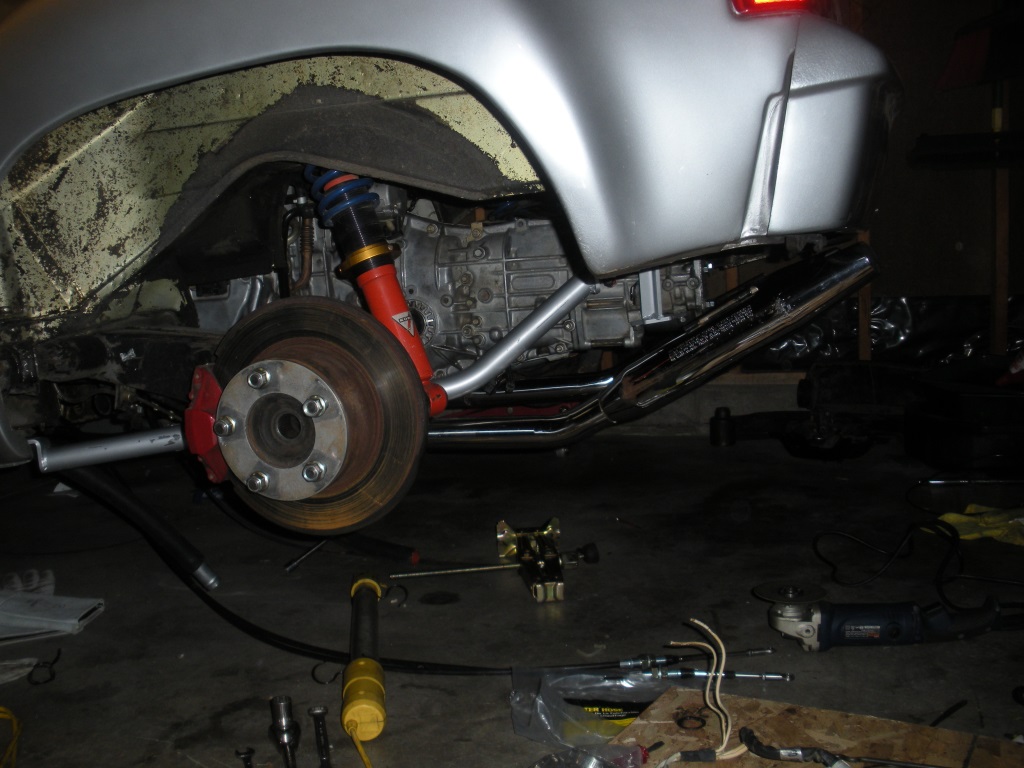
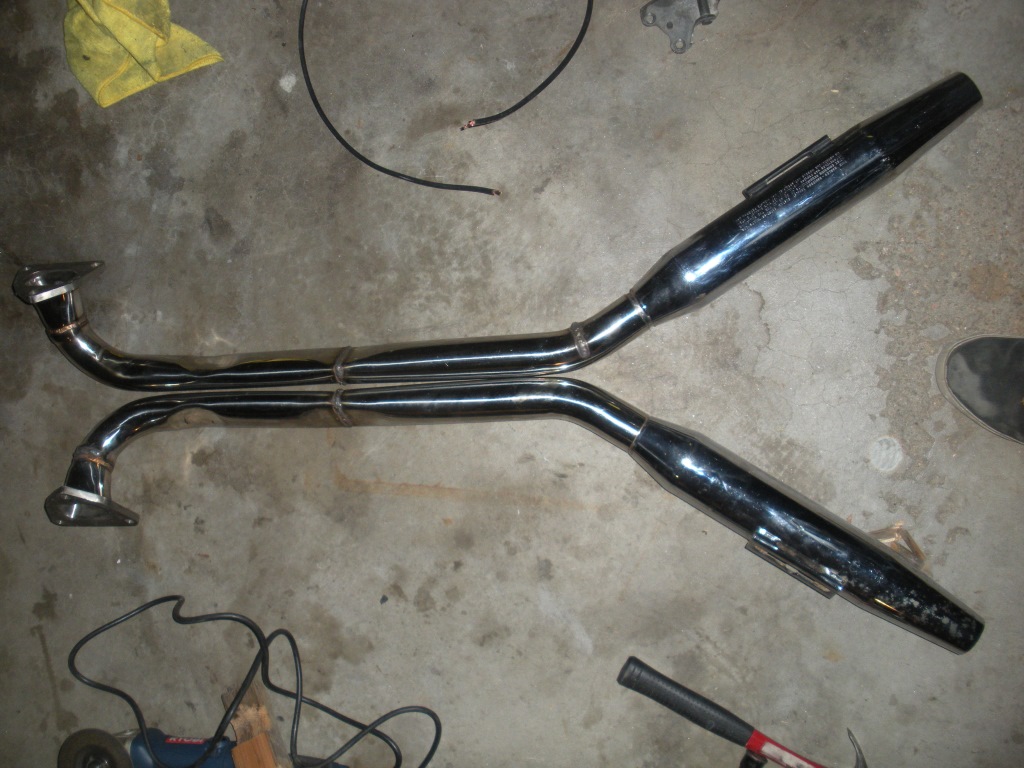
Posted by: brant Jul 1 2014, 10:49 PM
those are very cool..
can't wait to hear it in person
loving this thread
Posted by: 76-914 Jul 2 2014, 08:17 AM
Any idea's on ground clearance? Did you modify the length of the down piece off the header flange? SS welding is not in my skill set.
Posted by: rnellums Jul 2 2014, 08:22 AM
Any idea's on ground clearance? Did you modify the length of the down piece off the header flange? SS welding is not in my skill set. It won't be much. Maybe 3"... I pounded the puppies flat where they passed by my subframe,but other than that no mods. I hadn't welded SS before last night. I used my mig with some stainless wire and some co2-ar mix gas. It welded much like normal steel, but burn through was faster. I can't vouch for the weld strength, but this part isn't structural anyways.
Posted by: rnellums Jul 2 2014, 08:23 AM
those are very cool..
can't wait to hear it in person
loving this thread
Let me know when you want to come check it out Brant!
Posted by: brant Jul 2 2014, 08:24 AM
those are very cool..
can't wait to hear it in person
loving this thread
Let me know when you want to come check it out Brant!
when ever is good for you
I want a ride someday too
are you wrenching this weekend?
Posted by: 76-914 Jul 2 2014, 08:32 AM
Any idea's on ground clearance? Did you modify the length of the down piece off the header flange? SS welding is not in my skill set. It won't be much. Maybe 3"... I pounded the puppies flat where they passed by my subframe,but other than that no mods. I hadn't welded SS before last night. I used my mig with some stainless wire and some co2-ar mix gas. It welded much like normal steel, but burn through was faster. I can't vouch for the weld strength, but this part isn't structural anyways.
Ahhhhh! Activity!
I'm stuck with painting the house so not much 914 work for me. You da man for trying the SS weld. I guess I'll look into it some more. Honestly, after some recent gas welding again, I'm seriously looking at tig.
Posted by: BIGKAT_83 Jul 2 2014, 08:41 AM
Get some ear plugs Subaru's make some noise. The car Chris posted a video of has some long magnaflow mufflers on it.
Posted by: Chris H. Jul 2 2014, 08:42 AM
Speaking of welding and grinding, I had a tiny piece of metal in my eye for a week! No wonder I've been a little irritable. Dang that drove me nuts. I'm wearing goggles from here on out.
Posted by: rnellums Jul 7 2014, 09:39 PM
when ever is good for you
I want a ride someday too
are you wrenching this weekend?
Sorry Brant, I was already out of town when I got this! I'm out of town this weekend too for a wedding, but I'll be wrenching every night this week or you can just wait till the weekend after next to come check it out. Hopefully it will be ready to go by then!
Get some ear plugs Subaru's make some noise. The car Chris posted a video of has some long magnaflow mufflers on it.
I'm looking forward to hearing how it sounds when I start it up for the first time with these exhaust pipes once my O2 sensors get in! Its just about ready to go, I really just need to mount the shifter! Then I can start the long road of optimization hopefully!
Speaking of welding and grinding, I had a tiny piece of metal in my eye for a week! No wonder I've been a little irritable. Dang that drove me nuts. I'm wearing goggles from here on out.
I agree, the worst is when you are still wearing safety glasses and somehow the frag finds its way around and into your eye!
Posted by: rnellums Jul 7 2014, 09:46 PM
I finished up the cable clutch bell crank linage tonight. Its allowing me to use the stock clutch cable to pull on the new subie clutch.
I re-used a pretty stout pulley axle that comes on the back of the transmission before you pull the tail cone. I had to drill a new hole to get it to fit in the right place, but there is plenty of room to drill. 
I picked up a couple of bronze bushings from Ace and machined the OD to fit into some steel pipe using my mini-lathe. Then I welded the whole bushing to a piece of angle iron and drilled a few holes so I could play with the throw ratios!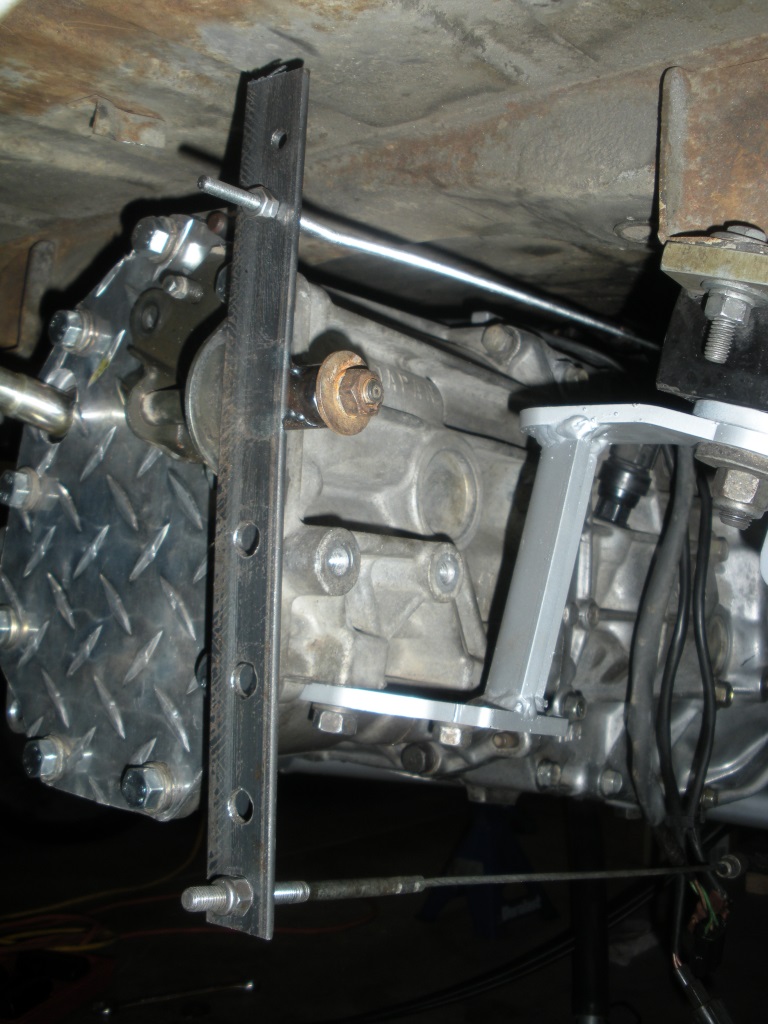
My linkage from the bell crank to the throw out arm is currently a piece of allthread. I'll get something more official in there eventually, but this will work for test driving!
The clutch pedal has a very different feel to it. The way I have the ratios set up right now it is much softer to push than a stock pedal, which makes it feel kind of weird. I can dial up the pedal pressure, but I think I'll go with it for right now.
Posted by: 76-914 Jul 7 2014, 10:00 PM
Way to go, Ross. Question; which wire off the tranny did you use for the VSS to the ECU. Is it the middle one of the 3 wires? I'm right where you are with your build.
Posted by: rnellums Jul 10 2014, 11:03 AM
I put the car back on its wheels for the first time with the exhaust installed. The pipes exit right where I want them to, but my ground clearance is pretty suspect, if estimate between two and three inches! I hope my suspension is stiff enough! 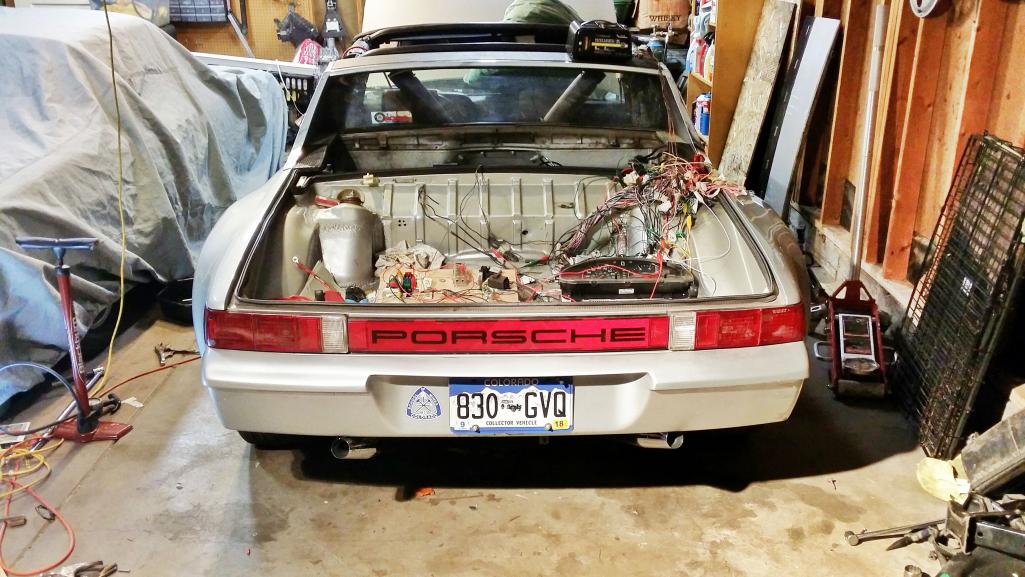
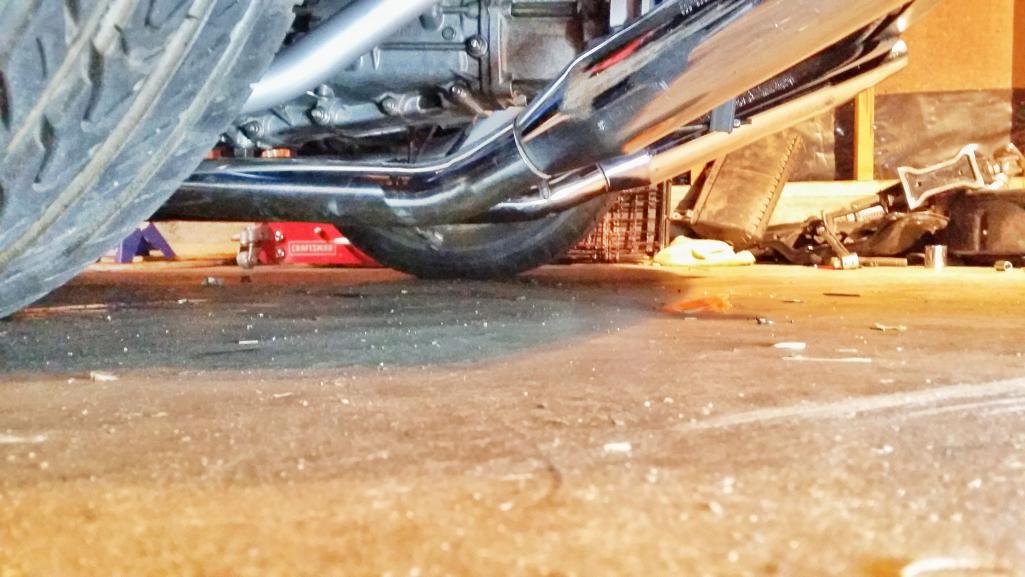
The engine is remarkably quiet at idle, but it gets throaty pretty quick when you throttle up. Sorry no videos yet!
The issue I'm having now is air in the coolant system. I can't seem to get the last bit out! Anyone have any tips?
Posted by: rnellums Jul 10 2014, 11:03 AM
Way to go, Ross. Question; which wire off the tranny did you use for the VSS to the ECU. Is it the middle one of the 3 wires? I'm right where you are with your build. I haven't dealt with that yet. Hopefully tonight!
Posted by: Chris H. Jul 10 2014, 11:37 AM
The issue I'm having now is air in the coolant system. I can't seem to get the last bit out! Anyone have any tips?
Wow those pipes look mean! Love it! Careful backing out of the driveway
! On the air in the system, can't picture your setup but here are the things I have read:
- Run the car with the radiator cap off to let the bubbles escape as freely as possible
- Jack the car up at different angles, especially if you know where the pocket probably is.
- DRIVE IT AROUND
Posted by: Scott S Jul 10 2014, 12:46 PM
The issue I'm having now is air in the coolant system. I can't seem to get the last bit out! Anyone have any tips?
Hi Ross -
Get a hold of Bob (BIGKAT). He explained to me how his orange car was set up (cooling wise) and how he directly addressed the air issue. It was pretty fantanstic - making it litterally a non issue ever again. Cool stuff.
Posted by: 904svo Jul 10 2014, 01:55 PM
The issue I'm having now is air in the coolant system. I can't seem to get the last bit out! Anyone have any tips?
Hi Ross -
Get a hold of Bob (BIGKAT). He explained to me how his orange car was set up (cooling wise) and how he directly addressed the air issue. It was pretty fantanstic - making it litterally a non issue ever again. Cool stuff.
This is how I purge the air out of my conversion, I used a radiator drain valve.
You open the valve to let out all the air while the engine is running
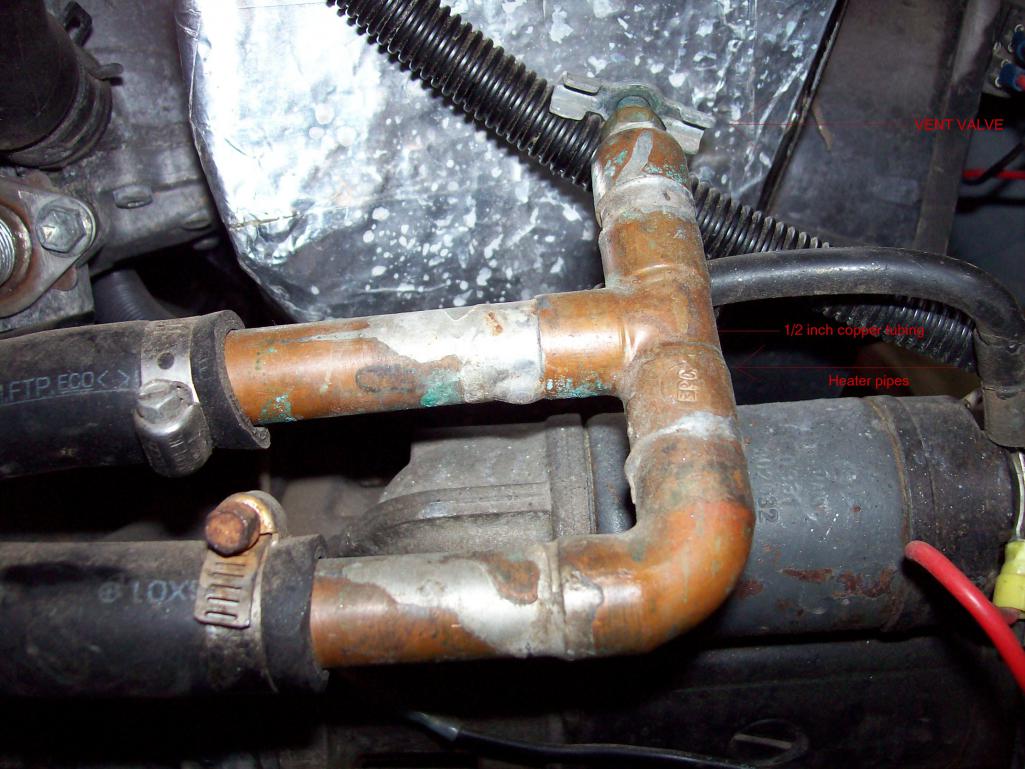
Posted by: rnellums Jul 10 2014, 02:11 PM
This is how I purge the air out of my conversion, I used a radiator drain valve.
You open the valve to let out all the air while the engine is running
Perfect! I bought a t like that last night, but didn't think it would work. It looks like it just fits onto the heater core hoses?
Posted by: mgp4591 Jul 10 2014, 03:07 PM
This is how I purge the air out of my conversion, I used a radiator drain valve.
You open the valve to let out all the air while the engine is running
Perfect! I bought a t like that last night, but didn't think it would work. It looks like it just fits onto the heater core hoses?
That could work well. What's the highest point in your cooling system? Then install it there and that should do it.
Posted by: 904svo Jul 10 2014, 04:34 PM
This is how I purge the air out of my conversion, I used a radiator drain valve.
You open the valve to let out all the air while the engine is running
Perfect! I bought a t like that last night, but didn't think it would work. It looks like it just fits onto the heater core hoses?
That could work well. What's the highest point in your cooling system? Then install it there and that should do it.
The way Subaru cools the engine it must be installed there!!!! They use a
close loop system on start up, the air & steam must be removed before the
thermostat opens. Thats why people have trouble with air in the system.
Posted by: bam914 Jul 10 2014, 08:52 PM
Best way to fill a cooling system and not have air in it.
http://www.amazon.com/UView-550000-Airlift-Cooling-Checker/dp/B0002SRH5G
Posted by: Amenson Jul 11 2014, 06:48 AM
I had a heck of a time getting the air out of my system as well. I have an expansion tank and coolant reservoir in both the front and rear. I tried bleeding it with different combinations grade and radiator cap installations and still could not get the air out.
Eventually I worked it out by leaving both caps on and tight and heat cycling the system several times while making sure that the reservoirs were always full while it was sucking coolant back in.
I am pretty sure that I had a few small leaks initially that were allowing coolant out and air back in also.
Good luck.
Scott
Posted by: 76-914 Jul 11 2014, 12:30 PM
The issue I'm having now is air in the coolant system. I can't seem to get the last bit out! Anyone have any tips?
Hi Ross -
Get a hold of Bob (BIGKAT). He explained to me how his orange car was set up (cooling wise) and how he directly addressed the air issue. It was pretty fantanstic - making it litterally a non issue ever again. Cool stuff.
This is how I purge the air out of my conversion, I used a radiator drain valve.
You open the valve to let out all the air while the engine is running
Copper
Where were you when I was getting flamed for using copper. I hope you'll be kind enough to take a pic of the inside of one of those fittings. I know you've been running this set up long enough to see the results. My $$ says your good. Ross, 3/4" copper OD=7/8" nom 3/4" tee OD = 1" nom. Highjack over.EDIT: I just saw it's 1/2" copper so 1/2" pipe OD = 5/8" nom and 1/2 Tee OD = 3/4"
Posted by: IanJ Jul 13 2014, 05:46 AM
Awesome build. Do you have any more details on the clutch setup? Some close up picks of the linkage or a diagram would be great thanks.
Posted by: rnellums Jul 22 2014, 08:41 PM
A bit of a setback! I had the car running and driving great and was in the middle of installing some EXCELLENT gauges from Kent, when I smelled some smoke. I lean out of the car and the harness by the left headlight is spewing smoke! Now I have got to weed through the entire harness forward of the firewall and replace wiring!
I do have some good news though! A new toy came up for sale through a co-worker at a price I couldn't say no to! say hello to my new semi-mid-engined daily! a 2003 S2000 with 76k original miles with a red leather interior and the factory hardtop (something of a rarity). I am its 3rd owner!
Attached image(s)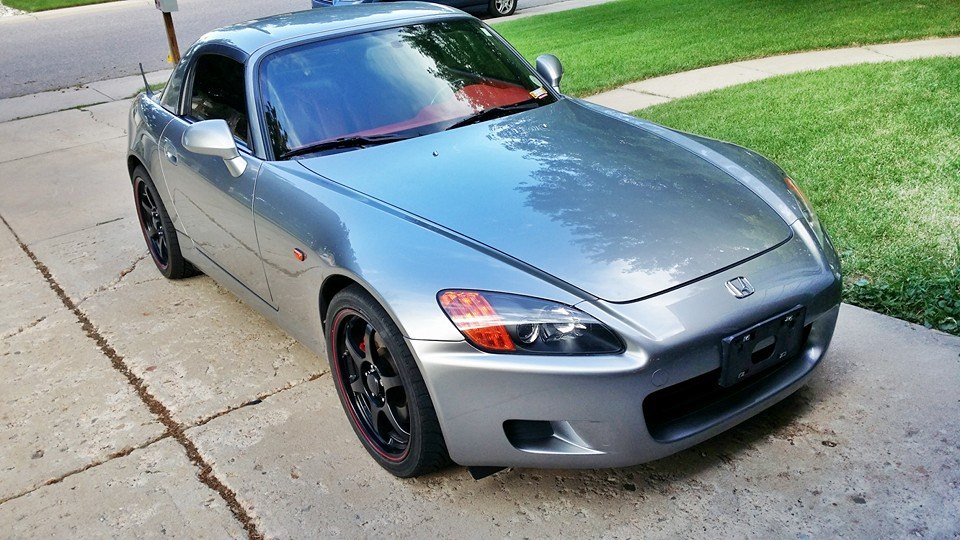
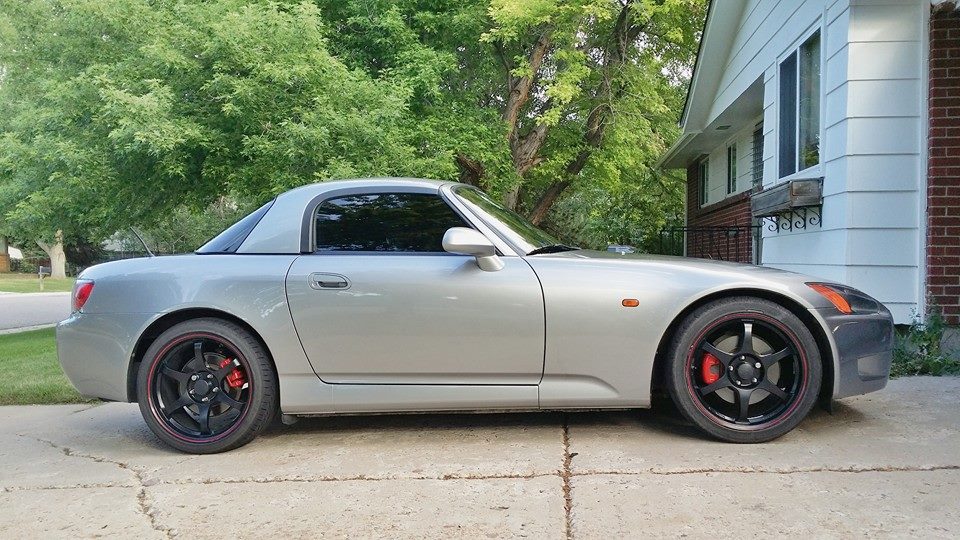
Posted by: brant Jul 22 2014, 10:14 PM
thats my favorite color combo
I've been looking casually for one
good score!
brant
Posted by: rnellums Jul 26 2014, 01:17 AM
Pretty productive day today! I repaired the wiring harness and was able to get the car running again! Then I drove it over to a friend's shop and used his scan tool to check the CEL codes listed below:
P0463
Fuel level sensor a circuit high input
P1698
manufacturer controlled computer output circuit
P0691
Fan 1 control circuit low
P0866
Tcm communication circuit high
P0447
Evap emission open
P0037
Heated o2 sensor heater control circuit low bank 1 sensor 2
Doesn't look like anything too serious. My fan still has never kicked on, but the temp gauge is staying right in the middle.
I also did some more dash work. Kent sent me a subie Speedo and a tach already mounted in 914 tach cans which look awesome. Unfortunately the Speedo hole won't fit the tach size, so I put a differentsubie Speedo into the stock Speedo can. It is definitely harder to read, but less cutting.
Attached thumbnail(s)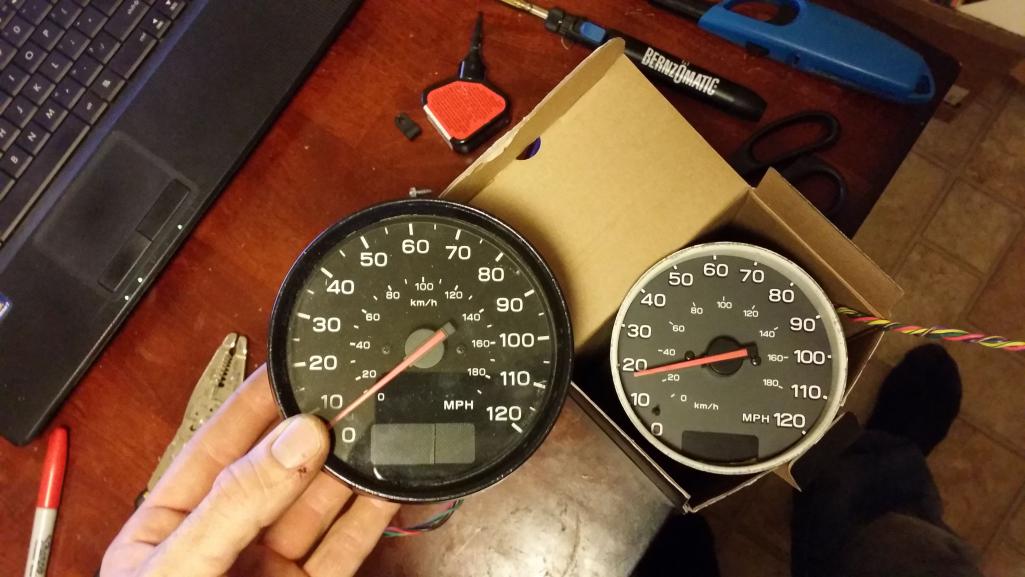
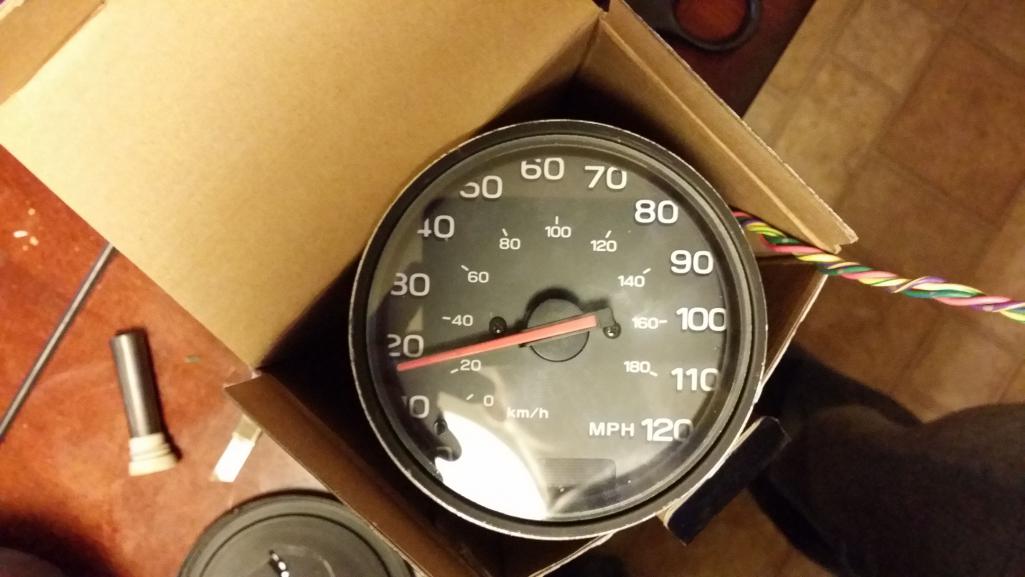
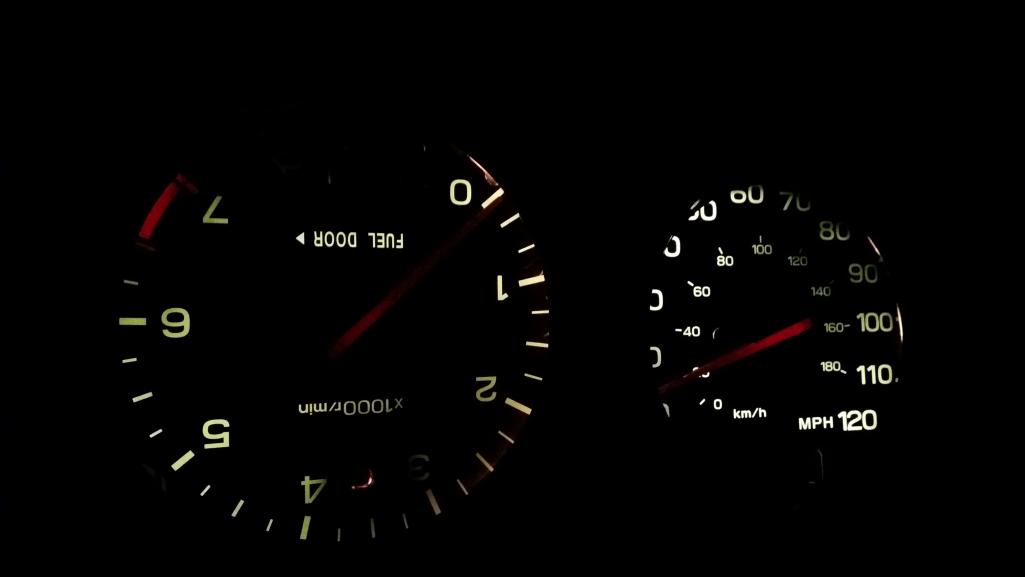

Posted by: 76-914 Jul 26 2014, 08:00 AM
Looks great, Ross. BTW, re: P0691; in that you are running single speed fans I wonder what would happen if you connected both grounds (hi-lo) together. Maybe the ECU doesn't see that ground. FWIW, I had P0037 code before I dropped the engine from the donor. No CEL's from the missing 3rd 02 sensor? Great job, Ross. Enjoyed your build.
Posted by: Chris H. Jul 26 2014, 08:00 AM
Sweet! How's the power?
You can probably search what those mean on a subie site and see how they handled them. rs25.com has a lot of conversions. I'd check the "high" circuits for sure, sounds like too much juice going through them but it might mean something totally different. Also that o2 sensor connection should be checked...loose or frayed wire maybe. You want that one good so the engine runs right. Did you clear them off and re-run them by chance?
BTW your tach is upside down (I know, I know).
Posted by: rnellums Jul 27 2014, 09:28 PM
Looks great, Ross. BTW, re: P0691; in that you are running single speed fans I wonder what would happen if you connected both grounds (hi-lo) together. Maybe the ECU doesn't see that ground. FWIW, I had P0037 code before I dropped the engine from the donor. No CEL's from the missing 3rd 02 sensor? Great job, Ross. Enjoyed your build.
This was a great idea! I combined all three Fan relay grounds so the fan will kick on when any of them satisfy their loading conditions. It works beautifully. The fan kick on fairly infrequently and then kicks back of after a minute or two! Great tip!
Sweet! How's the power?
You can probably search what those mean on a subie site and see how they handled them. rs25.com has a lot of conversions. I'd check the "high" circuits for sure, sounds like too much juice going through them but it might mean something totally different. Also that o2 sensor connection should be checked...loose or frayed wire maybe. You want that one good so the engine runs right. Did you clear them off and re-run them by chance?
BTW your tach is upside down
(I know, I know).The power is intoxicating! I rarely put the hammer down in first because its over too quickly. In second when you mash it the power just keeps coming, with the most seeming to come in the 4-6.5k range!
I haven't done any more work with the codes, but once I ground out the fuel level sender and finish the fan wiring I'll clear them and see what comes back.
The engine has been running flawlessly, I put 50-60 miles on it this weekend with short trips and tweaks in between and plan to continue putting on as many as possible prior to RRC!
On a downer note, the remoted gauges don't work. I'm going to pull them out of the dash tonight and make sure I had them hooked up properly, but I wasn't getting any movement out of them at all. for now I'm driving with the subie gauge pack in the passenger footwell and mostly just gauging speed by flow of traffic!
Posted by: JRust Jul 27 2014, 09:38 PM
Just download the ulysee speedometer app on your phone. Works great for temporary speedo until you get yours figured out. Just works off the GPS plus has a HUD feature if you want to use it at night. Just set the phone on your dash at night
Posted by: rnellums Jul 27 2014, 09:52 PM
Just download the ulysee speedometer app on your phone. Works great for temporary speedo until you get yours figured out. Just works off the GPS plus has a HUD feature if you want to use it at night. Just set the phone on your dash at night
Already have it! but how to keep it from sliding across my dash and out the window in high-g turns
?
Posted by: rnellums Jul 27 2014, 10:05 PM
A diagram with measurements for my clutch pull bellcrank. I also cut about an inch out of the throw out arm itself so it would clear the trunk without cutting.
I ran the stock cable under the engine, pulling it pretty tightly against the bottom of Ian's subframe. With these ratios the clutch pedal requires a bit less force than the stock 914.
I'm running a stock clutch pack out of a 97 base outback and its holding the power fine so far. We'll see how it goes as time goes on.
Attached image(s)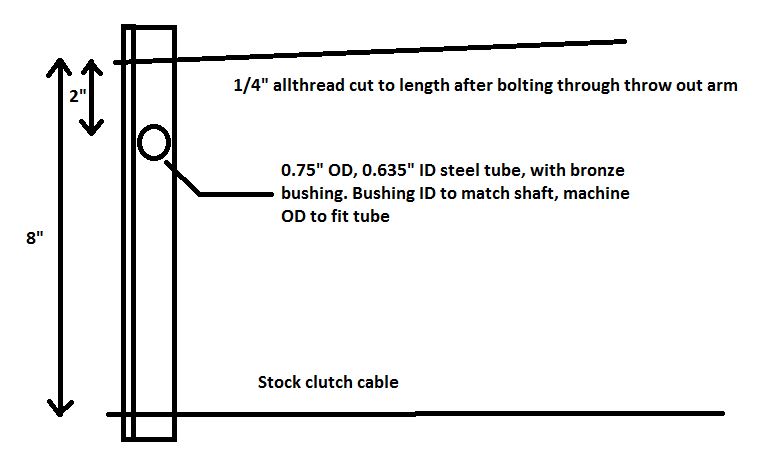
Posted by: JRust Jul 27 2014, 10:23 PM
Just download the ulysee speedometer app on your phone. Works great for temporary speedo until you get yours figured out. Just works off the GPS plus has a HUD feature if you want to use it at night. Just set the phone on your dash at night
Already have it! but how to keep it from sliding across my dash and out the window in high-g turns
?With my Samsung s5 in it's case. It jams into the space with all 3 vent controls to the right. It will jam in there & not move. Of course that puts your fan on high but I've used that many times. I also had the 3d print mount for my cup holder. That worked great too until I broke it. Then got the little bigger s5 phone anyway. Need to see if he is making that adapter yet. LOL
Posted by: rnellums Jul 27 2014, 10:26 PM
With my Samsung s5 in it's case. It jams into the space with all 3 vent controls to the right. It will jam in there & not move. Of course that puts your fan on high but I've used that many times. I also had the 3d print mount for my cup holder. That worked great too until I broke it. Then got the little bigger s5 phone anyway. Need to see if he is making that adapter yet. LOL
Sorry that it broke! I'll have to see about printing with a stronger material next time!!
Posted by: rnellums Jul 28 2014, 12:15 AM
On a downer note, the remoted gauges don't work. I'm going to pull them out of the dash tonight and make sure I had them hooked up properly, but I wasn't getting any movement out of them at all. for now I'm driving with the subie gauge pack in the passenger footwell and mostly just gauging speed by flow of traffic!
I revise my previous statement! When I was making the speedo I re-positioned the needle, which was giving an erroneous reading! one re-positioned correctly its working (at least a bit). On the tach, one of the pins has come out just a bit and had to be re-inserted. Not a big deal and now all is well!
Posted by: 76-914 Jul 30 2014, 07:28 PM
Hey Ross, anything to report yet on the heat or absence of heat from the longs. Re: your speedo, you said it's kinda of working. Be sure the needle has clearance from the glass. That one bit me.
Posted by: rnellums Aug 3 2014, 01:07 PM
Hey Ross, anything to report yet on the heat or absence of heat from the longs. Re: your speedo, you said it's kinda of working. Be sure the needle has clearance from the glass. That one bit me.
I can reach down and feel the return pipe from the drivers seat and tell when it's getting got, so far it definitely hadn't been unbearable though. I do think that I'm going to start working on an engine mounted radiator though as I have time. It will make everything so much more convenient!
As far as the gauges go the problem is primarily the pins in the back of the gauges coming slightly undone. The Speedo is working pretty reliably, but the teach is only running to 3k or so before the needle starts moving the other direction (engine goes faster). I also could be more excited about the night lighting color (greenish) but I really can't complain because Kent's work has saved me load of trouble!
Posted by: rnellums Aug 3 2014, 09:11 PM
YouTube link to some exhaust notes. Not quite as pretty as Kent's I'm afraid.
Exhaust noise: http://youtu.be/CayDApPDJ98
Posted by: 76-914 Aug 4 2014, 08:36 AM
I love it! Sounds fantastic. 
Posted by: rnellums Aug 6 2014, 10:07 PM
I went on a 50 mile cruise with a buddy this evening. We did a couple of highway pulls pitting my subie 3.0 against his twin turbo 2009 335. I pulled away every time . Im seeing 3.5 k rpm or so at up on the highway, and the exhaust note Is a bit droning at that pace.
Posted by: 76-914 Aug 7 2014, 08:22 AM
I went on a 50 mile cruise with a buddy this evening. We did a couple of highway pulls pitting my subie 3.0 against his twin turbo 2009 335. I pulled away every time
. Im seeing 3.5 k rpm or so at up on the highway, and the exhaust note Is a bit droning at that pace. I'm waiting on another throttle cable. They sent the wrong one, yesterday. Your killing me, Ross.  I've only done a partial pull in second, thus far. So, did your friend make excuses or offer to buy your car.
Posted by: 1stworks Aug 7 2014, 08:27 AM
I went on a 50 mile cruise with a buddy this evening. We did a couple of highway pulls pitting my subie 3.0 against his twin turbo 2009 335. I pulled away every time
. Im seeing 3.5 k rpm or so at up on the highway, and the exhaust note Is a bit droning at that pace.Very impressive! !!!
I could b super happy with that :-)
any changes in handling? ?
Scotty
Posted by: Chris H. Aug 7 2014, 09:03 AM
Very cool!
Was just showing (bragging to) Kent that I did this yesterday....
https://www.youtube.com/watch?v=ajYeJMkHopY
Will update my thread also. Without even driving it yet it seems extremely powerful compared to the 1.8 that was in there. It was late so I couldn't let it rip too loud but when you rev it up it sounds like a wild animal. I don't think I realized how fast the car is gonna be.
Posted by: 76-914 Aug 7 2014, 03:17 PM
Very cool!
Was just showing (bragging to) Kent that I did this yesterday....
https://www.youtube.com/watch?v=ajYeJMkHopY
Will update my thread also. Without even driving it yet it seems extremely powerful compared to the 1.8 that was in there. It was late so I couldn't let it rip too loud but when you rev it up it sounds like a wild animal. I don't think I realized how fast the car is gonna be.
Whoot!
If you were running a 1.8 before ANYTHING will be an improvement. A BIG congrats! I will be updating my exhaust in the near future to sound like yours. My wife isn't in to "sport" mufflers.
Posted by: BIGKAT_83 Aug 7 2014, 03:46 PM
Sounds pretty good to me.
Posted by: Chris H. Aug 7 2014, 06:32 PM
Well you should recognize the sound Bob since you made the exhaust! And the engine mount... Wait..what did I do ?
I'm chasing an oil leak now...sound familiar? Right under the middle of the timing belt cover. I think it's just the oil pump seal. Nothing at all on the belt itself, must be behind it. Only leaks when running. Trying to figure out how to get the crank pulley off without taking the engine out. Looks like there are a couple of options.
Note to self...NEVER say "I'm gonna update my thread TODAY." Something bad always happens!
Posted by: 1stworks Aug 9 2014, 04:38 PM
Super sweet and so smooth. ...
Thanks for letting me drive it
Posted by: rnellums Aug 15 2014, 10:54 PM
I'm thinking about getting a vinyl wrap to spice up the plain silver of my car. What are everyone/anyone's thoughts on urban camo?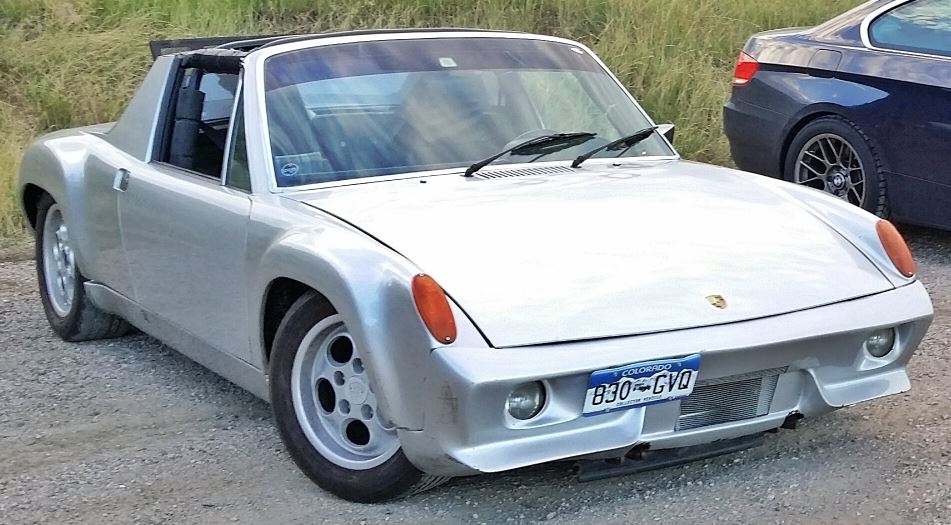
Stock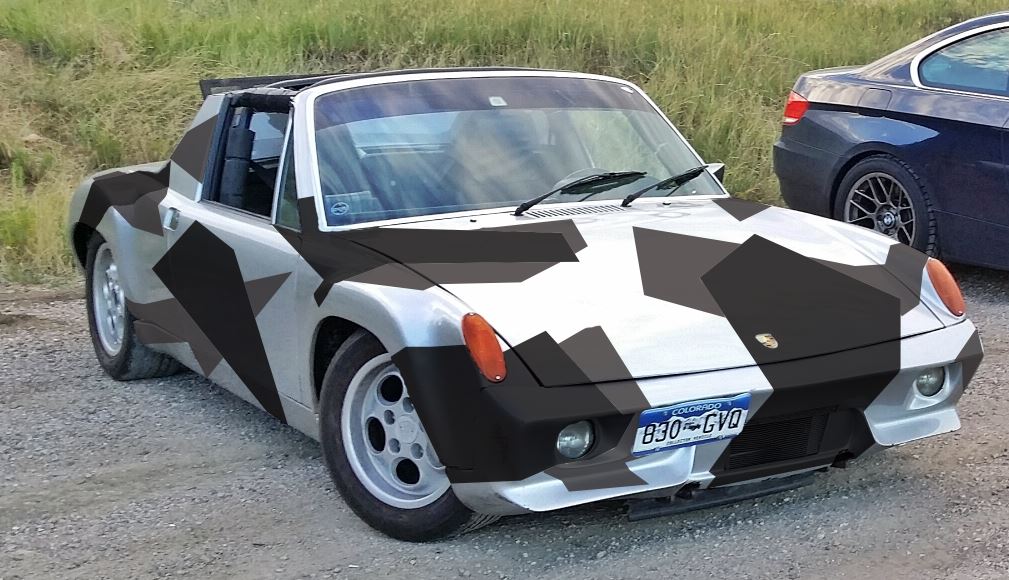
Photoshop
Posted by: 76-914 Aug 16 2014, 09:06 AM
I'm too old to comment on anything new.
Posted by: rnellums Aug 21 2014, 10:01 PM
I made one of the best investments of my conversion earlier this week.
It consists of a Bluetooth OBD II scanner and the Torque app for android. Not only does it allow me to read and clear engine codes while troubleshooting, but I can also see any relevant gauge in real time and log those metrics (along with gps) so I can review them later.
It. Is. Awesome.
Attached thumbnail(s)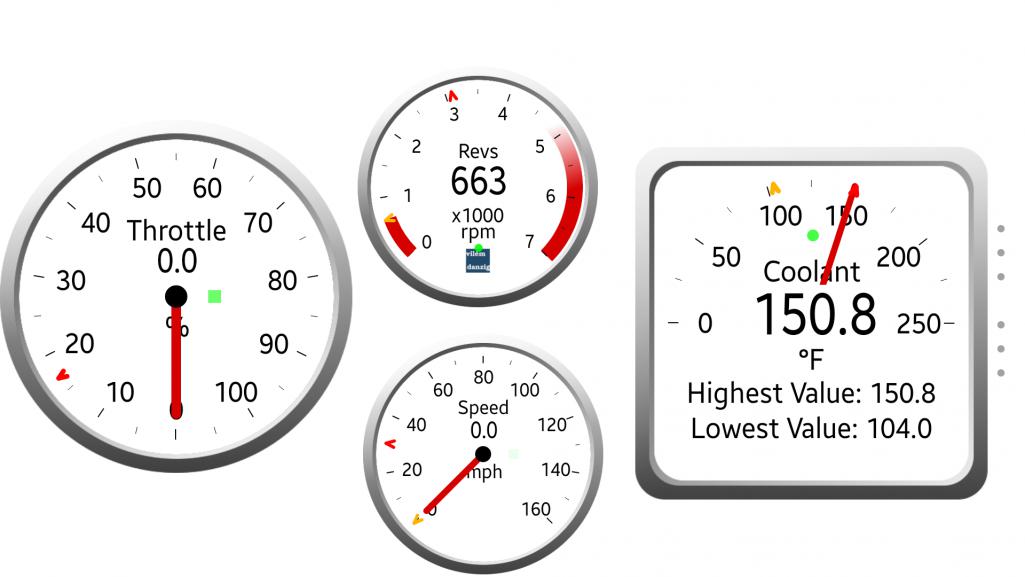
Posted by: 76-914 Aug 22 2014, 08:25 AM
Cool, Ross. I bought one of those wifi for my iphone. I got it to work on my PU but not the 914, yet. I like the real time feature. I paid $20 for the transmitter and 5 for the app.
Posted by: rnellums Sep 24 2014, 10:12 PM
So a quick update, I've got about 1200 miles on the conversion with a few hiccups. First, I had a CV come apart on me on the way to Moab. Second, at highway speeds unload my coolant temps start to creep up. At some of the passed here in Colorado I find myself having to go easy on it! I spoke with Rick about how he cooled the alien and he suggested the coolant might be passing through the radiator to fast, not allowing any time for heat transfer.
I'm also mocking up my plans for conserving the front trunk cargo area and test driving as much as possible to look at its effect on cooling. So far it seems to work well enough!
The flywheel is screwed down as a weight to hold the board in place.
Attached thumbnail(s)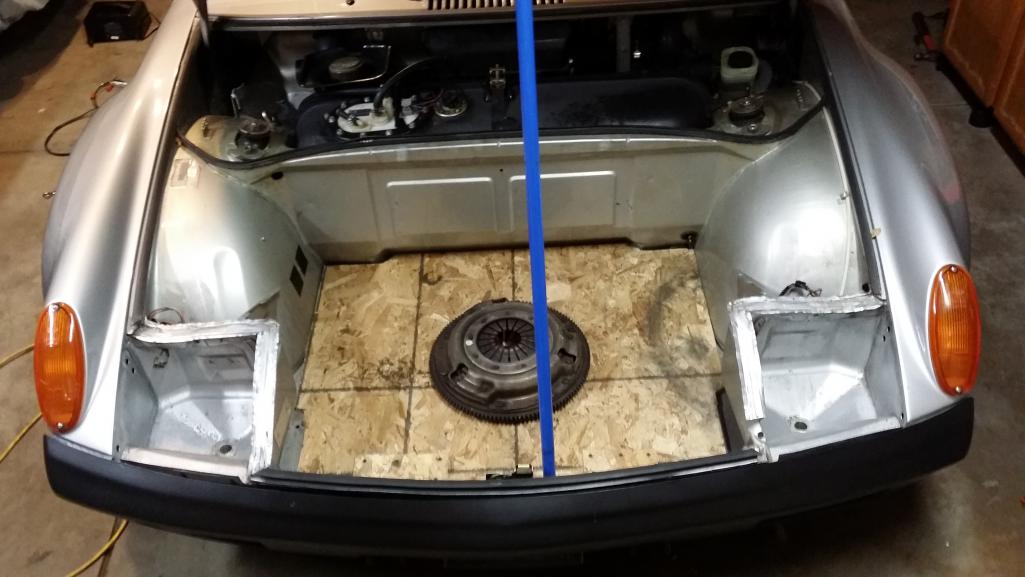
Posted by: rnellums Sep 24 2014, 10:13 PM
Without the cover
Attached thumbnail(s)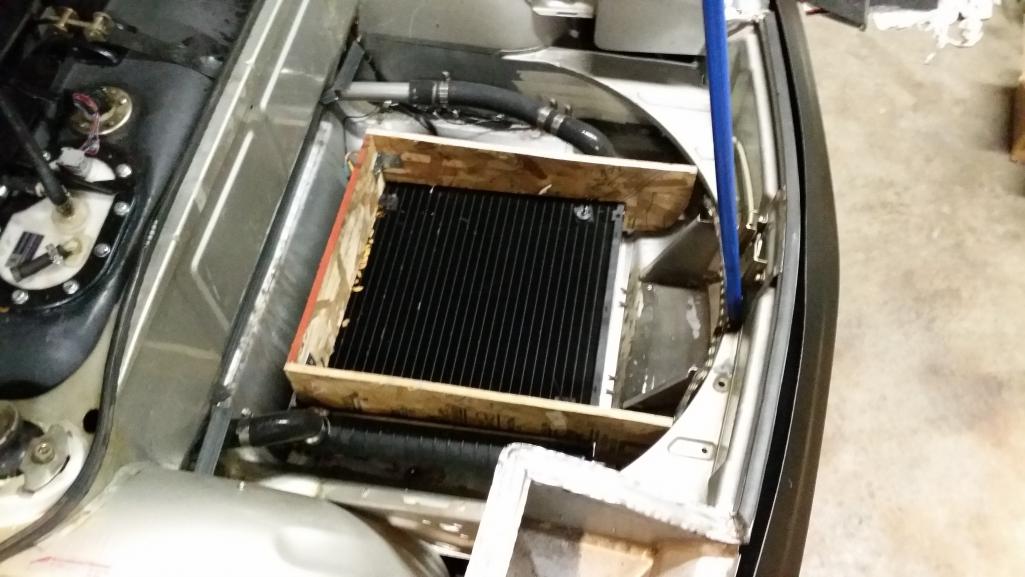
Posted by: mgp4591 Sep 24 2014, 10:17 PM
Did you make your front opening a bit bigger and seal it off? Given the hour, I doubt you've tested it but when you do let's hear the results! Looks like a sound idea you've got going...
Posted by: 76-914 Sep 25 2014, 09:11 AM
So a quick update, I've got about 1200 miles on the conversion with a few hiccups. First, I had a CV come apart on me on the way to Moab. Second, at highway speeds unload my coolant temps start to creep up. At some of the passed here in Colorado I find myself having to go easy on it! I spoke with Rick about how he cooled the alien and he suggested the coolant might be passing through the radiator to fast, not allowing any time for heat transfer.
I'm also mocking up my plans for conserving the front trunk cargo area and test driving as much as possible to look at its effect on cooling. So far it seems to work well enough!
The flywheel is screwed down as a weight to hold the board in place.
Could you describe your increase in temp when on the Hi Way. IOW, does your temp begin to climb after "X" min's regardless of OAT. Is it fine until you exceed "X" mph. Which of these 4 do you suspect? Run time, distance, OAT or speed. When the engine is fully heat soaked do Hi Way temp's come up more quickly? What are your temps on the inlet and outlet sides of your radiator? Does pulling to the side and letting the engine idle bring the temps down?
Posted by: Chris H. Sep 25 2014, 09:27 AM
Could you shoot a pic from the front Ross? Would love to see your inlet opening.
Thanks.
Posted by: rnellums Sep 25 2014, 08:41 PM
This is what I was running out to Moab. Temps crept up at 90 up passes, but in town and the canyons are fine.
Attached thumbnail(s)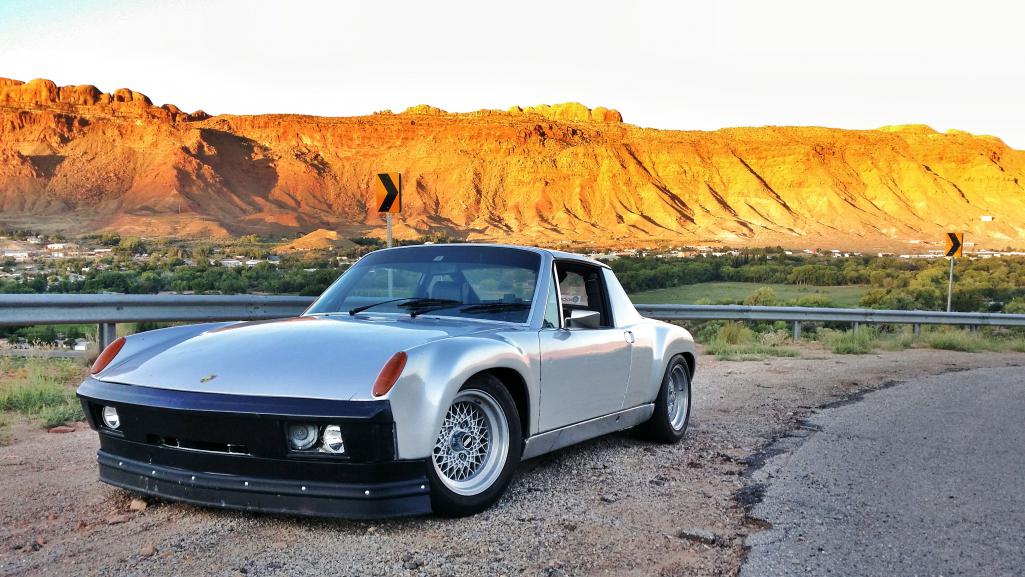
Posted by: ruby914 Sep 26 2014, 12:33 AM
Nice!
Posted by: majkos Sep 26 2014, 06:37 PM
Nice!
Don't mess with this 914.

Posted by: 76-914 Sep 27 2014, 02:07 PM
Your car looks great, Ross. Keep us posted on your results.
Posted by: rnellums Sep 28 2014, 11:45 AM
The car drove to the track and back from the track (80 miles each way) so i'll consider the day a success!
A few of the high points:
- The chassis still handles beautifully, basically just think where you want it to go and it complies! especially with Nitto NT-01's on it!
- At the end of the back straight I was hitting 105-110, similar to a lot of the other high horsepower cars out there and I could drive WAY deeper into corners.
In addition, there is something about a track day that identifies weak points!
- The cooling system is not yet sufficient. I could run for about 15 minutes before my temps would start to creep up higher that I was comfortable with and I had to pull off and let it recover. I'm planing on putting in a slightly larger dual pass aluminum radiator. I'll see if that helps!
- I used a piece of all-thread in my clutch linkage, after a few sessions I was pullng into the pits and th thread sheared off (tensional failure) I need to go to a larger diameter rod or a cable setup. Something to do for next time!
- One of the clips on the coil packs has broken, so the connector slowly vibrates loose and I start getting a miss. It fixes easily enough, but is annoying.
Overall, I would call the day a success!
-Ross
Posted by: mgp4591 Sep 28 2014, 11:54 AM
That does sound like a good day! Is your front inlet still the same size or at least sealed off for more directed cooling? And which part of your linkage was the allthread?
Posted by: 76-914 Sep 28 2014, 01:14 PM
Weld a bolt on the end of that all thread. The steel of that all thread is much too mild for that purpose. Between all of us, we may come up with a "one size fits all" cooling solution.
Posted by: rnellums Sep 28 2014, 01:29 PM
That does sound like a good day! Is your front inlet still the same size or at least sealed off for more directed cooling? And which part of your linkage was the allthread?
The inlet was slightly larger than previously, but was better ducted. The clutch uses the stock clutch cable roped to a bellcrank that pulls the linkage to the clutch fork. That linkage broke. Just using a steel cable should work nicely!
Weld a bolt on the end of that all thread. The steel of that all thread is much too mild for that purpose. Between all of us, we may come up with a "one size fits all" cooling solution.
I keep going someone else well come up with a cooling solution that fits in the engine bay or conserved the front trunk. I'm sure someone will get there eventually!
I'm planning on switching to a hardened steel rid with custom cut threads for the new linkage.
Posted by: Chris H. Sep 29 2014, 09:01 AM
Ross,
Have you seen this site?
http://members.rennlist.com/bluethunder/engine.htm
Looks like what you want to do. Running a Buick 3.8L...take a look at his setup. That radiator looks pretty big as does the fan. He also angled the radiator a bit. Long time member, very nice guy.
If he can get that thing cool you can get yours under control.
Posted by: rnellums Feb 1 2015, 10:57 AM
Well for anyone who hasn't seen my Calypso thread, I damaged the front of Apollo a week or so ago.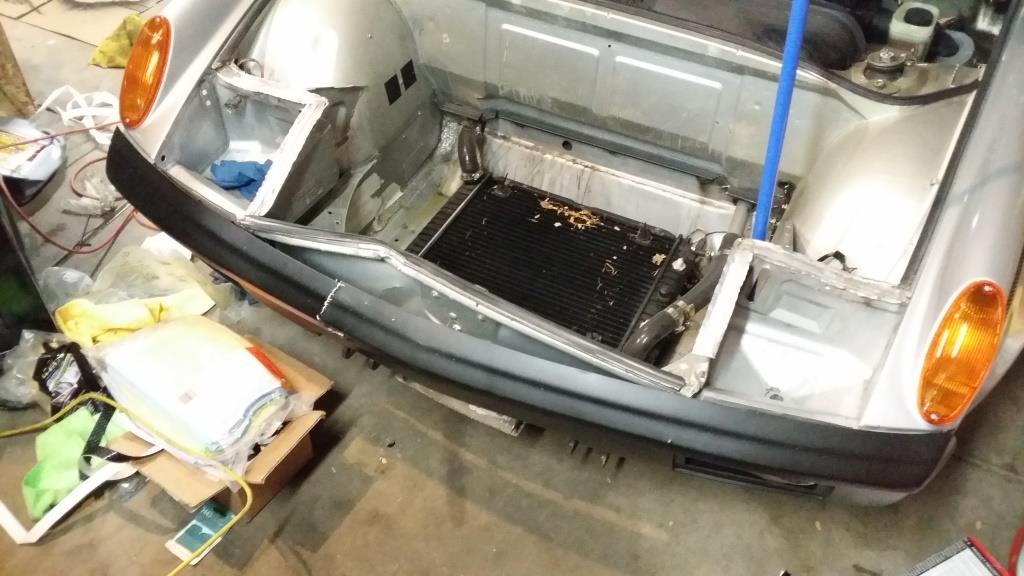
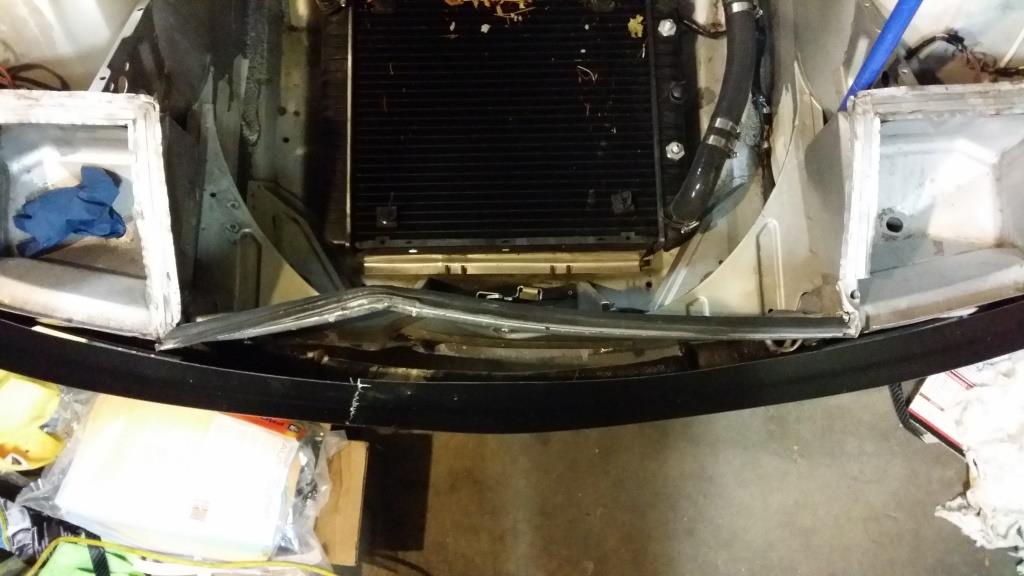
Its going to get fixed, but in the meantime I'm going to be starting to document the custom header setup I'll be building to replace my current pipes.
What I'm using currently is an aftermarket OBX header set that I chopped off before the collector and welded on two Harley Davidson motorcycle resonators.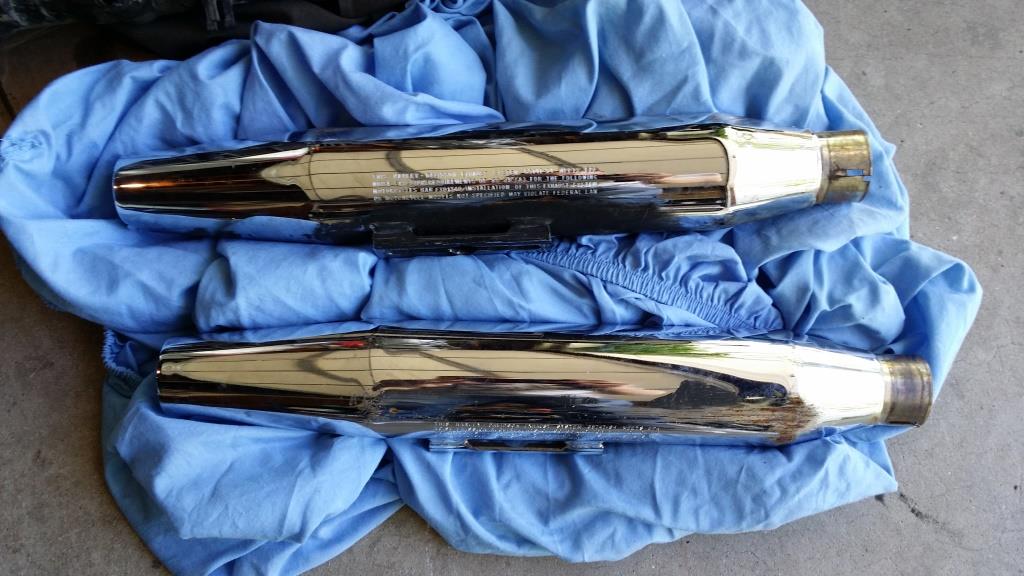
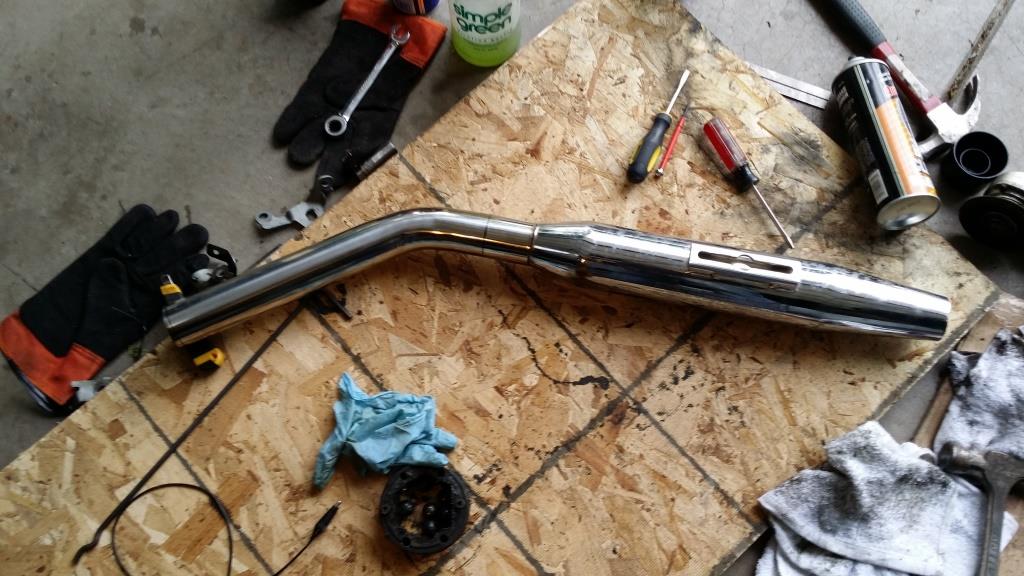
The upside is this system is incredibly simple. The downside is twofold:
First, the pipes are routed underneath Ian's cradle, which severely impacts my ground clearance (makes me cringe anytime I go over any bump)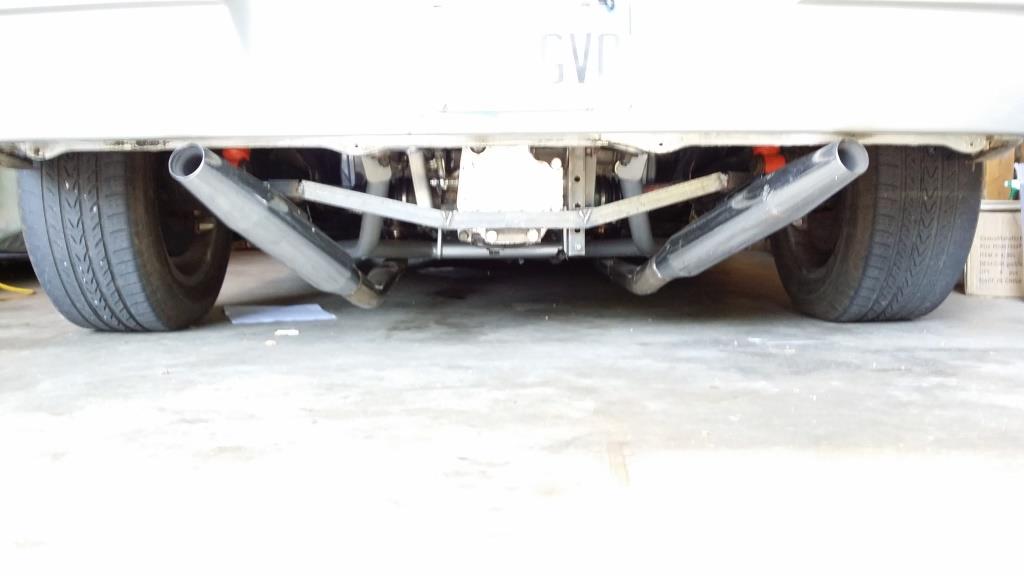
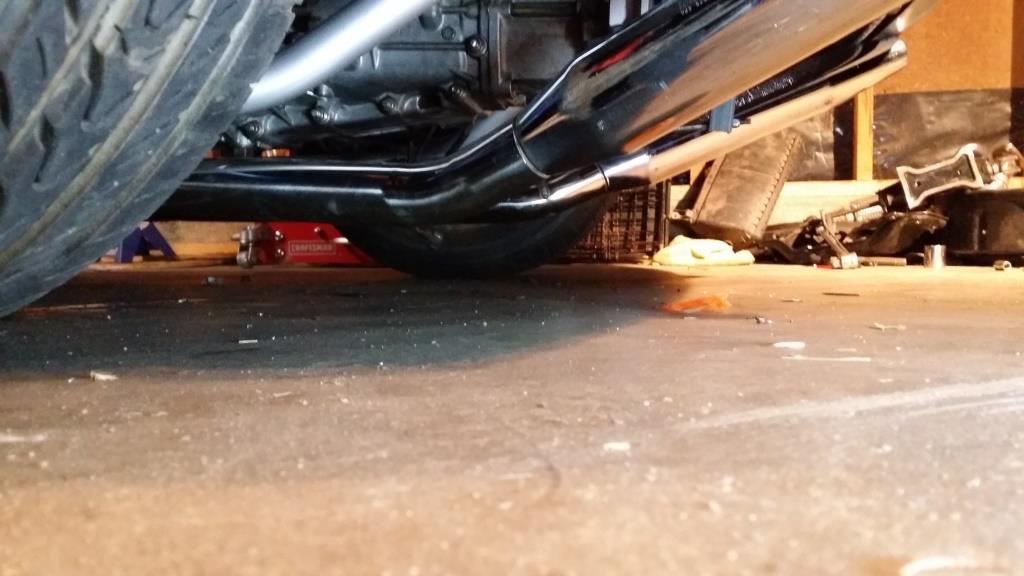
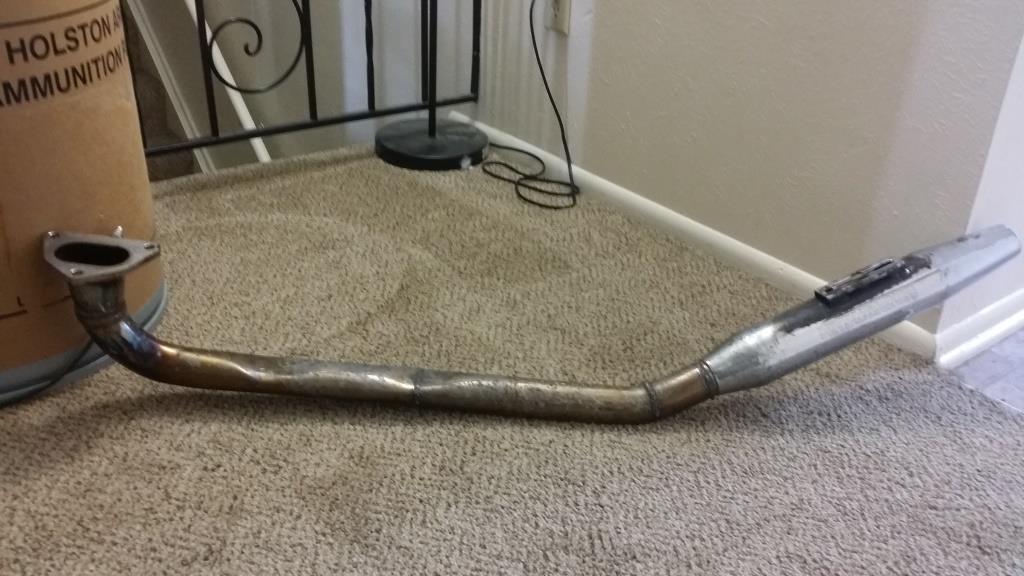
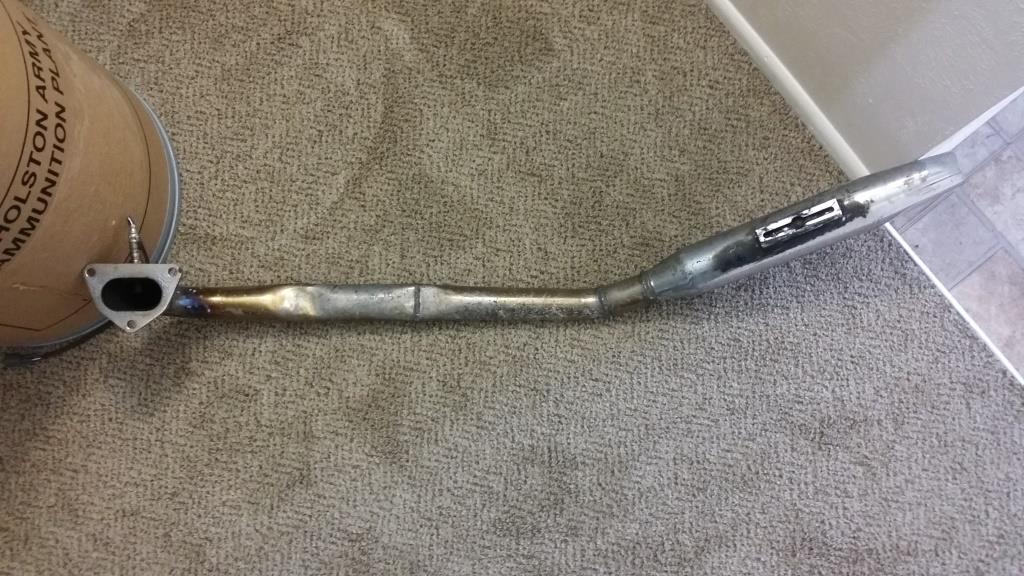
Second, the mufflers (resonators) are each built to handle 800cc spinning at 5500 RPM (2200 L/min), and I'm trying to force 1500 cc through them spinning at 6500 RPM (4875 L/min).
Marty at MSDS sent me an assortment of mandrel bends (some remnants, some new) which should be enough to get me started! I can't say enough how much I appreciate what Marty and MSDS do for our community, He has certainly been a big help to me!
I also got a couple race resonators from Mark Z at Autoworks in Littleton.
They'll probably be too loud by themselves for street driving, so I'll likely end up porting them into a magnaflow 2 in 2 out muffler like this guy did on his 911.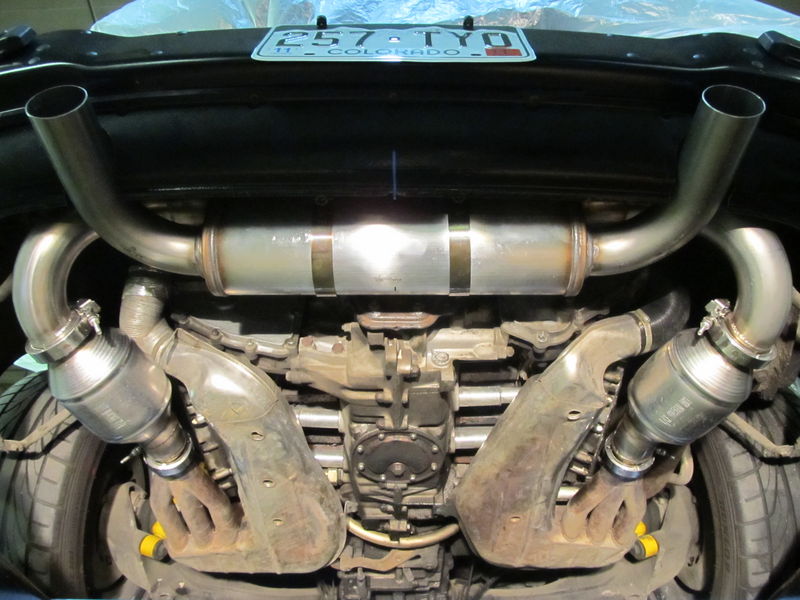
Posted by: rnellums Feb 1 2015, 11:01 AM
Or These 911's: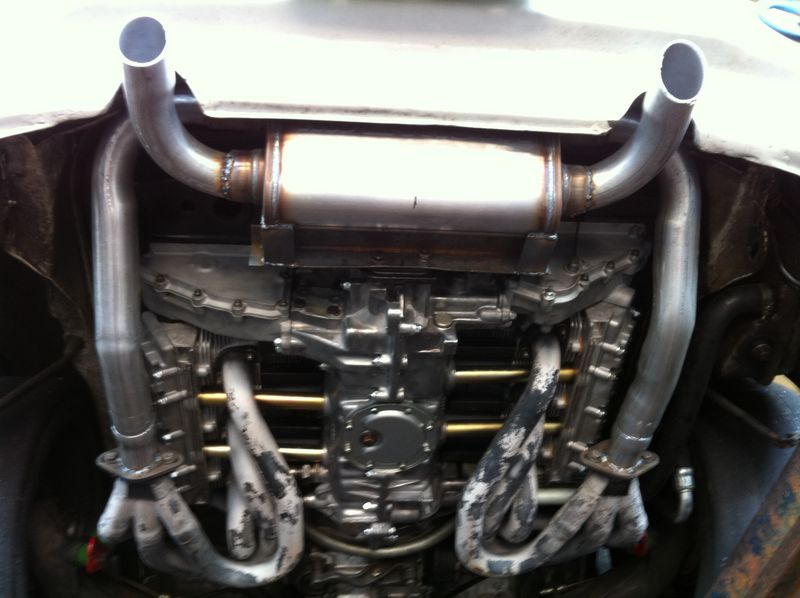
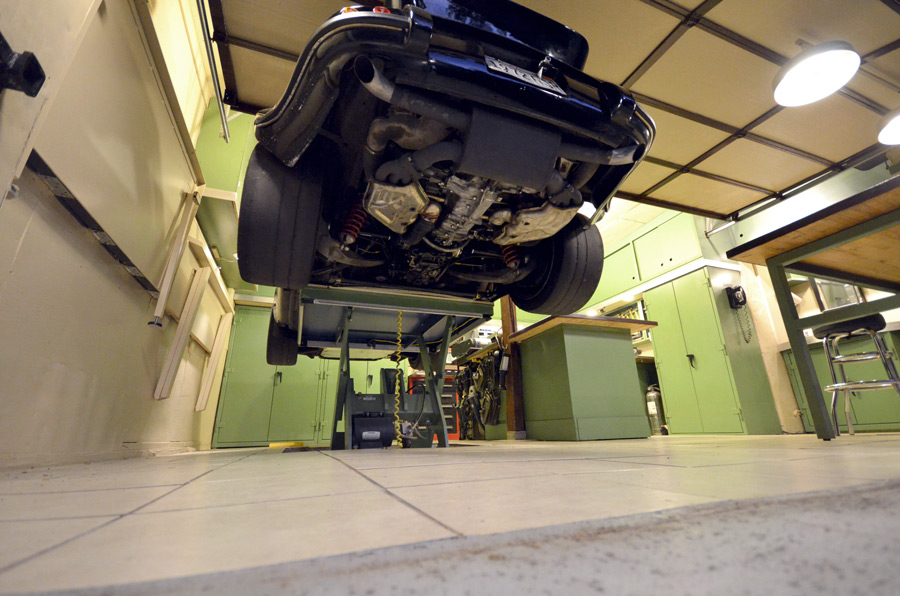
Posted by: rnellums Feb 1 2015, 11:15 AM
My current is to use 2" pipes for the initial exit from the header because the bends have a tighter radius, and then transition to a 2.5" pipe at a flange where it passes through Ian's cradle. I'm not planning to do any flex pipes as the entire exhaust system will be hard mounted to the engine and transmission, which is soft mounted to the frame. Thoughts?
Posted by: Chris H. Feb 1 2015, 11:45 AM
Bob's car was very quiet (for a Subaru). He did two mufflers into a center muffler. Here is a pic..
http://www.914world.com/bbs2/index.php?automodule=blog&req=attach&id=11491
Posted by: DBCooper Feb 1 2015, 12:18 PM
You can use a regular Camaro muffler, two in two out, that crosses between the transmission and the valance, fits and works great, cheap, super easy to plumb, and an outlet on either side is kind of different. And you can choose the brand, Magnaflow or whatever, according to the loudness/sound you prefer. Or alternatively, what would be my favorite, a two in one out Porsche performance banana. Problem with that one is what transmission you used and how much clearance the cradle positioning the tranny left between the end of the transmission and the valance. Need to measure. That would give you that Porsche six sound, if that's something you like.
Posted by: rnellums Feb 1 2015, 12:37 PM
You can use a regular Camaro muffler, two in two out, that crosses between the transmission and the valance, fits and works great, cheap, super easy to plumb, and an outlet on either side is kind of different. And you can choose the brand, Magnaflow or whatever, according to the loudness/sound you prefer. Or alternatively, what would be my favorite, a two in one out Porsche performance banana. Problem with that one is what transmission you used and how much clearance the cradle positioning the tranny left between the end of the transmission and the valance. Need to measure. That would give you that Porsche six sound, if that's something you like.
The Camaro muffler is almost exactly what I was thinking.
The Porsche performance banana muffler would be great, but i don't know if it is worth the extra cost to me.
Posted by: rnellums Feb 1 2015, 12:45 PM
I just drew a flange up in SW based on a scaled photo I took of my flange gaskets.
I'll probably have these water-jet cut out of 3/8" mild steel if anyone else is interested. Having 4,6,8, or 10 cut is only going to be marginally more expensive than having 2 cut.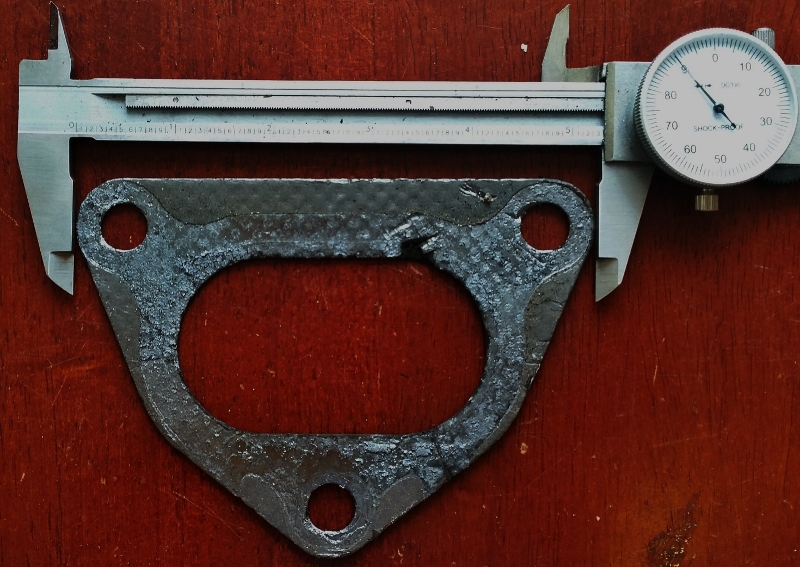
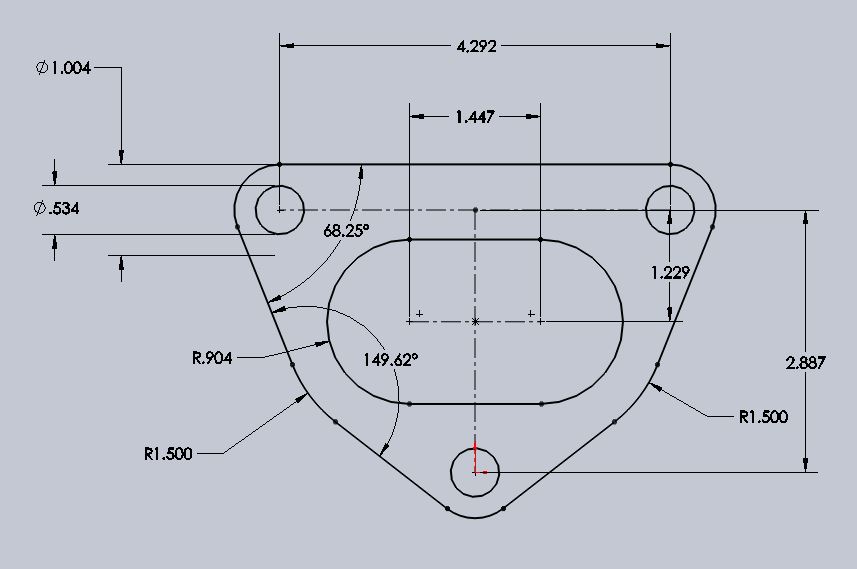
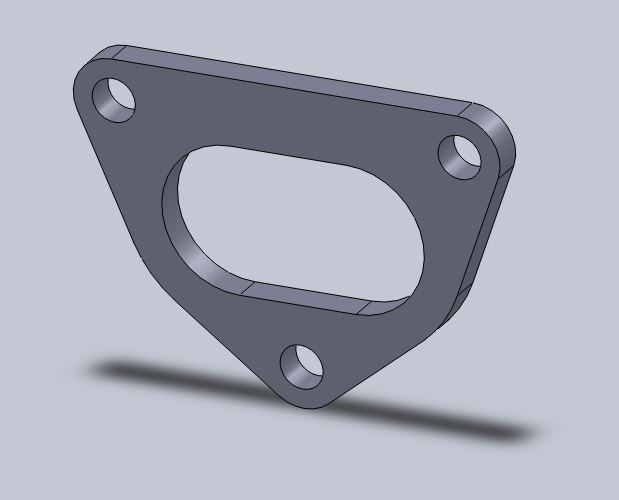
Posted by: BIGKAT_83 Feb 1 2015, 02:20 PM
http://www.stainlessheaders.com/index.aspx
Bob 
Posted by: rnellums Feb 1 2015, 02:36 PM
http://www.stainlessheaders.com/index.aspx
Bob
I was hoping someone would chime in with something like that! I'll put them on order tomorrow!
Posted by: 76-914 Feb 1 2015, 02:59 PM
I'd still be working on my car if it weren't for Bob's Hints!
Posted by: 914GTSTI Feb 1 2015, 03:00 PM
Don't know if you read this ? May help with the heating problem ? Motor is a 33 and may not apply.
Eg33 swapped 2002 WRX owner right here. Partial install shot right here.
http://www.dirtyimpreza.com/forums/showthread.php?12965-Team-Illuminata-EG33-engine-swap/page8
Some things:
1) Do not skimp on cooling on this motor. They have cooling system issues with pump cavitation at elevated RPMs and will boil coolant quite easily if used on track in OEM format. It's highly suggested that you remove the thermostat from behind the water pump inlet, and move it into a universal thermostat housing in the upper rad hose. This is the best and most simple start to a series of small mods to assist the cooling. Stepping up the inlet neck to about 40mm also assists the matter.
2) Get an oil cooler on it, period. Oil temps in these motor skyrocket without one.
3)#5 con rod is the one that like to blow due to oil starvation at high rpms. Motor like heavywiehgt oil.
4)This motor loves to breath. Cams and porting will be it's best friend.
etc etc. I've got more for you if needed.
Been driving my car every day, swinging to 7500 all day long.
Crossover tube in the exhaust messes with the scavenging effect that makes the IRIS effect shine in the plenum(essentially two stage runner length tuning on the fly)
PM or post if you have more questions. I can take other pics of my car if wanted
Posted by: rnellums Feb 1 2015, 03:26 PM
Don't know if you read this ? May help with the heating problem ? Motor is a 33 and may not apply.
Eg33 swapped 2002 WRX owner right here. Partial install shot right here.
I hadn't read that one, but I have heard that non OEM thermostats can have difficulty with insufficient coolant bypass, and that opening up the bypass hole a bit can help.
My cooling difficulties only manifest under load at speed (like on the highway). my impression is that the coolant is not spending enough time in the radiator to shed sufficient heat when the pump is moving coolant quickly.
I just put in an order for a larger capacity radiator with more tubes that will hopefully slow down the coolant velocity through the radiator while keeping the overall flow rate constant!
Posted by: 914GTSTI Feb 1 2015, 04:03 PM
Here is another one. (VERY LONG) I have not readed it yet.
http://www.subaru-svx.net/forum/showthread.php?t=51702
I'm looking into rethinking a EJ20T swap and going EG33.
Randy
Posted by: rnellums Feb 1 2015, 10:13 PM
Here is another one. (VERY LONG) I have not readed it yet.
http://www.subaru-svx.net/forum/showthread.php?t=51702
I'm looking into rethinking a EJ20T swap and going EG33.
Randy
I have gone back and forth over wether or not I should have gone with the EG33 vs the EZ30.
EG33 has a lot to recommend it, like cheaper, more aftermarket support, more stock power.
EZ30 is more modern, easier to find a low mileage motor, longer maintenance intervals (timing chain vs. belt), and its physically smaller and lighter.
I guess if I had a do-over I might choose the EG33, but the proof is in the pudding. I'l stick with what I've got until someone with an EG33 conversion lets me take it for a spin (you hear me Mike?
)
Posted by: mgp4591 Feb 2 2015, 03:16 AM
Here is another one. (VERY LONG) I have not readed it yet.
http://www.subaru-svx.net/forum/showthread.php?t=51702
I'm looking into rethinking a EJ20T swap and going EG33.
Randy
I have gone back and forth over wether or not I should have gone with the EG33 vs the EZ30.
EG33 has a lot to recommend it, like cheaper, more aftermarket support, more stock power.
EZ30 is more modern, easier to find a low mileage motor, longer maintenance intervals (timing chain vs. belt), and its physically smaller and lighter.
I guess if I had a do-over I might choose the EG33, but the proof is in the pudding. I'l stick with what I've got until someone with an EG33 conversion lets me take it for a spin (you hear me Mike?
)Yeah, I got ya! I've gotta take it for a spin first tho...!

Posted by: Chris H. Feb 2 2015, 09:18 AM
Hey if you ever come back this way Ross you can drive mine (but not in the snow). Need to get a couple things done first, but late Spring we should be all set.
I drove Bob's EZ car and it feels pretty much the same as mine power-wise. Plenty. You'll get that exhaust thing sorted and the cooling situation and be good to go. His never got hot and we definitely gave it a reason to. Needle never even moved.
Posted by: BIGKAT_83 Feb 2 2015, 09:32 AM
I've had both engines in my car. I think the EZ30D is faster than the EG33. The main reason I went from the EG33 to the EZ30 was the size and avialblity of parts for the new engine verses the old one.
I also have a EZ30R engine. These are the one to have 250HP. Megasquirt now has the code to run these. Now you don't need a $2500+ ECU swap these into a 914
Posted by: rnellums Feb 2 2015, 10:22 AM
I've had both engines in my car. I think the EZ30D is faster than the EG33. The main reason I went from the EG33 to the EZ30 was the size and avialblity of parts for the new engine verses the old one.
I also have a EZ30R engine. These are the one to have 250HP. Megasquirt now has the code to run these. Now you don't need a $2500+ ECU swap these into a 914
The 30R will be my engine of choice for the next upgrade then! How much continual tuning is required when running megasquirt?
Posted by: BIGKAT_83 Feb 2 2015, 11:35 AM
I've had both engines in my car. I think the EZ30D is faster than the EG33. The main reason I went from the EG33 to the EZ30 was the size and avialblity of parts for the new engine verses the old one.
I also have a EZ30R engine. These are the one to have 250HP. Megasquirt now has the code to run these. Now you don't need a $2500+ ECU swap these into a 914
The 30R will be my engine of choice for the next upgrade then! How much continual tuning is required when running megasquirt?
I have not touched the megasquirt on my EZ30D in over a year.
Bob
Posted by: 914GTSTI Feb 2 2015, 01:49 PM
Here is another souse for exhaust parts.
http://www.outfrontmotorsports.com/exhaust_systems.htm
Posted by: 914forme Feb 3 2015, 01:48 PM
Don't know if you read this ? May help with the heating problem ? Motor is a 33 and may not apply.
http://www.mrtperformance.com.au/resources/technical-documents/984-keeping-your-engine-cool-when-all-others-are-boiling-theirs is the summary page for the entire heating issue it might still be valid for other subaru engines.
Posted by: rnellums Feb 8 2015, 06:27 PM
Im working on a set of headers that gives me more ground clearance and also is a bit freer flowing. With 2.5" pipes this is the best I could do to clear Ian's sub frame. I have some 2" pipe bends that might be able to exit a bit straighter, but are much smaller diameter.
I could also modify Ians cradle to buy some more room.
Any input is appreciated!
Attached thumbnail(s)
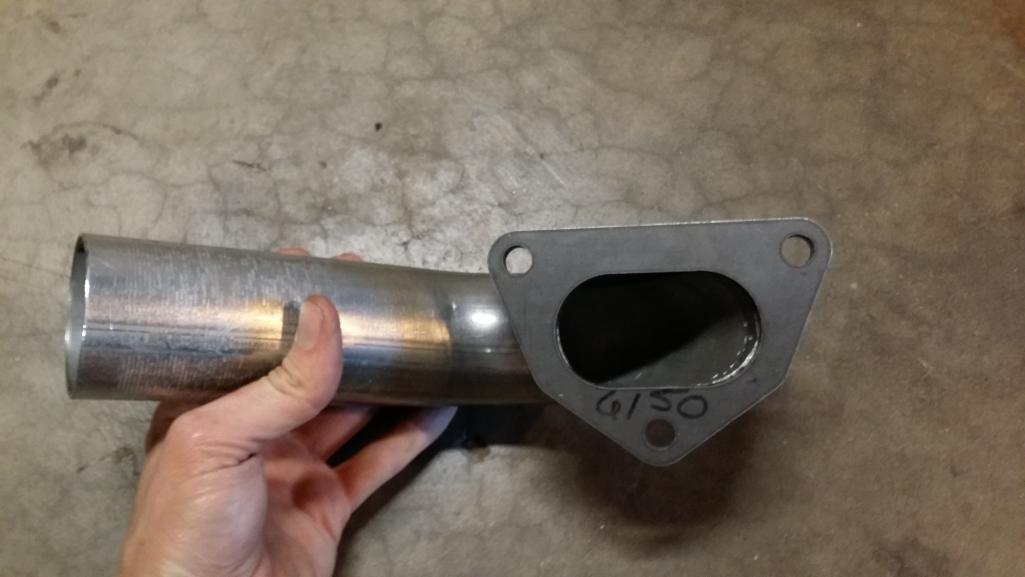
Posted by: 914forme Feb 8 2015, 08:03 PM
They look nice, I like them, would love to see it bolted to the engine and how its going the thread through the cold water cradle. Still haven't figured out why Subaru went back to a common port? But heck 250 HP it must be working for them.
Posted by: JRust Feb 8 2015, 08:28 PM
Im working on a set of headers that gives me more ground clearance and also is a bit freer flowing. With 2.5" pipes this is the best I could do to clear Ian's sub frame. I have some 2" pipe bends that might be able to exit a bit straighter, but are much smaller diameter.
I could also modify Ians cradle to buy some more room.
Any input is appreciated!
I think the only way to not have it drop below the cradle. Is to bring the headers to the front (towards firewall) Then join them or keep them separate but loop them back Down the sides above the cradle. Doable with a pipe bender. Another reason I was thinking of either doing a different mount that came from the firewall. Or bringing my exhaust forward then wrapping it around back. I hate that it drops below my cradle
Posted by: rnellums Feb 8 2015, 08:43 PM
They look nice, I like them, would love to see it bolted to the engine and how its going the thread through the cold water cradle. Still haven't figured out why Subaru went back to a common port? But heck 250 HP it must be working for them.
I'll see if I can get that shot.
I think the only way to not have it drop below the cradle. Is to bring the headers to the front (towards firewall) Then join them or keep them separate but loop them back Down the sides above the cradle. Doable with a pipe bender. Another reason I was thinking of either doing a different mount that came from the firewall. Or bringing my exhaust forward then wrapping it around back. I hate that it drops below my cradle
I looked at that, but with the water line return and shift cables where they ate at that looks like a big headache.
As built these come back up above the cradle and should be able to head above the axles from there.
The whole thing should work or pretty smoothly, but I'm wondering how much power I would lose by having such a sharp angle right at the exit.
Posted by: rnellums Feb 8 2015, 09:39 PM
With the current header mounted on the engine
Attached thumbnail(s)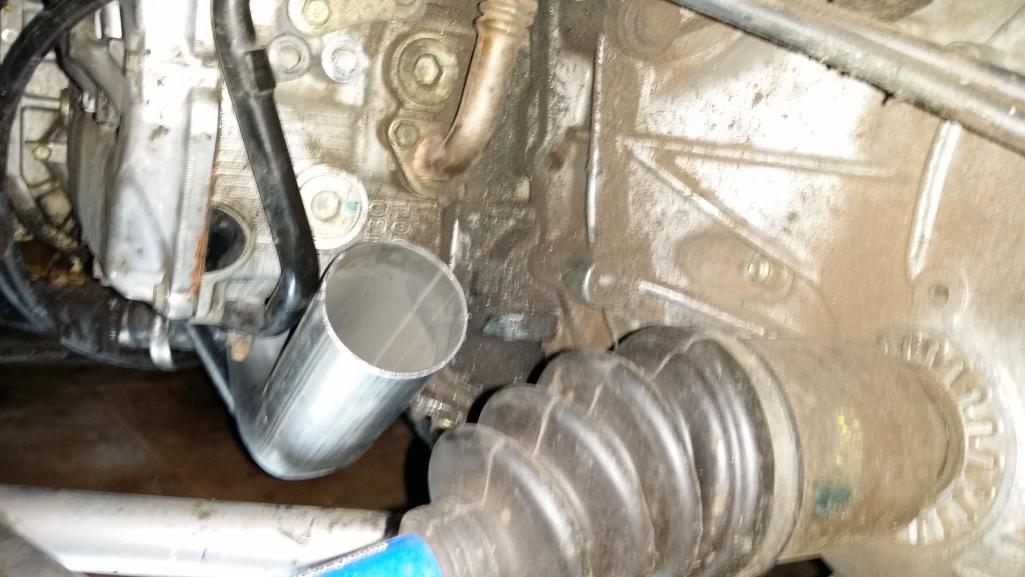
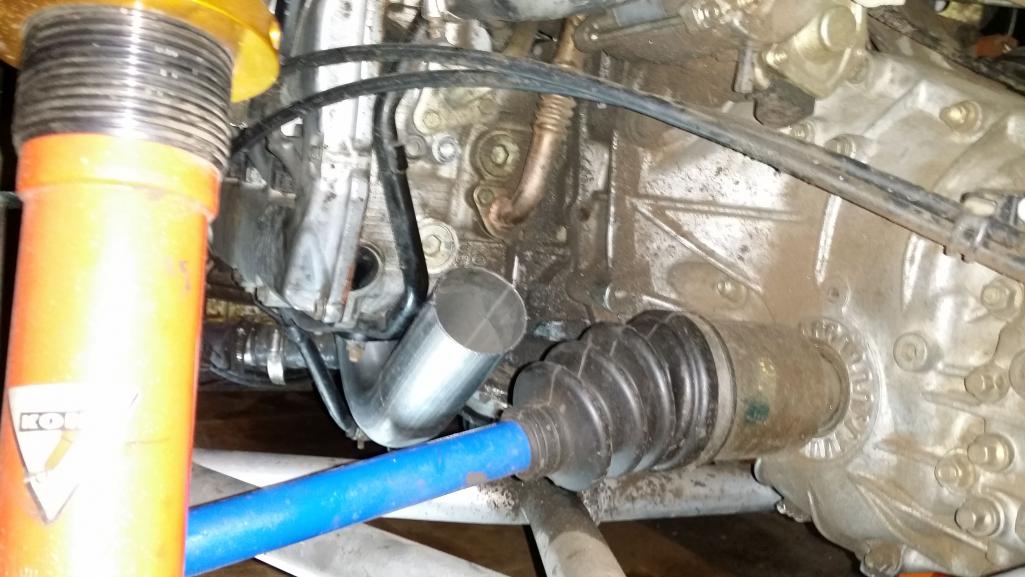
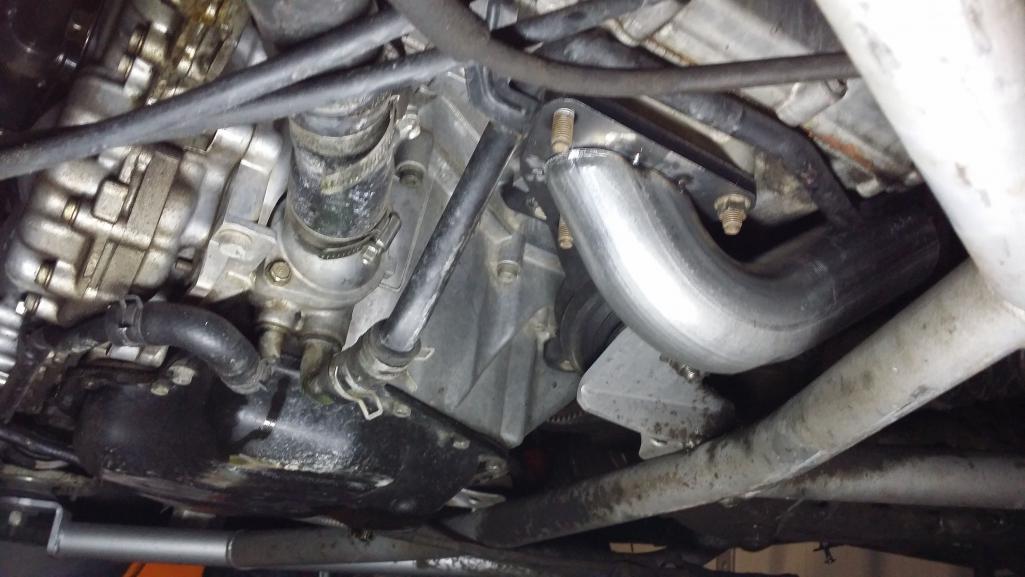
Posted by: mgp4591 Feb 8 2015, 10:07 PM
I'm wondering about that angle too... and if it's really that close to your inside CV boot the heat is gonna be a problem. Subaru has a similar heat problem on the r. inner boot because it sits right above the headpipe Y and catalytic converter- lots of heat. How about a large pipe section, like 3-4 inch schedule 40 pipe intersecting the cradle for your pipe to pass through at a different angle? You could gusset it also for extra strength... I can't see all the angles so I may be way off base on that suggestion.
Posted by: rnellums Feb 8 2015, 10:17 PM
It's not quite as close to the CV as it looks in the photos, but I'll have to insulate it somehow. I thought about welding in a pass through, I may go that route if this doesn't look promising.
Posted by: JRust Feb 8 2015, 10:49 PM
That looks better than I expected Ross. I was still picturing it looping under the cradle. I think that is going to work just fine. I don't think the angle of the header where it comes off the head will cause any flow problems either. I think you'll be golden with that man. Can't wait to see the finished product 
Posted by: Chris H. Feb 9 2015, 07:17 AM
If you like the way it turns out you should get it ceramic coated to reduce the exterior heat. Much better than wrapping it.
Posted by: 914forme Feb 9 2015, 07:34 AM
I like it, get it all tacked up. Weld it up outside the car, clean it up. Get it ceramic coated, then have an inner coating applied. And if need be make a heat shield around the CVs. area, it only takes a small gap to protect. And if you Coat it also, thats a plus.
Eastwood makes a DIY coating for the inside of your exhaust.http://www.eastwood.com/ew-hi-temp-internal-exhaust-coating-w-extension-tu.html
I have not used it.
Posted by: gryphon68 Feb 9 2015, 11:25 AM
Looks pretty good. Hoping to have the need to refer back to this thread soon.
It's nice how the slash cut gave a nice port shape opening.
Would be nice to get the pipe pointed slightly more outboard to maximize the clearance to the boot.
I was looking something like this as a possible option:
http://www.pro-werks.com/partdetail/C76-568/
They are pricey, but can solve problems the normal off the shelf bends can't.
Posted by: mgp4591 Feb 9 2015, 11:31 AM
Looks pretty good. Hoping to have the need to refer back to this thread soon.
It's nice how the slash cut gave a nice port shape opening.
Would be nice to get the pipe pointed slightly more outboard to maximize the clearance to the boot.
I was looking something like this as a possible option:
http://www.pro-werks.com/partdetail/C76-568/
They are pricey, but can solve problems the normal off the shelf bends can't.
I've used those donuts and they work great for the tight angles and keeping flow rates up without restriction. Well worth the cash!
Posted by: gryphon68 Feb 9 2015, 12:10 PM
Maybe cut here and clock the pipe outboard?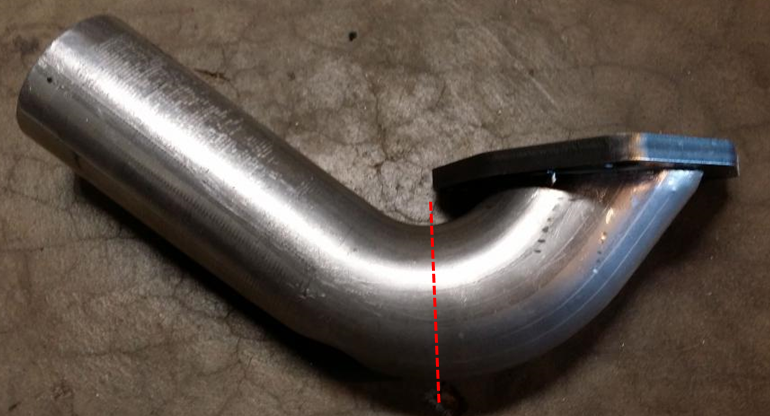
Posted by: rnellums Feb 9 2015, 02:03 PM
Would be nice to get the pipe pointed slightly more outboard to maximize the clearance to the boot.
I was looking something like this as a possible option:
http://www.pro-werks.com/partdetail/C76-568/
They are pricey, but can solve problems the normal off the shelf bends can't.
The tube does need to be massaged a bit to fit the opening, but nothing that can't be handled by a hammer and some pliers!
Those bends are sweet! Unfortunately one doughnut is more than I have paid for everything so far!
It might be worth it though to minimize the restrictions! Maybe I'll use it for the second exhaust revision!
As far as going more outboard, the clearance gets worse and worse the further out you go due to the cradle supports. My clearance off the cv is fair, the photos make it look close than it really is.
I plan to do a flange at the end of the first bend to make installation simpler, which should make fabricating a new header sub using doughnuts a bit easier if I do that route down the line.
Posted by: rnellums Feb 9 2015, 08:20 PM
I welded the headers up tonight. The weeks are a bit taller than I'd like, but I think they'll hold.
Attached thumbnail(s)
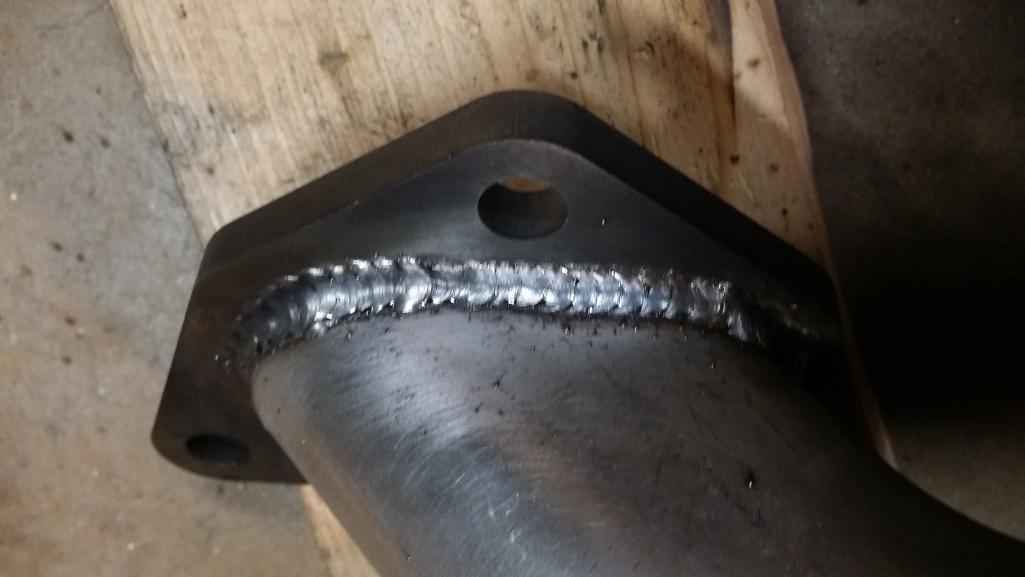
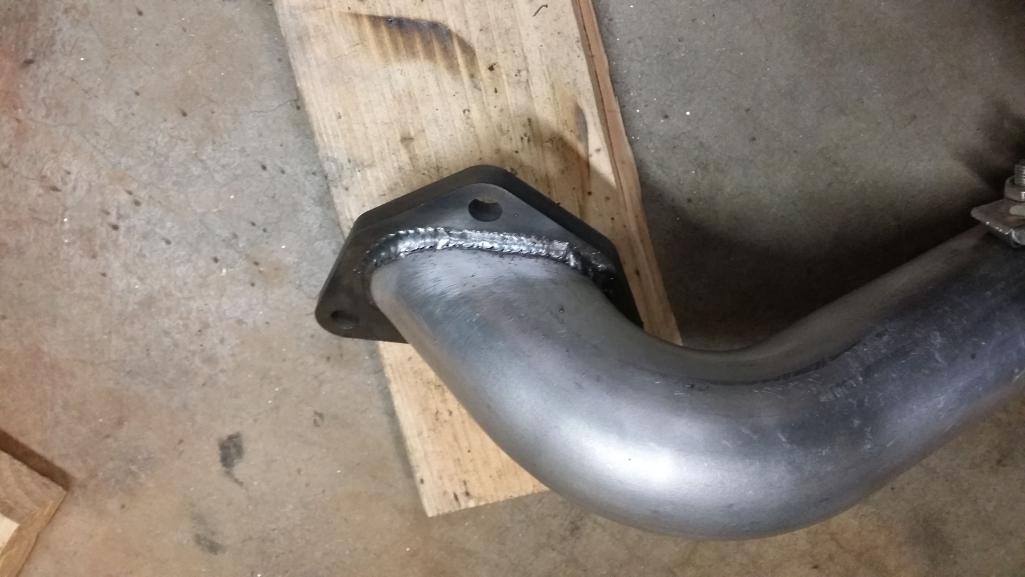
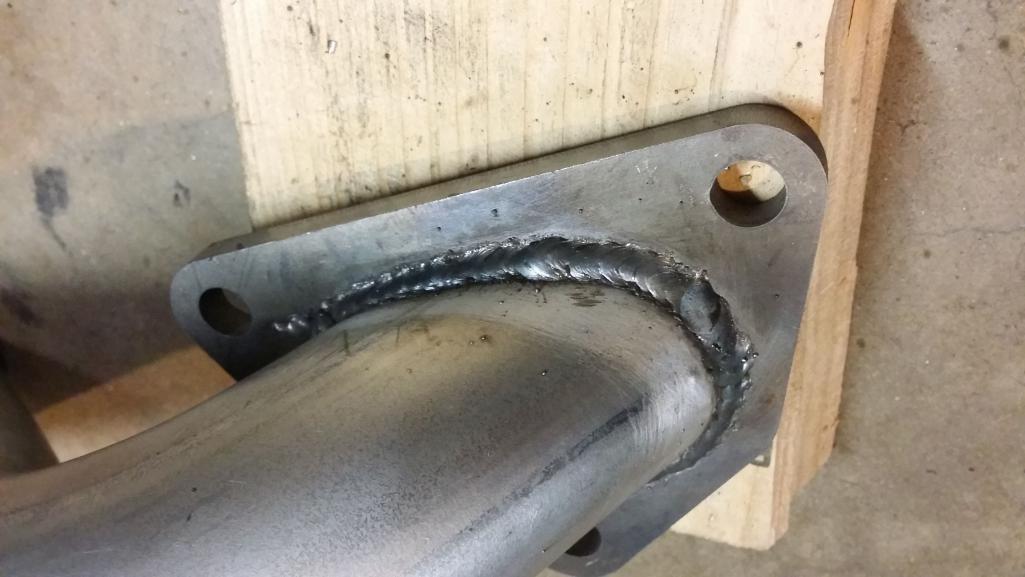
Posted by: rnellums Feb 10 2015, 09:54 PM
I got my O2 sensor bungs welded in tonight.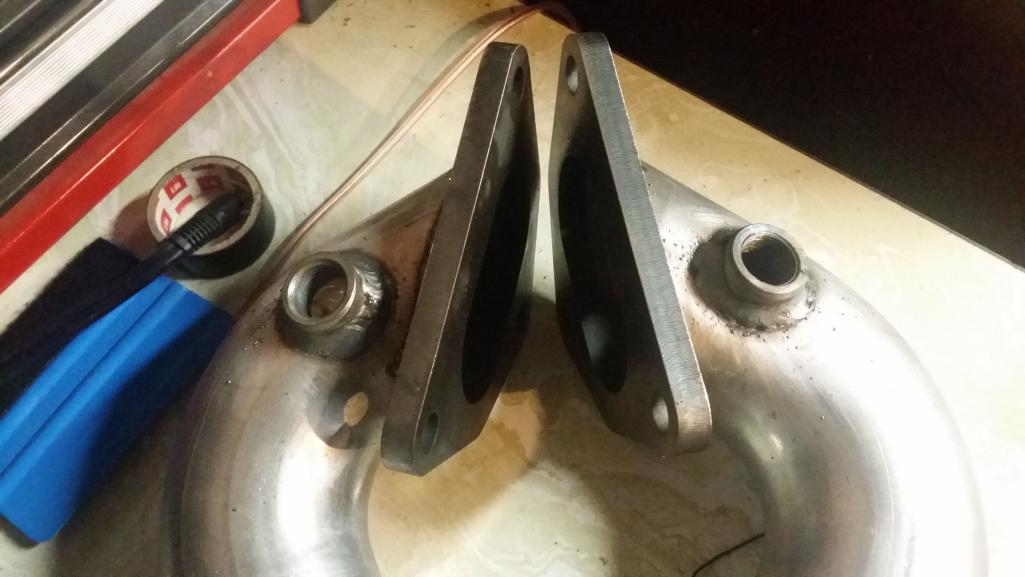
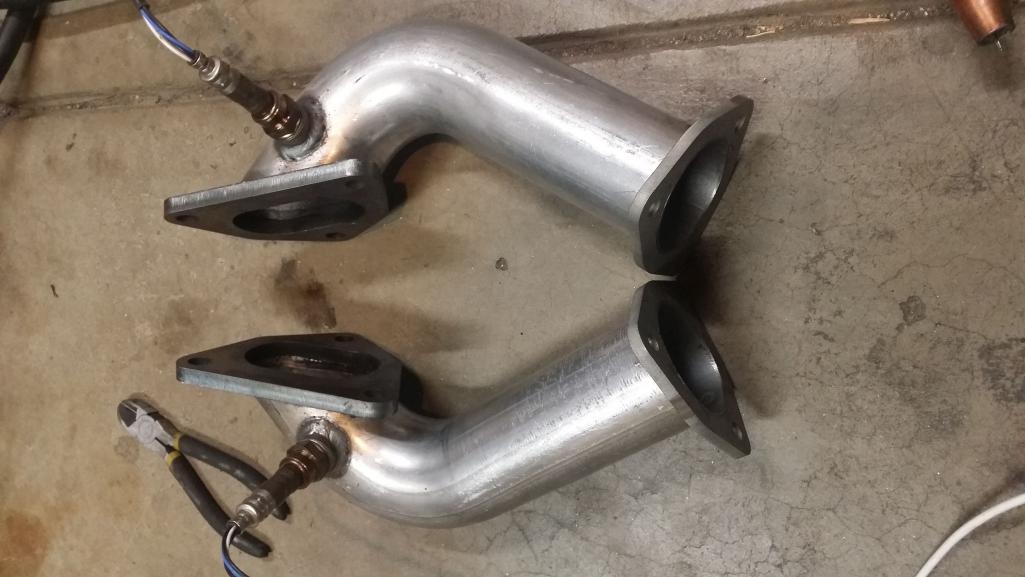
I have a pair of magnaflow 6" dia x 6" long race mufflers that I slid over the header ends as a gut check. The exhaust had a nice deep rumble, but was still pretty loud. Video at link below.
https://www.youtube.com/watch?v=rmDnX0FA8fg
I'm thinking I'll need a bit more muffling, but the dual in/out setup I wanted to try won't fit behind the transmission. It looks like I'll be sticking with dual straight exits, but I'll go to a larger 6"dia muffler, like magnaflow's 12616.
Posted by: 76-914 Feb 10 2015, 10:12 PM
Yeah, I need to quieten mine down which means I'll be doing what you are, shortly. Which means more 90's and more muffler. I'll miss the HP but not the noise. Is that a 4" or 6" radius J bend ( or U bend ) that you cut down? Alumanized or SS? Looks good!
Posted by: rnellums Feb 10 2015, 10:16 PM
Yeah, I need to quieten mine down which means I'll be doing what you are, shortly. Which means more 90's and more muffler. I'll miss the HP but not the noise. Is that a 4" or 6" radius J bend ( or U bend ) that you cut down? Alumanized or SS? Looks good!
Aluminized remnant bends complements or Marty over at MSDS! Super great guy to work with! I used 90 deg. elbows, but i'm not sure what the radius was. looks to be about 4" from the center to the outside.
Posted by: Maltese Falcon Feb 10 2015, 11:14 PM
Yeah, I need to quieten mine down which means I'll be doing what you are, shortly. Which means more 90's and more muffler. I'll miss the HP but not the noise. Is that a 4" or 6" radius J bend ( or U bend ) that you cut down? Alumanized or SS? Looks good!
Aluminized remnant bends complements or Marty over at MSDS! Super great guy to work with! I used 90 deg. elbows, but i'm not sure what the radius was. looks to be about 4" from the center to the outside.
Thanks for the comments ! the radius is 4. In the header business, big radius won't get you in + out of tight places

I even do some 1-D bending on special order. 1-D is when the diameter (od) of the tube=the same numerical radius ; example a 3" tube mandrel -bent on a 3 R .
Marty
Posted by: mgp4591 Feb 11 2015, 06:55 AM
Great looking welds- look forward to the progress on this!
Posted by: rnellums Feb 19 2015, 09:57 PM
I finished up the flanges and the muffler sub pipes. With the 6" race mufflers on there it is still WAY to loud for every day driving. I have got some larger mufflers now on order to test and see if I can improve the noise level a bit!
Attached thumbnail(s)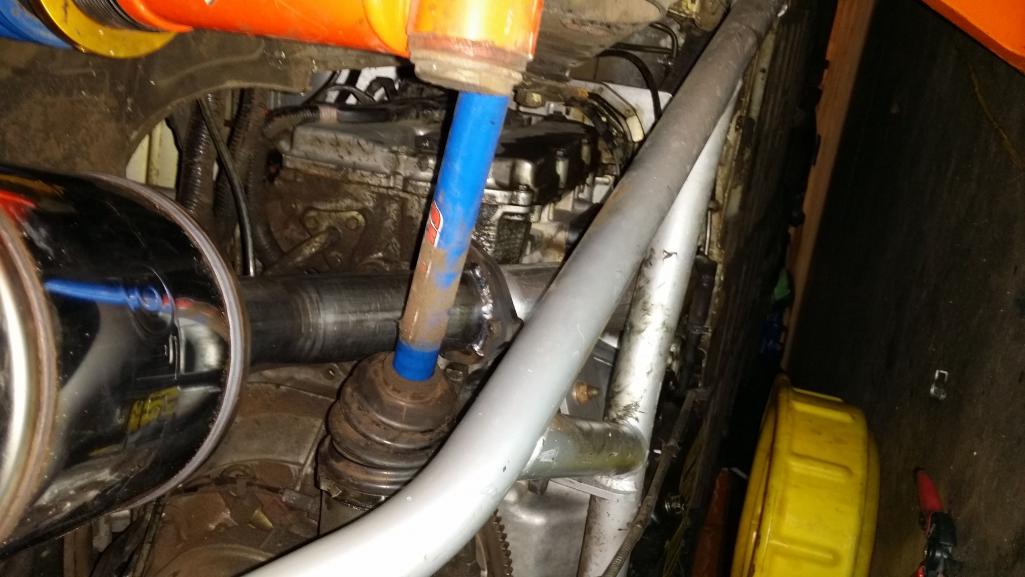
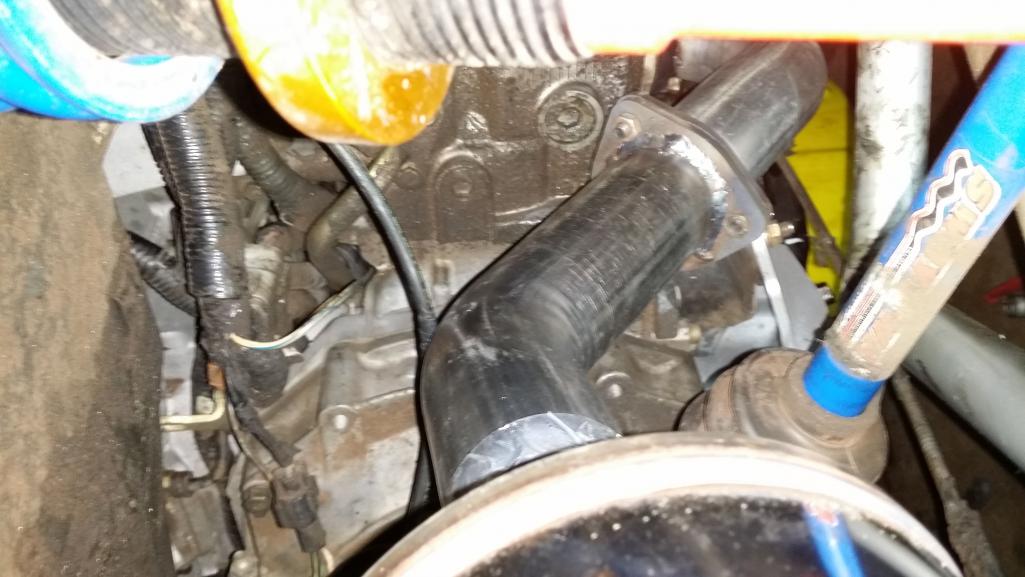
Posted by: scotty b Feb 19 2015, 10:10 PM
Marty or anyone have experience with the Flowmaster " hushpowers " ? they look fairly small and compact which worries me they may be excessively restrictive if they run as quiet as they do
https://www.youtube.com/watch?v=tH_2PFNmWog
https://www.youtube.com/watch?v=Zd4e8htvEfc
Posted by: scotty b Feb 19 2015, 10:21 PM
Nevermind. Apparently they aren't recommended for 4&6 cylinder cars 
Posted by: rnellums Feb 19 2015, 10:26 PM
Nevermind. Apparently they aren't recommended for 4&6 cylinder cars
I wonder why?
Posted by: Amenson Feb 19 2015, 11:10 PM
I finished up the flanges and the muffler sub pipes. With the 6" race mufflers on there it is still WAY to loud for every day driving. I have got some larger mufflers now on order to test and see if I can improve the noise level a bit!
Turbo's are very good at sound attenuation

Posted by: Chris H. Feb 20 2015, 07:33 AM
Turbo's are very good at sound attenuation
That's what Bob used to say a lot...also another minor reason he went to the EZ30. More room for the turbo stuff.
Speaking of Bob...Ross if you can pull it off you should add a center muffler like Bob's. That might help quiet it all down. His is very quiet unless you step on it, and even then it's not obnoxious. I can relate to the challenges of the cradle setup.
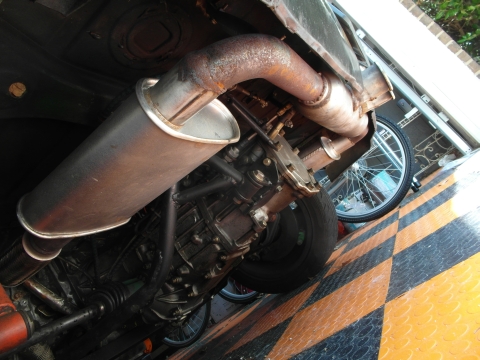
He used a tubular muffler and added two exhaust ports, although if the Camaro-style 2-in-2 out setup could be used (rotated so that it fits) go for that.
Posted by: rnellums Feb 20 2015, 07:39 AM
Speaking of Bob...Ross if you can pull it off you should add a center muffler like Bob's. That might help quiet it all down. His is very quiet unless you step on it, and even then it's not obnoxious. I can relate to the challenges of the cradle setup.
He used a tubular muffler and added two exhaust ports, although if the Camaro-style 2-in-2 out setup could be used (rotated so that it fits) go for that.
With the bellcrank cable shift setup there isn't much room behind the transmission. I might be able to get away with the center outlet though.. plus it will look great!
Posted by: Maltese Falcon Feb 20 2015, 10:00 AM
Worth looking into for small compact "Turbo profile" mufflers:
Spintech brand.
These come in all sorts of small medium and large sizes. Excellent noise control, without excessive backpressure. Patented chamber design+NO packing to disintegrate. We are currently using these on the Fiat 500 Abarth cat back with good results
Marty
Posted by: 76-914 Feb 20 2015, 10:05 AM
Thx for that tip, Marty. I'm going check this out. Currently re-designing my exhaust system, also.
Posted by: 914forme Feb 20 2015, 10:18 AM
Great Tip Marty, Now to build some cardboard mock ups and go to town finding a place to fit them.
Posted by: rnellums Feb 20 2015, 09:09 PM
So, while I'm waiting for some new exhaust parts to come in I'm thinking about working on how to flip my intake manifold. I have seen it done on the EZ30R's (plastic manifold) but never the EZ30D.
It seems to me that the first headache are the upper coolant pipes which have a physical interference with the intake when flipping it on the 30D. I have given the stock coolant routing diagram below: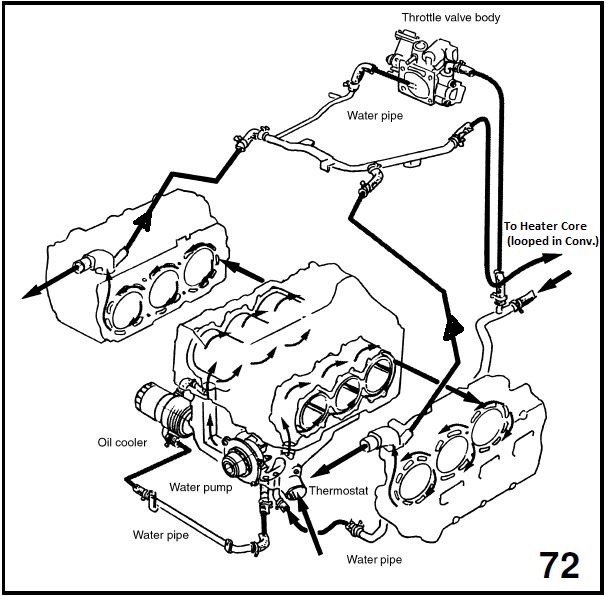
My question is, can I eliminate the coolant pipe (and heater core return pipe) all together? (diagram below)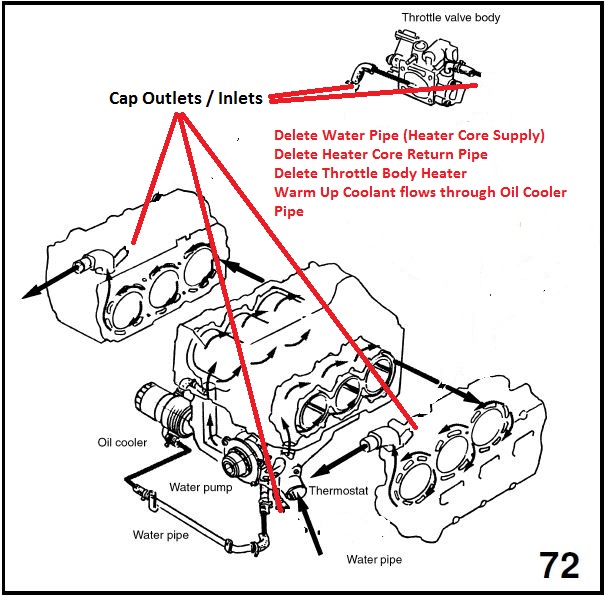
I would also lose the throttle body heater, but I don't feel like that's an issue unless I'm driving in freezing conditions often (not likely).
The only downside I can see is that it looks like during warm up (t-stat closed) the coolant flows through the heater core, bypassing the thermostat.
I would have to drill a larger bypass hole in the thermostat to compensate, which would slow engine warm up time.
Perhaps it would be better to only delete the throttle body heater and run a flexible hose in place of the coolant pipe? (diagram). What is the consensus World?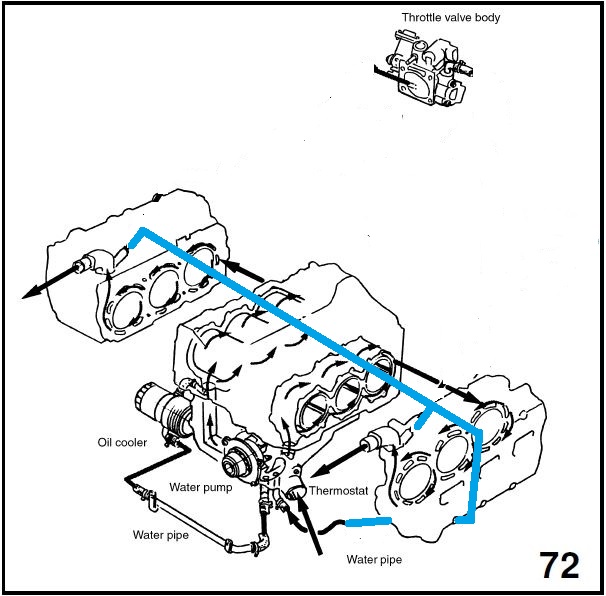
Posted by: Maltese Falcon Feb 21 2015, 01:42 AM
Great Tip Marty, Now to build some cardboard mock ups and go to town finding a place to fit them.
Spin tech should have physical muffler dimensions and diagrams of inlet / outlet positions /offsets on their site.
Posted by: veekry9 Feb 21 2015, 02:47 AM
This is great work and journaling,but I gotta "pipe"up.
https://www.youtube.com/watch?v=O1bXPNy1Yn4
http://www.superstreetonline.com/how-to/aftermarket-parts/epcp-1002-performance-exhaust-systems/14K for a nice header?
I hope this helps in some way toward building a better header with more clearance and performance in evacuating 500cc cylinders.
The oval ex ports pose a challenge to avoid a bottleneck close to the flange.
Posted by: rnellums Feb 21 2015, 08:22 AM
This is great work and journaling,but I gotta "pipe"up.
http://www.superstreetonline.com/how-to/aftermarket-parts/epcp-1002-performance-exhaust-systems/14K for a nice header?
I hope this helps in some way toward building a better header with more clearance and performance in evacuating 500cc cylinders.
The oval ex ports pose a challenge to avoid a bottleneck close to the flange.
That was a good vid! Thanks!
It eally reminds me of how much I need to get a "Baseline" read on my engine so I know if the changes I'm making are helping or hurting!
Posted by: mgp4591 Feb 21 2015, 08:46 AM
So, while I'm waiting for some new exhaust parts to come in I'm thinking about working on how to flip my intake manifold. I have seen it done on the EZ30R's (plastic manifold) but never the EZ30D.
It seems to me that the first headache are the upper coolant pipes which have a physical interference with the intake when flipping it on the 30D. I have given the stock coolant routing diagram below:
My question is, can I eliminate the coolant pipe (and heater core return pipe) all together? (diagram below)
I would also lose the throttle body heater, but I don't feel like that's an issue unless I'm driving in freezing conditions often (not likely).
The only downside I can see is that it looks like during warm up (t-stat closed) the coolant flows through the heater core, bypassing the thermostat.
I would have to drill a larger bypass hole in the thermostat to compensate, which would slow engine warm up time.
Perhaps it would be better to only delete the throttle body heater and run a flexible hose in place of the coolant pipe? (diagram). What is the consensus World?
You may end up with some really funky idle problems deleting that connection regardless of the weather. That usually results in the surging sound you hear on some cars when they're idling and your mileage may drop- it controls a few different functions as I recall... it may work okay but I'd be skeerd...
Posted by: rnellums Feb 21 2015, 08:56 AM
You may end up with some really funky idle problems deleting that connection regardless of the weather. That usually results in the surging sound you hear on some cars when they're idling and your mileage may drop- it controls a few different functions as I recall... it may work okay but I'd be skeerd...
My feeling is there there is very little flow through the throttle body currently anyways, as it usually depends on the pressure drop across the heater core to drive the flow. Without the heater core making a pressure differential, there is not reason to flow through the throttle body instead of around it.
Posted by: rnellums Feb 22 2015, 07:19 PM
I had a bit of an epiphany tonight. I'm not sure how important/unimportant it may be, but its at least something to thing about.
I have been thinking for a while about removing/bypassing the heater core tubes that are still on my engine as I don't have a heater core.
Now, the first issue with removing the tubes entirely is that they are critical to proper thermostat operation (as they provide an additional return path for coolant until the thermostat opens and allows coolant to move through the radiator).
Since the tubes seem a necessary evil I, and many others, bypass the heater core using a 5/8" hose loop.
Here's the issue: the radiator and heater core act like resistors in parallel in an electric system, and the water pump is the applied voltage. You always have the same voltage drop across the resistors, but the current flowing through each resistor varies based on the resistance of each path.
By eliminating the heater core and replacing it with a large-diameter bypass you are creating a path with much less resistance to flow than was originally intended by Subaru, which diverts flow from the radiator and instead cycles it back into the engine.
I can calculate what the flow resistance of the bypass is, but the hard thing is that I don't have a way to quantify what the flow resistance of the heater core and radiator are.
Ideally I would size the coolant bypass to a flow resistance that provides the same coolant flow rates as stock.
Posted by: mgp4591 Feb 22 2015, 10:51 PM
Would running a T from the heater inlet and outlet into the main coolant hoses respectively balance out the system effectively enough to solve this? It may not provide the "resistance" you may calculate but it could provide enough overall balance to negate your issues...
Posted by: 914forme Feb 23 2015, 02:03 PM
You could add a heater core out back, if you wanted to duplicate flow and resistance. That being said it seems that the heater cores might reduce the flow it would be pretty easy to figure out. It will be based on the diameter of the core tubes. They should be pretty free flowing though. But you would never know with out doing a test and figuring out what the flow rate is between the two systems. I know on the EG33 the coolant pump flows a huge amount and it is actually restricted by the Tstat and water inlet sizing.
Also I see what your saying from the diagram, but lets look at it this way, it will only heat up until the T-stat opens, it will marginally add reheated water back into the system, and well it has worked for a bunch of people not including us. 818 guys bypass it, even some Subaru people by pass the heater core. Don't try and over think this thing, It is not an issue. Many a thousand of miles has been run on the bypass systems.
borrowed from Small Car
Posted by: 914GTSTI Feb 23 2015, 10:35 PM
Could the water at the TB be for anti-icing and then maybe emissions ?
Posted by: mgp4591 Feb 23 2015, 11:52 PM
Could the water at the TB be for anti-icing and then maybe emissions ?
From what I've seen it's mainly for emissions- it helps the tb heat up with the rest of the engine and keeps the fuel delivery balanced with engine warm up. That's why when they go bad you'll hear the rpms rise then drop, rise then drop over and over. The tb doesn't know that the engine is warmed up to operating temp until the O2 sensor tells it it's getting too much fuel. The newer engines may have more controls that make the older systems antiquated but I'm not bypassing my tb on my EG33...
Posted by: Andyrew Feb 24 2015, 12:04 AM
borrowed from Small Car
Downloaded and saved.. Awesome diagram.
Posted by: 914forme Feb 24 2015, 10:59 AM
Could the water at the TB be for anti-icing and then maybe emissions ?
From what I've seen it's mainly for emissions- it helps the tb heat up with the rest of the engine and keeps the fuel delivery balanced with engine warm up. That's why when they go bad you'll hear the rpms rise then drop, rise then drop over and over. The tb doesn't know that the engine is warmed up to operating temp until the O2 sensor tells it it's getting too much fuel. The newer engines may have more controls that make the older systems antiquated but I'm not bypassing my tb on my EG33...
It is emission related but only for this reason. When the engine is cold it produces lots of water vapor, that conduces again in cold areas. Since you have a PVC system on these engines that systems vapors gets re-interduced back into the intake track. This contains the same mix of crap that condenses elsewhere. And since it is going through a Venturi it will tend to cool the vapors and they can form crystals that can potentially freeze up the TB. That is the emission side of this equation.
The other side is if you live in cold climates the same effect can cause icing in the same way.
BTW, the TB is not a smart device, it might house a sensor or two, like TPS, and maybe an intake temp sensor, but beyond that it does noting. It has one function, help you maintain control of the engine. Gas engines control the entry of air into the engine, it is one of the three requirements for ignition process. Modren Diesel engines don't even have a TB, its all done via fuel. Some do have an a shutdown plate that blocks the intake track. This is because they can run on, off oil introduced into the intake. Newer TB units also have a stepper for drive-by-wire systems. Solves the packaging issue of a cable connected your TB. That is also there to help control the engine, but it allows the engineer to manipulate the system also easier, so things like traction control become much easier when the computer can control all inputs and out put functions. IT is a wonderful thing, and can be used for much good in our world. Emissions, fuel economy, stability and traction control, and the list goes on one on...
All good things, for the average driver. With out this stuff, would anybody in the general public be able to drive a Dodge Hellcat off the dealer lot.
So since I share the road with these lack of control "great drivers" I'm glad theirs and engineer on the other side keeping them close to being in control. The hunting your explaining is a leak, and can come from the TB shaft, most likely from another source though. TB shafts can't be ruled out though. Replacing the TB, means you have replaced other items, or secured them and maybe solved the leak.
Hope that cleared some stuff up, and then made it about clear as mud.
Posted by: rnellums Feb 25 2015, 11:40 PM
I've been finishing up the exhaust system. Just need to add some hangers at the end of the mufflers.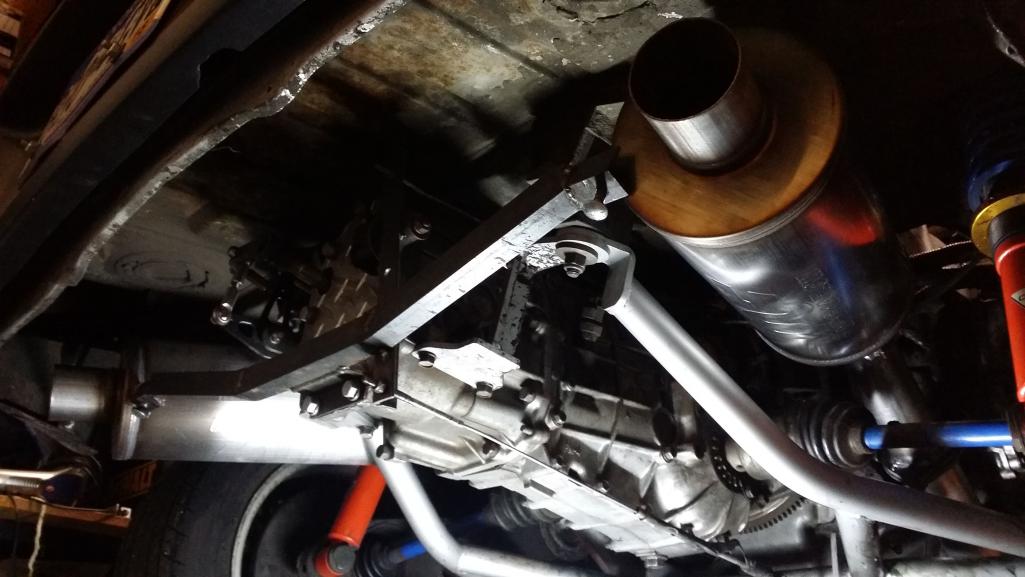
Also, does anyone notice anything different about my backup engine?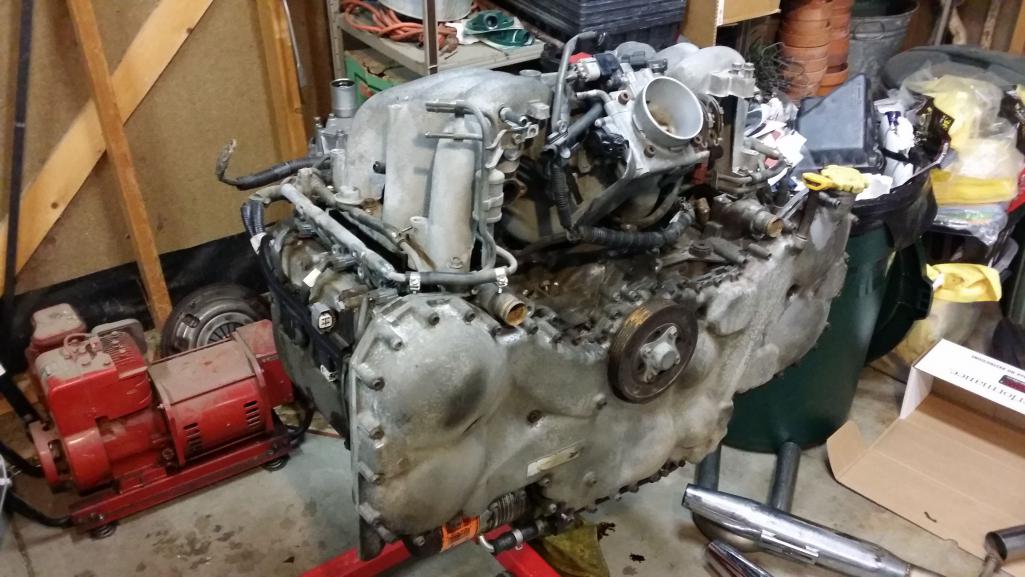
Posted by: bandjoey Feb 25 2015, 11:43 PM
It's red?
Posted by: rnellums Feb 26 2015, 12:10 AM
Hah, funny! I meant the one in the middle of the frame my backup subaru engine!
Posted by: A&P Mech Feb 26 2015, 06:20 AM
Nice job! How much fab is going to be required to do the same thing on Apollo?
Posted by: 914forme Feb 26 2015, 08:11 AM
3.0 or 3.6 oh please say its an R  Okay no plastic manifold not an R Im so
Posted by: rnellums Feb 26 2015, 10:15 AM
3.0 or 3.6 oh please say its an R
Okay no plastic manifold not an R Im so Well it's just the plain old EZ30D, but this engine I'm particular is my test mule (I have another EZ30D in the car already). And what I'm playing with at the moment is flipping the manifold so that I don't have to cut into the trunk and can run a stock air cleaner!
So far the modifications have been:
- grind/cut alternation mounting boss of of block
- remove and reroute heater core bypass
- modify head breather tube to move rearward
- remove egr and block off
- modify/reroute intake manifold wiring harness
- remove fuel line mounting boss on side of intake
- relocate alternator
I'll add more bullets and photos as I polish it up and get it rolling
Posted by: 914forme Feb 26 2015, 10:44 AM
EG33 is a lot easier to flip the manifolds on.
Posted by: rnellums Feb 28 2015, 03:36 PM
I pulled the engine and transmission today to install some upgrades!
I swear it looks better out than in!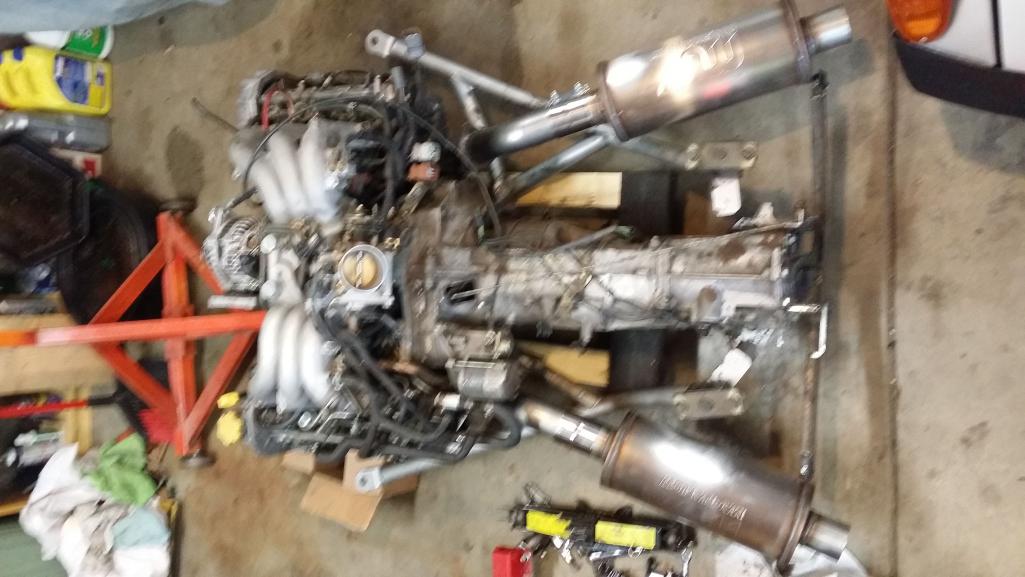
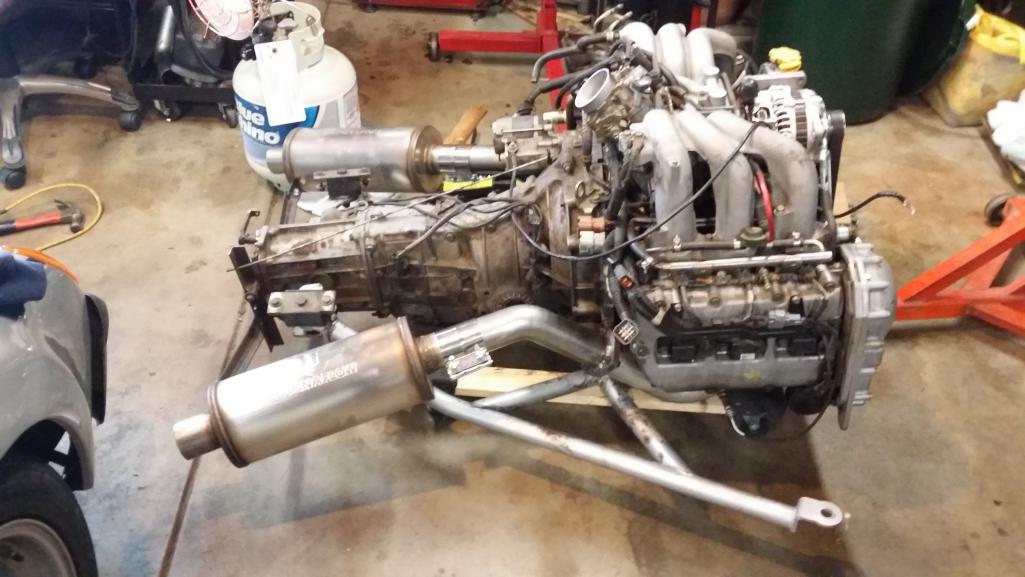
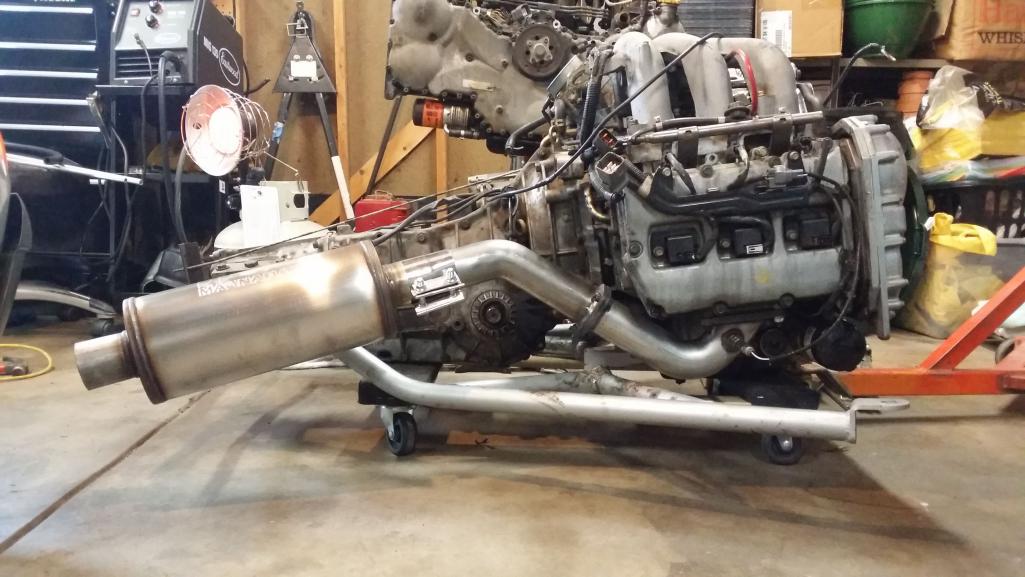
Posted by: majkos Feb 28 2015, 04:37 PM
Looking good.
Posted by: 3d914 Mar 5 2015, 06:30 PM
OOh Yeh!
Posted by: 914GTSTI Mar 5 2015, 07:24 PM
I see you have the heat on ? LOL
Looks like the EZ water in and water out are on the top ? Or 2 in at the top ?
Randy
Posted by: rnellums Mar 5 2015, 07:53 PM
I see you have the heat on ? LOL
Looks like the EZ water in and water out are on the top ? Or 2 in at the top ?
Randy
Heat on? Hell yeah! Its been a bit too cold for garage work here recently, but I want to forge ahead anyways!
The EZ30 actually has two outlets on top and one inlet on the bottom by the thermostat. Kinda weird huh?
In other news I installed Spoke's new front turn signals today and dropped my headers off to get ceramic coated!
I have also renovated my clutch actuator (switched from #10 allthread to wound cable) and painted a few things.
I installed a new starter cable and re-routed the heater core return to delete the throttle body heater and also fit around my new exhaust.
It looks like my manifold flip project IS NOT going to work. No clearance for the alternator, it would require ~2" of spacers underneath the manifold. I'm thinking that next winter I may go through and build my own manifold from mandrel bends. I'm sure it won't be as well tuned as the stock (or tuned at all), but I'm willing to lose a bit of power to have an un-cut trunk.
This weekend (when its nice) i'm going to do an engine bay deep clean and weld on some suspension ear stiffeners I got from Chris at Tangerine. How critical is it that I anneal the area after welding?
Also on the to do list is organizing and fixturing the wiring loom in the trunk.
Posted by: Amenson Mar 6 2015, 09:09 PM
Do you have a non blurry overhead picture....this is the money shot!
Posted by: rnellums Mar 6 2015, 09:16 PM
I'll get one. You'll have to wait till next week when I get my headers back though.
Posted by: rnellums Mar 6 2015, 10:00 PM
I played a bit of gauge dress up tonight with some spare carbon fiber vinyl I had laying around. Who knows how long it will last, but when I get tired of out I'll just peel it off and paint it.
Attached thumbnail(s)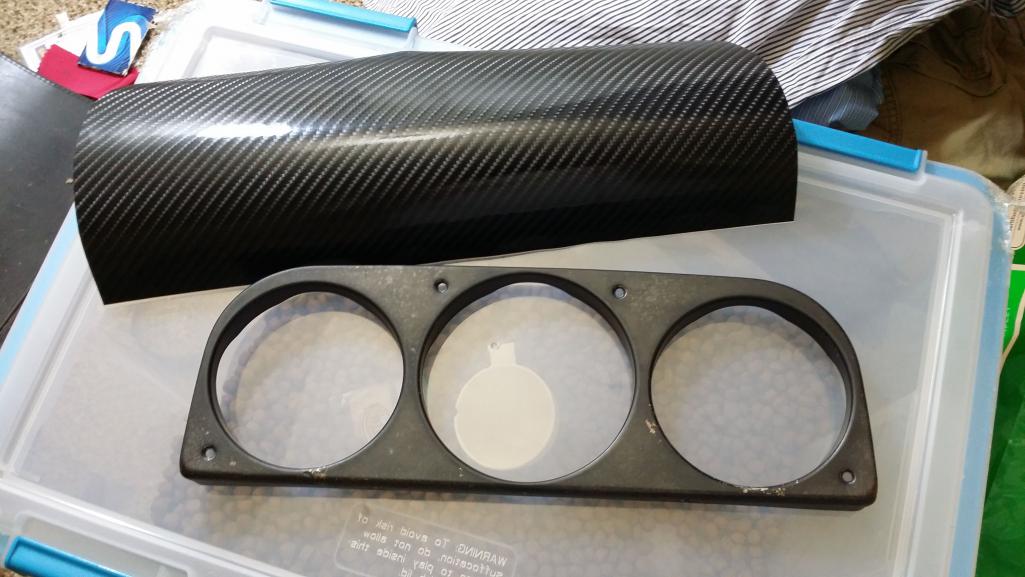

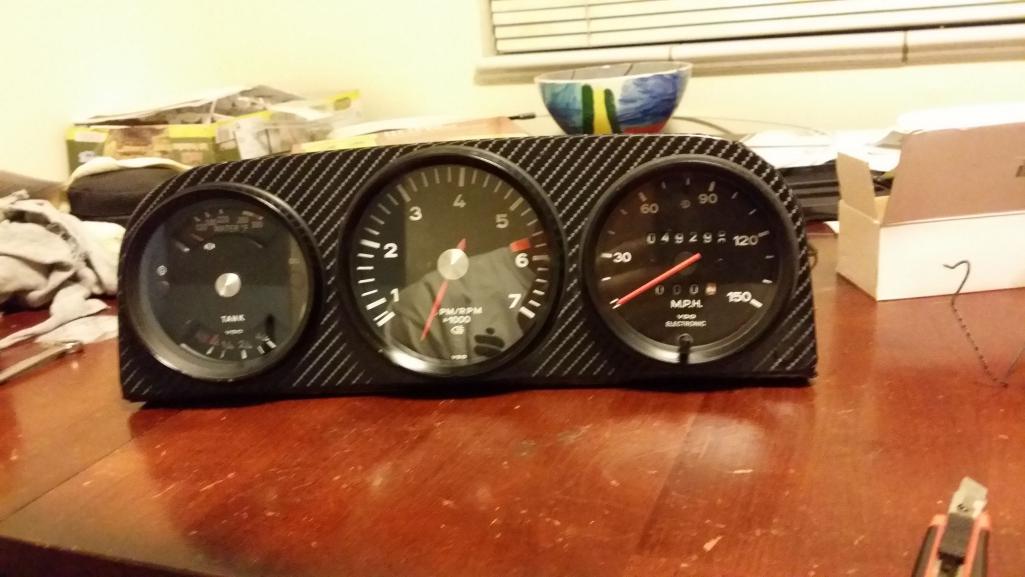
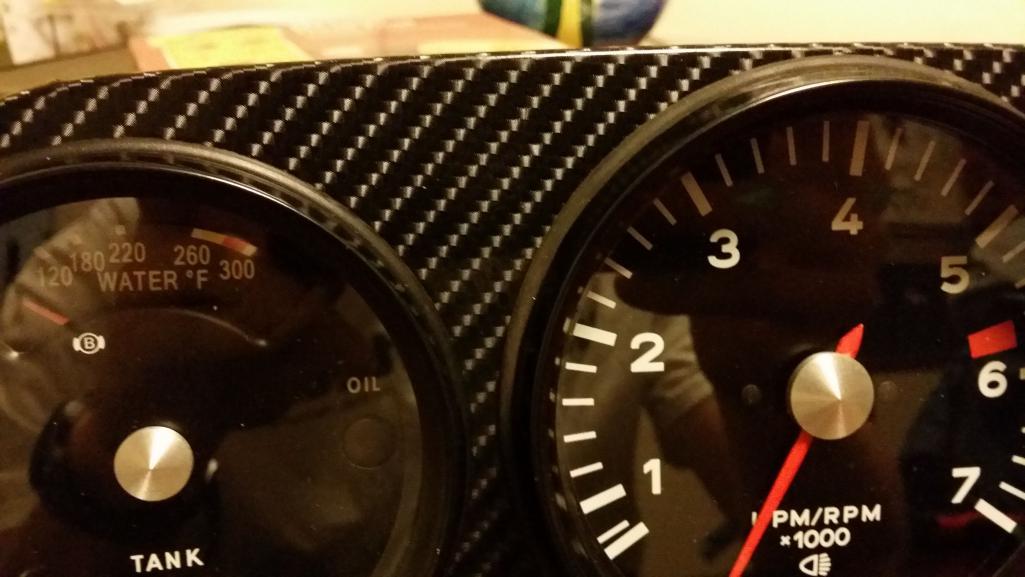
Posted by: 914forme Mar 7 2015, 01:29 PM
I must have missed this in your thread, is the water temp gauge in the combo gauge from a 924 - 944 - 928?
Posted by: rnellums Mar 7 2015, 02:27 PM
None of the above. It's from Tim. He also created the custom face too. It's printed on thick card stock. I think the gauge is from Jegs or summit. I'll be taking it out for a scale adjustment in a bit and I'll take some photos.
Posted by: rnellums Mar 9 2015, 11:23 PM
I added a silver button to my speedometer tonight. Now it will take a keenly trained eye to realize anything is out of the ordinary! 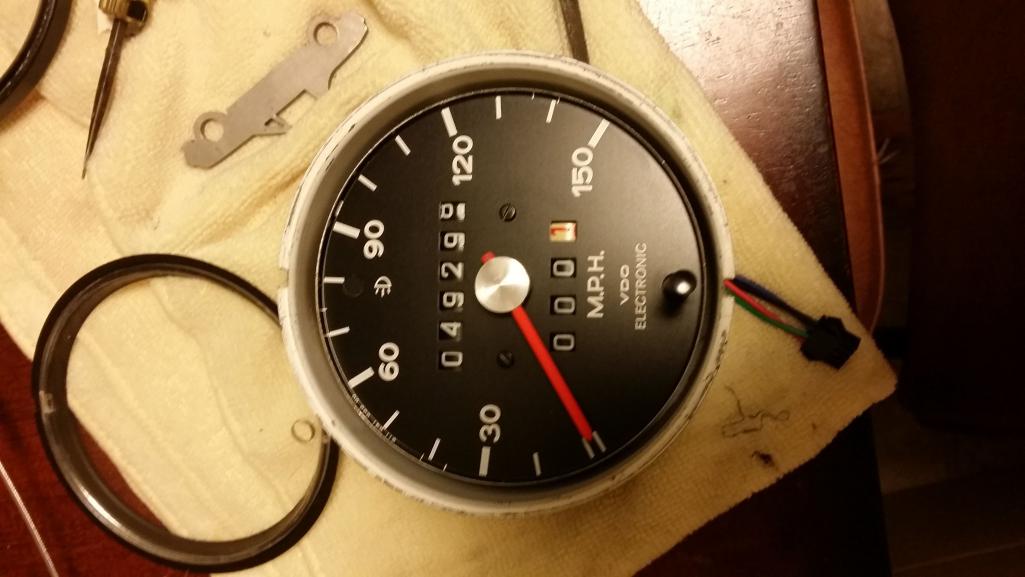
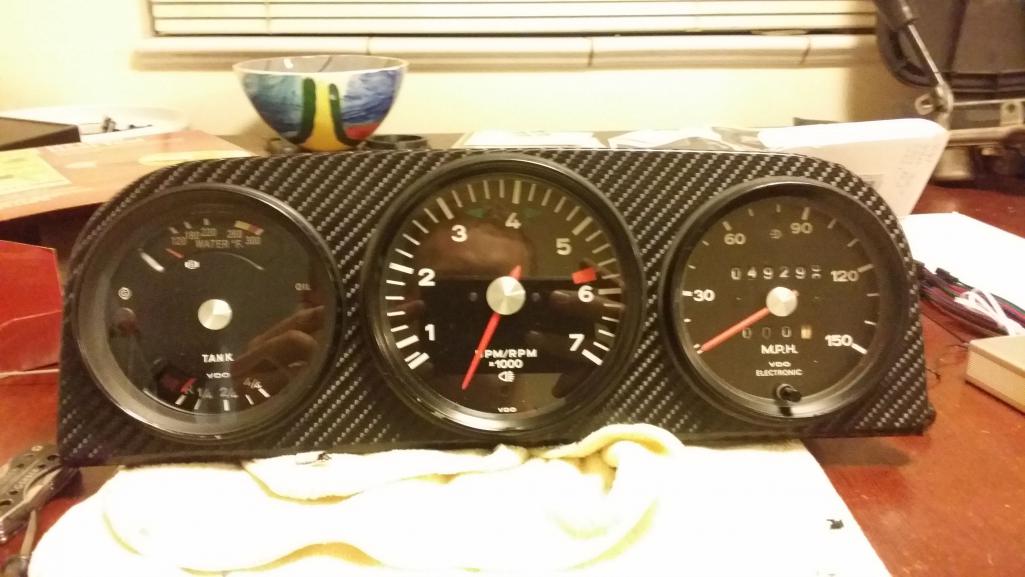
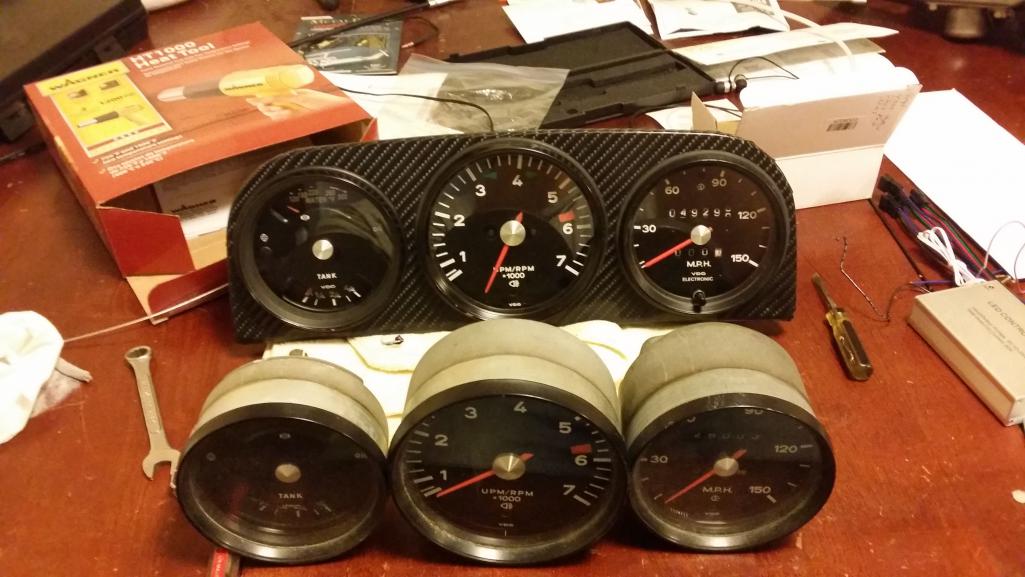
Posted by: rnellums Mar 12 2015, 08:25 PM
Tim's custom gauges are now wired in! The stock look with new internals and some sweet color change action, all for less than the Speedhut Gauges!
Attached image(s)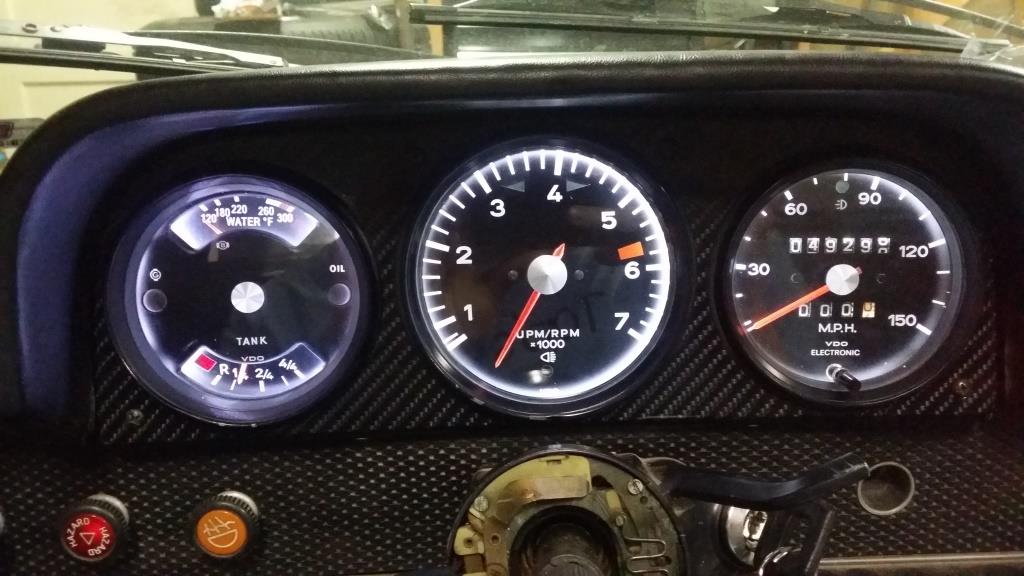
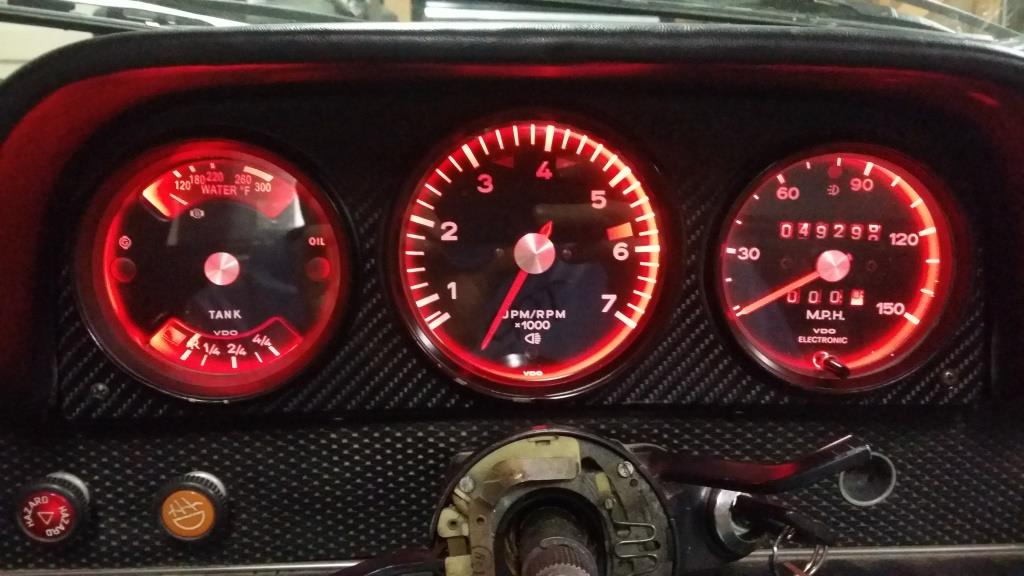
Posted by: rnellums Mar 14 2015, 10:43 AM
Yesterday was really productive, with the engine out I took some time to clean up the engine bay.
I have decided hat I'm unlikely to go back to the stock engine any time soon, so I stripped the unnecessary extra stock wires out of the engine bay and deleted the relay board connector.
I added in Some proper P-clamps for my fuel lines so that I could run the wiring back inside the stock clamps as well. I also installed new clutch and accelerator cables, and plugs for the shifter cables, the old heater controls, and the coolant hoses where they pass into the longs.
I painted and re-installed the shifter and supports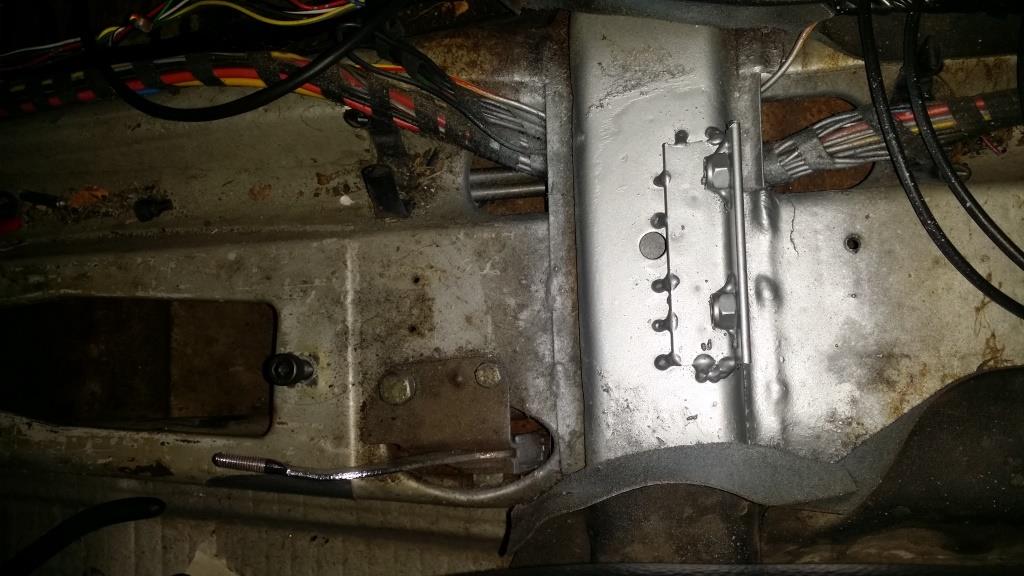

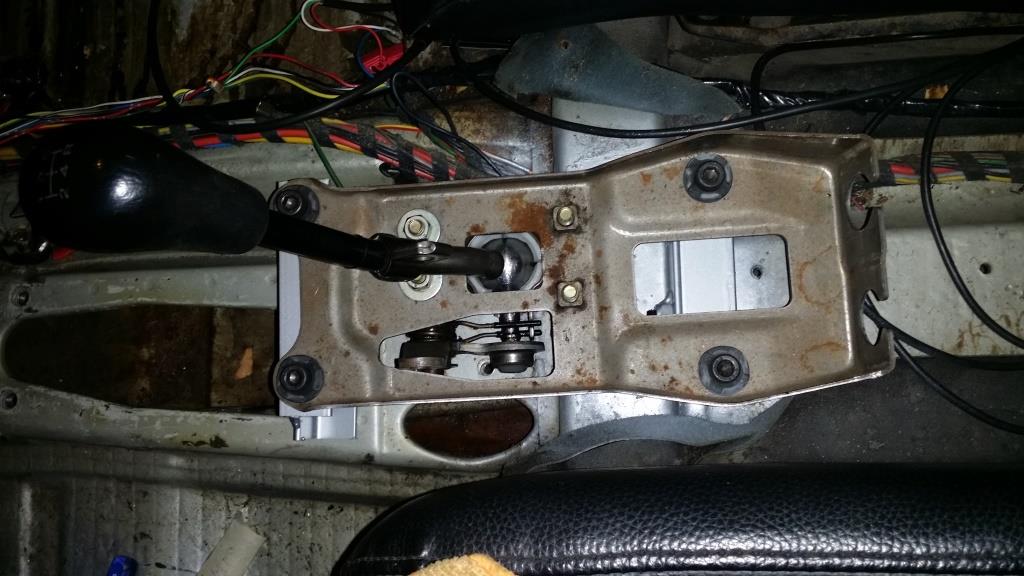
And, I got my ceramic coated headers back from the powdercoater. I wen't with black instead of the chrome because it was better recommended by the powdercoater, but also because I thought chrome would be a bit too much bling!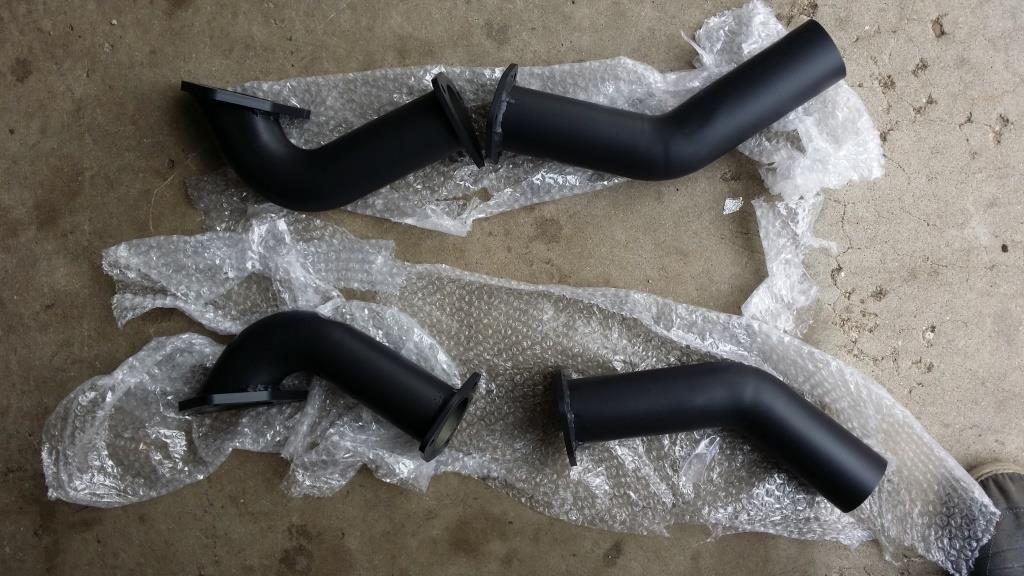
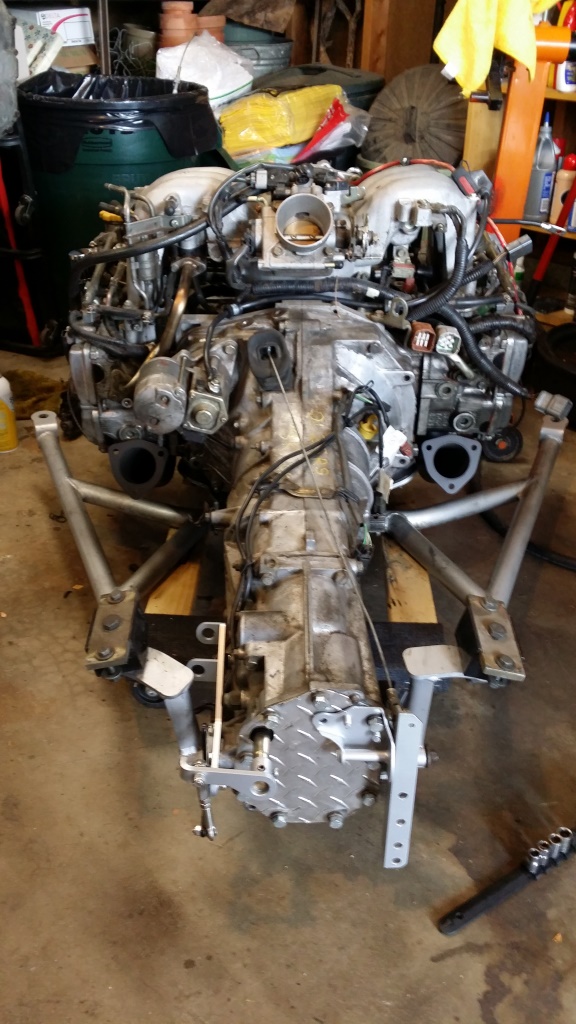
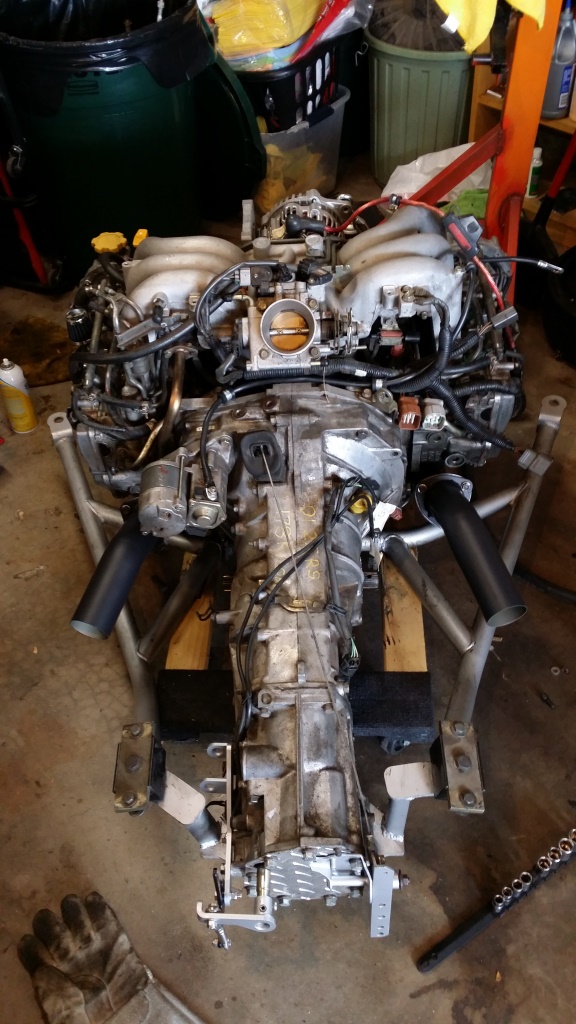
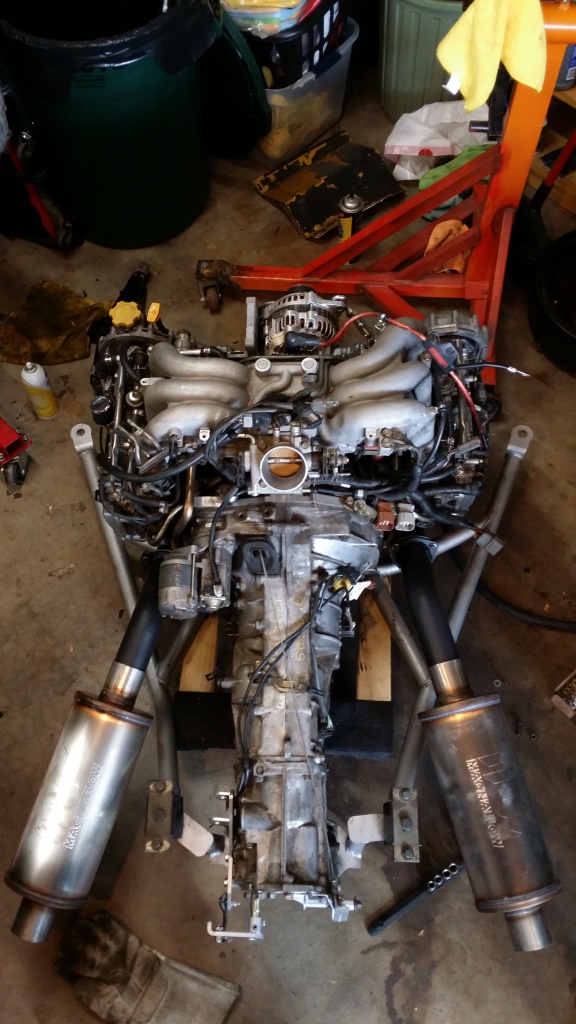
Posted by: mgp4591 Mar 14 2015, 10:50 AM
Nice fit Ross! Your new setup probably doesn't howl like the Harley pipes did even tho they sounded pretty cool. Hope the still give a good growl! Did you run new coolant hoses all the way through your longs or just update the transitions?
Posted by: rnellums Apr 5 2015, 09:53 PM
So I got everything in and plumbed up. I took it on a shakedown run today. 20 miles of highway followed by a steep run up some switchbacks (lookout mountain). On the way back down I noticed a slight miss so I pulled over and sure enough, one of the coil pack clips had come loose. When I started the car back up the miss was gone, but there was a lot of smoke from the drivers bank of cylinders!
Smoky startup:
https://www.youtube.com/watch?v=C1c10wbCJkM
I checked compression tonight, 117 +- 2 psi across the board, with no noticeable leakdown (over 5 minutes).
No visible oil in the coolant either.
My current plan is to drive out a bit more and keep an eye on coolant and oil level, see if either one drops. Thoughts?
Posted by: mgp4591 Apr 6 2015, 12:14 AM
Was the loose coil on the drivers side? If so, you may have washed down the cylinder a bit so you got some blow by. Or maybe some raw fuel left over... You didn't say if it smelled like oil or not, but if it's not doing it on a regular basis you're probably good.
Posted by: Chris H. Apr 6 2015, 07:03 AM
Yeah I agree, you were driving with a dead cylinder for a while. The engine was just burning off some unspent fuel most likely. Had that happen on my old Type 4 when I lost a plug wire. If you have good compression and it stopped smoking after a bit you should be fine. Fire it up again today and you'll know.
If it was coolant you would probably smell it already. That stuff is pungent!
Posted by: rnellums Apr 6 2015, 09:44 PM
I put my exhaust hangers together tonight!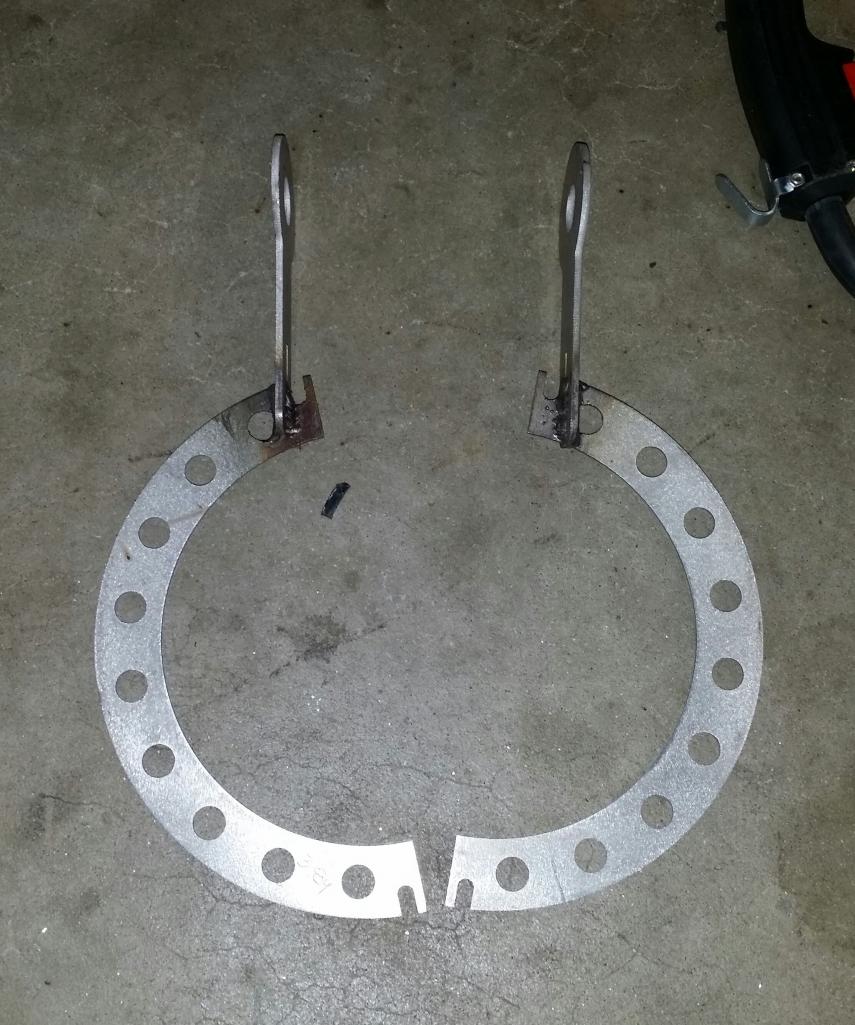
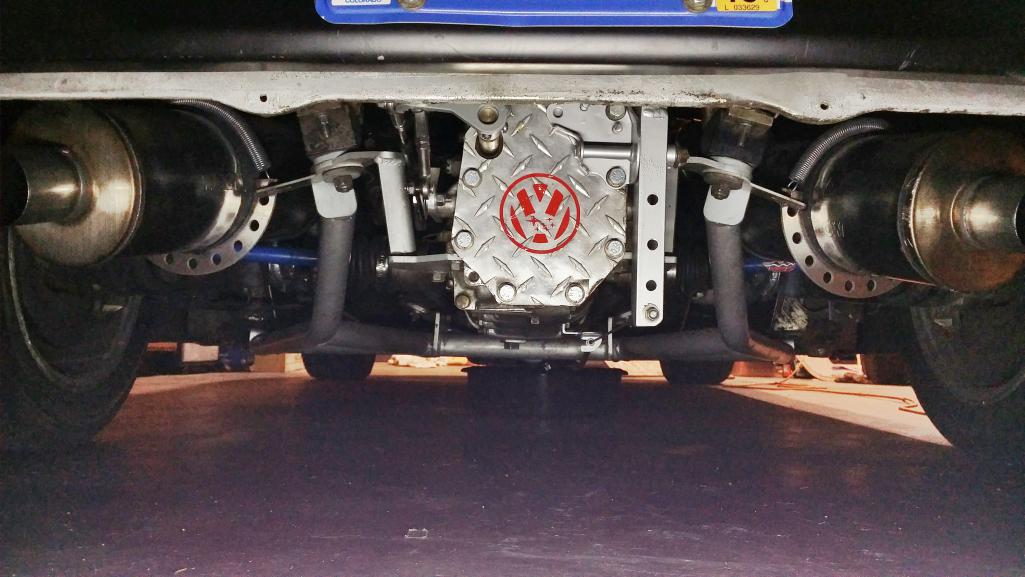
I also started back on one of my other back burner projects ... 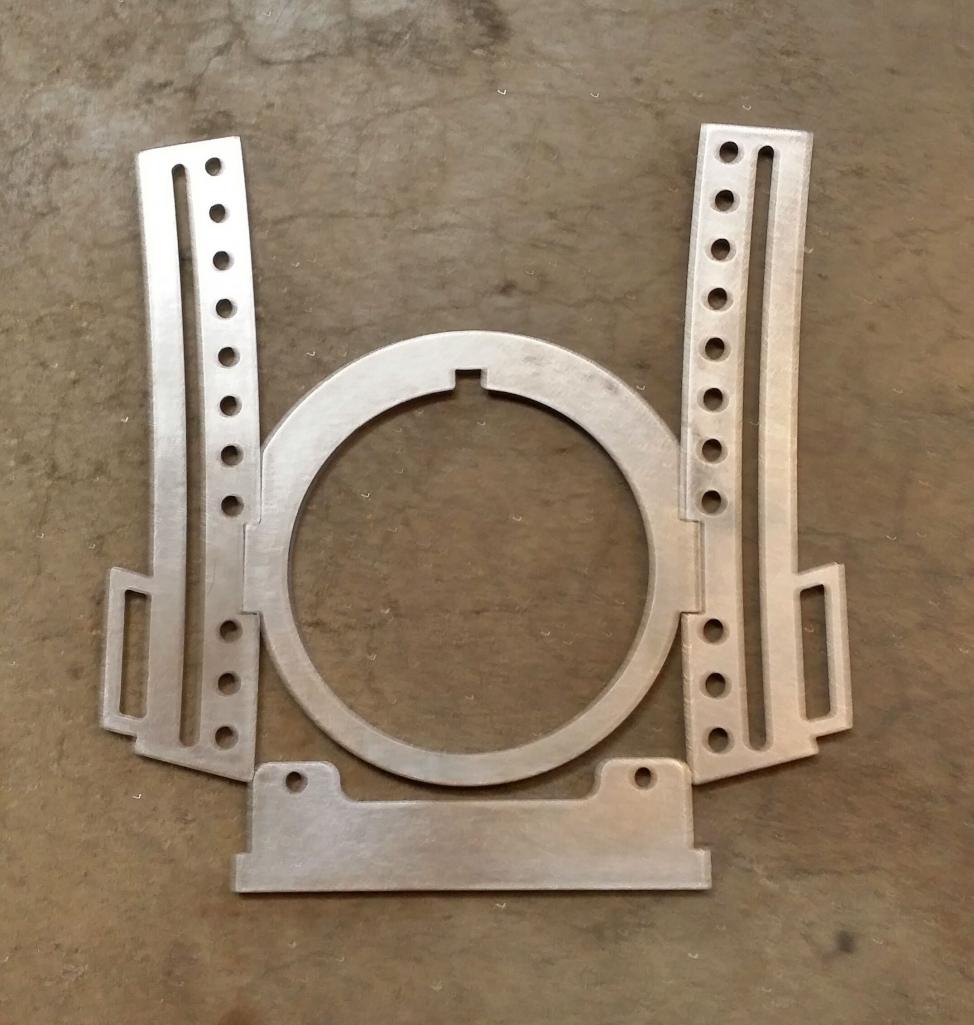
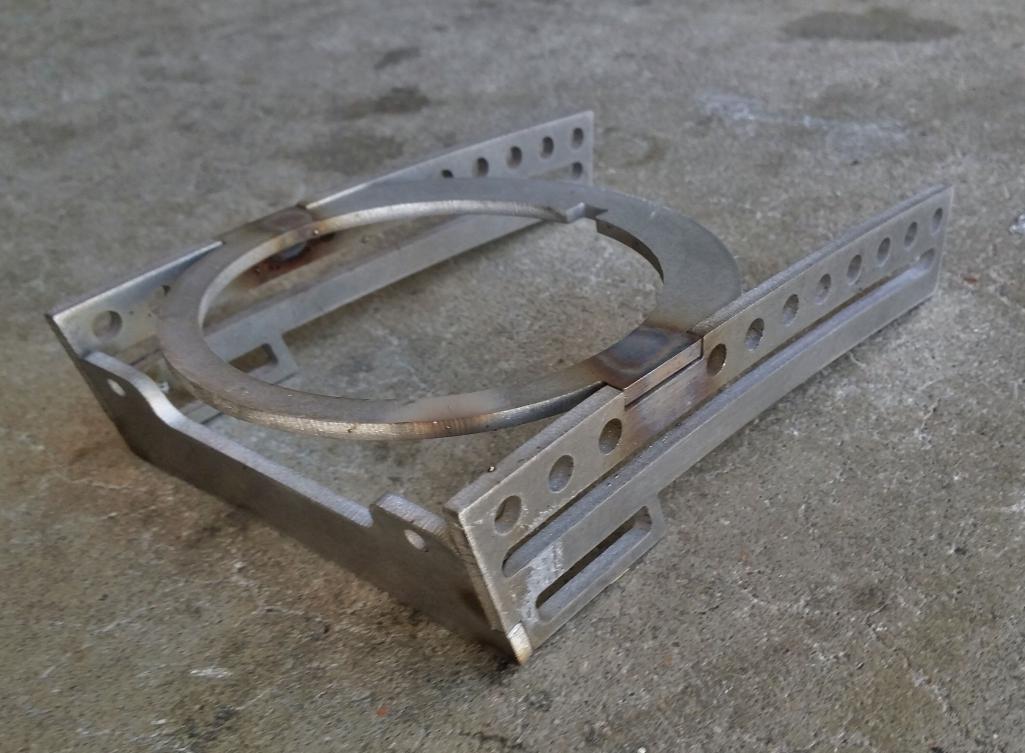
Posted by: rnellums Apr 6 2015, 09:49 PM
Not quite ready yet, but it's close!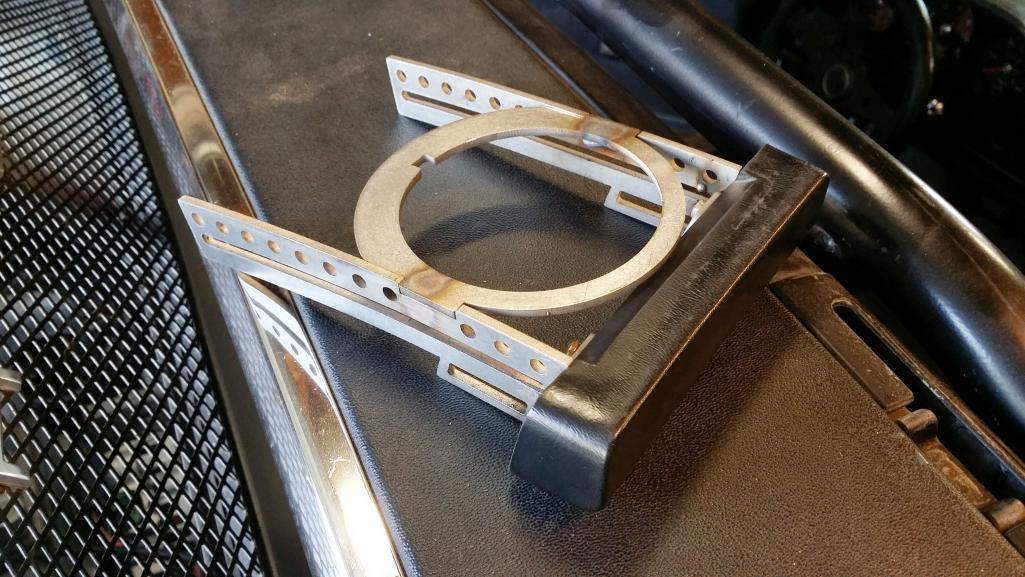
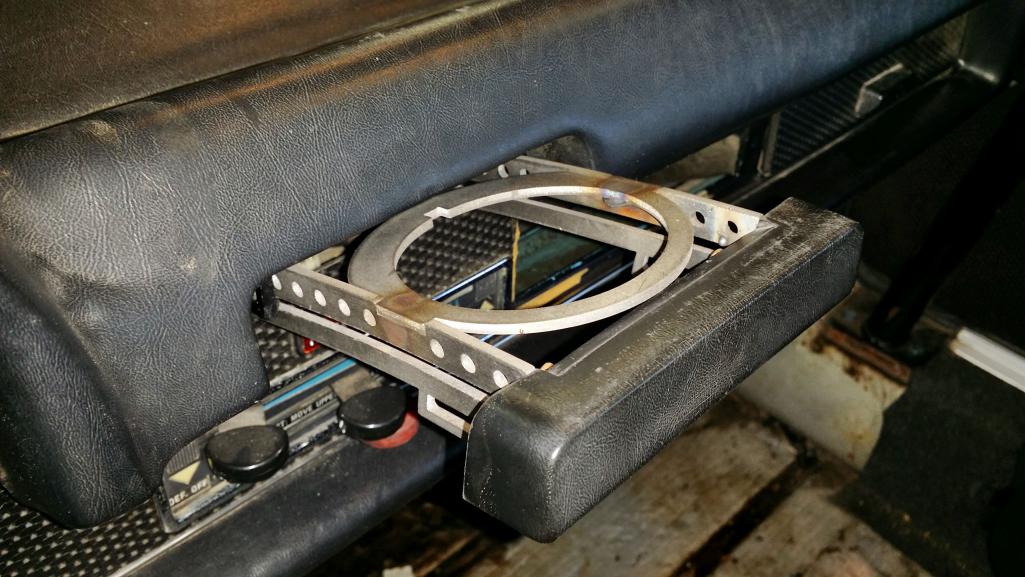

Posted by: Mike Bellis Apr 6 2015, 09:55 PM
Muffler brackets look cool but they also look like they will bend at the mounting tab.
Ash tray is way cool.
Posted by: rnellums Apr 6 2015, 09:58 PM
Muffler brackets look cool but they also look like they will bend at the mounting tab.
Ash tray is way cool.
Good point on the brackets. I'll add in a gusset on the bottom to strengthen them against bending.
Posted by: A&P Mech Apr 7 2015, 06:12 AM
Wow Ross! The cup holder looks awesome! I want one. Put me on the list.
Posted by: rnellums Apr 12 2015, 09:27 PM
I did a few small things this weekend, but my favorite change was plasti-dipping my wheels gold! I also think I have sourced a neutral safety switch that is closed in neutral instead of open which should make the lockout relay easier to install!
Attached thumbnail(s)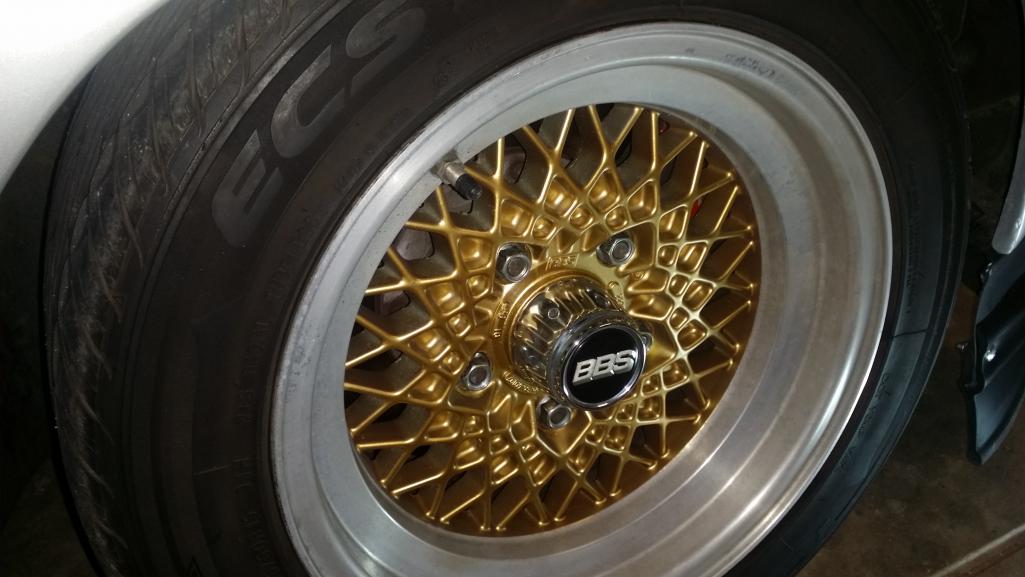
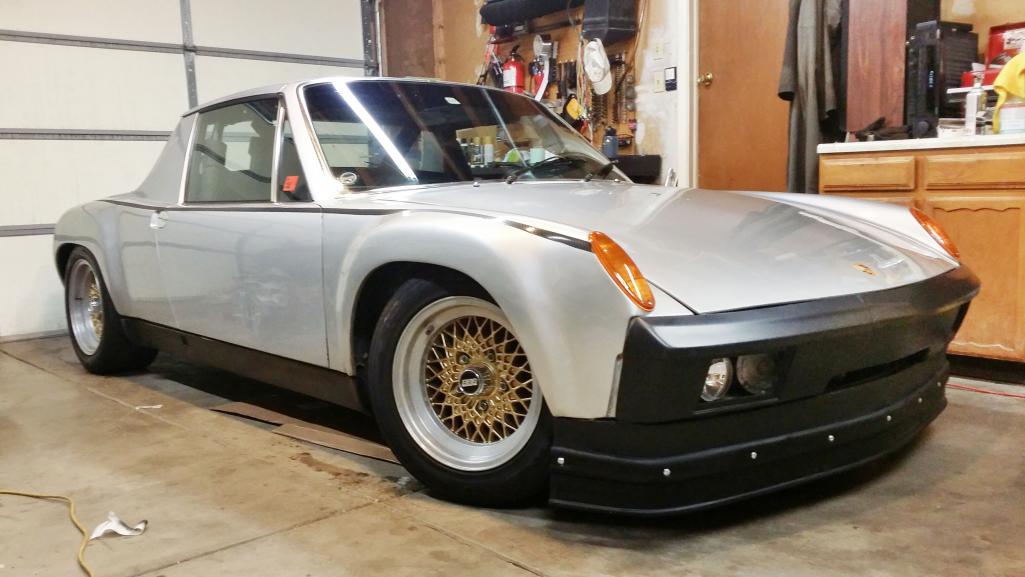
Posted by: mgp4591 Apr 12 2015, 11:00 PM
That's a good look! Did you get your small amount of body work completed on Apollo?
Posted by: rnellums Apr 12 2015, 11:02 PM
I did! Just about good as new!
Attached thumbnail(s)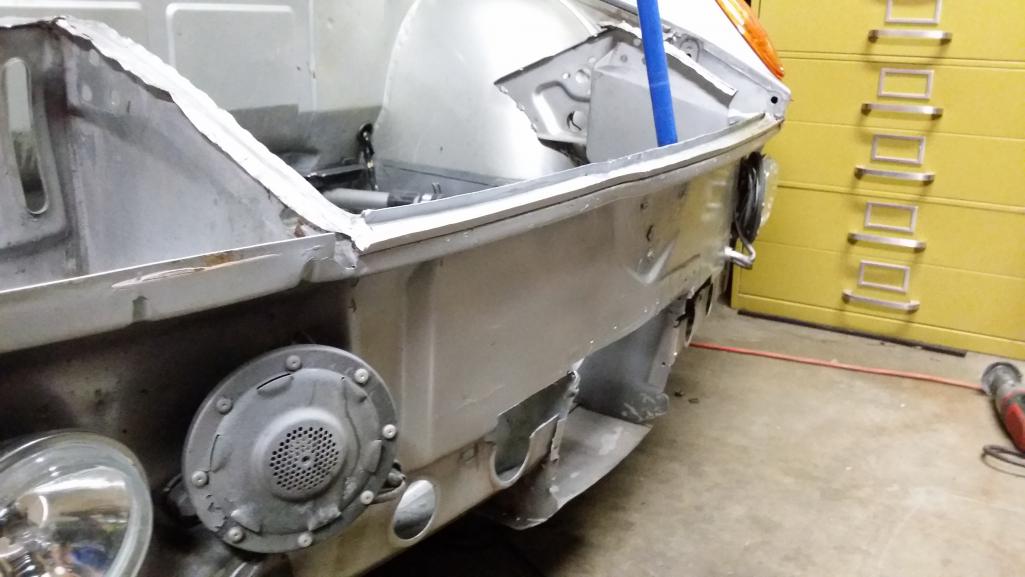
Posted by: Chris H. Apr 13 2015, 08:07 AM
Looks great! I always wanted to see what your radiator opening looked like. Do you have a shot of it straight on?
Posted by: rnellums Apr 13 2015, 09:08 PM
So I think I have discussed this before, but I had an incident a few months ago where I started the car in neutral and it resulted in Apollo jumping forward into my toolbox, smashing up my other 914 (Calypso) and caving in the front bumper of Apollo.
I have now officially repaired the damage, but I didn't want to drive the car much longer without a neutral safety switch.
The subaru transmissions come with one, but it is a normally open switch (i.e. in neutral the switch is open, and it is closed in gear. This could be integrated through the use of a normally closed relay (when in gear you energize the relay and it opens) to isolate the starter relay, but that would mean if the wiring or relay ever failed it would default to closed and I would again be unprotected (but wouldn't know it). Not good!
After doing some more research I discovered that for whatever reason the 2005-2007 WRX had a neutral switch that is normally closed (closed in neutral and open in gear) and that it has identical threads to the switch in my transmission (2003 2.5 RS). I just finished wiring it in tonight on the power side of the starter relay. Easy as pie and the part only costs ~30$.
Subaru Part No. is below:
32008AA151
Posted by: 76-914 Apr 13 2015, 09:16 PM
I like it. As you engineers say, KISS.
Posted by: rnellums Apr 13 2015, 09:17 PM
Looks great! I always wanted to see what your radiator opening looked like. Do you have a shot of it straight on?
I haven't settled on the final cut yet, but this works fine for in town and highway. Steep passes and track days I have to be careful on my temps, but I'm hoping to solve that by moving from a junkyard volvo radiator to a thicker dual pass aluminum unit.
Attached thumbnail(s)

Posted by: rnellums Apr 30 2015, 10:05 PM
I was getting tired of how loud my exhaust was so I added in another muffler/crossover tonight. Much better!
Marty at MSDS was kind enough to supply the mandrel bends (super easy to work with, and inexpensive too!) And the center muffler is just a cherry bomb muffler from the FLAPS. I HAVEN'T SEALED it all up yet, but so far it looks promising!
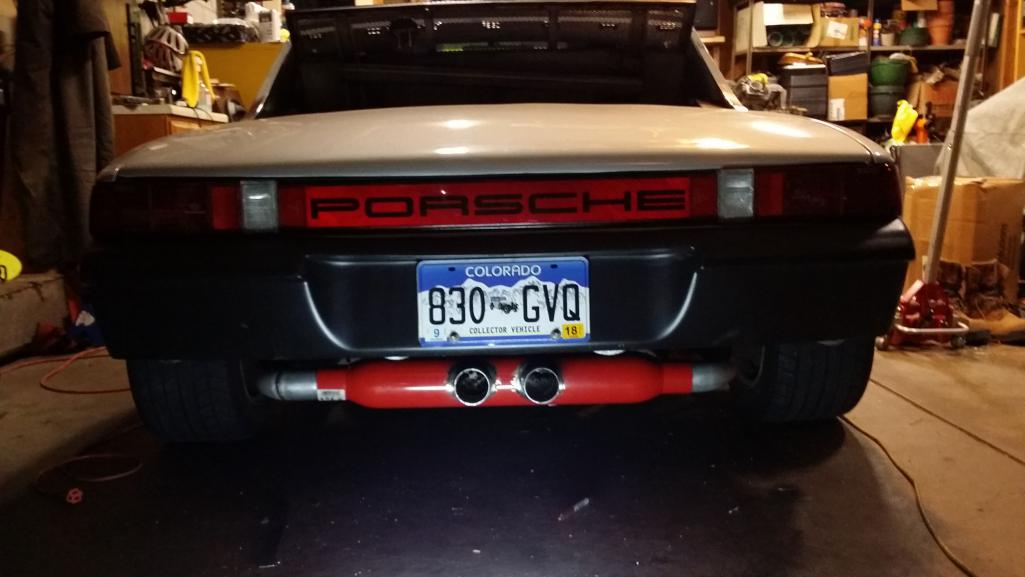
Posted by: Alphaogre Apr 30 2015, 11:07 PM
I was getting tired of how loud my exhaust was so I added in another muffler/crossover tonight. Much better!
Marty at MSDS was kind enough to supply the mandrel bends (super easy to work with, and inexpensive too!) And the center muffler is just a cherry bomb muffler from the FLAPS. I HAVEN'T SEALED it all up yet, but so far it looks promising!
Please post a video of how that sounds, I have been playing with the idea of building an exhaust like that for a few moths!
Posted by: 3d914 May 1 2015, 07:09 PM
Muffler brackets look cool but they also look like they will bend at the mounting tab.
Ash tray is way cool.
Good point on the brackets. I'll add in a gusset on the bottom to strengthen them against bending.
I agree - cool ash tray & muffler brackets!
Looks like you expect to hang some heavy sh$t on that ash tray though - material looks thicker than the muffler brackets. Posted by: rnellums May 12 2015, 11:52 PM
No real progress to report, I've been too busy playing witty my new toy - a vinyl cutter!
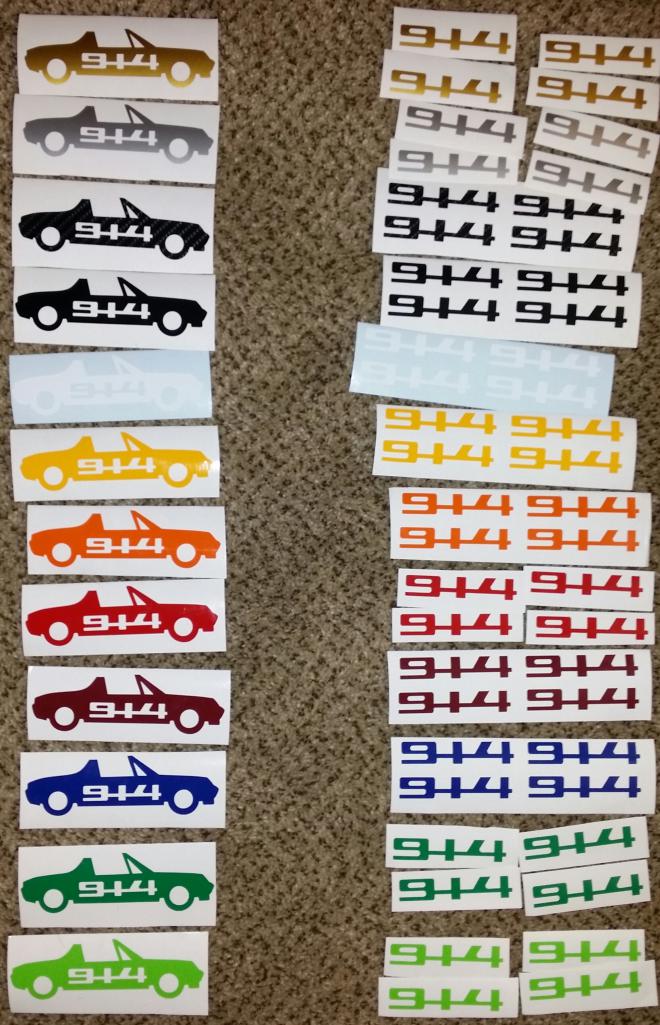
Posted by: mgp4591 May 13 2015, 01:36 AM
You may want to consider adding flanges to your add-on silencer set up. It's going to be fairly restrictive just by design alone and if you make it a convertible design you can change it out for your A/X activities. I wish I had access to flow meters for a truly accurate reading of the flow but if you increase the pipe diameter up it should minimize your backpressure, also adding a deeper tone. We need SOUND on this!
Posted by: A&P Mech May 13 2015, 06:47 AM
Wow the stickers look great! Are you planning to sale them? If so, I will take a set in red.
Posted by: Chris H. May 13 2015, 07:51 AM
Great job on the center muffler. It will help a lot. Looks similar to Bob's setup which made the exhaust note really nice.
Here is his (from his blog):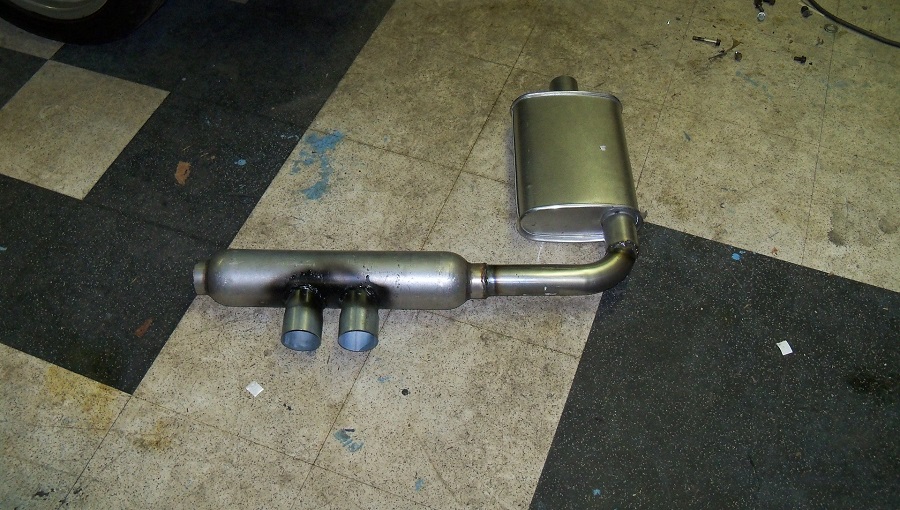
Nice welds BTW :beer2. Not easy to weld in a circle.
Posted by: 76-914 May 13 2015, 08:30 AM
Beat me to it, Chris. It's been on my "to do list" since Bob turned me on to this method. I want to do this but keep the existing exhaust as a spare set.
Posted by: rnellums Oct 18 2015, 08:32 PM
Odometer: 49,902 mi
Woof! May Since my last update!
Not much has changed, just little upgrades here and there.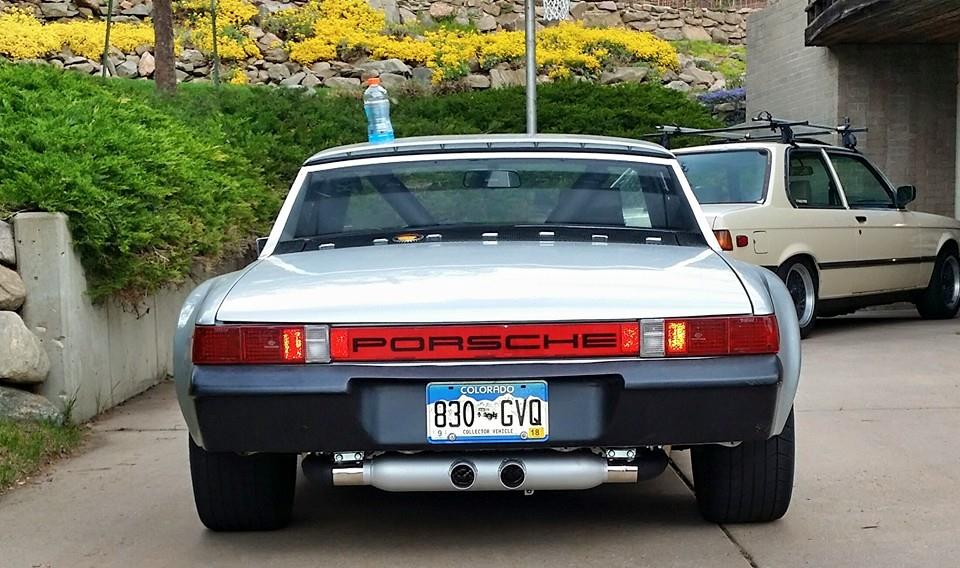
I painted the exhaust a less gaudy color, picked up a few spare EZ30's (trying to decide if I should resell or do a turbo build... ), and put on some carefree miles.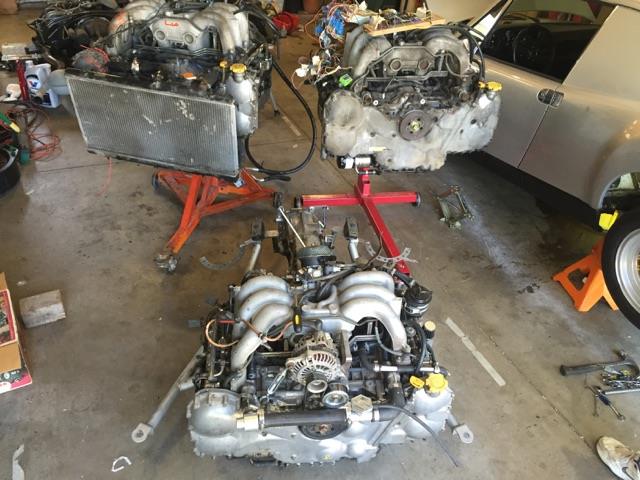
I had a bit of a scare earlier in the summer, coming down through the twisties in one of the mountain passes near Denver I had one of the plugs on my coil packs come loose and that cylinder started missing. I pulled over and fixed it, but on startup it let out a huge plume of smoke. I thought for sure I had done something serious, but there seems to be no lasting effect!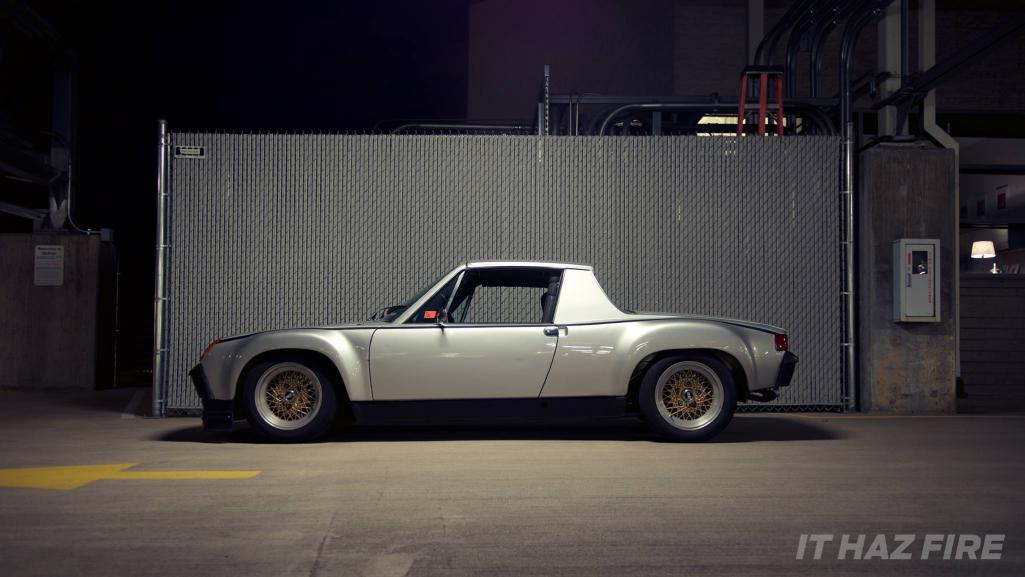
Just recently I decided to try my hand at making a center console and came up with the following. Built fron MDF, covered in 1/2" foam scrim and upholstered with vinyl. I'm hoping that a few heat cycles will allow the vinyl to stretch out and even out some of the sharper wrinkles. We'll see, but it is nice to have something to keep the dirt out of the shifter mechanicals!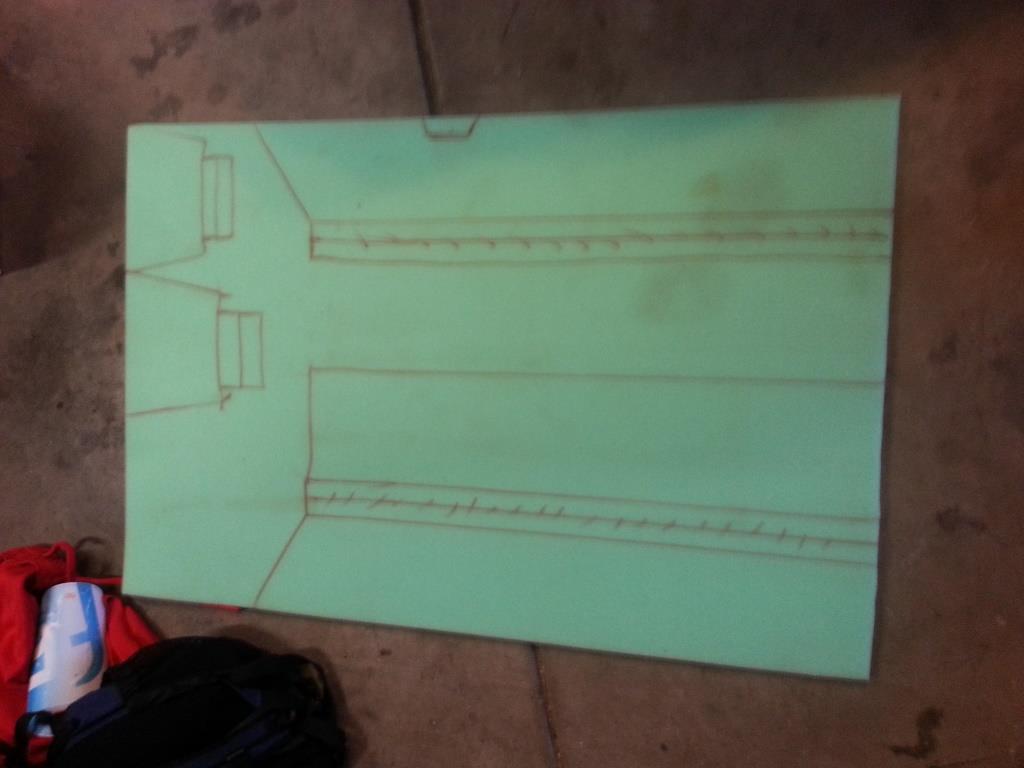
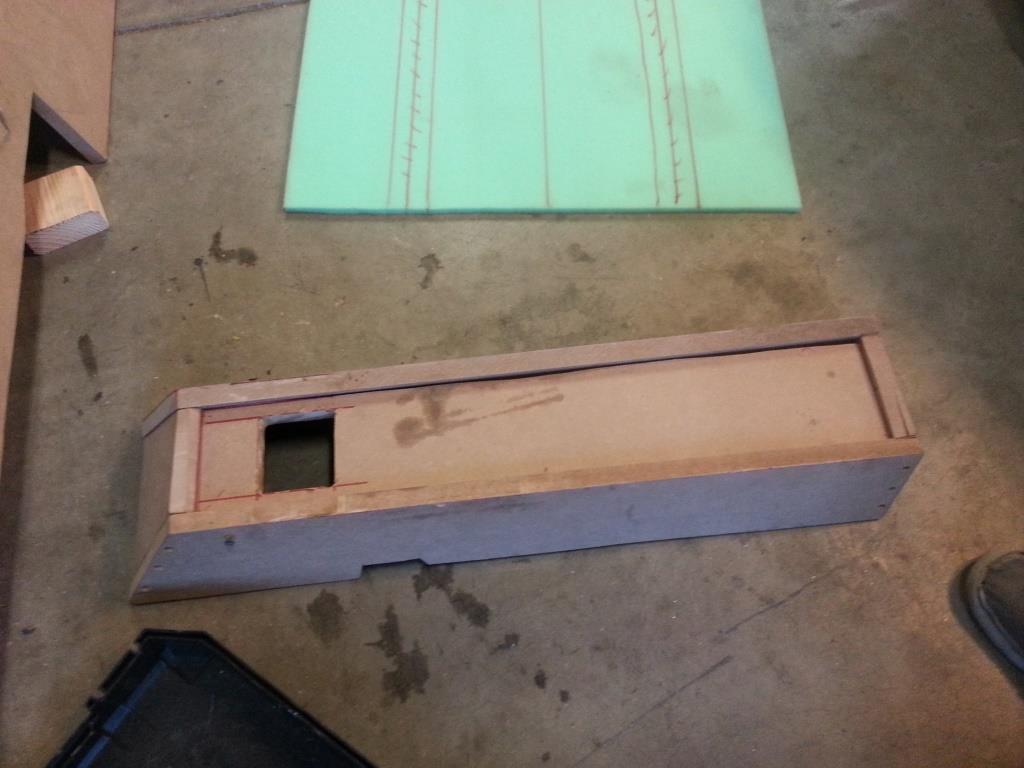
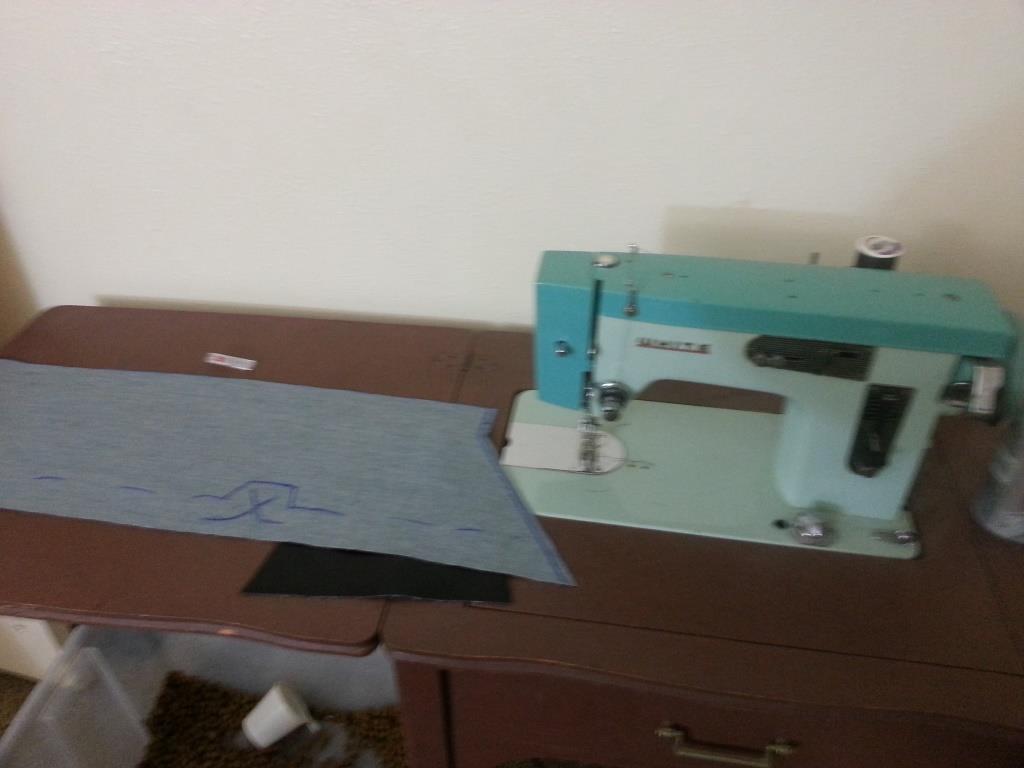
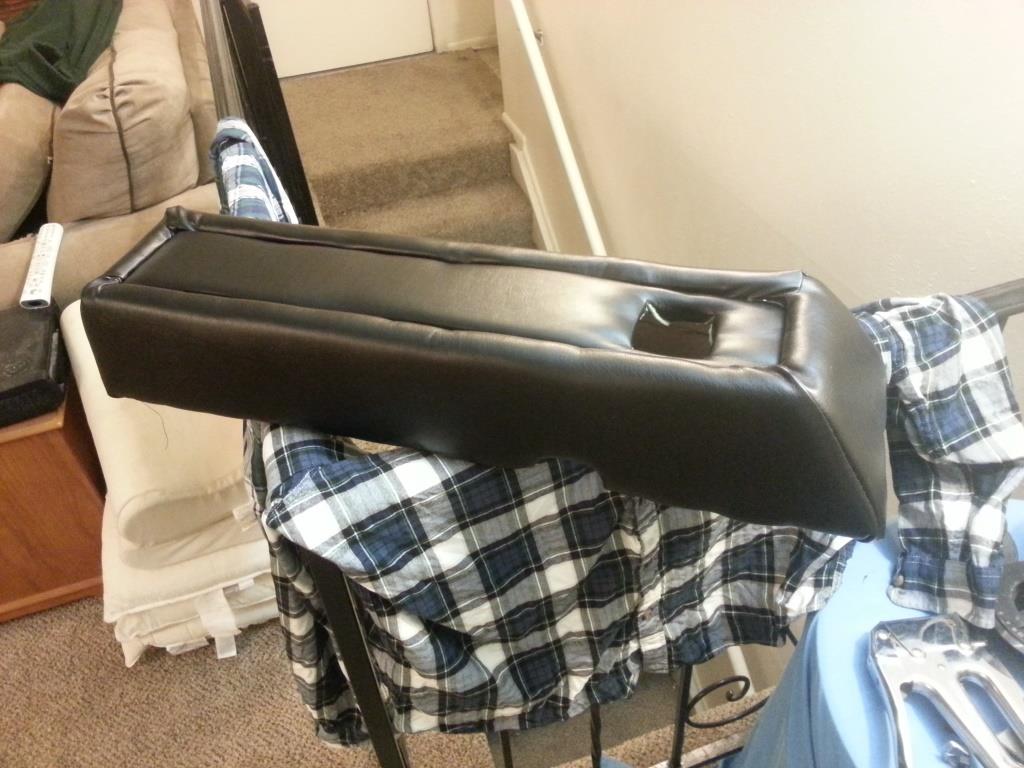
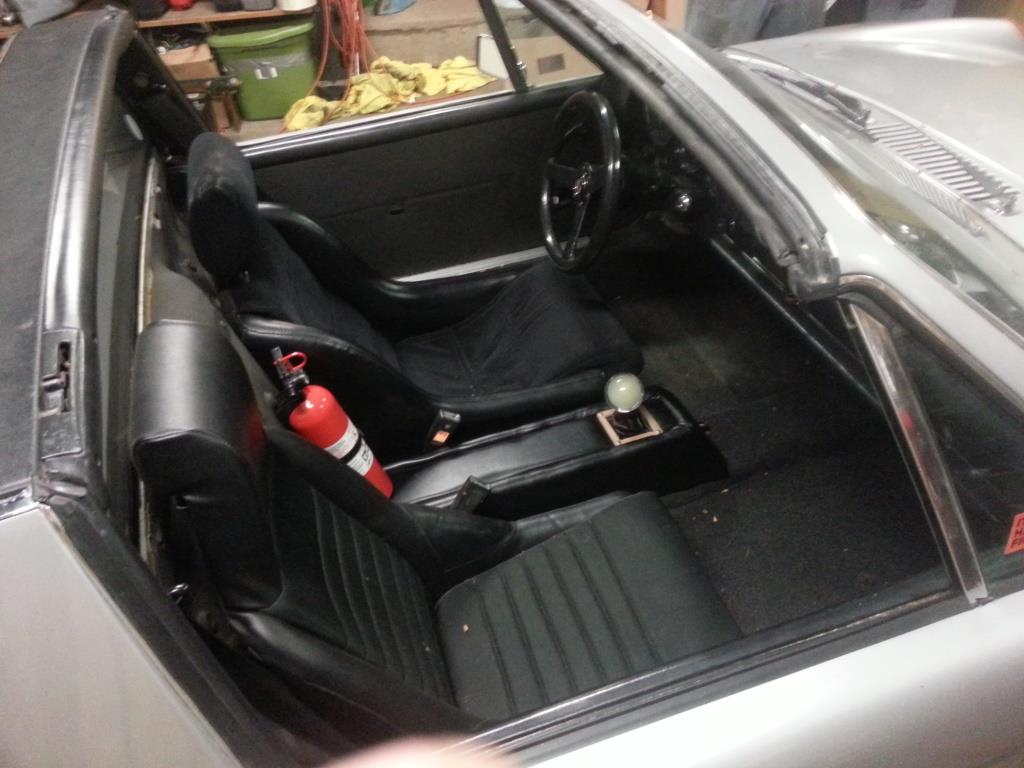
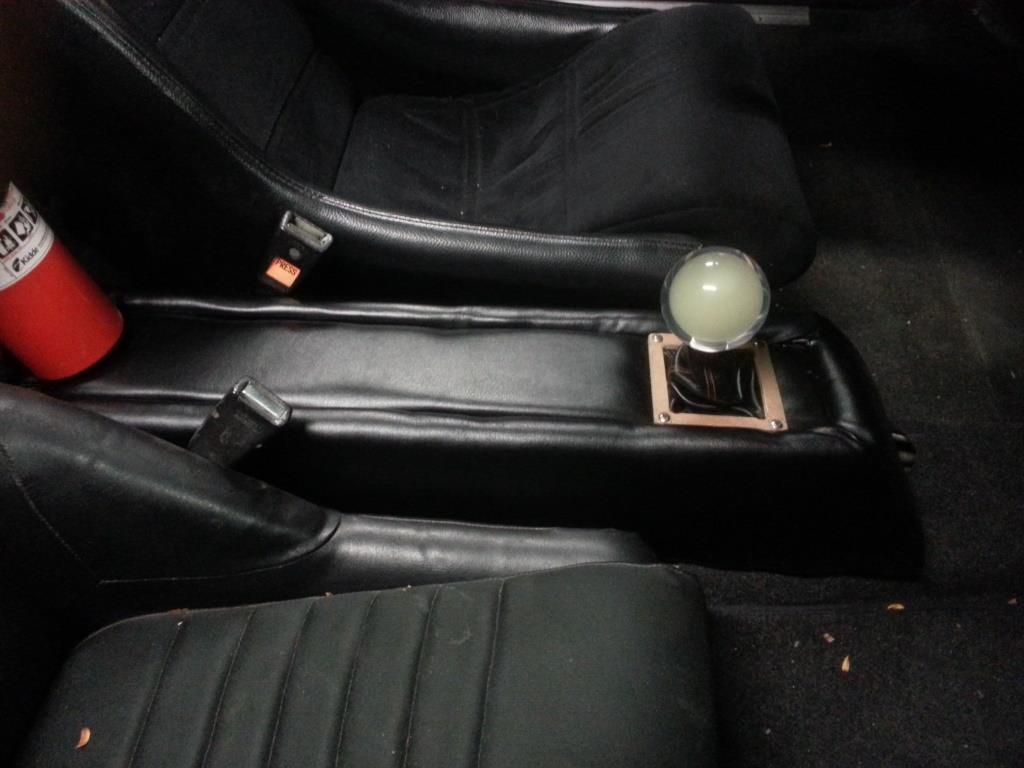
Posted by: mbseto Oct 19 2015, 07:39 AM
That's the shortest shifter I've ever seen. Is that an AX thing, or just a preference for a really short throw? Nice console, btw.
Posted by: rnellums Oct 19 2015, 08:50 AM
That's the shortest shifter I've ever seen. Is that an AX thing, or just a preference for a really short throw? Nice console, btw.
Its the stock MR2 shifter length, and is incredibly short, but the tightness of the Subaru transmission \ cable shift makes it viable. I usually use a 3" lever extender to make the throw longer, but it is fun shifting with a 1" throw once in a while.
Posted by: Chris H. Oct 19 2015, 11:30 AM
I'm getting EZ30 envy. How many of those do you HAVE man??? Any others or just the EZ?
Posted by: rnellums Oct 19 2015, 11:44 AM
I'm getting EZ30 envy. How many of those do you HAVE man??? Any others or just the EZ?
All EZ30s, but I'm down to one spare now and that may end up in Brett's challenge build car.
I have EG33 envy myself, so many more options for tuning without going all custom!
I'm planning on doing a custom intake manifold this winter to flip my intake and clear the alternator, so it will be nice to have a spare around.
Posted by: Chris H. Oct 19 2015, 12:16 PM
That's funny. We always want the one we don't have! Bob megasquirted his EZ30 BTW. Ran great. His comments are on the message boards over there. You could easily handle assembling one of those. I'm finding myself trolling for a newer 2.5L NA engine. Still have my cradle and stuff. Maybe take a few years and collect parts and have two complete drive trains! Just change 'em every few months .
Posted by: grantjd Mar 3 2016, 02:42 PM
I figured I'd eventually figure out whose car I saw at last years dragon boat festival. Your shift knob is the most memorable part!
Posted by: rnellums Aug 6 2016, 05:09 PM
Odometer:50907
Ive been driving the car quite a bit since my last update. My plan with the car has always been to maximize driving time and minimize time on jackstands. With that in mind i did a lot of things "good enough" during the initial build. Now that its been two years without serious mishap im going to start refining things a bit.
Below is a list of pet peeves on my project im going to work out!
Cooling system barely adequate
Cable clutch gives poor pedal feel
No heat
Intake extends into the rear trunk
No flip up headlights
No trunk supports
Sloppy ecu wiring (temporary wiring)
I started earlier this week rerouting and reorganizing the wiring harness to get it out of the trunk. It's till not quite done, but I dont want to finish it until i figure out where to hard mount the obdII port!
Attached thumbnail(s)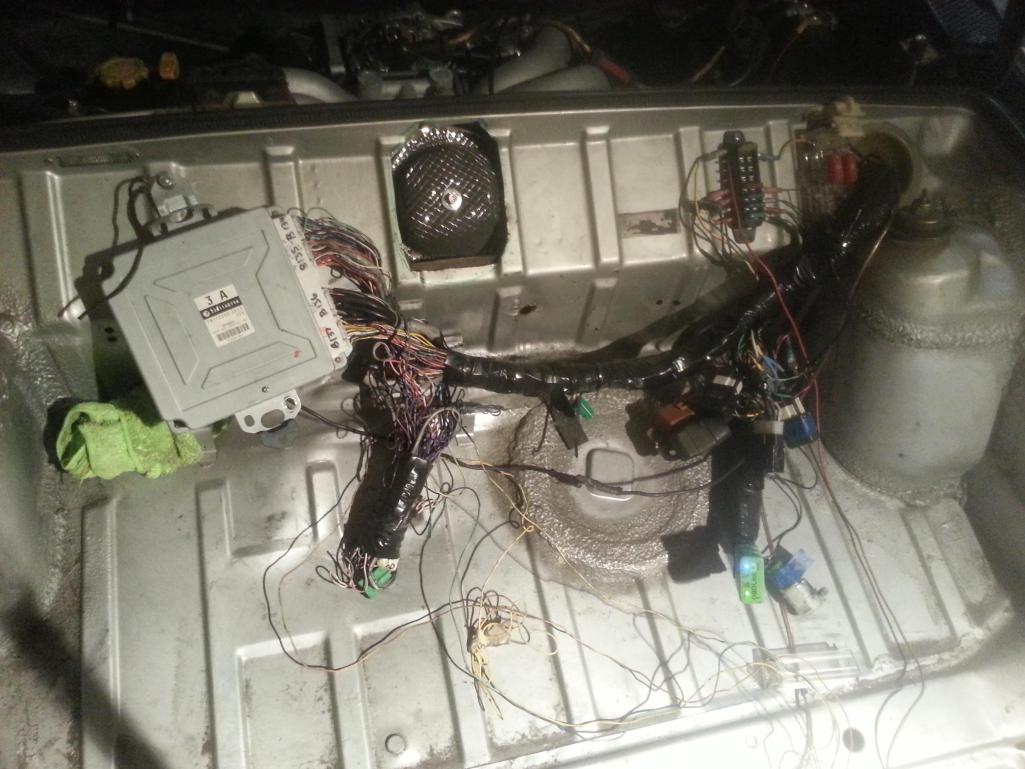
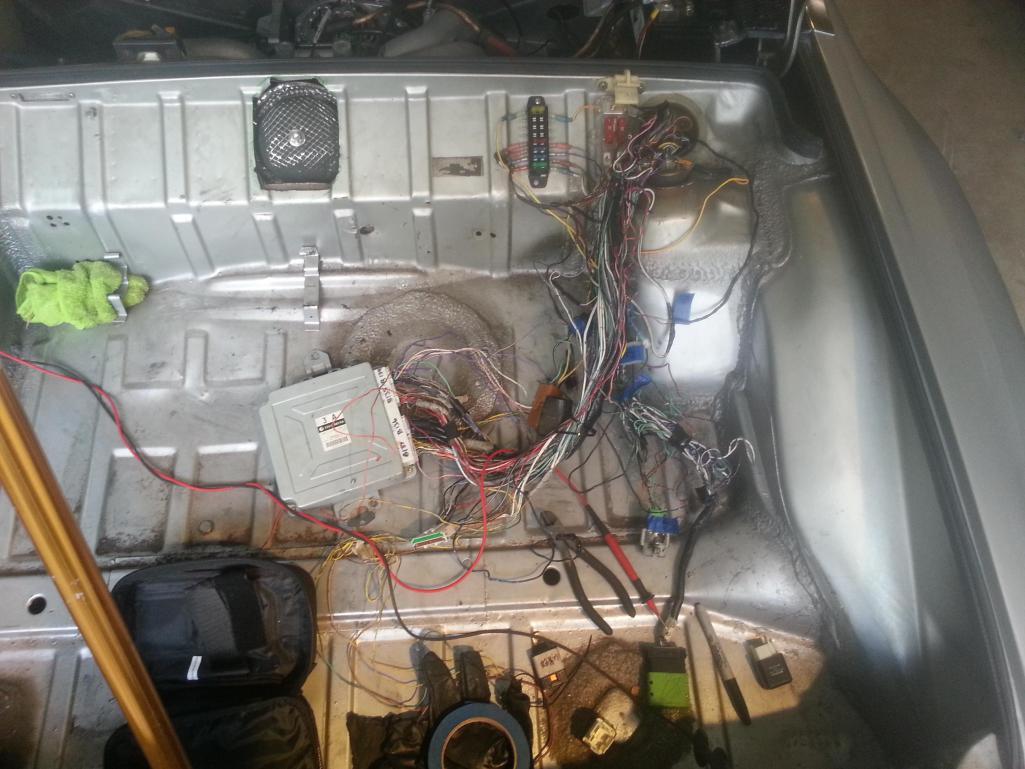
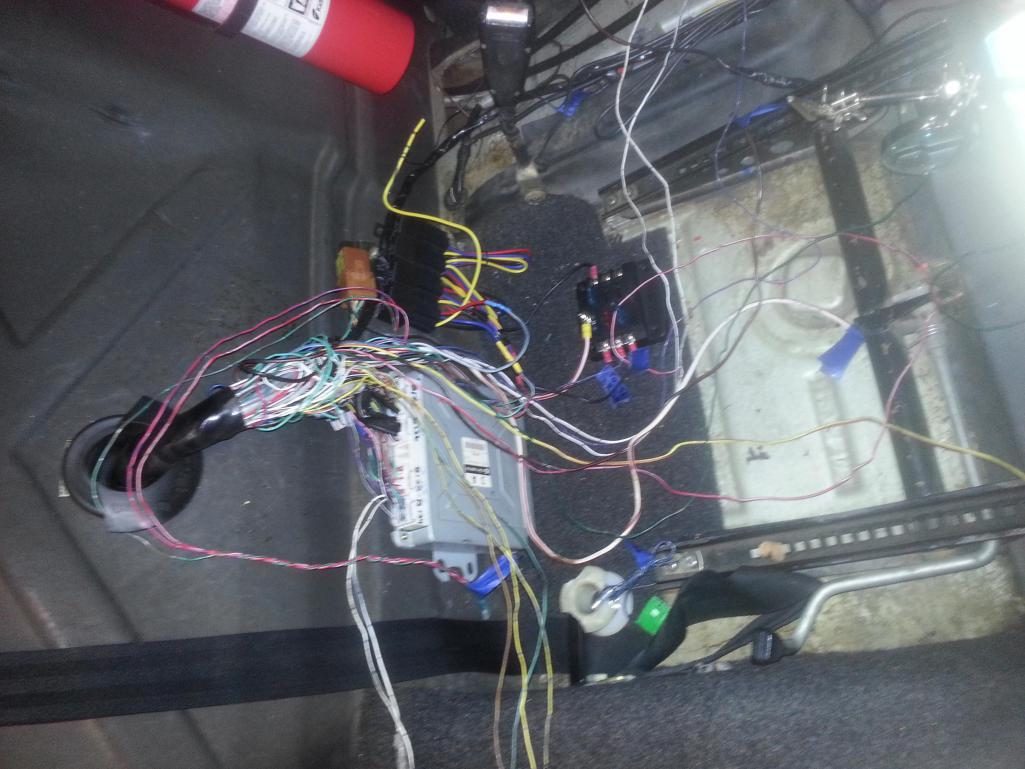
Posted by: rnellums Aug 6 2016, 05:09 PM
All finished up!
Attached thumbnail(s)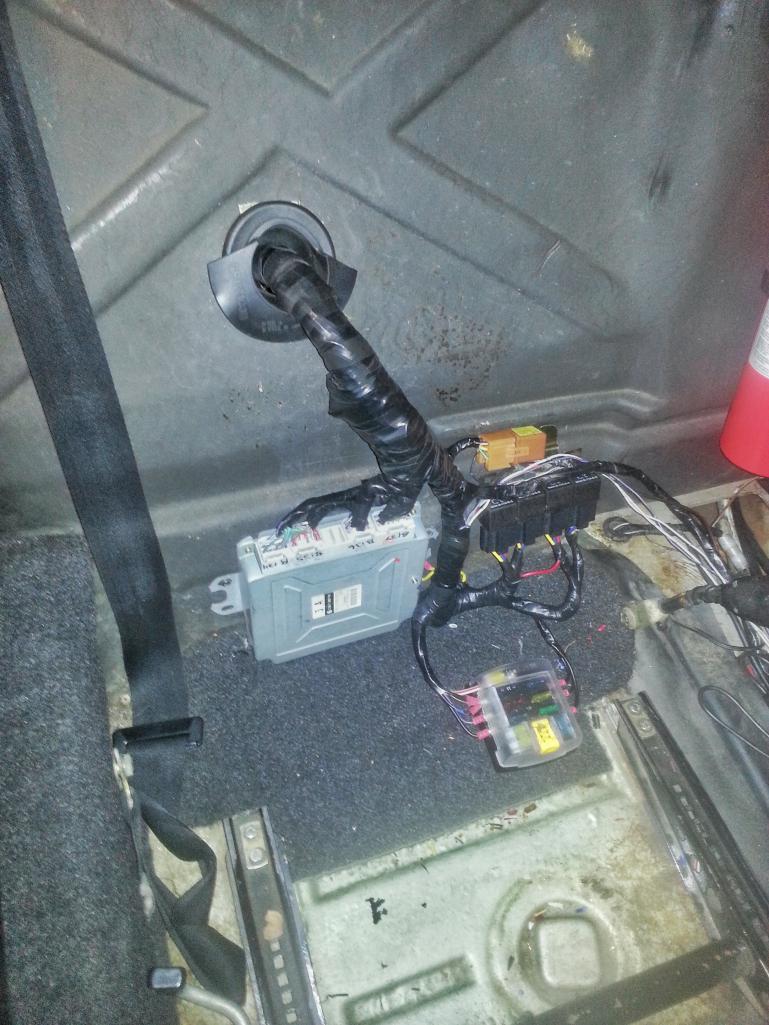
Posted by: majkos Aug 9 2016, 07:50 AM
Nice!
LMK if u need anything, 914 parts wise,
Like rear trunk material
Posted by: 76-914 Aug 9 2016, 08:02 AM
Looks a lot cleaner, Ross.
Posted by: rnellums Sep 5 2016, 04:27 PM
Odometer:51018
I finished putting in some aluminum shrouding on my radiator. I had tried previously to seal the radiator on the outlet side, but the shrouding over the intake side has had a huge effect on water temperatures. Coupled with the new Mishimotor radiator (z3 performance model) my fans essentially stay off unless I'm at a light. I have yet to test it under hard load in the mountains though.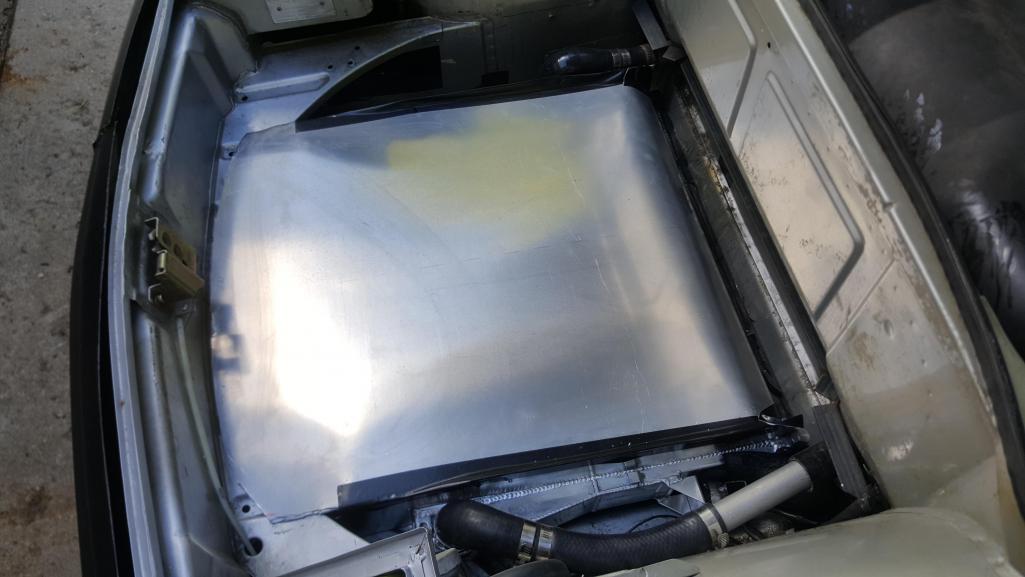
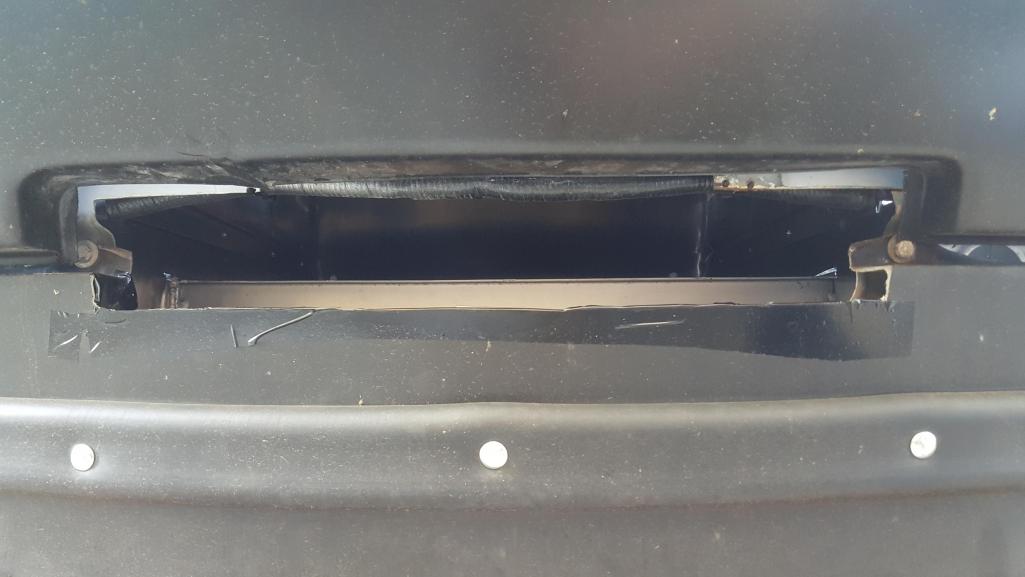
The best part is that I still have a front trunk. Even built a nice carpeted trunk board today!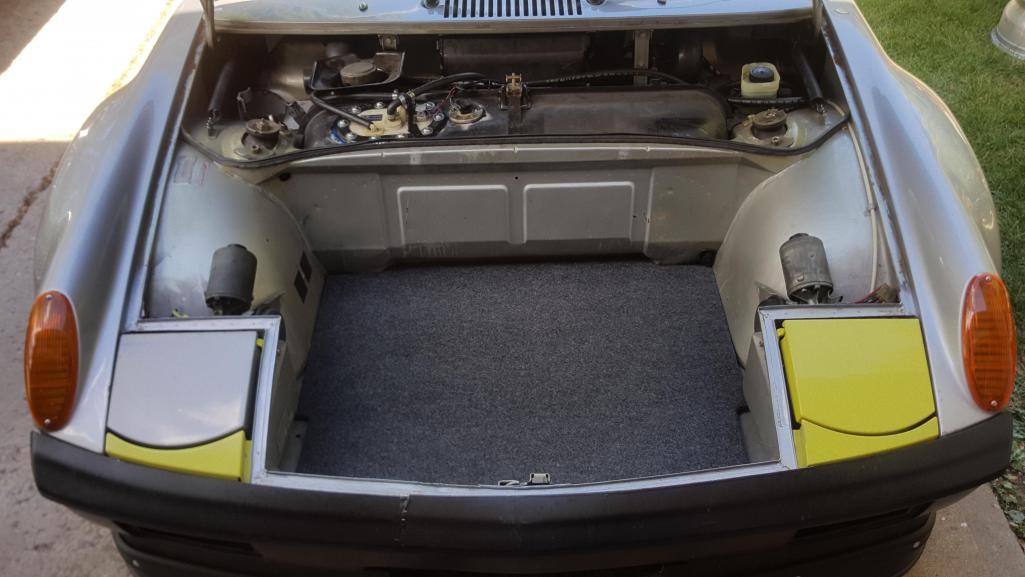
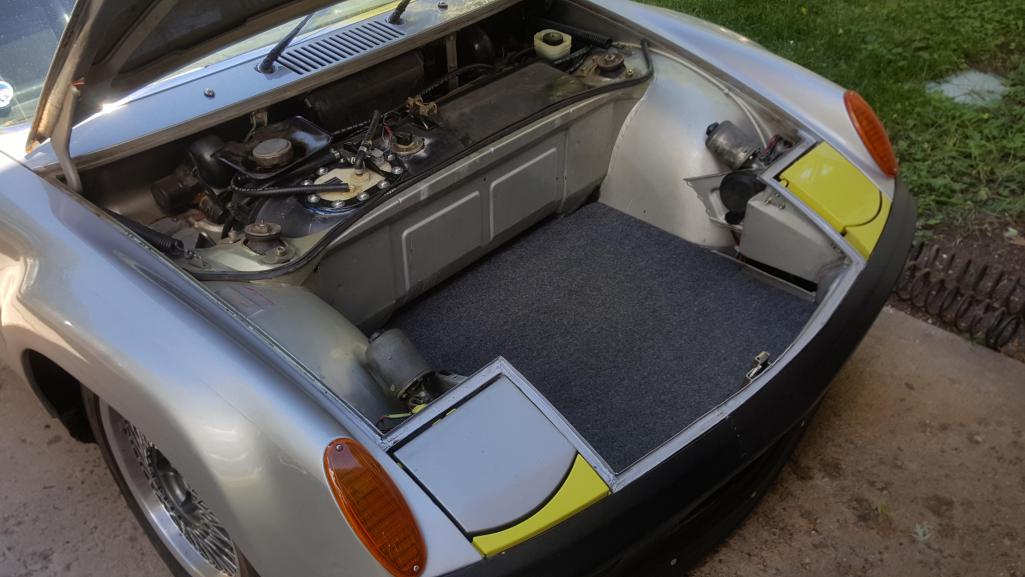
Posted by: rnellums Sep 5 2016, 04:32 PM
I also finally got proper flip up headlights back in the car and while I was at it, upgraded to LED units from vintageLED. Pretty spectacular result, and was totally plug and play.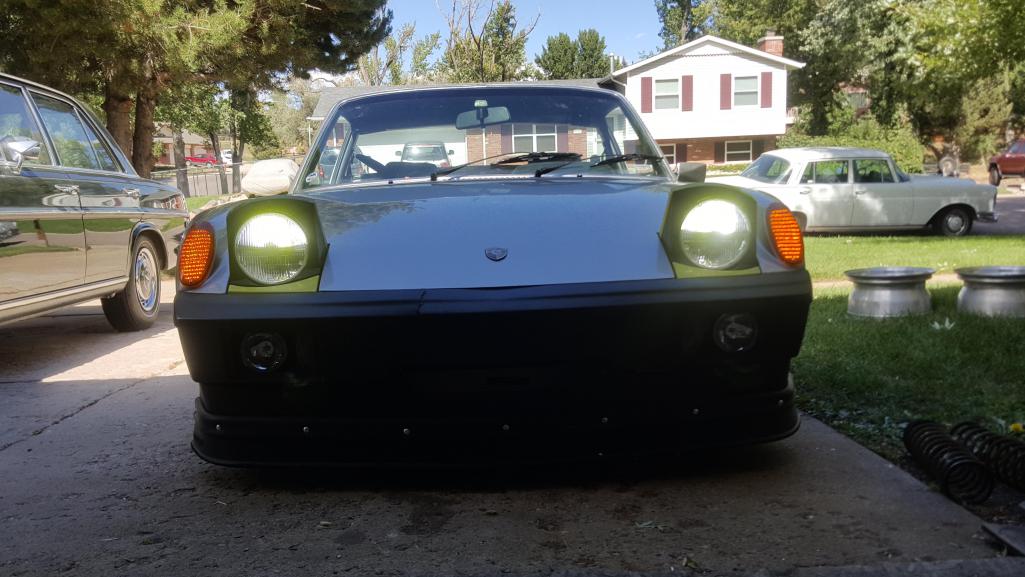
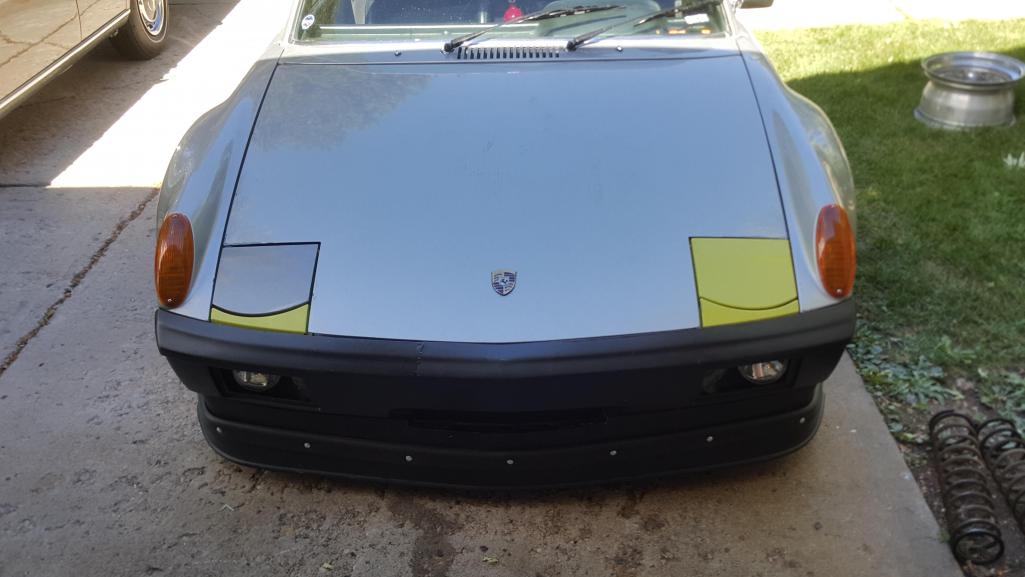
One side effect however is that the fog lights need to be rewired. The stock wiring grounds the fog lights relay through the high beam so the fogs cut off when going to high beam. LEDs won't allow the backward current, so the fogs can't come on. Should be an easy enough fix!
Posted by: A&P Mech Sep 5 2016, 06:09 PM
With all that front trunk space that the rest of us Denver conversion guys don't have, I guess I know who is hauling all the supplies for the RRC on Thursday!
Posted by: rnellums Dec 13 2016, 09:36 PM
I guess I am down to quarterly updates now!
RRC was fantastic as usual! I made the trip up there with three great friends, all in Conversions (Scotty in his LS-914, Conner in his EZ30-914, and Ray in his EJ25)
I have been continuing to improve on a few things here and there as well!
Attached image(s)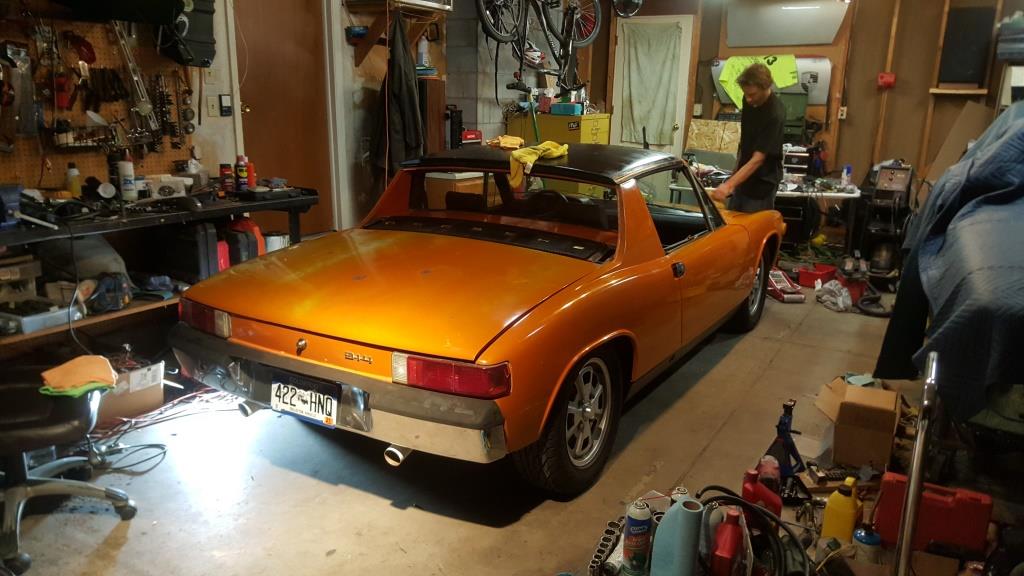
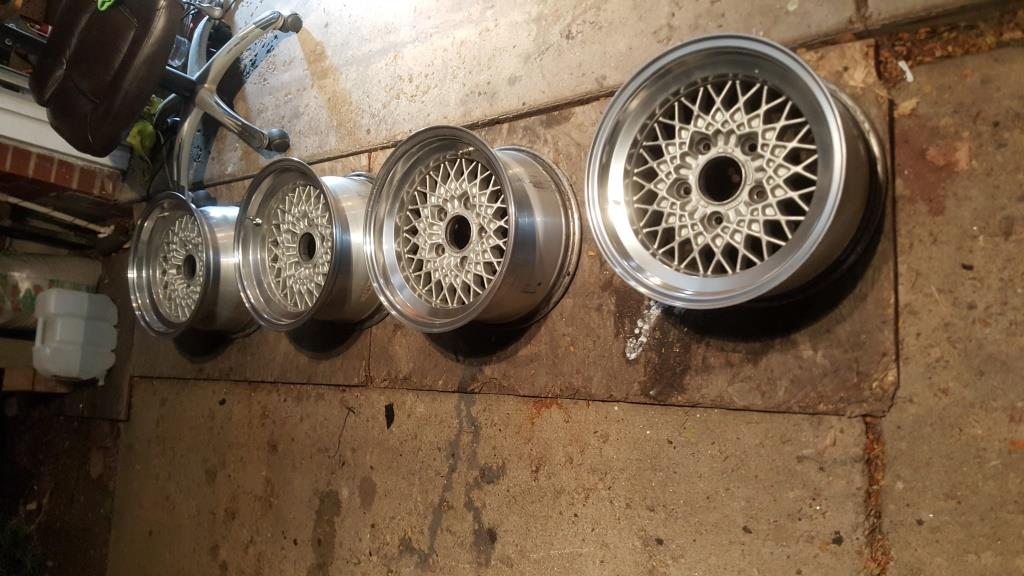
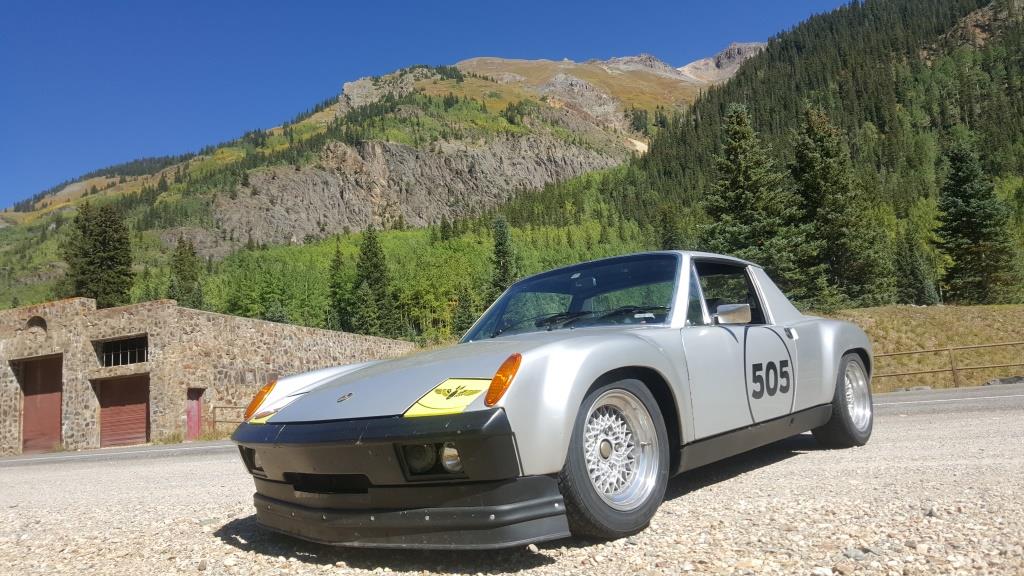

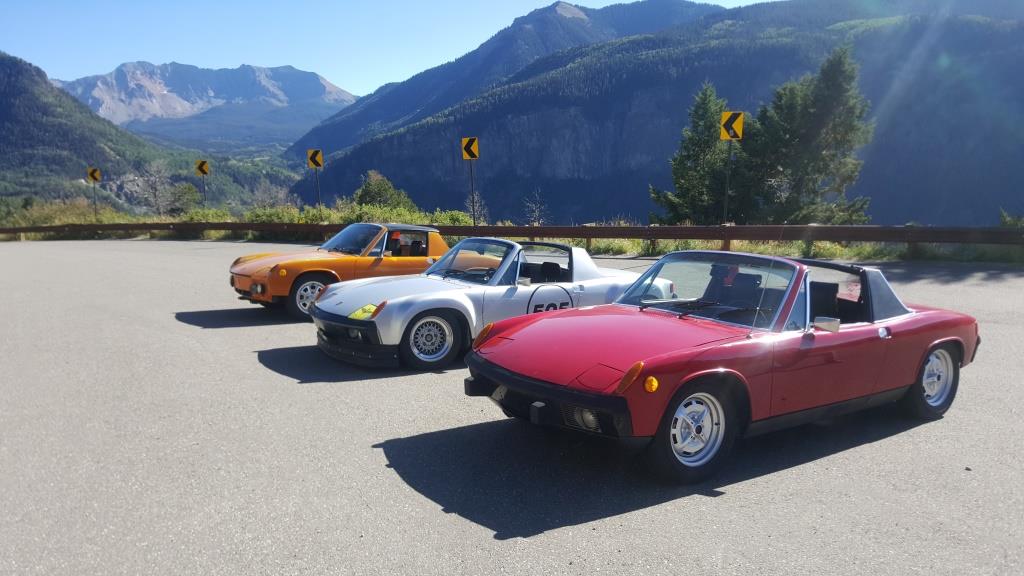
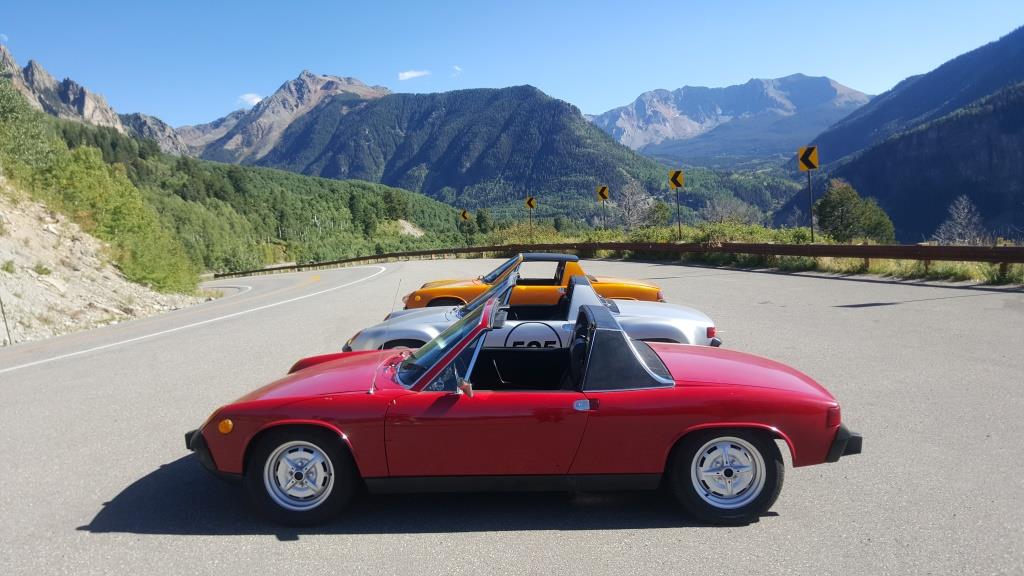
Posted by: rnellums Dec 13 2016, 09:38 PM
I added some camp 914 trunk struts, but didn't wan't to have to drill into the trunk. I built some brackets that bolt to the trunk hinges. Works great!
Attached image(s)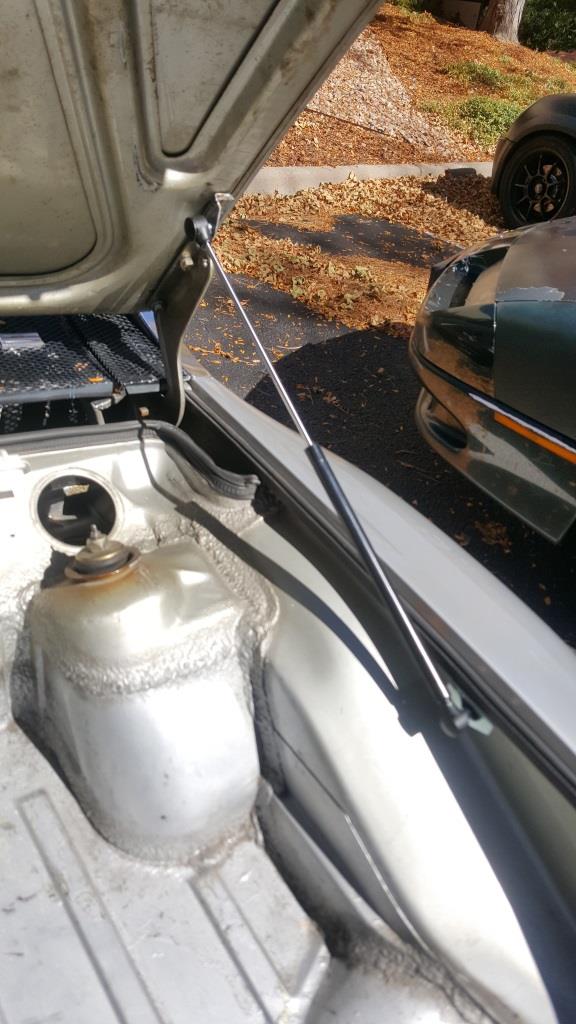
Posted by: rnellums Dec 13 2016, 09:42 PM
In bigger news, I picked up an EZ36 (3.6L Subaru, with more horsepower and torque than my first gen EZ30, plus variable valve timing)!
I also designed and built a set of ITB's based on Triumph speed triple throttle bodies. I'm planing on using Megasquirt to run it.
Attached image(s)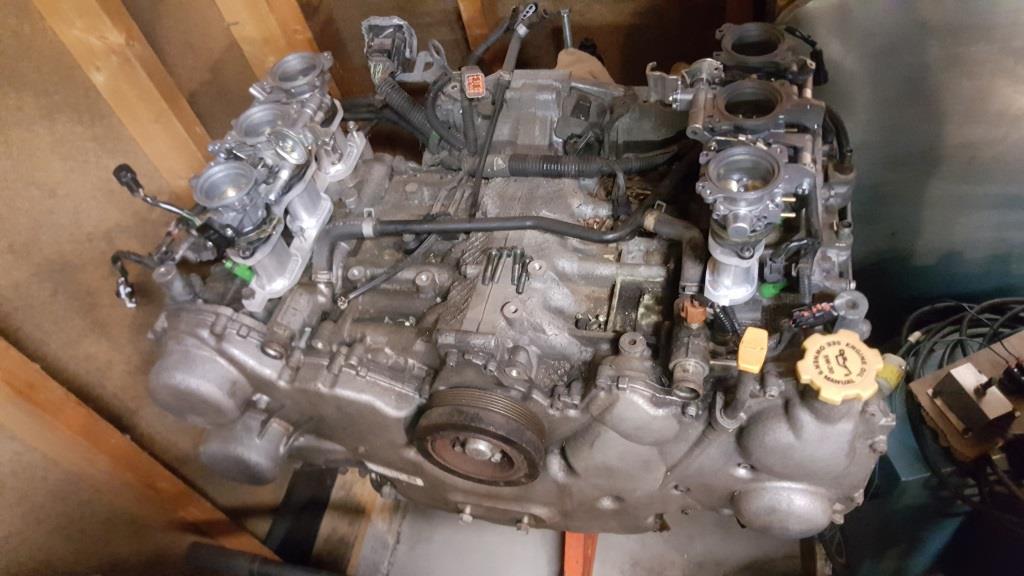
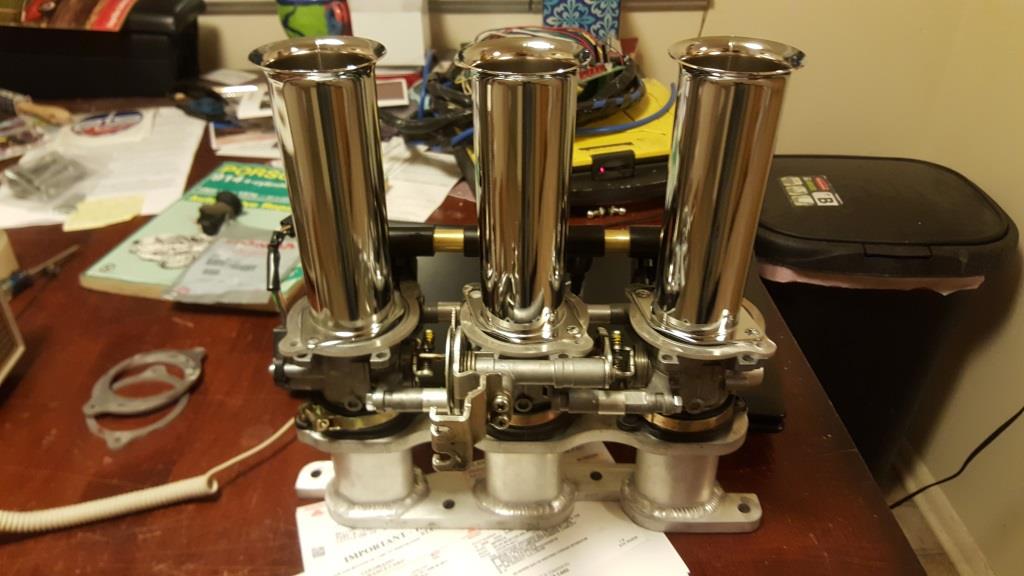
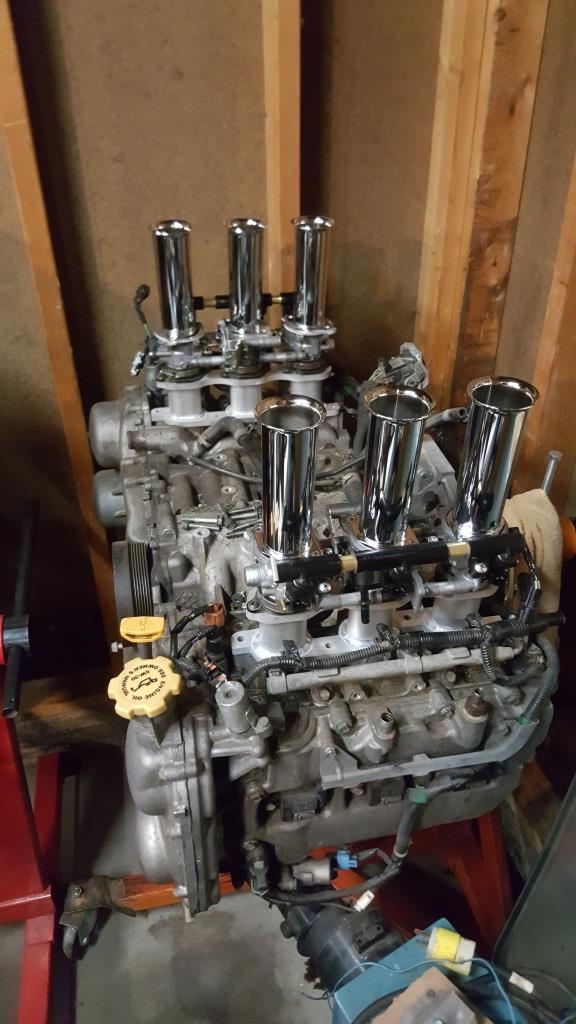

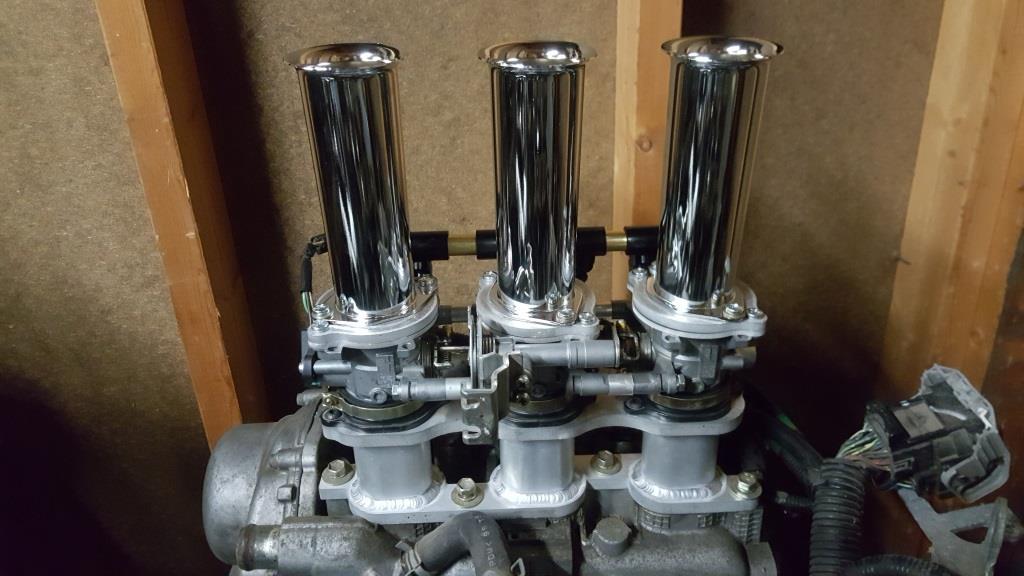
Posted by: rnellums Dec 13 2016, 09:46 PM
I'm also in the process of refinishing some 15x8 and 15x8.5" fuchs replicas! The intent will be to run some VERY sticky R888's in 235/50-15 on all four corners.
Attached image(s)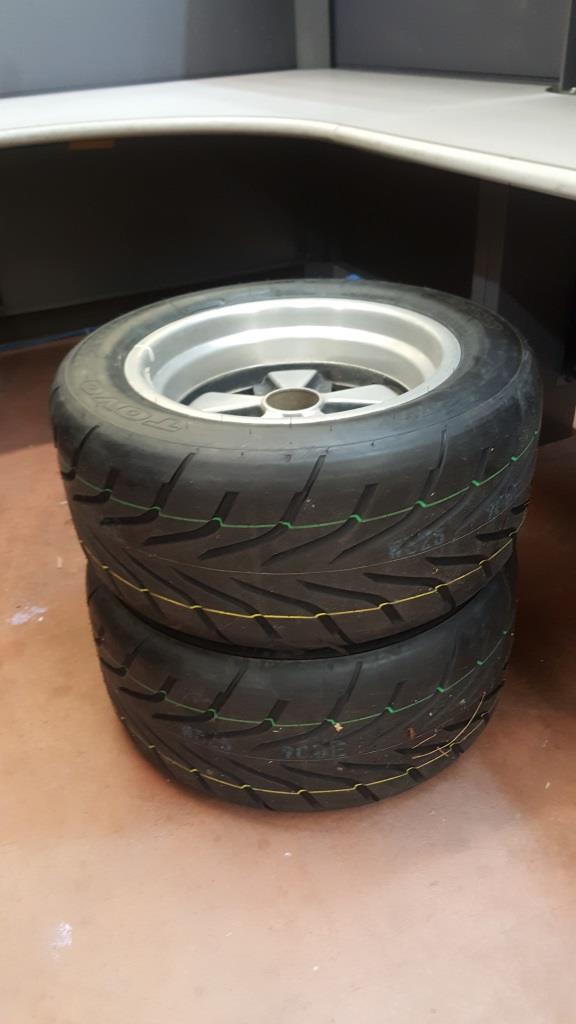
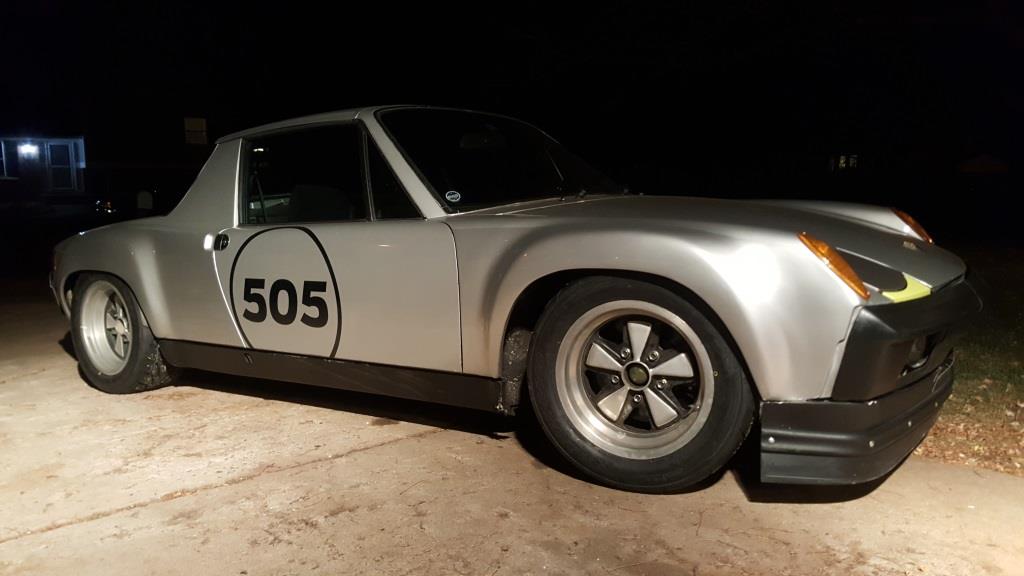
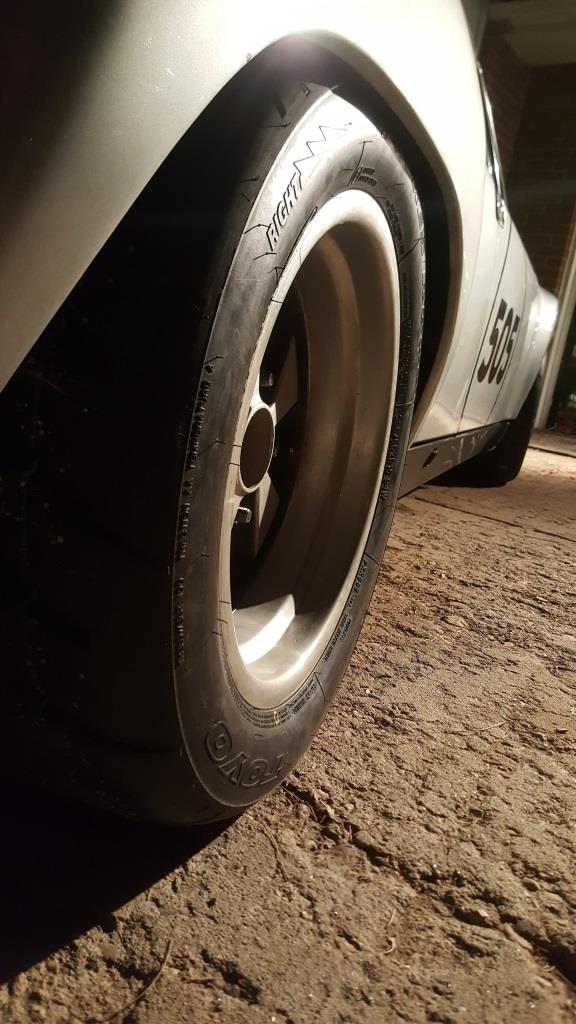
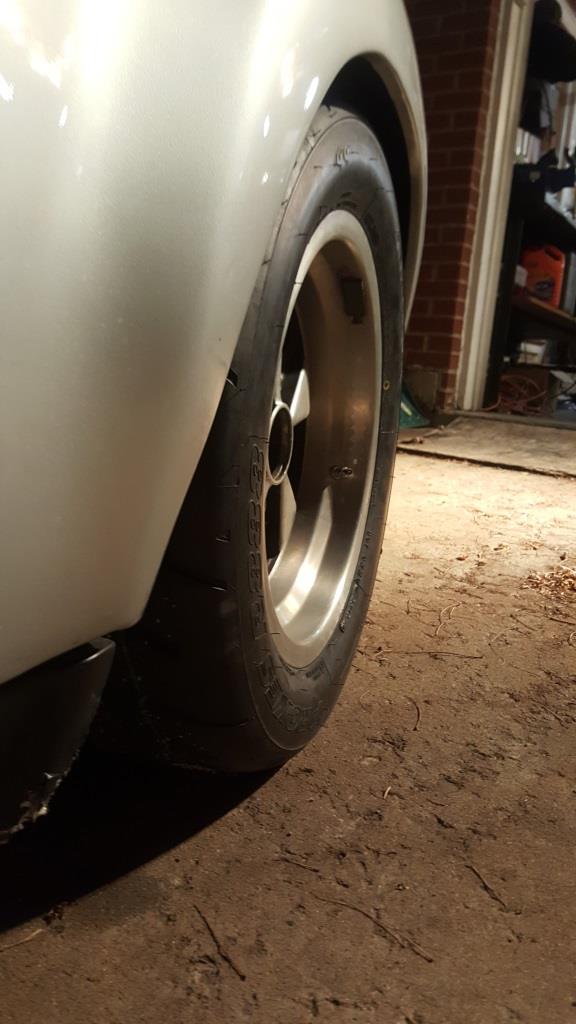
Posted by: rnellums Dec 13 2016, 09:48 PM
I have also decided to convert over to a hydraulic clutch and install a new transmission so I designed some new parts up and had them laser cut. Let me know if anyone wants a set!
Attached image(s)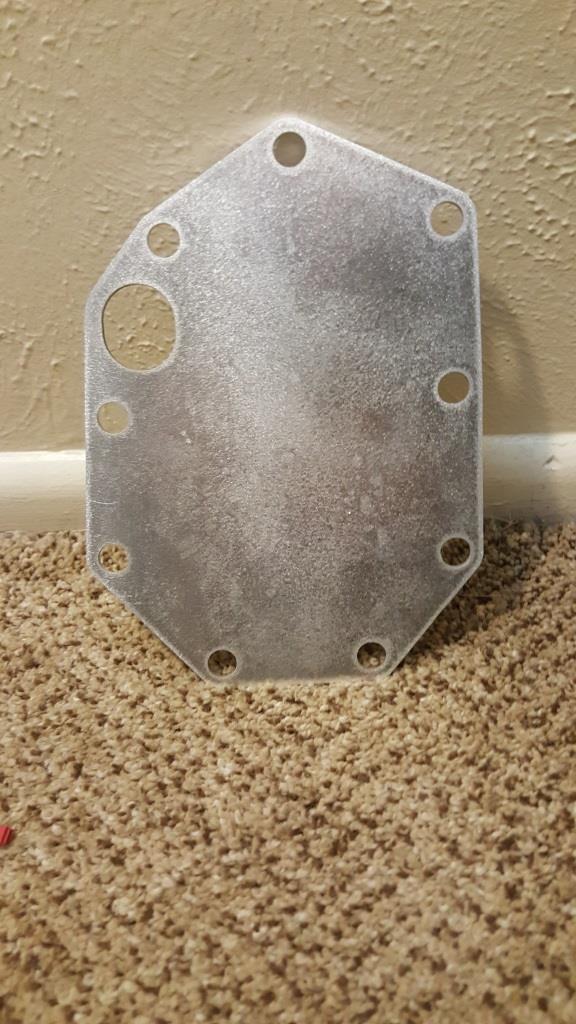
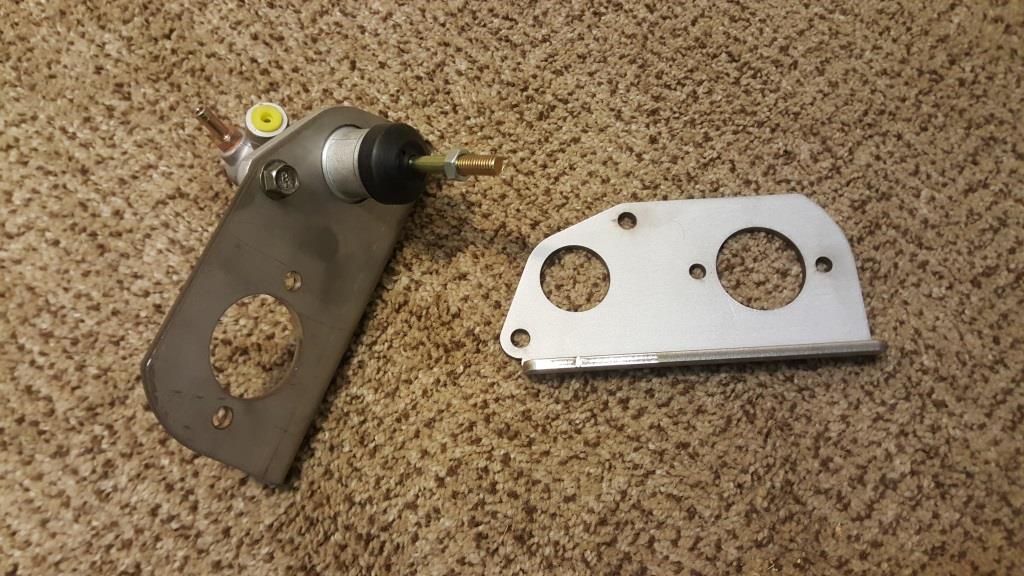
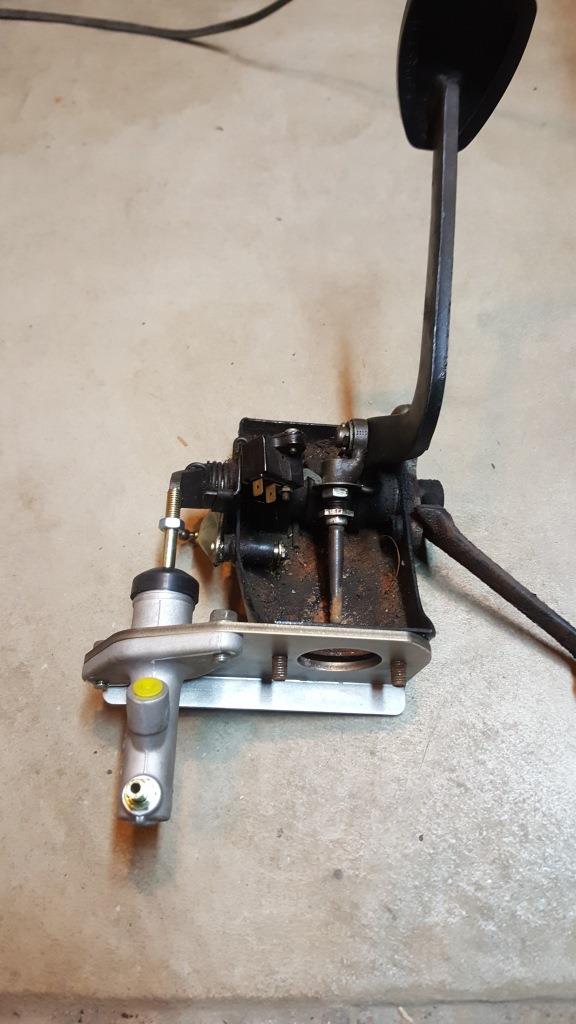
Posted by: mgp4591 Dec 13 2016, 10:59 PM
Some good progress there Ross! What type of air cleaner setup are you planning on using on those stacks or are the stacks staying?
Posted by: Chris H. Dec 13 2016, 11:44 PM
There are several really good ITB threads on Pelican.
http://forums.pelicanparts.com/porsche-911-technical-forum/654029-3-6-itbs-ms3x-into-g50-carrera-story-so-far.html
http://forums.pelicanparts.com/porsche-911-technical-forum/572759-another-itb-megasquirt-edis-setup-experience.html
http://forums.pelicanparts.com/porsche-911-technical-forum/427451-my-pmo-itb-project.html
I'm just about to go Megasquirt 3. Pretty excited about it.
If you have any questions on all the fittings and stuff for the clutch setup just let me know. You'll be very happy with the hydraulic clutch.
Posted by: JRust Dec 14 2016, 12:40 AM
I'll take a transmission rear diff block off plate! Let me know how much & where to pay you
Posted by: matthepcat Dec 14 2016, 12:52 AM
Looking forward to this build.
Posted by: nsyr Dec 14 2016, 09:10 AM
Nice work on the clutch master cylinder setup. I used the same master cylinder on mine.
Posted by: 76-914 Dec 14 2016, 09:25 AM
You'll wonder why you didn't do it in the first place. Nice design.
Posted by: BigFour1973 Dec 14 2016, 10:09 PM
I'd take a clutch slave bracket and center diff plate. Any chance you'd produce the cable mount bracket for the gear select rod
Posted by: 914forme Dec 15 2016, 12:21 PM
Odometer:51018
I finished putting in some aluminum shrouding on my radiator. I had tried previously to seal the radiator on the outlet side, but the shrouding over the intake side has had a huge effect on water temperatures. Coupled with the new Mishimotor radiator (z3 performance model) my fans essentially stay off unless I'm at a light. I have yet to test it under hard load in the mountains though.
So how did it do with a hard load?
Posted by: greggearhead Dec 15 2016, 12:25 PM
In bigger news, I picked up an EZ36 (3.6L Subaru, with more horsepower and torque than my first gen EZ30, plus variable valve timing)!
I also designed and built a set of ITB's based on Triumph speed triple throttle bodies. I'm planing on using Megasquirt to run it.
That things gonna sound wicked-cool.
Posted by: rnellums Dec 15 2016, 04:43 PM
Some good progress there Ross! What type of air cleaner setup are you planning on using on those stacks or are the stacks staying?
I'm planning on running the ITG foam filters, but I may have to fabricate some custom mounts (foam is only 100mm tall and the stacks are 150mm).
There are several really good ITB threads on Pelican.
I'm just about to go Megasquirt 3. Pretty excited about it.
If you have any questions on all the fittings and stuff for the clutch setup just let me know. You'll be very happy with the hydraulic clutch.
I'll have to check out those. I think the hardest thing will be figuring out how to run the cams, since they are truly variable, not just on/off.
I already followed your hydraulic clutch procedures when we put it in my roommate's car. Same engine and he blows me away because his shifts are so much faster and smoother than mine!
I'll take a transmission rear diff block off plate! Let me know how much & where to pay you
You got it!
You'll wonder why you didn't do it in the first place. Nice design. Thanks Kent! I'm looking forward to the improvement in driveability!
I'd take a clutch slave bracket and center diff plate. Any chance you'd produce the cable mount bracket for the gear select rod
My friend Ray is working on a design for the shift cable mounts. I hope to have a prototype in a week or two!
So how did it do with a hard load?
It did great. Only time it got hot was when I was stuck behind slow traffic on steep grades. Temps climbed to 220 on the slow extended climb out of Denver, but never got that hot again.
I will be rerouting my coolant lines (currently inside the longs) to under the car and I'm hoping the reduction in 90° bends will improve flow and reduce temperatures further.
That things gonna sound wicked-cool.
Thanks Greg! Did you end up getting your EZ30 sold? (For anyone reading, I built a harness up for an EZ30 that I sold for Greg's Bus conversion).
Posted by: mgp4591 Dec 15 2016, 05:03 PM
Your rerouting of the coolant lines should help somewhat with temps but have you thought about trying a larger hose size? Some have said that just a small increase makes a large difference and keeping the hoses in the longs keeps them out of harms way. I know a lot of folks run underneath but I've always thought that safer is better. We've got too many speed bumps around here anyway!
Posted by: rnellums Dec 15 2016, 05:50 PM
I'm already running fairly large lines (1.25"). I agree about the exposure of the lines being an issue, I may have a few ideas of how to counter that though.
Posted by: rnellums Dec 15 2016, 08:19 PM
Well, its definitely not as sexy (or as well tuned to the peak torque range) as the 6" stacks, but these are a hell of a lot more practical...
Attached image(s)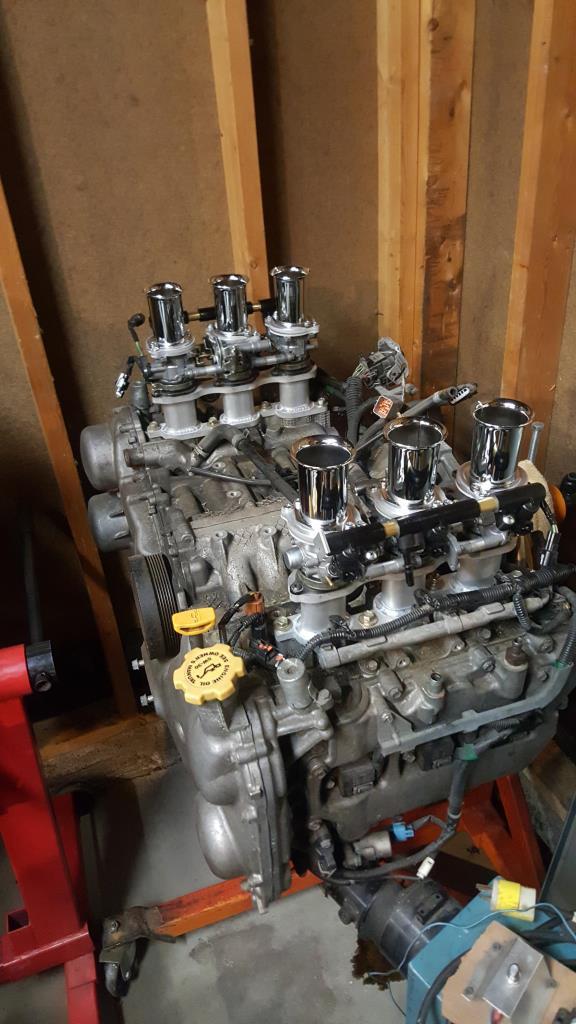
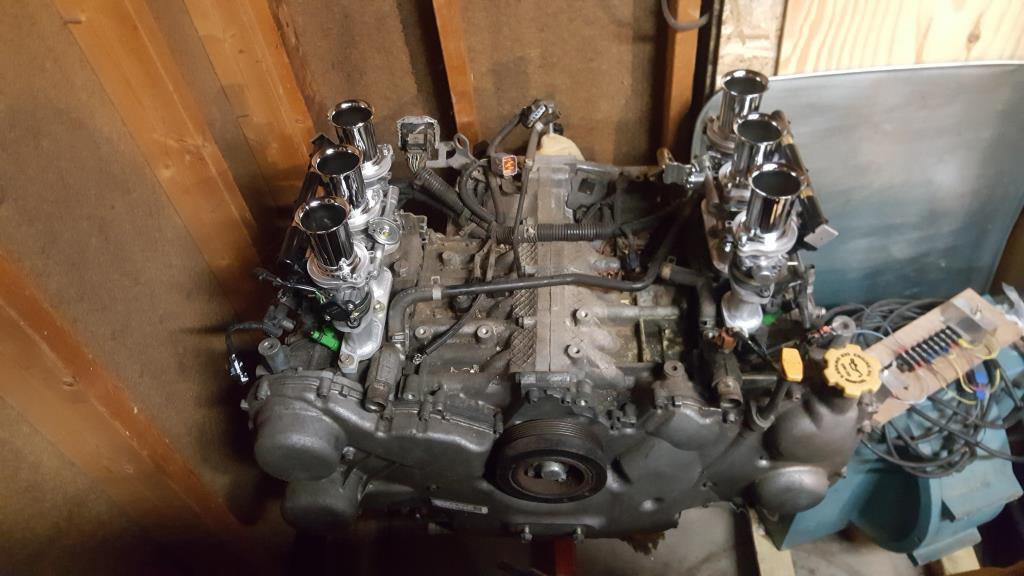
Posted by: Mike Bellis Dec 15 2016, 11:03 PM
I had a flat radiator on my first conversion 914. I loved having a front trunk but it was a PITA on a hot day, driving slow on a dirt road. Fans blew dirt everywhere. Air flowing under the car is not good either. I did have the rad modded to have a vertical filler tube that raised up almost to the hood. This was a great high point filler.
Posted by: rnellums Dec 15 2016, 11:37 PM
I had a flat radiator on my first conversion 914. I loved having a front trunk but it was a PITA on a hot day, driving slow on a dirt road. Fans blew dirt everywhere. Air flowing under the car is not good either. I did have the rad modded to have a vertical filler tube that raised up almost to the hood. This was a great high point filler.
I recall hearing that before! My fan must not be nearly as strong as yours, because I haven't experienced anything too annoying so far. I definitely do notice the hot air billowing up during the summer, but I suspect I'd get that with wheel well vents as well.
I have been worried about too much air under the car as well, bit I wonder if my low front spoiler helps somewhat. I have had it up to 105 at our local track.and it didn't feel too loose at that speed.
Did yours ever feel like it was loosening up?
Posted by: 3d914 Dec 19 2016, 09:07 PM
Ross, that motor looks gorgeous with throttle-bodies. Any idea how it will sound with them?
Posted by: greggearhead Dec 20 2016, 07:32 AM
[quote name='greggearhead' post='2434155' date='Dec 15 2016, 11:25 AM']
That things gonna sound wicked-cool.
[/quote]
Thanks Greg! Did you end up getting your EZ30 sold? (For anyone reading, I built a harness up for an EZ30 that I sold for Greg's Bus conversion).
[/quote]
I did - it's going into a guy's Karmann Ghia!!
I'm getting a flat 6 with a turbo and some old stand alone management, but I think I wanna build a healthy NA version instead. I'll be talking to you sometime soon. I've got an older Megasquirt sitting on the shelf and love those ITBs...
Posted by: rnellums Dec 20 2016, 08:02 AM
I did - it's going into a guy's Karmann Ghia!!
I'm getting a flat 6 with a turbo and some old stand alone management, but I think I wanna build a healthy NA version instead. I'll be talking to you sometime soon. I've got an older Megasquirt sitting on the shelf and love those ITBs...
I may start turning out kits, I mean hell, I already have all the components designed!
Posted by: Chris H. Dec 20 2016, 03:22 PM
No doubt there would be a market for it. Not huge, but for you it would be plenty.
Posted by: mgp4591 Dec 21 2016, 03:37 AM
ITBs on an EG33 would be purty kool.... maybe not super practical but who ever said driving a 914 was a practical endeavor??
Posted by: Chris H. Dec 21 2016, 08:51 AM
I'm starting to REALLY like those. What version of MS do you run them with?
Posted by: rnellums Dec 21 2016, 09:12 AM
Ross, that motor looks gorgeous with throttle-bodies. Any idea how it will sound with them?
No idea on how they will sound yet, but I sure hope it will be suitably raw!
I'm also planning on switching to a lightweight flywheel to help even more with throttle response. My understanding (I believe it was from DBcooper) is that our small cars really don't need all the flywheel mass required by a much heavier Subaru!
I'm starting to REALLY like those. What version of MS do you run them with?
I'm planning on building up an MS3 system, but that is by far going to be the most trouble I'm sure (Particularly running the variable cams).
Eventually I would like to run dual injectors as well (one set of injectors in the head, one set in the throttle bodies), and modulate the duty cyle on each to maximize response at low engine speeds (injectors in head, closer to valves) and maximize power at high engine speeds (injectors in throttle bodies, better fuel mixture before entering cylinder)
I'm buying the system this week, so hopefully I can sink my teeth into learning it as the new year comes!
-Ross
Posted by: mgp4591 Dec 21 2016, 01:25 PM
Do you really need the variable cam setup engaged or will the engine run without it? I know it's a tasty bit of technology but will the electronics adapt to the MS system? It would be easier if it was the Honda type Vtec type where it's pretty much built up oil pressure but I'm sure you've taken all of that into consideration...
This is pretty interesting stuff but I'm happy with more of a stock type because I'm lazy.
Posted by: 914forme Dec 21 2016, 02:52 PM
Another advantage for the short six engines from Subaru the Speed Triple TBs line up better with the intake ports. Looks like they where thinking of doing that al along. on the EG33 your intakes are of an unequal length. Or you have to separate the TBs build new linkage pieces and new fuel rails.
One nice thing with the Speed Triples is each one has a vacuum port so, you can dump them to a manifold, stick a Mig nozzle in the tube going to the MAP and you will have a nice steady signal.
Love the look
Are you planning on using a motorcycle cable splitter or linkage for the throttle cable connections?
Posted by: rnellums Dec 21 2016, 11:11 PM
Another advantage for the short six engines from Subaru the Speed Triple TBs line up better with the intake ports. Looks like they where thinking of doing that al along. on the EG33 your intakes are of an unequal length. Or you have to separate the TBs build new linkage pieces and new fuel rails.
One nice thing with the Speed Triples is each one has a vacuum port so, you can dump them to a manifold, stick a Mig nozzle in the tube going to the MAP and you will have a nice steady signal.
Love the look
Are you planning on using a motorcycle cable splitter or linkage for the throttle cable connections?
I did actually space the throttle bodies (~20mm) and modified the linkage between them so the manifolds are perfectly vertical!
The throttle bodies I have actually have two-way pulleys, so it should be pretty straight forward to have the throttle cable run to one, and have it pull the other pulley!
Posted by: rnellums Dec 21 2016, 11:11 PM
double post
Posted by: mgp4591 Dec 22 2016, 04:11 AM
Another advantage for the short six engines from Subaru the Speed Triple TBs line up better with the intake ports. Looks like they where thinking of doing that al along. on the EG33 your intakes are of an unequal length. Or you have to separate the TBs build new linkage pieces and new fuel rails.
One nice thing with the Speed Triples is each one has a vacuum port so, you can dump them to a manifold, stick a Mig nozzle in the tube going to the MAP and you will have a nice steady signal.
Love the look
Are you planning on using a motorcycle cable splitter or linkage for the throttle cable connections?
It sounds like the two systems were made for each other! Also make the decision to keep the EG33 as a simpler setup which is fine - there's other options for power improvement on that platform. Great build Ross!
Posted by: rnellums Jan 16 2017, 10:21 PM
Well, I put the EZ36 on the back burner for a bit while I made some upgrades to my existing setup. First off was adding in a hydraulic clutch (instead of my cable bell crank method). TO do this I designed a 304 Stainless master bracket that bolts onto the brake pedal supports (credit to Chris and Kent for that idea) I added a flange on the bottom edge to get enough stiffness to eliminate flex without a supplemental bracket.
The remote reservoir is mounted right next to the brake reservoir up top and has a separate fluid feed line.
I drilled a 1.5" hole into the passenger compartment for the master and lined it with a grommet to seal on the master itself. I also had to add a small hole for the hydraulic line to pass through, but overall am really pleased with the result.
Attached image(s)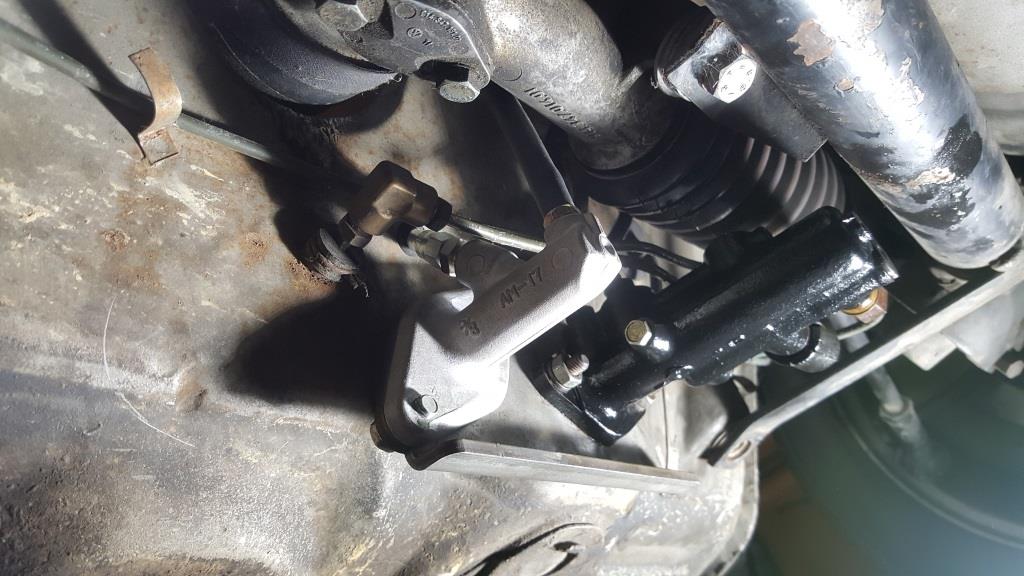

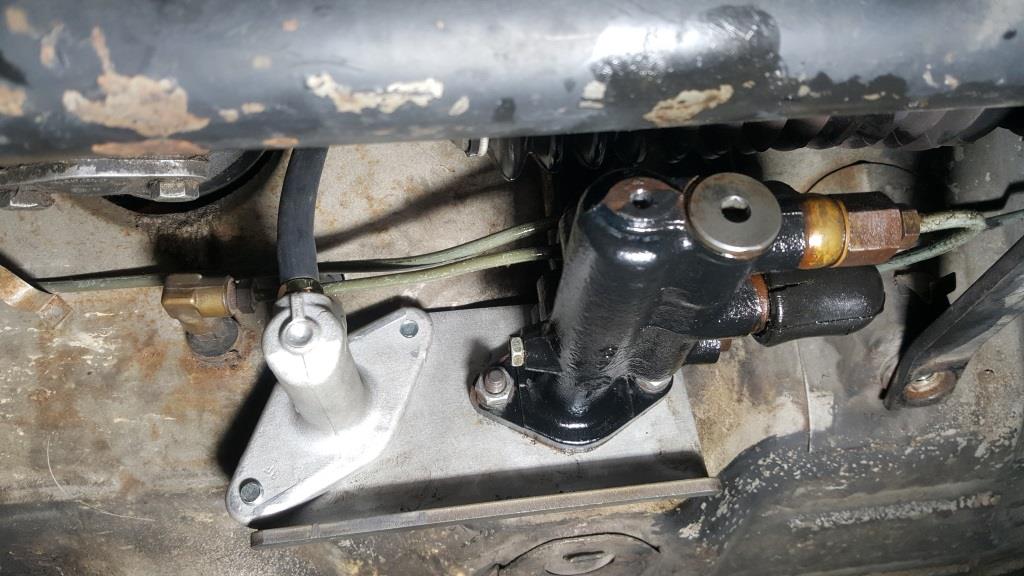
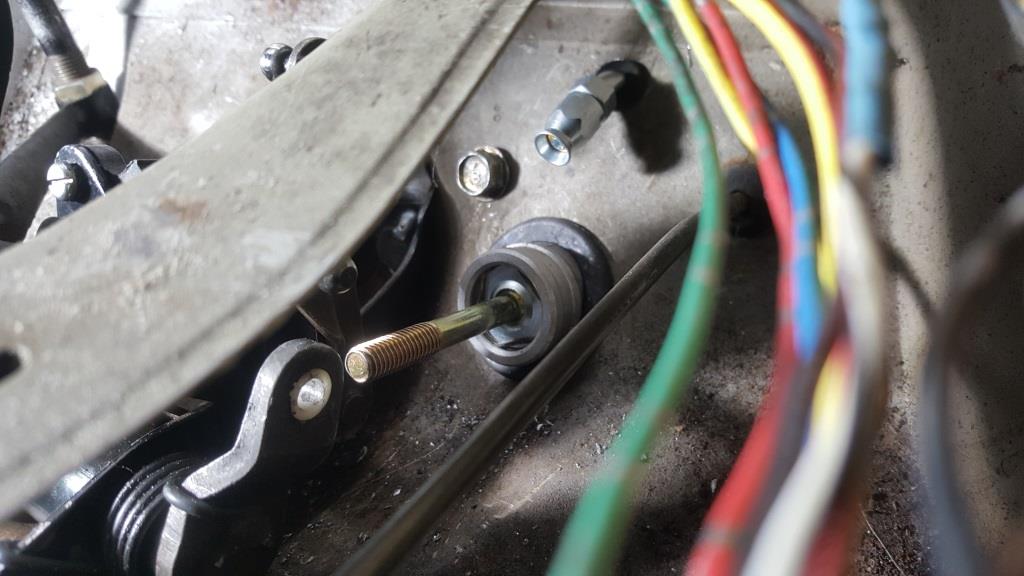
Posted by: rnellums Jan 16 2017, 10:26 PM
I had previously cut a small hole in the trunk firewall to allow clearance for small air filter. I have been trying to figure a way to clean it up since. This weekend I took a stab at making a manifold flip for the EZ30 using 1-R bend 2.5" tube. I wish I had used regular steel vs. Stainless because the welds came out so poorly. I may be making another one of these in the near future. Not sure if it will help or hurt performance, but I can run a proper air filter and can finally close my trunk back off.
Attached image(s)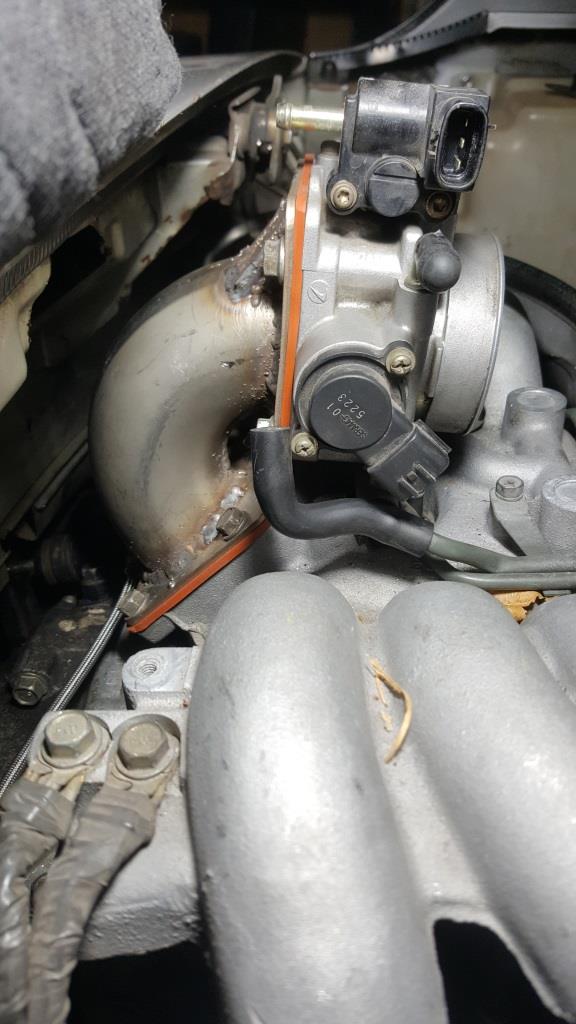
Posted by: greggearhead Jan 17 2017, 08:22 AM
Nice work - love the clutch master.
Posted by: Andyrew Jan 17 2017, 11:56 AM
I had previously cut a small hole in the trunk firewall to allow clearance for small air filter. I have been trying to figure a way to clean it up since. This weekend I took a stab at making a manifold flip for the EZ30 using 1-R bend 2.5" tube. I wish I had used regular steel vs. Stainless because the welds came out so poorly. I may be making another one of these in the near future. Not sure if it will help or hurt performance, but I can run a proper air filter and can finally close my trunk back off.
Did you use stainless wire? You should be able to weld stainless JUST like steel. Fiddle with your settings a little till its right.
Posted by: rnellums Jan 17 2017, 12:06 PM
Did you use stainless wire? You should be able to weld stainless JUST like steel. Fiddle with your settings a little till its right.
Yes on the stainless wire and argon shield gas. Stainless has much lower thermal conductivity, so it heats up locally much faster than carbon steel which is part of the issue. I was in a bit of a hurry though, as my NSX was sitting outside and snow was starting to fly! Probably shouldn't rush things so much next time
 .
.
Posted by: 914pipe Jan 18 2017, 08:12 PM
I was getting tired of how loud my exhaust was so I added in another muffler/crossover tonight. Much better!
Marty at MSDS was kind enough to supply the mandrel bends (super easy to work with, and inexpensive too!) And the center muffler is just a cherry bomb muffler from the FLAPS. I HAVEN'T SEALED it all up yet, but so far it looks promising!
Please post a video of how that sounds, I have been playing with the idea of building an exhaust like that for a few moths!
Please!
Posted by: rnellums Jan 18 2017, 09:38 PM
Please!
Try this on for size:
https://www.youtube.com/watch?v=VhRmOOy6TJ0
Posted by: rnellums Oct 9 2017, 07:52 PM
Not much to update here, mostly just a lot of driving. I decided I wanted something to cover the firewall, so bought a bit of quilted vinyl on Ebay and sewed in some velcro strips to cover the firewall and a home-built console. I also built an adapter to mount up the 5-spd shift knob from a Fiat 124. The perfect size, the right shift pattern, genuinely vintage, and not too expensive!
I also switched over from a in-tank pump to an external pump with top mount swagelock fittings connected to custom bent pickup tubes inside the tanks.
Attached image(s)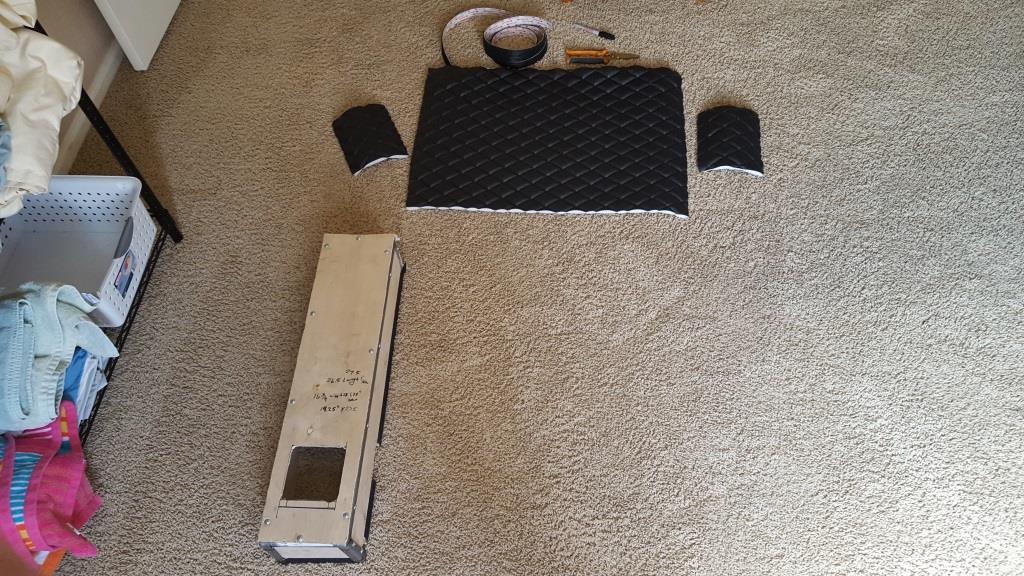
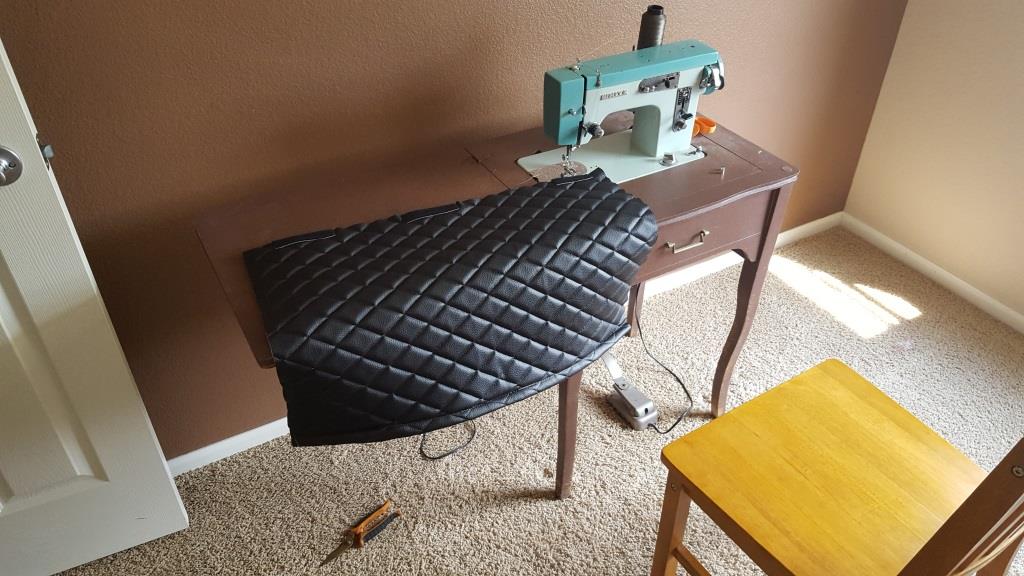
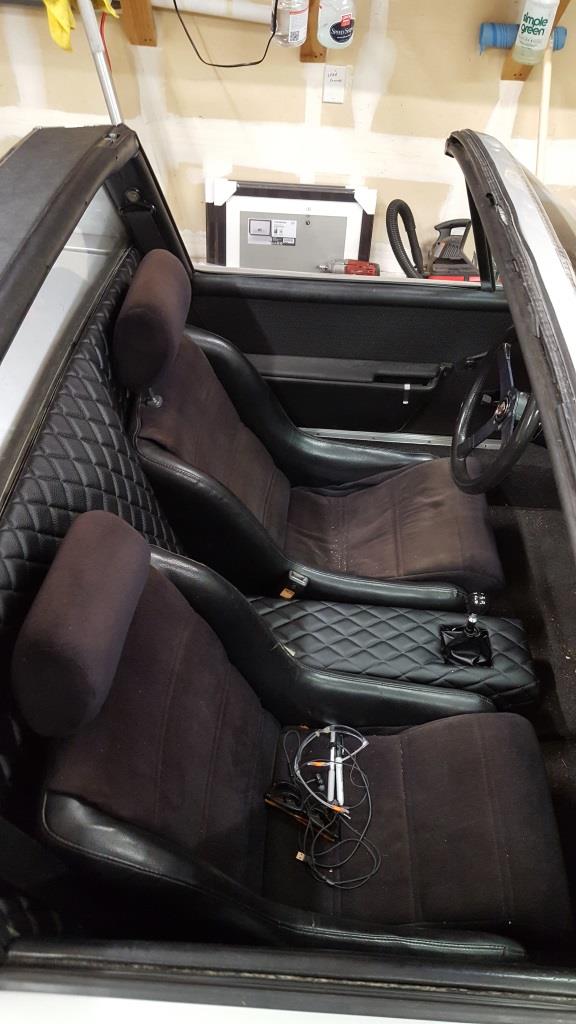
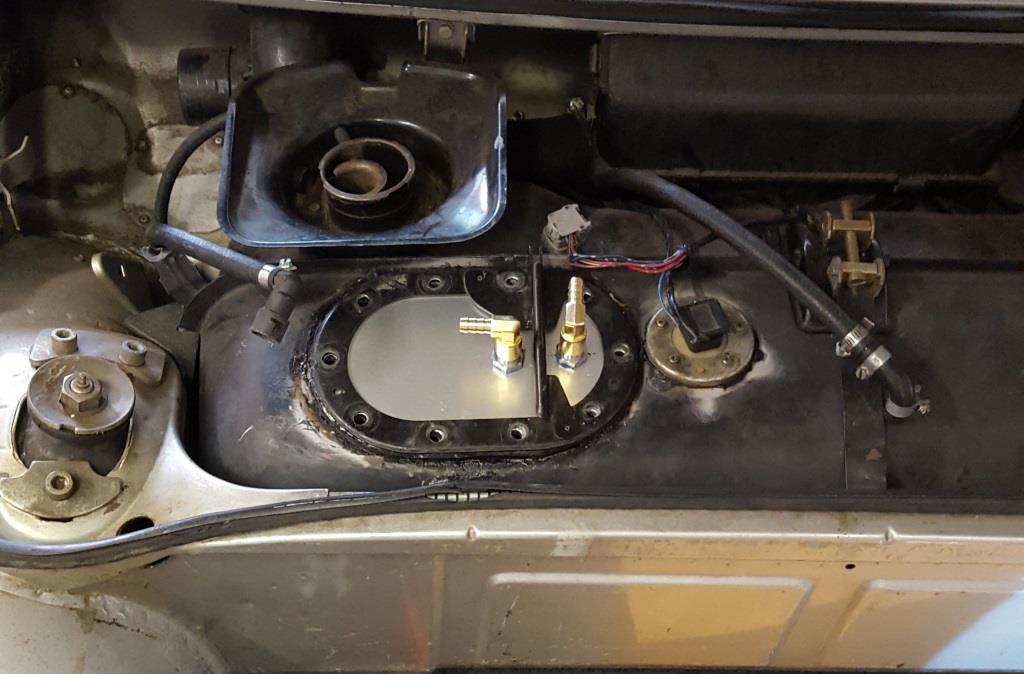
Posted by: 76-914 Oct 10 2017, 08:46 AM
Snazzy! Looks like it came with the car. What prompted your fuel pump change over? I missed the video in the prior post, before . Sounds great.
Posted by: rnellums Oct 10 2017, 12:27 PM
The pump just cut out while driving, and I had to get a tow. The pump was running, but not pumping. The new system should be much more robust and easier to repair if needed.
Posted by: 76-914 Oct 10 2017, 06:07 PM
Makes sense. I changed mine because of my faulty diagnosis. I like your approach to keeping those lines above the tank. It's nice not having to  with kinking a line beneath! You, Ray and myself need to hook up at a RRC one day when it's in UT. I'd love to compare exhaust noises and notes in general.
Posted by: greggearhead Jul 9 2018, 01:55 PM
Ross let me take this on the Silver Summit rally because all my cars weren't running. It's a beast, super fun, and super easy to drive.
My step son fell in love with it so much we are building a similar one very soon.
Thanks Ross.
Are there pics of how you routed your pipes through the longs? Did I miss it?
Powered by Invision Power Board (http://www.invisionboard.com)
© Invision Power Services (http://www.invisionpower.com)