Printable Version of Topic
Click here to view this topic in its original format
914World.com _ 914World Garage _ Zach's Carbs to Microsquirt conversion thread
Posted by: Vacca Rabite Oct 11 2011, 06:44 PM
I am retrofitting this thread to be my full on conversion thread, documenting my change from dual 40 Webers to MSII fuel injection.
Here is what I have so far, and what I need:
HAVE:
- MSIIv3.52 pre-built box.
- JimStim board for testing the MSII box
- V3 main Board wire harness.
Will soon have:
Injection system off a 1.8 914, from which I will use - Throttle body
- Intake Runners
- Fuel Injectors (unless I find they don't flow enough fuel)
- Fuel Rail
- Fuel Pump (maybe - Joe may still need it for himself)
Stuff I need: - TPS or MAF sensor
- 4 wire O2 sensor
- Bung welded into exhaust
- Fuel Pump (Maybe, see above)
- Other stuff I don't know about yet
Built on 1.7 heads.
Jake's 9530 cam (carb cam similar to Web 494)
Mallory optical ignition
ACCEL (UltraCoil) coil.
SSI exchangers for exhaust.
My goals for this project are to have near stock intake noise volume, better cold starting - especially in cooler weather, negate the bad effects or Ethanol on carbs, teach myself something about fuel injection.
Since I already have a pretty good ignition system, I am not going to go after crank fired ignition at this time, but I am not ruling that out for the future.
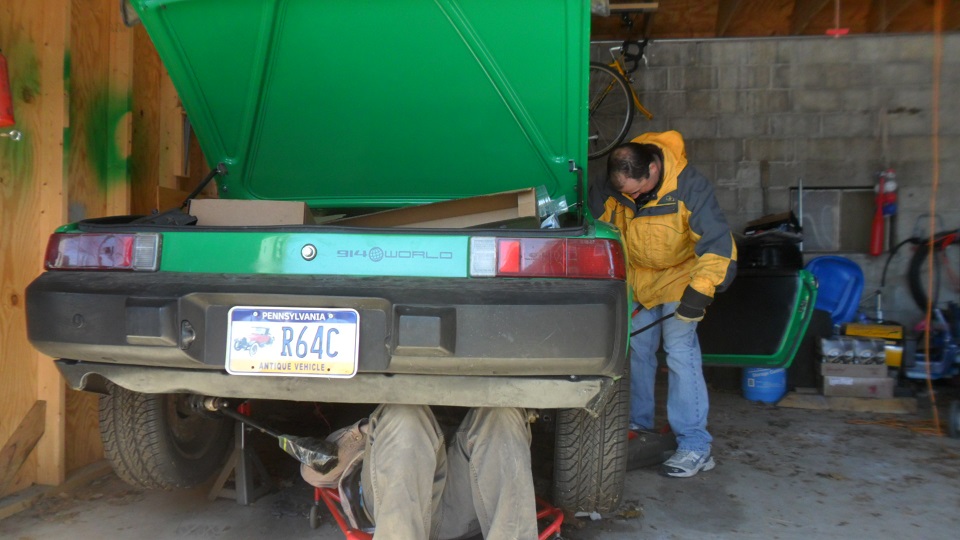
Before I begin the conversion, I am going to pull the engine and do a little refreshing and cleaning, including:
- Fixing an oil leak at the front of the engine
- cleaning under all tins (not that I exect to find much, but its a good thing to do)
- Fix some cooling tins issues that I have been living with for the past 2 years
- Open up holes in the tins I welded shut so I can replace heater tubing and heat my cabin!
- Check for battery acid leaks or rust appearance in the engine bay. Neutralize.
My goal is to use as much stock EQ as I can, but replace the sensors and such with modern, easy and cheaper to find stuff. Plus, since my car has a cam, the stock FI will not work.
My engine has 1.7 4 bolt heads.
1) are the 1.7 and 1.8 intake runners the same?
2) Is the intake runner inside diameter smaller then the 2.0 intake runner ID?
3) is the throttle body for the 1.8 smaller then the throttle body for the 2.0?
If the 1.8 TB is smaller then the 2.0, can the 2.0 TB be swapped in?
Are 1.8 injectors high or low impedance?
I am asking this as I will be able to get Joe's discarded 1.8 bits when he pulls his engine and starts going down the 2056 route.
Zach
Posted by: underthetire Oct 11 2011, 07:59 PM
1.7 and 1.8 runners are not the same, 1.8 is slightly bigger, but won't match up to the 1.7 plenum. I have no 2.0 stuff to compare. The 1.8 runners will bolt up to your heads, that much I know. I always thought the 1.8 injectors were high, but several here have actually measured them, and found them low just like the rest.
Posted by: Krieger Oct 11 2011, 08:13 PM
I pretty sure the stock throttle body bore for a 2.0 is 45mm.
Posted by: McMark Oct 11 2011, 09:48 PM
Yup, none of the intake runners are the same or interchangeable with other plenums, although I have cut and reoriented intake runners. Specifically getting a set of 1.8 runners to match a 2.0 plenum.
All 914 injectors are low impedance. L-Jet uses a resistor pack to 'emulate' high impedance injectors. If you want to use stock injectors with MegaSquirt, you can get one of those resistor packs to do the same.
The 2.0 throttle body has a flat bottom, and the 1.7, 1.8 have taper/cone bottoms. You could look into the size of the bus 2.0 TB.
Posted by: Valy Oct 11 2011, 11:20 PM
Since you want to use newer parts, L-Jet (1.8) is the way to go.
The air plumbing is not interchangeable. The J-tubes for 1.8 and 2.0 are the same diameter but different length. 1.7 are a bit smaller.
There are many cars fitted with L-Jet so you can rip parts from them.
Ont thing you should pay attention to is the Air flow sensor. Older L-jet (like the 914) have a potentiometer that has a linear relation to the air volume. Newer ones are not linear (to save manufacturing cost) ant the ECU compensates for linearity.
Posted by: Vacca Rabite Oct 12 2011, 06:21 AM
If the 1.8 and 2.0 intake runners are the same ID, are the throttle bodies also the same ID? Will I be starving my 2056 using the 1.8 throttle body?
Zach
Posted by: 7275914911 Oct 12 2011, 06:30 AM
In the research I did it looked like the Bus plenum/TB worked/flowed better in a 2056 setup w/L-jet. IIRC that comes from discussions on Jakes site and Shoptalkforum...
Posted by: FourBlades Oct 12 2011, 06:30 AM
If you are going to megasquirt, is there a plenum and set of sensors from a
common, modern car with a MAF, like a newer VW that would work?
Not using ITBs would allow you to use a lot of stuff from a more recent car.
John
Posted by: r_towle Oct 12 2011, 06:54 AM

If the 1.8 and 2.0 intake runners are the same ID, are the throttle bodies also the same ID? Will I be starving my 2056 using the 1.8 throttle body?
Zach
the ljet system can run a 2.4 liter motor.
You obviously will need to tune the A/F map that you use, but the throttle body should work.
You will need a different throttle position sensor for the aftermarket EFI...the ljet one is an on/off switch for Idel and WOT only...
I believe the Ford focus or fiesta one fits and works, and it has the additional curcuits for you.
Rich
Posted by: edwin Oct 12 2011, 06:57 AM
what carbs do you have now? why not use them and weld in injector bungs to the manifolds?
Posted by: Vacca Rabite Oct 12 2011, 07:02 AM
My primary goal is to kill the roar of running dual carbs. Get to a point where I don't need earplugs to go on a longer drive.
All the other benefits of EFI come second to this sime creature comfort. Otherwise I'd just keep the carbs.
Zach
Posted by: scotty b Oct 12 2011, 07:06 AM
How about getting a TPI setup from a Chevy V8 and cutting it down to 4 cylinders 

Posted by: Vacca Rabite Oct 12 2011, 08:12 AM
How about getting a TPI setup from a Chevy V8 and cutting it down to 4 cylinders
What's this? The pot calling the kettle black?

Zach
Posted by: r_towle Oct 12 2011, 02:41 PM
My primary goal is to kill the roar of running dual carbs. Get to a point where I don't need earplugs to go on a longer drive.
All the other benefits of EFI come second to this sime creature comfort. Otherwise I'd just keep the carbs.
Zach
On the cheap....
look at this setup.
then think about doing it with two turbo covers and a type1 aircleaner box...
The filter is easy to get over time.
The covers can be had at CB performance
Hoses can get gotten lots of places.
You would have a nice quiet setup for short money.
http://www.csp-shop.com/cgi-bin/cshop2/front/shop_main.cgi?func=det&wkid=827290089848&rub1=Engine&rub2=Fuel%20System%2CAir%20Cleaner%2CAir%20Box%20Systems&artnr=19931b&pn=0&sort=0&all=
Rich
Posted by: Dave_Darling Oct 12 2011, 03:09 PM
You can probably build an air-box for a lot less than that. Heck, just build it around your current air cleaners! Dyna-mat it (and make a long-ish intake snorkel pointing somewhere back away from you) and it should absorb a lot of the sound.
--DD
Posted by: FourBlades Oct 12 2011, 03:31 PM
I finished building this same thing recently in the quest for quiet plus better low
end response. I need to post some pictures...
I tried it with and without dynamat on the runners and stuff and found it made
little difference.
I welded up the carb tops and made a dual 3 inch / one 4 inch center plenum then
added a $25 cone air filter. Think I spent $60 total on it.
It feels a lot quieter but my sound meter does not show much improvement DB wise.
I'll post pictures when I get home.
John
Posted by: Vacca Rabite Oct 12 2011, 04:48 PM
There are a lot of other advantages of EFI, especially for cars that sit for long periods of time like mine. Both my 914 and the v8 in my jeep are going EFI though it would probably be easier just to do the carb.
Zach
Posted by: jsayre914 Oct 12 2011, 04:52 PM
cant you just redrill the intake flanges and bolt the whole shabang on there? Sound like it can handle your engine with a bit of adjustment.

Posted by: dlee6204 Oct 12 2011, 04:53 PM
end response. I need to post some pictures...
I tried it with and without dynamat on the runners and stuff and found it made
little difference.
I welded up the carb tops and made a dual 3 inch / one 4 inch center plenum then
added a $25 cone air filter. Think I spent $60 total on it.
It feels a lot quieter but my sound meter does not show much improvement DB wise.
I'll post pictures when I get home.
John
![popcorn[1].gif](style_emoticons/default/popcorn[1].gif) Please do!
Please do! Posted by: 76-914 Oct 12 2011, 05:24 PM
Hey Zack, Will you be our "FI Poster Boy" when the next great "Carbs vs. FI" debate comes around, again? 
Posted by: TargaToy Oct 12 2011, 06:04 PM
Zach, I'm glad you're asking this stuff. I drive the 1.7 but have a 1.8 waiting in the wings for a 2056 build up. Was wondering the same thing about the 1.8 runners being larger. They "seem" larger but when I threw my caliper on them, I got mixed measurements (mostly because I can only get on the bends on the runners in the car).
Still batting around L-Jet vs MS so research and learn away while I piggy-back on your findings!!!
Posted by: FourBlades Oct 12 2011, 06:05 PM
I apologize if this is a hijack. I would like EFI for a lot of reasons as well but I
thought I would see in a quick and dirty way how much the carbs could be
quieted down. 
The carb tops and plenum are just welded up exhaust pipe and 20 gauge sheet
metal. I put eastwoodmat around the carb tops. The tubing, couplers, and cone
filter are cheap FLAPS parts.
I need to do some more tests but my initial results are 88 db with itgs at 900 rpm
and 82 db at 760 rpm with my cheesy intake system. I was getting 104 db at
2600 rpm with itgs and never took a good reading with the new system at that
rpm. I'll get on that.
Now I can hear the exhaust a little but also a lot of general air cooled noise that
is not intake related.
This seems to help low end throttle response but obviously would be restrictive
past a certain rpm.
John
Posted by: Vacca Rabite Oct 12 2011, 06:12 PM
cant you just redrill the intake flanges and bolt the whole shabang on there? Sound like it can handle your engine with a bit of adjustment.
The 1.8 stuff should bolt right up to my car. No redrilling needed. I'll be able to many of the stock parts but want to use a MS brain - as much to learn it as anything else. The bolt pattern for the intake runners at the head is the same for 1.7 and 1.8.
Since the TB and runners are the same as the 2.0 units, there will need to be no cobbling together.
I apologize if this is a hijack. I would like EFI for a lot of reasons as well but I
thought I would see in a quick and dirty way how much the carbs could be
quieted down.
Hey there my thread pirate. You should start a thread on this info.Lots of folks would probably be interested.
Zach
Posted by: underthetire Oct 12 2011, 07:05 PM
Zach, if you get the v3 board on the megasquirt, it will run low impedance injectors. Diy auto tune is where I got my ms2 with the v3 board. At that time it was 249.00 for the diy kit. Takes about a full day to solder together, but was fun and pretty easy.
Posted by: Dave_Darling Oct 12 2011, 07:06 PM
The 1.8 uses the same manifold boots as the 2.0 does. (Those are the short and fat hoses from the intake runner pipes to the plenum.) The 1.7 uses different ones that have a smaller ID. So the inboard ends, at least, of the 1.8 pipes are larger than those of the 1.7 pipes.
--DD
Posted by: Vacca Rabite Oct 12 2011, 08:14 PM
I already have an MSII v3.52 "factory" built box from DIY, a JimStim board for testing, and the V3 main board wire harness. I picked this stuff up from Jake over the summer from his personal stash, since he ddcided not to build a test mule with it.
Zach
Posted by: Vacca Rabite Oct 12 2011, 08:35 PM
I am retrofitting this thread to be my full on conversion thread, documenting my change from dual 40 Webers to MSII fuel injection.
Here is what I have so far, and what I need:
HAVE:
- MSIIv3.52 pre-built box.
- JimStim board for testing the MSII box
- V3 main Board wire harness.
Will soon have:
Injection system off a 1.8 914, from which I will use - Throttle body
- Intake Runners
- Fuel Injectors (unless I find they don't flow enough fuel)
- Fuel Rail
- Fuel Pump (maybe - Joe may still need it for himself)
Stuff I need: - TPS or MAF or MAP sensor
- 4 wire O2 sensor
- Bung welded into exhaust
- Fuel Pump (Maybe, see above)
- Other stuff I don't know about yet
Built on 1.7 heads.
Jake's 9530 cam (carb cam similar to Web 494)
Mallory optical ignition
ACCEL (UltraCoil) coil.
SSI exchangers for exhaust.
My goals for this project are to have near stock intake noise volume, better cold starting - especially in cooler weather, negate the bad effects or Ethanol on carbs, teach myself something about fuel injection.
Since I already have a pretty good ignition system, I am not going to go after crank fired ignition at this time, but I am not ruling that out for the future.
Posted by: Dr Evil Oct 12 2011, 08:43 PM
Posted by: moparrob Oct 12 2011, 09:17 PM
I've got a nice fuel pump you can have if you decide you need it. It came with my car which the previous owner had converted to ITB fuel injection. However, when I bought the car it had no engine, so I built a six with Webers. I'm using a Holley low pressure pump.
The extra pump is a Bosch 0 580 254 979 which is rated at 165 liters/hour and maintains pressure at 5 bars (72 psi). It came stock on 78-79 930's and 79-82 924 Turbos. The pump was probably used for about 500 to 1000 miles of driving.
Anyhow, the pump looks like this:
This is a stock image, though. Mine has -AN fittings on the intake and exhaust ports, plus a mounting bracket.
They cost quite a bit new but I really don't need it and I have noticed you contribute quite a bit to this site's content. So if you want it just pay for postage (probably $10.) and it is yours.
Let me know.
Rob
Posted by: Vacca Rabite Oct 12 2011, 09:20 PM
Rob, consider me letting you know I want it. PM me details.
Zach
Posted by: moparrob Oct 12 2011, 09:44 PM
you've got mail....
Posted by: jcd914 Oct 12 2011, 11:03 PM
The extra pump is a Bosch 0 580 254 979 which is rated at 165 liters/hour and maintains pressure at 5 bars (72 psi). It came stock on 78-79 930's and 79-82 924 Turbos. The pump was probably used for about 500 to 1000 miles of driving.
That is CIS pump and will overwhelm a 914 fuel pressure regulator and probably most any EFI fuel pressure regulator.
I used a similar (or maybe the same) pump on a MoTec install on a 3.4L 911 turbo engine using 3.2 Carrera fuel rails and pressure regulator. It was too much fuel at idle and had to have an additional regulator added to keep pressure down at idle.
Under load it was OK since the engine used a lot of fuel but at idle pressure would build up.
Jim
Posted by: a914622 Oct 12 2011, 11:32 PM
I know a guy that pulls the stuff needed to make the maga squirt dyi and sells them on ebay. He pulls everything off the fords. The ztec engine has the right timing wheel and pickup, coil packs, tps, and a funky sensor that tells the amount of eythanl in the gas.
The fuel pump out of the volvo turbos have a great fuel pump and filter setup.
As far as a real quiet intake, The filter box out of a dodge caravan (90s) works great. The same noise problem in the subaru/vanagon setup. I turned the bottom housing around and ran a hose out the intake side to get the sucking sound farther out. You could almost run it all the way back to the lights?
jcl
Posted by: Valy Oct 13 2011, 10:33 AM
The extra pump is a Bosch 0 580 254 979 which is rated at 165 liters/hour and maintains pressure at 5 bars (72 psi). It came stock on 78-79 930's and 79-82 924 Turbos. The pump was probably used for about 500 to 1000 miles of driving.
That is CIS pump and will overwhelm a 914 fuel pressure regulator and probably most any EFI fuel pressure regulator.
I used a similar (or maybe the same) pump on a MoTec install on a 3.4L 911 turbo engine using 3.2 Carrera fuel rails and pressure regulator. It was too much fuel at idle and had to have an additional regulator added to keep pressure down at idle.
Under load it was OK since the engine used a lot of fuel but at idle pressure would build up.
Jim

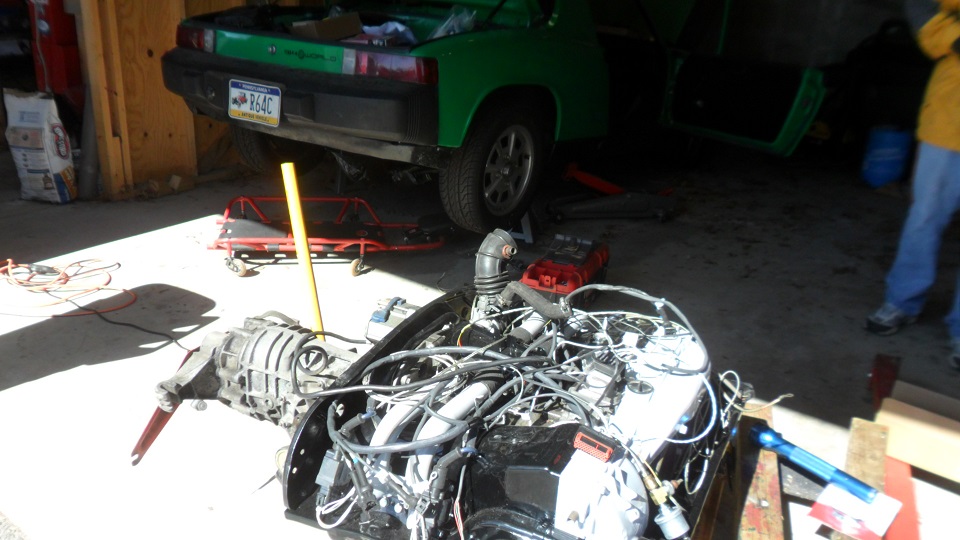
Posted by: Vacca Rabite Nov 5 2011, 08:22 PM
Just finished pulling the engine. We are officially under way. Carbs are up in storage as is the Tangerine cable sync. For sale by the way. Need money for EFI bits.
Joe, your 1.8 out yet? I need to scavenge!
Posted by: jsayre914 Nov 6 2011, 05:46 PM
Joe, your 1.8 out yet? I need to scavenge!
Not yet. With the wife not feeling good, sick dog, busy at work, kids karate, and football....
I would love to find the time

Come get what you need. All Fuel Injection is accessable with the engine in the car. I am home Tuesday as usual.
p.s. I do have another fuel pump. Both are tested and working great.

Posted by: aircooledtechguy Nov 7 2011, 10:08 AM
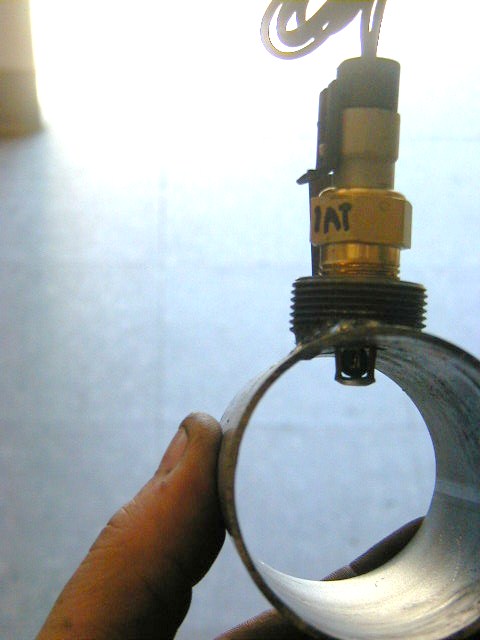
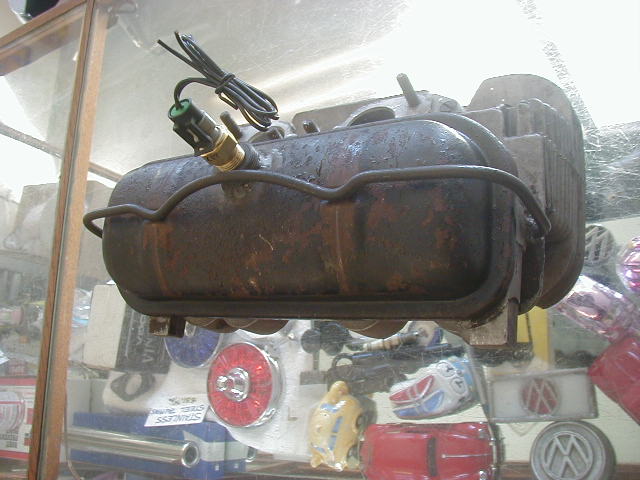
I just finished a similar conversion for my '67 Squareback. I transplanted a '73 914 2.0L and converted it to MS2 V3 w/ EDIS using the stock 2.0L runners and a 1.8L plenum (clocked about 3/4" on the fwd mounting only so the runners would line-up) and a slightly modified 2.0L TB. I get my CLT temp from the LH valve cover. I switched to a Walbro pump. The injectors are yellow-top Type-3 D-jet injectors which flow almost as much as the stock green-top 2.0L type. I have had no fuel starvation with these
I've been meaning to pull it all apart to get it all powder coated, but I just enjoy driving it too much. . . It drives like a scalded cat!! When I get the car painted I'm going to have the pin-stripper badge it "SB Type-P SS" ("Squareback, Type-Porsche Super Sleeper").
Mine has EDIS, but if you want the MSQ-file, shoot me your e-mail address and I'll send it to you. It'll get you in the ball-park for your motor and have a good starting point anyway.
Posted by: charliew Nov 7 2011, 11:05 AM
I'm just reading along and hopefully learning if only I can remember. I'm curious how a fuel pump can overwelm a pressure regulator if the return line is big enough. My son runs a BIG pump on his sti and still uses the stock lines. Oh yeah I forgot his pump is modulated.
Posted by: Brodie Nov 7 2011, 01:14 PM
Zach, There are some calculations to determining throttle body size.
cfm = (Max RPM x Volumetric Efficiency x Cubic inches) / 3456
or
max area of opening = (cfm x 2.4) / 300 feet per second
Use 85% for an average guess on volumetric efficiency. If you have information on what the actual volumetric efficiency is use it, but I'm not sure how to get it.
I would say that you need to calculate the area of the ID of all of the runners and make sure that they are at least as much as the throttle bottle. I would think that even a bit larger would be better. You want to flow as much air through the runners as the throttle body.
Don't oversize the throttle body by too much because at fully throttle it's fine, but at idle you bump the throttle just a little bit and a large amount of air rushes in. I would think that would cause some grief.
I haven't done this for myself yet because I have to get my car built from scratch, but when I do, these calculations will come in handy. (I think!)
I don't know if this will help you any but through my research I found a few tidbits here and there, and wanted to pass them along.
Good luck!
Posted by: Vacca Rabite Aug 17 2012, 08:36 PM
Okay, I've not updated this thread since November.
Could be I am maybe a bit embarrassed by my lack of getting-shit-doneness?
So there has been a bit of a change of plans.
I am going to be running McMark's Microsquirt setup.
I fought with myself for nearly 6 months before admitting that having a setup that took the engineering out of this would be a much better way to go right now. Mark's system gets me crankfire ignition, coil on plug, a weather sealed MS box that can live in the engine bay, a pre-built wire harness, and a huge bit of cussing and experimenting taken out of the picture.
The MSIIv3 box I have will go on the Jeep. Or I'll sell it. Dunno yet.
I just put my Mallory Unilite system up for sale in the classified section. NO BACKSLIDING!
Years ago I ran one of Chris's stainless fuel lines through the tunnel. For years I considered selling the return line. Almost gave it away twice. Glad I didn't. I was not looking forward to running it in, but tonight I did just that. While I had the tank out, I also pulled all the carb related fuel stuff out.
One kinda scary thing... The fuel filter I put in ~2008 was clearly not intended for ethanol. It looked like this when I pulled it out.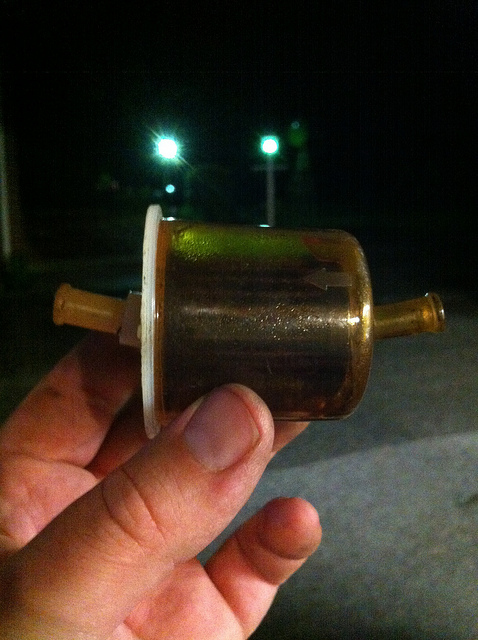
The inlet and outlet were both deformed and degraded from the fuel. If you are using this type of filter - CHECK IT!
Also, there was a LOT more rust in the tank then there was in 2008 when the tank went back in the car. Not nearly enough to be worried about, but enough that I was really surprised when I put a flashlight in and looked around. Stupid alcohol.
Zach
Posted by: JamesM Aug 17 2012, 09:36 PM
025 133 067a 
if you can find one
Posted by: Vacca Rabite Oct 18 2012, 07:25 AM
A quick update.
Yesterday I picked up a used, but in excellent shape, Triad muffler from one of our local members.
I have made 2/3rds of the payment to McMark for his excellent Microsquirt driven EFI and electronic spark. Will be paid off by the end of the month.
I stopped by my machinist today and he promised my heads would be done next week. Of course, its easy to say "next week."
I gave my engine tin to Joe to take to his powder coater in Baltimore. They did a great job on his stuff.
This is really starting to move together. I'm getting excited.
Posted by: McMark Oct 18 2012, 08:18 AM

Posted by: ConeDodger Oct 18 2012, 10:21 AM
You'll like it! Mark really has something in that package. I would consider it over carbs on a relatively stock car anyday.
Posted by: Dr Evil Oct 18 2012, 03:13 PM
Just in time to store it for winter!
Posted by: Vacca Rabite Oct 18 2012, 04:25 PM
If it runs in the winter that means it is likely to run in April. And that is what I really care about.
Zach
Posted by: hot_shoe914 Oct 18 2012, 08:09 PM
So, do you still want the loaner motor?  If not, I have a guy who wants to use it to build a megasquirt system. Still yours to use if you want it though.
Posted by: Vacca Rabite Oct 18 2012, 09:17 PM
If I have the loaner motor, I won't need it.
If I dont have it, my car won't be driving at Hershey.
Kinda like taking an umbrella on a cloudy day to ensure it does not rain.
At this point, if there is someone that needs the motor, I can't justify having it on hand for insurance. Especially if you are going to ship it cause you are not coming this weekend.
Posted by: hot_shoe914 Oct 19 2012, 07:10 AM
If I have the loaner motor, I won't need it.
If I dont have it, my car won't be driving at Hershey.
Kinda like taking an umbrella on a cloudy day to ensure it does not rain.
At this point, if there is someone that needs the motor, I can't justify having it on hand for insurance. Especially if you are going to ship it cause you are not coming this weekend.
Well, I will keep it on hand for you until you know for sure. They are in no hurry for it as they are Volvo guys. He was just going to design a ms system for us d-jet guys as a favor to me. I have it on hand in my storage unti on an engine stand in plug n play condition. Something happens and you need it, I will strap it to a pallet and send it right away.
Posted by: Vacca Rabite Oct 22 2012, 03:33 PM
Last week I picked up a triad muffler from Bill in Mt Airy.
Over the weekend I blasted it clear of old paint and what little rust it had. I also got a free, used O2 bung from a fellow teener this weekend at ECC.
Today I cut in the opening for the O2 sensor. I cleaned up the used bung and welded it into pace. I could not find a 18mm fine bolt, so I tried to be very careful not to warp the bung while welding it into place.
Then I put the first coating of grill paint on it.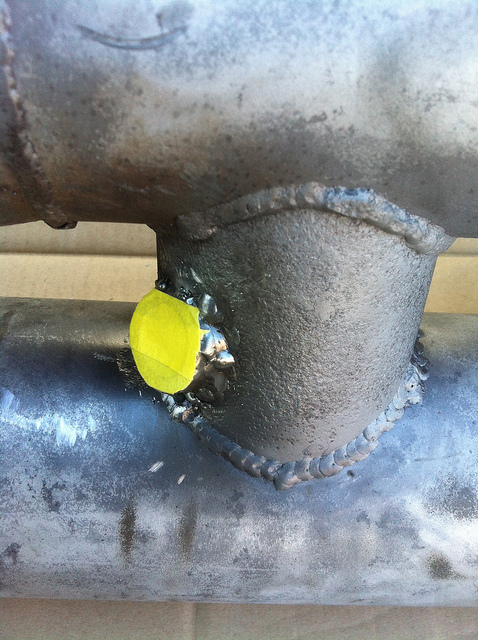
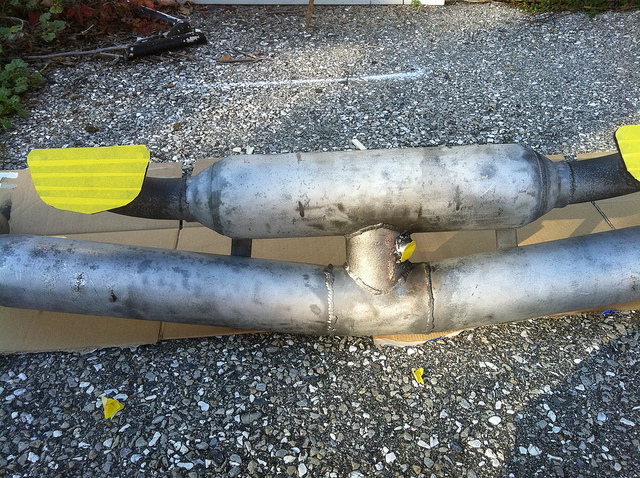
I actually made real progress today!!!
The second and third coats of paint will come ay a later date. The first was put on quickly today to keep it from rusting up since I had blasted the metal bare yesterday.
Zach
Posted by: wndsrfr Oct 22 2012, 06:00 PM
Geez, you're working fast Zach....good to see that bung is working out--it's pretty meaty & shouldn't have warped much if any. Which wideband are you going to be using?
Posted by: Vacca Rabite Oct 22 2012, 06:05 PM
Yeah man, it worked great.
It took very little time to clean it up and get it all round again. Made for easy welding.
I got to work today way early (easy as I was working from home today) and was done by one. Had to be ready to help my wife out this afternoon. I figured I would get as much done on it until she got home. As it was, I had three solid hours to work, and I was just finishing the first coat of paint when she drove up.
Zach
Posted by: McMark Oct 22 2012, 10:28 PM
You didn't warp it.
Posted by: ConeDodger Oct 22 2012, 10:52 PM
You didn't warp it.
Wow! You weld like I do Zach. My brother (aerospace welder) says "it looks like a chicken flew over and shit those welds" when I tried welding. I showed him though... After that comment, he had to do all my welding!

Posted by: Vacca Rabite Oct 23 2012, 04:12 AM
My welds are not pretty. But they hold just fine.
I don't do it enough to get pretty.
Posted by: ConeDodger Oct 23 2012, 08:47 AM
My welds are not pretty. But they hold just fine.
I don't do it enough to get pretty.
Me too...
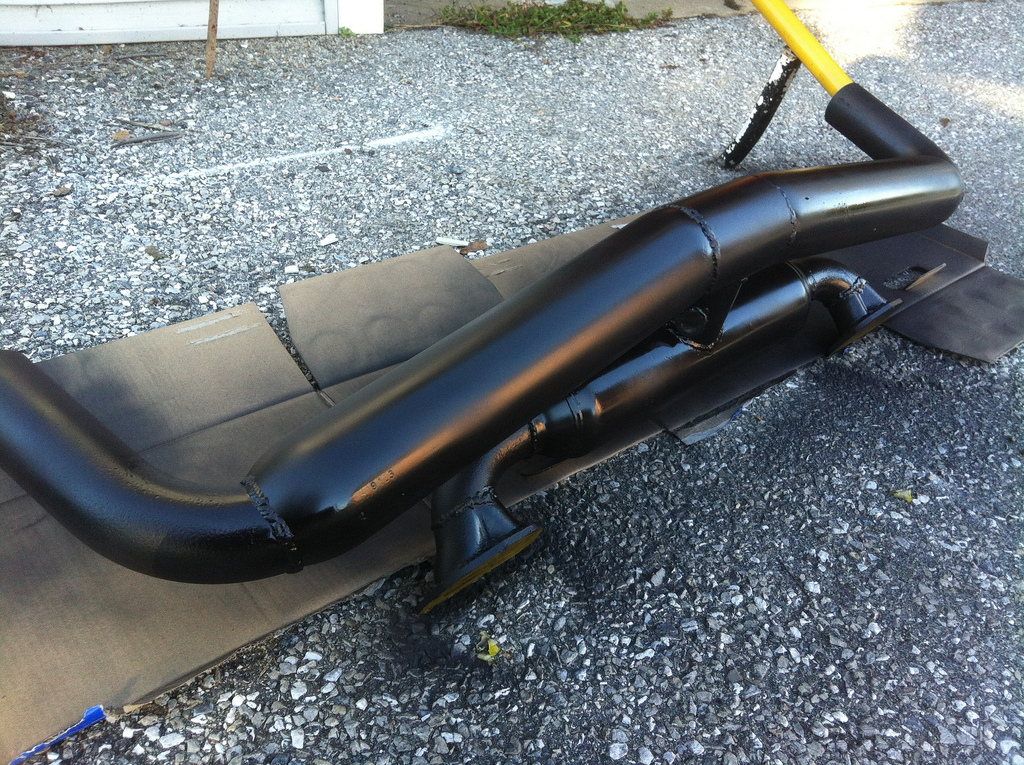
Posted by: Vacca Rabite Oct 23 2012, 07:59 PM
Triad muffler now has 4 coats of paint. After I out the kids to bed I laid some more down as it is a warm fall evening.
It looks brand new.
This part is done.
Posted by: Vacca Rabite Oct 24 2012, 07:37 AM
Just updated my project plan.
I have reached the tipping point!
I am 50.25% complete with my EFI conversion.
Yes. I am a nerd. So what? The project plan keeps me from diverging too much.
Posted by: saigon71 Oct 24 2012, 08:12 AM
Kick ass! Looking forward to seeing your car on the road again Zach.
Posted by: aircooledtechguy Oct 24 2012, 09:39 AM
Way to go Zach!! Having fun AND making progress. That's a combo for great results!!
Posted by: Vacca Rabite Oct 24 2012, 09:43 AM
Just got a call from Joe that my tin was done at the powder coater.
Finished paying Mark this AM for his EFI kit.
Good thing I get paid Friday!
Now all I need is the call saying my heads are done.
Right now I think that call could wait two weeks before that lump of cash falls out of my hands.
Posted by: jsayre914 Oct 24 2012, 03:31 PM
I cant wait to pick up your tin 
I advise you to stop by Warrior each and every day, till the heads are done.
(Good Luck)


Posted by: jsayre914 Nov 1 2012, 10:36 AM
I do believe we deserve some pictures sir.....
Posted by: Vacca Rabite Nov 1 2012, 04:04 PM
I got my Tins from joe last night. Yesterday I also got a call that my heads were done. I won't be able to get them until next Friday. But they are done!
Soon the engine will be back to a long block!!!
Posted by: Vacca Rabite Nov 13 2012, 11:18 AM
Got my heads today. Woot!
I need to CC them in case the CC value changed.
What's left? A lot. But getting closer.
Need to buy some more stuff.
Exhaust seals. CV gaskets. CV washers etc.
CC the heads and put them on the block.
Check pushrod geo to see if I need to cut new ones.
Pressure test my SSI exchangers to see if it is safe to hook heat back up.
Get the EFI stuff from Mark and install what needs to be installed before the doghouse and tins go back together.
Put the power train back together.
Get it in the car.
Oil
Gas
Drive
Tune
Posted by: McMark Nov 13 2012, 12:12 PM
I'll ship off your crank sensor ASAP.
Posted by: jsayre914 Nov 14 2012, 11:05 AM
C,mon Zach
show us some HEAD !!!!
Posted by: jsayre914 Nov 18 2012, 02:03 PM
Is it finished ???
Posted by: Vacca Rabite Nov 18 2012, 02:51 PM
Everyone but Erin at home right now is sick. I still need to get the stuff to CC the heads.
Did some work on the lathe, but that's about all I had the energy to do.
Zach
Posted by: Vacca Rabite Nov 20 2012, 09:27 PM
I should have the stuff I need to CC the heads Monday.
Got assorted small parts needed when you put an engine back in sourced.
Only stuff left to buy is ethanol proof fuel line, a few more FI hose clamps, pressure regulator, and a new VDO oil pressure sender. And new cut-to-length pushrods if my geometry changed. Which I will find out when I put the old ones back into place and check my geometry.
What is the pressure regulator that people like? Mark, am I going to be pushing somewhere between 28 and 30 psi fuel? Or More? Or less?
Zach
Posted by: McMark Nov 20 2012, 09:27 PM
Stock works.
Posted by: Vacca Rabite Nov 20 2012, 09:29 PM
I don't think I have a stock regulator.
Off to the For Sale section!
Zach
Posted by: McMark Nov 20 2012, 09:32 PM
Got you covered. I have plenty.
Posted by: Vacca Rabite Nov 20 2012, 09:36 PM
Woot!
Zach
Posted by: Vacca Rabite Nov 26 2012, 05:19 PM
CCed my heads today. Came out to between 60 and 61cc per head.
This will lower my compression ratio from 9.2:1 to 8.6:1. A little higher then stock but not much. Wonder if I will be able to get away with 87 gas now instead of the 93 I had been using. Before headwork they were at 56cc. I could have them fly cut a hair, but I think the slightly lower compression might be good for me.
My deck is at .040 and I don't want to go tighter then that.
Posted by: Dr Evil Nov 26 2012, 05:25 PM
With a deck at 40, you should be fine with 87.
Posted by: Vacca Rabite Nov 26 2012, 07:36 PM
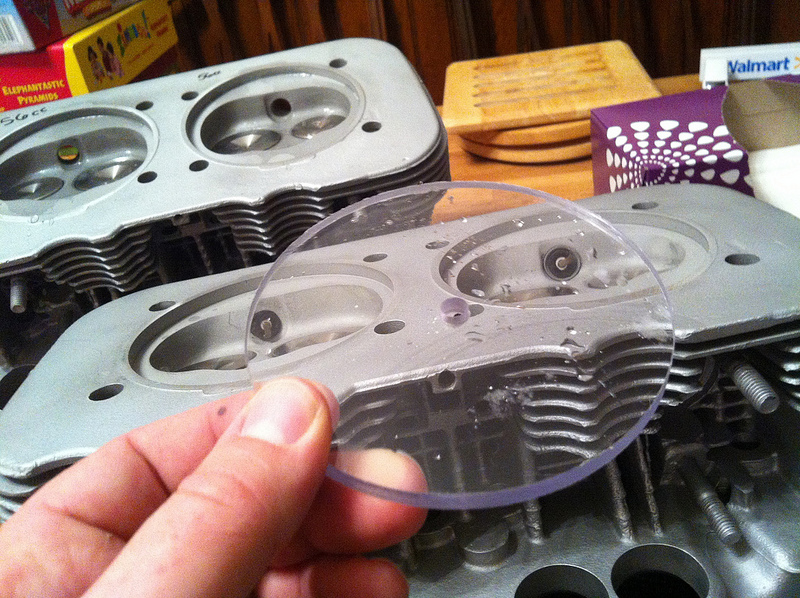
back heads both say 56, which was incorrect... There was a 4CC bubble. I remeasured and they came out at 60 and no bubble.
The plate I cut out of a sheet of 1/4 inch acetate.
Zach
Posted by: OU8AVW Nov 28 2012, 08:51 AM
A quick update.
Yesterday I picked up a used, but in excellent shape, Triad muffler from one of our local members.
I have made 2/3rds of the payment to McMark for his excellent Microsquirt driven EFI and electronic spark. Will be paid off by the end of the month.
I stopped by my machinist today and he promised my heads would be done next week. Of course, its easy to say "next week."
I gave my engine tin to Joe to take to his powder coater in Baltimore. They did a great job on his stuff.
This is really starting to move together. I'm getting excited.
Does he use Chesapeake Coatings? Those guys are incredible. They have like four ovens the size of two car garages for big military contracts. Cool place to visit.
Posted by: Vacca Rabite Dec 10 2012, 08:24 PM
Got a small box from Mark today!!!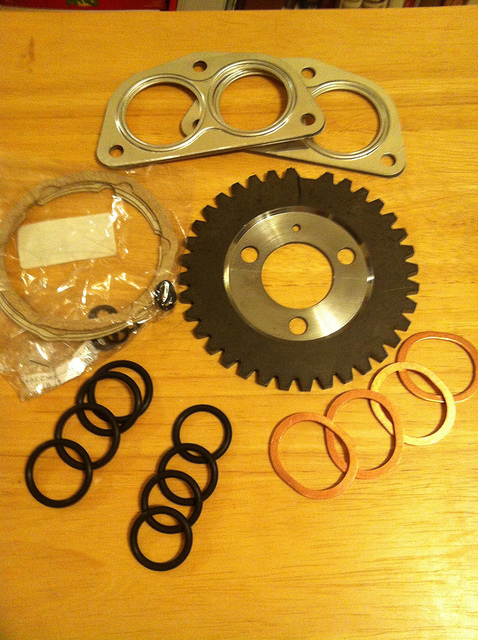
Its not everything, but it will get me back working this Friday after I get the kids to bed. I'm now one sensor away from being able to get the engine back in tins!
Let me just say that this trigger wheel is a really WELL made part. I expected goodness, and my expectations were exceeded. Looking forward on getting it bolted on to the crank!
Zach
Posted by: Vacca Rabite Mar 7 2013, 08:48 PM
I got more stuff today!!!
Original Customs 100% eFI kit. Let McMark take the engineering out of your eFI project.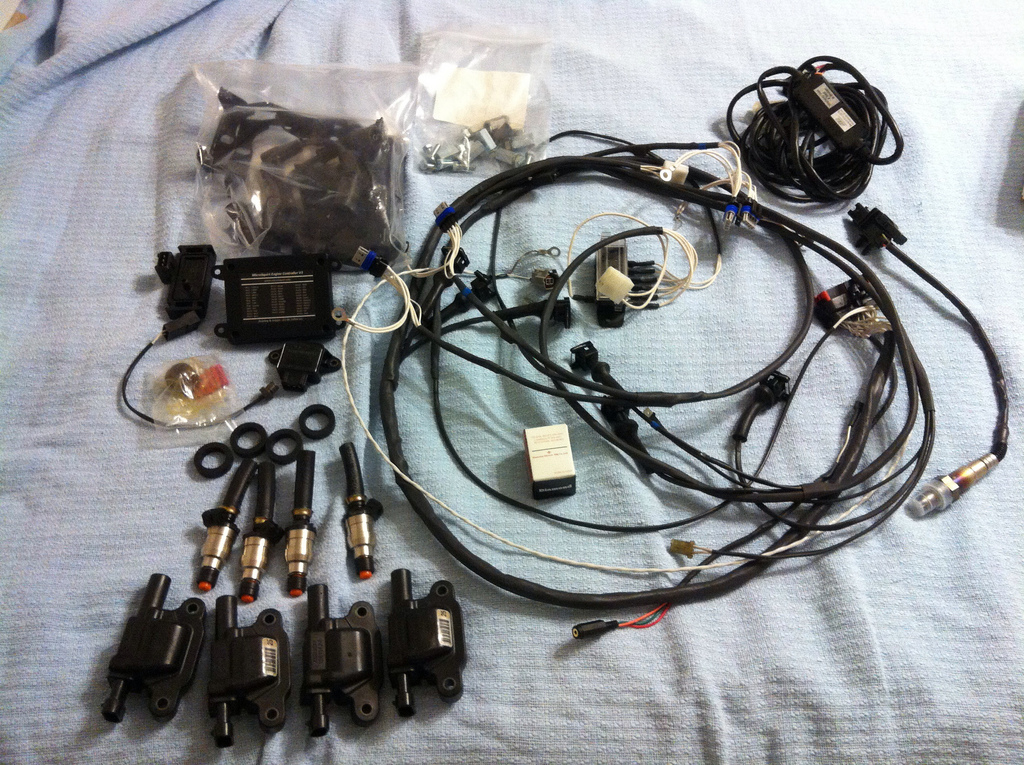
New fuel injectors? Coil on Plug? Hell yeah!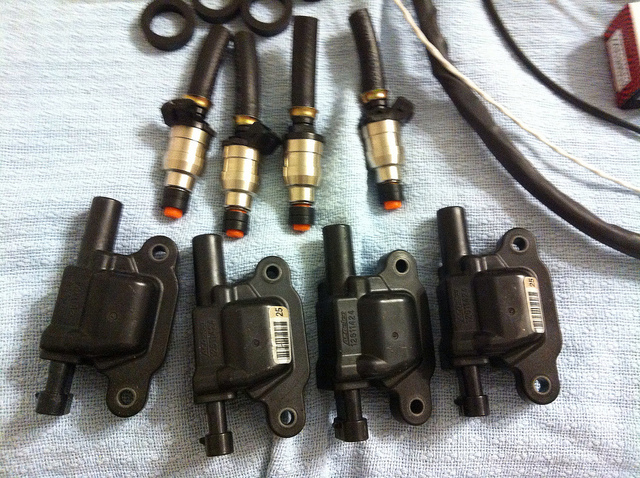
Prebuilt wire harness? Yup.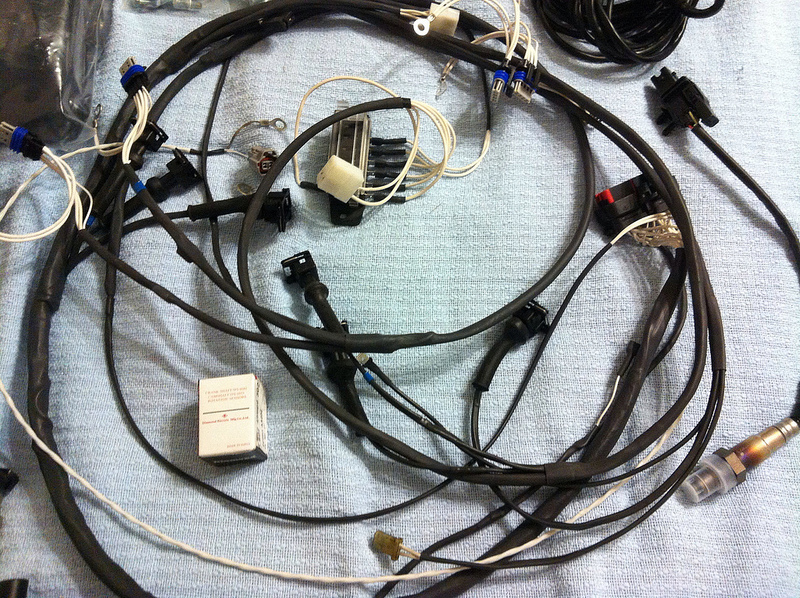
O2 sensor included? You better believe it.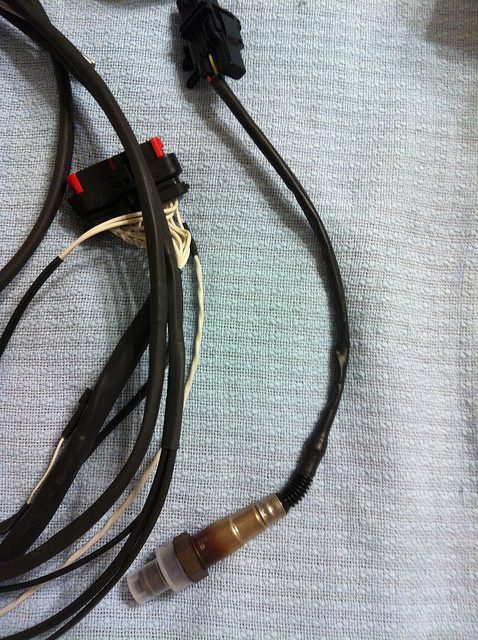
Weathertight Microsquirt controller? Included. Can you say mounted in the engine compartment with no worries? Yes you can. 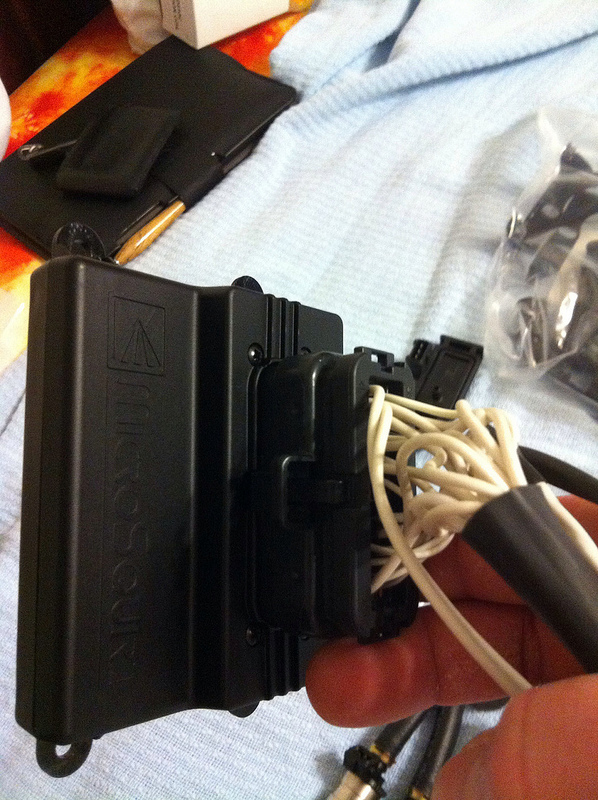
There are a couple things that I am missing yet, but I can start taking chuncks out of this job for real now.
Zach
Posted by: Dr Evil Mar 7 2013, 08:55 PM
Eh, you'll still fuck it up
Posted by: Vacca Rabite Mar 7 2013, 09:09 PM
Eh, you'll still fuck it up
So... Hows the bus doing? (pot, meet kettle)
Zach
Posted by: Dr Evil Mar 7 2013, 09:10 PM
I have been busy 
Posted by: saigon71 Mar 8 2013, 07:32 AM
Looking like the parts are rollin in Zach. Following this thread closely. If the D-jet causes me a lot of headaches after the car is on the road, I may look into megasquirt.
Posted by: JimN73 Mar 8 2013, 12:44 PM
Glad to see that you got your stuff from Mark. He's still working on my harness and it looks like we'll need an AAR to help with cold starts.
He tried one (AAR) on my engine and it idled too high. Might need some kind of restrictor.
Posted by: FourBlades Mar 8 2013, 07:07 PM
Nice looking setup!
I can't remember, are you going ITB or common plenum?
John
Posted by: Vacca Rabite Mar 8 2013, 09:16 PM
Common plenum off a 1.8. The impetus for this was to cut back on the howl ITBs and webers caused.
Jake said that the 1.8 plenum can support up to a 2.4 liter plant, so my little 2.0 should be just fine.
Zach
Posted by: Ductech Mar 9 2013, 01:50 PM
Dude.... All this work and you could have like a way newer motor..... 
Posted by: Vacca Rabite Mar 9 2013, 07:20 PM
This car will always have a T4.
When the 2056 gets tired i'll build it to a 2270.
And the FI will work on that too.
Zach
Posted by: cgnj Mar 10 2013, 05:29 AM
Common plenum off a 1.8. The impetus for this was to cut back on the howl ITBs and webers caused.
Jake said that the 1.8 plenum can support up to a 2.4 liter plant, so my little 2.0 should be just fine.
Zach
Zach, where did you find this nugget? Same true for 2.0 plenum? I think 1.8 would be much easier if one was thinking of MAF.
Carlos
Posted by: Vacca Rabite Mar 10 2013, 06:22 PM
Common plenum off a 1.8. The impetus for this was to cut back on the howl ITBs and webers caused.
Jake said that the 1.8 plenum can support up to a 2.4 liter plant, so my little 2.0 should be just fine.
Zach
Zach, where did you find this nugget? Same true for 2.0 plenum? I think 1.8 would be much easier if one was thinking of MAF.
Carlos
I have been pondering this project for nearly 2 years now and asked a TON of questions here, STF, and Jake's forums.
Jake let me know where he had found the limits of the 1.8 plenum to be, but I forget if it was here or on his forums.
Needless to say, my options were a 1.7 plenum or a 1.8 plenum as i have 4 bolt heads. And when i stumbled on a 1.8 full system, I knew where I was going to go. Eventually I do want to build this engine to a 2270 or a 2.3L plant, but there are going to be years inbetween finishing this and doing that.
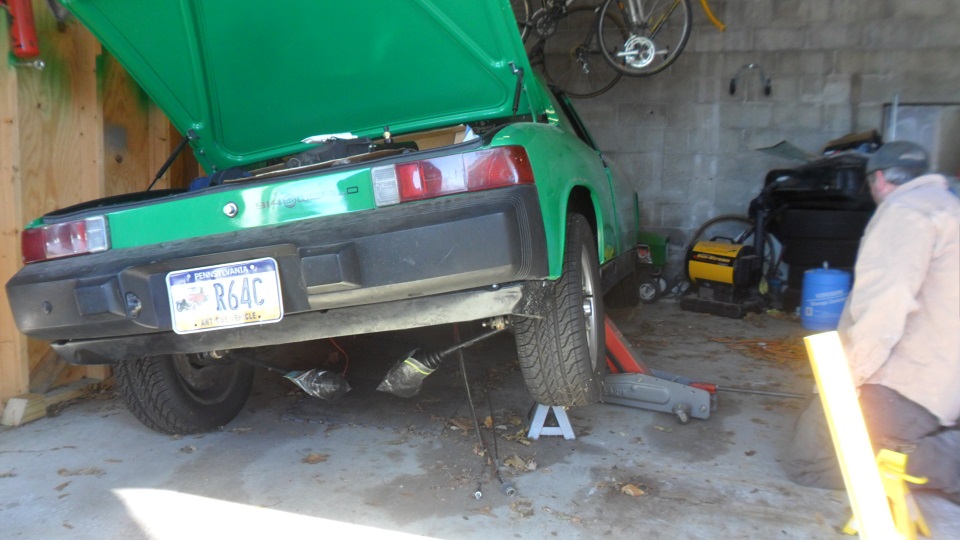
Posted by: Vacca Rabite Apr 5 2013, 10:58 PM
My engine is back to being a long block for the first time in a year!!!!
Now I just have 5 billion wires and such that I need to figure out. Was getting cold (its spring, warm the F up weather!) and overwhelmed. But I did get a lot done tonight.
Zach
Posted by: Vacca Rabite Apr 8 2013, 12:57 PM
Yesterday I double checked my pushrod geometry.
Since I had headwork done, I thought it would be prudent. And its a good thing I did.
All of my pushrods were still within +/- 5% of the advertised lift of my cam - except the #3 Exhaust, which was short and has to be recut. I think I have an extra cut-to size push rod somewhere. I'm glad I checked!
Stange thing was that all of them looked good at 1/2 lift, even the one that was a bit short.
Zach
Posted by: Vacca Rabite Apr 8 2013, 05:25 PM
Since I have not added pic in a while...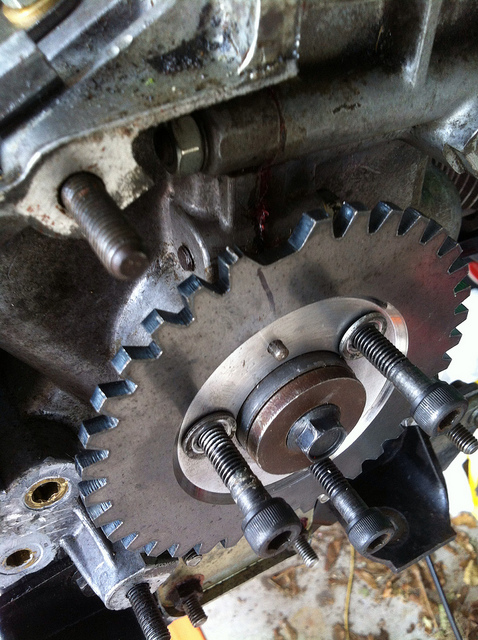
Crank fire!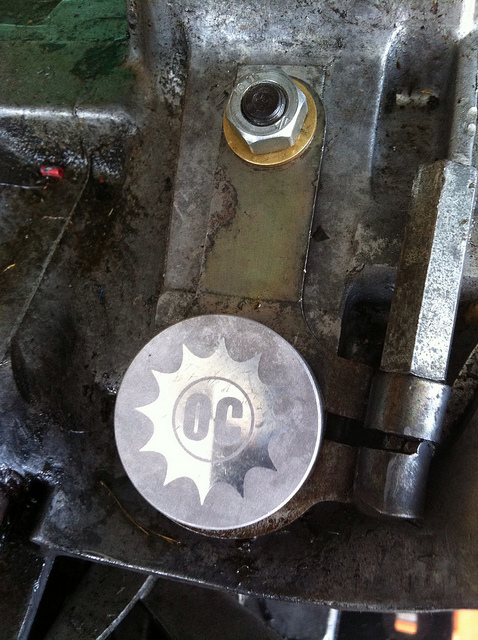
What dizzy?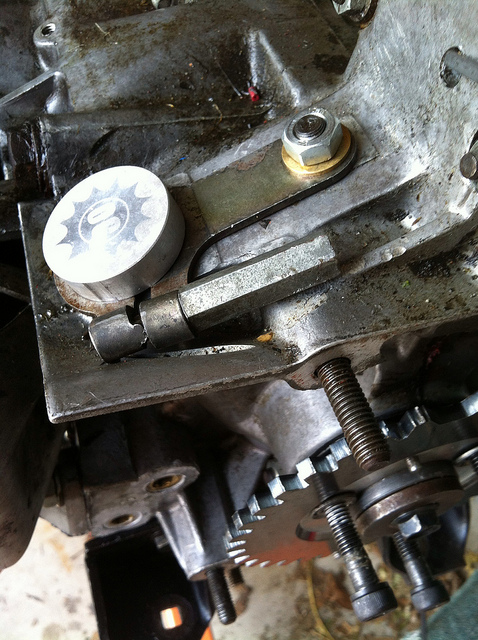
The knob is on the wrong side. Not going to change it unless the tin does not fit. It not like I will have to adjust a dizzy any longer...
Posted by: McMark Apr 8 2013, 05:35 PM
The distributor block off will stay in without the clamp. But, it doesn't really matter.
I would shorten your oil pump studs. If you have to do any work on it in the car, you'll thank me. BTDT.
Posted by: Vacca Rabite Apr 9 2013, 06:26 PM
Haha!
I knew I had some cut to length pushrods laying around. it only took my 5 minutes to find them while waiting for oil on my mower to drain. Even found the adjustable one.
Now I just need to get fuel hose and spark plugs! And the guts to start hooking up the new electronics.
Zach
Posted by: saigon71 Apr 9 2013, 08:34 PM
Haha!
I knew I had some cut to length pushrods laying around. it only took my 5 minutes to find them while waiting for oil on my mower to drain. Even found the adjustable one.
Now I just need to get fuel hose and spark plugs! And the guts to start hooking up the new electronics.
Zach
Looking good Zach. Nice catch on the valve lift. Any chance your car will be at Hershey this year? With Joe's hammered valve seat and my never ending battle with rust, it would be nice to have some local 914 representation at the car show!
Posted by: 914itis Apr 10 2013, 06:58 AM
Haha!
I knew I had some cut to length pushrods laying around. it only took my 5 minutes to find them while waiting for oil on my mower to drain. Even found the adjustable one.
Now I just need to get fuel hose and spark plugs! And the guts to start hooking up the new electronics.
Zach
Looking good Zach. Nice catch on the valve lift. Any chance your car will be at Hershey this year? With Joe's hammered valve seat and my never ending battle with rust, it would be nice to have some local 914 representation at the car show!
Posted by: Vacca Rabite May 4 2013, 08:05 PM
All pushrods are now in-spec. :-)
And I have new goodies for the car "while I'm in there."
Including the firewall back shifter upgrade for my Rennshift!
And new brakes from Erc.
And wheel studs to replace the lug bolts.
Cause... you know if I keep buying things for the car I can ensure it never actually gets completed. Like the Winchester Mansion.
Zach
Posted by: Vacca Rabite May 5 2013, 06:14 PM
My 5 year old replaced all 16 lug bolts with wheel studs today. So easy, a pre-K kid can do it. All I did was follow behind and torque them in.
https://www.youtube.com/watch?v=weqJJxFqHUE

Then he drove the car back into the bay while I pushed!
Today was a very good day. Did not get anything done on the engine, but my son was so happy to b able to help with the car.
Zach
Posted by: mepstein May 5 2013, 07:30 PM
He knows he'll be driving by the time it's running.
Posted by: Dr Evil May 9 2013, 09:21 AM
He knows he'll be driving by the time it's running.
By then, we will have all converted to hydrogen/electric
Posted by: Vacca Rabite May 9 2013, 11:17 AM
Mike, your Tranny Wagon has been down for your FI changes longer then my 914. How's that glass house? And what are you doing with that stone?
Posted by: Dr Evil May 9 2013, 07:27 PM
Maybe this weekend, buttercup 
Posted by: worn May 9 2013, 08:17 PM
My 5 year old replaced all 16 lug bolts with wheel studs today. So easy, a pre-K kid can do it. All I did was follow behind and torque them in.
https://www.youtube.com/watch?v=weqJJxFqHUE
Then he drove the car back into the bay while I pushed!
Today was a very good day. Did not get anything done on the engine, but my son was so happy to b able to help with the car.
Zach
Zach,
You have helped me in the past, so here is a return. Have some more of those very good days. Those five year olds have a way of growing faster than any Porsche ever drove. Thanks for the pix. And I think the advice about the oil pump studs makes sense, since that is looking to be my weekend.
Warren
Posted by: balljoint May 9 2013, 08:18 PM

I put insurance back on Mr. Yellow Sunflower today. My 7 year old and 4 year old are pumped to be taking the 914 out for a drive. 
I hope they don't have it out too long.
My 5 year old replaced all 16 lug bolts with wheel studs today. So easy, a pre-K kid can do it. All I did was follow behind and torque them in.
https://www.youtube.com/watch?v=weqJJxFqHUE
Then he drove the car back into the bay while I pushed!
Today was a very good day. Did not get anything done on the engine, but my son was so happy to b able to help with the car.
Zach
Posted by: r_towle May 9 2013, 08:43 PM
Zach,
You could always do what I did.
Buy a running 911 and you wont work on the 914 for at least 3 more years.
I do have one fender flare welded on...and three laying on the roof.
rich
Posted by: balljoint May 10 2013, 05:03 AM
Zach,
You could always do what I did.
Buy a running 911 and you wont work on the 914 for at least 3 more years.
I do have one fender flare welded on...and three laying on the roof.
rich
Make sure you post pictures when you get the other three welded to the roof. 
Posted by: worn May 10 2013, 11:49 AM
Zach,
You could always do what I did.
Buy a running 911 and you wont work on the 914 for at least 3 more years.
I do have one fender flare welded on...and three laying on the roof.
rich
Yeah, that's what I did, and then three head studs hit me in the face when I went to adjust the exhaust valves.
Posted by: Vacca Rabite Oct 14 2013, 07:41 AM
Holy crap! Progress got made!
I brought the engine to Rods shop for the ECC / Work party. Got a lot done on the EFI upgrade. I love working with other people. Special thanks go to Steven for keeping me on point for the past few weeks. He was a great help in figuring out how all the parts went together at Scott's shop in VA (where we could not actually get work done as I had forgotten the damned intake spacers at home...)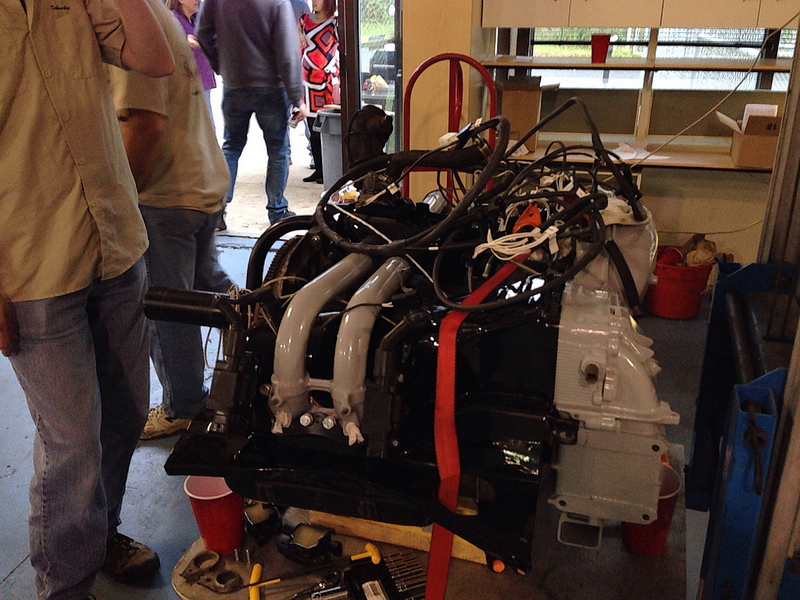
Check out the bitch'n orange injector holders. Jim gave them to me when I realized how grungy mine were. Just happened that he had Rod powder coat like 20 of them for him. I love it!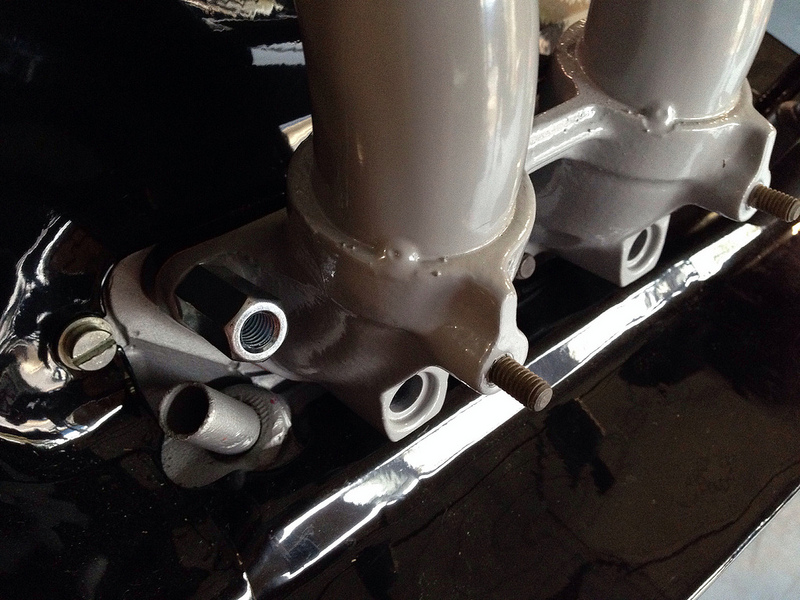
The trick here was the coupler nuts. We spent a lot more time then we should have trying to figure out how the COP bracket attached until I remembered the coupler nuts. 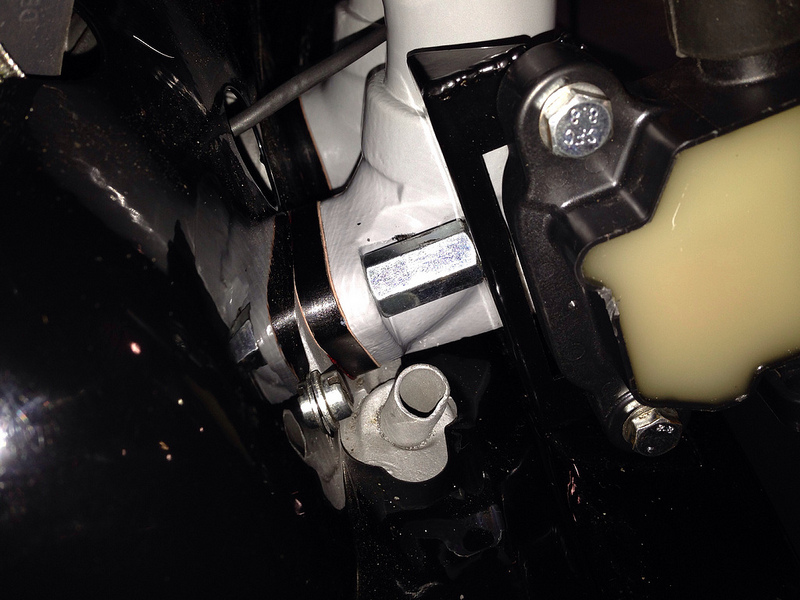
Bracket and coil near plug (CNP) detail. Everyone that saw this at ECC thought it was a really elegant design.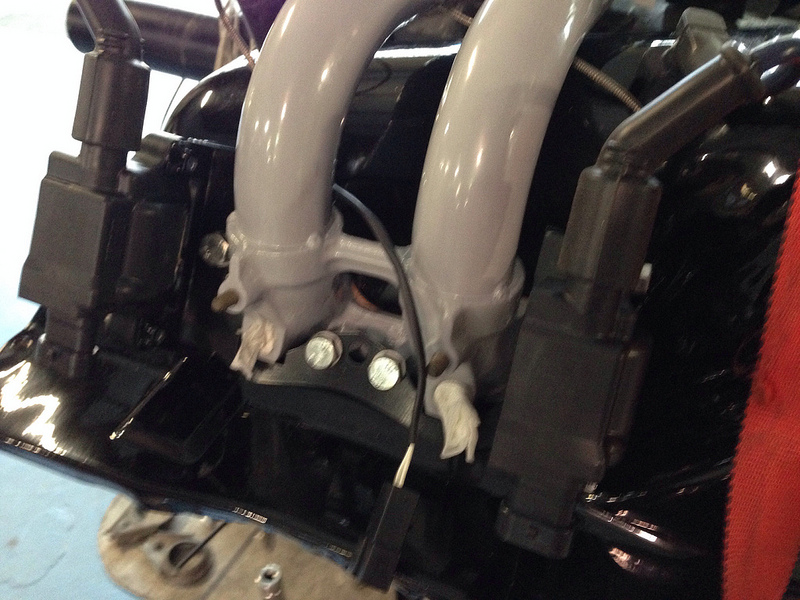
Another view of the CNP bracket and install.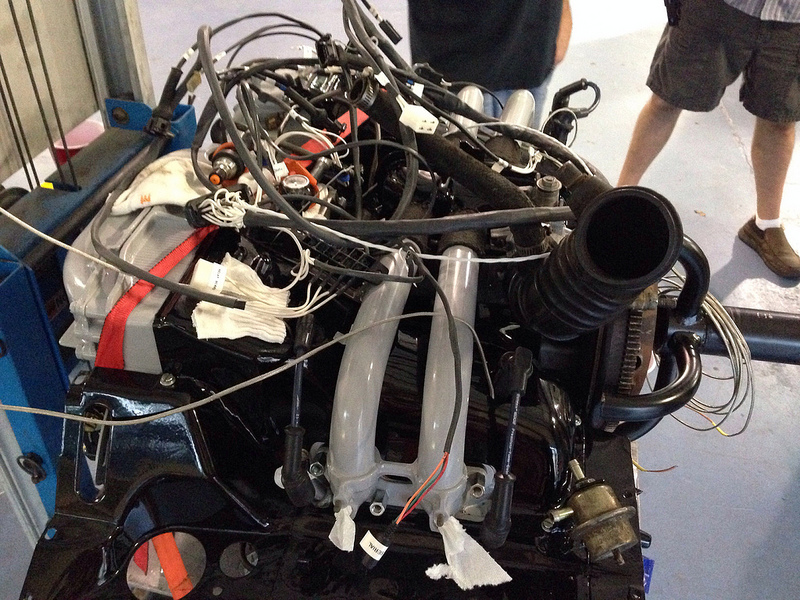
I was able to use Rod's ultrasonic cleaner to de-grunge my throttle body, and got that installed.
The wires are piled on the engine here. I had McMark label them, install will be a snap.
My plan now is to finish adding the FI stuff, and take the whole mess to Translog for dyno tuning on his engine dyno. That will save me a LOT of time tuning, and I will get a dyno sheet when its done (ie - I'll actually KNOW how much power this engine is making). I'm hoping that it makes ~130.
Another benifit of letting Translog tune it is that they will be better at fixing the oil leaks... I have jet to get pushrod seals to to actually seal the first time. If there are other drips that show up tony will be able to get them (or at least ID them).
I REALLY have to get my car on the rod. Bob (that ass!) drove his car to Rods. I have seriously got to step up my game.
Zach
Posted by: FourBlades Oct 14 2013, 08:02 AM
Whooo, nice progress!
That is a good looking engine.
John
Posted by: Dr Evil Oct 14 2013, 08:28 AM
Just in time for snow
Posted by: 02loftsmoor Oct 14 2013, 03:28 PM
How do you make your tack work with this set up?? i was thinking of distibutor-less ignition
Since I have not added pic in a while...
Crank fire!
What dizzy?
The knob is on the wrong side. Not going to change it unless the tin does not fit. It not like I will have to adjust a dizzy any longer...
Posted by: JimN73 Oct 14 2013, 04:10 PM
Two options, at least. I used a Compu-Fire tach adapter. MSD makes one, and there are others.
McMark is working on an idea that he got from the forum that replaces the guts of the tach with current technology. It's going to be cleaner and better than the adapter.
Posted by: edwin Oct 14 2013, 07:30 PM
The coil in a normal 12v relay should work as an output adapter too. It's what I used in my car. Better result than the msd adapter too
Posted by: McMark Oct 15 2013, 09:00 PM
http://www.914world.com/bbs2/index.php?showtopic=216719. It's not my development. I'm just following Timothy's instructions. Seems like the perfect solution to me. Works with most upgraded ignitions (MicroSquirt/MegaSquirt/MSD/etc) and works better than stock.
Posted by: jsayre914 Dec 15 2013, 05:34 PM
Hey Zach,
Is your car running yet?
Posted by: r_towle Dec 15 2013, 06:46 PM
Hey Zach,
Is your car running yet?
Posted by: Vacca Rabite Dec 15 2013, 06:50 PM
I have a 914?!
Oh yeah, that thing.
Posted by: Vacca Rabite Dec 16 2013, 07:17 AM
Matt and Bob have both offered to come over and help me finish it out. But I've been swamped with family lathe work and deer season.
I'm going to host a frozen digit build party in January and hopefully that will end with the car turning over.
Zach
Posted by: Vacca Rabite Dec 29 2013, 06:16 PM
Spent a little bit of quality time with the engine last night.
Got the alternator on, and belt tensioned.
Got all the rest of the tin on an aligned.
Got the rest of the engine mounted sensors/senders installed.
Got the wires for the Microsquirt setup mostly installed. I mat change them around, and need to test continuity to make sure I have good grounds at the COPS and Injectors.
Got the COPS all set up on the side that did not have them.
Sourced some hardware that I has misplaced.
Sourced grommets for all the holes in the tin.
Stuff left to do:
Install Tangerine firewall back shifter kit.
Redo fuel lines in front any back.
install transmission to engine.
Put the engine back in the car.
Put the exhaust on.
Oil.
Gas.
Start the motor!
Drive it to Translog for tuning.
Actively fishing for someone to come over and work with me some weekend day in January/Feb to get it all finished up.
Zach
Posted by: saigon71 Dec 30 2013, 07:11 AM
Spent a little bit of quality time with the engine last night.
Got the alternator on, and belt tensioned.
Got all the rest of the tin on an aligned.
Got the rest of the engine mounted sensors/senders installed.
Got the wires for the Microsquirt setup mostly installed. I mat change them around, and need to test continuity to make sure I have good grounds at the COPS and Injectors.
Got the COPS all set up on the side that did not have them.
Sourced some hardware that I has misplaced.
Sourced grommets for all the holes in the tin.
Stuff left to do:
Install Tangerine firewall back shifter kit.
Redo fuel lines in front any back.
install transmission to engine.
Put the engine back in the car.
Put the exhaust on.
Oil.
Gas.
Start the motor!
Drive it to Translog for tuning.
Actively fishing for someone to come over and work with me some weekend day in January/Feb to get it all finished up.
Zach
Good to see you are back at it Zach.
Pick a date and I will roll down. We need at least two green teeners at Hershey next year.
One request...I need heat! "Frozen digit" parties stopped being fun for me a few years back when the fingers on my right hand turned white for several hours.

Posted by: Vacca Rabite Dec 30 2013, 07:16 AM
Heat I can provide.
70K BTU heater gets it about pleasant to work so long as the temps outside are about 15 or so.
Zach
Posted by: Vacca Rabite Jan 18 2014, 08:51 AM
More work last night.
Was 24 degrees in my garage at 9:30PM when I started setting up. So I got the kerosene heater started and smoked a cigar while it warmed up to something tolerable.
Rolled out the components that I was going to be working on.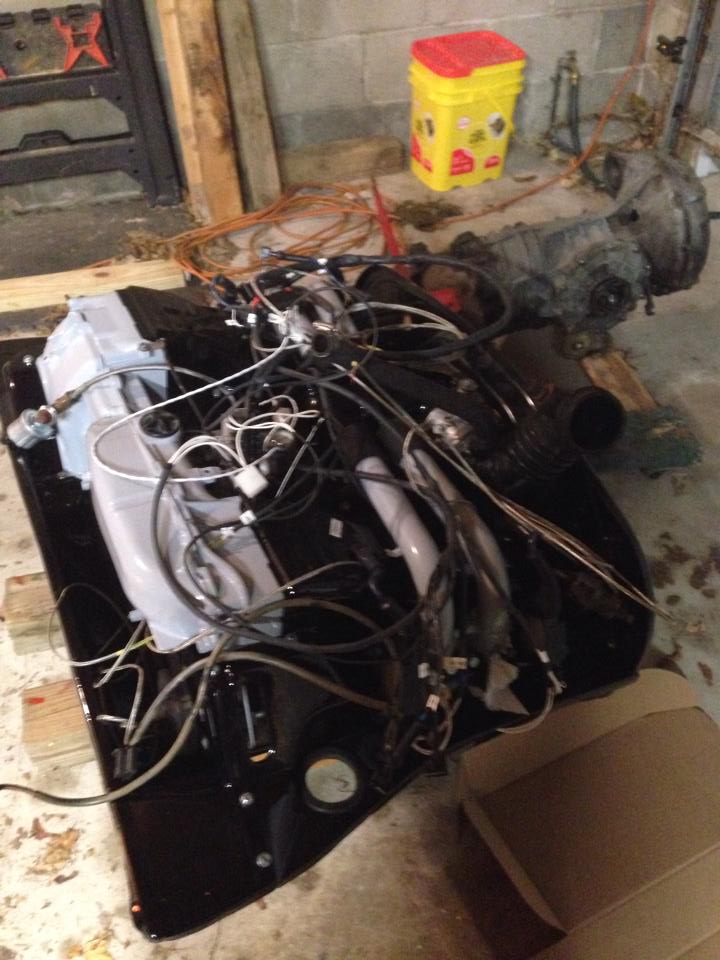
The engine only needed a few things that I had run short of last time. A bolt here, nut there, that kinda thing. I never ordered the IAT I needed and intended to install on it next time, so that will have to wait.
My main task for the evening was the transmission. Wanted to get that done and join the engine and trans back together.
Transmission task was installing the rear shifter kit I got from Chris Foley last year at Hershey. I read the directions a few times while smoking the cigar, laid out my parts and set to work.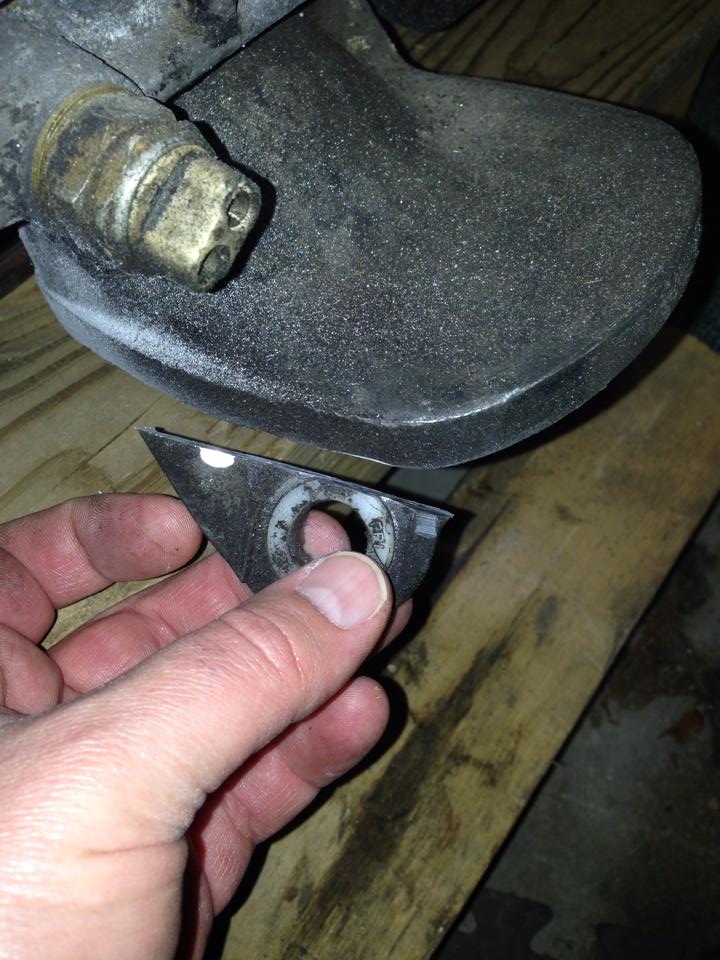
Now I'm committed. Also, Dr Evil is not speaking to me. 
Bracket installed. 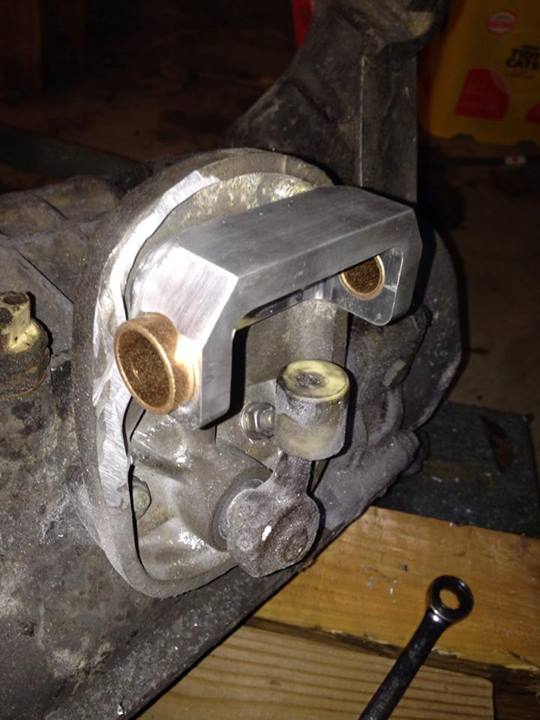
This went really smoothly. Chris, the template you included made this SUPER simple. 
A little grease and a cone screw later, and the shifter bar was in place.
I so can't wait to drive this thing and see how much better the shifting is.
Now I hit a snag. I went to put the trans back together with the engine, and noticed that the long bolt was on the wrong side. The shorter bolt was trapped by the throttle. So I had to pull the throttle, clean and reseal to get the long bolt where it needed to be.
Back together again! I got the nuts on, starter on and exhaust hanger turned right side up. Was just finishing buttoning it back up when the heater ran out of kerosene and died. PERFECT timing.
Went inside, got cleaned up, and was in bed by 1:30 am.
I have to put the improved shifter bushing on at the firewall, and buy/install an IAT somewhere on the plenum. After that, I think the engine is ready to go back into the car!
Things left to do:
*Firewall bushing
*Fuel tank, hoses, pump, fuel filter
*Engine install
*install exhaust, O2 sensor
*install fuel rails, injectors, fuel hose in engine compartment
*clean up wiring
*double check everything
*add oil
*add gas (pressurize system, look for leaks)
*START IT UP!
Zach
Posted by: type47 Jan 18 2014, 09:18 AM
soon. IAT ... remind me what that is ...
Posted by: Vacca Rabite Jan 18 2014, 09:30 AM
Intake air temp sensor.
Can probably get a cheap GM unit at FLAPS. Just need to do it and mount it.
Zach
Posted by: aircooledtechguy Jan 18 2014, 01:05 PM
You sir are a steelie-eyed missle-man for being out in a garage that cold (with or without a heater). . .
Posted by: Mike Bellis Jan 18 2014, 05:40 PM
Great Progress!
I don't like working in the garage when it gets below 50°... Burr!
I think it's almost 80° here today.
Posted by: r_towle Jan 19 2014, 09:31 AM
If we did not go out in the cold, garage time is limited to about 6 months....
Posted by: Java2570 Jan 19 2014, 10:31 AM
Zach - thanks for posting those shift rod install photos, that Tangerine mod is on my
list of things to buy. I already have his firewall shift rod bearing mod and it's really nice. Now you've peaked my interest again with the MS setup, I'm gonna have to
read through some threads again to see if I want to try it on my 2056 build or stick
with D Jet. Jon
Posted by: Vacca Rabite Jan 19 2014, 12:00 PM
Put this in the correct thread this time....
While I am using L-Jet as the base of my intake, there are bits I don't need. One piece in particular is the flapper box that attaches to the intake. I don't need it for Mircosquirt and it makes for an air restriction. So I'm going to make a connector in place of the flapper.
In this connector I'll weld in the bung for the IAT. This is an added bonus, as I did not want to ruin the powder coat on the plenum when I weld in the bung.
Flapper box: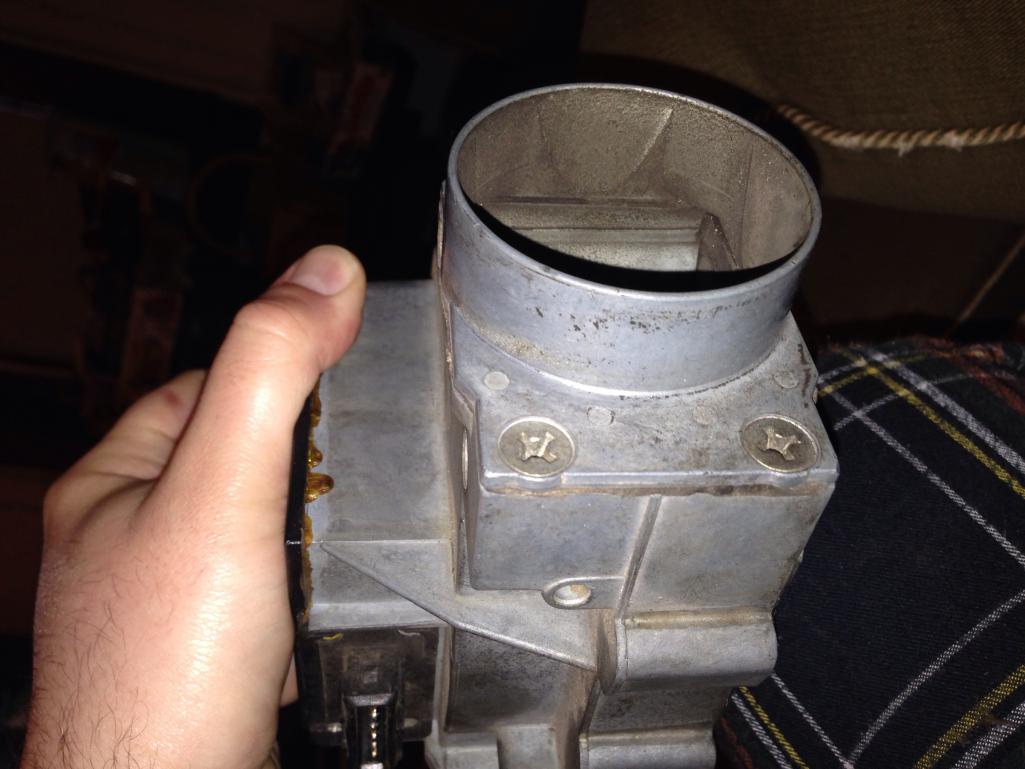
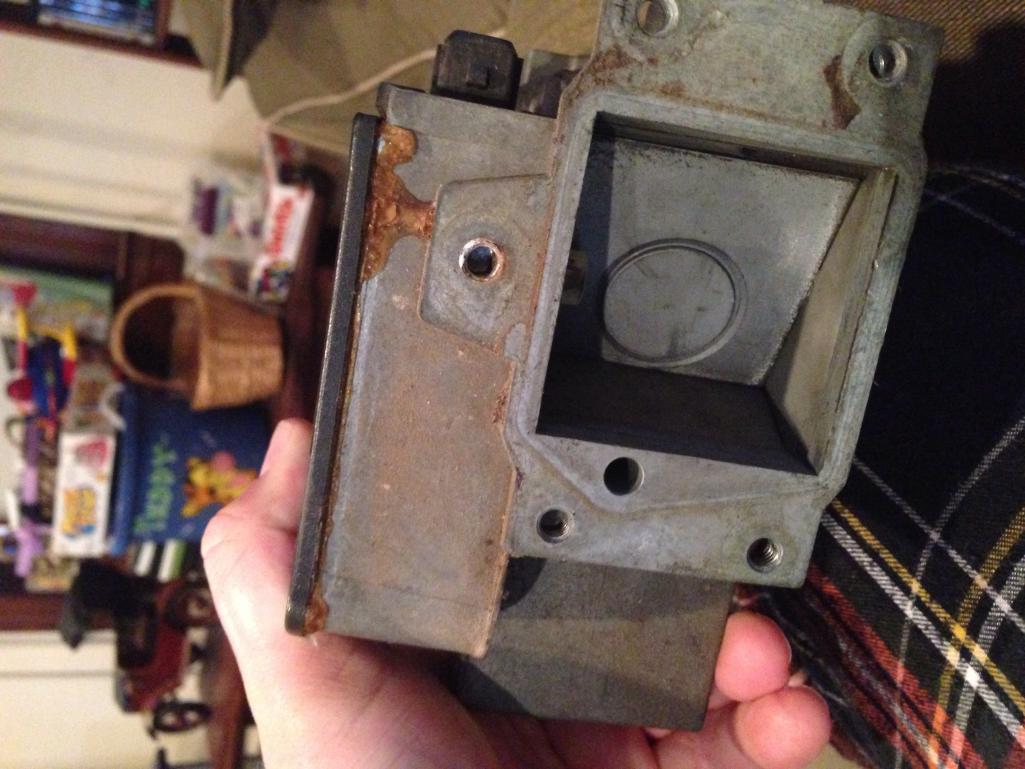
You can see the obstruction for airflow. I'm going to make just a simple pipe instead.
Zach
Posted by: type47 Jan 20 2014, 07:48 AM
I'm going to make just a simple pipe instead.
... and save weight (not much but AFM usless with MS)
Posted by: Vacca Rabite Jan 20 2014, 10:13 AM
At the very least I'll be taking an air restriction out of the intake path, and saving a bit of weight.
I got the stuff to make the intake pipe this morning, and it will hopefully be made (minus the bung which I could not get local) by the end of the day.
Zach
Posted by: aircooledtechguy Jan 20 2014, 11:00 AM
At the very least I'll be taking an air restriction out of the intake path, and saving a bit of weight.
I got the stuff to make the intake pipe this morning, and it will hopefully be made (minus the bung which I could not get local) by the end of the day.
Zach
I found that an old VW Beetle flywheel gland nut works perfect as a bung for the IAT and CLT sensors. I cut off the 36mm head and used the threaded base to run the 3/8 NPT thread into. Worked perfect and you can find them in the scrap bins at a local VW shop or local VW enthusiast's house. If you wanted to, you could use a bench grinder to remove the outer threads.. Just an idea. . .
Posted by: McMark Jan 20 2014, 11:03 AM
Nate, CLT should be your CHT. CLT is a measure of warmup and intake air isn't an indicator of that.
Posted by: Vacca Rabite Jan 20 2014, 11:07 AM
Bung and IAT already on order. I'll have the bung before I could get to someone that might have the gland nut.
Zach
Posted by: aircooledtechguy Jan 20 2014, 02:24 PM
Nate, CLT should be your CHT. CLT is a measure of warmup and intake air isn't an indicator of that.
I have the CLT sensor mounted to my valve cover getting oil from the head. I just used the same style cut-off gland nut for the bung that's all.
Posted by: McMark Jan 20 2014, 02:27 PM
AH! The other pipe is just a hose connection (AAR?). Got it!
I like the stock CHT for a CLT, but your way should work too.
Posted by: Vacca Rabite Jan 20 2014, 03:52 PM
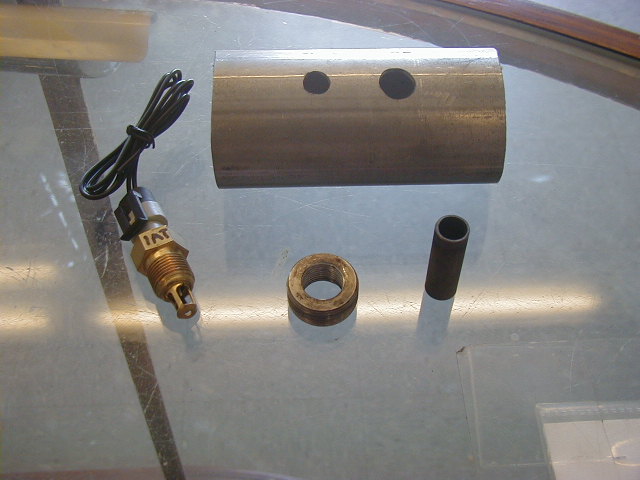
Intake cut out and welded up. Turns out the slip fit section of a 2.25 inch exhaust pipe from NAPA is a PERFECT fit for the intake boot for Ljet. 
Flange I made with the pipe fitted. I cut the pipe to length on my wood lathe, turning as slow at it would go and using a diamond shaped carbide cutter.
The hole in the flange I made with a cutoff wheel and lots of grinding to fit. 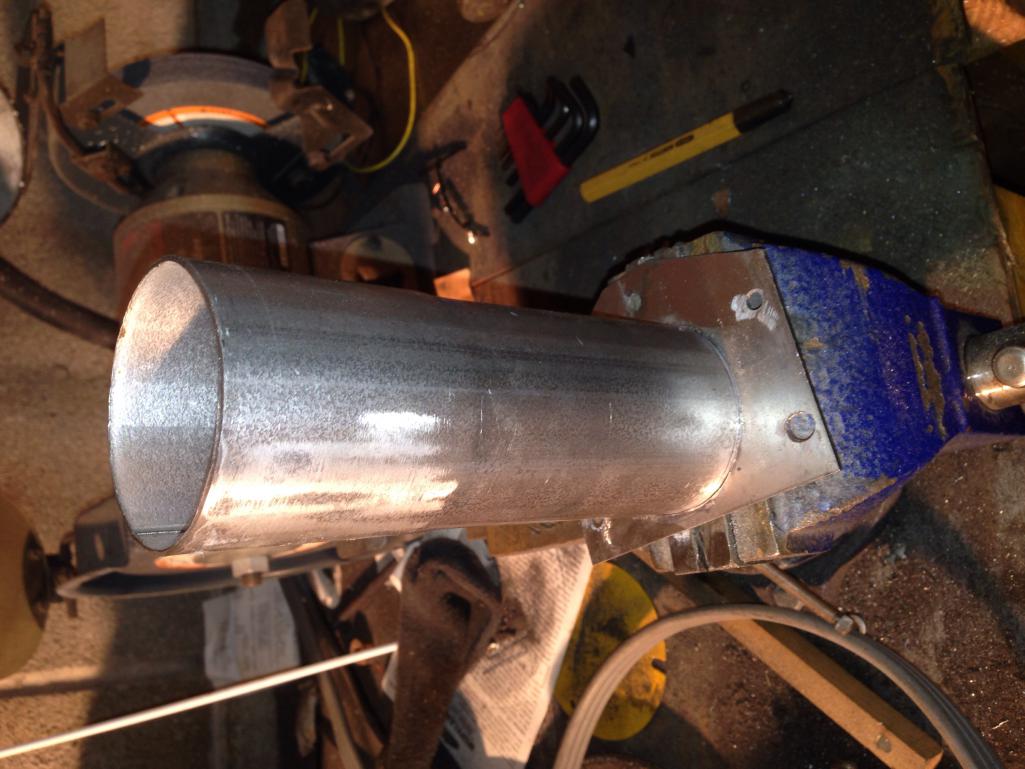
Just prior to welding it up.
It's all welded, except the bung. When I get the bung I'll zap that in and paint it black. This part will be done. :-)
Posted by: bigkensteele Jan 20 2014, 08:39 PM
Put this in the correct thread this time....
While I am using L-Jet as the base of my intake, there are bits I don't need. One piece in particular is the flapper box that attaches to the intake. I don't need it for Mircosquirt and it makes for an air restriction. So I'm going to make a connector in place of the flapper.
One man's trash...
Do you know if you have a 74 or 75 AFM? If it is a 75, I might be interested in purchasing it from you. Please PM me if you want to let it go.
Thanks,
Ken
Posted by: scotty b Jan 20 2014, 09:00 PM
No welding pics
Posted by: Vacca Rabite Jan 20 2014, 09:05 PM
Put this in the correct thread this time....
While I am using L-Jet as the base of my intake, there are bits I don't need. One piece in particular is the flapper box that attaches to the intake. I don't need it for Mircosquirt and it makes for an air restriction. So I'm going to make a connector in place of the flapper.
One man's trash...
Do you know if you have a 74 or 75 AFM? If it is a 75, I might be interested in purchasing it from you. Please PM me if you want to let it go.
Thanks,
Ken
No clue. How do you tell?
It is not original to my car.
Posted by: Vacca Rabite Jan 20 2014, 09:07 PM
No welding pics
I took one but it is real dark. I'll reshoot it when I weld in the bung for the IAT
Posted by: scotty b Jan 20 2014, 09:09 PM
No welding pics
I took one but it is real dark. I'll reshoot it when I weld in the bung for the IAT
Attached image(s)

Posted by: Kirmizi Jan 20 2014, 09:21 PM
Does Radar O'Reilly know you have his hat?
Attached image(s)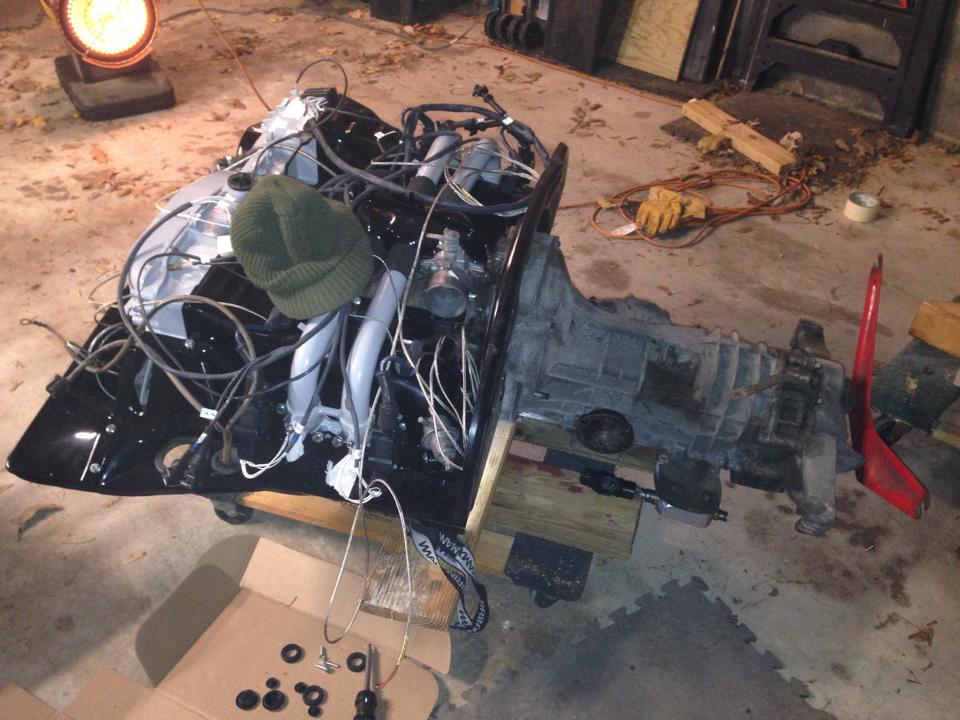
Posted by: bigkensteele Jan 20 2014, 10:20 PM
No clue. How do you tell?
It is not original to my car.
Just count the pins in the connector and PM the number. I don't recall off the top of my head how many go to 74 and how many go to 75, but they are different. I will count mine tomorrow and then we can determine what year yours is from.
Posted by: McMark Jan 20 2014, 10:38 PM
Hey, that muffler mount is upside down!
Posted by: aircooledtechguy Jan 20 2014, 11:06 PM
No clue. How do you tell?
It is not original to my car.
Just count the pins in the connector and PM the number. I don't recall off the top of my head how many go to 74 and how many go to 75, but they are different. I will count mine tomorrow and then we can determine what year yours is from.
There will be a Bosch P/N embossed into the black plastic cover that covers the electronics.
Posted by: Vacca Rabite Jan 24 2014, 02:45 PM
Steel bung came today to weld into the intake I made last week.
But.... It's 14 degrees now while the sun is out. No idea the forcast for tonight after I get the kids in bed. Not sure I have the stones to work when it's that cold out, even with the heater going.
:-/
Posted by: scotty b Jan 24 2014, 03:00 PM
Hey, that muffler mount is upside down!
SSHHHHhhhh he'll figure it out soon enough
Posted by: Vacca Rabite Jan 24 2014, 03:46 PM
:rollseyes:
Posted by: Vacca Rabite Jan 25 2014, 09:37 PM
Finished welding the intake pipe with the IAT bung.
Still cold, but above 20 so somewhat bearable.
Took it inside to paint. That will happen when the metal gets to room temp instead of ~25. 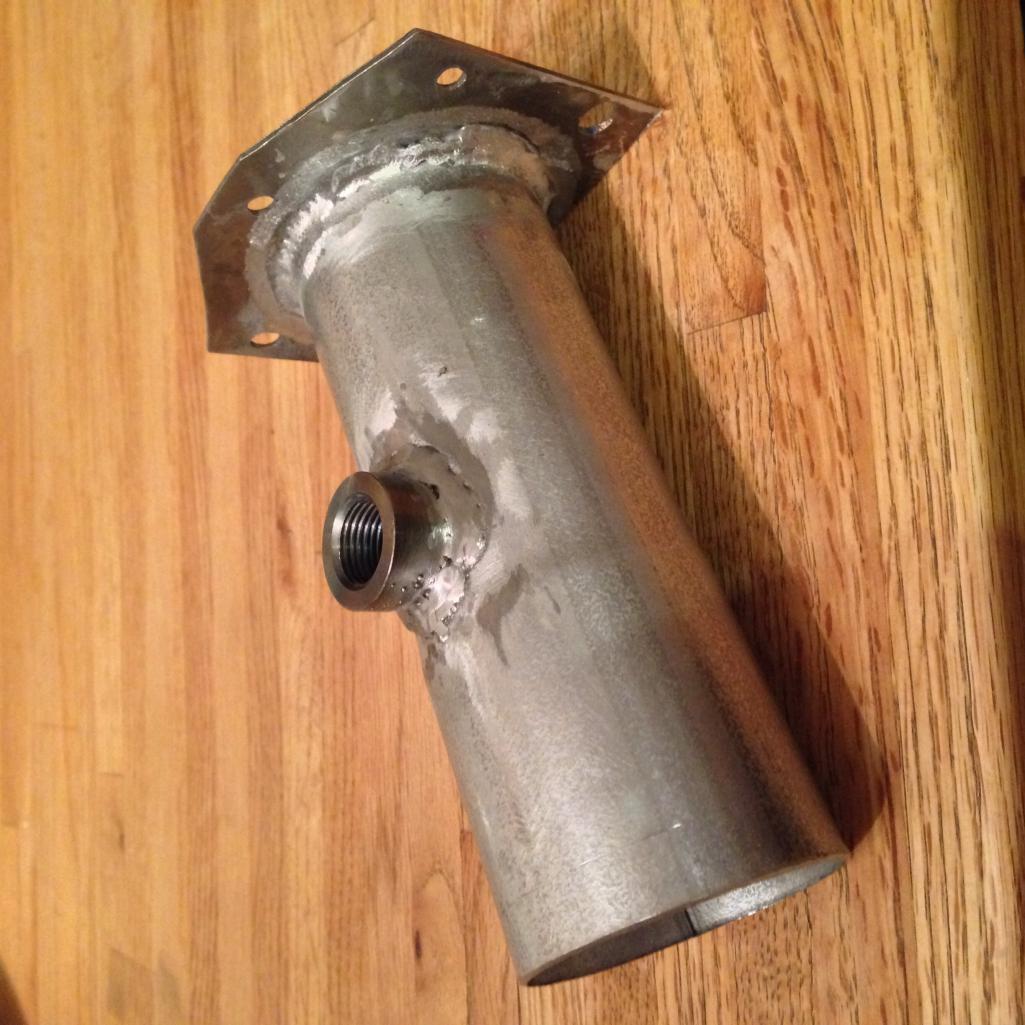
Posted by: saigon71 Jan 26 2014, 12:06 AM
Looks good Zach...when is the engine install party? 
Posted by: Vacca Rabite Jan 26 2014, 08:24 AM
Looks good Zach...when is the engine install party?
Next week is the eastern outdoor show in Harrisburg.
I'm free after that. We could say the 8th if weather warms up a tad more.
Zach
Posted by: type47 Jan 26 2014, 09:42 AM
We could say the 8th ...
The 8th is the drinking event down in Richmond ...
Posted by: Vacca Rabite Jan 26 2014, 10:05 AM
We could say the 8th ...
The 8th is the drinking event down in Richmond ...
So it is.
Funny. The outdoor show is a 9 day show. We were supposed to go on the 8th but are now going on the 2nd since none if the teams the Hunters care for are playing in the Super Bowl. Since I had taken the clinic off my calendar, it was out of my mind.
Zach
Posted by: Vacca Rabite Jan 27 2014, 12:26 AM
In all it's painted glory. 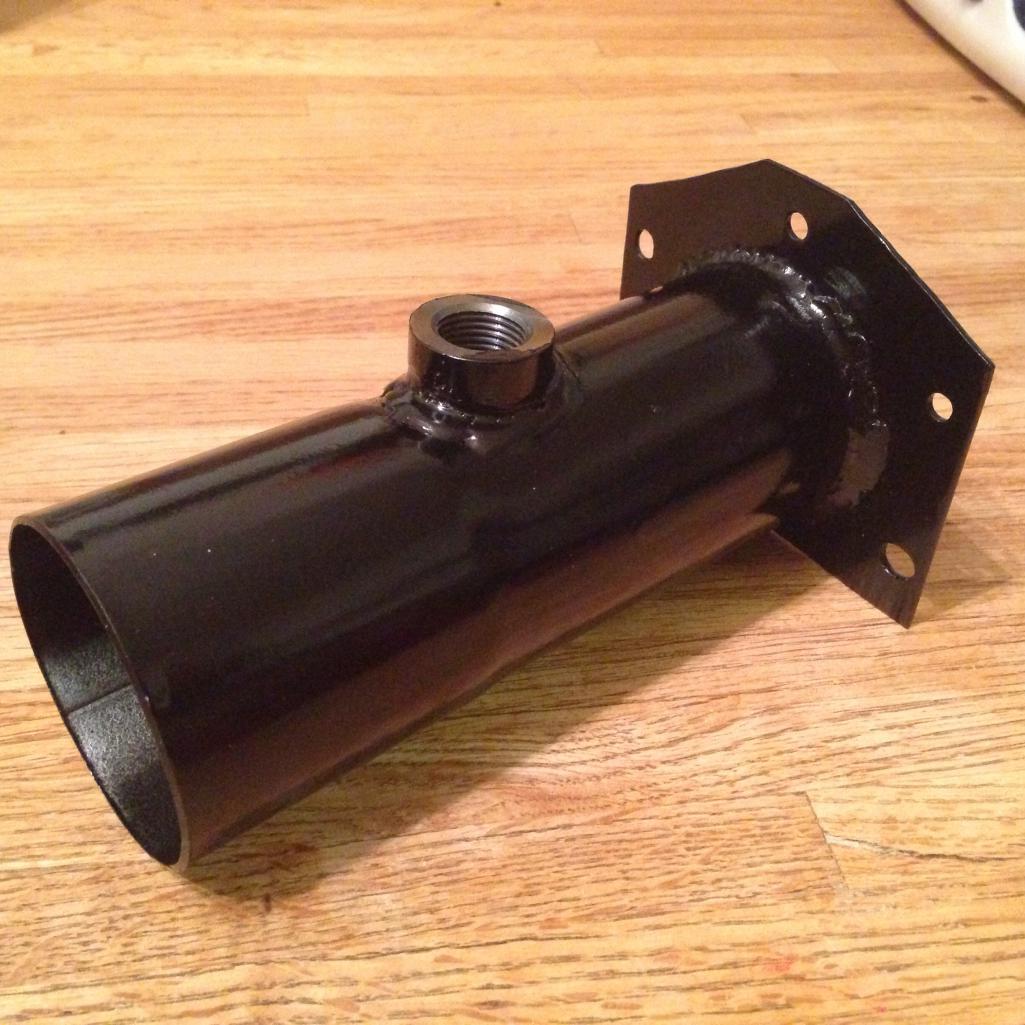
Ready for install on the air box.
Posted by: Vacca Rabite Feb 1 2014, 02:04 AM
Friday night is usually work night. Tonights plan was to install the new fangled firewall shift bushing fromthe shift kit. After thats installed I can put the engine back in the car. 33 degrees is even warmer then its been most of the past 2 months. But I was exhausted and went to bed early.
So why am I up at 3AM if I did not stay up to work on my car?
Both my kids got up at the same time and puked in their beds. And then after we got them cleaned up and fresh sheets, they both puked again. Now they are asleep and I am up, exhausted yet wired. Tomorrow is going to be fun.
Zach
Posted by: Vacca Rabite Feb 1 2014, 05:01 PM
More progress made.
I got the new fancy shifter bushing installed. Another very quality part for Racer Chris.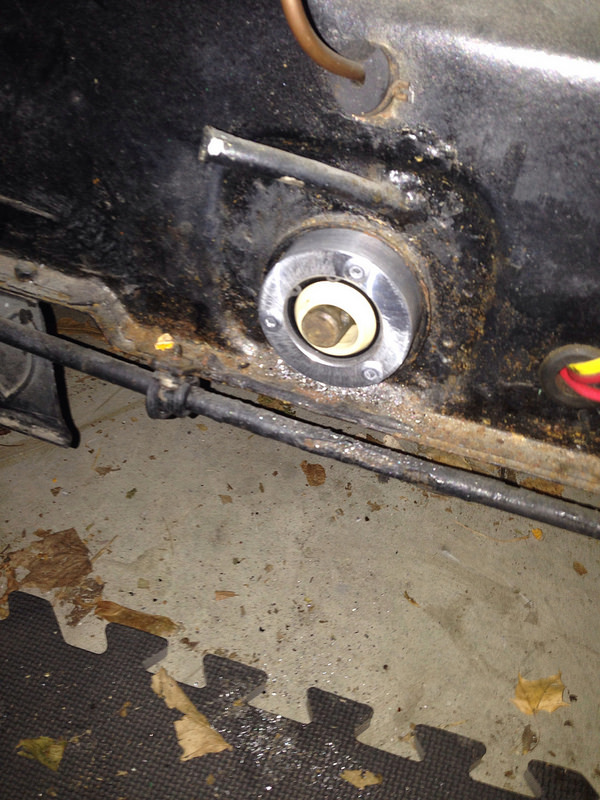
Don't look at the rust. If I see the rust I'll never get the engine in and never get my car on the road. There is no rust there.
And since I had the shifter all apart, I figured I'd change up my look. For the past few years I've been sporting this: 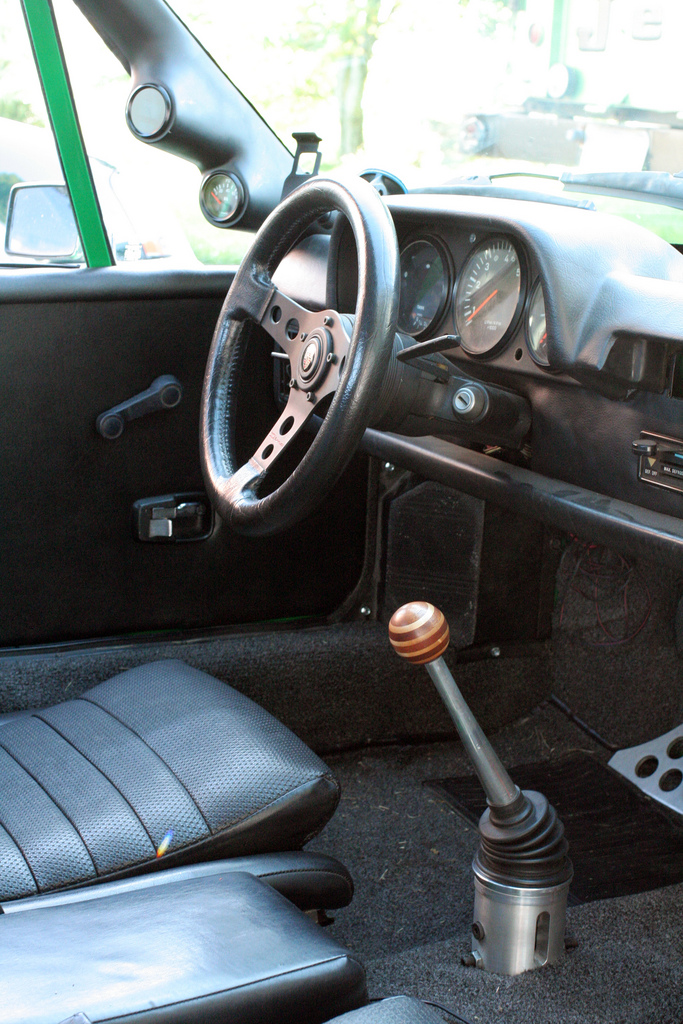
It was the prototype 917 knob - the first one I made.
I decided to change to this: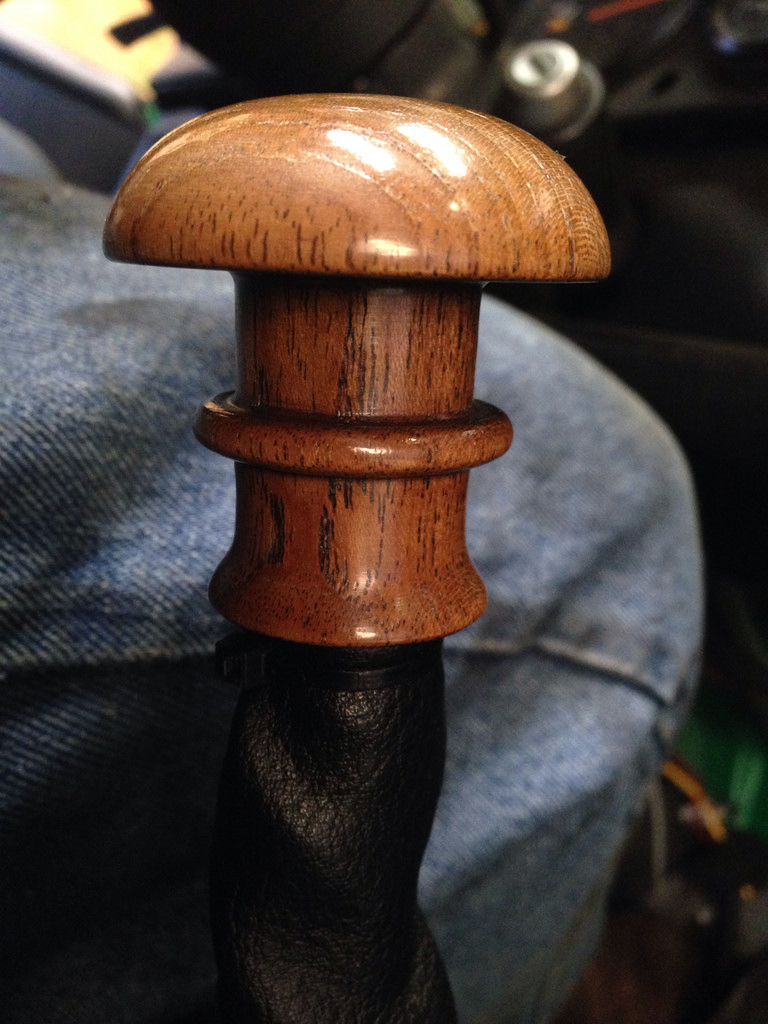
I figured a mushroom cloud better personified my car. I was going to put it on my Jeep, but my Jeep will get something else in time.
Anyway, I THINK that I am ready to put the engine back in. Which means that I need some folks to come over and help me. Some of the tasks need a second set of hands. I'll set something up after the clinic next weekend.
Zach
Posted by: r_towle Feb 2 2014, 09:15 AM
So you have time for some rust converter paint on that lower firewall......
Just saying.
Posted by: Vacca Rabite Feb 2 2014, 07:05 PM
If my garage heats up to a point where I could put paint on before I get the engine in, that is a consideration. What kind of rust converting paint should be used?
Zach
Posted by: McMark Feb 2 2014, 07:06 PM
Posted by: Dr Evil Feb 2 2014, 07:36 PM
Posted by: Vacca Rabite Feb 2 2014, 07:40 PM
Goddamn ninjas are everywhere.
Now just answer the question.
Zach
Posted by: Dr Evil Feb 2 2014, 07:50 PM
What is your question? What are you trying to convert priest to? Ninjas?
Attached image(s)
Posted by: scotty b Feb 2 2014, 08:04 PM
Goddamn ninjas are everywhere.
Now just answer the question.
Zach
Use the kind that combines air pressure and sand
Or the kind that uses electricity a grinder, and a knotted wire wheel
Then beat yourself over the head with that can of " rust converter "
Posted by: saigon71 Feb 4 2014, 07:30 AM
Zach:
I have dabbled with quite a few rust-proofing options over the past few years. While its to early to really know which, if any, actually work as claimed...I would hit that area on the firewall with a wire wheel, apply two coats of "Rust Bullet" and a top coat and call it a day.
You don't want to be pulling that engine back out to address a rusty firewall next year.
Bob
Posted by: Vacca Rabite Feb 18 2014, 01:53 PM
This weekend... The engine may cough to life!!!
Matt, Mark and Bob have agreed to come over and spend the day with me saturday. Get the engine in the car, fuel hoses set, and hopefully start the bitch up!
I'm double checking things this week making sure I'm not going to be held up due to lacking a $.05 washer or something equally stupid.
Punchout list is slowly getting smaller. I'm getting excited!
If anyone else wants to come and help, just let me know!
Zach
Posted by: mepstein Feb 18 2014, 02:16 PM
Help? I thought it was beer and chili ?
Posted by: Vacca Rabite Feb 18 2014, 02:44 PM
Never fear, food and beer will be provided.
Also, potentially other goodies.
Zach
Posted by: saigon71 Feb 18 2014, 03:28 PM
Looking forward to hearing that engine fire up Zach!
Matt...are you driving the 914 up? I'm undecided...concerned that all this snow melting may cause a wet/salty mess on the roads.
Catch everyone on Saturday.
Posted by: Vacca Rabite Feb 18 2014, 07:07 PM
I'm looking forward to seeing folks too!
Posted by: Vacca Rabite Feb 21 2014, 06:58 PM
Two cases of beer are chilling in the garage.
New red top is in the back of the truck.
Engine and various bits are ready to go.
Tomorrow is the day. :-)
Posted by: r_towle Feb 21 2014, 08:31 PM
OMG....
Are you putting the motor in the car?
Posted by: Vacca Rabite Feb 21 2014, 10:02 PM
That's the plan.
That and hang out with other 914 guys.
Zach
Posted by: balljoint Feb 22 2014, 06:33 AM
Good luck. Just as long as no one tries to put the SCROT winner back together.
Posted by: Vacca Rabite Feb 22 2014, 05:08 PM
Mark, Bob and Matt showed up. Got a lot done, but the engine has not fired yet.
Shifter bar through the big firewall bushing. That was a tedious job even for two people.
Engine is in. Oil lines hooked back up to the cooler. Axles back in but not torqued properly or safety wired. Clutch cable hooked in and adjusted. Engine side fuel lines run.
At this point we broke for lunch. Chili and burritos. Yum.
Then Mark headed out.
Shortly after that a biker slid on gravel into the back of a pickup. Rider went superman over the truck. I called 911 while Bob went over to render assistance. This was essentially the end of the work session. No less then 2 ambulances, 2 cop cars, fire chief and the fire crash truck and a wrecker showed up. Rider was wearing a helmet which is unusual around here. Smart but unusual. Probably saved him.
When that was over Bob needed to head out. Matt and I wanted to get the engine side shifter bar in place and the exchangers / exhaust on. But, the shifter bar is very tight against the bar under the cockpit. There is paint on the inside of the engine bar at the join that I need to remove. Then it should fit.
At this point I was starting to get frustrated and had a headache from laying under the car. It was about 5 and Matt wanted to get home before it was dark. He was driving his 914. So that is where we called it.
Still some work to do, but a lot got done today and I appreciate the help and company!
Posted by: Vacca Rabite Feb 22 2014, 05:20 PM
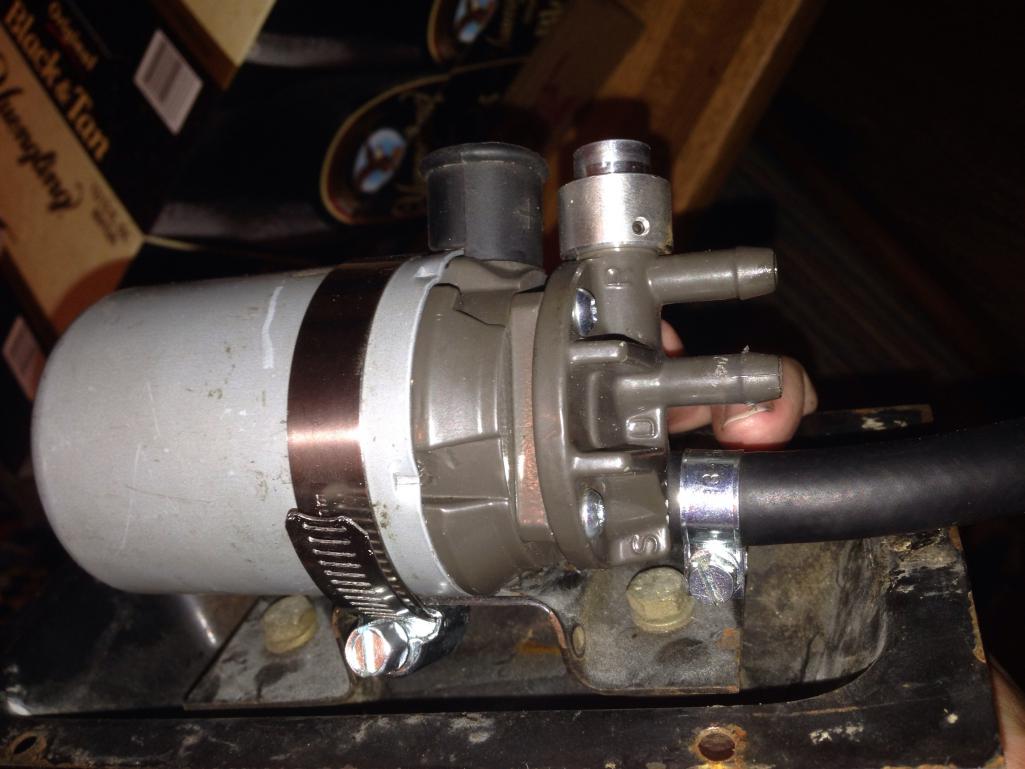
So, fuel pump question. Bob and Mark puzzled over this for an hour with my Haynes and a tablet online.
So the line from the tank is clear (has a hose and filter on it). Do we run the return line back to the pump? Or should that go direct to the gas tank? This pump is in the front of the car, not in the engine bay.
Zach
Posted by: Racer Chris Feb 22 2014, 06:05 PM
S connects to the filter
D connects to the tunnel
R connects to the wye
Posted by: McMark Feb 22 2014, 06:08 PM
with Chris.
S - Suction/Supply from the tank.
D - Druck(Pressure) goes to the engine.
R - Return: this is a bleed off in case the D port is over pressurized. Connect this with the return line from the engine and the return port in the tank. You need a Tee or 'Y' connection to hook the three lines together.
Posted by: Vacca Rabite Feb 22 2014, 06:27 PM
Ahhhhh!
We knew we needed a T or a Y but could not figure out where it went.
Zach
Posted by: r_towle Feb 22 2014, 11:12 PM
Ok, I was worried you might actually get it running...whew
Posted by: saigon71 Feb 23 2014, 07:27 AM
Great to see everyone & get caught up. Some photos: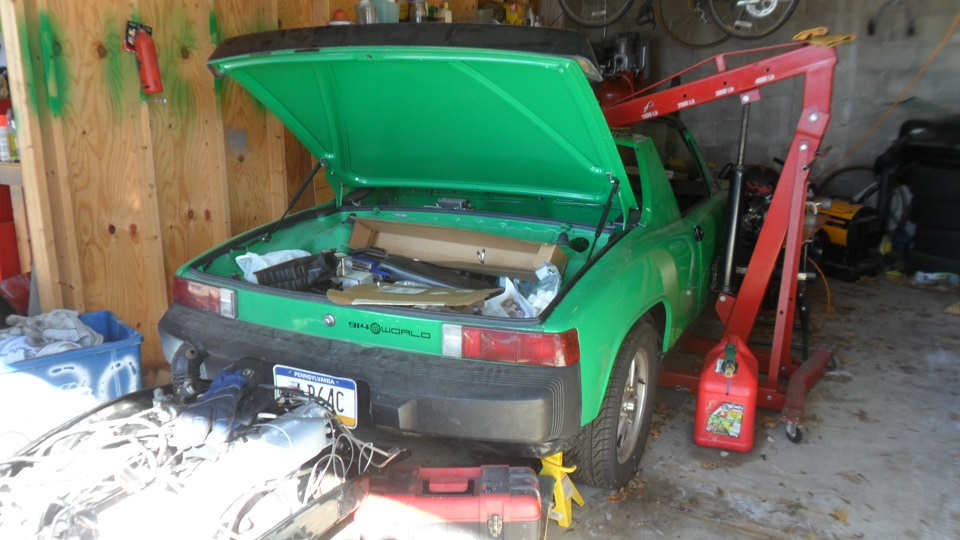

Posted by: Vacca Rabite Mar 22 2014, 07:03 PM
Goal for tonight: Fuel pump in, and rear shift linkage fitted.
9:03 PM. Kids are in bed. Time to get working.
Zach
Posted by: mepstein Mar 22 2014, 07:07 PM
Funny timing, I was just about to PM you and check on status. Do you need a plastic cover for the rear shift console? I found one in my stash. Comes with the rubber accordian boot.
Posted by: Vacca Rabite Mar 22 2014, 10:57 PM
Yes. Yes I need those. Thank you!
Got the fuel pump plumed in and the shift rod in place. Rod is loose for adjustment at the console.
Next task will be to get the tank in place w/o kinking the hoses. Tank is attached to the hoses but I did not have the energy to deal with it tonight.
Zach
Posted by: scotty b Mar 23 2014, 07:06 AM

Posted by: Vacca Rabite Apr 4 2014, 06:37 PM
Ahh. Not buried in work. Not traveling. Actually have the chance to work on my car tonight.
Well, until dinner when my eldest son suddenly started pulling his ear and said he could not hear well. So instead I'm waiting to see the after hours doctor. Maybe tomorrow?
Grumble. I'm just not supposed to get this heap to Hershey, it seems.
Zach
Posted by: Dr Evil Apr 4 2014, 06:44 PM
Just shove our phone in his ear and take a pic. Send that to me and I will take a look
Posted by: Vacca Rabite Apr 4 2014, 08:47 PM
Raging ear infection in the ear and ear canal. Yea!
Will see if I can get some work in tomorrow. I'm going to bed.
Zach
Posted by: Vacca Rabite Apr 5 2014, 08:08 PM
Cigar break time.
CVs are torqued. Tangerine shifter bar is adjusted from under the car. That was a task. Lots of trial and error of tightly machined parts. But it is in and done!
Break for a bit to get out from under the car and then it's time to put on the exhaust.
Progress is slow, but progressing none the less.
Zach
Posted by: Vacca Rabite Apr 5 2014, 09:43 PM
Bah. No more work tonight. Temps have tumbled and I can't find the hardware needed for the heat exchangers. I'll pick new stuff up tomorrow and try to get the exhaust on tomorrow. But, I got some good work done tonight, and hope to get more done tomorrow. :-)
I did get the gas tank in, and time will tell if the lines under it are kinked. I'll figure that out when I can get the back end of the car on the ground and the front end up.
Zach
Posted by: hot_shoe914 Apr 5 2014, 11:03 PM
Posted by: saigon71 Apr 6 2014, 08:27 AM
Bah. No more work tonight. Temps have tumbled and I can't find the hardware needed for the heat exchangers. I'll pick new stuff up tomorrow and try to get the exhaust on tomorrow. But, I got some good work done tonight, and hope to get more done tomorrow. :-)
I did get the gas tank in, and time will tell if the lines under it are kinked. I'll figure that out when I can get the back end of the car on the ground and the front end up.
Zach
Getting that gas tank by yourself must have been a chore.
I had a kink in one of my lines after installation but was able to work it out through the access hole.
Keep on truckin Zach...the Central PA Green Teeners must all be at Hershey this year!
Bob
Posted by: type47 Apr 6 2014, 08:34 AM
hmmm... I installed my gas tank then cut the fuel hoses to fit as a straight piece from the SS fuel line to the tank nipple. That way no possibility of kinking in the bend. The IS possibility of kinking if the cut piece is too long and would tend to try to bend and then kink in the bend. But if cut to just the right length, it's a straight piece. It is kinda a b!tch to tighten the hose clamps through the access hole but a right angle ratcheting tool was in the tool box and did it's job...
Posted by: Vacca Rabite Apr 6 2014, 08:54 AM
I like to have a service loop under the tank in case I have to pull it again. Which in theory I will do before too long when I start to reinstall the heat system to the cabin. Between the access hole and the front pump I hope to be able to smooth out any kinks.
I decided to order bolts from Bolt Depot last night instead of heading to True Value today. Will have to wait a few days to install the exhaust, but it gets me nuts and bolts with a 12mm head instead of the usual 13mm. That last mm is a big deal when installing heat exchangers. And I don't NEED exhaust to start it up the first time...
Steven is coming over next Saturday. I really want to start it with him there to help me get it running.
Zach
Posted by: Vacca Rabite Apr 9 2014, 06:58 PM
Had a really productive afternoon. Almost felt like I was back at the University again.
I got cut loose from work at 2:15 today by surprise when a training class ended early, and the one meeting I promised my boss I'd call into got rescheduled! Got home with 2 hours before the kids/wife would get home.
I made use of my time by getting the exhaust on my 914.
First I checked the torque on the CVs and then safety wired them.
Then the SS exchangers and TRIAD went up. Lots of fiddling to get it even, and no way to check for leaks right now but I think I have it pretty good. And the Triad looks awesome.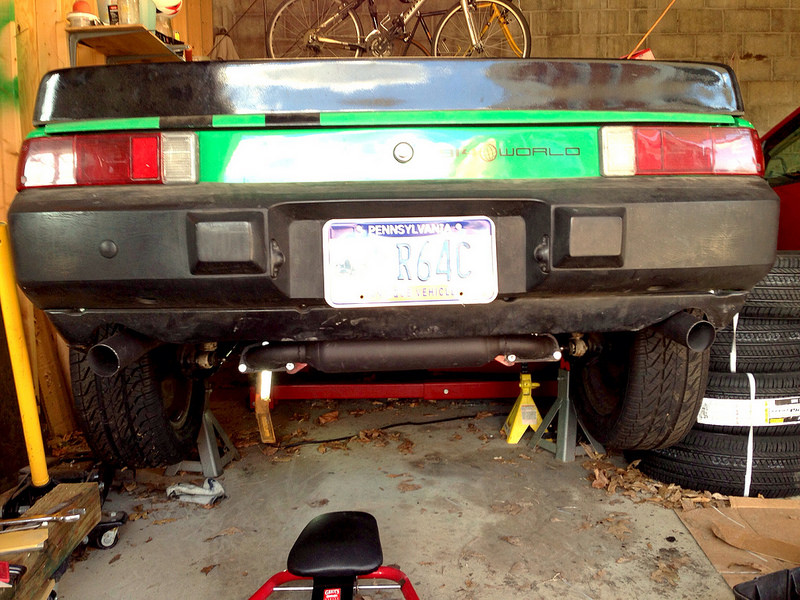
And got the o2 sniffer in (was kinda a bitch to get a wrench on it...)
I was getting the starter wired back up when wife and children came up the driveway and I had to stop. All I need to do before dropping the car back to the pavement (so I can raise the front end...) is tighten the leads on the starter, and check nuts and bolts. Maybe another 30 minutes of work (including lowering the car back down.)
Zach
Posted by: Racer Chris Apr 9 2014, 09:26 PM
I like to have a service loop under the tank in case I have to pull it again.
We've found that the 30R9 fuel hose kinks very easily when bent in a U.
Posted by: Vacca Rabite Apr 10 2014, 06:26 AM
So.... What does that mean I need to do? Straight line like Jim said, or just try to work the kinks free? What is the preferred way to work with this hose?
Zach
Posted by: Chris H. Apr 10 2014, 07:16 AM
I don't know but your custom rear 914 badge is awesome.
Not helpful at all I know.
Sorry.
Posted by: saigon71 Apr 10 2014, 07:27 AM
Zach:
I followed advice from Mr. Foley and left my lines long so I had room to work under there with the tank up.
While I ended up with a kink in one of the lines, it was pretty easy to work it out with the extra length of hose under the tank.
I would leave it the way you have it.
Bob
Posted by: Vacca Rabite Apr 10 2014, 09:43 AM
I don't know but your custom rear 914 badge is awesome.
McMark made them a while back. I got a bunch of them to give out at East Coast events. I have a few more, come to Hershey and I'd be happy to let you pick one. Don't know colors I have left off hand.
Zach
Posted by: Racer Chris Apr 10 2014, 09:52 AM
I haven't found time to work on it yet, but one of my thoughts was to find a coil spring to slide over the hose to see if that will help keep a kink from forming.
Posted by: John Jentz Apr 10 2014, 10:18 AM
I haven't found time to work on it yet, but one of my thoughts was to find a coil spring to slide over the hose to see if that will help keep a kink from forming.
NAPA has a device to keep hoses from kinking. I saw it on the counter awhile ago. Sorry no other info.
Posted by: Vacca Rabite Apr 10 2014, 04:29 PM
So I stopped at best buy and bought the cheapest laptop I could buy.
My old machine is just too damn old and the battery only lasts a few moments. So time to see what a new $250 laptop can do. If I can use it for tuning and web browsing it will be worth it. Tuning may start as early as tomorrow, but likely next week.
Still a very slim chance the heap will make Hershey.
Zach
Posted by: r_towle Apr 10 2014, 07:19 PM
What do you get for 250 this month?
Posted by: Vacca Rabite Apr 10 2014, 07:36 PM
Not a hell of a lot, and windows 8. Which I am learning I do not like very much.
But the machine works with Tuner Studio and I can search the web on it. So it does everything I bought it to do.
The sticker on it says a 500GB drive, 4GB ram, 15 inch monitor, Celeron processor.
Zach
Posted by: r_towle Apr 10 2014, 07:41 PM
Not a hell of a lot, and windows 8. Which I am learning I do not like very much.
But the machine works with Tuner Studio and I can search the web on it. So it does everything I bought it to do.
The sticker on it says a 500GB drive, 4GB ram, 15 inch monitor, Celeron processor.
Zach
They all come with too little ram....geez.
Windows 8 is a simple click to the classic window....
Check it out, the OS uses 4 gigs to function.....
Posted by: Chris H. Apr 11 2014, 12:07 PM
I don't know but your custom rear 914 badge is awesome.
McMark made them a while back. I got a bunch of them to give out at East Coast events. I have a few more, come to Hershey and I'd be happy to let you pick one. Don't know colors I have left off hand.
Zach
Thanks man
. Very kind of you to offer. Wish I could be there. I'll catch up with ya next year...hope to drive my conversion-mobile.
Posted by: Vacca Rabite Apr 11 2014, 01:13 PM
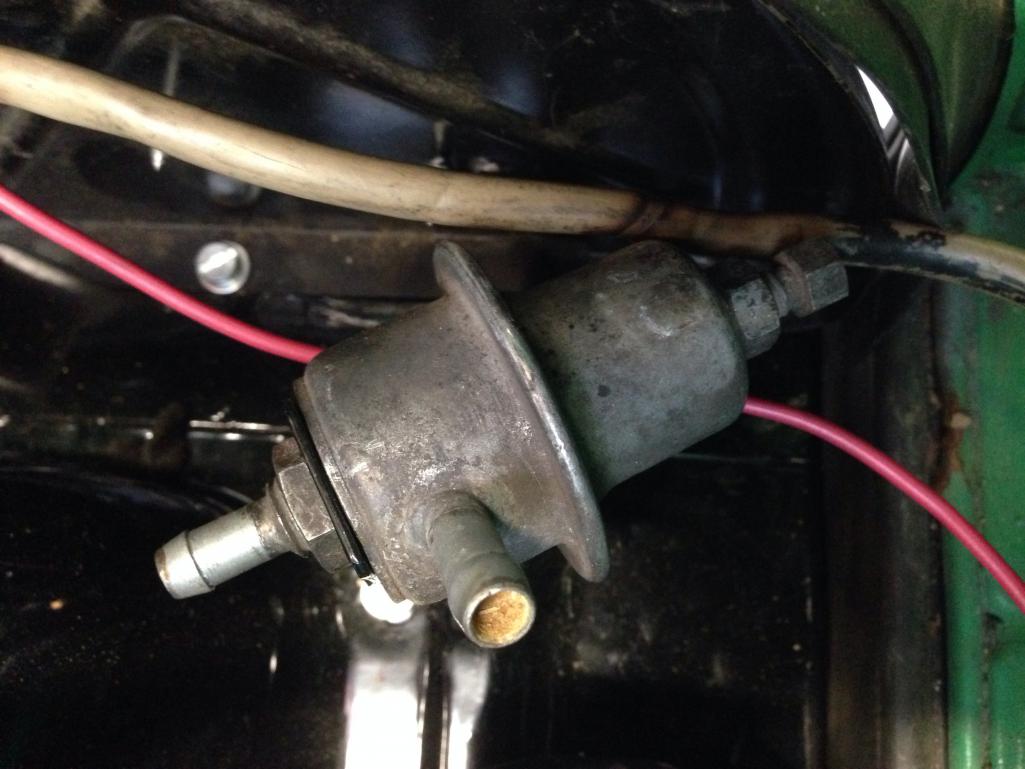
How does this get plumbed in?
How do the fuel rails get plumbed in as well?
Zach
Posted by: McMark Apr 11 2014, 02:39 PM
Tank - Pump - Pass Side Fuel Rail - Driver Side Fuel Rail - Regulator - Tank
In your picture, the fuel regulator outlet is on the left.
Posted by: Vacca Rabite Apr 11 2014, 03:05 PM
So fuel flows in from the side of the regulator and out through the bottom?
Or other way around?
Zach
Posted by: McMark Apr 11 2014, 03:19 PM
Ignore the right side.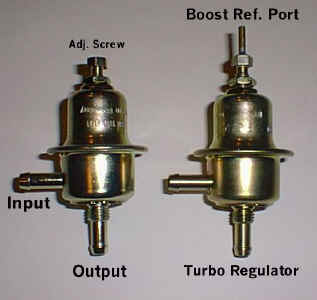
Posted by: McMark Apr 11 2014, 03:21 PM
Also, this:
Posted by: Vacca Rabite Apr 11 2014, 03:28 PM
Car is back on all 4 tires at least for the moment.
Injectors are in. The engine has oil I. It and nothing is (yet) leaking. Shifter is installed but not adjusted from the cockpit. Trying to find the rennshift install instructions.
Tonight I'll get the engine side fuel lines plumbed in, and hopefully finish adjusting the shifter.
If I get that done, I'll get the air cleaner housing in and start chasing wires and cleaning things up.
Last thing this evening will be raising the front end so I can check and unkink the fuel lines under the tank. Getting really close to first start! 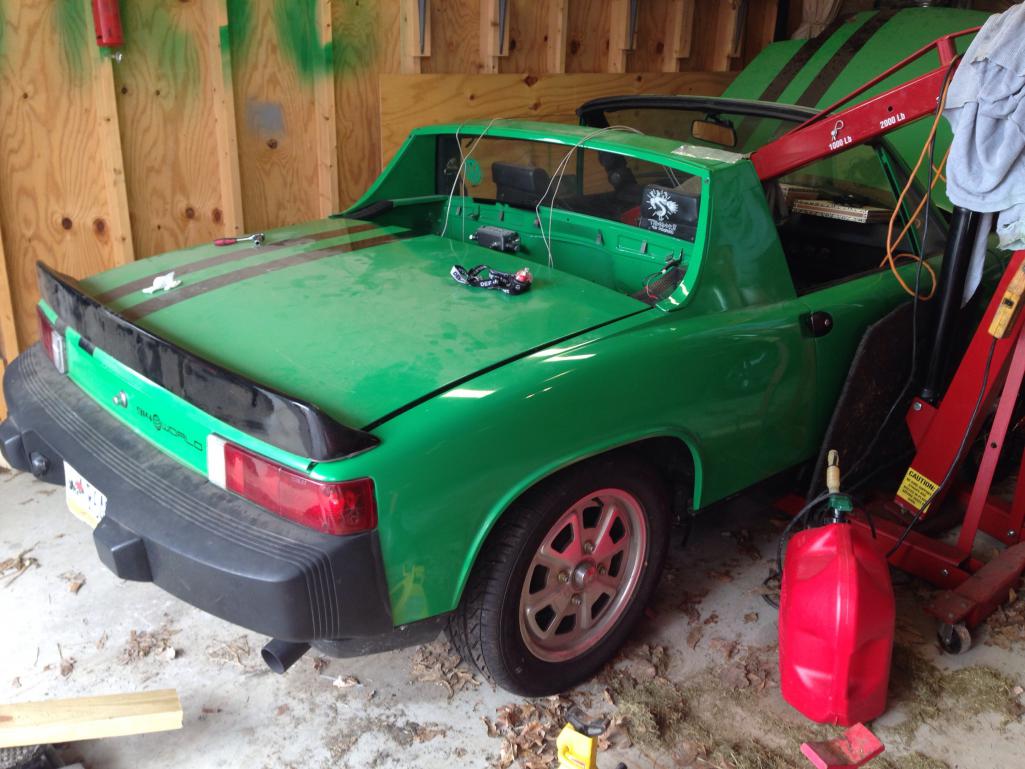
Posted by: crash914 Apr 11 2014, 03:46 PM
Nice, then you can come help me this weekend....I want mine running too...
Posted by: Vacca Rabite Apr 11 2014, 09:42 PM
Done for the evening.
Got the engine side fuel lines plumbed in.
Shifter in and adjusted.
1.8 Air Box in. That was kind of a bitch.
Got the car moved back and the front end up in the air. Tomorrow's task will be checking the fuel lines under the tank for kinks.
Cleaned up the shop a little and have stuff set up for tomorrow night.
Zach
Posted by: ablesnead Apr 12 2014, 08:24 PM
planning on purchasing a Rennshift don't have access to an engine hoist...will I be able to install it without one
Posted by: Vacca Rabite Apr 12 2014, 08:27 PM
planning on purchasing a Rennshift don't have access to an engine hoist...will I be able to install it without one
LOL you will be fine!
The hoist was there just to get it out of the way, and to provide a big physical barrier to try and save my 914 from door dings as it shares a bay with my wife's car (and the 6 year old and 2 year old that often ride in it.)
Zach
Posted by: Vacca Rabite Apr 13 2014, 06:33 PM
A good day. I got to do my first muzzle loading competition AND work on my car!
I took the cover off the steering rack and looked into the inspection hole. Also felt around. No kinks that I could find. Left the cover off in case I was wrong, but put the car back on the ground. Felt around the portal where the fuel pump is (pump is in the front trunk for 75+cars) and no kinks there either. Screwed that shut.
With the car back on the ground, closed the hood, and smiled. This week has been like it used to be when I worked for the university. Motivation and TIME that I can work on the car. Climbed behind the wheel and played with the shifter a little. It may need a little more adjustment towards R and 1st, but all the others go in REALLY smooth. I was tempted to put the battery in, and turn the key just to see the dash light up after so many years idle. But then I heard my wife scolding the toddler from the house, and I knew my car time was over.
Still, a damn good day. I love the spring. I'm glad spring finally decided to show up! :-)
Zach
Posted by: 396 Apr 15 2014, 08:56 AM
congrats...great info / education
Posted by: Vacca Rabite Apr 17 2014, 07:24 PM
Today I got a little done but not much.
Got the vacuum line hooked up in the engine bay.
Got the MAP sensor in place and the vacuum line it needed run.
I THINK I have all the vacuum hose barbs closed.
Tomorrow I took off for my last ditch attempt to get the car to Hershey.
There are a few electrical connections that still need to be figured out in the engine bay.
Also need to get the expansion tank back on and get gas in the tank.
Then its vroom vroom.... (I hope).
Zach
Posted by: Vacca Rabite Apr 18 2014, 09:13 AM
Dammit!
I'm having grounding issues. Cyl 1&2 injectors will not ground through the injector studs. And of course I have to pull a bunch of crap to get to them to investigate.
Everything else is grounding properly. I'm not sure what insulating those studs.
Zach
Posted by: tdgray Apr 18 2014, 10:33 AM
Dammit!
I'm having grounding issues. Cyl 1&2 injectors will not ground through the injector studs. And of course I have to pull a bunch of crap to get to them to investigate.
Everything else is grounding properly. I'm not sure what insulating those studs.
Zach
Aren't you supposed to be going somewhere?
Posted by: Vacca Rabite Apr 18 2014, 11:08 AM
Dammit!
I'm having grounding issues. Cyl 1&2 injectors will not ground through the injector studs. And of course I have to pull a bunch of crap to get to them to investigate.
Everything else is grounding properly. I'm not sure what insulating those studs.
Zach
Aren't you supposed to be going somewhere?
I was hoping to be going in my 914.
Events, as usual, have conspired against me actually getting time to work on the damn thing.
No one is going to be up in my neck of the woods til this evening. No reason to head up yet. Besides there is a big local car show near me this afternoon and it looks like I'll be able to go to both.
Zach
Posted by: saigon71 Apr 18 2014, 11:24 AM
Sorry to hear the teener won't make it Zach. On the bright side, I see a lot of alcohol in your near future.
Posted by: Vacca Rabite Apr 18 2014, 08:43 PM
Well yes. Indeed.
Posted by: jsayre914 Apr 18 2014, 09:30 PM
Well yes. Indeed.
Bummer

Posted by: Vacca Rabite Apr 22 2014, 06:33 PM
Today I buttoned back up the expansion tank on the gas tank.
I also called and made an appointment to bring the car to Translog and let Tony finish it up. I hated doing it, but I want to actually drive the damn thing. I'll work on it this weekend and bring it to him for the final check, start and tuning.
Not having the car at Hershey really pissed me off this year.
Zach
Posted by: Dr Evil Apr 22 2014, 06:46 PM
Ya, then you could have driven yourself home 
Posted by: scotty b Apr 23 2014, 06:52 AM
Ya, then you could have driven yourself home
Attached image(s)

Posted by: Moneypit Apr 23 2014, 03:02 PM
Car is back on all 4 tires at least for the moment.
Injectors are in. The engine has oil I. It and nothing is (yet) leaking. Shifter is installed but not adjusted from the cockpit. Trying to find the rennshift install instructions.
Tonight I'll get the engine side fuel lines plumbed in, and hopefully finish adjusting the shifter.
If I get that done, I'll get the air cleaner housing in and start chasing wires and cleaning things up.
Last thing this evening will be raising the front end so I can check and unkink the fuel lines under the tank. Getting really close to first start!
TROGDOORRRR!!!!!!!

Posted by: Vacca Rabite Apr 28 2014, 04:24 PM
Car is now at Translog for finishing. Dragged it there this afternoon and spoke to Tony for a bit. No idea when it will be up and running again, but its going to be sooner then if I was doing it on my own. I can only work weekends, and all my weekends are booked solid through mid June now. Tony got all my notes and I took some time to walk him through the engine bay, and trying to explain how it is all supposed to go together.
This is the really busy season for him, so I don't expect my car to be first. But I do hope o have it back by Matt's annual party in August. :-)
I hate that I had to admit defeat and hand the car off to get finished. But not having the car done by Hershey hurt, and I know this way it will be done right when it is done.
Zach
Posted by: mepstein Apr 28 2014, 06:37 PM
It's not defeat, it's bring in reinforcements - and soon you'll be driving.
Posted by: Vacca Rabite May 15 2014, 03:55 PM
Stopped by Translog today to drop off some stuff. Look what was in the bay:
No way I thought they would have time already. Super excited.
It's close!
Zach
Posted by: Dr Evil May 15 2014, 04:02 PM
"We have a turd in the punch bowl. Repeat, we have a turd in the punch bowl. Proceed with caution."
Posted by: bulitt May 15 2014, 04:10 PM
"We have a turd in the punch bowl. Repeat, we have a turd in the punch bowl. Proceed with caution."
Turd Expert...

Posted by: crash914 May 15 2014, 04:36 PM
Looking good! It won't take long..you will be driving soon...
Mine is running!
https://www.youtube.com/watch?v=kL12MIKktUg
Posted by: saigon71 May 15 2014, 05:18 PM
Excellent! When you get it back, let's gather the locals for a drive.
Posted by: Moneypit May 16 2014, 07:40 AM
Stopped by Translog today to drop off some stuff. Look what was in the bay:
No way I thought they would have time already. Super excited.
It's close!
Zach
If it has a Trogdor sticker, it must be fast! It might also occasionally burn thatched-roof cottages, so you might want to consider that with your insurance...
Posted by: Vacca Rabite Nov 11 2014, 05:17 PM
I stopped by Translog today with my laptop.
The ECU stopped communicating with Tony's PC, so I showed up with mine to see if I could eliminate the ECU as the issue. No love. I think that the ECU is corrupted and needs to be reflashed.
But while I was there I noticed my 914 was one of many in the shop.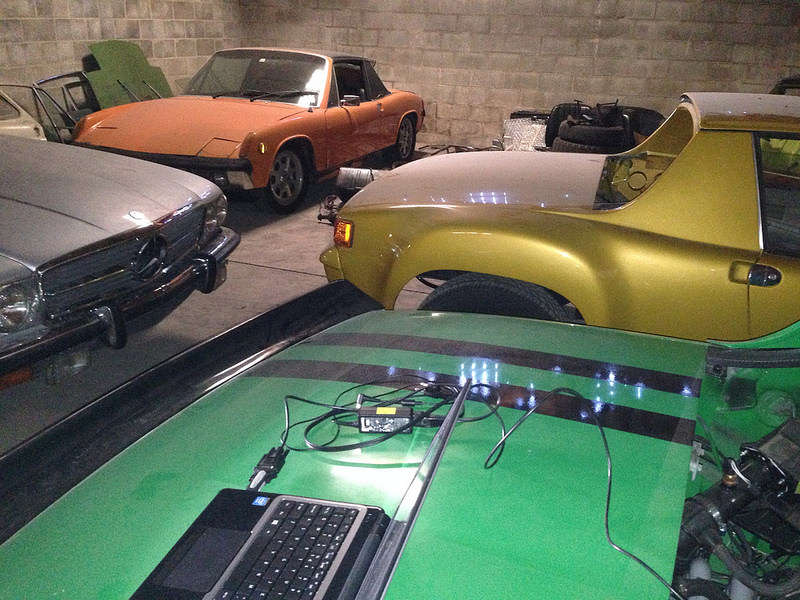
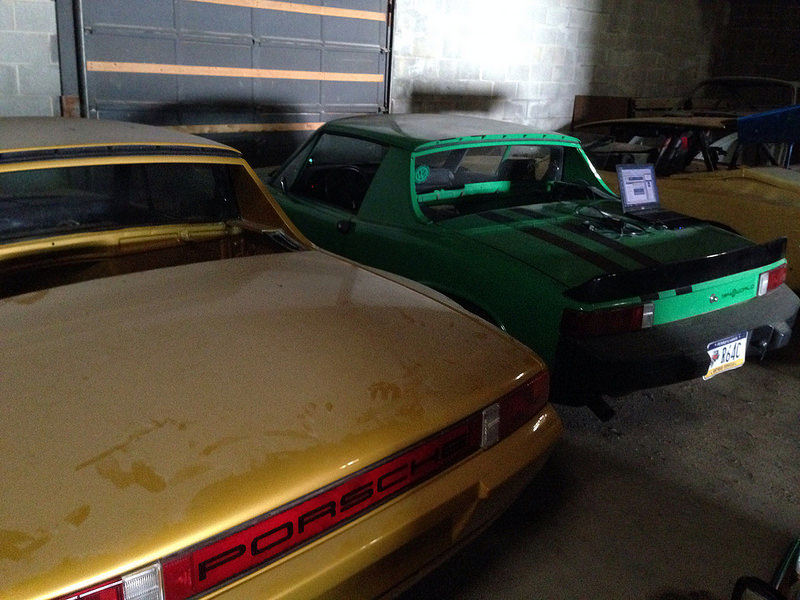
Zach
Posted by: McMark Nov 11 2014, 05:34 PM
USB to serial adapters suck. I would invest in a $200 laptop that has a built in serial port.
And/or send me the ECU so I can test it in my car.
Posted by: Vacca Rabite Nov 11 2014, 06:11 PM
USB to serial adapters suck. I would invest in a $200 laptop that has a built in serial port.
And/or send me the ECU so I can test it in my car.
Lol. That IS a $200 laptop. Maybe a $300 laptop. It was the cheapest I could get at BestBuy last year. Nothing they had still had a serial port.
The USB connector I got is the one they sold from DIYAutotune, that they claimed was the best on the market at the time for tuning their systems.
I sent Tony links for the Microsquirt manual for the vII system. I think the current system is the vIII.
Zach
Posted by: McMark Nov 11 2014, 06:30 PM
I use a Dell D630 which has a built in serial port. They're going for about $100 on Amazon.
The plastic body ECU is vIII.
Posted by: aircooledtechguy Nov 11 2014, 06:47 PM
I use a Dell D630 which has a built in serial port. They're going for about $100 on Amazon.
The plastic body ECU is vIII.
Or,. . .
Upgrade to MS3X and use a regular USB/USB cable. . .
Posted by: scotty b Nov 11 2014, 06:53 PM

Attached image(s)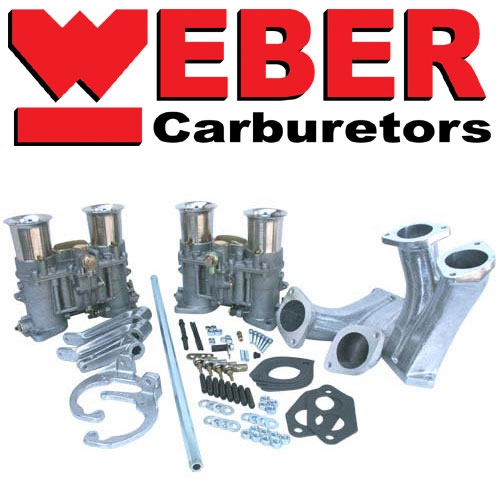
Posted by: crash914 Nov 11 2014, 07:02 PM
You can always swing by and we can test it with my stuff....I have both, bluetooth and usb serial cables....I also have a stim...
Posted by: McMark Nov 11 2014, 08:20 PM
Does the fuel pump turn on with the key?
Posted by: mr2by4 Nov 11 2014, 09:43 PM
Mark,
How much does this sort of deluxe, COP, prewired EFI system cost?
Posted by: Vacca Rabite Nov 12 2014, 11:15 AM
I did not hear the fuel pump turn on. But I was not listening for it either. I was only there for a few minutes. Long enough to plug in my laptop to see if there was communication.
If I can get time, I'll go back and run more tests, but I'm not sure tony would want me working on my car at his garage.
Zach
Posted by: McMark Nov 12 2014, 12:30 PM
Mark,
How much does this sort of deluxe, COP, prewired EFI system cost?
Roughly $3000 for:
- New Custom Wiring Harness
- New Injectors
- New Ignition Coils (Coil-on-plug)
- New Throttle Position Sensor
- New MAP Sensor
- MicroSquirt v3
- Mounting and Blockoff Brackets
I did not hear the fuel pump turn on. But I was not listening for it either. I was only there for a few minutes. Long enough to plug in my laptop to see if there was communication.
If I can get time, I'll go back and run more tests, but I'm not sure tony would want me working on my car at his garage.
Zach
If the fuel pump isn't running, the MicroSquirt isn't turning on. PM me the Tony's number again and I'll call him.
Posted by: peteyd Mar 28 2015, 03:37 PM
Any updates on your car Zach?
You have this thing running and on the road?
Pete
Posted by: Vacca Rabite Mar 30 2015, 07:46 PM
I need to call Tony tomorrow and find out. He said he'd have it running by the end of march.
Zach
Posted by: Dr Evil Mar 30 2015, 07:55 PM

Posted by: r_towle Mar 30 2015, 08:20 PM
What is that glass house throwing stones saying?
Posted by: toon1 Mar 31 2015, 11:11 AM
I need to call Tony tomorrow and find out. He said he'd have it running by the end of march.
Zach
Whats wrong with it?
Posted by: Vacca Rabite Mar 31 2015, 12:08 PM
Nothing in particular aside from me not having time to mess with it for the better part of 2 years. I gave it to Tony thinking it would be a summer project for his team. That turned into a year project. It's not like I'd suddenly have time to start working on it, so I have not made a fuss. When I get it it should be a dyno tuned system.
Zach
Posted by: Vacca Rabite Mar 31 2015, 02:04 PM
I talked to Tony. Not running and he is stumped.
He can't get the ECU to connect to TunerStudio. Can't get to first base as it were. It's got power and ground but won't sync.
It did sync at one point. Lost connection in the middle of an operation and communication has not been able to be reestablished. I'm going over Friday to futz with it and could use whatever help I can get.
Posted by: McMark Mar 31 2015, 02:16 PM
Zach, will you confirm they tried the tips I sent them. If they did, I'm gonna drop a spare ECU in the mail for you. PM me their address. The ECU has a bad tach_out, but everything else works.
Posted by: crash914 Mar 31 2015, 03:43 PM
Harness I think is different, but you are welcome to try my MSII to see if it works, we can swap the firmware easily....Marks solution is better, but anyway, mine is sitting here awaiting a car to put it in...oops, no vr circuit though...
Posted by: McMark Mar 31 2015, 03:53 PM
Yeah, MSII is very different. Nice offer though.
Posted by: Vacca Rabite Mar 31 2015, 04:30 PM
Mark, when I talked with Tony today they said they had tried everything you had told them about.
Mail the ECU to me if you dont mind. If I cant get mine to connect this week, I'm going to pull it and send it to you to see if it works on an otherwise known good system.
Seriously thinking of towing my car back home. as long as I'm going to be working on it again, I'd rather walk out to my garage then take days off work to work at tony's shop. Nothing against Translog, but I just dont want them burning shop hours fighting a connection. I want them burning shop hours tuning.
Zach
Posted by: Vacca Rabite Mar 31 2015, 04:33 PM
My plan of action thus far is to do a loopback test on the ECU. This will let me know if the laptop and ECU even see each other.
Then reload the firmware onto the ECU.
I'm putting together a checklist of parts and tests to run, since I will have limited time.
Going to bring full set of tools, and multimeter, and my laptop.
Posted by: Vacca Rabite Apr 1 2015, 08:02 PM
Heading to Translog tomorrow. (thursday).
Packing up tools and I cant find my damn multimeter.
Guess I'll be stopping by the hardware store on the way there.
Zach
Posted by: scotty b Apr 1 2015, 08:07 PM
you realize you could have shipped the car to Mark a year 3 years ago and be driving it right now don't you ?
Posted by: r_towle Apr 1 2015, 08:24 PM
you realize you could have shipped the car to Mark
are you thinking about shipping your car to mark to get it done? Seems like a good plan Scotty, and we are supportive of you finally making the decision.
Posted by: Vacca Rabite Apr 2 2015, 09:03 AM
Looks like the issue is a miswired factory serial cable!!!
I'm going out to find if I can buy a new minijack to DB9 cable.
On mine pin 2 is wired to pin 4. Only 2 pins used. Man I hope this is the issue!
Posted by: Racer Chris Apr 2 2015, 10:10 AM
you realize you could have shipped the car to Mark

Tangerine Racing is a whole lot closer.
I have Tunerstudio on my laptop and two customer cars at the shop running MS which we installed.
...just saying...
And no disrespect intended to McMark.
Posted by: Vacca Rabite Apr 2 2015, 10:18 AM
you realize you could have shipped the car to Mark
Tangerine Racing is a whole lot closer.
I have Tunerstudio on my laptop and two customer cars at the shop running MS which we installed.
...just saying...
And no disrespect intended to McMark.
Scott is starting rumors. :-/.
Car is not leaving York. I'm going to back the serial cable in a few minutes to fix the wireing. Then will see if it will connect. IF it does the car will start tuning at Translog.
Zach
Posted by: scotty b Apr 2 2015, 11:14 AM
you realize you could have shipped the car to Mark
Tangerine Racing is a whole lot closer.
I have Tunerstudio on my laptop and two customer cars at the shop running MS which we installed.
...just saying...
And no disrespect intended to McMark.
No offense intended Chris. I was just busting Sach's sack by making an exaggerated point.
Posted by: AndyB Apr 2 2015, 11:22 AM
you realize you could have shipped the car to Mark
Or you could of sent to CFR three years ago and driven it three years ago IMHO.
Posted by: Racer Chris Apr 2 2015, 11:42 AM
No offense intended Chris. I was just busting Sach's sack by making an exaggerated point.
I know. I just wanted to throw in my $.02.
Posted by: Vacca Rabite Apr 2 2015, 02:22 PM
Back at home again. Here is where I am at.
I hacked apart the DB9 end of the cable to "correct" the pin wiring. I have to say it in quotes as (after I hacked it up) I found other information that said it was correct the first time. But I get ahead of myself. I hacked up the cable, soldered the pins to the wires and tried to reinstall them into the DB9 head. This was not successful. The cable was never intended to be taken apart, and getting the pins back into the body resulted in mostly mangled pins. Then back to google to find information suggesting that the cable was right in the first place. *grumble*
At this point I packed up my stuff, grabbed the ECU out of my car and came home after doing a small favor for Tony by fixing a computer glitch he had on his office machine.
This was the pic that got me thinking my cable was wired wrong.
In this picture the wire that should have been on Pin 2 was on Pin 4.
HOWEVER
After I hacked the cable apart I found this:
WTF right?! Well I found the problem. The pic up top is of a MALE serial cable, and the pic below is of the FEMALE cable. I was just using google image search, and the pictures were not labeled as male/female. I had to figure that out on my own. My cable had the female end. Which means it was likely correct in the first place and I just ruined a okay cable.
So here is my plan.
buy a female 35 pin ampseal plug, new serial cable, and the Microsquirt mini-jack connector. With this I can bench test the ECU, and hopefully bring it up. At which point we can put it back in the car and start tuning.
I tested connectivity at the harness and its good. There may be a bad connection at the fuse block - I got a fault there unless I wiggled it around.
I also got more information on the failure mode in the first place. Tony said that they had connected to the ECU for a minute or two. The dashboard came up in tunerstudio, and the ECU was auto-detected. He turned around, and when he turned back connection had been lost.
Its not outside the realm of possibility that a bad connection at the fuse panel cut power to the ECU while it was connected to the laptop, corrupting the ECU. At this point I really don't know. I'm going to build the bench test rig and go from there.
I do have a JimStim which I may be able to wire into the bench test harness. That may be more trouble then its worth though. We shall see.
Zach
Posted by: McMark Apr 2 2015, 02:28 PM
Just left you a message Zach. Don't buy anything.
Posted by: Vacca Rabite Apr 2 2015, 05:45 PM
So right now this is my plan for the test board.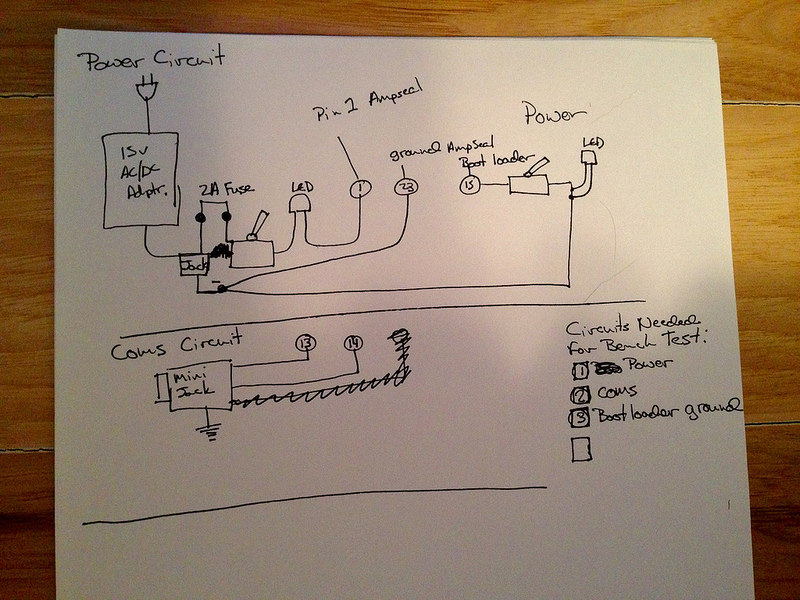
Please look and see if I have something glaring. Do I need to add a circuit?
I think I only need 3 circuits at this time.
1) Power
2) Coms
3) Bootloader Ground
I have a 15 volt, 1.4 amp power AC to DC power converter on hand. This will allow me to plug the test box into a wall and not have to fiddle with batteries.
The numbers inside circles are the pins to the Ampseal jack.
Boot loader will be on a switch instead of plugging and unplugging a wire, with an LED to show when it is grounding.
Zach
Posted by: Vacca Rabite Apr 2 2015, 07:10 PM
On a whim, as there is little else I can do right now, I just checked continuity on the ECU. I got no connection between pin 1 (power) and pins 19-23 (all ground pins).
Should I have continuity between Power and Ground pins while no power is applied to the ECU?
Zach
Posted by: McMark Apr 2 2015, 08:06 PM
I don't know for sure, can't test till Saturday. But I'm doubtful. There shouldn't be a clean path from power to ground because that would be a dead short. It's also unlikely there are any resistor type connections from power to ground. Most of the stuff is IC and does things with the power only when it's on.
Posted by: r_towle Apr 2 2015, 08:08 PM
On a whim, as there is little else I can do right now, I just checked continuity on the ECU. I got no connection between pin 1 (power) and pins 19-23 (all ground pins).
Should I have continuity between Power and Ground pins while no power is applied to the ECU?
Zach
no
You might want tp bend Mark Skalas ear on testing this....he may be of help...
I recall he is a hardware guy.
Rich
Posted by: Vacca Rabite Apr 2 2015, 08:17 PM
I don't know for sure, can't test till Saturday. But I'm doubtful. There shouldn't be a clean path from power to ground because that would be a dead short. It's also unlikely there are any resistor type connections from power to ground. Most of the stuff is IC and does things with the power only when it's on.
no
You might want tp bend Mark Skalas ear on testing this....he may be of help...
I recall he is a hardware guy.
Rich
I suspected as much. Thanks guys.
Zach
Posted by: okieflyr Apr 3 2015, 05:46 AM
Some power converters do not produce a clean enough voltage signal that sensitive electronics require.
A dedicated power supply may be better for the job if you can get your hands on one.
Posted by: Spoke Apr 3 2015, 06:38 AM
So right now this is my plan for the test board.
Please look and see if I have something glaring. Do I need to add a circuit?
I think I only need 3 circuits at this time.
1) Power
2) Coms
3) Bootloader Ground
I have a 15 volt, 1.4 amp power AC to DC power converter on hand. This will allow me to plug the test box into a wall and not have to fiddle with batteries.
The numbers inside circles are the pins to the Ampseal jack.
Boot loader will be on a switch instead of plugging and unplugging a wire, with an LED to show when it is grounding.
Zach
If pin 1 is the power pin, the LED should not be in series with it unless the manufacturer says so. If you want an LED to let you know when power is on, the LED should be connected between the switched power and ground through a resistor of about 5-10k ohms.
A couple of things from previous posts: You 'may' be able to see some resistance from power to ground with the power off. If it was a dead short, it would show up as zero ohms. This is not a conclusive test.
About the power supply noise, chances are the automotive voltage rails are about as noisy as can be. The electronics in the MS run off a low voltage like 5V or 3.3V or lower and likely have significant filtering from the input power to the conditioned digital power.
Still a good idea to have as quiet a power supply as possible. If you're going to have a fuse in the path, why not use a car battery? The load on the battery has to be minor and should give hours of running just the MS.
Posted by: Vacca Rabite Apr 3 2015, 06:43 AM
I don't have a spare car battery. My 914 and its battery are at Tony's shop.
Posted by: Spoke Apr 3 2015, 07:12 AM
Your power supply should be ok.
What exactly happened that the MS stopped working? I read through your thread but couldn't tell when the ECU stopped working.
I'll offer to take a look at it and see what's wrong. We do electronic solution development at work and have a lot of experience with small systems like MS.
Here's one we just finished. It's a camera on a needle for probing knees and shoulders. Pretty cool. We did the camera board (me) and the base processor and software. It runs Android. 
http://www.tricemedical.com/product.html
Posted by: crash914 Apr 3 2015, 08:06 AM
Schematics are available here...
http://www.microsquirtmodule.com/microsquirt_V2.2_module.pdf
Posted by: crash914 Apr 3 2015, 08:06 AM
it could be just the rs232 chip that is no good....
Posted by: McMark Apr 3 2015, 08:38 AM
Careful of changes by version. That schematic is v2.2, the ECU is v3.
Posted by: crash914 Apr 3 2015, 08:40 AM
yea, i thought about that.....ver 3.0 is also available...
Posted by: Vacca Rabite Apr 3 2015, 09:12 AM
Your power supply should be ok.
What exactly happened that the MS stopped working? I read through your thread but couldn't tell when the ECU stopped working.
I'll offer to take a look at it and see what's wrong. We do electronic solution development at work and have a lot of experience with small systems like MS.
Here's one we just finished. It's a camera on a needle for probing knees and shoulders. Pretty cool. We did the camera board (me) and the base processor and software. It runs Android.
http://www.tricemedical.com/product.html
I don't know. I was not there. All I know is what was stated. They had it connected, ad then it stopped communicating.
Could I get you to draw out the circuit (so a dummy layman like me could build it) so that I can have the LEDs light up when there is power to their circuit?
Zach
Posted by: Spoke Apr 3 2015, 10:29 AM
Schematics are available here...
http://www.microsquirtmodule.com/microsquirt_V2.2_module.pdf
Thanks but the link just takes me to a logo.gif file. I looked on the MS website but still didn't find the schematic. Got another link to the schematic?
Posted by: Spoke Apr 3 2015, 10:43 AM
Could I get you to draw out the circuit (so a dummy layman like me could build it) so that I can have the LEDs light up when there is power to their circuit?
Zach
Here's the main part of the circuit. The LED with the bootloader is not in the right place but I don't have a schematic to add this to it.
When you connect the power from the wall wart, do not connect the MS to it yet. Connect the fuse, switch, LED and resistor and try the power. If the LED doesn't light when you close the switch, the voltage is backwards. If the LED lights when the switch is closed, then the power is correct. Then turn the switch off and connect the MS.
When you're done with this and it doesn't work, you can give it to me and perhaps I can get it running and give it to you at Hershey. BTW, I pass through Harrisburg 2 times a week if you want to drop it off.
Attached image(s)
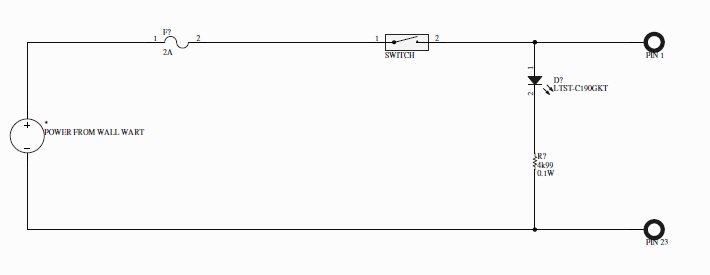
Posted by: McMark Apr 3 2015, 12:07 PM
I don't have a spare car battery. My 914 and its battery are at Tony's shop.
Motorcycle batteries are pretty cheap and make great tester batteries for all sorts of automotive projects.
Posted by: crash914 Apr 3 2015, 05:07 PM
Let's try this one.
Never mind......can't cut and paste
Posted by: Vacca Rabite Apr 3 2015, 05:55 PM
Herb, i may come to pick your brain when I get the tester built. Youve done this before and that may come inhandy trying to get the ECU back on line.
Zach
Posted by: crash914 Apr 3 2015, 06:14 PM
No problem...Jim stim and unit on my bench. I think I have everything to fab a cable if needed...
Posted by: Vacca Rabite Apr 9 2015, 07:16 PM
Well, I built the breadboard for the power circuit, and found an issue.
My 15 volt power supply (which would have been perfect for this) is actually a 20 volt power supply. Glad I checked it with a multimeter before connecting the MS unit.
Microsquirt can take a 9V to 17v supply. Looks like its time to go get a lawn tractor battery. At least I'll have a hot spare when the battery on my tractor dies.
Zach
Posted by: Vacca Rabite Apr 11 2015, 09:18 PM
Tester for power built.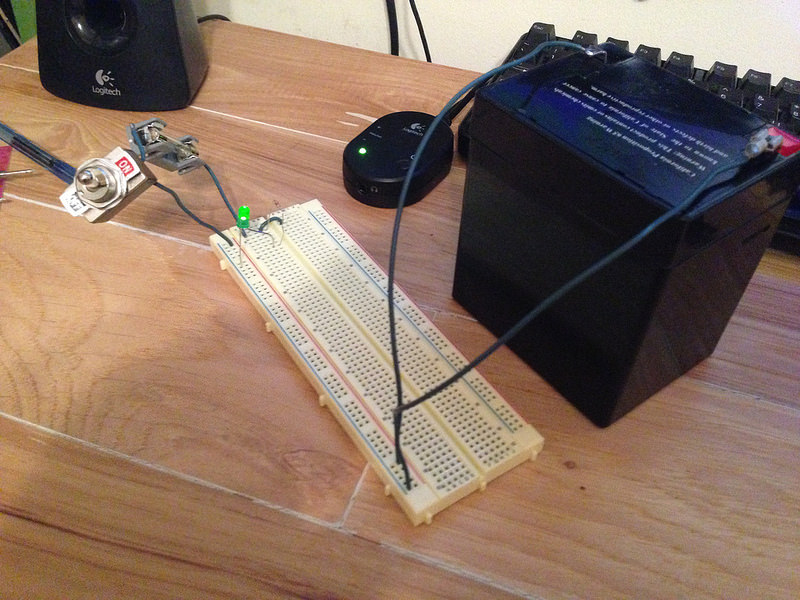
tested with the meter: 12.68 volts. In business.
Attach the leads and put 12 volts on the Microsquirt controller. No problem.
Turn that off, and go to hook up laptop.
Zach
Posted by: Vacca Rabite Apr 11 2015, 09:34 PM
My laptop has sucessfully communicated with Microsquirt!!!!!!!!
WOOOO!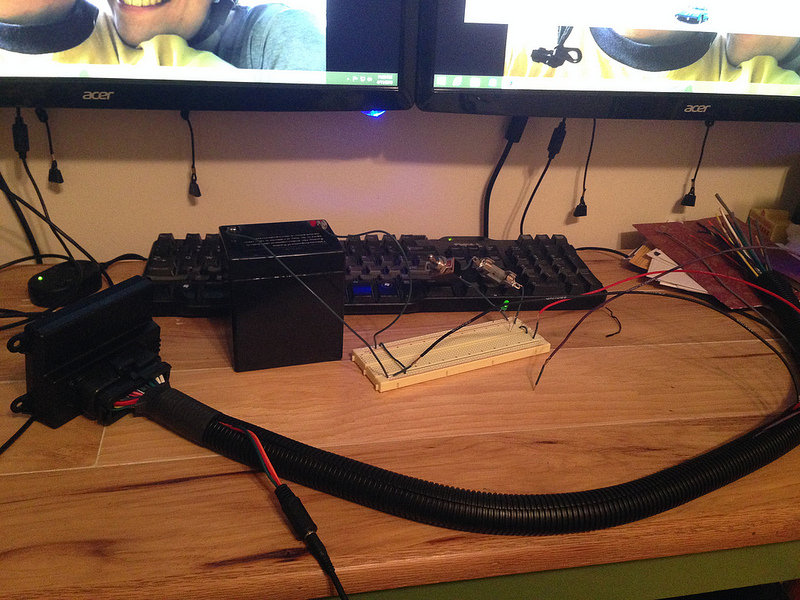
Now I just need to figure out why it won't on my car... My laptop detected the microsquirt ecu within second of plugging it in, so I know the ECU is good. I also know my laptop is good.
Harness? Ground loop?
zach
Posted by: Vacca Rabite Apr 11 2015, 09:54 PM
So here is my theory.
This test circuit only has power and ground and communications. Nothing else is hooked up.
I recall in the startup file I was reading again last night it said to unhook all the sensor leads and make sure they are not grounding anywhere. I bet this is the issue. The leads are unplugged but were just laying in the engine bay. I bet they are grounding and creating some sort of connection problem.
The other possibility is a fault in the harness. Maybe a bad crimp somewhere. Though I tested continuity on the harness and I got a solid tone each time, so this is not a strong theory.
Wont know till I can get back to the 914, which may have to wait till after Hershey - depending on Tony's schedule.
Zach
Posted by: Vacca Rabite Apr 14 2015, 10:21 AM
Brain goes back in the catr on Thursday for further testing. I had taken thursday off for Hershey anyhow, so this will be good timing.
Still, excited that I was able to get my laptop to talk to it, eleminating the ECU and my laptop as the issue.
Zach
Posted by: Vacca Rabite Apr 16 2015, 10:47 AM
No dice. Once in the car the ECU failed to connect again. I pulled everything that could be causing a ground loop out, still no love.
Finally pulled the wire harness to bench test at home. I may do this tonight at the Knights Inn, since the whole mess is in my car already.
Stuff I tested: there is power for sure. 12 volts.
Grounds are clean. Grounds go from the engine block to 1 place on the engine harness - so we should be getting a clean ground to the ECU.
The harness is the only thing I can think of at this point that would be causing a problem. Hopefully I will be able to figure that out tonight or tomorrow.
Zach
Posted by: McMark Apr 16 2015, 12:16 PM
Certainly sounds like the harness. Most likely culprit is the pins in the connector at the ECU. Those connectors are a major PITA to assemble. I'd suspect the serial connection wires themselves first.
Posted by: Vacca Rabite Apr 16 2015, 02:06 PM
Will find out tonight. If I can get a connection with it my plan is to take it to Tonys tomorrow and put it back in the car. Go connector by connector until it fails to try and isolate the problem.
Zach
Posted by: r_towle Apr 16 2015, 02:24 PM
how many pins is the connector?
Have you considered buying a more rugged cable with the correct number of wires, and redo the connectors at each end to match the new wire?
Something that may be easier to assemble and more reliable??
I am watching with loads of curiosity because I am about to go down this road....
Rich
Posted by: Vacca Rabite Apr 16 2015, 02:28 PM
Rich it's an amp-seal connector. Stop by my room at the Inn tonight it tomorrow night, I'll have it there. It's pretty rugged, and weatherproof.
Posted by: Dr Evil Apr 16 2015, 02:45 PM
Can't wait.
Posted by: Dr Evil Apr 16 2015, 02:47 PM
Pretty sure this is your problem. Need a new hampster.
Attached image(s)
Posted by: crash914 Apr 16 2015, 02:57 PM
bring a gas mask...
Posted by: Vacca Rabite Apr 17 2015, 07:00 PM
Well, not the harness.
I did find a fault in the fuse block, but that is fixed easy enough.
I connected the harness to my laptop via my little tester setup and had a connection instantly.
I am at a total loss as to what I need to do next.
Its got to be something in my car, which makes ZERO sense to me. I'm totally stumped.
Zach
Posted by: Vacca Rabite Apr 20 2015, 12:11 PM
I now have full confidence in the harness.
When I did my test at Hershey I only used one ground point. It occured to me when I got sober the next day that there are 8 ground points. I married all the ground together when I got home on Sunday and retested.
ECU connected right away on the test bench.
So, its something in my car. YAY! ;-|
I dont wantto tow the car back home, but I dont see it making sense to work on it at Tony's as I have to take off work. I also dont want to pay tony to chase wires. I want to pay him to tune...
So I guess I have to tow the car home and start digging into it old school style. Which will have to be Friday, and then work on it while I still have my post Hershey 914 buzz going on.
I will admit I was pricing buying IDFs again to get the car moving under its own power. But I'm not giving up yet.
Zach
Posted by: McMark Apr 20 2015, 12:41 PM
Bad relay board? Test the power supply pin. It's the one in the white connector on the right/passenger side. Make sure it's getting 12v, maybe even try jumpering it straight to the battery.
Posted by: Vacca Rabite Apr 20 2015, 01:00 PM
Relay board is first of the things I have to check.
The fuel pump also does not turn on when the key is turned, so I think there has to be some wierdness going on there.
When I had carbs it was not much of an issue.
Zach
Posted by: crash914 Apr 20 2015, 01:01 PM
Hot wire. Eliminate everything and then add back one by one. Do you need to borrow my trailer?
Posted by: r_towle Apr 20 2015, 01:08 PM
Zach,
Have faith, look what Wally did....
https://www.youtube.com/watch?v=5ufjeBe0PYo
Posted by: Vacca Rabite Apr 20 2015, 03:32 PM
Herb, I'll just flat tow it. Thanks for the offer though!
Posted by: McMark Apr 20 2015, 04:05 PM
Main power relay on the board may not be tripping. That would cause both issues.
Posted by: toon1 Apr 20 2015, 04:21 PM
relay board fuse, could be a switching transistor on the main board also.
Posted by: Vacca Rabite Apr 20 2015, 06:34 PM
relay board fuse, could be a switching transistor on the main board also.
What do you mean?
Specifically the "switching transistor on the main board" part. Something in the cabin?
Zach
Posted by: McMark Apr 20 2015, 07:02 PM
Since he's got Megasquirt I listed in his signature I suspect he's talking about the MS board. Another reason I only use MicroSquirt. 
Posted by: Vacca Rabite Apr 22 2015, 07:38 PM
Since I will be doing some rewiring, I made something big.
All the 914 wire diagrams in one wall poster.
Big one is the engine side, since that will be my main target.
Little copy of the firewall forward.
Detail of the relay board - my likely nemesis.
And the ledgend for all three charts.
Calipers are in there for scale reference. It's 48x36 inches. 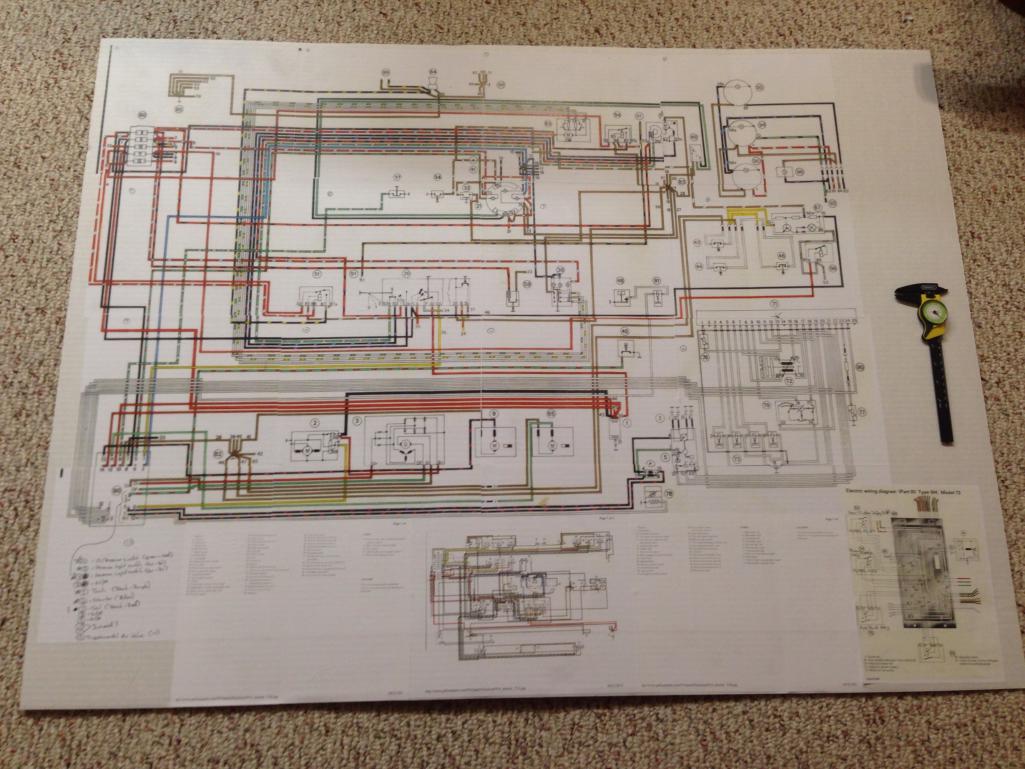
That should help a bit.
Zach
Posted by: Vacca Rabite Apr 24 2015, 09:02 AM
my 914 is back in my garage.
Work starts tonight...
Zach
Posted by: crash914 Apr 24 2015, 09:57 AM
Are you using the ms relay board? I only use my original one for the voltage relay.
Posted by: Vacca Rabite Apr 24 2015, 06:24 PM
Are you using the ms relay board? I only use my original one for the voltage relay.
Using the stock board for a few things. Some of the wires come out, some stay in.
Zach
Posted by: toon1 Apr 25 2015, 09:40 AM
relay board fuse, could be a switching transistor on the main board also.
What do you mean?
Specifically the "switching transistor on the main board" part. Something in the cabin?
Zach
The main MS board has switching transistors on it. There is in for the FP. The are small and could fail with a voltage overload.
Of you go to the megamanual It will show you where it is in the assembly instructions.
Posted by: Vacca Rabite May 8 2015, 05:16 PM
As usual, life got in the way. But work started at home again on this today.
An old wire harness I got from Joe a longtime ago paid off. I needed to make a new 12 pin harness, and that got made today and is in the car. For the first time in YEARS my car will have reverse lights... assuming the switch at the transmission works.
I still need to test the main board, which will happen this evening after the kids go to bed. After that, I need to attach the plug to the crank fire wires I had to cut. Good times. This is what I want to get done tonight after the kids are in bed - assuming I can keep my eyes open.
Zach
Posted by: crash914 May 8 2015, 05:35 PM
Fingers crossed
Posted by: shag May 8 2015, 06:15 PM
Good Luck, If it works are you going to the Import Show next weekend in Carlisle? It sure would be nice to meet you after being so close a couple of weeks ago. I just broke something in my shifter yesterday. I got carried away and shifted to hard or fast I guess. Paul in Harrisburg is going to get it fixed for me so I can attend the show next weekend.
John
Posted by: Vacca Rabite May 8 2015, 06:54 PM
Good Luck, If it works are you going to the Import Show next weekend in Carlisle? It sure would be nice to meet you after being so close a couple of weeks ago. I just broke something in my shifter yesterday. I got carried away and shifted to hard or fast I guess. Paul in Harrisburg is going to get it fixed for me so I can attend the show next weekend.
John
Nah, going to a different, non-porsche show next weekend.
Though I may drive up Sunday for the AX.... in my WRX.
Zach
Posted by: r_towle May 8 2015, 07:39 PM
Good luck, keep on it.
Posted by: Vacca Rabite May 8 2015, 09:51 PM
Work complete.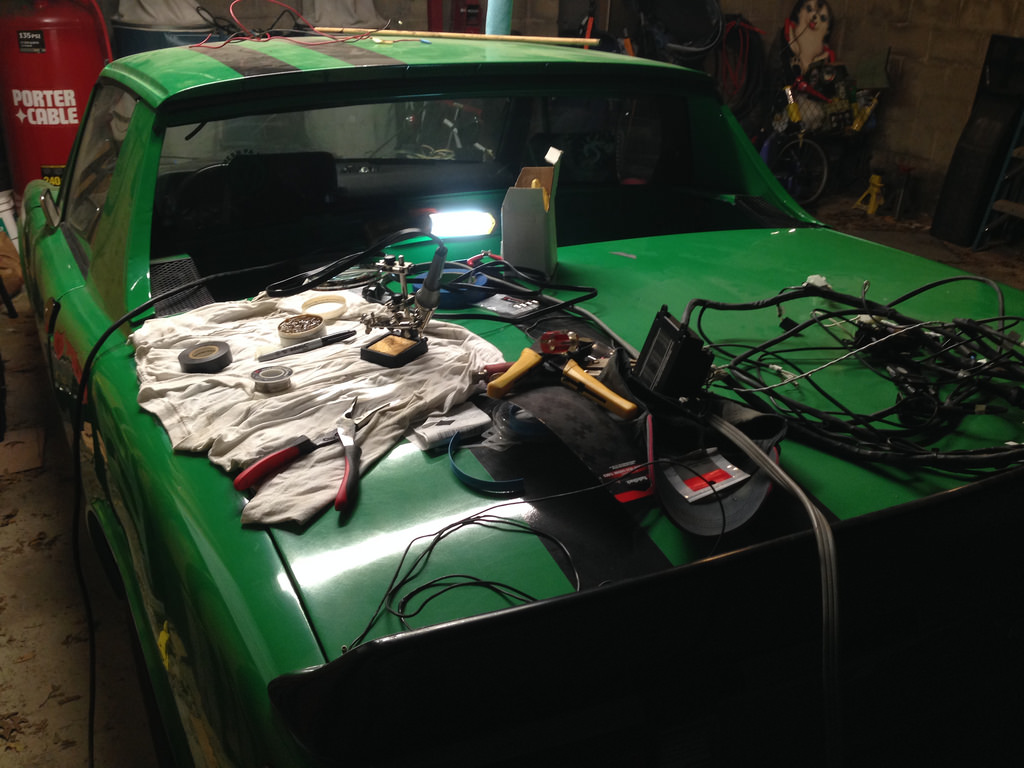
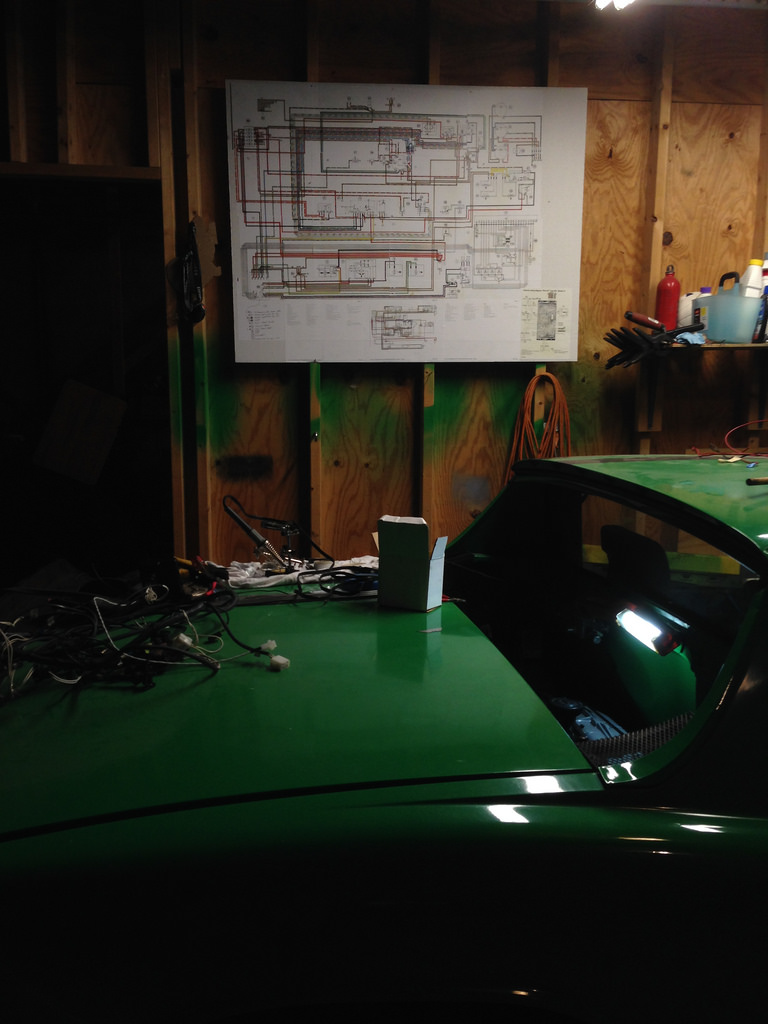
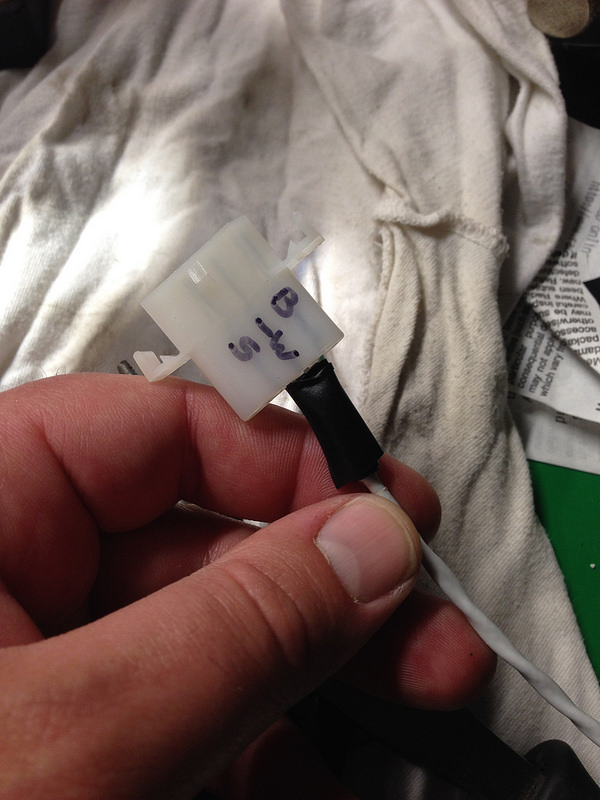
Got a lot done today, in my own slow way. Both Molex plug ends are in and the crankfire wires are connected again. So tired I can barely see straight. Goodnight.
Zach
Posted by: okieflyr May 9 2015, 10:38 AM
I love your poster board! My schematic pages are all taped together and rolled up like the Dead Sea Scrolls. Good luck on this
Posted by: r_towle May 9 2015, 02:22 PM
Keep at it, even an hour a week and you will conquer your demon....
You should rename the car demon btw.
Posted by: mepstein May 9 2015, 02:25 PM
Keep at it, even an hour a week and you will conquer your demon....
You should rename the car demon btw.
progress is progress. It all ads up and soon you will be driving. And then sell it and buy a Miata
Posted by: balljoint May 9 2015, 02:31 PM
I love your poster board! My schematic pages are all taped together and rolled up like the Dead Sea Scrolls. Good luck on this
On the other side is a poster of Elle Macpherson.
Posted by: Vacca Rabite May 9 2015, 03:22 PM
On the other side is a poster of Elle Macpherson.
The other side is the hole I've been digging to freedom.

Zach
Posted by: Vacca Rabite May 9 2015, 04:35 PM
With any luck, tonight I put the harness back in the car, unhooked aside from power and ground, and see if it connects.
Zach
Posted by: Vacca Rabite May 9 2015, 07:26 PM
Booya!
We have a connection in the car. repeat! We have a connection in the car!
I had a really good feeling when I turned on the key and suddenly I heard the fuel pump turn on for a few seconds. I had not been getting that.
Loaded tuner studio, and the MS connected!
Slightly scary part is that I have NO CLUE what I did to make it start working. But it is WORKING!
Tomorrow, if I get released from mothers day duty, I'll start replacing the harness in the car. Right now its just the power and ground plugs installed.
The only thing that is not connected now which had been connected earlier is the crankfire sender. Easy enough to see if that kills it, but not tonight.
Zach
Posted by: balljoint May 9 2015, 07:37 PM
Send Mom to the spa, instruct kids to clean their rooms in 15 minute segments broken up by Pokemon episodes on Netflix. Attend to car.
Posted by: saigon71 May 9 2015, 08:47 PM
Booya!
We have a connection in the car. repeat! We have a connection in the car!
I had a really good feeling when I turned on the key and suddenly I heard the fuel pump turn on for a few seconds. I had not been getting that.
Loaded tuner studio, and the MS connected!
Slightly scary part is that I have NO CLUE what I did to make it start working. But it is WORKING!
Tomorrow, if I get released from mothers day duty, I'll start replacing the harness in the car. Right now its just the power and ground plugs installed.
The only thing that is not connected now which had been connected earlier is the crankfire sender. Easy enough to see if that kills it, but not tonight.
Zach
Great news!!!Posted by: aircooledtechguy May 10 2015, 12:54 AM
Booya!
We have a connection in the car. repeat! We have a connection in the car!
I had a really good feeling when I turned on the key and suddenly I heard the fuel pump turn on for a few seconds. I had not been getting that.
Loaded tuner studio, and the MS connected!
Slightly scary part is that I have NO CLUE what I did to make it start working. But it is WORKING!
Tomorrow, if I get released from mothers day duty, I'll start replacing the harness in the car. Right now its just the power and ground plugs installed.
The only thing that is not connected now which had been connected earlier is the crankfire sender. Easy enough to see if that kills it, but not tonight.
Zach
Great news Zach!! If you are using a VR sensor, remember that it will only work with the wires in the right order. So if you get nothing when you crank it, flip the wires around and try again.
Posted by: crash914 May 10 2015, 07:07 AM
Posted by: McMark May 10 2015, 09:17 AM
Great news Zach!! If you are using a VR sensor, remember that it will only work with the wires in the right order. So if you get nothing when you crank it, flip the wires around and try again.
In MicroSquirt, maybe others, you can switch this in software by switching the triggering from Going High to Going Low, or visa-versa.
Posted by: Vacca Rabite May 10 2015, 09:36 PM
Well, found the issue!
Something is wrong with either the throttle position sensor or the wires for the throttle position sensor.
I thought I'd have an easy night hooking back up all the leads. Some of them are not easy to get to.
Turn the key, and no fuel pump. Dammit! I am now using the fuel pump as my dowsing rod. If it turns on foe a few seconds, I'm confident that the brain is working.
Take off a lead and try the pump. One by one. I got the point where I thought I had all the leads off and was starting to get really angry when I noticed the TPS tucked deep in there. Took that lead off and the fuel pump came back.
So, I'm going to replace the sensor, as I really doubt its the wires. I also happen to have another TPS on hand. But not tonight. Its 11:30 on a work night. I gotta get my ass in bed.
Frustrating, but at least I found the issue. I wish I had found it a month ago while the car was at Tony's shop.
Zach
Posted by: toon1 May 10 2015, 11:50 PM
Are you saying the fuel pump turns on because of the TPS?
They should have noting to do with eachother
Posted by: crash914 May 11 2015, 02:44 AM
shorted wires in the TPS, drawing down the operating voltage, fuel pump relay won't kick in for the short prime cycle.
fuel pump is a good test to see if the cpu is functioning correctly as it has full voltage...
Posted by: 914_teener May 11 2015, 07:30 AM
shorted wires in the TPS, drawing down the operating voltage, fuel pump relay won't kick in for the short prime cycle.
fuel pump is a good test to see if the cpu is functioning correctly as it has full voltage...
Just like D.jet. No fuel pump no tickee.
Posted by: Vacca Rabite May 11 2015, 06:00 PM
Replaced the TPS after work today. Tested it and and the fuel pump kicked over! We are in business.
Before I had to start being Dad, I was able to get the rest of the harness plugged back in, and turned the key for a quick test. The fuel pump kicked on just like it should.
I'm close to first start. Stuff left to do:
1) Calibrate sensors (TPS, AIT, CHT... I have a feeling I should have done this earlier, but I think I can do this with the sensors in the car.)
2) add fuel
3) put the air filter in
4) pressurize the fuel system and look for leaks
5) try to start it.
Would be totally awesome to be able to drive the car back to Tony's for final tuning.
Zach
Posted by: r_towle May 11 2015, 06:45 PM
Sweet
Posted by: Vacca Rabite May 18 2015, 07:53 PM
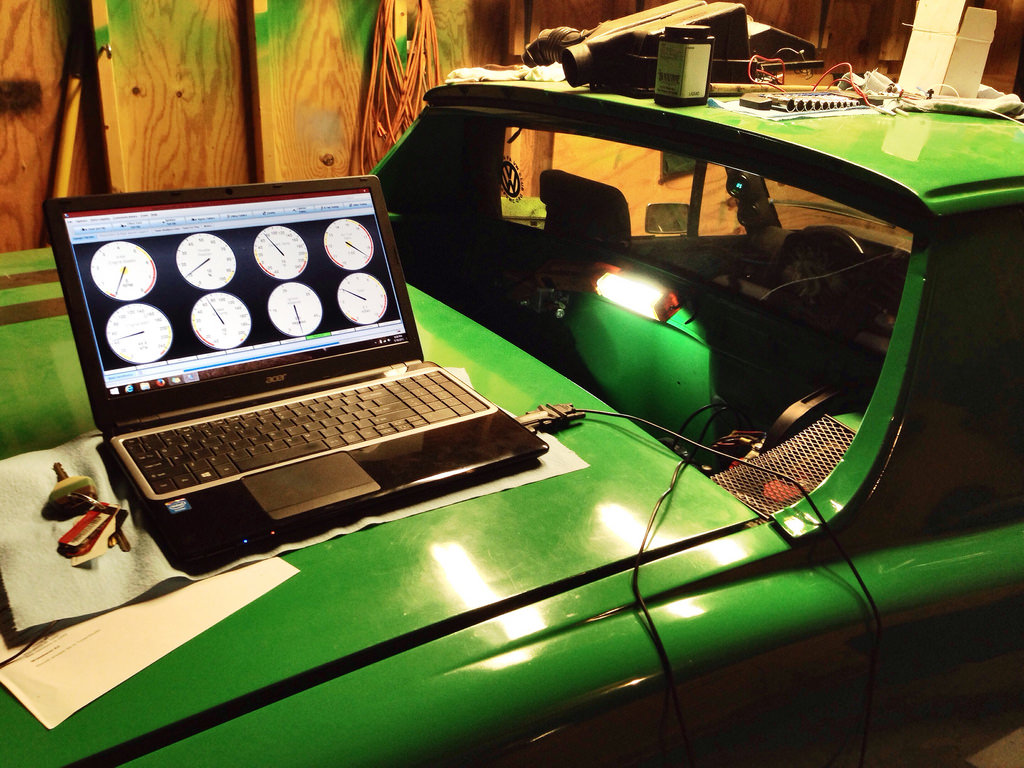
Sensors are calibrated and seem to be working correctly.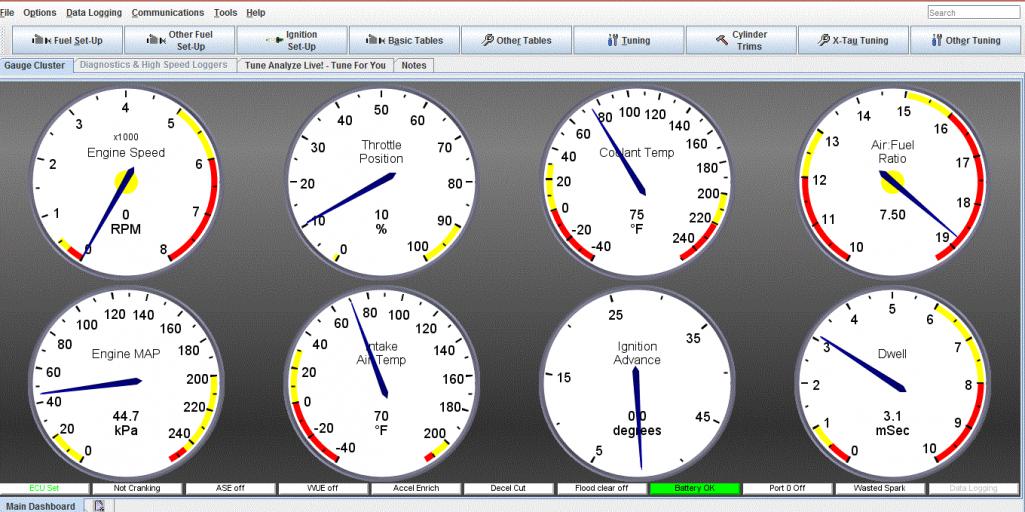
I did run into a hiccup trying to update the ECU to the latest firmware. The installer would not install the firmware. More investigation is required, but I followed the printed firmware updater instructions to the letter.
Push comes to shove, I just run with the current installed firmware, which is 1 rev behind (for now).
Next step is fuel, and make sure my fuel system does not leak when pressurized.
You will note there is a "coolant temp" gauge. That is actually the head temp at the stock location (as opposed to under a spark plug). I have an under the spark plug CHT for the gauge in the car, giving reading for Cyl 3. Eventually I will install the 4 way. But first things first....
I also learned today that my throttle sticks open a little. There is something it grabs on before it gets fully closed. Thats why in the screen shot its reading at 10% open instead of fully closed.
I still have a few mysteries to work out with the spark tables. I set the offset to 295 degrees per Mark's instructions, but did not see where to set the initial cranking advance to 12 degrees. Still in the steep part of the learning curve for this software.
Zach
Posted by: Dr Evil May 18 2015, 09:07 PM
C'mon Hershey 2020! You can make it! Probably!
Posted by: 914itis May 18 2015, 09:10 PM
Posted by: aircooledtechguy May 19 2015, 07:17 AM
A slow methodical approach is good. You're making it happen and you'll have it up and running before you know it!!
Posted by: Dr Evil May 19 2015, 03:02 PM
Because he will have developed Alzheimer's......
Posted by: Dr Evil May 19 2015, 03:03 PM
Because he will have developed Alzheimer's.....hey, wait a minute?
Posted by: McMark May 19 2015, 04:32 PM
Zach
There is no cranking advance that I remember. When confirming the timing for the first time, just set the entire spark map to 12 degrees. This way you don't have to worry about the MicroSquirt changing the timing due to RPM or MAP fluctuations. Then start the engine with your timing light attached. Set your timing light to 12 degrees, and use the Trigger Wizard to adjust the Offset Angle until you see the ZERO mark on the fan.
Attached image(s)
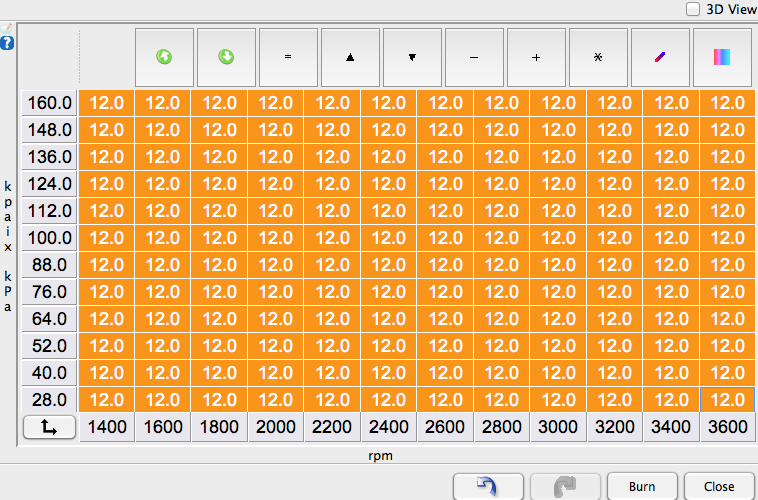
Posted by: Vacca Rabite May 19 2015, 08:11 PM
gas is in the tank.
Need to rig an inline fuel pressure gauge to make sure I have pressure set correctly. And then I can pressurize the system and look for leaks.
Zach
Posted by: Vacca Rabite May 19 2015, 08:33 PM
Is it important to measure fuel pressure at the rail, or is any point aft of the fuel pressure regulator acceptable?
Zach
Posted by: McMark May 19 2015, 08:40 PM
No, before the fuel pressure reg. Basically the rail is the best point.
Posted by: falcor75 May 19 2015, 11:17 PM
Is it important to measure fuel pressure at the rail, or is any point aft of the fuel pressure regulator acceptable?
Zach
Aft is in after the FPR you wont have the right pressure....? The FPR should be the last component the fuel passes before going back to the fuel tank. At least this is how I'm setting up my system...
Posted by: Vacca Rabite May 20 2015, 06:33 AM
Yes I mispoke.
Plan was to put the gauge into the short peice of hose between the drivers side rail and the FPR. Trying to use the nipple in the rail would make the gauge very hard to read.
Posted by: Dr Evil May 20 2015, 07:50 AM
Looking good....
Attached image(s)
Posted by: toon1 May 20 2015, 09:24 AM
Zach
There is no cranking advance that I remember. When confirming the timing for the first time, just set the entire spark map to 12 degrees. This way you don't have to worry about the MicroSquirt changing the timing due to RPM or MAP fluctuations. Then start the engine with your timing light attached. Set your timing light to 12 degrees, and use the Trigger Wizard to adjust the Offset Angle until you see the ZERO mark on the fan.
You want to set "base timing" first. If you have your trigger wheel set up the way Megasquirt recommends, your base timing will be at 10*BTDC.
You will want to mark 10* on the fan. Once the engine is running this is the first thing you want to set. This is done in tuner studios by changing "base timing" to +10 and moving the numbers up and down ( don't remember the box that the numbers are changed in) until you see your 10* mark come around to the 'V" in the fan housing. This is very important, Otherwise your timing WILL be way off, the computer WILL be lost and you will never get the engine to run correctly.
Ask me how I know.
Also, in later versions of, MSII and MSIII, you can change cranking timing and WU enrichment timing.
Posted by: McMark May 20 2015, 09:58 AM
Zach
There is no cranking advance that I remember. When confirming the timing for the first time, just set the entire spark map to 12 degrees. This way you don't have to worry about the MicroSquirt changing the timing due to RPM or MAP fluctuations. Then start the engine with your timing light attached. Set your timing light to 12 degrees, and use the Trigger Wizard to adjust the Offset Angle until you see the ZERO mark on the fan.
You want to set "base timing" first. If you have your trigger wheel set up the way Megasquirt recommends, your base timing will be at 10*BTDC.
You will want to mark 10* on the fan. Once the engine is running this is the first thing you want to set. This is done in tuner studios by changing "base timing" to +10 and moving the numbers up and down ( don't remember the box that the numbers are changed in) until you see your 10* mark come around to the 'V" in the fan housing. This is very important, Otherwise your timing WILL be way off, the computer WILL be lost and you will never get the engine to run correctly.
Ask me how I know.
Also, in later versions of, MSII and MSIII, you can change cranking timing and WU enrichment timing.
REMEMBER this is theMicroSquirt firmware. So menu options and settings are drastically different. If you haven't played around with it, TunerStudio completely changes depending on what firmware is installed. It's actually pretty annoying.
Posted by: Vacca Rabite May 20 2015, 06:38 PM
Tried to start it tonight for giggles.
No dice.
No fuel leaks that I could see. But also no indication that the system was actually pressurizing. The gas tank made some gurgling noises after the pump would run.
No clue if the pump is wired backwards or the lines under the tank are kinked or some other issue. Only had 5 minutes to play before I got called in for parenting duties. Really need to get that pressure gauge put in...
Posted by: r_towle May 20 2015, 06:58 PM
Got fuel in the tank?
Good luck, you are closing in on it.
Posted by: McMark May 20 2015, 07:29 PM
Gotta cycle the key a few times to purge all the air.
Posted by: Michelj13 May 21 2015, 12:27 AM
I have Mark's sensor/wheel but my base offset timing is set at 62 degrees. Mark has told me to set it closer to 290, but, I never had any luck with this setting. Not sure how to explain it, but, my car runs very well.
Posted by: Vacca Rabite May 21 2015, 12:57 PM
Cool. The gurgling I was hearing was likely air getting forced into the tank through the return line. Which would indicate the pump is working properly.
Going to hook an inductive timing light to one of the stubby plug wires to mKe sure I am getting spark.
Going t try and get her fired up this weekend, if I can squeeze in some time. This weekend is f¥€king packed.
Posted by: Vacca Rabite May 21 2015, 02:13 PM
Okay, few steps forwards!
and one biggie back.
Fuel system is pressurized, with no obvious leaks. Fuel pump now sounds a little labored, and not just like its free wheeling. No clue how much pressure it has built (those parts come in tomorrow) but it sounds pressurized, and the tank is not gurgling when I turn the key.
Oil pressure warning light went out. YEAH! Which means I was cranking the engine enough to send oil through all the oil lines into the AUX cooler and then to finally build pressure. And no obvious oil leaks (which is meaningless until the engine fires.)
But I'm not getting any spark. Inductance timing light does not flash at all when cranking. I did not expect to have the timing right, but I did expect to at least see some evidence of sparks being thrown.
Obvious possible fault will be the plug I wired into the crank wheel wires. Will have to check them. If thats not it, more digging will be needed.
Zach
Posted by: McMark May 21 2015, 02:17 PM
You should see cranking RPM on your laptop.
Posted by: Vacca Rabite May 21 2015, 02:37 PM
Nope, the tach in TunerStudio does not budge. Just tested that.
Crank fire wires?
ZAch
Posted by: McMark May 21 2015, 02:45 PM
Under Ignition Setup -> Base Ignition Settings, try flipping the Ignition Input Capture. If it's falling edge, try rising edge. This is how you 'flip the VR wires' in software.
Posted by: Vacca Rabite May 21 2015, 02:52 PM
Nope, no dice there either. (handy having a laptop while standing at the car...)
Are these correct?
I am going to check continuity just make sure the pins in the plug are actually mating as expected.
Zach
Posted by: McMark May 21 2015, 02:57 PM
Check the Dual MultiSpark Ignition Options Menu
Single Crank Wheel Input
Enable Auto Trigger
Offset Advance 0.0
Posted by: ndfrigi May 21 2015, 03:20 PM
after reading the pages with various information here, my acquired 71 1.7 has a megasquirt installed. After the car was not running because of broken rear suspension (which is almost done fixing it) what i did is just install a battery and started the engine with just one time turn on the ignition key, the engine run and immediately went around 700 to 800 rpm. Amazing megasquirt!!! But since i have to drop the engine to fix the suspension, now I don't know if after putting back those several wiring if the car will still run. I have no idea on this MS specially I'm not the one who installed it.
Here is the picture of my MS system. I beleived it is MS III.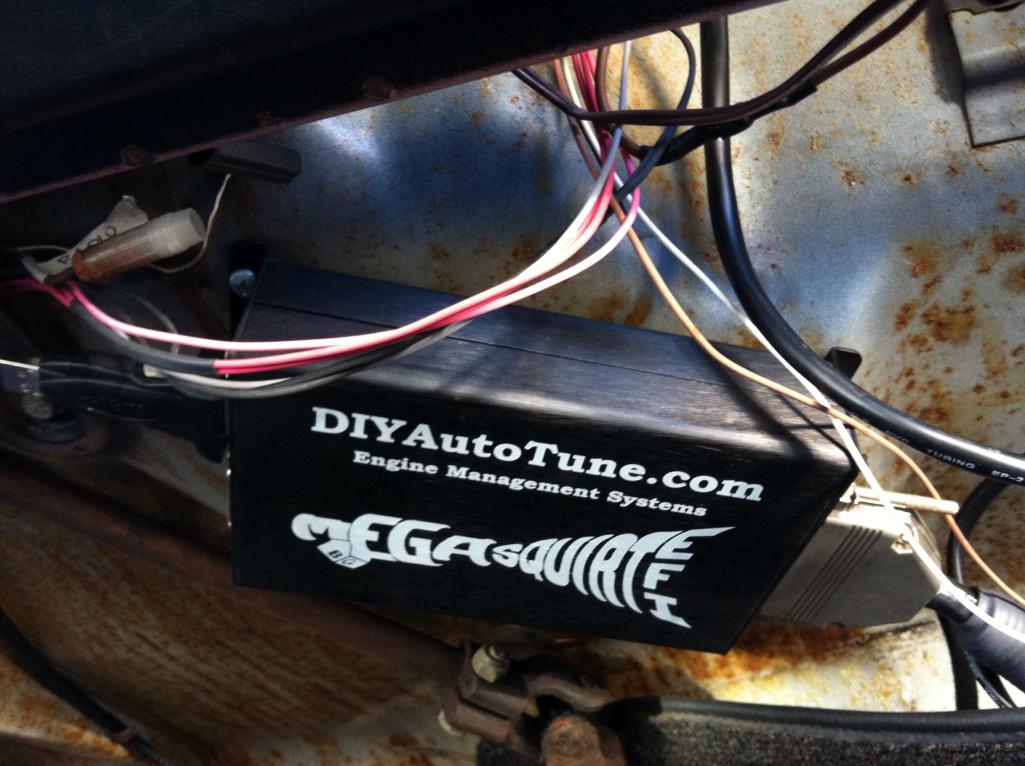
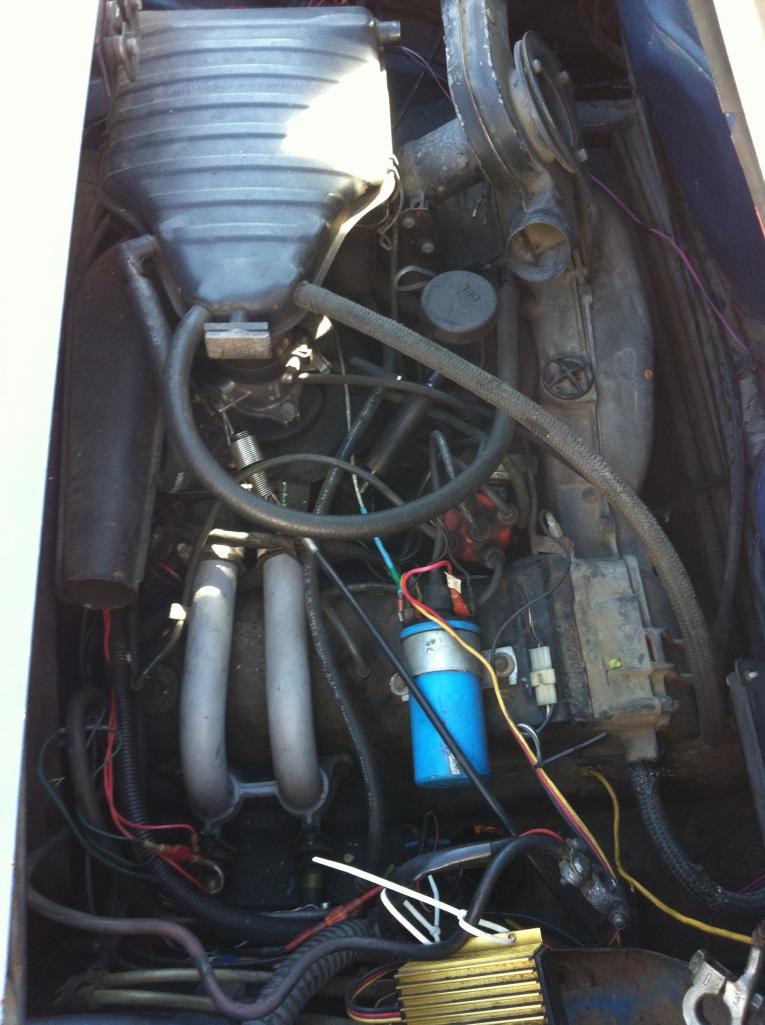
Posted by: Vacca Rabite May 21 2015, 03:27 PM
Mark what are the flow rates on your injectors? And do you happen to know the plenum volume for a 1.8 plenum?
Zach
Posted by: McMark May 21 2015, 04:52 PM
Mark what are the flow rates on your injectors? And do you happen to know the plenum volume for a 1.8 plenum?
Zach
23.8 pph @ 36.5 psi, so you'll have to scale down and approximate for the low PSI, or raise your fuel pressure before you start tuning. You can do either (I've done it both ways), but running higher fuel pressure is generally better because it improves injector atomization.
Can't help on the plenum volume.
Posted by: Vacca Rabite May 21 2015, 05:09 PM
Does plenum volume include intake runners? I suppose I could just fill it with water and measure that.
Won't THAT be a fun task.
Posted by: McMark May 21 2015, 06:52 PM
I've never done all that. I don't even know what section you're looking in
Posted by: Vacca Rabite May 21 2015, 07:09 PM
General fuel setup. One of the fields is plenum size in CC.
Sounds like I don't need to worry about it.
Posted by: Vacca Rabite May 22 2015, 09:49 AM
back on the bench again. :-/
After weeks of connecting, I plug in this morning and suddenly nothing. Only difference was that I put my battery on a charger last night due to all the cranking yesterday.
Get frusterated, and hook up the ECU the Mark lent me - boom. Connection. I have to reload settings, but it connects instantly.
So now i have my ECU out of the car trying to get it to connect again in lab conditions.
A few days ago I tried to load the new firmware, but that operation errored out. I am going to try and redo that on the bench, and hope the new firmware expunges some of the gremlins that have been plaguing me.
Zach
Posted by: McMark May 22 2015, 10:02 AM
Yeah, incomplete firmware upload can be a bad thing.
I found that Manifold Displacement setting, but it's greyed out for me. I tried flipping a few settings to see if I could find out why yours is available, but nothing I changed to enable that setting. I think this is all tied together.
Did you get the latest firmware from http://www.useasydocs.com/details/usv3code.htm as well as the INI file?
Posted by: Vacca Rabite May 22 2015, 10:21 AM
It can, and I guess (am hoping) this is a result of that. But in the past a bad firmware updates have shown up immediately, not a few days and a dozen restarts later.
Zach
Posted by: Dtjaden May 22 2015, 08:57 PM
Hi Zach,
Until you are getting an rpm reading to register in Tuner Studio you will not get a spark or any fuel spray from the injectors. During cranking you should see an rpm reading of a few hundred rpm.
Until you solve that issue the car absolutely will not start. Even iif your settings related to crank angle, etc. are off you should get an rpm reading. The possibilities include a bad crankshaft position sensor, bad wiring between the sensor and the MS ecu, incorrect position sensor settings in Tuner Studio and finally a bad ecu.
There is really no point worrying about other possible problems until you have a working position sensor.
I've been through this,
Darryl
Posted by: Vacca Rabite May 24 2015, 05:37 PM
What is the difference between the MSExtra firmware that comes loaded on the v3 units and the BG 3.83 firmware? The unit Mark sent me still has the MSExtra firmware and I'm afraid of briking the unit if I try and update it to the 3.83.
I have a feeling my unit got bricked when I tried to load the 3.83 firmware and it errored out... Its not responding on the bench. At all.
Also, how can I test the crank fire sensor without dropping the engine and pulling the doghouse? I am getting zero indication of engine speed with either my unit (before it stopped working) and the spare unit.
I probed the plug, and the plug has continuity for the blue wire, white wire, and shield. I also double checked to make sure I did not cross wire the plug - and I did not.
So the fault is either at the sender, or at the harness ampseal. Tonight I'll check continuity between the plug and the ampseal pins, and HOPE its my issue. If its not I have a long and frustrating night ahead of me.
Zach
Posted by: crash914 May 24 2015, 06:41 PM
Have you tried measuring the voltage off the sensor while cranking? Even with a digital Peter you should get a signal. I do have an oscilloscopebifbyou need to borrow one.
Posted by: McMark May 24 2015, 07:10 PM
Do this.
http://www.useasydocs.com/tachref.htm
It's a special firmware install that ONLY tests the trigger wheel. So you don't have to configure anything, or worry about settings. You just run the program, crank the engine for 30s, then analyze the results.
Posted by: McMark May 24 2015, 07:14 PM
That page isn't exactly clear, you have to load the S19 firmware file onto your MS first. Just like loading any other firmware, use the MS Downloader program.
Posted by: McMark May 24 2015, 07:16 PM
Sorry, Pound per hour
Posted by: Vacca Rabite May 24 2015, 07:39 PM
Do this.
http://www.useasydocs.com/tachref.htm
It's a special firmware install that ONLY tests the trigger wheel. So you don't have to configure anything, or worry about settings. You just run the program, crank the engine for 30s, then analyze the results.
Eh, not comfortable with this. I'm using the "loaned" MS unit right now as mine is dead. I don't want to turn the one you loaned me into a brick, especially sine I am not sure why the first one failed.
I'll test with a multimeter first.
Zach
Posted by: Vacca Rabite May 24 2015, 07:58 PM
Have you tried measuring the voltage off the sensor while cranking? Even with a digital Peter you should get a signal. I do have an oscilloscopebifbyou need to borrow one.
Nada.
No change in voltage.
time to start digging...
Posted by: McMark May 24 2015, 08:05 PM
Use the tooth analyzer.
Posted by: Vacca Rabite May 24 2015, 09:35 PM
Where I am now.
tooth wheel to sensor clearance.
Plug:
When I crank the engine, sometimes I get a burst of activity on the tach for the first quarter second of cranking. It will flash ~325 rpm and then the signal will drop to zero. Not all the time, but some of it. Usually the tach just stays pegged at zero.
Right now I have the car up and front tin and fan off. I'm not sure I have the clearance to remove the doghouse.
I can pop the plug end off, but getting to the bolt/screw that holds the shield wire will be really hard w/o removing the doghouse.
does the sensor require 12 volts to operate? or does it generate it own voltage via the trigger wheel? I may be able to test the sensor in place and see if its the wiring.
Herb, if you could come up for a day, i'd really appreciate the guidance from someone who is not feeling his way around in the dark like I am.
Zach
Posted by: Vacca Rabite May 24 2015, 09:38 PM
Oh, by the way. If I need to flip the trigger wheel, now would be the time to tell me. lol.
It is so whiskey time.
Zach
Posted by: edwin May 24 2015, 09:44 PM
The gap there doesn't look close enough to me.
Should be well under a mm from my experience.
Posted by: McMark May 24 2015, 10:45 PM
The fan hub alignment pin should be roughly lined up with the missing tooth. Which means when you flip it, the missing tooth stays in the same place. But it really doesn't matter where the missing tooth is once you get it running.
Posted by: Dtjaden May 24 2015, 11:44 PM
There are only a few possibilities if you are not showing a tach signal. You have eliminated the ecu as being the problem by swapping in a known good ecu. There are three other possibilities:
1. Bad wiring between the sensor and the ecu.
2. A bad crank position sensor.
3. The sensor could be positioned incorrectly. Too close or too far away.
4. The wrong sensor type specified - VR vs Hall.
5. Incorrect setup of the conditioner circuit.
In TunerStudio you can look at the Logger to view the CPS input pulses. I found this helpful.
Posted by: Vacca Rabite May 25 2015, 01:01 AM
There are only a few possibilities if you are not showing a tach signal. You have eliminated the ecu as being the problem by swapping in a known good ecu. There are three other possibilities:
4. The wrong sensor type specified - VR vs Hall.
Where do you set the senor type? I'm looking for that as it is real possibility.
Posted by: crash914 May 25 2015, 06:17 AM
Zach, I would swing by but am flat out until after the 14th. you should have it running by then.
picture of what I just installed yesterday..a little close so I spaced it out by 1 very thin washer. running the sensor and wheel on my drill press, I can generate a pretty good signal at a pretty good, 1/4 inch gap.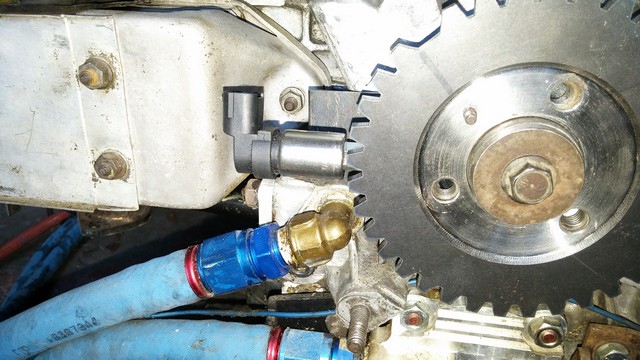
Posted by: 76-914 May 25 2015, 07:48 AM
Have you tried measuring the voltage off the sensor while cranking? Even with a digital Peter you should get a signal. I do have an oscilloscopebifbyou need to borrow one.
Zach's got a Digital Peter? Cool!
Posted by: Dr Evil May 25 2015, 04:00 PM
Didnt you hack the sensor wires and then reconnect them? IIRC, there was concern that the signal would be goofed up from this maneuver, unless I am mistaken.
Posted by: Vacca Rabite May 25 2015, 06:12 PM
Its a possibility. Mark does not think so, but it is a possibility.
Also a strong possibility that I don't have the software set up properly.
The shield wire grounds to the engine case. I am wondering if it has an improper ground. I'm going to pull the doghouse at some point this week (if I can get time) which will also let me pull the wire and sensor. Then I can test it on the bench.
Zach
Posted by: toon1 May 25 2015, 06:16 PM
At this point I'd start looking at taking everything, put it on a bench top, hook the TWo a drill, hook the rest to a stim board and diagnose.
It must be a PITA to try and trouble shoot everything bent over the engine bay.
Posted by: Vacca Rabite May 25 2015, 06:38 PM
At this point the tach is the only sensor malfunctioning. Everything else seems to be working fine and responding to input.
Zach
Posted by: McMark May 25 2015, 06:41 PM
I'm just gonna be an asshole until it happens -- use the tooth analyzer tool.
Posted by: Vacca Rabite May 25 2015, 08:04 PM
I will. Sometime this week I will get that loaded. Was hoping to today but kid B and I both get t stomach bugs today. :-(
Posted by: Dtjaden May 25 2015, 09:44 PM
Zach,
I may have lead you astray with my comment about wrong sensor type. I have an MS3ex so VR vs Hall requires jumpers on the main board. I believe you are using a Microsquirt which requires different wiring connections to the ecu and no internal changes.
The appropriate manual for Microsquirt discusses checking out the crankshaft sensor in section 2.15 on page 38. This is a link to the manual:
http://www.msextra.com/doc/pdf/Megasquirt2_Setting_Up-3.3.pdf
I tested the sensor location using the Composite Logger and Tooth Logger as discussed in the manual just using the starter to turnover the engine. I had to adjust the sensor location location closer to the tooth wheel than I initially had set it to get a crank signal.
Darryl
Posted by: crash914 May 27 2015, 05:59 PM
Let me know, but I seem 2 be available this weekend if I can help. If not, I will put mine back together...
Posted by: Vacca Rabite May 27 2015, 08:55 PM
I'm helping family move Saturday but will be free Sunday.
Posted by: crash914 May 28 2015, 02:53 AM
I should be able to do Sunday, anytime after 12:00..
Posted by: Vacca Rabite May 28 2015, 07:33 PM
I should be able to do Sunday, anytime after 12:00..
Awesome. Bring your oscilloscope. If we do nothing but get the tach readout working I'll call that a win for the day!
Course, if we get the tach signal working, it will probably fire up.
Zach
Posted by: Vacca Rabite May 30 2015, 07:20 AM
Last night I got the BG 3.83 code loaded. Yay!
I also tried to load the tooth analizer, but the firmware uploader did not like it. Need to see if there is a different uplader for that code.
However, once the BG 3.83 code was loaded, the ECU started constantly tripping the fuel pump solenoid. Nonstop. As soon as it finished one pulse, the solinoid would trip for another.
At this point I was too tired to continue (was not able to start work until 10PM last night) so I just unplugged everything and came in. I'm going to reload the MSextra 3.3.3 code and run with that. I may also try the MS uploader to see if I can get the tooth analyzer to work - but this will be obviated if Herb brings his oscilloscope tomorrow.
Zach
Posted by: crash914 May 30 2015, 07:32 AM
Planning on it!
Posted by: McMark May 30 2015, 09:29 AM
The pulsing fuel pump will go away once you choose the ecu type in the general settings. Which is to say, it's normal.
Posted by: Vacca Rabite May 31 2015, 06:16 PM
Stuff got done today.
We did not fire, but we got closer!
Herb and his son came over.
We got the B&G 3.830a code loaded on the ECU
We used Herb's oscilloscope to confirm that we were getting a solid VR signal from the crank wheel.
We wiped out the B&G code and loaded the tooth analyzer to confirm that the ECU was recognizing the signal from the VR.
Put back on the B&G code and got stuck.
So we called Mark out in California who walked us through the settings needed to have the ECU start using the tach signal.
We got the VR signal reading the 170ish RPM from cranking, and even got an occasional spark (as registered from the timing light). But the engine would not fire.
Aside from getting the right fuel and the right spark at the right time, logs showed that the ECU was getting shitty power. We think this was due to an early iteration of the fuse block on the harness. Mark has since moved to a more robust block, and I bought one to replace the fuse block currently on the harness.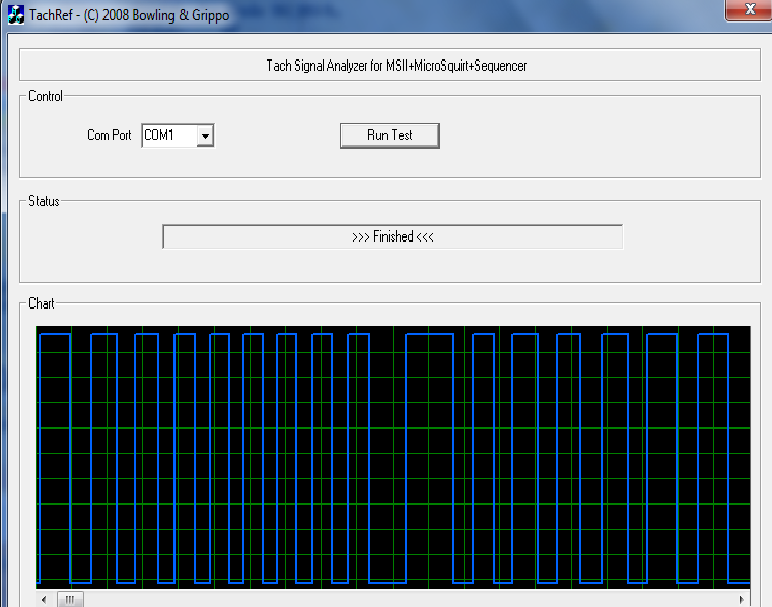
Output from the tooth analyzer. The missing tooth was inverted here, so we had to change the setup in Tuner Studio.
Zach
Posted by: 904svo May 31 2015, 07:56 PM
Stuff got done today.
We did not fire, but we got closer!
Herb and his son came over.
We got the B&G 3.830a code loaded on the ECU
We used Herb's oscilloscope to confirm that we were getting a solid VR signal from the crank wheel.
We wiped out the B&G code and loaded the tooth analyzer to confirm that the ECU was recognizing the signal from the VR.
Put back on the B&G code and got stuck.
So we called Mark out in California who walked us through the settings needed to have the ECU start using the tach signal.
We got the VR signal reading the 170ish RPM from cranking, and even got an occasional spark (as registered from the timing light). But the engine would not fire.
Aside from getting the right fuel and the right spark at the right time, logs showed that the ECU was getting shitty power. We think this was due to an early iteration of the fuse block on the harness. Mark has since moved to a more robust block, and I bought one to replace the fuse block currently on the harness.
Output from the tooth analyzer. The missing tooth was inverted here, so we had to change the setup in Tuner Studio.
Zach
Check the voltage on the coil, I had a problem when cranking the voltage would drop
low enought to stop the engine from firing. My fix was to wire the coil through a relay
to the battery post.
Posted by: 914itis May 31 2015, 08:42 PM
I've been watching this thread from day one. Every email notification I jump with anxiety.
This car is cursed.
Posted by: Vacca Rabite May 31 2015, 09:17 PM
Its getting closer. I've put all other hobbies aside this summer to work this out. Made my wood shop off limits. I've not been shooting (much) or building firearms at all.
For the past many years, I've ignored the car for projects with faster turn around. Now I'm trying to keep myself as laser focused on it as I am able.
When I get reliable spark (which is the battle I'm fighting now), I'll be able to set timing fairly easily. That will also get me to a point where it should start and idle.
The only rapid turnaround projects I have been doing are little things for the 914. Like installing the BMW mirror. And today I took off a door panel to fix whatever was wrong with the window regulator. I've also really dialed in the shifter. Other small stuff like new carpet, LED tails and front turn signals, and rebuilding the front headlight mechanisms are on the work list too, but these are all "I'm frustrated lets do something easy" jobs.
The car has been problematic. But I'm learning everything as I do it. Bound to run into errors along the way.
Zach
Posted by: Dr Evil Jun 6 2015, 06:42 AM
I look forward to this running.....and the subsequent "I got towed home again" posts as you work through all the bugs
Posted by: mepstein Jun 6 2015, 07:41 AM
I've been watching this thread from day one. Every email notification I jump with anxiety.
This car is cursed.
No, just challenged.
Posted by: 76-914 Jun 6 2015, 08:07 AM
Not trying to be mean spirited Zach. Just wanted to know when was the last time this car was on the road?
Posted by: Vacca Rabite Jun 6 2015, 08:51 AM
Spring of 2011 I got pissed off about carbs being pissy and decided to take it off the road till I found a better way.
Zach
Posted by: toon1 Jun 6 2015, 09:25 AM
have you been on the MS forums to get some answers there? They are a bit slow but usually give good info..
A good person to talk to is Matt Cramer, owner of DIY auto tune. He knows MS inside and out
Posted by: type47 Jun 6 2015, 11:12 AM
Just wanted to know when was the last time this car was on the road?
Zach at Halfmoon autocross

Posted by: 76-914 Jun 6 2015, 03:00 PM
Spring of 2011 I got pissed off about carbs being pissy and decided to take it off the road till I found a better way.
Zach
Smart move. Even if it takes a couple of years. I always thought that going from FI to carbs is akin to moving out of your house into a tent.
Posted by: Vacca Rabite Jun 6 2015, 07:06 PM
Just wanted to know when was the last time this car was on the road?
Zach at Halfmoon autocross
This was the last weekend I drove the car for any length of time. After that it was a couple short trips, and then a big exhaust leak appeared (I hated that Eurorace header...) But that weekend may have been the cars longest ride, from York PA out to Cumberland. AX and back to York PA.
Zach
Posted by: Vacca Rabite Jun 6 2015, 07:11 PM
Just turned down a kayak down muddy creek trip to save time to work on my car tomorrow.
*sigh* that one kinda stung. Would have been with a crew that would have given me tips on how to get around a feature that has intimidated the hell out of me...
https://www.youtube.com/watch?v=5oamv9OQy5g
These guys make it look easy....
Zach
Posted by: crash914 Jun 6 2015, 08:00 PM
Get r done!
Posted by: Vacca Rabite Jul 2 2015, 08:46 PM
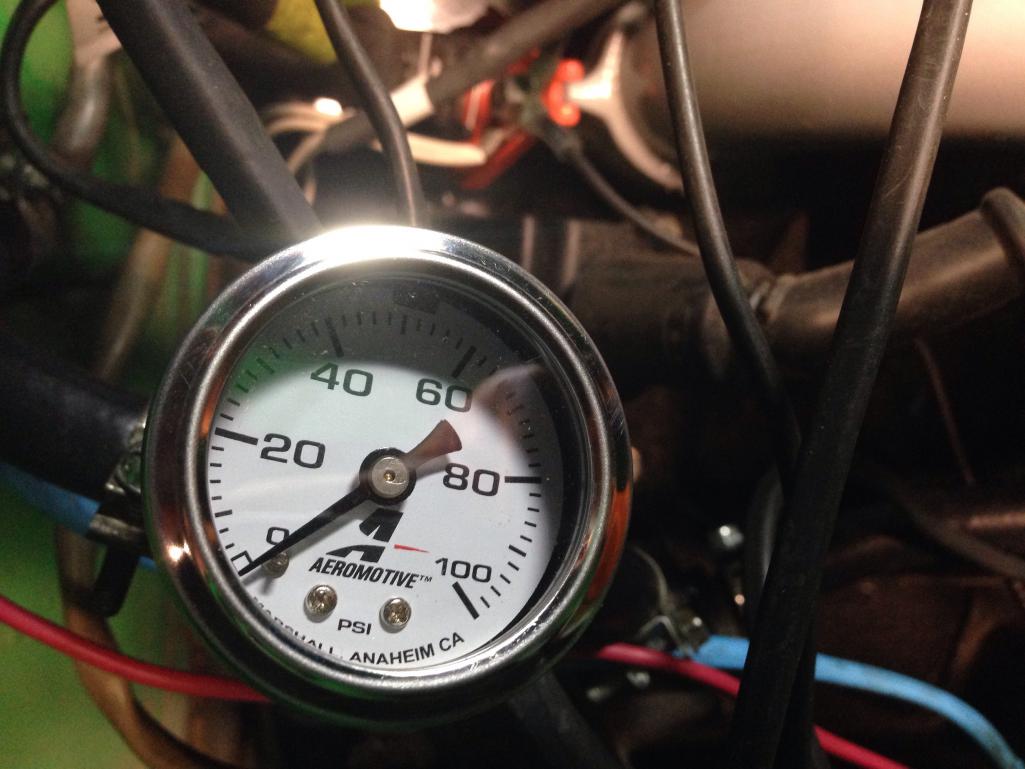
We'll one mystery solved. Won't fire if it's not getting any fuel.
Guessing a kinked line under the gas tank somewhere.
Glad I finally plumbed in a pressure gauge.
Posted by: McMark Jul 2 2015, 09:12 PM
Posted by: ConeDodger Jul 3 2015, 12:50 AM
And by that smile he means he's been there, done that!
Posted by: sixnotfour Jul 3 2015, 07:57 AM
Posted by: jimkelly Jul 3 2015, 10:45 AM
car looks good.
[/quote]
[/quote]
Posted by: wndsrfr Jul 3 2015, 12:34 PM
Which brings to mind one of the real classics from Little Big Man...Sometimes the Magic Works...
https://www.youtube.com/watch?v=uLso0ZBqOi4
Posted by: jpnovak Sep 29 2015, 08:19 PM
Did you ever get this sorted and running?
Posted by: Vacca Rabite Sep 29 2015, 08:36 PM
Not touched it since June. Will pick it up again after hunting season.
Zach
Posted by: Vacca Rabite Feb 27 2016, 07:34 PM
https://www.youtube.com/watch?v=LAvXXTp2ZaM
It. Ran. Today.
Doug came over today. We fixed some kinks under the gas tank.
Found some leaks. Fixed them.
Found that the fuel lines in the engine bay were plumbed backwards at the pressure regulator. Fixed that.
Primed it a few times (well, Doug primed it while I watched the fuel pressure gauge at the fuel rail).
And it fired up.
So.
Fuel pressure is low. Only 20 pounds. I need to adjust the pressure regulator.
I need to seriously do something about the rats nest of wires in the engine bay.
I need to get a new throttle cable and hook it up so I can start the car from inside the car, and not stand by the engine with my hand on the throttle.
And then I need to actually tune it.
But it is getting CLOSE!
IT RAN!
Zach
Posted by: r_towle Feb 27 2016, 07:37 PM
Congrats, the hard part is over, now it's just time to tidy up the mess.
Way to go!
Posted by: mepstein Feb 27 2016, 08:08 PM
Posted by: bigkensteele Feb 27 2016, 10:18 PM
But it is getting CLOSE!
IT RAN!
Zach
Getting closer to


Posted by: McMark Feb 28 2016, 07:30 AM

Posted by: aircooledtechguy Feb 28 2016, 09:50 AM
Way to go Zach!!
Posted by: 914itis Feb 28 2016, 10:34 AM
Look like the mystery 914 is finally to Hershey..
Posted by: gms Feb 28 2016, 10:45 AM
It. Ran. Today...
Great news hope to see it running at Hershey swap meet
Posted by: jpnovak Feb 28 2016, 07:17 PM
Nice! Now start tuning and go drive.
Posted by: 914dave Feb 28 2016, 07:45 PM
keep going, you're close now.
Posted by: wndsnd Feb 28 2016, 08:21 PM
Hershey autox!
Way to go Zach!
Posted by: saigon71 Feb 29 2016, 02:52 PM
Kick ass. This is great news!!!
Posted by: Dion Feb 29 2016, 11:22 PM
Congrats Zach. Expect ya at Hershey then. Way to go.
Posted by: Michelj13 Mar 18 2016, 12:23 AM
Good Times ahead :-) Have fun tuning, you will learn so much!
Posted by: Vacca Rabite Apr 17 2016, 07:29 PM
I'm back from Hershey and exhausted. But there is an update to the saga.
The car moved under its own power this weekend.
Scott, Mike, ans Stephen helped me with it Friday before we went to Hershey for the weekend - and I was trading PMs with Mark during down time at the big swap meet.
Where it is:
there are two critical path items that need addressed:
1) The shifter needs adjusting. Its out of phase and needs help. When you can get it in first, it pops out. It will find 3rd and 5th fine. R, 2, 4 are missing.
2) it runs really strong but at too high an idle (1500rpm warmed up.) needs tuning.
Once those 2 things are done I can start gently driving the car and tuning it.
And then aggressively driving the car an tuning it.
And then I can make it look pretty again. :-)
Zach
Posted by: r_towle Apr 17 2016, 08:13 PM
Great news.
Can't believe the shifting did not piss Mike off enough to fix it.
Are you planning the turbo setup yet?
Posted by: McMark Apr 17 2016, 09:49 PM
Take the car to get dyno tuned. I'm gonna keep saying it.
Posted by: Vacca Rabite Apr 19 2016, 09:04 AM
Mike had been working with the shifter Friday, and had it most of the way fixed.
I think I got it re-aligned last night.
As soon as I can get the car to idle properly, I'll take it to tony to get it dyno tuned. I know he can do that.
Zach
Posted by: Vacca Rabite Apr 21 2016, 11:53 AM
Another note -
At one point there was a concern that the stock tach would probably not work with the microsquirt output.
I was intending to just replace the stock tack with a modern one. Scotty_b suggested just plugging the stock tack in to see if it worked, so I did. And it did. For whatever reason, it worked great with no bouncing as you ran up and down the rev range. We were comparing it with the tach output on my laptop, and it was perfectly accurate!
One of the things that it has me thinking though is to replace my smaller diameter steering wheel with a regular diameter one. It would be nice to actually see my gauges.
Zach
Posted by: McMark Apr 21 2016, 12:03 PM
I think the late tachs work and the early ones don't.
Posted by: 76-914 Apr 21 2016, 03:26 PM
B
Another note -
At one point there was a concern that the stock tach would probably not work with the microsquirt output.
I was intending to just replace the stock tack with a modern one. Scotty_b suggested just plugging the stock tack in to see if it worked, so I did. And it did. For whatever reason, it worked great with no bouncing as you ran up and down the rev range. We were comparing it with the tach output on my laptop, and it was perfectly accurate!
One of the things that it has me thinking though is to replace my smaller diameter steering wheel with a regular diameter one. It would be nice to actually see my gauges.
Zach
Do it. I RnR'd the one on Kugel with a factory steering wheel (curtousy of Slits, TYVM) and never regretted it. Especially when parallel parking.
Posted by: Vacca Rabite Sep 5 2016, 06:23 PM
Did some work on the car today, and yesterday. Took advantage of the break in the heat and the lack of kids this weekend.
I did nothing in the engine bay. However, I got the front trunk re-buttoned up. Added a molex connector to the wires that run to the fuel level sender.
I also spend several hours diagnosing shifter issues. There is only 2 stock parts left of my shifter (and one of those has been modified). So figuring out shifting issues is a bit more involved. I was getting R, 3, 5 and missing 1, 2, 4. I finally found my issue by climbing under the car and working the shifter at the console. Two bolts that hold the gate at the console were slightly too long and were hitting the ball cup. Once I clearnaced those a bit, I got the shifter adjusted quick. The shifter on my car is really precise now. I'm pleased.
I modded the cover to fit over the enhanced shifter console and put it back on.
With the car back on the ground I started doing work in the cabin. There is dubious wiring from my earlier iteration of the car. Since I am adding a center console, I needed to move gauges around. Since I made no notes (that I remember) the first time around, I spent part of the afternoon chasing wires to see where they go.
My goal right now is to get the cabin rewired where it needs it before finishing up the engine. Last thing I want is a wire short or a electrical fire.
Zach
Posted by: BeemerSteve Sep 5 2016, 06:46 PM
Pictures please of your Megasquirt set up in the engine compartment.
Posted by: mepstein Sep 5 2016, 07:02 PM
Sound like you're going to be driving soon.
Posted by: Vacca Rabite Sep 6 2016, 07:50 AM
Sound like you're going to be driving soon.
I hope so.
The shifter issue surfaced the day before Hershey when several of us were working on the car. It moved under its own power in reverse, but was not able to get into first to move back.
It does feel like I'm working on the punch list now. There are still tuning issues that need to be addressed, and that I may need help with. But if I can take care of all the "other" stuff, then the tuning issues will be the last thing to keep the car from driving.
Zach
Posted by: McMark Sep 6 2016, 07:58 AM
Do I dare say it......
Dyno tuning.
Posted by: Vacca Rabite Sep 6 2016, 11:38 AM
Do I dare say it......
Dyno tuning.
That's the plan, but I'd like to get the car at least idling without having to introduce a huge air leak. I've been talking with Tony at Translog about getting it on a dyno, but it needs to be closer before I do that.
Zach
Posted by: Vacca Rabite Feb 6 2017, 09:57 PM
So. My desire to eventually drive the car has overrun my desire to finish this build myself.
I'm sending the car to McMark to button up my EFI and get it dyno-tuned.
With any luck I'll be able to fly out and drive it home sometime this spring.
Zach
Posted by: saigon71 Feb 7 2017, 08:18 AM
It'll be good to see your car on the road again Zach.
Posted by: struckn Feb 7 2017, 10:07 AM
That's great news Zach glad you're getting it done.
However, my only concern is your plan to drive it back home from Grand Rapids to York Pa. You might want to ease your way back into it once McMark is done and have him tell you if he thinks the car is solid enough to make the long trip home.
Just saying if it were me I'd get it shipped home, probably be less expensive then flying back out to Grand Rapids to pick it up and drive it home.
Doug
Posted by: 76-914 Feb 7 2017, 06:36 PM
So. My desire to eventually drive the car has overrun my desire to finish this build myself.
I'm sending the car to McMark to button up my EFI and get it dyno-tuned.
With any luck I'll be able to fly out and drive it home sometime this spring.
Zach
That was a smart move. Tell him to throw a small Turbo on it while he's in there.
Posted by: Vacca Rabite Feb 23 2017, 08:20 PM
Car is at Marks shop, and there has been progress.
Last Friday, my helper steered the car while I pushed it out of the garage and got it down the drive way.
So very dusty!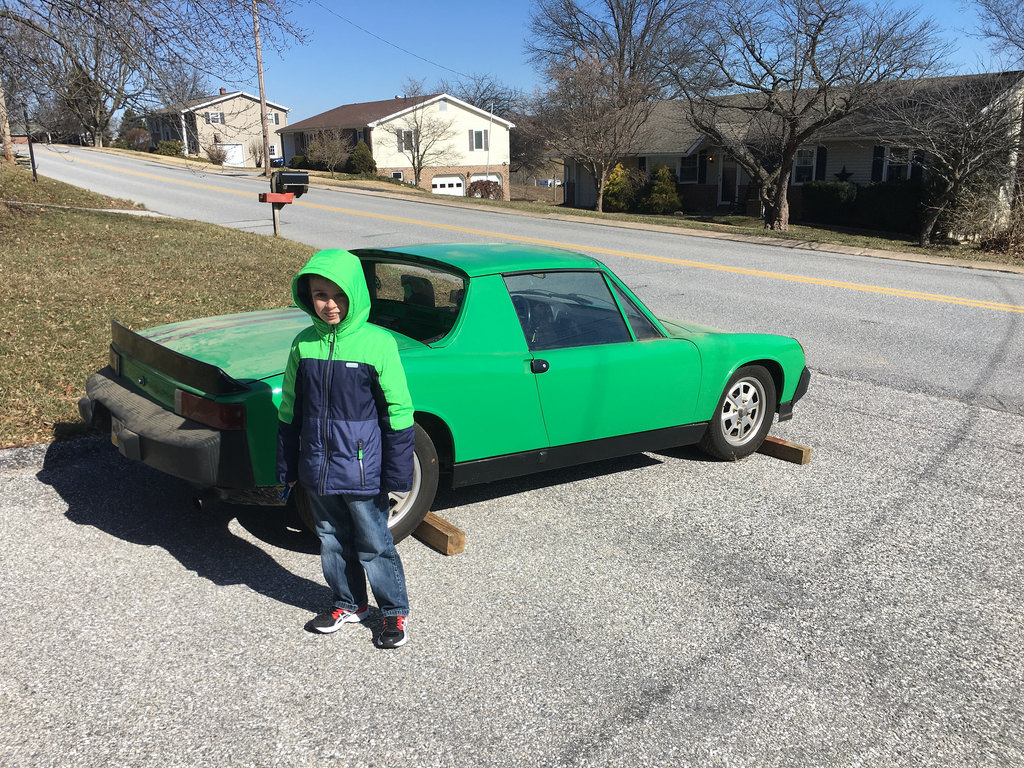
But also really nice to see it out in the sun again.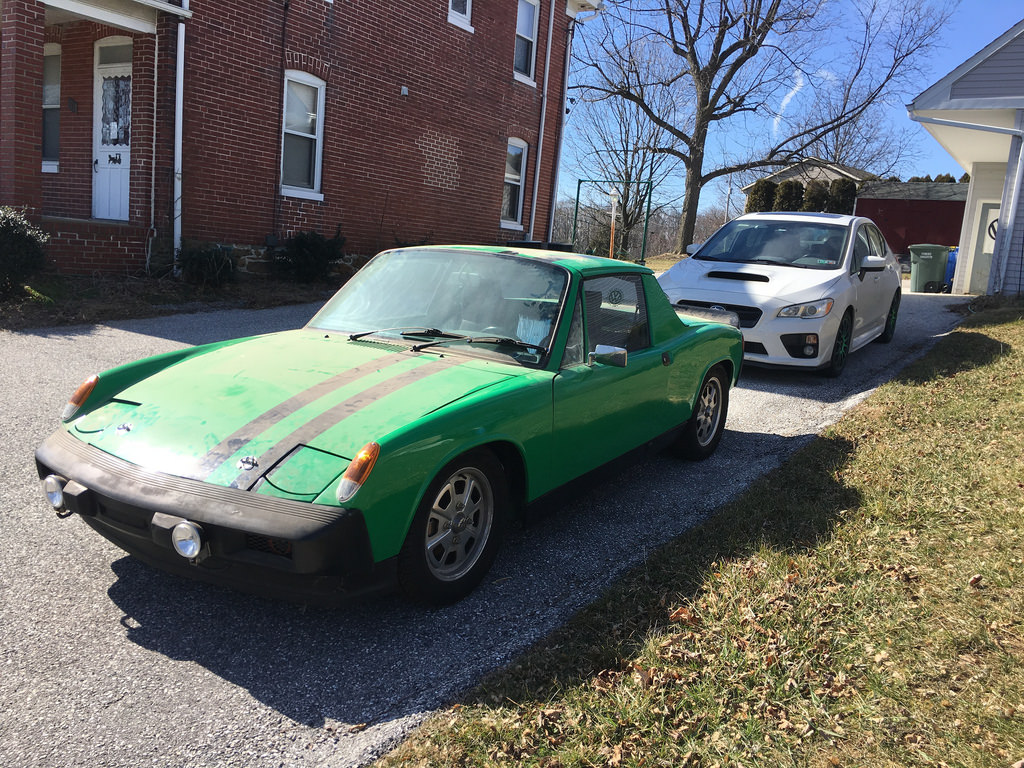
Up on the flatbed ready for its big trip to McMark.
Mark started having some of the same issues I was having with the spark signal and getting random misses. So he took out the plug I put in to the crank fire wires.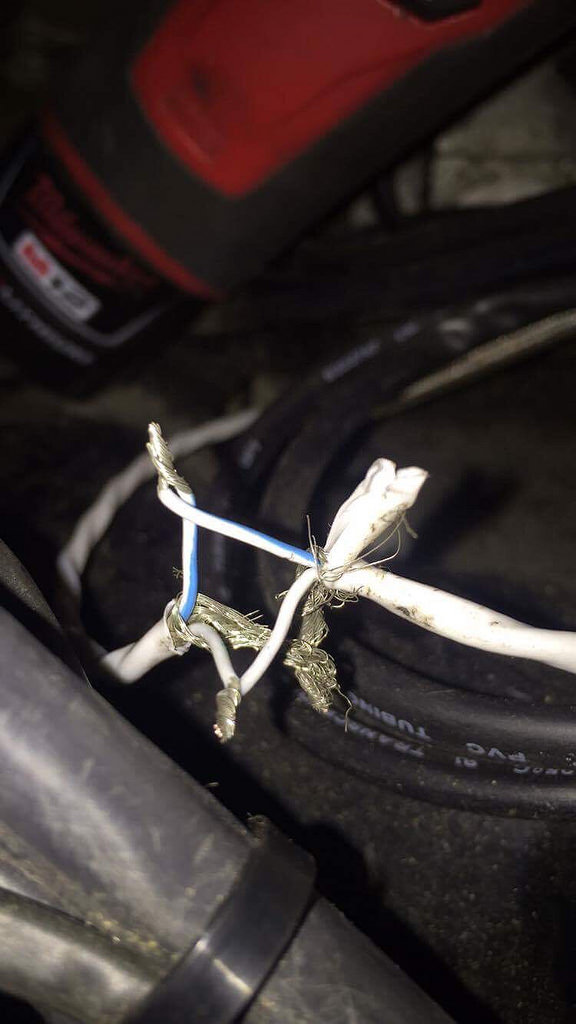
Seeing as how I doubt I'll be removing the wire harness again, I told him it was okay to delete the plug and make it a permanent join.
But that didn't fix the weak spark signal.
mark said he went so far as to build a test rig that only hooked up to the VR sensor and it still had issues when on the car, but worked fine when off the car. They tested all the EFI stuff, and it made no change. Pulled the battery, no change.
Pulled the starter....
And got a solid strong signal!
So, somehow my hi-torque starter has been interfering with my ignition signal. A stock starter worked just fine.
Mark was so excited he started texting me this afternoon as soon as he had figured it out.
This actually may be the answer to why I was always getting random misses with the Mallory as well. No one could explain it, but I would get constant misfires from the spark feed cutting out randomly. I worked around the problem at the time by putting in a HUGE coil and just pumping more energy into each pulse. There would still be misses, but the spark that went through went through with a lot more power.
I don't know that I EVER would have thought to pull the starter and test it with another starter.
Crazy stuff.
Zach
Posted by: crash914 Feb 23 2017, 08:28 PM
I need help with this one. How is a starter affecting running? Bad connection to the power connection at the starter?
Posted by: Vacca Rabite Feb 23 2017, 08:31 PM
I need help with this one. How is a starter affecting running? Bad connection to the power connection at the starter?
No idea. I can't make heads or tails of it. In theory the starter isn't getting power when its not starting the engine.
But something about it was wonky.
Zach
Posted by: shag Feb 23 2017, 09:20 PM
I need help with this one. How is a starter affecting running? Bad connection to the power connection at the starter?
No idea. I can't make heads or tails of it. In theory the starter isn't getting power when its not starting the engine.
But something about it was wonky.
Zach
Posted by: shag Feb 23 2017, 09:28 PM
I certainly hope that this works out for you, I have been watching you rebuild and get this car running for a long time.
Shag
Posted by: timothy_nd28 Feb 23 2017, 09:29 PM
My hat is off to Mark for finding that, what a great find. Still confused to why, but still a great find.
Posted by: McMark Feb 24 2017, 04:03 AM
That was one of the craziest troubleshooting sessions I've had. I tried everything and was pulling my hair out because nothing was working. Sometimes when all the obvious stuff isn't the problem you have to try the crazy stuff. All in all, I tried the following:
1 Removed the connector Zach added.
2 Tried a spare VR sensor.
3 Tried a whole new wire to the Vr sensor.
4 Tried a spare ECU.
5 Tried a dedicated, VR-only wiring setup.
6 Pulled the VR only setup and tested it with a trigger wheel on my lathe.
7 Tried the VR only setup back on the car, but with the ECU powered by a separate battery (isolating the ECU).
8 Tried the VR-only setup with separate battery and by turning the engine by hand. (This is where things started Working)
9 Swapped in a spare starter and left the Ford booster solenoid and factory wiring disconnected and used a starter button. Things still worked.
10 Reconnected the solenoid and factory wiring back the way it was but with the spare starter, everything still worked.
Whew! Next week I'll actually put a tune in the ECU for the first time and see if it runs. 
Posted by: McMark Feb 24 2017, 04:08 AM
Oh yeah, I also tried adding extra ground cables in case engine grounding was the issue. It wasn't.
Posted by: falcor75 Feb 24 2017, 04:57 AM
Wow thats one crazy issue. Wierd that that the starter can affect the VR sensor when its not even energized...
Well done Mark!
Posted by: crash914 Feb 24 2017, 05:32 AM
since I have a hi torque starter also, I will be watching.
Unless there is some current leakage through the starter, I just can't see how it would affect the signals...???
Glad its working!
Posted by: McMark Feb 24 2017, 07:52 AM
Possibly EMI.
Posted by: struckn Feb 24 2017, 08:55 AM
Wow Zach, this is great news and amazing that in such a short period of time it sounds like McMark has gotten to the root of your problems and is closing in quickly to getting your car back on the road. Perfect weather coming for a ride (if it doesn't snow Sunday).
Are you still thinking of Driving it back?
Doug
Posted by: 76-914 Feb 24 2017, 09:48 AM
Possibly EMI.
See Zach; that was a smart move. How many mechanics would have pursued that mystery with Mark's tenacity? Dedication, commitment and the desire for excellence come to mind.
Posted by: Spoke Feb 24 2017, 05:58 PM
Great find but really weird.
So put in a different starter and the VR sensor works fine? What is the VR sensor? Is that a power supply for the Megasquirt?
Everyone like to believe in PFM (pure funking magic) wrt electricity and electronics because one cannot see what is happening in an electric circuit until it starts working or the smoke is let out of something.
Since it seems the actual root cause has not been determined besides putting in a different starter, I'll take a guess that with the original starter in the circuit, there is some sort of instability causing oscillation wrt the impedance of the starter and the characteristic impedance of the power rails. Not all dc power supplies are stable over all load conditions.
Did anyone use an oscilloscope to check voltages at the VR sensor or the starter? If so, what did the voltage look like? I don't trust voltmeters to give a accurate dc reading since voltmeters generally average the voltage spikes and oscillations it sees. An oscope shows the actual voltage.
I say this about using an oscope after an experience trying to figure out why a new chip we were developing at Lucent wasn't working. Power was a stable 3.3Vdc as read on our voltmeter. We put the oscope on the 3.3V and found it was 3.3Vdc with 2VPP ripple on top of it. Voltmeter said Ok but oscope revealed we were fucked.
Posted by: ConeDodger Feb 24 2017, 06:30 PM
Possibly EMI.
See Zach; that was a smart move. How many mechanics would have pursued that mystery with Mark's tenacity? Dedication, commitment and the desire for excellence come to mind.
Mark has a big brain.

He told me that once when I asked him how he figured out some obscure thing on my car...
Posted by: jd74914 Feb 24 2017, 07:46 PM
So put in a different starter and the VR sensor works fine? What is the VR sensor? Is that a power supply for the Megasquirt?
Variable reluctance sensor for engine position.
Glad you got the problem corrected.
Since it seems the actual root cause has not been determined besides putting in a different starter, I'll take a guess that with the original starter in the circuit, there is some sort of instability causing oscillation wrt the impedance of the starter and the characteristic impedance of the power rails. Not all dc power supplies are stable over all load conditions.
I'm curious as to the root cause as well.
In general the MS DC-DC converter is of a pretty poor (not robust) design, as is the Microsquirt VR sensor hardware input filtering/processing. I literally could not get Microsquirt to reliably pick up a noisy VR crank sensor (worked fine on a number of other ECU's). The solution for the Microsquirt unit was to use a JBPerf conditioning board to pre-process the VR sensor and produce a square-wave output for the ECU.
http://jbperf.com/dual_VR/v2_1.html
VR sensors are passive to unless there is some EMI I wouldn't expect a lot of noise created by some voltage instability, but it would be interesting to see how the Microsquirt hardware reacts.
It would be interesting to have seen what the VR sensor was outputting via oscilloscope. Bet the signal was noisy.
Posted by: sixnotfour Feb 25 2017, 01:33 PM
Son's smile says , my first car is almost ready for me
Posted by: Vacca Rabite Feb 27 2017, 01:31 PM
Sitting at work daydreaming about driving my car this spring.
Its been a long long LONG time since I have done that.
I'm excited.
Zach
Posted by: mepstein Feb 27 2017, 01:49 PM
Sitting at work daydreaming about driving my car this spring.
Its been a long long LONG time since I have done that.
I'm excited.
Zach
Posted by: McMark Mar 5 2017, 05:21 PM
Turns out, as is so often the case, that there were two issues contributing to the same problem. After I posted above that I thought I had the whole thing solved, I came back the next day and the signal was wacky again. I didn't touch or change anything, it just didn't work anymore. After a bit more testing I found that the VR signal wires weren't being shielded correctly from EMI. So I added a jumper wire from the shielding to batt. neg. and everything cleared right up. Pulled the jumper, problem came back. AHA! I left everything alone and tested it a couple more times each day for a few days. Each time was the same, with the stock starter I could cause or fix the problem by connecting/disconnecting the VR shield jumper.
Today I installed the hi-torque starter since I thought I had proved that wasn't the problem and lo and behold, the VR sensor signal with the hi-torque starter was garbage no matter what I did. So I feel vindicated since the starter did turn out to be a problem. Either this hi-torque is degrading somehow, or they all throw out a LOT more EMI than a stock starter. Once I installed the new rebuilt starter I ordered, everything went back to working depending on the VR shield jumper.
I couldn't have solved this issue without finding both contributing factors. Now I'll replace the VR sensor wire completely and improve the grounding setup of the shielding. This improvement will reflect in all future versions of my MicroSquirt setup as well.
Tomorrow I need to solve the 70psi fuel issue as well, and then...finally...I can try starting the car. 
Posted by: crash914 Mar 5 2017, 06:07 PM
Great news! I think that the MS only uses the VR sensor for a couple of revs anyway? I think I saw a video of it being removed after starting. I can believe that the starter is very noisy, just when you need to get a stable VR signal.
Glad you figured it out!
Posted by: Spoke Mar 5 2017, 06:32 PM
Good news.
Posted by: sixnotfour Mar 5 2017, 06:48 PM
The Son is smiling.....
Posted by: McMark Mar 6 2017, 07:16 AM
Great news! I think that the MS only uses the VR sensor for a couple of revs anyway? I think I saw a video of it being removed after starting. I can believe that the starter is very noisy, just when you need to get a stable VR signal.
Glad you figured it out!
My setup only has crank trigger, so without it there is no RPM or TDC info for the ECU. Without those it has no idea when to fire injectors and definitely no idea when to fire the coils. So for this setup, a good clean signal is vital.
Thats the reason I spent so much time dealing with this before I've even tried to start the car. Without a good clean VR signal nothing can happen and if the starter is mucking with the VR signal then it's plausible that the coils or any other EMI source could have an effect as well. And those problems would be transient and almost impossible to chase down later. So we spend the time now and solve the problem because to solve it later is triple the work.
Posted by: aircooledtechguy Mar 6 2017, 01:10 PM
Have you guys considered switching out the VR sensor for a hall sensor of the same size? The hall sensors are not effected by EMI like the VRs are. I dumped my VR a few years ago because of intermittent EMI issues that would induce a random miss.
May be at least worth looking into going forward. Glad you got a handle on it.
Posted by: McMark Mar 6 2017, 01:14 PM
It's something to keep in mind. But I haven't had any issues with this setup on my car, and now that Zach's is sorted we'll see how it goes. Nothing is ever ruled out completely.
Posted by: McMark Apr 3 2017, 08:40 AM
Attached thumbnail(s)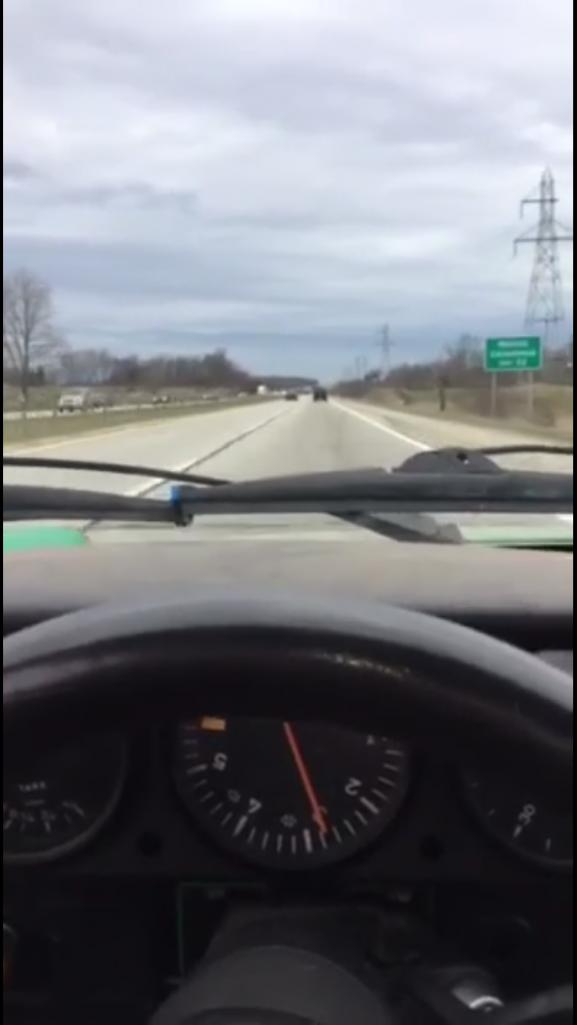
Posted by: ConeDodger Apr 3 2017, 09:07 AM
Road test!

Posted by: crash914 Apr 3 2017, 10:36 AM
No sound?
Posted by: McMark Apr 3 2017, 10:38 AM
No sound?
It's a picture.
Fine, here's your sound.
https://www.youtube.com/watch?v=Zs9qq_sfeAI
Posted by: Mike D. Apr 3 2017, 11:04 AM
So... It takes 6 years for a megasquirt conversion...?
JK... 
I've only been thinking about it for 6 years. Can't pull the trigger...
Posted by: ejm Apr 3 2017, 11:14 AM
So... It takes 6 years for a megasquirt conversion...?
Has it been that long since we saw Zach's car at Hershey?
Posted by: Vacca Rabite Apr 3 2017, 07:24 PM
Mark said my 2056 dynoed 130 HP and 140 TQ at the wheels.
I'm pretty pleased at that. Looking forward to getting the dyno chart.
Really looking forward to driving my car.
Zach
Posted by: r_towle Apr 3 2017, 07:28 PM
Mark said my 2056 dynoed 130 HP and 140 TQ at the wheels.
I'm pretty pleased at that. Looking forward to getting the dyno chart.
Really looking forward to driving my car.
Zach
Well holy shit.
Posted by: Vacca Rabite Apr 3 2017, 07:29 PM
So... It takes 6 years for a megasquirt conversion...?
JK...
I've only been thinking about it for 6 years. Can't pull the trigger...
Work. Kids. Divorce. All this stuff adds up and makes it hard to concentrate on stuff like toy cars. Plus, it's I got stuck fighting issues and ran out of talent. Took a long time to swallow my pride and send the car to Mark. I wanted to get it running myself.
Zach
Posted by: 76-914 Apr 3 2017, 09:17 PM
Congrats in order for "stick to itness"! Enjoy the Hell out of it. Didn't know about the Divorce. Factor that in and you get Triple Points for successfully weaving your 914 through Divorce Court.
Posted by: r_towle Apr 3 2017, 11:41 PM
I am thrilled for you!
Been a long haul, I hope I make it to Hershey to see you and your car both!
Posted by: Vacca Rabite Apr 4 2017, 12:06 PM
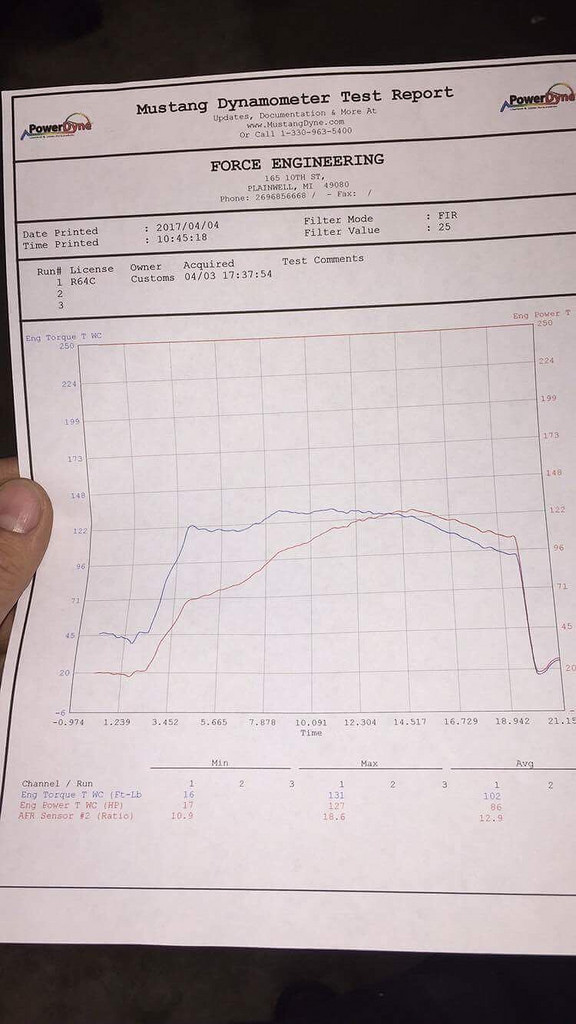
Got this from Mark this morning.
Assuming 18% drive train loss, engine is making 149HP at the crank. Not bad for a 2056, and a lot more then I expected.
I don't have an RPM plot yet. Still the torque goes up FAST and then gets flat. I like it.
Still some weirdness to be sorted. It's loosing fuel pressure at WOT (probably a kink somewhere) and there is an electric issue that may be the engine relay board failing. But, man, this is progress. I'm pleased.
Zach
Posted by: 914dave Apr 4 2017, 01:56 PM
Glad to see you're getting it sorted!!
Posted by: arvcube Apr 4 2017, 03:49 PM
Awesome! Thanks for sharing your numbers and graph. Something to look forward to hopefully
Posted by: 76-914 Apr 4 2017, 05:53 PM
Quoting the Monkey that got his tail caught in the lawn mower, "It won't be long now".
Posted by: ConeDodger Apr 4 2017, 05:59 PM
I am so impressed with Megasquirt. The video of Mark driving down to the dyno was so smooth.
As for stick-toitiveness, sometimes you just have to know when to write a check. This is why I go to Mark. I've got no time and I get to enjoy it sooner!
Posted by: Vacca Rabite Apr 6 2017, 09:06 AM
Its going to stay with Mark a little longer to figure out what is causing the electrical issue. This was a new issue to me. But the alternator is not charging fully, and suddenly the ignition switch would not turn off the car and stuff on the dash started getting wonky.
Mark thinks its probably the relay board.
When the car comes home, I'm going to wash it and get the interior back together and just drive it for a bit.
And then I'll start hacking up the fenders for flares and 5 lug.
But it will be nice to be able to actually DRIVE the car again.
Zach
Posted by: Vacca Rabite Apr 13 2017, 08:02 AM
Shipper just contacted me and the car comes home Monday night!
The charging issue was the voltage regulator.
Mark had to make a slight change in wiring to fix the run on issue after the key was turned off. Maybe he will chime in on that.
Now I just need to get the interior back together, get the head temp sensors into place and the console hacked to support the 4 way gauge.
But the car will be drive able Monday!
Zach
Posted by: 76-914 Apr 13 2017, 08:05 AM

Posted by: McMark Apr 13 2017, 08:31 AM
I'm pretty sure the feedback/run-on issue is a failing alternator. But I changed the wiring to an alternate, but still correct setup.
The car also needs a warmup idle air bypass. The 1.8 style should work well. It's a little hard to start and warmup right now, but I tested it was a controlled air leak (a long hose from the intake manifold to my hand!) and was able to make it idle really nicely from cold. 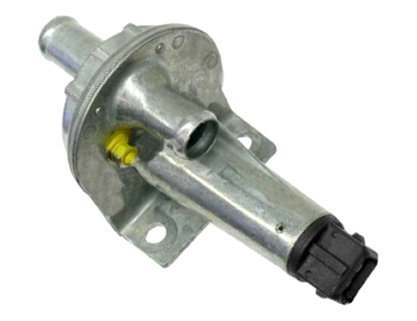
Also, the fuel lines need to be more comfortably routed.
Posted by: Vacca Rabite Apr 13 2017, 11:27 AM
I've got one of those in my parts stash. How will it need to be wired in?
Zach
Posted by: r_towle Apr 13 2017, 11:46 AM
Duct tape Mark to the rear trunk, leave the engine lid off.
It will run perfect!
Posted by: McMark Apr 13 2017, 12:08 PM
I've got one of those in my parts stash. How will it need to be wired in?
Zach
Switched power. That's the beauty of both styles of factory AAR, they're dumb. There's an internal opening, that simply closes more and more the longer power is applied. So you just have to have the power turn on when the car's on and it'll do the rest.
Confirm that yours is operational before installing it. Look down the port, see the hole, hook the wires to power and ground (either way, AFAIK) and wait and watch. If the hole starts closing off, it's good to go. I usually spray a bit of lubrication in both sides of the port to combat sticking.
For final installation plumb one side of the port to the plenum, and the other side to the air cleaner. Run the ground to the engine case somewhere, and run the power to the new fuse panel (piggyback on fuse #6, which is also the O2 sensor).
Posted by: saigon71 Apr 14 2017, 07:30 AM
Shipper just contacted me and the car comes home Monday night!
The charging issue was the voltage regulator.
Mark had to make a slight change in wiring to fix the run on issue after the key was turned off. Maybe he will chime in on that.
Now I just need to get the interior back together, get the head temp sensors into place and the console hacked to support the 4 way gauge.
But the car will be drive able Monday!
Zach
This is awesome news Zach!
Posted by: crash914 Apr 19 2017, 03:02 PM
WELL?????

Posted by: McMark Apr 19 2017, 05:21 PM
Shipper delayed pickup. So it left GR on Monday instead.
Posted by: Vacca Rabite Apr 19 2017, 06:59 PM
Got it around 5 today. Took it for a quick spin around the block before looking at the gas gauge and seeing I was running on fumes.
There are some punch out tasks, but its really close now.
1) fab up a hold down for the battery
2) Air box, fuse panel need to be bolted down.
3) under tank fuel lines need to be shortened up to remove kinking. This will kinda suck as it will remove the service loop, but it needs to happen.
4) put the AAR back on the car and close up the air leak at Idle.
5) interior back into the car.
6) adjust the clutch cable.
7) make a new shifter knob. The mushroom cloud looks cool but I don't like how it feels.
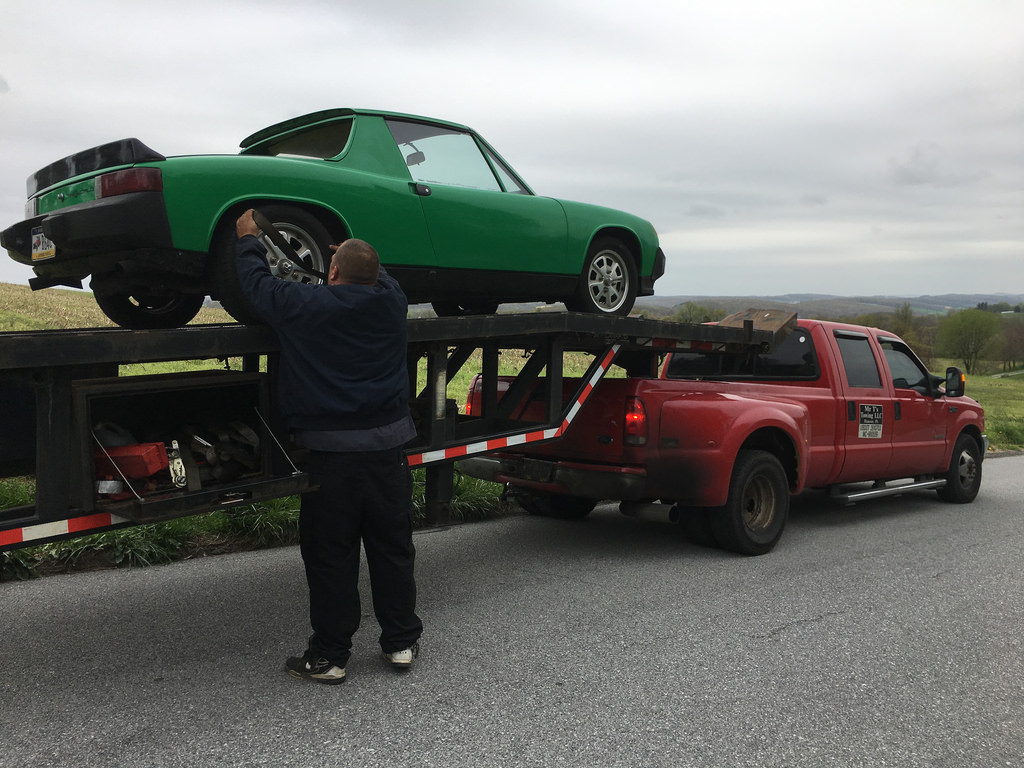
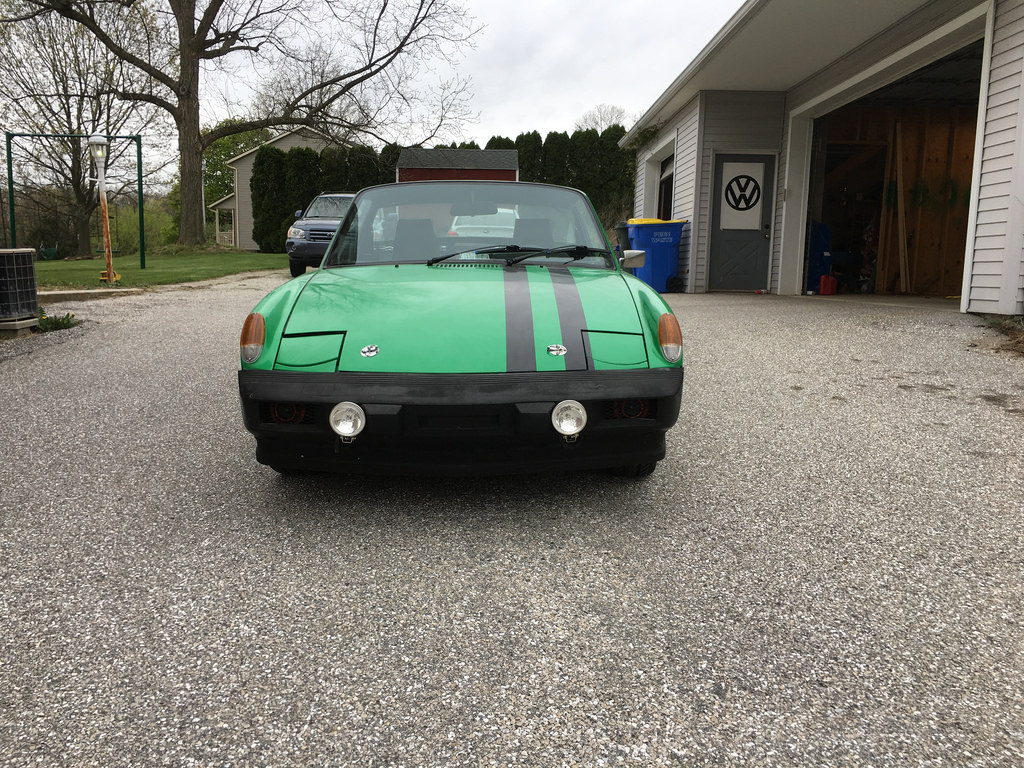
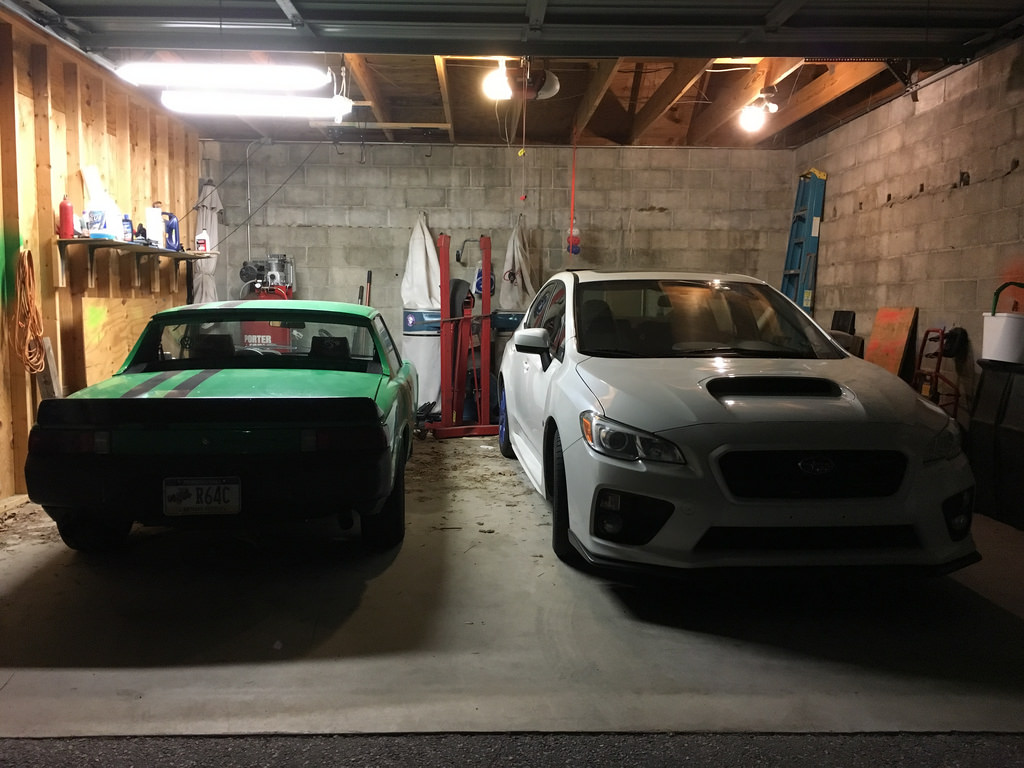
Excited!
Zach
Posted by: mepstein Apr 19 2017, 07:00 PM
Congrats!
Posted by: McMark Apr 19 2017, 07:22 PM
I've used these once, and have been meaning to try them again: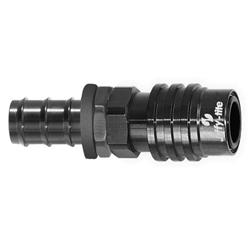
https://www.summitracing.com/parts/jif-21505j
https://www.summitracing.com/parts/jif-22505
Those are for AN-5 (5/16") barbs. I'm not 100% confident that's the one you need, but the technology is nice. Reach up in the hole, pop the quick disconnect and you're done.
There's also caps, because IIRC it's not 100% leak proof, just a occasional drip.
https://www.summitracing.com/parts/jif-ms2000p
https://www.summitracing.com/parts/jif-ms2000c
Posted by: Vacca Rabite Apr 19 2017, 07:26 PM
Mark (or anyone) do you think its worth putting in a dual port pump instead of the 3 port I have in there now?
Zach
Posted by: McMark Apr 19 2017, 07:28 PM
I would for plumbing simplicity. It's less components to fail, and less to deal with when servicing or accessing.
But functionally, no there's no benefit. A pump is a pump.
Posted by: bigkensteele Apr 19 2017, 07:45 PM
Glad to hear you are rolling again, Zach. You deserve it.
Posted by: crash914 Apr 20 2017, 03:57 AM
not in that order!
Posted by: jd74914 Apr 20 2017, 05:25 AM
Mark (or anyone) do you think its worth putting in a dual port pump instead of the 3 port I have in there now?
Definitely if you have an older 3 port. They have a tendency to start bypassing at the worst times.
Posted by: FourBlades Apr 20 2017, 03:34 PM
Great to see you have your car back and running!
I can't believe Mark ever figured out the voodoo starter issue.
I would have replaced the whole motor before ever thinking of the starter. 
Get out and drive it now.
John
Posted by: Vacca Rabite Apr 27 2017, 12:29 PM
Small update.
Mark and I still have our heads together to get the cold start right.
I adjusted the idle when warm that the engine would idle fine without the air leak.
Mark is going to make a small harness to wire the AAR into the Microsquirt.
I energized the AAR and timed its function and it was closed up within 40 seconds. Thats just not enough time. So what we are going to do is have the AAR energize when the engine warm up is complete.
I've been having connection issues getting my laptop to talk to the ECU, and have traced it down to a continuity issue in the coms cable that goes into the ECU. I'm guessing there is some oil/dirt/crap in the 3.5mm minijack which I consider to be a weak point. tonight I'm going to unscrew the housing from the minijack and start probing to see if the jack is the issue or the wires. Its possible that something vibrated loose either in the Ampseal connector or at the jack or somewhere in between.
I've driven the car a few times. No long drives yet. Buts its more punchy then I remember, and it sounds TOTALLY different then it did with carbs.
Zach
Posted by: Spoke Apr 28 2017, 05:07 PM
You should be able to slow the AAR down a bit by adding a series resistor. Although if the resistor is too large, the AAR won't open completely. It might be possible for the AAR to completely open with a series resistor and slow down the opening timing.
Posted by: Dtjaden Apr 28 2017, 05:40 PM
Is there a reason why you are not using a PWM idle valve that would be directly controlled by the Microsquirt ECU? They are relatively inexpensive and very easy to setup.
Posted by: McMark Apr 29 2017, 06:54 AM
Is there a reason why you are not using a PWM idle valve that would be directly controlled by the Microsquirt ECU? They are relatively inexpensive and very easy to setup.
For me it's one of the things I plan to look into for the next two MicroSquirt setups I'm building right now. I'd like to control a PWM idle valve, but for me it's a matter of finding the right valve that fits the space and looks closer to original. There's a lot of valve out there that work for people who are just looking for the function. But I like to make things hard on myself.

Posted by: Vacca Rabite Apr 30 2017, 11:27 PM
I'd like to know more about the PWM valves.
My biggest issue right now, and I'm pulling my hair out over it, is that I can't get the ECU to talk to my laptop.
Mark and the tuner were both able to connect. My laptop had connected in the past. I've gone through all the trouble shooting guides. Loopback tests work for the cable and serial to USB adapter. All the wires have continuity to the right places. All my drivers are updated. It just wont connect and I'm going nuts trying to figure out why.
Mark, could I get screen shots of your port settings? This is where I am sitting.
If anything here looks weird please let me know.
Zach
Posted by: Vacca Rabite Apr 30 2017, 11:30 PM
The other option I have is to try a Serial to bluetooth adapter instead of the serial to USB. Which I have been meaning to set up anyway so I can use my iPhone as a data logger.
Zach
Posted by: McMark May 1 2017, 05:51 AM
Those match my settings.
I know Zach's tired of me saying it, but I'm gonna post it here for everyone else to see...
When I started working with MicroSquirt I tried three or four different USB serial converters and never had any luck with them. In fact, one time one of those units glitched somehow and erased the MicroSquirt while driving with the laptop connected.
After wasting tons and tons of time, I just went on Amazon and bought a https://www.amazon.com/Dell-Latitude-D630-Laptop-Refurbished/dp/B014WVHL40/ref=sr_1_3?ie=UTF8&qid=1493639340&sr=8-3&keywords=latitude+d630+refurbished with a built in COM port for a little over $100.
And I've never looked back. It's the right tool for the job.
That being said, the bluetooth setup shows promise, and may be a better solution than a dedicated laptop.
Posted by: poorsche914 May 1 2017, 05:54 AM
I'm pretty pleased at that. Looking forward to getting the dyno chart.
Really looking forward to driving my car.
Zach
Any idea what the carbed version power numbers were? Wondering how much of a gain the MS gives you (if any).
Posted by: McMark May 1 2017, 06:03 AM
MS, carbs, stock FI, etc ALL have only one purpose in life -- to accurately dispense the proper amount of fuel for the quantity of air entering the engine. Measuring the correct fuel amount for varying conditions is the challenge and some setups are better than others. But a CORRECTLY tuned induction system will not 'make more power' over another. Power is more accurately attributed to air flow. Increasing the airflow through your engine (by reducing restriction in the intake or exhaust, or by increasing the size of the air pump AKA displacement) makes more power.
Think of is this way, you can't take a stock 1.7 and just add more fuel until it makes 125hp.
BUT you can increase the airflow to where it makes 125hp. This is EXACTLY what a turbo does.
Posted by: poorsche914 May 1 2017, 06:26 AM
Think of is this way, you can't take a stock 1.7 and just add more fuel until it makes 125hp.
BUT you can increase the airflow to where it makes 125hp. This is EXACTLY what a turbo does.
Thanks for the info, Mark. How about fuel efficiency, then?
Posted by: McMark May 1 2017, 07:00 AM
Think of is this way, you can't take a stock 1.7 and just add more fuel until it makes 125hp.
BUT you can increase the airflow to where it makes 125hp. This is EXACTLY what a turbo does.
Thanks for the info, Mark. How about fuel efficiency, then?
That has tons of potential to improve. Carbs only have <10 places where you can make adjustments. Fuel injection has multitudes more (depending on the system).
See this image, where light blue is the correct mixture, and the darker the blue the more wrong it is. As you travel along the red circle/line on the carb side you go through a range of blue and black. This is how carb work -- they're pretty right most of the time, but also there are places where it's quite wrong.
As you travel the same circle/line on the fuel injection side you can see there is less black because there are more squares. So the mixture is 'righter' more of the time.
Correct mixture is necessary for optimizing power and fuel economy, as well as proper cooling of the engine.
And this same idea applies to ignition timing.
Attached image(s)
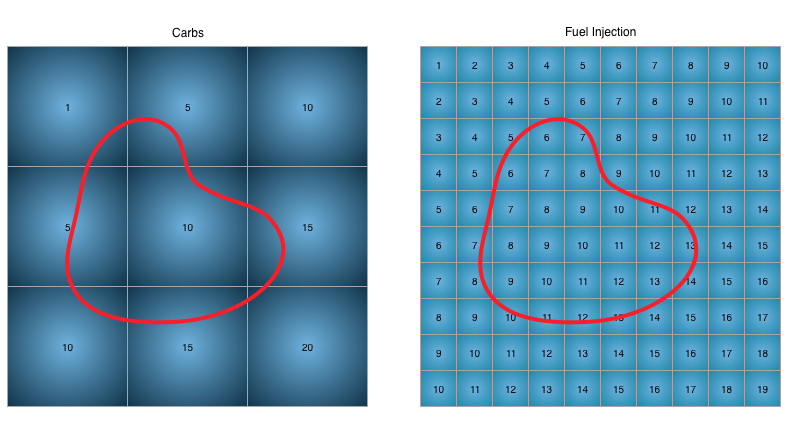
Posted by: arvcube May 1 2017, 08:05 AM
I've had consistent connectivity success with the serial to usb adapter listed on diyautotune.com's website for my Megasquirted scirocco and TunerStudio. You may want to try that one.
Posted by: Vacca Rabite May 2 2017, 11:51 AM
Built and configured the Serial to Bluetooth adapter last night, but was too zapped to want to go out in the driving rain to get into my garage and try it out.
hopefully removing the USB adapter will allow me to connect.
Zach
Posted by: Dtjaden May 2 2017, 12:41 PM
Think of is this way, you can't take a stock 1.7 and just add more fuel until it makes 125hp.
BUT you can increase the airflow to where it makes 125hp. This is EXACTLY what a turbo does.
Thanks for the info, Mark. How about fuel efficiency, then?
With my Megasquirted 2056 I have seen mileage in the high 30s on the highway at 70 - 75 mph.
Posted by: poorsche914 May 2 2017, 06:48 PM
With my Megasquirted 2056 I have seen mileage in the high 30s on the highway at 70 - 75 mph.
Thanks for that bit of info. Currently with my dual 44s I get mid to upper teens. Looks like it would be worth the expense to go with a MS setup.
Posted by: Mblizzard May 2 2017, 07:22 PM
I'd like to know more about the PWM valves.
My biggest issue right now, and I'm pulling my hair out over it, is that I can't get the ECU to talk to my laptop.
Mark and the tuner were both able to connect. My laptop had connected in the past. I've gone through all the trouble shooting guides. Loopback tests work for the cable and serial to USB adapter. All the wires have continuity to the right places. All my drivers are updated. It just wont connect and I'm going nuts trying to figure out why.
Mark, could I get screen shots of your port settings? This is where I am sitting.
If anything here looks weird please let me know.
Zach
Did you install the correct driver? I had isssues until installed the drive from DIY AutoTune.
Posted by: jpnovak May 2 2017, 07:29 PM
Are you running PortCheck at the same time as trying to connect to uS ECU?
The PortCheck will open and hold the connection and prevent the ECU from connecting.
I suggest to close the port check program, reset the COM port (USB adapter) and then run the ECU search function under "connection" tab in Tuner Studio.
If you can see the port, the ECU should connect, assuming that you have the physical connection in place. I had issues with the phono jack not seating properly at first.
I am a fan of hardwire connections not wireless comms.
Posted by: mepstein May 2 2017, 08:04 PM
With my Megasquirted 2056 I have seen mileage in the high 30s on the highway at 70 - 75 mph.
Thanks for that bit of info. Currently with my dual 44s I get mid to upper teens. Looks like it would be worth the expense to go with a MS setup.
I used to get mid 20's with Weber 40's. 44 is a lot of carb if you have a 2.0.
Posted by: poorsche914 May 2 2017, 08:28 PM
With my Megasquirted 2056 I have seen mileage in the high 30s on the highway at 70 - 75 mph.
Thanks for that bit of info. Currently with my dual 44s I get mid to upper teens. Looks like it would be worth the expense to go with a MS setup.
I used to get mid 20's with Weber 40's. 44 is a lot of carb if you have a 2.0.
It's a Raby-built 2056. I have a set of 40s I may try at some point. I used them on a euro spec 2.0 many years ago and got mid 20s.
Posted by: Vacca Rabite May 4 2017, 07:37 AM
Are you running PortCheck at the same time as trying to connect to uS ECU?
The PortCheck will open and hold the connection and prevent the ECU from connecting.
I suggest to close the port check program, reset the COM port (USB adapter) and then run the ECU search function under "connection" tab in Tuner Studio.
If you can see the port, the ECU should connect, assuming that you have the physical connection in place. I had issues with the phono jack not seating properly at first.
I am a fan of hardwire connections not wireless comms.
I'll try it. Have not touched it in a few days. I needed to step away from it.
Its frustrating as Mark and the dyno tune shop were able to connect. I'm not. So I know it will connect, if I can get the magic right.
The other issue is not being able to work on it until late at night after the kids are in bed and I'm already tired and prone to make mistakes. Maybe some day in June I'll have a weekend day free where I can be alert and methodical and figure out the issue.
Zach
Posted by: Vacca Rabite May 29 2017, 10:10 PM
Bit the bullet and bought one of the refurbished Dell 630 laptops with the serial connections.
Man I hope it works. I'm tired of fighting with my Acer and trying to get it to connect with the RS232-USB adapter.
Zach
Posted by: Vacca Rabite Jun 1 2017, 06:57 AM
I got the VW air valve, and am looking forward to wiring it in on my car.
How are you getting the ECU to control it?
Zach
FIDLE using PWM was able to do the testing in the test part of tuner studio.
Putting this here for reference later.
Posted by: Vacca Rabite Jun 6 2017, 07:36 AM
The Dell laptop with the native serial port came in. Still not connecting but getting a different failure mode
In the Tunerstudio's Mini terminal, with the ignition on and the Microsquirt powered up, it is acting like its doing a successful loopback test. IE, anything I type into the upper window is looped back to the lower window, just like I had jumped the pins for a loopback test.
The cable does not do this on its own - it has to be plugged into the Microsquirt ECU.
I loaded up the newest versions of tuner studio and made sure my port settings were correct.
Hopefully this gets me closer to being able to connect. Thoughts?
Zach
Posted by: Dtjaden Jun 6 2017, 05:04 PM
The Dell laptop with the native serial port came in. Still not connecting but getting a different failure mode
In the Tunerstudio's Mini terminal, with the ignition on and the Microsquirt powered up, it is acting like its doing a successful loopback test. IE, anything I type into the upper window is looped back to the lower window, just like I had jumped the pins for a loopback test.
The cable does not do this on its own - it has to be plugged into the Microsquirt ECU.
I loaded up the newest versions of tuner studio and made sure my port settings were correct.
Hopefully this gets me closer to being able to connect. Thoughts?
Zach
Hi Zach,
Some things to check on the serial comnnection:
1. The cable sould be a straight through cable. This means that pins 1-9 on one side of the cable should connect to 1-9 on the other end. This us not always the case. You can check this with an ohm meter.
2. The default baud rate for MS is 115,200. Make sure that this is the baud rate set on the Dell notebook computer.
Posted by: Vacca Rabite Jun 12 2017, 07:05 PM
I've gone round and round with the ECU connecting.
DIYautotune support thinks that the ECU itself is bad at this point. Either the coms chip or the coms ground going bad will cause the echo I'm seeing.
They have recommended a shop in Virginia Beach that will test and repair the ECU if needed.
If the ECU tests okay, I'm going to bring my laptop, cable and ECU and get the tuner there to show me WTF I'm doing wrong. This is right down the road from Scott, and I head down that way about monthly.
Zach
Posted by: hot_shoe914 Jun 12 2017, 10:42 PM
That's why you can't get shit done!
Posted by: Dr Evil Jun 13 2017, 03:41 PM
Did you turn it off and turn it on again??
Posted by: Spoke Jun 13 2017, 09:46 PM
What version of Windows are you running?
We've had troubles with Windows 8+ running some programs that use USB or serial ports. It seems like the program is running but it really isn't connecting to the peripheral.
We had to turn off something in Windows which authenticated the port or program. I don't recall the exact procedure. Had to do it for several different programs.
Posted by: Vacca Rabite Jun 15 2017, 07:23 AM
What version of Windows are you running?
We've had troubles with Windows 8+ running some programs that use USB or serial ports. It seems like the program is running but it really isn't connecting to the peripheral.
We had to turn off something in Windows which authenticated the port or program. I don't recall the exact procedure. Had to do it for several different programs.
The "new" old dell came with Windows 10 loaded. My Acer laptop that I was trying to connect with the USB adapter also has 10.
I hate 10. But I don't see a way around using it these days.
If you can think of what you had to change, I'd like to hear it.
ZAch
Posted by: McMark Jun 15 2017, 07:25 AM
I still have the three spare tester units. I can throw them in a box for you today if you want.
Posted by: Vacca Rabite Jun 15 2017, 07:42 AM
I still have the three spare tester units. I can throw them in a box for you today if you want.
Yes please. Thanks!
Zach
Posted by: Spoke Jun 15 2017, 07:01 PM
Zach, about loading a program in Windows 10, I described your issue to my colleague and his response is:
There's a special startup sequence that you go through with Windows 10 to load unsigned drivers. But you only need to do that if the driver fails to install. It sounds like this is a different kind of problem.
Posted by: bigkensteele Jun 15 2017, 07:37 PM
What version of Windows are you running?
We've had troubles with Windows 8+ running some programs that use USB or serial ports. It seems like the program is running but it really isn't connecting to the peripheral.
We had to turn off something in Windows which authenticated the port or program. I don't recall the exact procedure. Had to do it for several different programs.
The "new" old dell came with Windows 10 loaded. My Acer laptop that I was trying to connect with the USB adapter also has 10.
I hate 10. But I don't see a way around using it these days.
If you can think of what you had to change, I'd like to hear it.
ZAch
Look on the bottom of the Dell to see if there is a Windows key sticker. If it was originally built with Windows 7, and the key is still legible, you can reload that version (Home Premium or Pro) onto the machine and use that key. There are registry hacks that will prevent an upgrade to 10, but I don't know if you even need to do that anymore since the upgrade is no longer free.
I hate 10 too, but it is "lighter". I have found that it breathes new life into some older machines.
Posted by: Dtjaden Jun 16 2017, 10:41 AM
Zach,
Did you check the cable and baud rate as I suggested in post 551? If these are not correct you will never connect.
Posted by: Vacca Rabite Jul 6 2017, 10:35 AM
And the verdict is...
The coms ground pin on the Microsquirt was burned. That's why I was unable to connect. The guy said once he replaced the bad pin it connected immediately. He says its a fairly common fault.
If I'm still having issues when I get it back, I'm going to pull the harness out of the car, and take the ECU, the harness, and my laptop with me to his shop when I go down to visit Scotty_B in richmond in August, since the guy's shop is about an hour further down the road.
If anyone was interested, the guy DIYAutotune sent me to to check the Microsquirt was:
Peter Florance
PFTuning.com
Zach
Posted by: crash914 Jul 6 2017, 10:44 AM
Peter is one of the good guys. Been around quite a while and very good with the MS units.
I still need to complete the new wiring on mine....soon...
Posted by: Vacca Rabite Jul 6 2017, 10:52 AM
Zach,
Did you check the cable and baud rate as I suggested in post 551? If these are not correct you will never connect.
Sorry I never replied. MY bandwidth has been severely limited lately.
The cable is legit, I tested it to make sure. It was one of the first things I checked when I was having issues connecting.
Also the COM port has been set to the correct BAUD on both laptops. The DELL D630 did have the BAUD set at 9600 initially, but that was corrected fairly early on.
I still have the three spare tester units. I can throw them in a box for you today if you want.
I got them, and have not had a chance to try them yet. With any luck, I won't need to.
Zach
Posted by: Mblizzard Jul 6 2017, 10:58 AM
I have to send mine in to be fixed as well. But it is a resistor not a pin.
Posted by: McMark Jul 6 2017, 12:08 PM
Wow. Did he mention if there was a reason? I should probably have you send those other units to him instead of back to me when you're done and check them all out.
Posted by: Vacca Rabite Jul 9 2017, 09:01 AM
Wow. Did he mention if there was a reason? I should probably have you send those other units to him instead of back to me when you're done and check them all out.
No, he did not speculate on a reason, he just let me know what was wrong, and that it was a common fault when the ECU was to blame for connection issues.
Zach
Posted by: Vacca Rabite Sep 12 2017, 07:26 AM
So a brief update and a little progress.
I've not touched the car in months. On Sunday I NEEDED a project to take my mind off other issues. So I built a test harness (that only had power, ground, and coms in the Ampseal. I set it up on a switch with a 2 amp fuse in the circuit. Hooked my car battery to the system for isolated power. Plugged in my laptop, ECU, powered the system on and the ECU IMMEDIATELY connected to my laptop!
So, the ECU is fixed, and my laptop (I was using the Dell with the native RS232 port) has proven good.
I'm going to do some connectivity tests on my harness again (and check them against the test harness that I know works). I'm hopeful the the RX and TX lines are just in the Ampseal backwards (which would be my fault).
Should be in business soon!
Oh, also I've been driving the car a little as is. Only a few miles at a time... Man, I really miss this car!
Zach
Posted by: crash914 Sep 12 2017, 09:02 AM
Great news! I will assist if needed. We will be in the new house next week and should be fully moved by early October. Lift will be available.
Posted by: Vacca Rabite Sep 13 2017, 01:59 PM
baby steps to progress.
Today I bit the bullet and took the harness out of the car.
Hooked it up on my kitchen table, and instantly got a connection! I literally danced a little.
Again, all that was connected was switched, fused power, ground, my battery and coms. No other sensors were hooked up.
The ampseal connector on my car's harness is CONSIDERABLY looser then the one on the test harness I made. I'm sure its from plugging and unplugging it so many times. But for the sake of being sure, I unplugged and reseated the ECU.
Power on, no connection detected.
So, I think the ampseal itself may be the issue. Or one of the COMS pins inside the ampseal needs some love. I hate taking these things apart... they are fiddly. But that is my next move. Pull the COMS pins and inspect them. I think I have another new Ampseal 35 block on hand, maybe I just replace the loose block with a new tight one.
Zach
Posted by: Vacca Rabite Sep 13 2017, 02:10 PM
Now that I am following this train of thought...
I wonder if while chasing connectivity while the ECU had the blown COMS ground, I probed too aggressively and expanded a female COMS pin in the Apmseal block so that it no longer has a good mechanical connection to the male pin on the ECU?
Just another thing to test...
Zach
Posted by: Vacca Rabite Apr 5 2018, 02:40 PM
Its incredible how this drags.
I had sent the harness back to Mark to have him re-wire the Ampseal. Which he did. As soon as it got back, I hooked it up and have been happily communicating with my laptop.
In January I wired in an AAR, but have not had a chance to test it yet.
Last weekend I put the harness back in my car. Well most of it. Weather went from 70 to 40 in about an hour and I ended up getting sick. :-(
This weekend I'm hopeful to finish the wiring.
We still have salt on the roads here, and the forecast is for several more inches of Snow Saturday (WTF! - I've never had snow this late in the spring.)
I finally bought a 2 port fuel pump and will be simplifying the plumbing under the tank. Hopefully this will resolve the issue I was having with fuel pressure decreasing under load.
I know I can't make Hershey this year. So that pressure is off. But i still want to drive this car. And I have motivation right now from the trip to Amelia Island. So lets make use of it.
Zach
Posted by: crash914 Apr 5 2018, 07:24 PM
get yours done and I will finish mine...lets go for a ride!
Posted by: Porschef Apr 6 2018, 04:19 AM
We still have salt on the roads here, and the forecast is for several more inches of Snow Saturday (WTF! - I've never had snow this late in the spring.)
Zach
Yeah, this is crazy weather. Still salt here also, so I'm not taking the car out.
Haven't started it since October...

Posted by: Vacca Rabite Apr 6 2018, 07:56 AM
get yours done and I will finish mine...lets go for a ride!
Hell yes.
Zach
Posted by: Vacca Rabite Apr 15 2018, 09:11 PM
Fuel pump arrived this weekend. But, well, life. I've been stupid busy. Being sick as a dog for a week didn't help, and working 7 days a week.
Damn, this month has flown by! I'm so close. I need to make time and finish this thing!
Zach
Posted by: bulitt Apr 16 2018, 05:10 AM
Like eating an Elephant. However some Elephants are bigger than others...
Posted by: Mblizzard Apr 16 2018, 06:49 AM
While it is frustrating when you don't have time to work on things, I think it is worse when you have time but lack the part or have to spend lots of time on a minor issue that should take 5-min and then turns in to a Mongolian cluster F&*k and steals all of your time.
Hang in there. You will likely still beat me back on the road.
Posted by: Vacca Rabite Jul 17 2018, 08:26 PM
Been working on the car in little bites.
The gas tank is epoxy sealed with the Caswell kit.
The new pump is in place and wired in. No fuel lines are run to it yet.
I’ve bent up a hard fuel line to make that tight 180 turn after the fuel pump. Tired of fighting kinks.
The harness is back fully in the car, including the AAR valve wiring.
The AAR is wired, but the hose barbs are HUGE compared to what I need. I will either need to make fittings to step the hoses down, or replace the AAR with one using the same size hoses.
I’m close to starting the car again. Maybe this weekend. Won’t have a working AAR yet, but should be able to get the engine running again.
God all this takes me so long.
Zach
Posted by: McMark Jul 18 2018, 05:04 AM
I looked back but couldn't find any info in this thread about your AAR, but if the one I was working on will work I can send you my adapter piece and you'll have to order a Hyundai valve.
http://www.914world.com/bbs2/index.php?showtopic=319149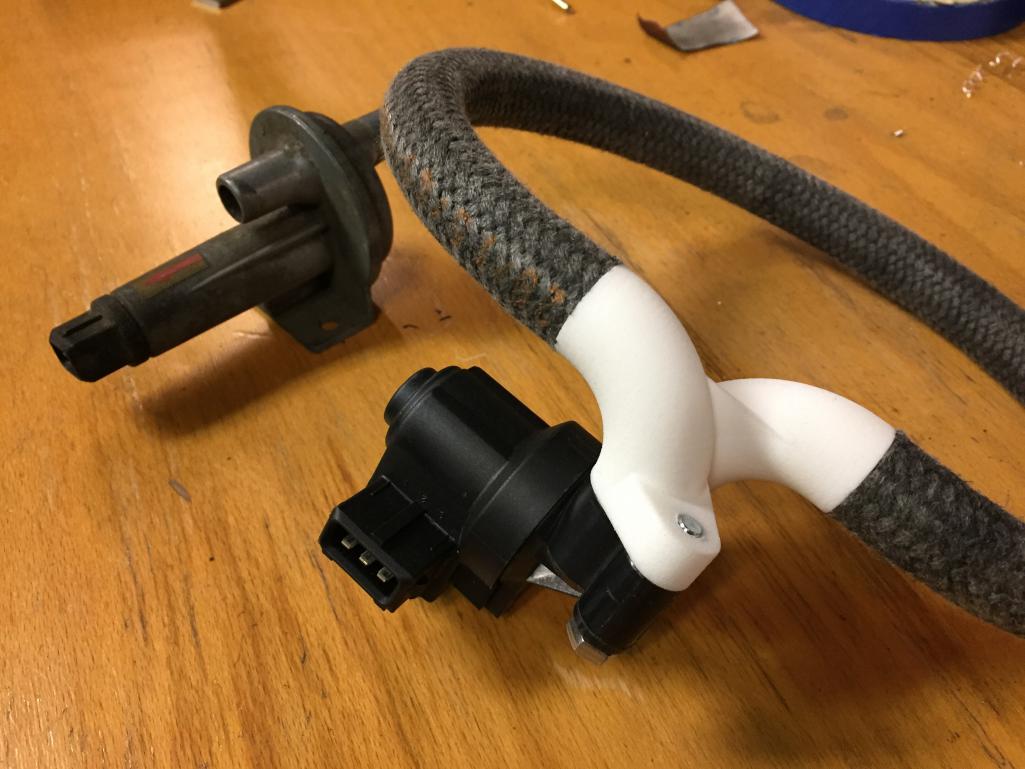
Posted by: Vacca Rabite Jul 18 2018, 07:28 AM
I looked back but couldn't find any info in this thread about your AAR, but if the one I was working on will work I can send you my adapter piece and you'll have to order a Hyundai valve.
http://www.914world.com/bbs2/index.php?showtopic=319149
Send me the model number of the Hyundai part and I’ll get it ordered.
Posted by: peteyd Jul 18 2018, 01:08 PM
Zach,
check out my solution for the AAR. Post 49 and onward.
http://www.914world.com/bbs2/index.php?showtopic=256751&st=40
If Im correct you bought a 2 wire unit. If your ports are as big as mine, I took some barbed brass fittings and JB welded them in there so I could plumb .5" hose, which is darn close to the 13mm stock.
or go with Marks setup.
Pete
Posted by: Vacca Rabite Jul 19 2018, 07:21 AM
Tank went back in last night. Front end of the car is jacked up as I need to get under and attach the hoses to the underside of the tank now. I'm not leaving myself a service loop for anti-kinking reasons, which has made everyhting a little more challenging.
But if it results in fuel pressure not dropping under throttle, then its worth it.
I may be able to start the car this evening. At least, thats the plan. In theory everyhting will work and I'll be able get my laptop on it. Or maybe just take it for a gentle drive around the block.
Zach
Posted by: crash914 Jul 19 2018, 10:54 AM
great news! Mine is running. I went for tuning run on Monday, but the rear brakes are dragging and I had bad brake fade.
Need to source new rear calipers.....
Posted by: Vacca Rabite Jul 20 2018, 01:10 PM
Well. Damn. 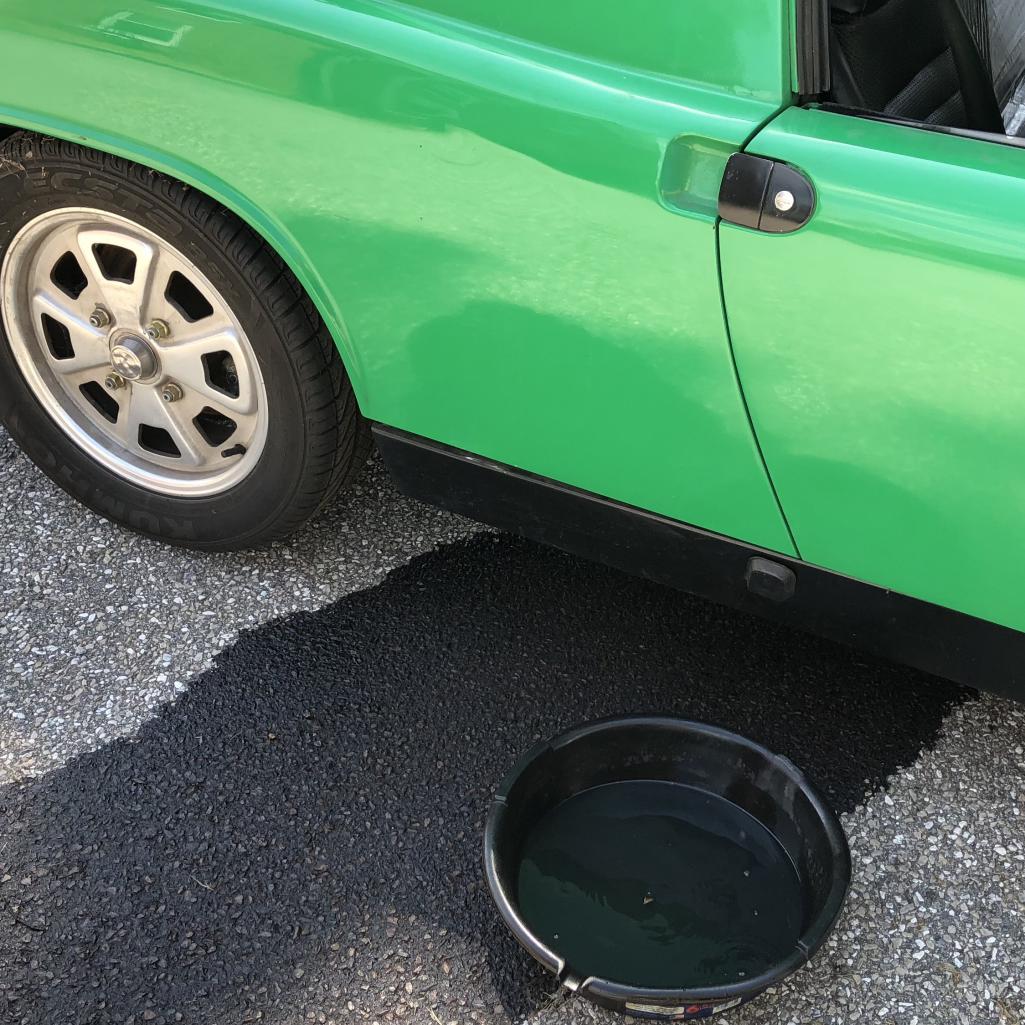
I’m glad I only put 2 gallons of gas in it. Looks like I popped a hose.
Just finished siphoning all the gas back out of the tank.
I’m glad I took the time to push the car outside before cycling the pump to build pressure.
Uhh. I’d say the new fuel pump is delivering plenty of pressure.
Zach
Posted by: saigon71 Jul 20 2018, 01:25 PM
UGH!
Keep battling bro. You are close to the finish line!
Posted by: Vacca Rabite Jul 20 2018, 01:40 PM
Back in the garage. Hose popped off the pressure pipe as suspected. Easy to fix but no time now as I have to go visit mom in the hospital, and have to clean up.
I have a really early set of Chris’s stainless fuel lines, before he started putting bubble flares on them. I just need to tighten the clamp down more over the hose.
Posted by: 76-914 Jul 20 2018, 02:46 PM
Zach. if you have a flaring tool put a very small flare on the end. Just enough to make a ridge. If you don't have a flaring tool you can take needle nose pliers and gently bend the end edge out enough to form a small ridge. It doesn't take much. We used to do this to the copper pipe so that the rubber cone washers wouldn't slip off. Our pressures varied from 30psi to 90psi.
Posted by: Vacca Rabite Jul 20 2018, 10:02 PM
https://www.youtube.com/watch?v=qKDxqJunbqI
Its running! We are back to the point we were last summer. it runs but has a very high idle.
I love how brite my tail lights are with the LEDs. It has really made a difference.
https://www.youtube.com/watch?v=H9DxHsHTVQE
I'm connected to my laptop! That is the error that took about a year to fix! Now I need to fix my tuning laptop. The battery is DEAD and it only runs when connected to an outlet. One is ordered.
A slightly bigger issue is that the throttle cable is somehow trashed. :-( Looks like something was chewing on it, and the wire sheath is all fucked up and causing the cable to bind. So I need to order and run a new throttle cable. This issue is keeping the car from being drivable at all.
My fuel pressure is also set too low - 30PSI. But that is easy enough to fix. Given that it was late I did not test to see if fuel pressure dropped under throttle. Ill test that tomorrow.
Big steps!
Zach
Posted by: Vacca Rabite Jul 22 2018, 09:58 AM
I found a new Terry throttle cable in my parts stash. It may have come from Kens parts that I bought up after he passed (thanks buddy!).
I had Theo help me pull the old cable and run the new cable in and he was awesome. Still need to hook up the throttle pedal and the throttle. But the hard part is done. 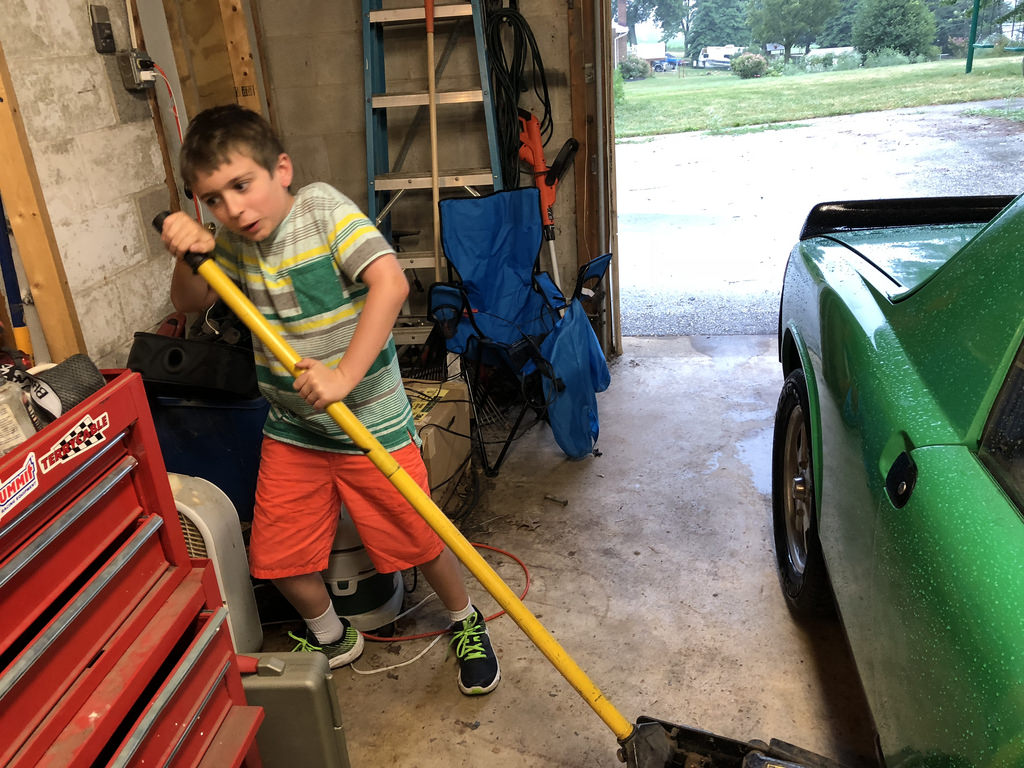
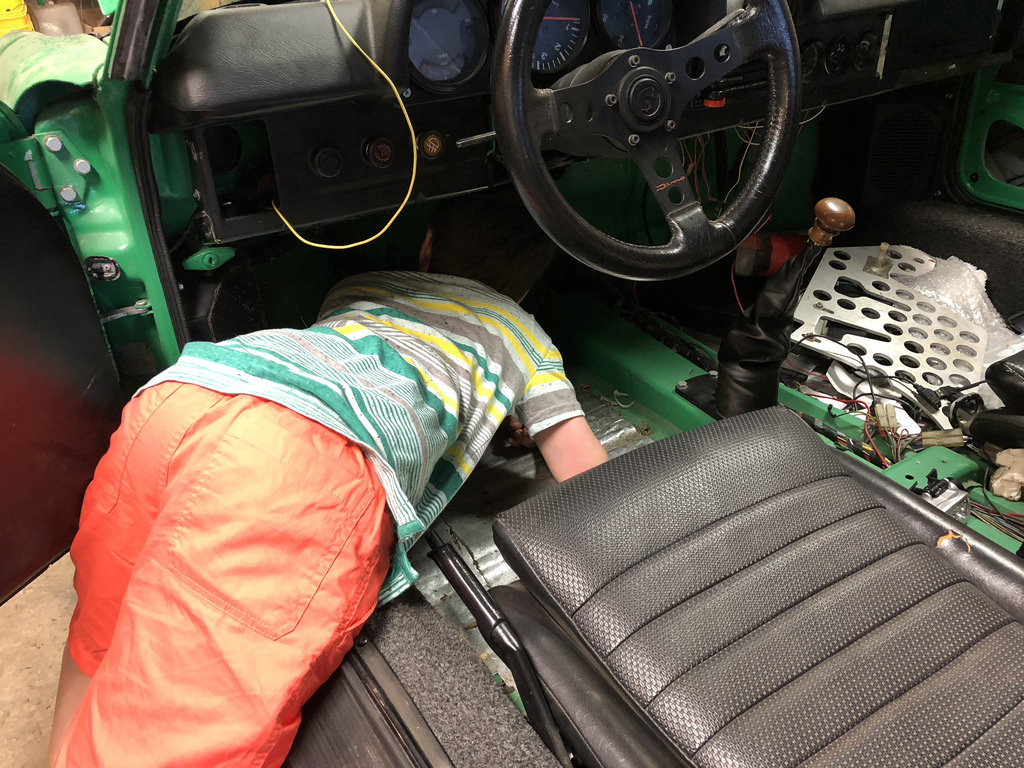
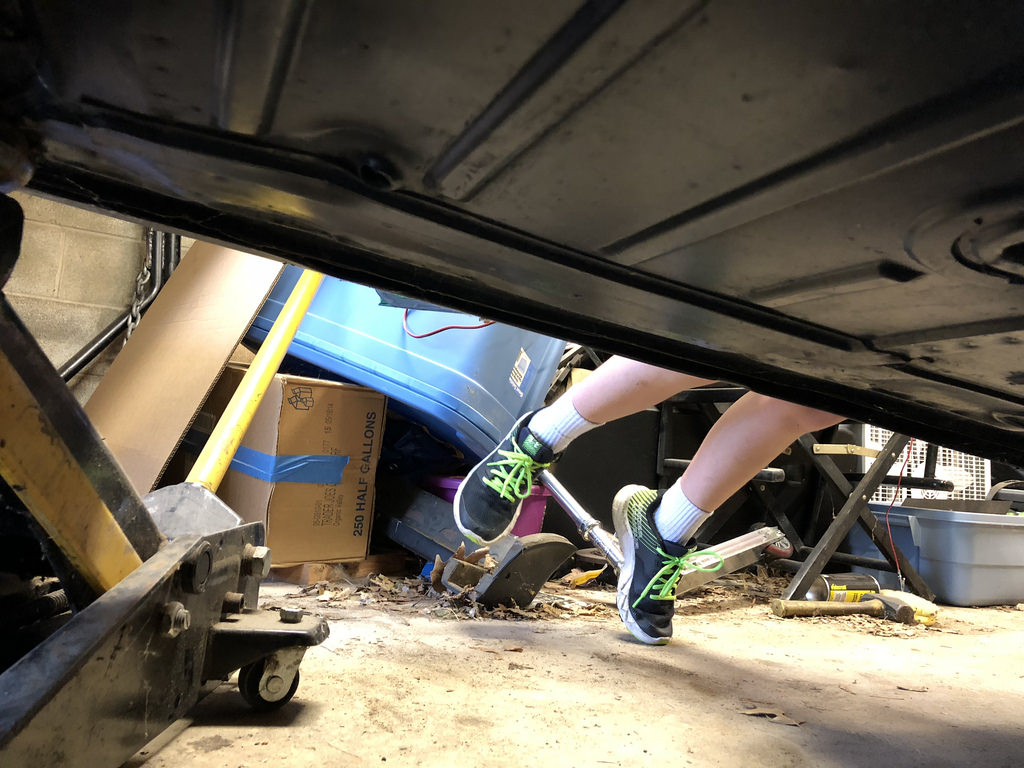
(yes, we have 2 pin type jackstands holding up the car. I leave the jack in place as an added layer of safety.)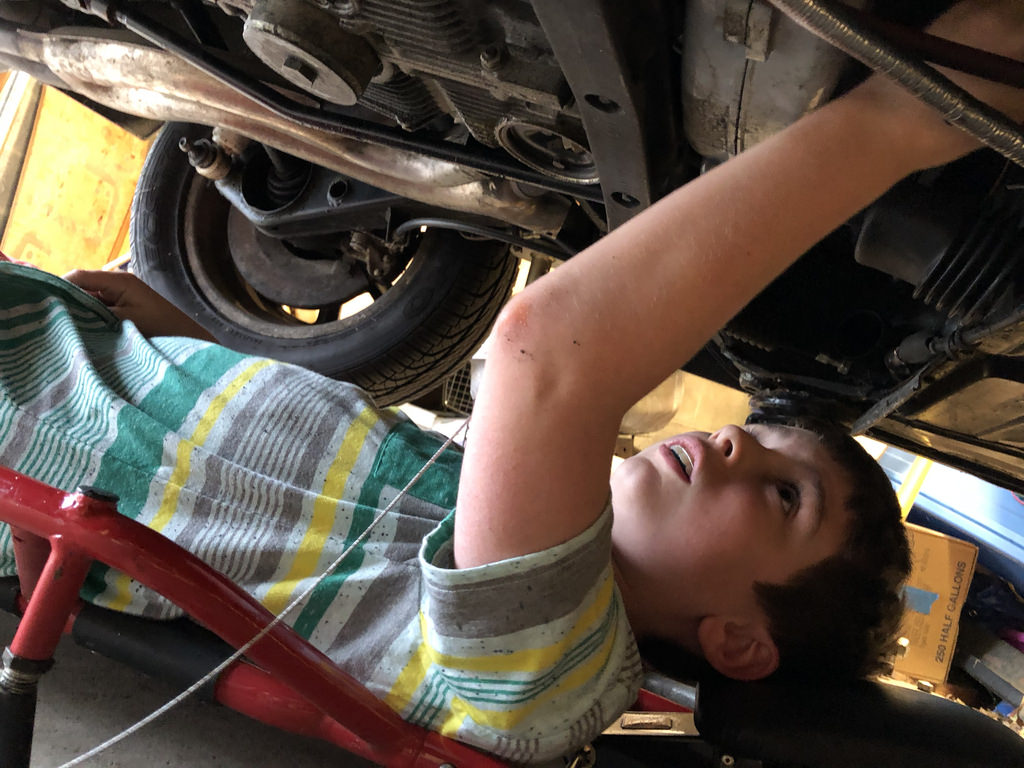
I was under the car with him, but he is getting old enough where he does not really need a ton of direction anymore. Just need to show him where things go and let him figure things out.
I should be able to get the throttle cable buttoned up at some point next week. I just need the AAR and I should I’d be able to drive it to Jim’s party in early August. 2 weeks left! eek!
Zach
Posted by: billh1963 Jul 22 2018, 02:56 PM
Started to get on you about jack stands...but, now I see them.
One big thing I noticed is no safety glasses on your son. I didn't wear them for years. Then, after a near miss, I now wear them religiously when working on the car where something may go flying or debris may drop in my eyes.
Posted by: Vacca Rabite Jul 22 2018, 09:08 PM
I was using two pin type jack stands and the jack as well as an added layer of security.
Posted by: JamesM Jul 23 2018, 12:07 AM
Its running! We are back to the point we were last summer. it runs but has a very high idle.
What sort of idle speed are you aiming for? 2nd video the idle didnt seem high at all, though the vacuum was not great and it looked like it may be jumping around a bit.
How were the AFRs looking? Id be interested to see a data log and the current tune file.
Posted by: Vacca Rabite Jul 29 2018, 06:40 PM
Got the hose Barbs from Mark @ Original Customs for the Hyundai AAR. Just need to figure out the wiring now. This is the last piece of the puzzle folks. After this is just making it look pretty again. 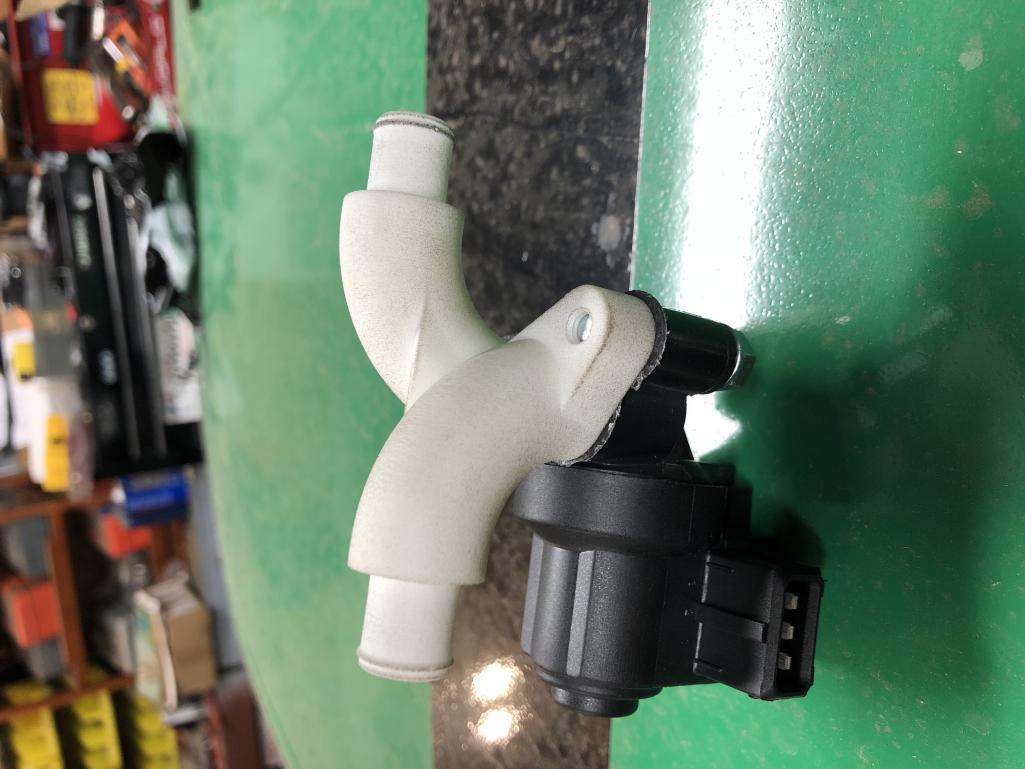
Zach
Posted by: McMark Jul 30 2018, 06:20 AM
Pins are numbered 1-2-3
The center pin (2) is the power in.
Pins 1 & 3 either open or close the valve. I'll look at my notes, but you can test it with jumper wires. Power to pin 2 and ground on pin 1 will either open the valve fully, or close it fully. Figure out which pin is the 'closer' and that one will go direct to ground with the resistor (you may need to play with the value). Wire the 'opener' to the MicroSquirt.
According to my notes:
3- Closes the valve (to engine ground, through resistor)
2- 12v power (from fuse panel)
1- Opens the valve (wire to MicroSquirt FIdle)
....edited to correct wiring pins 8/11/18
This little guy (and the BIG Bosch valves) work by making pins 1 & 3 fight against each other. When the MicroSquirt isn't trying to raise the idle, the ground on pin 1 pulls the valve shut automaticallly. But the resistor reduces the 'strength' or closing power. So when the MicroSquirt grounds pin 3 it is 'stronger' and can open the valve.
It's like having a scrawny kid trying to hold a door shut, but ever once in awhile a big, strong guy (MicroSquirt) pushes the door open anyway.
-------------
I haven't tested any of this on my car yet, but I would start with the 30-40 ohm resistor, but keep in the back of your mind the idea that those resistor values may need to change.
The value of the resistor is what establishes just how weak the scrawny kid is.
A 0-ohm resistor would mean that the valve would never move. Both sides are pulling the same.
A 999k-ohm resistor would mean that the closing side has absolutely no strength and can't even 'close the door' by itself.
Attached image(s)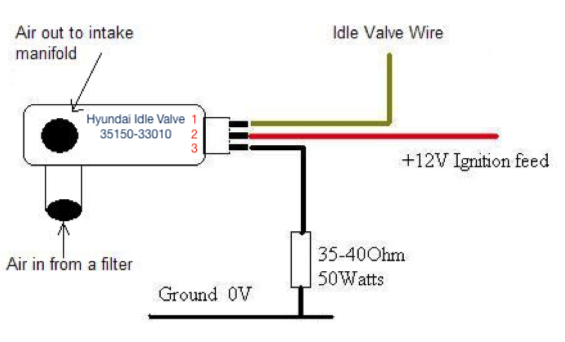
Posted by: Vacca Rabite Jul 30 2018, 01:03 PM
Excellent. Just picked up a 40ohm 50watt resistor block from Amazon.
Posted by: Vacca Rabite Aug 1 2018, 04:09 PM
Just took the car for a 10 mile spin.
Clearly I need to figure out how to tune the IAC. Hot idle is about 2K rpm right now. Also the car flat out would not start with the IAC plugged in. I unplugged it to start the car and the plugged it back in.
Time to learn something new.
Zach
Posted by: saigon71 Aug 2 2018, 05:37 AM
Posted by: Vacca Rabite Aug 2 2018, 10:00 AM
Mark (or anyone really) Have you played with the IAC settings at all in TunerStudio? They are under Fuel Setup Idle Control. I've been watching a bunch of youtube videos trying to wrap my head around it.
I have not found a way to import my IAC into tuner studio the way you do with all the other bits like the TPS and air temp sensor. It may be that TS doesn't really care and you just have to fiddle with the controls.
With the 40ohm resister, it feels like the IAC isn't open enough when cranking. Car starts fine if the IAC is unplugged. When its plugged in and the engine is cold, it coughs but won't fire. Makes a cool "phut" sound sometimes. So my first thing is giving it a larger crank value (I think).
Also, I think I have to do the 15 minute warm-up instead of sensing something else or going closed loop. The coolant sensor that is usually used to regulate warmup doesn't exist for me (its an air temp sensor.) I MAY be able to use the head temp sensor, if I can find out how to link it in. But I'd imagine 15 minutes after starting the car its as warmed up as its going to get.
From what I'm seeing this is how I get my idle lower. I'm excited to see an idle around 1000 rpm again.
I forgot how loud this car was. It has a really different sound then it used to with the carbs and headers. The high pitched scream has been replaced by a thumping base coming from the Triad.
Once the car is driving right, this winter I'm going to try and get some of the heater ducting back in place so I can defrost/defog the windshield.
Zach
Posted by: crash914 Aug 2 2018, 10:37 AM
Zach, I have used both the head temp sensor and oil temp sensor for coolant temp.
if you use < 180 degrees as cold, it should work. If you use the existing head temp sensor, you might need to do a temperature resistance calibration. I don't care as I just want to see above 180.
you might also want to look at pulse width cold and at cranking. could be you are too rich, thus have to have extra air.
I have ITB, so no fast idle or warm up help. had to get it working without. it does.
running MS extra. Prime pulse is around 13.5 @76 deg and 0 above 168. Cranking pulse width is 263 at 76 deg. and 100 at 191. I can't send you a screen shot right now, but can later.
Posted by: peteyd Aug 2 2018, 11:38 AM
Here are the settings on my idle control valve.
They may be a starting point for you .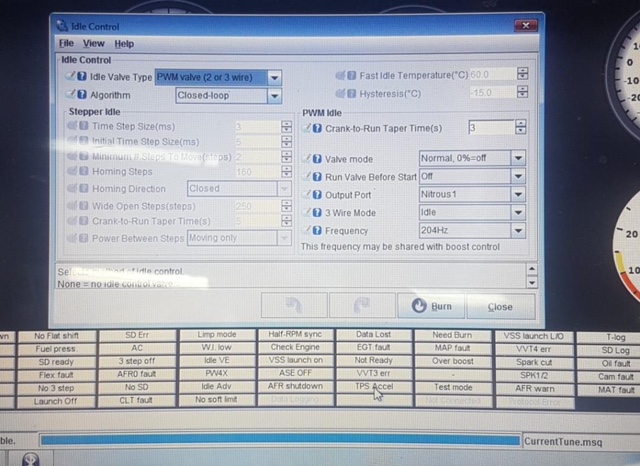

Posted by: porsche913b_sp Aug 2 2018, 08:00 PM
I looked back but couldn't find any info in this thread about your AAR, but if the one I was working on will work I can send you my adapter piece and you'll have to order a Hyundai valve.
http://www.914world.com/bbs2/index.php?showtopic=319149
Hi Mark, any possibility of purchasing one of your AAR adapter piece from you if its not that terribly expensive?
I'll PM you.
Thanks,
Ted
Posted by: Vacca Rabite Aug 3 2018, 11:00 AM
I spent my lunch hour with the 914 today. After a bunch of YouTube videos I was able to get it to cold start without throttle input. But, the kPa was really high and as it warmed up the idle went back to about 1700. I got data logs and if I can figure how I’ll post them.
Still, put some miles on it and got it a fresh tank of gas. It’s first meal that did not come from a can in about 5 years. That’s a mile stone. I really like driving this car. It’s very different from when I had it with carbs. More user friendly though 2nd gear does not quite have the punch I remember. That said I looked down at my gauges at one point and was doing about 60 in a 35 and it felt right at home on my Pennsylvania country roads.
Zach
Posted by: crash914 Aug 3 2018, 11:31 AM
Great news!
Posted by: Vacca Rabite Aug 3 2018, 07:52 PM
Went driving today and logged it.
Here is the link to the MSQ file.
https://www.dropbox.com/s/a36pwcb5cf42eii/2018-08-03_12.17.24.msl?dl=0
You will see that the IAC stays put at about 160 steps and never closes. I need to figure out how the heck to get it to close. I have the crank start at 100 steps, and that is where the IAC starts when cranking. But then it opens up.
I have a feeling its because its looking at the air temp sensor (coolant sensor) and is thinking the engine is never getting warm. For the life of me I have not figured out how to change the coolant sensor to the head temp sensor for warmup purposes.
Zach
Posted by: McMark Aug 3 2018, 08:32 PM
Post pics of your current IAC setting screens.
Posted by: Krieger Aug 3 2018, 08:54 PM
FRICKIN' A!
Posted by: crash914 Aug 4 2018, 05:26 AM
Zach,
Look at this curve in the idle warm up duty steps.
You might need the curve to go to zero percent at say above 140 degrees...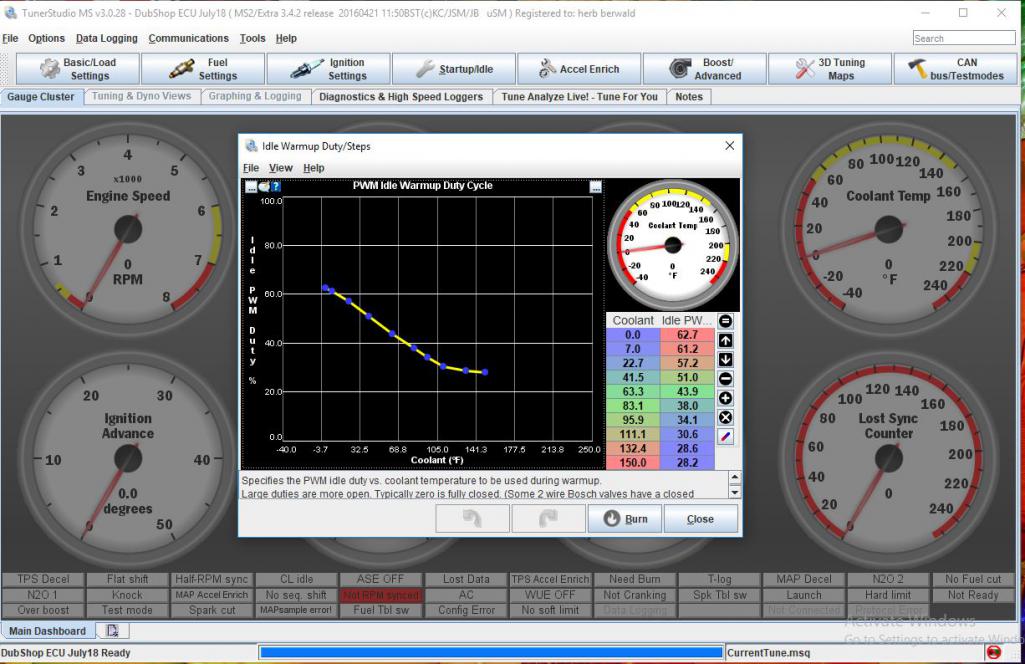
Posted by: Vacca Rabite Aug 4 2018, 06:40 PM
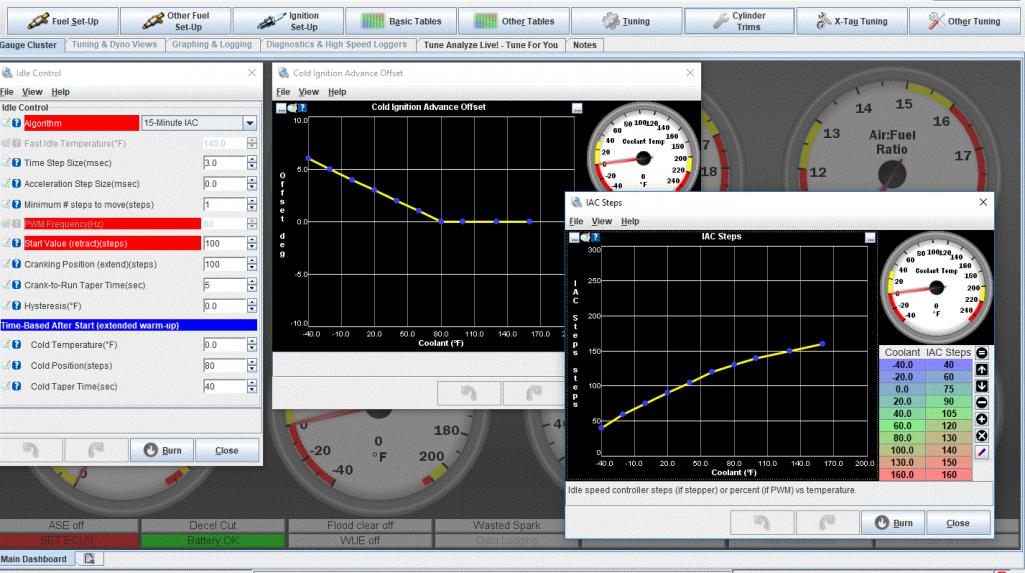
Here are my settings.
I'm assuming that 0 steps is closed and 160+ steps is wide open. I could be wrong on this though. Maybe it thinks the IAC IS closed at 160?!
If any one can tell me how to get TunerStudio to control the thing by head temp instead of coolant temp (where do I find that preference tab?) that would also be helpful.
So much to learn.
In the mean time I've given rides to the boys and my GF in the car. My eldest (10) says I should drive it everywhere.
My youngest (6) said it was too slow. I told him I was driving it slow for him and mashed the pedal down. He screamed and said TOO FAST NOW!
Zach
Posted by: crash914 Aug 5 2018, 07:03 AM
head temp, coolant temp, same thing. It just depends on where you are picking up the temperature.
You can connect the coolant signal from MS to the head temp sensor, one wire, or to the oil sump sensor, one wire.
I have an oil temp gauge so I use the head temp sensor. Then under sensor calibrations, I recurved it at 3 points for the VW sensor. you can use 32 deg with ice/water bath, ambient, and boiling. measure the resistance at the 3 points and put into the calculator to generate the curve.
Don't overthink this. (maybe I should, blown up several....)
Posted by: McMark Aug 5 2018, 07:11 AM
First, unless you've changed something, coolant temp IS head temp for your car. Think of them interchangeably.
Second, 15-Minute Warmup is for stepper IAC valves. Set Idle Control Algorithm to 'PWM Warmup'.
PWM Frequency is one of those settings that will be different for different valves. I don't know what this setting should be yet. I suspect that a high number (too frequent) will make the valve not close all the way, and a low number (too sporadic) will make the valve not open all the way.
Start Value should be the number that makes the valve open completely. You should be able to check this visually. Turn the key on and it should default to this Start Value, if you look and it's not open all the way, you need a bigger number OR a higher frequency. **(You can probably use this setting to test the closing efficacy as well by setting start value to 0 and seeing if the valve closes completely when you turn the key on).
Cranking Position sets the minimum open position while cranking. I suspect this relates mostly to hot start conditions where you don't want to be cranking with the valve completely open. So I would plan on fiddling with this number once you've got the other settings and cold-start dialed in.
Crank-to-Run Taper is the amount of time that the ECU will blend/transition from the cranking value to the HeadTemp based value. If, after starting, the idle is 'high for too long', this would be the setting the fiddle with. **You might be able to set this to 0 or 1 and then extend it as you see fit, if you really want to get it perfect.
I think you can figure out the rest from there...
Note: this post is based on my reading and general understanding of what's going on. I haven't gone through this process myself yet. So these are not answers just best guesses.
Posted by: McMark Aug 5 2018, 07:13 AM
Oh, and my presumption on the tuning curve is that higher numbers are more open. So your curve should be descending.
Posted by: Vacca Rabite Aug 5 2018, 08:29 AM
I'm also getting help on the MS forums, and someone said something there that jogged my memory.
I'm pretty sure Mark (OC) wired the head temp lead into the coolant temp in the first place, meaning that the fact that its saying "coolant" means nothing, its actually reading head temps already. I'm pretty sure I remember him telling me this when I bought the setup so many years ago, and I just forgot. So, hopefully, that mystery is solved.
So now I KNOW that tunerstudio only wants to use coolant temps for startup. So your head temp sender needs to go to the coolant pin on the ECU for warmup purposes.
And for those how want to be completely confused, I'm running 2 head temp sensors. The stock location is being used for warm up, and a second set of senders are at the spark plug going to the cockpit gauge.
Zach
Posted by: crash914 Aug 5 2018, 02:08 PM
you got it! That is what I was trying to say.
Now I have a funny problem...I can rev over 5K with out loosing sync.
its not the rev limit, with the VR sensor, I have jumped it with different values for resistance with no change, flipped leads around, changed rising edge and falling edge. no joy.
Suspect it might be injector feed back?
Posted by: Vacca Rabite Aug 5 2018, 09:33 PM
Hrm. My IAC just exploded and let out ALL its smoke. Pretty impressive. I must have popped the motor in it tonight while playing with settings. Fun times.
I may have screamed like a little girl for just a moment.
On the plus side, my car has an interior again. And an engine lid. At least it LOOKS better. Lol
Zach
Posted by: McMark Aug 6 2018, 08:35 AM
That's some MAGIC smoke!
I double checked the wiring on the IAC and made sure it is meant to run on 12v. Everything matched what I already knew and posted here. I'm curious what happened.
I'm starting working on this 2.3 install this week, so I'm right behind you and should have some REAL help for you soon.... or I'll learn from you.
Posted by: Vacca Rabite Aug 7 2018, 07:00 AM
So I think that this post will be the closing of this thread.
It may be reopened as I have need, but I've put a bunch of miles on the car (before I blew up my IAT and have to get a new one).
This thread was started in 2011.
Which means I have spent more time fiddling with the fuel injection then I spent restoring the car the first time around. Granted, there was kids to raise, a divorce (and the depression that follows) and a bunch of other stuff that threw me off the scent for a number of years. The journey had changed directions completely at least twice, and I have a whole bunch of unused MSII stuff I might sell (or..... *looks at the BMW*).
I TOTALLY wish that I had gone with fuel injection back in 2005 when I first bought the car, instead of spending years dicking around with various carb set ups and ever really being happy with how the car ran. Being envious of people whose car would start in the rain, or on cold mornings, or on rainy cold mornings.
This car has never run as well as it does right now, idle not withstanding. The engine was never this smooth. It is a totally different car then it was driving around on carbs.
While not fuel injection related, I need to talk about shifting. The shifter on this car has never been better. Years ago at Hershey I bought Chris's (Tangerine) demo unit for his shifter setup. I put it on the car while I was in the middle of the engine refit, just before the divorce, so I never really got to test it. My old shifter was not a bad setup at all. Rennshift, and all new plastic bushings everywhere. The Tangerine shifter mods made a night an day improvement to the car, and its still breaking in and getting better with each drive.
So whats next? I know I'm not going to be happy just driving it around - though that would be the smart move. Drive the 914 and work on the BMW 2002. But I'm also looking at those steel fender flares for my 914 and am itching to put them on and go 5 lug. BUT! I PROMISE I'LL DRIVE THE CAR TO HERSHEY BEFORE I TEAR IT APART AGAIN!
If anyone has been on the fence about moving to modern fuel injection - DO IT. Just do it. I'm an ape and needed tons of help. If I could get it done, so can you.
Zach
Posted by: JamesM Aug 7 2018, 10:25 AM
I TOTALLY wish that I had gone with fuel injection back in 2005 when I first bought the car, instead of spending years dicking around with various carb set ups and ever really being happy with how the car ran. Being envious of people whose car would start in the rain, or on cold mornings, or on rainy cold mornings.
This car has never run as well as it does right now, idle not withstanding. The engine was never this smooth. It is a totally different car then it was driving around on carbs.
If anyone has been on the fence about moving to modern fuel injection - DO IT. Just do it. I'm an ape and needed tons of help. If I could get it done, so can you.
This is what I have been preaching to people since i first installed megasquirt 15+ years now, cant be overstated but a lot of times people dont believe it until they see it. Its a steep learning curve for some but done right man is it worth it in the end
Glad to see your journey make it to this point!
Posted by: Vacca Rabite Aug 10 2018, 09:20 PM
About to fall on my face with tiredness, but I wanted to post some of my findings up with the Hyundai IAC.
Mark - you may want to try wiring with pins 1 & 3 reversed. Right now, following your diagram, 100% duty cycle equals closed, while 0 equals open. I have not tested it yet, but reversing pins 1&3 at the IAC should reverse those values so that 0 = closed and 100 = open. I don't think it matters, but at least for me having 100 = open makes more sense, and the lower duty cycle to close should extend the life of valve??? (maybe - guessing here).
Also, I stopped by a Hyundai dealer and got what they would give me of the wiring diagram for the valve we are using. I'll post that up for you if you don't already have it. It does not have much though. The techs at service looked at me like I was nuts asking for the frequency. Though there was a young tech that I immediately liked who thought what we were doing was super cool and wanted all the details. Also I drove the new Miata FV while I was there, which was cool too, but I digress.
With the current wiring, here is the settings that seem to have the car idling best. Note its at full duty cycle to close the valve when warm. Also note that the idle screw on the throttle body is open and closing it will change things. All goes well I'll be able to have another report in tomorrow.
My new valve has not come in yet, but the old valve seems to be functioning. I've lowered idle to about 1500 rpm hot, and am going to start playing with the idle correction screw on the throttle body (close it some to bring the idle down in theory). Well, tomorrow I'll do this. I guess I will warm up the engine, and the completly close the screw and tune from there. In theory, the IAC should negate needing the idle screw at all, and I can leave it closed.
The event that I thought was the IAC burning up last weekend was likely a backfire through the intake. Which still may have damaged the IAC. IIRC, backfire through the intake is too lean? Or is it too rich. I can't remember. And I was playing with settings at the time so its hard to say. Tomorrow I should have a new IAC and will measure resistance differences with my current one.
Oh! Another thing. We may want to go to a different resistor. too tired to figure out which way to go there. Checking voltage through the resisted ground I'm getting ~8 volts. My research is finding people with similar setups shooting for 5-6 volts on the resisted ground.
Learning curve is steep, but I feel like I am climbing up the curve.
Zach
Posted by: McMark Aug 11 2018, 03:55 AM
Great work! Looking forward to your continued experimentation.
We just started fiddling with this 2.3. I'm approaching it from the perspective that ALL other sources of idle air are blocked off. We turned the idle adjustment screw all the way in and even blocked the small hole in the throttle plate (not all have this). The idea being that it's best to let the idle air valve control everything in closed-loop.
Posted by: McMark Aug 11 2018, 04:09 AM
Is this the wiring you have?
Attached thumbnail(s)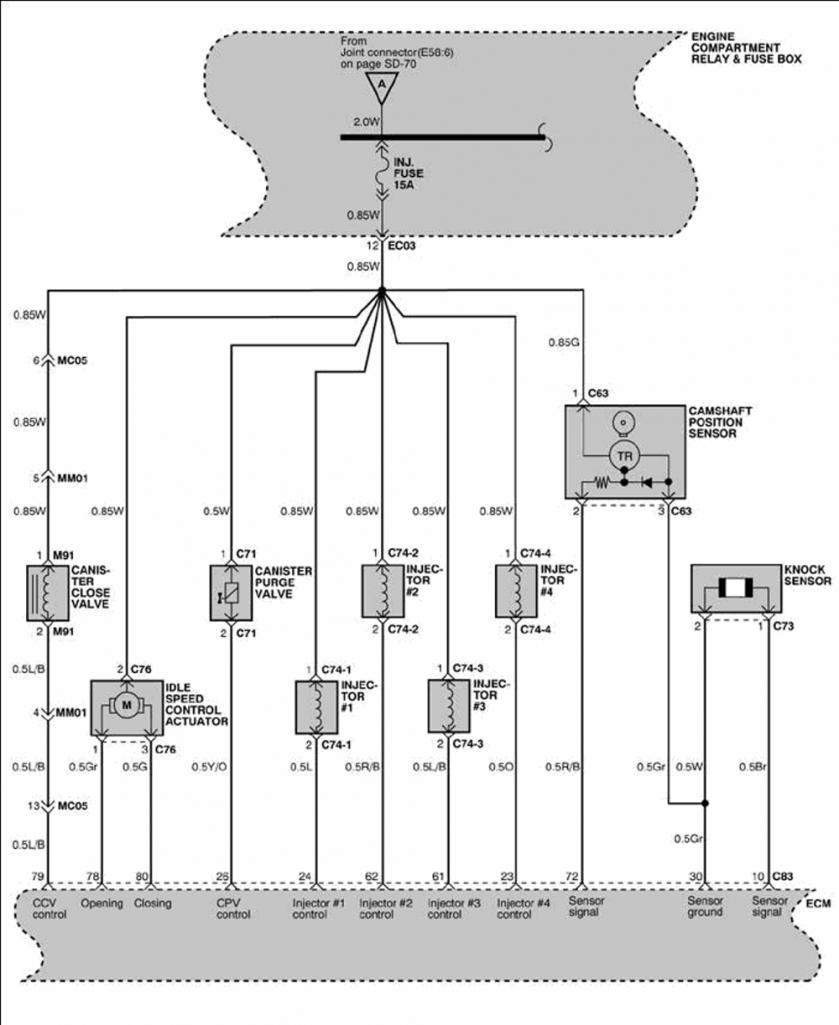
Posted by: Vacca Rabite Aug 11 2018, 10:43 AM
The diagram I got is different. Yours is better and has more information. Off get my printout and post it up after the kids and I get home from lunch.
Posted by: Vacca Rabite Aug 11 2018, 09:25 PM
EVERYTHING I posted last night is garbage.
The IAC was broken, the idle control screw was open, etc etc. I should delete that post, the information in it is BAD!
Today I put in the the new IAC that arrived today. Wow, instant response when I changed thing on the computer.
I'm using a frequency in the 300s. I tried a low freq and the IAC did not like it.
Totally closed the idle screw. Then started experimenting. The car simply would not start for a while. Then it started, and eventually I got the hot idle to be sitting pretty happy at ~1050 rpm.
When all the electrics are on (lights, fogs, flashers, wipers), the idle drops a little and hunts a bit, but does not stall. Here is my current setup. As cheap as these valves (~$11 on amazon) are, I may buy another just to have it on hand.
Here is the current setup.
The valve I had was clearly toast, I was probably just working off the open air screw on the throttle body.
Tonight I could change the duty cycle at hot idle by 1 digit and get a significant change to idle. The idle may not be perfect, but at between 1000 and 1100 I'll take it.
Zach
Now the test will be to see if it will start from cold tomorrow morning. It should, but I may need to tune the cold start some.
Posted by: Vacca Rabite Aug 12 2018, 08:25 AM
Started right up from cold this morning and settled into a 1200 rpm idle while the engine started warming up. Electrical on or off made no difference.
I’ll take it.
Zach
Posted by: crash914 Aug 12 2018, 08:42 AM
You go! When are you going to drive it over?
Posted by: Vacca Rabite Aug 12 2018, 09:41 AM
You go! When are you going to drive it over?
I’d drive it over right now just to drive it but I have the boys and need an extra seat. Lol.
I need to get the 2002 running for things like this. After the divorce I got it so I could go places with the boys.
Posted by: VaccaRabite Sep 20 2019, 01:37 PM
I’m declaring victory.
In July I sent the car to Translog for tuning. I got it back yesterday. They are a good shop and have a bit of a wait. And Tony himself wanted to do all the work on my car since my cars EFI is not stock.
The first thing they did was upgrade the firmware to one that would work a little better with Aircooled cars. In particular the Coolant Temp was not capped at 200, but would happily register temps that would melt my heads.
The car is running great. I had to change a couple things, in particular Tony did not understand the IAC function with the resistor, and said he did not want to charge me while he learned it. So he set the idle with a bolt, and I reinstalled the IAC last night and got the idle tuned how I want it.
Today I took the day off for some kid stuff. Once that was over I put about 100 miles on the car, with my laptop so I could pull over and tweak things. It did fantastic!
Yup. Calling this a win.
Hopefully I’ll see some folks at Ski Roundtop tomorrow for the Aircooled meet.
Zach
Posted by: mepstein Sep 20 2019, 02:06 PM
Posted by: Spoke Sep 20 2019, 05:13 PM
Awesome!
Posted by: VaccaRabite Sep 20 2019, 05:17 PM
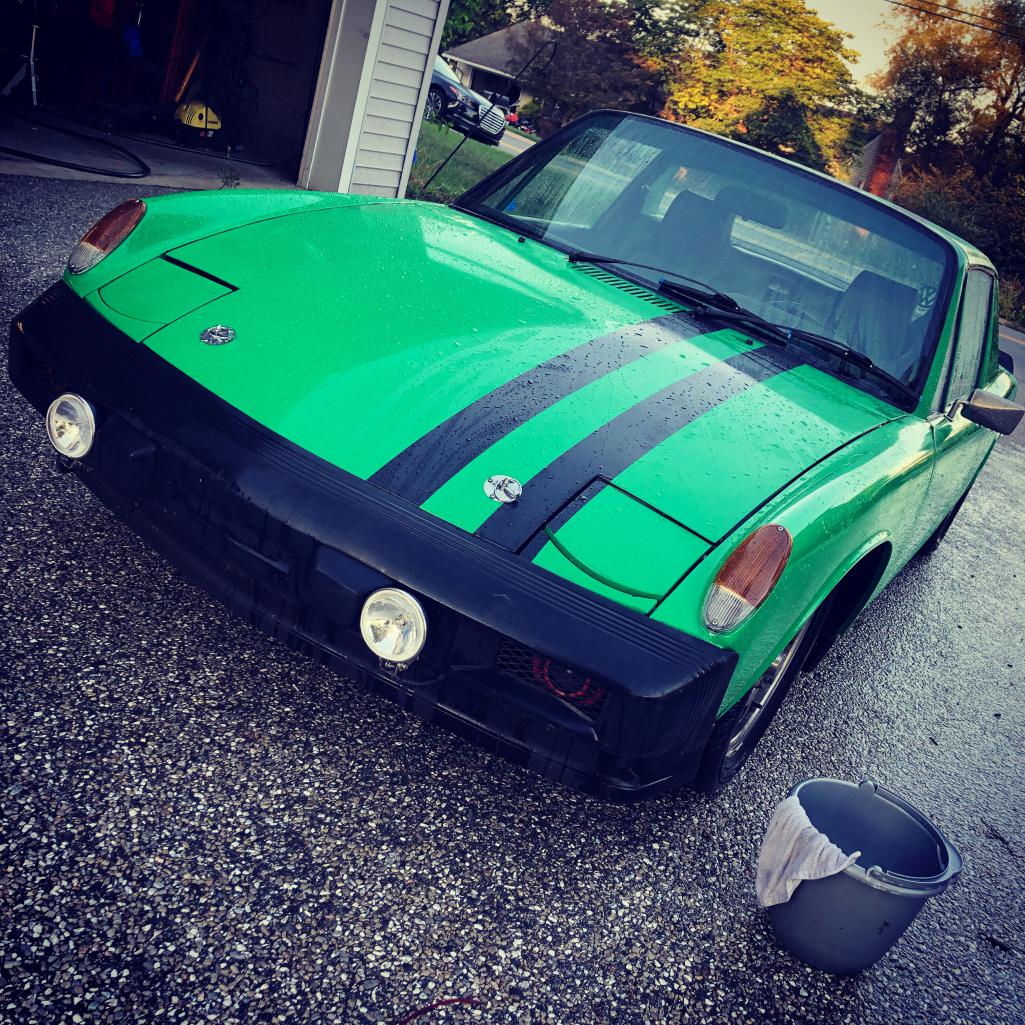
Even Gave it a nice washdown for tomorrow.
My kids noted after my drive today “wow your 914 sure is dirty!”
They were right. It was due.
Zach
Posted by: Superhawk996 Sep 21 2019, 09:20 AM
Thanks for posting this thread. Great information!
Posted by: rudedude Sep 22 2019, 03:44 PM
So which IAC are you now using? I am still having idle issues with my microsquirt conversion but other than that it sure runs well. Would you mind posting your msg file?
Thanks,
Jule
Posted by: VaccaRabite Sep 22 2019, 06:54 PM
I’m using the IAC out of a Hyundai Sonata. It’s a simple (and cheap -$11 on Amazon) PWM 3 wire unit. It works really well. I’ll post the MSQ file in a minute after I boot the tuning laptop.
Zach
Posted by: VaccaRabite Sep 22 2019, 07:39 PM
So which IAC are you now using? I am still having idle issues with my microsquirt conversion but other than that it sure runs well. Would you mind posting your msg file?
Thanks,
Jule
@http://www.914world.com/bbs2/index.php?showuser=3387
https://www.dropbox.com/s/lpc07wtkt6vcpzs/zach_914_2019-09-22.msq?dl=0
Its very very close. Completely driveable. It will sometimes pop through the intake on cold start, and I'm still tuning that out. But one it starts I only have to let it warm up for about 30 seconds before I can drive away.
Zach
Posted by: rudedude Sep 22 2019, 08:24 PM
Thanks! Now I have to figure out how to read the file and compare what I have done. Soon it'll be running well and then put away for the winter
Powered by Invision Power Board (http://www.invisionboard.com)
© Invision Power Services (http://www.invisionpower.com)