Printable Version of Topic
Click here to view this topic in its original format
914World.com _ 914World Garage _ Converting to a 914-6
Posted by: Root_Werks Aug 5 2004, 12:24 PM
Okay, so this is about the 5th 914-6 conversion I have done. They are all drivers to this day. Heck, Even Craigh Laughlin has one of my old ones! My goal is to put as many 914-6's out on the road as possible since I think that is what the desing intended for them to be anyway. Anyway, I have heard soem thoughts about costs or how hard it is to convert. Nah, just time really. yeah, a few parts, but mostly just some time. Lets visit the part$ shall we. You will probalby need the following (as in not worth making):
Tank - Lots-o-options, but don't spend over $500 on one
Headers - $450 - 500
Mount - Zowie! Lots-o-options here as well. I have a jig to make my own, it works, but takes time. It is not hard, but takes a lot of time. I gave up and grabbed a patrick moly mount just today. I am running out of time.
Everyting else, you can make or do yourself. I will show you how in this thread over the next couple of weeks since that is all the time I have left!
Here is a shot of the holes drilled for the oil tank. Yep, I am using a Vellios tank yet again. They work great and use the later filters. Also, you can go down to your local industrial supply shop and have them make the pressure hose for like $40. The suction hose is even easier, but more on that later.
Posted by: Root_Werks Aug 5 2004, 12:28 PM
If you are using a factory or factory style tank, you will need to drill these holes. Local hardware hole saws work great. I have had mine for years. Note the lowest hole (for pressure line) is not on a raised area. I made a template that gives me the exact center for this hole. Anyone wants it, send me a SESE. But, don't send one yet as I have many more templates I will show you later.
Attached image(s)
Posted by: Root_Werks Aug 5 2004, 12:30 PM
BTW - that is just dust on my trunk lid.
One more for now, the 911 engine on the ground with an early 911 flywheel. I used a dremil and marked the timming marks and then put a little paint on them as well. Viola! You have a 914-6 flywheel. Easy! This is a 2.2T engine, so I am using stock 914-4 clutch parts (yeah, they work fine).
Attached image(s)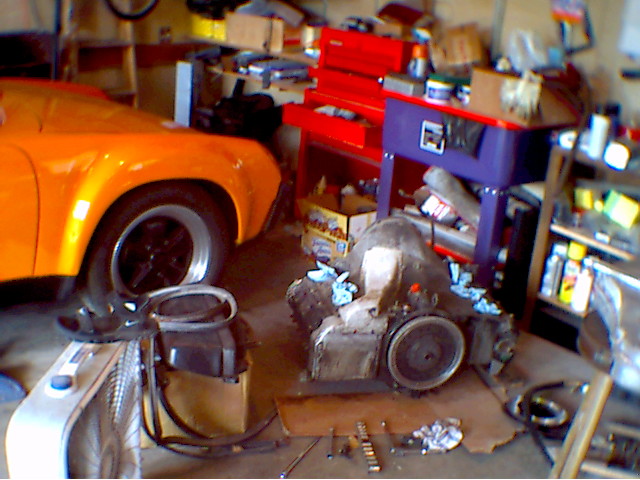
Posted by: J P Stein Aug 5 2004, 12:34 PM
This should prove interesting.
What motor are you using?
You say you have a "shop" but haven't identified it (or I missed it)....it's OK to do that here....I think 
You may even drum up some biddness by doing so.
Do "we" get to nit-pick?....assuming you have some nits to pick
Posted by: 9146986 Aug 5 2004, 12:47 PM
Hey, why didn't you come to the dinner at Duke's last month?? I would've enjoyed talking with another "converter".
PK 
Posted by: 736conver Aug 5 2004, 01:13 PM
I havent done mulitple conversions but I agree it can be done cheaper.
My 914-6 mount is home made.
I made my own oil lines even converted my oil cooler to a 90 degree fitting.
Found my oil tank used for $200.
Got my engine from a rusted out 911. Turned around and sold the 911 for parts and made money.
Homemade headers from the 911 heat exchangers.
It can be done cheap just have to find the "deals". Also you can make some of the things yourself and save a ton of money.
Posted by: Root_Werks Aug 5 2004, 01:27 PM
Yeah!  You guys have the right idea and attitudes! I love it!
Yeah, I had to break down and buy 914-6 headers today from GPR. Grrrr.  They cut me a great price (GPR rocks!) but I shouldn't have had to spend a dime on the headers. I had 911 ones ready to modify, but had a friend who needed some (converting 912-911) so not even a rusty set to replace them. Oh well, whats another $400?
  Same with the tin, I think I spent $20 on it? The hanger like $25?
Time, it mostly takes time.
My shop is called Root's German Werks. I have just operated it out of my garage at my house for about 3-4 years now. I even use to sponser PCA events from time to time. I have slowed it down a bit though as I work full time of course. My wife, Michelle and I have until the 20th to get this done. That is our Whistler trip with the Canada West region. So watch for posts up to then on this thread. I promise you won't be disapointed.
Posted by: Root_Werks Aug 5 2004, 01:33 PM
Out with the old.....
Eric Paine is coming up tonight to grab the MPS off this 1.7 as well as anything else he wants. After that, I think it will make a great door stop?
Tip - Don't just toss the engine. Some stuff can be removed to use off of it! One would be the rear tin. Did you know if you turn it around and make a few small bends and drill a couple of holes, it works perfect on a 914-6 conversion? Yep! It does. I will take pictures tonight of the tin work and templates I have. Post them tomorrow.
Attached image(s)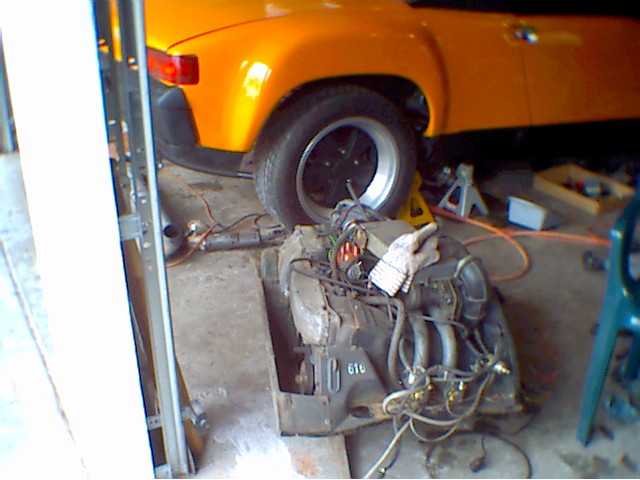
Posted by: Root_Werks Aug 5 2004, 01:35 PM
PK
Duke's? Fill me in, I am still new to the list.

Posted by: thesey914 Aug 5 2004, 01:45 PM
I dig this kind of resourcefulness
Posted by: airsix Aug 5 2004, 02:08 PM
Who are you, Root_Werks? And will you accept if I nominate you for President of the United States? 
I hate the "can't do it" culture and I eagerly look forward to the rest of your thread. 
-Ben M.
Posted by: red914 Aug 5 2004, 03:05 PM
Root rawks!!  post more pictures!
Posted by: trekkor Aug 5 2004, 04:09 PM
I already love this thread 
tracking this topic ...now.
I will want templates , of course.
Goal for me is to have a six in the barn by the end of the year. 
Thank you for the realistic approach tot his project.
I'll ignore those who chime in with their negative comments and " you're dreaming " talk. I've concluded from the small amount of research I've done that the project should go for less than $4k.
You will show us the way to do it for less. 
Trekkor
Posted by: trekkor Aug 5 2004, 04:14 PM
I'm already sensing a " classic " in the making. 
KT
Posted by: Root_Werks Aug 6 2004, 08:13 AM
Lets talk tin shall we?  BTW - thanks for all the support, I will post $$$ along with a project like this.
Tin, tin, tin. what to do? Spend $450-500 on someone's decent metal stuff or $200 on the fiberglass stuff? Ooooooor:
Go down to the local hardware store and pick up a large sheet of 22 gauge mild steel and do it yourself? Hmm, lets visit that one shall we.
I mentioned earlier that you can use the 4cyl rear tin by simply turning it around and making a slight mod to it and drill out a couple small holes for mounting. Well here is the picture of what you need to do to that peice. I didn't drill the little mounting holes yet, but that one is easy, just put the piece on and mark any of the little threaded 6x1.0 holes on the back of the engine. I wanted to show the mod for making the tin fit centered flipped around. Are you ready, this is a tough one so pay attention here:
Attached image(s)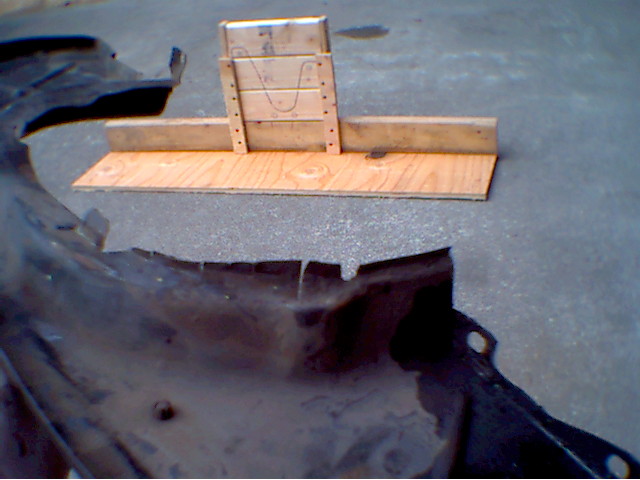
Posted by: Root_Werks Aug 6 2004, 08:18 AM
Ooooooo  That looks tough huh? I cut a few small slits in what was the passanger side of the tin and now the drivers side and bent them in just a tad to push the tin to the right of the car just a little bit. Dang! Is it all this easy? Not quite, lets see about the other 3 pieces. I have plywood templates copied from factory tin for all 5 pieces, but found I didn't need to make my own rear sections. So you only really have to make the sides and front. Here are some of those shots:
Attached image(s)
Posted by: Root_Werks Aug 6 2004, 08:20 AM
A closer shot of the 3 peices you have to make and the templates. If you can see, note the holes in the plywood, I use a center punch and tap through those for perfectly alinged mounting holes. Each tin fits over the plywood peice nice and tight.
Attached image(s)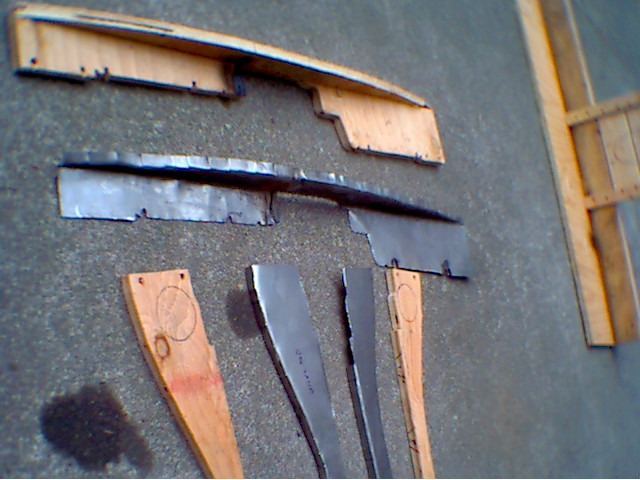
Posted by: Root_Werks Aug 6 2004, 08:22 AM
What all the pieces look like together. I painted them black last night and drilled the last of the mounting holes. I didn't drill for heater hoses, but my templates have the hole centers and sizes for those as well.
Attached image(s)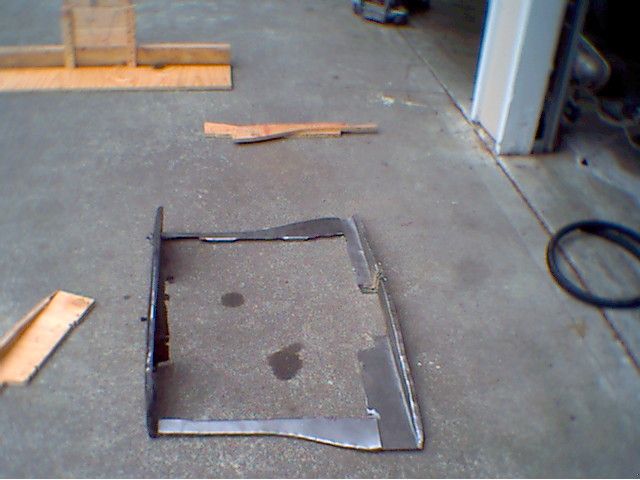
Posted by: Root_Werks Aug 6 2004, 08:24 AM
Another angle. You will notice that I had to tac together the front piece.  I was cheap and bought the $20 sheet instead of the larger $25 one. Usually I can make this long piece all out of one piece, not two.
Attached image(s)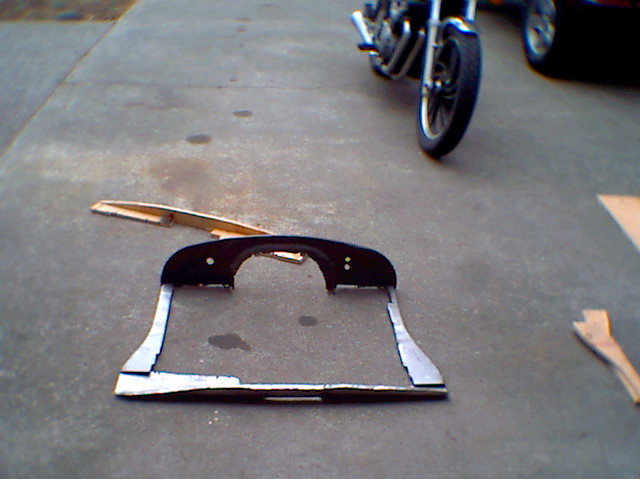
Posted by: michelko Aug 6 2004, 08:25 AM

Very impressive work, can´t wait to see more, much more, please
Michael
Posted by: Root_Werks Aug 6 2004, 08:32 AM
So there you have the tin! 22 gauge can be cut with a really good snippers, or you can use a little jig saw, either way I clean it up with a little grinder. You know what? After you install these, they look great! It is not show quality, but they do the job and even look good. Over the years I have made some sets for people, but they understand it is not a professional job. To bend 90degree corners on a radias, I simply slit, slit, slit, slit, bend, bend, bend..... I have gone back over and welded, grinded those smooth before, but it is a waist as you don't see them once installed. You only see the flat finished parts. People who have seen my tin can't tell.
Okay, lets look at the tank I am using. It is a Vellios tank, like the 3rd one I have used. I like them, good price, in a lot of conversions so you know they work now. Some of his earlier stuff didn't have baffles in the tank which caused the oil to foam up blowing up engines. That was a lot of years ago though. There are a ton of options for tanks, but you can pick up a V tank for under $500 which makes it a good buy.
Attached image(s)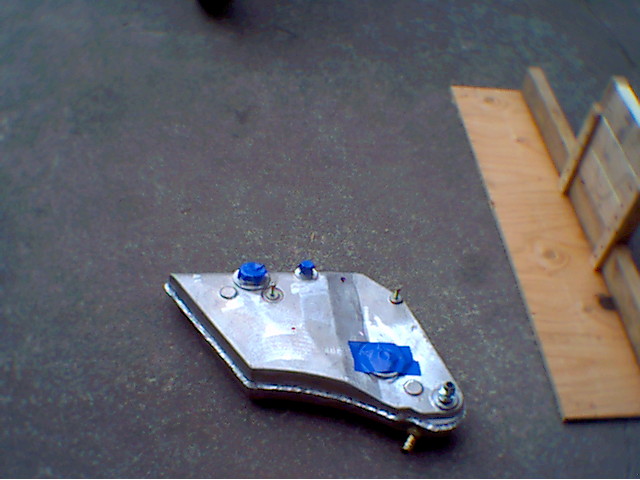
Posted by: Root_Werks Aug 6 2004, 08:42 AM
Note on the above picture I used the AN fittings. The pickup is just a 3/4 slip on and hose clamp thing. The pressure line I used a fitting and hose from a local industrial supply place. Funny, you walk in and say, I could use about 8ft of 3/4 oil line and these couple of fittings. They ask if it is for a backho or cat or something. Nah, just a car. You can do whatever with lines, the pressure line is easy. Get an AN adapter for the V tank (Usually come with it) and an AN adapter for the engine block. They are cheap, the lines are cheap. I think I spent $50 on everthing for lines? I will show you a way to do the oil cooler soon.
Here is a shot with tank in car. I removed the fan shroud and carbs so you can see better. What a nice guy am I?
Attached image(s)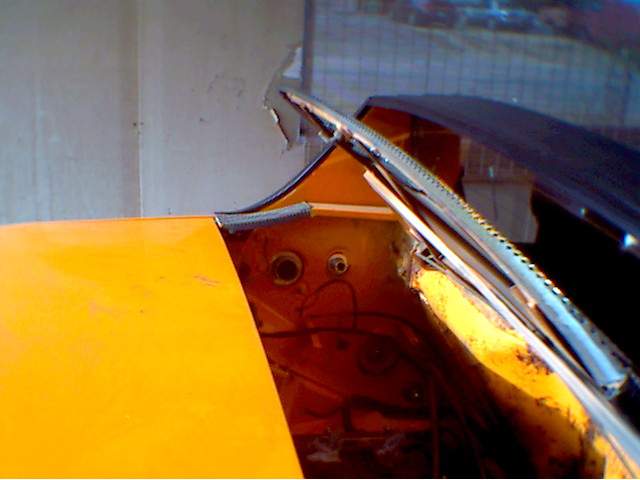
Posted by: Root_Werks Aug 6 2004, 08:46 AM
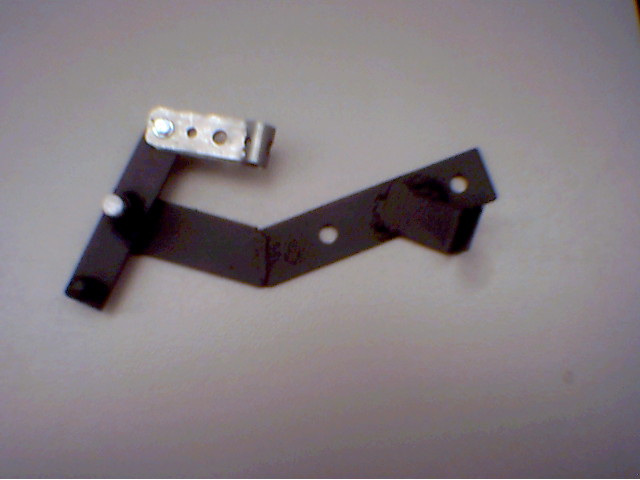
Okay! Moving along, what about the exhaust? Well, usually I grab old 911 heaters and mod them. But with no time and no 911 heater boxes, I spent the money from GPR (They rock, did I mention that?) and grabbed a set of Bursch ones. yeah, yeah, the paint sucks, whatever, go buy some more if it bothers you that much. They work and fit great. I should get them today. So how to hang them? We know the 1.7 hanger I have won't work? If you have a 2.0 hanger you still have to mod it. Sigh, so what to do? Oh hey! I have a 914-6 hanger template! That's right! Lets get fancy and go buy a sheet of $25 aluminum that is like 1/8 stock. Cut that out, clean up the edges, drill two holes and done! Don't even have to paint it.
Attached image(s)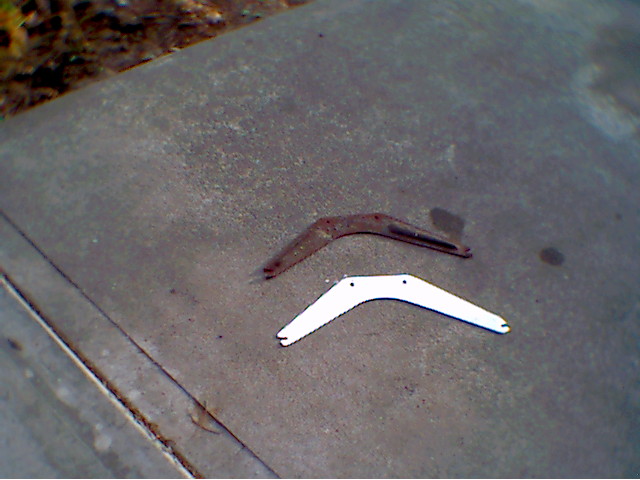
Posted by: Root_Werks Aug 6 2004, 08:56 AM
That is a "Real" 914-6 hanger next to mine for comparing the two side by side. Nothing too tough. Just takes time. BTW - I did all of this work in about 4-5 hours. So the time even isn't too bad.
Okay, I am out of pictures, but will keep posting as my work progresses. I will try to get a few shots of the engine install (already in, but just hanging there).
With me running out of time and buying the moly mount from Patrick and headers from GPR, there really isn't much left to do. Isn't that wierd? After this, you are almost done!
More later.....
Posted by: cardiaceagle Aug 6 2004, 05:27 PM
Great post.
To you and all the others who take the time
and effort to make this site so great......
THANK YOU !!!
P.S. Enjoy Whistler !!! But watch out for radar
on hiway 99 .....the cops here are cherry pickers.

Posted by: Air_Cooled_Nut Aug 6 2004, 06:11 PM
I hate to place a post in here because too many inturrupt the flow...but...how do you get the oil tank into the side and how is it mounted? Everybody mentions the cost and specialities of it but never how to install/mount
Posted by: Jeroen Aug 6 2004, 06:19 PM
The tank has threaded studs these go through holes in the inner fender and are bolted up...
cheers,
Jeroen
Posted by: Dr Evil Aug 6 2004, 06:59 PM
I think that this is great, BUT how would a person like me (just doing one conversion) make some templates for the tin? I don't have originals to go off of lest I would use them. Are you in the market for selling a set? 
Thanks for posting all of this!
Mike
Posted by: Brad Roberts Aug 6 2004, 08:07 PM
9146 uses a 914 stock 2.0 hanger... no different.
B
Posted by: thomasotten Aug 6 2004, 09:23 PM
I want my TIN TEMPLATES!
Thread of the year.
Posted by: campbellcj Aug 6 2004, 09:35 PM
Cool project! FWIW I got the sheet metal and Bursch headers from GPR. I had the headers Jet-Hot coated as Bursch paint sucks donkey dick (Zoisism). Believe it or not, I got a very nice repro muffler hanger from AA for around $18 on eBay! (Plus $35 shipping, LOL).
Keep us posted on the project.
Posted by: Root_Werks Aug 9 2004, 09:03 AM
In answer to the tank question about mounting, yes, there are two small studs that stick out..... Maybe a better approach would be to say when you drill holes in the 914 for the tank, all but one hole has a "raised area". So it is almost a no-brainer. You just drill out all the raised circles. I made a template for the last hole that doesn't have a raised area (pressure line).
Not too worry for anyone, I will make avaible templates that are mailable or even offer some home-made tin for folks. It takes a while to make and the templates are hard to make. But the exhaust hanger, oil tank hole and other little things I would be happy to pass along.
Okay, I must start sending pics of what I did over the weekend!
Posted by: Brad Roberts Aug 9 2004, 09:07 AM
Pay yourself 10$ an hour... is it really worth the money saved making some your own ?
B
Posted by: Root_Werks Aug 9 2004, 09:08 AM
9146 uses a 914 stock 2.0 hanger... no different.
B
I thought the 2.0-4 was a little longer on the end (as in have to shave off like 1/8 inch at the lower mount holes) than a 914-6??
Posted by: Root_Werks Aug 9 2004, 09:18 AM
Well, I didn't get the 914 fired off as a 914-6 this weekend. Ran into a few small snags which just come with using old parts. Two time costly ones were one exshuast stud that just wouldn't come out that needed to be drilled etc... I replaced 8 studs in all down there. Also, the alternator, carbs and such I took off,,,, so yeah, I had to put all that back on.
Well, like I said earlier, I have a jig for making a cross bar. Lets visit that and Dan's opinions of mounts shall we.
I like the patrick moly mount a lot. That thing rocks! It is light, tough as hell and a no-brainer to install. No doubt the bulk head mount Rich makes is a better system, but it costs time to install, not as easy. Lets look at some things:
Factory mounts, one bolt held up the front of the engine! Plus, the GT's had extra steal welded in to help brace them up.
Richs bulk head mount rocks! I have installed 2 on cars before. To do them right, it takes some time. they are much, much stronger than the factory bulk head system.
Cross bars - you can get the striaght bars - Don't, they get in the way of everything. Here is a picture of the Patrick moly mount I grabbed next to my jig. I have made a couple for myself and a friend. Mine are ugly and made of mild steal and suck compared to Patricks mount. I can make them, but no time with this one. Oh well. The cross bar works great and sometimes I wonder while mounting the factory 911 engine mounts in the 914-4 mounting spots if Porsche didn't do that on purpose? Like maybe there was a factory 914-6 cross bar in the works? Hey, you never know!
Attached image(s)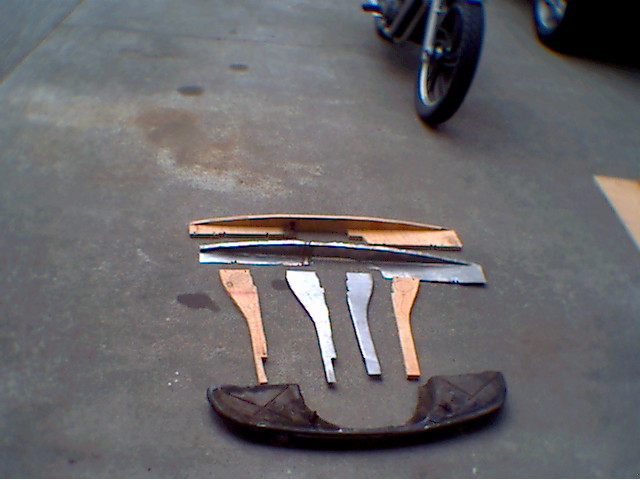
Posted by: Root_Werks Aug 9 2004, 09:19 AM
OOps! Wrong picture, sorry.
Attached image(s)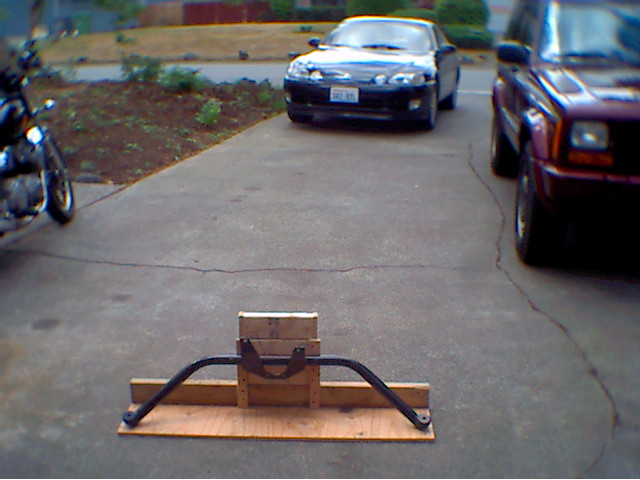
Posted by: Root_Werks Aug 9 2004, 09:20 AM
A quick picture of the tin painted and all mounting holes drilled.
Attached image(s)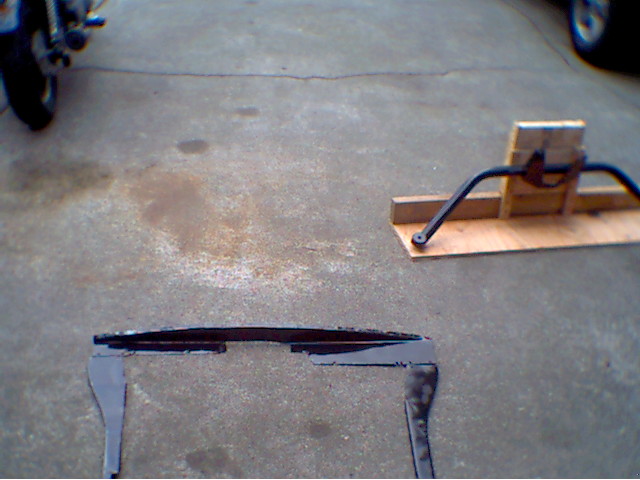
Posted by: Root_Werks Aug 9 2004, 09:23 AM
And of course a shot of the crapy paint, but nice Bursch headers. I don't bother re-painting them. It would take 100 years for them to rust with the way I drive and the weather I drive in. They fit good and the price is certainly right. I wish I would have had a set of 911 headers to modify for you. Maybe some other time. Also, there is a way you can set up a heater with these! I won't have the time before Whistler to put something together, but will add that one for sure when Summer draws to a close.
Attached image(s)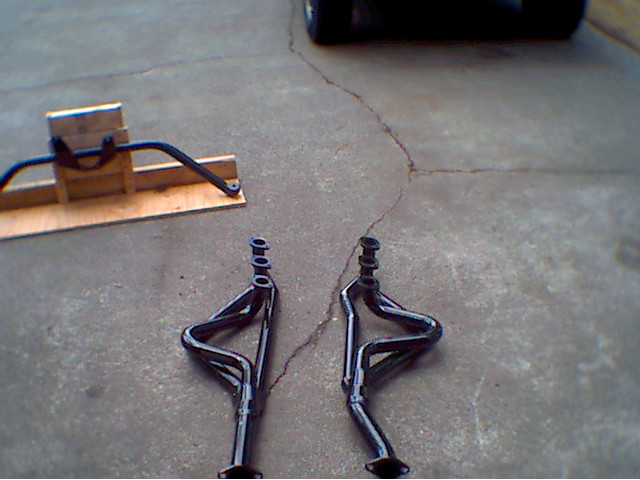
Posted by: Root_Werks Aug 9 2004, 09:25 AM
Oh yeah, the 911 engine mounts that go in place of the little steal bars when using the bar 914-6 mount. I didn't take any, but will try to get more pictures of the mount in place, where and how I routed cables all this week.
Attached image(s)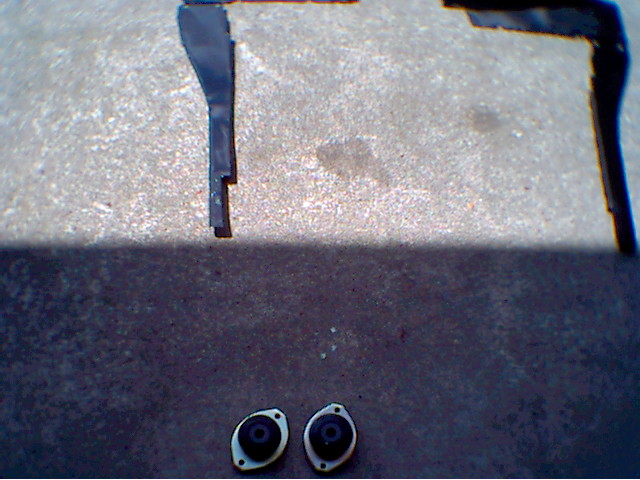
Posted by: Root_Werks Aug 9 2004, 09:58 AM
Alrighty then! Enough looking at overpriced parts. What about making some more parts Dan????? Oh yeah, lets keep it cheap shall we!
The next part we will be making is the shift bar. I have only converted post 73 cars, so I know exactly how to straighten out those bars only. Lets use my 73 1.7 side shifter for this example. I only have the two pictures, sorry about that. I got all tied up in doing it when I realized I hadn't taken any pictures!
Here is the proccess:
Take your bar and cut if off about 3/4 of an inch away from the shifter coupling end that goes into the body of the car(firewall). So you would have the shifter coupling and oval plate the boot fits on and about 3/4 of an inch of pipe left. The little stub of pipe should be srtaight. Now, the second cut will be a little tricky. I wish I would have taken pictures of this. If you buy a pipe, you wind up with a striaghter bar too.
Attached image(s)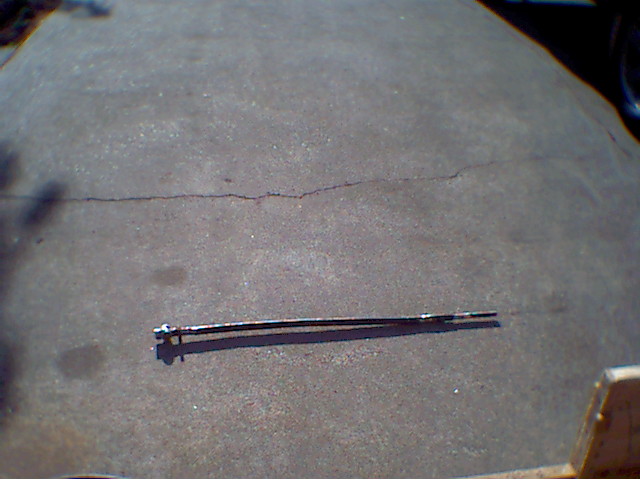
Posted by: Root_Werks Aug 9 2004, 10:00 AM
Actually, if you notice there is a slight, slight bend in mine. If you make them perfectly straight, they seem to bind just a tad. So I put just a little bend in mine. Here is another shot with paint on it.
Attached image(s)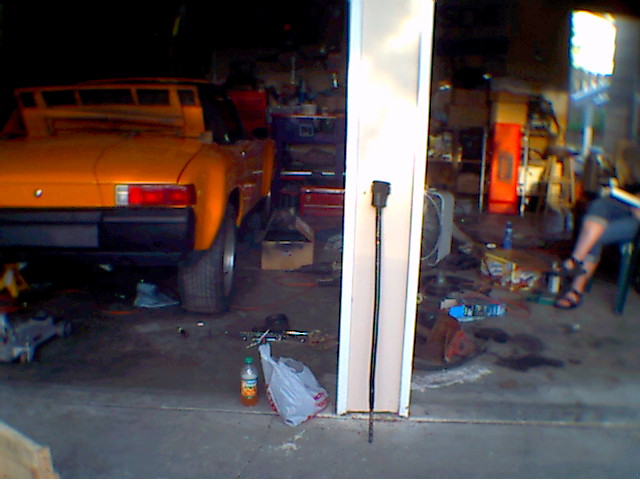
Posted by: Root_Werks Aug 9 2004, 10:06 AM
Here is a shot installed, no header pipes on this side yet. You can also sort of see the front pressure oil line just under the shift bar. Oh hey, and check out the really cool aluminum muffler hanger! Isn't that coooooooool?
If you don't bend the shifter bar straight, it will hit the headers.
Attached image(s)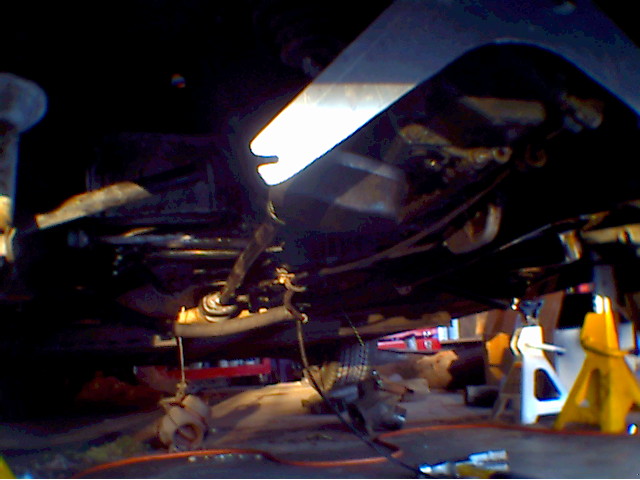
Posted by: Root_Werks Aug 9 2004, 10:08 AM
Another shot with the right header up, but not tightened up yet, so it is sitting a little low.
Attached image(s)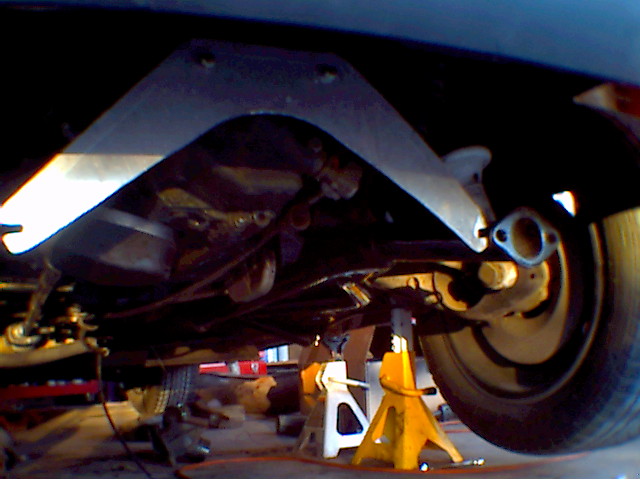
Posted by: Root_Werks Aug 9 2004, 10:16 AM
Pay yourself 10$ an hour... is it really worth the money saved making some your own ?
B
$20 for the 22 gauge mild steel, 4-5 hours for making the tin(cause I have done it before), so YEAH! I would rather spend the $70 paying myself to make the tin than $450 to have someone else do it! Granted, mine is not as nice, but dang, once in the car, you can't tell at all! I think the tin is the bigest savings. The headers probably the next and the bar a close 3rd.
Posted by: Root_Werks Aug 9 2004, 10:32 AM
One last picture I took. Quality stinks, but I tried to get a shot of the oil tank in the fender. You can see it..... Sort of.
My next series of pictures will be on the throttle linkage. Buy the bellcrank thing, they 911 rod from eng to trans? Nah! Go spend $1.99 on a rod and see what you have lying around the garage. I will show you how to even still use the factory 914-4 throttle cable (Cheaper and much more available).
Plus, - simple 3 wire CD box wiring, finally my batter relocate shots and maybe even my running 914-6 down on the ground.
So not to worry, still more to come!
Attached image(s)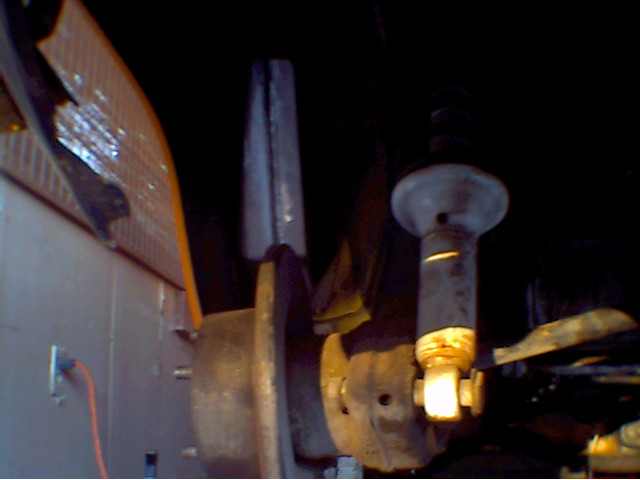
Posted by: Root_Werks Aug 9 2004, 11:05 AM
Thanks for posting all of this!
Mike
I have sold sets in the past as long as the buyer understands it is just a guy snipping and bending and doing a little welding. I am not stamping these things out. I will post some pics of the tin installed and if people want, I can make sets to sell. Like the 3 pieces for $150 if you use your 4cyl tin for the back piece sort of thing. This last set wasn't my finest, but good. They are a little wavy compared to others I have done.
Posted by: Root_Werks Aug 10 2004, 07:44 AM
I finally fired off the little 2.2T engine last night for the first time in this car. Only a few minor things that surprised me. One was someone removed the little fuel cut off sileniod so I had a brief garden hose of fuel draining onto the floor. Got it fired off, set the timing and carbs just a tad to a rather smooth idle and snappy throttle response. Sounds good, sounds real good.
I didn't have any time to take pics, but will go through what I did on the throttle linkage hopefully tomorrow for everyone as well as some other little things.
As for templates, I will gladly make templates for those who want what I have. I will list everything out later that I have made.
More soon....
Posted by: airsix Aug 10 2004, 09:23 AM
Dan (or anyone else reading this cool thread),
Anybody have a pattern/template/measurements for a bulkhead motor mount? I've got matterials and tools - I just need to know where to cut-n-bend.
Cool thread.
-Ben
Posted by: Porsche Rescue Aug 10 2004, 09:34 AM
Don't think I will ever do a conversion but this is still a great thread. Thanks Dan.
Posted by: Root_Werks Aug 10 2004, 09:39 AM
Anybody have a pattern/template/measurements for a bulkhead motor mount? I've got matterials and tools - I just need to know where to cut-n-bend.
Cool thread.
-Ben
I worked with a914guy - Rich on this a while back. I was going to use his piece that mounts on the firewall and develope a piece that mounts on the engine that didn't require using part of the 911 mount. But after looking into it more carefully, Rich has really done a great job on his mount. If you try to make one from scratch ( I have twice and not been happy, scrapped both of them) be warned, it is trail and error. Rich has already gone through all of that for the bulkhead mount. Right after I got my Patrick Moly mount (awesome mount for a cross bar) I noted Rich selling his complete mount kit on eBay for $325 buy-it-know. UGH!
 I would have grabbed one, my timming was off by one day. Bummer and oh well.
The only reason I have usually made the bars is because they are easy and cheap to make.
I would still love to develope a bulk head mount. If you start planing anything, let me know. I might have some good feedback of my failures for you.
Posted by: Dave_Darling Aug 10 2004, 10:52 AM
Note that there have been a couple of failures of Patrick's cross-bar mount. At least one was a 3.6 (lotsa torque!) but I think that there have been failures with smaller motors as well.
Patrick's response in those cases appears to have been, "Gee--that's too bad. We have an improved version now, want to buy one at full price?"
...I really can't recommend Rich's motor mount strongly enough!! (Yes, we do sell it at Pelican. Rich sells it as well, and I'm pretty sure other places do too.)
--DD
Posted by: airsix Aug 10 2004, 11:02 AM
I would still love to develope a bulk head mount. If you start planing anything, let me know. I might have some good feedback of my failures for you.
I'm afraid I'll have to make one. You see, I justified buying all these tools by telling my wife all the things I could make with them and how it would save money in the long run...

-Ben M.
Posted by: trekkor Aug 10 2004, 02:11 PM

Me too!


Trek
Posted by: Brad Roberts Aug 10 2004, 02:17 PM
Trekkor,
when was the last time you saw a 9146 take TTOD ?
B
Posted by: trekkor Aug 10 2004, 02:27 PM
Our friend Bill Pickering...He's fast.
Trek
Posted by: Brad Roberts Aug 10 2004, 02:31 PM
He took TTOD at our event. He hasnt had a TTOD at a PCA event...
Stick to your 4cyl.
B
Posted by: nine14cats Aug 10 2004, 02:59 PM
 Ah...how soon they forget.....
Yes...I took TTOD at 2004 WCC...
I have 2 LPR TTOD's and 1 GGR TTOD....
PCA stuff....
Now for the confession....
There are 2 regulars that I haven't beaten head to head when they show up...Steve Nieslony and Tom Provasi.
I've been been with thousandths of Steve....but it has to be a horsepower course...If it's Marina he'll kick my ass...With Tom....I've never been closer than half a second...on a tight course (Millerton Lake, Fresno). If it's on a HP course I haven't sniffed his exhaust....
Ultimately, I will not be able to be competitve in Auto-x if I continue with my plan for a dual purpose auto-x/track car...Steve, Andrew B., Brad, Randal, Trekkor can or are building lightweight cars. If it's a Nieslony killer (~1400lbs) you just can't beat that.
But I'll go down with my right foot to the floor!!!!
Bill P.
Posted by: Dave_Darling Aug 10 2004, 03:08 PM
A Six will take TToD at any event that Provasi shows up to. (With a working car.) The Orange Crate has a large-displacement Six in it. It was a 3.5 when he bought it, but I think he's swapped or rebuilt the motor since then. Not sure if it went up or down in displacement...
A 914-6 has taken TToD at Parade just about every year for the last decade. Provasi (numerous times), Dave Ferguson, and one guy about three years ago whose name escapes me.
--DD
Posted by: trekkor Aug 10 2004, 03:23 PM
Bill, you were thousandth's behind Nieslony at Reno both days.
Breathe out as you cross the line and you take him! 
Winter SIX is coming...don't try and stop me.
If I hate it, rebuilt big four goes back in with money from sold SIX.
I can't lose
Crazy T
Posted by: trekkor Aug 10 2004, 03:27 PM
Oh and BTW, I'll never take TTOD in a street legal 4 or 6.
Don't know if anyone has?
It's for fun. I'll never be a real racer.
Root Works, proceed. Lead us to the SIX!
Trekkor
Posted by: thomasotten Aug 10 2004, 03:41 PM
Brad:
I thought you were a big 6 guy? You like 4s better?
Posted by: J P Stein Aug 10 2004, 07:02 PM
Don't know if anyone has?
:
Trekkor
Of course you do.....but it didn't happen at a GGR AX, so it ain't real
I was more impressed with Doug Skinner's driving my car to 2, 2nd OA finishes last year
at SCCA events.....Nuthin' compared to GGR, tho.
Posted by: Root_Werks Aug 11 2004, 08:20 AM
All the teeners on this BBS crack me up. It is so cool how one small statement can lead into a large disscussion thread about TToD's in 914's. That rocks!
So anyway, I will have to take better pictures of this with my regular camera. Seems my $25 digital one is not up to the task. 
So here is one of the shots (terrible I know) of my home made bell crank throttle linkage. I will post better pictures later on. Lets look a little at what a did and why I did it that way:
I started out finding I one ball and two cups. What I mean by that is one little throttle linkage ball and two of the snap on cups that thread onto throttle linkage rod. I also went down to the hardware store and purchased 3/16 rod for $1.99 which I used about half of it for this job. Oooooh, big money huh? What do Bell Cranks cost? $300? It took me an hour to make this one. I promise better pitcures will come. In this picture if you can see it (no flash, DERRRR!) Is the completed set up. I used the factory 914-4 cable....oh, get how I hooked it up, I used the cable clamp system off of one of the heater valves, so there is one other part needed. Notice the cable comes from above the CV and is even above the rod..... If you can see it, again sorry about that. I do this to ease the pull and help keep it simple and progressive. When I made the pivot for this, I made sure my pull was equal for both cable and rod.
Attached image(s)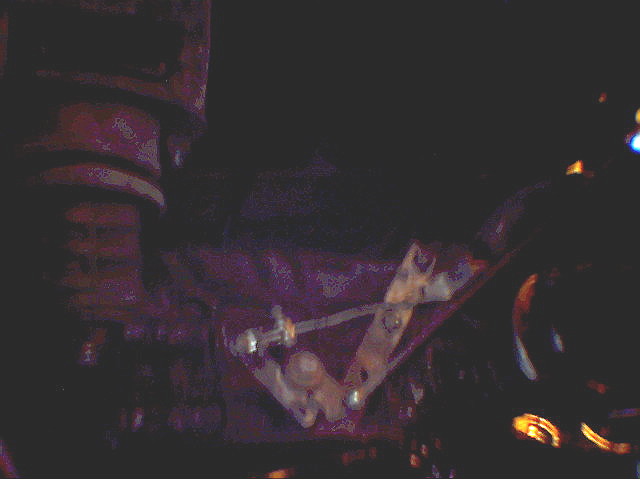
Posted by: Root_Werks Aug 11 2004, 08:32 AM
So I welded 2 small pieces of steel brackets together. One 90 to hold the cable welded onto a flat bar with holes drilled into it to mount the pivot to. I think you can see how I mounted all this on the trans. Simple, just a few brackets laying around the garage did the trick. Each one of these I have done has been a little different since I have never used the same parts to make it. Just what is lying around. WHich means this is a simple item to make. Don't think about it that much, you are just changing the direction of a pull, simple. Here is another sucky shot of the rod I made that goes up to the carb's. That's it, the rest up there in the engine bay is all stock. You can sort of make out the rod below the cable, but both still above the CV.
No it doesn't rub on anything and yes, the throttle form inside the car is smooth.
I will probably take my unit back off the car and take pictures of it. My wife and I drove the 914 around last night for the first time as a 914-6, so I was sort of excited to get things just on and done. But for the sake of readers on this thread, I will remove it and get more details on it.
Attached image(s)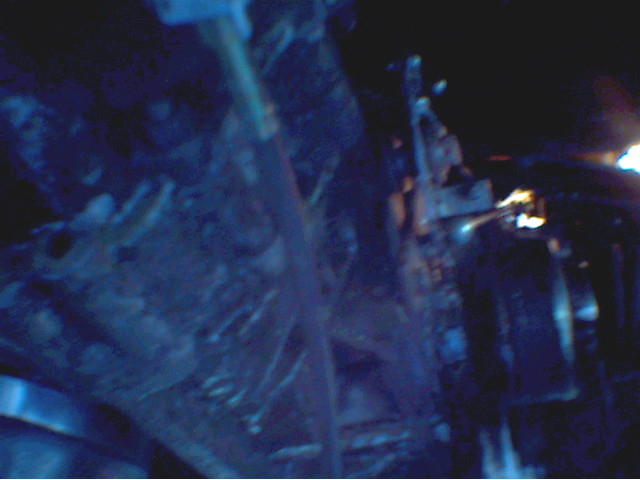
Posted by: Root_Werks Aug 11 2004, 08:43 AM
So here is yet another sucky shot of the rod I made coming up to the carbs. What I did with the rod was thread one end about 1.5" down the rod using a 5x1.0 tap(or is it die?) Screwed on a little nut and the cup, snapped it on the carb end, held up the pivoted linkage I made until it was about where I wanted it, marked the rod. I cut the rod, threaded the other end and presto, done. About the only factors in the length of the rod were how long the cable was so I wouldn't have to modify that. You want to use a factory 914-4 cable. They are cheap and you can get them almost anywhere. Plus I have tons and tons of adjustment room.
Attached image(s)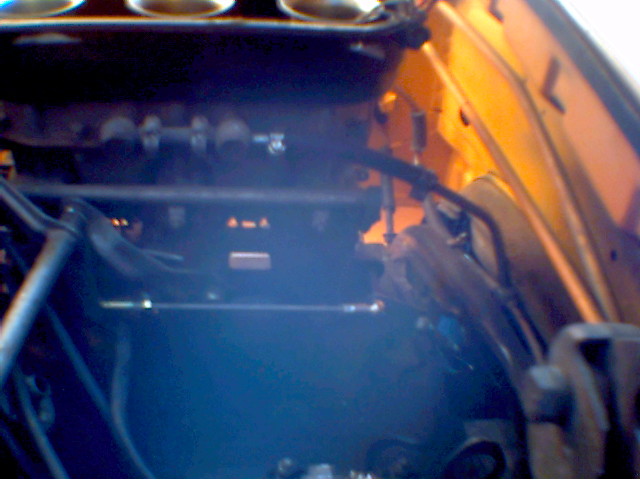
Posted by: nomore4 Aug 11 2004, 08:53 AM
You need to make a better camera
Posted by: Root_Werks Aug 11 2004, 08:54 AM
So lets switch gears a little and talk about the wiring. Again, keeping things simple lets do the charging system first. Talk about easy and straight forward. I love this stuff! You have your one large terminal on the back of the alt which you can run down to your starter terminal (the big one) I belive that one is B+. Then you have DF, D- and D+ ( Think that is them?) Anyway, you just have to match them up to the terminals on the 914 regulator, they are the same. BUUUT, you want to use the circut board so your idiot light will work. One trick on this one. Take the voltage reg off and you would think it would be:
........| DF
| D- Say this one is on the reg you pulled off.
........| D+
........| D+
| D- Well, the two terms are flipped on the circut board. Nice huh?
Oh, here is a shot so you can sort of see the breather hose. What did I use? 1 1/16" thick soft oil line from the industrail supply store and one of their 90degree plastic bends. So just like the factory, I have a short piece that comes off the filler neck to the 90 and then the longer piece that goes down to the block. Easy stuff!
Attached image(s)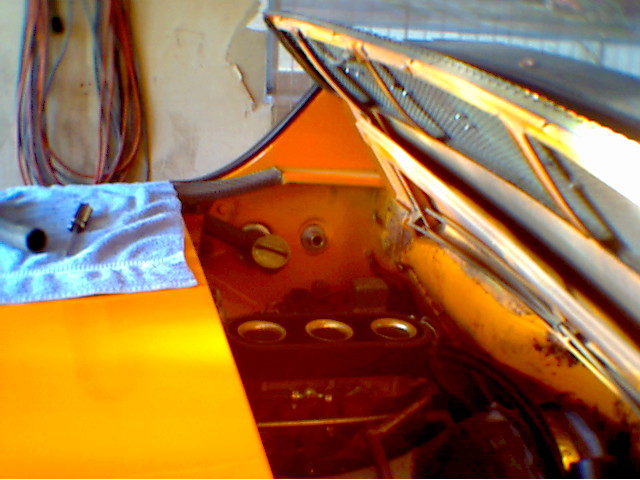
Posted by: Root_Werks Aug 11 2004, 09:23 AM
Driving impressions:
Well this is only a 2.2T, but what a great sound and what a great flat torque curve! I love it! I still have tuning to do for sure. This engine and the carbs sat around for a while. But it runs strong and burns really clean. I noticed while out driving I wound up getting my shiffter bar off a few degrees. Luckily there is adjustment for that, so no problem there. I have to touch my lock out to keep it in the 2-3 plane when it should be only the R-1 plane. Just need to loosen up the conections inside the car and move things over a bit. SHould take care of that. It is only slight too, I was probably off 2 degrees when I did the shift bar. That is what I get for not building a jig.
I noticed my oil lines are tight and dry, so another good sign. We put a quick 5 miles on the car, pulled over and fiddled with carb adjustment a few times. Idles decent, runs good. One thing we noticed while driving (windshield trim is still off) was the cracked windsield is only glued on the lower corners! If I pushed a little with my hand, I could get the whole thing to tilt out! Yikes! Well, I thought we would be able to wait until after our Whistler trip to do this one, looks like that will have to be replaced now.
Now onto other little things. This car sat since 1998, so the brake pedal is stiff. You have to pull it up with your toes. But hey, a whole week to go and it runs! WOO HOO! Everything else is small stuff. If anyone has questions, please ask. I will post more pictures (better ones) and happily go into detail about anything I might have missed.
The cost? Well, without going into any deals anyone might have given me on anything,,,,, including the car, engine, paint, fender flares, tires/wheels, conversions parts, but not labor: Just under $6000. After the windshield, I will probably push that $6000 mark.
By making most of my own parts, I saved over $1200 and it would have been more if I had the time to make my own mount and mod a set of 911 headers. But hey, time is money and if you don't have time, you will have to cough up a little money to do something like this. All in all, I would rather have this 914-6 for $6k than any 911 for $10k. But that is just me.
Posted by: James Adams Aug 11 2004, 09:50 AM
How did you hook up the suction line on the oil cooler?
Posted by: blabla914 Aug 11 2004, 10:32 AM
I'm glad to see someone else taking this approach to the six conversion. You don't need to spend a mint.
I too made my own tin, but I "kit-bashed" 914-4 and 911 tin. I figured I had both sets of tin and a mig welder. Screw it. It takes a bit of time. Brad it right, $400 for a fiberglass tin set is not a bad deal.
I too used the velios tank. Works great. I had to modify the inner edge of my rear quarter slightly to clear the fitting. No biggie. It doesn't leak.
Brad is also correct about the exhuast hanger. I traced a friends 2.0L hanger and cut it out of .125" aluminum. It bolted directly up to my Bursch headers.
I got impatient and bought the pelican throttle linkage. This is the biggest piece of crap ever. I ended up making my own bell crank from a 911 unit. I made a pivot mount and used the 911 actuation rod.
Yes! just mark a 911 flywheel and you're done.
I have a 2.0L E motor. Stock 914 clutch with 30k on it when installed works fine, even with 205-50 khumo's on 7" wide rims.
Making your own shift rod from a side shift -4 mount is a piece of cake. Bend as necessary (be careful it's tubing!), file the diameter down to shorten, and drill a new hole for the set screw. Works great.
One thing I have to disagree on is the Patrick mount. I autocross my car agressively, but I don't abuse it. I also autocross on some pretty rough sites. My side shift -4 front engine mounts lasted me for four autocross seasons and my dad is still using them in his car. The Patrick moly mount lasted exactly 4 autocross events before it started coming apart bending my tin, destroying my clutch and throttle cables, and bending my shift rod. I welded the mount up and made some reinforcements, but the flex still resulted in a bent shift rod. I can post some pictures of the Patrick mount carnage and what I tried to fix it tonight. I gave up and bought the Rich Thompson mount. It's $400, it takes a bit to install, but it rocks.
The biggest downside to the six is when it breaks, it costs quite a bit of money to fix. However, 2270 or 2316 Type 4's aren't cheap either.
Kelly
Posted by: Root_Werks Aug 11 2004, 01:18 PM
Ah yes, the cooler.
I was going to wait to get some decent pics of that, but here goes (I will be waiting for the abuse after telling people how I do this one):I grab my sawzall
and oh yeah, you guess it, cut back about 1" from the threaded fitting and then cut the threaded fitting off. So all you are left with is an unsupported aluminum tube coming out the bottom of the cooler. Then I simply slip over the suction hose, 2 hose clamps (don't even have to be that tight). Then I use a padded seel bracket (like a wire loom holder thingie) and support the line at the body of the car. This almost completely eliminates the line tugging around on that un-supported cooler tube. I have done it 5 times now? And never had any troubles with it. I know it is not the "Right" way to do it, but it seems to work just fine. I have logged tens of thousands of miles on conversions done that way. I think the factory tube is just strong is all.Okay, you can let me have it for that one. I am ready, slam me!

Posted by: mack914 Aug 18 2004, 08:00 AM
Please post more pics of shift rod and carb linkage fabs. Clearer anyway.
Mack
Posted by: Root_Werks Aug 18 2004, 09:07 AM
Mack
I promise I will, Last night I adjusted the valves and then the carbs. The engine has sat for a little while, so the usual needed to be done. Also this 914 sat since 1998 so many things have "Sit sindrome" which required attention. This was a project of start and don't stop until it is done. Friday is our trip to Whistler so I have been working daily to shake out any problems. There have been some too, but nothing major. But things that would have put a stop to the trip!
So I have been spending my time on those items.When we return I plan to post better shots of my linkage for throttle and shifting. Both are very smooth. I will also post dimensions for the throttle bell crank and rod I made. I will probably borrow someone else's camera though.
Posted by: Sammy Aug 18 2004, 10:35 AM
All this home made engineering and back yard fabrication makes me sick.
The only way to do something like this is to throw a great big pile of money at someone and have them do it for you!
Oh wait, I just remembered who I am and what I've done to Porsches over the past several years.
Seriously, I am impressed.
I've always admired those who can turn true imagination into a solution, you are obviously one of
'those people".
Posted by: michel richard Aug 18 2004, 11:54 AM
I know you said not to think about it too much, but could you give approximate dimensions and angles for the throttle capble bracket ?
What do you use for the cable itself ?
Michel Richard
Posted by: Root_Werks Aug 18 2004, 12:52 PM
What do you use for the cable itself ?
Michel Richard
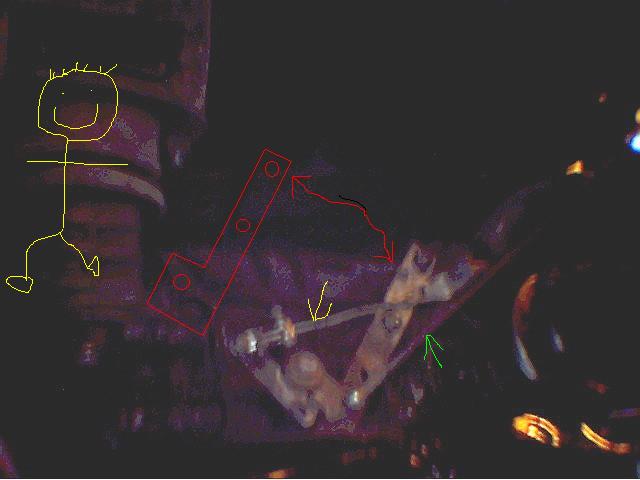
Well, before I can take better pictures, let me butcher one up a little. In this picture, you can sort of make out the pieces I made. The mounting bar is pointed out in red and a rough outline made up with the three holes I drilled for it. 2 for mounting to the transmition and one the crank pivots on. The yellow arrow is the stock 914-4 cable, not modified at all. The green arrow is my rod I made for $1.99. Heck, so far this is my best bell crank. Maybe I will just crank out a few and offer them up for sale for like $50? Even with buying the little "cups", it is only about $15 in parts.
Then I decided to express my artistic side. What do you think?
Attached image(s)
Posted by: dflesburg Aug 19 2004, 10:01 AM
Would you be interested in making a paper pattern of your wooden sheet metal jigs?
Posted by: Root_Werks Aug 19 2004, 10:16 AM
Sure.
Nothing I will do before my trip this weekend. But I have where to bend the tabs, drill the holes and depth of things. I don't mind doing that at all. I also want to post more pictures of my tin installed in a 914. It really turns out nice for $20 worth of sheet metal.I have been doing extra testing on my latest bell crank for the throttle and am just loving this one I did. So I want to take it all back appart, make another one to make sure I can do it again, install the new one, test it and maybe sell a few for cheap. They are fun to make.
Posted by: mack914 Aug 19 2004, 12:35 PM
I would be interested in purchasinglinkage kit.
Mack
Posted by: Root_Werks Aug 19 2004, 02:40 PM
Mack
When I get back, I will see about putting a handful of them together and offering them to fellow teeners. I like this one a lot and would like to get some out there and get feedback from other teeners.
Posted by: Eddie914 Aug 19 2004, 03:38 PM
Root,
Great job!
I live in West Seattle. What part of Seattle do you live?
I'd love to get together after you get back from Whistler.
Eddie
'73 914 2.7
Posted by: dflesburg Aug 19 2004, 08:28 PM
Root,
Thanks, you are the man. If you ever have to come to Ohio let me know, I'll buy you dinner!
I may even get my car done someday if we all strive to be more like Root and help each other.
That's what I am going to do from now on. Help others with stuff I can do.
Thanks for being a good example for us all to try to live up to.
Posted by: hars914 Aug 20 2004, 05:28 AM
Root, Put me on the list for the linkage.I am finishing up my 6 install now
and this thread is just what I am looking for. Great work
Posted by: Stutgart46 Aug 20 2004, 07:04 AM
Thanks for the hints and tricks. Please include me on the links as well.
Posted by: Root_Werks Oct 30 2004, 08:29 AM
Well, last night I finished up my heater "tubes" for my 914-6 running Bursch headers. I know, I know, Bursch sucks, whatever. I had an exhaust shop bend a tube for each side, then I dimpled them to fit snug up agaisnt the header pipes. Ran my hoses, put a stock 914-4 elect. fan on each side of the transmission to power the heater. Tested last night, no car running. Dude, these things kicked out some serious air! love it! So this morning I have to work, start driving in, stop at a gas station still in town. Heater tubes are warming up, heating up cabin nicely. Sweet! Hit the freeway, dang! Tubes start to cool off! They cool down to a mild mid 60's temp. A little cool, but I know of some things that will help that. I only tac welded the tubes onto the headers. I am going to run continous beads everywhere I can to allow for as much heat transfer as possible. That will help, but I don't think I will see much better than low 70's blowing out the vents. Which is actually fine.
Only problem I ran into this morning was a downpour of rain. All was well, warm cabin, air blowing, clear windows, light rain. Then buckets of water started coming down. Little hydroplaning even. I must not have sealed something up quite right because somehow a little water got into the heater tubes and you guessed it. One minute clear windows, next second fogged, couldn't see a thing! Doh! I wiped quickly, turned the fans off for a bit. When the rain let up, I turned them back on, they fogged for a bit, but then cleared up.
I don't have pic's this morning but will post what I did soon. It was super easy to do! Just a little more welding and maybe some better tubes? Either way, I think I spent about $25 for 914-6 heat! Right on!
Posted by: michel richard Oct 30 2004, 12:35 PM
This is very interesting.
So the fan motor is under the trunk floor, next to the tranny ? I suppose that those motors are designed to withstand some water dripping onto them, but have you done anything to try and ensure that the fan motor won't short out from exposure to spray coming from the wheels ?
In any event, from what you describe the setup survived at least one good rain.
Keep these things coming !
Michel Richard
914 2.2E MFI
Posted by: rhodyguy Oct 30 2004, 02:34 PM
where is the fan air drawn from, under the car?
kevin
Posted by: Root_Werks Nov 8 2004, 09:14 AM
It has been a little while, But I did promise I would come back and better explain the bell crank throttle linkage for folks. All I did was stumble upon something that happened to work perftect. Well, I have made a few in the past, but this one I like the best of them all. So this weekend, I made 5 of them! I brought one to work with me this morning and will see if I can post the dimensions of this cool product. I am selling these for $60 plus shipping and will post in the appropiate place.
Attached image(s)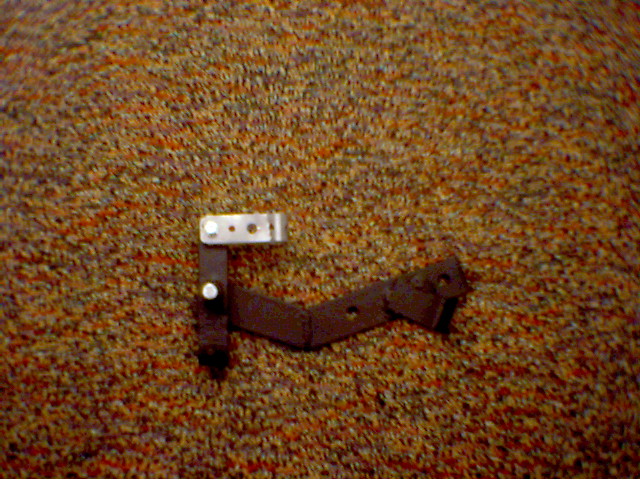
Posted by: Root_Werks Nov 8 2004, 09:18 AM
As before, you can see I am still using my ceral box digital camera. Oh well. The set mounts on the pass. side of the trans cover. You simple remove 2 nuts, slip this on and put the nuts back on. It also uses the stock 914-4 throttle cable so you don't need to buy anything but my kit! Sweet huh? Not pictured in these is the rod that goes from the bell crank to the carb linkage. Oh, this should work exactly like the factory one as in works with carbs, MFI and CIS engines. I am sure it would work with DME engines, but you might have to modify the rod?
Attached image(s)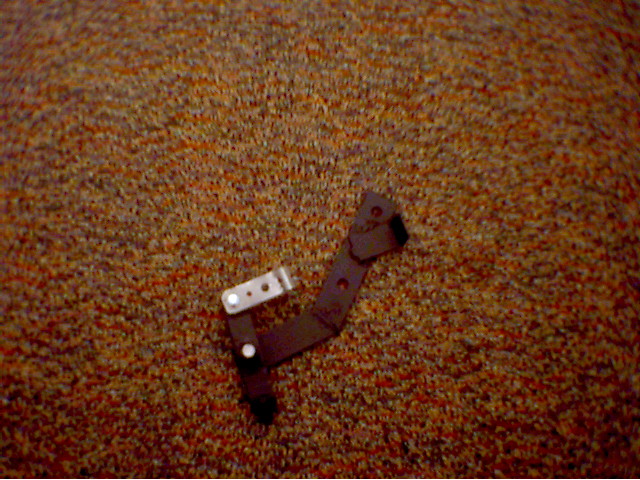
Posted by: Root_Werks Nov 8 2004, 09:22 AM
More shots, do your eyes hurt yet? 
Attached image(s)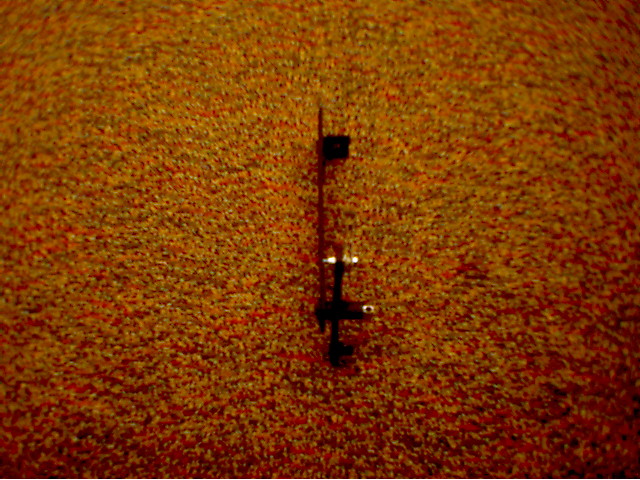
Posted by: Root_Werks Nov 8 2004, 09:22 AM
More
Attached image(s)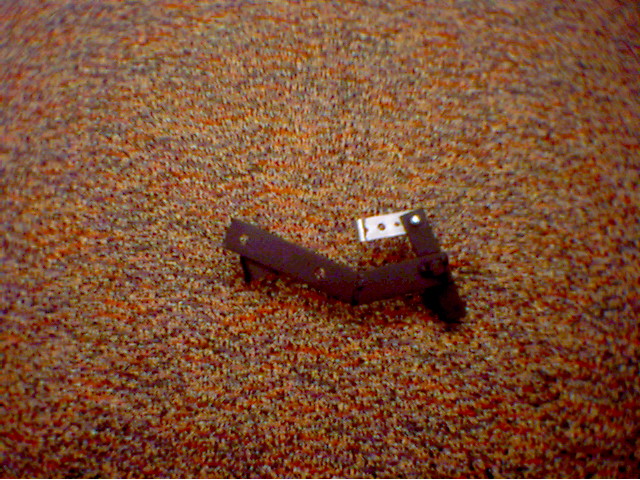
Posted by: Root_Werks Nov 8 2004, 09:23 AM
Last one. I will see if I can draw some sort of picture of how it mounts.
Attached image(s)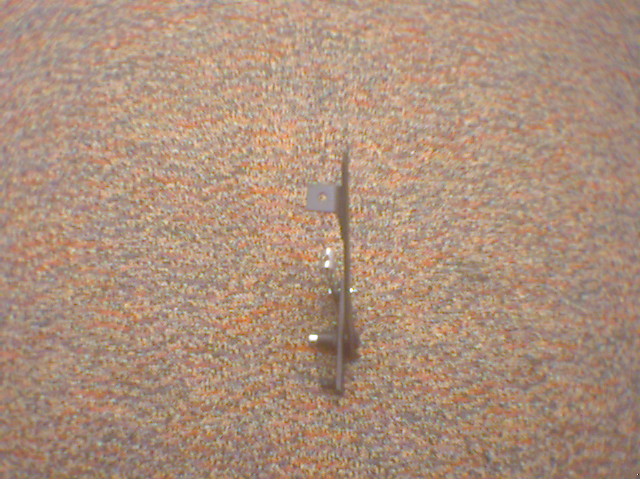
Posted by: michel richard Nov 8 2004, 09:49 AM
Thank you for all you arcontributing. I must say, however, that pictures on a better background would be even more helpful.
A small drawing with dimensions would be extraordinary.
Thanks
Michel Richard
914 2.2 E MFI
Posted by: Root_Werks Nov 8 2004, 10:09 AM
A small drawing with dimensions would be extraordinary.
Thanks
Michel Richard
914 2.2 E MFI
$20 dig camera on a carpet background, what's the problem?
Oh okay. From the top of my file cabinet:
Attached image(s)
Posted by: Root_Werks Nov 8 2004, 10:10 AM
More, still makes my eyes hurt. I asked for a better camera for X-Mas.
Attached image(s)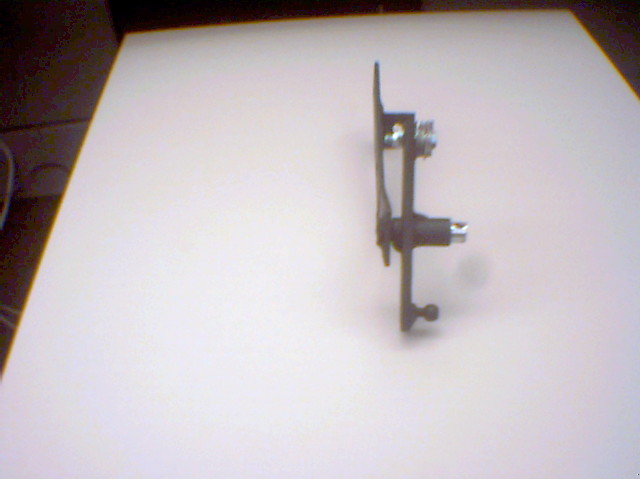
Posted by: Root_Werks Nov 8 2004, 10:11 AM
'Nuther
Attached image(s)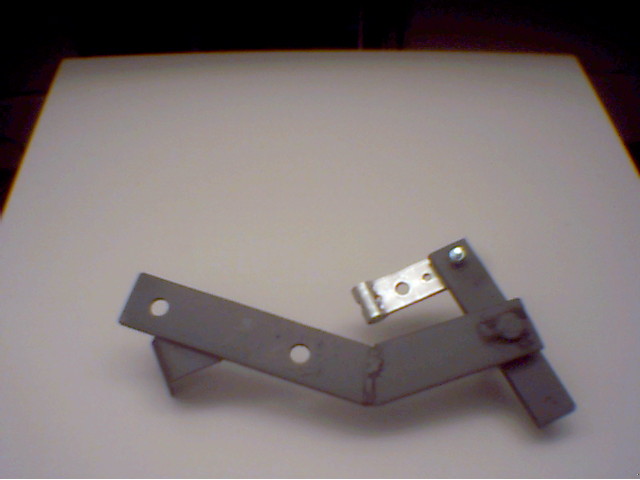
Posted by: Root_Werks Nov 8 2004, 10:14 AM
Last one again. I will post the dimensions hopefully today. I have like 6 meetings to go to though. So no promises on the today part, but I will post them. In order to use the stock cable, you can see I welded on a little "L" brakcet with a hole in it, then had to make something the cable can run through using the stock cable clamp thingy. It isn't anything complicated and I encourage people to take my idea and make thier own. But I will warn you, it is easily $15 in parts even doing it the way I am and work, much work. When you do like 5 at a time it is worth it. But if someone would have offered this for $60 when I did my conversions, I would have bought one every time.
Attached image(s)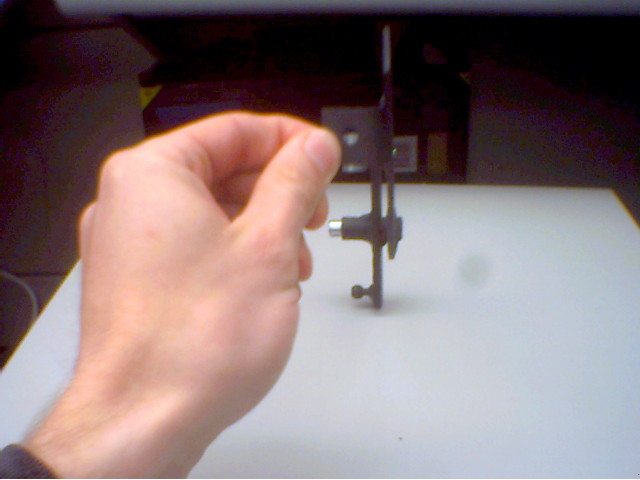
Posted by: Root_Werks Nov 8 2004, 11:10 AM
This is what I did at my first meeting today:
Attached image(s)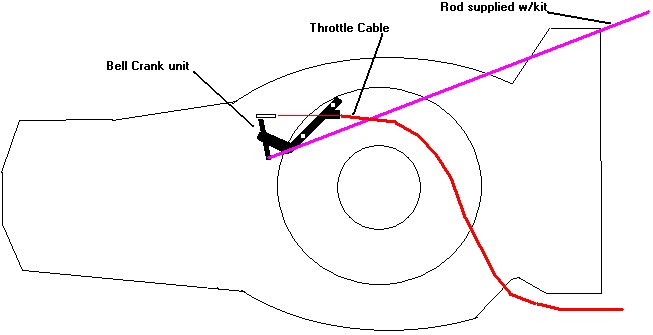
Posted by: michel richard Nov 8 2004, 02:57 PM
You are a gentleman.
Posted by: trekkor Nov 8 2004, 03:38 PM
Great
Thank you!
KT
Posted by: Root_Werks Nov 9 2004, 09:05 AM
Don't thank me just yet Trekkor, wait until you get the prototype bell crank I am sending you.
Posted by: Root_Werks Dec 20 2004, 09:53 AM
So the 914-6 project is essentaily a done one, thus some of you know I am starting on a 914-4 project for my wife. Both cars are really "ours" as "we" take them places. Although she can't do 99% of the work on either of them, I think she likes to just be involved, which rocks.  So here is a picture after I lowered the 914 and added rear wheel spacers to take up the space still left in the rear fender well. I also hand cut out my 914-6 2.2 stickers. I think they look good.
Attached image(s)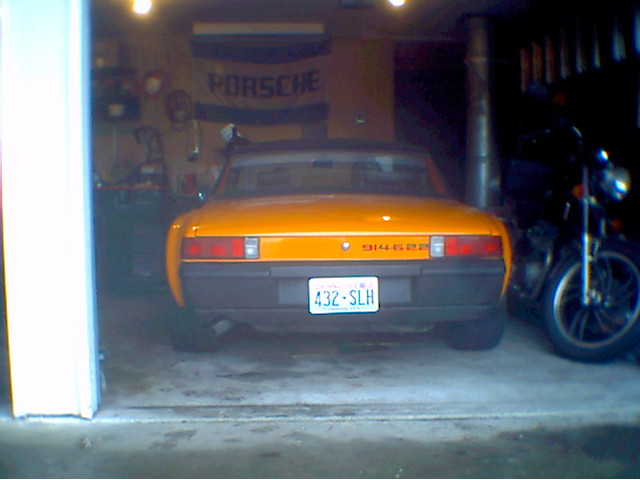
Posted by: Root_Werks Dec 20 2004, 09:54 AM
Another
Attached image(s)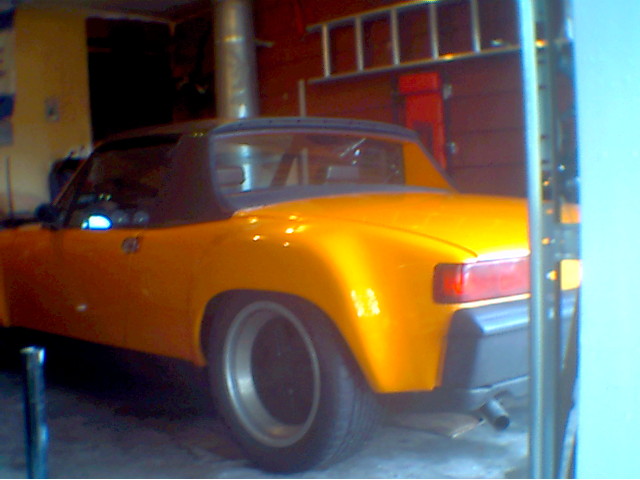
Posted by: rdauenhauer Dec 20 2004, 12:52 PM
Dan , what color is that?
Posted by: Root_Werks Dec 20 2004, 01:00 PM
| QUOTE (rdauenhauer @ Dec 20 2004, 10:52 AM) |
| Dan , what color is that? |
L20E Signal Orange, my favorite color. sixnotfour on the club here found it for me in September as a lonely sitting in someone's field 914-4 1.7. I did the conversion in a rush (6 weeks) from dented front fendered stock 914 to what you see there. Then we drove it to a PCA Whistler event in Canada. It also has heater boxes I made myself. I recently added heat sheilds to them because they would cool off too much when going over 60mph. Two electric fans run through my heater tubes so you get massive heat even at an idle.
Can you tell I love my car?

Posted by: watsonrx13 Dec 20 2004, 01:04 PM
Very nicely done... 
And thanks for posting the steps needed to convert to a -6...
Posted by: siverson Dec 20 2004, 02:24 PM
> Two electric fans run through my heater tubes so you get massive heat even at an idle.
Tell me more about this... Inline fans? Pictures?
-Steve
Posted by: Root_Werks Dec 20 2004, 02:54 PM
| QUOTE (siverson @ Dec 20 2004, 12:24 PM) |
| > Two electric fans run through my heater tubes so you get massive heat even at an idle. Tell me more about this... Inline fans? Pictures? -Steve |
I will get some pic's of the system set up. I used two 914-4 electric fans mounted above each side of the trans, then ran two "tubes" I welded onto cheapo bursch headers. Later added a heat sheild to one side (testing heat loss at speed). Dang, the work awesome! But you bet, I will take some pics for folks soon. I have heard we got a nice dig camera for X-mas.

Posted by: Dr Evil Dec 20 2004, 04:51 PM
Ya Dan, I wanna see yer heater also. It sounds simple and effective. Odd that you are actually trying to keep a part of your engine warm for a change. Does the heater system cause the engine to retain anymore heat, dissipate meore heat, nothing, both, leave me alone and go away?
Posted by: trekkor Dec 20 2004, 06:58 PM
Dan, as soon as you mentioned inline electric fans, I right away thought of 12v marine bilge blowers. They really move air and are pretty quiet and cheap. 
I'd like to see your heat exchanger design. I'd like to build some myself.
KT
Posted by: Root_Werks Dec 21 2004, 09:16 AM
| QUOTE (Dr Evil @ Dec 20 2004, 02:51 PM) |
| Ya Dan, I wanna see yer heater also. It sounds simple and effective. Odd that you are actually trying to keep a part of your engine warm for a change. Does the heater system cause the engine to retain anymore heat, dissipate meore heat, nothing, both, leave me alone and go away? |
Not to worry oh Evil one, pic's will come, but probably not until after X-mas. I purposely added a heat sheild to only the drivers side so I could take pic's for 914'ers, one side done, one side half done.
No heat added to engine compartment at all. So far the only bummer is they probably wiegh close to what the factory heater boxes do. So no real wieght savings with my system. But it works great and I am sure my design could be improved upon by others.


Posted by: sanman Dec 21 2004, 10:36 AM
| QUOTE (trekkor @ Dec 20 2004, 04:58 PM) |
| Dan, as soon as you mentioned inline electric fans, I right away thought of 12v marine bilge blowers. They really move air and are pretty quiet and cheap. |
 Me too
Posted by: Root_Werks Dec 21 2004, 10:55 AM
| QUOTE (sanman @ Dec 21 2004, 08:36 AM) | ||
Me too |
I thought of that as well and someone could probably use them after seeing how I grabbed heat from my headers. I just used 914-4 heaters I had laying around from previous conversions. I always pulled the elec fans out and just boxed them. Had like 6-7 at one time. I think I have one that doesn't work, one that does and 2 I put on my 914-6. I want my camera now so I can so you guys what I did!
Time to go snooping under the tree. 
Posted by: Root_Werks Jan 12 2005, 09:24 AM
Well, figured out how the new dig camera works. I just jacked up the car and laid on the ground to take some pictures of the heater and how the 914-4 rear tin works with the 914-6 set up. So my angles on my shots could be a little goofy. 
This first one shows the left(drivers) side of the 914-4 tin. There are two things you need to do on this side. One is bend up the tin around the radious of where it sits on the bell housing. If you just flip the tin and set it on, it will be off center to the left too far. So you have to take and cut or bend ( I just bend ) the tin a little, not much so the tin sits center. You can do the fitting after the engine is installed or before. Doesn't matter. If you fit this rear tin piece with the engine out of the car, you won't have the body gasket to help center it with. So I install the two 914-6 side tin pieces to help show where center is. Once you get the tin centered, you can mark a hole for mounting. You can see I just used on bolt to mount on the left side. You don't need anything more than that.
Oh, you can also see part of my heater tube welded to the bursch headers. Not in this picture is the electric fan. But more on that later.
Posted by: Root_Werks Jan 12 2005, 09:33 AM
Derr, how about a picture.
The red arrow shows the part where the tin needs to be bent back a little and the blue arrow shows about where the mounting bolt goes. just behind the heater tube out of sight. Sorry about that. 
Attached image(s)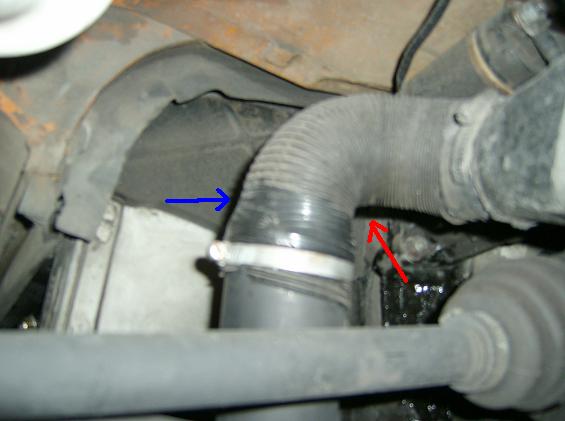
Posted by: trekkor Jan 12 2005, 09:38 AM
I'm right here scarfing this up 
KT
Posted by: Root_Werks Jan 12 2005, 09:42 AM
Now the right (pass) side I F'd up on. It should be mounted higher than this. Another reason it is better to fit this piece when the engine is hanging in the car. This shot you can see a little better I just drilled one mounting hole. Works fine, but one of these days I will go back in and raise it up 1/2" so it touches the body gasket. The only thing you need to do on this side is drill one mounting hole and drill out a larger hole for the throttle rod assuming you are using either the stock 914-6 bell crank or my superior 914-4 to 914-6 bell crank kit. The larger hole is not an exact science, I drill probably more than I need to, push the rod through, dang, a little more off the side.... fit again sort of thing.
Attached image(s)
Posted by: Root_Werks Jan 12 2005, 09:59 AM
Actually, let me add some more to this picture. I circled where you have 3 threaded holes in the cam cap to choose from. I should have drilled the top one. Note my mounting bolt is almost not on the tin. I should have raised it up just a little and used the top mounting hole.
Also, I circled the bell crank throttle rod. You can't really see the hole I made all that well, but you get the idea.
Hey, it isn't perfect, but it is free and fits pretty dam nice if you don't rush like I did on this one. I have done this a couple of times and have had better fits than this. I shouldn't have rushed. But I was out of time when I did this.
Attached image(s)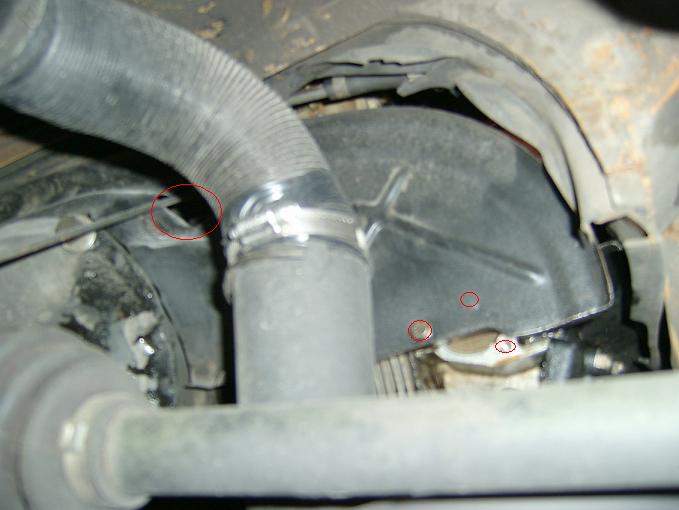
Posted by: Root_Werks Jan 12 2005, 10:09 AM
Sort of moving along to the heater set up I have. one fan mounted on each side. You can see the fan and the tube as it bends up from the headers. What I used to hang both fans was an exhaust hanger from a local FLAPS. I welded it onto the body of the car adn just bolted the fan on. Done deal.
Attached image(s)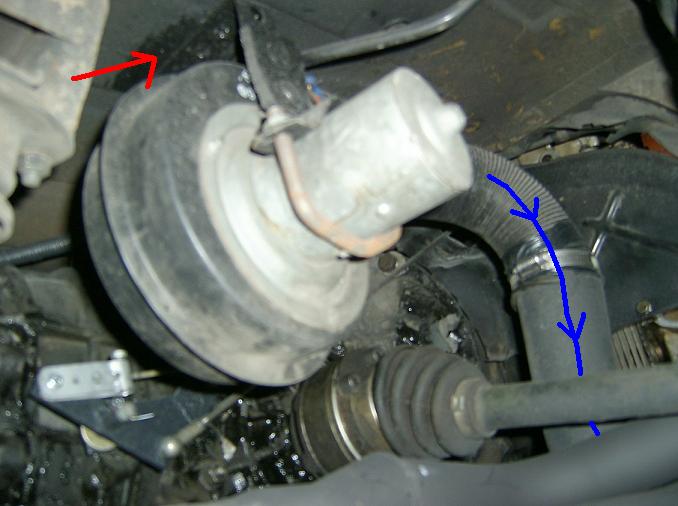
Posted by: Root_Werks Jan 12 2005, 10:11 AM
Here is a better shot of the piece of 2 1/2" exhaust pipe I welded onto the headers and the flow of air. This is the right side heater tube with no heat sheild on it. In town, the tube retains heat and works awesome. When you pick up speed, it cools the tube down more than I like. I will show a picture of the left side tube/heatshield next.
Attached image(s)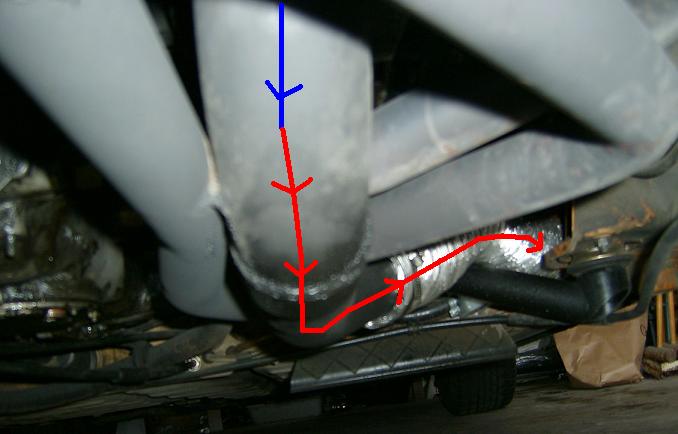
Posted by: Root_Werks Jan 12 2005, 10:17 AM
Bummer, I didn't bring the left side heater tube picture with me.  Oh well, here is a couple of shots of the bell crank throttle linkage installed, the hole in the rear tin etc...
Attached image(s)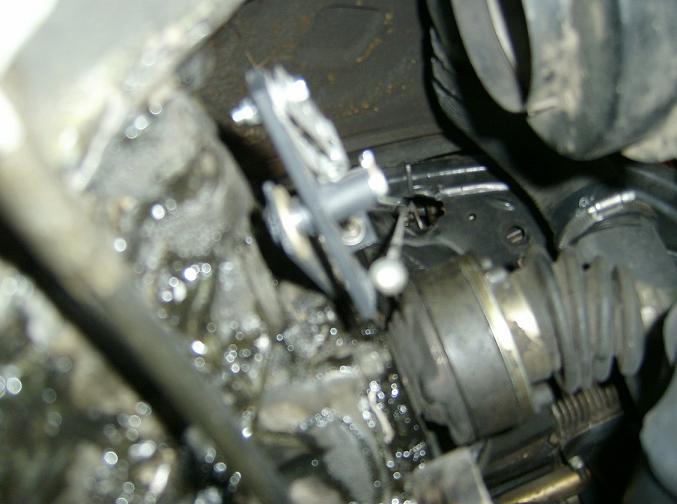
Posted by: Root_Werks Jan 12 2005, 10:18 AM
Last one I brought with me today.
Attached image(s)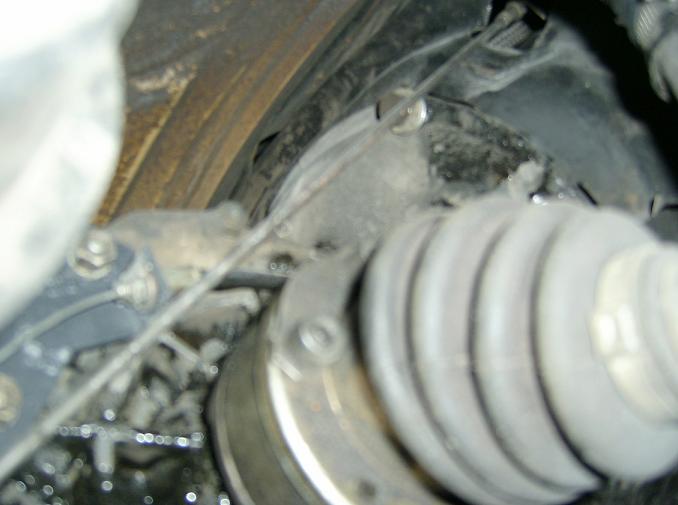
Posted by: trekkor Jan 12 2005, 12:13 PM
Here's my Root Bell Crank install...
Thanks Dan! 
KT
Attached image(s)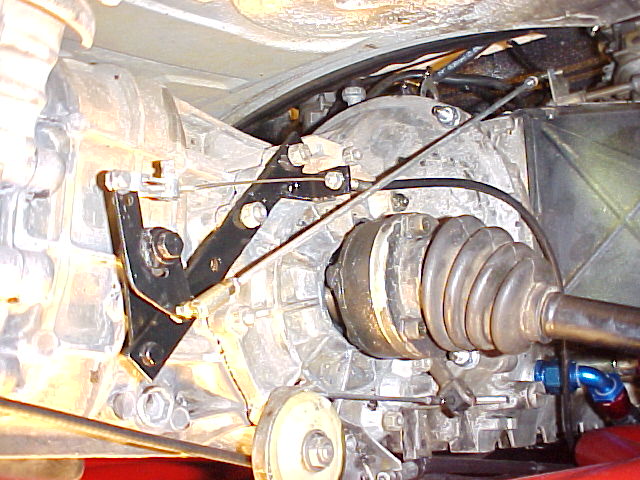
Posted by: trekkor Jan 12 2005, 12:15 PM
I'll do the sheet metal tonight or tomorrow depending on how tired I am after work. 
Pics to follow, of course.
KT
Posted by: Root_Werks Jan 12 2005, 12:32 PM
Sweet! can't wait to see more pics of the install!
Yep, trekkor has my prototype bell crank. I just got lucky with the angles and dimensions. They work really good, very smooth and linear in travel. I have sold like 15 now. Easy install/adjustment.
Posted by: Phil Plummer Mar 6 2013, 08:52 PM

Okay, so this is about the 5th 914-6 conversion I have done. They are all drivers to this day. Heck, Even Craigh Laughlin has one of my old ones! My goal is to put as many 914-6's out on the road as possible since I think that is what the desing intended for them to be anyway. Anyway, I have heard soem thoughts about costs or how hard it is to convert. Nah, just time really. yeah, a few parts, but mostly just some time. Lets visit the part$ shall we. You will probalby need the following (as in not worth making):
Tank - Lots-o-options, but don't spend over $500 on one
Headers - $450 - 500
Mount - Zowie! Lots-o-options here as well. I have a jig to make my own, it works, but takes time. It is not hard, but takes a lot of time. I gave up and grabbed a patrick moly mount just today. I am running out of time.
Everyting else, you can make or do yourself. I will show you how in this thread over the next couple of weeks since that is all the time I have left!
Here is a shot of the holes drilled for the oil tank. Yep, I am using a Vellios tank yet again. They work great and use the later filters. Also, you can go down to your local industrial supply shop and have them make the pressure hose for like $40. The suction hose is even easier, but more on that later.
Wow you seem Knowledgeable on the 914/6 conversion .
Iam building a 94/6 and am using a 3.0 form a 81 911 sc ..I am sticking with the injectors .... all is ready only no spark..NO Spark.. none...zip but all is good coil etc.etc If you have any suggestions and can help please let me know or if you know someone who can help please point me ion the right direction.thanks in advance....Regards Phil
Posted by: SirAndy Mar 6 2013, 09:00 PM
I can point you towards a good source for calendars since this thread is almost 10 years old ...

Posted by: 930cabman Jan 25 2021, 06:46 PM
Now this thread is 16+ years young and what has changed, the once lowly 914 has
become reborn, everything is more expensive and we are in a pandemic. Our '74 rustout is being made whole once again and looking at options for a power plant. For now I am thinking building a reasonably stock 2 liter, maybe boost the compression a bit, maybe decent heads, cam, Webers ......
Considering starting to collect the parts/pieces for the conversion. I have not found Vellios, are they still making tanks? or is anybody making steel tanks?
thanks
Posted by: mepstein Jan 25 2021, 07:24 PM
Now this thread is 16+ years young and what has changed, the once lowly 914 has
become reborn, everything is more expensive and we are in a pandemic. Our '74 rustout is being made whole once again and looking at options for a power plant. For now I am thinking building a reasonably stock 2 liter, maybe boost the compression a bit, maybe decent heads, cam, Webers ......
Considering starting to collect the parts/pieces for the conversion. I have not found Vellios, are they still making tanks? or is anybody making steel tanks?
thanks
Vellios hasn't made tanks in years. Ben/MB911 picked up the ball and ran with it. www.914-6Werkshop.com
Posted by: Steve Jan 25 2021, 09:37 PM
Now this thread is 16+ years young and what has changed, the once lowly 914 has
become reborn, everything is more expensive and we are in a pandemic. Our '74 rustout is being made whole once again and looking at options for a power plant. For now I am thinking building a reasonably stock 2 liter, maybe boost the compression a bit, maybe decent heads, cam, Webers ......
Considering starting to collect the parts/pieces for the conversion. I have not found Vellios, are they still making tanks? or is anybody making steel tanks?
thanks
Vellios hasn't made tanks in years. Ben/MB911 picked up the ball and ran with it. www.914-6Werkshop.com
Vellios past away (RIP). All his left over parts were on Ebay awhile back.
Posted by: Mark Henry Jan 26 2021, 06:00 AM
Now this thread is 16+ years young and what has changed, the once lowly 914 has
become reborn, everything is more expensive and we are in a pandemic. Our '74 rustout is being made whole once again and looking at options for a power plant. For now I am thinking building a reasonably stock 2 liter, maybe boost the compression a bit, maybe decent heads, cam, Webers ......
Considering starting to collect the parts/pieces for the conversion. I have not found Vellios, are they still making tanks? or is anybody making steel tanks?
thanks
Vellios hasn't made tanks in years. Ben/MB911 picked up the ball and ran with it. www.914-6Werkshop.com
Vellios past away (RIP). All his left over parts were onre Ebay awhile back.
Ben bought the Vellios tanks, finished them and re-sold them IIRC.
No engine build for a 914 is cheap anymore and a /6 build is close to 4x the cost (ballpark) of a /4 build now.
Posted by: 930cabman Jan 26 2021, 06:02 AM
Is a -6 4x the fun?
Posted by: mb911 Jan 26 2021, 06:56 AM
Is a -6 4x the fun?
Yes they are to me but that is a question you have the answer for yourself..
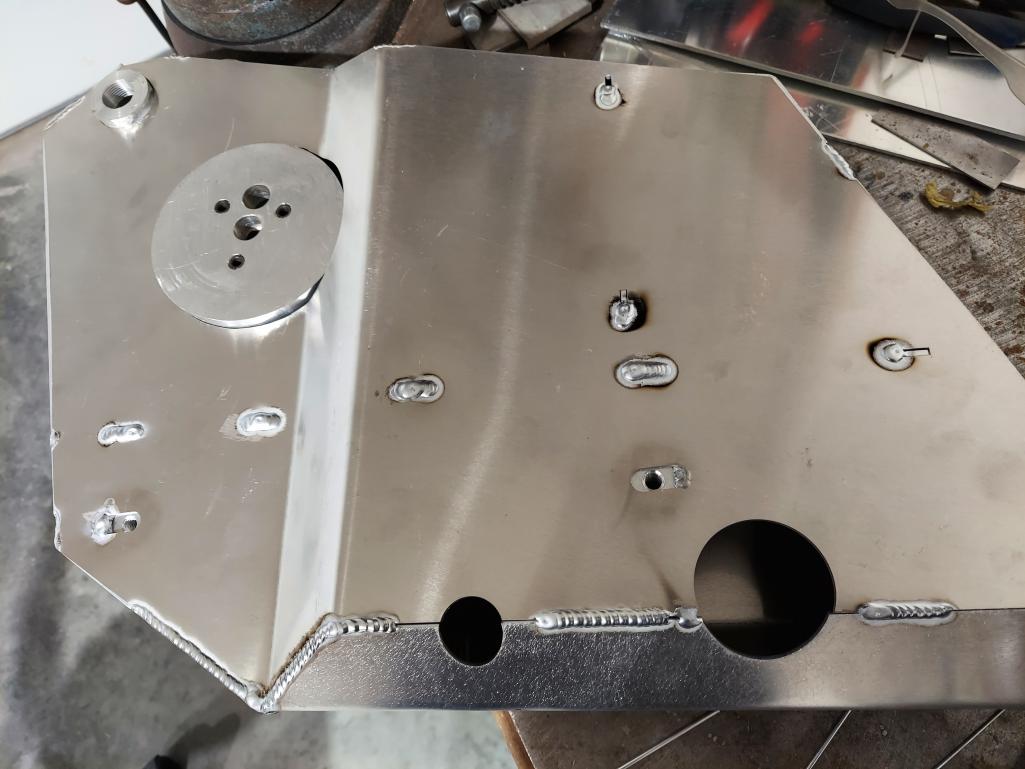
Here is a tank I was working on last night.. I make almost everything needed for a conversion.
Posted by: Root_Werks Jan 26 2021, 09:52 AM
914-6 aftermarket tanks have come a long way. I would use Ben's tank.
Some of my pictures....oye, I probably still have that digital camera someplace.
Posted by: 930cabman Jan 26 2021, 10:59 AM
Is a -6 4x the fun?
Yes they are to me but that is a question you have the answer for yourself..
Here is a tank I was working on last night.. I make almost everything needed for a conversion.
Very nice looking work. I am seeing a 2.7 fitting into our 914 rustout as a more and more viable option in place of building a 4 cyl. My trigger finger is almost ready to strike. How long will you be holding the "spring special" pricing for the RD metal and tank combo?
thanks
Posted by: mb911 Jan 26 2021, 11:30 AM
Is a -6 4x the fun?
Yes they are to me but that is a question you have the answer for yourself..
Here is a tank I was working on last night.. I make almost everything needed for a conversion.
Very nice looking work. I am seeing a 2.7 fitting into our 914 rustout as a more and more viable option in place of building a 4 cyl. My trigger finger is almost ready to strike. How long will you be holding the "spring special" pricing for the RD metal and tank combo?
thanks
I only have 6 sets left of sheet metal and not sure the cost on my next batch will be..
Posted by: rhodyguy Jan 26 2021, 12:09 PM
If anticipating the 6 road, buy the tin NOW! If you change your mind you'll get what you paid for them. A RARITY!
Posted by: Root_Werks Jan 26 2021, 01:10 PM
If anticipating the 6 road, buy the tin NOW! If you change your mind you'll get what you paid for them. A RARITY!
Prices only seem to go up and supply comes and goes over the years.
Posted by: 930cabman Jan 26 2021, 06:04 PM
I am on the fence to go the -6 route. It is looking like somewhere in the $6-7k range for a -4 build. Not sure if I have $20.k disposable income to go with a -6. Carbs or CIS? My decision is partly based on $$, but also getting road time this year. A -6 conversion seems quite a bit of additional work but I don't want to build a -4 and be unhappy with the lack of a decent kick.
Which ever route I take this 914 build will be compared to our '87 turbo cab.
Still working through several rustout sections with the chassis. RD has come to the rescue, but some stuff needs to be fabricated from scratch
Posted by: Mayne Jan 26 2021, 08:28 PM
I am on the fence to go the -6 route. It is looking like somewhere in the $6-7k range for a -4 build. Not sure if I have $20.k disposable income to go with a -6. Carbs or CIS? My decision is partly based on $$, but also getting road time this year. A -6 conversion seems quite a bit of additional work but I don't want to build a -4 and be unhappy with the lack of a decent kick.
Which ever route I take this 914 build will be compared to our '87 turbo cab.
Still working through several rustout sections with the chassis. RD has come to the rescue, but some stuff needs to be fabricated from scratch
This is why I can’t get the Subaru 6 conversion out of my head. Probably for the $6-7k, you could have it pretty well sorted with power on par with a 3.2 Carrera conversion in a revvy, smooth, reliable motor. I know, I know, it’s not the same, but....
Posted by: mb911 Jan 26 2021, 08:42 PM
1st. Smart money for performance is suby.
2nd 4cyl big build makes sense on really nice car that can easily turned back to stock as values are climbing like crazy. I consider this category a car that is in near excellent to perfect condition with minimal rust repair done or done to a level like @http://www.914world.com/bbs2/index.php?showuser=20845 s
3rd 6cyl conversions for cars that are missing original engines or may have had major surgery like mine or @http://www.914world.com/bbs2/index.php?showuser=2766 @http://www.914world.com/bbs2/index.php?showuser=22428 going after a tribute 914-6 or GT car and has the hotrod vision like the factory did and the need for the 6 sound,smell, and emptier pockets. The good news is conversions are getting great money. Basically clean slate cars that struggle to be original but the owner has the sickness such as I. Remember the factory planned accordingly with the oil tank stampings.
Posted by: flat4guy Jan 26 2021, 08:59 PM
I would love to make ours a 6 but it is too original to mess with, ugh, the struggles I have. haha
Posted by: infraredcalvin Jan 26 2021, 09:53 PM
I am on the fence to go the -6 route. It is looking like somewhere in the $6-7k range for a -4 build. Not sure if I have $20.k disposable income to go with a -6. Carbs or CIS? My decision is partly based on $$, but also getting road time this year. A -6 conversion seems quite a bit of additional work but I don't want to build a -4 and be unhappy with the lack of a decent kick.
Which ever route I take this 914 build will be compared to our '87 turbo cab.
Still working through several rustout sections with the chassis. RD has come to the rescue, but some stuff needs to be fabricated from scratch
I just made a decision to keep my race car a slightly larger 4 than go to an rs spec 6. I have the 6 core, and the car is already set up for a 6 (oiling/cooling, 5 lug, 911 A and M brakes, so all it needs is motor and mount.
I have a lightened flywheel bolted to a 2165 it sure is fun. For under $10k I’m getting a FAT built 2165 race motor (actually $7k but I get to use a few previous parts). Can’t touch that cost rebuilding the 6 myself. I briefly considered a subie, but water cooled really makes it more complicated than I wanted.
Posted by: Superhawk996 Jan 27 2021, 06:56 AM
A -6 conversion seems quite a bit of additional work but I don't want to build a -4 and be unhappy with the lack of a decent kick.
Which ever route I take this 914 build will be compared to our '87 turbo cab.
@http://www.914world.com/bbs2/index.php?showuser=24877
If you're going to compare to a 87' tubo you bettter do a big six.
If youre going to compare a /4 on the basis of acceleration, to modern cars, you'll be disappointed. Modern Toyota Camry XSE good for 0-60 in 5.8 seconds.
914's are all about handling. In that domain, you will rarely be outgunned or disappointed.
If you decide on the /6 route, Ben's deal on RD tin cannot be beat. Buy now before price goes up.
Posted by: Superhawk996 Jan 27 2021, 06:58 AM
. . . I briefly considered a subie, but water cooled really makes it more complicated than I wanted.
Posted by: 930cabman Jan 27 2021, 10:01 AM
I would love to make ours a 6 but it is too original to mess with, ugh, the struggles I have. haha
Good problem to have, I have an early 911S in the same catagory.
Posted by: 930cabman Jan 29 2021, 06:37 PM
Took the leap, the oil tank/engine tin is on the way from Ben, dropped off our 2.7 to a local engine builder for new head studs, ......
We have 6 sporting cars in the stable, all are too nice to cut up and bastardize. Hence, a 914 rustout with a 2.7. A go kart with a body
Powered by Invision Power Board (http://www.invisionboard.com)
© Invision Power Services (http://www.invisionpower.com)