Printable Version of Topic
Click here to view this topic in its original format
914World.com _ 914World Garage _ OT: Working on my shop car
Posted by: aircooledtechguy Dec 23 2011, 07:20 PM
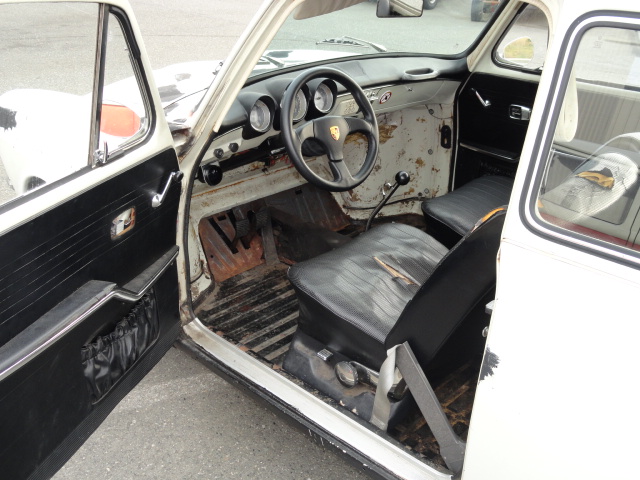
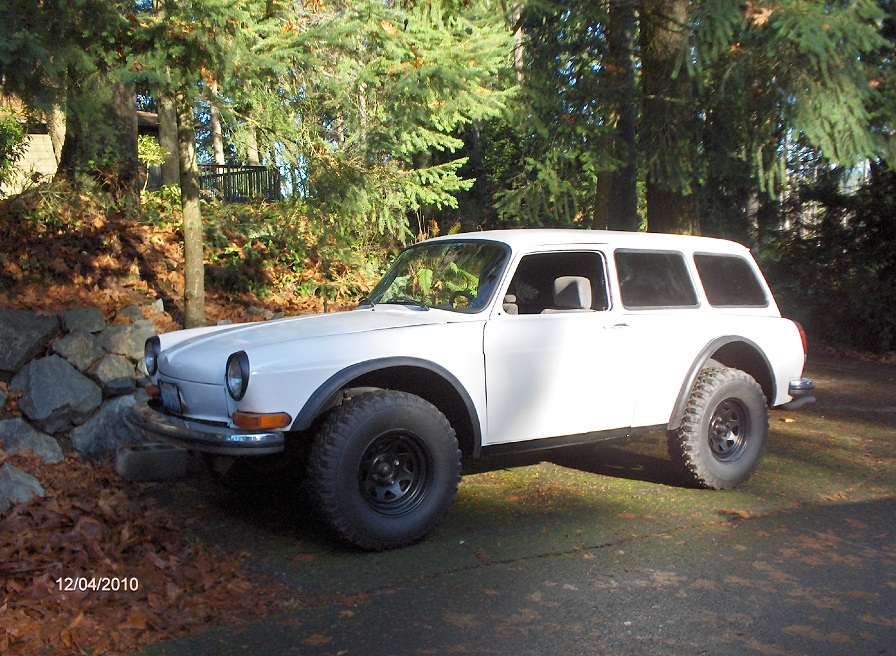
I've had a long term project going now to turn my '67 Squareback into my shop car. While I love driving my 914, it has limitations as a daily parts hauler. I love old styling with new technology and updates, so my goal is to turn my humble Square into the wagon that Porsche never made. I want it to drive and handle more like a Porsche than a VW wagon and it's got to be a true "Sleeper" (not a real problem; since it's a wagon). 

This has been a 4-5 phase project.
Phase-1 - Convert it to Porsche 914 2.0L motor. Make it physically adapted to the car and running MS2 w/ Ford EDIS ignition. Get it tuned to be a daily driver. DONE!!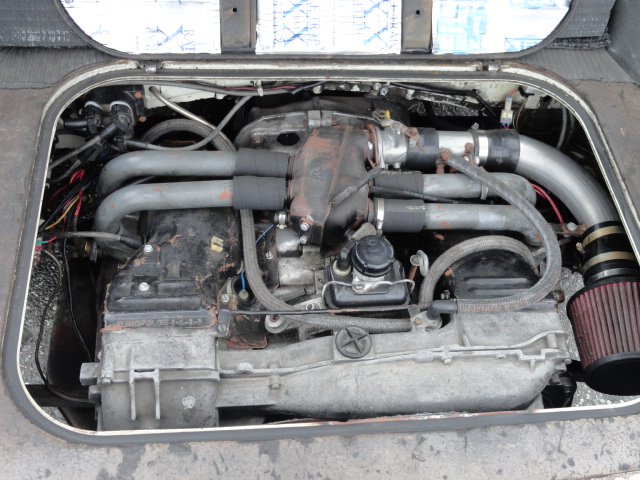
Phase-2 - Make the motor look good and freshen it up with new P&Cs. The heads were freshened only about 2K miles before I got it, by me when it was in a clients 914 that he converted to Subie power. I noticed that once I had a few miles on it myself, it was using a bit of oil. So I upgraded to a new set of 96mm P&Cs. So now it's a 2056.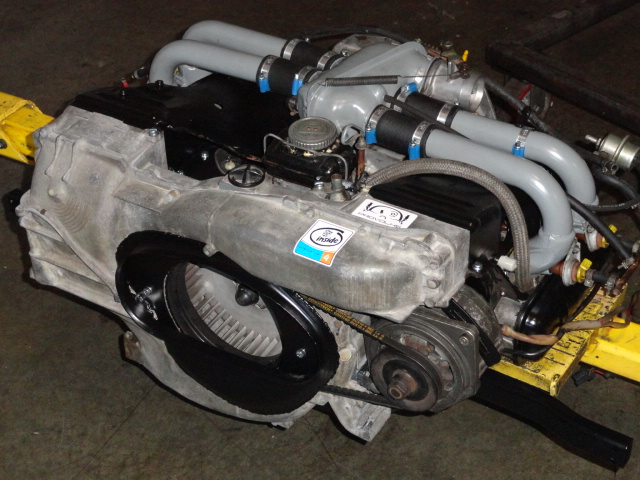
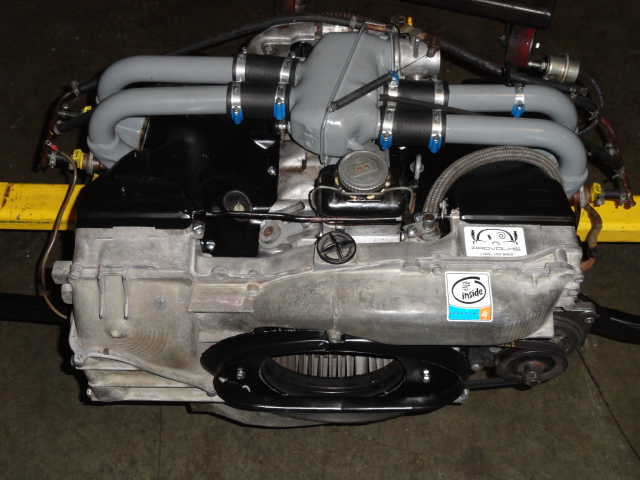
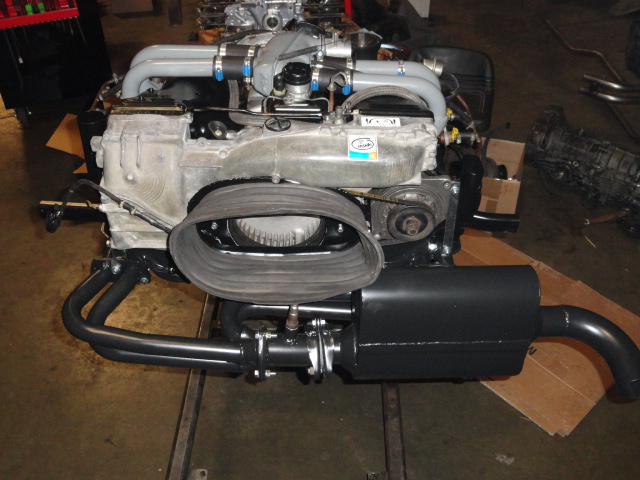
I had my local powder coater do all the tins in black and the plenum and runners in grey for a stock look. I'm running T-4 H/Es with a modified bus header and a Summit Racing Flow Master clone muffler. So I had those ceramic coated in black so they are not attention grabbers from the back. This car is a sleeper 
DONE!!
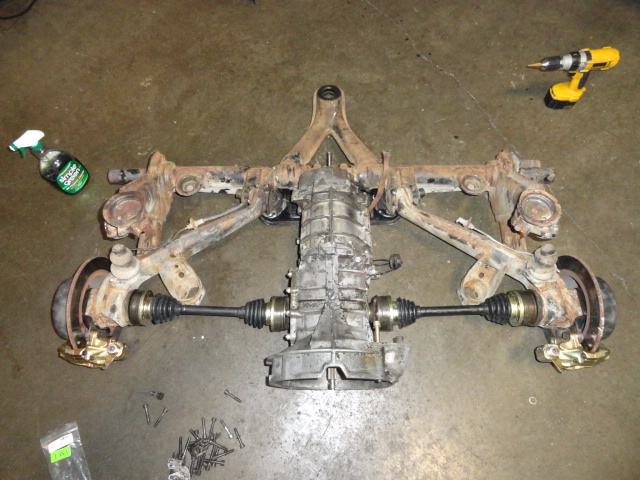
Phase-3 - Convert the rear suspension to the later style IRS and install a Porsche 923 trans out of a Porsche 912E. The rear suspension is DONE!! While at it, I upgraded it with 914 rear brakes, urethane bushings, adjustable spring plates and a rear sway bar. 
Since the trans is taller than a stock 4-speed and cutting into the car can't happen due to rear seat issues. I gained the 1.5" I needed by spacing the body off the rear suspension with spacers. So here I sit, on the final leg of phase-3. I now need to couple the motor/trans and lift it into it's final place and fab rear engine hanger mounts for the rear bar. It's late and I'm tired. . .
Phase-4 - Front suspension upgrade. Currently in-work
Phase-5 - Paint so it doesn't look so crappy, though it does add to the "sleeper" persona. . .
Stay tuned for more later. . .
Posted by: BajaXJ92 Dec 23 2011, 07:30 PM

Let me know if you ever want to sell it!
Posted by: JRust Dec 23 2011, 07:47 PM
Looks like a cool project! Can't wait to see some pics & video of it once roadworthy 
Posted by: NORD Dec 23 2011, 07:48 PM
Very Cool
Now Zebra paint job almost there
The Mahles look good
Autocross school in the spring! Will it be ready?

Posted by: Krieger Dec 23 2011, 07:56 PM
I dig this car! You have to keep us posted.
Posted by: Tom_T Dec 23 2011, 08:45 PM
I've always loved those Squarebacks! Several buddies back in the 60s & 70s had them as surf-wagons, as a cool alternative to a VW Bus or early Woodies.
Another HS buddy front-ended his new 69 911S grad present, then got a beater VW Splitty van & had the 911S engine/transaxle & suspension, instruments, etc. on it - but left it looking like a ratty rust bucket. He became known for doing wheelies in the school parking lot, and for dragging & beating the 60's muscle cars around town in the stop-light-drags - several of which had a bus full of us geeky HS kids in it! 
That looks like it will be both a hot & cool build, especially with a really slick paint job on it!
Posted by: phillstek Dec 23 2011, 10:09 PM
Looks great and can't wait to see it done (which appears to be soon). I really like type 3's, I got my driver's licence in my mum's 1600 fastback. The dash was way cooler then my brother's beetle and it went a lot better too.
phil
Posted by: rdauenhauer Dec 23 2011, 10:56 PM


Posted by: swood Dec 23 2011, 11:03 PM
subscribed! looking forward to the "how-to" thread...that is sweet!

Posted by: 9146986 Dec 23 2011, 11:33 PM
Very cool project! That's one of my favorite wagons. I missed getting my aunt's nice clean CA squareback wagon, because my cousin is a nertz.
Posted by: mrbubblehead Dec 24 2011, 12:48 AM
too cool. ive never had a type 3. is it i window warper? do the side windows bend open instead of being hinged?
i didnt know the torsion housing was removable in type 3s. very handy to have it removable.
Posted by: orange914 Dec 24 2011, 01:24 AM
5 speed for freeway delivery... cool!
Posted by: aircooledtechguy Dec 24 2011, 05:01 PM
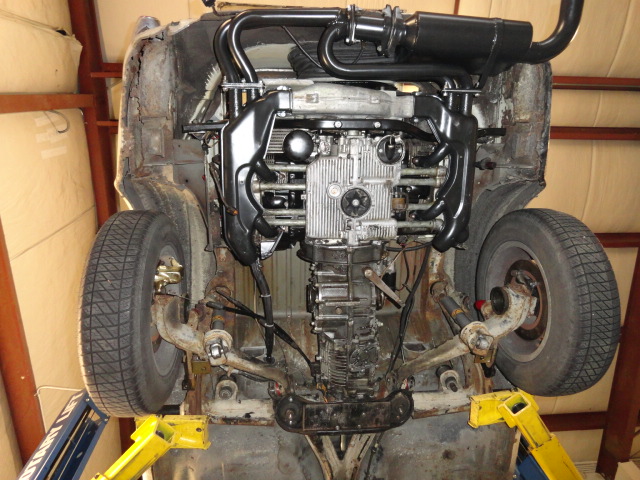
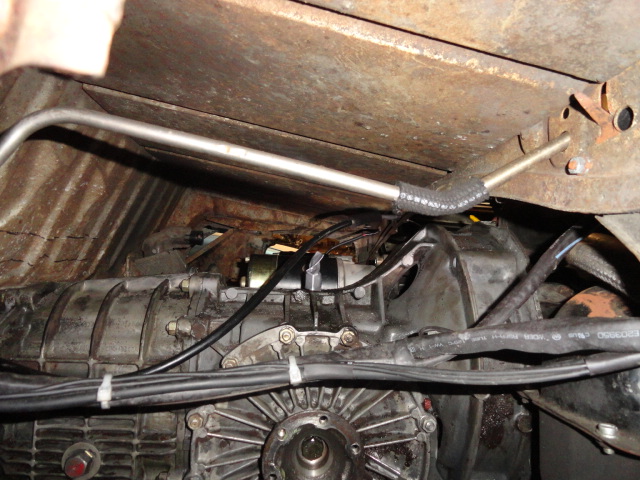
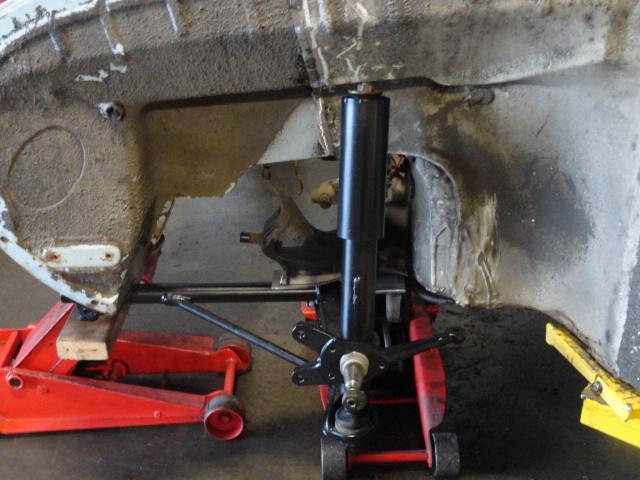
Made good progress today. Joined the motor and trans hopefully for the last time.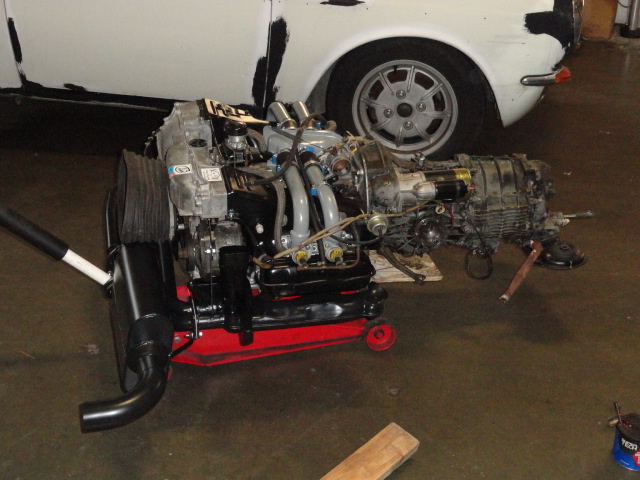
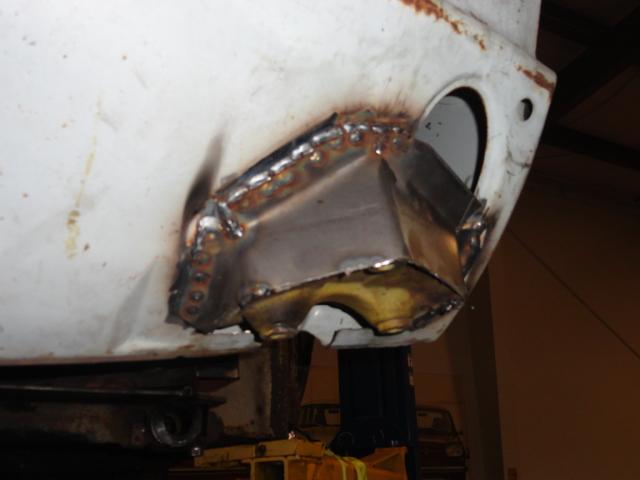
Lifted the car and got the motor and trans into position, then dropped the car onto the motor/trans. LIKE A GLOVE!! Then I had to design and fab a pair of rear hangers for the rear mount bar. The bar is a stock bus bar, so it's rubber mounted at the motor. So these are solid mounts to the car. The pic is 90degrees off, but you all get the idea.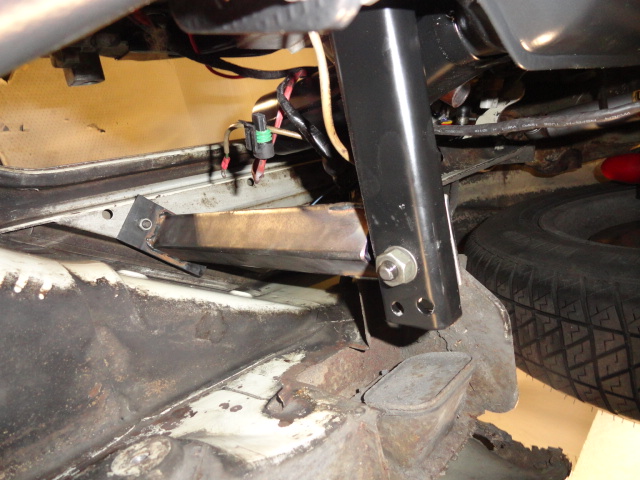
Once I bolted these up, the motor and trans was finally home; not hooked-up, but home in it's final location.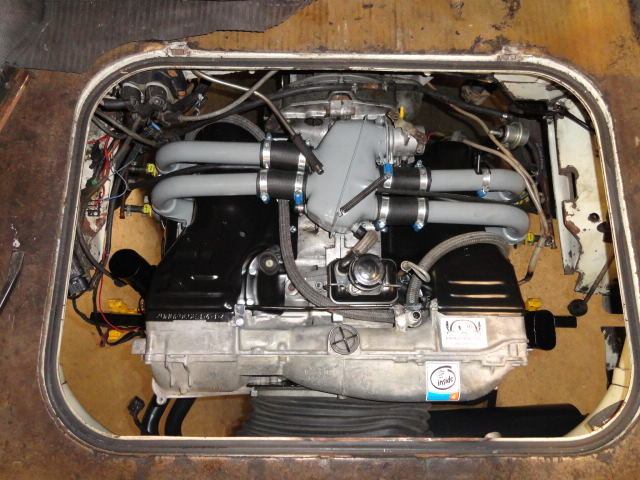
Things I have to re-engineer before I can close out phase-3 are:
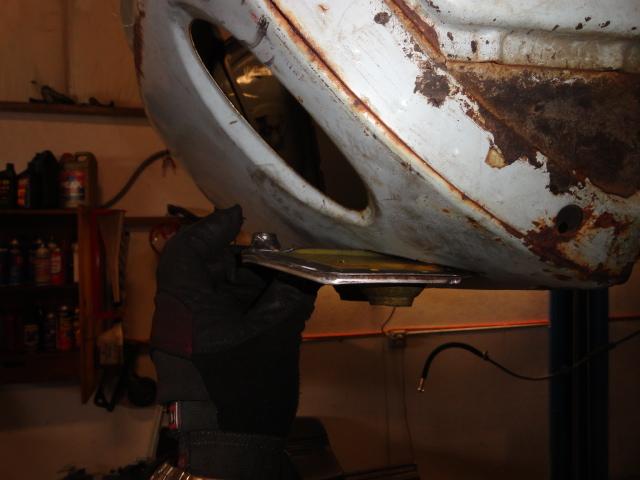
- The clutch cable. The stock one is about a foot too short now and I need a custom-made bowden tube. That should be interesting. . . I'm going to test fit a stock 914 cable assembly just to see how it does. . .
- E-brake cables. Same issues as the clutch but found a company that makes cu$tom e-brake cable$.
- Make new brake lines. This should be a snap.
- Make a custom off-set shift coupler for the trans. Right now the shift rod is above the torsion housing and the trans shift shaft is below it. . .
- Figure out what to do for a shifter. I think I already have this one done, but i don't want to jinx it. . .
- Hook-up the EFI and all the wiring and fuel system.
I lowered it down to see how it's riding and while it looks great, I may raise it up about an inch since it's almost riding on the bump-stops.
Well time to START my Christmas shopping. . . (I do better under pressure) 
Posted by: 3d914 Dec 24 2011, 05:12 PM

Well time to START my Christmas shopping. . . (I do better under pressure)
Very cool wagon. I love sleepers.
What type of heat exchangers are those? This is a 2.0L right?
Posted by: Jakeodoule Dec 24 2011, 05:20 PM
Very nice work Nate!
Posted by: Dr Evil Dec 24 2011, 05:34 PM
WANT!
Mix that with rootwerks lifted monster square 
Posted by: Dr Evil Dec 24 2011, 05:36 PM
Ya know, I see things like this and I want to move next to your shop
Posted by: rick 918-S Dec 24 2011, 05:36 PM
Nice project!
Posted by: aircooledtechguy Dec 24 2011, 08:36 PM
Thanks for the kind words guys. I've had this car for about 8 years in various set-ups but basically stock.
is it i window warper? do the side windows bend open instead of being hinged?
No. Regular hinged type quarters on Squarebacks. The fastbacks had the windows that just bent. . . Freaky!!
What type of heat exchangers are those? This is a 2.0L right?
The H/Es are from a VW 411/412. They are a very basic H/E like our 914 ones. Until I had them ceramic coated, I had been running a set of heavy Bus H/Es. They worked fine but took a long time to heat up the aluminum jacket that is cast around the pipes. These should heat-up within a couple blocks and I save about 20# off the back of the car (this thing is a drift car in the wet
).The motor is a 2.0L out of a 914. I've just added a set of flat-top 96mm P&Cs to bump it up to a 2056cc. With the worn P&Cs it was a lot of fun to spank Honda fart-cars out on the hwy. It pulled really strong. Now with the added CR and size, I should surprise a lot more too.
The car only weighs about 1800# (well more with my big @$$).Posted by: Vacca Rabite Dec 24 2011, 08:58 PM
The T3 Wagons were my favorites of the aircooled VWs. I want to own one some day. I love this build!
Zach
Posted by: Jacob Dec 24 2011, 09:40 PM
Great build! thanks for posting! ![popcorn[1].gif](style_emoticons/default/popcorn[1].gif)
Posted by: PanelBilly Dec 24 2011, 09:53 PM
How about spraying the interior with a bed liner. It would coat everything with a texture and go along with the industrial "hauler" theme
Posted by: smontanaro Dec 25 2011, 08:51 AM
- The clutch cable. The stock one is about a foot too short now and I need a custom-made bowden tube. That should be interesting. . . I'm going to test fit a stock 914 cable assembly just to see how it does. . .
Would a hydraulic clutch be an easier option?
Cool project. I've been looking at Type 3s on The Samba off-and-on for a month or so. (I've owned a couple squarebacks but actually like notchbacks better.) Most of them have been so thoroughly thrashed that I wouldn't even think of buying one. (Maybe there is some parallel non-Samba universe where all the Type 3s are all perfect?)
S
Posted by: Series9 Dec 25 2011, 09:01 AM

I love it. My first car was a Fastback.
Posted by: barada Dec 25 2011, 11:38 AM
Awesome build. I bet some hand drawn logos on it would look really cool. Can't wait for the update.
Phillip
Posted by: rgalla9146 Dec 25 2011, 12:13 PM
Awesome build. I bet some hand drawn logos on it would look really cool. Can't wait for the update.
Phillip
Trans looks like a 915 ... why 923 ? Great ideas and great execution.
Posted by: aircooledtechguy Dec 25 2011, 02:03 PM
[ Trans looks like a 915 ... why 923 ? Great ideas and great execution.
The trans IS a 915, but it's got some unique gearing to compliment the 2.0L-4 cylinder engine and throw-out assembly that is specific to the '76 912E. So as with all the unique 912E parts, Porsche gave it its own "923-series" P/N rather than a 915-series.
Posted by: aircooledtechguy Jan 11 2012, 09:36 PM
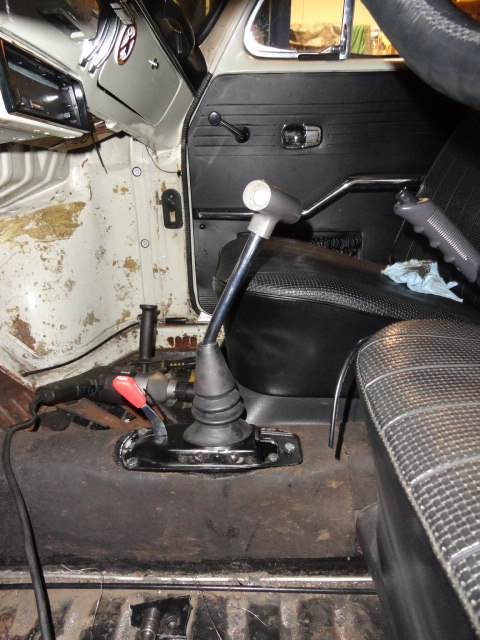
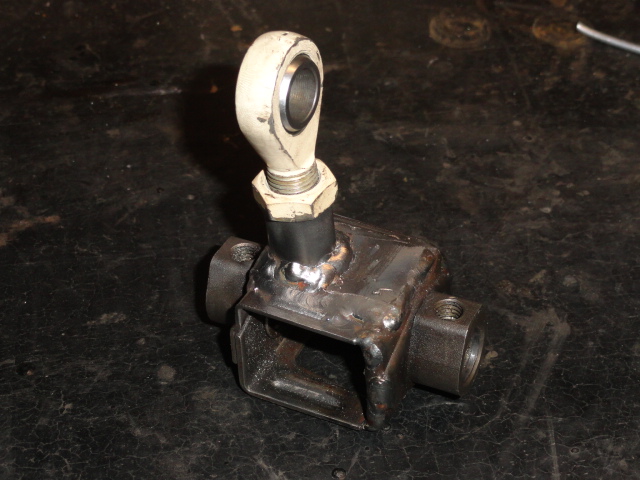
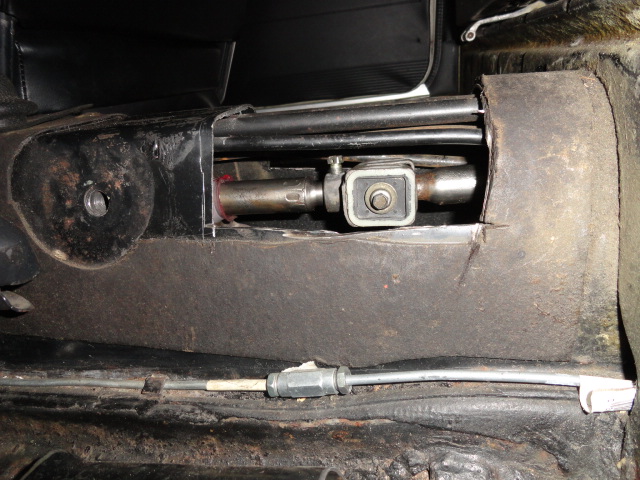
Made some progress this afternoon. Fabbed-up a custom length shift rod from an early beetle shifter. I used and early beetle because the nipple for the shift coupler is exactly the same OD as a stock Porsche coupler. Change to a beetle set-screw and I'm golden. I also fabbed and positioned the rear hanger for the new shift rod. It's going to be a two-piece shift rod using a mix of VW/Porsche/custom/aircraft parts to get it all done.
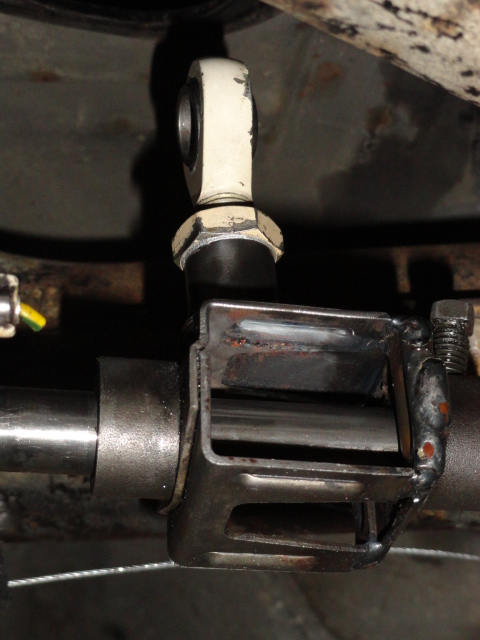
It's a little hard to see with all the cable tunes in the tunnel through the access hole that I cut. I had to first cut a window. Then make a pedestal for the rear hangar and bushing. A stock Porsche shift coupler was used and then robbed the bottom of a late 914 shifter to use as the alignment adjustment for the shifter. If all goes as planned, I should be able to adjust this shifter just like a stock Porsche.
Shot for context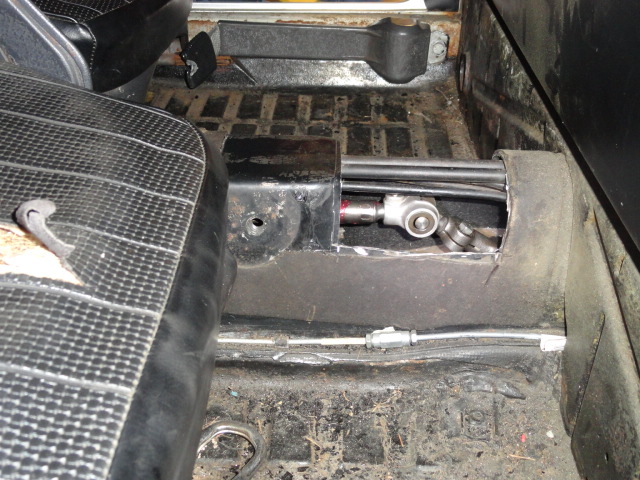
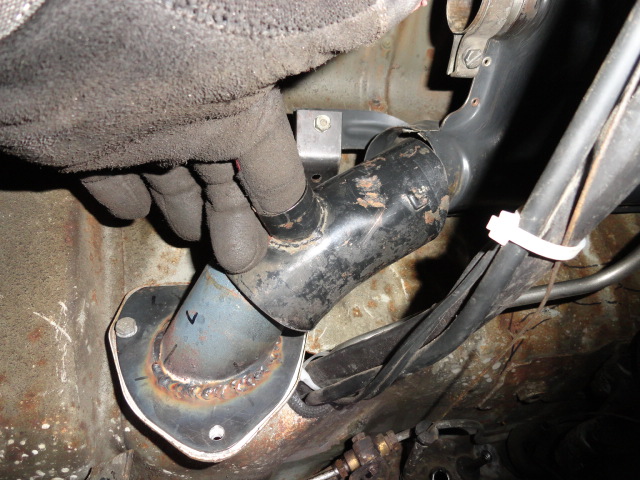
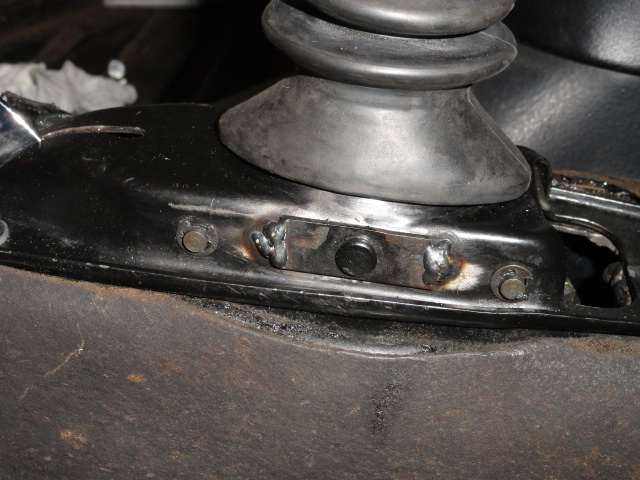
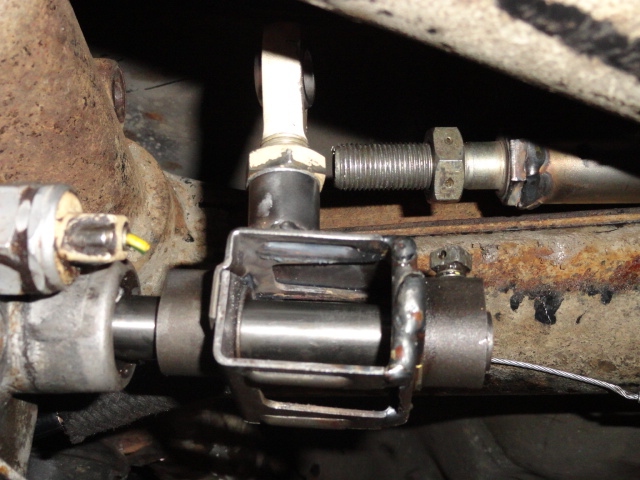
A close-up between the tubes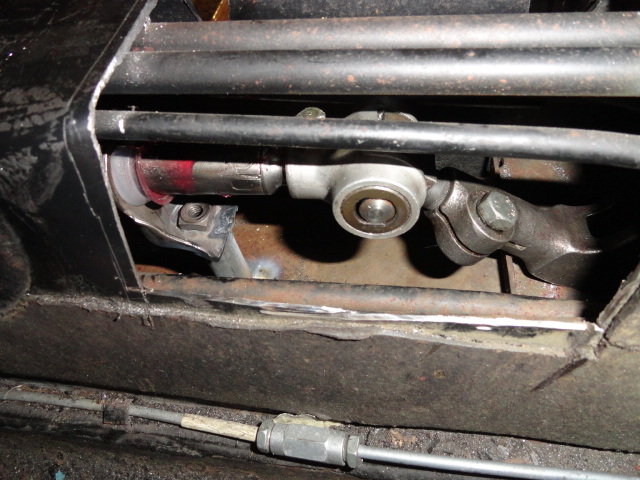
Next is going to be the "S" piece that actually connects to the trans input shaft.
Posted by: plymouth37 Jan 12 2012, 08:51 AM
Great project! I have always loved these, nice work!
Posted by: Root_Werks Jan 12 2012, 10:29 AM
WANT!
Mix that with rootwerks lifted monster square
Don't ever let these two T3's have kids!
Attached image(s)
Posted by: PeeGreen 914 Jan 12 2012, 11:08 AM
This is a very cool SB. I've always liked them and seeing this makes it more so. Can't wait to see what it will be when finished
Posted by: aircooledtechguy Jan 14 2012, 04:56 PM
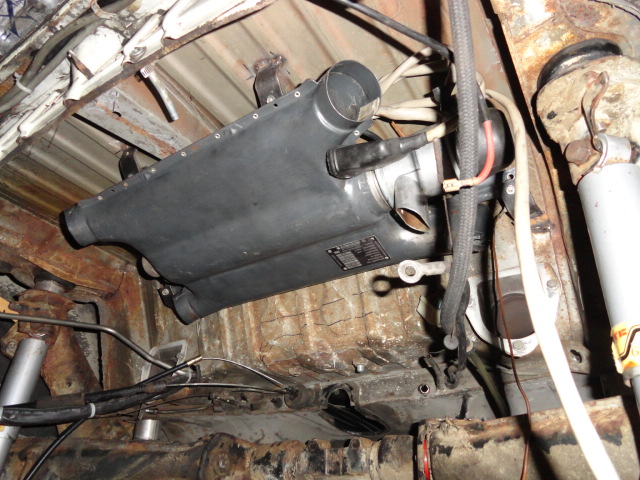
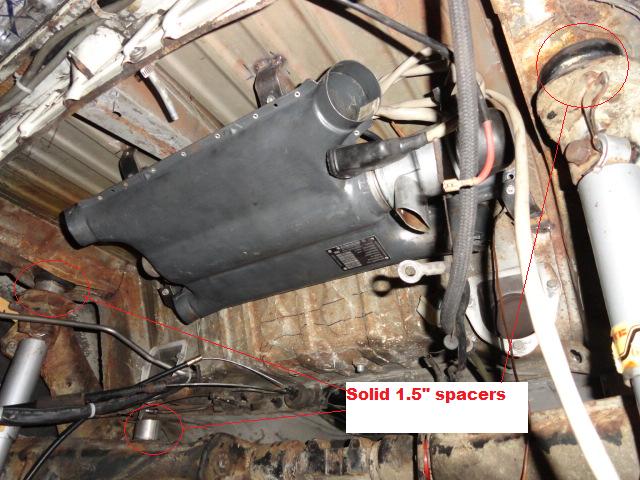
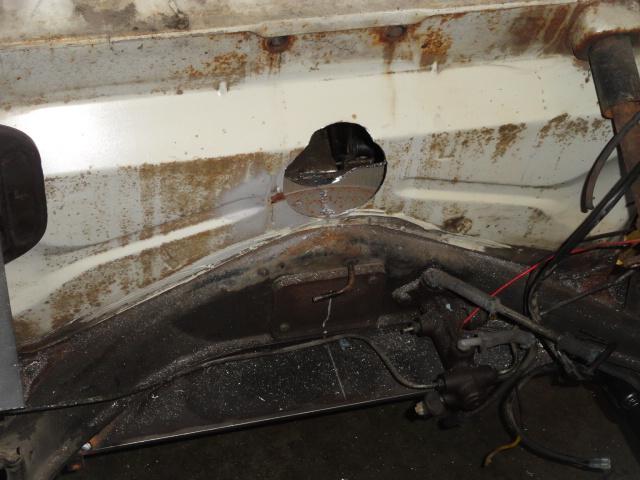
Pulled the motor and trans out to get the last pieces out so they could go to the powder coater. While everything was out, I figured it was as good a time as any to get the Eberspacher BA4 gas heater fitted in it's final location. I ended up mounting this 180 degrees opposite of how it's normally mounted in the 411/412 cars so the air inlets/outlets could be more friendly for the T-3 body. I'm still going to be doing a lot of custom fabrication to get it all running out of the heater and into the body, but I don't think it will be too bad.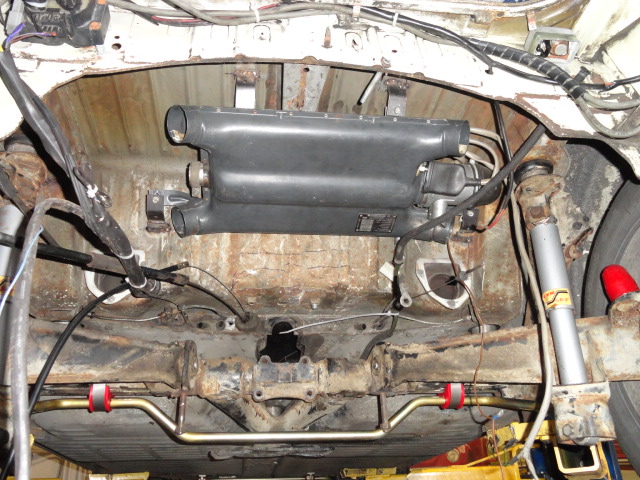
I still need to make an access cover in the cargo floor for servicing the glow plug and the coil but that type of stuff is pretty basic. I also need to decide where to run the wires into the cab under the rear seat and where I will have the relays mounted. Luckily, since I swapped the orientation of the heater, the wires will be on the opposite side of the rear seat area from the Megasquirt, EDIS and O2 sensor wiring.
I temporarily removed the rear suspension so I could cut the access hole for the shift linkage. I also made the final shift linkage piece. Once my rear engine mounts come back from the powder coater, I can get that all finalized. Fingers crossed but I'm confident this time the shifting will be spot-on.
Posted by: aircooledtechguy Jan 17 2012, 12:02 PM
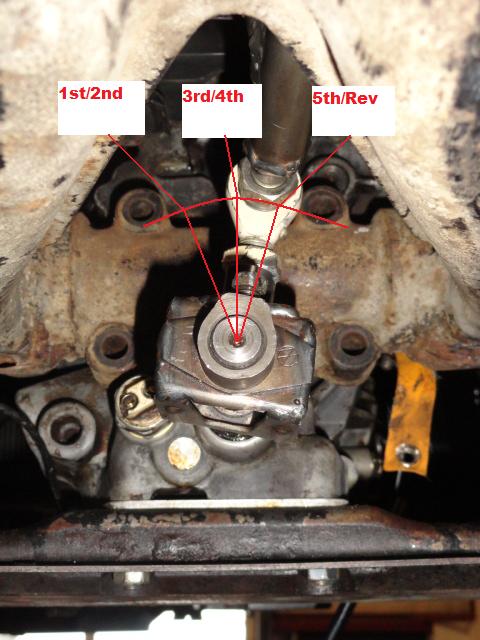
I worked on the shift-shaft and coupling for the Porsche 923 trans yesterday and this morning. After a partial redesign. . .
I now have 5 gears fwd and one in reverse!! I have to do a slight bit of refining of the design, but it is working pretty darned well as it is.
Doing the shifter linkage forced me to re-install the motor/trans into the car. The rear hangars are at the powder coater, so it's all being held in place with a transverse 2X4 across the engine access and ratchet straps. :shock: It works well for mock-up, but I wouldn't want to drive that way.
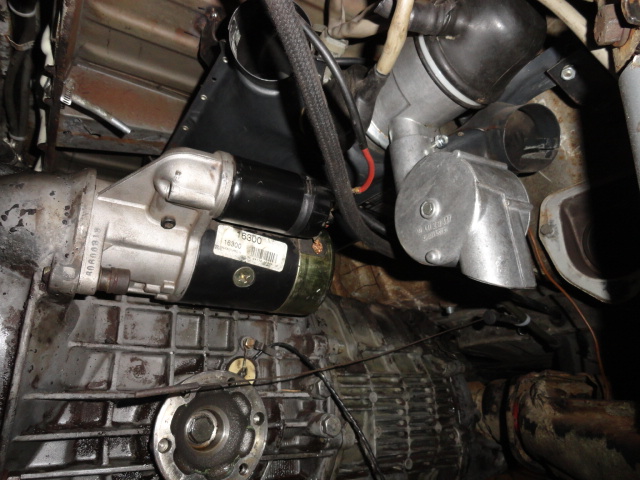
While the motor/trans was in, I had the chance to see how close the BA4 heater is to the starter. . . Got plenty of room; no interference at all with almost 1" of room. So now I can proceed with wiring and ducting into the car and fab an exhaust for it.
Posted by: ChrisNPDrider Jan 17 2012, 03:34 PM
sweet 
Posted by: rdauenhauer Jan 17 2012, 08:46 PM
If the starter is in that close proximity to the heater do you have to shield it to prevent heat soak & no start?
Posted by: aircooledtechguy Jan 18 2012, 02:00 PM
If the starter is in that close proximity to the heater do you have to shield it to prevent heat soak & no start?
It shouldn't be a problem since the 411/412 cars had the heater installed in exactly the same position in relation to the trans/starter. If this becomes an issue though, it's a simple fix.
Posted by: smontanaro Jan 18 2012, 03:21 PM
Interesting. Did that model have some sort of gas/diesel heater option?
Posted by: majkos Jan 18 2012, 08:13 PM
Great thread!
My first car was a '69 SquareBack,
Wood panel over the the windows on inside,Hey this was in the 70's
with the back seat down, 5 inch padding, she was dubbed, "Passion Wagon"
My gas heater was a SW, ( Stewart Warner?)
and mounted in front trunk. funny as hell in winter, exhaust for the heater is piped out the driver front wheel well,smoke coming from front of car.
people always telling me, "your car is on fire..." 
I really dig the rear sway bar. SQ are a "lil" top heavy.
(Rolled in one) 'nuther story
Posted by: rhodyguy Jan 19 2012, 01:14 PM
very cool nate. did you have to mount the fresh air shrould bracket off of the t-3? submit the project to HOT VWS mag. i bet you could sell conversion packages to the t-3 crowd.
k
Posted by: aircooledtechguy Jan 19 2012, 04:35 PM
Awaiting parts on a bunch of stuff, due to all the snow we have around here, so I figured I would make the most of my time.
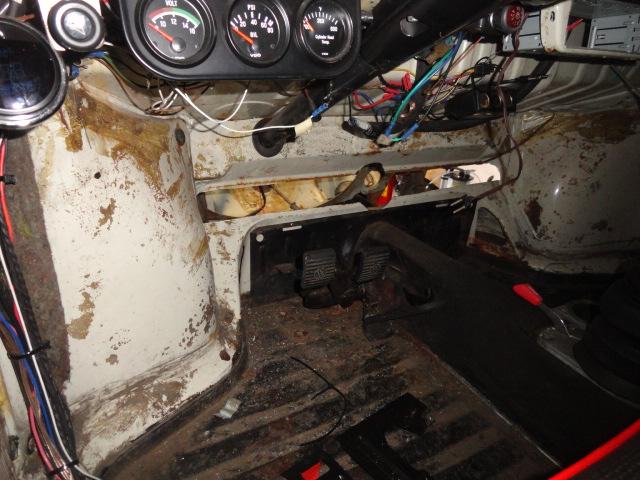
I decided the dash would be my focus. I'm replacing the stock 3 gauges in favor of a pair of Porsche gauges (since they fit so nicely :wink: ) and a VDO tach that I had laying around.
Before: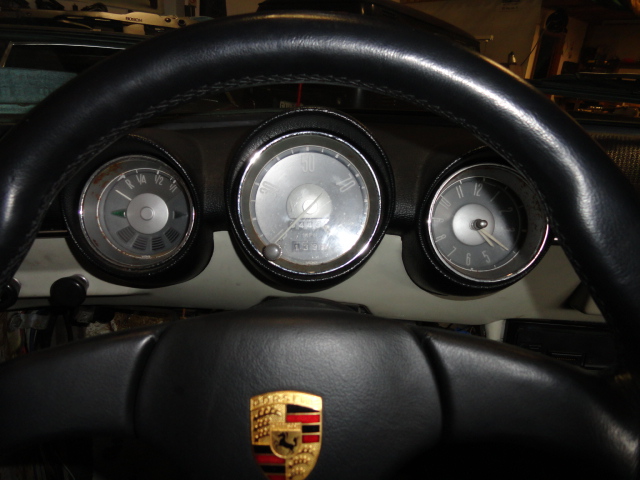
pulled the gauges out and drilled holes in the dash for the new idiot lights since the Porsche gauges I'm installing do not have these. I had to install one for the alternator, oil pressure, high beam and blinker. They turned out pretty good so I don't mind making the cuts.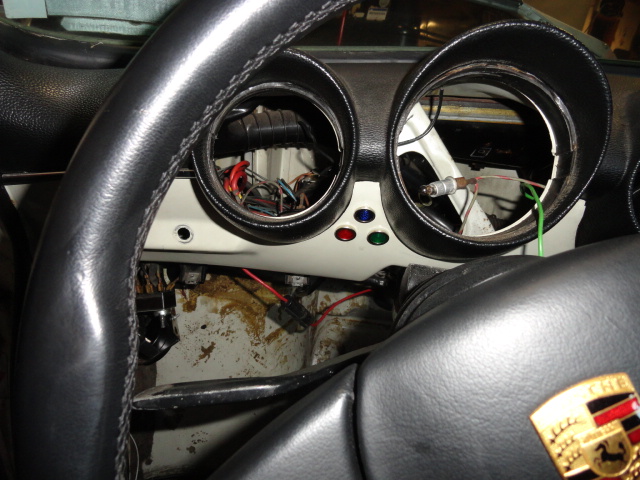
Next I made a custom harness for the gauges so that I could simply plug into the Porsche gauges from the stock harness. I haven't tested the wiring yet, but how hard can a few idiot lights ans senders be, right??  Famous last words. . . I still have wires to run back for the oil temp and speedo pick-up on the trans. I'm planning to run them along with the other gauge wiring when I run the CHT, oil pressure and volt meter.
Finished: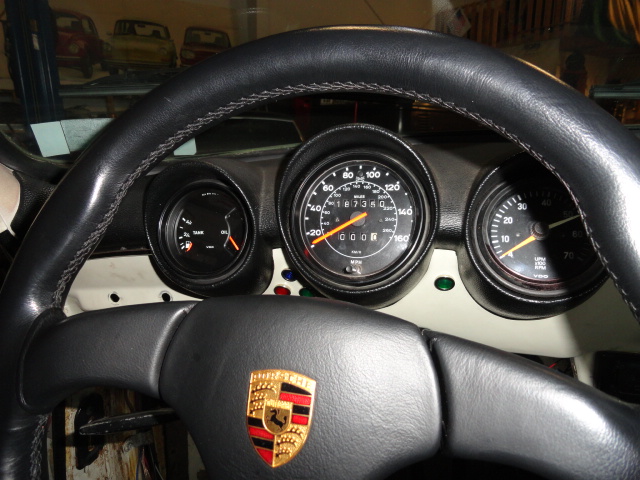
I am probably going to clock the tach so that the entire sweep is within view when the car is driving again. The Porsche 930 wheel is smaller and blocks the view from about the 1-4 o'clock positions.
I also took some shots of the heater with the trans installed. Room-O-Plenty!! I'm going to spend the rest of the day making the adapters for the inlet hoses for the heater to car connections. I really like how the 69 Square with the BA4 had the fan mounted on the air duct. I may have to duplicate that!!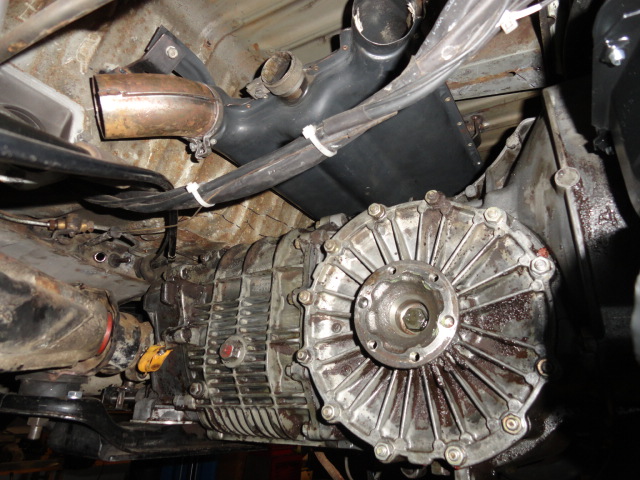
Posted by: zymurgist Jan 19 2012, 05:01 PM
Great thread!
My first car was a '69 SquareBack,
Wood panel over the the windows on inside,Hey this was in the 70's
with the back seat down, 5 inch padding, she was dubbed, "Passion Wagon"
'69.
Passion Wagon.
Giggity.

Posted by: ottox914 Jan 19 2012, 05:14 PM
Just checked this out- awesome project- keep the progress and pics coming!
Posted by: aircooledtechguy Jan 22 2012, 11:09 PM
Saturday I made some progress on the BA4 heater install and the dash gauges.
I spent some time making 3 wiring harnesses; L - BA4 dash switch harness, C - Speedo trans pick-up harness, and R - engine gauges harness (tach, oil temp/pressure and volt). I ran out of shrink-tube, so I'll have to finish these later in the week or next weekend.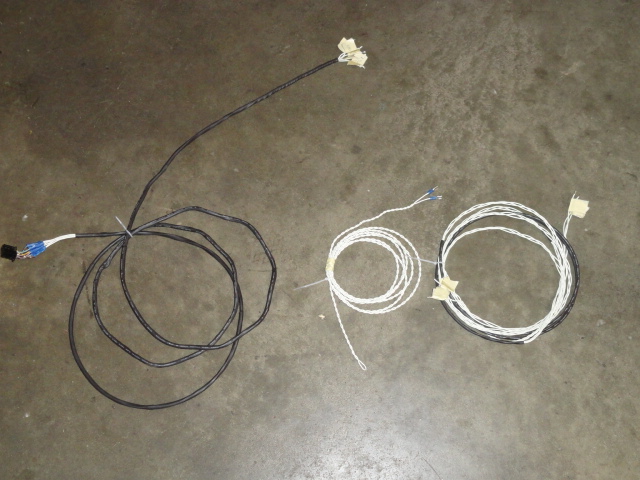
Next I made a pair of these body adapters for the inlet air from the heater. I also modified a factory mount for the BA4 outlet air temp sensor to fit. This will be held with flex tube or possibly silicone stubs. It fits better than it appears to in the photo. 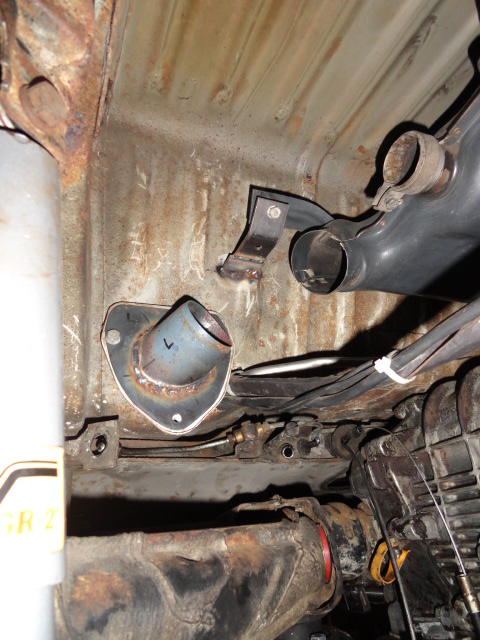
Finally, I installed the relay and safety switch in the car under the rear seat on the passenger side. I'm quickly running out of room for more wires under the back seat. :wink: 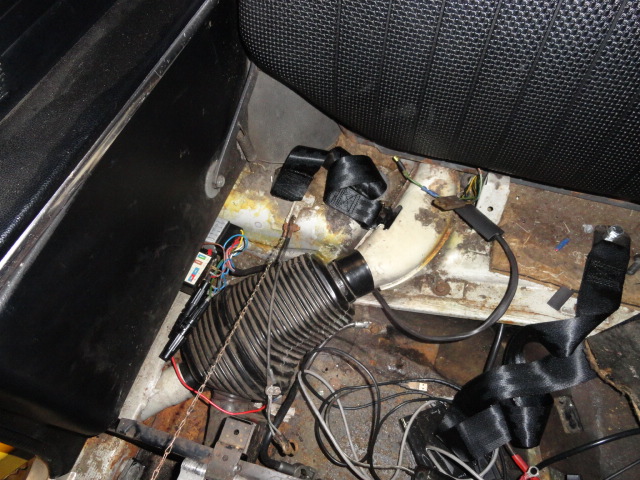
Posted by: Prospectfarms Feb 14 2012, 08:37 AM
...The H/Es are from a VW 411/412. They are a very basic H/E like our 914 ones. Until I had them ceramic coated, I had been running a set of heavy Bus H/Es. They worked fine but took a long time to heat up the aluminum jacket that is cast around the pipes. These should heat-up within a couple blocks and I save about 20# off the back of the car (this thing is a drift car in the wet
)Aircooledtechguy
Very interesting thread with nice photo's, thanks.
The BA/BN heaters work so well I wonder if you've considered bypassing the H/E, like a '73 type 181? The combo seems like overkill in everything except a bus. Maybe off the shelf header's are not available and/or you feel H/E's are needed as a heat shield for the exhaust.
Thanks again for the write up.
Posted by: aircooledtechguy Feb 16 2012, 11:17 PM
A few days ago I got my custom clutch cable from the cable maker. . . I had them add 17.5" to a stock 912E cable assembly (well actually they made an entirely new cable and just reused the stock bowden tube). It looks just like stock but ended up being just a bit too long (D'oh)!!  Well, for now, I made a simple spacer to go between the end of the bowden tube and the trans and I'm able to get full motion form the clutch and it feels like a stock clutch!! When everything else is done, I'm going to have another cable made a total of 16" longer than stock and that should be PERFECT. The custom cable was surprisingly cheap!!
This is the pedal end of the cable using the Porsche clevis and pin in the stock VW pedal hook.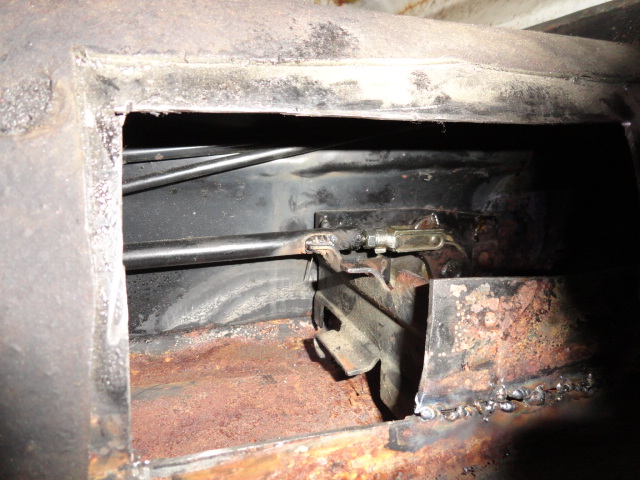
Here the Porsche 912E clutch cable bowden tube fits like stock in a type-3. (note my 1" extension for the bowden tube just before the trans case)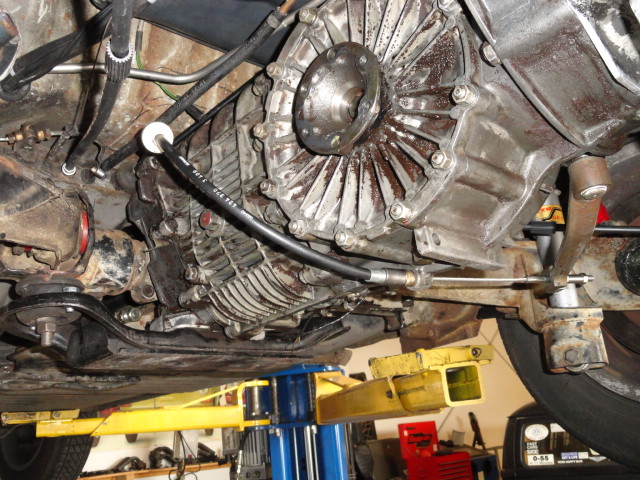
Posted by: Root_Werks Feb 17 2012, 12:45 PM
Dang Nate, you are an animal! Keep up the great work.
Do you work on Exhausts? I should bring my Puma up so you can correct a couple of little things for me.
Posted by: strawman Feb 18 2012, 10:51 PM
Been watching this thread closely, as I've always loved Squarebacks and I owned a '66 VW Fastback in college. In fact, when my parents couldn't pay my hospital birth costs, they sold their Euro '54 Bug -- so I've got VW in my blood.
Anyway, today I finally convinced my wife's friend to let go of her beloved (and neglected) 1969 Squareback for $200. It has been sitting since October 2005, and it is mostly straight with very little rust in the typical places -- under one headlight bucket, the battery tray, and along the bottom of one front fender. I've got a receipt for an engine rebuild 12k miles ago in 2001, and it has been converted to stock VW dual carbs. Like my 914 project when I got it, it is covered in moss and cobwebs. 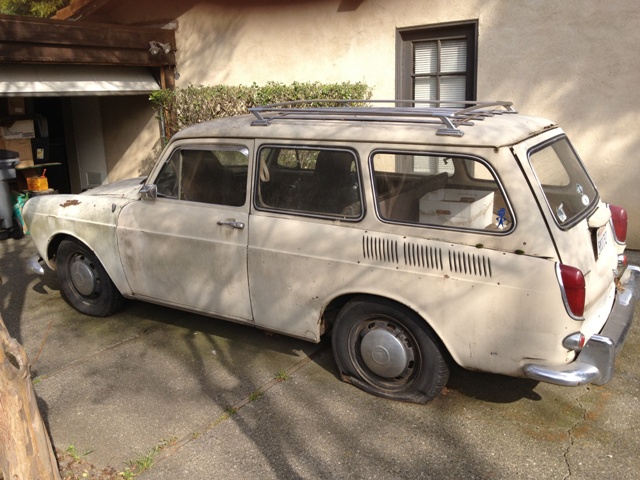
Cheers!
Geoff
Posted by: arkitect Feb 18 2012, 11:39 PM
Been watching this thread closely, as I've always loved Squarebacks and I owned a '66 VW Fastback in college. In fact, when my parents couldn't pay my hospital birth costs, they sold their Euro '54 Bug -- so I've got VW in blood.
Anyway, today I finally convinced my wife's friend to let go of her beloved (and neglected) 1969 Squareback for $200. It has been sitting since October 2005, and it is mostly straight with very little rust in the typical places -- under one headlight bucket, the battery tray, and along the bottom of one front fender. I've got a receipt for an engine rebuild 12k miles ago in 2001, and it has been converted to stock VW dual carbs. Like my 914 project when I got it, it is covered in moss and cobwebs.
Cheers!
Geoff
Geoff,
Cool new project. How is your 914 going, running yet? Probably no time with your move.
Dave
Posted by: aircooledtechguy Feb 20 2012, 06:30 PM
Congrats on the new project Geoff!! That's a score!!
Posted by: Bleyseng Feb 21 2012, 05:10 AM
Great project and good to see how you modernized it so it should be a great DD.
I had a 64 1500S that I loved and looked just like this beautiful one with the SW front trunk gas heater. Also had a 69 Fastback that was a great DD.
Attached image(s)
Posted by: aircooledtechguy Feb 29 2012, 12:45 PM
So over the past several weekends I have been working to make the Porsche 912E (923/915 series) 5-speed fit and work like a stock trans in my Squareback. I have now finished the fabrication and I am please to say that it works and works well. It feels and looks like it belongs in the car. Aesthetically, it’s pure Porsche and I’m really pleased with the result.
Some of the challenges I’ve had to deal with or over come were:
- The height if the transmission case (at the nosecone)
- Connecting the trans to the stub axles (Porsche inners/VW outers)
- Choosing a shifter that will work
- Modifying a shifter to work
- Modify the tunnel for the shifter to fit (honestly, it’s not nearly as bad on a T-3)
- Designing shift linkage (linkage that will compensate for an un-parallel trans shift shaft)
We’ll discuss these in order. . .
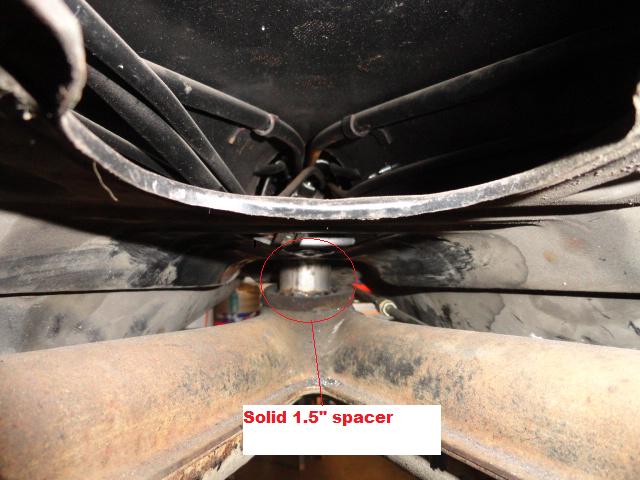
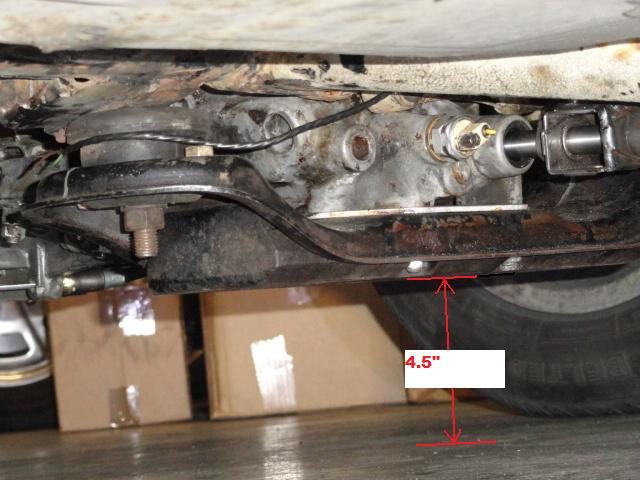
Since the height of the trans at the nose cone was WAY taller than the stock T-1 trans, most times, as a fabricator you would simply add a pocket to the area under the seat and be done with it. However this is not an option with a Squareback (well at least if you still want to fold the rear seat flat like stock). So instead of moving the body up with a pocket, I had to move the mount down. Not wanting to have a trans nose hanging super low, I opted to lower the entire rear suspension sub-frame 1.5” (which effectively raised the rear of the car 1.5”). I had to make 5 custom spacers to pull this off and then also re-adjusted the height of the car with adjustable spring plates. Now, the lowest point on the car is the factory Porsche skid plate for the trans mount and it’s an acceptable 4.5”. Actual trans and engine is a full 6”+. 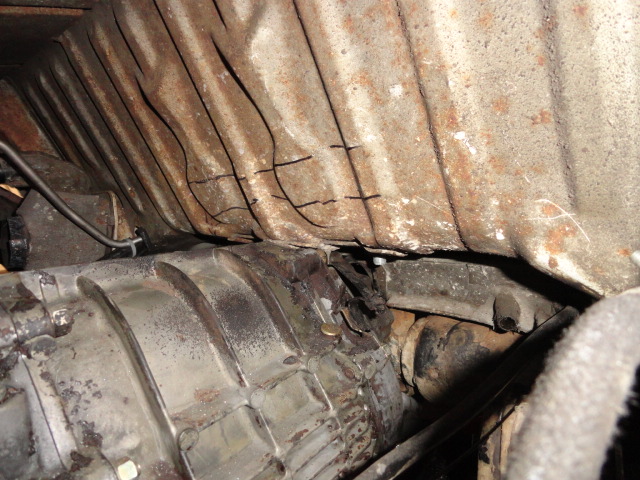
Once the trans was physically in place I had to figure out what CV/Axle arrangement to use. The 923 trans has output CV flanges that fit 911 CV joints. However I found that the output flanges are the course spline type just like a 914 (woohoo!!). I have a bumper-crop of 914 CV flanges around here, so I simply bolted a set to the trans, used stock Beetle axles with 914 CVs on the inner side and they bolt up as stock!!
When it came to shifters, I used 3 different ones before I ended-up with the one I like and worked. I did 90% of my mock-up using a slightly modified Superior Formula Vee (VW) shifter and honestly it worked great except that the shift pattern ended up being backwards due to the linkage arrangement. So that also precluded the use of a stock Porsche 911 shifter either early or the late 915 style since they all move the shift rod in the tunnel opposite of the shift handle. Normally that’s not a problem, but my shift linkage flips the movement at the trans so I had to use a shifter that would move the shift rod with the handle. My solution was a ’73-’76 Porsche 914 unit. 
I did have to modify the shifter slightly so that the spring lock-out for Reverse/1st (for the 901 shift pattern) was flipped to the other side and correct for 5th/Reverse (for the 923/915 shift pattern) This was accomplished by first removing the springs and plate. Then I drilled out the welds for the alignment pin plate. Then I had to drill a new hole on the opposite side for the alignment pin plate and finally rosette welded the plate back to the other side. Viola!! A Porsche 914/923/915 shifter with correct 5th/rev lock-out.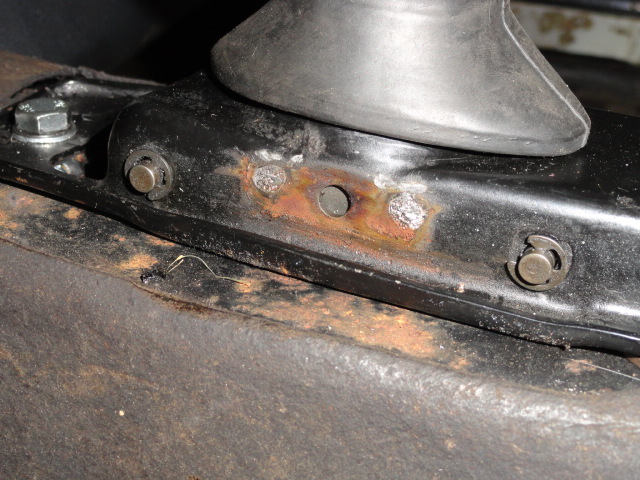
Modifying the tunnel was pretty straightforward. On a T-3 the tunnel is wider and the shifter is more centered than a beetle. So I just needed to enlarge the center hole and mark/drill the three mount holes. I made simple nut plates out of flat stock and 8x1.25mm nuts and then welded them to the under-side of the tunnel. As a bonus to using a Porsche shifter, I was able to mount a stock Porsche 914 heater lever in the nose of the shifter for my gas heater. It won’t actuate a cable, but it will be wired as the ground for the gas heater and heater fan. It gives the look though of an early 911 shifter w/ the factory enrichment lever!!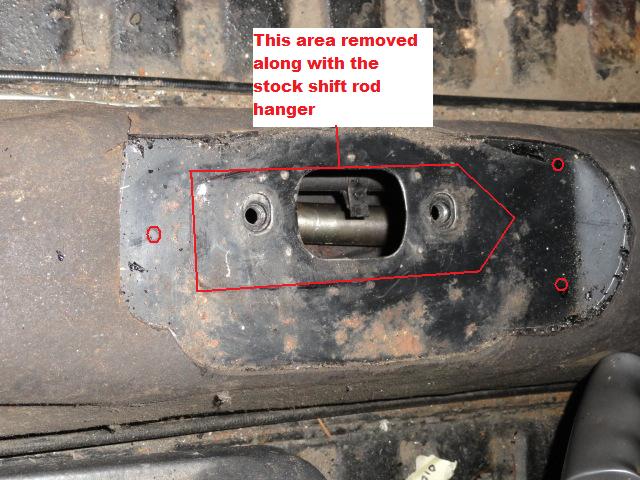
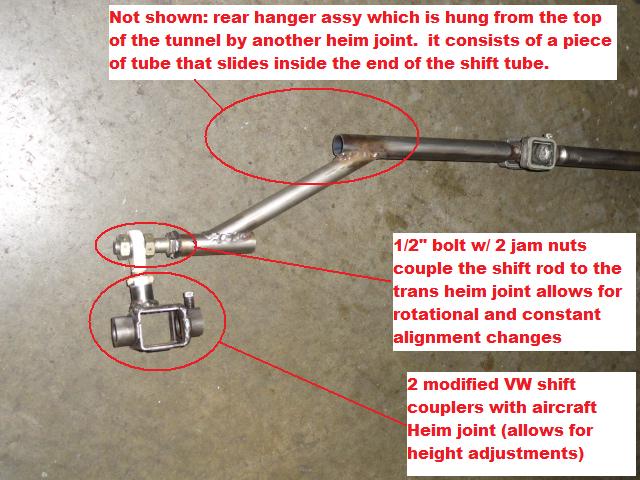
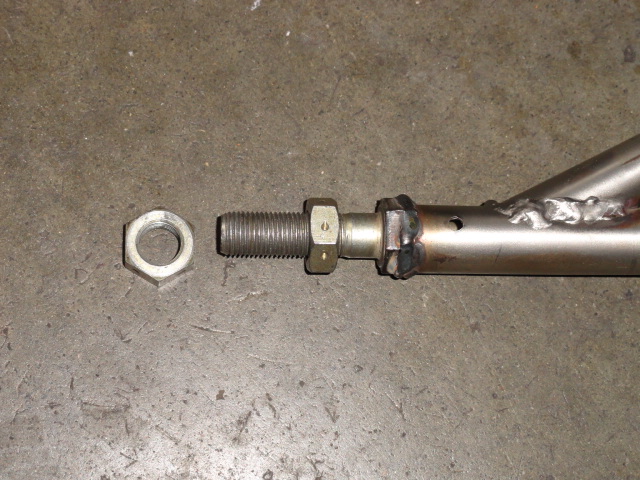
Designing the shift linkage was in a word, CHALLENGING!! Part of lowering the rear suspension was that if I lowered it straight down, not only would I have room for the trans nose cone, but an side effect was that the exhaust would also be showing more AND my intake air bellows would now not fit. So I had to mount it tilting down in front. What this did was disrupt the parallel plane between the shift linkage in the tunnel and the shift shaft at the nose of the trans (the trans was tilted about 10 degrees down). This caused stiction as you shifted. I had about a 6” drop and a 10 degree down angle to overcome. My design incorporated two, ½” heim joints to allow for movement at increasing angles without stiction. This linkage was redesigned and remade about 4-5 times before I had solved all the issues that came-up. You can now see why the stock style shifter caused the shift pattern to be flopped and why I had to go with a late 914 side-shift shifter to get the shifting back to normal. I’m really happy with the result. Shifting is positive and it’s infinitely adjustable
Rather than describe it, below are some photos to show exactly how it’s made.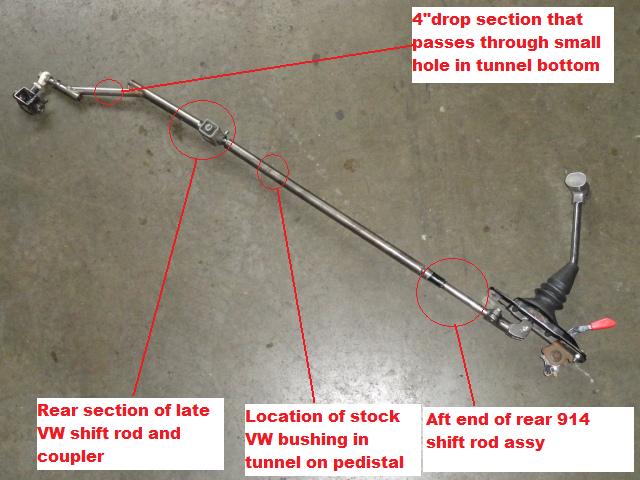
Posted by: Irish914 Feb 29 2012, 02:46 PM
great project looks like lots of fun
Posted by: veltror Feb 29 2012, 02:54 PM
I do like this...
Posted by: Prospectfarms Mar 1 2012, 12:31 AM
Fascinating, but the difficulty of fabricating the new shift linkage made my head hurt. Will the custom mount of the transmission change the effective lube level of fluid coverage in the sump? Will part of the gearbox ever become fluid starved?
(BTW, I've often visited Nate's Aircooled webpage for some tidbit of info and similarly interesting how-to's. Now here you are. Thanks. (The link is in his signature)
Posted by: aircooledtechguy Mar 20 2012, 12:00 AM
Been spending my Saturdays of late, wrapping up all the small details that come with the new 5-speed, the rear brakes the gas heater and all the wiring-in of all the various components. Whew, there's a lot of little stuff that takes a lot of time.
I made one change to the brakes. I had planned on running stock 914 calipers in the back so as to retain my stock e-brake. The issue I had was the cable routing since my brake calipers had to be on the rear of the trailing arm, the cables would end up being very close to the axles/CVs. So I traded them out for 912E calipers that I had. Fit like a glove!! But now i don't have en e-brake. Perusing eBay I came across a really simple hydraulic e-brake set-up used by drift cars guys. . . I pulled the trigger on it and now I'm going to have an fully functional hydraulic e-brake!! 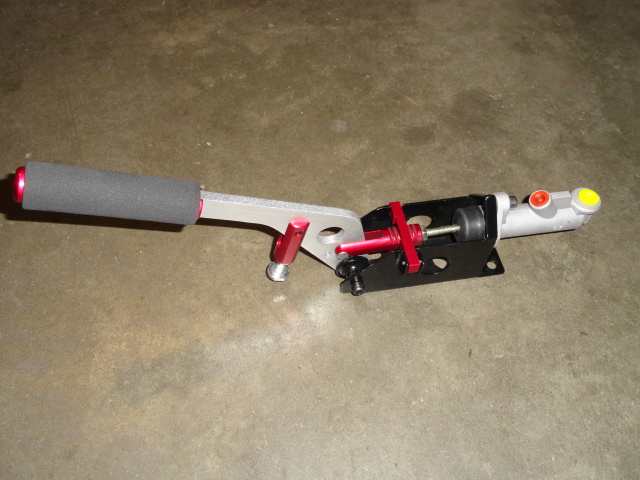
I've also made a few purchases that will add to the creature comforts. Updating this older car with modern car amenities is also a goal of the project. I've never owned an air-cooled car with cruise control, so I picked-up a Dakota Digital fully digital cruise system. It uses no vacuum off the motor, and I'll be able to stuff the module under my rear seat (like every other bit of electronics). Every day, I pass through several highly patrolled speed traps so I'm looking forward to the added piece of mind cruise control provides (especially with a car that really moves).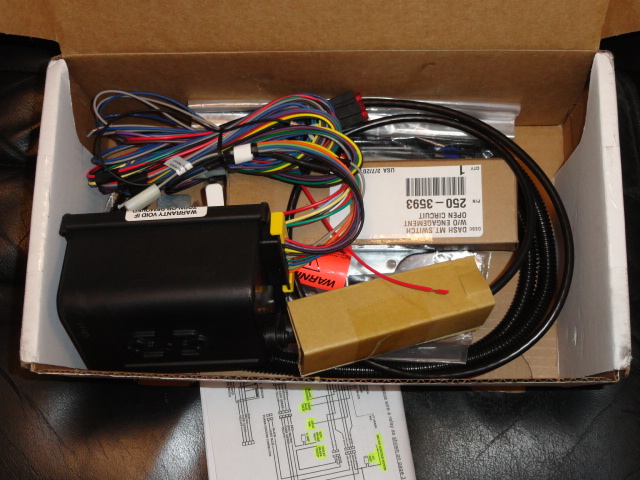
I got this little jewel from Zach (Vacca Rabite) so I'll be rolling this cool 917 replica shift knob. It feels sooooooo nice in my hand (cool in summer, warm in winter) and the finish is simply un-believable. It's actually finished with about 20 thin layers of super glue(!) and polished to a mirror finish. It simply must be seen to be appreciated fully.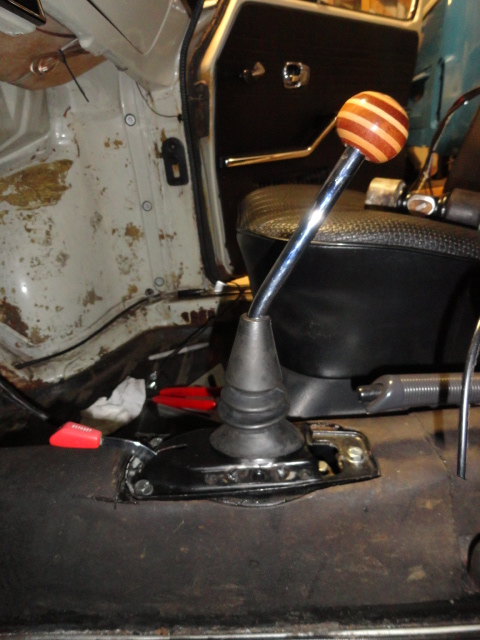
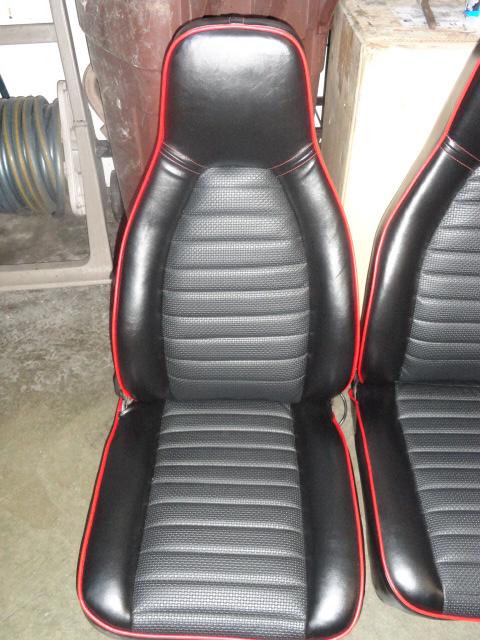
I also picked-up a pair of mid-70s/early 80s Porsche 911 seats off Craigslist super cheap. While I'm not a fan of high-backs, they are a lot safer. They also have bolstering top and bottom so I won't be sliding off the seat while cornering like I do in the stock, flat, low-backs. I'm having these recovered in black vinyl w/ stock black VW basket weave in the centers. Before the covers go on though, I also opted for seat heaters for both seats. I've never had a car with that option, so I figured, what the hell!! 8) 
Posted by: rhodyguy Mar 20 2012, 10:36 AM
heat exchangers, gas fired heater, heated seats...you moving to the south pole?
Posted by: aircooledtechguy Mar 20 2012, 01:21 PM
heat exchangers, gas fired heater, heated seats...you moving to the south pole?
My wife always complains about my cars being cold.
 I'm putting an end to that right here.
Posted by: aircooledtechguy Apr 16 2012, 06:38 PM
Been sewing up details on the shop-car over the past few weekends. Finally got them all finished and can officially close out phase-3 
Fired the motor up and did some gear checks. Found all five so that''s good. Then out of the blue, my alternator let the magic smoke out Luckily I have some spares around here (and it's easier to change than on the teener).
I could have this beast prowling the back-roads by tomorrow afternoon. . .
I've decided that this is as far as I will take things this year. The front-end swap is as ambitious an undertaking as the 5-speed and also includes a power brake upgrade, so knowing how much I will actually have to dedicate to this during the busy months here at the shop it will be put on hold until next winter. I want to be able to drive and enjoy it for the upcoming show season and only do fine-tuning to the current set-up.
I will be going ahead with custom widened wheels and tires though and adding in my 911 seats when the upholsterer gets them finished in a week or so. I also may fabricate a custom center console so I can move my gauges in there permanently. If I do, I'll probably wire-in the cruise control at that time.
I do plan to have the MS2 re-tuned for the added displacement and CR when I upgraded from the stock U.S. spec 94s to the flat-top 96s.
I know some have been interested in the gearing and what it would translate MPH = RPMs The preliminary tests on the gearing for the 923 (912E) trans are as follows (as indicated by the speed sensor in the trans and indicated by the 912E dash gauge I have installed and wired into the car)(RPMs are rounded):
In 5th gear
40mph = 1700rpms
50mph = 2200rpms
60mph = 2600rpms
70mph = 3100rpms
80mph = 3600rpms
90mph = 4000rpms
I didn't feel real comfortable running it faster than that on my lift in the shop with the tires only an inch or so off the ground. I may have to wire in that cruise control sooner than later. . . 
Posted by: aircooledtechguy Apr 19 2012, 10:08 PM
So I've logged about 60 miles on the Square since getting the 5-speed installed and I LOVE it. Cruising down the hwy, I have less engine noise and we'll see about the fuel mileage when I get the bugs out of the speedo (needle sometimes works flawlesly; other times not at all).
Some things that I definitely need to do to make it a solid driver are:
- rear-end alignment. I can tell it's out. It drives perfectly straight, but becomes a little "twichy" as speed increases. It's O.K. below 55-60, but the couple times I sprinted to 85-90, it was beginning to feel dicey. Don't want to crack this thing up because of a simple alignment issue. . .
- I need to replace my rear axle bearings. Probably should have done that during mock-up, but i didn't think of it.
- Rear brakes slightly drag. I may need to do my Porsche brake MC upgrade sooner than later. . .
- I need to get the wider tires on this before I even attempt another high-speed run over 80mph!! The 155R15s(!) that are currently mounted are wholly insufficient for anything other than drifting (which is quite fun BTW), and don't add to the stability in or out of corners.
- The speedo works only about 1/3 of the time. I'll have to investigate that. I may just have a wire that is grounding on the back (they are really close to the chassis).
- The lights for high beam, park lights and blinkers don't work or don't work correctly. I just LOVE wiring. . .
- My oil pressure gauge is not reading right. I may have the wrong sender. I also need to re-wire all the grounds for my gauges. I daisy-chained a few of the grounds together for simplicity of wiring and I think they are insufficient so some weirdness is going on.
Other than the alignment problem, the axle bearings and the brakes, the rest is more convenience stuff that I will just have to get sorted as time allows.
The ugly and unassuming "Squarsche Type-3/P SS" (Super Sleeper) is now mobile and prowling the roads for winged H*nda f@rt-cars to embarrass and demean publicly.
Posted by: kg6dxn Apr 19 2012, 10:26 PM
I run one of those hydraulic brakes. It will loose pressure as the fluid cools. Not great for hills. It will hold on my steep driveway for a few hours, just not over night. If I wait until the fluid cools and press the brake pedal (under the dash), it will hold over night. Works great on flat ground to hold the car from moving.
Great thread btw. I had a 66 & 67 fastback. loved those cars. Still have a set of dual carbs for it. Now I need a T3 to put them on...
Posted by: aircooledtechguy Jun 20 2012, 02:55 PM
As I log more and more miles onto my shop car, I have found that I miss the larger 15 gallon tank on my 914. I drive 40 miles round trip a day minimum and find that because of that, I need to fill up before the weekend if I fill it on Monday. Also, the Porsche 911 fuel gauge works on a slightly different oHms range so when full, it only read about 7/8 full. Currently I'm getting around 27mpg in mixed driving. So I decided to do something about the lack of range and the incompatible sender.
I have had a spare tank for years, so I carefully cut it with a cutting wheel (after ensuring there were no old fuel fumes present) and cut off the original filler neck. This is the tank "on the half shell"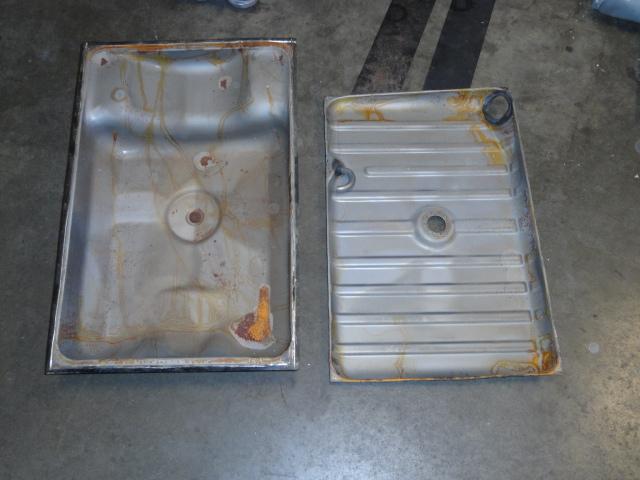
I added 2 "L" shaped pieces that were 4.5" tall into place and welded them into place.
After everything was fully welded, I placed the top back on and welded that into place. Then I brazed a custom filler that will fit below the hood like stock. I also brazed in a fuel return nipple to the bottom as well so the plumbing can finally be correct for the MS2.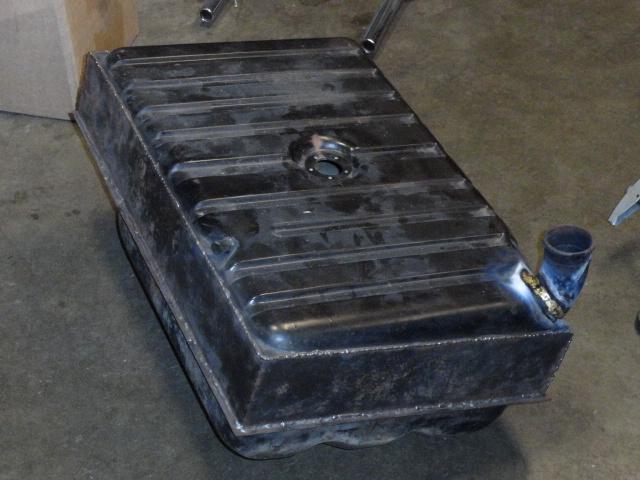
Now I need to coat it with POR-15 tank resin to ensure the rusted areas are stopped AND to ensure that if there are any small pin-holes in the welds, they will be permanently sealed. Then a black paint job and undercoating to make the outside look the part.
I should also mention that another reason for this was to better balance the car and up the weight a bit over the front wheels for better cornering (she pushes a bit in the corners like my 914 does when the tank gets below 1/2 full). I will be giving up a good portion of my frunk, but it's a Square, so room for crap is no big deal and I never really used the frunk anyway.
Posted by: Jamie Jun 20 2012, 08:00 PM
Dangit, the guy can even make a custom fuel tank! This has been a very interesting project to follow, and I bow to a great craftsman. As a retired photographer I'm appreciative of the excellent images made in some awkward positions. I'm constantly amazed by the projects that some 'teener gearheads will tackle when they have the skills and tools to get 'er done. 
Posted by: Jakeodoule Jun 20 2012, 09:15 PM
Nice work Nate! really cool ride!
Posted by: aircooledtechguy Jul 9 2012, 04:37 PM
Thanks for the kind words guys; it's been a really fun project so far. . .
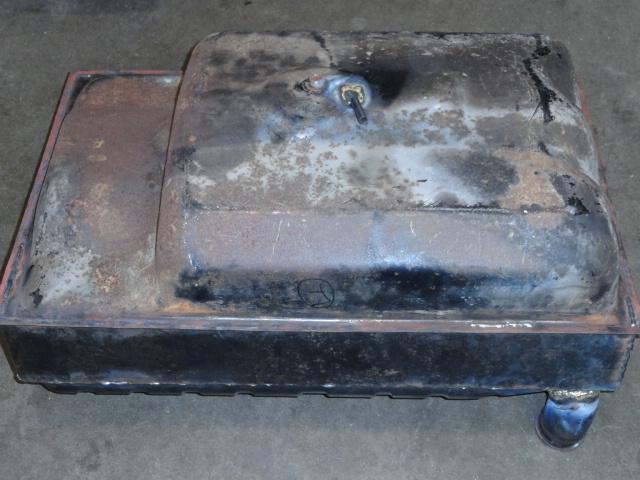
Last Friday, I cleaned and treated the new tank with POR-15 tank treatment to seal and treat the rust and any minor pin holes that may have been present after all the welding. It has to cure for a full 4 days afterwords, so on Saturday, I painted it and under coated the bottom, added a new fuel sock screen and a new petcock.
Today was the swap-out day. I had to remove the breather tube and do some minor surgery to it to make it fit the new height so a low point was not created and block proper breathing.
Before: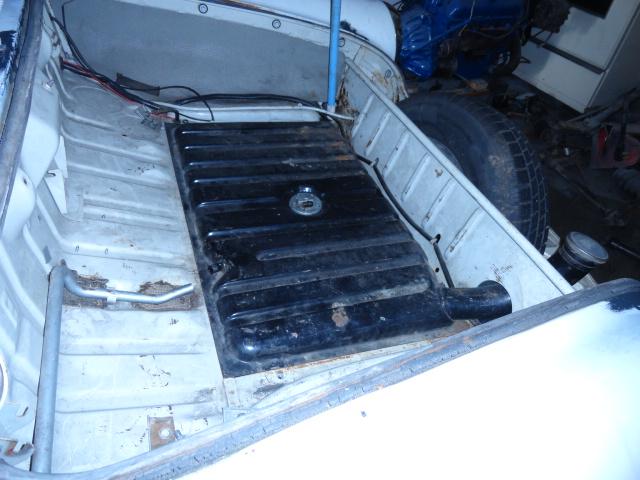
After: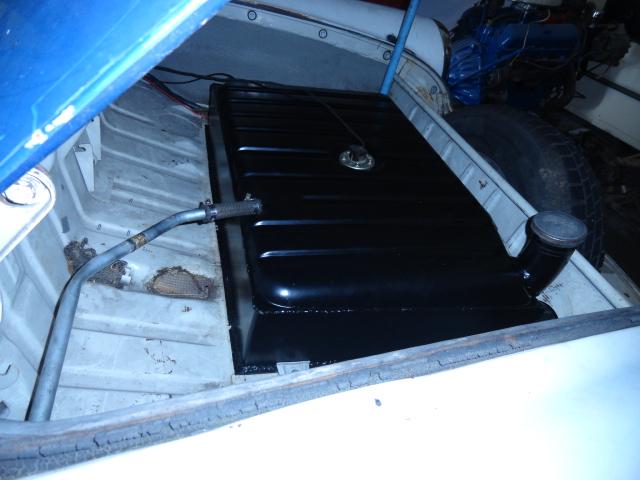
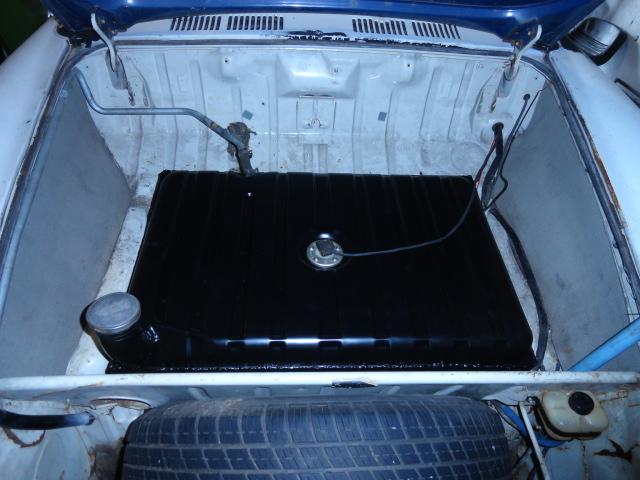
I added 2 gallons from a can I had, then proceeded 1 mile away to the filling station where I proceeded to top it off with an additional 17.2 gallons. I was expecting somewhere around 17 gallons total, so i was a bit surprised when the total ended up being 19.2!!.
No leaks (whew!) due to the POR-15 sealer I'm sure. As was expected, the car has a heavier feel at the wheel at slow speeds due to the added weight right over the front wheels, but it's not excessive and the added weight where I need it going into a corner will be welcomed. I plan to auto-X this car and hopefully use it on an occasional track day.
I did get around to putting the car on a vacant truck scale this weekend (before the tank swap). It weighs 2200# total with just over 800 on the front axle and 1400 over the rear axle. I'm going to have to check it again now that I have made this significant change to the bias. Even though the rear is significantly heavier, it doesn't act that way. I think the wider slightly cambered tires and the rear sway bar help a lot with it sticking. But I also suspect that lowering the center of gravity (by lowering the motor and trans in relation to the body to get it all to fit), has really made the biggest difference. This may sound far fetched, but I believe that this thing may be able to keep up with my Porsche 914 on a twisty road; no problem. It feels that firm in the corners. Once I get my new seats installed, I'll really be able to lean on it in the corners without feeling like I'll be flung out of the seat.
Speaking of new seats. . .
Got my Porsche 911 seats back from the upholstery shop this morning. I’m lovin’ how they turned out. We used stock VW black basket weave for the inserts so they look more at home in the VW. Then I chose red welting and stitching to accent the black. The car will be painted hot rod black with red pin stripping so these should accent the final look really well. I do like the clean look of the stock, low-backs, but these are safer and if I kept the low-backs I would never be able to get it the car onto a race track in the future.
I had seat heaters installed so this winter my wife should be comfy and I should hear no complaints.
Before:
After: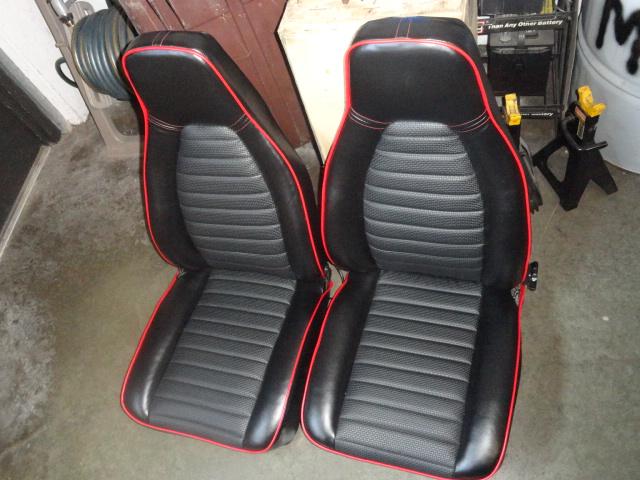
Posted by: Mr.242 Jul 9 2012, 09:07 PM
ARE you fricken kidding me? Nate...you've been hiding your talents way too long.
Nice work and you da man!
Posted by: aircooledtechguy Jul 11 2012, 06:08 PM
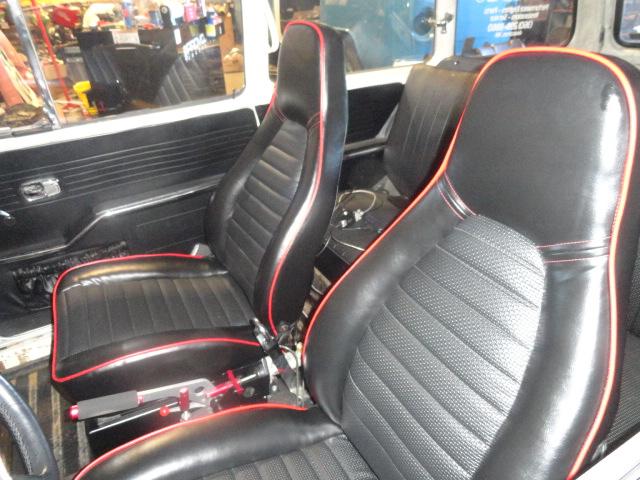
I finally got the chance to install the new seats. Man are they comfy!! My seating position is a lot better and they are mounted about 1 inch lower than the stock seats. This helps the viewing of my gauges and lowers my center of gravity (which can't be a bad thing since I'm a big guy).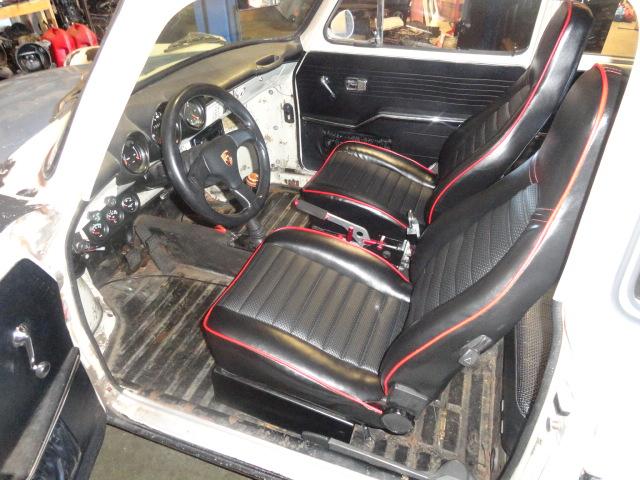
Posted by: rdauenhauer Jul 12 2012, 08:39 AM
Posted by: Tom Jul 12 2012, 08:53 AM
Nice work Nate. What a cool shop car! Would putting baffles in the tank help with weight transfer left to right?
Tom
Posted by: OU8AVW Jul 12 2012, 09:12 AM
Awesome! Simply Awesome!
Posted by: aircooledtechguy Jul 12 2012, 04:01 PM
Would putting baffles in the tank help with weight transfer left to right?
Yeah, it most definitely would. Actually, I meant to add a set into the lower half of the tank to keep fuel from sloshing away from the p/u tube, but in my haste to get-r-done, I totally forgot until I was on my last 6" of welding. . .
I may end up having to make another tank anyway due to the front-end swap that's in the future, so I might have to re-visit this all over again anyway. If I do have to make another tank, I want it to be aluminum and fully baffled top to bottom to keep the sloshing down.
Posted by: aircooledtechguy Aug 9 2012, 08:23 PM
The Porsche fornication continues. . . Made a couple refinements to the shifting and to the e-brake this week.
Last weekend I attended John Walker's annual Porsche swap in Seattle. I scored a perfect '72-'89 Porsche 911 shifter. This is the original style of shifter that was used with my 912E (923) 5-speed. Until now I have been using a slightly modified '73-'76 Porsche 914 shifter and while it worked well, it lacked the reverse lock-out of the 915 style shifter. However this style if shifter is no bolt-in part. I had to cut the ball off the bottom of this shifter and weld on the linkage mount off the 914 shifter in order to have the shift pattern right. Then I had to carefully cut a window behind the shifter tower so that I could access the shift adjustment bolt. Then I also had to cut a slot in the front and shave down some of the right fwd edge in order to continue to use my Porsche heater switch. Viola!! Smoother, even ore positive shifting with reverse lock-out!!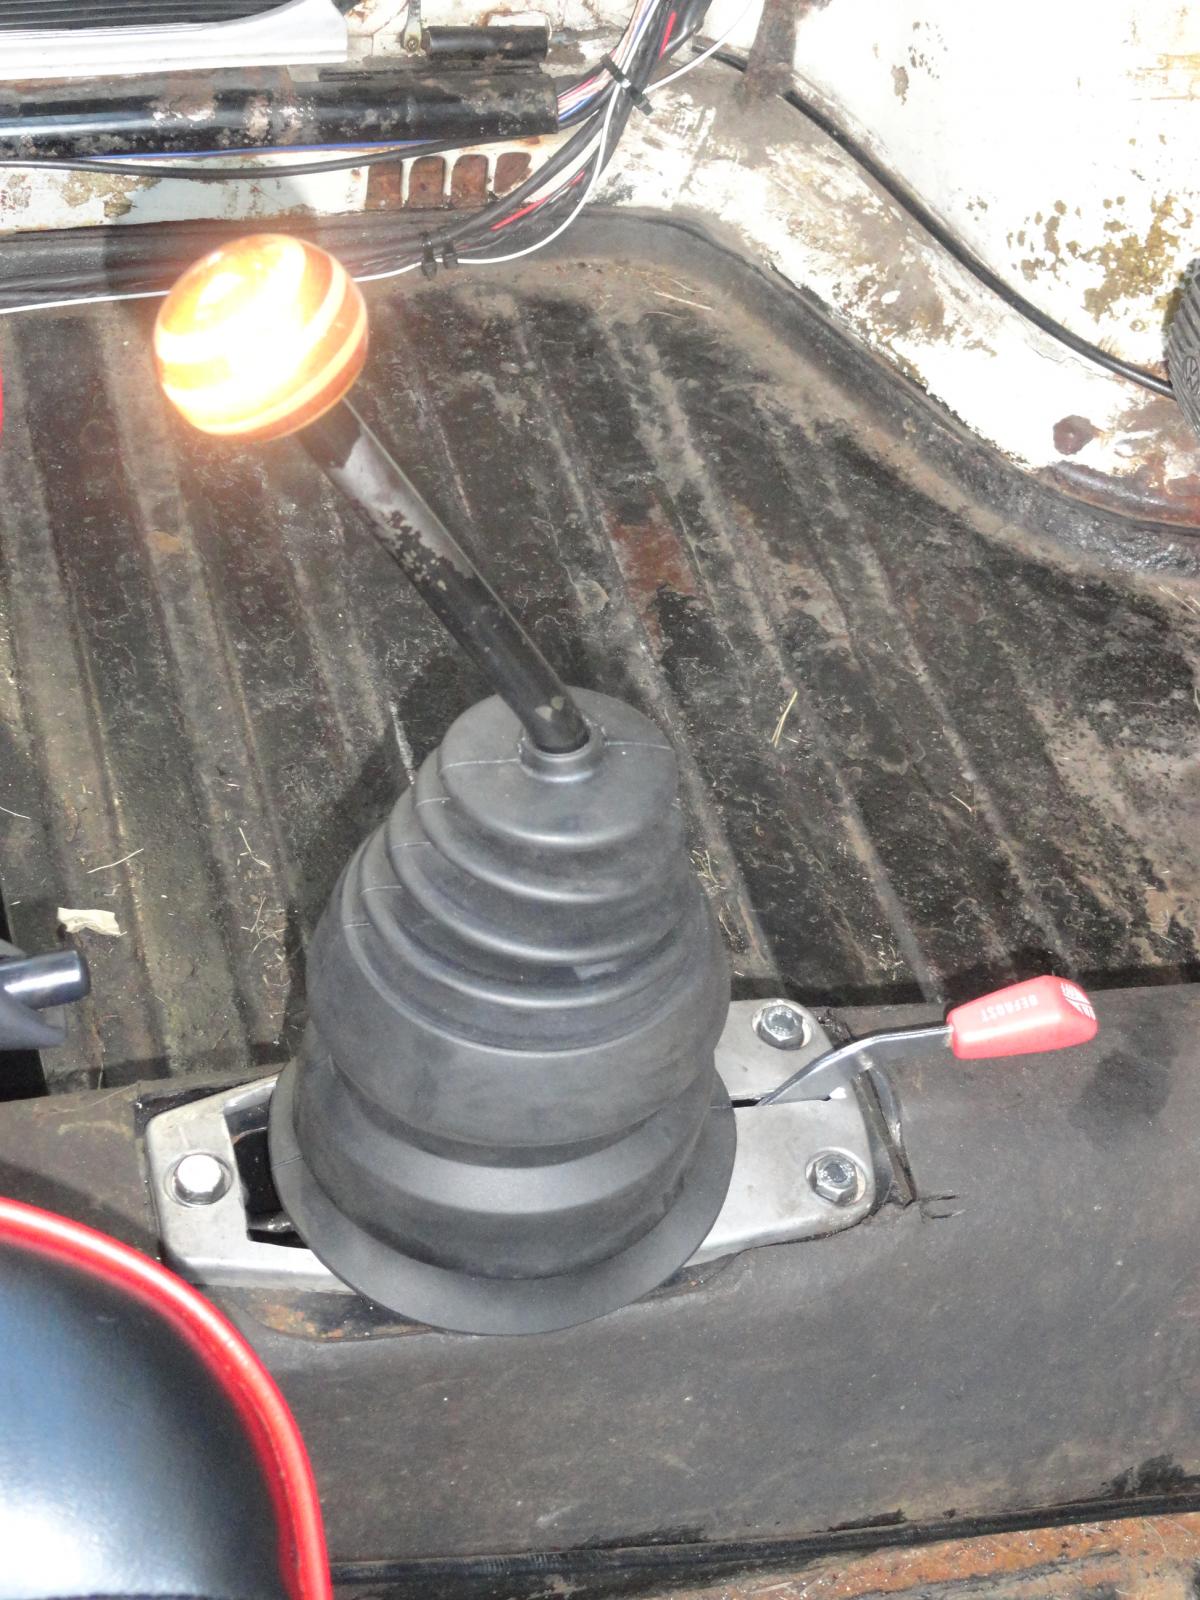
Next was the e-brake handle. Since I upgraded the rear brakes using 914 rotors w/ 912E calipers, I had to switch to a hydraulic e-brake. The lock ratchet worked O.K. (barely O.K.) but needed both hands to dis-engage. I figured at first, no big deal. But after a couple months driving it, I really got tired of 2-handing the brake handle. So my solution was to shorten the handle 4" and add a boss to the top that would work the piston of the slave cylinder. I also shortened the actuator arm to get it to all fit and work like a stock e-brake, but this one REALLY grabs the brakes now!!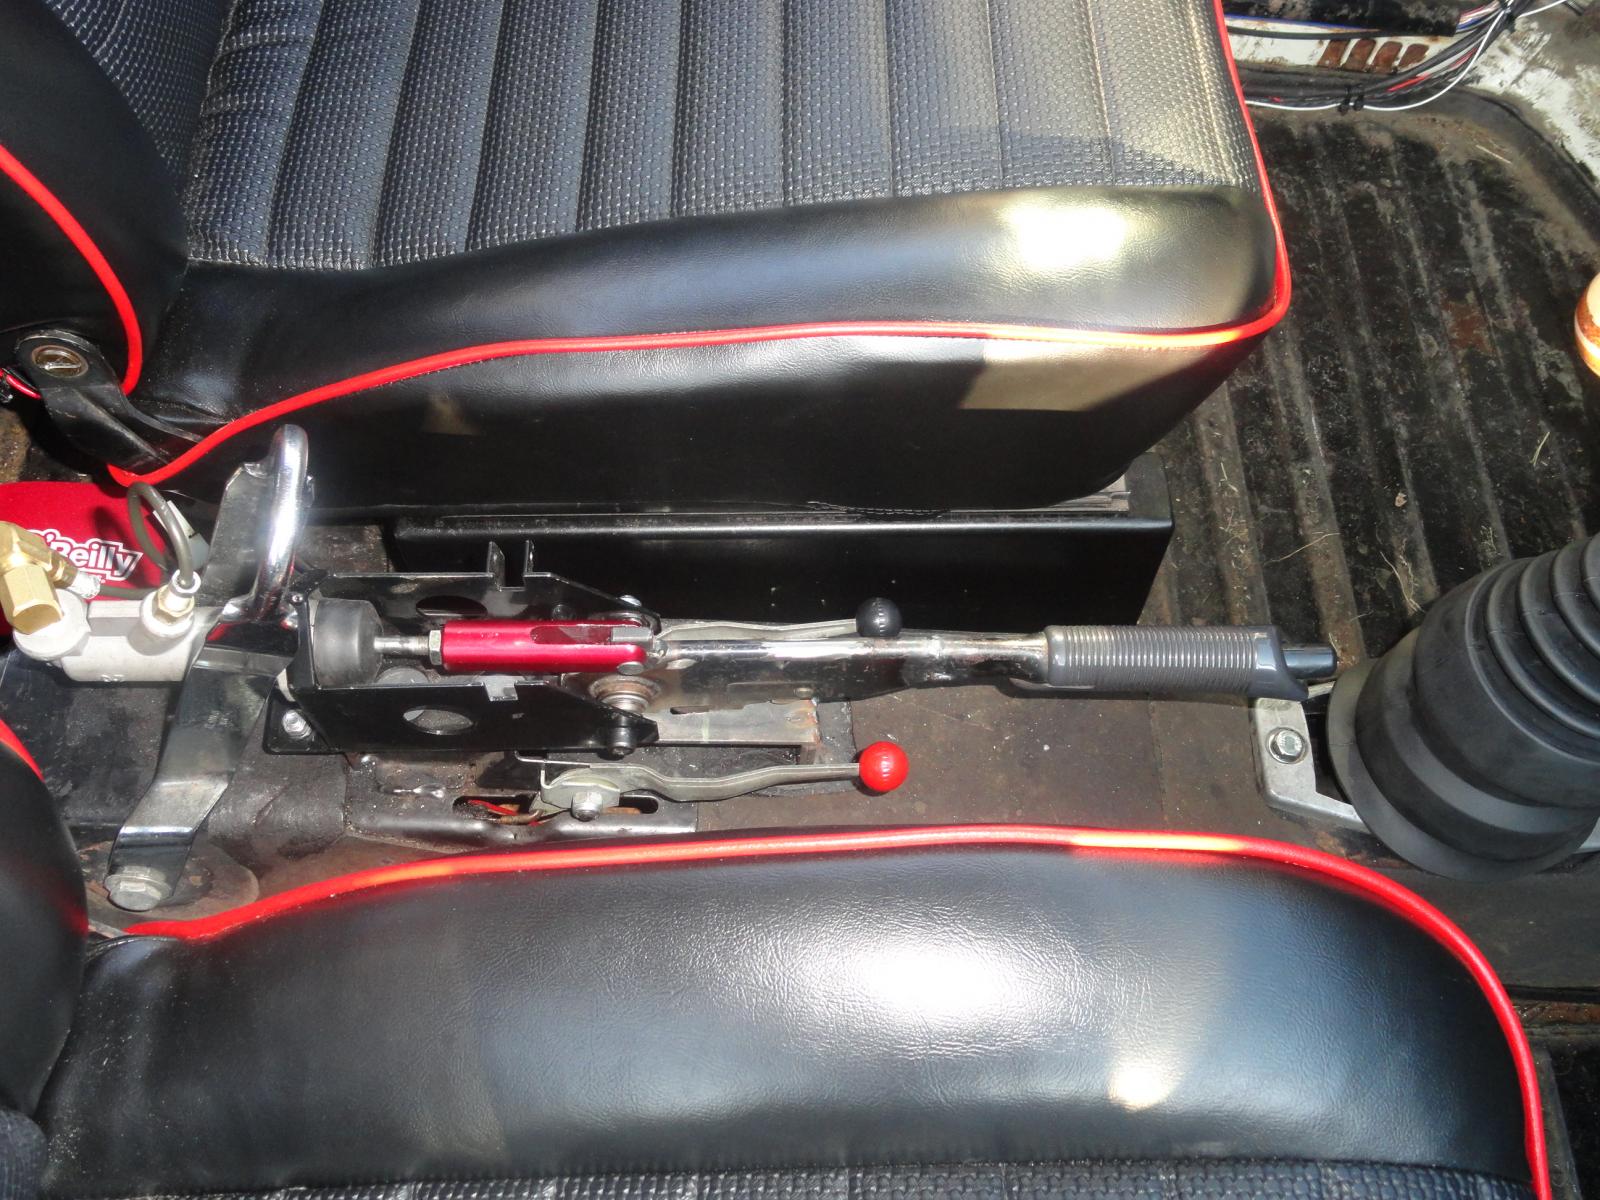
Posted by: aircooledtechguy Aug 31 2012, 12:22 AM
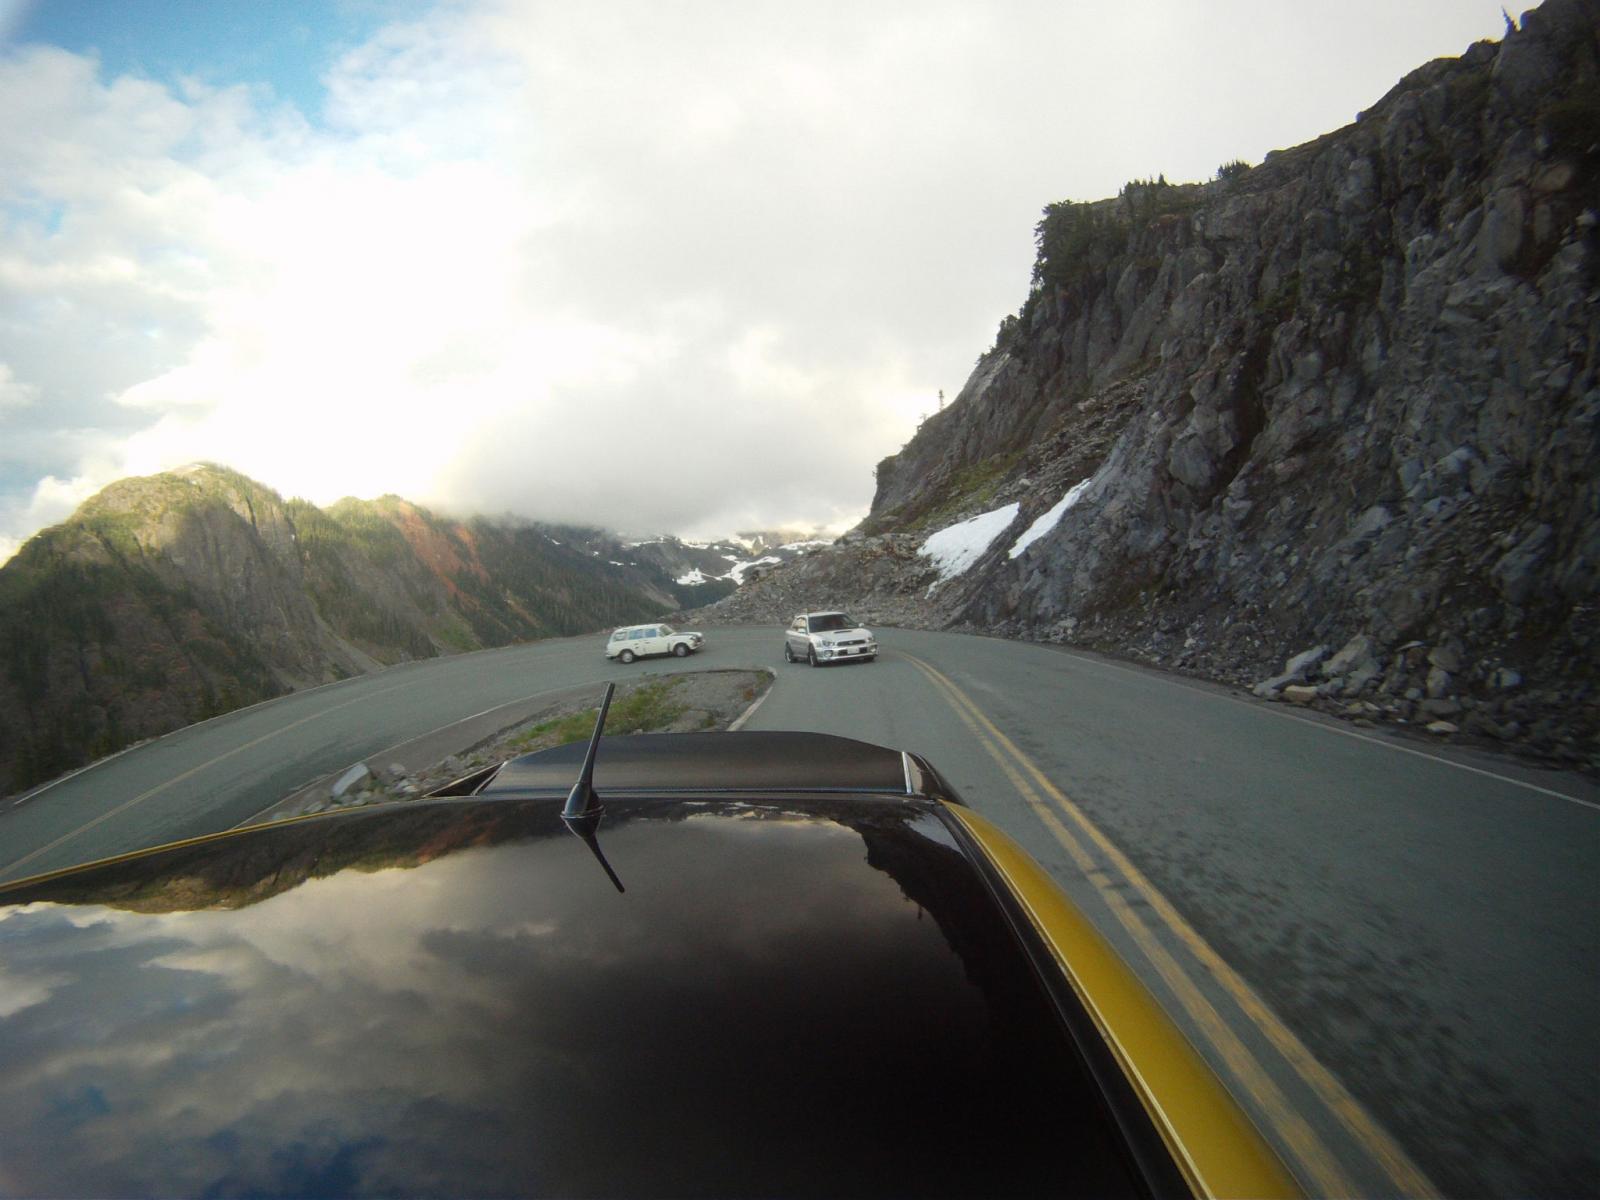
I finally got a chance to really put the "Squarsche" through it's paces on a long twisty road yesterday. I connected up with members of the Chuckanut Sports Car Club after work yesterday and we sprinted up to Artist Point and back on Mt Baker, in NW Washington state. This drive was my first real test of the engine, trans, suspension mods, brakes and virtually everything I have been doing to the car thus far. The drive is about 100 miles round trip and begins at about 100' above sea level. During the first 35 miles, it's a fast sprint with un-impeaded speeds averaging between 50mph and 75 mph through some farm lands & forest with beautiful stretches that border the Nooksak River as it gently climbs to about 1500'. The drive then gets progressively twistier as the rate of ascent steepens in the final 12 miles. This is where it becomes really fun. In the final 12 miles you climb to 5100' with the better part of that in the final 6 miles. There are virtually no straight stretches of road with which to allow your mind to wander and take in the beautiful views. In all the years I've been driving this road, I have yet to enjoy the scenery except from the summit
The car handles really well for having a weight bias of 37/63 (37% front - 63% rear). When I see the numbers like that I immediately think, "this should make a nice drift car", but it doesn't handle like I expected. Flat in the corners and the rear-end was firmly stuck to the road in all but the most extreme situations. There are a couple fast left-right-left-right corners that if you carry too much speed in and have to stab the brakes, you can feel the rear-end getting a little light and it whips a bit during the transition, but I experience that too in my Porsche 914 (with a 49/51 weight bias), so it's the nature of the beast. It does push going into a corner hard because there is so little weight in the front. However, I was a little pressed for time getting to the meeting place and totally forgot to fill my extra large 20 gallon tank before the drive. So I not only had about 1/3 of a tank of fuel, but also had all that weight sloshing side to side aggravating the problem. So next time I'll be filling the tank first. I still plan on shedding some weight off the rear and relocating the battery to the front and as much other stuff as I can.
The motor pulls like a freight train above 3K even in the thinner air. At 4K+ it really gets a pissed off sound that I just love. :twisted: AFR averaged between 12.7 & 13.5 on the LC-1. The Porsche disks could haul the 2200# car down to sane speeds in a hurry and I never felt the pedal fading. The Porsche 912E trans-axle has PERFECT gearing for this motor and the car. 2nd is low enough that I could still have good power getting out of the tight switchbacks. 3rd is my favorite gear since you can easily rev it to about 65mph before getting close to the red-line. 4th was good for cruising at even speeds through fast sections where I still wanted instant power on tap at higher speeds. There were only a few places that I could even engage 5th on this road since speeds were generally 65mph and under in the upper sections. Once we pass the snow plow barn, the pace really intensifies with speeds between 60-80mph.
Overall, I could not be happier with the results. This car will absolutely SMOKE my Porsche 914 in every aspect except getting into the corners (the under-steer). It pulls harder, brakes faster, lays flatter and sounds meaner (and that really the most important thing, right?? )
For your viewing enjoyment, here's the 1st leg of the drive from the summit down to the ski lodge. The second leg will be up loaded hopefully tomorrow. BTW, I'd like to thank Nord (in the silver G35) for waving me by 
http://www.youtube.com/watch?v=7I-2T0ZghD8&feature=plcp
Posted by: FourBlades Aug 31 2012, 06:19 AM
This is such a great thread.
You've got some serious car building skills.
John
Posted by: NORD Aug 31 2012, 04:26 PM
I'm glad you all got to see I let Nate by me. I followed him down and that
square back runs pretty good for a VW. Nate was lieing about the speeds
we were going though My disclaimer " we never excedded the posted speed
limits" Nate's speedo must be wrong.
Posted by: aircooledtechguy Aug 31 2012, 09:11 PM
Nate was lieing about the speeds
we were going though My disclaimer " we never excedded the posted speed
limits" Nate's speedo must be wrong.
Everyone knows a VW can't go that fast
Here's an action shot via the GoPro on Troy's Honda
Posted by: speed metal army Aug 31 2012, 10:10 PM
I love this thing! Buddy of mine is scooping a notch next week...
Question!
Why the heck did you weld up the tank,then braze on fittings?
Posted by: aircooledtechguy Aug 31 2012, 11:19 PM
Question!
Why the heck did you weld up the tank,then braze on fittings?
That's a great question. . .
When building the tank, I had to remove the super long neck at the base and shorten it. The filler necks on the tanks are originally brazed on at the factory. I believe it's because it was easier to have a guy braze the tight fitting slip-joint rather than have to weld it by hand. The joint is originally like a sweated copper plumbing pipe joint. The reason I brazed my new neck on was because once you have metal that is contaminated with brass from previous brazing, there is no way to weld to it with a MIG, TIG or any other traditional welding method, so your only option is to braze to it again.
The two half shells are machine welded together with a machine that welds as it rolls along the seam (kind of a rolling, continuous spot welder). Since they are welded in the traditional way without brass, I could simply cut the joint apart and then weld to it.
As for the return nipple on the bottom,. . . I already had the oxy/acet. torch out but the real reason is that for sealing up a small tube like that where the fit is really tight, brazing is the easiest and cleanest solution. Welding a tube that is almost laying flat against the tank is a total PITA to get sealed then you risk burn-through in the process. Brazing it takes seconds and burn-through is darn near impossible.
Posted by: speed metal army Aug 31 2012, 11:37 PM
Question!
Why the heck did you weld up the tank,then braze on fittings?
That's a great question. . .
When building the tank, I had to remove the super long neck at the base and shorten it. The filler necks on the tanks are originally brazed on at the factory. I believe it's because it was easier to have a guy braze the tight fitting slip-joint rather than have to weld it by hand. The joint is originally like a sweated copper plumbing pipe joint. The reason I brazed my new neck on was because once you have metal that is contaminated with brass from previous brazing, there is no way to weld to it with a MIG, TIG or any other traditional welding method, so your only option is to braze to it again.
The two half shells are machine welded together with a machine that welds as it rolls along the seam (kind of a rolling, continuous spot welder). Since they are welded in the traditional way without brass, I could simply cut the joint apart and then weld to it.
As for the return nipple on the bottom,. . . I already had the oxy/acet. torch out but the real reason is that for sealing up a small tube like that where the fit is really tight, brazing is the easiest and cleanest solution. Welding a tube that is almost laying flat against the tank is a total PITA to get sealed then you risk burn-through in the process. Brazing it takes seconds and burn-through is darn near impossible.
Well there ya go! Makes sense to me.
Posted by: aircooledtechguy Sep 1 2012, 08:42 AM
Here's the 2nd leg from the ski lodge down about 7 miles or so. . .
http://youtu.be/TwWxfx1n23M
Posted by: aircooledtechguy Sep 19 2012, 10:04 AM
The relentless quest for more power and speed continues. . .
Ever since installing the 5-speed, I was forced to go back to using the stock Porsche flywheel. It's a nice forged piece, but damn this thing is boat anchor @ 17+# compared to the conversion flywheel I had on it that weighed in at about 12.5#. Believe it or not, when I had to switch back to the Porsche flywheel (due to installing the Porsche 5-speed), I also upgraded to the larger P&C set upping my displacement 85cc and the car got a bit SLOWER. . . This COULD NOT STAND!! So I did some calling around and found a local place to lighten a spare Porsche flywheel I had laying around. They were able to conservatively shave a full 5.5# off and still leave me tons of meat on it. I'll bet they could have gotten another 2# if they had not conservatively done it. Next time, I'll tell them to go crazy with it!! 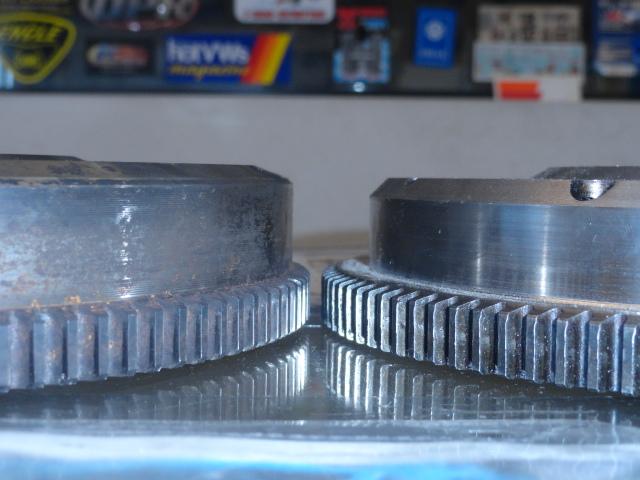
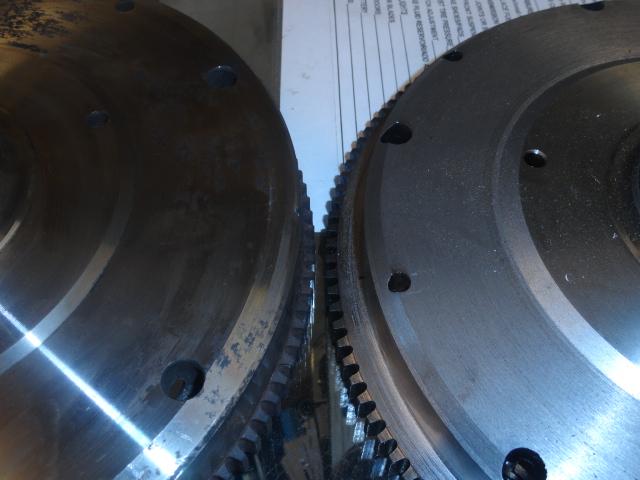
I'm SUPER happy with the results. Instead of using HP and torque to spin that heavy flywheel, the motor can now put that lost energy to my tires, and these things are gonna pay for their past 6 months of laziness. :twisted: The car is MUCH quicker getting to a given speed. It's lighter, but not so light that it is jerky to drive and still drives like stock. Coincidentally, I had the opportunity on the way in this morning to test the added acceleration against a guy in a winged H*nda fart-car. I don't think he ever had the chance to see that I have a blue trunk lid that doesn't match the rest of the car. . .
I also removed my rear hub assemblies and modified them for Porsche 930 press-in wheel studs. One thing VW really missed the boat on is using wheel bolts instead of studs and nuts. I only did the rears for now since I'm planning to change the entire front-end this winter. Instead of using steel nuts, I modified a set of Porsche alloy nuts on my lathe for use with the long studs. Now tire changing will be a breeze. Especially since I have to use 1/4" wheel spacers on the back. What a PITA to hold the wheel AND spacer when using the lug bolts. . . :evil: BTW: the photo makes it look like the lugs are not pressed in straight, but that is just an illusion due to zooming in for the photo (I blame the jerk behind the lens ).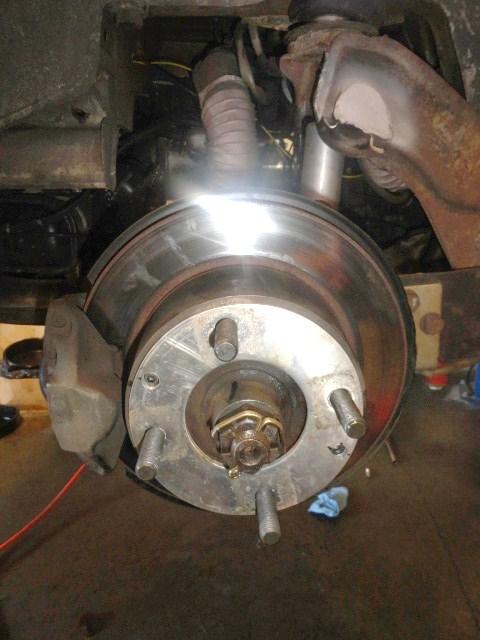
The final thing was that I made a significant change to the end of the shift linkage where it mates to the Porsche trans-axle. Over the past 6 months, I had come to realize that my dimensions were off just slightly on a couple things and this resulted in a "compressed" shift pattern which sometimes made 2nd to 3rd and 5th to 4th gear changes a bit tricky. So after lots of thought and staring at it from underneath, I realized the error and corrected them. Thankfully it turned out to be a fairly simple fix after some careful measuring, cutting and welding. The result is that now it shifts *EXACTLY* like a stock Porsche 911. All gears are super positive, the shift pattern is spread out like stock and I have not missed a shift since, even in fast power-shifting. I even had a client stop by who drives a Porsche 911SC with the same trans and shifter and asked him to shift it through the gears and tell me what he thought. He said it felt better than his Porsche!! That's what I was going for, so the design is finalized and I can put the shifting to bed once and for all. 8)
Posted by: Cap'n Krusty Sep 19 2012, 10:44 AM
Having had a bad experience with hydraulic hand brakes, I would caution you to be VERY careful with it. If it's tied into the main braking system, the heated fluid contracts as it cools and releases pressure. You could find your car in the street in the middle of the night as I did. Beyond that flaw, it's illegal (DOT) to use the main braking system as a parking brake.
The Cap'n
Posted by: aircooledtechguy Sep 27 2012, 09:05 AM
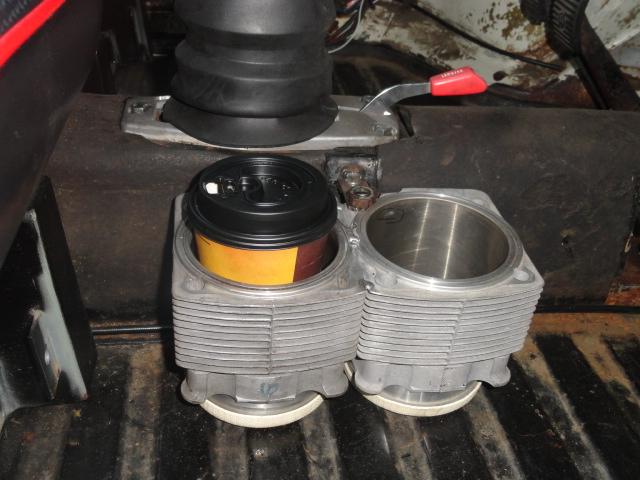
One thing that consistently bugs me about ALL A/C VWs is that there are no cup holders in the car. Typical aftermarket one-size-fits-none solutions generally suck and are flimsy. The Squarsche needed a set, so I came up with these (after seeing sixnotfour's cool drink cup), which could be the words fastest cup holders. I made them out of a pair of un-usable Porsche 911 Nikasil-coated Aluminum cylinders. I first TIG welded them together, added a piece of pinch-welt to the base (from an old set of beetle pop-outs I had) and then mounted them to a bracket I welded to the tunnel to keep them from moving around while driving. They fit a large McDonald's coffee (Mmmmmmmm. . .) great as well as any of the drink cups.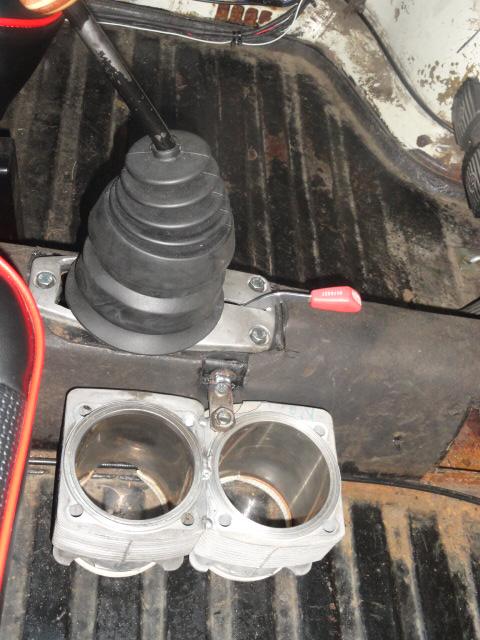
Posted by: aircooledtechguy Nov 26 2012, 01:47 PM
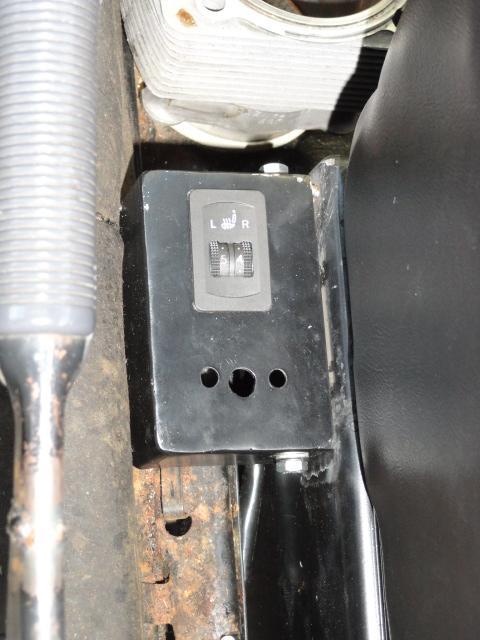
I finally got the opportunity to make a mount for the seat heater switch and the cruise control switch (though I haven’t yet mounted that). I didn’t want it to be visible from the outside and didn’t want to cut big holes in the dash, so I made a 4 sided box and a pair of brackets and mounted it all to the side of the passenger seat mount between the mount and the tunnel. It’s ergonomic for yours truly to reach as I drive and that was a must. I ran most of the wires down the tunnel so they won’t be visible and won’t interfere with carpet later.
So how do the new seat heaters feel??. . . Aaaaahhhhhh, so nice on a cold morning and they have really turned cold as of late which was part of my motivation. It takes about 2 minutes for them to heat-up and then it’s pure heaven with 10 adjustment settings. I can definitely see my lower back getting a therapeutic benefit from this upgrade. New car amenities in an old package; gotta love that combo!! If you’re planning to re-do your front upholstery anyway, these are worth the $80-$100 for the set of elements, the switch and the wiring.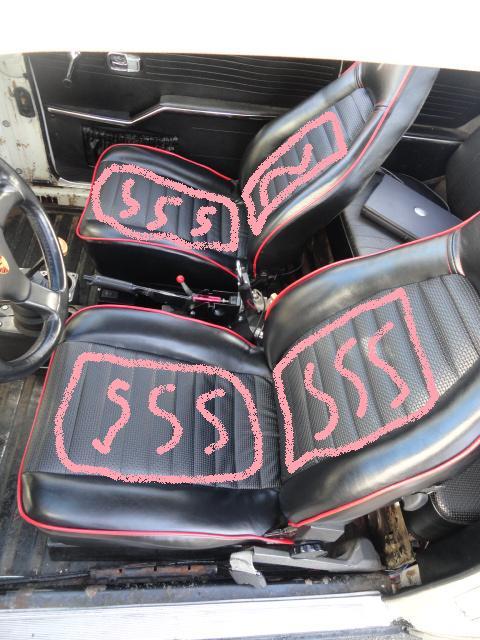
Posted by: JRust Nov 26 2012, 02:41 PM
Nice! Love heated seats in the good old PNW. Excellent add on
Posted by: ChrisNPDrider Nov 26 2012, 03:34 PM
OMG I want cup holders like those!
Posted by: aircooledtechguy Mar 4 2013, 10:52 PM
Big changes coming to the ProVolks shop car. . .
I've taken it off the road for the foreseeable future to complete the final body mods to fit the wheels, brakes and front-end under it. I'm begining with the rear-end since it's the easiest.
Brakes: I recently scored a complete rear-end off a Porsche 924 turbo so i could switch to Porsche wheels and brakes the right way. Since I already had IRS rear-end under it, I just swapped out the backing plates and the hub assembly. At this time I didn't swap the stub axle since I the stub is identical other than the CV required. Since I already had that sorted out, I figured, why bother at this time??
New brakes mocked-up: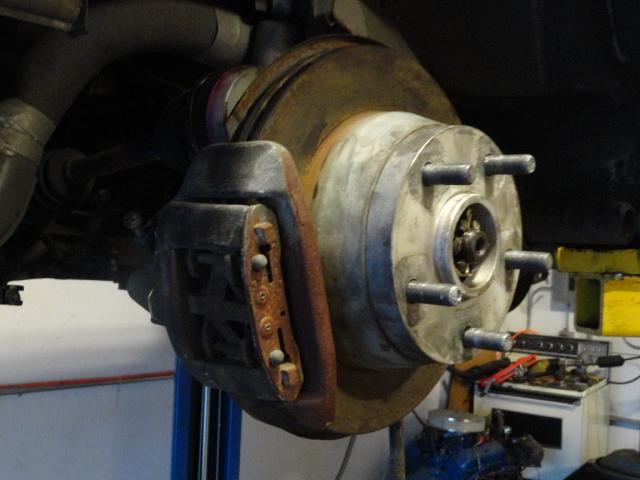
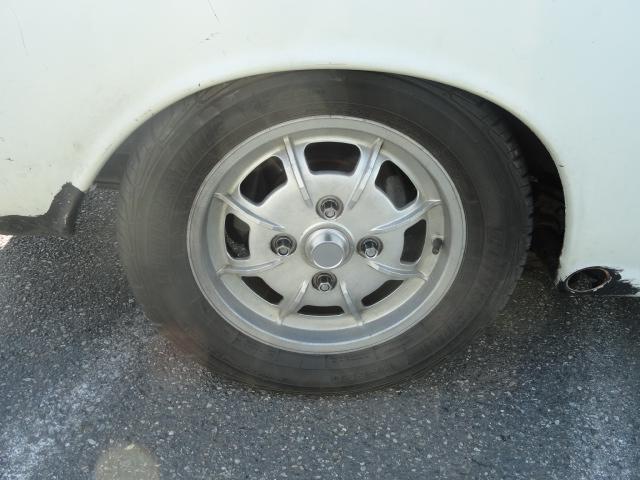
Mocked-up with 17"x8" 40ET Porsche wheels w/ 235-50-17 wheels w/ the 23mm factory spacers:
Mocked-up with 17"x8" 40ET Porsche wheels w/ 235-50-17 wheels w/o spacers: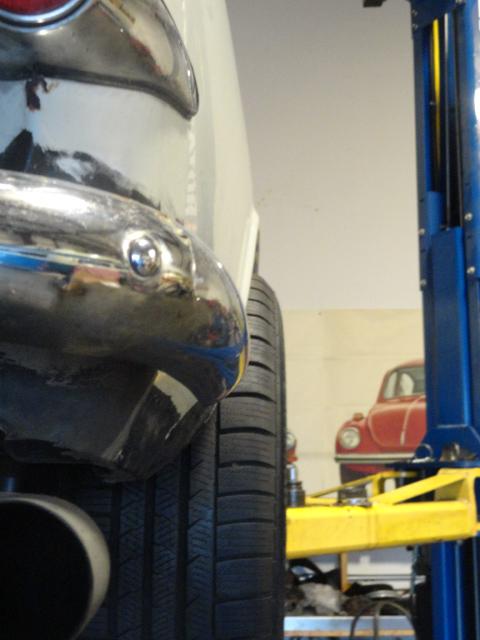
On the ground (yeah, it's on the fenders):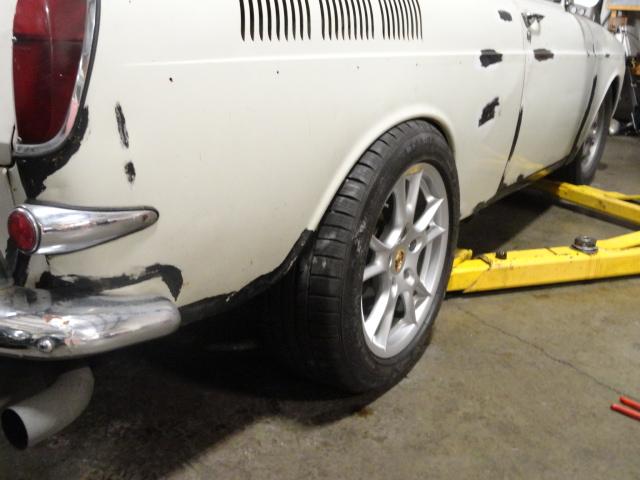
A glimpse of the old and new: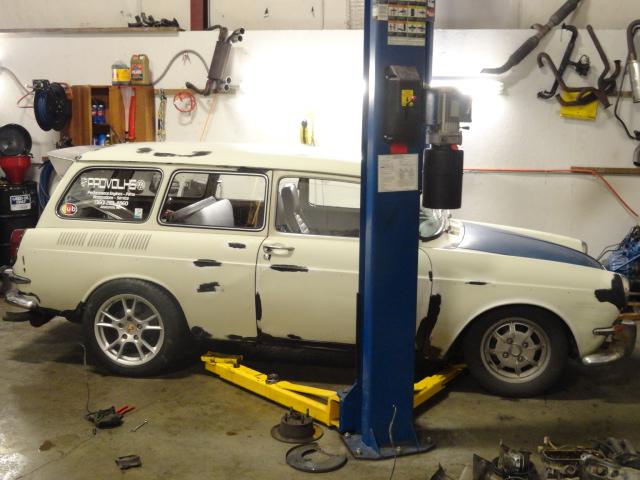
I'm gonna have to stretch the rear fenders about 2.5" - 3" in order to get everything to fit. I'm going to be doing all the body work with these over-sized tires AND the factory spacers so that there's plenty of clearance ion the inner side (which was tight without the spacers). When completed, I plan to run slightly smaller tires on these rims, but also this will allow me to run 17'/18" BBS LM wheels if they should ever present themselves for a good price. 8)
So much debauchery; so little time!!
Posted by: aircooledtechguy Mar 19 2013, 06:18 PM
Friday, a friend of mine came by the shop to help me out with removing the damaged front clip off the ’67 Square. Originally I was going to just run what I had and body work it, but I soon discovered that the clip was pushed back almost ¼” on the drivers side making it all not square underneath and preventing the fenders from mounting properly. What I have planned for the front suspension requires it to be 100% square, so the old had to go.
We began by removing the fenders. Then made a series of careful measurements so as to ensure repeatability from one side to the other. Then marked the front-end with cut lines. Then taped the cut lines and cut along them with a cut-off wheel.
Won’t be driving fro a while until this gets back on. How’s that for adding some motivation??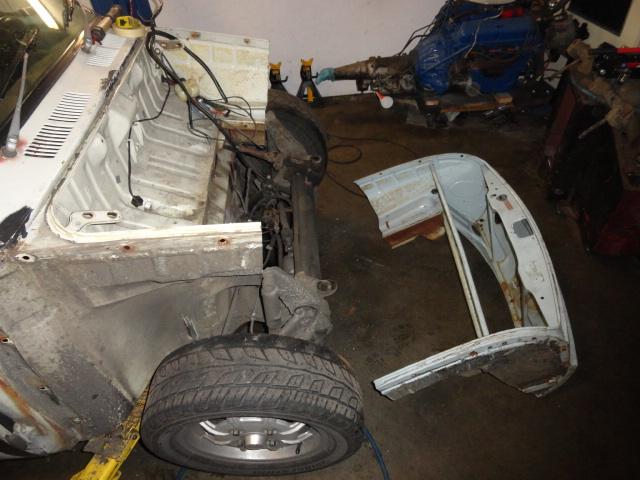
I’ve currently got about ½” overlap which will be slightly trimmed to about ¼”. Then I’m going to flange the rear side with a flanging tool so I can properly overlap and weld the pieces back together on either side. This method should make a super strong re-connection.
Had to stop on a clients car early due to waiting on a part, so I put the rest of the day to good use.
I prepped the edge of the cut on the body with a 2" wheel down to bare metal. repeated this to the replacement clip section. Then brought out the flanging tool which is air driven. It makes a nice off-set flange so you can slightly overlap metal to be welded. Makes for a nicer joint in the end and is easier to fit pieces too. 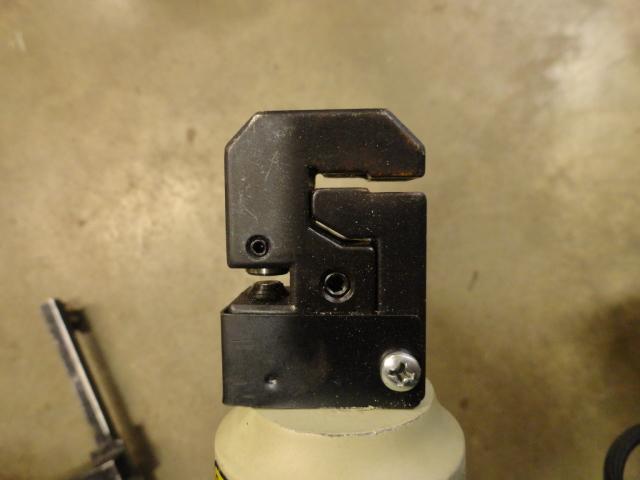
Once the body was flanged, I test fit it and double-checked the key measurements. Then triple-checked them again. Then tacked it in place. . . 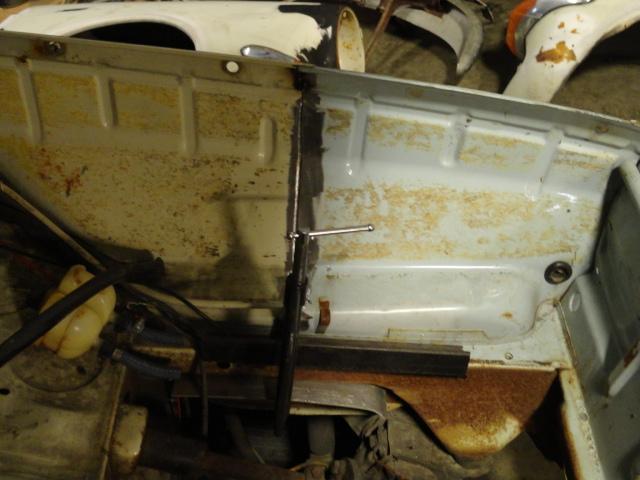
Then mounted the hood for a test fit before final welding. . . PERFECT!!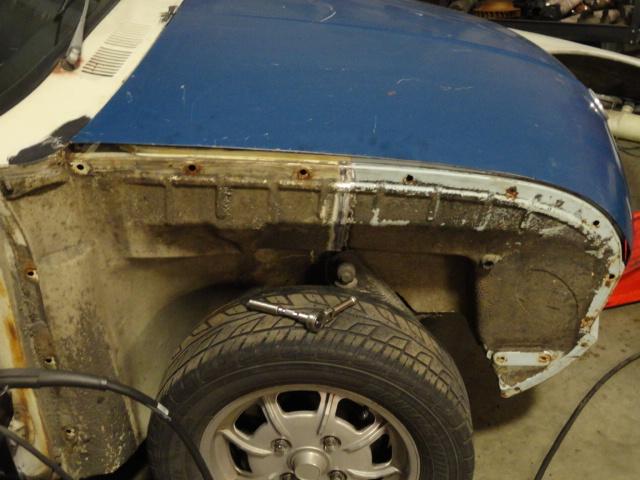
Now I have to finish weld both sides after I get another bottle of shielding gas.
Posted by: Vacca Rabite Mar 19 2013, 07:14 PM
Badassed!
Posted by: Kirmizi Mar 19 2013, 09:26 PM
Posted by: RickS Mar 19 2013, 10:43 PM
This is good stuff!
Posted by: audio_file Mar 20 2013, 06:38 AM
I'm such a sucker for (all) wagons, love it!
Posted by: rdauenhauer Mar 20 2013, 08:22 PM
Break out the Teener front end!
Posted by: aircooledtechguy Mar 20 2013, 10:14 PM
Break out the Teener front end!
Patients Rich, patients. . .
I gotta get the foundation layed before I can start the major surgury.
Once this front clip is welded on, I will have no excuses for not tackeling the front suspension.
Posted by: aircooledtechguy Apr 3 2013, 11:55 AM
Am I missing something here????? :shock: The "point of no return cut" takes place. . .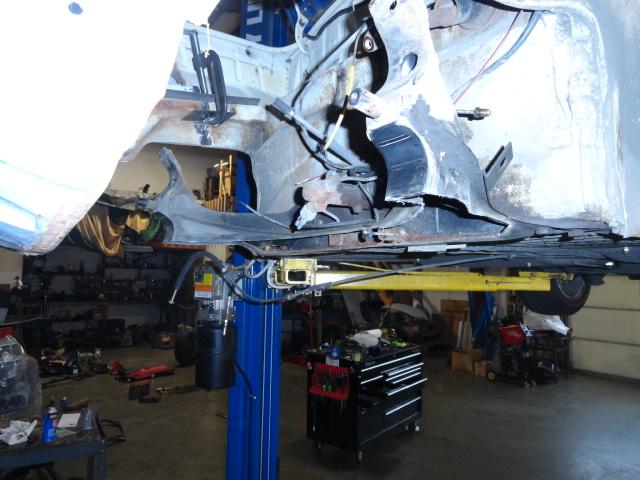
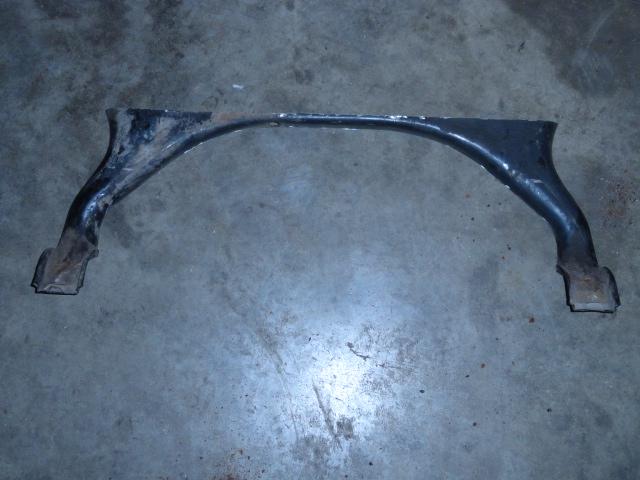
The lid is ready to come off on my plans for the front-end. Out with the old beam, in with highly tunable Porsche 914/911 front suspension. :twisted: Don't worry, the center beam will be powder coated like all the rest once any mods that need to take place happen first.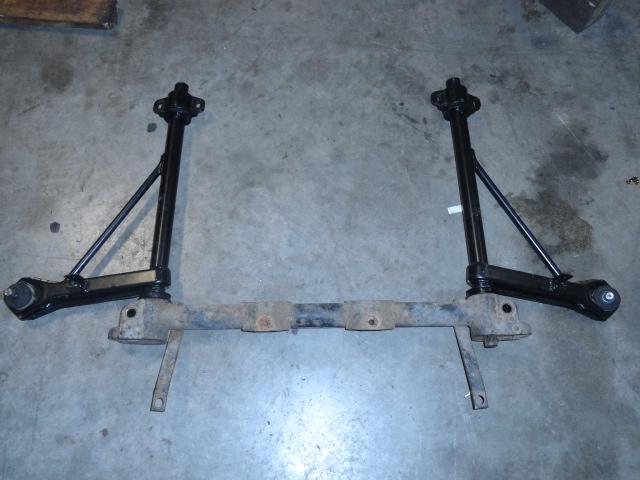
Mocked-up to the general position where this front-end will call home from now on. Before that happens, MUCH prep work will take place beginning with boxing in the area that was cut out in order to gain back the strength.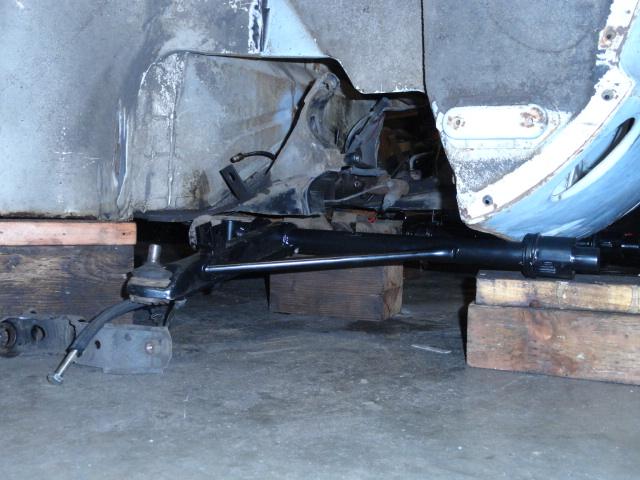
The fun continues. . . 8)
Posted by: Vacca Rabite Apr 3 2013, 12:22 PM
...Porsche 911 Nikasil-coated Aluminum cylinders. I first TIG welded them together, added a piece of pinch-welt to the base (from an old set of beetle pop-outs I had) and then mounted them to a bracket I welded to the tunnel to keep them from moving around while driving. They fit a large McDonald's coffee (Mmmmmmmm. . .) great as well as any of the drink cups.
I was thinking about this today.
Wouldn't this set up effectively make hot drinks cool and cold drinks warm a lot faster then usual? After all, those jugs are made to shed heat quickly.
Zach
Posted by: aircooledtechguy Apr 3 2013, 03:18 PM
I was thinking about this today.
Wouldn't this set up effectively make hot drinks cool and cold drinks warm a lot faster then usual? After all, those jugs are made to shed heat quickly.
Zach
You're way over-thinking these cup holders. . .
Posted by: aircooledtechguy Apr 4 2013, 07:24 PM
Made a fair bit of progress today. Made the box-in section for the frame horns to regain the strength. I made the load bearing part out of 1/4" thick flat stock. The rest that actually goes up the front of the horns is 1/8" steel. Once I have it all tacked in place, I'll be boxing-in the outer edges where the center truss mounts. I plan to tie it into the body of the car with plates and gussets since this is where 80% of the stress is on this front-end.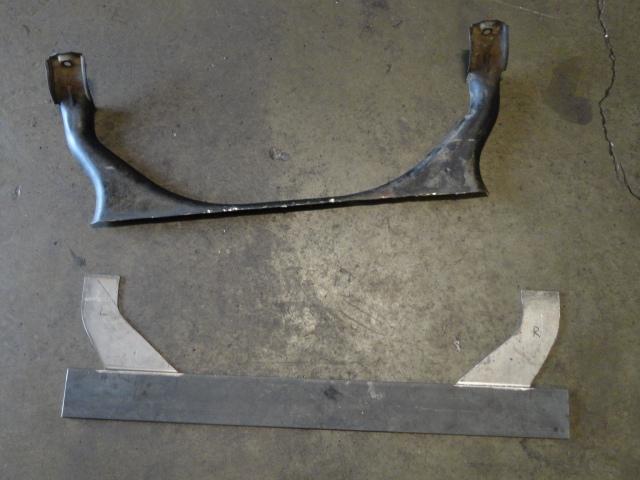
Here's a couple shots after I raised it up in place so I could see how it would all fit in the car. I can already tell that I will need to make a small pocket for the aft end of the torsion bars and clearance the bottom of the frame horns where the strut arms connect. The shock struts are approx where they will be mounted, eventually. . . 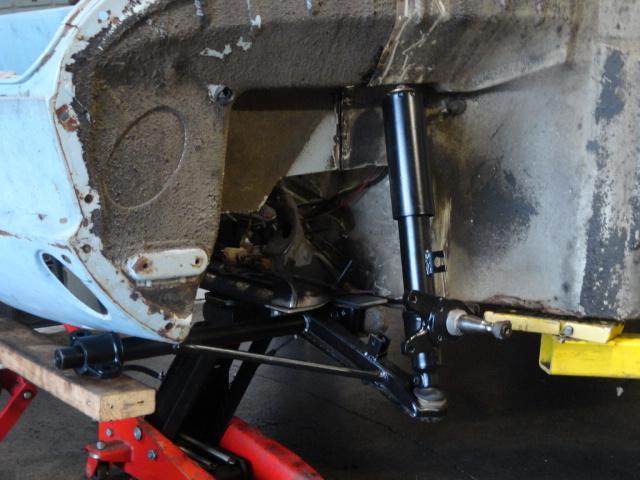
Posted by: aircooledtechguy Apr 9 2013, 10:46 AM
I finally got the Porsche front mounts that I cut from a derelict 914 trimmed down and prepped for mock-up. In these shots, they are mounted to the a-arms and the whole lower front-end is mocked in place so I could get a really good look at where the cut lines will need to be made. These will be recessed into the nose at the rear about 3/4", but will need to be boxed outward significantly at the front. I'm going to first recess the rear edge so that it fits correctly. Then after that is done, then I can tackle the box structure in the front.

The material it's boxed with will be the same .75" (2.0mm) sheet that the Porsche mounts are made from. This will then have plates on the inside that tie it all to the body and pan via the upper frame horns. So far everything is going according to my sick plans. . .
Posted by: aircooledtechguy Apr 29 2013, 09:03 AM
Made a ton of progress this Saturday. Here are the highlights:
- Finished the main front-end support.
- Welded said support to the frame head.
- Located front mounts on body and cut recesses for them.
- Fabricated and welded front mount supports that box them in and tie them to the front-end.
I started off with the main support. I had that basically made (all the hard stuff anyway), I really needed to make the relief cuts on the fwd corners so it didn’t interfere with the movement of the A-arms. With that finished, I decided that I could no longer put off mounting this piece to the car.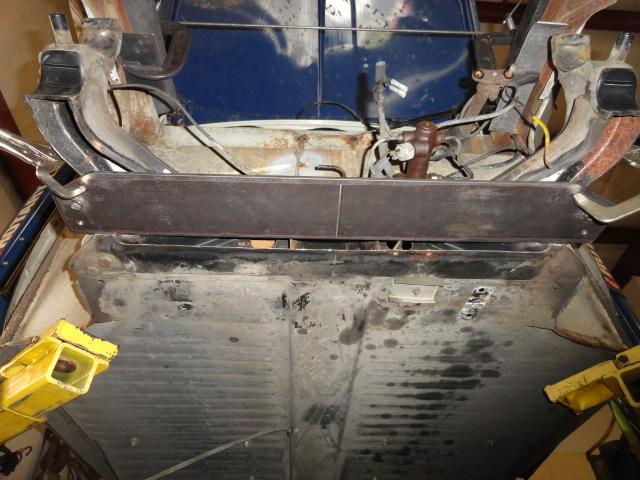
Everything else depends on this piece, so I really took my time to get it aligned with the center line of the car and to immovable points on the pan; Points that I knew would have to have been very accurate when the pan was made on the jig at the factory. With it all spot-on, double-checked, triple-checked and one more check for good luck, I tacked it into place and then made another check. With it still good, I began laying beads of weld to make it all permanent.
After that was in place, I attached the main support beam and slipped in the A-arms so I could then locate where those would mount. On the under side of the sheet metal, I carefully measured for center line and then measured out from there. The torsion tubes are just less than 26” apart (center to center), so I marked out the centers for those and began marking the rear edge of the relief that would need to be cut in order for them to sit straight and level on the multi-curved surface. I also had to cut a relief so that I could use a 2.5” piece of tube cut in half so that the tops of the torsion bars could pass through the bottom edge of the front apron.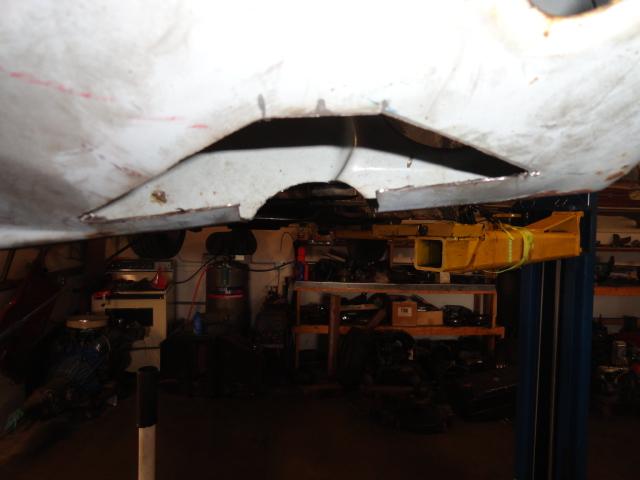
Once all that was done, I needed to make the fwd sheet metal that would box-in the front of the mounts. Rather than begin with sheet metal, it’s a lot easier and quicker to make a template out of cardboard. After some careful measurements, I was able to make this cardboard template in about 15 minutes and it fit pretty well. 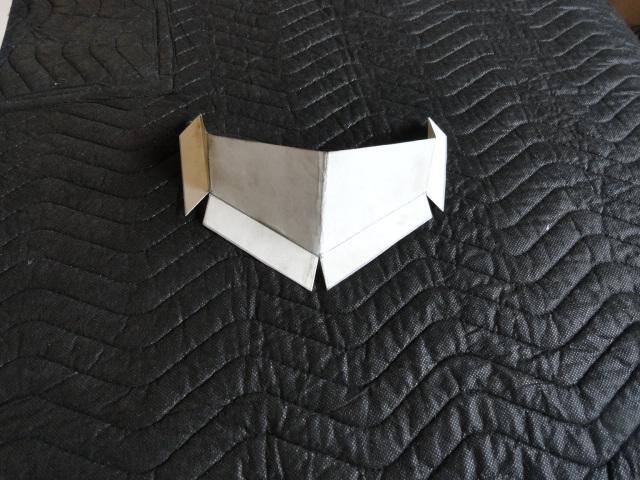
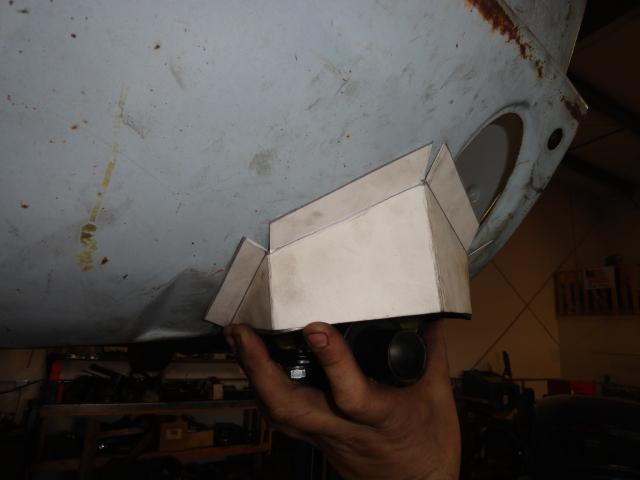
The next step was to transfer this to my metal and fabricate a pair. The metal I used was pretty thick; .065” mild steel. I need these mounts to be extra heavy duty and at least as thick as the metal that the mounts themselves are make from. This is how they turned out.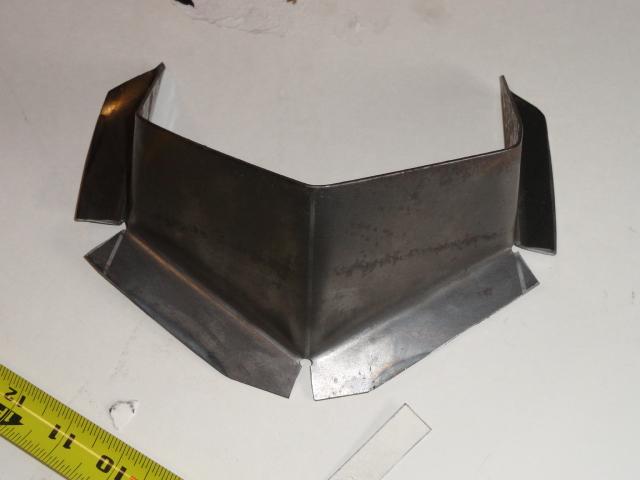
Once I got them placed exactly where they needed to be, I used the hole puncher and made a series of holes in the mounting flanges. This way I could not only weld the out side but get some rosette welds inside. These cannot come loose!! Then I welded them in place one at a time indexing off my center line mark. 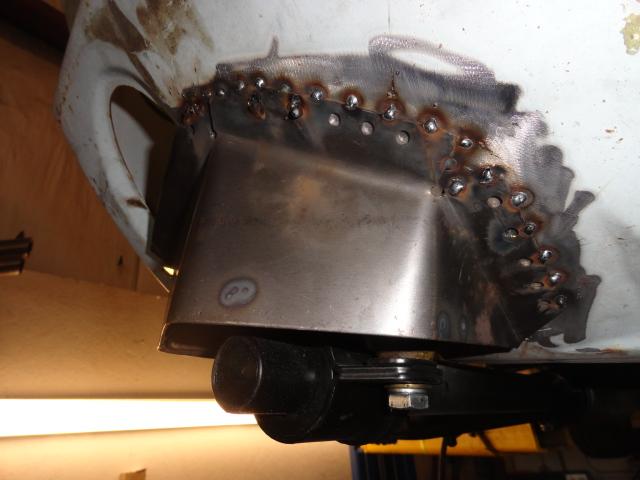
Happily, they are exactly the same distance apart at the front as they are at the main support tube. So far, I believe it should align and track straight since everything is done exactly as planned (whew!!).
I didn’t have time to box-in the inside of the front since I ran out of welding gas. 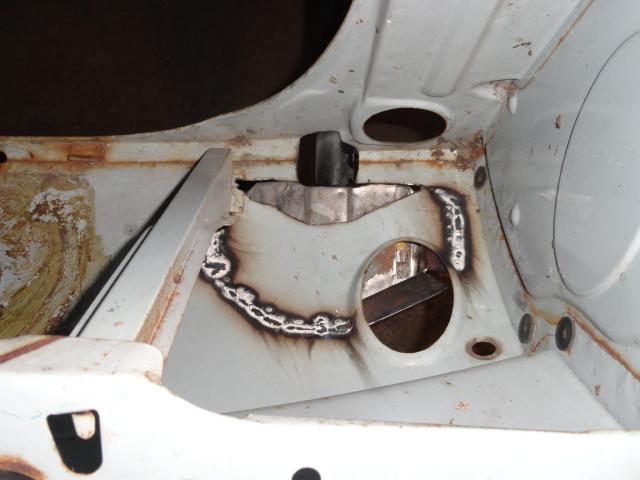
No big deal since I was out of time and tired!! I did bolt everything on since it’s not going anywhere at this point. Here’s the first look from underneath.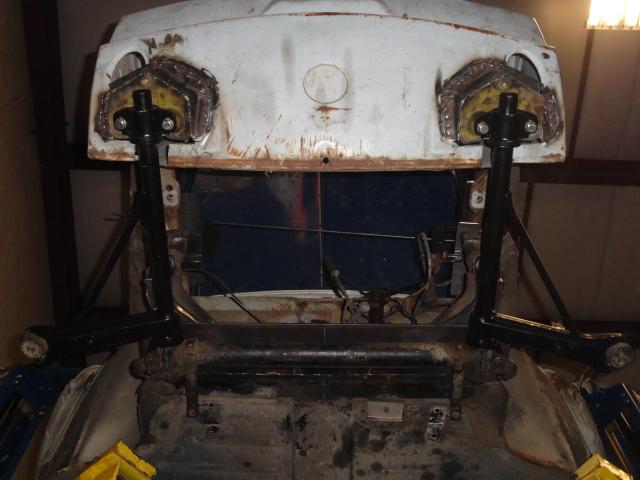
All in all a good day. . .
Posted by: Dr Evil Apr 29 2013, 04:06 PM
Dibs if you ever sell this
Posted by: aircooledtechguy May 5 2013, 03:25 PM
This weekend I turned my attention to the steering since I’m awaiting a set of camber plates assemblies from Chris @ Tangerine Racing (www.tangerineracing.com). The goal was to finish the welding on the front mounts from last weekend (since I ran out of welding gas) and get the front-end ready to accept the Porsche rack & pinion steering gear. I fell a bit short, but made fine progress nonetheless. It is surprising even to me just how much time this stuff takes to do.
Since I’m going all Porsche on the front suspension, it’s only natural to upgrade to a Porsche R&P set-up. So I acquired a nice factory unit and upgraded it with Porsche 930 turbo tie rods which is a popular upgrade to add a more positive feel and preciseness to the steering. 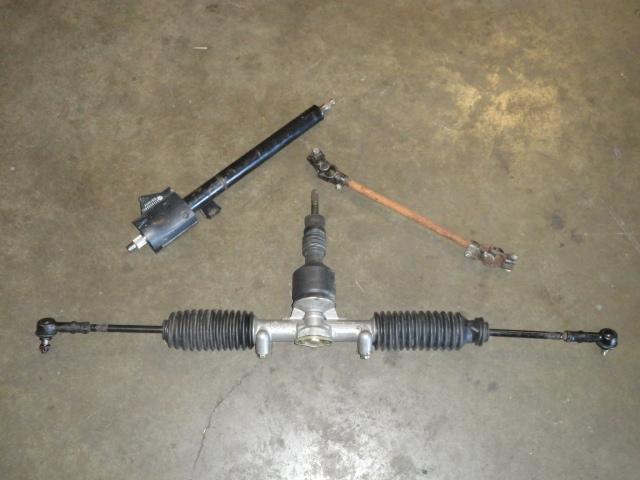
The column chosen is from a '73-on Super Beetle. I want to have a modern dual stalk column so I can get the wiper switch off the dash and onto the column and have a steering lock. This is also a dual bearing column which uses a similar intermediate shaft as the Porsche unit in the photo. Of course the column mounting will have to be heavily modified for the type3 as well as shortened considerably along with the intermediate shaft in order to work in the Squarsche.
Since the lay-out of the car and pedals prevents me from installing the R&P unit in the same location as a Porsche, I had to mount it above the master cylinder. This, actually, is a good thing since it will enable me to attach the tie rods from the top of the pitman arms rather than from the bottom and thus avoid bump-steer issues. To attach them, I will be modifying them with a VW Super Beetle bump-steer kit. As luck would have it, the Super Beetle tie rods have the same length and taper as the Porsche tie rods, so a cheap $15 kit is all that’s required.
I began by locating the center and where the steering shaft assembly would pass through the fwd firewall. Then I used a 4” hole saw to make the hole.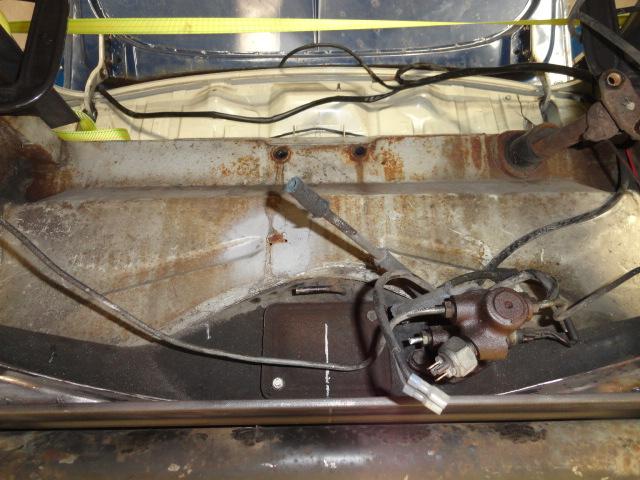
The rack could have been installed as is, however, it would be too far fwd by about 1.5” so the tie rods would be swept too far back (more than stock) and cause more bump-steer issues. So I had to set it back. So I traced a pair of lines 3” apart and carefully cut a slot lengthwise in the front firewall so it would be in the correct position.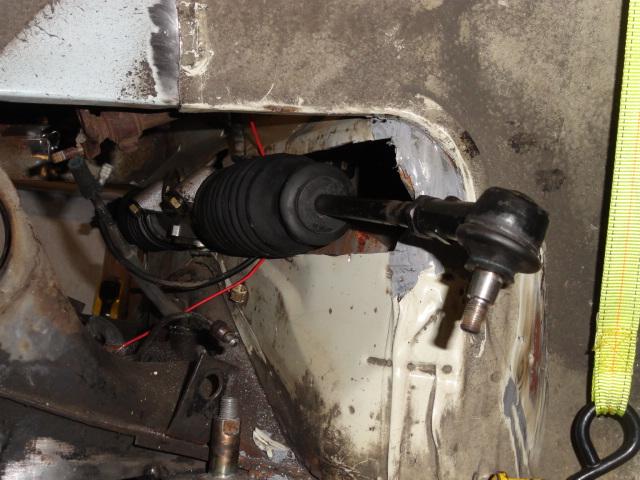

Then used half a 3” muffler pipe to box-in the section and make it all strong again. 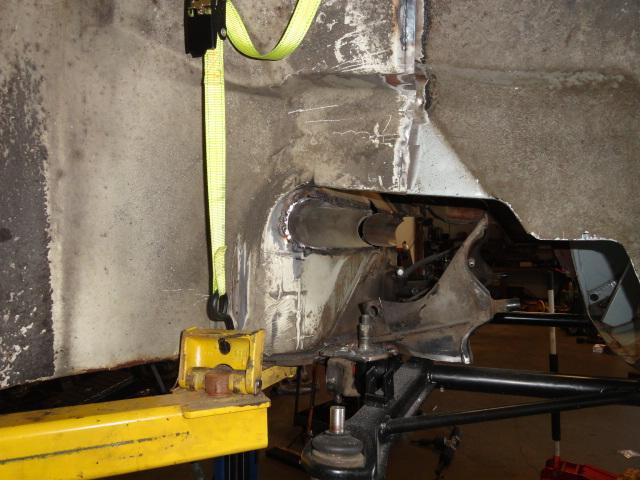
The pipe actually intersects 3 pieces of metal since the bottom half is a double-wall. 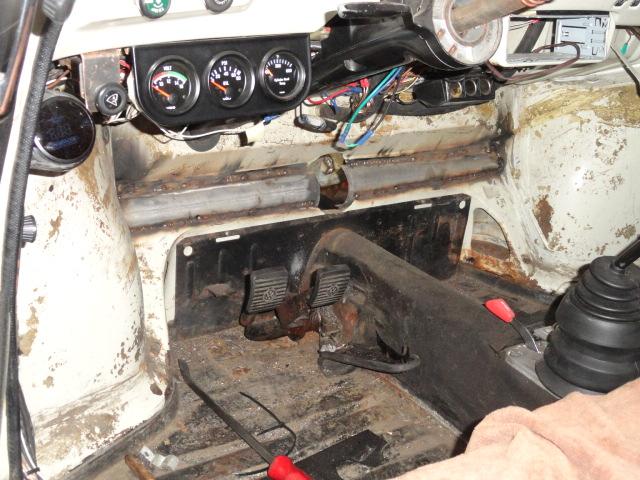
This is actually stronger than stock now and will become stronger when I install the 4” piece of pipe to the center to make the pass-through for the steering shaft.
This is as far as I got this weekend. I was shocked at just how much time that took to get accomplished ; I burned the better part of a day getting the tube fitted and welded. . .
Posted by: scotty b May 5 2013, 03:33 PM
quick reading resulted in a hasty post. Carry on
Posted by: PanelBilly May 5 2013, 10:06 PM
Such creative workmanship. What's next?
Posted by: aircooledtechguy May 9 2013, 01:57 PM
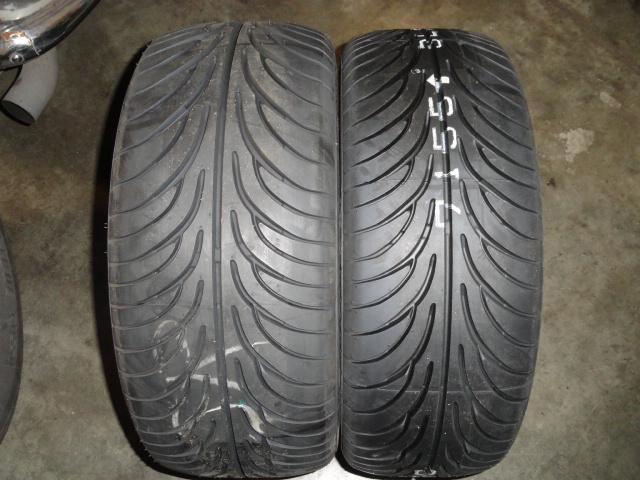
Got some new tires for the Squarsche today via Tire Rack. This aught to piss off the purists. . . :twisted: Staggered fitment; 205s in front, 235s out back. That should keep the rear-end under control. I just went with some cheap Sumitomos this time to get things going. We'll see how well they hold-up to the abuse and maybe upgrade to a better tire/compound in the future as funds allow.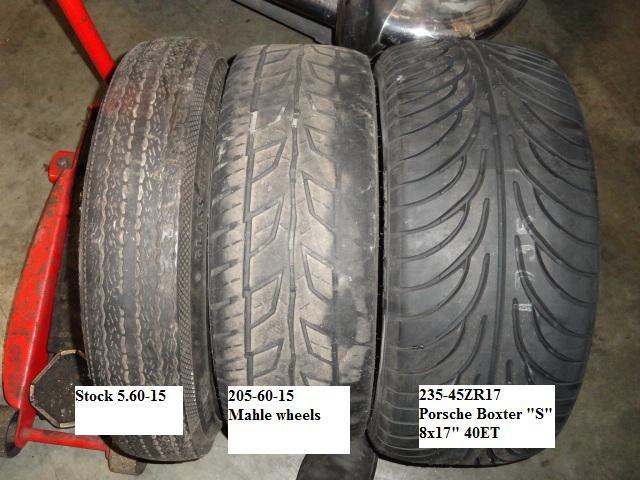
I also took delivery of a set of camber plates from Tangerine racing. OMG are these things cool!! I'll be able to add up to 2.5 degrees of camber in the front if I want. So if I have a track day/auto-X, I can add more camber and improve the handling. So I'm in the process of making the shock tower templates now so I can get those fitted and get this beast back on it's feet.
Posted by: carr914 May 9 2013, 03:02 PM
Those Sumitomos may be Cheap, but they are Great Tires
Posted by: bozo914 May 9 2013, 03:24 PM

Posted by: aircooledtechguy May 9 2013, 04:50 PM
Those Sumitomos may be Cheap, but they are Great Tires
That's good to hear. They got pretty solid reviews on-line so,. . . I figured that for the price, even if they last only one year, they will be O.K. This has been an expensive week for this project with having to buy wheel spacers, camber plates and tires, but I need everything now in order to proceed.
Posted by: carr914 May 9 2013, 05:24 PM
Those Sumitomos may be Cheap, but they are Great Tires
That's good to hear. They got pretty solid reviews on-line so,. . . I figured that for the price, even if they last only one year, they will be O.K. This has been an expensive week for this project with having to buy wheel spacers, camber plates and tires, but I need everything now in order to proceed.
They are very good, I used them as Track Tires on my S2000. The rest of the Sumitomo line is Junk IMHO
Posted by: aircooledtechguy May 11 2013, 06:27 PM
My attention today was the steering. I needed to fit the Porsche R&P steering unit, fabricate the bracket to mount it. Then shorten a Super Beetle steering column (yeah, Supers ARE good for some things )
I first had to modify my 4" hole that I cut earlier so that the tube would not be in the way and so that the input shaft would be in the right position when mounted. Then it was tacked.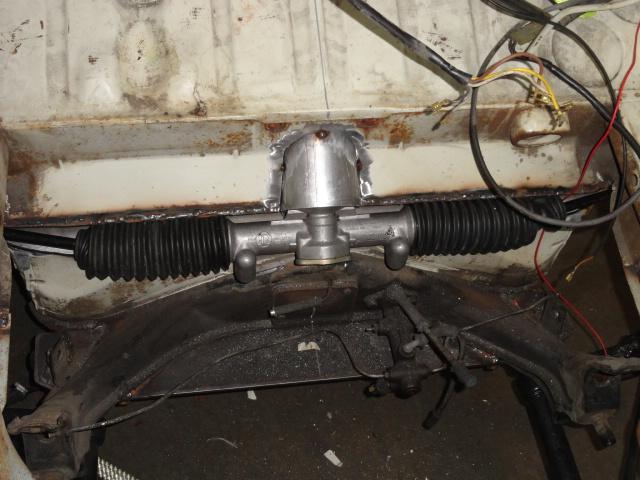
The mount was next. Spent some time getting this made so it would be strong and fit right. I'm happy with how it came out.
Then I needed to shorten the Super Beetle steering column. I used a Super column for 2 reasons.
1. It has a bearing at both ends which I needed.
2. It is a dual stalk column, so I'll be able to move the wiper switch off the dash where it's a total PITA to use and right where it should be; within fingers reach. This will also enable me to use a delay wiper relay if I want to later.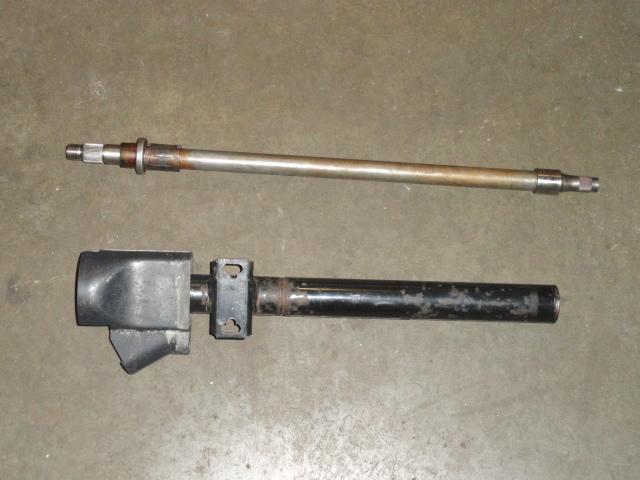
This turned out to be a really easy job. I cut about 1 foot out of the outer tube. I then trued-up the ends on my 12" disc sander and removed the paint. Then I tacked it together and finished welded it.
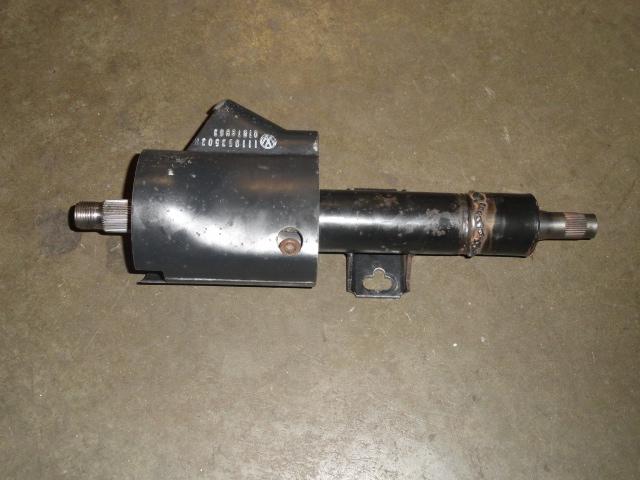
Once that was made I could take measurements for the steering shaft to ensure it was the right length. I used a tubing cutter to cut it apart. This makes a nice clean and straight cut. Then on the disc sander, I beveled the ends at a 45degree angle since the metal is thick. This allows for proper penetration when it's welded. Then I clamped it into my vice tubing clamps to ensure it was held straight and tacked it. After verifying that it was straight and worked i the column, I finish-welded it together.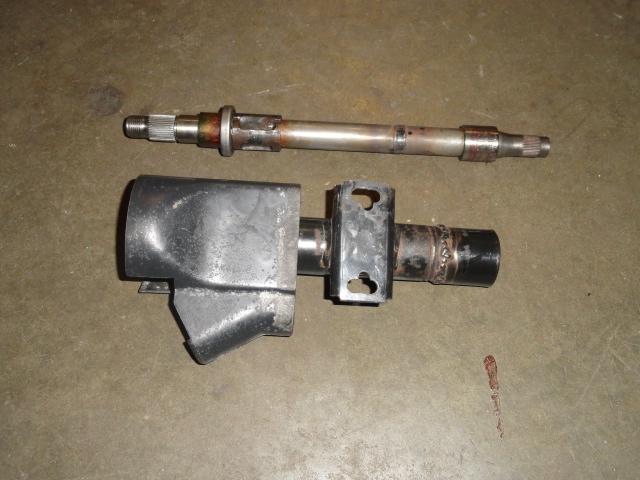
Another thing I got accomplished this week in preparation of today, was to remove the dash vents and get those back to working condition though they are still out. And I modified the wiper assembly so I could use the late wiper pivots and arms. I made some custom wiper arms out of late bus arms since the type3 units are harder to find.
Posted by: aircooledtechguy Jun 22 2013, 09:28 PM
So,. . . I FINALLY got a Saturday to get back to the debauchery and I made some good progress.
First, I have to confess that I’ve been putting off the purchase of a plasma cutter for way too long. So after my last update, I was so tired of doing all this fabrication the hard way that I finally man’d-up and bought one.
FYI: I bought one of the cheap Ebay specials after reading reviews on-line. I got a Cal Electric Cut-50. It’s yellow and everyone knows yellow tools cut stuff better, so. . . For being $320 delivered to my door, it works pretty darned good and has saved me a ton of time already. I think of all the time I wasted fabbing the camber boxes and other parts and . . . So to recap: after 80% of the fabrication in DONE, I decide to make things easier. . . Well, I’ve NEVER been accused of brilliance or good timing, so all I can say is, better late than never!! ANYWAY!! Back to the debauchery. . .
VW pedal assemblies are great for driving to and from work and stuff, but they are just too tall and un-ergonomic for any kind of performance driving where the right foot needs to do heel/toe duty. So to bring the pedals to a better height, I cut them down 1.5”. Now before some cry, “Hey, that’s gonna make the brakes harder to apply!” Not to worry, if I find the brakes are too stiff, I’ve already got a secret weapon in the arsenal in the form of a Porsche 996 master cylinder and matching power brake booster. I may not actually need this since I’m gonna have Porsche 944 brakes out back and 911 in front running a Porsche 911 MC, but just in case, I’m prepared to make changes to the power 996 unit.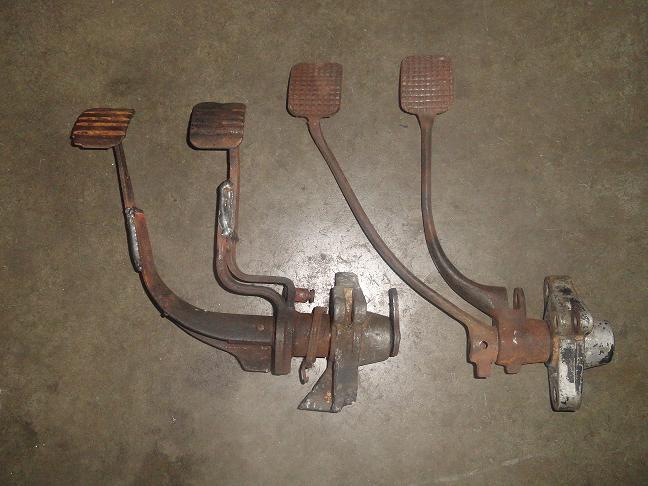
I also ordered and received a very hard to find set of female, metric M14XM1.5 heim joints to replace the factory Porsche tie rods. Since I had to move the R&P up a couple inches, I could not use the stock tie rods. Normally they mount from under the pitman arm, but mine will have to mount from the top or massive bump-steer would be an issue (similar to how you have to flip them in a lowered super beetle). I found these in Europe and they fit the bill perfect. I’m still waiting on the 14mm drill bit so I can’t finish the job. Once I ream the hole 14mm, I’ll make one long spacer that goes ¾ of the distance they will need to be and add shims for the remainder so I can have some tuneability in the bump-steer area.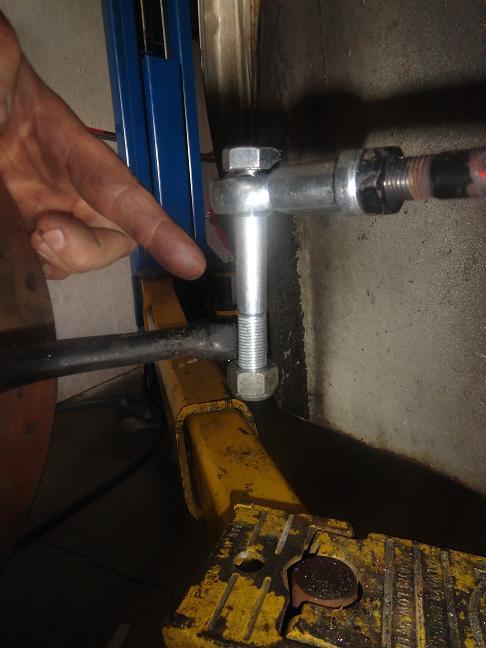
The rest is all getting the Squarsche back on it’s shoes.
I finished the camber boxes , so I had to ensure the holes on the inner fenders were large enough for the shock struts could fit through with the dust covers. So I marked them out on a Sharpie and cut them with the Plasma cutter (Damn I love that thing!!)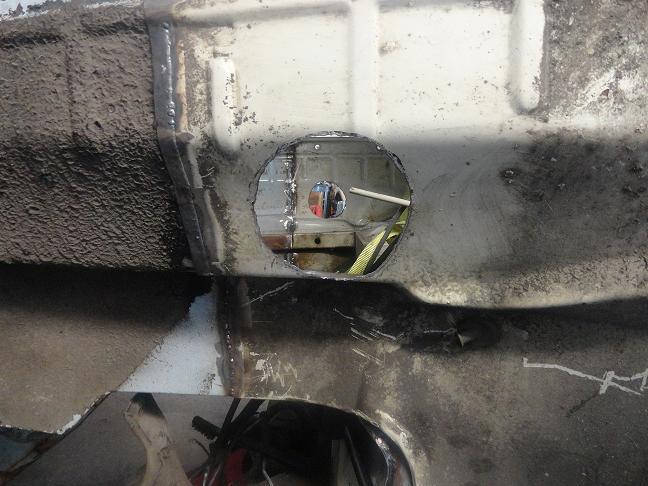
After stripping the paint away from the areas the camber boxes would mount and priming everything with weld-through primer, I sparked up the MIG welder and tacked them in place. Then after careful measurement, I finish welded them in place. They’re permanent now, like it or not. 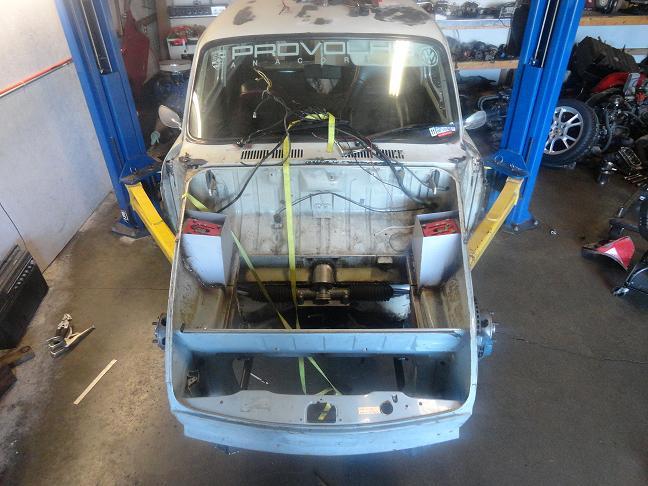
Once they were cooled-off, I assembled the struts with the dust covers and the Tangerine Racing mono-ball strut mounts and assembled the struts for a test fit. Like a glove!! 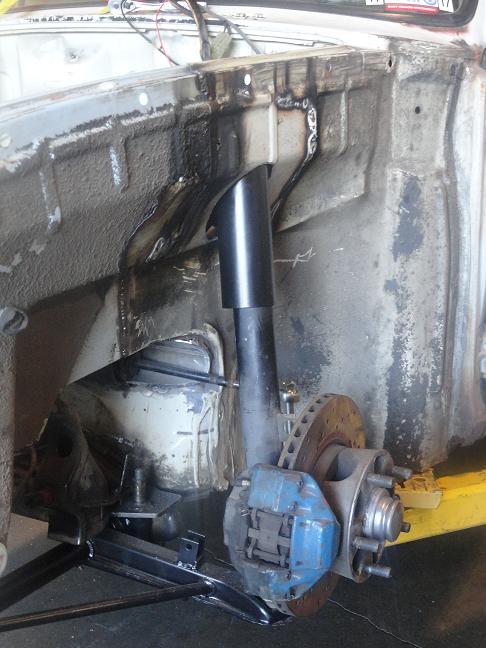
The Squarsche is now back on all for wheels for the first time in over 3 months!!! There’s still a lot of work to do, but it’s nice to know jack-stands and blocks of wood are a thing of the past!! If I listen closely, I hear winged H*nda fart-cars scrambling to get their passports stamped so they cam make a quick escape before the embarrassments begin. . .
The first pic of it back on the ground. . .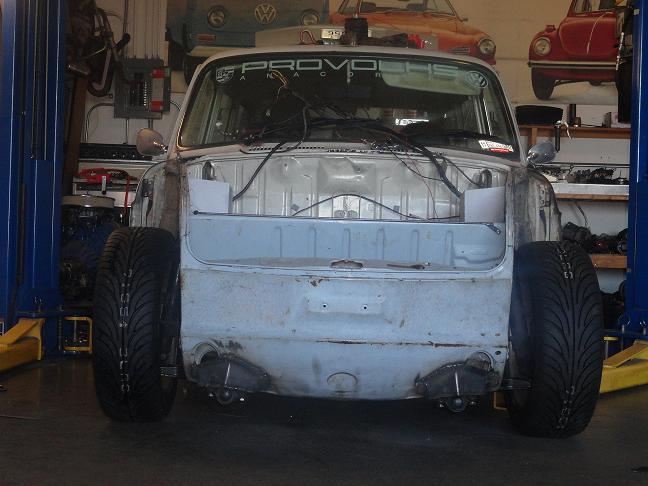
I hung a fender to see what I could be in for. It hides everything. It’s nice and stealthy; just a wagon with new wheels rolling down the street, really. . . Sorry Rich; the wheels are staying; get used to them.  If my plans didn’t call for wheel spacers front and rear, I could probably roll the rear fenders with my fender roller and be finished, but I have much more debauchery planned. Stay tuned. . .
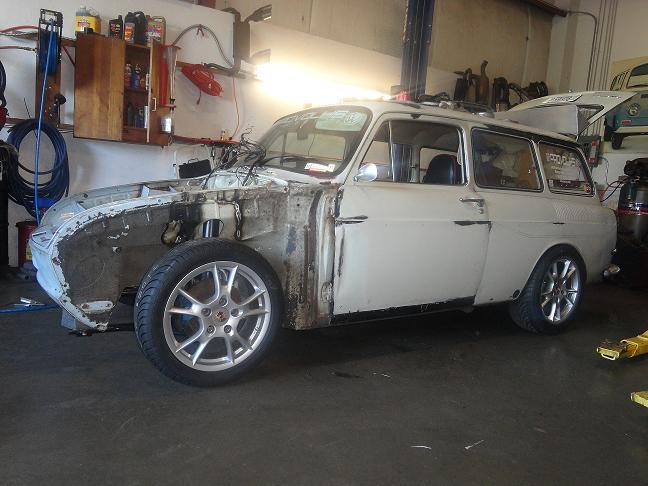
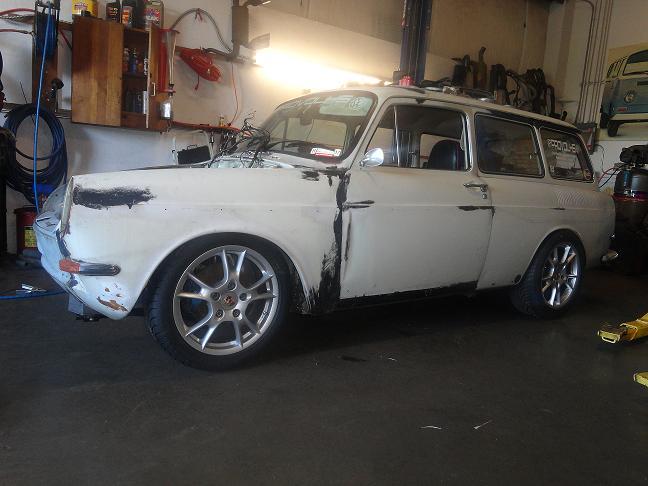
Posted by: McMark Jun 22 2013, 09:49 PM
So sick...
Posted by: NORD Jun 22 2013, 10:03 PM
Nate; Room for a V8 up front? Pretty Cool.
Posted by: sixnotfour Jun 22 2013, 10:11 PM
Nice ..17's vs 15's youre on it..
Posted by: BajaXJ92 Jun 23 2013, 10:04 AM
I love this build!
Jealous!
Posted by: kg6dxn Jun 23 2013, 11:17 AM
Very Cool!!!
Posted by: rdauenhauer Jun 23 2013, 11:22 PM
Ba-LING!!!
Posted by: montoya 73 2.0 Jun 24 2013, 01:10 AM
Everytime I read this thread, it makes me want a Squareback again! My first car way back in 1986 was a 65 variant S. I loved that car. Good job Nate!
Posted by: jaxdream Jun 24 2013, 08:01 AM
You need a custom emblem on the back ...VW-T314!!!
Jack
Posted by: JawjaPorsche Jun 24 2013, 08:36 AM
I really admire your skills. Awesome build.
Had a 68 Fastback when in college. Traded it for my new 914 in 1973. Had some good times in the Fastback.
Posted by: aircooledtechguy Jun 24 2013, 10:16 AM
Ba-LING!!!
Isn't a requisite for that chrome twenty-fo's??

Posted by: aircooledtechguy Jun 24 2013, 10:21 AM
You need a custom emblem on the back ...VW-T314!!!
Jack
I tried to order one from Jim a year and a half ago. . .
Posted by: aircooledtechguy Jun 24 2013, 10:23 AM
Nate; Room for a V8 up front? Pretty Cool.
Not a snow-balls chance in a hot place brotha!!
Posted by: sean_v8_914 Jun 24 2013, 10:39 AM
super cool project
Posted by: Java2570 Jun 24 2013, 02:37 PM
Hey Nate - I love this build you're doing with the Squareback.....excellent stuff!! Jon
Posted by: aircooledtechguy Jun 24 2013, 04:03 PM
Thanks for the kind words guys. I'm having a lot of fun making it all work in a new car. Can't wait to go driving. . .
Posted by: aircooledtechguy Jul 8 2013, 06:36 PM
I spent my lunch today installing a set of 100mm wheel studs on my front hubs. The stock 45mm studs were not long enough to allow for wheel spacers larger than about 10mm, which just would not do. I was planning to run a pair of Porsche 944 21mm spacers on each side up front (42mm total) in order to widen the track so that it would be equal to the rear track. Actually, it only would take 1-21mm spacer in front if I weren’t planning to run 1-21mm spacer in the rear, but I wanted the flexibility of spacers front and rear if I decide to run a different set of wheels/tires in the future. So I ordered a pack of 10-100mm studs. I didn’t need longer studs for the rear since the Porsche 911 trailing arms already have 65mm studs installed for the factory 21mm spacers.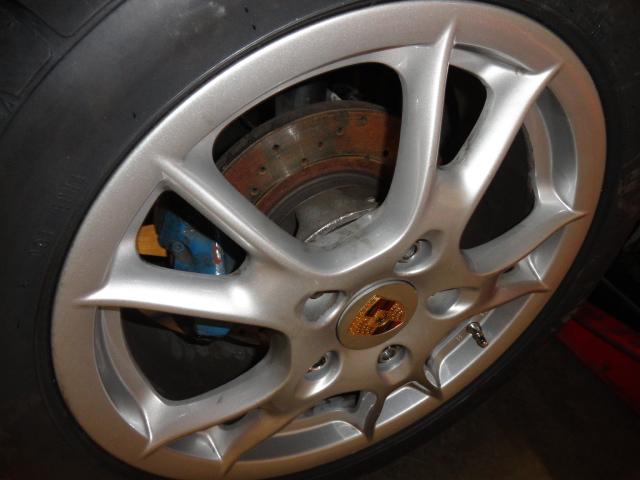
It didn’t take too long to remove the hub, then the rotor and finally the studs. Luckily I recently bought a 20-ton press so they came out and went in like butter. 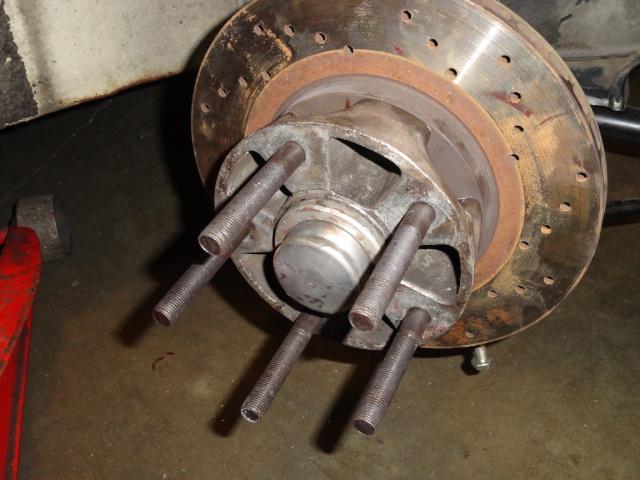
Now with the wheel spacers installed, I have a track width of 64” in front and 64.5 out back; perfect!! 
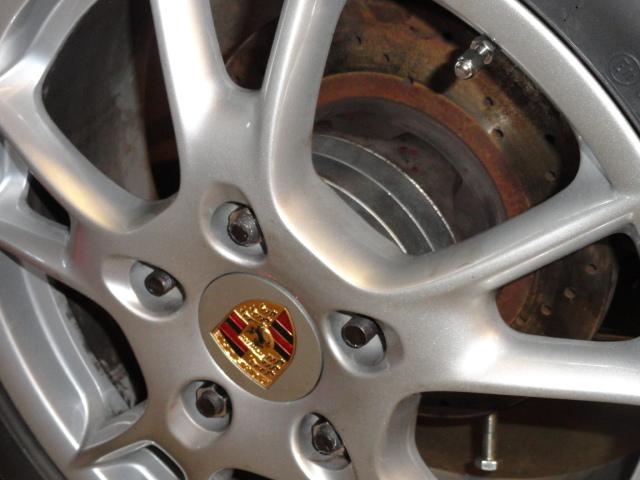
Now I need to seriously stretch the fenders front and rear so everything fits. 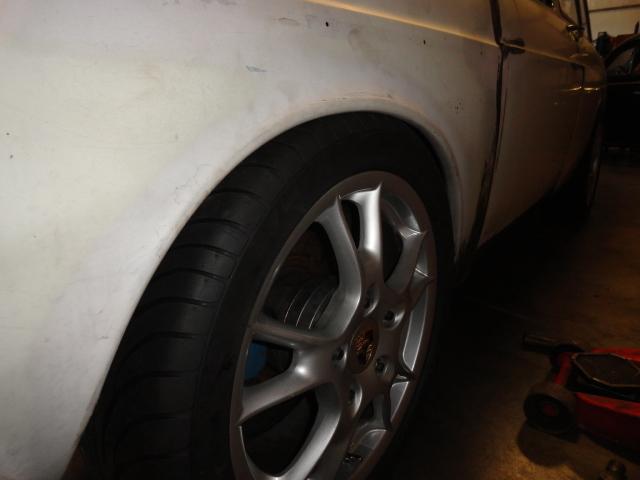
Fortunately, this weekend when I was at the vintage races, I found a guy with a Mustang that had stretched his fenders almost exactly the way I want to do mine. For now, I'm keeping that close to the chest until it's done. I’m looking forward to getting that started after I button-up all the loose ends on the suspension.
Posted by: aircooledtechguy Sep 28 2013, 09:19 PM
Finally!!! I got a bit of time today to work on the Squarsche.
I began with POR-15ing the fresh air vent assemblies. They were pretty crusty and since they are just spot welded together, I wanted to ensure they wouldn't leak (and corrode) in the future. Then I lubed the cables with a motorcycle cable lube tool and lubed all the hinge points. For the first time since I've owned this car (10 years), they will work 100% correctly.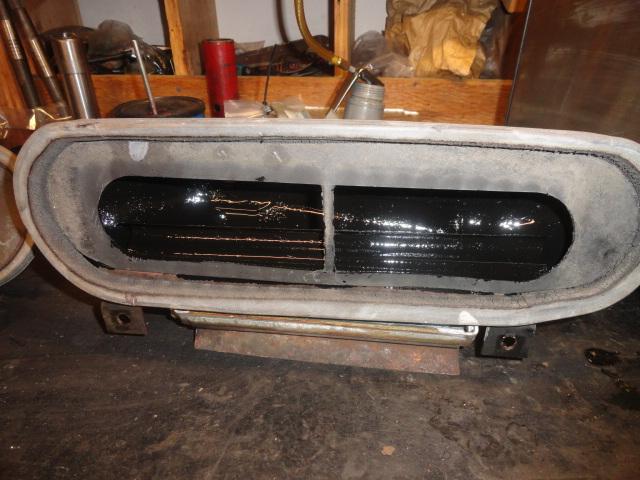
Then I had to install them which is easier said than done. . . Of course, the wiper assembly was already installed, so I had to first remove that.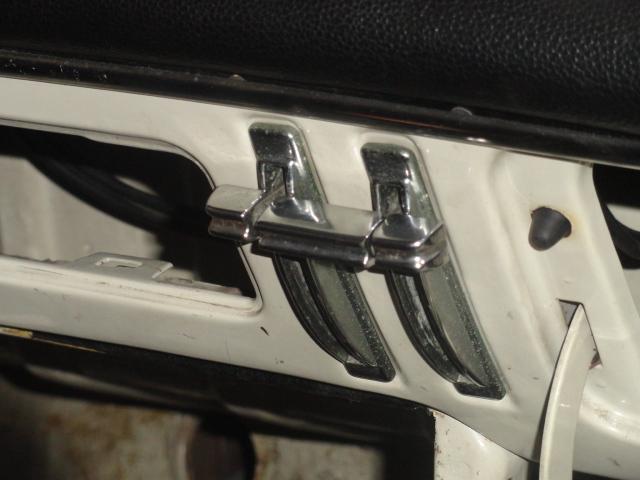
While the wipers were out, I decided to update the wiper pivots to the later style like the '71-on use. I was hoping to just swap out the early assembly for the later style and be done with it, but of course, the wipers are in slightly different positions compared to the early cars. :roll: So I removed the early pivots and cut the arms off. Then did the same to the late pivots and then welded the early arms to the late pivots. Then assembled everything back again. Since I like the extra spring pressure of the extra spring pressure that the late bus wiper arms have, I cut down and re-welded a pair of bus arms so that they were type-3 sized. I forgot to take photos of the process, but t's virtually the same as this:
http://www.aircooledtech.com/early_wiper_upgrade/`
When I broke for lunch, I received a call from a guy with a spare set of Porsche Boxter wheels cheap. So I picked those up so I can mount a set of winter tires on them. They are just the basic 17 X 7" & 8.5" staggered set.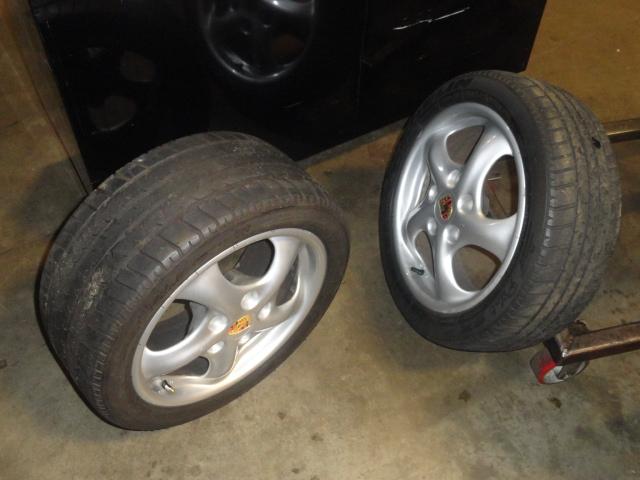
In order to comply with SCCA rules, I have to remove the steering lock mechanism from the lock cylinder. So I completely dis-assembled the Porsche 914 ignition assembly and removed the lock bar. Then re-assembled it with a new ignition switch since the old one was cracked. It fits like a glove in the shortened, '73 Super Beetle dual stalk column.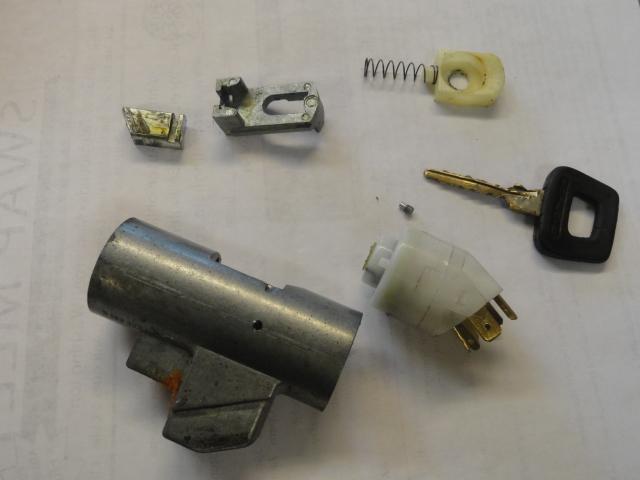
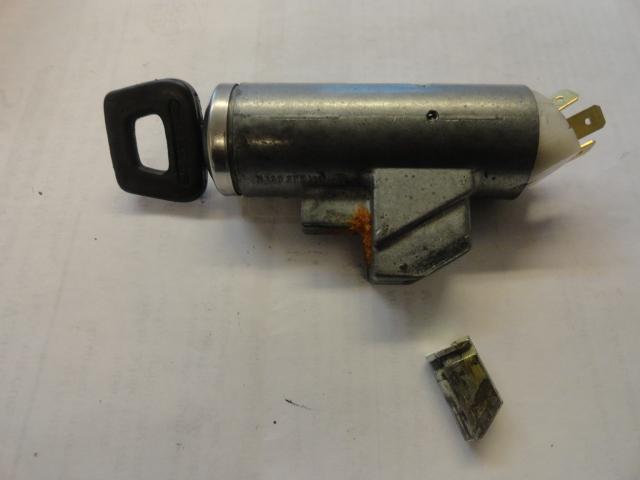
It was really good to get back on this again!!
Posted by: aircooledtechguy Oct 1 2013, 01:29 PM
I had a little time last night to finish-up the brackets that allow me to mount the shortened Super Beetle steering column into the car. Now it fits well and has a solid feel.
This morning, I turned my attention to the steering shaft that connects the column and the Porsche R&P unit. It's just roughed into place at this point, but it's all there and works like it should. Woohoo! 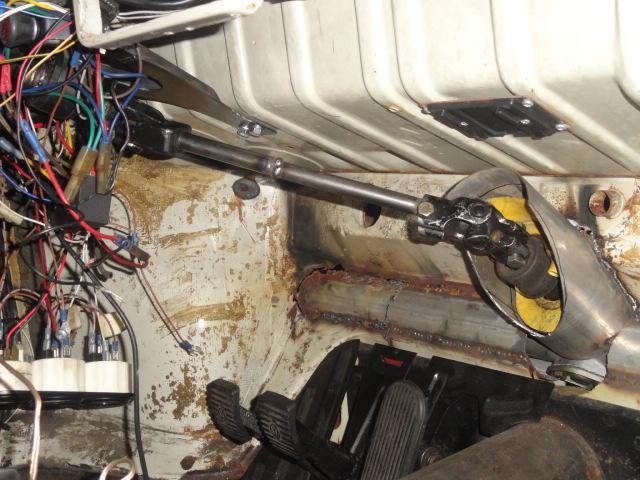
Posted by: aircooledtechguy Oct 28 2013, 04:46 PM
I may not have had much time to dedicate to building the Squarsche as of late, but I have acquired a few parts. I recently took delivery of a massive box of random 1 5/8” mandrel bent tubing in preparation for building a custom header. Gotta love eBay!! I’m going to first have to build a set of custom stub pipes and then create an equal length 4into1 system for a special muffler I plan to use on the new motor.
I should be able to make a header or two out of this box of mandrel bent goodness. . .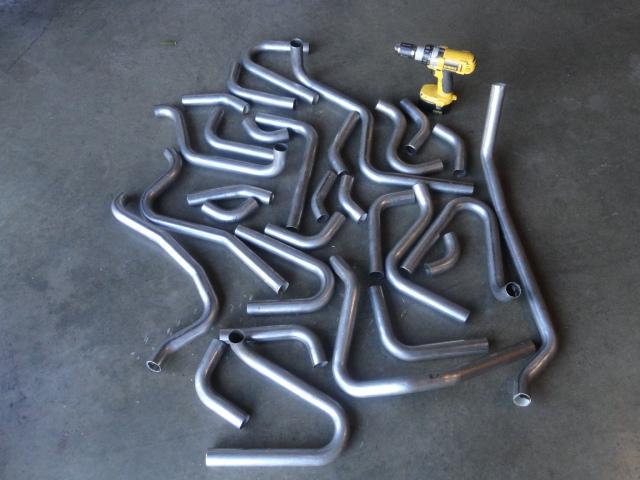
Posted by: aircooledtechguy Dec 2 2013, 12:03 AM
While my wife combat-shopped at crowded stores full of frantic holiday shoppers, I was hold-up at the shop, locked behind a prominently displayed "CLOSED" sign 20+ Gigs of music playing on shuffle and spent some much needed quality time with the Squarsche. MAN, did I need it; it felt great!!
I began by finishing up the firewall pocket for the Porsche 911 steering rack. The center 4" tube was tacked in, but I needed to fabricate the outer 8" or so to have proper clearance for the 930 turbo tie rods. I made some rough cardboard templates and then transferred them to sheet steel. Then I bent them by hand around some tubing. Tacked them in and then finish welded everything in place. Now I'm happy with how they came out and I have proper clearances when turning the wheels lock to lock.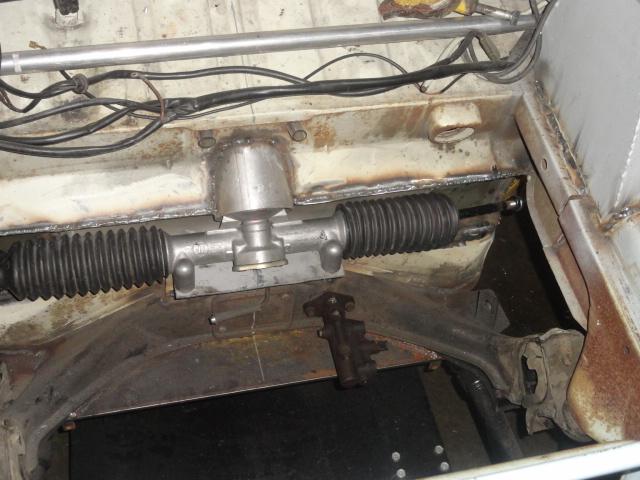
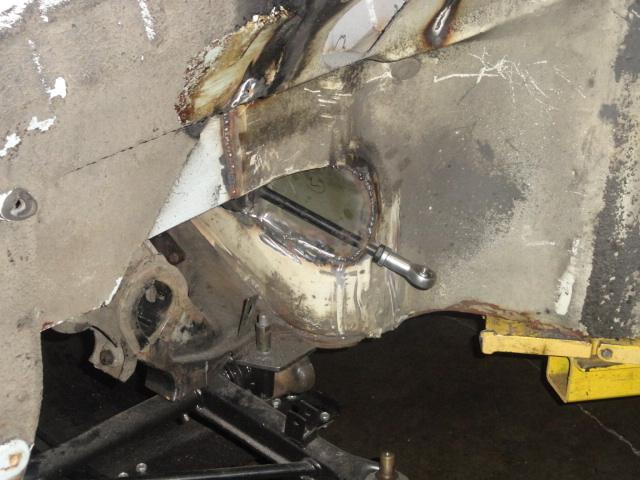
Then I turned my focus to the forward suspension mounts. I wanted to tie the two mounts together with tubing side-to-side in a first step toward stiffening the front-end. In time, the center of this brace will also have the mount plate for a Braille racing battery (an effort to lighten the car AND shift the weight as far forward as possible to get the rear weight bias under control). I still plan to add a pair of braces from the uper factory beam mounts to the front mounts as well, but this is the main brace.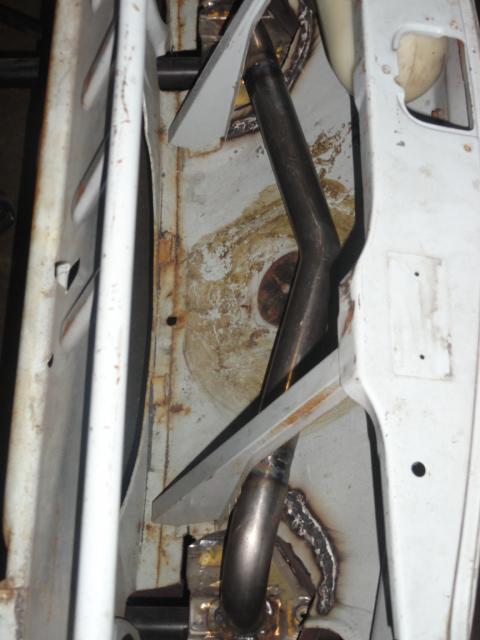
Then I turned to the pitman arm braces. This basic design idea was brought to my attention by "gearheadgreg" (Thank you!!) and is my take of a factory Porsche RSR style brace. I first made a cardboard template of the basic flat brace. Then I transferred that to 1/8" plate steel and cut it out with my plasma cutter. After smoothing the edges and trial fitting, it was ready for mock-up and mounting. Before that could happen, I had to drill out the taper in the Porsche pitman arm with a 14mm drill bit. Then I mounted up a 130mm long M14x1.5 thread bolt and set the proper height for the new braces. Then the bare arms were tacked and then finish welded in place. The arms are strong, but I wanted to ensure they wouldn't deflect when highly stressed, so I took some 1/2"x1/8" flat steel and boxed-in the new braces. I first ground the inner edge so I could get good penetration when welding Then I tacked one end and bent it around the perimeter, tacking it as I went. Once it was all in place I finish welded a bead all the way around it. I plan to add one large gusset unter the brace between the pitman and the brace for good measure, but I ran out of time this weekend. With this set-up, I'll be able to tailor the bump-steer by simply switching around some spacers so the tie rods have the desired angle. It should work pretty good and be simple to make adjustments. Here's some shots of the process. . .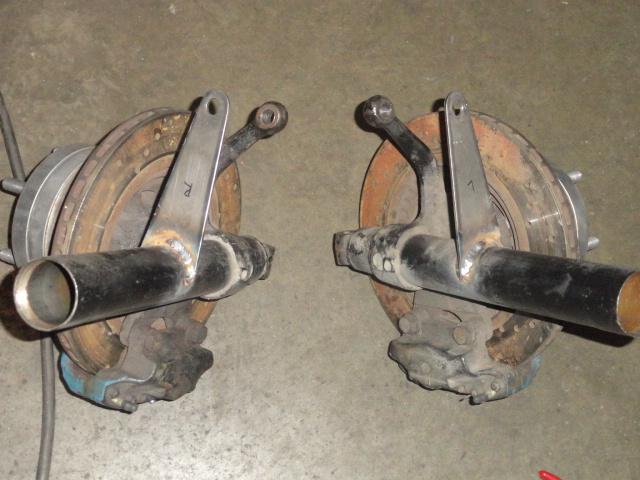
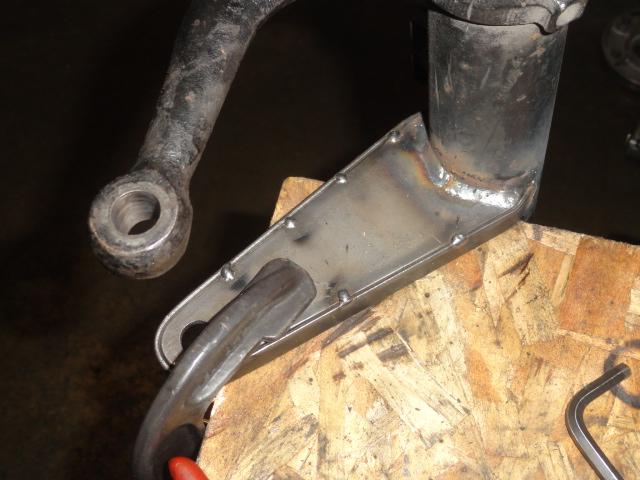
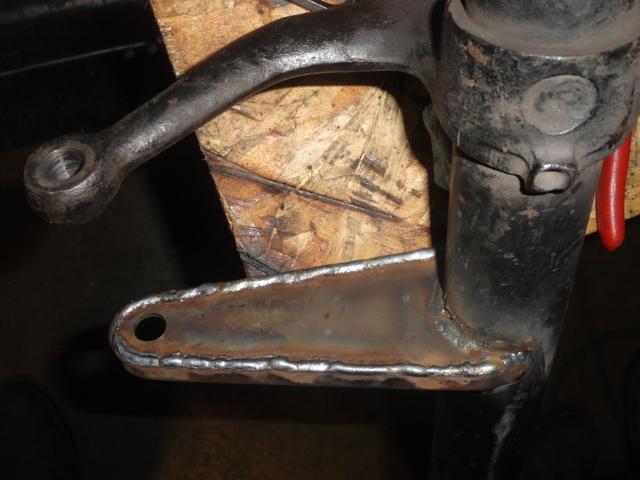
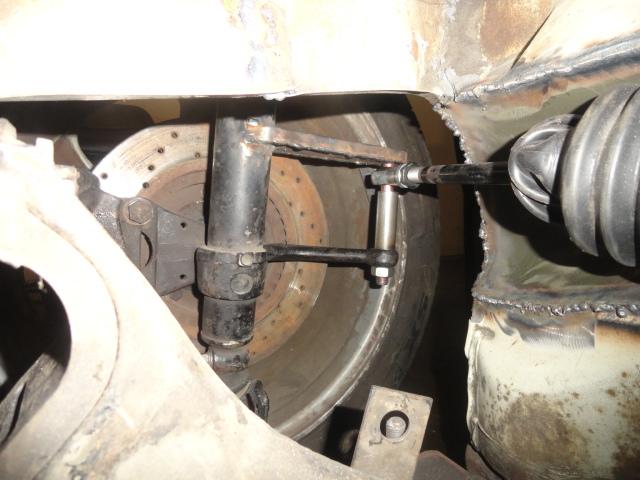
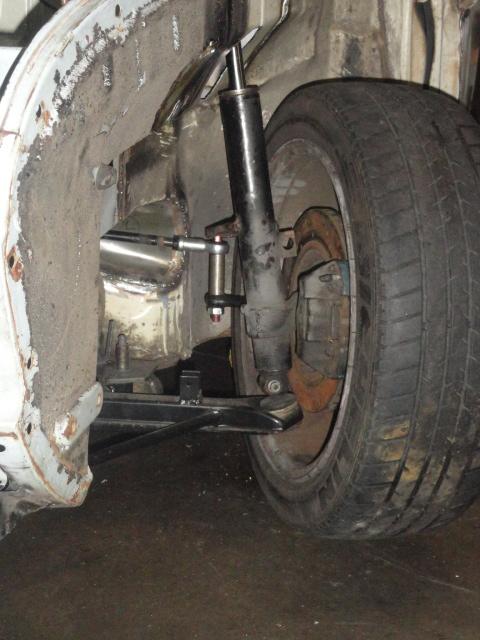
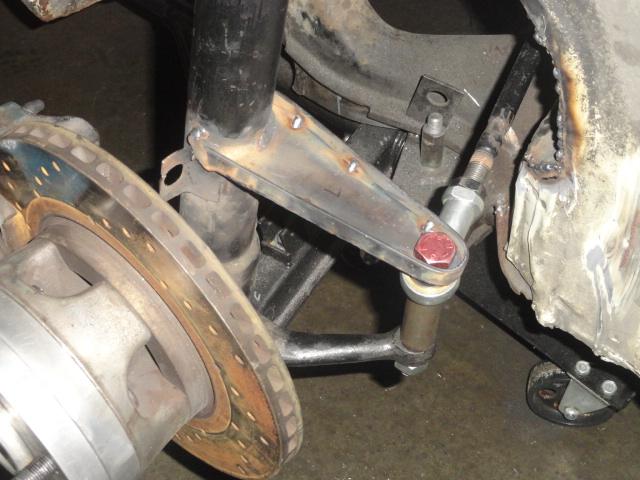
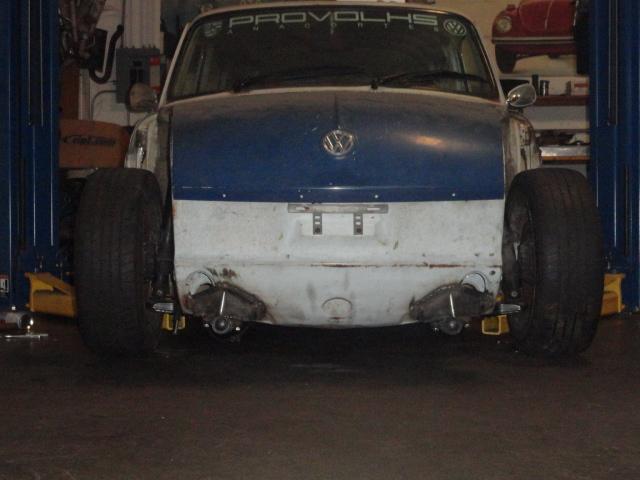
Posted by: jaxdream Dec 2 2013, 08:33 AM
Dadgum , this is just plain slicker than socks on a rooster !!!!
Keep it going dude !!!
Jack
Posted by: zambezi Dec 2 2013, 12:40 PM
Great job, and nice to see more progress. I know the sloping nose of the earlier type 3's is more appealing but if you had started with a 70 - 73 model the front suspension pickup points would be totally hidden. Love the fabrication going on here.
Posted by: MDG Dec 2 2013, 04:35 PM
Dadgum , this is just plain slicker than socks on a rooster !!!!


I have no idea what that means but I will use that line.
Posted by: aircooledtechguy Dec 10 2013, 01:17 PM
Thanks for the kind words guys.
Zambesi; actually the front end only appears to be longer on the late model cars due to the area above the bumper sticking out further. The area the suspension actually mounts to is just as long as the earlier cars. No way, I'd roll in a fat-chick Square. . . I just can't get past the looks of that nose.
I never liked the location of my 4 gauges that I had mounted to the left of my dash since I really couldn't see them unless I leaned forward and peered over the spoke of the steering wheel. To be honest, it was always a temporary location to get it on the road until I found a better solution. So, I had a good friend of mine that builds racing sail boats, build me a prototype center gauge panel for the Squarsche. I'm not a fan of full center consoles mainly because they get in the way of my "Bozo-ish" feet and they tend to make a car feel smaller by being less open. So I opted for a center/right custom panel that could house my gauges. Then to angle them up slightly and toward me, I fitted a set of S/S angle mounts that I purchased (and never used) when I was stationed in the Philippines back in 1990. All the Jeepneys had these for the gauges on the dash and finally I have a perfect use for them. So if you're an old-timer like me and have ever ridden in a Jeepney, those will probably look kinda familiar and may bring back some memories. . . Now I will have a perfect view of the gauges at all times at a glance.
Some photos of it all mocked-up. . .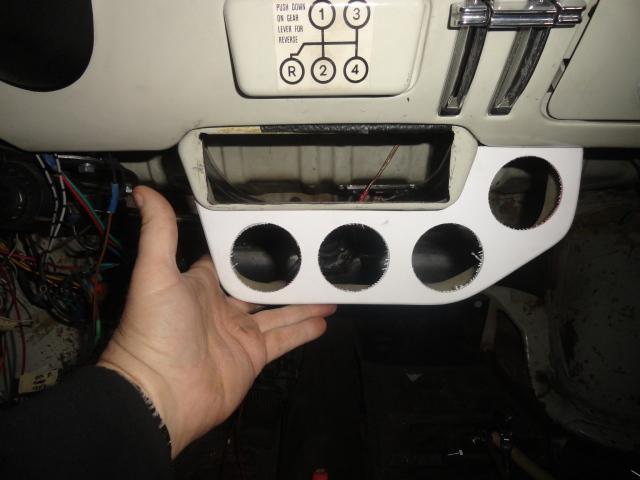
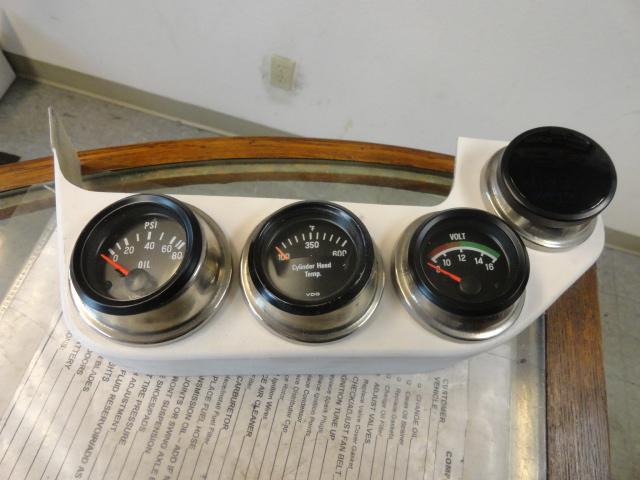
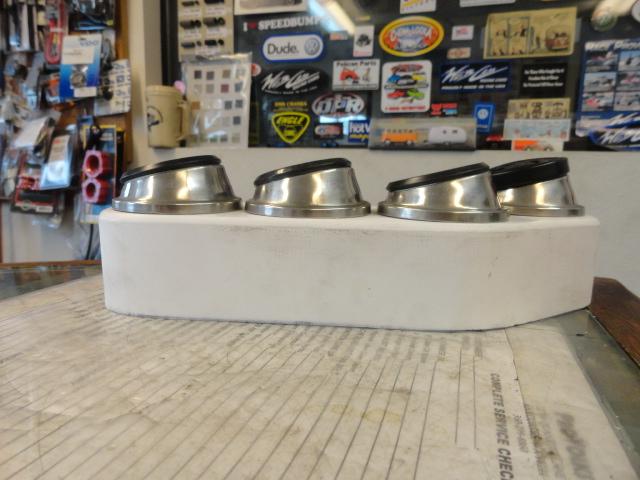
Posted by: ChrisNPDrider Dec 11 2013, 02:32 PM
Posted by: aircooledtechguy Dec 14 2013, 07:32 PM
So this week I focused on the rear engine hangar and the engine mounts among other things. I’ve got some severe torture in store for this car in the near future, so when I install the new motor, I’m not willing to continue running the factory rubber engine mounts. These don’t last long in a stock bus 2.0L w/ 70hp and I’ve been punishing them long enough with my Porsche 2056cc that’s probably putting out a mere 100-110hp. I don’t want to risk them with a race-prepped 2.3L running MS3 and COP. So I opted to modify a set of bus rear engine mounts and a bus mount bar (since that’s what I’m currently running) and make it a solid mount arrangement.
For this, I bolted together a mock-up motor to my engine stand so I could ensure everything fits 100%. Finally a shop full of crap pays off!! I’m also in the process of making my stub pipes and exhaust, so some of these features will be incorporated in since they also use the mount bar, however, I’m not going to be letting that cat out of the bag just yet. . .
Here’s a few photos of the solid mounts. These should transfer a lot more engine noise into the cabin. . . Oh well, it’s the cost of being able to go *really* fast. Nothing ear plugs can’t handle.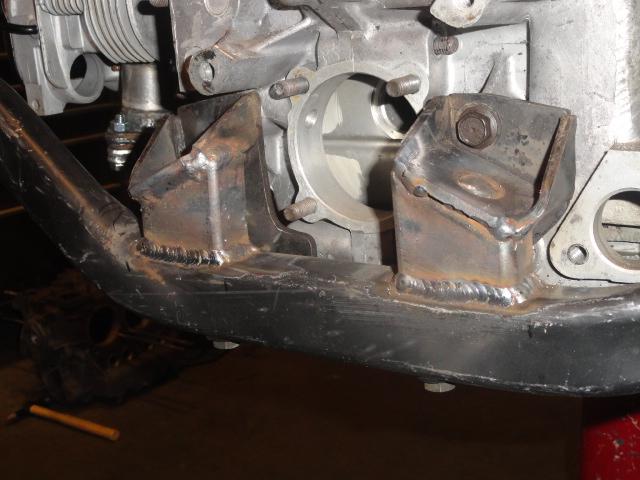
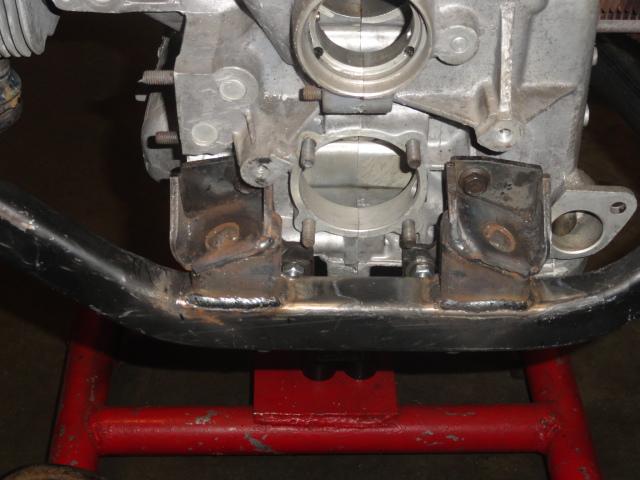
Here’s a couple shots of the almost completed mount bar with the part of the custom exhaust hangers welded in place. I'll let you all speculate as to what exhaust I'll going to be running. . . 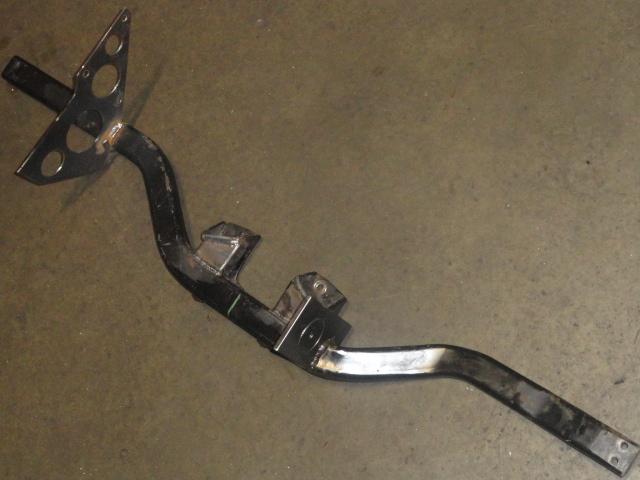
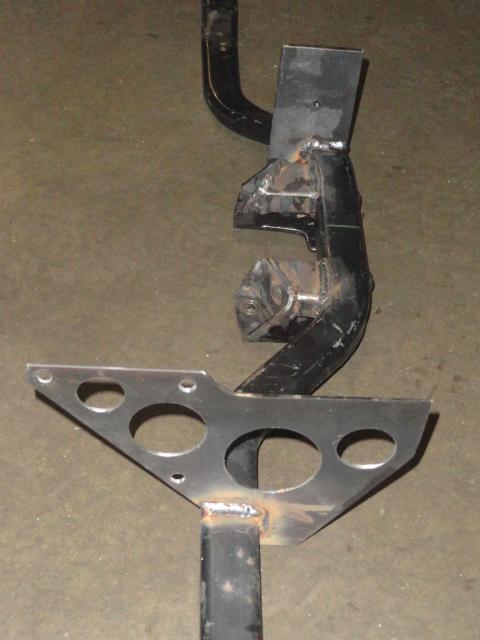
I’m only letting on to about ½ of what I’ve been up to recently. . . Stay tuned for the rest of the story. . .
Posted by: scotty b Dec 14 2013, 08:32 PM
Posted by: aircooledtechguy Dec 17 2013, 07:20 PM
With the new, more powerful 2.3L street/race motor that’s going in the Squarsche, I needed to upgrade to a full-on performance minded exhaust. So the stock type-4 heat exchangers and off-the-shelf bus 4into1 header was not going to cut it anymore. Since there are not any affordable systems that will work, I opted to make my own so it would fit and incorporate the muffler I wanted to use; a Bischoff S/S Porsche 911 banana can!
So I began by creating a set of stub pipes. I chose to use 1 ½” pipe for the stubs and 1 5/8” for everything else before the collector. I also wanted to try out a new idea that’s been rolling around in my head that would enable me to have leak-free stub to header connections. It involves 2 slip-joints, which cause any exhaust gasses that wish to escape to have to turn 180 degrees, then another 180 degrees and finally another 90 degrees for a total of 450 degrees all in a millisecond; that just isn’t going to happen! So these stubs will be leak-free while being exhaust gasket free too. They were kind of a PITA to make, but they came out exactly as I envisioned and they fit the bill perfectly. I still have some finish welding to do on the flanges and cleaning up on the flanges, but you get the idea. . . Once it's all tacked together, I'll go back and TIG weld every joint.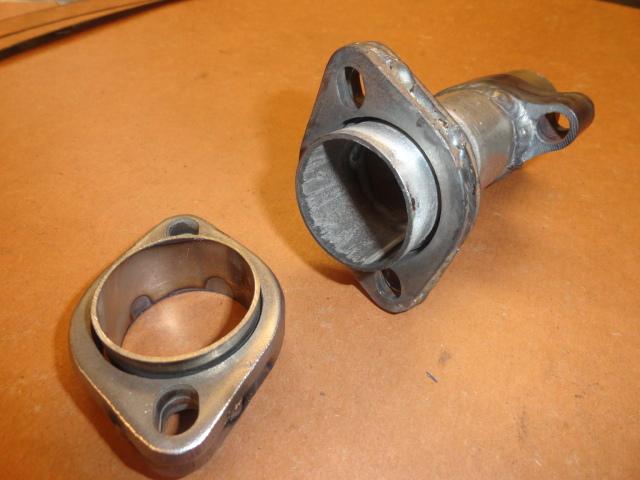
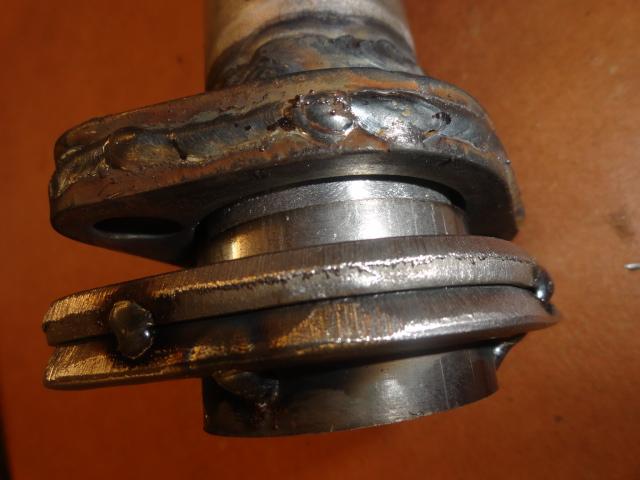
When building an exhaust, you have an obvious starting point for the system at the heads, but you also need to have an ending point so you can figure out how to get it all to fit. So next I mounted the muffler. Since I had never seen a 911 banana can muffler on a VW engine, I needed to come up with a muffler mount system. You just can’t mount it to the fan shroud since it’s not really made for mounting anything larger than an AC compressor, your mounting options become limited. So I decided to make the mounts attach to the main engine mount bar which is the main load bearing member at the rear and is tied into the body of the car.. The right side mount I made from ¼” steel since it has to bear the full weight on that side and the lions share since that mount is about 1' off center-line.. The left side I made out of 1/8” steel, but tied it into the AC compressor mount holes that already exist in the fan shroud. I cannot tell you for sure just how many times I mounted/dismounted the bar and fan shroud during the build process, but it was at least a couple dozen! Everything was dry fitted, then welded in place to ensure a perfect fit.
Once the bare mounts were made, I needed to make a pair of cradles where the muffler will sit. I chose aluminum for this since it needed to be ¼” thick and steel would just be too ridiculously heavy for this part. All the mock-up was done with the engine sitting on my lift about 10” off the ground with the muffler sitting atop wood bucks that held it at the right position. One of the goals with this exhaust is to not have any part of the system below the bottom of the engine. Ground clearance can be an issue with the car lowered and I got really tired of my exhaust scraping occasionally as I exited a couple parking lots in my town. Plus this car should see a fair amount of track time in the future and I'll be lowering it on those occasions.
Mount holes were drilled through all materials at once so there was no chance of bolts not fitting or fitting loosely. The result is a super-solid mounting that does not rely on the tightness of the bolts to be a tight fit. Here's a few shots of the muffler cradles in place on the mock-up motor:
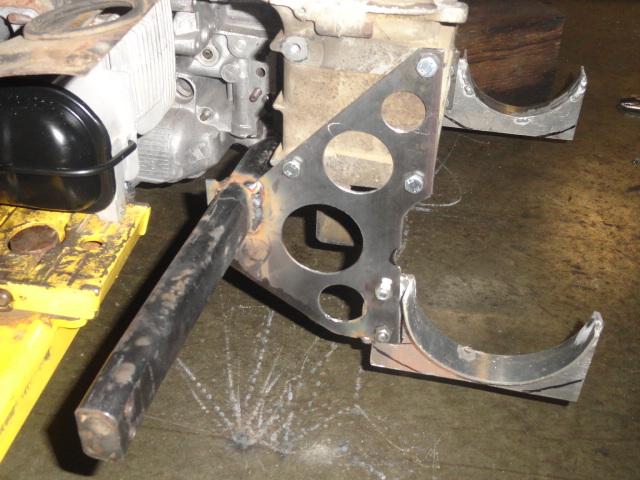
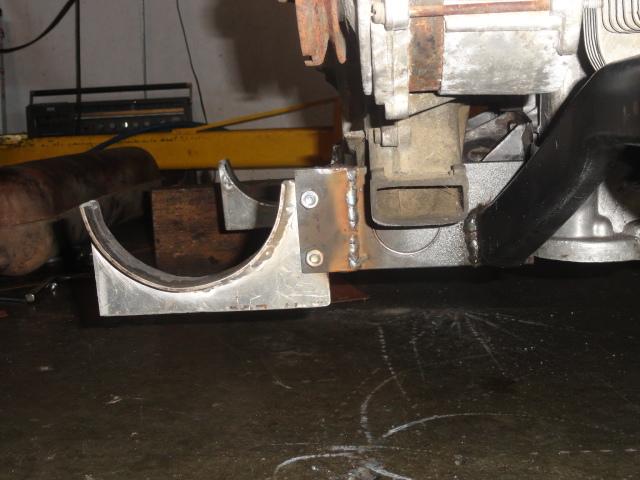
Here’s some shots of the muffler in place on the new cradle on the mock-up motor: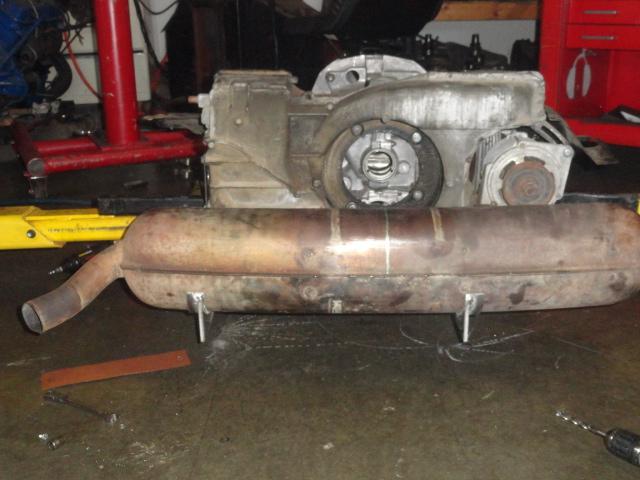
Strapped on with temporary straps:
I also modified the muffler to exhaust mounting with a V-band coupler so that for track days I can easily remove the muffler and add on a Supertrapp or more basic flow-through muffler/stinger system.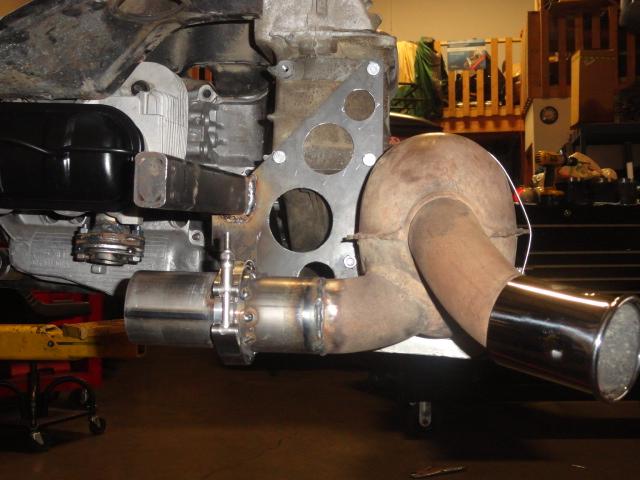
Now that I have a definite beginning point and ending point I needed to locate where the collector would be and begin building to the rest of the header. Stay tuned. . . 8)
Posted by: rdauenhauer Dec 17 2013, 07:31 PM
Crazy!
Posted by: bigkensteele Dec 17 2013, 07:41 PM
I love this thread!
How much room will there be between the fan pulley and the muffler? Are you concerned about cooling the engine with hot air?
Just curious as you have obviously thought this through.
Posted by: aircooledtechguy Dec 17 2013, 08:55 PM
How much room will there be between the fan pulley and the muffler? Are you concerned about cooling the engine with hot air?
Just curious as you have obviously thought this through.
I'm using a custom steel air guide that replaces the factory rubber bellows on the type-3 that brings the air from the rear duct directly into the fan. I may add a second skin 1/4" off the center section of the muffler if I find it's too close and transfers heat but I don't think it will be a problem really.
What I may do to monitor incoming cooling air is to add a temp sensor and integrate that into the Megasquirt dash so I can monitor it directly rather than assuming heat by watching my head temp gauge which is a very indirect way.
Posted by: aircooledtechguy Dec 23 2013, 02:46 PM
I spent Saturday hold-up here at the shop and made it my mission to get the Squarsche's new exhaust header built and tacked together. The goals were to have a header that (1) was equal length (or darned close), (2) not have any part of it hang down below the sump and cause ground clearance issues and (3) to not interfere with access to the engine (like the valve covers, etc). I began by getting the collector positioned and tacked into place. Then it was a matter of getting all the other pipes to fit from their respective stubs to the collector while adhering to the rules.
I began with cyl. #2 since this was the longest run and the most direct shot, then I did #1. I needed those two to fit between the bell housing and the case where there's a bit of room and it's there that I installed a slip-joint for expansion and to ease in installation & removal.
Cylinder #3 & #4 were the most difficult since I also wanted to ensure they didn't interfere with the valve cover on that side. and because of that, it's easy to run out of room for tubing. Cyl #3 was the most difficult but I got it all to fit in there and be smooth so I'm happy with it. I hope it sounds good. . .
Here's the system all tacked together and ready for finish TIG welding: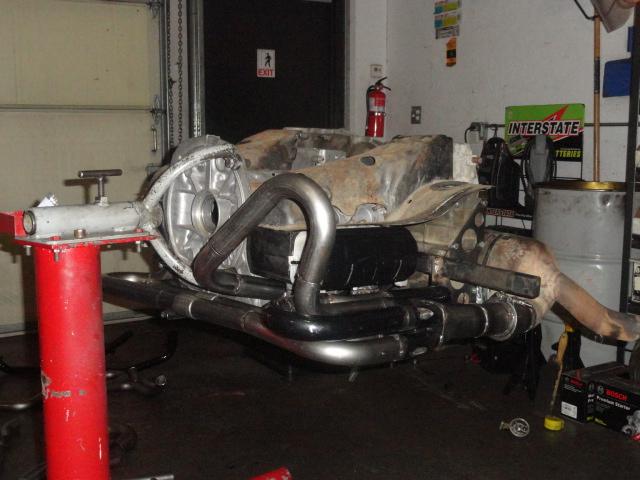
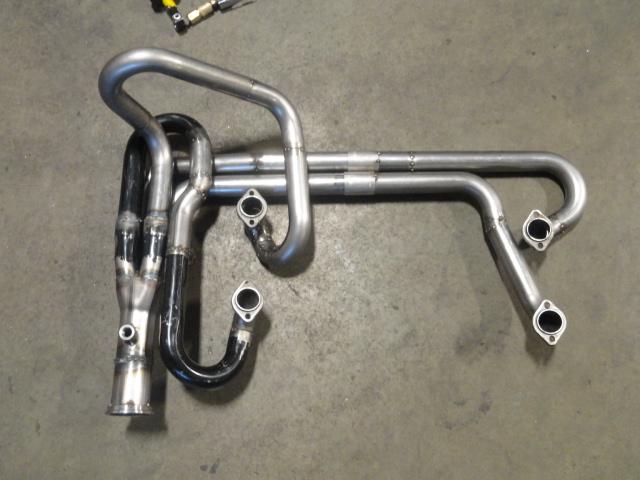
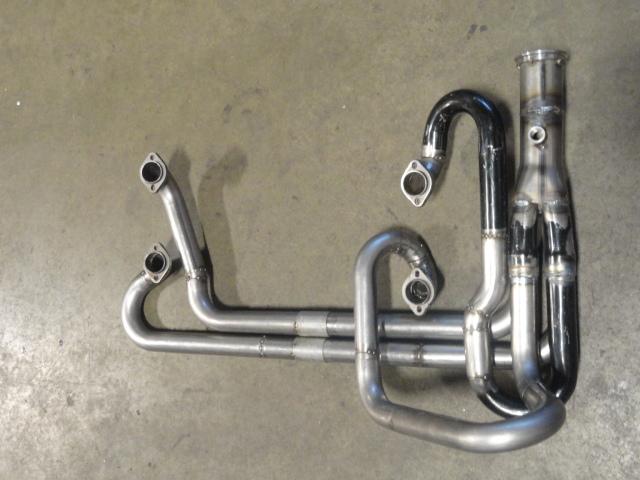
With the muffler:
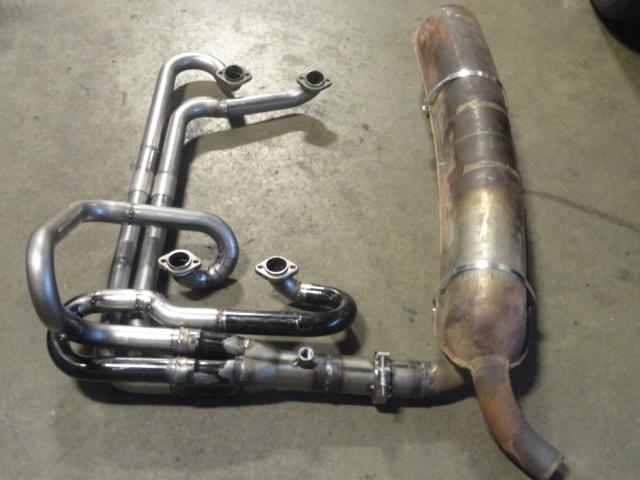
Posted by: wingnut86 Dec 23 2013, 02:59 PM
Ummm, Mongo REALLY want one!!
Posted by: Java2570 Dec 23 2013, 06:03 PM
that looks great! Can't wait to hear what she sounds like!!
Posted by: aircooledtechguy Dec 24 2013, 04:41 PM
I came in a little early this morning so I could put a nagging issue to rest. Since going to Porsche 5-lug wheels, I have not had a real spare or one that I would call handy. The only affordable type I could find was at a local Porsche swap that was from a Porsche 944. I recently priced a single early 911/912 wheel in 15x4 .5 and that ain't happening!!!!!! Holy crap guys are proud of those things!! While it could do the job alright, it's truly a VERY temporary spare that has absolutely no re-enforcement chords of any kind and basically no tread either. The other issue is that it's designed to be stowed in the deflated position which would necessitate carrying an air pump. . . Another thing to haul around everywhere. To make matters worse, the rim was 5" wide which made it a super snug fit into the tire well.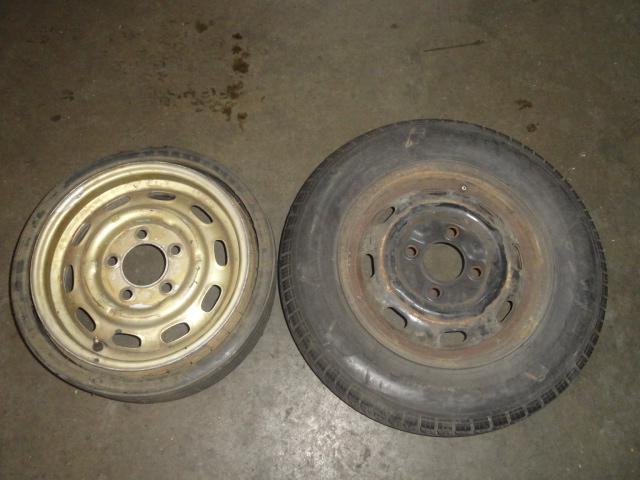
Last week on a whim I measured the ID of the hoop on both rims and discovered that they were exactly the same. So this morning I carefully cut the welds that hold the wheel centers to the hoops. After prepping the Porsche center and the 4.5" VW hoop, I tapped the center into the hoop.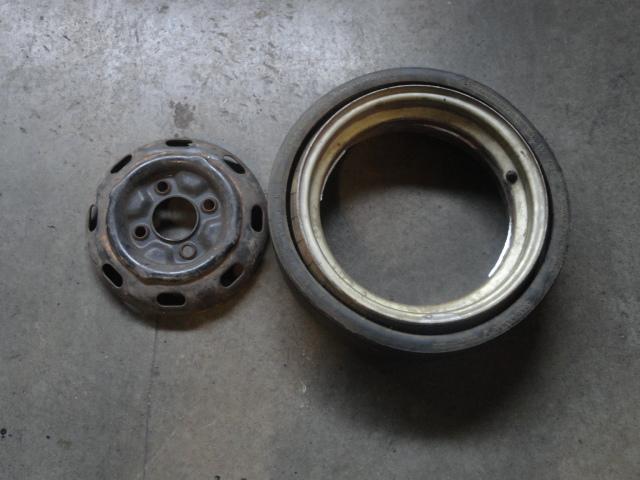
Then I bolted it to my front hub and trued the hoop on the hub by spinning it while a piece of chalk showed me the high points. Once the chalk made constant contact, I knew it was true so I tacked it in place. Then I carefully dismounted the rim and finish welded the Porsche wheel center to the VW hoop. 'Cause I know someone will say something; YES, the tire is a junker and was deflated with the valve core removed!! 
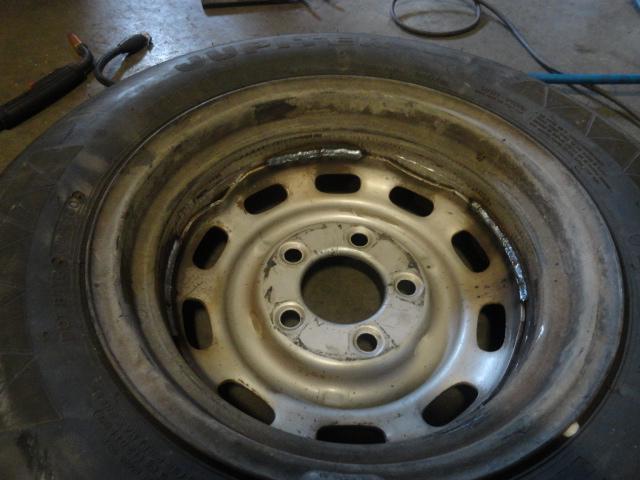
Viola!! A spare that is full size, can be aired fully, can be driven hundreds of miles if need be, is the same diameter as my Porsche wheels/tires and fits like stock in the tire well. Surprisingly, it only took about an hour to complete. Now I'll have to send it out for powder coating when I have a bunch of stuff get done.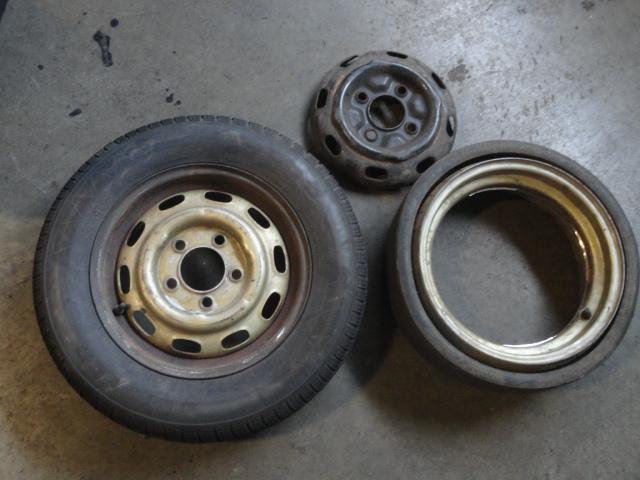
Before it goes in the scrap pile, does anyone want a 4-lug VW rim 5" wide with a folding Porsche spare tire??
Posted by: rick 918-S Dec 24 2013, 08:50 PM
Great solution! Way to think out of the box!
Posted by: KELTY360 Dec 25 2013, 12:18 AM
Since this build is obviously out of this world it begs the question.....what color is the sky on your planet?
Posted by: aircooledtechguy Jan 14 2014, 07:18 PM
Since this car will see a race track from time to time, the fenders will be going on and off quite a bit for maintenance and adjustment track side. So I figured replacing the stock screws and installing dzus fasteners would be a good upgrade. Luckily I have a sprint car supplier showroom near by (www.speedmart.com) so I hit them-up for some aluminum dzus parts.
I had to first slightly enlarge the holes in the fenders with a burr.
One thing that always slows the process is drilling the holes for the spring catches in exactly the right spot. So after pondering the problem, I came-up with this steel template that centers itself in the hole via a cut-off bolt and then you just drill through the guide holes on either side. Viola!! Perfect placement and it only takes about 2 minutes to drill ALL the rivet holes for the springs!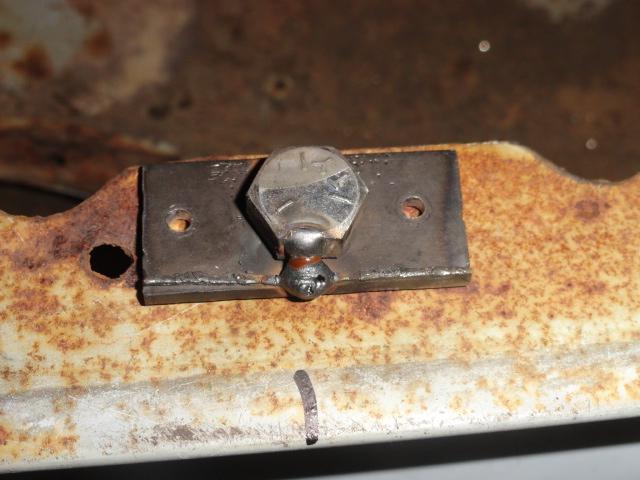

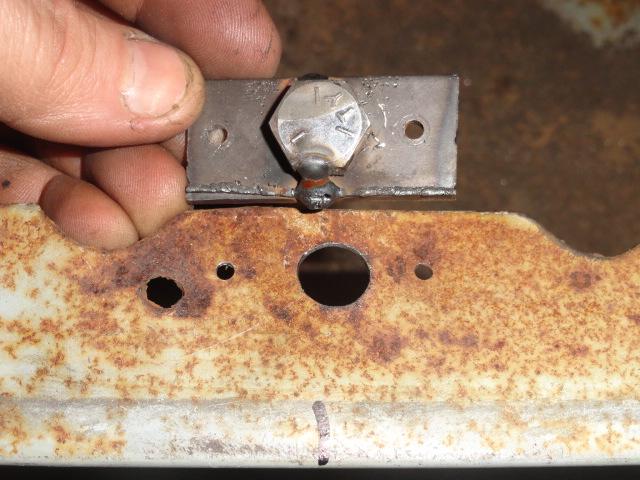
Rivet the springs in place: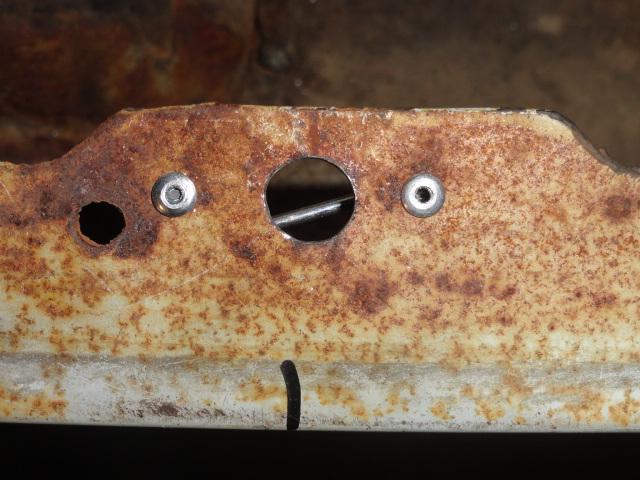
Then fit the fender and fasten the dzus fasteners with a 1/4 turn "click". 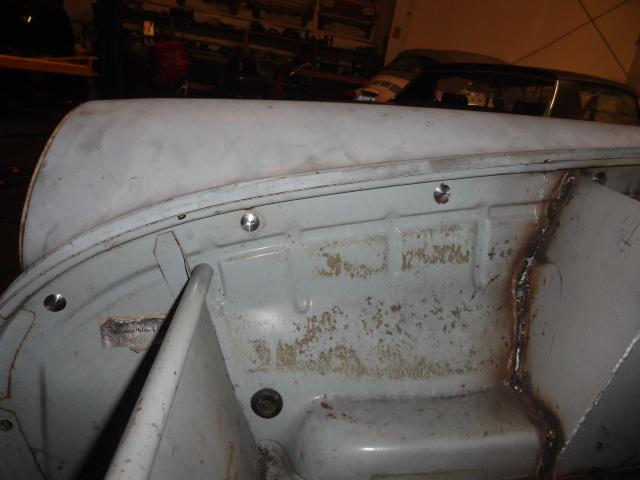
Now I'll be able to remove a fender in about 30 seconds rather than several minutes.
Posted by: KELTY360 Jan 14 2014, 07:34 PM
Way cool!
Posted by: NORD Jan 15 2014, 12:56 AM
Kelty; I. Was down to Nate's shop a few weeks ago. That square back is going to be really different than stock. I'll let Nate share that when the fenders are on.
Posted by: aircooledtechguy Jan 15 2014, 10:22 AM
Thanks Marc. I can't wait to get this back on the road and go driving. Crossing the center line shouldn't be an issue with 255/40/17 tires stuffed in.
Kelty; I. Was down to Nate's shop a few weeks ago. That square back is going to be really different than stock. I'll let Nate share that when the fenders are on.
If I haven't already pissed-off the stock-nazis in the VW community, my fender mods should send them to the hospital.
At least my mods will all be functional. . . I'm keepin' a tight lid on this until they are finished. . .Posted by: audio_file Jan 15 2014, 12:26 PM
This is really looking great Nate! Ive got to get up there and visit again soon...
chris
Posted by: Dr Evil Jan 15 2014, 06:03 PM
For you, Nate:
Ego stroke, ego stroke, ego stroke 
Not that you seek it, but you deserve it. Wish we were neighbors
Posted by: aircooledtechguy Feb 13 2014, 07:30 PM
I had an hour or so between jobs today and decided to tackle the passenger outside mirror. The side mirrors on my '67 while functional look like such an afterthought and I always hated them. So off they went and I decided to use a period Porsche mirror instead. I wanted something that looked "right" on a Squareback but also wanted something that was fold-able for high speed runs. IMHO the Porsche 914 flag mirror looks PERFECT on a Squareback.
So I made a quick template out of cardboard, transferred it to 20 gauge metal cut and bent,. . . BAM!! The new base: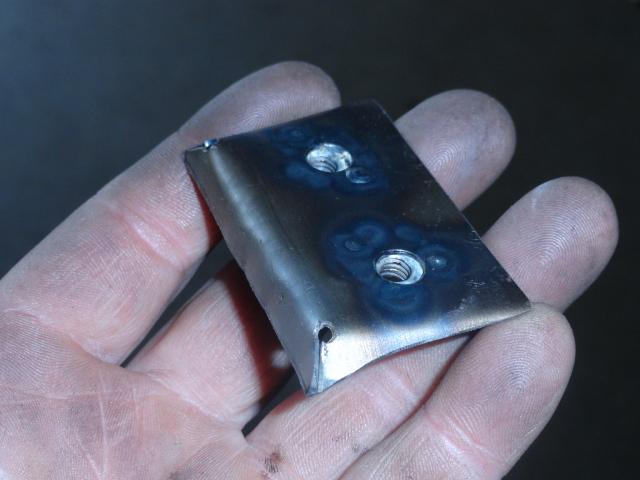
Then I had to mark out where the anchor nuts would be recessed into the door and then drilled them out with a step drill. Then it could lay nicely on the metal.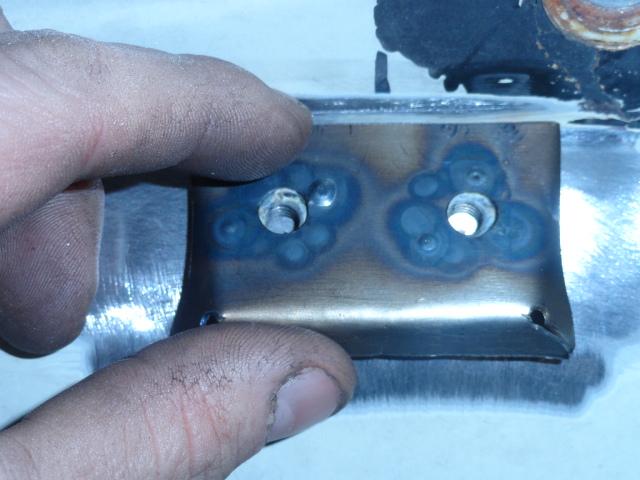
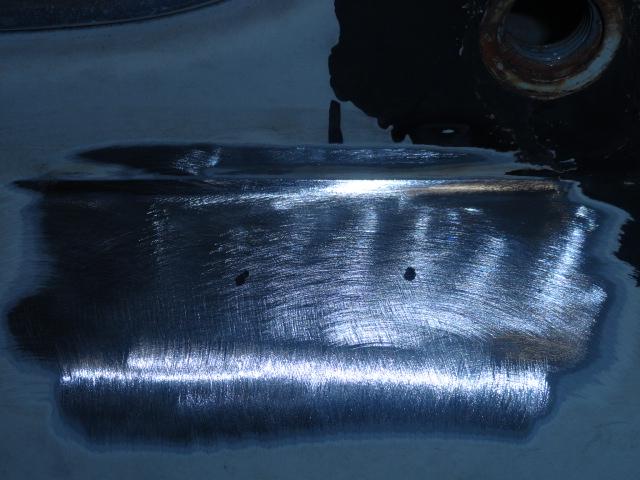
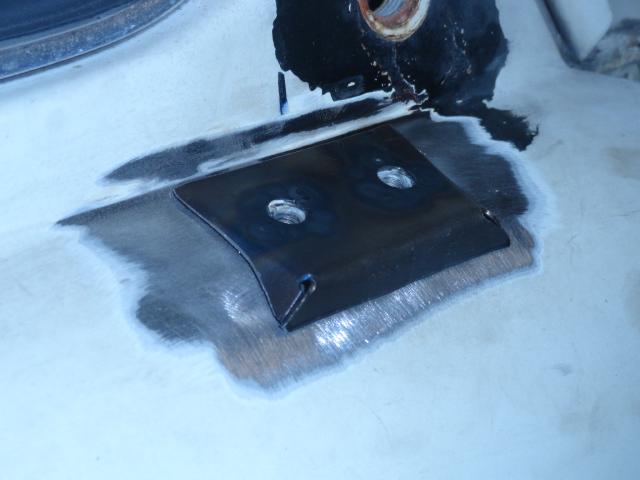
After that the base got welded in place and the new mirror attached for a test fit. PERFECT (well in my mind anyway )
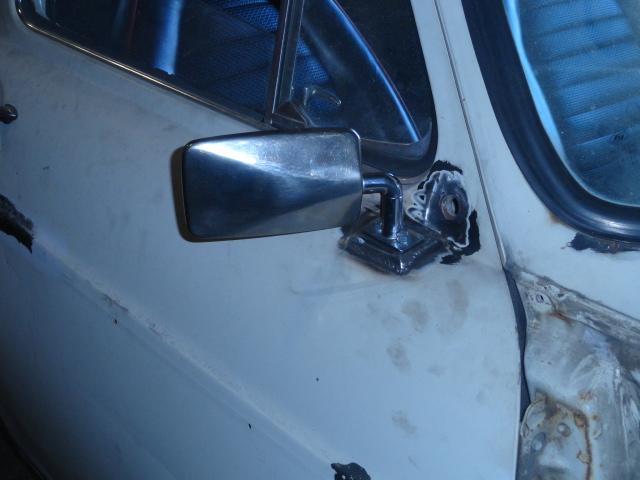
Posted by: aircooledtechguy Feb 15 2014, 08:39 PM
So late yesterday, I pushed in my derelict '69 Square that I've been keeping around for parts and other stuff, so I could finally do some of that "other stuff".
So I threw it on the lift and with the help of air tools and other implements of destruction, 5 minutes was about all it took to separate the rear suspension sub-frame from the car. 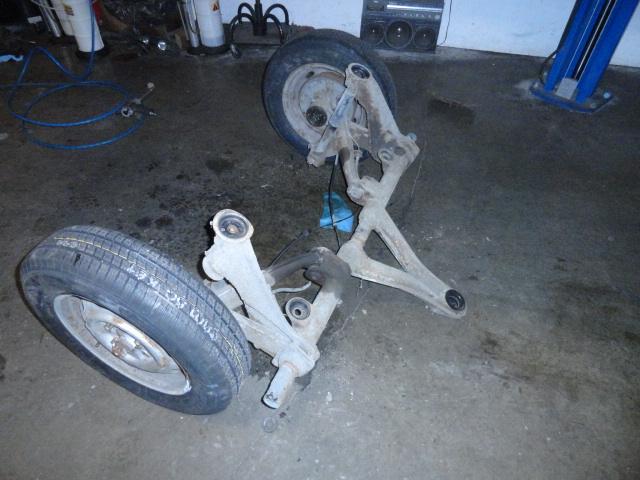
My goal for this weekend was to turn a 3" round block of Teflon into solid rear suspension sub-frame mount bushings (that's a mouth full). After taking careful measurements off my '67 Square, I determined that the body of the bushings would need to be 1.5" tall.
Just to refresh those who may have missed this back a couple years ago, when I installed the Porsche 923 (915 series) 5-speed trans, it was discovered that in order to NOT have to cut a pocket into the back seat area (and the seat), I would need to lower the suspension. Thus lowering the engine/trans in the process. Well it worked fantastic and the center of gravity was lowered in the process adding to the handling of the car. The spacers that I had previously made were more of a "run what you brung" type of deal made with stuff I had at the shop at the time. They work fine and were perfectly safe, but I want something race worthy since I'm gonna be taking this thing to future tack events and and have to pass tech inspections from lots of different sanctioning bodies.
Anyway,. . . I needed access to the profiles of the cars body and to the sub-frame since they kind of lock in place to ensure that they lock tight in the future. So with these exposed, I went to work.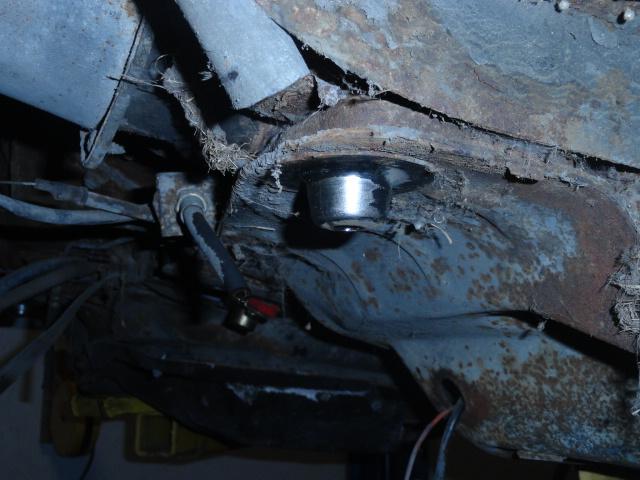
I began by cutting 5 two inch pieces of Teflon. This would give be the 1.5" I needed for the spacer and an additional 1/2" that will fit into the sub-frame. It's easier to leave them a bit long and then make them precise on the lathe. Teflon is really easy to work with. If there are any REAL machinists in the house, please avert your eyes from the horror that follows. :wink: This stuff ain't goin' on an aircraft, but it WILL fly!! 8)
Chucked-up and finished the last aft mount.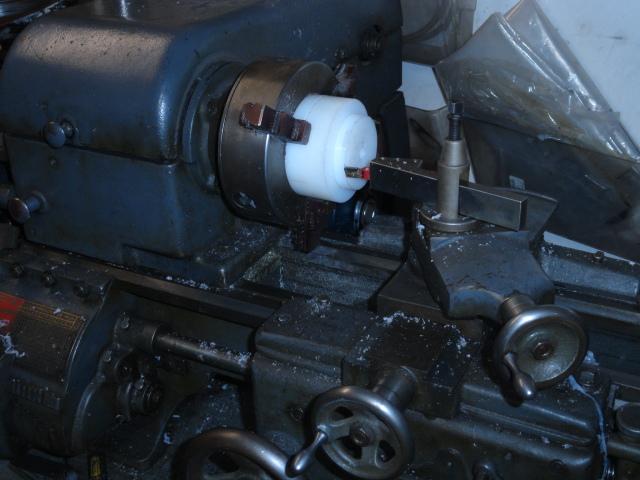
The completed set: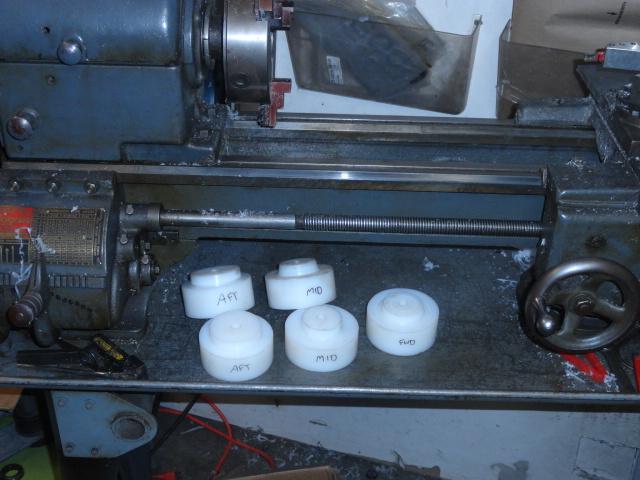
Comparing the old and the new: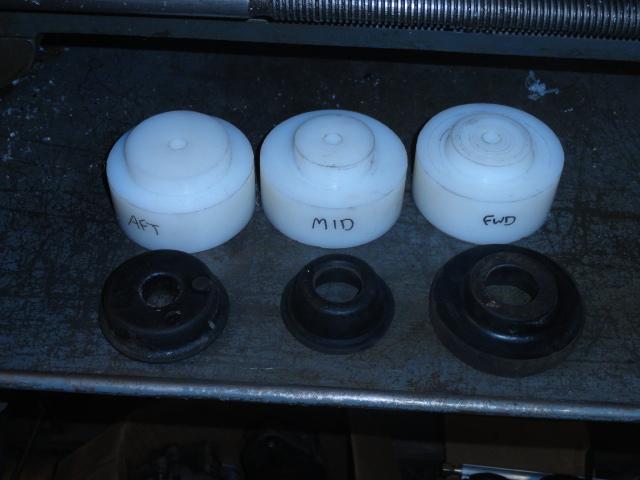
Fitted to the sub-frame: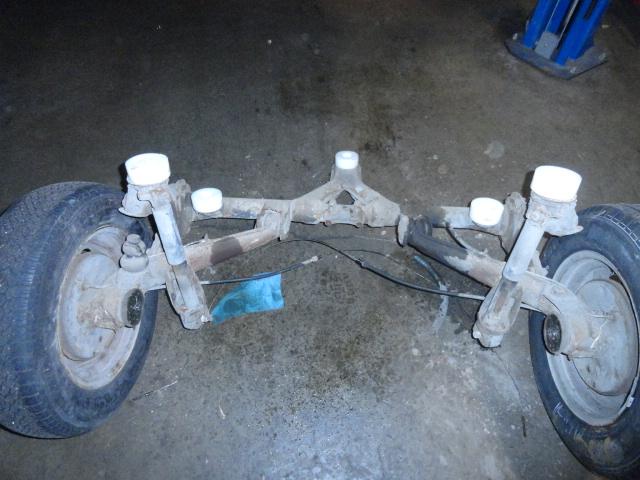
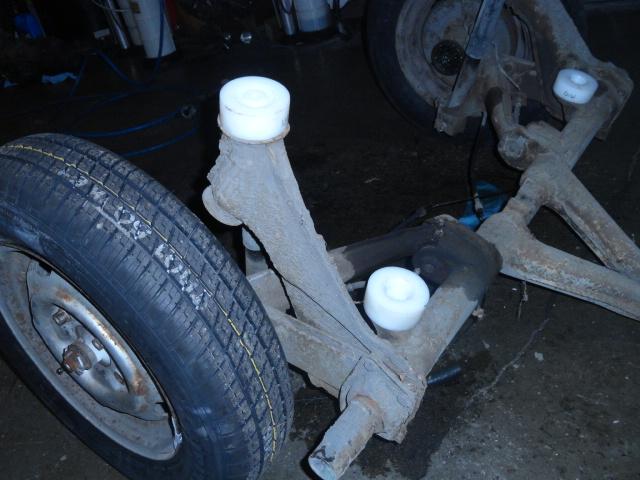
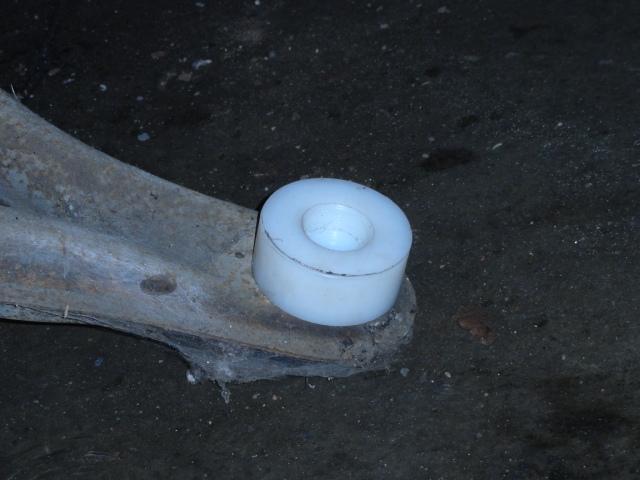
Posted by: r_towle Feb 15 2014, 09:17 PM
What are your plans for that rear sub frame once you are done.
I might want that for a project.....
Posted by: aircooledtechguy Feb 15 2014, 11:10 PM
What are your plans for that rear sub frame once you are done.
I might want that for a project.....
I'm actually going to be using parts of it for another project this summer. Sorry.
Posted by: aircooledtechguy Mar 14 2014, 07:46 PM
As the fender widening continues in earnest, some other stuff has gotten done. I removed the ugly rear calipers and rebuilt them. Since it's a proven fact that red calipers not only make the car faster, but also helps you stop better :roll: , I went with red powder coat. . . 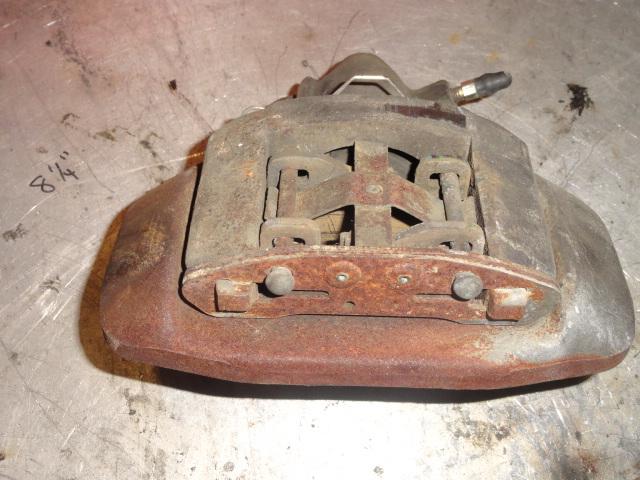
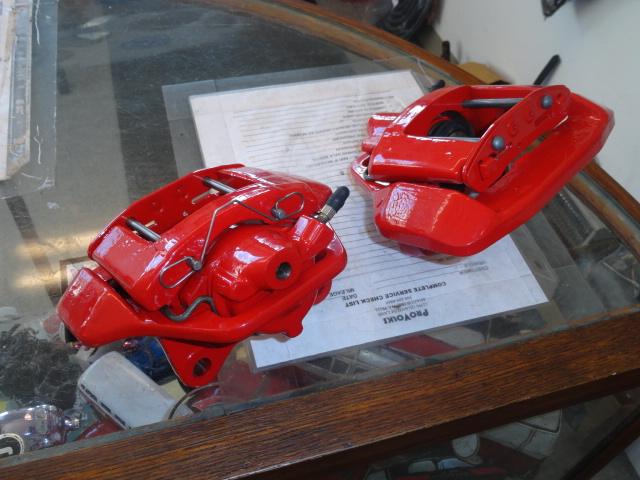
The fronts are in-work as I type. . .
Posted by: jaxdream Mar 15 2014, 09:36 AM
Single piston sliders from what vehicle ??? RRRReeeeDDD !!!!
Jack
Posted by: aircooledtechguy Mar 15 2014, 11:15 AM
Single piston sliders from what vehicle ??? RRRReeeeDDD !!!!
Jack
They are stock Porsche 944 N/A for the rears and I'm using 911 front struts/rotor/brakes.
Posted by: aircooledtechguy Mar 17 2014, 06:08 PM
While other fab is going on behind the scenes, parts acquisition continues. . .
Mario Velotta @ www.thedubshop.net made me a deal on these 45mm ITBs, 35# PICO injectors and one if his CLT sensors over the weekend that I couldn't refuse. These additions along with the new trigger wheel w/ hall sensor and COP ignition, should help motivate the new 2.3L power plant nicely. The sh*t just got serious!! 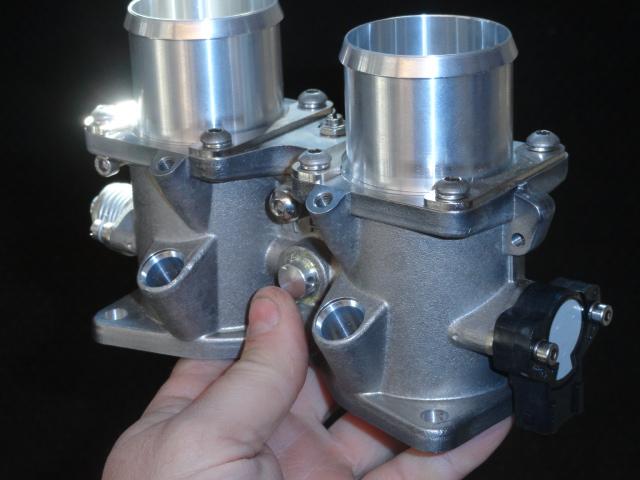
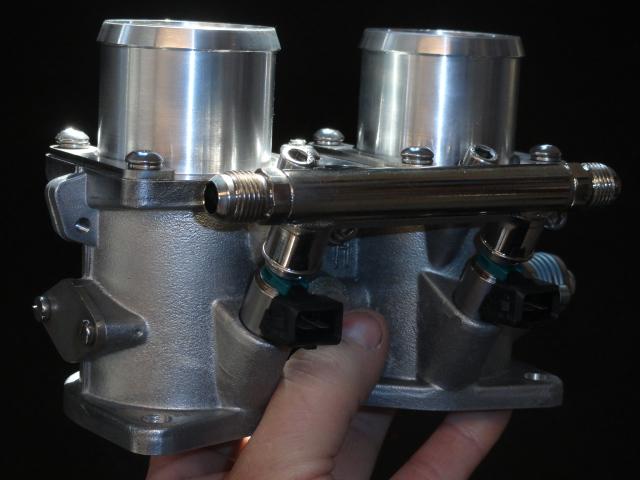
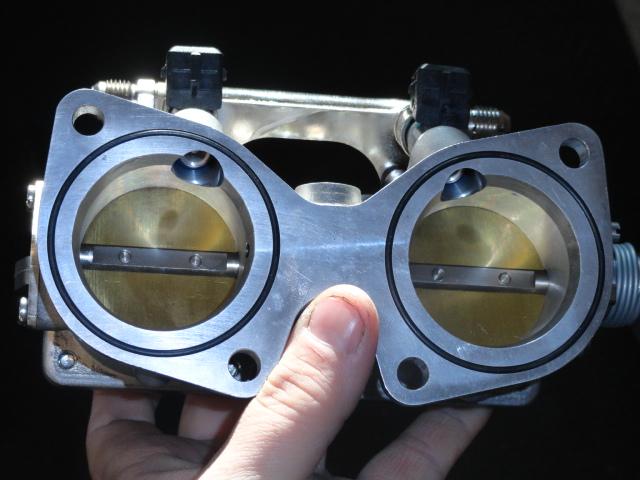
Now I either need to modify a pair of manifolds I already have or fab a custom set from scratch. I'm thinking the later. . . 8)
Posted by: pjhaun Mar 18 2014, 11:09 AM
While other fab is going on behind the scenes, parts acquisition continues. . .
Mario Velotta @ www.thedubshop.net made me a deal on these 45mm ITBs, 35# PICO injectors and one if his CLT sensors over the weekend that I couldn't refuse. These additions along with the new trigger wheel w/ hall sensor and COP ignition, should help motivate the new 2.3L power plant nicely. The sh*t just got serious!!
Now I either need to modify a pair of manifolds I already have or fab a custom set from scratch. I'm thinking the later. . . 8)
So, Nate; How much did they cost you?
Posted by: aircooledtechguy Mar 18 2014, 07:55 PM
Sometimes my wife sees this stuff. . .
Lets just say that I saved about $100. It's not the cost, it's the value.
Posted by: aircooledtechguy Mar 26 2014, 06:12 PM
A few weeks ago, I stopped by Speed Mart (www.speedmart.com) which is a local sprint car shop, to look at their offerings for helmets for the up coming race season. Until now, I had never really needed to own a helmet since most of the time I had friends with me at the auto-X's that I went to that let me share theirs between runs. Having never bought one before, and I'm planning to see much higher speeds than an auto-X event, I figured I would seek professional help to steer me in the correct direction. These guys are great to work with and I walked out today with a new Snell 2010 approved full-face Pyrotect helmet, an extra smoke face shield and a pair of gloves. Everything fits perfect and they didn't try and up-sell me stuff I didn't need. What more could a guy ask, right?? 
I'd like to also get a pair of driving shoes when I have a few extra $$$. I'll definitely be back. It sure is nice that these guys are local to me.
Posted by: NORD Mar 26 2014, 09:43 PM
OMG!!!
Now you'll be dangerous.
Posted by: aircooledtechguy Apr 1 2014, 10:07 AM
I’ve had a distrust of the factory trunk latches since 1983 when the hood of my first car flew-up on the freeway. Since then, I’ve never really trusted them. So knowing that the Squarsche will be seeing track events and some very high speeds, I wanted to be sure that this was NEVER an issue and give myself some peace of mind. So I searched for a truly positive trunk latching system. Hood pins work, but they are rather ugly to me and the pin lanyards bung-up the paint over time. They are also not lockable unless you use a small padlock which just looks stupid if you ask me. In looking for something better, I ran across AeroCatch hood pins which are a modern aircraft style hood pin system. They had a lockable version too so I jumped on these since the trunk is where the fuel tank is and where I can store stuff out of sight. Here’s what the assembly looks like.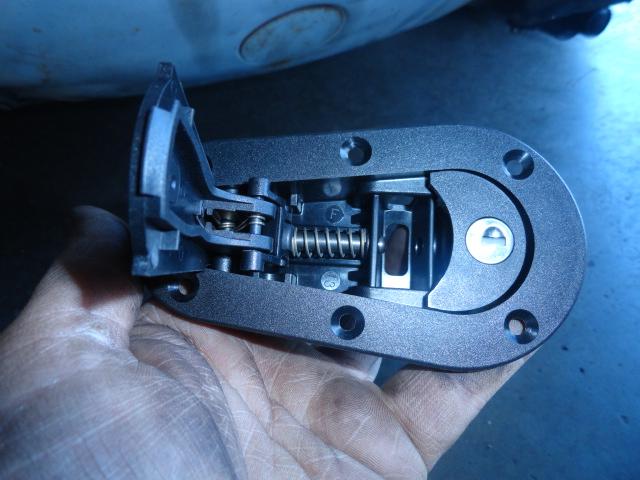
I stayed late last night to get these mounted. I first mounted the pins to the hood being careful to leave at least 1” of up or down movement so that final adjustments could be made.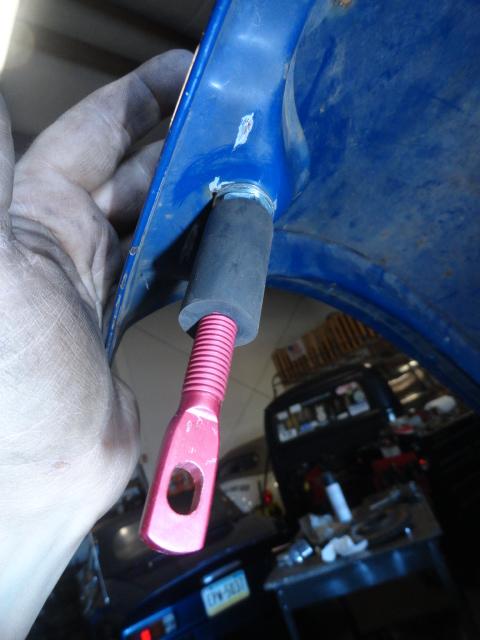
I then marked out the pin holes and used a burr to remove metal so that the pins fit through. After those were in and even, I took some careful measurements and marked out the latch locations on the body.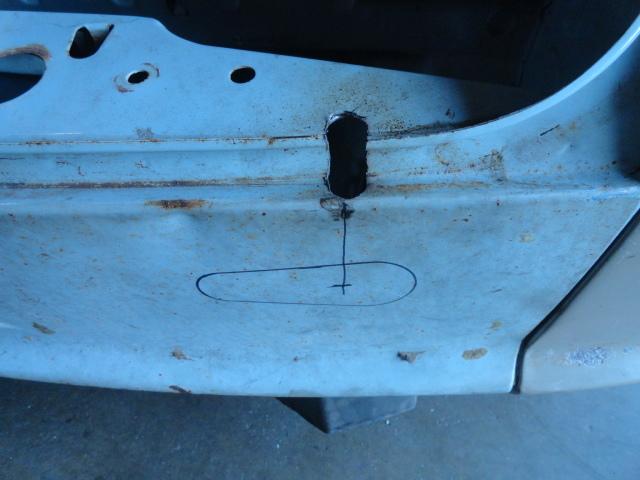
I used a hole saw to cut the outer contours of the latch assembly and tin snips and a burr to finish it off. 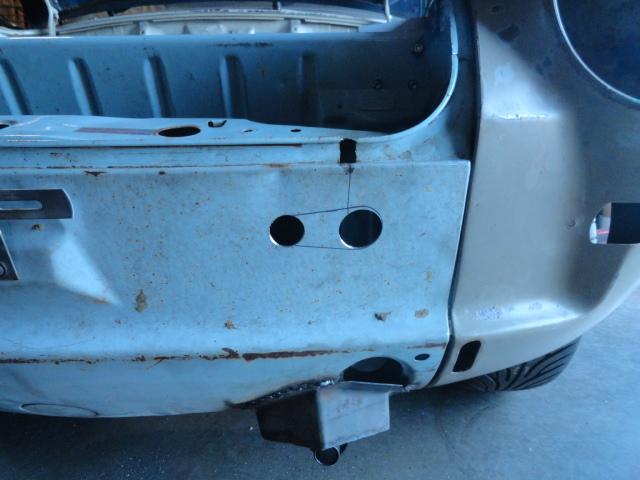
I drilled the 6 holes for the mount bolts and test fit the latch. I ended-up making about a 1/8” adjustment on the pin to get it all perfect and then cut the rubber bumper to the correct size. Perfect fit and this hood is NOT coming up unless I want it to. The factory hood latch and cable will not be going back in the car. This set-up is all that’s needed now.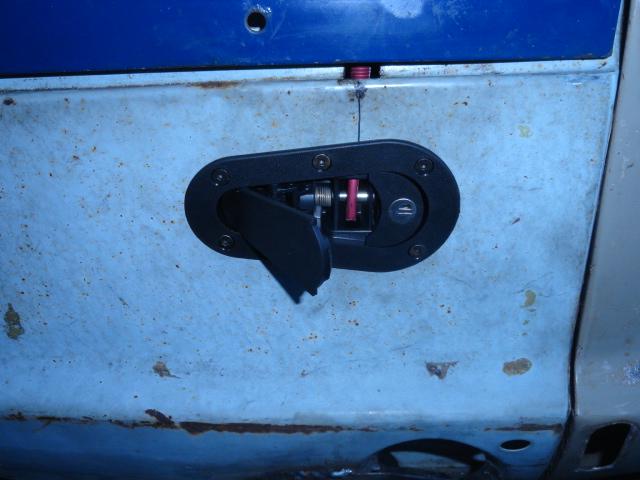
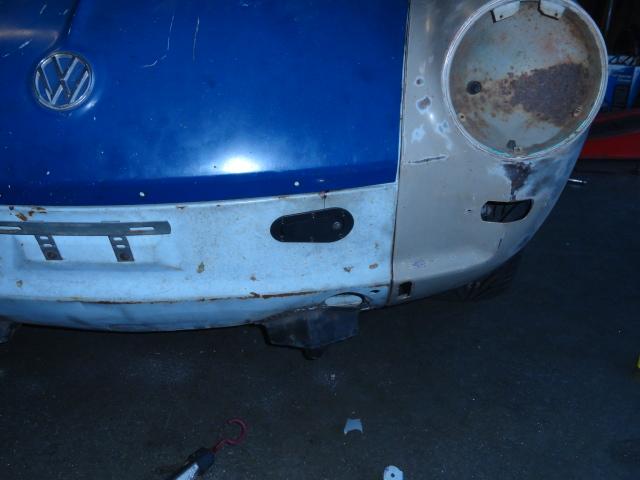
Posted by: KELTY360 Apr 1 2014, 11:09 AM
I figured I would seek professional help to steer me in the correct direction.
...and how's that working out for you?
Posted by: aircooledtechguy Apr 1 2014, 11:17 AM
I figured I would seek professional help to steer me in the correct direction.
...and how's that working out for you?
Money down the tubes. . . obviously! Posted by: KELTY360 Apr 1 2014, 01:21 PM
I figured I would seek professional help to steer me in the correct direction.
...and how's that working out for you?
Money down the tubes. . . obviously! When will you learn?.....there is no cure.

Posted by: aircooledtechguy Apr 5 2014, 11:55 PM
So I'm basically finished with most of the widening process and I thought I would come clean with it and confess my sins. . .
I began going a different route entirely and I plan to make a set like originally planned, but I have planned for later this year. So in the K.I.S.S. vein, I merely kept is simple stupid.
For the front, that was easy. I removed my wheel spacers and the longer studs and threw on the shorter studs and mounted the wheels directly to the hubs. Then with a few vigorous pulls, I was able to massage the lips out about 1/2" from stock and there are currently no rubbing issues. Now, I will need to re-set the rear door gap, but that should be pretty easy.
The rears were another story. I had to overcome this. . .

I decided that I wanted to be more subtle with this set, so I bumped out the fender arches 3". This also forced me to have to extend the engine cooling air duct lip as well. The front bottom edge had to come out 3" or so to ensure and angled to the factory rocker width. The rear bottom edge had to be extended so that the rear edge of the wheel arch would cover the tire.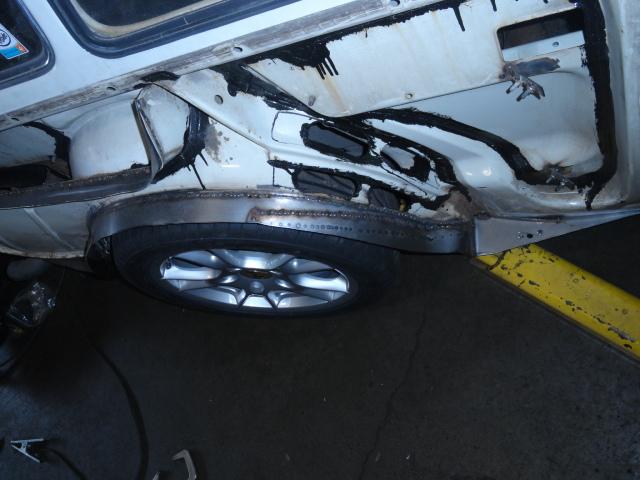
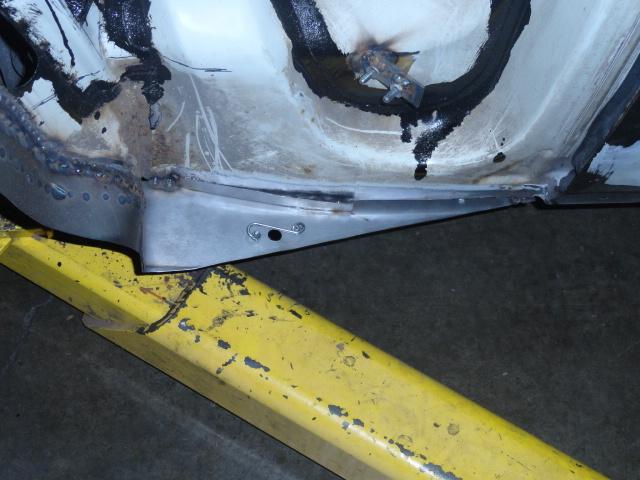
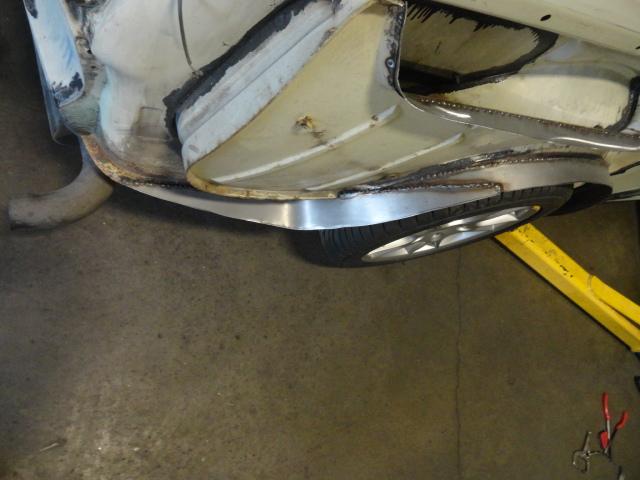
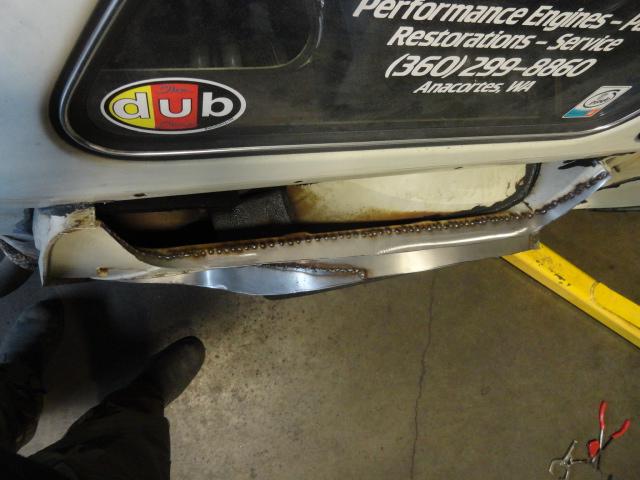
Once this was done, the rear door gap was HUGE. It went from a sloppy 7/16" at the top to a portly 1.25" at the bottom. 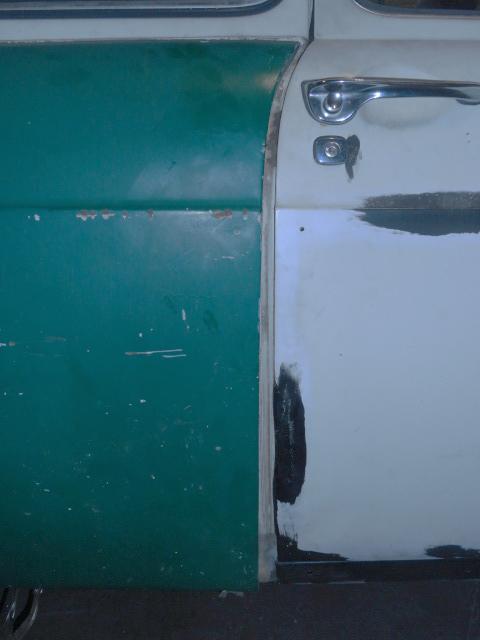
To correct this was pretty simple. Once the fender was installed, I marked a line 3/8" from the fwd edge with a Sharpie and used a cut-off wheel to cut the front edge off the fender. 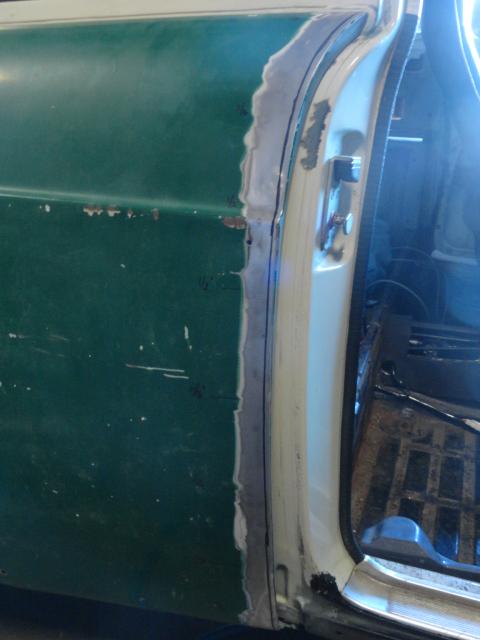
Then I bent some metal in the shape of the top section so that t fit tightly and welded it in. Then I made a strip for the bottom section and welded it in.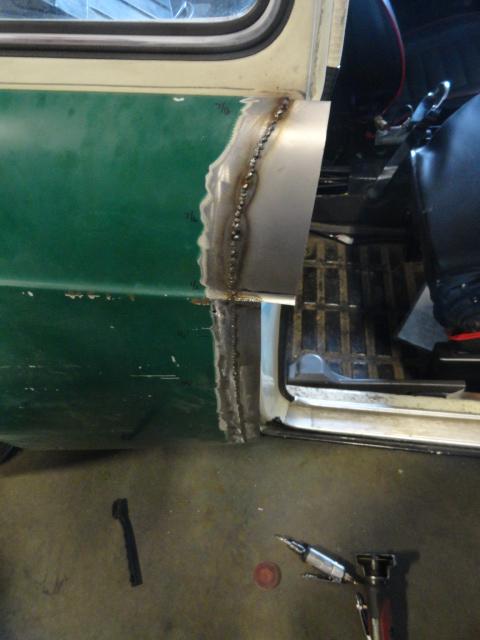
After that I cut the sections down enough that I was almost able to shut the door and used a Sharpie to mark a cut line. Then I placed the front strip on the filler, set the gap to 3/16" and tacked it in place.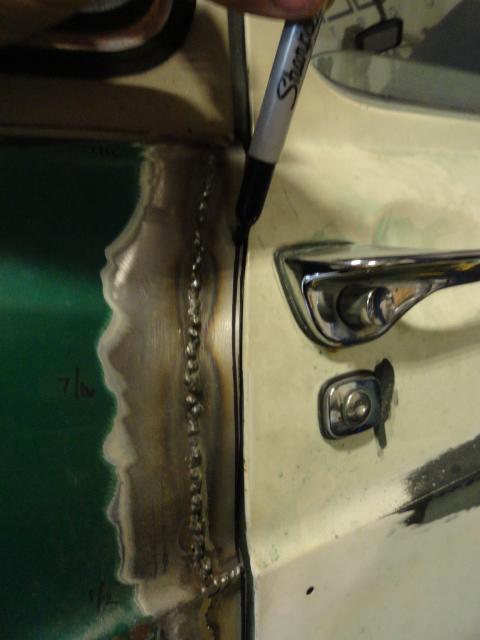
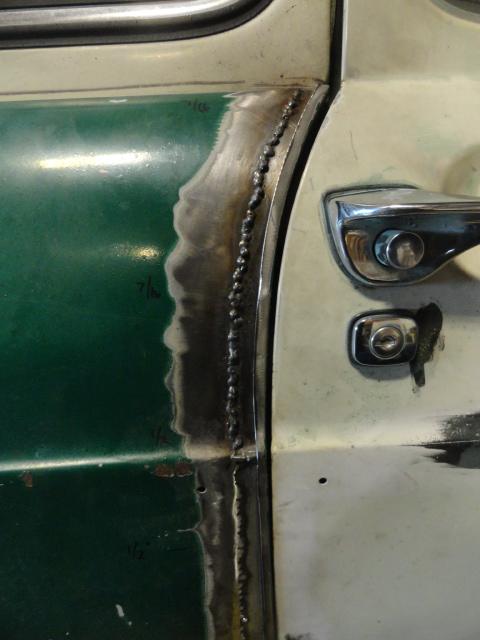
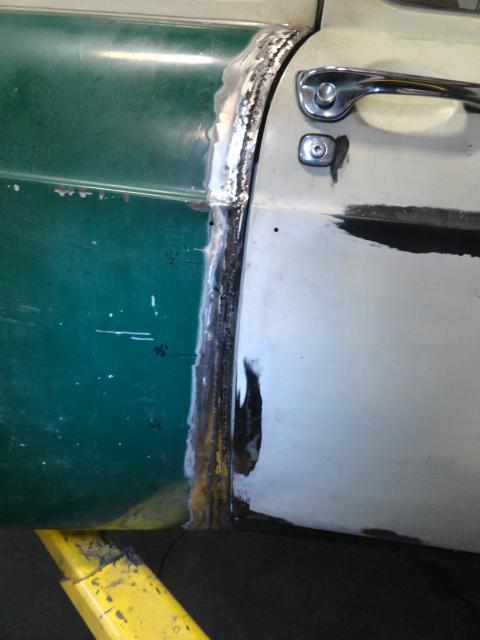
The rear seam had issues as well. The gap was too small at the top, normal in the middle and about 3/4" at the bottom.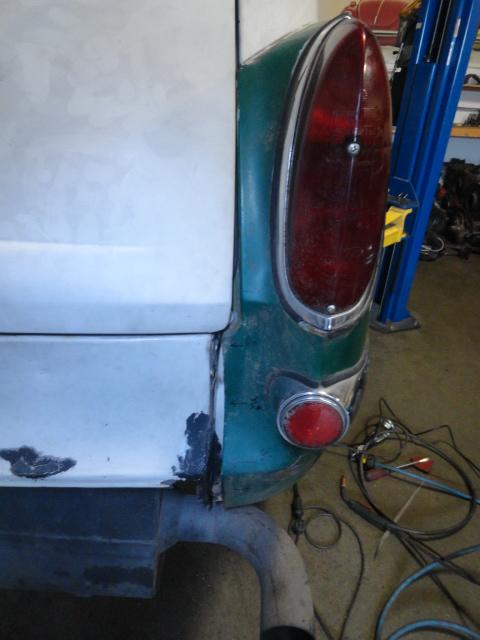
The rear was easy. I cut a section out of a donor fender that was about 1/2" at the top and about 1" at the bottom. Then I marked a cut line on the fender and cut just the edge off. Then I mounted the donor strip to the car and pushed the fender over the donor. Once it was in place, I tacked it in place.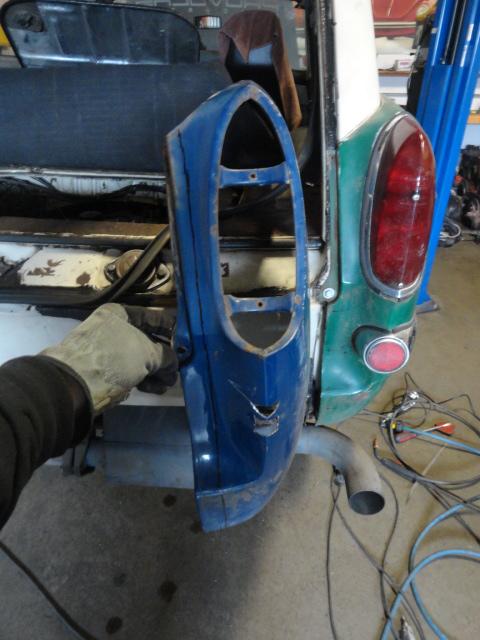
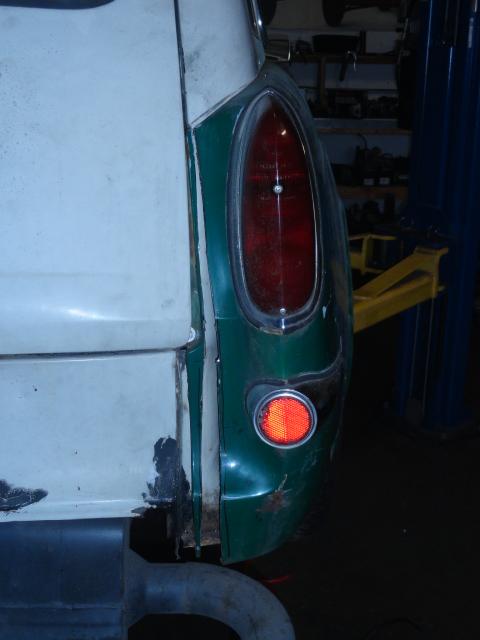
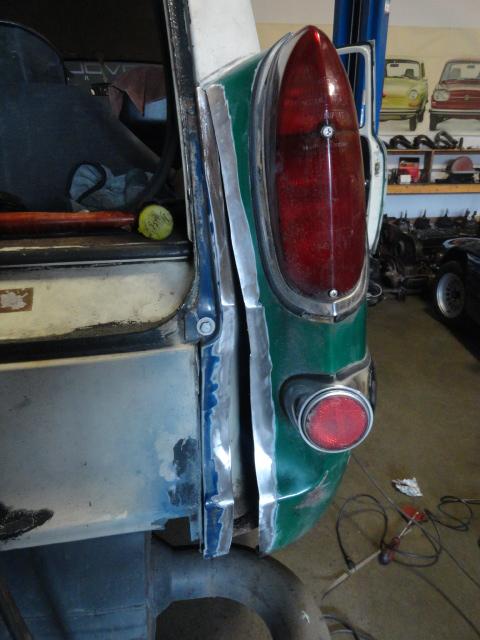
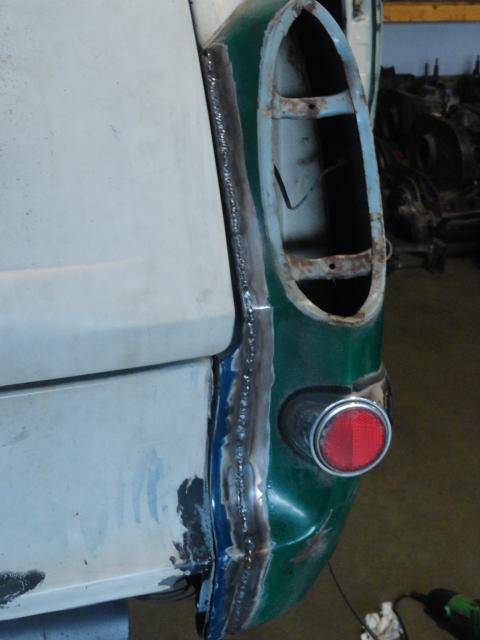
Here's the results. . .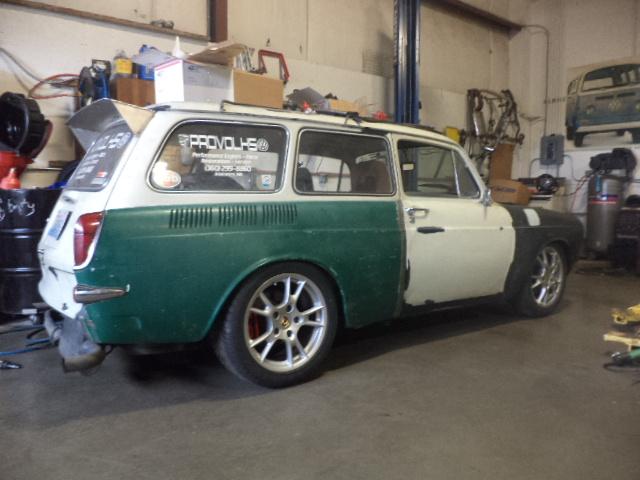
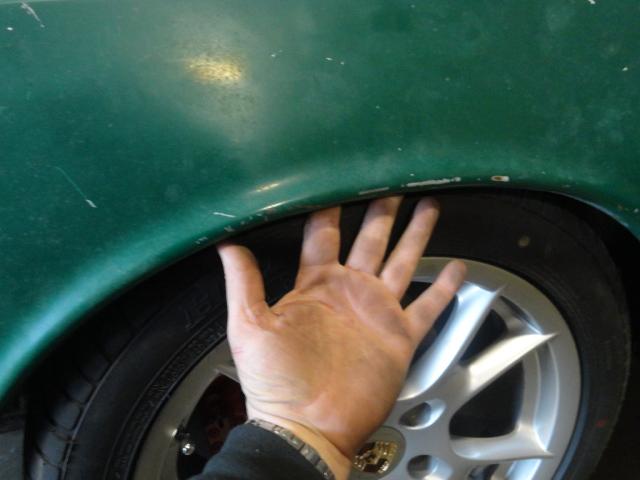
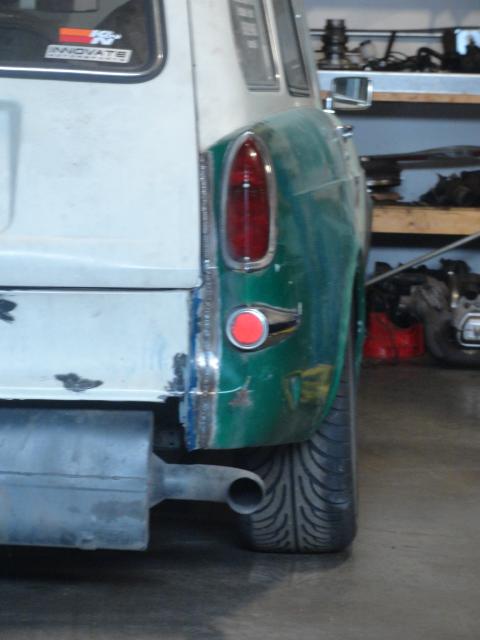
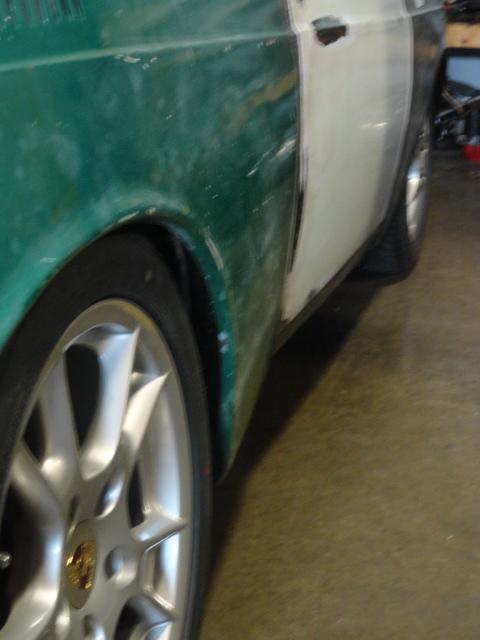
Now that I have the passenger side done and can use it as a pattern, the drivers side will be much quicker. Unfortunately, the drivers side has a bit of rust repair as well.
This rear fender is not totally done though as I have some rear ducting to fabricate but the fender is basically a done.
Posted by: r_towle Apr 6 2014, 07:37 AM
Nice and subtle....very cool
Posted by: jaxdream Apr 6 2014, 08:19 AM
You seem to have limitless ingenuity !!!!! Please keep going , very interesting thread as in the past I let 2 squares slip away from me and have always liked them .
Jack
Posted by: PanelBilly Apr 6 2014, 09:18 AM
Very creative work. Have you ever seen a similar car or is this all stuff that you're inventing.
Posted by: Tom Apr 6 2014, 10:58 AM
Just wow!!
Tom
Posted by: aircooledtechguy Apr 6 2014, 09:06 PM
Thanks for the kind words guys. Some things I've done to my car I've seen before like the rear fender stretching. However not a 3" stretch. The car I saw was about 1-1.5" and he didn't have to re-gap the door and rear edge. Other things like the 5-speed and front suspension and many of the other Porsche mods are of my own twisted mind.
It's just hotrodding of a different kind.
Posted by: aircooledtechguy Apr 28 2014, 09:45 AM
I took two weekends off for family stuff which included last weekend where my eldest daughter and her husband had my 2nd grandson!! It's been crazy around here.
So this weekend, I'm back at it. I had to close-up the door gap on the Front fenders after the stretching/pulling exercises of late. 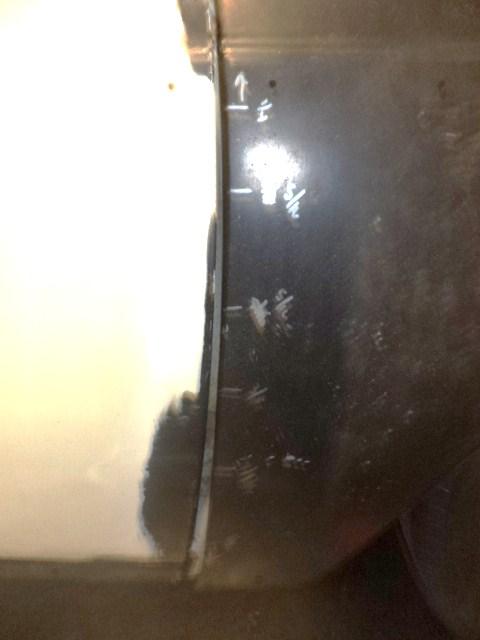
There are many ways to skin a cat and when it comes to body type work like this, I know very few of them since this is really my first foray into body work. A hotrodder told me about the following method and it sounded intriguing, so I gave it a try.
I measured the thickness of the metal on the edge (the folded edge) used pieces of 3/32" TIG wire welded in to build-up the missing metal. It worked great. I used a couple magnets to keep it even with the base metal and bent it into shape and I tacked it in place. Then went back and finish welded it.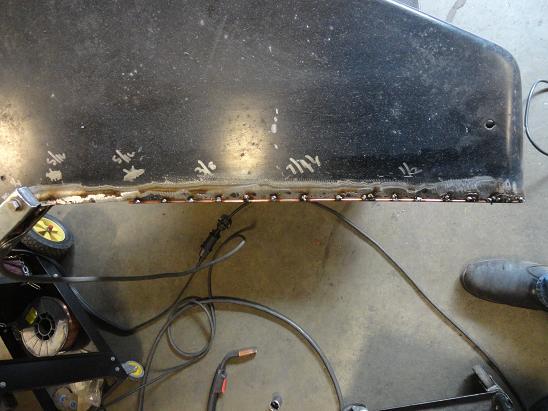
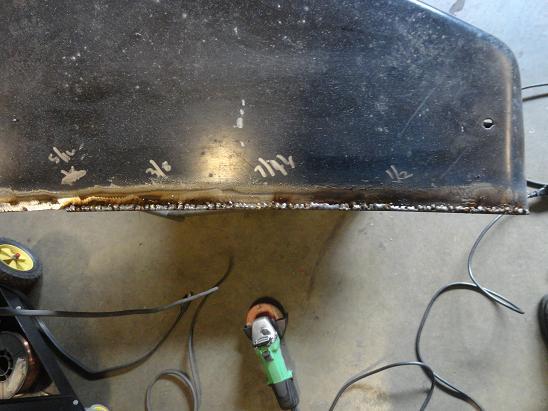
After that, I used a grinder to carefully grind the welds smooth. I did this several times building it up 3/32" at a time. What was nice about this is that you always end-up with a nice finished edge and if you need to add more, you get good penetration between the pieces.
On the back, I welded the rods together. I'll be giving them a good coating of POR-15 to seal between all the cracks in the back.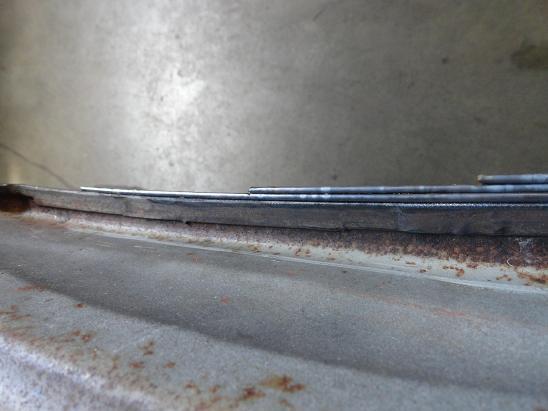

Once I had enough built-up, I marked a new gap in the edge and used the grinder to smooth out the finished edge.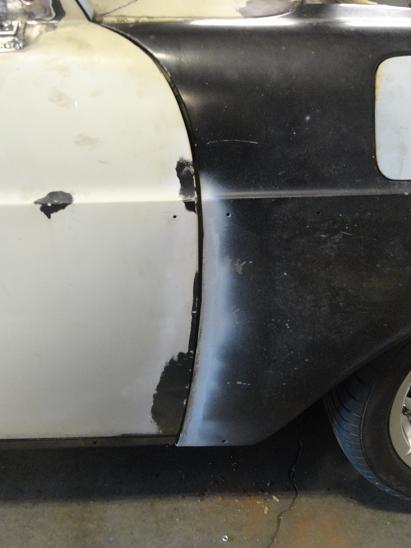
Then I turned my attention to the fuel filler door. Since my car is a '67, it never had a door there. This fender is a '69 with a '68 door and spring (to spring the door to the closed position). I chose his set-up specifically so that I could use it as the location for my battery ground cut-off switch. To be Race legal, you gotta have a battery cut-off switch on the outside of the car, so the fuel door seemed like the logical place for it.
I began be baking a backing plate for the switch that would fit into. Then I trimmed it to fit behind the stock hole. Then I welded it in place. Perfect!! 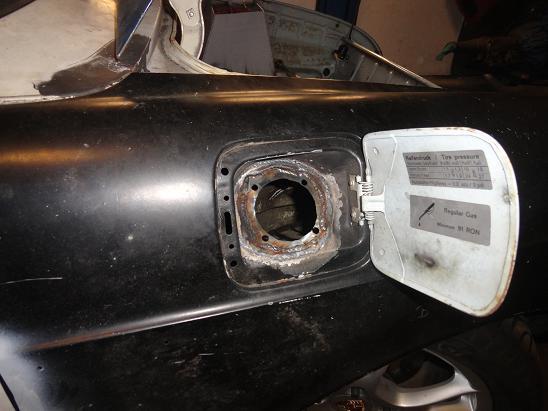
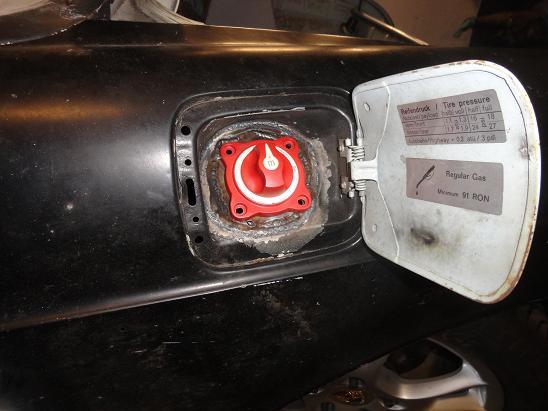
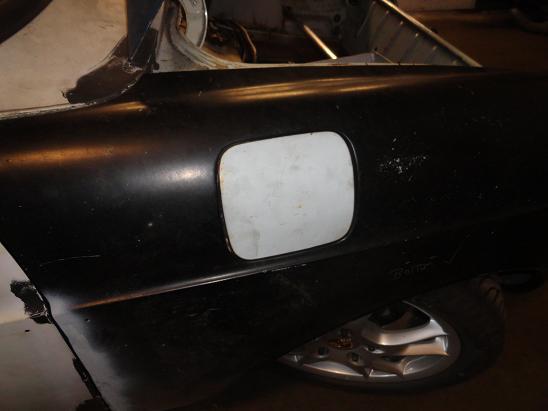
Now, I'll have to transfer a finger dimple to the rear edge of the opening like a '68 fender has, and I'll be good to go!! My buddy who is going to be doing the body work said he'd handle that for me, so my work here is done.
Posted by: Travis Neff Apr 28 2014, 07:57 PM
the widening of the rear is bad ass!
Posted by: rick 918-S Apr 28 2014, 10:25 PM
Nice
Posted by: aircooledtechguy May 5 2014, 01:30 PM
I temporarily turned my attention to the bumpers this weekend. I’ve got a pair of fiberglass bumpers from Glass-Action in AZ (http://vwinnovations.com) and I’m to the point of needing them to be mounted in order to do trimming and such for the fenders. I also needed to graft on the air dam (flex dam) I purchased a while back too from Mark (http://914rubber.com).
I began by cutting some 2” muffler tubing in half on about 10” lengths. Then I made some flat brackets with captive nuts with which to mount the brackets to. This way I could fiberglass the metal mount brackets to the fiberglass bumpers w/o requiring any thru-bolts to show.
I tossed the stock bumpers and brackets to the side and chose a thin, light set of early beetle bumper brackets. The front brackets were used on the rear of the Square and only required elongating the mounting holes slightly to fit like a glove. 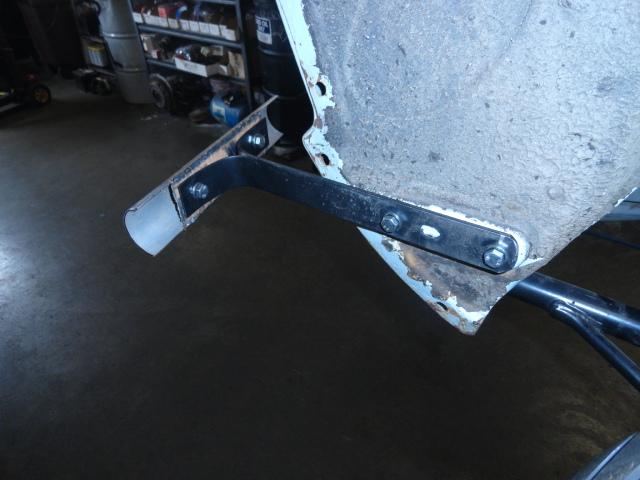
The rear beetle brackets were used in the front of the Square and required custom holes to be cut in the proper place and the excess cut off the back.
I prepped the bumper bottom and the air dam top with a 3” disc to remove the gel coat. I also removed the mount tabs off the air dam. Then I cut a slice in the center of the air dam to allow it to be splayed out a bit more on each end to fit the fiberglass bumper better. I temporarily put them together with some spring clamps to ensure they would work correctly together.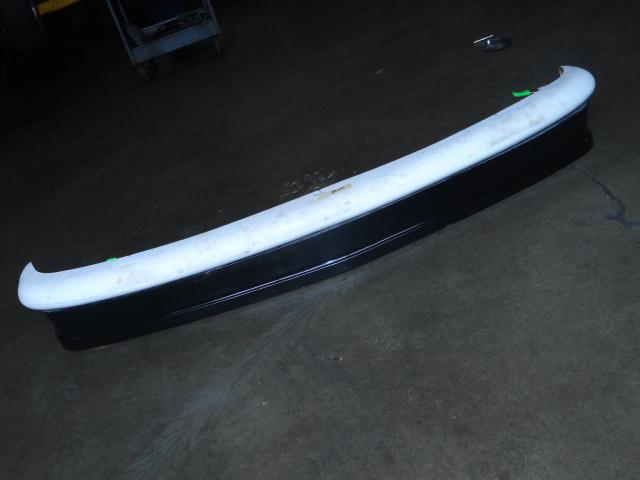
I test hung the bumper/air dam combo onto the brackets and it fit well. With my car at the current height, the bottom of the air dam is currently 5” off the floor. 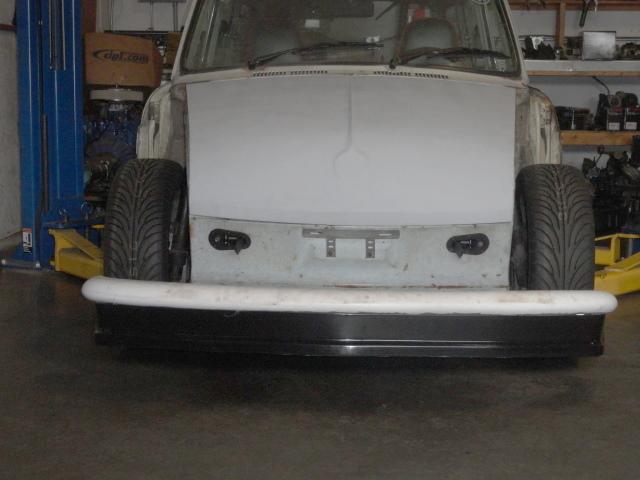
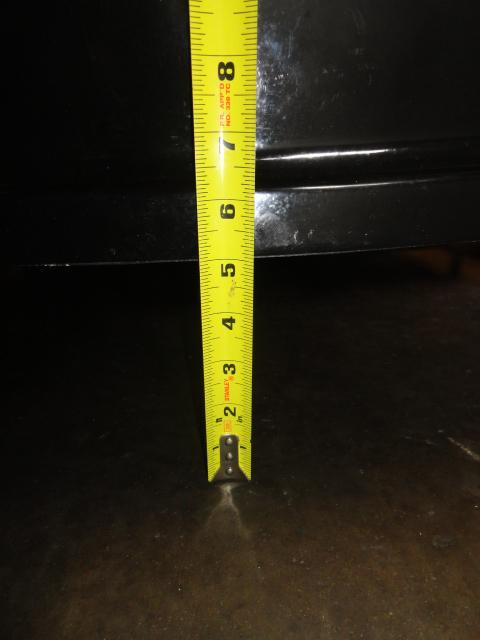
This air dam also has a rubber skirt that hangs down an additional 3”. So as it is, the bottom of the air dam will reside about 2” above the floor. Since I have infinitely adjustable suspension via the 911 front and adjustable spring plates rear, I will be able to get it to about 1” for racing purposes pretty easily. Woohoo!!
Now I’m off to consult with my friend, Jim who does fiberglass/carbon fiber for a living, to see how he recommends permanently bonding the brackets and the air dam to the fiberglass bumpers. . . More to come. . .
Posted by: tdgray May 6 2014, 09:33 AM
Nice work!
Posted by: aircooledtechguy May 6 2014, 08:26 PM
Look what showed-up today on the brown truck. . .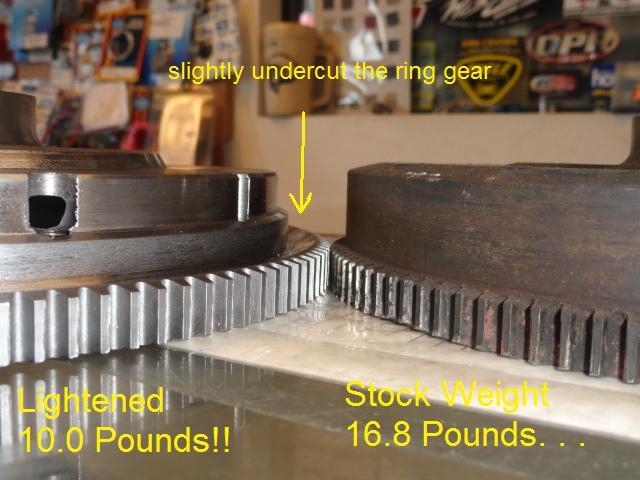
I contacted my machinist and asked him to make it light, but not a bomb. . . He was able to remove 6.8# off of it right where it counts. Started out a portly 16.8#. Now she's a trim 10.0#!! Hell, my daughters have more crap hanging from their key chains than this thing weighs!!
Should make for a lively rev'r and allow a lot of the power to actually get to the tires!!
Posted by: aircooledtechguy May 7 2014, 04:36 PM
My buddy hooked this brother up and used Plexis to permanently bond the bumper and air dam together. Then he fared the two together for a smooth seamless look. Now it's ready for a scuff, prime and paint. I added the flexible rubber bottom skirt to see how it looks together with the bumper.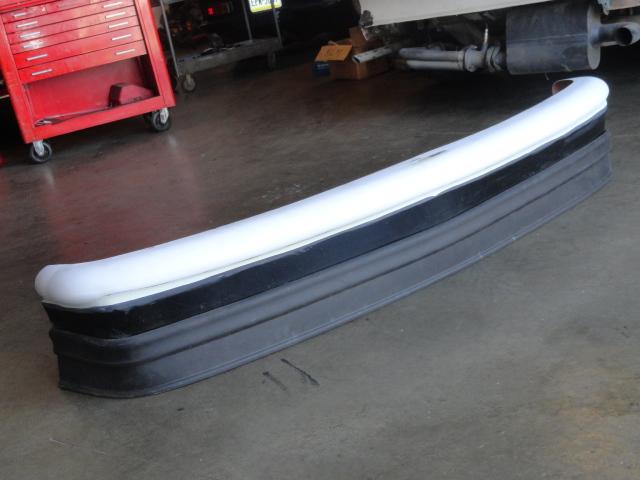
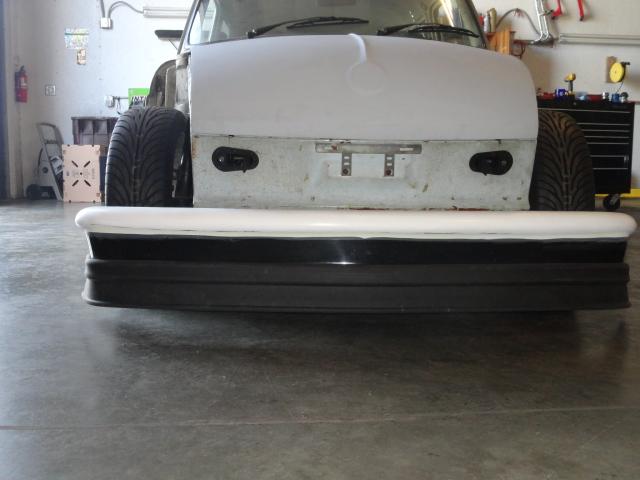
Posted by: aircooledtechguy May 12 2014, 12:51 PM
Lots of mundane stuff this Saturday.
Fixed and pulled the drivers front fender into place to give it room for the front tires/wheels. Here's a couple before (stock) and pulled so you can see how much can be done with just your hands.
tire clearance begins with under 1/4"; ends with just over 1":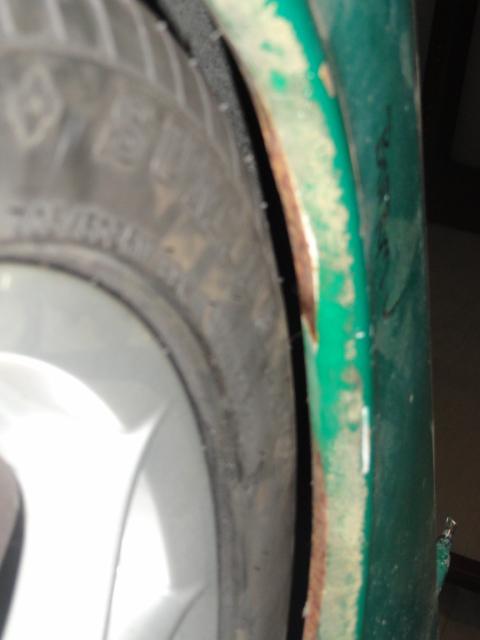
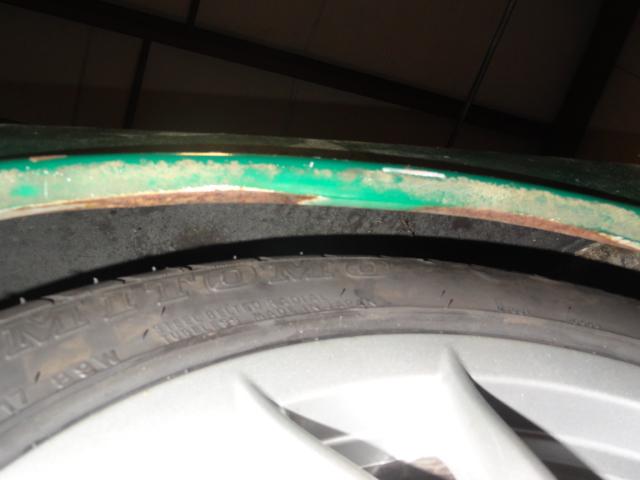
Subtle pulling can just be seen: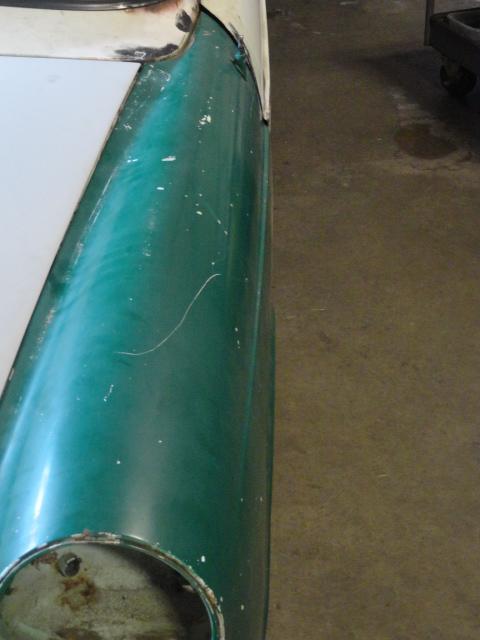
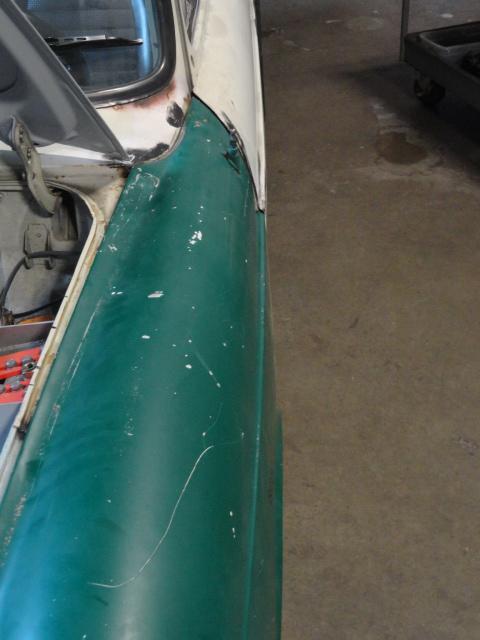
It should be noted that by pulling the fenders even by hand like this causes the door gap at the front of the door to get HUGE and filling/re-gapping is required after.
Added the driver mirror mount and filled the OEM mirror holes. Also filled the stock windshield squirter hole. In time, I'll be adding a set of OEM Porsche 911 squirters to the front hood.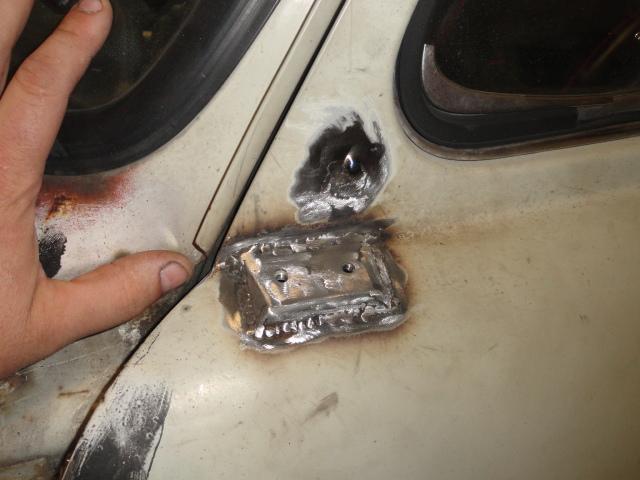
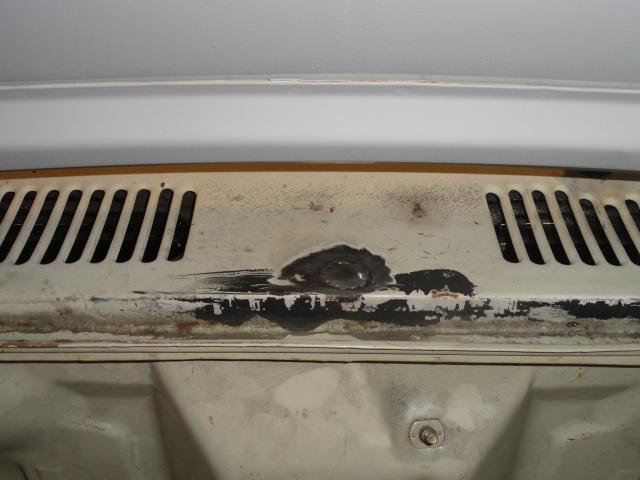
Finally got a chance to mate-up the front bumper with the fenders in place to get a good look. For street driving, I probably won't run the rubber skirt. For the track though, it'll definitely be on there.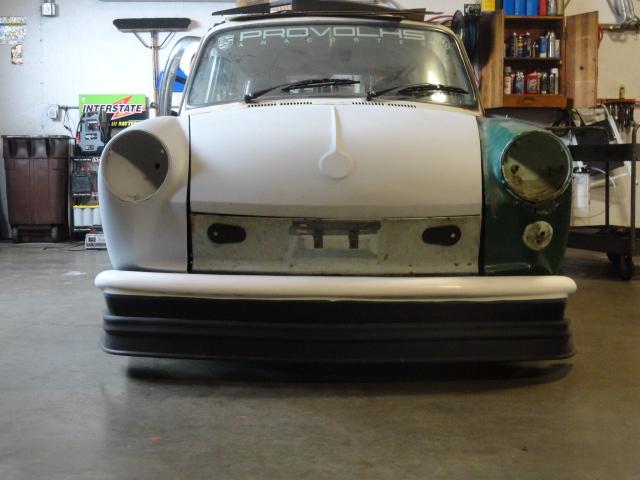
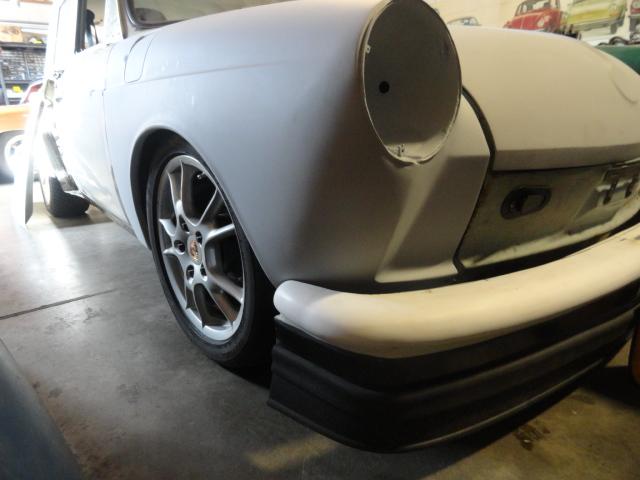
Posted by: bulitt May 12 2014, 01:09 PM
Awesome !
Posted by: KELTY360 May 12 2014, 02:57 PM
You're gonna need landing lights on either side of the license plate bracket to finish that puppy off.
Posted by: aircooledtechguy May 28 2014, 06:17 PM
As body work continues at my buddies house, I've turned my attention to the new motor. After 3 years of acquiring parts, I finally have the final pieces in hand and none too soon. The final pieces were the custom Web cam, and a custom set of Deves rings. So I mocked-up the bottom-end so I could clearance the H-beam rod caps so they wouldn't hit the cam lobes on pistons #2 & #4. I also had to modify and clearance a type1 pump and the cam bolts so they would all live in harmony as well as port the oil passage on the pressure side of the pump.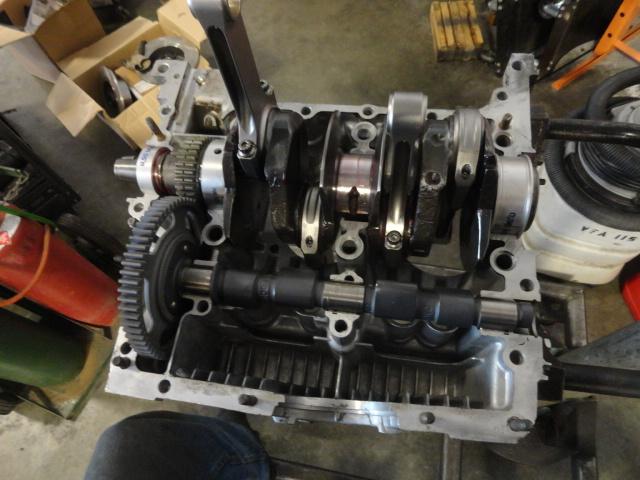
I also took this occasion to get my deck height and calculate static CR for this motor. It's a dual purpose mill that will see street driving as well as track duties. I know that it's a compromise on both parts, but it's built more for the track since I always have my trusty 2056cc to fall back on if it's just not practical for street use. I was already having fun with the local H*nda V-tec dorks with the mild 2056cc, so this 2.3L stroker should send all but the turbo'd guys home with their tails between their legs.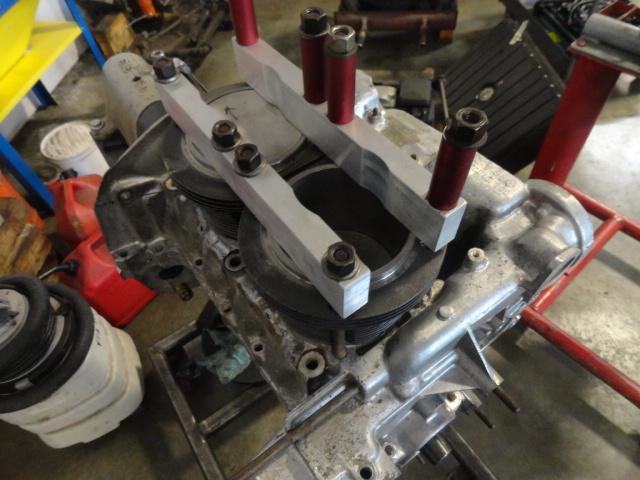
Once I get the parts back from the balancer, my son Josh is going to build this motor as I look on. I want him to get the credit/accolades for any wins the car gets in future events. He's stoked about the opportunity to *finally* build a motor after 5+ years of tear-down duty here at the shop. He's been the tear-down-king since he was 8 y/o and it's about time he did the deed. As I always say, families who build motors together, stay together.
Posted by: Tom May 28 2014, 06:25 PM
Nate,
That is so cool!
Tom
Posted by: jmill May 28 2014, 07:11 PM
The sh*t just got serious!!
How the heck did I miss this? Best build ever!!!!
Posted by: aircooledtechguy May 28 2014, 08:03 PM
Thanks for the kind words guys. It's been a long journey thus far, but the end is getting close enough to see. . .
Posted by: Todd Enlund May 29 2014, 12:54 AM
Awesome stuff Nate. Gonna be the coolest type III on the planet!
Posted by: aircooledtechguy May 31 2014, 09:43 PM
My buddy who's doing the body work came by and grabbed both doors and the front left fender to work on and brought back the right rear fender. . . Man, this thing is coming together. Pics later on that; I have bigger fish to fry.
I concentrated on getting the engine parts 100% ready for the balancer and the rear valance.
On the motor side, I only needed to notch the H-beam rods so that a stream of oil would spray on the bottom of the piston crowns. This cools the pistons and cooling can't be a bad thing right?? Bel0w is the un-modified rod:
Below is the modified rod. 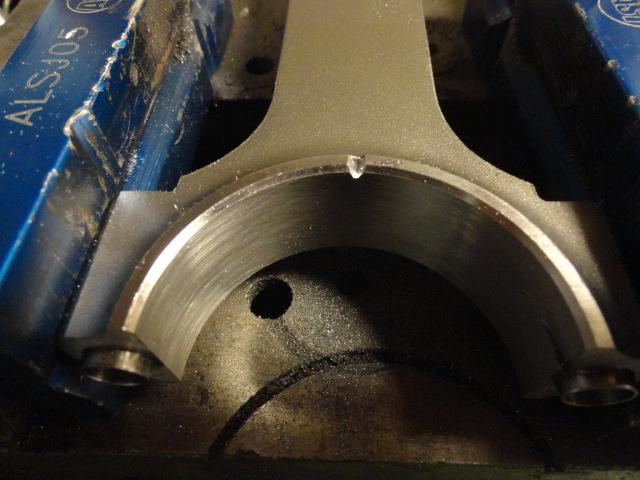
I used a three sided hand file to make the groove in just a few strokes. This channels the oil splash off the rod the and forces it to the back side of the piston in order to cool the crown. This 5 minute mod, can cool the pistons by 30F+. Well worth the time.
Now I turned my attention to the rear of the car. A month or more, I removed the factory rear apron; it was bent and generally wasted. I wanted to remove it and replace it with a panel that would breath and allow the natural vacuum of the car to draw not only the engine cooling air out, but also the air under the car. I decided to make a rear diffuser of sorts. I started by tracing out the rear profile onto a template material. Then bolted-up the fiber glass rear bumper, to ensure it would exit just under the bumper. 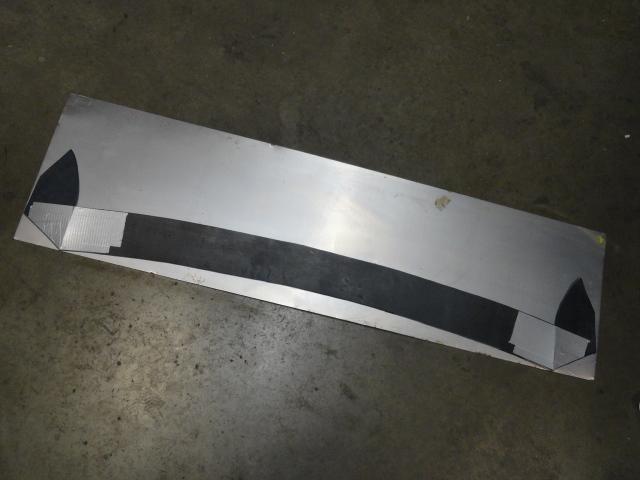
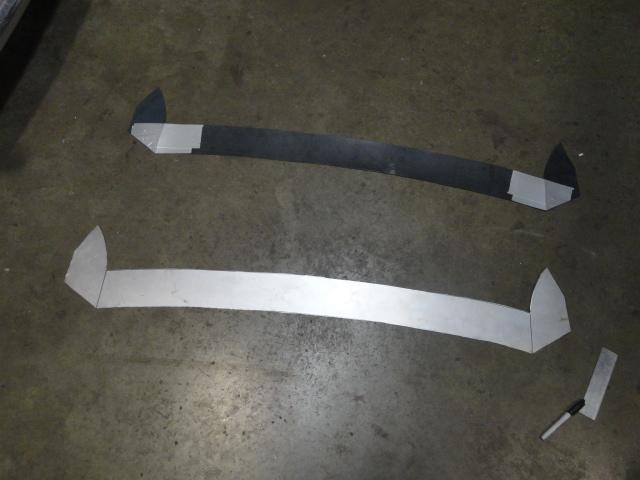
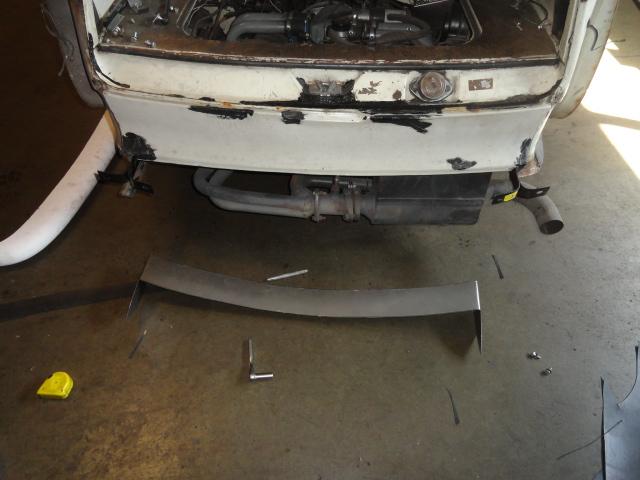

Then I welded it in place.
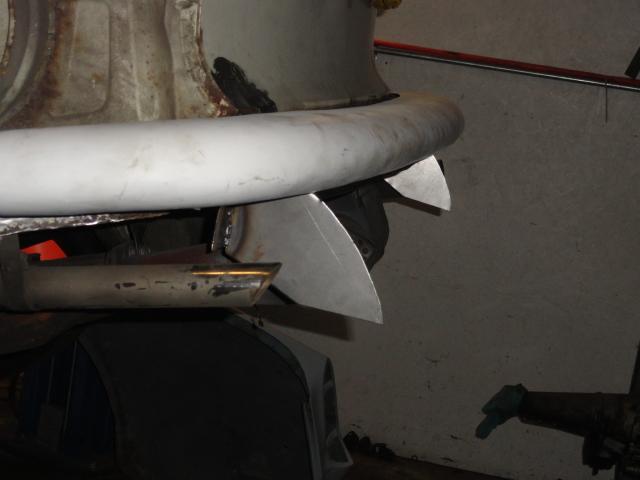
The entire area under the rear will be mesh but I'm still waiting on that from the supplier.
On the front of the car, since I'm going to run small Braille 18# battery that will be totally contained between the spare tire and the nose skin of the front apron, jumping it will be impossible. So I added a pair of remote battery terminals for jumping the car if that was ever necessary. I picked these up on eBay cheap. This week, I'm going to be carefully measuring the cables needed and getting them made locally.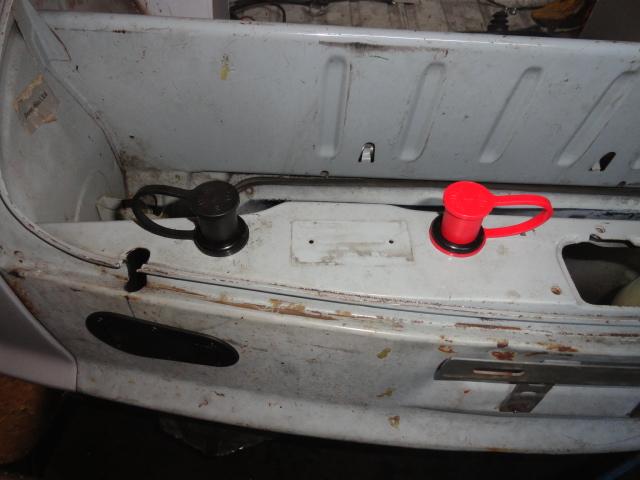
Posted by: aircooledtechguy Jun 3 2014, 09:31 AM
Out with the old. . . 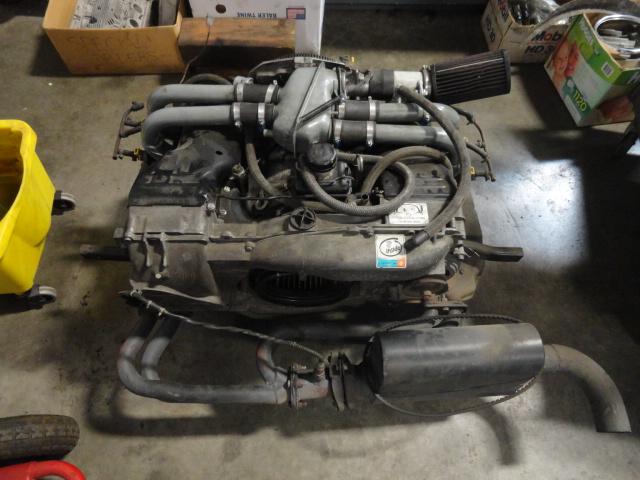
The 2056cc comes out to make room for the new 2.3L that will replace it. With a little luck, my son may begin the build-up this Saturday if I can get the parts back from the balancer by Friday. Only the cooling tins and alternator will move over to the new motor. All the injection and exhaust will be new, one-off pieces.
Posted by: aircooledtechguy Jun 11 2014, 09:35 PM
So as body work continues (cough, hack, puke), I took a break from that work that I hate(!) and jumped back on a fab job that I began a couple months ago. I got to the point that I needed to install my mock-up motor so I could finalize the racing exhaust pipe location as well as finish making the custom air box for the ITBs. Believe it or not, this was my first test fit of the mock-up motor with the new mount bar, exhaust and ITBs in the car. . . LIKE A GLOVE!!!
I began by dragging out a pair of relatively hard to find Porsche 2.0L air cleaner assemblies. I made some cut lines and began cutting them both to pieces in order to come-up with basically a square center box with a short, but better breathing wide snout.
The vision. . .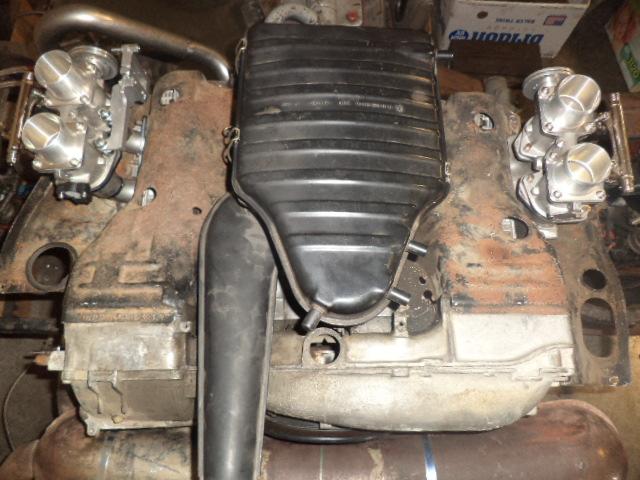
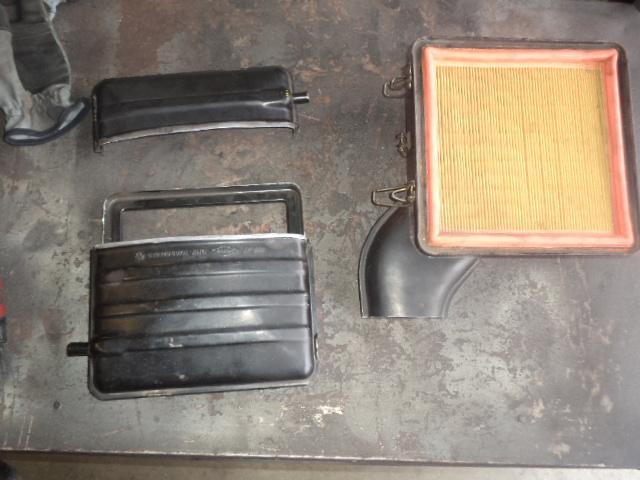
After the cutting was done, the left over pieces went into the recycle bin. . .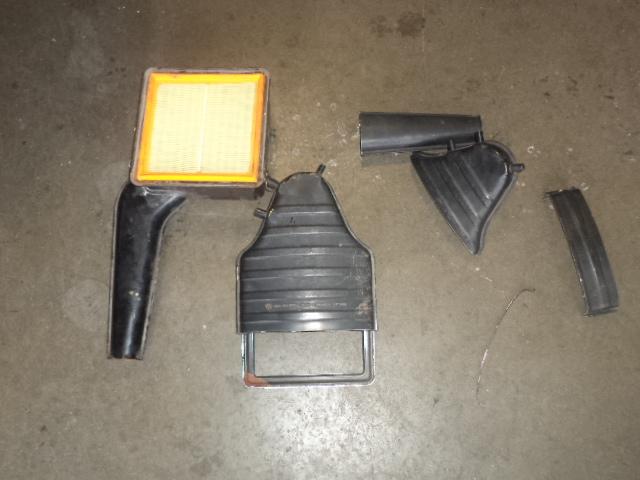
I welded the pieces together and ended up with a center air box that fit great. 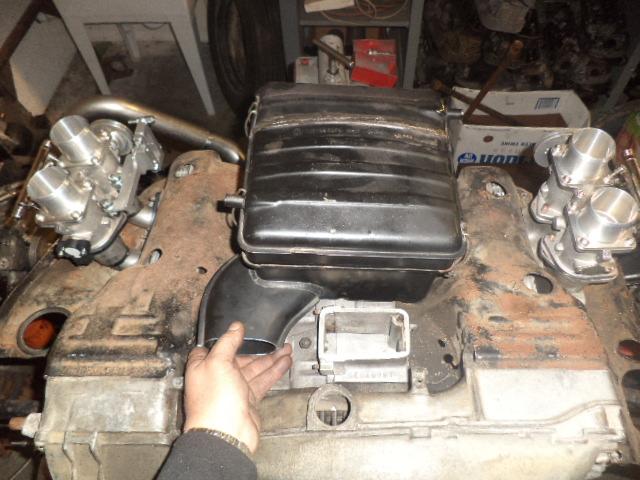
Then I ordered four 90 degree silicone boots and cut about ¾” off one end so they wouldn’t be too tall and fit under the factory type3 engine cover. 
Then I marked out where the 2” pipes would come into the center box and hole sawed the sides of the center box. I used some 2” muffler pipe to make the pipes leading out to each ITB silicone elbow and tacked them in place with the MIG.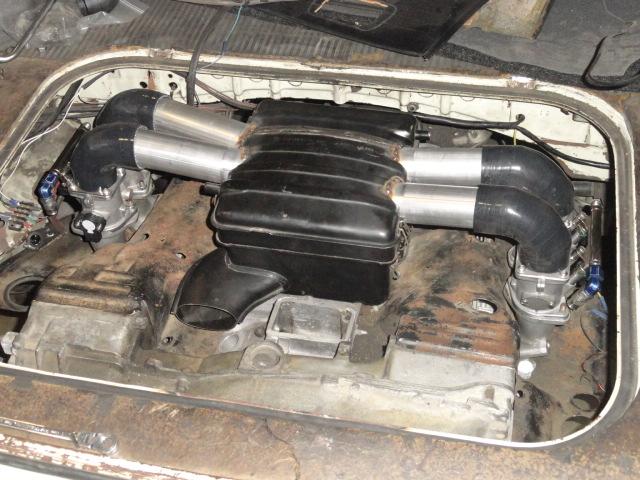
I’ll finish weld them tomorrow since it’s been a pretty long day thus far. Eventually it will get powder coated like the engine tins for that "factory skunk-works" look and a fresh K&N element.
Posted by: PanelBilly Jun 12 2014, 09:16 AM
Can I be one of your sons?
Posted by: Dave_Darling Jun 12 2014, 10:42 AM
I began by dragging out a pair of relatively hard to find Porsche 2.0L air cleaner assemblies.
Hard to find? Does that mean my stash of them could be worth some $$?
--DD
Posted by: Cap'n Krusty Jun 12 2014, 11:03 AM
I wouldn't be Krusty if I didn't ask a few annoying questions:
First, you say: "Should make for a lively rev'r and allow a lot of the power to actually get to the tires!!" I understand the quicker revving, but how does lightening the flywheel increase the amount of power getting to the wheels?
Second: Why a K&N on an engine in which you have so much time and money invested? There is far more (like a multiple) filter area, measured in square inches, in the factory type filter than in a K&N. The pores in the filter medium are much smaller, giving you a FAR better chance of removing those pesky little buggers that cause wear to the internals.
Thank you for the opportunity to be myownself! Oh, and thanks for the marvelous thread! Along with Britain's, there's a lot of awesome entertainment value.
The Cap'n
Posted by: aircooledtechguy Jun 12 2014, 02:14 PM
I wouldn't be Krusty if I didn't ask a few annoying questions:
First, you say: "Should make for a lively rev'r and allow a lot of the power to actually get to the tires!!" I understand the quicker revving, but how does lightening the flywheel increase the amount of power getting to the wheels?
Second: Why a K&N on an engine in which you have so much time and money invested? There is far more (like a multiple) filter area, measured in square inches, in the factory type filter than in a K&N. The pores in the filter medium are much smaller, giving you a FAR better chance of removing those pesky little buggers that cause wear to the internals.
Thank you for the opportunity to be myownself! Oh, and thanks for the marvelous thread! Along with Britain's, there's a lot of awesome entertainment value.
The Cap'n
If you lighten a flywheel it takes less HP for the motor to spin it which in turn allows more of it to get to the wheels. The motor doesn't make one single bit more HP at the crank, it's just easier to turn. This same principal applies to any of the rotating parts (crank, rods, pistons, etc.); make them lighter and you allow more of the motors power to turn the wheels. If you've ever done any cycling, the same principal applies when you lighten the rims/tires (kevlar beaded) on your bike; you're able to spin faster and go up hills easier and the effect is pretty dramatic. It simply allows more of your available HP to get to the ground. Of course the trade-off is that you can't coast as well with a lightened flywheel (or bike wheels for that matter) since you don't have as much stored energy in the flywheel so you sacrifice a bit of fuel mileage for the access to that power.
I'll have both filters available when I dyno the motor and I'll decide then what I will run at the track. I may not even run this filter assembly at the track and may just run traditional filter assemblies for that. This is mainly so I don't have to listen to the "snort-snort" of the ITBs as I drive on the roads.
I'm here for your retirement entertainment Cap'n.
Posted by: 914werke Jun 12 2014, 03:12 PM
Nate if you still have that nose section removed from the airbox hang onto it. I have my own mod/project that it would be useful.
Posted by: Cap'n Krusty Jun 12 2014, 03:45 PM
I'm not all that convinced by your explanation of the benefits of the flywheel mods, but I'll think on it for a bit. Next question: Is that intake tube gonna be attached to a cold air source? I suspect you might gain more benefit from that than from chopping the flywheel.
The Cap'n
Posted by: McMark Jun 12 2014, 04:27 PM
I agree with Nate. HP at the wheels is always lower than at the crank. Why? the variety of losses along the way from the crank to the wheels. Anything you can do that reduces transmission losses shows up at the wheels. Lighter flywheel? Aluminum pressure plate? Lightened differential? All those will reduce transmission losses.
Posted by: messix Jun 12 2014, 05:56 PM
oh dear Krusty.....
have you ever tried to spin a old time grinding wheel ? or an old hand crank sharpening wheel?
to get a mass rotating takes a considerable amount of power... right? well once it is rotating it doesn't take too much to keep it rotating right ? that is just like a flywheel right.
well if you have a fly wheel that's has a heavy mass, and that mass affects the overall mass of the rotating drive train, if you lighten any part of that overall mass the car will accelerate at a quicker rate due to less power taken to accelerate the overall rotating mass.
clear as mud?????
Posted by: aircooledtechguy Jun 12 2014, 06:02 PM
I agree with Nate. HP at the wheels is always lower than at the crank. Why? the variety of losses along the way from the crank to the wheels. Anything you can do that reduces transmission losses shows up at the wheels. Lighter flywheel? Aluminum pressure plate? Lightened differential? All those will reduce transmission losses.
Exactly. It's just physics.
Posted by: aircooledtechguy Jun 12 2014, 06:28 PM
I'm not all that convinced by your explanation of the benefits of the flywheel mods, but I'll think on it for a bit. Next question: Is that intake tube gonna be attached to a cold air source? I suspect you might gain more benefit from that than from chopping the flywheel.
The Cap'n
I may in time duct it to the cooling air duct like the factory did but I doubt it. I may in time turbo the car so this would be obsolete then. Absolutely no way a cold air intake would be more beneficial to this car than lightening the flywheel. Have you ever changed a car to a lightened flywheel and actually felt the big difference it makes??
Posted by: aircooledtechguy Jun 15 2014, 11:29 AM
Finally, the fender stretching is done!! Got the drivers side rear finished-up yesterday evening and it feels good to have that all behind me. It came out pretty darned good but was a bit tedious to get the same as the left side. 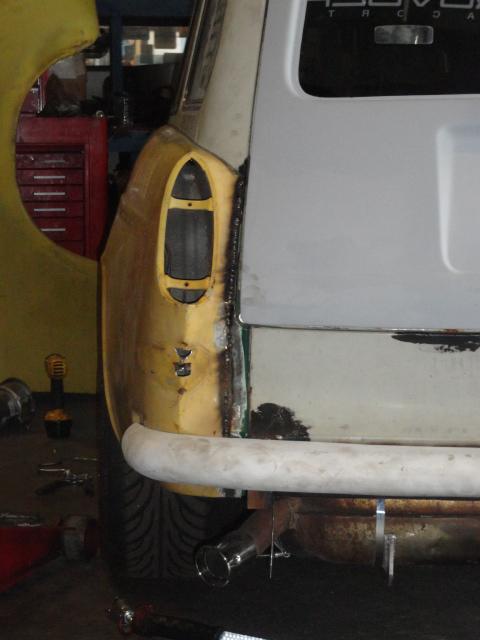
I also shaved the inner edge of the fiberglass bumpers in order to allow them to fit since the fenders wouldn't allow proper fitment without it. Luckily there's enough meet on them to trim around 1/2" off and still have them look un-modified.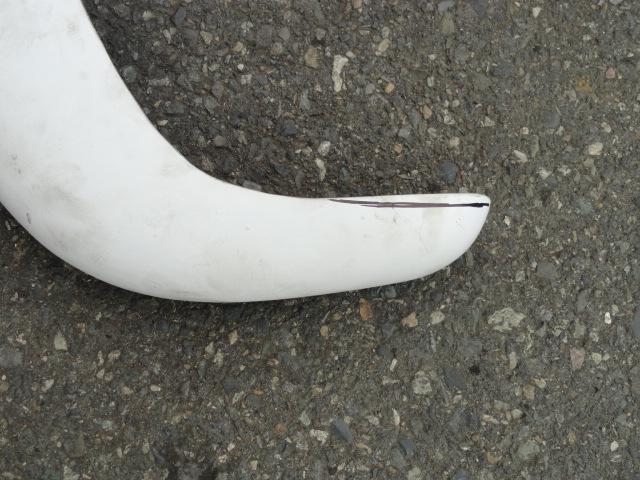
I still have a bit of under fender work to do, but the part everyone see's is done. I really like the "fat squatting" look from the rear with the fat tires and the 911 banana can poking out. I may reposition the exhaust tip a little higher, but all in all the look of the rear is about where I wanted it.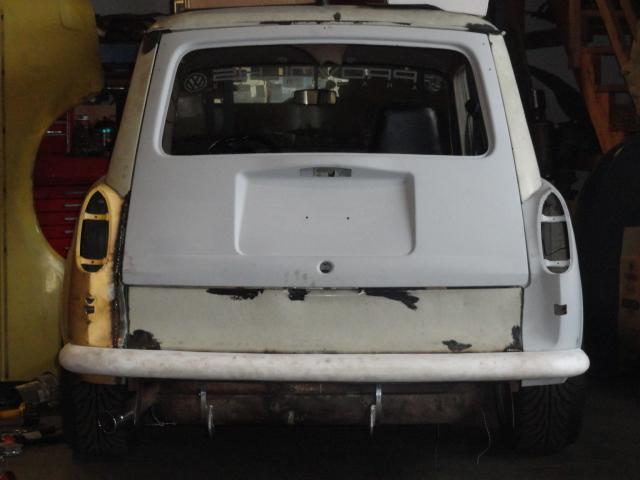
Posted by: Mike Bellis Jun 15 2014, 11:35 AM
I love this thread. I wish you had more time to work on this project.
Posted by: aircooledtechguy Jun 17 2014, 06:31 PM
I love this thread. I wish you had more time to work on this project.
Well that makes two of us!! I'm making time these days as my deadline looms near. . .
Took about an hour to shorten these IDF/DRLA manifolds 1 3/4" so they would fit into the Squarsche. I cut them apart on a band saw.
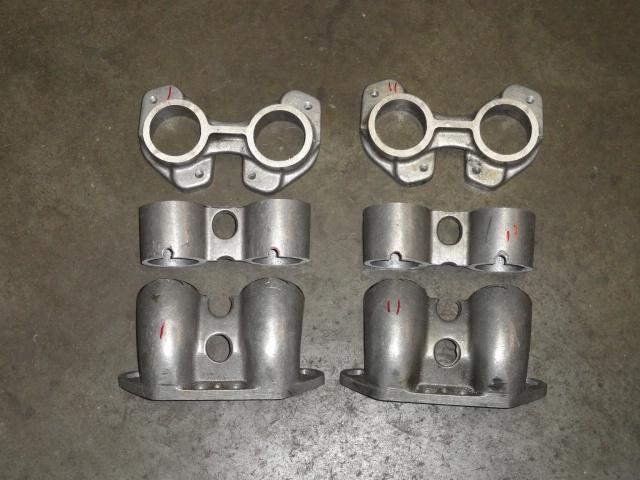
Then after beveling all the edges so I could get good penetration, I TIG welded them back together again. Then after they cooled down, I used a burr to smooth out the transition on the inside for good flow from the ITBs.
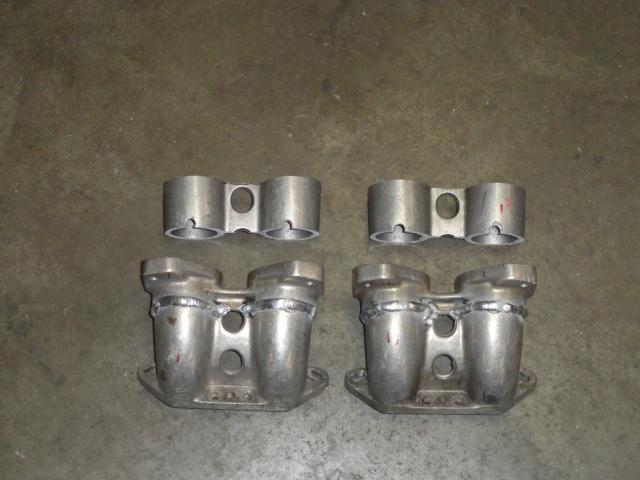
Posted by: Cap'n Krusty Jun 17 2014, 10:12 PM
I agree with Nate. HP at the wheels is always lower than at the crank. Why? the variety of losses along the way from the crank to the wheels. Anything you can do that reduces transmission losses shows up at the wheels. Lighter flywheel? Aluminum pressure plate? Lightened differential? All those will reduce transmission losses.
Exactly. It's just physics.
Physics? There you are. I passed HS physics by the skin of my teeth and a volunteer job as a lab assistant. I learned something today. I learn something every day.
The Cap'n
Posted by: aircooledtechguy Jun 23 2014, 09:35 PM
This Saturday, I got the sway bar mounts made (well mostly made) and test fitted.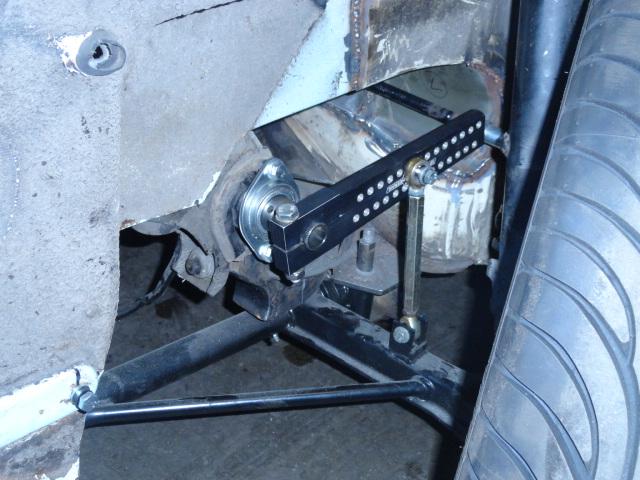
I also tweeked the entire throttle cable system and get it swapped over from the single TB location to the new location that works with the ITBs on this car. This also called for a custom cable, cable sheath extension and some other stuff so that it would work in this bastard step-child of a car. The result is a SUPER smooth cable linkage. The system is from Tangerine Racing and is a piece of art. If you want smooth linkage that is simple to sync and clean, this is the only set to get.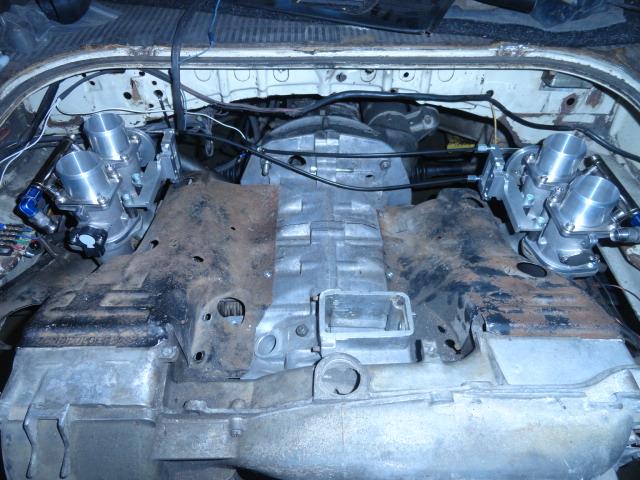
Today, my son Josh began assembling the bottom-end of the new race motor. He's doing a great job so far and I'll post photos of that when the bottom-end comes together.
Posted by: aircooledtechguy Jun 26 2014, 10:26 AM
Beginning this week, my son Josh has been out of school and is coming in to give his old man a hand at the shop. But it’s not without a mission. Since he was about 8 y/o, he’s been coming in occasionally to help when he needed some extra money to buy stuff kids buy. Over the past 6 years or so, he’s been my tear-down/parts-washing king. The un-disputed king at that. Now that he is 14 y/o he’s earned a new job. . .
Monday and Wednesday, he spent the better part of both days assembling the 2.3L race motor that will be the new heart of the Squarsche. What follows are a few shots of him assembling the bottom end. I have to say that he has really listened well and is doing a bang-up job on this motor so far. I couldn’t be more proud. . . 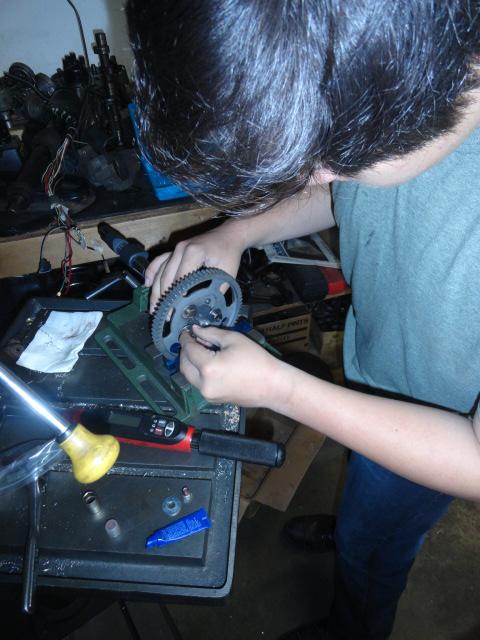
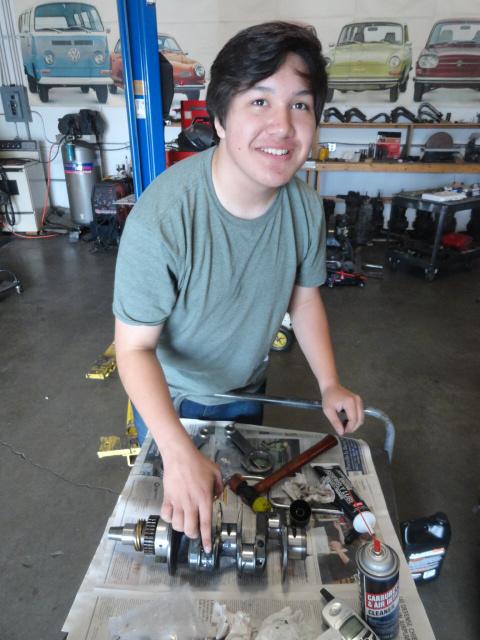
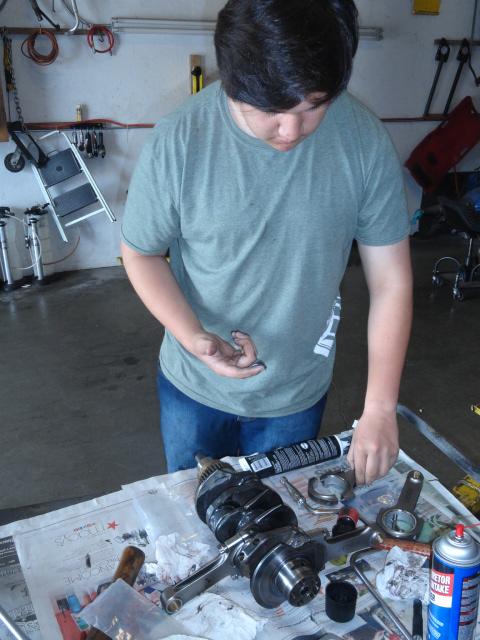
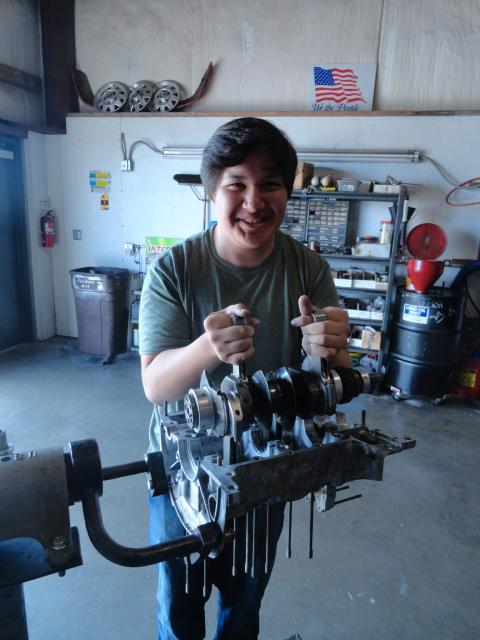
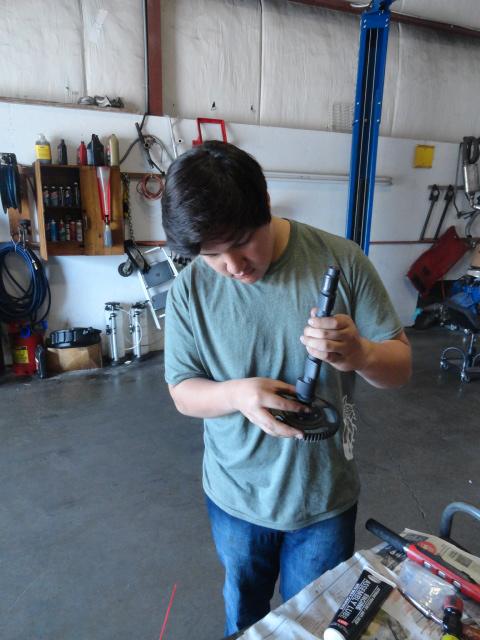
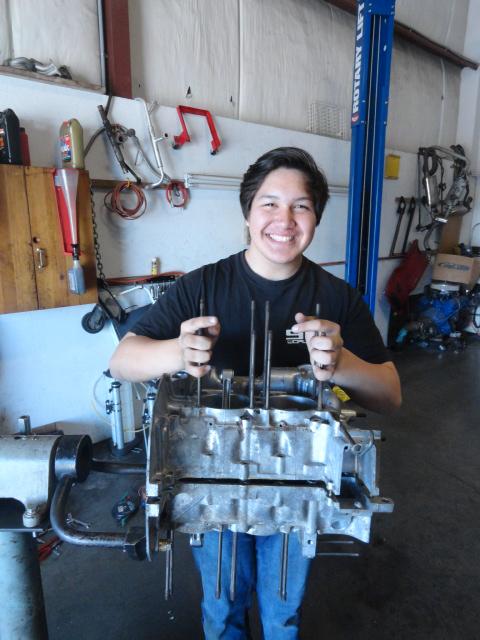
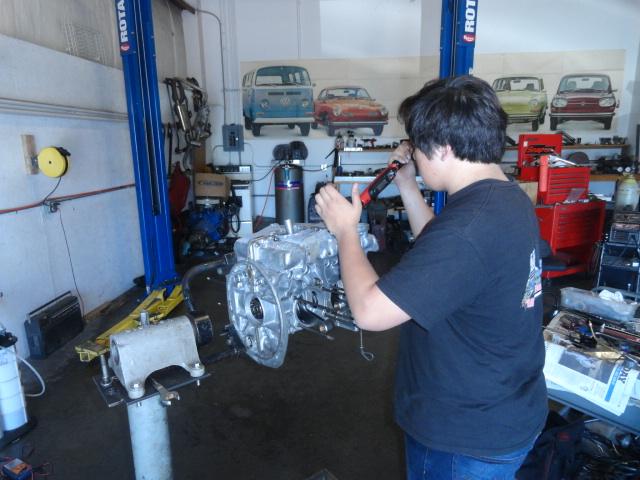
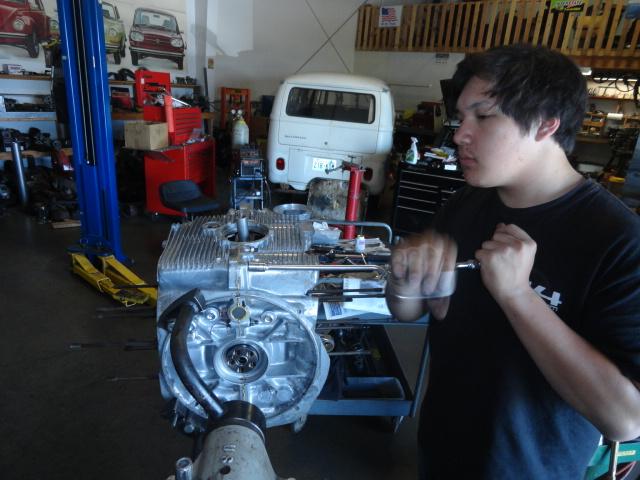
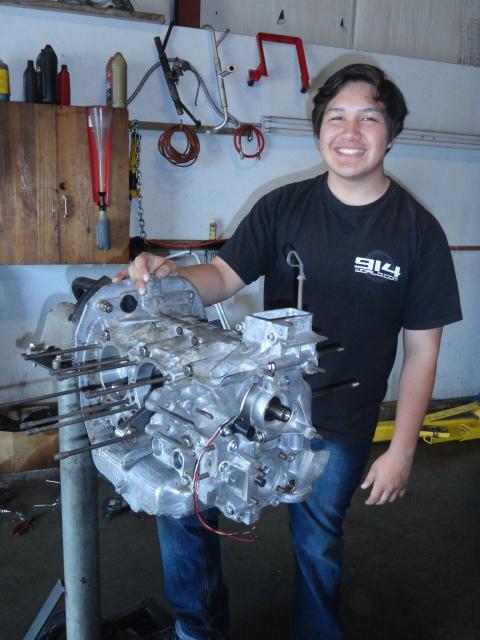
Posted by: KELTY360 Jun 26 2014, 10:53 AM
Yea Josh!!
Posted by: NORD Jun 26 2014, 11:18 AM
Josh; PM me, your probably less money than your dad for motor rebuilds.
Posted by: JRust Jun 26 2014, 01:42 PM
About time you got some help. You really are fuchin slow
.
.
.
.
.
.
.
.
.
.
.
Okay seriously though. Good to see Josh getting some first hand work in on the project. You have made amazing progress on it. Can't wait to see that thing in person
Posted by: Vysoc Jun 26 2014, 06:17 PM
Nice T-Shirt Josh...Great Work!!!!!
Vysoc 
Posted by: aircooledtechguy Jun 26 2014, 08:08 PM
Thanks guys. He's a good kid and to my surprise, through all the smart-assness he listens really well and is really careful and methodical with his actions. Which is perfect for engine building,. . . and plotting to burn down the school. . . I'll steer him to the former and hope the later never enters his mind.
Since I sent-in my car registration, Dr's certs, waivers and entry fees today, I may as well let everyone know that I'm officially planning to "pop the cherry" on the Squarsche at the Bonneville Salt Flats this September at the World of Speed event (Sept 6th-9th). We'll be attempting to gain entry into the "130 Club" which means we need two consecutive runs with an average between 130.000 - 139.999mph without going over. It's a tall order, but we're going. That's the goal, that's the mission and we're determined to make it.
Oddly, it turns out that there has NEVER been a type3 VW to compete at Bonneville so we'll be poppin' the cherry on that one too!! There has only been 1 type3 (a Fasty) to ever compete in a land speed event in the world and it was last year in Australia. Apparently they ran into motor issues and only attained a top speed of around 75mph. . . I'm hoping to better that in 3rd gear with another two gears to go.
My son and I have named our race team "Mutt Racing" since the Squarsche is a mutt-car. Our Race number is T-828 which s the average of all the cars that donated parts to the mutt, so cheer us on come early September.
As a side note: Josh is going to be towing me back to the pits after each run since "racing vehicles" are not allowed to drive back under their own power after a run (even if they are in a street car class like the 130 Club). I think Josh is more excited about getting to drive my '62 Ranchero tow vehicle than actually being part of a race team competing at Bonneville. . . He went for his first practice today on the back roads. . . I can't get that sh*t-eatin' grin off his face 3 hours later. . . Crap; hope his mother doesn't find out. . . 
Posted by: PanelBilly Jun 26 2014, 08:40 PM
Wow, I'm going to know someone famous! What a cool idea. Where did this idea come from?
Posted by: KELTY360 Jun 26 2014, 08:51 PM
That is way cool Nate. Another site I visit has a couple of LSR folks - they drive Y-Block Ford pickups. They have documented how stringent the tech process is and how helpful it is to have an experienced person do a pre-check to keep from getting a big surprise at the Flats. Do you have anyone local to provide a second set of eyes?
Posted by: aircooledtechguy Jun 26 2014, 09:52 PM
That is way cool Nate. Another site I visit has a couple of LSR folks - they drive Y-Block Ford pickups. They have documented how stringent the tech process is and how helpful it is to have an experienced person do a pre-check to keep from getting a big surprise at the Flats. Do you have anyone local to provide a second set of eyes?
The sort answer is NO. I'm racing with the Utah Salt Flats Racing Association (USFRA) in hopes of gaining entry into the 130 club which is a "street car" class. Meaning 90% of the class rules do not apply. The 130/150 Club classes are true grass-roots classes designed to get folks hooked on a high-sodium diet in hopes that next year you build a class racer. Basically only basic safety rules apply like no fuel lines in the drivers compartment, 3-point belts or better, H-series tires or better, helmet, long sleeves, long pants and closed toe shoes (the rules actually exclude sandals by name!!) etc. etc. If I were to compete for a specific class (an absolute speed record), then all the SCTA (Southern California Timing Association) rules would apply and I'd need a gaggle of folks looking over my shoulder. Holy crap there are a lot of requirements and for good reason, but damn. Once you get into class racing, it becomes easy to see why sponsorship is not only a luxury, but darned-near a requirement. If I were to go class racing, I could easily see dumping $5-$10K into the car to gain compliance to the rule book and probably a lot more. It quickly becomes evident why there are so few true privateers in racing (any kind of racing).
While the obvious goal is to gain entry into the 130 club, privately, my goal is to just have a good time with my son and create memories that will last a lifetime. Any accolades are merely gravy to me and will rightfully go to Josh as the engine builder. The race is happening now. I can't imagine Bonneville being any more strenuous than what we're doing now just trying to get the car ready to run.
If in the future I do build the car for class-racing, I have several guys locally who race at Bonneville who have indicated that they would be happy to look over the car for compliance. One of the guys, Dave Tatom, used to race for Porsche in the late 50s/early 60s in Europe and raced a factory RSK. He now runs "Bonneville Betty" a bright yellow '32 Ford running one of his famous blown flathead V8s that he builds out of his shop. I've only met him once, but I came away thinking, "I should buy this guy endless beers just to hear his racing stories from the hay-day of racing" (videoing it of course for posterity). He's simply a wealth of knowlege. . .
We truly stand on the shoulders of giants that have come before us. I believe that with every fiber!!
Posted by: aircooledtechguy Jun 26 2014, 10:16 PM
Wow, I'm going to know someone famous! What a cool idea. Where did this idea come from?
I don't know about famous. NOTORIOUS is probably a better word.
Well, it goes back to 1974 when my mom bought me a copy of the Guinness Book of World Records. Out of all the fun records like fattest man, tallest man, lingest fingernails/beard, etc, etc., the only two records that stuck in my mind were:
1. Fastest car - The Blue Flame 630+mph and
2. Longest skid - 5 miles, Spirit of America, Breedlove (of course)!!!
BOTH AT BONNEVILLE. I remember thinking that someday I should check out this place they call Bonneville. . .
The silly crap 8 y/o's remember. . .
Fast forward 38 years and one of my clients comes in and hands me a photo he recently took at Bonneville of a turbo'd bug that went around 160mph and a program for the event. . . The photo went up on my wall and the program has never left my desk. Damn him!! The die was cast and I blame HIM for it all every time he comes in!!
Posted by: KELTY360 Jun 26 2014, 11:34 PM
If in the future I do build the car for class-racing, I have several guys locally who race at Bonneville who have indicated that they would be happy to look over the car for compliance. One of the guys, Dave Tatom, used to race for Porsche in the late 50s/early 60s in Europe and raced a factory RSK. He now runs "Bonneville Betty" a bright yellow '32 Ford running one of his famous blown flathead V8s that he builds out of his shop. I've only met him once, but I came away thinking, "I should buy this guy endless beers just to hear his racing stories from the hay-day of racing" (videoing it of course for posterity). He's simply a wealth of knowlege. . .
We truly stand on the shoulders of giants that have come before us. I believe that with every fiber!!
I had no idea that Dave Tatom had a Porsche connection. He is a legend in the flathead Ford world. His shop is in Mt. Vernon or Sedro Woolley or somewhere over there. Definitely cultivate that relationship.
Posted by: aircooledtechguy Jul 9 2014, 03:12 PM
Got my fenders and doors back from my body guy, so I hung them on and dragged her outside so I could take a shot for the official program for the World Of Speed event in Bonneville. It's sitting a little ass-high since there's no motor in it. All in all, the debauchery is coming together nicely. . . 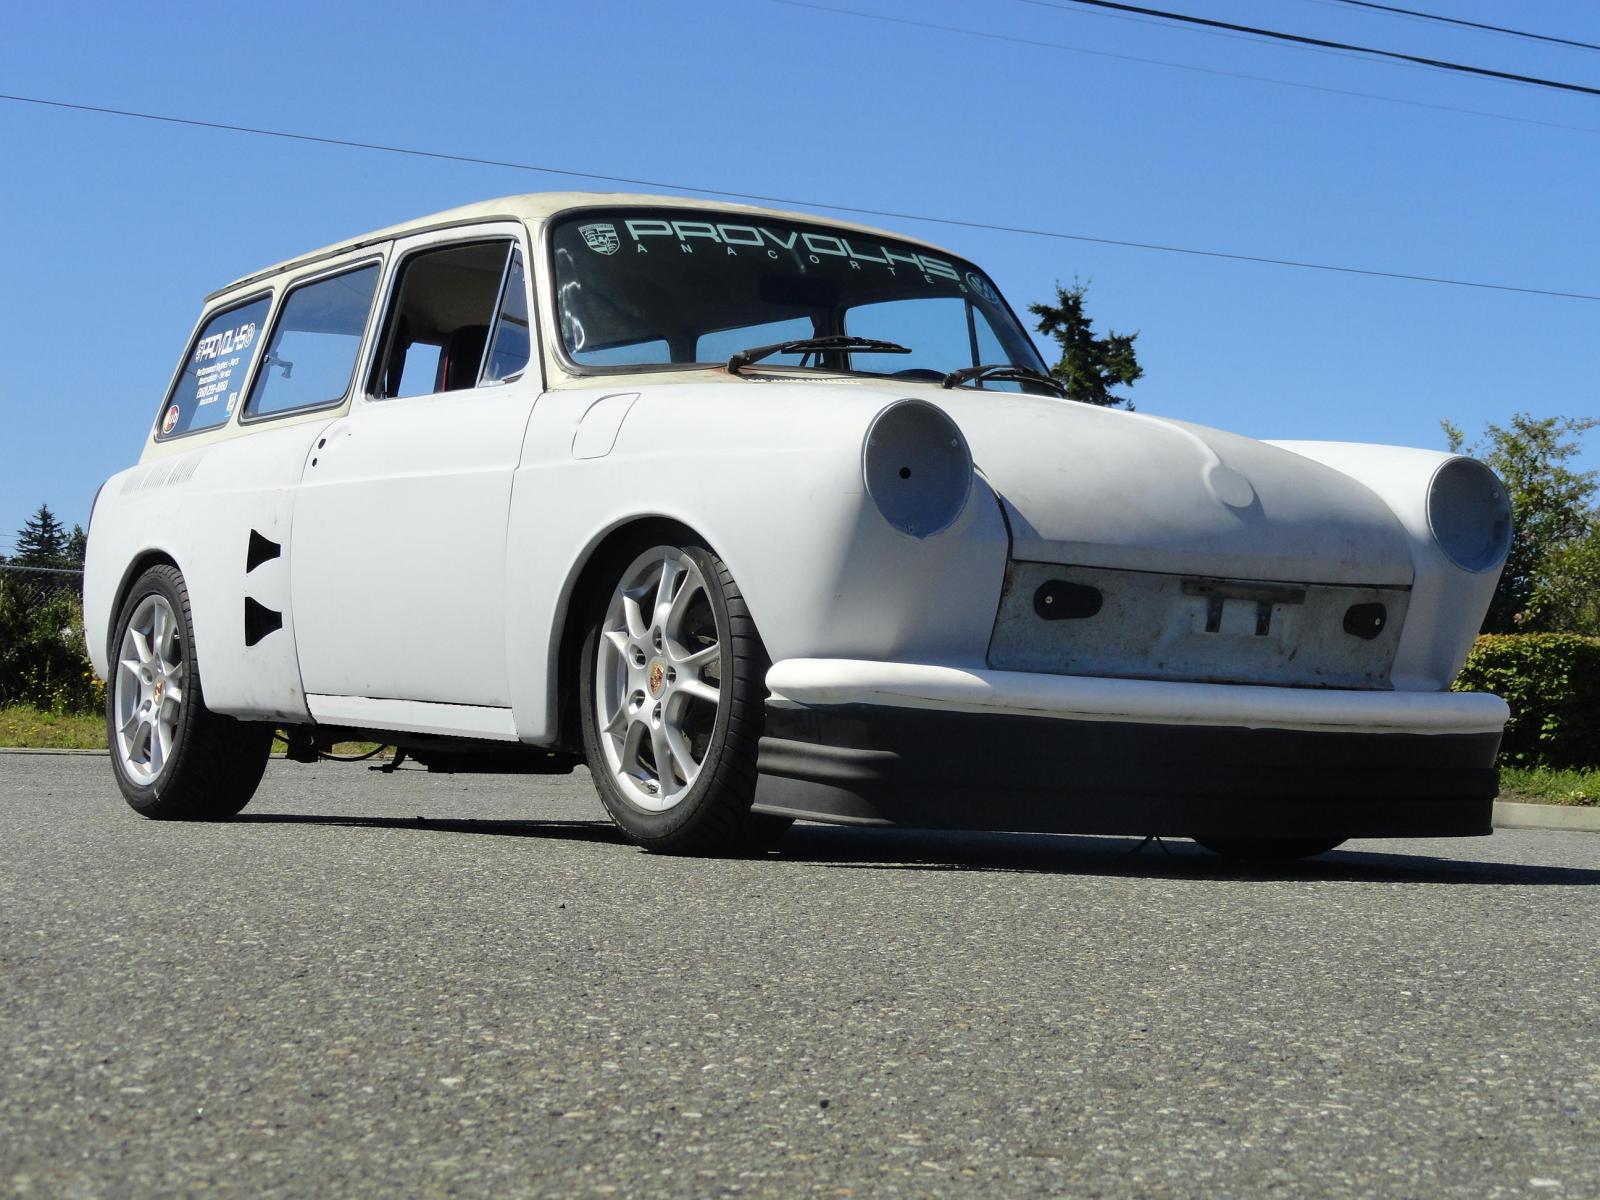
Posted by: Java2570 Jul 9 2014, 03:37 PM
Damn, that is bad ass! I should have come by the shop when I was out in Seattle last month!
Posted by: aircooledtechguy Jul 16 2014, 10:34 AM
I had Josh trace out and cut the second inner fender well panel for the Squarsche today. He'll be doing a mirror image of what he watched me do yesterday on the passenger side. 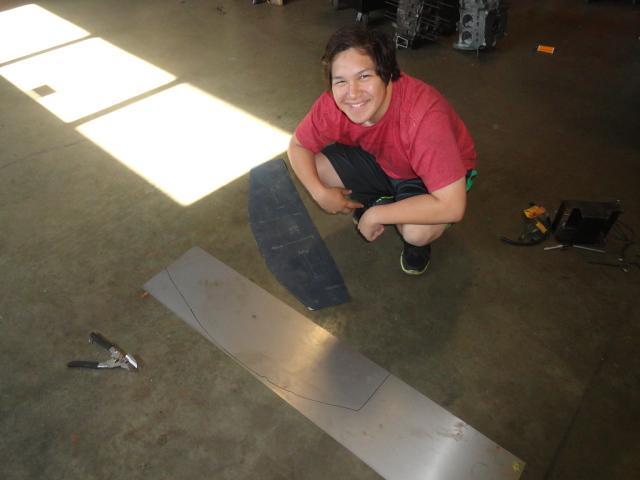

On the passenger side I marked and welded in the dzus anchors I bought from Speed Mart into the OEM inner fender well. This will act as an air duct to bring cooling air from the NACA ducts fwd of the rear wheel, over the rear wheel and straight into the OEM cool air duct at the back of the car. This will help to force-feed the fan at speed. I went this route rather than just switch to the later fender grills and *hope* enough air would find its way into the fan.
Since we're running at Bonneville, we had better be able to clean the ducts out after racing, so they are being held in with dzus fasteners. Here's my side: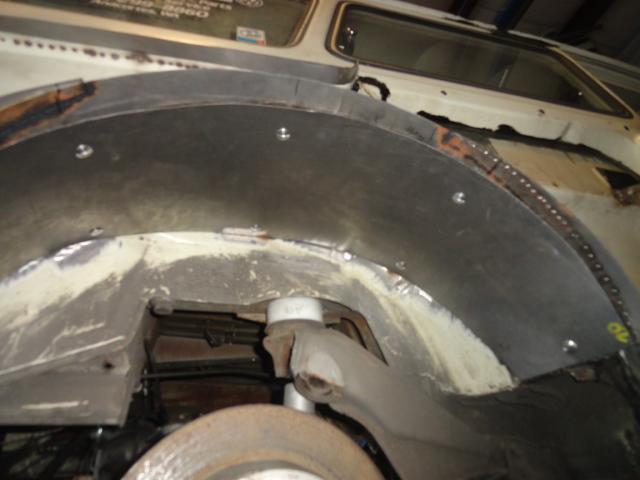
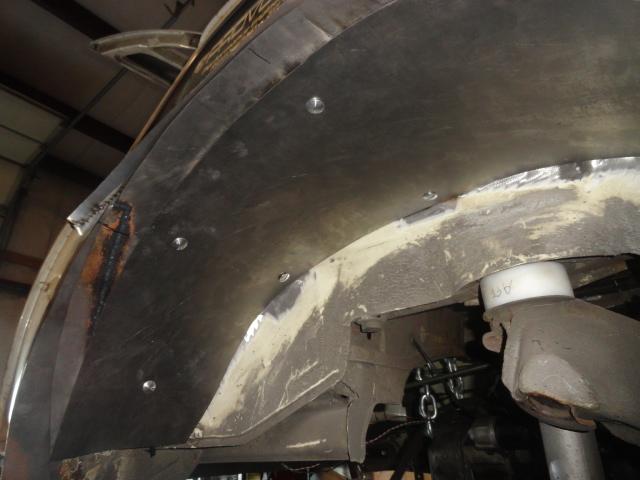
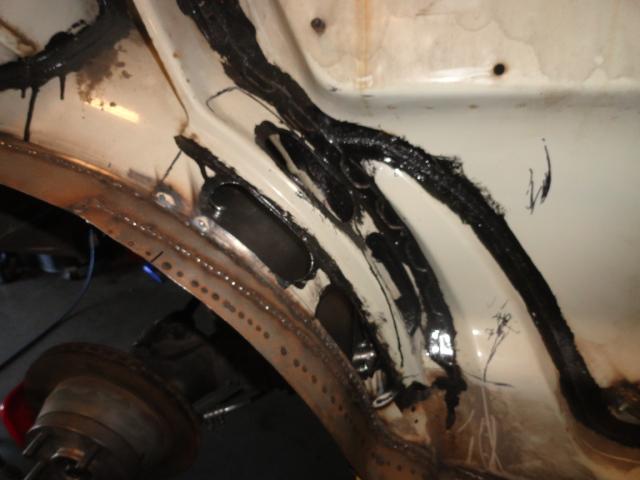
His side to follow and I'm sure it'll be better than mine. . .
Posted by: aircooledtechguy Jul 22 2014, 05:42 PM
No pics today. . . Just verbage.
Had a couple days that disappointed me and ended up as wasted time, which I can't afford at this point with less than 50 days to go before World of Speed @ Bonneville. Anyway, progress was made on 2 fronts. . .
1. I got the inner fenders sealed for the NACA ducts to bring cooling air to the engine. This was huge. Originally, I had grandiose schemes of ducting from the NACA ducts to the inner fenders, however I had grossly over thought this. All I needed to do was to prevent air from traveling from the NACA ducts to the rear section of the fenders and attempted a fiberglass ducting system to make this happen. . . I lost a n entire day on this fiasco. A simple 6" wall prevents this and the "lazy air" will have no choice but to go down the duct over the rear tire and into the engine. Woohoo!! A HUGE burden has been lifted off my shoulders. . .
2. I now have brakes. Yeah, racing at Bonneville make brakes kind of the last thing you need to be concerned about, but it was forward progress, so I'm counting it today. I need all the fwd progress that I can get.
3. I found the perfect seals on Ebay for the inner fender/outer fender and I'll be ordering them tonight.
I may start throwing receipts away on this project. . . This sh*t is getting expensive and completely depressing . . I'm a freakin' privateer on a shoestring budget and and prayer!!!!!!!!!
Posted by: aircooledtechguy Jul 22 2014, 05:47 PM
No pics today. . . Just verbage.
Had a couple days that disappointed me and ended up as wasted time, which I can't afford at this point with less than 50 days to go before World of Speed @ Bonneville. Anyway, progress was made on 2 fronts. . .
1. I got the inner fenders sealed for the NACA ducts to bring cooling air to the engine. This was huge. Originally, I had grandiose schemes of ducting from the NACA ducts to the inner fenders, however I had grossly over thought this. All I needed to do was to prevent air from traveling from the NACA ducts to the rear section of the fenders and attempted a fiberglass ducting system to make this happen. . . I lost a n entire day on this fiasco. A simple 6" wall prevents this and the "lazy air" will have no choice but to go down the duct over the rear tire and into the engine. Woohoo!! A HUGE burden has been lifted off my shoulders. . .
2. I now have brakes. Yeah, racing at Bonneville make brakes kind of the last thing you need to be concerned about, but it was forward progress, so I'm counting it today. I need all the fwd progress that I can get.
3. I found the perfect seals on Ebay for the inner fender/outer fender and I'll be ordering them tonight.
I may start throwing receipts away on this project. . . This sh*t is getting expensive and completely depressing . . I'm a freakin' privateer on a shoestring budget and and prayer!!!!!!!!!
Posted by: rhodyguy Jul 23 2014, 01:07 PM
nate, how will you deal with the salt and the bottom of the engine? some sort of covering?
Posted by: aircooledtechguy Jul 23 2014, 06:25 PM
nate, how will you deal with the salt and the bottom of the engine? some sort of covering?
I could install a belly pan to cover/fair the engine/trans, but there's no time for that this year anyway. I'll just have to pressure wash it after the meet since there's nothing else I can do about that while I'm there.
For next year, there are some serious changes coming to the Squarsche and front/rear belly pans may factor into those changes. If I build a spec car, I'm allowed to fair up to 50% of the bottom on a stock bodied car. Since VWs come with a flat belly pan from the factory, I only have 40-45% to do anyway to make a 100% faired belly.
Posted by: Dave_Darling Jul 23 2014, 11:09 PM
Just be sure you have enough cooling if you build an under-tray. There should be low pressure under the engine to draw the cooling air down across the fins, but low pressure will draw in salt and air, so...
Hopefully the air from the intakes will create enough pressure differential that cooling will be fine, but you might want to check that before putting the belly pan under the engine.
--DD
Posted by: Vacca Rabite Jul 24 2014, 07:17 AM
Nate, you ever get that package from me?
Zach
Posted by: aircooledtechguy Jul 24 2014, 10:32 AM
Nate, you ever get that package from me?
Zach
I did Zach; Thanks. No time yet to get them mounted and snap some photos. They are STUNNING!!!!!!!!!!
Posted by: aircooledtechguy Jul 24 2014, 10:41 AM
Just be sure you have enough cooling if you build an under-tray. There should be low pressure under the engine to draw the cooling air down across the fins, but low pressure will draw in salt and air, so...
Hopefully the air from the intakes will create enough pressure differential that cooling will be fine, but you might want to check that before putting the belly pan under the engine.
--DD
A lot of thought will have to go into belly pans in the rear for sure. Access to low pressure is not a huge problem with this car due to that flat rear-end
That vacuum at the rear is gonna be an issue with this car going fast fo'sho' Posted by: aircooledtechguy Aug 6 2014, 10:17 PM
After weeks of delays due to shop and family commitments as well as part incompatibility issues, Josh was finally able to finish the engine build that he started several weeks ago. None too soon I might add since it is getting down to the wire on this project!!
One of the issues we had was when I ordered a ring set, TWICE, I was sent the wrong oil control rings. Each time, causing a week or more in delays. . . Man was it nice to get those cylinders on and the motor finished. Here are a few shots of Josh back at it getting the cylinders prepped and heads on and torqued.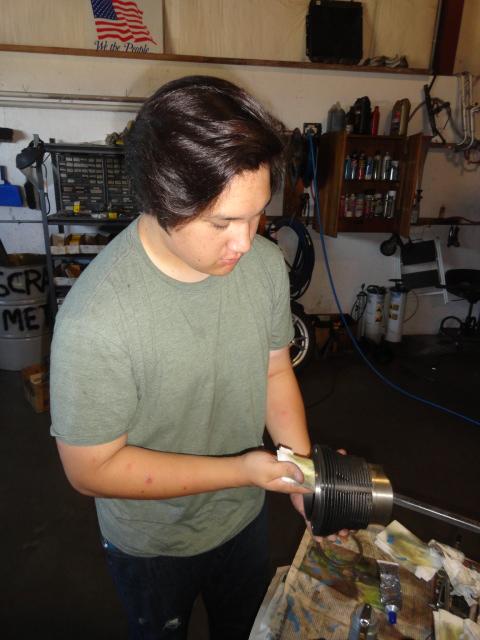
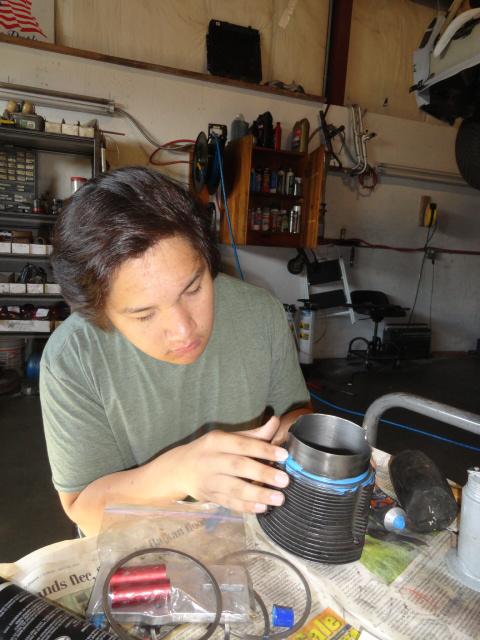

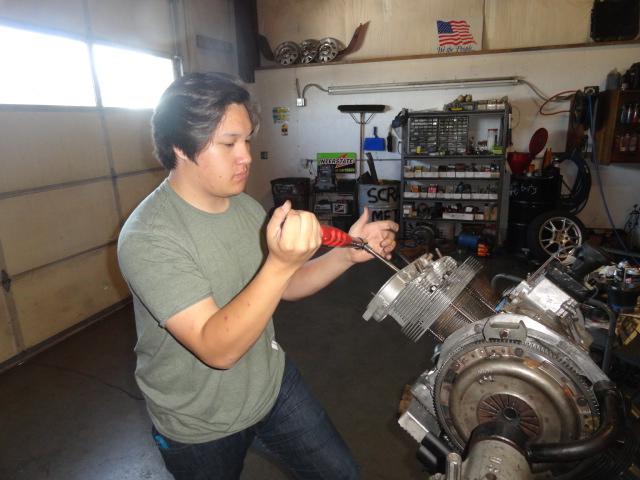
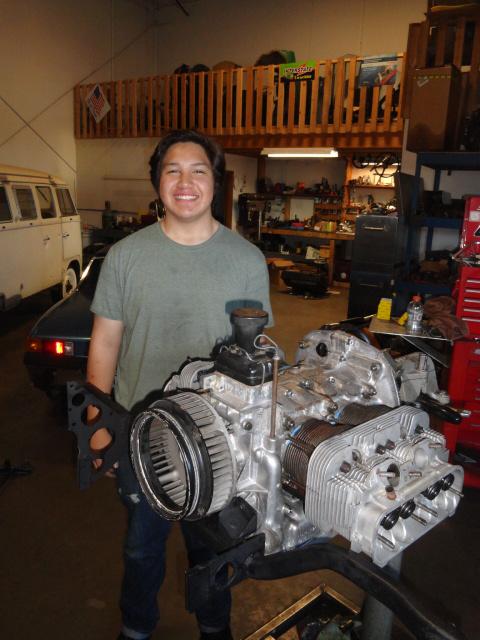
After we determined our rocker geometry and made adjustments via shims and push rod length, Josh got down to making the custom length chromoly push rods. He did a fantastic job!! 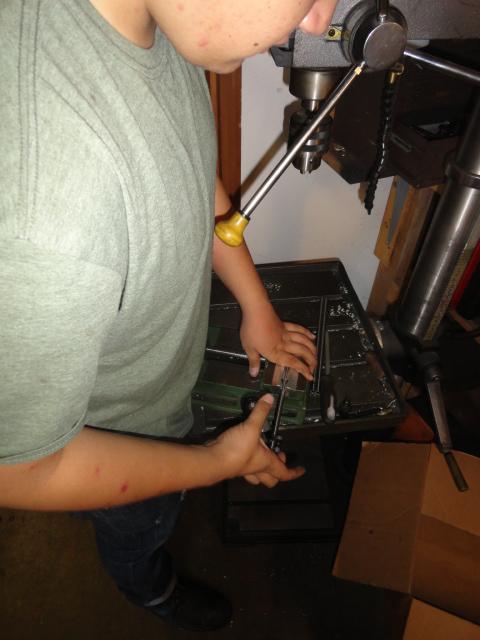
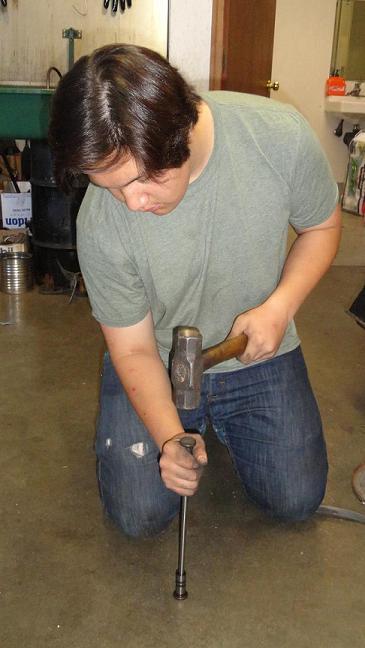
He then was able to get the modified 1.7L rockers w/ OEM Porsche 911 adjusters installed and the valves adjusted. 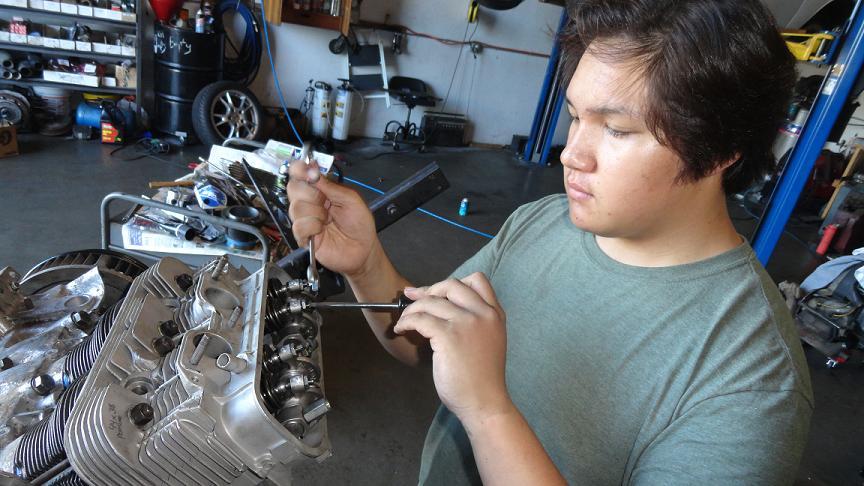
We’re going to start the motor with these bolt-on covers. Yeah, yeah, I know; they will probably leak, but we gotta try ‘em anyway since they’re easy to change out for stockers. . .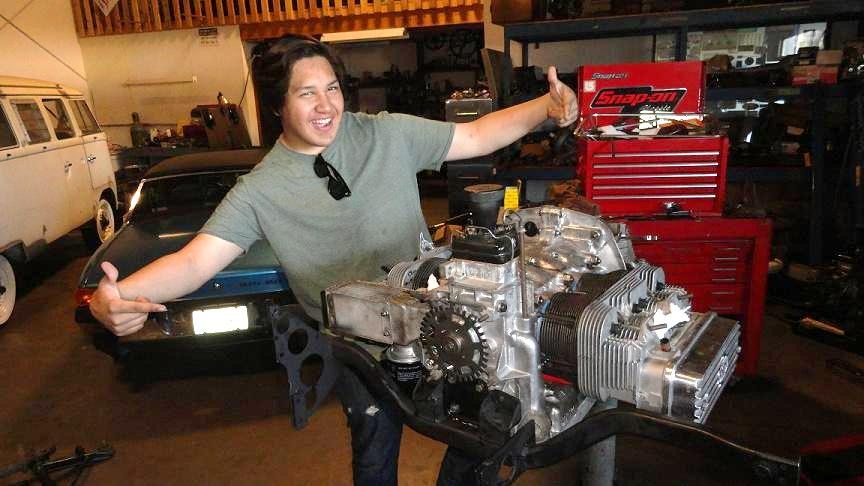
Before the engine tins went on, we set the air gap at the hall sensor and 36-1 trigger wheel to 3mm and verified a good signal with a multimeter. We wanted to do this now since getting at it later will be “fun”.
Then began the job of the engine tins. We robbed these off the old 2056cc and cleaned them-up. 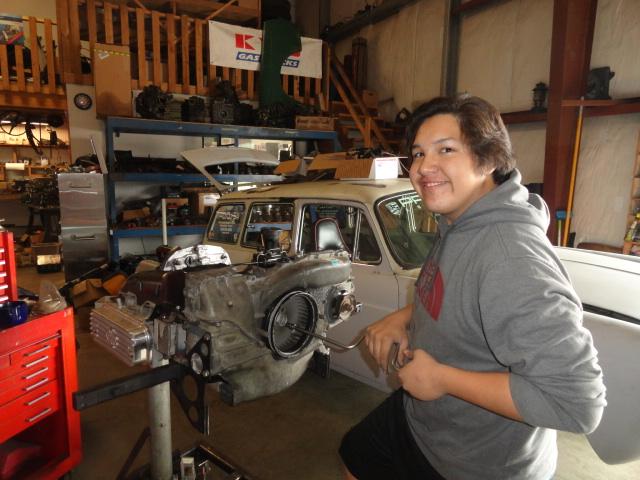
After that, we mounted the ITBs and synced the linkage, which only took about 30 seconds (try syncing any other type of linkage that fast).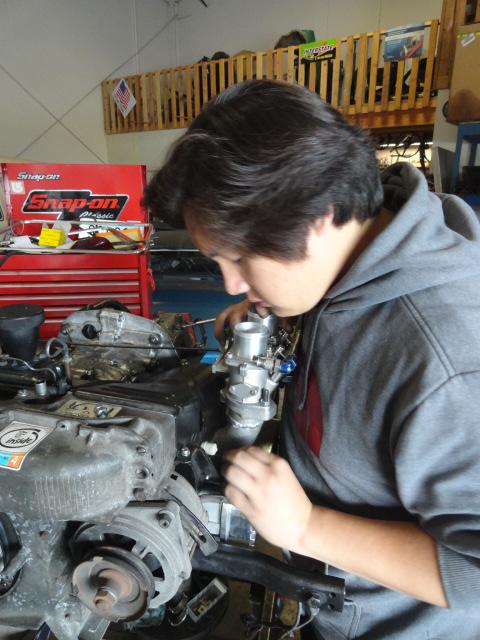
Then I had Josh break out the torch and anneal the copper exhaust gaskets so they would be butter-soft for good stub sealing.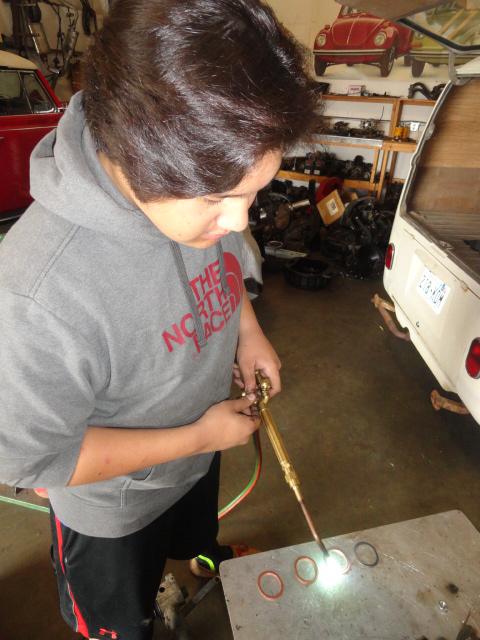
After they cooled, he installed them into the ports, anti-seized the studs and mounted the custom stubs using OEM Porsche 914 2.0L exhaust nuts. 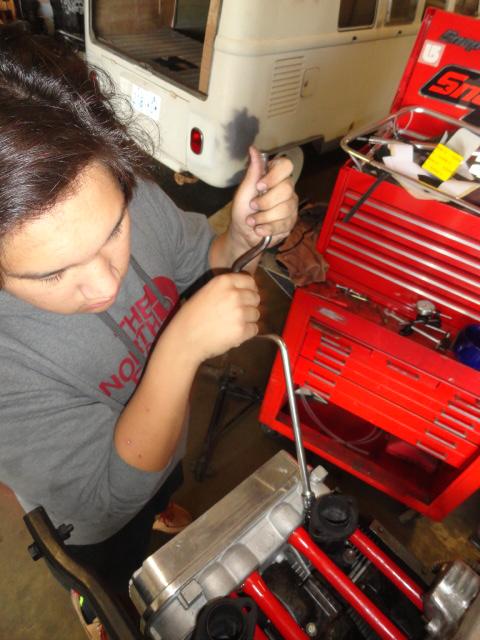
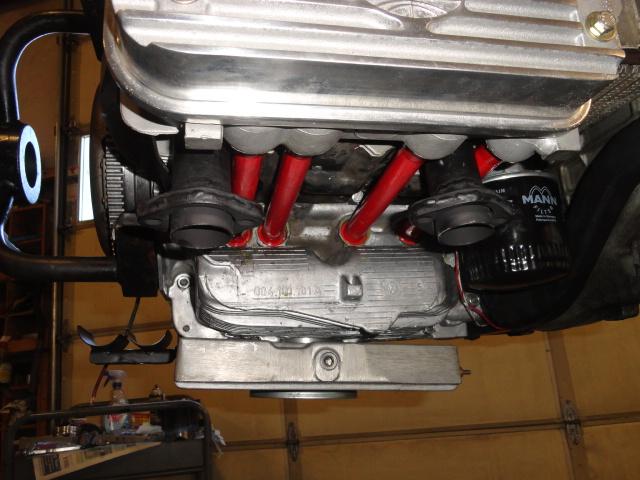
Below is a shot of Josh and his first motor build. I’m really proud of him and what he has created here.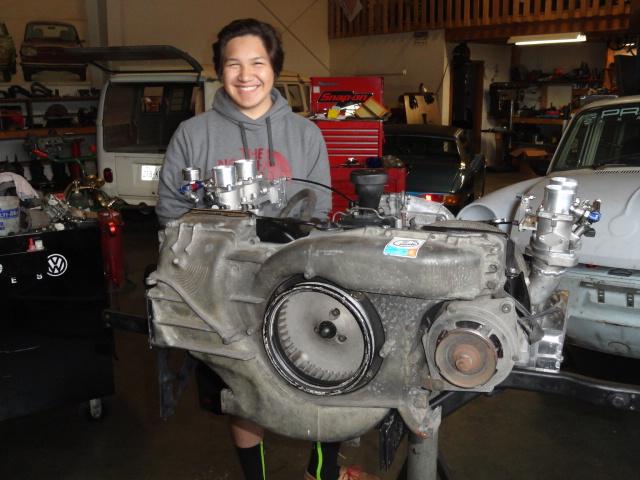
Today, I had to make an exhaust hanger just before the V-band. With the 911 muffler, this is not needed, but if I run a straight pipe, it will need to be supported. This is what I came up with.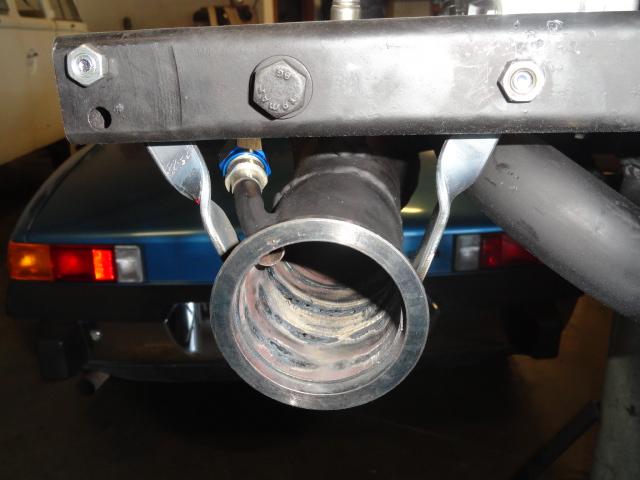
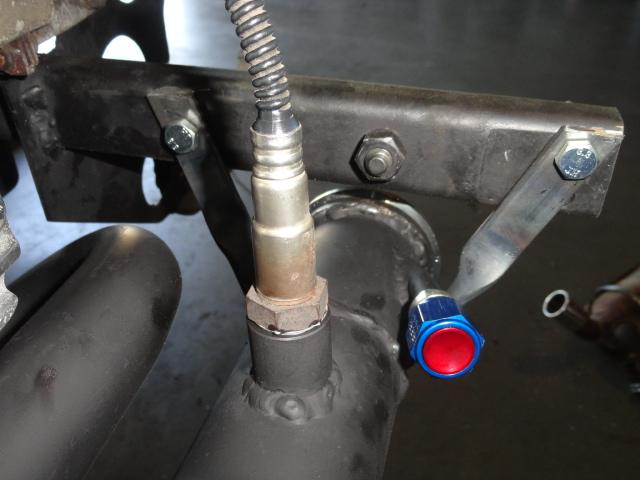
Then we got the header on and the muffler installed.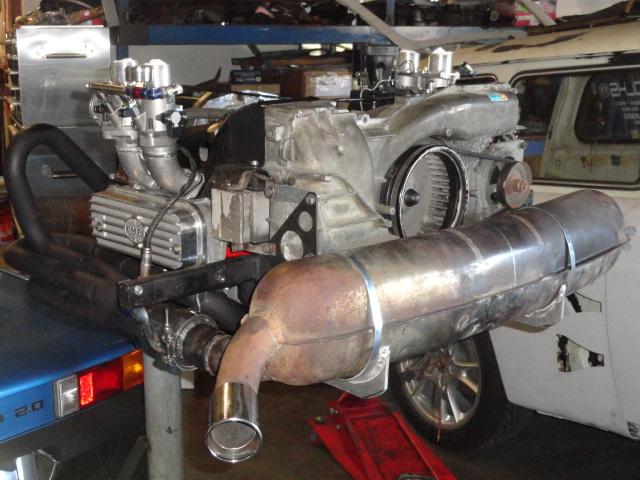
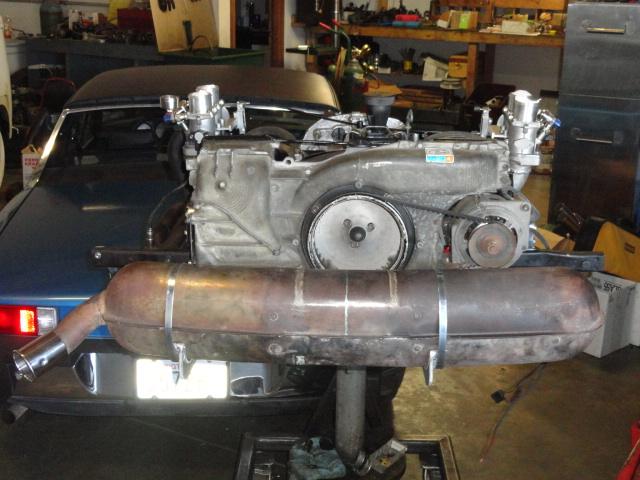
Posted by: JRust Aug 6 2014, 10:32 PM
Lookin good Nate! What a great build & Josh is into it. Well done man! Good to see a young man cutting his teeth air cooled style 
Posted by: Cap'n Krusty Aug 6 2014, 10:44 PM
Nice. Looks like you've infected your son with the car bug ............... Please 'splain to him the benefits of using the box end of the wrench on those valve adjuster lock nuts. Tell him Cap'n Krusty says to do it.
The Cap'n
Posted by: aircooledtechguy Aug 6 2014, 10:50 PM
Nice. Looks like you've infected your son with the car bug ............... Please 'splain to him the benefits of using the box end of the wrench on those valve adjuster lock nuts. Tell him Cap'n Krusty says to do it.
The Cap'n
Nice catch Krusty!! Will do sir, will do!! Posted by: Cap'n Krusty Aug 6 2014, 11:56 PM
See? I LOOK at the pictures, albeit mostly in envy. Way to go!
The Cap'n
Posted by: aircooledtechguy Aug 10 2014, 11:00 AM
Thanks for the kind words guys. Even through all the smart-@$$ness, I think Josh is picking this stuff up pretty good and is doing a great job on his part.
I made some more progress yesterday. I modified the tank (via BAH ) and got it mounted. That enabled me to be able to finalize the front strut bar and weld-in the studs for it.
This is the first front stiffener to go in. I'm going to be doing some testing in the months to come to see if more will be needed.
I also made the spoiler stiffener support and mounted it to the inside of the spoiler. This is necessary because all the force of the air at high speeds will eventually break the mounts for the bumper since they are just fiberglassed in place. This will support the bottom really nicely and make it solid at high speeds. I still need to make the strut bars that tie it to the front suspension, Since I ran out of materials.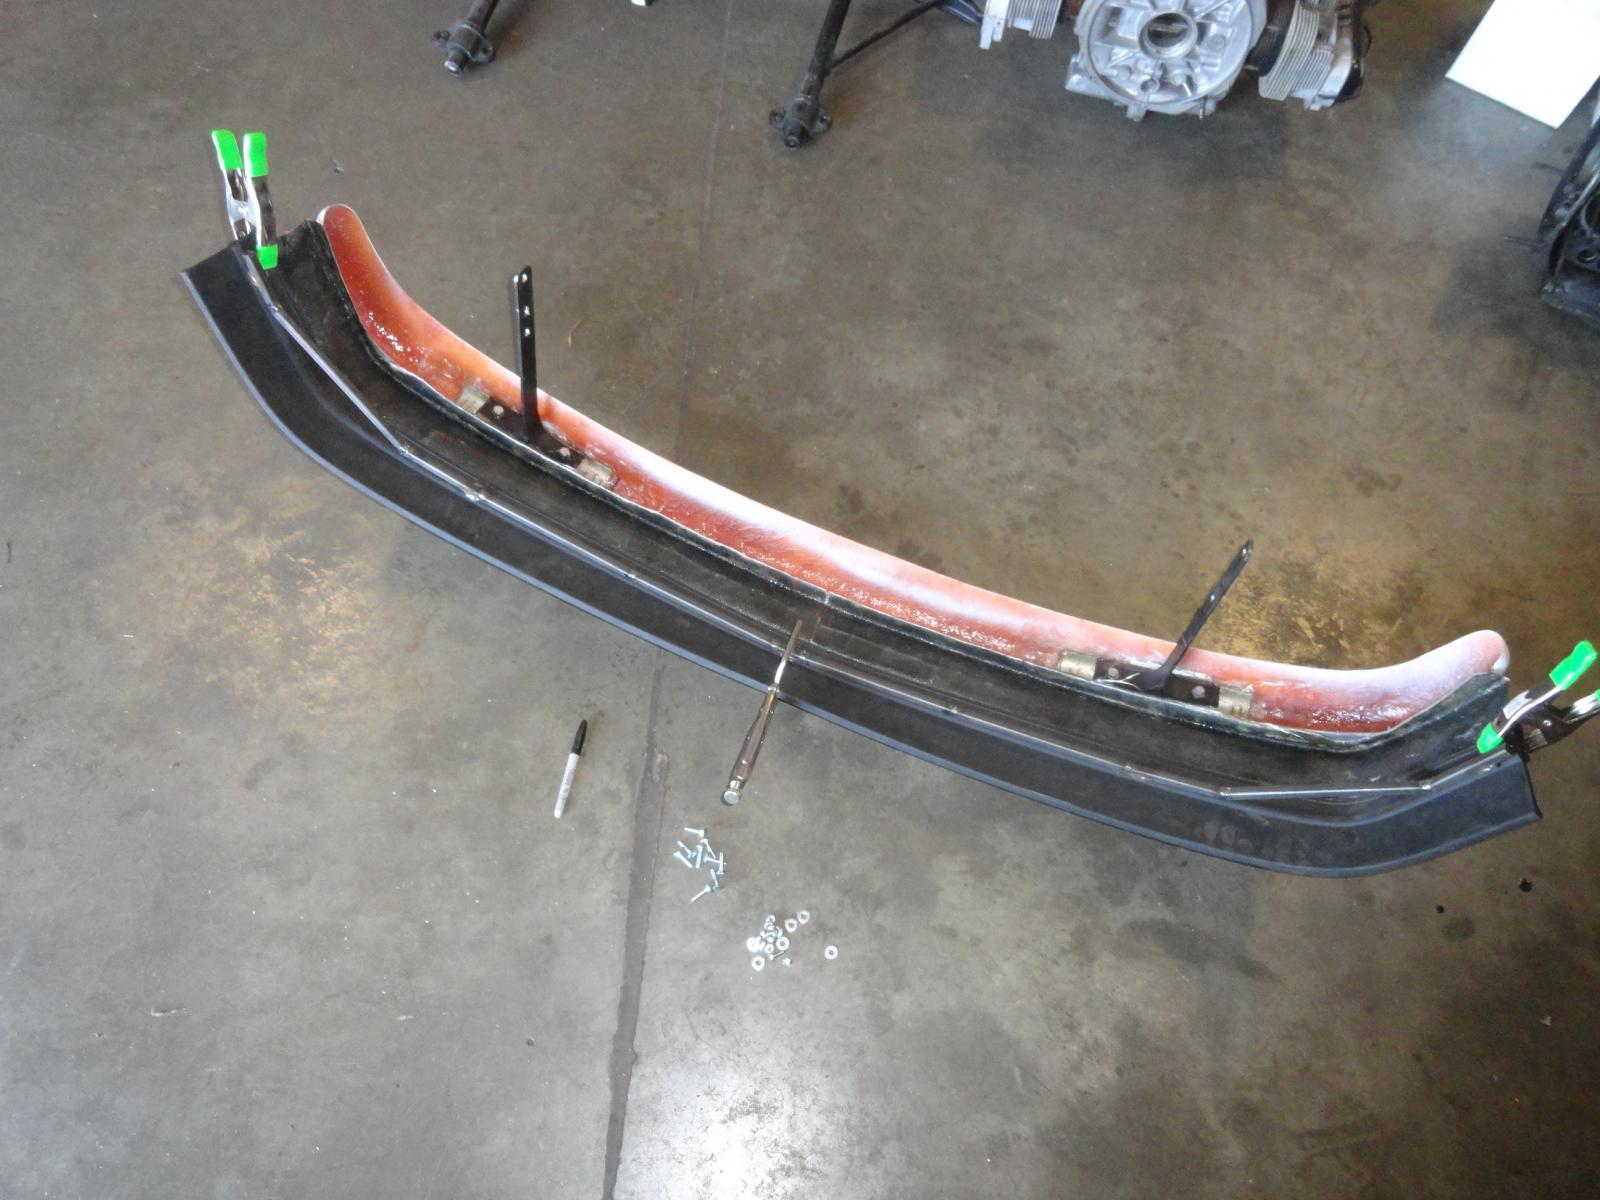
I also mounted & plumbed the Walbro fuel pump and filter as well as ran all the front fuel hoses. 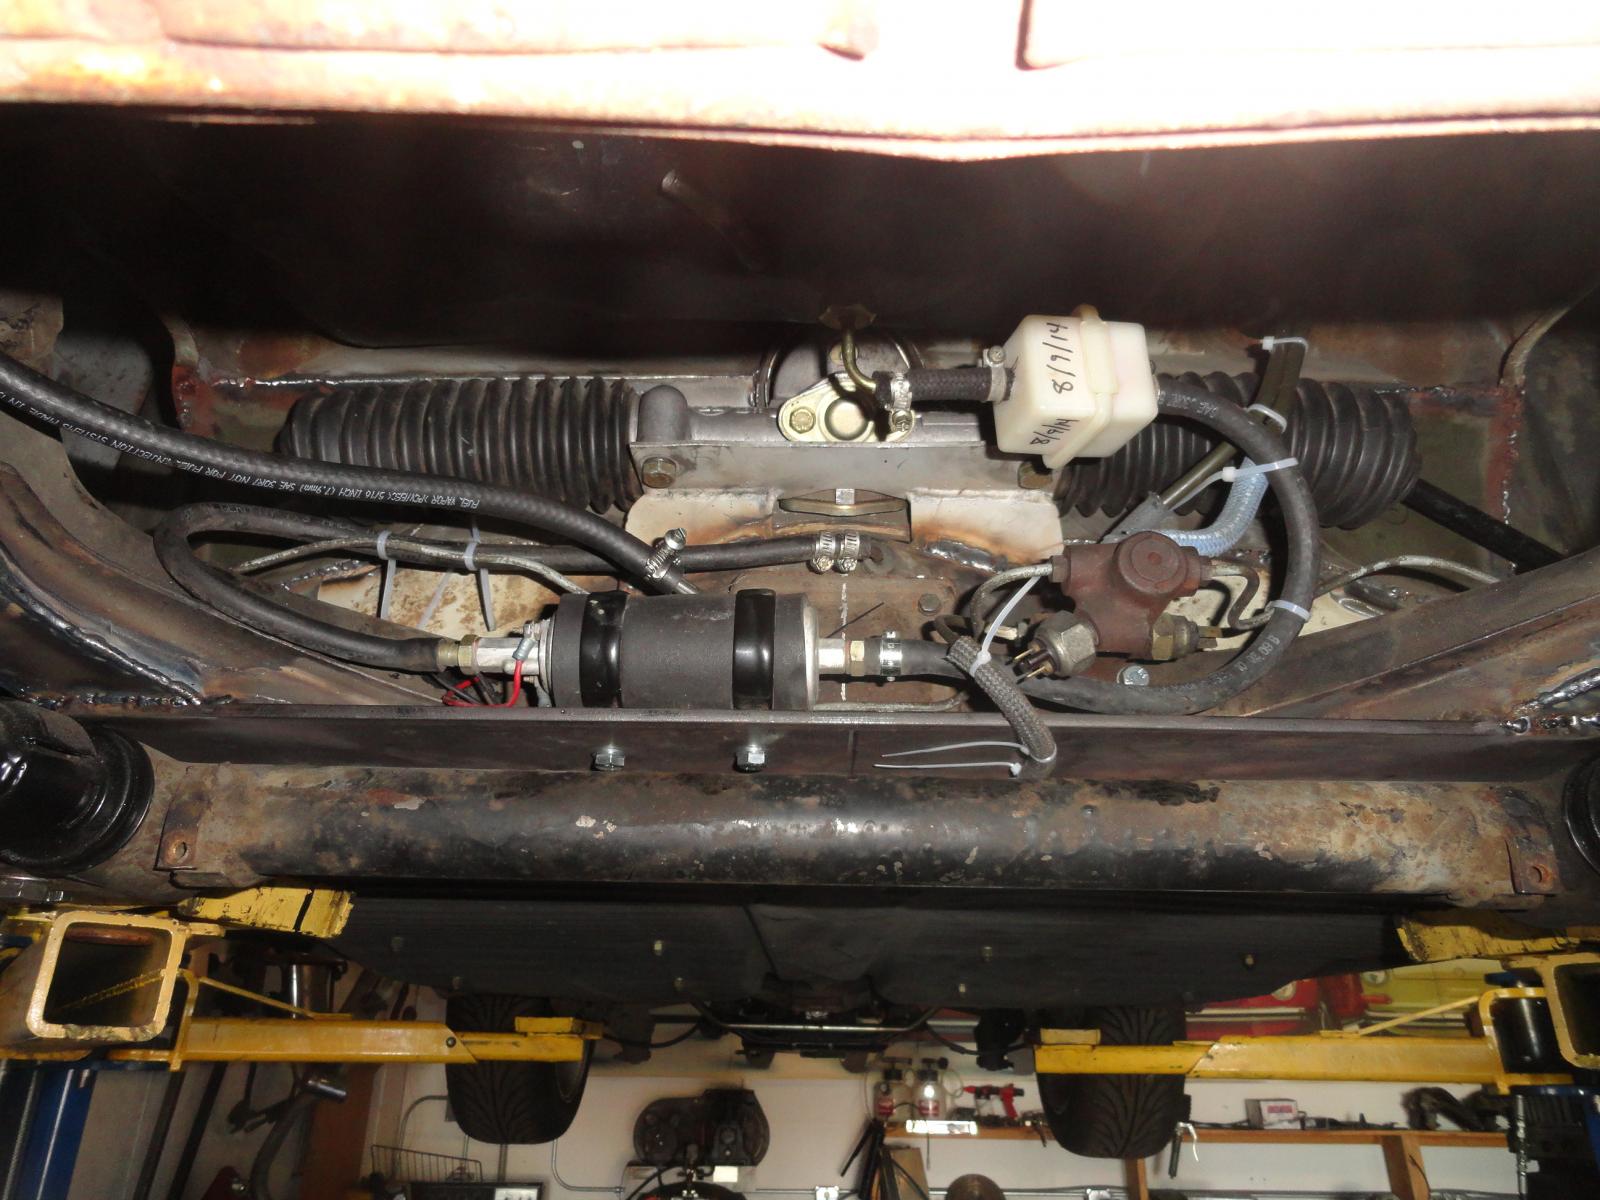
Posted by: jaxdream Aug 11 2014, 09:41 AM
Shouldn't your fuel hose / lines be 30R9 instead of 7 ???? maybe I gots it bakards . Still a great looking Square !!!!
Jack
Posted by: rhodyguy Aug 12 2014, 07:38 AM
i dunno, the fuel line is clearly marked 'not for fuel injection'. i use the same line on my car but with carbs. the line on the pump outlet needs a shouldered clamp and it looks a bit 'stressed' where it goes over the fitting. what pressure does that pump run at?
Posted by: aircooledtechguy Aug 12 2014, 11:33 AM
That fuel hose is a return hose so there is no pressure. All pressure hoses are EFI rated hose. Not to worry gents.
The pump is rated @ about 50psi unregulated and will be regulated down to about 40psi. Again, all hose that is in the pressure loop from the pump outlet to the regulator is the appropriate EFI rated hose. From the tank to the pump & from the regulator outlet to the tank does not require a special EFI type of hose because it's under no pressure.
Posted by: Cap'n Krusty Aug 12 2014, 01:06 PM
Bad news? http://autoweek.com/article/car-news/2014-speed-week-bonneville-salt-flats-cancelled-due-flooding?utm_source=DailyDrive20140812&utm_medium=enewsletter&utm_term=headline-center&utm_content=body&utm_campaign=awdailydrive
The Cap'n
Posted by: aircooledtechguy Aug 12 2014, 06:01 PM
Bad news? http://autoweek.com/article/car-news/2014-speed-week-bonneville-salt-flats-cancelled-due-flooding?utm_source=DailyDrive20140812&utm_medium=enewsletter&utm_term=headline-center&utm_content=body&utm_campaign=awdailydrive
The Cap'n
Yeah, that was a bummer for sure. A lot of folks turned out for nuthin'.
On the bright side, the event we're participating in is World Of Speed put on by the USFRA and is in about one month from now.
'Course without a crystal ball who knows what the weather will do between now and then. We'll pray for sun.With temps in the 90s, it only takes about 2-3 days to dry out and be race ready after being flooded like it was. Last year WOS was canceled due to flooding too, but Speed Week went off without a hitch. Every year its a roll of the dice.
Luckily, I'm pre-registered and good to go for WOS. You wouldn't believe the number of people trying to buy a pre-registration spot for WOS now that SW was canceled.
Posted by: john77 Aug 12 2014, 06:09 PM
Bad news? http://autoweek.com/article/car-news/2014-speed-week-bonneville-salt-flats-cancelled-due-flooding?utm_source=DailyDrive20140812&utm_medium=enewsletter&utm_term=headline-center&utm_content=body&utm_campaign=awdailydrive
The Cap'n
Yeah, that was a bummer for sure. A lot of folks turned out for nuthin'.
On the bright side, the event we're participating in is World Of Speed put on by the USFRA and is in about one month from now.
'Course without a crystal ball who knows what the weather will do between now and then. We'll pray for sun.With temps in the 90s, it only takes about 2-3 days to dry out and be race ready after being flooded like it was. Last year WOS was canceled due to flooding too, but Speed Week went off without a hitch. Every year its a roll of the dice.
Luckily, I'm pre-registered and good to go for WOS. You wouldn't believe the number of people trying to buy a pre-registration spot for WOS now that SW was canceled.
Can spectators come to this?
Posted by: aircooledtechguy Aug 12 2014, 09:20 PM
Can spectators come to this?
Absolutely, and I believe it's FREE to watch. Log onto the http://saltflats.com/index.html for all the details.
Land speed racing is one form of racing that is mainly for the racers. No press about anything that happens unless one of the really fast records gets broken. No prize money. Out in the middle of nowhere when it's hot.
It is one form of racing where the grass-roots racer and the highly financed corporate teams share the paddock and race head to head.
Hopefully I'll see you there. If you do come, please stop by our pits and introduce yourself.
Posted by: aircooledtechguy Aug 13 2014, 04:17 PM
I got the new motor stuffed in the car and some other details wrapped-up today as well. 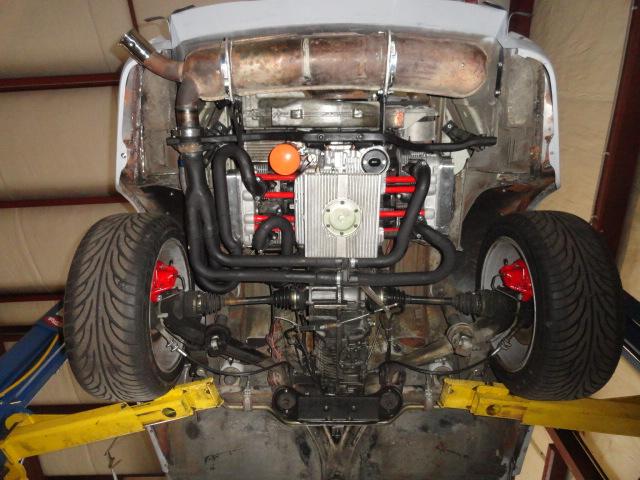
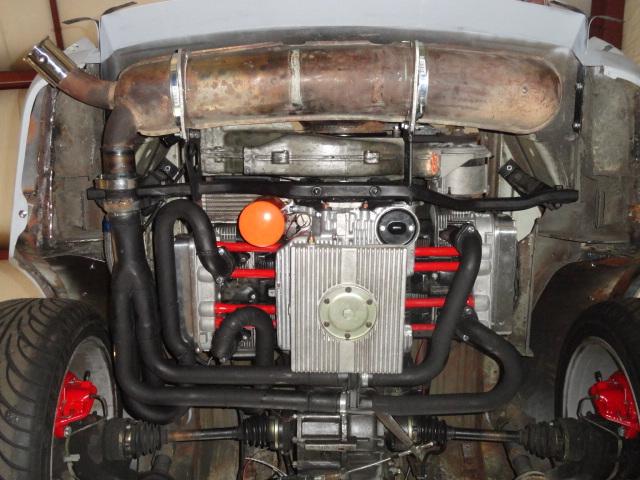
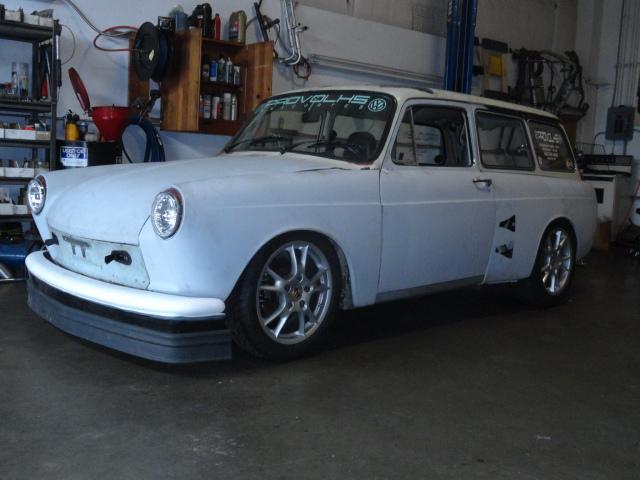
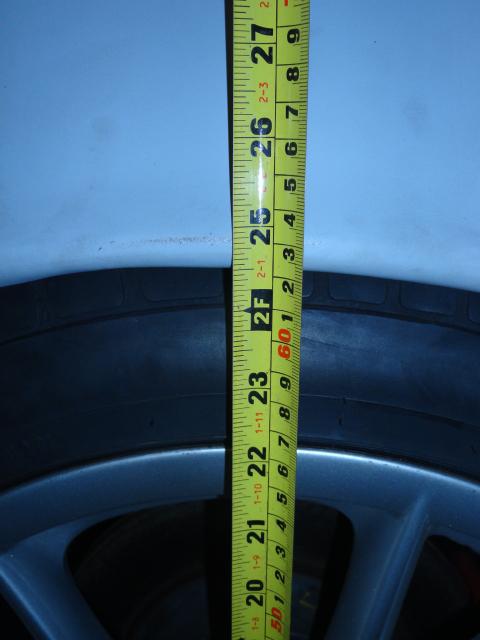
So far the ride height as it is allows 3" at the flex-dam and 4" at the trans mount/skid plate and the sump. I'll be raising up an inch or so before any street driving just to be safe, but will lower it 1.5" front and another inch in the rear for Bonneville.
Posted by: rhodyguy Aug 13 2014, 04:20 PM
Maybe I missed it. Is that a 912E engine mount bar?
Posted by: aircooledtechguy Aug 13 2014, 05:57 PM
Maybe I missed it. Is that a 912E engine mount bar?
Nope. It's a standard Bus bar that has been welded directly to the engine mounts. I'll probably need ear plugs for long trips. . .
Posted by: rgalla9146 Aug 13 2014, 07:03 PM
I don't see too many people mention Bonneville or flatheads or VW or land speed records around here.
What you are doing with your car and more importantly with your son is really cool.
I have a Flathead '32 Ford roadster, a real 914 6 and been a VW and Street Rod enthusiast for 40 years.
And been to Bonneville.
But you'll be running there ! How cool ! I'm jealous.
Good luck. Be safe.
PS the record for 2.0 sports cars is 147mph.
Doesn't seem outrageous
Posted by: aircooledtechguy Aug 15 2014, 08:13 PM
I don't see too many people mention Bonneville or flatheads or VW or land speed records around here.
What you are doing with your car and more importantly with your son is really cool.
I have a Flathead '32 Ford roadster, a real 914 6 and been a VW and Street Rod enthusiast for 40 years.
And been to Bonneville.
But you'll be running there ! How cool ! I'm jealous.
Good luck. Be safe.
PS the record for 2.0 sports cars is 147mph.
Doesn't seem outrageous.
As I tell everyone, not too many people are foolish enough to bring an old air-cooled VW to a LSR event, but I'm just that kind of fool.
I won't be competing for an absolute speed record since I don't have a car built to the SCTA rulebook. The USFRA has two classes called "the 130/150 club which are specifically for "street cars". It' s a way to get guys hooked on a high sodium diet and get them to build a spec-built car next time. I'll be competing in the 130 club. If I can achieve my goal of being in the 130 club and feel like it's got more to give, I plan to buy another set of runs and just see how fast this pig can go.
Posted by: KELTY360 Aug 15 2014, 10:41 PM
I don't see too many people mention Bonneville or flatheads or VW or land speed records around here.
What you are doing with your car and more importantly with your son is really cool.
I have a Flathead '32 Ford roadster, a real 914 6 and been a VW and Street Rod enthusiast for 40 years.
And been to Bonneville.
But you'll be running there ! How cool ! I'm jealous.
Good luck. Be safe.
PS the record for 2.0 sports cars is 147mph.
Doesn't seem outrageous.
As I tell everyone, not too many people are foolish enough to bring an old air-cooled VW to a LSR event, but I'm just that kind of fool.
Posted by: aircooledtechguy Aug 16 2014, 10:47 AM
As I tell everyone, not too many people are foolish enough to bring an old air-cooled VW to a LSR event, but I'm just that kind of fool.

Posted by: rhodyguy Aug 16 2014, 11:06 AM
have you fired up the engine? or did i miss that post?
Posted by: aircooledtechguy Aug 16 2014, 06:07 PM
have you fired up the engine? or did i miss that post?
Not yet. I'm getting all the details done before that happens. On Friday, Mario from www.thedubshop.net is coming to the shop with my new ECU, full custom wiring harness and custom cam sync (for the COP ignition). Then we'll get her fired-up, broke-in and start tuning.
I had most of the dash out and am converting the wiring for the custom 2 stalk steering column, so I have lots of wiring changes to do, get all my gauges & lights hooked-up and get everything routed above the new steering shaft so nothing is hanging down. I'm hoping to get a lot of that done tomorrow.
Posted by: Cap'n Krusty Aug 16 2014, 10:46 PM
Please keep us posted on your progress. Do they pre-assign run times? Any idea what day or time you'll be running?
The Cap'n
Posted by: aircooledtechguy Aug 17 2014, 12:56 AM
Please keep us posted on your progress. Do they pre-assign run times? Any idea what day or time you'll be running?
The Cap'n
I definitely will. Your entry buys a certain number of trips down the track. Depending how busy it is I've heard you'll likely only be able to get 2-3 runs in a day; you just hop in the line and wait till you're on the start line.
My entry fee for the 130 club gets me up to 6 trips down the salt +1 licensing run at no faster than 100mph (to calibrate our speedo/GPS/etc.). Once I have 2 consecutive runs that average between 130.000-139.999 without going over to 140+, I forfeit my remaining runs. If I want more runs to say better my time, I have to purchase another lot of 6.
Posted by: aircooledtechguy Aug 17 2014, 05:42 PM
I got my bottom brace for the front spoiler finished today and I'm really happy with it. The spoiler is really solid now and the only flex is in the rubber base skirt (as it should be). This ties into the front suspension for strength.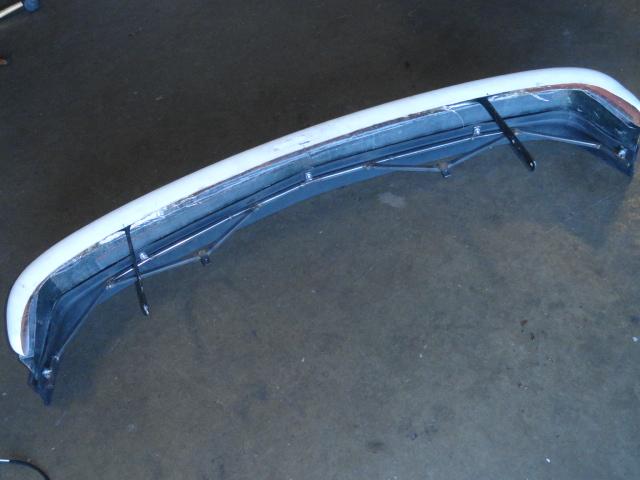
Over the past couple days, I turned a mess of a wiring system that was hanging half way to the floor into a working, correctly routed dash. My friend Robert helped me out by extending the gauge wiring a few weeks ago so it made it a lot simpler. Thanks Robert!! This thing is coming together!!
I also wired-in the new custom steering column. My original '67 column was fine and I could have modified it to work with the 911 steering, but it was a single stalk column and I really wanted to have the wipers up by my hands. Having to reach to the dash for it every 30 seconds with this PNW drizzle we get up here gets old on about 2 miles of driving. So if you remember, I severely cut down a '73 Super Beetle dual stalk column. Yesterday afternoon and today, I attacked the wiring and got them all wired-in. The 13 pin blinker went the way of the Dodo bird and I now have an electric flasher unit for the LED lights. As time allows, I may add an emergency flasher box by way of a couple diodes, but there's just no time for such things now.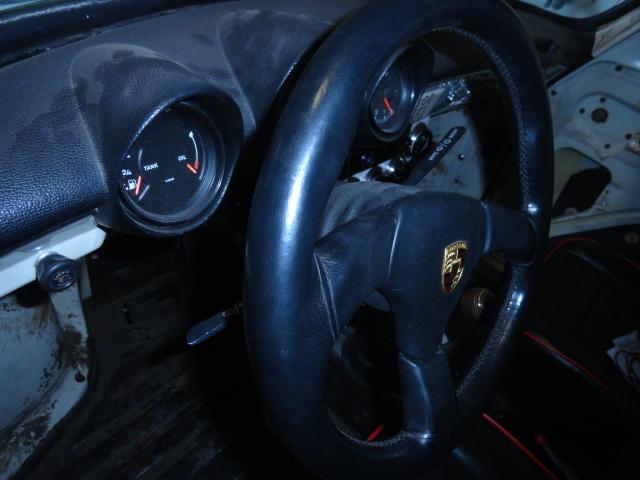
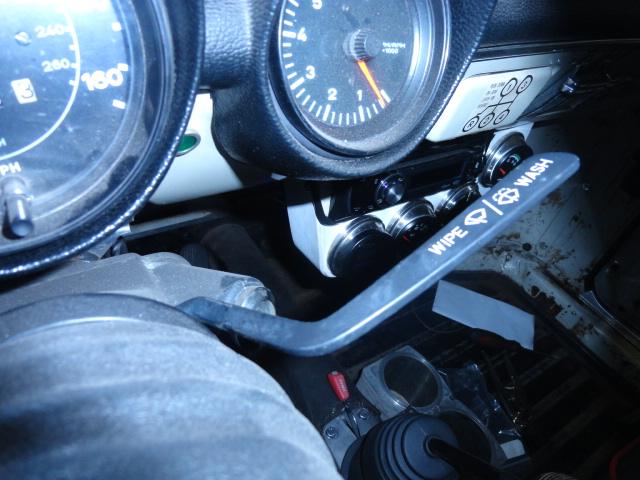
I also got the driver's seat re-installed for the first time in a long time. That felt good too. I sat down in the drivers seat for the first time since about March of 2013 and it was like re-uniting an old friend that you have been missing. . . I can't wait to beat the crap out of this old friend!! 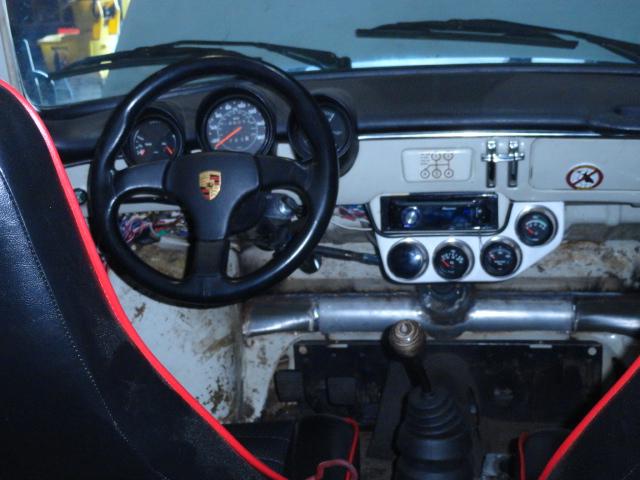
I also got the coils mounted on the engine and a new set of plug wires routed and cut to length with the correct air-cooled ends. I found that a Bosch set of Vanagon (hack, cough, puke. . .) wires have the correct 90 degree fittings on the coil end for the LS style coils. Just cut them to length and the air-cooled plug ends/seals just screw on like factory.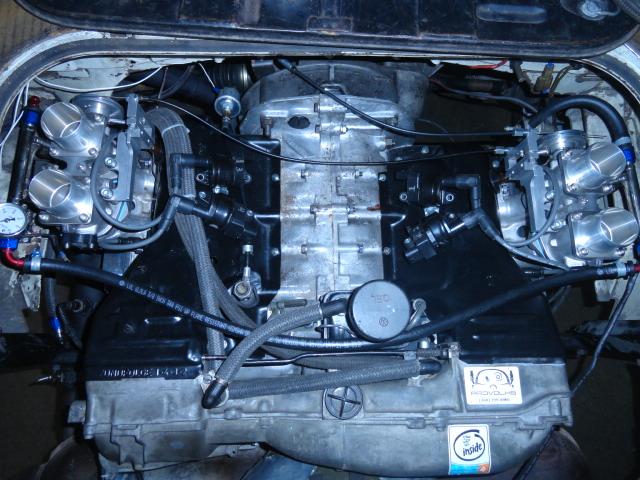
Friday is the big day that Mario Velotta from www.thedubshop.net comes over to my shop with the new MS3X ECU, custom wiring harness and cam sync so we can get this beast fired-up, broken-in and tuned.
Man I can't wait to drive this thing!! All in good time. . .
Posted by: rhodyguy Aug 17 2014, 08:32 PM
That's really a clean install Nate. Is your tangerine cable setup the newer version?
Posted by: aircooledtechguy Aug 17 2014, 10:13 PM
That's really a clean install Nate. Is your tangerine cable setup the newer version?
Thanks Kevin. I have no idea what version it is. I bought it used off craigslist.
Posted by: Cap'n Krusty Aug 21 2014, 10:07 AM
Bump to the top so I don't have to search for it! How's it coming along?
The Cap'n
Posted by: Java2570 Aug 21 2014, 10:49 AM
Nate - hopefully your runs will be recorded on video for us to enjoy!
Posted by: aircooledtechguy Aug 21 2014, 09:36 PM
Nate - hopefully your runs will be recorded on video for us to enjoy!
I plan to record each run with one GoPro out the front windshield and a second one synced on the outside of the rear window getting the sound looking backward.
Posted by: Dr Evil Aug 22 2014, 06:17 AM
Have the windshield one capture the gauges, too 
Posted by: aircooledtechguy Aug 22 2014, 09:23 AM
Bump to the top so I don't have to search for it! How's it coming along?
The Cap'n
Tried replying to this last night, but the battery died on my laptop.

Yesterday was a day of progress, steps back and delays. Isn't that just typical of racing??
On the progress side, my Thursday trip to the San Juans to fix a car got canceled so I was able to have Mario come out a day earlier. We hit it first thing in the morning and by noon, the engine wiring harness was made and installed on the engine side. By 4pm, the entire EFI system was live and all sensors, coils, injectors and triggers were tested and checked good. In that regard a lot was accomplished. We stopped just short of starting the motor. That's where the step back came into play. . .
The step back came around noon when it was time to install the cam sync on the distributor hole. I had not yet installed the distributor drive gear since having it in there without a dizzy to keep it in place will cause it to rise-up in the hole and bind if you hand crank the engine. Even though it doesn't really matter on this cam sensor how the drive gear is orientated, I still wanted to install the drive gear in the correct orientation. So I began to hand crank the motor with the only thing I can hand turn it with; the alternator pulley. As I got about 3/4 turn, the motor "clunked" and bound-up!!
 I turned it back the other way and the same thing. . .
So we began the deconstruction to eliminate possibilities each time checking if it would turn. We checked the valve springs for binding (again) - good, removed the rockers - good, checked the valves with a straight edge - good borescoped the cylinders through the plug holes - good, borescoped the intakes through the ITBs - good,
Everything was fine. The last time the motor had been rotated was during the valve adjustment and it was perfect. . . confident that it was not caused by anything internal, out came the motor. Pulling this motor is not as straight forward as most cars since literally everything is custom on it. To fit in, it must be pivoted at a unit at about a 30 degree down angle on the fwd trans mounts, then you can separate it. 'Course that means you must disconnect all the shift linkage or you will destroy it and possible the trans nose cone and shift shaft. So as soon as we get it ready to separate, I loosen the final nuts on the bottom and shift the motor back about 1/4" and try turning the engine; IT SPINS FREE!! So now we know the issue is in the bell housing.
We separate the engine completely and the witness marks reveal that during the balancing process, a small amount of weight was needed to bring the pressure plate into balance with the rest of the assembly, so a small piece of steel was welded to the PP. Unfortunately, it was interfering with the trans case where the throw-out shaft is. . . So I used a burr to take down the boss on the trans case a bit and the problem was solved. Man, I'll tell you what, I'm gonna give my balancer some good natured crap over that one!!
As for the delay, we decided to hold-off with the starting and tuning until Monday. By the time Josh and I got the motor back in, Mario was finishing up with the wiring inside the car and we would have had enough time to do the initial break-in at least, but there were a couple details that I had overlooked and taking the weekend to get those sewn-up I think would be the wiser move. I also wanted to take advantage of one of the nice features on this new MS3X ECU. I need to install, and wire-in, a momentary button and an LED light to my gauge panel. This will enable me to datalog at the push of a button straight off the ECU to a SD card so no device like a computer or bluetooth phone will need to be in the car for this purpose. This is important since I can't legally have a laptop in the car during a race session.
So all-in-all a good day. Not as great as I would have hoped, but progress was made and by Monday we should be starting, tuning and driving this pig!!
Posted by: aircooledtechguy Aug 22 2014, 09:26 AM
Have the windshield one capture the gauges, too
I'll see if we can make that happen!!
Posted by: Cap'n Krusty Aug 23 2014, 09:58 AM
As a racer, I'm sure you know that all this drama is supposed to be happening at the track, not 2 weeks early in the comfort of your shop ......................
The Cap'n
Posted by: aircooledtechguy Aug 23 2014, 10:26 AM
As a racer, I'm sure you know that all this drama is supposed to be happening at the track, not 2 weeks early in the comfort of your shop ......................
The Cap'n
Posted by: aircooledtechguy Aug 23 2014, 08:13 PM
Spent the day getting all the little details ready for Monday morning with Mario (Part 2). Here’s a couple shots of the offending weld and where it was hitting and binding on the bell housing and the fix for it. . .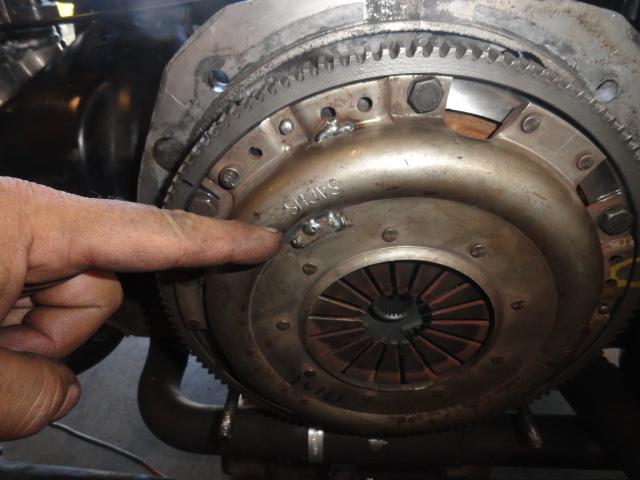
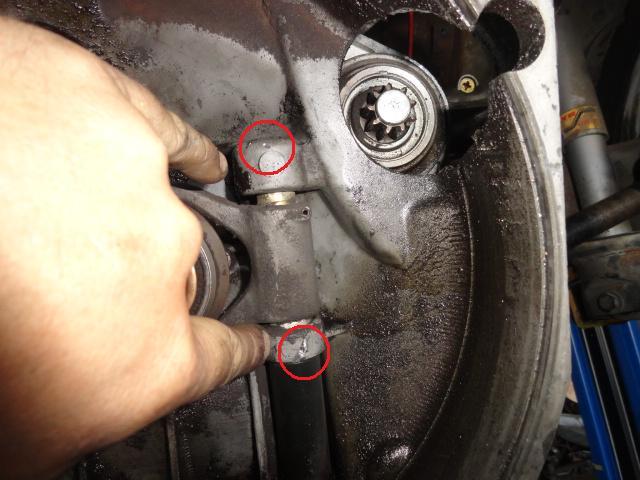
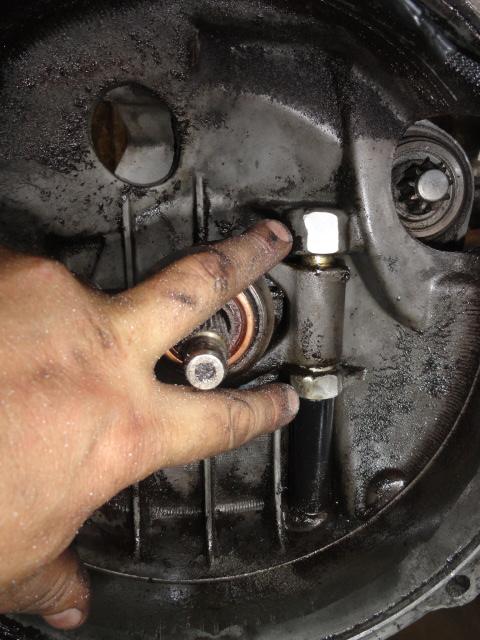
Got the motor re-stuffed (I’m getting really good at it and it’s scaring me.) With 2 jacks and 30 minutes it’s out and about another 40 minutes to go back in.
Here’s what it’s like with all the harness installed and zip-tied down. Super clean. IMHO, Mario from www.thedubshop.net makes the best harnesses you can buy.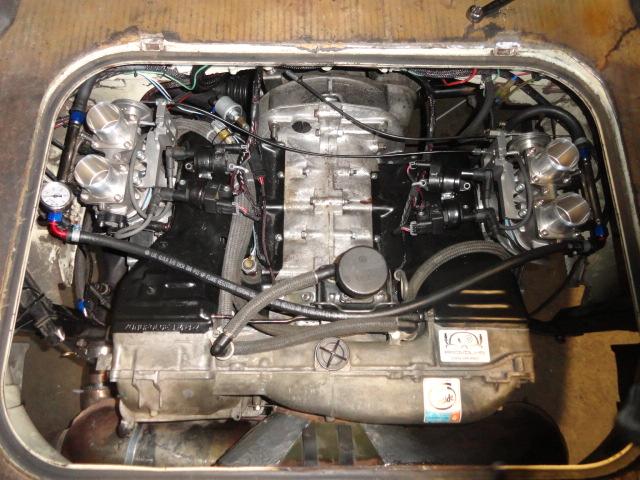
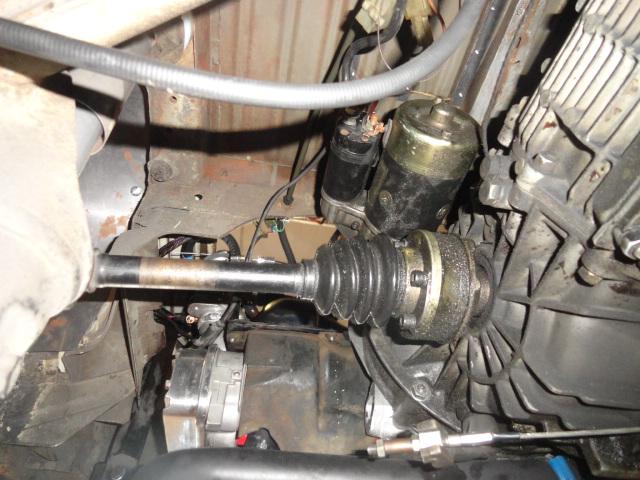
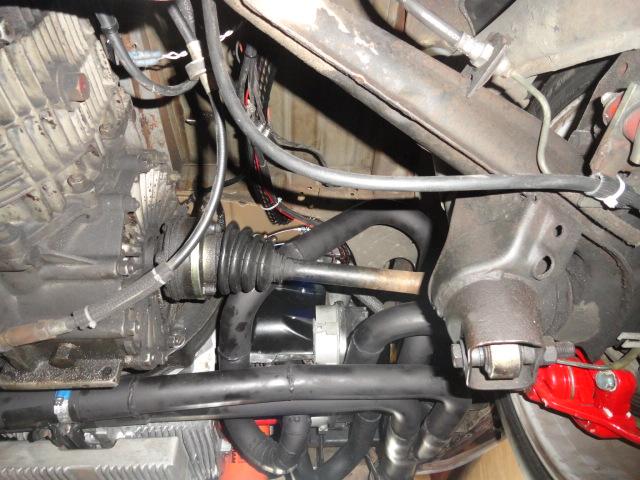
Speaking of Mario and his products, here’s a shot of the mini cam sync installed that he designed and makes for our motors. This takes the place of this unit from CB Performance and scales it down to about a 1/5th scale. . . Freaking amazing little piece and it works great too.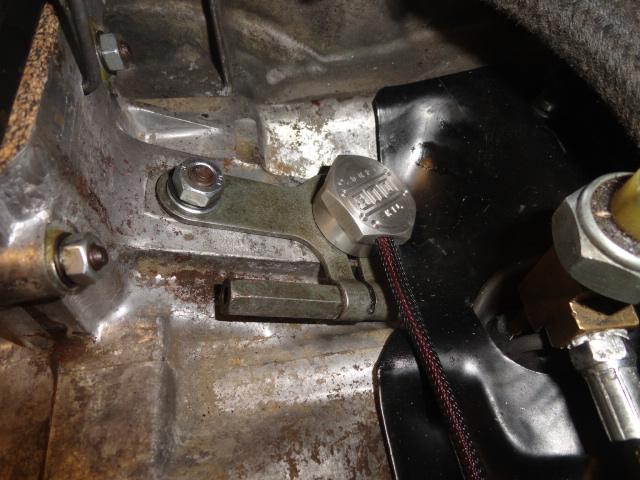
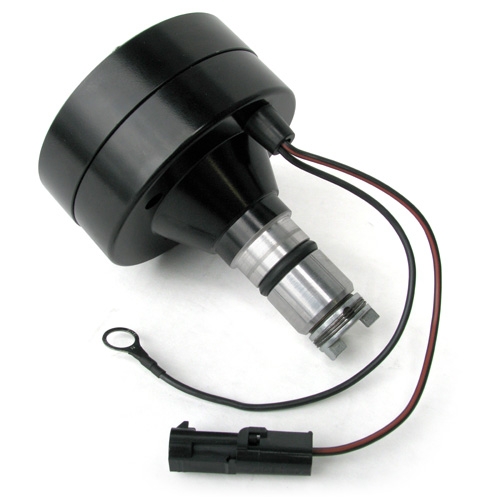
So as of now, I have 5 gallons of Premium gas in the tank. The fuel pressure is set @ 35psi on the peanut gauge. I cranked the motor to prime it with oil until the light went out. Now all I have to do its wait until Monday morning. I've got the GoPros charged-up and ready to capture that sh*t-eatin' grin on Josh's face when that motor roars to life for the first time. . . Come-on Monday!!
Posted by: bigkensteele Aug 23 2014, 08:26 PM
I love everything about this thread. Father and son. Extremely cool car. Reasonable budget, and incredible ingenuity and fabrication. Simply fantastic!
Posted by: aircooledtechguy Aug 24 2014, 10:41 PM
I love everything about this thread. Father and son. Extremely cool car. Reasonable budget, and incredible ingenuity and fabrication. Simply fantastic!
Thanks for the kind words; we're having a good time with this project for sure.
No time for the real paint job before Bonneville and the rules say that your car must have a neat, presentable appearance.,. . . so a quick bomb-can-job will have to do for now so she's all one color. I found the perfect color of grey that I was looking for too. Ford tractor and implement grey; grey with a little brown in it.
My philosophy is: Go fast enough and no one will be able to notice the flaws!!
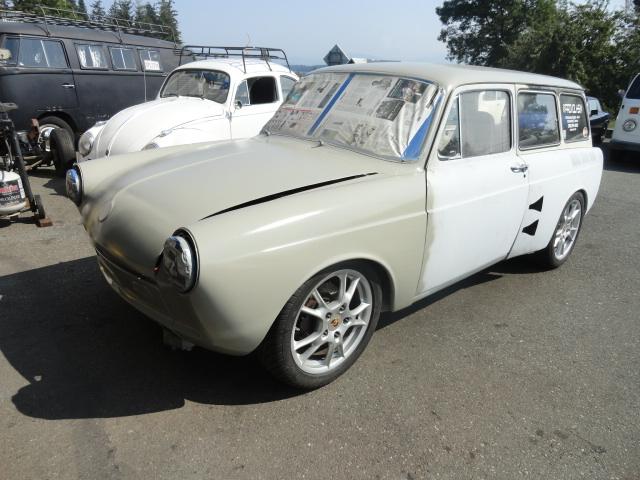
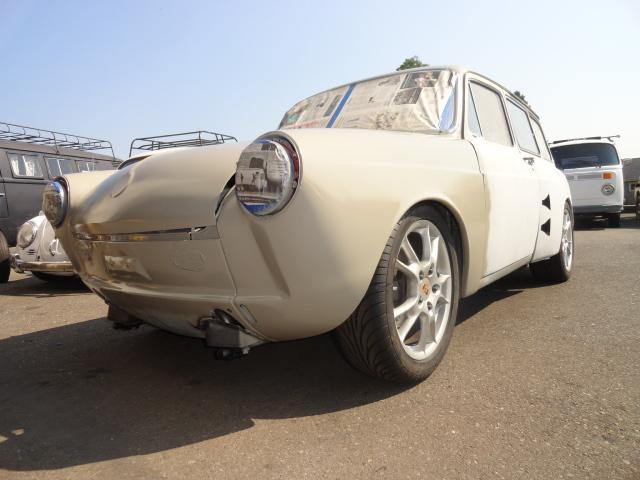
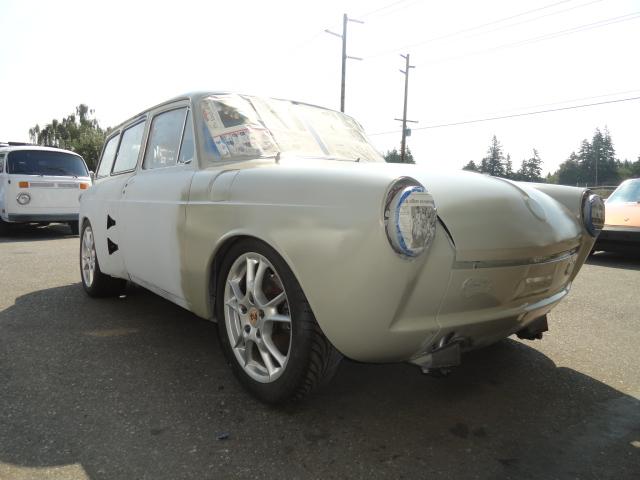
So far I have the roof, rear hatch and the front-end painted. The rest will be shot later in the week. I really want to drive it to the tranny clinic next weekend so I can break-in the motor before Bonneville.
Fingers crossed on that one though. . .
Posted by: KELTY360 Aug 24 2014, 10:50 PM
Where did you get that paint? It's the exact color I need to paint my Westy propane tank.
Good luck on the start up tomorrow.
Posted by: aircooledtechguy Aug 24 2014, 11:19 PM
Where did you get that paint? It's the exact color I need to paint my Westy propane tank.
Good luck on the start up tomorrow.
Ace hardware. It's their "Ace" brand @ $4.99 for a large can with the good style adjustable spray tip too.
Posted by: KELTY360 Aug 24 2014, 11:20 PM
Where did you get that paint? It's the exact color I need to paint my Westy propane tank.
Good luck on the start up tomorrow.
Ace hardware. It's their "Ace" brand @ $4.99 for a large can with the good style adjustable spray tip too.
Perfect, a CSOB special.
Posted by: rhodyguy Aug 25 2014, 08:18 AM
shelton and back. BOLD test for right out of the 'box'.
k
Posted by: Dr Evil Aug 25 2014, 08:47 AM
I approve of this!
Posted by: aircooledtechguy Aug 25 2014, 03:43 PM
shelton and back. BOLD test for right out of the 'box'.
k
Let me re-think this. . . Blast it to 130+ (hopefully) out of the box, or give it a shake-down run prior to the blast ro 130+ (hopefully). . . I'll give it a shake-down run thanks.
Either way, the miles go on it. I live 20 minutes (15 miles) from the ferry terminal on Whidbey Island. Once you cross the ferry it's only about 60 miles to Shelton on the 101. It's a great twisty drive where I get to test the motor, suspension, everything!! Posted by: KELTY360 Aug 25 2014, 05:00 PM
shelton and back. BOLD test for right out of the 'box'.
k
Let me re-think this. . . Blast it to 130+ (hopefully) out of the box, or give it a shake-down run prior to the blast ro 130+ (hopefully). . . I'll give it a shake-down run thanks.
Either way, the miles go on it. I live 20 minutes (15 miles) from the ferry terminal on Whidbey Island. Once you cross the ferry it's only about 60 miles to Shelton on the 101. It's a great twisty drive where I get to test the motor, suspension, everything!! I don't know, that thing looks pretty low. Are you sure it won't scrape getting on/off the ferry? I'd hate to see you hung up on the ramp as the boat pulls away from the dock.
Posted by: aircooledtechguy Aug 25 2014, 10:01 PM
I don't know, that thing looks pretty low. Are you sure it won't scrape getting on/off the ferry? I'd hate to see you hung up on the ramp as the boat pulls away from the dock.
The suspension is adjustable front and rear. I don't plan to drive this thing on the road as low as it is now. `I will need to have 5-6" clearance in the rear and at least 5" in the front. That means it must come up 1.5" F & R for the street. For Bonneville, I'll have the front flex dam within 1/2"-3/4" off the ground with the rear about as low as I can go to make it flat.
In other news,. . .
The new motor has fought Josh and I from day one. Today was the biggest PITA I have had in memory. From now on, this car will be referred to as "Murphey's Squarsche" cause this pig is going to drive me to drink,. . . MORE.
We have fought poor parts from the word go. Today we discovered that the pump cover was not flat all the way across and it literally poured oil as soon as the oil light went out. Then we found a head leak caused by a bad cylinder. I can tell you with 100% certainty that I will NEVER, NEVER, EVER use AA cylinders again. I don't give a shit how much a set of Mahles cost.
So at the end of the day, we were faced with a decision: Continue to fuck with the new motor with a dwindling time schedule, roll the dice and possibly not have a motor with no time to ready the spare motor. OR get the tried and true spare motor in with the new injection and make make it to Bonneville and run the shit out of this car. . . Not a decision I wanted to make, but not having a car to run is just not an option at this point. I've promised Josh that we're going and I won't welsh on that promise. We're going and we're bringing a car to compete with. So a decision has been made. For now, we're going to shelve the 2.3L and methodically work the bugs out when we're not under the pressure of a hard timeline. When it's ready, it's ready. The 2056cc will go in with the new injection, the new exhaust and we're gonna run the wheels off this bitch. No B.S.!!
We'll get these issues ironed out in time and it'll make the victory all the sweeter. For now I think it better to relieve the pressure a bit so we don't take un-due risk with 3 year$ worth of part$ acqui$ition and turn them into a pile of junk on the floor of the shop because we were cutting a corner for a deadline. That's just foolish IMHO.
On a bright note, I just un-corked a fresh bottle of Deception Distillery, Skagit Moon moonshine. It's the smoothest corn squeezin's you've ever tasted.

Posted by: rhodyguy Aug 26 2014, 09:05 AM
i have a set of 94mm mahles when you're ready for them. what a hassle you're going thru so late in the process.
Posted by: Cap'n Krusty Aug 28 2014, 09:37 AM
Bump!
Posted by: aircooledtechguy Aug 31 2014, 12:46 AM
The Squarsche is ready for Bonneville!! The only thing left to do is to add a tow hook front and rear and get a 4-wheel alignment. Everything is painted and on the car now. I came out exactly as I had envisioned it. I've driven it about 400 miles in the past 3 days including the tranny clinic and other than the alignment (the rear is out badly and makes it a bit twitchy in high-speed corners), it really drives nice
As of last night. . .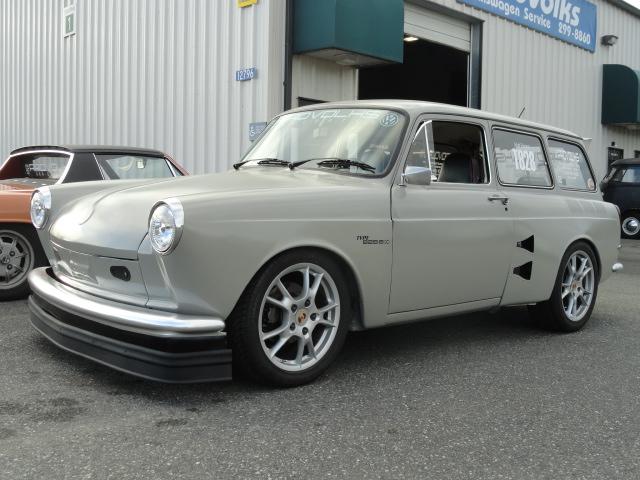

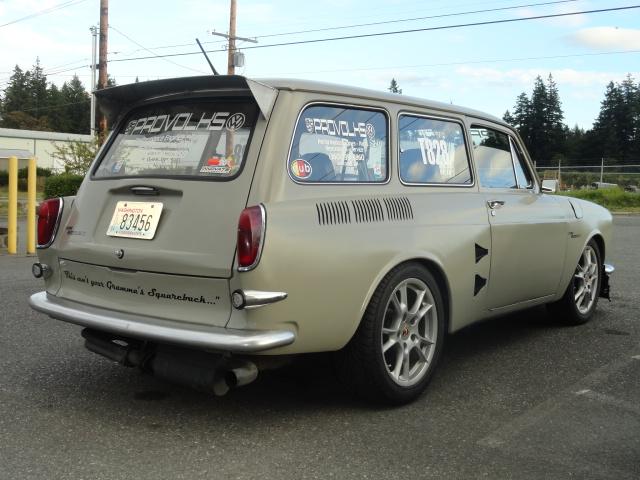
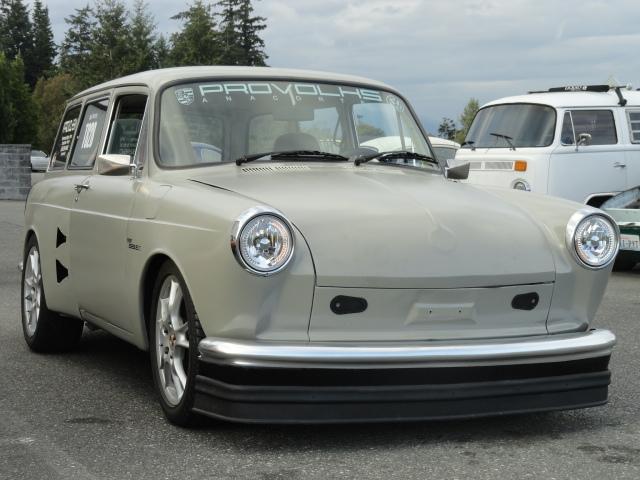
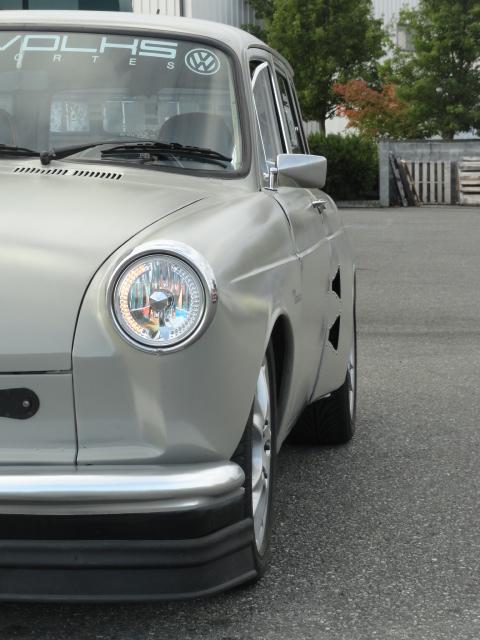
Posted by: jeeperjohn56 Aug 31 2014, 01:06 AM
Nate, your shop car looks awesome hope you do well at bonneville. John
Posted by: KELTY360 Aug 31 2014, 06:56 AM
Love the rear quarter treatment. The flaring looks great.
Good luck Nate and Josh. 130 here you come!
Posted by: garrettlee1 Aug 31 2014, 07:41 PM
What group are you running with?
Posted by: aircooledtechguy Aug 31 2014, 09:33 PM
What group are you running with?
We're running in a street car class called "The 130 Club". To gain entry you must have 2 back-to-back passes that together average between 130.000 and 139.999 without going over. I really don't anticipate going over will be an issue. It's the getting to 130 flat that is going to be the challenge for us now that we're running the back-up motor. Ether way, I'm going to have a good time with my son and soak it all in.
Posted by: rhodyguy Sep 1 2014, 07:46 AM
i believe it could be a 'show case' car in hot vws and dune buggies. so much innovation i hope it gets there some day. sounds pretty hot with the 'punny' 2056. 
Posted by: mgp4591 Sep 1 2014, 08:11 AM
See you out there on the 6th!
Posted by: Cap'n Krusty Sep 3 2014, 12:07 PM
BUMP for roll call! Who's gonna be there to support the effort?
The Cap'n
Posted by: mgp4591 Sep 3 2014, 03:41 PM
BUMP for roll call! Who's gonna be there to support the effort?
The Cap'n
I'm there in the afternoon- got talked into a golf tourney in the morning... I don't even play golf
Posted by: strawman Sep 3 2014, 10:23 PM
Lookin' good Nate. You'll probably see a horribly-painted yellow Opel GT there with a cheesy Honda-looking rear wing there... it is our 24 Hours of Lemons "race car." It is a tribute to the number 8 ALMS Corvette car, but I'm sure the team would be hugely embarrassed. Tell Mike not to blow it up again this year -- last year we blew it up at 118mph on the Salt. So far, it is the World's Fastest Lemon. The following weekend, the "Tinyvette" is scheduled to run newly-expanded Thunderhill Raceway.
Good luck!
Posted by: aircooledtechguy Sep 3 2014, 10:48 PM
I'll see you there mgp4591!! Strawman; I'll definitely check it out. I love the Opal GTs (mini-vettes).
Josh and I have the truck loaded w/ the car on the dolly and we're out of here before dawn headed for Bonneville. I'll try and update daily on how the adventure is going.
Keep your fingers crossed. . .
Posted by: KELTY360 Sep 3 2014, 11:15 PM
Keep your fingers crossed. . .
I would, but then I couldn't pick my nose....

Posted by: Cap'n Krusty Sep 4 2014, 09:02 AM
Gonna finish loading an extra heavy assortment of Krust into the wagon, bikes are on the top, the ice chests are getting filled, and the stinkin' diesel Krustymobile will be on the way tomorrow AM. Plenty of insults and disrespect, as well as sarcasm, to go around. See ya'll there! We'll be at the motel 6 when we're not out at the track.
The Cap'n
Posted by: mgp4591 Sep 4 2014, 12:28 PM
I know it's the 6th thru the 9th but are you planning on running the 6th? I can't be there til later in the afternoon and I hope to see you along with some other bitchin' rides. I also get up for work at 4 am on Sunday so staying late isn't an option...
Posted by: aircooledtechguy Sep 4 2014, 08:22 PM
We left at 0-dark-30 (3:30am) and left the shop @4:30am. We made pretty good time in the "Mighty Ranchero". We just checked-in at the Super8 in Burley, ID which is about 30 miles east of Twin Falls on the I-84 after a marathon day. We're planning to get back on the road @ 6am so we can be at the salt around noon tomorrow to get the pits set-up and hopefully get the car through tech inspection before it closes at 6pm.
I'm hoping to race most of those days if I can. There's no schedule or anything. When you're car is ready, you get in the line and wait your turn. That's about the long and short of it.
I look forward to seeing both of you guys!!
Posted by: aircooledtechguy Sep 4 2014, 08:24 PM
Keep your fingers crossed. . .
I would, but then I couldn't pick my nose....
That's never stopped you in the past. . .
Posted by: Scott S Sep 5 2014, 09:48 AM
Wow. Just Wow. Absolutely awesome car.
I spent my Kindergarten through 8th grade years (73 - 81) being shlepped back and forth to St Johns Lutheran School in Orange, CA in an perfectly/anally maintained yellow squareback.
Best project ever. Absolutely LOVE it.
Posted by: Chris Pincetich Sep 5 2014, 12:38 PM
AWESOME
I hope the rain and thunderstorms stay away!
Good luck
Posted by: KELTY360 Sep 6 2014, 06:48 PM
Insert smiley of man standing with arms crossed, impatient expression and tapping his toe while waiting for and update. 
Posted by: aircooledtechguy Sep 6 2014, 11:42 PM
Insert smiley of man standing with arms crossed, impatient expression and tapping his toe while waiting for and update.
O.K., sheesh. . . patients is a virtue right??
Friday:
We got on the salt by 11:30. Spent about 3 hours getting out pits set-up. Most of the air-cooled VWs are together in a long row. We're next to the Appletree guys.
Breezed through tech with no issues. One minor rule they added literally while I was in line was taping the headlights, so we did that and it was a done deal.
Saturday:
We arrived late and missed the drivers meeting. No big deal as it's pretty straight forward. Right about 9:30 we got in the 130-club line on the short course. Soon after that, racing was stopped because a gal driving a streamliner motorcycle (250+mph) crashed and the only ambulance at the flats had to take her to the hospital to get checked out. Around 1pm racing resumed. The VERY NEXT car on the long course was a steam powered streamliner. It too crashed and racing stopped again until about 3pm.
By about 4pm I was able to make my qualifying run(!). It went off without a hitch. The car is running very rich due to the high altitude (4200ft) so I'll have to address that in the morning by adjusting the altitude compensation % in the ECU. Because of this the the motor was really lazy feeling , 5th gear was basically useless. It just couldn't pull in high gear. Shifting at a conservative 5K, we held 90mph through the speed traps. We were limited to no more than 100mph on the qualifying run so we could feel-out the car. The car is absolutely rock solid. Not a wiggle or shake or wander to be had. I couldn't be happier with how it drove.
We were able to officially be the first type-3 to ever compete at Bonneville and we bested the current type-3 top speed by 15 mph on the speed limited qualifying run. Once I get the AFRs leaned out to where they are at sea level, this thing should really fly.
After we got to the pits Cap'n Krusty walked up with his friend and we spent the better part of the afternoon chatting and watching the car fly by at the 3 mile marker on the long course.
More to follow. . .
Posted by: messix Sep 7 2014, 12:08 AM
pictures ?!!?!?!
Posted by: aircooledtechguy Sep 7 2014, 12:13 AM
During the marathon wait in the staging lanes. . .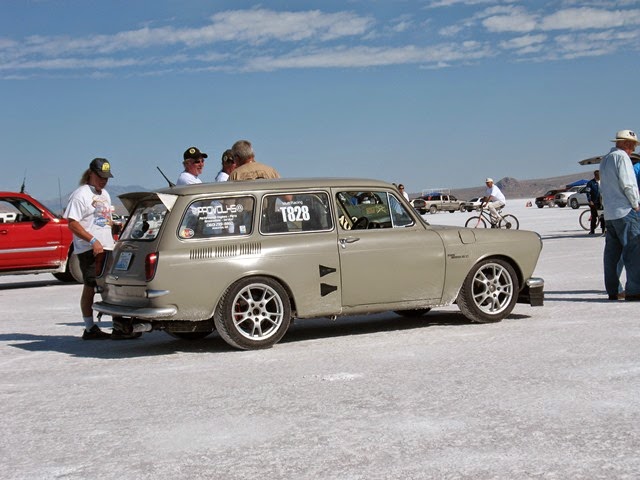
I'll post more tomorrow evening. I'm spent for today.
Posted by: Java2570 Sep 7 2014, 06:59 AM
Nate - very exciting to see the car out at Bonneville ready to compete! I look forward to seeing the pics and videos from the runs.....good luck!! Jon
Posted by: KELTY360 Sep 7 2014, 07:22 AM
During the marathon wait in the staging lanes. . .
I'll post more tomorrow evening. I'm spent for today.
Looking at that pic on the salt makes me think that some people go to Burning Man while others go to Burning Gas.
Nice work Nate!
Posted by: Krieger Sep 7 2014, 08:11 AM
Congratulations Nate!
Posted by: mgp4591 Sep 7 2014, 08:43 AM
During the marathon wait in the staging lanes. . .
I'll post more tomorrow evening. I'm spent for today.
Don't forget about pictures of the big salty lake you drove thru getting to your pit area! What a frickn mess!

Posted by: aircooledtechguy Sep 7 2014, 09:22 PM
Don't forget about pictures of the big salty lake you drove thru getting to your pit area! What a frickn mess!
Yeah, I'll have to get one tomorrow.
Were you able to get all that salt off your Harley?? That was a frickin' mess for sure!!
I sure enjoyed meeting you. Thanks for braving the salt lake.
Posted by: aircooledtechguy Sep 7 2014, 09:25 PM
Having a great time down here at World Of Speed. Bonneville (and land speed racing in general) is I think the only place where a privateer on a shoestring budget using junkyard parts and his own ingenuity, can truly compete aainst the big boys and win. It's like you're teleported back to the 1950s & 1960s when hotrodders had to make everything themselves because the aftermarket didn't exist. Every car is experimental in it's own way and out-of-the-box thinking is the norm. Very refreshing if you ask me.
Here's our pits.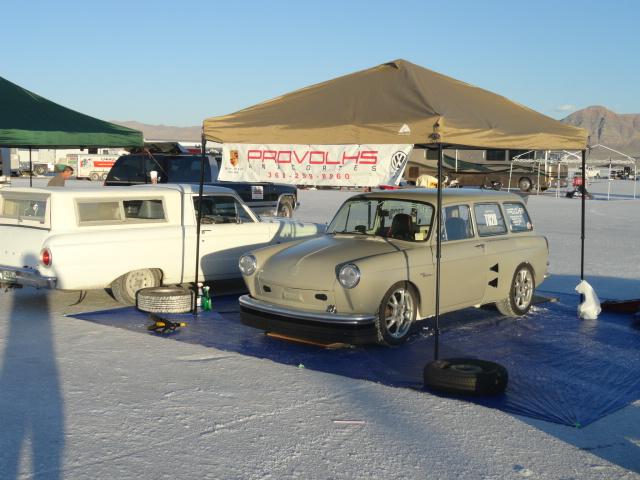

Out on the salt this morning just before the HotVWs group photo.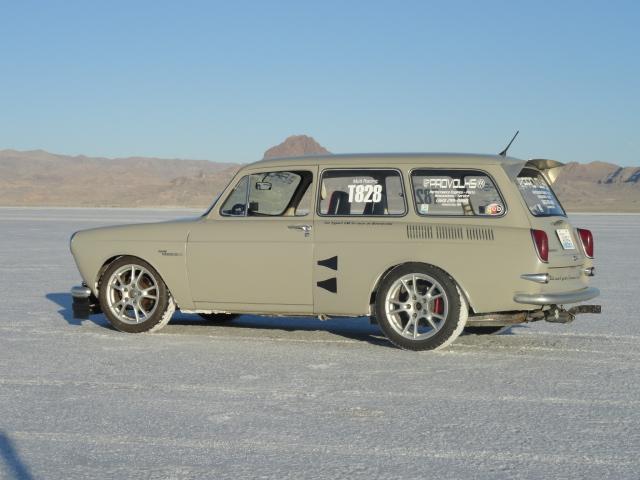
After the first run was in the books, I could officially label the Squarsche as: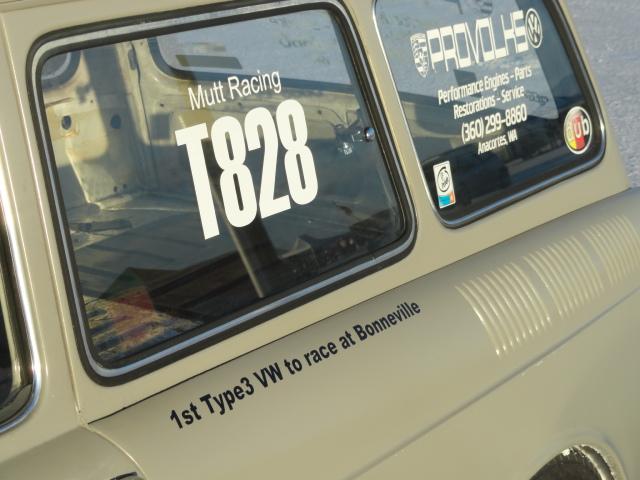
In the staging lanes for run 2 this morning.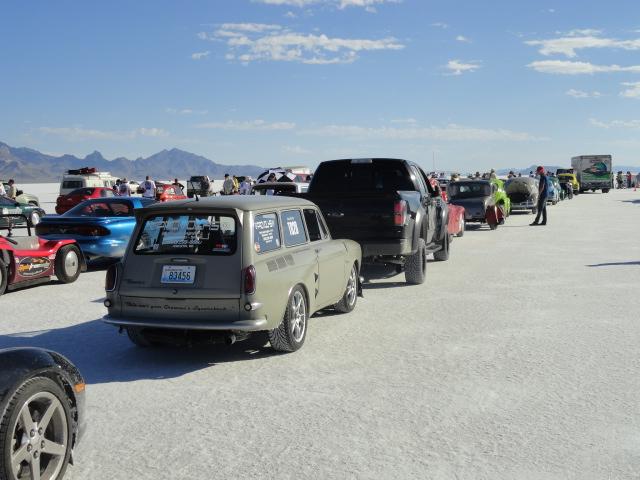
If you've never been and it's on the bucket list, make plans for the World Finals this fall, or one of the events next summer.
When I get home, I'll post some run videos to share.
Posted by: championgt1 Sep 7 2014, 10:54 PM
Very cool Nate!! Did you make it to 130?
Posted by: aircooledtechguy Sep 8 2014, 06:13 AM
Very cool Nate!! Did you make it to 130?
Sadly, not even close. The plan-B motor 2056 just does not have the HP or the RPM range needed to pull in 5th gear here. Shifting at the 5600rpm redline, it pulls through 4th gear but 5th gear is pretty useless without more hp. We are running very rich at the moment due to the elevation (4200ft) and its making this motor feel lazy and lack-luster. I'm hoping to pull some fuel out today now that I've downloaded the right firmware and the correct version of Tuner Studio for the MS3 (my laptop only had a version compatible with my old MS2 ECU.
What we have lacked in speed, we've made up for in reliability and consistency. I've only loaned tools to other racers never needing to tin a wrench on the car and my speeds have been within 2/10th of a MPH at the speed traps. With a leaner tune, I think we'll do much better today.
Fingers crossed. . .
Posted by: Philip W. Sep 8 2014, 07:23 AM
I have enjoyed this thread and watching the progress!- seeing so much happen in a short time here at the end, sorry to hear of the motor issues!
My dad had a squareback, i dont remember what year it was, but had to be @ 65-68, because i remember riding in that thing, and going with when he traded it in for a brand new super beatle in '71 - i have not seen one in person in years!
Good luck running today!!!
Posted by: maf914 Sep 8 2014, 08:04 AM
Great thread! Thanks for sharing your build and Salt Flats experience.
How does the aero stability feel? Are you permitted to add air deflectors or spoilers? I suppose you can if the front spoiler is okay. Pushing that boxy shape through the air at speed is going to take some horsepower.
Posted by: Cap'n Krusty Sep 9 2014, 10:47 AM
Back in Santa Maria. I AM WIPED! Road trips at 70 aren't like they were at 20! Great to meet Nate and Josh, see some other friends, walk the pits (did over 8 miles on foot. Didn't even take the bicycles off the roof of the Krustymobile. Damn things cut my fuel mileage by 30%. Had a GREAT time! Definitely a bucket list thing. You get to see an AMAZING assortment of approaches to the issues of going fast, and meet a lot of great, friendly, innovative, and otherwise VERY cool people. Met a guy who once spun out at 200MPH and recovered, clearing the traps at 202, only to be told the run didn't count because of the spin ............. My wife wants to do this one in another year or two. Gotta go pull the fender liners off the TDI and get the rest of the salt out .....................
The Cap'n
Posted by: mgp4591 Sep 9 2014, 10:54 AM
Don't forget about pictures of the big salty lake you drove thru getting to your pit area! What a frickn mess!
Yeah, I'll have to get one tomorrow.
Were you able to get all that salt off your Harley?? That was a frickin' mess for sure!!
I sure enjoyed meeting you. Thanks for braving the salt lake.
I was pretty nasty but I got most of it off in Wendover before riding back to SLC. Still finding chunks hiding in strange places but should be cleared out for Thursday heading to Grand Junction. Have you thought about my little suggestion? Lots of fans would love to see you in Moab in a couple of days...
Posted by: aircooledtechguy Sep 9 2014, 11:44 PM
We're about half way home and have stopped for the night in Oregon.
Going to Bonneville to race was a whole group of adjectives. Eye-opening, fun, bonding, challenging, aggravating, exhilarating, retro, fun (did I say fun already??), etc, etc
Eye-opening: Anyone at or near seal level who has a hot car will be disappointed in it's performance at 4200'. At home (sea-level) my car pulls hard in every gear. I shift into 5th at around 90mph and it keeps pulling pretty nicely even when I let-off around 105-110mph. At Bonneville, in the thin air my car felt like it was breathing through a straw. In fact it was. at home, WOT is 100kpa. At Bonneville, WOT was 85kpa (with the engine off and the MAP sniffing ambient air). This cannot be overstated. It results in a very lazy feeling car. Having experienced this first hand now, I have even more respect for the guys who go fast especially on a N/A motor.
With the back-up motor, I knew 130 club was not possible. But I assumed I would be in the 110-115mph range at the end of the 1 mile course. . . Boy was I wrong!! Our car was very consistent but consistently slower than I would have guessed. We ran 94.3-94.5mph on day 2 shifting @ red line (5600) on every shift. I would shift into 5th at around the 3/4 mile mark but it just wouldn't pull in high gear. It couldn't breathe. It was very interesting and aggravating. This morning we did our final 2 runs and made a change to the fuel maps to lean it out a bit since it was pig-rich. Progress was made and we ran a 96.0 on the first run. So before the second and final run of the meet, I removed the air dam since it was only needed around 105 in the past. We really hoped to break 100mph after removing all that frontal area. . . Well, it only improved us to 96.9mph.
The take away for me was that I really needed a better cam (this motor has a stock bottom-end) and the ability to get 6500 or more out of every gear. Going into this meet over 80hp down and 1500 less rpm range blocked us.
Traction was also a big issue. My tires were not ideal for Bonneville, but I knew that. Driving on the salt is like driving on astro turf. It's hard but soft at the same time.
We were super reliable all through the event. I only loaned my tools to other racers. My car needed nothing between runs.
Parting shots from the salt. . .
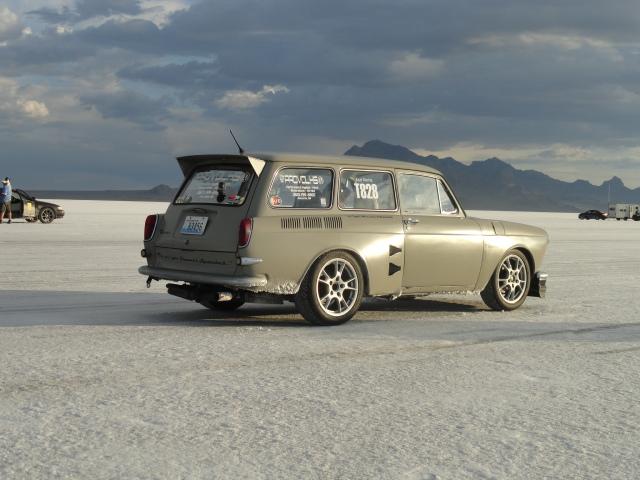
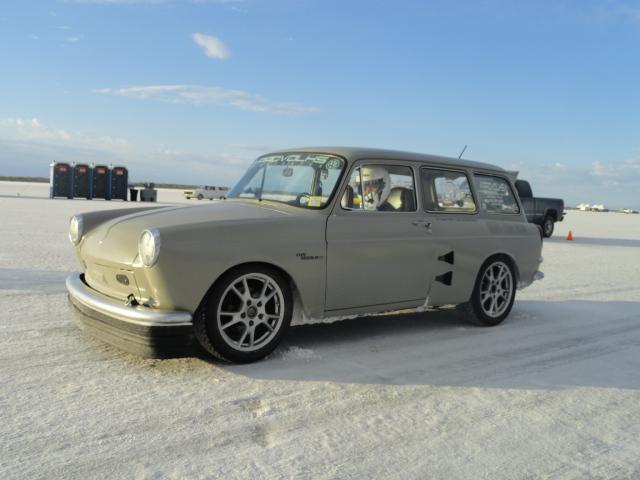
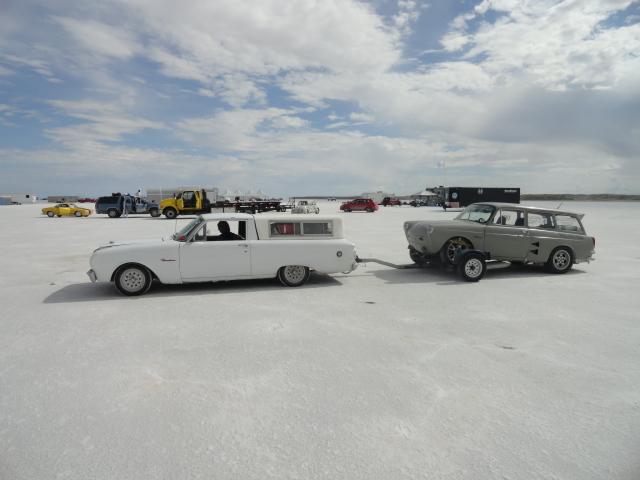
As for cleaning the salt off the cars, virtually everyone I talked to said the exact same thing: Put it on jack stands with no wheels and put 4 oscillating Rain Bird sprinklers under it for 2-3 days to douche it all out.
BTW, speaking as a spectator as I walked through the staging lanes, I came to the conclusion that land speed racing very well be the last of the motorsports that are still like it was back in the '50s-'60s. These cars are all hand-made with out-of-the-box approached to problems is the norm just like back in the old days when there was no automotive aftermarket.
Posted by: messix Sep 9 2014, 11:53 PM
I wonder how much mph was lost to tire spin/slip?
maybe add more weight for traction next time?
Posted by: maf914 Sep 10 2014, 05:56 AM
I like that last photo of your tow rig! How about a description of the Ford? Thanks again for this thread.
Posted by: aircooledtechguy Sep 10 2014, 07:32 AM
I like that last photo of your tow rig! How about a description of the Ford? Thanks again for this thread.
Our tow vehicle is our '62 Ranchero (AKA: the "Mighty Ranchero"). It's powered by a pretty new 200-6 and a C4 automatic. She's not a power house but she tows at 60-65mph and is dead reliable. On this trip I think we've passed only 6-7 vehicles; all semis and 1 motorhome.
Posted by: rhodyguy Sep 10 2014, 08:46 AM
next year for the 130 club. what an experience for you and your son!! far more valuable and they will last for the rest of your lives.
Posted by: 76-914 Sep 10 2014, 09:02 AM
Great looking car. You should have been down about 13-14% on your HP @ 4200' ASL. Is that close to your calc's?
Posted by: KELTY360 Sep 10 2014, 10:38 AM
Great adventure for you and Josh, and an awesome build thread. Now you know you can make parts pickup runs @ 96mph! 
Posted by: aircooledtechguy Sep 11 2014, 10:54 PM
Great looking car. You should have been down about 13-14% on your HP @ 4200' ASL. Is that close to your calc's?
When we got back to the shop last night, we dropped off the two cars and hopped in the 914 w/ a 1.8L with over 350Kmiles on it. The 914 is a dog compared to the Squarsche and it felt as quick as the Squarsche felt @ Bonneville!! I'd say at least 15% down on power.
I spent the entire day today with the pressure washer wand in hand spraying the salt off the Squarsche, the Ranchero and the tow dolly. Holy ton of salt Batman!! I would guess that I sprayed off 100# of salt off of EACH car!! I pulled all the fenders off the Squarsche to make things easier than the Ranchero. The front fenders weighed about 40# each!! The rears had almost nothing on them.
After 2 cars the the tow dolly were done, the parking lot was solid white from all the salt. Freakin' increadible. . . I am so glad I had Josh douche both cars with two coats of SaltX solution prior to leaving.
Posted by: aircooledtechguy Sep 14 2014, 08:11 PM
A short action video from Bonneville. . .
http://youtu.be/tPFrJx8GY6w
Josh early on the last morning on the salt. . .
https://www.youtube.com/watch?v=Qo9LuAI9ghA
Posted by: Java2570 Sep 14 2014, 08:44 PM
That's pretty damn cool to watch, especially the rear view! Jon
Posted by: messix Sep 14 2014, 09:03 PM
that boy needs some schoolin!
Posted by: aircooledtechguy Sep 15 2014, 07:22 AM
Hey Crusty; Remember laughing at this guy in the Camero dressed in a Faux F1 suit??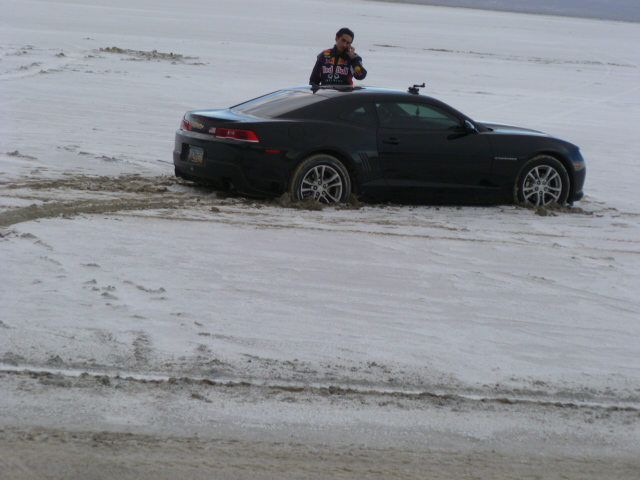
Here's a little back story on him from one of the guys working the event at Lands End. . .
"Hugh Coltharp (USFRA treasurer, works at Land's End) said the guy got to Land's End and wouldn't pay to go on the salt to see the event. He was extra-grumpy and rude and left. I hear he evidently decided to drive around the end of the pavement and the "pay gate" and save himself some money -- showing the USFRA that he was better than them.
Hmm, let's see. he saved the twenty bucks of a one day pass, but spent how many hundreds getting towed out? evil evil rolleyes
I hear he wouldn't speak to anyone after he was freed. Grouch!"
Karma's a bitch!!
Posted by: Cap'n Krusty Sep 15 2014, 09:08 AM
We saw him at the car wash on Sunday afternoon. Lotsa pointing and snickering among the folks on hand. Bet he failed to get most of the salt out from under his car. Guess that Go Pro didn't keep him out of trouble ..................... Narcissism is beginning to catch up to Darwinism as a cause of hilarity among the masses.
Missed you guys at the VW barbecue!
The Cap'n
Posted by: KELTY360 Sep 15 2014, 09:59 AM
Hey Crusty; Remember laughing at this guy in the Camero dressed in a Faux F1 suit??
Here's a little back story on him from one of the guys working the event at Lands End. . .
"Hugh Coltharp (USFRA treasurer, works at Land's End) said the guy got to Land's End and wouldn't pay to go on the salt to see the event. He was extra-grumpy and rude and left. I hear he evidently decided to drive around the end of the pavement and the "pay gate" and save himself some money -- showing the USFRA that he was better than them.
Hmm, let's see. he saved the twenty bucks of a one day pass, but spent how many hundreds getting towed out? evil evil rolleyes
I hear he wouldn't speak to anyone after he was freed. Grouch!"
Karma's a bitch!!
Poser Justice! Sad part is, he has no clue how silly he looks.Great adventure Nate. You and Josh have stories for a lifetime...or until you go back to the salt for another try.
Posted by: Cap'n Krusty Sep 15 2014, 11:21 AM
Some onlookers later told me the tow guy made the driver dig it out far enough to allow access for the tow rig ......................
The Cap'n
Posted by: aircooledtechguy Sep 15 2014, 01:51 PM
Some onlookers later told me the tow guy made the driver dig it out far enough to allow access for the tow rig ......................
The Cap'n
Yeah, when we passed him (pointing and laughing) he had a shovel and was frantically going at it with the tow truck parked across the road looking on. . . Boy he really showed everyone how it's done alright.
I felt really bad about missing the BBQ; sorry about that. We left the salt around 4pm and we took a "nap". At 9:30pm I woke-up and realized we slept through it. I was pretty bummed about missing it. The sun really took it out of us though while we were there.
Posted by: Cap'n Krusty Sep 15 2014, 03:13 PM
You should be bummed. I had to share the Santa Maria Style tri-tip with the cooks. Not that they complained .............
The Cap'n
Posted by: aircooledtechguy Sep 15 2014, 06:56 PM
You should be bummed. I had to share the Santa Maria Style tri-tip with the cooks. Not that they complained .............
The Cap'n
Doh!!
Let it be known that the Cap'n is not nearly as "Crusty" in person as he may seem here. . .
It was really great to meet you. Thanks for your support!!
Posted by: Cap'n Krusty Sep 16 2014, 09:25 AM
You should be bummed. I had to share the Santa Maria Style tri-tip with the cooks. Not that they complained .............
The Cap'n
Doh!!
Let it be known that the Cap'n is not nearly as "Crusty" in person as he may seem here. . .
It was really great to meet you. Thanks for your support!!
Busted me! You sure you really wanted to do that? Years of karefully krafted reputation down the drain ................. Guess you're gonna have to wait until the next time I go to Barneyville (just WHERE was that big purple fella, anyway?) to enjoy gourmet beef, Santa Maria Style.
It was a truly great experience, and my wife's sooo pissed she missed the 100th anniversary event. I'll be back ....................
The Cap'n
Posted by: MMW Sep 20 2014, 03:31 PM
Saw this on the Volksrod forum.
http://volksrods.com/forum/showthread.php?t=19537&page=11
"Nate Morse 96.990 T828 130 67 T3 Squareback 2000cc Super Block Porsche 914 Engine
New T3 VW Challenge Record Holder"
Attached image(s)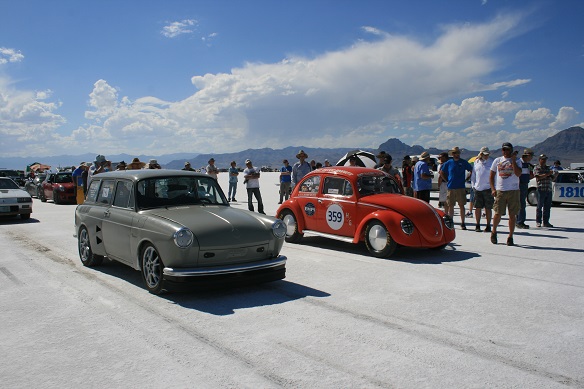
Posted by: sixnotfour Sep 21 2014, 03:08 PM
Awesome Nate ...
Posted by: aircooledtechguy Oct 22 2014, 07:14 AM
Since our trip to Bonneville, I’ve been driving the Squarsche daily so I can sort out any issues that it has and to refine the front suspension.
The first thing I did was to remove the spacers for the fwd trans mount. Thankfulluy I never had a problem when it counted at Bonneville, but as soon as I got home, I had a hell of a time getting 5th and Reverse. Once I removed them and re-adjusted the shift linkage, smooth as butta. . . 1-5 & Rev.
When driving on the street, I was getting a lot of bump-steer input from the suspension. While it was fairly manageable it could cause some twitchiness in high-speed turns and when I would give quick steering inputs (like darting out to pass someone). The suspension geometry had been altered quite a bit in the grafting in of the Porsche 911 suspension/steering so a slow graduated approach was needed to bring back the responsive steering of a Porsche. I began by playing with ride height since a Porsche’s suspension is dramatically altered by height adjustments. On a Porsche, as you lower the car, it toes-in; as you raise the car it toes out so you have to find that sweet-spot. After a few days of playing, I was able to find the perfect height that balanced toe-in, neutrality and toe-out. There were also differences in how the car handled between a full tank and an empty tank which told me that the stock torsion bars were just too soft in the Squarsche. So I installed a set of Sway-A-Way torsions that I picked-up at the Porsche swap meet a couple years ago. I got them so cheap they were almost free (like $50). Holy crap!! The car is completely different animal now. Very predictable handling and it’s a 2-finger driver at 100mph!! Yeah, it’s loosing it’s soft ride, but I don’t care; it handles like a 911!!
Since the summer weather is pretty much over now, I installed the heater hoses that connect the H/Es and the body. Seat heaters help, but I need a little defrost in the morning when it’s in the low 50s to keep the fog off.
I also finally got the rear brake splash-guards powder coated so I installed those since the rains are finally upon us here in the PNW.
The stereo head unit stopped getting the noise to the speakers, so I’ll have to investigate that, but all I all, progress is being made on the refinements to the Squarsche. I am in work on door panels and arm rests and another accessory for it. No, they’re NOT stock and YES, they are Porsche inspired.
Posted by: maf914 Oct 23 2014, 07:02 AM
I like that last photo of your tow rig! How about a description of the Ford? Thanks again for this thread.
Our tow vehicle is our '62 Ranchero (AKA: the "Mighty Ranchero"). It's powered by a pretty new 200-6 and a C4 automatic. She's not a power house but she tows at 60-65mph and is dead reliable. On this trip I think we've passed only 6-7 vehicles; all semis and 1 motorhome.
I was browsing Tower Hobbies and ran across this. You may need one of these.
http://www3.towerhobbies.com/cgi-bin/wti0001p?&I=LXDDBX&P=W
Attached image(s)

Posted by: KELTY360 Oct 23 2014, 08:36 AM
Now that you've got the easy stuff out of the way, when are we going to see the gyroscopic cup holder installation?
Posted by: Root_Werks Oct 23 2014, 08:37 AM
Nate, you got that T-3 to go how fast again? Crazy!
Posted by: 76-914 Oct 23 2014, 10:04 AM
Two rare events in one day. A blazing fast T3 and Instant Karma delivered upon a Ass Wipe. Damn, I woulld have paid good $$ just to witness that  stuck in the sand.
Posted by: aircooledtechguy Nov 17 2014, 05:34 PM
The relentless quest for speed and better handling continues. . .
I made further refinements to the front suspension by finally installing the Speedway Engineering 1” hollow sway bar that I bought last spring. This is a bar that I bought used and modified from a Porsche 914. It’s normally sold as a NASCAR sway bar and has 18” billet arms on each side for the drops. These had been trimmed down a few inches and the arms had been custom drilled and tapped with 28 holes each for very fine stiffness adjustments and came with Weltmeister double heim joint drops that attach to the Porsche front A-arm tabs. I don’t have the weight on this, but I can say it’s easily half the weight of an aftermarket type-3 sway bar and is much lighter than a factory Porsche sway bar assembly.
I made some adjustable mounts that hold the bar in the factory type-3 location for the upper front-end tube. I made the mounts eccentric so I could move the bars location in any position within the front-end mount. This will make using the softest and firmest settings more accessible without having the drops at steep angles. I also slightly modified the upper corners of the billet side bars to get just a bit more tire clearance. 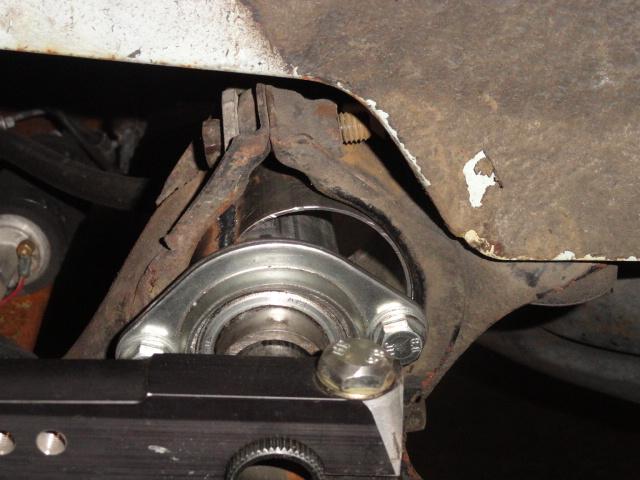
This bar is highly adjustable with 28 holes for the drops off the arms. The closer you mount the drops to the sway bar the less twist on the bar is allowed due to lack of leverage and the flatter the car is in the corners. The further you mount the drops from the bar, the more twist is allowed since you’ve increased the leverage on the sway bar. With no experience with this type of bar and certainly on this car, I decided to start-off with hole #14 right in the center. . .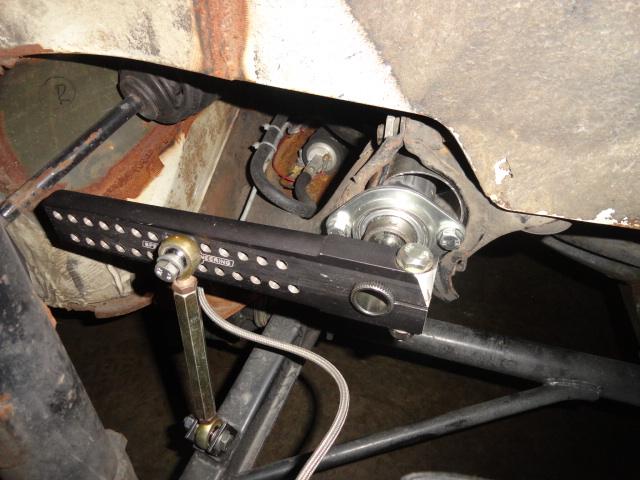
I took it down the street where I have a turn circle that I can properly test it on. . . WOW!! This thing lays flat in the corners!! I can’t imagine what it would be like even closer to the bar!! I really want to get this thing out on the road to Artist Point to give it a full workout, but that’ll have to wait until next summer now that the road is closed. The car’s handling is getting closer now to what I wanted it to be so I may have to check with the local track safety requirements so I can hopefully schedule a track day in the spring. I just hope I can wait that long. . .
Posted by: KELTY360 Nov 17 2014, 06:05 PM
If'n ya can't wait, just take a couple runs up Mt. Erie. That'll get the adrenaline flowing.
Posted by: r_towle Nov 17 2014, 06:18 PM
Makes me smile that your bump steering was happening whe you "darted out to pass someone" all in a square back
Never made to dart out anywhere, and certainly not to pass anyone, ever.
Posted by: orangecrate Nov 18 2014, 08:56 AM
Yea Compression start your automatic 73 Blazer coming DOWN Mt Erie. On tall skinny mud tires. That will get your adrenaline flowing--- and your passengers screaming!!!
Posted by: aircooledtechguy Nov 18 2014, 10:17 AM
Makes me smile that your bump steering was happening whe you "darted out to pass someone" all in a square back
Never made to dart out anywhere, and certainly not to pass anyone, ever.
That's why I love this platform; no one expects it.
Yea Compression start your automatic 73 Blazer coming DOWN Mt Erie. On tall skinny mud tires. That will get your adrenaline flowing--- and your passengers screaming!!!
No thanks!! Mt Erie is literally on my way home, but I don't like to drive that road fast. Too tight (calling it a two lane road is a stretch) with too many hikers, bikers joggers and critters popping out of nowhere all the way up and down.
I'm guessing you'd need about 30+mph to start an automatic. . .
Posted by: orangecrate Nov 19 2014, 03:25 PM
Yea something like that. I was to busy watching the road to look at the speedo! And it was a couple decades ago in late fall I think. The tourist had all gone home. It would be fun to get it blocked off for hillclimbs though. Probably upset the birkinstock crowd. And it is kinda small up top.
Posted by: aircooledtechguy Nov 19 2014, 05:10 PM
Probably upset the birkinstock crowd.
They're pissed there is even a road or cars to drive on it.
Posted by: aircooledtechguy Jan 6 2015, 04:39 PM
I've been a little nervous about coupling the new 2.3L race motor to the Squarsche with just a stock clutch installed. In the past I had been able to slip the clutch just a bit in the harshest driving with the 2056cc engine with a disc I used to run. That hasn't been a problem wince I replaced the disc, but I didn't want that to be an issue. So when I found a guy on the local craigslist selling a NOS Centerforce dual friction 914 clutch kit, I bit and picked it up cheeeeeeeep. 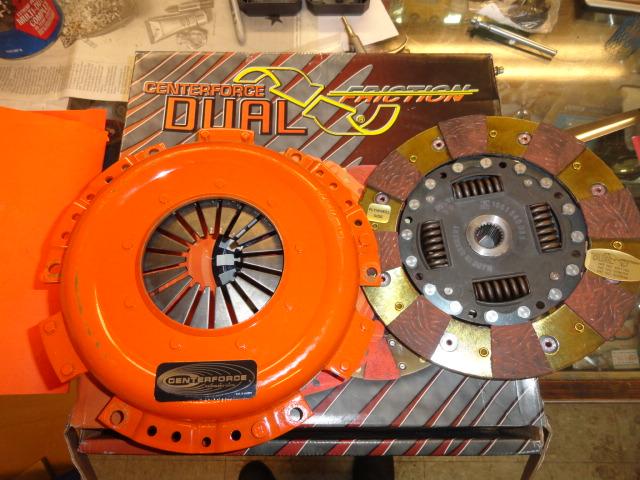
He bought it back in 1999 for about $350. I bought it in 2014 just before Christmas for $250. Normally this set-up goes for around $850+ today so it was quite a score for me.
In order to comfortably use this HD clutch assembly, I would have to upgrade my clutch actuation to a hydraulic set-up. So after seeing what was out there and reading mixed reviews, I decided on the SACO in the tunnel MC/slave cyl kit since I could use my existing pedals.
I’m no stranger to custom installs. In fact, a good custom job beats a stock job just about any day since it’s doing something different. I love custom work. What I do not love, is tons of custom fabrication when the parts are advertised as “bolt-in”.
I knew going into this install that it would not be 100% bolt-in because I have a Porsche 923 5-speed trans which is anything but stock so I knew I would have to figure out how to make the slave cylinder work with what I have. I did half way expect the master cylinder install to go fairly smoothly and be relatively bolt-in since the kit was made and advertised for both T-1 & T-3 cars. I can’t speak about how it installs into a T-1, but I can tell you all that the kit takes considerable tweeking to fit into a T-3. In retrospect, I think installing cheap Chinese chrome engine tins and getting them to seal like factory German tins would have been easier.
I’m just glad that I already had a larger access hole cut into my tunnel AND that I have a lift here at my shop so I had easier access than either on my back or through the top by removing the fuel tank.
To fit this MC and bracket into a type3, here are some of the added steps not noted in the instructions that had to be done in order for it to physically fit in it's intended location:
- I had to trim the upper, left tunnel cover mount hole off so the MC mount bracket/MC would even fit into the tunnel (it sticks out of the front of the tunnel approx 2”).
- I had to trim the entire left side of the tunnel access hole so the bracket would fit flat when bolted in.
- I had to use a burr to clearance the bottom, fwd end of the bracket approx ½”X1” in order to allow the 2 mount bolts to align with the factory pedal bolt locations.
It doesn't sound like much, but I cannot stress what a TOTAL PITA this was due to the location and access (or lack there of). Approx 5 hours of back and forth, taking a bit off and try and wrestle it back in only to find I had more to remove here and there. All the while laying across the seats reaching through a sharp access hole. There is no easy way to work in the pedal area; it ALWAYS sucks in the best of circumstances. I cannot tell you all just how many times I seriously contemplated taking this MC & bracket across the street and filling it full of .45 slugs!!! 
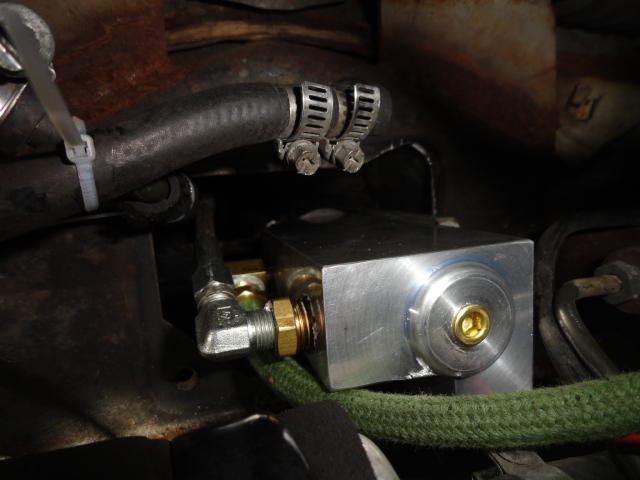
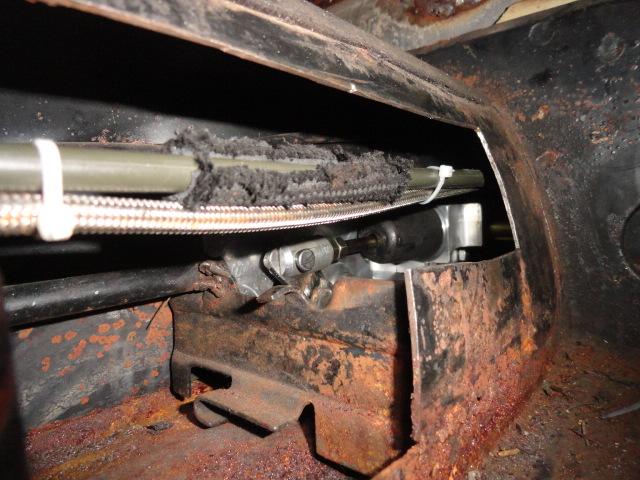
The slave cylinder was surprisingly straight forward and rather simple. It fit perfectly between the casting on the trans case which holds the clutch cable end and the clutch arm. I simply drilled out the Porsche clutch clevis to fit the S/C. I turned a teflon bushing with my lathe for the other end and bolted it to the trans case being sure that it could move and pivot in the stationary hole. I had to slightly trim one of the ribs about 1/8" so the slave cylinder wouldn't hit it. Lastly, I replaced the supplied 90degree #3AN fitting with a straight #3AN fitting so the braided pressure line would fit better.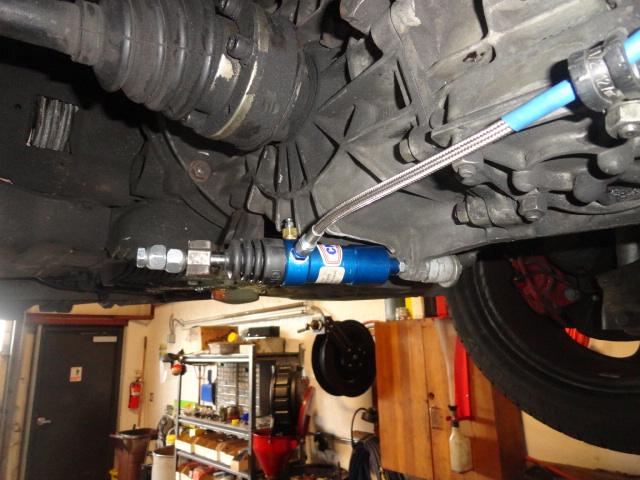
Of course, once I mounted the reservoir and bled the system, I quickly discovered that I needed just a bit more pedal movement then I could get with the factory hook. So I had to take out and pull apart the pedal assembly. I cut-off the hook and made a piece that was 10mm longer and welded it to the clutch pedal rod. Then I made a new clutch MC push rod that was about ¼” longer. When I then discovered that I still needed slightly more throw, I relented and cut about ¼” off the pedal stop. . .
FINALLY, a hydraulic clutch that works as it should. No small feat though getting this kit to work on my T-3. Not all the issues I encountered were due to the kit not fitting a type3. However, there was just no way that MC & bracket would ever fit without a lot of massaging of the bracket and the car.
While it seems to works well, I don’t know if I could recommend this to anyone installing it into a T-3 without letting them know what they are in for. Again, I’m no stranger to custom fabrication; it’s just irritating when parts that are supposedly designed to work and fit, don’t even come close to either. I’m glad this was for my car and not for a client.
Posted by: Steve Pratel Jan 7 2015, 07:47 AM
Always wanted one of these
Posted by: aircooledtechguy Feb 4 2015, 07:45 PM
The quest for reliable speed continues. . .
After much contemplation, thought and otherwise thinkin' things over, I've decided that dry sumping the 2316cc race motor would be a wise investment. Here have been my thoughts in random fashion. . .
- The deep sump hangs down a little lower than I would like and otherwise makes me a bit nervous. I'm retired Navy and when I go on base with the Squarsche, I have to cross some pretty big steel barriers that would either (a) hit the deep sump or (b) come darned close to hitting the deep sump and every crossing I would wonder: "is this the day. . ." I don't want to test it!!
- Long sweeping turns are no big deal when you have 12 quarts in the dry-sump. They can be a problem in a wet-sump motor with less than half that. . .
- All the added weight is low and forward of the center of gravity in the car.
- Not having to worry about ruining my high $$$ race motor by running dry on oil; PRICELESS!!
I've acquired a new CB dry sump pump. This will be dutifully modified for use in a type4 and will be ported internally.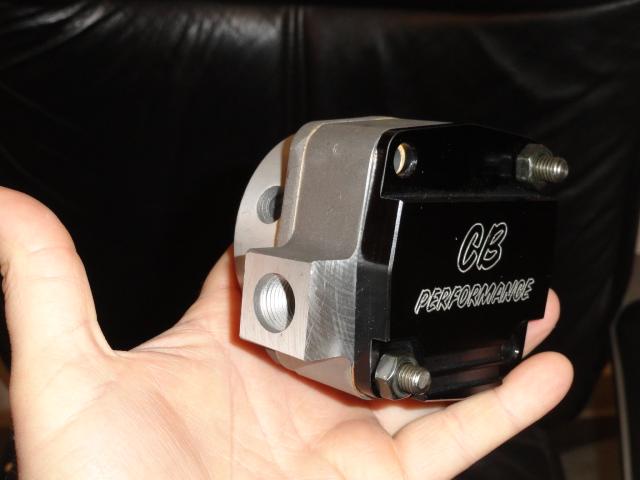
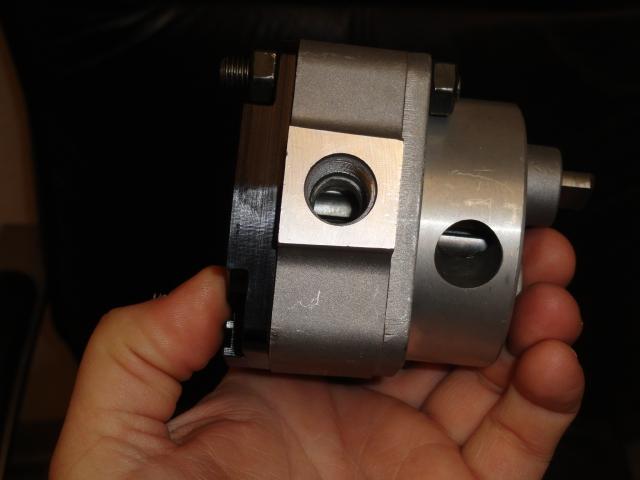
The custom mount bar I made earlier will need to be highly modified since the inlet/outlet to & from the dry sump tank are right where the solid mounts are that I made earlier. . . (sigh!) Such is custom car building. . . So a re-design is in order so the oil lines can fit in that space while still mounting the engine. I already have ideas so look for an update on that when I have time to make it happen.
The tank I found was an eBay special in the form of a Richardson Racing 12qt dry sump tank out of a modified race car. Some of the fittings are too big and will need to be made more VW-compatible. Some are not needed. But this tank has an integrated O-Berg oil filter and should fit nicely where the battery now resides under the rear seat. For the price, I couldn't pass it up!!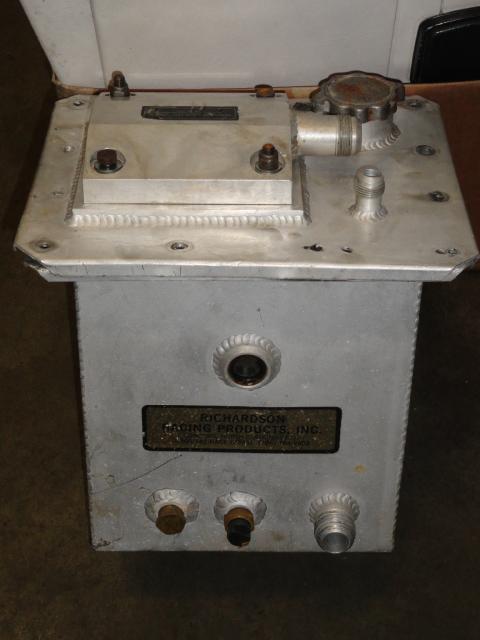
The battery will be permanently moved to the "frunk" where it belongs and where it will aid in adding weight where needed.
Posted by: tdgray Feb 5 2015, 01:11 PM
frunk... that's funny
Nice work as usual
Posted by: edwin Feb 6 2015, 01:09 AM
Very keen to see how this turns out. I've been think about a dry sump conversion for a while. As in understand the CB pump still uses the same oil pickup and pressure ports in the case?
I seem to remember something about it being more difficult to run a remote filter and cooler like with some others. I assume it's still easy to adapt to ports in the block for that though.
Very keen to see how it sits behind the fan shroud. Would it be possible to show it with 914 engine mounts?
Cheers
Edwin
Posted by: aircooledtechguy Feb 6 2015, 09:19 AM
Very keen to see how this turns out. I've been think about a dry sump conversion for a while. As in understand the CB pump still uses the same oil pickup and pressure ports in the case?
I seem to remember something about it being more difficult to run a remote filter and cooler like with some others. I assume it's still easy to adapt to ports in the block for that though.
Very keen to see how it sits behind the fan shroud. Would it be possible to show it with 914 engine mounts?
Cheers
Edwin
I don't see any way to run standard 914 or even bus engine mounts with the pump. The external oil inlet/outlet are right where the mount *should* be on a stock mount. I think I've got a pretty simple work-around for that, but I gotta try it first when I have some time. I really liked how my motor mount turned out and I hate the idea of cutting it up again. . .

I will need to clearance a couple of webs behind the fan shroud a little with a burr, but there's just enough room for it back there.
First though, I need to modify this pump so I can make it fit and live in harmony within the motor. Posted by: Dave_Darling Feb 6 2015, 10:28 AM
That's always been one of the issues with dry-sump setups. It can be dealt with, of course. And it's easier to deal with in engines converted to upright fans. I bet that when the pump setup was designed, the 911 fan setup was the default for the "advanced" Type IV engines, so they designed for that. That was before Jake actually tested the fan setups, of course.
--DD
Posted by: aircooledtechguy Feb 23 2015, 06:17 PM
I spent some time today doing some of the mods necessary to correctly fit a CB Performance type1 dry sump pump into a type4 motor. I have to say that it was not much more difficult than the mods required for a 30mm pump.
Here's how the pump breaks down: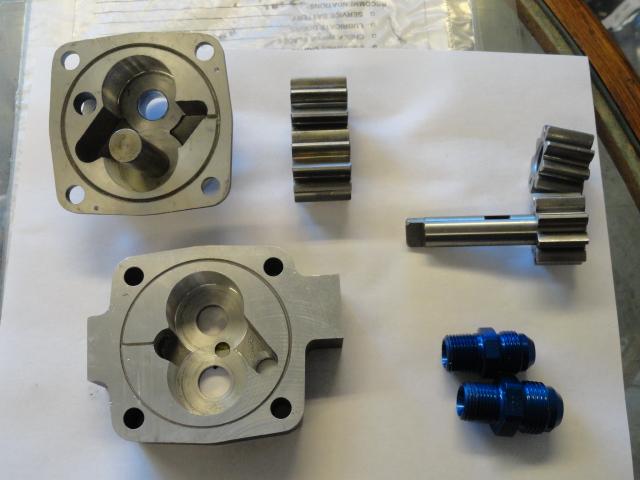
The pump uses a 26mm suction side (the bottom pump) and a 21mm pressure side.
On the back side of the pump, there was a small bit of clearancing needed. On the drive shaft boss, I needed to shave approx. '040" off. On the idler boss, I shaved it approx .030" which was basically flush with the pin.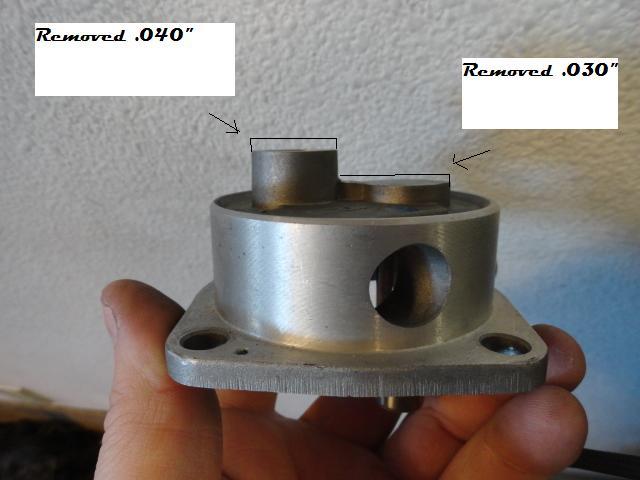
On each end of the drive pin, I shaved approx. '025". On the pressure gear end, I removed the '025 on my lathe. On the drive tang, I simply removed it by hand on a disc sander and re-profiled it.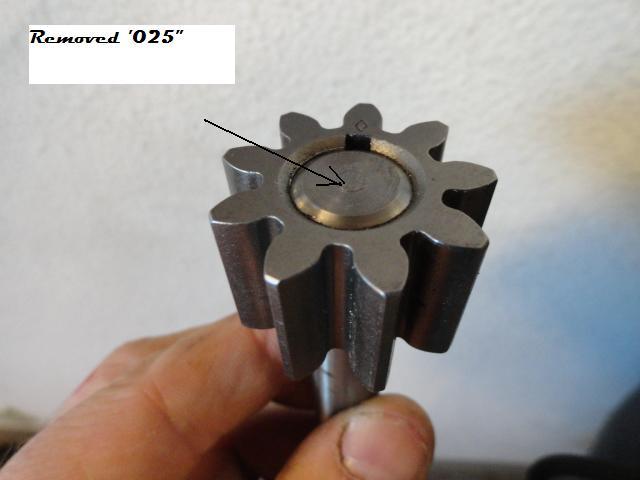
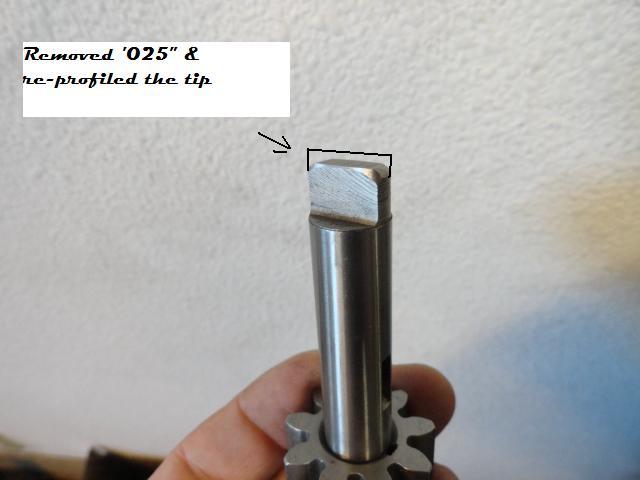
On both the inlet (from the tank) and outlet (to the tank) I had to drill each approx. .200" deeper and re-tap the holes deeper into the body to be able to attach the inlet/outlet nipples. They would not fit otherwise. Kind of crappy manufacturing, but I've seen this before on other things.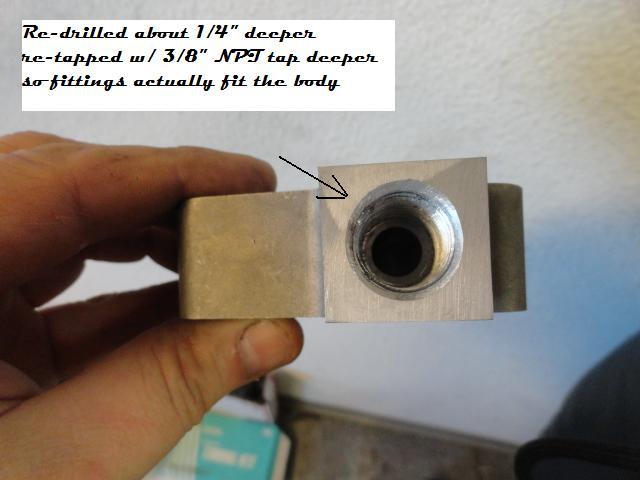
Now all I have to do is to port in internal passages and clean in my ultrasonic cleaner and it'll be ready to install in the motor.
Posted by: aircooledtechguy Mar 16 2015, 08:30 AM
This weekend, we got the chance to test the Squarsche at a track event. Evergreen Drift was hosting an auto-X @ Evergreen Speedway in Monroe, WA, so we grabbed our gear and headed down. That was about the best $65 I've spent in a long time!!
The course took most about 1:00 - 1:20 seconds to complete depending on your car and driver's ability to get through it. My best time was around 1:08. I won't even talk about the times on 2 runs that I spun out.
It poured rain for most of the day, so that was to our advantage since we didn't have the HP of some of the other cars giving us better traction. It was very satisfying to beat an R32 Skyline, 'course if the pavement had been dry, he'd have handed my @$$ to me.
I did get to play with the Koni front shocks a bit and found that full firm minus one turn was the hot ticket for that track in those conditions for my car. On full firm, the back-end would get loose a lot easier in the slalom section under braking, but when I softened it up a bit, the rear was more compliant and stuck better. It really handled great! In the back section, I could normally begin to close gaps between us and the car in front. It laid pretty flat in the corners and handled as good and better than I had imagined.
Some areas of improvement that became very evident are:
1. I need a fuel cell. I could smell gas sloshing out of the cap on a few corners.
2. I need new easier to reach adjustment screws for the rear suspension.
3. I need to dyno tune the EFI to this motor. We gave up a lot of time due to tuning and having a lack of power at the moment we needed it.
4. Of course, MORE HP!!
As can be expected with the weather we had, it was a drift-fest and one hell of a lot of fun. The best part was that my son Josh could ride with me in the so we could enjoy it together.
Here's a shot of the Squarsche w/ Josh inside in the staging lanes waiting for the next run.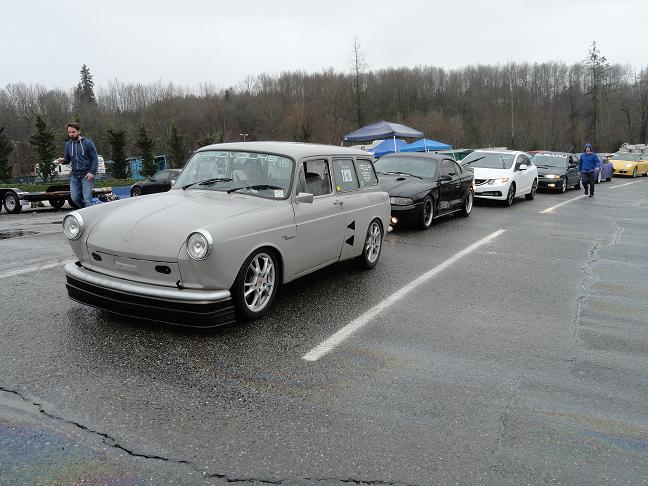
In all, we were able to make 9 runs around the course. I got them on the GoPro, however I had it mounted upside down on the suction cup. Normally I have it outside the car, but this time I had it inside and it would only fit up side down. If any of you know how to flip the videos before I up load, let me know how please. I'm electronically challenged. . .
Posted by: aircooledtechguy Apr 2 2015, 10:50 PM
Finally got a video uploaded from the auto-x.
https://www.youtube.com/watch?v=6k9cbZ2m3PI
Posted by: rick 918-S Apr 2 2015, 11:07 PM
Cool! Were you sliding around 1:22-23?
Posted by: aircooledtechguy Apr 3 2015, 09:35 AM
So yesterday, I had a lull in the action while waiting on a few parts so I decided to begin doing something about the fuel sloshing and leaking out under hard cornering that I experienced at the auto-X. I knew that in time a fuel cell would be needed so I had already begun getting parts for it. I was at a car show a year ago and found a fuel cell top that was in really nice condition for $20 so I snagged it. I'm not going to be using the factory outlet and long suction tube, so I'll be capping that off.
This morning, I went over to the local metal supplier and dug through the scrap cuttings (the stuff you only pay by the pound for) and got some nice pieces of 3/16” 6061 T6 to make all the pieces I would need. Even though it was scrap I still had $140 into the materials!! Gotta pay to play, right?? I went with 3/16 to ensure I had good thick metal that would hold up in the event of the un-thinkable. The internal baffling will be thinner though.
My cheap plasma cutter worked awesome and cut through it like a hot knife through butta’. After I cleaned up the edges, on the top plate, I began laying it out by making an “X” from corner to corner. Once I got the vent valve, fuel outlet nipple and the burp-flap removed, I got it centered and used a centering punch to make the first 2 drill marks and drilled them. 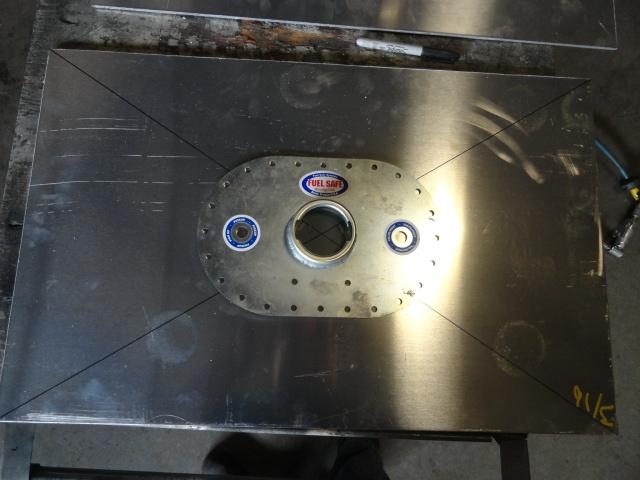
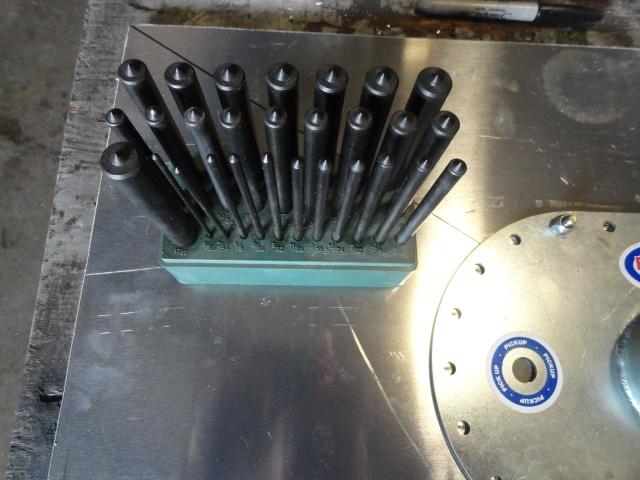
I went back and de-burred all the holes with a countersink bit. 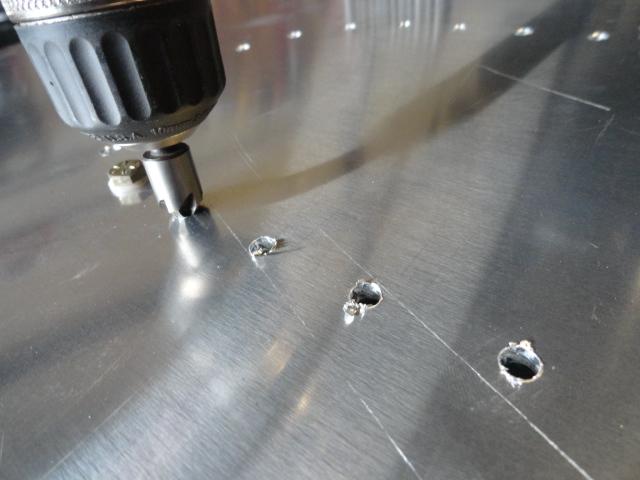
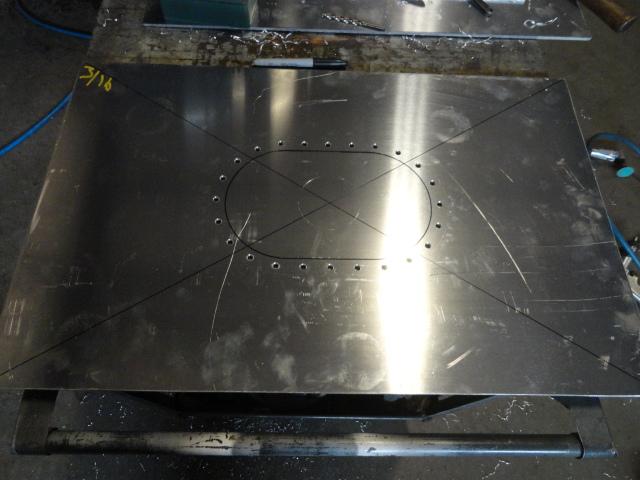
Then I bolted the top into place marked all the other holes. Since the top piece is steel, I chose to use it as a drill guide to ensure all the remaining 22 holes were perfect.
I used the base ring as a guide for the large center hole and marked it with a sharpie. Then hole-sawed a pair of holes and jig sawed out the rest. I’m saving the 2 round hole-saw discs for later so I can use them as re-enforcement for the outlet and inlet nipples that will later be in the bottom of the tank. 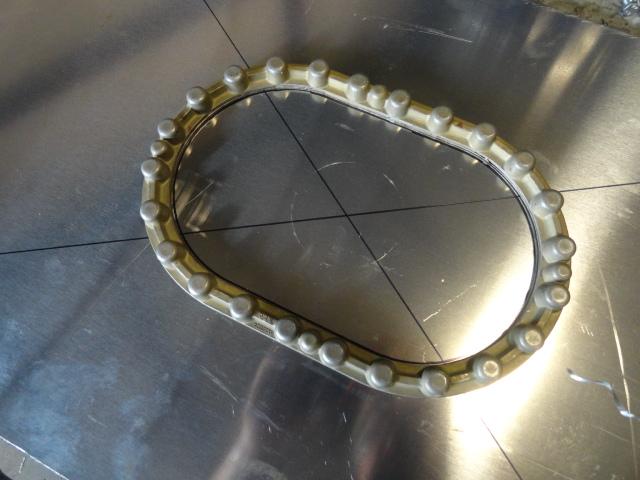
Once the edges were smoothed, I got everything fitted to the top. Fits perfect!!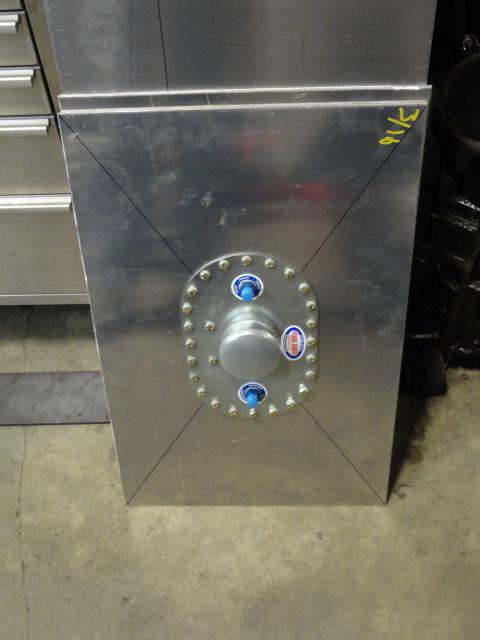
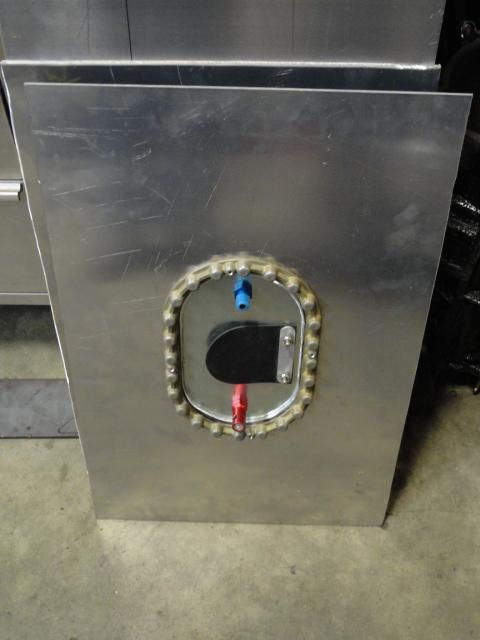
I'm estimating this tank to be around 23+ gallons.
Posted by: aircooledtechguy Apr 19 2015, 11:45 PM
I found a few pics on-line that were taken of Josh and I at the auto-X back on March 15th. Making the best of a rainy day. 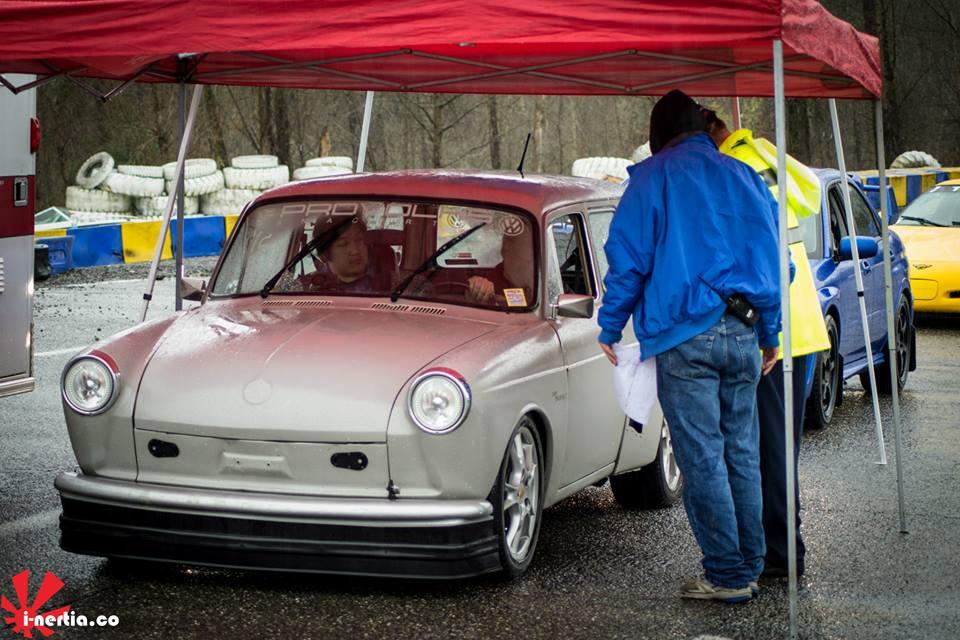
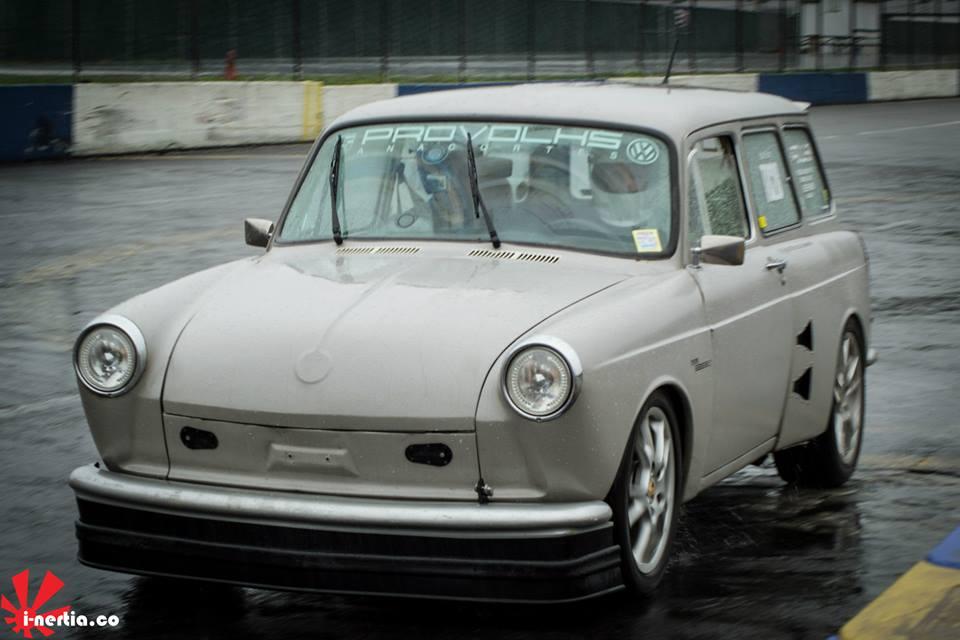
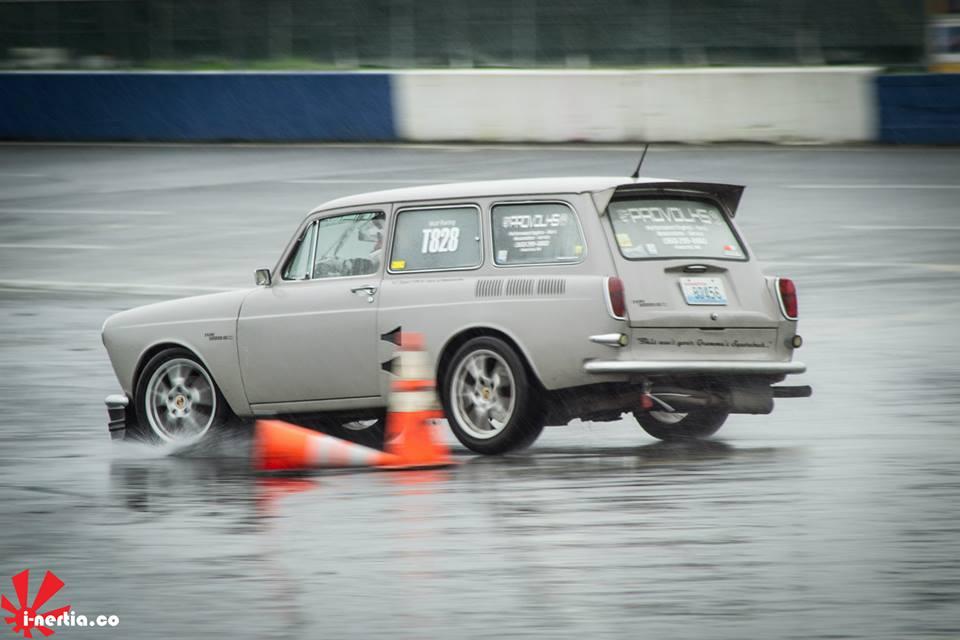
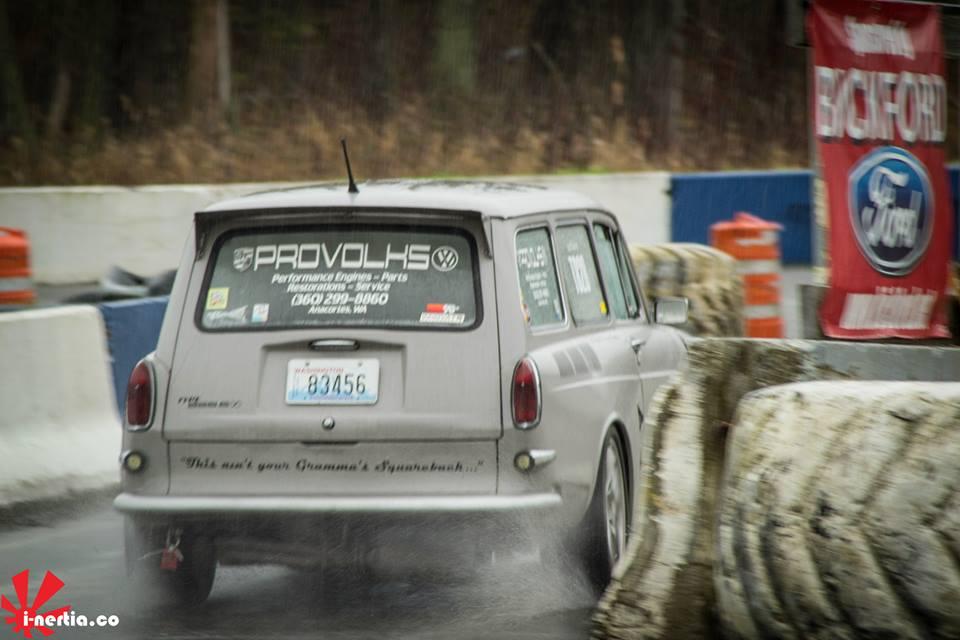
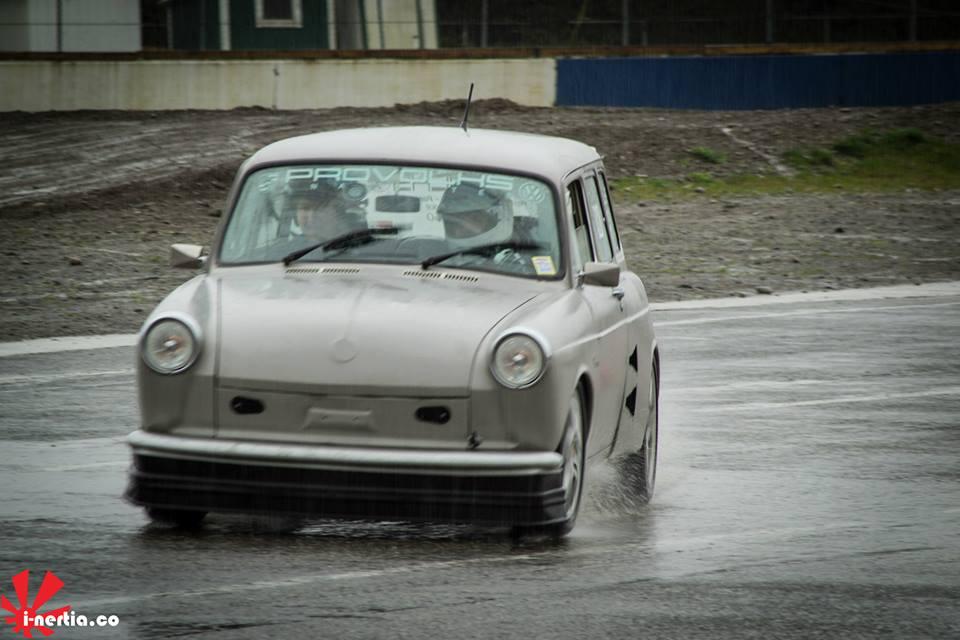

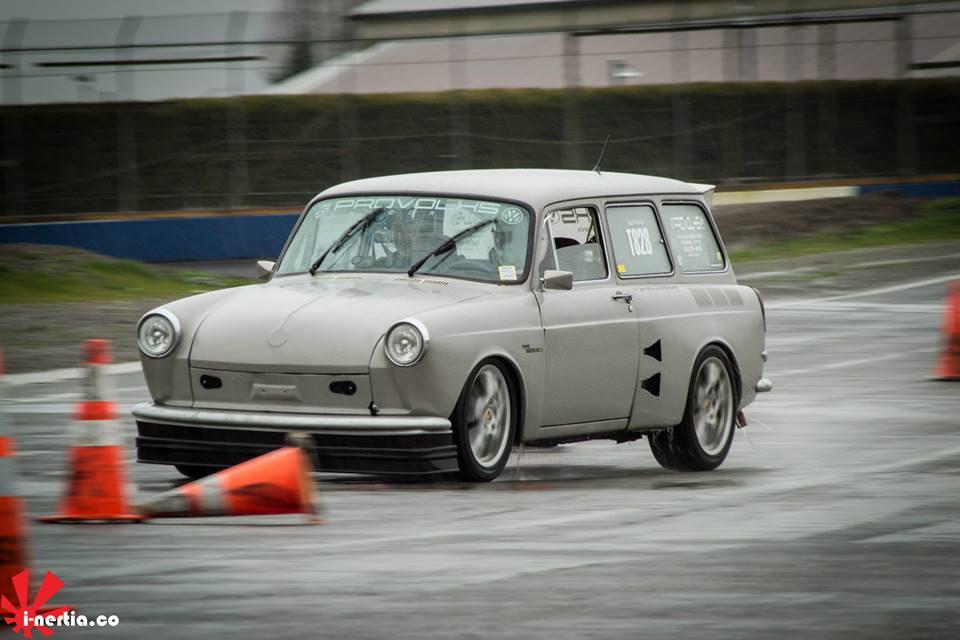
We are looking forward to the next one; hopefully on a drier day.
Posted by: aircooledtechguy Jun 22 2015, 10:19 PM
Just a quick look at something I've been working on at my buddies shop in my off time. Stay tuned for more on this in the future. . . 8)
https://www.youtube.com/watch?v=usJl45lVULg
Posted by: aircooledtechguy Jun 24 2015, 01:24 PM
This morning I stopped by my buddies shop and removed the door panel blank off the infusion table. Should make a nice door panel when trimmed out and done the way I'm planning. 
Posted by: aircooledtechguy Jul 9 2015, 01:55 PM
Almost a year after I began driving my car after the suspension fender mods, I finally have a mostly complete interior. Better late than never I guess
To keep the Porsche inspired theme going, I decided to make door panels reminiscent of the early 70s RS/RSR racers by deleting the metal door latch and replacing it with a light web strap and Porsche grommet. 
Instead of leather covering like a Porsche, I opted for carbon fiber. I infused all the blanks at my buddy Jim's shop Left Coast Development LLC. Then traced out OEM panels and attached them with black oxide screws.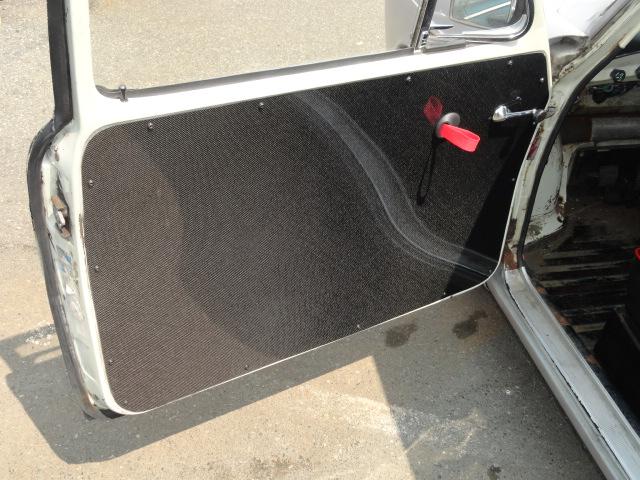
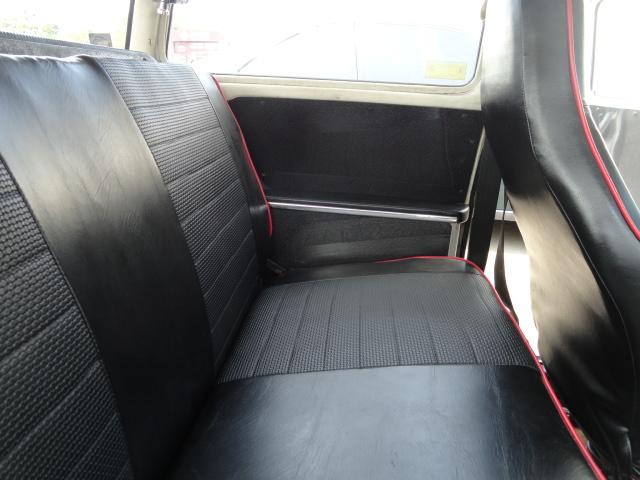
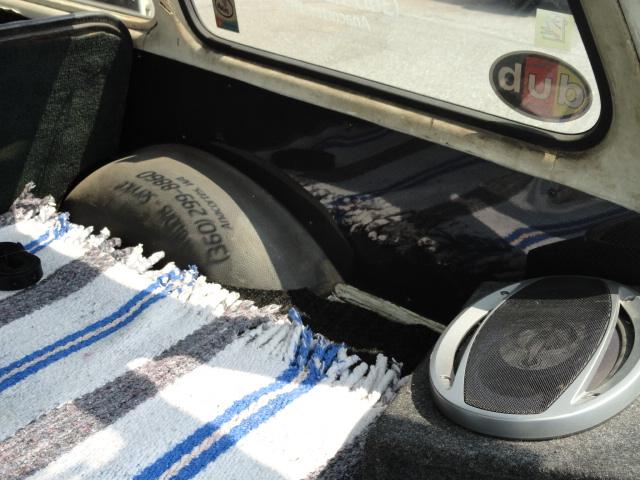
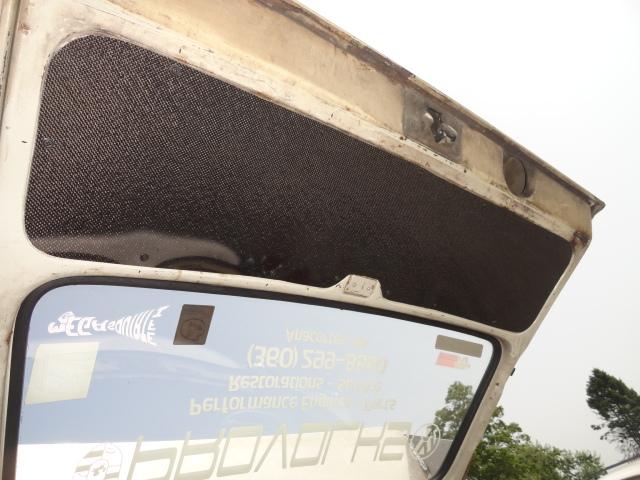
Simple, light weight and un-cluttered. Now I can look at something other than a skeleton door as I drive.
Posted by: maf914 Jul 10 2015, 02:41 PM
Your door panels look good. Do the rigid CF panels rattle or vibrate, or did you dampen them in some way?
Posted by: aircooledtechguy Jul 10 2015, 04:06 PM
Do the rigid CF panels rattle or vibrate, or did you dampen them in some way?
I didn't have to dampen them. I bought silicone washers to go under the heads of each screw, but didn't end up using them.
Posted by: aircooledtechguy Jul 29 2015, 09:42 AM
I was getting tired of not having any sun visors this summer. Especially since we are having one of the sunniest summers in a decade or more. I've got some exciting stuff happening at the end of the week, I figured that I had better get these done and on the car.
Originally I planned on having a custom set stitched-up to match the seats. But the upholstery guy flaked out and lost my custom set. So I ended up making these at the same time I did the door panel set. I used the same carbon fiber but used a 1/4" core filler to give them some structure and one layer of glass on top of the foam core. I cut them to shape, then painted the backs flat black for anti-glare. I made them so they will fill in around the mirror since as we all know, that's where the sun always is; right where the visors don't cover!! 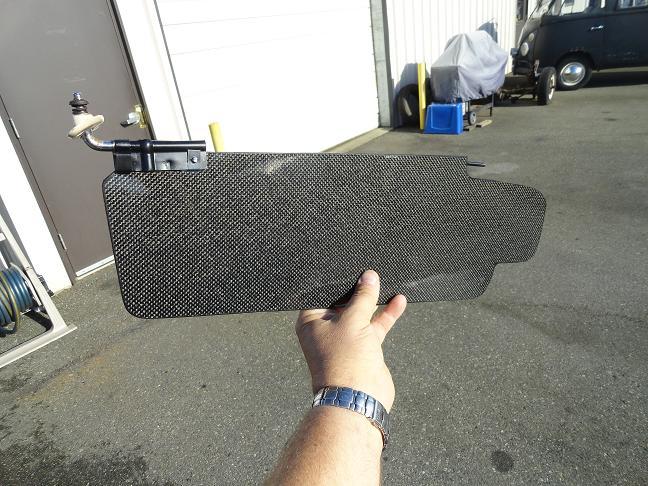
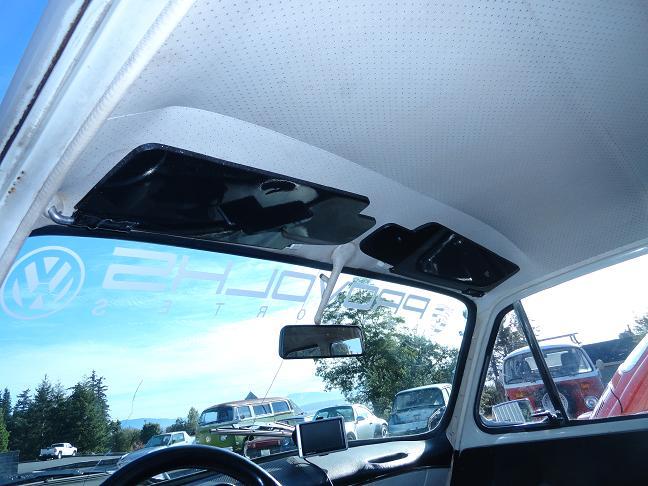
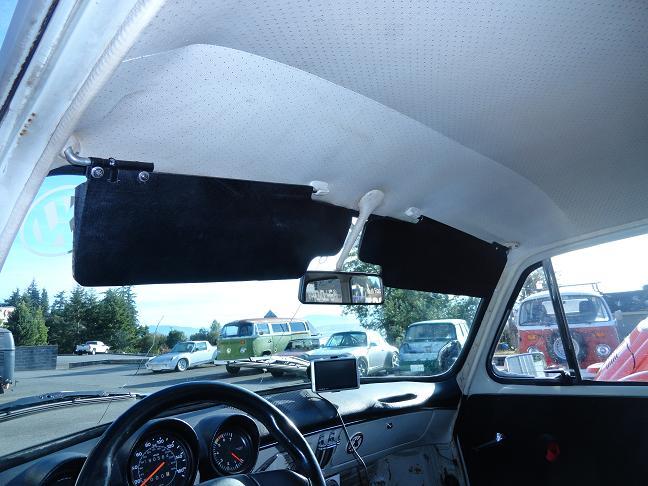
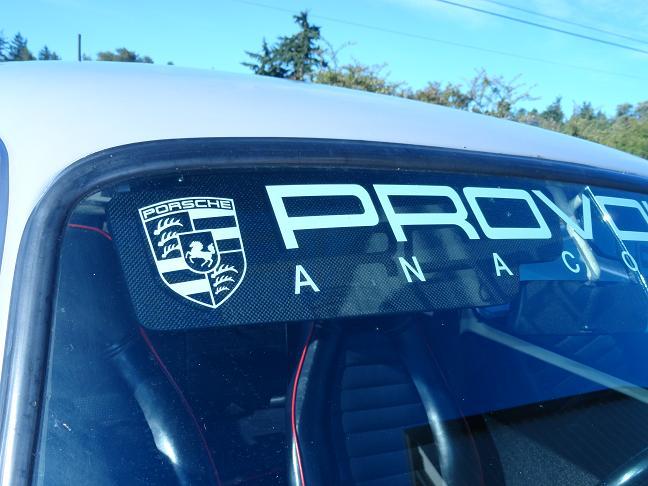
In the near future, I will be adding a mirror to the passenger side to appease my wife but for all intents and purposes, they are a done-deal and work fantastic.
Posted by: rhodyguy Jul 29 2015, 10:09 AM
pretty groovy nate.
Posted by: euro911 Jul 30 2015, 01:55 PM
I'd like to try running Bonneville some time (bucket list)
I'll try to jet it for the altitude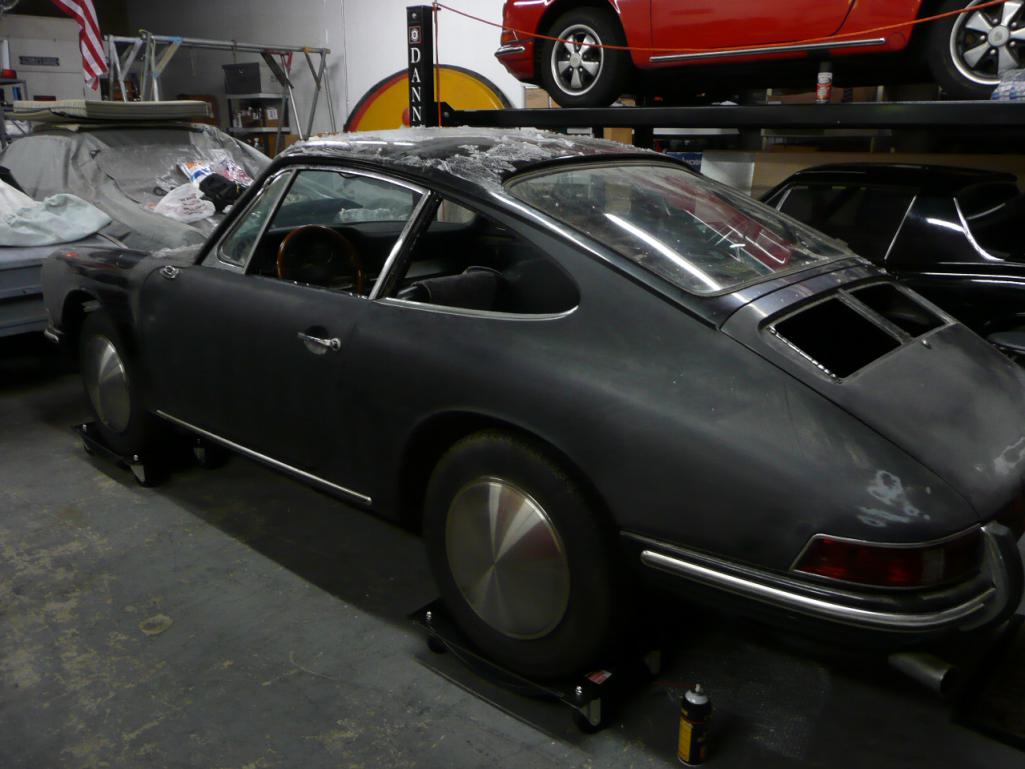
Posted by: aircooledtechguy Aug 25 2015, 11:04 AM
Just finished the initial break-in on the 2316cc engine my son built last summer. Yeah, not a lot of time to do my own thing since last year but I work better under pressure anyway.
I wanted to run it out of the car first in case any issues came up since it's kind of a pain to work on in the car and not the easiest motor to install or remove. So I bolted up a set of type-4 DCNFs and an 009 dizzy and let it rip for 20 minutes. :twisted: Other than some carb issues :roll: everything went well. I can't wait to dump the carbs and dizzy and get that sweet running MS3X & LS2s on there and begin tuning.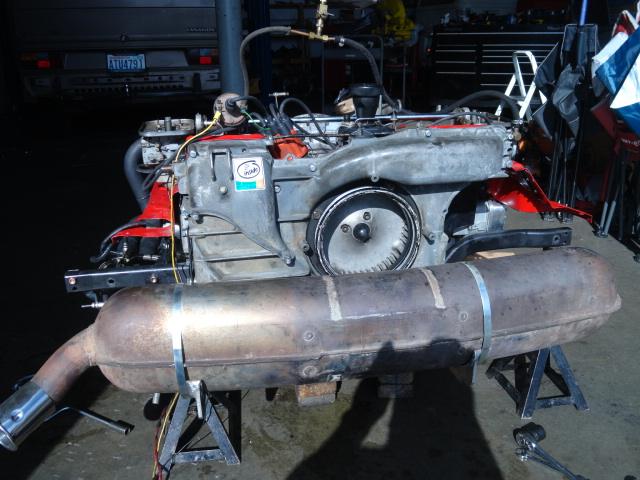
You know what I'll be doing this weekend. . .
BTW, the 911 muffler sounds good. It's quieter than my current muffler.
Posted by: JRust Aug 25 2015, 11:21 AM
Awesome Nate! Can't wait to see the new motor in the car. Then get the report on how it compare's to your old one. Was the old a 2056? I forget
Posted by: aircooledtechguy Aug 25 2015, 11:32 AM
I'd like to try running Bonneville some time (bucket list)
I'll try to jet it for the altitude
Do it!!
This guy showed-up last year in his 911.
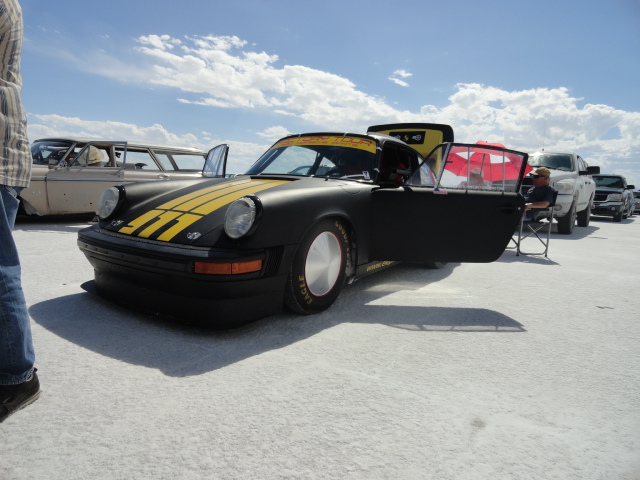
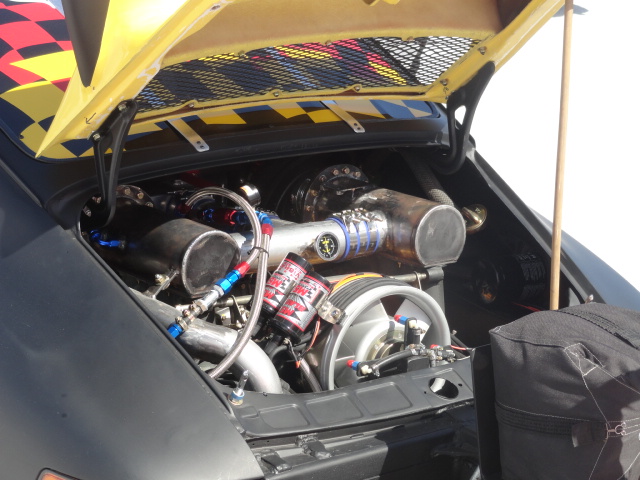
I don't know what size the motor was (guessing 2.2/2.4L), but it was an MFI turbo engine that sounded like sh*t. For all the money and time thrown into that car, he only ran about 10mph faster than I did (around 105mph). . .
Seriously, I don't think that motor ran on more than 4 cylinders at any given time and they still rolled it up to the line and ran it that way. Personally, I would have been embarrassed/scared to run it sounding like it did.Posted by: aircooledtechguy Aug 25 2015, 11:36 AM
Awesome Nate! Can't wait to see the new motor in the car. Then get the report on how it compare's to your old one. Was the old a 2056? I forget
Yeah, 2056. Bone stock bottom-end and heads with only the flat-top 96mm P&C and the removal of the head gaskets for mods. Bottom-end and heads had around 150K miles on them since 1973.
Posted by: aircooledtechguy Aug 27 2015, 04:03 PM
At a recent car show, I lifted up the carpet in the rear and noticed a crack in the cargo deck poking out from under the sound mat. Seems as though the constant abuse from my right foot has taken a toll on this area.
After investigation and removal of the sound mat, I discovered a "small crack" had developed that was right along the seam where the air duct is spot welded and some significant flexing of the surrounding area was happening. 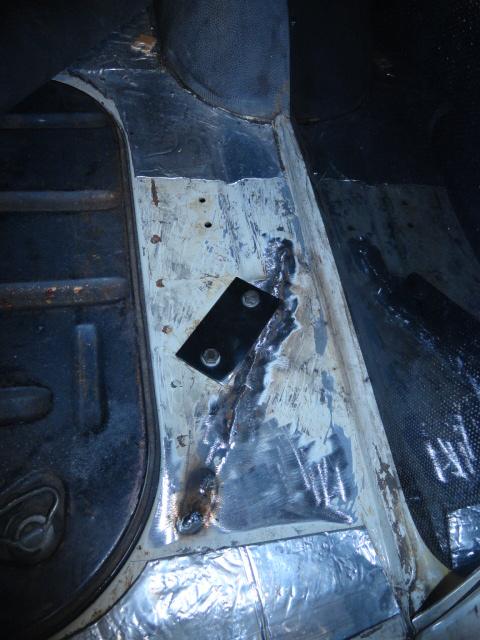
So after welding the crack and grinding the welds flat, I cut a 3/32" piece of steel plate that would distribute the load on the right side of the car over a large area spanning both the floor and the air duct. I drilled a couple dozen holes to rosette weld it to the floor and ensure it wasn't just the perimeter holding it all. The plate spans both the floor and the boxed air duct for extra rigidity. I'm much more comfortable now bolting in my race motor that has double the HP of the 2056. . . but I'm still gonna keep a close eye on it.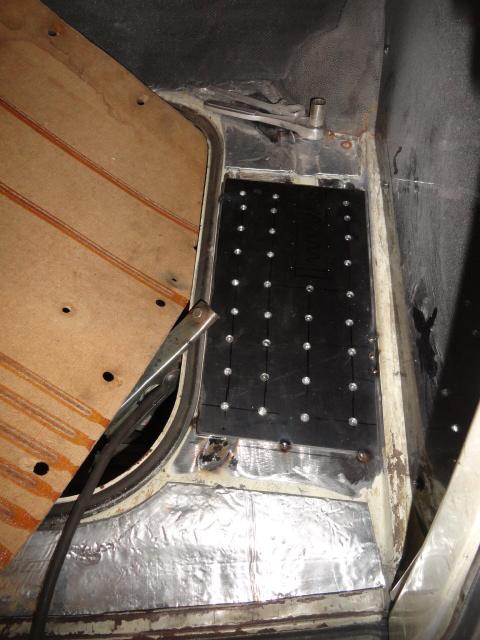
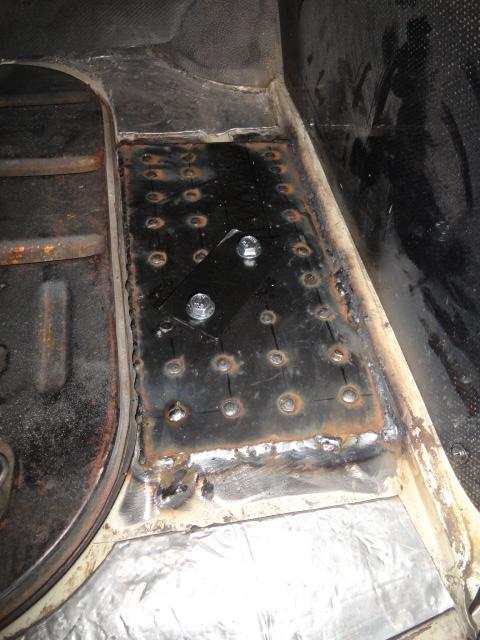
Posted by: mgp4591 Aug 28 2015, 01:09 AM
I've been a little out of the loop lately but are they still holding a Speed Week this year? I know alot has been canceled so it wouldn't surprise me if it didn't go on - some folks say yes, others say no...
Posted by: aircooledtechguy Aug 28 2015, 06:15 AM
I've been a little out of the loop lately but are they still holding a Speed Week this year? I know alot has been canceled so it wouldn't surprise me if it didn't go on - some folks say yes, others say no...
The two events put on by SCTA (Speed Week and The World Finals) have both been canceled due to rains and poor salt conditions. The World Finals is not until October, but they already canceled that one a couple weeks ago due to a mud flow that covered part of the long track. They won't hold an event without a long track.
The USFRA's event is World Of Speed and they are still monitoring the conditions. If they can get one or two short tracks out of whats there and if the salt is in good shape, their event is on. I'll find out if we're going NLT Sept 1st. (fingers crossed)
Potash mining has really decimated the salt flats. There used to be a layer of salt 14" thick over most of the flats. Now after 70+ years of mining it's no thicker than about 2" but it's usually only 1/2-1" thick. . .
We may be seeing the end of an era if BLM doesn't get their heads out of their asses and begin to actually start managing and protecting the salt.
Posted by: rhodyguy Aug 28 2015, 05:22 PM
Are you running heat exchangers on the 2056?
Posted by: aircooledtechguy Aug 28 2015, 06:27 PM
Are you running heat exchangers on the 2056?
Yes. The 2056 has a set of bus H/E mounted currently since it's my DD. I used to run a set of type4 H/Es but they just didn't give much heat.
Posted by: aircooledtechguy Aug 30 2015, 08:39 PM
I got good news and bad news. . .
Good news: The new race motor that Josh built is in and it sounds GOOOOOOOD!!
https://youtu.be/KUBwnmRAI0Y
Bad news: about 1/2 hour after me and my buddy got it stuffed and hooked up, we found out that World of Speed 2015 has been canceled!! :evil:
Back to the good news, . . . So I've got a full year to get it dyno tuned and fully broken-in. :wink:
Posted by: rhodyguy Aug 31 2015, 07:24 AM
That sounds really good. Nice work josh! Interesting that the HEs will support that large displacement. When does josh get his driver's licence?
Posted by: aircooledtechguy Sep 8 2015, 10:09 AM
I spend yesterday playing with the injection system on the car. I was having some sync issues and it traced back to the hall sensor/36-1 wheel clearance. So I closed that gap a bit and BAM!! I was off to the races!!
I like to test drive on the street outside my shop since it's a down hill coast to the shop if I run into any issues and get stranded. I have to say that Josh nailed this build and knocked one out of the park!! It pulls like a freight train and with the extended reving this motor has, I can now do in 3rd gear what I could do in 4th before!! Needless to say, I was never able to get it into 4th on my test launches 'cause the road just isn't long enough.
It's a great street motor. It's docile and compliant like any stock motor,. . . until you mash the gas!! I look forward to it being fully broke-in since it'll be even more powerful then!! Mario Velotta from www.thedubshop.net is coming to the shop on the 15th for some fine tuning. She's ready!!
Posted by: aircooledtechguy Sep 8 2015, 10:11 AM
That sounds really good. Nice work josh! Interesting that the HEs will support that large displacement. When does josh get his driver's licence?
No HE on this motor. Just the 4 into 1 header into the banana can. I'll be on seat heaters ONLY with this motor installed.
Posted by: aircooledtechguy Sep 26 2015, 03:37 PM
While I await a set of push rod tube extensions (the cause of the leak), I'm relegated to only short trips around the local area. Still no real tuning opportunities so the tune is rough, but completely driveable. I warmed her up and took my friend for a short jaunt up the street and back so he could feel the new motor compared to the last one.
https://youtu.be/KPTj6_NLhto
Posted by: rhodyguy Sep 26 2015, 04:43 PM
Was that red car @ 1:28 a t-3? Fast car Nate.
Posted by: aircooledtechguy Dec 13 2015, 09:21 PM
Had an acquaintance take some low-res cell phone video of the Squarsche the other night. If you've wondered what a 2.7L Bischoff banana can sounds like on a big-4, here's how it sounds.
https://www.youtube.com/watch?v=Ea7b28DxnoE&feature=youtube_gdata
Posted by: euro911 Dec 13 2015, 10:18 PM
Sounds great
Posted by: Maltese Falcon Dec 13 2015, 10:59 PM
Awesome+innovative square back ,great work !
I was watching some footage of last year's Carrera Panamera down Mexico way. The gal who was the co- driver of a 356 in the 2 liter class, stated that she was running a type 4. Also stated that they kept it below 140 mph as it got "Light" and started lifting. Guess that any aero aids are not allowed
Type 4s in a 356 are a bonified Outlaw as well...quick too 
Marty
Posted by: aircooledtechguy Dec 14 2015, 09:55 AM
Prior to the flex-dam, this car would get noticeably light at around 100-105mph which made things get interesting quick. Now, it's solid at high speeds.
Posted by: Dave_Darling Dec 14 2015, 10:04 AM
What's the high-pitched sound we hear after the car is started? Fan? Alternator belt?
Sounds very nice at speed!
--DD
Posted by: aircooledtechguy Dec 14 2015, 11:03 AM
What's the high-pitched sound we hear after the car is started? Fan? Alternator belt?
Sounds very nice at speed!
--DD
Straight-cut cam gears.
Posted by: rgalla9146 Dec 14 2015, 11:53 PM
I'd like to try running Bonneville some time (bucket list)
I'll try to jet it for the altitude
Do it!!
This guy showed-up last year in his 911.
I don't know what size the motor was (guessing 2.2/2.4L), but it was an MFI turbo engine that sounded like sh*t. For all the money and time thrown into that car, he only ran about 10mph faster than I did (around 105mph). . .
Seriously, I don't think that motor ran on more than 4 cylinders at any given time and they still rolled it up to the line and ran it that way. Personally, I would have been embarrassed/scared to run it sounding like it did.His name is Tom Woodford, from Nevada somewhere. Was from NJ a long time ago.
He owns a 914 6 that is race/rally prepared in tan and red with Hedonism sponsorship all over it.
I think the 6 is or was for sale recently,
Mark Epstein has had contact with him ?
I've never met him.
Posted by: mgp4591 Dec 15 2015, 10:13 PM
Just checked out your video (about time I'd guess!). Wow that's some acceleration! So that's what you're going to run at Bonneville next year? That's gonna turn some heads for sure!
Posted by: Dave_Darling Dec 15 2015, 10:42 PM
He owns a 914 6 that is race/rally prepared in tan and red with Hedonism sponsorship all over it.
I think the 6 is or was for sale recently,
It's been for sale since before it was finished... It started at an absurd price, and has probably gone up from there. But the market may be starting to catch up with it...
--DD
Posted by: jim_hoyland Dec 16 2015, 09:04 PM
I met Tom at the Rennsport Reunion V at Laguna Seca. His car frequently goes to events. Nice guy, has a shop in Winnimucka, NV
Attached image(s)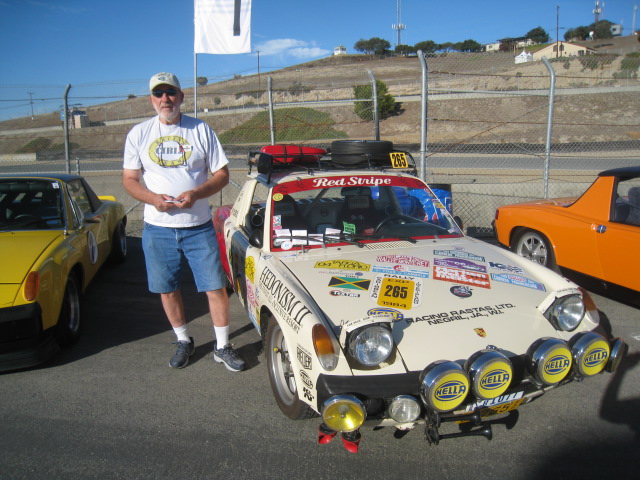
Posted by: Chris H. Dec 17 2015, 07:57 AM
Car needs a couple more lights.
Posted by: aircooledtechguy Dec 17 2015, 09:01 AM
Car needs a couple more lights.
. . . and horns.
Posted by: Cracker Dec 17 2015, 09:12 AM
How cool is that! Your car sounds great! My first car was a '70 squareback that my parents bought new 2-weeks prior to my birth. They gave it to me 16-years later. Best damn heater ever created - it could start fires!
T
Posted by: aircooledtechguy Jan 10 2016, 02:16 PM
January 9th, Josh & I headed down to Evergreen speedway to test & tune at the Auto-X. This was to be our maiden outing with the new motor that Josh built and the stable of extra ponies it has. Other than my poor driving skills, the car performed great and while cold (mid-40s), the weather was PERFECT and sunny. The day was not without it's minor issues though. . .
1. I haven't driven the car in almost 2 months because of the really cold weather and the car currently has no heat. So I forgot to re-adjust the shift linkage and it was a bit sticky going from 2nd to 3rd making it easy to accidentally shift into 5th. This made coming out onto the front straight at the end rather tricky and several shifts there were missed there throughout the day which really effected the lap times. My fault; not the car. Compared to the last time though, my speeds through the start/stop line at the end went up by 15mph with the new motor, so the acceleration is really improved.
2. I do much of my "tuning runs" at night since they are not exactly legal. I found out today in the light of day that above 4.5-5K rpms, my exhaust vacuum breather system pulls a lot of oil vapor directly into my muffler. It's like flipping on the "007 smoke screen". . . :evil: Embarrassing, but not a big deal and a simple fix. I never noticed that was happening until I drove it hard in the day light. Later in the day, I removed and capped the exhaust vent, and Viola!! No smoke. :roll: :wink:
3. I have got to migrate more weight to the front and put this gal on a diet in the rear. My Lexan windows are going in. I also need to add front camber and a new set of front tires. I found that stiffening the front made under-steer worse, so I softened-up the Konis in the front and she began to hook better in the corners.
I did have a couple incidents that were a bit scary. The R-rear tire drifted out on a corner on one run when Mario Velotta from the dubshop.net was riding with me and it hit a massive pot-hole on the edge of the track. At first I thought I had blown a tire or at the least bent a rim with the impact. Luckily no damage to anything. #-o If you want to see his video he shot of the run, check out The Dub Shop facebook page. . . :oops: The other incident was on the next run and I was giving Rob a ride. Apparently I need to add a handle for passengers to hold onto. He thought the red strap on the door would be a good place to hold on. He quickly opened the door while going through the slalom section. So every left-hander, the door would fly open with him holding onto the loop wondering what was going on. I had a short straight after a 90degree right-hander and told him "let go of the strap" while leaning over and shutting the door. We laughed our asses off about that the rest of the run!!
Here's a few shots from the day with videos to follow. . .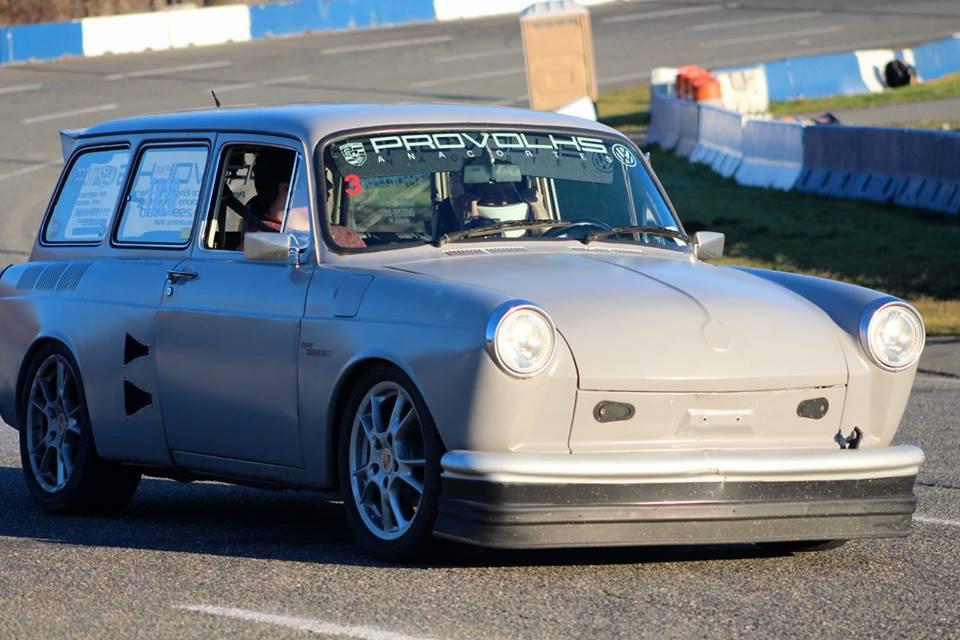
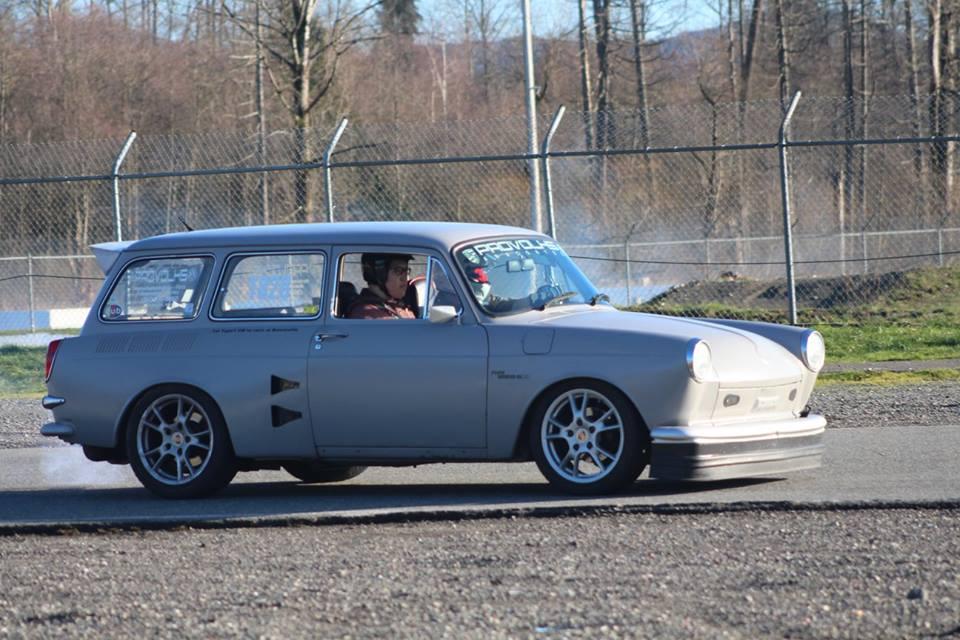
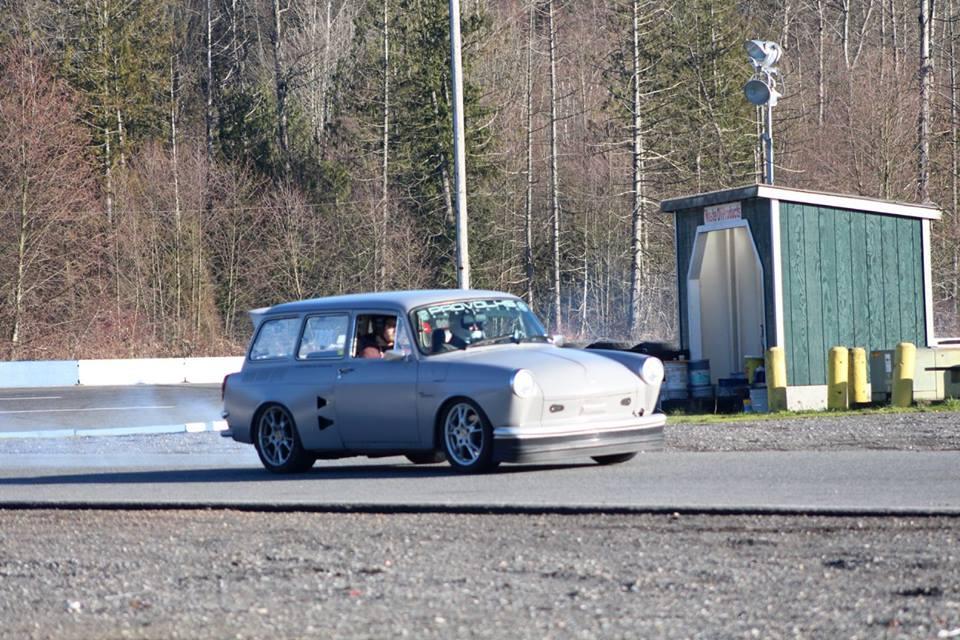
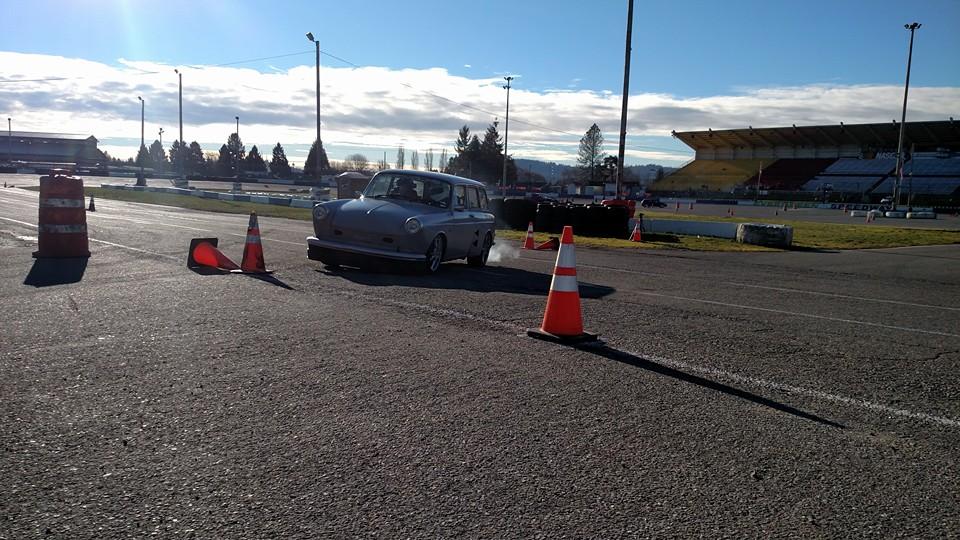
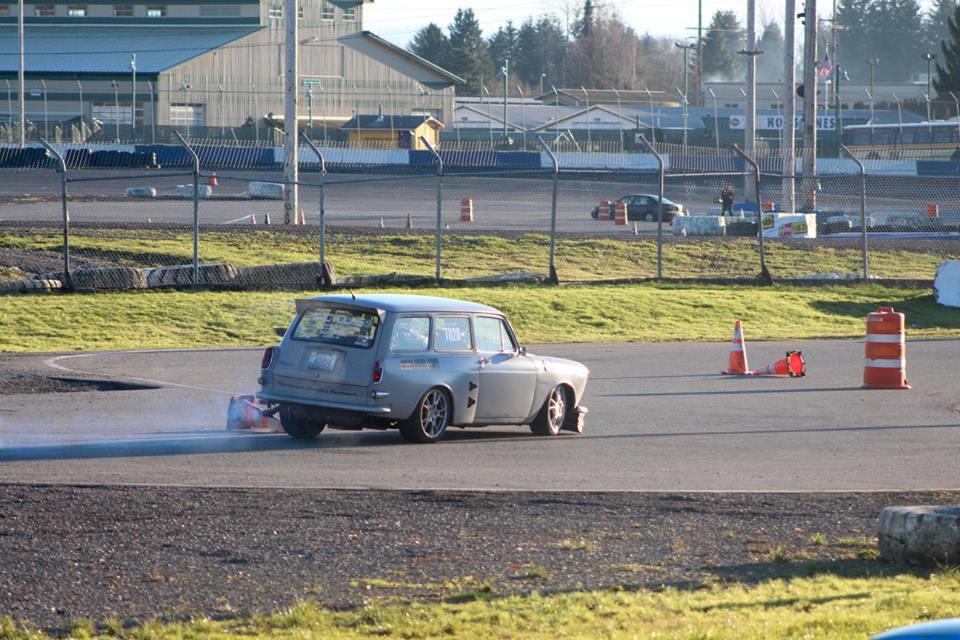
Posted by: aircooledtechguy Jan 11 2016, 12:02 PM
I don't think it gets any closer than this. . . When I drifted the R-rear off the track, I took a hit to the deep sump and spun it about 15 degrees!! I am freakin' AMAZED that this thing did not/is not leaking!!! The wheel faired just fine in the ordeal. A skid plate may be in order or fast-tracking the dry sump system!!
Here's a short video. The rear view in the middle is the run I drifted into the hole at the track edge. . .
https://www.youtube.com/watch?v=wTaFLv9bKuU
Here's the damage. I dodged a bullet on that one!!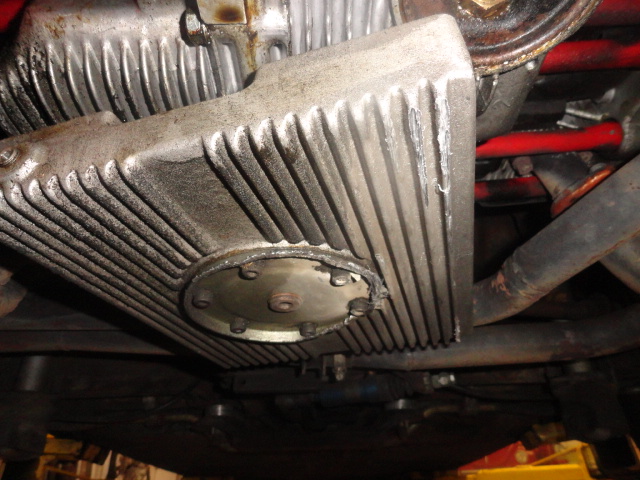
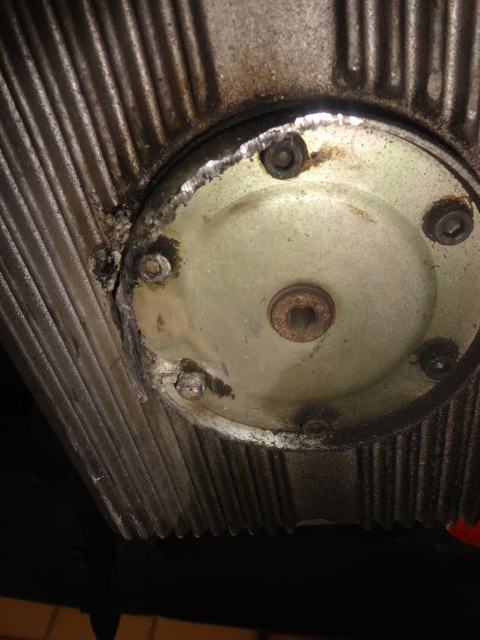
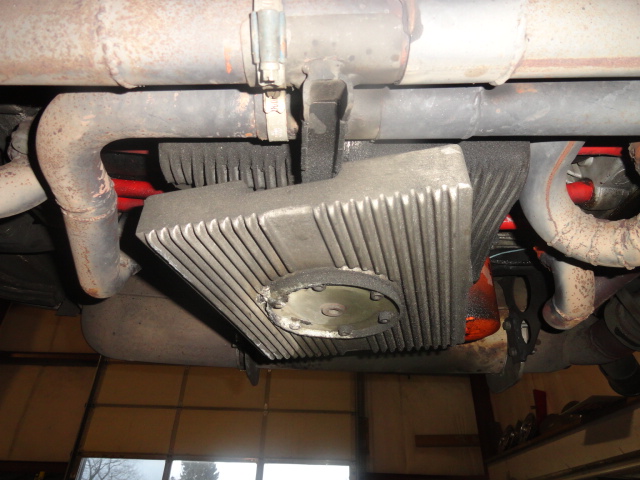
Posted by: strawman Jan 17 2016, 08:57 PM
Nate, I love the wagon and enjoy updates on your build. However, I think you might need a stiffer front anti-sway bar... looks like you're about to rub the door handle off!
Posted by: rdauenhauer Jan 17 2016, 09:07 PM
What's the high-pitched sound we hear after the car is started? Fan? Alternator belt?
--DD
Straight-cut cam gears.
Tell us more. Why did you go that way during your build vs Helical and what did you hope to achieve (besides the added noise)?
Are you happy w/choice or have regrets?
Posted by: aircooledtechguy Jan 17 2016, 11:33 PM
What's the high-pitched sound we hear after the car is started? Fan? Alternator belt?
--DD
Straight-cut cam gears.
Tell us more. Why did you go that way during your build vs Helical and what did you hope to achieve (besides the added noise)?
Are you happy w/choice or have regrets?
Reduced parasitic loss compared to the stock helical gears = less HP required to turn the cam against the dual springs. This will enable more HP to get to the ground. Another benefit is that it does not load and wear the thrust surfaces on the cam bearings.
Nate, I love the wagon and enjoy updates on your build. However, I think you might need a stiffer front anti-sway bar... looks like you're about to rub the door handle off!
The sway bar I have is a 1" hollow bar with 28 way adjust-ability. Currently it's about in the middle. I will be using a slightly stiffer setting next time. There is a balance though between stiff/soft and under/over steer.
Posted by: aircooledtechguy Feb 8 2016, 11:21 AM
Spent another fun and exciting day at the track auto-X'ing the Squarsche. For those of you PNW guys who actually *DRIVE* your cars, this is a great place to learn car control and it's only $50!! Since my last outing I had repaired the sump, changed over to Mobil-1 full synthetic oil, moved the rev-limiter up from 5.6K to 6.5K, added 2 degrees of camber and re-set the toe on the front and beefed-up my left rear engine mount area since it had begun to crack like the right side did earlier (I knew that was coming).
These mods (mainly the camber/toe adjustments and the rev limiter) helped shave almost 2 seconds off my times. The track was similar, but they changed the gates through the slalom section which tested my sight/muscle memory/control a lot. Read that: I blew a lot of gates in the morning getting my rhythm on the course. It never rained, but was cool (mid 40F low 50s) and was clear by the end of the event; PERFECT!!
With a real set of sticky tires, I could probably shave another 2-3 seconds off my times easy. The tires I have now are almost bald on the fronts (maybe a 1/16"<) and just need to be wider & stickier to keep the rear-end under control. I never thought 235/40s would not be enough, but I think I'm going to have to step-up to 225/45 & 255/40s when I buy the sticky set. But better tire$ will have to wait unfortunately. I love going to Evergreen Speedway for these events. We had 71 cars show-up in total and i still got 17 runs. It's all about the seat-time. :twisted: Here's a couple shots from Saturday's action.
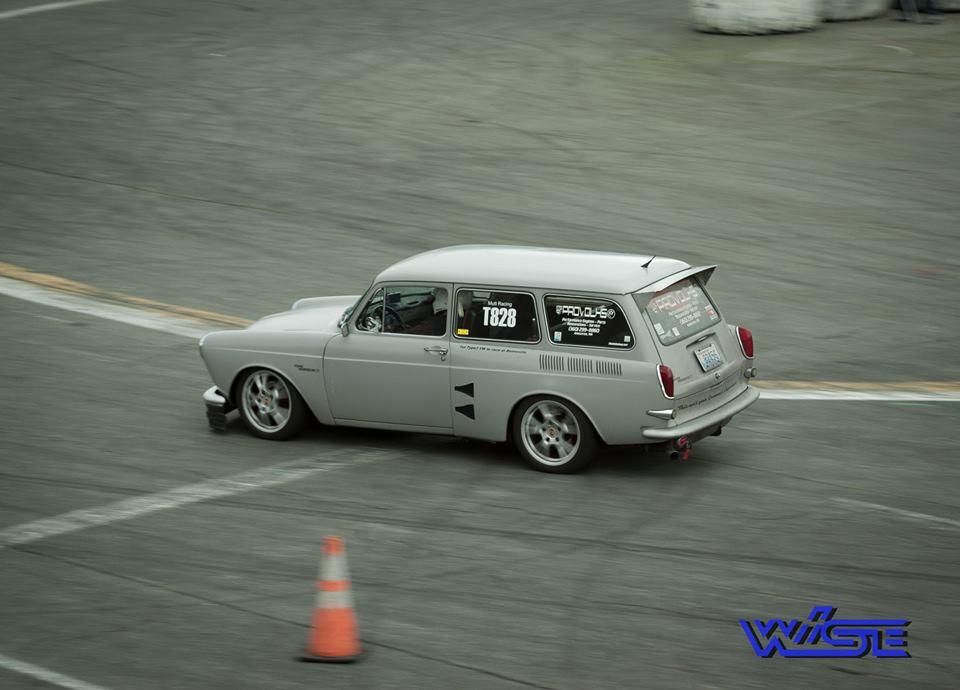
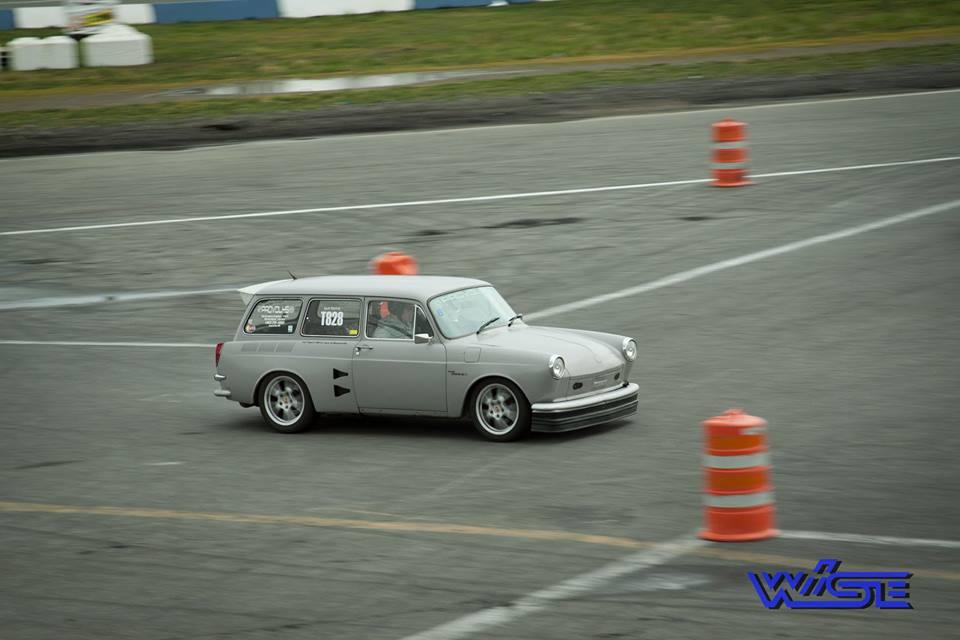
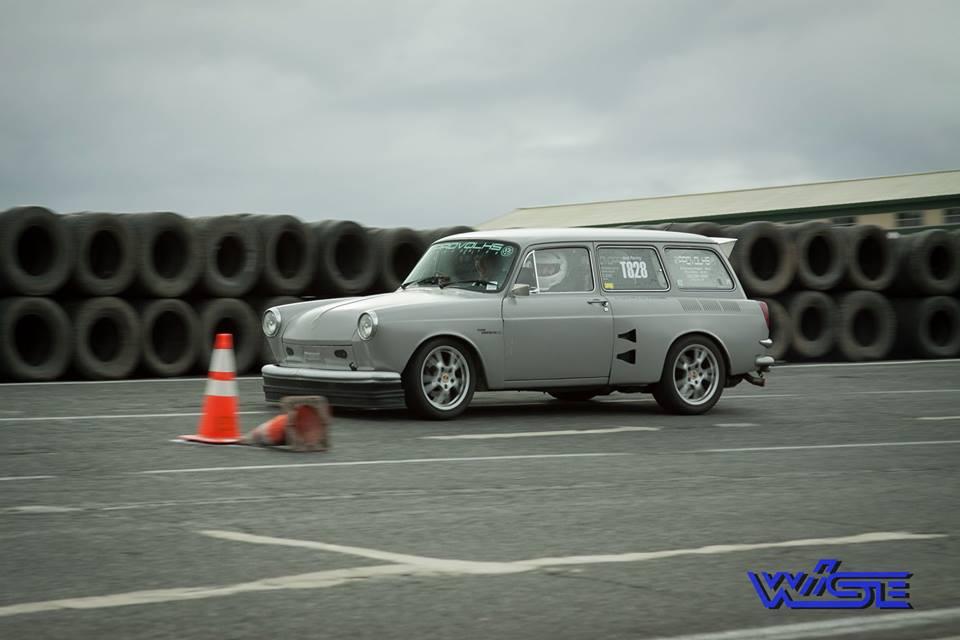

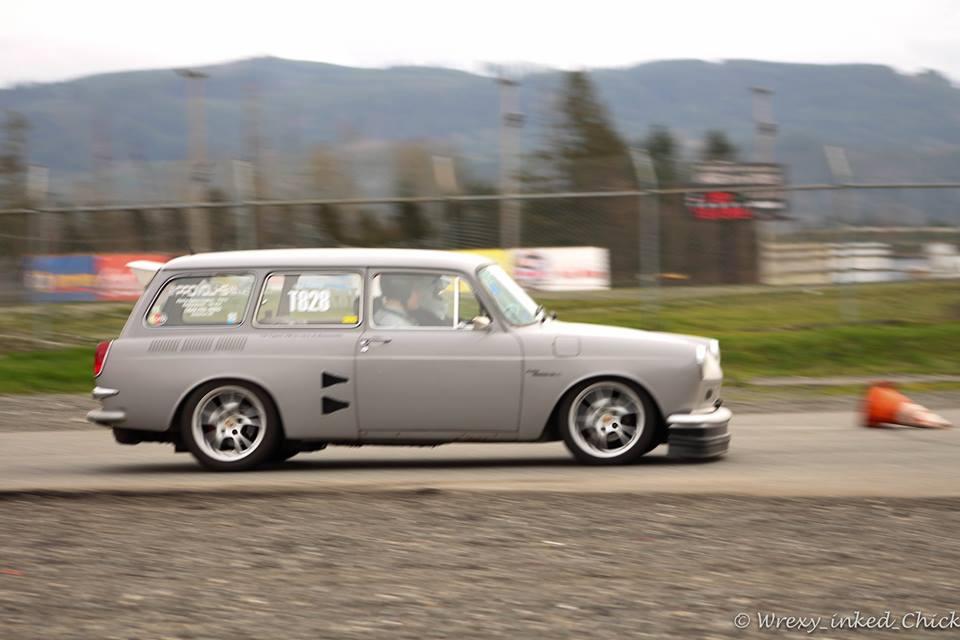
Here's a video of one of my cleaner, faster runs and also a not-so-clean one ride-a-long with Craig M.
https://www.youtube.com/watch?v=ZmbXN7MYIdY
Posted by: aircooledtechguy Mar 2 2016, 09:10 PM
Just got word from Mario Velotta from thedubshp.net that I'm scheduled for a dyno session on Friday!! WooHoo!! I finally get more than an in-car tune and I'll get the fuel and spark properly tuned. It's going on an eddy current dyno so we will be able to get it tuned under virtually any load/RPM combination and not just WOT. It's really close now but I need to get the acceleration enrichment dialed in better especially with the muffler off.
Tomorrow, I'm installing a switch and wiring that I'll need to start using what's called "table switching" What this will allow me to do is when I go to the track and pull off the muffler and install the straight pipe, I can flip that switch and the Megasquirt will switch to a completely different VE table (and possibly spark & ARF table, but I can't remember exactly), so with that loss of back pressure, the motor will be perfectly tuned for it. Then when I replace the muffler, I can switch back to a street tune that's optimized for the added back pressure of the muffler.
I'll also be adding launch control switches too to aid in getting off the line better.
^^^^^^^^^
That's me doing the happy dance
Posted by: mgp4591 Mar 2 2016, 10:39 PM
ARF?? So you're saying it will be a dog? After all the work you've put into this build it oughta scream like a banshee once you get that AFR figured out! Finally put down some real numbers and hit Bonneville running great!
Posted by: JRust Mar 2 2016, 10:45 PM
I can't wait to see this in person finally at WCR Nate! So damn cool
Posted by: KELTY360 Mar 3 2016, 12:13 AM
That's me doing the happy dance
Oh man! Some things can't be unseen...even if they're just mental pictures.

Posted by: aircooledtechguy Mar 3 2016, 08:18 AM
That's me doing the happy dance
Oh man! Some things can't be unseen...even if they're just mental pictures.
So,. . . You're saying to DO fantasize about about big, ugly, middle-aged guys and what sets you off is seeing a banana in a sailor hat?????
I still like hanging out with you.
Posted by: KELTY360 Mar 3 2016, 12:26 PM
That's me doing the happy dance
Oh man! Some things can't be unseen...even if they're just mental pictures.
So,. . . You're saying to DO fantasize about about big, ugly, middle-aged guys and what sets you off is seeing a banana in a sailor hat?????
I still like hanging out with you.
See...this is the problem...

I'll never get to sleep again.
Posted by: aircooledtechguy Mar 20 2016, 12:43 PM
Yesterday I headed down to Ozzy Motorsports for a dyno day event they were having. Pretty cool time. It was a very un-nerving experience though since one of their shop yahoos had to operate the car on the dyno and not me. I've only had my son and 2 of my closest, most trusted friends ever operate my car and I was in the car with them. . . Anyway, it passed pre-run inspection no problem and they got it strapped-on.
It laid down about what I thought it would. 150 RWHP with a calculated 180+/- at the crank. I ran it with the muffler removed and the straight pipe on. Since the dyno was in the center of the shop, it was freaking loud!! 6500 rpm goodness. . .
https://www.youtube.com/watch?v=gO5z8WabXZ8
https://www.youtube.com/watch?v=gO5z8WabXZ8
Posted by: messix Mar 20 2016, 03:08 PM
nice
Posted by: KELTY360 Mar 20 2016, 04:24 PM
Sounds like about 120 on The Salt to me.
Posted by: aircooledtechguy Mar 21 2016, 07:22 AM
Sounds like about 120 on The Salt to me.
Exactly! Must force-feed, must force-feed. . .
Posted by: messix Mar 21 2016, 07:45 PM
60lbs of bottled n2o
Posted by: aircooledtechguy Apr 19 2016, 08:44 AM
Yesterday evening the weather was so beautiful around here with temps in the upper 70s, so Josh and I just had to go for a cruise. He's learning to drive a stick, so what better way to learn than with the Squarsche. We traveled the back roads of north Whidbey Island from Oak Harbor down to Greenbank and back enjoying the views. Here's a few shots that will make it easy to see why I live up here in this area. . .
At Flintstone park, Oak Harbor looking toward the Seaplane base: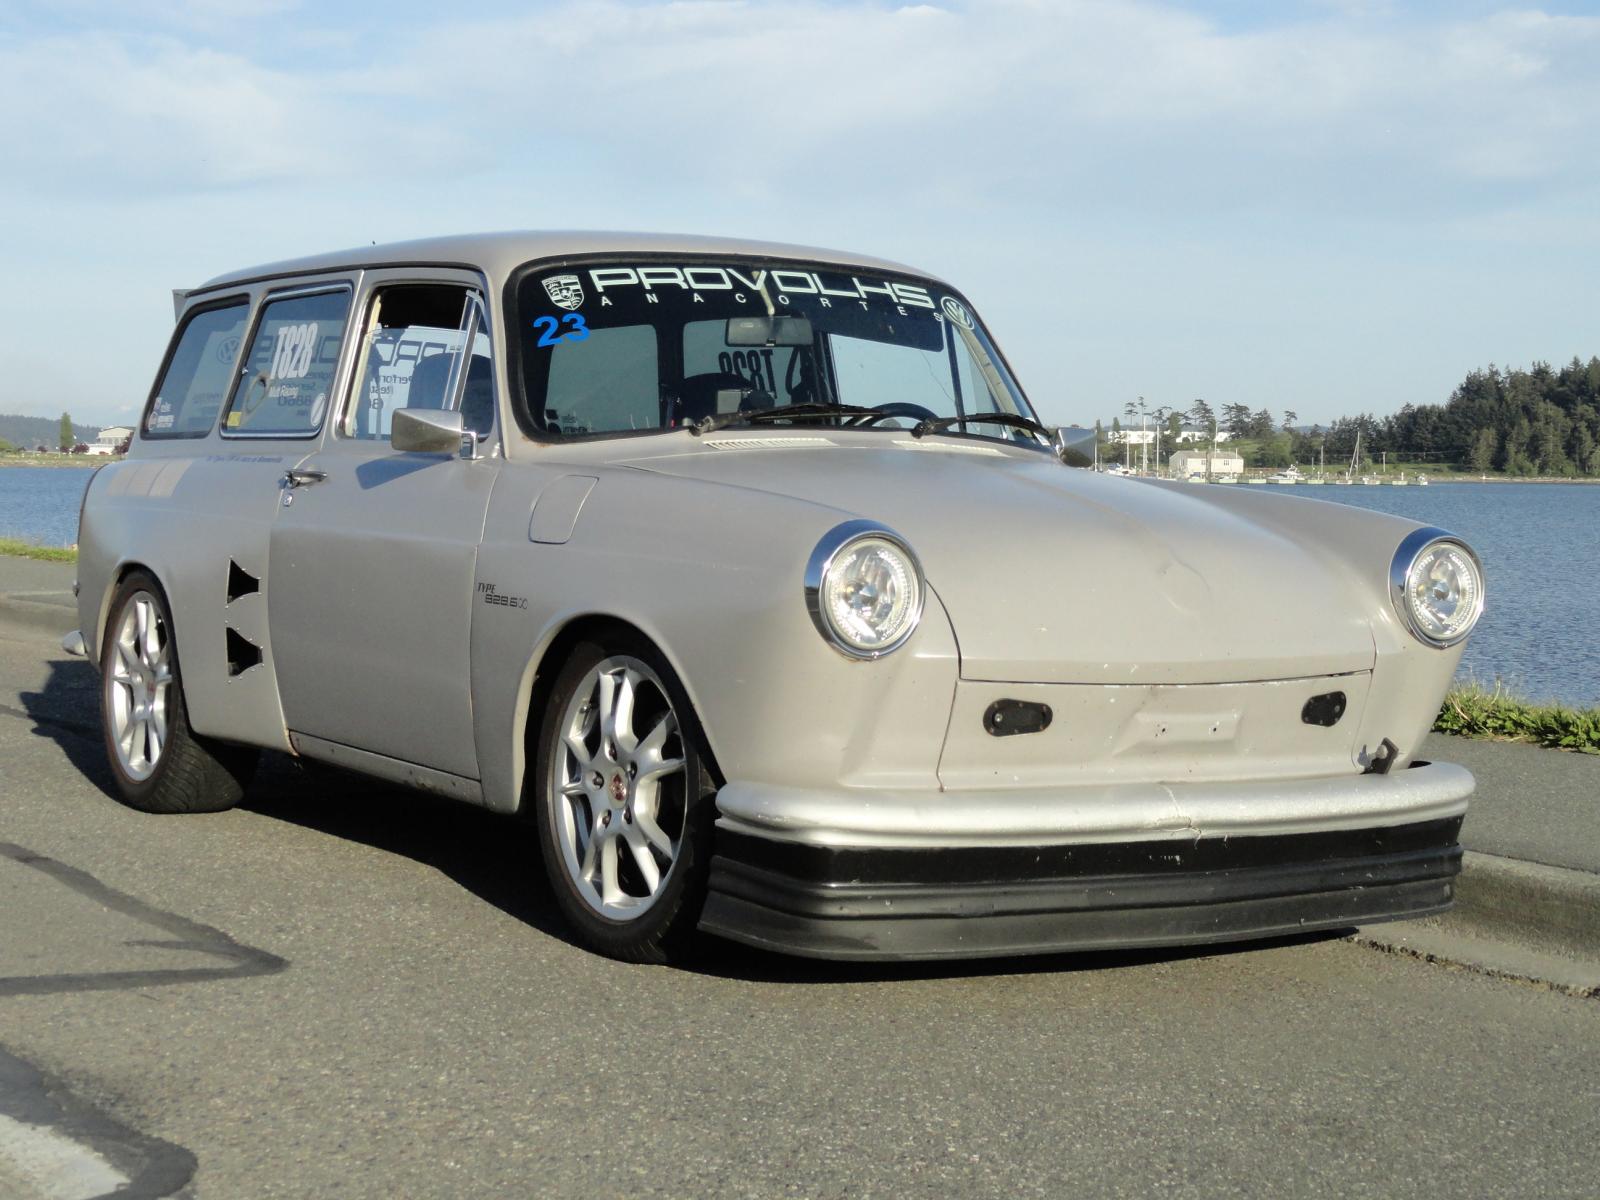
At City Beach in Oak Harbor: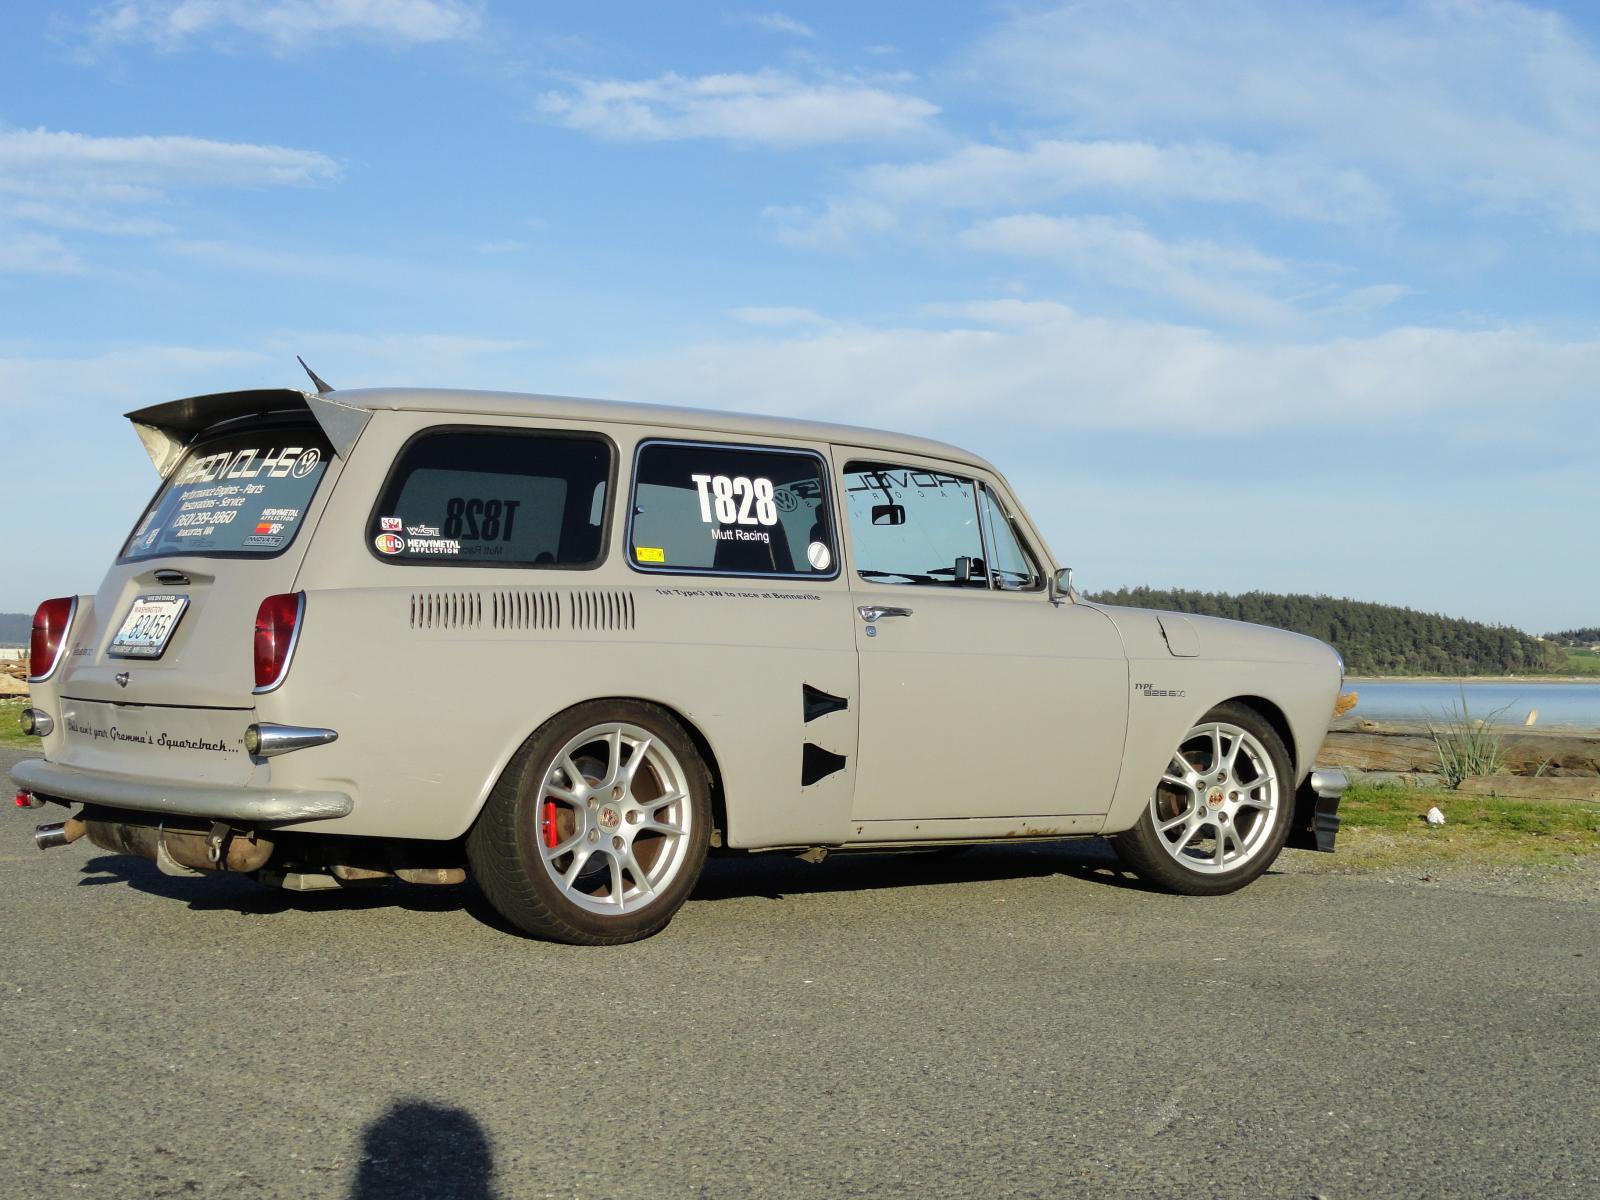
At the north end of West Beach looking toward the San Juan Islands:
At a random park on West Beach Drive: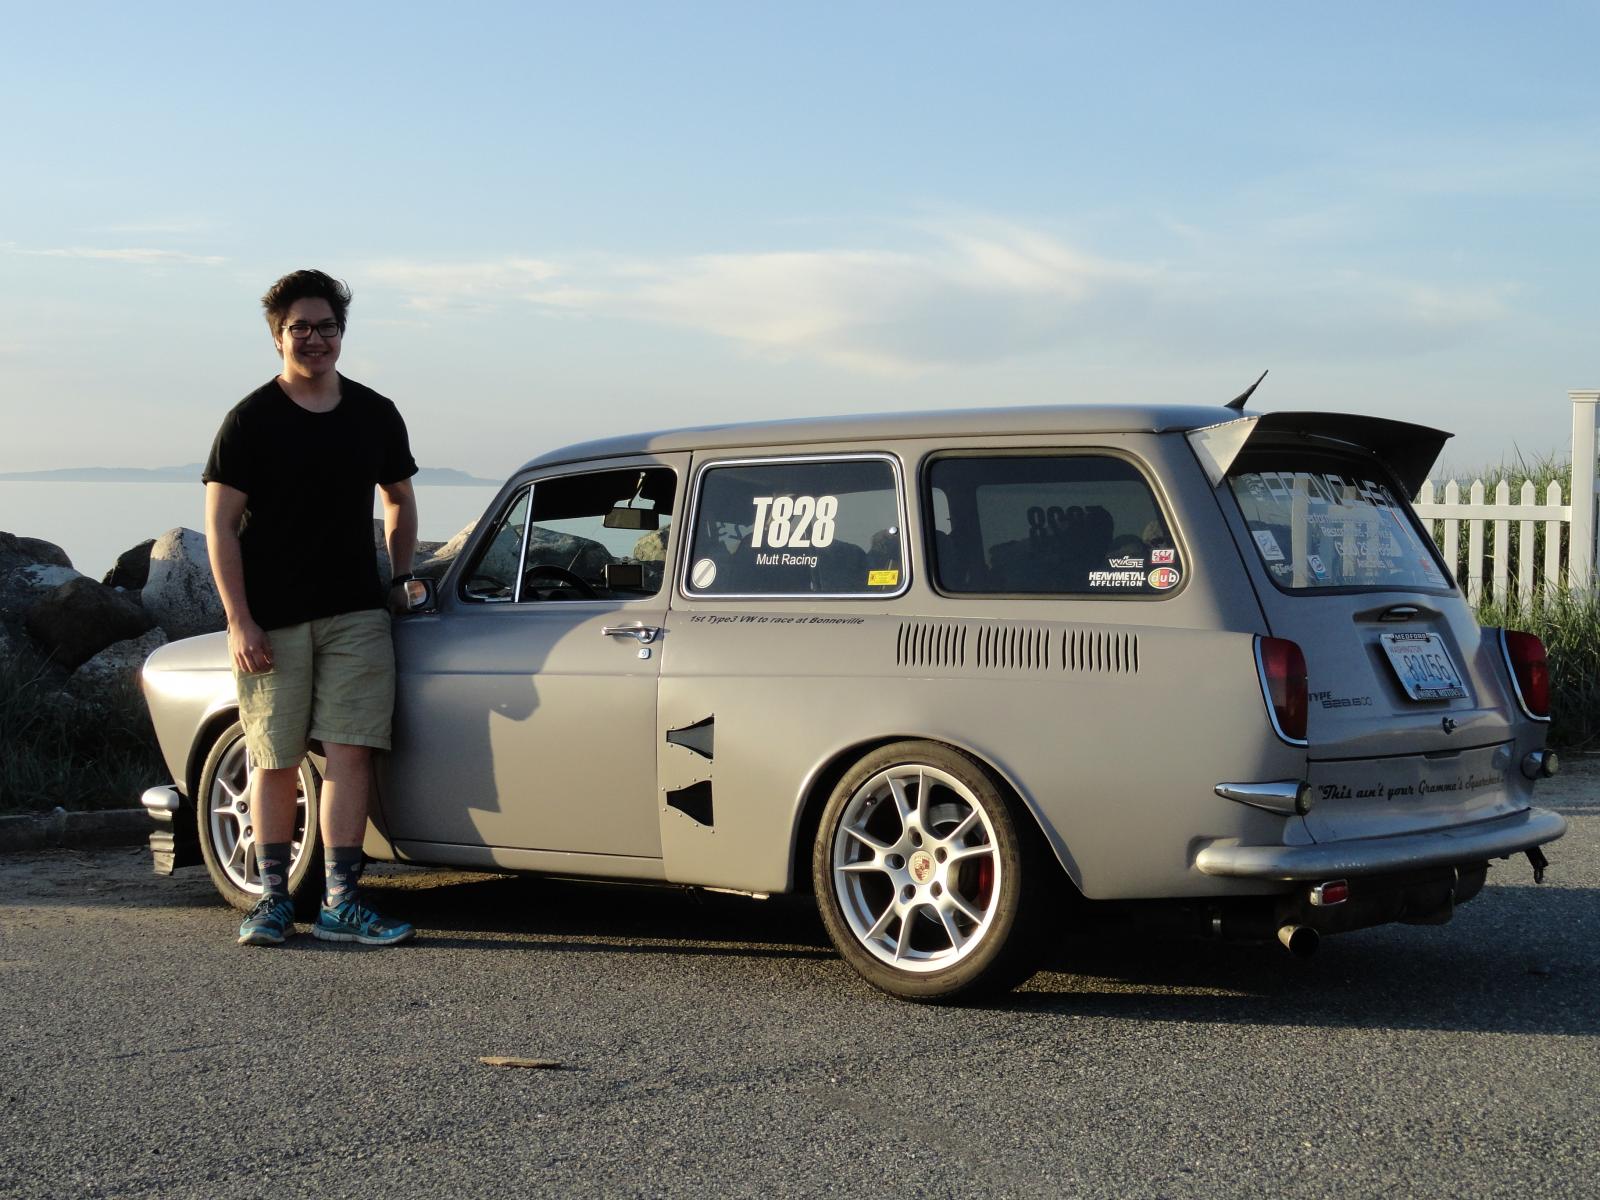
At Ebey's Landing: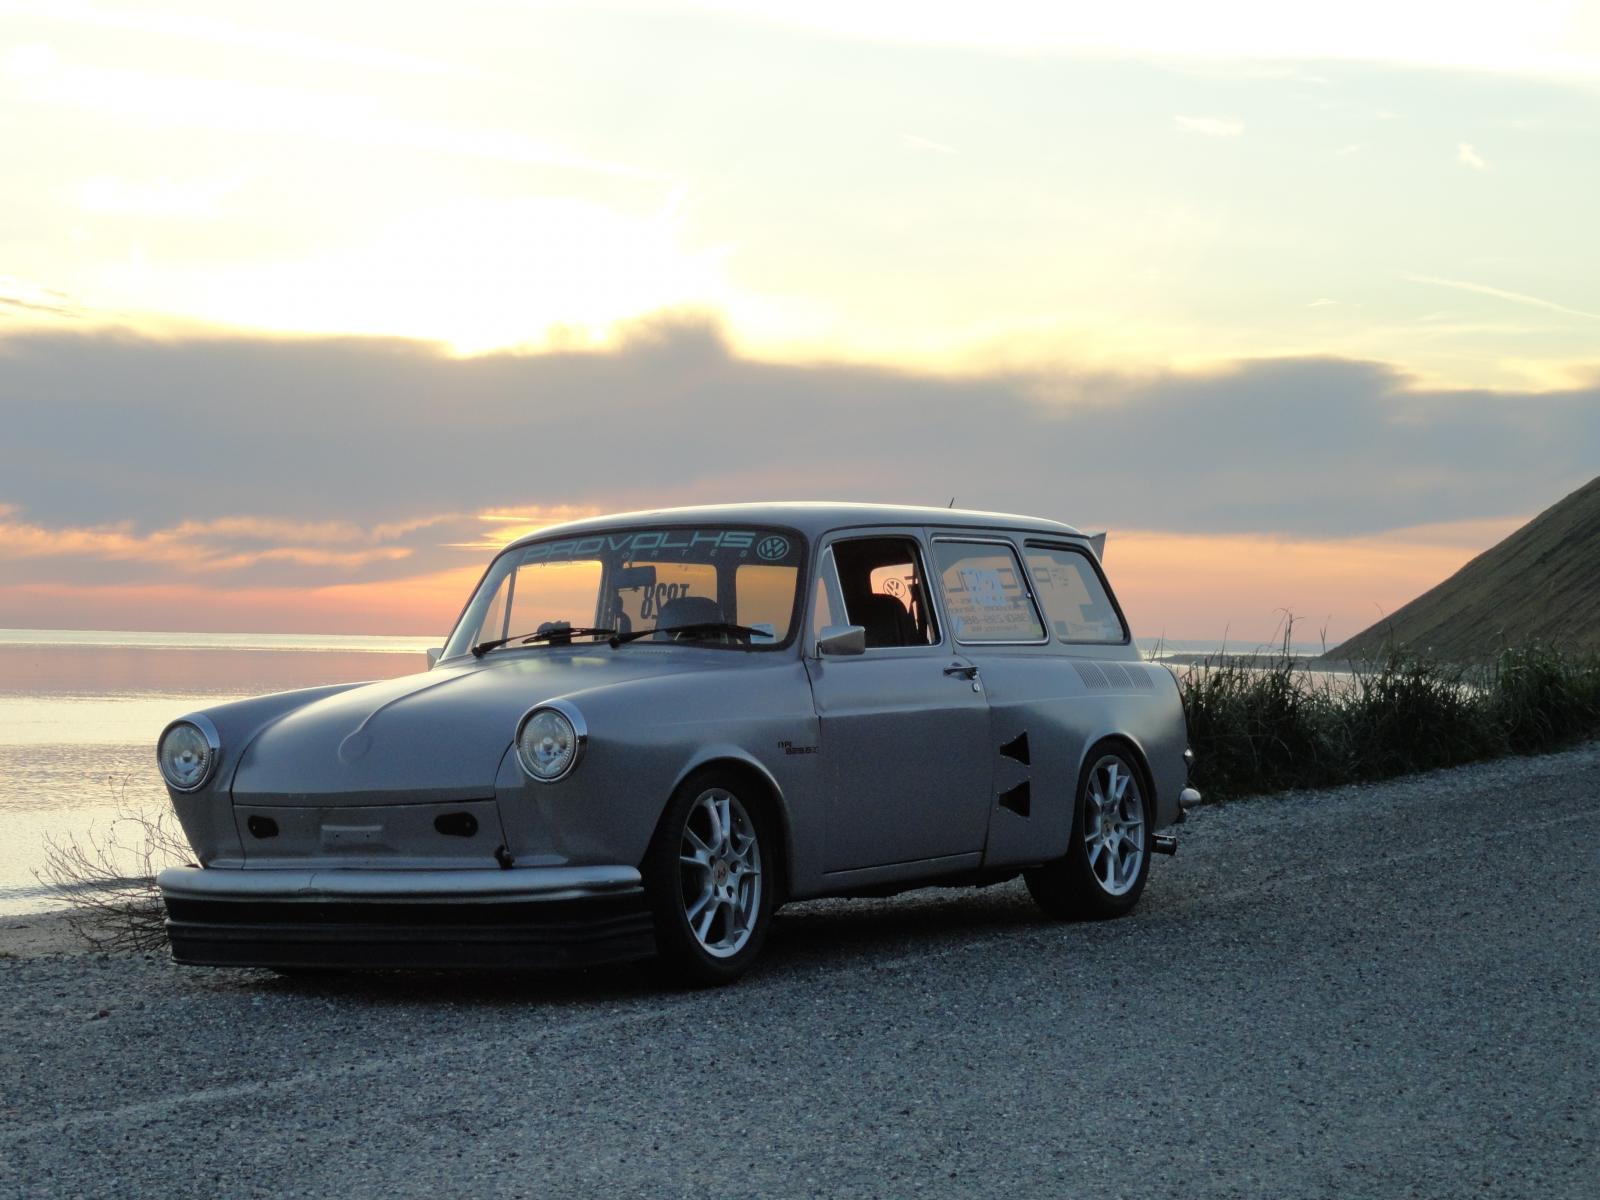
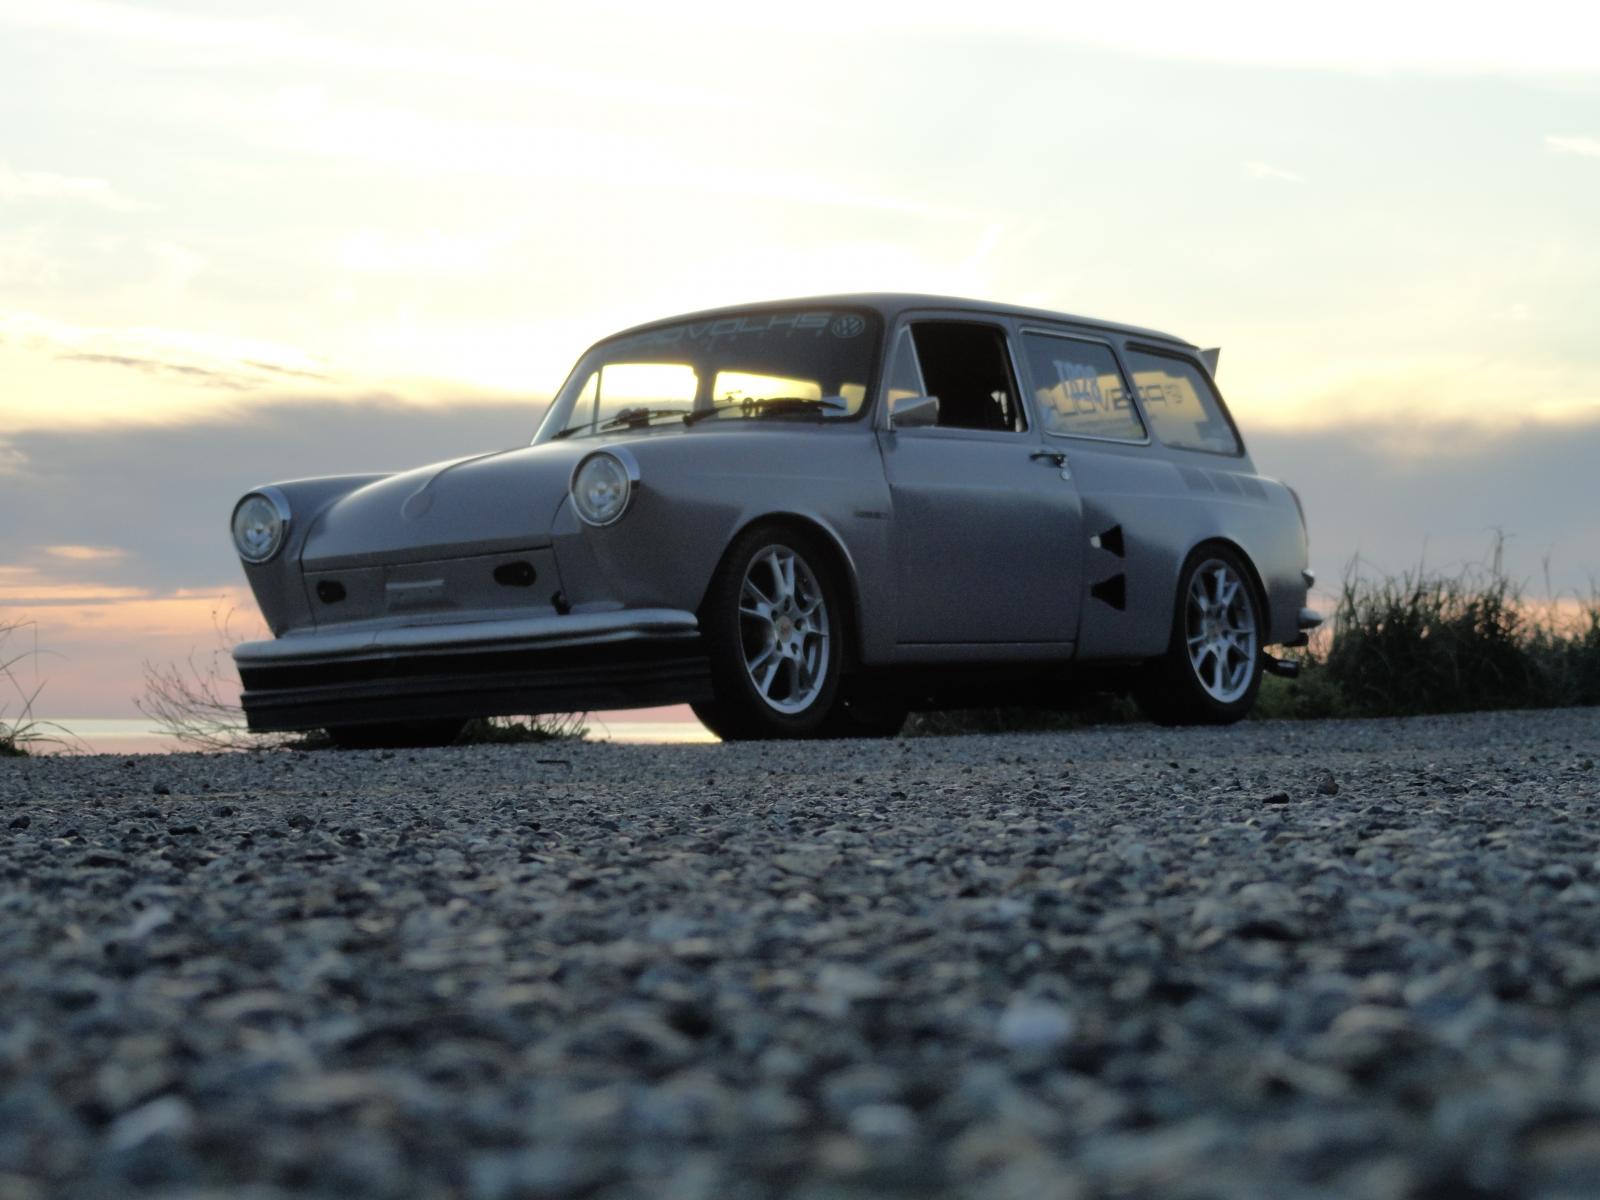
Posted by: KELTY360 Apr 19 2016, 03:26 PM
Wow, Josh is rally growing up. How long before he can take you?
Great scenery BTW. I'm almost ready to fire my rebuilt Subie so I can get the Westy out for some cruising. Maybe I'll come see you during the break-in.
Posted by: aircooledtechguy Apr 21 2016, 01:38 PM
Wow, Josh is rally growing up. How long before he can take you?
Great scenery BTW. I'm almost ready to fire my rebuilt Subie so I can get the Westy out for some cruising. Maybe I'll come see you during the break-in.
Take me?? He probably could now, but don't say nuthin'. I've got him convinced it's never!!
He's right about 6'+ 200# now. . . Man I'm old. . .Posted by: aircooledtechguy Apr 21 2016, 01:38 PM
I doubt that the rear seat will ever go back in. Nobody ever sat back there and you really needed to be either under 5y/o or a double amputee above the knee to fit anyway. . . So I boxed it in.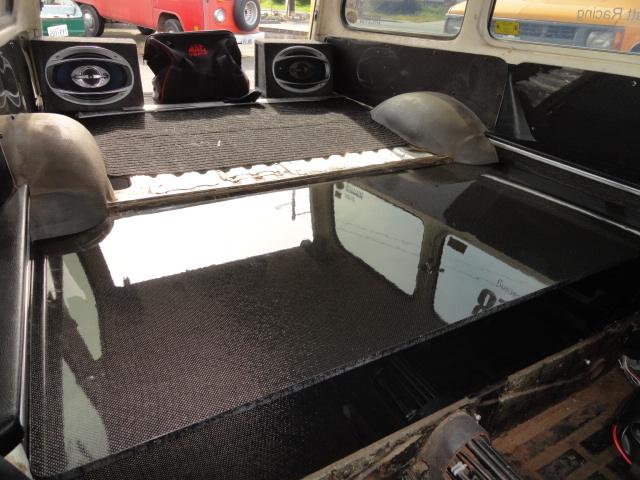
I had enough extra carbon fiber from my door panels to make a matching box. I used 1/2" foam core to give it rigidity and still keep it light. I think the whole box weighs around 6#. Compare that to the seats which are somewhere in the 40-50#+ range.
It's actually not finished yet. I plan to cut about 6' from each side and hinge the middle from the rear to access everything underneath. I have it all one piece for now since I won't have that finished before Springmeet on Sunday.
Posted by: aircooledtechguy Jun 27 2016, 09:20 AM
Josh & I finally got a chance to get the Squarsche out on a true and legendary road course this past Friday. We signed-up for the SCCA Track Night out at Pacific Raceway (it'll always be Seattle International Raceway or SIR to me) and had a great time.
The night was uneventful for us, but was very expensive for a couple folks. A guy in a late model Porsche 911 GT2 skidded off and ruined a set of wheels and tool out his front bumper, left-side radiator and lots under the car. Fixable, but it'll cost him. A guy in an '05 Z-06 Vette right behind me lost it in the first 200 yards (!!) on cold tires and impacted the wall @ around 75-80mph before bouncing across and OVER the other wall and coming to rest in a heap on the drag strip. Paddy-wagon came and he was fine, but the car was a total loss. Anywho. . .
We needed to run this event with our full muffler on which meant we were down a bit on power plus it was running a bit lean @ WOT and you could feel the car hesitating in places, but overall it ran good. I ordered a set of race tires (Hankook Ventus R-S3 V2s), but they didn't come in time for this event, so I ran it on my ragged-out Sumitomos and they worked fine, but I was extra cautious in areas because of them. I was fully expecting brake fade to set-in, but it never did and was very happy about that.
On the last session, I told Josh to hop in and we'll let them tell us that he couldn't ride along,. . . No one did!! So he got to have some fun too!!
https://www.youtube.com/watch?v=CdAGGP_fN4I
Posted by: anderssj Jun 27 2016, 09:29 AM
Josh & I finally got a chance to get the Squarsche out on a true and legendary road course this past Friday. We signed-up for the SCCA Track Night out at Pacific Raceway (it'll always be Seattle International Raceway or SIR to me) and had a great time.
The night was uneventful for us, but was very expensive for a couple folks. A guy in a late model Porsche 911 GT2 skidded off and ruined a set of wheels and tool out his front bumper, left-side radiator and lots under the car. Fixable, but it'll cost him. A guy in an '05 Z-06 Vette right behind me lost it in the first 200 yards (!!) on cold tires and impacted the wall @ around 75-80mph before bouncing across and OVER the other wall and coming to rest in a heap on the drag strip. Paddy-wagon came and he was fine, but the car was a total loss. Anywho. . .
We needed to run this event with our full muffler on which meant we were down a bit on power plus it was running a bit lean @ WOT and you could feel the car hesitating in places, but overall it ran good. I ordered a set of race tires (Hankook Ventus R-S3 V2s), but they didn't come in time for this event, so I ran it on my ragged-out Sumitomos and they worked fine, but I was extra cautious in areas because of them. I was fully expecting brake fade to set-in, but it never did and was very happy about that.
On the last session, I told Josh to hop in and we'll let them tell us that he couldn't ride along,. . . No one did!! So he got to have some fun too!!
https://www.youtube.com/watch?v=CdAGGP_fN4I
Great video--thanks for posting. Looks like you had a great time!
Also looks like the track has stayed about the same over the years (a good thing)--is there still a bump at the end of the long straight going into that left turn?
Thanks again!
Posted by: rhodyguy Jun 27 2016, 09:59 AM
Yes, the rise is still there. The down hill run to the back section still results in carnage too.
Posted by: aircooledtechguy Jun 27 2016, 12:34 PM
Nasty series if bumps @ turn 9 coming onto the straight is a car killer as is turn 1. 5B is sneaky too since you get light @ the apex and there's no real run-off. The Vette lost it on 9 and the GT2 lost it on 5B. I was getting a big light in the ass-end out of 1 which is pucker-time since you're well north of 100mph.
Super good time!!
Posted by: rhodyguy Jun 27 2016, 12:48 PM
In the old configuration, where the course USED to dump onto the drag strip and the drivers had to cross the starting line, I watched a real gt40 get loose on some oil laid down by a previous car. The gt Driver almost saved it. Almost. Broadsided into one of the jersey barriers. The collective groan was sort of funny.
Posted by: 2mAn Jun 27 2016, 04:51 PM
It laid down about what I thought it would. 150 RWHP with a calculated 180+/- at the crank. I ran it with the muffler removed and the straight pipe on. Since the dyno was in the center of the shop, it was freaking loud!! 6500 rpm goodness. . .
thats pretty damn good! I dont want to go back through the entire thread but what are the specs on your motor?
Love the whole concept of this car
Posted by: aircooledtechguy Jun 27 2016, 06:35 PM
It laid down about what I thought it would. 150 RWHP with a calculated 180+/- at the crank. I ran it with the muffler removed and the straight pipe on. Since the dyno was in the center of the shop, it was freaking loud!! 6500 rpm goodness. . .
thats pretty damn good! I dont want to go back through the entire thread but what are the specs on your motor?
Love the whole concept of this car
Thanks. It's a 2316cc (80x96), CW crank, H-beam rods, KB pistons w/ custom Webcam Ported/polished 914 2.0L heads w/ big valves, custom 4into1 header w/ lots of other little details along the way. All built by my son Josh when he was 14 y/o (his first motor build). Induction is MS3X w/ 45mm ITBs LS2 coils w/ fully sequential fuel & spark.
Posted by: aircooledtechguy Jul 28 2016, 09:40 PM
Can't wait!! Hotel reservations are in. The car is running awesome. I've got a final dyno day set to get the race tune dialed to the max. so far, the salt is in great condition. We're going back to World of Speed @ Bonneville September 9th - 13th with the Squarsche to defend our record and raise the bar a lot higher!! My son has to get his driver's license 5 days before we leave. If he does, he'll be racing for the first time co-driving!!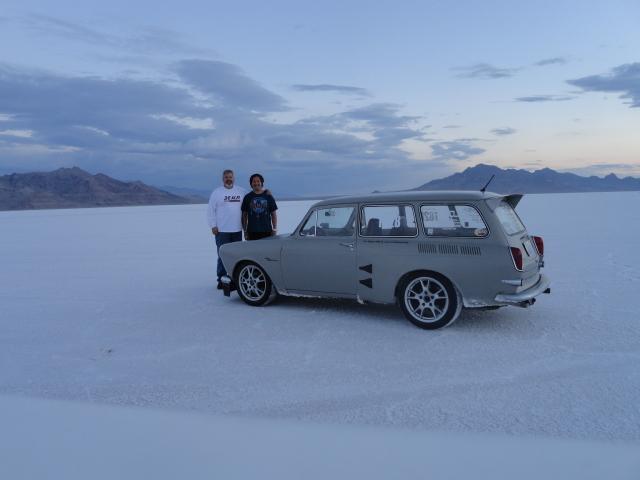
Posted by: mgp4591 Jul 29 2016, 01:53 AM
I've got it marked on my calendar, right after I come back from RRC! It'll be great to see you again - tune it up and give er hell!
Posted by: steuspeed Jul 29 2016, 02:55 AM
Awesome! I love this thing.
Posted by: rgalla9146 Jul 29 2016, 06:44 AM
What a great story.
I'll bet this years event at B'ville will be awesome.
Many regulars have been building and waiting over the last two years just like you.
I hope it exceeds your expectations.
Good Luck, be safe.
Posted by: aircooledtechguy Aug 31 2016, 11:53 AM
Got with Mario Velotta of www.thedubshop.net yesterday and converted my car from MAP based enrichment (speed density) to TPS based enrichment (Alpha N). The reason was that with the higher lift and longer duration cam, the motor doesn't make a ton of vacuum @ idle (about 72kpa)which can make MAP based tuning tricky. He also discovered that my map sensor had been malfunctioning and needed to be replaced anyway. This would explain my going lean @ altitude problem I noticed last weekend on a drive up the mountains, so. . .
He got it dialed-in and it runs awesome!! Instant throttle response at any RPM now. I'll be going to Bonneville this year with about 70 more HP at the wheels over last year (2014). Now I'm off to get a 4-wheel alignment. After that, I just have to pull the passenger seat out and remove the un-necessary stuff out of the car and we're ready for the trip next Thursday. Maybe this year we'll gain entry into the "130 Club"; we'll definitely be a lot faster than 2014!!
Here's the final dyno pull from yesterday. . .
https://www.youtube.com/watch?v=bReOErRtRxE&feature=youtu.be
Posted by: rdauenhauer Aug 31 2016, 12:46 PM
What were you using as a MAP sensor and where was it located?
Posted by: aircooledtechguy Aug 31 2016, 02:27 PM
What were you using as a MAP sensor and where was it located?
I have a board like this with one engine MAP and one atmospheric MAP.
https://www.diyautotune.com/product/mapdaddy-4-bar-map-sensor-with-barometric-correction/#
They are located on my ECU. Of course he had one in stock and soldered it on in minutes and we were back in business.
Posted by: rhodyguy Sep 1 2016, 10:10 AM
70 hp? ZOIKS! I can see a fancy plaque hanging in the shop. Then you make the local news and you have 70 hour weeks. Go get em' Nate!
Posted by: aircooledtechguy Sep 10 2016, 04:24 AM
We made it back down for round 2 @ Bonneville. This year we have the motor we should have had back in 2014. Also, my son Josh will also be driving the car too!! He literally picked-up his drivers license 4 days ago (Tuesday) and will be making his racing debut today out on the black line on the short course. If there's time, we'll re-tech, re-number the car and I'll take a crack at it
Going through tech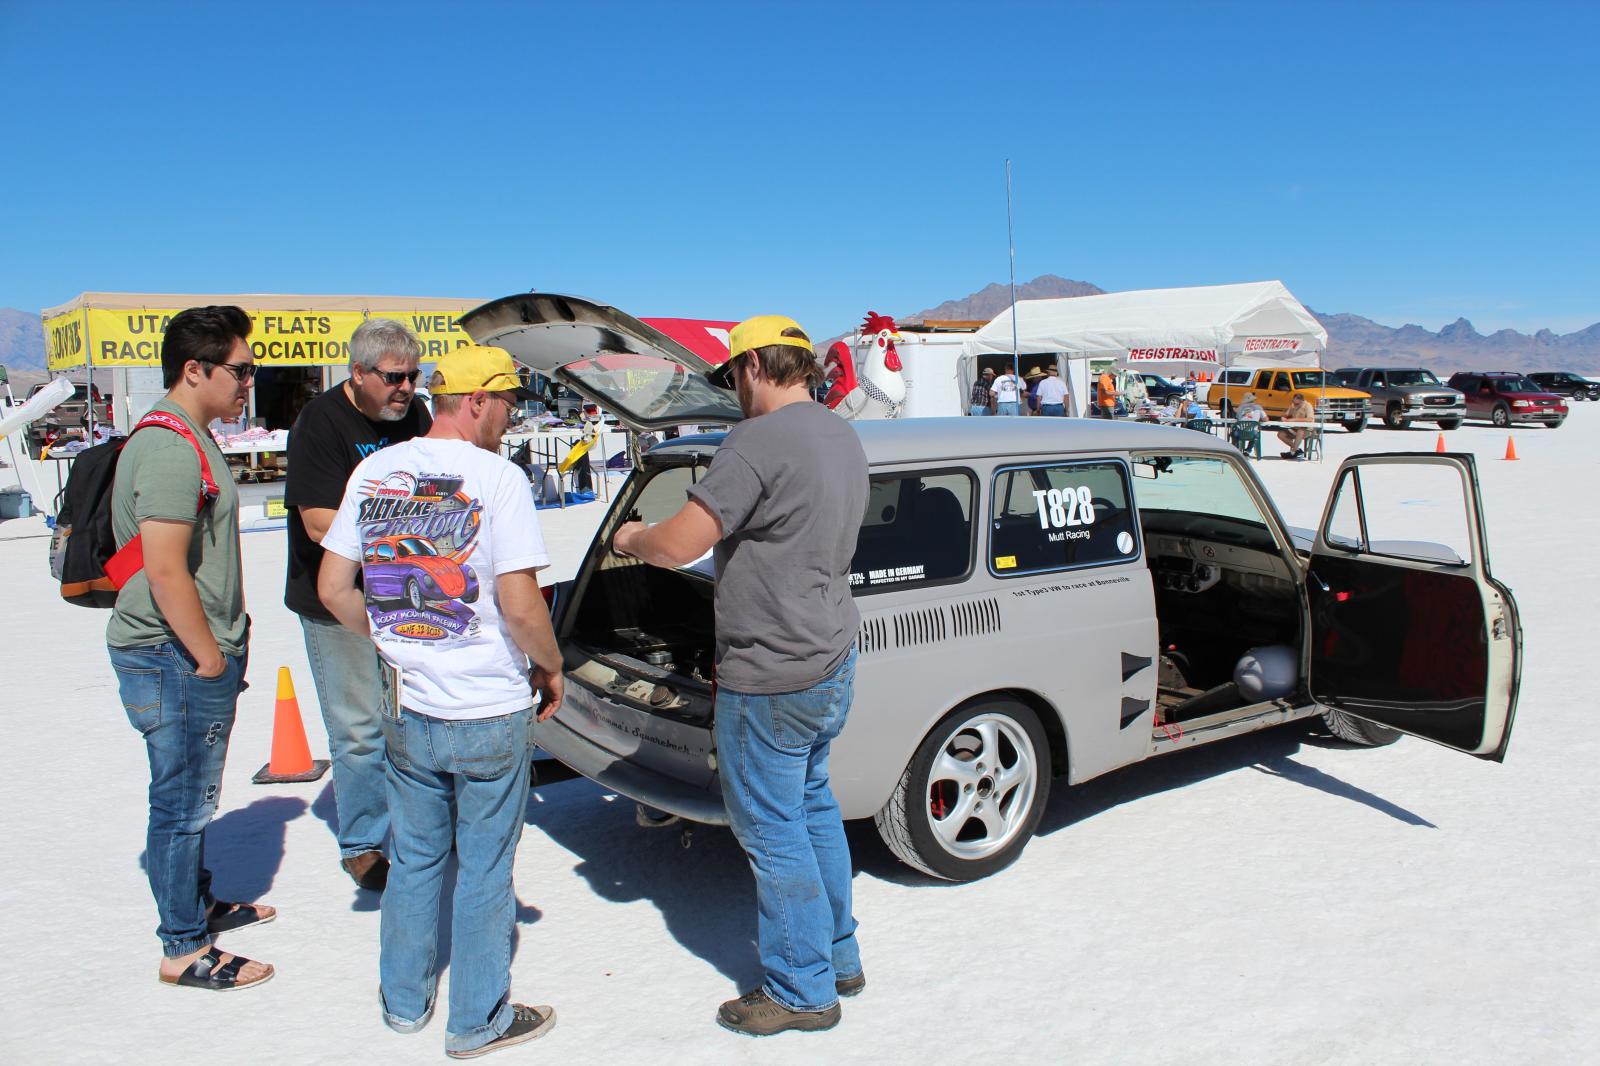
Josh pre-race photos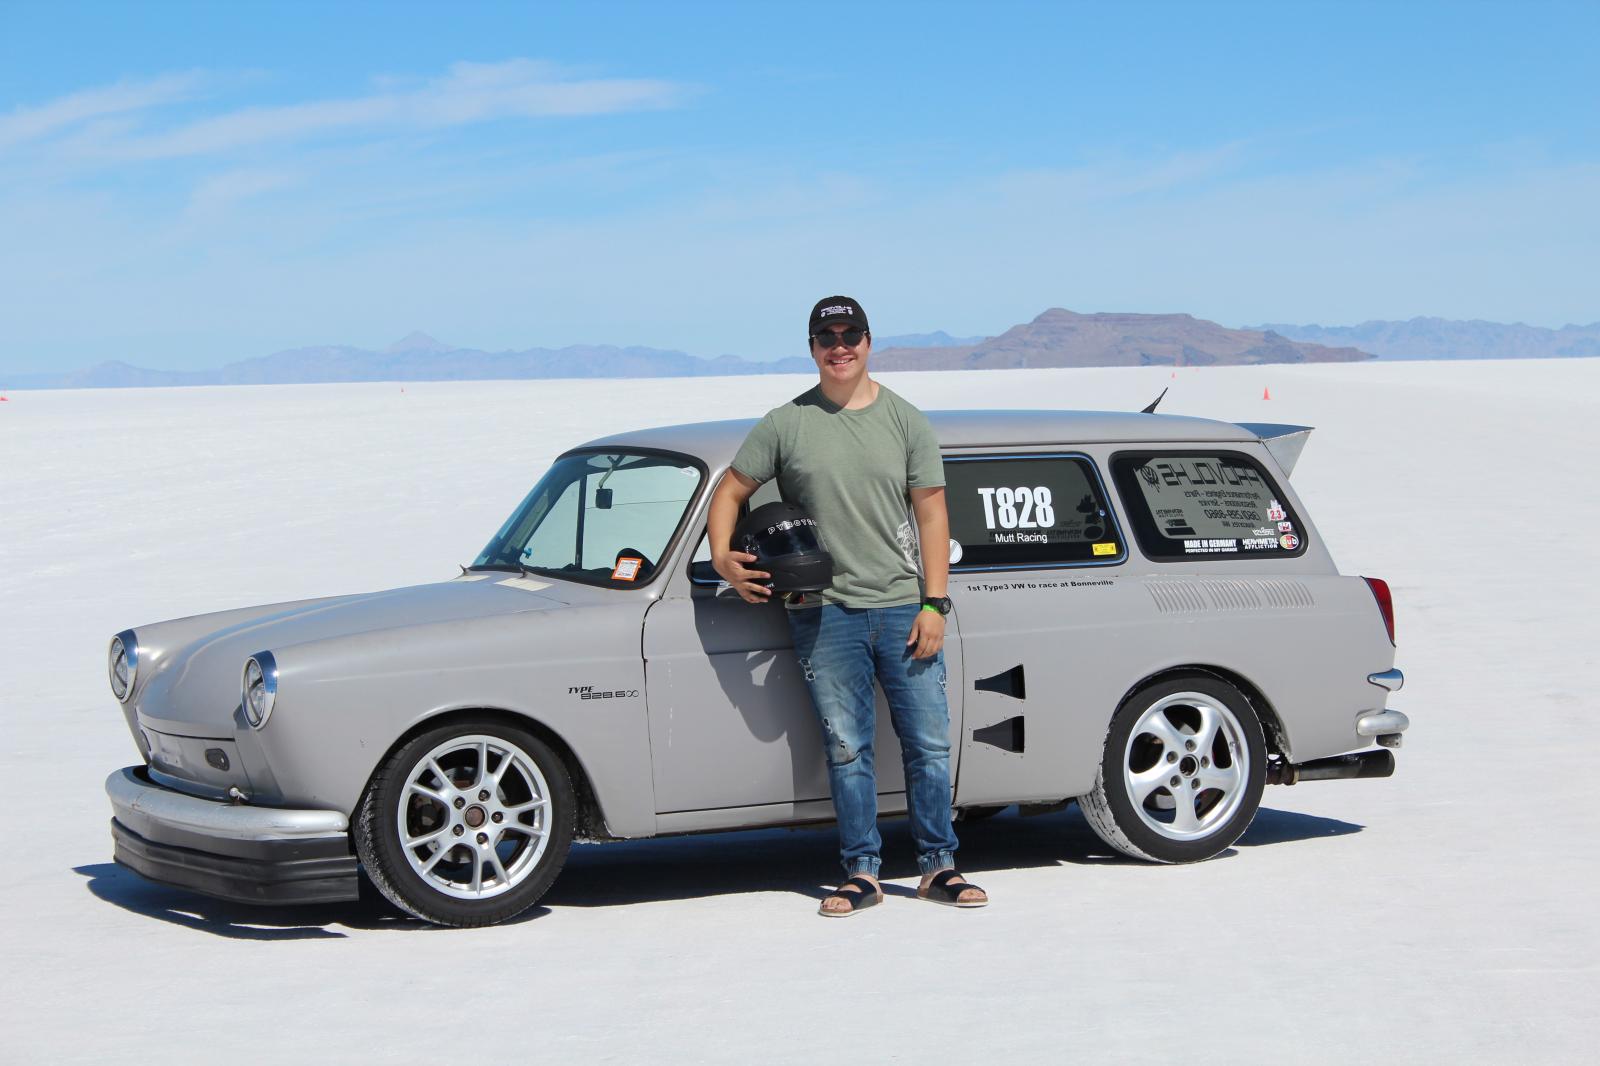
This years crew- Josh, me & Robert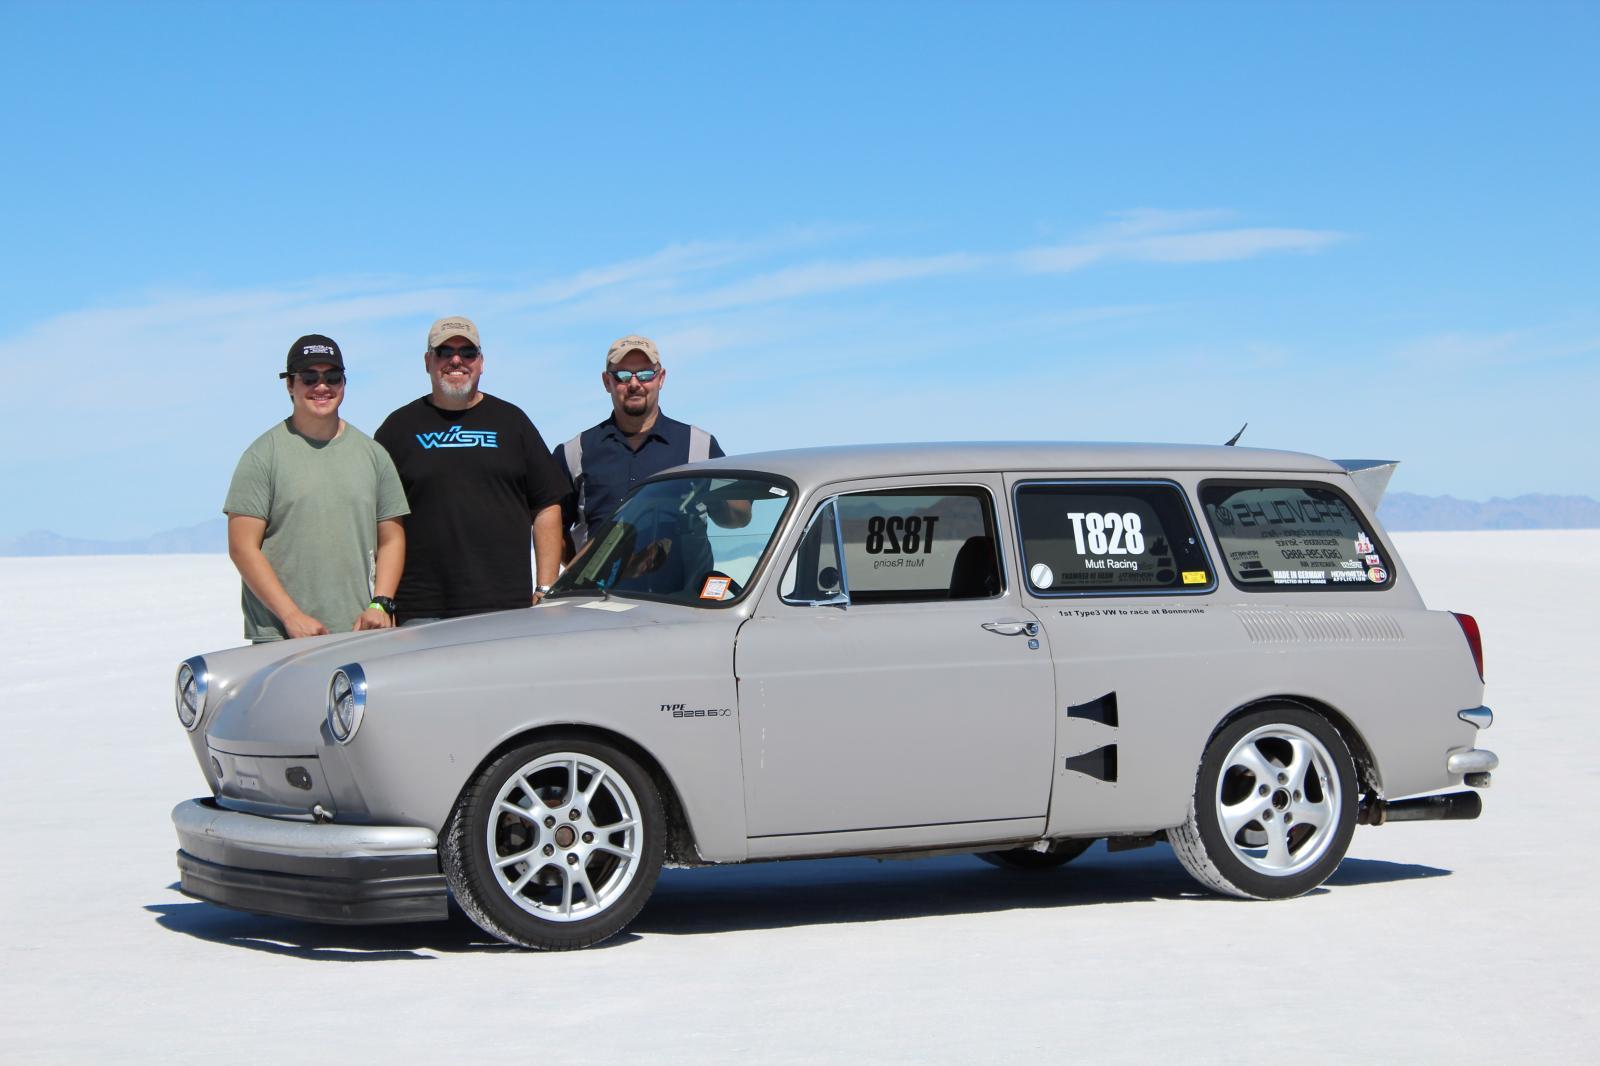
7
Posted by: maf914 Sep 10 2016, 05:16 AM
Nate, Thanks for the great thread and the updates. Good luck.
Looking at these recent photos of your car, it appears there may be a gap between the top of the front bumper-spoiler and the body work. At 100+ mph there might be a lot of air pushing through that gap creating lift and drag. Just a thought.
Posted by: aircooledtechguy Sep 10 2016, 05:49 AM
Nate, Thanks for the great thread and the updates. Good luck.
Looking at these recent photos of your car, it appears there may be a gap between the top of the front bumper-spoiler and the body work. At 100+ mph there might be a lot of air pushing through that gap creating lift and drag. Just a thought.
We're going to be trying it with and without the front bumper/air dam to see which is faster. Last time, we did run our fastest w/o it.
Posted by: aircooledtechguy Sep 10 2016, 06:35 PM
Today was the first day of racing. Josh kicked @$$!! I'm one super proud dad!!
On his first run (the qualifying run), he sandbagged it in 4th gear and ran a 104mph revealing me of my previous 2014 VW Challenge record. It wasn't a clean run, but it was good enough with the new motor.
His second run was mostly clean and the fastest of the day @ 115.4mph!! He's definitely raised the bar. What makes this even better is that he only recieved his drivers license 4 days ago and this was literally the first time he drove any car on his own w/o either me or his mom in the car with him!! I'm super proud of him!!
We're running just a little rich which will hurt power, so I e-mailed a datalog and tune to Mario from thedubshop.net and he's making positive changes to the tune. So tomorrow we should be even better. You just gotta love technology.
I ran my fastest w/o the front air dam and bumper assembly back in 2014, so we're going to run it removed and see how if that helps. We're also going to be taping all the seams and vents with duct tape too. :wink:
Getting ready to run getting last minute advise from Dad:
Carlos Wheeldon checking his belts and safety gear before his first run: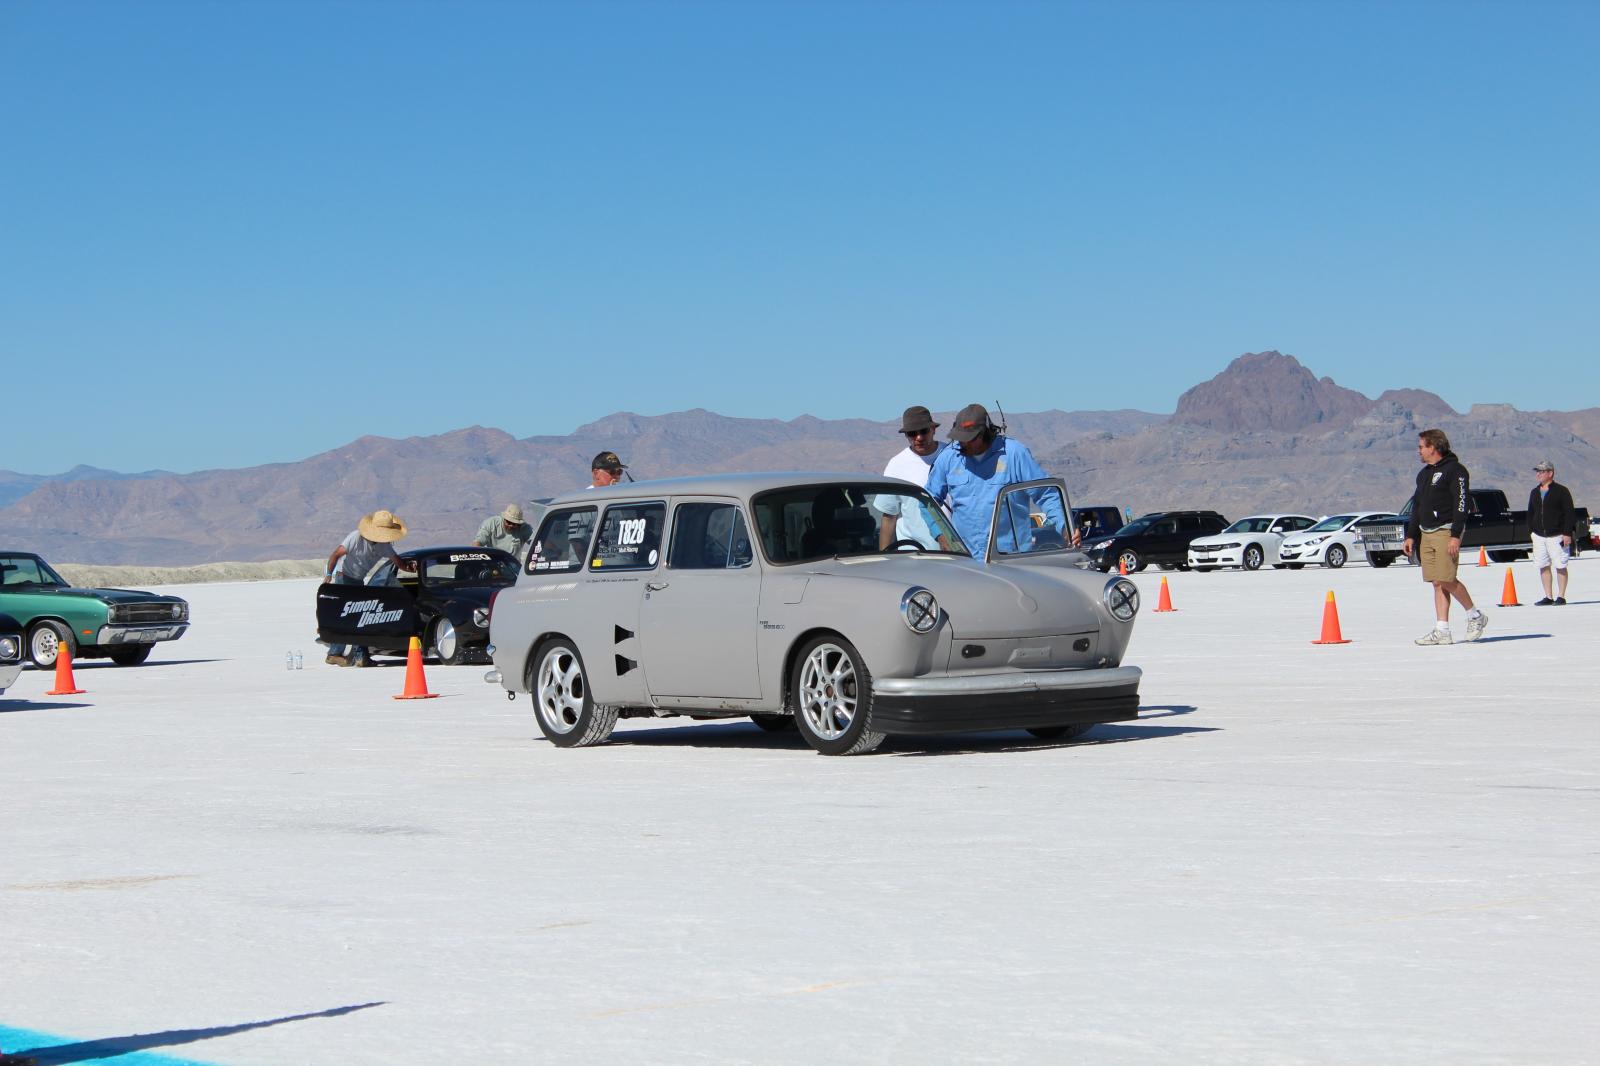
Away he goes. . .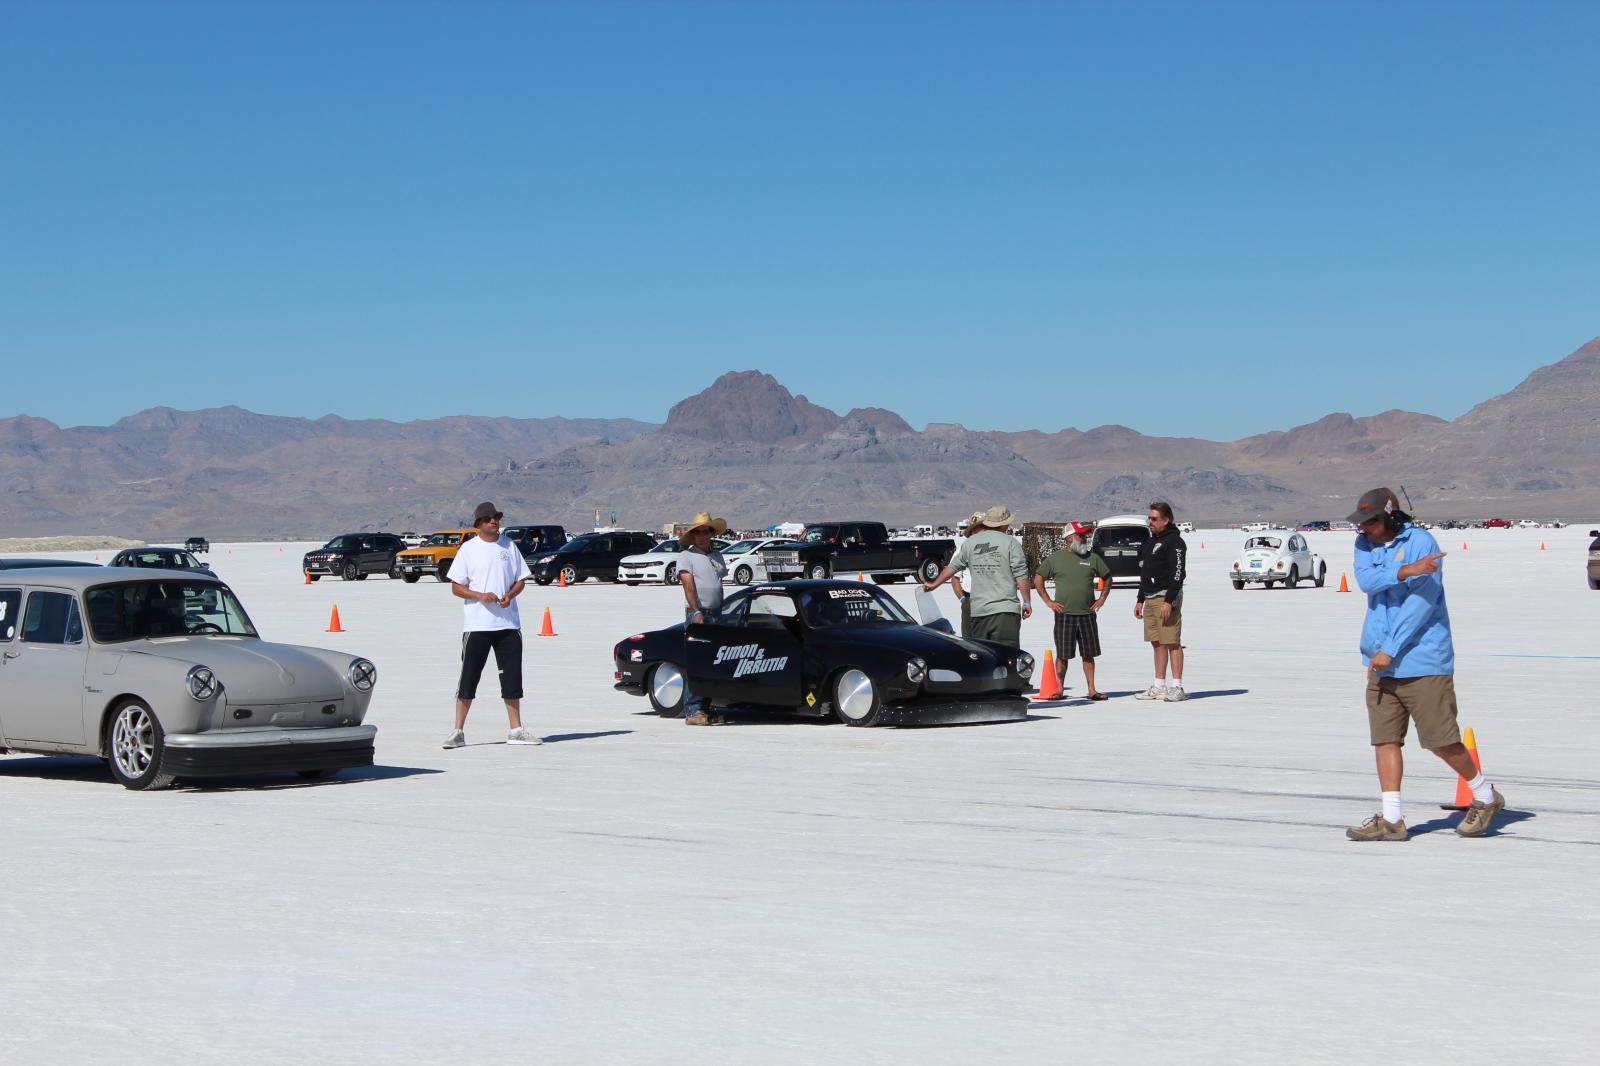

Posted by: rhodyguy Sep 10 2016, 07:59 PM
What is redline with the new config? Sounds like a completely dif car on the dyno.
Posted by: aircooledtechguy Sep 11 2016, 06:23 AM
What is redline with the new config? Sounds like a completely dif car on the dyno.
I've got the rev-limiter set at a fairly conservative 6.5k. The motor begins to drop off on power @ 6.2k, so there's no real reason to rev more.
Posted by: aircooledtechguy Sep 11 2016, 06:27 AM
Josh's fastest run (115.4mph) from 9/10/16. You can hear his excitement!!
https://www.youtube.com/watch?v=tFYlj9ijO7Q
Posted by: Dion Sep 11 2016, 06:51 AM
Congrats Nate and to your son Josh. I've been following this thread, awesome
stuff. Just so cool. Keep going and be safe.
Posted by: KELTY360 Sep 11 2016, 11:16 AM
We're also going to be taping all the seams and vents with duct tape too. :wink:
Better make sure it's some of that special 130 mph duct tape!
Congrats to you and Josh...that is just huuuge!
Good luck on your runs Nate.
Posted by: aircooledtechguy Sep 11 2016, 07:01 PM
Today, first thing we partook in the HotVWs Magazine group photo shoot. This is always fun. Then we headed out to the start line for racing. Mario from www.thedubshop.net worked up a pair of tunes that made 10% fuel correction and 20% correction. The one that worked the best was the 20% leaner correction.
Josh finished-up the last 3 of his 6 runs. He improved with runs of 116.7mph, 117.4mph and his top speed was 117.786mph!! I still can't believe how fast he went with only 6 solo drives under his belt!!
After lunch, I went through tech and began my runs. Even though it was hot, I wanted to at least make the slower qualifying run before the cool morning tomorrow. I completely sandbagged the run and went 107mph. I decided to make one more run in the heat and ran a 117.5mph. So Josh currently still holds the record, but I suspect I could best it in the cool morning air if I get a clean run.
Posted by: mgp4591 Sep 11 2016, 07:10 PM
If the weather holds up I'll cruise out and hopefully see you run. Just got back from RRC so I'm up for a short road trip!
Posted by: aircooledtechguy Sep 16 2016, 09:46 PM
We had an amazing trip down to World of Speed 2016!! We got there and back without incident, the car ran flawlessly and we returned home closer friends/family than when we left. That makes for a WIN, WIN, WIN in my book.
First off, I cannot express my pride in words for how my son Josh drove the car!! He only received his license 2 days before we left and his first 6 solo drives without myself or him mom in the car were all 104+mph passes!! On his 6 passes, he made 104 (qualifying run), 115, 116, 115, 117.8, 116 & finished out with a 117.4 and then stayed in the throttle to 120 indicated by our GPS.
Josh's best launch on his last pass (like a pro):
https://www.youtube.com/watch?v=7rlOVH2mTH4
Josh stays in it to 120mph and celebrates with a few dabs @ speed:
https://www.youtube.com/watch?v=G7dNkHSA6Uw
We re-teched the car and I began my runs. I pulled a 107 (qualifying run), 116, 117, 119.0, 117, 117 and then kept my foot in it all the way through the 2 and then 2.25mile traps. I found that terminal velocity for the Squarsche as currently set-up was 123mph!! That's all she's got in it @ 4200' on salt. Clearly, we have our work cut out for us over the next year to make it into the 130 club by the 1 mile.
Then it was my buddy Roberts turn at the wheel. He ran a 116 (he blew-off the qualifying run Laughing ), 115 and another 116. We were going to finish his final 3 runs the next morning when it was cool, but Mother Nature had her own plans. A rain storm blew through in the night and the track was under 1/8" of standing water in the morning. Sad So Robert has some unfinished business for next year.
I cannot recommend enough coming out and at least spectating one time at WOS and check out the VW Challenge racers. See the enthusiasm, smell the race gas, check out the amazing cars and take in the true spectacle of racing that is Bonneville Speedway.
Powered by Invision Power Board (http://www.invisionboard.com)
© Invision Power Services (http://www.invisionpower.com)