Printable Version of Topic
Click here to view this topic in its original format
914World.com _ 914World Garage _ College budget restoration
Posted by: ThePaintedMan Dec 29 2011, 07:02 PM
Hello all,
I'm finally getting around to documenting my restoration after the past several months of work. This may not get updated immediately as I'm trying to get as much done as possible before grad school kicks in again in January. However, I'm going to try and post pics when I can.
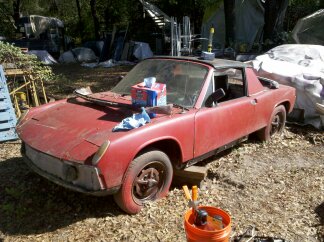
I purchased this car from a gentleman less than ten minutes from my house named Ray. He apparently is/was a member on the forum as well and was a very cool guy to meet. We talked several times about the car and he was very up-front about its condition (to the best of his own knowledge). He recommended it be used only for the drivetrain, which at this point seems like it was the correct suggestion. However, being 27 and stubborn, I saw it as an opportunity. Most of my experience in the past has been with American and Japanese cars from the the 1980s and newer, and most of that spent doing body work. This car I saw as a chance to learn something (mostly because I figured I couldn't make it any worse than it already was  .
.
So, after seeing the thing run and falling in love, I gave Ray 1,000 for it and convinced my girlfriend to help me tow it home. Unfortunately I do not have pictures of this, but wish I did! The look on her embarased face was something like, "Oh my God, now I've become trailer trash." We towed it five miles clunking the whole way because Ray failed to mention that the CV joints had been disconnected from the wheel. What a ride home.
I then set to work on it immediately, replacing a broken clutch fork and cable over the span of a weekend. Drove it around for two weeks to make sure I was still crazy enough to keep it, then began tearing it down.
I should mention several things. First of all, this car always had an intention of being raced, which initially was to be in Chumpcar. However, I realized the amount of work needed just to get the thing safe to drive warranted me keeping it for more than just track use. So, at the moment, its going to race Chumpcar next August, and I'm going to PRAY it doesn't get clobbered so that it can be driven afterward. Trust me, I already know I'm  .
.
Second, I have made it a point and a promise (to my forever understanding girlfriend) that I'm going to keep the cost to a minimum. That means a minimum of pre-fabbed parts, which also forces me to learn more about metal working as well. This build is certainly not up the past quality work of many of the folks on this board, but like I said, I'm a cheapskate (student loans ain't what they used to be).
So, here it goes! I'll try to explain more as I go along.
Attached thumbnail(s)
Posted by: ThePaintedMan Dec 29 2011, 07:09 PM
Here is our old friend, the passenger long, or what was left of it. You know, as much as I read up on this forum before buying the car, I missed soooooooo much. Oh well, too late now!
Attached thumbnail(s)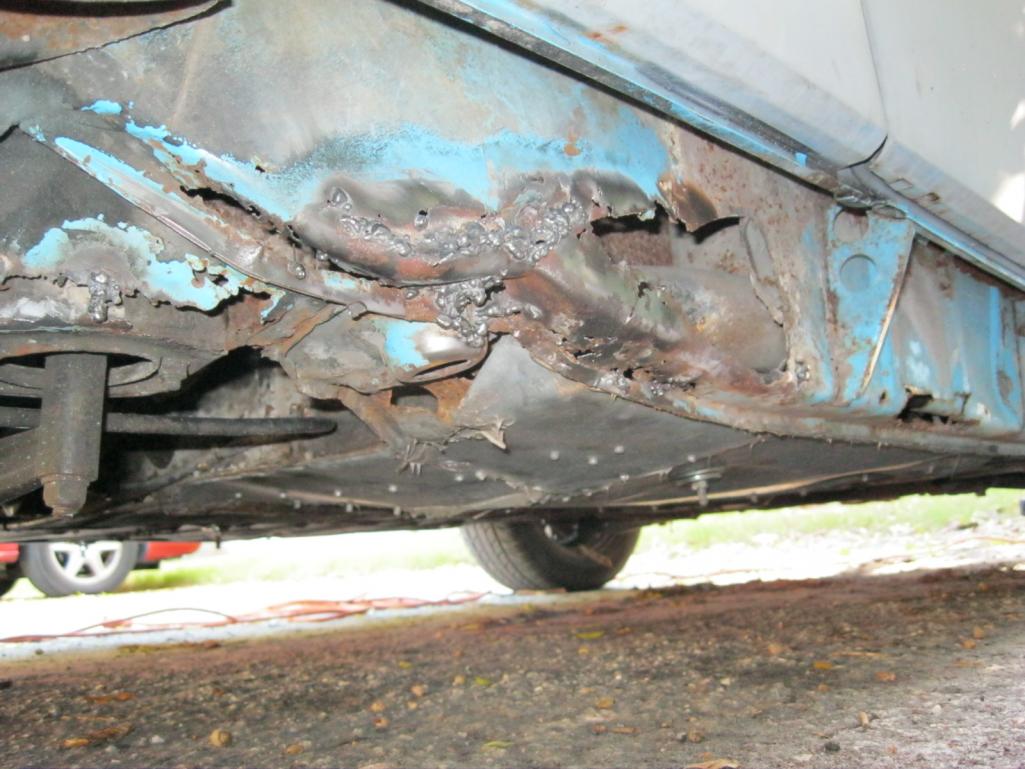
Posted by: ThePaintedMan Dec 29 2011, 07:12 PM
Oh man, is this fun. I'll have another picture of it stripped, but this is galvanized aluminum or tin where the center hump used to be. To top it off, its secured with a combination of rivets, bathroom caulk and, my favorite - BRASS! Needless to say I've been grinding for awhile now.
Attached thumbnail(s)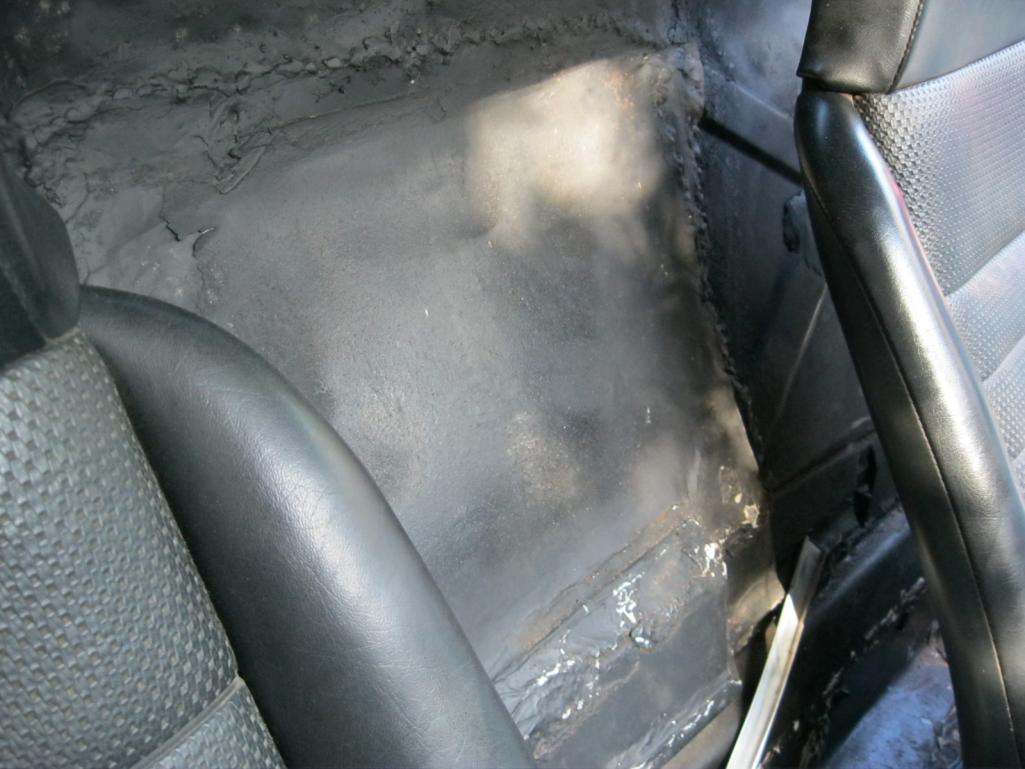
Posted by: ThePaintedMan Dec 29 2011, 07:14 PM
"Fuel cell" for a gastank. Seems someone else already was going to race this car at one point because its almost completely stripped too. However, it might as well be a cardboard box. Its not lined or anything, so I'm positive its not legal.
Attached thumbnail(s)
Posted by: billh1963 Dec 29 2011, 07:14 PM
Sounds like a great learning opportunity. I'm looking for a local tech school or something similar to learn MIG welding. I want to tackle the floor boards on one of my project cars.
Posted by: ThePaintedMan Dec 29 2011, 07:17 PM
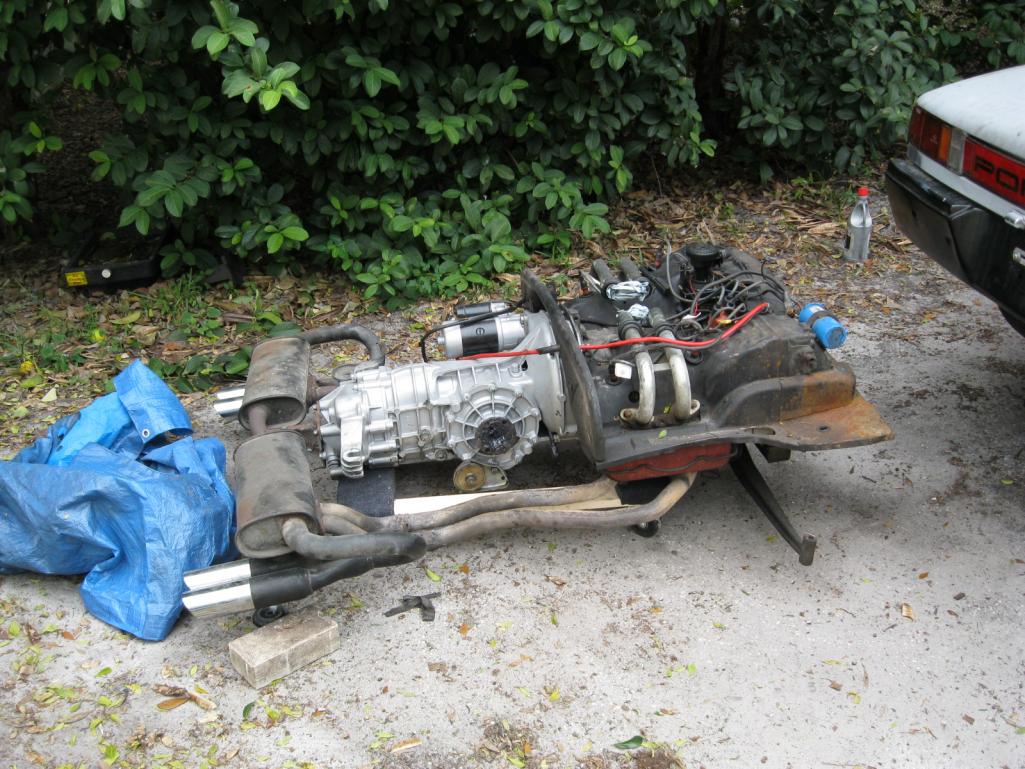
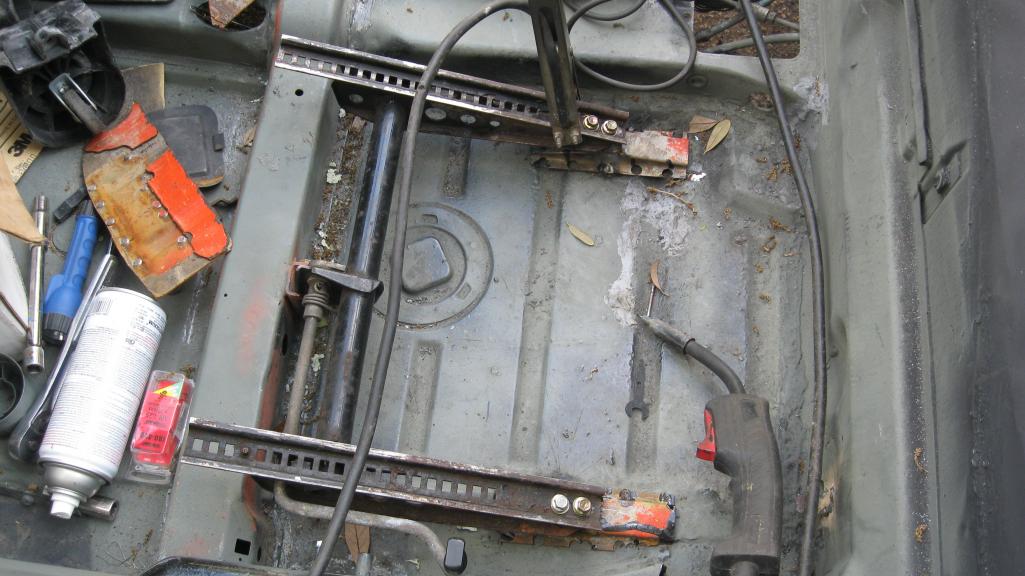
A great day! After dropping the transmission when I first got the car and putting it back in just to see if it would go anywhere (it did!) I dropped the whole thing together several weeks later. Let me just say, no matter what I have to do to this engine/tranny in the future, they're coming out together. So much easier. The fun part was figuring out where to jack the thing up from. There was nothing left of the jack point, long, or bulkhead. I can't remember what I did now to be honest.
Attached thumbnail(s)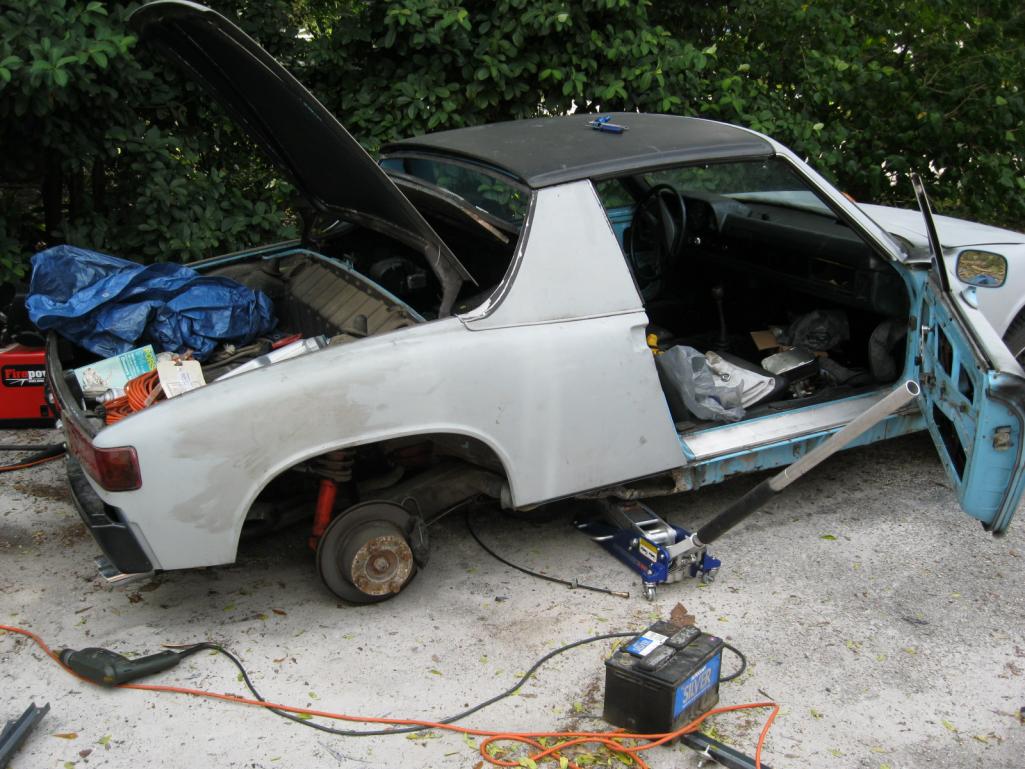
Posted by: wndsrfr Dec 29 2011, 07:46 PM
Can't help myself....looking at that drivetrain sitting there, it's begging for a set of big HF casters mounted under the engine bar ends, a set of drive wheels on the tranny hubs and an office chair with seatbelt bolted to the rear tranny mounts. Strap in and take it for a "spin"! Just think of the awesome power to weight ratio! Directional stability might not be so hot..... 
Posted by: wingnut86 Dec 29 2011, 08:59 PM
...I like the HF idea.
He should go CAMO like my 2nd one 
Posted by: ThePaintedMan Dec 29 2011, 09:08 PM

...I like the HF idea.
He should go CAMO like my 2nd one
I agree! Funny thing is its already sitting on HF casters (on a dollie). Maybe I should hook up some kind of steering and get er goin. I don't think the neighbor kid is using his Powerwheels truck laying out in the yard...
-George
Posted by: ThePaintedMan Dec 29 2011, 09:10 PM
BTW, can anyone confirm that those are Enkei wheels? Have been wondering this for awhile.
Also, does anyone have the dimensions for the center hump on the firewall? I'm going to try to replicate it... key word... try.
-George
Posted by: bembry Dec 29 2011, 09:56 PM
They're either Enkei 92s or copies of Enkei 92s
Posted by: Thestigz06 Dec 30 2011, 12:02 AM
They're either Enkei 92s or copies of Enkei 92s
Theyre real enkei 92's I have them on my car. They would say on the spokes on the inside, just a little raised portion.
Posted by: moparrob Dec 30 2011, 12:38 AM
Also, does anyone have the dimensions for the center hump on the firewall? I'm going to try to replicate it... key word... try.
-George
When I needed that section of firewall I ended up finding someone who was parting out a 914 and had them sawzall out the entire section and ship it to me.
It will not cost much and is much easier than trying to form it yourself.
Posted by: carr914 Dec 30 2011, 01:18 AM
Hi George 
I don't remember seeing you Post before. I'm over in Tampa.
Be careful getting under a car that is not structurally sound and make sure you use multiple Jackstands under the car
T.C.
Posted by: ThePaintedMan Dec 30 2011, 07:10 AM
Also, does anyone have the dimensions for the center hump on the firewall? I'm going to try to replicate it... key word... try.
-George
When I needed that section of firewall I ended up finding someone who was parting out a 914 and had them sawzall out the entire section and ship it to me.
It will not cost much and is much easier than trying to form it yourself.
Ahh, good call Rob! Thank you!
Posted by: ThePaintedMan Dec 30 2011, 07:12 AM
They're either Enkei 92s or copies of Enkei 92s
Theyre real enkei 92's I have them on my car. They would say on the spokes on the inside, just a little raised portion.
Thanks gents! Good to know. I kind of like them, since I'll never be able to afford Fuchs. Wouldn't mind a set of EMPIs though.
Posted by: ThePaintedMan Dec 30 2011, 07:20 AM
Hi George
I don't remember seeing you Post before. I'm over in Tampa.
Be careful getting under a car that is not structurally sound and make sure you use multiple Jackstands under the car
T.C.
Hey thanks T.C.! I've actually been posting here and there for several months, but mostly questions rather than any added knowledge. BTW, I know where and who you are very well! Have grown up in St. Pete immersed in music and have heard you play numerous times as a kid. My parents used to manage the State Theatre back in the mid-90s and I vaguely remember you playing there once or twice. Will have to get out and catch your next gig

As of right now I'm doing the long repairs on 4 jackstands and 2 bottle jacks with wood beams along the length and have not ventured under the car yet. I also made door bars which seem to be holding well exactly at 25 1/8 in. Will post more pics soon!
-George
Posted by: kevin311 Dec 30 2011, 07:20 AM
If you want Empi rims I have a black set I would trade for those enkies.
PM me if your interested
Posted by: carr914 Dec 30 2011, 08:14 AM
Hi George
I don't remember seeing you Post before. I'm over in Tampa.
Be careful getting under a car that is not structurally sound and make sure you use multiple Jackstands under the car
T.C.
Hey thanks T.C.! I've actually been posting here and there for several months, but mostly questions rather than any added knowledge. BTW, I know where and who you are very well! Have grown up in St. Pete immersed in music and have heard you play numerous times as a kid. My parents used to manage the State Theatre back in the mid-90s and I vaguely remember you playing there once or twice. Will have to get out and catch your next gig
As of right now I'm doing the long repairs on 4 jackstands and 2 bottle jacks with wood beams along the length and have not ventured under the car yet. I also made door bars which seem to be holding well exactly at 25 1/8 in. Will post more pics soon!
-George
George, I'm not T.C. Carr of T.C. Carr & the Catch. My Name is T.C. Davis, my Middle Name is Carr
Posted by: ThePaintedMan Dec 30 2011, 08:22 AM
Hi George
I don't remember seeing you Post before. I'm over in Tampa.
Be careful getting under a car that is not structurally sound and make sure you use multiple Jackstands under the car
T.C.
Hey thanks T.C.! I've actually been posting here and there for several months, but mostly questions rather than any added knowledge. BTW, I know where and who you are very well! Have grown up in St. Pete immersed in music and have heard you play numerous times as a kid. My parents used to manage the State Theatre back in the mid-90s and I vaguely remember you playing there once or twice. Will have to get out and catch your next gig
As of right now I'm doing the long repairs on 4 jackstands and 2 bottle jacks with wood beams along the length and have not ventured under the car yet. I also made door bars which seem to be holding well exactly at 25 1/8 in. Will post more pics soon!
-George
George, I'm not T.C. Carr of T.C. Carr & the Catch. My Name is T.C. Davis, my Middle Name is Carr
Weird! Sorry about that. I'm sure that has happened to you more than once, lol.
-George
Posted by: carr914 Dec 30 2011, 08:55 AM
Yep, all the time
Posted by: rnellums Dec 30 2011, 12:43 PM
What are you in grad school for? I am in a similar situation to you with zero time while school is in session. I just finished cutting my old 914 apart and I think i might have a solid rear suspension console you can have. Let me know if there is something you need and if I have it you can have it for shipping. It just might take ma a while to get it shipped out. (Sorry Veltor!) 
Posted by: ThePaintedMan Dec 30 2011, 06:30 PM
What are you in grad school for? I am in a similar situation to you with zero time while school is in session. I just finished cutting my old 914 apart and I think i might have a solid rear suspension console you can have. Let me know if there is something you need and if I have it you can have it for shipping. It just might take ma a while to get it shipped out. (Sorry Veltor!)
Very cool! I am in my second year, finishing up my Environmental Science masters. Currently I should be working on my thesis, but this is far more interesting (if you really want to know what my thesis is all about I can oblige as well). I actually already got a console and engine mount, but still looking for some other parts. I could use a battery tray and support as well as all of the front heater stuff (everything was gutted from this car). You don't have to send me anything pro bono, I'll be happy to make a donation to your college fund
Oh, and what are you in school for? Cool for find other students on the forum for sure.
-George
Posted by: ThePaintedMan Dec 30 2011, 09:24 PM
Okay, a little fast forward. I forgot to take pics of the rust before I cut it out, but here is where I decided to begin the repairs. As I'm sure you'll see in other photos, I already made the door bar brace out of some channel steel and some cheap home depot steel turnbuckles (with aluminum body. Like I said, I'm a cheapskate and couldn't find any better turnbuckles anyway. This may come back to bite me in the  later on, but as of right now its holding at 25 1/8 inches. I don't even recall having to adjust it any other than just getting the turnbuckles tight initially. With the rust this car has, its amazing it isn't already broken in half. I've taken multiple measurements and nothing has changed. Also, I have to note with the rust it had, there was nowhere for me to jack the car up but the rear suspension and front donuts. I know others have supported their cars much better than this, but it doesn't SEEM to be a problem. Sometimes you have to do what you can. Also, this car won't be on a rotisserie - its all being done in my driveway on jackstands.
Attached thumbnail(s)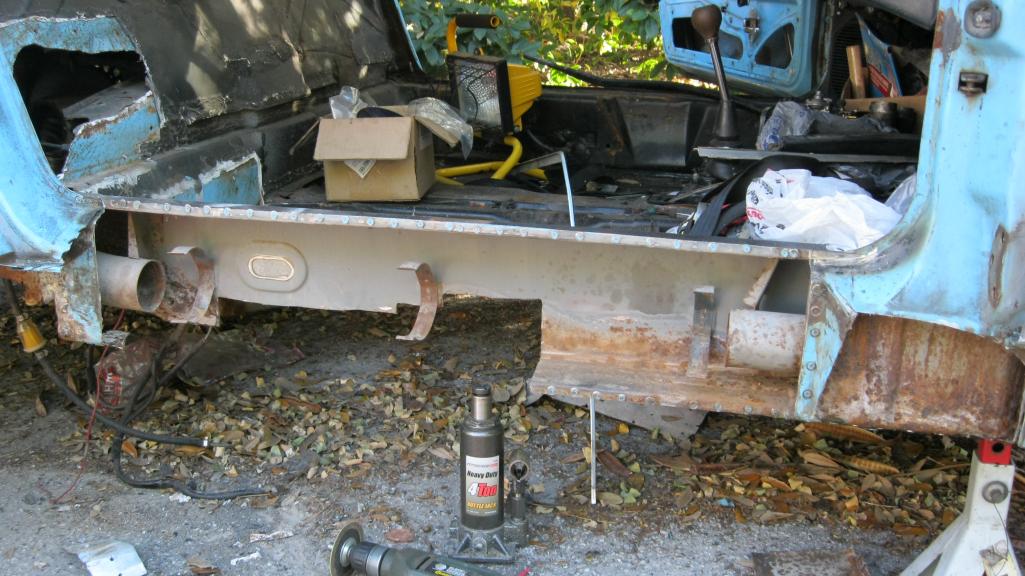
Posted by: ThePaintedMan Dec 30 2011, 09:40 PM
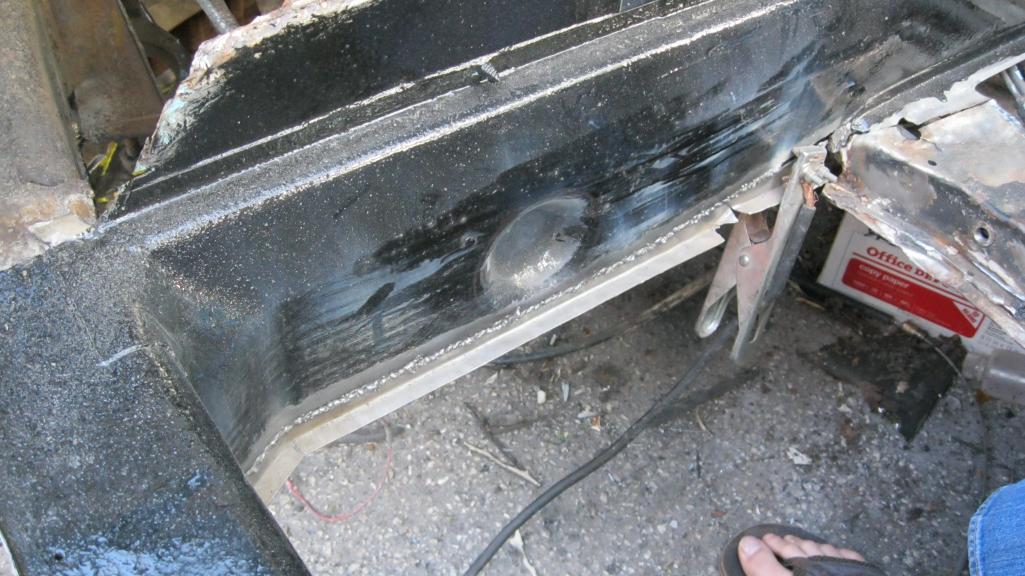
The pieces I fabbed here are made from 18 gauge steel that was hand-formed using a hammer, clamps and channel steel as a brake. I don't have money for a sheet metal brake, and didn't feel I would have enough to do to warrant buying one. In hindsight, it might not be a bad idea for most people. I would recommend it if you're looking for spot on fitment. In my case, it wasn't a big deal since I'm fabbing much of the outer longs as well. The only concern I have right now is introducing some kind of twist or something into the frame. When its finished and I take the brake out I'll let everyone know if the gaps stayed the same. I also chose 18 gauge over what I was told was factory (20 gauge) so I could grind more without worrying too much and not burn through so fast.
This is all done with a 110v welder that I picked up on Craigslist. Its a "Firepower" by Thermadyne, model FP-130 I believe. I'll confirm that later if anyone is wondering. Its an American company and like Lincoln, Miller and Hobart is manufactured in various countries. I am really impressed with it for being used and relatively cheap. I am using flux-core wire at the moment simply due to its simplicity and cheapness. I have considered full MIG but for the most part, it serves my purpose - to learn. Also, I read many others talk about having problems burning holes in their metal. I had similar problems, but usually when the gaps between pieces were too far apart. I usually keep my power settings high, but chose to use a copper plate behind the weld to bridge the gap and keep it cool. Also, don't try to weld long lines. If you have to, just do single spot welds. Once you get a feel you can move up to longer, half-inch welds. Thats about as much as I can do while still getting good fusion between the pieces without warping or burning through metal. Remember if you use flux-cored wire to clean them well with a wire brush after each series of welds. When you try to weld too close to another weld still covered in slag, those two welds will not completely join - you'll have small amounts of slag between them. You'll see this is you start grinding them down. I did my welds in a series of steps, cleaning in between till the thing was completely fused.
Attached thumbnail(s)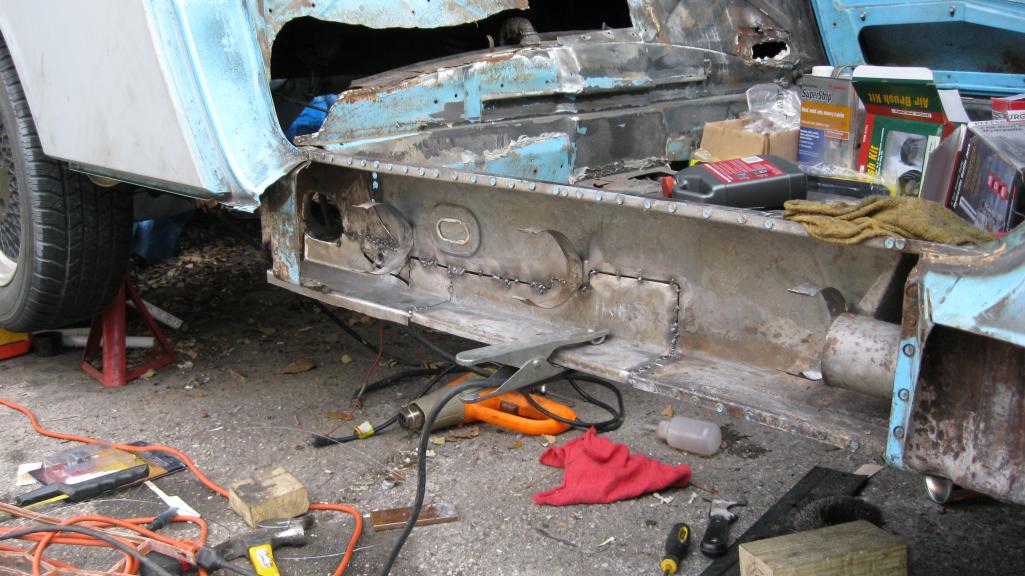
Posted by: ThePaintedMan Dec 30 2011, 09:53 PM
"Hey Jim Bob, you got any rivets laying around?"
"Yep."
"How bout brass?"
"Yep."
"Bathroom caulk?"
"Yep."
"Beer?"
"Yep."
"Sounds like a recipe for a new far'wall to me!"
"Yep."
Well thats how I imagine the conversation between these two  went at the time. Now I get to grind brass out a little at a time. Tried MAPP gas - it doesn't work. Gets the brass just hot enough to make you THINK you can scrape it out. It got a little gummy, but not enough to actually be of service. Depending on what Bruce Stone comes up with, I might be able to just cut around it if the replacement hump is big enough. I was originally going to try to replicate this. Better that I don't - I would never get it right with the basic tools I have. All the other little holes I can take care of with some sheet steel and butt welding. Oh yeah, I forgot to mention that if you're going to do ANY butt welding, come off the ten bucks and buy a set of butt welding clamps from Harbor Freight. You will use them for far more things than you could ever imagine. A Dremel is almost a must as well.
-George
Attached thumbnail(s)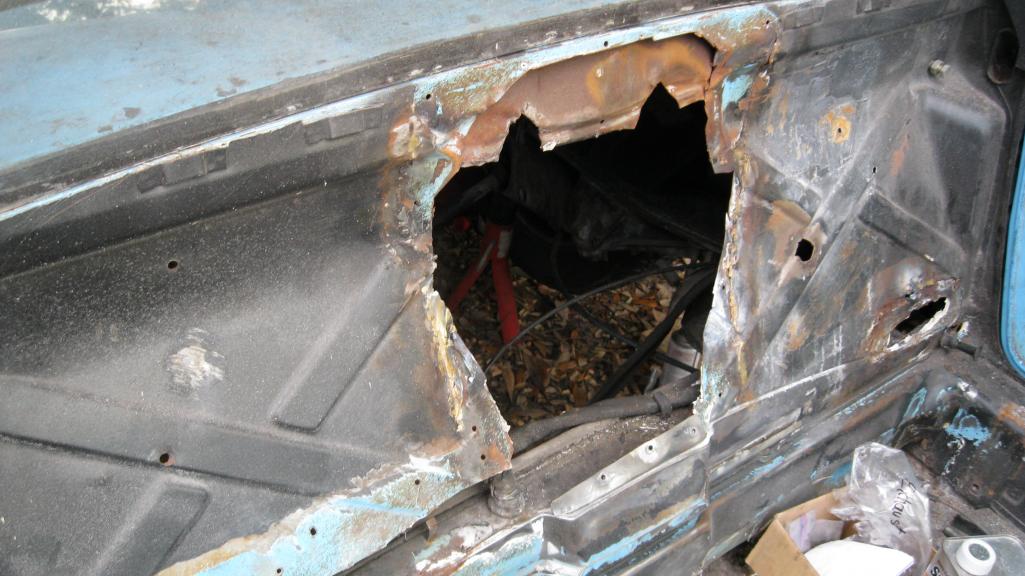
Posted by: ThePaintedMan Dec 30 2011, 10:05 PM
Okay, here is the hole in the long behind the firewall. I left the piece of the outer long there for reference for the moment. Obviously I still need to bend the piece I fabbed up a little more when I install the outer longs.
Attached thumbnail(s)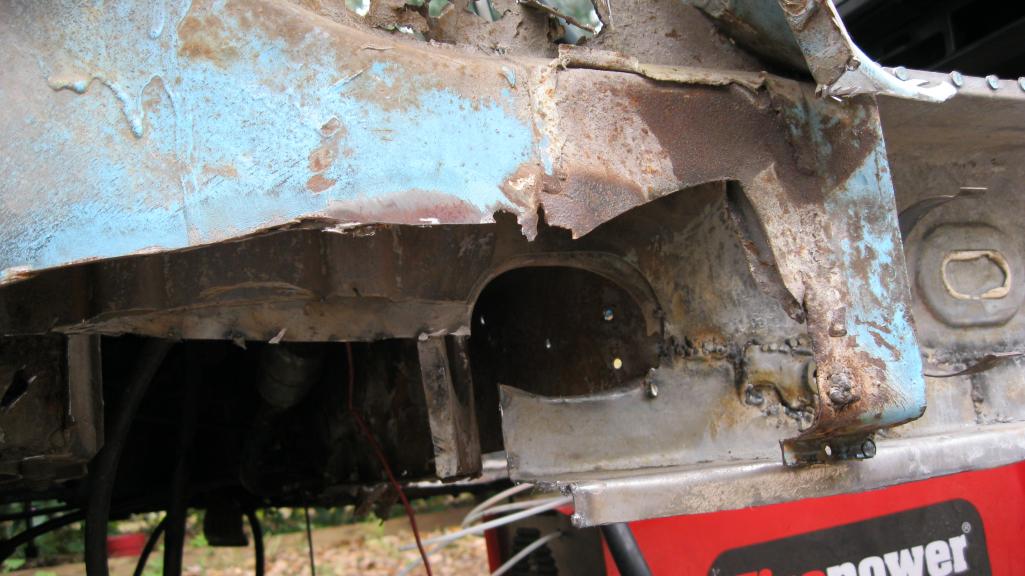
Posted by: ThePaintedMan Dec 30 2011, 10:10 PM
This pic is of the bend that goes up toward the engine mount area of the inner long. Make a paper template using the old piece if you have it. I did not have enough left to do so, so I sorta guessed  . Unfortunately I'll just have to do with what I have till I have enough to move a jackstand underneath this area with the rebuilt donut. Then, I can use the rear suspension console and frame piece that Bruce Stone sent me to verify that. Again, I'll keep everyone posted.
If you need to make this piece yourself, I started with a paper template, then slotted it in several parts. The slots should only extend to the parts where you'll put the 90 degree bends in. No need to go further. Then put in the 90 degree bends. Then, simply hammer the middle until you reach the shape you desire. Some of the slots are going to narrow and possibly overlap. Grind the overlap off and then weld the slots shut. Compare the bottom piece with the piece above it. Make sure you put the slots in the second piece in the same spots as the first. This will ensure you have two almost identical pieces. You will weld both of these together using rosette welds since this section should be double-walled just like the outsides.
Attached thumbnail(s)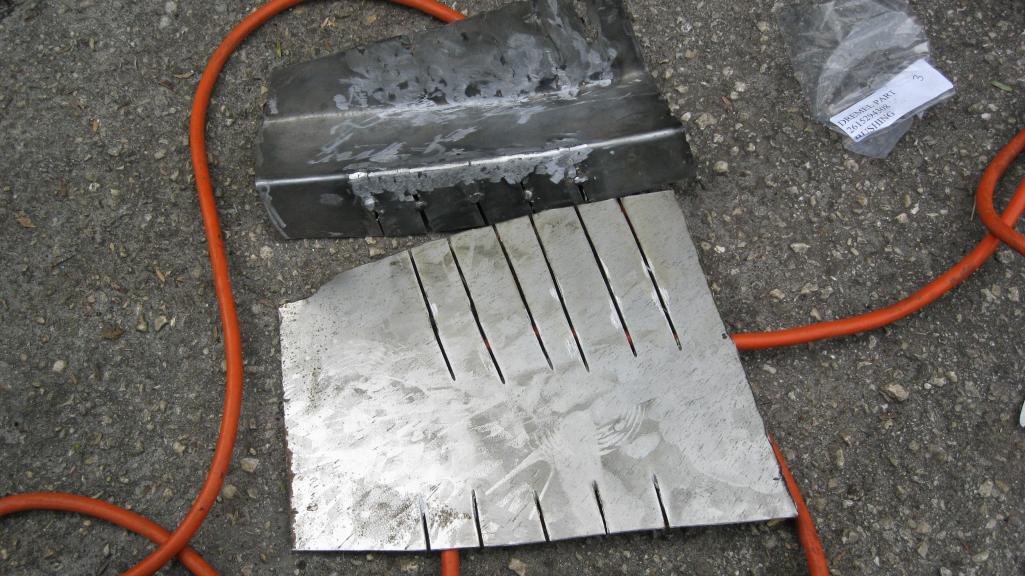
Posted by: ThePaintedMan Dec 30 2011, 10:17 PM
And this is it. I welded the back part in today and POR'd it up. I even managed to get a little inside the longs in the process, but most of it ended up on me. I have used it in the past, but forgot how no matter what you do, it gets everywhere. WEAR LONG SLEEVES. Also, make sure you clean the heck out of the metal first. I only wire-brushed and did the metal ready. I got plenty of fish eye in the POR, which I'll have to check on in the morning. Hopefully it just means another coat. I did use paint stripper first, which I think is what I forgot to adequately clean off.
-George
Attached thumbnail(s)
Posted by: stewteral Dec 30 2011, 11:20 PM
Here is our old friend, the passenger long, or what was left of it. You know, as much as I read up on this forum before buying the car, I missed soooooooo much. Oh well, too late now!
ThePaintedMan,
Yes Virginia, you DO have a project! But BRAVO, you are rebuilding the bashed/rusted stuff the right way. I'm glad to see you are doing the welding.
I got a MIG when I started my V8 conversion and it is the most valuable tool I have for all the repair and fabrication I've needed to do. Like anything, practice, practice and the welds will get better.
My first recommendation is to install a FULL ROLLCAGE. The 914 chassis is a real flexy-flier new, not to mention 35 years later. After I welded mine in (including running tubes fore & afte to brace the suspension shock towers) I finally had a 914 that could be jacked up and the doors still open! As I see it, set the chassis so the dimensions are right, weld in the cage and then you will not have to worry about the effects of further repairs and welding distorting things.
Speaking of doors: It is MANDATORY that you brace the door hing points against the latch point as the door opening with SHRINK when the rollcage welds cool! I got the tip from Brad Roberts and can testify that this WILL happen!
BTW: Your girlfriend sounds like a very smart lady! I thinks she's a keeper!
Best,
Terry
Posted by: carr914 Dec 31 2011, 06:26 AM
I could use a battery tray and support as well as all of the front heater stuff (everything was gutted from this car).
-George
I may have a Battery Tray and you don't need the Heater Stuff - You live in Florida and it's going to be a ChumpCar

Your work looks good.
You need to take a drive over and check out the parts I have - they are everywhere, in my attic, Garage, Storage Shed, Trailer etc. I would also suggest you put an Engman Kit in your car - you could see them in both of my cars
Happy New Year
 ,
,T.C.
Posted by: hot_shoe914 Dec 31 2011, 09:23 AM
Might I also suggest that you put a list of parts youneed here in the thread and that way anyone who might want to donate or get rid of can see what you need. I know I am supposed to be checking on some for you but can't remember what all. I also have parts I will never use that you may need that I would gladly let go for shipping. Just a thought as it might help you out in the long run.
Shoe
Posted by: windforfun Dec 31 2011, 05:48 PM
How's the job market for your major?
Posted by: ThePaintedMan Dec 31 2011, 08:47 PM
Might I also suggest that you put a list of parts youneed here in the thread and that way anyone who might want to donate or get rid of can see what you need. I know I am supposed to be checking on some for you but can't remember what all. I also have parts I will never use that you may need that I would gladly let go for shipping. Just a thought as it might help you out in the long run.
Shoe
Shoe,
Good call. I'll add that next. Unfortunately I got pretty impatient over the past few months and just started buying what I could. But there is still some more that I will need soon. Thanks for the advice, great to have guys like yourself to keep me moving in the right direction.

-George
Posted by: ThePaintedMan Dec 31 2011, 08:59 PM
How's the job market for your major?
Ehh, its okay I suppose. The field is ever-growing but politics are always a factor, specifically in state and federal jobs which is what I'm most interested in. In Florida, many government env. science positions are being done away with at the moment. Have had many good friends just graduate, get jobs and be let go within the past year!
In my opinion though, like anything else, its all about what each person makes out of it. The main reason I went back to school is that I was working in a field that was interesting, but very limited in terms of mobility. Our company restores and maintains residential stormwater lakes, ponds and wetlands. Being out on a boat everyday is fun for awhile, but I needed more to keep me interested, and I honestly never had a chance to network into other disciplines - mostly because I was on a boat by myself, lol. When I made the decision to return for my masters however, I also promised myself to maximize the opportunity I had to network as much as possible. I knocked on doors for awhile and eventually got the chance to volunteer with NOAA, where I currently help wit GIS and cartography. http://sero.nmfs.noaa.gov/pr/GISDataandMaps.htm is a little of what I'm working on at the moment. Pretty cool to just be volunteering but still get the chance to publish some of my own work!
Anyhow, to answer your question, the jobs are there. Good, tangible experience is always a plus I think to most employers, which is what I'm lacking. But I think the market will only continue to grow over the next decade. Environmental regulation and our need for good science is always growing in order to make the regulations better for everyone. I'd be happy to talk more about it if anyone like, but I don't want to get flagged for being OT
-George
Posted by: ThePaintedMan Dec 31 2011, 09:16 PM
Parts Needed
As per Shoe's recommendation, I'll start a little list here of what parts I'm still looking for. Again, this car is kind of a weird mix of track and street. Its just a Chumpcar, but on the other hand I'd like something I can drive around and have fun with during the week. The best part about this is I'm not beholden to a perfect restoration and every last little perfect part. But there are some things that I'd like to get back on the car to give it the feel it had from the factory (namely heat!) So here it goes. I'll update this as I accrue things or think of something else.
1) Battery tray and support (just need it to make a template)
2) Pedal board and accelerator stop
3) All the front trunk heater stuff, I mean everything
4) Heater control for dash
5) Heater control lever
6) Late style parking brake lever
7) Gas tank (maybe, still trying to figure out if I'm going to just go ahead and do the fuel cell)
8) Alternator (this one was dying when I had the car running)
9) BMW front calipers and 19mm master cylinder
10) Firewall center hump (see the FS/WTB section)
11) Original 73 jack
12) Rain tray and hoses (any condition works for me)
13) Stiffer rear springs (originals are 100#, correct?)
14) Backpad (any condition works)
Thats it for now, I think! Thanks again Shoe for the heads up.
-George
Posted by: ThePaintedMan Dec 31 2011, 10:04 PM
T.C.,
Sounds great! Over the course of a week I've found 3 more people in the TB area to meet with. First will be Rob on Monday, then hopefully we can get together soon after that. I would love to see all the parts but I'd want to see the car first! If you've got time over the next week, shoot me a PM and I can give you my phone number and exchange info. Thanks for going out of your way.
Oh, and regarding the heat stuff - I am a wimp and get cold with anything under 80 degrees. Plus, I can dream the car might actually survive and be a street driver too, can't I?
-George
I could use a battery tray and support as well as all of the front heater stuff (everything was gutted from this car).
-George
I may have a Battery Tray and you don't need the Heater Stuff - You live in Florida and it's going to be a ChumpCar
Your work looks good.
You need to take a drive over and check out the parts I have - they are everywhere, in my attic, Garage, Storage Shed, Trailer etc. I would also suggest you put an Engman Kit in your car - you could see them in both of my cars
Happy New Year
,T.C.
Posted by: saigon71 Jan 1 2012, 10:35 AM
Great work man!
I too rebuilt my inner long with sections of hand formed metal in a vice. It takes some time, but can be done. I added doubler plates over all the seams in this area for added strength.
My chassis barely moved when I cut the metal out of the car. Keep a close eye on measurements when welding new metal in...that is when things change. 
Best of luck on this project.
Bob
Posted by: ThePaintedMan Jan 2 2012, 09:42 PM
Great work man!
I too rebuilt my inner long with sections of hand formed metal in a vice. It takes some time, but can be done. I added doubler plates over all the seams in this area for added strength.
My chassis barely moved when I cut the metal out of the car. Keep a close eye on measurements when welding new metal in...that is when things change.
Best of luck on this project.
Bob
Good to know Bob! I'll keep an eye on that. Its nice to know I'm not the only one who isn't doing it all to exact specs, just trying to get the thing back together as reasonably (albeit correctly I hope) as possible. So far I haven't been too worried about the doublers but before I seal this puppy up I will probably add some. Thanks!
-George
Posted by: ThePaintedMan Jan 2 2012, 09:53 PM
Wow, what a day!
Today I had the opportunity to meet a couple of great guys, Rob Watson and T.C. Davis, both local Tampa Bay teeners. Both gentlemen provided me with some great parts which will go a long way to getting this car back on the road, not to mention good conversation and inspiration. Thank you both for spending part of your days off talking with a rookie.
I'm sorry I haven't done a great job posting pictures, but I really haven't done much else but welding in the inner doubled sections of the inner firewall. I'll explain more tomorrow when I get pics. I have struggled with this part and figuring out how to coat the backs of the pieces since they all need to be welded in. After reading others' posts, I think I've developed a method to the madness. I anticipate being done with the repairs to the inner passenger long completely tomorrow, weather permitting.
However, after talking with T.C. and Rob, I think I will opt to stiffen both sides though with my own version of the Engman/Brad Mayeur kit, even though the car will be getting a roll cage. This could be done after I get the longs sealed, but I might try and start on it prior to that because I'm worried the welding on the cabin side might disturb the POR I've already put down inside the long.
Hope everyone had a great New Years!
-George
Posted by: ThePaintedMan Jan 11 2012, 01:10 AM
A little update. So classes have started again. Ugh. Its going to be a rough semester of statistics, ecology and soil dynamics. Hoping to get up early in the mornings to get as much done as possible, and POTENTIALLY make it to Sebring with the car. We'll see.
The below picture is how the car ended December. Unfortunately I prematurely did my POR work, not remembering that the welds I was doing on the inside of the car were going to burn through the POR. I also coated this in cold galvanizing compound for a little added protection. Long story short, I think I'll end up stripping out a lot of this and doing it over. Especially when I weld in the inner long stiffeners I'm fabricating. Essentially they're a cheap rip-off of the Engman kit (sorry!) I'll get pics of that up soon.
Attached thumbnail(s)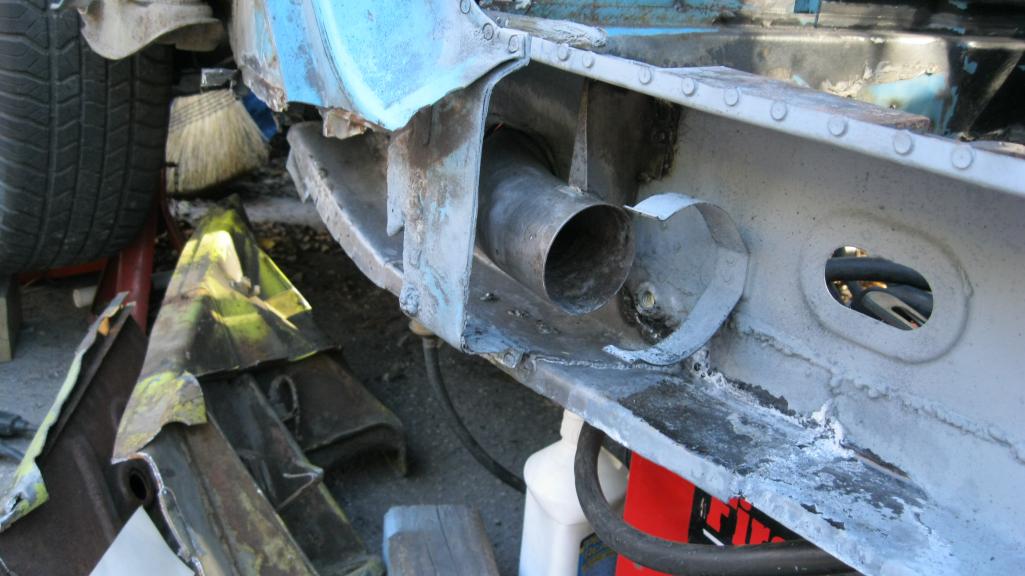
Posted by: ThePaintedMan Jan 11 2012, 01:14 AM
After entering the VIN in the database, I also found out that this car was owned not long ago by kevin311! We have done a little talking and I'm hoping to meet him soon. He seemed glad that the car isn't being crushed and may find a second wind (if I ever finish it).
My buddy Marc (and co-driver) came over the past weekend to do some work on the car. He had never welded before. But the piece he made looks good to me!
Attached thumbnail(s)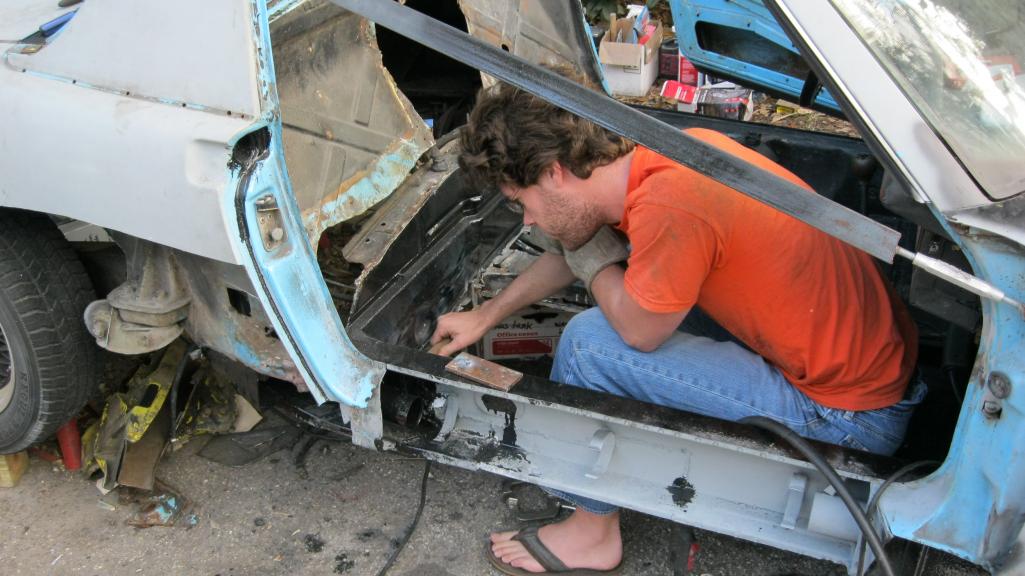
Posted by: ThePaintedMan Jan 11 2012, 01:22 AM
Marc and I fabricated a new floorboard for the passenger side as well! I'll post a picture of that tomorrow. It ain't half bad for a couple of novices, or cheapskates, however you look at it.
We also got the pedal assembly out. Kevin, if you read this, how the HELL were you even able to drive this car? Glad we got to it when we did, otherwise this could have been bad...
Attached thumbnail(s)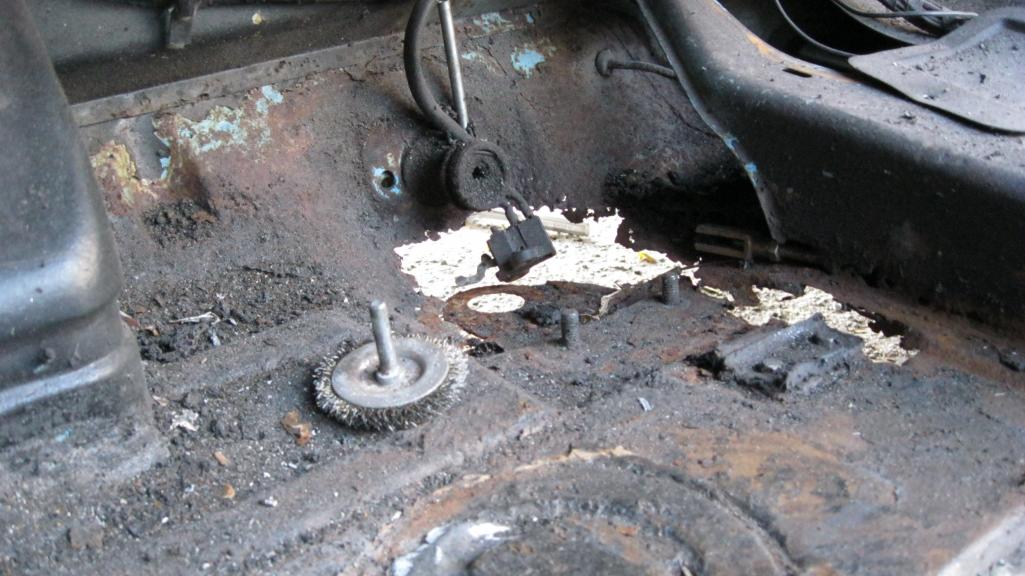
Posted by: billh1963 Jan 11 2012, 06:03 AM
Good looking progress!
Safety note: welding (and even turning a wrench) don't play well with flip flops.
Posted by: ThePaintedMan Jan 11 2012, 11:14 AM
Bill,
I have reminded him of this a million times. Marc is a beach bum from the east coast, but won't listen to someone who has already been burned a few times. At least I got him to wear a freakin helmet.
Speaking of which, I don't know if I already mentioned this. After my first big day of welding I had the strangest sensation in my eyes before going to bed. Could not figure out what for. Then, by 3:45 in the morning, when I could not keep my eyes closed for more than a few seconds without searing pain, I began looking around on the computer. Sure enough, I had welders flash. Let me go ahead and tell everyone if it hasn't happened to you yet, you DON'T want to experience it. For me, it was the cheapo Harbor Freight helmet I was using. I think the batteries for the auto-darkening function were bad when I bought it new. So, I did the repair that this guy thought of http://www.pskl.us/wp/?p=648. Worked perfectly. I highly recommend that if you have this helmet you go ahead and just do it. It will save you money... and a lot of pain at some point.
-George
Good looking progress!
Safety note: welding (and even turning a wrench) don't play well with flip flops.
Posted by: carr914 Jan 11 2012, 11:28 AM
Good looking progress!
Safety note: welding (and even turning a wrench) don't play well with flip flops.

Posted by: matthepcat Jan 11 2012, 11:35 AM
Flip flop car work is a fine art.....just like flip flop weed whacking. In the warm states it has to be done from time to time.
Posted by: ThePaintedMan Jan 11 2012, 12:07 PM
Thanks for the kind words fellas. Been raining all day so I couldn't get any work done on the car before classes this afternoon. However, I went out and took a few photos. This one is the passenger floorboard we made. Still needs some welding and a few more bends to be complete, but I think it'll do fine in the car. It was a full days worth of work to make, but for me, cost is everything. If you look at the welds, you can see how it was done. We cut a few slots lengthwise using a cutting wheel as well as one down the side for the seat channel. Then, bent those downward using channel steel and a ball peen hammer. Then, hammered this "V" shaped valley against bar steel to achieve more of a "U" shape. This left about an 1/8th to 1/4 in gap, which had to be welded closed. The only real problem was the warping, because I failed to mention to mark that he needed to put in all of his spot welds first. However, fitment wasn't bad, and since this car was destined for a scrap yard anyway, I think anything we do to it is an improvement. Once I'm out of college I'll find a nicer model to do everything the "right" way
Attached thumbnail(s)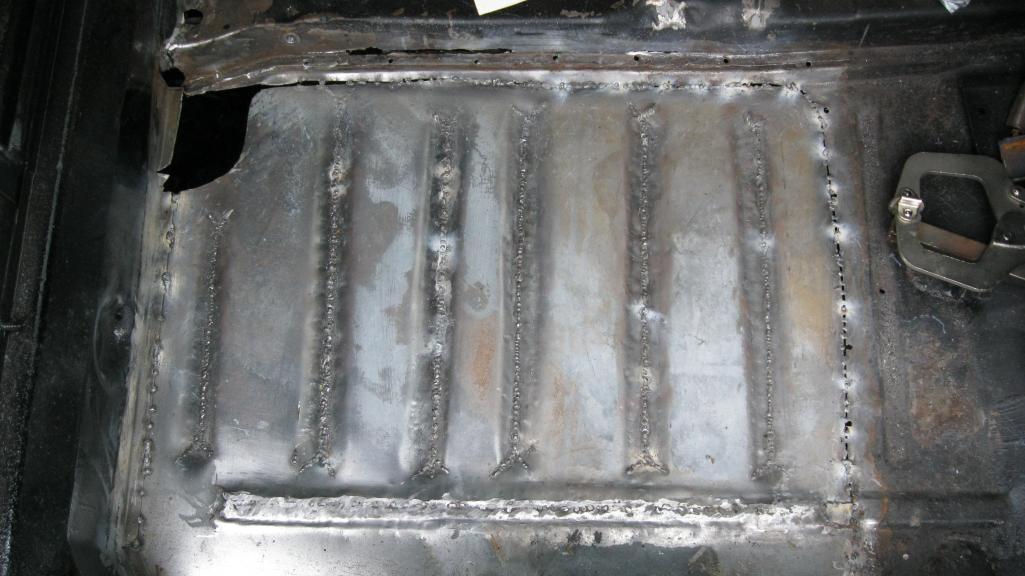
Posted by: ThePaintedMan Jan 11 2012, 12:14 PM
I also pulled the pedal cluster apart yesterday. What a bitch. The roll pin was the least of the worry. On this car, the clutch pedal arm had rust-welded itself to the shaft that it rides on. I resorted to a pickle fork to get the thing off, which buggered up some of the metal and welds on the cluster. I'll have to do some re-shaping and welding once the replacement bushings get here. I'll also POR it at that point. Check out the bottom of the base and all the pitting. Yikes.
Of note, I used a product called EVAPO-Rust, commonly available at Autozone, Advance, etc. Man, this stuff is amazing. Its not acid-based as far as I can tell, and will not burn your hands. I got everything as clean as I could prior to dipping it, but once I did, this stuff found its way into every pit and hole in the metal. I'll still wirebrush and clean the metal before using POR, but I was really impressed. Especially since I've been getting AWFUL results with POR's "Prep and Ready." I haven't painted a piece yet that hasn't fish-eyed. Maybe this stuff will help.
Attached thumbnail(s)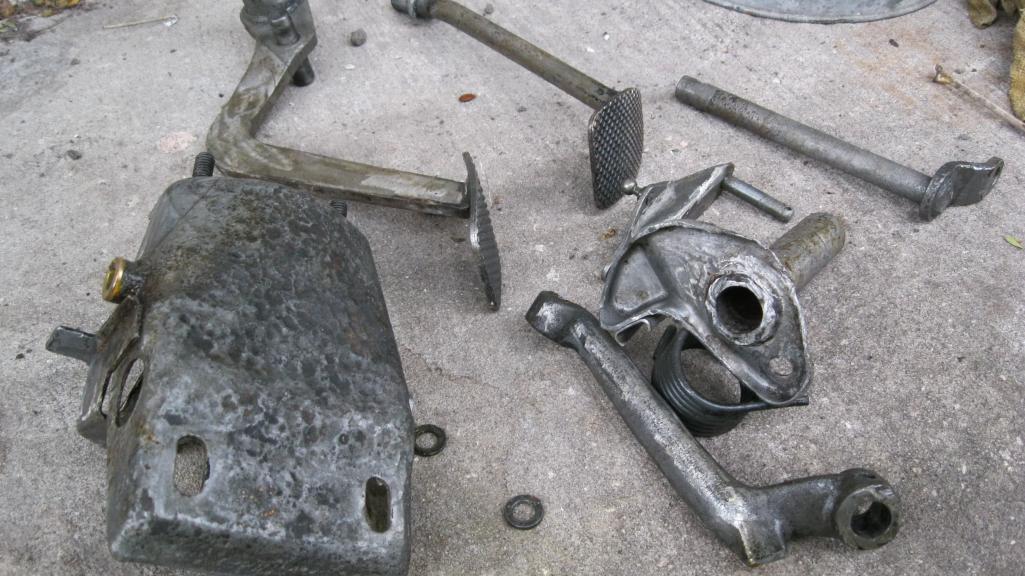
Posted by: kevin311 Jan 11 2012, 12:52 PM
Thats scary to look at and think that I drove it.. Its worse than I remember it to be. 
Looks like it was holding together with hopes and dreams..
You are the man for taking this on, I cant wait to get over there to see the progress and drop off some stuff.
See you some time this weekend
Posted by: Krieger Jan 11 2012, 07:45 PM
Trash that pedal assembly. There isn't a whole lot of steel left in that pan. You are going to be kicking those pedals, but not for very long before something bad happens.
Posted by: rnellums Jan 11 2012, 08:58 PM
Parts Needed
As per Shoe's recommendation, I'll start a little list here of what parts I'm still looking for. Again, this car is kind of a weird mix of track and street. Its just a Chumpcar, but on the other hand I'd like something I can drive around and have fun with during the week. The best part about this is I'm not beholden to a perfect restoration and every last little perfect part. But there are some things that I'd like to get back on the car to give it the feel it had from the factory (namely heat!) So here it goes. I'll update this as I accrue things or think of something else.
1) Battery tray and support (just need it to make a template)
2) Pedal board and accelerator stop
3) All the front trunk heater stuff, I mean everything
4) Heater control for dash
5) Heater control lever
6) Late style parking brake lever
7) Gas tank (maybe, still trying to figure out if I'm going to just go ahead and do the fuel cell)
8) Alternator (this one was dying when I had the car running)
9) BMW front calipers and 19mm master cylinder
10) Firewall center hump (see the FS/WTB section)
11) Original 73 jack
12) Rain tray and hoses (any condition works for me)
13) Stiffer rear springs (originals are 100#, correct?)
14) Backpad (any condition works)
Thats it for now, I think! Thanks again Shoe for the heads up.
-George
2) Pedal board and accelerator stop
got it
3) All the front trunk heater stuff, I mean everything
Do you mean the fresh air vent or the flapper boxes? I think I have both anyways.
4) Heater control for dash
got it
5) Heater control lever
Might still have it
6) Late style parking brake lever
Might still have it
11) Original 73 jack
Got it
12) Rain tray and hoses (any condition works for me)
Got em
13) Stiffer rear springs (originals are 100#, correct?)
Brand new 100#ers I'm not going to use
14) Backpad (any condition works)
Got it
I am in my first year of my masters in Mechanical Engineering, specializing in energetic materials. I'm hoping to go for PhD if I can find the stamina. Right now its looking a little bleak.
Shoe will be cheaper for shipping... He's closer, I'm up at Purdue.
-Ross
Posted by: ThePaintedMan Jan 12 2012, 06:59 AM
Trash that pedal assembly. There isn't a whole lot of steel left in that pan. You are going to be kicking those pedals, but not for very long before something bad happens.
Yeah... thats what I was thinkin. Its pretty much pitted through in some spots. Not sure where to get another pedal assembly though. Don't want to pay for a completely rebuilt set.
-George
Posted by: ThePaintedMan Jan 12 2012, 07:05 AM
ThePaintedMan,
Yes Virginia, you DO have a project! But BRAVO, you are rebuilding the bashed/rusted stuff the right way. I'm glad to see you are doing the welding.
I got a MIG when I started my V8 conversion and it is the most valuable tool I have for all the repair and fabrication I've needed to do. Like anything, practice, practice and the welds will get better.
My first recommendation is to install a FULL ROLLCAGE. The 914 chassis is a real flexy-flier new, not to mention 35 years later. After I welded mine in (including running tubes fore & afte to brace the suspension shock towers) I finally had a 914 that could be jacked up and the doors still open! As I see it, set the chassis so the dimensions are right, weld in the cage and then you will not have to worry about the effects of further repairs and welding distorting things.
Speaking of doors: It is MANDATORY that you brace the door hing points against the latch point as the door opening with SHRINK when the rollcage welds cool! I got the tip from Brad Roberts and can testify that this WILL happen!
BTW: Your girlfriend sounds like a very smart lady! I thinks she's a keeper!
Best,
Terry
Hey Terry,
Thanks for the kind words. We are going to get to the roll cage at some point once the major frame stuff is done. I don't think this is something I want to attempt myself, for a number of reasons. However, when I do get it done, I will certainly take your advice. That makes sense - since a roll cage ties the left/right and front/back sides together, I would certainly expect some shrinking in the doorway (as well as right/left, but I assume the bulkheads probably prevent most of that). If anyone knows of a good cage builder in the Tampa Bay area, let me know!
-George
Posted by: carr914 Jan 12 2012, 08:57 AM
I also pulled the pedal cluster apart yesterday. What a bitch. The roll pin was the least of the worry. On this car, the clutch pedal arm had rust-welded itself to the shaft that it rides on. I resorted to a pickle fork to get the thing off, which buggered up some of the metal and welds on the cluster. I'll have to do some re-shaping and welding once the replacement bushings get here. I'll also POR it at that point. Check out the bottom of the base and all the pitting. Yikes.
Of note, I used a product called EVAPO-Rust, commonly available at Autozone, Advance, etc. Man, this stuff is amazing. Its not acid-based as far as I can tell, and will not burn your hands. I got everything as clean as I could prior to dipping it, but once I did, this stuff found its way into every pit and hole in the metal. I'll still wirebrush and clean the metal before using POR, but I was really impressed. Especially since I've been getting AWFUL results with POR's "Prep and Ready." I haven't painted a piece yet that hasn't fish-eyed. Maybe this stuff will help.
Yep, Trash that George, I may have one or at least some good parts
T.C.
Posted by: ThePaintedMan Jan 12 2012, 10:35 AM
T.C.,
If you do indeed find one, let me know. The base is really the only part that needs replacing. However, I did bend the clutch tube a little when I had to use a pickle ford to remove the clutch pedal arm. I think I got it bent back enough to be okay, but this part would help as well. Thanks brotha!
-George
I also pulled the pedal cluster apart yesterday. What a bitch. The roll pin was the least of the worry. On this car, the clutch pedal arm had rust-welded itself to the shaft that it rides on. I resorted to a pickle fork to get the thing off, which buggered up some of the metal and welds on the cluster. I'll have to do some re-shaping and welding once the replacement bushings get here. I'll also POR it at that point. Check out the bottom of the base and all the pitting. Yikes.
Of note, I used a product called EVAPO-Rust, commonly available at Autozone, Advance, etc. Man, this stuff is amazing. Its not acid-based as far as I can tell, and will not burn your hands. I got everything as clean as I could prior to dipping it, but once I did, this stuff found its way into every pit and hole in the metal. I'll still wirebrush and clean the metal before using POR, but I was really impressed. Especially since I've been getting AWFUL results with POR's "Prep and Ready." I haven't painted a piece yet that hasn't fish-eyed. Maybe this stuff will help.
Yep, Trash that George, I may have one or at least some good parts
T.C.
Posted by: bulitt Jan 12 2012, 11:43 AM
When Ferrari first started building cars there was a shortage of steel after the war so they had to improvise. The result was many missing street signs around Maranello!
Posted by: ThePaintedMan Jan 12 2012, 06:08 PM
When Ferrari first started building cars there was a shortage of steel after the war so they had to improvise. The result was many missing street signs around Maranello!
LOL, good to know!
Posted by: SUNAB914 Jan 13 2012, 01:01 PM
Do not Por15 the pedal assembly when you get the parts, that stuff is thick and things might not work. Just sand blast parts and paint with rattle can.
Posted by: clow Jan 13 2012, 01:11 PM
Its looking good. Keep up the great work. There will be times you wish you took the torches and cut the car to pieces but don't get discouraged. (I had a few of these days myself) The final product will be sweet! I understand the college budget, I am currently in school as well. Goodluck.
Clow
Posted by: broomhandle Jan 13 2012, 01:43 PM
agreed, good work. and looks like the trans is rebuilt. way cool.
just make sure you have fun!!!
Posted by: ThePaintedMan Jan 13 2012, 07:51 PM
agreed, good work. and looks like the trans is rebuilt. way cool.
just make sure you have fun!!!
Thanks for the replies all. I'll keep that in mind for the pedal cluster - no POR. Also, its not a rebuilt trans.... yet.
Paint can be deceiving! I pulled it out before getting into the metal work and degreased/painted it while I was at it. Still crunches first and second. Thats on my list of things to due, however.-George
Posted by: arkitect Jan 13 2012, 10:17 PM
Good luck on your build. Looks like you got the right attitude to just keep at it until it's done. There's alot to these little cars.
Also, I'm far from a college budget but I still try to manufacture my own parts when I can. Everyone can't buy new parts.
Dave
Posted by: ThePaintedMan Jan 23 2012, 10:02 PM
Thanks Clow, been following your work as well. Truly remarkable. Good luck with your own studies. You're at Purdue, correct?
Its looking good. Keep up the great work. There will be times you wish you took the torches and cut the car to pieces but don't get discouraged. (I had a few of these days myself) The final product will be sweet! I understand the college budget, I am currently in school as well. Goodluck.
Clow
Posted by: ThePaintedMan Jan 23 2012, 10:12 PM
Hello again all,
Sorry I haven't done a great job updating in the past few days. First weeks of classes have been pretty hectic. However, I was able to get a little more work done! The outer long is basically complete around the jack post. Also, I just welded in the support from Restoration Design today. I'll have pictures of that tomorrow. Below is a picture right before I finished the second layer. To those who haven't attempted this yet, remember that its double walled. So if you fabricate a piece you actually need to duplicate it. You can get the picture of this below. It actually doesn't double up all the way around, though. The "inner" layer of the double wall that I made just sort of floats along the bottom of the long. Then, when you weld in the outer layer, you rosette-weld the two together. I'll try to get a picture of this if I can remember. So far I've already doing a poor job of that.
Also, I'm probably being anal because as you can see, I have been POR-ing between each piece that I've made. Everyone else just does a good coat of weldable primer. Meh, I just want to have to come back here again, so I'll keep doing it this way and never have to worry about rust again... at least in the long.
Attached thumbnail(s)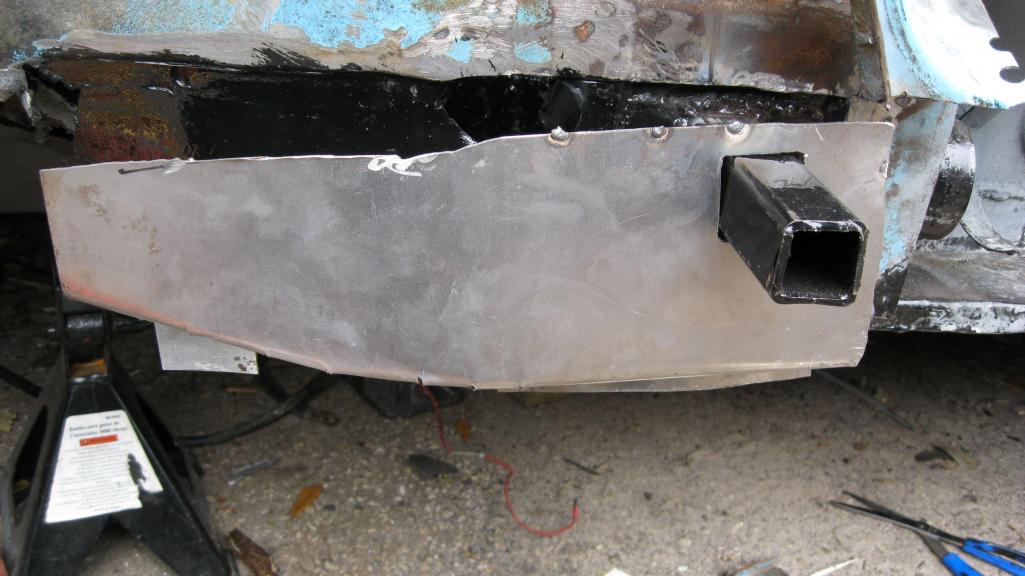
Posted by: ThePaintedMan Jan 23 2012, 10:23 PM
While I was already busy getting covered in POR, I decided to go ahead and do the window channels and part of the floorboard. Even though I bought mine in 6x4oz cans, I don't want to waste any. Once these cans are opened, regardless of what anyone says, its a crapshoot whether you get them open again.
Posted by: ThePaintedMan Jan 23 2012, 10:31 PM
The floorboard we fabbed. When you see the whole floor, you can barely tell that this isn't a Restoration Design or AA piece. Once I get all the interior cleaned up and painted, I'll be sure to post that pic for your opinions.
Attached thumbnail(s)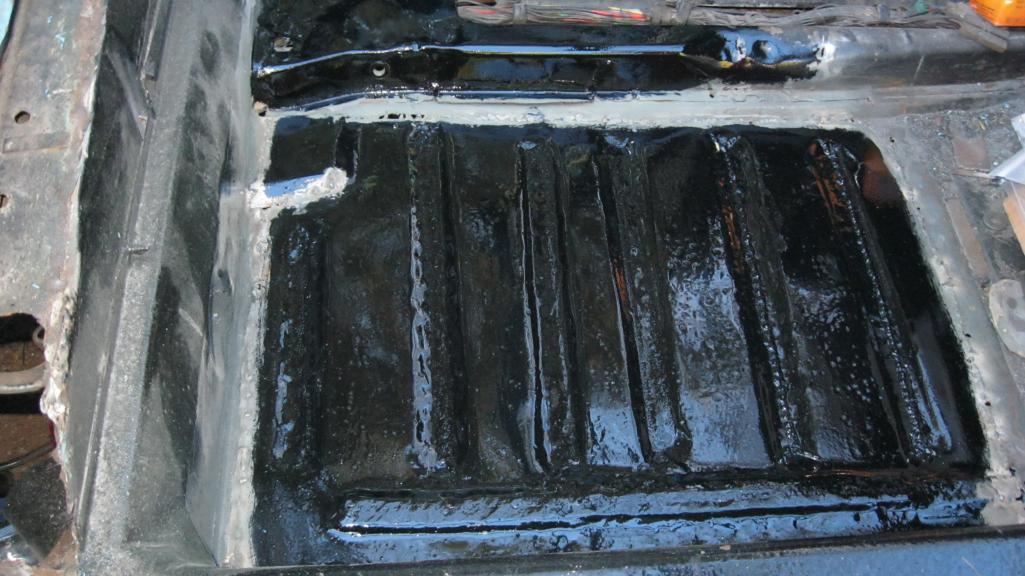
Posted by: ThePaintedMan Jan 23 2012, 10:33 PM
And finally, the front windshield channel. I discovered some rust here too. Glad I got to it when I did. I'm not sure how I'm going to try and seal the other side yet. But this POR should stop anymore rust from appearing on the outside. Still having fisheye problems. I'm starting to think I just got a bad batch (I have heard this does happen from time to time).
Attached thumbnail(s)
Posted by: windforfun Jan 23 2012, 11:05 PM
![popcorn[1].gif](style_emoticons/default/popcorn[1].gif)
Posted by: VOX Jan 23 2012, 11:16 PM
good luck on your build! mines is a college budget resto as well, but i'm glad i didnt start with something in such bad shape! respect for rebuilding it. i suppose im just lucky i live in socal where the rot doesnt hit so hard.
Posted by: ThePaintedMan Jan 23 2012, 11:22 PM
I'm pretty sure I'm not going to get any flack from anyone else for this....

Are you unemployed or just living off of your parents? You must be to find time to go around telling people how they should live their lives.
FYI - I'm at the end of my coursework in my Masters Thesis, holding a 3.76 GPA while teaching several labs and busting my ass at my day job out in the sun. I'll be happy to provide a copy of my transcript as well as letters of reference if it pleases you. Otherwise,  .
.
Are you getting A's in school? If not, why the hell are you waisting your time with a beat up old car? It's an old piece of shit. Face it, you'd be better off studying & preparing for your future.
Posted by: ThePaintedMan Jan 23 2012, 11:28 PM
VOX,
I seem to remember hearing that about yours as well. You are truly smarter than I for starting off with a better example. However, I knew getting into this that I wanted to tackle one of the things that I had not done before, which is metal work. I definitely got more than I bargained for, but I also saved a ton of money by picking a less complete car. I'm sure most of us would probably recommend to anyone that 99% of the time its better to find low-rust cars to start with. But for the crazy few of us who just want to learn, at least we're saving a car in the process! To me, its worth it just knowing that Kevin311, one of the previous owners of this car is happy to see it being saved. Good luck with yours! What are you studying?
good luck on your build! mines is a college budget resto as well, but i'm glad i didnt start with something in such bad shape! respect for rebuilding it. i suppose im just lucky i live in socal where the rot doesnt hit so hard.
Posted by: Valy Jan 23 2012, 11:33 PM
I'm pretty sure I'm not going to get any flack from anyone else for this....
Are you unemployed or just living off of your parents? You must be to find time to go around telling people how they should live their lives.
FYI - I'm at the end of my coursework in my Masters Thesis, holding a 3.76 GPA while teaching several labs and busting my ass at my day job out in the sun. I'll be happy to provide a copy of my transcript as well as letters of reference if it pleases you. Otherwise,
.Are you getting A's in school? If not, why the hell are you waisting your time with a beat up old car? It's an old piece of shit. Face it, you'd be better off studying & preparing for your future.

Posted by: Ed_F Jan 24 2012, 02:44 AM
Oh man, is this fun. I'll have another picture of it stripped, but this is galvanized aluminum or tin where the center hump used to be. To top it off, its secured with a combination of rivets, bathroom caulk and, my favorite - BRASS! Needless to say I've been grinding for awhile now.
Yikes! Sounds like the mess the in between owner (I owned mine from 99 - 2002 and 2010 - present) did on my first car. He actually put fiberglass over the rotted inner rocker, and riveted sheet metal to the longs

Posted by: rnellums Jan 24 2012, 08:38 AM
In my experience, having a diversion from studies helps you make better use of the time you DO spend studying. BTW, I'm the one at Purdue. Clow is up in Canada I believe doing ME in Ontario.
Posted by: porbmw Jan 24 2012, 09:08 AM
[quote.
Also, I'm probably being anal
Geez....that kinda talk gets some of these members just a tad too excited
And humbled/inspired by the skills and determination...that is truly a project car...and you'll be done and driving long before I get my repainted car reassembled....
Diversions from studies....or work....are a necessity
Posted by: Germancar-Junkie Jan 24 2012, 12:20 PM
Yikes! Sounds like the mess the in between owner (I owned mine from 99 - 2002 and 2010 - present) did on my first car. He actually put fiberglass over the rotted inner rocker, and riveted sheet metal to the longs
Ed, the in between owner of your car must have owned my car at some point in time. the repairs, and I use that term loosely, were eerily similar.

George, I agree whole heartedly with your colorful reply. Your rebuild is what inspired me. Keep up the good work!
Dawn
Posted by: ThePaintedMan Jan 24 2012, 04:40 PM
Thanks for the positive replies all. Dawn, I don't know if I'd call this inspiration, but its proof you can do this relatively cheaply as long as you're willing to put the time in and have an open mind to learn. If you ever have any questions, I'll do my best to show you what I did, whether its considered 'right' or ''wrong.'
I've got some more pictures to post here this evening. Took off the old suspension console and what I found scared the crap outta me. It wasn't pretty and it was rusted almost all the way through.
Also, one of these posts I'm going to list some of the "do's" and "I wouldn't if I were you's" that I've learned. I've been keeping a running tally on what I've been spending and in some areas what I initially thought would be saving money probably has cost me some. The floorboards come to mind. While I'm happy with the way they've turned out, I do think that some parts should just be purchased instead of being fabricated. For example, I've bought well over $150 in Dremel and angle grinder discs which I had not accounted for at the beginning. If you buy pre-made parts you're not going to spend as much time or money cutting and grinding. It certainly equals out if not completely outweighing the money saved by making hard to replicate pieces on your own. Plus, no matter how much better I've gotten at fabricating, the replacement pieces are always going to look better. Like I said, this is a learning process
Posted by: rnellums Jan 25 2012, 11:58 AM
I have one solid susp. console. I cant remember if it is right or left though...
Posted by: dlo914 Jan 26 2012, 01:55 AM
VOX,
I seem to remember hearing that about yours as well. You are truly smarter than I for starting off with a better example. However, I knew getting into this that I wanted to tackle one of the things that I had not done before, which is metal work. I definitely got more than I bargained for, but I also saved a ton of money by picking a less complete car. I'm sure most of us would probably recommend to anyone that 99% of the time its better to find low-rust cars to start with. But for the crazy few of us who just want to learn, at least we're saving a car in the process! To me, its worth it just knowing that Kevin311, one of the previous owners of this car is happy to see it being saved. Good luck with yours! What are you studying?
good luck on your build! mines is a college budget resto as well, but i'm glad i didnt start with something in such bad shape! respect for rebuilding it. i suppose im just lucky i live in socal where the rot doesnt hit so hard.
LOL we paid $300 for the rolling chassis and another $300 for the engine and tranny.
Posted by: al weidman Jan 26 2012, 09:44 PM
George, you are doing great and you will have a good portion of self satisfaction. I do some things just to see if I can. 


Posted by: shuie Jan 26 2012, 10:09 PM
With the POR cans...
I usually just buy the little cans and cover one small area at a time, but you can drill a hole in the lid and then use a cork from the hardware store to re-seal them if you don't want to use the entire can at once. They don't get exposed to too much air and will keep for a little while like this.
Posted by: ThePaintedMan Jan 26 2012, 10:35 PM
George, you are doing great and you will have a good portion of self satisfaction. I do some things just to see if I can.
Thought I hadn't quite said it that way, this is exactly what goes through my mind, lol. Much to my girlfriend's chagrin, however. Thanks for the kind words!
Posted by: ThePaintedMan Jan 26 2012, 10:37 PM
With the POR cans...
I usually just buy the little cans and cover one small area at a time, but you can drill a hole in the lid and then use a cork from the hardware store to re-seal them if you don't want to use the entire can at once. They don't get exposed to too much air and will keep for a little while like this.
Shuie,
I had heard/seen that as well. May try that if I find myself getting to a stopping point with an open can. However, so far I've done a pretty good job of predicting what I would need before I started. Also, have heard that keeping them in the fridge helps once opened. Of course, I don't have kids, so I would be EXTREMELY careful if I did!
Posted by: OU8AVW Jan 27 2012, 10:06 AM
With the POR cans...
I usually just buy the little cans and cover one small area at a time, but you can drill a hole in the lid and then use a cork from the hardware store to re-seal them if you don't want to use the entire can at once. They don't get exposed to too much air and will keep for a little while like this.
Shuie,
I had heard/seen that as well. May try that if I find myself getting to a stopping point with an open can. However, so far I've done a pretty good job of predicting what I would need before I started. Also, have heard that keeping them in the fridge helps once opened. Of course, I don't have kids, so I would be EXTREMELY careful if I did!
Open the can then put saran wrap over allowing the wrap to contact the paint. Then put the lid back on. The wrap contacting the paint keeps all the air out. Then you can wad up the saran wrap when you're done, put it in a paper sack and have a good ole' huffin' time....


Posted by: mepstein Jan 27 2012, 10:17 AM
Also, one of these posts I'm going to list some of the "do's" and "I wouldn't if I were you's" that I've learned. I've been keeping a running tally on what I've been spending and in some areas what I initially thought would be saving money probably has cost me some. The floorboards come to mind. While I'm happy with the way they've turned out, I do think that some parts should just be purchased instead of being fabricated. For example, I've bought well over $150 in Dremel and angle grinder discs which I had not accounted for at the beginning. If you buy pre-made parts you're not going to spend as much time or money cutting and grinding. It certainly equals out if not completely outweighing the money saved by making hard to replicate pieces on your own. Plus, no matter how much better I've gotten at fabricating, the replacement pieces are always going to look better. Like I said, this is a learning process
Exactly what Scotty B told me at the start of my project. Buy everything you can and it will still need work but at least you're 90% of the way there.
Posted by: rwilner Feb 23 2012, 02:42 PM
updates?
I like this thread
Posted by: ThePaintedMan Feb 23 2012, 06:32 PM
Man, I had no idea anyone was even really following this. Thanks for the reminder to update this! Well, as the semester has worn on, time to work on the car has been limited. However, I have finally gotten the suspension console done and fully buttoned up. This is what it looked like first, after I took the console itself off. BTW, this is a chore, if no one has done it yet. The spot welds are one thing, but cutting through the brace from the inside<-> console is a whole other story.
Attached thumbnail(s)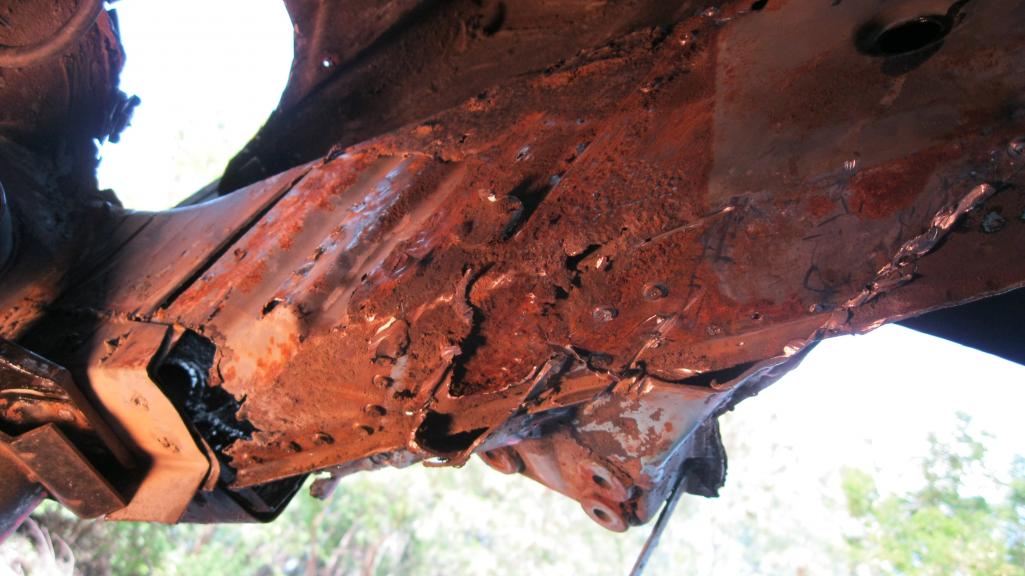
Posted by: ThePaintedMan Feb 23 2012, 06:35 PM
Obviously the outer skin on the inside was trash. So I carefully cut through it to keep the inner intact. The inner wasn't ALL that bad, I suppose as you can see below. Initially I was just going to re-skin the outer section of the inner long. However, as you'll see on the next page, I had some issues.
Attached thumbnail(s)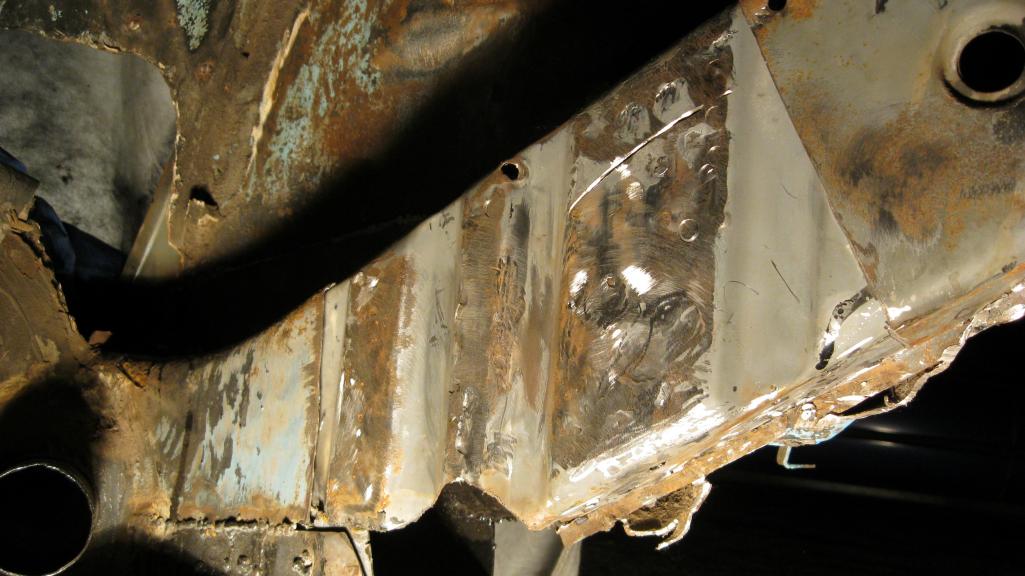
Posted by: ThePaintedMan Feb 23 2012, 06:39 PM
Bruce Stone (bdstone914) sent me a whole inner frame section from a parts car. This is the console with several pieces including the engine shelf removed. The problem with using non-replica parts is whatever you cut out, you're going to have to do it TWICE. I drilled out all the spot welds on this suspension console, only to get to the point where I could not figure out what was keeping it attached to the remaining frame piece. So I got frustrated and....
Attached thumbnail(s)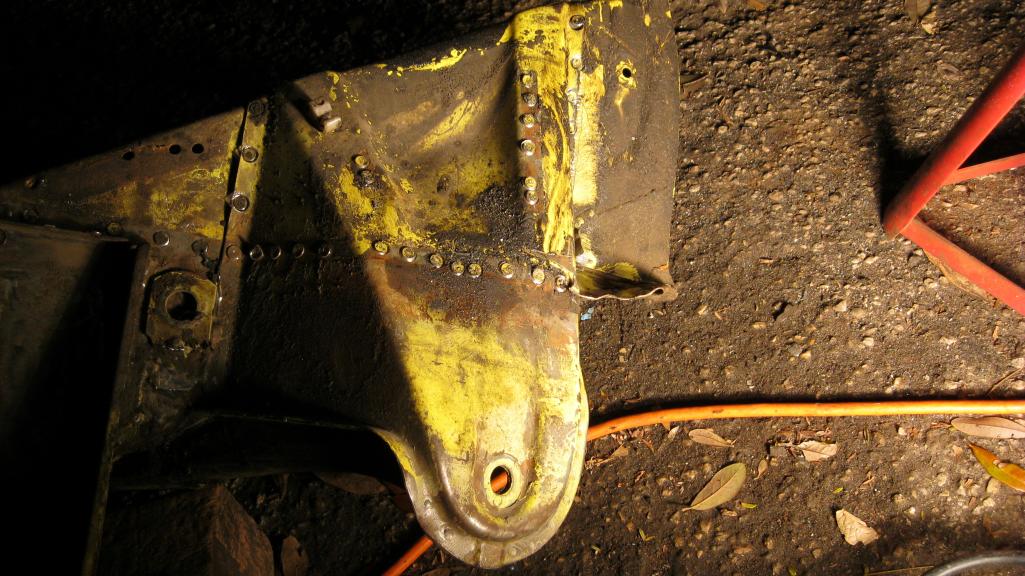
Posted by: carr914 Feb 23 2012, 06:40 PM
George, I'm sure there are a bunch of us following this ( Check the Views) You're doing Great
Posted by: dlee6204 Feb 23 2012, 06:41 PM
Yeah dude. We are all watching and waiting. Keep up the good work.
Posted by: ThePaintedMan Feb 23 2012, 06:44 PM
Cut the whole thing out to replace it all as once piece. In hindsight, probably NOT the best solution, since its very easy to weld in the whole piece too far in any direction. As you can see in the next post (GD post size limit!  ) , I used the old piece to line up my cut lines on the "new" piece.
Attached thumbnail(s)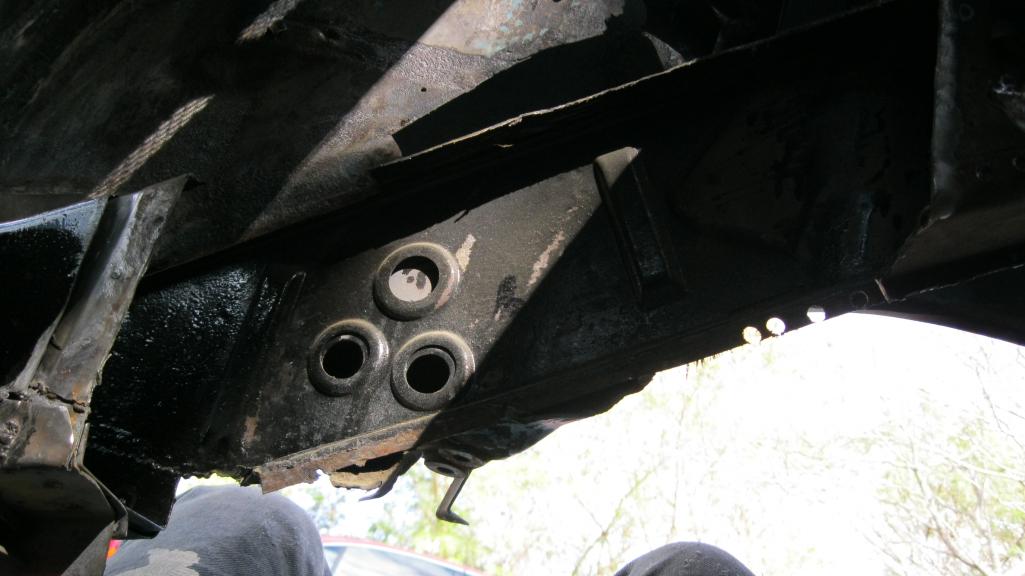
Posted by: ThePaintedMan Feb 23 2012, 06:45 PM
The "new" piece.
Attached thumbnail(s)
Posted by: ThePaintedMan Feb 23 2012, 06:48 PM
And the portions I used to line up the cuts. If you look closely, you can see I sectioned the original piece where the folds in the inner section are. Also, those round holes helped line it up. Otherwise I would have been fuched.
Attached thumbnail(s)
Posted by: ThePaintedMan Feb 23 2012, 06:51 PM
Once I got the piece cut to size, I then had to go and cut the outer skin off about 1/2 in on both sides as well as the outer skin on the remaining section of the frame on the car. Not sure how to explain this, but it allows you to weld the inner skins together first. Then you grind this down and weld in your outer skin patch so that the seams of the welds aren't in the exact same place. If anyone is curious I could post a picture with a diagram of what I mean.
Attached thumbnail(s)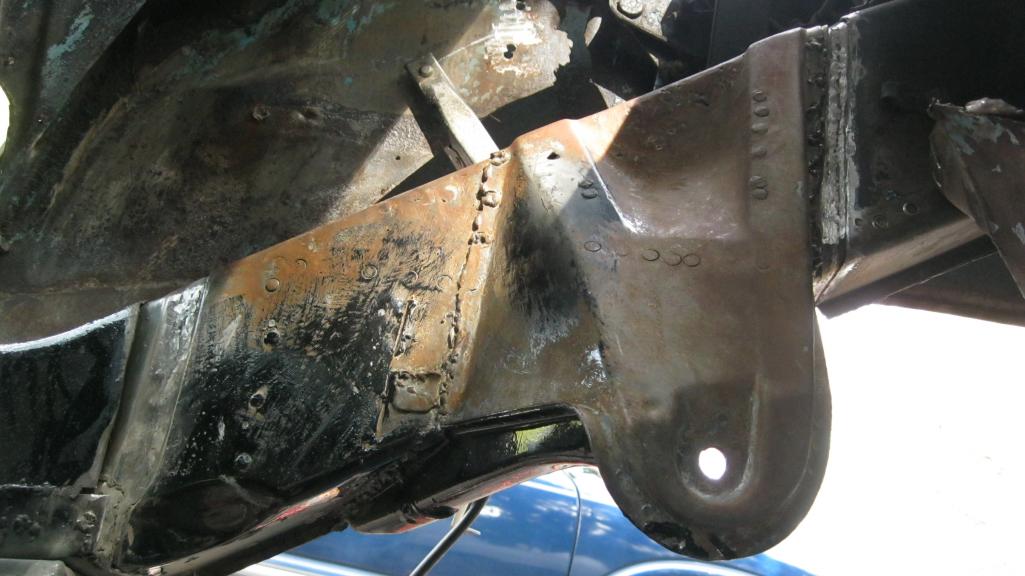
Posted by: ThePaintedMan Feb 23 2012, 06:55 PM
Of course, I took measurements before all of this. I had no friggin idea how to follow the measurements provided in body dimensions section, to be honest. So I used the drivers side console as a reference. I ended up with the exact same length from the center of the console bolt hole to the large dimples on the bulkhead, maybe +/- 1 mm. Obviously, its pretty hard to get the thing out of line on the Y or Z axis, since the flanges of the two frame halves should match up.
Attached thumbnail(s)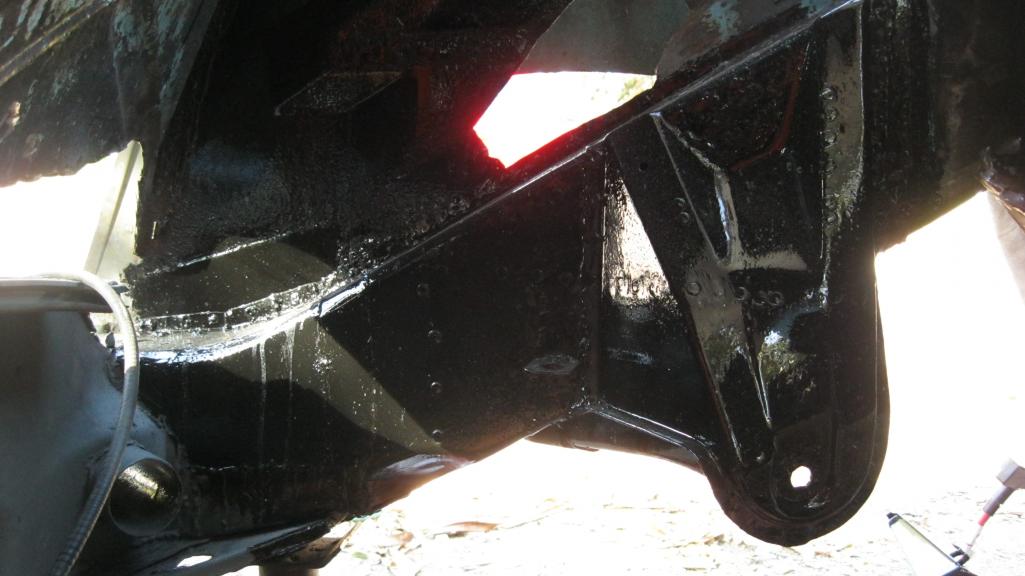
Posted by: ThePaintedMan Feb 23 2012, 07:01 PM
A couple other things are done (well actually a lot, but I just don't have pictures at the moment.) The jack point is below. I ordered the support plate from RD, which in hindsight, I should have ordered all of this stuff from them. Long story short, if is not a flat piece of metal, or a since 90 deg. bend, just order the shit. Its going to cost you more in grinding/cutting discs than its worth. I might have saved a few hundred dollars here, but thats about it. Of course I learned a ton though and got to - all of my favorite pastimes. Note: the cool thing about doing this yourself though is you get to make your own "modifications." As far as I can tell, my jack receiver tube is at least twice as thick as the RD version, which I did not order. I'm hoping it'll stick around a little longer than most of them seem to do.
Attached thumbnail(s)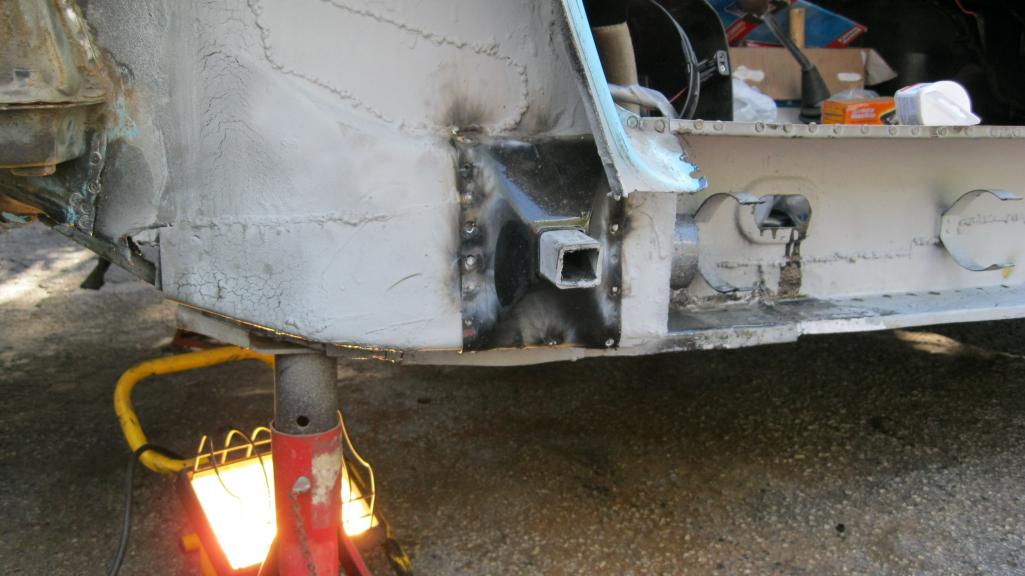
Posted by: ThePaintedMan Feb 23 2012, 07:03 PM
Hole that existed before, plus a little extra cut out to get rid of all the damn brazing.
Attached thumbnail(s)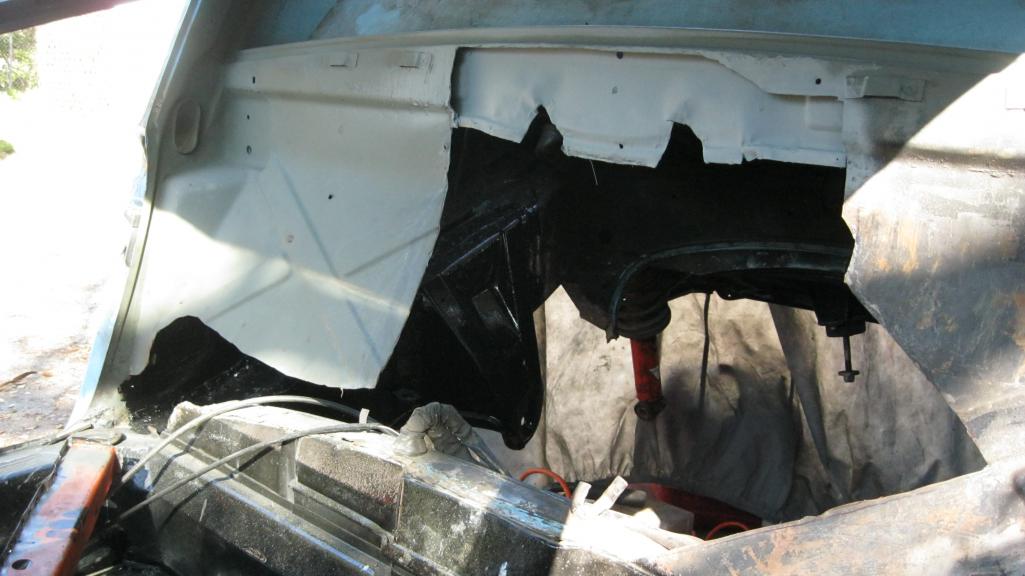
Posted by: ThePaintedMan Feb 23 2012, 07:06 PM
The piece that Mark (76911s) sent me cut and fitted. FYI, this guy is one of the many people who went FAR out of their way to help me in this endeavor. He went out and cut seat hinges, a parking brake mount, the center cross beam and the firewall hump out of one of his parts cars in the F'ing snow. Truly this car will be a testament to all of you guys as much as it is to me.
The next few posts will skip ahead, since I've gotten all of these holes filled and welded since I last took pictures. Its no fun not being able to reach through the firewall anymore to grab tools laying on the floorboards!
Attached thumbnail(s)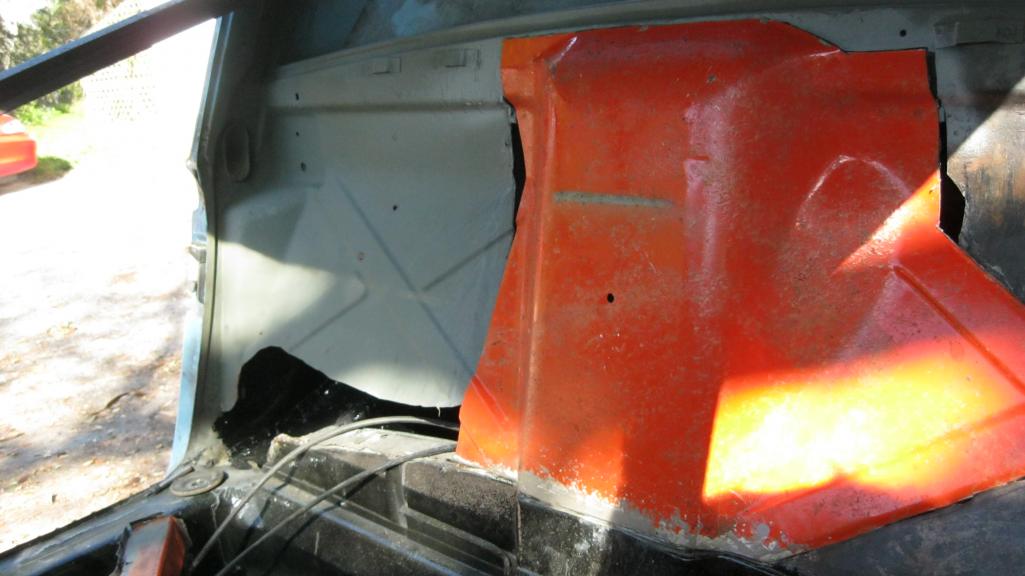
Posted by: Jon Fernandes Feb 23 2012, 07:41 PM
You're really making some progress! Can't wait to see the firewall finished! Awesome job so far 
Posted by: Bob L. Feb 23 2012, 09:13 PM
Me too. ...Riveting!
I'll be referring to this when I do mine.
Posted by: ThePaintedMan Feb 24 2012, 06:27 AM
Thanks fellas. Again, the only thing I can stress if you're going to refer to this one is to buy as much of the hard to form stuff as possible. You won't save all that much money forming them yourself and you will be much more likely to get everything to line up the way its 'sposed to in the end. However, there are some parts that can't be bought. Don't quote me on this, but I don't think Restoration Design has the inner side of the longitudinals, either the inner skin or the outer skin. If your car is as bad off as mine (which most people in their right minds never would have bothered with in the first place!) then you would have to resort to doing things this way. In this case, I guess I'm glad I bought pieces cut out of other cars (thanks Bruce and Mark) because it helped me see what I needed to do and what was missing in the first place.
Another point to mention I suppose. Even as far gone as this car was, its surprising how well it drove when I last took it around the street. Granted, I don't think it should have been on the road because it was a ticking time bomb. But, I think it says something about the engineering that went into it. Even with the suspension console and motor mount just about rusted through, there was enough metal where it counted to keep it together. Can't wait to see what its like now!
Posted by: ThePaintedMan Mar 28 2012, 09:36 PM
This is probably going to piss a bunch of you off, since I have not updated in some while, but guess what? IT RUNS! I busted ass over my Spring Break, desperately trying to get the car ready to make it to Sebring. Unfortunately that was not to be. However, when I got back all it took was a little tweaking here and there to get it to run. The following posts will be a little recap of what I've done since I last posted.
The last post I made was showing the work on the firewall. This is a pic of it nearly finished. I primed it prematurely as there were still plenty of pinholes to finish welding up. Eventually I just gave up and used a little filler, lol.
Attached thumbnail(s)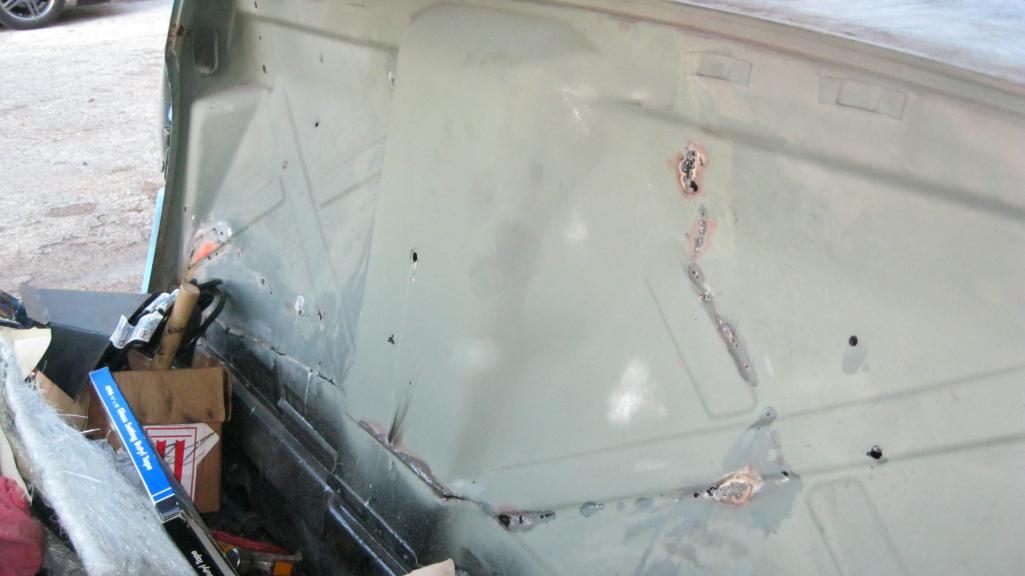
Posted by: ThePaintedMan Mar 28 2012, 09:46 PM
Doh! Since I guess I still haven't reached enough posts to be able to post pictures back to back, you guys will have to refer to my previous posts to see how back the pedal area was. This picture is the area welded up and POR'd. This actually was one of the easier pieces to fabricate! Cut it out, and basically just hammered with a ball peen and a piece of wood with a valley in it till I got the shape right. Don't skimp in this area - use good heavy gauge steel. One, to give some wiggle room in case it rusts in the future (doubtful). But also because there is PLENTY of flex in the floor in this area when under threshold braking. Even though I thought I did a pretty good job here, when we were bleeding the brakes I could see quite a bit of deflection. I'm planning on putting in something similar to Chris' Tangerine Racing MC brace to help cure this.
Attached thumbnail(s)
Posted by: ThePaintedMan Mar 28 2012, 09:49 PM
Floorboards with POR. BTW - as if using POR could be anymore of a pain in the ass, doing it outside sucks. There is nearly no way to keep stuff from getting stuck in it. But then again, I'm not going for perfection.
Attached thumbnail(s)
Posted by: ThePaintedMan Mar 28 2012, 09:53 PM
Seat brackets and the sliders installed. I actually bolted the brackets to the sliders first to help me locate where they needed to be welded.
Attached thumbnail(s)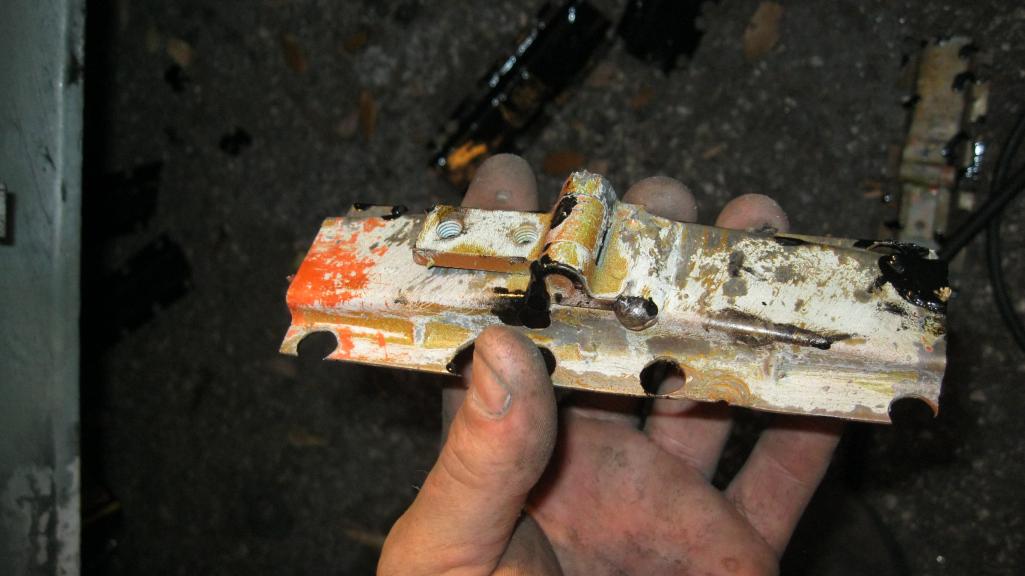
Posted by: ThePaintedMan Mar 28 2012, 09:54 PM
Seats!
Attached thumbnail(s)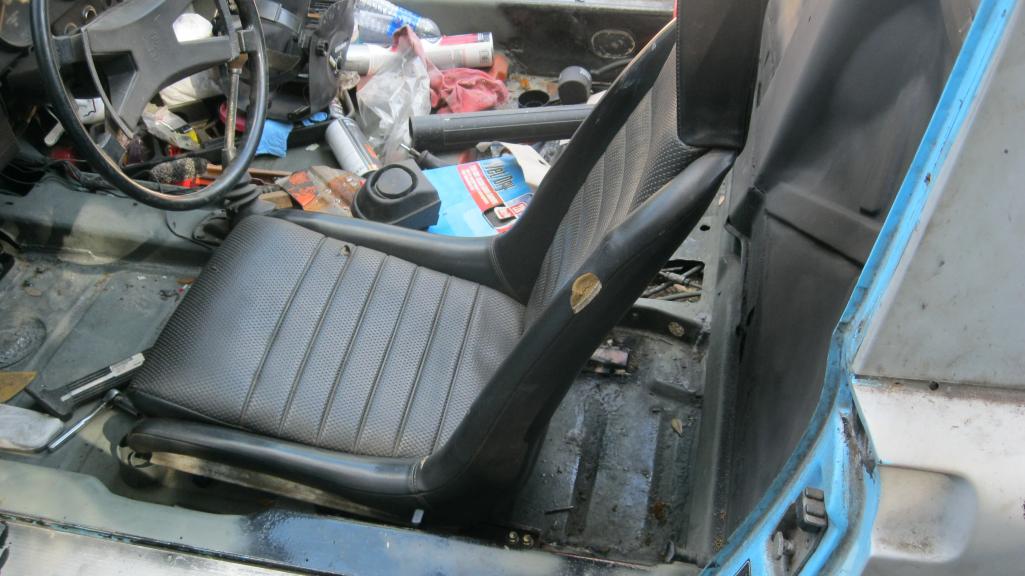
Posted by: ThePaintedMan Mar 28 2012, 10:02 PM
Once I was satisfied I had everything pretty well in place, I made the repairs to the outer portion of the long and welded it up. It had a few holes in it initially, but I'm pretty happy with the end result. I still have no idea why I get the flash rust after treating with Metal Prep/Ready. 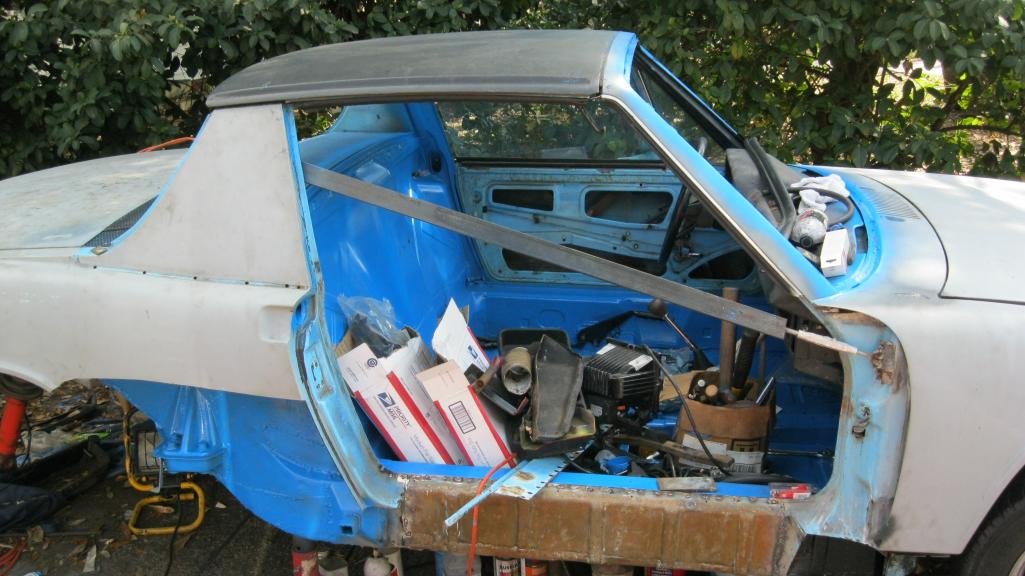
Also, I swear I thought I was going nuts. I had a dream that I welded that sucker back together and forgot to put the heater tube back inside, lol. Since I won't be hooking the heat up for awhile, I'm just praying that I got it right (trust me, I would be the person to have found a way to install it wrong).
Attached thumbnail(s)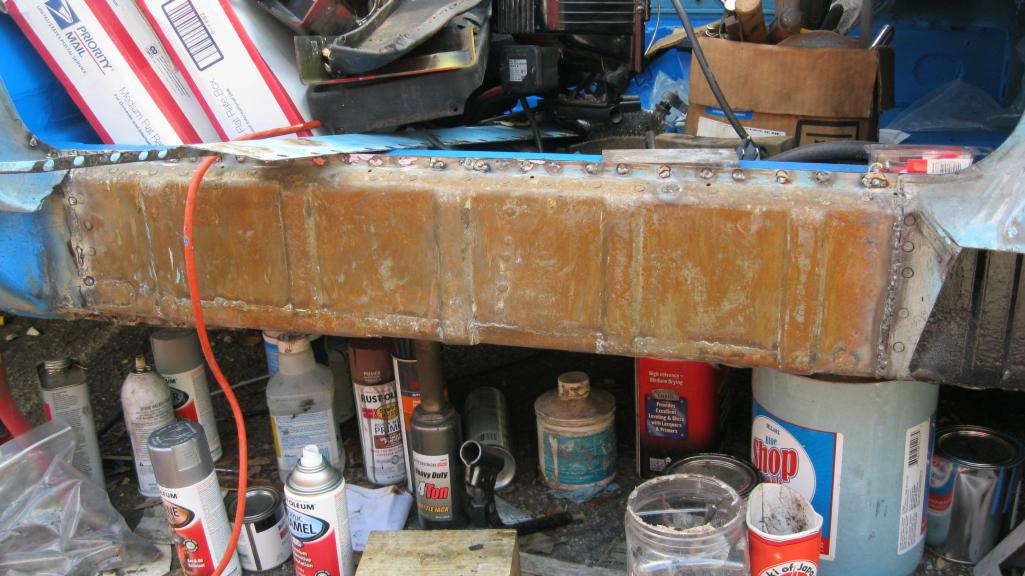
Posted by: ThePaintedMan Mar 28 2012, 10:08 PM
Final priming and prep the night before painting.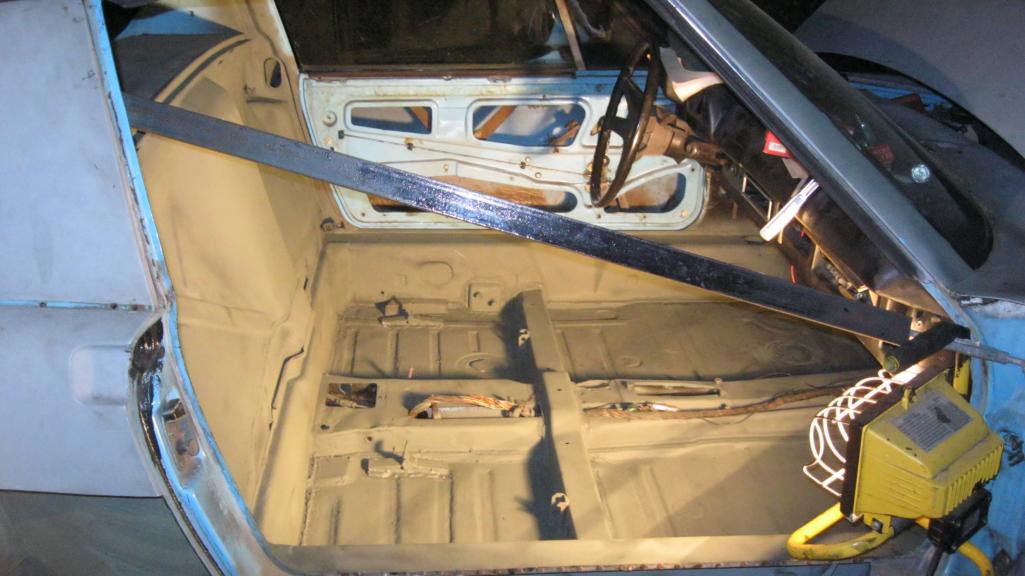
And...... PAINT! No, its not a factory Porsche color, I know. Again, in my defense there is nothing original left about this car and its a 1.7 anyway. However, I'm curious if anyone can guess the color? Hint: its domestic. Some might hate it or wonder why I chose this color, but it'll make sense later. I only did the interior and windshield areas for now using a Preval Sprayer just to get it back together. I'll go back to some of these areas later when I spray the whole car.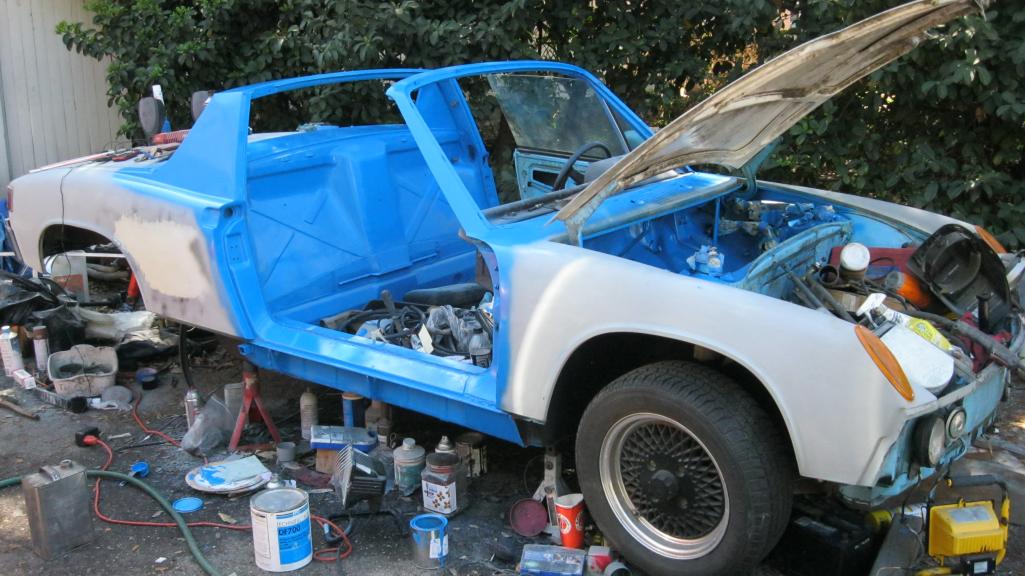
Posted by: ThePaintedMan Mar 28 2012, 10:11 PM
Engine bay and the breather bottle
Attached thumbnail(s)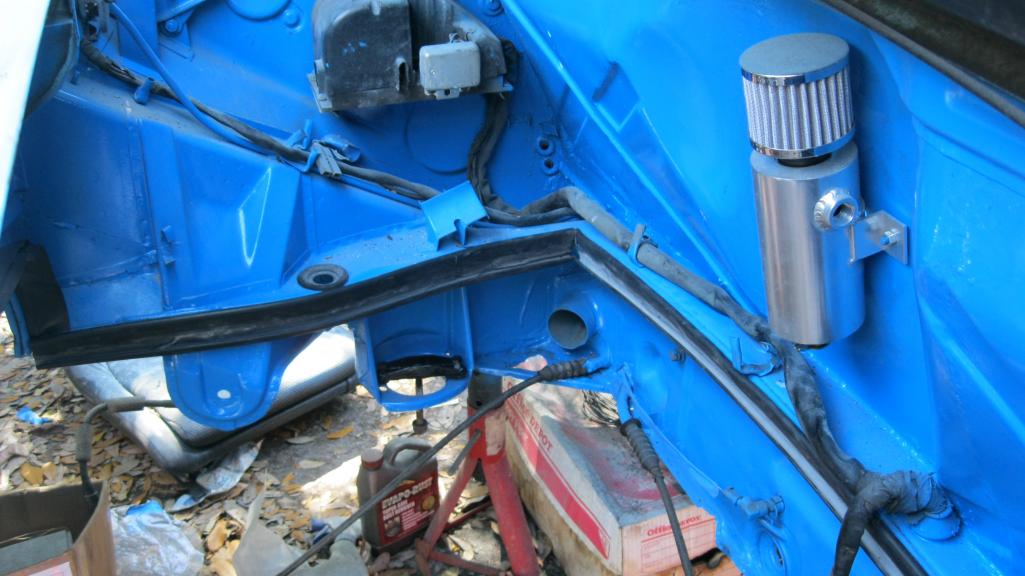
Posted by: ThePaintedMan Mar 28 2012, 10:13 PM
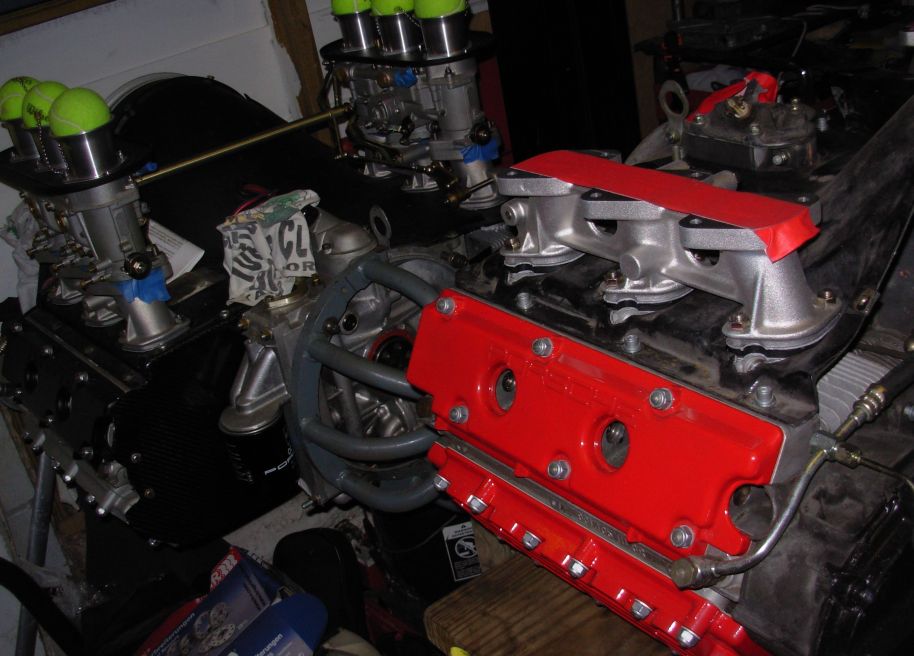
My buddy and I pulled several long nights trying to get the car to Sebring, as I mentioned previously. We ran into some issues, as expected. Most of it was due to fitting the dual carbs and wishful thinking that the bits of linkage I had would all match up, since the car had a progressive on it originally. Again, wishful thinking.
Attached thumbnail(s)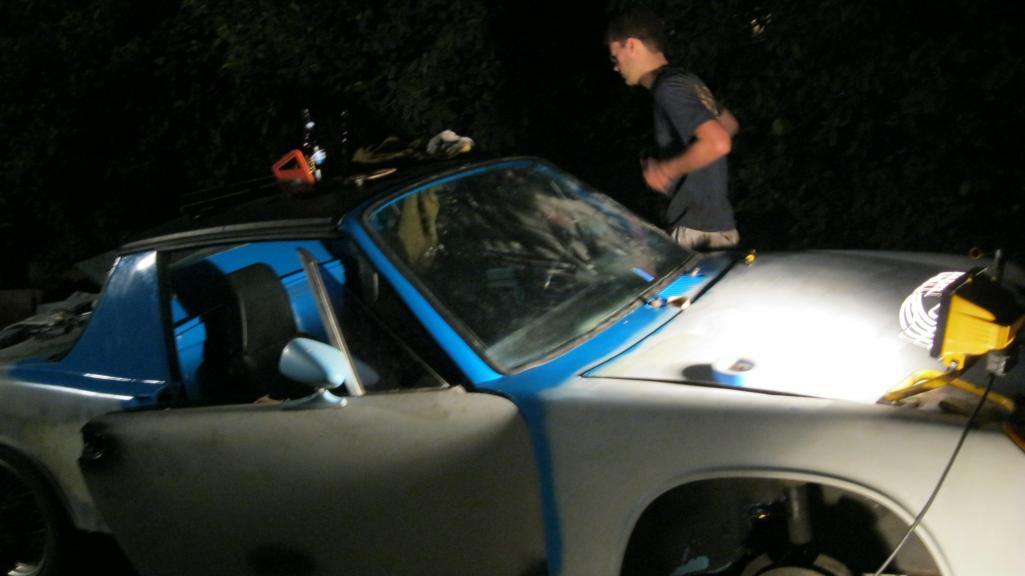
Posted by: ThePaintedMan Mar 28 2012, 10:20 PM
Here is something else we noticed. I ordered new intake gaskets from Pelican, which had three holes. Unfortunately this car has four studs? Did I miss something here? Ended up re-using the old ones.
Attached thumbnail(s)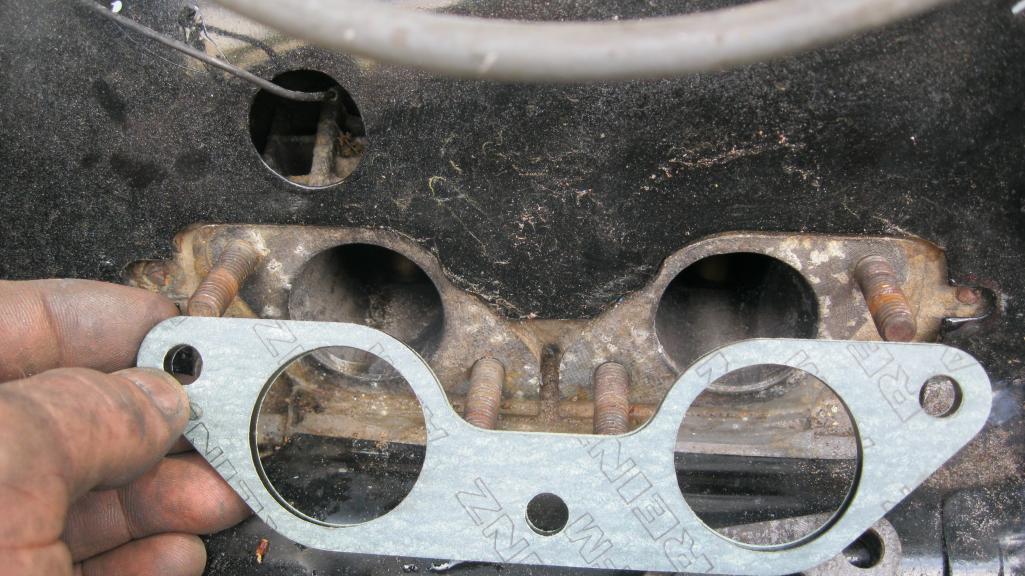
Posted by: ThePaintedMan Mar 28 2012, 10:28 PM
So here she is on all fours, just the way I like I do have an issue with the door gap, but not to fear. I think. This door is in dire need of new hinge pins so I can't get it aligned right currently. Even though its really close at the top near the door handle, there is a significant gap at the upper front part part of the door. This tells me that once I get new hinge pins we should be able to correct this.
On that note - does anyone have a set of decent used pins? Or at least know where to get new ones?
Also, as we really rushed to get the car back together I didn't do a good job taking pictures. I did weld the lower rear quarter panel back on with minimal flex in the metal. This was accomplished with low heat, really taking my time spacing the spot welds out and using a damp cloth to cool after each weld. I never expected it to be flush and nowhere near the quality of the work of people like Scotty B. However, I ended up with a very thin coat of Evercoat over the top, which I can live with. One day I'd like to learn how to do this without any filler at all.
Attached thumbnail(s)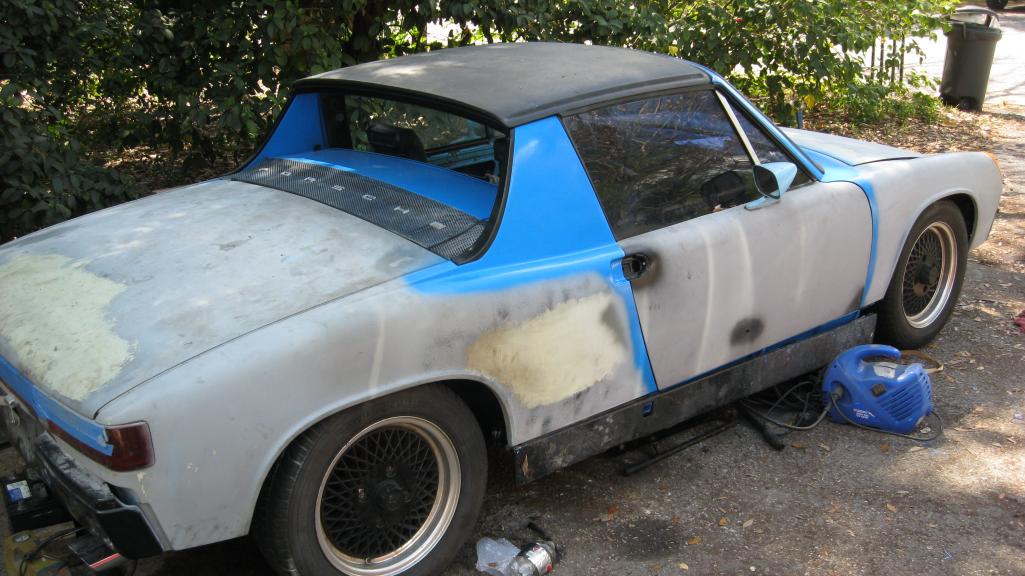
Posted by: ThePaintedMan Mar 28 2012, 10:35 PM
And to finish for now, the last picture I have currently is one of my very rednecked linkage setup. For what its worth, the way I have it has allowed me to drive the car to and from campus every day this week! I even took the plunge and drove it over the bridge to Tampa (about 30 miles away) and the car ran great. The carbs are about as synched as I could imagine they could be. However, there is a spot at about 1/3rd throttle where they get out of synch. The good news is they're synched again at full throttle! This makes for some interesting looks and some very spirited driving, lol. I've ordered a new linkage kit which I hope to receive any day now.
Once I got the motor in, I also went ahead and adjusted all the valves, replaced all pushrod tube seals, valve cover gaskets, etc. This motor is, from what I can tell, original in every way and doesn't leak a DROP of oil. What a freakin blast!
Another quick note. I'm learning all kinds of things from this. I rebuilt both carbs prior to installing them with the Redline kit. However, I guess I didn't clean them out adequately. I started the car and got it running, but for the life of me couldn't synch them. I drove it around the block a few times, assuming it was the linkage. After driving it hard I brought it back into the driveway and realized I had one exhaust pipe that was darn near cool to the touch. Turns out I had one mixture screw that didn't seem to do anything at all. I then came off the 30 bucks and bought a gallon of B-12 Chemtool. I disassembled the carb once again and dipped it for a couple hours. Slapped it back on and immediately the car ran better. I can only assume there was some dried gas within the idle circuit of the carb, but the B-12 seems like it got it. I would recommend that anyone rebuilding old carbs go ahead and buy a can of it. Its well worth the investment and you can use it again and again.
Attached thumbnail(s)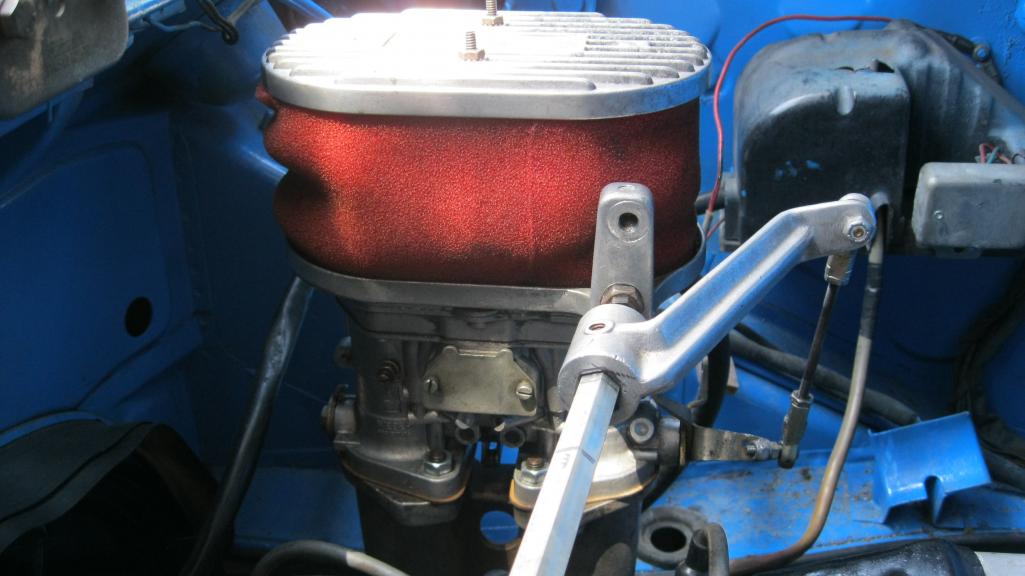
Posted by: carr914 Mar 29 2012, 05:52 AM
As far as posting more pictures, try resizing them down to about 900x600, then you will be able to Post more.
The Intake Gaskets look like you got the ones for a different size motor.
You're doing such a good job, you want to come over & put an engine in with me?
Posted by: rwilner Mar 29 2012, 06:12 AM
go George!
Posted by: ThePaintedMan Mar 29 2012, 08:50 AM
Thanks fellas! T.C., sure thing bud. You name the day!
Posted by: carr914 Mar 29 2012, 02:32 PM
And...... PAINT! No, its not a factory Porsche color, I know. However, I'm curious if anyone can guess the color? Hint: its domestic.
Looks like the Blue on New Mustangs ( and since you DD a Mustang) so that's my guess
Thanks fellas! T.C., sure thing bud. You name the day!
I'm getting a Motor delivered tonight
Posted by: ThePaintedMan Mar 29 2012, 04:37 PM
Looks like the Blue on New Mustangs ( and since you DD a Mustang) so that's my guess
Yep, Grabber Blue. Again, not original and some would say stupid, but I'm hoping the eventual result will be fun. Will explain later.
You're getting a motor tonight? I'll assume this isn't for the GT, since that one has a great motor sitting there ready to go. I'll be out of town till Sunday afternoon, but could come over after that. PM me and I'll send you my number again if you don't have it.
Posted by: ThePaintedMan Mar 29 2012, 05:01 PM
One more shot of my redneckery. Just to get it down to 2 colors rather than 4. 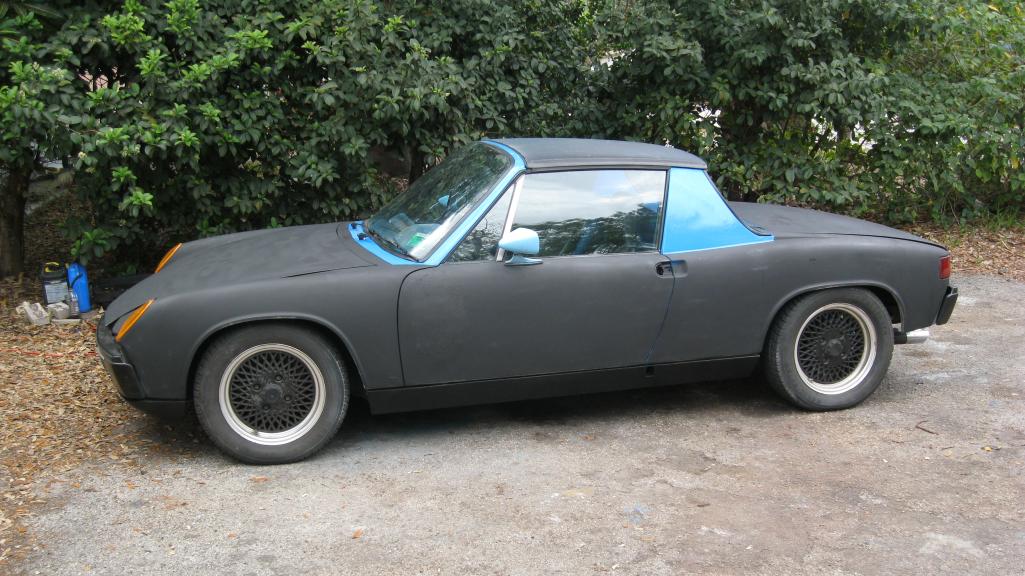
Posted by: ThePaintedMan Mar 29 2012, 05:02 PM
And carpet!
Attached thumbnail(s)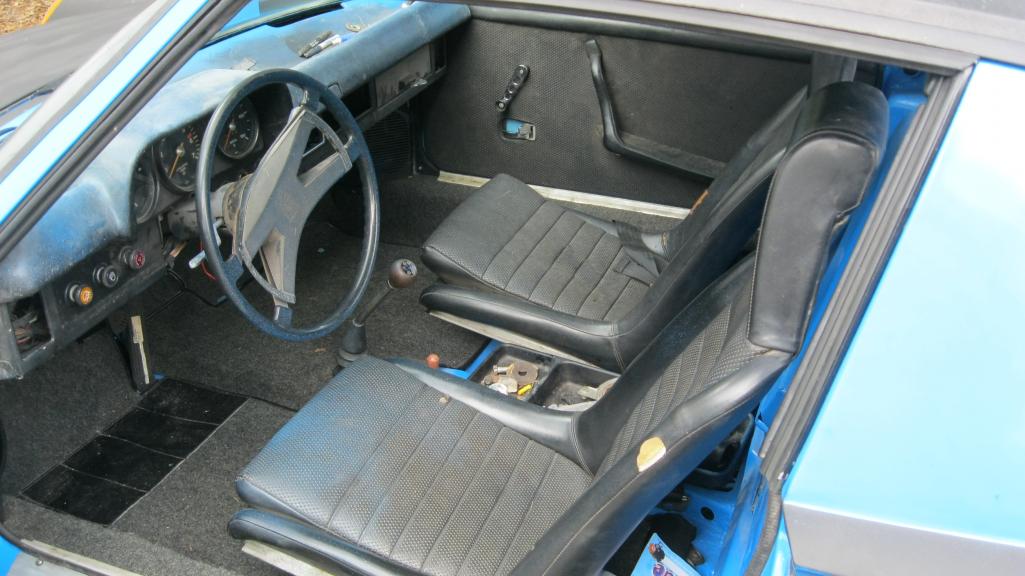
Posted by: trojanhorsepower Mar 29 2012, 06:07 PM
That has to be one of the fastest driveway restorations I have ever seen!
Great work!
Keep posting pictures so those of us who need to can work on our cars vicariously though you.
Peter
Posted by: Germancar-Junkie Mar 29 2012, 06:31 PM
No wonder you haven posted in a while... you've been workin' your off! Looks great! So glad to hear you're drivin it.
Keep up the inspiring work!
Posted by: carr914 Mar 29 2012, 06:53 PM
Looks like the Blue on New Mustangs ( and since you DD a Mustang) so that's my guess
Yep, Grabber Blue.
You're getting a motor tonight? I'll assume this isn't for the GT, since that one has a great motor sitting there ready to go.
Yep for the Steel roof
Posted by: dlee6204 Mar 29 2012, 07:03 PM
Wow what a quick turnaround! 
Posted by: VOX Mar 29 2012, 10:12 PM
driving it already! awesome! keep up the good work!
Posted by: ThePaintedMan Mar 30 2012, 08:01 AM
Thanks for the support all. It has been a lot of work and I know I've made mistakes along the way, but at least now I get to have a little fun. Driven it over 100 miles to and from campus this week and saved a bunch of gas over the Mustang. I'll slowly start tackling the body work once the semester is over. Right now I've got to buckle down on research statistics and my thesis.
A question though, and maybe you can help with this one T.C. Where is a good place in the Tampa Bay area to get the windshield re-installed? We boogered it up when trying to put the 914rubber trim on it. I would rather just get it done right.
Also, T.C. - I hate you on principle alone. That motor looks great!
Posted by: carr914 Mar 30 2012, 08:10 AM
Don't know any Windshield Installers - Sorry
Posted by: Irish914 Apr 11 2012, 12:01 PM
One more shot of my redneckery. Just to get it down to 2 colors rather than 4.
I like the two tone look it really makes that blue pop. Even though its not a typical 914 color.
Posted by: ThePaintedMan Apr 11 2012, 05:45 PM
Well, thanks Its just rattle can black primer though. Eventually it'll be all blue. Until I add the green. You'll see.
Update: Aircooled.net is FINALLY sending the linkage kit I ordered about a month ago. I talked to John on the phone and explained I was ordering it through him because CB Performance took so long before and charged outrageous shipping. AC.net took just as long and the shipping was just as bad. Wish we had better vendors for this stuff.
Posted by: dlee6204 Apr 11 2012, 05:46 PM
Eventually it'll be all blue. Until I add the green. You'll see.
Posted by: ThePaintedMan Apr 11 2012, 09:22 PM
Eventually it'll be all blue. Until I add the green. You'll see.
I promise it won't be awful
Posted by: rwilner May 29 2012, 01:00 PM
![]()
updates?
Posted by: carr914 May 29 2012, 01:54 PM
updates?
George drove it to my house on Saturday, we drank Beer
 - End of Update
Posted by: vw505 Aug 5 2012, 10:24 PM
Dam cant belive you pulled that off! What part of St Pete are you from. I grew up in shore acres and lived in Tampa working in Ybor.
Posted by: rhodyguy Aug 6 2012, 08:11 AM
holly cow george!! i had never seen this thread before and had no idea of the condition of the car you started with. good work. the pict in post #110 with all the automotive supplies surrounding the car is a classic.
k
Posted by: ThePaintedMan Aug 6 2012, 02:49 PM
Hello again,
I do have some updates, but my camera is currently stuck in the car while it rains. I'll work on getting some progress pics up soon. Mostly little things and getting the carbs tuned, but bodywork will come soon as the Fall rolls in.
Vw, I grew up on the south side of St. Pete, near the Albert Whitted Airport. After college, I moved to Tampa in the Carrollwood area and was working there for awhile till I decided to go back to school. If you're ever in this neck of the woods, let me/us folks know.
Kevin, thanks again for the kind words. Still a work in progress, obviously, but I have yet to work on the car and not learn something.
More pics/progress soon. I promise.
Posted by: ThePaintedMan Aug 14 2012, 12:37 PM
8/14/12 Update:
Had a very cool, albeit frustrating weekend. Walter Olin (walterolin) was down to visit his daughter and family from Missouri and was gracious enough to stop by with Johnathan, his son-in-law. We talked about all kinds of stuff in the short time he was here, and he filled me in on a few things that I was wondering. Great fun. Walter also graciously brought me the original heat exchangers from his early 1.7 so I would have something to replace the ones that were falling apart on mine.
With that I decided it was finally time to replace my exhaust and fix some issues I had with the exhaust studs. Soon after he left on Saturday, I began dropping the exhaust. This was a chore because the whole system was welded together by the PO. As in the HEs and the Monza-style exhaust were one unit that had to be unbolted all at once. I had inspected it previously and noted this, but also that the nuts were butted right up against the manifolts on several studs. I was able to pry and get a wrench on all of them finally and removed the exhaust. Needless to say, it almost fell apart in my hands, the welds were so bad. I also then discovered the reason why the nuts were so hard to remove. It appears that the PO had installed chevy 3/8 in studs after the orignals must have stripped out.
I spent the rest of the weekend first trying to find stepdown studs from M10-M8 as they were the only ones that would ostensibly fit the hole size in the head after they had been drilled out. No luck. So then I moved to plan B, which was to install Time Serts and the original style M8 studs. Installing the Serts was quite easy, and unfortuantely I only had 4 on hand. But the remaining 4 were on the side of the exhaust that I could still reach with a crow-foot extension, so I was okay with leaving them for now. This left me with two problems though. The holes in the HEs that Walter brought me would only fit over a M8 stud and would not clear the remaining 3/8 inch studs. On top of that, I could not find the appropriate length M8x1.25 studs at any local source. I settled for a "universal" stud kit that had M8 studs in it for the time being, but I still had to do something about the HEs. I remembered that I bought some later style manifolds with cherry-bombs welded to them. In the interest of getting the car back together and off jackstands until I could come up with a better option, I decided to put them on, knowing they would be ungodly loud.
I annealed the copper washers and started bolting things up, only to realize that despite my best efforts, I still had clearance issues. The PO had obviously drilled/tapped the studs at an angle such that when I put the Time Serts in, the studs still ended up too close to the manifold, and even with the correct 12mm nuts, I was not able to get a wrench fully on them.
By this point it was nearly dark, so I tightened things up the best I could and started it up. Yup, sounds like a tractor at idle, but what happens when I rev it? Well, its really loud and to my utter surprise, throws about a 1 1/2 foot flame out the back along with a satifying "POP". I gotta take a video of this.
I'm not really sure what to do next. Driving it on the street probably wouldn't be a great idea and would just get me pulled over. I can't hook the original style HEs back up due to the studs. I also think that I discovered a hole under one of the studs into the combustion chamber from the PO drilling too far. It looks like a head rebuild is inevitable. Unfortuantely I have way too many things going on and never enough money, so I think it will be prudent for me to let it sit for awhile until I get things figured out. The only other solution I can think of is to find a used engine for cheap (<$300) somewhere in Florida that hasn't been totally abused like this one.
I promised pics, and I will have more up soon.
On a positive note, I did get my headlight situation figured out and installed the JWEST kit. Very, very cool! I can now turn on the fogs independently and flash with them without the headlights popping up. I'd recommend this to anyone, it was a very simple install and a great reward for little work.
Posted by: JawjaPorsche Aug 14 2012, 01:00 PM
And you did all this while on your back! I am impressed!
I guess the PO has enter witness protection to prevent a real ass whupping!
Posted by: ThePaintedMan Aug 14 2012, 02:28 PM
And you did all this while on your back! I am impressed!
I guess the PO has enter witness protection to prevent a real ass whupping!
Yeah, wait till you see the pics. Its bad. I honestly never knew a car could be so neglected. Scratch that, if all he did was neglect it, I would be fine. Instead, this owner or owners made it worse with redneck engineering. I'm learning a real appreciation for doing things the right way the first time!
Out of curiousity, since we don't really have anyone in Florida that I know of who does good machine work, do any of you think it would be reasonable/remotely cost effective to ship heads to one of the many shops you guys have out in California?
Posted by: rnellums Aug 14 2012, 02:34 PM
It seems to me like rebuilding those heads would be WAY more trouble than it is worth. I would think that finding some 1.7 heads off a core engine wouldn't be too hard...
Posted by: URY914 Aug 14 2012, 02:35 PM
I think I have some heads if you need them. I'll look this weekend.
Posted by: ThePaintedMan Aug 14 2012, 04:34 PM
Paul,
That would be fantastic! Let me know what you're looking to get for them. Either way, it would be nice to finally get over to your place to check out your car, even though it'll stay boxed up till it cools off a little more.
Also, I forgot to mention this. Guess how many copper sealing rings were under the manifolds? I pulled out 7 of them. No wonder why it wasn't sealing right and one side of the exhaust was higher than the other.
Posted by: FourBlades Aug 14 2012, 05:06 PM
Sorry you are having so much trouble with the exhaust. 
A better set of heads and sealed up exhaust will make your engine run much
better, maybe fixing some of the carb/ignition problems you were having.
John
Posted by: URY914 Aug 14 2012, 05:15 PM
Right now I have nothing schduled for Sat. if you want to come over and play 914's.
Posted by: Spoke Aug 14 2012, 07:29 PM
What is it that attracts redneck engineering to finely engineered German vehicles like the 914?
Posted by: Dr Evil Aug 17 2012, 02:37 PM
Posted by: ThePaintedMan Sep 20 2012, 09:47 PM
Been awhile, but as I cleaned out out my camera/sd card in preparation for my race on Saturday, I figured I'd post some of the madness I've had over the past month and half.
Below are pictures of the broken door hinge debacle. Note: it would have been easy to drive the pin out.... if it hadn't been broken in two different places! Not sure how that is possible, but I finally ended up cutting in in half. Found another half from the parts car at the end of the street and drove in two new pins from PP.
Attached thumbnail(s)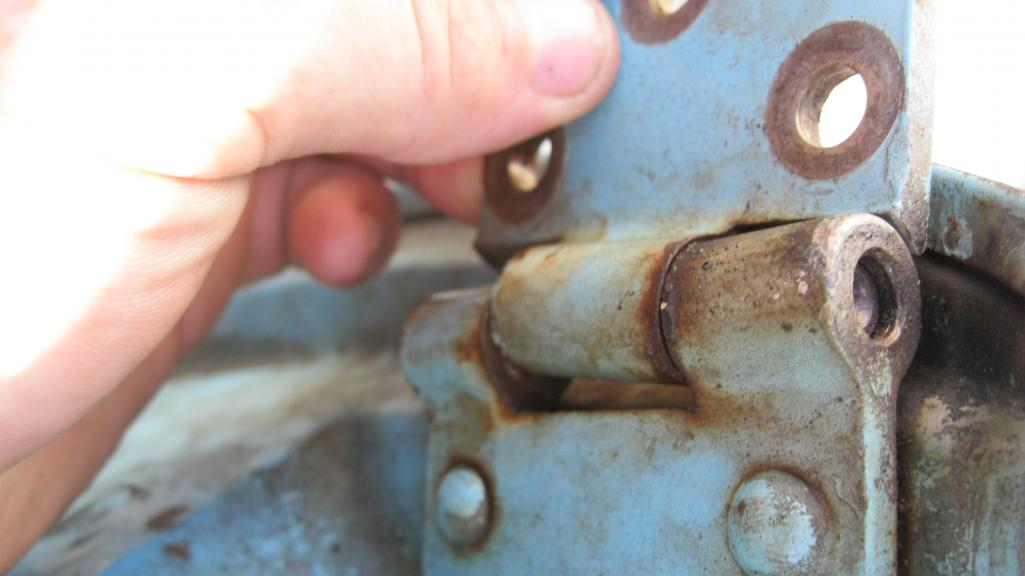
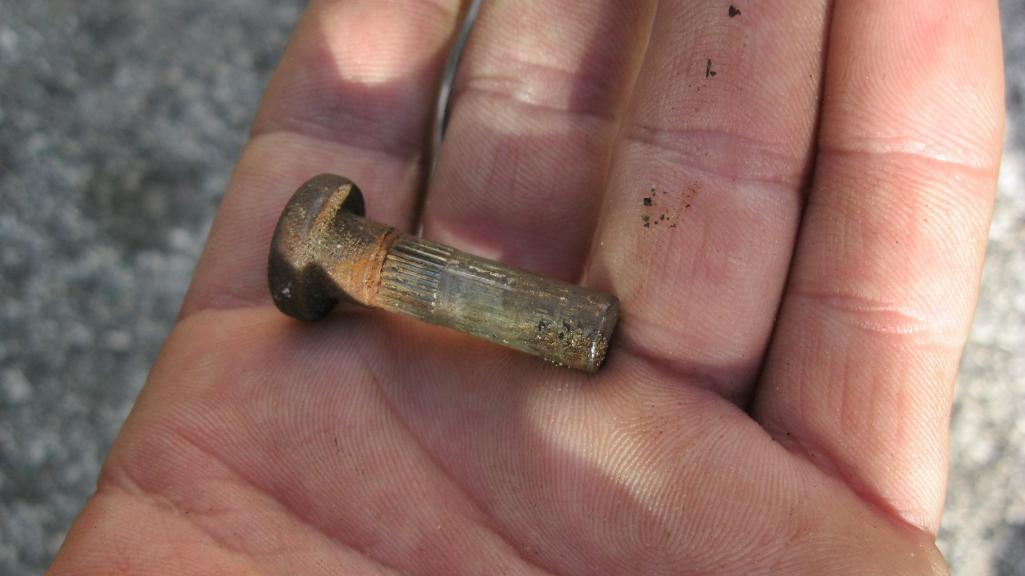
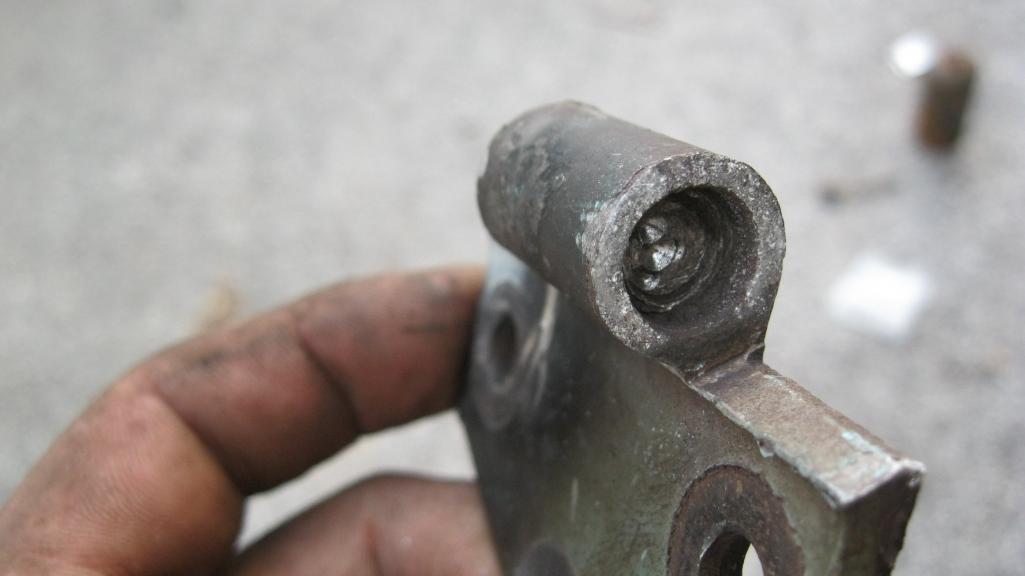
Posted by: ThePaintedMan Sep 20 2012, 09:51 PM
... Then moved onto the exhaust. Think its pretty obvious how messed up this is, but what you're seeing are the he's welded straight to the muffler, then cut/patched poorly. When I pulled the exhaust off, it cracked right in half.
Attached thumbnail(s)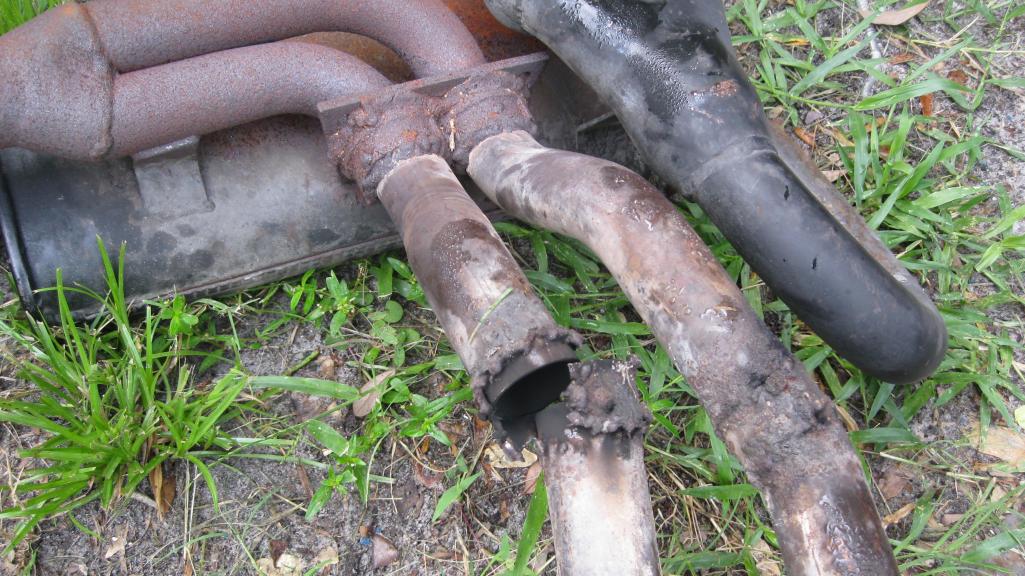
Posted by: ThePaintedMan Sep 20 2012, 10:13 PM
Of course when the exhaust came off, it brought about another set of problems. Most of the studs were loose or already pulled out, so I ended up installing time serts for the time being. Paul (URY) found a set of heads he had, which I'm looking into getting rebuilt at a local machine shop. Paul, when I found out what condition they're in, we can figure out a price?
In the meantime, I'm stuck with these heads. I'm pretty sure #3 has a burned ex valve. Below is a picture - is there anything obvious from it?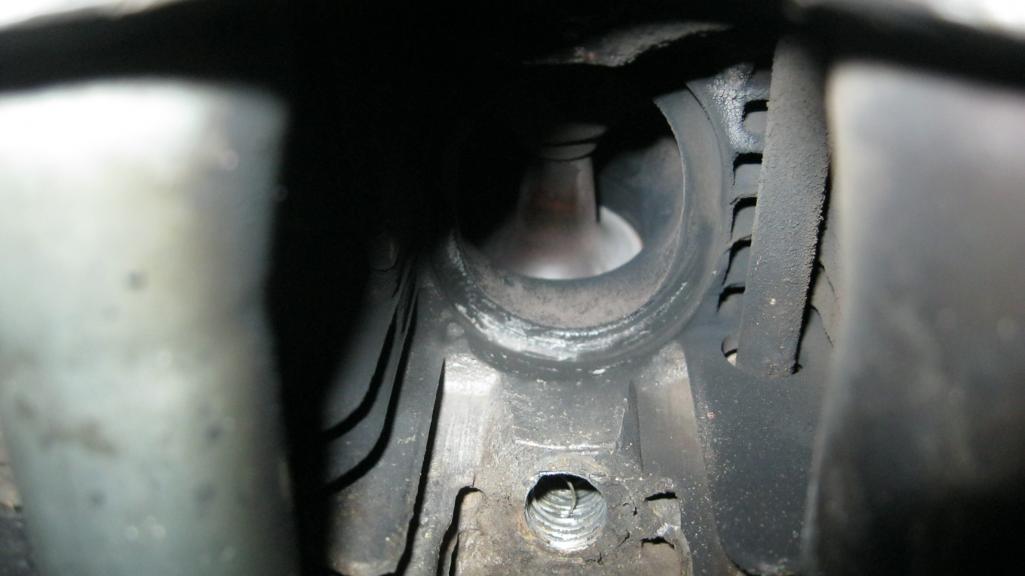
Also, last oil change was pretty curious. At the bottom of the tuna can was a bunch of crusty stuff. I ran a magnet through the sludge, and nothing stuck to it except a few very small slivers. I wonder where all this crap came from then? 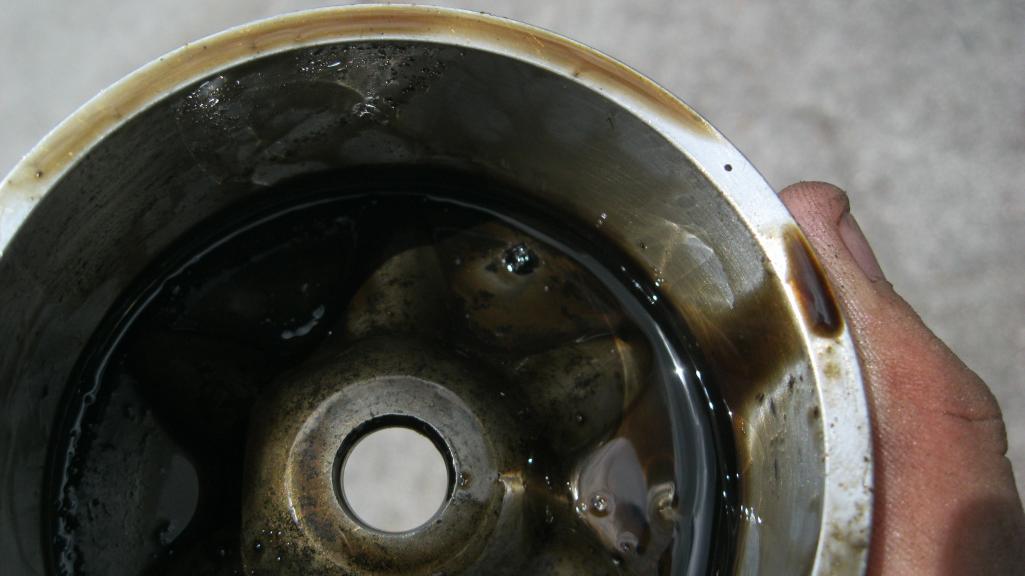
Posted by: Valy Sep 21 2012, 04:07 PM
Below is a picture - is there anything obvious from it?
Seems to me that the plug hole was already fixed once but someone didn't take the time to cut a flat set for the plug.
It can be fixed but make sure it's cut it straight this time.
Posted by: ThePaintedMan Dec 12 2012, 07:58 PM
Been quite awhile, and in fact, only a little over a year after I purchased the car, I can't believe how far its come. Dropped a transmission, drove it, dropped the trans/engine, repaired the passenger long, floorboards, put the drivetrain back in and now almost ready for paint in a little over 12 months. So, after the Tropical Ramble, landing a full-time gig and sort of figuring out school and money for the time being, I got a chance to tackle what I consider my specialty (and my favorite hobby, believe it or not) - bodywork. I started with the front and rear trunks.
Attached thumbnail(s)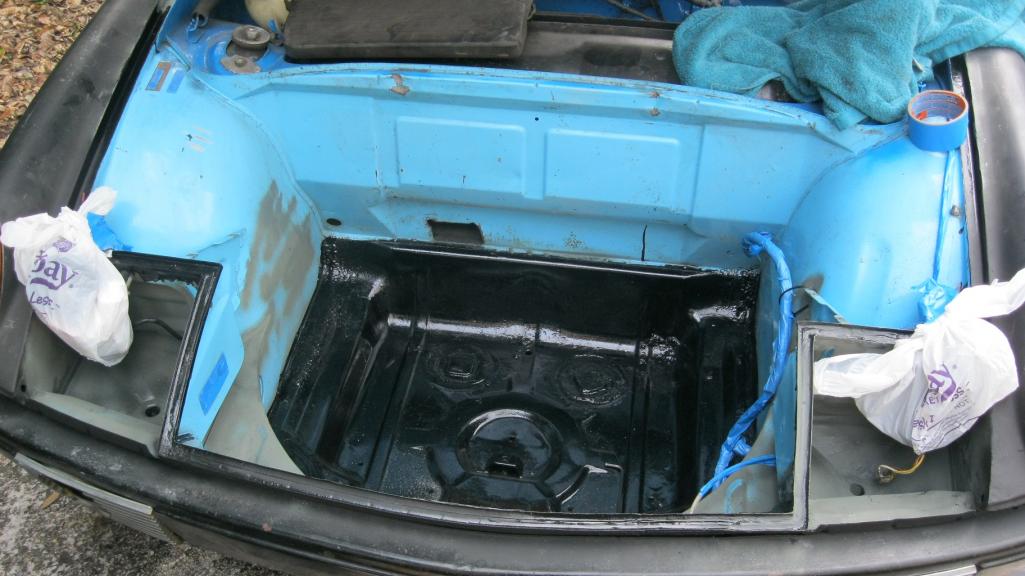
Posted by: ThePaintedMan Dec 12 2012, 08:09 PM
I guess I don't have a good picture of the front trunk or rear trunk painted. But here is the prep work on the rear. This was probably one of the most difficult tasks I've done on the car. The PO sprayed some kind of rubberized undercoating all over it. The "lie detector", as Scotty B calls it, didn't work very well, neither did a standard wire wheel. The heat gun made progress but it was slow and I was removing a lot of good paint, which I felt was unnecessary, since there wasn't rust in the majority of the trunk. Finally I tried brake cleaner, which is dirty, greasy work, but removes that rubberized stuff like a charm. I wonder if the same would be true for you guys removing the floor tar? The last pic is after filling in pin holes and reapplying seam sealer where necessary, then a coat of POR.
Attached thumbnail(s)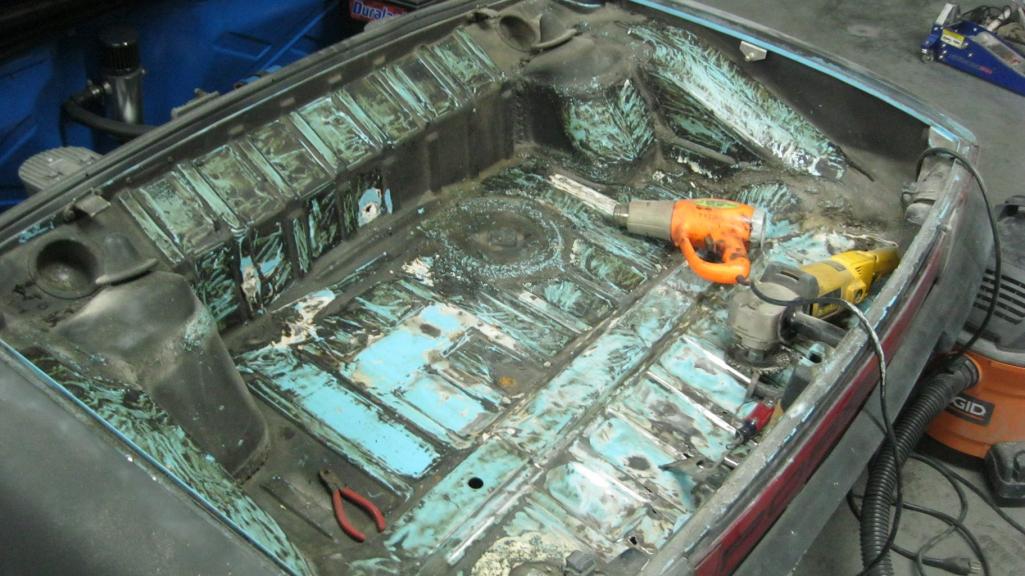
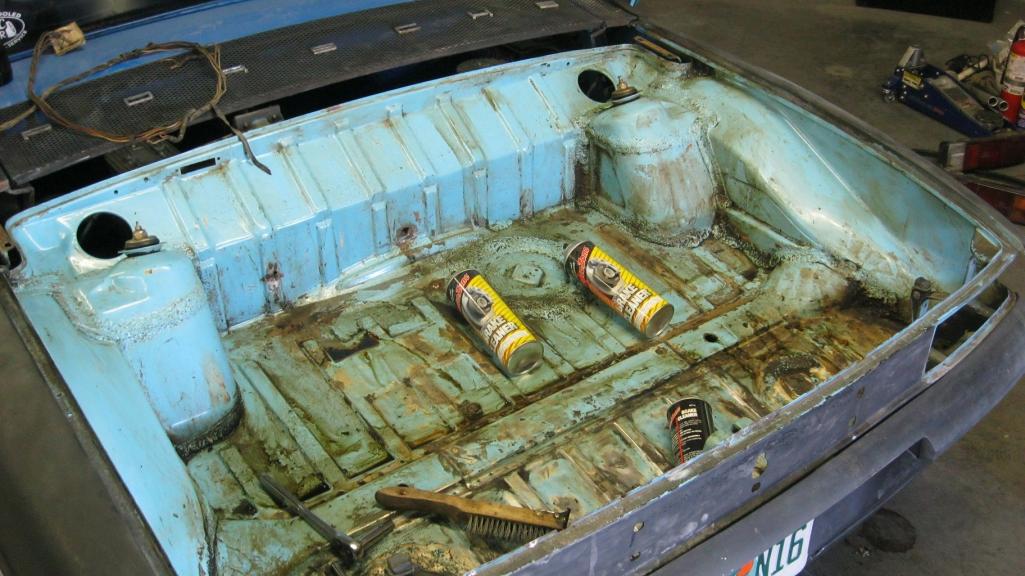
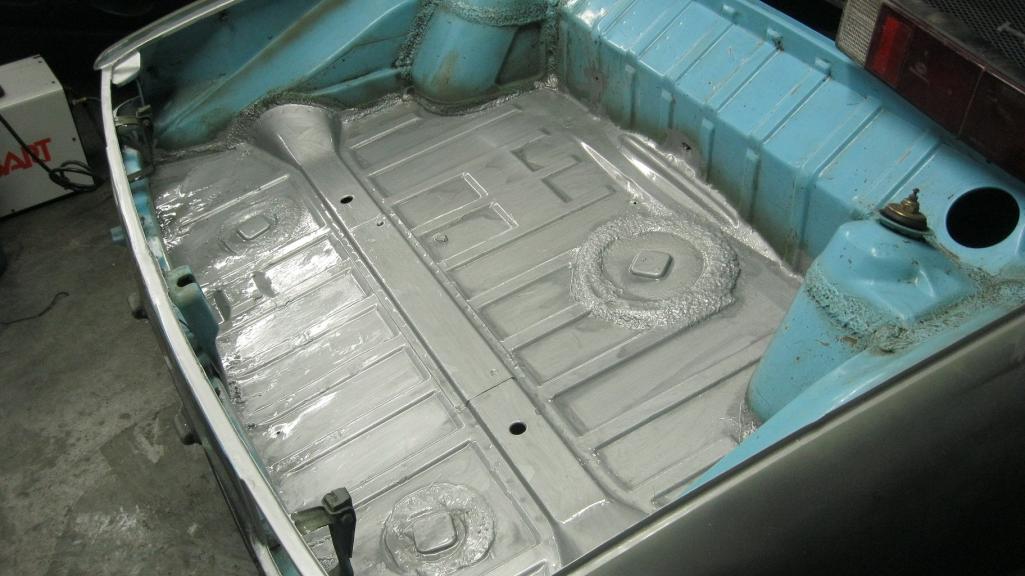
Posted by: billh1963 Dec 12 2012, 08:11 PM
That's awesome progress compared to many cars on this board that have been on jack stands for years!!!
Posted by: ThePaintedMan Dec 12 2012, 08:17 PM
I've said from day one that this was to be a "rolling restoration." By that I mean, I wanted to get the car mechanically as sound as I could so I could enjoy it, even if it looks like a turd. The other part is that since I do not have the ability to own a compressor where I live, I have to drive to my previous company's shop (which they graciously allow me to use) in Tampa to do any kind of work that requires one. And, well, I'm tired of working outside. I also happen to work in Tampa, so when I get off at the end of the day I spend a couple hours doing a little bit of body work here and there with filler. Here is the last bit of welding that I had to do before I could start with the filler.
Attached thumbnail(s)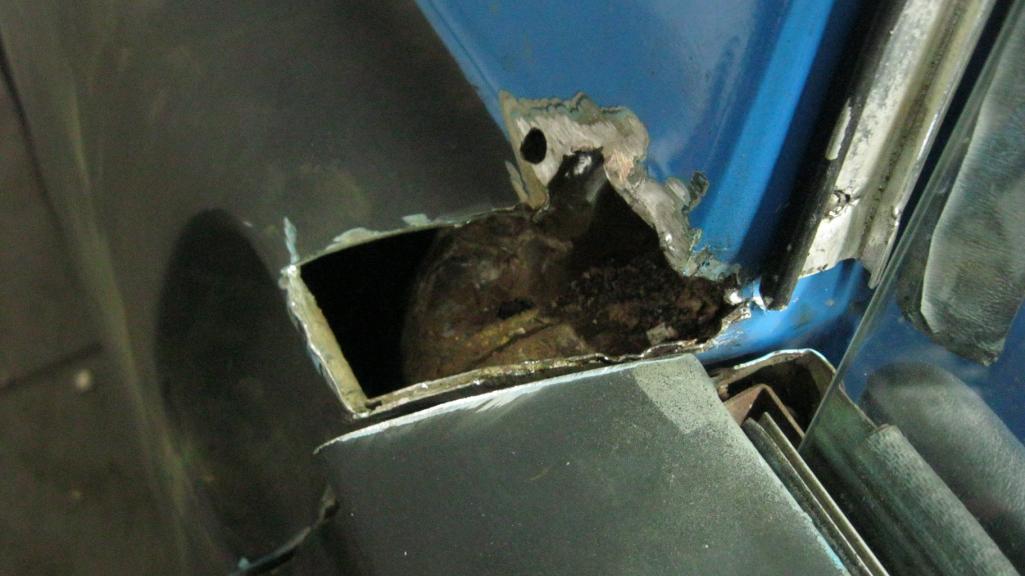
Posted by: Madswede Dec 12 2012, 08:22 PM
Lookin' good man!
Posted by: ThePaintedMan Dec 12 2012, 08:26 PM
Unfortunately I welded this up with flux-core prior to the Tropical Ramble, where John Faure (Fourblades) so graciously donated his great Hobart mig setup . However, as John said, the proverbial and literal torch has been passed and I plan to put it to good use with the roll cage. Thank you once again John.
On a side note, if any of you are ever going to re-paint your cars or do any work around the door jamb area, make sure to check not only the little round vent for rust, but also the area I cut out. Poke and prod there and more than likely you will find plenty of weak metal. If you didn't have the sail panel trim, you might get lucky. This is a big blunder I think on Karmann's part - below you will see the white epoxy-like chunks I scraped out of this area, which trapped water, most of which came in through the holes in the sail panel.
Attached thumbnail(s)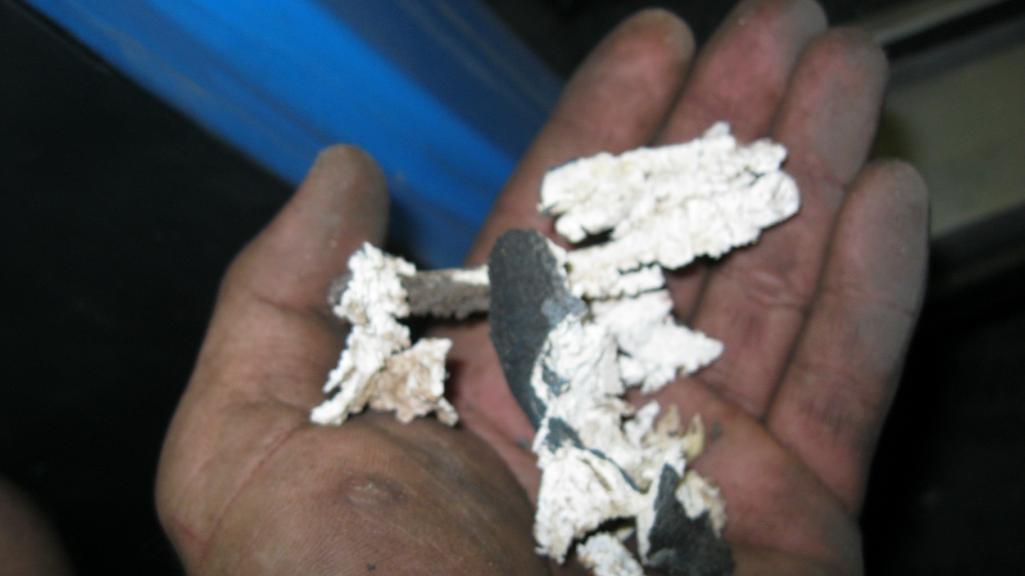
Posted by: ThePaintedMan Dec 12 2012, 08:31 PM
Here is something interesting. I didn't know till recently looking at all the other cars at the TR that the fenders are not supposed to be flush with the cowl. The PO of my car had at some point filled all this in. So, I ground out the filler to see what was underneath. Sure enough, the fenders are welded to the cowl where there would normally be a seam. Luckily, they did a decent job and there was no rust under the filler, so I re-filled it.
Attached thumbnail(s)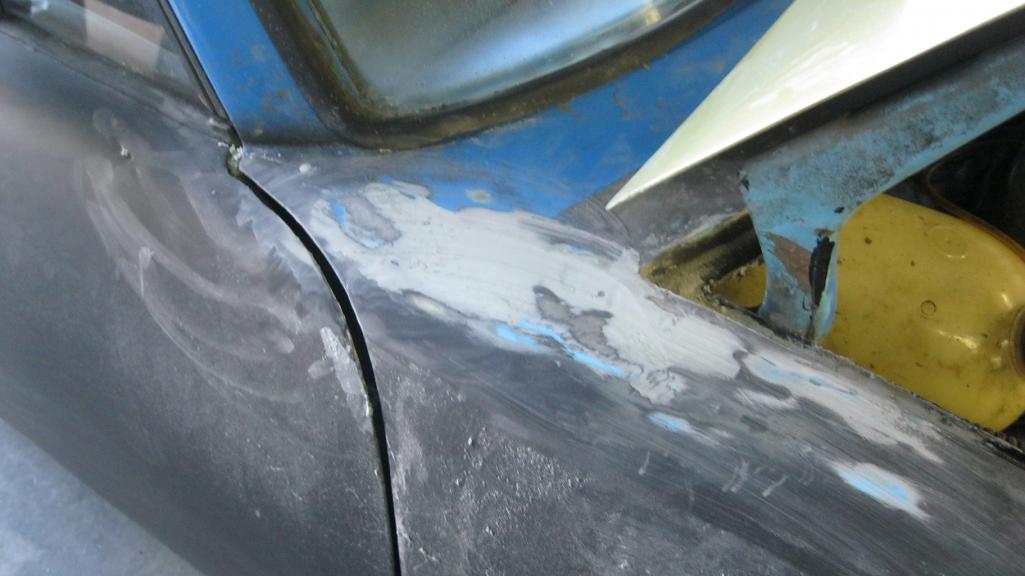
Posted by: ThePaintedMan Dec 12 2012, 08:42 PM
Almost forgot about this. The front of this car was tagged pretty good at some point, obviously.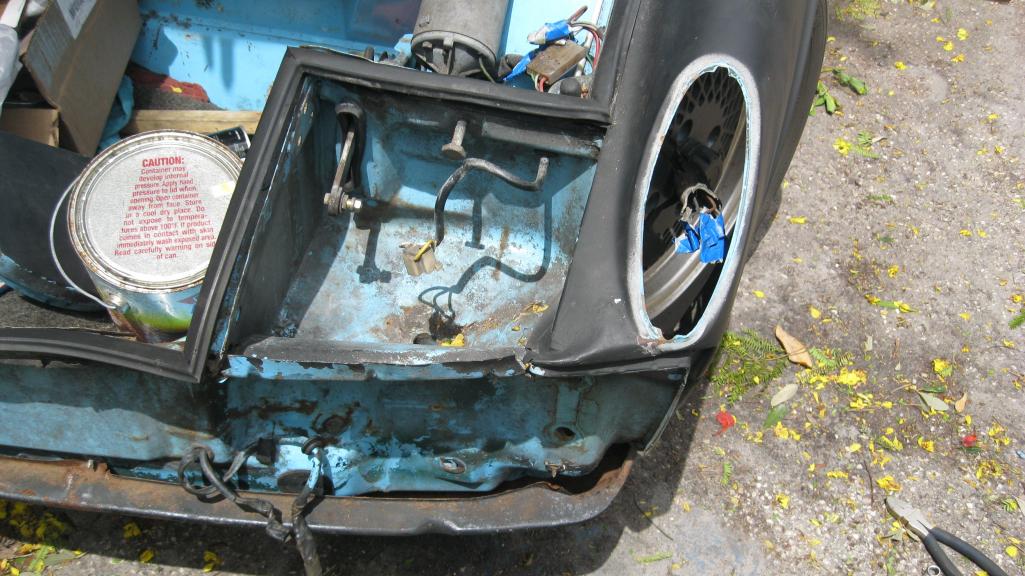
The headlight bucket was pretty buckled. If I were in a different spot financially or this car had been in better shape to begin with, I would have just sourced a replacement piece. 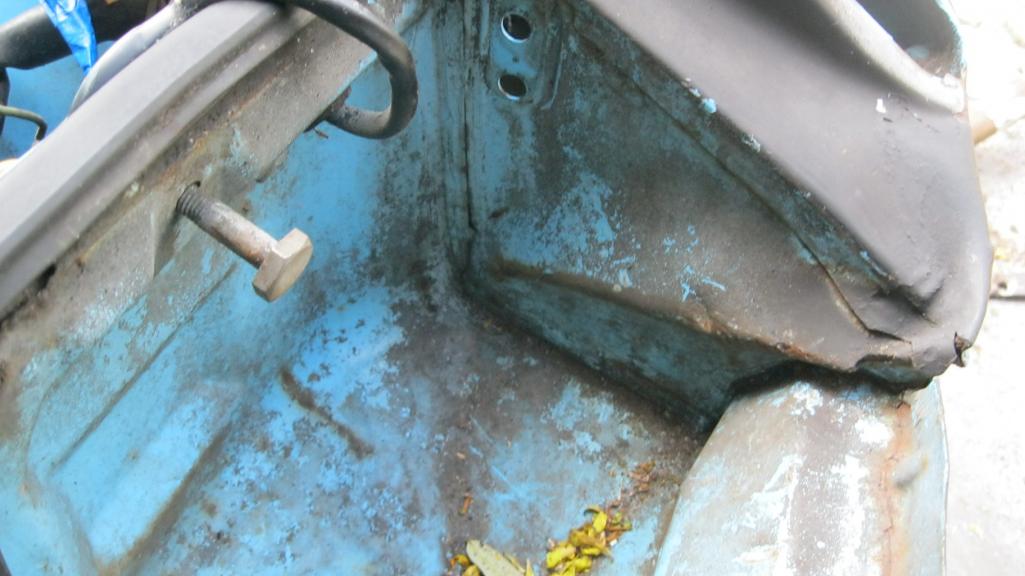
But, as I wanted to learn more about metal and collision work during this process, I thought this would be a good chance.
Started by drilling out spot welds (anyone else who has tackled any metal work will know this is usually the first step).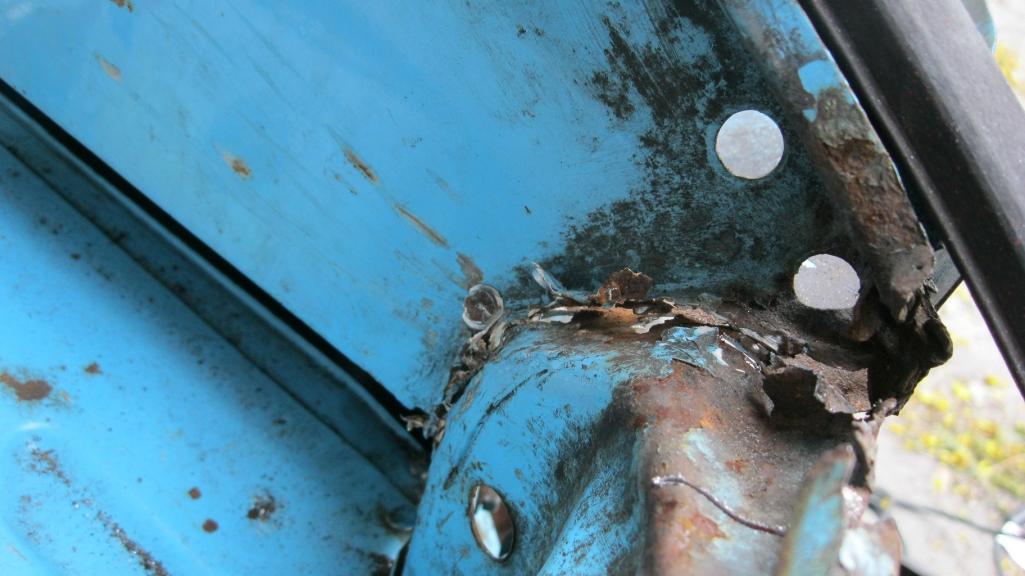
Posted by: ThePaintedMan Dec 12 2012, 08:50 PM
Then I "relieved" the metal by cutting it along the creases.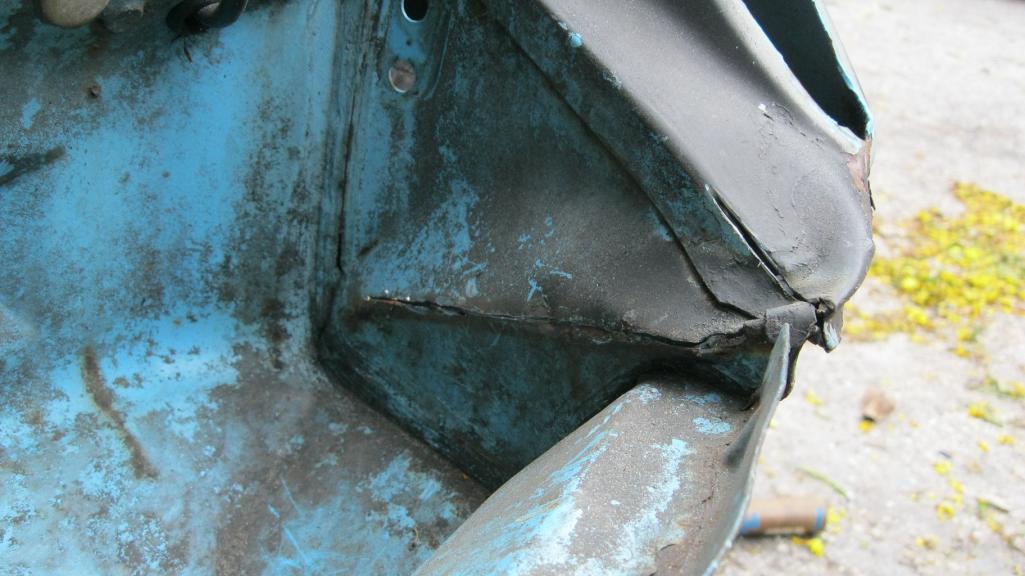
Then cut the three welds holding the bucket support bracket to the fender. I then let the redneck in me out and hooked up a ratchet strap to the bucket. Next, rolled the car backwards in neutral a few times, and checked the distance from the bucket to the bulkhead using the passenger side measurements as a reference. 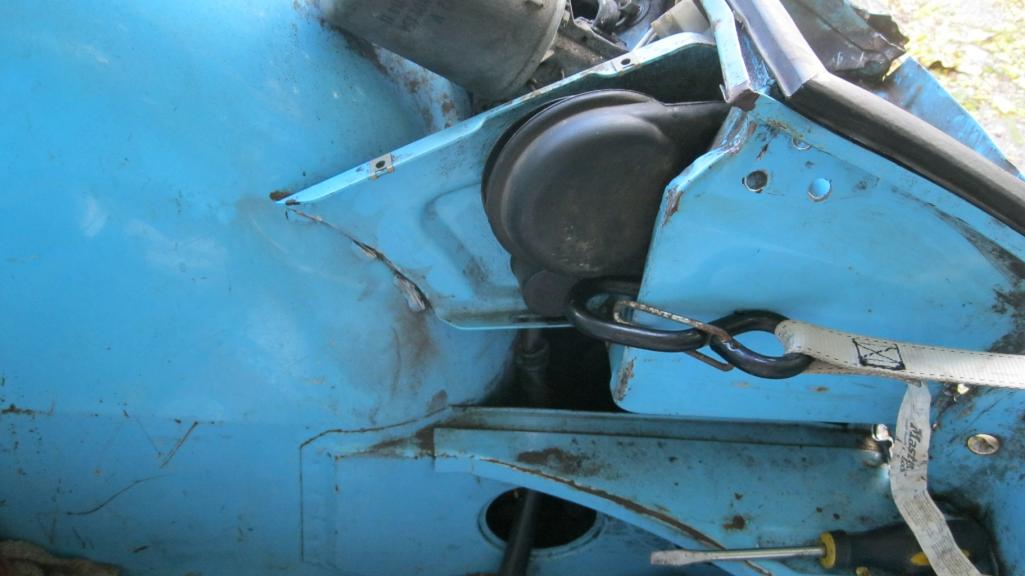
Finally, once I was satisfied, that was all welded back up. Fast forward to last week, and this is what it looks like with a little filler.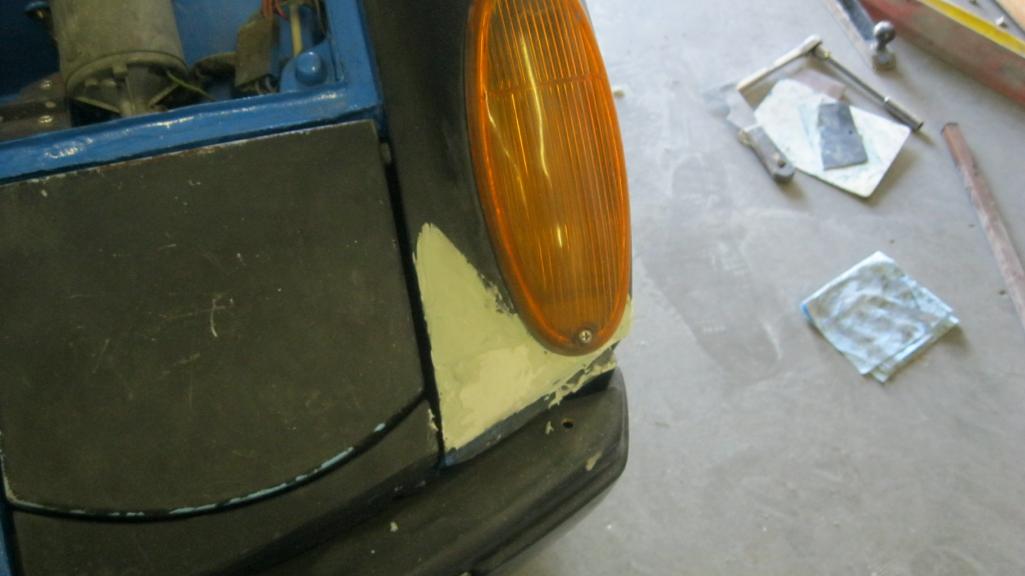
Posted by: ThePaintedMan Dec 12 2012, 09:08 PM
More filler. Trust me, it looks like a lot more than it really is. I pulled and dollied out as much as I could before starting. Also, if no rust was present, I chose to scuff the surface lightly prior to adding filler. I personally don't believe in stripping it down to bare metal before filling, as the paint is one more barrier to prevent rust. If you were doing a concours car, obviously it would be a different story and you probably wouldn't consider filler in the first place. For me, no big deal 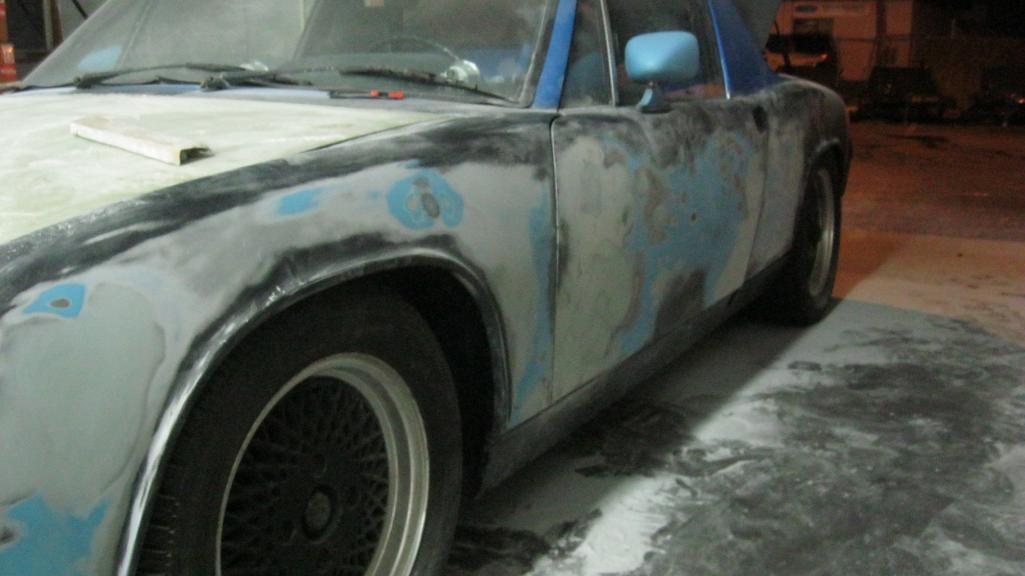
Now here is the frustrating part. See all those black swirlies? It appears as though someone at some point let a five year old loose on this car with a dremel or something along those lines. They were ALL over the car. None that I observed went through the sealer or first coat, but most were through the second paint job layer. I only discovered this when I started to DA/block the car. From what I understand, this would usually mean taking the whole car down to at least the first coat. Since I don't have the time, resources or a dedicated shop, I can't strip the whole thing down. So instead, I decided to block it as best I could so that the primer coats I would lay wouldn't have so many steep "valleys" to fill. Perhaps Scotty B or Rick can chime in here, but I'm keeping my fingers crossed that once I block the primer I won't see these valleys in the final coat.
And that brings me to last weekend, where I shot a coat of urethane primer/sealer. I will block this coat and then possibly shoot another before color. Traditionally a great paint job gets at at least 3 of these before color, from what I understand. But for a Chumpcar/daily driver, I think I've probably already done far more than was really necessary. The best part was that my fiance said, "Okay, so I just want to say, you did a great job. A year ago, I never thought you'd get this far. I'm proud of you." .... I guess I can keep her Wait till it gets color - she might even ride in it then! 
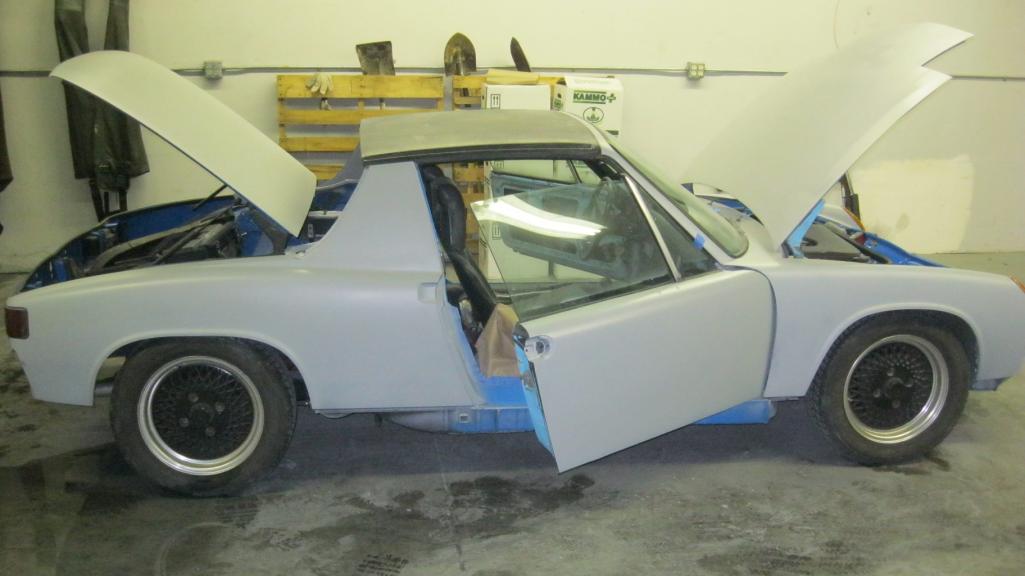
Posted by: FourBlades Dec 12 2012, 09:18 PM
Nice work George!
It is looking good.
John
Posted by: jdlmodelt Dec 12 2012, 09:42 PM
Thanks for the kind words fellas. Been raining all day so I couldn't get any work done on the car before classes this afternoon. However, I went out and took a few photos. This one is the passenger floorboard we made. Still needs some welding and a few more bends to be complete, but I think it'll do fine in the car. It was a full days worth of work to make, but for me, cost is everything. If you look at the welds, you can see how it was done. We cut a few slots lengthwise using a cutting wheel as well as one down the side for the seat channel. Then, bent those downward using channel steel and a ball peen hammer. Then, hammered this "V" shaped valley against bar steel to achieve more of a "U" shape. This left about an 1/8th to 1/4 in gap, which had to be welded closed. The only real problem was the warping, because I failed to mention to mark that he needed to put in all of his spot welds first. However, fitment wasn't bad, and since this car was destined for a scrap yard anyway, I think anything we do to it is an improvement. Once I'm out of college I'll find a nicer model to do everything the "right" way
nice work! have you decided to build this up right? i thought you were going to take it to a smashem up derby and about cried. kinda like "The Crying Game".
Posted by: carr914 Dec 12 2012, 10:11 PM
You really don't want to repeat your Award from the TR 
Posted by: no1uno Dec 12 2012, 10:29 PM
It's looking better and better. way to go!
Posted by: Gint Dec 12 2012, 10:35 PM
That's one way to get it done.
Posted by: SirAndy Dec 12 2012, 10:43 PM
That's one way to get it done.

Posted by: URY914 Dec 13 2012, 05:54 AM
Good job Painted Man. Your name fits.
Posted by: bcheney Dec 13 2012, 06:30 AM
It's great to see all your progress with the car! Your doing a great job and with her support the sky is the limit
Posted by: ThePaintedMan Dec 13 2012, 11:42 AM
Thanks guys!  No, I don't plan to take it to a 'smash em up,' but I won't be terribly upset when it gets tagged in a race... if and when that day ever comes. But for the time being it will be nice to have a decent paint job so I don't have to repeat my award , as TC reminded me, at next year's Tropical Ramble. Just to piss you off though T.C., I will be keeping the rear reflector. After working on the rear, it would have been more work than is necessary to fill the holes and straighten all of the dents. I promise the next teener that I get won't have the goofy reflector.
Posted by: carr914 Dec 13 2012, 01:46 PM
I don't mind you keeping the reflector, it only makes me angry when someone butchers a car to put one on
Posted by: ThePaintedMan Dec 17 2012, 03:40 PM
Crappy pic, and not quite the paint job I had hoped for, but it'll do for now. Need to color sand and possibly repaint the hood after it dries over the next month. I was wearing gloves and didn't know my hands were sweating inside. Needless to say there is a spot where sweat dripped onto the paint where I had just gone over. Oh well, looks better than it did.
Attached thumbnail(s)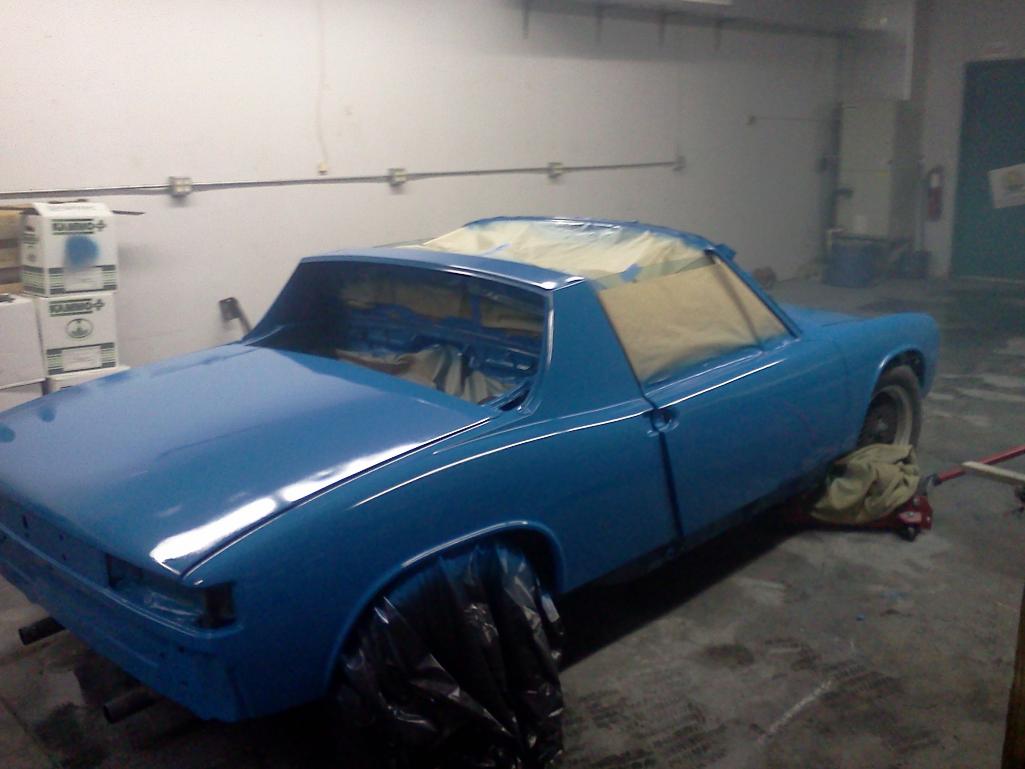
Posted by: billh1963 Dec 17 2012, 03:42 PM
Great work!
Posted by: mr914 Dec 17 2012, 03:53 PM
Lookin good!
Posted by: wingnut86 Dec 17 2012, 05:03 PM
Damn George - Awesome work!
Posted by: carr914 Dec 17 2012, 05:09 PM
Looks like you're going for Most Improved Award at the next Tropical Ramble
Posted by: URY914 Dec 17 2012, 05:43 PM
Nice work!
Posted by: euro911 Jan 24 2013, 02:31 AM
First time seeing your build thread, George. Nothing short of awesome!
Anything else transpired in the past month?
Posted by: ThePaintedMan Jan 24 2013, 06:57 AM
First time seeing your build thread, George. Nothing short of awesome!
Anything else transpired in the past month?
Thanks Mark
Yeah, I've been piecing things back on it for the past few weeks and removing others to repaint or replace. I mocked up the cage so I could get measurements and soon I'll start wiring it for a cutoff switch, etc. Still have a small hesitation under heavy throttle transition, but I think that can be solved with bigger idle jets. John (FourBlades), my new teammate has agreed to loan me some so I can troubleshoot. Here is the most recent picture. Would never have gotten this far without everyone else's help and inspiration. Thanks again!
Attached thumbnail(s)
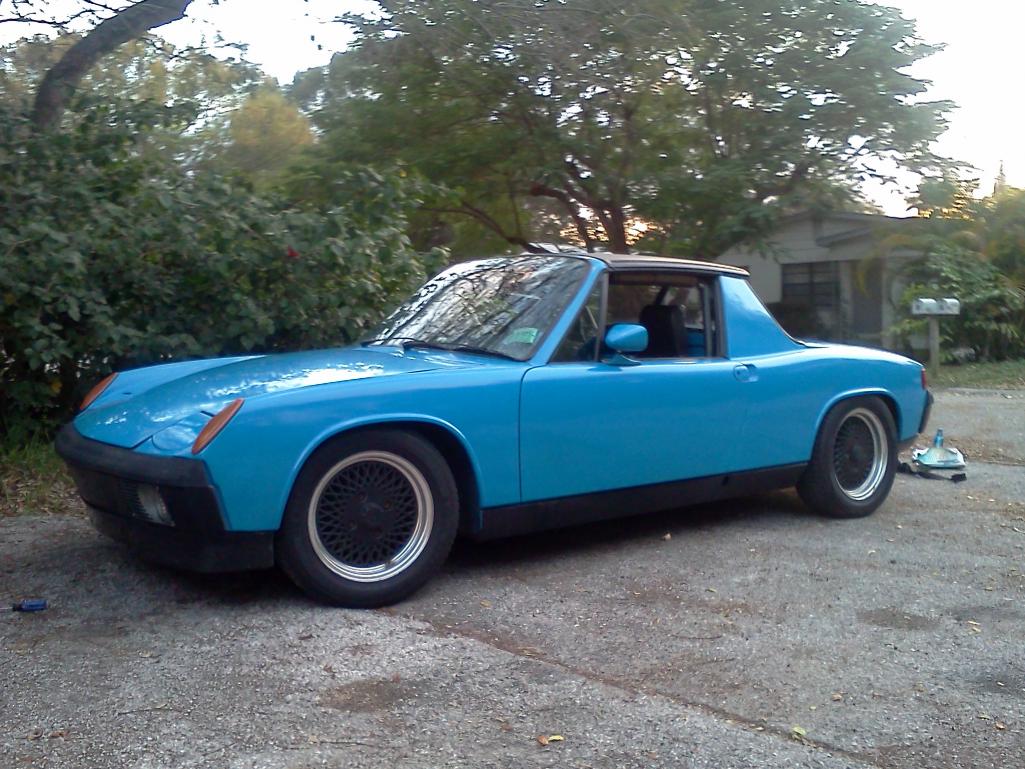
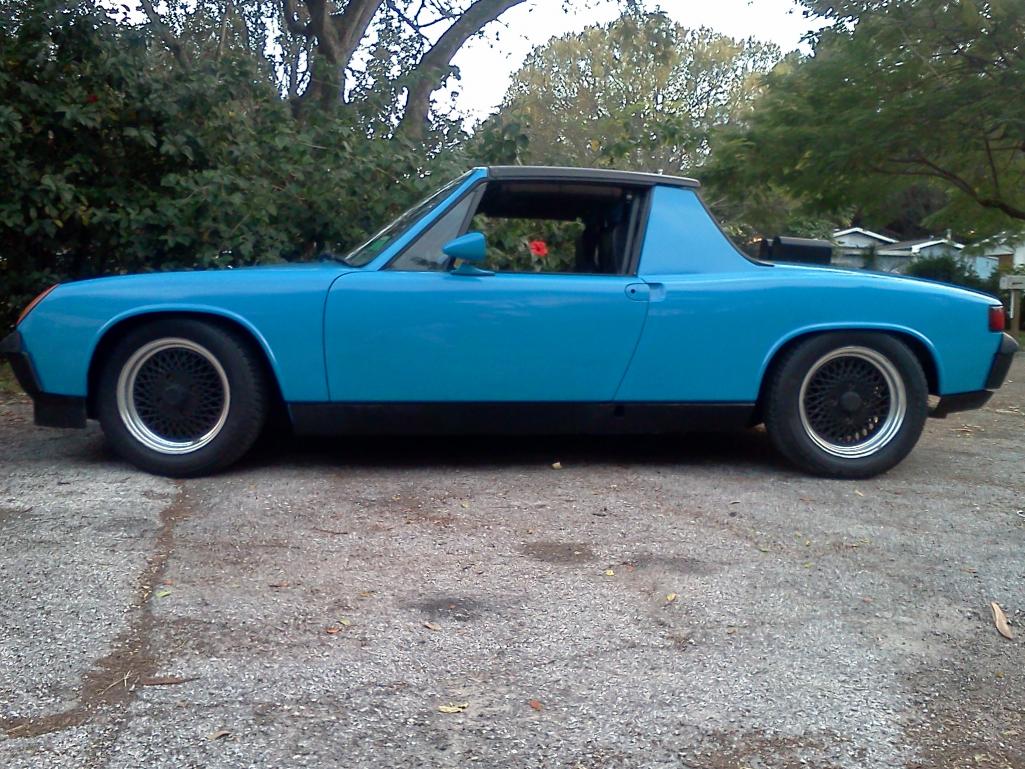
Posted by: JawjaPorsche Jan 24 2013, 07:04 AM
I like the chrome-less look! Nice job!
Posted by: billh1963 Jan 24 2013, 07:05 AM
Quite a transformation! You have every reason to be proud!
Posted by: KENNY Jan 24 2013, 07:15 AM
Awesome work!
Posted by: bulitt Jan 24 2013, 07:17 AM
Holy Crap George, It's awesome!!!
Posted by: scotty b Jan 24 2013, 07:19 AM
Looking good. Sorry I never saw your post about those gouges in the primer coats. di that turn out o.k. once you got the color on ?
Posted by: Cracker Jan 24 2013, 07:27 AM
I'm not inspired...I'm exhausted! I'm too old for this stuff but am glad to see some of you out there have a vision and tenacity to save cars like this! Your car looks great and you should be very proud!
Cracker
Posted by: stuttgart46 Jan 24 2013, 07:41 AM
Good looking car you got there. Well done.
Posted by: ThePaintedMan Jan 24 2013, 08:36 AM
As always, thanks for the support fellas. The paint on the car didn't turn out quite like I had hoped, even though it looks decent in crappy pictures. Up close, there are a couple dimples I missed here and there and I should have spent more time with the 600 grit since I can detect some sanding lines in some areas. However, given the gouges that Scotty pointed out and the amount of crappy work done previously, I'm fairly happy with it. It was my first time spraying single stage, and I learned a few things. Either way, eventually it will hit the track and look better than 99% of the Chumpcars out there (well until the first corner at least.) For now I'm just having fun and receiving thumbs ups!
Next to do:
Finish the bolt in cage
Wire up cutoff switch
Install remaining gauges (this will be a cool project - going to rework the dash in fiberglass)
Hopefully test it out at a DE soon
Posted by: rhodyguy Jan 24 2013, 09:35 AM
nice work george.
Posted by: Millerwelds Jan 24 2013, 10:48 AM
Looks great! I would paint the mirror(s) black so the body line flows better. I also like the all blacked out trim and black mirror(s) would add to that. Congratulations - great work!
Posted by: jdlmodelt Jan 28 2013, 09:11 AM
I'm pretty sure I'm not going to get any flack from anyone else for this....
Are you unemployed or just living off of your parents? You must be to find time to go around telling people how they should live their lives.
FYI - I'm at the end of my coursework in my Masters Thesis, holding a 3.76 GPA while teaching several labs and busting my ass at my day job out in the sun. I'll be happy to provide a copy of my transcript as well as letters of reference if it pleases you. Otherwise,
.Are you getting A's in school? If not, why the hell are you waisting your time with a beat up old car? It's an old piece of shit. Face it, you'd be better off studying & preparing for your future.
WOW! I can't believe someone would rip into you like that?! I am inspired and impressed with what you are working on and what you are accomplishing.
Keep up the amazing work!
James
Posted by: Dr Evil Jan 28 2013, 09:28 AM
I'm pretty sure I'm not going to get any flack from anyone else for this....
Are you unemployed or just living off of your parents? You must be to find time to go around telling people how they should live their lives.
FYI - I'm at the end of my coursework in my Masters Thesis, holding a 3.76 GPA while teaching several labs and busting my ass at my day job out in the sun. I'll be happy to provide a copy of my transcript as well as letters of reference if it pleases you. Otherwise,
.Are you getting A's in school? If not, why the hell are you waisting your time with a beat up old car? It's an old piece of shit. Face it, you'd be better off studying & preparing for your future.
WOW! I can't believe someone would rip into you like that?! I am inspired and impressed with what you are working on and what you are accomplishing.
Keep up the amazing work!
James
Wow, the lack of civility is palpable. What is the point in posting such harsh words and criticizing?
I guess I have a dog in this fight:
BA Psychology with a 3.9 while working on my 914 and others transmissions.
MD - while working on my 914 and other transmissions.
MPH - third verse same as the first.
Oh, and I have many other projects as well. I put myself through school. I managed to fund my hobbies by providing services to members here like transmission clinics, DVDs, parts, interiors, CV bolts, special rear view mirrors.
How someone managed to maintain their hobby is none of your business unless they decide to share it. The distraction this hobby offers from school work is priceless.
Posted by: bulitt Jan 28 2013, 10:41 AM
I'm pretty sure I'm not going to get any flack from anyone else for this....
Are you unemployed or just living off of your parents? You must be to find time to go around telling people how they should live their lives.
FYI - I'm at the end of my coursework in my Masters Thesis, holding a 3.76 GPA while teaching several labs and busting my ass at my day job out in the sun. I'll be happy to provide a copy of my transcript as well as letters of reference if it pleases you. Otherwise,
.Are you getting A's in school? If not, why the hell are you waisting your time with a beat up old car? It's an old piece of shit. Face it, you'd be better off studying & preparing for your future.
WOW! I can't believe someone would rip into you like that?! I am inspired and impressed with what you are working on and what you are accomplishing.
Keep up the amazing work!
James
Wow, the lack of civility is palpable. What is the point in posting such harsh words and criticizing?
I guess I have a dog in this fight:
BA Psychology with a 3.9 while working on my 914 and others transmissions.
MD - while working on my 914 and other transmissions.
MPH - third verse same as the first.
Oh, and I have many other projects as well. I put myself through school. I managed to fund my hobbies by providing services to members here like transmission clinics, DVDs, parts, interiors, CV bolts, special rear view mirrors.
How someone managed to maintain their hobby is none of your business unless they decide to share it. The distraction this hobby offers from school work is priceless.
George is like the Board's adopted, little brother, most everyone tries to help him!
Some people forget their manners... "If you don't have something nice to say, than don't say anything!"
Posted by: bembry Jan 28 2013, 11:11 AM
Man--great job with the car! Mine sat for 14 years before I got it going again. This was fast!
Posted by: mittelmotor Jan 28 2013, 12:19 PM
Ignore the haters, George, and keep inspiring us with your work!
Posted by: billh1963 Jan 28 2013, 12:46 PM
I guess I have a dog in this fight:
BA Psychology with a 3.9 while working on my 914 and others transmissions.
MD - while working on my 914 and other transmissions.
MPH - third verse same as the first.
3.9 in psychology?... Why not a 4.0?

My GPA was 3.925/4.0 for my BSEE...now that was a lot of work.
Only got a 3.75 for my MSEE. Of course, I had two small kids and was flying back and forth to England for a year. I guess I got lazy...
Posted by: ThePaintedMan Jan 28 2013, 01:22 PM
Thanks again fellas. That guy posted a long time ago, and have not heard from him since. Either way, my coursework is done and now I'm just finishing up my thesis.
I always thought of myself as the red-headed stepchild of the forum, but I'll take younger brother any day.
Full disclaimer though, I never intended this car to turn out as nice as it has, which is still a long way from most of your restorations. If quality isn't a main concern, it definitely speeds up the process. I envy those of you who are doing it "right." Hopefully I'll have some cool stuff to show in the next two months as the rest of the stuff gets done. Right now its wiring the kill switch ignition switch and starter button, which confuses the hell out of me. I'll need all the help I can get!
Posted by: Kirmizi Jan 28 2013, 01:29 PM
Keep up the good work at school and on the teener, both will be well earned accomplishments when you're finished.
Mike
Posted by: Dr Evil Jan 28 2013, 02:07 PM
My comment was not aimed at George, it was kind of hard to tell
Posted by: ThePaintedMan Jan 28 2013, 02:38 PM
My comment was not aimed at George, it was kind of hard to tell
No offense taken Dr. Mike. Question for you though - as we all sat around imbibing watching the Rolex 24, I was asking some of the guys about my transmission. I noted that I usually can produce a grind in every gear but fifth if I don't give plenty of time between throws, and of course the 1st synchros are definitely shot. I haven't really ever driven a teener with a new transmission quickly, so I'm not sure - with a freshly rebuilt gear stack, is it possible to shift any quicker than a... one Mississippi, two Mississipi without them grinding? I'm assuming this transmission its the original box and never been serviced, though it does have brand new fluid in it which helps.
On a similar note, there is a guy about 50 miles away selling a recently rebuilt side shifter for $300, which I've considered. While I'd like to send this one off to you to work your magic on, I think this is a decent deal to swap out to get me around in the meantime. Your thoughts?
Posted by: Dr Evil Jan 28 2013, 03:05 PM
1- Rebuilt for $300? I doubt that. I have some ocean front property in AZ for sale, too. Save your $300 and spend it on a rebuild of what you have. Better economy. Does the guy have any proof? All are cores without proof, most are cores after.
2- Grinding in all gears is usually an external issue. Does revers grind? This would indicate that your clutch is dragging and you need to tighten it up. It is rare that a tranz with good lube grinds in multiple gears.
Posted by: ThePaintedMan Jan 28 2013, 04:31 PM
1- Rebuilt for $300? I doubt that. I have some ocean front property in AZ for sale, too. Save your $300 and spend it on a rebuild of what you have. Better economy. Does the guy have any proof? All are cores without proof, most are cores after.
2- Grinding in all gears is usually an external issue. Does revers grind? This would indicate that your clutch is dragging and you need to tighten it up. It is rare that a tranz with good lube grinds in multiple gears.
1 - This is by no means proof, but:
http://tampa.craigslist.org/hdo/pts/3530223889.html
I believe he did some SCCA club racing in the past, as he had a bunch of other stuff listed some time back. I have not called him to see if he's
 but I will do so.
2 - T.C., Paul and Steve also suspected the same thing. Reverse does not grind. Clutch is adjusted per your recommendations/diagram, in the "green" zone.
Posted by: ndfrigi Jan 28 2013, 04:50 PM
Wow George! You did a tremendous job on your teen!!! God Bless you more not only with car but also with your studies and with the support of your girlfriend and friends!
Posted by: Dr Evil Jan 28 2013, 04:58 PM
In what reality is 20K mi a rebuilt tranz??? Its a core. $300 might be nice for a great core, but who can say without pulling the stack.
No grind in revers = probably internal. Pull the stack and see.
Posted by: ThePaintedMan Jan 28 2013, 05:04 PM
In what reality is 20K mi a rebuilt tranz??? Its a core. $300 might be nice for a great core, but who can say without pulling the stack.
No grind in revers = probably internal. Pull the stack and see.
Heehee, sorry. 20k is a lot better than whatever this one has on it. You're right though, pulling the stack is the only way to go. Trust me, its on my list of things to do. When I get around to it then, its going straight to you, fair warning!
Posted by: Dr Evil Jan 28 2013, 05:39 PM
If you think 20Kmi is better than what you have you are missing the point that it takes far fewer neglected and abused miles to ruin a box.
Posted by: ThePaintedMan Jan 28 2013, 05:46 PM
If you think 20Kmi is better than what you have you are missing the point that it takes far fewer neglected and abused miles to ruin a box.
Didn't mean to sound like I didn't. Like I said, eventually I'll suck it up and send you the guts. I promise.
Posted by: carr914 Jan 28 2013, 06:32 PM
George, I've got Evil's Tranny Rebuild DVD & some of the Tools when you want to tackle it!
Posted by: ThePaintedMan Jan 28 2013, 06:37 PM
George, I've got Evil's Tranny Rebuild DVD & some of the Tools when you want to tackle it!
No friggin way. Scares the hell out of me.
Forgot. Any chance I could rent some time on the lift? I have a little bit of welding that still needs finished.
Posted by: ThePaintedMan Jan 30 2013, 10:30 AM
So, absolutely phenomenal news. After talking with John and Kevin on the phone, I think I've finally figured out what the big stumble was between the idle and main circuit transition! Kevin asked me what the exhaust looked and smelled like. Of course I said sooty and rich. Both he and John had hinted before that it sounded like the car was running way rich. As I always heard it was better to run rich than lean on AC engines, I never tried to really turn the mixture screws down until yesterday. Moral of the story, trust your senses, young padawan. The car transitions very well now, but I believe its still a bit rich as it really pops out the exhaust on decel. I'm trying to find a set of 45 idles to help lean things out and give me a little more room to adjust with the mixture screws... they're almost all the way in now.
While I'm at it though, can anyone take a look at these pics and tell me what you see? The first two are of the transmission mounts, first just hanging and the next with me pushing up on the tail. I see a large gap at the top and obvious movement. I'm really just trying to determine if the mounts are bad or whether I have them installed wrong somehow.
The last pic is of the passenger side trailing arm bushing. I have been getting some real clunks from the right rear of the car when going over bumps, and I think this is a dead giveaway that the bushings are bad - I'm assuming the pivot shaft is moving up and down in the console. Can you confirm this from the picture?
Thanks again everyone!
Attached thumbnail(s)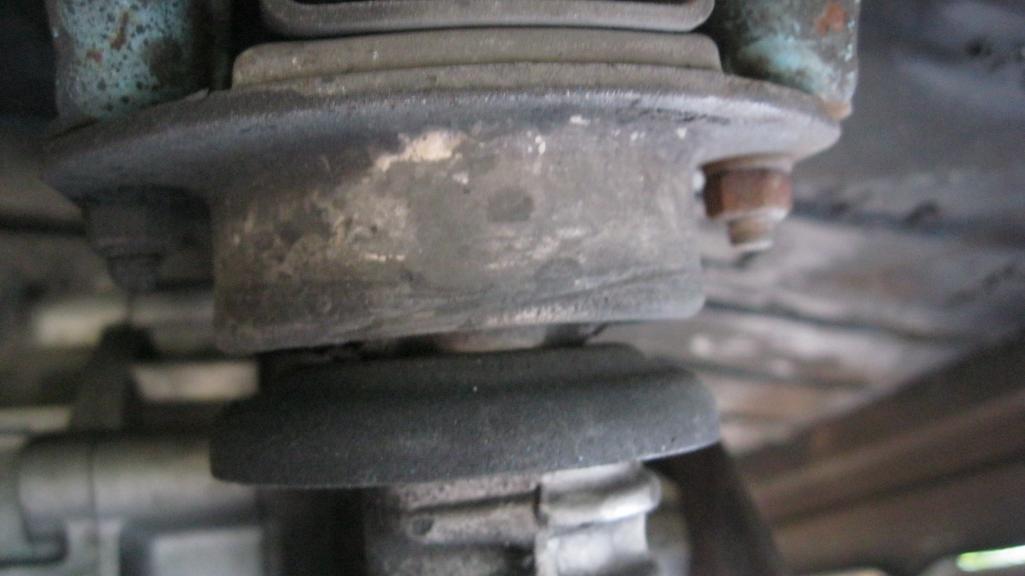
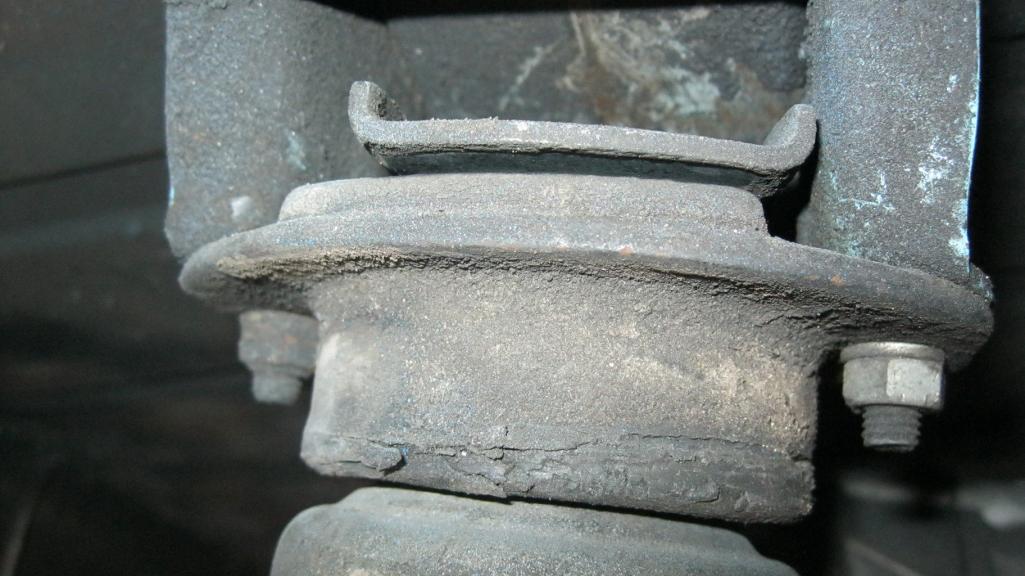
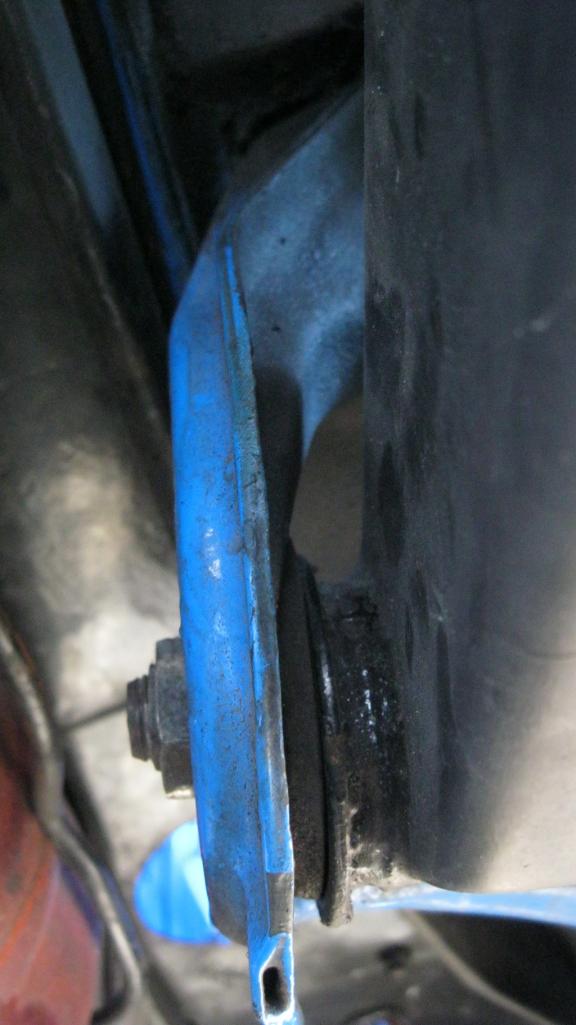
Posted by: carr914 Jan 30 2013, 10:35 AM
George, I have the fix for that as well - I have a couple of pairs of WEVO Tranny Mounts in my Tool Box
T.C.
Posted by: rhodyguy Jan 30 2013, 11:24 AM
nice TC. i fear an epic failure with the mounts you're running with george. when one of them goes south it won't be in the garage.
btw..."backfiring and snapping out the exhaust pipes during deceleration, follow procedures: 6, 13, and 14". focus on #14. bob is your friend.
k
Posted by: dpires914 Jan 30 2013, 11:41 AM
Nice looking car. You did a great job.
Posted by: Madswede Jan 30 2013, 12:21 PM
A bit late but I wanted to add my congrats to the paint job ... sure makes a huge difference, even if there are defects/issues that can't be seen unless close up. I, too, really dig the chrome-less look. Keep it up George! 
Posted by: FourBlades Jan 30 2013, 01:37 PM
Great progress, George!
You know you are relevant when you have haters!
I included a set of 45 idles with the 55s I mailed on monday.
I included some 135 main jets as well but they may be too big.
Finding the right combination for your car may come down to choosing the compromise you want. Rich idle but good off the line, or lean idle but harder to get going in first, etc.
John
Posted by: ThePaintedMan Feb 7 2013, 07:57 AM
Small update, but an important one for me. John (FourBlades) sent me some loaner jets which I promptly put to good use this past weekend. First, I switched out the 50 idles for 45s, which initially was not a big help, but I'll explain why in a second. I had both a problem off idle before and when going between gears, full throttle to full throttle. Basically, the car would fall flat on its face. Just to eliminate variables, I replaced my fuel pressure gauge and regulator with good quality units. Drove the car, expecting the stumble to be gone. While the transition was better, I still had big problems going back to heavy/full throttle after shifting. This, to me, indicated that either the carbs were flooding and far too rich when I let off the gas to shift, or way too lean. It ended up being the latter. Going by Bob Tomlinson's Weber Tech Book recommendations for jet size as well as discussions with Paul (URY914), John and Kevin, I began so suspect that the mains were too small. Put in the 135s that John sent me, and I was speechless. The car runs better than my Mustang, which is fuel injected.
The car will run all the way up to 4,500 with plenty of power and transitions off idle much better. The only hesitation I have now I attribute to the crappy 009 dizzy I have on there for the time being while I rebuild my SVDA and what I think is a bent/twisted throttle shaft which is making it hard to get the butterflies to close completely on one carb.
The lesson is, listen to the car and advice from others and think through the problem. The hard part is not getting frustrated, but once you understand how carbs work, especially how each model is designed, the solution will eventually present itself!
Posted by: Kirmizi Feb 7 2013, 11:16 AM
Oh man, just wait until you replace that 009.
You're gonna have serious permagrin.
Posted by: carr914 Feb 7 2013, 01:32 PM
MSD makes a Billit Dizzy that is Great!
Posted by: ThePaintedMan Feb 7 2013, 02:42 PM
Yeah I had the SVDA on there for awhile, but prior to figuring out the carbs. I did like it, but I'm not getting full use out of it yet, as I'm not getting the proper vacuum from the carbs since the butterflies don't close quite right yet. The reason I really switched back to the 009 is when I washed the engine off one day, I must have somehow either got water in the condenser or the centrifugal advance became stuck somehow. It ran like crap and fouled a set of plugs till I switched the dizzy back out.  Not sure what happened.
T.C., you sure do know how to feed people's imaginations. I've seen that MSD and the Mallory that Chris carries, but way too rich for my blood for now. Plus its just an old tired 1.7 - no sense in shining up a turd too much! But thanks for keeping my eyes wandering.
Posted by: dfelz Feb 14 2013, 11:22 PM
I like the chrome-less look! Nice job!
Me too!! thats what i want to do. I have looked through your thread before, you did a great job. Today went to check out that side mirror
Question for you though regarding the chrome-less look. for the front windshield, what is the black piece sealing the gap of the glass to frame, it doesnt look like the stock chrome piece just painted black....?
Thanks!
Posted by: carr914 Mar 11 2013, 10:10 AM
George at work on the underside 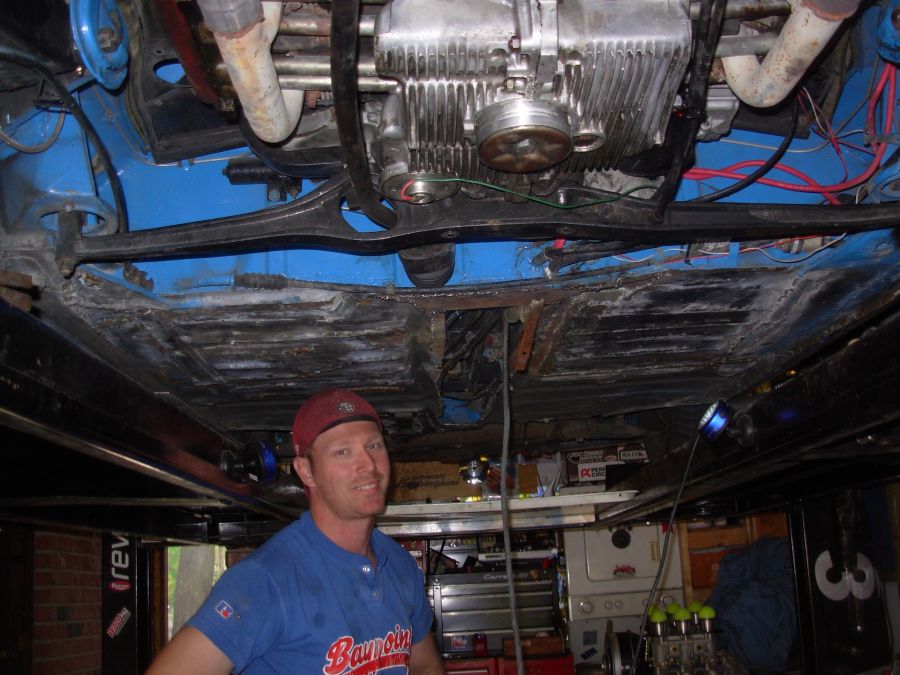
Posted by: chads74 Mar 11 2013, 12:45 PM
... for the front windshield, what is the black piece sealing the gap of the glass to frame, it doesnt look like the stock chrome piece just painted black....?
Thanks!
[/quote]
Looks like the chrome replacement from 914rubber. I have it on my car and love it.
Posted by: ThePaintedMan Mar 11 2013, 01:12 PM
... for the front windshield, what is the black piece sealing the gap of the glass to frame, it doesnt look like the stock chrome piece just painted black....?
Thanks!
Looks like the chrome replacement from 914rubber. I have it on my car and love it.
...Yes that is. Sorry I missed that post before. It is very nice, like everything Mark produces, but it was a bitch to install. And of course I screwed it up. I would suggest ordering it from Mark, but allowing a professional to install it. You know how there are some things that you learn how to do while working on a car that you like and/or are good at? Glass is not mine. Neither is wiring. Or upholstery. Or transmissions.
BTW, thanks to T.C. for giving me some lift time this weekend! And for the picture of my ugly mug, I guess.
Posted by: euro911 Mar 11 2013, 08:51 PM
Posted by: ThePaintedMan Mar 11 2013, 09:21 PM
Nice taco plate and tuna can
Yep! I bought mine long before the group buy. I'm sure you guys will enjoy them as much as I do!
What about the gaping hole in the tunnel?
Posted by: euro911 Mar 12 2013, 01:58 AM
Are you going to weld it back up, or fab a screw-in/removable plate for future access?
Posted by: ThePaintedMan Mar 12 2013, 05:30 AM
Are you going to weld it back up, or fab a screw-in/removable plate for future access?
Yeah, the metal there was completely gone. I had left a little bit there to keep the cables and everything from falling out after I did the rest of the metal work (and mostly I was not willing to weld directly overhead while on my back on jackstands).
What you describe is is precisely what I did on T.C.'s lift though. I cut out the remaining crappy metal and welded in "flanges" around the sides of the center tunnel. Then T.C. and I affixed a 7 inch aluminum strip that runs the length of the tunnel. However it was pretty late when we got that done so I didn't get pics. Will be nice to have access though if I ever need it.
Posted by: dfelz Mar 12 2013, 11:14 AM
Are you going to weld it back up, or fab a screw-in/removable plate for future access?
Yeah, the metal there was completely gone. I had left a little bit there to keep the cables and everything from falling out after I did the rest of the metal work (and mostly I was not willing to weld directly overhead while on my back on jackstands).
What you describe is is precisely what I did on T.C.'s lift though. I cut out the remaining crappy metal and welded in "flanges" around the sides of the center tunnel. Then T.C. and I affixed a 7 inch aluminum strip that runs the length of the tunnel. However it was pretty late when we got that done so I didn't get pics. Will be nice to have access though if I ever need it.
When you do get a chance, would love to see pictures of the finished tunnel project, I have always thought this would be helpful if you needed full access in there.
Thanks again for the bushing, it came in the mail last week!
For the windshield rubber, i did finally find that on marks website, what was hard about the install, any tips.... since i will probably be doing it myself... also, are those 16 little black clips around the window railing only needed for holding the chrome pieces on? or are they also there to center the windshield?
Thanks, keep up the good work!
David
Posted by: ericoneal Apr 19 2013, 10:03 AM
Could you tell me where you got the rubber replacement for the chrome trim on the back rollbar? I dont see it on 914Rubber. Did you fabricate your own?
Thanks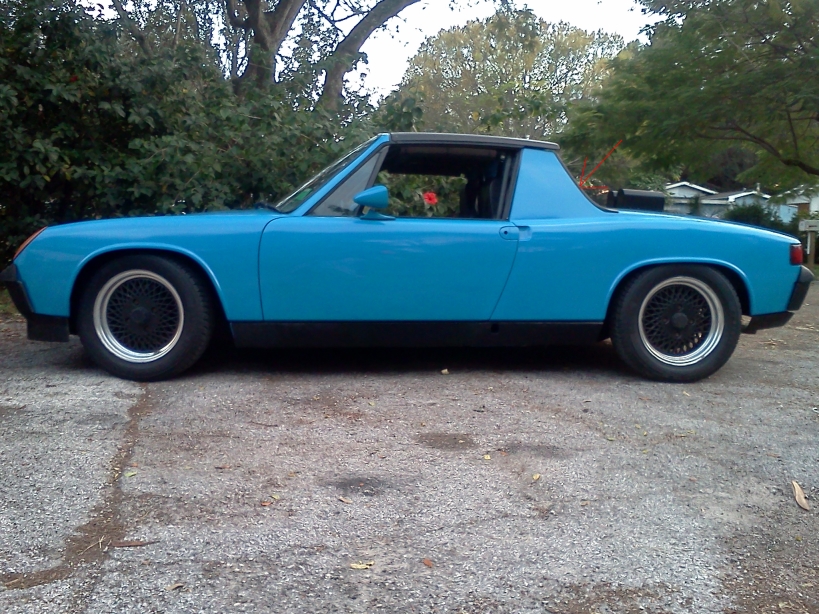
Posted by: ThePaintedMan Apr 19 2013, 11:21 AM
Hey Eric,
The aluminum trim was painted black. I used a product called SEM Trim Black. It can be found at most automotive paint supply stores, and NAPA Paint sometimes carries it. It's a little expensive, but well worth it. It is designed to be painted directly onto aluminum trim (I'd recommend scuffing the aluminum first though), and holds up much better to chips and scratches than the other rattle can varieties.
Posted by: ericoneal Apr 19 2013, 11:52 AM
Thanks. I was hoping to get out without needing to buy the trim. I am missing mine.
Hey Eric,
The aluminum trim was painted black. I used a product called SEM Trim Black. It can be found at most automotive paint supply stores, and NAPA Paint sometimes carries it. It's a little expensive, but well worth it. It is designed to be painted directly onto aluminum trim (I'd recommend scuffing the aluminum first though), and holds up much better to chips and scratches than the other rattle can varieties.
Posted by: ThePaintedMan Apr 19 2013, 11:55 AM
There is a parts car down the street from me that I believe still has the rear trim. I will be out of town this weekend with FourBlades at a PCA DE , but when I get back I'll check for you. Please remind me as I have a million things going on right now.
I'll see what I can talk the guy who owns it down to. Shouldn't be much.
Posted by: ericoneal Apr 19 2013, 12:51 PM
Thanks, I'd really appreciate that.
There is a parts car down the street from me that I believe still has the rear trim. I will be out of town this weekend with FourBlades at a PCA DE
, but when I get back I'll check for you. Please remind me as I have a million things going on right now.I'll see what I can talk the guy who owns it down to. Shouldn't be much.
Posted by: AZ914 Apr 19 2013, 01:50 PM
George,
Love the color! What is it called? Great job BTW.
Posted by: ThePaintedMan Apr 19 2013, 02:55 PM
George,
Love the color! What is it called? Great job BTW.
Thanks
2011 Mustang "Grabber" Blue.... it was what I had on hand when I started. I suppose I'm pretty happy with it
Posted by: Madswede Apr 19 2013, 04:31 PM
I dig it. A good looking blue, and since you've raced a Mustang it's OK. For now.
Posted by: carr914 Apr 19 2013, 07:12 PM
George is having Problems getting the Car through Tech @ Sebring. I put a call into my friend who is the Tech Chief who is going to help George in the Morning. It's a Tie-Rod/Balljoint Issue
Posted by: ThePaintedMan Apr 21 2013, 05:49 PM
Yeah, we didn't make it through tech, sadly. I feel like at this point either John or I have replaced or at least inspected just about every component on the car. Unfortunately the only thing I never thought to check was the front suspension. The car always tracked dead straight and never wore out tires, so I just thought I could wait to R&R the tie rods, ball joints, wheel bearings and steering coupler.
Long story short, John had a hell of a time the past two weeks getting the car ready for our first DE, which included new Corbeau Forza seats, Schroth Belts, a partial cage, rebuilt rear brakes and fixing a pinhole in the gas tank - only to get to Sebring and not pass tech. Essentially, the watchful eye of Carlos, our region's Porsche master mechanic caught some extra play in the front tire while he was checking lug torque. Sure enough, the inner tie rods are shot. A lesser mechanic (like me) would not have picked up on something like that. The funny thing is it had to be pre-teched at an authorized Porsche dealership, and they never even mentioned anything in the front end.
Oh well, we'll try again in May. The best part of my weekend though is I got to work on a couple 911s and do some troubleshooting alongside Carlos (the mechanic). I learned a lot and it was nice to know that I could actually keep up with a master mechanic. T.C., if you ever hang out with him again, I'd like to tag along. He's a cool guy and I enjoyed sponging some of his knowledge!
Posted by: URY914 Apr 21 2013, 07:16 PM
Will they give you a refund?
Posted by: carr914 Apr 21 2013, 08:08 PM
Yeah, we didn't make it through tech, sadly. I feel like at this point either John or I have replaced or at least inspected just about every component on the car. Unfortunately the only thing I never thought to check was the front suspension. The car always tracked dead straight and never wore out tires, so I just thought I could wait to R&R the tie rods, ball joints, wheel bearings and steering coupler.Long story short, John had a hell of a time the past two weeks getting the car ready for our first DE, which included new Corbeau Forza seats, Schroth Belts, a partial cage, rebuilt rear brakes and fixing a pinhole in the gas tank - only to get to Sebring and not pass tech. Essentially, the watchful eye of Carlos, our region's Porsche master mechanic caught some extra play in the front tire while he was checking lug torque. Sure enough, the inner tie rods are shot. A lesser mechanic (like me) would not have picked up on something like that. The funny thing is it had to be pre-teched at an authorized Porsche dealership, and they never even mentioned anything in the front end.
Oh well, we'll try again in May. The best part of my weekend though is I got to work on a couple 911s and do some troubleshooting alongside Carlos (the mechanic). I learned a lot and it was nice to know that I could actually keep up with a master mechanic. T.C., if you ever hang out with him again, I'd like to tag along. He's a cool guy and I enjoyed sponging some of his knowledge!
Carlos is Super Cool & knows his Porsches (even 914s - he actually grew up wrenching on Bugs). I told you what we can do in the Future. Hopefully I can make it down there in May ( I think it is only 2 or 3 Weeks)
Posted by: ThePaintedMan Apr 22 2013, 05:25 AM
Yeah Paul, we're getting a refund. It took some real , but we got them to. I explained that if they ever want first timers to come back, they had better give our money back. Its not like the car passed tech and then had issues. If it blows up on the track, I understand. I also think they're used to all of the guys with GT3s who have money to blow. Us po' folk have to do what we can.
Posted by: FourBlades Apr 22 2013, 06:16 AM
It was a good learning experience for all of us.
I think like you said we need to expect some teething problems the first time we take our cars to the track.
At least you guys got to do the touring laps and I got 4 really good sessions in.
John
Posted by: URY914 Apr 22 2013, 06:36 AM
Yeah Paul, we're getting a refund. It took some real
, but we got them to. I explained that if they ever want first timers to come back, they had better give our money back. Its not like the car passed tech and then had issues. If it blows up on the track, I understand. I also think they're used to all of the guys with GT3s who have money to blow. Us po' folk have to do what we can.Good for you.
Posted by: ThePaintedMan May 7 2013, 06:31 AM
Update: Finally got the car back on the ground after installing new turbo tie rods, ball joints, Tangerine Racing delrin steering coupler, bumpsteer kit, and reindexing the torsion bars. I'll have pics up soon, but as I was strapped for time, I didn't take pictures as I went along. I still need to do a string alignment, install the rear sway bar and replace the starter with a spare that T.C. gave me. Funny story about that - the car has been getting more and more finicky about starting until I was driving the car back over here from Vero Beach on Friday night. Stopped for gas in Yeehaw Junction, which many Floridians know is more of a truck stop than an actual town, at 12:00 A.M. Car wouldn't start with the key and then wouldn't jump with a screwdriver. Unfortunately the several times people tried to help me push start it didn't do the trick either. Luckily after I pulled it back out, let it cool down, and reinstalled it, it fired right up. Pretty sure that 40 year old solenoid is done for, but it's served it's purpose well.
Posted by: ThePaintedMan May 8 2013, 11:56 AM
A couple pics of the rear of the car, as requested by Eric.
Attached thumbnail(s)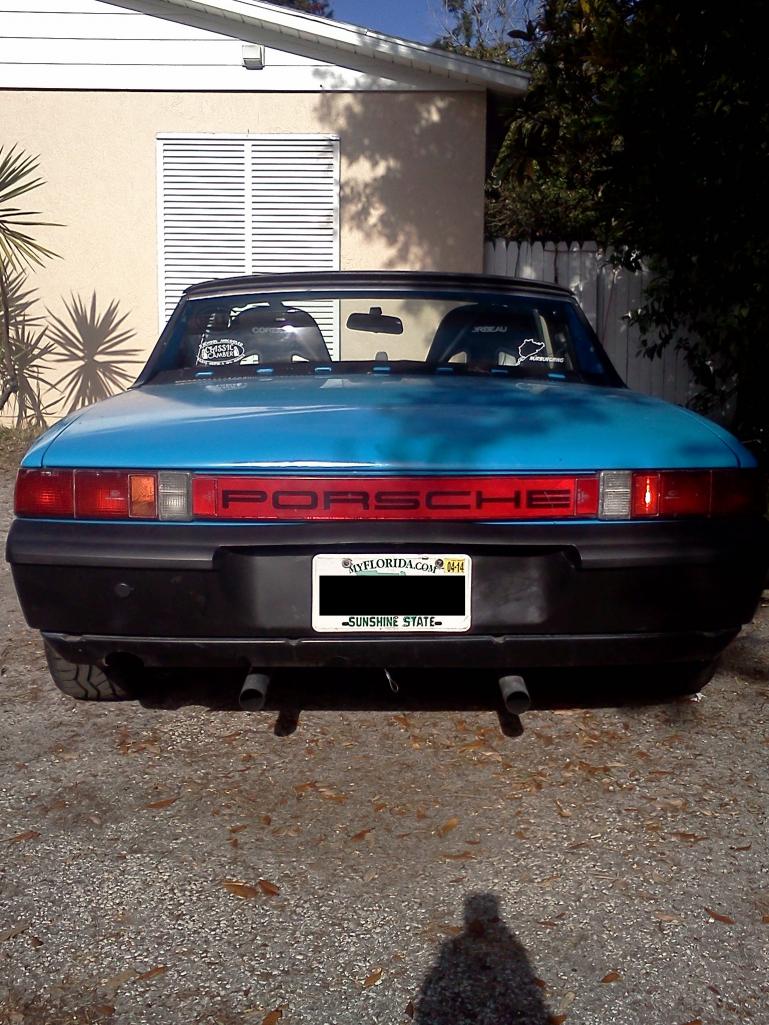
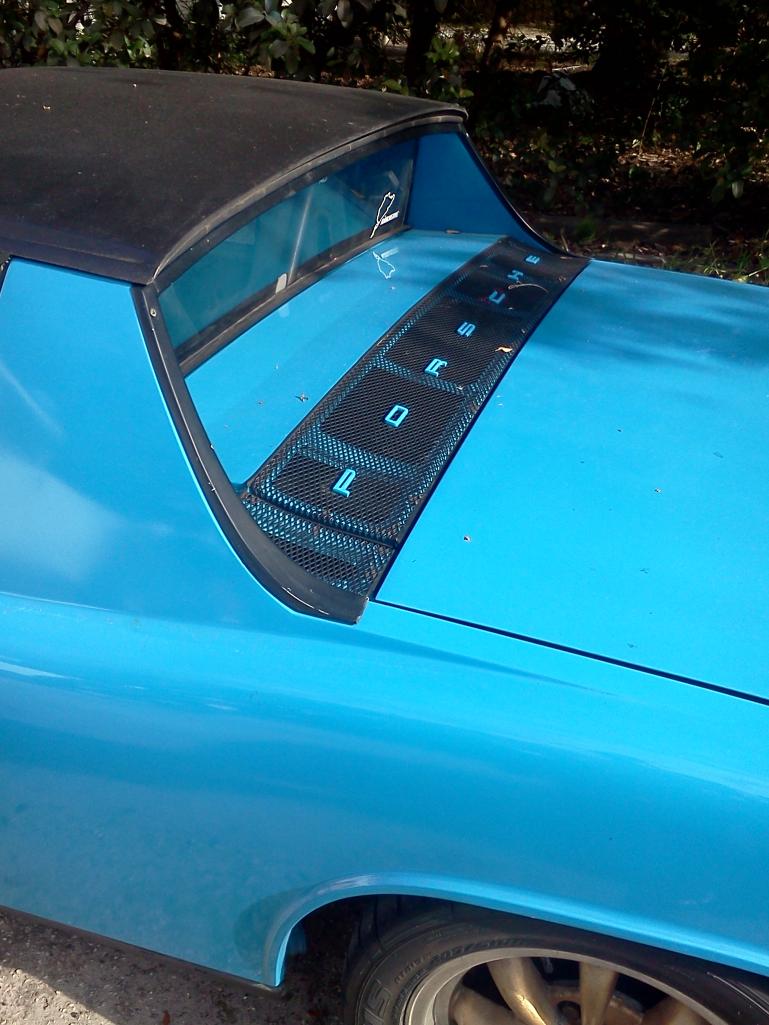
Posted by: URY914 May 8 2013, 01:47 PM
Good thing you blacked out your plate. Someone may want to track you down and steal that thing.
Posted by: xperu May 8 2013, 01:53 PM
A couple pics of the rear of the car, as requested by Eric.
What paint did you use on your sail trim. Mike
Posted by: ThePaintedMan May 8 2013, 02:00 PM
A couple pics of the rear of the car, as requested by Eric.
What paint did you use on your sail trim. Mike
It needs to be redone. Initially I scuffed up the trim, then used self etching primer and top-coated with the crappy Duplicolor stuff from Autobone. It's too soft and doesn't bond well enough with the aluminum so it's got some chips.
After doing some more research and listening to Scotty b, I used the SEM Trim Black on the window trim, with much better results. This stuff is a little more expensive, at $15 for a can, but you need to do is clean and scuff the aluminum and spray. Much better bond and it's designed for this usage. Find it at most paint stores - I bought mine from my local NAPA paint store.
Posted by: carr914 May 12 2013, 05:54 AM
George's Excellent Adventure
https://www.youtube.com/watch?v=2rKH0_Yywxg
Sorry my Battery ran out on this one!
Posted by: carr914 May 12 2013, 05:56 AM
Part II (in-Carr)
https://www.youtube.com/watch?v=4vHTeLK1o_E
Posted by: JawjaPorsche May 12 2013, 06:20 AM
I like how you painted you PORSCHE letters to match your car! Looking Good!
Posted by: FourBlades May 13 2013, 04:43 PM
That is great that you made it and had TC for an instructor!
We need to figure out your carb issue...
I don't remember it popping when I drove it last month.
Could it be a plug or otherwise ignition problem???
Some famous person said 90% of carb problems are ignition related.
John
Posted by: Rand May 13 2013, 04:56 PM
Looks like my morning commute.
All kidding aside,
Dude I can only give you huge kudos for everything you are doing. Your restoration and your path to better driving..... Very well done!
Cool that TC is helping out.
Posted by: carr914 May 13 2013, 04:59 PM
Definately a problem, we couldn't go over 4,000 RPM & were short-shifting all day.
I'm thinking bad plug/dead cylinder/ignition. I was busy with Race Control when I wasn't Instructing George, so I wasn't able to look into the problem. Carlos, the Head Tech. my friend the Porsche Master Mechanic said it was like that when George had the car aligned this past week.
But we didn't blow it up  & George made it back home
On the Driving Side, George is Good! Was Flying through the Corners, just had no Juice on the Straights. Hopefully his Video shows him passing the Cayman R while we were doing our Fred Flintstone imitiation!
Posted by: r_towle May 13 2013, 05:07 PM
Friends like that is why racing is such great fun.
TC is a good man to be an instructor...he might know a thing or two that will help.
rich
Posted by: carr914 May 13 2013, 07:50 PM
http://www.awolphoto.smugmug.com/keyword/051113-225#!i=2509079297&k=LqMc9rj
Posted by: ThePaintedMan May 15 2013, 07:31 AM
Thanks for the kind words guys. All in all, even with the poor running, it was a blast and a long road to get the car to this point. Either way, it needed a shakedown and I'm glad I got a chance to put it on the track. Eventually John will need to drive it as well, since it's definitely got a lot less ponies than his car and probably handles a little differently.
I should also say, I am honored to have T.C. instruct me. The first session I had been driving the car the same way I drove the Mustang at Chumpcar last year, which was really my only other track experience. Within 1 session, T.C. had me driving a completely different line and style, much more suited for momentum cars. I felt confident the whole time, and he has a unique ability to combine both visual and audio aids in just the right amount to coax the driver into a new way of approaching the course. In the afternoon, he basically didn't say anything, which actually built my confidence more and allowed me to explore the track and the car's capability. If you ever intend to track your car at Sebring, he is definitely the guy to have beside you and it would probably be worthwhile to fly him in to show you other tracks as well. Though it was pretty boring on the straights, we had a lot of fun. In the second video you'll see where we got waved by from another car and it took us the whole back straight to get by him 
https://www.youtube.com/watch?v=5XiU92tIQOY
Posted by: rhodyguy May 15 2013, 11:28 AM
an extra 1500rpm would have come in handy.
Posted by: NS914 May 15 2013, 12:19 PM
George, I have to tell ya...amazing!!! The car looks fantastic and the work you have taken on is inspiring....good on ya for sure...I actually think the blue is really cool! When I think of how much work you have done in sucha short time...I bought my car while I was in the middle of my Masters Degree as well....my Wife has a similar comments to your girl friend early on but now she just wants me to finish the car so she can drive it....lol. Thanks so much for documenting your build and showing us all of the work and results. We all learn a lot from these builds. Your idea with the seat slider was great and in fact I am just about to do the same after replacing the fron half of my floor and installing the Engman kit.
Posted by: ThePaintedMan May 15 2013, 08:37 PM
Kevin, you're telling me. It's easy to go back now and pick the corners that I definitely would have left it in third or 4th instead of short shifting.
Grant, thanks for the kind words. It's cool to know someone has a similar story! Hope you get yours back on the road soon
Posted by: ThePaintedMan May 15 2013, 08:42 PM
More video, this time of the second session. I got up a little more confidence in this one and started exploring more of what the car could do, especially though T1, T13 and T17.
https://www.youtube.com/watch?v=fBh7ZDJuJyI
Posted by: r_towle May 15 2013, 09:07 PM
You are not running on all four cylinders properly.
It sounds like one cylinder is either not using a good plug, a bad wire, or the carbs are not setup right.
Posted by: Madswede May 15 2013, 11:49 PM
Well I'm both impressed and jealous! Some day I'll drive Sebring ... I can only hope! It looks like it was a ton of fun, even if the car wasn't performing to its potential. I'd say it looks like you've really learned T13 and T17 very well. That's just from the camera perspective of course, but still those (and T1 as you said) seem to be your favorites and of course they are crucial momentum conservation turns, hence their challenge. So I've been told. In a word, Awesome!
Posted by: FourBlades May 16 2013, 06:39 PM
Great videos George and nice job on the driving.
When we get the engine running right your car is going to give the chump world hell.
John
Posted by: ThePaintedMan Aug 28 2013, 09:15 PM
Well that just about solves it! Spent the past two weeks pulling the old engine and putting the spare in. Finally got it buttoned up tonight and started with no drama. Cranked it for a few times to build oil pressure, then hooked up power to the fuel pump and away she went. First impression is that it runs MUCH smoother than the old one. No coughs from the carbs, no hesitation and NO backfiring! Took it around the block a few times just to put my mind at ease.
Tomorrow I'll do a basic tune - get it timed, synch the carbs, adjust the mixture and re-tighten the exhaust nuts.
Big thanks to John for being patient and Billh1963 for being honest with me and providing me a good spare!
A bonus - I swapped transmissions to the one that was attached to this motor. Bill, I think this must have been rebuilt too at some point.WOW, what a difference good synchros make. Not sure what is going on internally, but the "throws" feel much tighter as well. If the good Dr. Evilicious sees this, maybe he can shed some light on what would cause this difference.
Posted by: carr914 Aug 29 2013, 02:53 AM
Posted by: bulitt Aug 29 2013, 04:12 AM
You must have a good instructor George! We can tell by his legs who he is!
Posted by: URY914 Aug 29 2013, 04:56 AM
Posted by: billh1963 Aug 29 2013, 05:25 AM
Big thanks to John for being patient and Billh1963 for being honest with me and providing me a good spare!
A bonus - I swapped transmissions to the one that was attached to this motor. Bill, I think this must have been rebuilt too at some point.WOW, what a difference good synchros make. Not sure what is going on internally, but the "throws" feel much tighter as well. If the good Dr. Evilicious sees this, maybe he can shed some light on what would cause this difference.
I'm glad to see the "Pink Panther Returns" is more than just a movie title
The PO of the Pink Panther was adamant that both the engine and transmission only had around 5k miles on the rebuild. I guess that's true. I'm so happy that the engine is working out for you!
Posted by: JawjaPorsche Aug 29 2013, 05:36 AM
Attached image(s)
Posted by: ThePaintedMan Aug 29 2013, 07:09 AM
Thanks fellas. It'll be cool to tear into those heads on the old engine to see if my suspicions are confirmed. I think there is a head gasket leak on #3, a cracked head, or other, but that'll be for another day. Too much stuff left to do for the moment.
Posted by: rhodyguy Aug 29 2013, 07:32 AM
sounds like you can ratchet up your shift point to 5.5k. have fun with your 'new' car george. 
Posted by: ThePaintedMan Aug 29 2013, 07:37 AM
sounds like you can ratchet up your shift point to 5.5k. have fun with your 'new' car george.
Thanks Kev. Still not sure I have the stones to do that... so worried about breaking something. But it'll be nice to at least get it past 4,000.
Posted by: WLD419 Aug 29 2013, 07:01 PM
, Bill D.
Posted by: Mblizzard Aug 29 2013, 07:26 PM
George does that engine have that bolt I sent you in it? If so the it can easily go to the redline. It is a very special bolt!  Rev away! While I am sure that going too far with every shift is not good but if it is a sound seasoned engine there should not be too much risk with taking it there once in a while.
Hey I sprung for one of Tim's gauge light sets. Have you installed yours yet? I hope to have them next week and ready for Okteenerfest.
Posted by: ThePaintedMan Aug 29 2013, 10:12 PM
It sure does Mike! Now that I know I have the special crank bolt, I'm a little more confident to rev it. Sort of like the "special tires" Harry put on Cole Trickle's car in Days of Thunder.
Have not had a chance to send my gauges to Tim yet. I'm dropping the car off on the east coast this weekend with FourBlades so we can finish our prep on the car. Still have a lot of must-do items to meet tech requirements so unfortunately the gauges fell by the wayside. It would be nice to have them for the race though as shift lights!
Posted by: ThePaintedMan Jan 13 2014, 10:43 AM
Door bars in and cage complete, finally!
Attached thumbnail(s)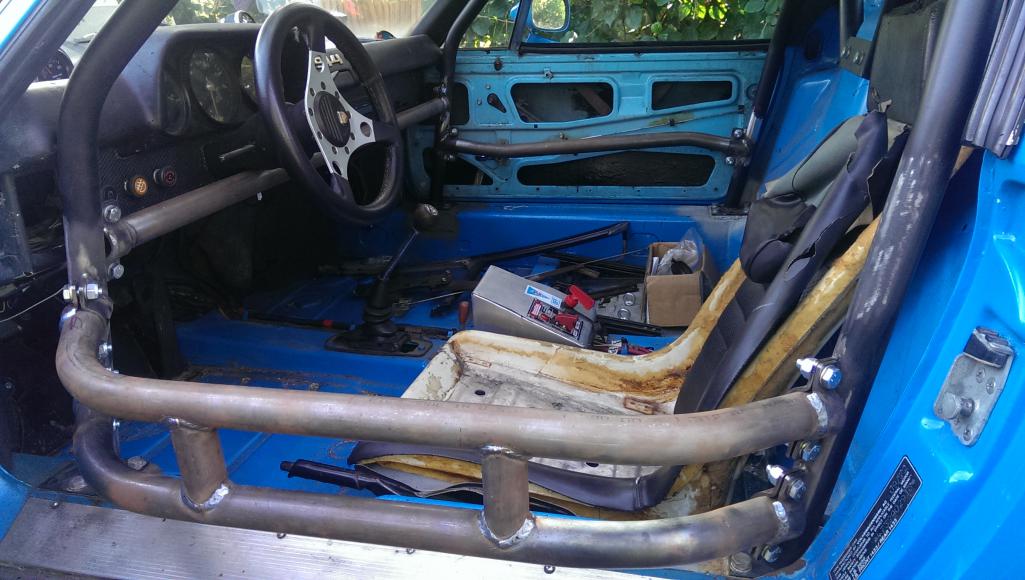
Posted by: Jetsetsurfshop Jan 13 2014, 10:08 PM
Door bars in and cage complete, finally!
Looking good.
Posted by: ThePaintedMan Jan 13 2014, 10:11 PM
Thanks Shane. As I mentioned to you, not quite Tangering Racing quality, and if I had it to do over again, I probably would have just purchased Chris's product. But it will be nice to remove the cage to R&R things if need be.
Posted by: chads74 Jan 14 2014, 08:21 AM
Looks like it turned out pretty nice. Are you planning on paint or powder coating to prevent too much rust?
Posted by: billh1963 Jan 14 2014, 08:43 AM
I may be missing the point but should the bolt heads be facing you instead of the bolts? I would think you would want any pointy parts away from you
Posted by: ThePaintedMan Jan 14 2014, 09:51 AM
I'll probably just use tractor paint, or some kind of durable epoxy paint. Getting it over to a powdercoating shop would be a pain in the ass.
Bill, that's a good call. But this is only how the guys at the hot rod shop put it together after they did the tube bending. I have to disassemble it all and do some other work, then put it back together. Then, I'll make sure all of the pointy things are out of the way
Posted by: chads74 Jan 14 2014, 10:02 AM
Well if you get into it this weekend let me know
Posted by: Jetsetsurfshop Jan 14 2014, 07:56 PM
Hey George,
What your plans for bolting the roof down? Our factory latches won't pass tech for Chump.
Posted by: ThePaintedMan Jan 14 2014, 08:10 PM
Hey George,
What your plans for bolting the roof down?
Our factory latches won't pass tech for Chump. Custom "solid" latches - no drilling necessary!
Posted by: ThePaintedMan Jan 15 2014, 09:21 AM
Latest project. Came out pretty good and took very little effort/time... which is rare for most of my projects.
Attached thumbnail(s)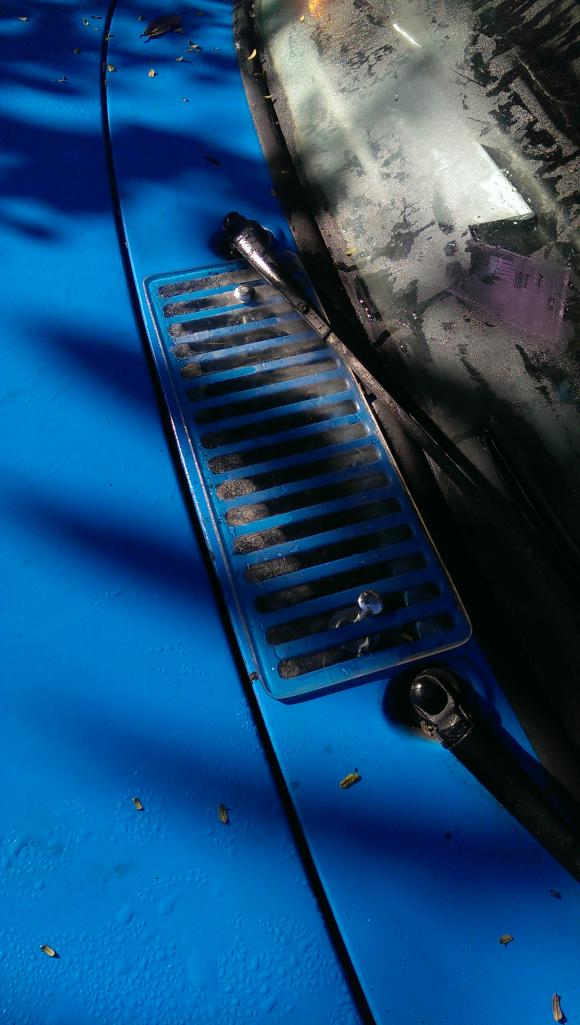
Posted by: chads74 Jan 15 2014, 09:35 AM
Did you use plexiglass? How did you cut it?
Posted by: ThePaintedMan Jan 15 2014, 09:46 AM
I believe it's 1/4 inch acrylic. It's what I had sitting here at the time (not even sure where I got it.) I cut it with a Dremel and a little saw blade attachment I got at Harbor Freight. Ideally, I think the best way to cut it is with a band saw. I have some leftover if you want to experiment Chad.
Posted by: chads74 Jan 15 2014, 09:02 PM
Sounds good, I am tired of worrying about water leaking in there
Posted by: ThePaintedMan Jan 19 2014, 11:11 PM
Chad stopped by on Saturday morning to help me drop the transmission and replace the throwout bearing and wheel bearing. The man is a beast! He had it out in 30 minutes and still had a good attitude despite having a radiator hose blow off of his V8 car on the way over
Attached thumbnail(s)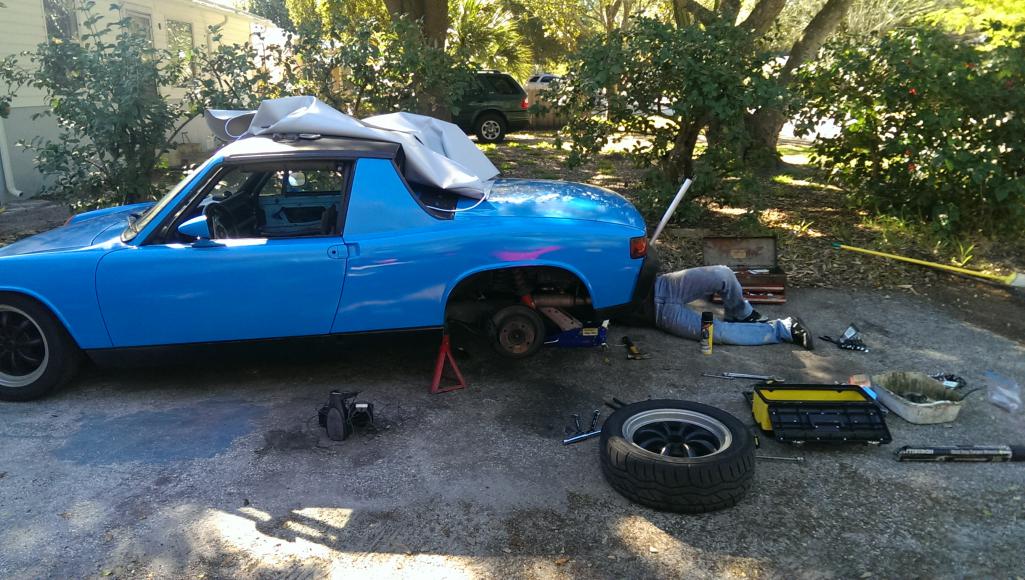
Posted by: ThePaintedMan Jan 19 2014, 11:17 PM
Chad had to run, but I was able to tackle the wheel bearing. Of course Eric Shea's http://www.youtube.com/watch?v=3sfC1NiXamA is probably preferred, but I tackled it on the car since I've done it multiple times on Miatas and other vehicles. This allowed me to avoid re-aligning the car (at least for the time being) as well.
First, I removed the rear hub nut, wheel and caliper and used an http://www.harborfreight.com/impact-screwdriver-set-with-case-37530.html to remove the two screws retaining the rear disc to the hub. Then I borrowed a slide hammer (part #27033) and hub puller attachment (part #27032) from Autozone. This can all be seen below.
Attached thumbnail(s)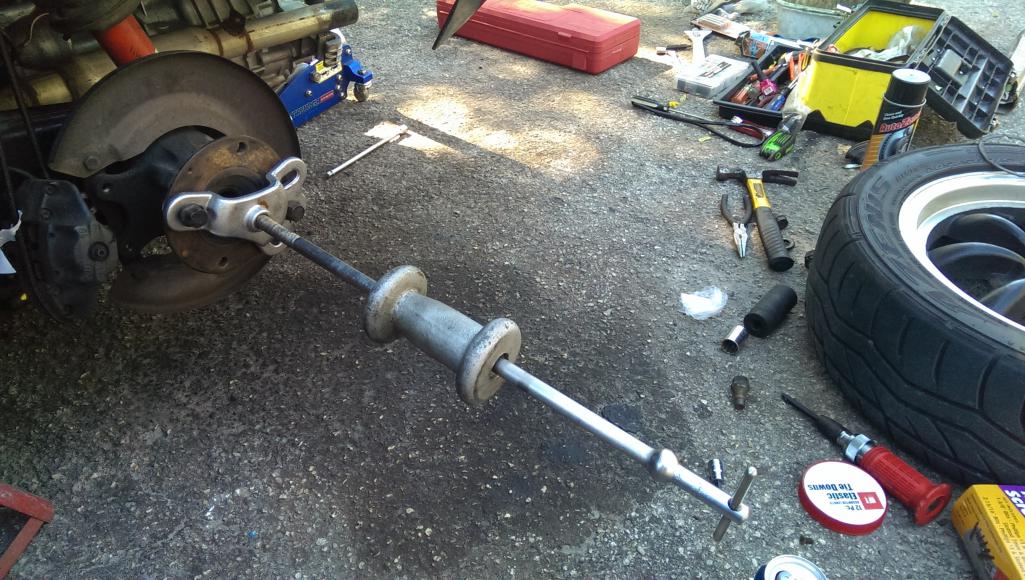
Posted by: ThePaintedMan Jan 19 2014, 11:24 PM
...Gave it a couple pops and it came right off, and even left the inner race inside the bearing, which is nice (often times you'll end up having to drive/split the race off of the hub).
The bearing had a decent amount of play in it, which explains the squealing. These are SKFs, and I believe them to be original to the car. Not bad to get 40 years out of one of these puppies. Notice that the outer seal is completely dried up and shrank from the outer race.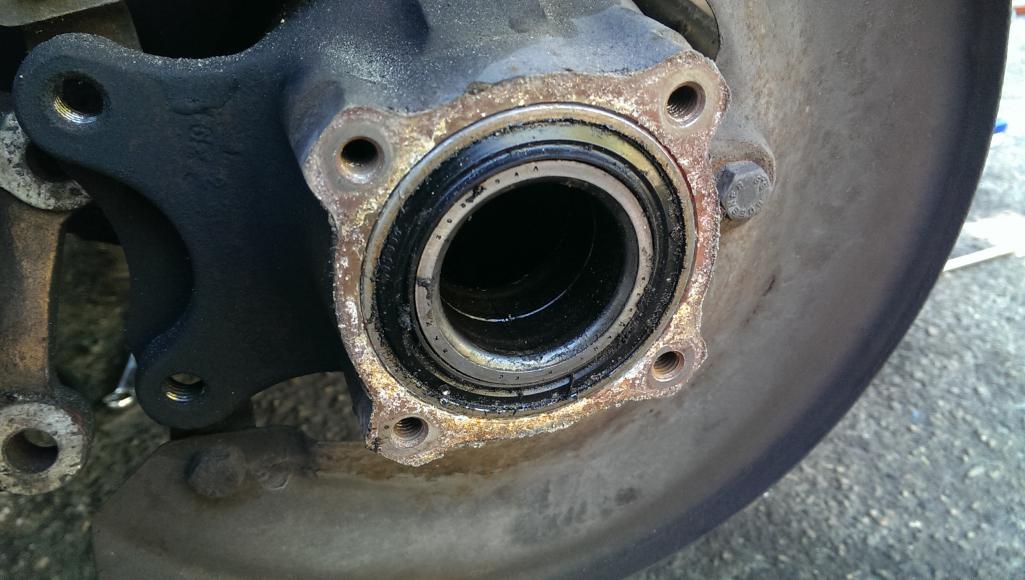
Next I removed the bearing retainer plate. While it is possible to drive the bearing out of the arm from the backside, there is limited space to work, so I put my threaded rod to use with a large socket behind the inner bearing race. I used the the weight portion of the slide hammer on the threaded rod to pull the bearing out.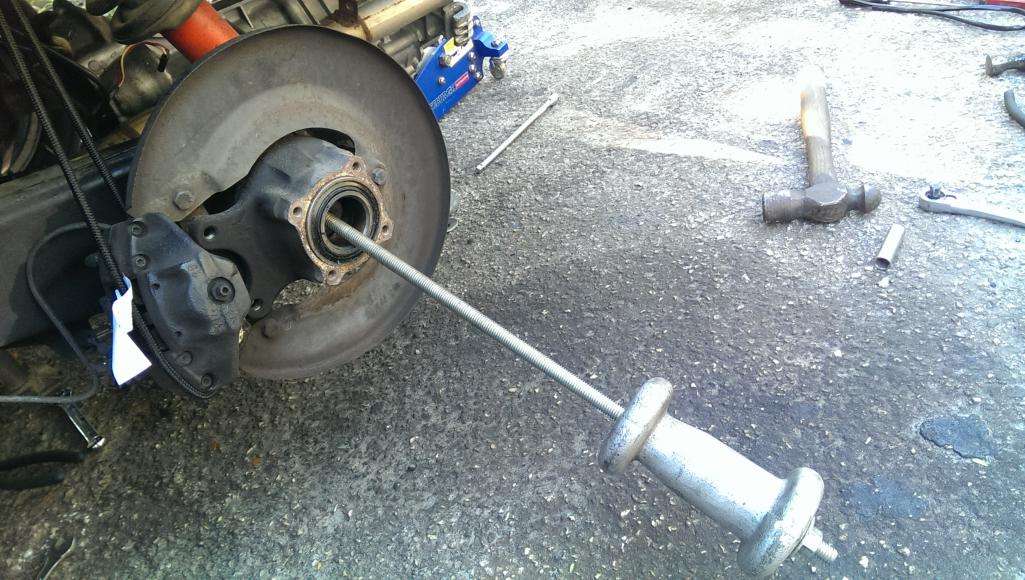
Posted by: ThePaintedMan Jan 19 2014, 11:33 PM
Here is the whole assembly out of the car.
Then, after freezing the new bearing for a few hours and heating up the trailing arm recess, I lightly began to tap it in. Once it was in fairly straight, I used the old bearing to drive it the rest of the way how. ONLY tap the outer race - do not touch the inner race or risk having to do this all over again in a short amount of time.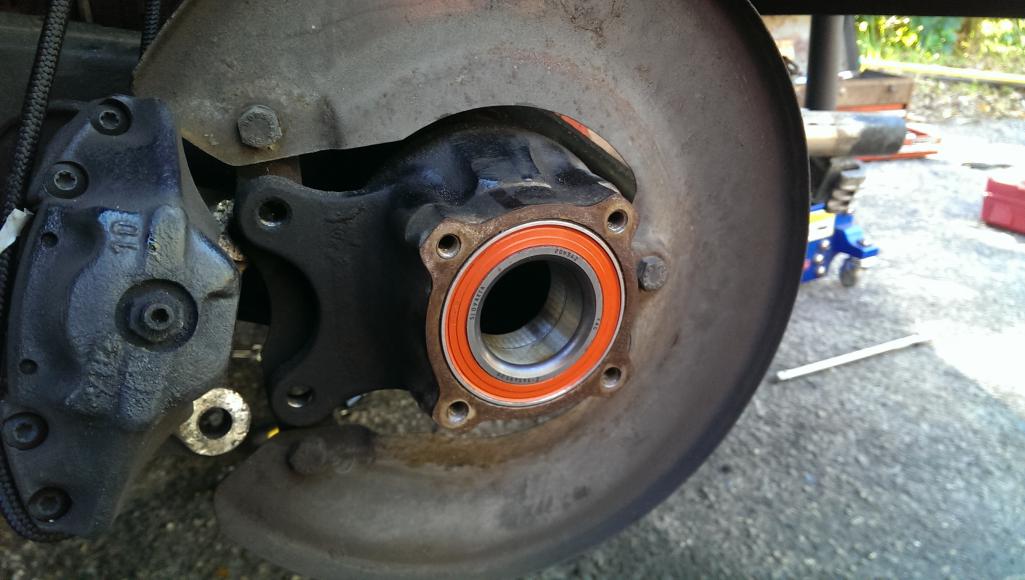
Posted by: ThePaintedMan Jan 19 2014, 11:34 PM
Then I used the threaded rod to pull the hub into the bearing. A little bit of leftover Redline rear end grease made this a piece of cake. 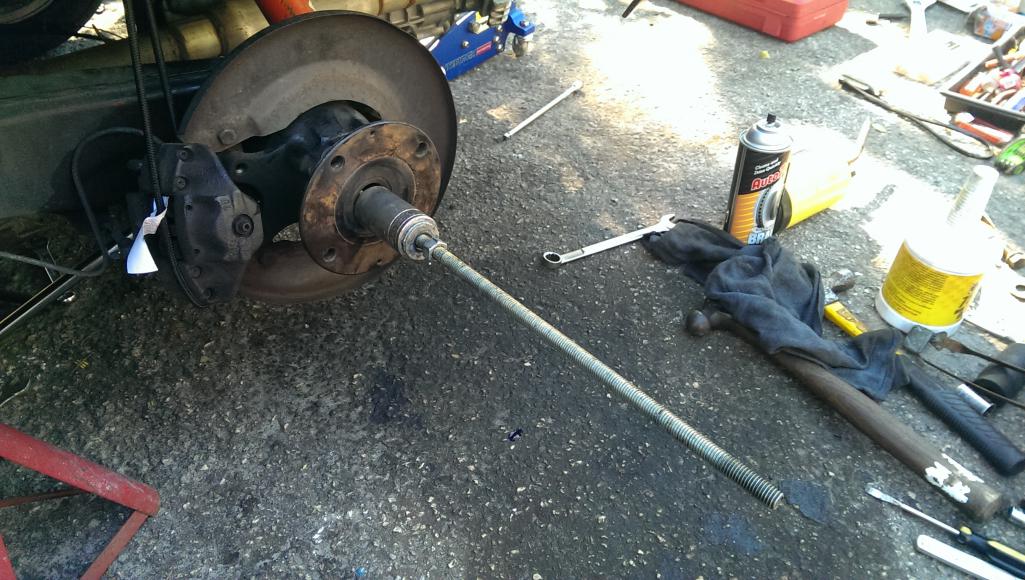
The rest is pretty boring Reassemble in reverse order and torque the rear hub nut to 180-250 ft lbs.
Now I get to move onto the fun stuff including window net, painting the cage, putting in the rear polycarbonate glass from 914Rubber, figuring out whats still going on with my fog lights and installing the fire system.
Posted by: ThePaintedMan Jan 22 2014, 09:18 AM
Window net in! A bit of a pain finding something that would attach the bottom to the door bars effectively and remain tight, but also be flexible enough to fall completely out of the way to allow ingress/egress. I ended up using a solid 5/16 steel bar with 3/32 vinyl coated cable.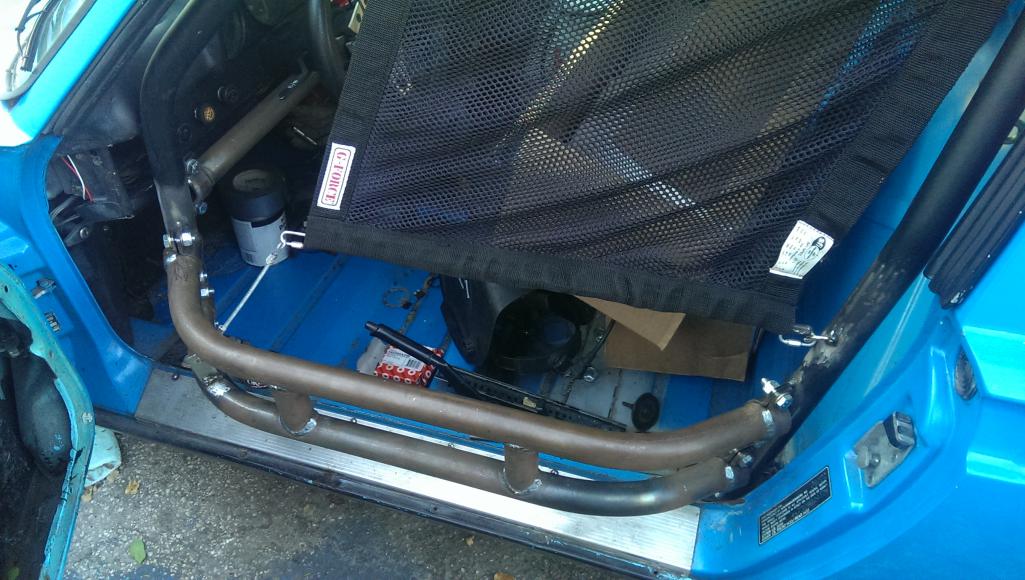
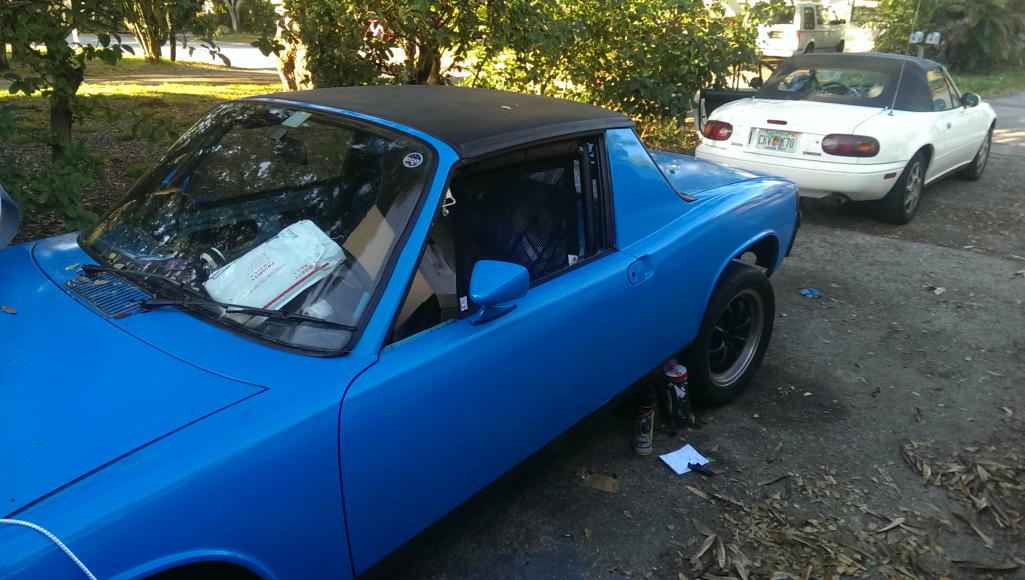
A huge thanks to Perry Kiehl as well. Since the window had to be removed to fit the door bars, I had no way to keep water from getting inside. Perry rushed me out one of his GREAT umbrella covers, which makes rolling up the windows (or even having any) unnecessary now! 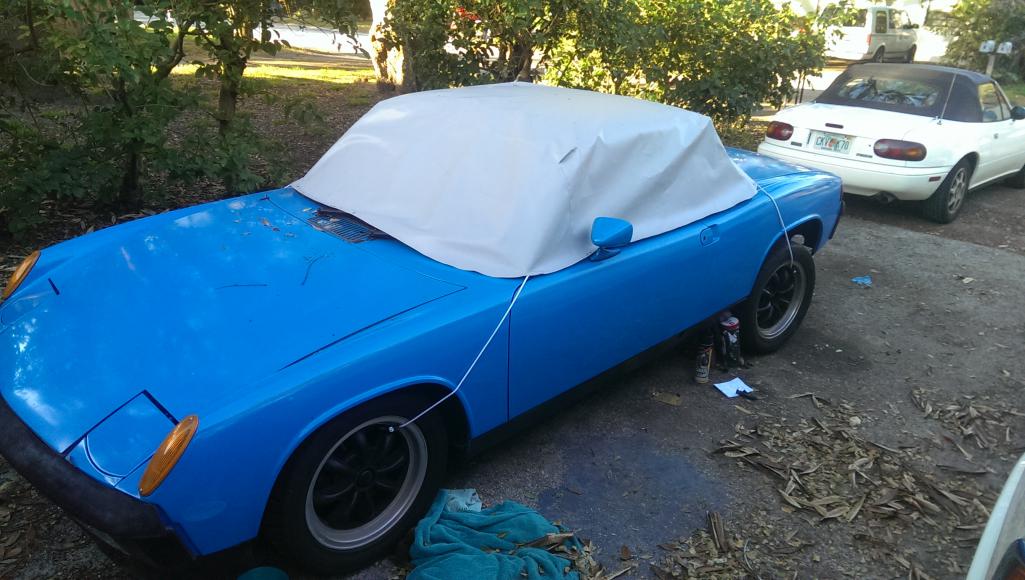
Posted by: Jetsetsurfshop Jan 23 2014, 07:36 AM
Window net in! A bit of a pain finding something that would attach the bottom to the door bars effectively and remain tight, but also be flexible enough to fall completely out of the way to allow ingress/egress. I ended up using a solid 5/16 steel bar with 3/32 vinyl coated cable.
A huge thanks to Perry Kiehl as well. Since the window had to be removed to fit the door bars, I had no way to keep water from getting inside. Perry rushed me out one of his GREAT umbrella covers, which makes rolling up the windows (or even having any) unnecessary now!
Does it also cover the engine bay?
Posted by: ThePaintedMan Jan 23 2014, 08:36 AM
Does it also cover the engine bay?
It sure does Shane. For anyone with carbs, this is a no brainer, but I think it's pretty much a prerequisite for any 914 anyways. Perry is a great guy and was super helpful.
Posted by: ThePaintedMan Mar 25 2014, 06:02 PM
A couple more things I've been meaning to do for awhile.
First, I emulated Brant's simple, but awesome hood fuel filler door idea. Simple measuring and cutting and a little bit of thin aluminum produced almost exactly what I wanted.
I finished it off by adding a little bit of split rubber cord from McMaster. I need to go back and paint the metal where the cutting wheel took the paint off once it stops raining around here.
Attached thumbnail(s)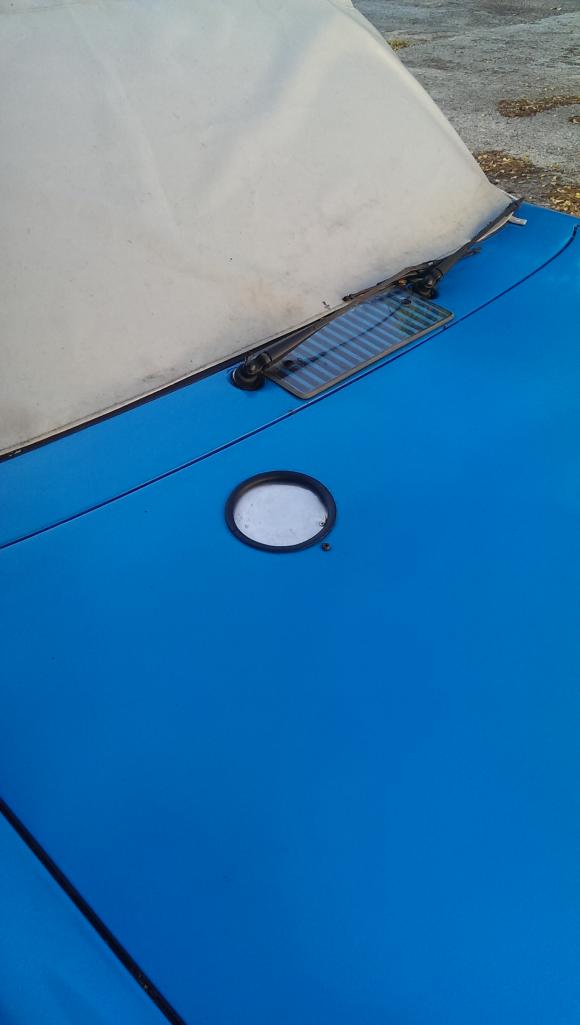
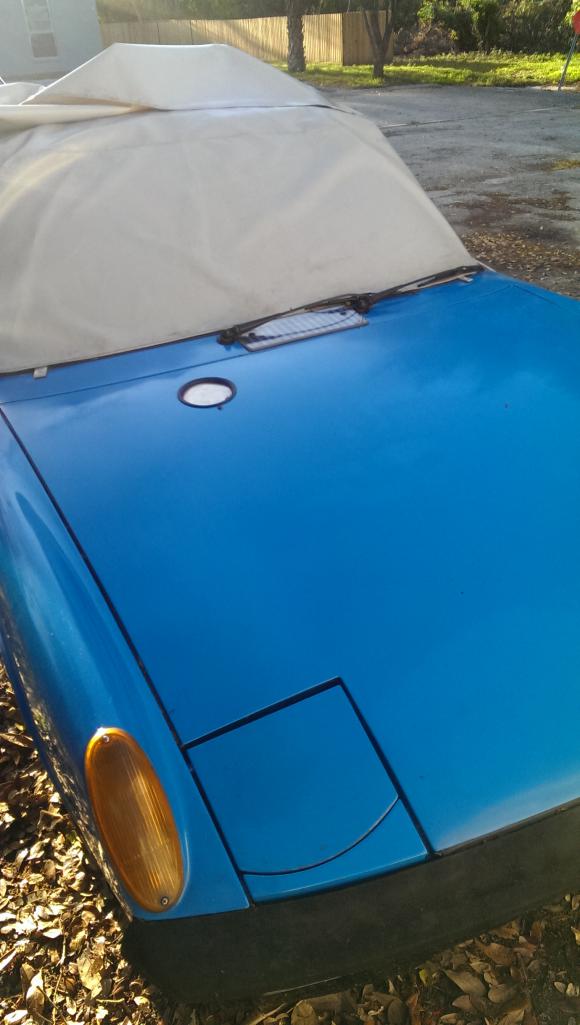
Posted by: ThePaintedMan Mar 25 2014, 06:07 PM
I also needed a simple and lightweight solution for a defroster. I ended up with a $20 bilge blower from Ebay, some ducting from Home Cheapo and a little bit of time fabbing up an aluminum vent to replace the factory bakelite piece that would have been there. I didn't see the need to connect it to the cowl as all you really need is air at the same temperature as ambient. I would say the whole thing weighs less than 2-3 pounds.
Last night's rain gave me a chance to try it out with the window fully fogged over. In less than a minute it was clear again - those bilge blowers put out a TON of air.
Attached thumbnail(s)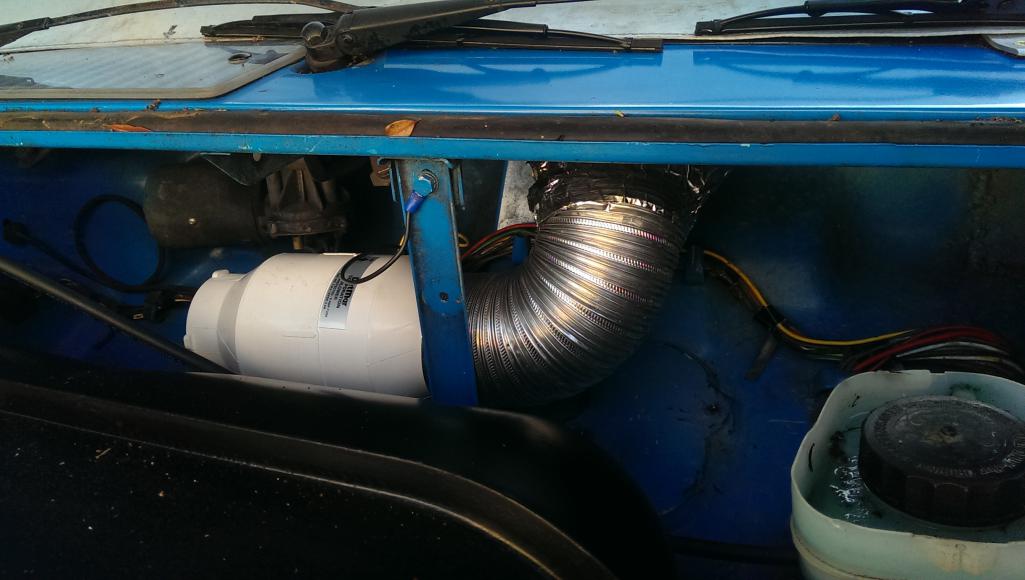
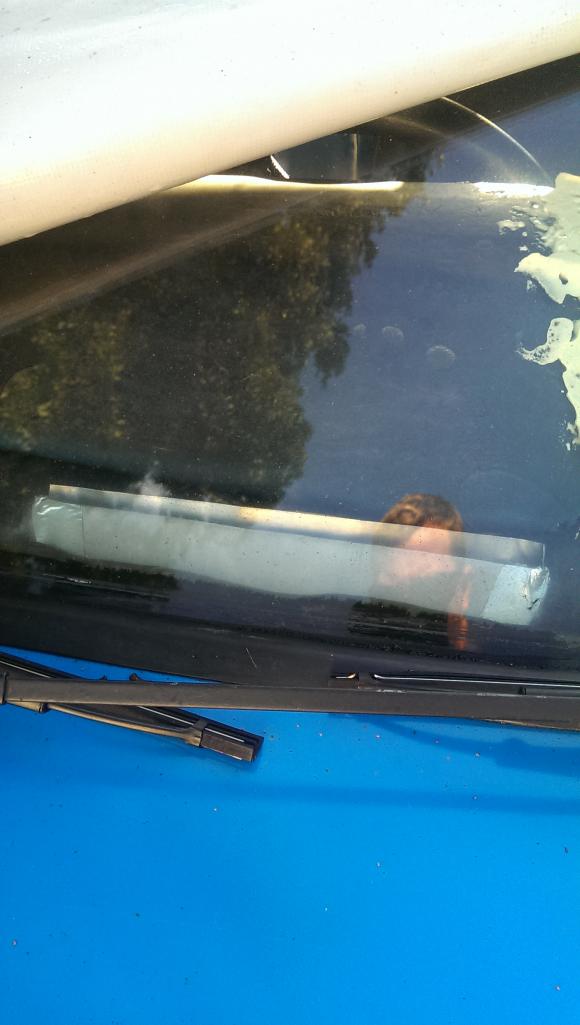
Posted by: ThePaintedMan Mar 25 2014, 06:11 PM
Finally over the weekend I was able to finish my homemade caliper ducts. I'll concede that this idea was wholeheartedly stolen from Racer Chris' awesome idea for providing vented air to solid rotors. These actually sit directly on top of the caliper, blowing air into them rather than on the rotor.
Unfortunately they're made of thin steel, so they weigh about 1/3 lb each. One day I'll go back and do them in aluminum.
Again, thank you to Racer Chris as I definitely wouldn't have come up with the idea on my own.
Attached thumbnail(s)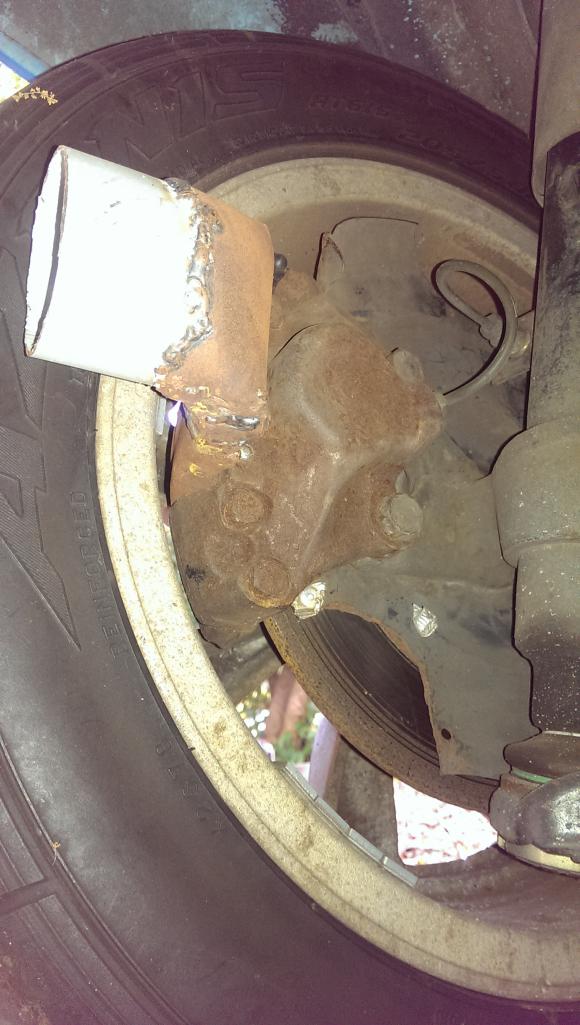
Posted by: chads74 Mar 25 2014, 07:11 PM
I also needed a simple and lightweight solution for a defroster. I ended up with a $20 bilge blower from Ebay, some ducting from Home Cheapo and a little bit of time fabbing up an aluminum vent to replace the factory bakelite piece that would have been there. I didn't see the need to connect it to the cowl as all you really need is air at the same temperature as ambient. I would say the whole thing weighs less than 2-3 pounds.
Last night's rain gave me a chance to try it out with the window fully fogged over. In less than a minute it was clear again - those bilge blowers put out a TON of air.
I need to do this on mine one day.
Posted by: FourBlades Mar 25 2014, 07:22 PM
Great progress!
We will be terrorizing chump car this year!
John
Posted by: ThePaintedMan Mar 26 2014, 02:55 PM
Thanks John! I sure hope so. Just need to finish the seats and dash now and order the rest of the gas containers and consumables - brake pads, etc.
... after we get into the house of course.
Posted by: vw505 Mar 26 2014, 03:21 PM
You ever find out what was wrong with the old motor?
Posted by: ThePaintedMan Mar 26 2014, 04:12 PM
You ever find out what was wrong with the old motor?
Nope, not yet. Waiting to move into the new house next month with a proper garage for the first time in my life.
 Didn't feel right tearing the heads off of the old motor just to end up getting dirt and debris in the cylinders. Everything I've done thus far on the car has been outside in the driveway full of sand.
 But it is indeed on my list of things to do. I want to learn exactly what went wrong. Hopefully do a top-end rebuild to introduce me to these engines before I tear one completely apart.
All I know is with the linkage working correctly, this thing engine runs like a scalded dog!
Posted by: 2mAn Mar 26 2014, 04:20 PM
Just went through the entire thread. Nice work George! I cant wait to join the club. Ive been hanging out, learning and getting more and more anxious to get my hands on one. I love the blue!
Posted by: ThePaintedMan Mar 26 2014, 04:30 PM
Thanks Simon! You'll find one eventually. You've done it right - learn all the bad/susceptible parts of these cars first - take your time and buy one that will leave with with less work to do in the long run.
Posted by: carr914 Mar 26 2014, 07:07 PM
You ever find out what was wrong with the old motor?
Nope, not yet. Waiting to move into the new house next month with a proper garage for the first time in my life.
Didn't feel right tearing the heads off of the old motor just to end up getting dirt and debris in the cylinders. Everything I've done thus far on the car has been outside in the driveway full of sand. But it is indeed on my list of things to do. I want to learn exactly what went wrong. Hopefully do a top-end rebuild to introduce me to these engines before I tear one completely apart.
All I know is with the linkage working correctly, this thing engine runs like a scalded dog!
George, when are you Moving? I'll Trade you Truck & Trailer Moving Time for Valve Adjustment/Carb Synch on the Blue 2.0
Posted by: ThePaintedMan Mar 26 2014, 08:43 PM
George, when are you Moving? I'll Trade you Truck & Trailer Moving Time for Valve Adjustment/Carb Synch on the Blue 2.0
T.C., it'll be April 18th tentatively. But we'll see. I was going to call you anyways and see if you'd be willing to let me tinker with those carbs and linkage a little. You don't owe me a thing bud.
Posted by: carr914 Mar 27 2014, 05:28 AM
Still waiting to get the car back
Posted by: chads74 Mar 27 2014, 07:51 AM
Whats getting done to the car T.C.?
Posted by: vw505 Mar 27 2014, 08:55 AM
You ever find out what was wrong with the old motor?
Nope, not yet. Waiting to move into the new house next month with a proper garage for the first time in my life.
Didn't feel right tearing the heads off of the old motor just to end up getting dirt and debris in the cylinders. Everything I've done thus far on the car has been outside in the driveway full of sand. But it is indeed on my list of things to do. I want to learn exactly what went wrong. Hopefully do a top-end rebuild to introduce me to these engines before I tear one completely apart.
All I know is with the linkage working correctly, this thing engine runs like a scalded dog!
I grew up in "the Berg" myself, went to North east High School. I know all about the sand!
Posted by: ThePaintedMan Mar 27 2014, 06:00 PM
I grew up in "the Berg" myself, went to North east High School. I know all about the sand!
No way! That's a rarity - even more rare here on the World. I can count on one hand the people I've met who actually were born here.
If you're ever in town, I'll be happy to treat you to a beer and a burger at Chattaway!
Posted by: carr914 Mar 27 2014, 06:22 PM
Whats getting done to the car T.C.?
Paint

Posted by: Jetsetsurfshop Apr 8 2014, 06:47 AM
Hey George,
Noticed that your looking to buy fiberglass bumpers for chump. I was going to put my steel ones back on for that race. You think glass will be ok?
Oh, only because we talked about this before, I ran a 2.48 at Sebring trying to chase down Joe in that V-8 beast. Best time yet!
Shane
Posted by: ThePaintedMan Apr 8 2014, 07:58 AM
Hey Shane,
Though I'm a little worried about contact, I think FG is the only way to go with a really underpowered car. That should be in the neighborhood of 30-40 lbs weight savings.
A 2:48 is FLYING in a /4 at Sebring. I'm really impressed man. I still need to return your call so I'll give you a shout at some point this week.
Posted by: Jetsetsurfshop Apr 28 2014, 06:32 PM
Any new progress?
Shane
Posted by: Larmo63 Apr 28 2014, 07:45 PM
What is the contact for Perry and the bikini top thingie?
Awesome and entertaining build, btw.....!!!!
Posted by: Jetsetsurfshop May 4 2014, 07:18 PM
https://www.pegasusautoracing.com/productselection.asp?Product=2426
Is this the extinguisher system you went with? I'm on again off again about Chumping my ride.
Posted by: ThePaintedMan May 5 2014, 07:19 AM
Hey guys. Sorry I wasn't around to respond sooner - was in Daytona crewing for a team for this weekend's SCCA Regional race.
Larmo - send me a PM and I'll send you Perry's e-mail address. I'm not sure that he wants it posted publicly. He is still producing the umbrella tops, but he is very busy at the moment, so you'll have to be patient.
Shane, that is indeed the system that I used and I like it a lot. Simple and effective. I chose the 4.0L liter, despite weighing a few more pounds for the added egress time. Although I like doing business with Pegasus, I actually ordered my system from these guys:
http://www.racingfiresystems.com/RacingFireSystems.com/Recommended_Systems.html
A little cheaper and every bit counts!
Posted by: Jetsetsurfshop Jul 16 2014, 06:23 PM
Hey guys. Sorry I wasn't around to respond sooner - was in Daytona crewing for a team for this weekend's SCCA Regional race.
Larmo - send me a PM and I'll send you Perry's e-mail address. I'm not sure that he wants it posted publicly. He is still producing the umbrella tops, but he is very busy at the moment, so you'll have to be patient.
Shane, that is indeed the system that I used and I like it a lot. Simple and effective. I chose the 4.0L liter, despite weighing a few more pounds for the added egress time. Although I like doing business with Pegasus, I actually ordered my system from these guys:
http://www.racingfiresystems.com/RacingFireSystems.com/Recommended_Systems.html
A little cheaper and every bit counts!
Anything new going on with the Chump build?
Can I help?
Posted by: ThePaintedMan Jul 16 2014, 09:08 PM
Still chugging along Shane. Got your e-mail and I promise I'll respond tomorrow - very sorry I have not yet. I need to finish the fiberglass stuff this weekend if possible. Not sure how much is still left after that other than a good shakedown and getting the lights squared away. To date, the limitations have been both time and money related. I'm getting a little bit more of both now, but hopes are still on for September. We'll talk this week.
Posted by: Jetsetsurfshop Jul 17 2014, 09:54 AM
If you car isn't ready, mines pretty close. Just a thought.
Posted by: Jetsetsurfshop Aug 24 2014, 06:03 PM
Attached thumbnail(s)
Posted by: ablesnead Aug 24 2014, 06:43 PM
George or Shane , I have a really nice smooth satin black targa top...if you want you can have...this top was tested at Acme labs in Yehaw Junction ..they estimate a 20 mile an hour speed increase down the back straight !
Posted by: carr914 Aug 25 2014, 05:08 AM
Still chugging along Shane. Got your e-mail and I promise I'll respond tomorrow - very sorry I have not yet. I need to finish the fiberglass stuff this weekend if possible. Not sure how much is still left after that other than a good shakedown and getting the lights squared away. To date, the limitations have been both time and money related. I'm getting a little bit more of both now, but hopes are still on for September. We'll talk this week.
Are you registered for Chump?
Posted by: ThePaintedMan Aug 25 2014, 11:27 AM
Huge thanks to Shane and his stepdad Keith for their assistance with the car. Towed it down to their beautiful shop in Marco Island, and despite the total nightmare of getting down there, it was a productive day. Shane and his family are good peoples.
We found some issues that I wouldn't have probably diagnosed on my own, but I'll definitely be able to fix in the coming weeks.
Shane's car is really cool too! Very trick and sounds AWESOME.
Yup, T.C., we're registered for the 20th.... now just need to for the next few weeks to get it finished. I'll post pics soon.
Posted by: Jetsetsurfshop Aug 26 2014, 05:18 PM
No worries, glad to help. I would of went home after the tire issue in Port Charlotte.
Thanks for the props on my car, I meant to let you run it around the block. Just ran out of time.
If you need some help on a Sunday to get more stuff done, let me know. I can drive up your way. No big deal.
Shane
T.C., you signed up for Sebring too?
Posted by: carr914 Aug 26 2014, 05:25 PM
Yes, I'm signed up for Chump
I'm going to Start another Thread so we don't clog up this Thread
Posted by: ThePaintedMan Sep 16 2014, 09:04 AM
Quite a hectic year, but I'm happy to report the car is now track ready, almost 3 years later. Many updates including a full FIA-rated fire system, custom seat made from a 914 seat shell, custom gauge bezel to hold our VDO gauges, true projector HID lights in the original pop-up housings, fiberglass bumpers, and radio system.
This weekend is the Chumpcar 14 Hours of Sebring and there are several 914World drivers who will be driving the car: FourBlades, JetsetSurfShop and tooms351. Wouldn't have been able to do it without them, or the rest of you here at 914World, including several of our vendors here on the forum. Thank you all!
Though it's a little goofy, I think our theme turned out okay. Our team name: Team Falken Awesome.
Attached thumbnail(s)

Posted by: ThePaintedMan Sep 16 2014, 09:06 AM
Vendors
Attached thumbnail(s)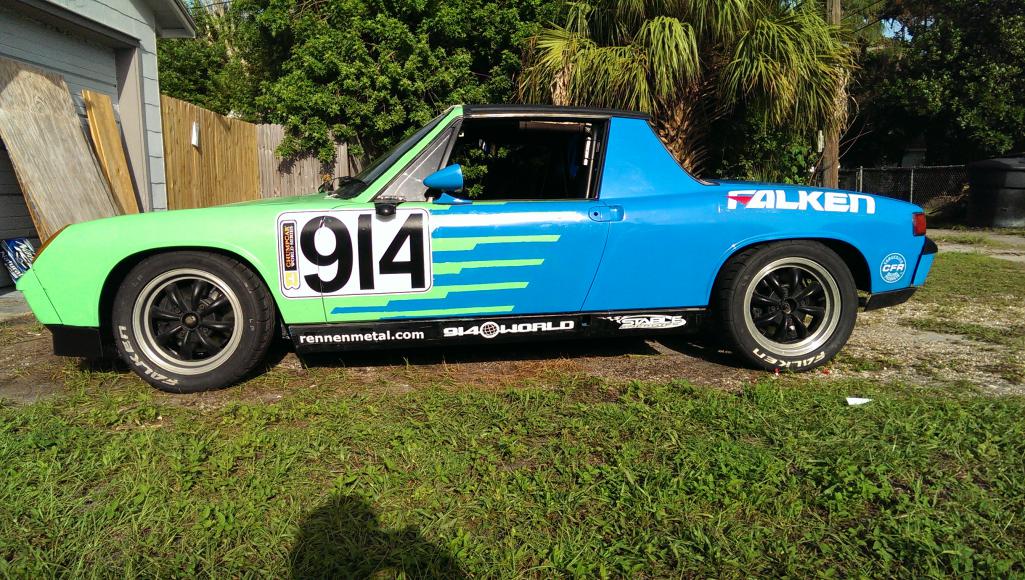
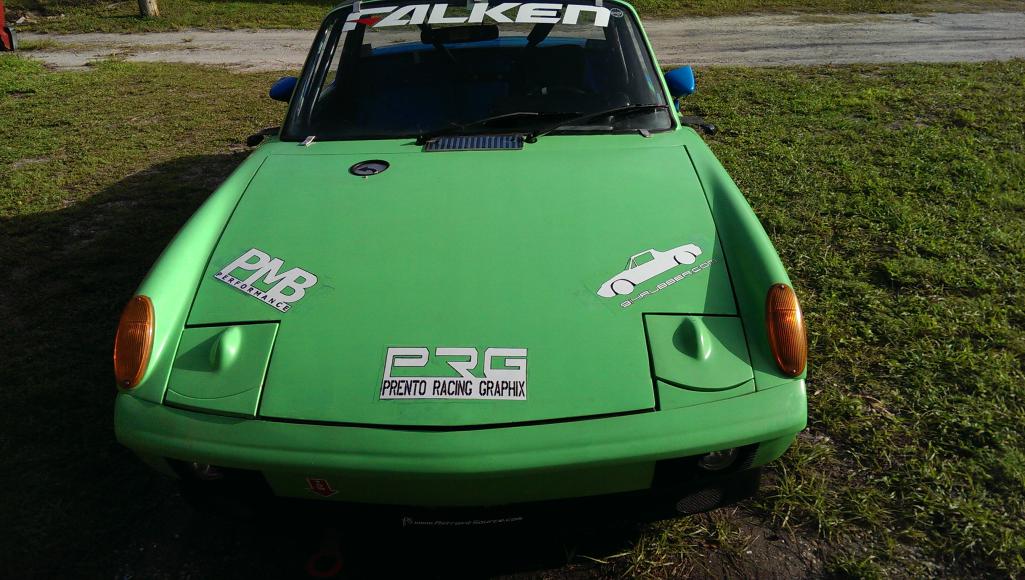
Posted by: ThePaintedMan Sep 16 2014, 09:07 AM
CFR/Tangerine Racing and lights
Attached thumbnail(s)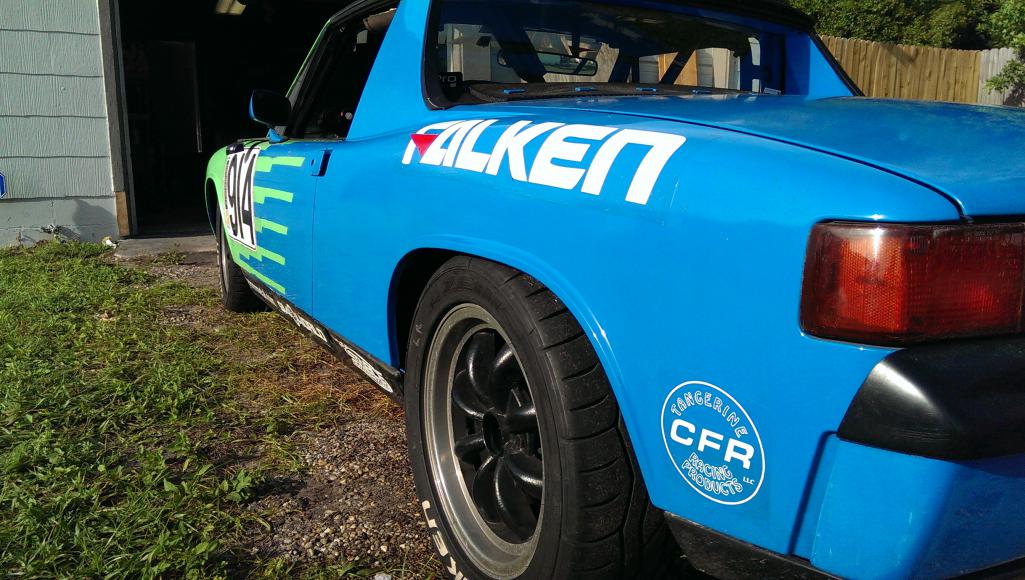
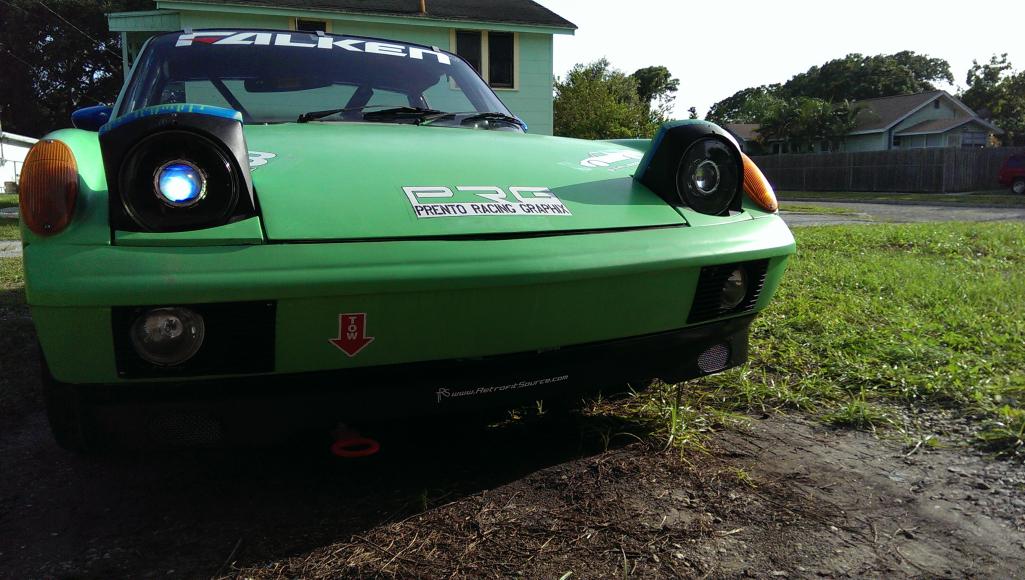
Posted by: ThePaintedMan Sep 16 2014, 09:09 AM
Dash and interior
Attached thumbnail(s)

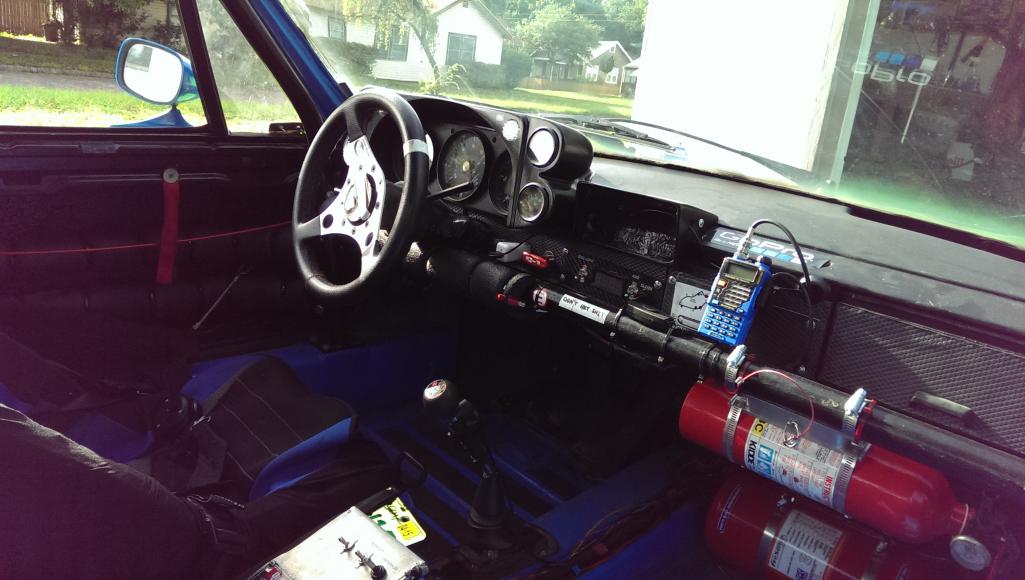
Posted by: ThePaintedMan Sep 16 2014, 09:10 AM
Easy-pull door handle
Attached thumbnail(s)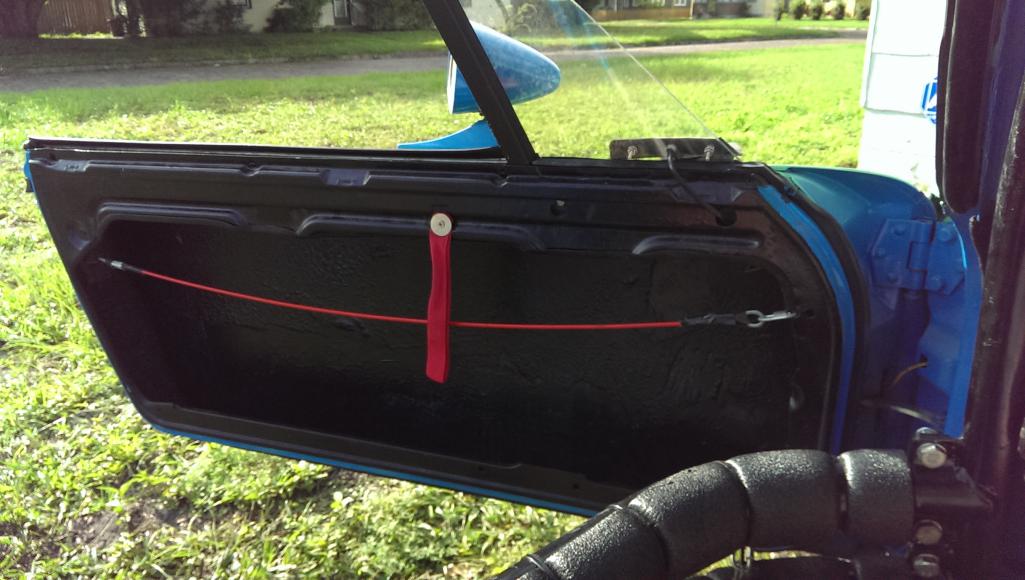
Posted by: Jetsetsurfshop Sep 16 2014, 05:27 PM
The message on the dash is killer. We like to say "keep the shiny side up" See you in a few days!
Oh, Seabird will be there too.
Posted by: carr914 Sep 16 2014, 05:37 PM
I hope you guys will let me in a Picture or two even though I'm not driving for you!
Posted by: matthepcat Sep 16 2014, 10:25 PM
CFR/Tangerine Racing and lights
What light are these?
Posted by: ThePaintedMan Sep 17 2014, 08:10 AM
Absolutely T.C. We'll all get plenty of pictures together I'm sure, including Seabird (Miguel).
Matt, the lights are retrofitted Morimoto Mini projectors inside Ebay housings. Then I had to fabricate some fiberglass covers. It was way more work than I had hoped. At some point I'll go back and take some more pictures if you guys are interested in how I did them.
Posted by: matthepcat Sep 17 2014, 08:43 AM
Nice! I was wondering if you did a retrofit. You must have got your gear from TRS.
Absolutely T.C. We'll all get plenty of pictures together I'm sure, including Seabird (Miguel).
Matt, the lights are retrofitted Morimoto Mini projectors inside Ebay housings. Then I had to fabricate some fiberglass covers. It was way more work than I had hoped. At some point I'll go back and take some more pictures if you guys are interested in how I did them.
Posted by: malcolm2 Sep 17 2014, 09:49 AM
Dash and interior
Love the look of the car.
I have a non-racing slightly OT topic for you.... tell me about the gauge holder around the dash. it looks aftermarket for that dash and not "ho-made". I have 4 gauges to add to my daily driver and just can't seem to find a good looking (easy) way. I don't have the center console to putz with, but figured I might have to get one.
Clark

Posted by: Jetsetsurfshop Sep 17 2014, 11:29 AM
Dash and interior
Love the look of the car.
I have a non-racing slightly OT topic for you.... tell me about the gauge holder around the dash. it looks aftermarket for that dash and not "ho-made". I have 4 gauges to add to my daily driver and just can't seem to find a good looking (easy) way. I don't have the center console to putz with, but figured I might have to get one.
Clark
I seen his gauge cluster, George made it. It's really trick. Want one too.

Posted by: arkitect Sep 18 2014, 06:13 AM
George,
Great looking race car. I like the way it turned out. A ton of work.
Dave
Posted by: ThePaintedMan Oct 1 2014, 09:44 PM
I'll post pictures of the gauges, gauge cluster, HID lights, etc when I get a chance.
In the meantime, Shane sent me some great pics of the car and the weekend that I wanted to share.
Attached image(s)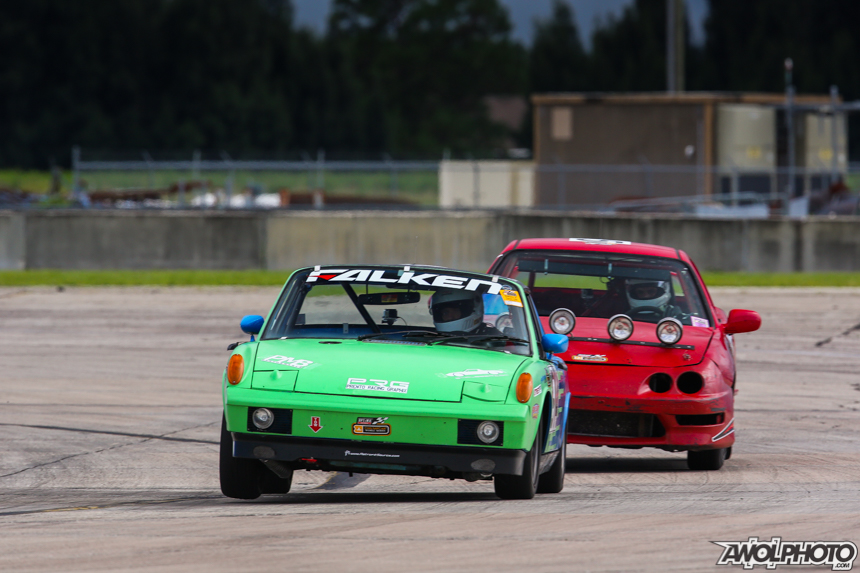
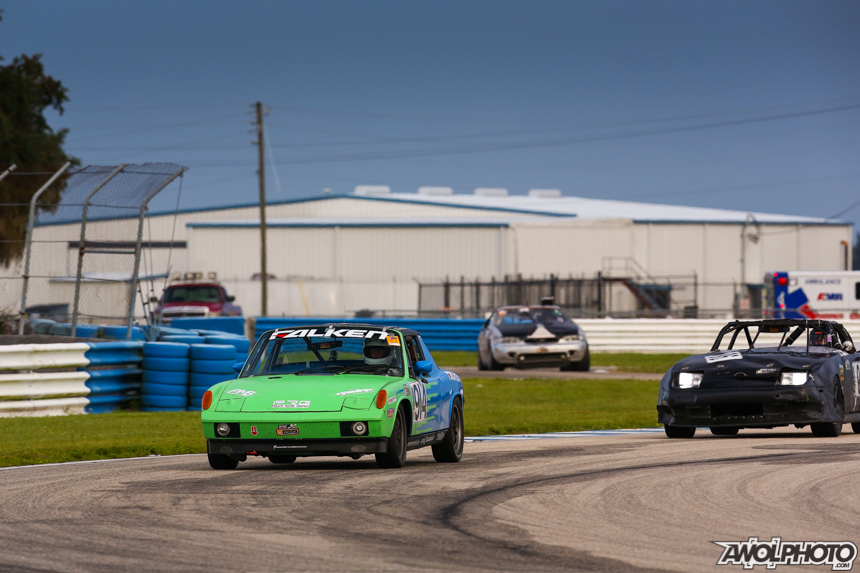

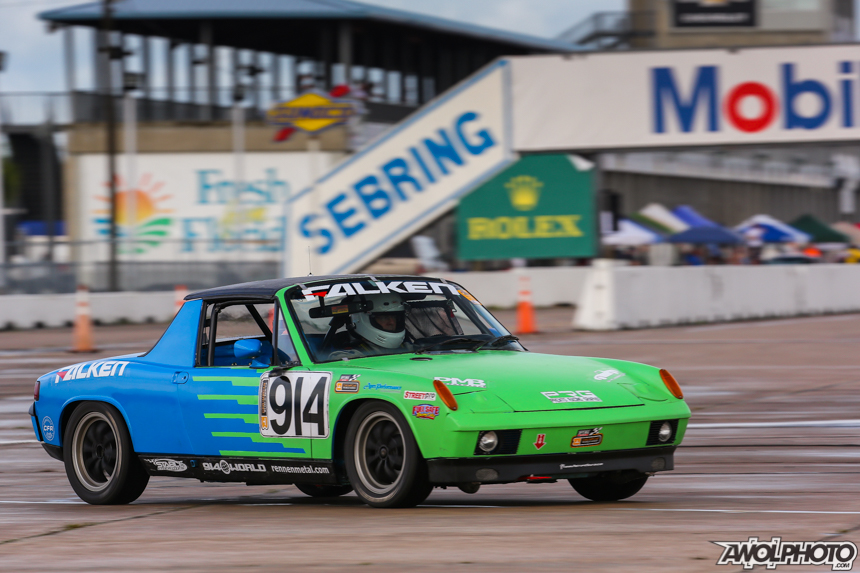
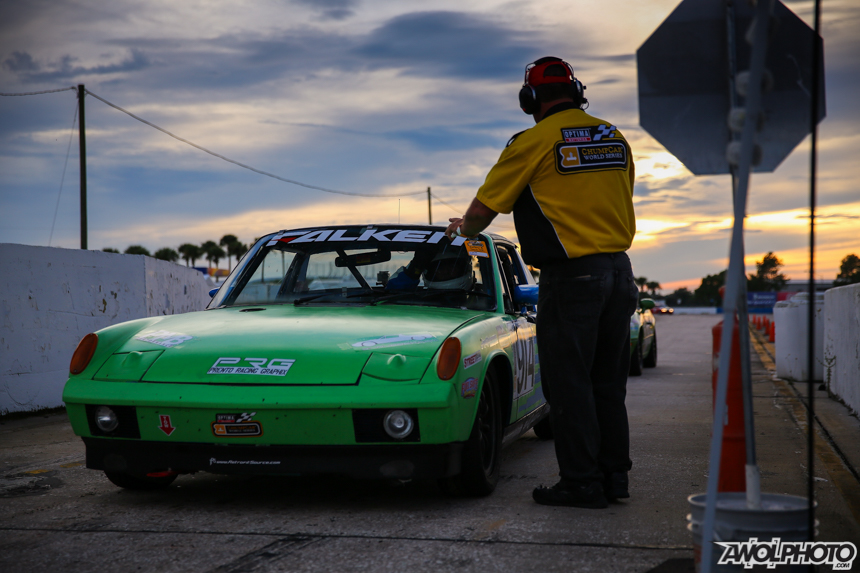
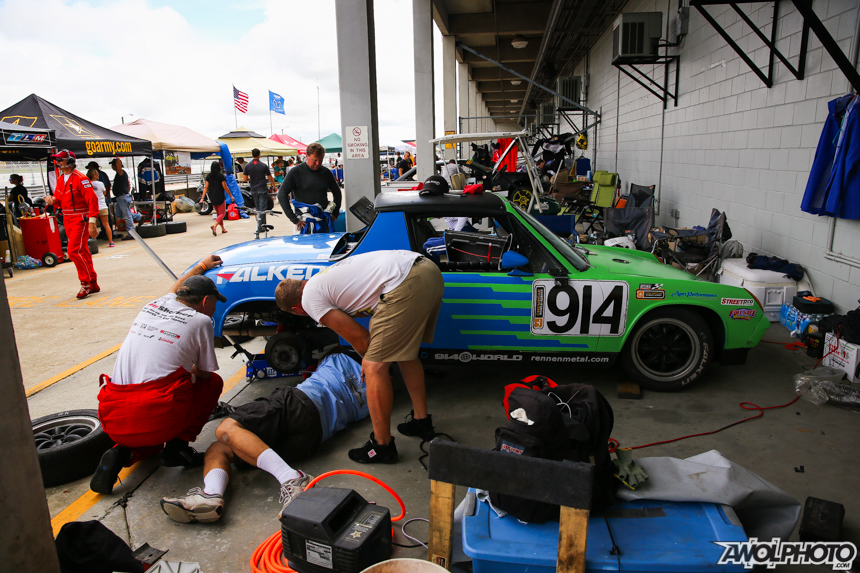
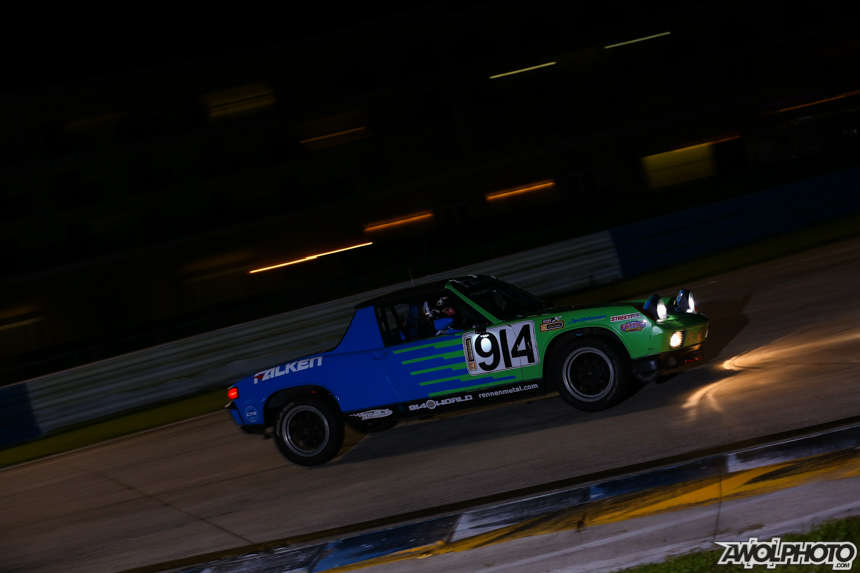

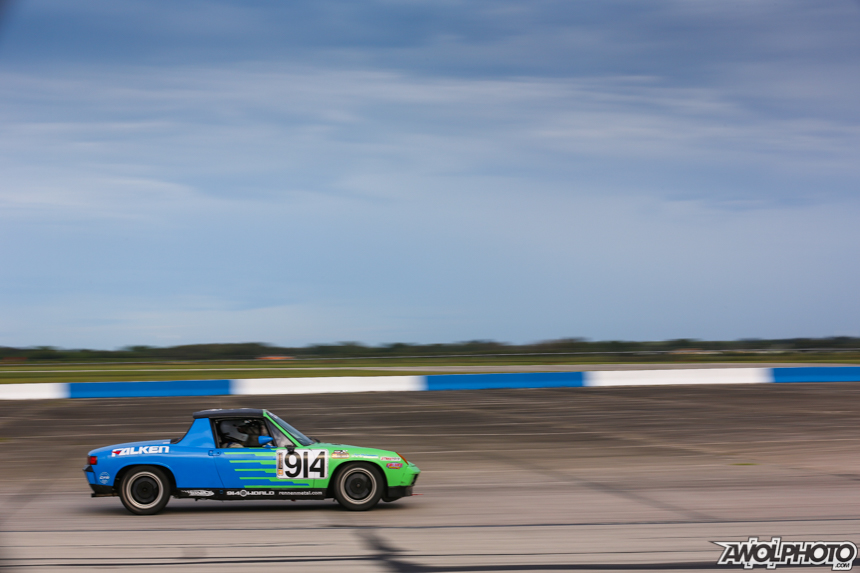
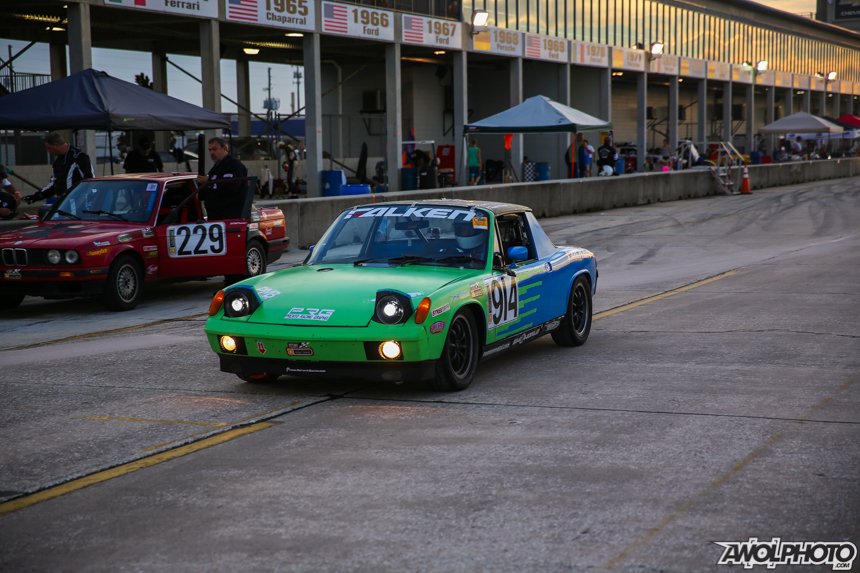
Posted by: ThePaintedMan Oct 1 2014, 09:47 PM
By far my favorite. John noticed we were right under the string of Porsche victories up on the pit building behind us. Very cool!
Attached image(s)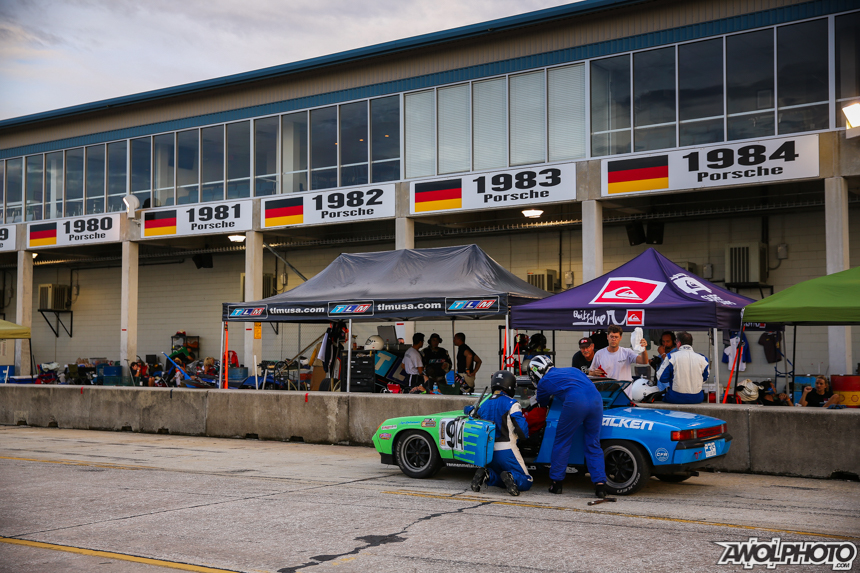
Posted by: ThePaintedMan Oct 1 2014, 10:00 PM
More race day fun
Attached thumbnail(s)
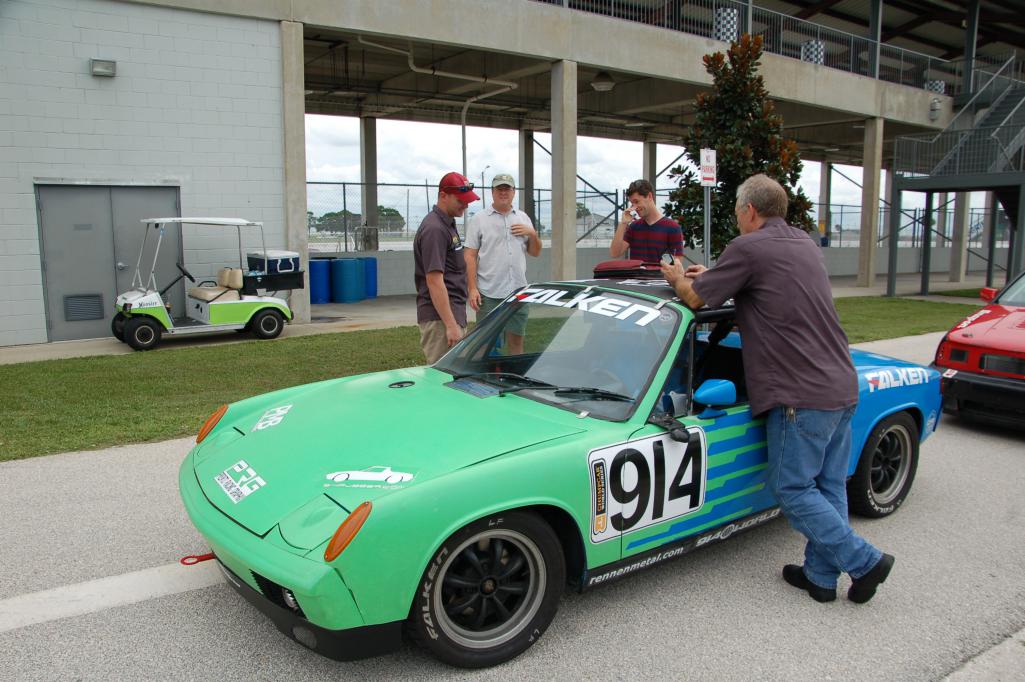
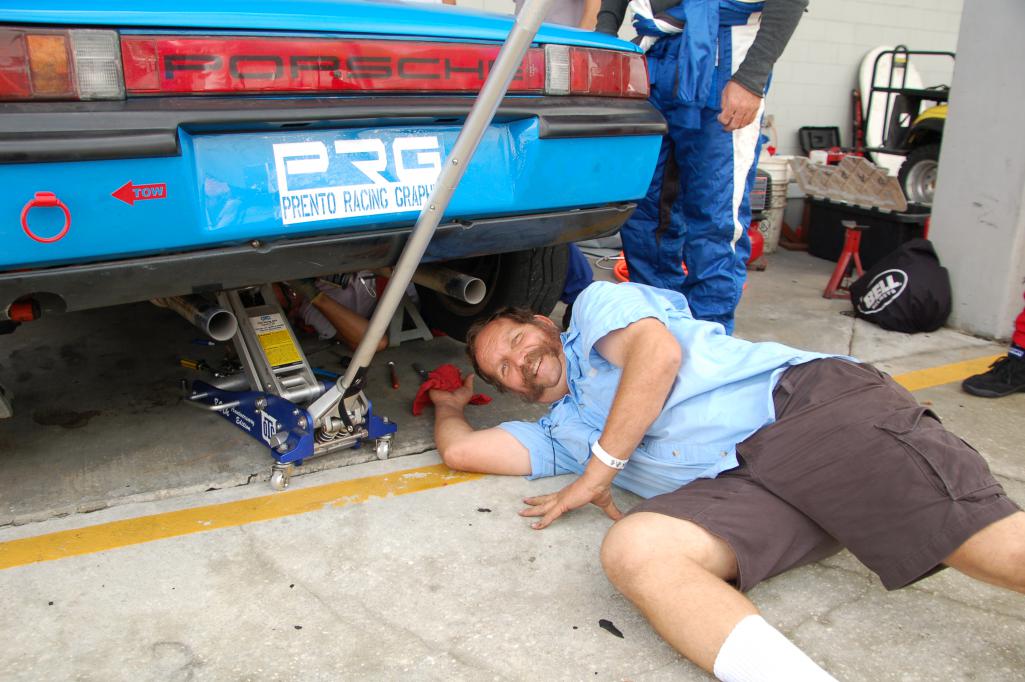
Posted by: ThePaintedMan Oct 1 2014, 10:04 PM
John is really photogenic.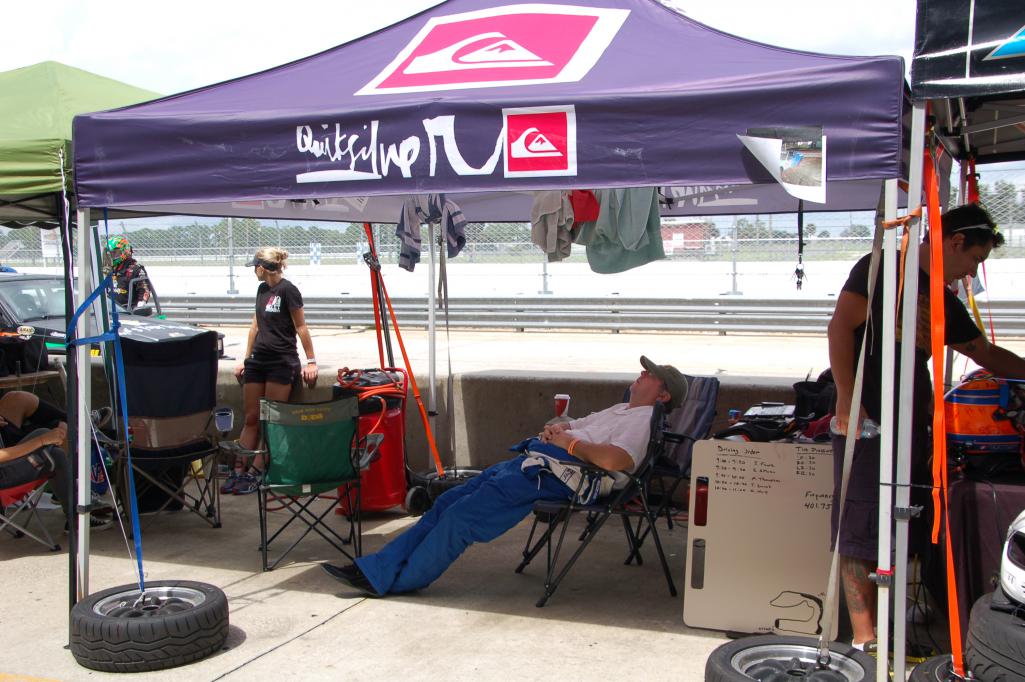
This is the high point of my weekend. Even though we blew a clutch, at some point we had every person under the car working on something to get it back on track. I wish we had timed it, but the important thing is it was done right and I got to work beside some of my best buds. You can also see the disintegrated clutch disk there on the left.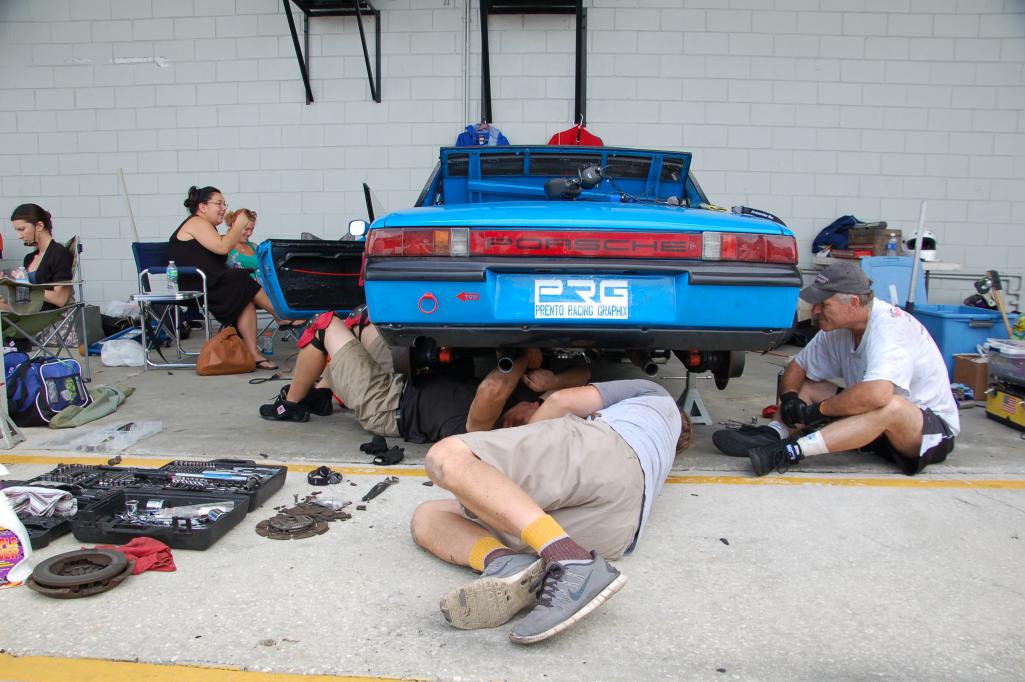
Posted by: ThePaintedMan Oct 1 2014, 10:11 PM
We might not have had first gear, but we were back on track!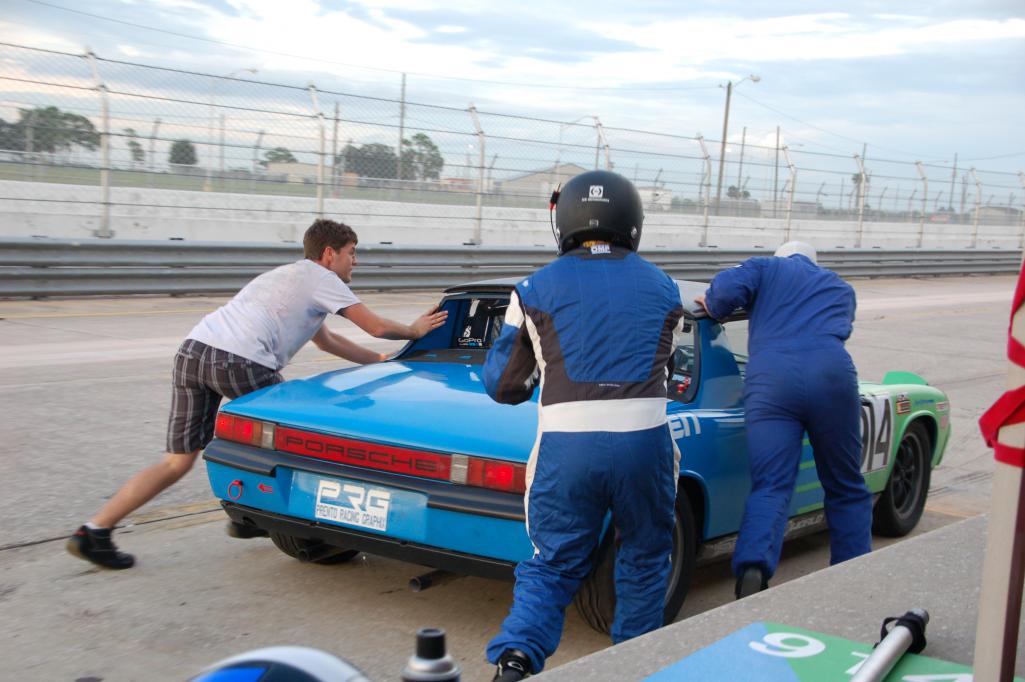

Posted by: ThePaintedMan Oct 1 2014, 10:16 PM
Night pitstops are really exciting!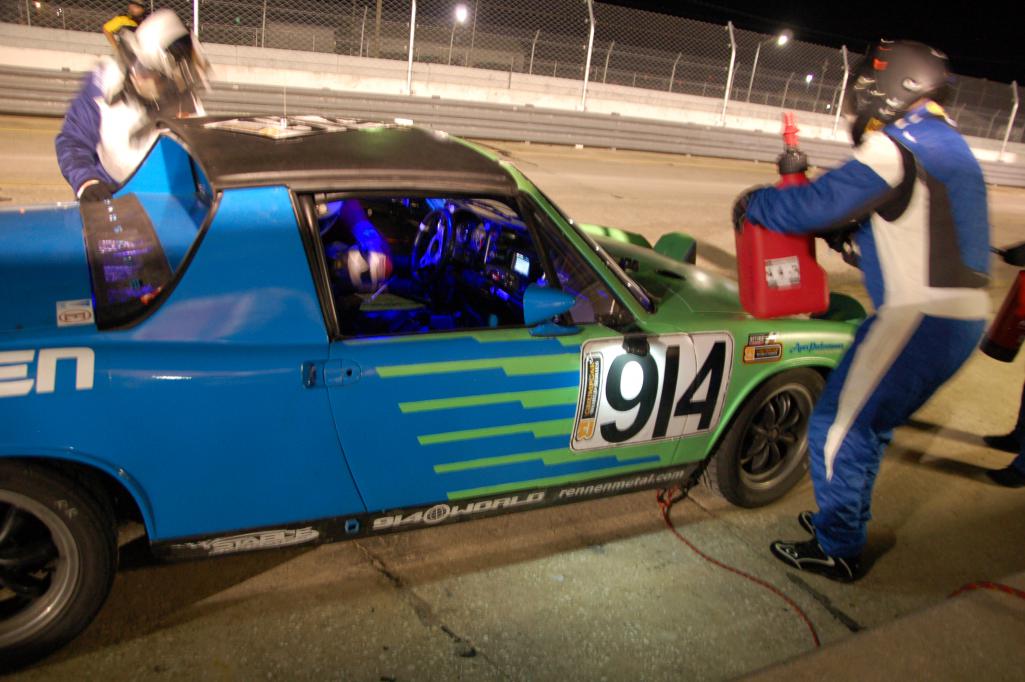
It's pretty cool to be able to talk to you wife while in the car and NOT have to pickup groceries...
Posted by: ThePaintedMan Oct 1 2014, 10:18 PM
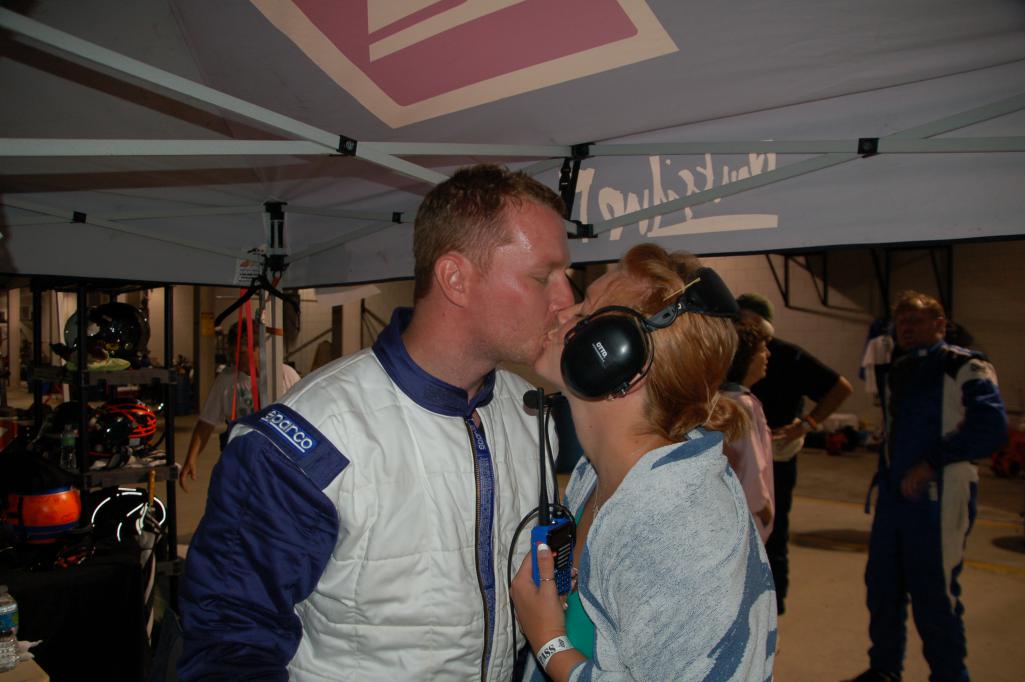
Shane did a great job getting us to the checkered!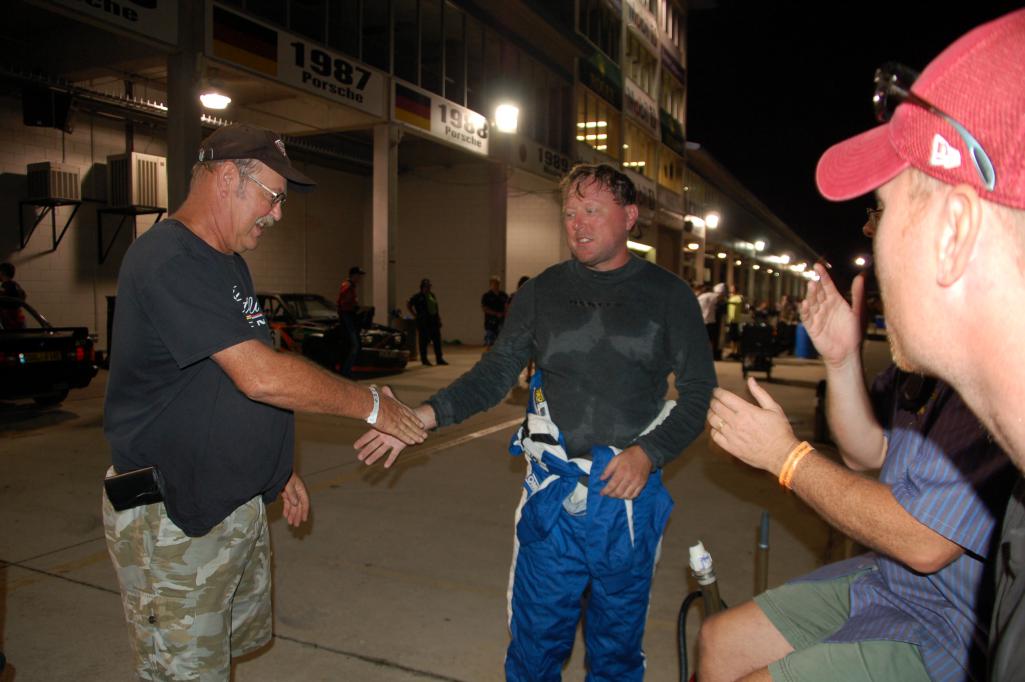
Posted by: ThePaintedMan Oct 1 2014, 10:20 PM
Nice job boys! And thank you 914World, we wouldn't have made it without you all!
Attached thumbnail(s)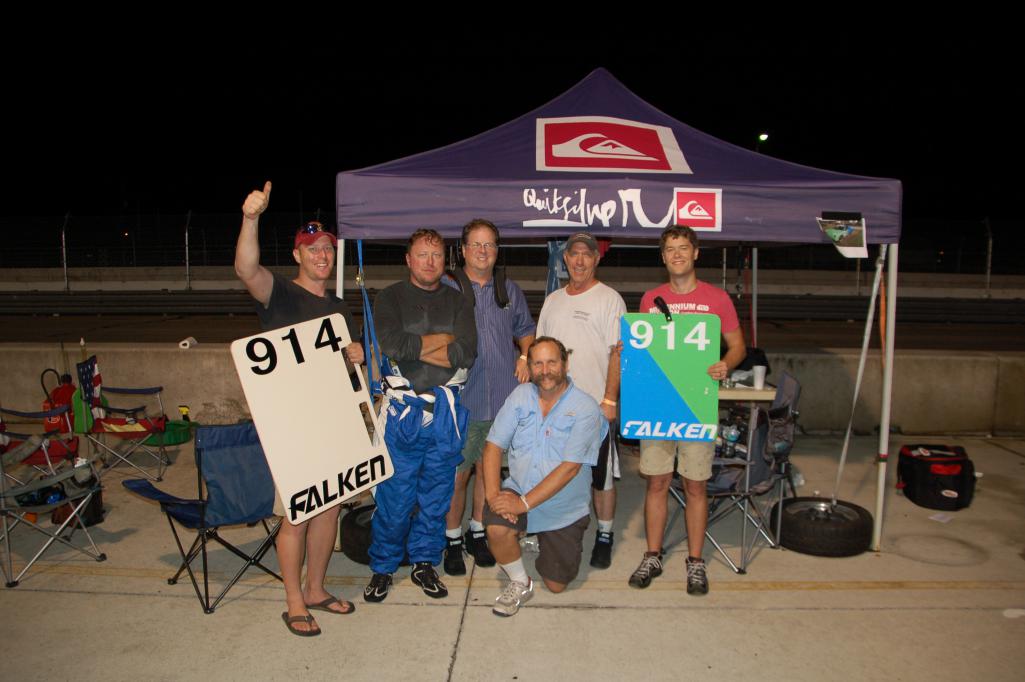
Posted by: ThePaintedMan Oct 1 2014, 10:27 PM
Here are all of the videos as well.
https://www.youtube.com/watch?v=Wu_NmswQttc
https://www.youtube.com/watch?v=XvZQcH-7ook
https://www.youtube.com/watch?v=pHpibh-skvs
https://www.youtube.com/watch?v=KlTXGqoECuM
Posted by: pete000 Oct 1 2014, 10:58 PM
Wow, very impressive !
Brumos Racing hasn't got anything over you guys !!!
Posted by: ThePaintedMan Oct 15 2015, 07:06 PM
BOOM. The next evolution has begun.
Attached thumbnail(s)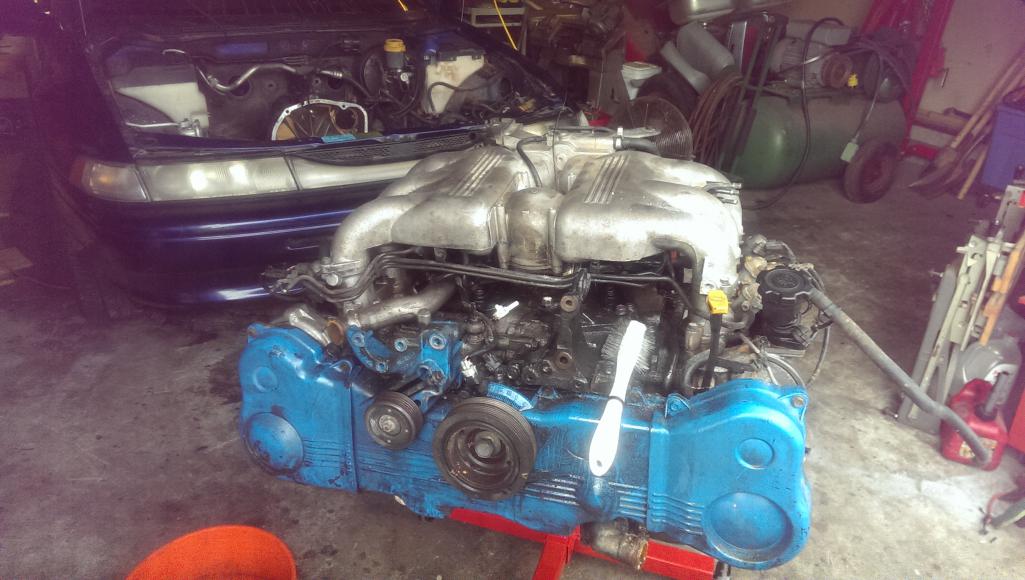
Posted by: rhodyguy Oct 15 2015, 07:12 PM
Very cool. It will make a incredible progression thread better. I think I need one of those for the legacy wagon.
Posted by: Chris H. Oct 15 2015, 07:18 PM
Did you do the seals yet or are you waiting?
Posted by: ThePaintedMan Oct 15 2015, 07:30 PM
Following my promise to Kevin, (along with my family, of course) I'm going about this very slowly as funds are present Chris. The additional money I have to come up with for childcare every month now really brings us back down to barely breaking even now that we have the little guy. But long story short, found the car for $800, already parted it out for that, and some and still have yet to get the thing scrapped. It was fun getting it running right before I pulled the motor. So far it's cost me nothing. In the next couple days I'll post pictures of how I flipped the manifold and did all the "free" things I could before I am able to spend more money on it. My goal is to do the EG33 swap as simple and cheap as possible, perhaps to illustrate that getting 240 hp in one of these cars doesn't need to cost 10k +. Granted it's a beatup old racecar, but hopefully it'll at least be one more thread with information for others ready to do the same swap. Certainly would not have gone down the path without guys like you showing the way Chris.
Posted by: chads74 Oct 15 2015, 09:10 PM
Love the pictures and videos!
Posted by: Chris H. Oct 16 2015, 07:37 AM
Following my promise to Kevin, (along with my family, of course) I'm going about this very slowly as funds are present Chris. The additional money I have to come up with for childcare every month now really brings us back down to barely breaking even now that we have the little guy. But long story short, found the car for $800, already parted it out for that, and some and still have yet to get the thing scrapped. It was fun getting it running right before I pulled the motor. So far it's cost me nothing. In the next couple days I'll post pictures of how I flipped the manifold and did all the "free" things I could before I am able to spend more money on it. My goal is to do the EG33 swap as simple and cheap as possible, perhaps to illustrate that getting 240 hp in one of these cars doesn't need to cost 10k +. Granted it's a beatup old racecar, but hopefully it'll at least be one more thread with information for others ready to do the same swap. Certainly would not have gone down the path without guys like you showing the way Chris.
Oh that's right...racecar. Let me think of a few things that are cheap or free.
Couple things:
1. re-seal the oil pan. It has no seal to buy, just use black RTV. That one is ALMOST CERTAINLY leaking.
2. For the throttle cable, since you flipped the intake you can now just use the 914 throttle cable. No need for a custom cable. You can either use a cable stop screwed to the end like the 914 is OR use the SVX end like mine
SVX/914 cable
1. cut the end off of the SVX cable (last few inches), then go to a home improvement store and get a ferrule stop and tool...
This may not be the right size, and they sell them in 2 packs for about $2, but you get the idea, right? Take the cable with you and you'll be able to see what size you need.
http://www.homedepot.com/p/The-Hillman-Group-1-16-in-Cable-Ferrule-in-Aluminum-50-Pack-322202-0/203809768
Swaging Tool:
http://www.homedepot.com/p/Lehigh-Swaging-Tool-ST18S/100243794
Crimp the two cables together and then you have the SVX end in the SVX throttle body, 914 end for the 914 end. It WILL NOT pull out once you crimp it.
Now...you'll only use this tool ONCE...so....keep you're receipt...know what I'm sayin'
? Its obvious most of the swaging tools have been returned over and over. Just keep it shiny and take it back.Make sure before you crimp it that you measure it out so that you're close to the right length. Once you crimp it you're committed!
Make sense at all?
Posted by: Jetsetsurfshop Oct 16 2015, 07:25 PM
Whats the displacement on that engine? Does it put you in C Class?
Posted by: ThePaintedMan Oct 17 2015, 05:39 AM
Cool, thanks for the tips Chris! I haven't decided which way to go on the throttle cable yet. I've swaged many a ferrule before, so that wouldn't be a big deal if I went that route. I'm not going to do the oilpan yet, as I need to order a bung for the oil temp sender and weld that into the pan since the car didn't come with one. On the street it wouldn't be a concern, but since these motors turn 7000+ rpms, I am curious what tracking it would do to the oil temps. I've already got the gauge anyway, so might as well use it.
Shane - it's 3.3, which would put it in the "C" class.
Posted by: ThePaintedMan Jan 21 2016, 08:57 PM
Sorry for the delay. 2015 ended up being quite the year - certainly the most "highs" and "lows" that I've ever had so close together. My first child was born in June, and I lost my dad shortly thereafter in September. But as I've had time, and for my own sanity, I've spent some more time working toward the swap. It's therapeutic in a lot of ways, I suppose. Anyhow, I started doing some work on the engine as time permits. So far cleaning it up, flipping the intake and getting the deck straight has been essentially free and now I have a better idea of what I need to save up for in the way of parts. I needed to open up the engine to figure out whether this thing was really as healthy as it sounded and if it was okay to proceed.
Getting it home was fun. These cars weigh a ton, and most of it was up front.
A ripped fuel pump line kept it from really running right, but it sounded good anyway. I later replaced that torn line in the tank and it ran like a top.
https://www.youtube.com/watch?v=PzzivLrlwgs
Spent about 3 hours and I had the engine out and on the stand. Don't be afraid to do it yourself rather than paying someone else if you find one of these cars.
Posted by: ThePaintedMan Jan 21 2016, 09:05 PM
One of the first things I did after pressure washing the engine was to pop the intake off and see what everyone was talking about when they said these are easy to flip.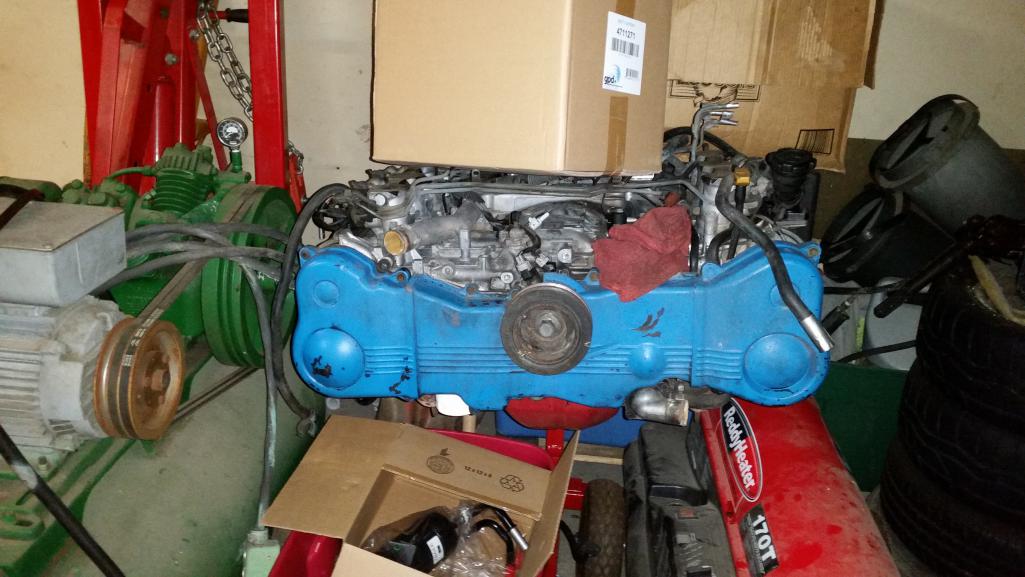
It actually is quite simple. I went ahead and marked the various sensors and solenoids before I got ahead of myself.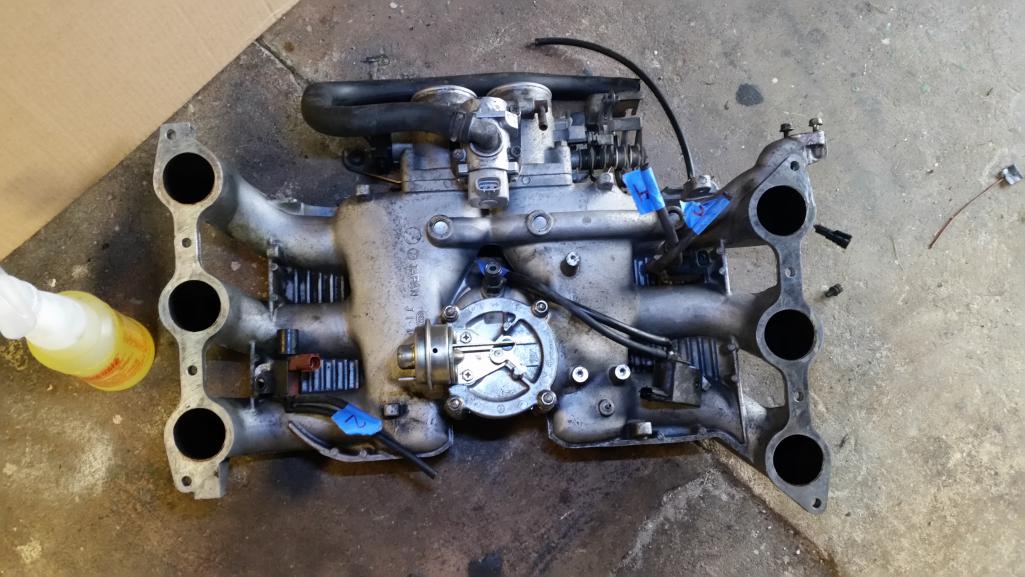
Posted by: ThePaintedMan Jan 21 2016, 09:12 PM
Several of these will simply swap to the other side of the intake and use existing bolt holes. I found that this nub (1) needed to be cut off in order to clear the air solenoid. Additionally, I had to hog out the holes for the air diverter (2) and rotate it ever so slightly to clear the coolant crossover tube on top of the block.
NOTE: About a week after I finished doing this stuff, I found out that there is a guy selling phenolic intake spacers which would eliminate having to do either of these. That link is here:
http://www.subaru-svx.net/forum/showthread.php?t=63141
Attached thumbnail(s)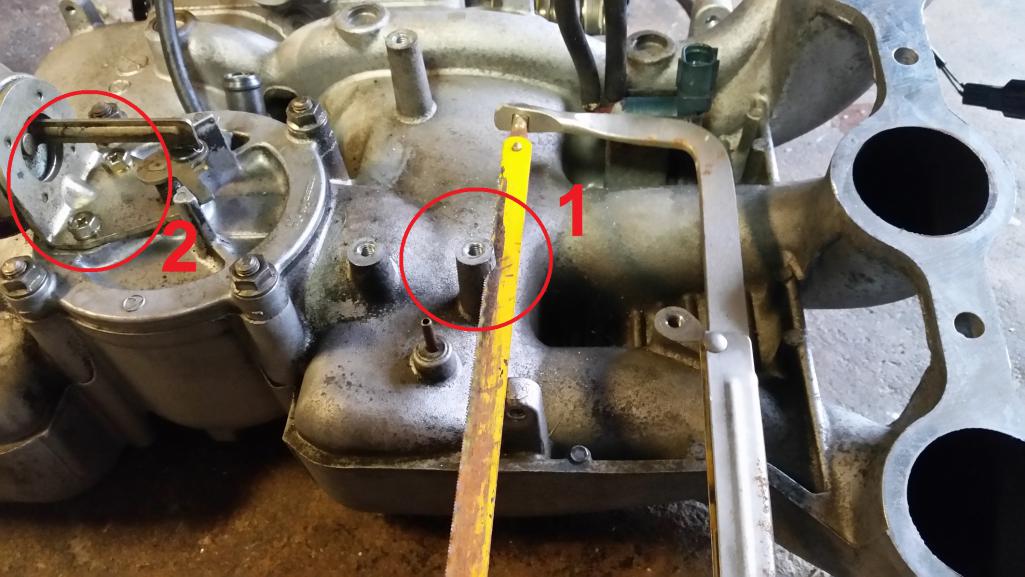
Posted by: ThePaintedMan Jan 21 2016, 09:20 PM
Next I moved onto fabbing up an alternator mount, using the stock belt tensioner. This will work for my application since I won't be using the power steering pump or the A/C compressor. I had just enough room without either to mount the alternator close to the stock location. However, it wasn't till after I finished it that I looked at the lack of "belt" wrap" on the crank. We'll see how much of an issue this is later on. I'm a little worried about the belt slipping, especially since this engine will see a lot of hard on/off throttle on the track. But it may work. If not, I'll have to get a little more creative.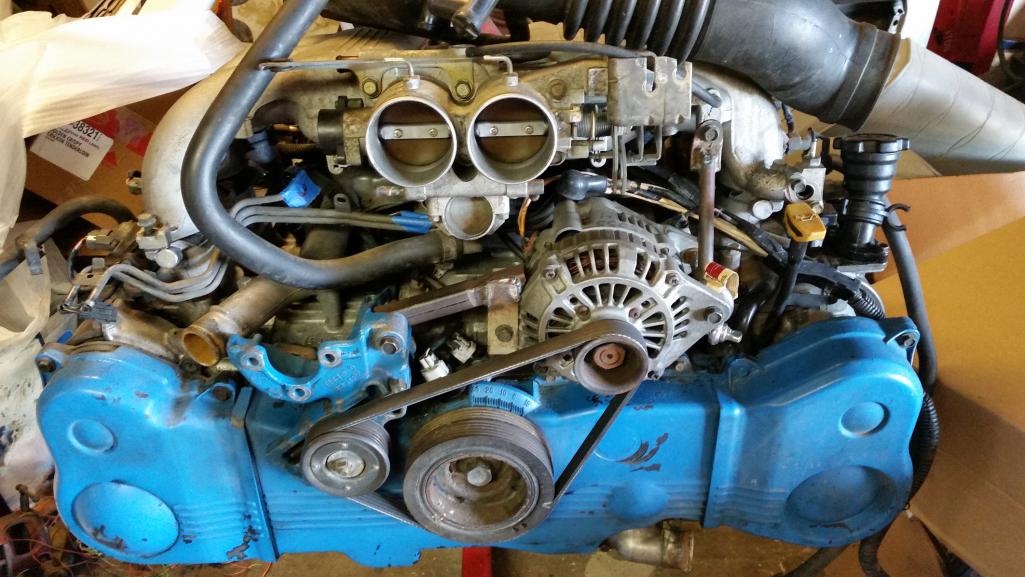
The other issue with flipping the intake and retaining the stock airbox and snorkel is that the whole thing occludes the path of the dipstick and the oil filler. I think I have a pretty easy fix for the oil filler neck, but the dipstick will require some bending. This probably isn't a big deal on a street car as you would simply loosen and move the snorkel to check and fill the oil. In an endurance race, it means more time lost in the pits...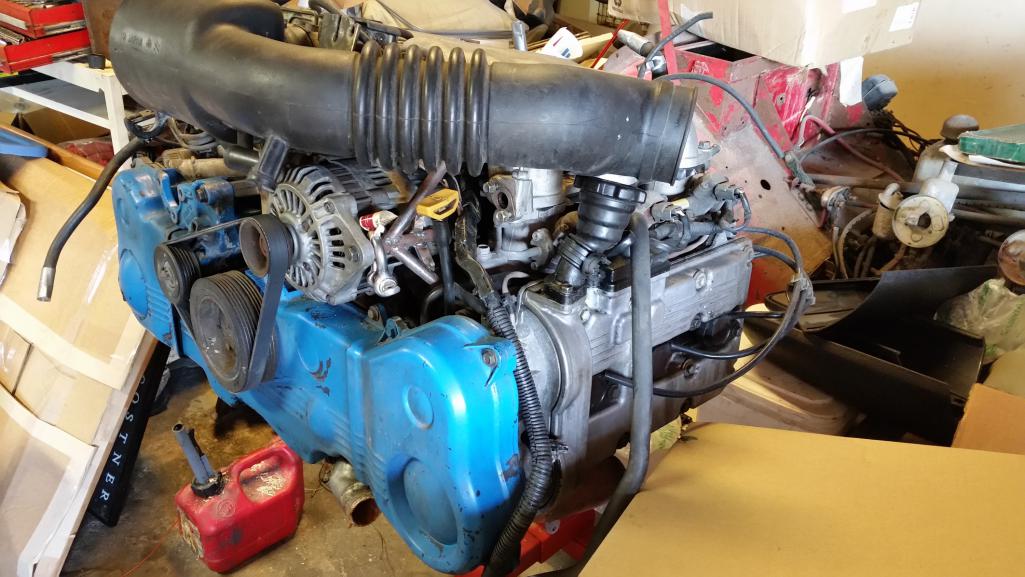
Other issues I can forsee are that the EGR tube inlet to the manifold is now on the wrong end of the engine. I'll come back to that one later and since I spent so much time making sure this engine had no codes when I pulled it, I'd like to keep it that way. I believe a new tube strategically bent and rewelded can probably solve this. Also, routing the intake over the fuel lines, which actually pass under and through the intake "spider legs" makes removing it a bit more of a PITA. But it can be done. The good news is with the intake flipped, there is no cutting of the trunk involved and the throttle cable routing is much closer to stock and much simplified.
Posted by: ThePaintedMan Jan 21 2016, 09:42 PM
At some point I decided with 180,000 miles on the engine and since I had made my money back parting the car out, that it would be a good time to start tearing it down and inspect it further. After pulling off the thermostat cover, and then the water pump, the rust and scale I saw convinced me that proactively replacing the head gaskets was a good idea. Though these are not "interference" engines, (i.e. the valves and pistons do not occupy the same space), it was good to see that the timing belt had been done at least somewhat recently. However, the pulleys and idlers did not turn quite as smoothly as one would hope, indicating that the belt was the only thing changed. The water pump also was a little bit sluggish. Glad I got in there.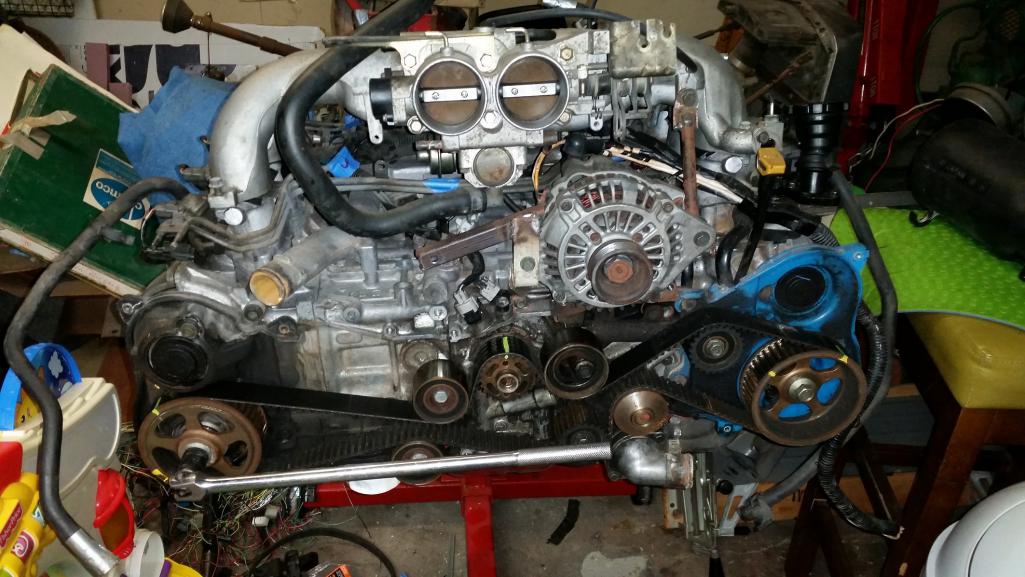
Be sure to follow the Subaru manual to the tee when disassembling these engines. They are assembled and machined to exacting tolerances and require a delicate hand when removing components.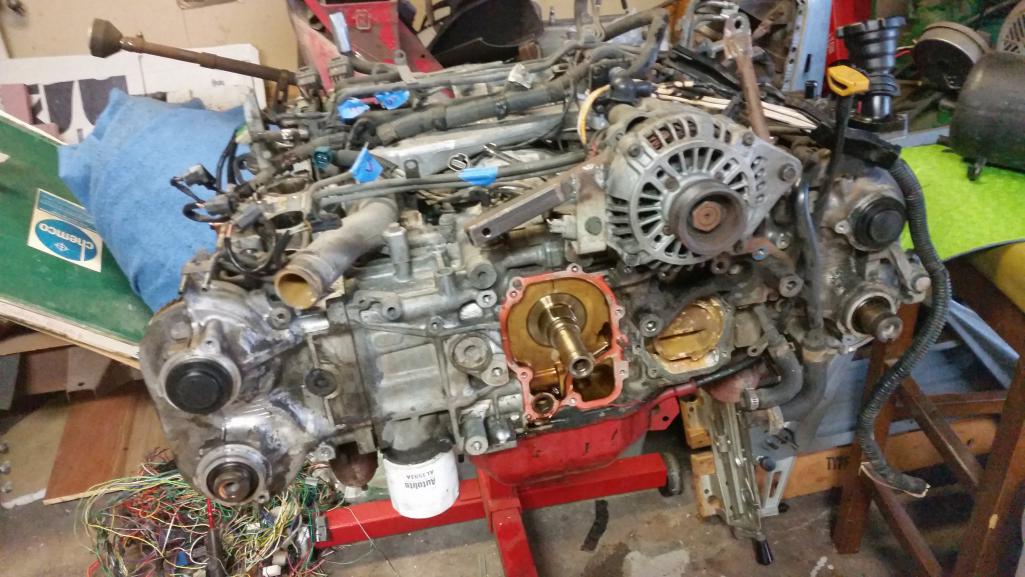
Posted by: ThePaintedMan Jan 21 2016, 09:52 PM
The cams need to come out in a very methodical fashion, again outlined in the Subaru factory manual (thanks Chris H.). 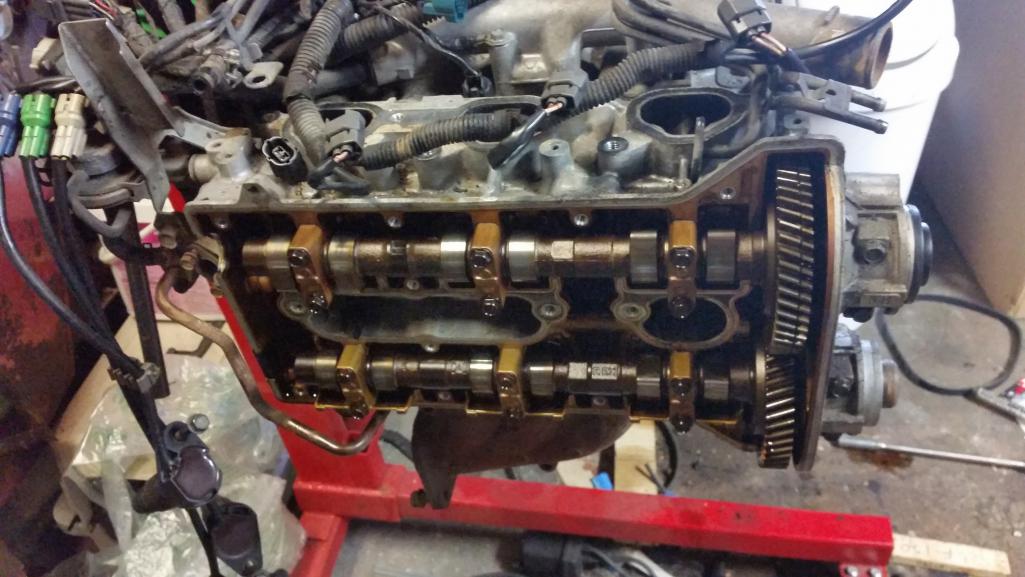
... for example, the cam tower caps are all wear components, which like the rest of the valvetrain, have worn alongside their individual cam lobes. If you screw one up, the whole cam then needs to be replaced, and the cam towers reworked. Honestly I don't even know how one would go about that process. The COOLEST part is that the Subaru engineers are far the most forward-thinking of any I've experienced. They had the foresight to label almost every component on the engine with indentations, so you know where everything goes when it's reassembled. About the only thing I had to do on my own was keep the hydraulic lash adjusters organized (all 24 of them).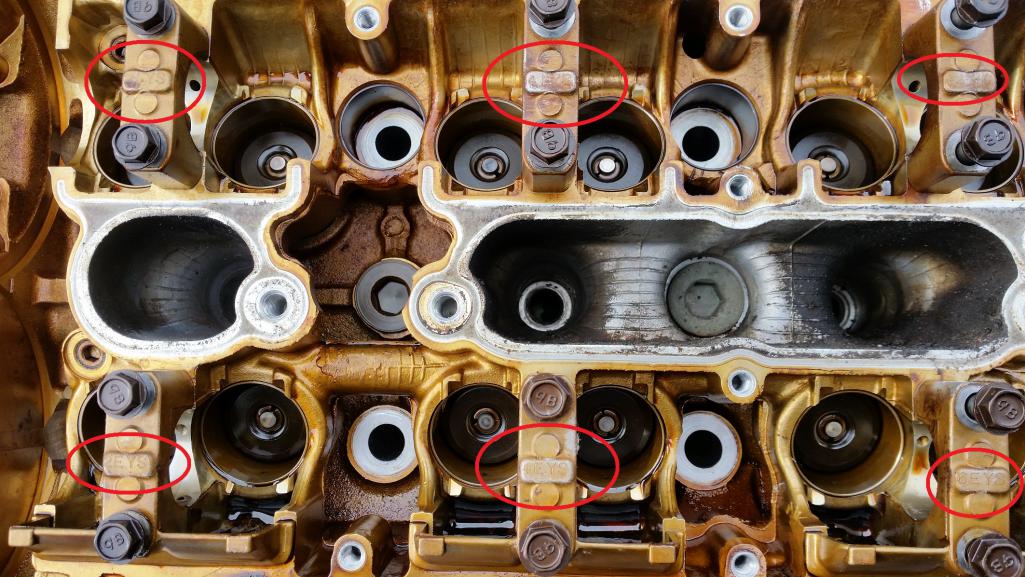
Posted by: Puebloswatcop Jan 21 2016, 10:19 PM
Dash and interior
I absolutely love the hand written note...
Posted by: ThePaintedMan Jan 22 2016, 09:07 PM
...Speaking of which, several folks have already asked me where I got the Subaru factory manuals. Chris H. has been my mentor through much of this and sent me a ton of stuff, so I made a promise to myself, if any of you want to do an SVX swap, I'll be happy to send you what he sent me. In the meantime, if you want to access the manuals online, a gentleman already has them posted here ->
http://phantomotaku.com/SVX/
This was my solution to organizing 24 individual hydraulic lash adjusters. It just so happens that Harbor Freight has a very handy organizer for about 3 or 4 bucks and has 24 compartments that just barely have enough room for each. Much better than trying to cut holes in cardboard or other media.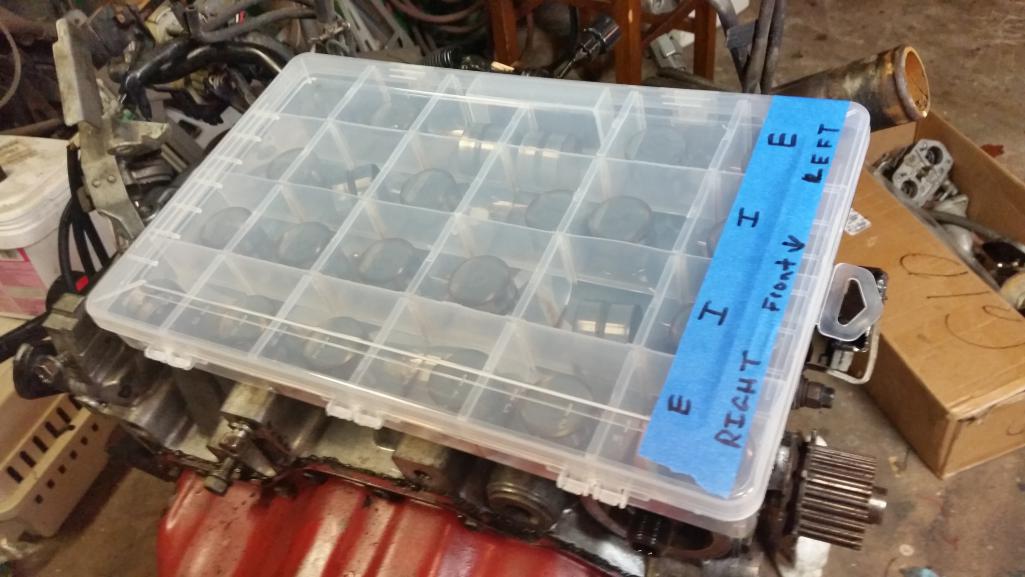
Posted by: r_towle Jan 22 2016, 09:18 PM
George,
Alternator fan belt.
What is the pulley to the left?
Is that an idler pulley or a tensioner?
I would consider losing that or move it up higher.
If you lose it, you could use the alternator to add tension to a different belt...
And, if you get close, send me a cardboard template of that thing you made and I will machine up something better...
Posted by: G e o r g e Jan 22 2016, 10:04 PM
Impressive
Posted by: pete000 Jan 22 2016, 11:33 PM
How about running the alternator off the rear axle like Freddie Baker's Kool Bus did ?
Posted by: ThePaintedMan Jan 23 2016, 08:58 AM
Rich, the pulley to the left is the stock tensioner pulley. I considered making the alternator bracket itself adjustable for belt tension, but I was somewhat limited by the length of 6 rib belts that are commonly available. The other issue is that the alternator really doesn't have a whole lot of room to be moved up or down in it's new location.
Posted by: ThePaintedMan Feb 3 2016, 08:43 PM
Well, I've spoken with several Subaru specialists and have decided it's worth it to move forward with Cometic MLS (multi-layered steel) head gaskets. I wavered on this, given the fact that, as far as I can tell, the OEM gaskets lasted 180,000 miles. But given the work involved with tearing the engine down and it's intended track use, I might as well spend the extra money an do it the best it can be done. This is important because it also dictates a couple of other things in the meantime, namely the precision that the mating surfaces need to be machined/milled to and their roughness average (RA). Cometic requires an RA of 50 or better with their gaskets, which is drastically finer than the factory finish.
So I moved forward with the head removal...
As can be seen above, the water jackets were pretty stuffed with rust, calcium deposits and other "gunk" Though it's not an indication that the head gaskets would have failed anytime soon, I feel like a thorough inspection, cleaning and head gasket change is peace of mind, particularly given the architecture of the Suby engine. Notice the fairly small sealing surfaces on the deck, both around the cylinder bores and the oil return passages. No wonder why these engines (moreso the 4 cylinders engines) eventually have problems with the HGs. Meanwhile, this also gave me a chance to inspect and clean the cylinders. As you can see below, there is still evidence of the factory honing, which again, isn't proof of a healthy engine, but it's nice to see.
Posted by: ThePaintedMan Feb 3 2016, 08:52 PM
While I save up for the engine gasket/seal kit, part of which I need before I can have the heads done, I figured it would be good chance to examine the deck and head for any potential issues.
First, in order to clean up the heads, I needed to remove the locating dowels from the top of each deck. Luckily, they are recessed with just enough space below them that a blind hole puller and slide hammer borrowed from AutoZone makes quick work of them. I decided to place the old head gasket back on top of the surface in case I slipped or screwed up otherwise.
Posted by: ThePaintedMan Feb 3 2016, 09:02 PM
Next, I spent several hours cleaning the heads and the deck with acetone and a scraper, as one does to remove the old gasket remnants. I went with this method after consulting with Suby experts and watching several videos. Using a "whizz-wheel" or Roloc disks is not advised for several reasons. All whizz-wheels, even the 3M rubberized versions are prone to rounding off sharp mating surfaces. With so little room to play on the deck, I didn't want to take and chances. Additionally, Roloc disks are apparently embedded with silicon carbide which inevitably comes off and ends up in the crevices and cavities. If that stuff makes it's way into the sump, goodbye bearings. Instead, acetone, a scraper and elbow grease and several hours of labor is the preferred method. Clearly there is more to be done - you can see some of the corrosion and/or material (rust?) deposited on the aluminum heads, particularly around the water jackets. However, I thought this would give me a good base to determine the amount/if any warp existed in the head and deck.
Attached thumbnail(s)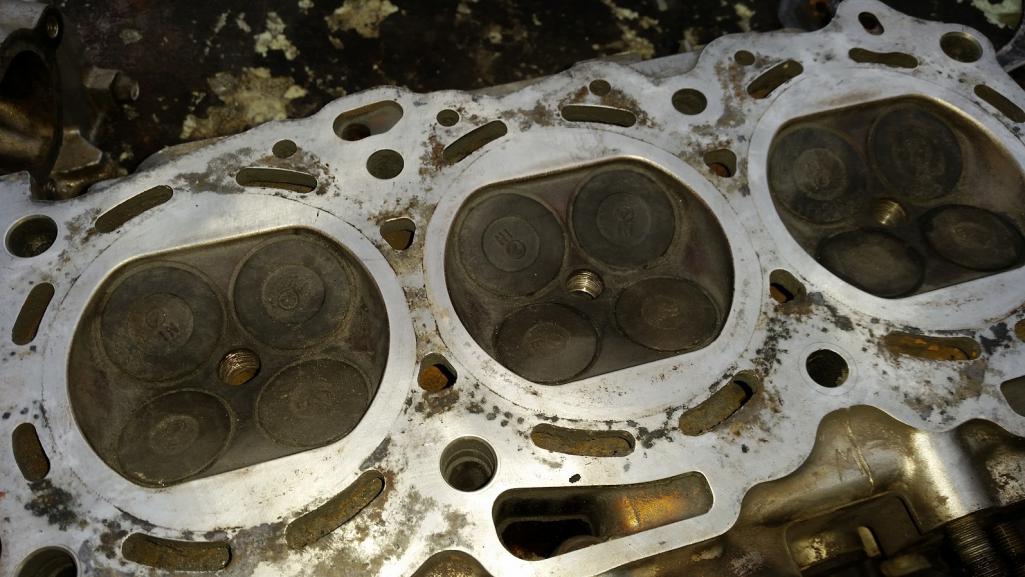
Posted by: ThePaintedMan Feb 3 2016, 09:10 PM
What I found was interesting. There does indeed exist an air gap at the center of the head when it is placed back on the block without the gasket. How much is hard to tell, but it is visible with a flashlight on the other side. With a stock head gasket, this might even be acceptable.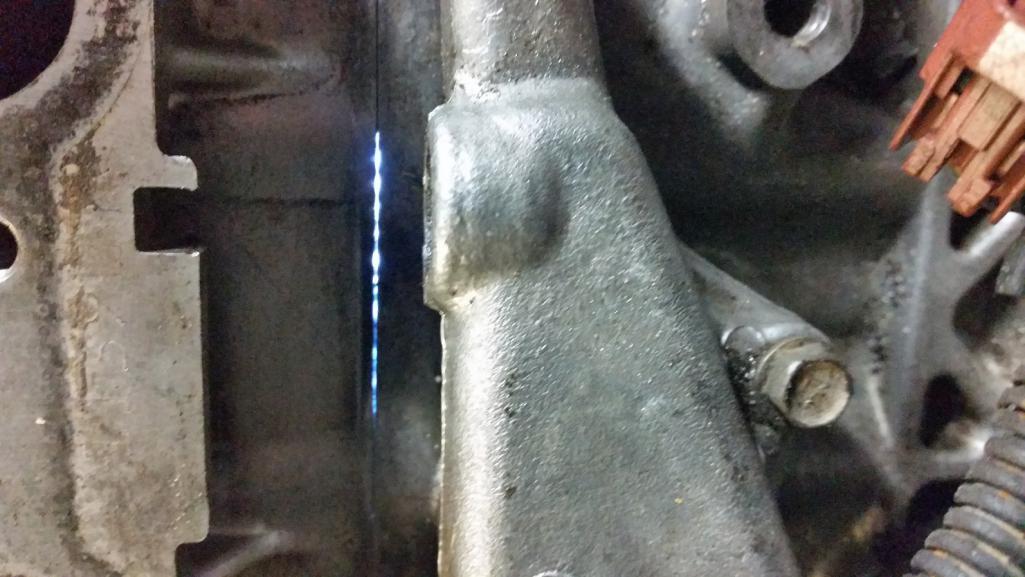
I was not quite able to fit my smallest feeler (.006) in this gap, but it at least confirms to me that the heads will be milled several thousandths and the deck probably needs a little massaging too. If I remember correctly, the Cometic requirements are .002 or less runout longitudinally. Hopefully I'm saying that right, but please correct my lingo if I'm wrong.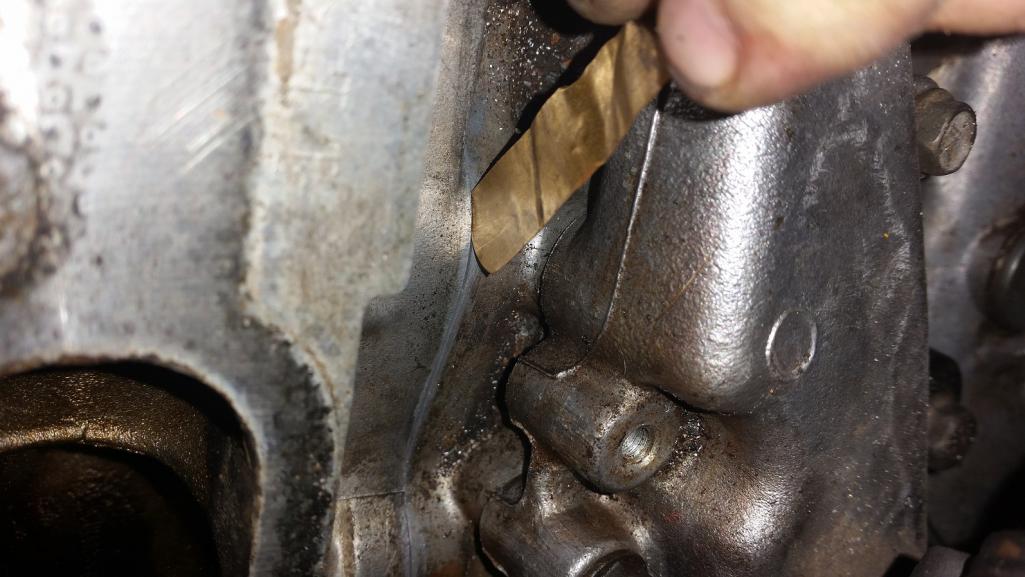
Posted by: ThePaintedMan Feb 3 2016, 09:19 PM
So, since the heads are going to the shop, and I still need something to do, I moved on to working the deck surface. First, I plugged all oil passages, bolt holes and the cylinders with shop rags dabbed in Vasoline. I'm hoping that the Vasoline will help catch any debris and small particles that the shop rags can't.
I went to the local metal supply and found a good 3.5 x 30 aluminum block. I first block-sanded that with 320 grit paper and WD-40 to get, as best as I can tell, a truly flat surface. I then used spray adhesive and glued 320 grit paper to that. I soaked the paper and the deck in WD-40 and went to work in diagonal passes on the deck, slowly removing gasket remnants and a little material, observing any pits and valleys as they disappeared. 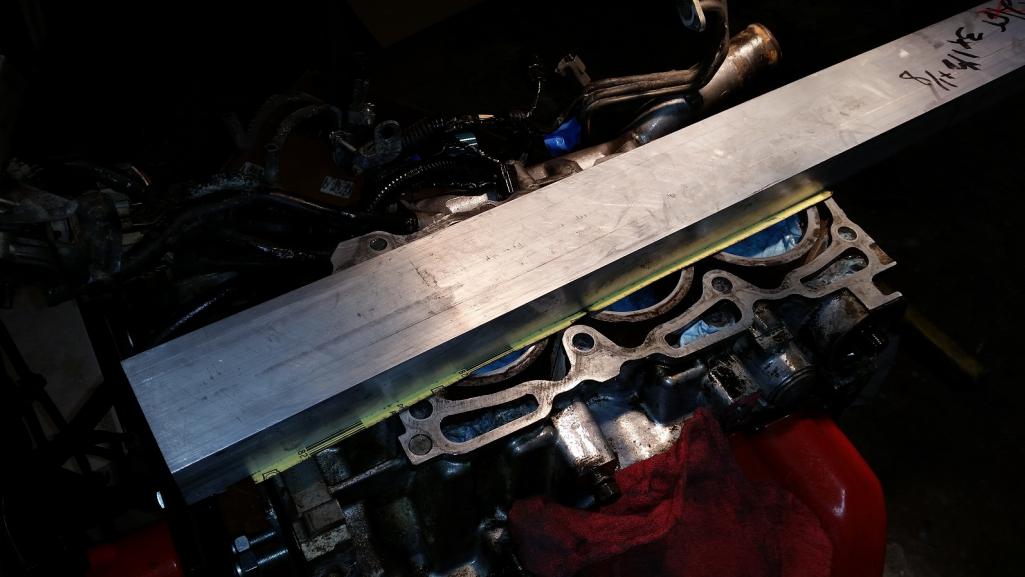
Posted by: r_towle Feb 3 2016, 09:25 PM
Keep going. How much is the expensive gasket set versus the stock set?
I think it would depend upon the cost to me, experts always say go with the gold parts, they are better, but as you have seen here, lots of information is passed along with no real world knowledge, just something they read somewhere online.
That gap is huge, just sayin.
I would assume you will be having the heads machined, but what are you going to do if that gap is created by the case?
An aluminum framing square from Home Depot might give you a good idea on the case.
Oh, read up on acetone, wear the right respirator, that stuff is really bad for you.
Posted by: ThePaintedMan Feb 3 2016, 09:28 PM
The first passes revealed a fairly obvious recess in the deck surface, though not excessive in my opinion. I continued forward till most of that was gone. You can see some of the cross hatching below. The key is to go slow, alternating diagonal motions and allowing the block and paper to do the work.
Then I switched paper to 400, then eventually 600. I consulted several references, and while I could get no straight answer, 600 grit paper on aluminum should equate to a 15 RA finish or better, exceeding the Cometic specs. I theory one could continue to 800 or 1000 grit, but from what I understand, some "tooth" on the surface is desirable for good gasket adhesion. In fact, more grit would be desirable for an OEM composite gasket.
Posted by: ThePaintedMan Feb 3 2016, 09:37 PM
Thanks Rich. I have done another assessment with a straight edge on the finished surface and the deck is within a tolerance that I cannot determine a noticeable gap at this point. My plan is once the heads are back from the reputable shop up the road, to apply Prussian blue to the deck surface and then use very, very small movement of the head on it to determine if there is anymore work that needs to be done.
The other thing I'm slightly worried about is the amount of material that I removed. I believe it to be fairly inconsequential, and I will rely on the machine shop to tell me how much was removed from the heads. At that point, I'll order the appropriate gasket thickness to try to retain the stock compression and therefore, timing. My understanding is that as deck height is decreased, timing is retarded, in some cases by several degrees.
Oh, and the SVX is finally gone. A guy in town wanted it to "restore". I tried to explain that the majority of the harness, interior, etc was gone, but it wanted it anyway. For $200, I can't complain. Bye-bye SVX!
Attached thumbnail(s)
Posted by: ThePaintedMan Apr 28 2016, 06:27 PM
Uh ohh... look what I got back today! 
I have a machine shop down the street from me that does incredible work - I've sent multiple things out to them and been impressed every time. In this case, both heads, even at 180k miles checked out perfect on the valve leak tests and the crack test. They did need to be milled .004 to get rid of surface pitting and a slight bow and they went ahead and installed the valve stem seals that I supplied, $220 out the door. Perfect! Especially since the Cometic MLS gaskets I ordered were .004 oversized (estimated ahead of time). I'm hoping to get the heads back on this weekend, however it'll still be some time before I start it. I've got more plans in the way of trap-doors in the oil pan, and I need to weld in a bung for the oil temp sensor. But finally making some progress.
Posted by: carr914 Apr 28 2016, 08:07 PM
purty!
Posted by: Chris H. Apr 29 2016, 08:24 AM
Looking very good George. BTW I finally got to Bob's and picked up the 75 POUNDS worth of EG33 parts he was saving for me from an extra engine he had. In addition to all of the sensors I needed he gave me quite a few extra coils and injectors so let me know if you end up with any bad ones. Test all of your coils. They don't always throw a code and they are a huge PITA to take out when the engine is installed.
Are you sending your injectors out to be serviced? I might. Saw this place on a post recently:
http://www.mrinjector.us/
Looks like it would be worth it for me. My car has been sitting on and off for a while.
Posted by: mepstein Apr 29 2016, 08:32 AM
We've sent mr injector at least 200 injectors. Super happy with their service.
Once I didn't get back about 50 injectors for a couple weeks. Little panicked since I thought they got lost in the mail. Turned out they had come back quickly and one of the guys threw them in the drawer. Would have been out a ton of money. Turn around was just so fast I didn't expect them back.
Posted by: Chris H. Apr 29 2016, 09:04 AM
Oh thanks Mark. BTW that goes for you too. If anyone has a need for an extra whatever lemme know. The coils and stuff are stupid expensive new. Like 928 parts. I need to do something nice for Bob.
I MIGHT be a wiring expert soon. We'll see. Gonna re-do mine in May. Will ping you.
Posted by: ThePaintedMan May 2 2016, 06:55 AM
Hey Chris,
Wow, what a nice offer! I would for sure like to have at least 1, perhaps 2 spare coils, maybe an injector or two as well. That's one of the issues with running this motor at the track - none of that stuff is available in town at AutoZone. For now, I believe everything should work fine as-is, since it did when I pulled it all off. Might not be a bad idea to send the injectors in since they do have 180K on them. However I had a helluva time trying to pull one off the fuel rail already, even following the factory procedure. I just don't want to bust anything.
I did get the heads back on it this weekend and the cams back on the RH side. I'll post some pictures when I get home. Unfortunately my warranty from the machine shop is 90 days, but I doubt I'll have any way to fire this thing up before we reach that point. Still, it'll be nice to have the engine back together and get some of this stuff out of the bins.
Posted by: ThePaintedMan May 6 2016, 03:32 PM
Well I got a little ahead of myself and didn't take as many pictures as I had hoped, but the engine is almost back together. I should be getting the car back next month, at which point I will begin removing the 1.8 that's in there now so I can start mocking this one up in the car. I still need to do a few things like replace the injector o-rings, put manifold back on and start thinking about a way to run the sensors. Also, once the engine is in the car, I'll take some measurements as to how much room I have to modify the oil pan. These engines have issues with oil starvation at higher Gs, but other folks have successfully installed "trap doors" in the oil pan to eliminate that issue. It just requires some fabrication.
Here's what the Cometic gaskets look like. These are called "MLS", or Multi-Layered-Steel gaskets, and you can see why. There is a very thin (0.001) layer of viton rubber on the surface to help seal minor imperfections, but this is why the deck and block have to be so, very precisely machined. The heads I'm sure were done right, but only time will tell if my sandpaper block job on the deck is up to snuff. When I laid the bare, machined heads on the block there was no visible light seen through. And I decided to do one final pass with 800 grit sandpaper to make sure I was within the RA recommended by Cometic (50 RA or better).
First I installed the dowel locating pins that I had popped out of the deck previously. Then I laid the heads on and torqued them to the Suby OEM procedure and specs. Sorry for the crappy picture. 
Posted by: ThePaintedMan May 6 2016, 03:37 PM
In the Subaru procedure, everything gets torqued in sequence to 51 ft-lbs, in 2 steps. Then there is a very specific procedure outlined in the manual where the bolts are torqued to a spec, then torqued to an angle. This is a little bit unnerving for me, as this is typical with torque-to-yield fasteners. The SVX uses two sizes of head bolts, long for the inner 4 locations (marked on the bolt head itself - genius!) and short for the outers. Unfortunately the short bolts are NLA from any supplier I've found. However, the LONG bolts are still available. I had two long bolts which were rounded off at the tops of the triple squares, so I purchased new long bolts. Now, nowhere in the manual does Subaru state that new head bolts must be used, but that would be ideal. In my case, I had no choice to replace a couple of them and reuse the rest. At this point it'll either work or it won't.
Anyhow, here's a trick that I use for torquing based on an angle, as Subaru wants us to do. I simply mark the bolt heads with a sharpie and use that as my baseline. I've used one of those crappy torque angle gauges before and by the third bolt I was not sure how far I had actually turned it. So now, I do it this way. Subaru gives us a spec of 80-90 degrees on each turn, saying that we are not to exceed a total of 90 degrees at each step in the sequence. With my marks, I was able to make sure that I stayed within those guidelines, or close enough for my liking.
So this is torqued to initial 33 ft-lbs, and marked perpendicular to the head in preparation to turn 90 degrees. As you can see, I also mark the torque sequence on the head itself for my own reference. BE SURE YOU ARE LOOKING AT THE MOTOR IN THE CORRECT ORIENTATION when you flip it over to do the other side. Almost got caught out on that one.
And this is after torquing 90 degrees on the inner bolts. Make sense?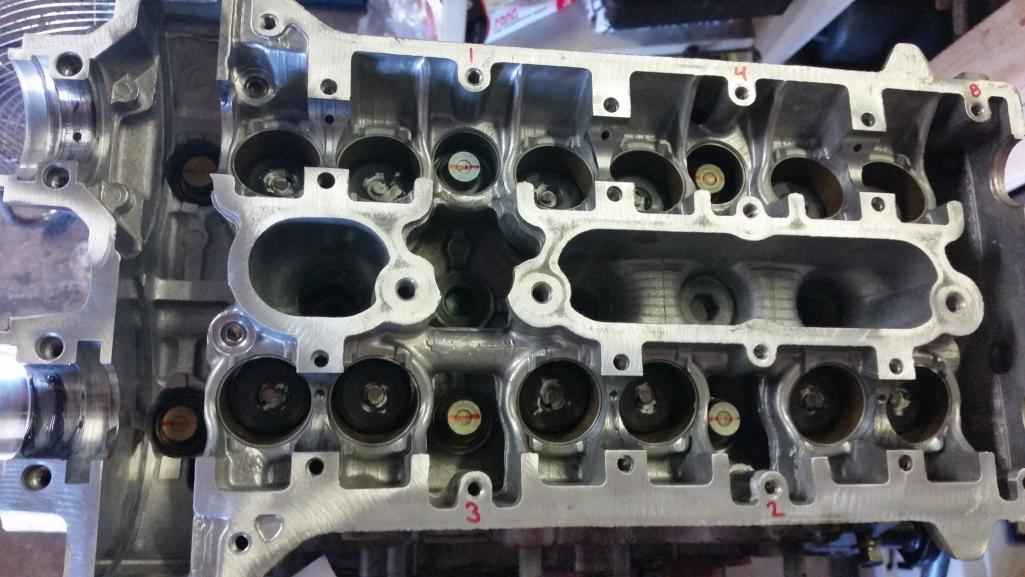
Posted by: ThePaintedMan May 6 2016, 03:53 PM
That's pretty much it. The rest of the assembly is fairly straightforward... except two things.
1) The service manual has a typo in it that really sucks. On the LH camshaft, the notches in the end are faced directly downward on both the exhaust and intake cams. You lay the cam in the journals, then torque the cam caps in sequence. ON THE RH camshaft the manual says lay the cams in with the notches facing downwards. That should read upwards, as the picture directly below that shows. If you have them facing downwards, then you won't be able to lay the cam in flat and torque it correctly as several lobes will be in the open position and you can potentially damage the thrust surfaces on the head.
2) The Cometic gaskets come with rivets installed in them to hold all the layers together. I chose to go ahead and install them with the rivets attached. However, when the final assembly of the timing cover and gears happens, these rivets stick out too far on the RH head. After doing a lot of reading of similar problems on other applications, I chose to dremel these off after I had everything torque down (picture below).
3) Finally, I also decided this was the time to install new water pump to heater pipe hoses. Once the timing covers are back on, it's a real pain to get at the spring clips that hold them on. I *could* have ordered these from RockAuto and saved 20 bucks had I thought about it ahead of time. But instead I wanted to get it back together and found them locally. They're just two simple 90 degree molded heater hoses, one is 1/2 and the other 5/8. The part numbers that you can cross-reference are Gates 28460 and 28566.
Posted by: carr914 May 6 2016, 08:23 PM
post some pictures of my carb rebuild to my 2.0 Thread please
Posted by: Jetsetsurfshop May 8 2016, 09:19 AM
At the rate your going you'll be ready for Sebring before me....
Posted by: FourBlades Nov 1 2018, 08:23 PM
George, what is going on with this build?
This is such a cool motor, I want to see and hear it running.
John
Powered by Invision Power Board (http://www.invisionboard.com)
© Invision Power Services (http://www.invisionpower.com)