Printable Version of Topic
Click here to view this topic in its original format
914World.com _ 914World Garage _ diggin into hell
Posted by: michelko Sep 5 2004, 03:13 AM
Hi guys,
look what i found under the fender. The PO did some very fine work to repair the hell hole 
Attached image(s)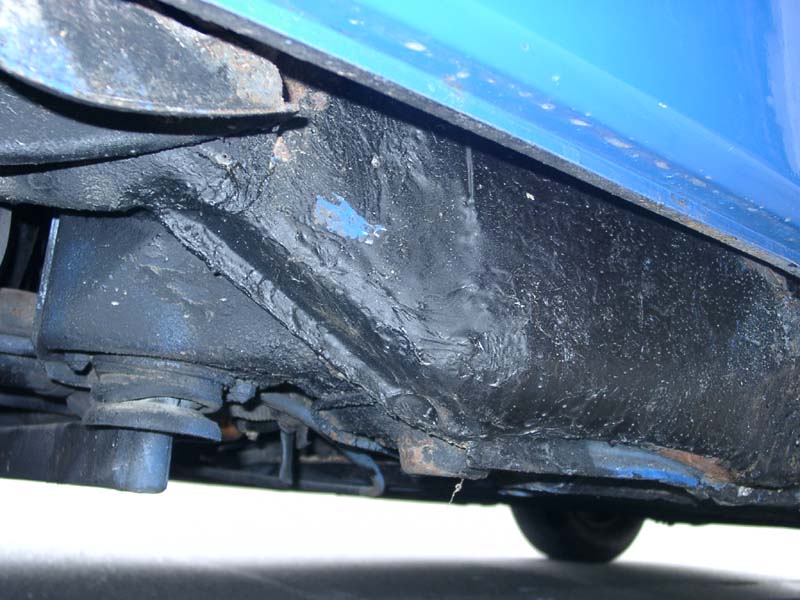
Posted by: michelko Sep 5 2004, 03:14 AM
another
Attached image(s)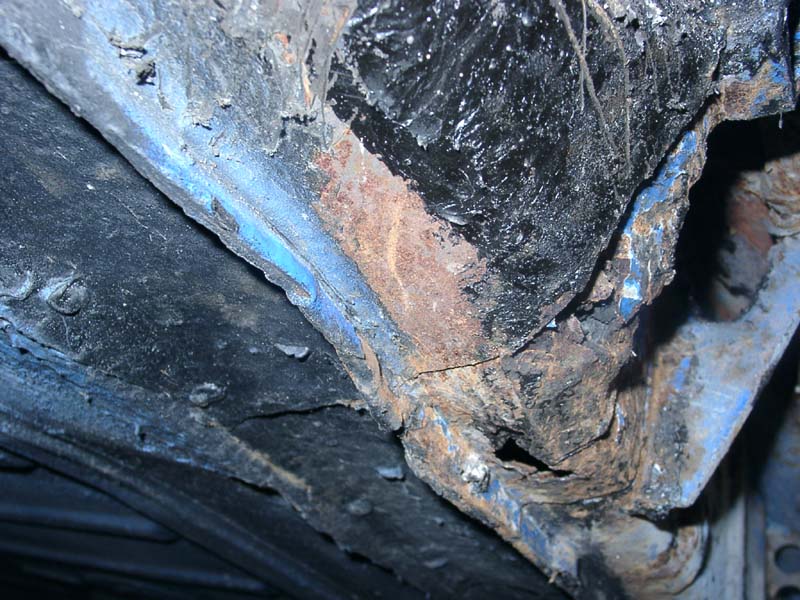
Posted by: michelko Sep 5 2004, 03:16 AM
The sheet metal was riveted to the longitudinal 
Took me the last Weekend to remove all the rustetd crap.
This wekend i cleand up the area an fabricated new piece to close that realy big hole.
Attached image(s)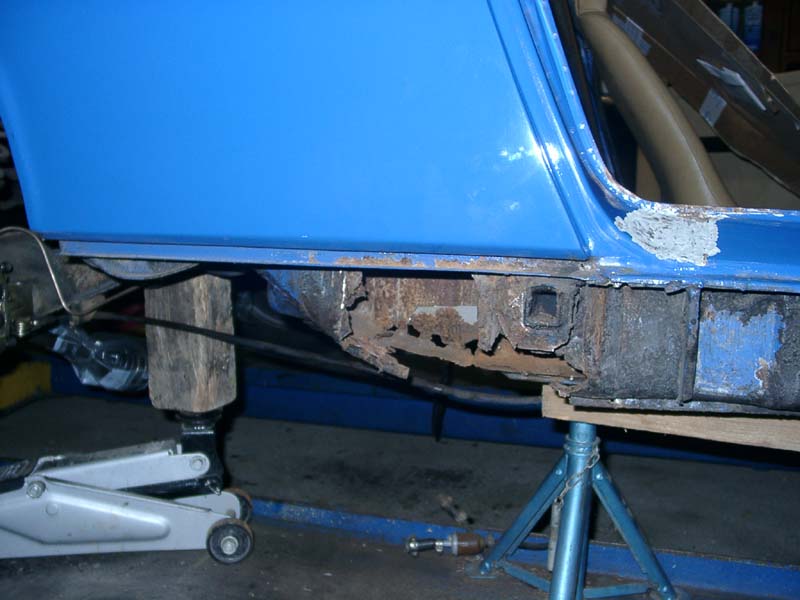
Posted by: michelko Sep 5 2004, 03:17 AM
ger
Attached image(s)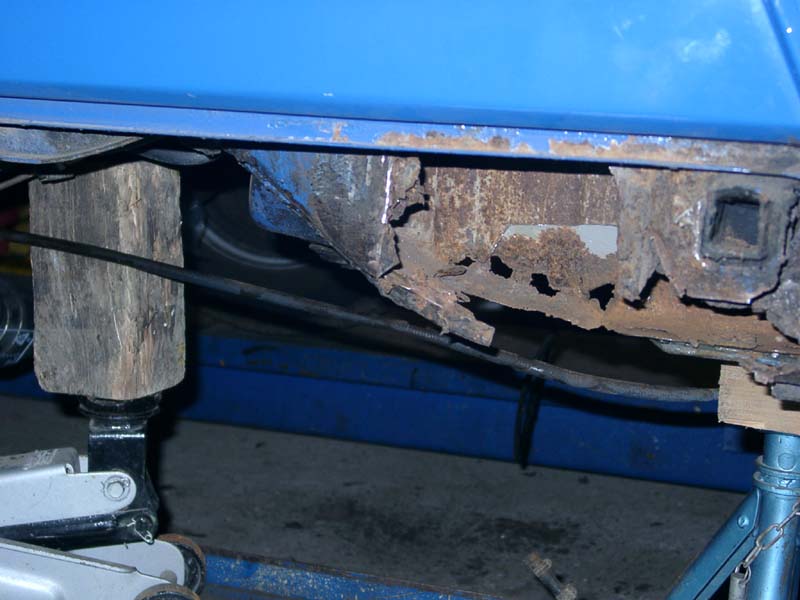
Posted by: michelko Sep 5 2004, 03:17 AM
ger
Attached image(s)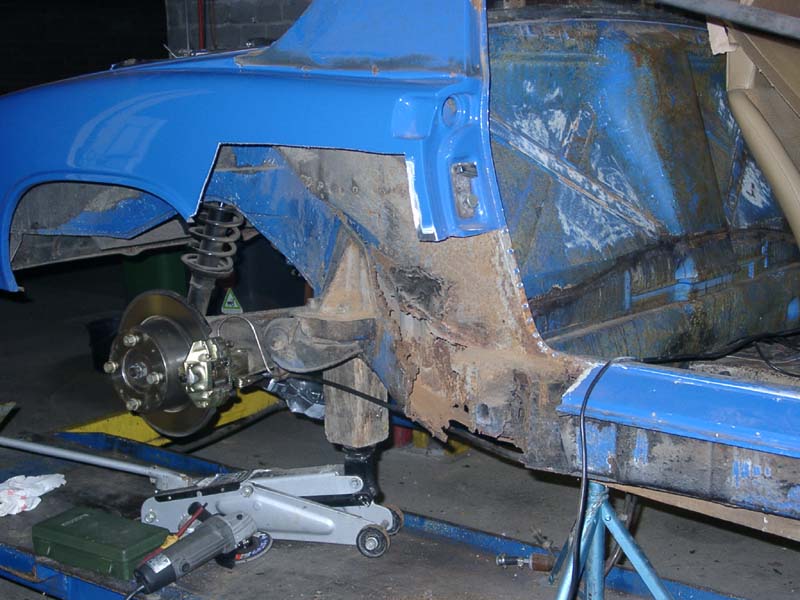
Posted by: michelko Sep 5 2004, 03:18 AM
ger
Attached image(s)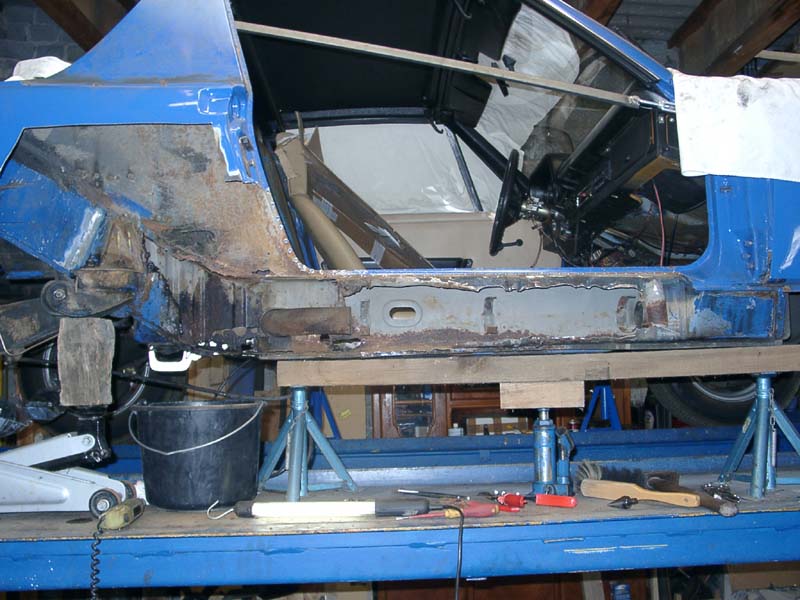
Posted by: michelko Sep 5 2004, 03:20 AM
here you can see the new metal. Think next weekend is welding ti  me
me
Attached image(s)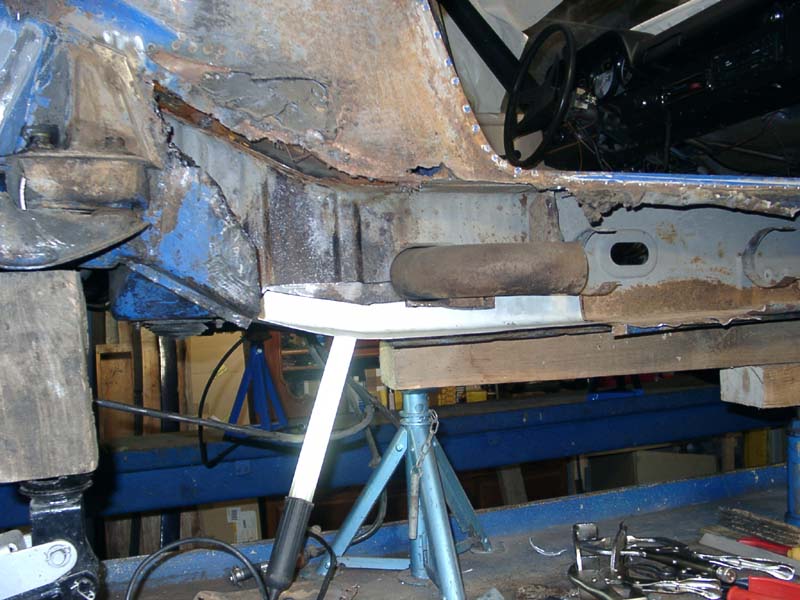
Posted by: michelko Sep 5 2004, 03:23 AM
Some advice to keep the door gap stable?
I made a bar from the safty belt mounting point to the door hinge. hope that helps.
Attached image(s)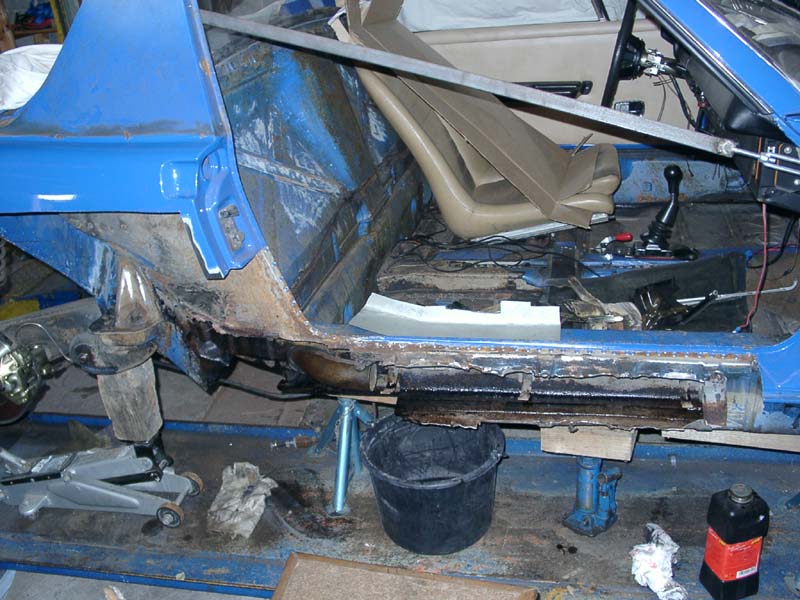
Posted by: michelko Sep 5 2004, 03:24 AM
i will keep you informed.
Posted by: Joe Sharp Old Sep 5 2004, 03:59 AM
Reminds me of one of my ex's, so pretty outside so rotten inside. But thats love.  It's so nice that you can fix her, for I could not.
Please keep updated up on your work 
Joe
Posted by: redshift Sep 5 2004, 05:21 AM
Oh my god dood, you went waaaaaaaaay too far!
That redish stuff is the color of the metal on a 914!
M
Posted by: Jeroen Sep 5 2004, 07:26 AM
Hey Michael, good job!
The only thing worse than rust are PO repairs.
Where are you getting the replacement sheetmetal?
(or are you gonna fab it all yourself)
Keep us posted of your progress
cheers,
Jeroen
Posted by: michelko Sep 5 2004, 09:18 AM
Hi Jeroen,
got that nice piece of metal on US Ebay. I think it is from Autoatlanta.
The other parts i have to make myself.
That piece in the picture above was not so hard to fabricate and it fits realy good.
Just can´t wait to do the welding . The cutting out and cleaning the rusted parts is a little frustrating.
Attached image(s)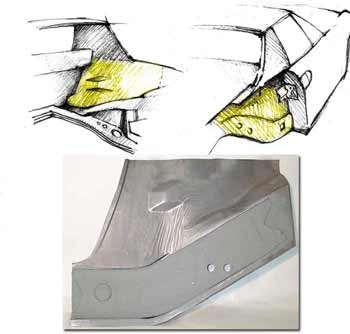
Posted by: Brad Roberts Sep 5 2004, 09:24 AM
WOW !!. That is crazy.
You did a great job with the brace. We normally use a larger/stronger "tube" with adjustable ends similiar to what you made. Put some preload in your adjuster. Make the car spread apart a few mm's more than a stocker. When you weld the car it will shrink when it cools.
HOPEFULLY you will receive your parts from AA in a timely fashion. Next time you order anything from anyone stateside ASK THE CLUB first. The maker of that piece that supplies everyone is a member of this forum.
B
Posted by: Brad Roberts Sep 5 2004, 09:25 AM
You should also look in our Vendors area for the new stiff kit that was recently released. It goes on the inside of the frame rail inside the car under the carpet and wraps all the way around the passenger compartment.
B
Posted by: michelko Sep 5 2004, 09:42 AM
Hi Brad,
received the part with no problems. The transaction was closed in only 2 weeks.
Can´t tell anything bad about them, till now!
I am also looking for the engine shelf, made yesterday an inquiry to restoration design for the shipping fee.
What do you think how much more mm for the spreading?
638mm is the target.
The brace is of solid steel 25*10mm, and it feels very strong. Think it would hold the car together.
Posted by: SpecialK Sep 5 2004, 11:39 AM
The maker of that piece that supplies everyone is a member of this forum.
B
Really? So we could get AA sheetmetal repair parts, without going through AA?

Posted by: michelko Sep 9 2004, 01:45 PM
Hi guys,
did some welding on the inner long.
took the longest time to clean up that rusty mess. welding was done in half an hour. I am realy happy about the progress. I think in an week or so the car can stand on his own feet again.
Attached image(s)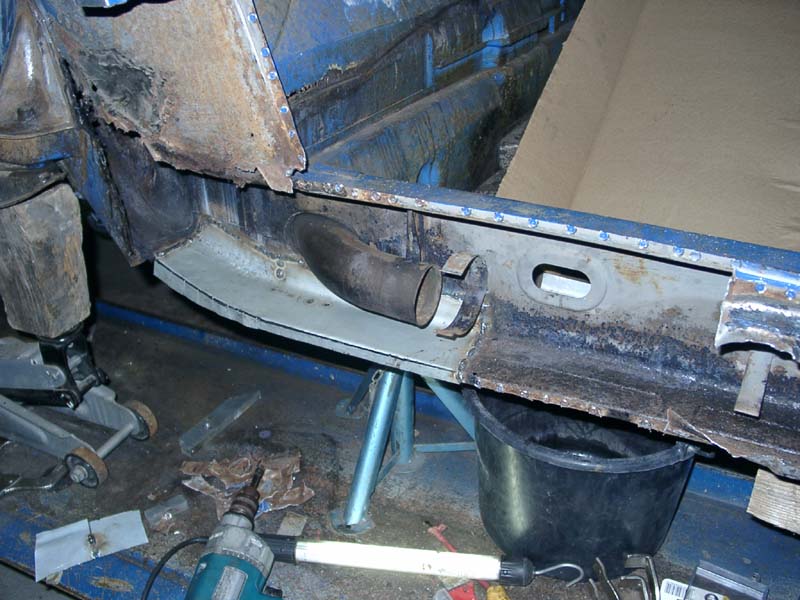
Posted by: michelko Sep 9 2004, 01:47 PM
Just some grinding and forming the second layer, a little an this part is ready. 
Attached image(s)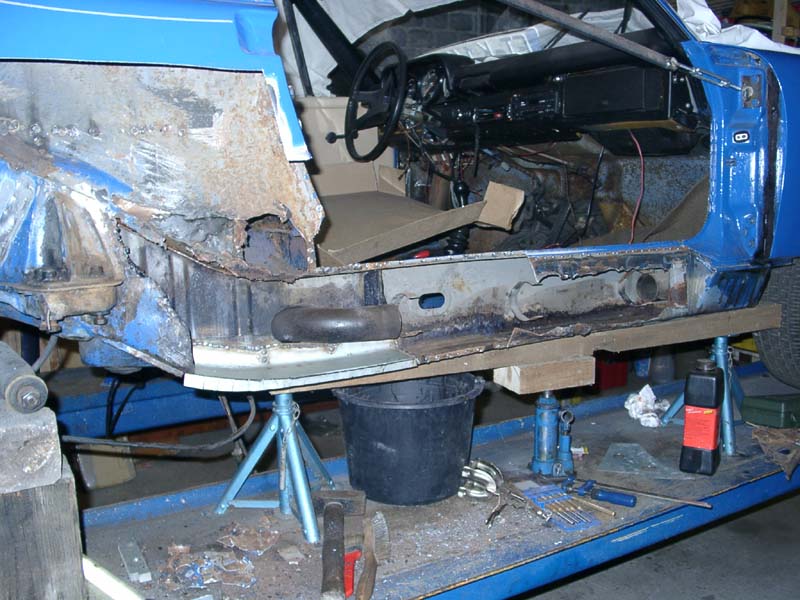
Posted by: Root_Werks Sep 9 2004, 02:21 PM
Very cool! You are doing a great job! 
One of my customers came in for a windshield leak. I spent about 2 hours welding little holes up and cleaning up rust in the lower corners before I could put the windshield back in. I am no body man, I tell people that and they have seen my car. I say this is as good as I can do, they still say looks good to them.
I am with you though, I love to weld. Dam, sometimes I wonder around the garage wondering what I can weld together. 
Posted by: buck toenges Sep 9 2004, 02:23 PM
Adriatic Blue. Best color for 914 ever. 
Posted by: michelko Sep 9 2004, 02:47 PM
Yeah man,
ido realy love that colour
Attached image(s)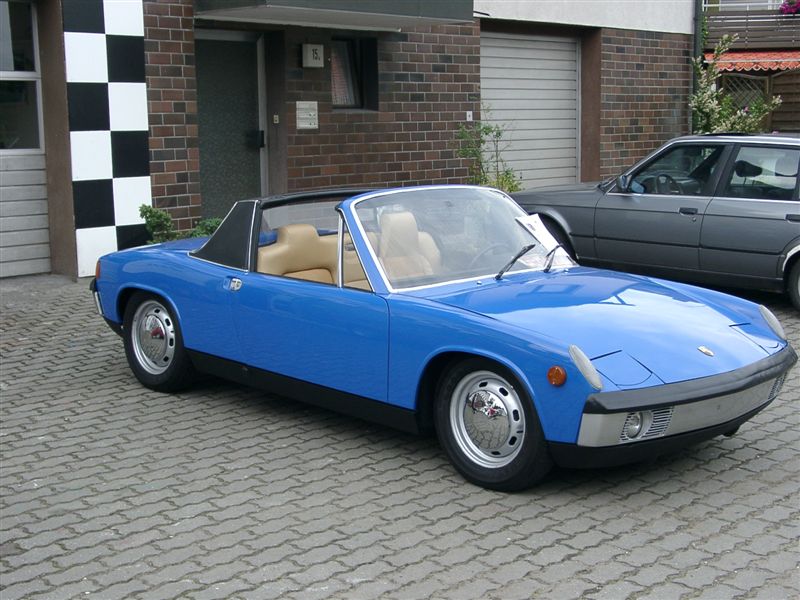
Posted by: Brando Sep 9 2004, 02:54 PM
I hope that's the finish pic...
Cutting a car that looks that good... would make my stomache churn for hours...
Posted by: dinomium Sep 9 2004, 03:11 PM
I am with you though, I love to weld. Dam, sometimes I wonder around the garage wondering what I can weld together.
You can always come to Bremerton! There is ALWAYS someting to weld in my shop!!
lol
Posted by: red914 Sep 9 2004, 03:12 PM
it makes me very afraid to look too closely into the abyss... 
Posted by: michelko Sep 10 2004, 12:31 AM
I hope that's the finish pic...
Cutting a car that looks that good... would make my stomache churn for hours...
No ,no, no, the last pic shows the beauty three years ago. The PO did some nice work to hide all the bad things, that you should not see and pay a large ammount for a "superb" car  .
.
There are two choices: repair it or abandon it.
guess what i decided 
 and again
Posted by: michelko Sep 11 2004, 11:00 AM
Hello together,
did some  and . The second layer is in the car.
Attached image(s)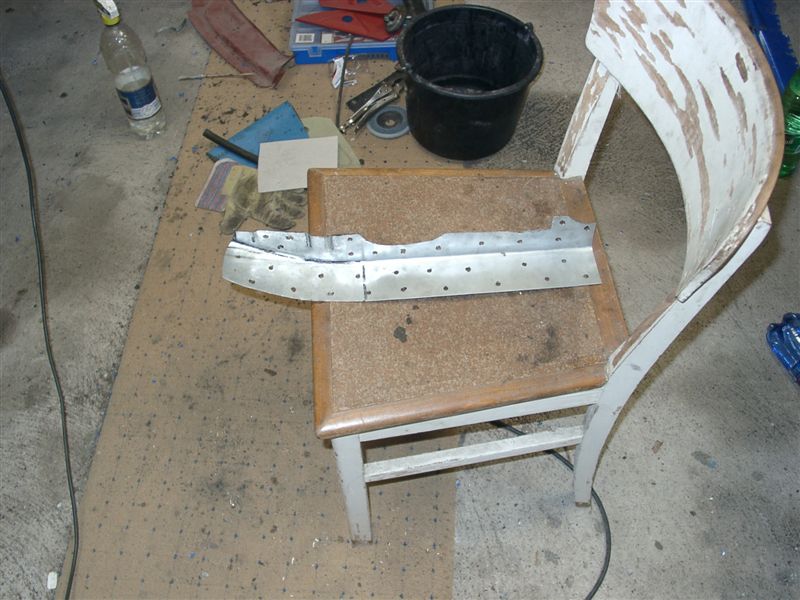
Posted by: michelko Sep 11 2004, 11:01 AM
ger
Attached image(s)
Posted by: michelko Sep 11 2004, 11:03 AM
Attached image(s)
Posted by: michelko Sep 11 2004, 11:04 AM
werqwe
Attached image(s)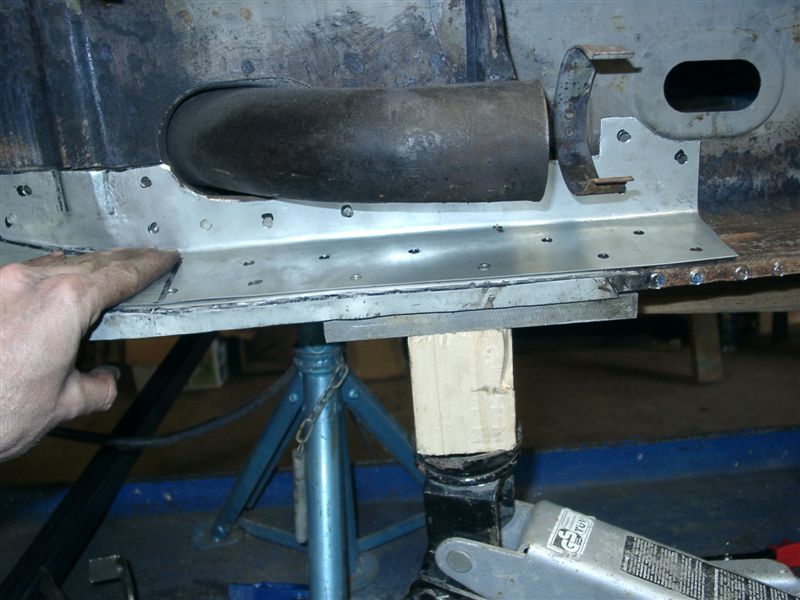
Posted by: michelko Sep 11 2004, 11:05 AM

Attached image(s)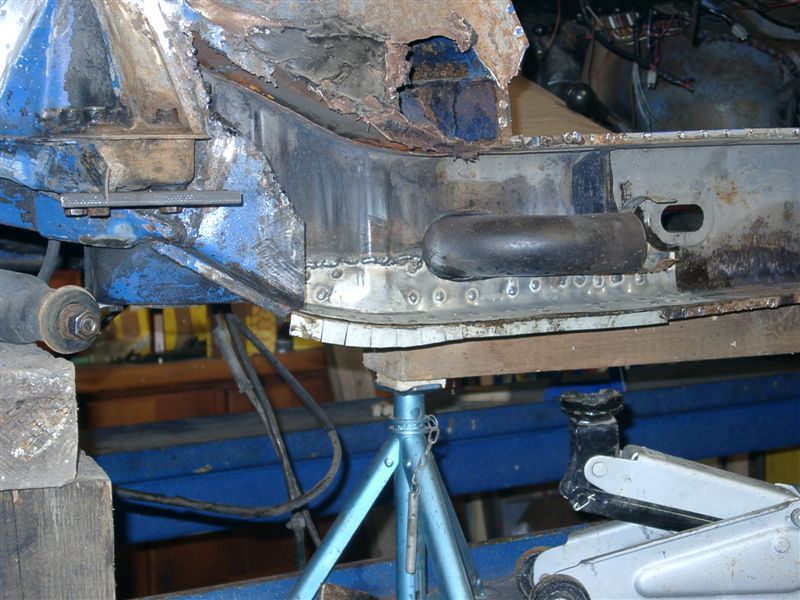
Posted by: michelko Sep 11 2004, 11:09 AM
and now its the right time to drink some cold beer. 
Next step will be battery stand and engine bay side of the hell hole.
Attached image(s)
Posted by: red914 Sep 11 2004, 11:54 AM
nice work! thanks for the updates; it is great to see someone showing how it is all done!
Posted by: bryanthompson Sep 11 2004, 12:06 PM
Damn, that's awesome! I'm doing the rear trunk first, but i'll be doing the longs before too long. I'll be posting pics of my progress when i get finished...
Anyway, did you keep patterns or anything of the pieces you are making?
Posted by: Brando Sep 11 2004, 12:34 PM
Very amazing... Makes me scared to look at mine...
One time, 2 years ago when checking out 914s... I checked out a red '70 in Pomona, the guy wanted $2800 OBO. Had dual webers and barely ran. Point being, the chassis was cut up, welded together (from another car). non of the numbers on the chassis matched. I open the compartment and check "the hell hole" and you could see all the way through the bottom passenger's side fender. Or the "ear" right there. Nothing but large gaping hole i could fit my fist through.
Scary.
Posted by: SpecialK Sep 11 2004, 12:41 PM
You didn't buy that car in the US Midwest and ship it to Deutchland did you? Looks awfully familiar! 
(Supposed to be funny...in a kind of "sad but true" way)
Nice work.
Posted by: michelko Sep 11 2004, 01:22 PM
The little princess was original delivered to italy an came back to germany in 2001.
Sorry , no patterns. All pieces are unique. I tried to keep as much good metal as posible. You can see this at the curved cutting.
This was my first work with sheetmetal, and it is not so hard.
I think anybody can do it with a little time and patience.
@ brando: if you are not sure, you should definetly look at these point of your car. Every day you wait, the rust gets worser (hope that is the right spelling  ) and the repair is more difficult.
Posted by: SpecialK Sep 11 2004, 01:28 PM
Impressive! With a little more practice (and it looks like you'll be getting some
) you could be a guest fabricator on "Monster Garage" (is that shown over there?)
Posted by: BatAc Sep 12 2004, 12:20 AM
I have to go to HELL 'n' I'm not sure I have the strength you do. Great work, can't wait to see the flip side of this project.
Posted by: michelko Sep 12 2004, 10:26 AM
additional pic from inside of the long. Have to drill a hole for the securitiy belt mounting. The mounting point is in good shape, so i only have to paint it and weld it.
Will keep you informed.
Attached image(s)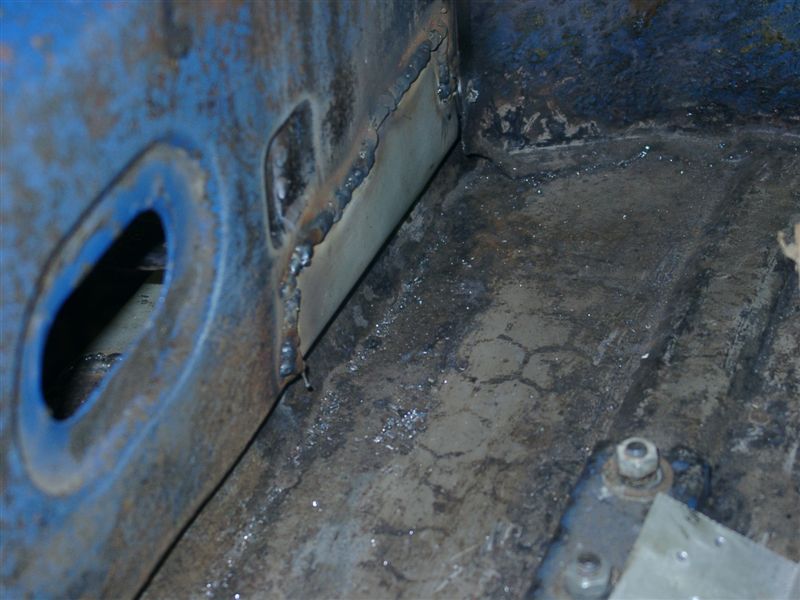
Posted by: michelko Sep 16 2004, 02:54 PM
hi everybody,
did some work on the rustbucket.
Cuted out the Suspension console. No way way to solve the problem with less cutting <_< It was rusted directly to the console, so there was no metal left to weld the new one against.
Attached image(s)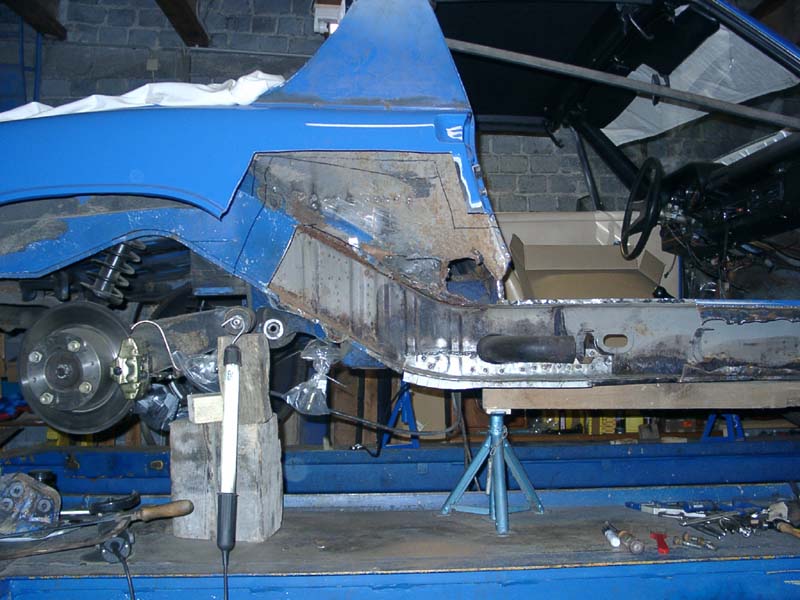
Posted by: michelko Sep 16 2004, 02:56 PM
Hold the new sheetmetal in place. looks very nice the car will be strong again in this area.
Posted by: michelko Sep 16 2004, 02:56 PM
should add the pic
Attached image(s)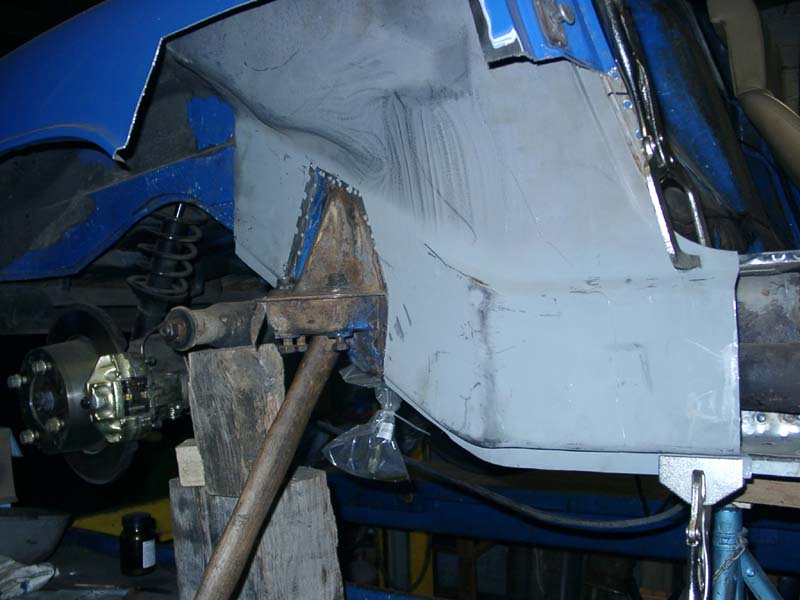
Posted by: michelko Sep 16 2004, 02:59 PM
nother one
Attached image(s)
Posted by: michelko Sep 16 2004, 03:02 PM
inside of the console and the safetybelt mounting point.
Will bring them tomorow to the sandblaster.
Attached image(s)
Posted by: michelko Sep 16 2004, 03:04 PM
outside
saturday will be weldingtime again
Attached image(s)
Posted by: bryanthompson Sep 16 2004, 03:07 PM
You're my hero, man!

Posted by: Headrage Sep 16 2004, 03:18 PM
That is really excellent. I have my fingers crossed hoping I'm not going to see the same thing this weekend when I delve into mine.
Posted by: michelko Sep 16 2004, 03:25 PM
headrage,
wish you the best, but.... no illusions, that cars are over 30 year old and there is no additional coating of wax or something in the longs or somewhere. Expect the worst, and be positive surprised of the condition.
best wishes
Posted by: SpecialK Sep 16 2004, 03:27 PM
You da man michelko!! I get chills thinking just thinking about pulling off my outer rocker panels, hope I don't find what you did (but probably will)!
Posted by: michelko Sep 18 2004, 09:50 AM
And the story goes on.
removed the batterytray today. The PO purchased a new on and welded it in like crap  . I hate PO´s!! It took me 2 hours to remove the tray, and when iz was out i saw that shitty welding. sory no pic of it.
next step was cutting out pieces of the engine shelf
Attached image(s)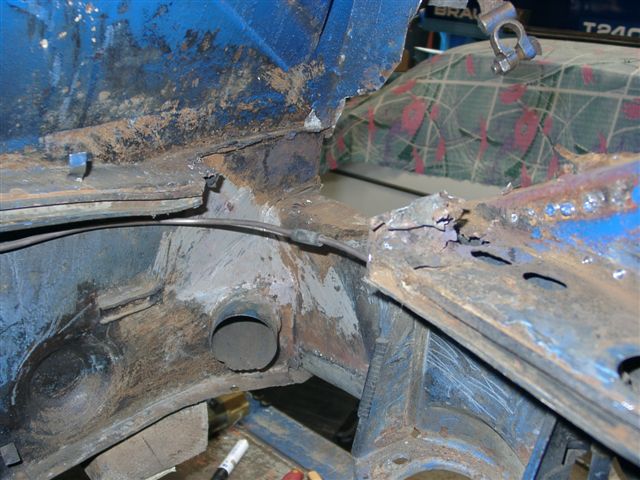
Posted by: michelko Sep 18 2004, 09:52 AM
the firewall was also infected. The first replacement sheet is fabricated.
Attached image(s)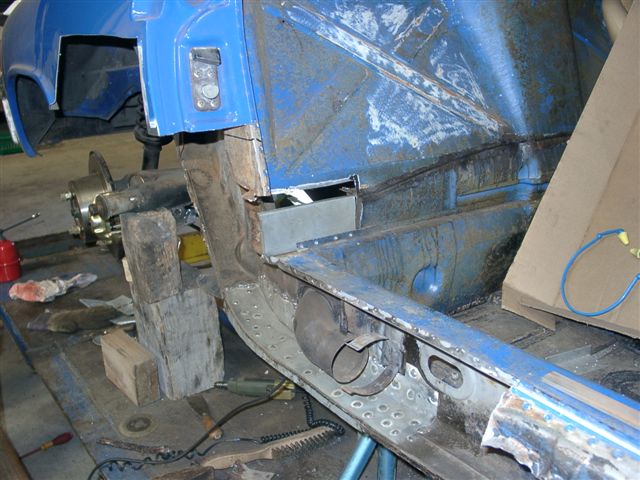
Posted by: michelko Sep 18 2004, 09:53 AM
wr
Attached image(s)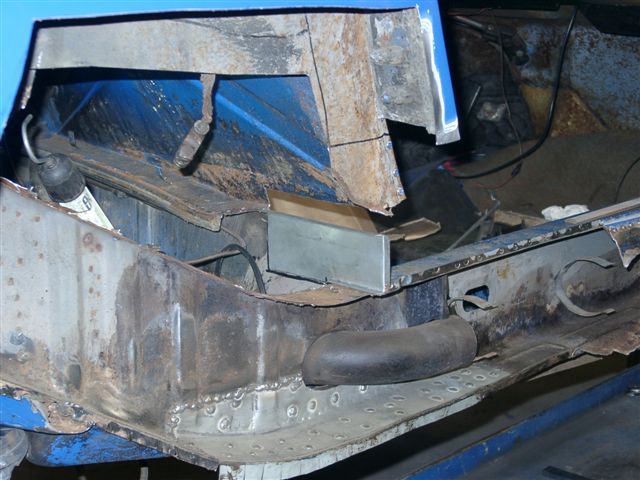
Posted by: michelko Sep 18 2004, 09:56 AM
thats for today.
did i tell you that i hate rust? more than PO´s?
I will be happy when this is finished and the car is on the road again
Have a nice Weekend
Attached image(s)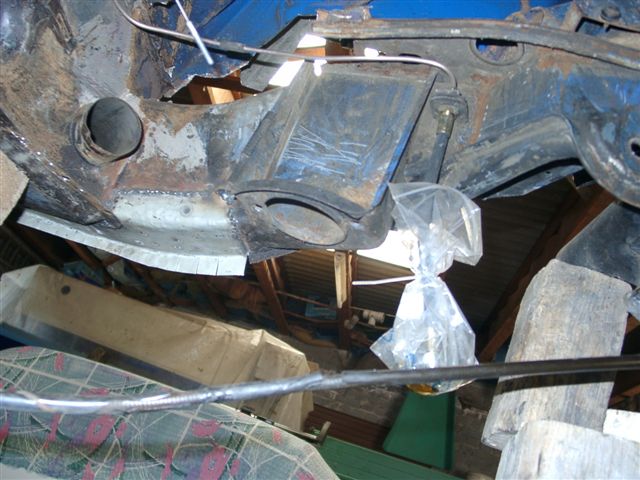
Posted by: BatAc Sep 18 2004, 10:29 AM
As much as you're scarin' the sh*t out of me, the more you're givin' me hope this can be done. 
Posted by: d7n7master Sep 18 2004, 10:39 AM
Damn - you do beautiful work
I don't weld, but I definitely need to learn. My '73 needs hell hole repair & I want to do it myself
Awesome post!!! Great pics!!! You have no fear
Now I have got to go to nite school & learn to weld. That really looks like fun. Just curious, how long did it take for you to be able to weld like that???? I've seen a lot worse 
Posted by: michelko Sep 18 2004, 11:24 AM
during study i worked one day per week in an metall shop. There, i learned and practice welding, and some more helpfull skills. But that material was much stronger than the sheetmetal of an car.
You can burn a hole in the metal very quick , so you have to be carefull.
Practise is the key to success, but it is not so hard to learn!!
I like that forum very much, unfotunatly no comparable in germany.
Posted by: SpecialK Sep 18 2004, 12:39 PM
That's no lie! I was practicing on some scrap 26 Ga I had laying around figuring if I could weld metal this thin, then the 22 Ga would be a little more forgiving. Blowin' holes like I was wielding a shotgun!
I've got a flux core mig welder, think I'll have any sucess with it? Or should I start shopping for a gas type mig?
Posted by: 9146986 Sep 18 2004, 01:05 PM
Kevin,
Don't waste your time welding on a 914 with flux core wire, get the gas set up. The G in MIG is Gas, so if you don't have shielding gas then you aren't really MIG welding. You will also have the best sucess using a welder that has infinite heat and wire speed adjustments.
PK
ps How nice of your wife to pose for your avatar!
Posted by: SpecialK Sep 18 2004, 02:04 PM
ps How nice of your wife to pose for your avatar!
If that was my wife I wouldn't have time to play with 914's....."what's that honey?"..."Oh, it's only a picture of....
 "
"
Posted by: SpecialK Sep 18 2004, 02:11 PM
The flux core seems to do a dandy job on thicker metal, but I can't turn it down far enough to weld the sheet metal. Not much control over the voltage and feeds (min., max., high, low). I wonder if there's some way to wire potentiometers to replace the two position switches 
I think I'll take your advice on the Gas MIG...I'll just rent one for now and see if I can't get some better results.
Michelko, how do you say "You've got balls!" in German?
Posted by: fiid Sep 18 2004, 03:05 PM
Some flux core welders are upgradeable to mig for not very much cash. That's what I use, and I'm pretty happy with it.
Fluxcore really is a pain in the ass - my welds have gotten a lot better since I went mig.
Posted by: michelko Sep 18 2004, 03:12 PM
Hi Special_K
"how do you say "You've got balls!" in German?" don´t know exactly what this means in english  and I definitfly don´t know how to say it in German.
Give me a hint.
I am using a MIG welder, works just fine
Posted by: SpecialK Sep 18 2004, 03:42 PM
"how do you say "You've got balls!" in German?" don´t know exactly what this means in english
and I definitfly don´t know how to say it in German.Give me a hint.
I am using a MIG welder, works just fine
It's English/American slang for "You are one brave man to take on a task like that!", it's a compliment more or less.
fiid: I'll see if they make a conversion kit for my welder, wonder if they make a "universal conversion kit" that'll work on cheap-ass 110V welders.
Posted by: BatAc Sep 18 2004, 10:26 PM
Oh, if you haven't noticed I believe this is a classic (thread). Also Michelko, in the beginning that tar stuff the PO used I think maybe was an old halfass fix it solution. My car seems to have the same garbage.
Posted by: BatAc Sep 19 2004, 12:13 AM
Michelko, I assume you're going to "sandwhich" together the inner wheelhouse sheet metal to the exising piece. Would one POR15 both pieces before welding together to insure the rust wont occur in between them????
Posted by: SpecialK Sep 19 2004, 01:38 AM
I don't know about michelko, but I'd "weld-through" primer the area to be welded, prep the welds and surrounding area affected by welding with an Ospho/Metal Ready solution, and then POR-15 it. I friggin' hate rust.....and I just noticed that the forum colors have turned that color....very funny! <_< Or maybe I've just seen so much of that color lately....
Posted by: trojanhorsepower Sep 19 2004, 07:28 AM
I am not worthy
How did you bend the metal? Do you have a break, if so what size?
How did you cut the metal? What gage are you using?
How the hell did you bend the metal with the 90 deg. Lip?
I am attempting this repair and am getting very frustrated. I appreciate any tips and your posting of this thread.
You do great work.
-Pete
Posted by: michelko Sep 20 2004, 04:09 AM
I use rustconverter (fertan) on all old stuff and then paint it with some epoxy rust preventive paint called ferpox (both are german products, known for good results in restoration).
The welded pieces will also primed with weldable primer (don´t know the name).
After all work is done, all the caverns will be flushed with protective wax.
This should work for the next 100 years, cause the car will not see much rain in future(hope so)
Fabricating the new sheetmetall is realy not so hard. You need some special material. Think you can get it at your flaps. This material can easily be stretched and bent and has a coating that should prevent new rust.
next time I will take a Pic of the tools i used to fabricate all the stuff.
:gerflag
Posted by: BatAc Sep 21 2004, 03:41 PM
On the inner wheelhouse when you take off the wheel "thingy-a- ma-jingy" that's what goes in those two holes!?! Correct me if I'm wrong but you could possibly replace this piece without an engine drop? Plus you could conceivably replace this piece without cutting into the fender?
Also instead of jus' a PO do we have POSPO???
Posted by: michelko Sep 25 2004, 09:53 AM
The story goes on, ....slowly but steady  .
.
Did some cleaning and fitting the repair panel into the hole.
The suspensionconsole is fresh sandblasted and primed.
It is a little tricky to find the right position for the repair panel, because its position is realy important to find the right position for the suspension console.
Attached image(s)
Posted by: michelko Sep 25 2004, 09:55 AM
nother one
Attached image(s)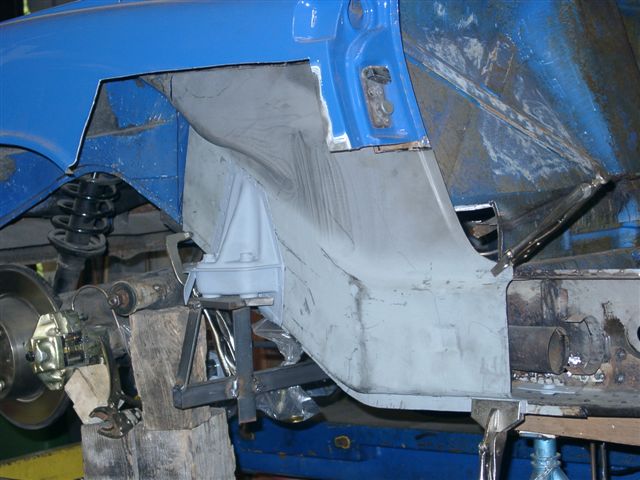
Posted by: michelko Sep 25 2004, 09:55 AM
from the inside
Attached image(s)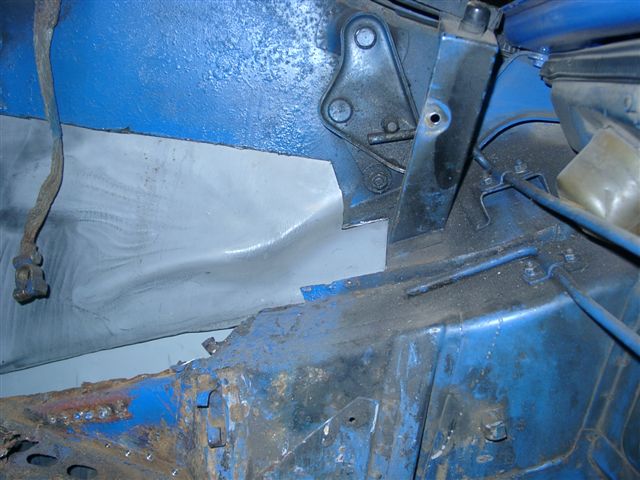
Posted by: michelko Sep 25 2004, 09:57 AM
nother
Attached image(s)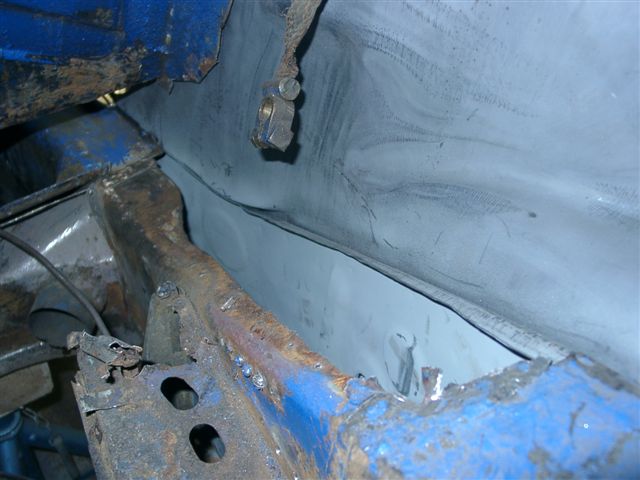
Posted by: michelko Sep 25 2004, 10:10 AM
I wil have to do some more cleaning till i can wels the pieces together.
I hate cleaning and i hate rust
But i can see light at the end of thre tunnel
Posted by: BatAc Sep 25 2004, 10:30 AM
Jus' in time my man! I was jus' 'bout to post this question:
I'm looking to get the inner wheelhouse sheetmetal panel to "sandwhich" flush. It's jacked up some an' the wheel is off. Looking at it there seems to be several things in the way. These or this would be the bracket for the rear suspension console (ear) it seems? It creats a "hump", I believe Brad called it "scab" metal??? Is this thing (growth, "what not") spot welded in or something??? The controling arm goes from the hole in the ear towards the outside to the fender. This is also where the tiny bracket (that little piece of flat metal) from the fender to this area connects. If you look you see it creats a "hump" for lack of a better word. If someone has put the wheelhouse as a solid piece flush I believe they understand my convoluted question.
The "ear" will have to come off as well, so this might be that whole section. I don't know. Also can one put the "ear" on without cutting the engine shelf?
Sorry no images (the irony here is that I've made a living for more than a quarter of a century in photography but the only camera I currently possess is a 4x5 'n' that won't do for this.).
However, that hump is the "ear" isn't it??? Can you slid up the ear (support console) without cutting into the engine shelf??? Plus no need for pics there they are, thanks.
Posted by: michelko Sep 25 2004, 03:22 PM
somewhere on the forum there is a thread from Brad Roberts i think. He managed to replace the ear witout cutting the engine shelf. Unfortunately don´t know how to find it  . The thread also contains pic´s of the process. Maybe you contact him directly and ask him about.
That "scab-metal" is MIG-welded, in my opinion.
Posted by: watsonrx13 Sep 25 2004, 06:49 PM
Here's Brad's http://www.914world.com/bbs2/index.php?act=ST&f=2&t=16191where he replaced the ear without removing the engine shelf. Hope this helps.
Posted by: BatAc Sep 25 2004, 07:01 PM
Thanks, I appreciate that!
Posted by: michelko Sep 30 2004, 01:18 PM
Here we go. Some progress pics.
Fitted the outer rockerand primed the inner.
Some new parts arrived today. Think i am now complete with the parts.
Attached image(s)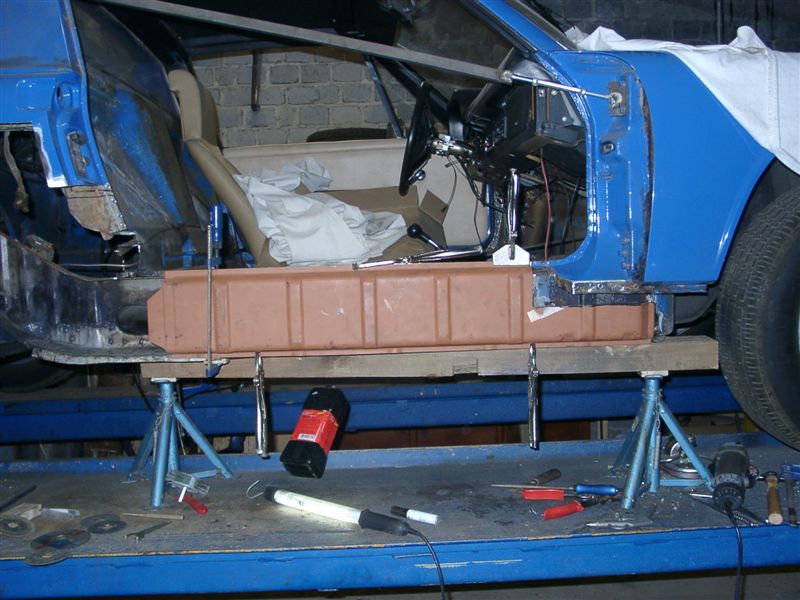
Posted by: michelko Sep 30 2004, 01:19 PM
blabal
Attached image(s)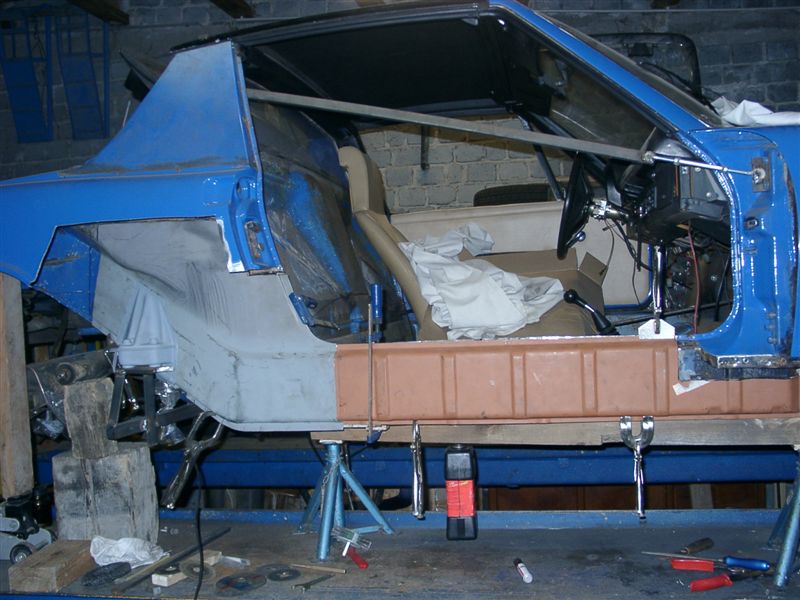
Posted by: michelko Sep 30 2004, 01:20 PM
Attached image(s)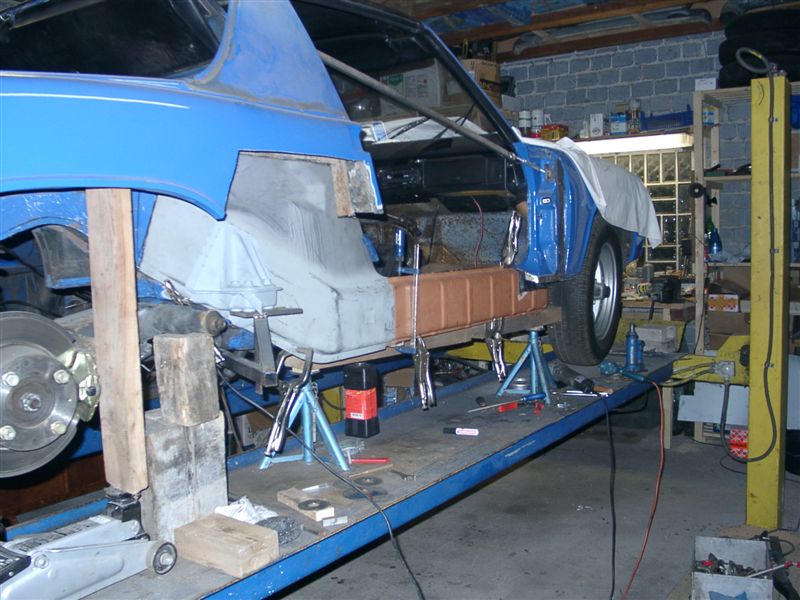
Posted by: michelko Sep 30 2004, 01:22 PM
primed area 51
Attached image(s)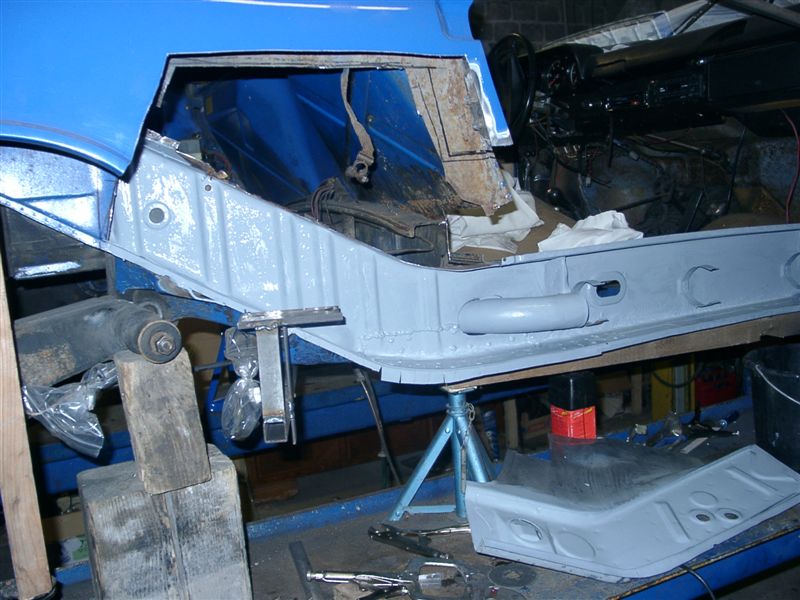
Posted by: michelko Sep 30 2004, 01:23 PM
front
Attached image(s)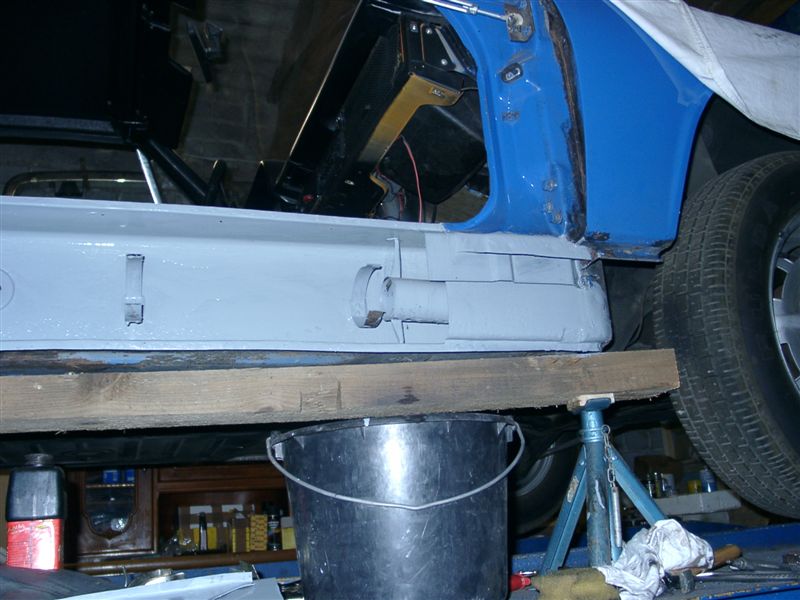
Posted by: michelko Sep 30 2004, 01:24 PM
nother
Attached image(s)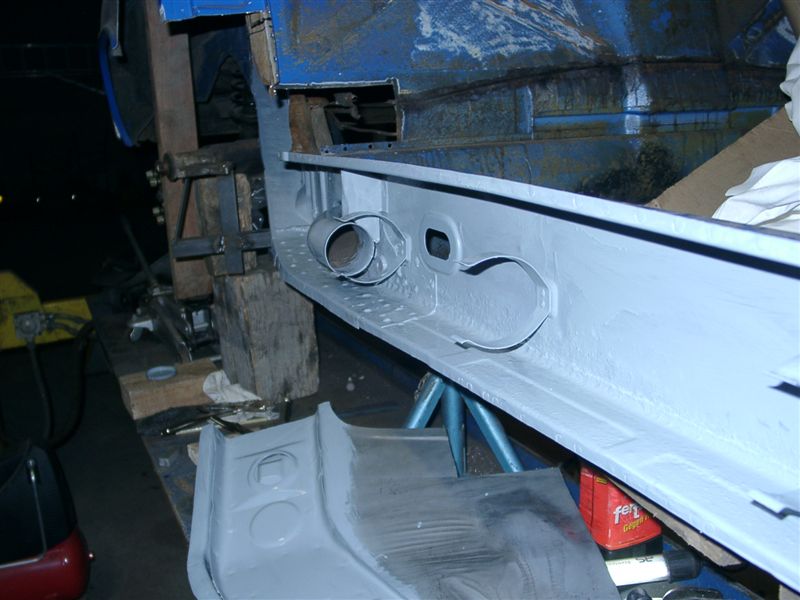
Posted by: michelko Sep 30 2004, 01:25 PM
and the new parts
Attached image(s)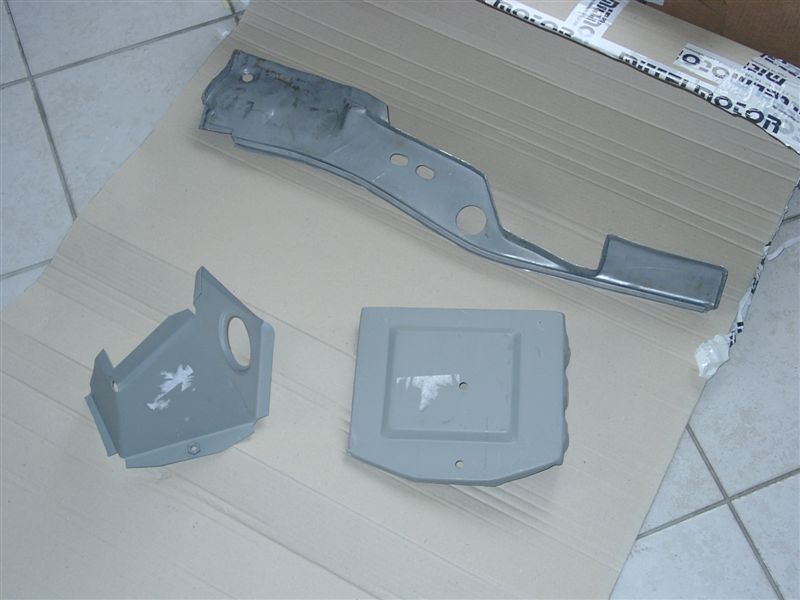
Posted by: michelko Sep 30 2004, 01:26 PM
can you count the number of paint jobs?
Attached image(s)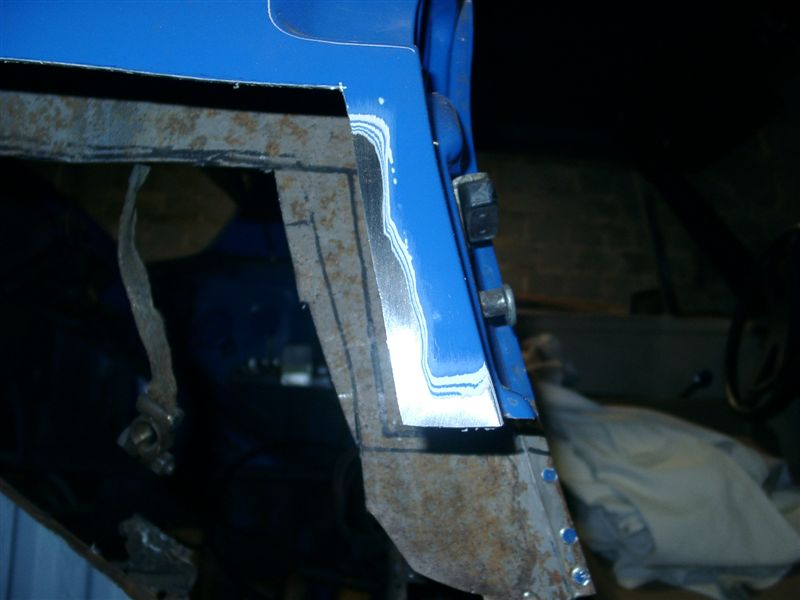
Posted by: michelko Sep 30 2004, 01:53 PM
and some more new parts and a bottle of fuel
Attached image(s)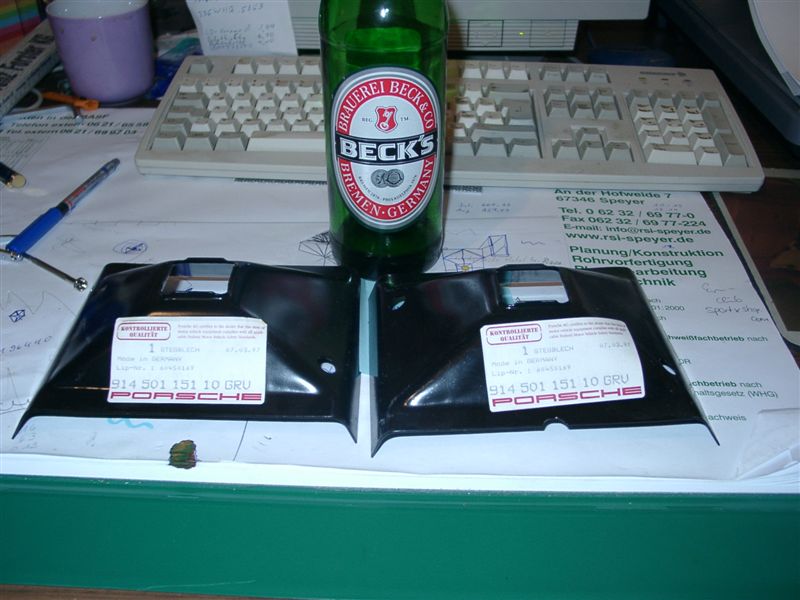
Posted by: michelko Sep 30 2004, 01:56 PM
i also received last week engman´s stiffenig kit.
This is realy a awsome piece of art. very good fittment and the transaction was very quick and smooth
Attached image(s)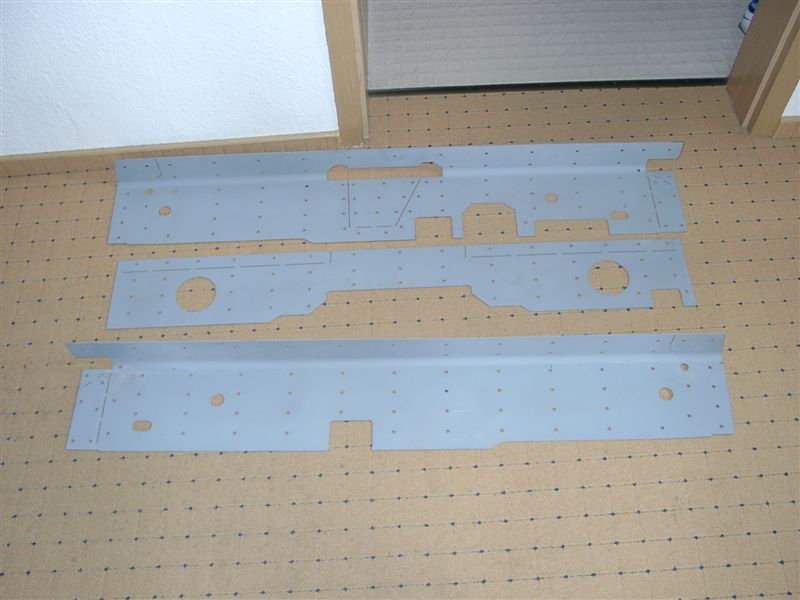
Posted by: J P Stein Sep 30 2004, 02:04 PM
Just a little note on "weld thru primer".
The outfit I worked for did a lot of work on this back in the early 80's......and I was involved. We found that the thickest
it could be aplied was .75 to 1 mil. Above that, weld contamination/porosity became a problem. Dunno what strides have been made in the last 25 years tho.......
Posted by: phantom914 Sep 30 2004, 02:06 PM
Why does a bottle of German beer in Germany have "Germany" written in English on the label?
Andrew
Posted by: michelko Sep 30 2004, 02:10 PM
Why does a bottle of German beer in Germany have "Germany" written in English on the label?
Andrew
don´t know why
but it is a fine brew
Posted by: Root_Werks Sep 30 2004, 02:15 PM
This thread, forum is inspiring! Proof that 914's are worth saving. Great work, I love all the pic's! Keep them coming!
Posted by: scruz914 Sep 30 2004, 02:20 PM
Geologic paint rings!
Man you are doing a nice job. Love the progress pics. Looking forward to the finished product. (Bet you are too!)
-Jeff
Posted by: scruz914 Sep 30 2004, 02:21 PM
Wait, there was supposed to be a pic in that.
Attached image(s)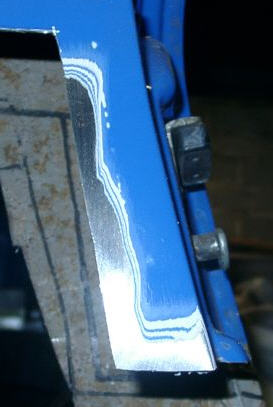
Posted by: sgomes Sep 30 2004, 02:30 PM
My only question is: When can you take delivery of my car?
Absolutely inspiring job!!!
Posted by: scott thacher Sep 30 2004, 06:12 PM
well i know how you all feel about rust and holes under the battery here is my winter driven east coast 75 914 after i removed the engine self to give a little more room for the suby, not to mention it cleans up the engine bay a bunch
scott thacher
Attached image(s)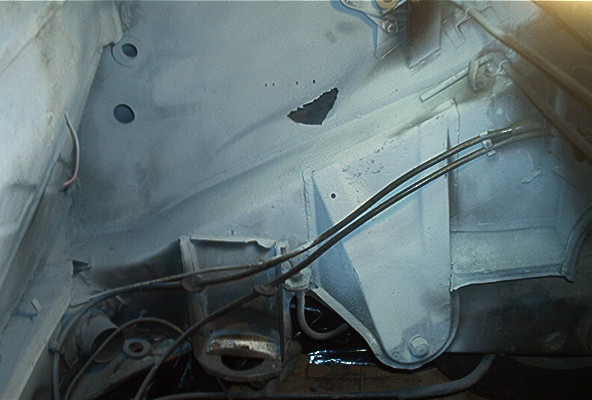
Posted by: Engman Sep 30 2004, 06:34 PM
This is realy a awsome piece of art. very good fittment and the transaction was very quick and smooth
Great to see it waaaayyyy over there. Very glad to hear the fit on yours was the same as I have seen and heard here in the states.
You have done a very nice job with ALL of your metal work. Please keep us posted on the progress - it inspires me!
Mark
Posted by: SpecialK Sep 30 2004, 07:25 PM
Beautiful work michelko!!
Good thing Engmans stiffener kit wasn't painted beige, you'd never see it.
Attached image(s)
Posted by: sechszylinder Oct 1 2004, 01:22 AM
Hiho Mickelko,
really very nice work !!
In the next weeks i have to do pretty much the same work on my car.
It will be partly sandblasted next week and then i have to breath the smell of rust ...
BTW:
Did you bought the engine tray from Mittelmotor ? If yes , how much is it and how much did
you paid for the german customs when buying the frame stiffening kit ?
Aircooled greetings from Berlin
Benno
Posted by: michelko Oct 1 2004, 01:30 AM
Did you bought the engine tray from Mittelmotor ? If yes , how much is it and how much did
you paid for the german customs when buying the frame stiffening kit ?
Hi Benno,
yes the shelf comes from Mittelmotor. Waited for it about 6 weeks. 149 Euro is the price. Dont´t know customs fee, the bill is on the way.
Was very easy to deal with engman, and the part are realy fine. Can´t await to do the welding
Gruss aus Frankenthal
Posted by: michelko Oct 1 2004, 01:32 AM
really very nice work !!
In the next weeks i have to do pretty much the same work on my car.
It will be partly sandblasted next week and then i have to breath the smell of rust ...
BTW:
Did you bought the engine tray from Mittelmotor ? If yes , how much is it and how much did
you paid for the german customs when buying the frame stiffening kit ?
Aircooled greetings from Berlin
Benno
Dont´t forget to show us pics from your project!!!
Posted by: Jeroen Oct 1 2004, 04:25 AM
Hey Benno,
I'm not quite sure about Germany, but I think it is the same as in the Netherlands (or other EU countries)
Importing duties/taxes are 3.5% on car parts (if the value is over 500 euro)
Plus you pay sales tax (MehrwertStuer) over the cost of the parts and shipping (16% for Germany)
So it's not too bad...
cheers,
Jeroen
Posted by: Gint Oct 1 2004, 07:55 AM
I somehow never managed to look at this thread until this morning.
Nice work! Keep those pics comin.
Posted by: ClayPerrine Oct 1 2004, 09:29 AM
This is impressive work.. I actually paid a body shop to do similar work. ....
IMHO.. I would invest in one of Brad Mayer's long stiffing kit. It really helps to make the car stronger across the bottom.
Keep us posted on this...
Posted by: michelko Oct 2 2004, 09:50 AM
Hi guys,
today was welding time  I love it!!!
First shot: the Heater tube mounted
Attached image(s)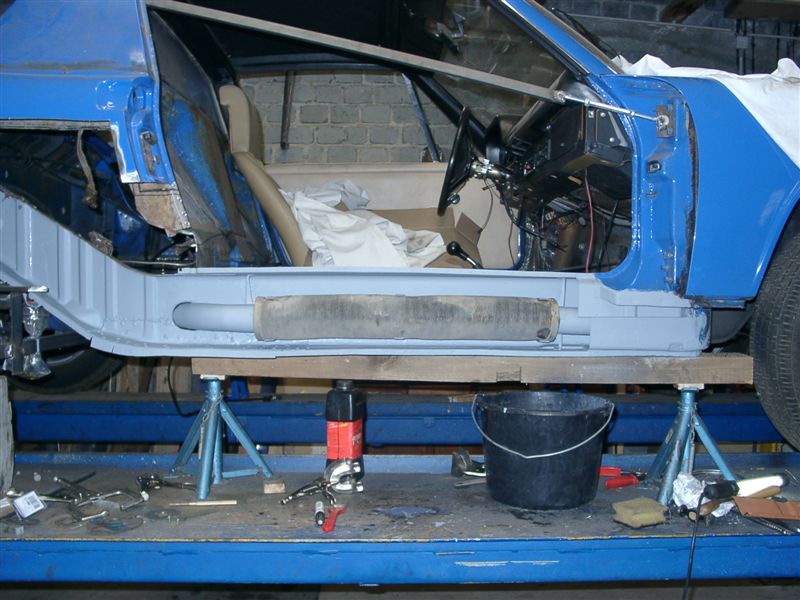
Posted by: michelko Oct 2 2004, 09:51 AM
primed pieces
Attached image(s)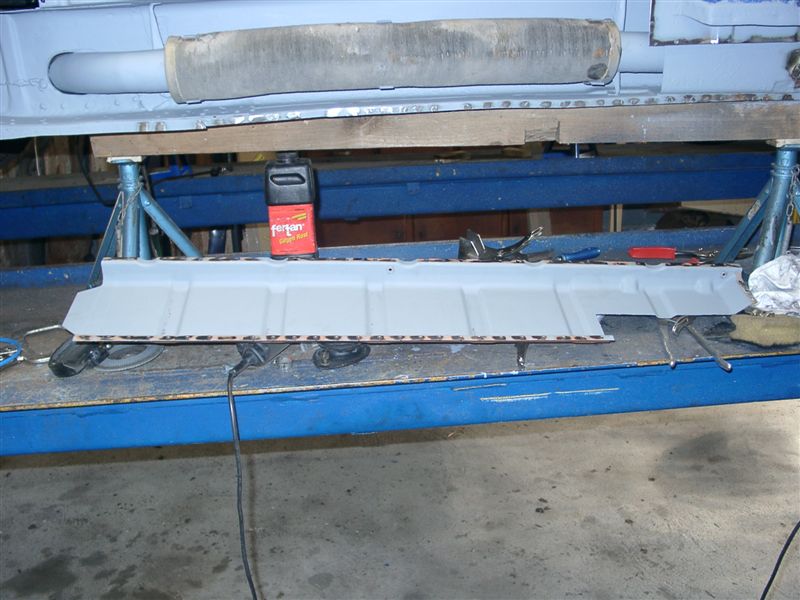
Posted by: michelko Oct 2 2004, 09:52 AM
drilled a lot of holes to do the spot welding.
First rule: have the welding area as clean as possible.
Attached image(s)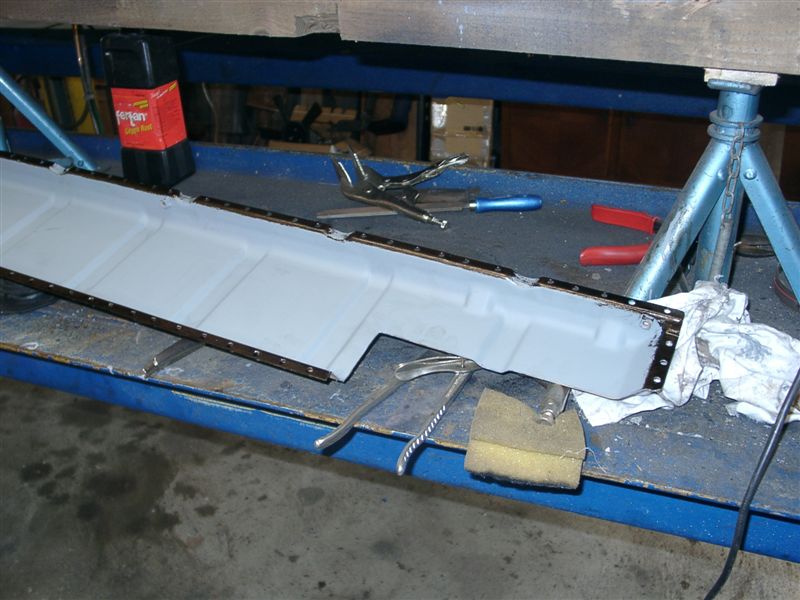
Posted by: michelko Oct 2 2004, 09:53 AM
the dark colored area is painted with wel trough primer
Attached image(s)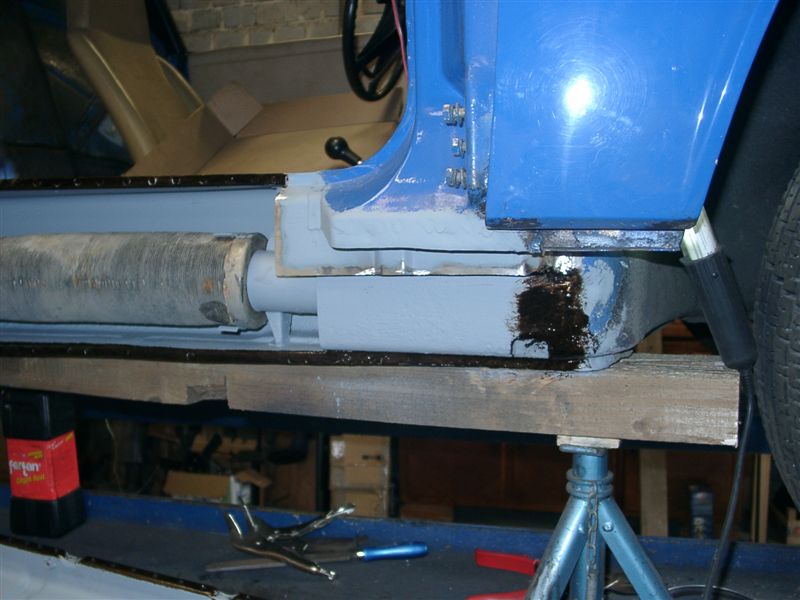
Posted by: michelko Oct 2 2004, 09:54 AM
Attached image(s)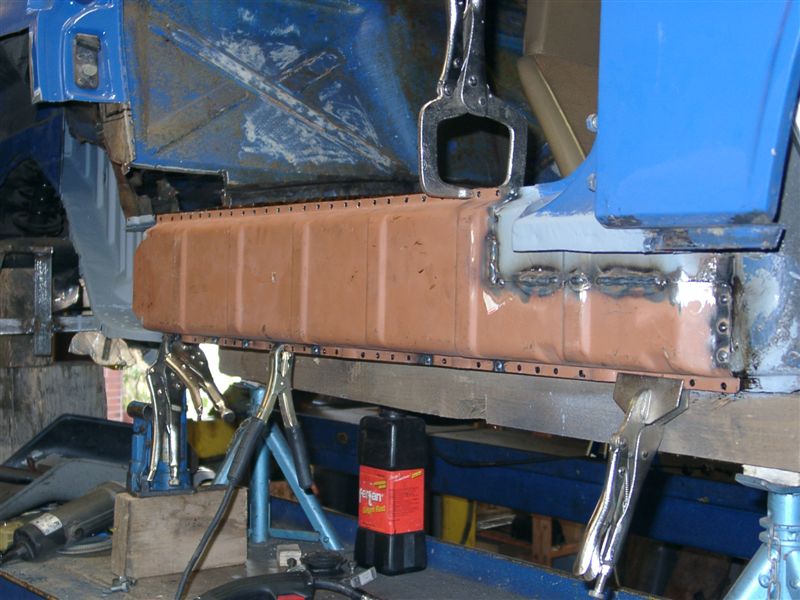
Posted by: michelko Oct 2 2004, 09:55 AM
Attached image(s)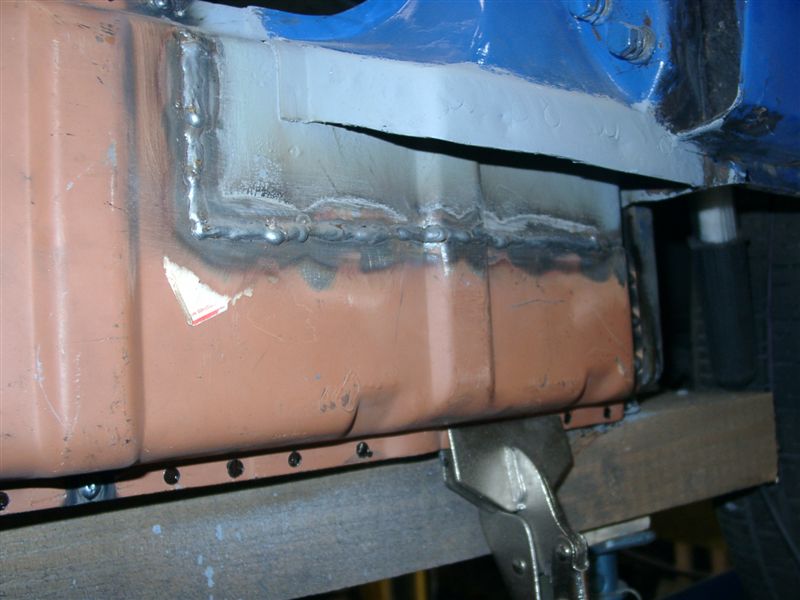
Posted by: michelko Oct 2 2004, 09:56 AM
Attached image(s)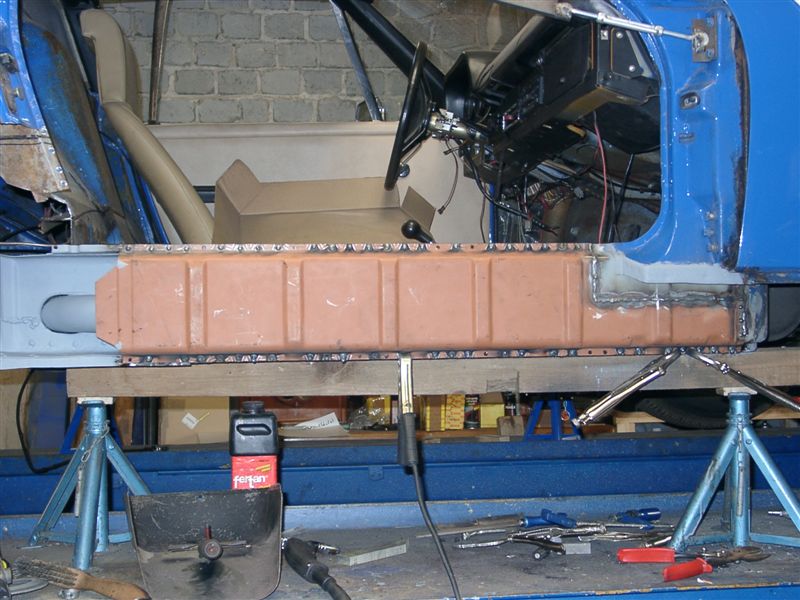
Posted by: michelko Oct 2 2004, 09:57 AM
ert
Attached image(s)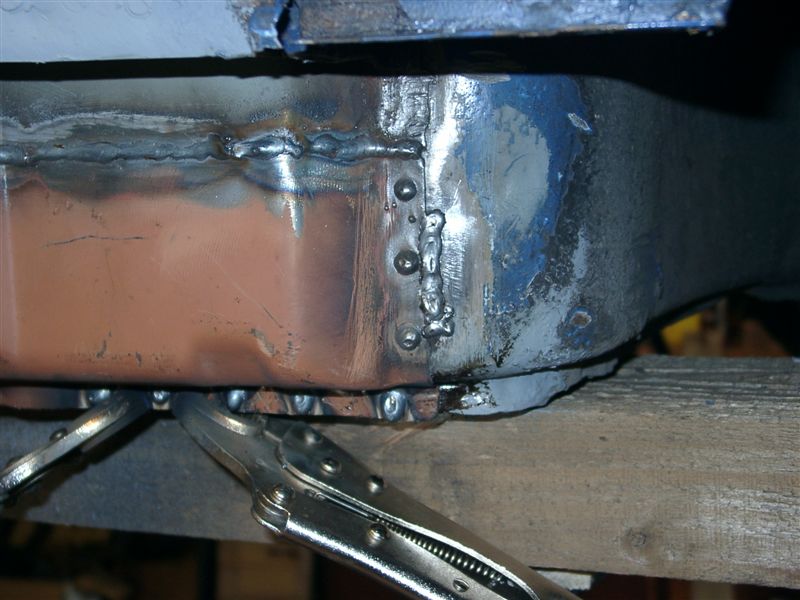
Posted by: michelko Oct 2 2004, 09:58 AM
uigio
Attached image(s)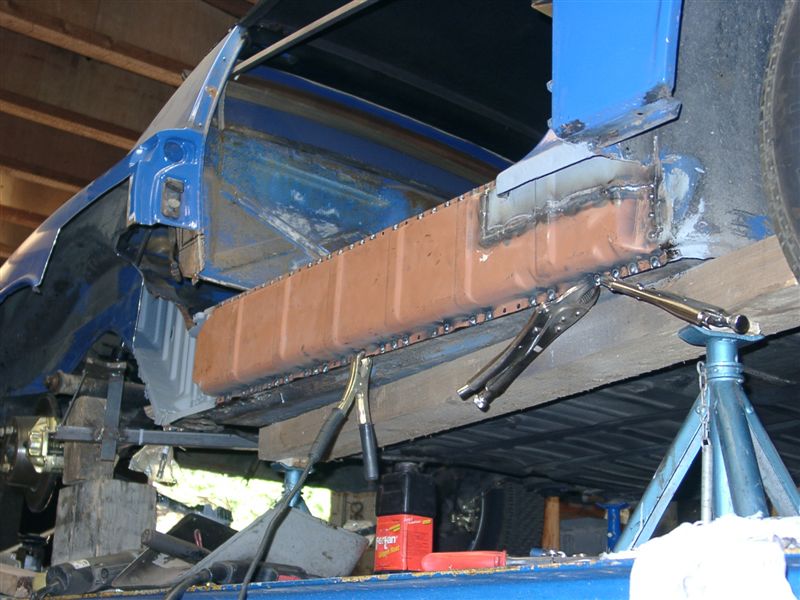
Posted by: bryanthompson Oct 2 2004, 09:59 AM
You are freaking amazing!
Posted by: michelko Oct 2 2004, 10:00 AM
this progress made my day.
ANd now it´s time to 

Hope you enjoy the pic´s
Attached image(s)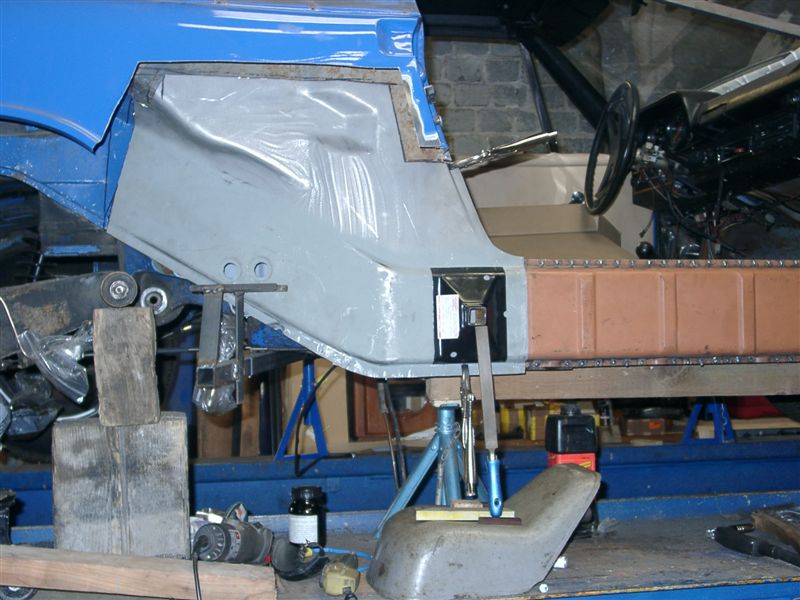
Posted by: rhodyguy Oct 2 2004, 11:35 AM
my first look too. in most cases your's would be a parts car in the states. great work!!!
kevin
Posted by: Root_Werks Oct 2 2004, 11:40 AM
This rocks man! I love this stuff! 
Posted by: bryanthompson Oct 2 2004, 11:46 AM
Did you do anything special to hold the geometry of the car while you cut/welded the new outer long in there? Also, can you notice any shrinkage from the welding you've done there?
Posted by: Bleyseng Oct 2 2004, 11:48 AM
Great work!
I think that more us will be trying to rescue cars that have this problem in the future over here.
Geoff
Posted by: michelko Oct 2 2004, 12:16 PM
Sure, made a bar between mounting point from security belt and door hinge.
You can see it in some pictures. The bar is adjustable, so you can set the right messurement.
No shrinkage till now, but i think there will be some when i weld in the grey part (donßt know the name in english
)I think i will give the door opening 1 or two additional millimeter to compensate the shrinkage. Hope this helps.
In the factory repais manual you can find some chasis measurement. I will try to match them after the welding.
Wish me luck.
In europe there are not so mutch car´s. Realy good ones are rare.
Most of the produced car´s where exported to the US. You lucky guys!!
Posted by: bryanthompson Oct 2 2004, 12:20 PM
ahh, looking back, i see the strap you used... very cool.
Is there any solution to shrinkage, or do you just have to live with it?
Posted by: michelko Oct 2 2004, 12:24 PM
Maybe slow welding. let it cool down every spotweld to reduce the heat in the metal?
Welding the long took about 2 1/2 hours.
Posted by: SirAndy Oct 2 2004, 12:38 PM
hey michelko,
you're doing a great job, i'm impressed!
as for the measurements, check out the 914 info section (link on top of this page), we have all needed measurements listed there ...
keep us posted!
AndyPS: sehe ich da "sonne" im hintergrund? im oktober?
Posted by: michelko Oct 2 2004, 12:49 PM
Hi ANdy,
i know that measurements. The problem is how to get them in a restored car.
Should i give them a little plus so that the shrinkage is compensated or adjust the bar at the correct amount and hope that the chasis is strong enough to hold that measurement?
Posted by: SirAndy Oct 2 2004, 01:21 PM
i would think that with the bracing, shrinkage will be minimal. the chassis can't really move anywhere if it is braced correctly.
i had only the door-braces when my roll-cage was welded in (brace from front hinge to lock plate) and the top of the car shrank about 3 mm ...
if i had braced that as well, i would have been fine.
make a X-Brace from the front targa latches to the rear targa latches,
that will keep your windshield-frame and targa top in place.
that, plus the door braces you already have, you should be fine!
Andy
Posted by: michelko Oct 2 2004, 01:44 PM
[quote=SirAndy,Oct 2 2004, 10:38 AM] [QUOTE=michelko,Oct 2 2004, 11:24 AM]
PS: sehe ich da "sonne" im hintergrund? im oktober? [/quote]
Jep. war ein toller Tag heute.
Gruss Michael
Posted by: michelko Oct 9 2004, 05:11 AM
Hi together,
here are some update pic´s.
Welded in the repair panel from AA.
Attached image(s)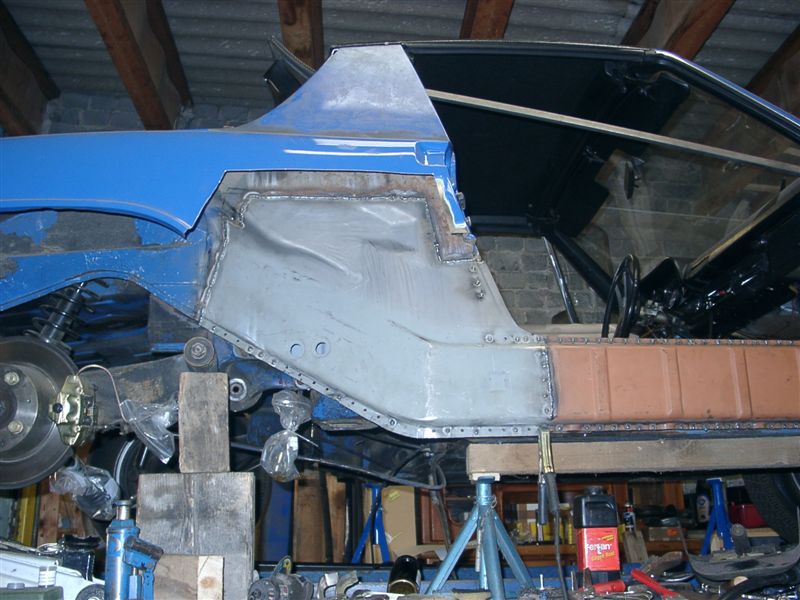
Posted by: michelko Oct 9 2004, 05:12 AM
was a straight forward work.
I love welding
Attached image(s)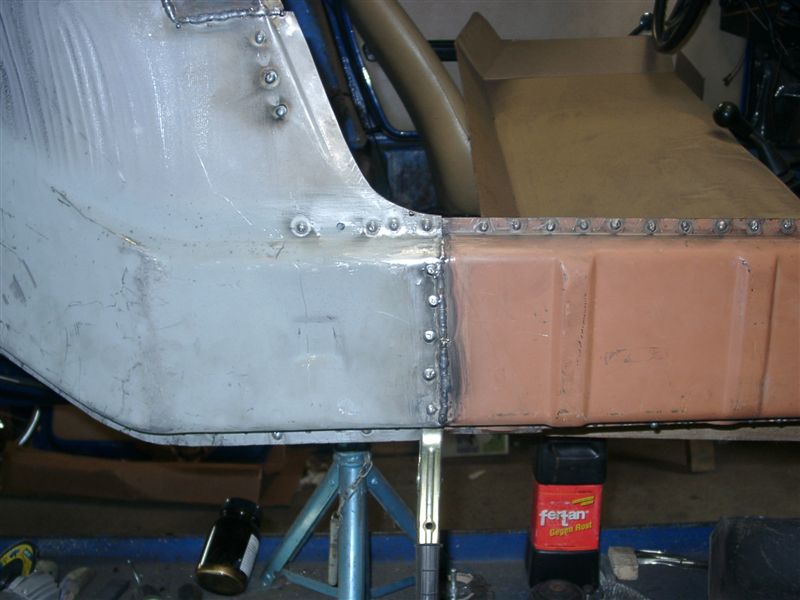
Posted by: michelko Oct 9 2004, 05:13 AM
nother one
Attached image(s)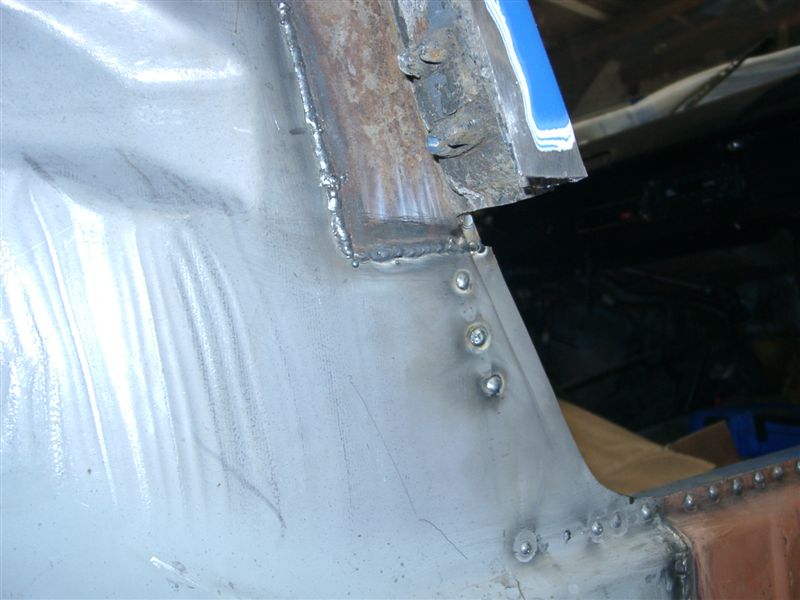
Posted by: michelko Oct 9 2004, 05:13 AM
#3
Attached image(s)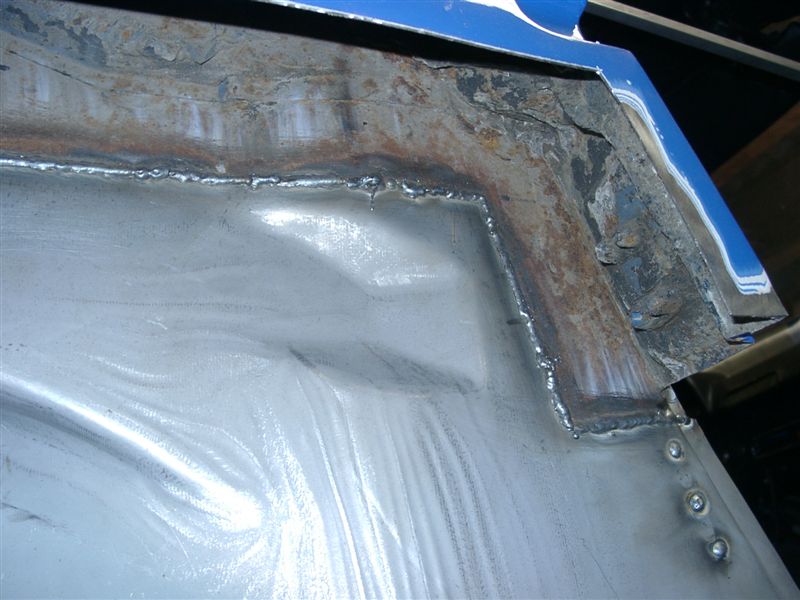
Posted by: michelko Oct 9 2004, 05:14 AM
back side
Attached image(s)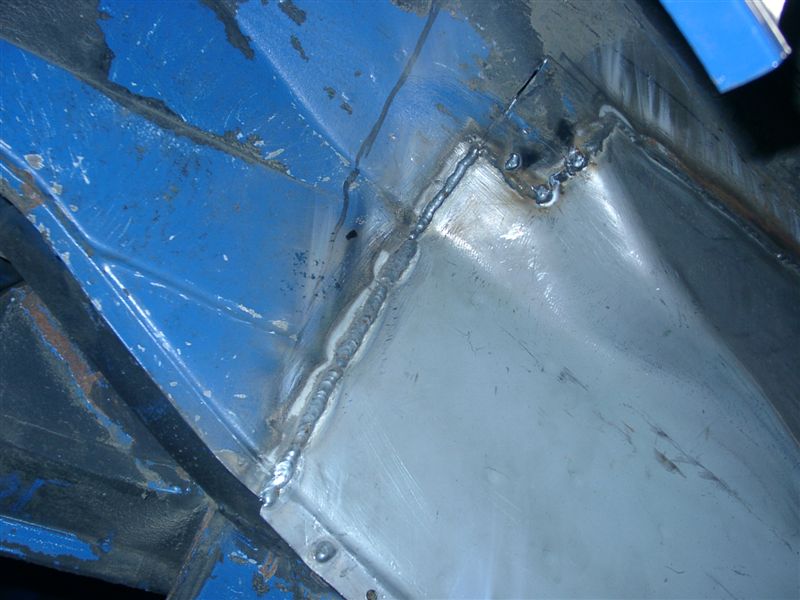
Posted by: michelko Oct 9 2004, 05:15 AM
one or two weeks, and it will stand on his own feet again.
Attached image(s)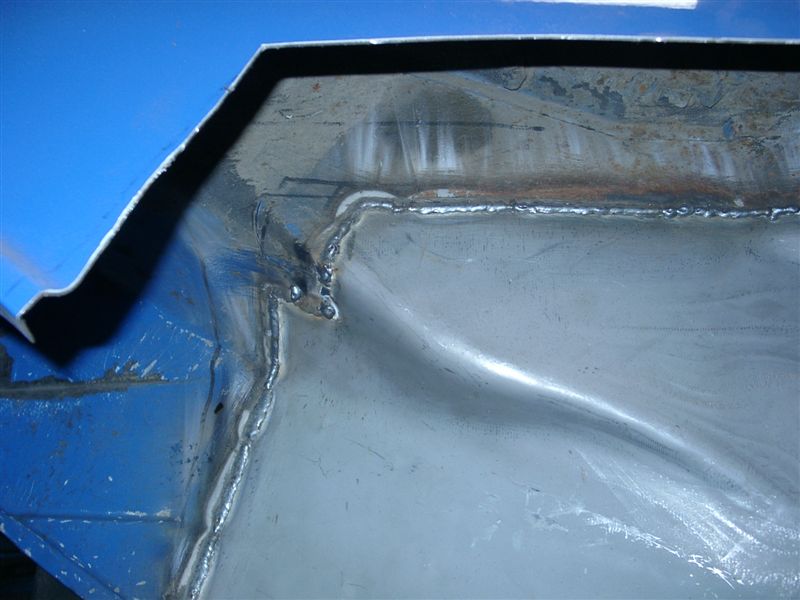
Posted by: michelko Oct 9 2004, 05:16 AM
view from inside of the engine bay
Attached image(s)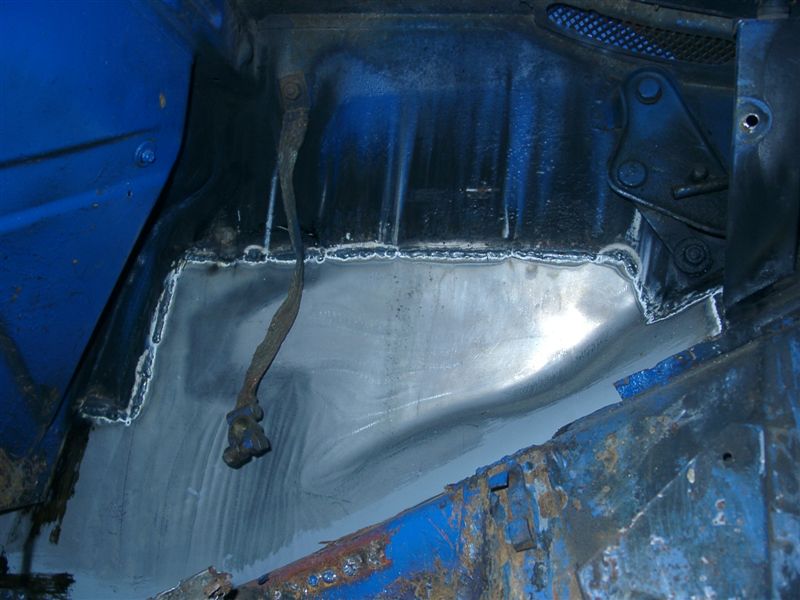
Posted by: michelko Oct 9 2004, 05:17 AM
nother one
Attached image(s)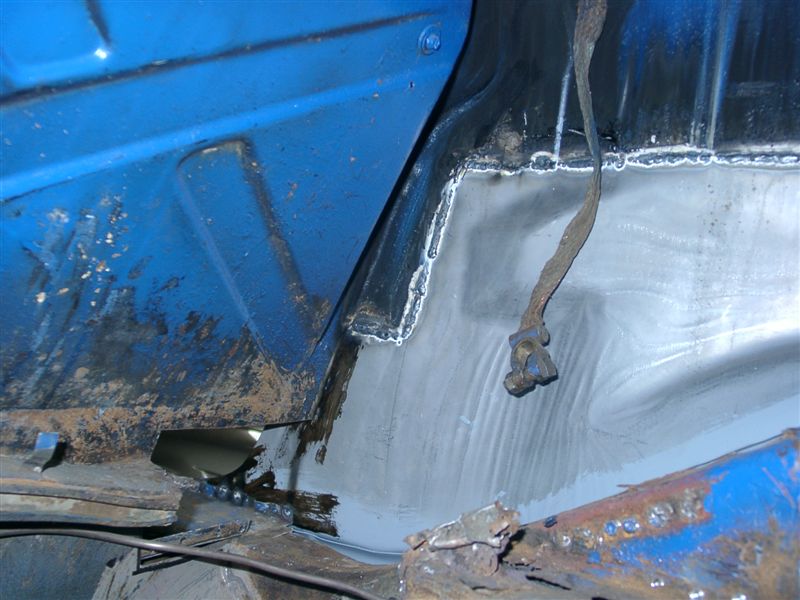
Posted by: michelko Oct 9 2004, 05:18 AM
the welding burned nicely through. So i think this should be strong like new. (hope so)
Have a nice weekend
Attached image(s)
Posted by: Jeroen Oct 9 2004, 05:30 AM
Again... nice job!
Those welds look very nice
Posted by: SpecialK Oct 9 2004, 04:11 PM
Those welds look very nice

Looks VERY strong! I'm paying very close attention to this thread because unfortunately I'll be making the same repairs in the not too distant future
Posted by: sgomes Oct 9 2004, 07:25 PM
Everytime I catch up on this thread I just stare at my monitor slack jawed...
Dude, you are a man amongest children.
Posted by: mikey Oct 10 2004, 12:09 PM
Amazing work! Just beautiful.
My right suspension ear was rotten too. But I was lucky, I guess. The right longitudinal was solid.
Posted by: michelko Oct 12 2004, 01:57 PM
Hello together,
today i welded in the outer suspension console. I made a brace to match the original place. Hope it worked. An allignment Job will show it
first pic shows the primed area. Dark colour is weldeable primer.
Attached image(s)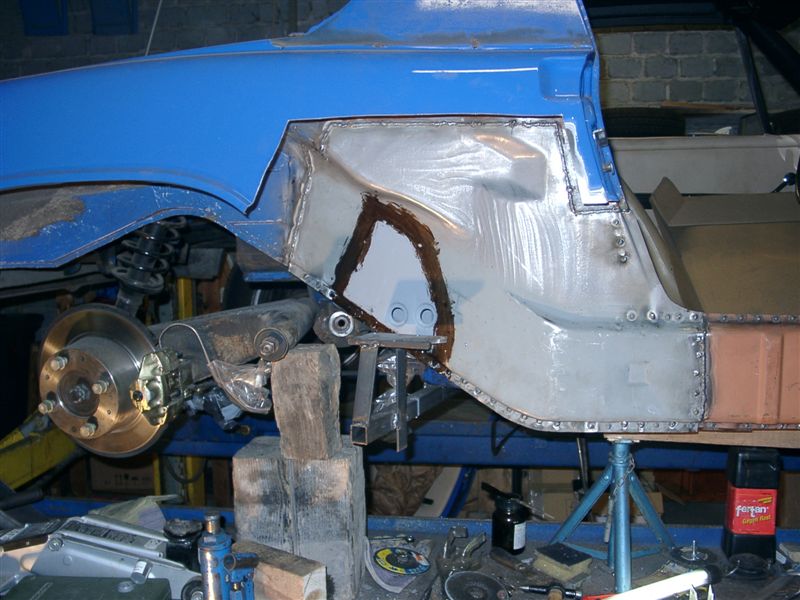
Posted by: michelko Oct 12 2004, 01:58 PM
brace
Attached image(s)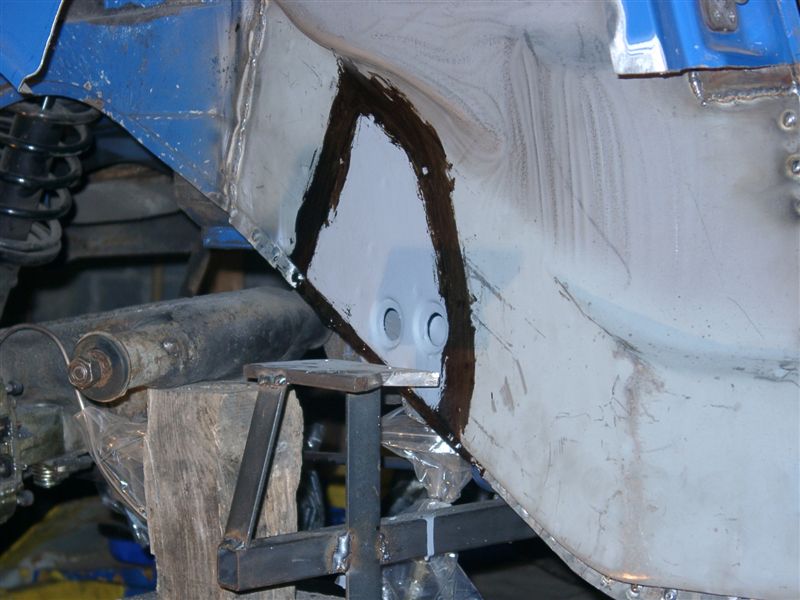
Posted by: michelko Oct 12 2004, 02:00 PM
console in place
Attached image(s)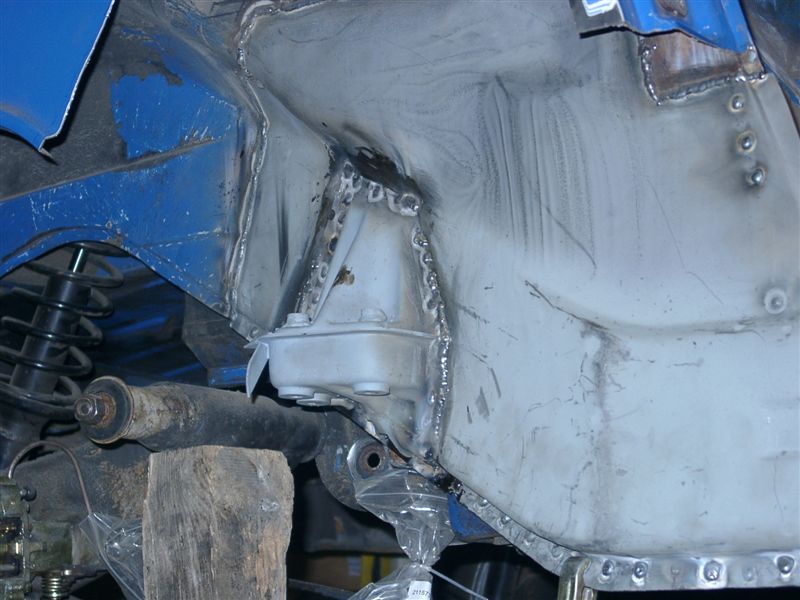
Posted by: michelko Oct 12 2004, 02:01 PM
with mounting hardware
Attached image(s)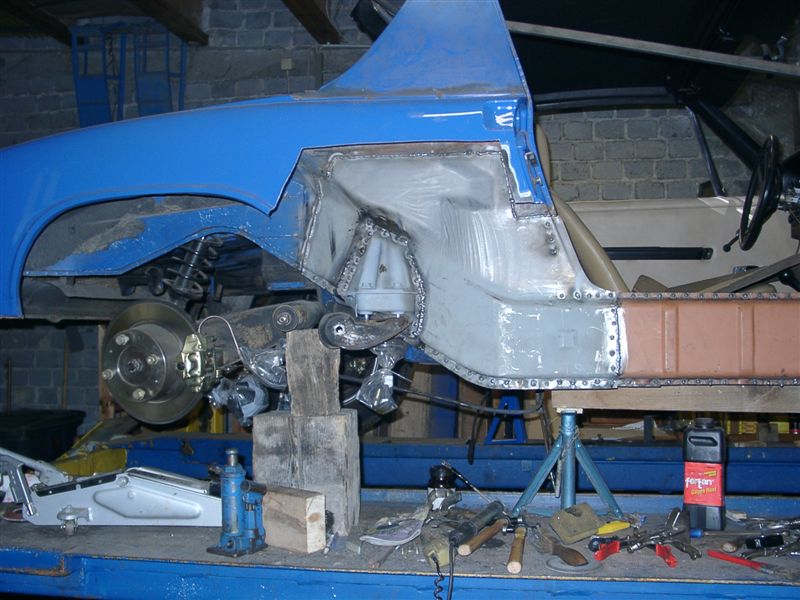
Posted by: michelko Oct 12 2004, 02:03 PM
test fitting of the new door sill
Attached image(s)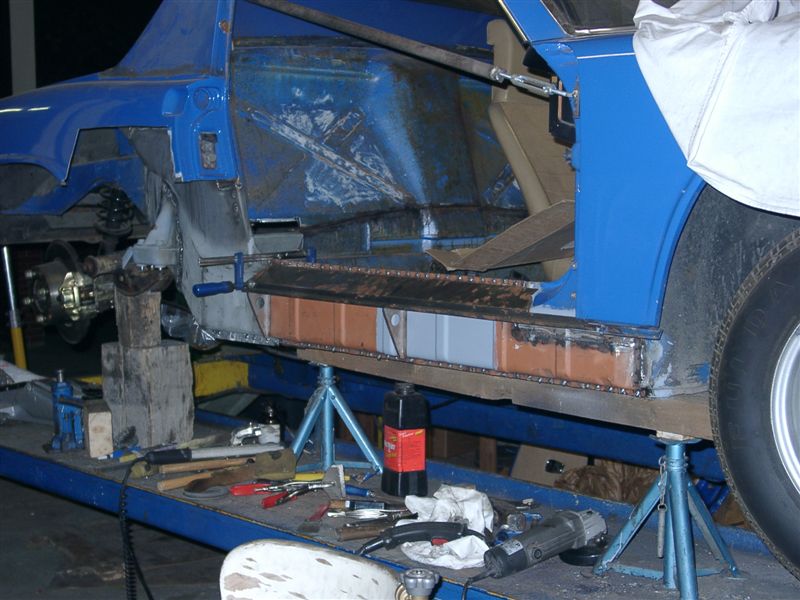
Posted by: michelko Oct 12 2004, 02:04 PM
nother view.
this piece fits perfect. Don´t know the manufaturer. Got them from e-bay.
Attached image(s)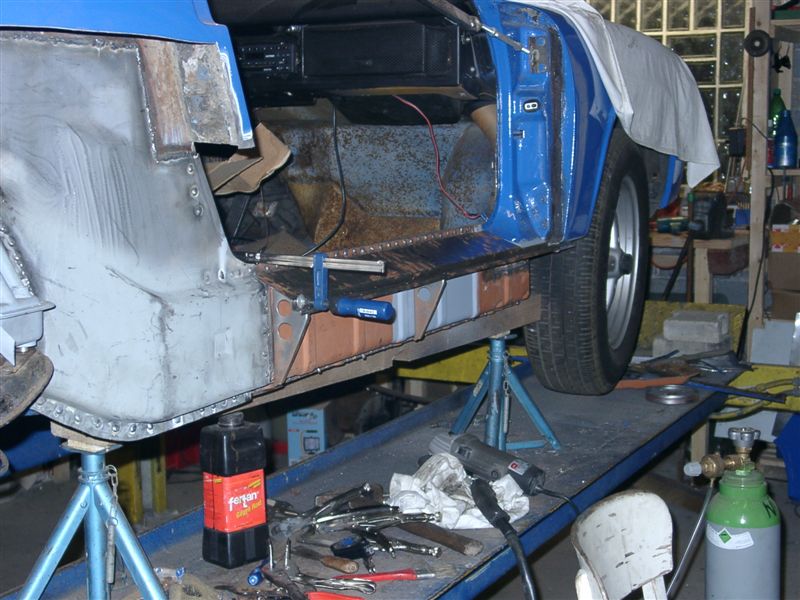
Posted by: Root_Werks Oct 12 2004, 02:13 PM
Dang man, you are an animal! Thanks for all the great pics! Keep them coming.
Posted by: SirAndy Oct 12 2004, 03:03 PM
sehr gute arbeit!
du hast dir ein paar biere verdient!
Andy
Posted by: balljoint Oct 12 2004, 03:38 PM
Michelko, very nice work. I am jealous.
Do you know who made the outer suspension console or is that one of the pieces that you bought off of ebay? I need one and I did not know they were available new. After seeing your posted pictures I checked on a few websites but I could only find the inner suspension console ear.
Posted by: BatAc Oct 12 2004, 07:19 PM
The "outer" console or bracket if you've gone through the thread you'll see what Michelko has done. He took off the old one sandblsted it, primed it 'n' WHALA new piece!!! So Michelko, did you just regular (grey) prime the various pieces? Then the black stuff that looks like POR 15 is really welding primer on top of regular primer???
Thanks, keep it up, the next major piece I assume is the "ear"? Looking forward to it!!!
Posted by: michelko Oct 12 2004, 10:26 PM
Thanks, keep it up, the next major piece I assume is the "ear"? Looking forward to it!!!
Hi,
batac is right. The console is the old one, sandblasted, etc.
The welding primer is NOT painted over the other primer. That should not work.
under the welding primer is clean metal, so there is no sputtering during the welding.
Again, first rule for welding :clean surfaces!!!
I also haven´t a supplier for the outer console.
Posted by: balljoint Oct 13 2004, 07:41 AM
Oops, I guess that I have not been following this thread closely enough. Thanks guys. I will now follow that example myself and repair the old one off the car. Great inspiration.
Posted by: michelko Oct 16 2004, 09:58 AM
Hi guys, here is a little update on the project.
Today i did some grinding on the spotwelds and cleaning at the engine shelf.
I am not sure if i should replace the whole part or rescue as mutch as possible of the original metal.
Attached image(s)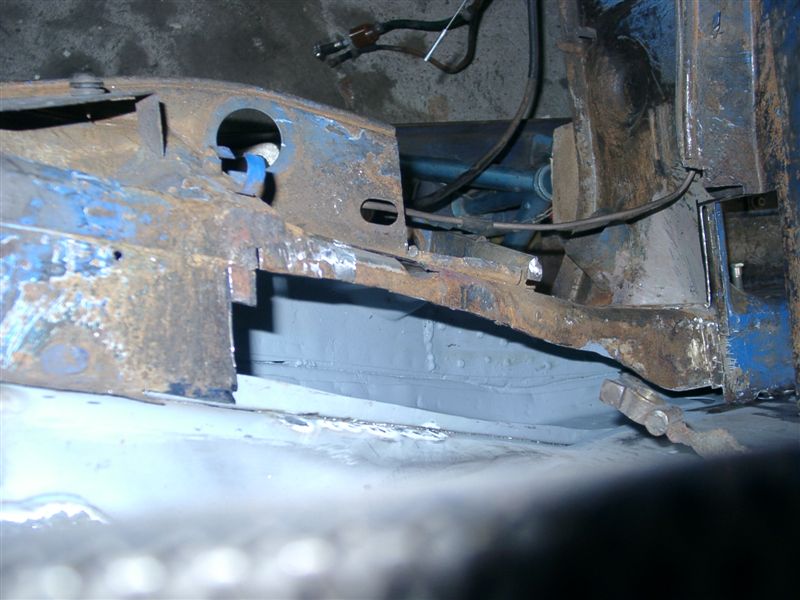
Posted by: michelko Oct 16 2004, 09:59 AM
grinded spotwelds
Attached image(s)
Posted by: michelko Oct 16 2004, 09:59 AM
much more to go
Attached image(s)
Posted by: michelko Oct 16 2004, 10:00 AM
oops, wrong pic.
Attached image(s)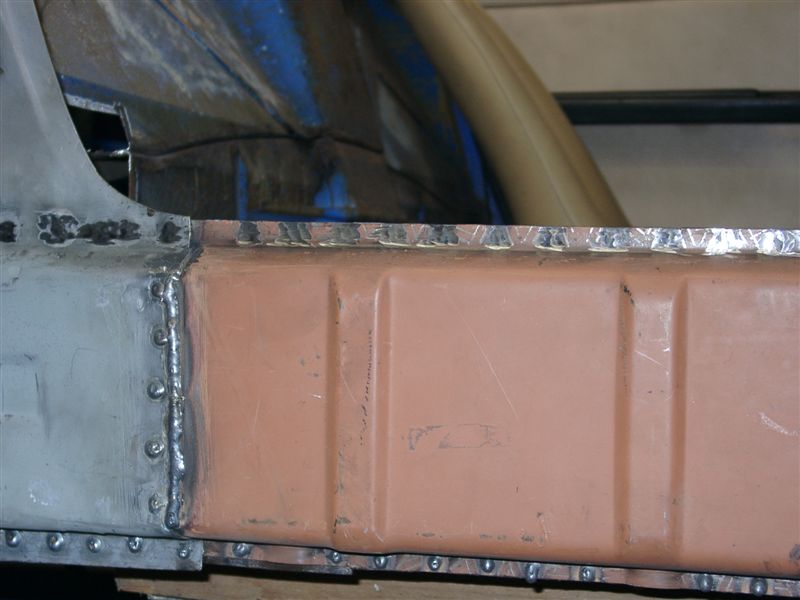
Posted by: michelko Oct 16 2004, 10:03 AM
primed long, jack support will be next.
Attached image(s)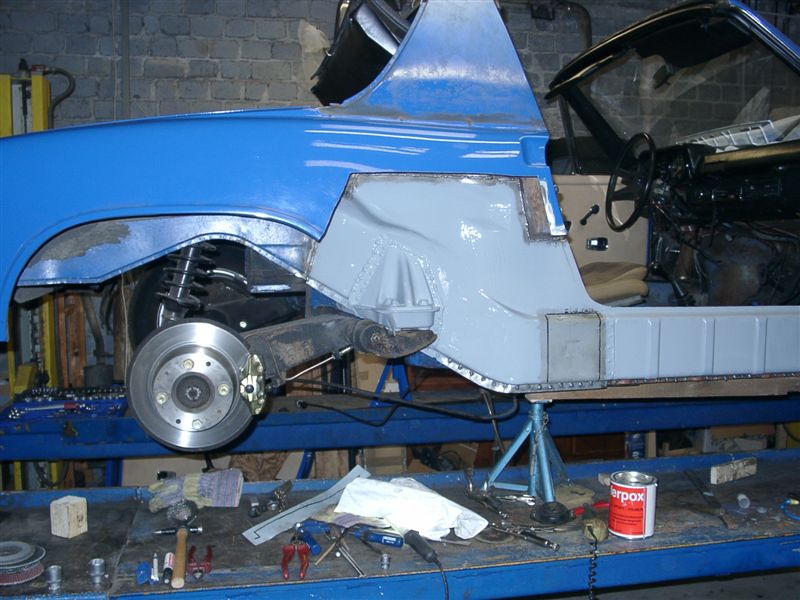
Posted by: michelko Oct 16 2004, 10:06 AM
Next weekend the car will stand on it´s own feet. I am curious about the shrinkage.
Have a nice weekend
Attached image(s)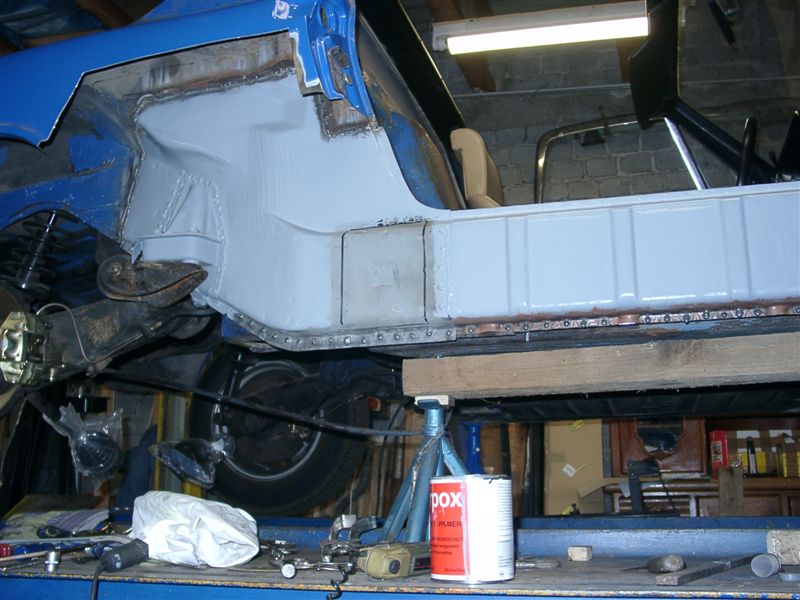
Posted by: rhodyguy Oct 16 2004, 10:32 AM
how are you going to adress the fender cut out issue? you must have lost some material when taking the lower section out.
kevin
Posted by: michelko Oct 16 2004, 11:34 AM
kevin
Yes a little bit is lost. But i used the smal "dremel" Cutting wheels.
I think they are less then one mm thick.
I am also looking for an new quarter panel, to replace the whole thing.
Till then, the old one should work fine.
Posted by: michelko Oct 21 2004, 01:39 PM
Hi Guys,
so here is the next update. Welded in the jacksupport and did some priming.
Today i lowered the car on its tires and removed the brace. What should i say, there is no shrinkage The measurement is originaly like listed in the 914 info section. I am just so happy
Attached image(s)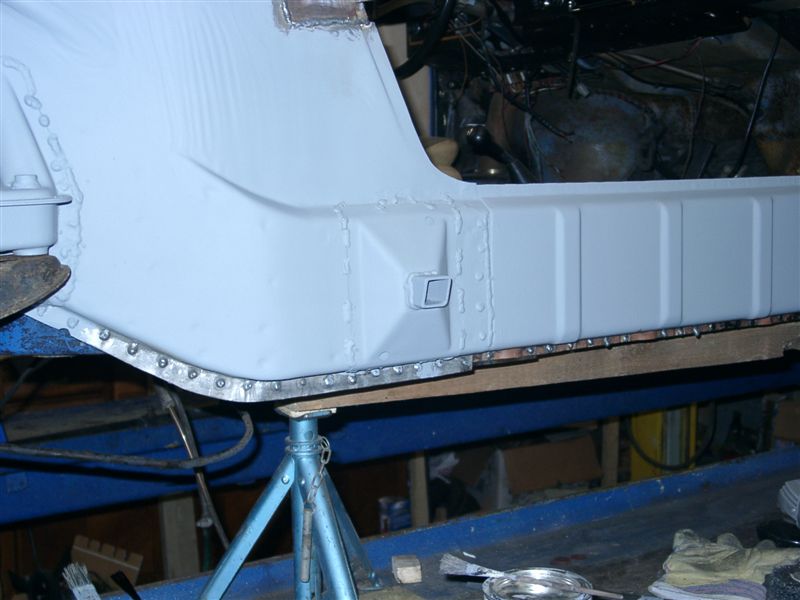
Posted by: michelko Oct 21 2004, 01:40 PM
Attached image(s)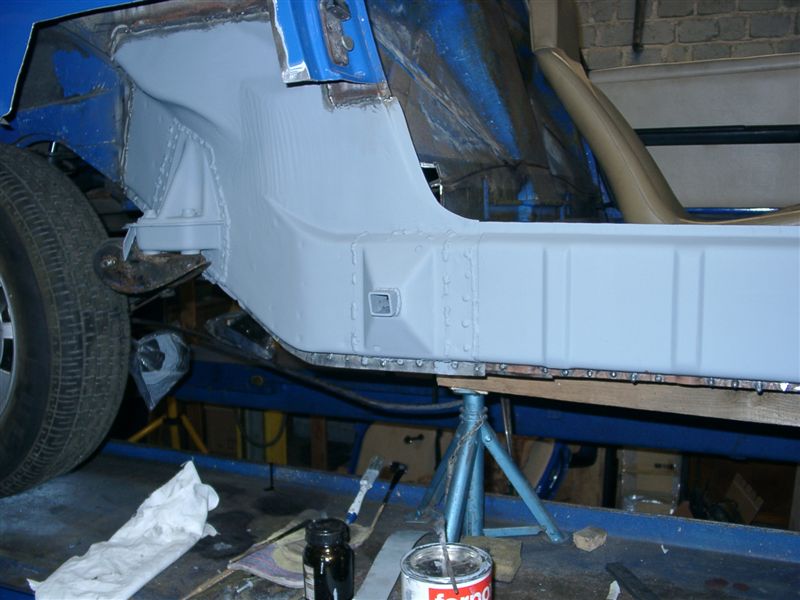
Posted by: michelko Oct 21 2004, 01:41 PM
here is a shot of the original engine.
It will be replaced with an second one that always has the injection and dont make strange sounds while running.
Attached image(s)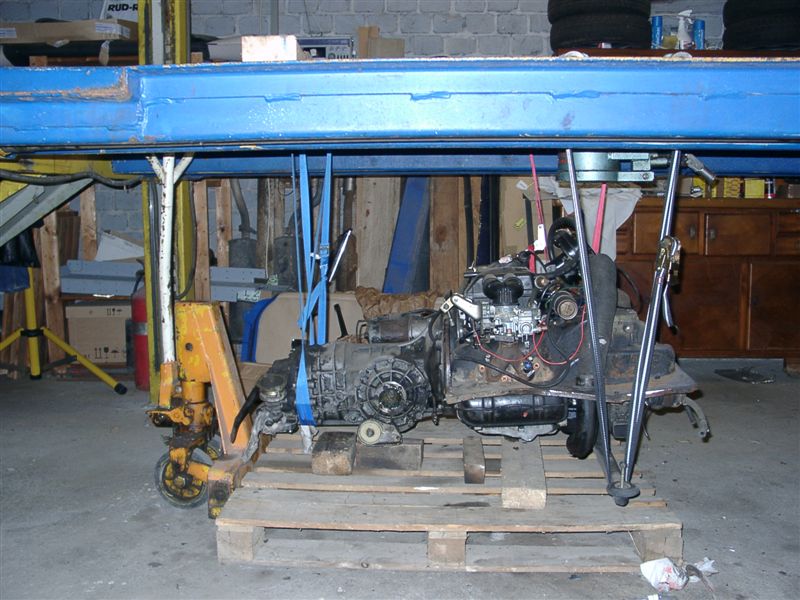
Posted by: michelko Oct 21 2004, 01:45 PM
second engine in the test-stand.
will keep you informed.
Attached image(s)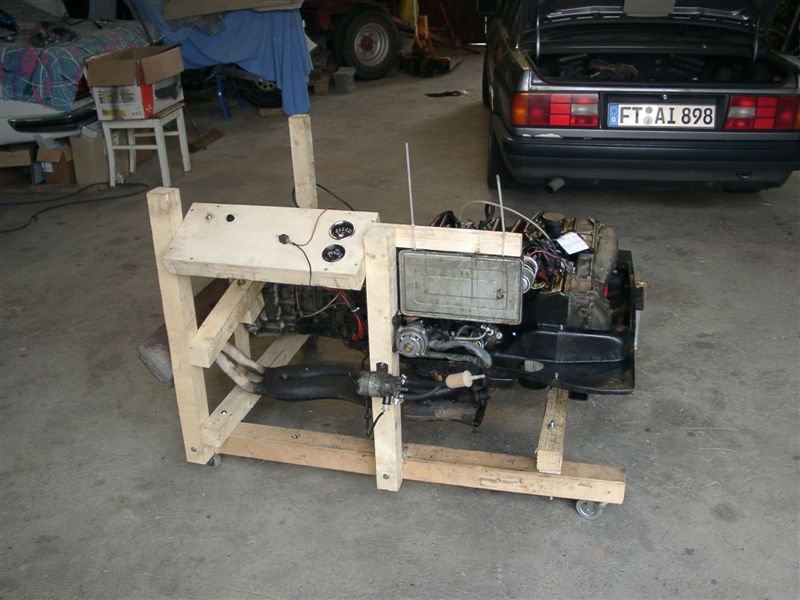
Posted by: bryanthompson Oct 21 2004, 01:46 PM
That looks amazing! You have an insane amout of talent, i'm in awe!
Posted by: Root_Werks Oct 22 2004, 03:32 PM
Very nice! I know if mine ever gets that bad, I will have to fix it!
Posted by: michelko Nov 11 2004, 02:18 PM
Hi Guys,
here ara some news.
Some progress at the hell hole. No pics yet will take them saturday.
In the mean time i worked on the transmission. What an oily mess. That little ball with the threads that holds the clutch fork was loose. So there was an oil leak. Sorry forgot to take a pic of that, here is one after cleaning with new Seals and oil waiting to get assambled to the engine.
Attached image(s)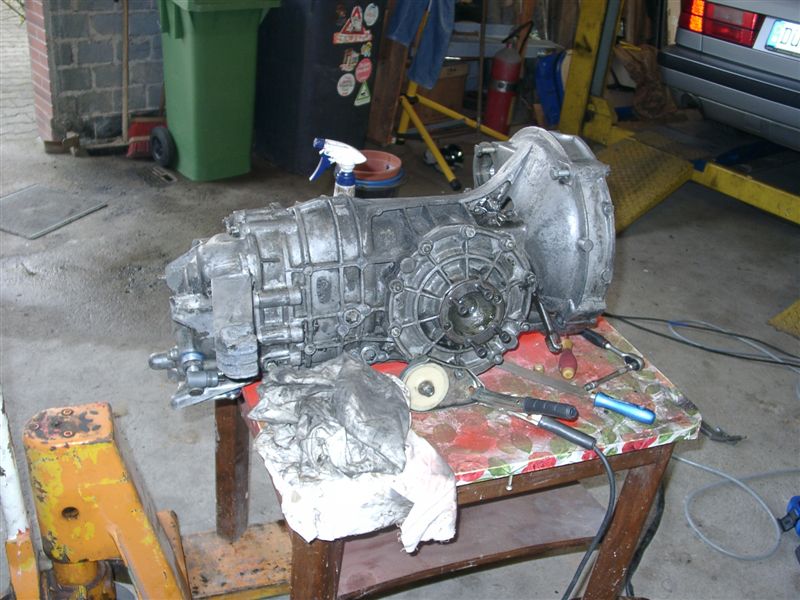
Posted by: michelko Nov 11 2004, 02:20 PM
shiny and clean. i have also a new clutch disk , bearing etc.
Can´t wait to drive that car again.
By the way, yesterday we had the first snow! And it gets realy cold in the gararge. <_<
Attached image(s)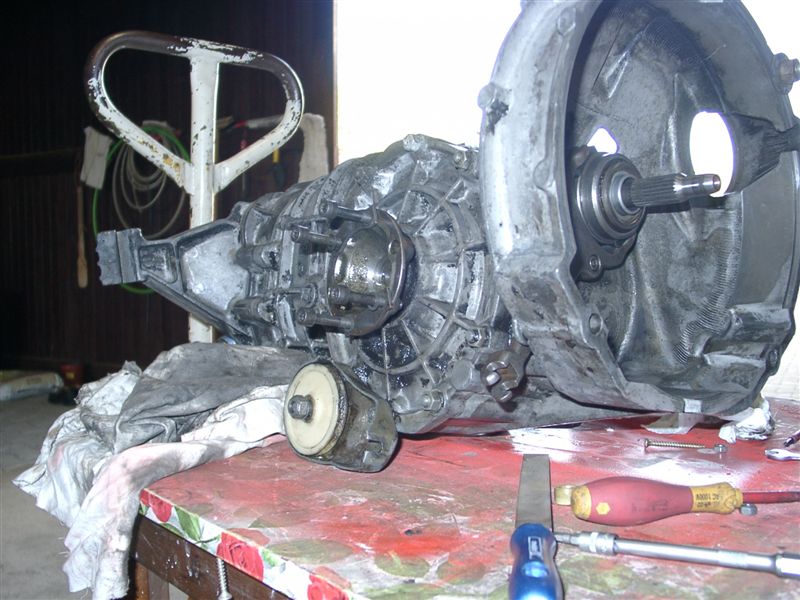
Posted by: SirAndy Nov 11 2004, 02:22 PM
hey michelko, what year is your car? that sure looks like a "sloppy" tailshifter to me ...
Andy
Posted by: michelko Nov 11 2004, 02:27 PM
Hi Andy,
it is an 1970. It was manufactured as #7092. No Problem with the tailshifter. (after replacing al the bushings, some fine tuning,etc But i have no comparison to an side shifter. Those cars are realy rare here in good old germany.
Posted by: michelko Nov 11 2004, 02:29 PM
it was first registrated in 5.25.1970 Bologna Italy.
Posted by: type11969 Nov 11 2004, 03:31 PM
Michelko-
Do you have any close ups of the cross bar you made, and how it mounted to the body of your 914? Looks like I am going to have to fab something up, and any ideas/pics you can share would be helpful.
Thanks,
Chris
Posted by: michelko Nov 12 2004, 02:42 PM
Hey Chris,
tomorow is again fighting day. I will take some pics of the brace and post it for you.
The brace mounts at the original safetybelt mount and the upper doorhinge mounting point. It was done in about 5 -10 minutes. You only need a drill an d a welder to do this.
Posted by: type11969 Nov 12 2004, 03:04 PM
I have a drill and I just got a welder, hooray!
Looking forward to seeing those pics, thanks.
-Chris
Posted by: michelko Nov 13 2004, 12:32 PM
Hi Chris,
here are the promised pics.
First shot: Doorhinge mounting
Attached image(s)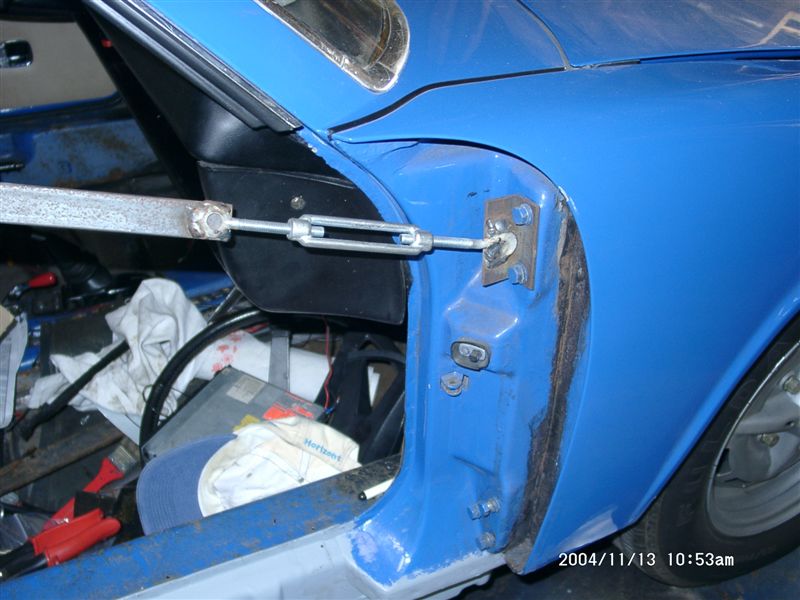
Posted by: michelko Nov 13 2004, 12:36 PM
don´t know the english word for this.
It let you adjust the measurement of the chasis.
I managed to hit the factory specs with this brace
second shot: Security belt mounting
Attached image(s)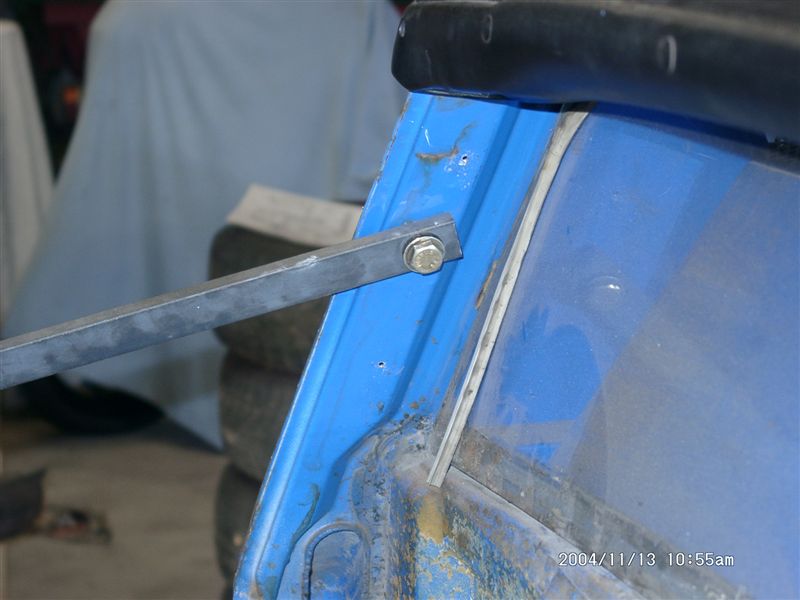
Posted by: michelko Nov 13 2004, 12:37 PM
as you can see, it is no rocket science to keep the measurements of the car.
Attached image(s)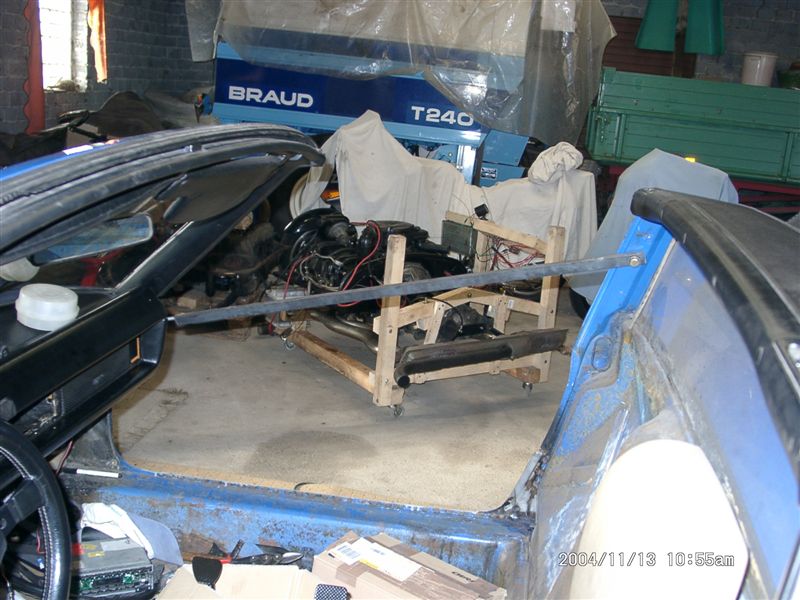
Posted by: michelko Nov 13 2004, 12:39 PM
And now to the realy good news. The hell hole is closed with fresh metal.
The patch:
Attached image(s)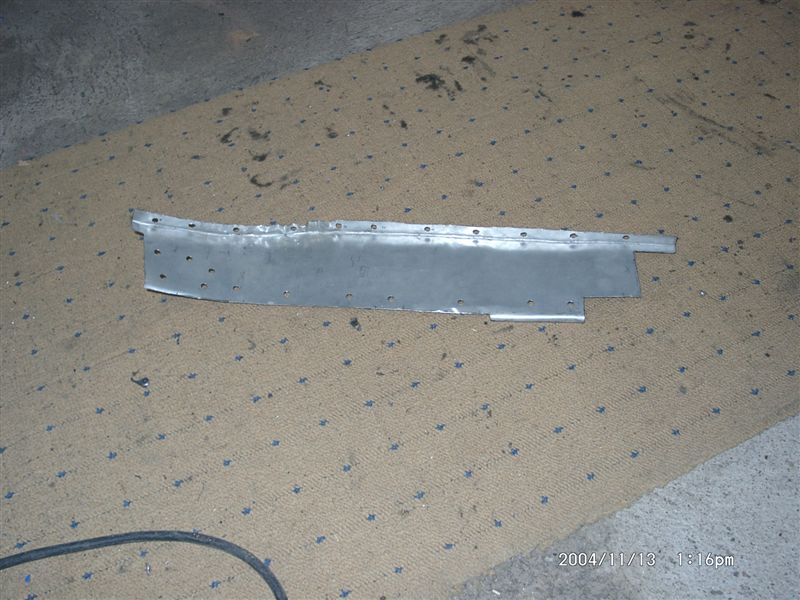
Posted by: michelko Nov 13 2004, 12:40 PM
patch plus weldable primer
Attached image(s)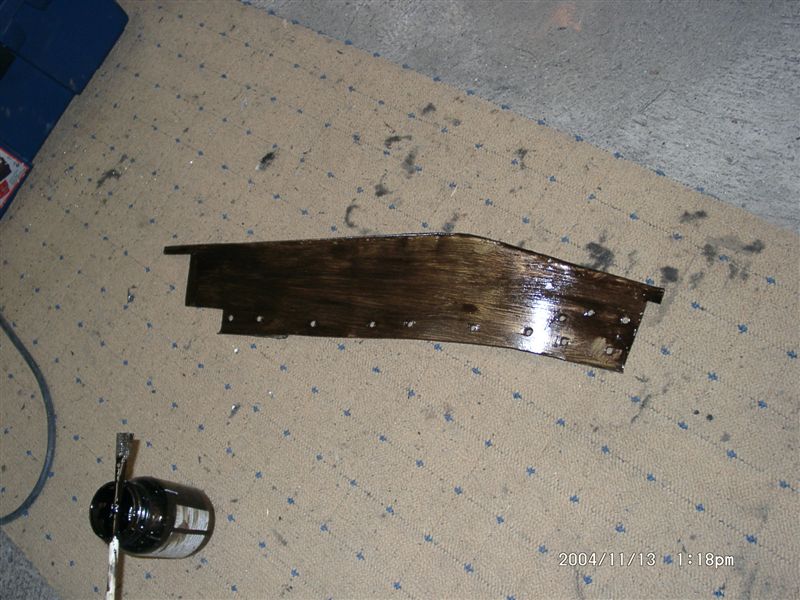
Posted by: michelko Nov 13 2004, 12:41 PM
patch in place
Attached image(s)
Posted by: michelko Nov 13 2004, 12:42 PM
view from passenger side
Attached image(s)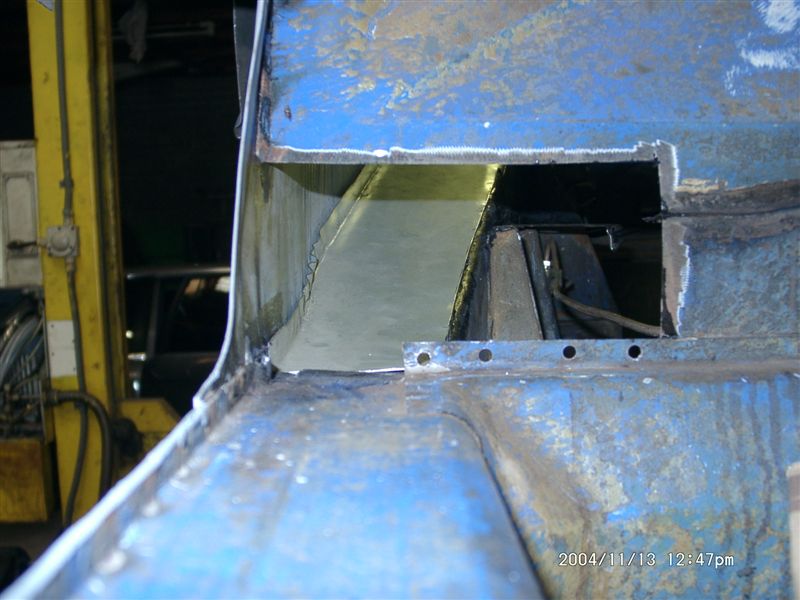
Posted by: michelko Nov 13 2004, 12:43 PM
and some
Attached image(s)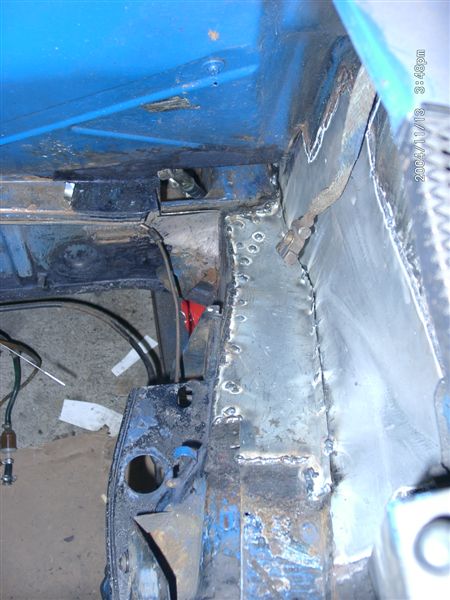
Posted by: michelko Nov 13 2004, 12:57 PM
Other project:
second engine with old transmission. Trans was cleaned an got new seals, new clutch, clutch bearing, etc.
Attached image(s)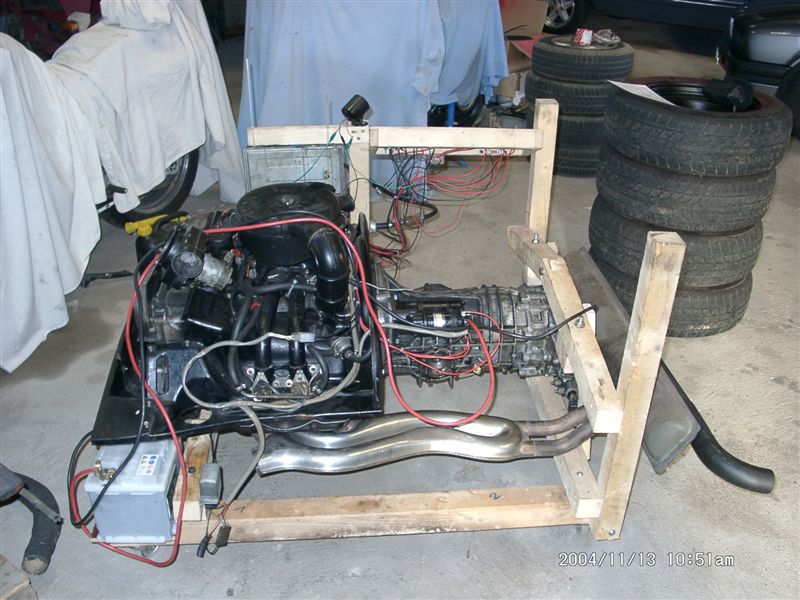
Posted by: michelko Nov 13 2004, 12:59 PM
at least a shot of the new steering column. It was an old 911 column.
Attached image(s)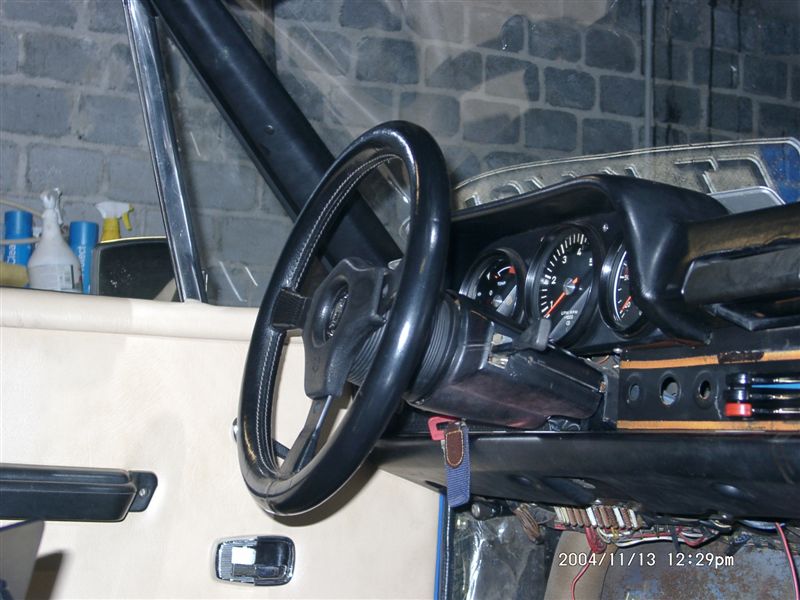
Posted by: michelko Nov 13 2004, 01:01 PM
other side
Attached image(s)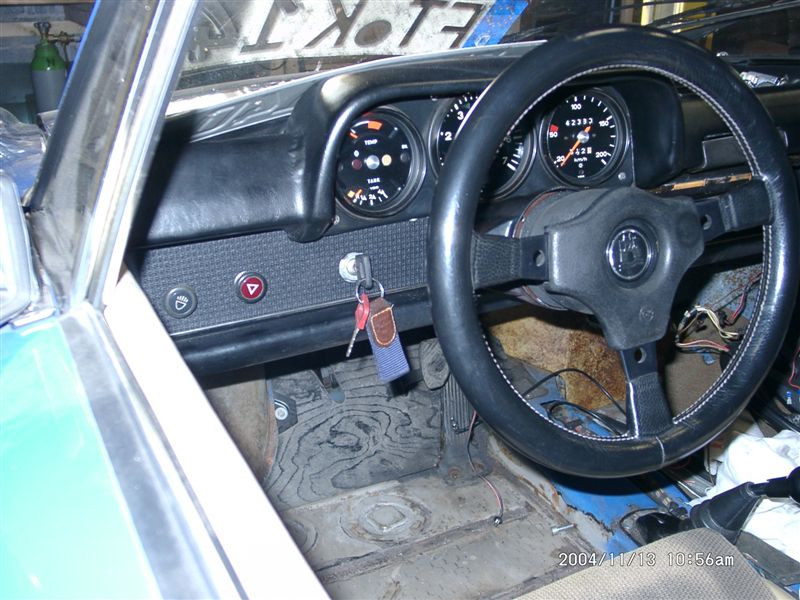
Posted by: type11969 Nov 13 2004, 01:03 PM
Thanks for the pics Michelko, looks like it is time to go figure out how to weld.
-Chris
Posted by: michelko Nov 13 2004, 01:04 PM
have a nice weekend
Posted by: michelko Nov 16 2004, 03:03 PM
little update today.
testfitted the door, looks realy good. No schrinking. Glad to se this.
Attached image(s)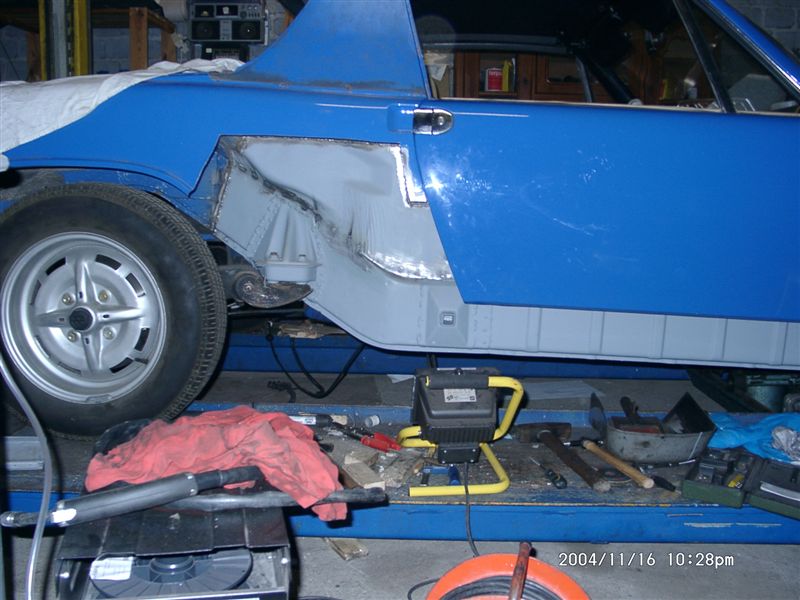
Posted by: michelko Nov 16 2004, 03:05 PM
also did some grinding.
I think it looks like factory made
Attached image(s)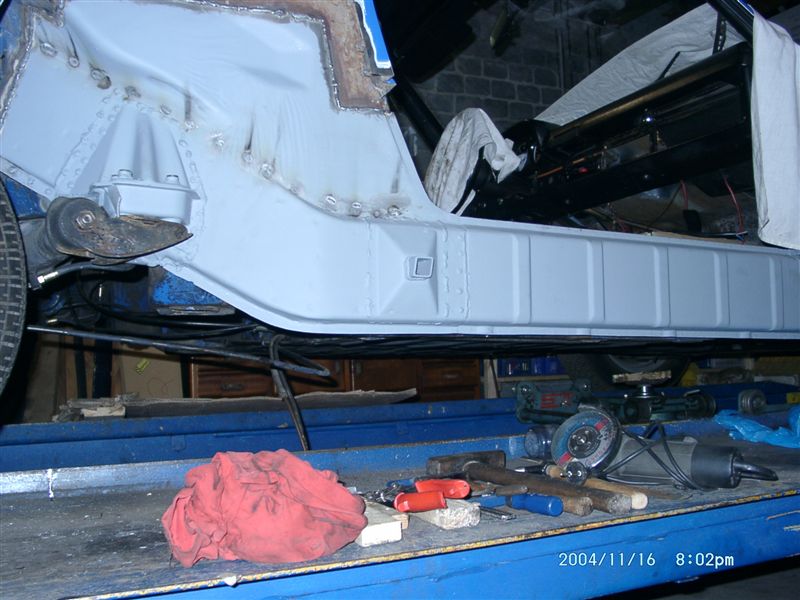
Posted by: Brad Roberts Nov 16 2004, 03:05 PM
Man.. that looks GREAT. You did a fine job 
B
Posted by: michelko Nov 16 2004, 03:06 PM
and last one for today.
next will be grinding down the welding points on the hell hole and mounting the battery stand.
Will keep you informed.
Attached image(s)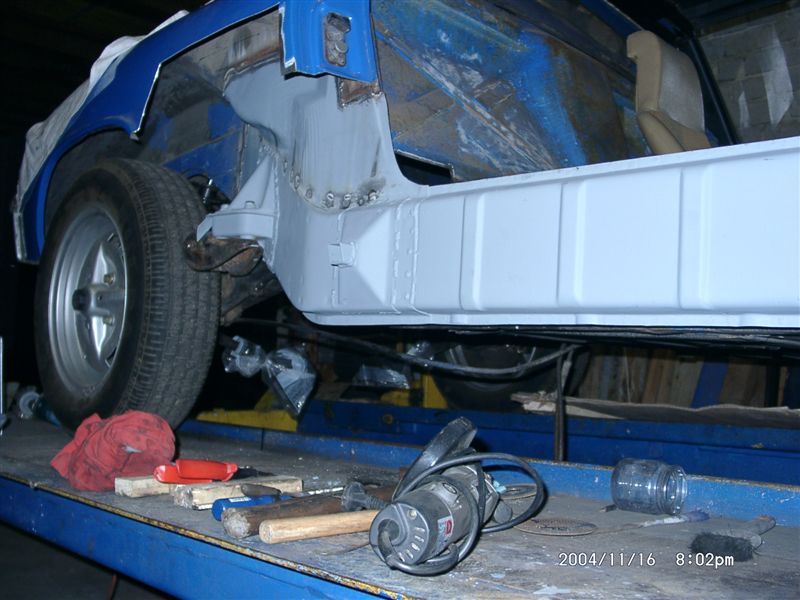
Posted by: silver six Nov 16 2004, 03:43 PM
Absolutely amazing job. Really very impressive.
Douglas
Posted by: scooter311 Nov 16 2004, 03:43 PM
That is some incredible work, I feel-so-inadequate
And I thought my welding skills were coming along just fine...... I think I'm gonna dig a big hole in my backyard and toss in my welder, some wrenches, and my rusty hammer.
I can't wait to see it done, bravo!
Cheers,
Jeff
Posted by: michelko Nov 27 2004, 09:53 AM
Hello togehther,
today was not so cold , so i did some work on the car.
Grinding down some welds and welded in the lower part of the firewall patch.
Attached image(s)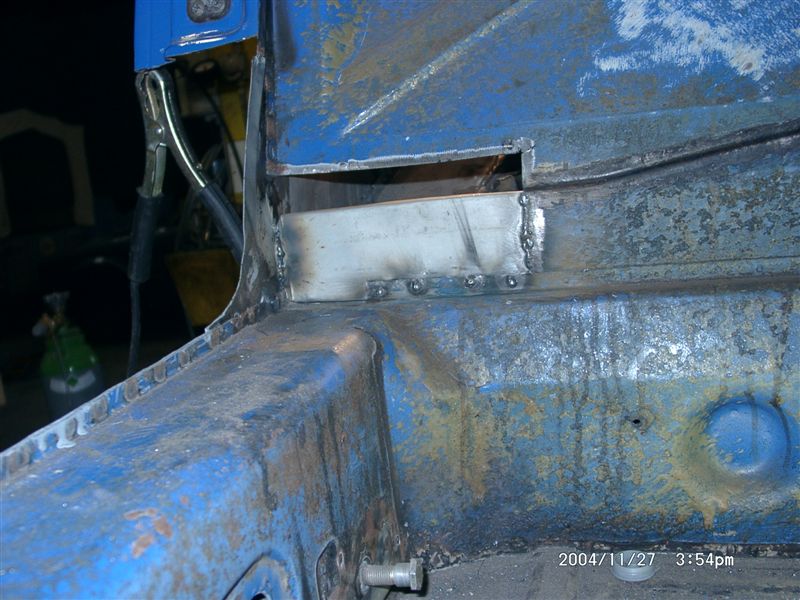
Posted by: michelko Nov 27 2004, 09:54 AM
shot from the engine bay
Attached image(s)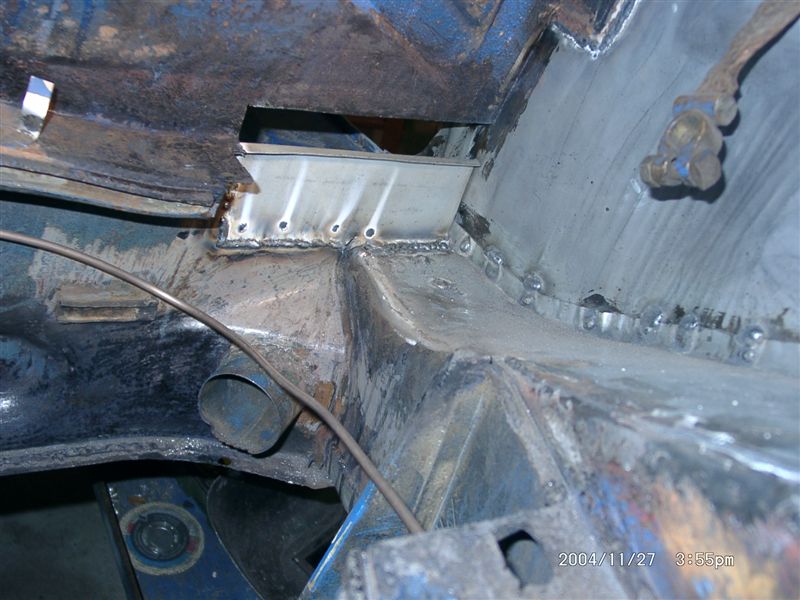
Posted by: michelko Nov 27 2004, 09:58 AM
upper part to go.
nice solid hell hole. New battery tray is waiting to get welded.
Unfortunately it is fucking cold here. Last weekend we had -5°C. No fun to work in the garage without heating.
Have a nice weekend
Attached image(s)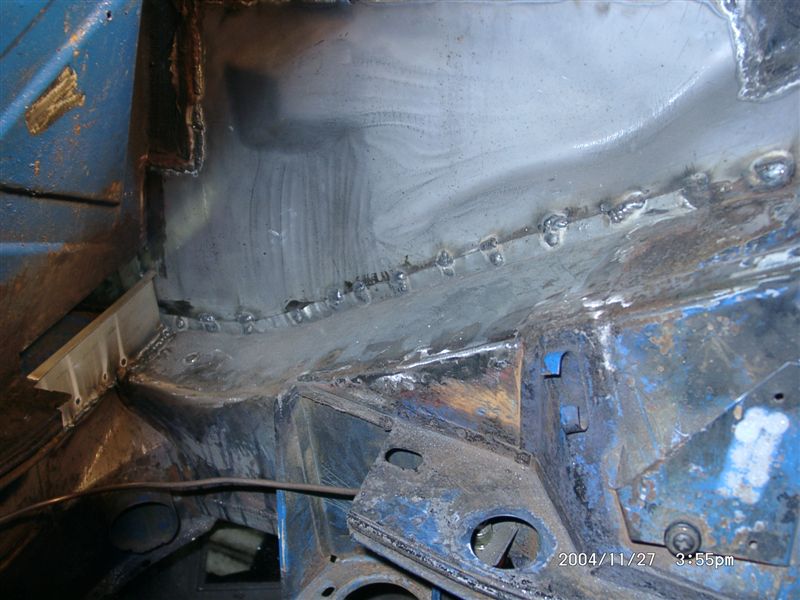
Posted by: michelko Dec 4 2004, 09:16 AM
Hi folks,
again just a little progress, unfortunately its winter in germany.
I wish i could heat the garage, but there is no chance.
Welded in the lower front part at the door-jamb. Did some grinding.
Attached image(s)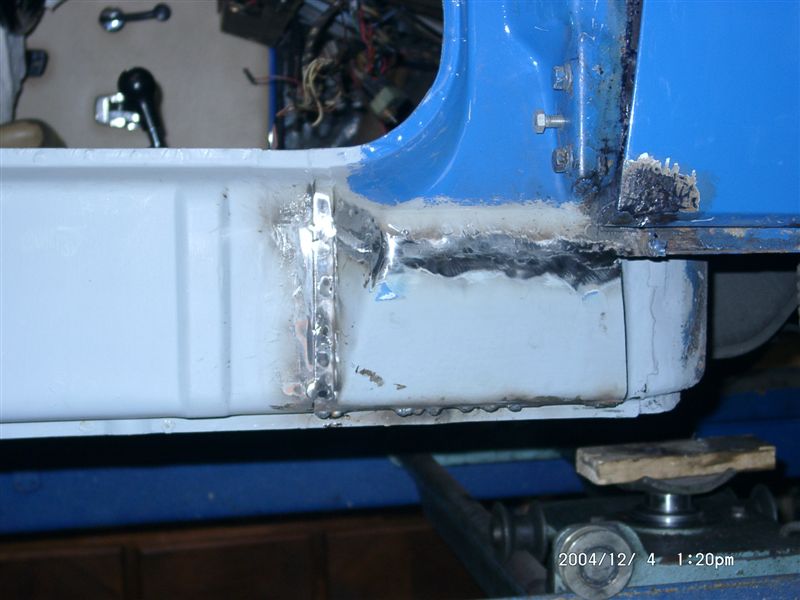
Posted by: michelko Dec 4 2004, 09:17 AM
#2
Attached image(s)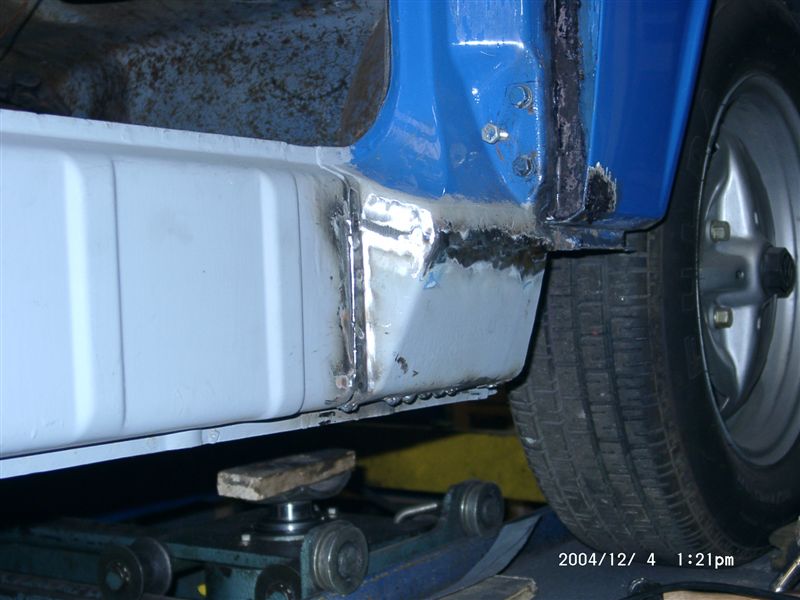
Posted by: michelko Dec 4 2004, 09:20 AM
At home i did some wiring to the blinker switch. It´s from an early 911. Looks nicer than the ugly VW part. The switch fits now to the original Wiring in the car.
Not checked till noe but i am sure it works.
Attached image(s)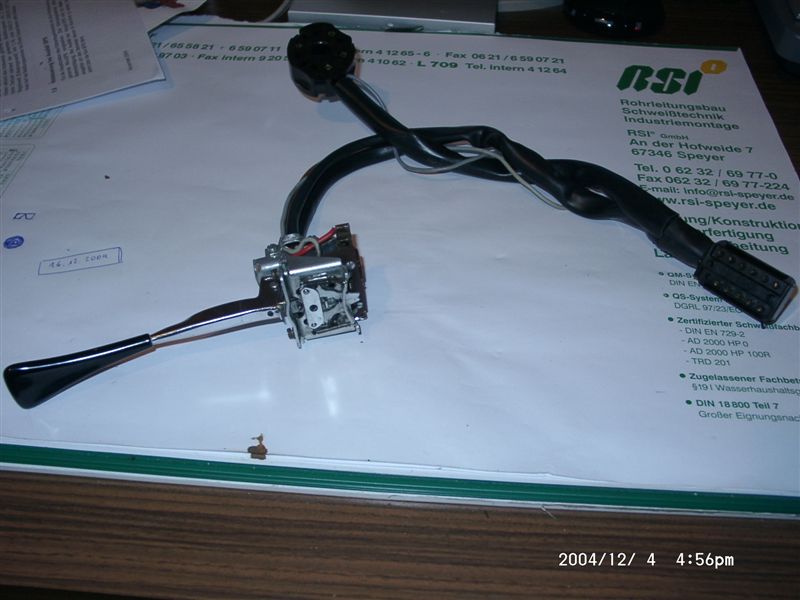
Posted by: michelko Jan 8 2005, 10:30 AM
Hello together,
today was a nice day, warm enough to work a little at the car.
Did some metalwork under the door hinge.
#1 without the new part
Attached image(s)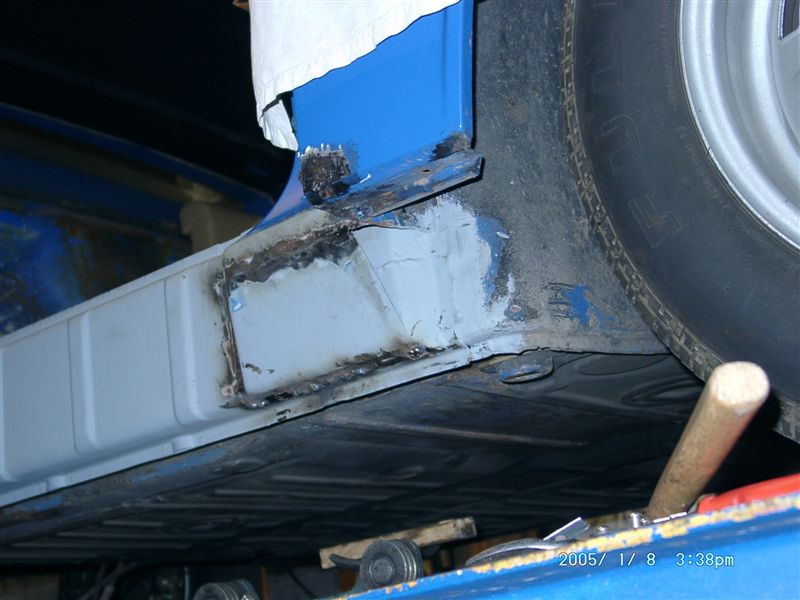
Posted by: michelko Jan 8 2005, 10:32 AM
and the new part in place
#2
Attached image(s)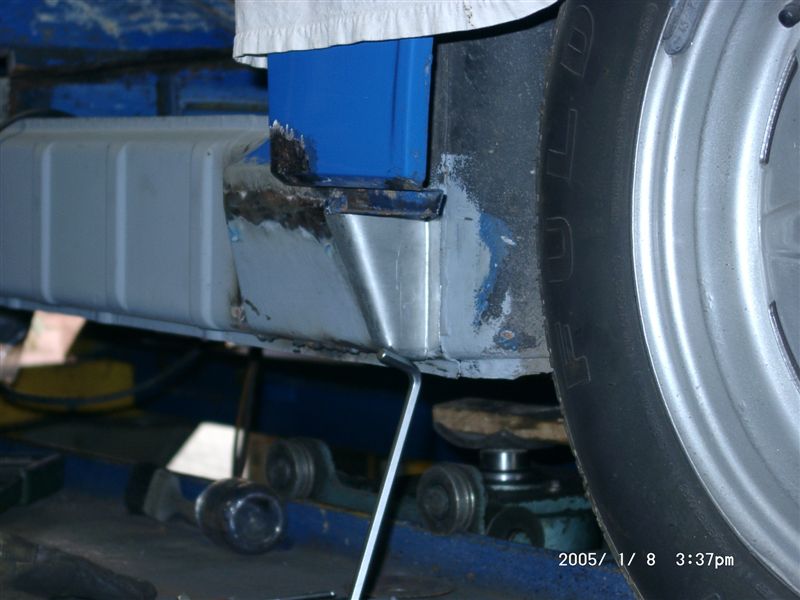
Posted by: michelko Jan 8 2005, 10:33 AM
#3
Attached image(s)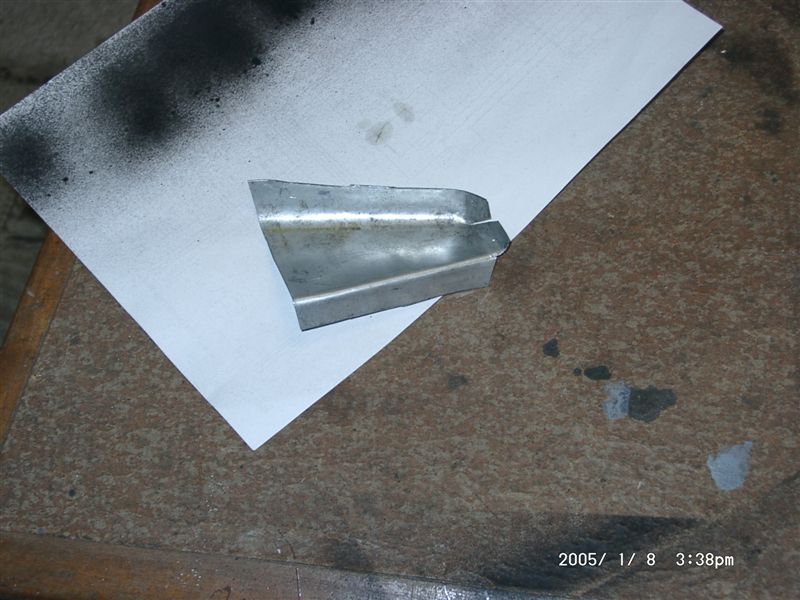
Posted by: michelko Jan 8 2005, 10:33 AM
#4
Attached image(s)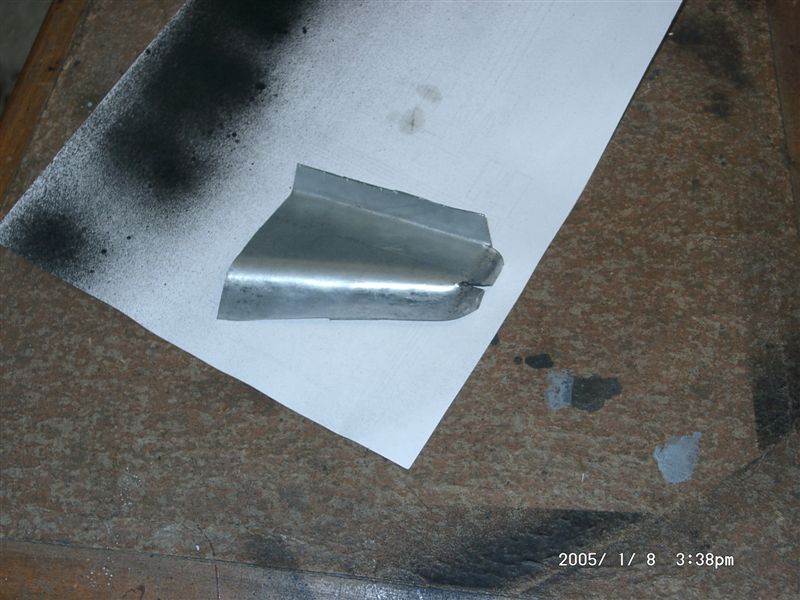
Posted by: michelko Jan 8 2005, 10:35 AM
last one
have a nice weekend
Attached image(s)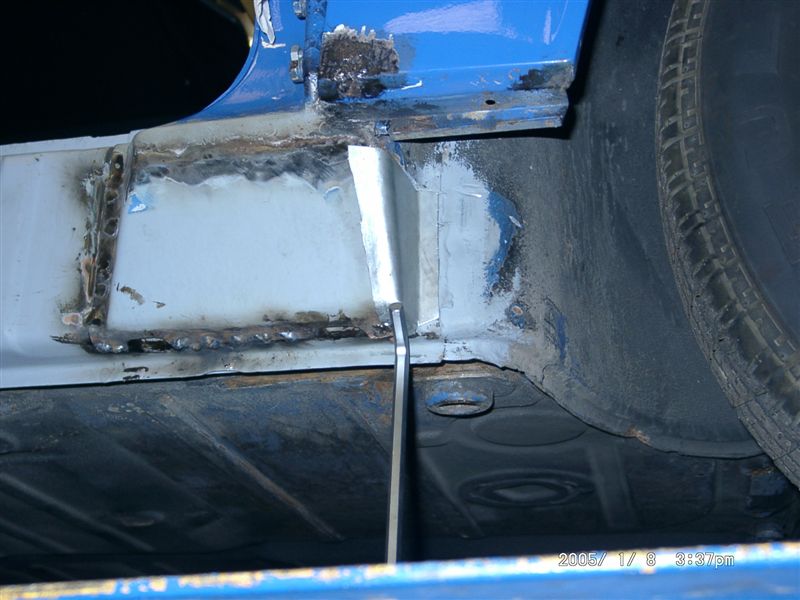
Posted by: Root_Werks Jan 8 2005, 10:40 AM
Your work is stunning!  Thanks for posting all the great pics! Keep them coming!
Posted by: xsboost90 Jan 8 2005, 10:58 AM
 wow and i was all happy cuz i welded up one hole!!!!
Attached image(s)
Posted by: jet1 Jan 8 2005, 02:05 PM
this is one of the best step by step rust repair topic threads I have come across! great work! I hope this ends up in the classics.
Posted by: Gint Jan 8 2005, 06:45 PM

Keep those pics comin!
Posted by: Quebecer Feb 9 2005, 10:00 AM
Fabulous work !!!
You're an inspiration ! 
Posted by: michelko Feb 9 2005, 12:19 PM
Thanks together for the flowers.
These cars are realy inspirating  ,
,
Wish i could work the whole day at it. Unfortunately must have a job to buy all the nice restoration stuff und some beer 
I hate the winter in germany. It`s just to cold to go to the garage.
Can`t wait for springtime
Posted by: sean_v8_914 Feb 9 2005, 01:10 PM
what was your cost of materials?
thanks for teh inspiring pictures
Posted by: riverman Feb 9 2005, 02:53 PM
Awesome thread . I am in the middle of a very similar repair (see pic) and I found your posts very interesting and informative. As daunting a job as this can be, I'm finding it to be more fun than I've had in a long time.
I'm not going for a show car in the end, just a driver so I'm making most of my patches instead of buying them. To ensure adequate strength when I'm finished I'm installing the Mayeur stiffening kit.
Thanks for sharing.
Attached image(s)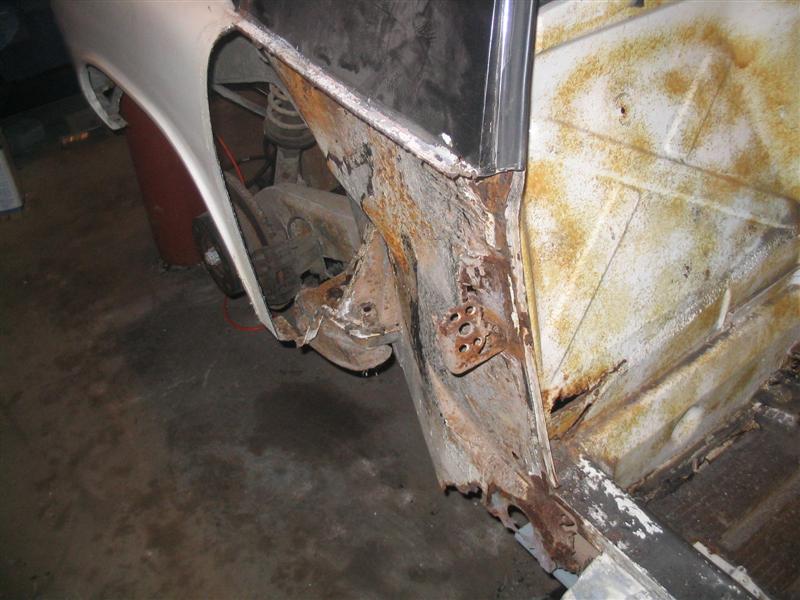
Posted by: riverman Feb 9 2005, 02:55 PM
Driver's side nearly done. Not as much initial damage.
Attached image(s)
Posted by: michelko Feb 9 2005, 02:57 PM
Havn´t count the total amount till now.
Big parts were
AA Repairpanel 245,- $ plus shipping plus duty for germany (complete 330,- Euro)
a pair nos outer longitudinal 55,- Euro (approx. 60$)
a pair new door sills 75,- Euro
mig-welder, bottle of gas 300,- Euro
can weldable primer 25 euro
can epoxy primer 29 Euro
pice sheet metal 15 Euro
some standard tools like hammer, angle-grinder, etc.
and much much time, but its a funny thing to work at the car and see it getting healthy again.
Posted by: michelko Feb 9 2005, 03:09 PM
hey another one on the rescue
Iwill also install a stiffening kit. I ordered engmann´s very nice parts.
i forgot to list this parts in the former thread 157,- Euro for the parts plus shipping and duty.
Have fun with your restotation an alway head up
Posted by: SpecialK Feb 9 2005, 04:19 PM
 Absolutely incredible work!
Posted by: michelko Mar 1 2005, 02:42 PM
Hi guys,
this winter sucks. -7 °C no fun to work in the garage.
Here is a pic from some minor progress. Unfotunately i ran out of (welding) gas, half the work done. 
That give me some time to clean upparts of the floor pan.
Next weekend welding goes on (hope so)
Attached image(s)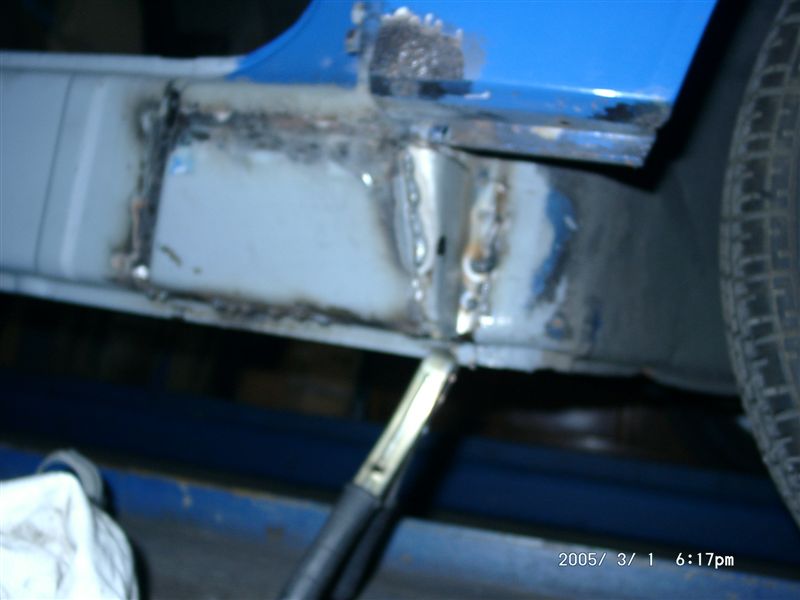
Posted by: michelko Mar 1 2005, 02:45 PM
sorry for the bad quality, got the wrong pic!
This one should be better.
Attached image(s)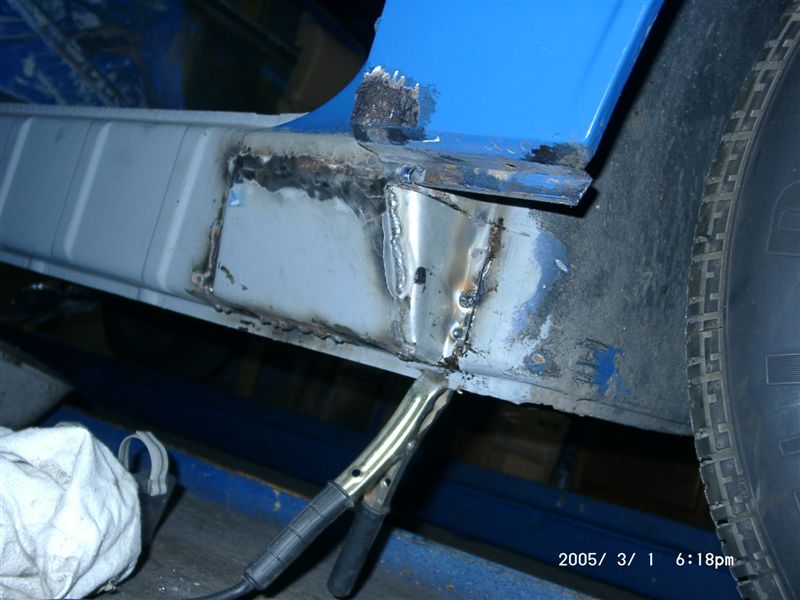
Posted by: michelko Mar 1 2005, 02:46 PM
and here is the rigt side fllor ready to get treated with some rust protective stuff (por15)
Attached image(s)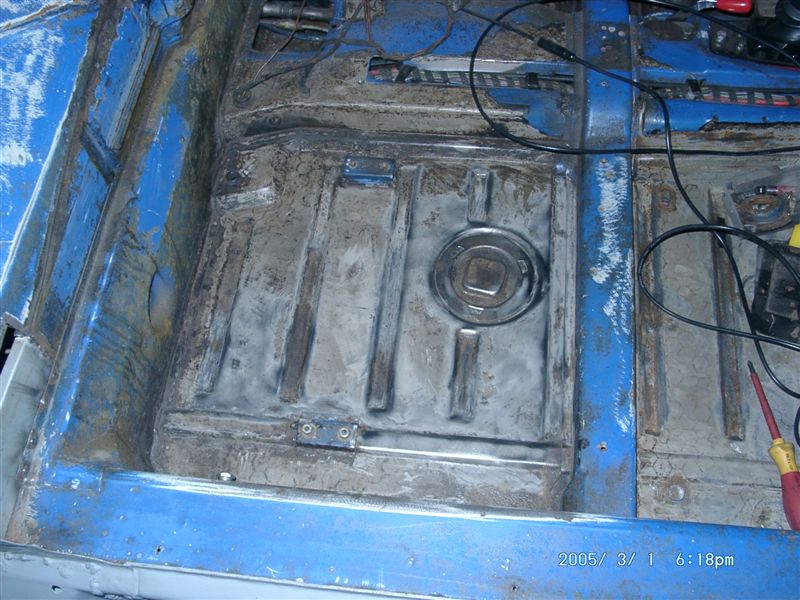
Posted by: Root_Werks Mar 1 2005, 05:32 PM
I love following this thread!
Posted by: MecGen Mar 1 2005, 06:12 PM
Hey
Amazing thred...just did my tub with Por15 yesterday !!
I spoke with the distributor about this product... I bought the whole kit, Marine clean (amazing cleaner), Metal ready, Por15, Por sealer, Por pre-primer - etcher stuff, I forget the name. I have a friend that works with a "special" industrial paints, and he swears up and down that I must use the whole line, some other substitutes will work buts never been tested or fine tuned to blend one with the other. I have amazing first quick check results so far, looks good.
I am in the process of rechecking my factory specs on a A+ frame machine, then welding the inner kit as you have,
Wish you all the best with this AAA+++ thred.
Have a beer
Prost
Joe
Posted by: mr914 Mar 2 2005, 07:03 PM
You are a professional
I am only a seasonal weekend warrior 
I am going to/or at least planning to do similar work on #269 
Posted by: michelko Mar 5 2005, 09:45 AM
Hello together,
the story goes on. Bought a new bottle welding gas yesterday.
Finished the part under the door hinge.
Attached image(s)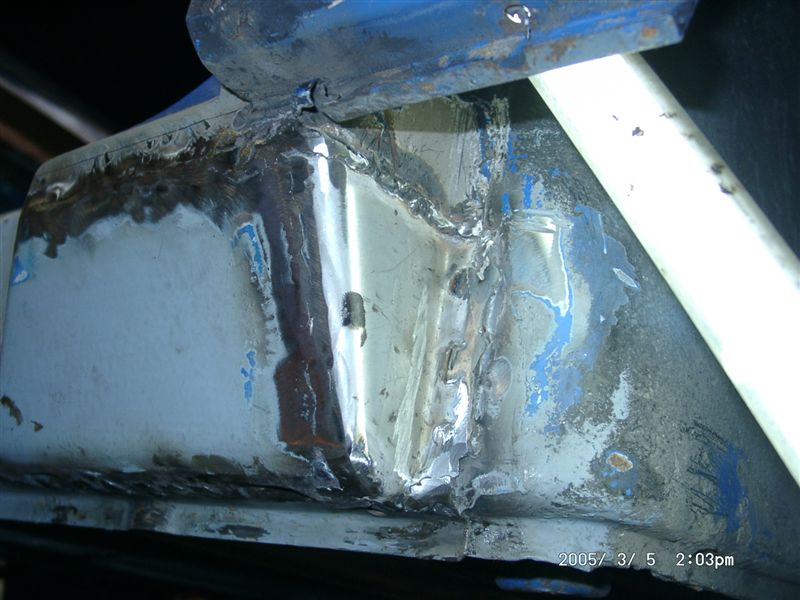
Posted by: michelko Mar 5 2005, 09:47 AM
second part
Attached image(s)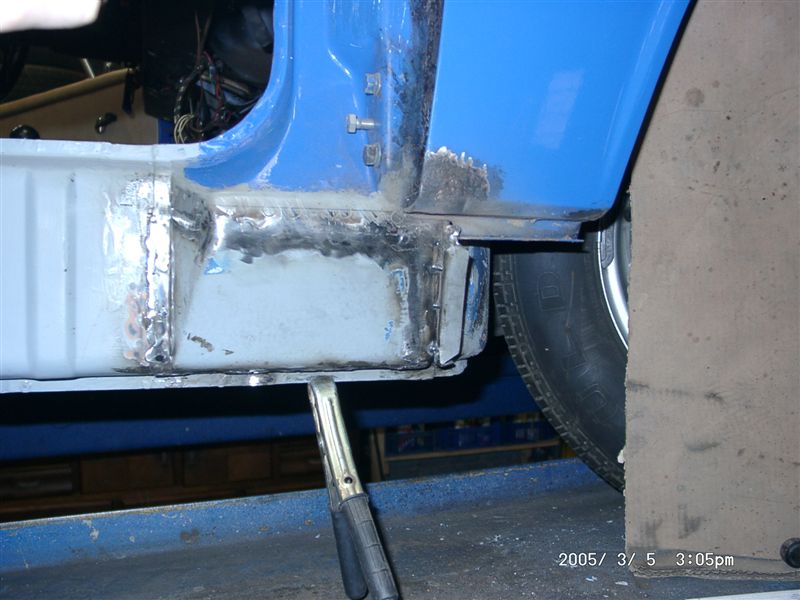
Posted by: michelko Mar 5 2005, 09:48 AM
nother angle
Attached image(s)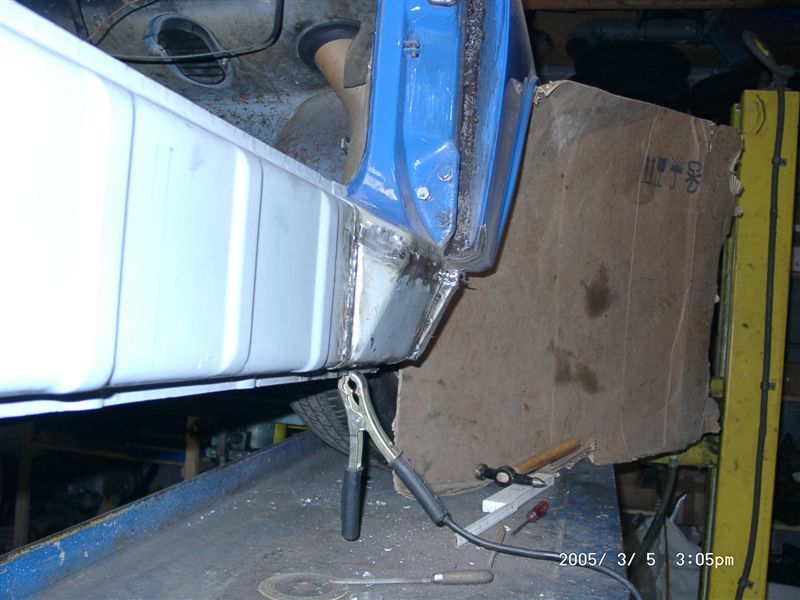
Posted by: michelko Mar 5 2005, 09:49 AM
nother
Attached image(s)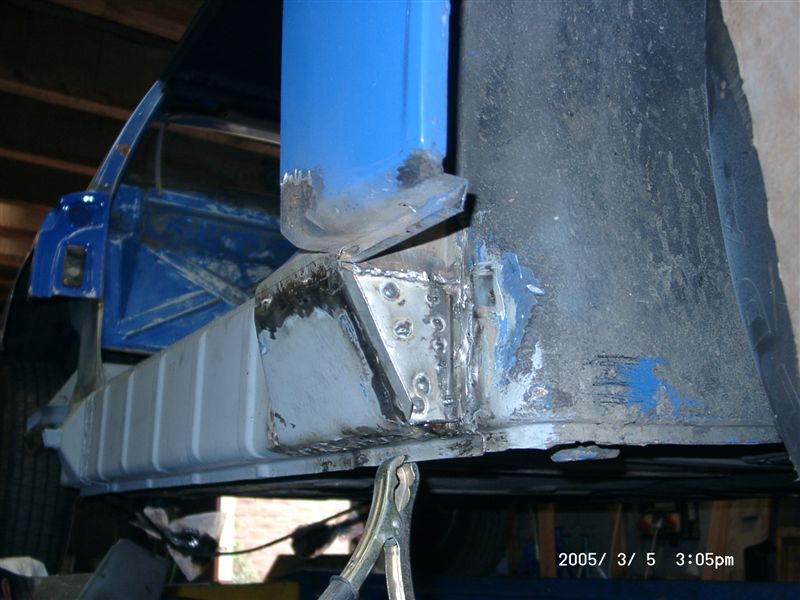
Posted by: michelko Mar 5 2005, 09:50 AM
door sill
Attached image(s)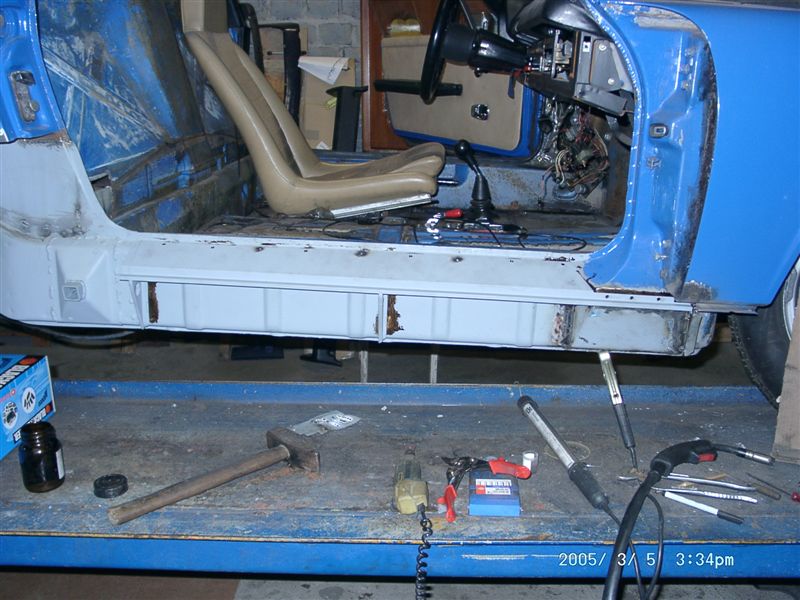
Posted by: michelko Mar 5 2005, 09:50 AM
front 
Attached image(s)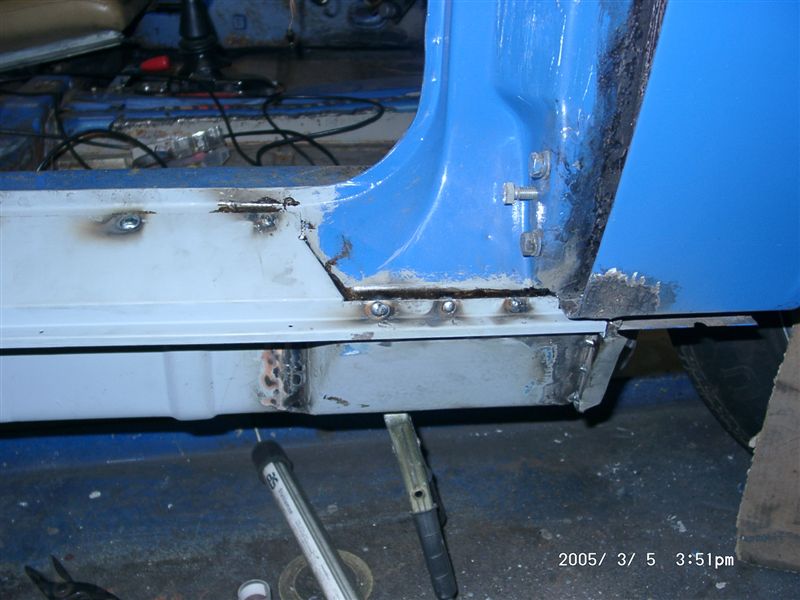
Posted by: michelko Mar 5 2005, 09:51 AM
whole part welded
Attached image(s)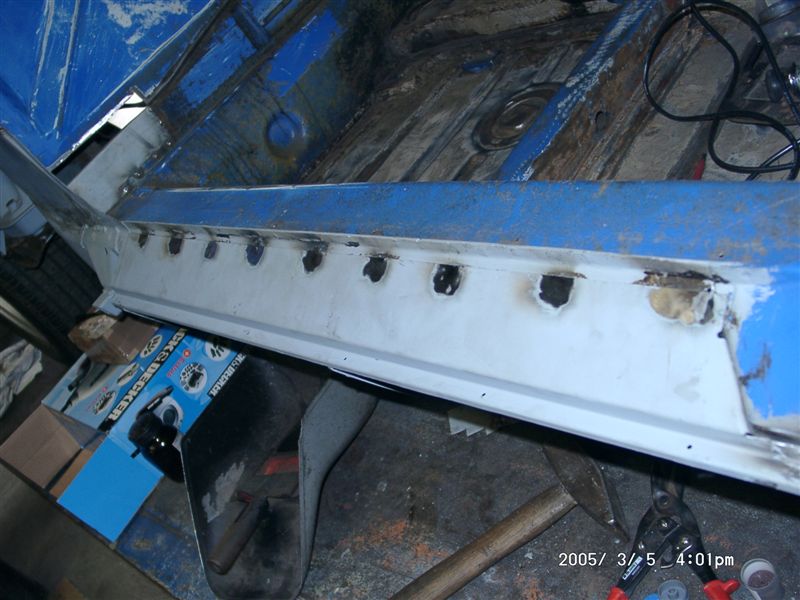
Posted by: michelko Mar 5 2005, 09:52 AM
testfitting of some repro sheet metal. not realy good, but some  and it should fit just fine
Attached image(s)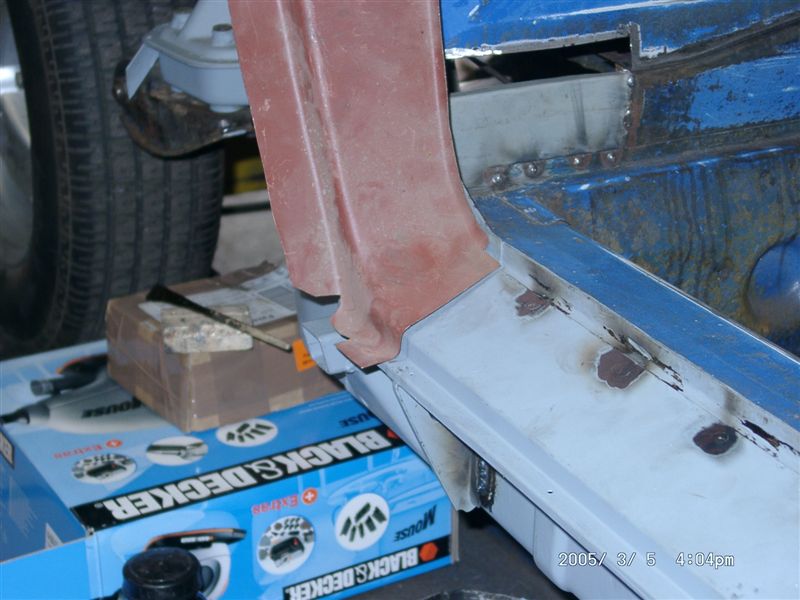
Posted by: michelko Mar 5 2005, 09:53 AM
sefhwh
Attached image(s)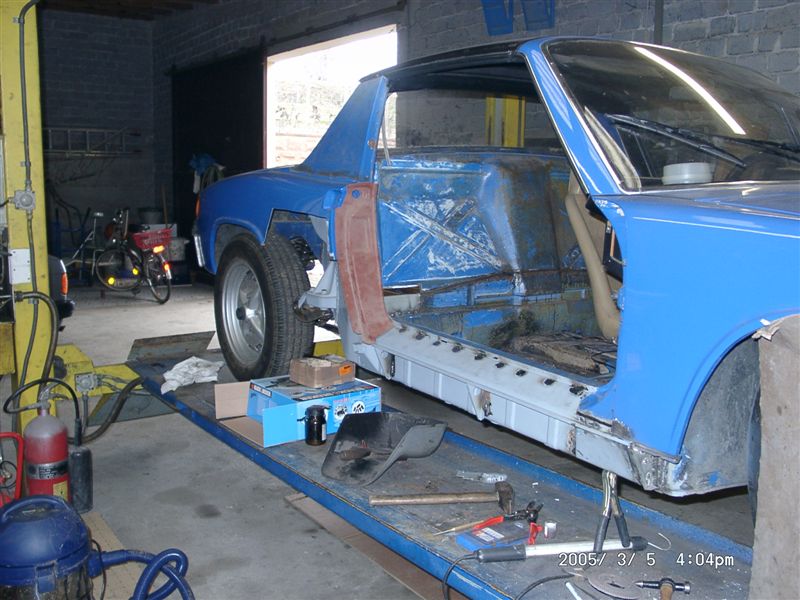
Posted by: michelko Mar 5 2005, 09:55 AM
and the door in
Attached image(s)
Posted by: michelko Mar 5 2005, 09:57 AM
have a nice weekend
Attached image(s)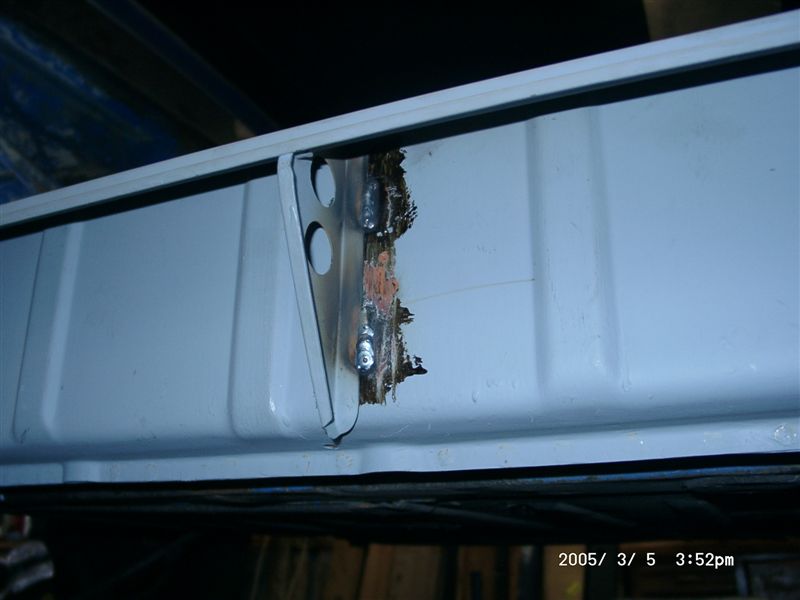
Posted by: michelko Mar 12 2005, 10:50 AM
Hi there,
here again some progress 
Today i welded the sheet metal that hold the jacking donut. Don´t know the right expression for it. Check out the pic´s.
Attached image(s)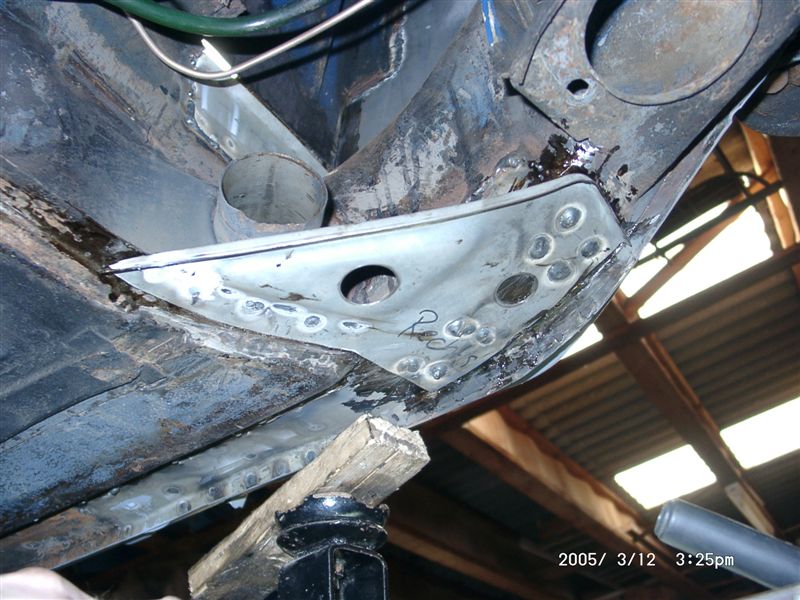
Posted by: michelko Mar 12 2005, 10:51 AM
nother view:
Attached image(s)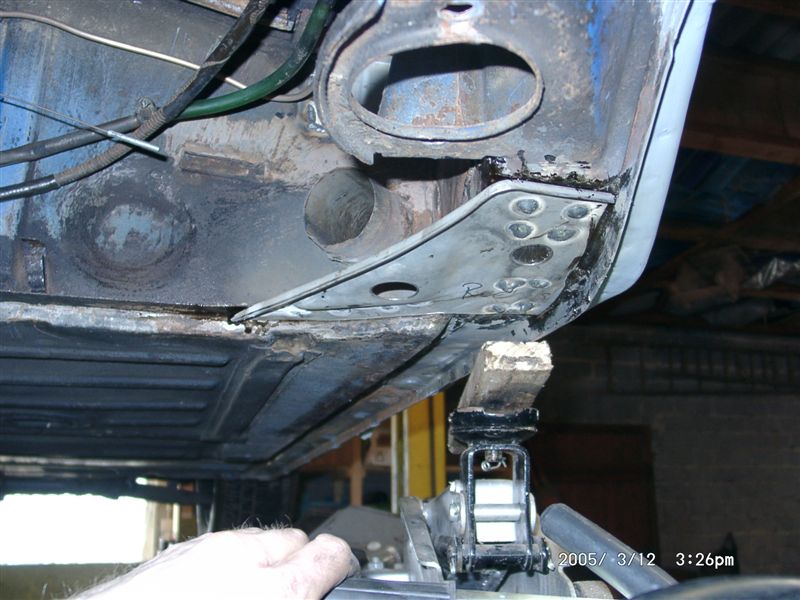
Posted by: michelko Mar 12 2005, 10:52 AM
top view
Attached image(s)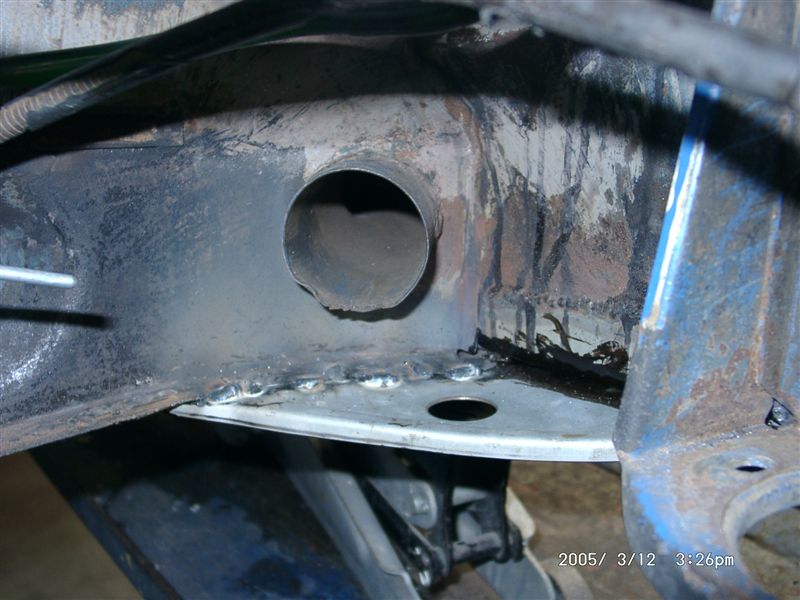
Posted by: michelko Mar 12 2005, 10:56 AM
just have to grind down the welding spots and weld on the old donut ( after its cleaned and rustfree).
I also fabricated a new aluminium sheet for dash face. Fits just nice. The box cover is already coverd with the new vinyl.
Attached image(s)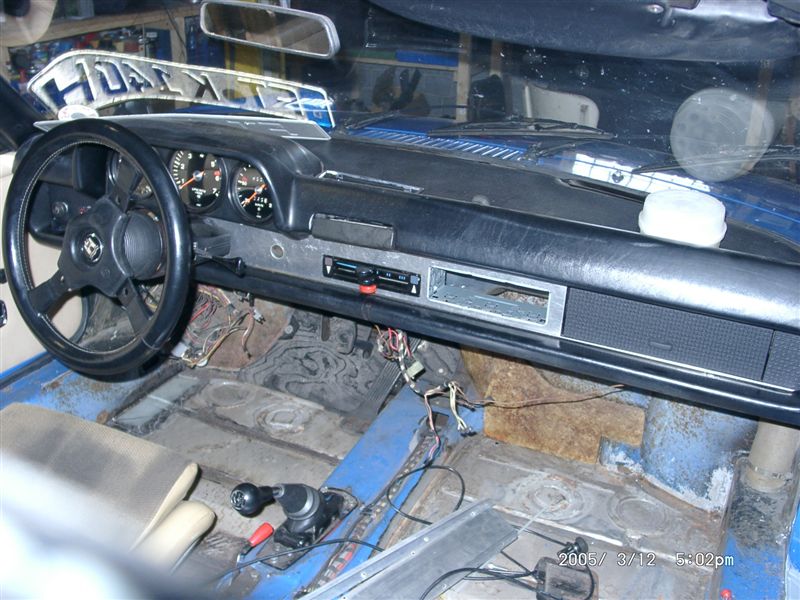
Posted by: SpecialK Mar 12 2005, 02:32 PM
Absolutely amazing thread.......and work!!
Rust doesn't scare you a bit michelko!
You Da Man! 
Posted by: william harris Mar 12 2005, 04:22 PM
Thank you for this amazing progress thread!!
Posted by: rick 918-S Mar 13 2005, 08:30 AM
![]() Nice work!
Nice work!
Posted by: rhodyguy Mar 13 2005, 09:11 AM
great thread . did you locate/buy the triangular threshold supports as individual pieces? if so, where? i need some and don't want to buy the whole outer long just to cut them off.
k
Posted by: michelko Mar 13 2005, 09:54 AM
| QUOTE (rhodyguy @ Mar 13 2005, 07:11 AM) |
| great thread . did you locate/buy the triangular threshold supports as individual pieces? if so, where? i need some and don't want to buy the whole outer long just to cut them off. k |
I got this part from an ebay auction. The guy build it scratch.
I know another guy in germany who fabricate them without the radius.
This was 25 Euro the pair.
Did you check restoration design homepage?
Attached image(s)
Posted by: kwales Mar 13 2005, 11:03 AM
I just cut off the old one, traced it onto a piece of thick sheet metal, and cut out the profile.
Tacked the sheet metal profile onto the top of the old plate and hammered away (into the dipped area) with my ball peen body hammer until the two profiles matched perfectly and nested together. Used some dollys for support on the back side of the original, particularly where the original was thin.
Bent the edge using the hammer and vise trick.
A little smoothing hammer and dolly work, and it was perfect. Cut off the cup, derusted it and welded into place on the new part. Primed, clamped and welded into place.
Posted by: michelko Mar 19 2005, 10:21 AM
Hi everybody,
today i did some cleaning the part under the hell hole. Step one : sanding down the worst dirt ans rust. Step two : Cleaned up with Marine clean. Step three: Used metal-Ready. Step four: Painted the glove box with Por15  .
.
I let work the metal-Ready thing a day or two, then the part under hell hole will be painted with por15.
Attached image(s)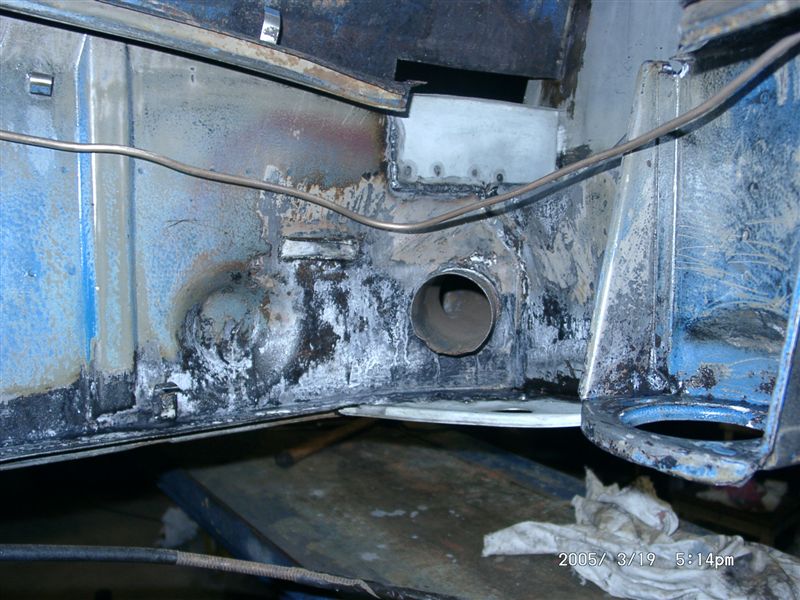
Posted by: michelko Mar 19 2005, 10:22 AM
nother view
Attached image(s)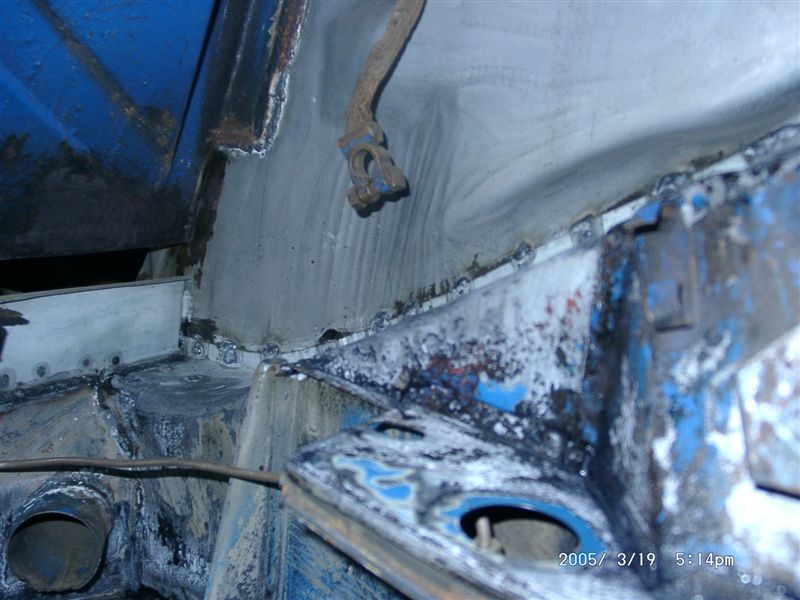
Posted by: michelko Mar 19 2005, 10:22 AM
and the box #1
Attached image(s)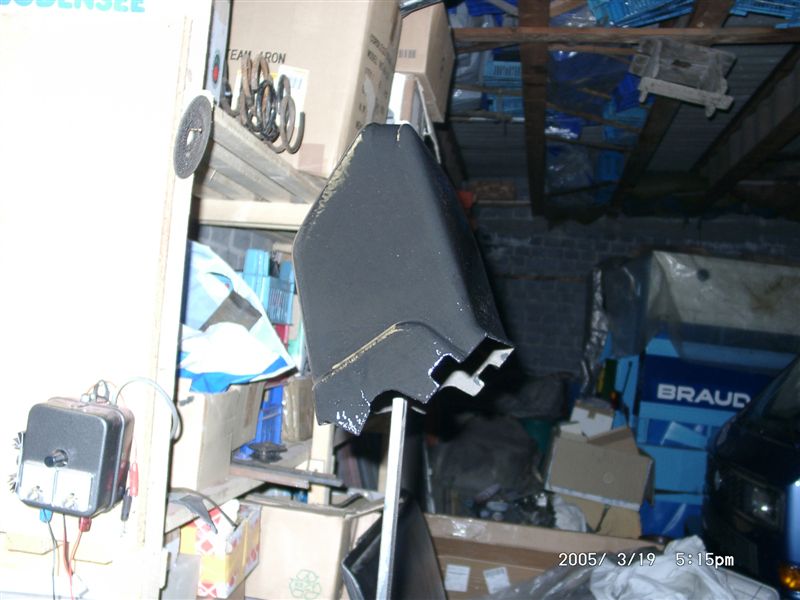
Posted by: michelko Mar 19 2005, 10:23 AM
#2
Have a nice weekend!
Attached image(s)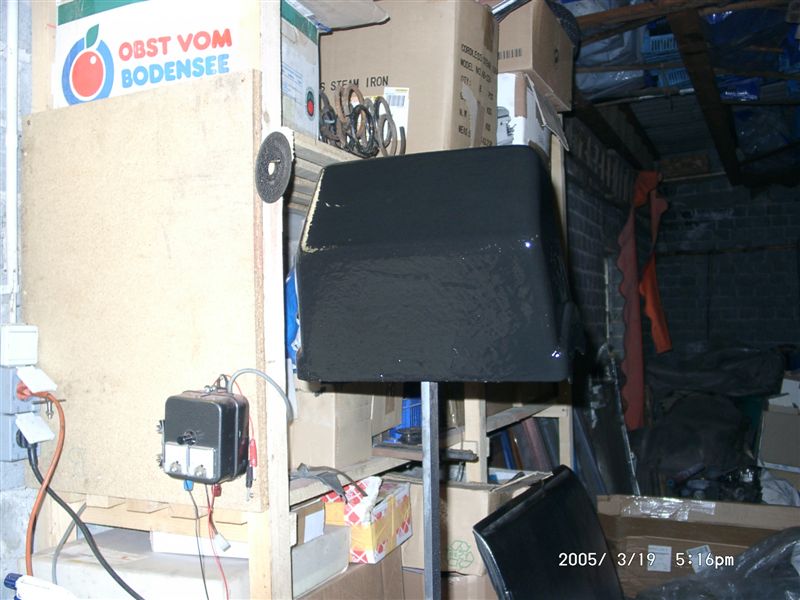
Posted by: rhodyguy Mar 19 2005, 10:58 AM
i called R.D. some time ago about purchasing just the supports and the caping piece on the end. couldn't be done, it was the whole long or nothing. i've considered your method as well ken.
k
Posted by: michelko Mar 20 2005, 03:53 AM
I also tryed to contact R.D. three or four times. Never got any reply.  .
.
I ordered then the needed parts by an german dealer (Mittelmotor). Took about 3 month till they delivered the parts.
Posted by: CptTripps Mar 20 2005, 07:51 AM
Ditto here...
I've tried R.D. Twice and even left messages saying "I want to buy something from you. I now what I want, all I want is for someone to call me and take my money." Nothing...
That's a crying shame.
Your work is fantastic michelko!
Posted by: michelko Mar 24 2005, 03:11 PM
Hi together,
since the weather is realy good the last days, its realy funny to work on the car.
I made some big progress. Watch the pic´s.
first : engine shelf
Attached image(s)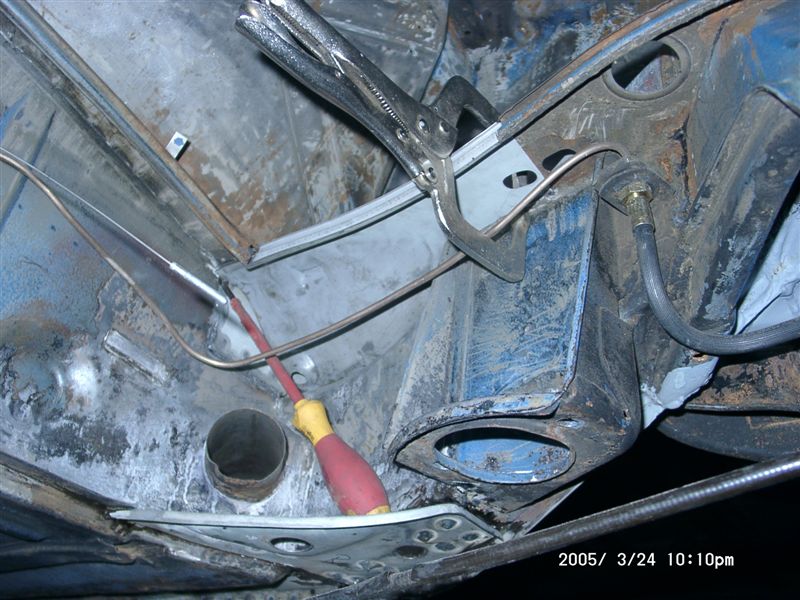
Posted by: michelko Mar 24 2005, 03:14 PM
#2: nother view. as you can see, i did some cleaning and grinding on the fire wall.
Someone sprayed a black material on it and covered that with the blue paint. Unfortunately the metall was rusted (surface) in uncountable places.
Attached image(s)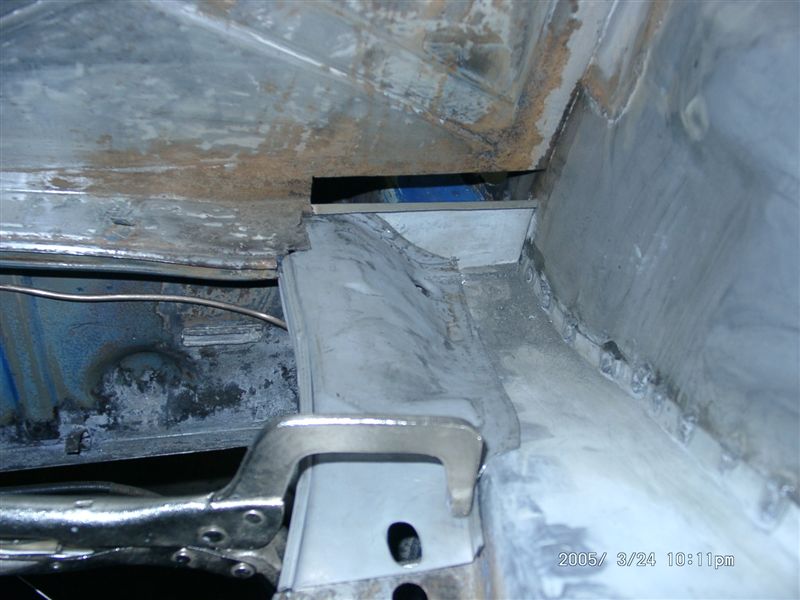
Posted by: michelko Mar 24 2005, 03:16 PM
i will treat the whole metal in this area a second time with metal ready, just for sure.
pic #3 : battery tray held in place
Attached image(s)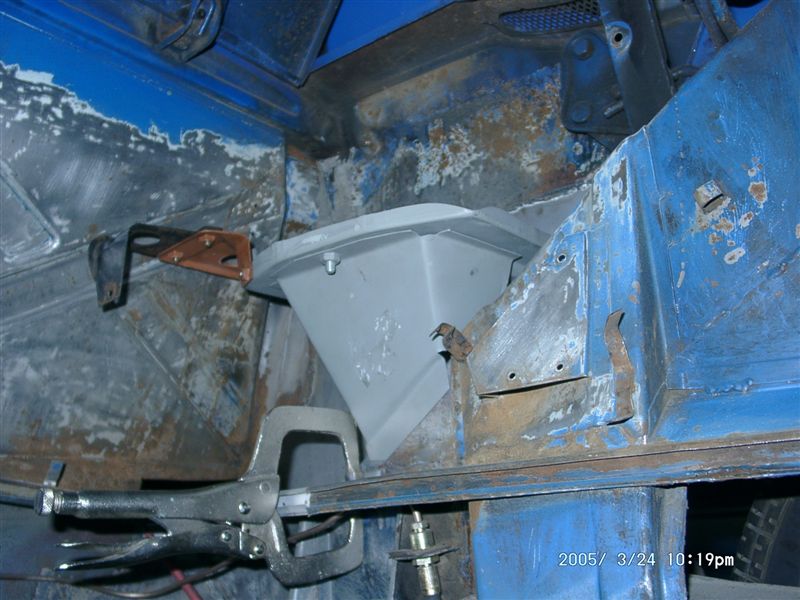
Posted by: michelko Mar 24 2005, 03:18 PM
#4 nother view
Attached image(s)
Posted by: Root_Werks Mar 24 2005, 03:24 PM
 Sweet mother of metal replacement! That is some amazing work! Talk about saving a teener! Wow!
Posted by: michelko Mar 24 2005, 03:25 PM
I am not sure if i should grind down that long welding seam arround the tray or leave it as it is 
Attached image(s)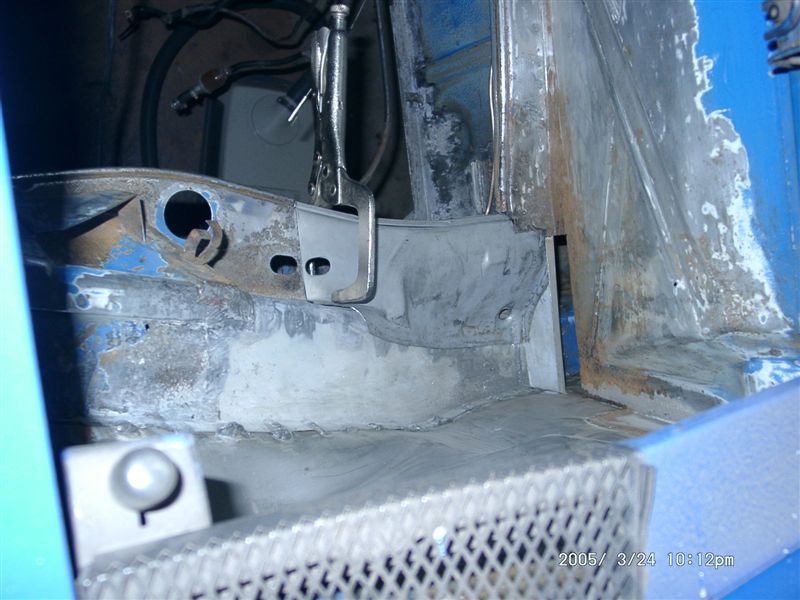
Posted by: Root_Werks Mar 24 2005, 03:27 PM
I just replaced the engine shelf on my 914. Little tacs about an inch appart. I ground them flat. most of them only needed a little touching anyway, but after painting it, they almost disapear. So yeah, I would do it. Looks cleaner.
Posted by: michelko Mar 24 2005, 03:38 PM
can´t believe how fast that shit is rusting again. That seam is just half a year old.
Attached image(s)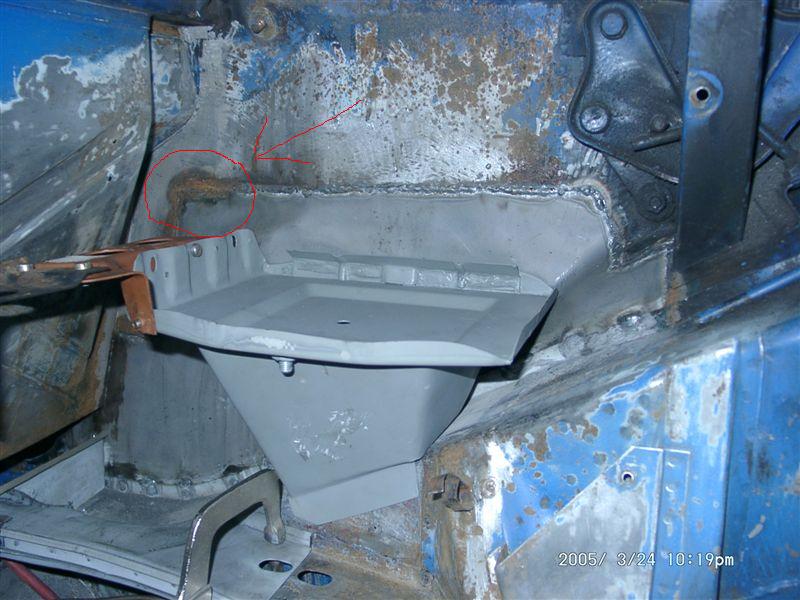
Posted by: Lou W Mar 24 2005, 03:39 PM
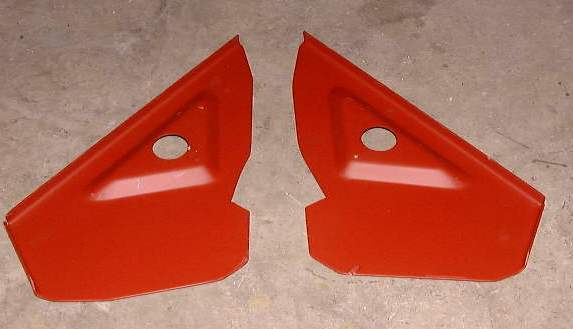
Michelko, Looks great, your work has me motivated to start my rust repair, I just got both of these sent to me this week.
Attached image(s)
Posted by: Lou W Mar 24 2005, 03:40 PM
and this one
Attached image(s)
Posted by: Travis Neff Mar 24 2005, 04:01 PM
If it were me, I would grind down that bead flush - You are doing everything on the car where you cannot tell it is different than how it came from the factory - why leave large telltale signs now?
Posted by: michelko Mar 26 2005, 10:08 AM
Hello together,
today i made again big progres.Closed the firewall and welded in the last part of the engine shelf. Did some grinding, and metal ready.
Attached image(s)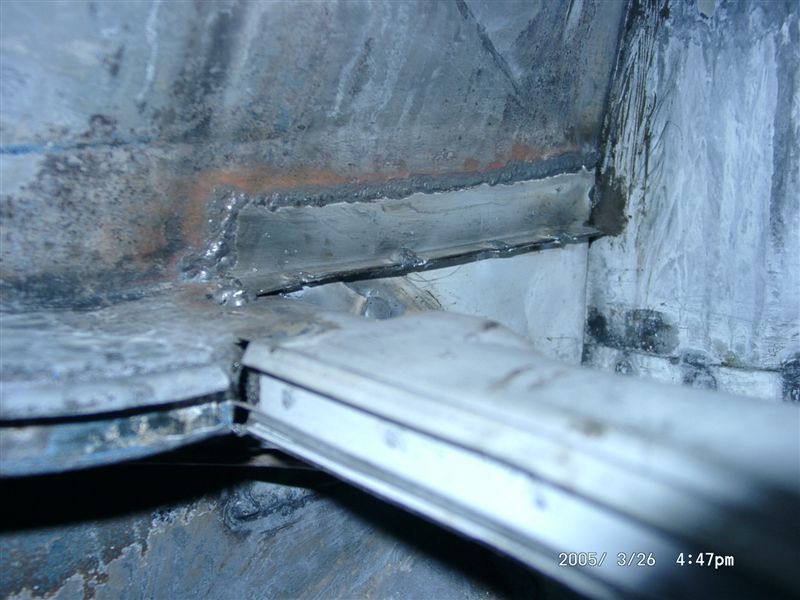
Posted by: michelko Mar 26 2005, 10:09 AM
the shelf
Attached image(s)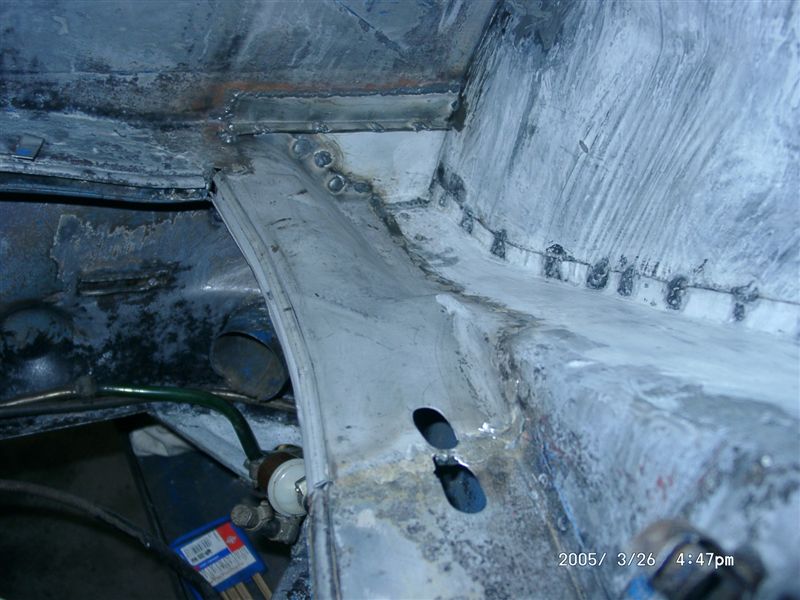
Posted by: michelko Mar 26 2005, 10:11 AM
Anybody knows if its normal that the metal readyed surface gets whit after washing with water
Attached image(s)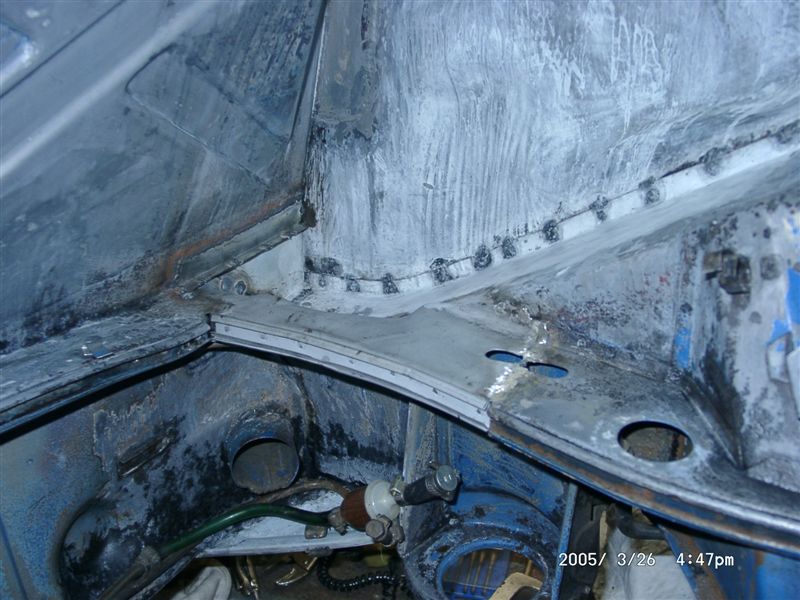
Posted by: michelko Mar 26 2005, 10:12 AM
the engine seal in place
Attached image(s)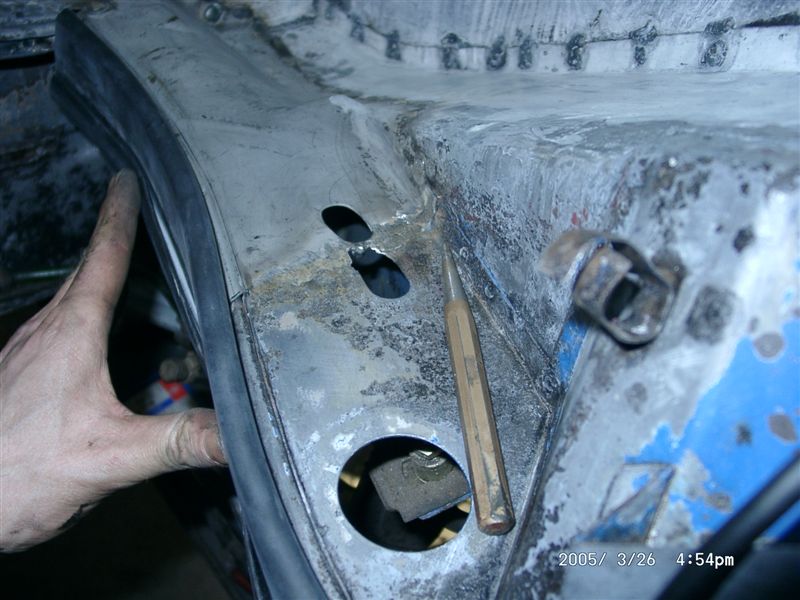
Posted by: CptTripps Mar 26 2005, 10:13 AM
As always....outstanding work.
Posted by: michelko Mar 26 2005, 10:13 AM
Fire wall from inside
Attached image(s)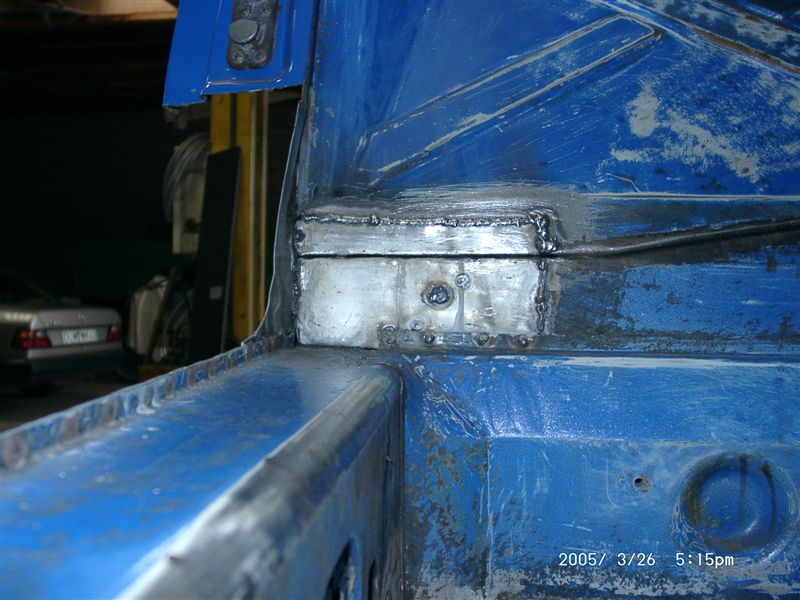
Posted by: michelko Mar 26 2005, 10:14 AM
last one, down under.
have a noce weekend
Attached image(s)
Posted by: Gint Mar 26 2005, 10:38 AM
| QUOTE (michelko @ Mar 26 2005, 09:11 AM) |
| Anybody knows if its normal that the metal readyed surface gets whit after washing with water |
Yes, it's normal. Until it all washes off that is. But you'd have to have it out in the rain for that to happen. BTDT.
Posted by: michelko Mar 26 2005, 03:51 PM
| QUOTE (Gint @ Mar 26 2005, 08:38 AM) | ||
Yes, it's normal. Until it all washes off that is. But you'd have to have it out in the rain for that to happen. BTDT. |
Can i paint this white areas with por 15 or should i wash them again and again??
Would the por15 hold perfect on this surface?
Thank you.
Posted by: Gint Mar 26 2005, 04:04 PM
The metal ready is supposed to be rinsed off (I think). So you probably want to apply it and then clean it all off before applying POR15. It would probably be best to follow the instructions. I don't know exactly what they are off the top of my head.
Posted by: cdmcse Mar 26 2005, 09:04 PM
Metal ready is supposed to leave a zinc phosphate coating on the metal (the white stuff). I rinse it off until there is just a slight white residue left on the metal and it has worked pretty good.
Posted by: SirAndy Mar 27 2005, 02:40 AM
| QUOTE (cdmcse @ Mar 26 2005, 07:04 PM) |
| Metal ready is supposed to leave a zinc phosphate coating on the metal (the white stuff). I rinse it off until there is just a slight white residue left on the metal and it has worked pretty good. |
 white means it's working!
you only need to rinse it off with water once, after that you can prime/paint over it ...
 Andy
Andy
Posted by: McMark Mar 30 2005, 11:05 PM
Happy Birthday Mr. Metalworker! 
Posted by: michelko Mar 31 2005, 12:02 AM
| QUOTE (McMark @ Mar 30 2005, 09:05 PM) |
| Happy Birthday Mr. Metalworker! |
tHANK YOU VERY MUCH!!
Posted by: Jeroen Mar 31 2005, 06:06 AM
Gluckwunsch am Geburtstag!
Posted by: Root_Werks Mar 31 2005, 10:12 AM
| QUOTE (Jeroen @ Mar 31 2005, 04:06 AM) |
| Gluckwunsch am Geburtstag! |
Yeah, what he said!
Posted by: CptTripps Mar 31 2005, 10:22 AM
Kein Amerikaner kann wie ein Deutscher trinken! Ich nicht. Haben Sie ein für diese Kerle.
:: At least that's what the little translator do-hickey told me to say ::
Happy Birthday! (There...in English!)
Posted by: michelko Mar 31 2005, 11:23 AM
| QUOTE (CptTripps @ Mar 31 2005, 08:22 AM) |
| Kein Amerikaner kann wie ein Deutscher trinken! Ich nicht. Haben Sie ein für diese Kerle. :: At least that's what the little translator do-hickey told me to say :: Happy Birthday! (There...in English!) |
What??
Thank you!! I wish i could spend you al guys some
I love this side.
Posted by: michelko Mar 31 2005, 11:25 AM
| QUOTE (michelko @ Mar 31 2005, 09:23 AM) | ||
What?? Thank you!! I wish i could spend you al guys some I love this side. |
should be "site"
my english is not he best.
Posted by: SirAndy Mar 31 2005, 11:46 AM
| QUOTE (michelko @ Mar 24 2005, 01:38 PM) |
| can´t believe how fast that shit is rusting again. That seam is just half a year old. |
bare metal will rust start rusting within hours if exposed to moisture.
and knowing where you live, i don't think there's any shortage of moisture during the winter time ...
Andy
Posted by: SirAndy Mar 31 2005, 11:50 AM
| QUOTE (michelko @ Mar 31 2005, 09:23 AM) |
| What?? |
he's trying to tell you that he thinks germans can drink pretty much any american under the table and that you should drink a beer or two for the guys over here in the land of no alcohol until 21
 ... Andy
Posted by: michelko Mar 31 2005, 12:58 PM
| QUOTE (SirAndy @ Mar 31 2005, 09:50 AM) | ||
he's trying to tell you that he thinks germans can drink pretty much any american under the table and that you should drink a beer or two for the guys over here in the land of no alcohol until 21 ... Andy |
okay, i can do this you , take some
immediately.
Posted by: michelko Mar 31 2005, 01:00 PM
must be something wrong with the keyboard, or is it me?
All they time there are missing words. again:
okay, i can do this FOR you , take some immediately
Posted by: SpecialK Mar 31 2005, 01:12 PM
| QUOTE (michelko @ Mar 31 2005, 09:25 AM) | ||||
should be "site" my english is not he best. |
No need to apologize for mis-spelled words on this site, they're everywhere
 .......and your English is waaaay better than my German.
 Fantastic work! And thanks again for taking the time to document your restore with pics!
Posted by: michelko Apr 2 2005, 09:44 AM
Hi to all the 914 lovers,
this weekend no major upgrade on the restoration. Had to change Tires for a friend and starter for another. Welded in the jacking donut and did some cleaning on the "driver side hell hole". Looks good, just some surface rust.
Attached image(s)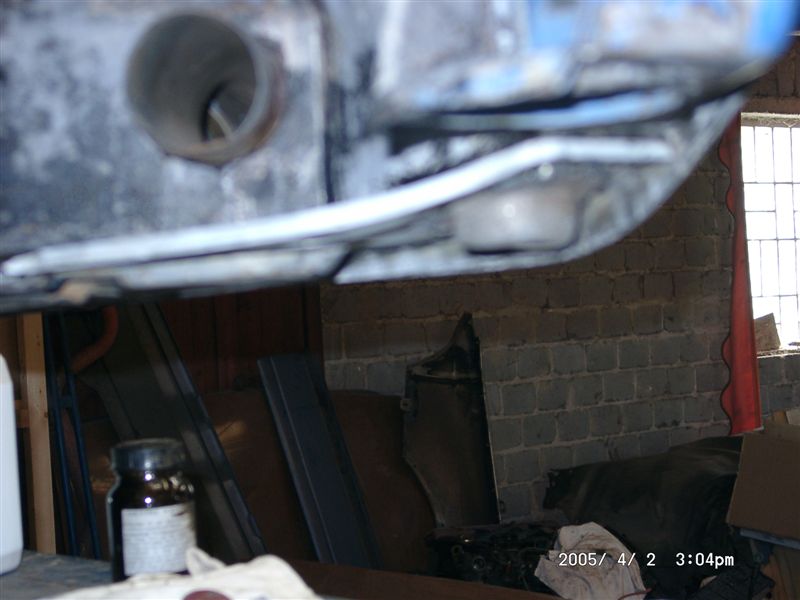
Posted by: michelko Apr 2 2005, 09:45 AM
should take the sharp pics 
Attached image(s)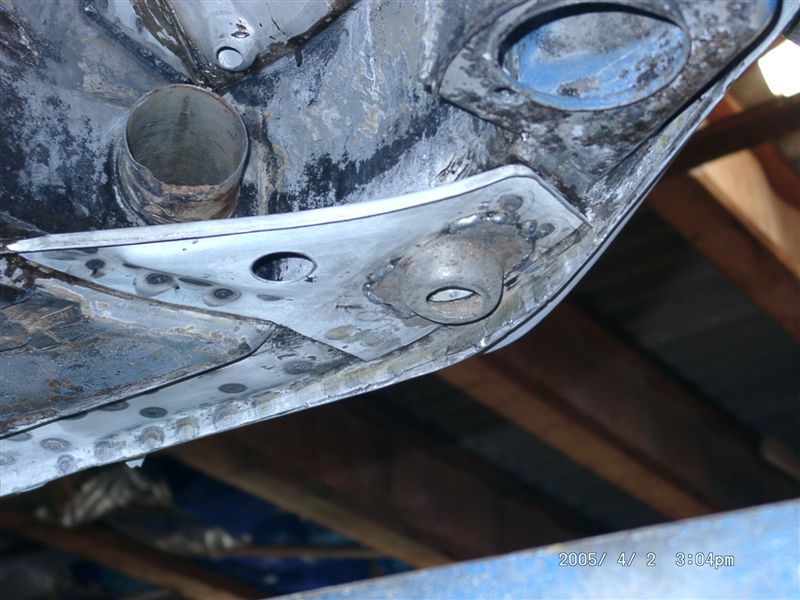
Posted by: michelko Apr 2 2005, 09:45 AM
driver side
Attached image(s)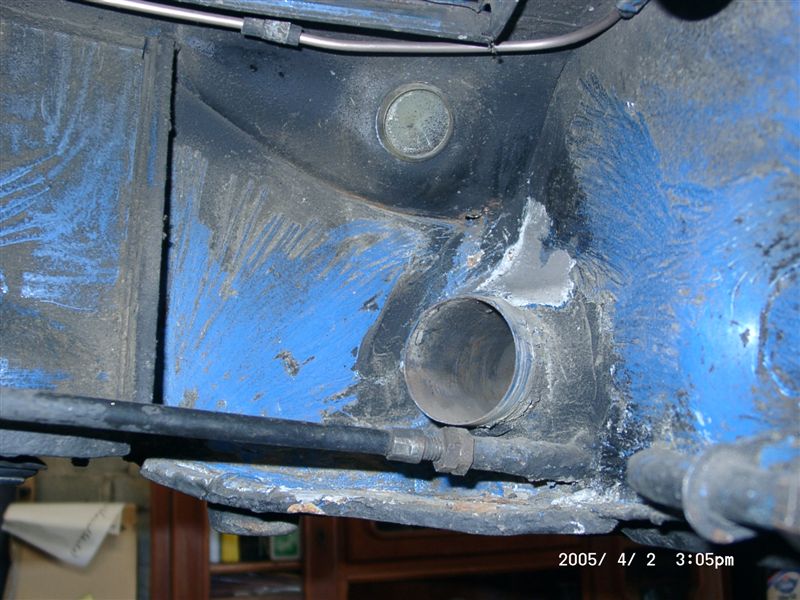
Posted by: michelko Apr 2 2005, 09:46 AM
#2
Attached image(s)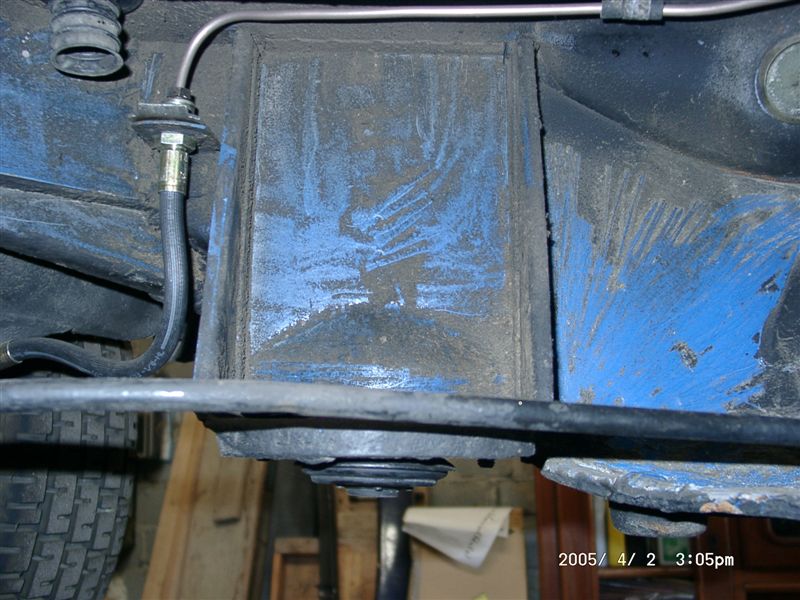
Posted by: michelko Apr 2 2005, 09:47 AM
#3
Attached image(s)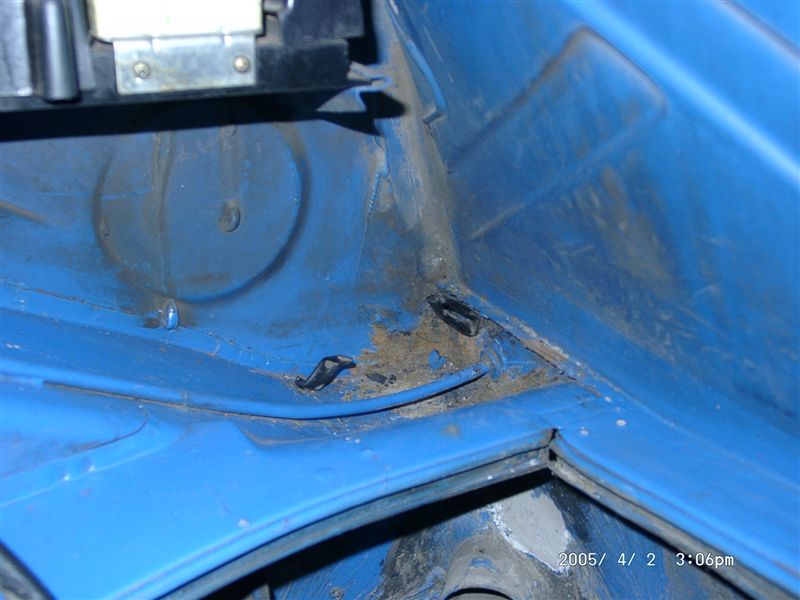
Posted by: michelko Apr 2 2005, 09:48 AM
#4
Attached image(s)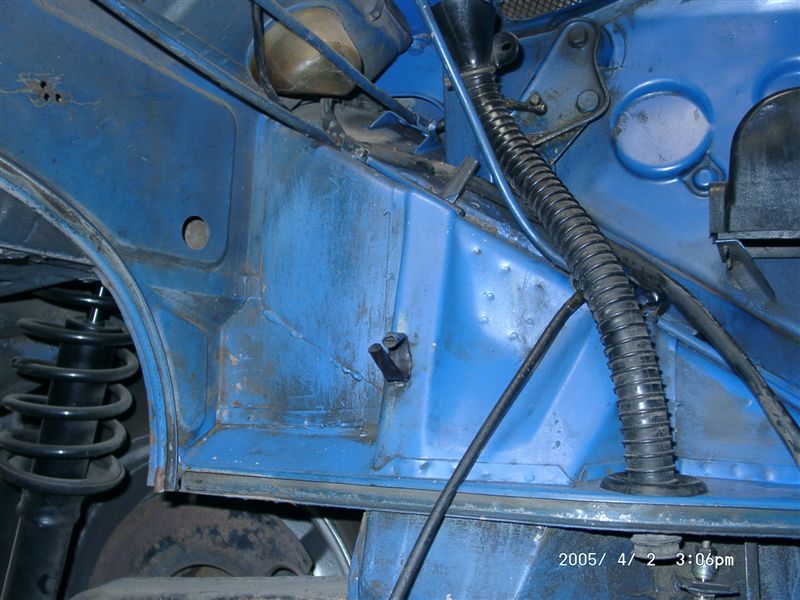
Posted by: michelko Apr 2 2005, 09:49 AM
have a nice weekend
Posted by: michelko Apr 9 2005, 10:50 AM
Hello,
so this weekend was welding time .
Ihave done the battery tray, and sealed the complete area with por15.
#1 lower part welded in
Attached image(s)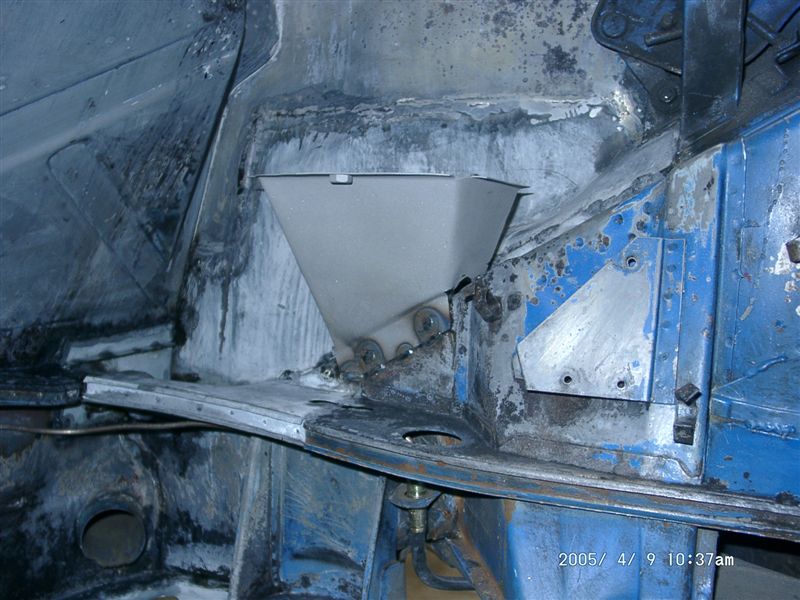
Posted by: michelko Apr 9 2005, 10:51 AM
nother angle
Attached image(s)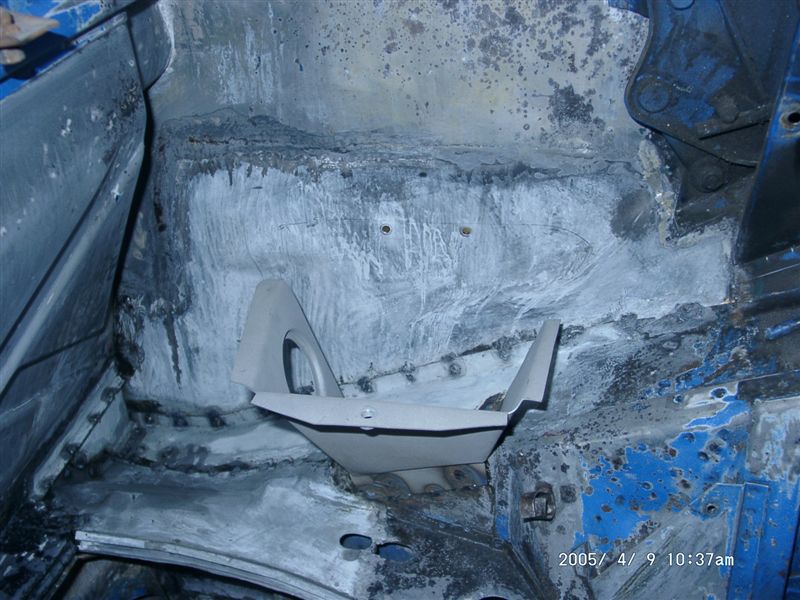
Posted by: michelko Apr 9 2005, 10:53 AM
upper part with por15 on the underside. Once its welded in, there is no chance to seal this side right.
Attached image(s)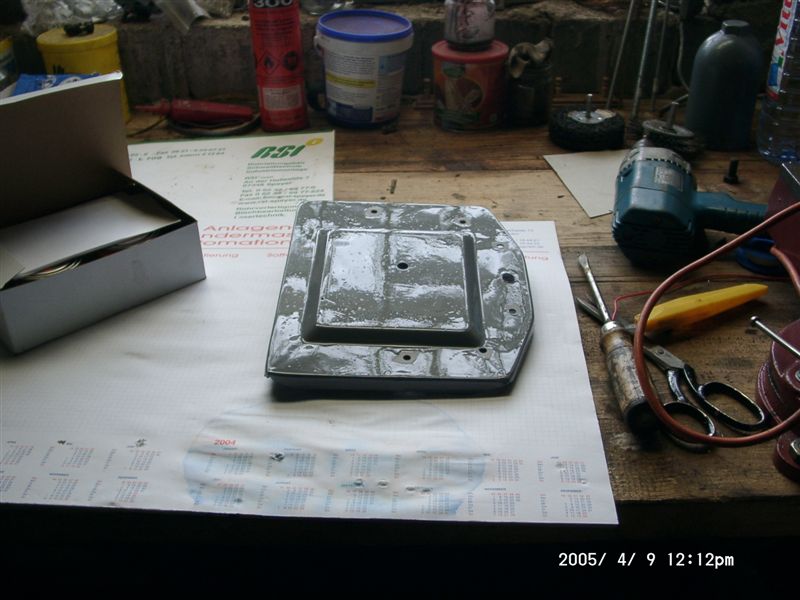
Posted by: michelko Apr 9 2005, 10:56 AM
first coat por15
Attached image(s)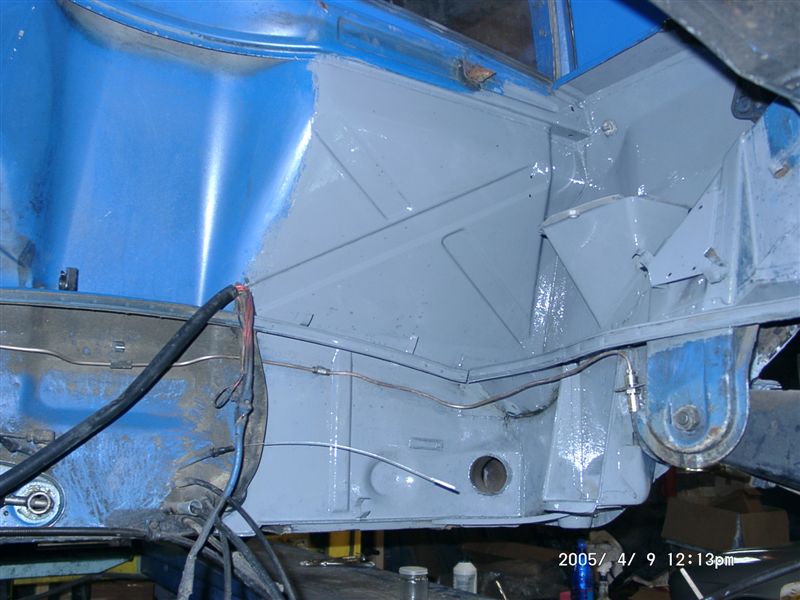
Posted by: michelko Apr 9 2005, 10:58 AM
can you see the seam from the big sheet metal part?
After grinding and priming you can think the sidewall is one piece
Attached image(s)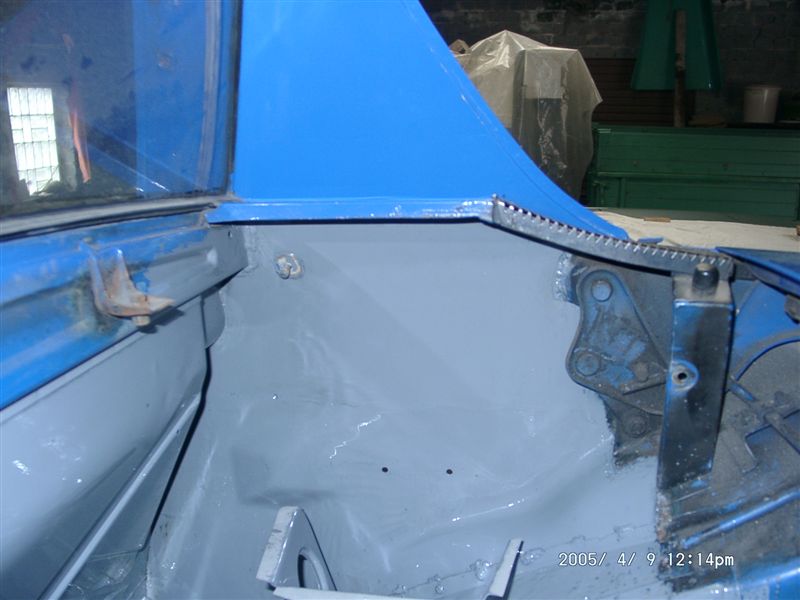
Posted by: michelko Apr 9 2005, 10:59 AM
down under
Attached image(s)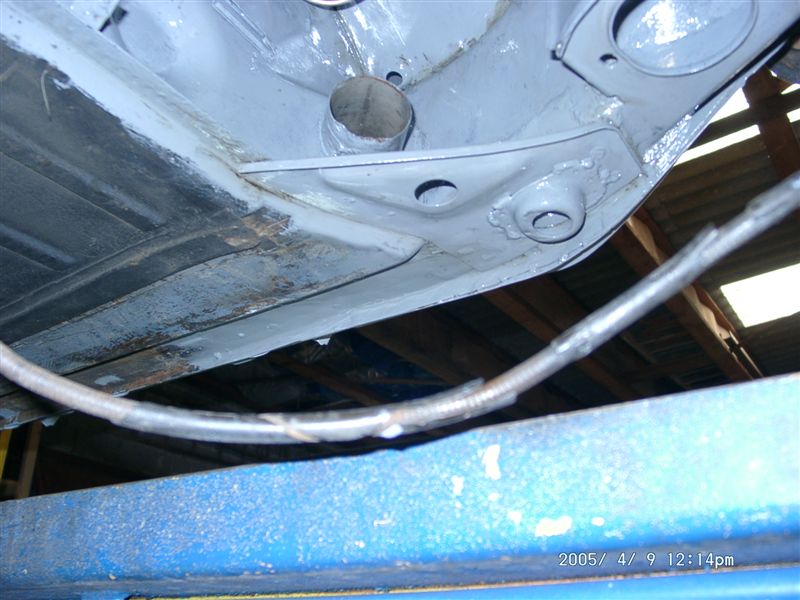
Posted by: michelko Apr 9 2005, 11:00 AM
nice view
Attached image(s)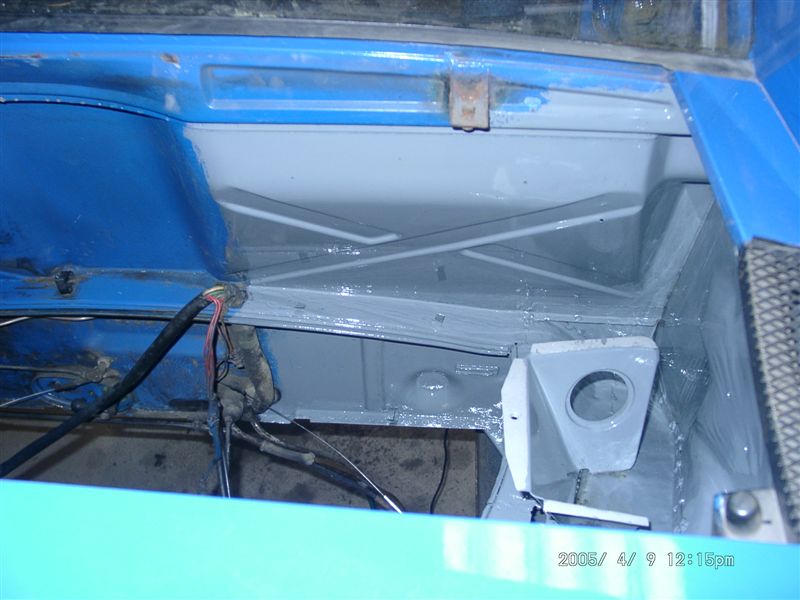
Posted by: michelko Apr 9 2005, 11:02 AM
second coat por15
Attached image(s)
Posted by: michelko Apr 9 2005, 11:03 AM
stretqetq
Attached image(s)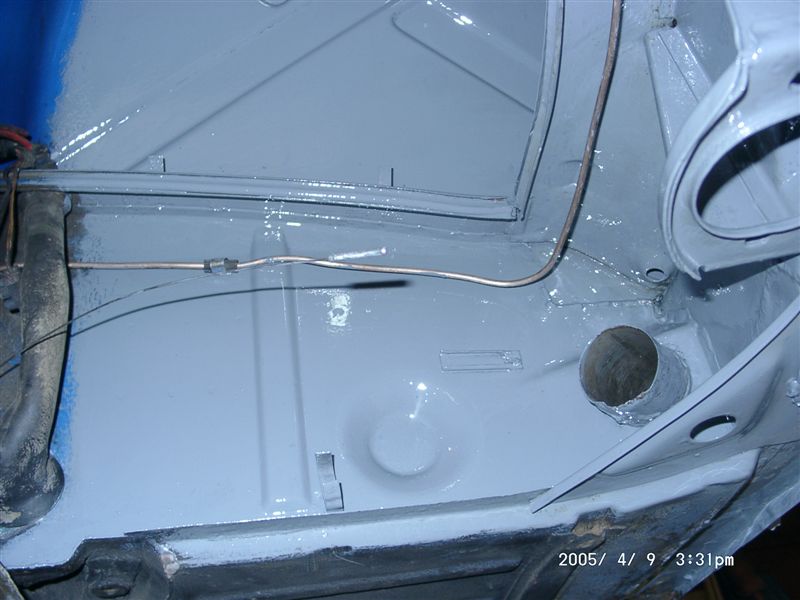
Posted by: michelko Apr 9 2005, 11:04 AM
and battery tray in place
Attached image(s)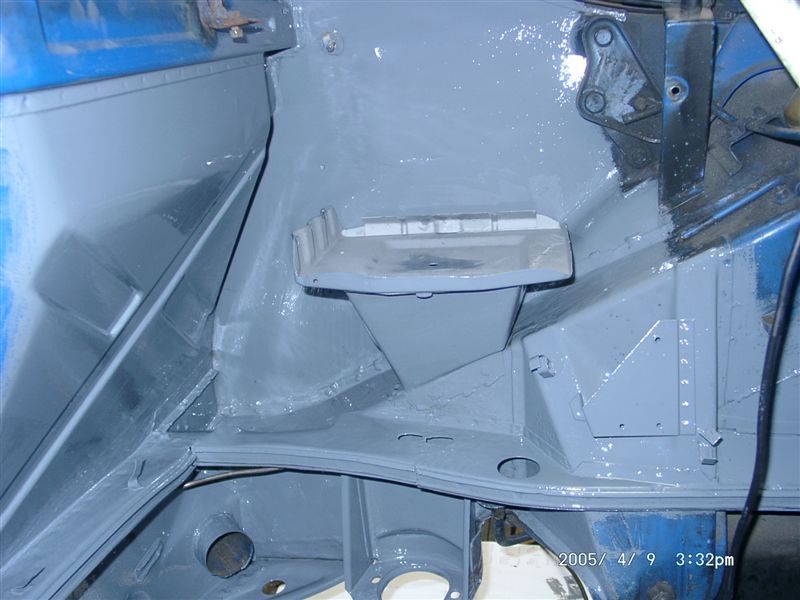
Posted by: michelko Apr 9 2005, 11:05 AM
erteqrzqe
Attached image(s)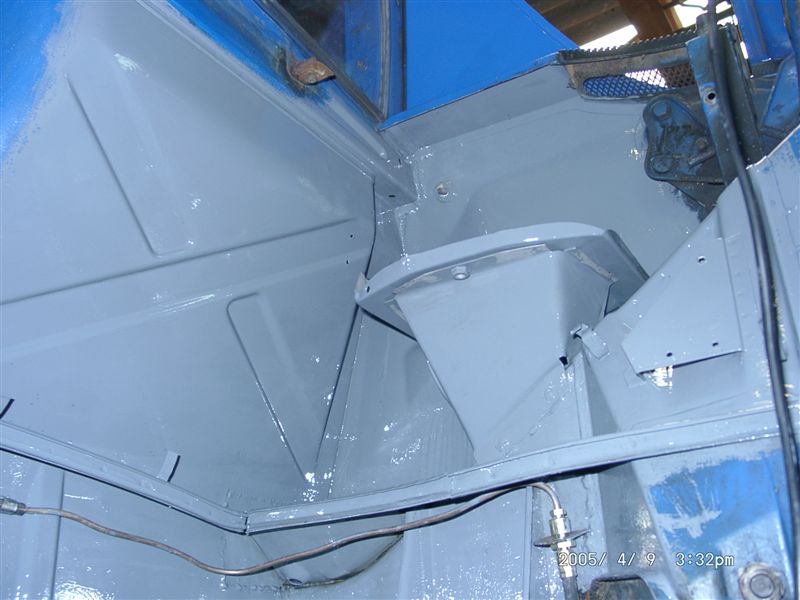
Posted by: michelko Apr 9 2005, 11:06 AM
last one for today
cheers
Attached image(s)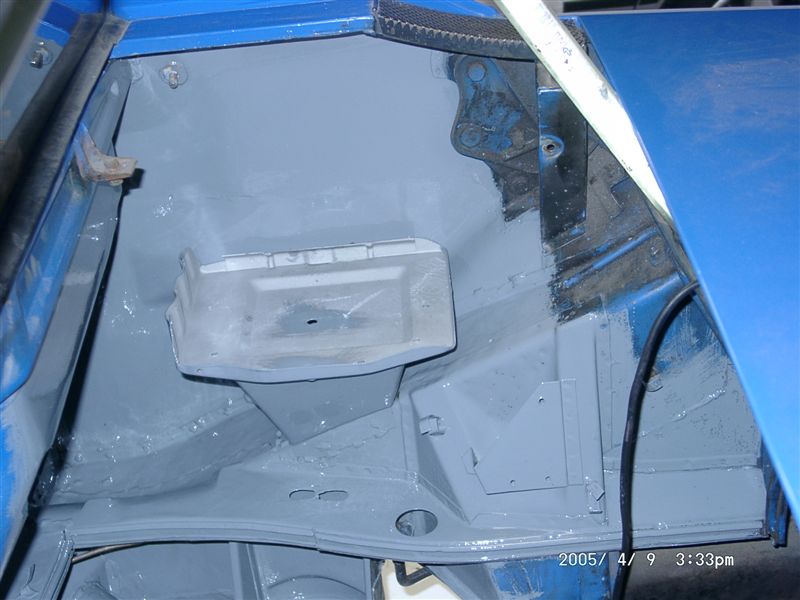
Posted by: Jeroen Apr 9 2005, 11:11 AM
once again... excellent job!
Posted by: michelko Apr 30 2005, 10:40 AM
hi together,
while waiting for the tie coat primer to cover the por 15 areas i fixed another little hole. I pulled the tank. Nothing big. Came out just fine.
Attached image(s)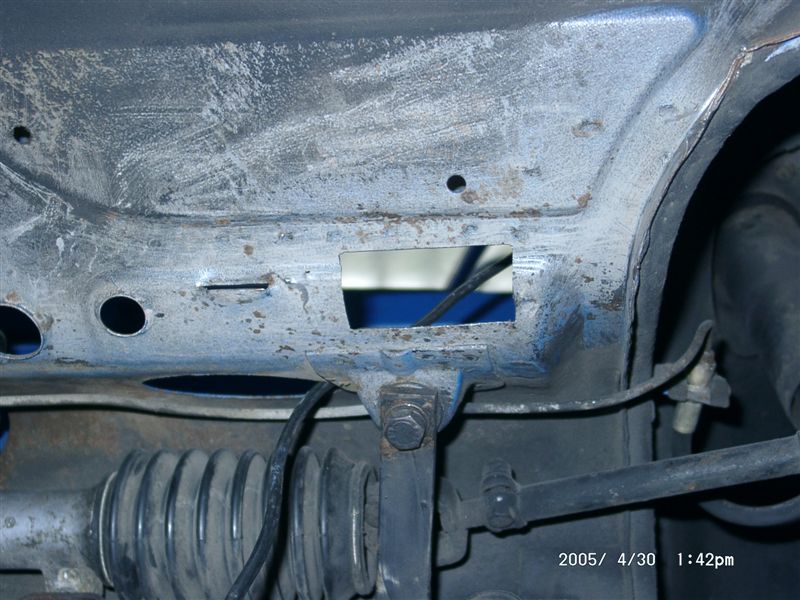
Posted by: michelko Apr 30 2005, 10:41 AM
nother view
Attached image(s)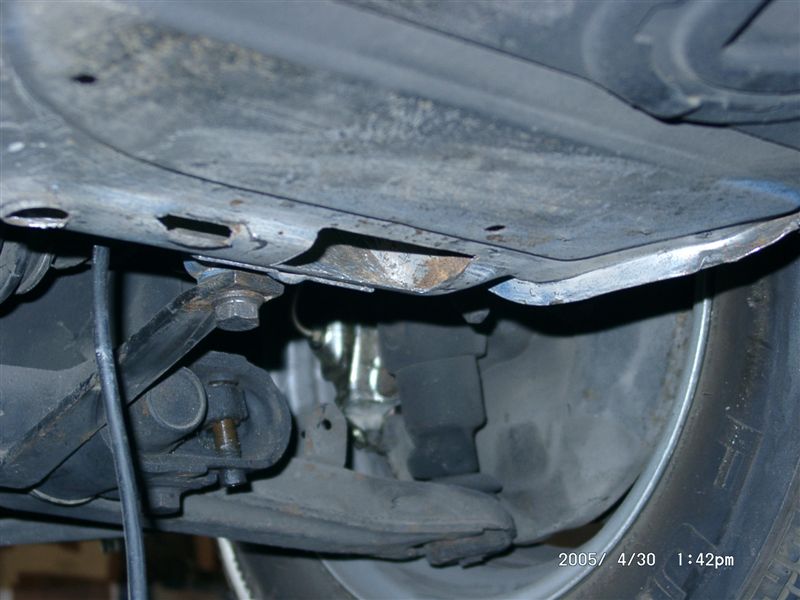
Posted by: michelko Apr 30 2005, 10:42 AM
the patch
Attached image(s)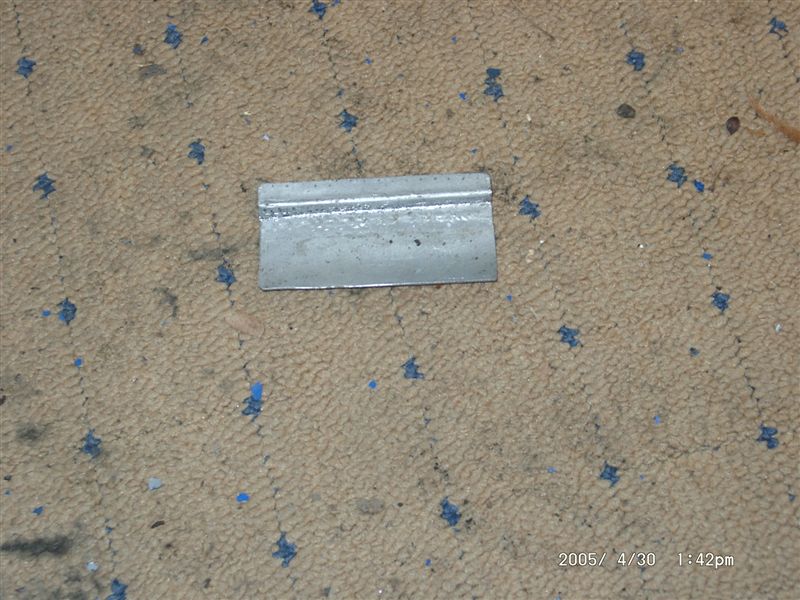
Posted by: michelko Apr 30 2005, 10:42 AM
the patch held in place
Attached image(s)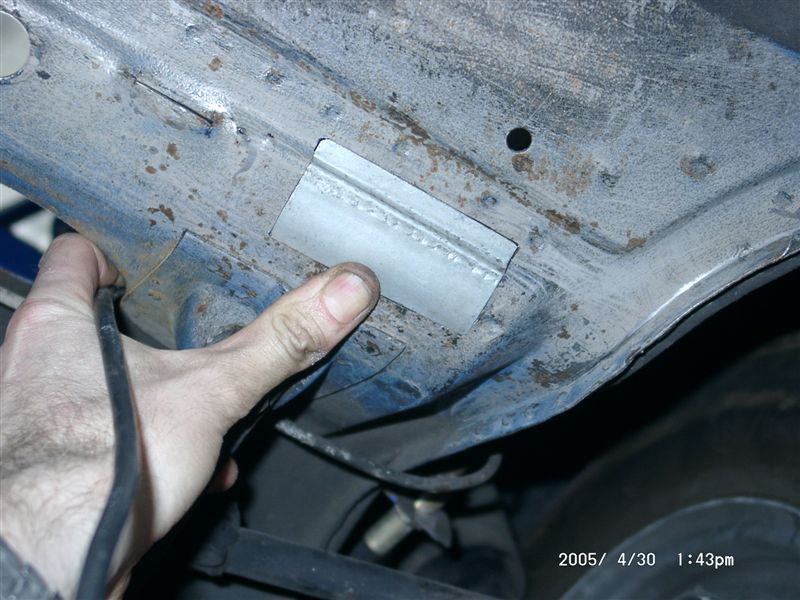
Posted by: michelko Apr 30 2005, 10:43 AM
and welded in
Attached image(s)
Posted by: michelko Apr 30 2005, 10:44 AM
view from inside the car
Attached image(s)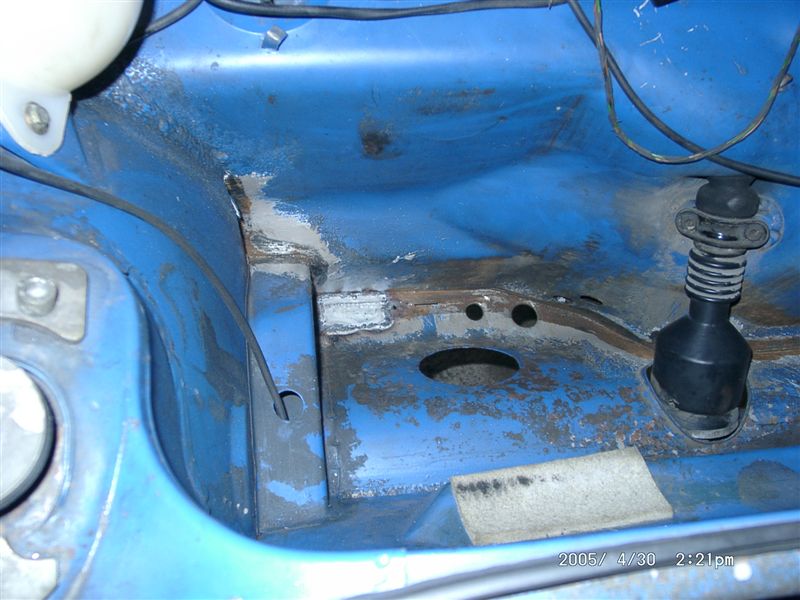
Posted by: michelko Apr 30 2005, 10:45 AM
the rest of the tank compartment is in good shape no need to weld
Attached image(s)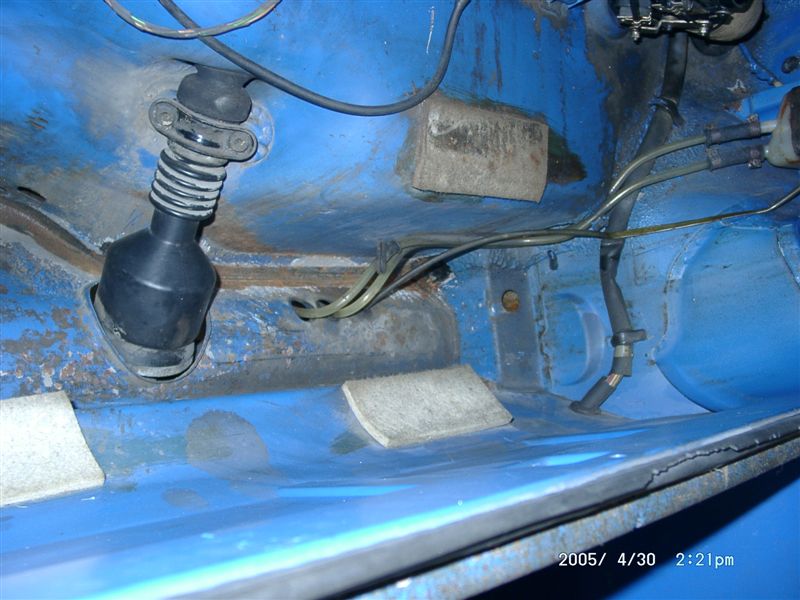
Posted by: michelko Apr 30 2005, 10:46 AM
ert
Attached image(s)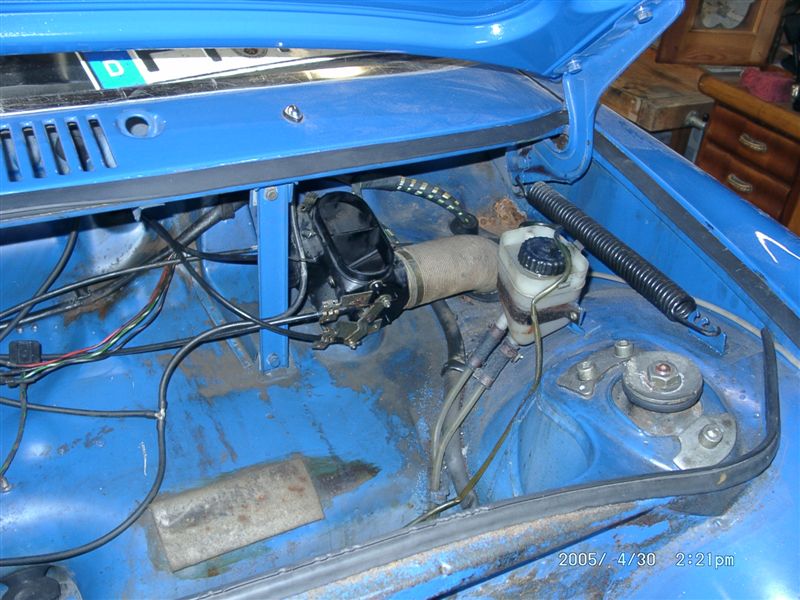
Posted by: michelko Apr 30 2005, 10:47 AM
wretre
Attached image(s)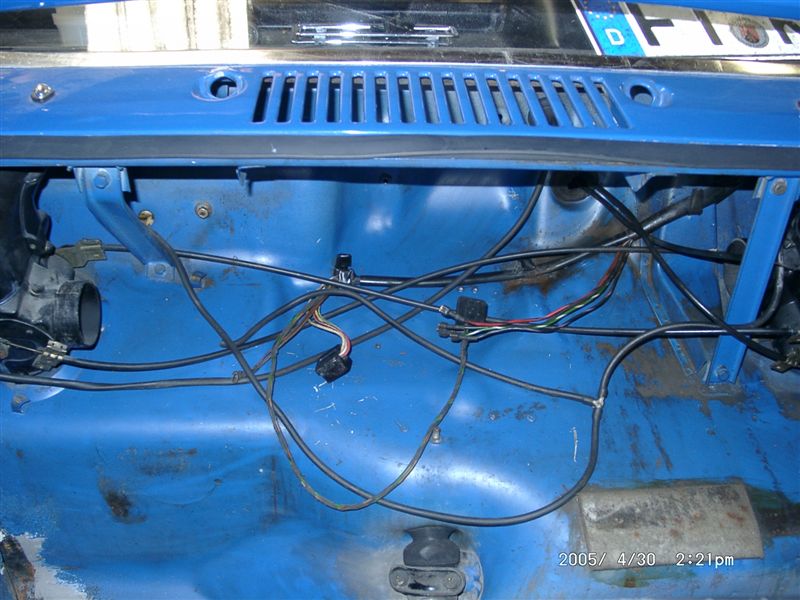
Posted by: michelko Apr 30 2005, 10:47 AM
utezutz
Attached image(s)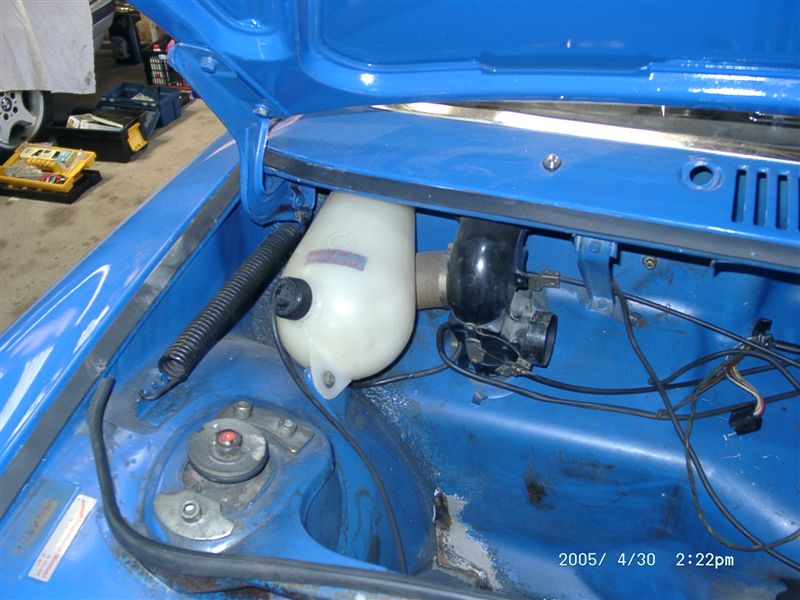
Posted by: michelko Apr 30 2005, 10:49 AM
cleaned up the engine compartment with marine clean. this is realy good stuff
Attached image(s)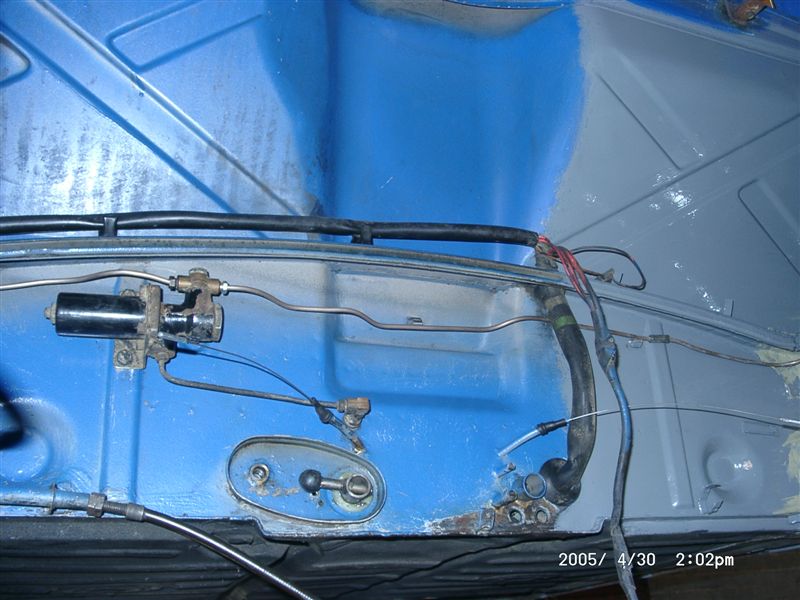
Posted by: michelko Apr 30 2005, 10:50 AM
better shot
Attached image(s)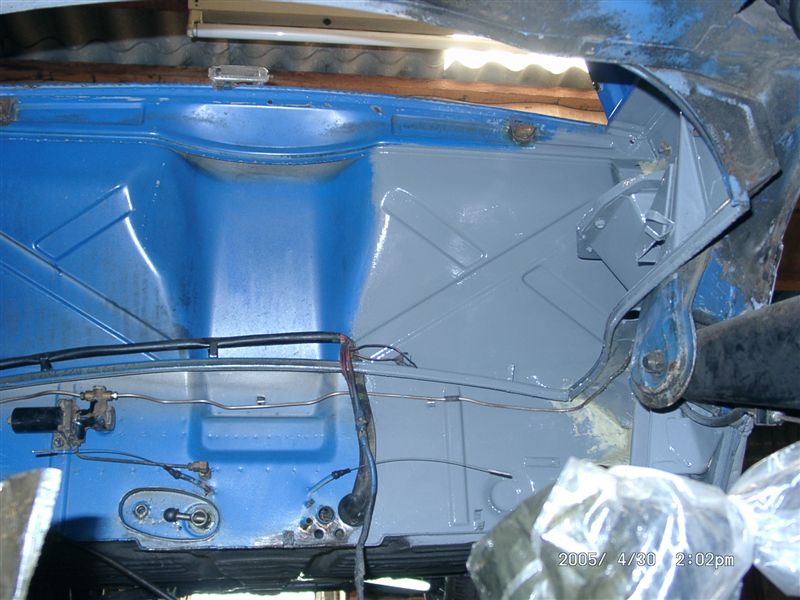
Posted by: michelko Apr 30 2005, 10:51 AM
an the hell hole area, ready to get some primer on it.
have a nice weekend
Attached image(s)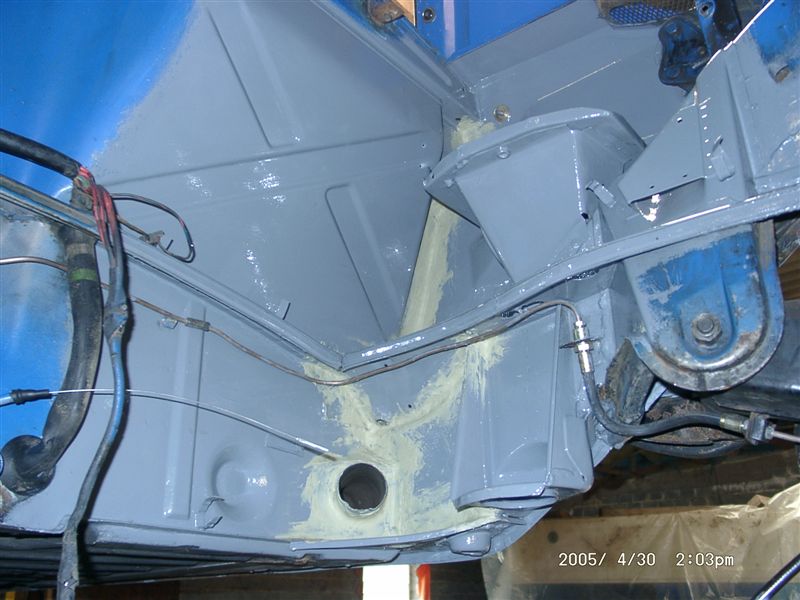
Posted by: michelko May 8 2005, 06:39 AM
Hi everybody,
in the meantime i grinden out the old Primer/rust/dirt mix on the floor panel.
Today i gave it a por 15 coat.
The difference is realy impressive with a clean surface and one stage more with the primer on.
I hope i can take a ride the next weeks
Attached image(s)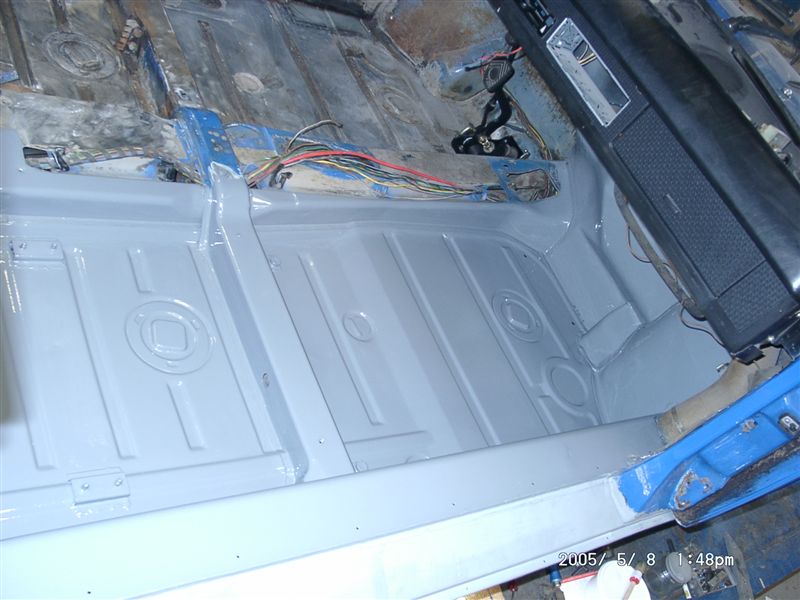
Posted by: michelko May 8 2005, 06:40 AM
#2
Attached image(s)
Posted by: michelko May 8 2005, 06:40 AM
#3
Posted by: michelko May 8 2005, 06:41 AM
ooops
Attached image(s)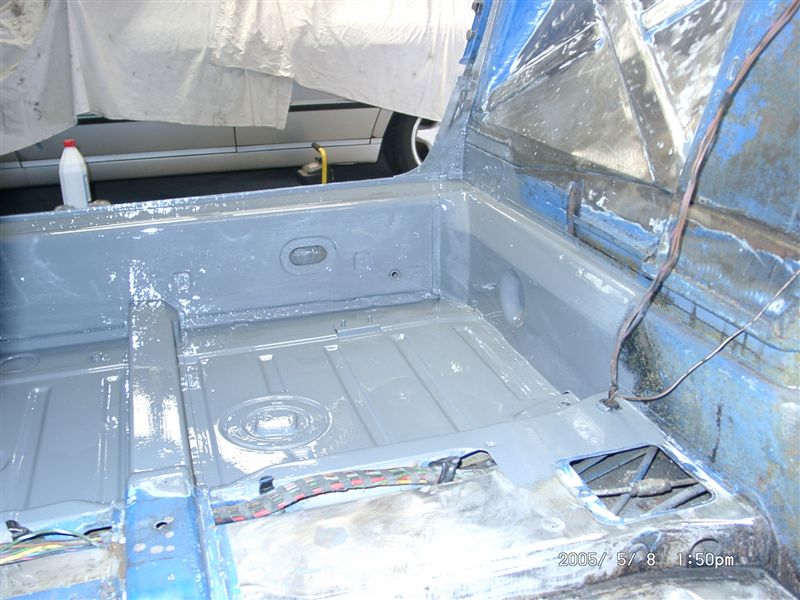
Posted by: michelko May 8 2005, 06:42 AM
#4
Attached image(s)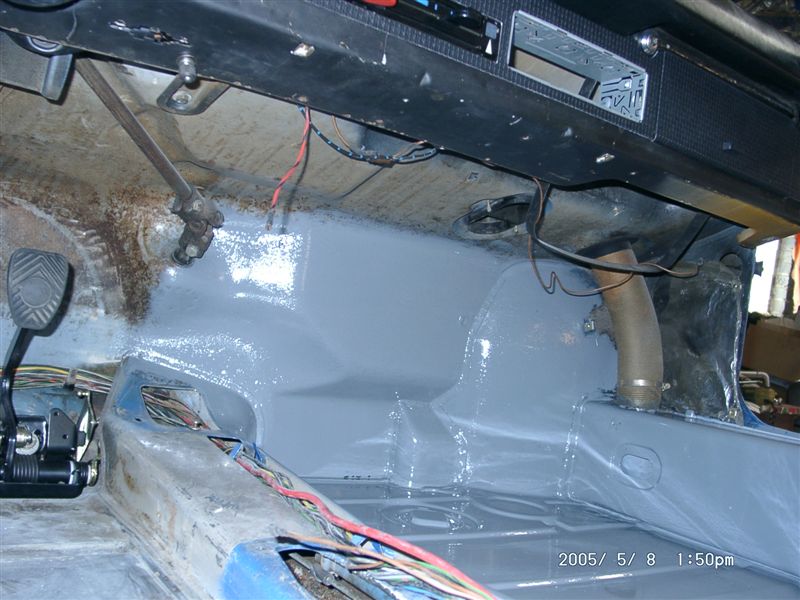
Posted by: michelko May 8 2005, 06:43 AM
and the nice new pedal cluster waiting to get connected
Attached image(s)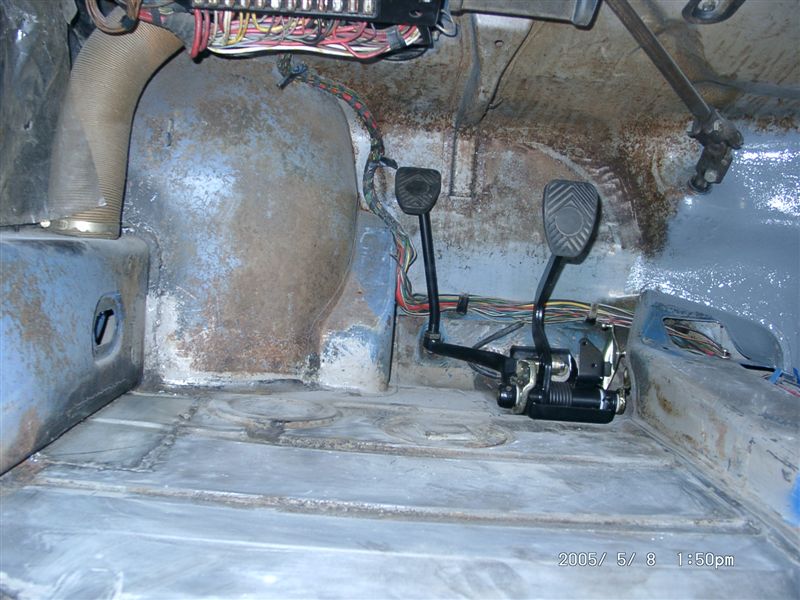
Posted by: CptTripps May 8 2005, 07:11 AM
You are getting close man....doesn't it feel great!
Keep it up...you'll be on the road in no time...
Posted by: michelko May 15 2005, 02:51 AM
Hi together,
this weekend i did the driver side. Metal ready and Por 15 on the floor.
I also wrapped the cables with new textile band (don´t know the right name in english  ).
).
Attached image(s)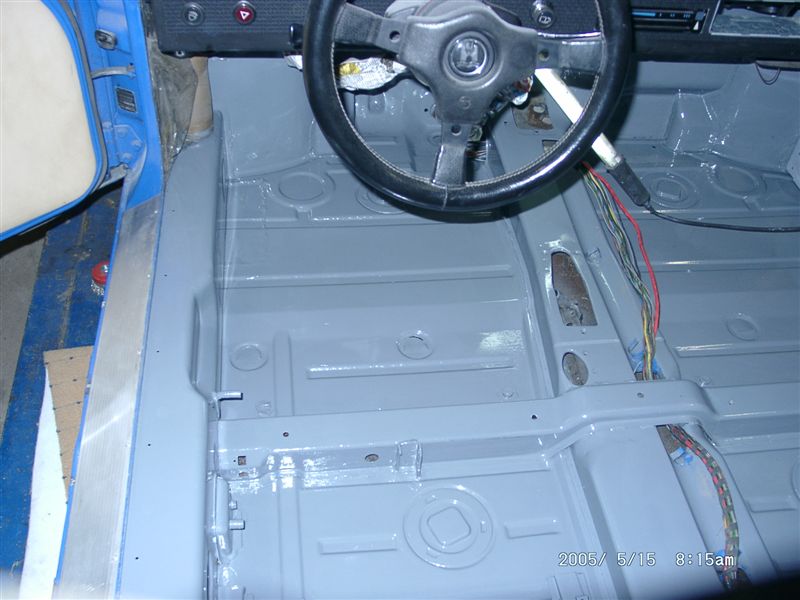
Posted by: michelko May 15 2005, 02:53 AM
this por 15 is realy great, i love that stuff. Better than a i testet till now
Attached image(s)
Posted by: michelko May 15 2005, 02:54 AM
nother
Attached image(s)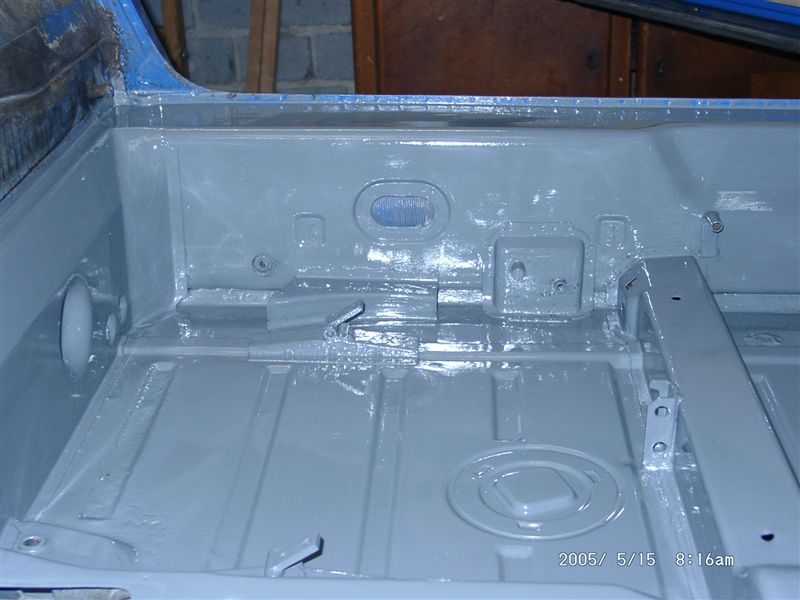
Posted by: michelko May 15 2005, 02:55 AM
cable work
Attached image(s)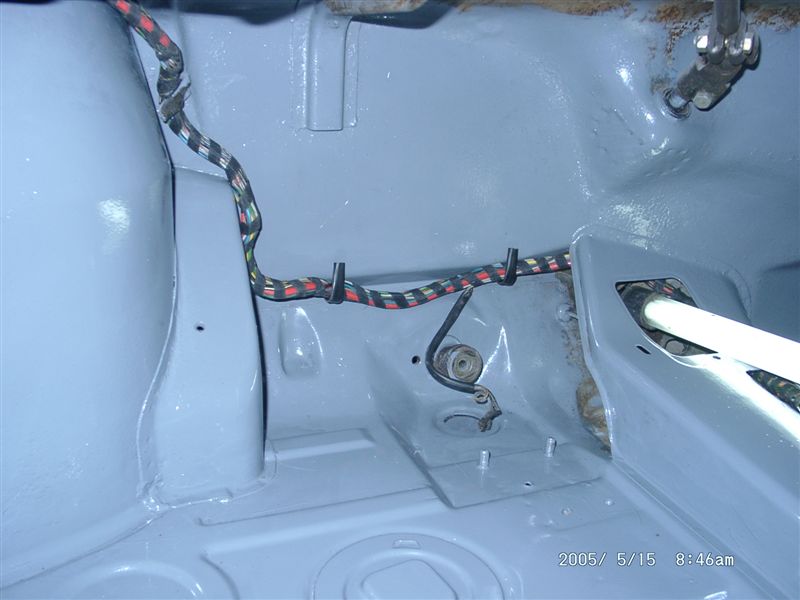
Posted by: michelko May 15 2005, 02:56 AM
with pedal cluster
Attached image(s)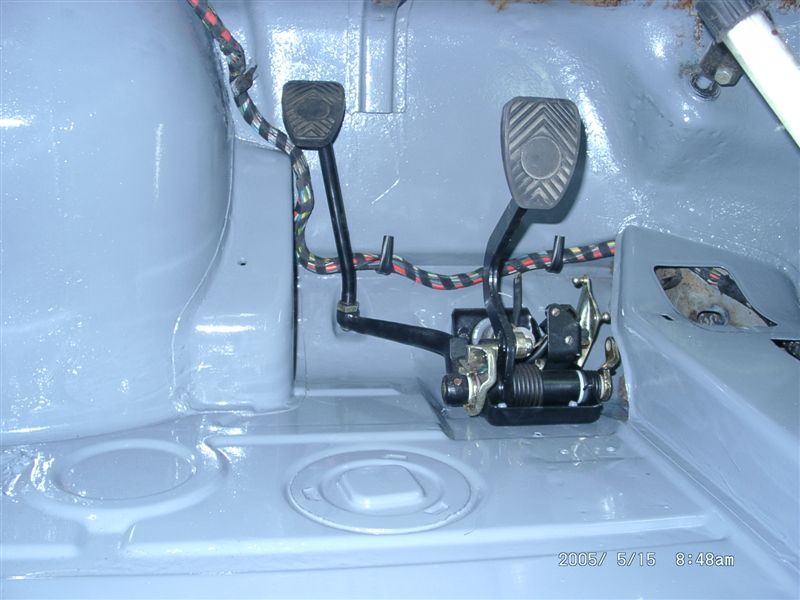
Posted by: michelko May 15 2005, 02:56 AM
fdghsd
Attached image(s)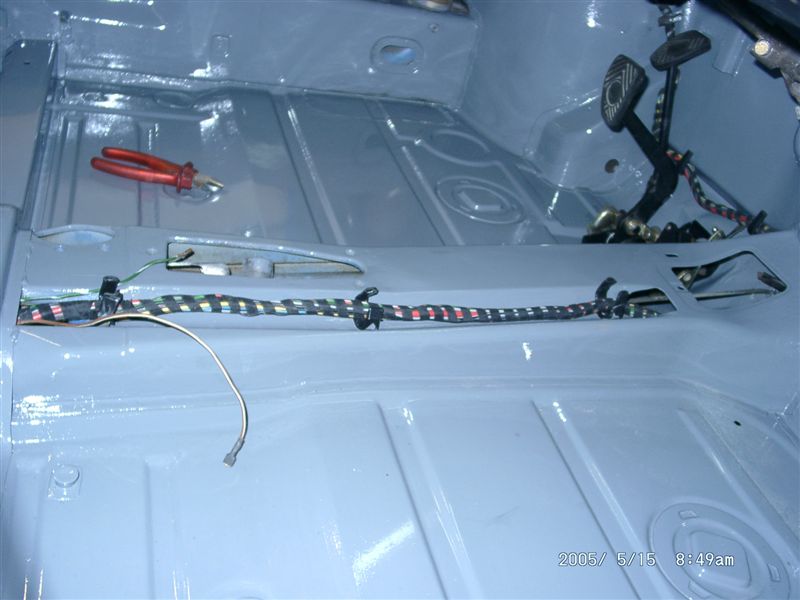
Posted by: michelko May 15 2005, 03:00 AM
and the seat adjuster newly plated.
Now i am waiting for the ordered stainless steel fuel lines.
I am thinking on relocating the fuel pump. I can´t get a working old style pump, and the new stile didn´t fit in the engine compartment .
Attached image(s)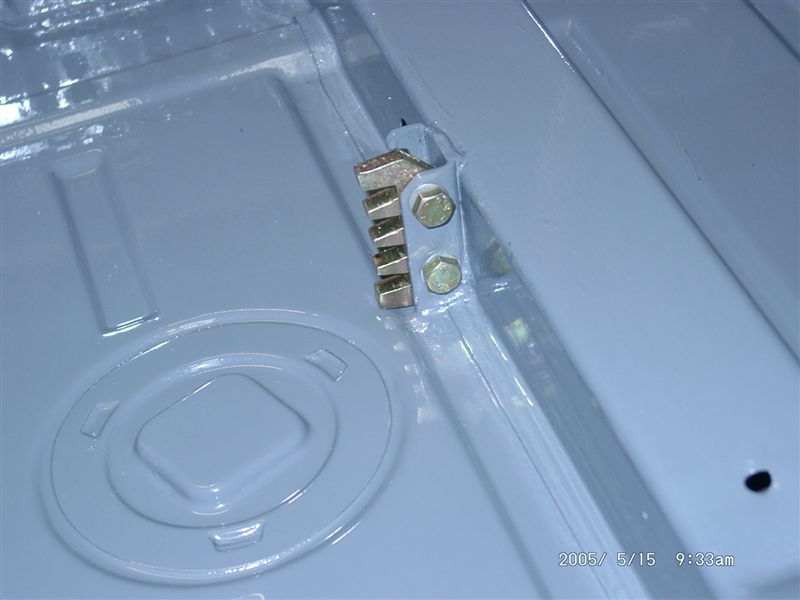
Posted by: CptTripps May 15 2005, 06:48 AM
Great work man!
My fuel pump is up front, I'm not sure that I like it up there, but we'll see. As soon as I turn the key, I can hear it running...SHOULD it be like that...I don't know.
I *DO* know that your car is looking fantastic. Have a 'Goal Date' in mind to drive her?
Posted by: michelko May 15 2005, 12:59 PM
| QUOTE (CptTripps @ May 15 2005, 04:48 AM) |
| Great work man! My fuel pump is up front, I'm not sure that I like it up there, but we'll see. As soon as I turn the key, I can hear it running...SHOULD it be like that...I don't know. I *DO* know that your car is looking fantastic. Have a 'Goal Date' in mind to drive her? |
Thanks for the flowers,
but your work is also impressive
. After i saw your paint job i decided to try this part too.I think you can hear the pump anyway front or rear for a couple of seconds.
Goal for driving is asap.
To get the engine in, i have to paint the engine bay. Don´t want to pull the engine a second time to get this done.
Tie coat primer arrived last week, and i have to buy some (adriatic-) blue paint to complete this part.
I think the compartmment is a nice practice ground.
So i think first drive out could be end of june?! Hope so.
When didi you drive yours again?
Posted by: michelko May 22 2005, 02:01 AM
Hello all,
this weekend i removed the poorly repaired engine bay hinge on the driverside.
the hood was about 5 mm lower then on the other side. Someone has used some solder instead of welding the broken part .
Attached image(s)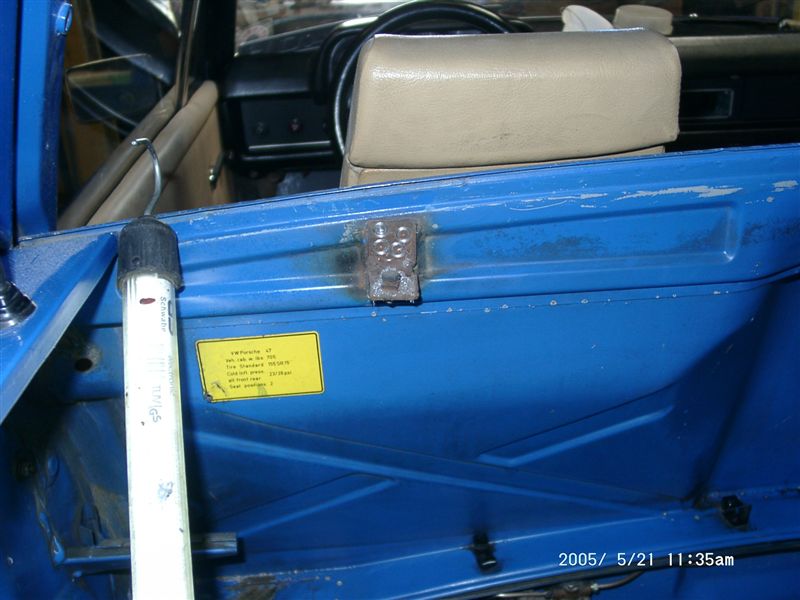
Posted by: michelko May 22 2005, 02:03 AM
the passenger side, also rusted but in good shape.
Have only to clean it.
Attached image(s)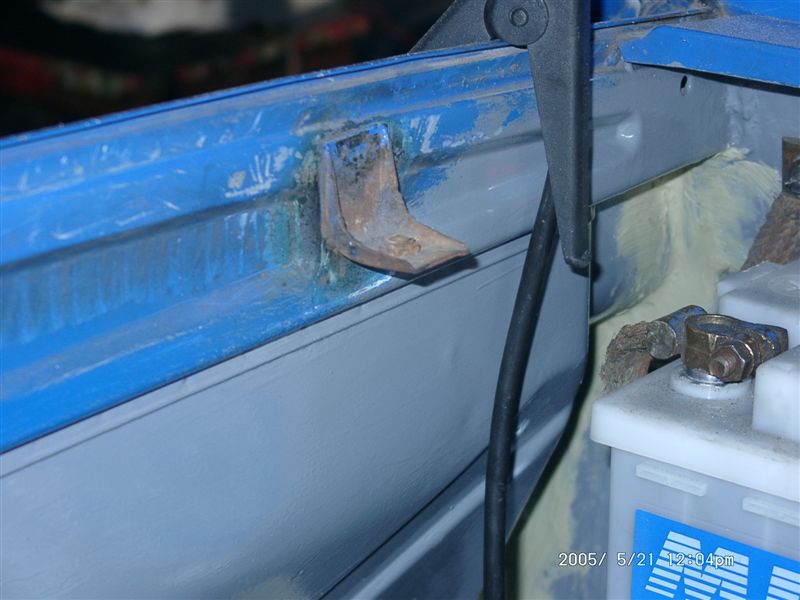
Posted by: michelko May 22 2005, 02:04 AM
driver side out of the car
Attached image(s)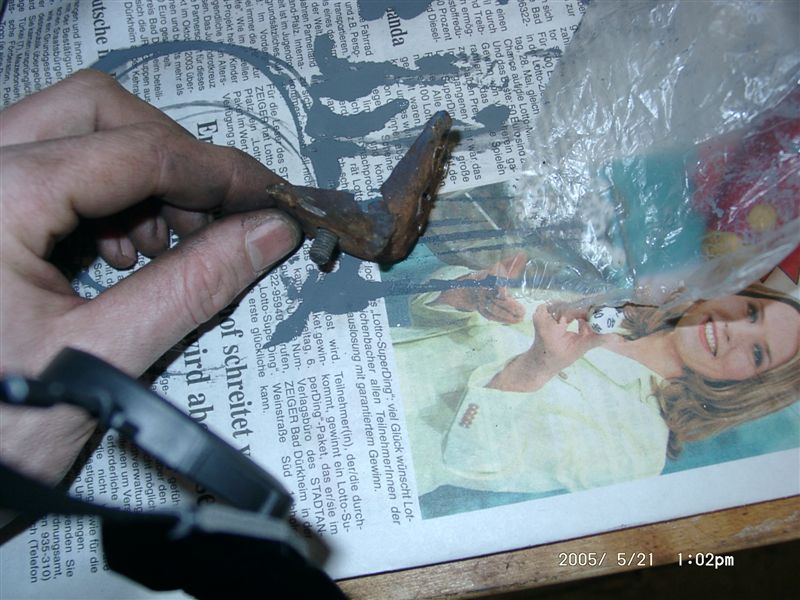
Posted by: michelko May 22 2005, 02:06 AM
and here is the new one. look much stronger than the part i drilled out. I think it is not an OEM part
Attached image(s)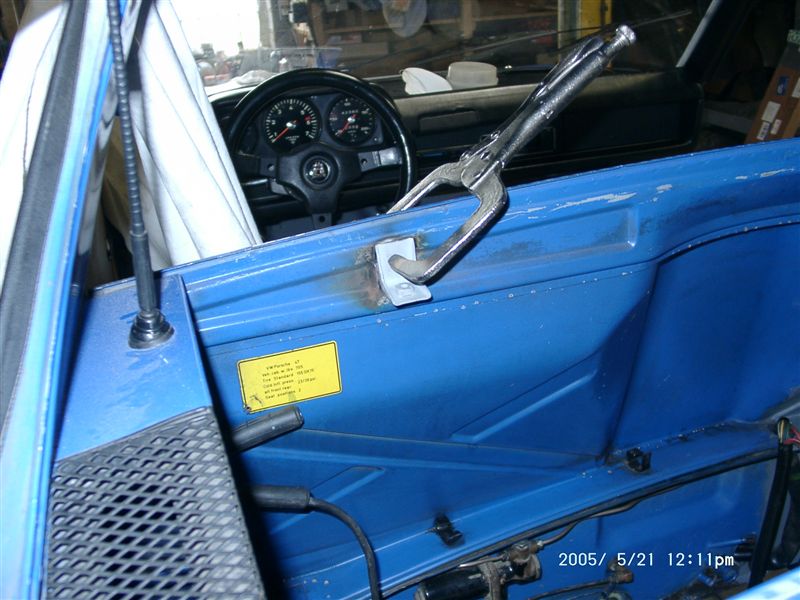
Posted by: michelko May 22 2005, 02:07 AM
welded in
Attached image(s)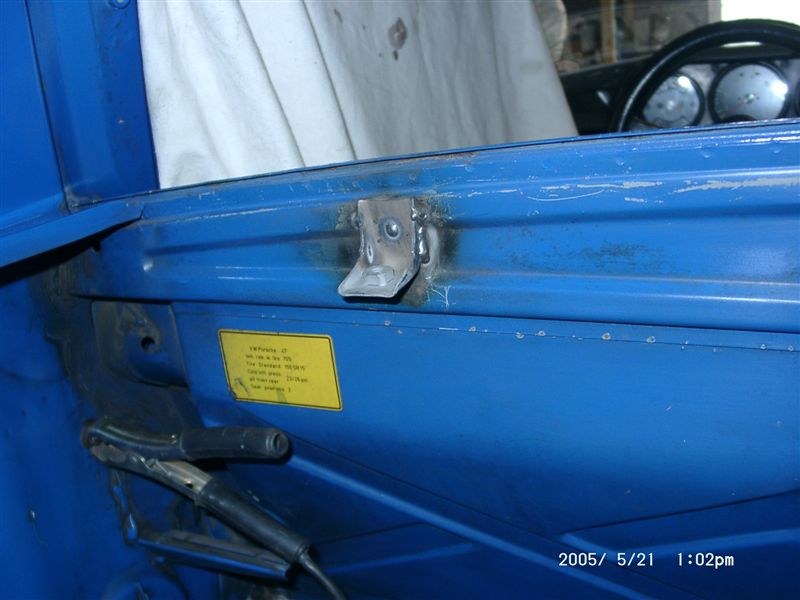
Posted by: michelko May 22 2005, 02:10 AM
last week i drilled the holes for the front sway bar.
this weekend i cutted out the sheet metal to put in the reinforcement plates.
Driver side.
You can also see the new cable for the relocated fuel pump.
Attached image(s)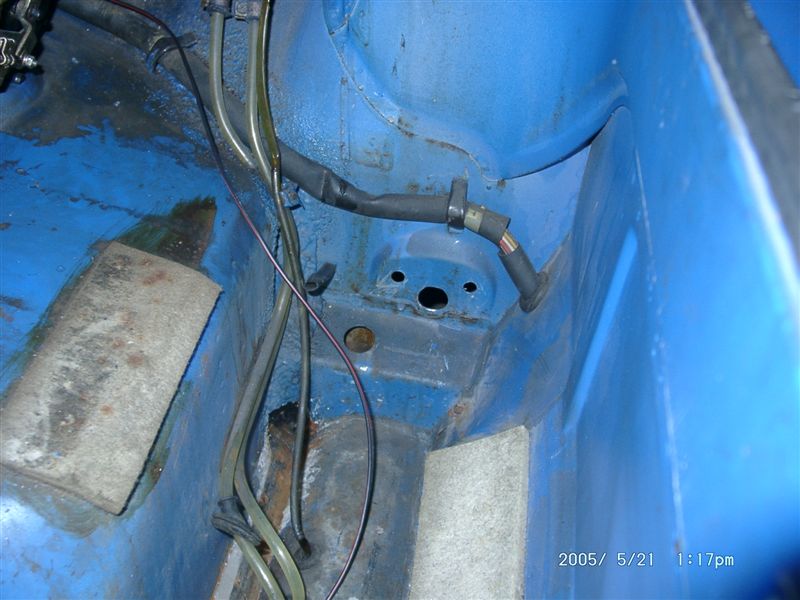
Posted by: michelko May 22 2005, 02:11 AM
passenger side
Attached image(s)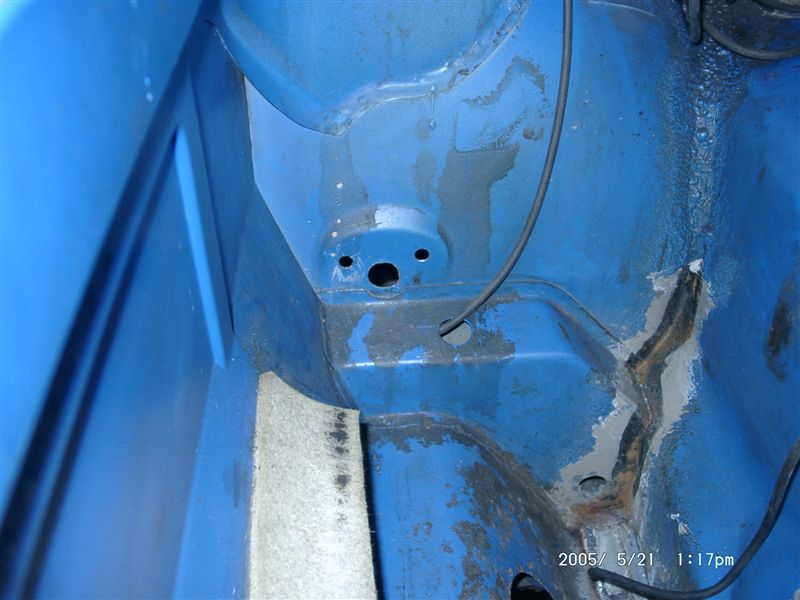
Posted by: michelko May 22 2005, 02:12 AM
cutting the opening
Attached image(s)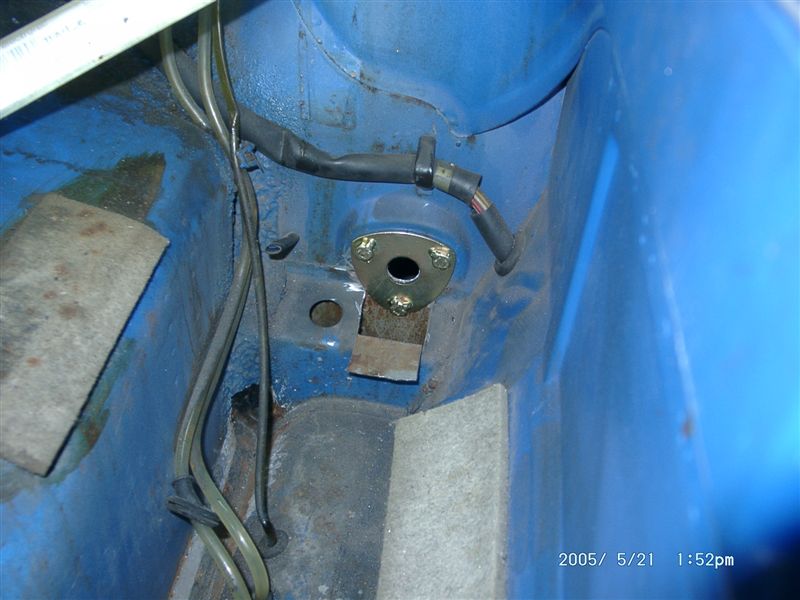
Posted by: michelko May 22 2005, 02:13 AM
without the plate
Attached image(s)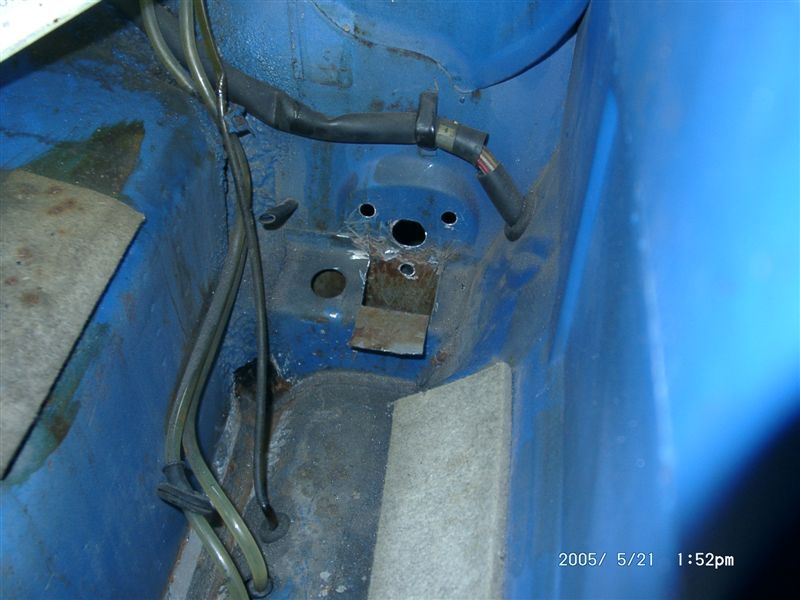
Posted by: michelko May 22 2005, 02:14 AM
view from the wheel side
Attached image(s)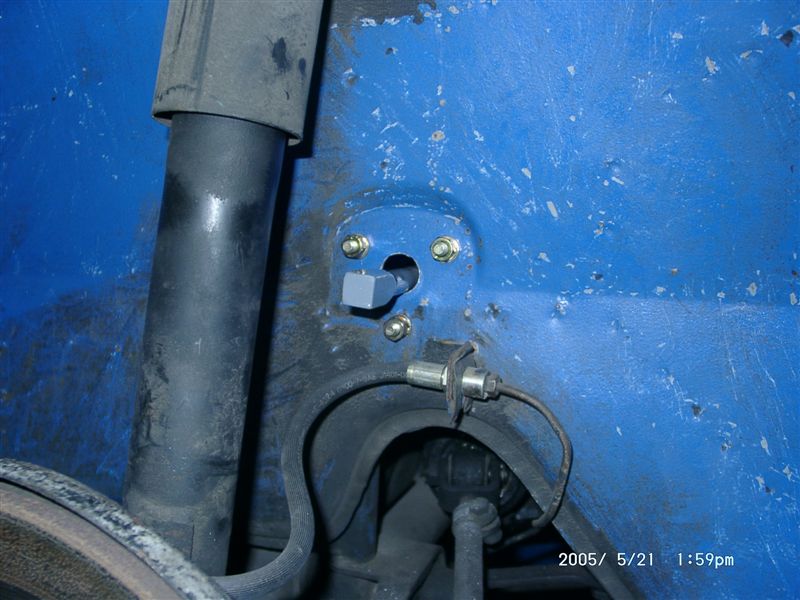
Posted by: Lou W May 22 2005, 02:14 AM
| QUOTE |
| michelko Posted on May 15 2005, 02:00 AM and the seat adjuster newly plated. Now i am waiting for the ordered stainless steel fuel lines. I am thinking on relocating the fuel pump. I can´t get a working old style pump, and the new stile didn´t fit in the engine compartment dry.gif . |
Where are you getting the new fuel lines from?
Are you going to paint over the por15 that you applied on the interior floor boards?
Keep up the great work.
Posted by: michelko May 22 2005, 02:15 AM
Plate welded in and the hole closed
Attached image(s)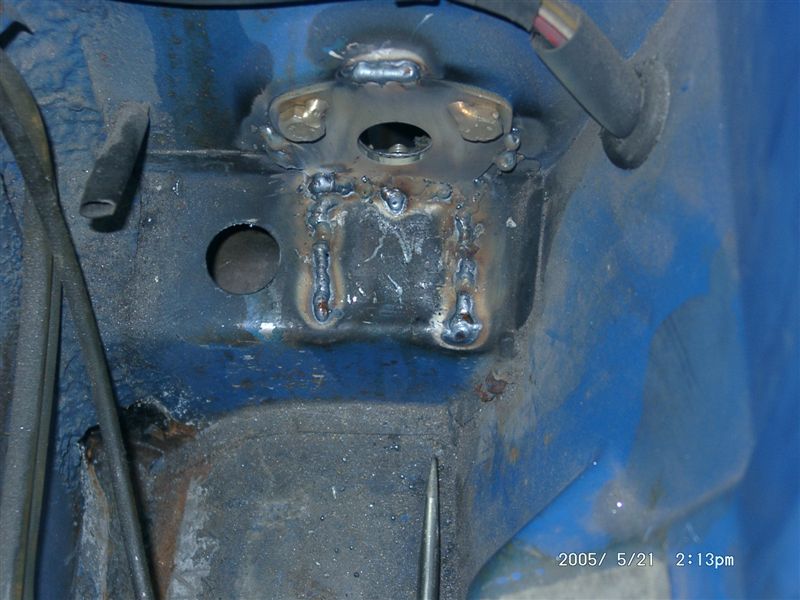
Posted by: michelko May 22 2005, 02:16 AM
same procedure on passenger side
Attached image(s)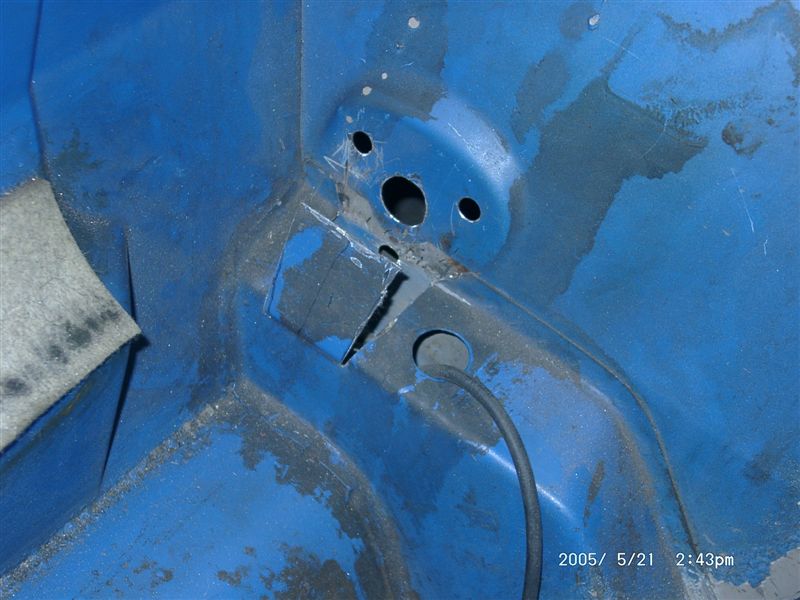
Posted by: michelko May 22 2005, 02:17 AM
welded and closed
Attached image(s)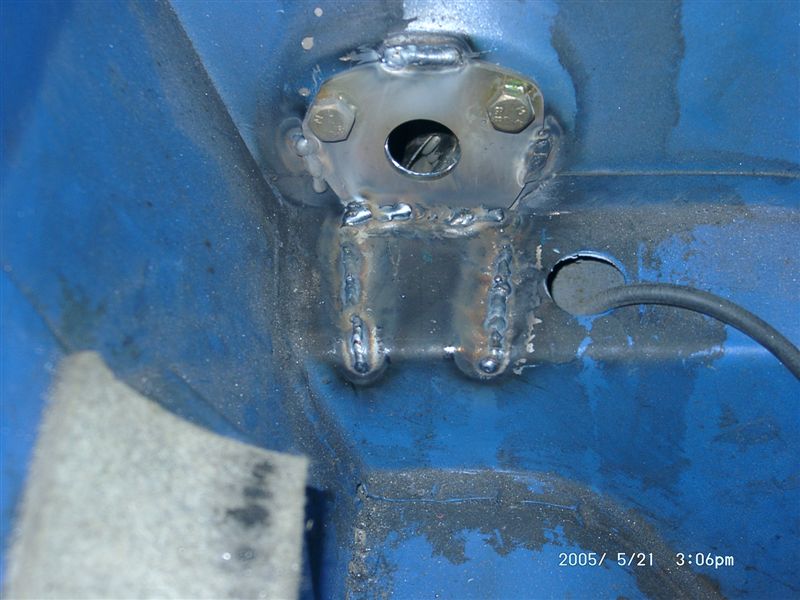
Posted by: michelko May 22 2005, 02:19 AM
and the last one view from wheel side again
Attached image(s)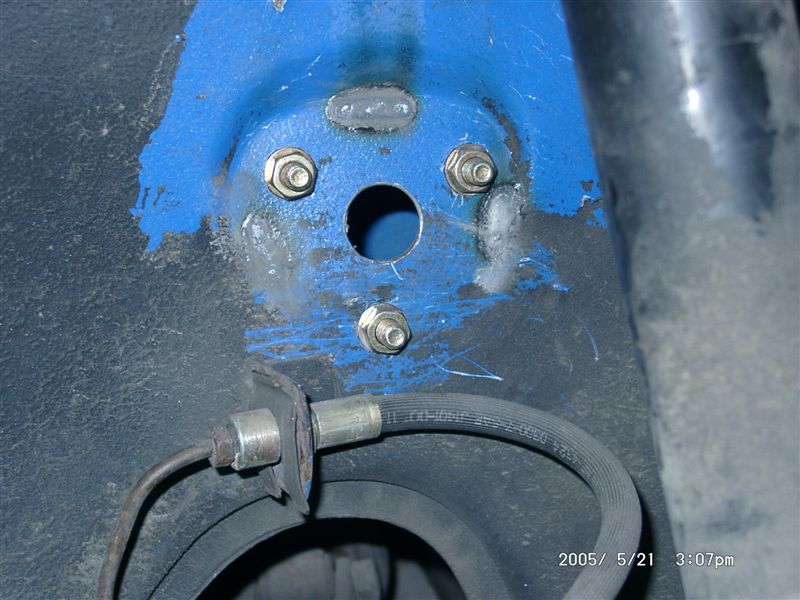
Posted by: Lou W May 22 2005, 02:19 AM
| QUOTE |
| michelko Posted on May 22 2005, 01:10 AM last week i drilled the holes for the front sway bar. this weekend i cutted out the sheet metal to put in the reinforcement plates. |
Did your car have the original factory swaybar upfront?
Posted by: michelko May 22 2005, 02:24 AM
| QUOTE (Lou W @ May 22 2005, 12:14 AM) | ||
Where are you getting the new fuel lines from? Are you going to paint over the por15 that you applied on the interior floor boards? Keep up the great work. |
the brother of my girl friend is working in a pipe building company.
he ordered the pipe for me. This one are called "ermeto" pipes in germany.
don´t know if i should paint over the por 15? nobody will see this after the sound deadening material and the carpet is in.
Posted by: michelko May 22 2005, 02:28 AM
| QUOTE (Lou W @ May 22 2005, 12:19 AM) | ||
Did your car have the original factory swaybar upfront? |
nope. i bought a used 911 swaybar. and new reinforcment plates from a 914 parts dealer in germany. I grinded down the sway bar to bare metal and por15ed it. I think i will bring the drop links to the sand blaster, it is to much work to clean them by hand
. maybe i will get them plated or they will also be por15ed.
Posted by: Lou W May 22 2005, 02:29 AM
| QUOTE |
| the brother of my girl friend is working in a pipe building company. he ordered the pipe for me. This one are called "ermeto" pipes in germany. don´t know if i should paint over the por 15? nobody will see this after the sound deadening material and the carpet is in. confused24.gif |
Are the fuel lines similar to what is being offered by one of our members?
Yeah, that makes sense, your'e not going to see it once it covered.
Posted by: Lou W May 22 2005, 02:34 AM
| QUOTE |
| nope. i bought a used 911 swaybar. and new reinforcment plates from a 914 parts dealer in germany. I grinded down the sway bar to bare metal and por15ed it. I think i will bring the drop links to the sand blaster, it is to much work to clean them by hand dry.gif . maybe i will get them plated or they will also be por15ed. |
Oh, ok, I was trying to figure out if you were stiffening the mounts for the stock swaybar, or adding one. I'm trying to decide if powder coating the sway bars would work, If not, then I'll probably just paint them. I'm getting ready to powder coat parts of my suspension, and now would be the time to do it.
Posted by: michelko May 22 2005, 02:40 AM
| QUOTE (Lou W @ May 22 2005, 12:29 AM) | ||
Are the fuel lines similar to what is being offered by one of our members? Yeah, that makes sense, your'e not going to see it once it covered. |
don´t know if they are similar
I measured the old ones: sucktionline is 10mm outer diameter, returnline is 8 mm. After i decided to relocate the fule pump to the front i am using now both line 8 mm. now iw ill have a return line and a pressure line, sucktionline is realy short, i think 30-40 cm from tank to pump.
Posted by: michelko May 24 2005, 12:57 PM
Hi ogether,
yesterday i gotm the stainless steel piping for the fuel lines.
Very nice to work with. I made both lines of 8 mm pipes.
Attached image(s)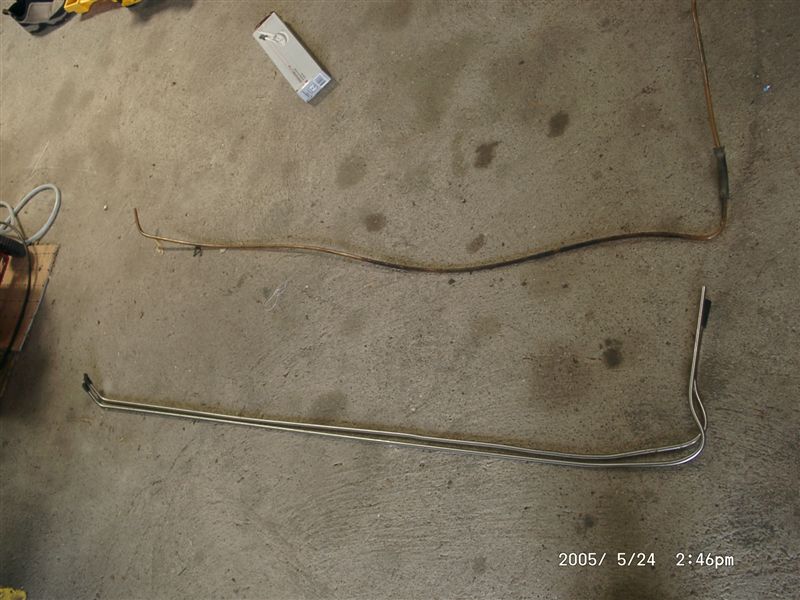
Posted by: michelko May 24 2005, 12:57 PM
nother view
Attached image(s)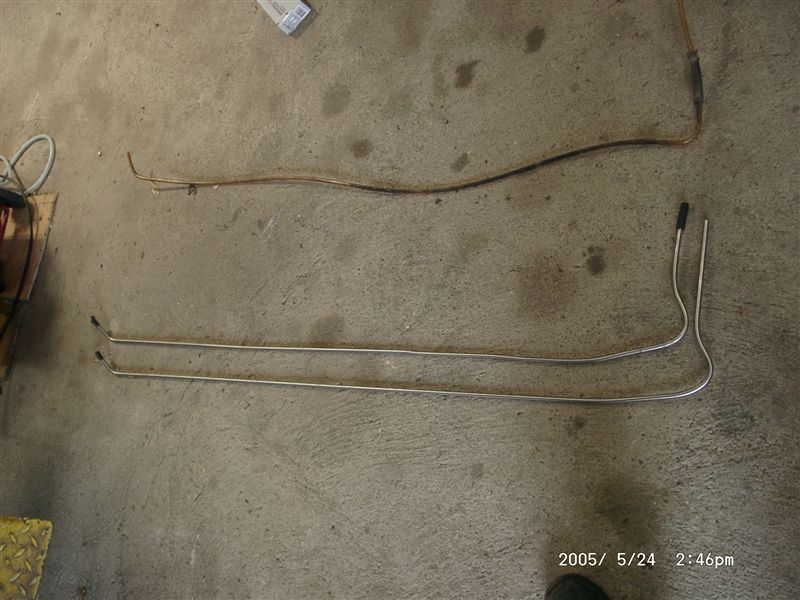
Posted by: michelko May 24 2005, 12:59 PM
i decided to make two parts of each line and conect them with high pressure fuel line. much easyer to handle
Attached image(s)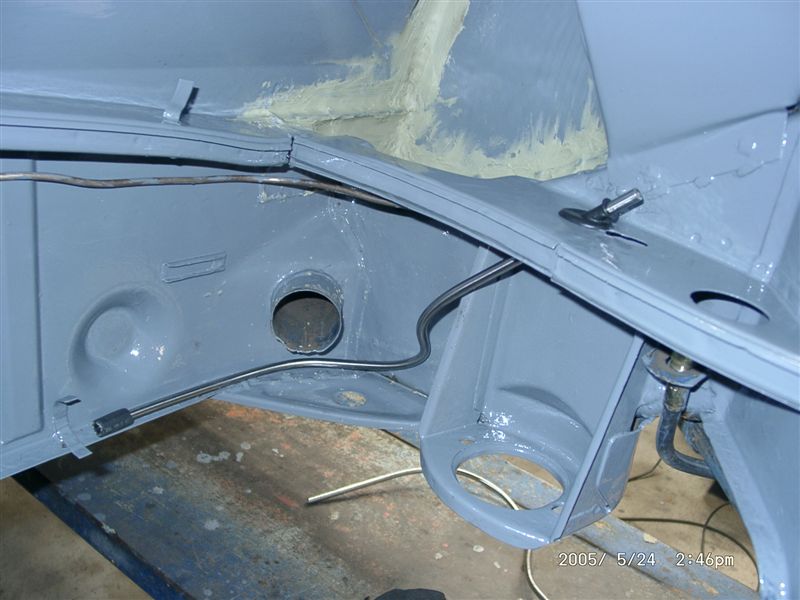
Posted by: michelko May 24 2005, 01:00 PM
with grommets installed
Attached image(s)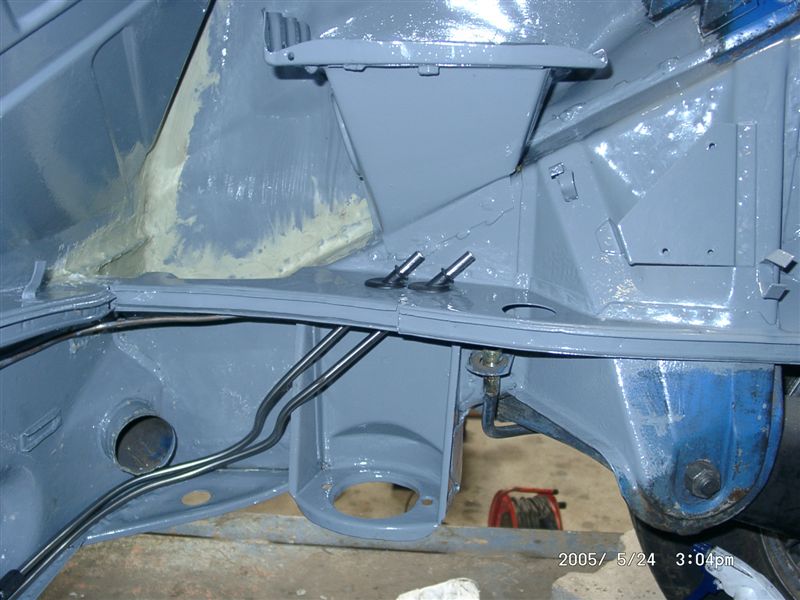
Posted by: michelko May 24 2005, 01:03 PM
i flared the ends of the pipes so they should hold the pressure, hope so.
i did also some wire work. the trunk cables are new wraped with tape and i made the connection for the licence plat light new
Attached image(s)
Posted by: michelko May 24 2005, 01:04 PM
nother
Attached image(s)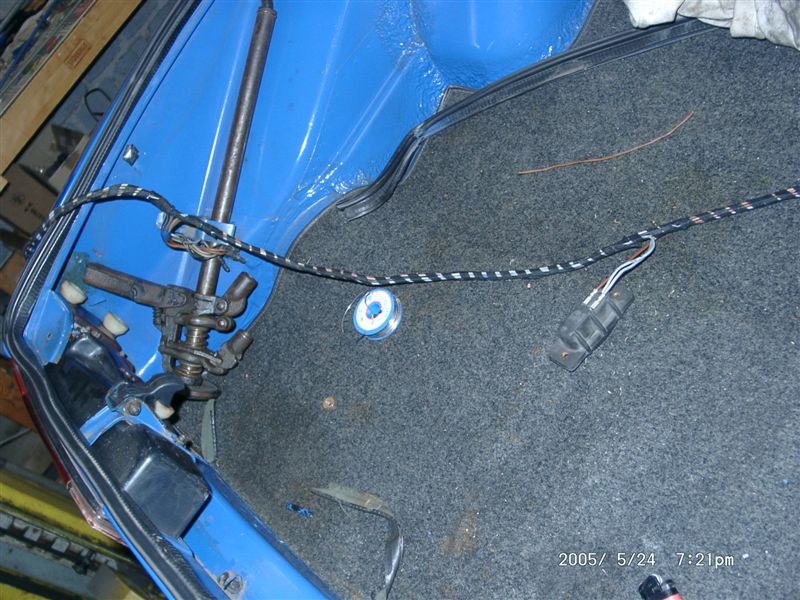
Posted by: michelko May 24 2005, 01:07 PM
last but not least i did the rest of cleaning and rust treatment in the engine compartment. Next step will be the tie coat primer and then a shot of nice blue colour (bought 1 l last friday).
Attached image(s)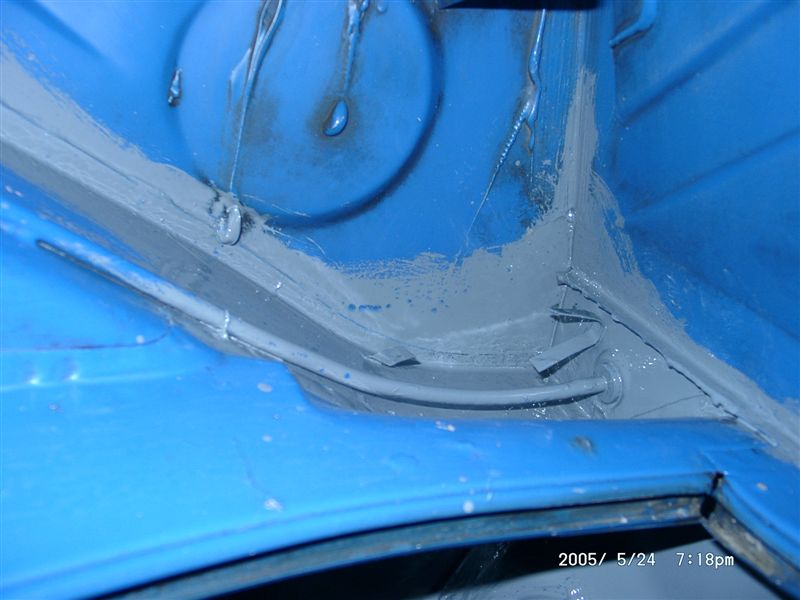
Posted by: michelko May 24 2005, 01:08 PM
nother
Attached image(s)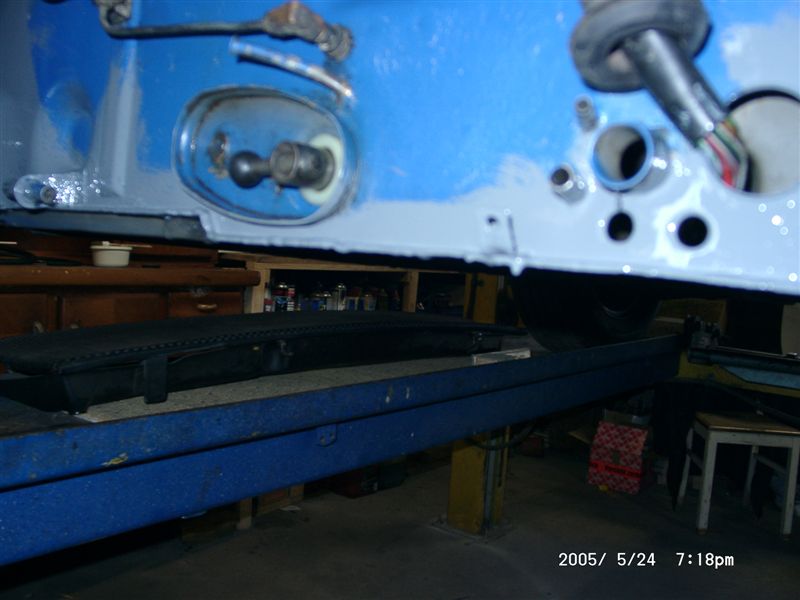
Posted by: michelko May 24 2005, 01:08 PM
nother one
Attached image(s)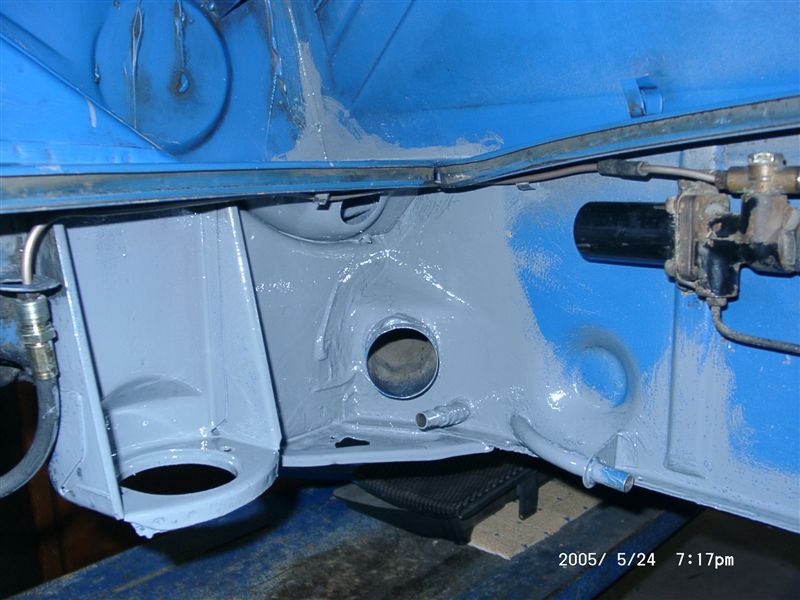
Posted by: michelko May 24 2005, 01:10 PM
and the new (NOS) trunk hinges in colour
Attached image(s)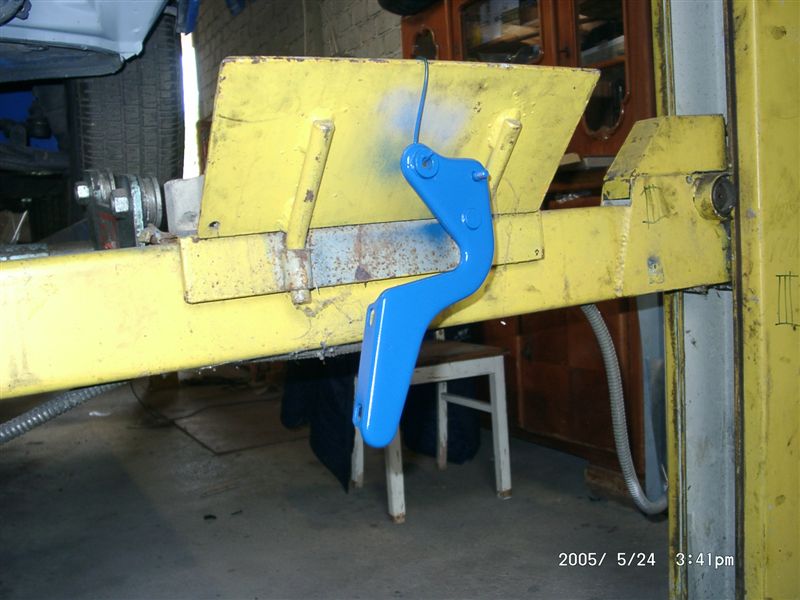
Posted by: michelko May 24 2005, 01:11 PM
Attached image(s)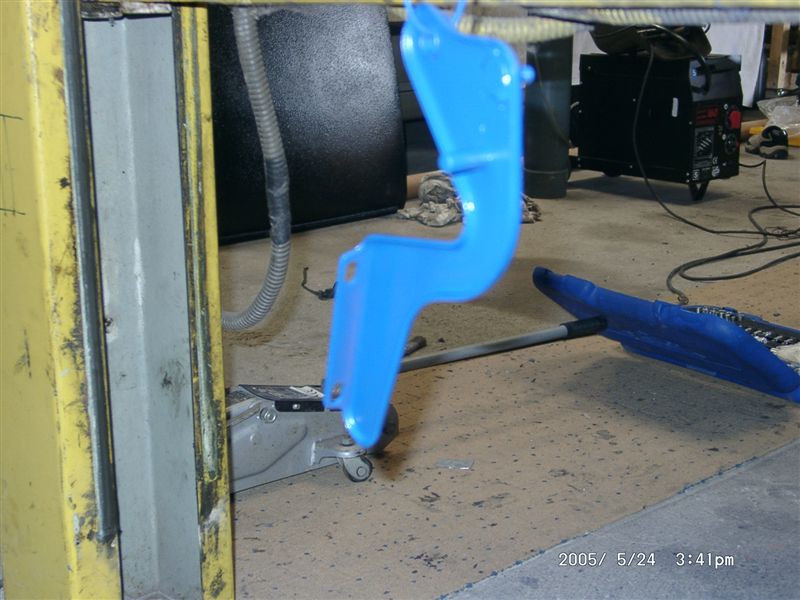
Posted by: tat2dphreak May 24 2005, 02:27 PM
how I've gone this long without reading this thread is beyond me! you have done an amazing job!!
this thread gives me faith to do what I have to do!
Posted by: SirAndy May 24 2005, 02:39 PM
congrats!
looks like you're getting really close to drive her again ...
Andy
Posted by: michelko Jun 2 2005, 02:23 PM
little update on the fuel pump relocation process. i fabricatet some sheet metal to mount the fuel pump at the stock position of the late cars.
Printet on paper and cutted it out with the angle grinder.
Attached image(s)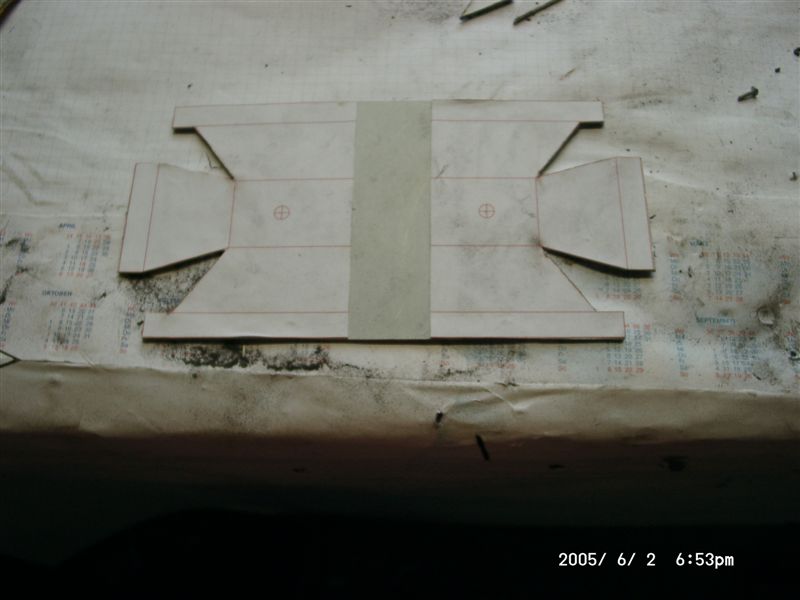
Posted by: michelko Jun 2 2005, 02:24 PM
some bending
Attached image(s)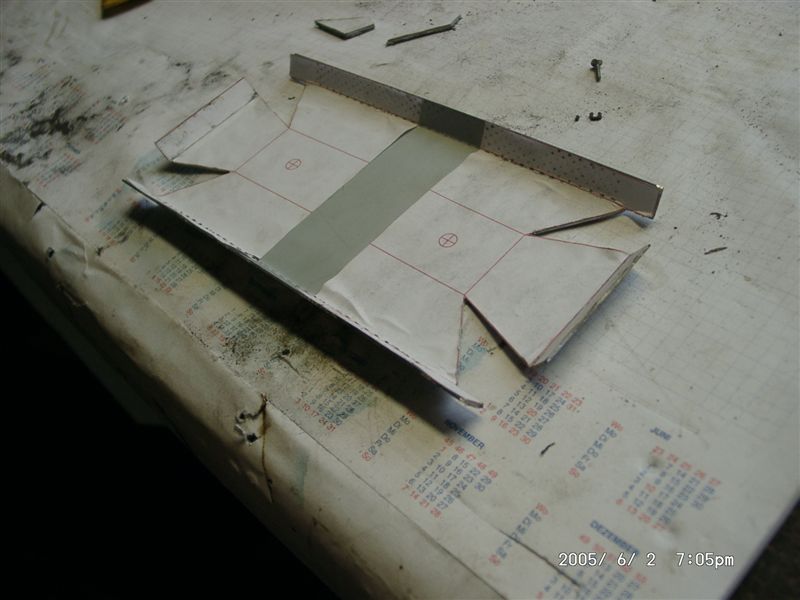
Posted by: michelko Jun 2 2005, 02:24 PM
more
Attached image(s)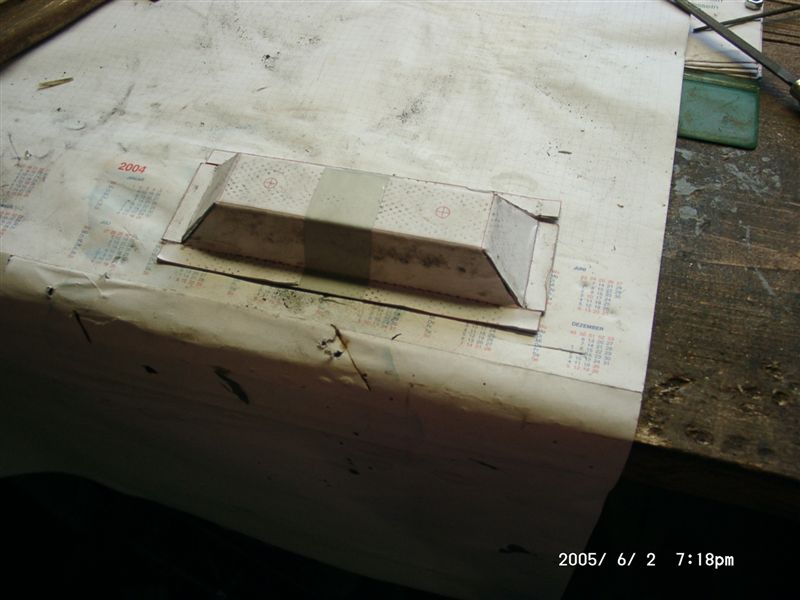
Posted by: michelko Jun 2 2005, 02:24 PM
nother shot
Attached image(s)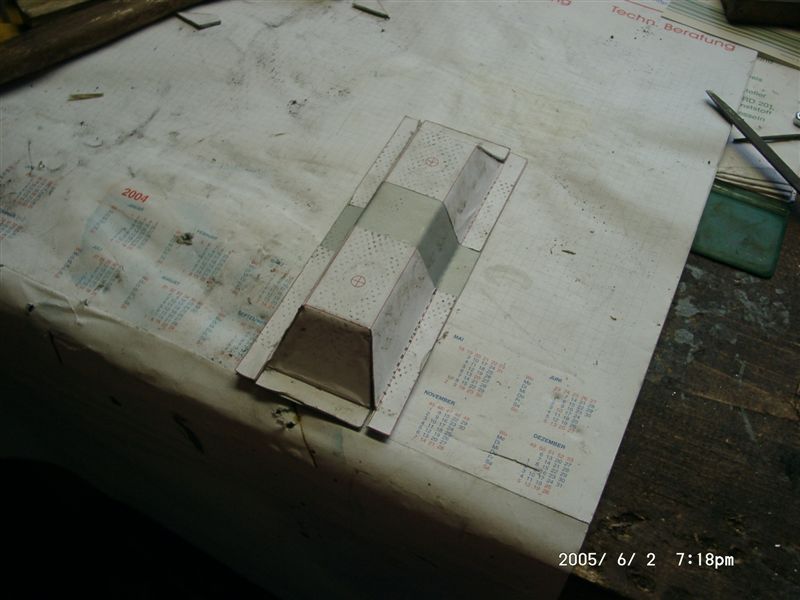
Posted by: michelko Jun 2 2005, 02:25 PM
welding a little
Attached image(s)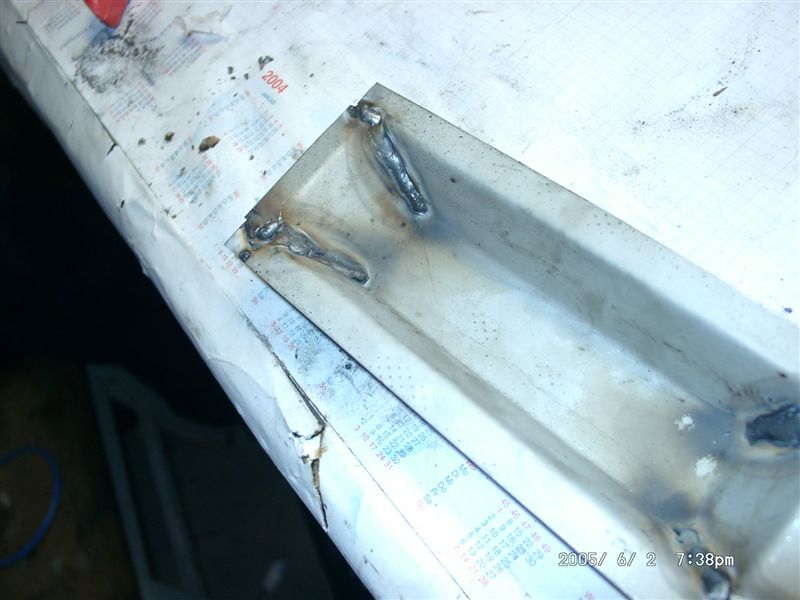
Posted by: michelko Jun 2 2005, 02:26 PM
grinding
Attached image(s)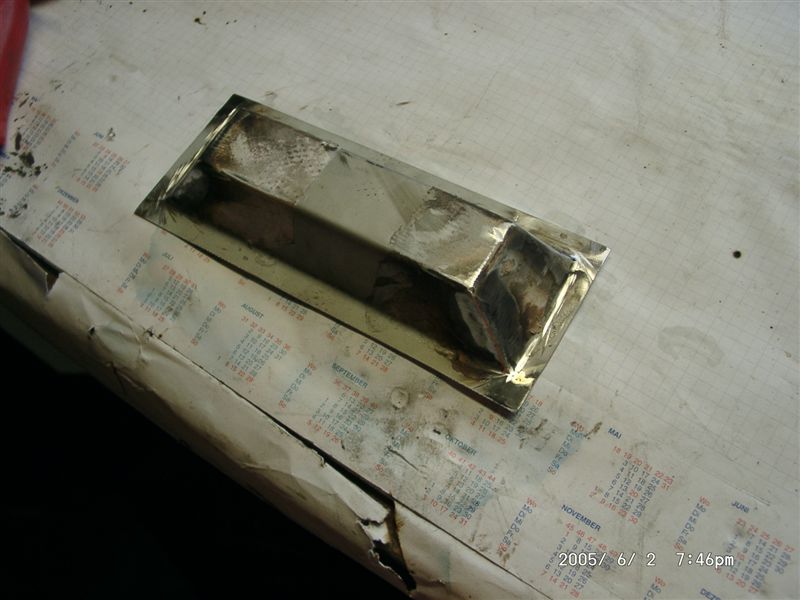
Posted by: michelko Jun 2 2005, 02:27 PM
pump with rubber mounts
Attached image(s)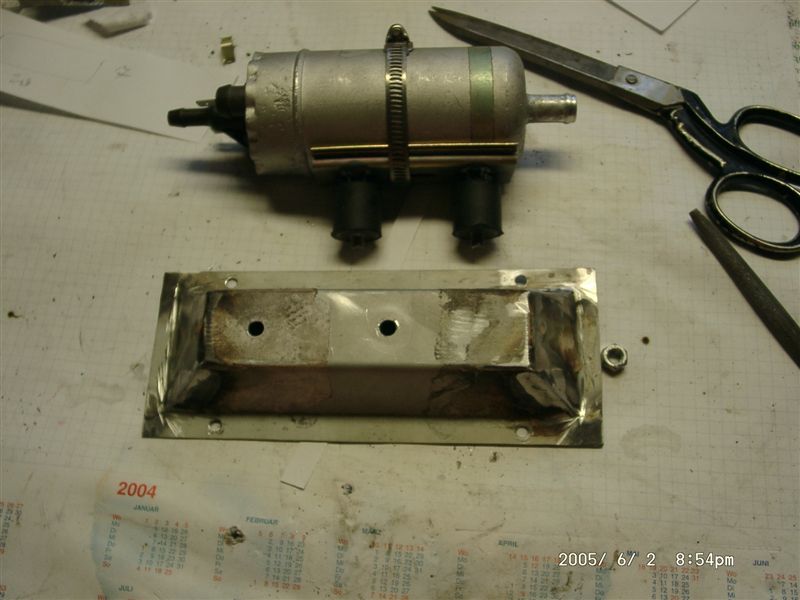
Posted by: michelko Jun 2 2005, 02:27 PM
assembled
Attached image(s)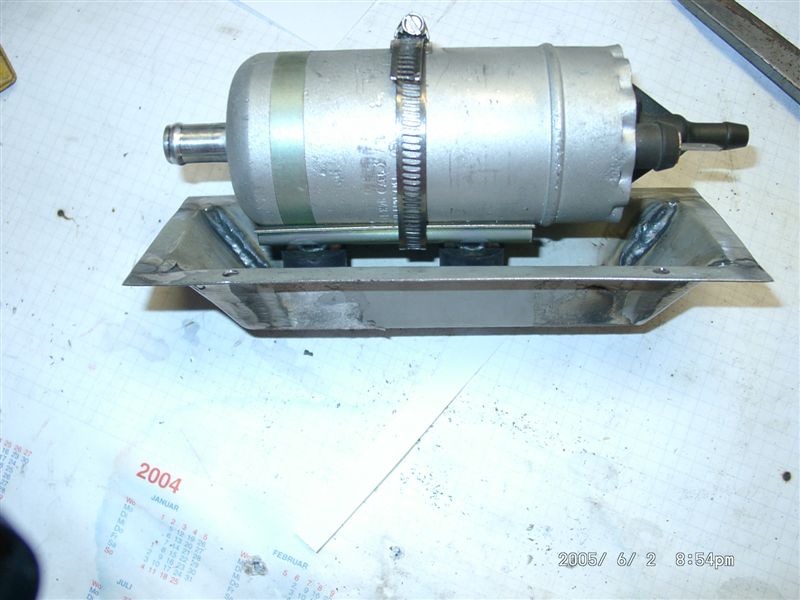
Posted by: michelko Jun 2 2005, 02:28 PM
in place
Attached image(s)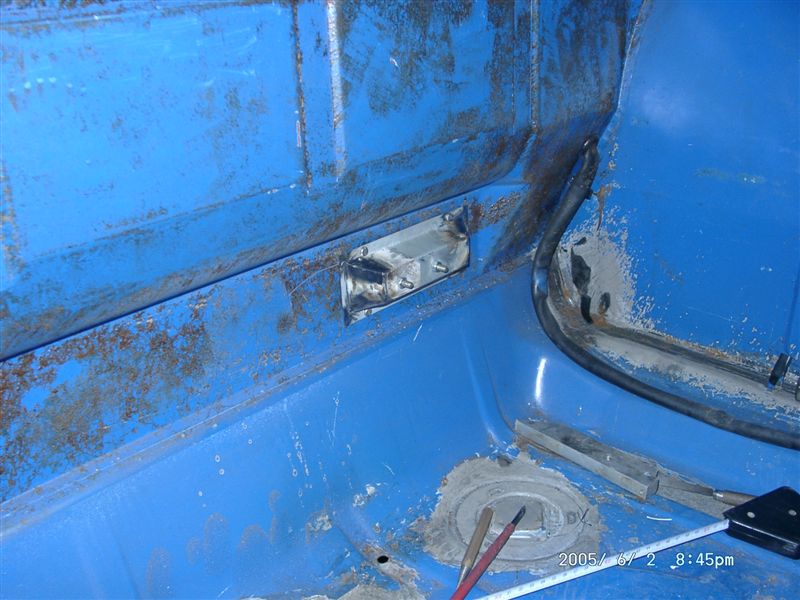
Posted by: michelko Jun 2 2005, 02:29 PM
access hole
Attached image(s)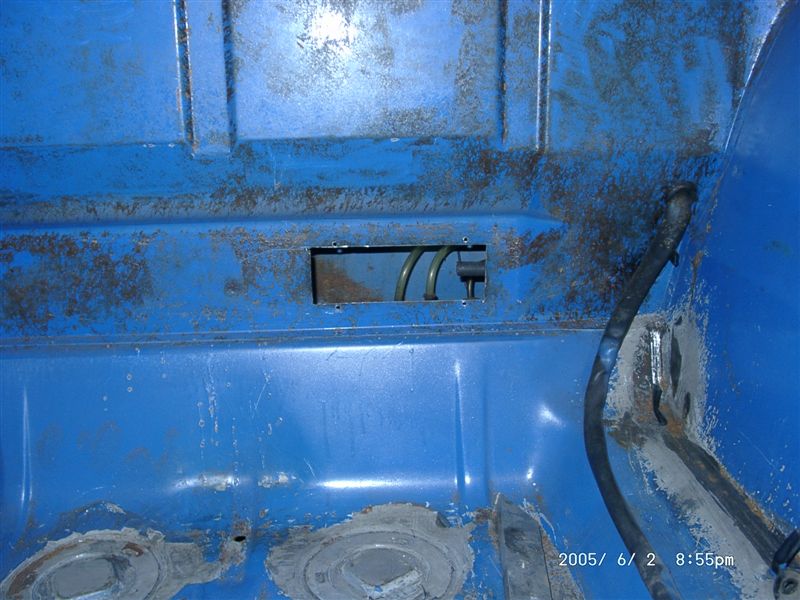
Posted by: michelko Jun 2 2005, 02:29 PM
fuel compartment.
Attached image(s)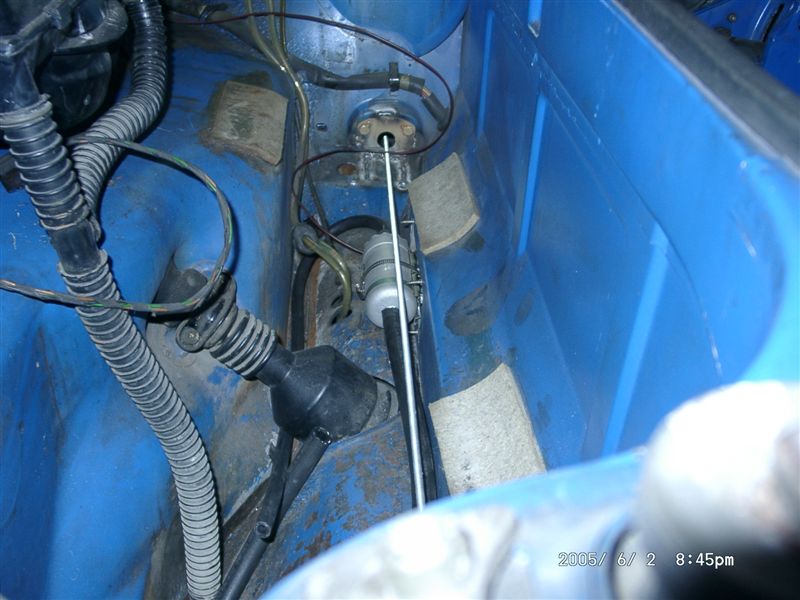
Posted by: Travis Neff Jun 2 2005, 02:56 PM
Great Job!
Posted by: watsonrx13 Jun 2 2005, 05:12 PM
Michelko great job. One question, where are you going to position the fuel filter? Thanks for the pics as I'm going to be moving my fuel pump to the front soon....
Again, congrats on the excellent progress...
Posted by: michelko Jun 2 2005, 11:52 PM
| QUOTE (watsonrx13 @ Jun 2 2005, 03:12 PM) |
| Michelko great job. One question, where are you going to position the fuel filter? Thanks for the pics as I'm going to be moving my fuel pump to the front soon.... Again, congrats on the excellent progress... |
dont know how to go with the fuel filter
. There are two way in my opinion.I have a new original filter (cube) but the fittingsof this are 8mm outside. Suktionline of the pump is 12 mm, this wont fit witout an adapter! Pressure side of the pump is 8mm so the filter will fit, but i think it was never ment to work under pressure!
Nother idea is to use a modern jetronik filter. they are used in the presureline of the pump.
Have to buy one and test it.
Posted by: Quebecer Jun 3 2005, 06:50 AM
Freaking amazing !!
Never seen such clear pictures and explanations for relocation of the fuel pump.
Thanks a whole bunch for your great contributions to this site.
Posted by: tat2dphreak Jun 3 2005, 09:59 AM
great job man!! that is slick!
Posted by: michelko Jun 4 2005, 10:17 AM
today i did some priming with the tie coat primer (por 15 system). Tomorow i will do the second layer and next weekend i will shoot the blue.
Attached image(s)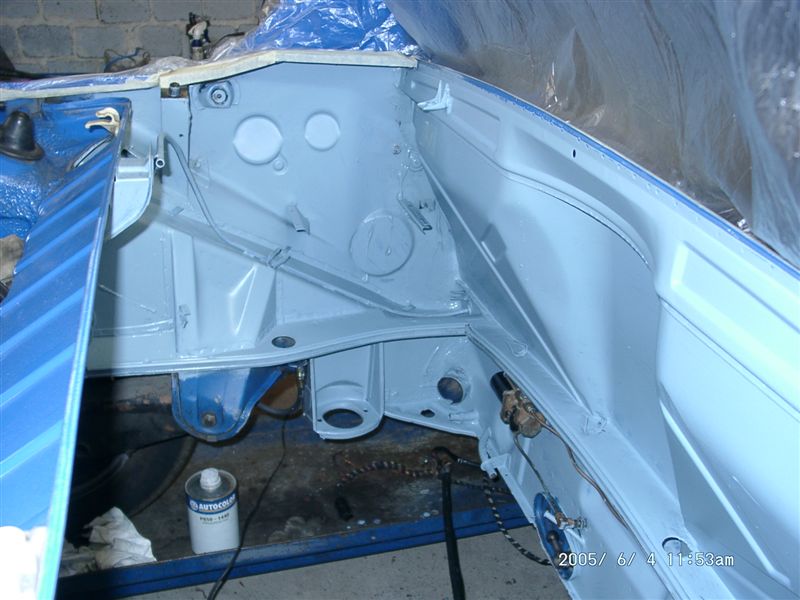
Posted by: michelko Jun 4 2005, 10:18 AM
#2
Attached image(s)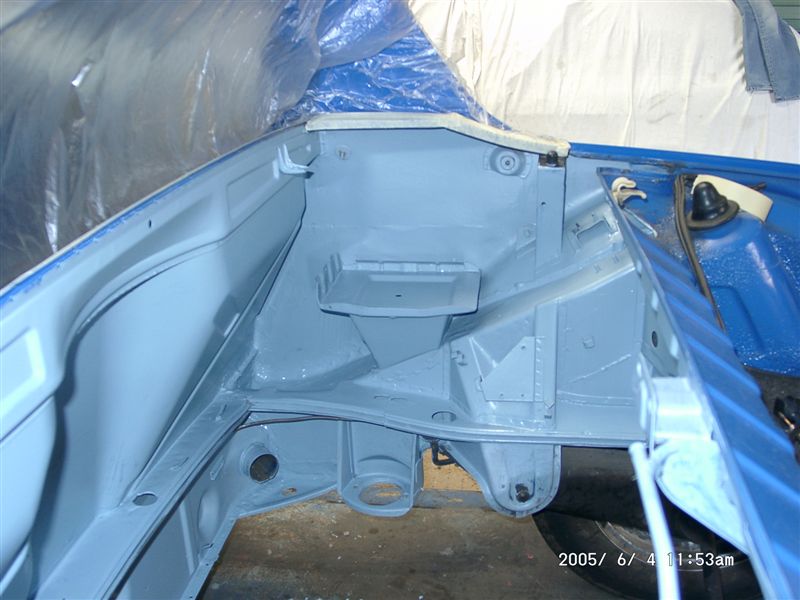
Posted by: michelko Jun 4 2005, 10:18 AM
#3
Attached image(s)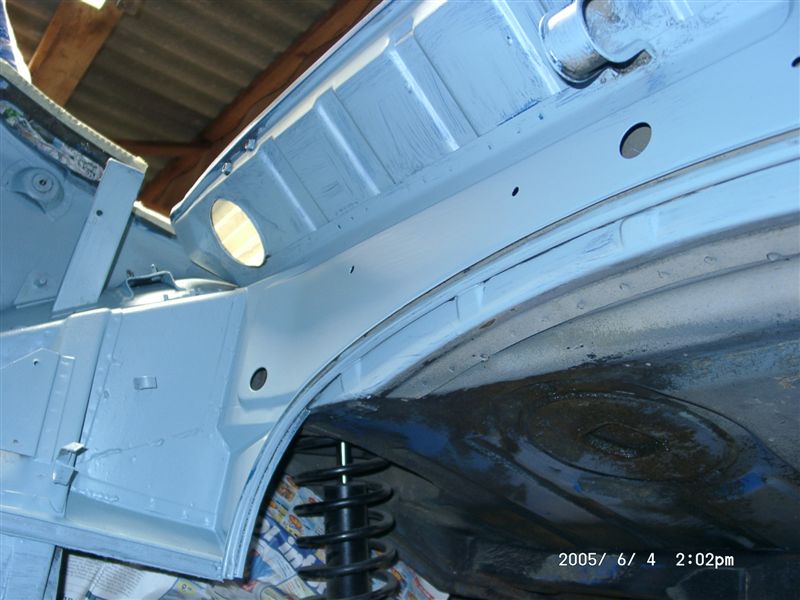
Posted by: michelko Jun 4 2005, 10:19 AM
#4
Attached image(s)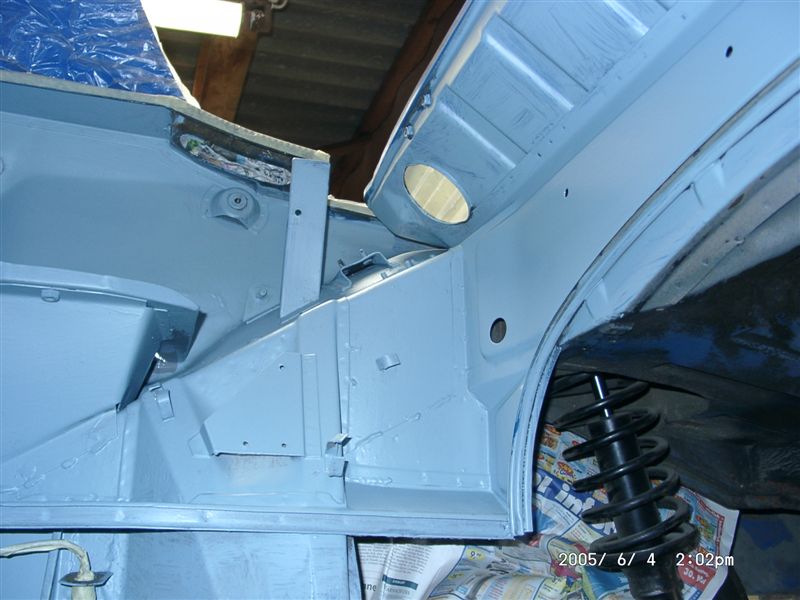
Posted by: michelko Jun 4 2005, 10:20 AM
#5
Attached image(s)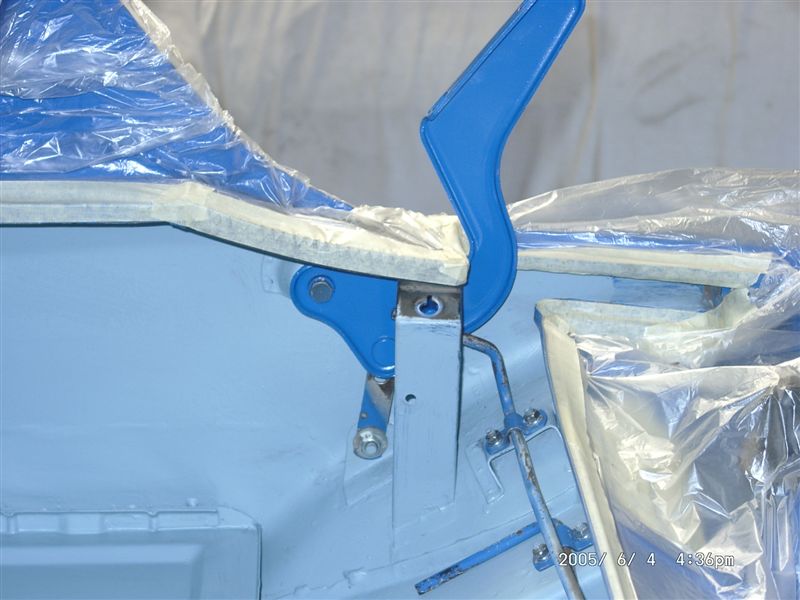
Posted by: michelko Jun 4 2005, 10:20 AM
#6
Attached image(s)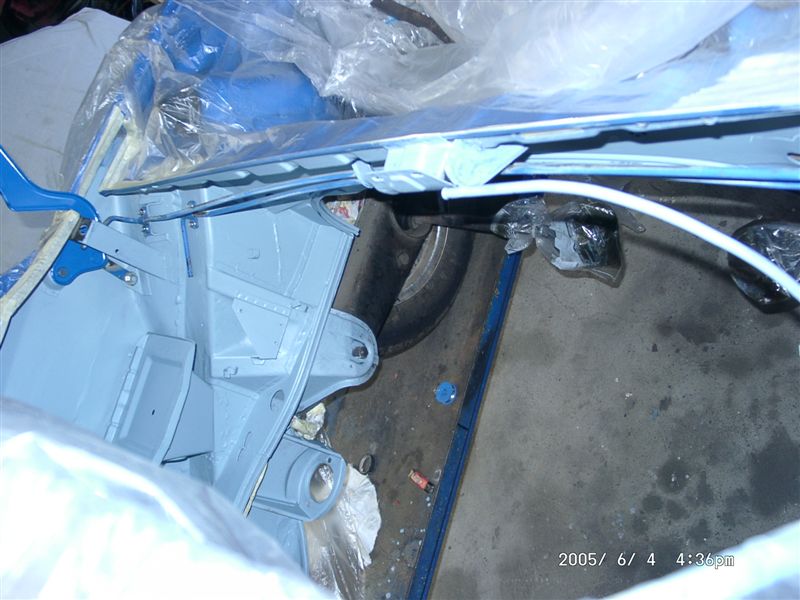
Posted by: michelko Jun 4 2005, 10:21 AM
and the holder for the fuel pump
Attached image(s)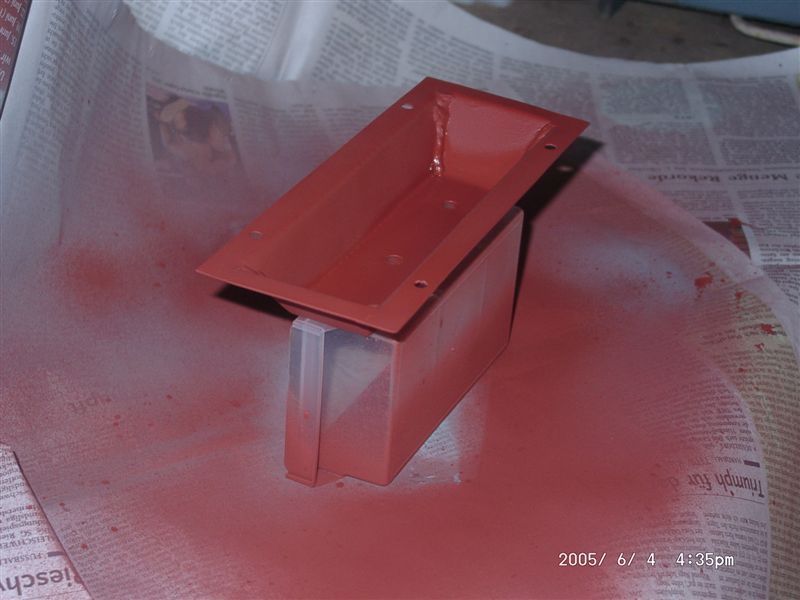
Posted by: michelko Jun 4 2005, 10:21 AM
nother view
Attached image(s)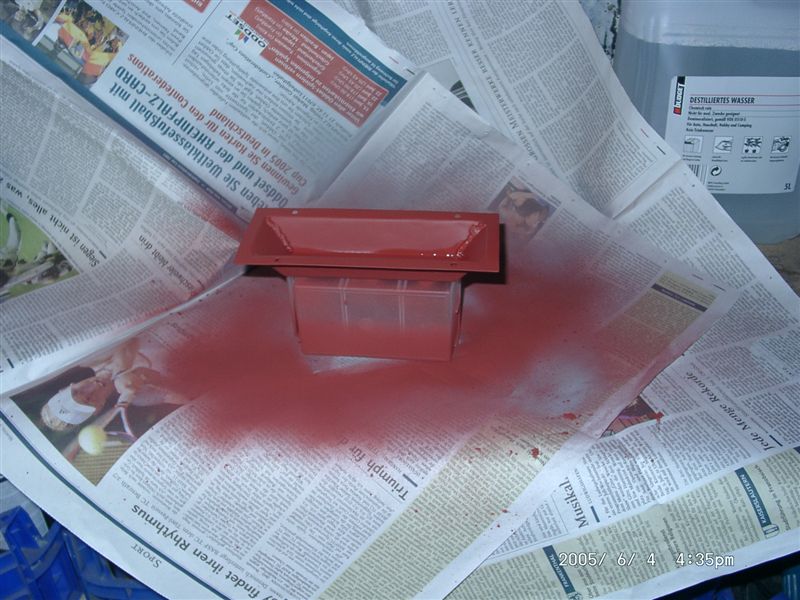
Posted by: michelko Jun 4 2005, 10:23 AM
last one for today.
have a nice weekend.
Attached image(s)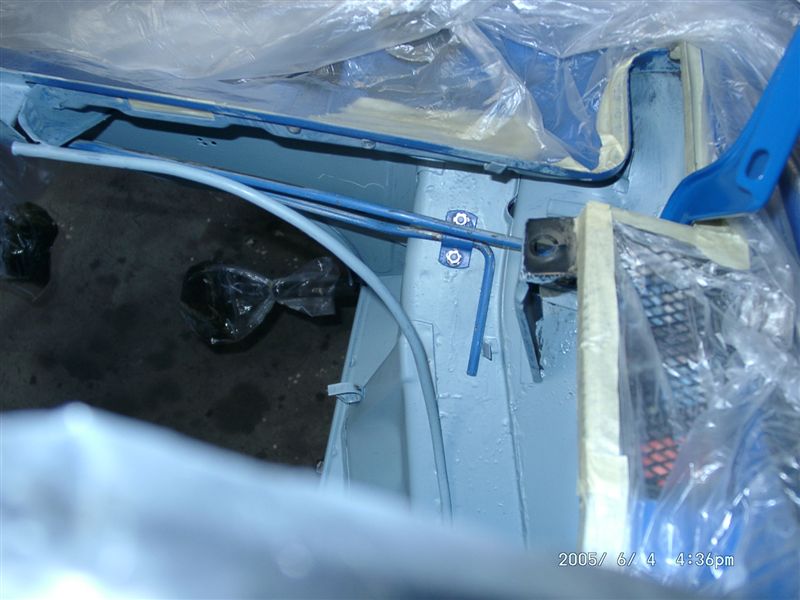
Posted by: Gint Jun 4 2005, 10:58 AM
Lookin good (as usual). Must be warming up in Germany eh?
Posted by: sgomes Jun 4 2005, 11:21 AM
| QUOTE (Gint @ Jun 4 2005, 08:58 AM) |
| Must be warming up in Germany eh? |
I was thinking the same thing. You kinda went into hibernation for the winter. As soon as things warmed up it seems like you had a lot to catch up on! You make us look like a bunch of misfits.
Posted by: michelko Jun 5 2005, 01:25 AM
| QUOTE (Gint @ Jun 4 2005, 08:58 AM) |
| Lookin good (as usual). Must be warming up in Germany eh? |
Yes it´s realy nice weather the last two weeks.
We made a motorbike tour to france a week ago, and the temperature was on two days nearly 30°C (dont know in farenheit
)Here is a shot of our base camp. we drove 1300km in 5 days
Attached image(s)
Posted by: CptTripps Jun 5 2005, 07:24 AM
Great work man...really well done.
Makes me wish I'd done my engine bay!
Keep it up...
Posted by: michelko Jun 10 2005, 08:53 AM
Boy o boy its done, i painted the engine bay.
I am proud like shit about the result 
Attached image(s)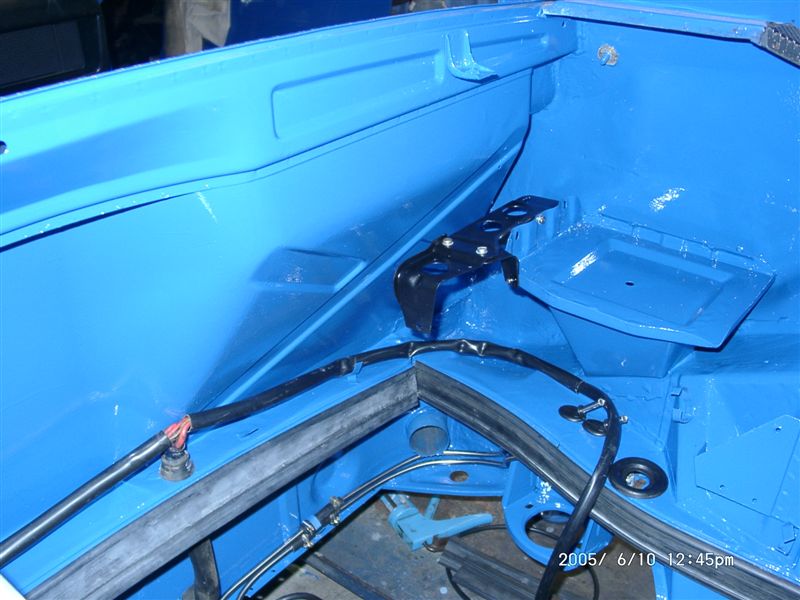
Posted by: michelko Jun 10 2005, 08:54 AM
wett
Attached image(s)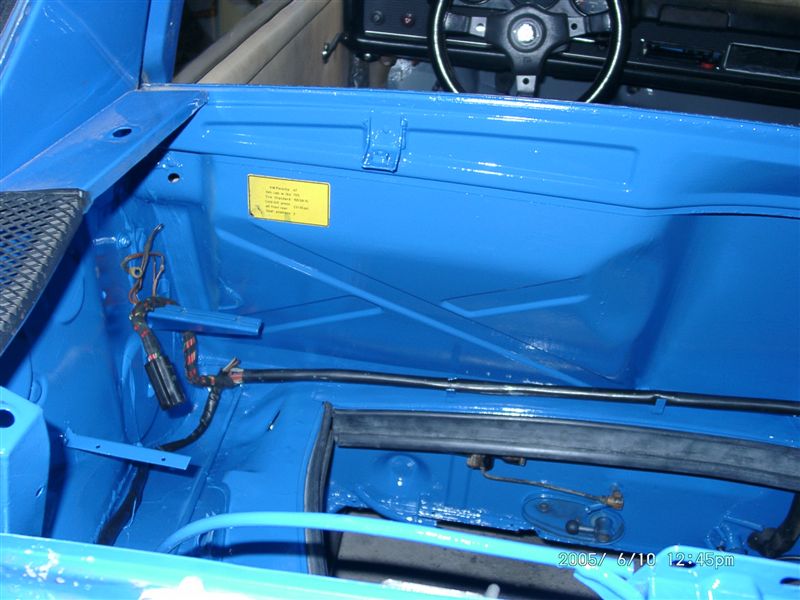
Posted by: michelko Jun 10 2005, 08:54 AM
qewrwer
Attached image(s)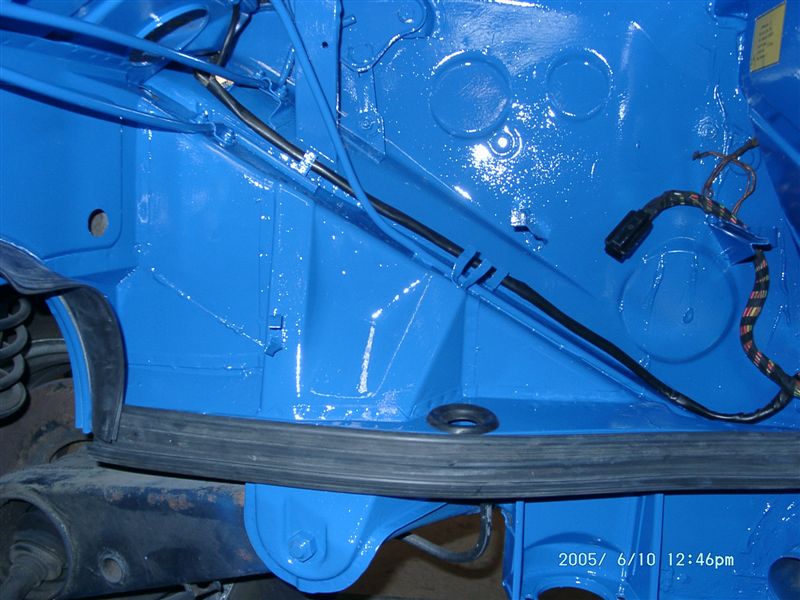
Posted by: michelko Jun 10 2005, 08:55 AM
new seals in
Attached image(s)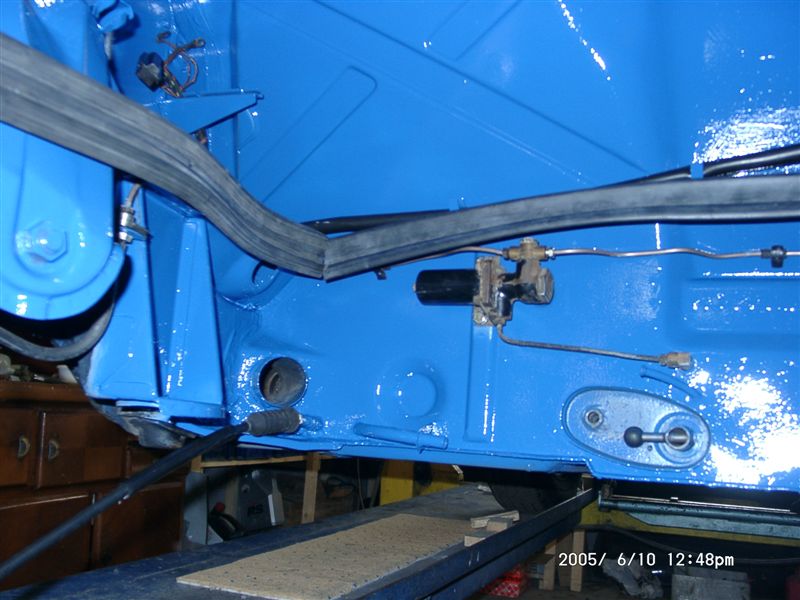
Posted by: michelko Jun 10 2005, 08:56 AM
battery tray
Attached image(s)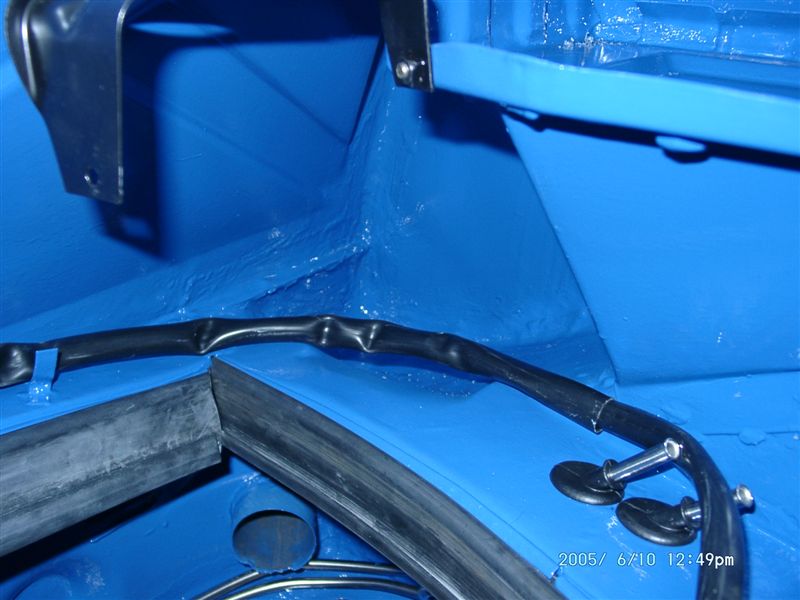
Posted by: michelko Jun 10 2005, 08:56 AM
asdvSFD
Attached image(s)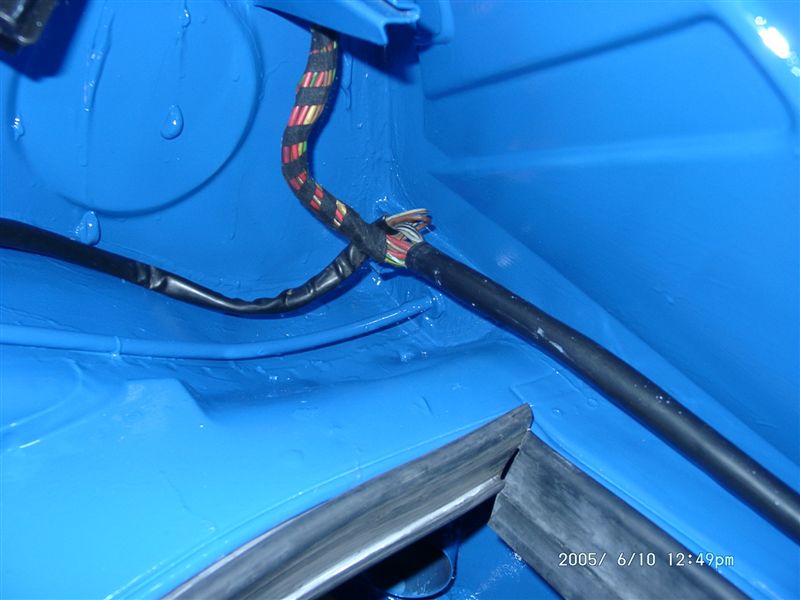
Posted by: michelko Jun 10 2005, 08:57 AM
NEW FUEL LINES
Attached image(s)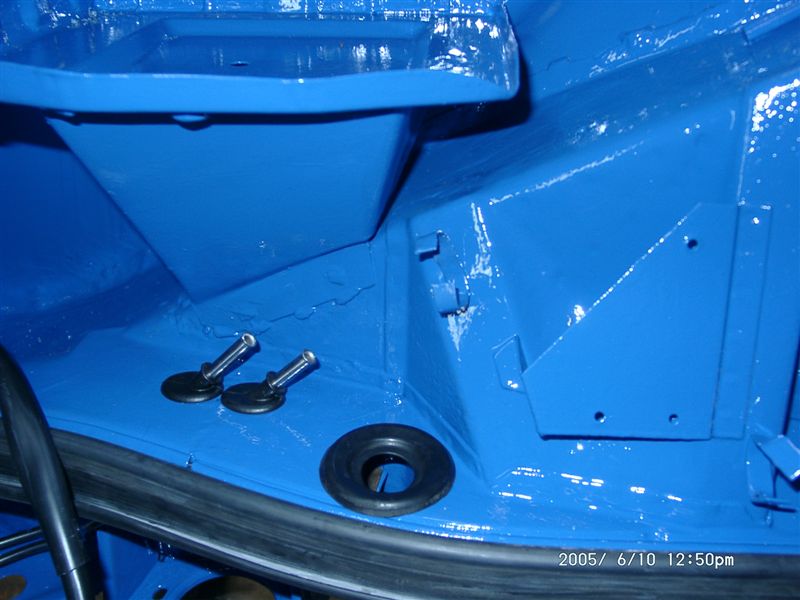
Posted by: michelko Jun 10 2005, 08:59 AM
AND THE ENGINE READY TO GO IN
Attached image(s)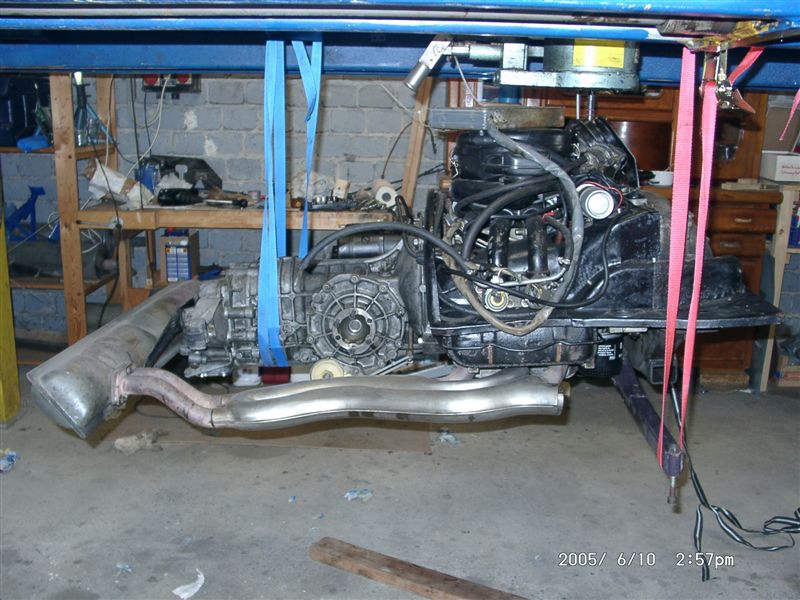
Posted by: michelko Jun 10 2005, 09:13 AM
NOTHER SHOT OF THE NICE NEW FUEL LINES
Attached image(s)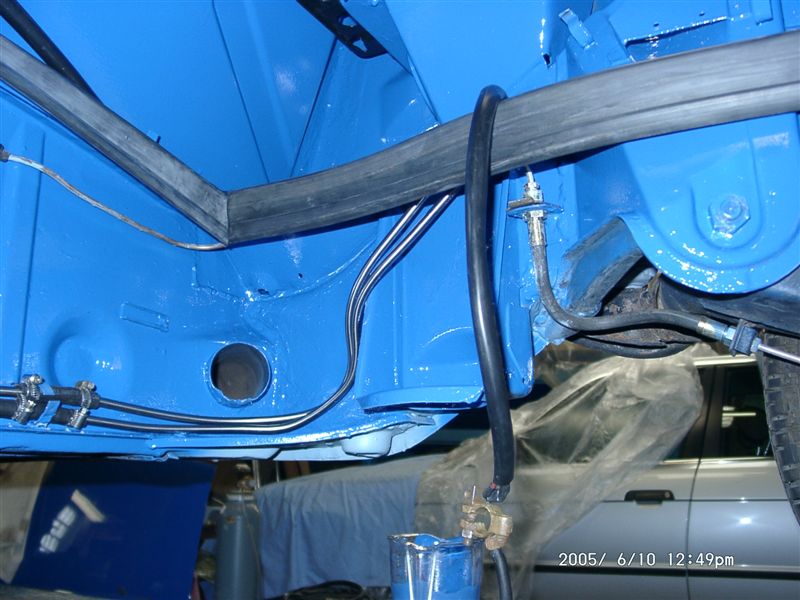
Posted by: CptTripps Jun 10 2005, 10:06 AM
DUDE!!!!
You should just stop and put it in a museum! That looks PERFECT!
I'd get to points like that and want to run into the street screaming "LOOK WHAT I DID!"
My hat is off to you...outstanding job!
Posted by: JOHNMAN Jun 10 2005, 11:58 AM
You have done a truely fantastic job on your hell hole.
I have a couple questions for you though.
1.
On page 19, there is a pic that you posted of your rear trunk.
In that pic, there is what appears to be one of the strangest jacks that I have ever seen. (That is a jack isn't it?) Where did that come from?
It is at least in the spot where a jack would be.
2.
You also mentioned in an early post that you would take a couple pics of your metal working tools (shrinker/stretcher, etc...) would you please post some?
P.S. I bet you can't wait to drive that 914 after all the work you did.
Once again, great job!
Posted by: michelko Jun 10 2005, 01:25 PM
| QUOTE (JOHNMAN @ Jun 10 2005, 09:58 AM) |
| You have done a truely fantastic job on your hell hole. I have a couple questions for you though. 1. On page 19, there is a pic that you posted of your rear trunk. In that pic, there is what appears to be one of the strangest jacks that I have ever seen. (That is a jack isn't it?) Where did that come from? It is at least in the spot where a jack would be. 2. You also mentioned in an early post that you would take a couple pics of your metal working tools (shrinker/stretcher, etc...) would you please post some? P.S. I bet you can't wait to drive that 914 after all the work you did. Once again, great job! |
yes this is a jack and i think it is the original one from the early years. It fits like a glove in the place it is mounted.
And yes i remember that promise. Tomorow i will be in the garage again, i try to take some pic´s of the tools i used. But be aware there is nothing realy special!!
maybe i can take a drive tomorow. car is not ready but a run around the block should be possible, let´s see how it goes.
Posted by: redshift Jun 10 2005, 01:32 PM
ARTWORK! CONGRATS! BEAUTIFUL!
M
Posted by: michelko Jun 12 2005, 06:02 AM
first, here is a shot of my metal work tools.
As told, there is nothing special. All you need is some inspiration and practice.
I didn´t made realy complicated forms so these tools worked fine for me.
If you try to make a fender from scratch, you surely need professional tools.
Attached image(s)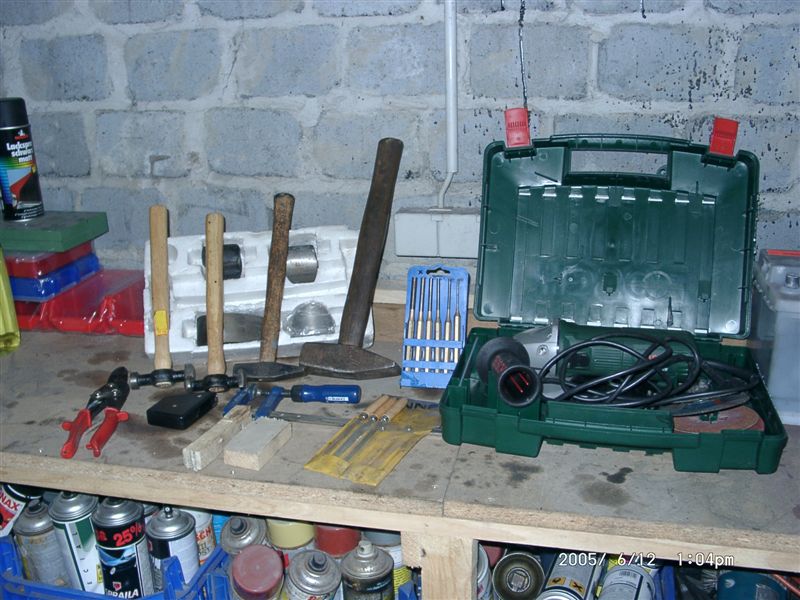
Posted by: michelko Jun 12 2005, 06:03 AM
and this one was realy usefull
Attached image(s)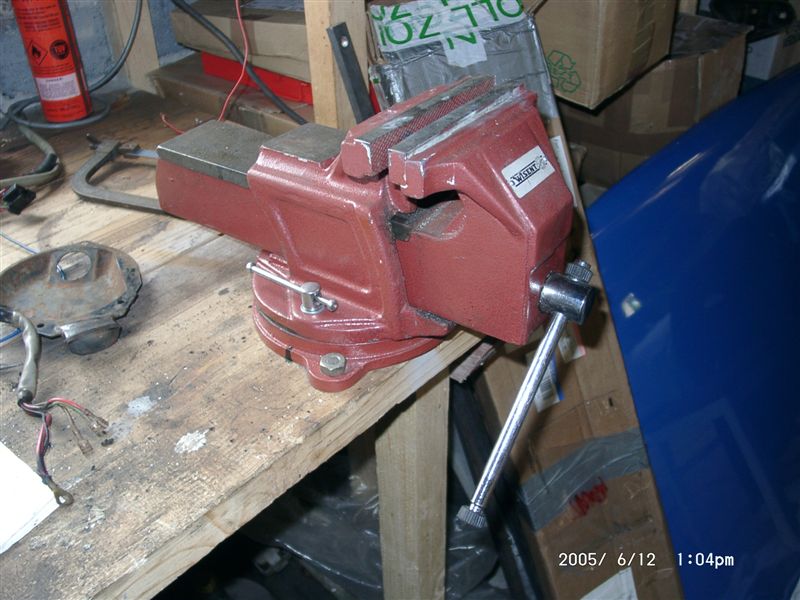
Posted by: michelko Jun 12 2005, 06:04 AM
now some shots from the engine in
Attached image(s)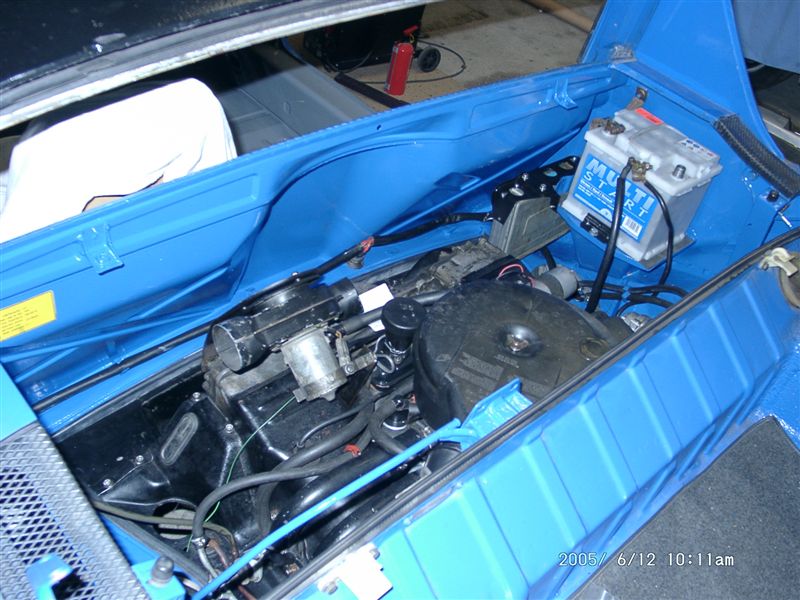
Posted by: michelko Jun 12 2005, 06:05 AM
#2
Attached image(s)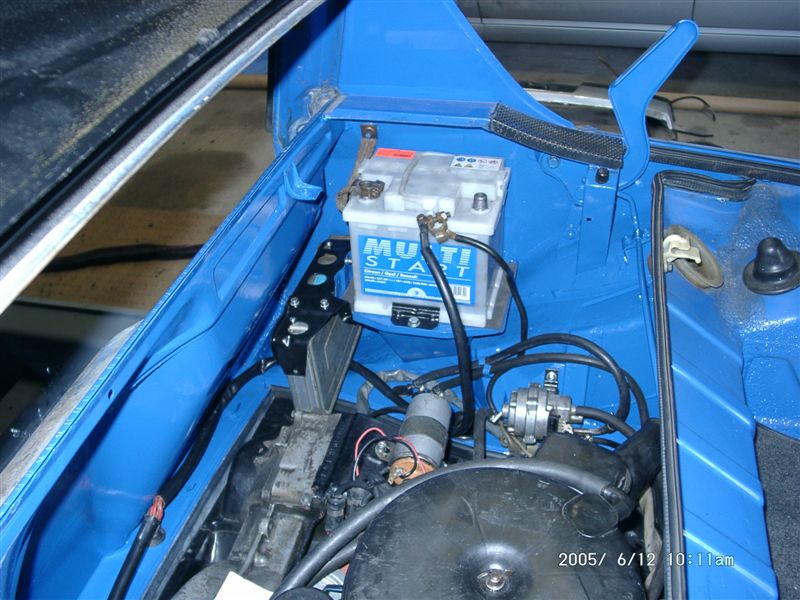
Posted by: michelko Jun 12 2005, 06:05 AM
#3
Attached image(s)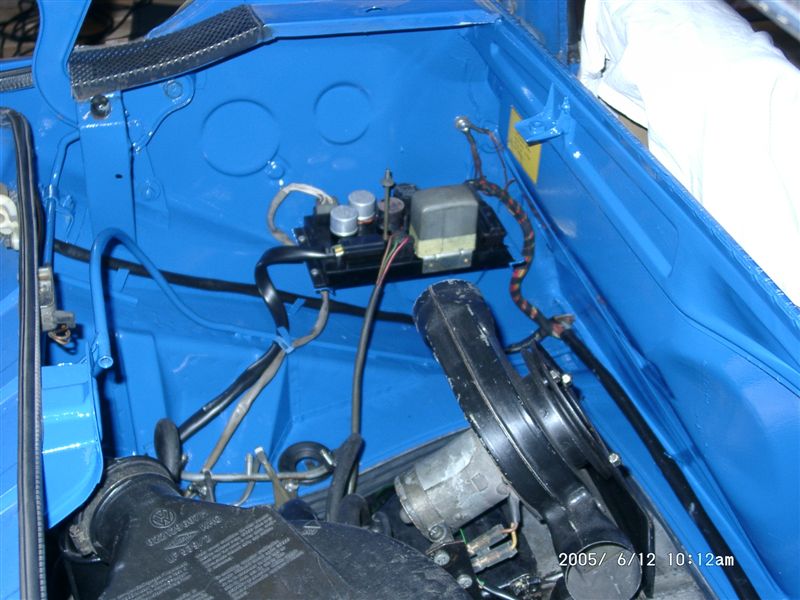
Posted by: michelko Jun 12 2005, 06:06 AM
#4
Attached image(s)
Posted by: michelko Jun 12 2005, 06:07 AM
#5
Attached image(s)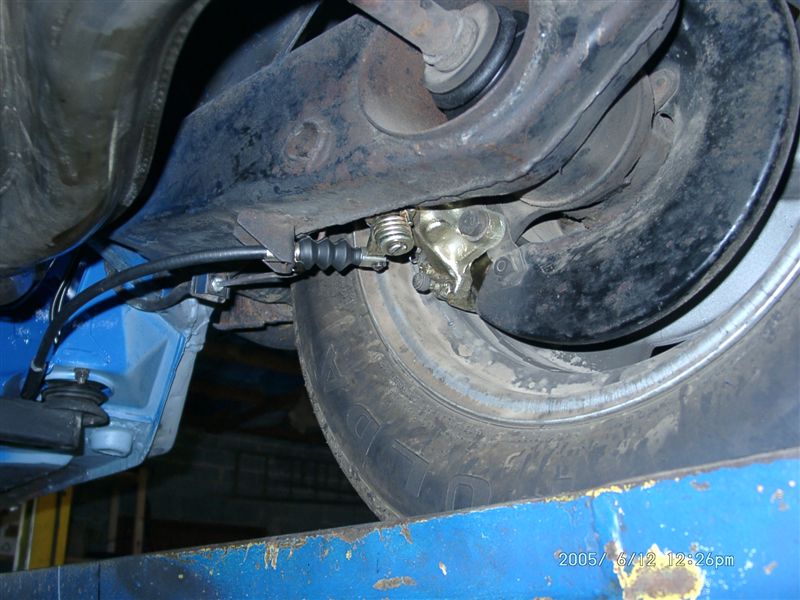
Posted by: michelko Jun 12 2005, 06:10 AM
#6
I drove it yesterday, only 400m casue there is no door and trunk in.
It ran fine, i am realy happy. Hope to drive it regular soon.
Attached image(s)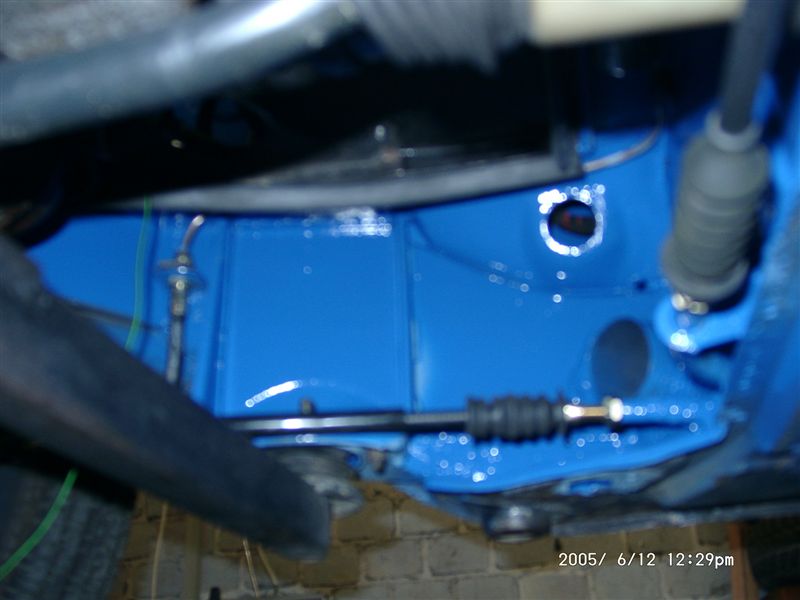
Posted by: CptTripps Jun 12 2005, 07:09 AM
We need a 'standing up and applauding' smiley.
I know EXACTLY how it feels to drive it without doors or hoods. That little 30min drive inspired me to get the rest of the project done in no time.
You are certainly kicking that things ass! Go for it man...finish him off!
:: here is a bad attempt at a German compliment ::
Die hervorragende Arbeit, die Sie durchführten, dient als Ziel für viele.
(How did I do?)
Posted by: michelko Jun 12 2005, 08:37 AM
| QUOTE (CptTripps @ Jun 12 2005, 05:09 AM) |
| We need a 'standing up and applauding' smiley. I know EXACTLY how it feels to drive it without doors or hoods. That little 30min drive inspired me to get the rest of the project done in no time. You are certainly kicking that things ass! Go for it man...finish him off! :: here is a bad attempt at a German compliment :: Die hervorragende Arbeit, die Sie durchführten, dient als Ziel für viele. (How did I do?) |
thank you Doug,
but your work was also impressive and huge inspiration for me.
The club is a great thing and a huge resource for informations , i wish we had a community like that in germany.
This car is loud like hell without doors, the rear window and absolutely no sound deadening material between you and the music
I hope this thread is helpfull for others to keep that wonderfull cars on the road.
Posted by: tat2dphreak Jun 12 2005, 08:40 AM
this smiley works:
GREAT JOB!!!! amazing work
Posted by: michelko Jun 18 2005, 02:09 PM
todays minor update. helped a friend with his motorbike. Did some service on it.
On the Teener i fitted the new door part (the red one , i donn´t know the name in english) with the old part i cutted out for access.
Attached image(s)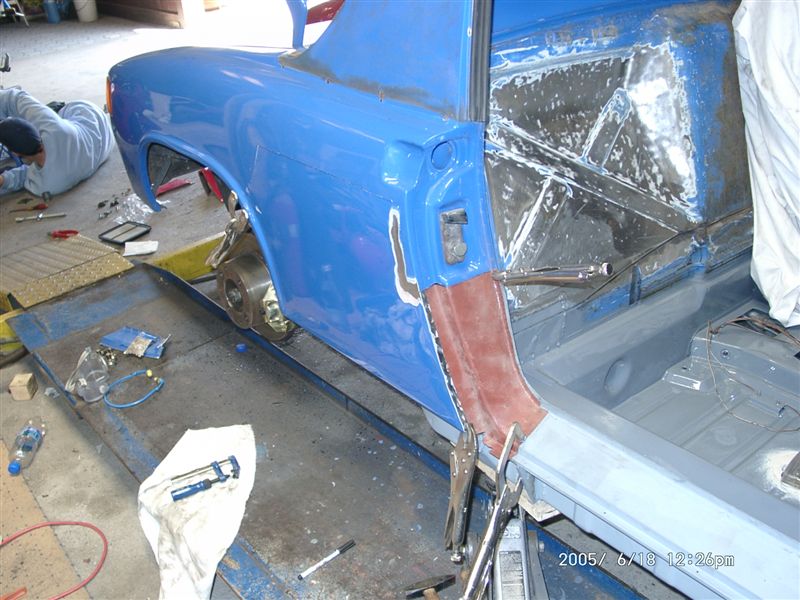
Posted by: michelko Jun 18 2005, 02:10 PM
nother view
Attached image(s)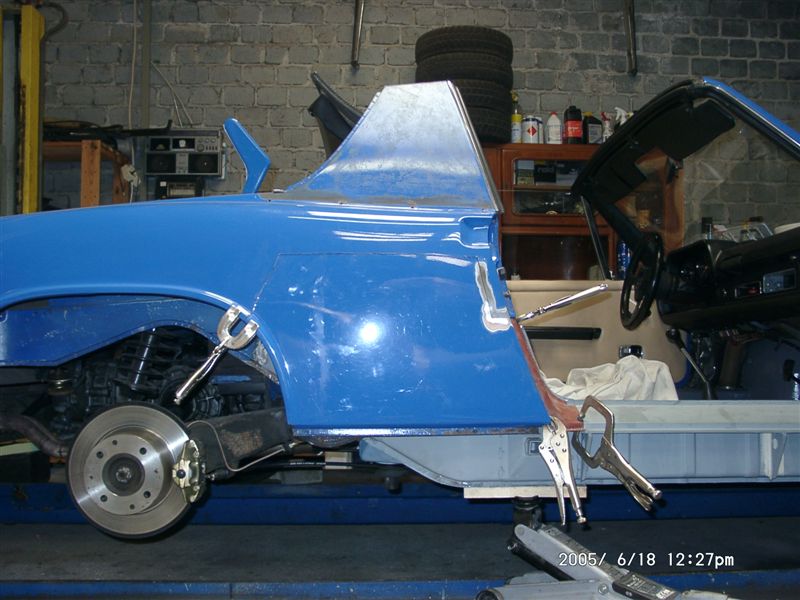
Posted by: michelko Jun 18 2005, 02:11 PM
have to do some more cleaning and priming under the fender
Attached image(s)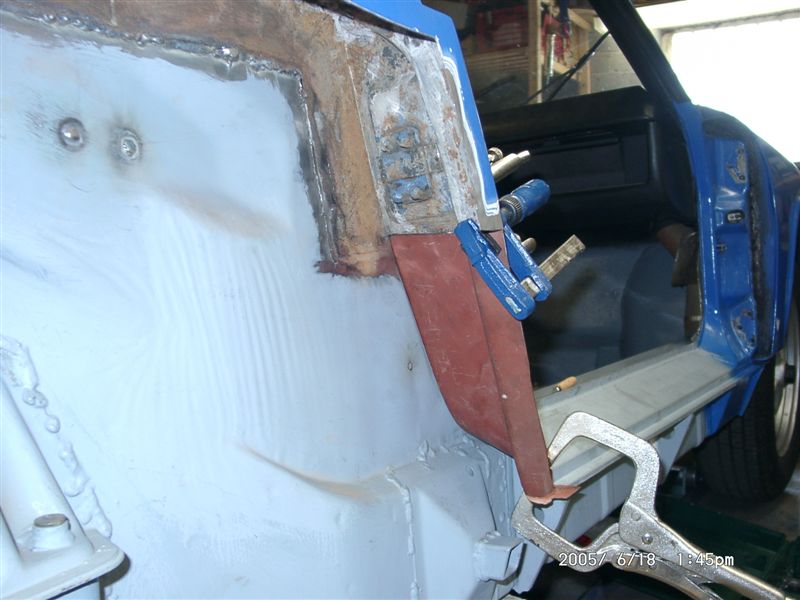
Posted by: michelko Jun 18 2005, 02:13 PM
grinded down some old seams. it is only cosmetic, not realy necesary.
Attached image(s)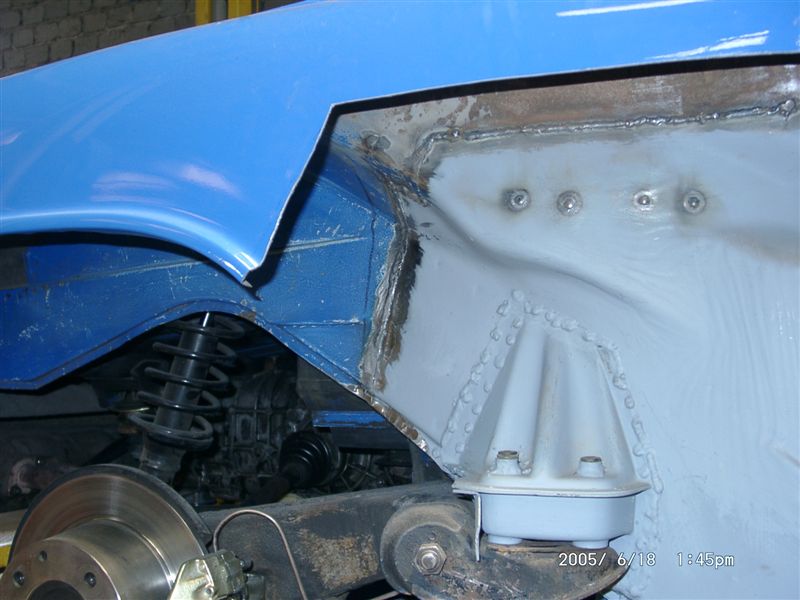
Posted by: Dead Air Jun 22 2005, 04:13 PM
| QUOTE (michelko @ Jun 18 2005, 12:09 PM) |
| On the Teener i fitted the new door part (the red one , i donn´t know the name in english) with the old part i cutted out for access. |
[QUOTE]
We don't know the name for it in english, either!

Very, very nice job!!
Posted by: michelko Jun 23 2005, 12:10 AM
Hi, guys here is a little update on my suspension parts.
Have them sandblasted and then painted with por15. Looks realy nice.
Attached image(s)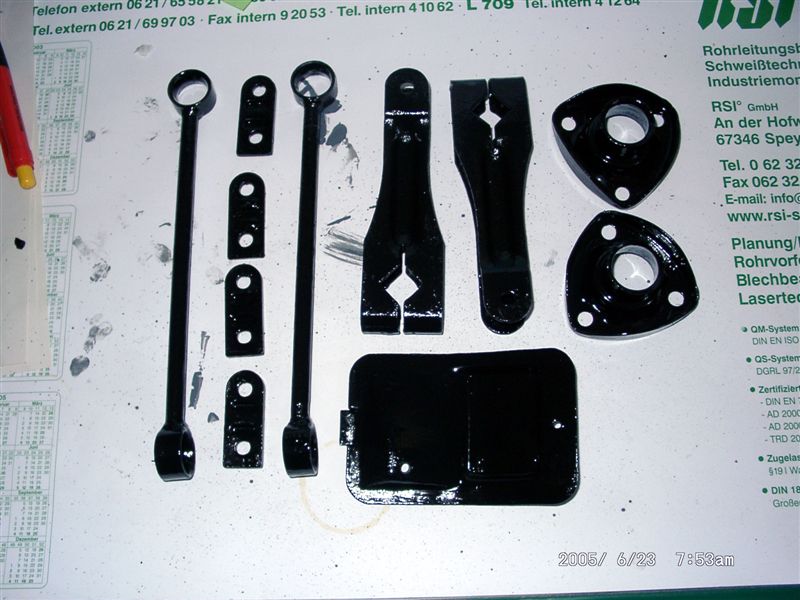
Posted by: michelko Jun 23 2005, 12:10 AM
#2
Attached image(s)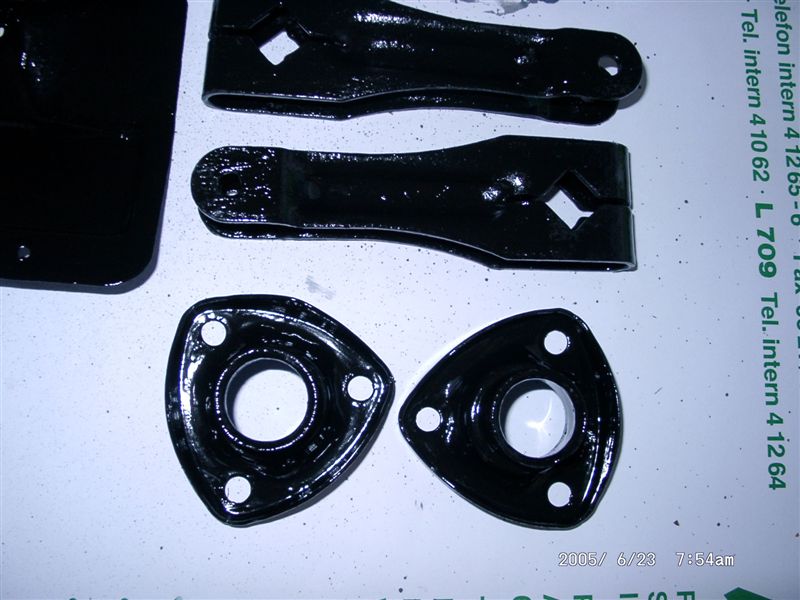
Posted by: McMark Jun 23 2005, 12:21 AM
Amazing work as always. You're a true inspiration.
One question: Do they have sealed batteries in Germany? Optima, Orbital, etc? What you've got in there now looks like a standard leaky, hell-hole causing battery.
Posted by: banksyinoz Jun 23 2005, 02:38 AM
its never nice finding unwanted work let alone something that some other has hidden especially something thats structural hard work definetly has paid off looks great job well done
Posted by: michelko Jun 23 2005, 08:19 AM
| QUOTE (McMark @ Jun 22 2005, 10:21 PM) |
| Amazing work as always. You're a true inspiration. One question: Do they have sealed batteries in Germany? Optima, Orbital, etc? What you've got in there now looks like a standard leaky, hell-hole causing battery. |
Yes the optima batterys are availlable in germany. This one is an cheap one to get the car moved and test al the tings i repaired and modified. Later i wil buy an optima or so for regulare service. The fresh repaired hell hole should stay fine the next 100 years, hope so
Posted by: McMark Jun 23 2005, 09:45 AM
Just making sure.
Posted by: michelko Jul 13 2005, 01:26 PM
Hi everybody,
here is some update on my restauration:
Welded in that red piece (forgot to take some pics) and painted the firewall inside with por 15
Attached image(s)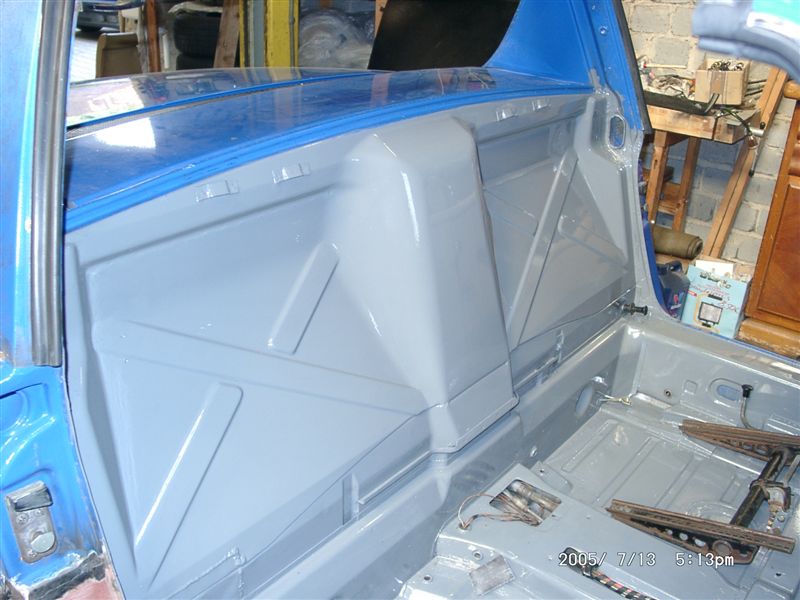
Posted by: michelko Jul 13 2005, 01:26 PM
nother
Attached image(s)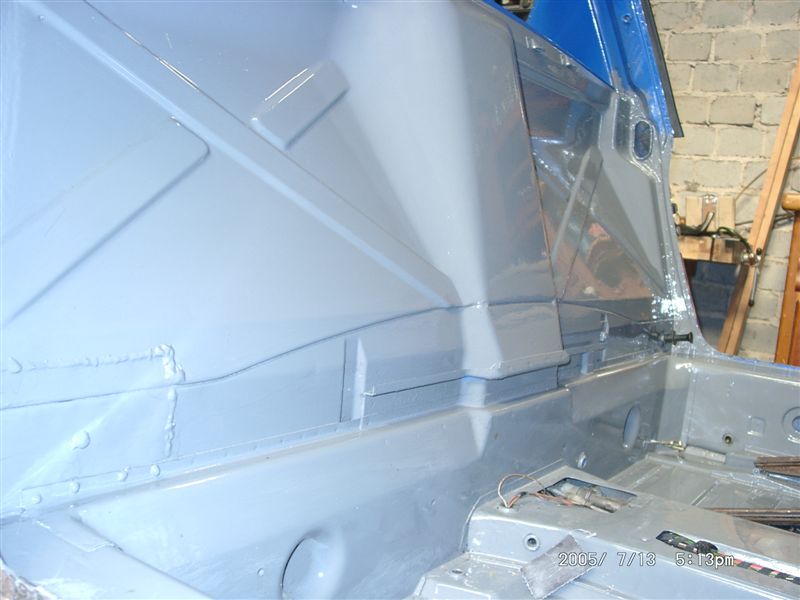
Posted by: michelko Jul 13 2005, 01:27 PM
#3
Attached image(s)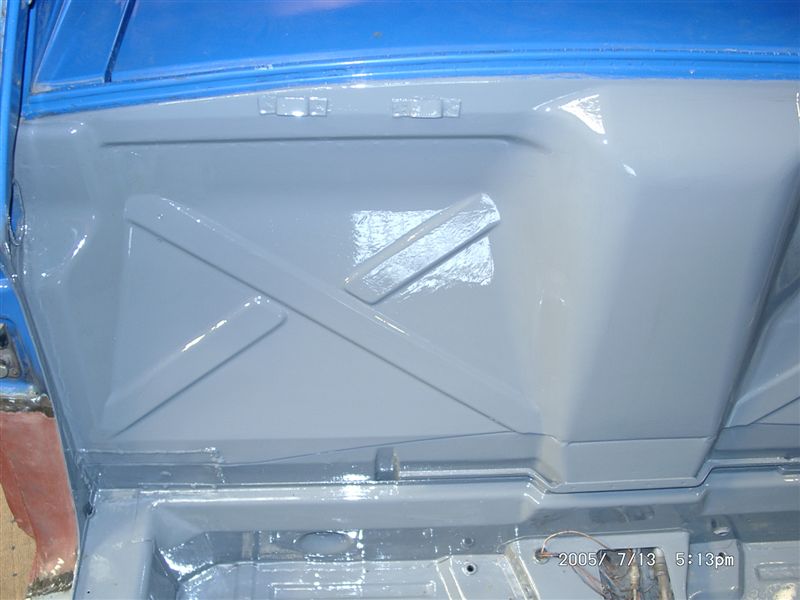
Posted by: michelko Jul 13 2005, 01:27 PM
#4
Attached image(s)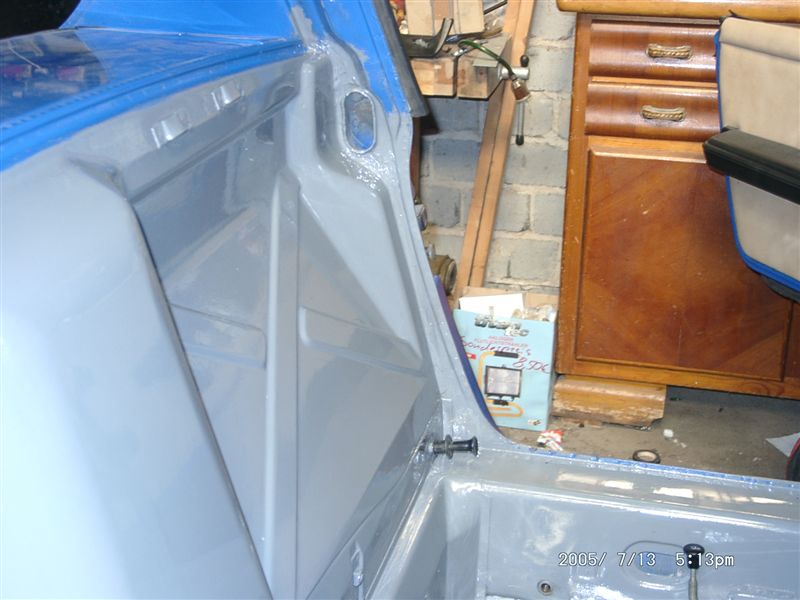
Posted by: michelko Jul 13 2005, 01:28 PM
glued in the rear window, using this:
Attached image(s)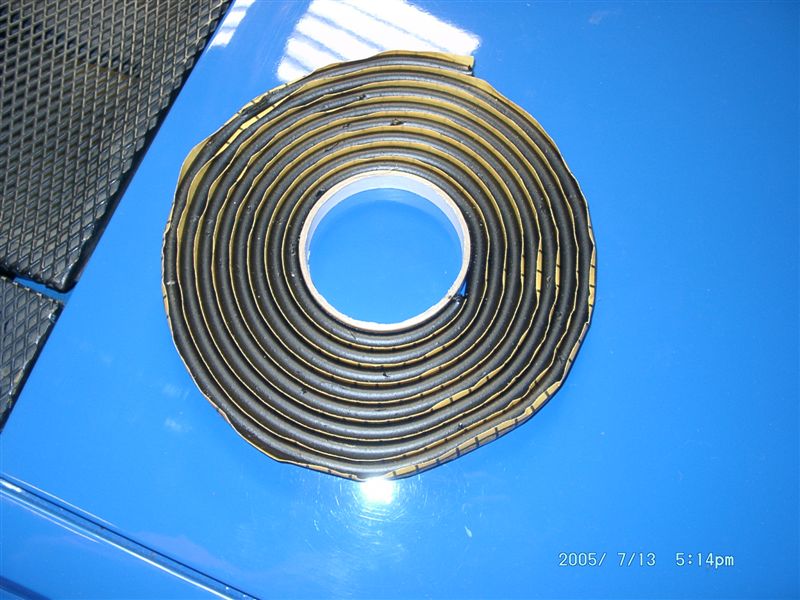
Posted by: michelko Jul 13 2005, 01:29 PM
window in, i cleaned it realy good. You may not see it
Attached image(s)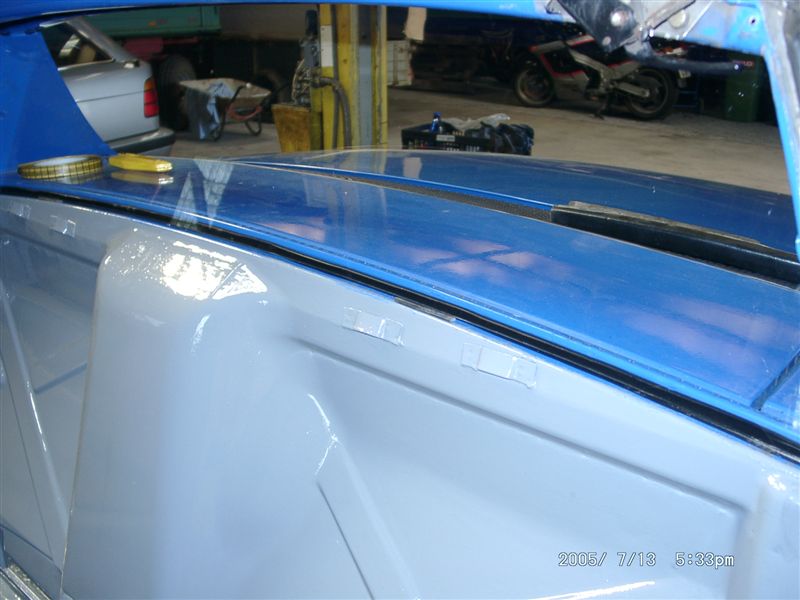
Posted by: michelko Jul 13 2005, 01:34 PM
outside
i found the source for that strange sound on the engine. Weeks ago i changed the valve adjusters and mounted lash caps. The caps seeem to be hardend , the srews not
they lost about 0,3mm in roud about 2 hours running.
should buy new ones, maybe original parts from VW are the better choice.
Attached image(s)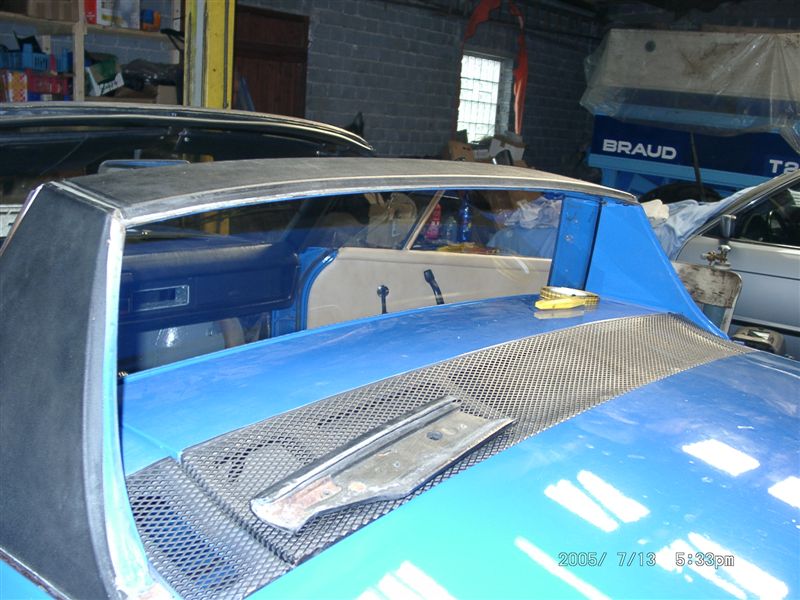
Posted by: Root_Werks Jul 13 2005, 03:59 PM
I love this thread!
Posted by: MecGen Jul 13 2005, 07:45 PM
| QUOTE |
| I love this thread! |
later
Joe
Posted by: CptTripps Jul 14 2005, 10:06 AM
Yup...one of mine too...
Doing GREAT work man...keep it up!
Posted by: william harris Jul 14 2005, 10:16 AM
This thread is an inspiration to the whole 914 community.
Posted by: tat2dphreak Jul 14 2005, 10:27 AM
| QUOTE (william harris @ Jul 14 2005, 11:16 AM) |
| This thread is an inspiration to the whole 914 community. |
well said!
Posted by: michelko Jul 16 2005, 08:39 AM
the show is going on. prepaired all the stuff at rear right quarterpanel. so the welding can be done in no time (hope next week).
All cleaned and treated with por 15 stuff
Attached image(s)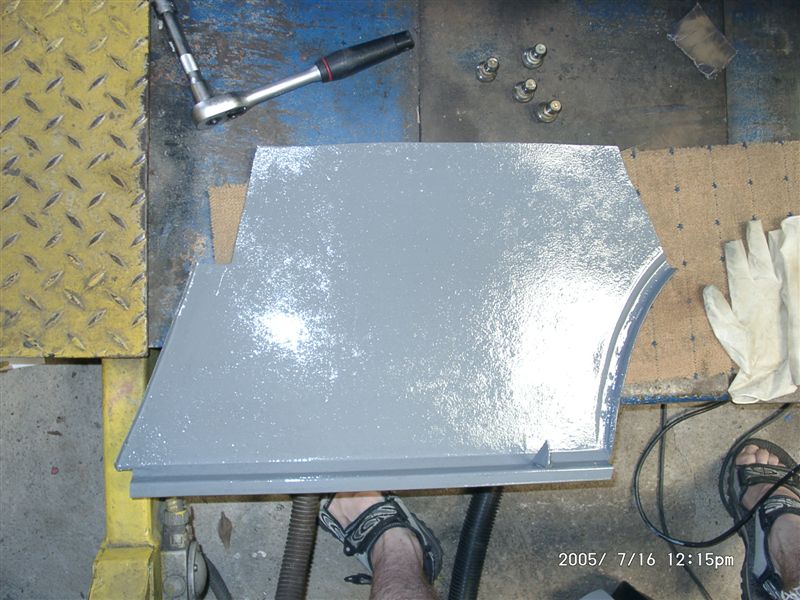
Posted by: michelko Jul 16 2005, 08:39 AM
inside the wheel well
Attached image(s)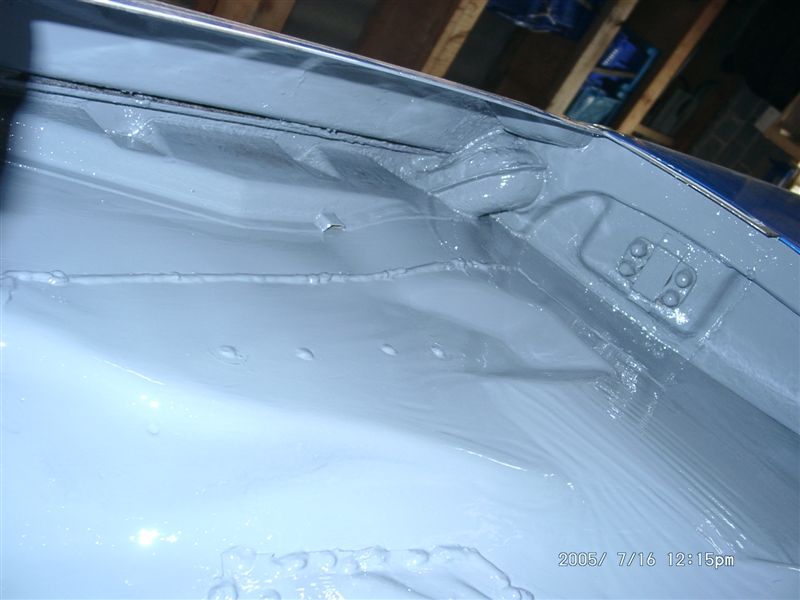
Posted by: michelko Jul 16 2005, 08:40 AM
nother
Attached image(s)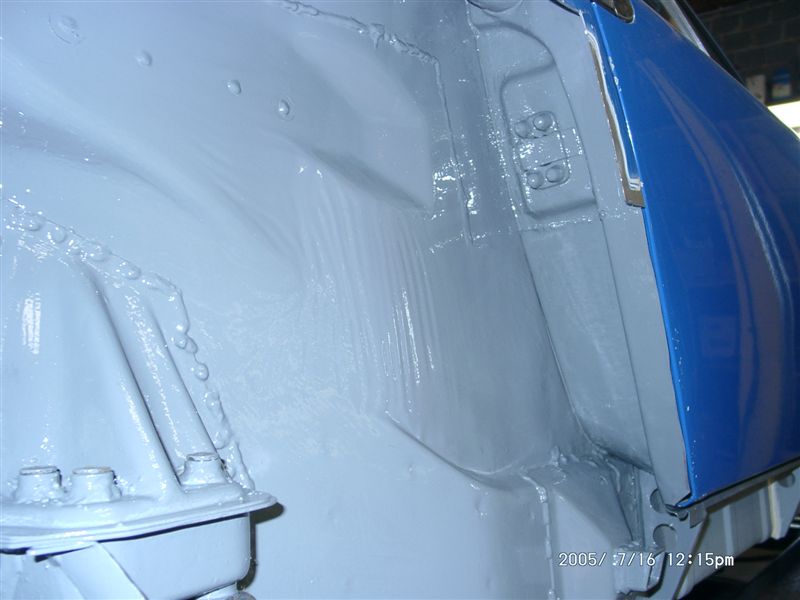
Posted by: michelko Jul 16 2005, 08:41 AM
qweqwe
Attached image(s)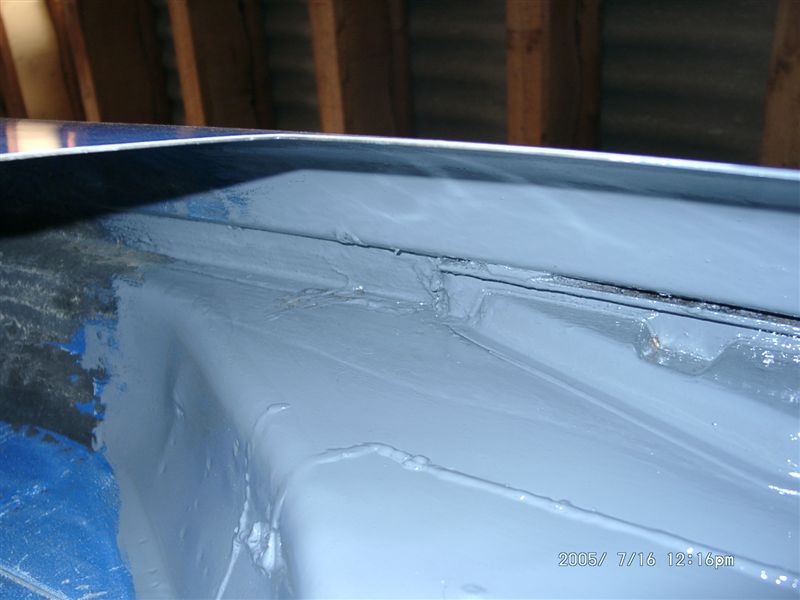
Posted by: michelko Jul 16 2005, 08:42 AM
also preped the tank compartment, grinding and cleaning
Attached image(s)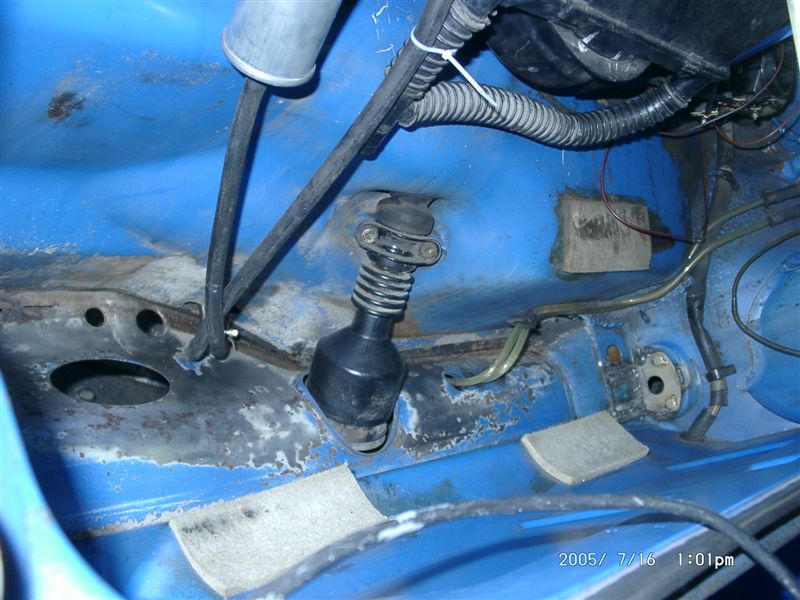
Posted by: michelko Jul 16 2005, 08:43 AM
metal readied
Attached image(s)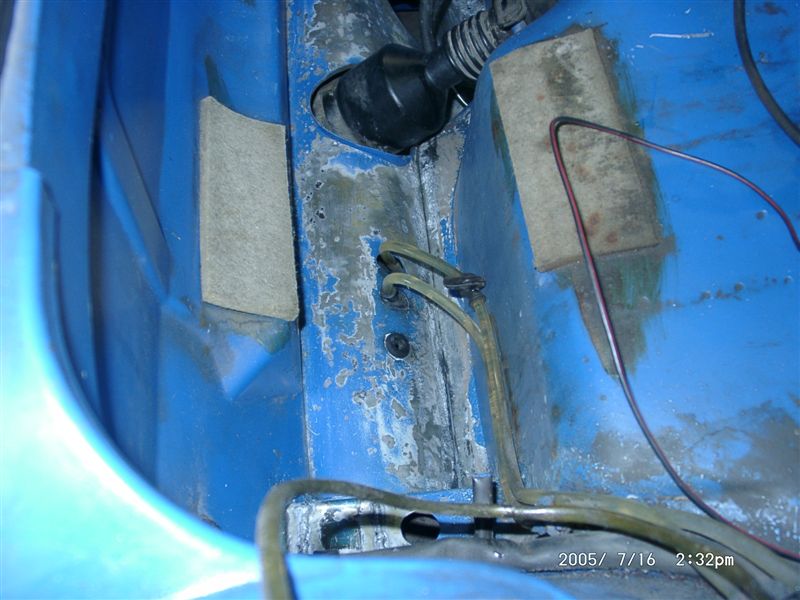
Posted by: michelko Jul 16 2005, 08:43 AM
por 15ed
Attached image(s)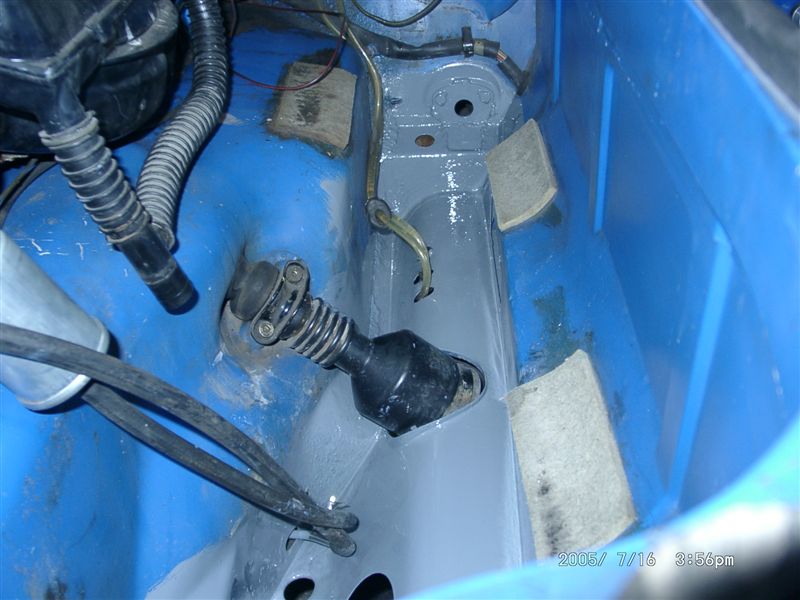
Posted by: michelko Jul 16 2005, 08:44 AM
nother
Attached image(s)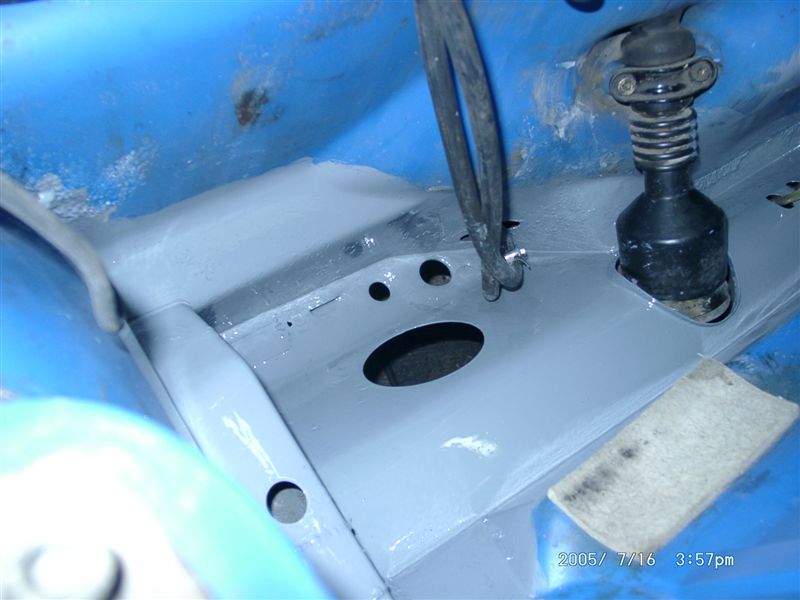
Posted by: michelko Jul 16 2005, 08:45 AM

Attached image(s)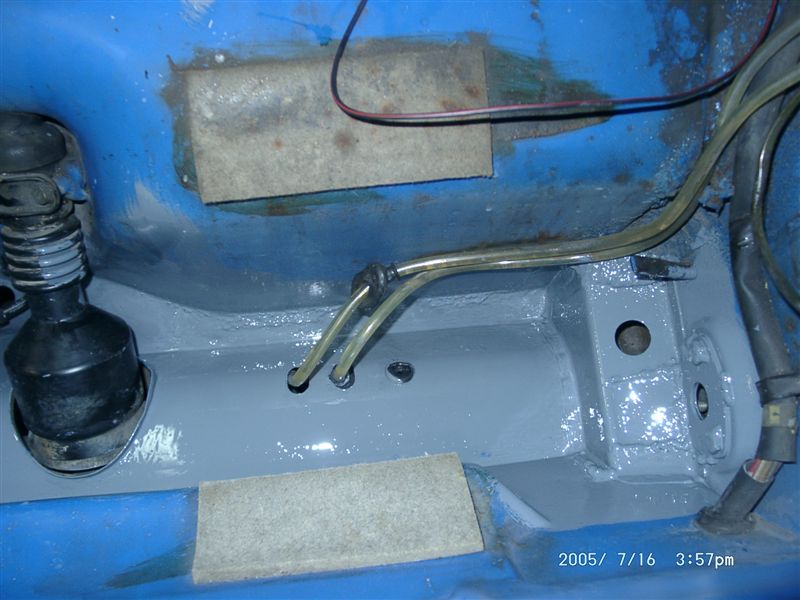
Posted by: michelko Jul 16 2005, 08:46 AM
last one have a nice weekend
Attached image(s)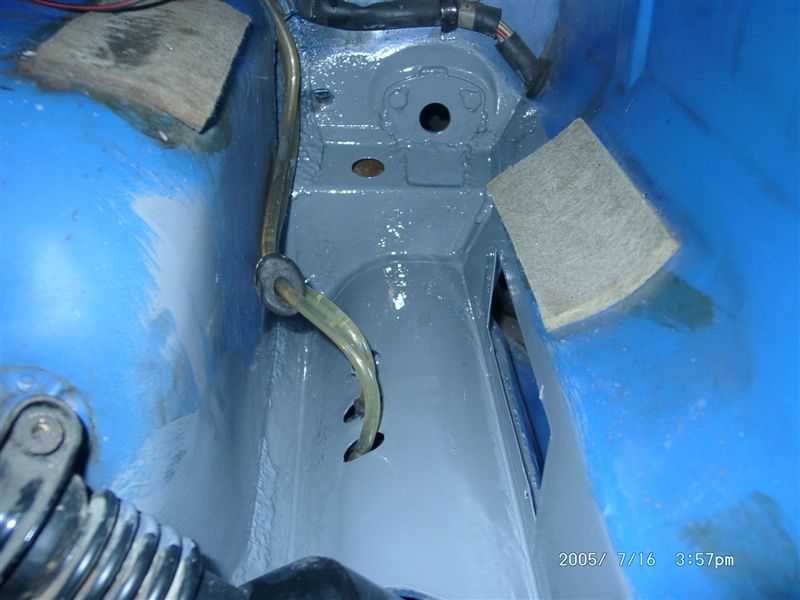
Posted by: CptTripps Jul 16 2005, 09:11 AM
Well done sir....wanna come to this side of the pond and work on my next one???
Posted by: michelko Jul 22 2005, 12:27 AM
| QUOTE (CptTripps @ Jul 16 2005, 07:11 AM) |
| Well done sir....wanna come to this side of the pond and work on my next one??? |
Sure, will be looking for the next projekt if i ever get this one ready
I am doing now that part that you have done weeks ago.
look:
found a big bondo patch under 4 layers of paint and filler.
decided to keep this.
Attached image(s)
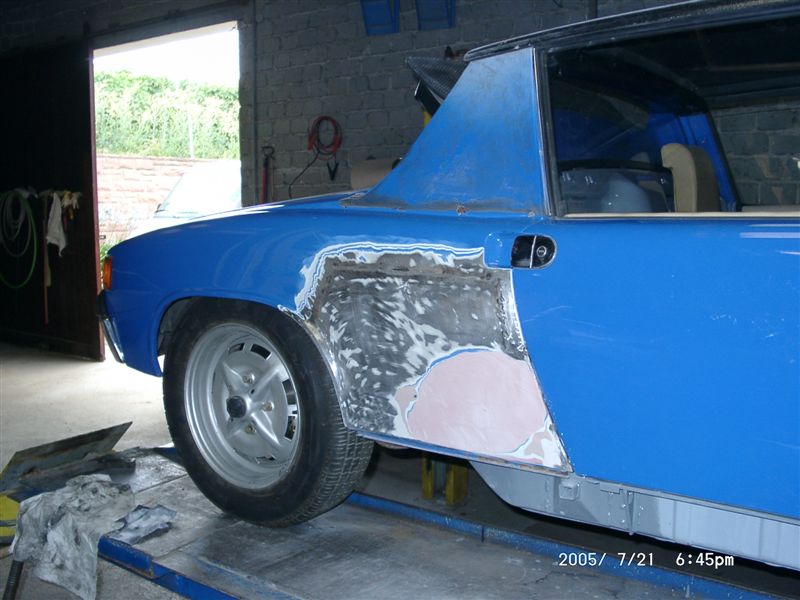
Posted by: michelko Jul 22 2005, 12:30 AM
nother angle
Attached image(s)
Posted by: michelko Jul 22 2005, 12:38 AM
and another little project:
the restored headlights. Sandblasted and painted.
Attached image(s)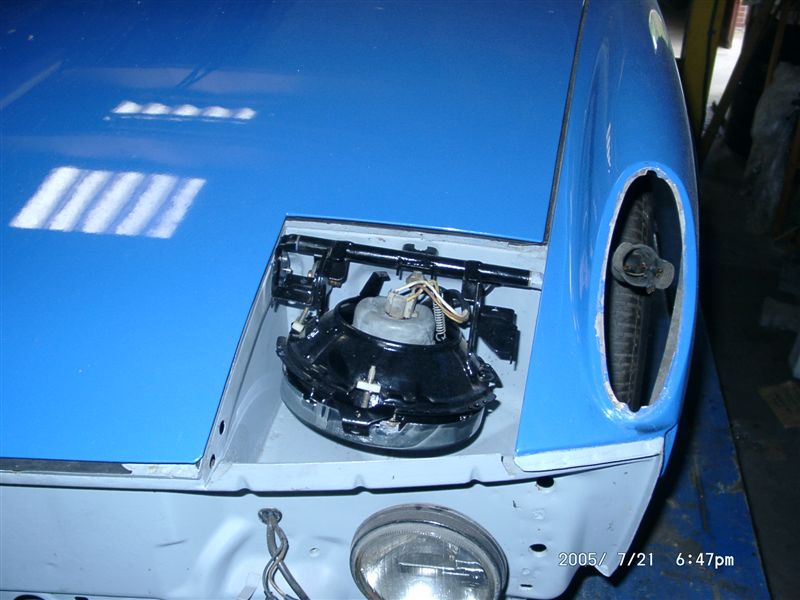
Posted by: sean_v8_914 Jul 22 2005, 01:26 AM
!!! ![]()
Posted by: CptTripps Jul 22 2005, 07:04 AM
I wish I'd spent more time with the body work...well, I spent a lot of time, but I didn't know what I was doing. Particularly on that patch of bondo you found. that's the one area I REALLY wish I'd done a better job.
Looking great man...
Posted by: Root_Werks Jul 22 2005, 02:26 PM
Posted by: michelko Jul 23 2005, 08:41 AM
spend nearly the whole day to grind down to bare metal. I think there was abóut 3-4mm Bondo filler and paint on the quarter. don´t know why
As shown in the pics the panel is nice and straight. The car lost some kilo´s today.
Attached image(s)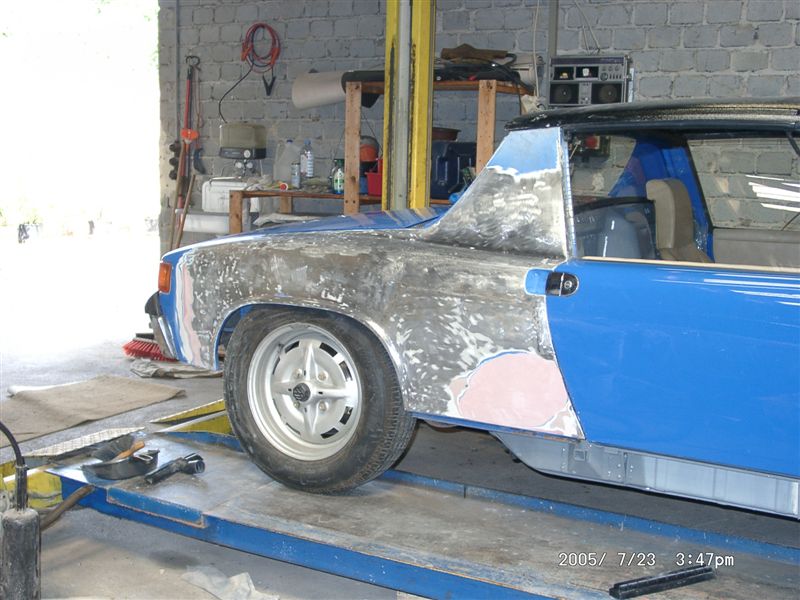
Posted by: michelko Jul 23 2005, 08:42 AM
nother view
Attached image(s)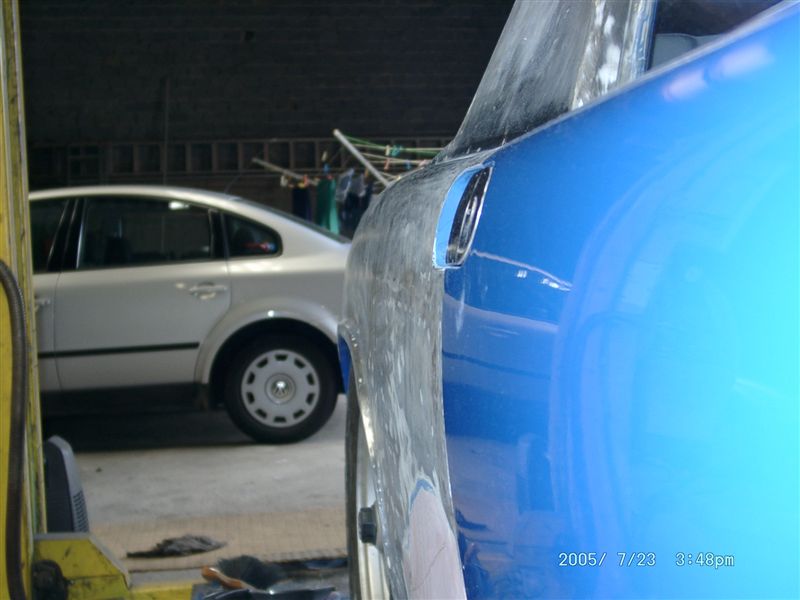
Posted by: michelko Jul 23 2005, 08:42 AM
see what i mean?
Attached image(s)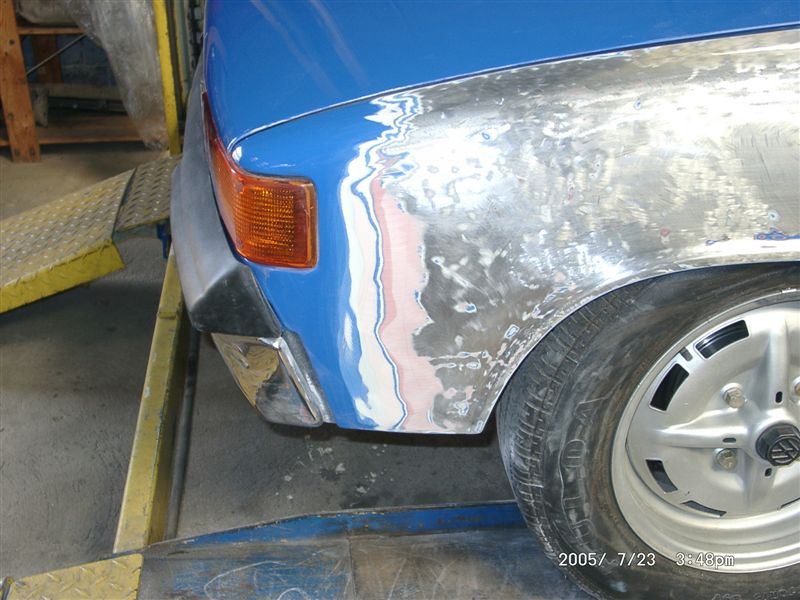
Posted by: michelko Jul 23 2005, 08:44 AM
I am also eliminating the side markers
Attached image(s)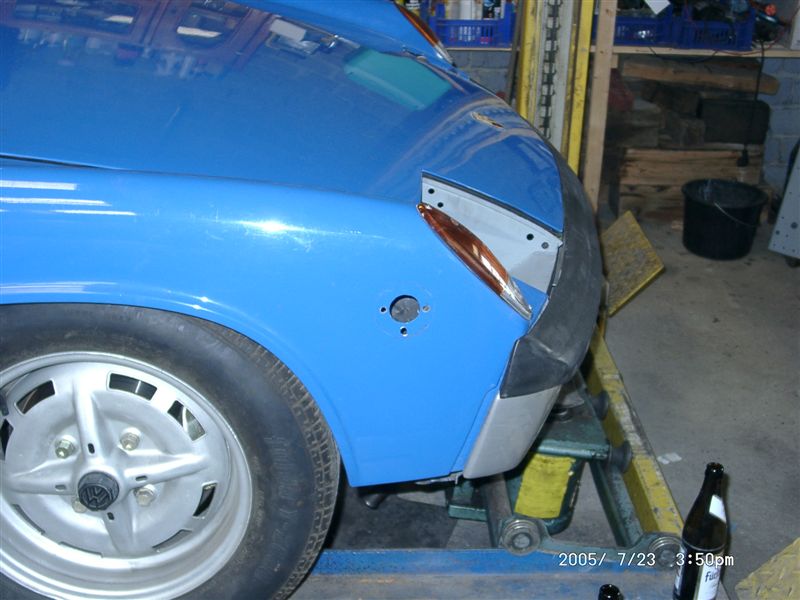
Posted by: michelko Jul 23 2005, 08:45 AM
i am thinking of using por15 as first coat on the quarter panel. then tie coat primer then filler and paint. any sugestions?
Attached image(s)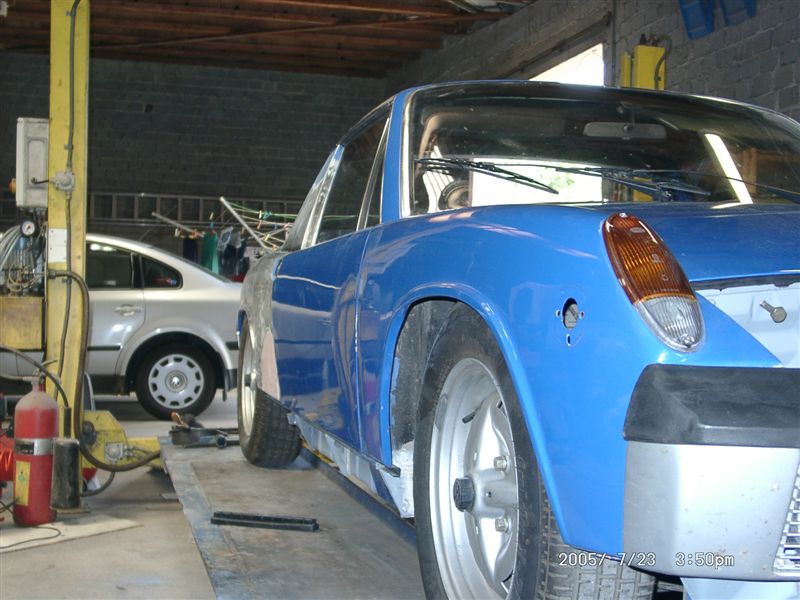
Posted by: SpecialK Jul 23 2005, 09:59 AM
As much as I like POR 15 (and I've got it damn near everywhere), I'd be a little leery about using it under my paint job. I'm planning on laying down a coat of epoxy primer:
House of Kolor (copied from their website)
KWIKURE EPOXY PRIMER (KP21)
KP21 is a 2.1 VOC hi-solids catalyzed Epoxy Primer that meets all current air quality regulations. It is designed to be the first primer applied to bare steel, aluminum, fiberglass, magnesium and galvanized surfaces. It's strong adhesion, hi-build, excellent durability, and corrosion resistance make it the logical choice for the base of a long lasting paint job.
For the inside of the wheel wells and floor pan, I think POR is a good choice for it's durability.
Posted by: michelko Jul 23 2005, 10:07 AM
| QUOTE (Special_K @ Jul 23 2005, 07:59 AM) |
| As much as I like POR 15 (and I've got it damn near everywhere), I'd be a little leery about using it under my paint job. I'm planning on laying down a coat of epoxy primer: House of Kolor (copied from their website) KWIKURE EPOXY PRIMER (KP21) KP21 is a 2.1 VOC hi-solids catalyzed Epoxy Primer that meets all current air quality regulations. It is designed to be the first primer applied to bare steel, aluminum, fiberglass, magnesium and galvanized surfaces. It's strong adhesion, hi-build, excellent durability, and corrosion resistance make it the logical choice for the base of a long lasting paint job. For the inside of the wheel wells and floor pan, I think POR is a good choice for it's durability. |
yes, epoxy base primer was the other thought. Not sure what is better under paint
Posted by: SpecialK Jul 23 2005, 10:29 AM
I'm planning to use House of Kolor products for the paint job on my '73 just because of the results my friend got on his '67 Camero . PPG and other brands are probably just as good, but you wouldn't want to mix and match primers and paints from different companys, i.e. - POR under PPG primer, topcoated with House of Kolor base coat (or that's what I've been told).
You've done such a beautiful job of getting your car solid, you're definitely going to want to have the paint job last as well.
Posted by: michelko Jul 31 2005, 06:43 AM
oh my god, grinding, grinding, grinding, sanding etc.
don´t want no more
i have the right rear quarter ready, think so.
Stripped to bare metal. let the painting begin
Attached image(s)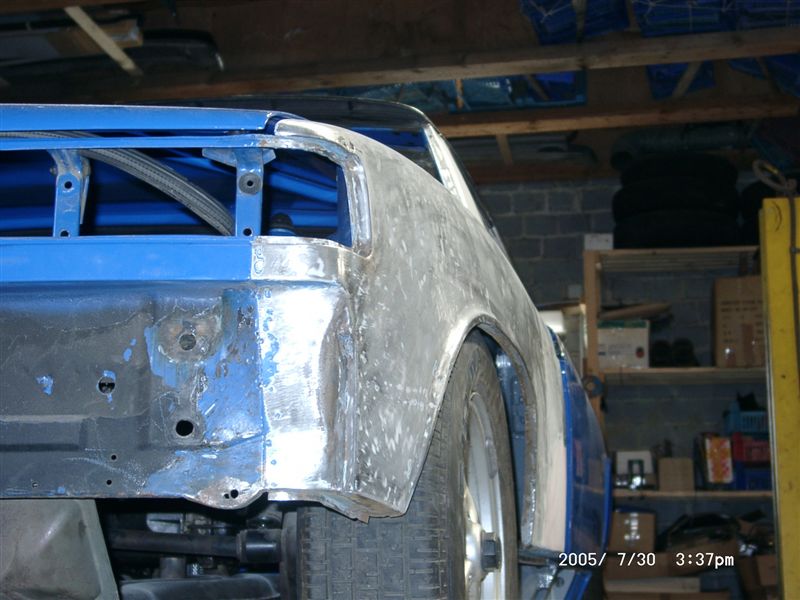
Posted by: michelko Jul 31 2005, 06:44 AM
found a little rust hole. can you see it?
Attached image(s)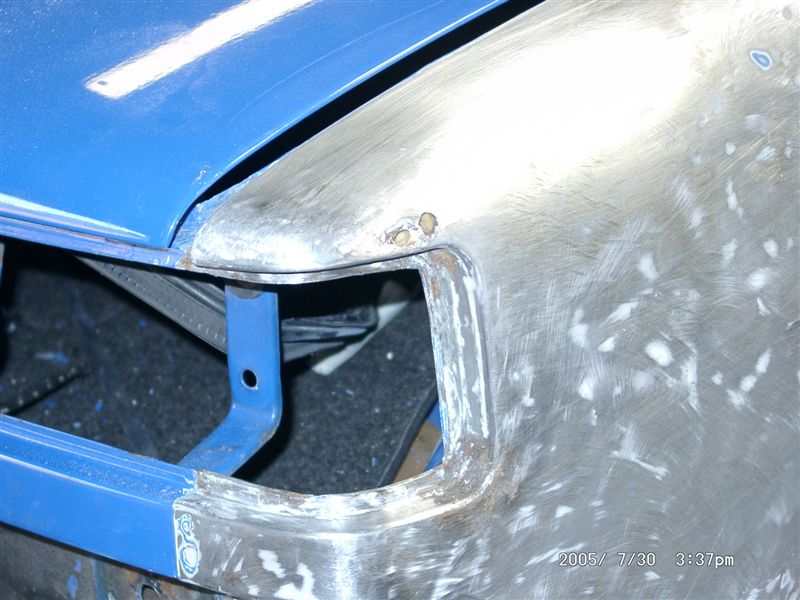
Posted by: michelko Jul 31 2005, 06:45 AM
nother
Attached image(s)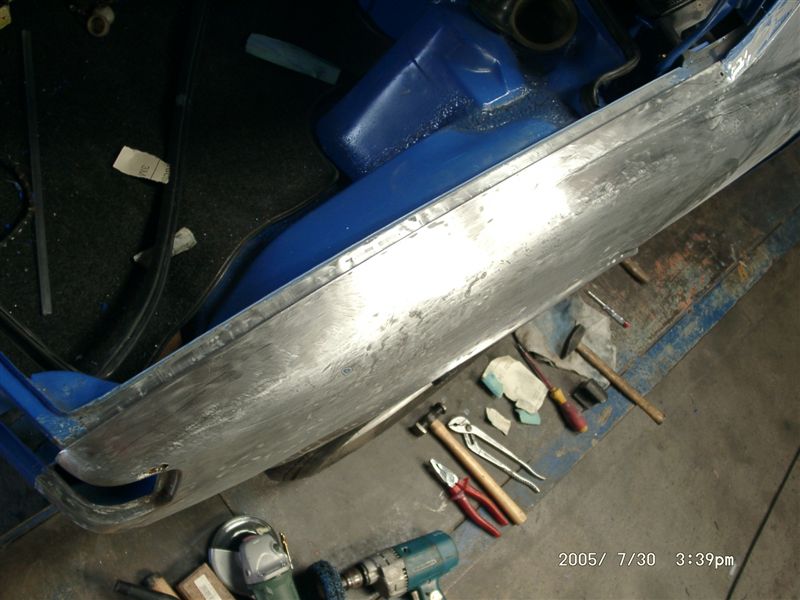
Posted by: michelko Jul 31 2005, 06:47 AM
 forgot to fab the little missing piece. Now it realy hard to get it welded in
Attached image(s)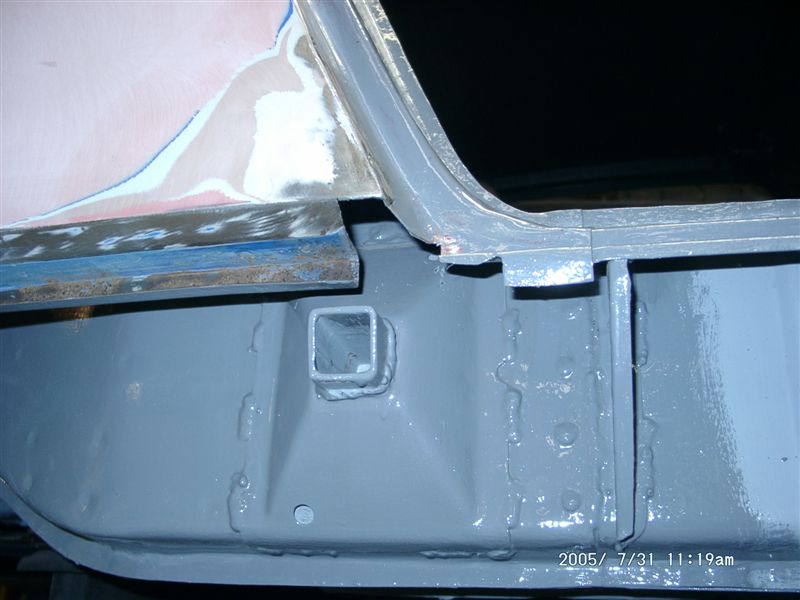
Posted by: michelko Jul 31 2005, 06:47 AM
the part
Attached image(s)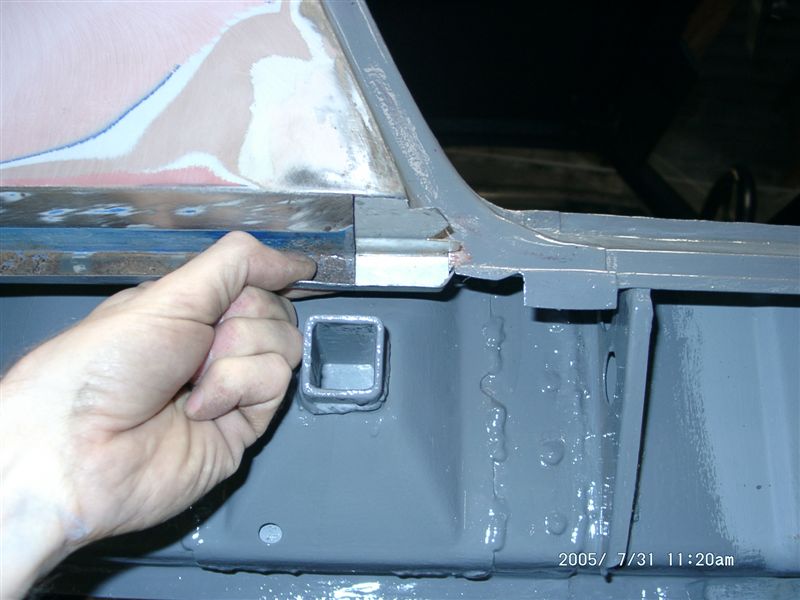
Posted by: michelko Jul 31 2005, 06:49 AM
nother view
its amazing what you can do with some sheet metal and a hammer
Attached image(s)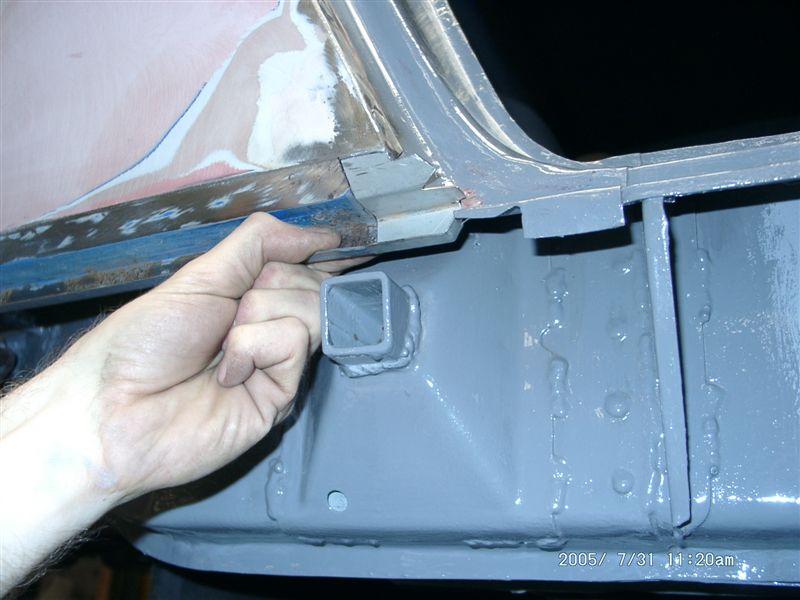
Posted by: michelko Jul 31 2005, 06:50 AM
welded in, not my best welding, but it should be good enough for that hidden place. Some grinding and it should be fine
Attached image(s)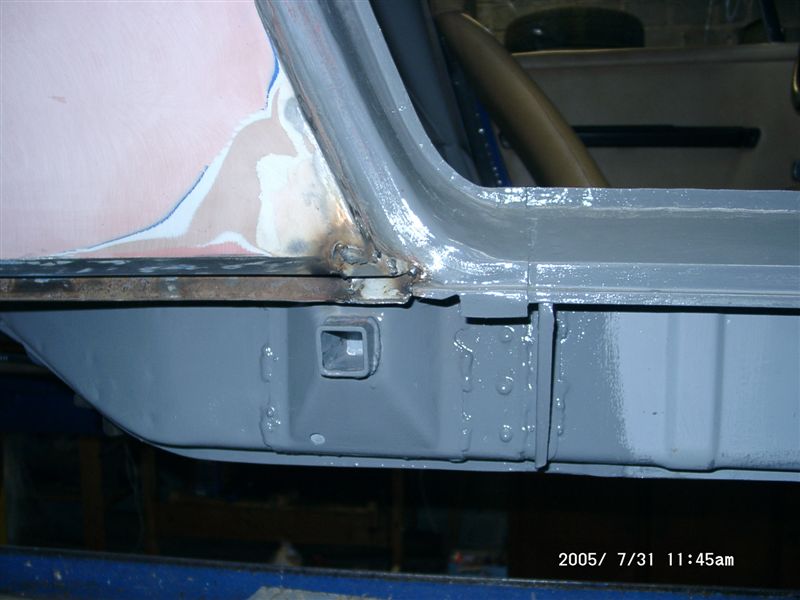
Posted by: michelko Jul 31 2005, 06:51 AM
nother view
Attached image(s)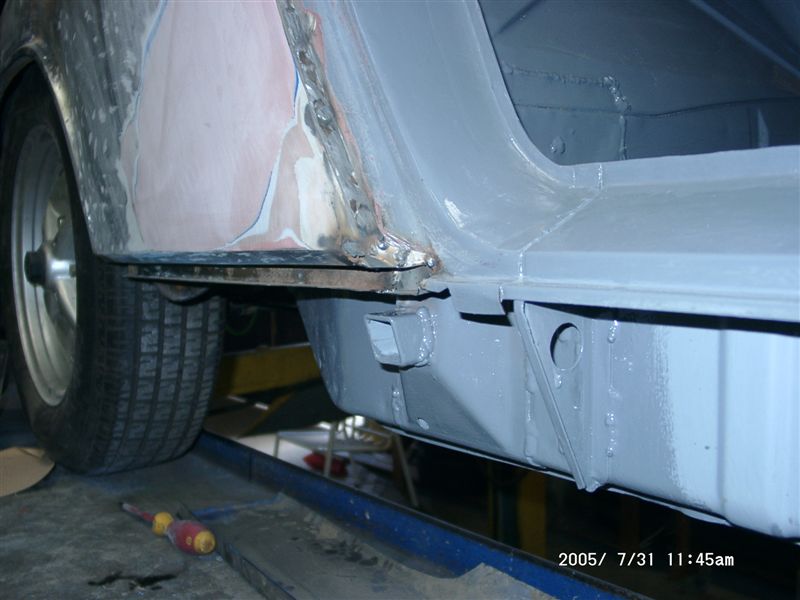
Posted by: michelko Jul 31 2005, 06:53 AM
and here the realy nice parts. sandblasted painted reasambled front light. with new reflector
Attached image(s)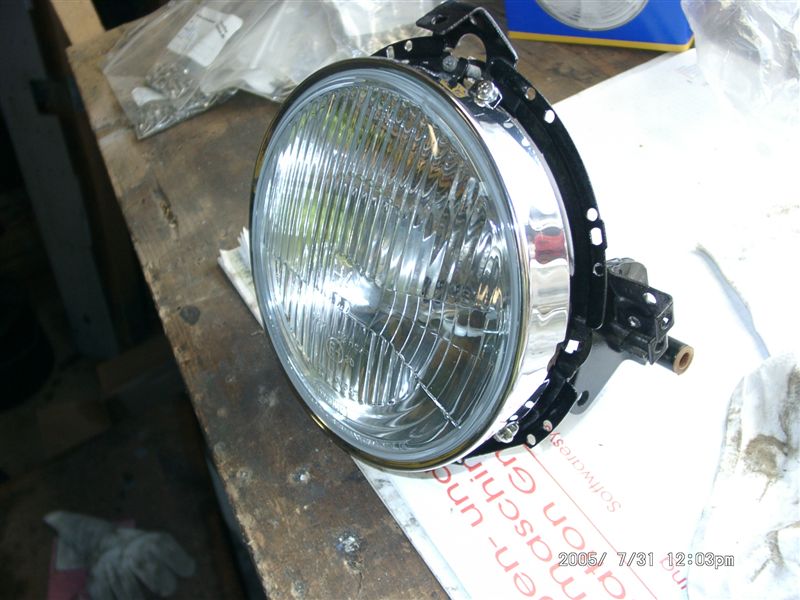
Posted by: michelko Jul 31 2005, 06:53 AM
#2
Attached image(s)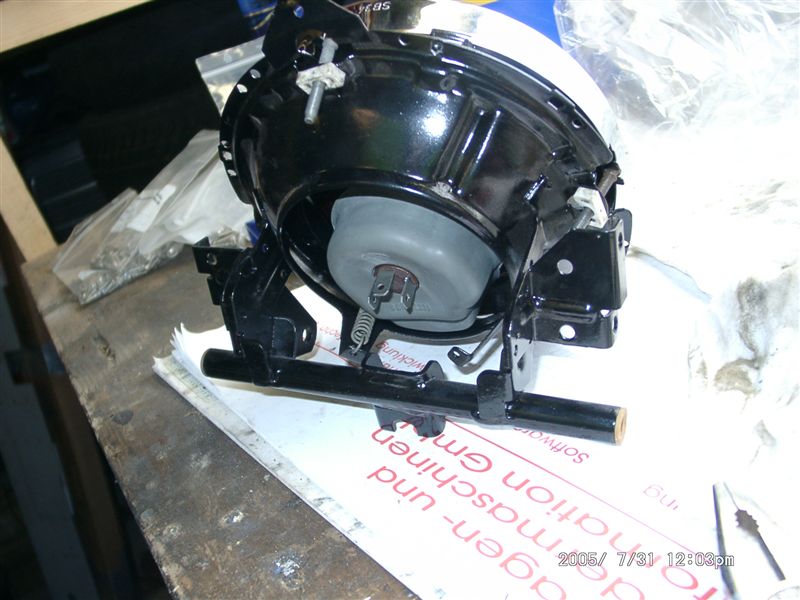
Posted by: michelko Jul 31 2005, 06:54 AM
last one
have a nice weekend
Attached image(s)
Posted by: SpecialK Jul 31 2005, 08:14 AM
| QUOTE (michelko @ Jul 31 2005, 06:49 AM) |
| nother view its amazing what you can do with some sheet metal and a hammer |
"...its amazing what you can do with some sheet metal and a hammer."
Posted by: michelko Aug 6 2005, 08:24 AM
So guy´s
i decided for the por 15 way. Grind down the panel to bare metal (exept the great ding), wash it with marin clean, prep it with metal ready, paint some por 15. So far so good. then tie coat primer, then bondo the little scratches and dings, sand all smooth, shoot filler, again sanding/filling, last but not least the blue paint.
This is the plan , let´s see how it works.
the first four steps i did today, see the pics.
#1 after metall ready
Attached image(s)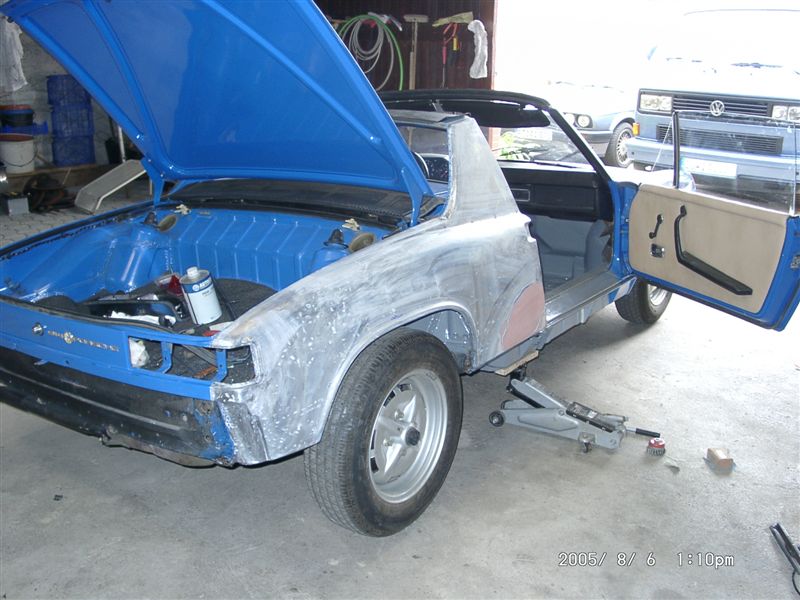
Posted by: michelko Aug 6 2005, 08:25 AM
#2
Attached image(s)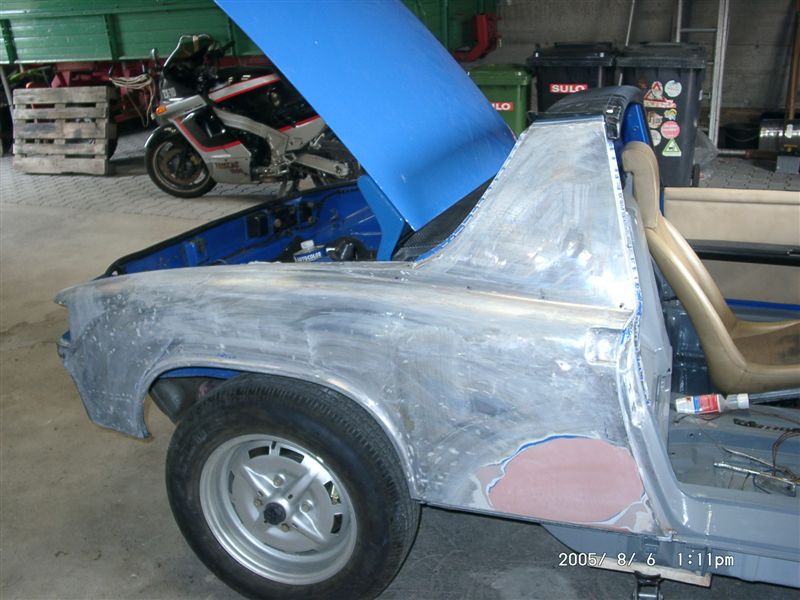
Posted by: michelko Aug 6 2005, 08:26 AM
#3
Attached image(s)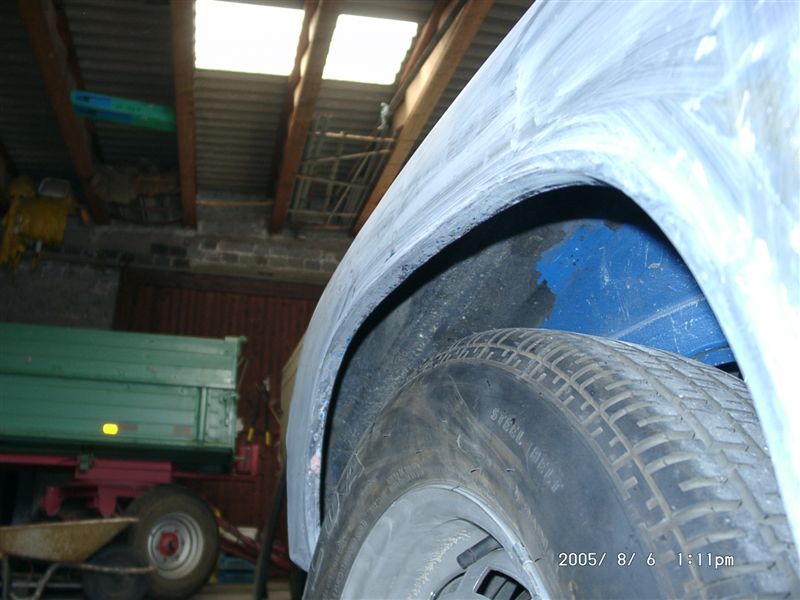
Posted by: michelko Aug 6 2005, 08:27 AM
#4
Attached image(s)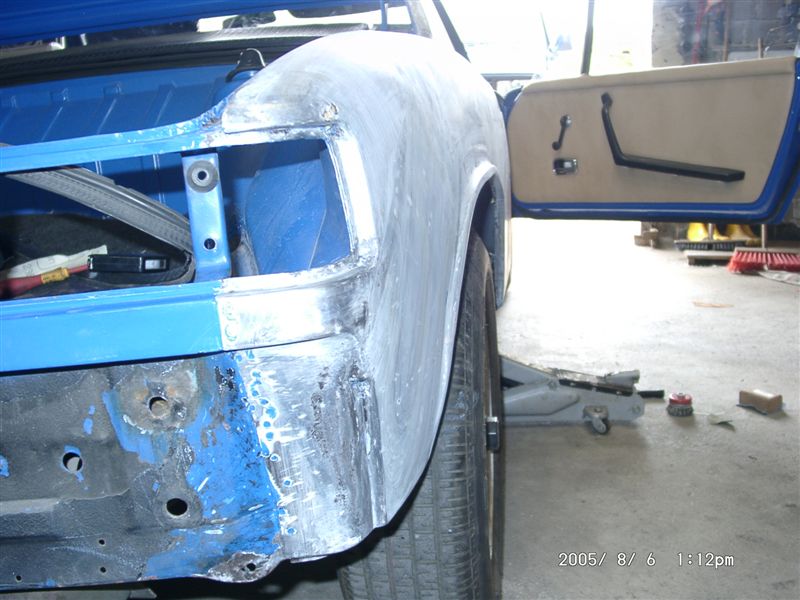
Posted by: michelko Aug 6 2005, 08:29 AM
the next ones with the por15 on
the difference in the look is realy amacing
#5
Attached image(s)
Posted by: michelko Aug 6 2005, 08:30 AM
#6
Attached image(s)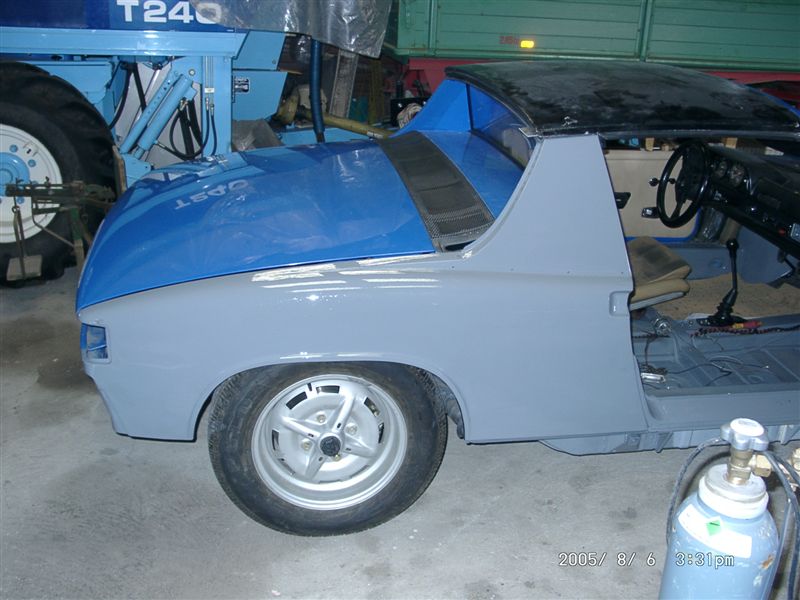
Posted by: michelko Aug 6 2005, 08:31 AM
#7
Attached image(s)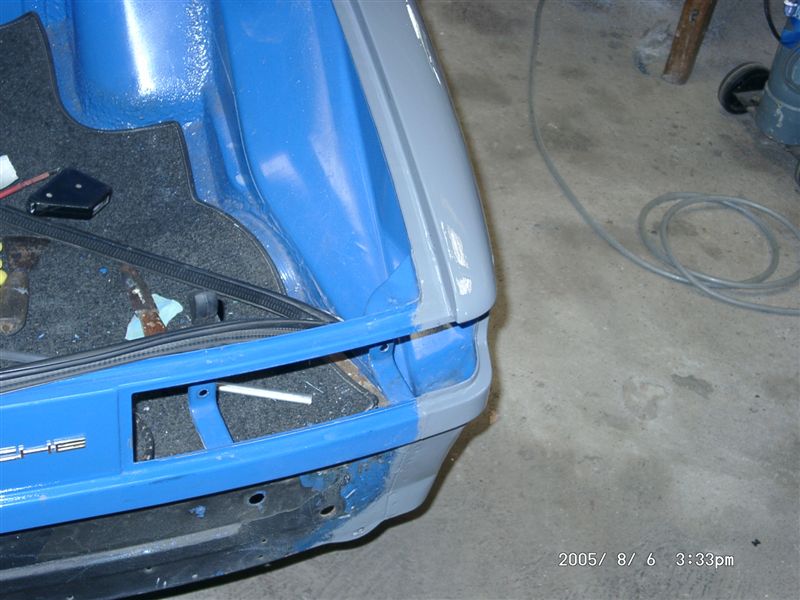
Posted by: michelko Aug 6 2005, 08:32 AM
#8
Attached image(s)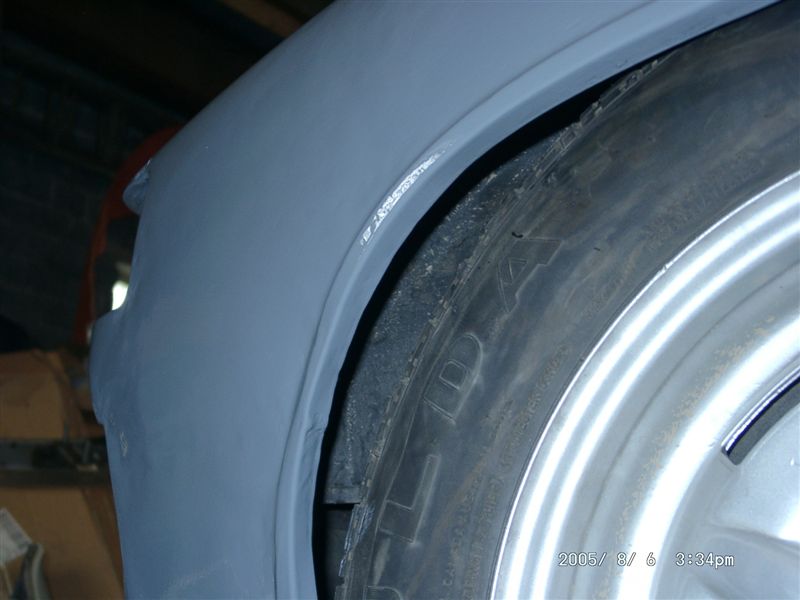
Posted by: michelko Aug 6 2005, 08:32 AM
#9
Attached image(s)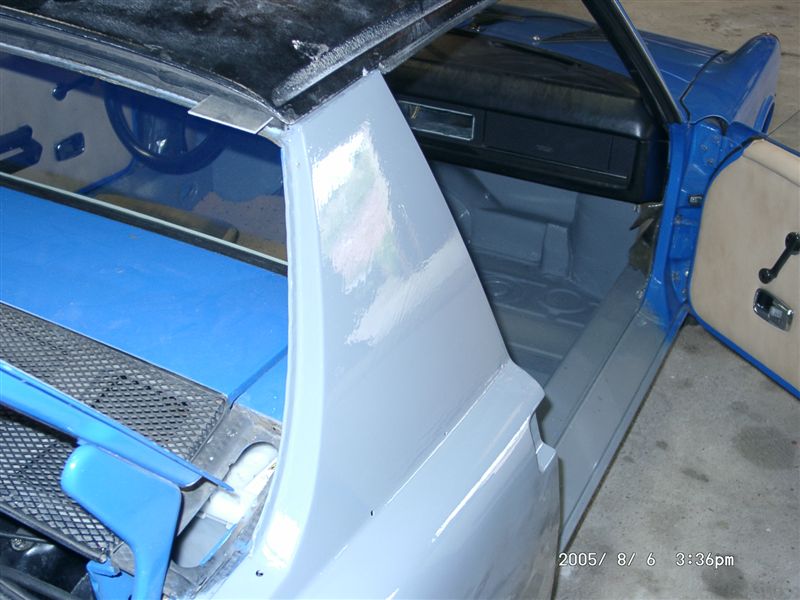
Posted by: michelko Aug 6 2005, 08:34 AM
#10
till now i am realy sattisfied with the result.
can´t wait to go further.
Attached image(s)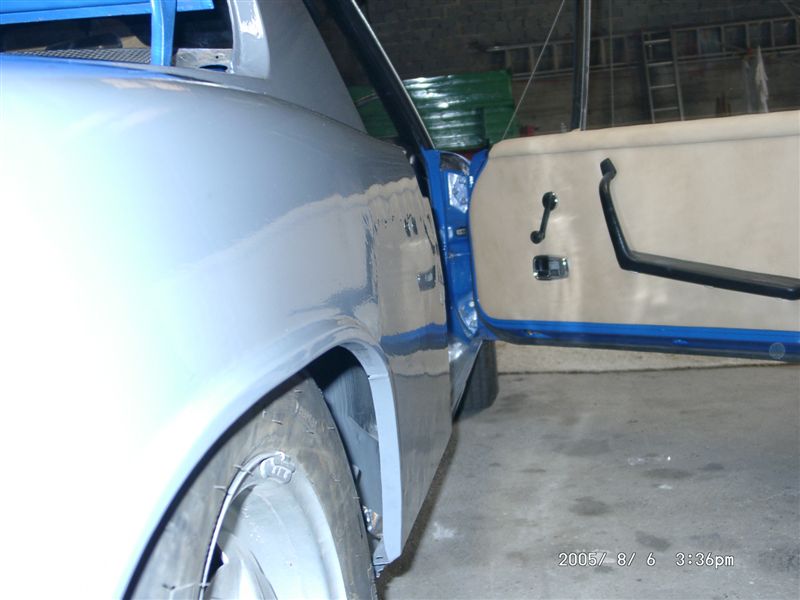
Posted by: SirAndy Aug 6 2005, 01:02 PM
| QUOTE (michelko @ Jul 31 2005, 05:44 AM) |
| found a little rust hole. can you see it? |
yes, you have to remove the hard foam filler that's sitting inside the cavity (from underneath) and clean it all out really good and use lots of "Metal Ready" in there.
that's a very common rust spot on those cars. the seam sealer around the foam cracks after a few years of road use and allows water to seep in.
the foam acts like a spunge and keeps the water in there until it has eaten it's way through the metal ...
 Andy
Andy
Posted by: michelko Aug 6 2005, 01:36 PM
| QUOTE (SirAndy @ Aug 6 2005, 11:02 AM) | ||
yes, you have to remove the hard foam filler that's sitting inside the cavity (from underneath) and clean it all out really good and use lots of "Metal Ready" in there. that's a very common rust spot on those cars. the seam sealer around the foam cracks after a few years of road use and allows water to seep in. the foam acts like a spunge and keeps the water in there until it has eaten it's way through the metal ... Andy |
so you (mean I ) can access that foam from the wheel well?
Gruss aus der alten Heimat
Posted by: SirAndy Aug 6 2005, 01:46 PM
| QUOTE (michelko @ Aug 6 2005, 12:36 PM) |
| so you (mean I ) can access that foam from the wheel well? Gruss aus der alten Heimat |
yes, from inside the wheel well. you'll see that the cavity is filled with "something" and has seam-sealer around it (might have undercoating over it) ...
once you start "digging" into it, you'll see it's the same yellowish foam they used in so many other places on our little cars.
you have to get it all out and clean it up really well. if it's already rusted through the top, i wouldn't be surprised if it also ate through into the rear trunk and behind the taillights (on the side) ...
Viel Spaß beim Restaurieren!
Andy
Posted by: michelko Aug 16 2005, 01:03 AM
Hi everybody, here is some update on the project.
Like sirandy mentioned, i scraped out the foam. Nearly impossible from wheel well. "Fortunately" there was an hole in the fender, so i could use this as a window to access the schitty foam. found some nice rust under it.
Sorry no pic of it.
Metallreadyied the hell out of it and then put some por 15 over.
After that i shot a coat of tie coat primer on it
Attached image(s)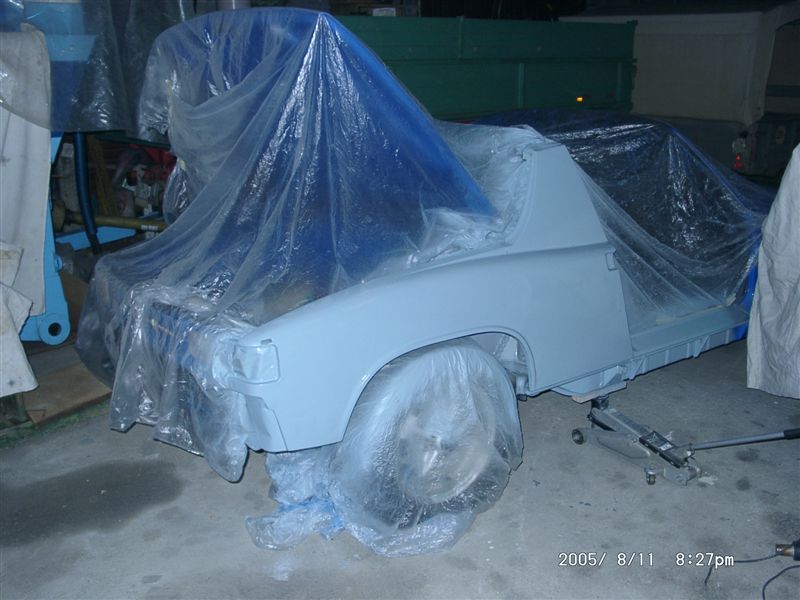
Posted by: michelko Aug 16 2005, 01:04 AM
nother
Attached image(s)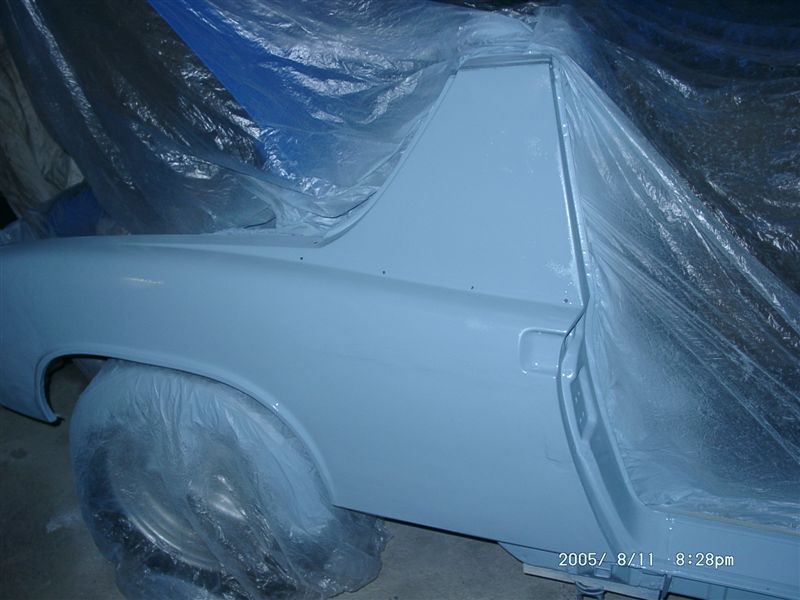
Posted by: michelko Aug 16 2005, 01:06 AM
next step:
filling the little dings with bondo an sanding it
some more to go , but looks nice again
Attached image(s)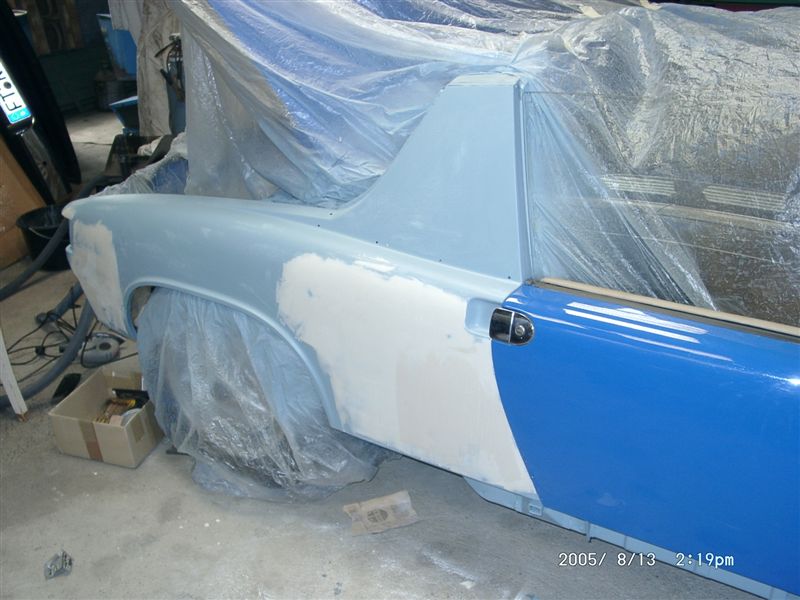
Posted by: michelko Aug 16 2005, 01:07 AM
nother
Attached image(s)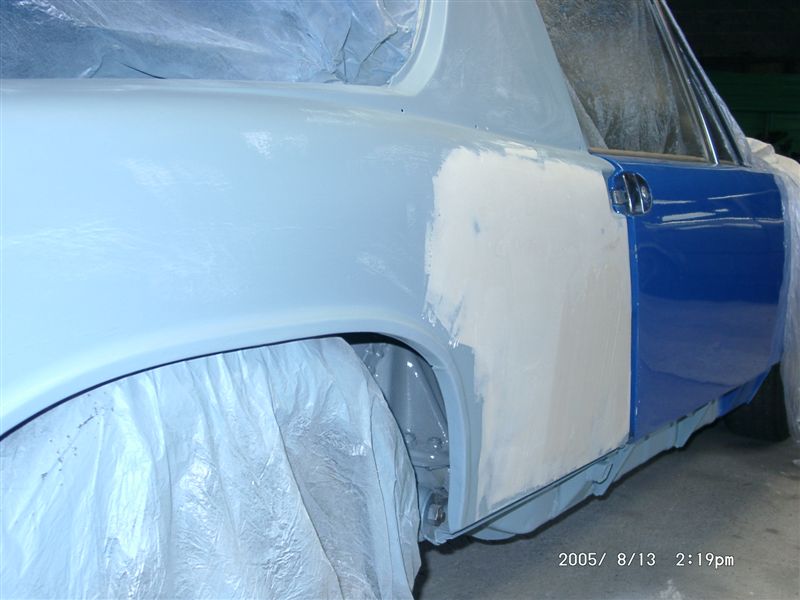
Posted by: michelko Aug 16 2005, 01:08 AM
last one
Attached image(s)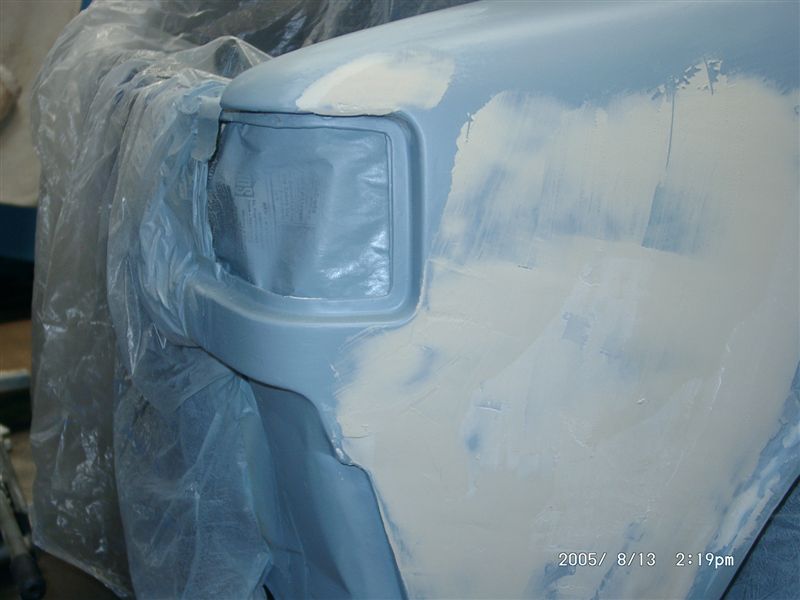
Posted by: CptTripps Aug 16 2005, 06:22 AM
Unsolicited Advice: MAKE SURE you get this section PERFECT. I didn't, and I've been mad at myself ever since.
Don't be afraid to go back down to metal again to get it right. I thought "I'm too far at this point to go back" before I painted, and afterwards, I've been kicking myself for NOT going back and fixing it.
Looking great man!
Posted by: michelko Aug 21 2005, 02:27 AM
Hi together,
next part of the painting progress.
One layer of filler, some more bondo and sanding and again a layer filler.
Next step will be sanding (wet)
Attached image(s)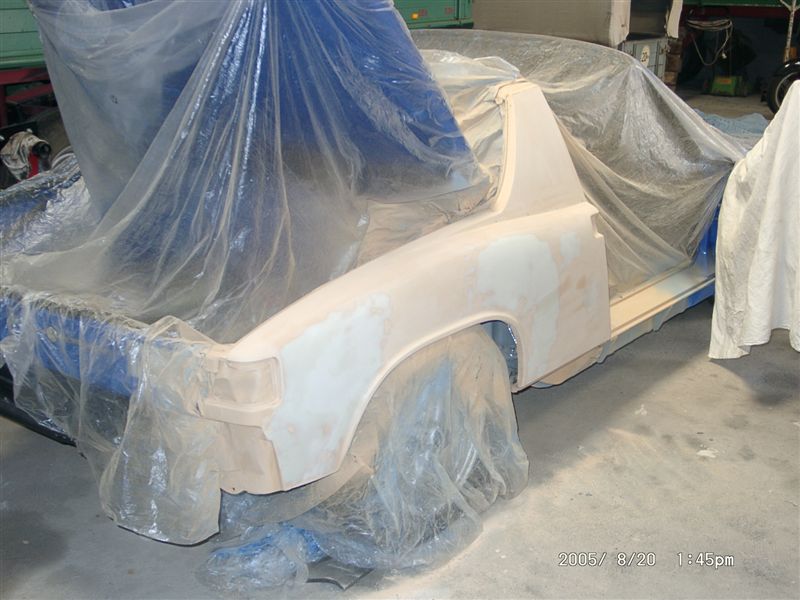
Posted by: michelko Aug 21 2005, 02:28 AM
nother view
Attached image(s)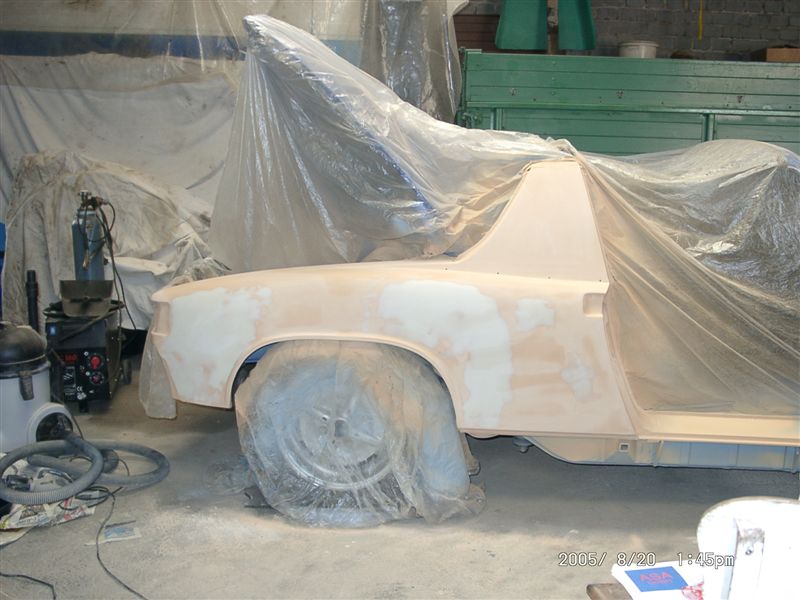
Posted by: michelko Aug 21 2005, 02:30 AM
next filler layer
Attached image(s)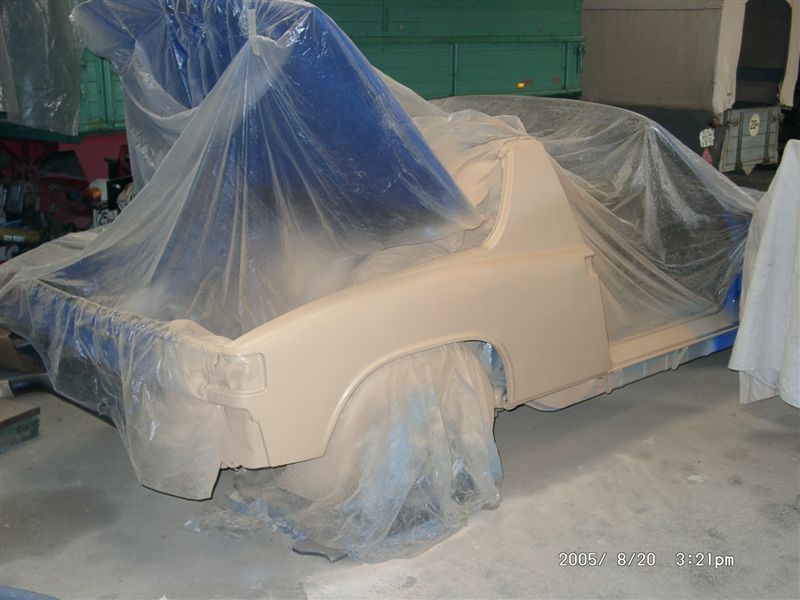
Posted by: michelko Aug 21 2005, 02:33 AM
nother
Attached image(s)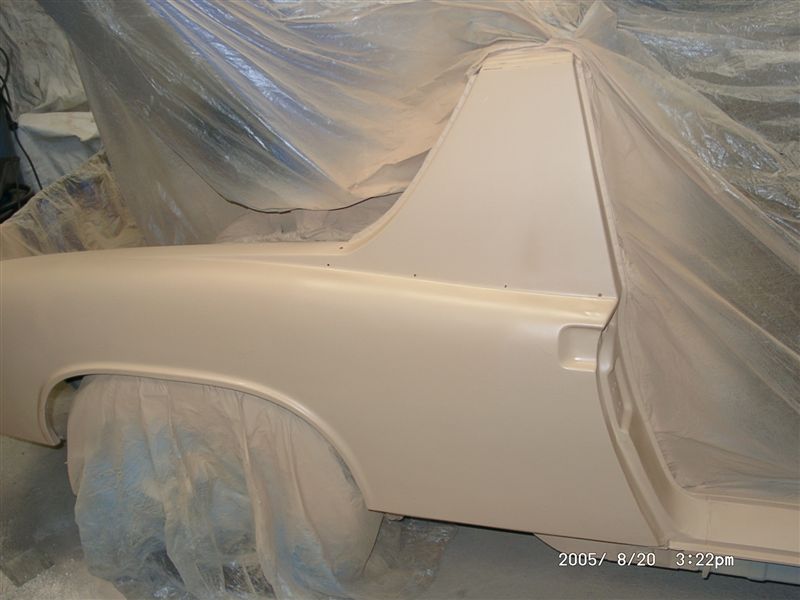
Posted by: michelko Aug 21 2005, 02:34 AM
qwert
Attached image(s)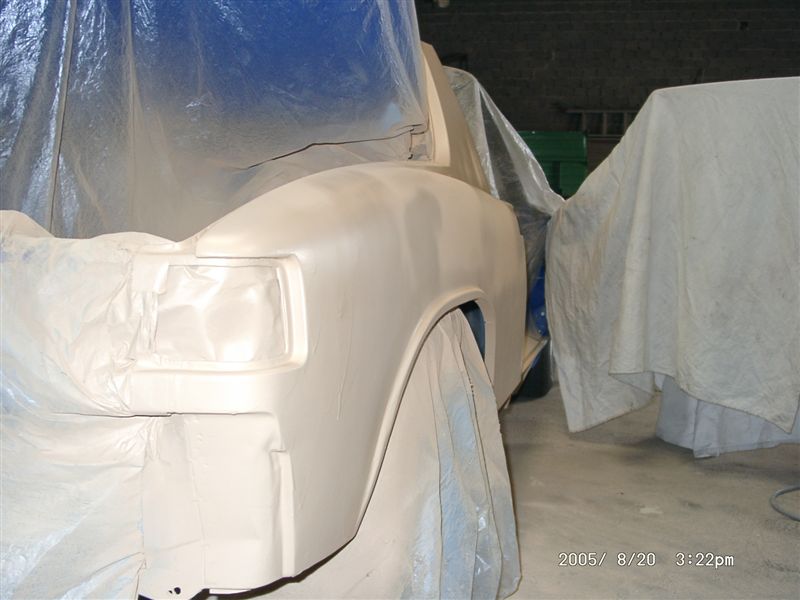
Posted by: michelko Aug 21 2005, 02:35 AM
weqrew
Attached image(s)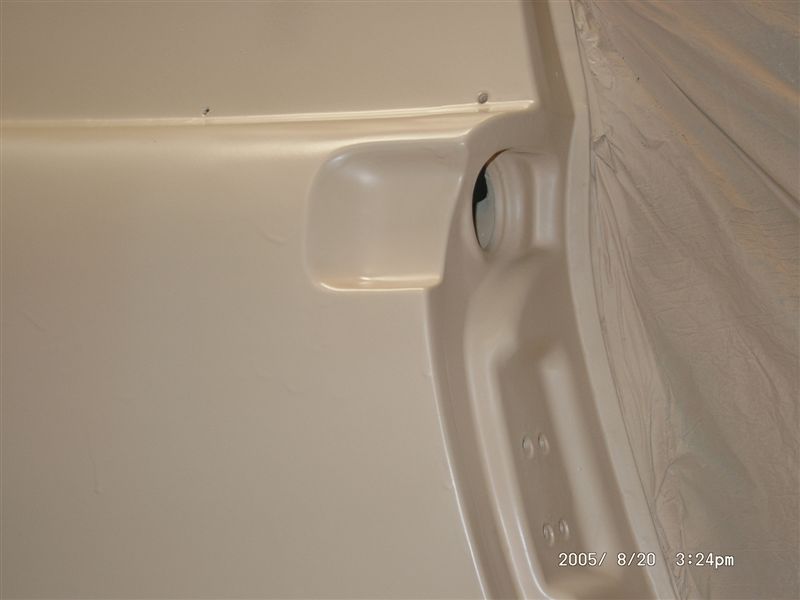
Posted by: michelko Aug 21 2005, 02:36 AM
last one.
Attached image(s)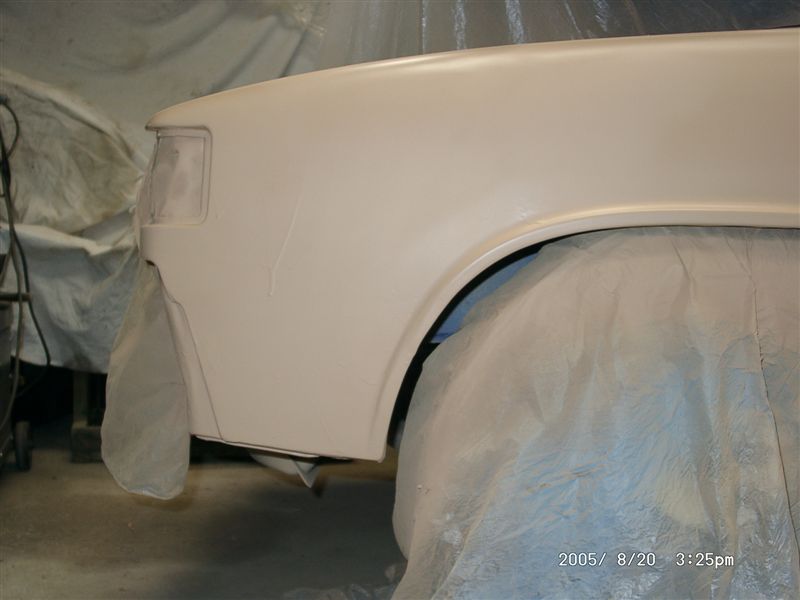
Posted by: Jacco Aug 21 2005, 02:49 AM
Hey!
amazing progress, very inspiring and impressive
can't wait to see the finished car
respect
greets
Jacco
Posted by: URY914 Aug 21 2005, 09:02 AM
Get someone to take a picture of YOU standing next to your car.
We want to meet you.
P
Posted by: michelko Aug 22 2005, 07:05 AM
| QUOTE (URY914 @ Aug 21 2005, 07:02 AM) |
| Get someone to take a picture of YOU standing next to your car. We want to meet you. P |
O.K. Here we go.
Not standing next to the car but its a picof me with the blue (almost) beauty.
Sanded down the filler to nice and smooth surface.
Only two points were i have to do some more filler.
Attached image(s)
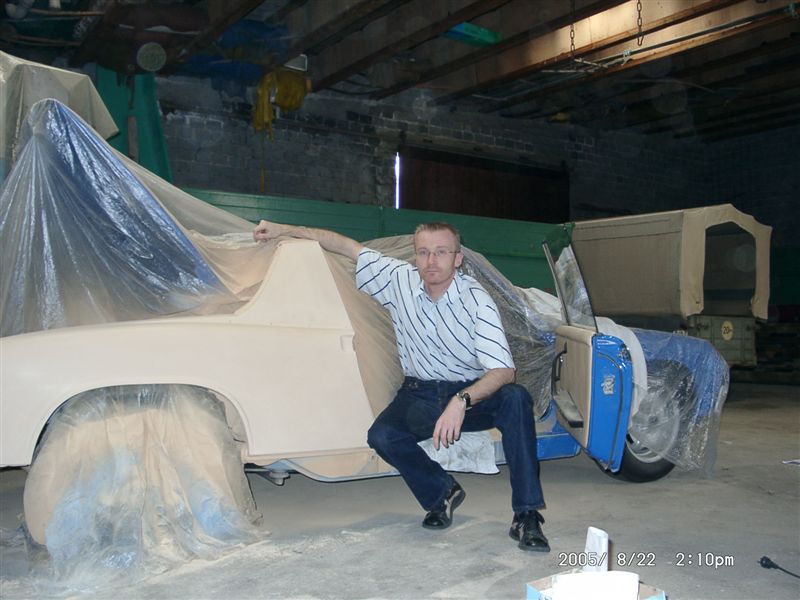
Posted by: michelko Aug 22 2005, 07:05 AM
first
Attached image(s)
Posted by: michelko Aug 22 2005, 07:06 AM
second
Attached image(s)
Posted by: michelko Aug 22 2005, 07:08 AM
at the points above the bondo isn´t covered anymore from the filler.
I will give them another layer.
Next step will be wet sanding
Attached image(s)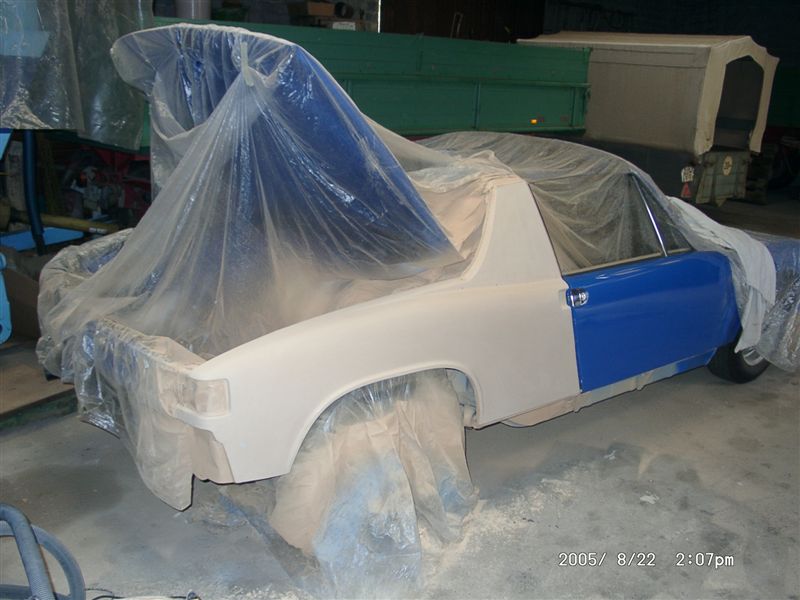
Posted by: michelko Aug 22 2005, 07:09 AM
nother
Attached image(s)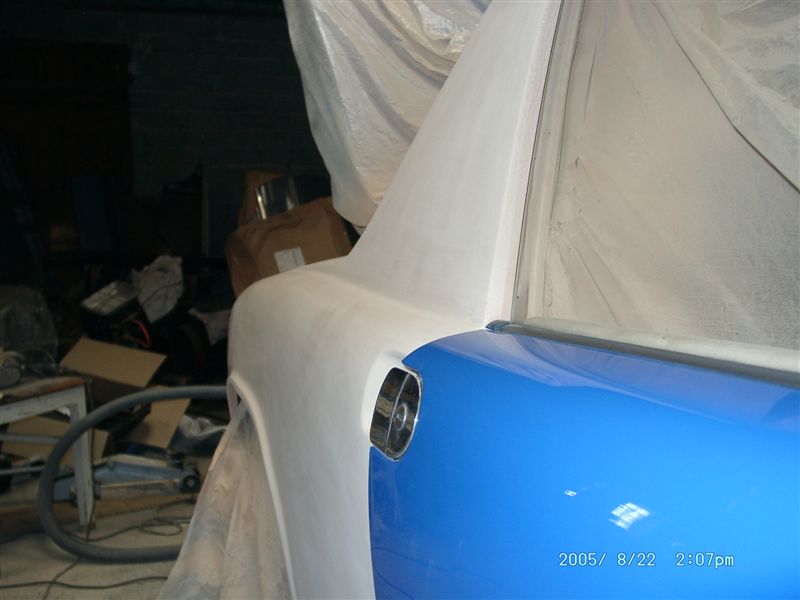
Posted by: michelko Aug 22 2005, 07:10 AM
shooting primer is lots of fun. snding not so much
Hope i didn´t mess up with the paint job.
Attached image(s)
Posted by: tat2dphreak Aug 22 2005, 07:20 AM
absolutely amazing work at every step... great job!
Posted by: mihai914 Aug 22 2005, 08:31 AM
This is true labor of love, and I think it will serve as a reference for a long time!
If there would be an award given each year to the best hell-hole longitudinal repair, this thread would get my vote!
No matter what the turnout will be, between excellent and very excellent, no body repair shop would of done a better job not even the factory
Posted by: ClayPerrine Aug 22 2005, 08:36 AM
This one is definitely going into the classics....
Posted by: restore2seater Aug 23 2005, 01:44 PM
michelko,
I've been going through Mike Ginter's "Rustoration" thread and yours from start to finish. Trying to get a little inspiration to begin work on my car.
Maybe I missed it but, towards the beginning of your project you bought "Engmans stiffening kit" and I see that you applied POR15 to the inside of your passenger compartment. Did you decide not to use the kit?
Just curious.
Posted by: CptTripps Aug 23 2005, 08:03 PM
Well done sir...well done.
Keep it up....home stretch is always the toughest part!
Posted by: michelko Aug 24 2005, 12:22 AM
| QUOTE (restore2seater @ Aug 23 2005, 11:44 AM) |
| michelko, I've been going through Mike Ginter's "Rustoration" thread and yours from start to finish. Trying to get a little inspiration to begin work on my car. Maybe I missed it but, towards the beginning of your project you bought "Engmans stiffening kit" and I see that you applied POR15 to the inside of your passenger compartment. Did you decide not to use the kit? Just curious. |
I still will use the stiffening kit. But i will do the driver side first. Tillt hen i did the rust preparation on the passenger side. Have to grind down thedrillpoints later to bare metal to do a proper welding job.
Driver side isn´t as bad as the passenger side (from what i can see now).
Posted by: CptTripps Aug 24 2005, 04:56 AM
after the job you did...you don't really NEED to put it in till you are ready. Most people get that kit to prolong the inevitable.
Posted by: michelko Sep 7 2005, 12:32 PM
Hi guys, after all that grinding, welding, bondoing, sanding, filling, wetsanding, i did the last small step: the paint!!
first shot after the wetsanded filler
Attached image(s)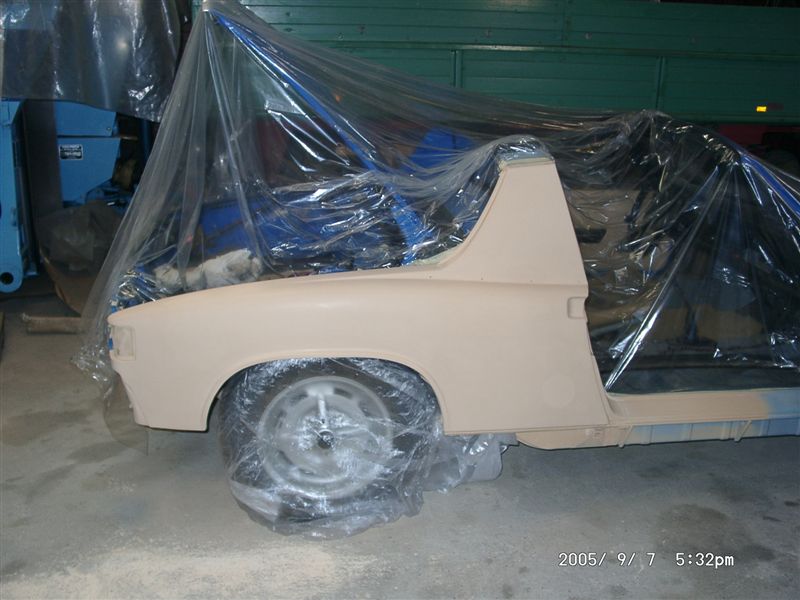
Posted by: michelko Sep 7 2005, 12:33 PM
nother
Posted by: michelko Sep 7 2005, 12:34 PM
 now with the pig
Attached image(s)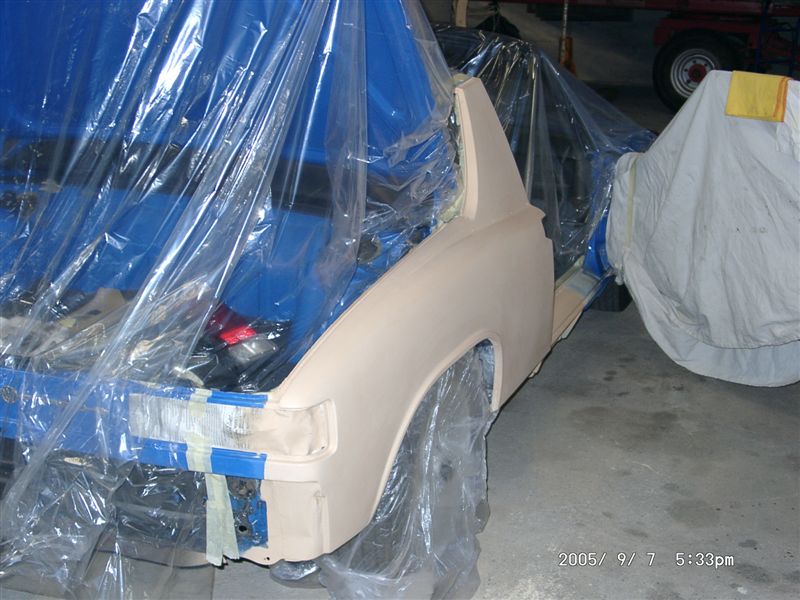
Posted by: michelko Sep 7 2005, 12:34 PM
tada: first layer blue
Attached image(s)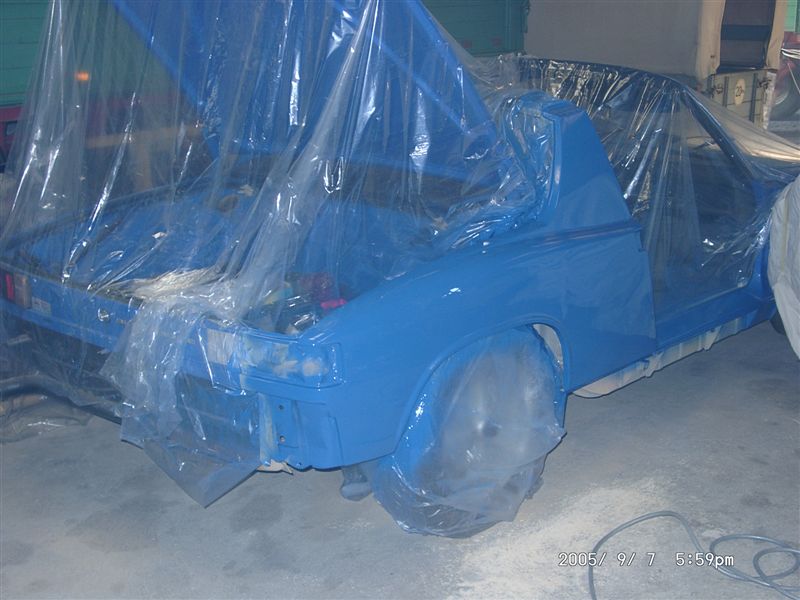
Posted by: michelko Sep 7 2005, 12:35 PM
ertewrt
Attached image(s)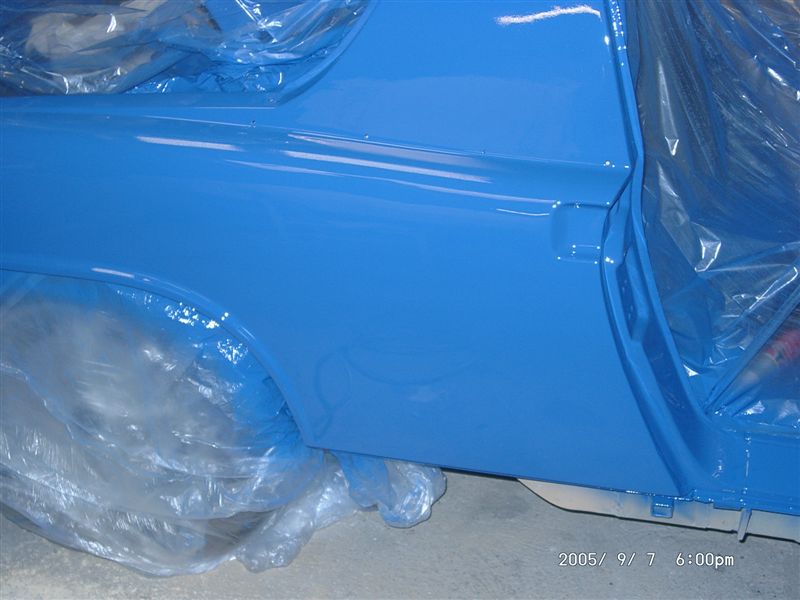
Posted by: michelko Sep 7 2005, 12:36 PM
and the second
Attached image(s)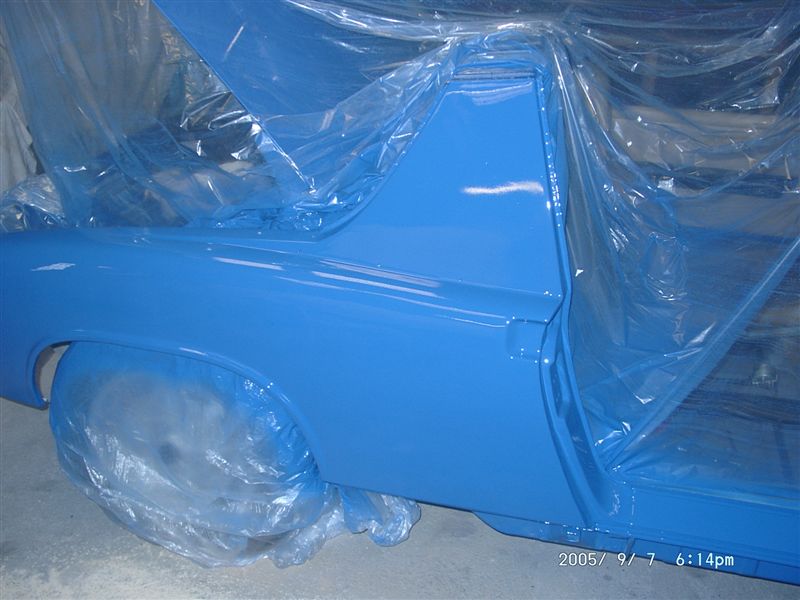
Posted by: michelko Sep 7 2005, 12:37 PM
qwerqwter
Attached image(s)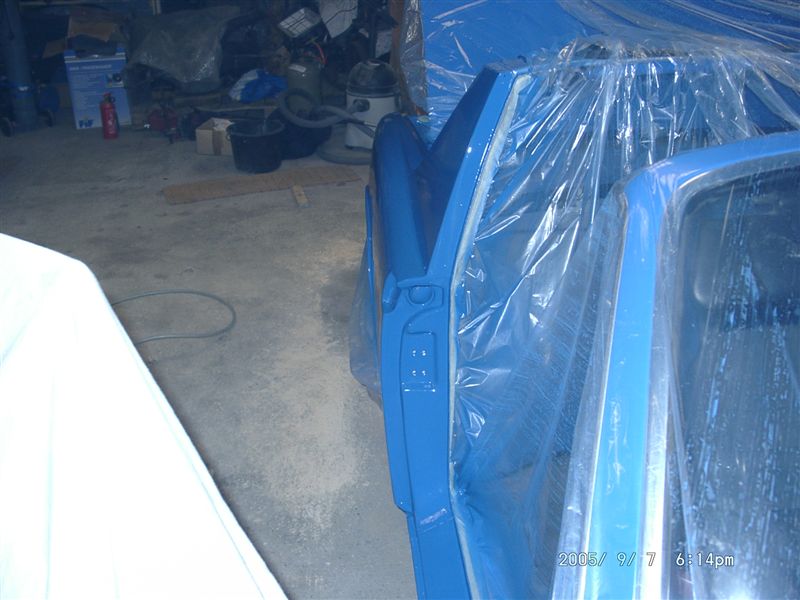
Posted by: michelko Sep 7 2005, 12:38 PM
in the daylight
Attached image(s)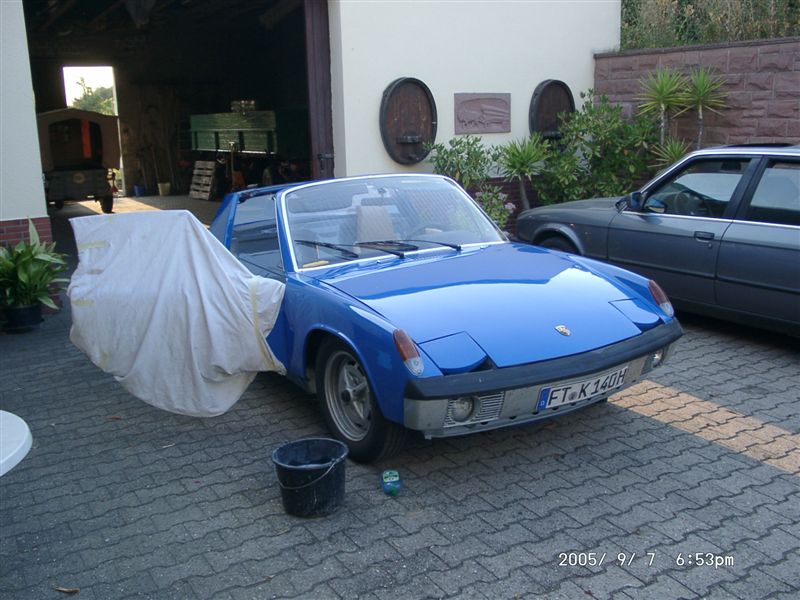
Posted by: michelko Sep 7 2005, 12:39 PM
side view
Attached image(s)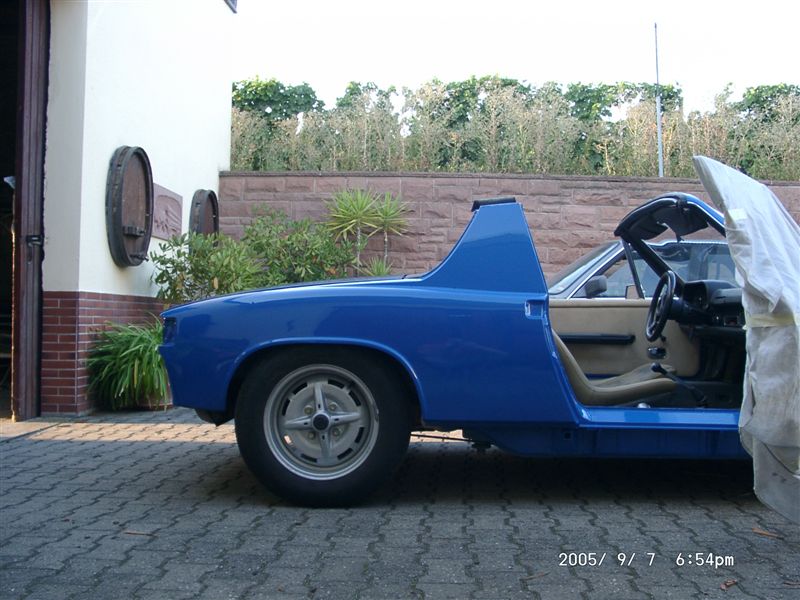
Posted by: michelko Sep 7 2005, 12:41 PM
rear
Attached image(s)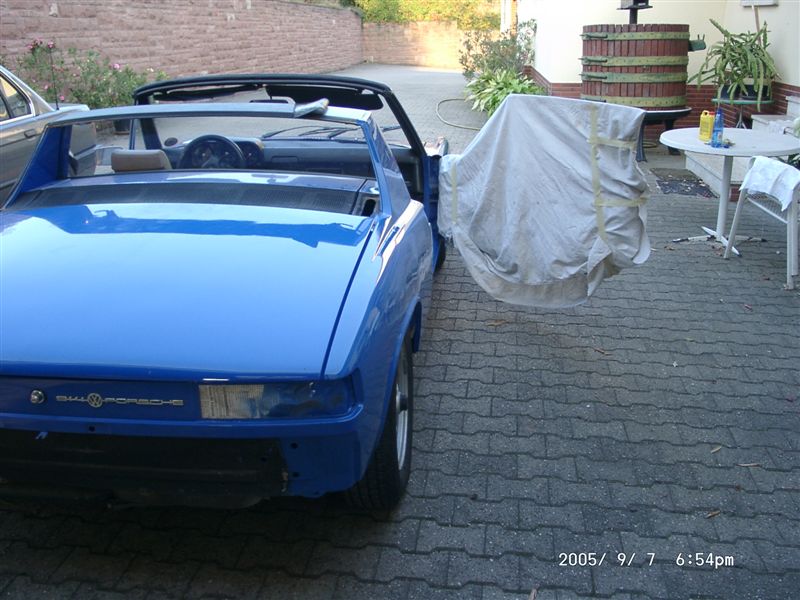
Posted by: michelko Sep 7 2005, 12:42 PM
Attached image(s)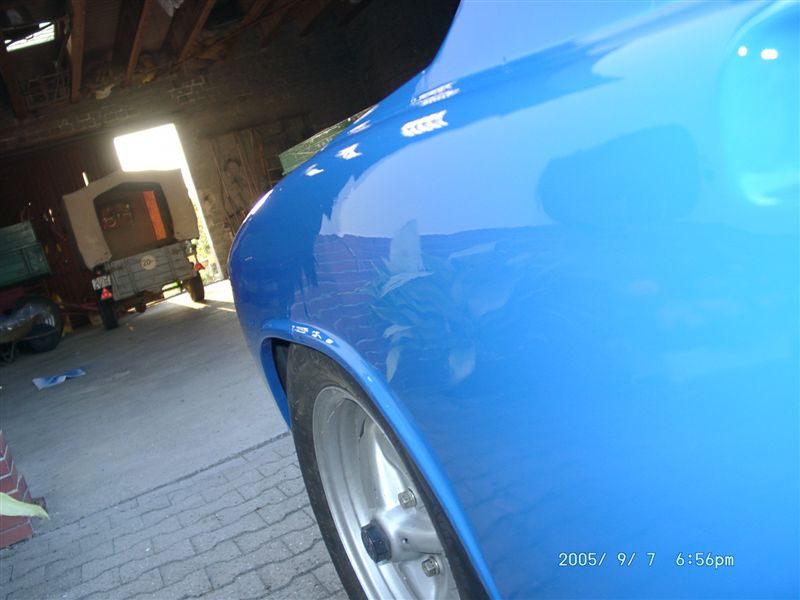
Posted by: michelko Sep 7 2005, 12:43 PM
new colour fits nice
Attached image(s)
Posted by: michelko Sep 7 2005, 12:44 PM
again
Attached image(s)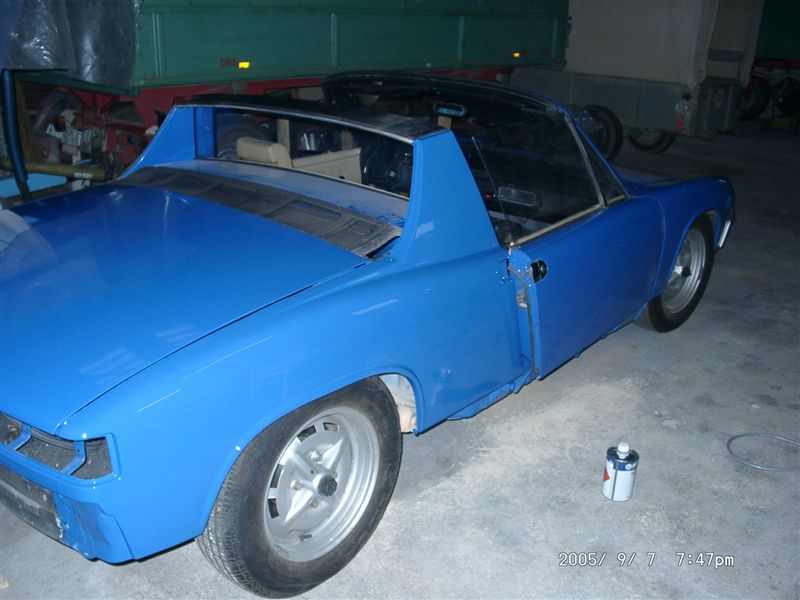
Posted by: michelko Sep 7 2005, 12:46 PM
last one for today.
i am very satisfied with the result of my first paint job.
Waiting for the complete drying of the new colour. I has a slight different shade then the old one.
Hope you enjoyed the pics.
Attached image(s)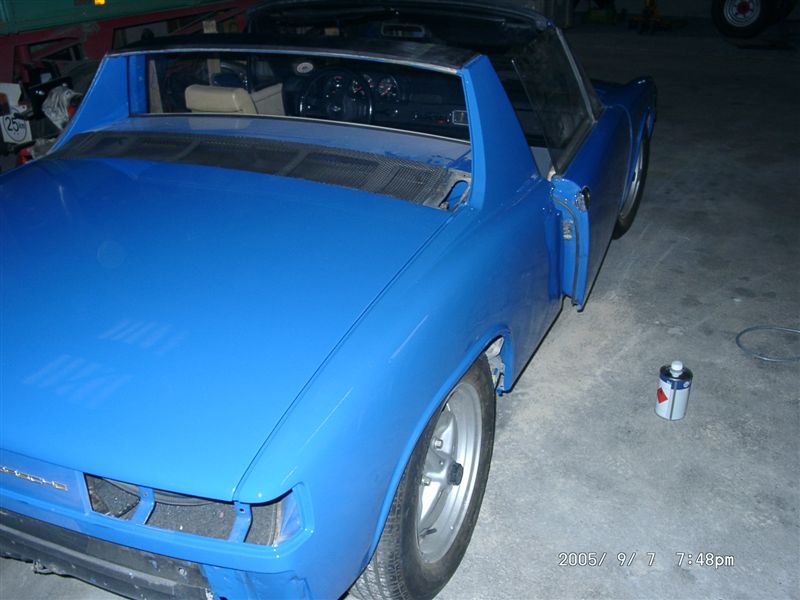
Posted by: TimT Sep 7 2005, 02:27 PM
verrrryyyyy nice
Posted by: tat2dphreak Sep 7 2005, 02:55 PM
AMAZING work!! this thread is a definate classic, it's a "how-to do it right"
Posted by: michelko Oct 2 2005, 01:26 PM
about one year working on the car without driving it, that was realy hard. Now that the winter is coming i am ready to go to traffic with it.
Come take a ride with me:
http://www.michael-kost.de/1.oktober.wmv
Posted by: messix Oct 2 2005, 02:21 PM
your the man! great job. and nice video
Posted by: Grimstead Oct 2 2005, 02:27 PM
What a great job & and a great video. You have done good!
Posted by: jet1 Oct 2 2005, 02:46 PM
NICE!!!
Posted by: brp914 Oct 2 2005, 03:52 PM
Great work, beautiful car, and nice video. That had to be one satisfying ride!
Posted by: Jacco Oct 2 2005, 05:03 PM
Now that's absolutely awesome!
I'm impressed and very inspired, cool movie!
good luck on finishing the details, but that will all be peanuts greetz
Jacco
Posted by: Lou W Oct 2 2005, 05:37 PM
Your car turned out beautiful, great video too.
Posted by: CptTripps Oct 2 2005, 05:58 PM
Well done sir!
I KNOW that feeling...I wish I'd have been smart enough to take a vid of my first ride after the restoration.
Now we need to get you a seat bottom for the drivers side!
Congratulations. Seriously...you diserve the respect of every single member of this club.
Posted by: grasshopper Oct 2 2005, 06:18 PM
wow, you have been a great insperation to me, to get the show on the road and start the restoration!!! Great job Awsome movie
Posted by: SpecialK Oct 2 2005, 06:25 PM
| QUOTE (CptTripps @ Oct 2 2005, 05:58 PM) |
| ...you diserve the respect of every single member of this club. |
Oh, I'm sure he has it!
VERY impressive Michel! What who was the excellent background music from?
Posted by: michelko Oct 3 2005, 01:31 AM
| QUOTE (Buzzard1 @ Oct 2 2005, 04:25 PM) | ||
Oh, I'm sure he has it! VERY impressive Michel! What who was the excellent background music from? |
Thank you very much all together.
The Forum and the members were super helpfull to do the restoration.
Great resource for information and inspiration.
This car is far from beeing ready and i am thinking of a new project
Isn´t that crazy?
Now that the car is running again, it feels a little "underpowered".
I am dreaming of a realy kick ass engine. Not sure witch way to go? Nice six or a big four.
The background music is from the "Best of Van Morrison" CD.
Posted by: michelko Oct 3 2005, 01:47 AM
More Pics of the yesterday progress.
Mounted the front swaybar. It came from an 911 but fitted pretty nice. Whole thing was sandblasted and painted with por15.
What a difference in the driving!! Everybody should have that sway bar.
Attached image(s)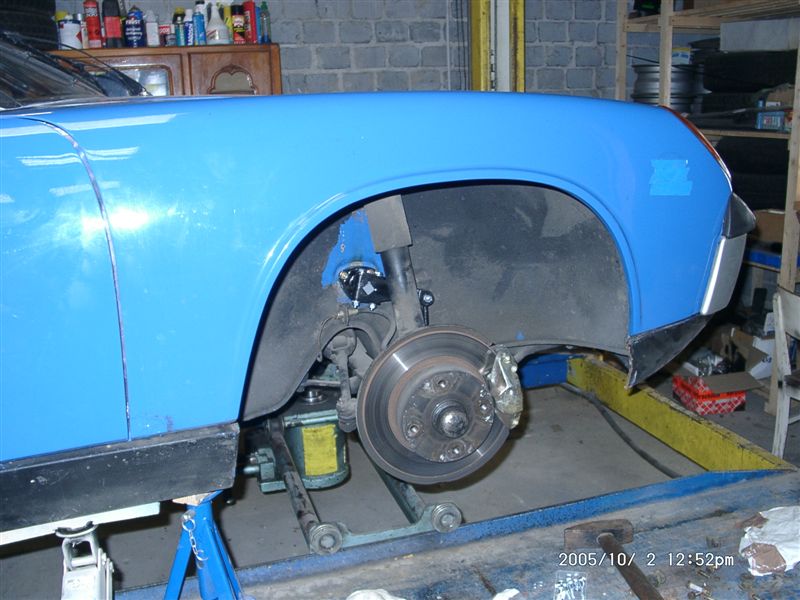
Posted by: michelko Oct 3 2005, 01:49 AM
forgot to repaint the burned paint around the mounting
Attached image(s)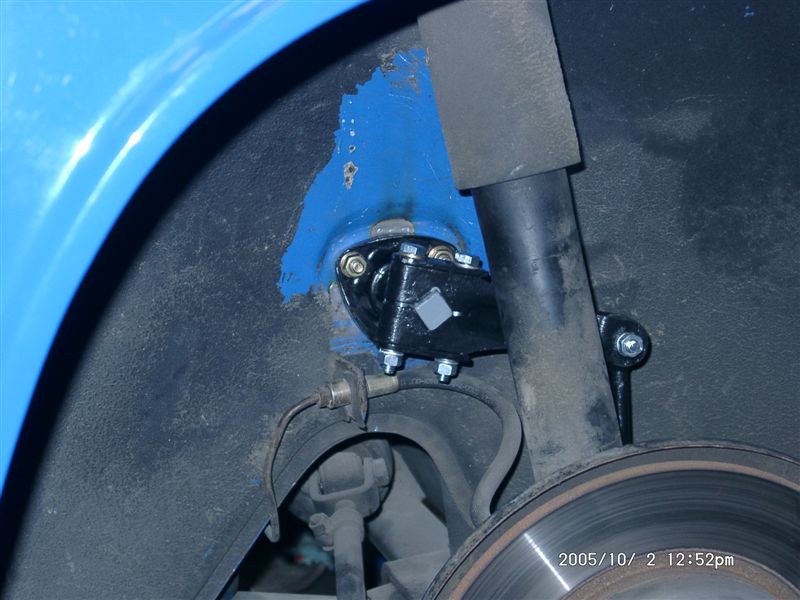
Posted by: michelko Oct 3 2005, 01:50 AM
frontview
Attached image(s)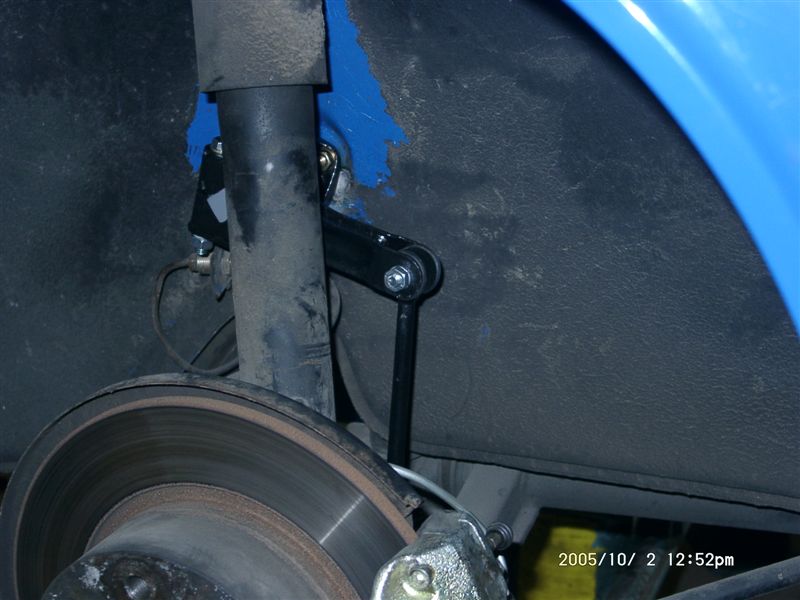
Posted by: michelko Oct 3 2005, 01:51 AM
interior shots partially new upholstered
Attached image(s)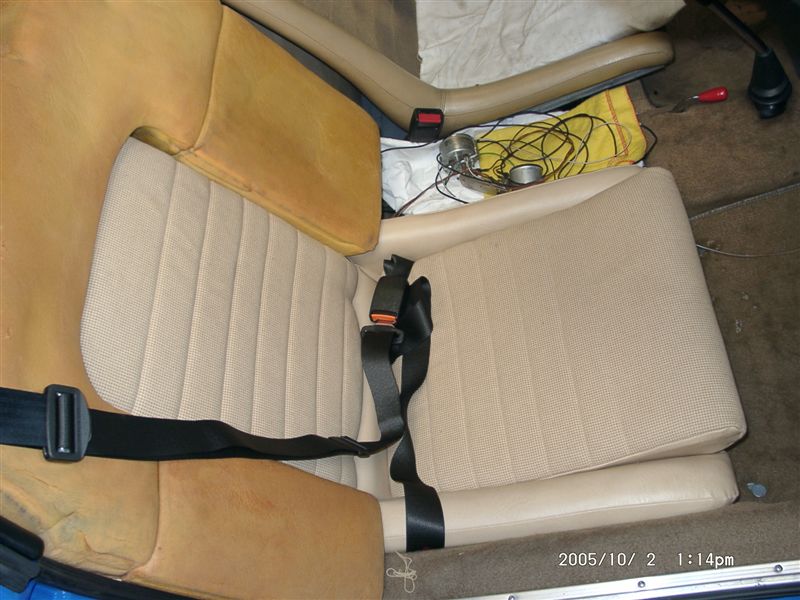
Posted by: michelko Oct 3 2005, 01:52 AM
need also new carpets
Attached image(s)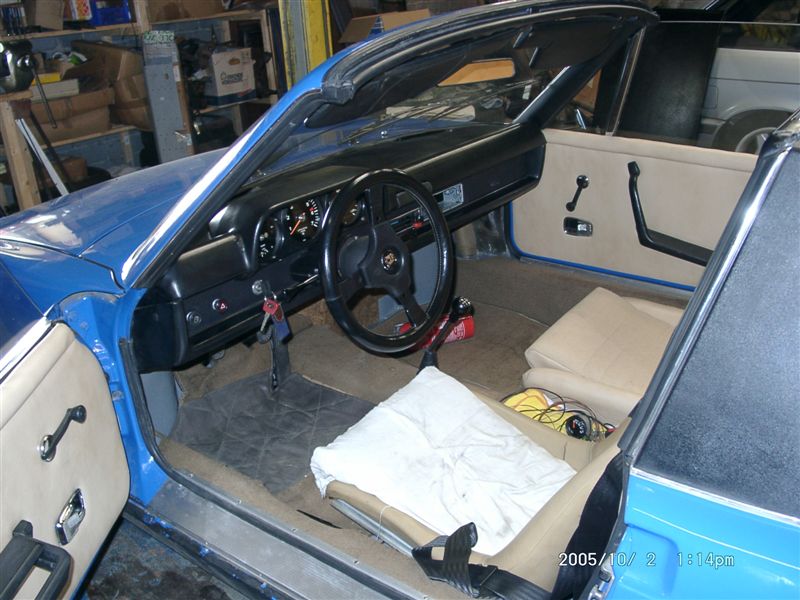
Posted by: michelko Oct 3 2005, 01:53 AM
old and dirty driver seat
Attached image(s)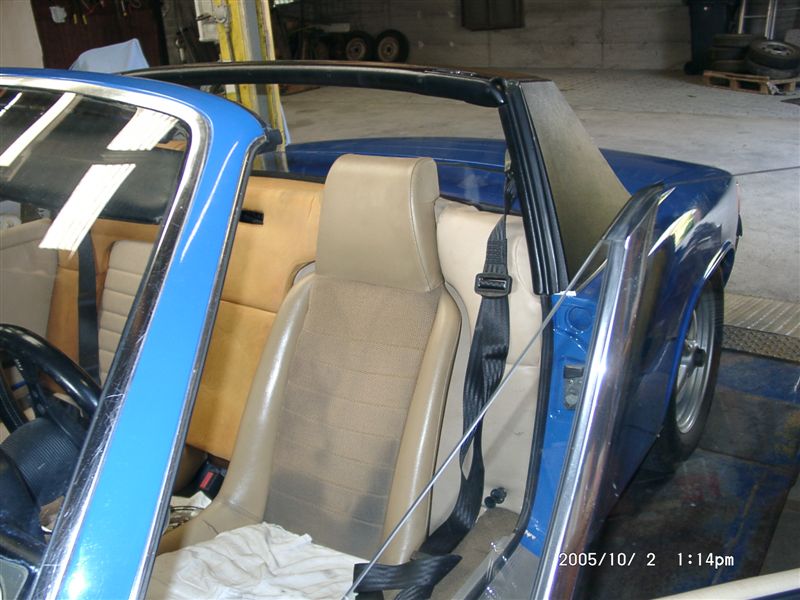
Posted by: Gint Oct 3 2005, 06:34 AM
Beautiful job man!
Posted by: shorty01 Feb 17 2006, 06:38 AM
vid is nice? what vid the link is broke
can you fix it? id like to see it
Posted by: william harris Feb 17 2006, 10:40 AM
I suppose the German (?) says something like: data not found??? Please fix link, the rest of us would love to view it.
Posted by: johannes Feb 21 2006, 06:28 PM
Ja bitte !!! ich will auch dass Film anschauen !!
Posted by: michelko Feb 26 2006, 02:09 AM
Sorry guy´s , my fault. Needed some online storage and so i deleted the file.
But now.. tada! the video is online again.
here the link (same as the other):
http://www.michael-kost.de/1.oktober.wmv
Here are also some progress pics of the interieur.
Did some carpeting
Attached image(s)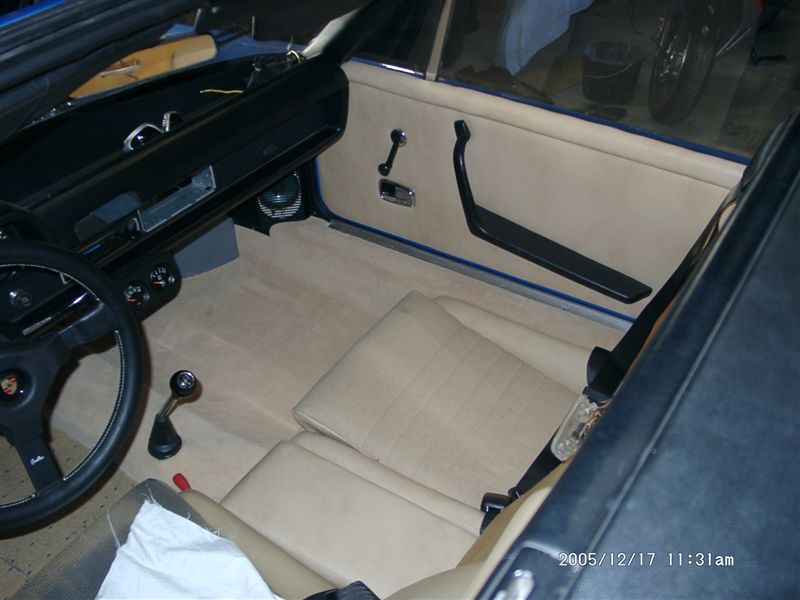
Posted by: michelko Feb 26 2006, 02:13 AM
This colour is awsome in natural. But i think it is very sensitive to dirt.
Attached image(s)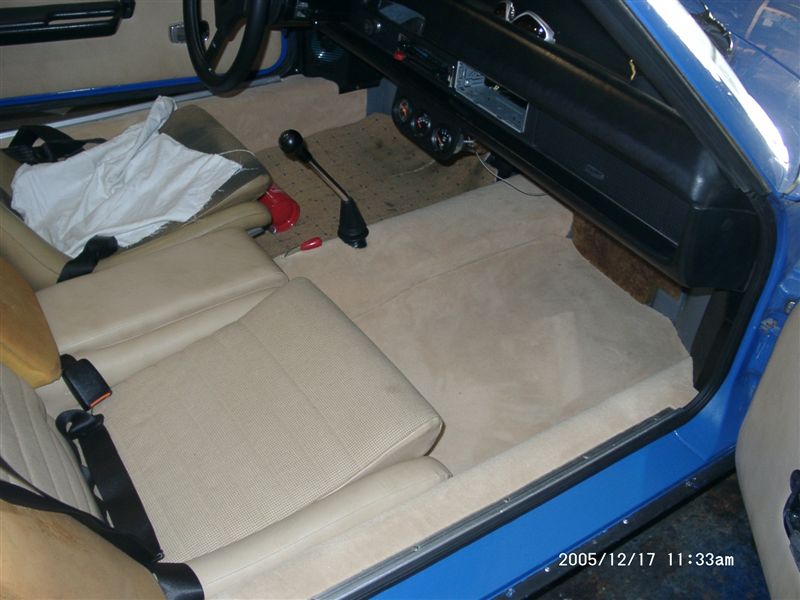
Posted by: michelko Feb 26 2006, 02:14 AM
nother view.
Still have to do the driver side.
Attached image(s)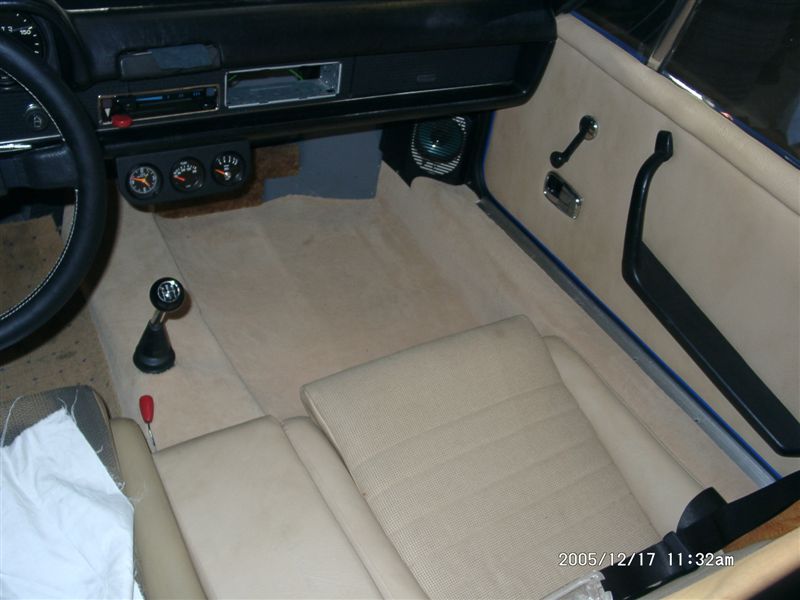
Posted by: michelko Feb 26 2006, 02:17 AM
Little Off topic but have to share.
Since i had an accident with my new daily driver there was no major Progress the last day´s.
Owned it only for 5 weeks and then had a little problem on the highway
Attached image(s)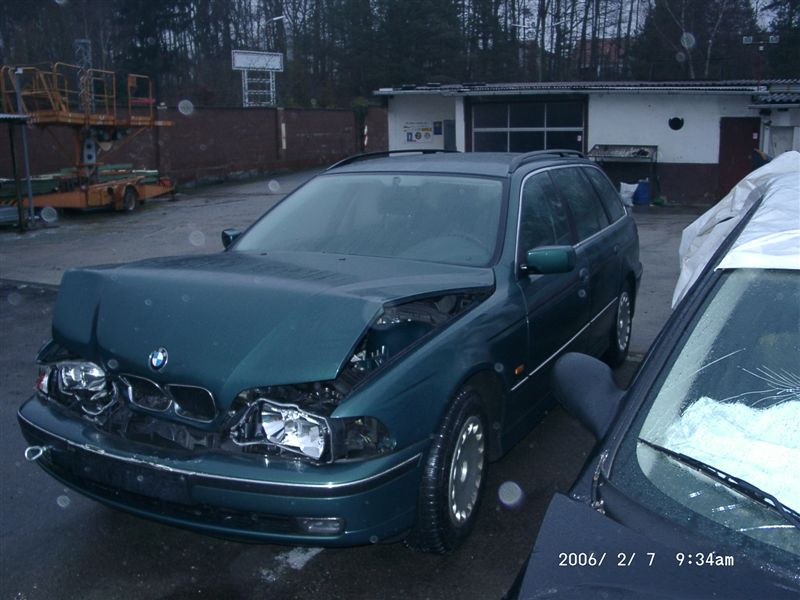
Posted by: michelko Feb 26 2006, 02:18 AM
took out all the crushed stuff.
Attached image(s)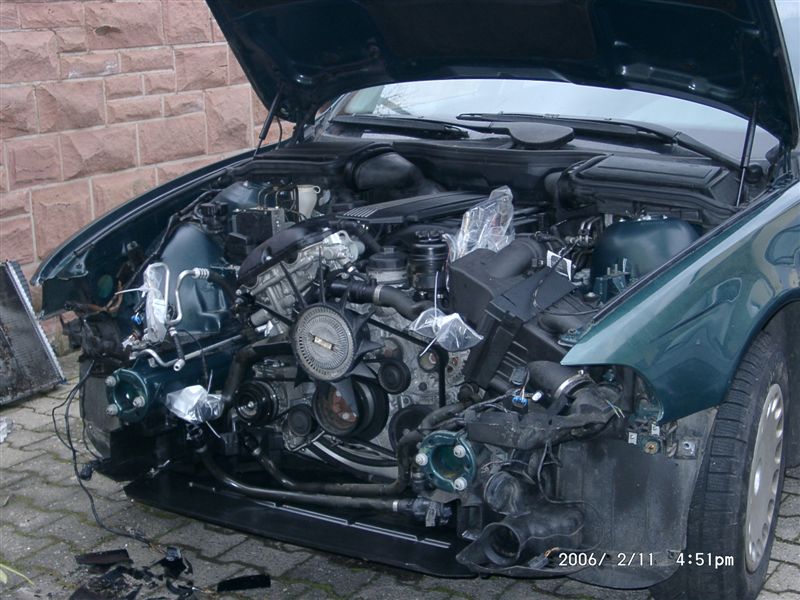
Posted by: michelko Feb 26 2006, 02:20 AM
Got it back on the road yesterday.
Still have got it painted.
Posted by: thesey914 Feb 26 2006, 03:37 AM
Got the 5 series back on the road? That's going some. I really like the colour Adriatic blue -and yours is the first 914 I've seen with the reversing lights working. Also noticed you have swapped your wipers to park on the passenger side, well done.
Posted by: michelko Mar 29 2006, 06:46 AM
Hi together,
last conversion on the car was changing the old style windows to new style windows and cranks.
No more rattling of the windows!!!
Attached image(s)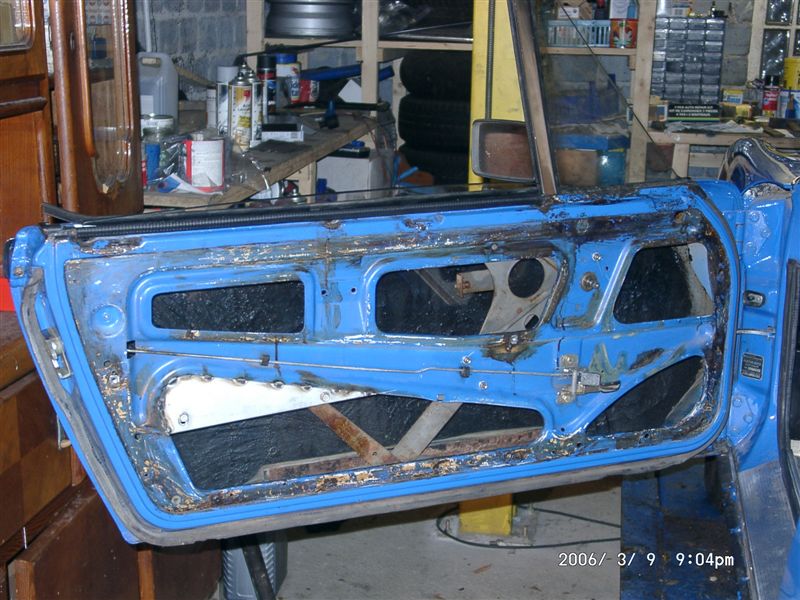
Posted by: michelko Mar 29 2006, 06:47 AM
all i had to do was collecting the window parts drill some holes and weld a piece of sheet metal in.
Attached image(s)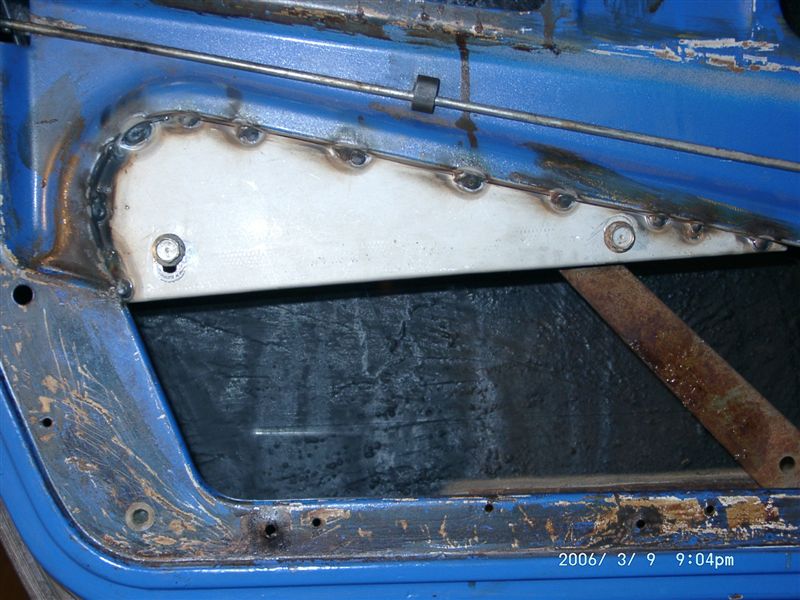
Posted by: michelko Mar 29 2006, 06:48 AM
the windows goes very smooth up an down.
Realy worth the work.
Attached image(s)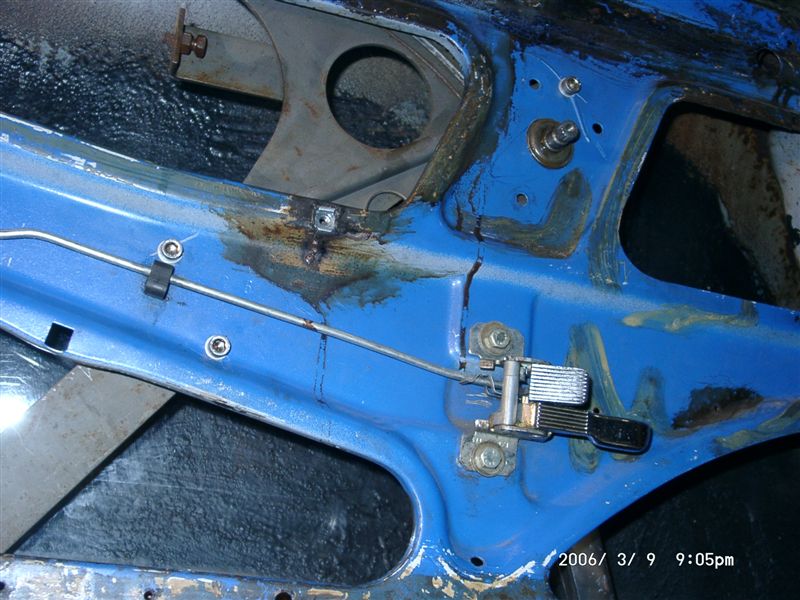
Posted by: michelko Mar 29 2006, 06:49 AM
nother view
Attached image(s)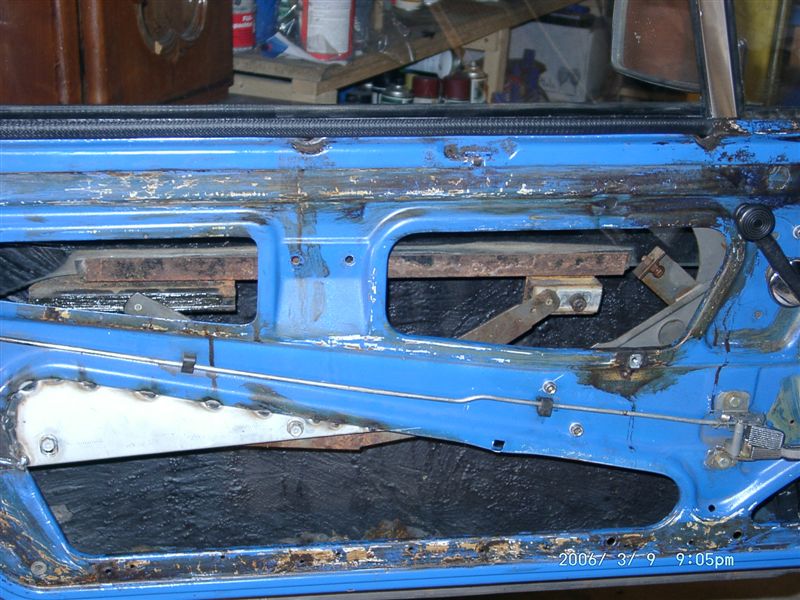
Posted by: Root_Werks Mar 29 2006, 08:42 AM
Thanks for posting the pictures of this, what a great conversion idea. Need light doors? Want late regulators? Looks pretty straight forward even. Cool!
Posted by: Claymore_5by5 Mar 29 2006, 03:18 PM
Wow......
I just read this thread for the first time. I just got my 914 a short time ago and after reading this thread, I get a feeling that I have no idea what I've gotten myself into.
It's the same feeling I got when my Drill Sergeant started screaming in my face on my first day of Basic Training. (Only without the bad breath).
With people like you and the rest of 914World.com for guidance and inspiration, I am confident that I shall overcome the dreaded rust monster.
I have to start drinking a lot more beer 
Posted by: michelko May 26 2006, 08:37 AM
Hi guy´s
did some work on 5 lug conversion. Got the struts sandblasted and painted with por 15. Reeeaaly nice!!
Last missing part to start the swap is the 19mm master cylinder.
First pic: the raw struts.
Attached image(s)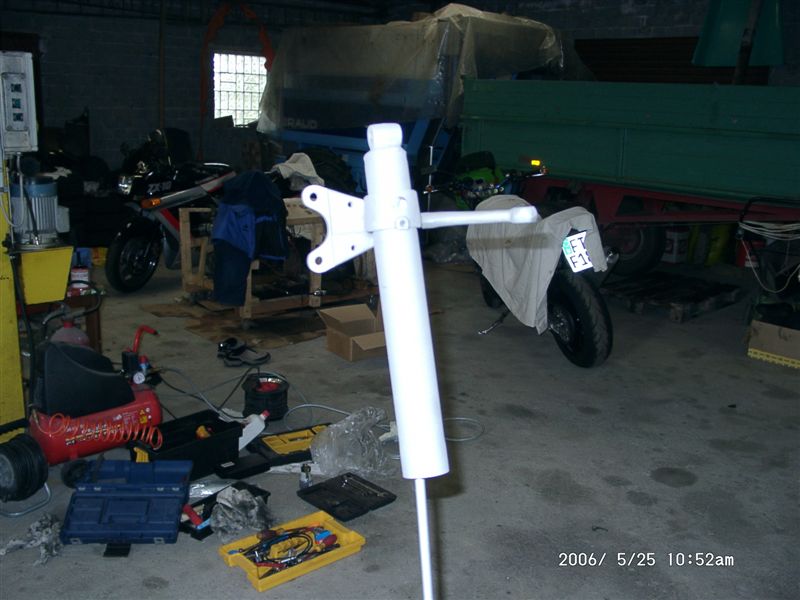
Posted by: michelko May 26 2006, 08:38 AM
nother one
Attached image(s)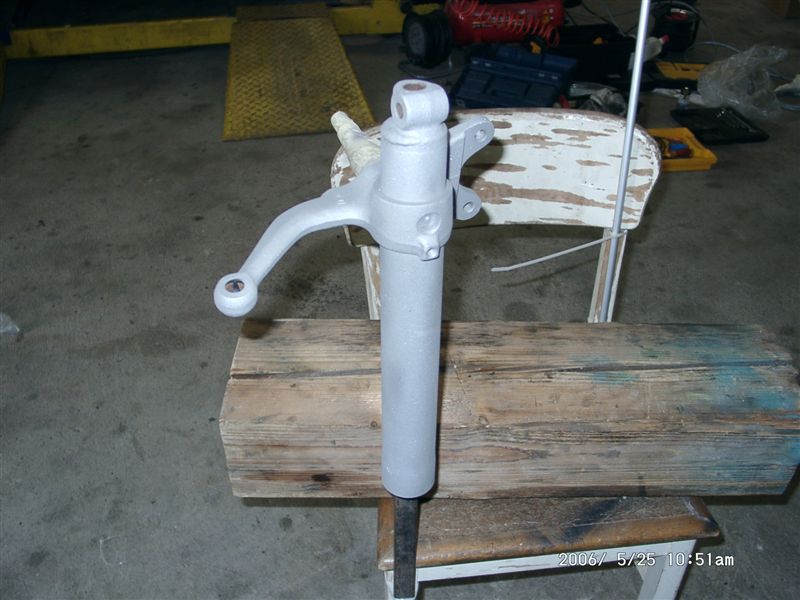
Posted by: michelko May 26 2006, 08:39 AM
first coat of por 15
Attached image(s)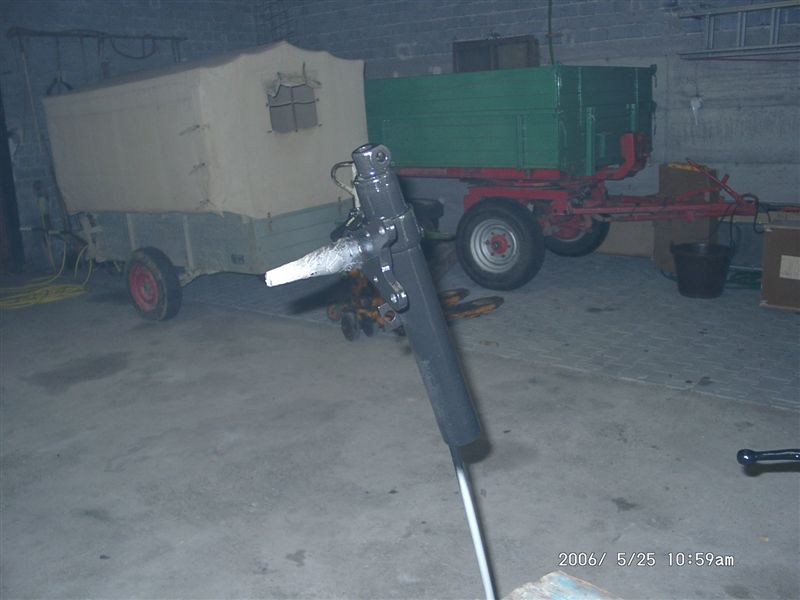
Posted by: michelko May 26 2006, 08:40 AM
the new dust shields
Attached image(s)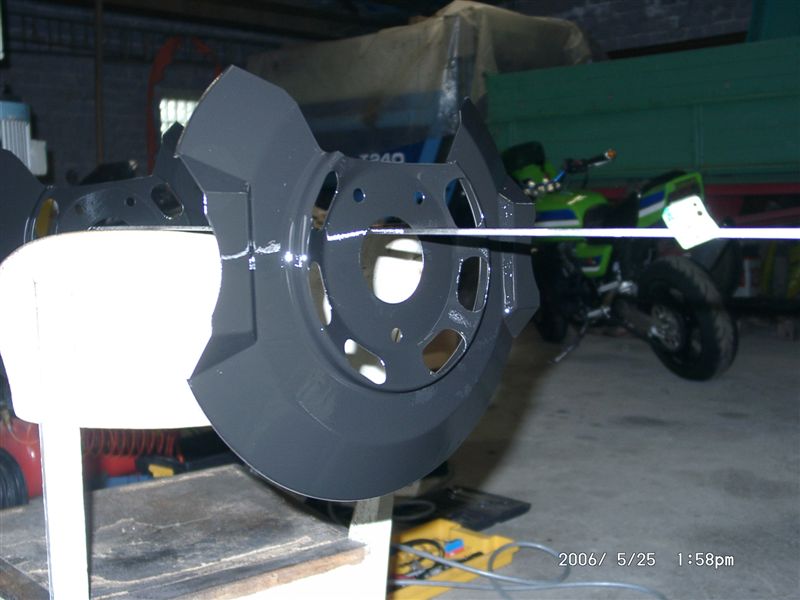
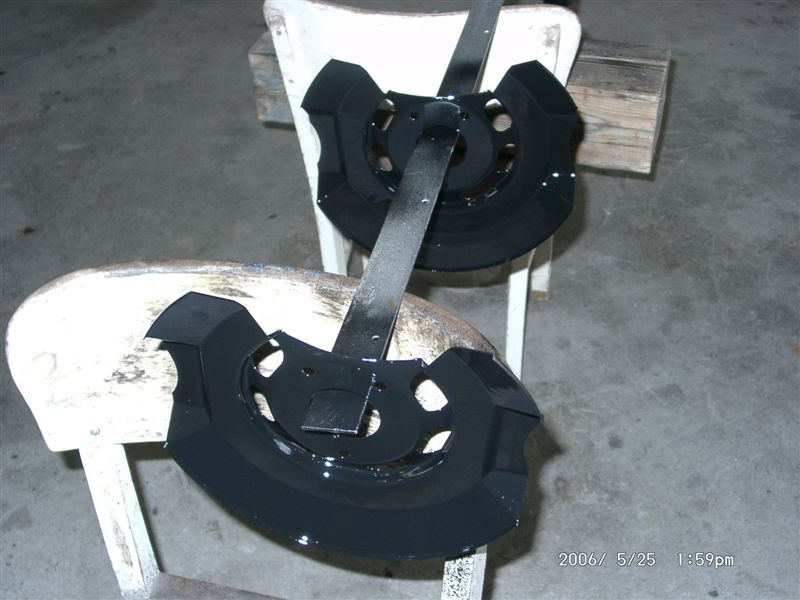
Posted by: michelko May 26 2006, 08:42 AM
hey cool i discovered the multiple attachment function
and here is the nearly complete Setup. equiped with new bearings , new koni´s etc.
Attached image(s)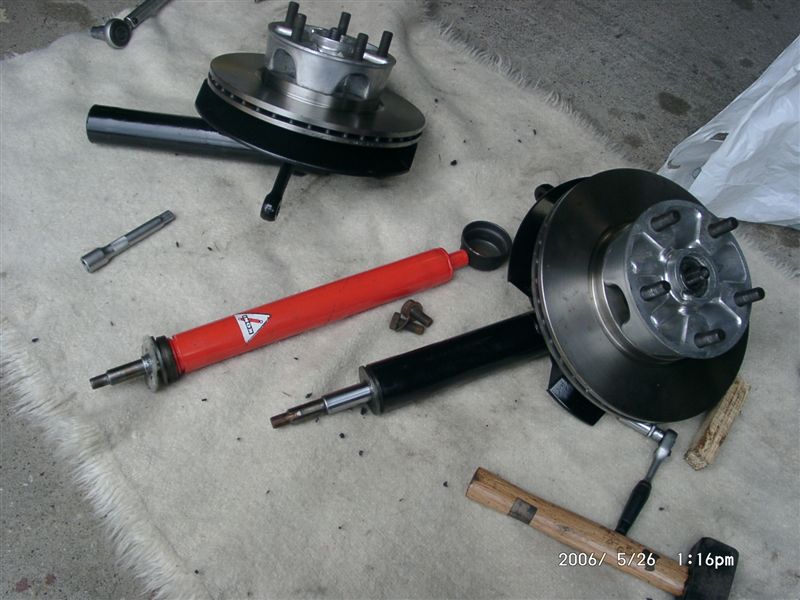
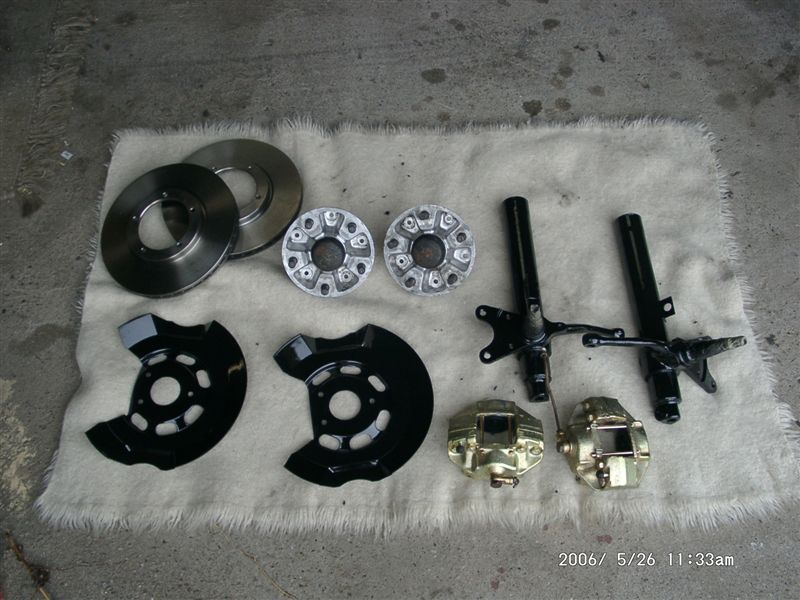
Posted by: grasshopper May 26 2006, 12:13 PM
wow! that looks great!
Posted by: michelko May 27 2006, 08:41 AM
Today i changed to the new style windowregulator on passenger side.
No more rattling windows
Attached image(s)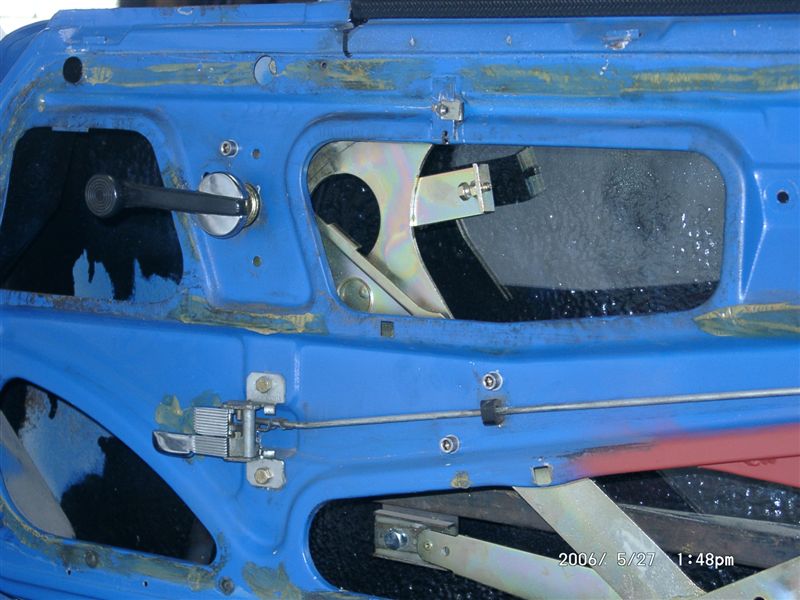
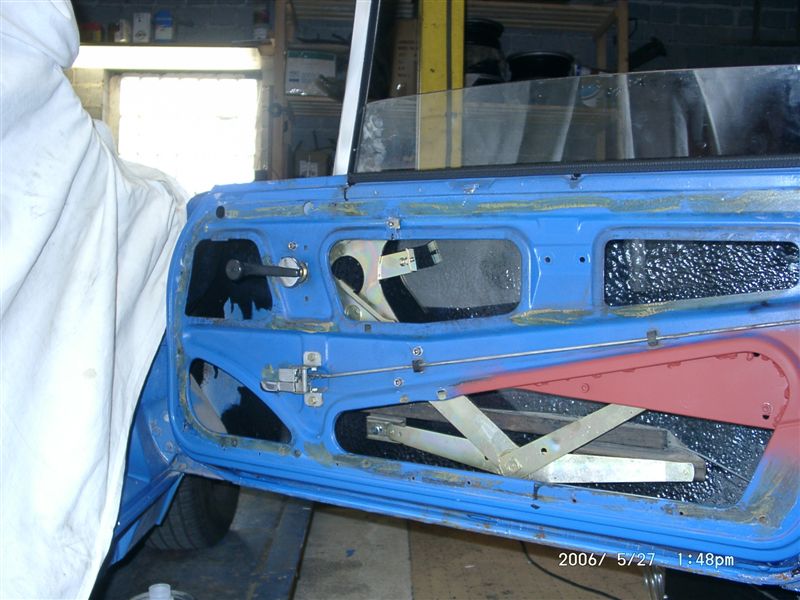

Posted by: michelko Jun 15 2006, 03:37 AM
Here is a little update on my restoration thread.
Stripped down the underside of the car to the primer, some parts to bare metal.
It´s just amazing how solid this is!!
I think i strip all to bare metal and the using metal ready and por 15.
Not sure how the por15 will stuck to the old primer??
The first two pic´s shows the bottom
Third pic shows the long before restauration.
Unbelievable it the same car!!
Attached image(s)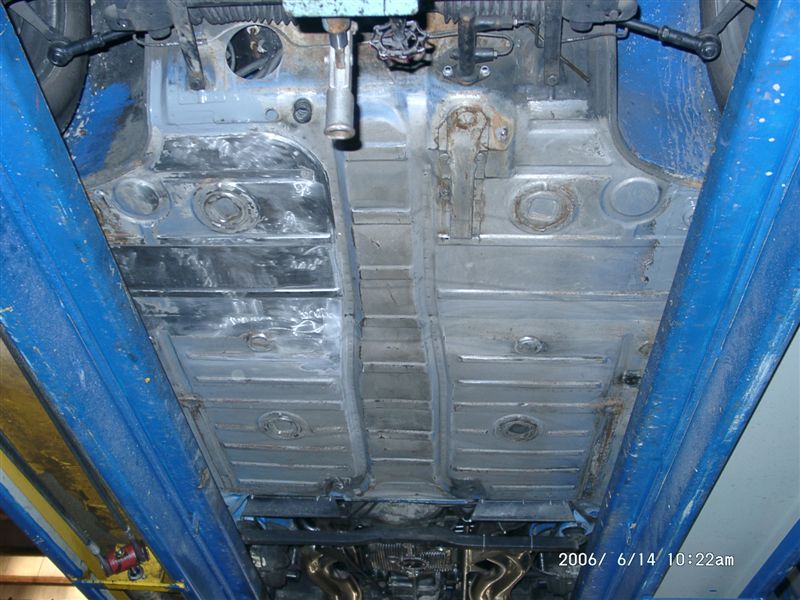
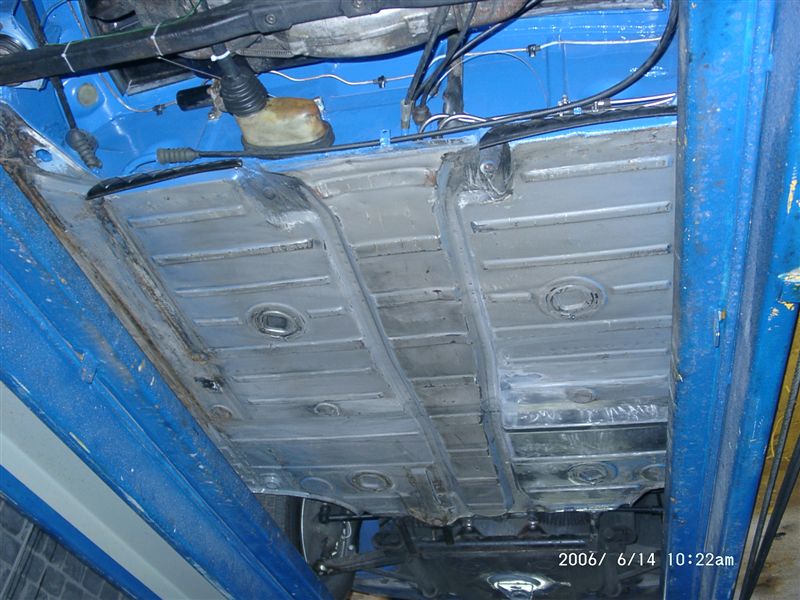
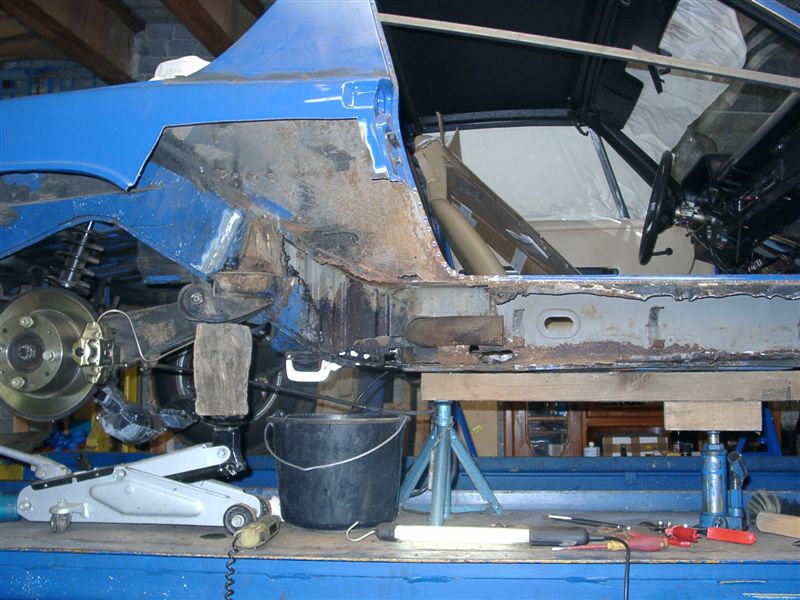
Posted by: michelko Jun 25 2006, 11:15 AM
Another update n the restoration.
After i stripped the whole floorpan i treated it with metall-ready and painted it with por 15.
Didn´t find any new hole, all solid and nice 
Not sure about the further painting. Maybe i will use some modern underbody stuff? or use wax? any suggestions?
Attached image(s)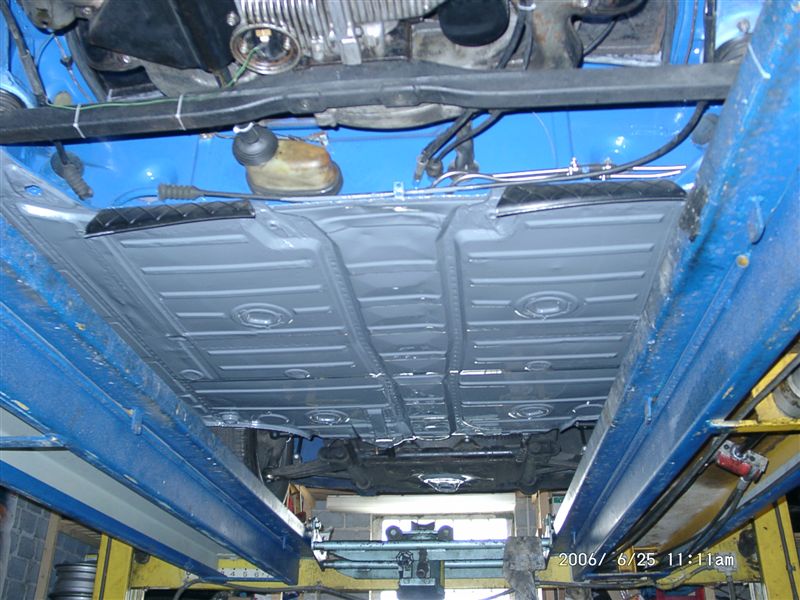
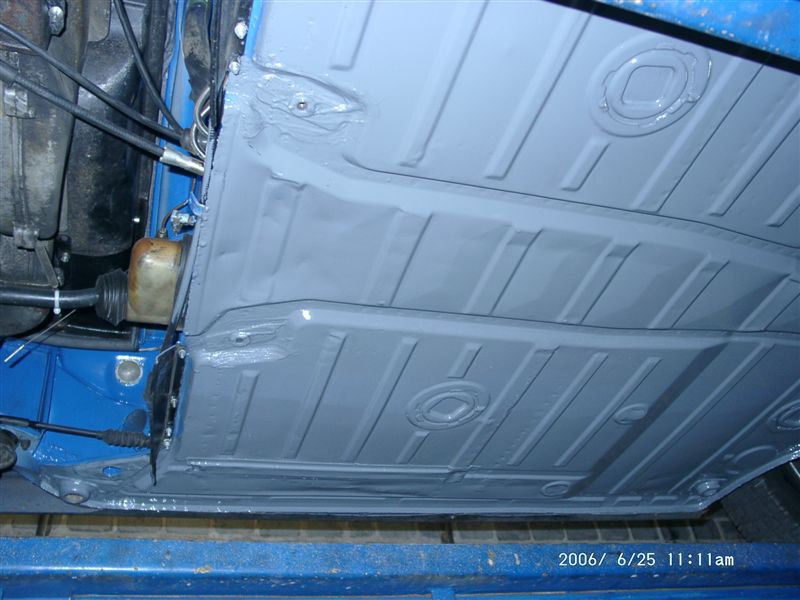
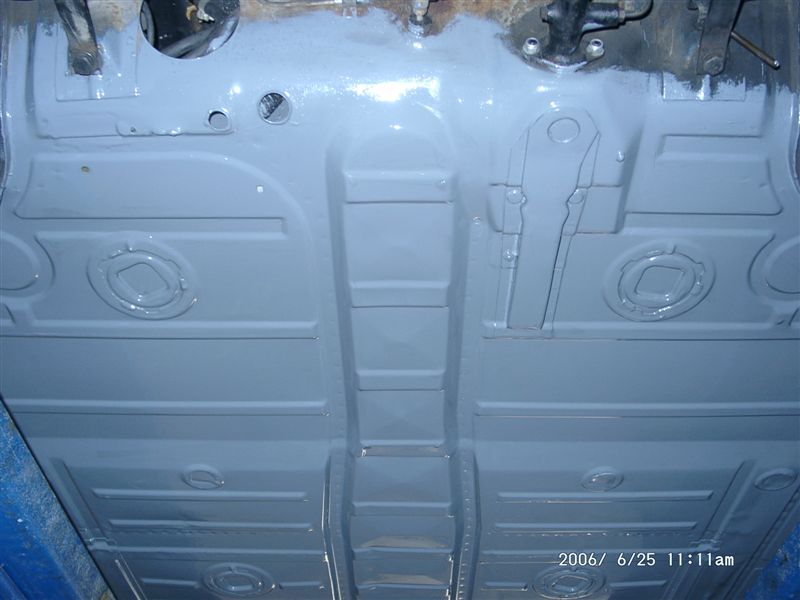
Posted by: jimkelly Jun 25 2006, 11:54 AM
I vote for this to be a classic thread once complete?
Jim
Posted by: jimkelly Aug 18 2006, 06:57 PM
this is a classic - no ??
Posted by: grasshopper Aug 18 2006, 06:58 PM
YES. CLASSIC
Posted by: maf914 Aug 19 2006, 07:52 AM
Michelko, fantastic work. This is a great thread.
Posted by: michelko Sep 1 2006, 01:45 AM
while i did the 5 lug conversion i cleaned the left wheelhouse and did some rust treatment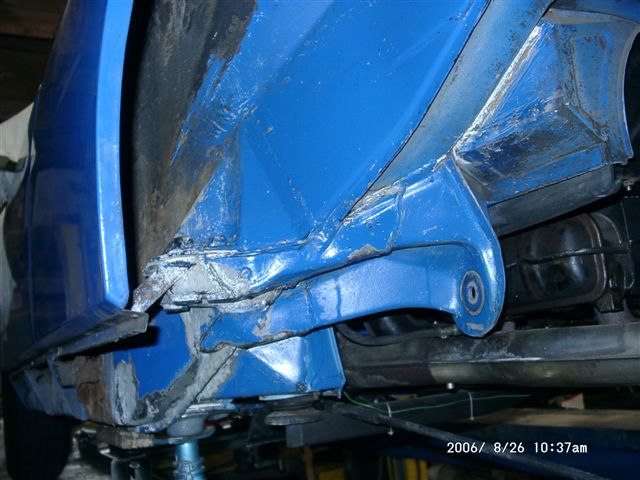
Used some ellbow grease, marine clean, metal ready and at last por 15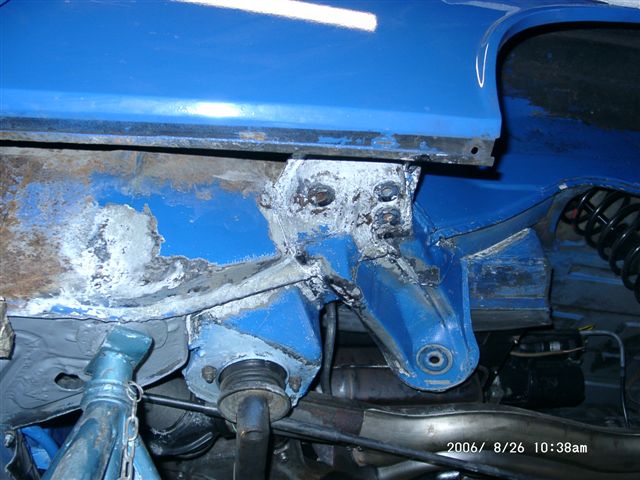
nothing realy bad (god bless)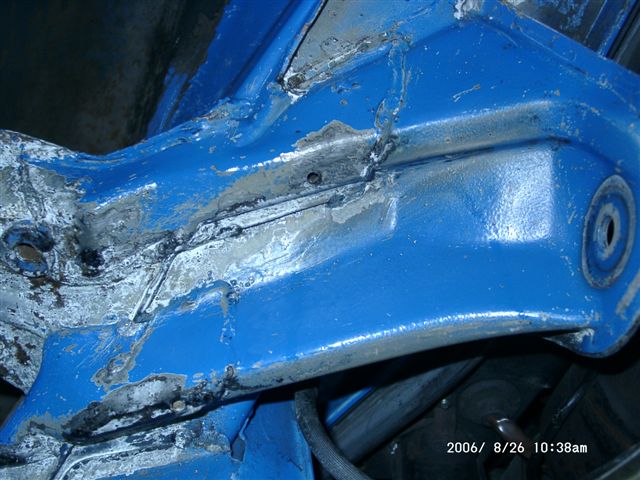
and in paint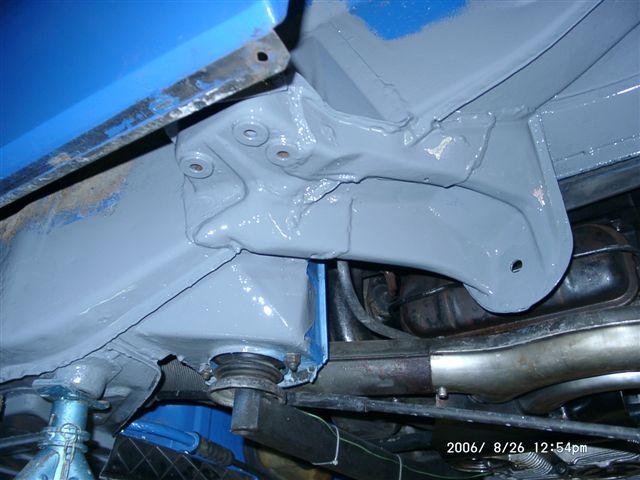
nother with the trailing arm in place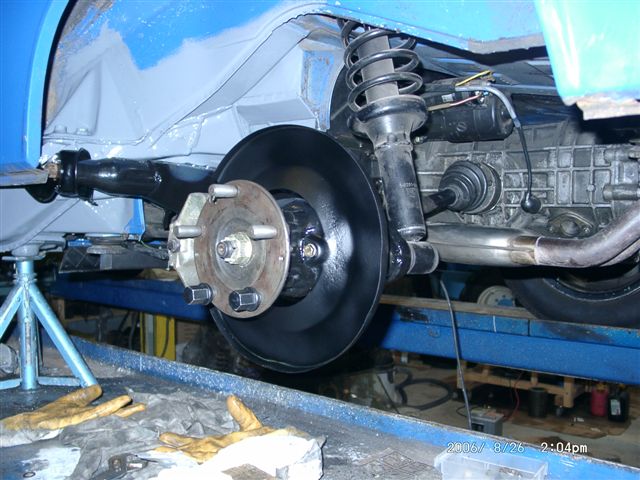
Posted by: SirAndy Sep 1 2006, 12:04 PM

while i did the 5 lug conversion i cleaned the left wheelhouse and did some rust treatment
nice!
one day, i'm gonna clean the underside of mine too. one day ...
Andy
Posted by: Evill Ed Sep 1 2006, 08:08 PM
Outstanding Job!! You should be very proud!
Regards,
Ed
Posted by: VintageExcellence Sep 4 2006, 03:02 PM
Adriatic Blue. Best color for 914 ever.
I bought a 914-6 that apears to be Adriatic blue. Anyone know the color code? My color plat just says 16 on it with no other numbers.
Posted by: sixnotfour Sep 4 2006, 07:05 PM
color chart and codes;
http://members.rennlist.com/chuxter/914Colors.htm
Posted by: autohausdolby Jan 10 2007, 09:23 AM
Best. Thread. EvAr. I want to see it with 5 stud wheels
Posted by: michelko Jan 12 2007, 09:09 AM
You want pic´s? here they go 
Have a nice time
Attached image(s)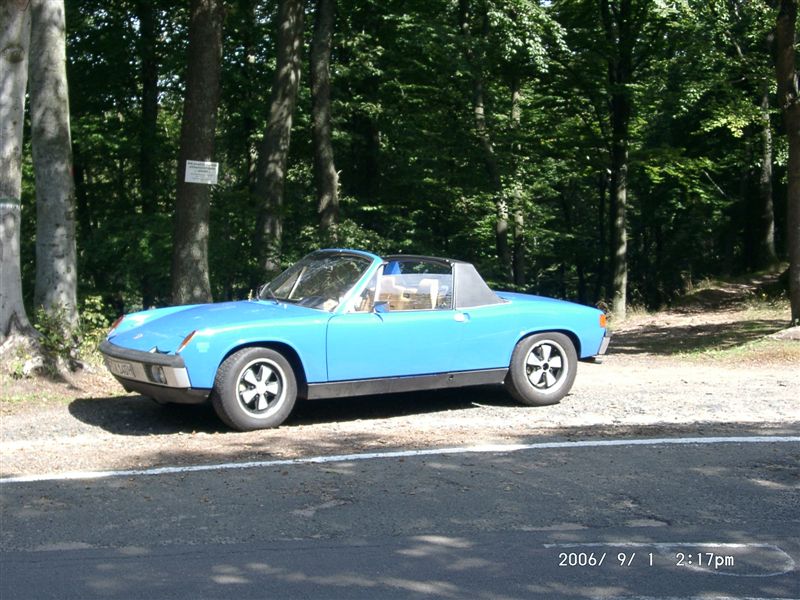
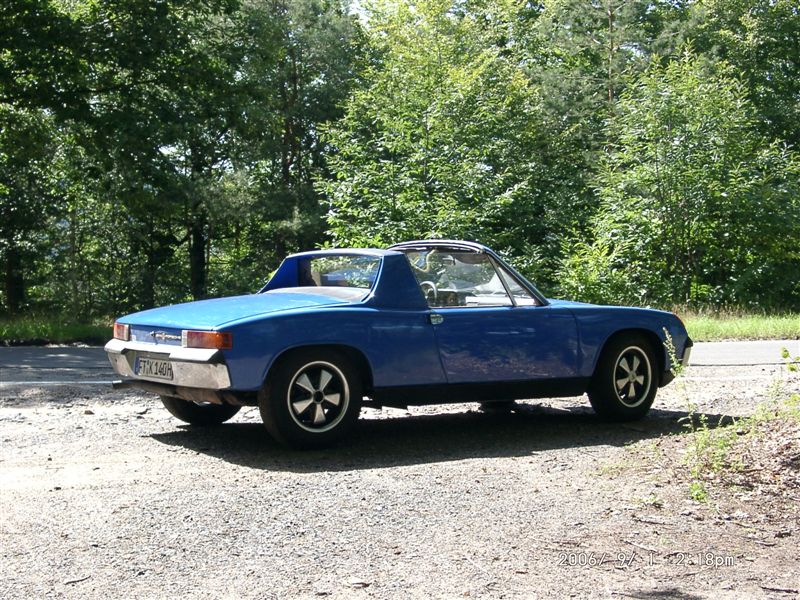
Posted by: tdsmoonchild Jan 12 2007, 09:12 AM
Great work and inspiration for me! 
Posted by: thesey914 Jan 12 2007, 12:19 PM
What happened to the six conversion?
Posted by: michelko Jan 12 2007, 12:39 PM
What happened to the six conversion?
Still gathering parts
i have the carbs to bee rebuild by an professional, think they are back mid february
oillines are the last missing parts, so far as i can see.
Engine tin is on the way, i hope it arrives the next few days.
Motor mount is also on the way.
Still have to buy a ignition system, maybe the original cd or an msd?
Will post pic´s of the other parts when they arrive.
Posted by: thesey914 Jan 12 2007, 12:45 PM
Have you converted your oil cooler yet -I'm struggling with mine?
Posted by: John Jan 12 2007, 09:18 PM
Do you need a headlight blind on the drivers side?
Posted by: michelko Jan 13 2007, 02:37 AM
Do you need a headlight blind on the drivers side?
Hi John,
sorry but i forgot to tell you that i was able to purchase a factory set of engine sheet metal. So i don´t need your nice reproduction.
I own the headlight blinds, but have them on the shelf since i have to do some restauration (painting ) in that area. I was a little lazy on that project
Posted by: michelko Jan 13 2007, 02:39 AM
Have you converted your oil cooler yet -I'm struggling with mine?
Hi James,
i did some research and theoretical design to convert mine. But in the end Rich Johnson offered me a ready converted Cooler.
Hope it will arrive soon.
Will post pic´s of al the parts later.
Posted by: Hammy Jan 13 2007, 02:59 AM
michelko, how did you strip the underside? What did you use?
Looks great!!
Posted by: michelko Jan 13 2007, 04:46 AM
michelko, how did you strip the underside? What did you use?
Looks great!!
Por-Strip, big load of elbow grease and wire wheel on an angle grinder will do the work. Then metal-ready and Por15 and you are ready. But be sure it is a pita to work over head for a long time. Rotissery would be the solution.
Posted by: ClayPerrine Jan 13 2007, 08:08 AM
I am going to relocate this to the classics folder, and leave a link here.
This is some wonderful stuff!!!
Posted by: showalml Jul 8 2012, 04:52 PM
Hi everyone this is my first post on this website lol and I am about to start digging into hell. My 914 has body rust somewhat like this but on the passenger side. This thread was really informative and it makes me feel better that someone is doing such a great job at this! The pictures really are great and make me a little less nervous about doing it myself. I will hopefully be getting assistants from a longtime (40yr) metal frame guy.
Posted by: seanery Jul 8 2012, 07:55 PM
What a great thread!! I just read the whole thing - amazing job!!
Posted by: 6freak Mar 7 2013, 11:27 AM
patch in place
does anyone make this piece that goes on top of the long...not the inner fender piece the other one...Thanks
...post#180
Posted by: 6freak Mar 7 2013, 11:34 AM
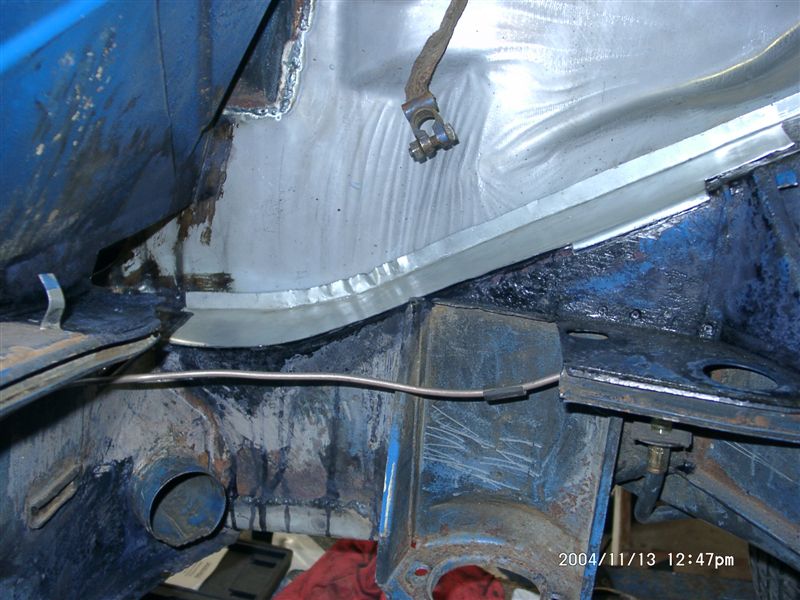
ok thats better..piece on the bottom???
Posted by: Cairo94507 Mar 7 2013, 05:22 PM
 Very nice.
Posted by: michelko Mar 11 2013, 01:04 AM
ok thats better..piece on the bottom???
Hi,
i think you can get the whole long but not for cheap. I fabricated this piece from scratch. Not realy complicate.
Michael
Posted by: 6freak Mar 11 2013, 01:22 PM
ok thats better..piece on the bottom???
. I fabricated this piece from scratch.
thought so! ...thanks ..nice work by the way
Posted by: housepumpinpc Oct 8 2014, 08:17 PM
I feel inspired by this thread.I WILL HAVE THAT CONSLE PAD CUT OUT AND NEW ONE WELDED IN. Starting in the am.
Posted by: veekry9 Oct 9 2014, 07:00 PM
Hi guys, after all that grinding, welding, bondoing, sanding, filling, wetsanding, i did the last small step: the paint!!
first shot after the wetsanded filler

I have to ask.Looks quite familiar.
What brand of primer filler did you use?
Posted by: michelko Oct 16 2014, 01:45 PM
Hi, long time since this, i think it was dupont. Maybe i have the old can stored in the shop. Will have a look.
Michael
Hi guys, after all that grinding, welding, bondoing, sanding, filling, wetsanding, i did the last small step: the paint!!
first shot after the wetsanded filler
I have to ask.Looks quite familiar.
What brand of primer filler did you use?
Posted by: Tbone425 Aug 18 2015, 01:17 AM
Wow...just...wow, thats All I've got to say (My first post here)
Posted by: Geezer914 Aug 18 2015, 01:23 PM
Nice job, done the right way. You have to take your time and pace your self. Accomplish little goals each day or it becomes overwhelming. That is when people give up and the car never gets finished.  :
: 
Posted by: OU812 Jul 22 2016, 05:24 PM
Nice job, done the right way. You have to take your time and pace your self. Accomplish little goals each day or it becomes overwhelming. That is when people give up and the car never gets finished.
: Great Thread,
Up until now I did not think the 74 I have was repairable, but it look very simular in condition to this car when started.
But after reading and watching through the 30 some pages I am now thinking it is worth saving.
Thank you, michelko
Posted by: rush Mar 18 2017, 12:59 AM
Very high quality, style in the pics, and perfect comments...Thanks, Steve
Posted by: Chip Mar 23 2019, 07:07 PM
<!-- QuoteBegin michelko+Jul 31 2005, 06:49 AM --></span><table border='0' align='center' width='95%' cellpadding='3' cellspacing='1'><tr><td>QUOTE (michelko @ Jul 31 2005, 06:49 AM)</td></tr><tr><td id='QUOTE'><!-- QuoteEBegin --> nother view
its amazing what you can do with some sheet metal and a hammer <!-- QuoteEnd --> </td></tr></table><span class='postcolor'> <!-- QuoteEEnd -->
"...its amazing what you can do with some sheet metal and a hammer."
<!-- emo&:worship: -->
<!-- endemo -->Think of what he could do with a scalpel. He should go into plastic surgery.
Powered by Invision Power Board (http://www.invisionboard.com)
© Invision Power Services (http://www.invisionpower.com)