Printable Version of Topic
Click here to view this topic in its original format
914World.com _ 914World Garage _ Effutuo build
Posted by: effutuo101 Mar 9 2012, 10:44 AM

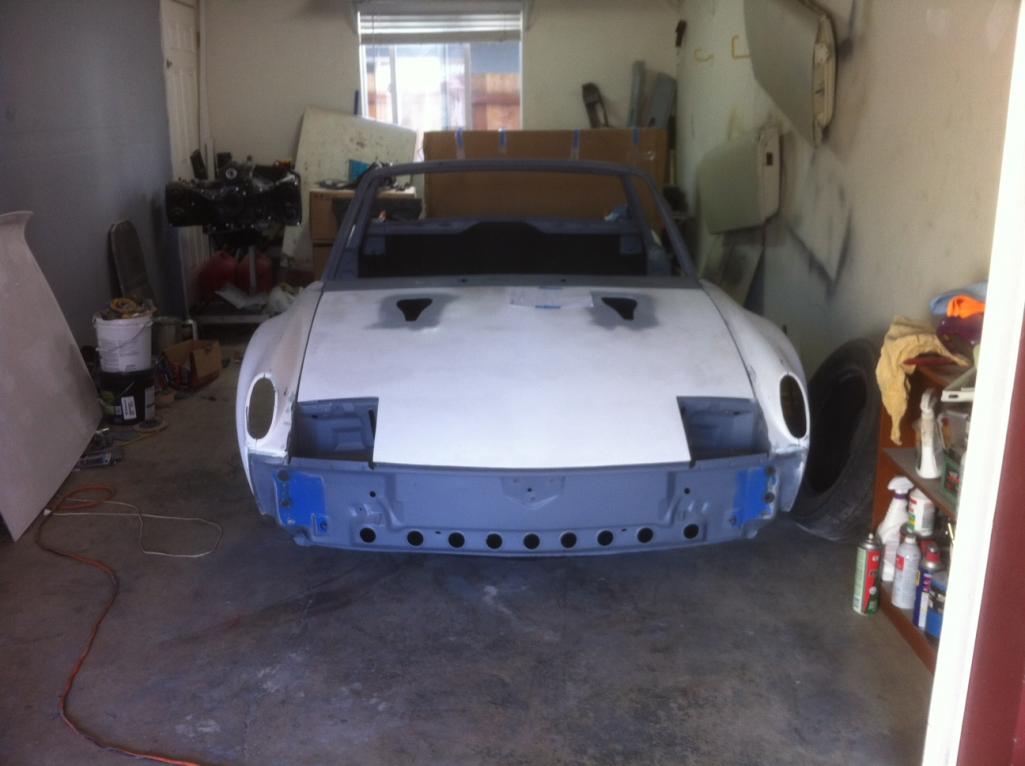
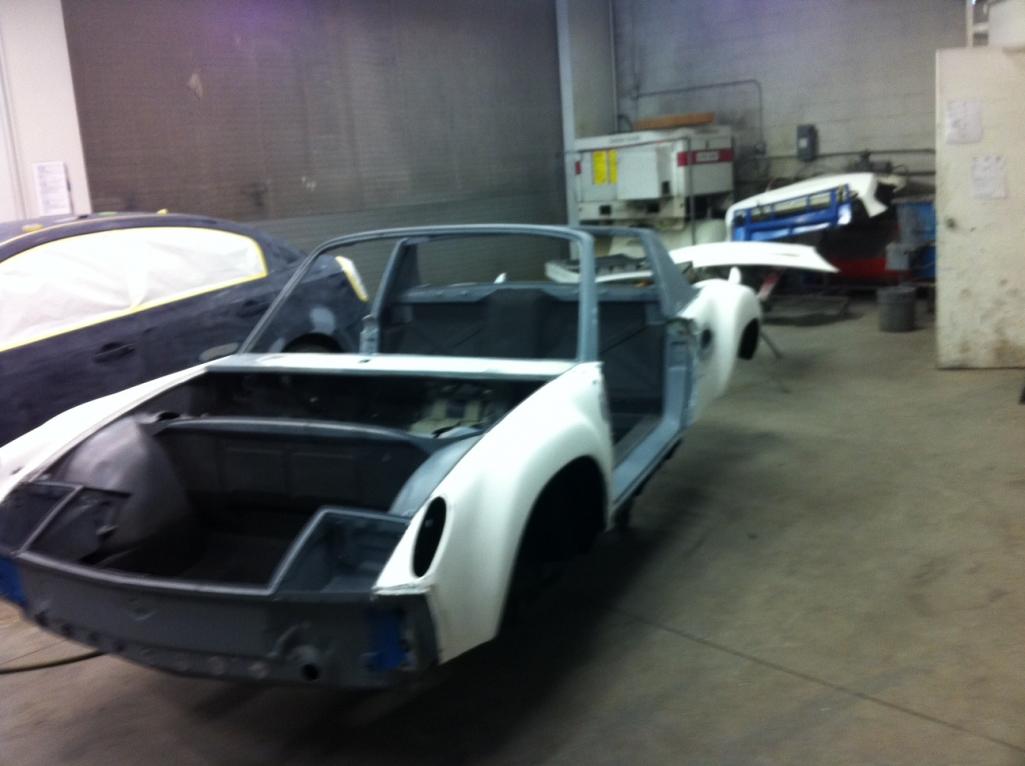
So, last year I picked up Ugmo. After a short stint, Rich D. came up with this car. As it already had a lot of what I wanted to do to my ride, I talked to Rich and we traded off Ugmo.
Let the cutting and welding begin.
We would need:
new floors welded in
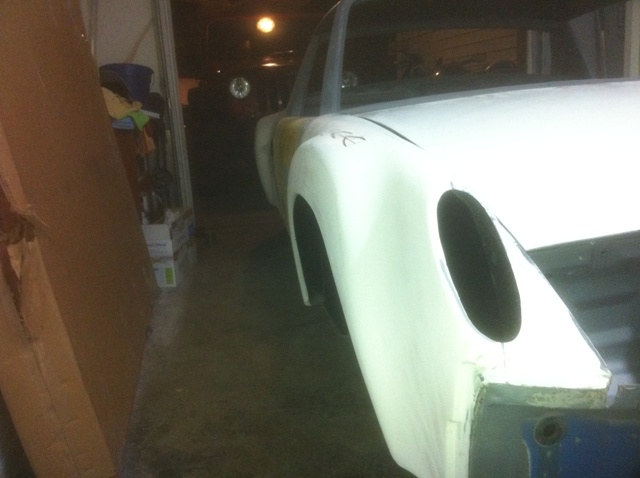
cut off the remaining fenders
GT kit welded in
Media blast
primer
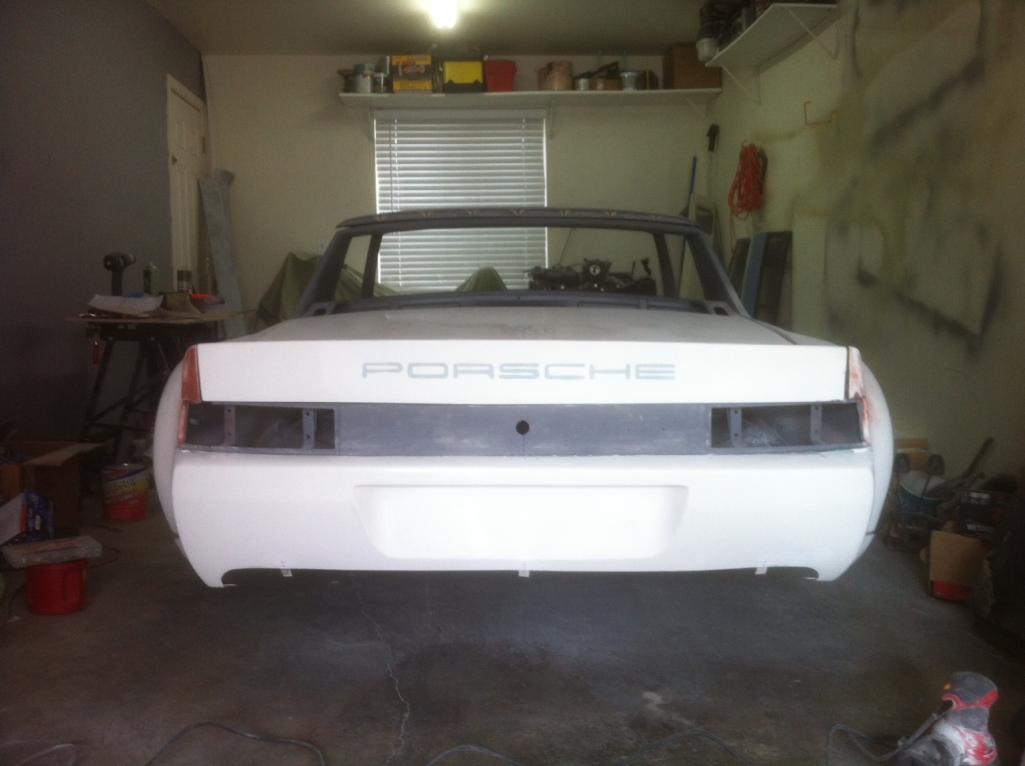
The eventual build would have
Fiberglass fenders, hoods, rear bumper
suby motor
Low maintenance
easy for the wiffy to drive
Lets begin
Attached image(s)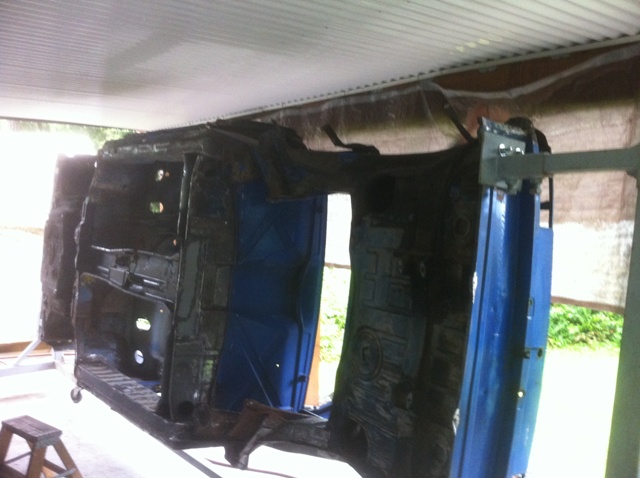
Posted by: effutuo101 Mar 9 2012, 10:45 AM
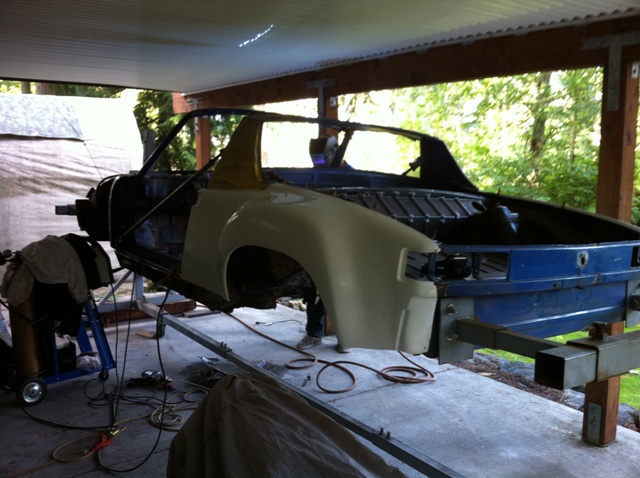
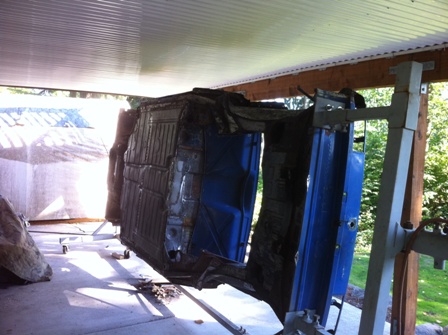
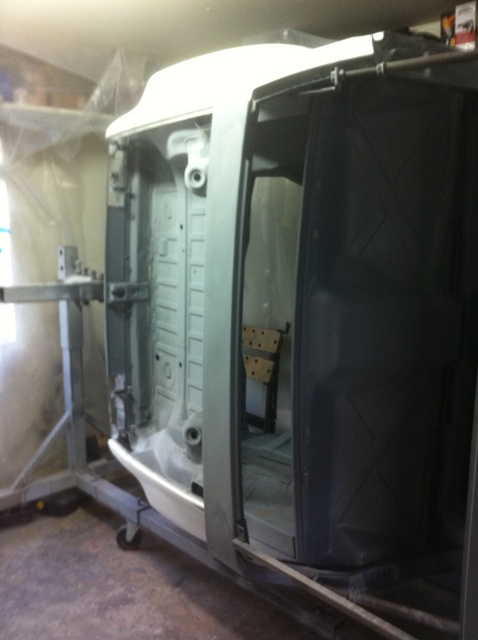
so, the work began with the car on the rotisserie.
Attached image(s)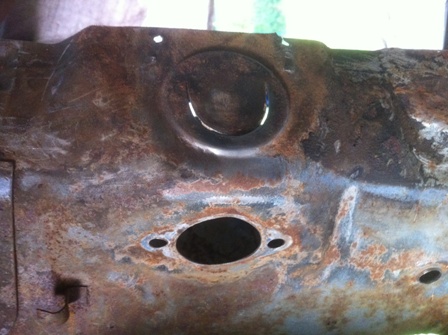

Posted by: effutuo101 Mar 9 2012, 10:46 AM
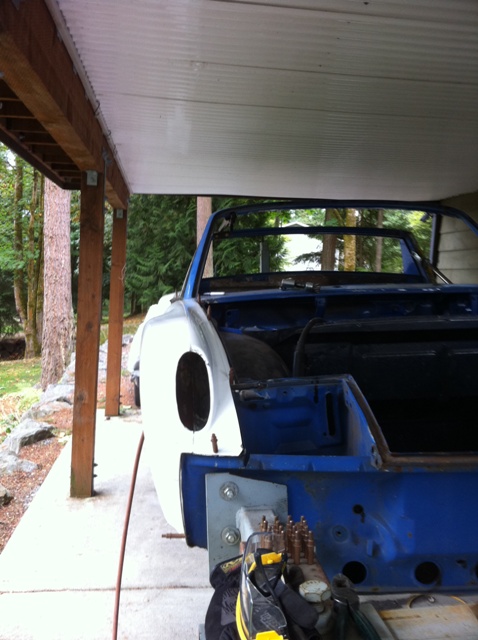
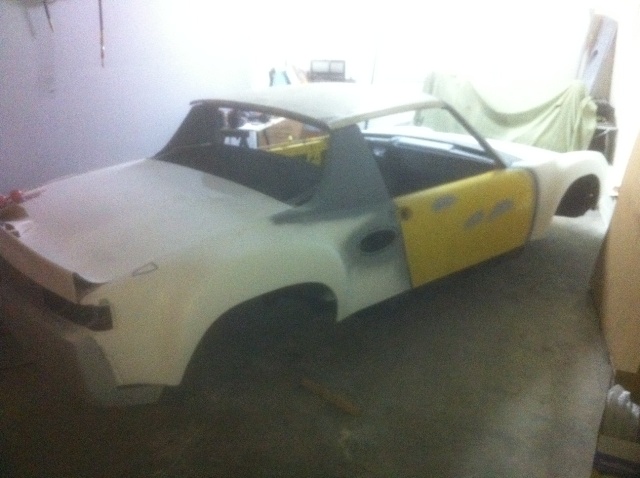
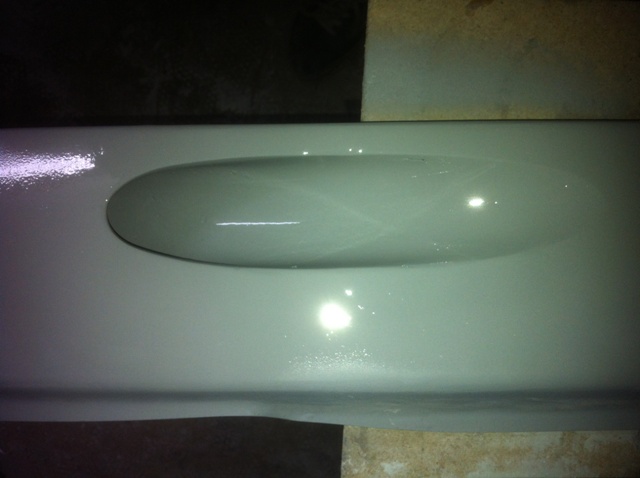
more glass fitting
Attached image(s)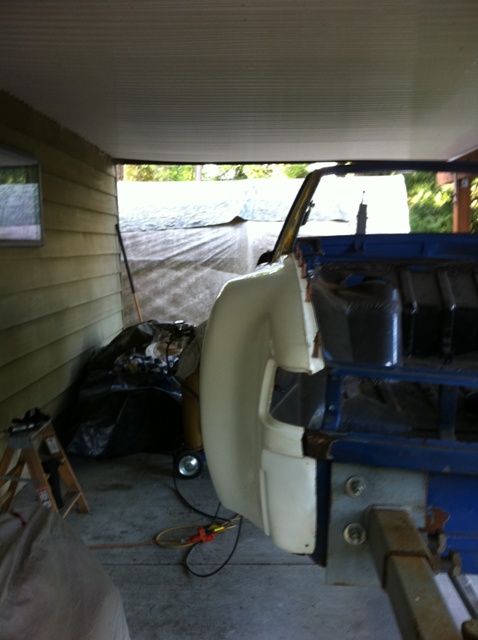
Posted by: effutuo101 Mar 9 2012, 10:47 AM
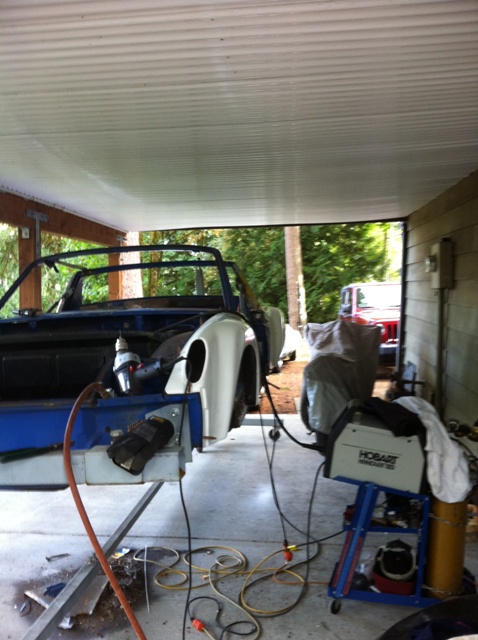
continue
Attached image(s)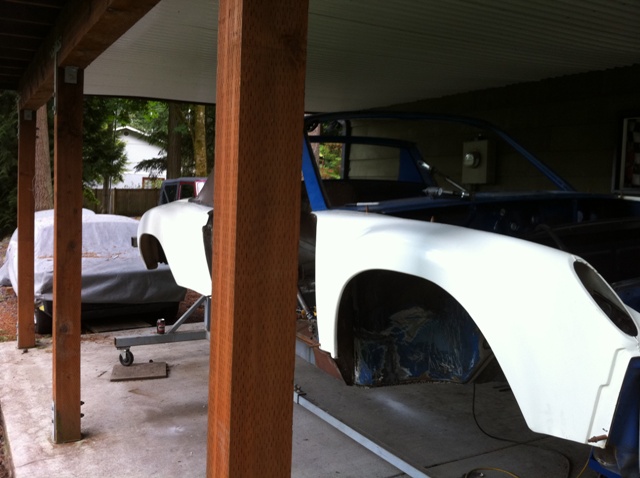

Posted by: effutuo101 Mar 9 2012, 10:48 AM
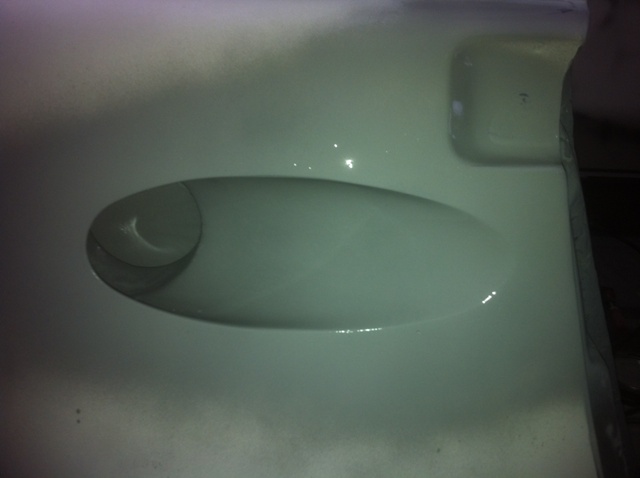
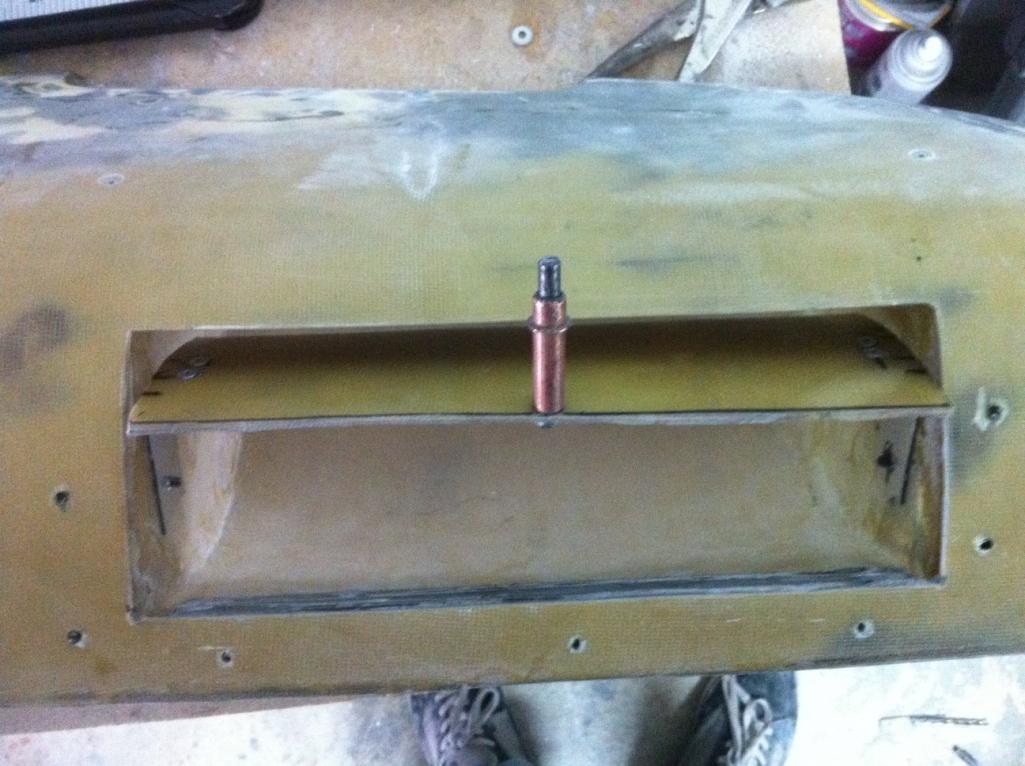
and more
Attached image(s)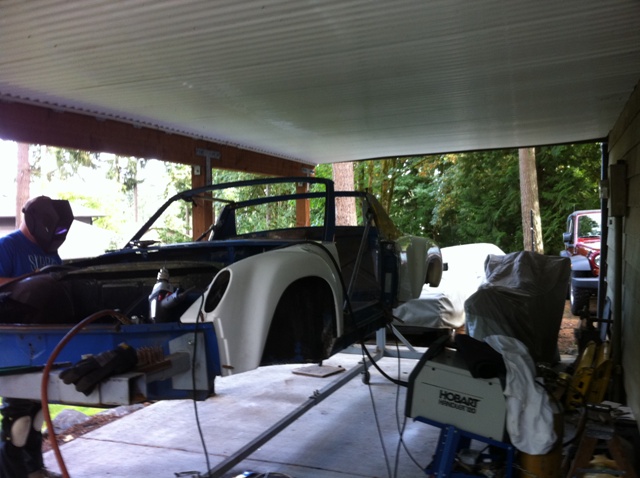
Posted by: effutuo101 Mar 9 2012, 10:49 AM
more
Attached image(s)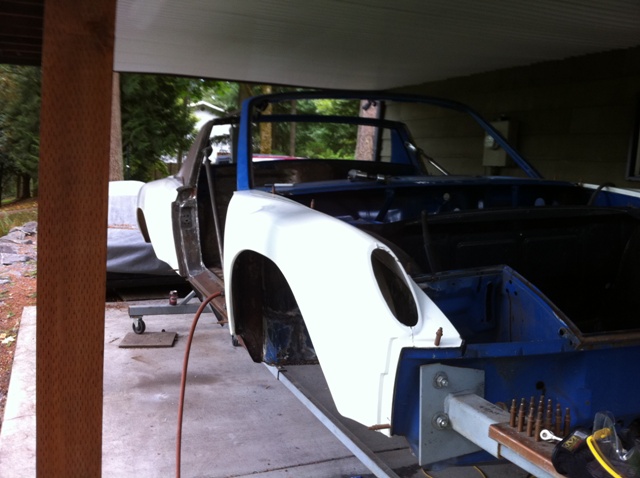
Posted by: effutuo101 Mar 9 2012, 10:50 AM
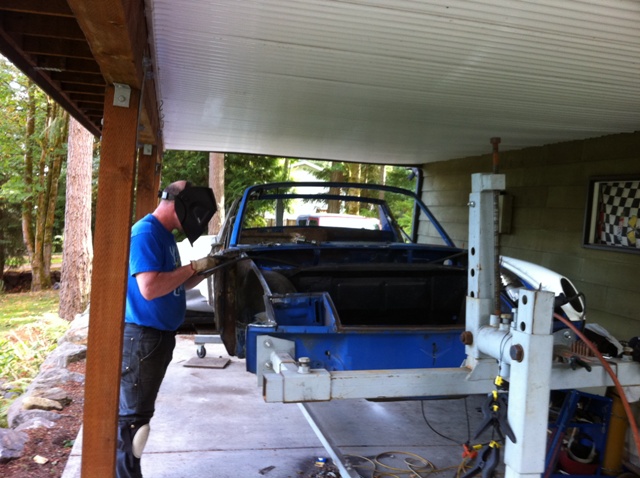
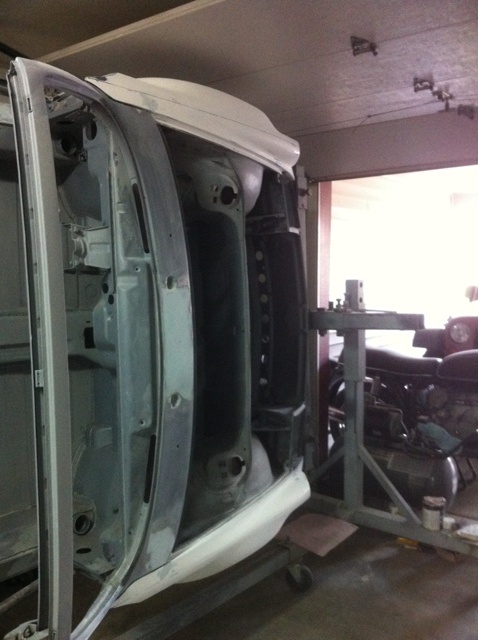
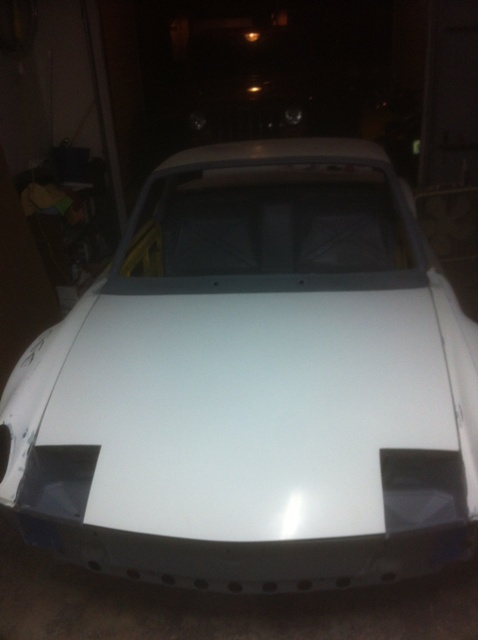
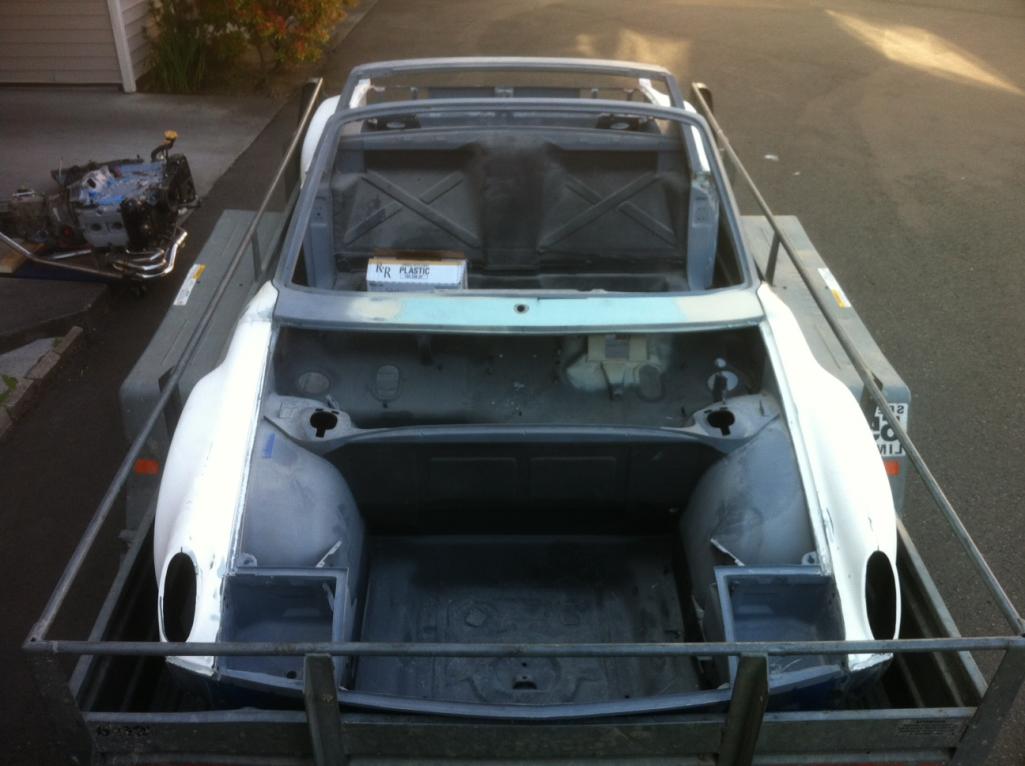
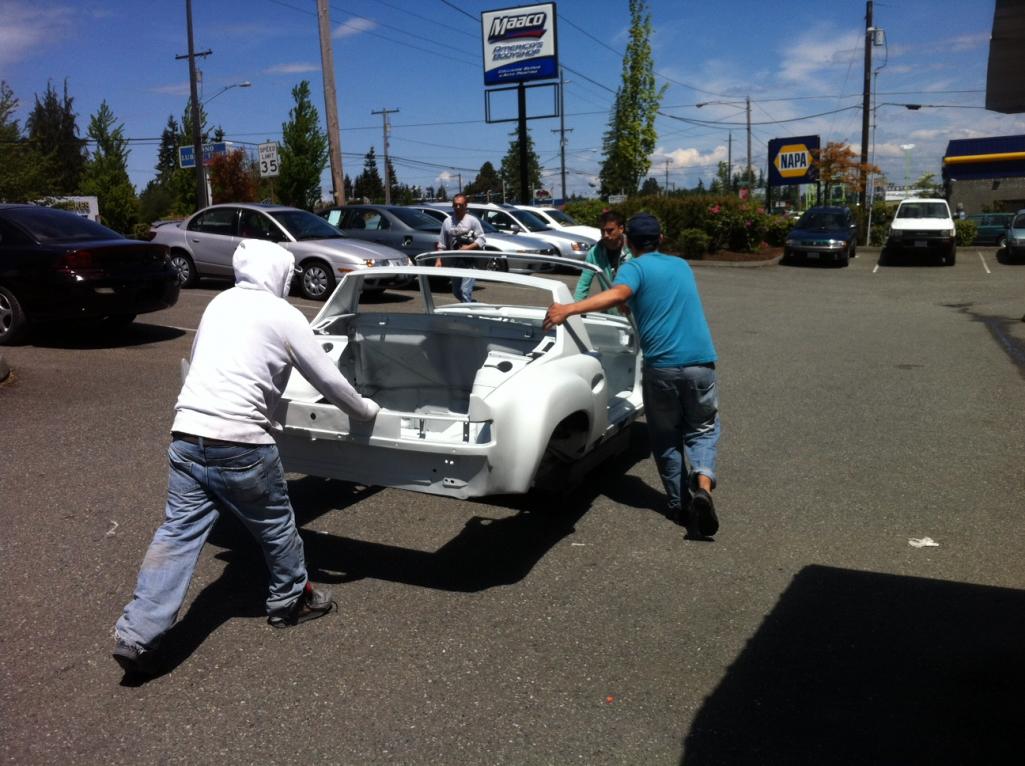
floor pans finally welded in. Car was media blasted and transferred to my garage.
Jon Bovey came over and helped shoot the primer.
Attached image(s)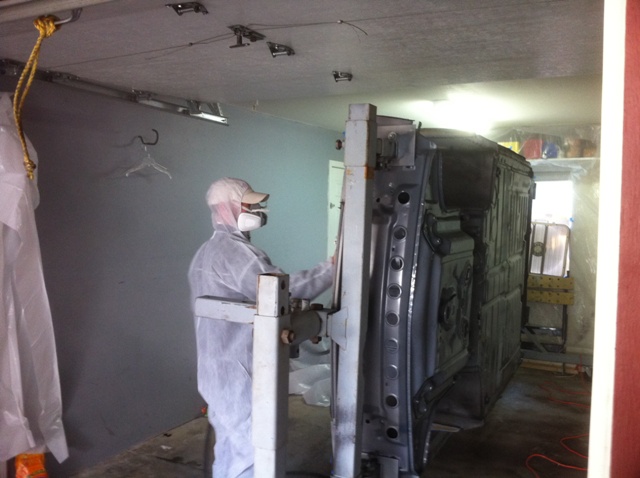

Posted by: effutuo101 Mar 9 2012, 10:52 AM
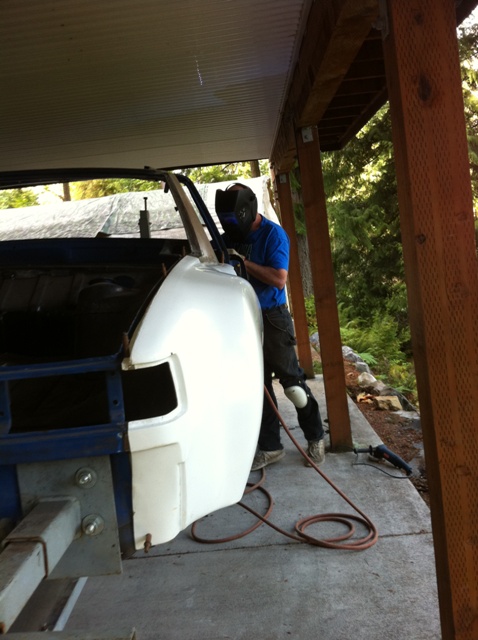
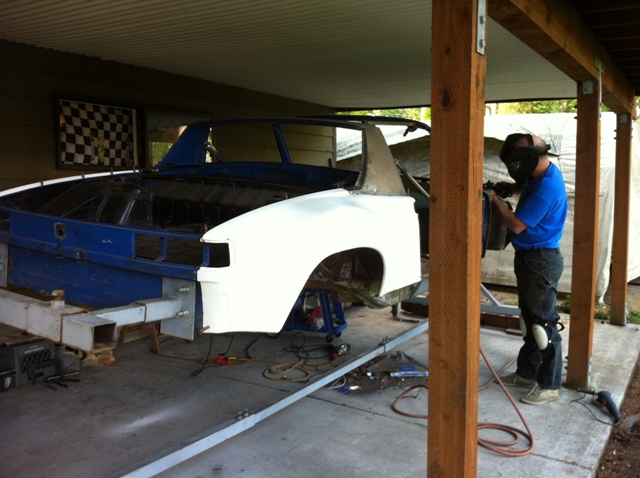
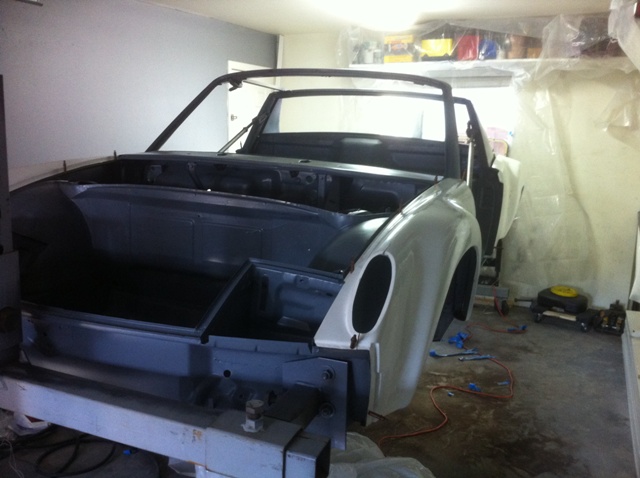
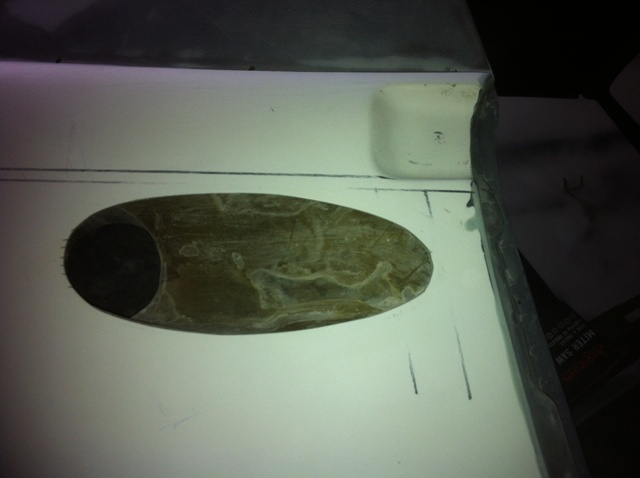
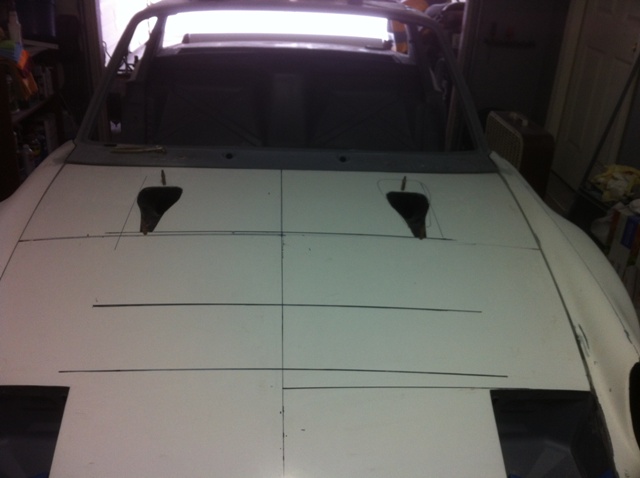
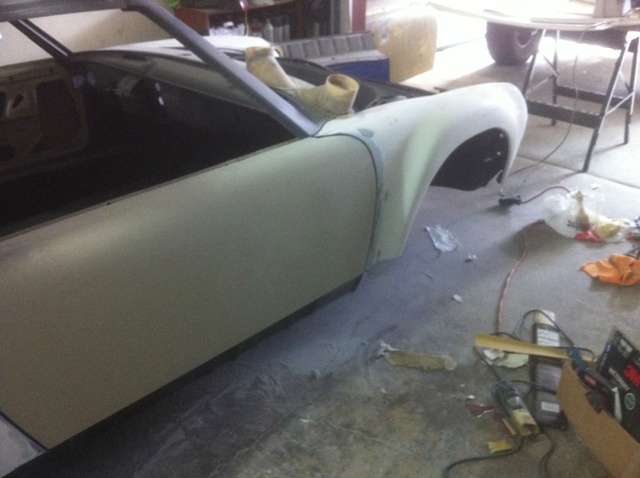
finish fitting fenders
Attached image(s)

Posted by: effutuo101 Mar 9 2012, 10:53 AM
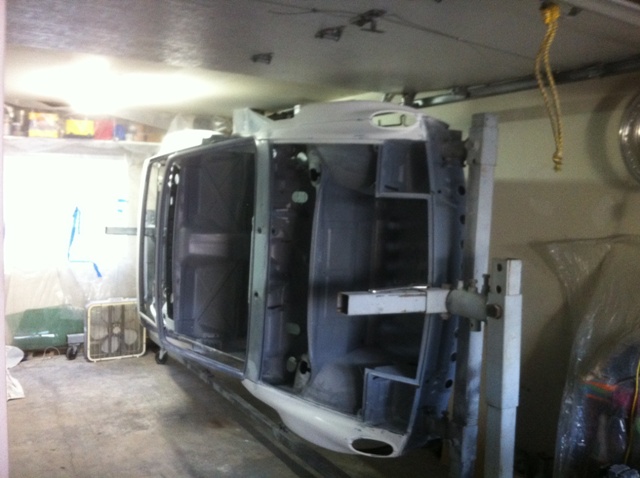
you can fit two 914's in a single car garage...with stacking
Attached image(s)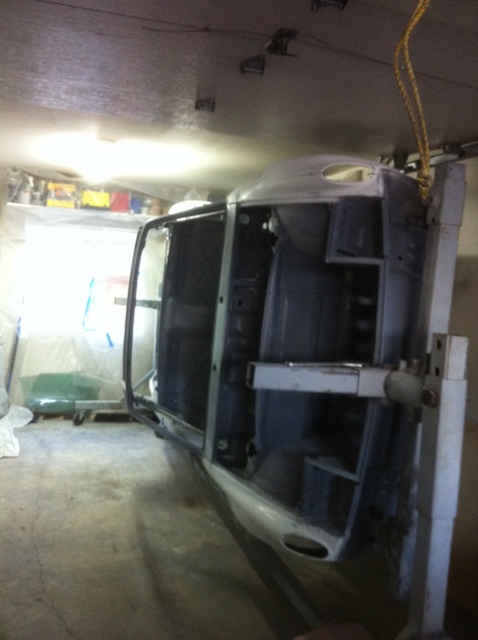
Posted by: effutuo101 Mar 9 2012, 10:54 AM
had to pack in the project for a few months due to other work, but, after a short break, I am back at it! time for some cold air.
Attached image(s)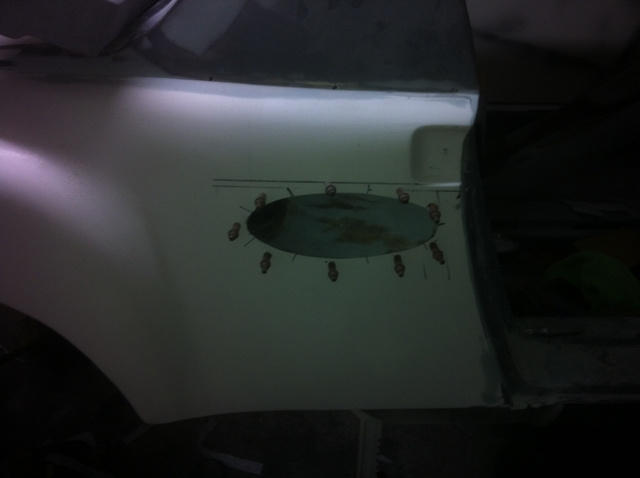
Posted by: effutuo101 Mar 9 2012, 10:56 AM
the new 914 hover craft.. and a quick trip to the Sci fi exhibit.
Attached thumbnail(s)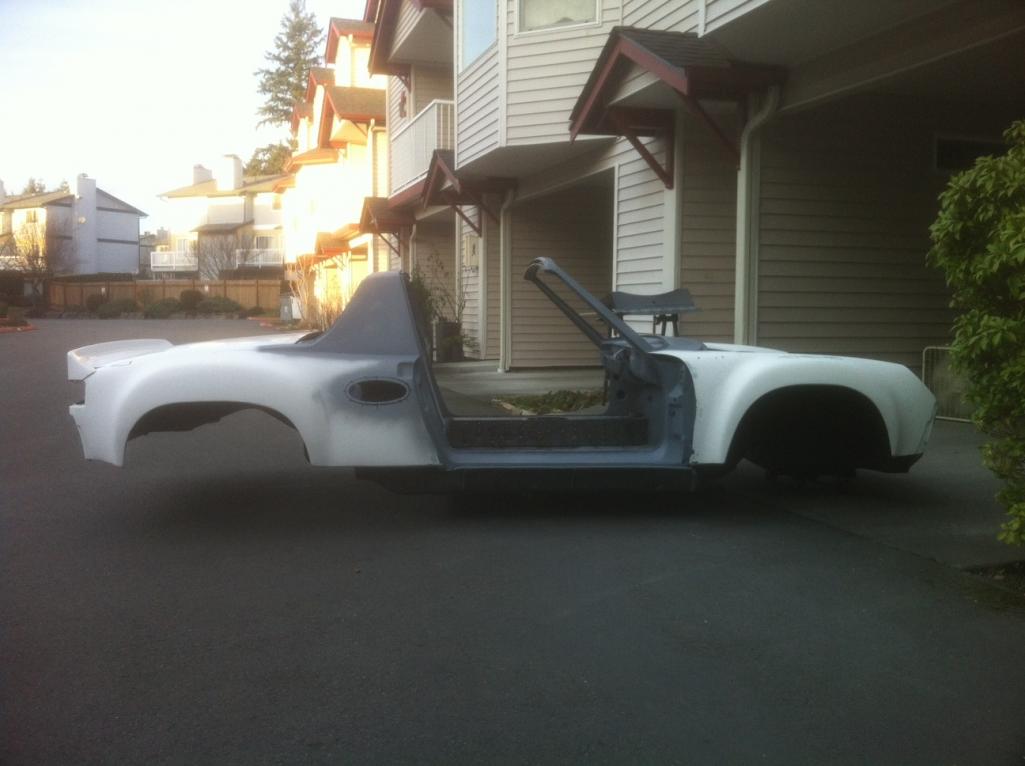
Attached image(s)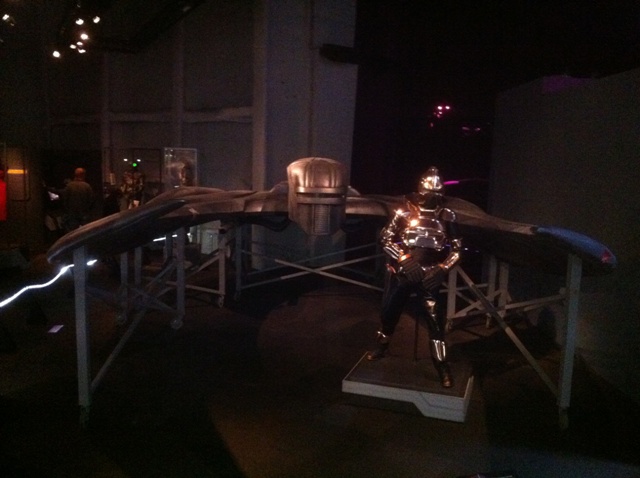
Posted by: effutuo101 Mar 9 2012, 10:57 AM
ok, back to work... test fit....lots of stuff...
Attached image(s)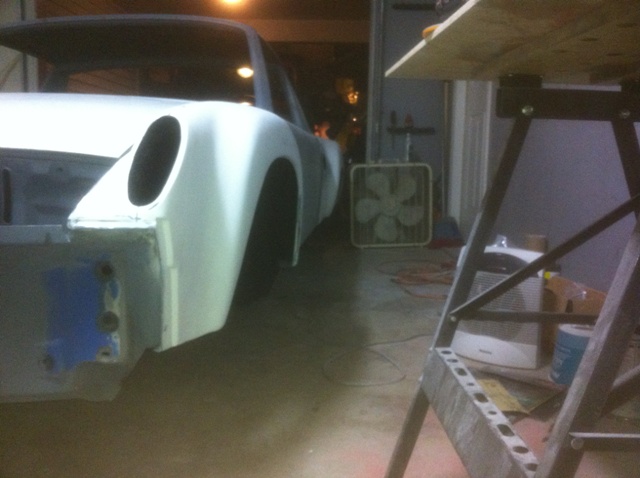
Posted by: effutuo101 Mar 9 2012, 10:59 AM
Rich doing more welding...
oh, I need more air...for the rear brakes
Attached image(s)
Posted by: effutuo101 Mar 9 2012, 11:00 AM
ok, maybe too much...naw... I need more air!
Attached image(s)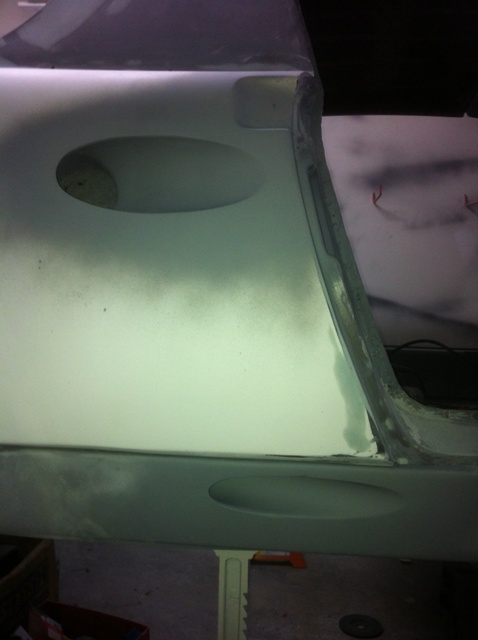
Posted by: effutuo101 Mar 9 2012, 11:01 AM
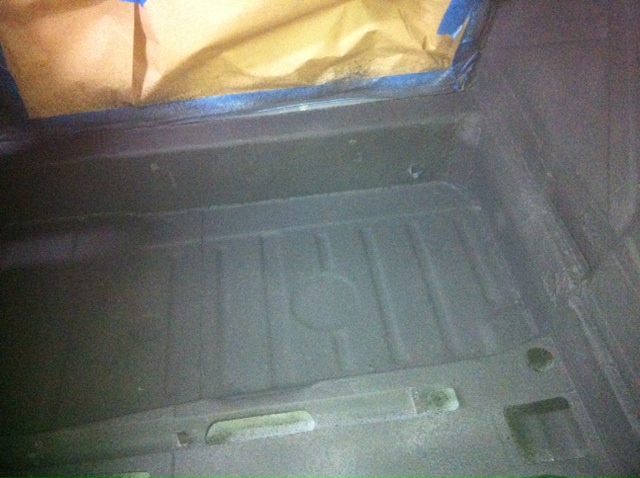
Lizard skin going in.
Attached thumbnail(s)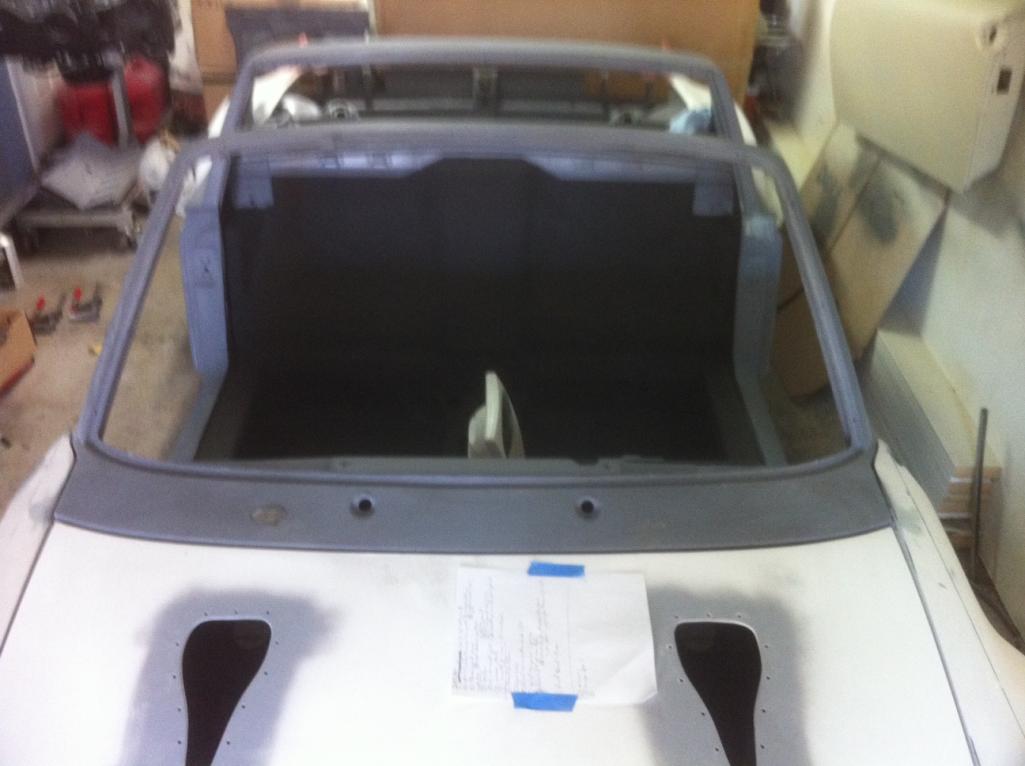

Posted by: effutuo101 Mar 9 2012, 11:17 AM
and some more...
Attached thumbnail(s)

Posted by: PeeGreen 914 Mar 9 2012, 11:17 AM
 It's getting close
Posted by: effutuo101 Mar 9 2012, 11:18 AM
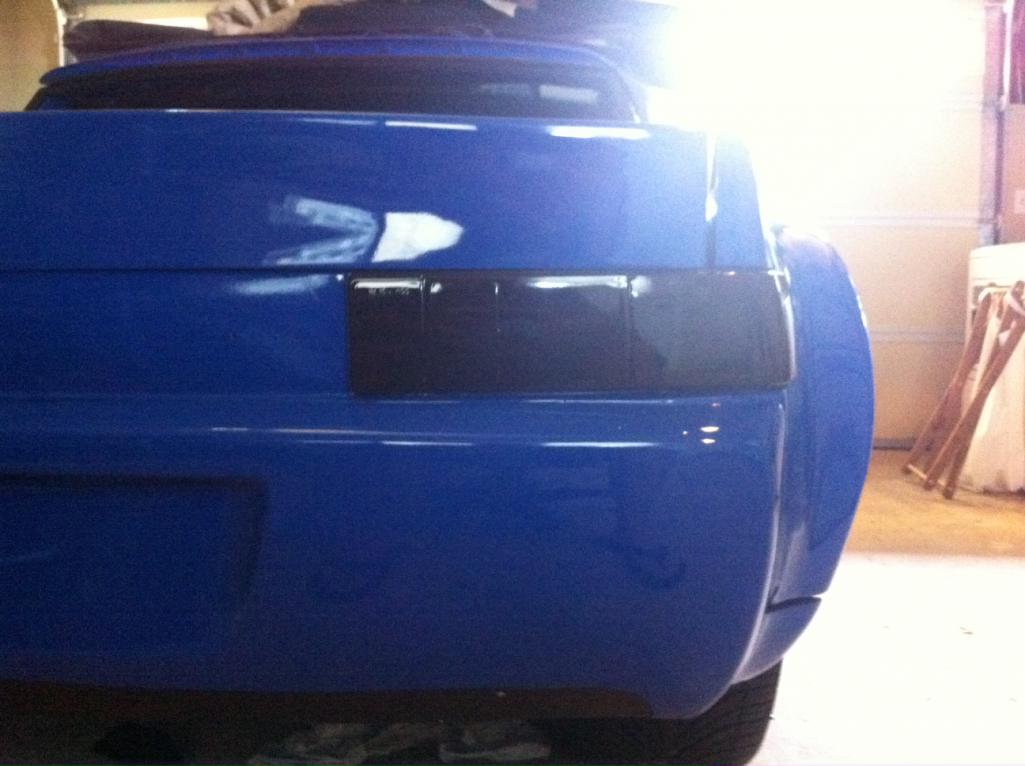
lizard skin...check..
i should clean my phone lense
Attached image(s)
Posted by: effutuo101 Mar 9 2012, 11:20 AM
ok, one more then back to work.
color selection process. Wiffy voted for the stock Blue...
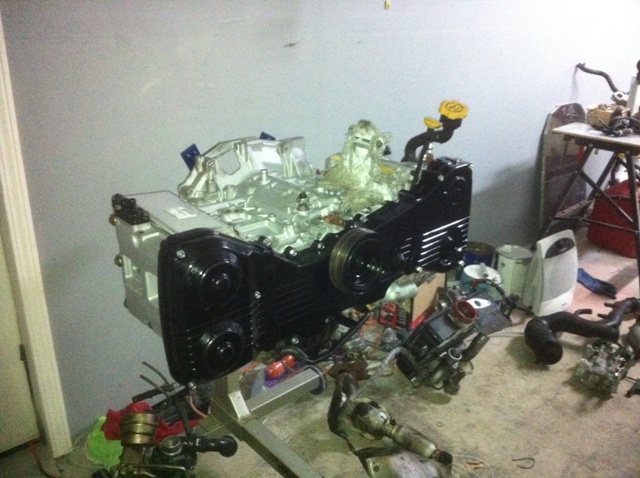
and here is my motor. 2.5l turbo suby
Attached image(s)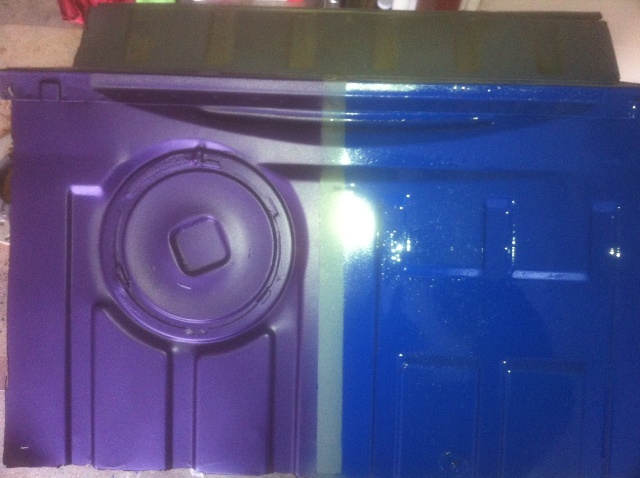
Posted by: effutuo101 Mar 9 2012, 11:23 AM
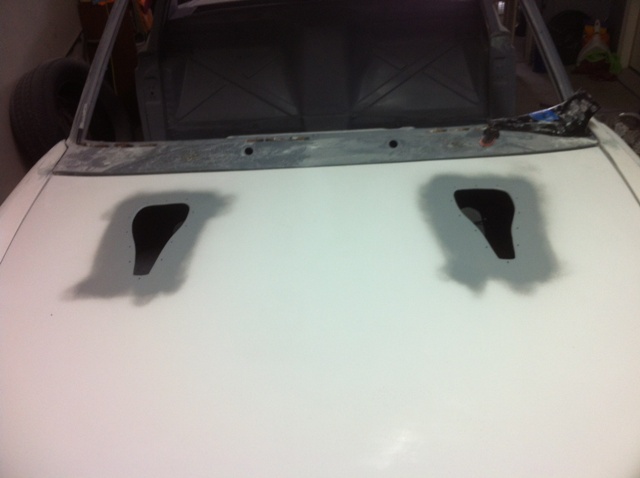
so, I decided I could lose some more weight. I am redoing my side intakes and going to punch out my hood hinges and cut off any necessary metal.
Next.
Finish new side intakes
Hood pins
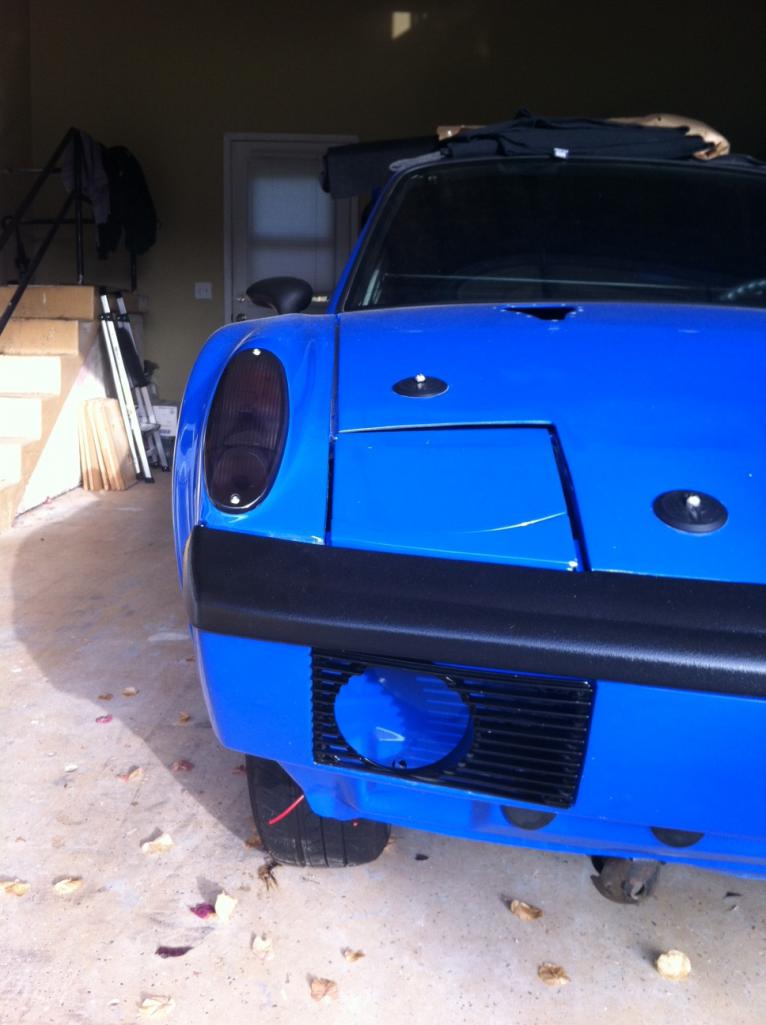
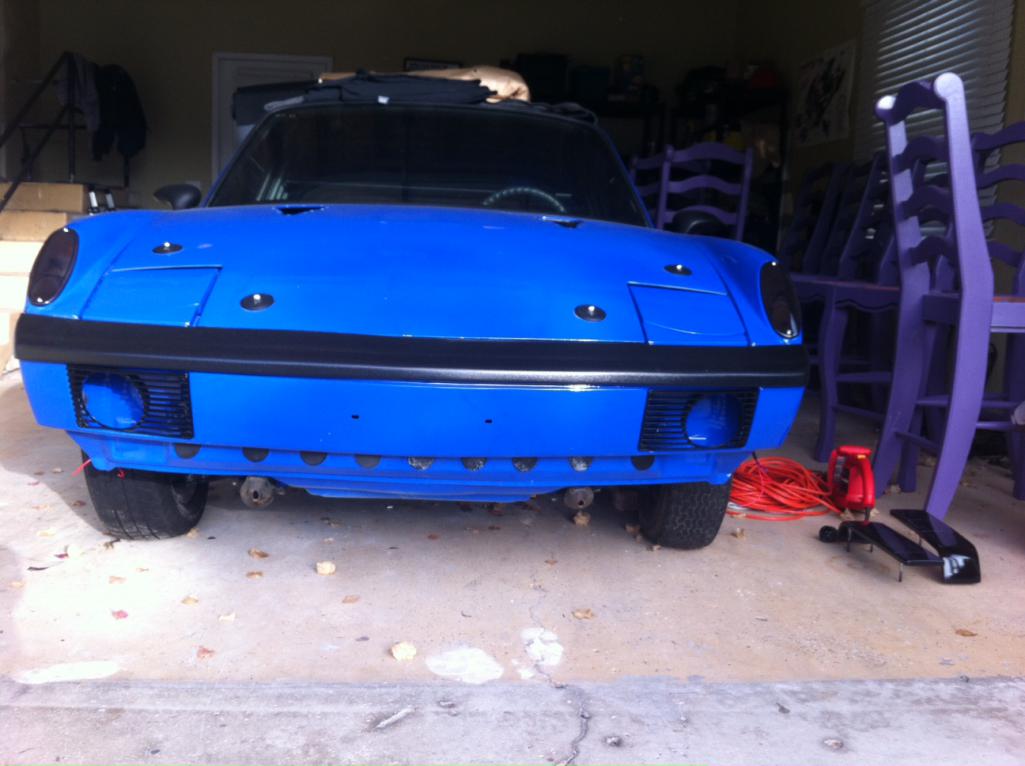
fit rear bumper... should be here today!
put doors back on for final fit
prep air dam for special projects
final body work
sand...
Maybe more, who knows..
Posted by: RiqueMar Mar 9 2012, 11:26 AM
I'm not a fan of side air intakes, but that's looking awesome!
Love that blue, too! 
Keep it up! 
Posted by: effutuo101 Mar 9 2012, 11:26 AM
Stitch...Mostly evil...
Posted by: gothspeed Mar 9 2012, 11:33 AM
Wow  !!! Does the lizard skin need carpet or paint to protect it? or is it robust enough to stand on its own?
I am considering second skin audio butyl mats or bedliner with carpet over it or something like this lizard skin.
Your experience will be much appreciated!
Posted by: jim_hoyland Mar 9 2012, 11:48 AM
Looking good ! Thanks for shaing. I like the side air intakes. The aftermarket convertible 914s had those, they located aft the door handle, IIRC
Posted by: effutuo101 Mar 9 2012, 11:50 AM
The final texture is just like rhino lining. I am sure it would stand up. But, the nice thing is you can paint right over it. I will probably add some sound material to the low spots just to even out the floor as well as the back panel.
There are 4 layers on the fire wall. Two sound and two heat on each side. Only two layers of sound and heat on the floor.
my rear bumper just arrived. But, I have to go do some work downtown. Maybe a mock up later today...
Posted by: effutuo101 Mar 9 2012, 11:51 AM
@ Jim, yes, I almost did the same. But, given the size, I had to drop them down a bit. They have 3 inch intakes behind them. Same with the NACAducts. The brake intake are 2 inch.
Posted by: effutuo101 Mar 9 2012, 11:52 AM
And now my doors are back from the sand blasters. primer and seal as well....
Posted by: Ferg Mar 9 2012, 11:56 AM
Wow, Cool! 
Posted by: gothspeed Mar 9 2012, 12:14 PM
Thanks for the info effutuo101 !! I think I will put some deadener mats on the big flat spots, go over everything (including the mats) with that lizard skin then paint it black.
You are doing a great job man!!!!
Posted by: effutuo101 Mar 9 2012, 12:38 PM
@ Ferg! 
any new projects?
@ goth. spray lizard skin first. then put on matting. it must be sprayed on primer or paint. Jeggs has it cheap. the gun is really cheap. Also, for what you are doing, you might want to find somebody to go in with you and share the product. It comes in 2 gallon containers.
Posted by: audio_file Mar 9 2012, 01:50 PM
Looking great man! If you need an extra pair of hands for anything, shoot me a pm, I'm close!
the other Chris in Everett...
Posted by: jcambo7 Mar 9 2012, 02:47 PM
Sweet! Finally! 
![popcorn[1].gif](style_emoticons/default/popcorn[1].gif)
Posted by: gothspeed Mar 9 2012, 03:44 PM

.................
@ goth. spray lizard skin first. then put on matting. it must be sprayed on primer or paint. Jeggs has it cheap. the gun is really cheap. Also, for what you are doing, you might want to find somebody to go in with you and share the product. It comes in 2 gallon containers.
Ok so the lizard skin must go on pretty smooth then? ........ if so, what you recommend sounds like a good aproach ..... the deadener mat I will be using is the damplifier pro ................ thanks man!!
Posted by: Ferg Mar 9 2012, 03:55 PM
@ Ferg!
any new projects?
@ goth. spray lizard skin first. then put on matting. it must be sprayed on primer or paint. Jeggs has it cheap. the gun is really cheap. Also, for what you are doing, you might want to find somebody to go in with you and share the product. It comes in 2 gallon containers.
No projects, just watching you guys hammer out some sweet 914's. I'll buy one soon enough...
Ferg
Posted by: effutuo101 Mar 9 2012, 06:55 PM
.................
@ goth. spray lizard skin first. then put on matting. it must be sprayed on primer or paint. Jeggs has it cheap. the gun is really cheap. Also, for what you are doing, you might want to find somebody to go in with you and share the product. It comes in 2 gallon containers.
Ok so the lizard skin must go on pretty smooth then? ........ if so, what you recommend sounds like a good aproach ..... the deadener mat I will be using is the damplifier pro ................ thanks man!!
Not really. It depends on how you adjust the fun. It goes on a lot like Rhino with a serious texture. Not smooth like paint. More like a textured wall in your house.
Posted by: mrbubblehead Mar 9 2012, 08:18 PM
nice work chris, how did you attach the fiberglass to the steel? i see the clecoes, but i asume those are for alingment of the panels...
Posted by: Socalandy Mar 9 2012, 08:47 PM
Very cool
Posted by: effutuo101 Mar 10 2012, 07:21 AM
There is an adhesive that has to go on bare metal and the fiberglass. I will ping Jon for the name. Once set it has to be ground off. It has a dual piston calking gun that mixes the chemicals as you pump the trigger
Posted by: PeeGreen 914 Mar 10 2012, 11:19 AM
I don't recall what it's called. One of my good friends that runs an autobody supply shop told us what to use for this.
Posted by: Gint Mar 10 2012, 01:46 PM
That's killer Chris! How ya doin?
Posted by: westtexass2k Mar 10 2012, 02:54 PM
Your car is looking good. It looks like my car has the same fenders that you are using. I didnt install them but car had them on it when I bought it. What size wheels are you going with? Look forward to the finsih product.
I used Lizard skin on Lotus 7 replica and it works great. It is fairly durable as well. Its nothing like bed liner material as far as abraision resistance but should work great where you applied it. I was going to use the Lizard on my project as well since I have it left over from the Ultralite. It defenitely kills the noise. it will drive like a new car.
I think Panel Bond Adhesive is what you are talking about. It is seriously strong stuff. We bonded a couple a 16g pieces together to test it and put it in a frame machine and pulled it. The metal tore but not at the bond.
Posted by: effutuo101 Mar 10 2012, 05:07 PM
Hiyas Gint! Good! Busy. How is Shar? Hope all is good on the snowy front.
Posted by: mrbubblehead Mar 10 2012, 05:42 PM
thanks for the info on the panel bond.....did you take any detail photos of the attaching?
Posted by: effutuo101 Mar 10 2012, 07:10 PM
I didn't. But, once you have everything fitted up, you lay the adhesive on both sides, clecko back into place and wait. in about 8 hours, you won't be able to get it off. Pretty neat stuff.
If somebody hits the fender, it will be me with a grinding wheel to get the material off and replace the fender with the same process.
Posted by: raw1298 Mar 10 2012, 07:53 PM
I used the same stuff on my flares. Works great and easy to use. It seals the metal too, that is why I used it.
Posted by: jcambo7 Mar 10 2012, 07:56 PM
 Need more pics...
Posted by: effutuo101 Mar 11 2012, 04:17 PM
I used the same stuff on my flares. Works great and easy to use. It seals the metal too, that is why I used it.
yes, that stuff is really good.
I built lighter intakes this morning...more glass work to do on the fenders now. but, in all I lost some weight, so a plus on that.
Posted by: effutuo101 Mar 13 2012, 10:15 AM
Refitting intakes yesterday. Just a couple of minor modifications and then ready for final prep on rear and front fenders.
To do:
sand 2-3 mm off of rear deck for correct fit by lights
measure and drill rivet holes for side intakes
finish primer of doors and front bumper
final fit of rocker covers
later this week.
install hood pin mech
fit mirrors and prep
door handle check and prep
Media blast eyebrows, headlight covers and primer
Media blast intake and paint
Paint headlight brackets and misc parts
Next week
final prep and paint of NACA ducts and intakes
paint mirrors
So much to do!
Posted by: jcambo7 Mar 13 2012, 10:37 AM
Refitting intakes yesterday. Just a couple of minor modifications and then ready for final prep on rear and front fenders.
To do:
Take ton's of pictures
Post them on 914world
sand 2-3 mm off of rear deck for correct fit by lights
measure and drill rivet holes for side intakes
finish primer of doors and front bumper
final fit of rocker covers
later this week.
install hood pin mech
fit mirrors and prep
door handle check and prep
Media blast eyebrows, headlight covers and primer
Media blast intake and paint
Paint headlight brackets and misc parts
Next week
final prep and paint of NACA ducts and intakes
paint mirrors
So much to do!
Their that looks better. I fixed your to do list.

Posted by: effutuo101 Mar 14 2012, 09:20 PM
Rear deck fitted, naca ducts finalizes, roof 99.9% ready, 916 bumper very close to being complete. Mor pics tomorrow James, I promiseT
Posted by: dlo914 Mar 15 2012, 03:36 AM
I think you just convinced me that my next 914 has to have fender flares
Posted by: effutuo101 Mar 15 2012, 08:48 AM
As long as she has legs a little bit of bedunkedunk in the trunk is a good thing...my wife said that 914's must have junk in the trunk. She likes certain colors in a narrow body, but, for the most part and for us...it must have much back.
Posted by: jcambo7 Mar 15 2012, 09:51 AM

I cant reed i need picurs...
Posted by: effutuo101 Mar 18 2012, 07:17 PM
Ok James!
didn't get much done today due to work.
But, yesterday:
fixed 3/4 inch gap on pass door
fixed 1/2 inch gap on driver door
finished fitting my rear bumper
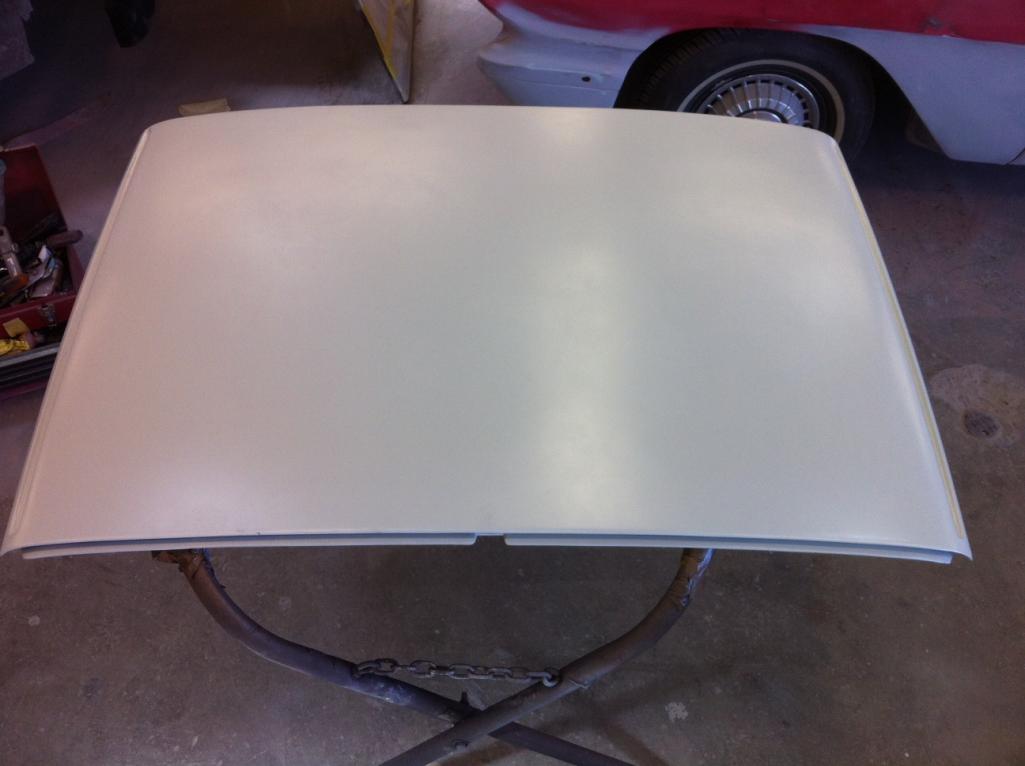
glassed up some re enforcements on the hood. need to finish sanding and re glass
Attached image(s)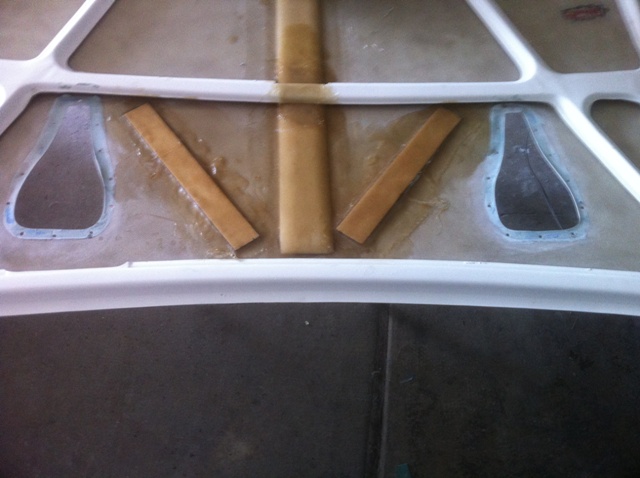
Posted by: effutuo101 Mar 18 2012, 07:18 PM
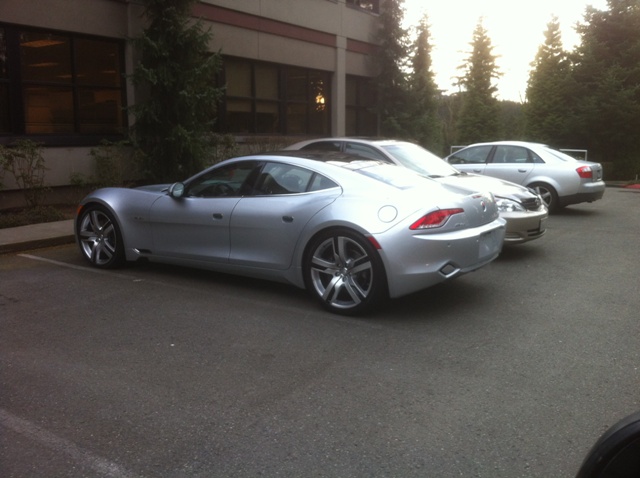
oh, and saw this at work
Attached image(s)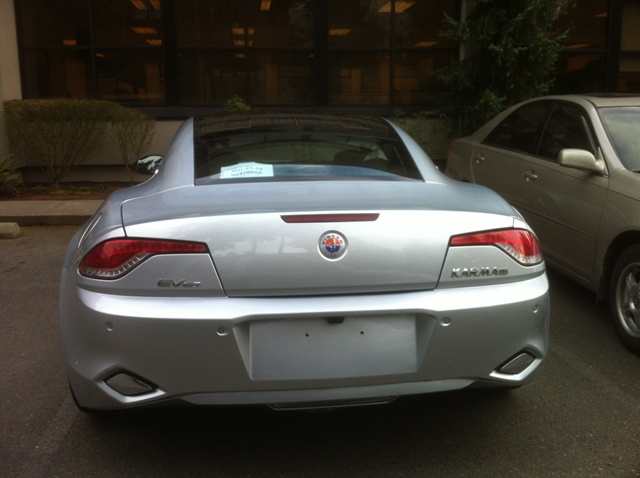
Posted by: effutuo101 Mar 18 2012, 07:18 PM
hope to get more done tomorrow.
Posted by: PeeGreen 914 Mar 18 2012, 08:05 PM
The Fiskar looks really cool. I just hope the issues I've heard of don't damage the rep. I'd like to see more from this group.
Posted by: effutuo101 Mar 20 2012, 04:00 PM
Makes two of us. very pretty car.
anyways onwards and upwards..


Attached thumbnail(s)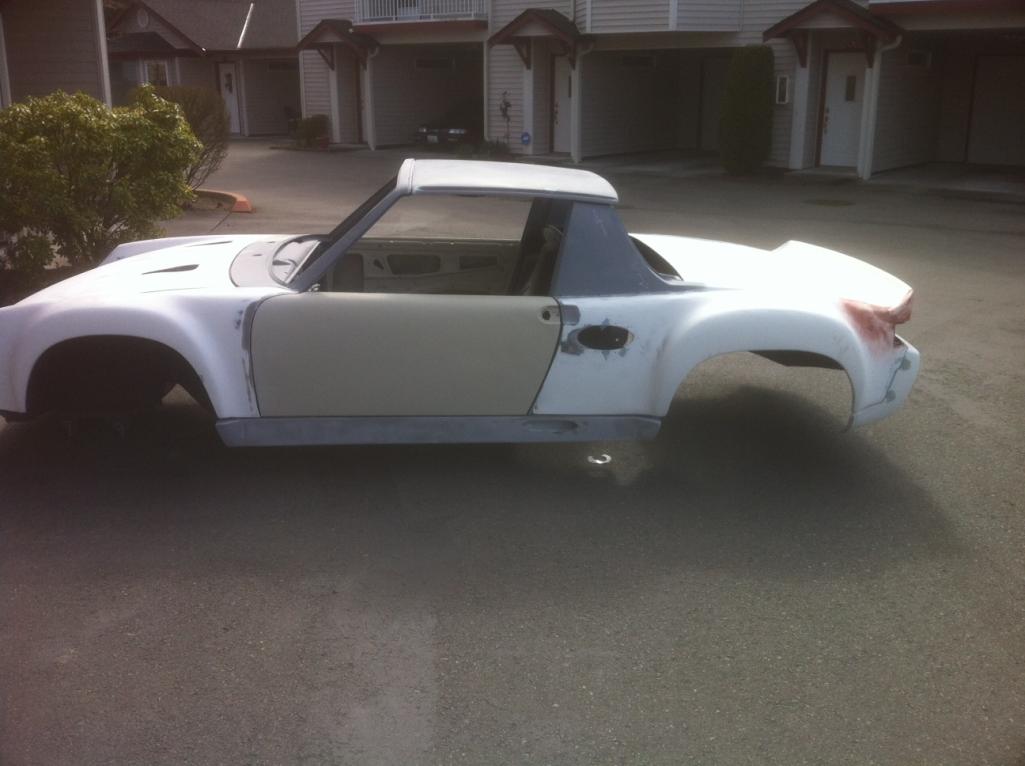
Posted by: jcambo7 Mar 21 2012, 09:08 AM
Posted by: effutuo101 Mar 23 2012, 05:59 PM
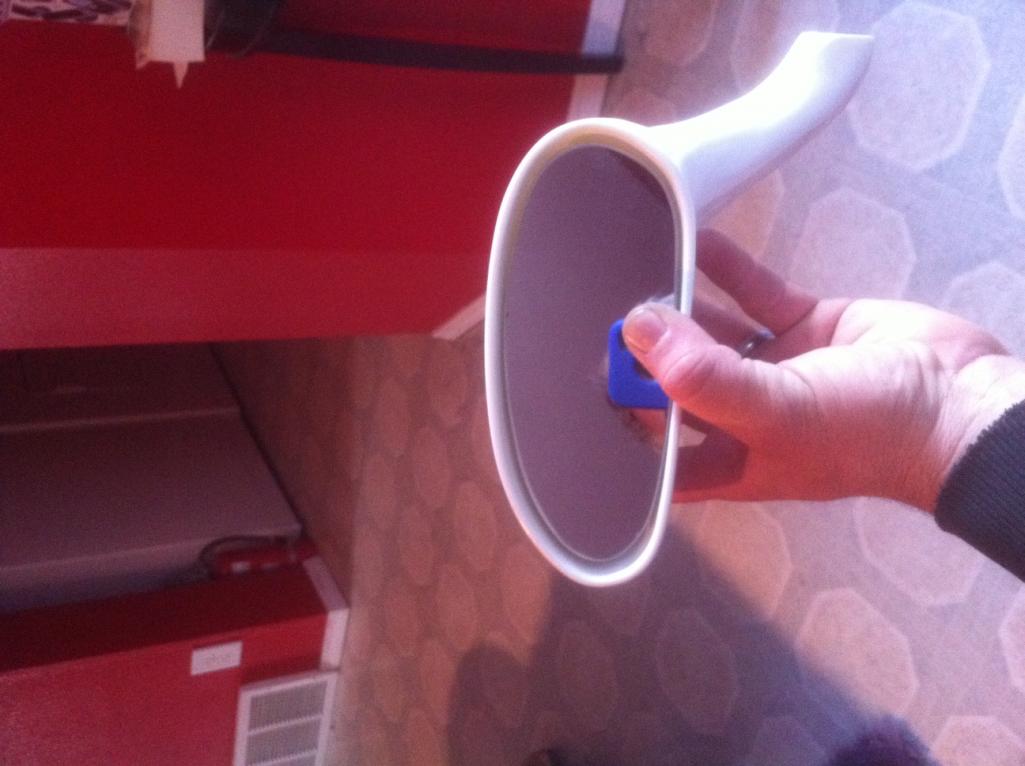
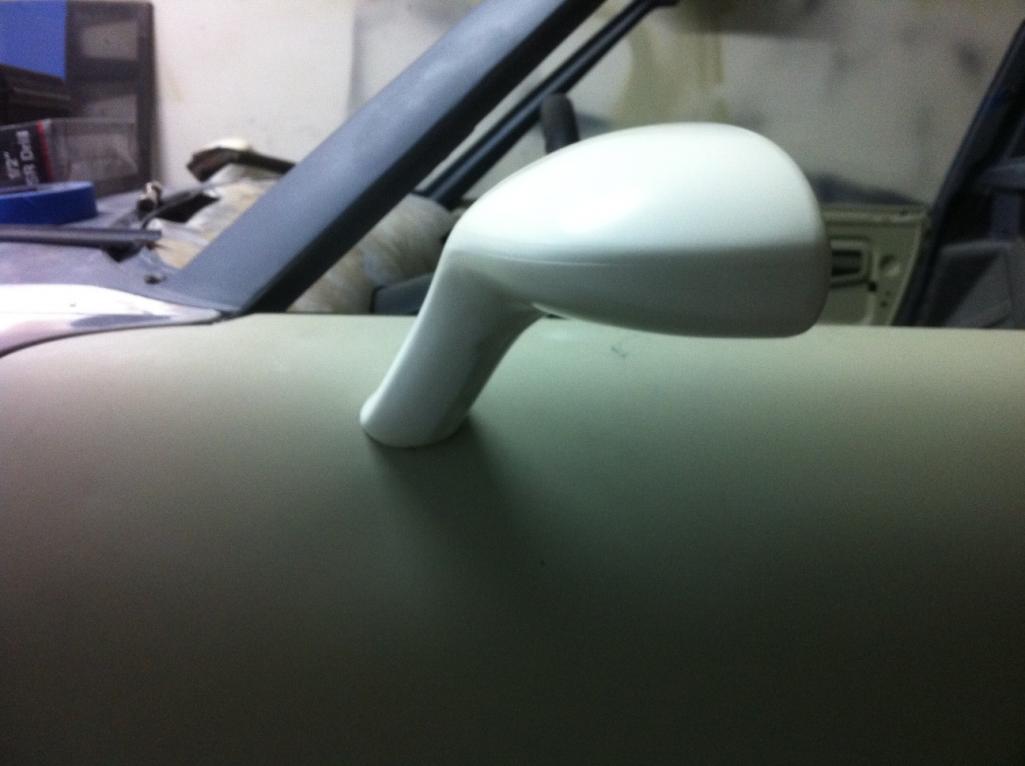
hood pins and mirrors showed up... I guess I will get them fitted. Then time to shape the mirrors... This should be fun!
Attached thumbnail(s)
Posted by: pete-stevers Mar 23 2012, 08:12 PM
where did you get those hood pins from??
Posted by: dakotaewing Mar 23 2012, 09:13 PM
What kind of mirrors?
Posted by: effutuo101 Mar 23 2012, 10:42 PM
I got them bot from "dreamers" (local hot rod shop). I had the hood pins powder coated satin black. I will post the details when I go back down stairs tomorrow.
The mirrors are composite. You shape to fit your door.
Posted by: effutuo101 Mar 24 2012, 09:18 AM
The mirrors are Vision out of Canada. VF4
http://visionhotrod.com/
Posted by: effutuo101 Mar 26 2012, 09:43 AM
hood pins are Eddie Motorsports. they come in a textured or smooth finish and can be powder coated.
http://www.eddiemotorsports.com/store/cart.php?m=product_detail&p=27015&c=417;;
Playing with some dash idea's late last night...
Attached thumbnail(s)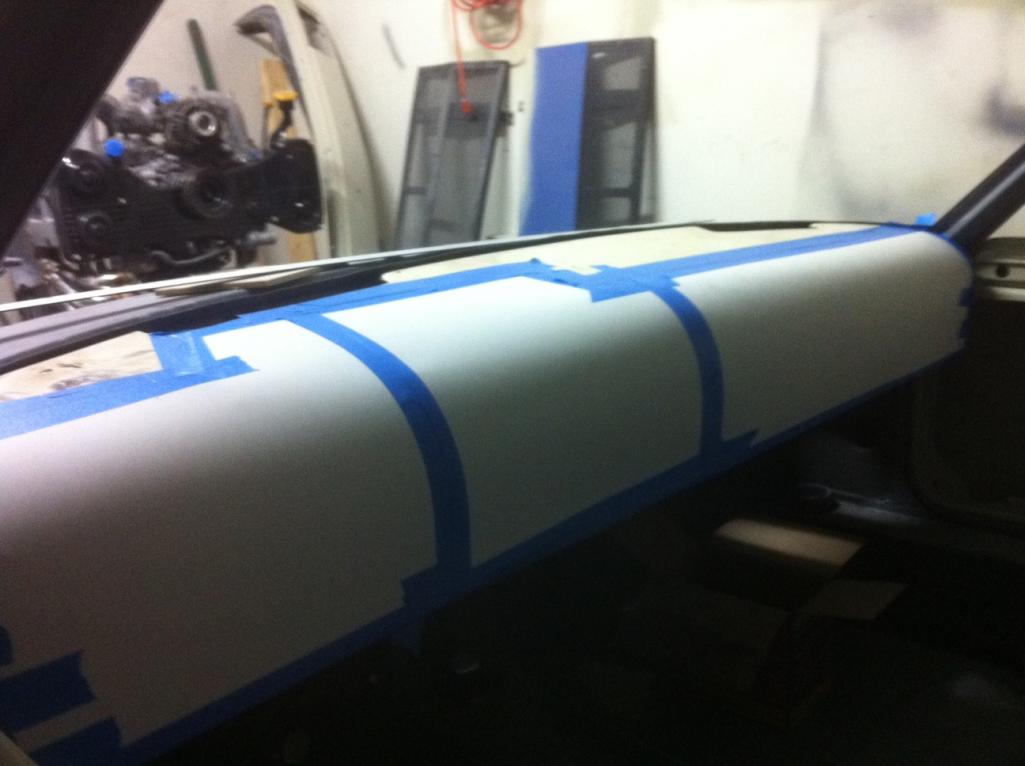
Posted by: jcambo7 Mar 26 2012, 09:47 AM
Ooo...A GT lid. Are you putting it on this 914?
Posted by: effutuo101 Mar 26 2012, 10:11 AM
LOL! Hi James, I am going to have options....we will see what the final looks like. It really depends on a couple of factors.
Posted by: effutuo101 Mar 27 2012, 12:08 PM
so, I did it. I cut apart my dash last night and laid some glass. Here is the rough mold. Still have to finish the sides and tie it all together. The rest of the dash will be modular so pieces can be taken off.
Time to start building a glove box... form space for headlights, gauges and instrument cluster
Attached thumbnail(s)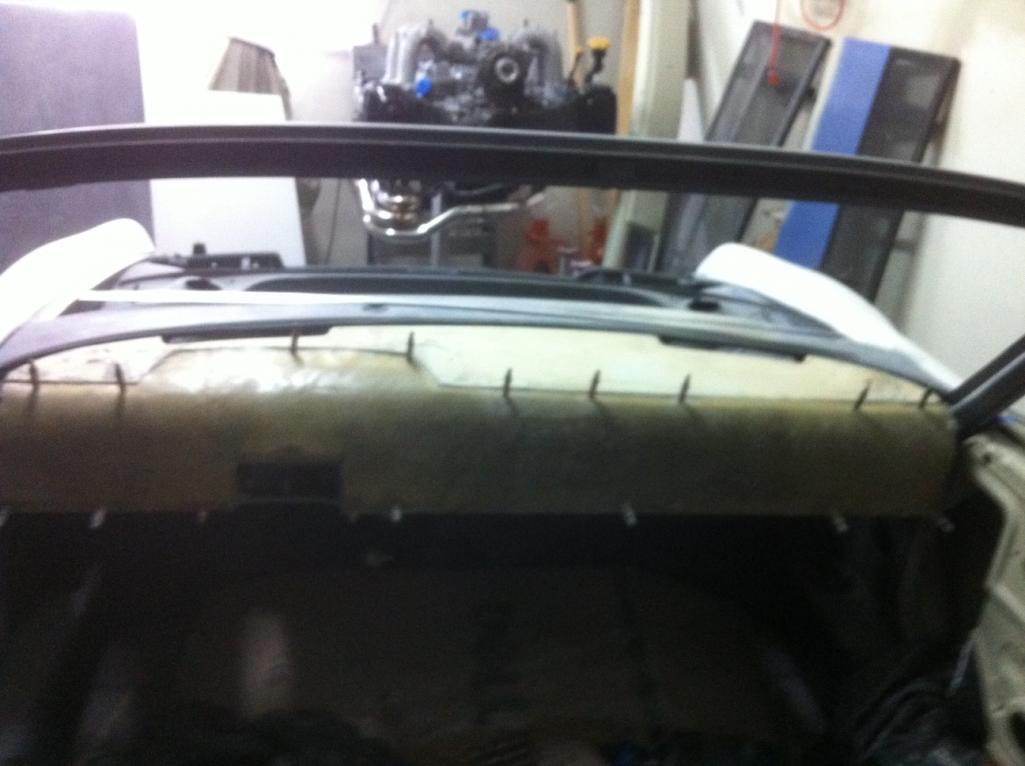
Posted by: PeeGreen 914 Mar 27 2012, 04:49 PM
Hey Chris,
You should make two of those
Posted by: effutuo101 Mar 27 2012, 06:05 PM
LOL! If you know somebody who can make a mold, you are free to borrow as long as I get an all glass one in the swap. This one will be lighter than original, but heaver than planned as I have to do a little fill work in some wrinkles..
Posted by: McMark Mar 27 2012, 06:14 PM
Cool stuff! 
Posted by: effutuo101 Mar 30 2012, 03:00 PM
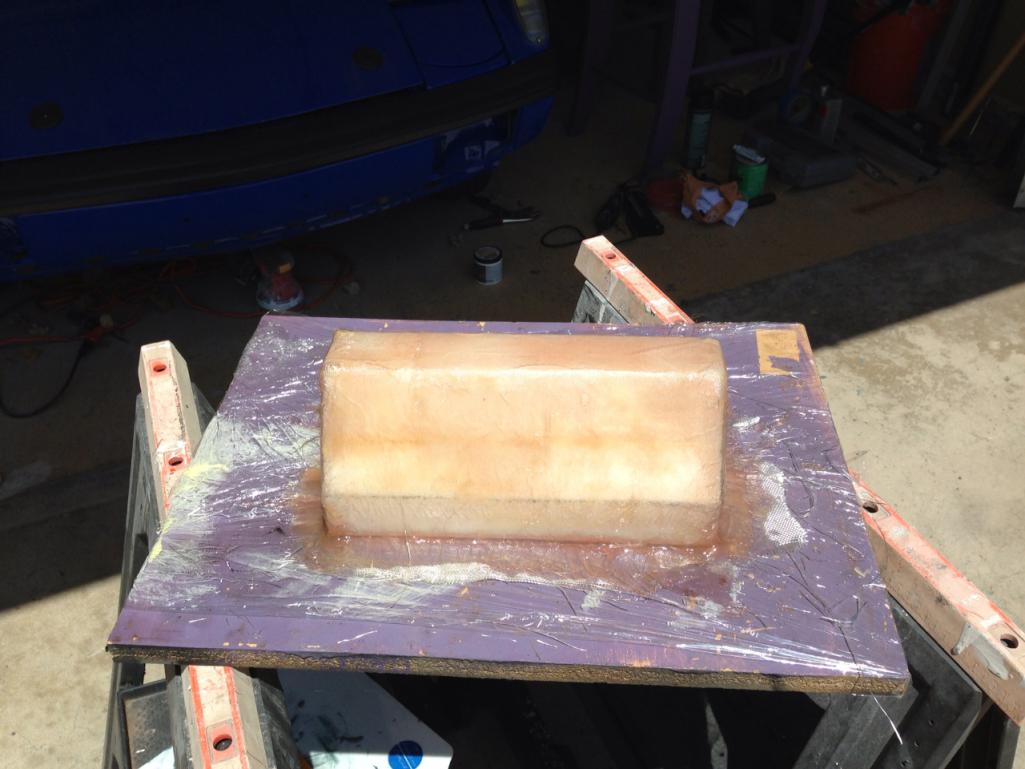
on a con call since 5 am. So, I built and test fitted a glove box mold. Maybe later tonight I can actually drop some resin on it.
Posted by: effutuo101 Mar 30 2012, 03:01 PM
an now for a picture... pre wax and final prep for glass
Attached thumbnail(s)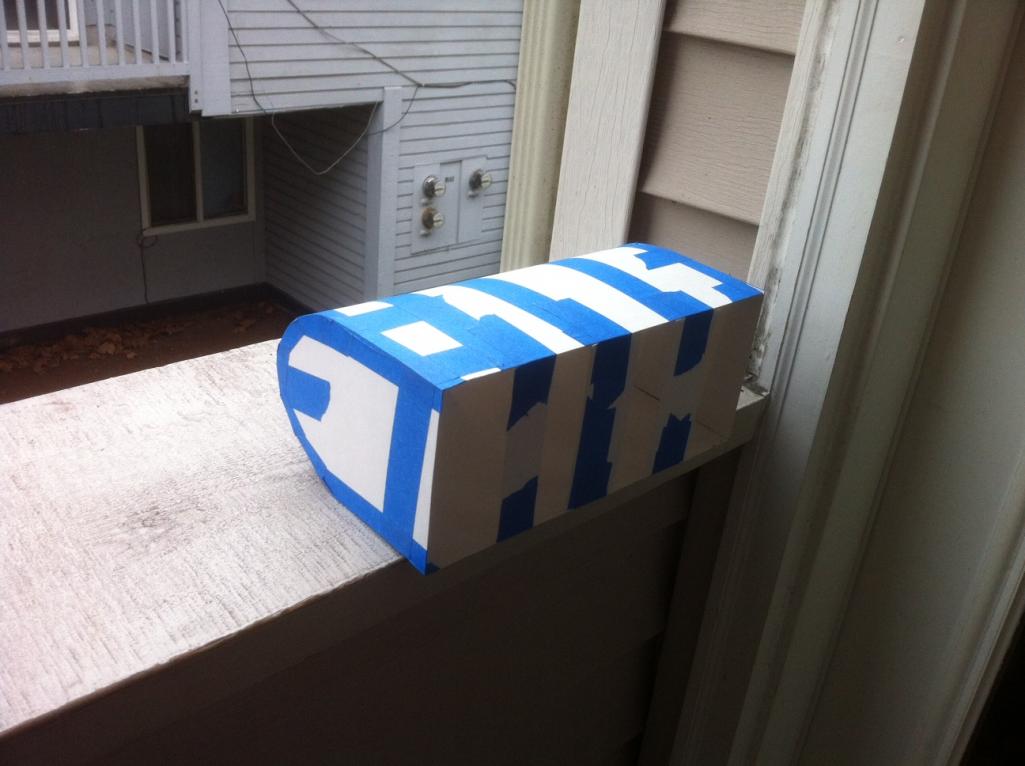
Posted by: effutuo101 Mar 30 2012, 03:02 PM
yes, it is a mail box... but once I get the glass done and fit it to the curve of my dash....
Posted by: jcambo7 Mar 30 2012, 03:04 PM
Posted by: effutuo101 Mar 31 2012, 06:05 PM
The wife had oral surgery Thursday afternoon. She is a trooper.
She woke up this morning with her face really puffy. We thought she had an allergic reaction to her meds. Long day, she will have two shiners. No fun.
Back to work on my dash....
Posted by: sixnotfour Mar 31 2012, 06:48 PM
Wish Her Well.. should I come over tomorrow ?
Posted by: effutuo101 Mar 31 2012, 07:16 PM
Sounds good! 
Posted by: NORD Mar 31 2012, 09:17 PM
Make that Gloove Box big enough to hold all the Tickets!!!! 
Nice job on the car. Last time I seen it I was holding floor pans for you
and it was in Rich's carport. Has come along ways. Keep posting.
Posted by: Ductech Apr 1 2012, 12:19 AM
Dood .....'did your engine mount and trans show up yet?
Posted by: effutuo101 Apr 1 2012, 08:12 AM
Hi Nord! yes, it has come a long way. The help that the local peeps have given along the way has been absolutely spectacular. Thank you and the rest of the PNW crew for pitching in on this long project!
Rich has become the sole supplier of parts for me and Jon B let me borrow his compressor for like 8 months.
@ Robert. Plan got pushed. next weekend I should get the cradle, transmission and junk and stuff.
Back to the garage....
Posted by: effutuo101 Apr 1 2012, 08:14 AM
So, late last night, I popped the glove box off the mold and trimmed the excess off.
Attached thumbnail(s)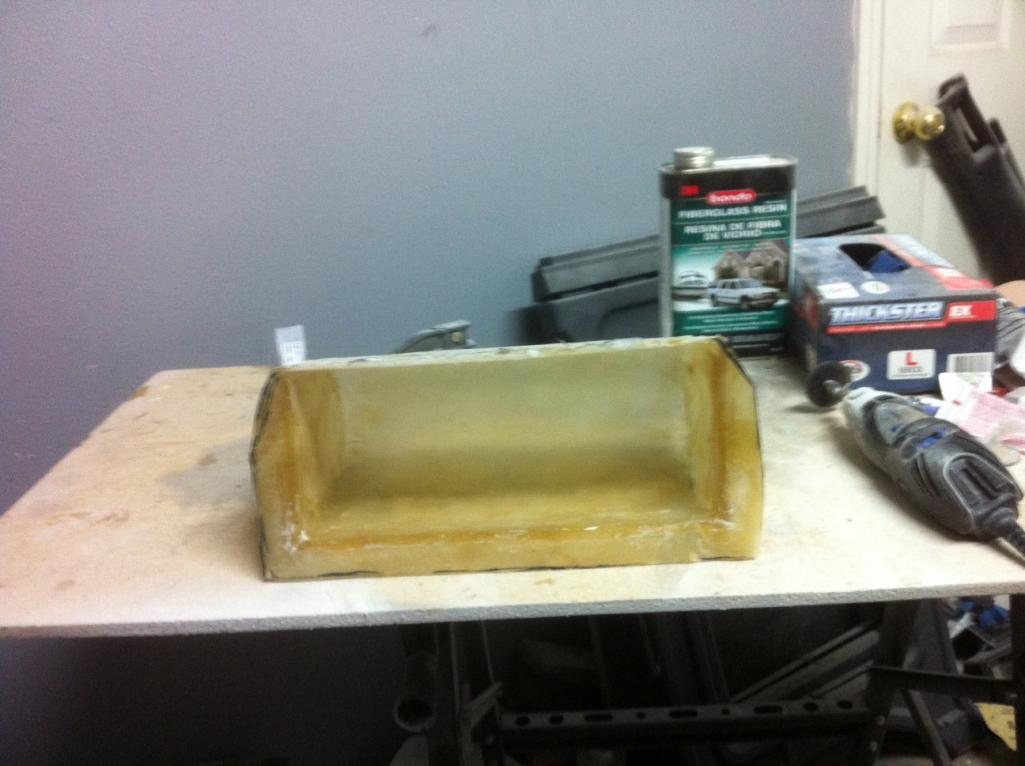
Posted by: effutuo101 Apr 1 2012, 08:16 AM
a little trimming up and presto, a glove box.
@ Nord, It is big enough to hold registration, insurance card, 2 pair of sunglasses and 1 ticket.....
Attached thumbnail(s)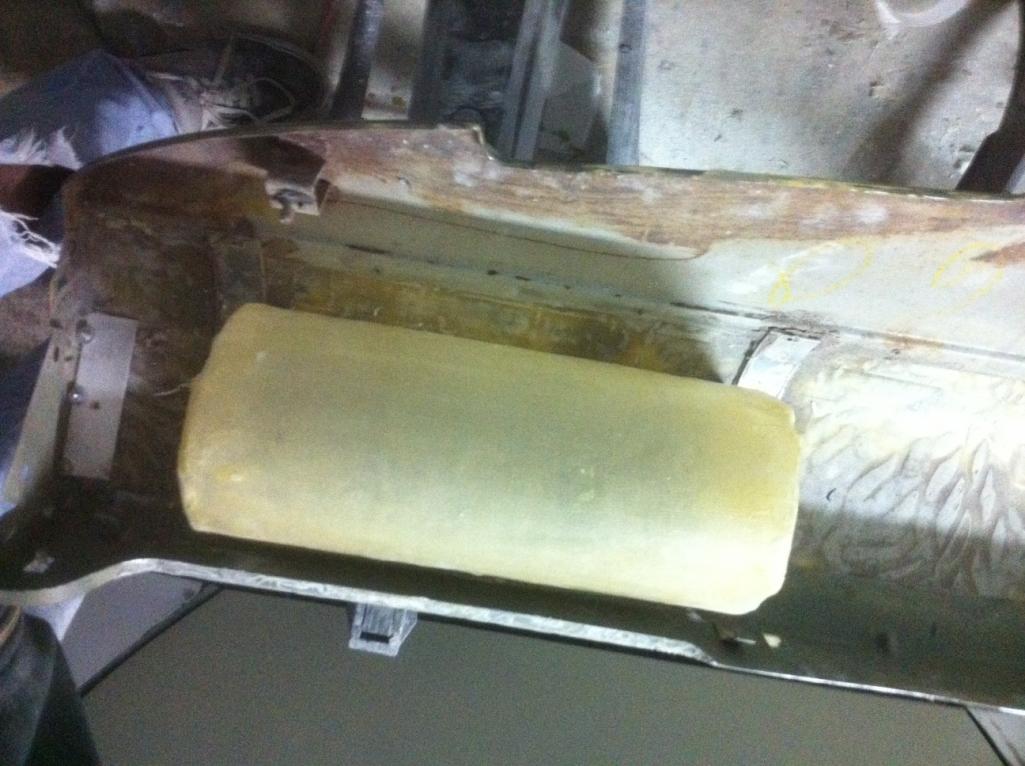
Posted by: effutuo101 Apr 1 2012, 08:17 AM
got the headlight switch and dimmer switch cut out and fitted.
Attached thumbnail(s)
Posted by: effutuo101 Apr 1 2012, 08:20 AM
this morning:
Drink coffee
later today maybe:
drill the hood for pins
drill the doors for the mirrors.
make bracket and fit glove box door. with the curved dash, that will be fun!
Posted by: MDG Apr 1 2012, 08:21 AM
Diggin' it! 
Posted by: effutuo101 Apr 2 2012, 05:57 PM
an oddly strange day at work. Took my lunch hour and did some work.
I got the glove box roughed in. left needs to come out about 2-3mm. Then straighten the edges of the box and loose some mass. This spot had a problem in my casting...
Then final fit, hinges, smooth it out, and put some felt in it.
just enough room for two pair of sunglasses, a small package of tissue, and registration/insurance stuff.
In the end it is about 7 inches deep. no where near the cavern that was stock, but, it also doesn't hang down below the dash.
Attached thumbnail(s)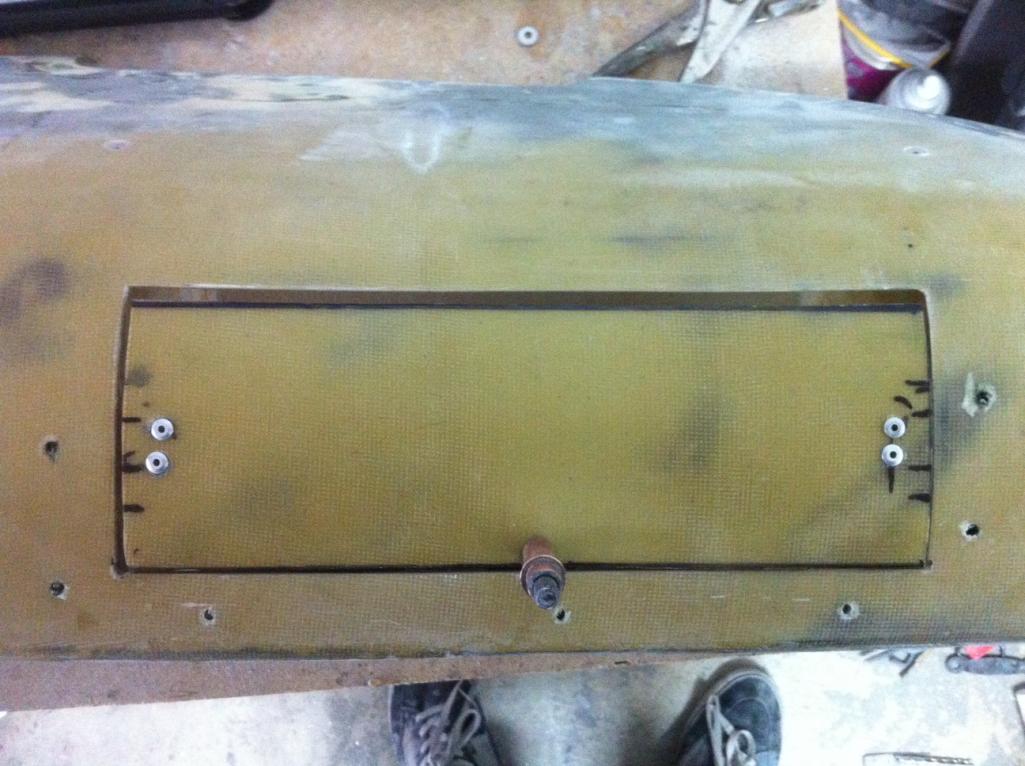

Posted by: mrbubblehead Apr 2 2012, 06:40 PM
good work. you are going to have a real nice car.
Posted by: effutuo101 Apr 2 2012, 09:23 PM
Thanks! It is coming to a town near you at the end of summer. I might even have it road worthy... :
Next x
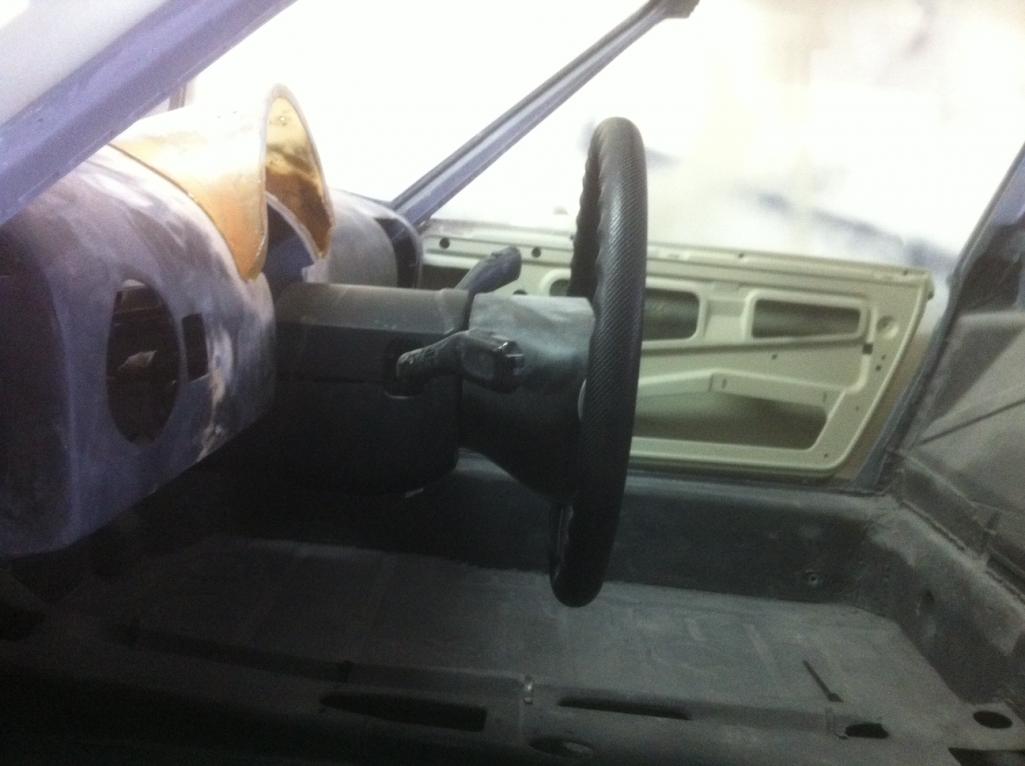
ditching the stock steering for a little adjustment.
Heya Jeff! it will need a lot less love than I thought inside the cabin.
Attached thumbnail(s)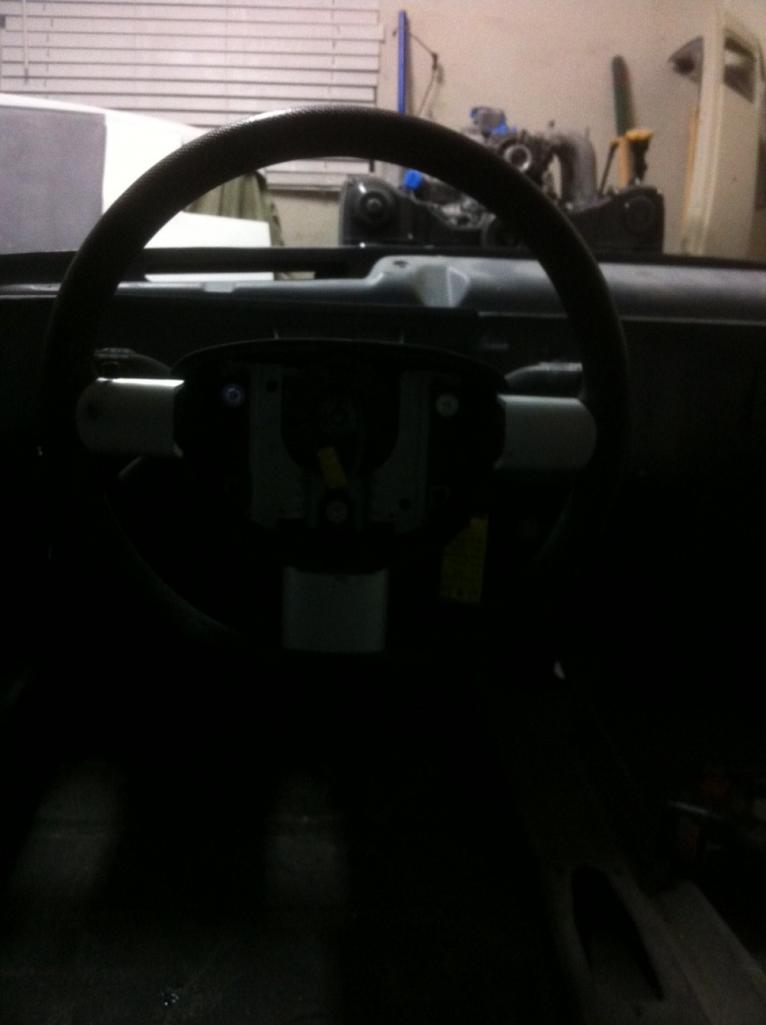
Attached image(s)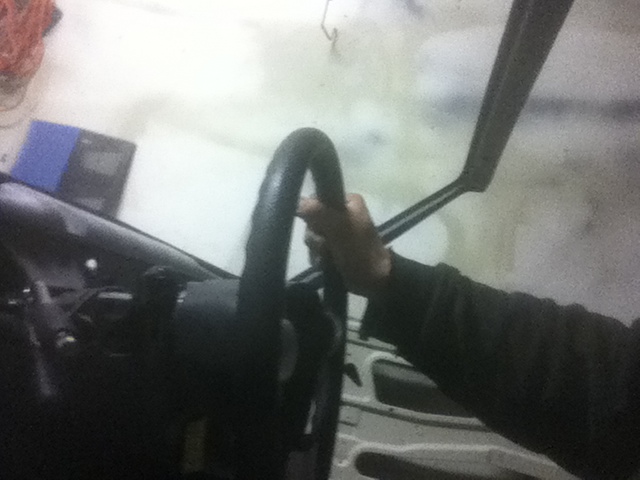
Posted by: effutuo101 Apr 2 2012, 09:25 PM
the column is out of a 2002 VW beetle. We should be able to keep all of the adjustments in tack. So, it may be a little easier getting in and out of the car for me...or, it might just end up in my lap at full low...\
Posted by: effutuo101 Apr 9 2012, 04:33 PM
start mirrors
Attached thumbnail(s)
Posted by: effutuo101 Apr 9 2012, 04:35 PM
lunch time work... 
Attached image(s)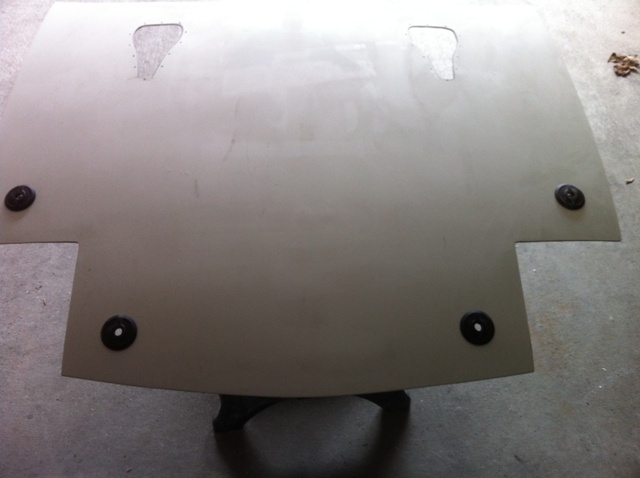
Posted by: effutuo101 Apr 23 2012, 01:04 PM
not much posting, but some progress
picked up my cradle and some other parts from Ian, just waiting for the final transmission mounting bracket.
did a final fit on my steering wheel
Redo of glove box as I was not happy.
The list grows both shorter and longer with each passing day.
Attached thumbnail(s)
Posted by: sixnotfour Apr 23 2012, 10:21 PM
Where is the blood pool picture from your 914 cutting me up like a pig ??
Does the column feel rigid enough ??
Posted by: sixnotfour Apr 23 2012, 10:32 PM
Doesn't your cowl look more like this now ??
Attached image(s)
Posted by: effutuo101 Apr 24 2012, 08:52 AM
Not yet, got the grinding done yesterday. primer and mud today and see where it is at.
Posted by: ruby914 Apr 24 2012, 10:37 AM
Looking good Chris.
Nice cradle, hats off to Ian for that.
It looks like you will use the Subaru gauge cluster? If so, your tilting column will help you get it in and out.
Were you able to maintain the same arms length to the wheel? Using the WRX column, that was a big challenge for me.
Posted by: effutuo101 Apr 24 2012, 11:33 AM
Thanks,
No, not a suby cluster. gauge cluster on window pillar and looking at different options for speed and tach. I found a HUD for about 100 that has speed, tach, shift light, temp and low fuel light. So, the space may be just for a couple of gages or be eliminated all together.
Posted by: effutuo101 Apr 24 2012, 11:35 AM
so far the steering will go closer to the dash than stock and come way further out than the stock. So, I think I may have to get a seat in and check.
But, yes, my biggest complaint has always been the steering wheel getting in my way of getting in and out of the car. This should make that a non issue. I will probably also go with a D ring once I get everything sorted.
Posted by: IM101 Apr 24 2012, 01:27 PM
not much posting, but some progress
picked up my cradle and some other parts from Ian, just waiting for the final transmission mounting bracket.
did a final fit on my steering wheel
Redo of glove box as I was not happy.
The list grows both shorter and longer with each passing day.
Great meeting you Chris, Im super exited to be a part of (if only a small part) this awsome build.
The rest of your parts should be there thursday. Can't wait to see this thing complete!

Ian M.
Posted by: effutuo101 Apr 24 2012, 01:50 PM
Thanks to you Ian! I am looking forward to driving her to SoCal latter this year. We will see.
Posted by: effutuo101 May 17 2012, 05:28 PM
ok, work got in the way of my build. 2 weeks in Mass and no 914 world to keep me busy at night.
So, off the car went today.
Much thanks to Robert and Rich. Robert for doing the heavy lifting and Rich for the lifting and the truck.
No, your eyes aren't playing tricks. that is a 6x12 trailer.. close fit!
Attached thumbnail(s)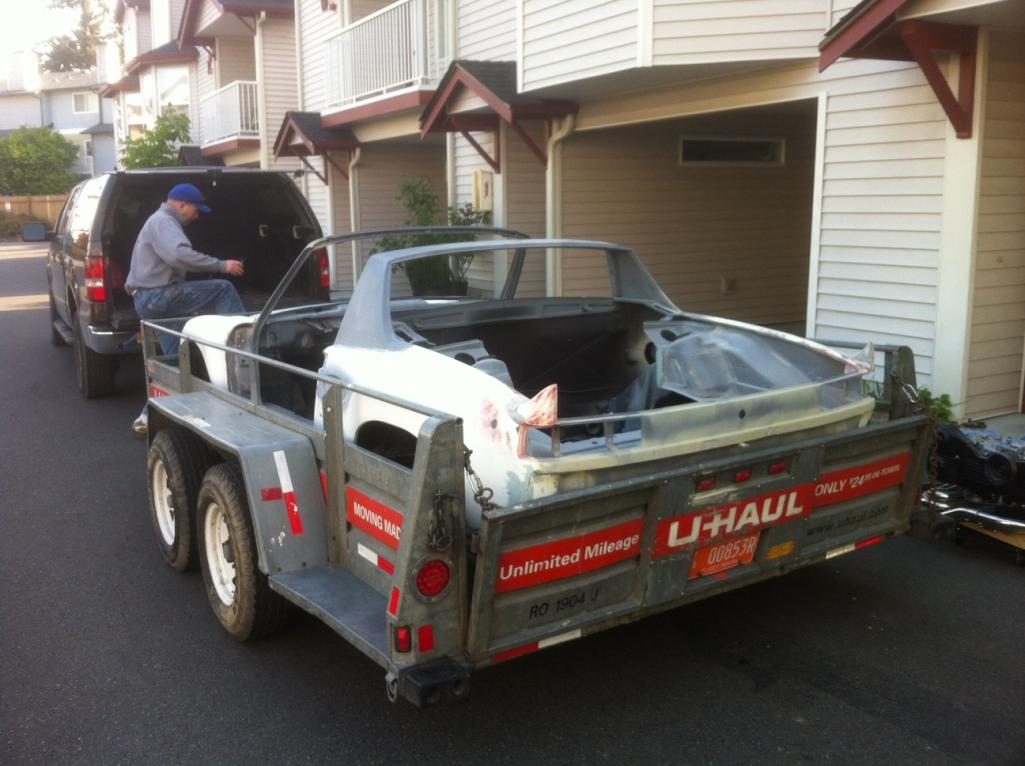
Posted by: sixnotfour May 18 2012, 05:55 PM
I cant wait to see some color..
Posted by: Lennies914 May 18 2012, 08:57 PM
Subscribed!
Great work. Looking forward to watching this build.
Posted by: effutuo101 May 22 2012, 04:36 PM
ok, so:
Dropped off suspension pieces to get media blasted and powder coated. Should be done next Friday
Dropped off rim centers to get painted. Will be complete with Car. Should be next Thrusday
Car should be in Primer tomorrow afternoon. I will get pictures and post them
Ordered a small fortune of stuff from the Bird for suspension bit. Ball joints, rear wheel bearing, trailing arm bearings
Ordered turbo tie rods and boots
Worked on my cousins Vespa P200 while waiting for my car. Pretty much have it sorted out. I will finish up hammering on the body tomorrow evening. Get it filled and in primer.
Next, book my trip to LA.
Posted by: effutuo101 May 25 2012, 02:31 PM
got busy with work, so here are a few updates:
Attached thumbnail(s)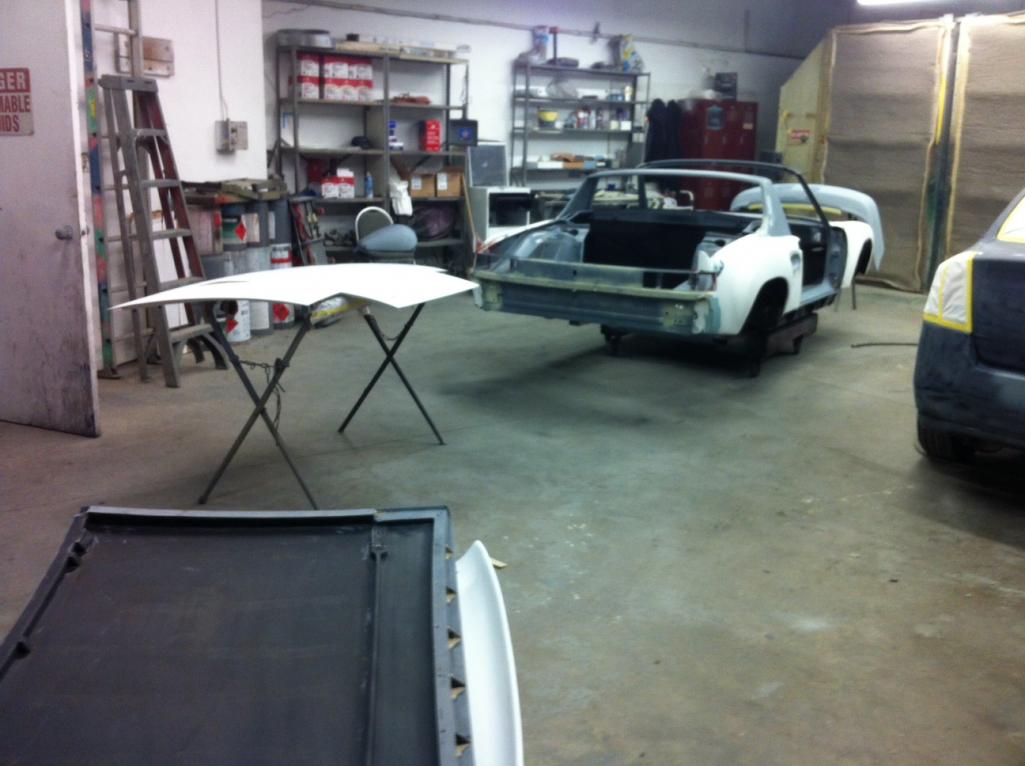
Posted by: effutuo101 May 25 2012, 02:32 PM
after an over night bake...
and running it to the other side of the shop.
Attached thumbnail(s)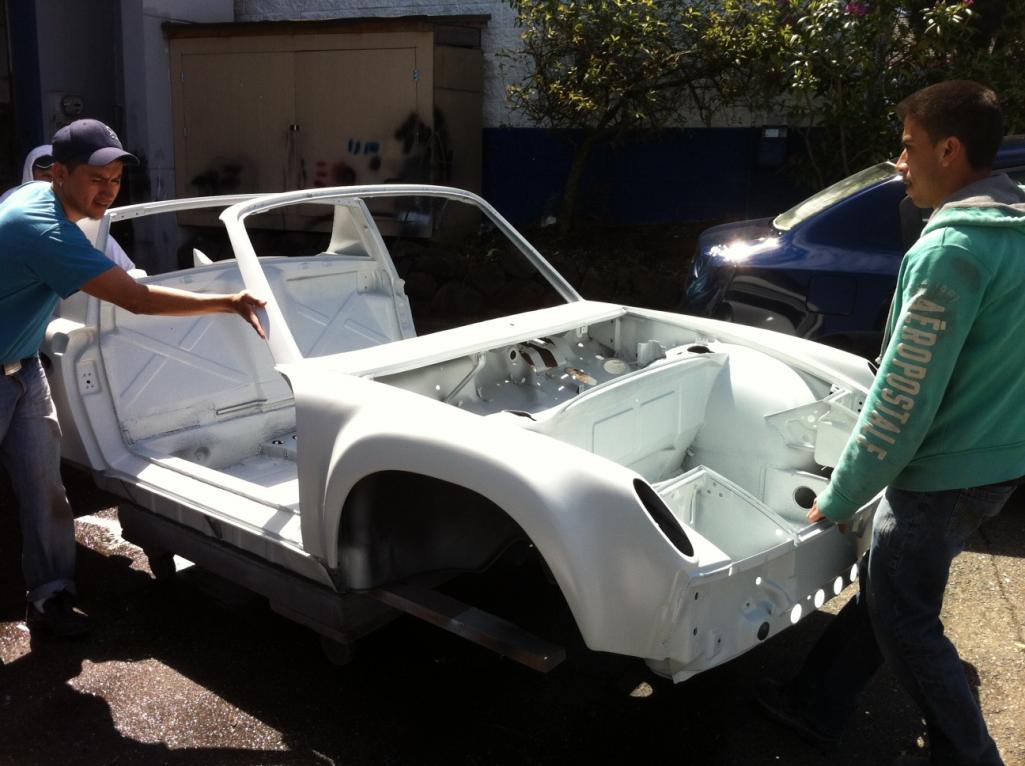
Posted by: effutuo101 May 25 2012, 02:34 PM
and off to final prep.
It was funny to watch 4 guys bust out a piece each..
Attached thumbnail(s)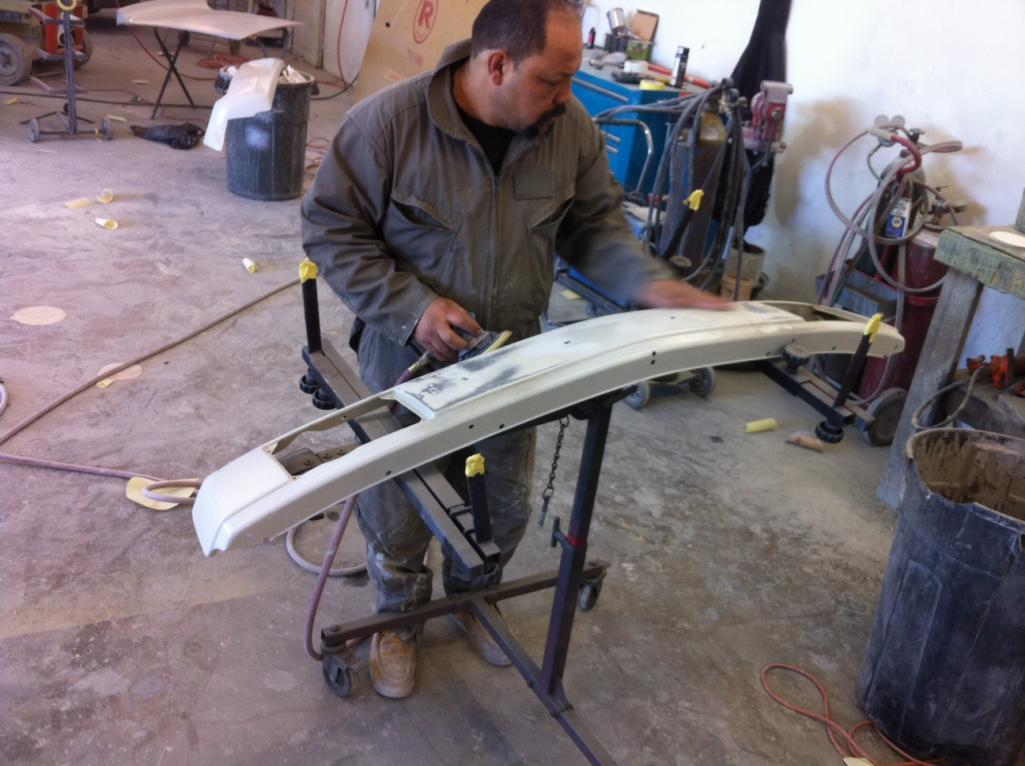

Posted by: effutuo101 May 25 2012, 02:36 PM
so, it may go to paint this afternoon or Tuesday morning. It all depends on how much is left to do on the body. From the looks of it, I missed 3 or 4 low spots and the cowl has to be finished.
More pictures when we have color.
Posted by: effutuo101 May 25 2012, 02:37 PM
missed one.
Attached thumbnail(s)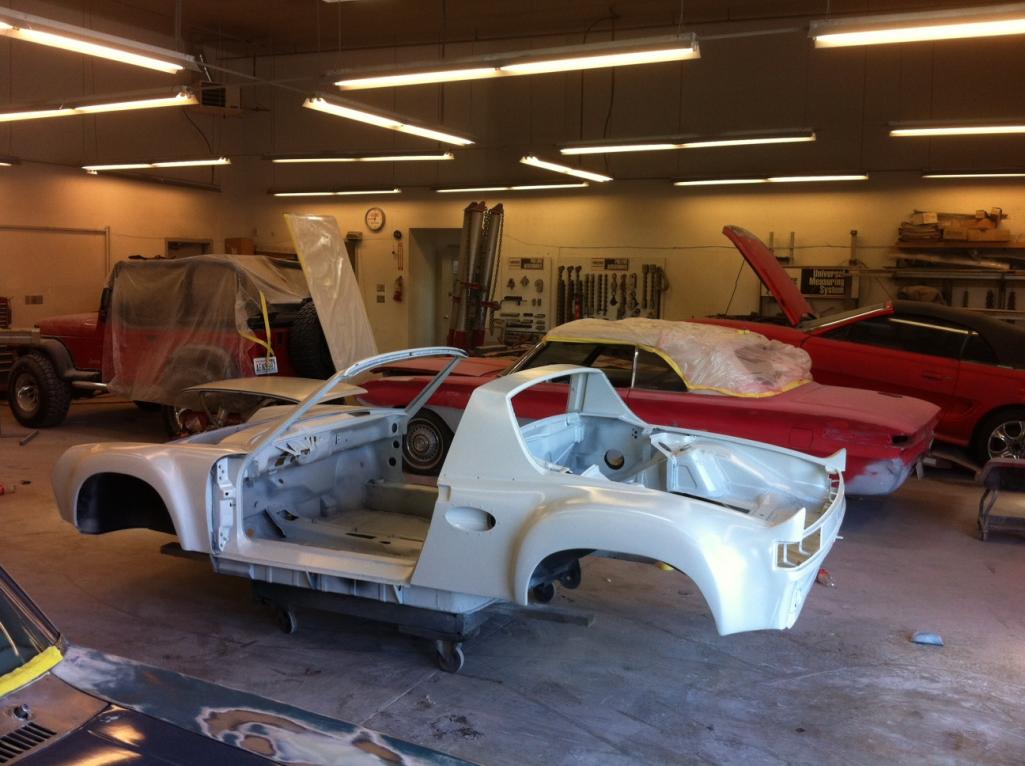
Posted by: PeeGreen 914 May 25 2012, 02:45 PM
Cool buddy
Posted by: sixnotfour May 25 2012, 02:59 PM
Is that Mexico ??
Posted by: effutuo101 May 25 2012, 03:19 PM
Umm mexeverett is the place together stuff done cheap.
Posted by: effutuo101 May 25 2012, 03:50 PM
so, the fed ex guy and the mail lady were both at my door.
Look what they brought me! almost everything I need to put the suspension together... to bad I was a moron and forgot to order 2 ball joints....oh well, that will be here next week.
Attached thumbnail(s)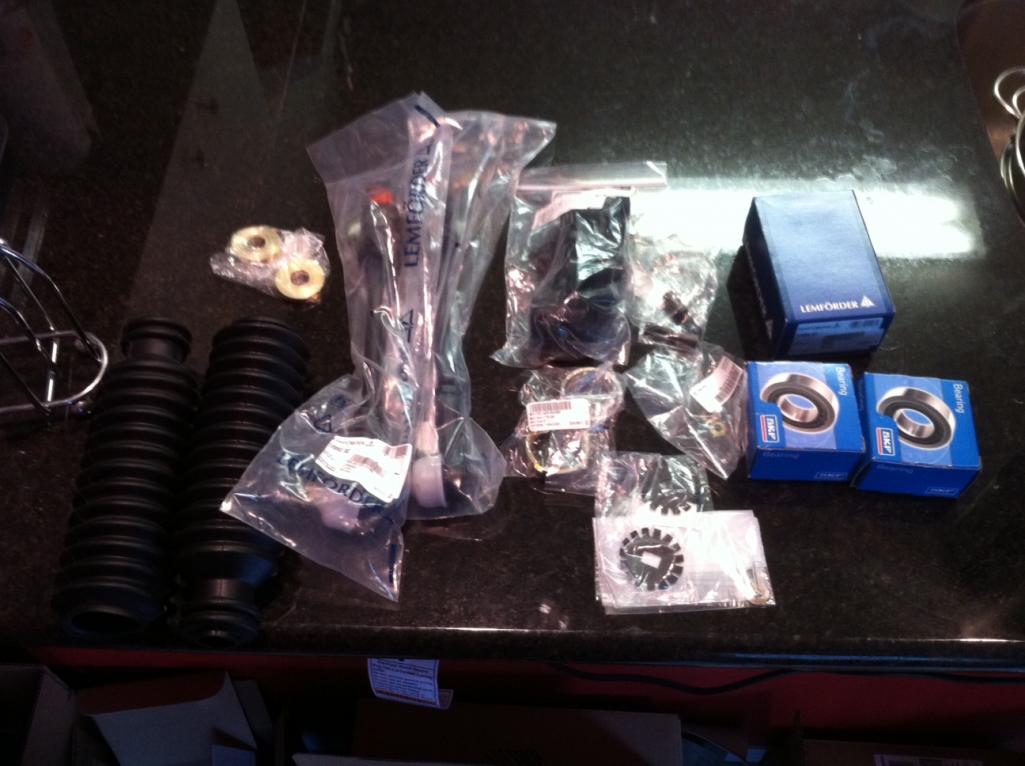
Posted by: PeeGreen 914 May 25 2012, 03:55 PM
Feel free to swing that all by my place
Posted by: effutuo101 May 25 2012, 05:17 PM
as long as there are a lot of zip spiffy new suspension pieces in my car when I leave.....
Posted by: IanJ May 25 2012, 06:39 PM
Car is looking great. Just had a quick flick through your pictures.
I don't seem to see any provision for water cooling. What is your plan for this?
Posted by: effutuo101 May 25 2012, 08:24 PM
Car is looking great. Just had a quick flick through your pictures.
I don't seem to see any provision for water cooling. What is your plan for this?
Intakes are in the hood and under the car. The radiator will be in front of the motor in the car. There is about 9 or 10 inches there with the shelves cut out.
The side intakes will feed the intake.
Don't worry, more pictures to come!
Posted by: rdauenhauer May 30 2012, 09:54 AM
Attached image(s)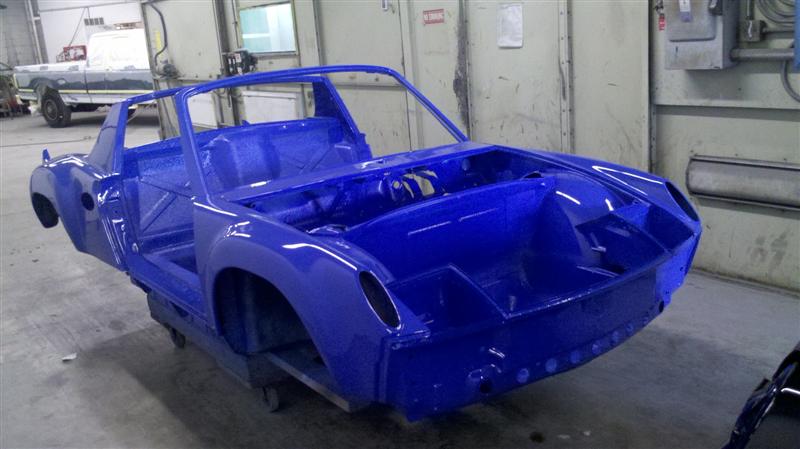
Posted by: PeeGreen 914 May 30 2012, 09:57 AM
Purty
Posted by: effutuo101 May 30 2012, 02:20 PM
I hope so, it is very bright!
Attached thumbnail(s)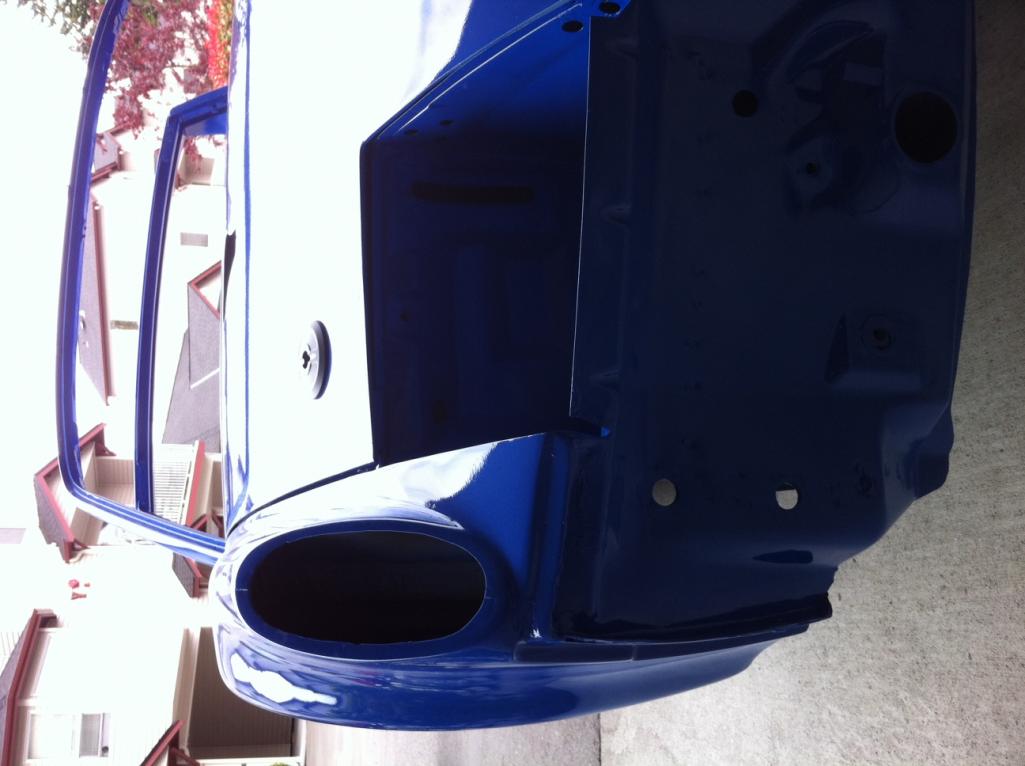
Posted by: effutuo101 May 30 2012, 02:22 PM
back into the garage for assembly...
Attached thumbnail(s)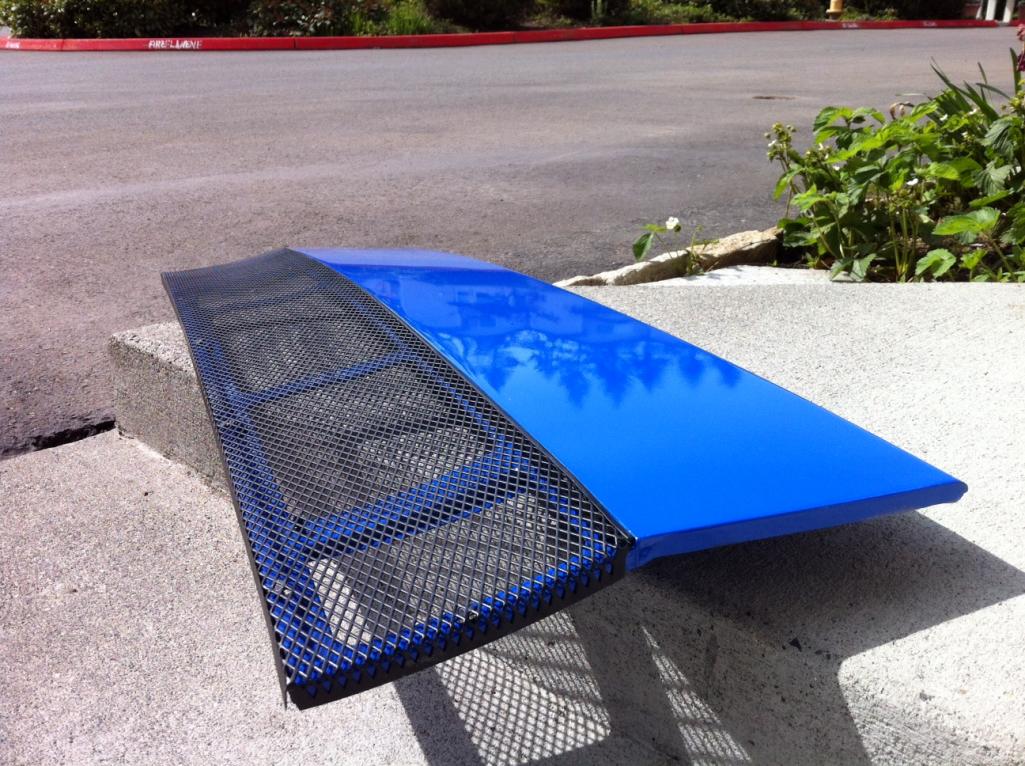
Posted by: effutuo101 May 30 2012, 02:23 PM
last for now.
Attached thumbnail(s)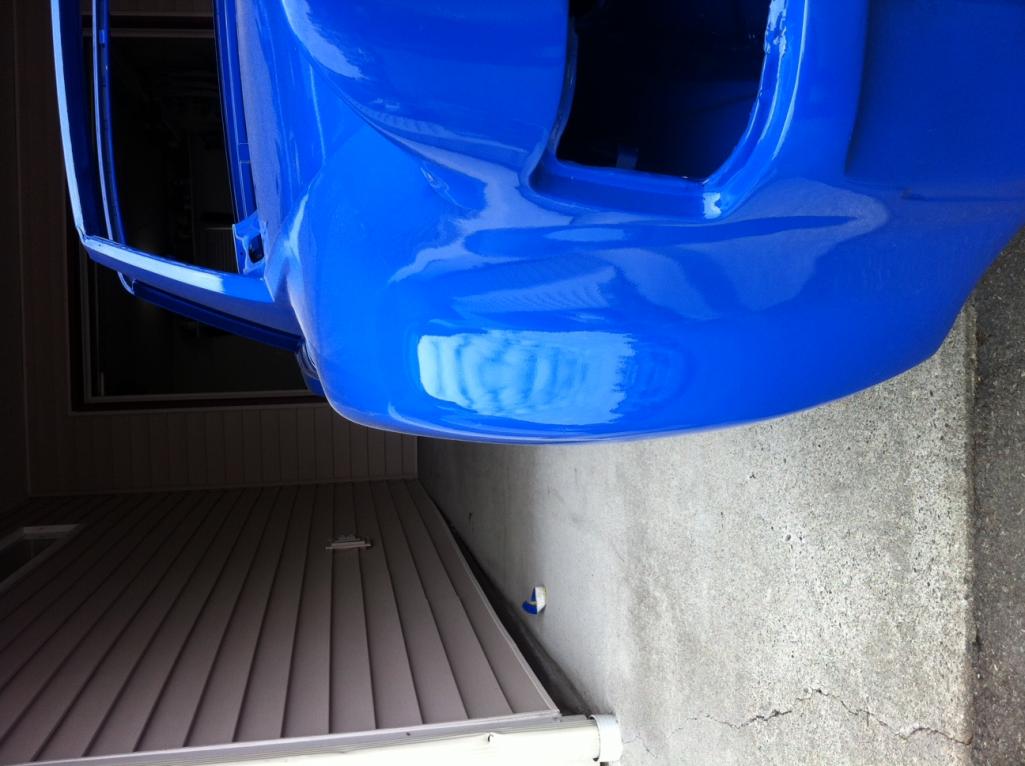
Posted by: Ferg May 30 2012, 02:29 PM
Posted by: Andyrew May 30 2012, 03:09 PM
How many coats? I've seen mixed results from Mayco.
Looks like yours was great!
Posted by: effutuo101 May 30 2012, 03:35 PM
single stage. A lot of guess work was taken out by me doing a majority of the body work. I do have to touch up some pieces as the painter was too short to reach!
Posted by: NORD May 30 2012, 09:32 PM
Looks good
Thats just the primer right? you're not going to leave it blue.
Silver is the new car color for repaints. Ask Mr 242
Posted by: Mr.242 May 30 2012, 11:07 PM
Looks good
Thats just the primer right? you're not going to leave it blue.
Silver is the new car color for repaints. Ask Mr 242
 Yes it is!
Nice build, despite it being so BLUE.
Posted by: Andyrew May 30 2012, 11:20 PM
single stage. A lot of guess work was taken out by me doing a majority of the body work. I do have to touch up some pieces as the painter was too short to reach!
I could crack jokes there about short painter....
Also I like single stage... how many coats did they do though?
Posted by: effutuo101 May 31 2012, 05:53 AM
it looks like one coat.
Posted by: effutuo101 Jun 2 2012, 12:45 PM
got a lot of stuff bolted on and a very large pile of parts to sift through and get put on. But, the pile is getting smaller one piece at a time...
Attached thumbnail(s)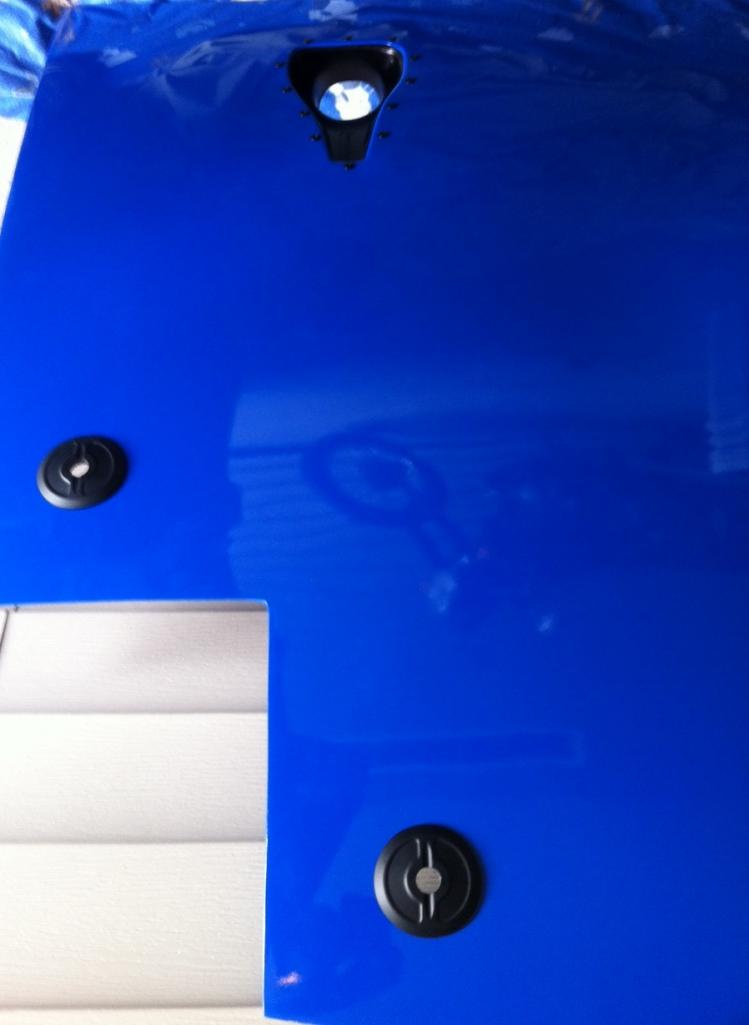
Posted by: Andyrew Jun 2 2012, 01:47 PM
Its probably 2 or 3. One coat wont give full coverage. 2 might, 3 will.
Posted by: rohar Jun 2 2012, 02:18 PM
Looks good
Thats just the primer right? you're not going to leave it blue.
Silver is the new car color for repaints. Ask Mr 242
Nuh HUH! Cream! I hope so anyway, I just picked up two gallons from the local tractor supply...
The blue does look awesome Chris, congrats!
Posted by: a914622 Jun 14 2012, 09:22 PM
Are you looking at an air/water intercooler? Or air/air intercooler? I was going to use the power stering pump hole to run a water pump for a A/W intercooler. I should be able to find ya something. Call me sunday if you can stop by and ill dig thru the intercooler box.
Call me this weekend
jcl
Posted by: audio_file Jun 15 2012, 05:32 AM
Are you looking at an air/water intercooler? Or air/air intercooler? I was going to use the power stering pump hole to run a water pump for a A/W intercooler. I should be able to find ya something. Call me sunday if you can stop by and ill dig thru the intercooler box.
Call me this weekend
jcl
Hey, I've got a factory top mount intercooler from a wrx taking up space in my garage, if that happens to be what you want to use, its all yours.
(the other) Chris (in Everett)
Posted by: effutuo101 Jun 15 2012, 06:30 AM
Nice! I will take it! Pm me your number
Posted by: effutuo101 Jun 15 2012, 03:51 PM
most of the suspension in, finger tight
5pt cross bar in
front brakes mocked up
Posted by: pete-stevers Jun 15 2012, 06:10 PM
lookin GREAT!
Posted by: euro911 Jun 15 2012, 10:38 PM
Yeah, nice paint 
Posted by: kwlane Jun 15 2012, 10:50 PM
Looks Great! Must feel good to start putting it back together. Where did you get those side mirrors?
Posted by: abnrdo Jun 16 2012, 02:56 AM
Looking fantastic! Cant wait to see more of your car completed.
Keep up the great work!!
Posted by: effutuo101 Jun 25 2012, 01:27 PM
Ok, between work and travel, not much progress.
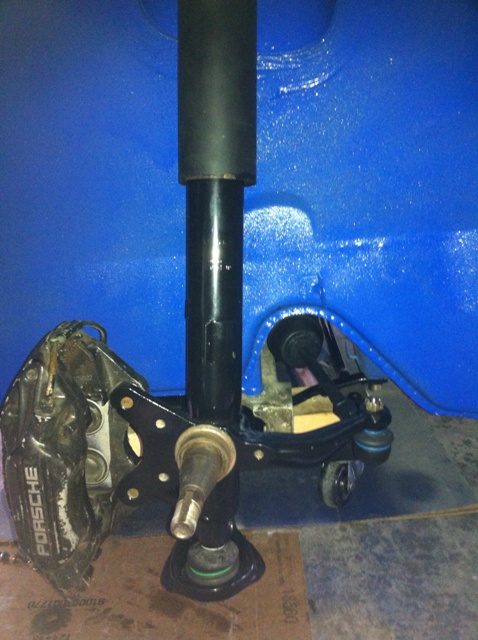
front suspension:
in, but need to finish tightening all nuts, bolts and so on....
Attached image(s)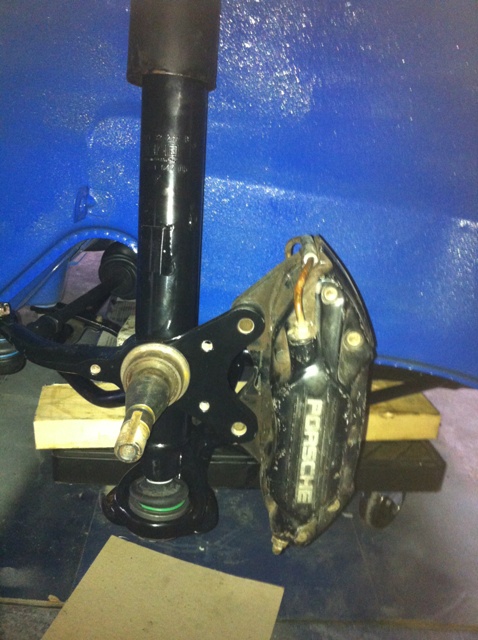
Posted by: effutuo101 Jun 25 2012, 01:28 PM
GT Kit in
need to pull it all back apart and do some minor finishing work.
Attached image(s)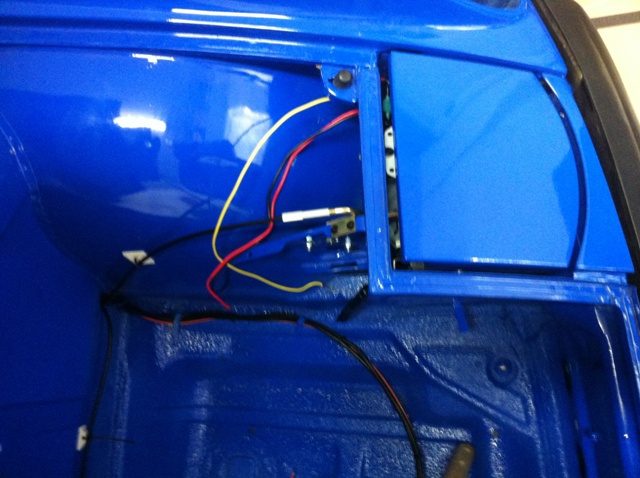
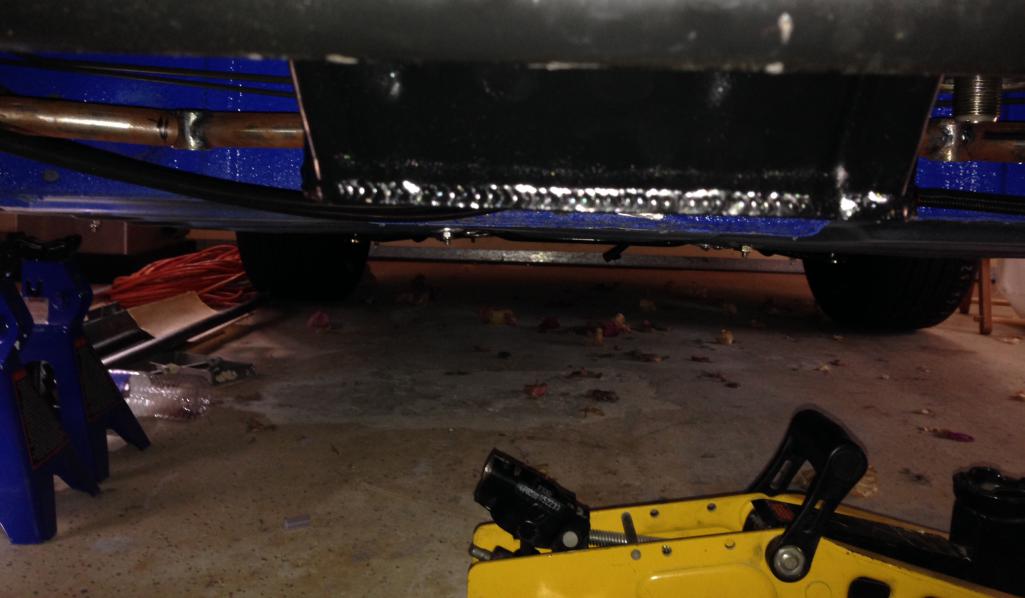
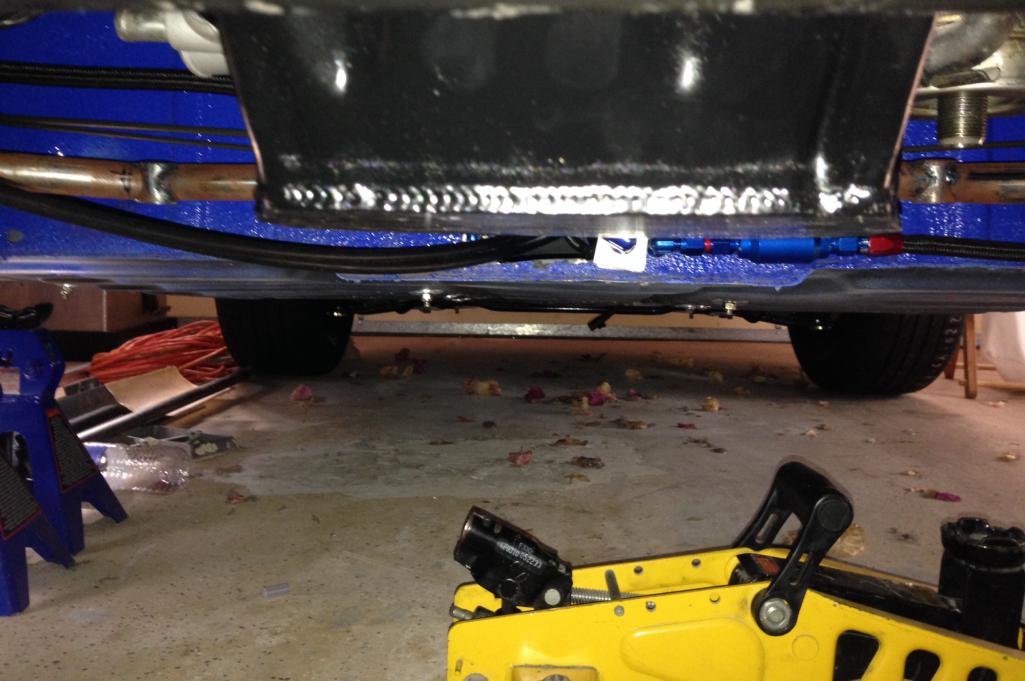
Posted by: effutuo101 Jun 25 2012, 01:28 PM
steering almost complete. once done, then some finish work will need to happen
Attached image(s)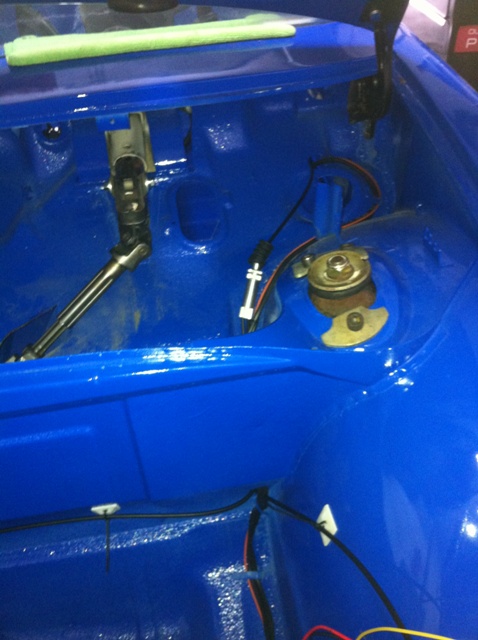
Posted by: effutuo101 Jun 25 2012, 01:32 PM
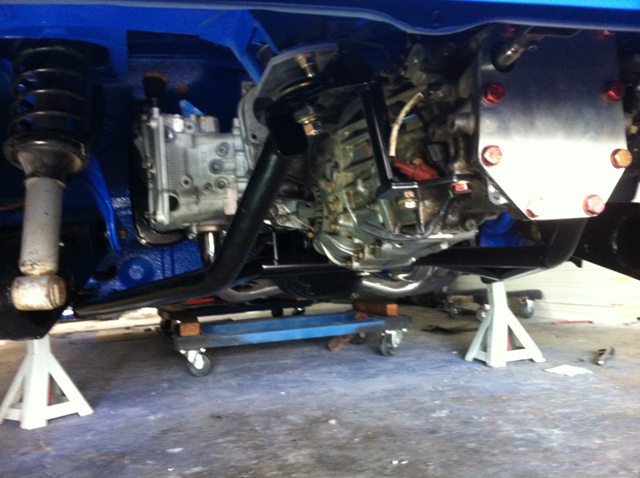
ok, the biggest step is getting the motor back together
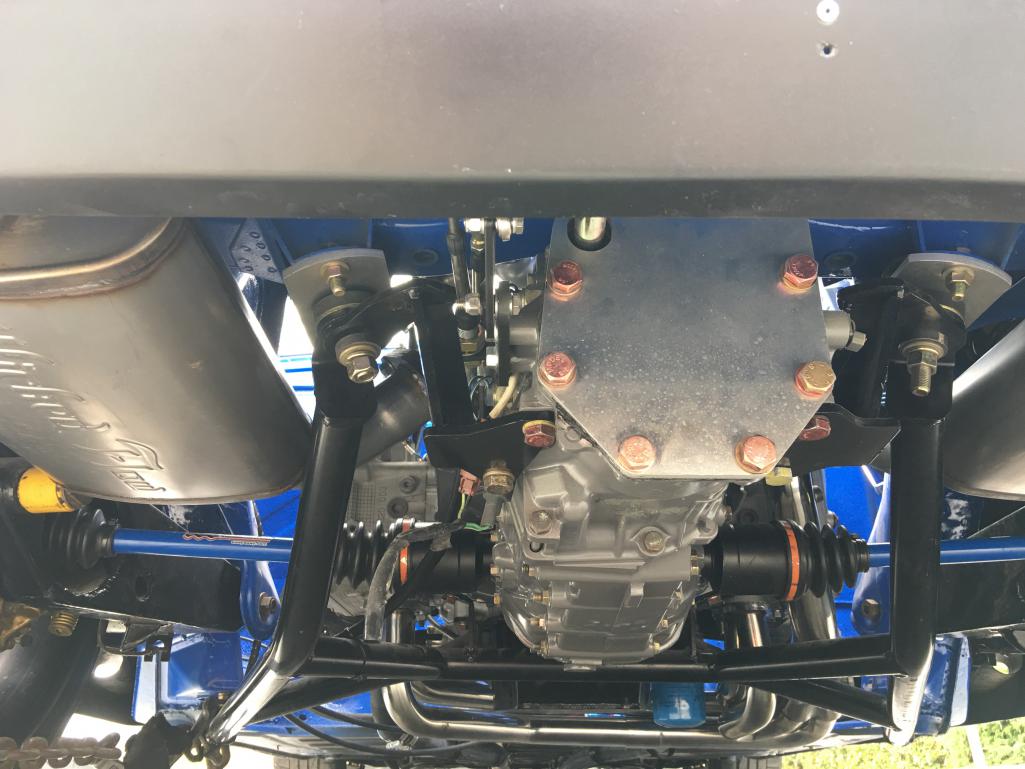
fly wheel, pressure plate and clutch installed and torqued.
Transmission mounted
Engine and transmission installed in cradle
Cradle installed
rear suspension hung and pending 5 lug and stub axles
Attached image(s)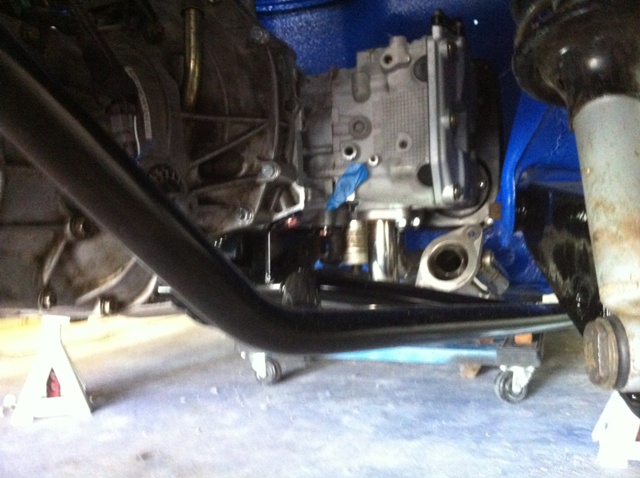
Posted by: messix Jun 25 2012, 01:50 PM
No sway bar? 
Posted by: effutuo101 Jun 25 2012, 03:22 PM
For the rear?
No.
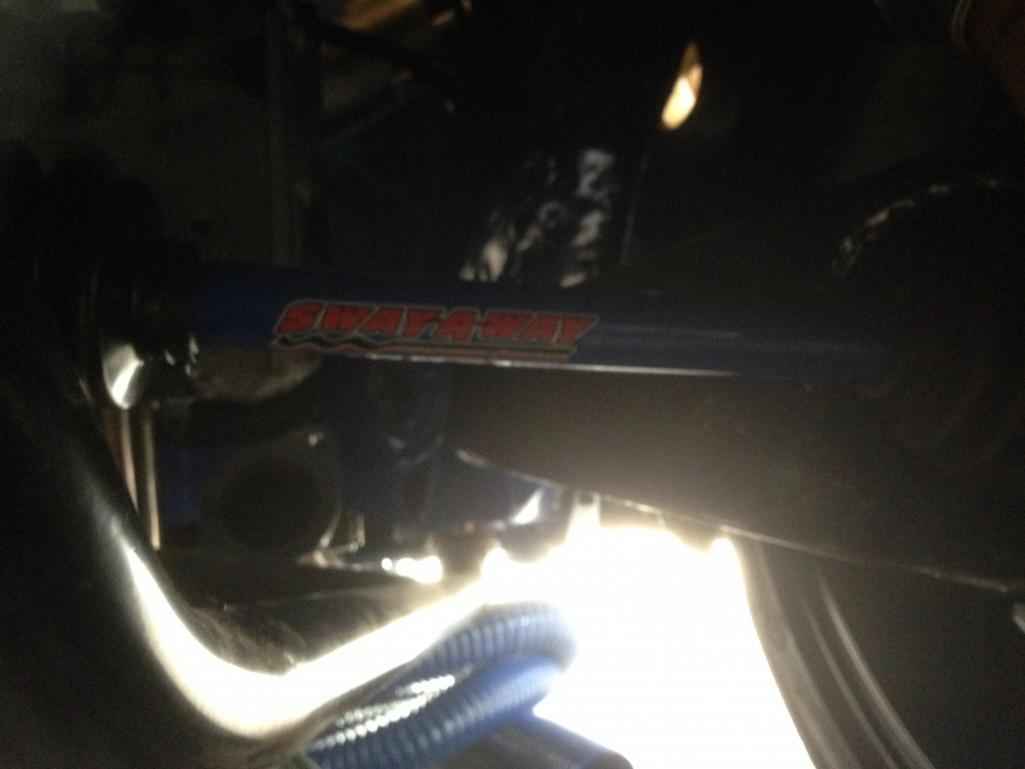
Front is 911 under body sway.
Posted by: Ferg Jun 25 2012, 03:27 PM
Looking good my friend
Posted by: effutuo101 Jun 25 2012, 04:43 PM
Thanks Ferg!
With the fires up in Estes park, my wife was talking about your white 914. I am still trying to live up to the HP you showed...
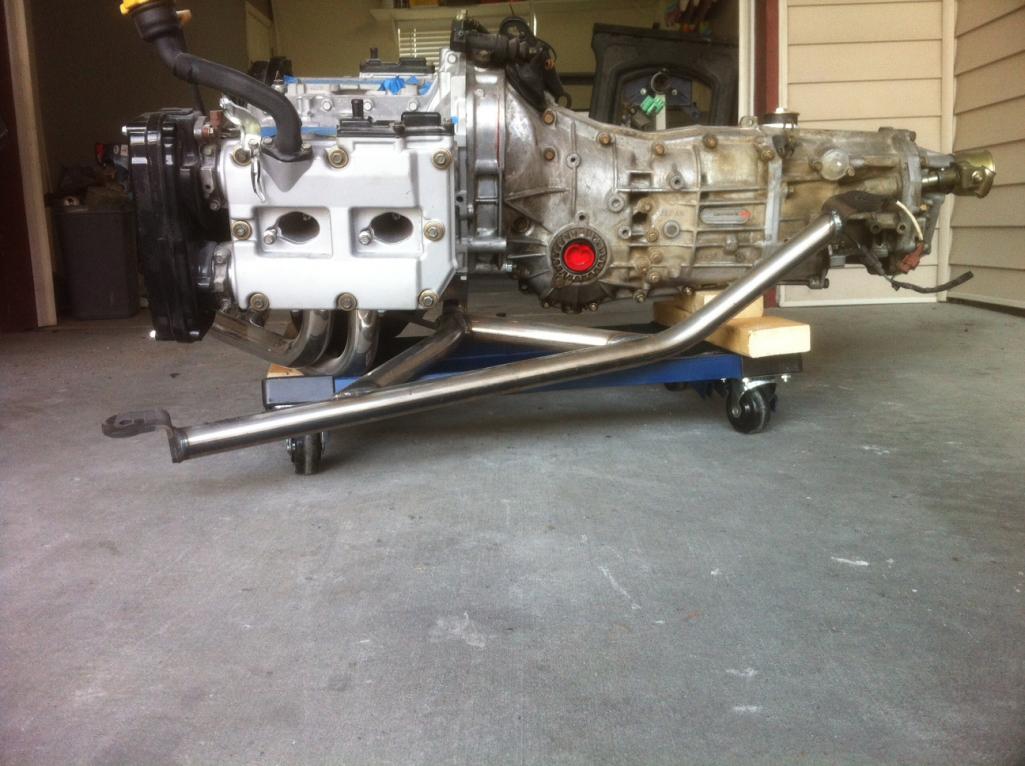
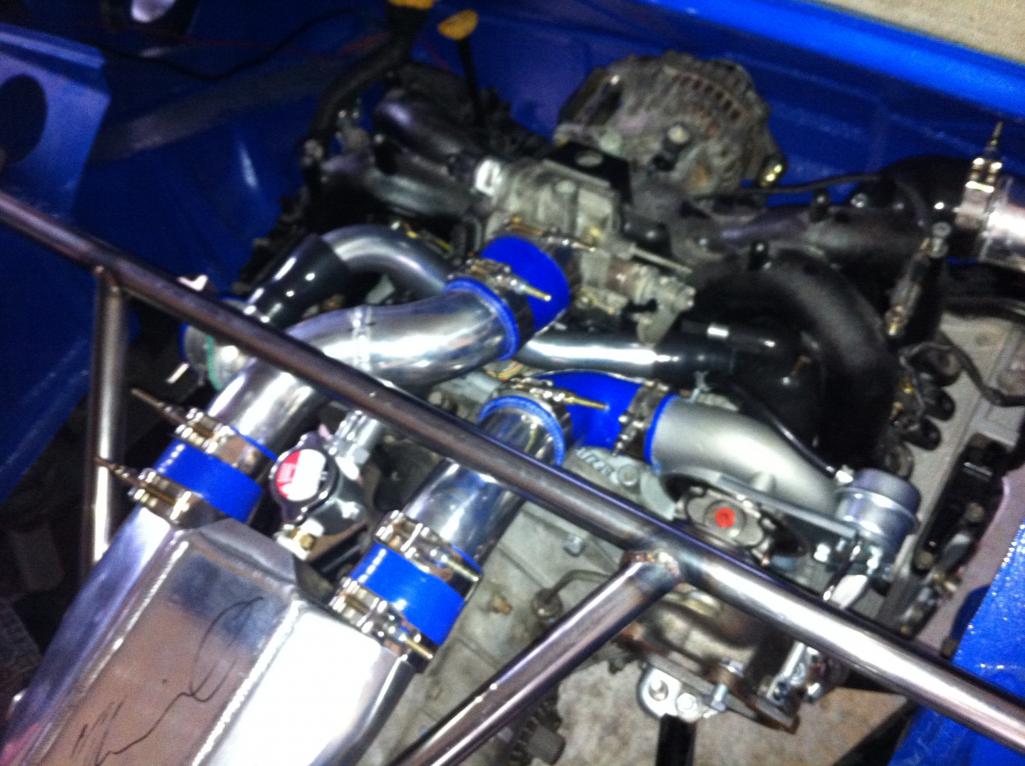
my 2.5L 16V turbo motor
Attached image(s)
Posted by: effutuo101 Jun 25 2012, 04:45 PM
while I get some semi gloss for the tail section..
Attached thumbnail(s)
Posted by: PeeGreen 914 Jun 25 2012, 05:12 PM
Posted by: effutuo101 Jun 26 2012, 05:17 PM
wife veto'd the blue...so, now the intakes are black. time for some touch up.
Attached image(s)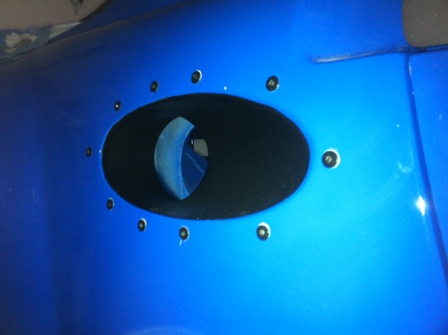
Posted by: InkyP Jun 26 2012, 08:32 PM
Looking Great! Now I want to fix up my teener!
Posted by: effutuo101 Jun 29 2012, 07:23 PM
Dash is going together. Slow but sure..
Attached image(s)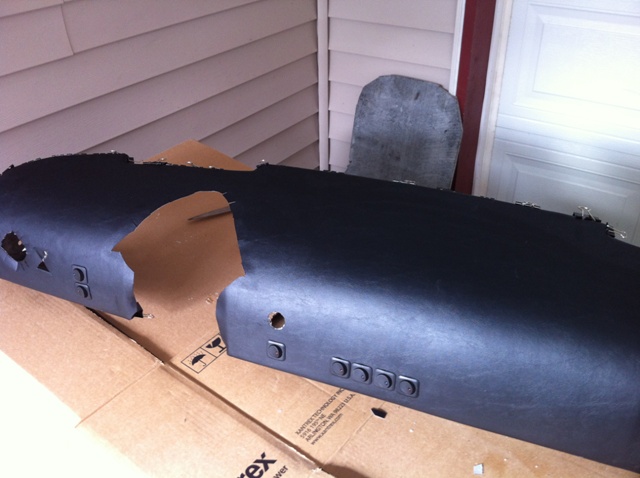
Posted by: Mr.242 Jun 30 2012, 08:34 AM
Glad to see the build going together. I think it was the funnest part on mine...cleaning up pieces and installing gave me great satisfaction. But when you get to the point of pouring in fluids, especially gasoline, I could barely contain myself!
Go get 'em! Nice build
Posted by: jcambo7 Jun 30 2012, 10:36 AM
Looking great Chris!
Posted by: effutuo101 Jul 12 2012, 11:05 AM
ok, after some fast work by Jeff, my 914 has hit the ground. Still pending my wheels, but rolling around the parking lot.
Keep in mind that the engine is installed, but at this point is lighter than stock...uh oh.
Attached image(s)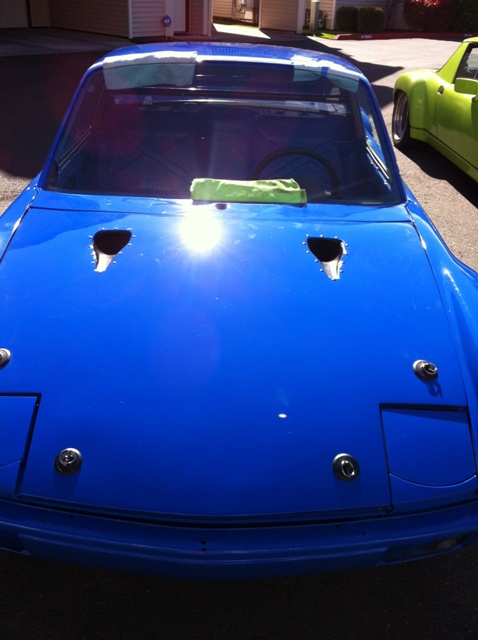
Posted by: effutuo101 Jul 12 2012, 11:06 AM
next
steering is hooked up and good. I actually think it is a lighter pull than stock with this size tire.
Attached image(s)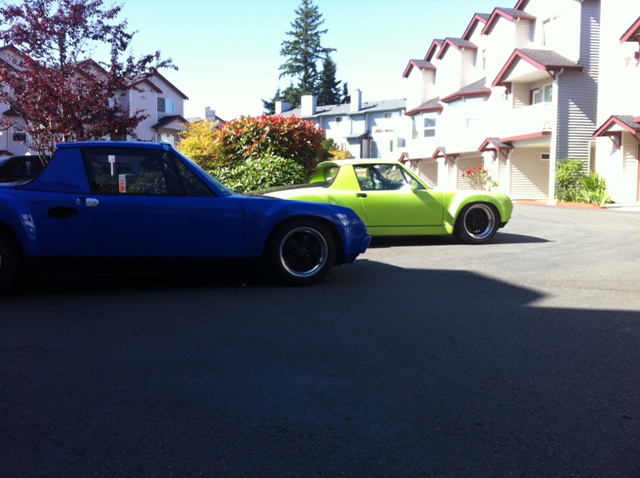
Posted by: effutuo101 Jul 12 2012, 11:07 AM
and now this goes over to Rich for a few items, then on a truck to our new home...
Attached image(s)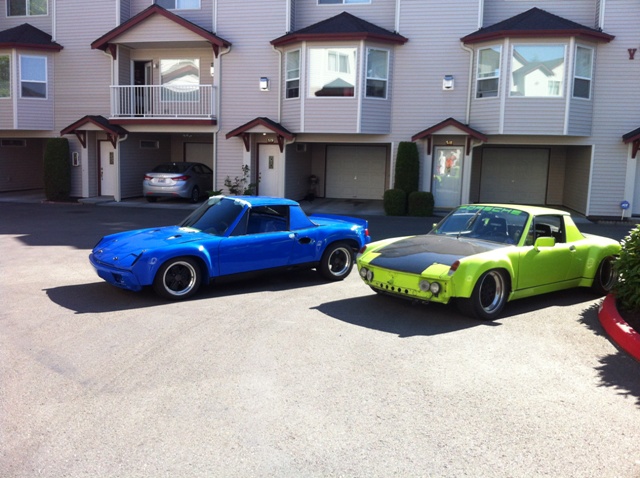
Posted by: effutuo101 Jul 25 2012, 01:44 PM
Front window is in! Thank you Rich!
Attached thumbnail(s)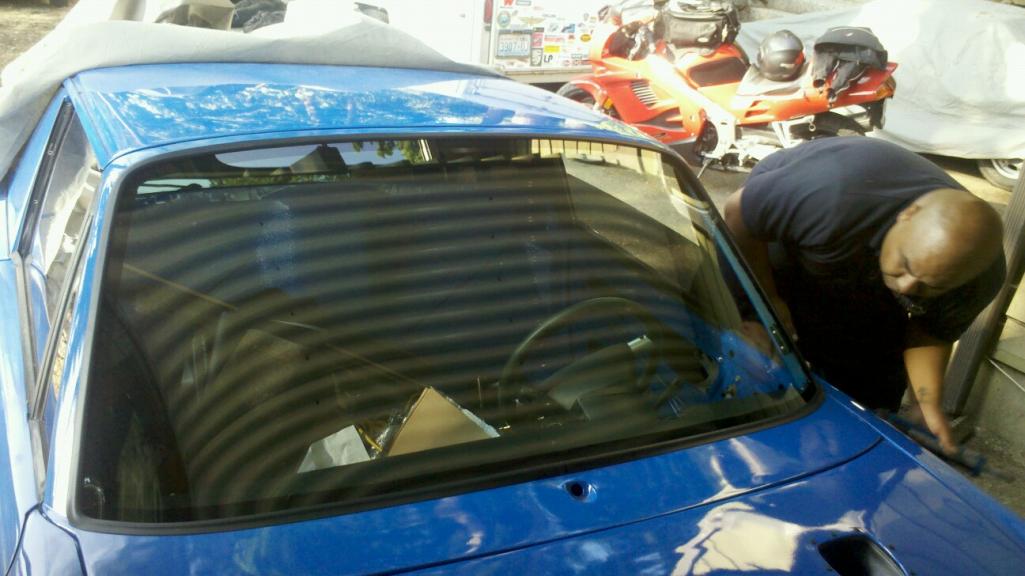
Posted by: arkitect Jul 27 2012, 08:31 AM
Chris,
I like how clean your fiberglass projects have turned out. What is the process you are using?
Dave
Posted by: effutuo101 Jul 27 2012, 09:13 AM
Thank you. For the most part I have been building shells with heavy construction paper and wax paper. Then hand laying glass and doing the fitting and sanding to get it perfect. Then one more layer of glad to get the form rigid.
Posted by: arkitect Jul 27 2012, 09:36 AM
So for example your glove box you made. Correct me if i am wrong...construction paper for the box, then place the wax paper on the outside, then resin and fiberglass.
Then you can peel off the form from the inside?
Dave
Posted by: effutuo101 Jul 27 2012, 11:05 AM
correct. the fiberglass resin doesn't stick to the wax paper. The only complex part is the scotch tape to have it all stick together. Fiberglass doesn't stick to that either, so, once you pull the cured glass form, you may have to dig in and remove the tape. Usually not a big deal. Then sand it out smooth and start fitting the item. I did learn that if you have a very complex shape to make it in two parts and glue it together. once you have the final shape, you can lay the last layer of fiberglass and be done with it.
The important part to remember is that all of these parts were one off, so, I had no desire to create a "buck" for a multiple product run. But, once you have a finished piece, that can be used to create the proper mold. From there, you can really thin out the weight and create a very finished product straight from the mold.
Posted by: slothness Jan 13 2013, 02:05 PM
5 months and no updates?
Posted by: sixnotfour Jan 13 2013, 03:21 PM
Lets see?? I have his wheels, don't know anything other than its in CA somewhere..
Posted by: Gint Jan 13 2013, 04:23 PM
Holdin 'em hostage?
Give the guy a break. He moved since that last update.
Posted by: slothness Jan 13 2013, 05:35 PM
Holdin 'em hostage?
Give the guy a break. He moved since that last update.
Yeah, more or less. Just excited about this build.

On that note, Chris hope the move went well and your busy enjoying this Cali weather...well, not at the moment since its damn cold but at least it's not raining.
Posted by: effutuo101 Jan 14 2013, 08:23 AM
Yep, between the move, buying a new garage space with a side of house(and all of the durable goods you need), job and carrying a couple of house payments for few months, and a bum knee, my project got sidelined.
It is really odd to have enough room to walk around my car with crutches and not have to crab walk!
On a positive note, I just picked up out fronts alternator bracket and got that installed as well as my intake.
Believe me, the tires are important, but I have quite the laundry list to get done before I worry about shoes!
Updates within the next few weeks I promise.
In the meantime, I am reading everybody else's stories and being jelous.
Posted by: effutuo101 Mar 18 2013, 05:31 PM
Ok, I have been down for the count as far as updates go. Started work on my car again. I got the mirrors fitted, anti chip'd and mounted the passengers today. Tomorrow I will work on the drivers and start pulling out boxes of stuff to put back on the car.
On the plus side, I have a bigger garage to lose stuff in....
Attached image(s)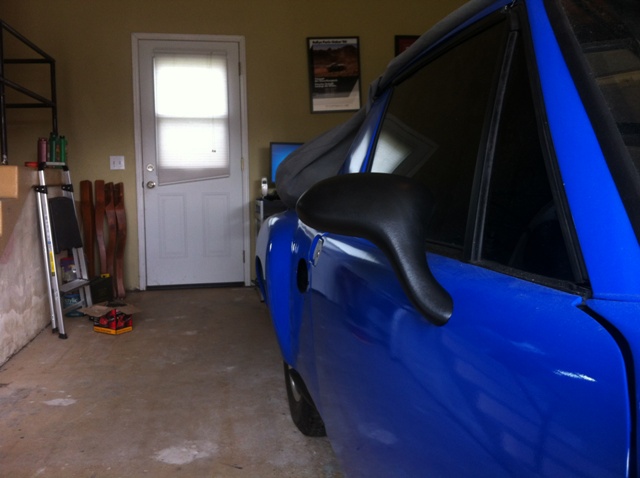
Posted by: dfelz Mar 18 2013, 07:19 PM
Just went through your whole thread, car looks fantastic, great work, cant wait to see the rest.
When you glassed on extra bracing to your front lid, what was the material you used for the structure? and are you letting all of your FG parts cure at STP? or in vacum bag? Also what are the front air ducts supplying air too?? i read the rears supply air to rear brakes...but fronts?
Thanks! keep up the good work!
Posted by: effutuo101 Mar 18 2013, 11:08 PM
Hi, the bracing is Balsa and fiberglass. A thin piece with a couple of layers of Glass does a lot.
The hood scoops are for my radiator. I am using the heat tubes to channel additional air.
The big scoops on the side are for the intake and inter cooler.
I hope to be up and running by late fall.
My to do list:
fuel tank and pump
Gas, brake and clutch cluster and plumbing
Seats and interior.
Turn/brake electronics
Gauges and finish new wireing loom.
I just finished up making a new set of front turn signal buckets, so it is time to finish thos up and order the front and rear lenses.
Posted by: rdauenhauer Mar 18 2013, 11:22 PM
Posted by: effutuo101 Mar 19 2013, 12:32 AM
Rich! The parts guru! How are you? Owe you a call. Tomorrow?
Posted by: effutuo101 Apr 4 2013, 04:51 PM
A little progress.
Drivers mirror mounted.
Turn buckets complete.
New flat LED turn and running light installed.
Ordering lenses tomorrow!
Start work on rear stop/turn this weekend.
Attached thumbnail(s)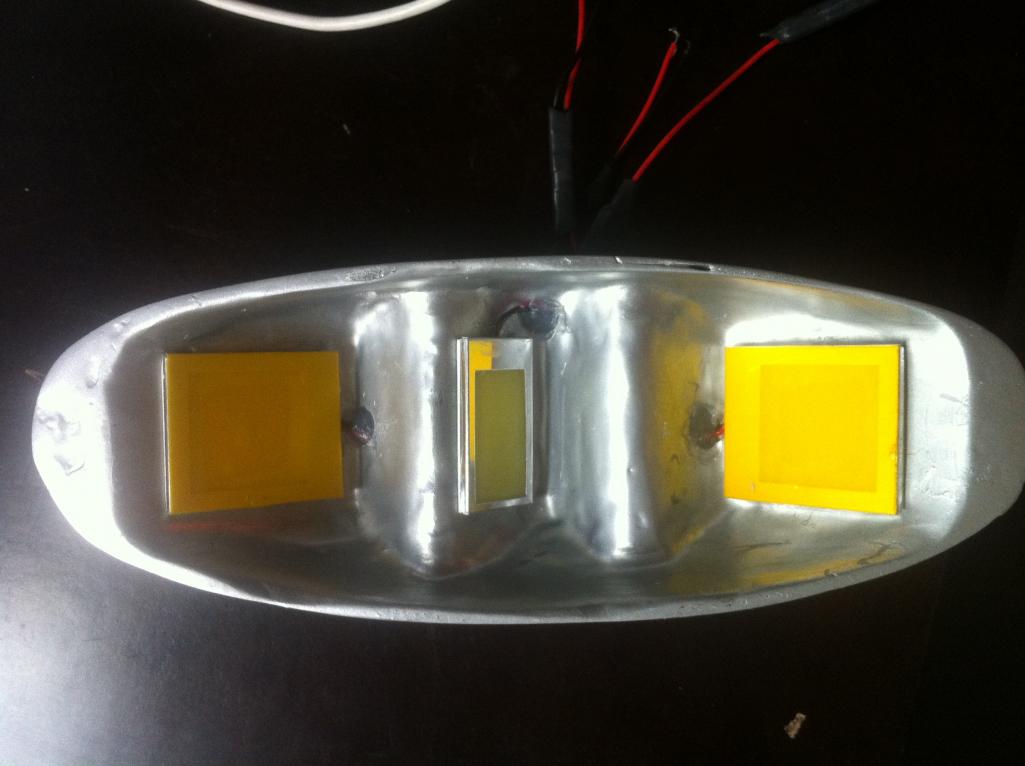
Posted by: effutuo101 Apr 4 2013, 04:54 PM
Ran across this yesterday in La Jolla...
Wow. 8 Lamborghini's 5 Ferrari's an bunch of Bentleys and this.
Attached thumbnail(s)
Posted by: effutuo101 Apr 13 2013, 05:23 PM
Thank you Mark! The smoke turn lenses are beautiful! i think the smoked turn covers will need a media blast and 1 more layer of black color to create the Semi gloss I am going for.
Mirrors in their housing.
Attached thumbnail(s)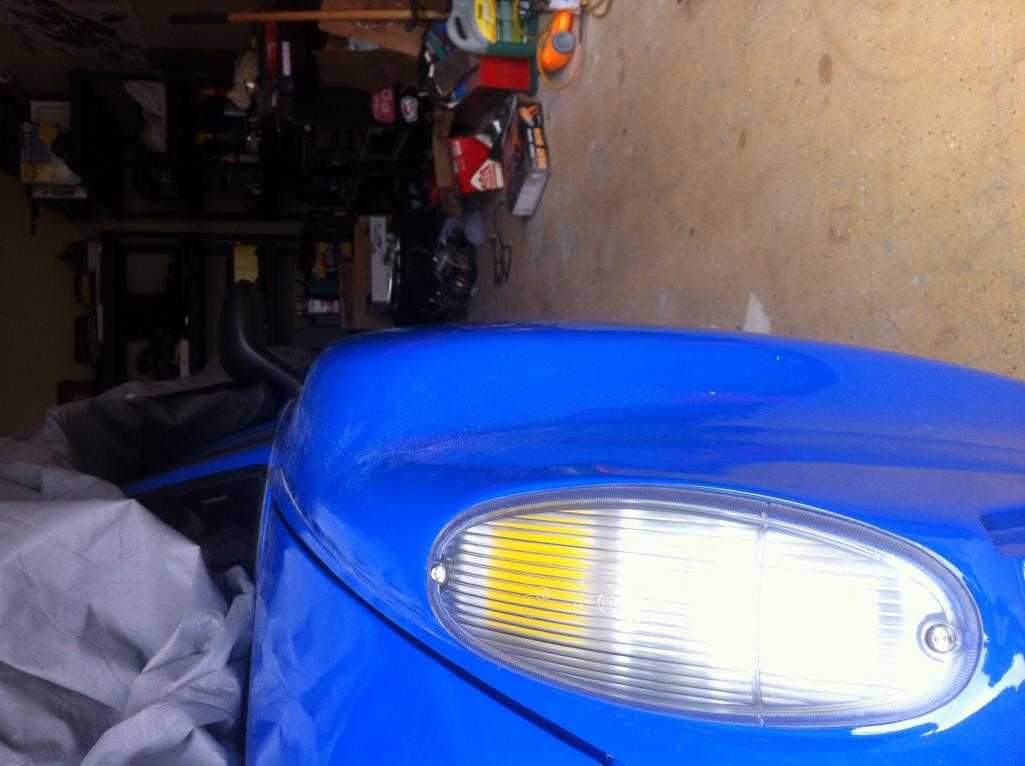
Posted by: effutuo101 Apr 13 2013, 05:24 PM
Mirror
Attached thumbnail(s)
Posted by: effutuo101 Apr 13 2013, 05:26 PM
The Porsche crest is from my iPhone cover. I totally missed that when I uploaded the picture.
Posted by: rdauenhauer Apr 13 2013, 06:37 PM
Dude fix your photos Im getting a crick in my neck!
Posted by: dfelz Apr 13 2013, 10:34 PM
lol, also you should upload a video of that turn signal bucket in operation! looks great
Posted by: effutuo101 Apr 14 2013, 11:29 AM
I will see what I can do!
Posted by: John1180 Apr 14 2013, 11:50 AM
Chris,
where did you source your fiberglass fenders and quarters?
Posted by: effutuo101 Apr 14 2013, 01:31 PM
From the classified section here. A fellow teemed decided not to use them
QRS has 7 and 8 quarters here. I would have to go find the 9 and 11's.
Posted by: jaxdream Apr 14 2013, 09:34 PM
[quote name='effutuo101' post='1699106' date='Jun 25 2012, 11:27 AM']
Ok, between work and travel, not much progress.
front suspension:
in, but need to finish tightening all nuts, bolts and so on....
[/quo
Calipers on the wrong sides , upsidedown - can't bleed em with the bleeders on the bottom , just sayin dude...
Jack
Posted by: effutuo101 Apr 15 2013, 07:30 AM
That's is what happens whe you throw stuff on the car in prep to move it! Thanks!
Posted by: PeeGreen 914 Apr 15 2013, 10:37 AM
Sheesh Chris... rookie mistake Miss ya buddy
Posted by: effutuo101 Apr 15 2013, 04:29 PM
Perfect for you to fix on your next trip Jon! We will take the kids to the beach!
Posted by: effutuo101 May 5 2013, 07:58 PM
Slow progress. But, the front bumper now looks great!
Let the adjusting begin.
Attached thumbnail(s)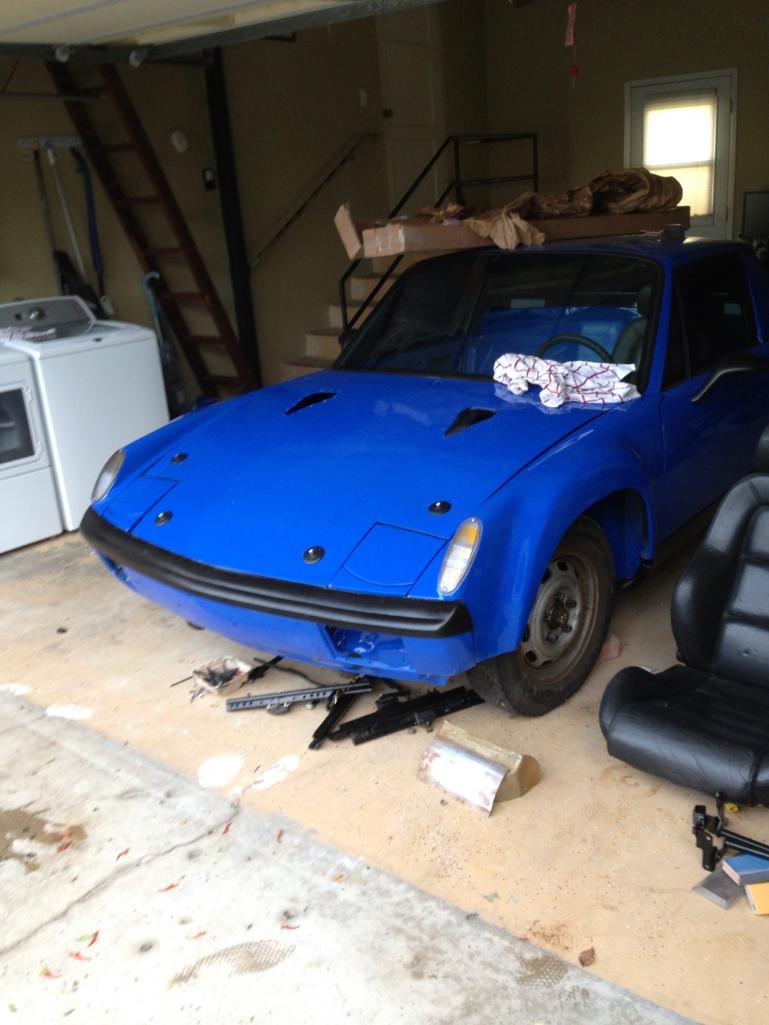
Posted by: effutuo101 May 7 2013, 01:39 PM
looks like fuel cell is inbound. size and placement say 12 gallons. That should get me a couple of miles down the road.
Attached image(s)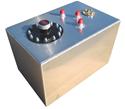
Posted by: treborzerimar May 7 2013, 02:28 PM
Congrats on a beautiful project.... I want to drive home and punch my 914 in the face.
Instead, I will plan for her make-over 
Posted by: rjames May 7 2013, 02:31 PM
Congrats on a beautiful project.... I want to drive home and punch my 914 in the face.

Posted by: effutuo101 May 7 2013, 02:56 PM
Congrats on a beautiful project.... I want to drive home and punch my 914 in the face.
Instead, I will plan for her make-over
It's ok, I think Robert did just that....
Time to go tank the front bumper and trim off a little bit of edge to make it fit better.
Peddle cluster is the next purchase.
Posted by: effutuo101 May 7 2013, 02:58 PM
And thank you! A lot of hard work by the PNW folks. Jeff H, Rich D, Jon B and Robert all contributed to this to name a few. Serious skills.
Posted by: stugray May 8 2013, 12:39 PM
Nice!
I plan on using these hood latches:
https://www.pegasusautoracing.com/productselection.asp?Product=3038-001
They would look great on that car
Stu
Posted by: effutuo101 May 8 2013, 12:52 PM
They would! I may have to get some of those!
Posted by: effutuo101 May 31 2013, 05:13 PM
So, here we are. 1 year ago I was frantically packing and trying to get my car together.
Time to do some stuff.
Attached thumbnail(s)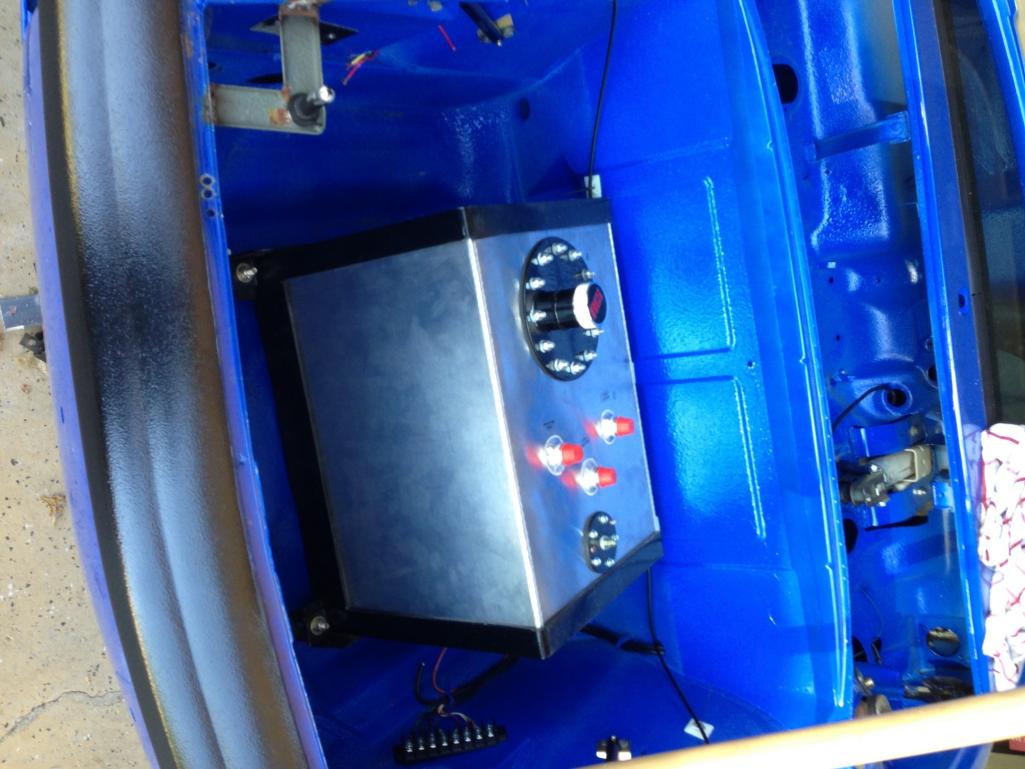
Posted by: PeeGreen 914 May 31 2013, 05:15 PM
Posted by: effutuo101 Aug 20 2013, 11:03 AM
small steps...
Attached thumbnail(s)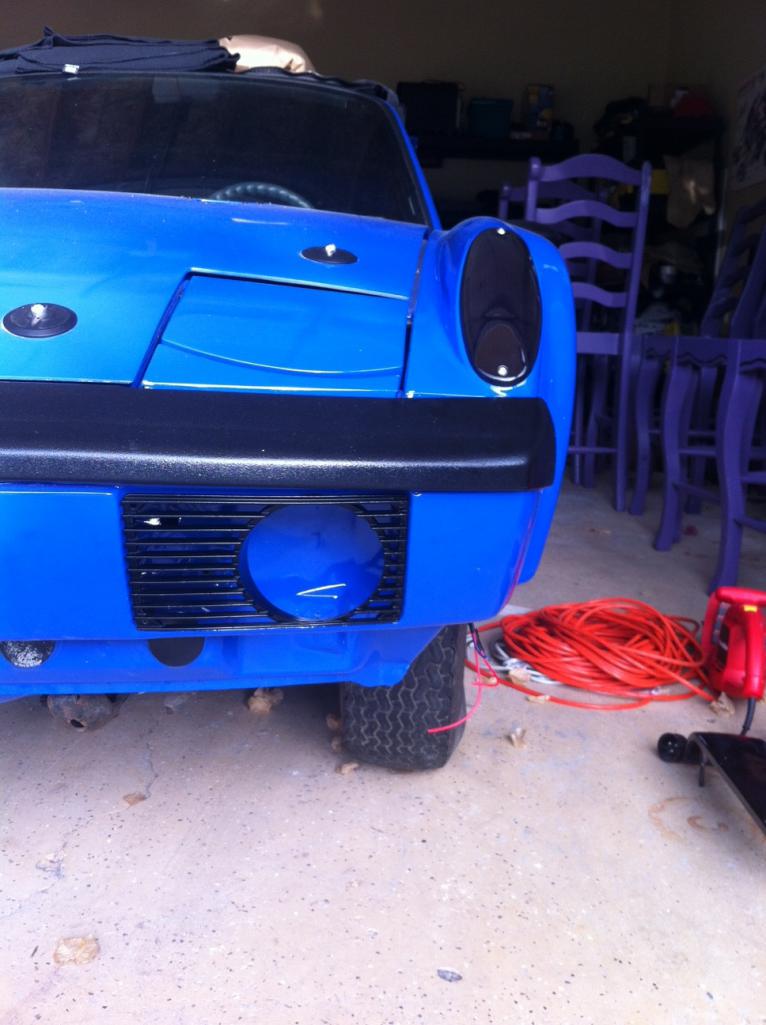
Posted by: effutuo101 Aug 20 2013, 11:04 AM
The question on the rear is do I satin out the space between the rears...
Attached thumbnail(s)
Posted by: effutuo101 Aug 20 2013, 11:05 AM
So, the question is do I black out the space between the tail lights...hmm. opinion?
Attached thumbnail(s)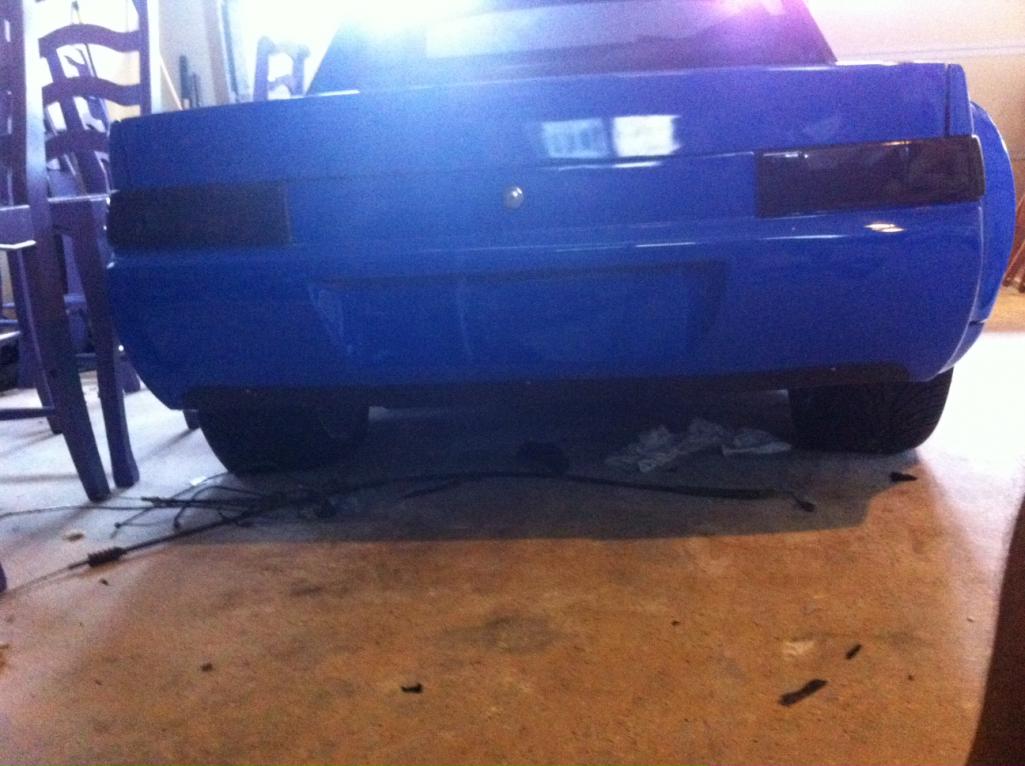
Posted by: effutuo101 Aug 20 2013, 11:13 AM
rebuilt the glove box. fun with fiberglass!
Attached thumbnail(s)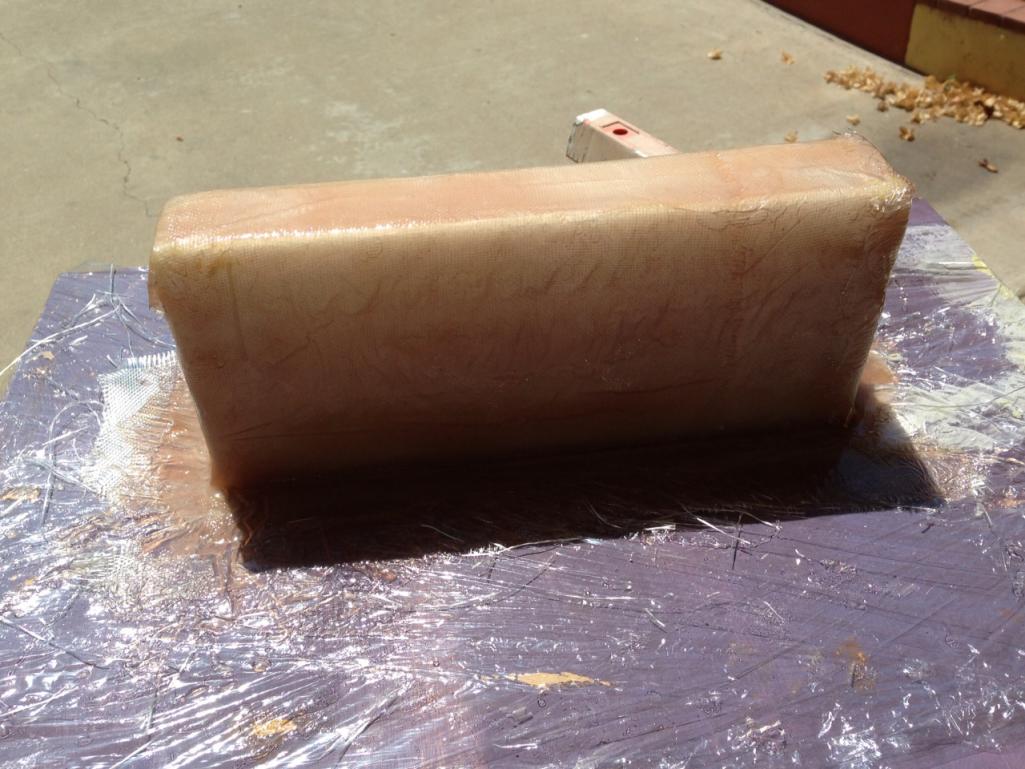
Posted by: Ferg Aug 20 2013, 11:31 AM
So, the question is do I black out the space between the tail lights...hmm. opinion?
I vote no, but I would consider some black around the plate cutout or perhaps a custom emblem or graphic on backside of duck/lip
Posted by: effutuo101 Aug 20 2013, 11:41 AM
agreed. the license plate will be satin black
how about this?
The sad part is I actually thought of putting my metal emblem by the 914 (yet to go on)
Attached thumbnail(s)
Posted by: Ferg Aug 20 2013, 12:33 PM
I was thinking more like this from a 944 in black, and maybe even wrap it around side of duck...
Attached image(s)
Posted by: rdauenhauer Aug 20 2013, 01:23 PM
Try some Plasti-Dip if you dont like it peel it off.
Posted by: effutuo101 Aug 21 2013, 08:30 AM
good idea Rich! I am going to go play with it.
Posted by: effutuo101 Aug 21 2013, 08:31 AM
Hey Ferg! I just realized that I have the exact same license plate surround. weird.
Posted by: jimkelly Aug 21 2013, 08:49 AM
with our cars so prone to be HIT
I like the idea of some body color (or black) reflective tape tastefully located
jim
Posted by: effutuo101 Oct 4 2013, 02:09 PM
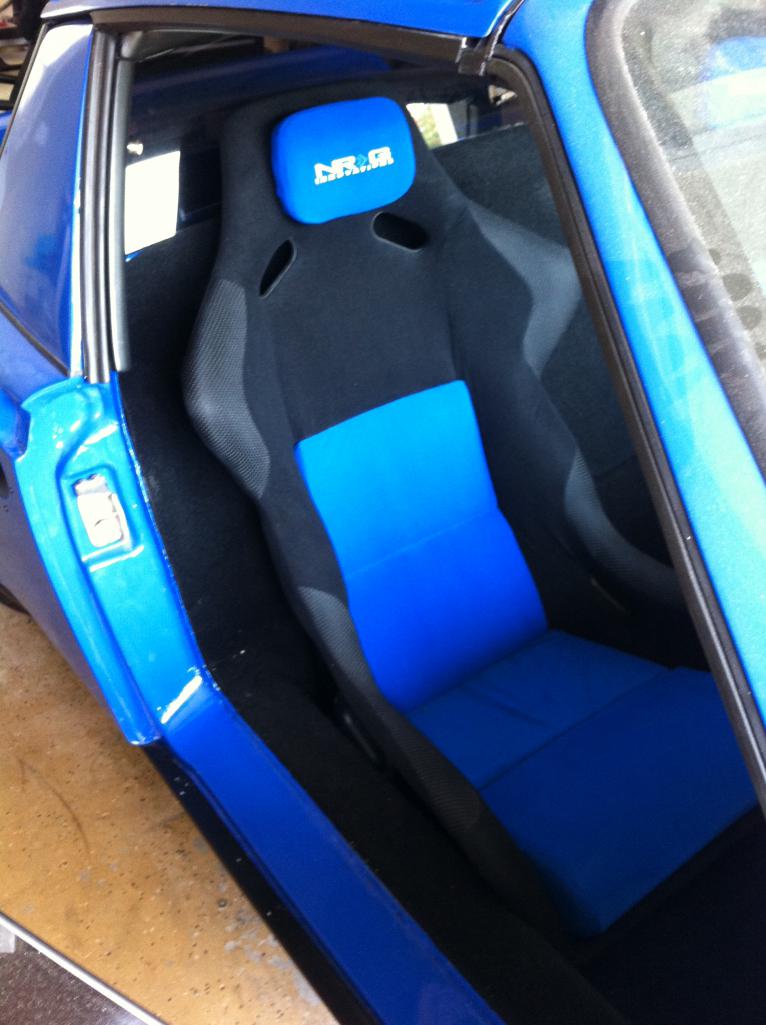
Several steps forward today. got the turbo that is going in (20G), ordered the up and down pipe and got my seats....
headed off to get my horns and 2 more sheets of sound reduction material for the doors.
Attached thumbnail(s)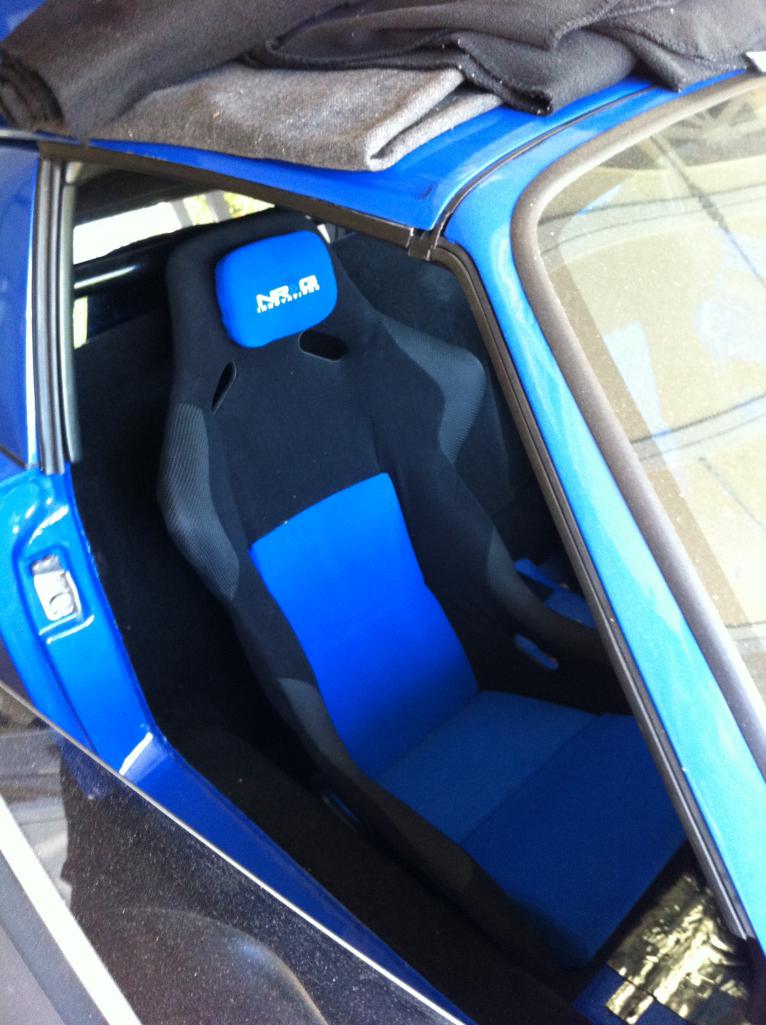
Posted by: arkitect Oct 6 2013, 02:13 AM
Awesom project. Getting close to being done.......can't wait to see the final picts.
Dave
Posted by: effutuo101 Oct 6 2013, 01:42 PM
That makes two of us. Getting more done tomorrow.
Posted by: AfricanHijinx Oct 8 2013, 07:48 PM
man I wish I would have known about this a year ago I would have loved to help out with this. I am in the planning phase still
Posted by: effutuo101 Oct 8 2013, 10:26 PM
Ouch! Yes, there are fantastic resources in and around Everett.
What are you planning?
Posted by: effutuo101 Oct 10 2013, 01:48 PM
no longer mocked up. But, not happy with the way the harness bar works. Probably going to have to lose it.
Attached thumbnail(s)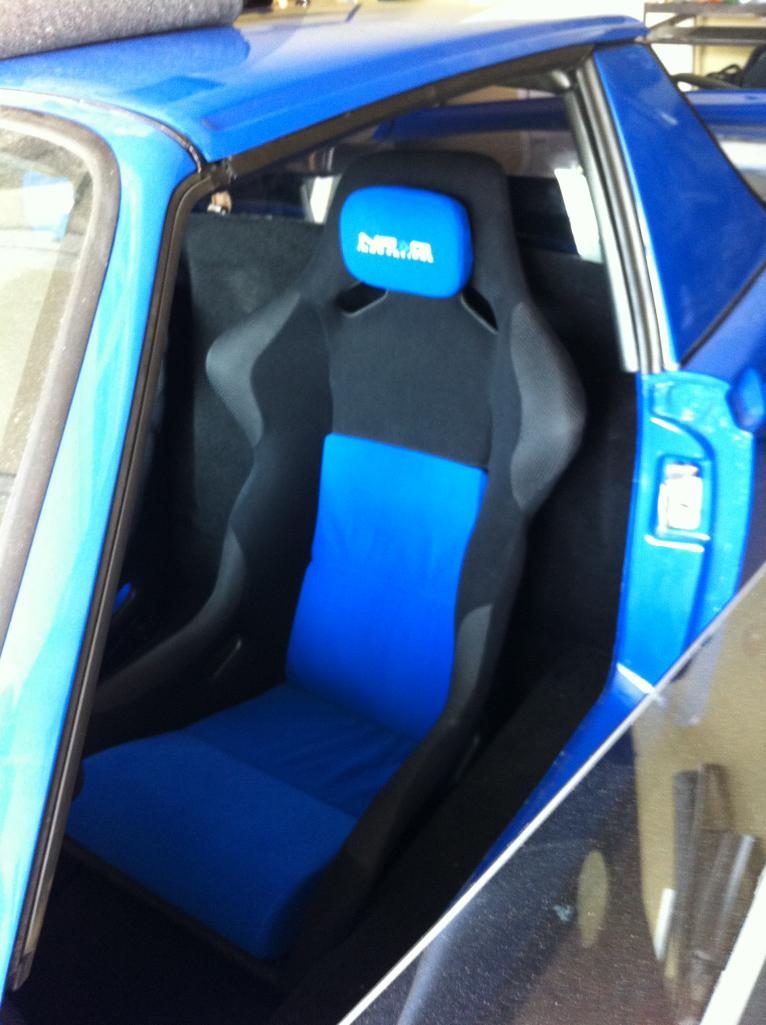
Posted by: effutuo101 Oct 10 2013, 01:53 PM
also got some electrical work done. have to get two more relay's and then I can test everything out as far as high/low lights, turn, running and stop.
Pick up turbo brackets tomorrow as well as the relay's. I will have time to mount the turbo brackets, but ran across a small snag on my intercooler. Going to have to solve that one.
Headed to Orlando next week, so it will be about 3 weeks before much more progress.
Posted by: AfricanHijinx Oct 10 2013, 05:07 PM
Ouch! Yes, there are fantastic resources in and around Everett.
What are you planning?
I want to throw a subie motor into a 1970 tub I found for cheap
Posted by: effutuo101 Oct 10 2013, 06:55 PM
Nice! Ian is the guy to talk to. He does fantastic work on engine cradles.
What size Suby? 2.0 turbo will be a lot of fun. So would an EZ3.x
Posted by: effutuo101 Nov 22 2013, 12:37 PM
ok, it has been a while, but progress has been made.
Electrical:
Headlights high/low good. switch activated, actuated by column lever
Running lights tested and good. switch activated by light switch
turn L/R good. actuated by steering column lever.
Front brake lines. complete. fitting run to foot well
Clutch line run through tunnel
Brake line run through tunnel for rear brakes
Fuel send and return lines run through tunnel.
Next:
Rear brake lines cut, need fitting and final fit.
getting new front disks ordered today for install with front brakes and
Brake lights tested good. but, I need a lot more light. will check grounds and test again.
will post video later on turn signal for those interested.
Posted by: effutuo101 Nov 22 2013, 12:38 PM
fog lights tested and good.
Pending headlight and fog light aim and adjustment.
forgot to put a fuse in that wire sequence.... 
Posted by: Tilly74 Nov 22 2013, 02:02 PM
I can't believe I just found this thread. BEAUTIFUL WORK!
Subscribed
Posted by: effutuo101 Nov 22 2013, 02:32 PM
Reminder to self. Aftermarket horns are very loud. Open garage door to test when you finish the last connection.
Posted by: effutuo101 Nov 23 2013, 12:12 PM
Horn from steering wheel good. Dressed some wires.
Next: put together chairs for the wife's project.
Finish rear brakes
Install fuel pumps
Posted by: effutuo101 Dec 15 2013, 07:36 PM
A bit of a reconfig for my inter cooler. But a lot o forward progress today.
Justin did some serious reconfig on the intake set up. Now liquid cooled.
Attached thumbnail(s)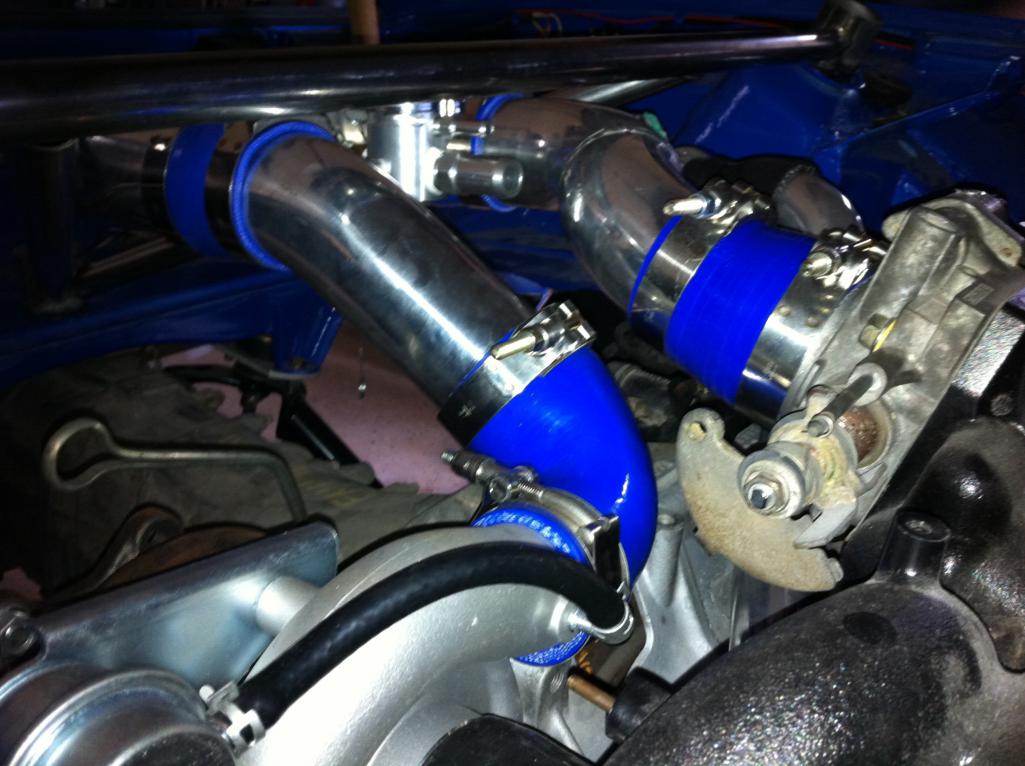
Posted by: effutuo101 Dec 15 2013, 07:38 PM
1more before pulling it all apart to do the finish work on the welds and tubes.
Attached thumbnail(s)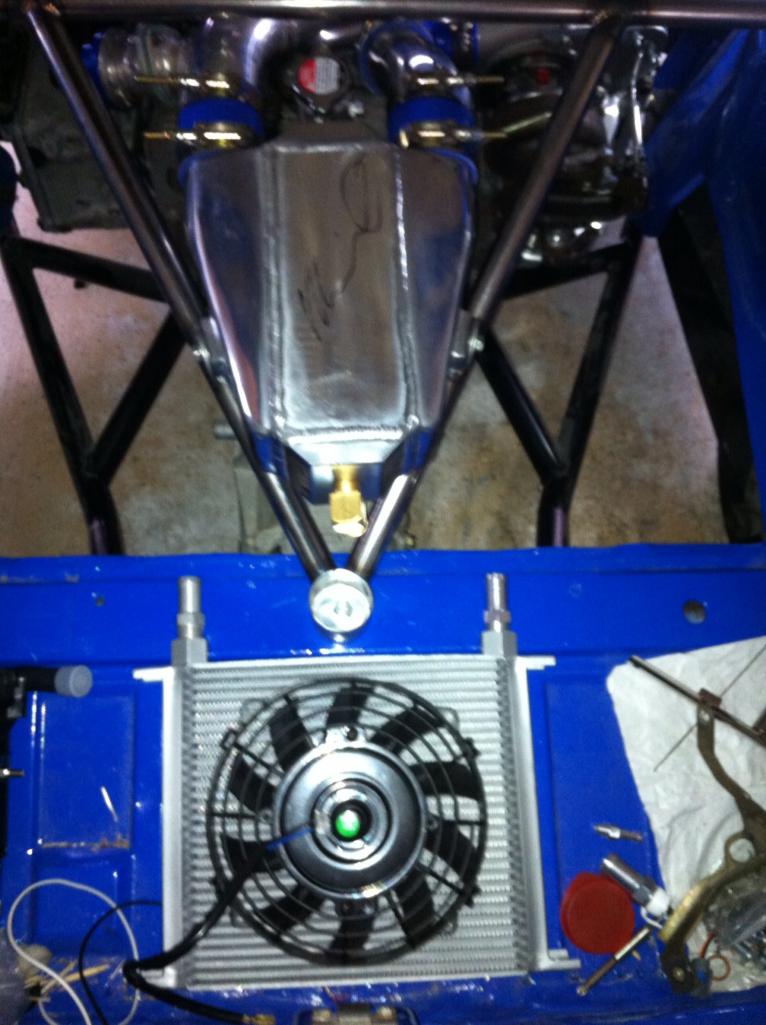
Posted by: effutuo101 Dec 18 2013, 09:13 AM
I get to put the finishing touches on today and get some liquid for the cooler.
Posted by: effutuo101 Dec 18 2013, 09:14 AM
And a picture.
Attached thumbnail(s)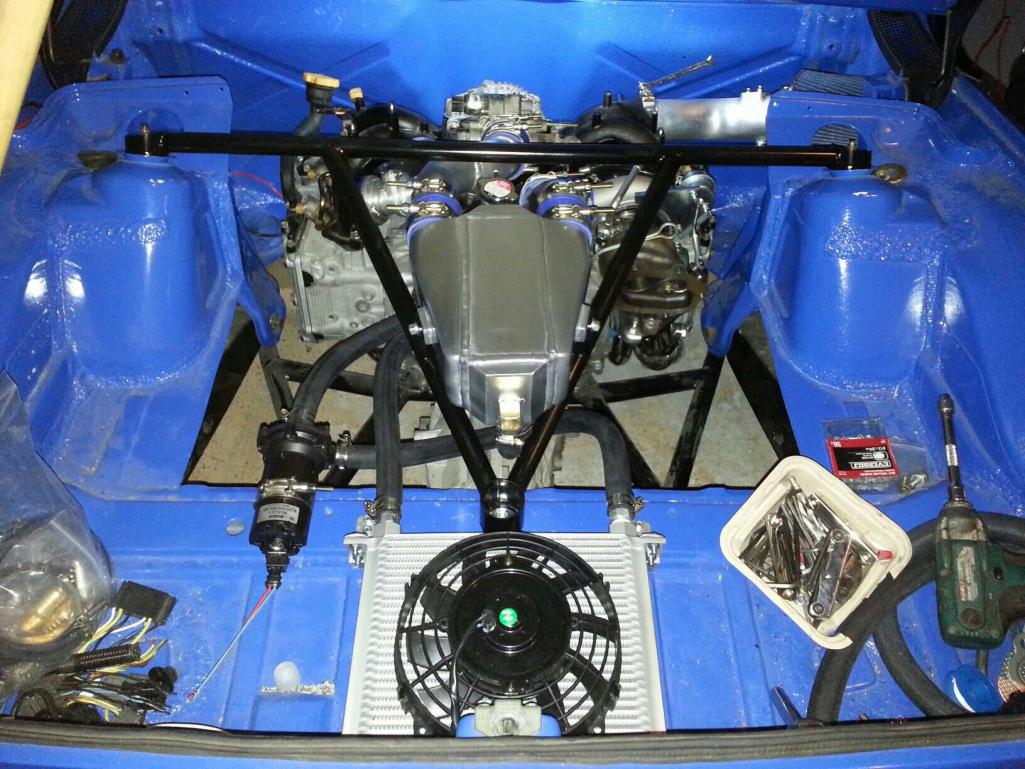
Posted by: effutuo101 Dec 30 2013, 07:02 PM
Front disks mount. Need to replace all bolts and nuts.
Fuel return: done
Fuel feed: pending 3 more AN fittings and that will be done.
Clutch lines: done and routed to diver floorboard.
Front brakes: don and routed to driver floorboard.
Rear brakes. Need 2 couplers, two adapter fittings and they will be done.
Next: radiator bracket and plumbing
Peddle cluster
Battery mounting and battery
Shifting mech. Pending Ian
Half shafts. Pending Ian
Eng mgt and harness.
Misc:turbo oil/water plumbing
Re tighten every bolt and nut
Attached thumbnail(s)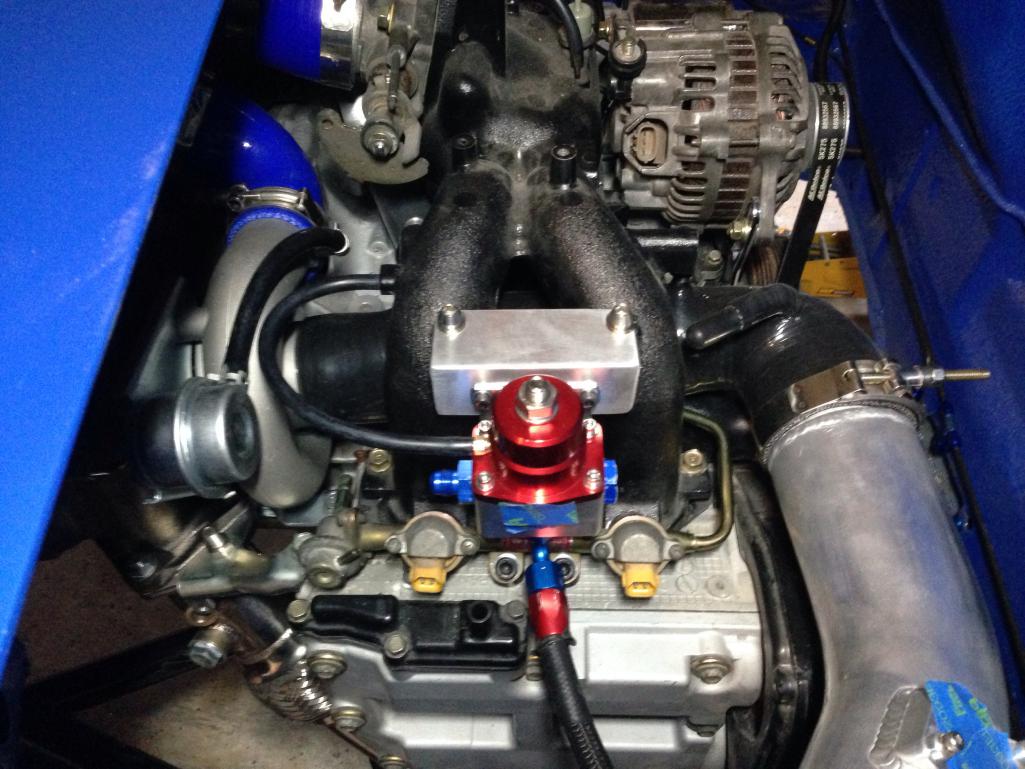
Posted by: CptTripps Jan 2 2014, 05:39 AM
Will you have enough cooling from that position? I was going to put mine up front with the radiator. Other than the length of hose, is there's down-side to putting it up there?
Posted by: effutuo101 Jan 2 2014, 09:34 AM
With the holes cut through the trunk floor, it should be good until I go higher than 400 hp. That little fan pushes some serious air. 10000cf per minute? I will ask the genius behind the design.
Posted by: effutuo101 Jan 2 2014, 09:37 AM
If you put it up front, you will just have the extra weight of the tube/fluid. You may also have to put in a burp valve as the system is so low.
Realistically you can put this anywhere as it is dedicated to just the air system and doesn't mix with the hot fluid system.
Posted by: effutuo101 Jan 2 2014, 09:55 AM
Today's project: install fuel pump and spare.
Maybe get to the engine and head venting system.
Attached thumbnail(s)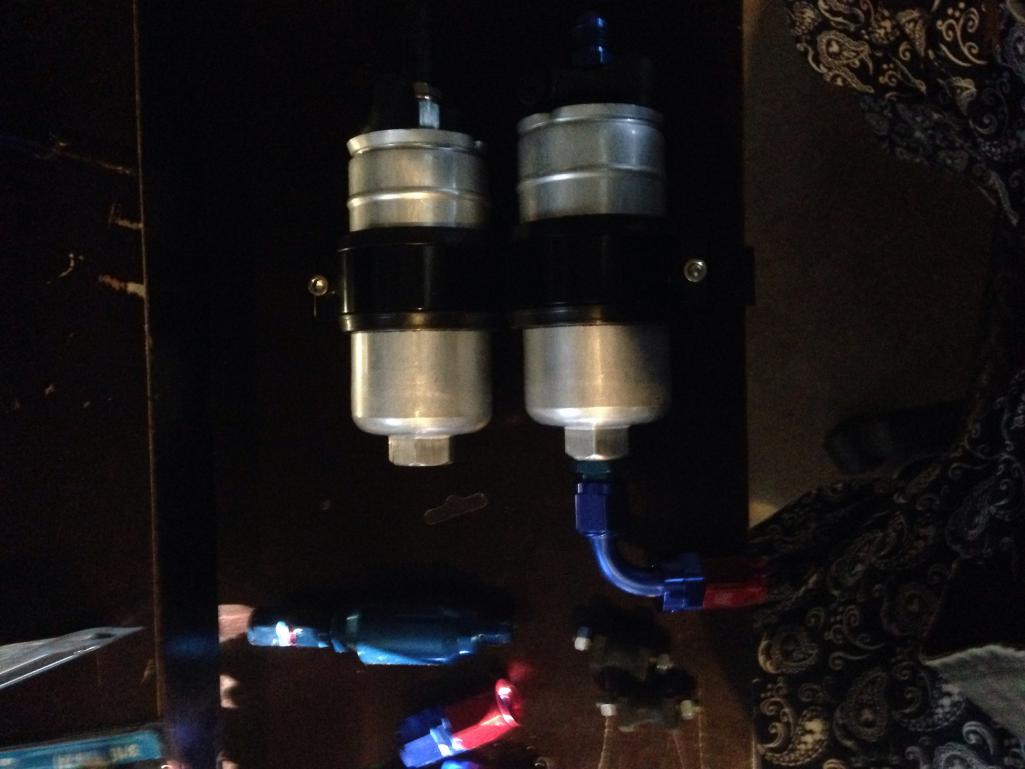
Posted by: effutuo101 Jan 4 2014, 11:58 AM
Satellite thermal imaging picked up an intense heat plume and an area of equally intense cold in very close proximity.Thermal dynamics are at play again near one of the Boeing plants in the PNW.
After a short time equalization took place and other thermal anomalies began to appear.
This activity is being closely monitored. Updates to follow in the days to come.
Satellite images may be posted after they have been redacted for public consumption.

Posted by: 914werke Jan 4 2014, 01:24 PM

Posted by: 3d914 Jan 4 2014, 06:18 PM
And a picture.
Awesome. I love that blue!
Posted by: effutuo101 Jan 4 2014, 06:36 PM
 thank you. Stock color!
Posted by: effutuo101 Jan 4 2014, 06:38 PM
Early images. The picture quality is very hi, but redaction blurred the picture a bit.
Attached image(s)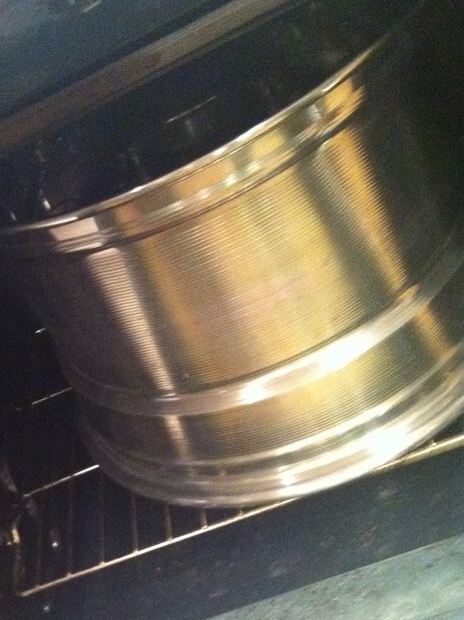
Posted by: effutuo101 Jan 6 2014, 09:47 PM
Further photo's
Attached image(s)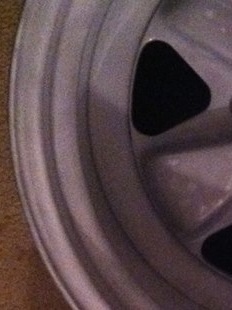
Posted by: CptTripps Jan 7 2014, 08:16 AM
Did you seriously bake those in your oven? LOL
Back to the intercooler...
I was thinking about mounting mine in the rear drivers-side wheel well, like where the oil cooler was on a 6?
Posted by: effutuo101 Jan 7 2014, 08:38 AM
hey! something about port in a storm? I can't tell you how many motorcycle parts I have baked over the years in my oven. Wife not so happy about that! but, hey, she loved the end product... Besides, that was happening north of Seattle and I live in So Cal now.
Anyway, Yes! The great thing about these is that since they are completely separate cooling system, they can go anywhere. I looked at the drives side well initially, but decided I had other plans for that area (pull additional air for the radiator with a 4 inch in line fan for instance).
That should look nice and flow well. you can push air around where ever you want! A little glass work and you can make a really nice tidy package.
Most of this stuff is way over done. That way I can do relatively simple upgrades to stuff to get more out of it. For instance, I will probably do some bigger fuel rails after I am up and running (I already plumbed the fuel lines to handle a lot more fuel).
Posted by: CptTripps Jan 7 2014, 08:55 AM
Intercooler: That's going to save me a LOT of time and energy. I think that's the way to go.
Radiator: I want to glass something nice up so I can use that front trunk for a spare tire and maybe some luggage if I need to.
Fuel Rails: Yeah, I'm way ahead of you there. I have a set of billet rails (2 actually) and I have the whole system plumbed with -6AN fittings and stainless braided line.
What bushings/mounts did you use with Ian's cradle? I hadn't even thought of that until just now.
Posted by: effutuo101 Jan 7 2014, 09:07 AM
nice!
as far as bushings and mounts go, the ones Ian supplied are the ones I used. I have one of the first cradles, so, mine bolts straight to the block. That may have to change depending on the amount of engine vibrations that come through.
From a fuel rail stand point, yes! I am AN8 to the fuel rail and step down to stock and then back up to AN6 for the return. So, lots of room to play there! Nothing like brushed aluminum and color to spice things up.
Looking forward to seeing your motor back together soon.
Posted by: CptTripps Jan 7 2014, 12:48 PM
It's getting there. I should be able to bring the motor back to the office in another week or so. I'm going to spend quite a bit of time getting the trans and everything else fitted to it though. It won't see the car until late February.
Posted by: sixnotfour Jan 7 2014, 06:25 PM
Attached image(s)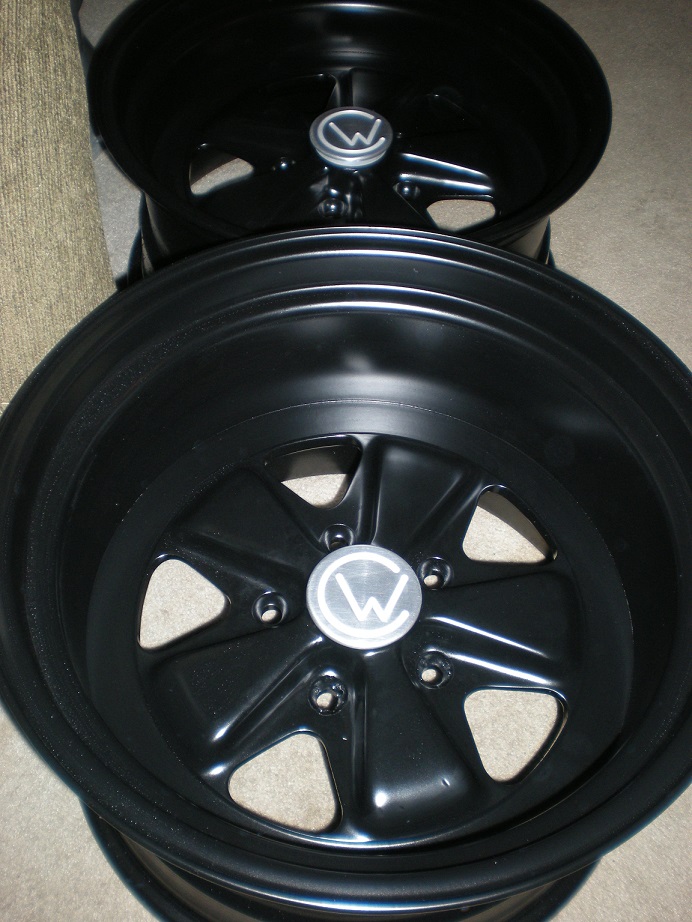
Posted by: rdauenhauer Jan 7 2014, 07:04 PM
CW? Ohhh...
Posted by: effutuo101 Jan 7 2014, 07:34 PM
Oh My! those are absolutely fantastic!
Posted by: effutuo101 Jan 7 2014, 07:38 PM
so, semigloss black rims 9 and 11 with customer made centers by the one and only Jeff Hines! Thank you so much Jeff! these are absolutely fantastic!
Posted by: sixnotfour Jan 7 2014, 08:03 PM
20% gloss black powder coat, 17 inch dia. wheels
Posted by: effutuo101 Jan 7 2014, 08:24 PM
I can't get over how cool those look!
Posted by: Rotary'14 Jan 7 2014, 09:21 PM
I didn't know (CW) Concourse Weenie was a brand,,
 they sure look cool too!
Posted by: effutuo101 Jan 8 2014, 12:40 AM
I hope that you will see them on a car near you soon'
Posted by: sixnotfour Jan 8 2014, 10:53 AM
It's "Custom Wheel".... 
or
"Chris Williams"
Posted by: aircooledtechguy Jan 8 2014, 08:23 PM
HOLY CRAP Jeff!! Those are insane!!
Posted by: effutuo101 Jan 10 2014, 11:52 PM
Who has two thumbs and is going tire shopping?
Me.
Attached thumbnail(s)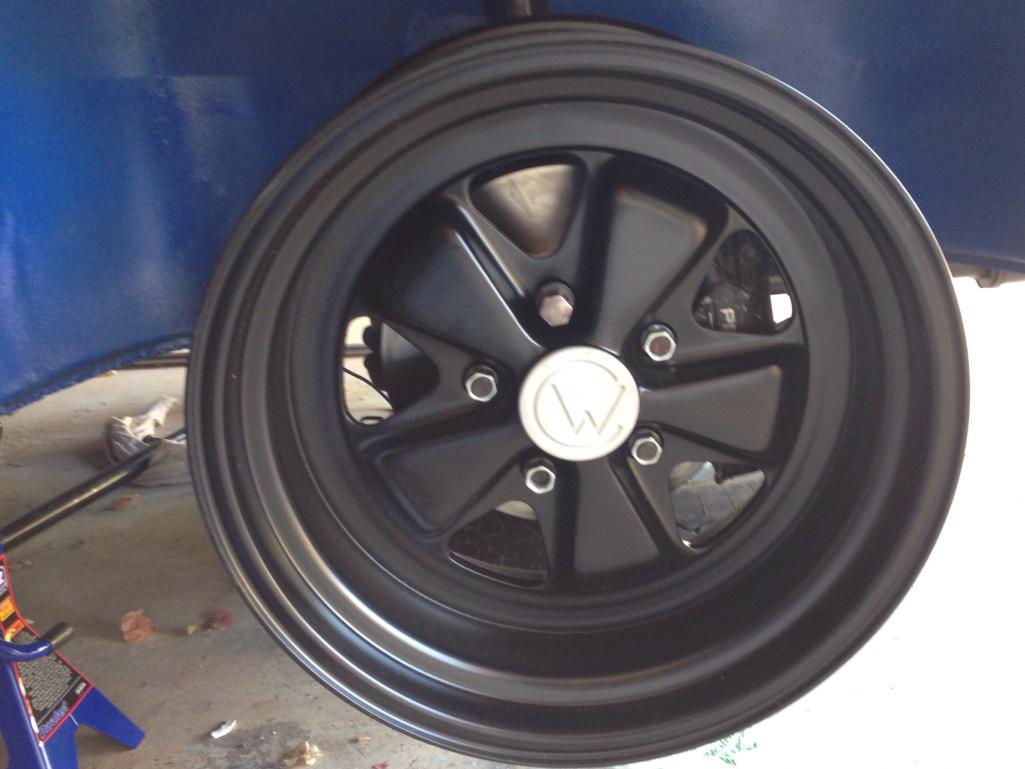
Posted by: Chris H. Jan 11 2014, 10:05 AM
That would be you.
Posted by: 02loftsmoor Jan 11 2014, 10:13 AM
Sooo what do you do in your spare time?
Posted by: effutuo101 Jan 11 2014, 01:44 PM
Work. And go to Disneyland.
Posted by: effutuo101 Jan 14 2014, 04:46 PM
test fitted a few tires today.
Gotta love used stuff so you can see if it is going to work.
Attached thumbnail(s)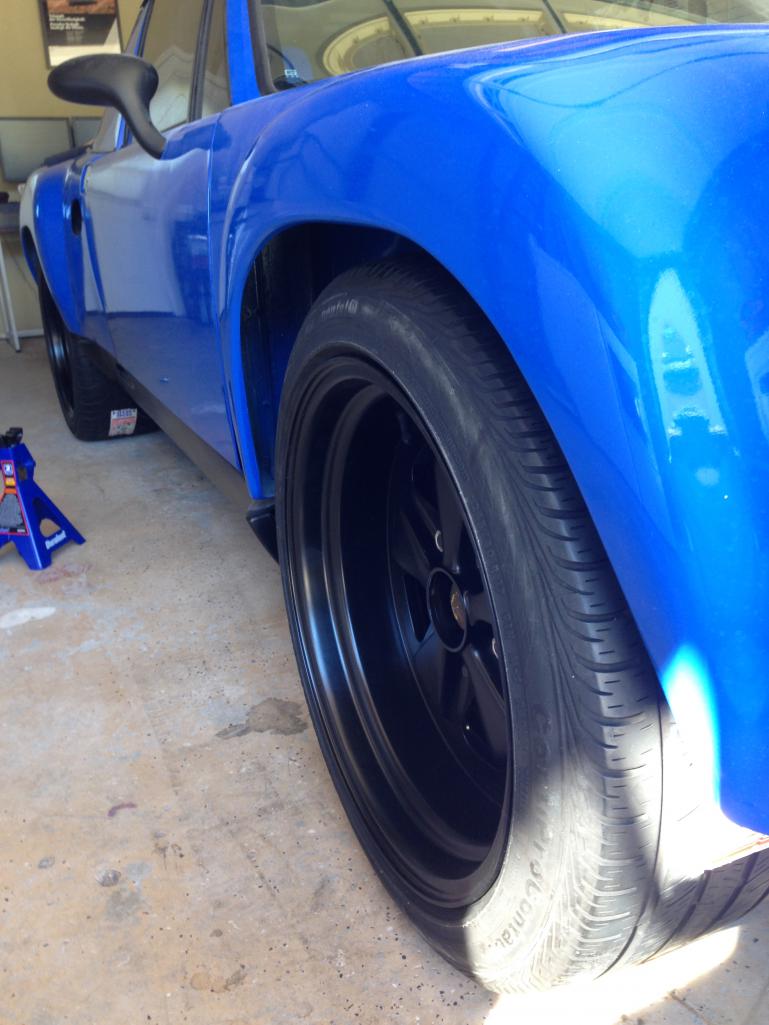
Posted by: effutuo101 Jan 14 2014, 04:48 PM
Time to:
Set the ride height! 
Posted by: CptTripps Jan 14 2014, 08:40 PM
What rear-view mirrors are those? They look a lot easier to add than my Pontiac Solstace mirrors are going to be.
Posted by: effutuo101 Jan 14 2014, 10:37 PM
I will have to dig up the link. It is earlier in the thread somewhere.
They were pretty easy to fit, but a slight mistake on the passengers side is going to be difficult to fix.
Also, they do come with LED turn indicators.
Pretty cool.
Posted by: sixnotfour Jan 14 2014, 10:48 PM
http://visionhotrod.com/
VF 4
Posted by: effutuo101 Jan 14 2014, 11:00 PM
Thanks Jeff!
Posted by: CptTripps Jan 15 2014, 08:03 AM
I need to look and see if those would be easier to work with than the ones I have from the Pontiac. I'll need to make sure both sides are modified EXACTLY the same. The VF4s may be a lot easier in the long run.
Great tip. Thanks!
Posted by: Chris H. Jan 15 2014, 08:10 AM
Hey there's an LED turn signal version...sweet. Really increases visibility. I'm afraid to take my side markers off until I get something like that since I live in a congested area.
Posted by: CptTripps Jan 15 2014, 08:25 AM
Adding LEDs is SUPER easy. I have a kit I'll send you if you want. I bought an extra. All you need to do is hit the mirror with a heat gun, remove the glass, tape these things into place, and then replace the glass. The LEDs shine through really easily.
PM me your address Chris.
Attached thumbnail(s)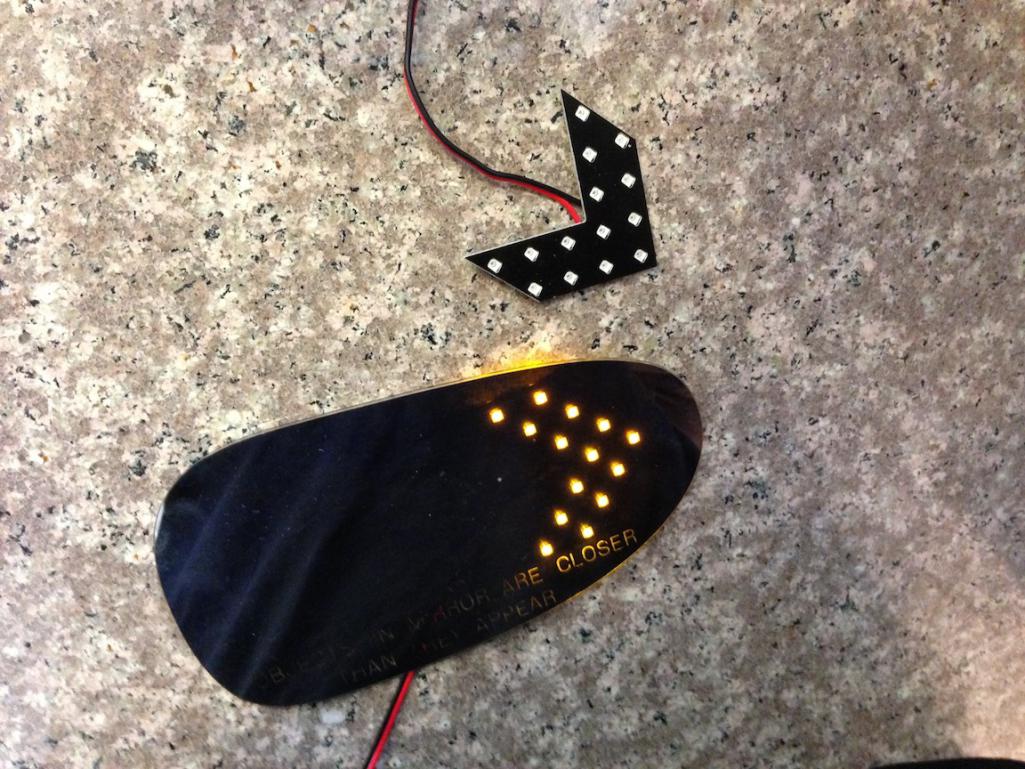
Posted by: Chris H. Jan 15 2014, 08:35 AM
Cool! Thanks man.
Posted by: effutuo101 Jan 15 2014, 03:00 PM
Doug, you are very generous. I already owe you
I actually decided some time ago to put a small 911 style light on the front fender (like my 2nd 914). Thank you for the offer!
Attached thumbnail(s)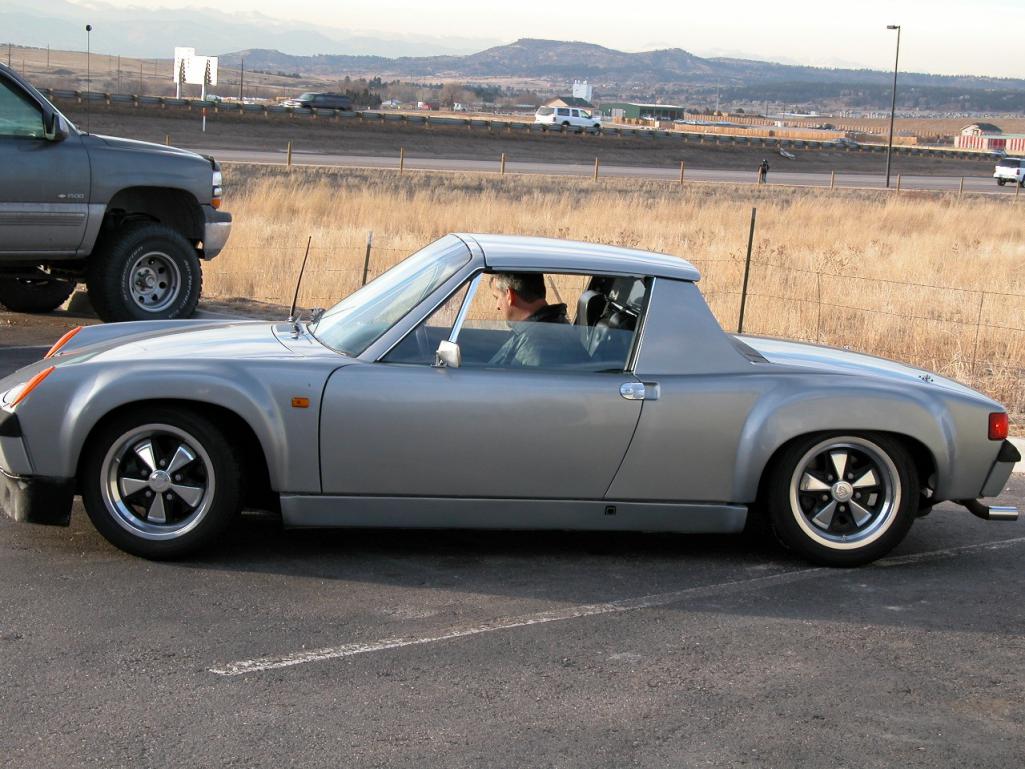
Posted by: effutuo101 Jul 28 2014, 04:16 PM
Ok, So, work, life and everything got in the way and it is finally time to get going.
Engine harness, relay's and computer are ready to pick up.
Also ready is my re enforced and shortened (by 2 inches and steel plate added) oil pan. Then S&S will come down and make final measurements and make braided oil and water lines for my turbo and provide me block off for unused holes in head.
To do:
add oil to motor and trans.
get AN fittings put on the fuel rails
Get half shafts completed
New exhaust built (the current one hangs down to far) to the turbo.
Front brake pads and retainers
Start car for the first time...ever.
Coming soon:
new rear adjustable shocks
Peddle cluster
bleed out brake and clutch
finish up throttle cable.
Finalize turbo back exhaust
Gauges and pod.
Cooling system
This should put me at a point where I can at least drive the thing.
blegh. It is all money now.
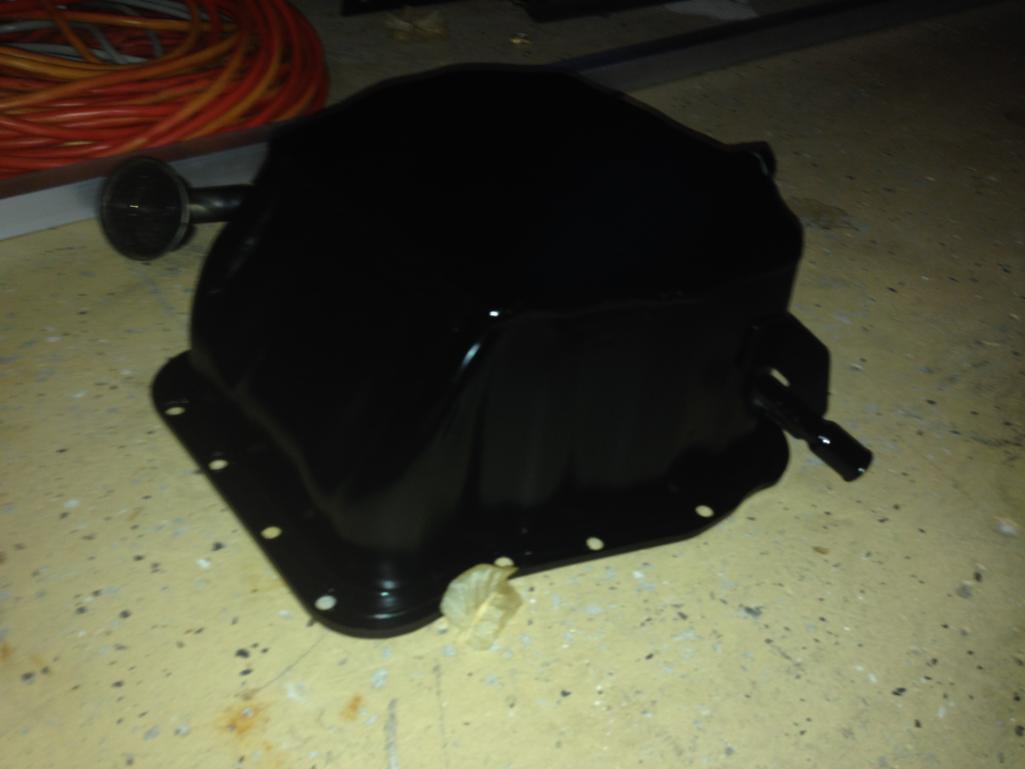
Posted by: effutuo101 Jul 30 2014, 01:53 PM
hmmm, a few parts showed up today!
Oil pan shortened 1.75 inches
Stinger wireing harness, computer and base program for 2.5L turbo with G20 turbo (tuning time to come later)
I guess I know what I will be doing next week!
Attached thumbnail(s)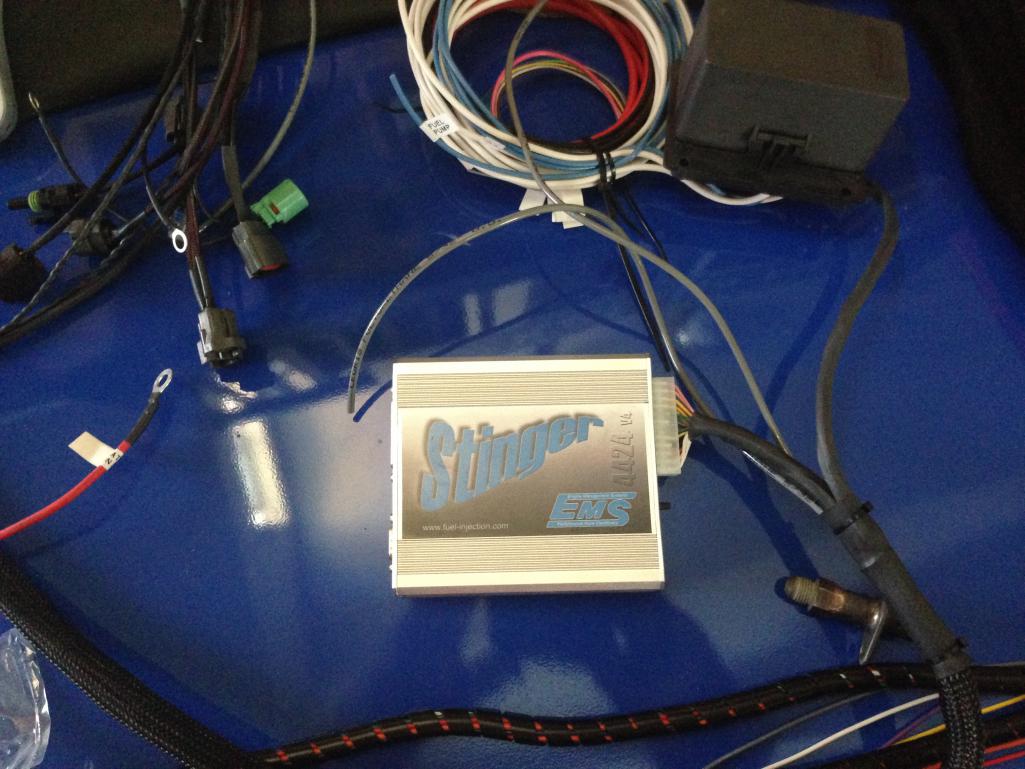
Posted by: CptTripps Jul 31 2014, 06:42 AM
Way to go man. Let's get yours started so I'm inspired to do the same with mine!
Posted by: effutuo101 Aug 5 2014, 10:01 AM
Old vs new oil pan depth.
The pictures are dark, but, the new pan now sits level with the floor.
Time to get rid of my old (brand new) exhaust and get a custom header.
If you are running the newer version of Ian's cradle that uses the stock engine mounts, the engine sits a bit higher, the exhaust should work great. PM me if you are interested.
Attached thumbnail(s)
Posted by: swooshdave Aug 5 2014, 03:21 PM
Looks like a /5 sitting back there...
Posted by: effutuo101 Aug 5 2014, 03:34 PM
LOL! my wife's /6 with euro tank. 1975! Maybe she will ride it again...
Posted by: CptTripps Sep 11 2014, 11:16 AM
Can you post a few more pics of the BOV area?
I've decided to mimic your setup for the intercooler. Seems like the best option for me. I'll still mount the radiator for it under the car though. See if I can retain SOME of the trunk space.
Posted by: CptTripps Jan 22 2015, 12:42 PM
Alright Chris....you and I need to get off dead-center and finish our cars.
I propose we switch. You move to Cleveland for a month to work on mine, and I'll move to SoCal for a month and finish yours. Deal?
Posted by: effutuo101 Jan 22 2015, 01:35 PM
LOL! Right?
Got my new clutch install with my wife this last Monday and am now waiting on my half shafts to get finished.
Tell you what, my car is headed up the hill as soon as shop space opens to get the radiator work done. Ther will be space in the garage for yours. Bring it and we will get both on the road.
The weather is much better here!
Posted by: sixnotfour Jan 22 2015, 03:48 PM
word
Posted by: effutuo101 Jan 22 2015, 04:07 PM
word
And a easy to get to!
Hiya Jeff!
Posted by: rdauenhauer Jan 23 2015, 07:32 AM
...Love that color.
Posted by: effutuo101 Jan 23 2015, 08:20 AM
Thank you Rich! We almost painted UGMO this color!
Posted by: Smallblockbug Sep 11 2015, 03:17 PM
Love the build. Trying to decide what to do with my build still. Is there an album on here somewhere of your car that i can look at just to make sure how the panels were installed on the car as im a fiberglass to steel bonding virgin. Metal to metal has always been my medium. Thanks for any help you can provide.
Posted by: effutuo101 Sep 11 2015, 07:29 PM
Sorry I missed this. There is a 3m bonding agent that I used. Any quality auto paint shop should have it. Also a lot of klecko pins to hold everything in place.
Make sure your doors are on and adjusted so you get the gaps correct.
Posted by: Smallblockbug Sep 11 2015, 07:36 PM
Sounds good. Just wasnt sure if it was anything special. I have a few places i deal with for bodywork so i will talk with them in the next few weeks.
Posted by: effutuo101 Sep 21 2015, 12:10 PM
had some time this last weekend in the heat to get some work done.
CV's built and installed
Attached thumbnail(s)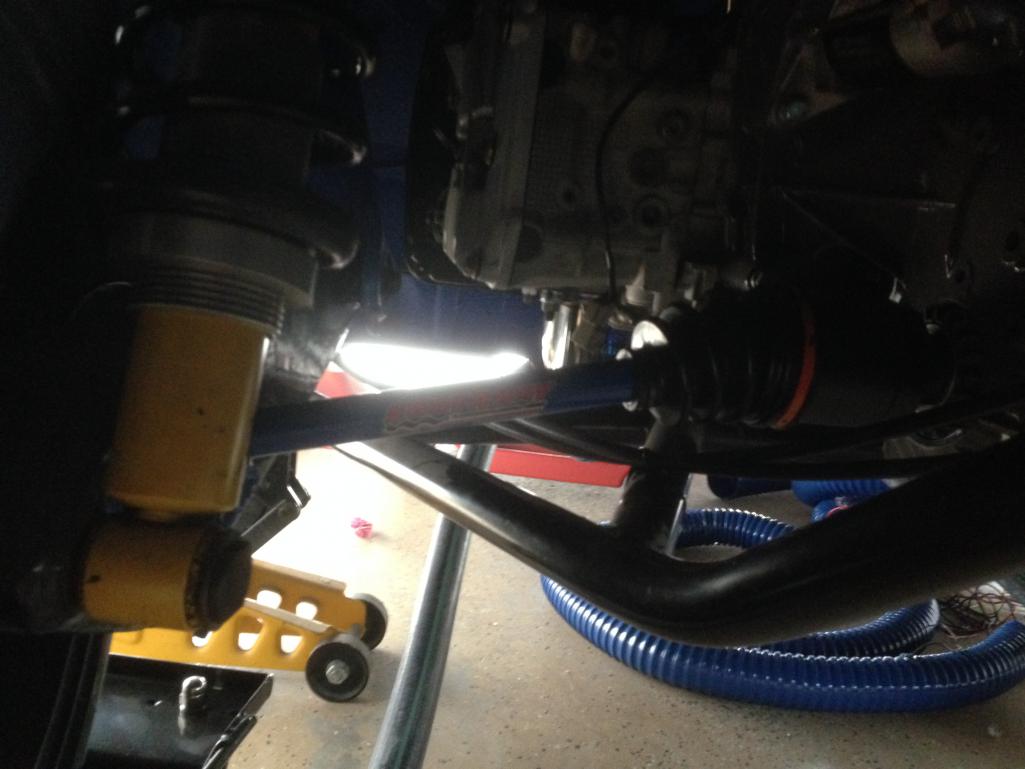
Posted by: effutuo101 Sep 21 2015, 12:11 PM
Radiator install completed. working on hose's tonight
Attached thumbnail(s)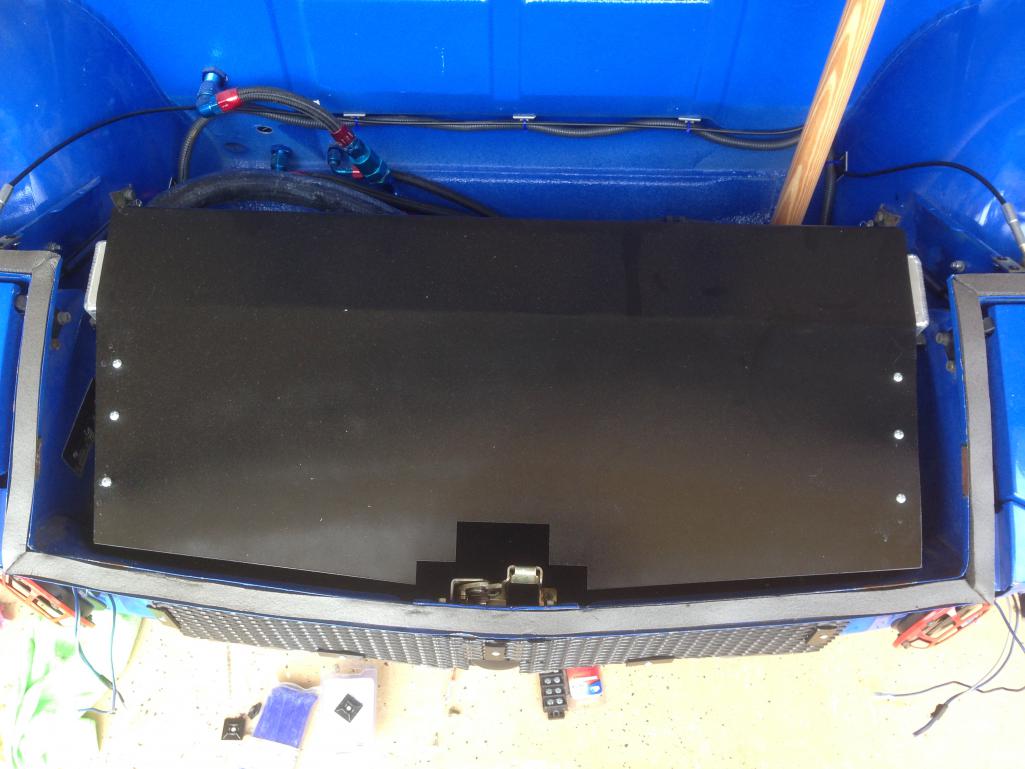
Posted by: effutuo101 Sep 21 2015, 12:12 PM
went down to the Coronado Festival of speed and watched some great racing.
Saw this little beauty sitting by the 914's
Attached thumbnail(s)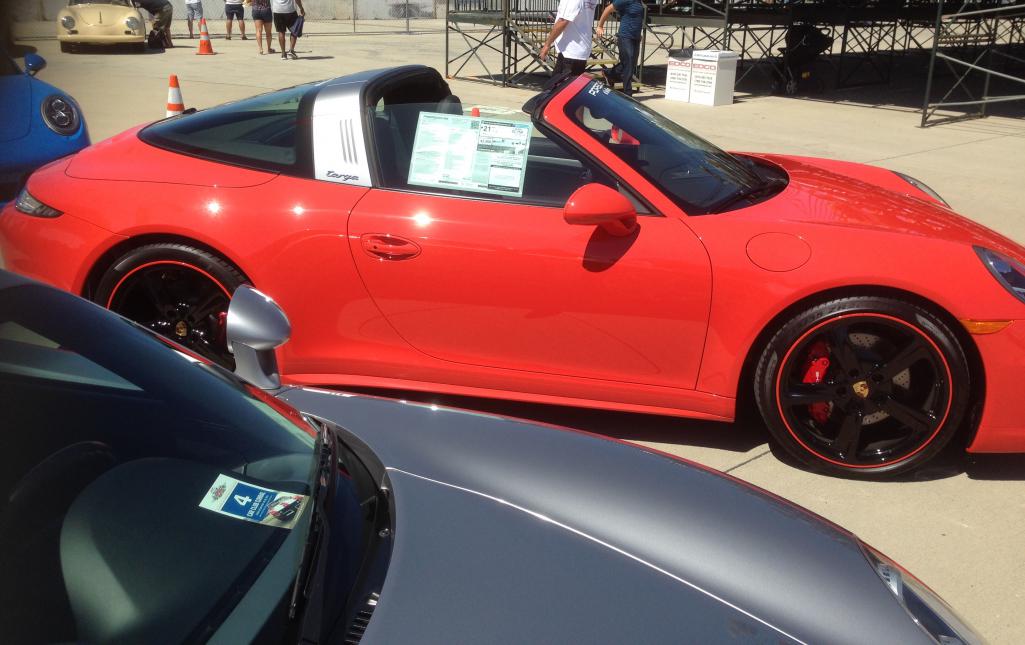
Posted by: effutuo101 Apr 4 2016, 05:24 PM
That was a long, rough winter for work. Finally getting back on this project.
Oil in transmission, exhaust and up pipe back in. Rework of the wiring (a couple items to sort out) but fan and pump for water to air inter cooler are now good to go.
dash work redo.
GT headlight kit now works like a charm from the cockpit.
Turbo is off to install gasket.
Remapping the engine harness as I didn't like the way it routed before.
Next up:
Brake, clutch and throttle
Gas tank (placement) again
Finish up plumbing radiator
Light the fire and get it on the Dyno.
Maybe next year I will be able to drive her.
Here is to selling my condo in Everett and being done with that extra burden.
Posted by: sixnotfour Apr 4 2016, 06:10 PM
Right On Chris...I have been patiently waiting for some progress...You never want to return to Everott....
Posted by: effutuo101 Apr 4 2016, 06:15 PM
hehe. Lynnwood and Lake Stevens or Edmons for a visit? Yes. To live in Everett? Not so much.
Posted by: 914werke Apr 11 2016, 07:46 AM
Go Go GO!!
Posted by: effutuo101 May 11 2016, 09:37 PM
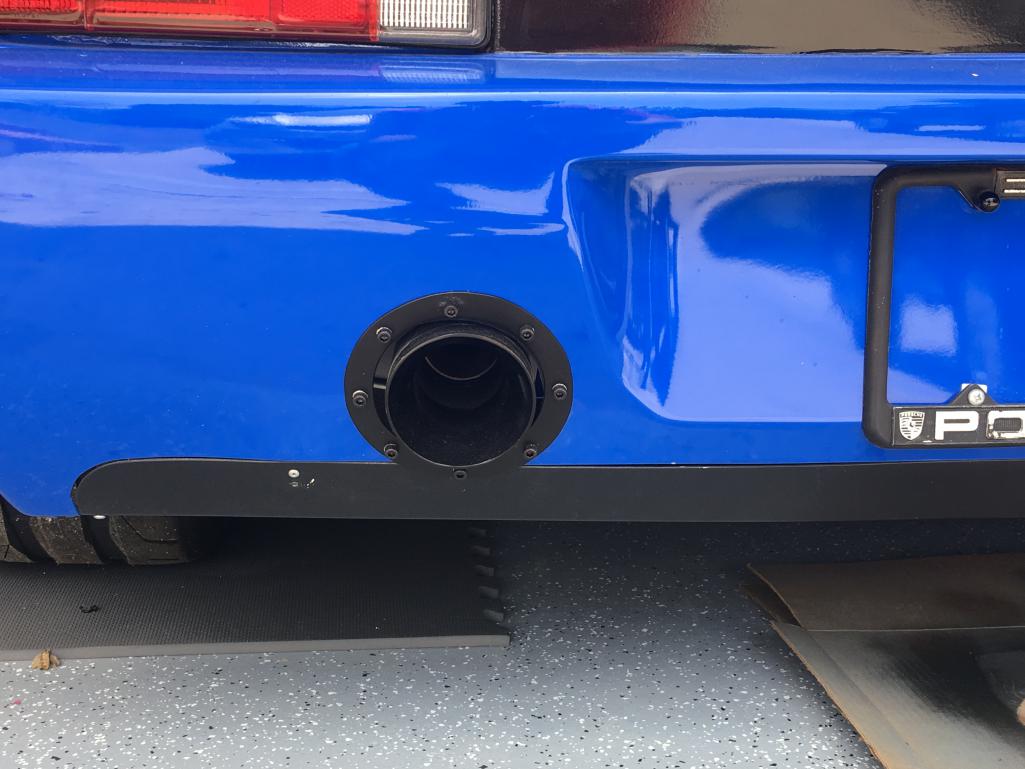
Next little project done. May do some changes but happy being able to see the back of my car!
Attached thumbnail(s)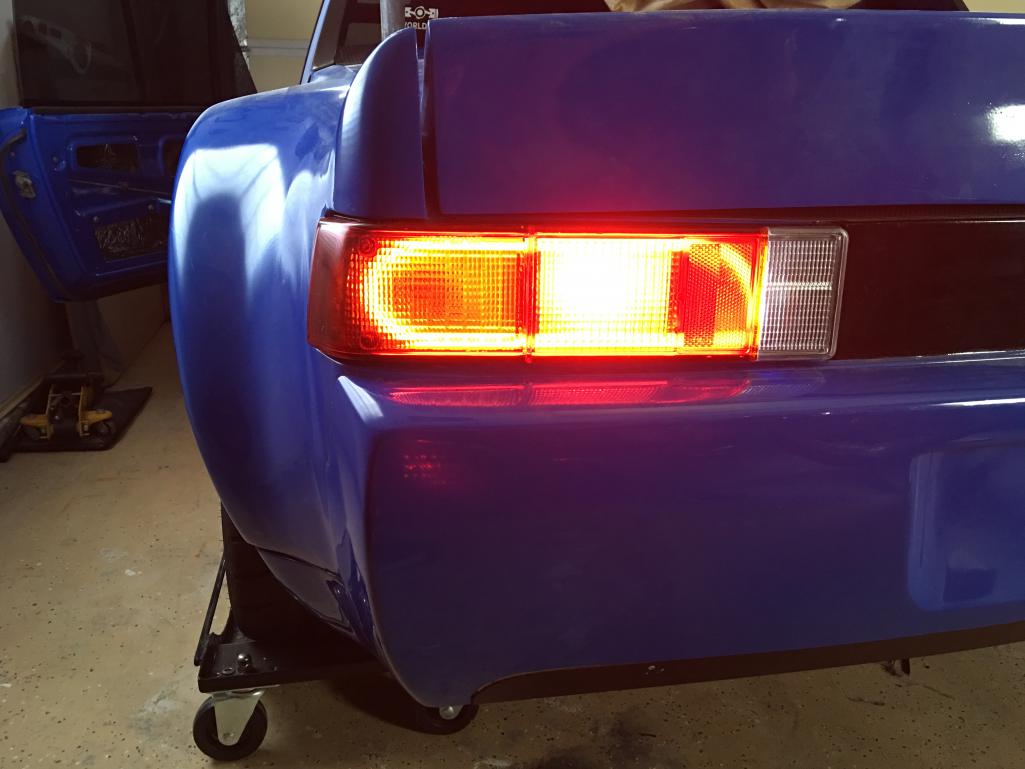
Posted by: effutuo101 May 11 2016, 09:39 PM
That is just the running light.
Haven't decided if I am going to keep the dual brake lights. It actually hurts my eyes.
Gotta love super bright LED tech.
Attached thumbnail(s)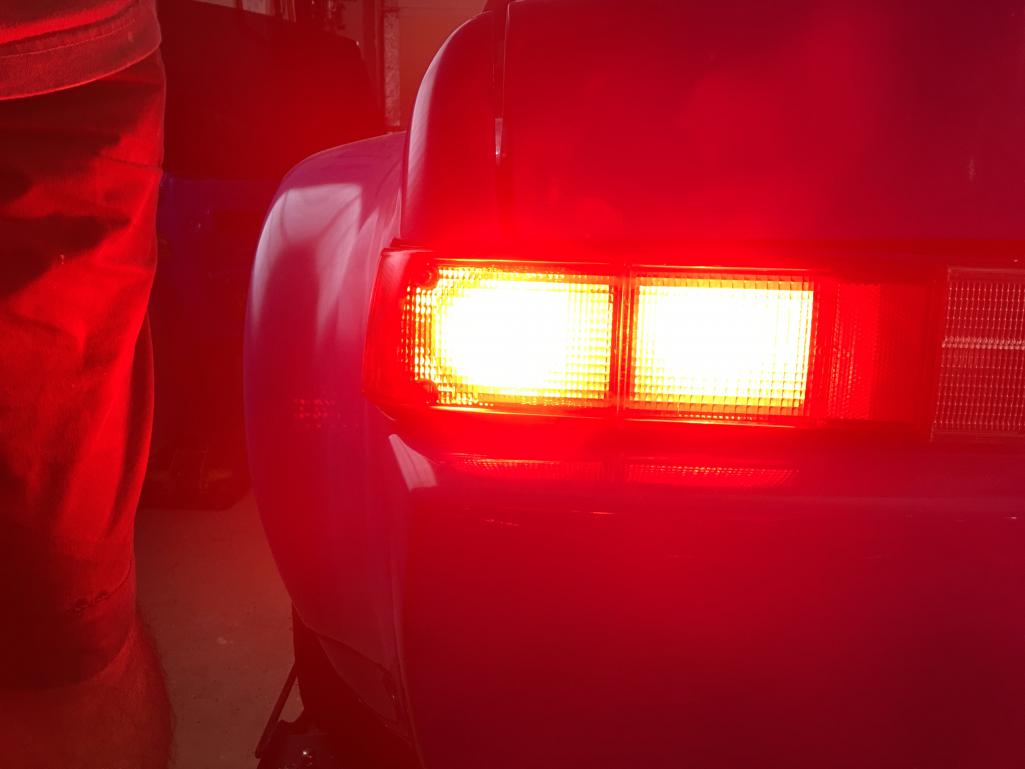
Posted by: sixnotfour May 11 2016, 09:48 PM
About Time you gave Us an update... 
Posted by: effutuo101 May 11 2016, 10:03 PM
Hehe. Right?
I am trying to get back in the habit of an hour a day working on this.
The To Do list is getting shorter, but still too long.
Posted by: effutuo101 May 11 2016, 10:05 PM
Trying to upload video
Attached File(s) trim.3D2F59C8_FA04_4945_8A4B_8AD62A499D2F.MOV ( 1.89mb )
Number of downloads: 74
trim.3D2F59C8_FA04_4945_8A4B_8AD62A499D2F.MOV ( 1.89mb )
Number of downloads: 74
Posted by: sixnotfour May 11 2016, 10:11 PM
you tube
Posted by: mgp4591 May 11 2016, 10:39 PM
Where did you find those? They don't look like the ones from Spoke...
Posted by: effutuo101 May 12 2016, 07:18 AM
Some really cool products out of super bright.
I wanted something a littl ore the beaten path
Attached thumbnail(s)
Posted by: effutuo101 Jun 6 2016, 05:47 PM
Up on the truck and off to get exhaust
Attached thumbnail(s)
Posted by: effutuo101 Jun 6 2016, 05:48 PM
Cutting. Rings will cover the exhaust outs...
Attached thumbnail(s)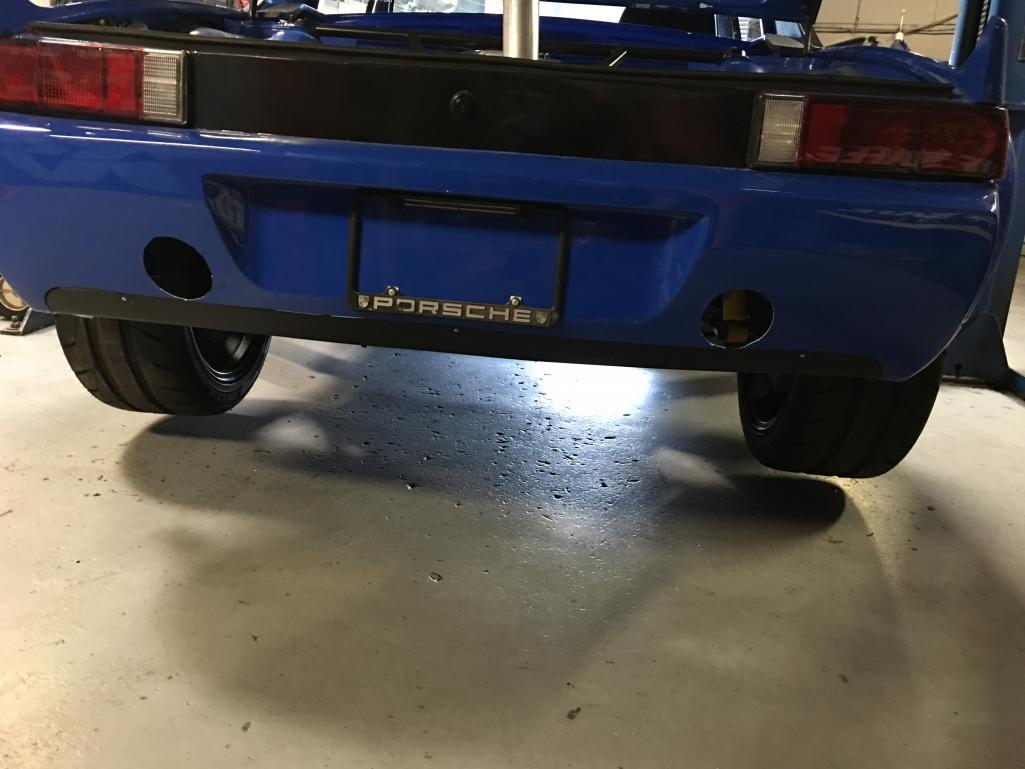
Posted by: 76-914 Jun 6 2016, 06:25 PM
Up on the truck and off to get exhaust
Unless you have masochistic tendencies, that was probably a good idea. Took me 4 tries and 2 entirely different systems to get the exhaust the way I wanted it. Looking back, I dodged your setup because of the exhaust work but now I believe it might have been easier, although more costly, to install a turbo'd 2.5 with that single tail pipe. Very nice work thus far.
Posted by: effutuo101 Jun 6 2016, 06:54 PM
If I wasn't concerned about the noise, I could have gone with a single side exhaust, with just a resonator (still below 90db). I would have probably walked away for about $250-300. Doubling up actual mufflers and a jointed Y pipe for ease of maintenance and black tips is what made this a bit more spendy. Although it won't be as quiet as I want, it is being built with a bigger turbo in mind. Trade offs.
Posted by: effutuo101 Jun 8 2016, 11:44 AM
Step one done. Time for exhaust trim rings..
Attached thumbnail(s)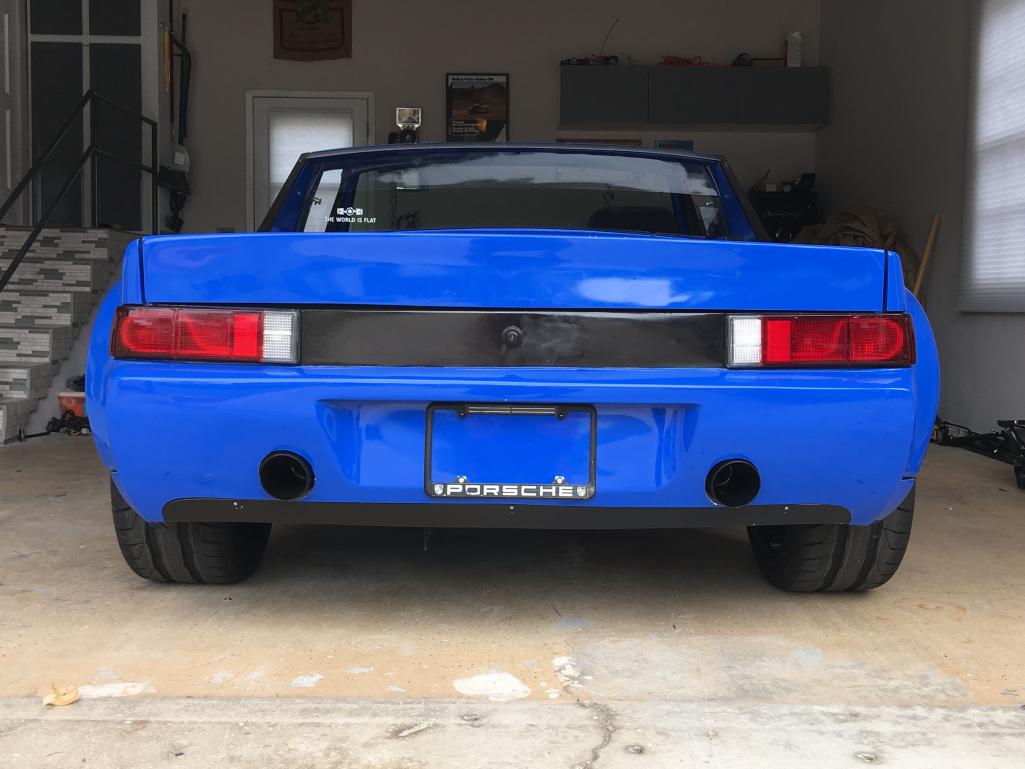
Posted by: sixnotfour Jun 8 2016, 12:00 PM
Damn ,,Lookin Good
Posted by: 914werke Jun 8 2016, 12:09 PM
DAmmmmn!!
Posted by: 76-914 Jun 8 2016, 12:14 PM
Very nice! North or south of $750?
Posted by: Mueller Jun 8 2016, 12:25 PM
Nice!
Posted by: effutuo101 Jun 8 2016, 12:27 PM
Thanks!
As far as price, Just a sneeze north of 750. Half of what other shops quoted me.
Posted by: effutuo101 Jun 8 2016, 12:28 PM
I went with 2 wicked flow mufflers which drove up the cost.
Posted by: sixnotfour Jun 8 2016, 12:53 PM
You should at least get the Thing fired up,,,,, the pedal thing is gonna be some work and maybe a little heat out the pipes will Really fire you up..... and you can piss off the neighbors any time you want...
Posted by: 76-914 Jun 8 2016, 12:53 PM
Thanks!
As far as price, Just a sneeze north of 750. Half of what other shops quoted me.
If I had received a similar quote I would have never touched mine, period.
 Drop the Shops name if you're happy with them. If you don't mind, lay down and take a pic looking up so we can see the entire system. Do we have a jealous or suicide avatar, yet?
Posted by: effutuo101 Jun 8 2016, 04:58 PM
Under car
Attached thumbnail(s)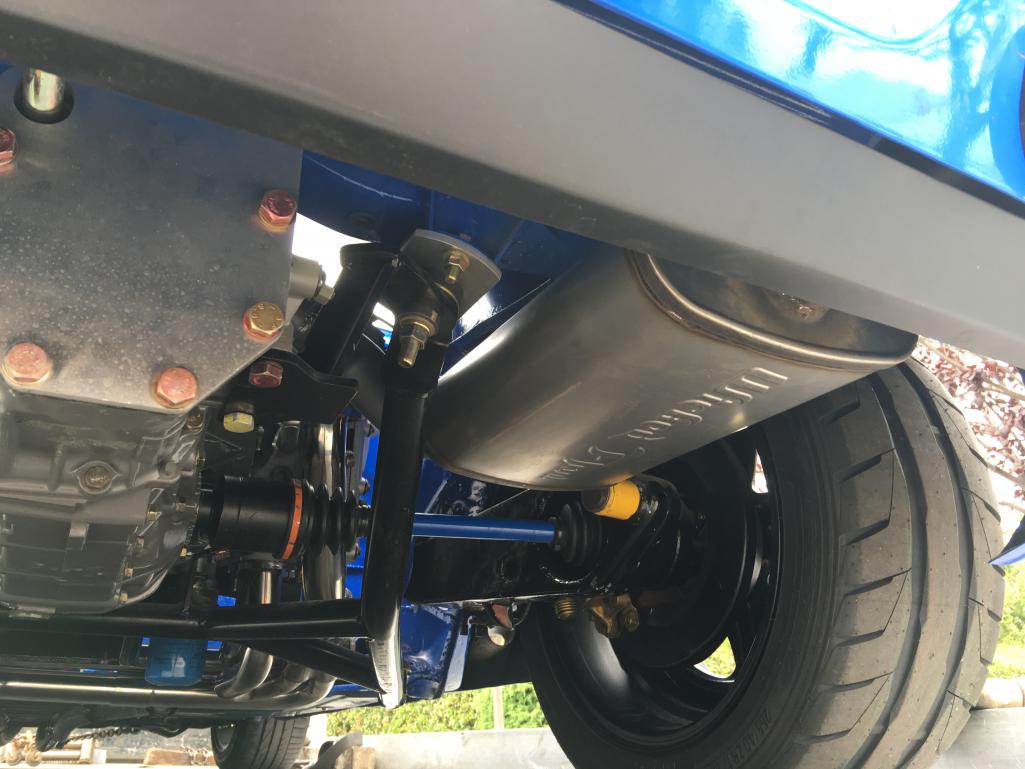

Posted by: effutuo101 Jun 8 2016, 05:01 PM
From the engine bay.
Attached thumbnail(s)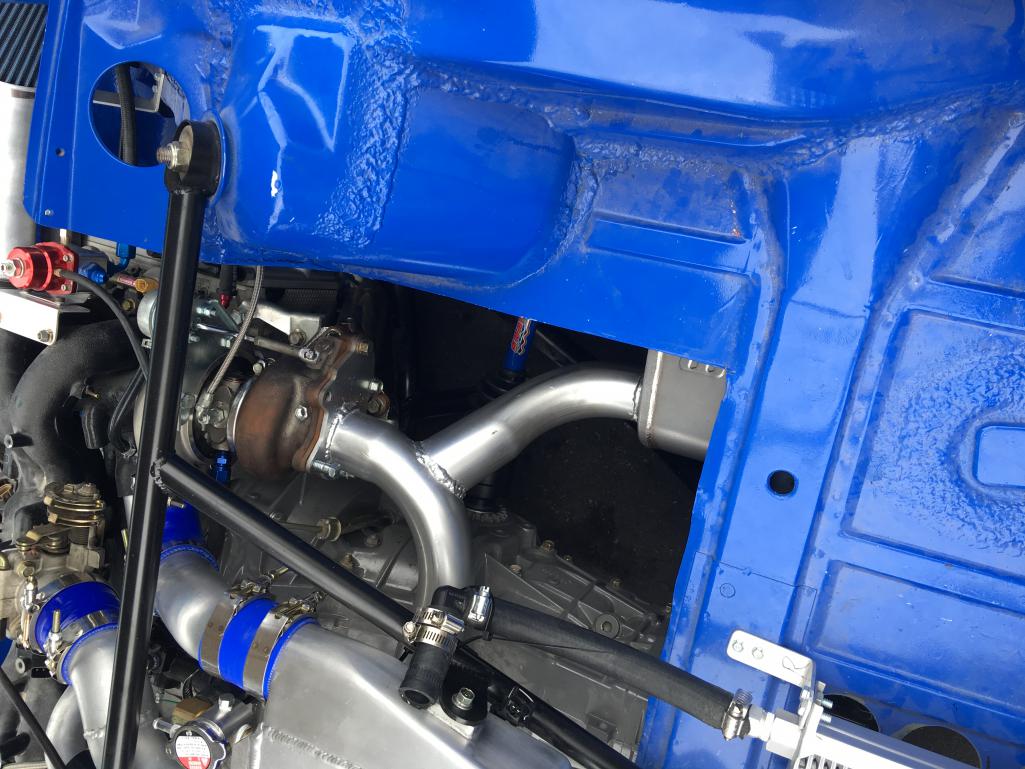
Posted by: effutuo101 Jun 8 2016, 05:10 PM
Jessie's muffler in Lemon grove. Nice guy, he does a lot of the low riders and classic cars around here. So, he completely understood when I said I need it tucked up and out of the way.
Same day build. The only thing he was out of was the tips. He did step up the tube size to handle the planned larger turbo.
As far as sound and performance, I will have to wait until my car fires up.
Posted by: effutuo101 Jun 3 2017, 12:26 PM
Had to take a break for a while to get some house stuff taken care of.
Exhaust trim rings. Have to swap out the bolts for button style.
Attached thumbnail(s)
Posted by: effutuo101 Jun 3 2017, 12:27 PM
Finally got my headligh release sorted out.
Attached thumbnail(s)
Posted by: effutuo101 Jun 3 2017, 12:30 PM
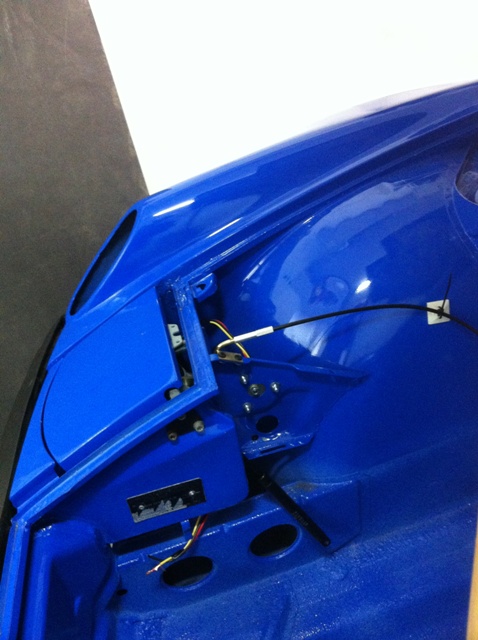
Mounted computer and ran harness to engine bay.
Built a center console (WIP)
Attached thumbnail(s)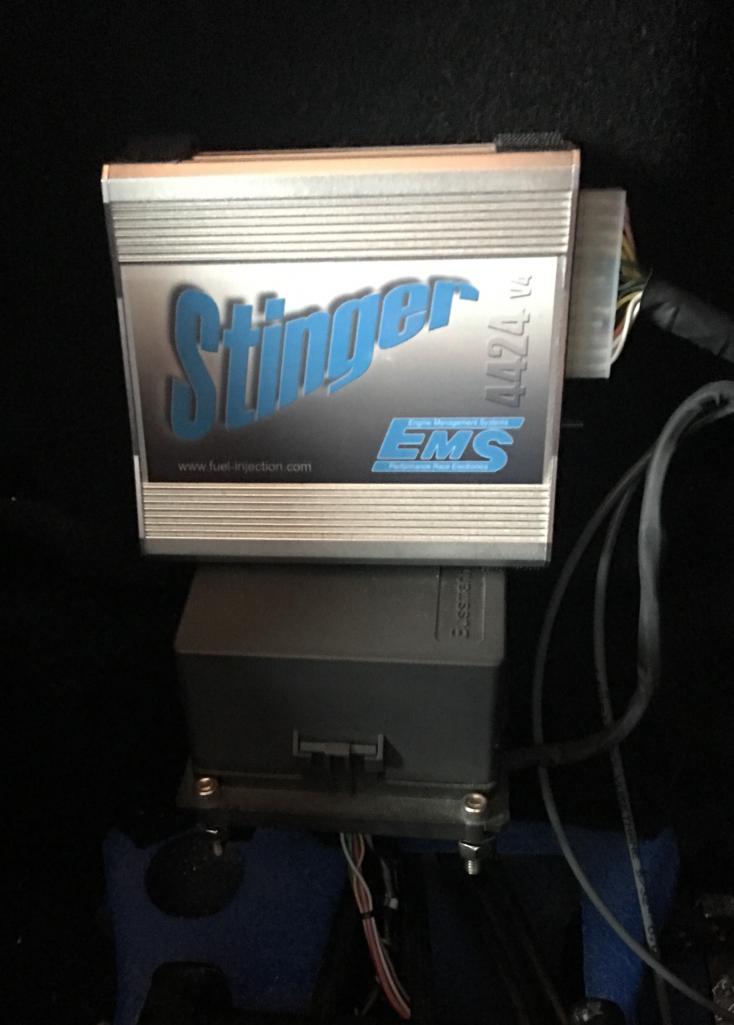
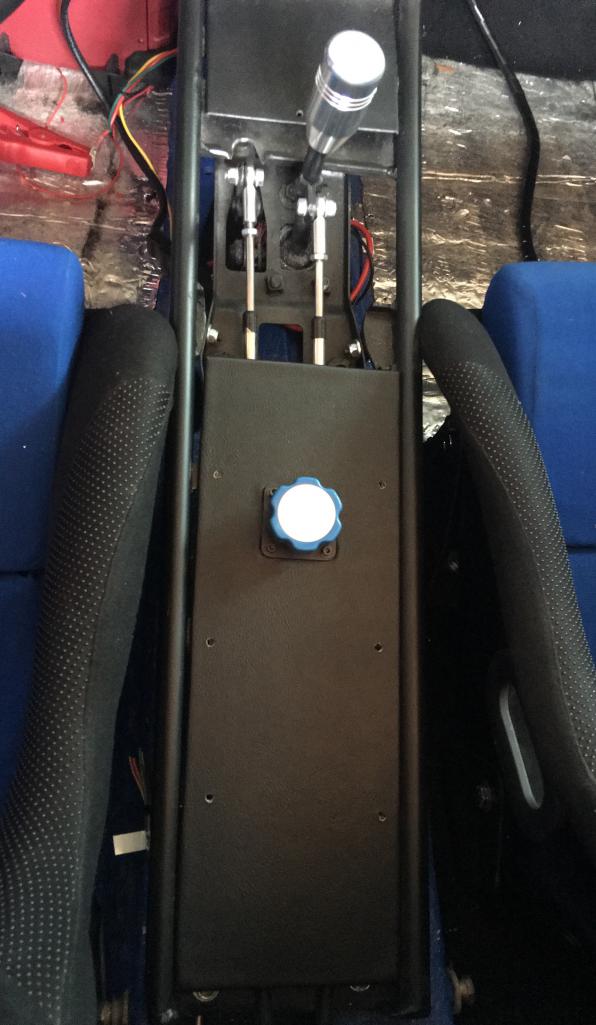
Posted by: effutuo101 Jun 3 2017, 12:33 PM
More center console.just a couple of things to sort it for wiring.
1 more fitting and the fuel lines are done!
Then on to finishing up the tank ( had to go back to stock location and tank). Then pressurize and test.
Attached thumbnail(s)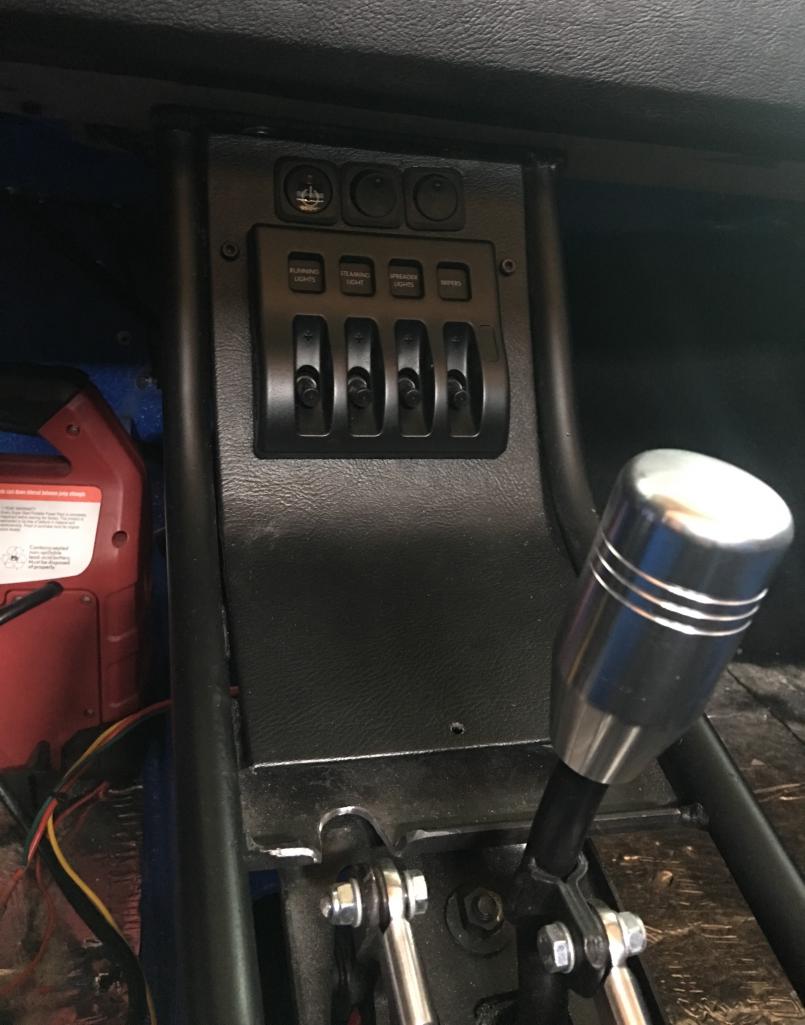

Posted by: effutuo101 Jun 3 2017, 12:34 PM
Hehe double pic.
Posted by: effutuo101 Aug 2 2017, 05:46 PM
Got these foodies in the mail. Thank you PMB!
Attached thumbnail(s)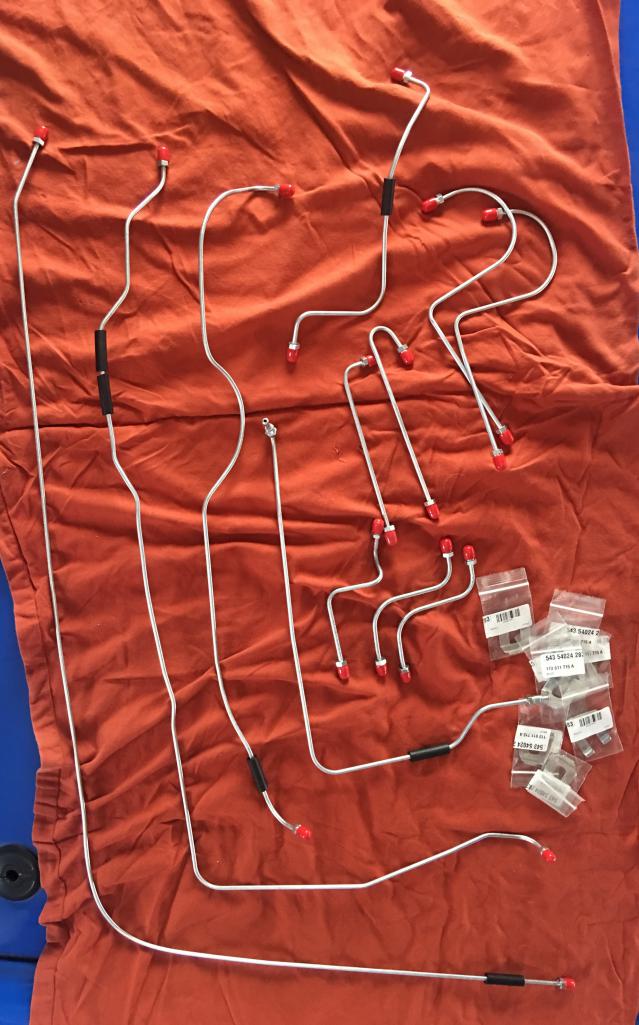
Posted by: effutuo101 Dec 2 2017, 10:54 PM
Life got in the way. Back to incremental progress!
Rear brake and clutch lines all run. Peddle cluster mounted. Have to get another clutch soft line made. Incorrect fitting on one side. Now on to the front brake lines and a couple of block off plates to tidy things up. Brake/clutch Fluid resivior mounted and lines run.
Built the last segment of my fuel line. That goes in tomorrow after coffee.
New seat brackets are exactly what the doctor ordered!
I will post some pictures once I tidy up.
Posted by: effutuo101 Dec 14 2017, 07:26 PM
Peddle cluster in and mounted. Brake fluid in the rear brake and clutch lines and resiviors. Time to ramp up the pressure, check for leaks and see what else needs done.
Posted by: 76-914 Dec 14 2017, 08:32 PM
Looking good. Your pretty damned close now. Been sitting in it making Vroom noises yet?
Posted by: effutuo101 Dec 14 2017, 09:54 PM
Hahaha! Nope! But the wife wants to know when it will be ready to drive. She gives me grief about how long this has taken. I think she wants to drive it more than I do!
Posted by: 76-914 Dec 15 2017, 10:08 AM
Hahaha! Nope! But the wife wants to know when it will be ready to drive. She gives me grief about how long this has taken. I think she wants to drive it more than I do!
That's the nice thing about a conversion. Anyone can drive your car. No more pre-drive conversations of "do this, don't do that". After I got mine sorted, I handed the keys to my BiL and told him to depress the clutch when starting and to drive it. He's 70 and loved it. If he drove my stock 914 he'd have needed a 1 hour forum before hand.
Posted by: theer Dec 15 2017, 10:49 AM
More center console.just a couple of things to sort it for wiring.
1 more fitting and the fuel lines are done!
Then on to finishing up the tank ( had to go back to stock location and tank). Then pressurize and test.
Nice! Where did you find those center console switches?
Posted by: effutuo101 Dec 15 2017, 12:14 PM
Ha! West Marine. The come in grey and can be painted.
https://www.westmarine.com/?Ntt=blue+sea+switch+panel
Blue sea will build to specification and color if you want to.
Posted by: effutuo101 Dec 16 2017, 06:37 PM
There be clutch and rear brake pressure! I don’t know how many years since the car last had brakes as I got it as a shell.
Posted by: Amenson Dec 18 2017, 08:24 AM
Keep up the progress, the beauty will be on the road in no time.
Cheers,
Scott
Posted by: effutuo101 Jan 28 2018, 07:24 PM
Front brakes installed and pressure tested. Still have to get them rebuilt, but it can’t go to get dyno work with out brakes.
Next x fuel level sending unit and evaporate tank.
Posted by: jcambo7 Jan 28 2018, 07:38 PM
Front brakes installed and pressure tested. Still have to get them rebuilt, but it can’t go to get dyno work with out brakes.
Next x fuel level sending unit and evaporate tank.
I'm looking forward to the finale! I finally got my 914 dialed in quite well. Hopefully I can keep her running longer and drive her more this year!
Posted by: effutuo101 Jan 28 2018, 08:02 PM
Front brakes installed and pressure tested. Still have to get them rebuilt, but it can’t go to get dyno work with out brakes.
Next x fuel level sending unit and evaporate tank.
I'm looking forward to the finale! I finally got my 914 dialed in quite well. Hopefully I can keep her running longer and drive her more this year!
Sweet!
Hope to her this beast start mid month. It all depends on work, schedules and coin.
Posted by: Ferg Jan 29 2018, 02:00 PM
Good news, I want a ride when it's done and I'm not getting any younger 
Posted by: effutuo101 Jan 29 2018, 11:51 PM
Good news, I want a ride when it's done and I'm not getting any younger
Ha! My wife said the same thing! She asked if I, when working late, sit in the car and make vroom vroom noises.
Posted by: 914werke Jan 30 2018, 12:14 AM
Ha! My wife said the same thing! She asked if I, when working late, sit in the car and make vroom vroom noises.
I figured that was a given!
Posted by: effutuo101 Feb 18 2018, 02:00 PM
Thank you Rich for the fuel level sender! I so owe you!
One step forward two steps back! Finally back to where I was a month ago.
3 more boxes of stuff sorted through and either put in play or repacked for a future day.
Nothing more I own will go on the car. From here on out is it fabrication time. And all motor/cooling related.
Post build list is being thought about.
1. Have Eric refresh all brakes ( just to be 100% on them.)
2. rear cross drilled disks
3. cross drilled vented front disks
It is really odd seeing the car on the roller jacks and not be missing any pieces...
Posted by: 914werke Feb 18 2018, 02:34 PM
Posted by: effutuo101 Apr 14 2018, 10:30 PM
Rear brakes ordered.
Battery location changed. Battery tray mints, new cables run, cables connected.
Transmission oil done.
Removed oil heater and installed filter.
Removed collant lines that ran to the oil filter.
Engine oil done.
A few minor odds and ends that I am waiting for from the welder. Then fuel and coolant.
Swapping my side intakes and mirrors.
Almost time to pressure test all fluid systems.
Posted by: 76-914 Apr 15 2018, 09:20 AM
What the Hell? Did your camera break? We demand pics of these conversions.
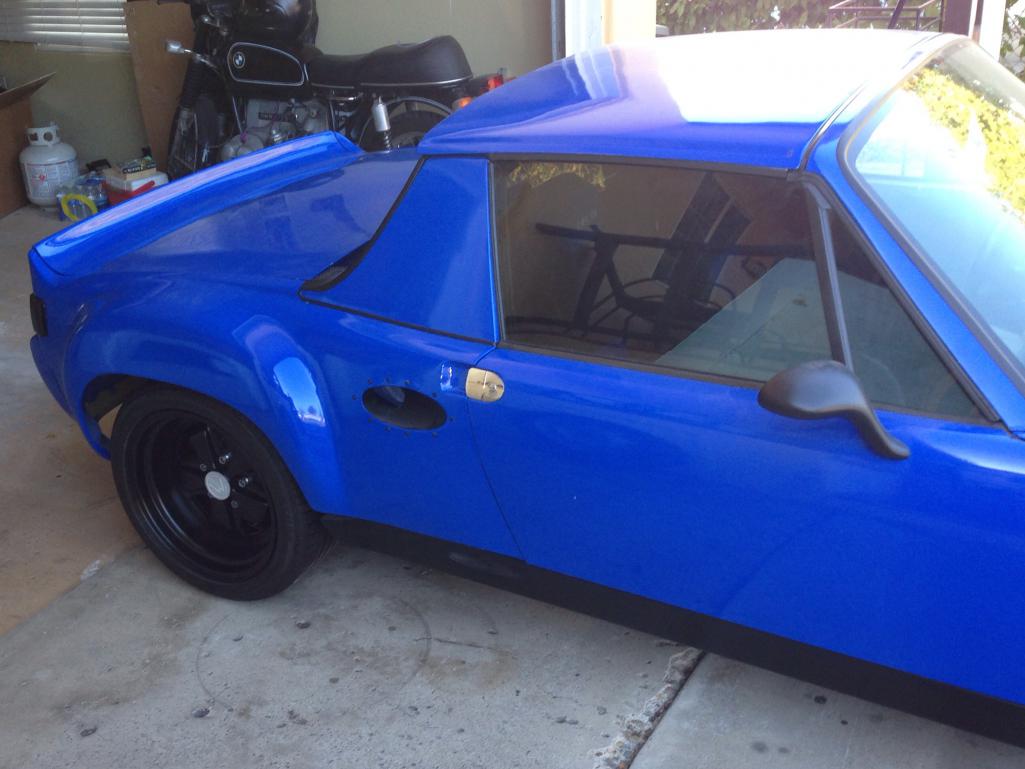
Posted by: effutuo101 Apr 28 2018, 04:05 PM
Gauge placement phase 2
Attached thumbnail(s)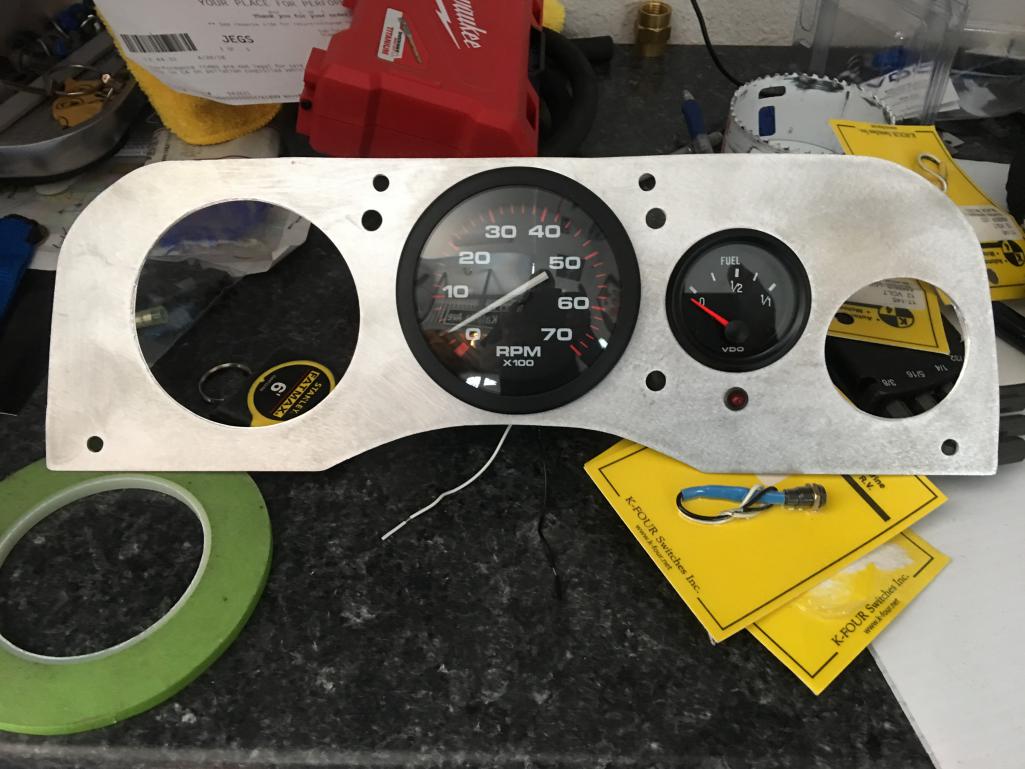
Posted by: effutuo101 Apr 29 2018, 05:34 PM
Almost read tit install. Hav to adjust st them.
Attached thumbnail(s)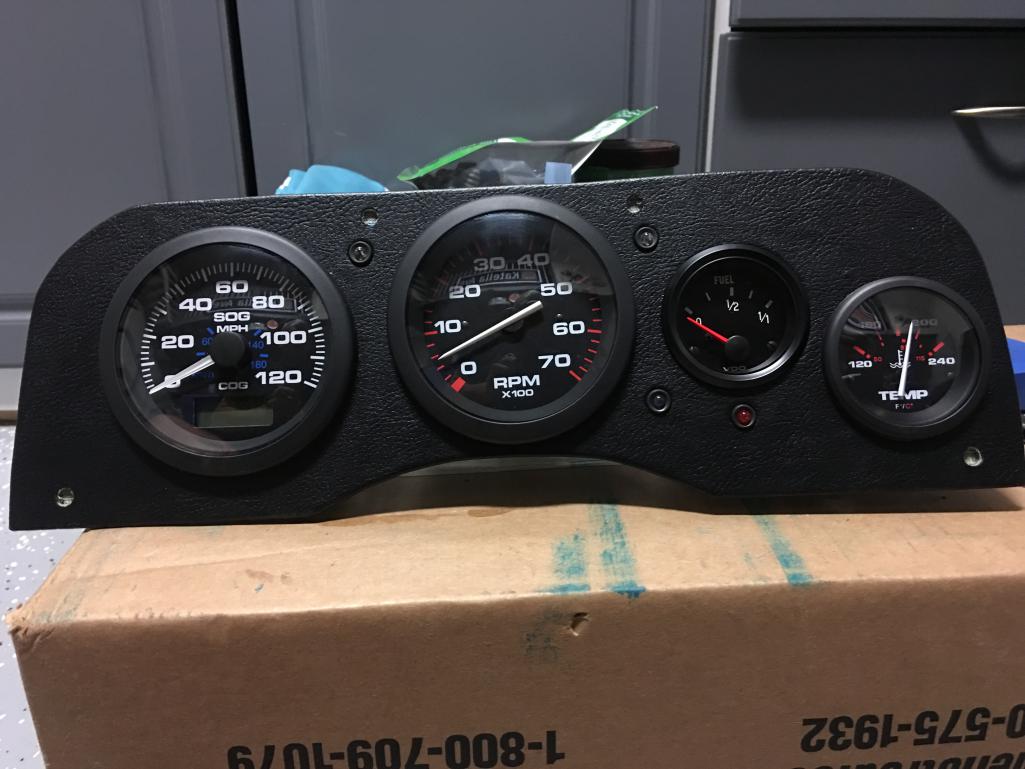
Posted by: Andyrew Apr 30 2018, 09:00 AM
Only a 120mph speedo? Seems a bit low?
Clear and nice guages though, I like the face print on the surround!
Posted by: effutuo101 Apr 30 2018, 07:36 PM
Only a 120mph speedo? Seems a bit low?
Clear and nice guages though, I like the face print on the surround!
Yep. GPS speedo. Above 100 is go to jail go directly to jail, do not pass go.

Posted by: Costa05 Apr 30 2018, 08:00 PM
Almost read tit install. Hav to adjust st them.
Nice looking gauges. What kind are the speedo and tach?
Posted by: Andyrew Apr 30 2018, 08:04 PM
Only a 120mph speedo? Seems a bit low?
Clear and nice guages though, I like the face print on the surround!
Yep. GPS speedo. Above 100 is go to jail go directly to jail, do not pass go.
But Willow springs is right near you and that's probably a 130-140mph course!
Posted by: effutuo101 Apr 30 2018, 10:11 PM
Almost read tit install. Hav to adjust st them.
Nice looking gauges. What kind are the speedo and tach?
Sierra Marine grade gauges. Figured water and impact resistant. Why not?
Posted by: effutuo101 Apr 30 2018, 10:13 PM
Only a 120mph speedo? Seems a bit low?
Clear and nice guages though, I like the face print on the surround!
Yep. GPS speedo. Above 100 is go to jail go directly to jail, do not pass go.
But Willow springs is right near you and that's probably a 130-140mph course!
Hmmm. Don’t see willow in my future. Maybe som auto x to learn how to drive a914 again.
Posted by: Costa05 Apr 30 2018, 10:22 PM
Almost read tit install. Hav to adjust st them.
Nice looking gauges. What kind are the speedo and tach?
Sierra Marine grade gauges. Figured water and impact resistant. Why not?
Haha. Sounds reasonable to me. Outlaw build.
Posted by: effutuo101 May 1 2018, 08:07 AM
Almost read tit install. Hav to adjust st them.
Nice looking gauges. What kind are the speedo and tach?
Sierra Marine grade gauges. Figured water and impact resistant. Why not?
Haha. Sounds reasonable to me. Outlaw build.
yep!
Posted by: effutuo101 May 2 2018, 07:55 PM
Have to adjust the temp guage..
Attached thumbnail(s)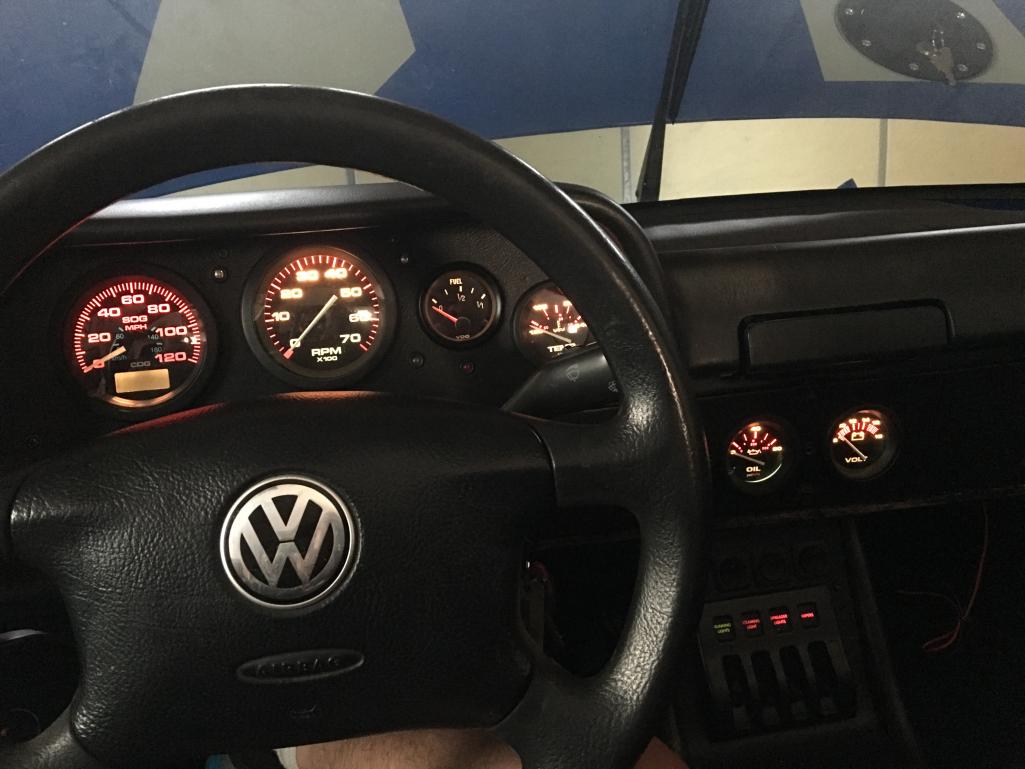
Posted by: effutuo101 May 2 2018, 08:08 PM
A couple of bolts and fix the alternator plug wire.
Fuel system final check, gas guage final wiring for sender and low fuel light.. Fuel and coolant filling and pressure test.
Final nut and bolt for all go systems.
Final wiring check of all systems.
Swap out rear brakes with my new PMB ones and bleed.
What am I forgetting?
To do: dyno, put hoods back on, Alignment, mirrors, sea belts, plates, insurance... I have to be missing something.
Attached thumbnail(s)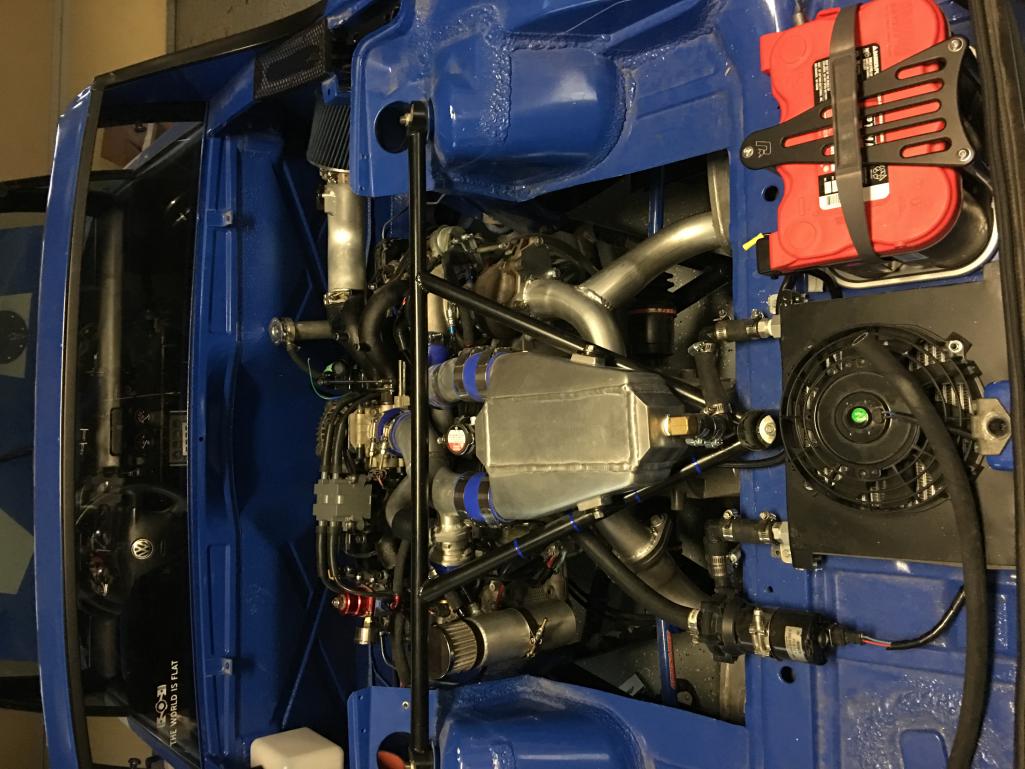
Posted by: PeeGreen 914 May 3 2018, 09:11 AM
Posted by: effutuo101 May 3 2018, 02:20 PM
Coolant in, leaks fixed.
Rear calipers swapped for new PMB calipers. Need the bleed.
Time to go get a gas can and get some gas....
Posted by: rdauenhauer May 3 2018, 08:10 PM
Its about damn time~
Posted by: Mueller May 3 2018, 08:14 PM
Great build, should be a blast.... nice gauge setup also!
Posted by: effutuo101 May 4 2018, 11:52 AM
@Rich, really gut?
Thanks!
Fuel pressure tested to 60 lbs. for 10 minutes. Nothing broke or spewed has. Nice leaks.
Next x....
Posted by: Gint May 6 2018, 08:54 AM
Hiya Chris.  What's the wether like in SD in July?
Posted by: effutuo101 May 6 2018, 09:25 AM
Hiya Chris.
What's the wether like in SD in July?Hi Gint and Shar!
We are about 15 minutes east of downtown. Usually low 80’s, but that all depends on the Marine layer.
You headed this way?
Posted by: Gint May 6 2018, 03:26 PM
Hiya Chris.
What's the wether like in SD in July?We are about 15 minutes east of downtown. Usually low 80’s, but that all depends on the Marine layer.
You headed this way?
We're looking for a summer vacation destination. We'll check hotel stuff and get back to ya!
Posted by: effutuo101 May 6 2018, 05:04 PM
Cool! Last year was really mild. But, you never know!
Posted by: effutuo101 May 8 2018, 06:21 PM
May Day May Day May Day. First start today. Now if I can just figure out how to upload the video, I will be happy...
Posted by: rdauenhauer May 8 2018, 06:42 PM
!!!!!!!!!!!!
Posted by: Amenson May 8 2018, 07:52 PM
May Day May Day May Day. First start today. Now if I can just figure out how to upload the video, I will be happy...
Are you seriously going to leave us hanging!?
Upload it to your YouTube account and then post the link.
Posted by: effutuo101 May 8 2018, 08:04 PM
Yep. Have to create yet another account.
Posted by: effutuo101 May 8 2018, 08:16 PM
Ok, first try...
https://youtu.be/bscs_HuL0nM
Posted by: 914forme May 8 2018, 08:43 PM
Yep no workie  need my fix, been working on gauges all night eyes are crossed and was wanting to get a nice fix for the drug I need.
Posted by: effutuo101 May 8 2018, 09:09 PM
https://www.youtube.com/watch?v=bscs_HuL0nM&sns=em
Try this.
Posted by: effutuo101 May 9 2018, 10:07 AM
Changed some settings. Maybe now it will share?
https://youtu.be/bscs_HuL0nM
Posted by: effutuo101 May 9 2018, 10:55 AM
https://youtu.be/1kAhQwXr8Qg
Next attempt
Posted by: effutuo101 May 9 2018, 04:13 PM
Exhaust leak somewhere. Next x find it and fix.
https://youtu.be/86fq00MGPq8
Posted by: Mueller May 9 2018, 04:22 PM
Sounds good.
Posted by: Gint May 9 2018, 04:30 PM
Posted by: effutuo101 May 9 2018, 05:21 PM

Posted by: Amenson May 9 2018, 09:45 PM
Congratulations!
Posted by: 76-914 May 10 2018, 08:50 AM
Ain't that a great feeling. The feeling of relief highlighted by the feeling of accomplishment.
Posted by: effutuo101 May 11 2018, 02:50 PM
Time to sink the gas lid.
Attached thumbnail(s)
Posted by: effutuo101 May 11 2018, 02:51 PM
Step 2
Attached thumbnail(s)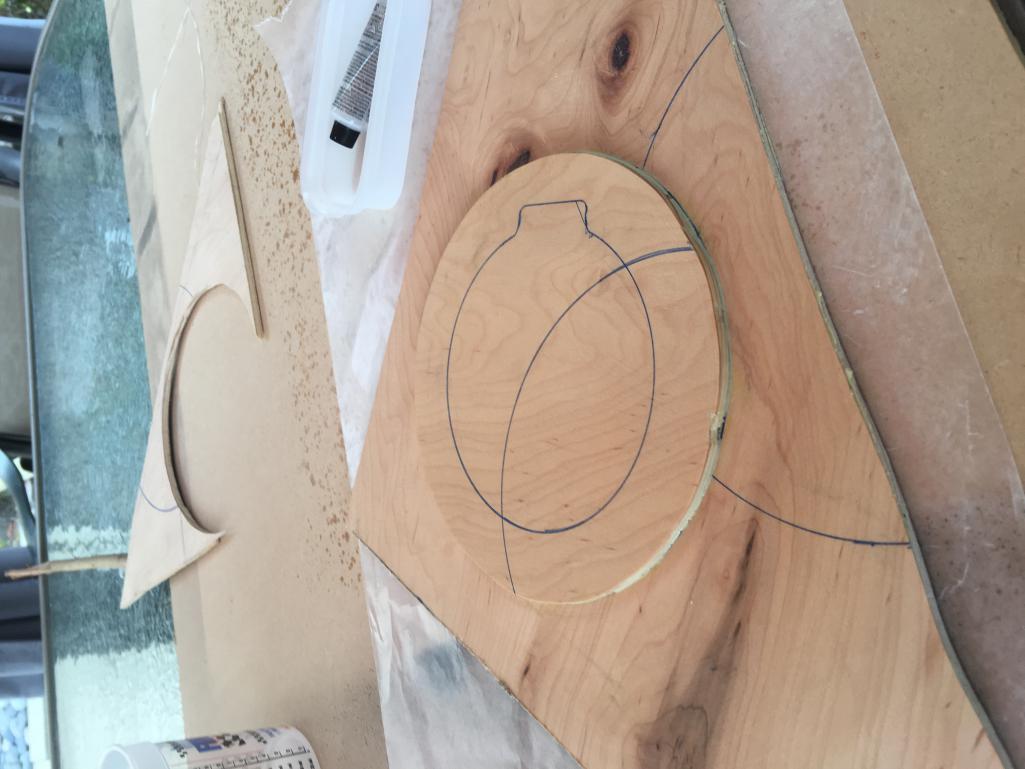
Posted by: effutuo101 May 11 2018, 02:51 PM
Step 3:
Attached thumbnail(s)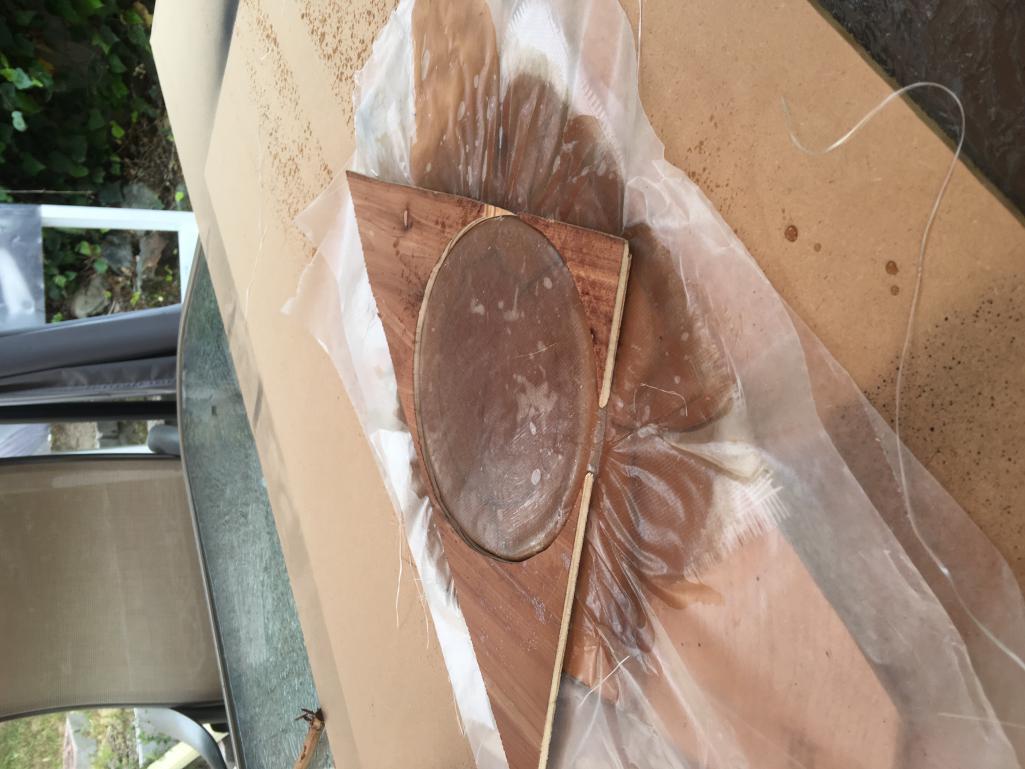

Posted by: effutuo101 May 11 2018, 02:55 PM
Step 4:
Cut,drill, fit, and bond.
Time to let dry for 24 hours.
Attached thumbnail(s)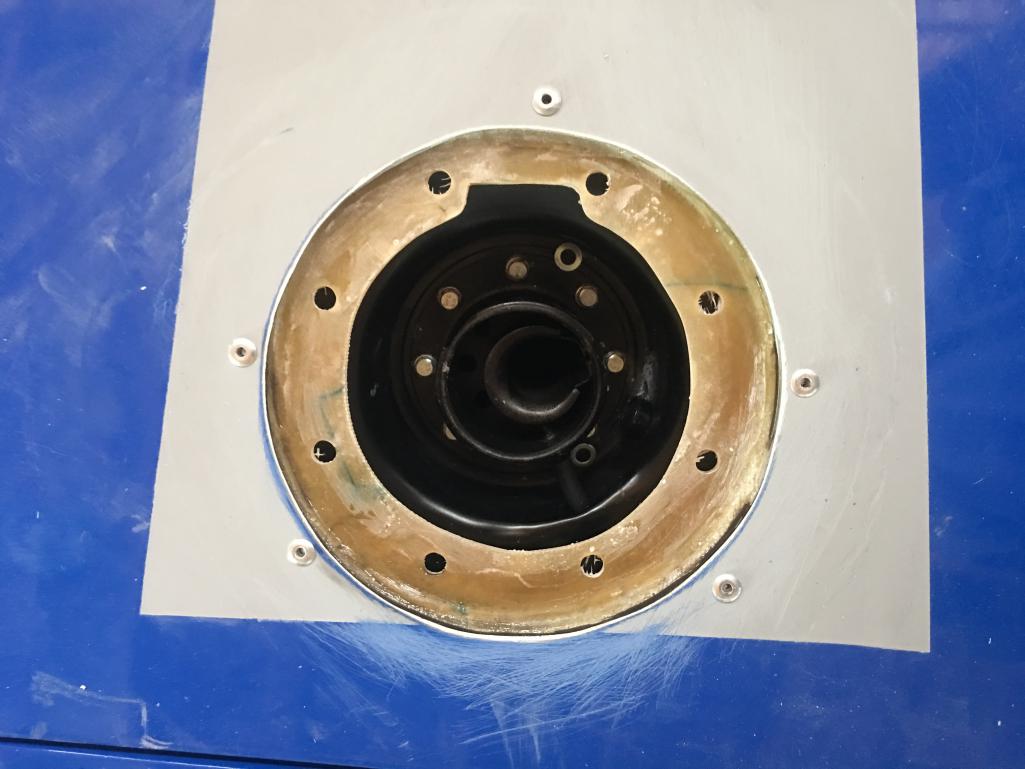
Posted by: effutuo101 May 15 2018, 09:01 AM
Roughed in. Time for some glaze and sanding to see where I am at.
Attached thumbnail(s)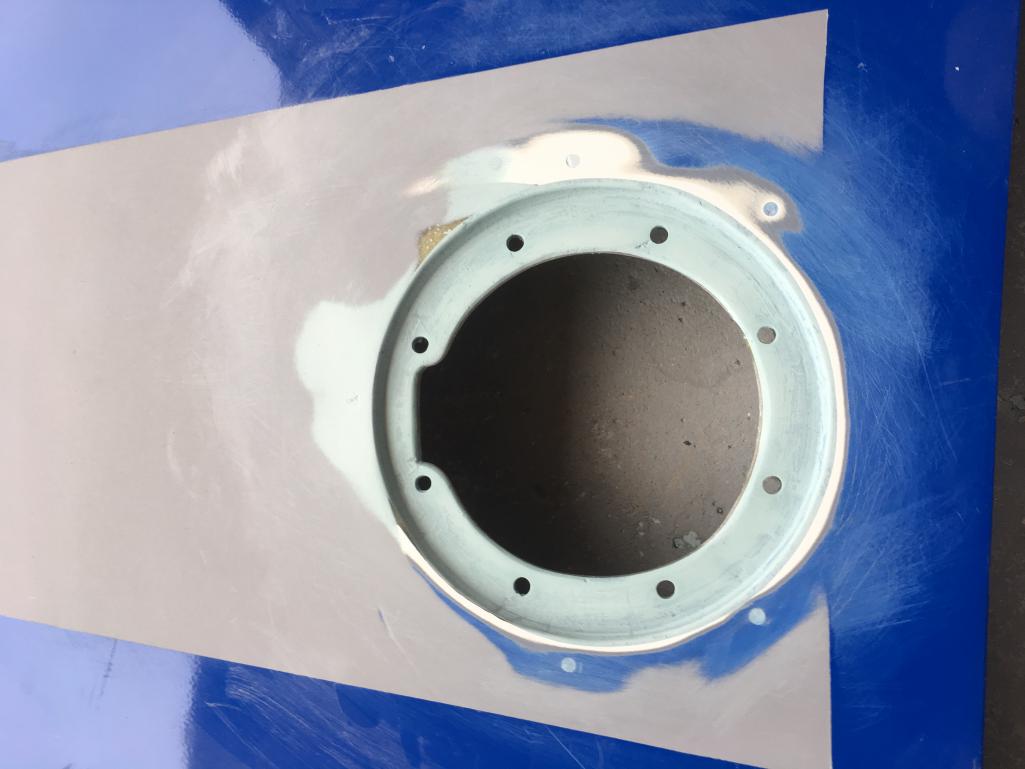
Posted by: effutuo101 May 16 2018, 10:17 AM
While I wait for my ISP tech that arrive, I figured I wold install some floor mats from Terry Rutley
Posted by: effutuo101 May 16 2018, 11:43 AM
Passenger
Attached thumbnail(s)
Posted by: effutuo101 May 16 2018, 11:55 AM
Driver
Attached thumbnail(s)
Posted by: PeeGreen 914 May 18 2018, 05:27 PM
Those are purty
Posted by: effutuo101 May 18 2018, 05:39 PM
Posted by: effutuo101 May 18 2018, 06:36 PM
New hood pins arrived today.
Attached thumbnail(s)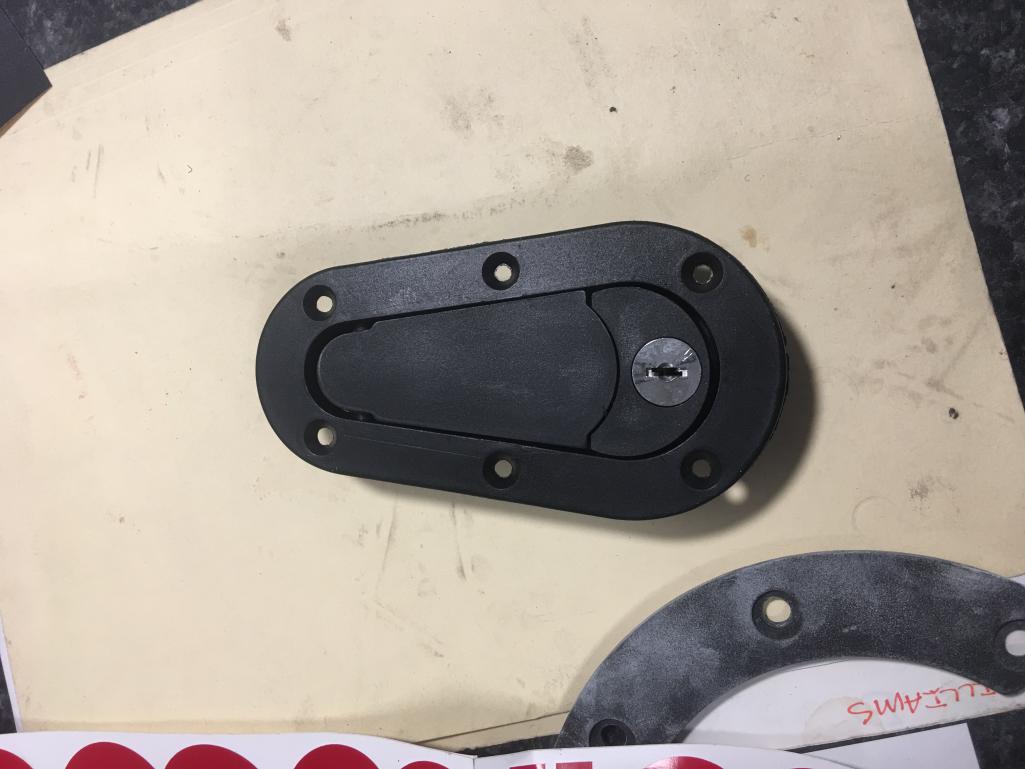
Posted by: effutuo101 May 18 2018, 06:37 PM
So, at lunch time, this happened.
Attached thumbnail(s)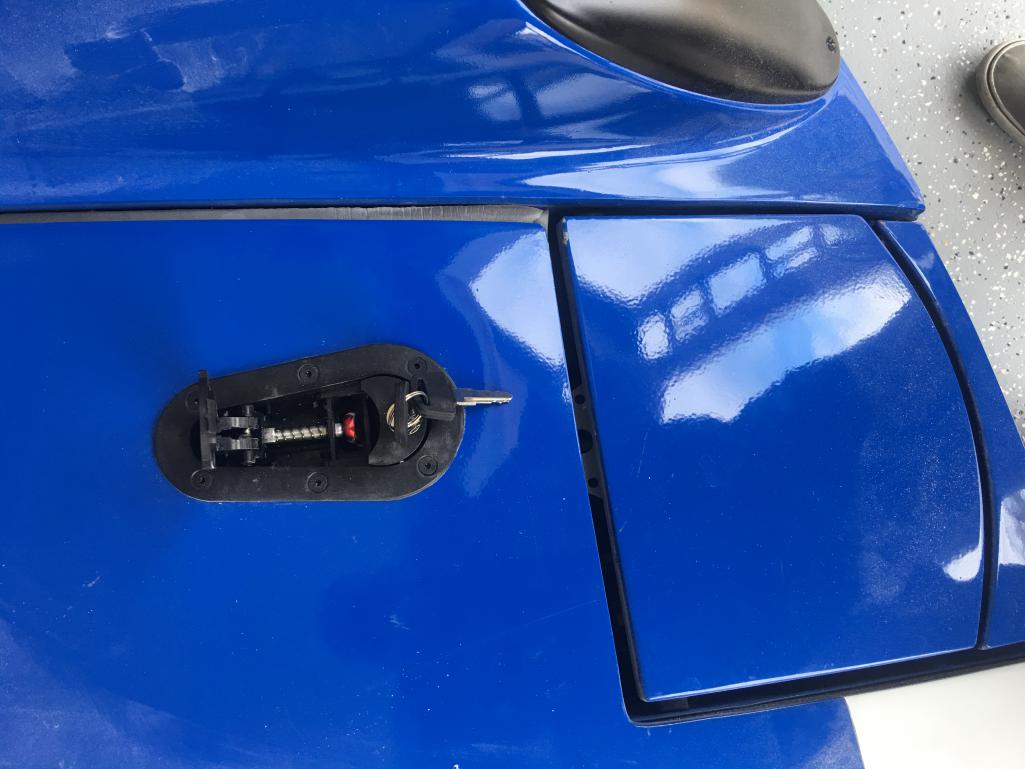
Posted by: effutuo101 May 28 2018, 03:06 PM
Dashbos done.
Attached thumbnail(s)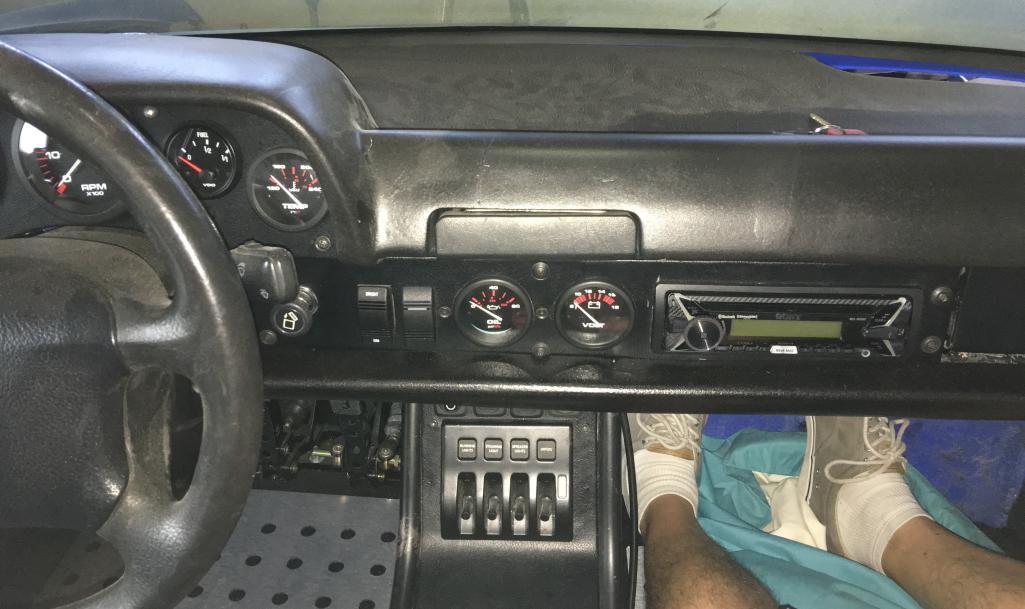
Posted by: effutuo101 May 28 2018, 03:08 PM
Cut down a later lower dash and ditched the vents.
Attached thumbnail(s)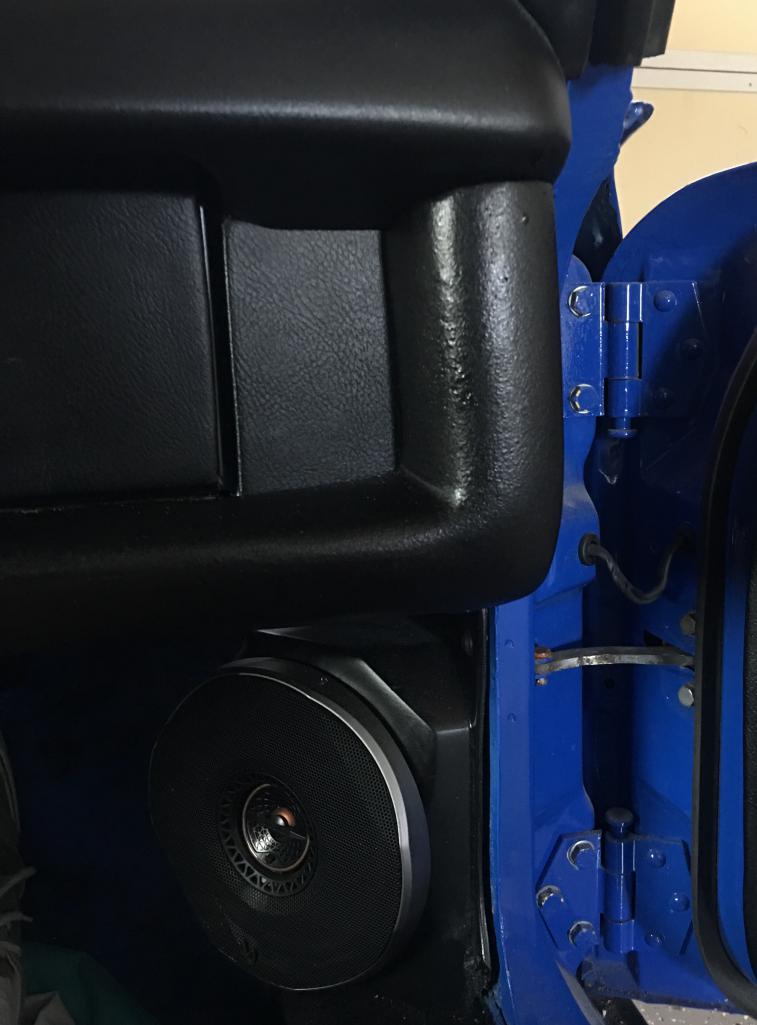
Posted by: effutuo101 May 30 2018, 02:52 PM
So, for the first time in probably 20 years, this car moved under its own power.
Not running great yet.
Dyno tune
Seatbelts and mirrors
Align
Drive like I stole it.
Touch up paint where I had to shift stuff around.
A lot of little stuff to finish up or work on, but the main package is in one piece.
Attached thumbnail(s)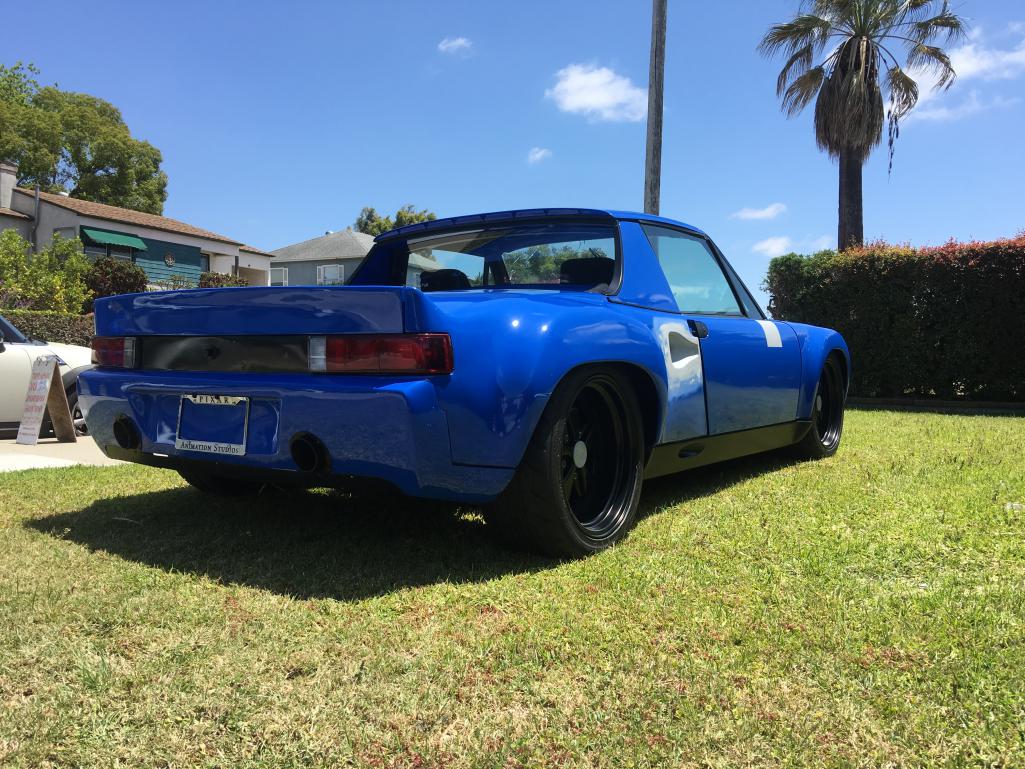
Posted by: Ferg May 30 2018, 02:56 PM
 Congrats, it must feel good.
RRC this fall, just sayin...
Posted by: ValcoOscar May 30 2018, 03:02 PM
Congrats..that's one mean looking machine
Now go
Posted by: effutuo101 May 30 2018, 03:36 PM
Wife tried to talk me into driving around the block. 50 would see me for sure...
Thanks all!
Next post when back from Dyno and alignment. Probably a video of first actual drive.
Rich D, Jeff H. Jon B. Couldn’t have gotten here with out all of your help, patience and mad skills.
Posted by: 914werke May 30 2018, 03:55 PM
WINNER WINNER CHICKEN DINNER!
Posted by: 76-914 May 31 2018, 09:20 AM
Looking forward to seeing your machine.
Posted by: PeeGreen 914 May 31 2018, 06:35 PM
Wife tried to talk me into driving around the block. 50 would see me for sure...
Thanks all!
Next post when back from Dyno and alignment. Probably a video of first actual drive.
Rich D, Jeff H. Jon B. Couldn’t have gotten here with out all of your help, patience and mad skills.
Posted by: sixnotfour Jun 1 2018, 01:07 PM
more outside pics....I keep telling Chris Hines to come see you...He has finished moving so better have time soon...
Posted by: effutuo101 Jun 1 2018, 07:04 PM
He texted! We will have him over soon for BBQ and hanging out!
Posted by: effutuo101 Jul 26 2018, 05:03 PM
Ok! Car is up at the Dyno shop getting tuned.
As I cleaned my garage I reviewed my list of To Do items:
Seat Belts
Mirrors (side and windscreen)
Alignment
Touch up Paint....
What is everybody doing for Alignment? Stock?
My plans are spirited driving and the occasional AutoX. I don’t care about Tire wear as I plan on replacing my tires every 10k (or 3 years which ever comes first....)
Can people chime in on what they have set?
Running 8’s and 9’s respectively
Posted by: 914forme Jul 26 2018, 06:25 PM
Front toe zero
Front Camber 2.1 degrees negative
Front Caster 5.5 Degrees
Rear toe 1/8 in
Rear Camber 2.0 degrees negative.
Can be a bit squirrelly on odd pavement.
I ran it with 1/8 out on the front for a while, scared my wife to death, os I backed off a bit.
Oh I run "R" rubber think BFG Rivals, RE-71-R etc... Even with these setting tread wear is pretty good. Rocks into the top of the fenders not good You can glue in material to help with the issue. I would like to run a set of fender liners, but would need to make custom ones due to the flares.
Posted by: effutuo101 Jul 26 2018, 06:59 PM
Cool! Thank you!
Anybody else?
Posted by: sixnotfour Jul 26 2018, 08:25 PM
1.25-1.5 front 1.5 -1.75 rear ..start conservative...when you get aggressive you will know when you need more ...
Posted by: effutuo101 Jul 27 2018, 11:43 PM
Cool! Thank you!
Posted by: effutuo101 Aug 1 2018, 09:12 AM
Jamie Rust! Good chatting with you on FB!
Posted by: effutuo101 Sep 12 2018, 04:33 PM
Ok! Dyno tune is as far as they can take it.
320 Torque at 2900 RPM drops to 280 after 3k RpM)
280 HP at 5500 RPM.
Next x alignment and sort out fuel pump issue.
Posted by: effutuo101 Sep 17 2018, 01:27 PM
Back from alignment. Everything is roughed in.
Time to get mirrors, seatbelts and a temp plate to road test...
Posted by: Andyrew Sep 17 2018, 01:50 PM
Awesome progress! 280Whp is SOLID!
We'll need a running video!
Posted by: burton73 Sep 17 2018, 02:35 PM
You know this is a really nice modified 914. Your work looks top notch. Sounds killer as well.
Bob B
Posted by: effutuo101 Sep 17 2018, 07:05 PM
Once I sort out my fuel pump issue and she is running smooth again, I will get a video!
Posted by: effutuo101 Sep 25 2018, 10:54 AM
3 days at alignment with specifics provided and this is what I get back.
Any ideas on the passenger rear? The toe in was the most they could get.
Attached thumbnail(s)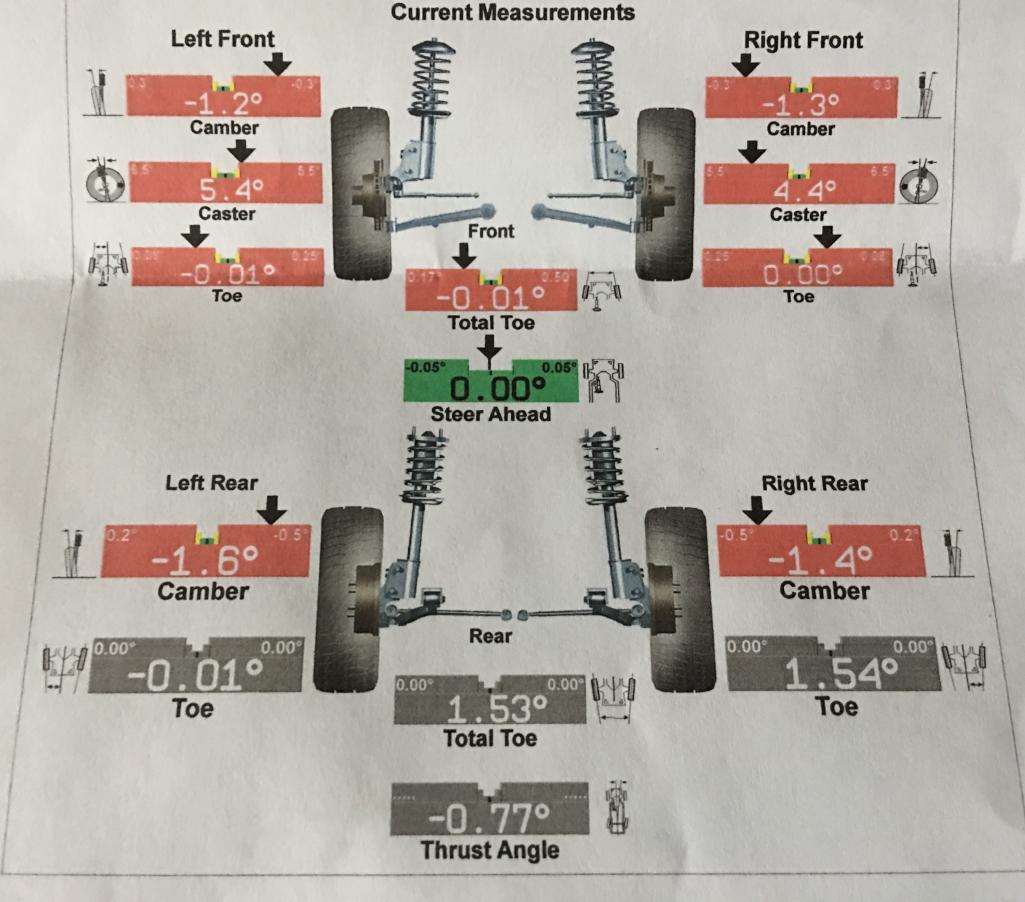
Posted by: sixnotfour Sep 25 2018, 12:36 PM
right rear is good left rear ??
https://robrobinette.com/ConvertToeInchesToDegrees.htm
Posted by: effutuo101 Sep 25 2018, 02:41 PM
I will check on the calculations when I get home!
Posted by: Amenson Sep 25 2018, 06:07 PM
Confirm that the rear tires are centered on the chassis. I had the PorSTI aligned at a "hot rod" shop that did not understand the suspension and had the rear shifted to one side with similar results.
After much fussing a quick measurement from the wheels to the chassis revealed the 
Posted by: effutuo101 Oct 27 2018, 07:19 PM
First street drive today. About a half mile. Well behaved at 1/4 throttle.
Next x finish mirror backing plates and install mirrors
Install Seatbelts.
Posted by: 914forme Oct 28 2018, 10:46 AM
Got to love firsts drives
Posted by: effutuo101 Jan 17 2019, 04:04 PM
First upgrade.
Shifting mechanism. Out with the old!
Attached thumbnail(s)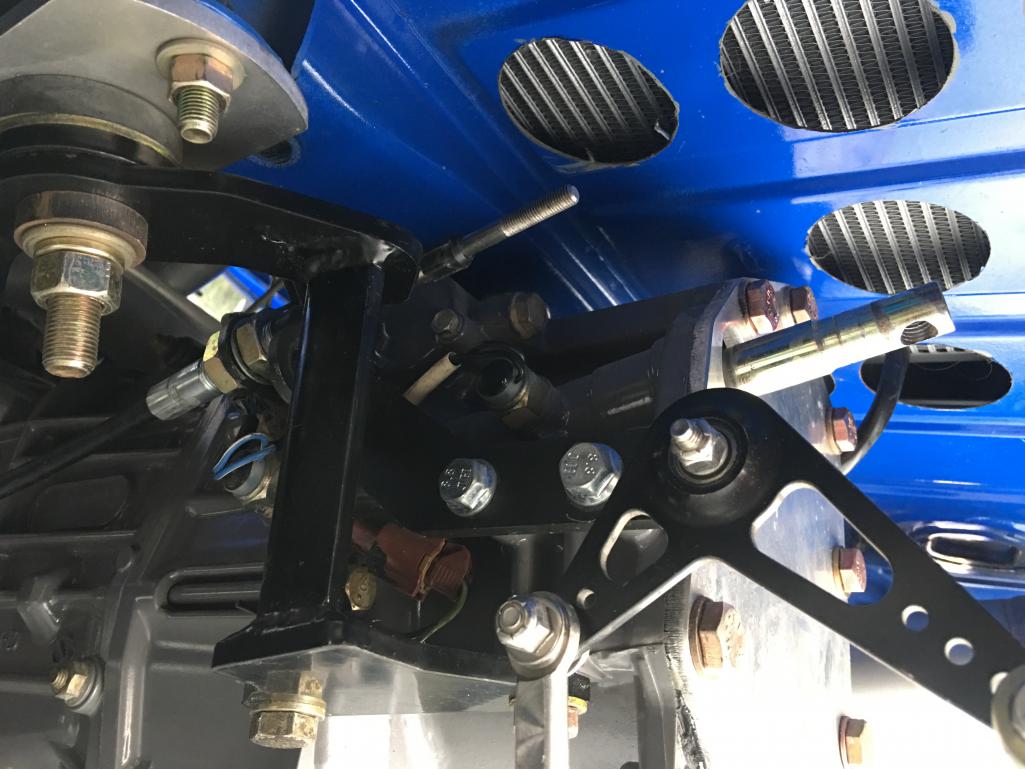
Posted by: effutuo101 Jan 17 2019, 04:05 PM
In with the new!
Zero decibel motorsports.
Geometry now looks much better.
Attached thumbnail(s)
Posted by: Amenson Jan 17 2019, 06:10 PM
In with the new!
Zero decibel motorsports.
Geometry now looks much better.
Looking forward to your comparison report.
Posted by: 914forme Jan 17 2019, 07:16 PM
Did you reuse the cables from the cold water kit or did you get new ones?
Posted by: effutuo101 Jan 17 2019, 07:56 PM
I will report on this once it stops raining!
I got new cables. I was going to reuse my old ones till I realized that one was binding and had been crushed. Now I have to build a plate for my shifter to anchor the new style cables on. Oh well...
Posted by: 914forme Jan 17 2019, 08:21 PM
Where did you get them and P/N or length?
Posted by: sixnotfour Jan 17 2019, 08:34 PM
omg rain in san deigo ,,the horror..
Posted by: effutuo101 Jan 17 2019, 09:11 PM
omg rain in san deigo ,,the horror..
Right?
In Chris’s neighborhood they had flooding, then a water main broke. In fixing that, they hit a gas line... in fixing that, they knocked out a power line.
As far as the cables (since I changed them out) I soureced the from West marine.
Seastar Solutions Teleflex 4300 series cables part numbers CCX43008 (8ft) or TELCCX43007 (7ft).
If you get the CCX4330(length) that is the upgraded cable. Smaller radius bends. I went with the 8footer as I wanted to avoid my exhaust a little bit more.
You can probably order straight from seastar.
You will have to dig to find the bulkhead to bulkhead cables that Ian used.
I guess I should find one more and find my old shifting mech a new home.
Posted by: sixnotfour Jan 17 2019, 09:36 PM
hopefully Chris H was up in LA buying wheels...I wanna see Angela do a power pass in that 914...
Posted by: effutuo101 Jan 17 2019, 09:40 PM
hopefully Chris H was up in LA buying wheels...I wanna see Angela do a power pass in that 914...
Hehe! Leave it to Chris to be out of town when North Park goes South!
Oh, you will. She was bugging me about it Sunday morning!
Posted by: 914werke Jan 17 2019, 11:55 PM
Damn!!
Posted by: effutuo101 Jan 18 2019, 09:51 AM
For Ian’s shifter the replacement part idor the 7ft cable is:
https://midwestcontrol.com/shop/40-084-BH-BH-3-MSF-4-QD250
Posted by: Ferg Jan 18 2019, 09:59 AM
hopefully Chris H was up in LA buying wheels...I wanna see Angela do a power pass in that 914...
Posted by: effutuo101 Dec 17 2019, 04:15 PM
New pan back from powder coating!
New Wireing harness and computer being sorted out by Jeff R.
The EMS stinger was top binary and fought with altitudes.
Out with V1 shortened pan and in with V2!
Attached thumbnail(s)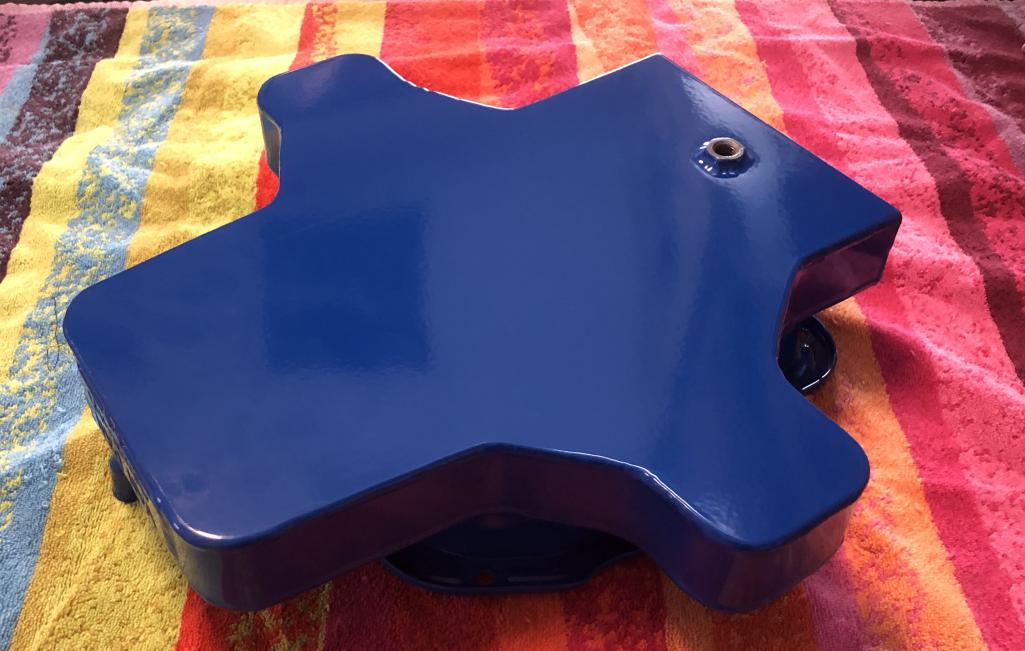
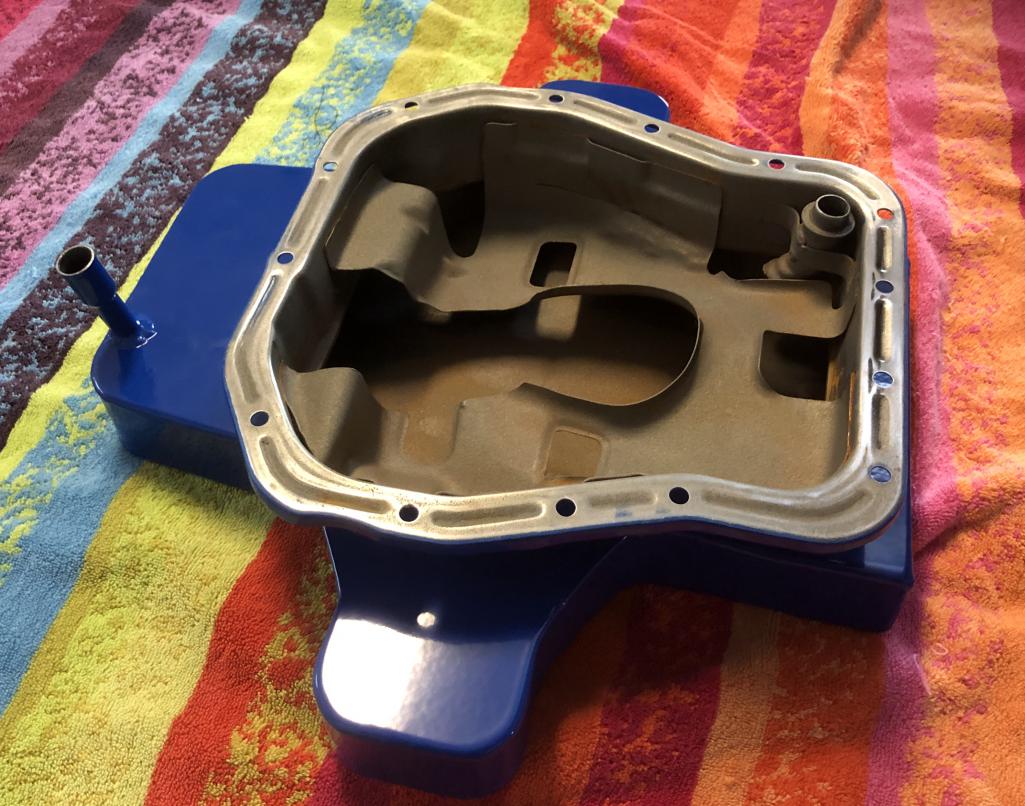
Posted by: 914werke Dec 17 2019, 06:37 PM
& its Blue!
Posted by: MichiganMat Dec 18 2019, 12:38 PM
I think you've got a problem with your linkage.
I mention it because your photo shows exactly the kind of mounting that I did with the ZeroDB linkage that was incorrect.
The little arm that mounts to the transmission output shaft should *not* be attached at the existing hole in the linkage. It needs to be mounted as close to the taper as possible, with the goal (and heres the important part) of the linkage being as squared up (i.e. 90-degree angles everywhere) as possible when the transmission is in neutral.
If the arm is mounted at the stock hole in the transmission output shaft, the angles are not 90, and the shift pattern at the shifter will feel not like an |-|-|, but much more like: |-\-/ because of the bad geometry.
On my race-car, the bad geo at the shifter resulted in 2 (!!!) mis-shifts at the track. I ultimately found the bad geometry, drilled a new hole in the output shaft, and sternly suggested to ZeroDB to send instructions with their kit.
Very best,
Mat
Posted by: effutuo101 Dec 19 2019, 01:01 PM
Thank you Matt!
I was told after the fact what needed to be done. I will be correcting this when I pull the transmission (probably next week). Need better gearing for the race track that is so cal.
Posted by: effutuo101 May 27 2020, 09:09 PM
Transmission geometry fixed.
Transmission back on motor and unit back in car.
Unboxed the new turbo. Oh boy! So pretty!
Posted by: effutuo101 May 27 2020, 09:11 PM
& its Blue!
Had some clearance issues with this pan due to the cradle. Had to go with a shortened pan (but 1/2 inch deeper than my previous pan).
Posted by: Root_Werks May 28 2020, 08:47 AM
Project sure has come a long way, looks great!
Posted by: eric9144 Jun 5 2020, 08:51 AM
Transmission geometry fixed.
Transmission back on motor and unit back in car.
Unboxed the new turbo. Oh boy! So pretty!
Glad to see you back at it
Posted by: 914werke Aug 21 2020, 08:32 PM
@http://www.914world.com/bbs2/index.php?showuser=3914
OK Chis whats going on..?
Are you just so busy driving that beast that you you've left us all hanging?
Posted by: effutuo101 Sep 14 2020, 09:12 AM
@http://www.914world.com/bbs2/index.php?showuser=3914
OK Chis whats going on..?
Are you just so busy driving that beast that you you've left us all hanging?
Unfortunately not yet. I have to wire in the new computer and measure for 930 axles. Had a few home projects take priority during the hot months. So, back to it now that the weather is cooling down.
How have you been?
Powered by Invision Power Board (http://www.invisionboard.com)
© Invision Power Services (http://www.invisionpower.com)