Printable Version of Topic
Click here to view this topic in its original format
914World.com _ 914World Garage _ Install battery stand and tray
Posted by: watsonrx13 Oct 13 2004, 04:01 PM
Since I had to search extensively for the installation of a battery stand and tray, I decided to write up the process that I used to weld in my new one.
This 'upgrade'/'enhancement' to the 914 is probably the easiest welding project that I've done yet. I replaced mine because I was replacing the suspension ear and engine shelf and the battery tray was starting to show signs of rust. It also allowed me to check the frame rail underneath.
Here's the before shot. It doesn't look as bad as others, but I wanted to do it 'right' since I was in there.
Attached image(s)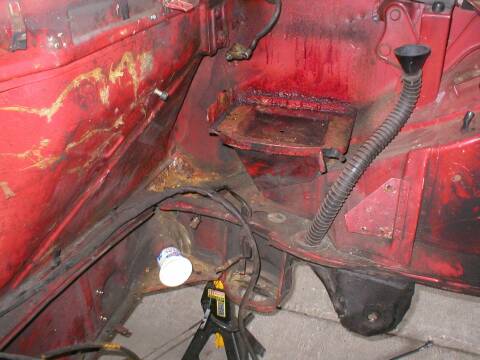
Posted by: watsonrx13 Oct 13 2004, 04:02 PM
I'm not going to show the removal process as it will depend on the state of the stand/tray. I would recommend drilling out the spot-welds, if you can find them. If not, then you can use a cutting wheel to removed the stand and tray, then grind out the left over metal.
Anyway, here's what mine looked like when I was finished removing it.
Attached image(s)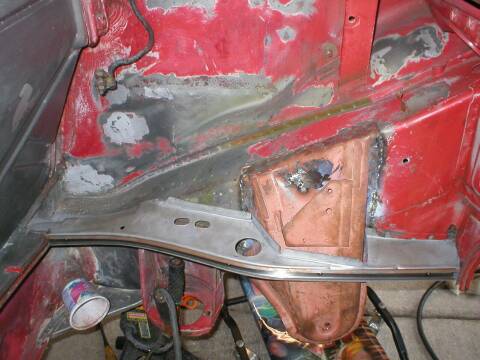
Posted by: watsonrx13 Oct 13 2004, 04:02 PM
The first thing you'll need to do is bolt the stand and tray together, using a 13mm bolt. This will allow you to place the stand in position to determine where you'll need to adjust it. Remember, these new pieces are just a starting point, you will need to fit, bend, grind, then repeat until it fits.
Here's mine fitted in place.
Attached image(s)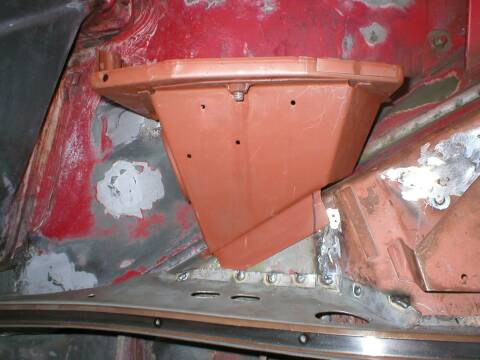
Posted by: watsonrx13 Oct 17 2004, 03:51 PM
Here's a section that I'll remove to make mine fit next to the suspension ear.
Attached image(s)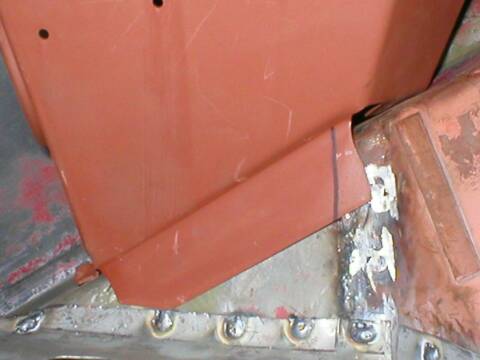
Posted by: watsonrx13 Oct 17 2004, 03:51 PM
Next, I removed the stand and tray and painted the inside of the stand and the bottom of the tray with flat black. I felt that this would be a good color in case I ever decided to repaint the engine compartment.
Attached image(s)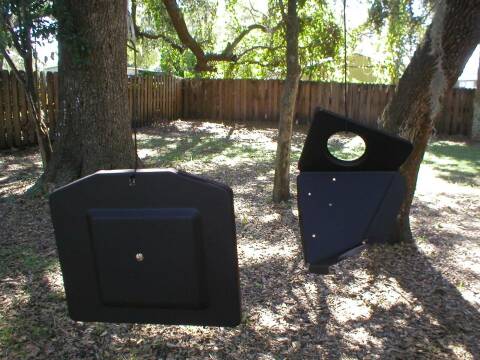
Posted by: watsonrx13 Oct 17 2004, 03:51 PM
Next, I removed the paint where I will be welding the two pieces together.
Attached image(s)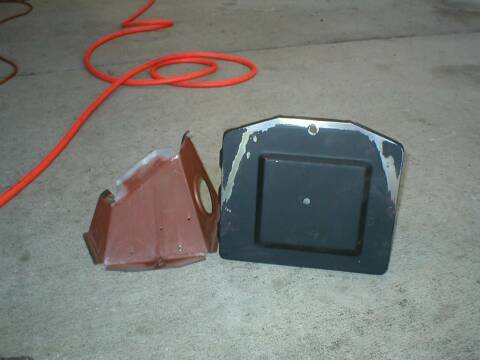
Posted by: watsonrx13 Oct 17 2004, 03:52 PM
Now I ready to begin welding. I bolted the two pieces back together and placed them into position. I tack-welded them into position, then completely welded the two tabs that are connected to the frame rail. I decided not to drill holes and spot-weld, which some people do. I felt that I could get a better weld this way.
Attached image(s)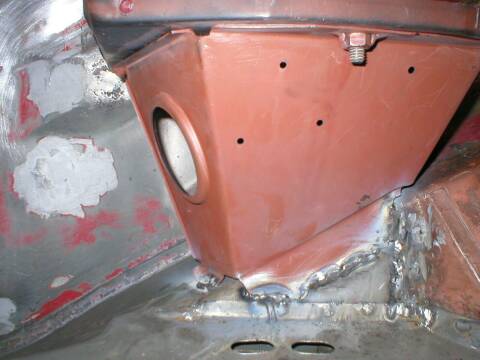
Posted by: watsonrx13 Oct 17 2004, 03:52 PM
Next, I removed the bolt and the tray to be able to weld the inside tab to the frame rail.
Attached image(s)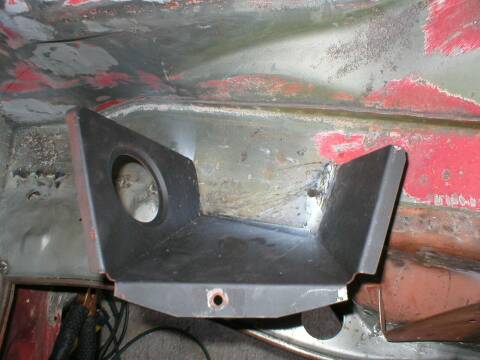
Posted by: watsonrx13 Oct 17 2004, 03:53 PM
Now comes the final welding of the tray. I bolted the tray back to the stand, and clamped both side tabs with c-clamps. Then I welded the three tabs, on the stand, to the tray.
Attached image(s)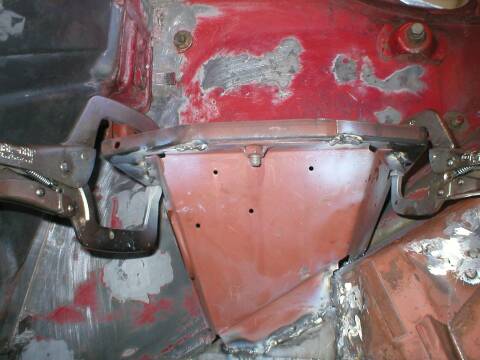
Posted by: watsonrx13 Oct 17 2004, 03:53 PM
The final welding was done on the top. I welded the tray to the side of the fender well.
Attached image(s)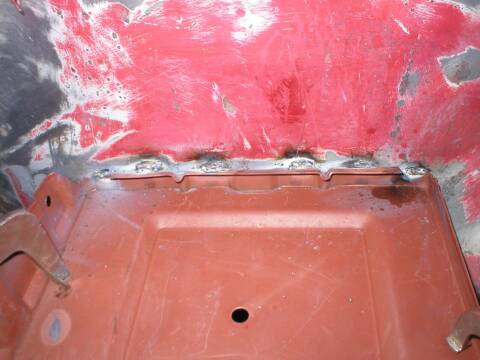
Posted by: watsonrx13 Oct 17 2004, 03:53 PM
Here's my completed engine compartment improvement. It includes the new suspension ear, engine shelf and battery tray.
Attached image(s)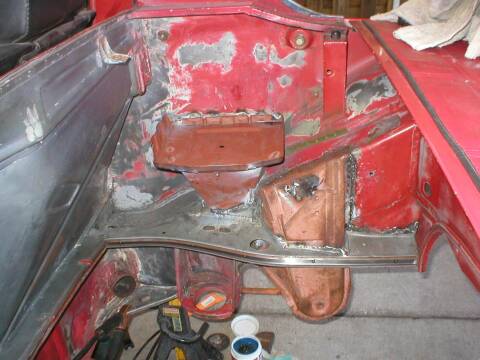
Posted by: watsonrx13 Oct 17 2004, 03:54 PM
Finally, here's a shot of an old battery that I put in place to verify the position and the strength of the welds.
This is a very straight forward welding project that anyone can do, just remember, take your time. I probably spent 10x the amount of time fitting and/or grinding as I did welding.
I hope your project turns out as well as mine. Good luck.
Attached image(s)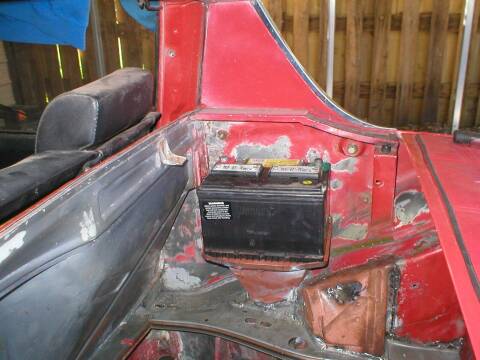
Posted by: type47 Oct 17 2004, 03:59 PM
i haven't done this myself, but a shop did it for me. i would recommend that to help align and locate the tray and support, use the bracket that covers/holds/surrounds/mounts the ECU. the ECU mount bolts to the tray and to the engine shelf. i have a 1.8 and the battery tray is off just enough that the ECU mount cannot both bolt to the tray and the engine shelf. 
Posted by: dinomium Oct 17 2004, 05:28 PM
If I can get off the couch today, I just might go out to the shop and do that project. I have all the parts... It is dismantled and ready
but it Soooooooooooooooooo nice and warm in here!

Good job! Almost insparational to the most LAZY club memeber, ME!
Posted by: double-a Oct 17 2004, 05:32 PM
thanks for the great step-by-step! it's especially useful to a newbie like me who needs to get that hell hole area fixed this winter, especially since my tray just disintegrated recently.
~a
Posted by: URY914 Oct 18 2004, 07:10 AM
Rob,
I think people would be intrested to know that before this project, you have had never welded before or ever really tackled anything of this nature.
You've done a great job. 
If it was not for this board and guys like you there would be a lot of dead 914's out there.
Paul
Posted by: watsonrx13 Oct 18 2004, 10:02 AM
Thanks Paul for the compliment, especially coming from someone with your years of knowledge and experience working on these 'monsters'.
You are absolutely correct, with this Forum there will be alot more teeners back on the road and/or track. 
Posted by: i love porsche Oct 18 2004, 12:53 PM
looks great!
i think im just going to relocatemy battery to the rear trunk though...we'll see
Posted by: Lou W Oct 18 2004, 01:16 PM
Thanks for all the info, I've been down loading pictures like yours and putting them in a binder, so that when I start putting my car back together I'll have some examples to look at. This site is great.
Posted by: Root_Werks Oct 18 2004, 02:26 PM
i think im just going to relocatemy battery to the rear trunk though...we'll see
That is what I did. The battery in the rear trunk is nice. It really cleans up the engine compartment. If you do that, make sure you use a Gel battery. Otherwise battery acid will eay paint, carpet or stuff stowed back there. Otherwise, it is a very cool way to mount the battery.

Posted by: BatAc Oct 18 2004, 08:27 PM
Root, if ya' install the battery in the back boot, does the targa still fit???  Also let me tell ya' that acid eats a whole lot more than paint. I have a damn hell canyon that proves that point! <_<
Powered by Invision Power Board (http://www.invisionboard.com)
© Invision Power Services (http://www.invisionpower.com)