Printable Version of Topic
Click here to view this topic in its original format
914World.com _ 914World Garage _ Fix a six
Posted by: wachospeedo Jun 10 2012, 07:10 PM
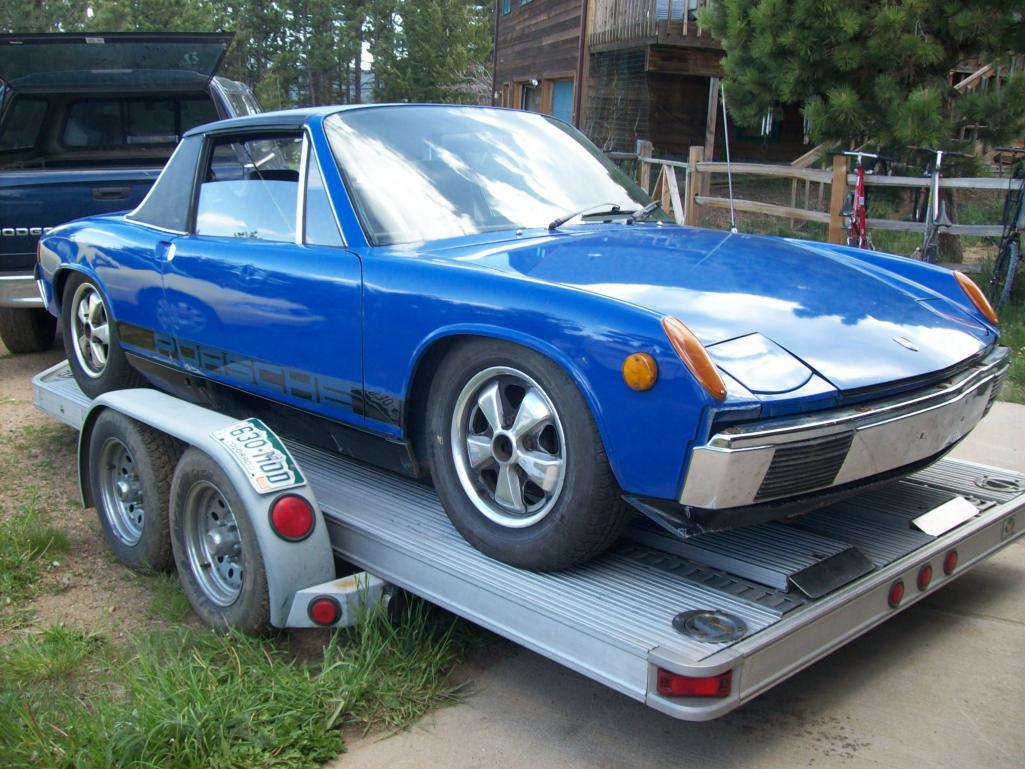
New to the board. Most of my work and experience is over on Pelican with 911 longhoods. I stalked a local PCA guy who was going to eventually sell his 914-6. No pressure, just every few months I let him know I hadn't forgotten. Finally got a chance to see the car in person three weeks ago. Passenger rocker issues as well as surface bubbling in a number of places. Car had been extensively autocrossed at PCA parades for years...very successfully. Owner had pulled the original 2.0 and replaced with a 2.7 RS spec engine with carbs. He bought another mid-engined car (boxster) and ignored the 6. I bought the car (w/ 2.7) and original engine. Got the 2.7 running well enough to drive the car...and decided to dive into the resto. I am familiar with rust, and plan to do it correctly. I have a rotisserie with 911 mounts, but shouldn't be a big deal to make mounts for the 6. Made a couple calls to Resto Design to check on parts...and away I go. I have a 71 911 softie that has been at paint too long...so while I wait for it to come home, thought I would see what my sandblasters schedule was. Turns out he can do the car in two weeks. So, I have a deadline. So...I guess this is my resto thread on my new Adriatic Blue 6... 
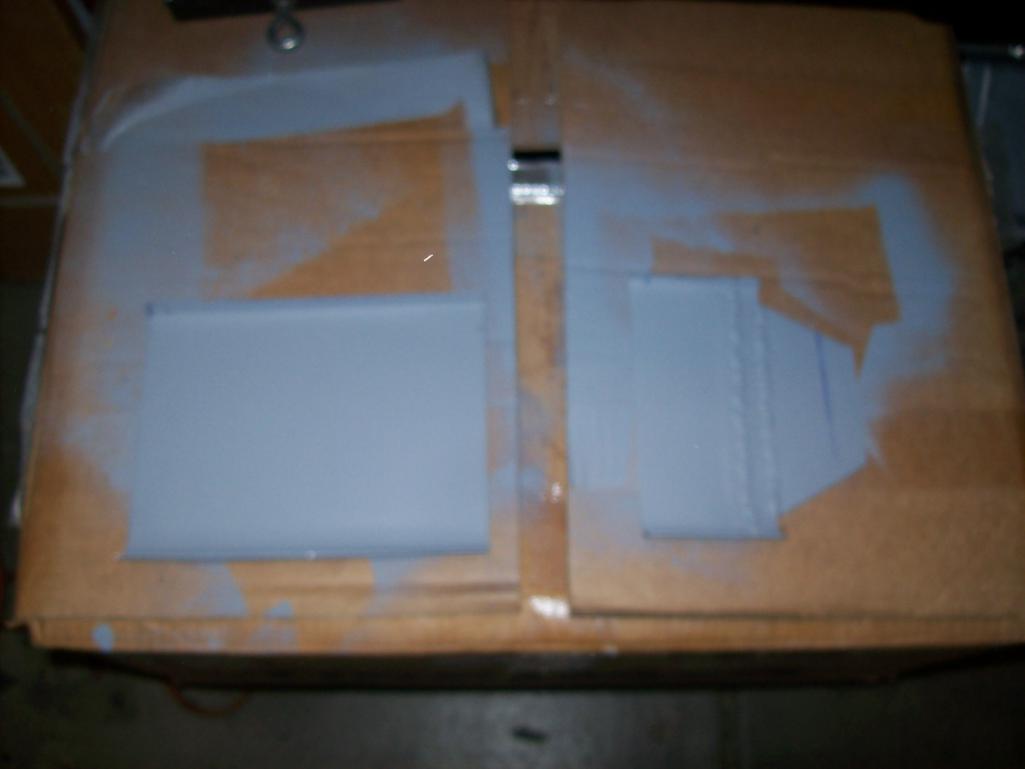
I took a few hours Friday afternoon,a couple yesterday, and a few more today. Almost ready for the blaster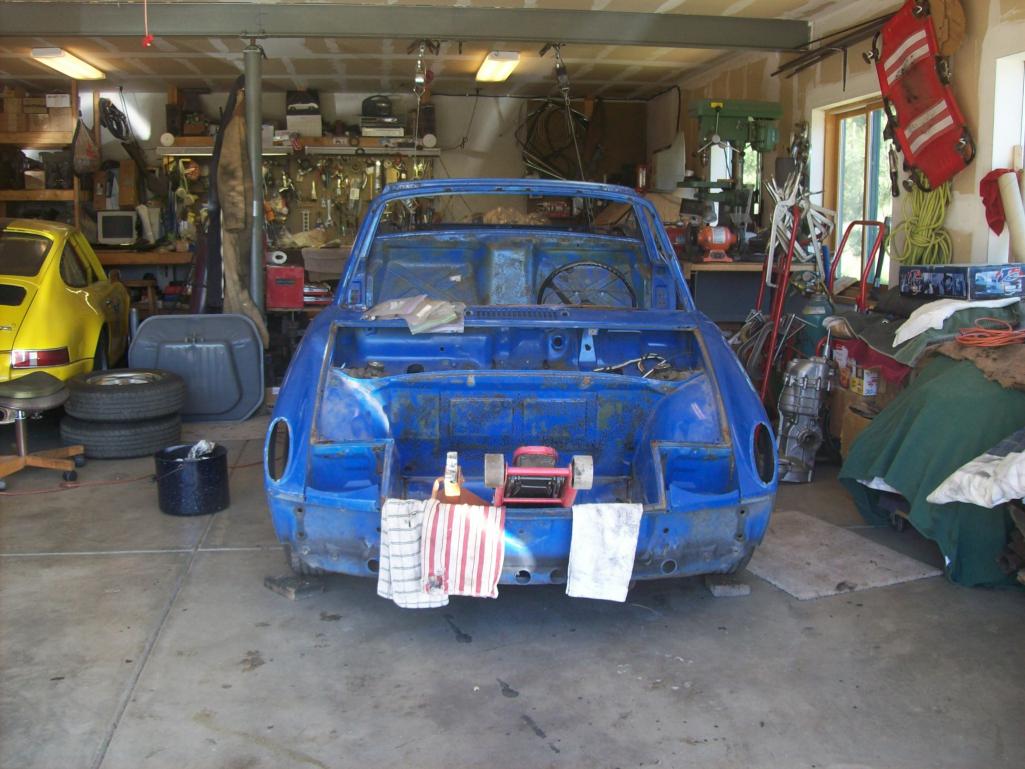
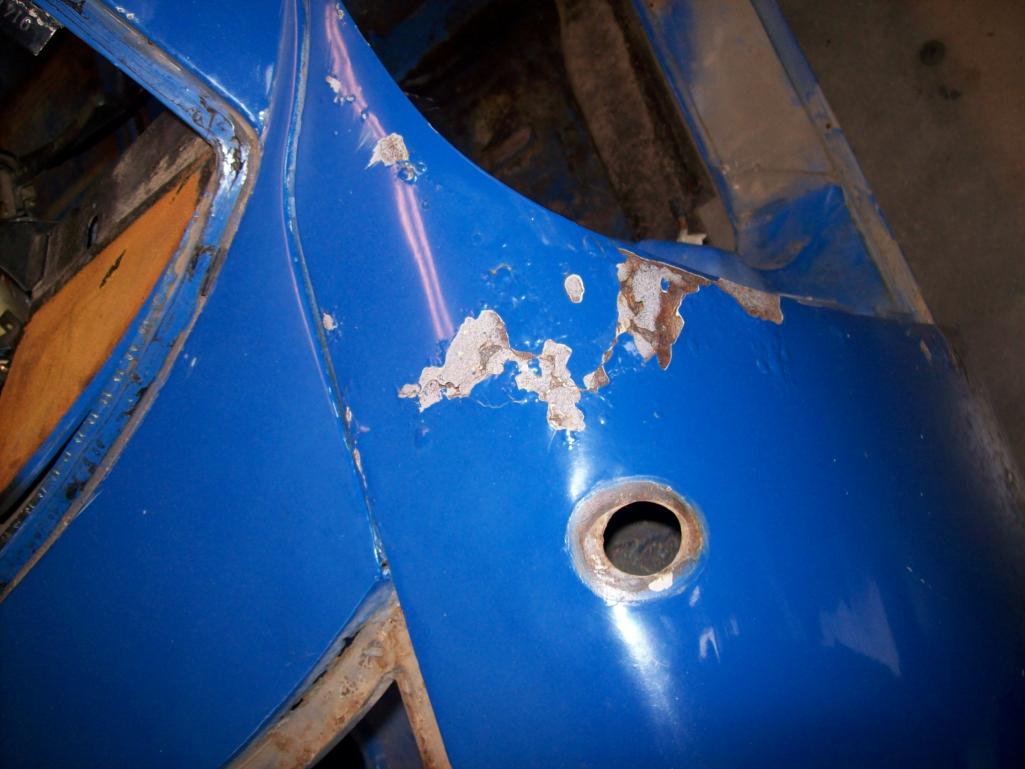
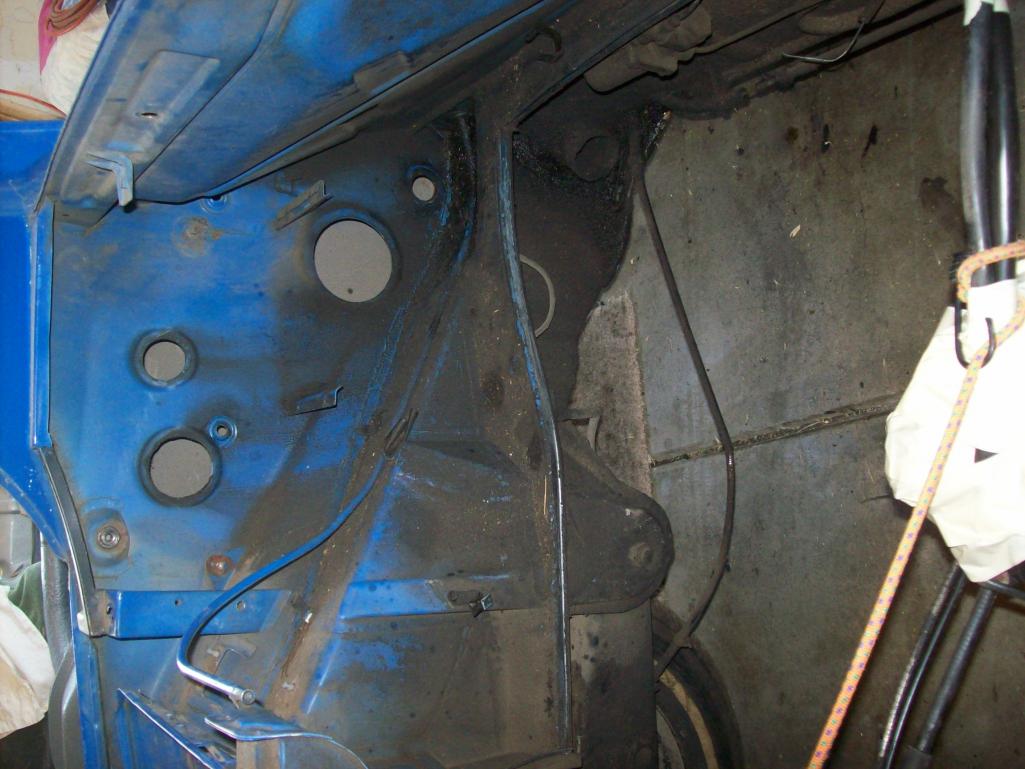
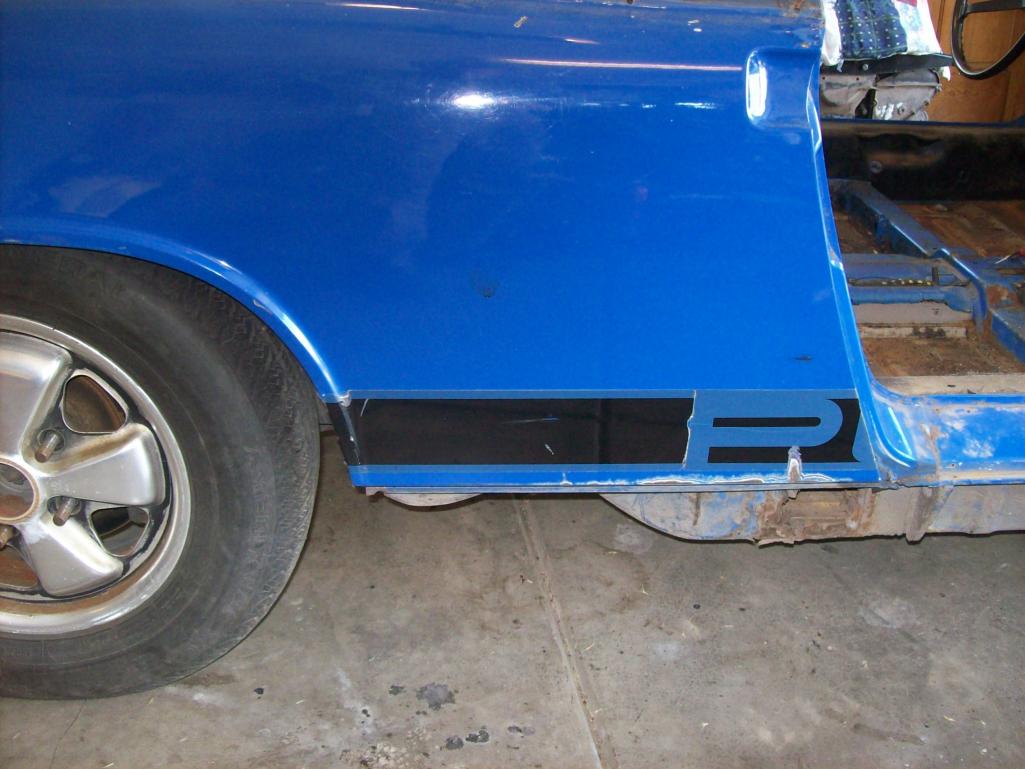
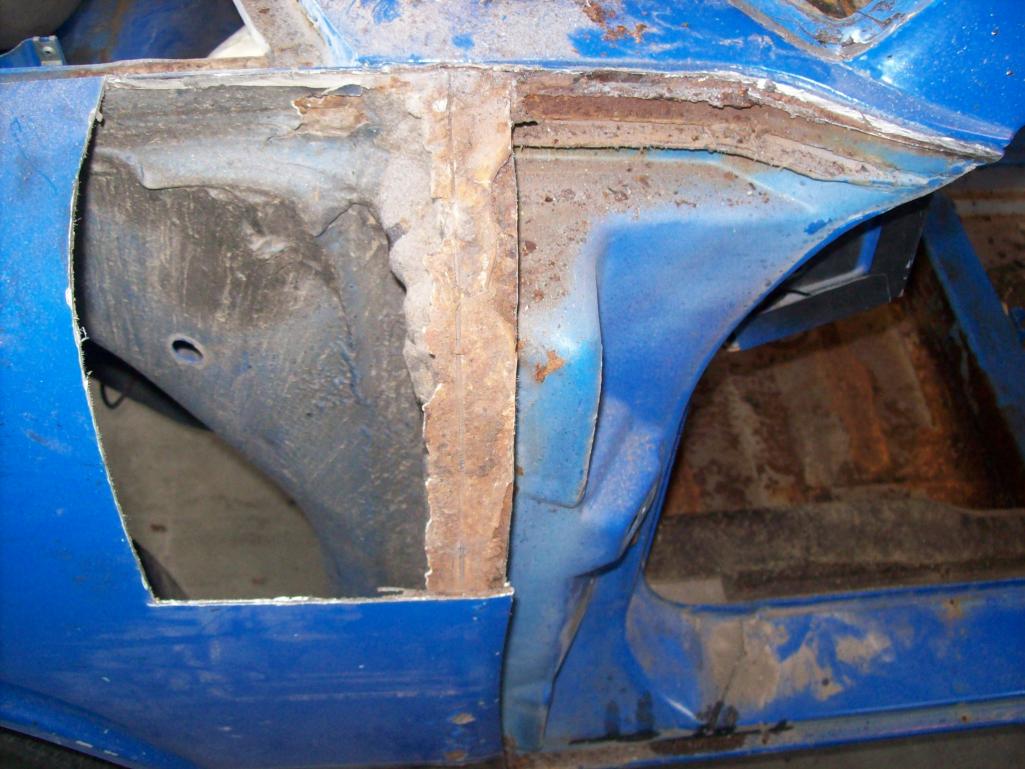
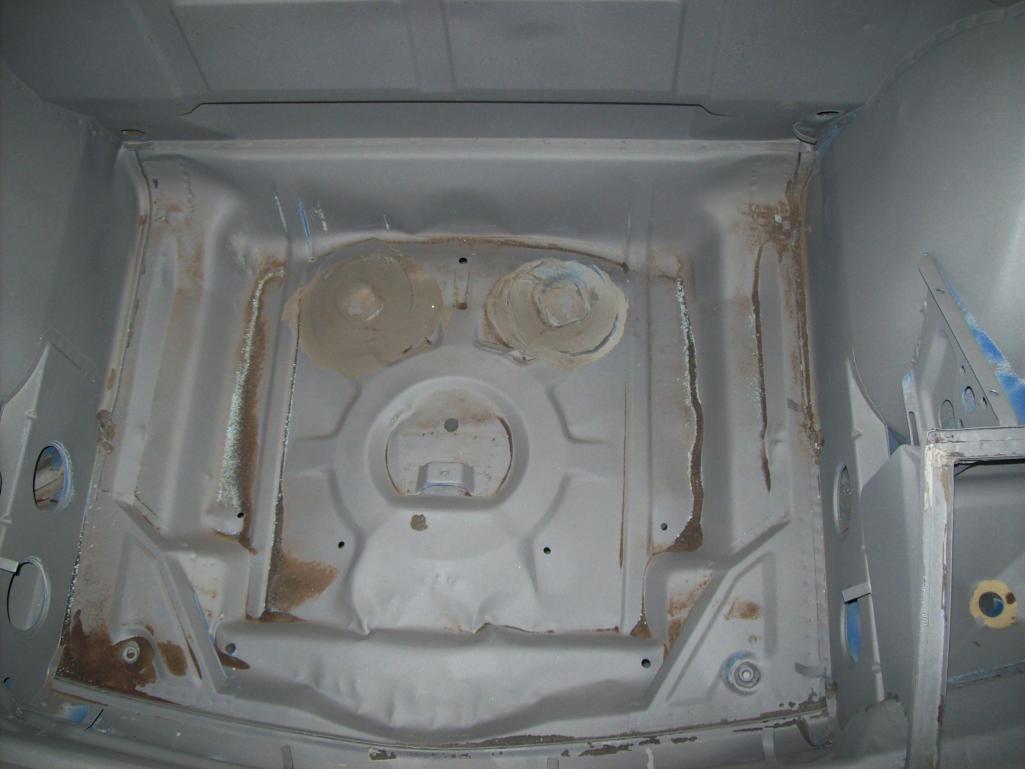
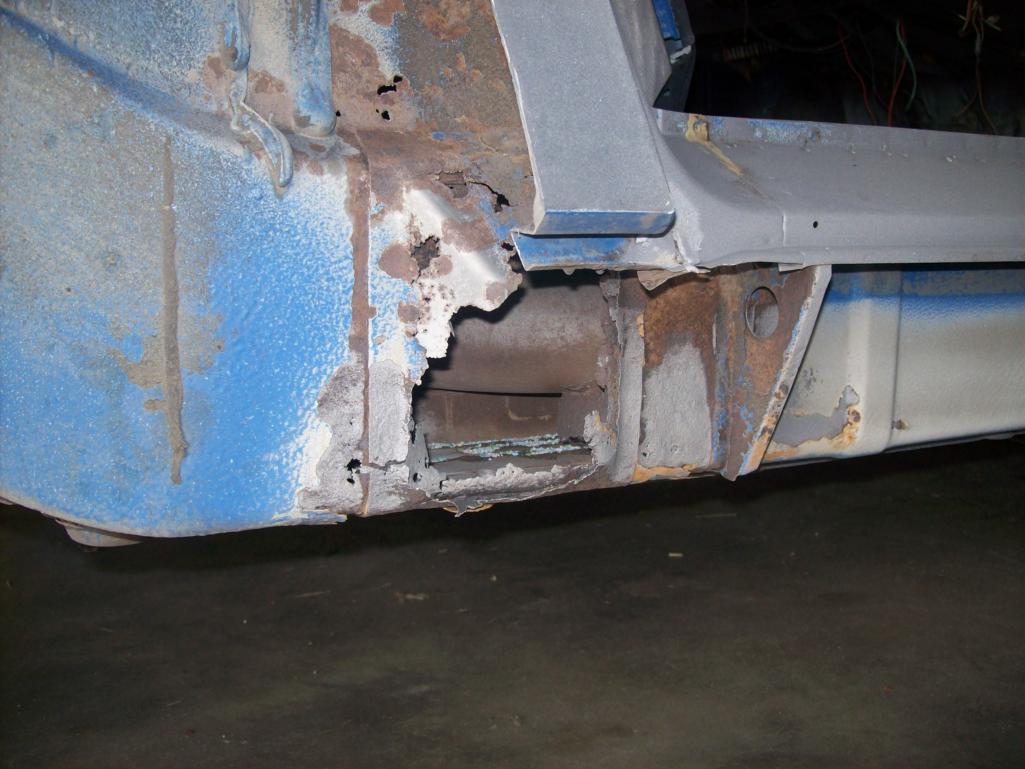
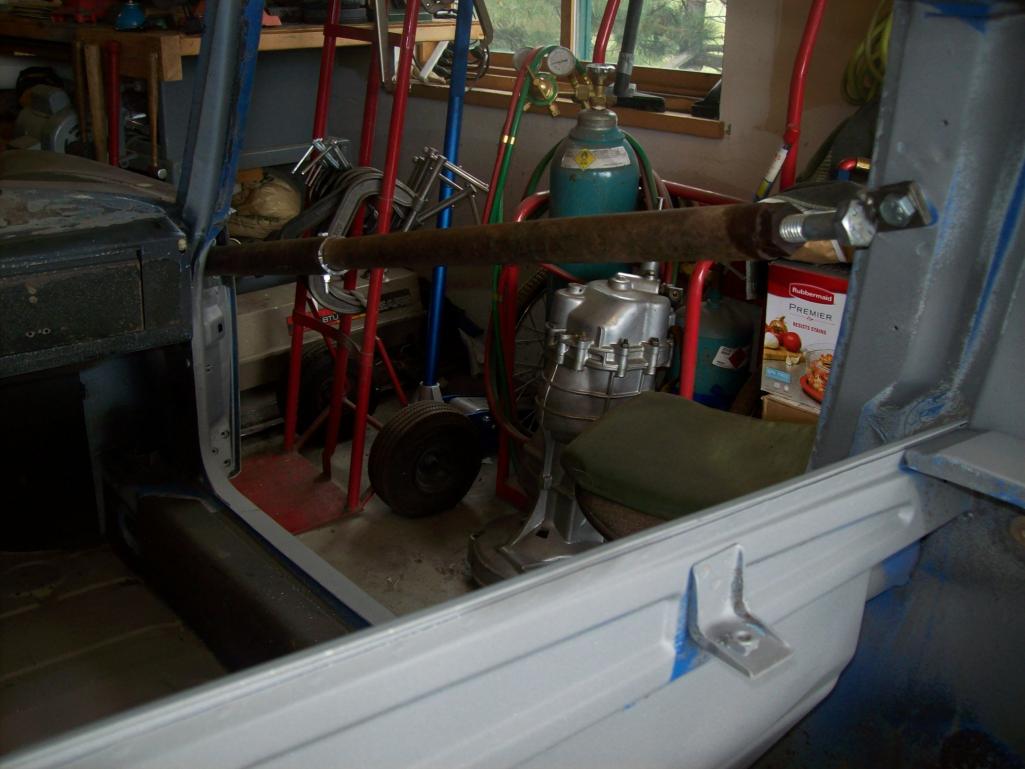
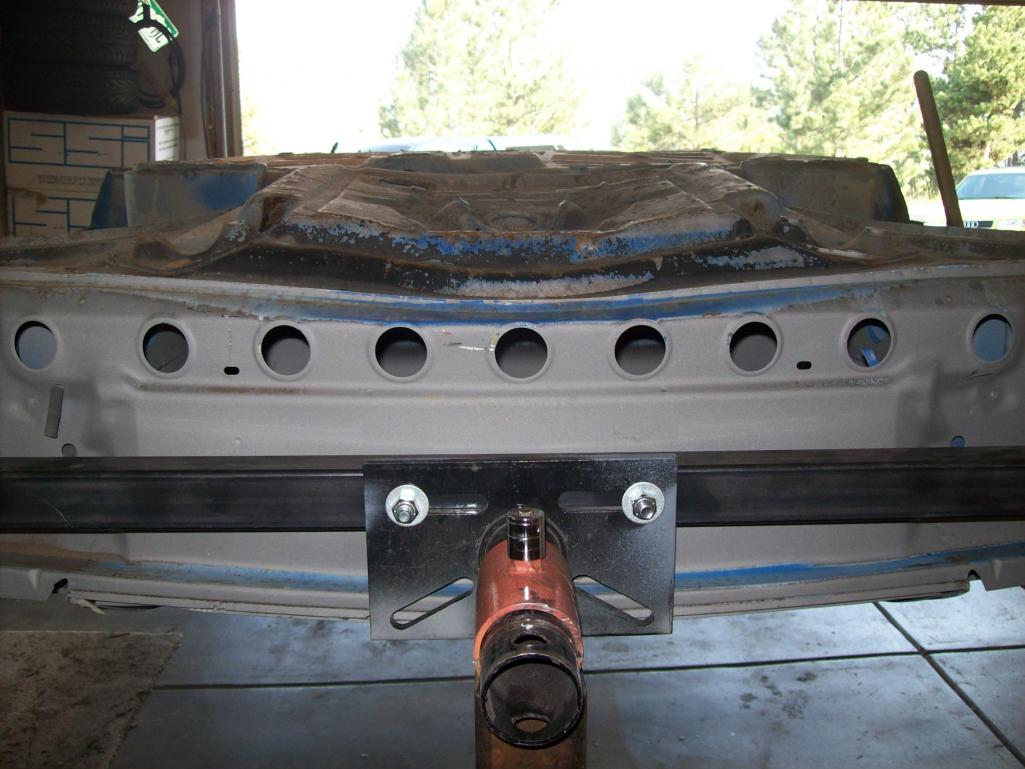
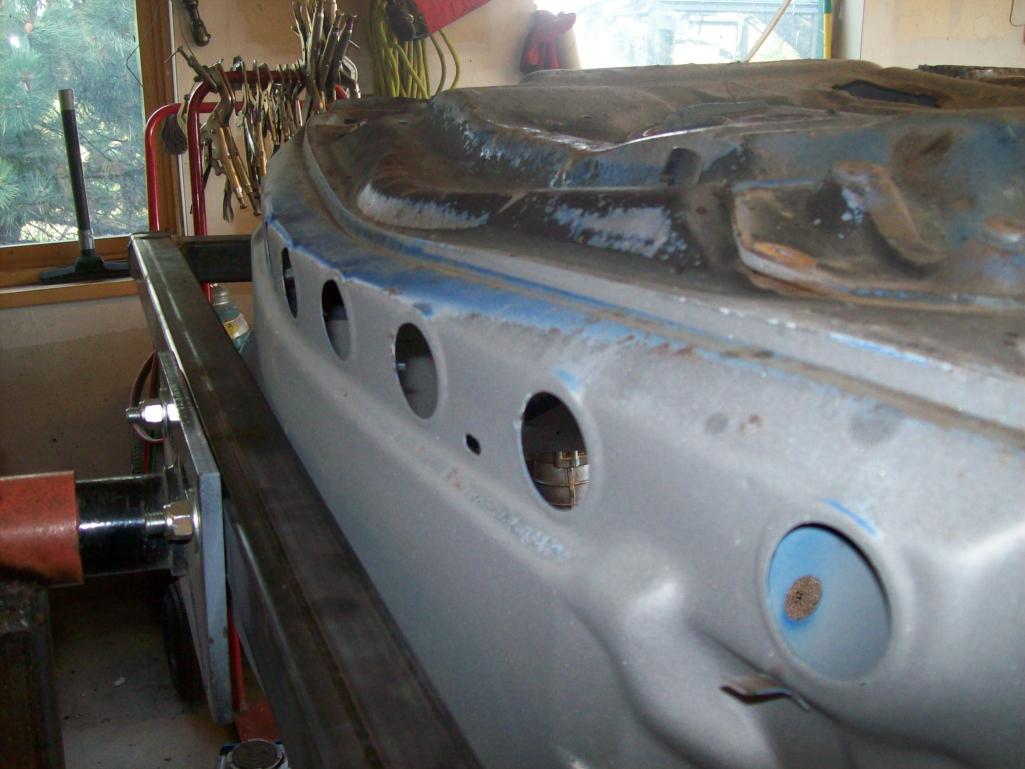
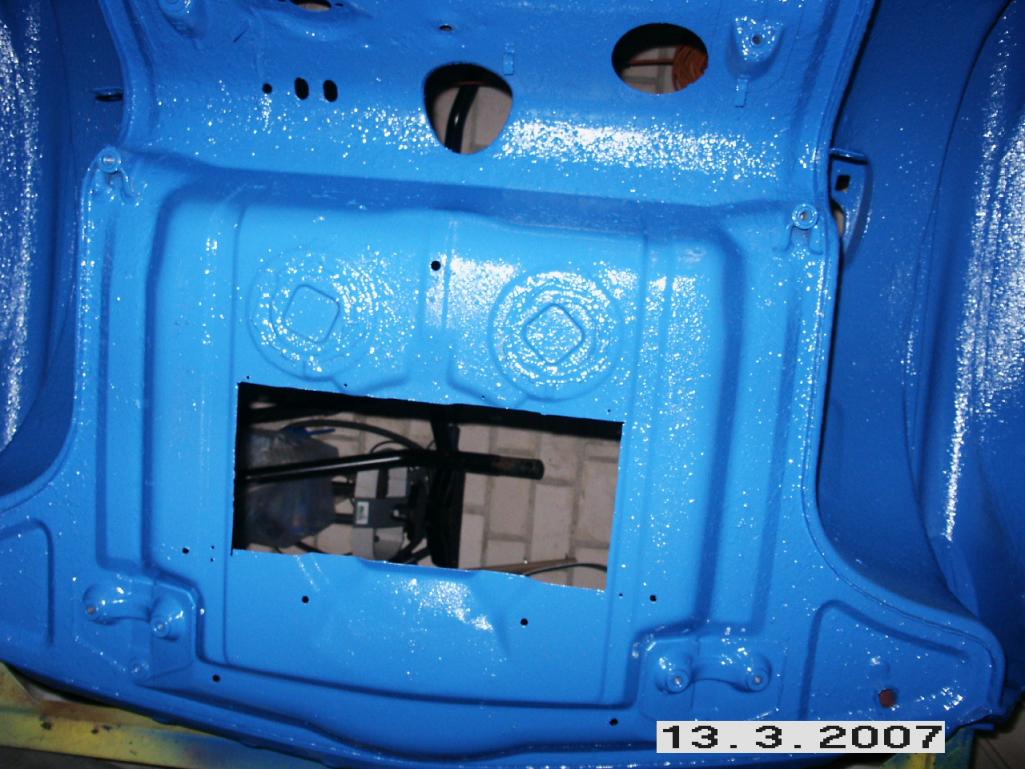
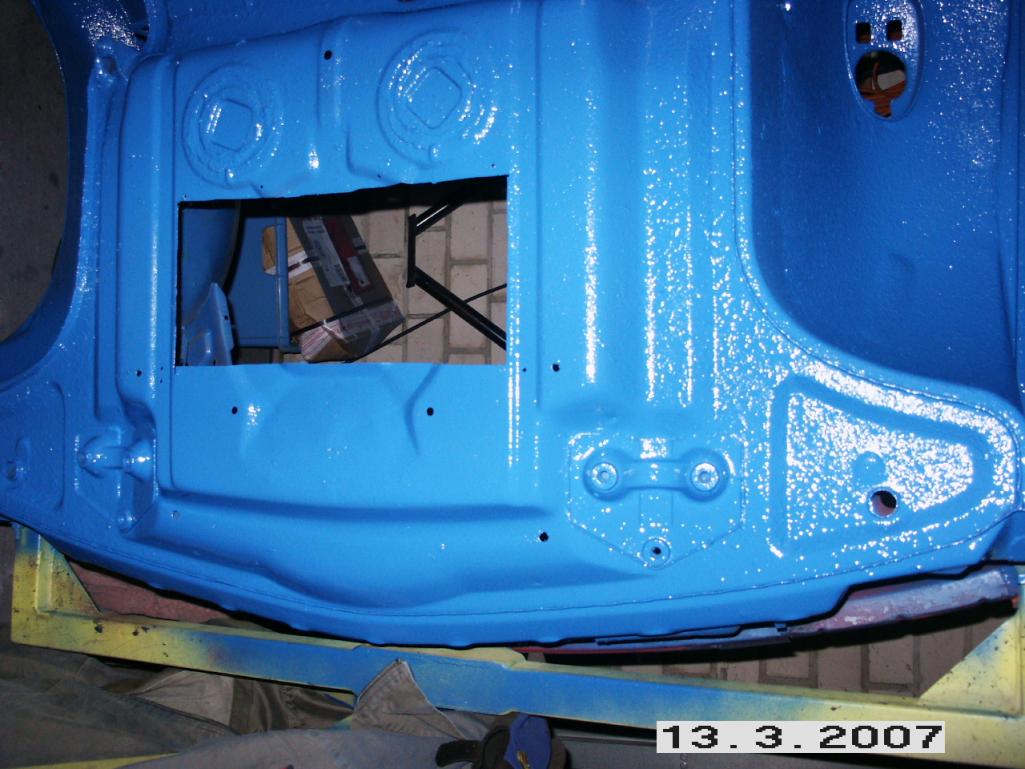
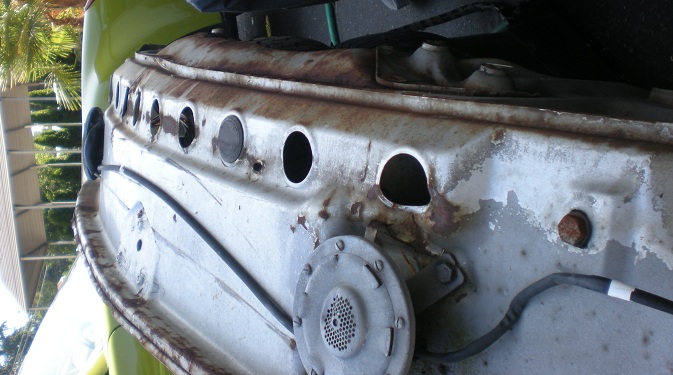
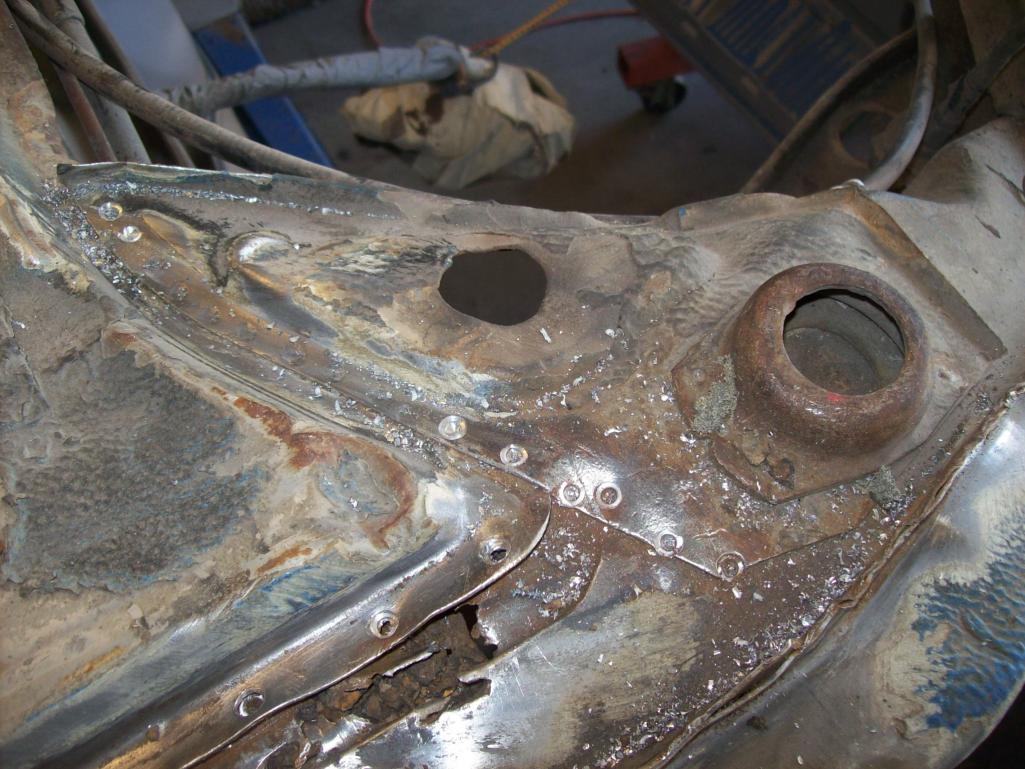
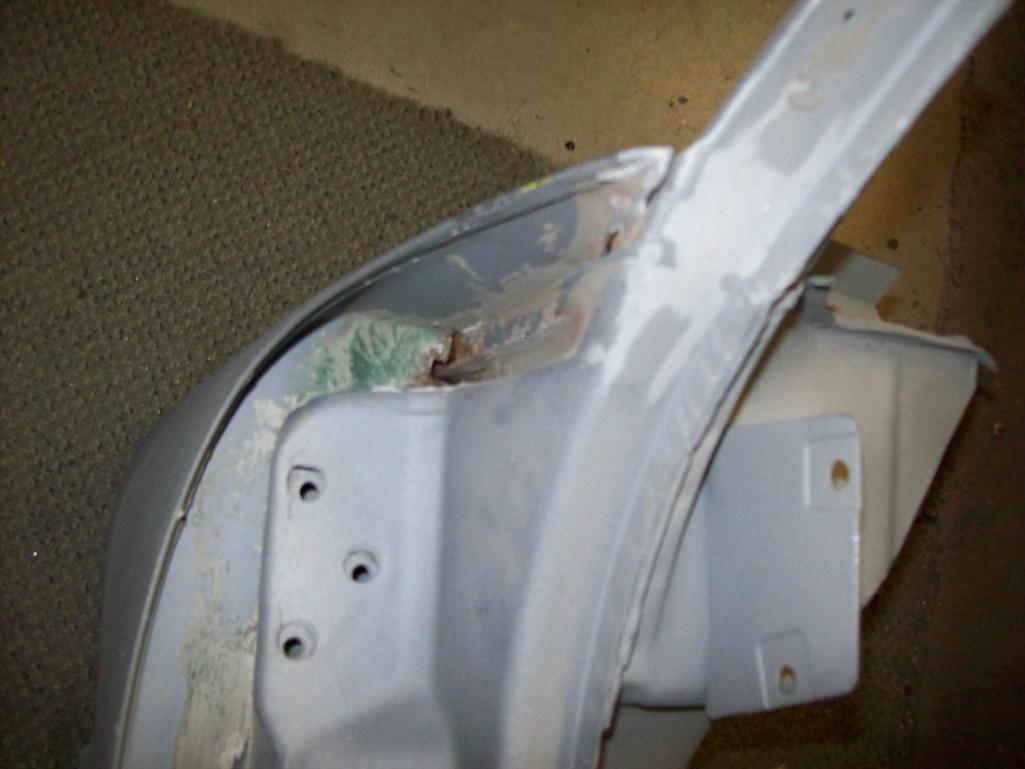
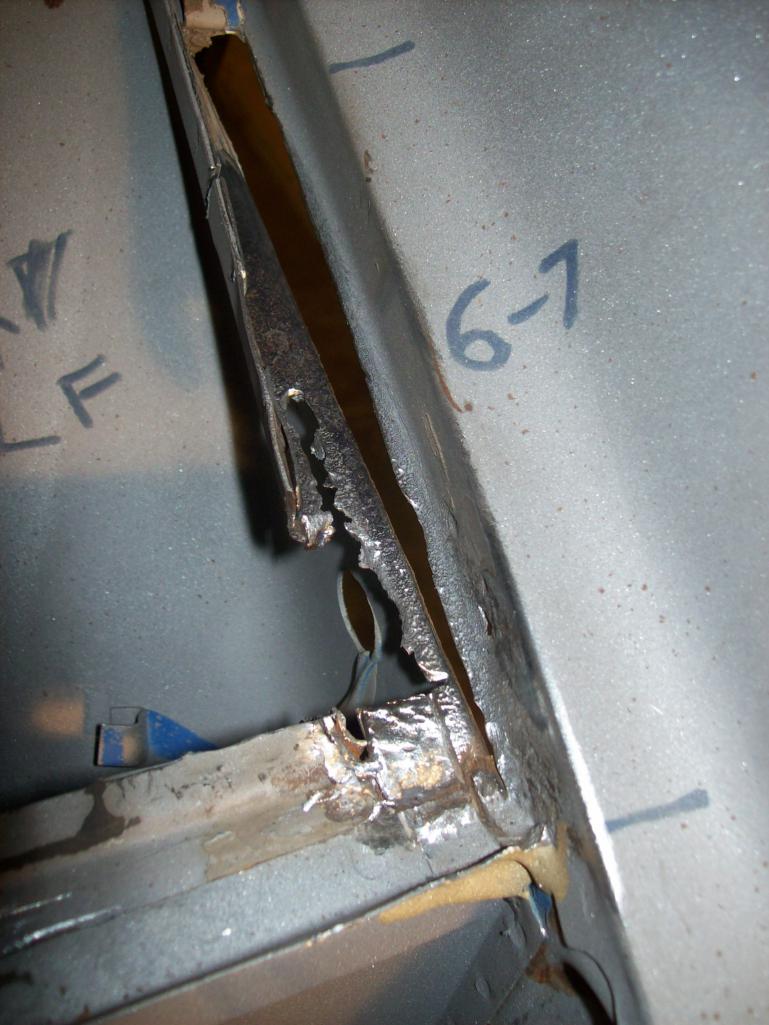
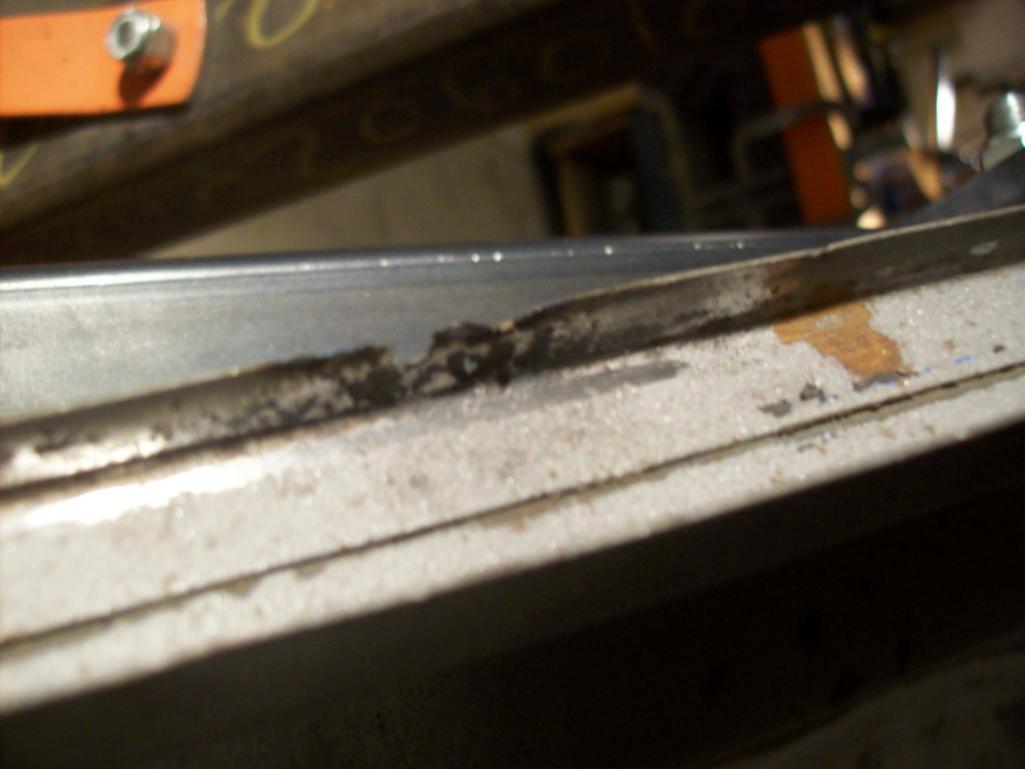
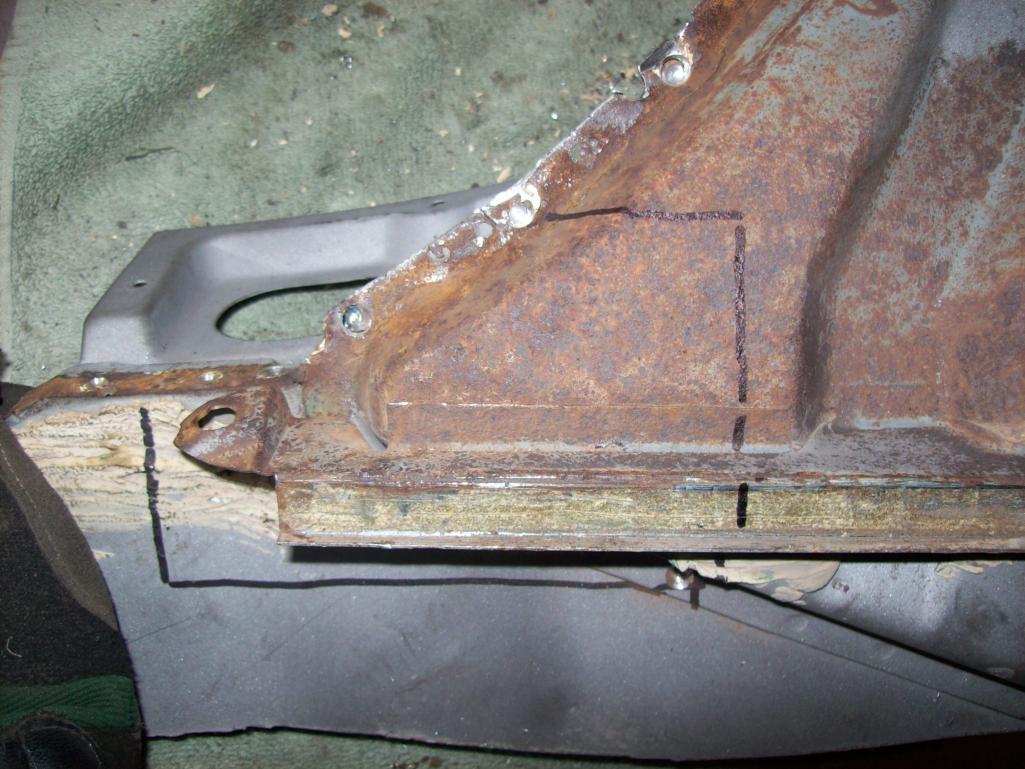
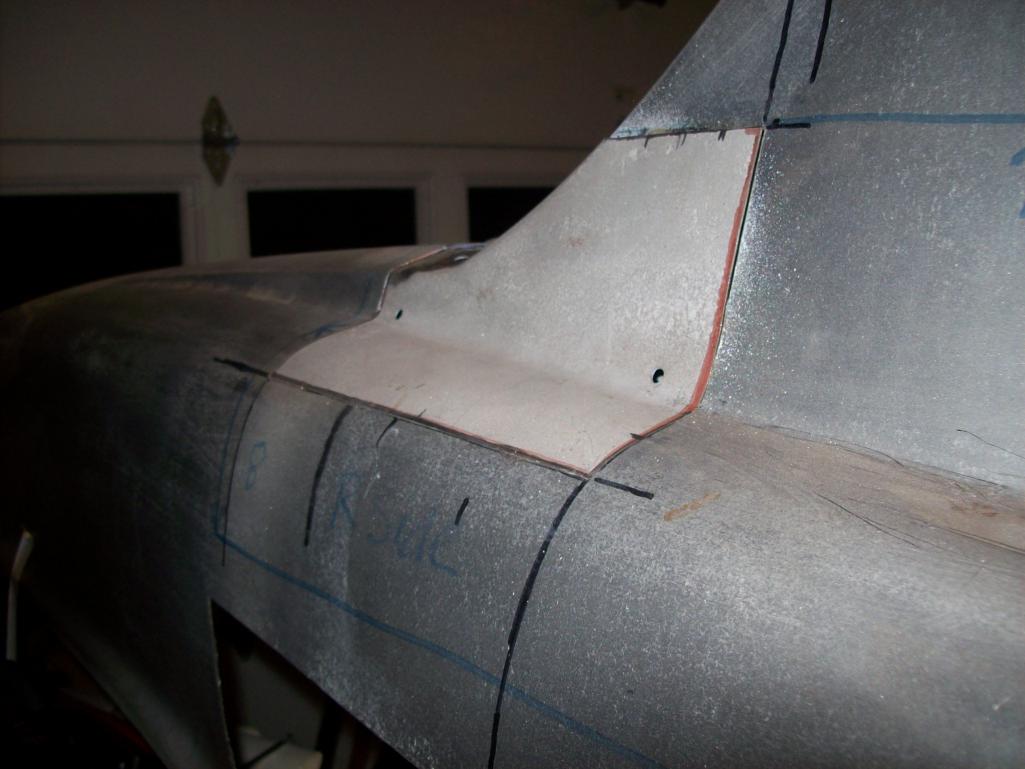
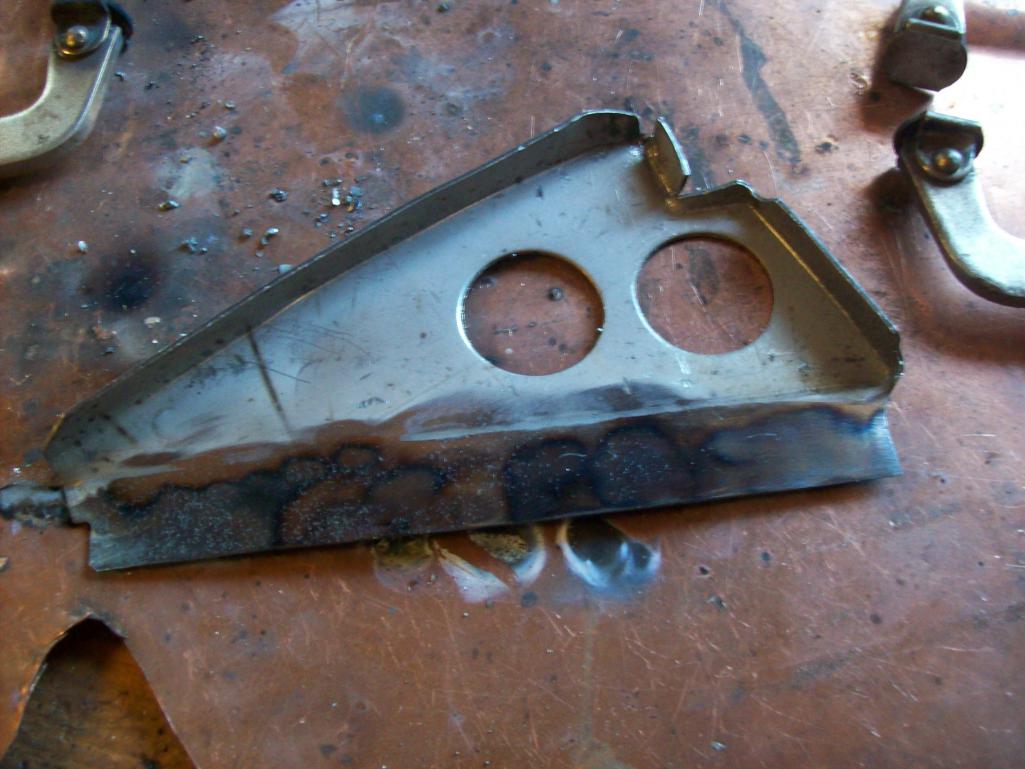
[attachmentid=315964]yuck...passenger side. Drivers side looks ok. Before you question...yes I do have some hell-hole issues.
More later...
Speedo
Attached thumbnail(s)
Posted by: Cairo94507 Jun 10 2012, 07:41 PM
Wow, way to tackle the car. Looking forward to seeing the in-progress blasting photos.
Posted by: dakotaewing Jun 10 2012, 07:49 PM
If you are going to blast the car, please put quality door braces in the car now, before proceeding. Obviously your not new to these cars, but it is a typical mistake folks make. It will insure your door gaps don't move.
Soda or sand? There are arguments for/against both.
Good luck with your resto, and 
Posted by: carr914 Jun 10 2012, 09:06 PM
Looks Nice. Probably too nice for Original Paint. If that was the case, I wouldn't blast
Posted by: carr914 Jun 10 2012, 09:07 PM
And
Posted by: kg6dxn Jun 10 2012, 09:27 PM

Posted by: smj Jun 10 2012, 09:32 PM
Welcome, and wow - looks like this -6 didn't find a new home, it found a three star spa and resort!![popcorn[1].gif](style_emoticons/default/popcorn[1].gif)
Love reading the resto threads, especially when they're done right. I don't have the resources for more than piecemeal progress, but I'll be stealing ideas where I can...
Posted by: Mr.242 Jun 10 2012, 09:39 PM
Nice work so far! It will be nice to see this car when done!
Posted by: rick 918-S Jun 11 2012, 07:48 AM
Keep the photos coming! There are several Colorado guys here. Also contact Gint. He has a Colorado yahoo list I think. 
Posted by: GeorgeRud Jun 11 2012, 07:51 AM
Actually, it seems this -6 may have found another guardian. Gotta love these old cars.
Posted by: abnrdo Jun 11 2012, 07:53 AM
Wow! Thats a quick start!  That rocks!
Posted by: brant Jun 11 2012, 07:54 AM
Good Work Lars!
this is going to be a great thread
This car deserves a taste of your metal skills
brant
Posted by: Travis Neff Jun 11 2012, 09:34 AM
Posted by: sixnotfour Jun 11 2012, 10:24 AM
Has not changed much since I saw it 20 years ago. San Diego Porsche Parade 1992
I think I have another somewhere from Monterey 1990,
Attached image(s)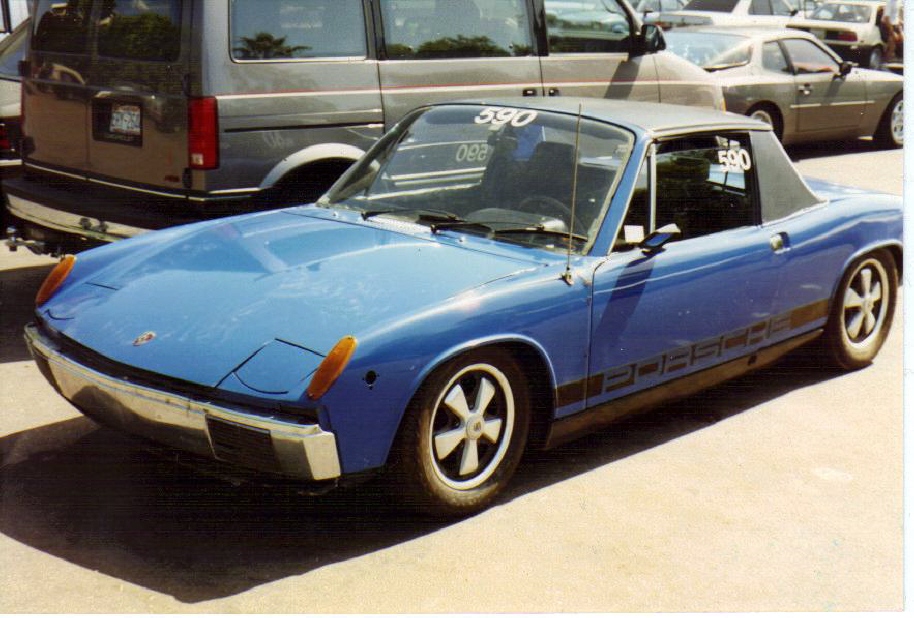
Posted by: Ferg Jun 11 2012, 10:38 AM
Hi Lars!
Gang, mark this thread, Lars has skills, and this is soon to be a "classic" thread.
Lars, great to see you and the car, going to love watching this one brought back.
Ferg
Posted by: SirAndy Jun 11 2012, 11:17 AM
Love that color! 
Posted by: 6freak Jun 11 2012, 03:09 PM
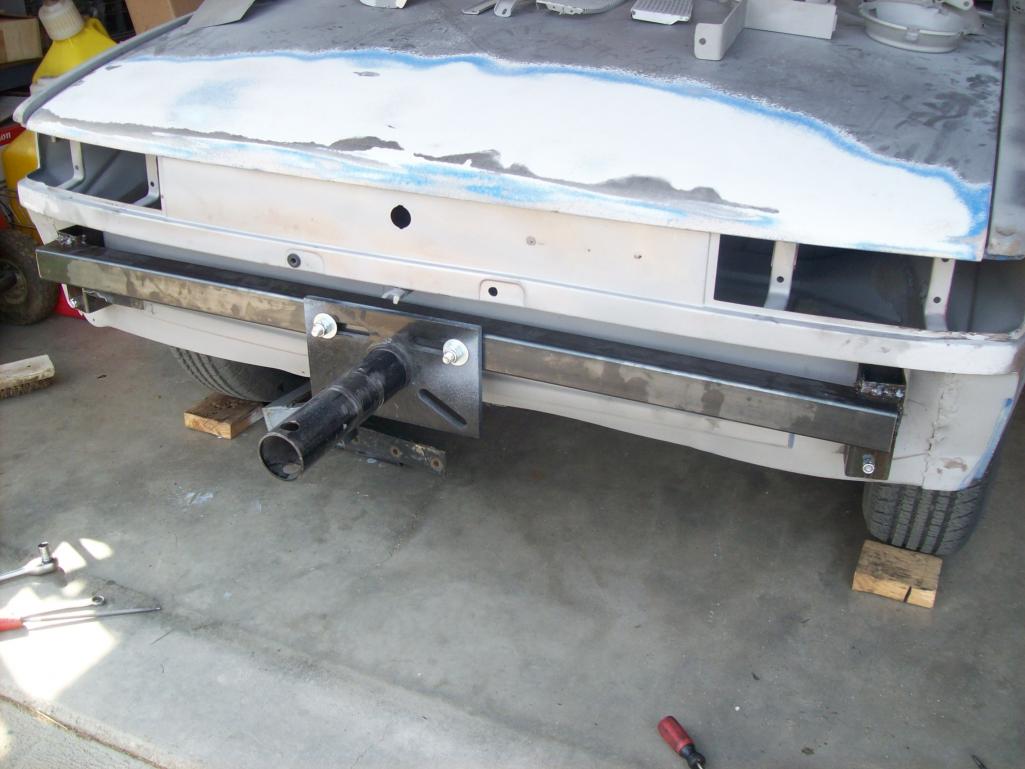
1st picture of the car show what looks like a trailer hitch or something hang n down for rear bumper ?? what is or was it...

Posted by: brant Jun 11 2012, 05:41 PM

1st picture of the car show what looks like a trailer hitch or something hang n down for rear bumper ?? what is or was it...
trailer hitch...
very common amongst the autox crowds and DE crowds
usually for towing a very small dolly-trailer loaded with Yokohama 008R's
brant
Posted by: pete000 Jun 11 2012, 06:26 PM
Wow, fast tear down ! Looks like this one should be rescued quickly 

Posted by: wachospeedo Jun 11 2012, 07:22 PM
sixnotfour,
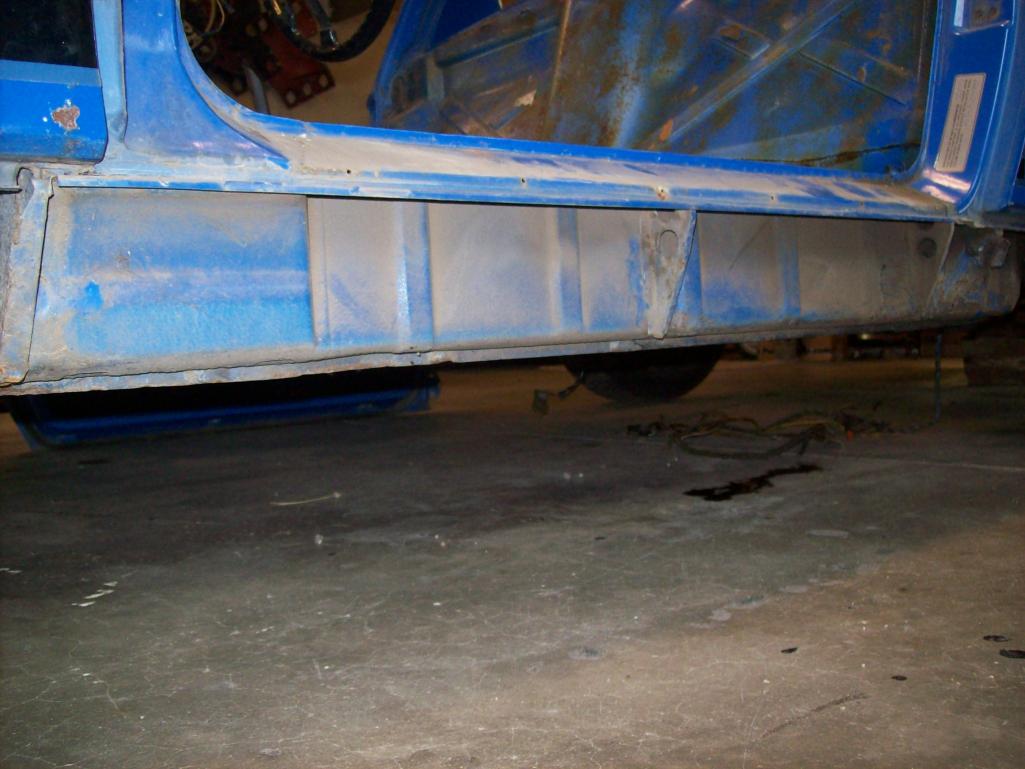
Wow! That's the car alright! No, not much has changed. There is a little rust at the top rear of the drivers fender by the bonnet and in your pic I can almost see it! And it was missing the front bumper top rubber trim 20 years ago. Thanks a bunch for posting. I will do the car justice. I picked up the square stock for the door jam braces today. I'll post better pics of the good, the bad and the ugly. This car (in terms of what I normally drag home) is in much better shape (at the outset).
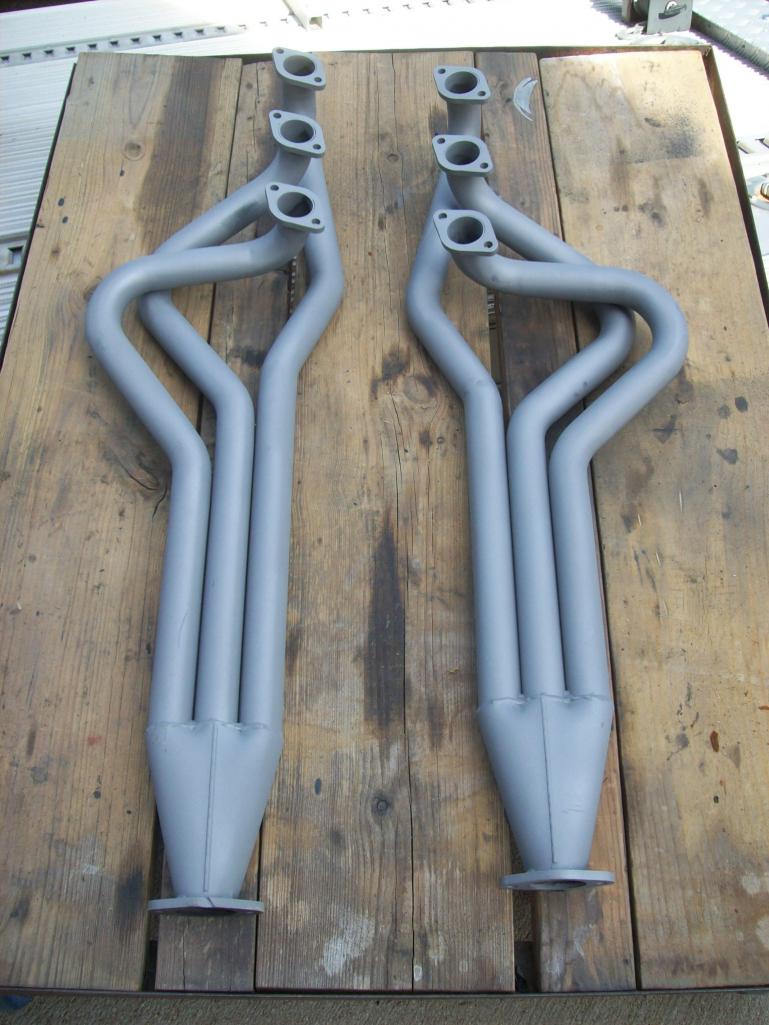
I will start to accumulate a list of needs...like to swap the later wrong rear bumper for a 1970 right bumper. Did any of the early 6s that were not GTs ever have 2 in 2 out sport exhausts? If I am out of line (purists) with the muffler...just shut me down. I make nice 2 in 2 out sport exhausts for my 911s.
Speedo
Posted by: TargaToy Jun 11 2012, 07:37 PM
What a great "find". Really paid off to stay on the seller's radar.
Congrats and welcome!
Is the mirror in your "before" picture the same as the one it had in the 20 years ago shot?
Posted by: 914Sixer Jun 11 2012, 07:48 PM
One of my favorite colors.
Posted by: sixnotfour Jun 11 2012, 08:12 PM
not from the factory, but many many have had that added.
Here is my dads from 1977 it has had a home made one. (i have the -6 still) And I have the big rear valance drilled for the sport pipe.

Attached image(s)
Posted by: PanelBilly Jun 11 2012, 08:19 PM
Can't wait to seel the build. Is the 2.0 or 2.7 going back in to start with?
Posted by: wachospeedo Jun 12 2012, 07:10 PM
Can't wait to seel the build. Is the 2.0 or 2.7 going back in to start with?
I am going to pickle the correct 2.0 and store it...sorry for the PMs about parting with the original engine. I will do a leakdown and a top-end probably on the 2.7. The engine was having a hard time transitioning from idles to main jets. I blew the jets and added clean gas, but it still wanted to stay under 2500-3000 rpm. I will likely keep the carbs on the 2.7 and rebuild them (as I am a carb guy), but I also have a 2.4 S MFI setup as an option.
Yeah that POS aftermarket mirror was on the car when I bought it...actually it was one of the first things I took off the car. Why to people yank nice OEM mirrors and put $7.99 Pep Boys mirrors on their cars? Brant and ferg came up to look at the car after I brought it home and noticed a bunch of things about the car that were not correct (read funky). Here are some better pics of what I have to work with. Damn...sorry about the sideways pics. I tried to rotate them before posting, but they didn't stay that way. Still getting used to the posting format.

Posted by: wachospeedo Jun 12 2012, 07:30 PM
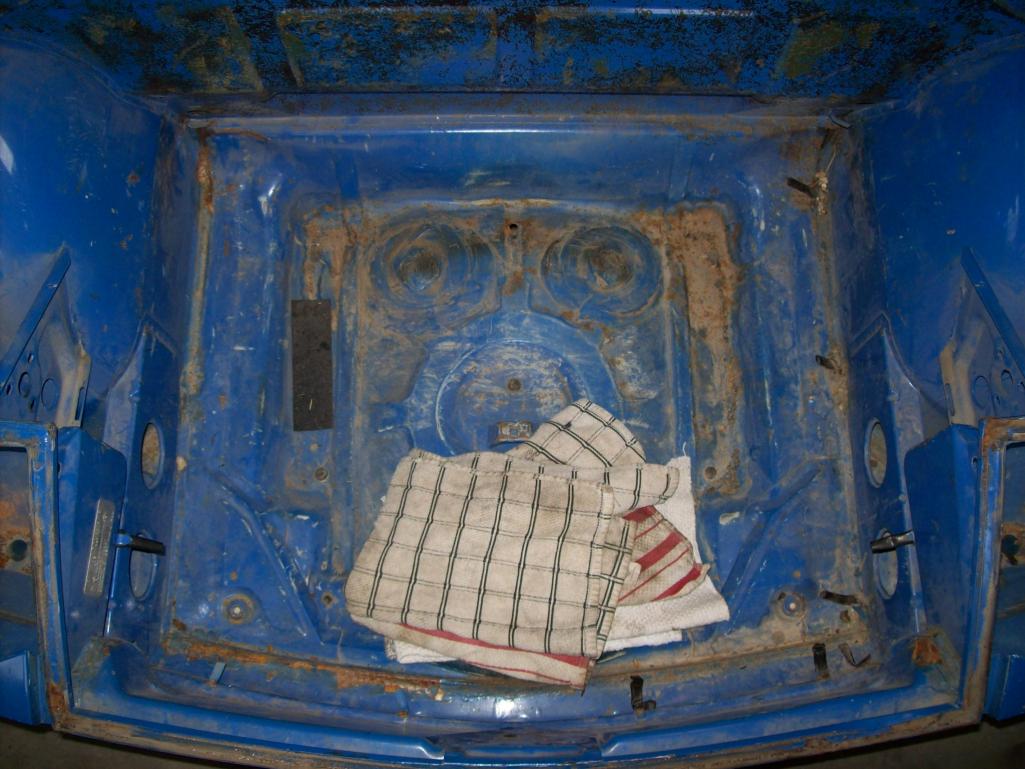
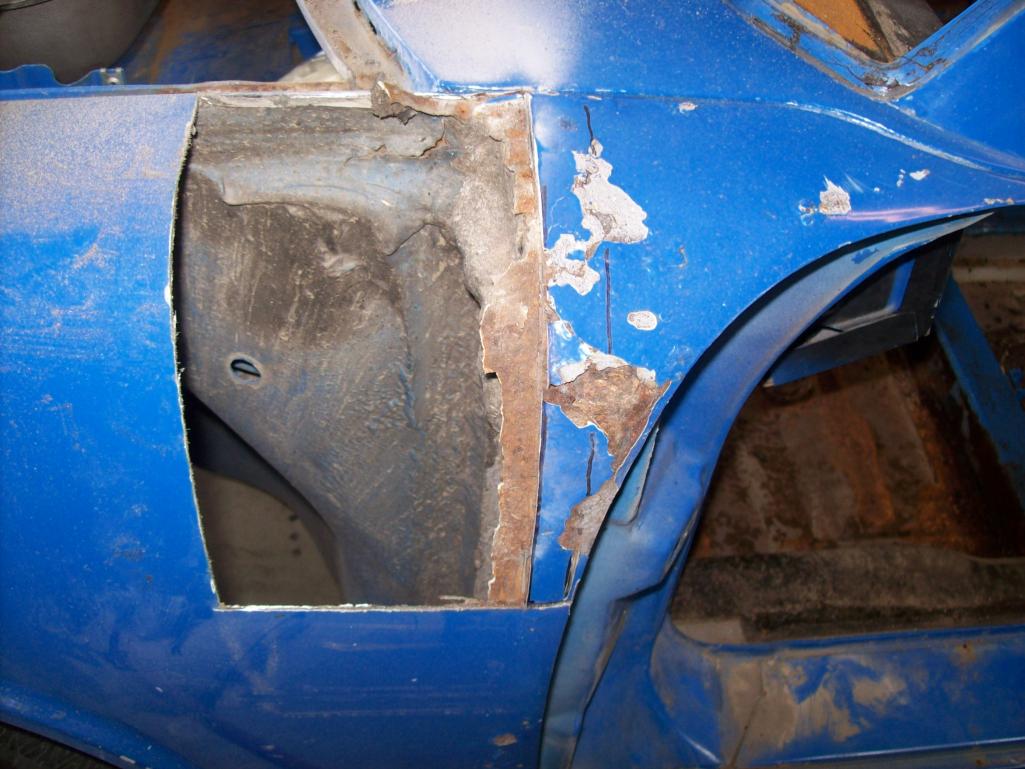
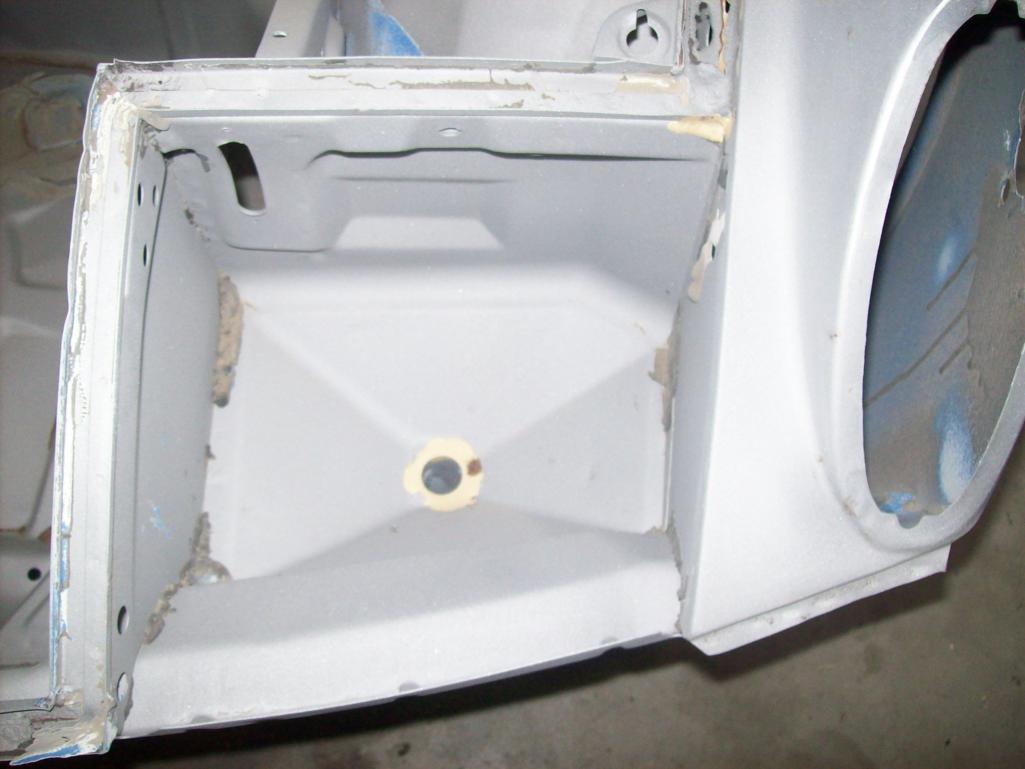
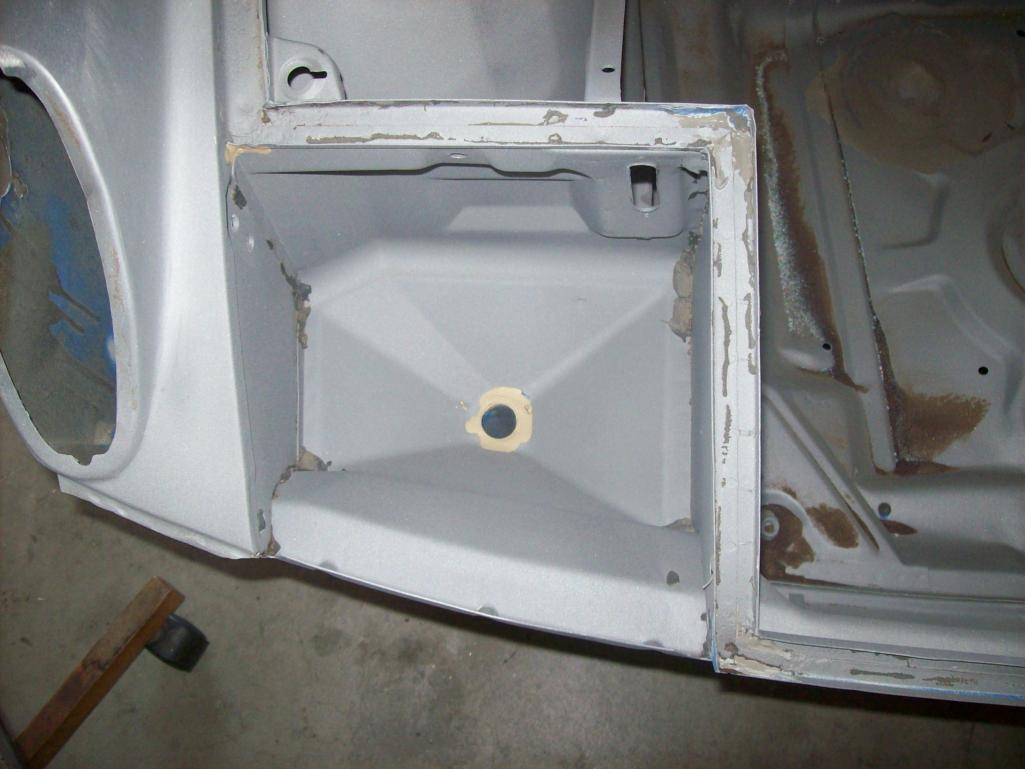
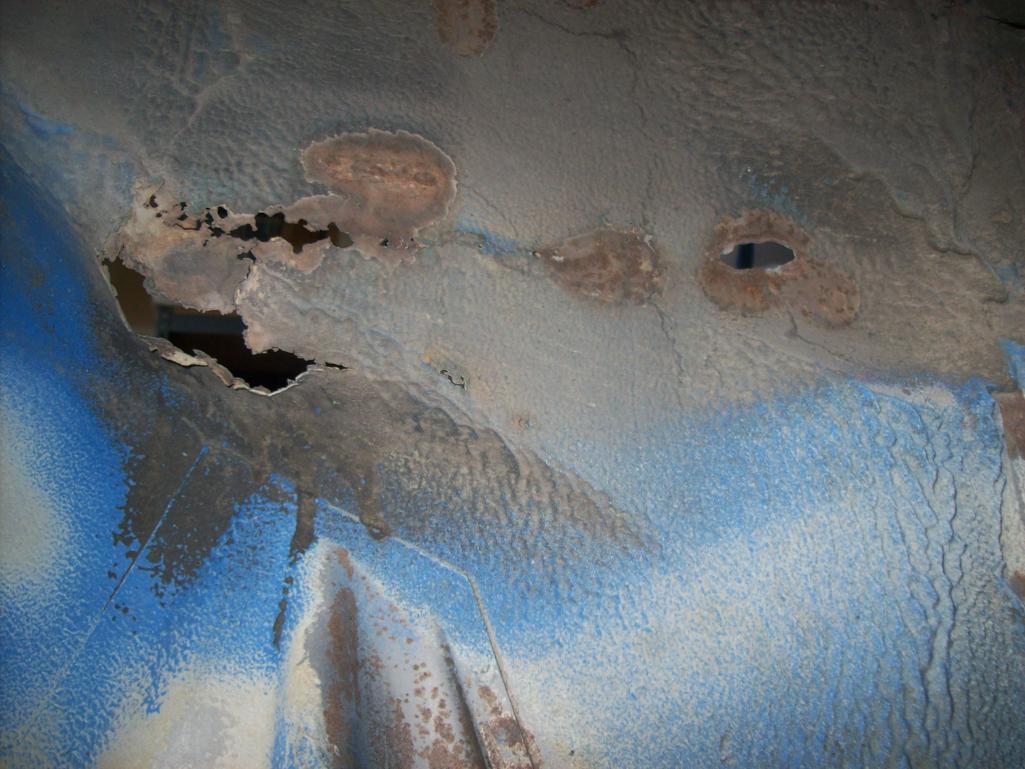
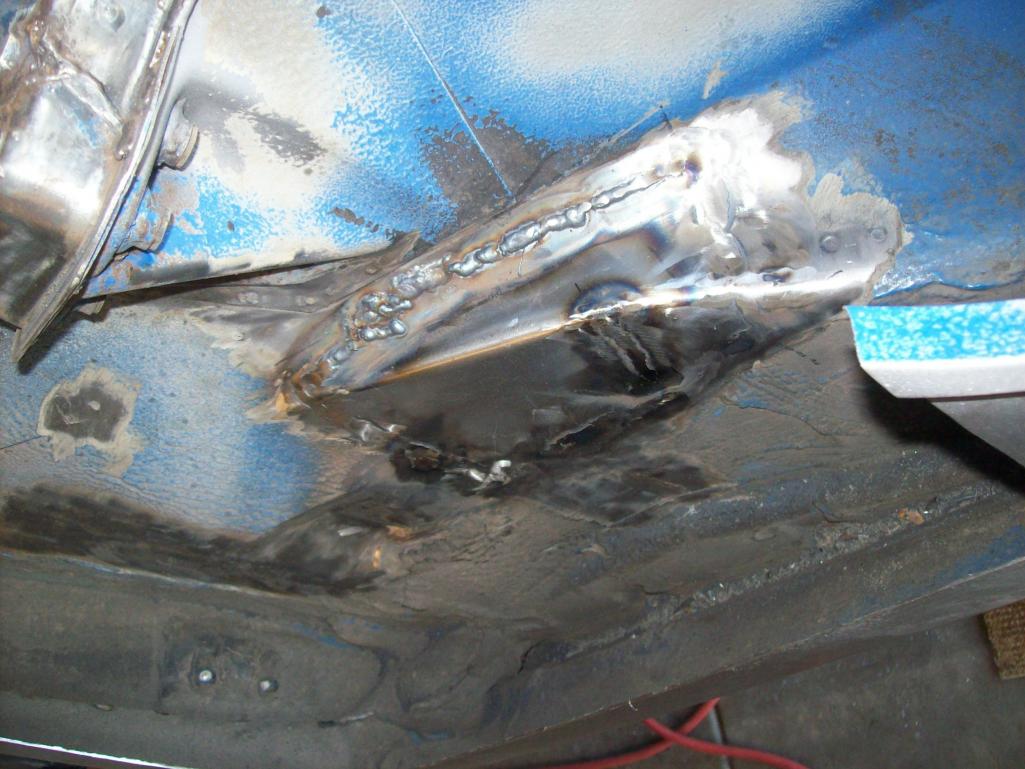
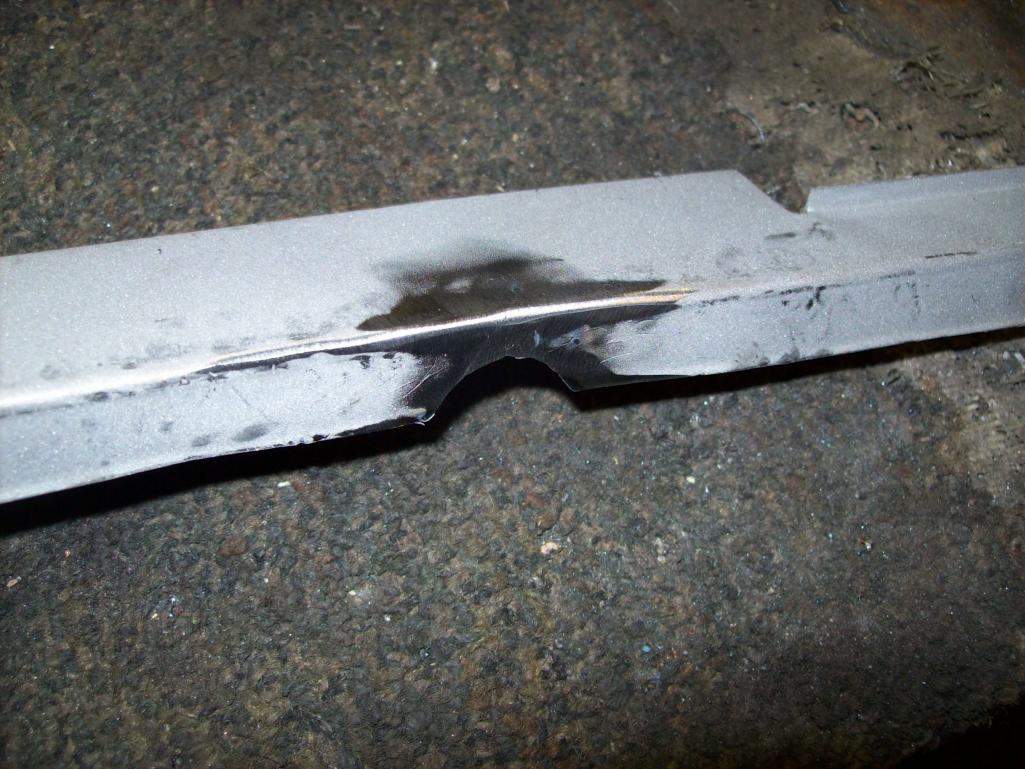
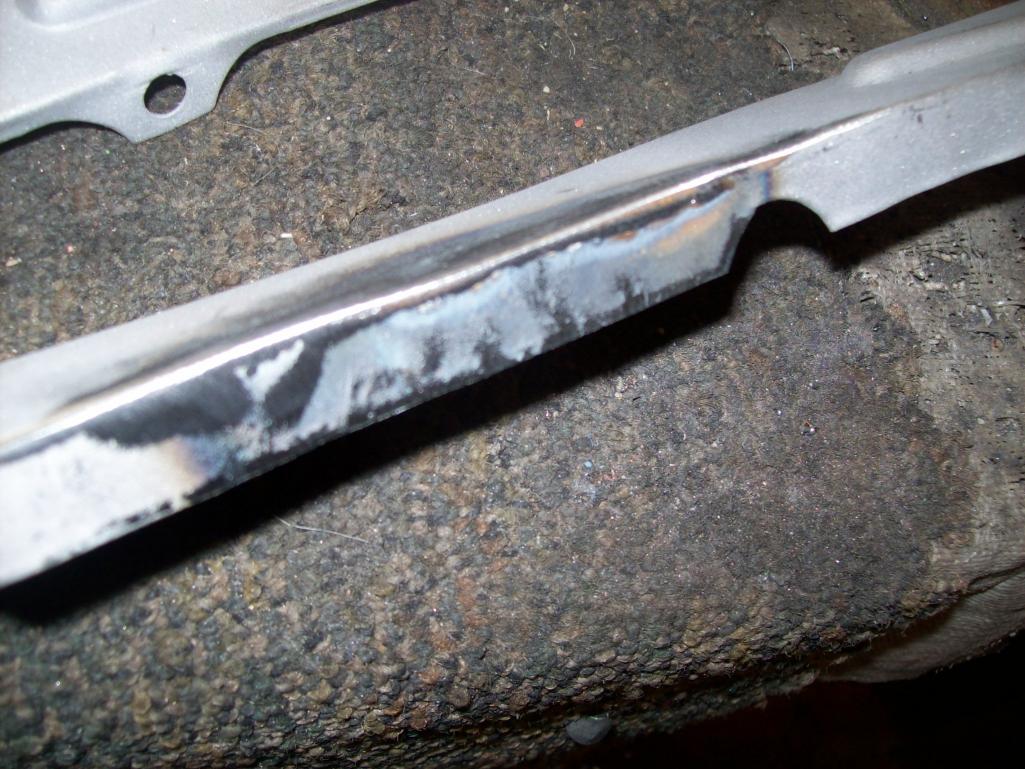
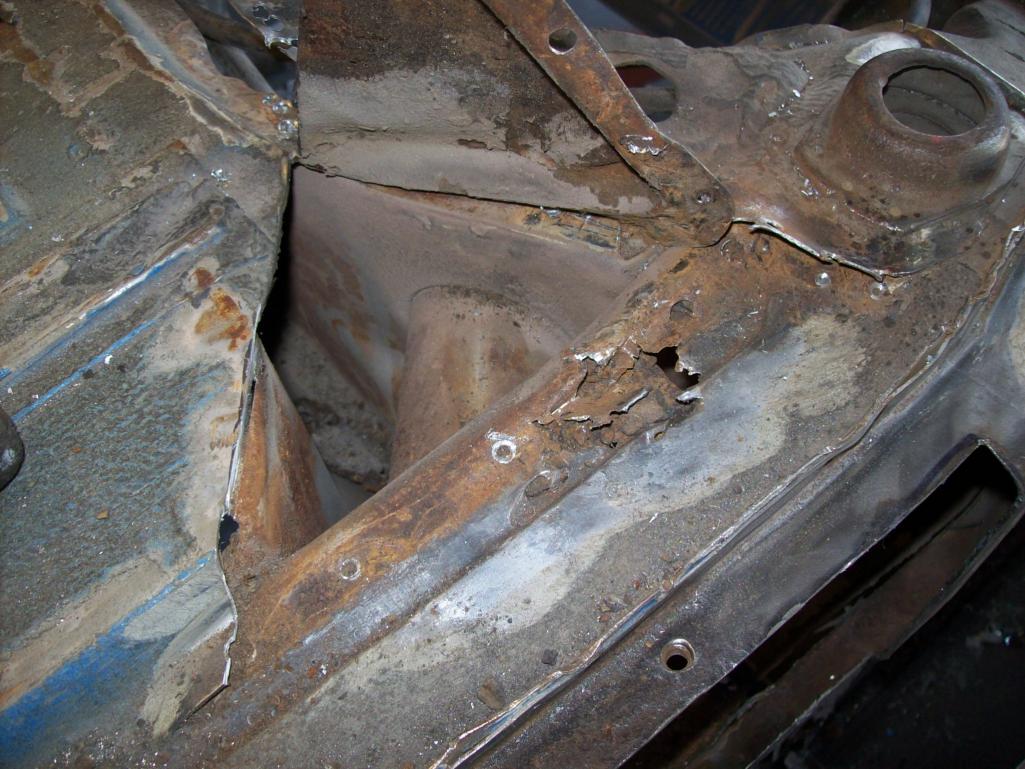
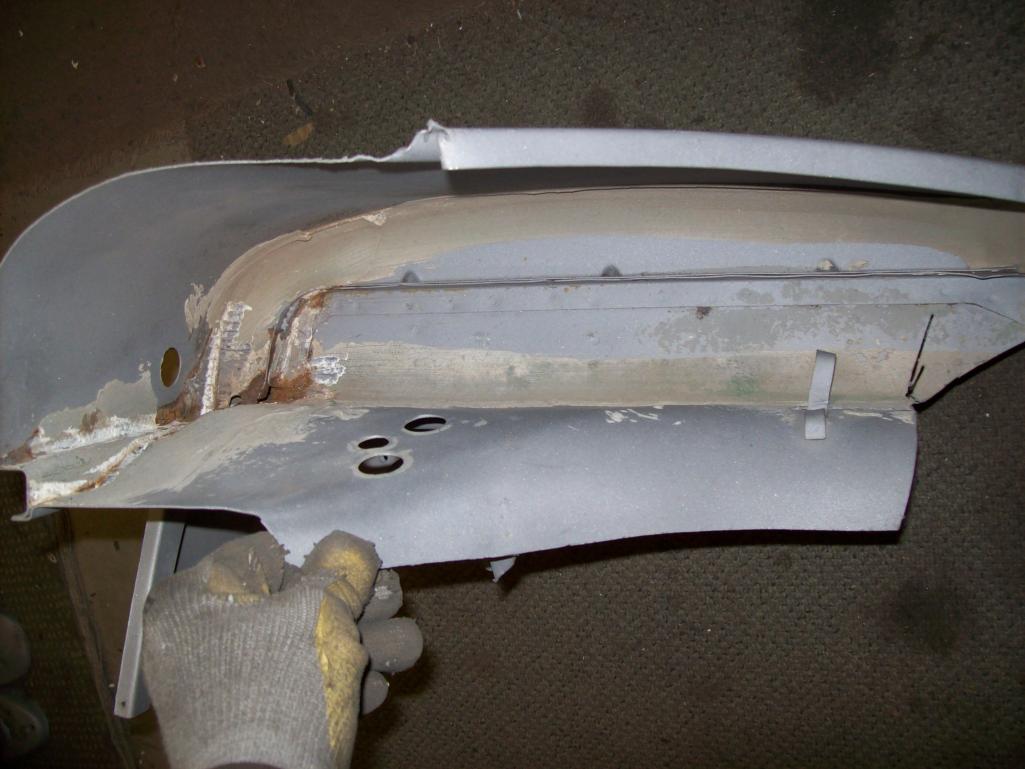
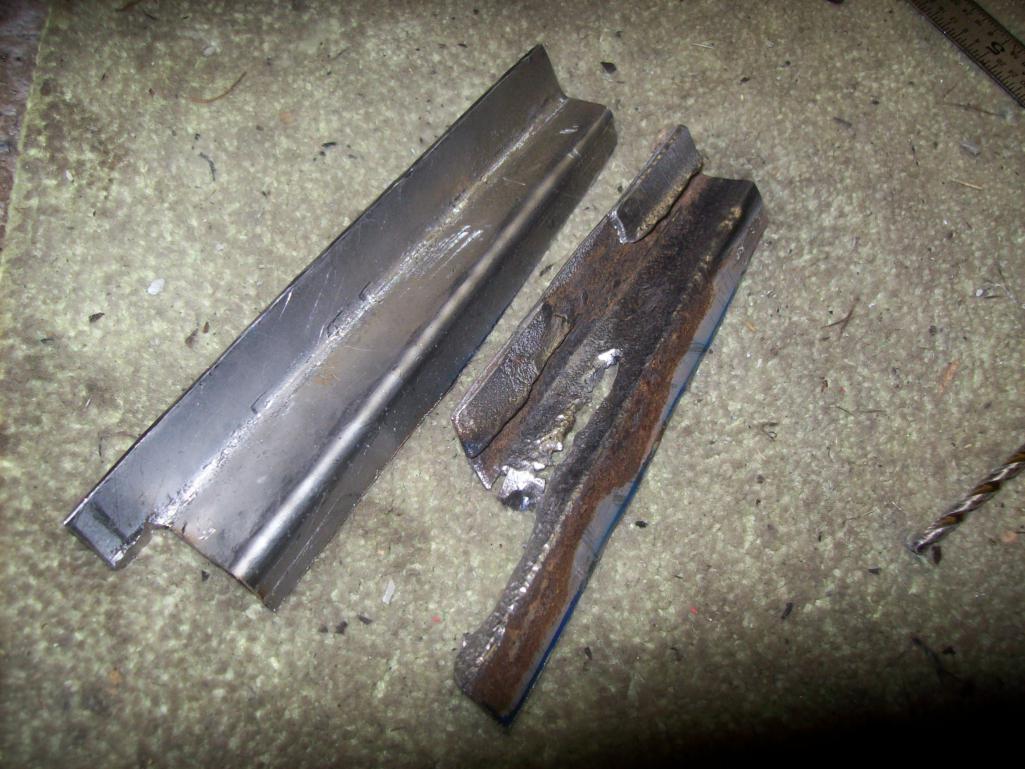
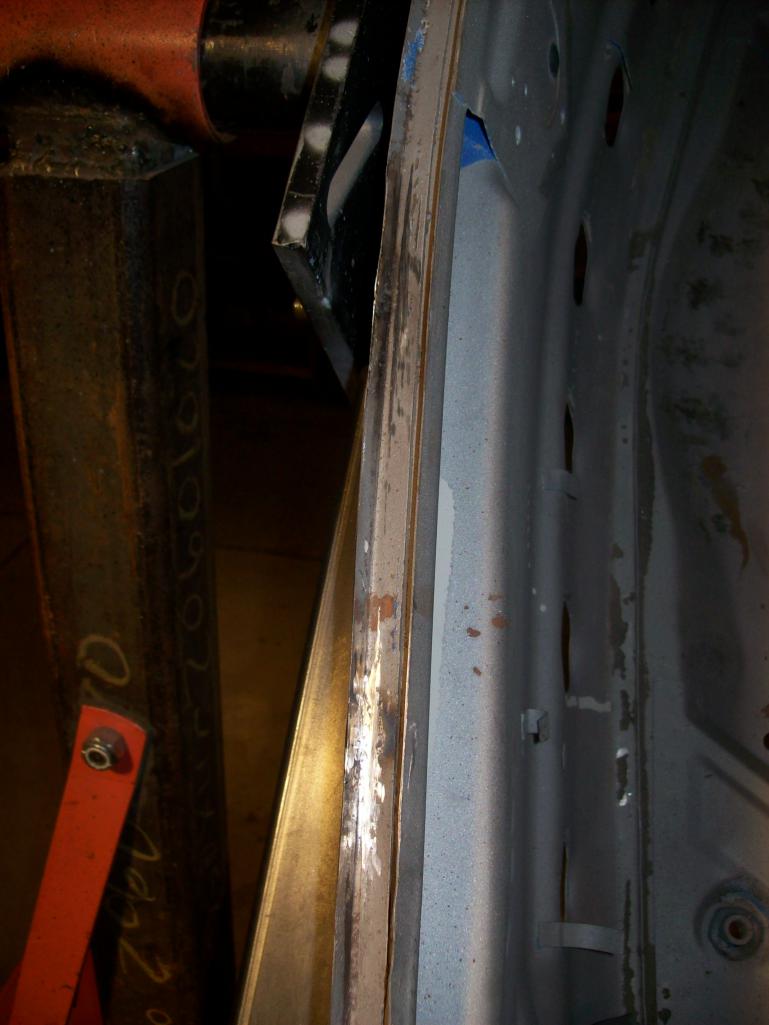
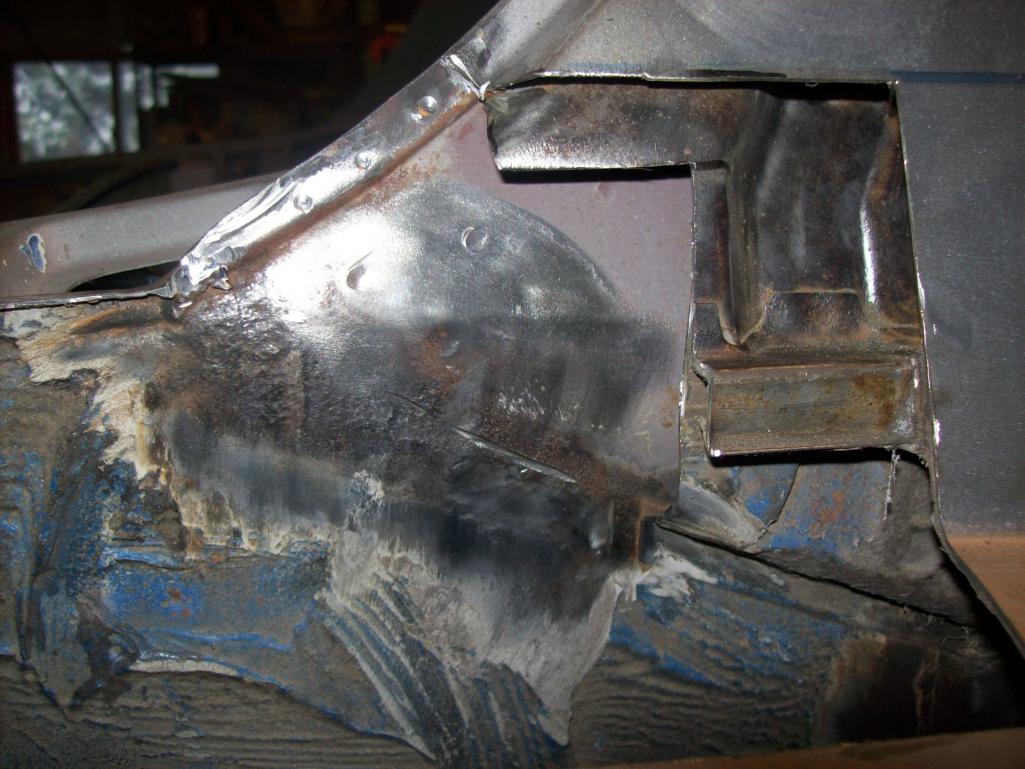
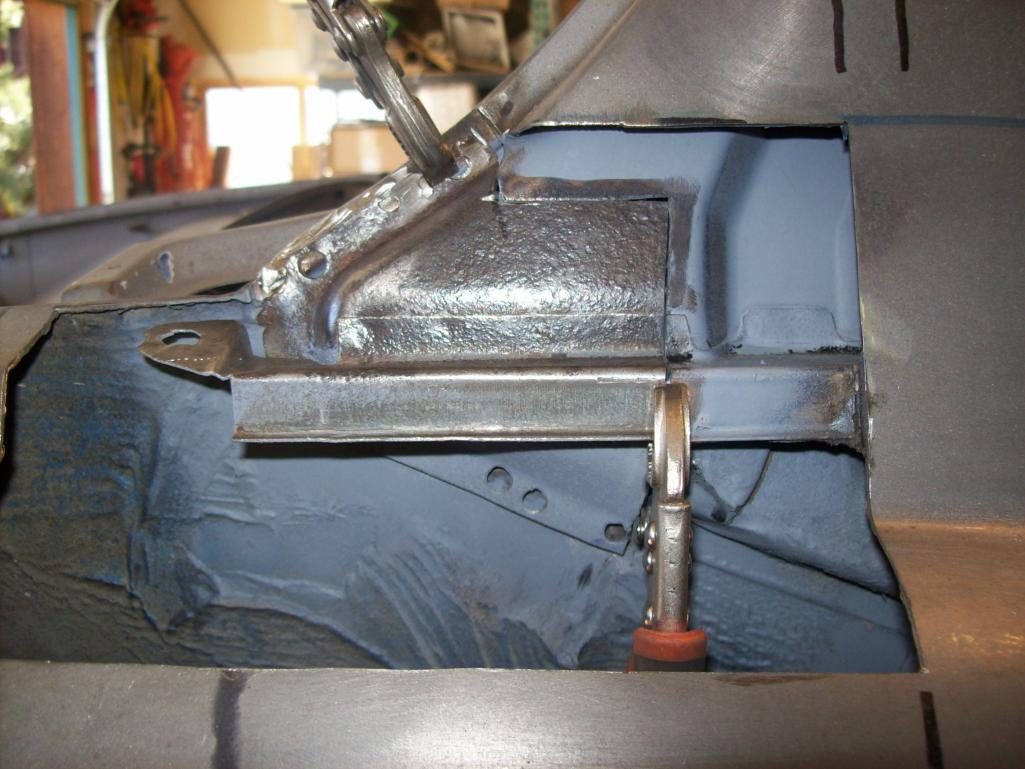
Couple more...the hell hole. Hopefully after blasting doesn't turn into the "hell holes" or the "never ending hell chasm".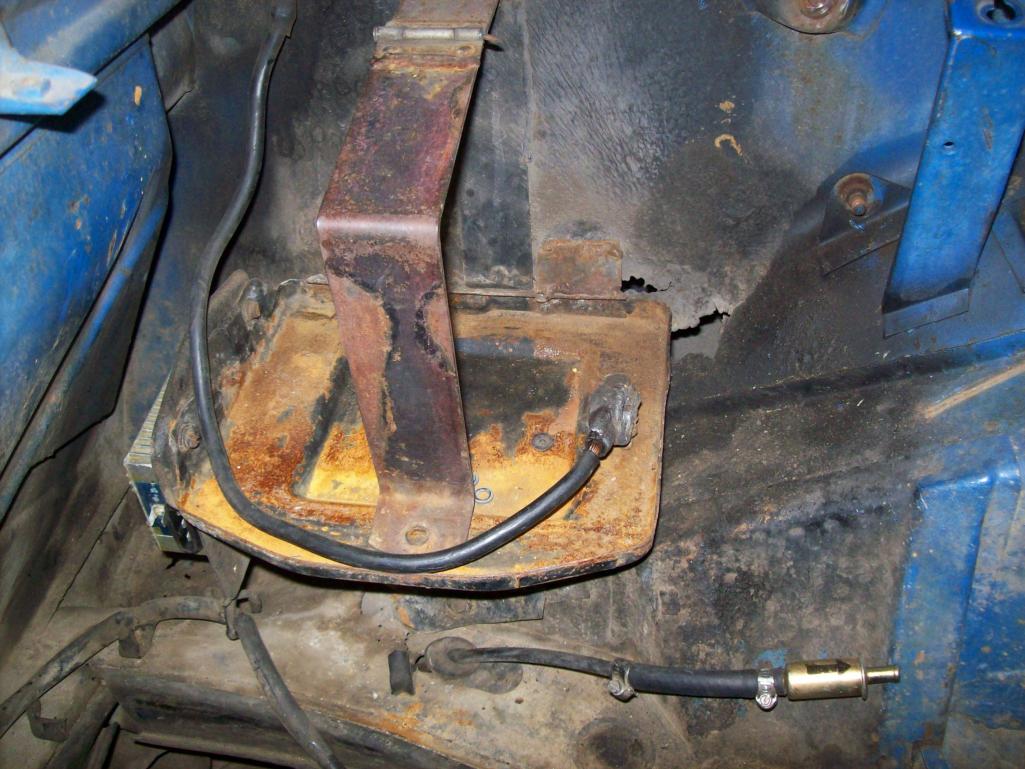

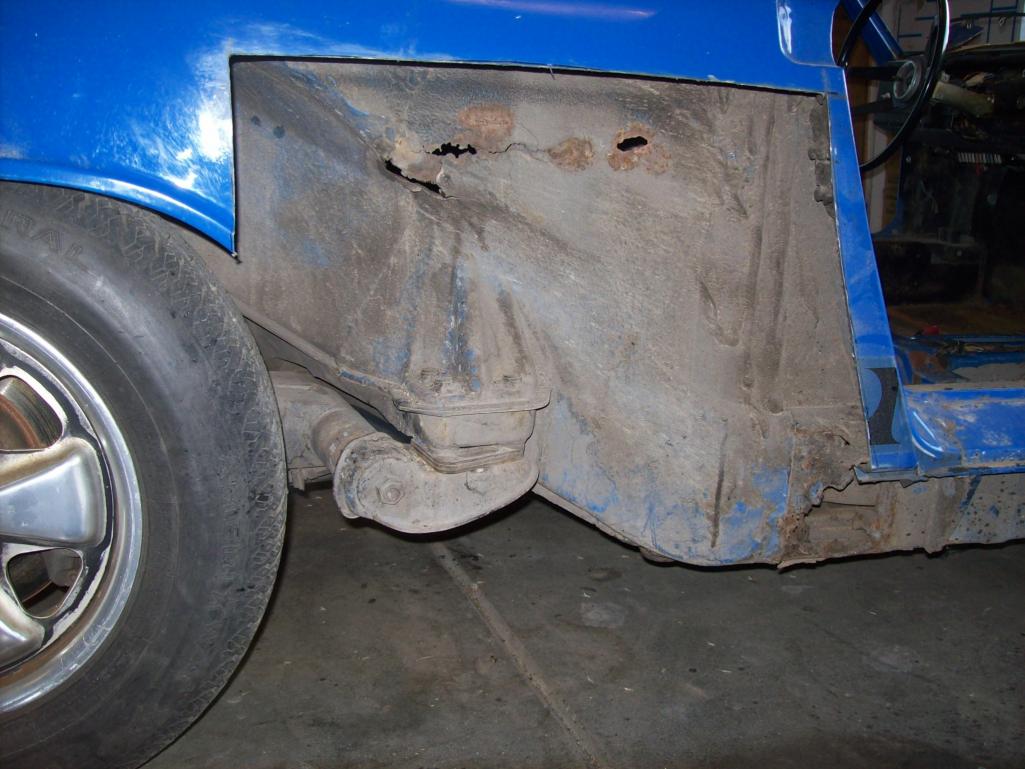
The PO ( or the shop the PO hired) took the induction off the 2.0 and bolted it onto the 2.7, there is nothing special here. In fact it really would benefit from being cleaned up.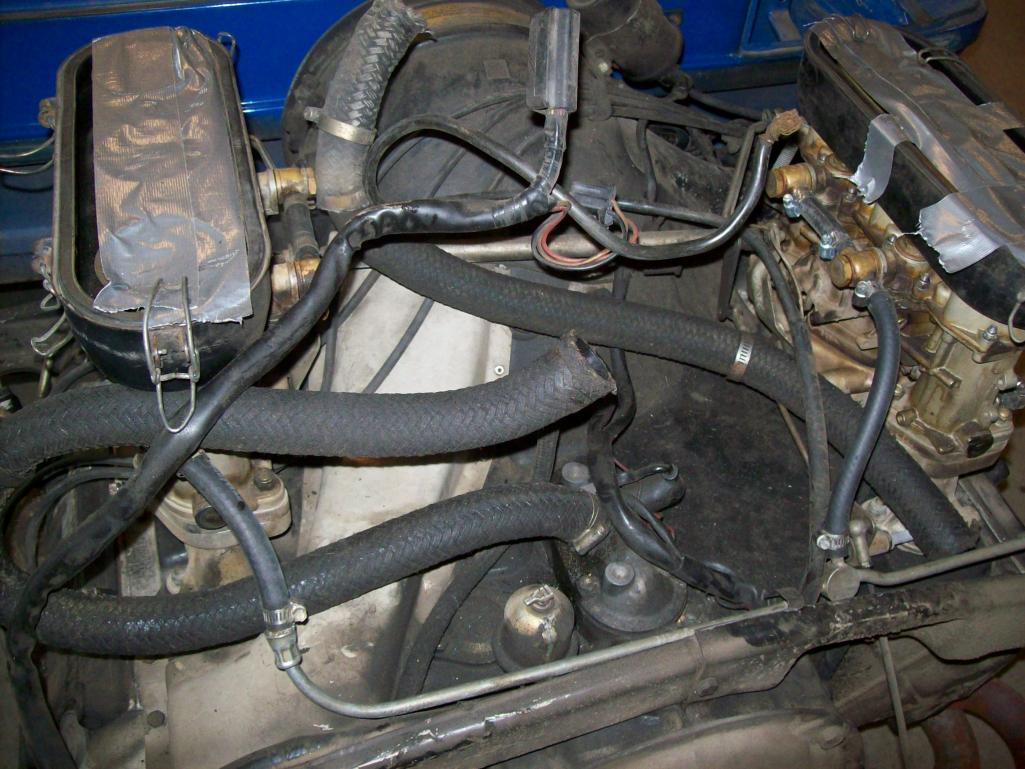
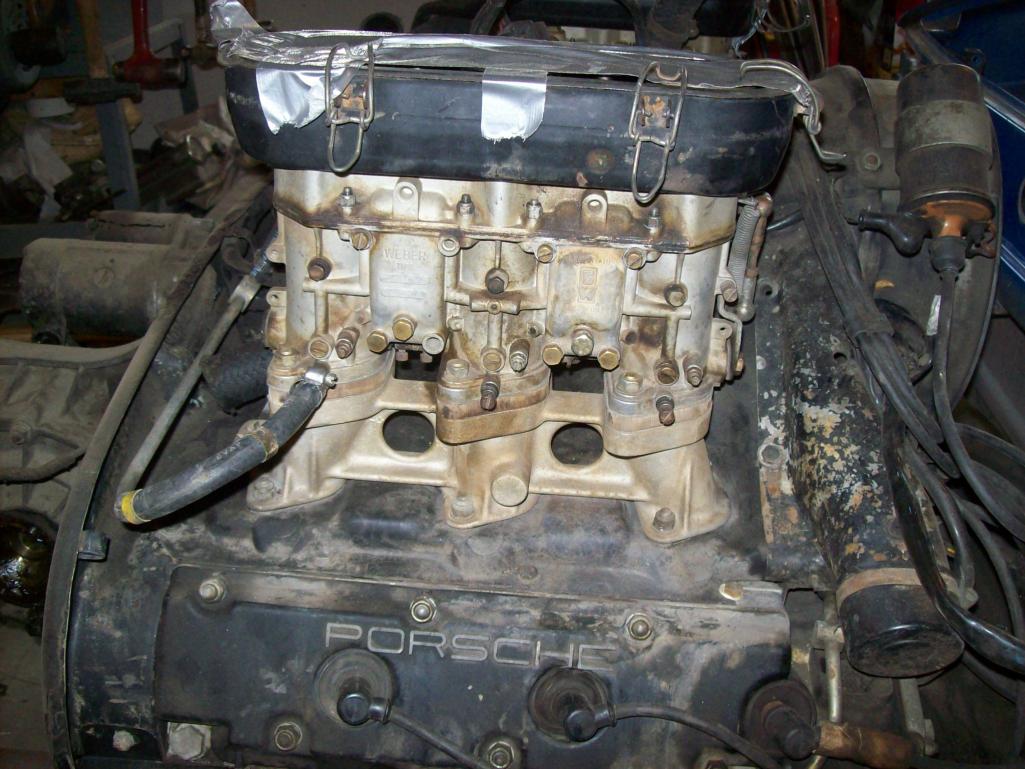
The 2.7 needs a makeover...here is the fresh stroked 2.2 w/ rebuilt Zeniths waiting for the 71 911 softie to come back from paint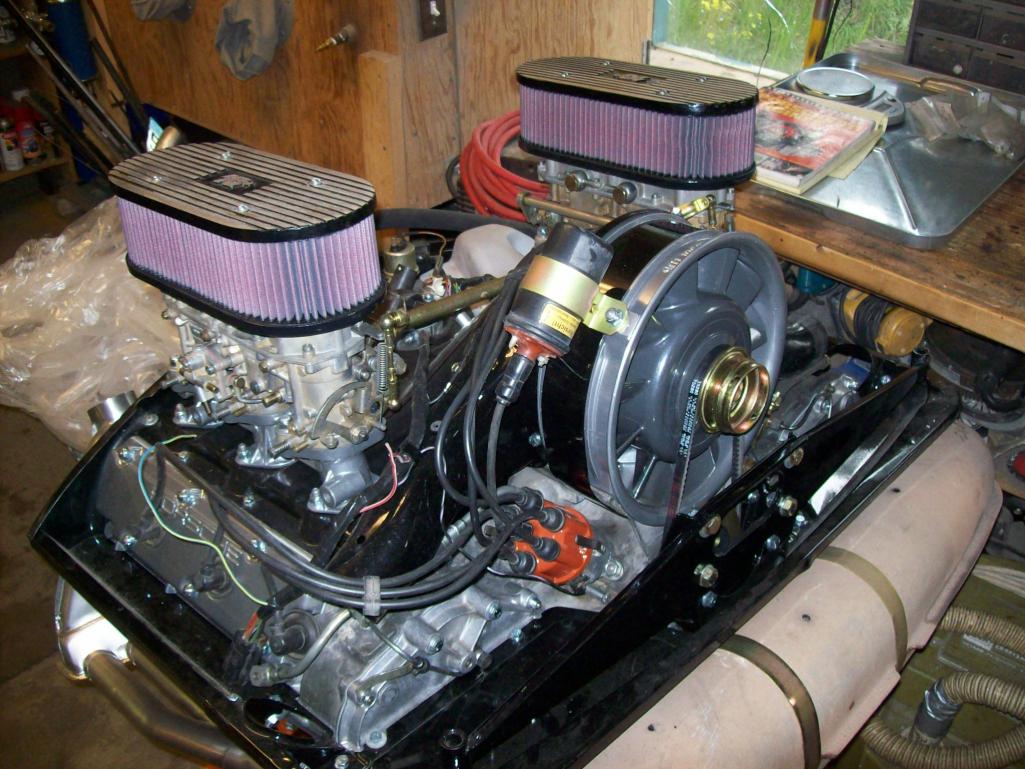
I am going to ditch (store) the stock aircleaners and go with rainshields or K and Ns. In fact, it might make sense to put the stock induction (shroud, dizzie, fan and alt, carbs, air cleaner etc) back onto the 2.0 to keep it original, and run a good rebuilt set of 40 IDAs on the 2.7 with another shroud-dizzie etc.
I need a couple afternoons this week to make some more headway.
BTW...Ferg and Brant started to explain what size fuchs I can run without spacers...and I don't remember what they said. I have factory deep sixes, 15x6s and 15x7s. I was hoping to run 15x6s or 7s with just a bit of negative camber. Will I have clearance issues with 205 50s?
Speedo
Posted by: seanery Jun 12 2012, 08:07 PM
I know sixes fit the fenders ok with 205s. Not sure about sevens.
Posted by: Cairo94507 Jun 12 2012, 08:26 PM
I didn't even know the deep six was made in 7". What year and model did they come on? Love that beautiful engine BTW.
Posted by: rick 918-S Jun 12 2012, 08:35 PM
That is a nice shell! 
Posted by: brant Jun 12 2012, 11:01 PM
pull that oil tank before it goes to the blaster...
you can't run the risk of anything contaminating it
Posted by: wachospeedo Jun 18 2012, 06:52 PM
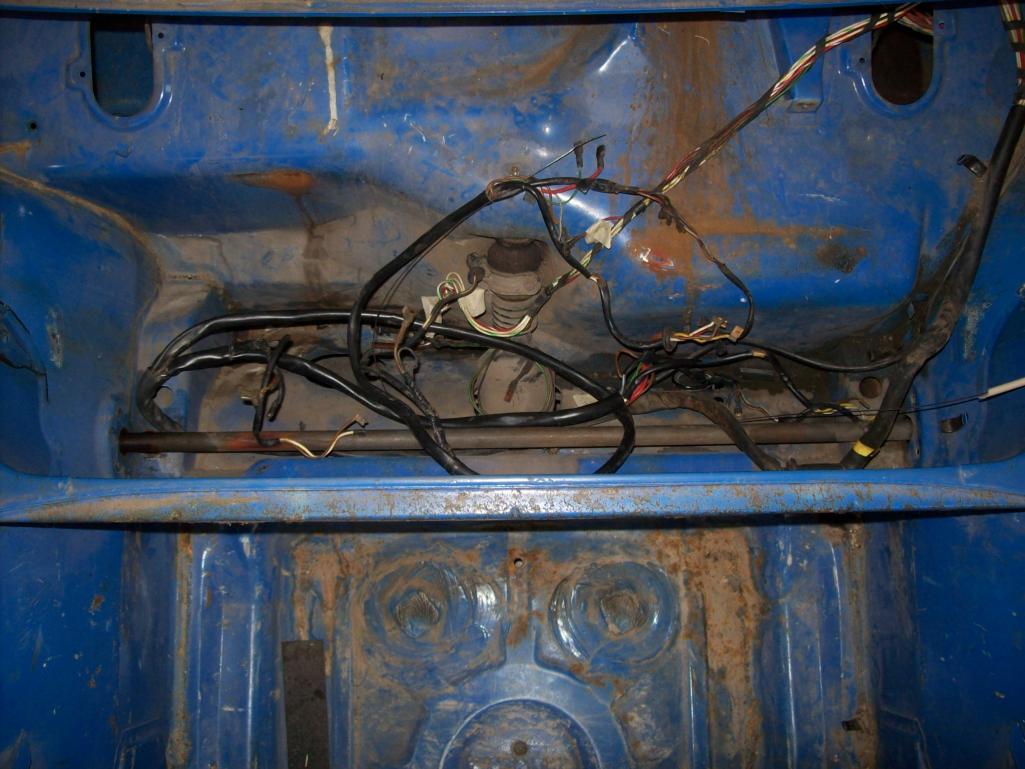
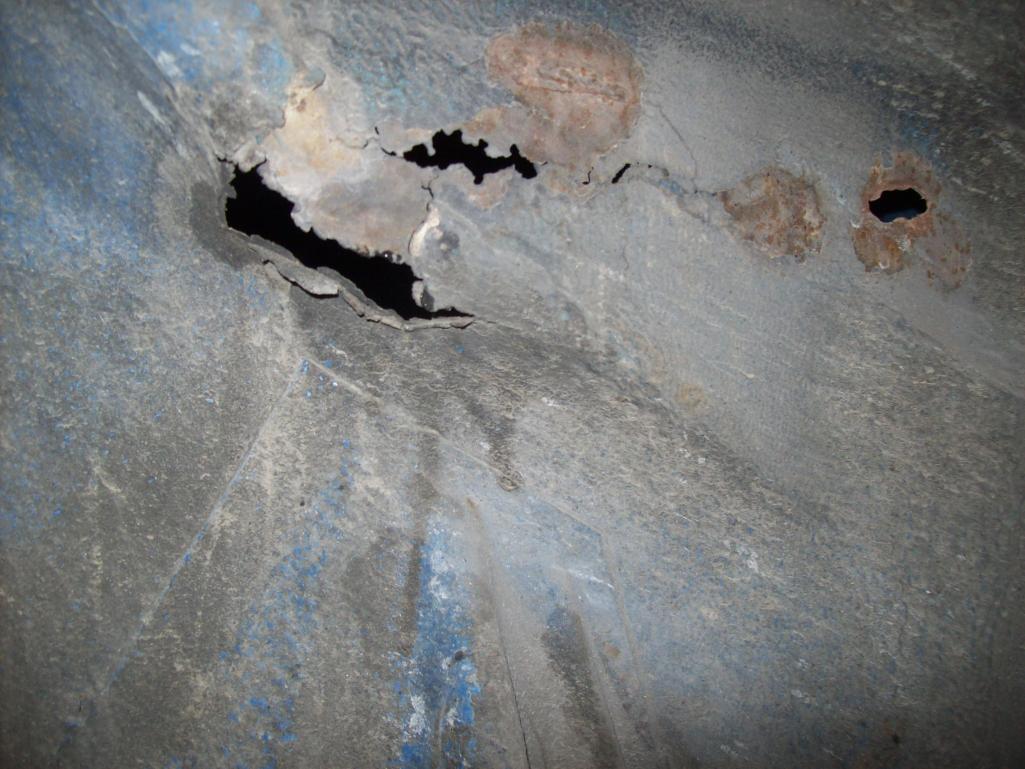
More prepping for sandblaster. Removing the oil tank...how come nobody warned me about this? What a mother! All the inside fittings were a piece of cake. The bottom oil line is close to impossible to get off while the oil tank is under the fender. I was going to dremel the line off, as it was the only thing prohibiting the tank from being removed...but I'd hate to find out after the fact that it was one of "those" lines that are beaucoup expensive. Impossible to get a wrench up in there to get the fitting off. I managed to get the thing out...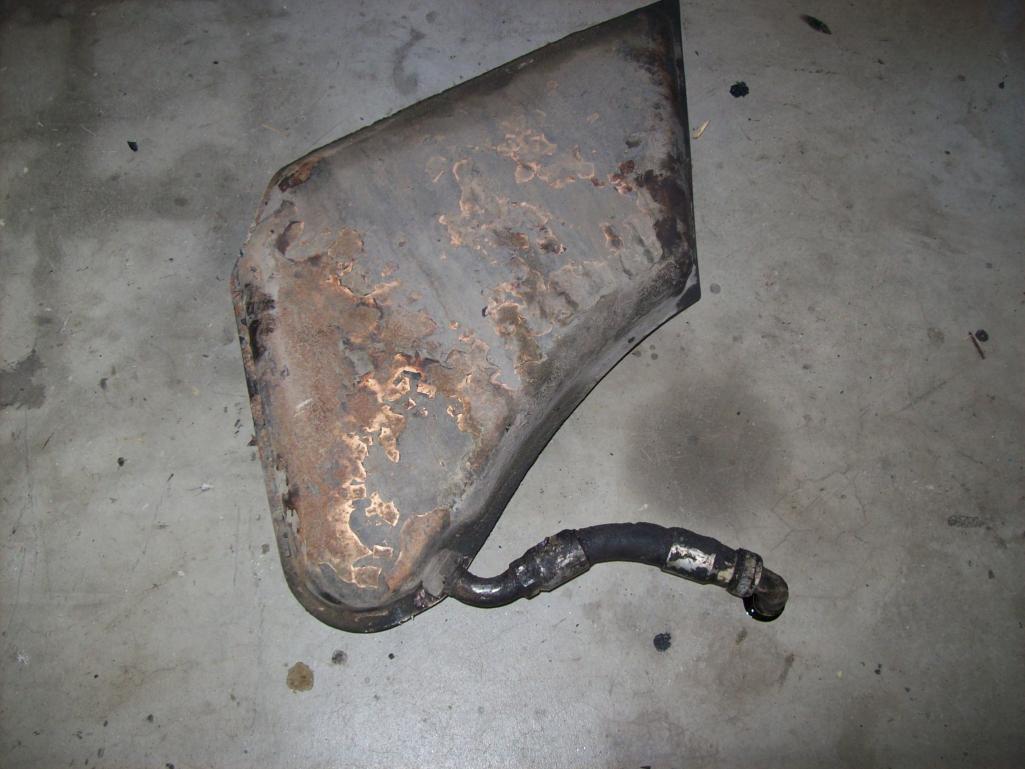
This was the culprit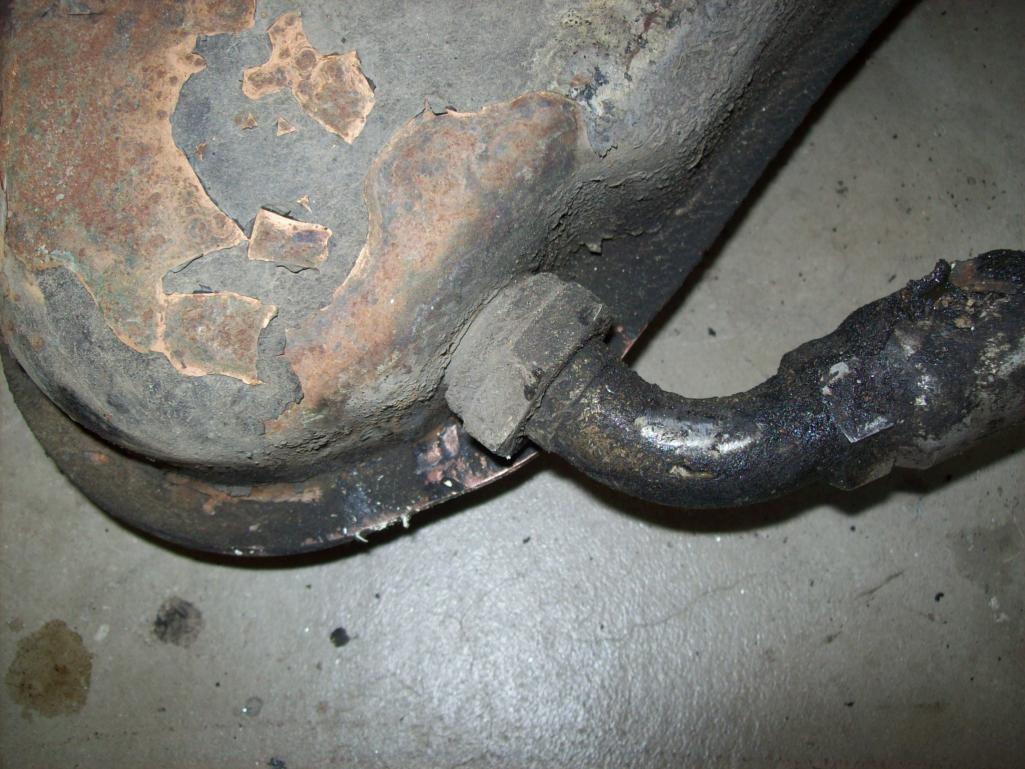
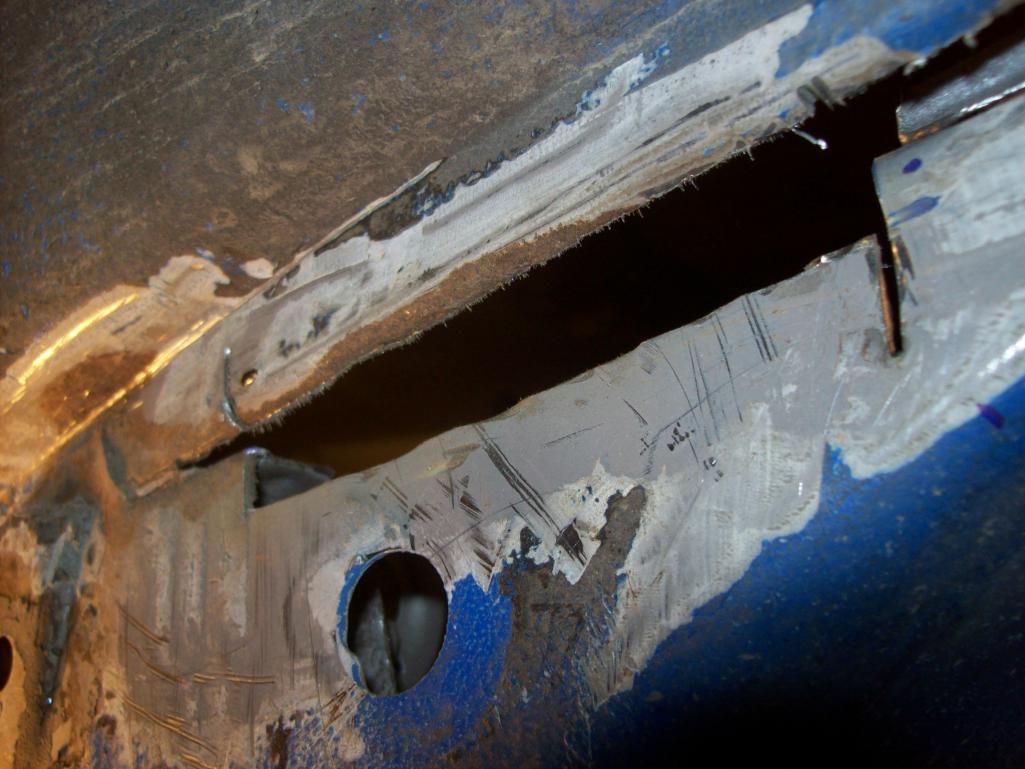
Gutted the rest of the engine compartment and found more not so great hell hole news...no big deal, I sort of expected it.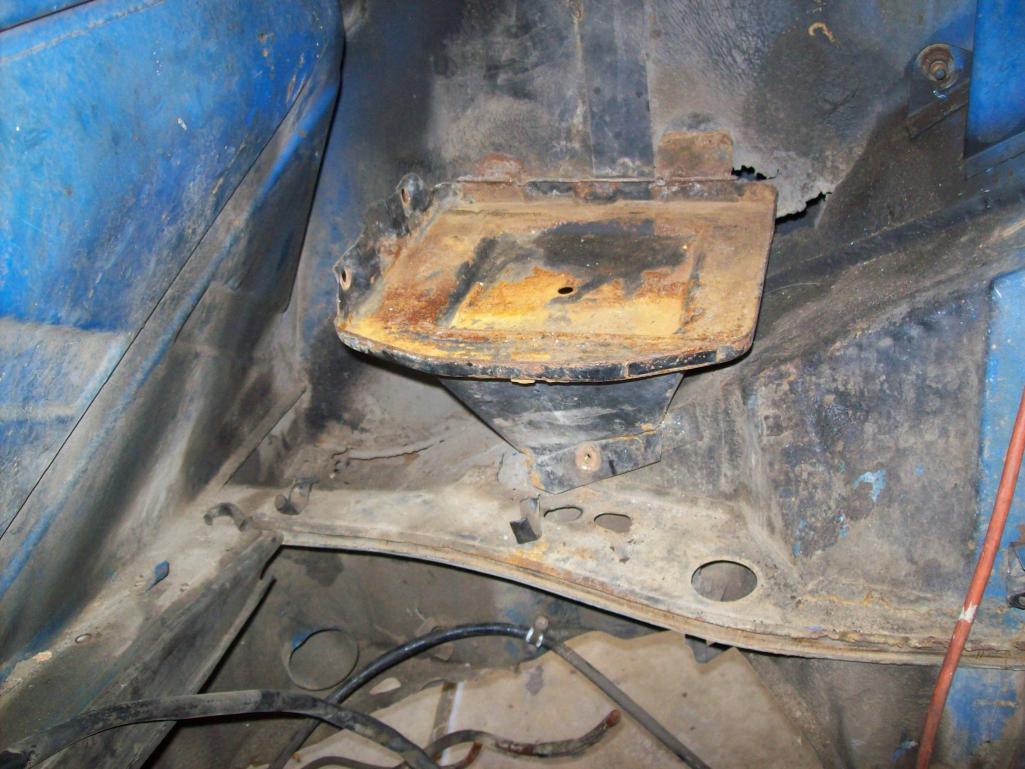
Ground out the old battery mount. It was actually factory steel, but a hack job of installation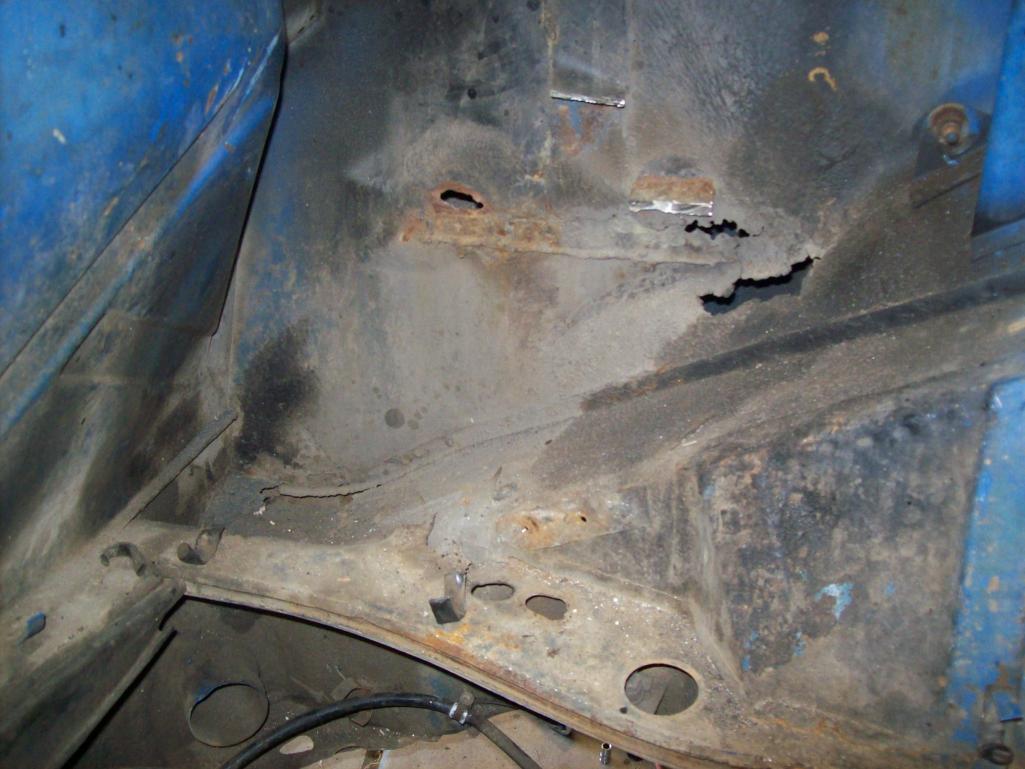
Oh well...resto-des has all my parts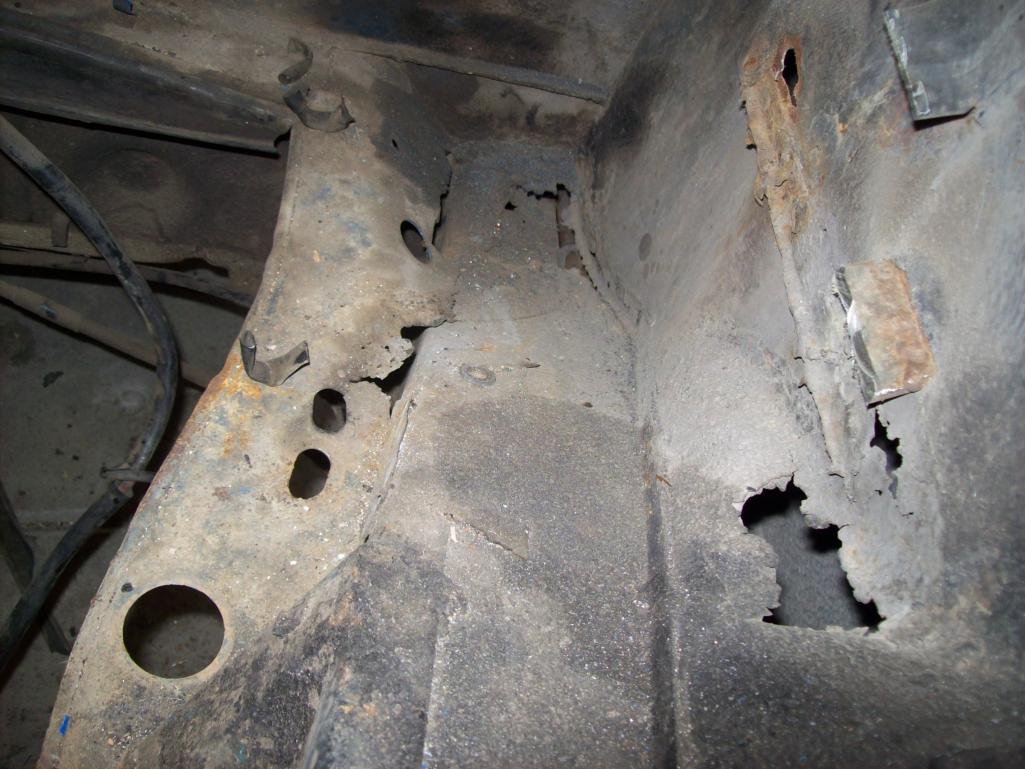
Posted by: shuie Jun 18 2012, 06:58 PM
I didn't even know the deep six was made in 7". What year and model did they come on?
The 15x7 Fuch that looks just like a deep 6" was used on the rear of the 911R. An original would be much more valuable and rare than a deep 6". Most of the 7R wheels out there were welded up from a deep 6 and a donor wheel. I forget the offset, maybe 49mm, but it pushes most of the wheel inboard so a 205 tire can be tucked under the narrow flares of an early SWB 911.
Posted by: wachospeedo Jun 18 2012, 07:11 PM
Moving on...This all obviously is bye bye
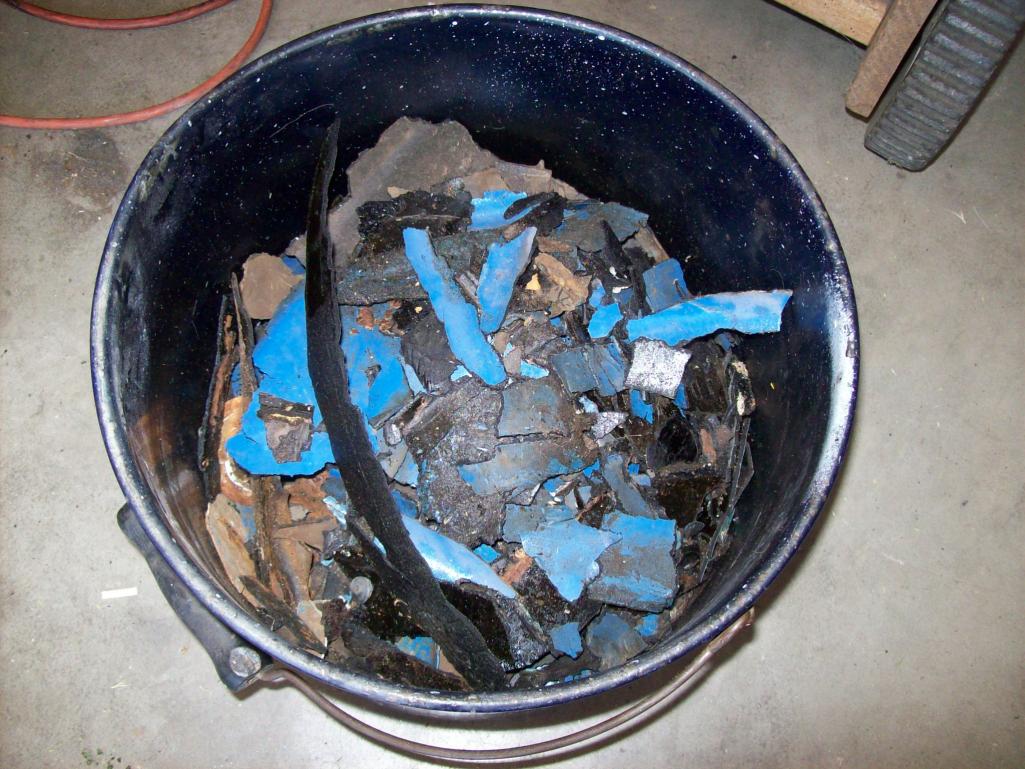
I attacked the floor sound insulation as I figured the sandblaster wasn't going to be able to blast through it. There is a technique. The floors are oxcidized, but I think they will blast clean. Must have been 15-20 lbs of this stuff.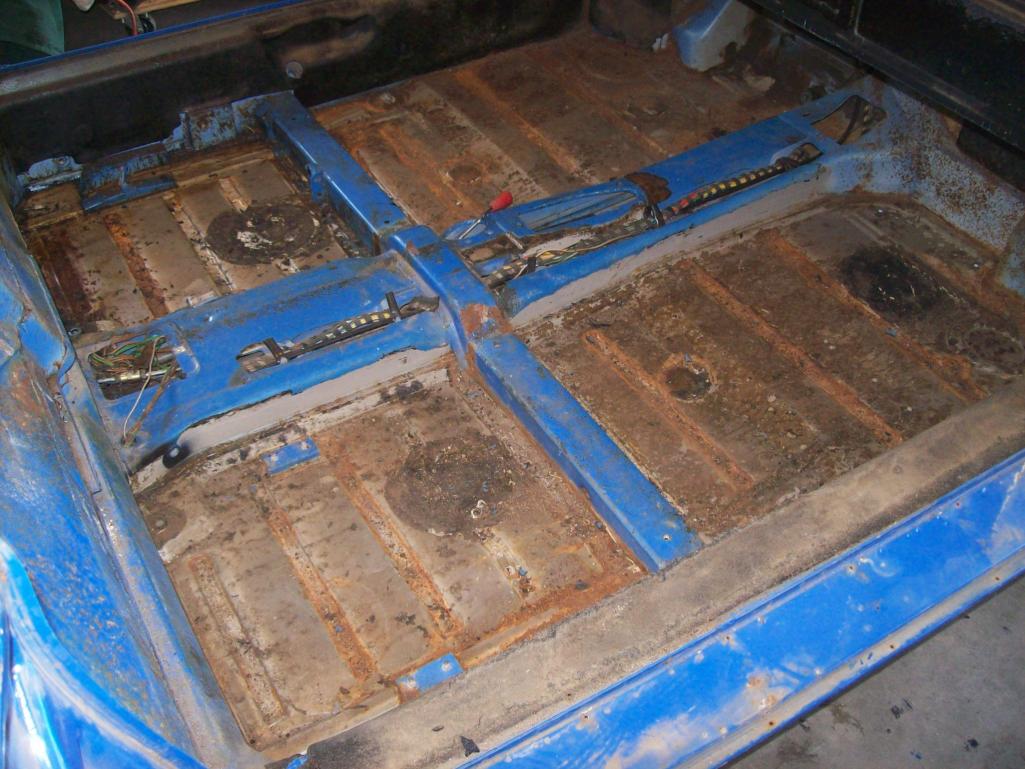
This area is all bagged up and ready to go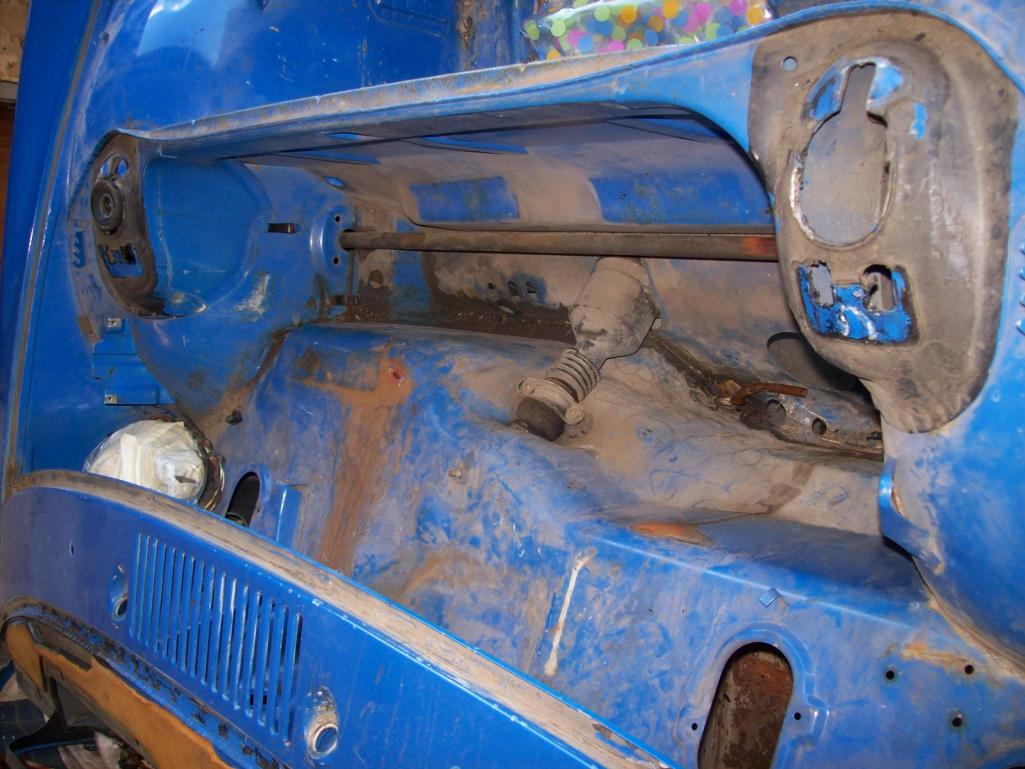
My Porsche pickup truck...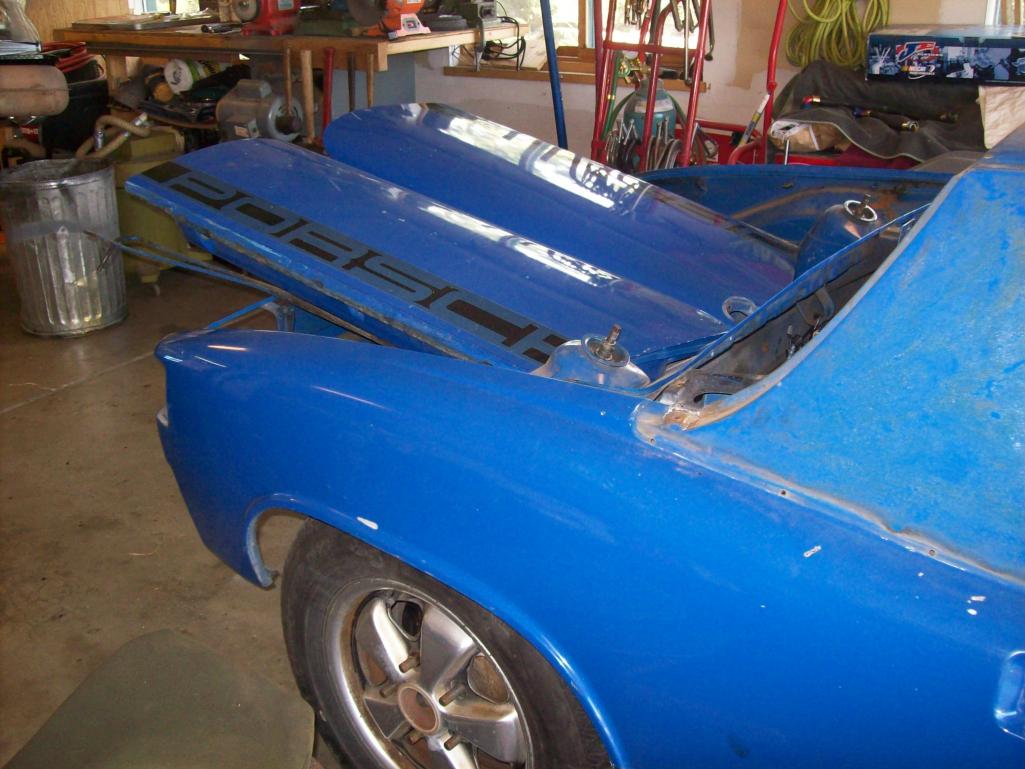
Speedo
Posted by: pete000 Jun 18 2012, 10:36 PM
Great progress !
Posted by: Cairo94507 Jun 19 2012, 10:00 AM
Wow I am really going to enjoy watching this build. We now have two sixes that are starting rebuild and/or restoration at about the same time. This will be fun. But at the speed your moving yours will be back on the road long before mine.
Posted by: brant Jun 19 2012, 04:53 PM
Nice job....
time to cut that front fender off...
its a pain in the butt...
(I remember from when the race car got tagged by the miata)
Posted by: 914Sixer Jun 19 2012, 07:37 PM
Looking good !!!!
Posted by: wachospeedo Jun 20 2012, 08:25 PM
Ok Brant...
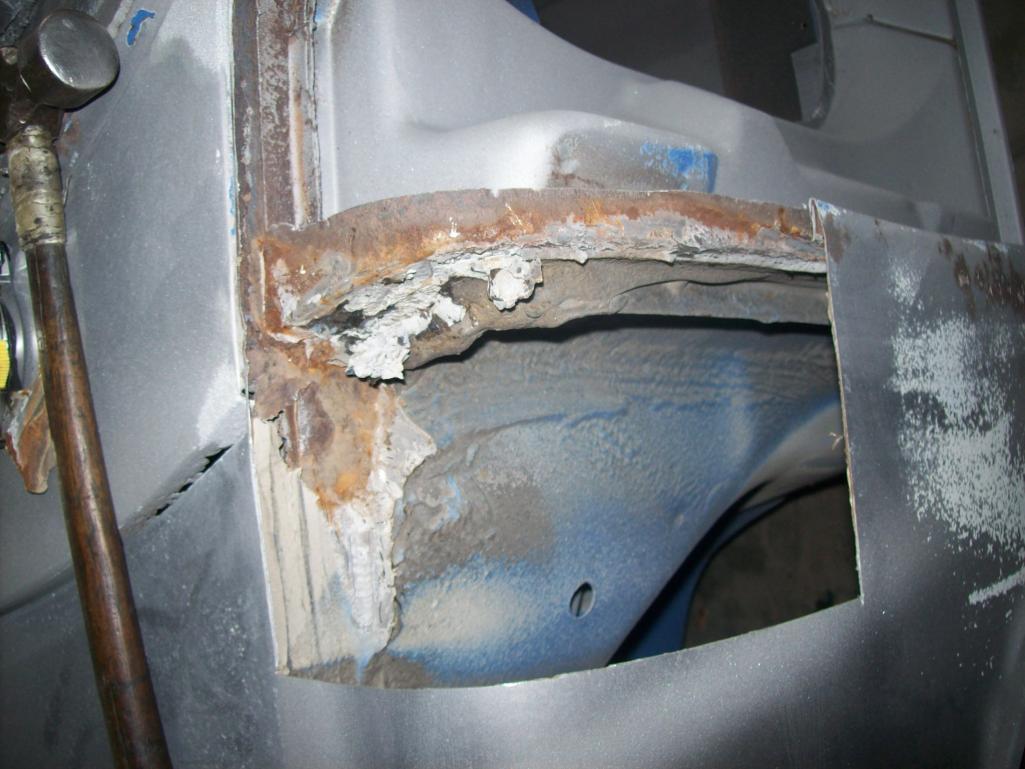
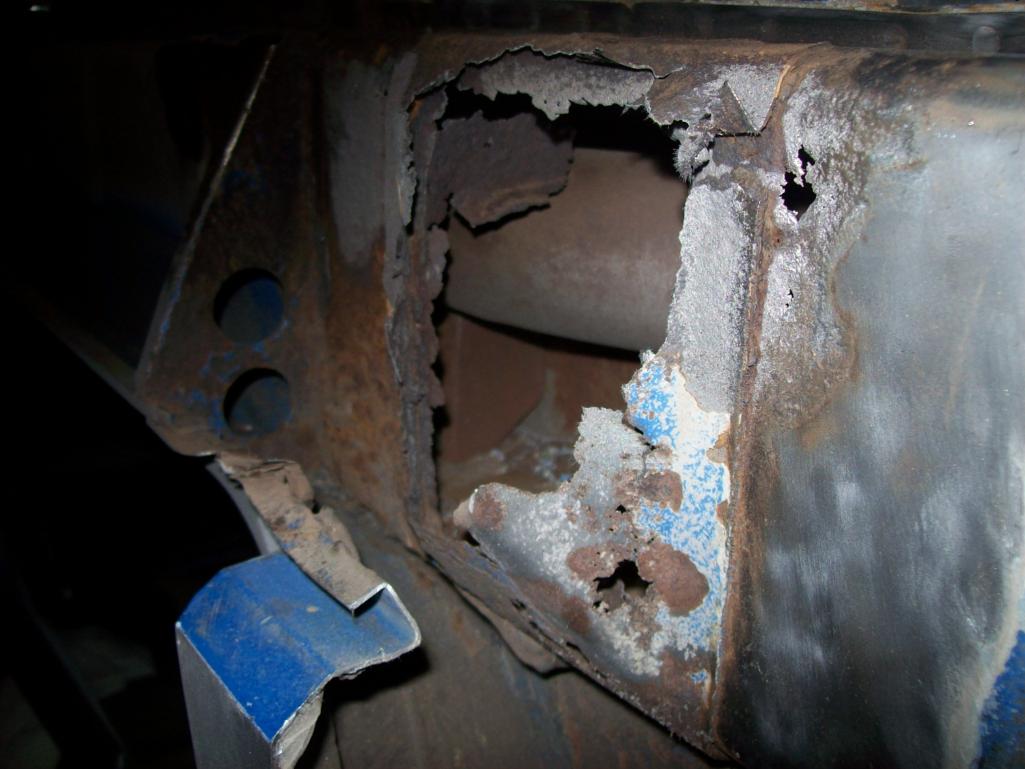
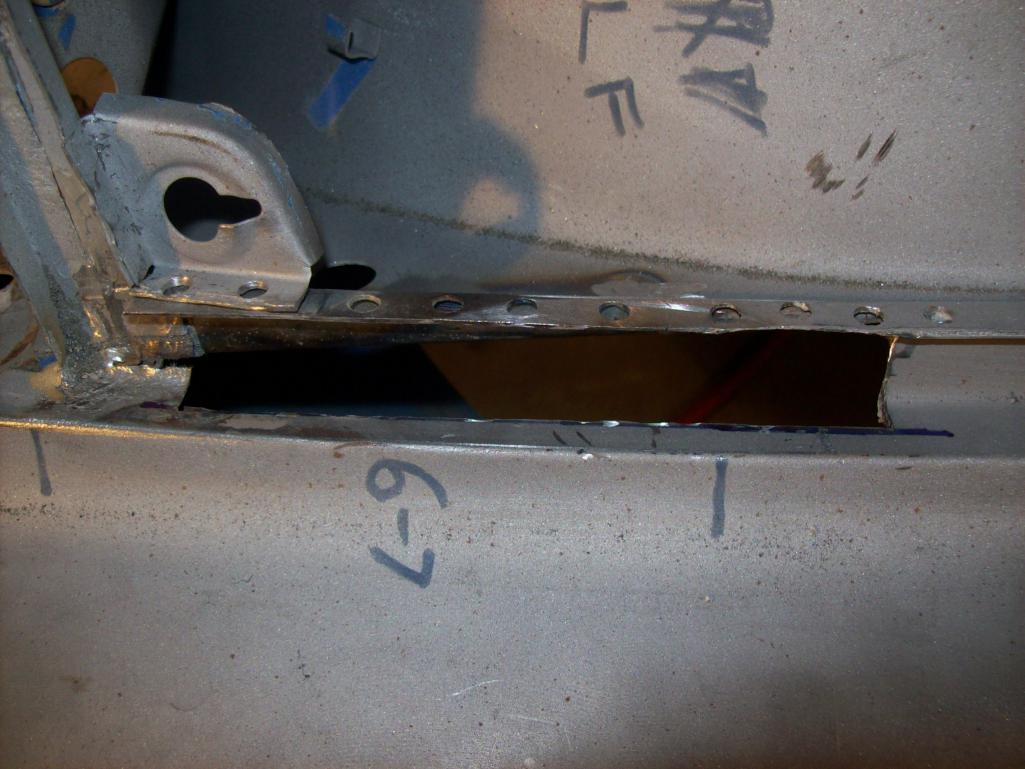
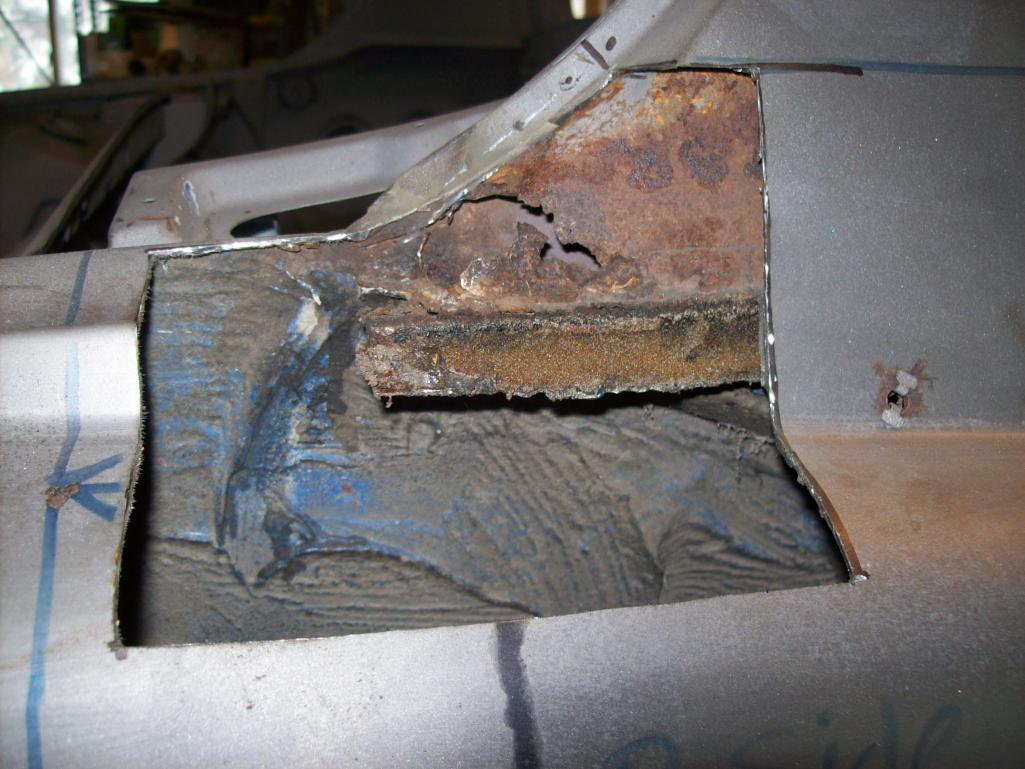
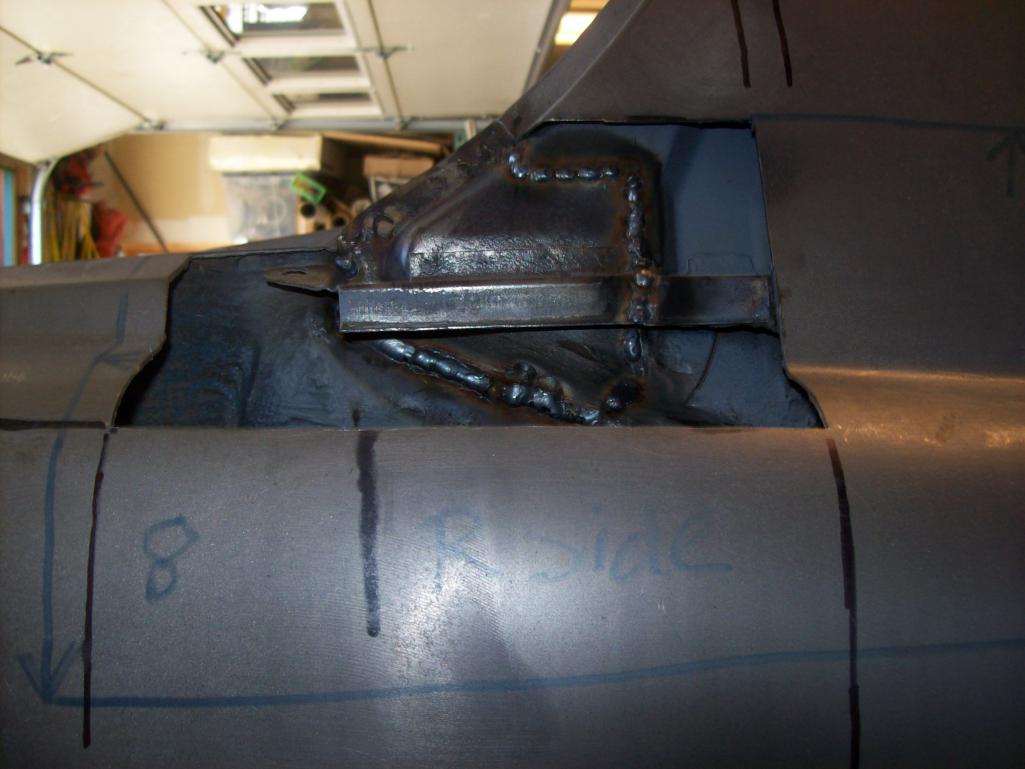
Marching orders...cut the bad out before the sandblaster. So I have two specific areas that are going to need to be very exposed to the media (not the paparazzi).
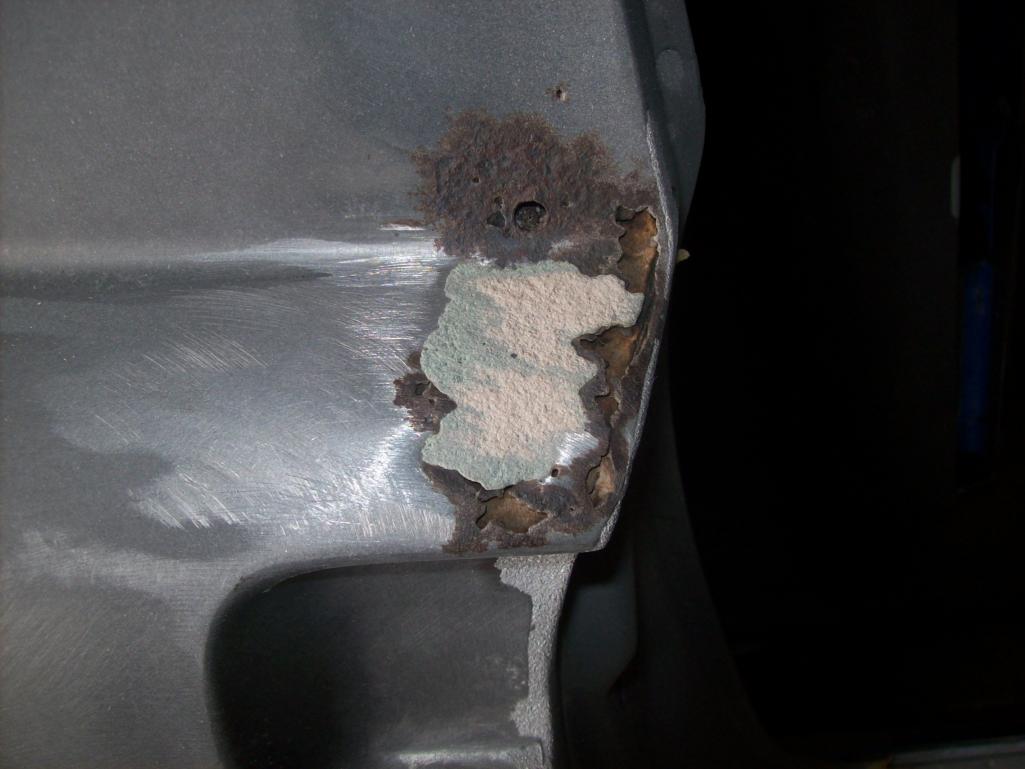
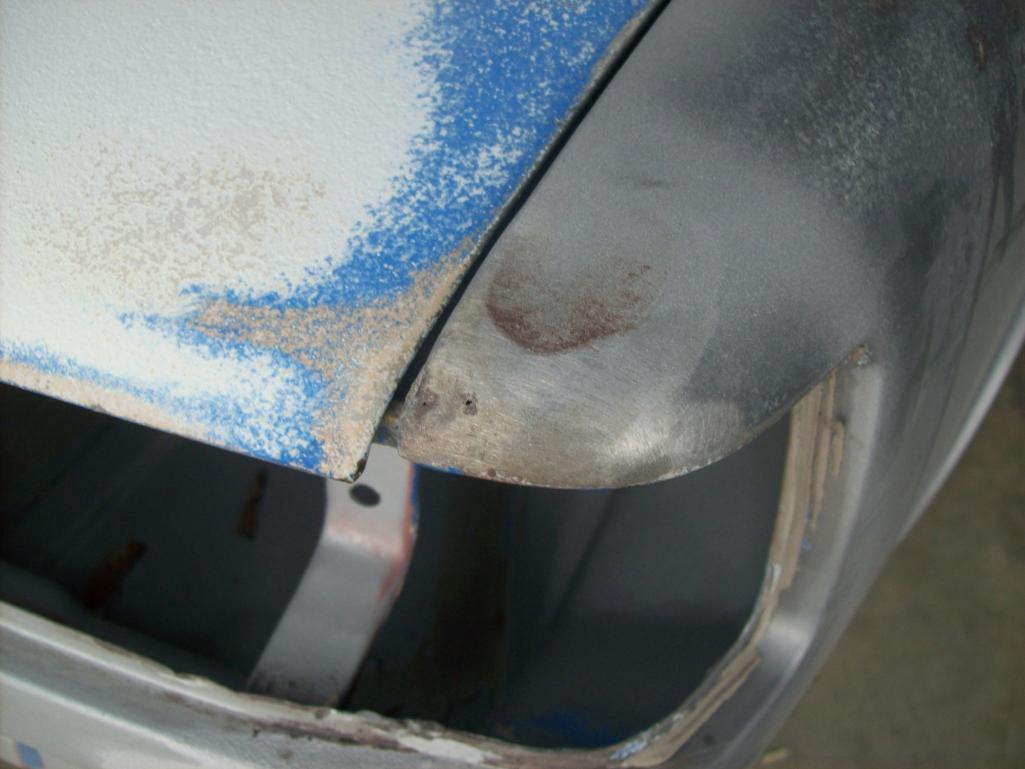
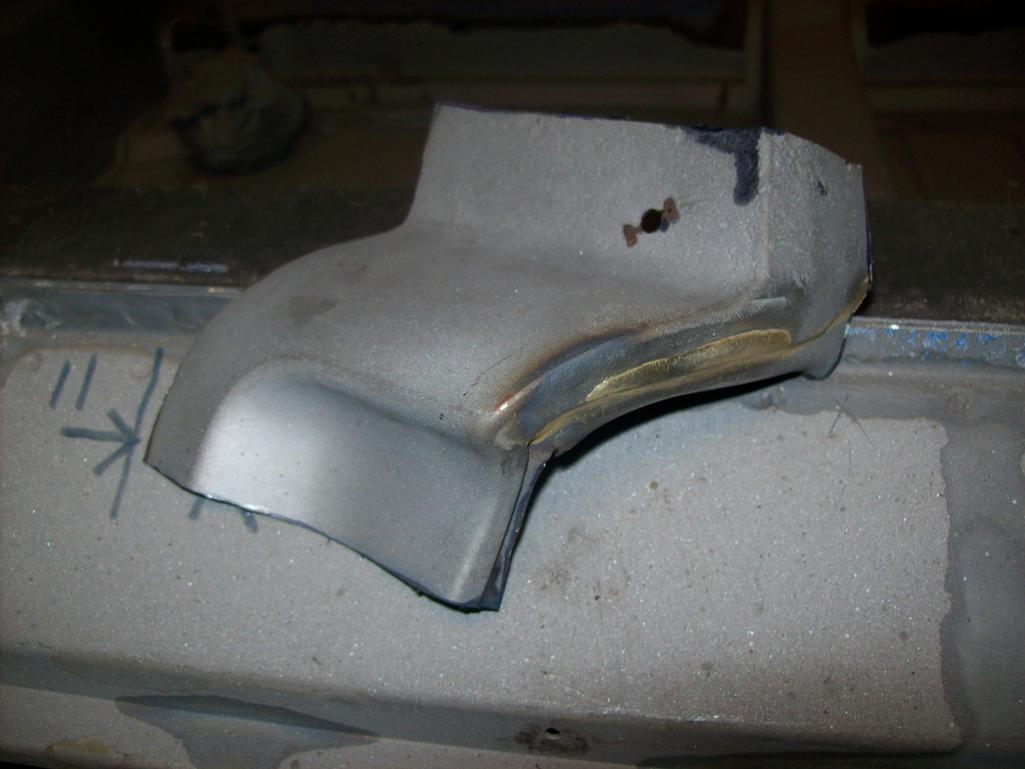
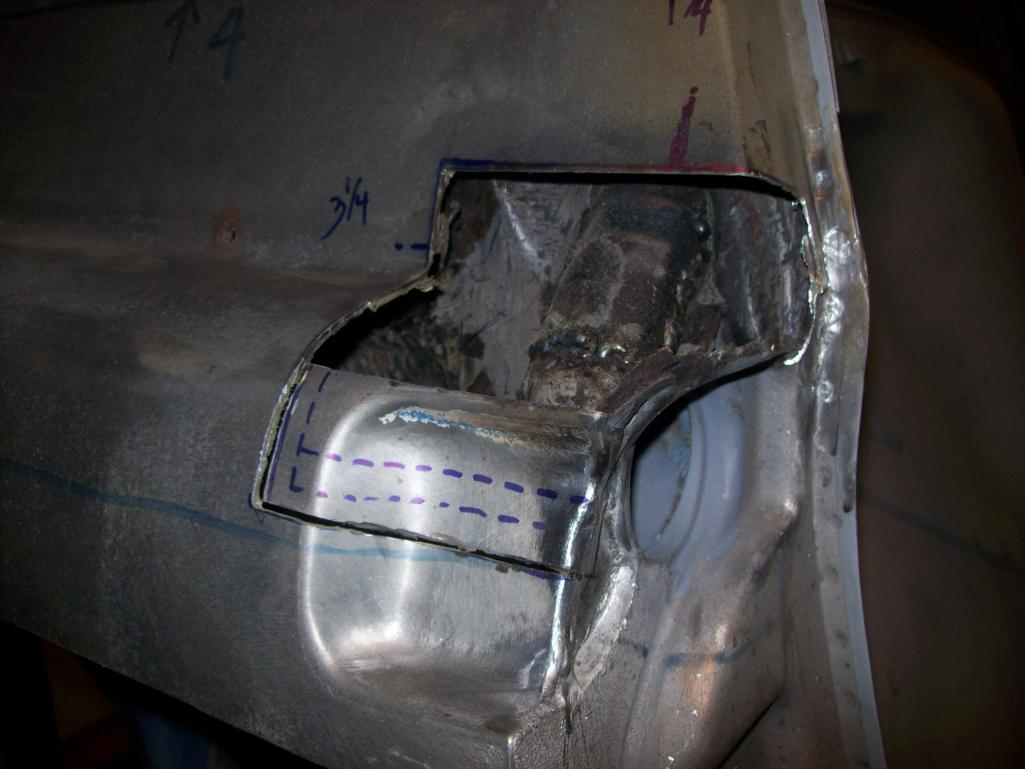
I need to cut back on the tail of the fender to clean up what is underneath....mark and cut 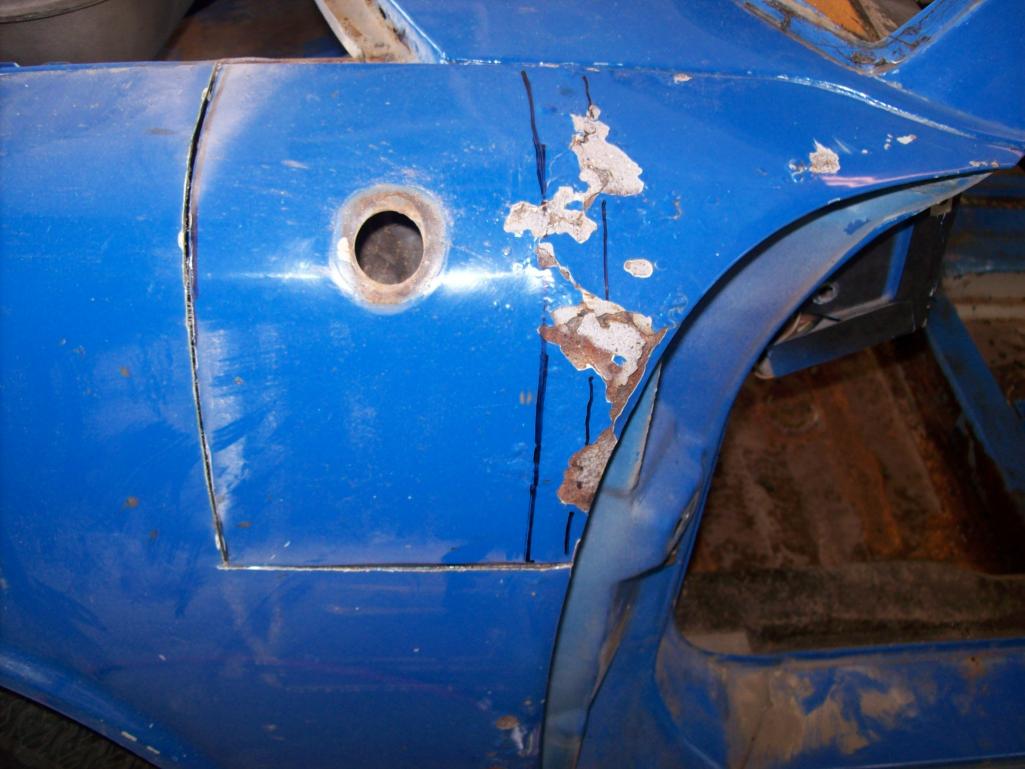
The damage is worse than was apparent from the first pic...but not so bad from here. We'll wait to see what things look like back from the blaster
Posted by: wachospeedo Jun 20 2012, 08:38 PM
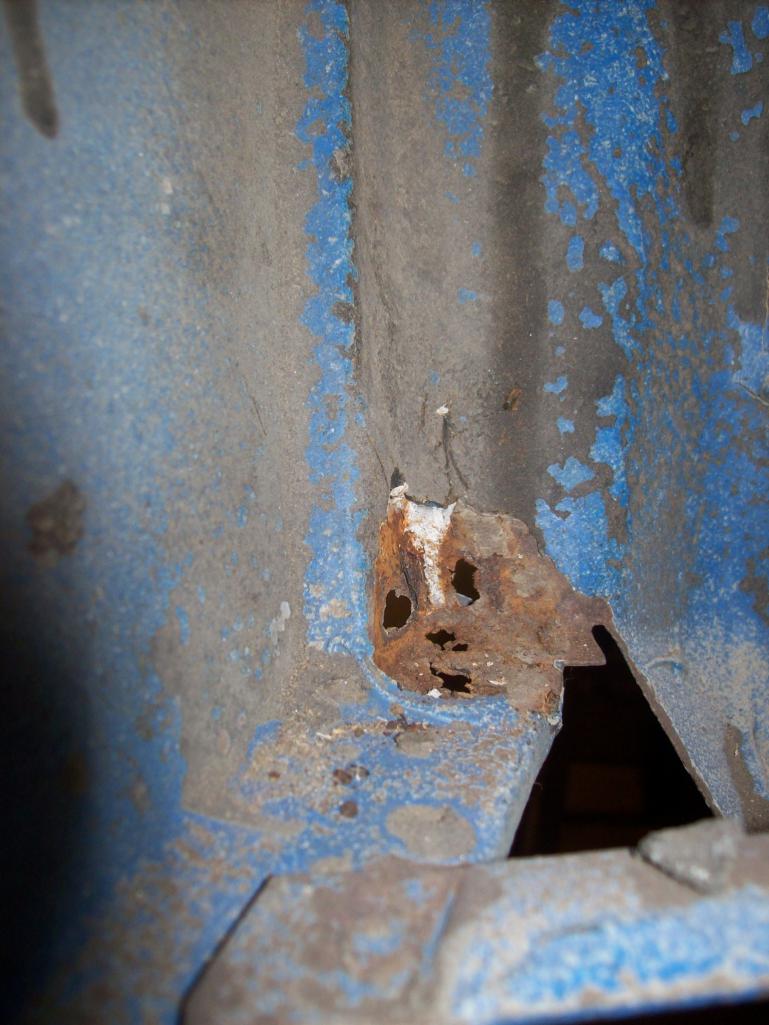
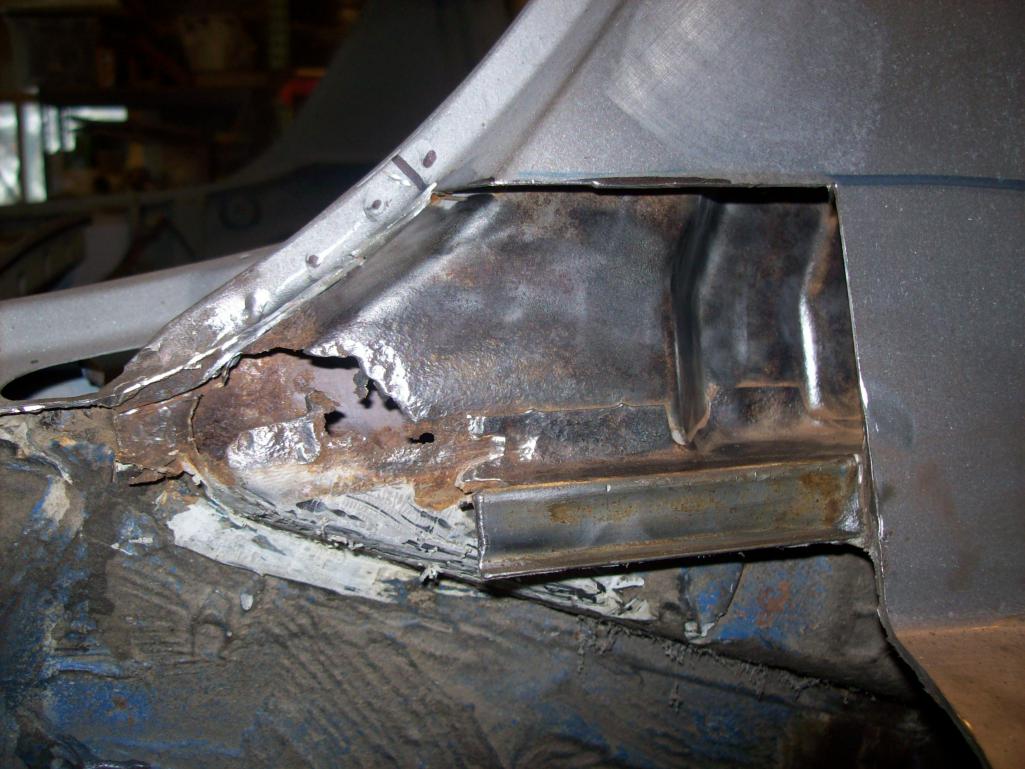
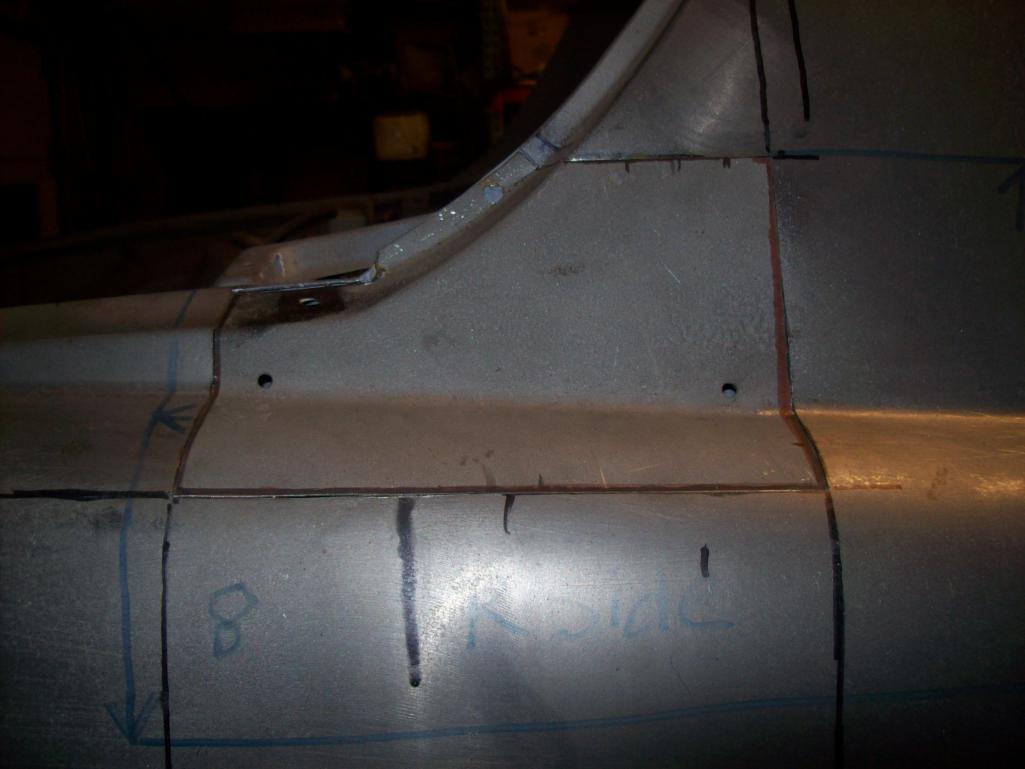
One more view of the perforations in the lip next to the bonnet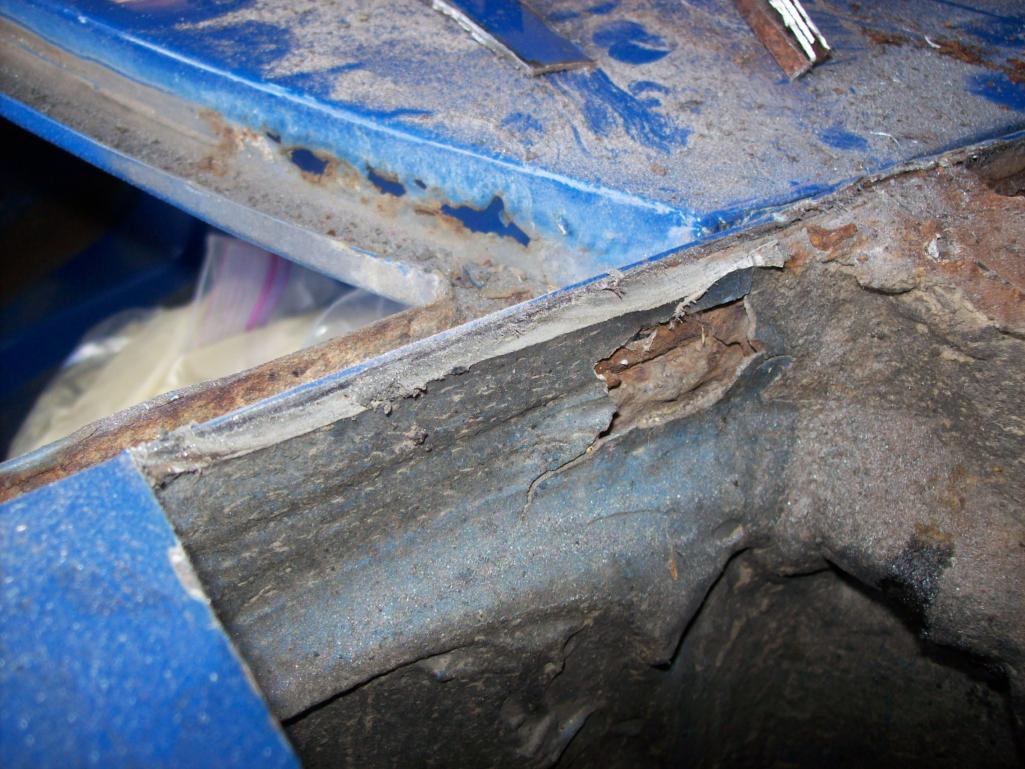
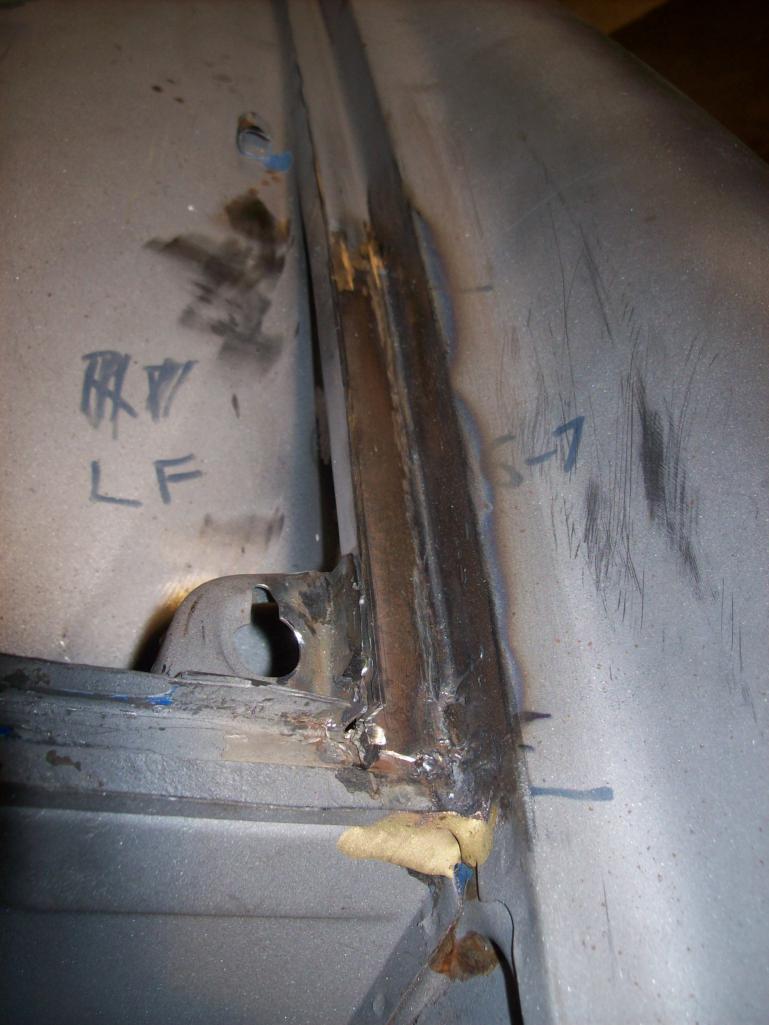
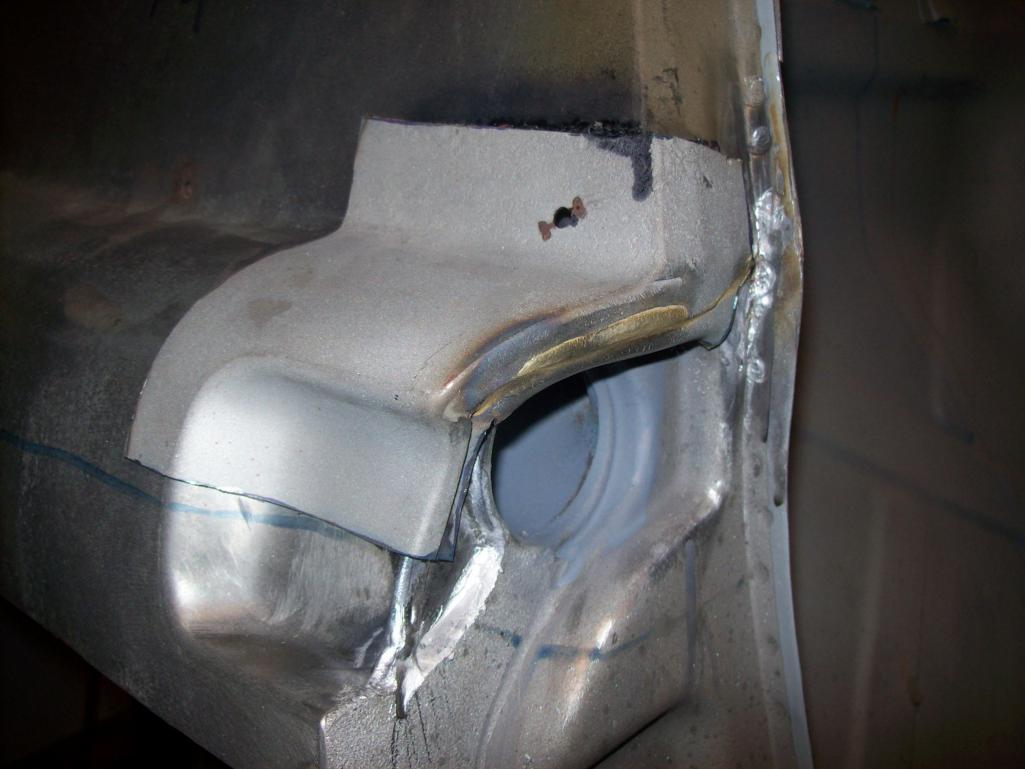
Now on to the quarter panel...that by the way is in decent shape. So yes, I am going to hack off a perfectly good quarter panel, just to gain access...and give the sandblaster access to the hell hole. First cut is the deepest...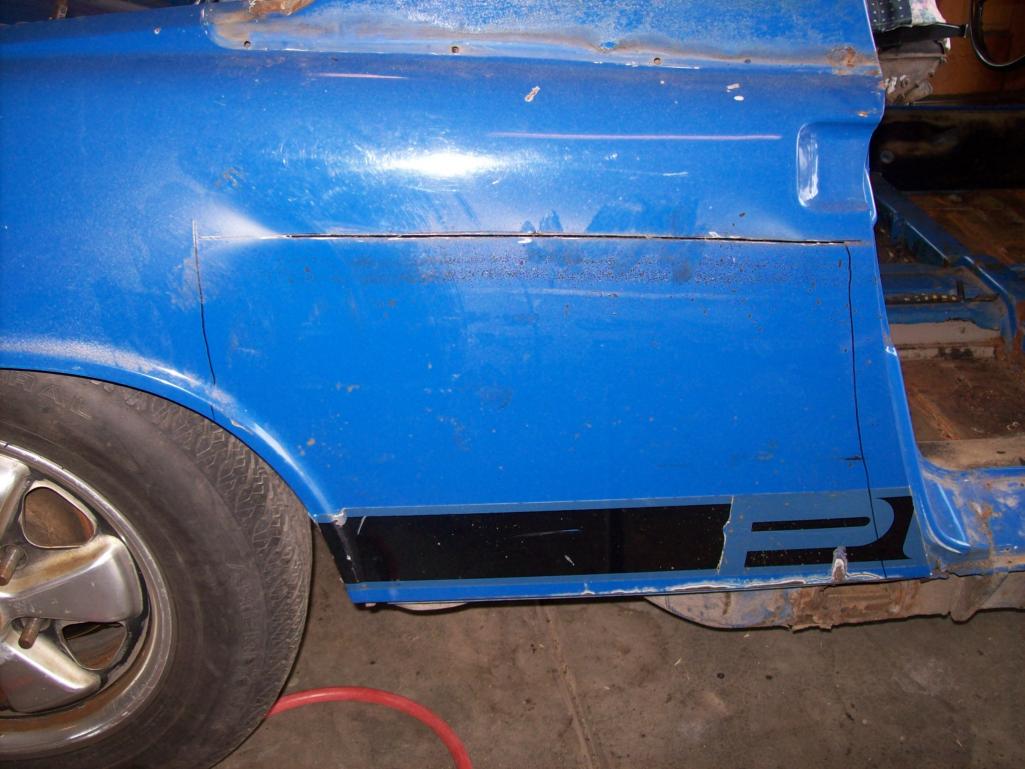
What have I done???
This will get blasted better and more deeply. We'll get good access to the hell hole and inner fender.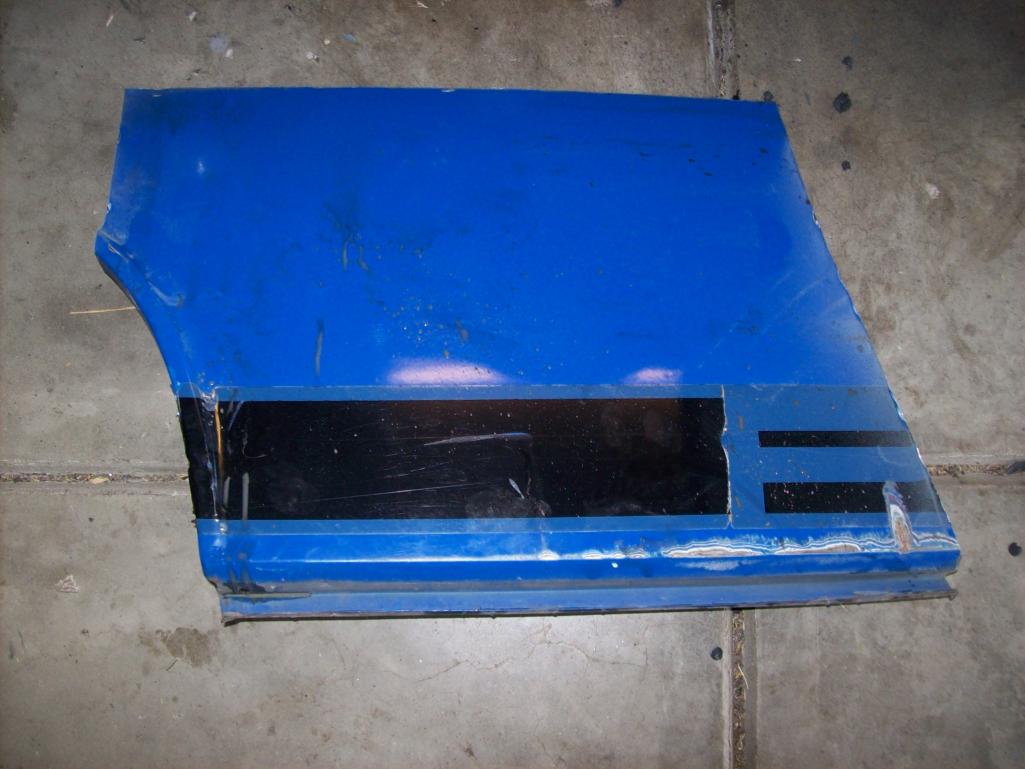
So the car is ready to be loaded up. I disassembled the pedal cluster to add to the small parts box to include to get blasted. Wiring harness is taped off and I didn't bother to protect the original palstic fuel lines as they will be yanked and replaced with steel once the car is back and on the rotisserie. Here we go...
Posted by: brant Jun 20 2012, 08:57 PM
you're moving much too fast to be a real 914 guy...
all this in 2 weeks and the thing isn't on jack stands yet
you need to slow down for a year or two if you want to be a true teener fan....
Posted by: wachospeedo Jun 22 2012, 03:46 PM
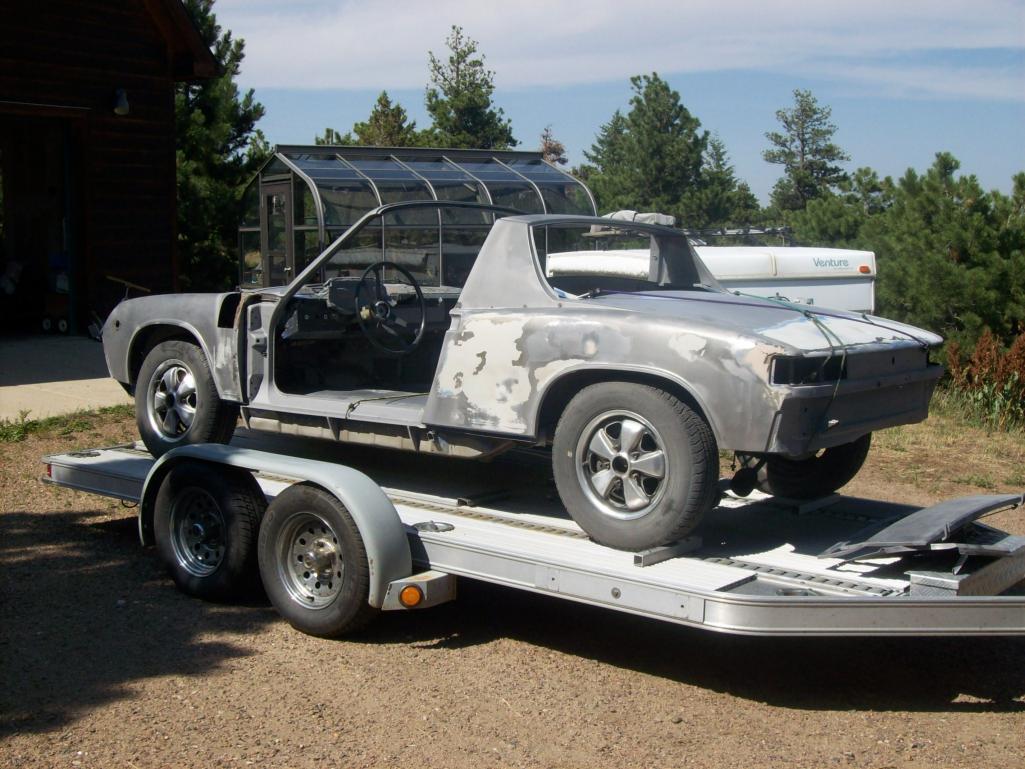
Packed up and ready to go. Trunk is full of small parts (pedal cluster, light bucket assembly, engine tin and linkages) that will get plated or powdercoated later. 
I have 5 days before it comes home to sort through the pile of disassembled parts, and evaluate save-repair-replace. I will be looking for a referral for seat upholstery, rubber seal set and minutia like winshield clips. I have access to a local shell for body parts when it comes back blasted and I can see just what I need. I also need to bring the rotisserie back home and make the fittings for the ends of the car...unless someone local to Denver has a pair that will fit my yokes. Good kharma when I dropped the car at the blaster this am...a 914 shell was all freshly blasted sitting there...someone local on the board?
Posted by: Ferg Jun 22 2012, 04:03 PM
Yo, you get my email? Parts and books in truck if you are not up Mtn yet.
I wanna visit when it comes back.
Ferg
Posted by: Eric_Shea Jun 22 2012, 05:45 PM
This thing done yet? What's the holdup Lars? 
Posted by: Ferg Jun 23 2012, 08:27 AM
This thing done yet? What's the holdup Lars?
His painter


Posted by: Eric_Shea Jun 23 2012, 08:38 AM
Painters are all like that!! 
Posted by: brant Jun 23 2012, 11:00 PM
I want to see it when it comes back too...
also I need some tall sidewall 14 inch rims with crappy roller narrow/tall tires to use in the trailer (to clear the ramp in and out..)
are you going to sell those wheels on the car?
Posted by: wachospeedo Jun 24 2012, 06:58 AM
I was going to use the wheels as rollers to get through the project and then make them go away. In the near term Brant, call me and I can hook you up with a set with tires on them...tall narrow and nicely patina-ed (dry rotted)...but they still hold air.
BTW...when you an Ferg came up, you said the muffler wasn't correct? Is that true? I wouldn't know the difference between a 911 muffler and a 914 muffler. Can someone please school me?
Speedo
Posted by: brant Jun 24 2012, 08:08 AM
I don't know how to tell the mufflers apart visually...
the only difference is the angle of the tail pipe...
you should be able to cut and weld your tail pipe to fit the early 914/6 valance (that you don't have yet)
here is one thread:
http://www.914world.com/bbs2/index.php?showtopic=90471&hl=914/6+rear+valance
regarding wheels
are steelies affordable these days ?
all I'm looking for are roller wheels with "patina" and cheap...
in fact 15 inch anythings... would give me more ground clearance than 14's
brant
Posted by: brant Jun 24 2012, 08:11 AM
stolen picture
Attached image(s)
Posted by: wachospeedo Jun 24 2012, 06:22 PM
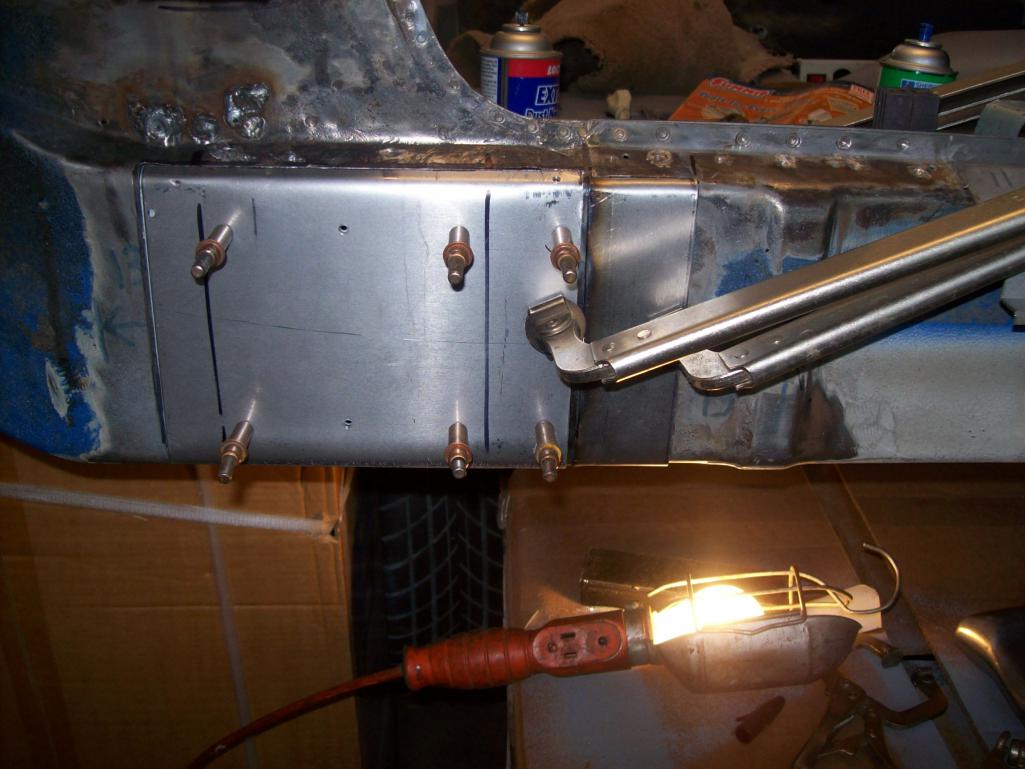
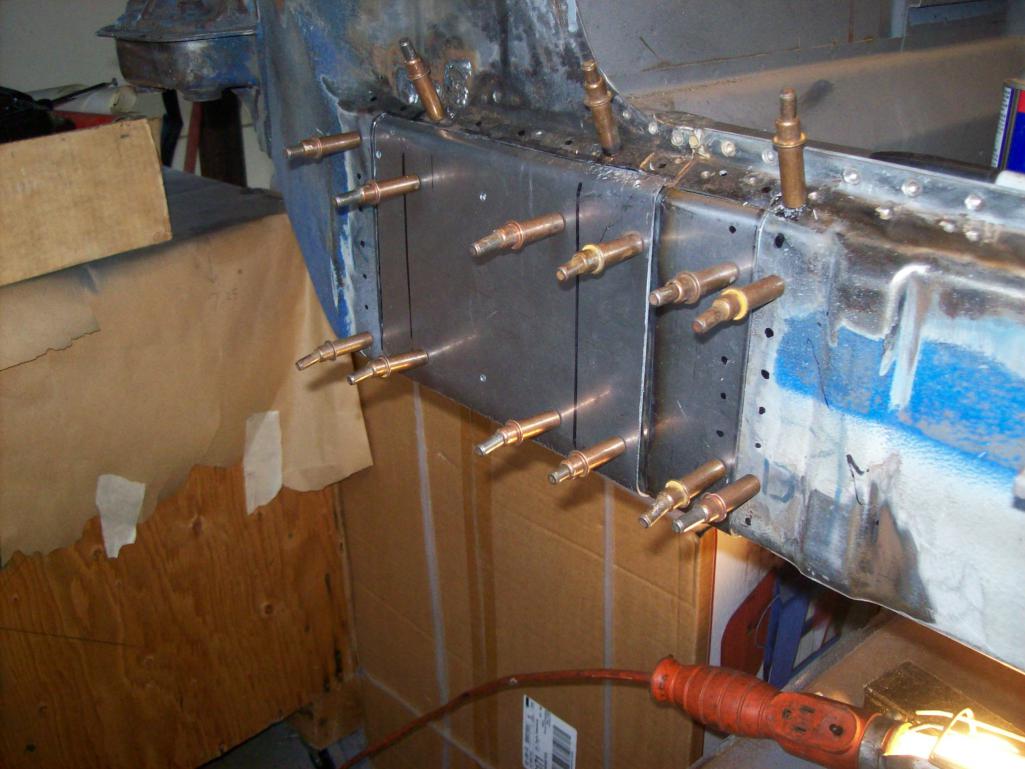
Spent a couple hours going through by baggies of parts and organizing. The chain cover housings on the 2.0 which is getting "pickled" needed a couple studs (missing) so I decided to pull them off to do a repair correctly. Looking at the lip for attacching the sheet metal ...and what do you know? That battery acid is tough stuff!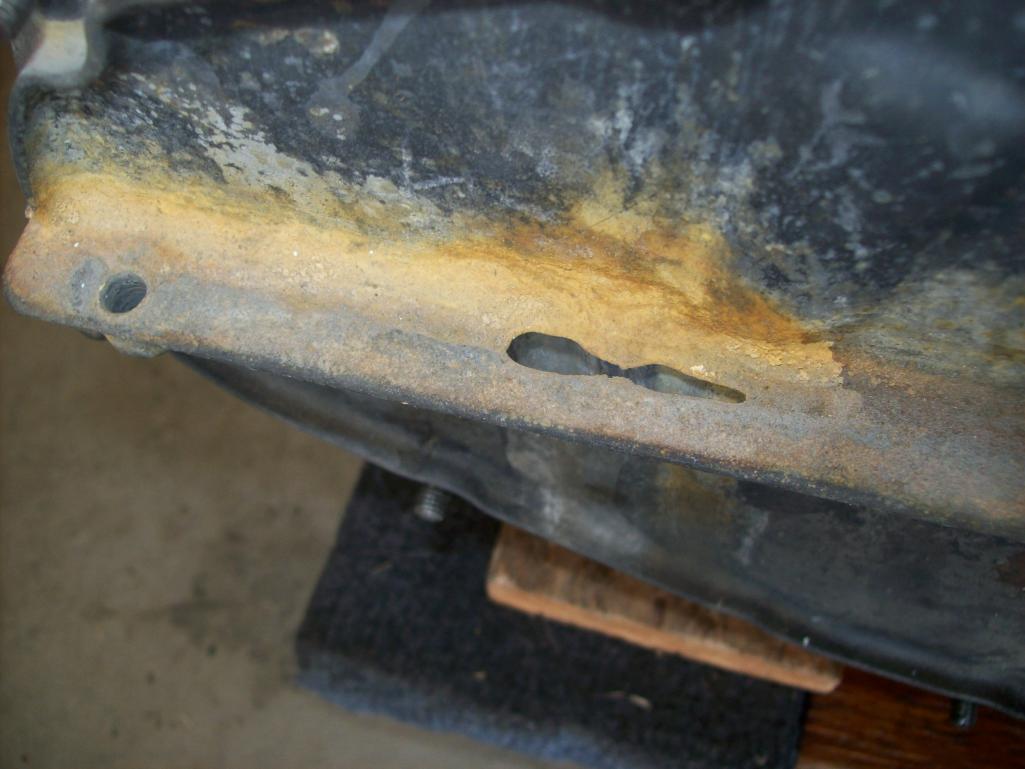
It ate right though the lip...damn!
I have extra covers, so when I removed it to to the stud replacement, I noticed these...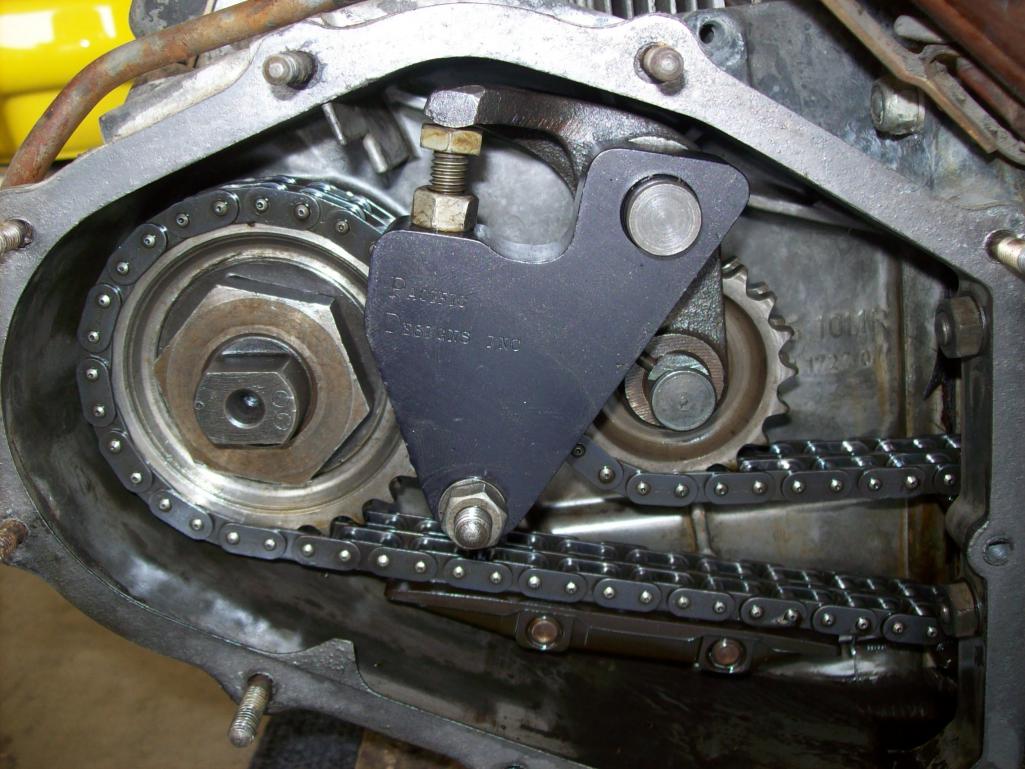
Race tensioners...or solid tensioners...whatever. Interesting. The PO flogged this thing regularly...not on the track, but as I mentioned in auto cross. And the underside is cone dented in many places as testament. I will show the carnage when it is floating on the rotisserie. Notwithstanding...when I eventually go through the 2.0, I will be curious to see what tweeks the engine experienced over it's life. Same to be said for t-bars and springs etc. Anyway...interesting to see the tensioners. Shows me the PO went through a lot of valve cover gaskets while adjusting those puppies.
Posted by: Ferg Jun 26 2012, 11:38 AM
tick tock tick tock 
Posted by: Ferg Jul 16 2012, 08:21 AM
![]()
Posted by: wachospeedo Aug 3 2012, 06:30 PM
Lots of updates (long overdue) but not till tomorrow 
Posted by: Cairo94507 Aug 3 2012, 07:28 PM
tease!
Posted by: shuie Aug 3 2012, 11:34 PM
Hi Lars, I hope all is well. Nice work again!
I will be looking for a referral for seat upholstery
http://www.autosintl.net/
Autos International. Seriously, if there is a better upholstery shop I'd like to know about it.
They are doing my 914 seats right now. They did a set of 356 seats for me last month. Just amazing.
Posted by: Ferg Aug 9 2012, 03:46 PM
Liar 
Don't make me come up there
Posted by: sixnotfour Aug 9 2012, 04:44 PM
tomorrow never comes..
Posted by: wachospeedo Aug 12 2012, 07:17 AM
tomorrow never comes..
It does come ...sometimes. Ok where was I, or more like where am I?
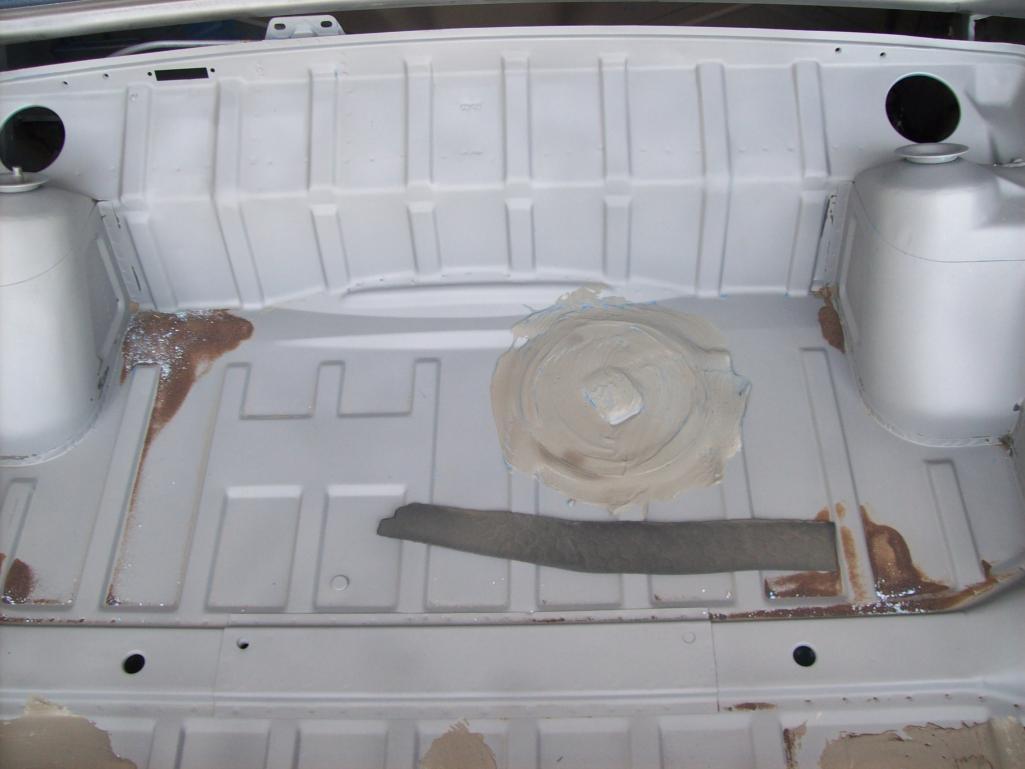
The car came back form the blaster and there were no real surprises. Two different kinds of media used, heavy for the inside and lighter for the outside. AS usual, when you think the body has only one spray, you find underneath the paint, areas of bondo which obviously means not only resprays, but also body damage at some point. Here is what we looked like coming home...
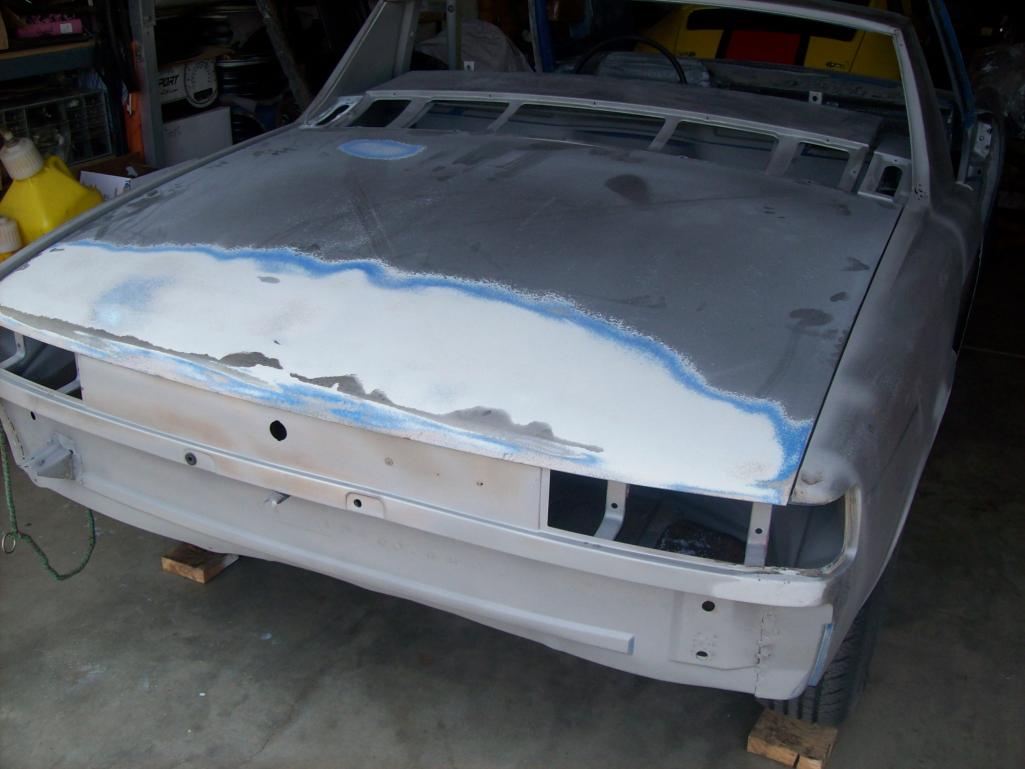
I also had the headers cleaned up. These will get hot coated and sold. I have sourced a nice pair of heat exchangers in their place
Here are some of the areas that "came clean"
Posted by: wachospeedo Aug 12 2012, 07:21 AM
Clean continued....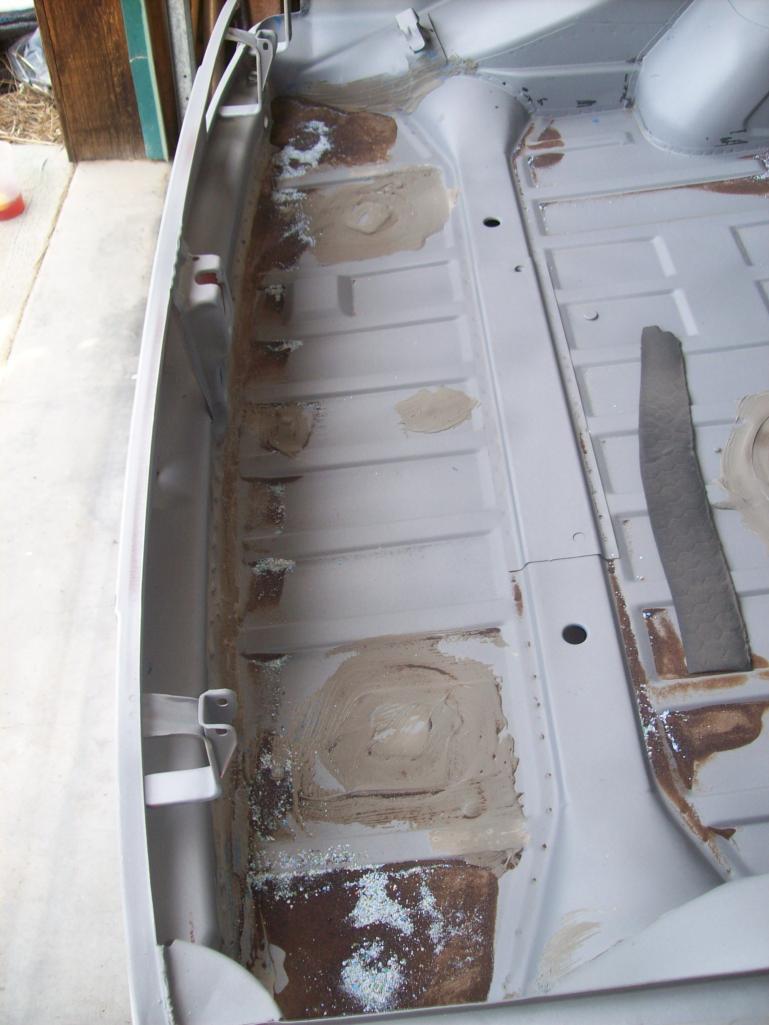
Now for something completely different...the not so clean...the bad news...the unhappy steel. Take a deep breath...
Posted by: Cairo94507 Aug 12 2012, 07:53 AM
Very nice chassis. I hope mine looks reasonably close to that when it is done in the next couple of weeks.
Posted by: brant Aug 12 2012, 08:10 AM
Nice progress
car is good
when do you need help lifting it onto the rotiseree
Posted by: wachospeedo Aug 12 2012, 09:43 AM
The "unwashed"...the worst first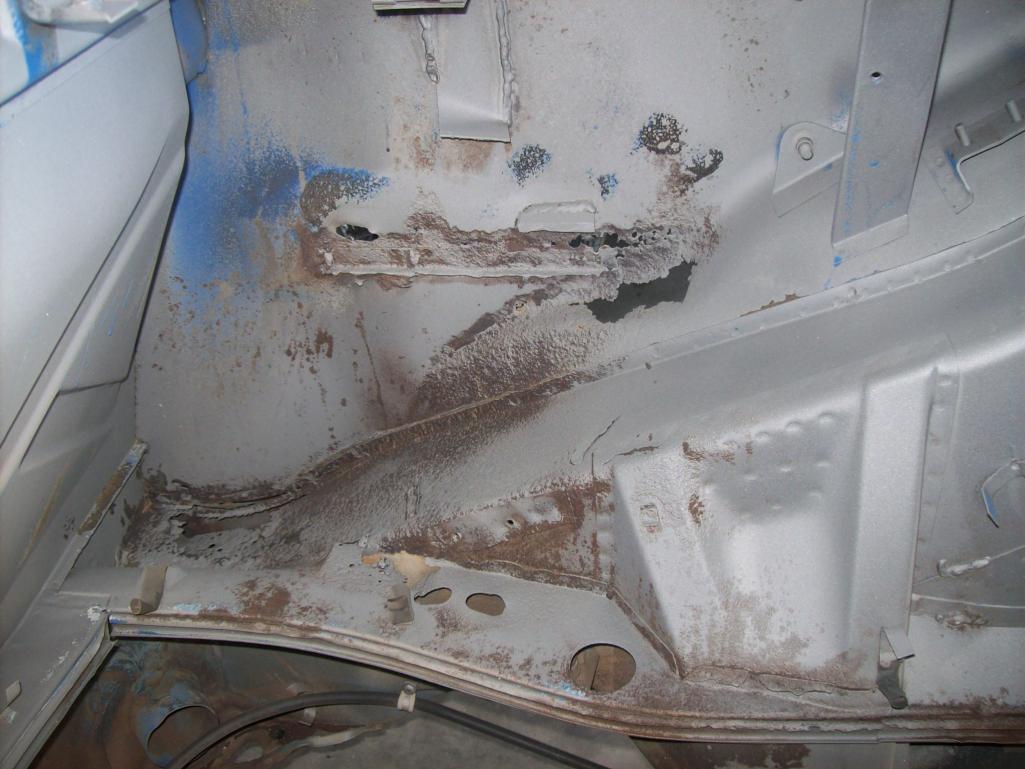
I have recently picked up a donor 71 parts car that I will be using for some small stuff...corners specifically. I hauled a 3 wheeled car off of a mountain outside Evergreen Colorado with a buddy who also is needing parts for his GT914 conversion. Price was right $100, but it had become overgrown with plants and trees from being dumped there 30 years ago. What an enormous PITA. Took several hours, and the seller claimed he could help us load it on my trailer with his backhoe...what a disaster. Never again at any price! We ultimately got it back to Tad's house and it has since been disassembled...so lots of good straight parts, but if you ever find a car that looks to be priced too cheaply...there is a reason it is priced that way. Run far far away.
Posted by: wachospeedo Aug 12 2012, 09:50 AM
Instead of "the corner workers", these are the corners needing work...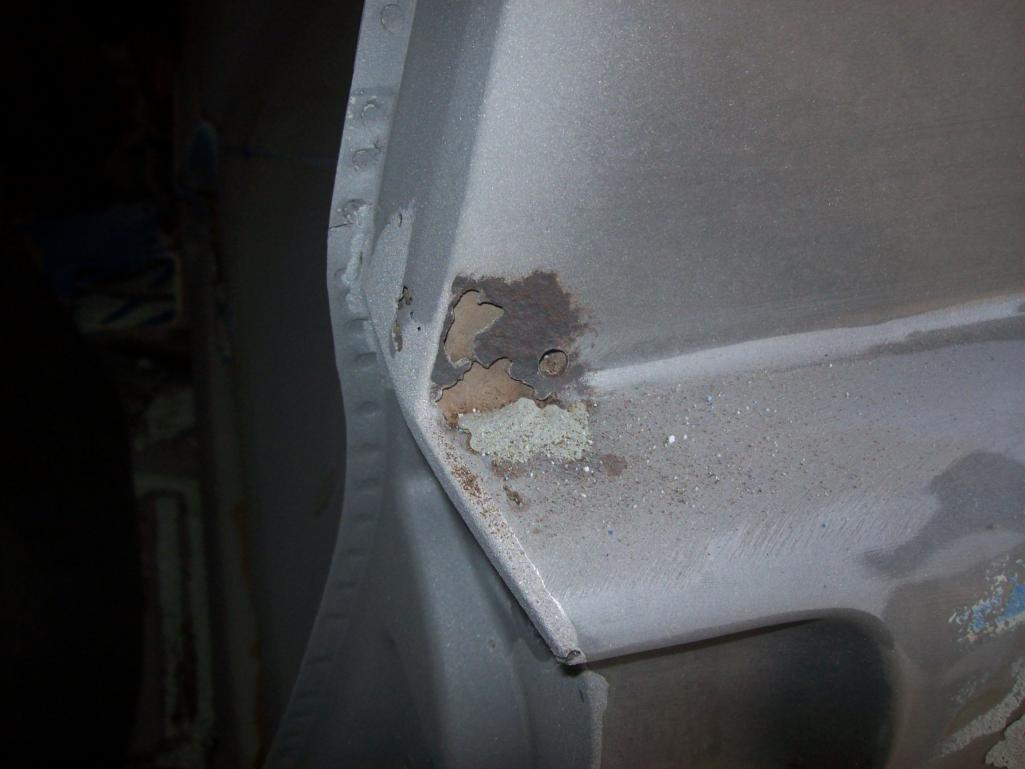

Some are worse than others, but the donor shell will come in handy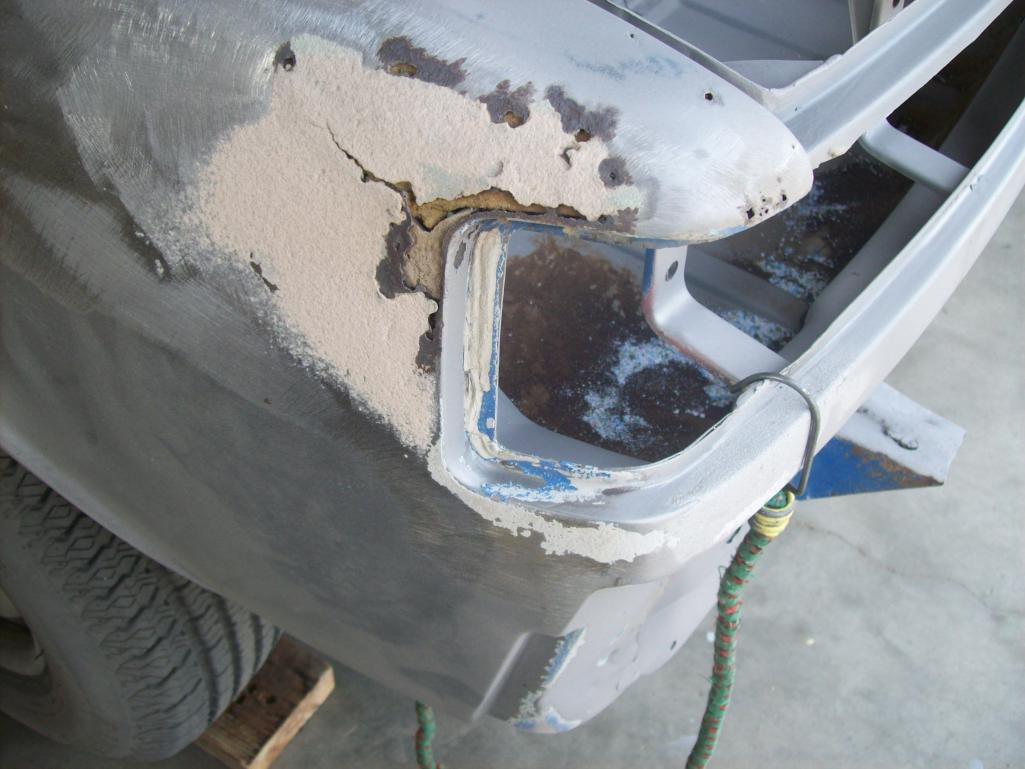
Better buy a couple hundred dremel cut-off discs
Posted by: wachospeedo Aug 12 2012, 10:05 AM
I ordered a big batch of repro steel from RD with Peter's help. Somewhere along the line, the shipper laid the box flat, something got stacked on the box, and the outer rocker for the right side got damaged so we had to ship it back. Claim seems to be going smoothly...we'll see.
The repro steel...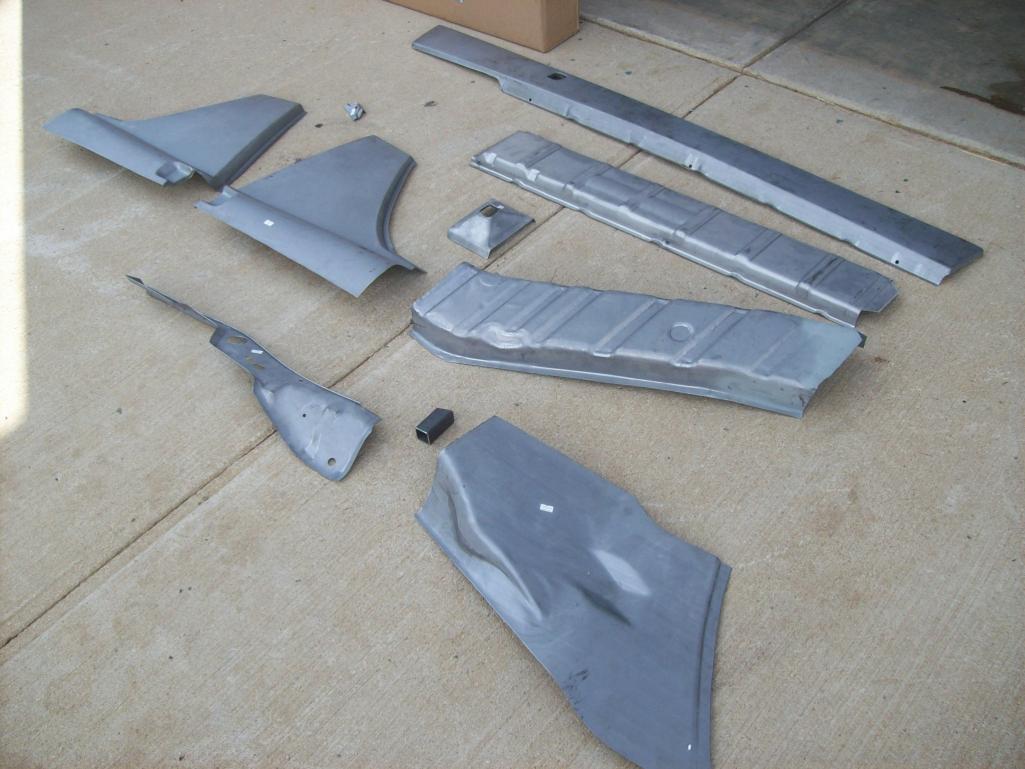
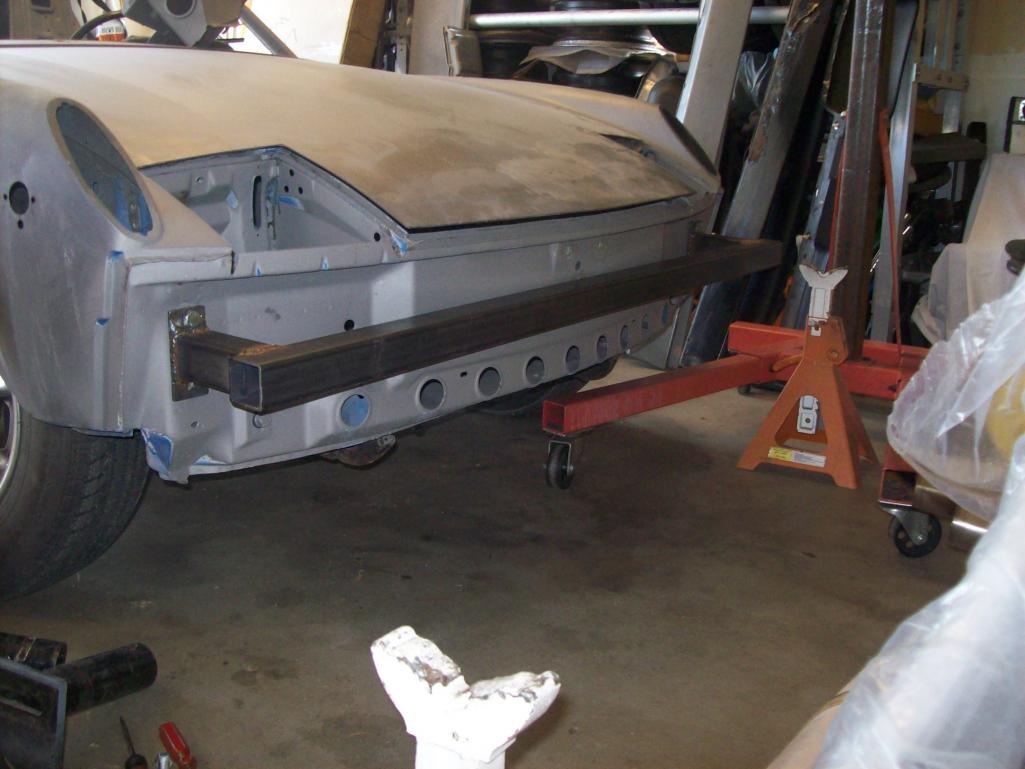
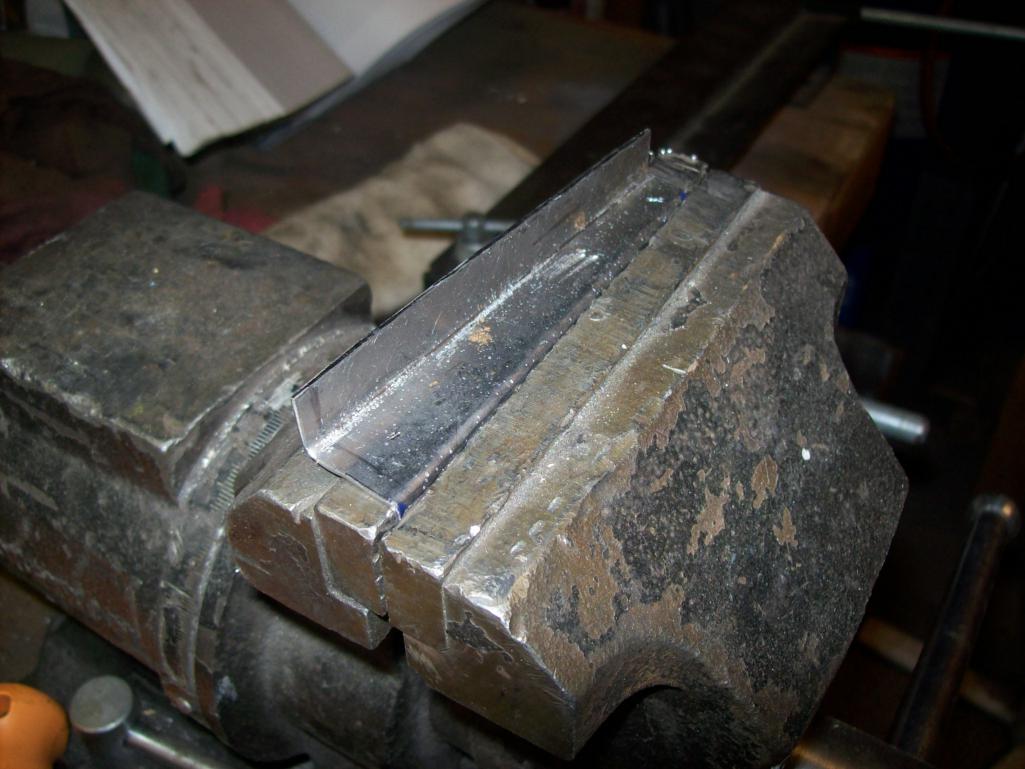
I ordered some 2 inch square steel tube to make the front and rear attach points for the rotisserie. In the beginning... 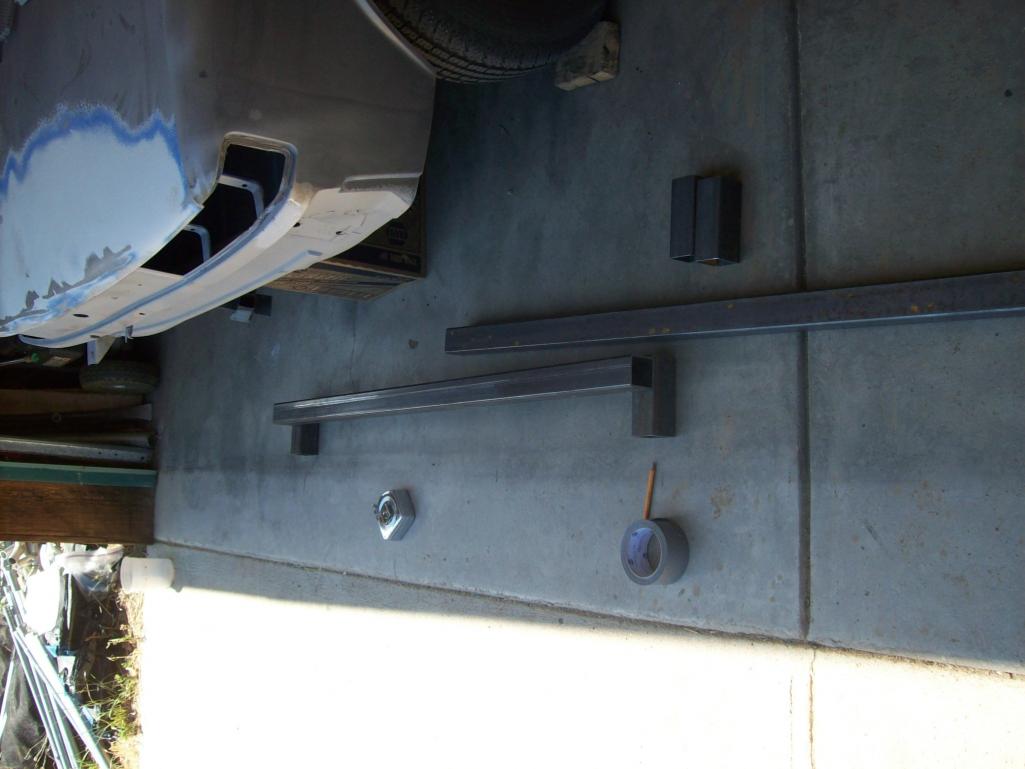
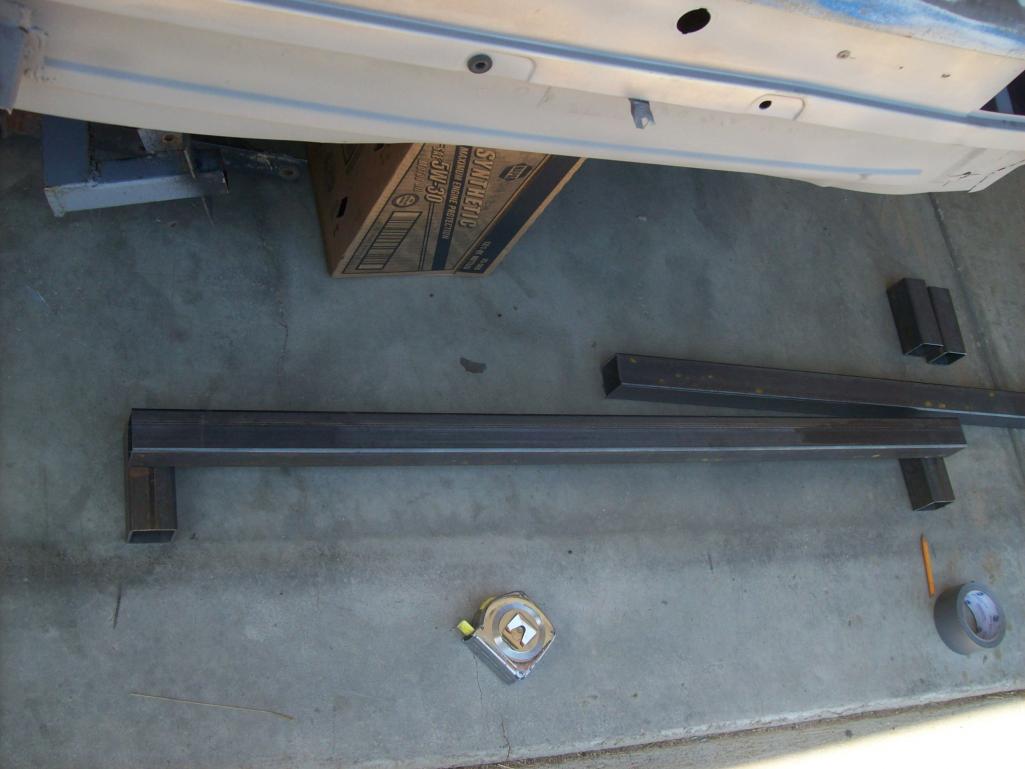
After getting it cut and trimmed and mocked up, the welding was a piece of cake.
Attached thumbnail(s)
Posted by: wachospeedo Aug 12 2012, 10:16 AM
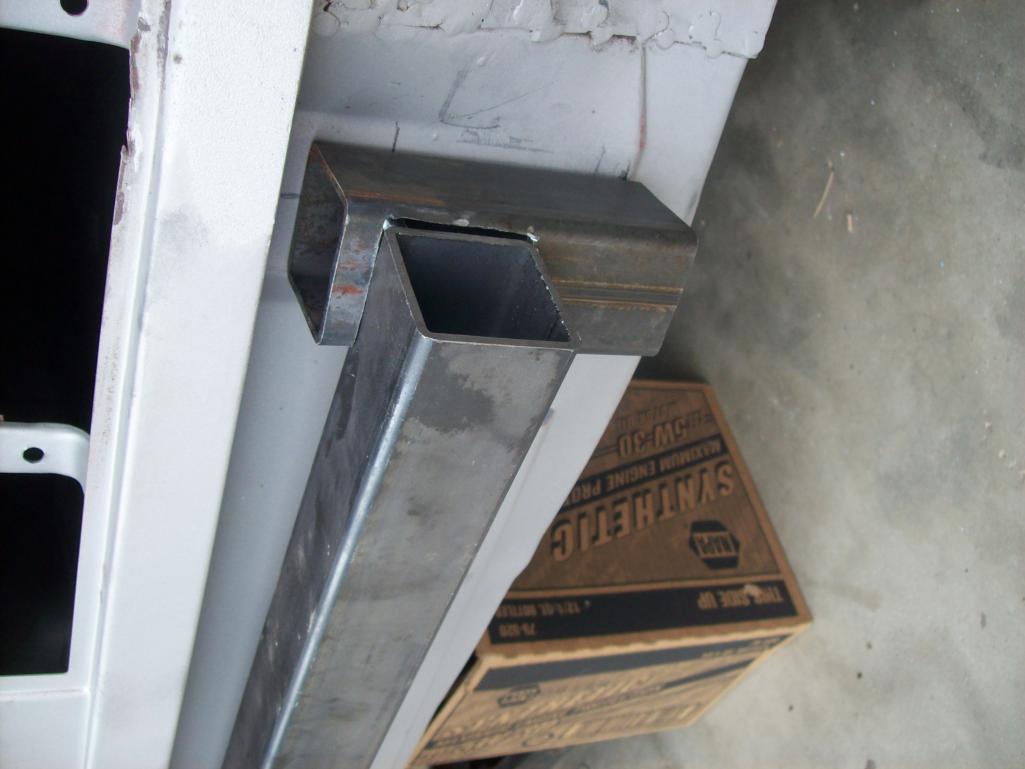
Braces going together...trial fit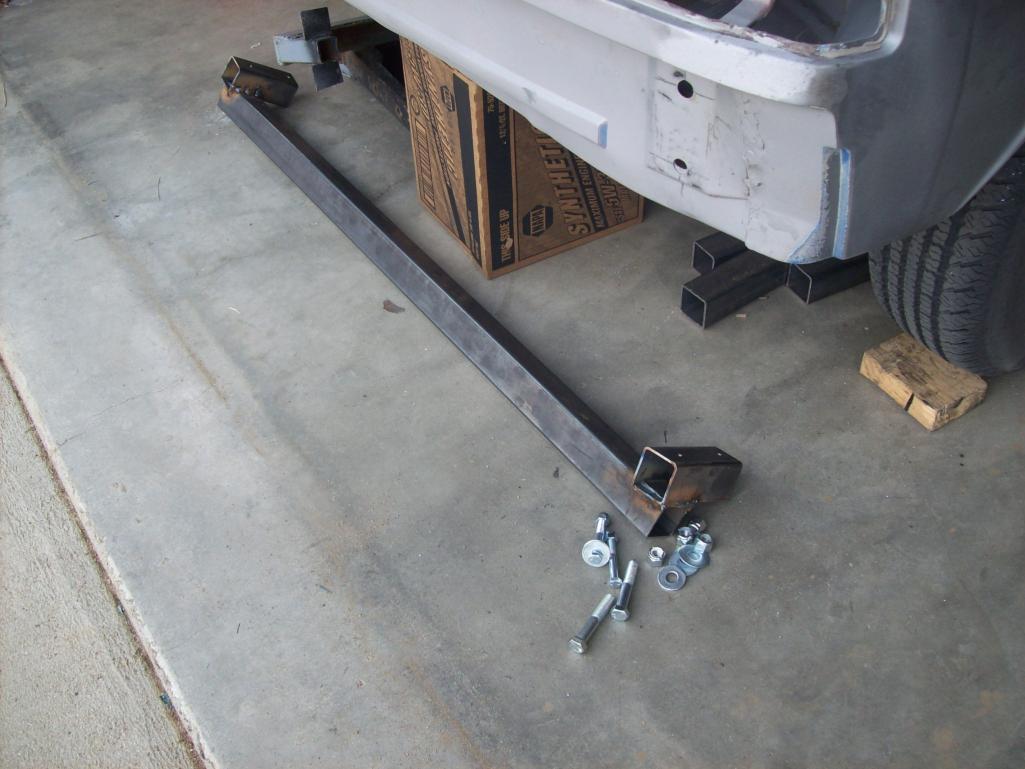
I had to use a cutoff wheel in a chop box to fine tune the steel tubing angles. This meant that the steel got hot...very hot. I finished the vertical for the left rear, removed it (carefully) and was setting the right side in the box. Leaning forward ready to pull the saw down...I braced my left (bare) arm on something for no more than a second. I have a nice brand of that left side vertical on the back side of my forearm. Didn't take long to go through several layers of skin quickly. Seared it right up. Glad I'm not a cow.
Finished mounts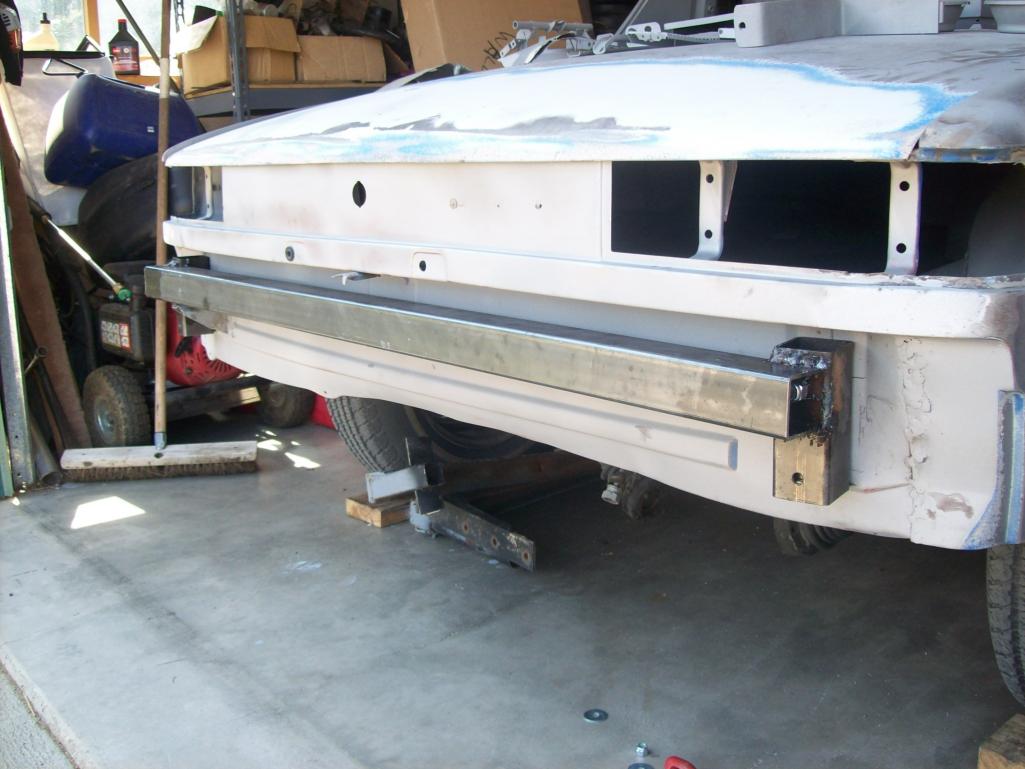
And with plugs for yokes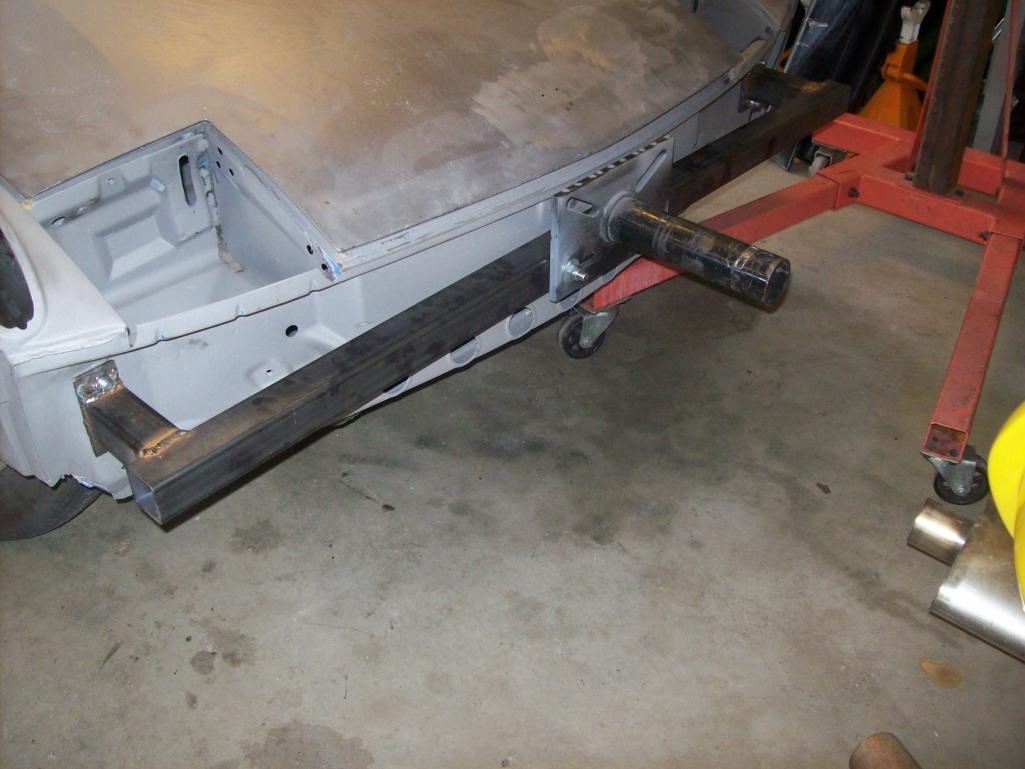
Posted by: wachospeedo Aug 12 2012, 10:31 AM
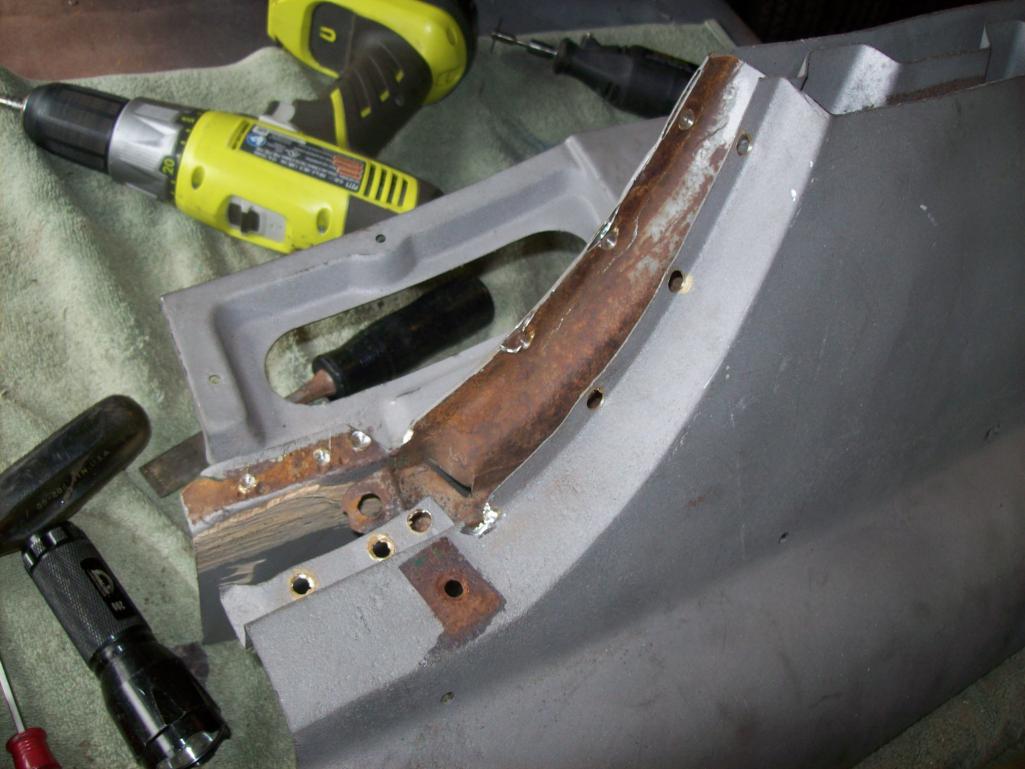
I needed to massage a few front trunk areas while the car was still supported by it's suspension. This area is solid, but beat up. Like it was seriously offroaded. The PO did a lot of autox in his day...but the cones he hit must have been made out of wood. Take a look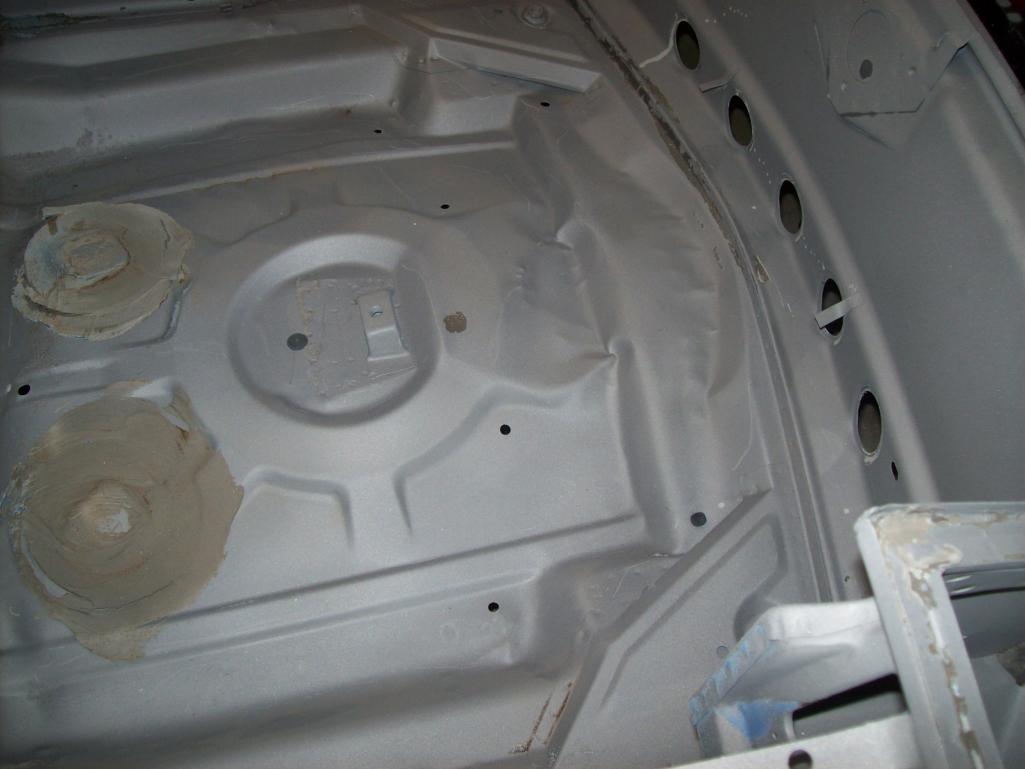
I talked with Peter again at RD and he sent me a link to his stamping link for the new front pan. I wanted to know how far down I need to work the pan. I believe there is a very slight "arch" at the front of the pan after it comes up off the floor of the pan. I am amazed that this thing has dents (upward) on top of dents. Like looking at pictures of mars with craters inside craters inside craters. You get the picture.

I metal worked with a hammer and dolly all of the small dings and some of the large ones. The pan is still "proud", but not much I can to from here...I will likely run my cutoff saw exactly down the middle of the pan north to south and release the tension. That will allow me to work both sides down so that I can stitch the center back together once flat.
Won't go into the detail, but I needed to fabricate side braces that telescope. Put these together and gave just a tidge of "pre-load". I used the typical top hinge and the seat belt support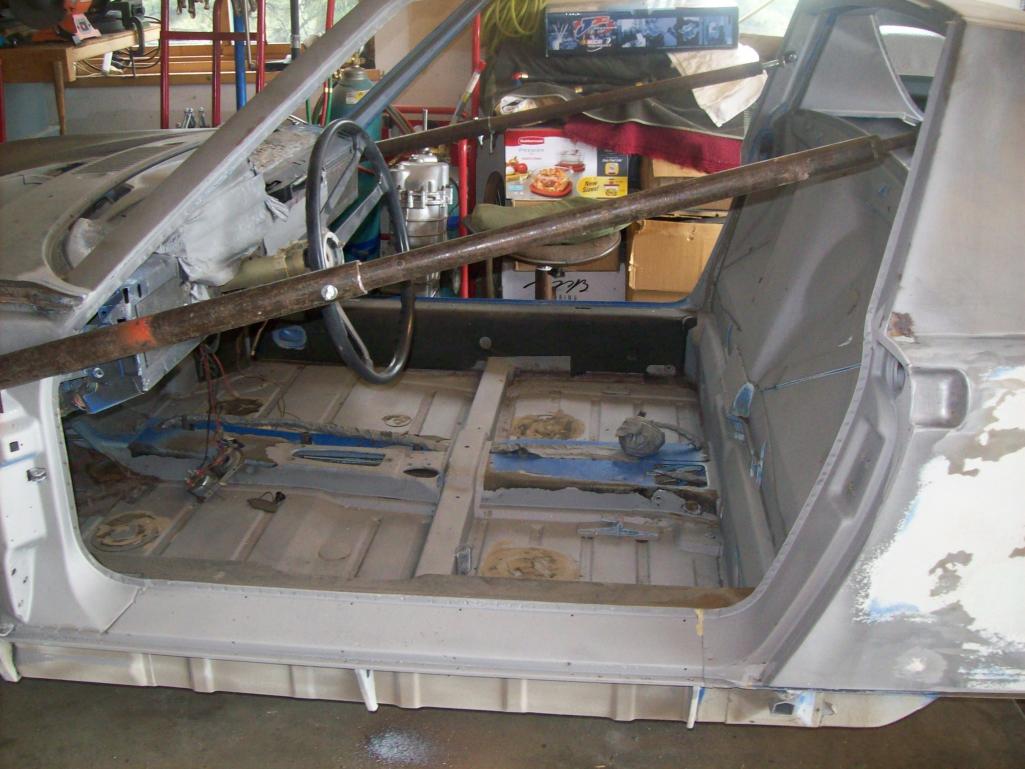
Posted by: wachospeedo Aug 12 2012, 10:54 AM
Crap! I rolled my car!
So not claiming to be the best driver...I have had my share of unfortunate circumstances in cars. Most of the time, it was a result of rapidly changing conditions (weather) or deer...hey I live in the mountains at 8100 ft. I remember as a kid hearing some teenagers bragging about having "rolled their car" and walking away unscathed. Well as I usually drive a 911 year round and don't have much seat time in a 914...I guess I got a bit cocky yesterday. I should have been more careful, it was nobodies fault but my own...and as I can fix it...I will.
Not for the faint of heart, but here are the pictures.
Before...kind of a nice artsy shot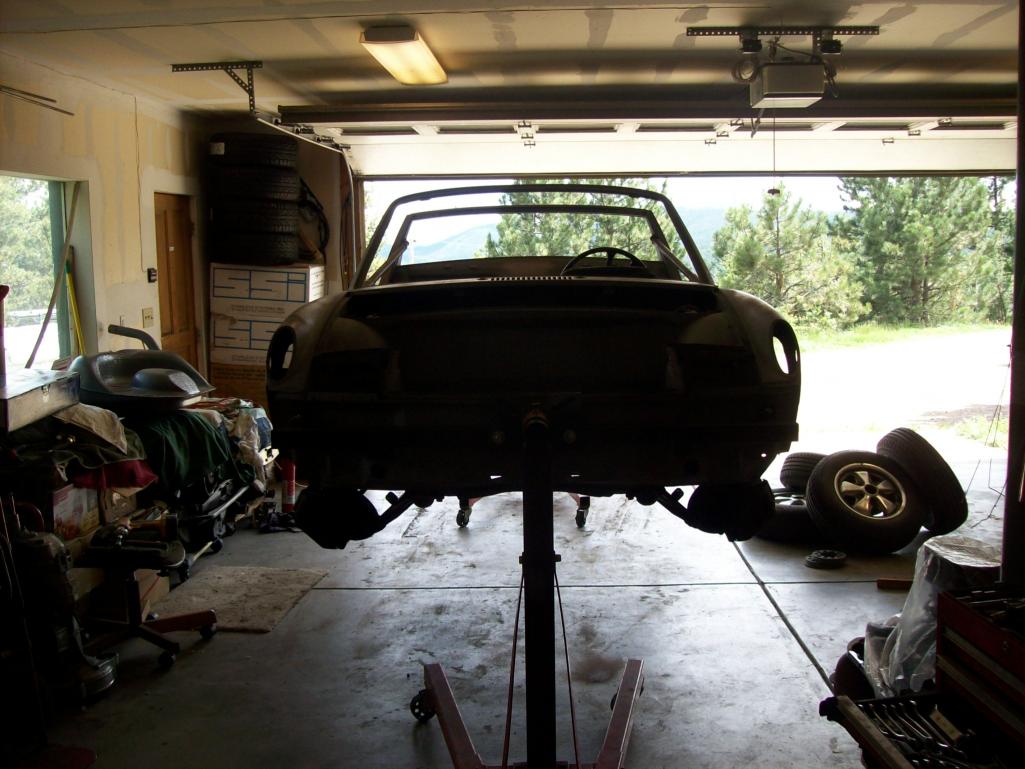
During ...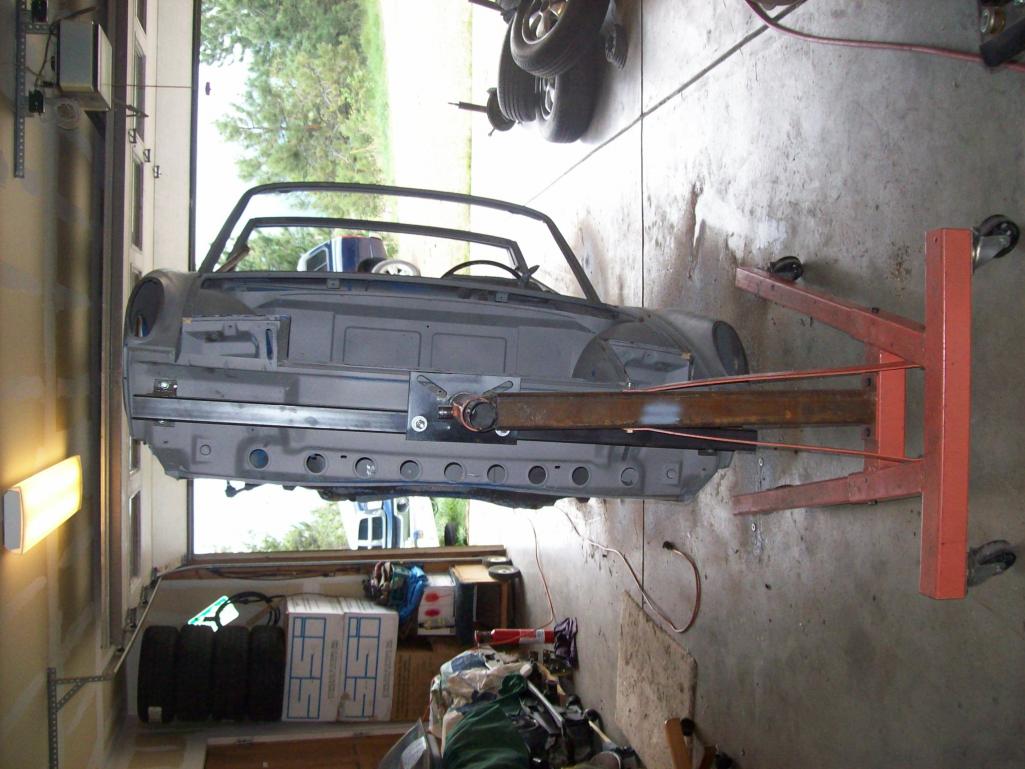
And after...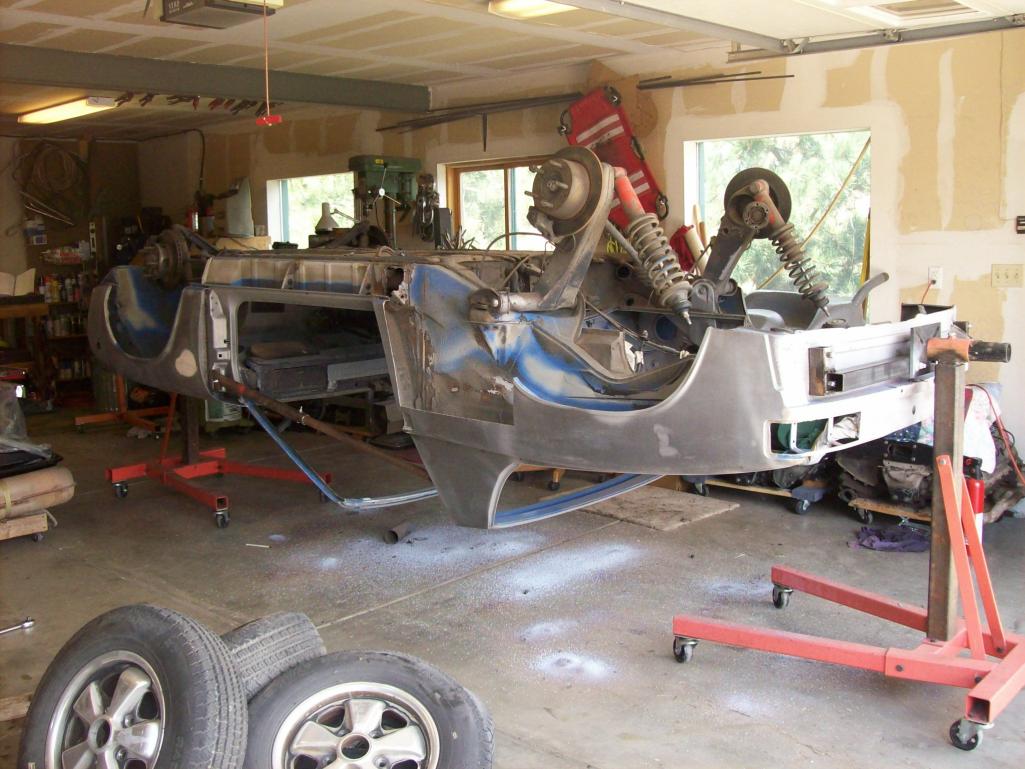
Pretty scary stuff.
Oh I get it, if I keep rotating the car...more of this stuff (sandblasters media) will come out. I could just hook a small motor up to the rotisserie and leave it over night. I might also polish the internals on the chassis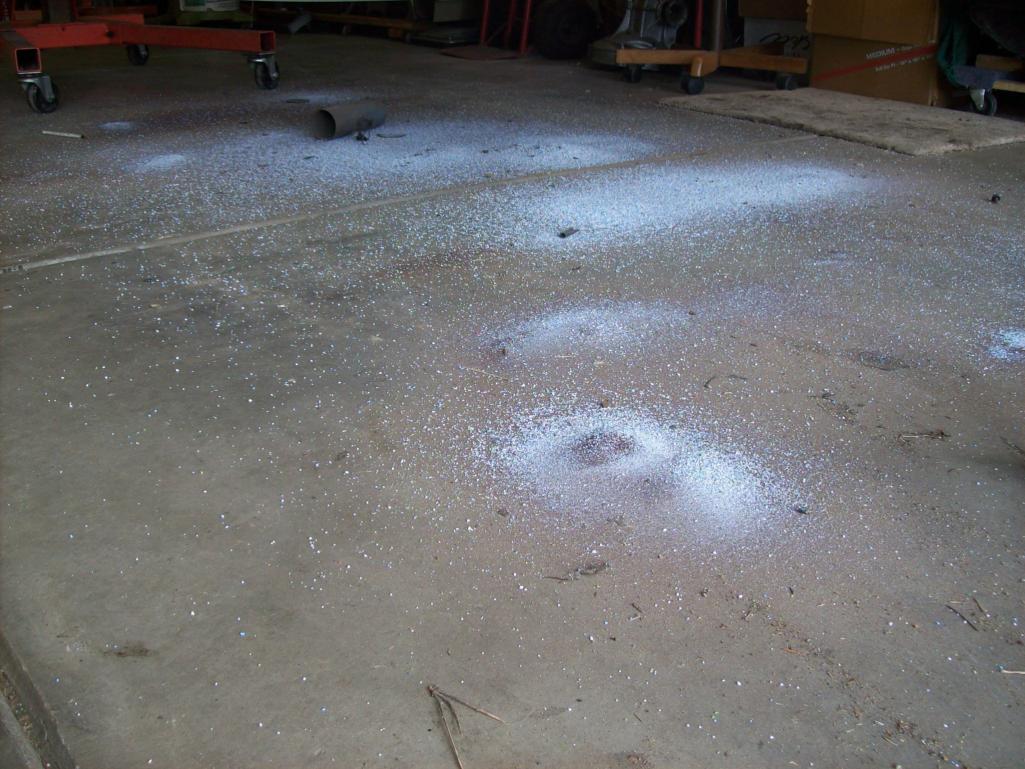
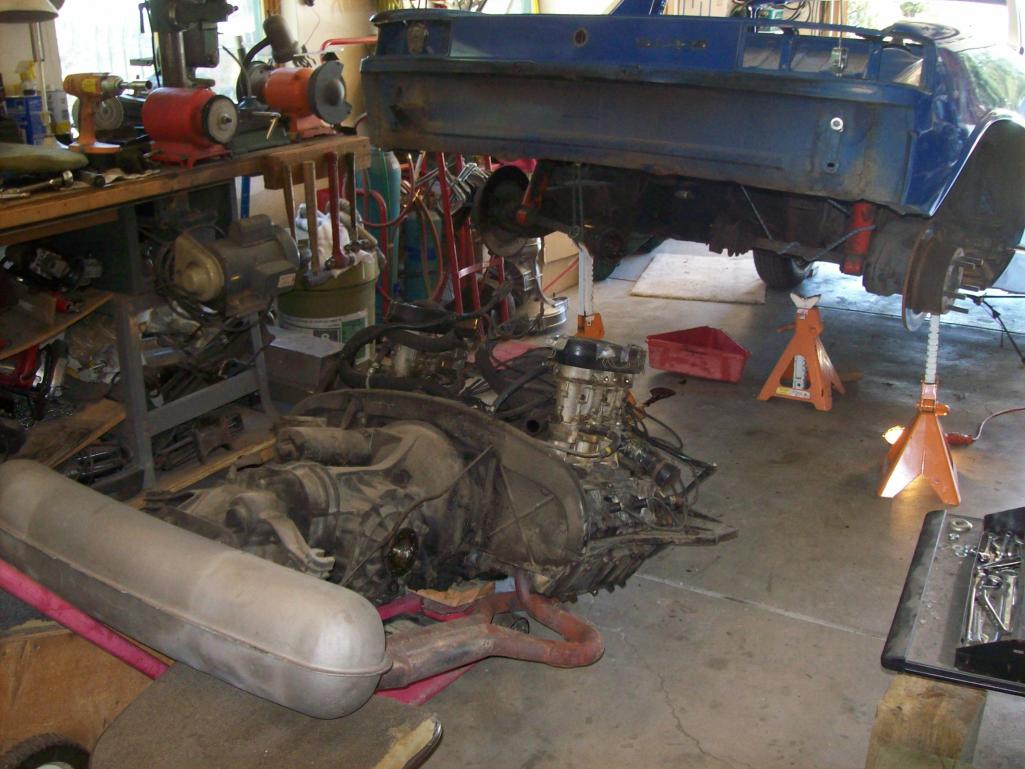
Removing the suspension is going to be an easy job while upside down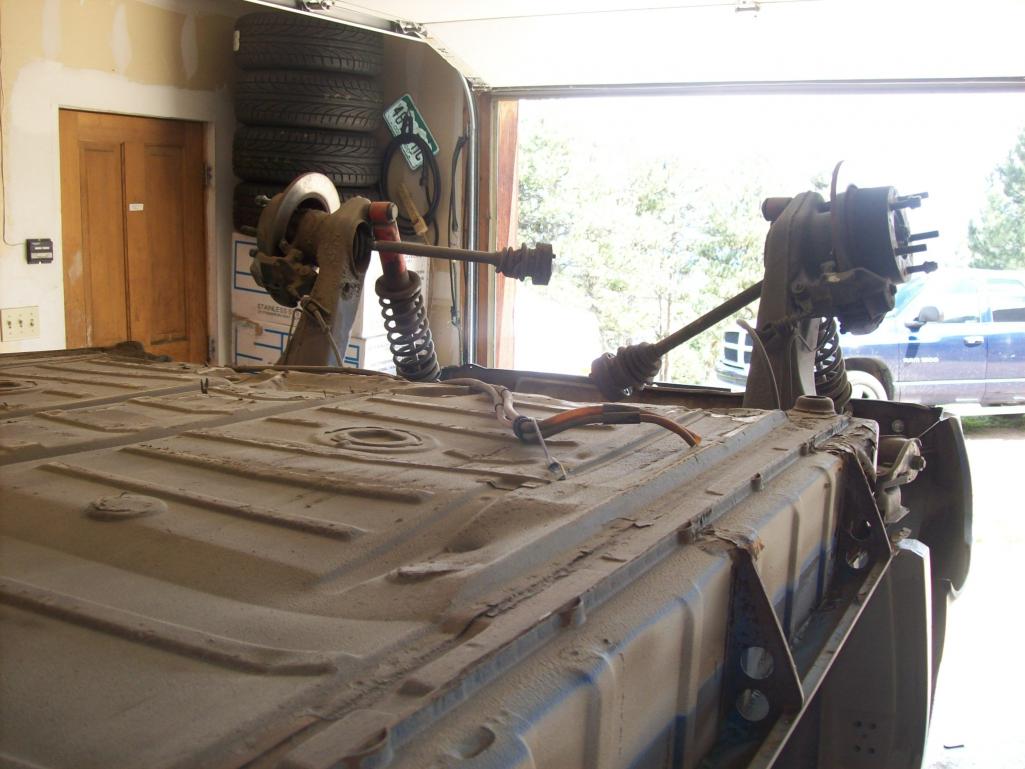
Posted by: wachospeedo Aug 12 2012, 11:06 AM
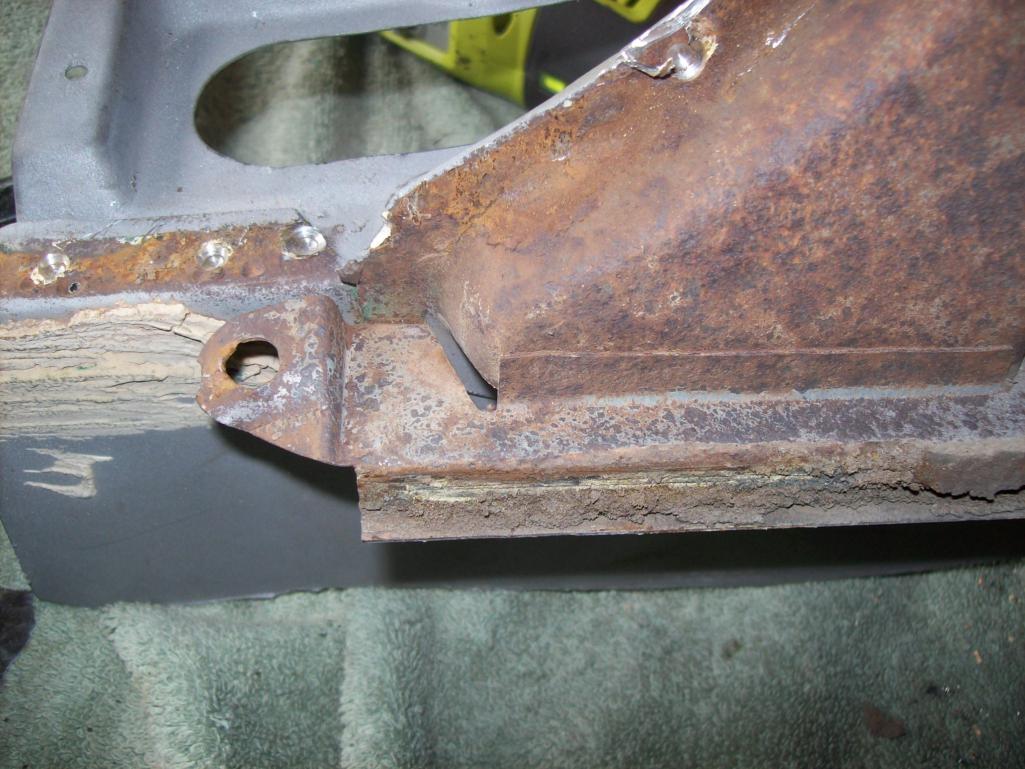
Front suspension first. Nice to have easy access to the crossmember and A-arm mount points. No problem till I found this...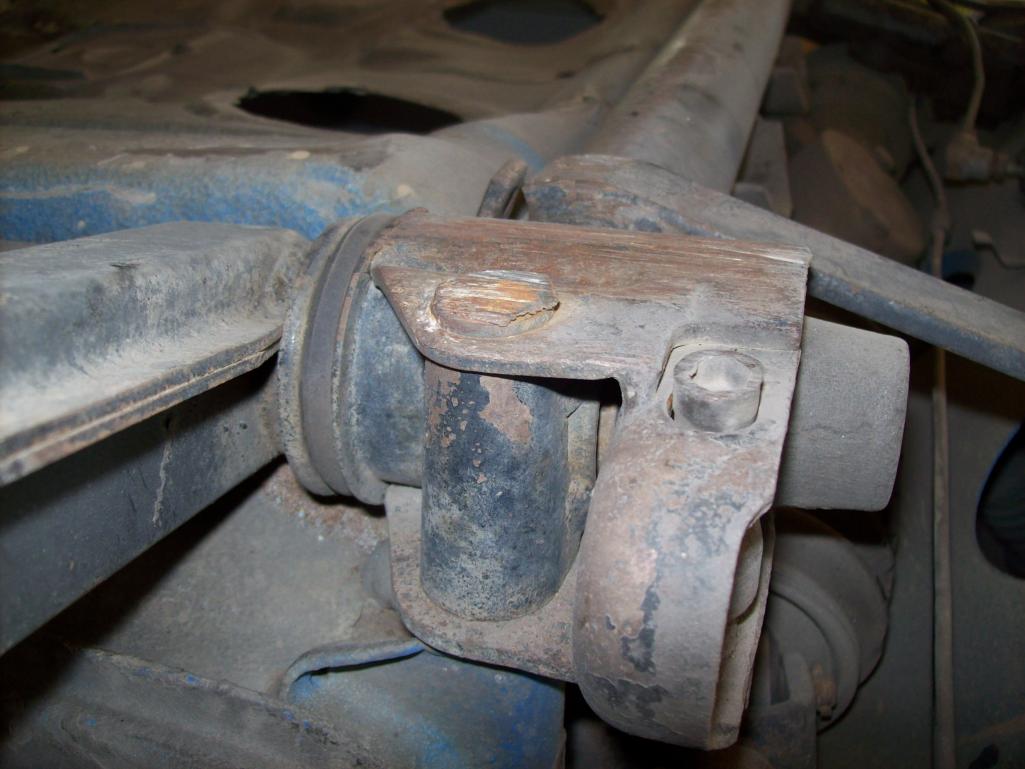
Wait, not the other side too? Really?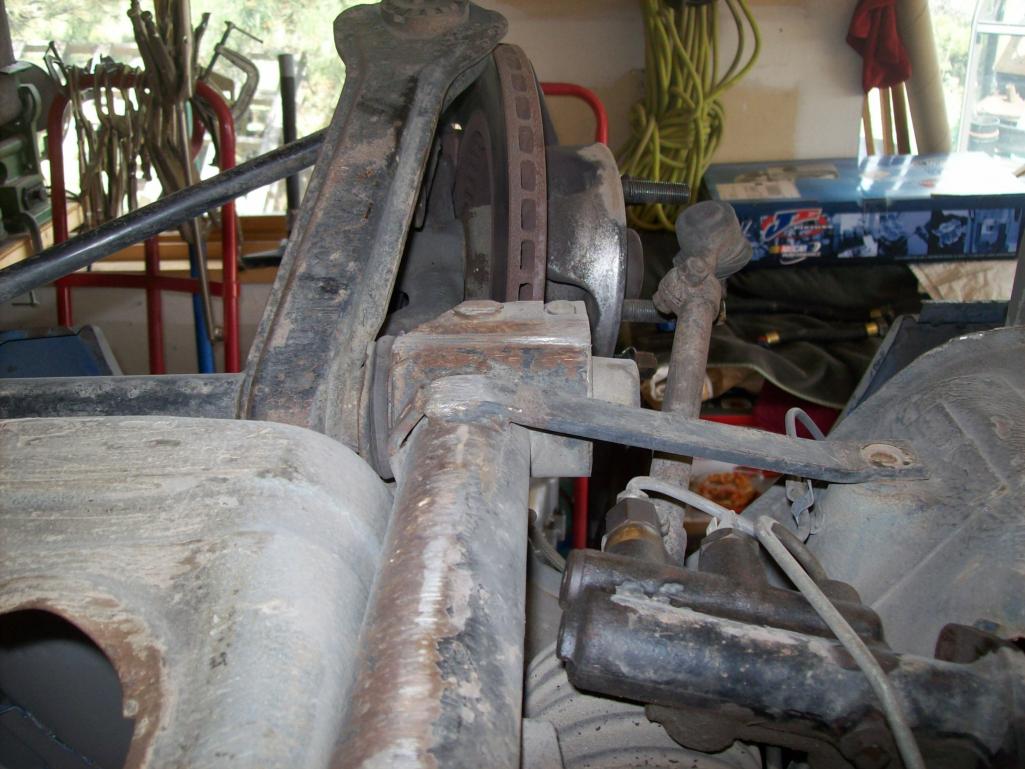
These are hardened bolts. These are not scuffed, or gouged...these are ground down to the point that there is little seperating them from the lock washers. Amazing. Probably a result of hitting those dog-gone autox cones so many times. This is going to either turn out badly or double badly.
I will try to grind the remaining heads down to the washers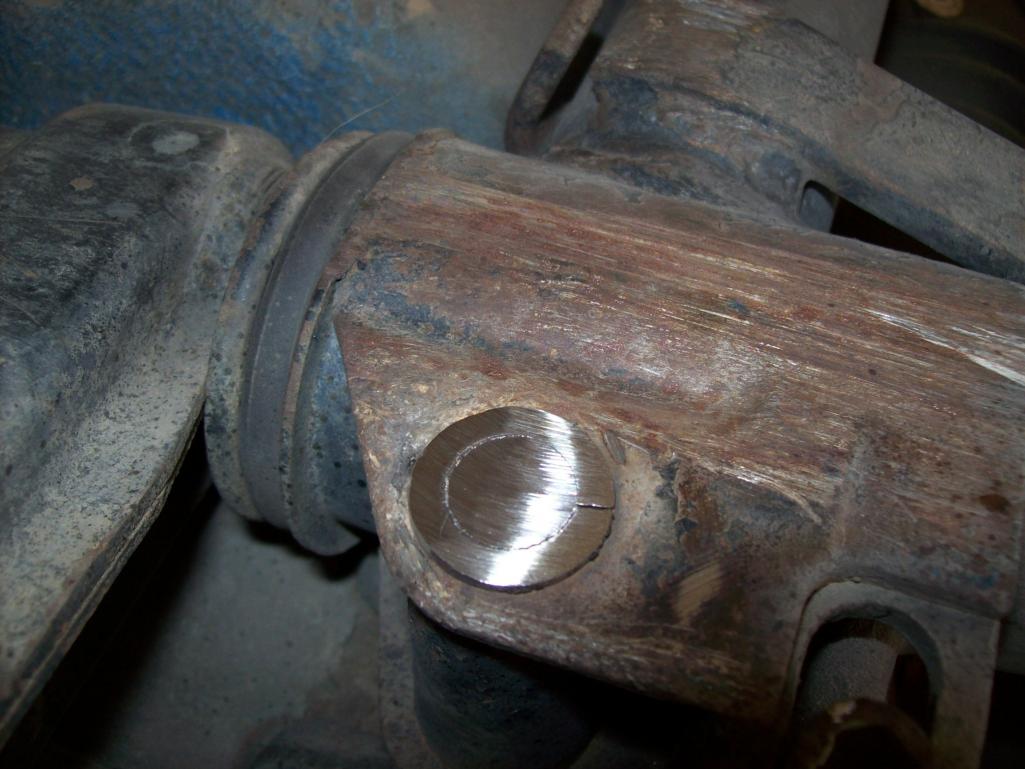
And pry the crossmember off the remaining headless bolts
Bingo...fortunately the bolts were not rusted to the inside of the crossmember. On 911s, this can happen on the early cars with steel crossmembers. With the later aluminum crossmembers, not a problem
Whew...feel like I dodged that bullet.
Posted by: wachospeedo Aug 12 2012, 11:20 AM
My next concern was whether or not the remaining bolts were rusted to the inserts in the chassis. I was lucky so far. Fortunately with some penetrating fluid, they backed right out
This is all that was left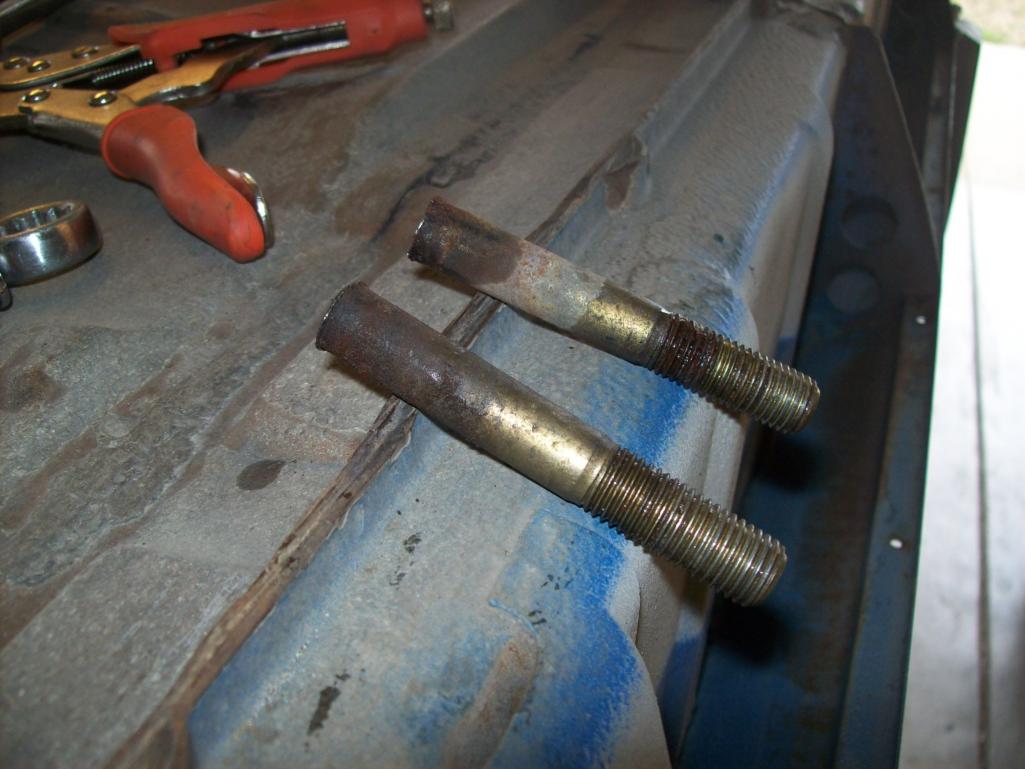
On to the rear suspension. As the 914 front suspension is identical to the 911 suspension...I was in my comfort zone. The rear is new territory for me.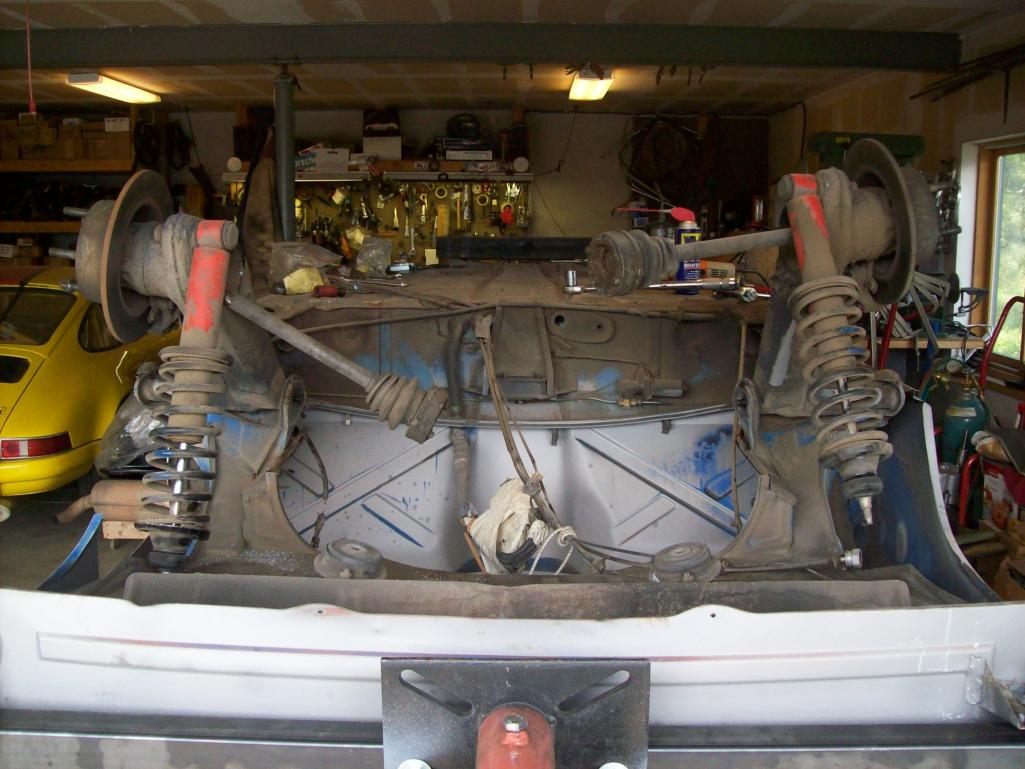
BTW how do you get to this fitting to grease it? Is this factory?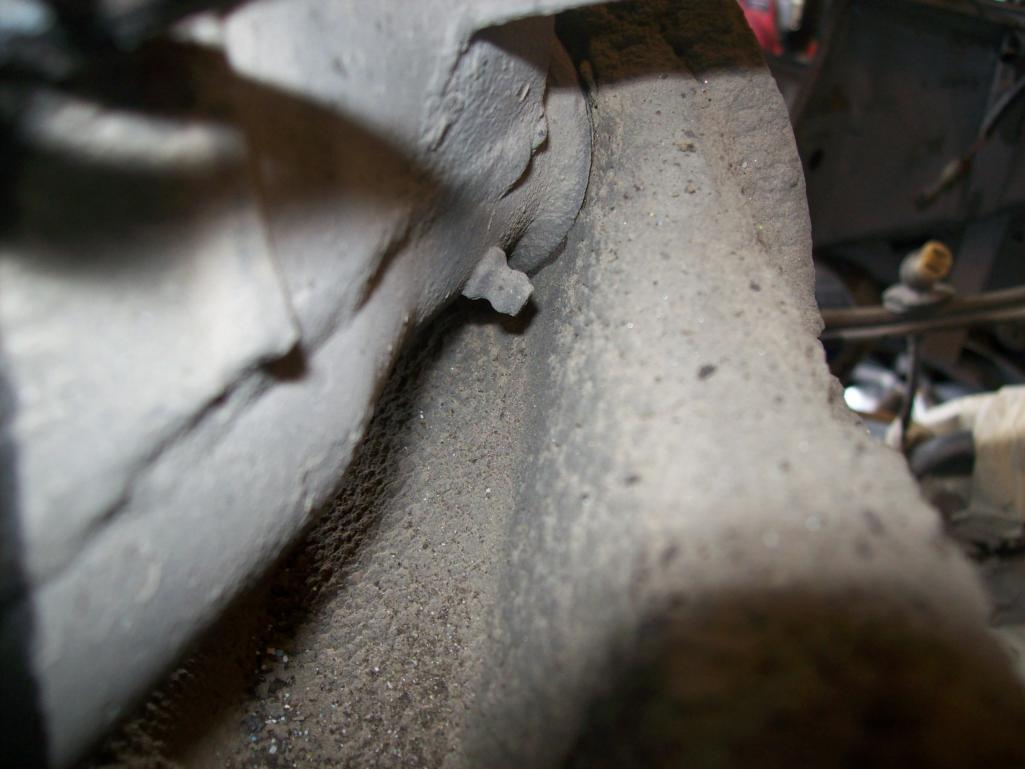
Everything came apart as one might expect. This beast just lost about 700 pounds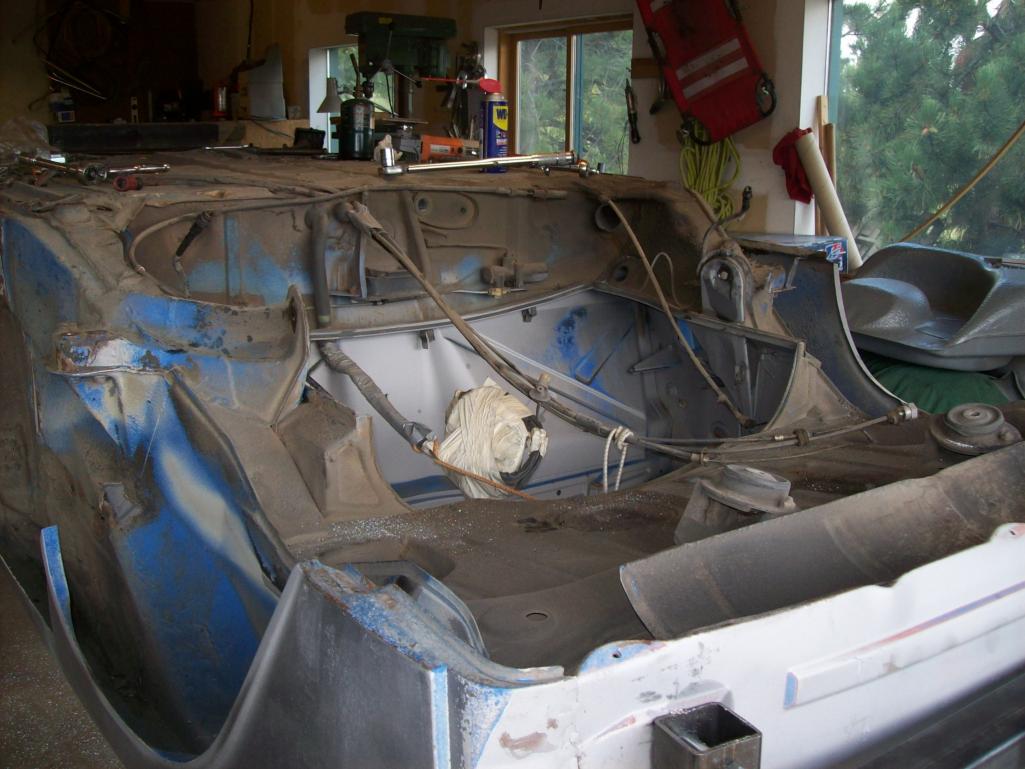
Now I need to disassemble and clean up all the suspension components...maybe sandblast and repaint or powdercoat. Am I correct in thinking that the A-arms and crossmember and rear control arms were all semi gloss black? The struts will be their basic colors (Koni orange, Bilstein green, and Boge black)...right? Looks like I have Boge with some sort of aftermarket inserts.
Posted by: sixnotfour Aug 12 2012, 11:31 AM
Boge are Grey on sixes,
Posted by: wachospeedo Aug 12 2012, 11:37 AM
Long days work...but it feels good to get the car up in the air and get the suspension out of the way.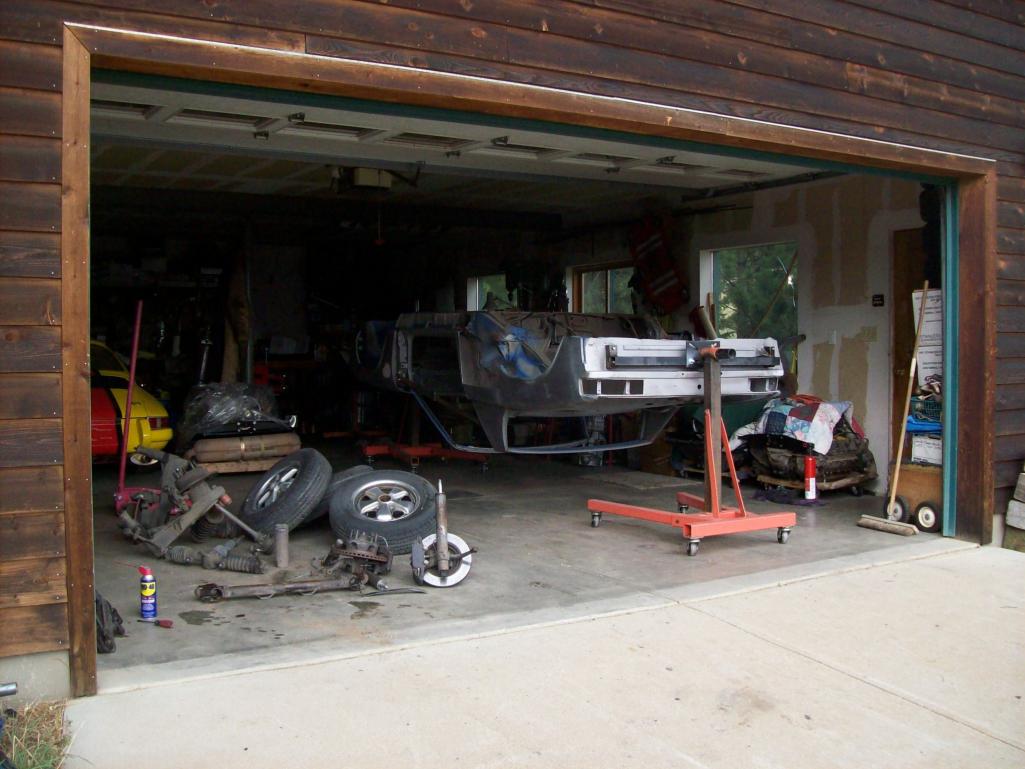
I got my plating (latches etc) back from the plater
Still wondering about this engine...me thinks this is not a 2.7 at all...but a 2.4 instead.
I emailed the seller and he says that he built up the engine himself. I suppose a head dated in 72 could be an early 90 mm 2.7 head, but my guess is that it is an 85 mm head which would make it a 2.4 and I am fine with that. I measured the ports and they are 36 I and 35 E. With 2.4 S pistons and a Crane cam (S profile), that would mean likely the engine was built to 2.4 S specs...ok with me.
I sent the fan-shroud-strap and valve covers off with the engine tin to get powder coated. I will tear the engine down to short block and decide if I split the case at that point...TBD by what all I find. I am inclined to go to zero and have the case line bored and build it back up...but if the short block seems stout, and bearing are devoid of slop, maybe I clean it up and just do a top end.
To be continued...hopefully sooner than later 
Attached thumbnail(s)
Posted by: sixnotfour Aug 12 2012, 12:51 PM
2.4 heads only need a chmfer to work for 2.7 PC's,
Mahle 2.7 cylinders have 11 fins
Mahle 2.4 Biral Cylinders have 16 fins
Posted by: wachospeedo Aug 12 2012, 06:59 PM
2.4 heads only need a chmfer to work for 2.7 PC's,
Mahle 2.7 cylinders have 11 fins
Mahle 2.4 Biral Cylinders have 16 fins
So as they are 11 fins...I guess we are back to a 2.7
Spent the day diassembling suspension that had been removed. Fronts are Boge struts with Koni sport inserts, rears are Koni coil-overs. Is Ford orange still the orange repaint of choice? No dust/brake shields on either end...were those cad yellow from the factory? My slotted rotors up front were 20.5mm and the solid rears were 9.5mm...look like those are still in spec? I need to replace the wheel studs back to stock (so if someone has extras for sale, let me know. The car had 3x8mm spacers on 52mm front studs and 59mm rear studs...these are going to be for sale.
Speedo
Posted by: Ferg Aug 12 2012, 09:51 PM
Nice work Lars
Posted by: brant Aug 13 2012, 09:01 AM
I think the stock 914/6 wheel stud lengths are the same as the 911 ones..
those grease zerks in the back are not stock
the stock bushings were bonded into the swingarm and also bonded onto the shaft
so the stock bushing really was an elastic effect
all replacement bushings rotate on the shaft
those are 99.99% likely delrin or replacement hard plastic bushings sold in the 70's - 80's
they squeeked and when properly installed grease chanels were cut inside and zerks added to make them serviceable.
(I've got the same on my black car)
Posted by: wachospeedo Aug 13 2012, 08:15 PM
So I need to get a concensus as to whether where the front latch panel meets the floor panel is completely horizontal. From my pics, there is a minor arch. I can't believe that autox cones have symmetrically created this arch. I know that the front trunck pans are bowed upwards...but this looks factory. Responses encouraged...but be nice.


This guy served his purpose protecting the front of the A-arm...but needs to be welded back together again...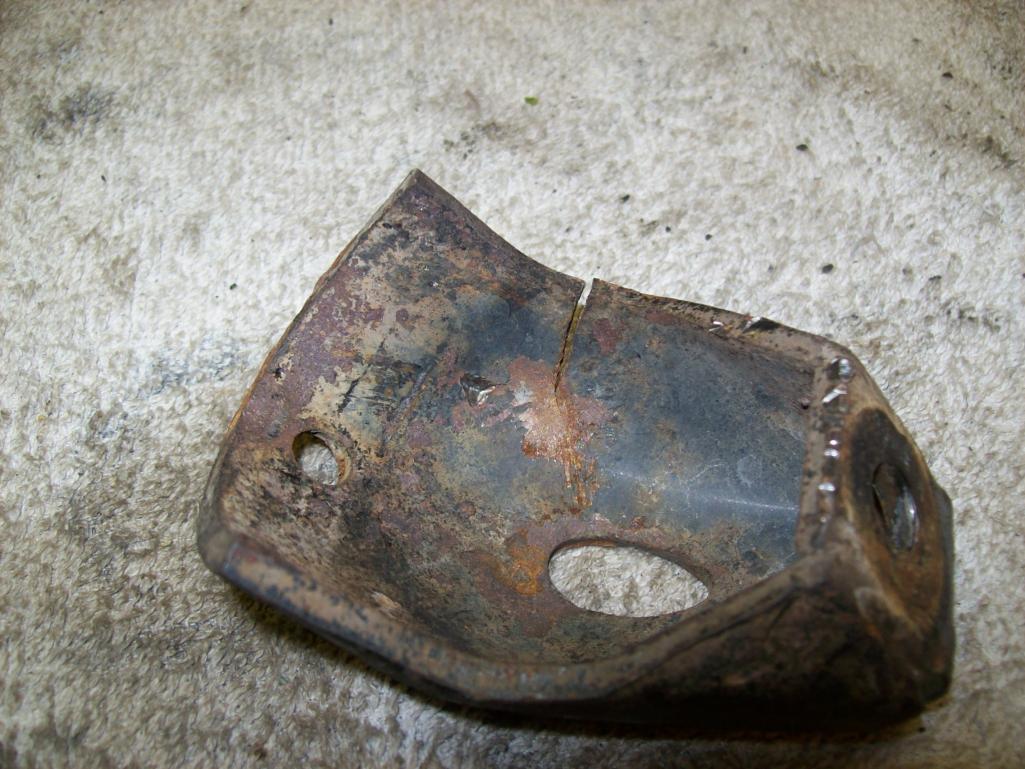
Attached thumbnail(s)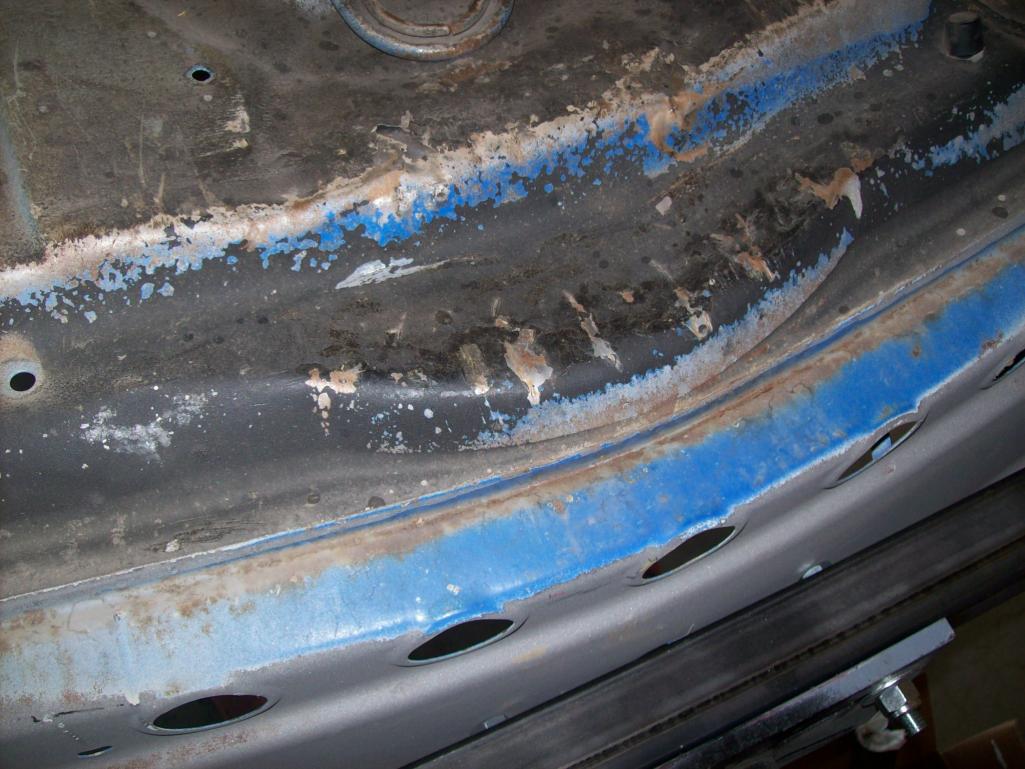
Posted by: seanery Aug 13 2012, 08:54 PM
That looks bent to me.
Posted by: brant Aug 13 2012, 10:40 PM
sorry but I agree... bent
can people please add pics of their front ends to use as a comparison.
Posted by: DEC Aug 14 2012, 03:07 AM
sorry but I agree... bent
can people please add pics of their front ends to use as a comparison.
72er 6er front end
Posted by: Cairo94507 Aug 14 2012, 06:25 AM
Yup; should be flat.
Posted by: brant Aug 14 2012, 08:35 AM
Nice shot DEC
does anyone have a frontal shot showing the flatness?
Posted by: peteyd Aug 14 2012, 03:12 PM
Heres a pic...
Posted by: sixnotfour Aug 14 2012, 04:07 PM
Pete's looks pushed up in the center also.
Attached image(s)
Posted by: Katmanken Aug 14 2012, 06:03 PM
Dang, I wonder if the PO used the flat of the front floor pan as a jacking point.
All those little dings coud be from zooming into the pit, jamming a jack under there, and jacking away.
The dents at the scraped and dented areas along the bend in the front also make me wonder if the PO finally noticed the dents and caved in floor, and switched to the front bend area which has more stiffness.
Attached image(s)
Posted by: seanery Aug 14 2012, 06:27 PM
I like where you're going with that ken.
Posted by: Speedo Aug 19 2012, 07:10 PM
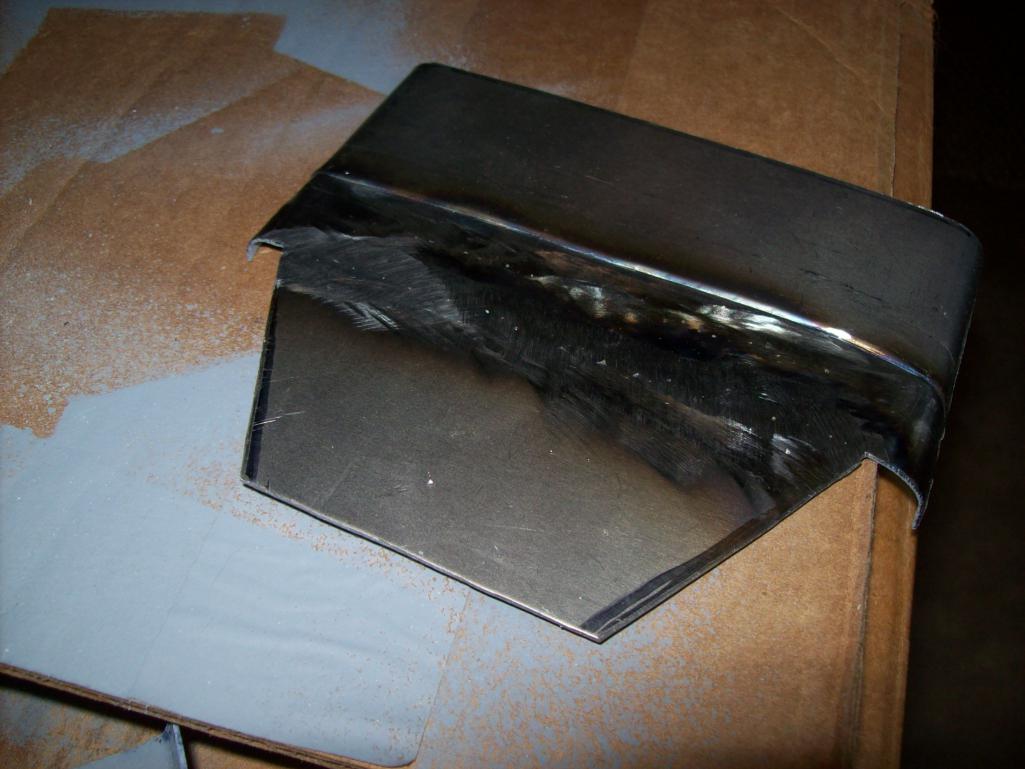
I was going to start hammering on the front end to bring the arch down...using a jack and a 6x6 timber on end to act as a bucking block...but when I applied pressure to the pan with the jack, it wanted to lift the front half of the rotisserie off the ground. Plan B...wait until the car is rotated rightside up and hammer down against the bucking block. Brant offered to let me come out to see the underside of his black car as he was going to remove the front bumper. I decided to get the welding going instead. So I decided to launch into the welding...here
I need to get the wire brush out to see where the rust starts and ends...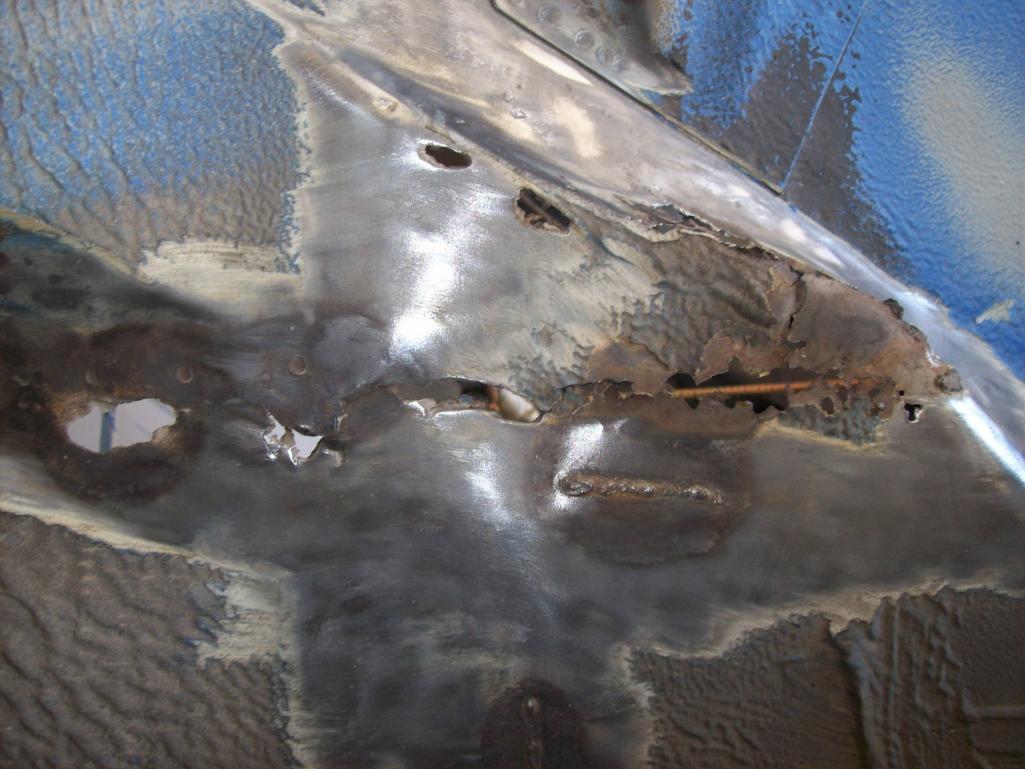
So this is the nice resto design replacement outer longitudinal...but I don't think I need this much. 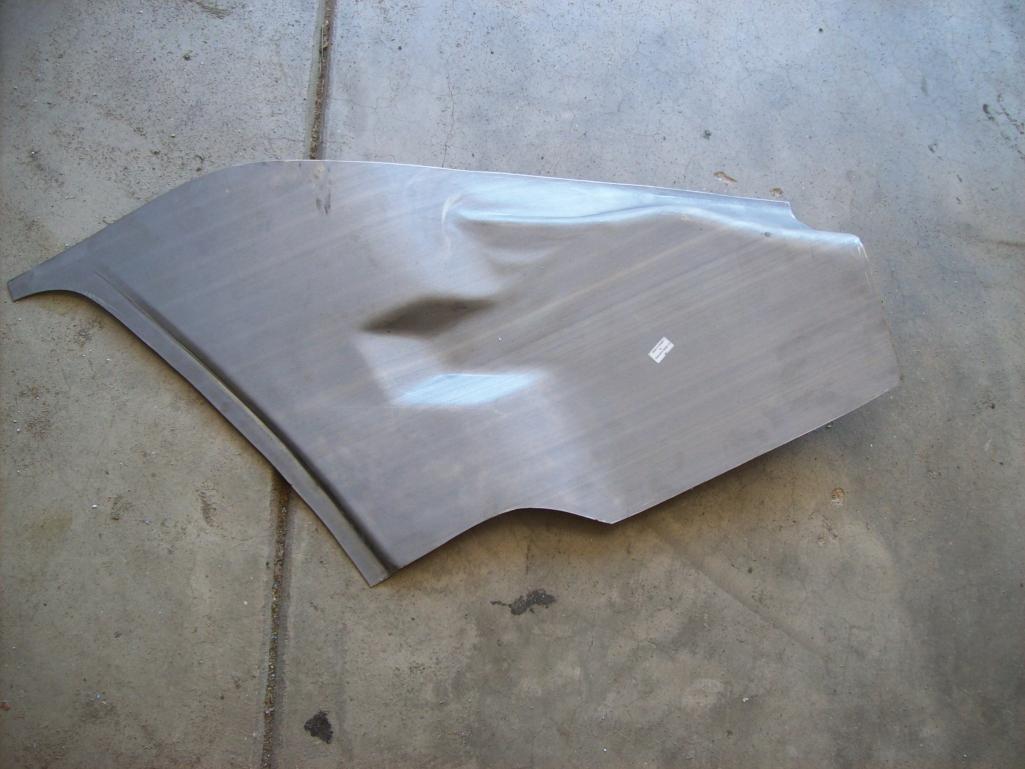
I only need to replace a decent size area, and up here a bit also needs to be scabbed in...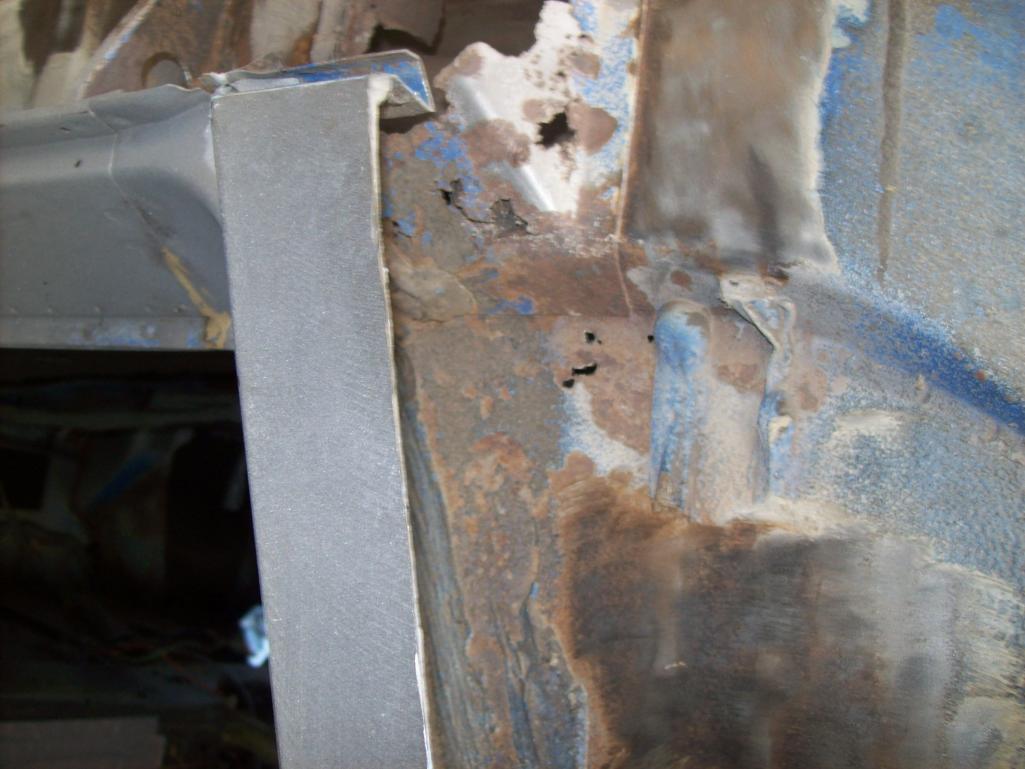
I think I will save this nice peice and patch this area myself. What I have to work with...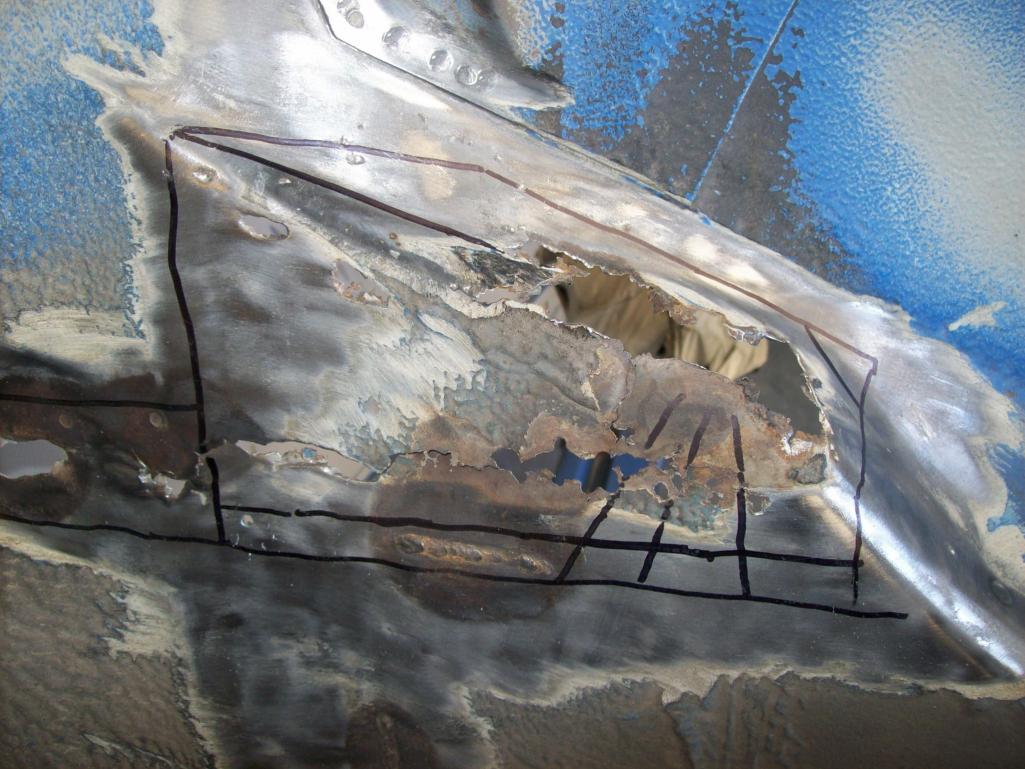
I will try to visualize how the steel needs to be shaped to fit the replacement area.
Posted by: Speedo Aug 19 2012, 07:18 PM
I like the fab work...so we start. Peter's part was a nice one, so I have to be able to create a part nice enough to justify not using his. I am not going to walk you through the process...you all know how this goes.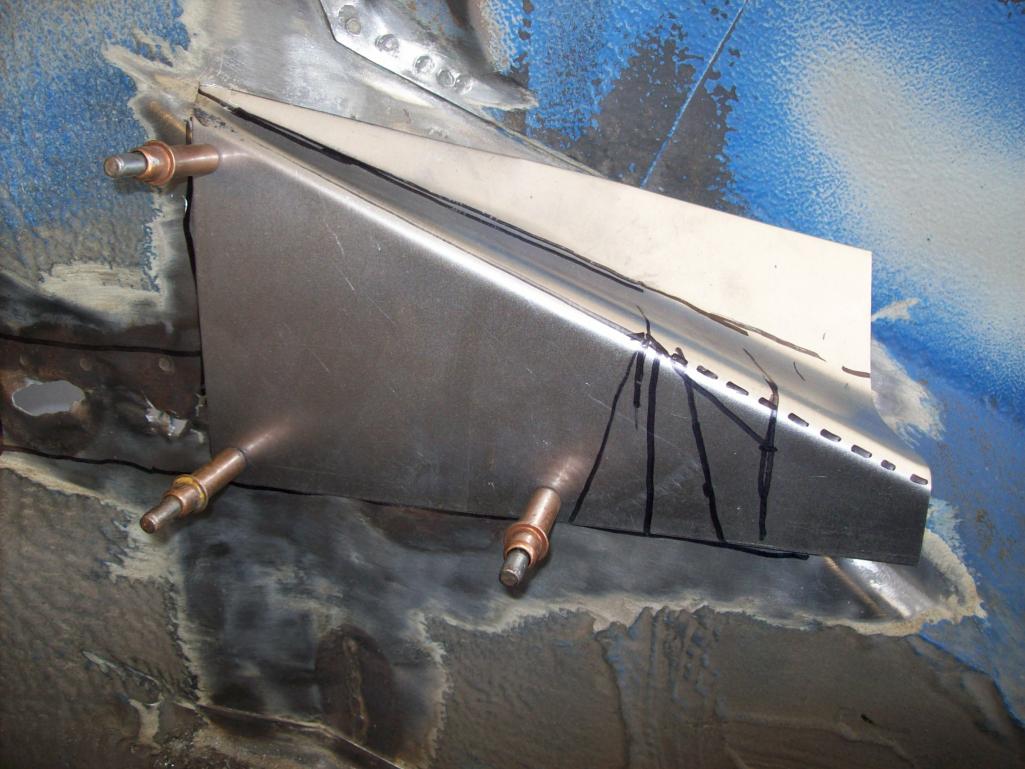
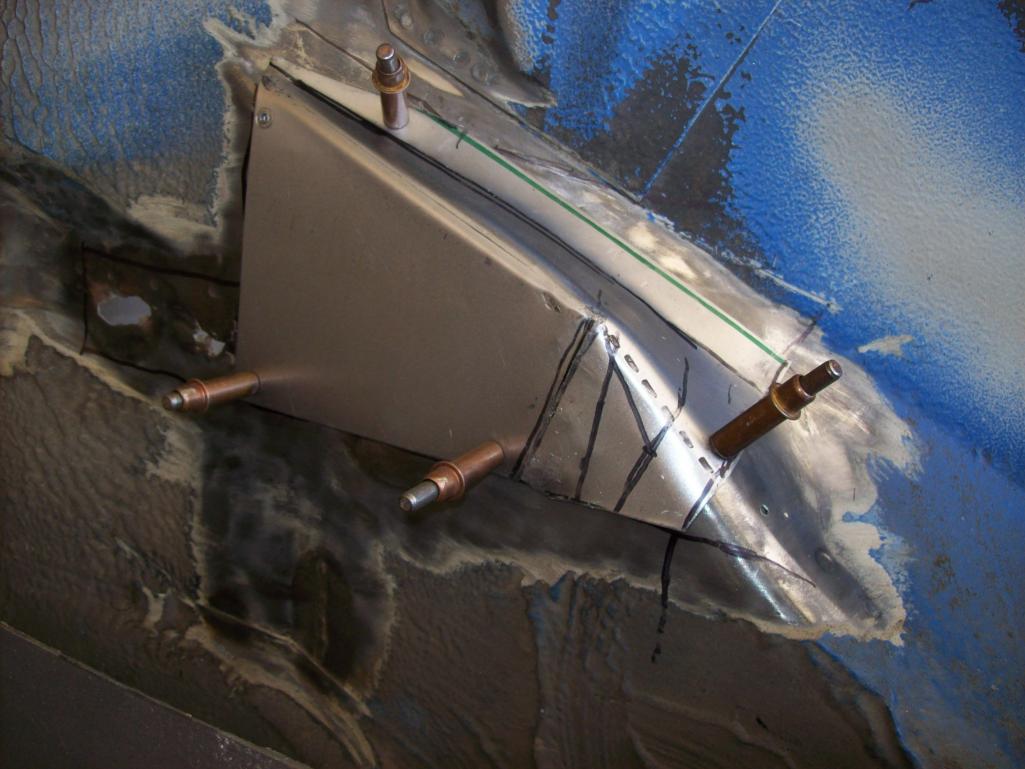
[attachmentid=328908]
Now I need to add the dogleg and stich it all in place
Posted by: Ferg Aug 20 2012, 02:43 PM
Nice Lars
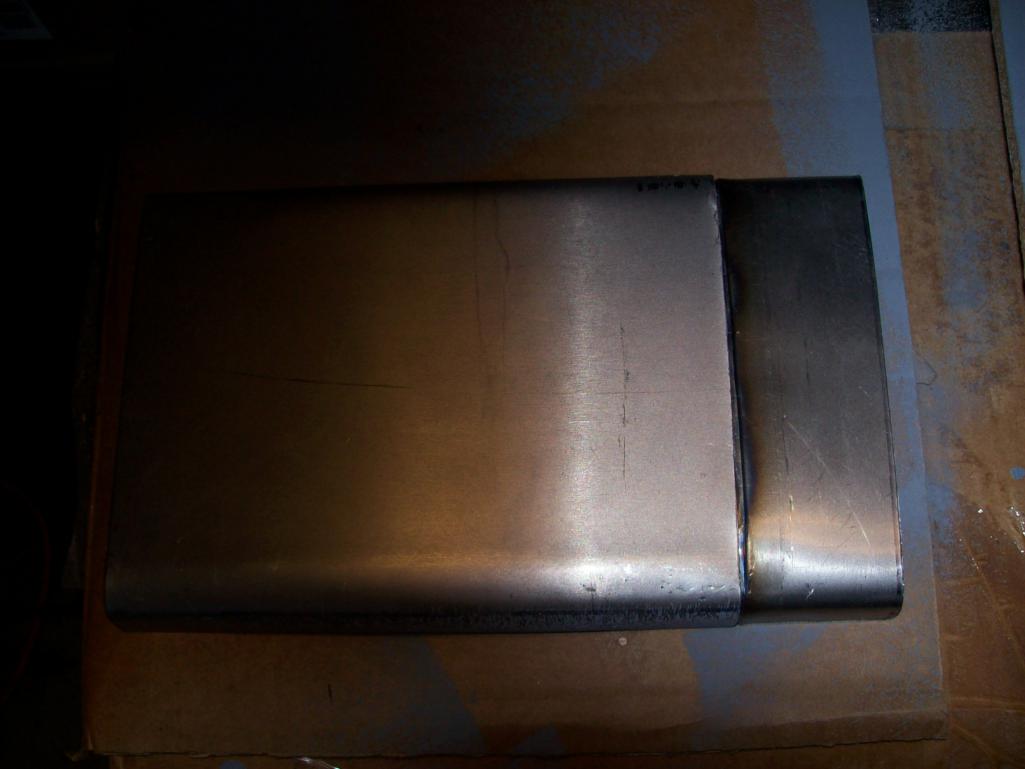
Posted by: Speedo Aug 20 2012, 08:11 PM
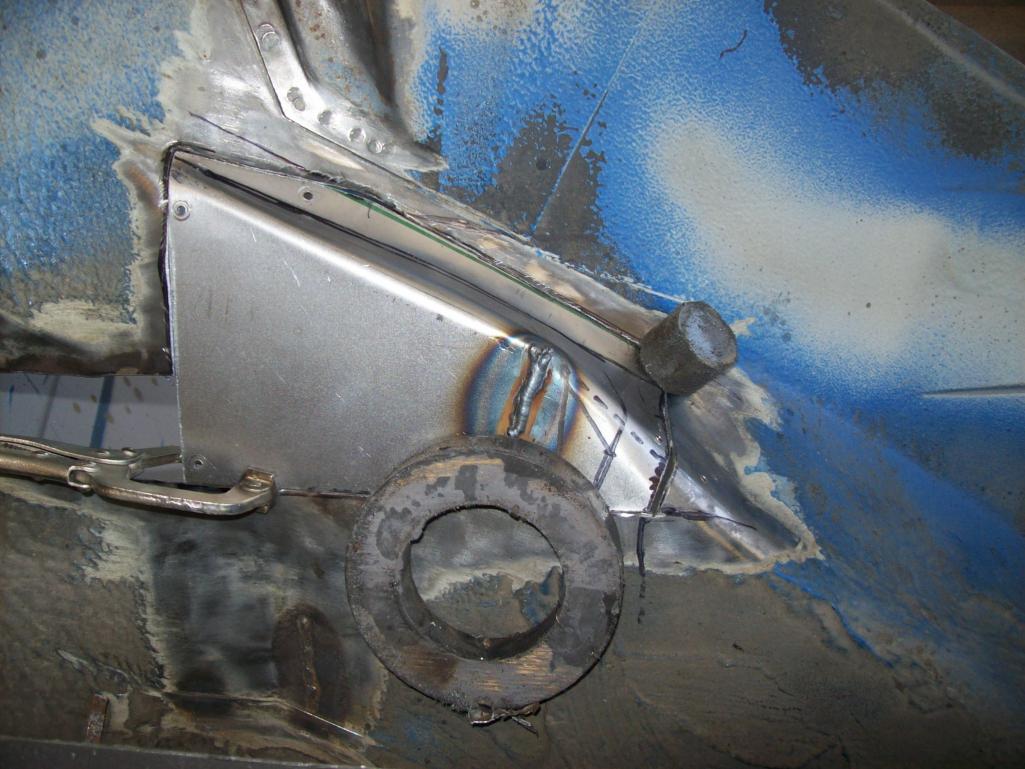
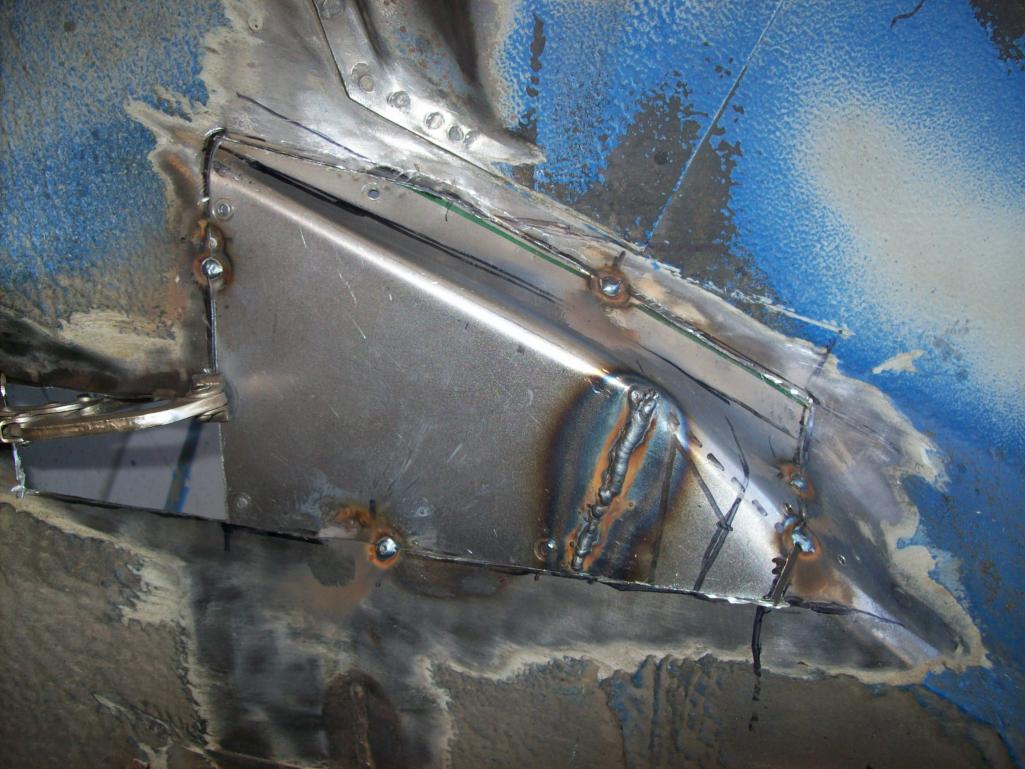
Pretty straightforward....cut and fit and repeat.

The suspension mount had some very schetchy factory welds...mig wire sticking out everywhere...bubbling welds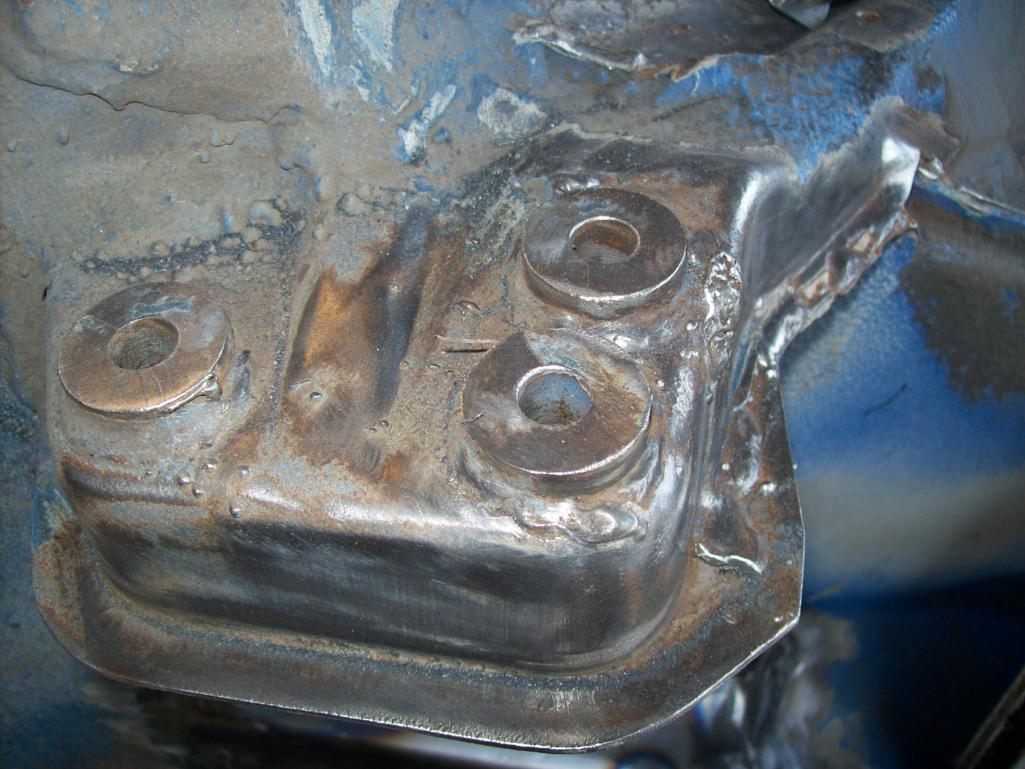
I need to clean up the welds to finish off and prime. I need to do some small stuff to take a quick break. Coming up....
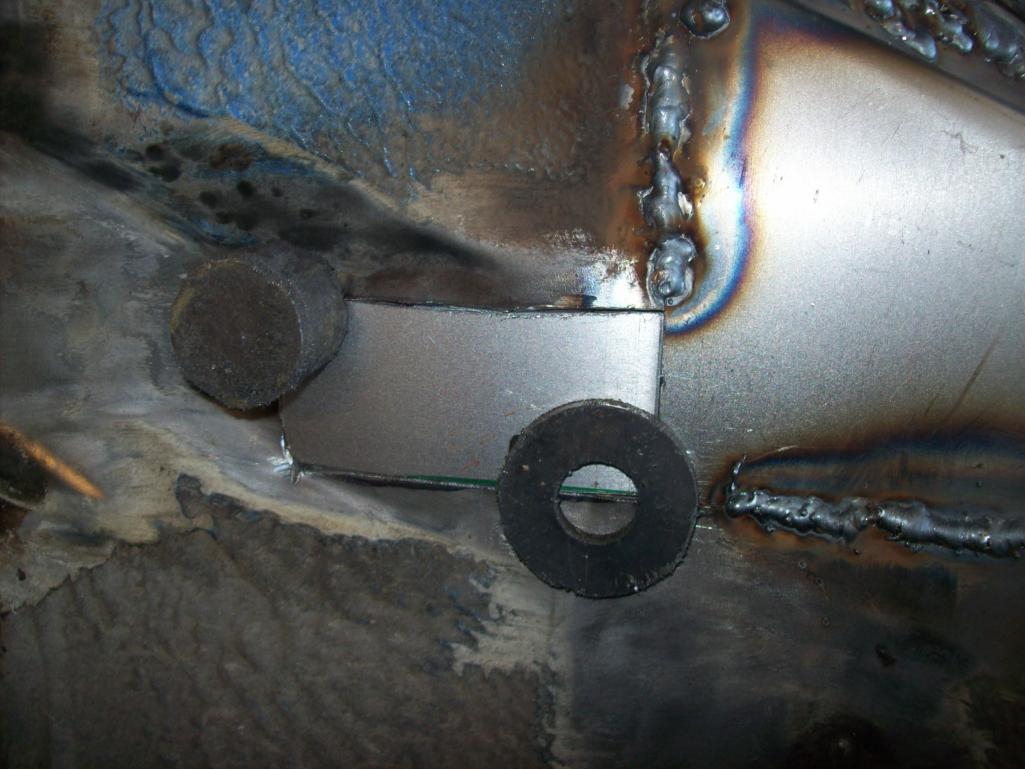
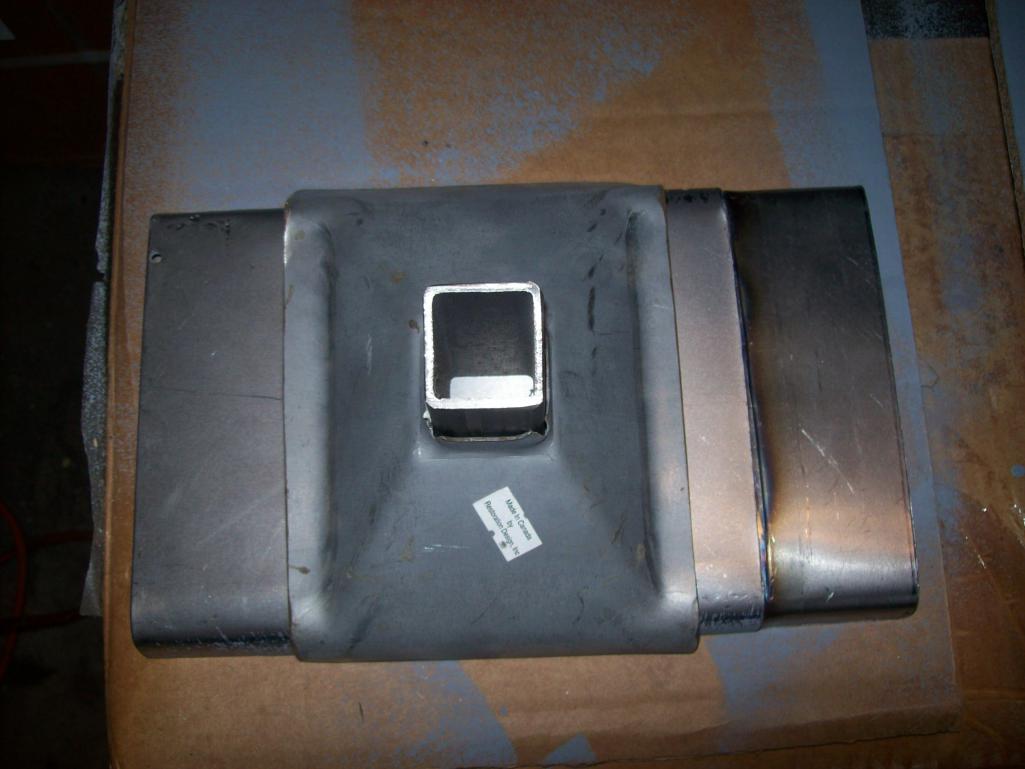
Posted by: Speedo Aug 20 2012, 08:46 PM
My front A-arms didn't want to give up the t-bars...so I drilled a hole in the forward end and liberally applied penetrating fluid. After a couple days, they agreed to come out. Now the holes need to be sealed (not caulked) 
The engine tin that was bent and cracked also was going to be too expensive to replace...so while the welder was out, thin welding repairs occurred. Finally the front cracked A-arm cover was due.
The before...
The after...
I am about to send more parts to be powdercoated...anybody have a color for me for the "grey" Boge front struts? And the front t-bars...the bars and through the body brackets...black or yellow zinc?
Thanks guys.
Posted by: Gint Aug 21 2012, 06:13 AM
all this in 2 weeks and the thing isn't on jack stands yet
you need to slow down for a year or two if you want to be a true teener fan....
Hey, I resemble that remark...
Been working all summer and hadn't seen this thread until today. Nice work Lars! Who blasted your tub?
Posted by: wachospeedo Aug 27 2012, 05:24 PM
I needed to beat on something this weekend. As it has been suggested (by people far smarter than me)...that the front pan is beyond repair, I decided to tackle it. My first problem was how to create a bucking block. No sense in pushing or hammering awy at the pan without something behind , or on the other side of the force. With the floor jack on the concrete pushing up on the pan using a 6x6, all I accomplished was to lift both the car and the rotisserie up into the air. Not exactly what I wanted to accomplish. So my plan B was to create a platform across the two legs of the rotisserie on which I could place the jack. Now as I force the 6x6 pole up into the floor pan...either the car was going to give (floor pan move), or the rotisserie was going to explode. Fortunately the former happened. Here was my rig...sorry, couldn't get the pic to stay rightside up.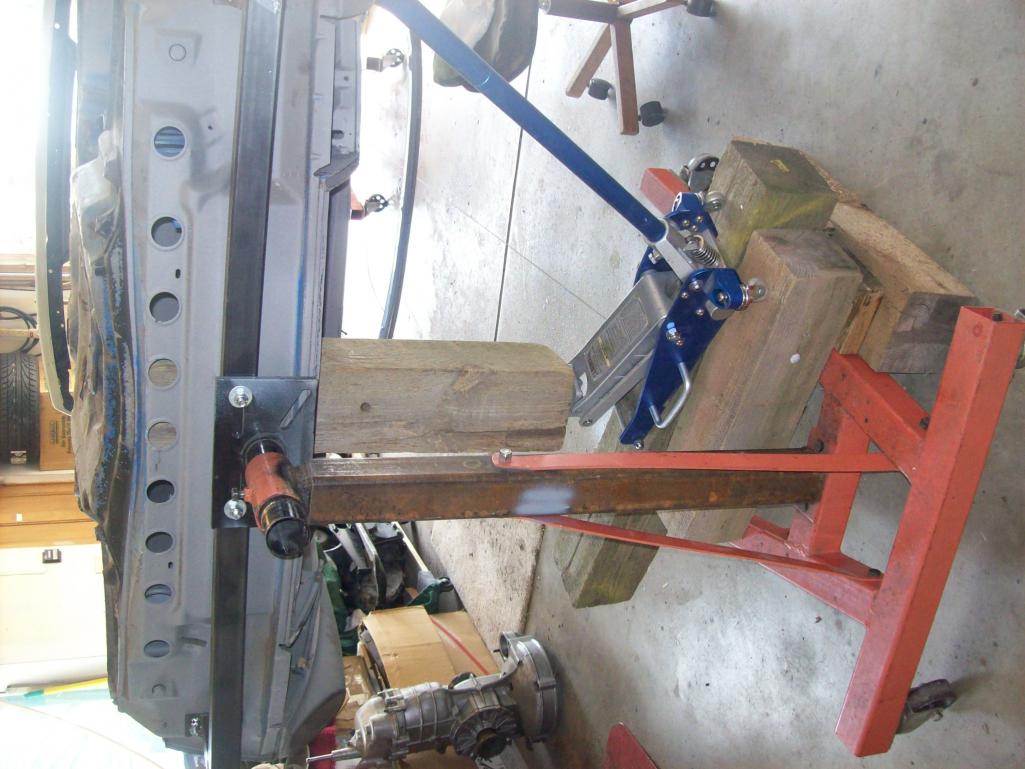
I will go to work on the front lip first. You guys have convinced me that the lip was originally straight, not arched. I don't want to believe, but the pics posted don't lie. This area will be hidden behind the bumper...but it needs to be made right. So this needs to be massaged...note also how badly dented down/in the pan behind the lip...tow hook can hardly be seen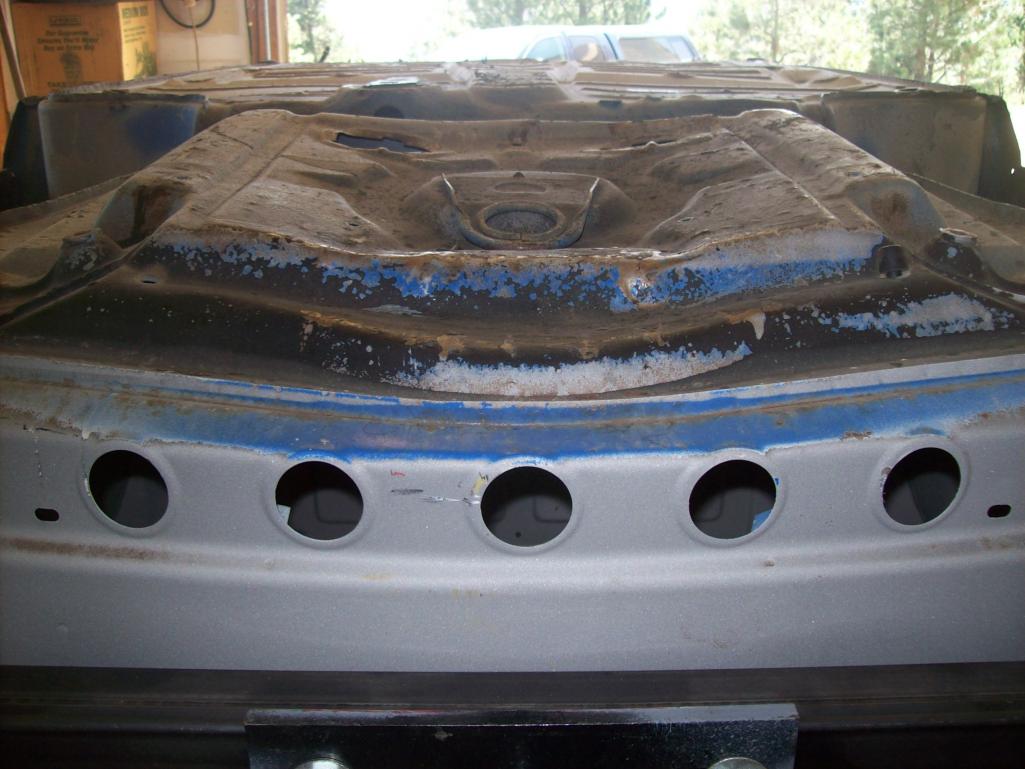
I worked in small segments, using my mallet to relieve the steel as I went along. It was slow work, but it worked. Nothing broke, not sheet metal tearage...I'm quite pleased.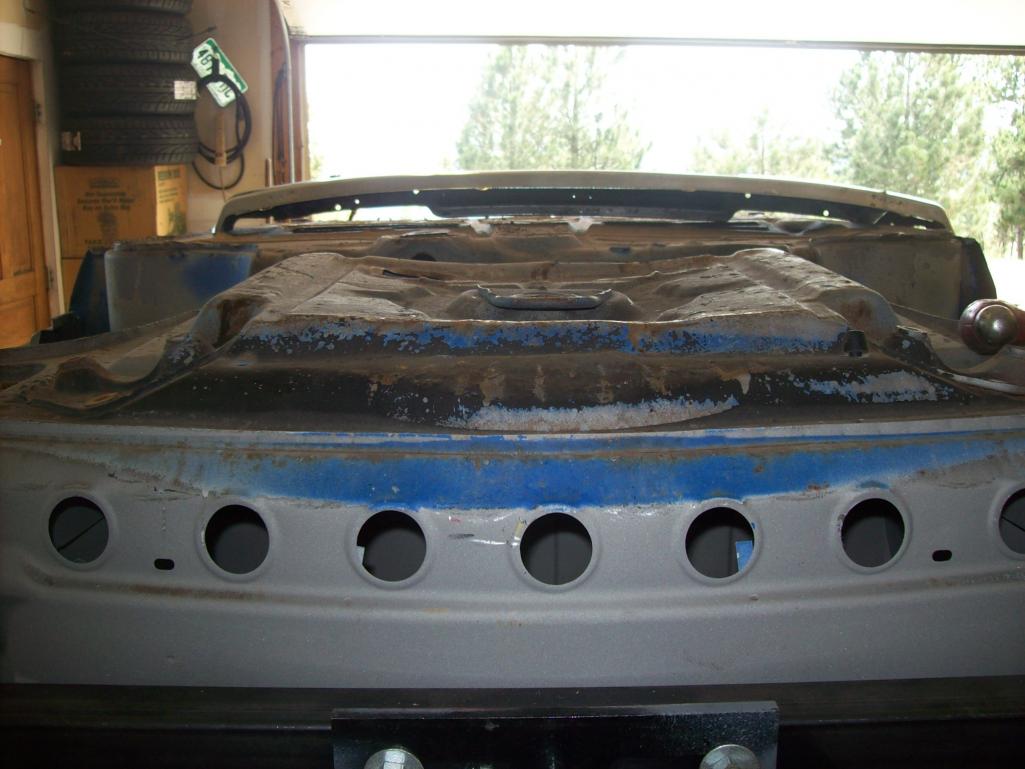
Side view...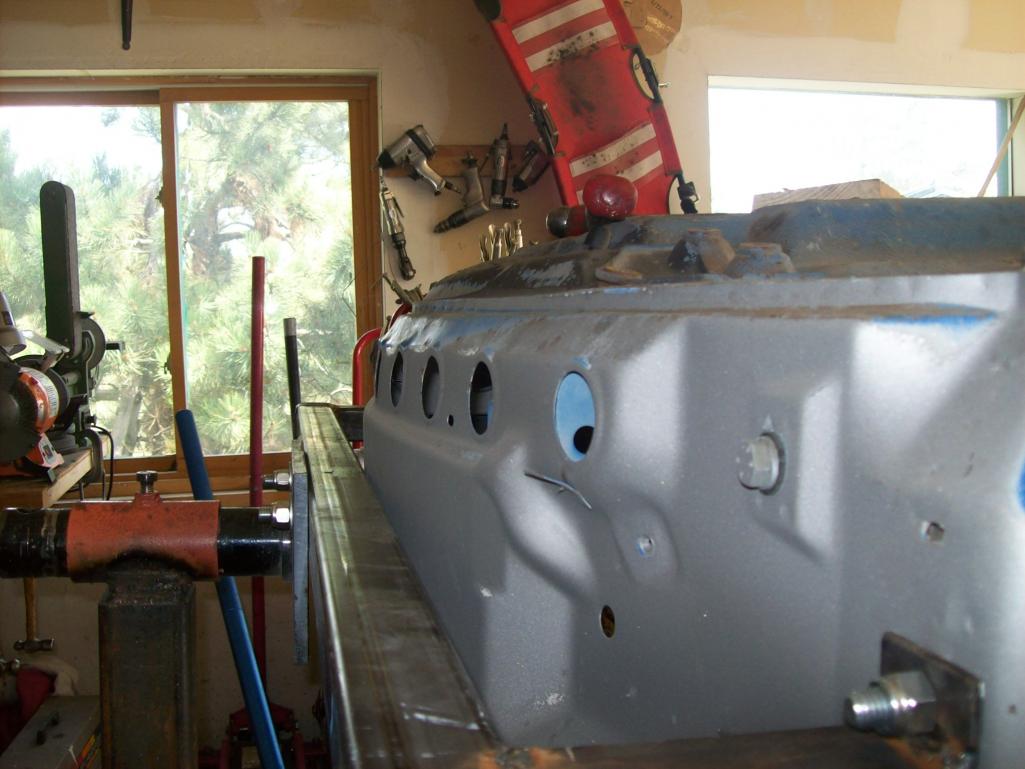
So now I bring the tow hook back to life and start to work on the front pan. I thought initially that the pan was so stretched that I'd have to slice it lengthwise and reweld it flat. Or, as Peter at RD suggested...just replace it. I'm optimistic.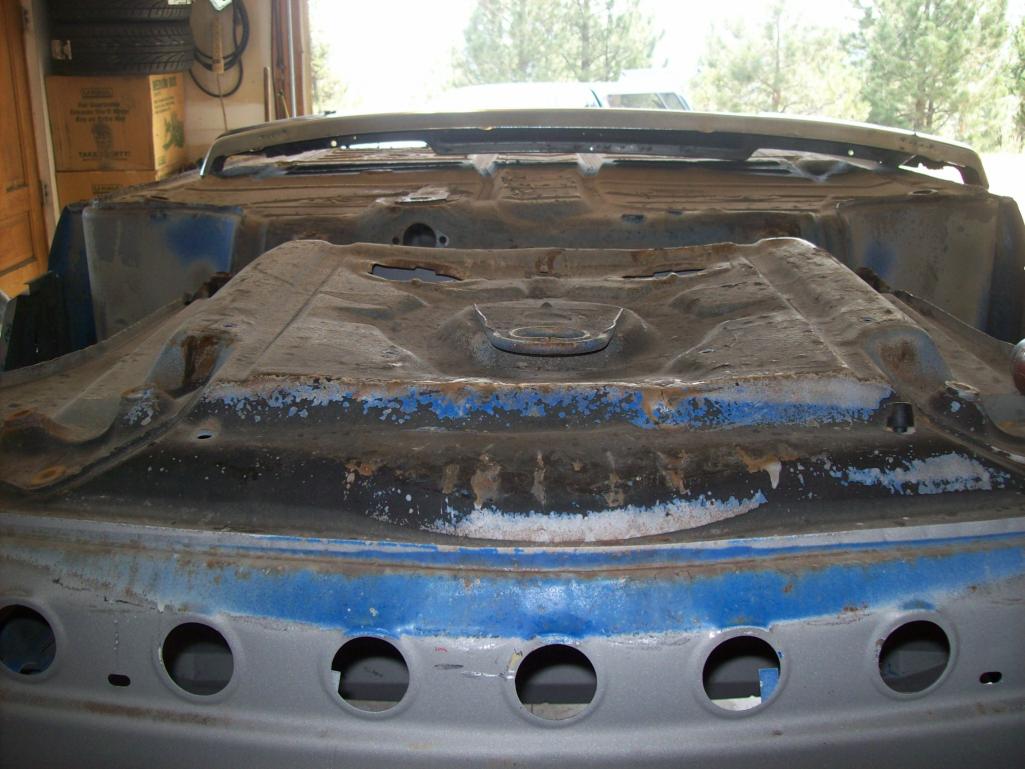
Posted by: wachospeedo Aug 27 2012, 05:35 PM
This is going to take some time...lots of big damage, and lots of dings too. I would use the flat surface of the top of the 6x6 as my bucking block as I worked the steel. The jack forces the floor up pas the neutral position and I would work with the hammed to compress/shrink the steel. Then I would release the jack and the floor would settle. Press repeat 100 times. Here is what I used to work the dings out...same process but focused on much smaller ares (like a square inch)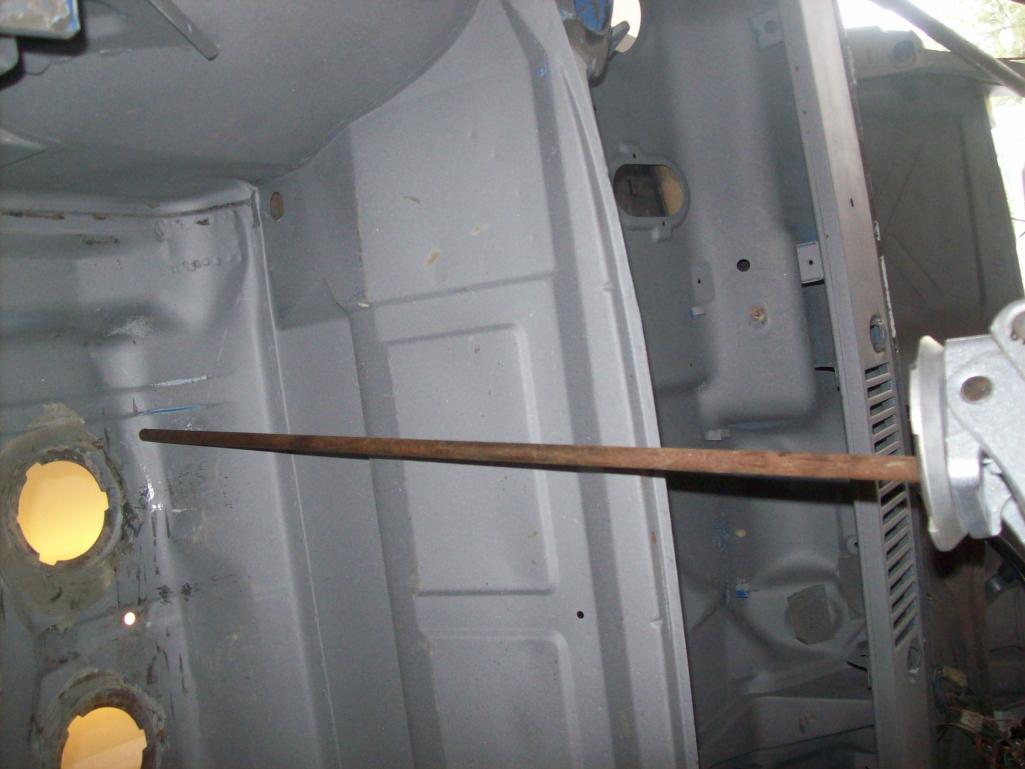
Slowly she is coming back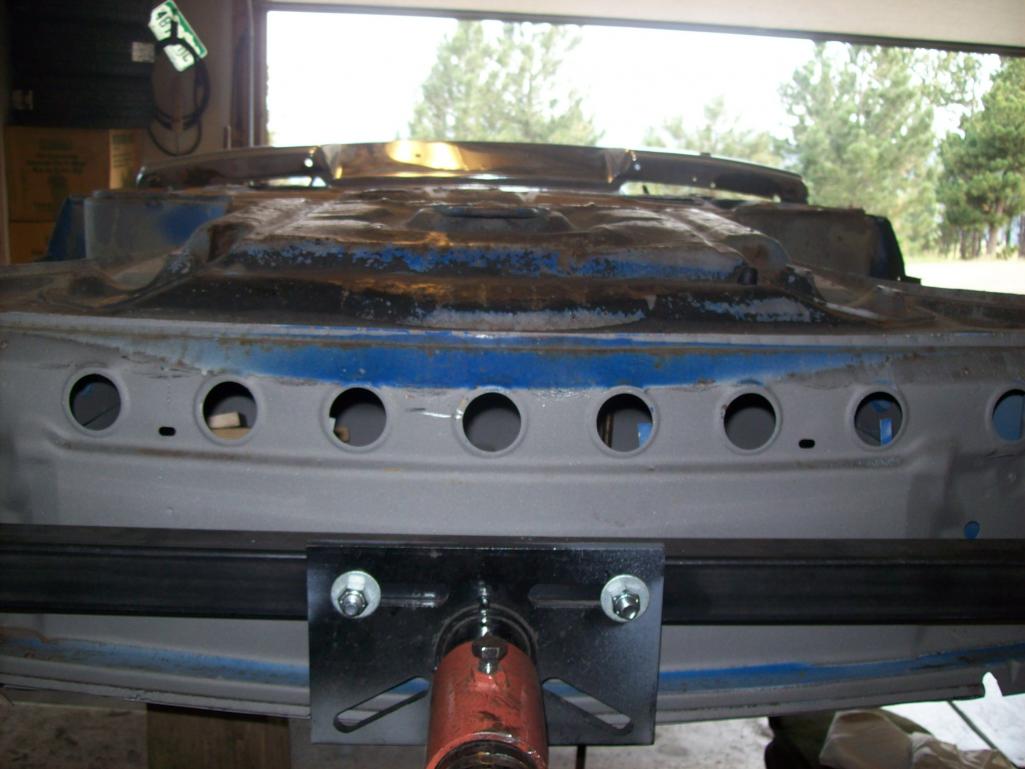
Side to side and front to back
This would have been a lot easier with two people
Posted by: Scott S Aug 27 2012, 05:40 PM
Wow Lars - looks fantastic.
You guys should see his 911R that he built........ 
Posted by: wachospeedo Aug 27 2012, 06:09 PM
And the finished product...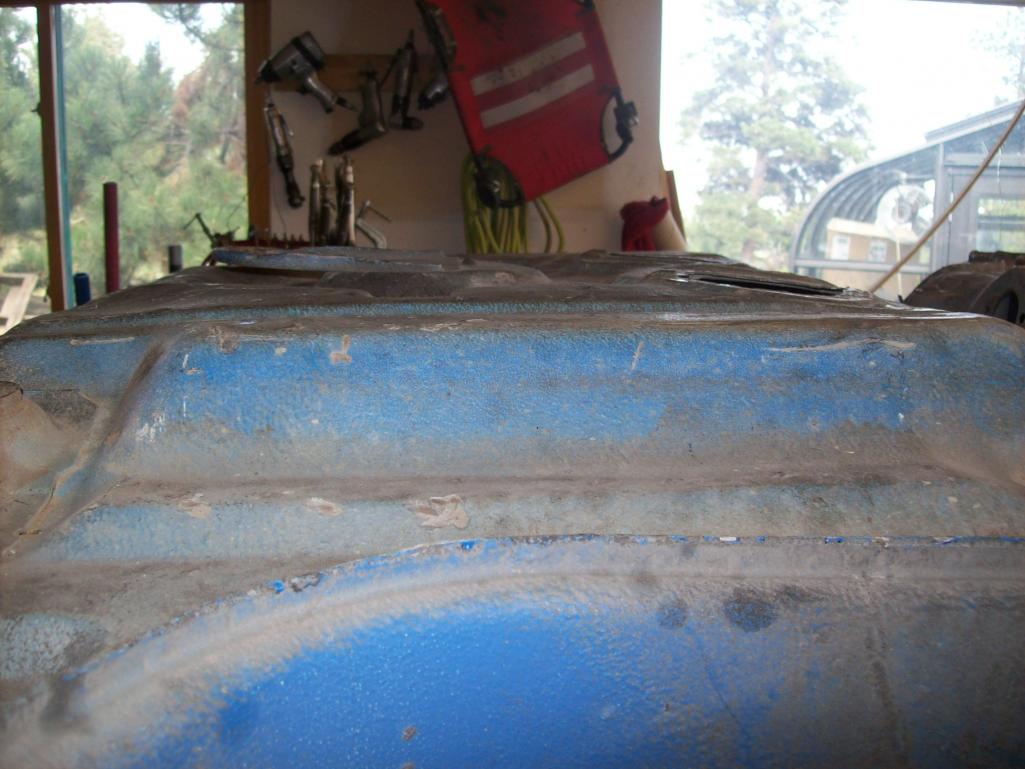
Beats replacing the entire pan. This is in better shape than most pans I have seen (granted that would only be a few) and after it gts wire brushed and sealed up, the Wurth undercoating will hide any minor imperfections that remain. There are some dings in the center floor pan, but I think they will best be addressed when the car is back upright. The bottom lip,flange of the floor pan was trashed from "errors in jacpoint decisions" in many places, so I spent some time circling the car, bringing these seams back to vertical. Next step is to attack the passenger rocker and jackpoint. I get to drill out some spotwelds in preparation.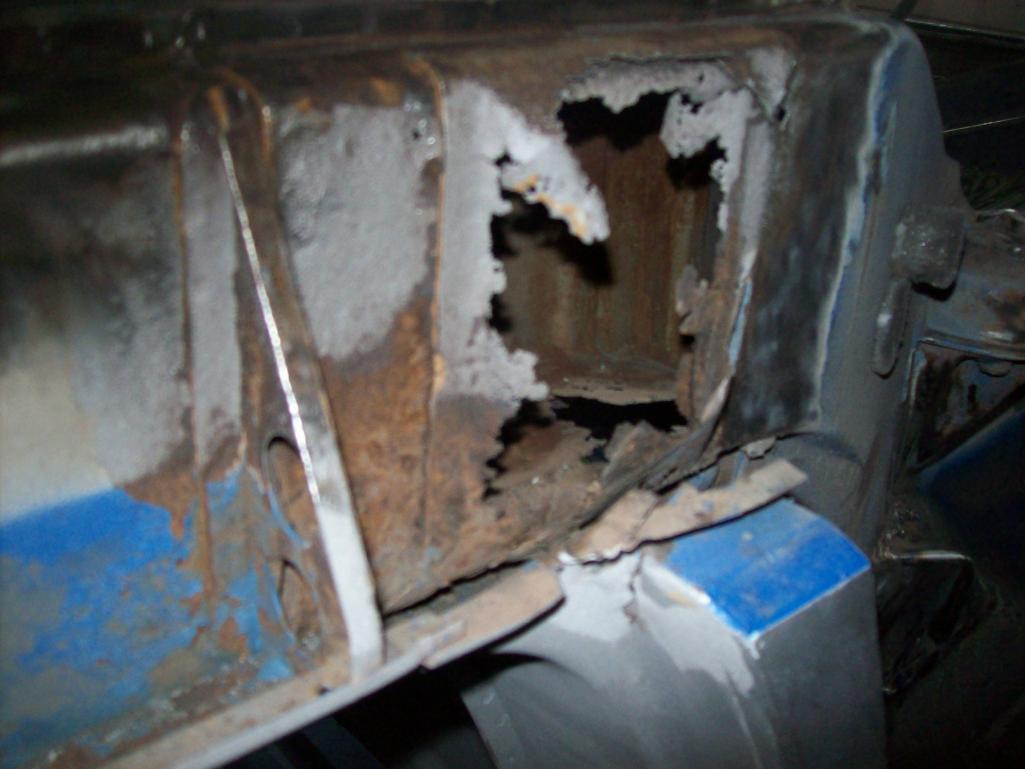
What are the supports called that hold the sill in place...sill supports?
I may need to remove the lower 8 inches of the lockpost to get good access to this area.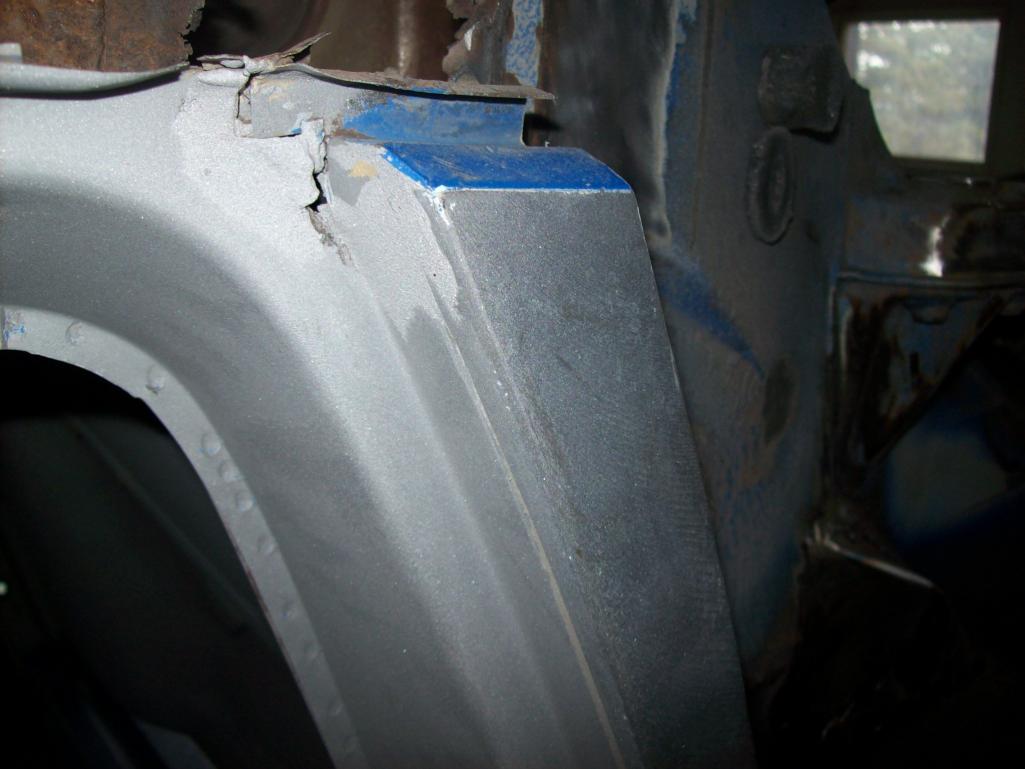
I am actually looking forward to this area as it is totally different than repairs on 911s in the same area.
Posted by: RON S. Aug 27 2012, 06:20 PM
Lars,
If your mindset is like mine the only reason your investing so much time, talent, and money is the Serial# right up there on the right side inner fender well.
Keep up the good work. 
I've BTDT. 2-3 years worth of rust repair. In the end, when you are riding down the road, you and you alone will know the sacrifices, and you'll smaile at the results..
Ron 
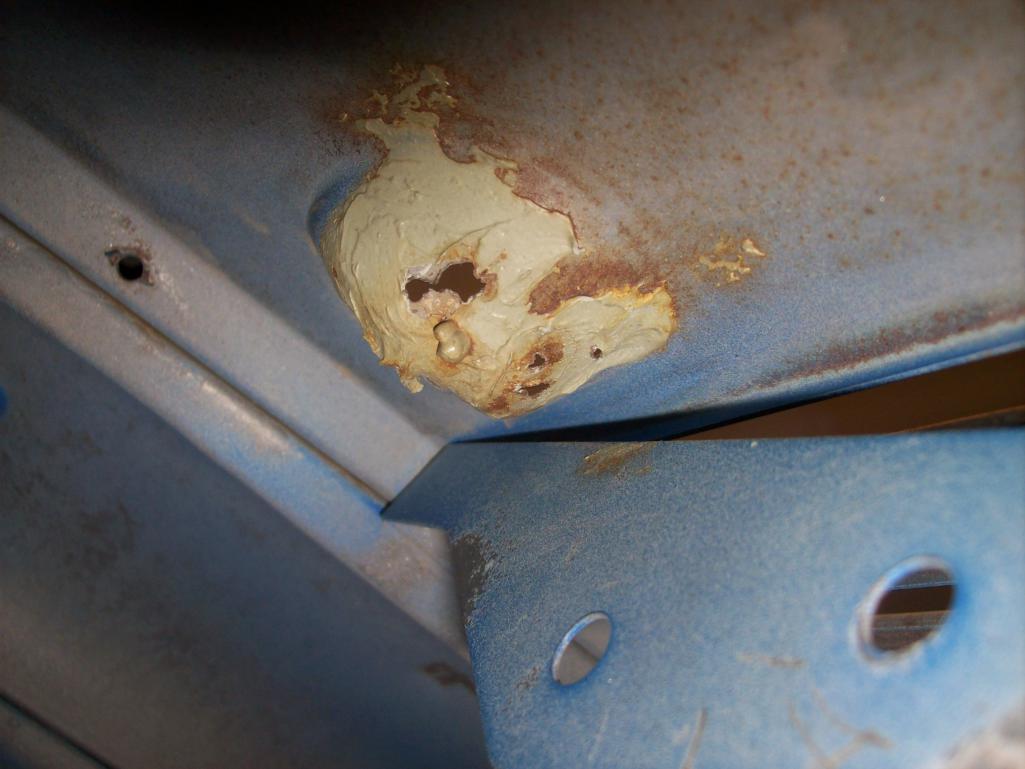
Posted by: wachospeedo Sep 3 2012, 07:51 AM
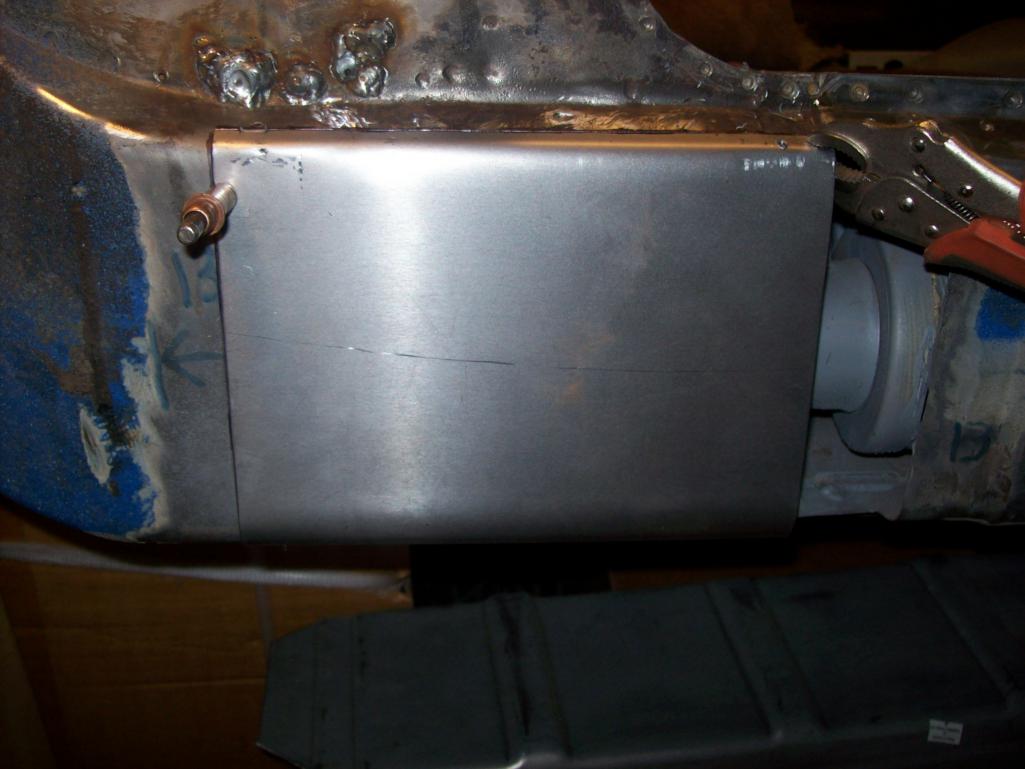
It is going to get worse before it gets better...so I invested in some 1/4 inch cobalt bits for the spots I am going to drill out. Hard to see how much is bad, and how much access I will need to create...but I have to start somewhere. first pass at the passenger side rocker (upsidedown). Still not sure why the picture wants to lay down when the file on my computer has been rotated 90 clockwise...good excercise for our necks...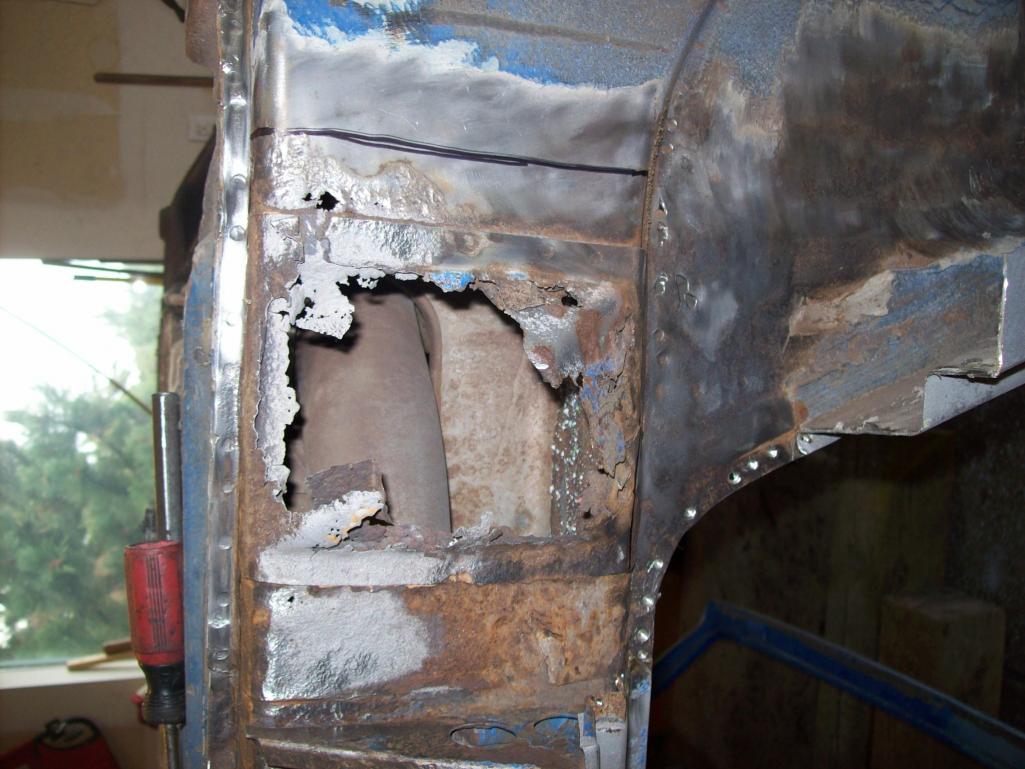
And we end up with....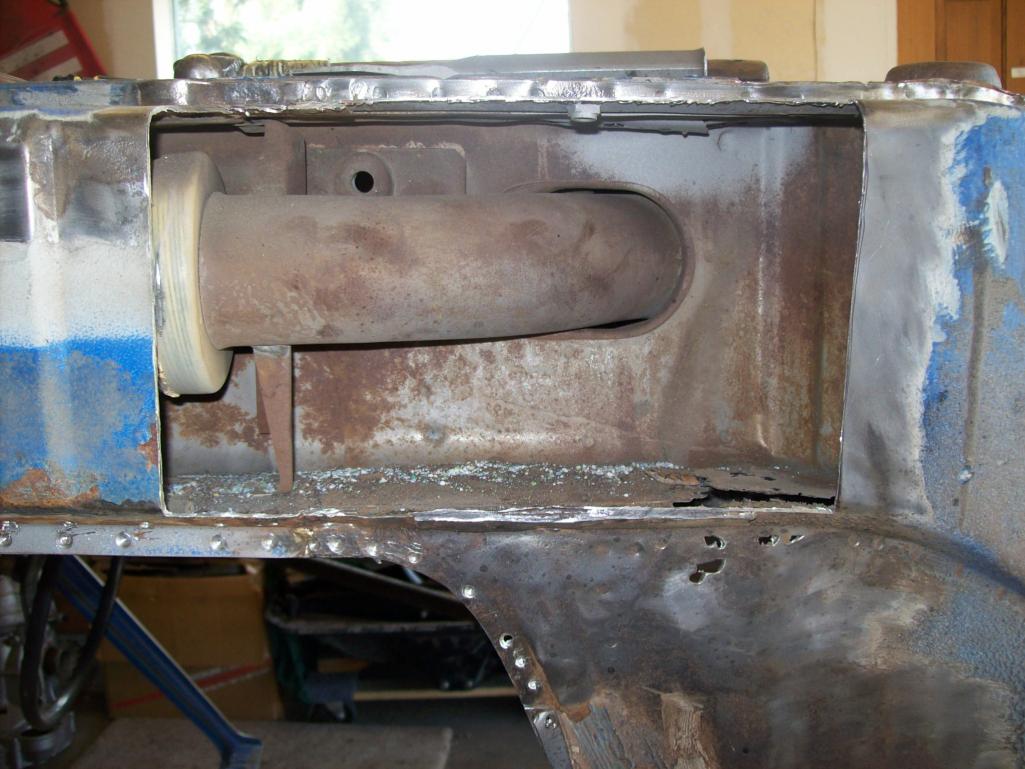
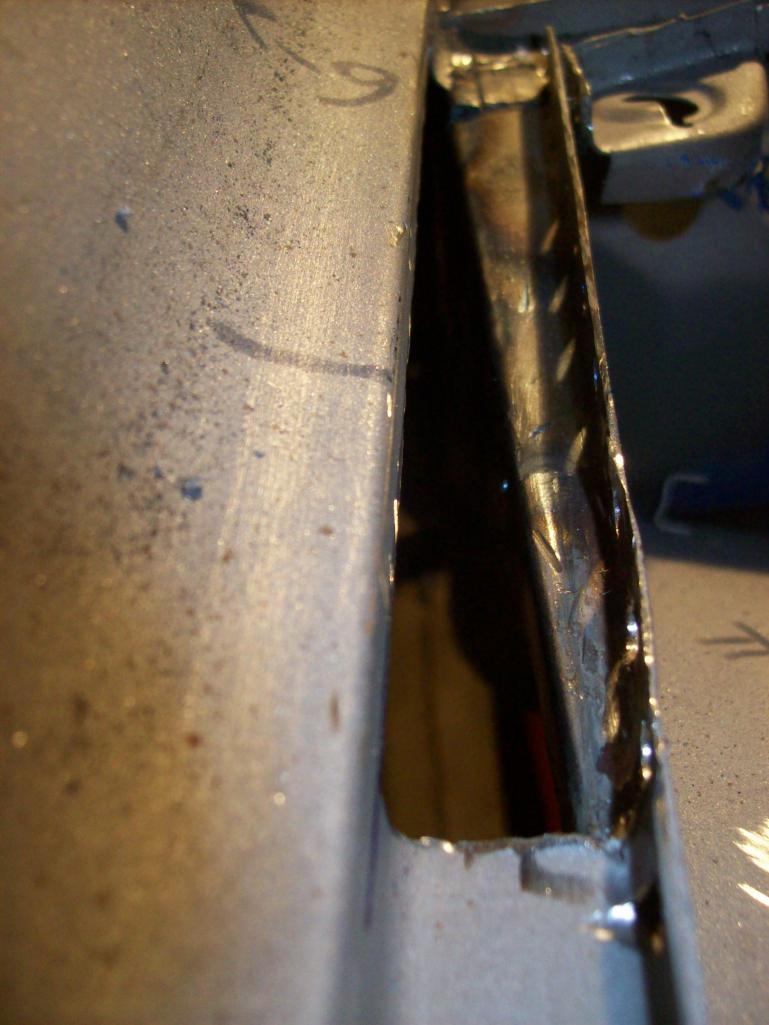
Something here caught my eye....so I started digging
This is a doubler on the bottom of the longitudinal. It was created in the over lap from the inner side of the longitudinal overlapping the outer. and there is a tiny channel that is created. Anywhere a cavity exists, moisture (can) gets in and the reaction begins. This is looking at the overlap area from the inside of the longitudinal which would be the top of the channel Really hard to see, but the area is about 2-3 inches long, an inch wide and very weak.
I will dig into it repairing the underside first, then do the other layer from inside the longitudinal. Start to create some room. There is a lot going on back here. Have to approach it like peeling back the layers of the onion...and sometimes you do feel like crying 
Posted by: wachospeedo Sep 3 2012, 08:10 AM
It is what it is.....I am going to just open this up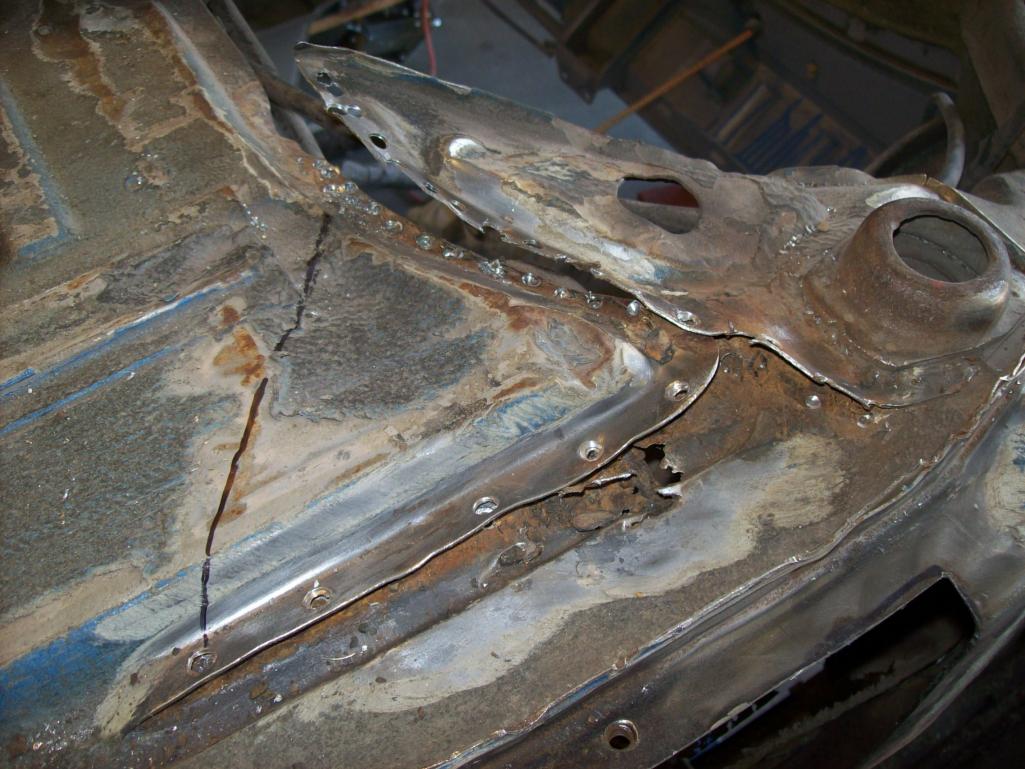
Could be worse. I will section out the bad and weld in the good and that will take care of the bottom. Top will get done from the inside. The small pile of the good the bad and the ugly.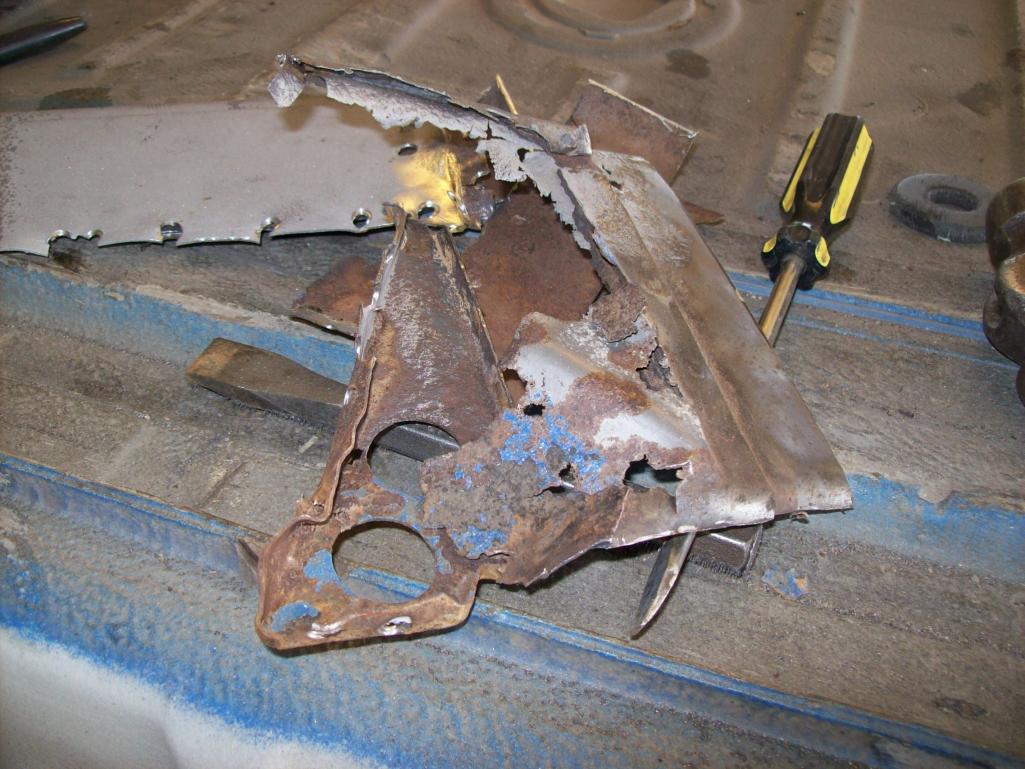
I can treat this area and get ready to close it back up.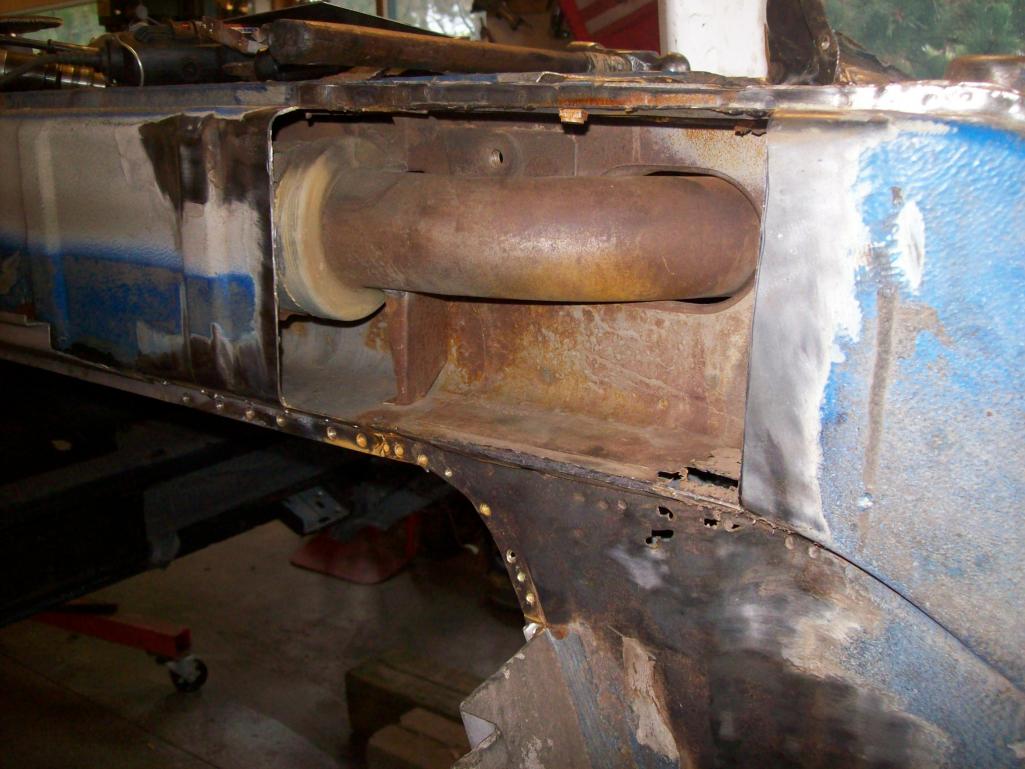
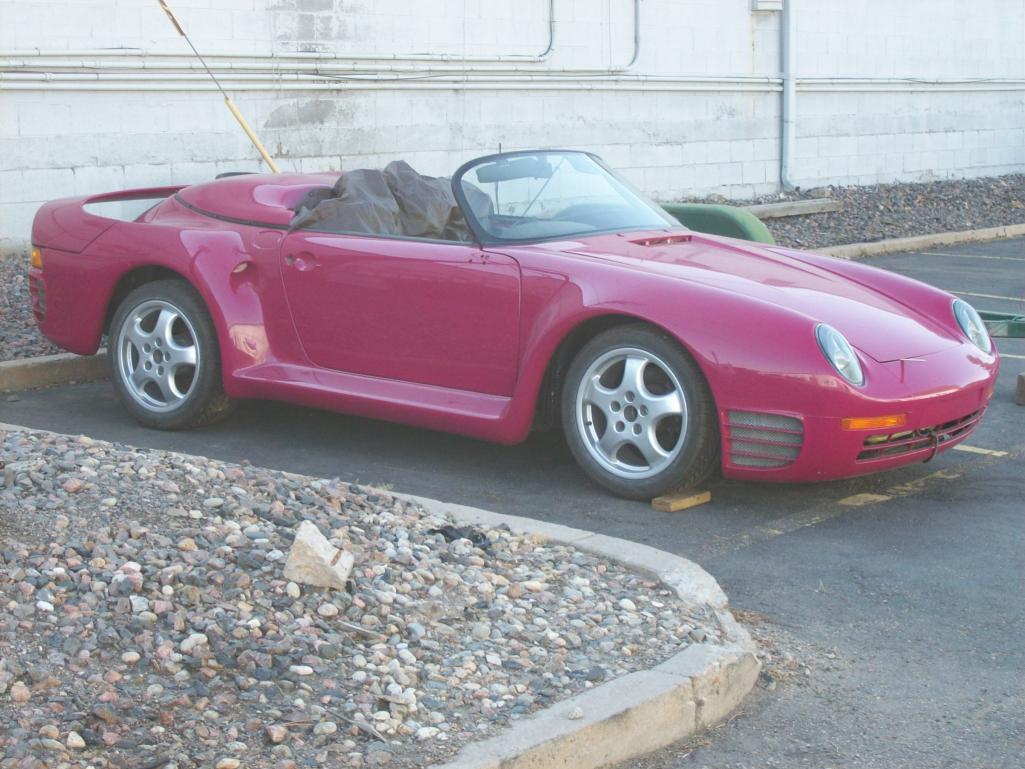
Just found out that my mig wire ran out. Helped a buddy weld the rear door on his old jeep back together. Thought I had an extra roll, but it turned out to be flux core gassless .030 and I run .023 with gas so it is off to the hardware store at 5 pm on a Sunay afternoon if I want to do any welding tomorrow. On my bumper run to Denver (gathering up my cores to drop off for rechroming) on Friday, I spied this beauty "barney" in S. Denver. Seriously...a right hand drive fiberglass 959 convertible...really? I had anything to eat yet...fortunately. 
Posted by: Ferg Sep 25 2012, 04:31 PM
![]()
Posted by: Speedo Oct 9 2012, 06:37 PM
Alright alright.
I've made progress, but an not as comfortable posting on this board (familiarity) as I am on PP so...forgive me. Last posts were of the underside of the passenger rear floor corner. Going to have to go at this from the bottom, and then because it is a sandwich, from the top...inside the longitudinal. Bad metal removed and cavity treated...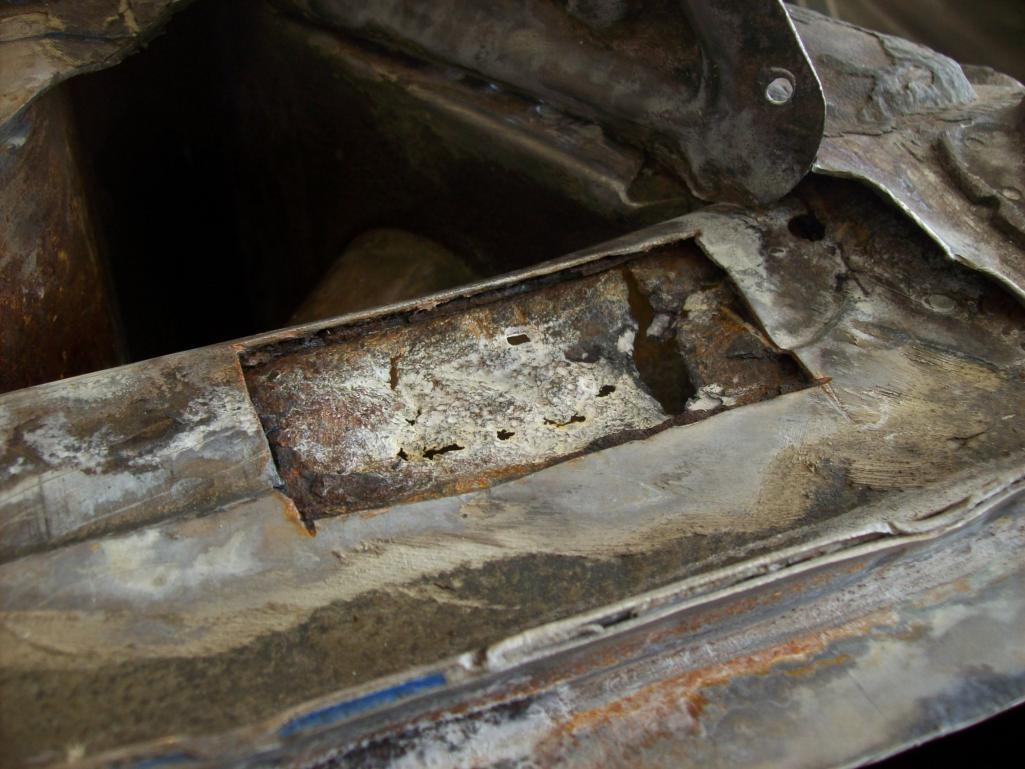
The replacement patch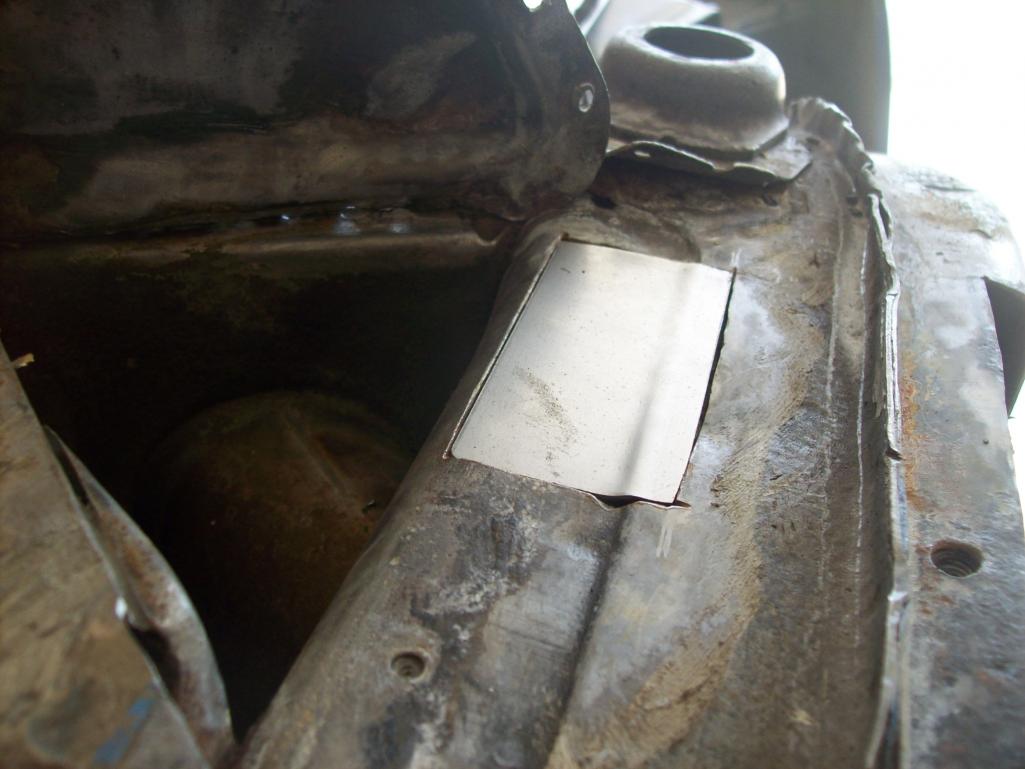
Closing things back up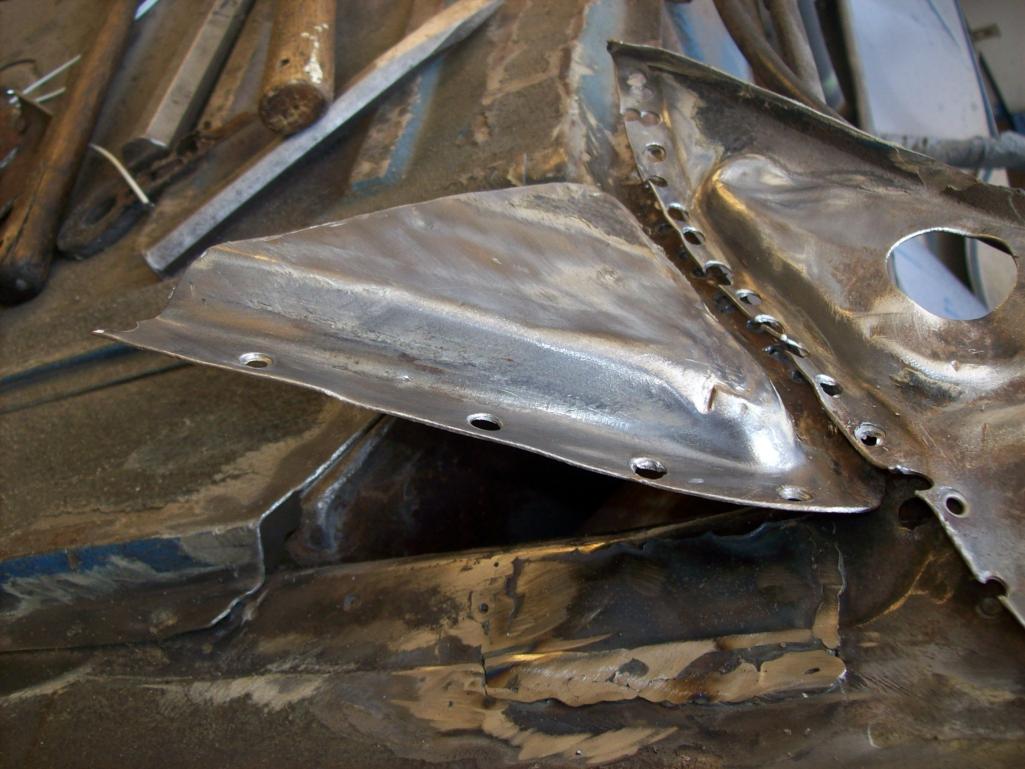
This jack/corner support was totally mangled and needs to be reworked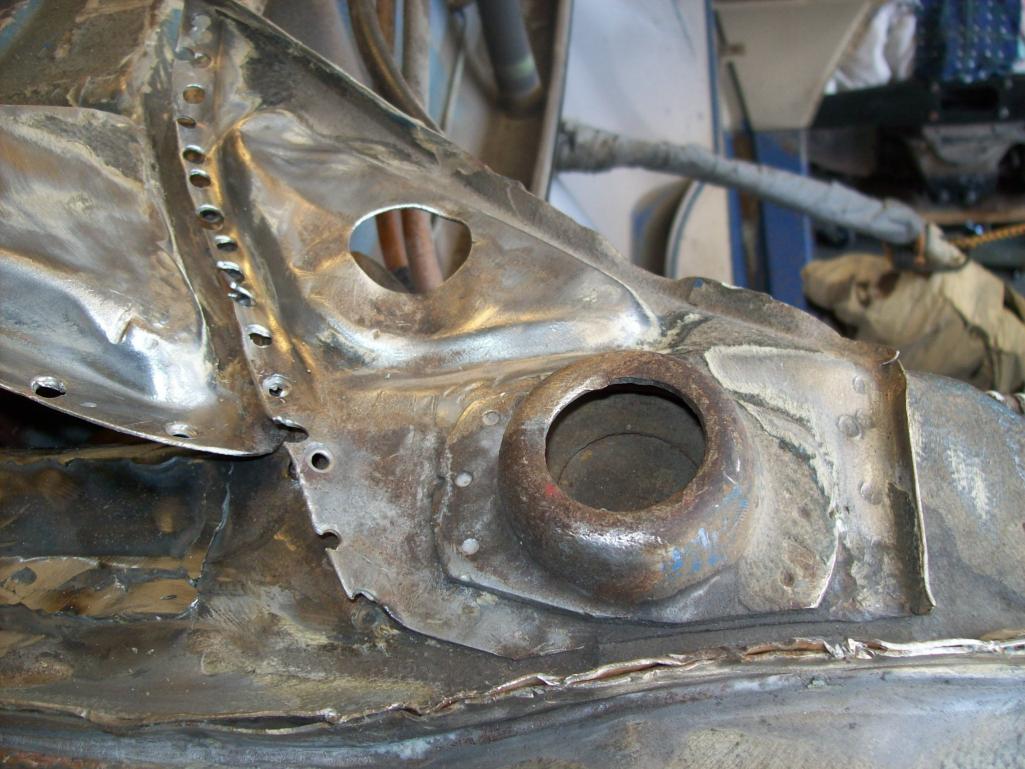
And done...came out nice but big difference between the two pics
Posted by: Speedo Oct 9 2012, 06:47 PM
Now to close it up
Basically I peeled the onion back to get access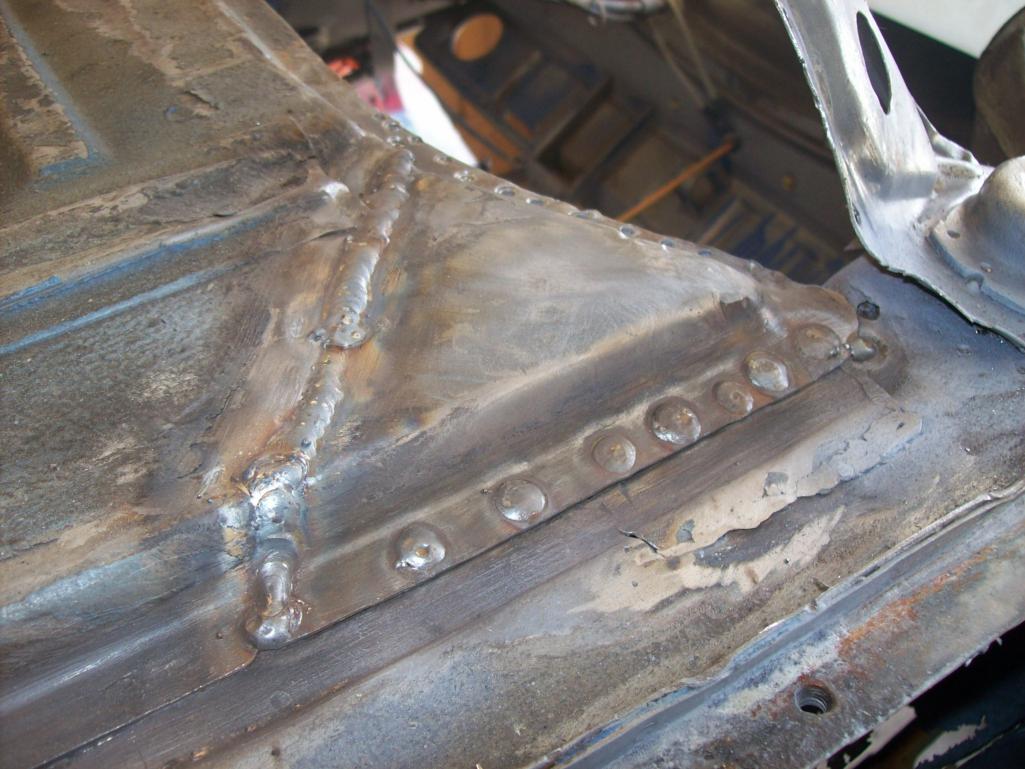
And now I am folding the layers back
This is much better than What I started with
Much straighter too...this corner was wacked when I started
Now I need to clean up the top side from inside the longitudinal, and then close up the jackpoint.
Posted by: Ferg Oct 29 2012, 09:31 AM
Lars sent me this, he was busy over the weekend harvesting metal from his parts car
Love this pic
Attached thumbnail(s)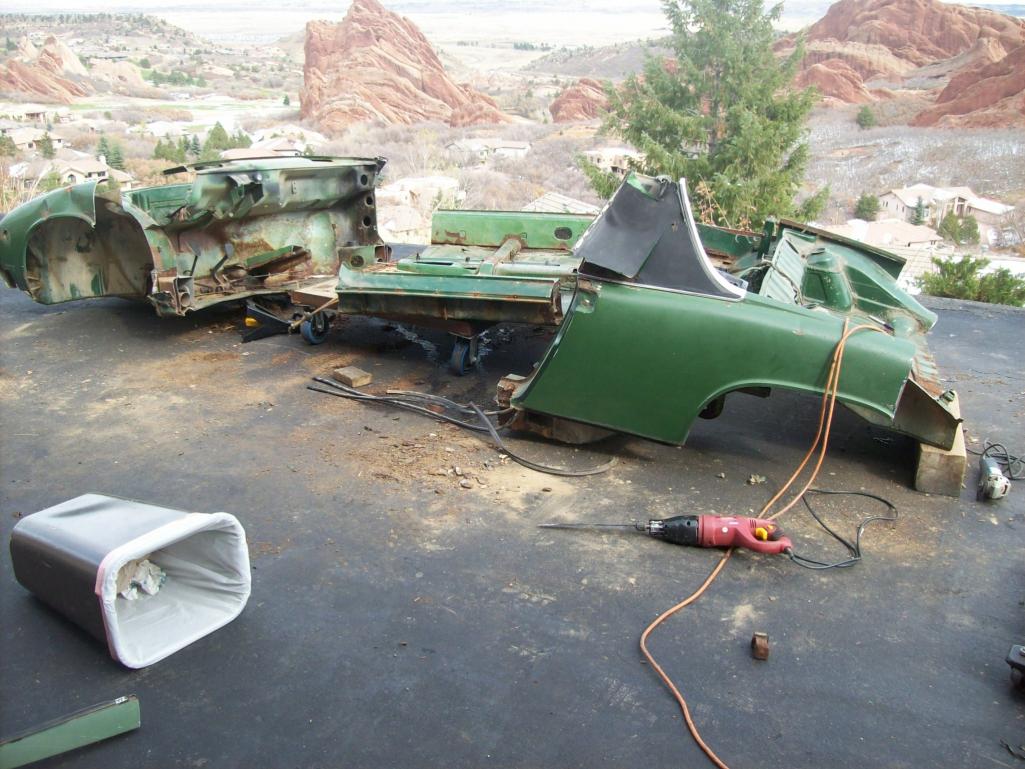
Posted by: bandjoey Oct 29 2012, 09:36 AM
Nominate this picture for the next car of the month.
Posted by: Speedo Nov 11 2012, 07:28 PM
I sent my parts sacrificed from the green car (still feel bad about that) to the sandblaster to clean up. A week later I am here...
I started prepping the parts to get ready to splice in. Unfortunately some of my replacement parts need work before they get to be replaced. Figured the best way to get at this left rear corner is to take it apart.
What a PIA...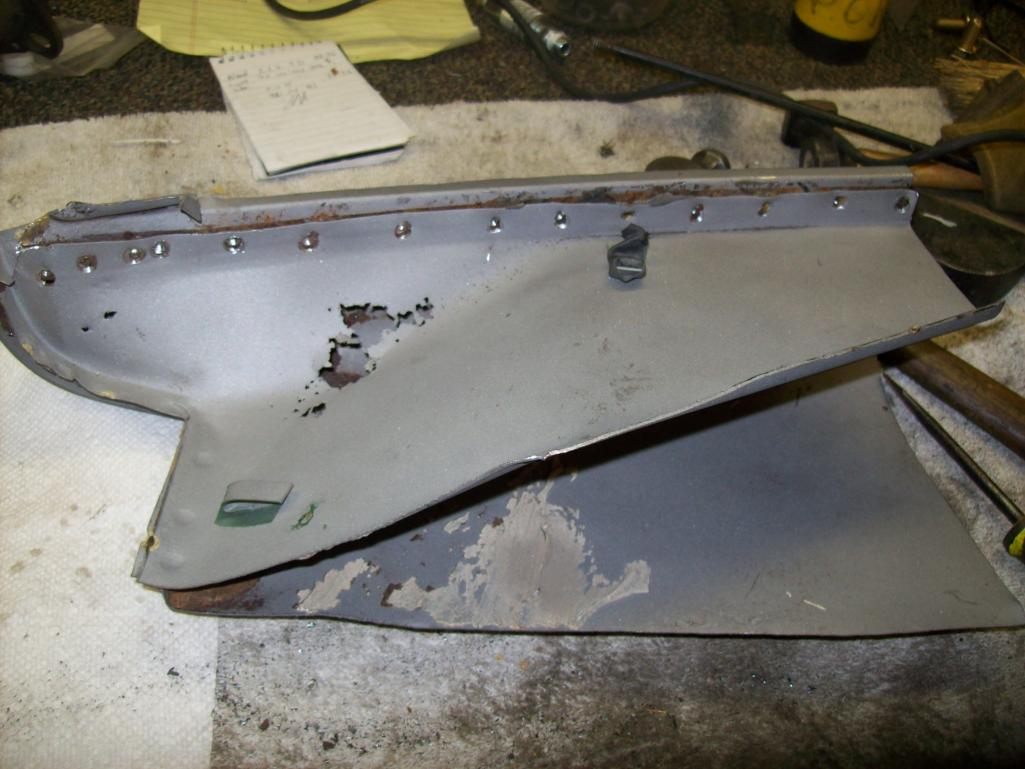
Finally
Posted by: Speedo Nov 11 2012, 07:39 PM
Once the inner and outer fender corners are separated I can clean them up. Here...my work is cut out for me...
Finally decided to get a self darkening welding helmet after borrowing a friend to do some welder-comparisons yesterday. So today there will be no welding...just more prep. Steering rack cover pan is torqued and needs to be massaged back. My 6 didn't have one and at least the donor car had this to offer up.
Attention now goes to the big chunk I scavenged on the rear of the drivers fender. I wasn't looking forward to figuring out how to...much less diassembling it.
I found this to be very complex...not much forsight on the part of Porsche as to how these fenders could be easily (much less realistically ) replaced.
Posted by: Speedo Nov 11 2012, 07:46 PM
I hate seam sealer. That stuff is thick, and the sandblaster didn't dent it. I had to dig it out with various sharp implements of destruction to get to the spot welds I needed to access. Slowly if emerges
It's like playing chess in 3D...just doesn't want to come apart. Can't force it for fear of damaging the panel I need..finally
And now as a result of going slowly and peeling back the layers of the onion, I know know how this all needs to go back together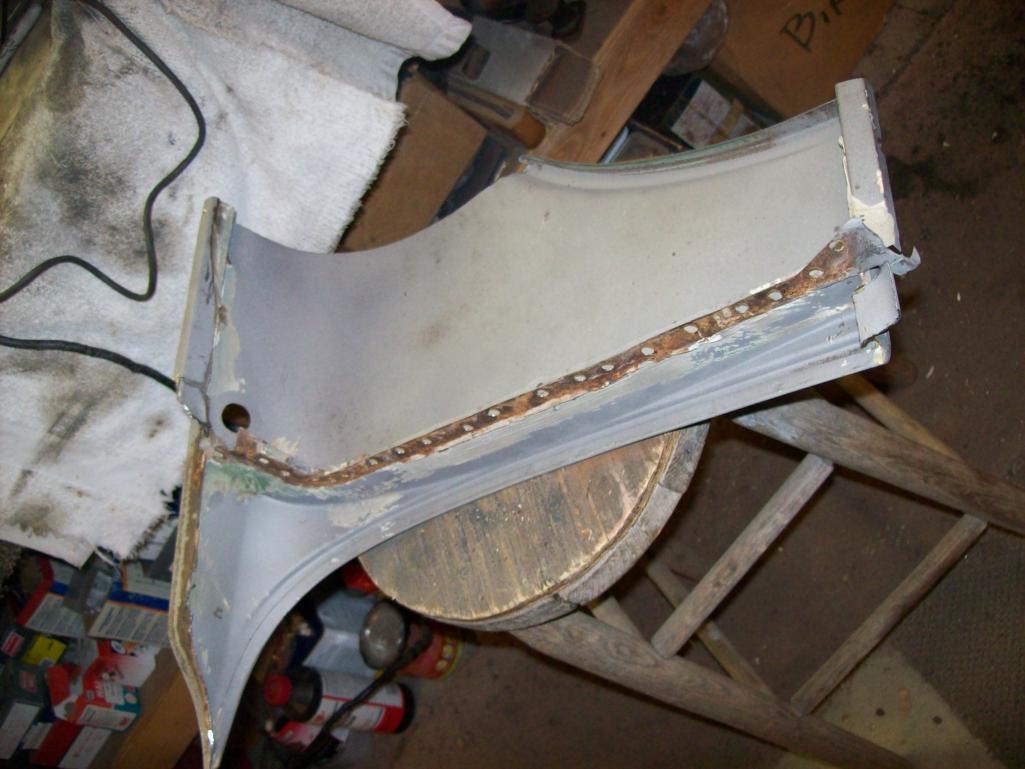
It is going to be easier to get the bad part of the drivers fender removed now I know the assembly process...but it is still going to be time consuming to dig out the seam sealer to find the spot welds to dril out. Onward...
Posted by: Socalandy Nov 11 2012, 09:50 PM
Amazing work!!! I love to see these cars being saved and they all have their own stories to tell as they get taken apart to be restored.
I wish we had a count of how many have been saved in the database.
Posted by: Matt Monson Nov 16 2012, 02:40 PM
Lars,
You are a nut job. It is part of why I like you. Keep up the good work. And when you have a spare moment come down and start cutting and welding one of my stillborn projects. I'm a real 914 guy. Neither of mine has been started in over 2 years...
Regards,
Matt
Posted by: Ferg Dec 19 2012, 12:42 PM
![]()
Posted by: Ferg Mar 20 2013, 09:31 AM
![]() what's new lars?
what's new lars?
Posted by: Luke M Mar 16 2014, 05:31 PM
Hi Lars,
I found your thread so get updating now..
Posted by: Ferg Mar 16 2014, 09:13 PM
Lars has been busy finishing his other car...
See here:
http://forums.pelicanparts.com/porsche-911-technical-forum/557256-time-dig-softie-conversion.html
It's almost done, so 914 is next up I believe. I will alert him that he is neglecting us 914 folks
Ferg
Posted by: Luke M Mar 17 2014, 09:52 AM
Lars has been busy finishing his other car...
See here:
http://forums.pelicanparts.com/porsche-911-technical-forum/557256-time-dig-softie-conversion.html
It's almost done, so 914 is next up I believe. I will alert him that he is neglecting us 914 folks
Ferg
Lars and I have been communicating for some time about his projects and parts. We just exchanged emails over the weekend and figured this may motivate him to update his thread over here. I know he likes to hang over on the Pelican site.
Now that Andy and Marv are almost done with their cars I'm trying to drag Lars back here so we have another car to watch being restored.

Posted by: Speedo Mar 17 2014, 07:42 PM
Ok, ok...
I am done (pretty much) with the 71 targa softie conversion. It came back from the painter (way late...like 11 months) and I had picked up the 6 in the interim. The six was already on the rotisserie and the welding and grinding had to stop when the freshly painted car next to it came back home. Now that 71 car is mobile and I can move it to re-start working on the 6. I have more than enough sheet metal to finish the 6, I just need to get motivated after being focused else-where for a year. I have a lot of metal work to do before I commit to what engine goes back in. I have a few choices ranging from 2.0 MFI 911 S to 3.0 twin plug MFI engine. Really not sure what will happen there. Glad for Luke and Ferg to bust my chops to get this moving again...but I have been busy over on "the other side " of the Porsche world.
Cut me a month slack and then get on me.
Speedo
Lars has been busy finishing his other car...
See here:
http://forums.pelicanparts.com/porsche-911-technical-forum/557256-time-dig-softie-conversion.html
It's almost done, so 914 is next up I believe. I will alert him that he is neglecting us 914 folks
Ferg
Lars and I have been communicating for some time about his projects and parts. We just exchanged emails over the weekend and figured this may motivate him to update his thread over here. I know he likes to hang over on the Pelican site.
Now that Andy and Marv are almost done with their cars I'm trying to drag Lars back here so we have another car to watch being restored.
Posted by: Ferg Mar 17 2014, 08:53 PM
I'll cut u a little slack as long as we are riding in that time.
Posted by: Speedo Sep 22 2014, 07:33 PM
I'll cut u a little slack as long as we are riding in that time.
I have been riding a ton...although not with big Mike, and cleaning up room in the shop, and sending the soft window targa to storage. Now I have room, and no excuses. I like building engines, and I am behind. The 6 came with it's 2.0 (pickled) and a supposed 2.7 RS spec engine with carbs. I trust the PO on the RS spec side, but as it was a 90s build and I couldn't get it to run right on the webers...I tore it apart to see exactly what was inside. It was built on a 911/81 73.5 CIS case. It had some machining done to the case, heads etc so it was a built engine. The CIS injector sleeves had been machined and plugged. turns out the plugs were the same sizes as the MFI injectors. Well, if the case was set up, and the heads were set up, what are the cams and pistons? Well the pistons are Mahle 90mm 8.5 cr so they are correct, and the cams are S cams, but without the MFI pump drive on the left side. Turns out I have an extra left side S MFI drive cam in my stash (not sure where that came from) so I can swap out the left side if I want to run MFI...hmmm. So right about when I started thinking about building the engine back up to be a true 2.7 RS spec engine with the correct MFI (as I have the MFI induction)...I stumbled across a fresh 2.7 MFI RS spec engine that was built and pickled back in 1994 and never fired up. It was complete except for the right induction, but I have an extra. So I guess it was meant to be. The 6 is going to get a 2.7 RS spec MFI engine. I'm sure someone has done this before, but in the interest in making only original mistakes...if you have, please feel free to warn me about the shortcomings.
I will finish the induction on RS spec engine number one, the hurry up and complete the build on RS spec engine number two. Then with the engines out of the way, my focus is on the 6. I have all the replacement steel. Just have to get back into the measure-cut-fit-trim-weld mode. I'll post pics of the engines.
Kind of excited, as I have never personally seen a 6 run an MFI engine.
Speedo
Posted by: Luke M Sep 22 2014, 07:57 PM
Hi Lars,
How's things ?
It's about time the 6 got some loving.
Posted by: Ferg Sep 23 2014, 12:59 PM
Time for some Fall driving Lars, sent you an email. Got a new SC I should test out on your road
Posted by: Speedo Sep 24 2014, 07:13 PM
Time for some Fall driving Lars, sent you an email.
Got a new SC I should test out on your road Yeah,
You should do that...all the sheriffs up here retired, and with all the budget cuts, they haven't been replaced. You should be good to go

See you in a few minutes
Posted by: mbseto Sep 25 2014, 06:31 AM
"Love this pic "
Not to hijack, but have you climbed that rock in the background?
Posted by: Speedo Sep 27 2014, 11:01 AM
"Love this pic "
Not to hijack, but have you climbed that rock in the background?
Refresh my memory...what rock in what picture?
Posted by: Speedo Nov 30 2014, 08:04 PM
I have been procrastinating (I mean organizing). A tire shop went out of business in Boulder and he had a lot of industrial shelving...cheap. I bought two sets for the shop to get things off the ground. An engine on a dolly takes up the same space on the floor as three engines stacked on shelves. Great way to be economical with space, that's the good news. Bad news is that everything stashed against the walls of the garage on the floor needed to be pulled out for the shelves to be installed. Kind of like cleaning your room as a kid...absolutely hate the idea, but you are glad when it is done. All the cars are off to storage, and the only car in the shop is the 6 on the rotisserie. Frankly the order and space is really nice. Went to S Denver today to help a Pelican friend with the front hood latch gremlin on a car he is reassembling, and he has a huge shop/garage with 20 ft ceilings. But the floor was a disaster. Going vertical is a good thing. I have been practicing welding again...kind of a "girly thing" like ballroom dancing I guess. But I felt out of touch with my welding skills, so I spent a few days welding thin gauge steel to get my confidence level back up. I have a lot more welding to do on this car, and some of it is complicated. I circled the car a couple times to see what I could start with that was relatively easy. I didn't want to fabricate...so I needed to find something that I cut out of the donor car that I could use to repair a section. Left front lower corner behind the bumper is where I will start.
I cut the area out and started to trim my replacement part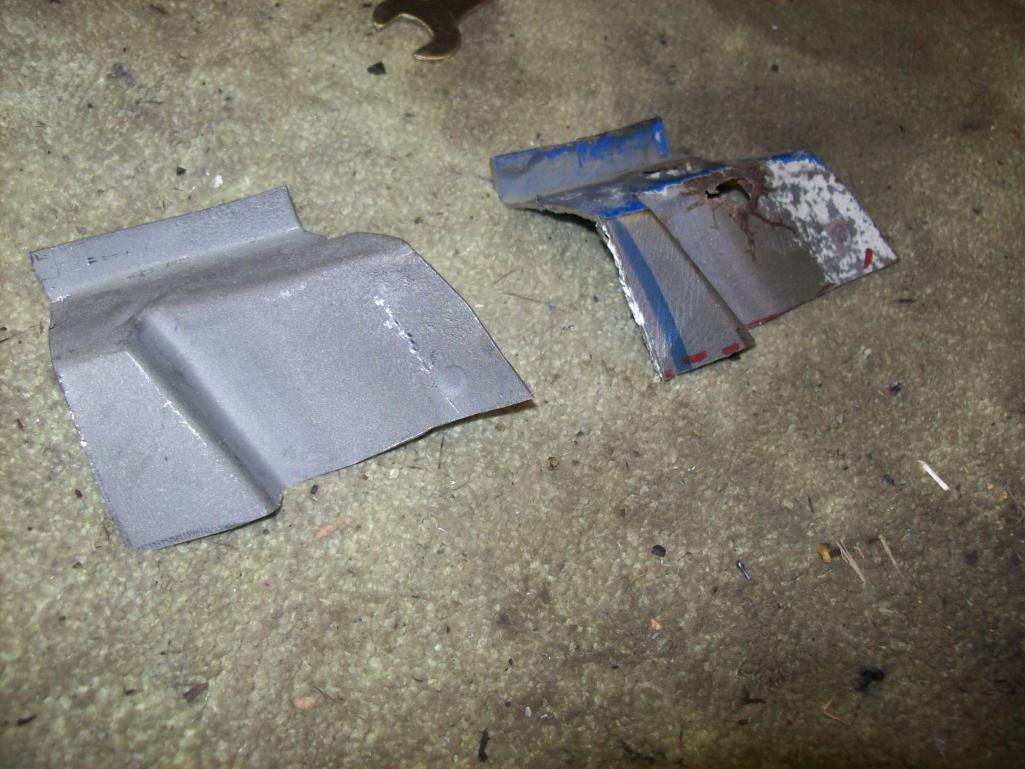
Cut and fit and cut and fit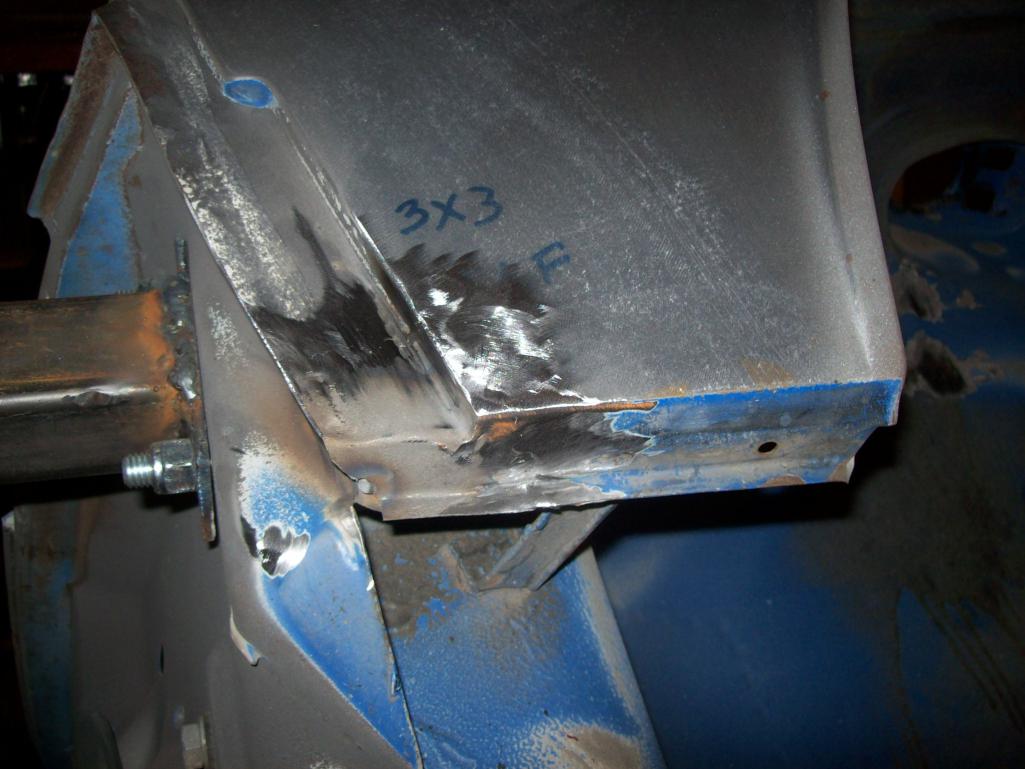
Ok...done. Haven't lost too much metal skill. More work to be done on this corner up top where the hood seal traps moisture next to the head light. Unfortunately, this little segment will need to be fabricated as it didn't get chopped out of the donor car. I think the plan is to go corner to corner clockwise.
The 2.7 RS spec MFI engine is built and waiting. If someone want to chime in as to what I am going to need to do th prepare the chassis for MFI, let me know. I realize I will be running a high pressure MFI fuel pump, will I need to run a return line? I probably will start to come up with lots of induction questions...
Posted by: Speedo Nov 30 2014, 09:04 PM
Oh yeah...forgot, this kind of gets "my juices " going again...yeah, I am weird.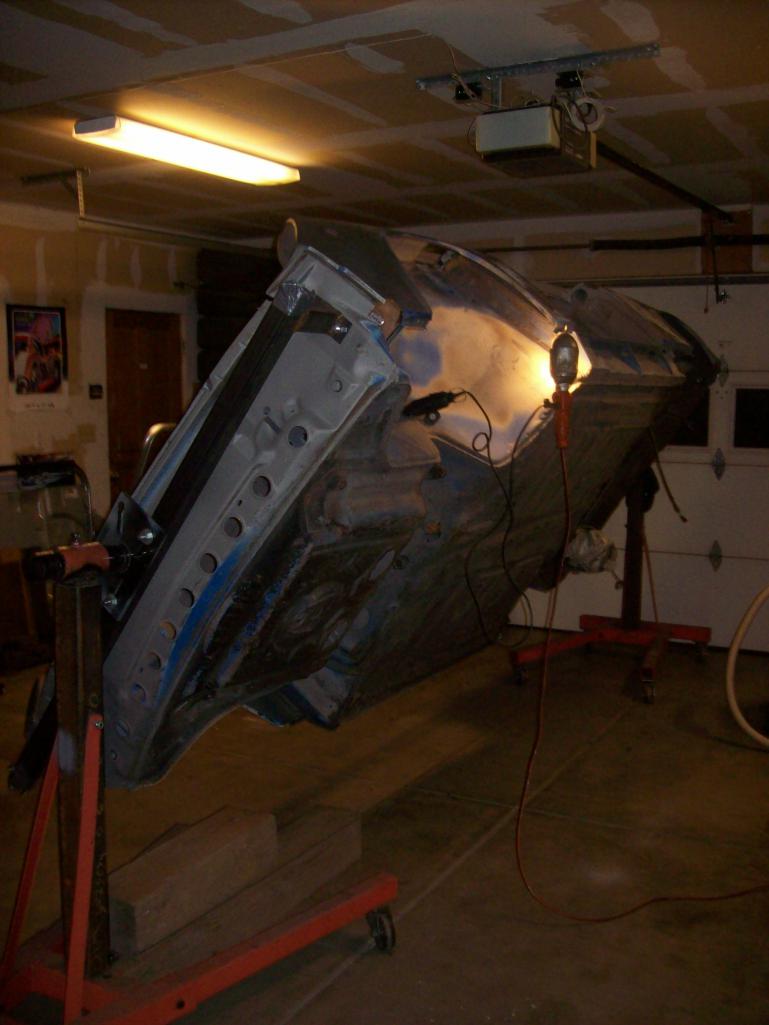
Speedo
Posted by: Ferg Nov 30 2014, 10:03 PM
 Nice work Lars!
I will visit soon.
Ferg
Posted by: Luke M Dec 1 2014, 08:10 AM
Hey Lars,
The 6 is looking good so far and Keep up the great work.
It's been a while since I saw a MFI setup running but it can't be too hard to make it work in a 914. Long ago a friend of mine had a 2.4 T MFI engine in his 914 but I can't recall how he did the fuel plumbing on it.
If you are going the MFI route then just copy the system off a 911.
I do remember him having some issues with trying to figure out the wiring. It can't be too hard now a days with all the info out on the web.
Posted by: Speedo Dec 7 2014, 09:20 PM
Weekend of welding. Cheaper than a weekend of wedding. Need to clean/dress up some welds and post pics. MFI question ; I am familiar with 911 gas tanks...some of which have a port in the tank for a return line. Does the 914-6 have a return line for the carbs...I can't remember? If It does, I am cool, if not I need to figure one out.
With all the trouble I have had in the last several years with painters...(Ferg, this is not about you) I have almost decided to create a booth and paint the car myself. Not looking forward to that, but unless an ethical, reasonable, non-meth-head-painting-fumed-brain painter surfaces soon, I will start to head down that highway.
I am looking for an LE project guys...prefer a creamsickle vs a bumblebee but will consider all ideas. Brant, where are you? Hibernation? You are normally busting my chops about progress. The racecar may come home this winter to decide whether it gets tweaked for next year, or un-race-car-ed.
Speedo
Hey Lars,
The 6 is looking good so far and Keep up the great work.
It's been a while since I saw a MFI setup running but it can't be too hard to make it work in a 914. Long ago a friend of mine had a 2.4 T MFI engine in his 914 but I can't recall how he did the fuel plumbing on it.
If you are going the MFI route then just copy the system off a 911.
I do remember him having some issues with trying to figure out the wiring. It can't be too hard now a days with all the info out on the web.
Posted by: brant Dec 7 2014, 10:26 PM
The tank has a return nipple.
I've painted two cars. It's hard work. Got to be a guy somewhere
Posted by: Speedo Dec 8 2014, 08:17 PM
Ok,
If you don't want to look at welding...stop here as that is pretty much all of what is going to be posted till this thing gets painted by Brant. BTW, thanks for sharing your experience Brant...and offer!
For reference, I and going around the car clockwise and will finish at the A pillar on the drivers door. Still on the drivers side...channel where the fender is spot welded to the inner fender...not nice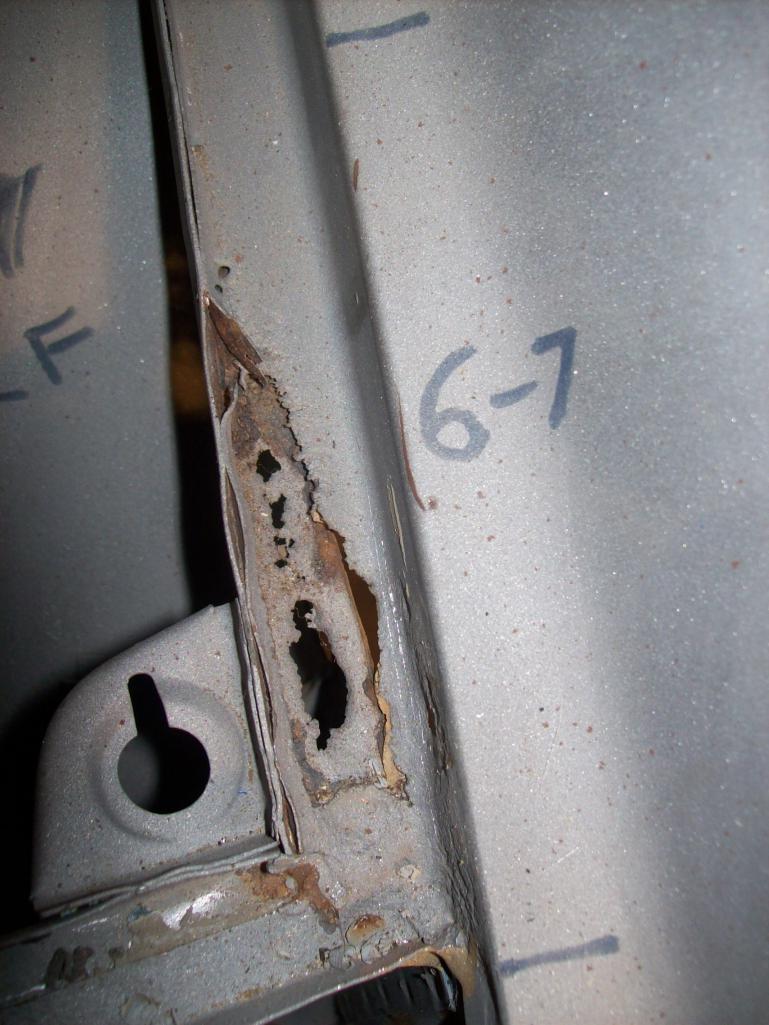

From the inside of the fender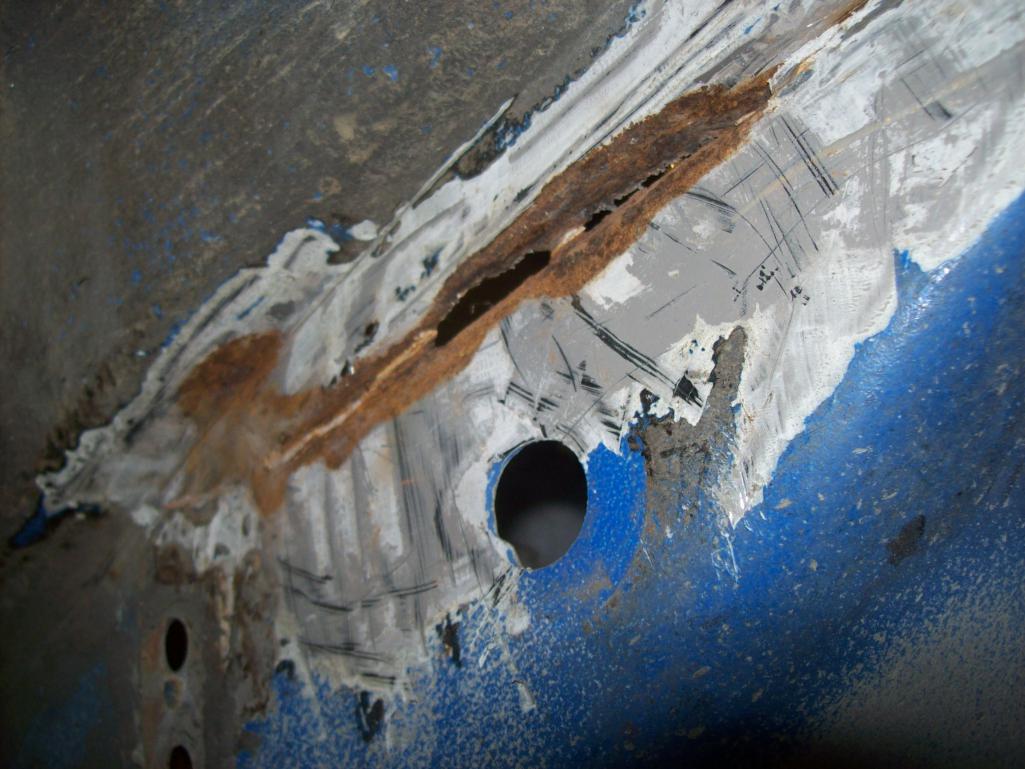
As I am learning on 914's you have to peel back the layers of the onion. First have to cut away the fender to repair the inner fender. 
Posted by: Speedo Dec 8 2014, 08:25 PM
Sorry for the double post...someone show me how to edit please. I am not going to do a running commentary...but I will just show the steps I had to go through and the finished product.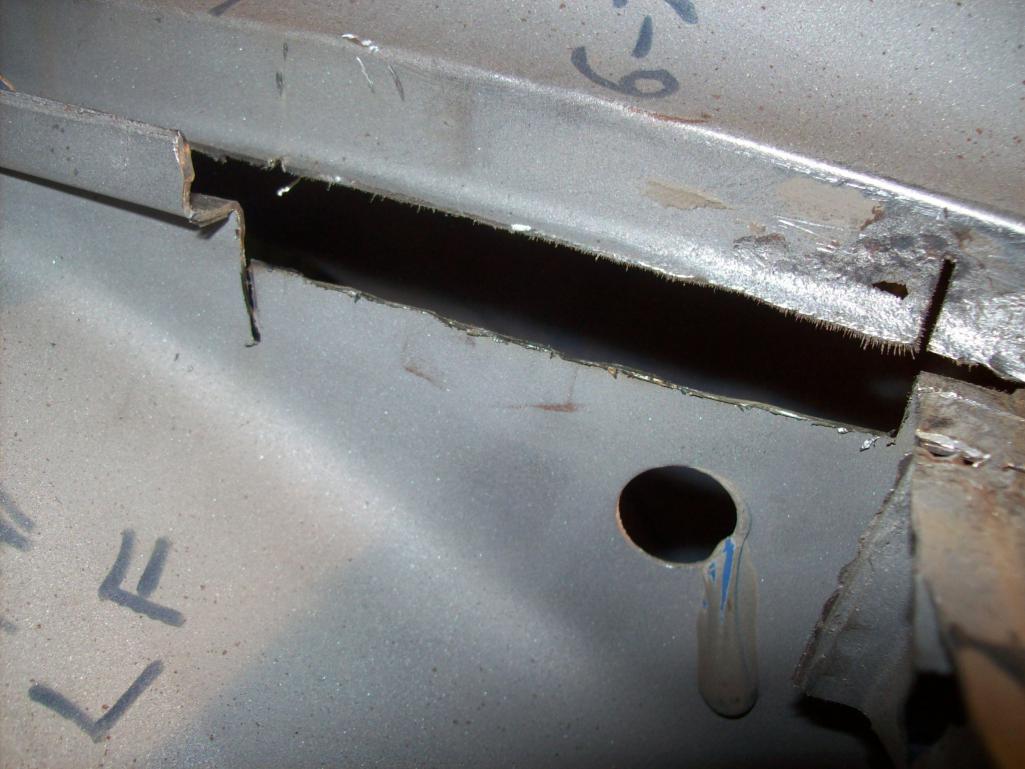
Getting the inner fender replacement part dialed in
Posted by: Speedo Dec 8 2014, 08:31 PM
Easier to work on the car when it is horizontal on the rotisserie...no wait!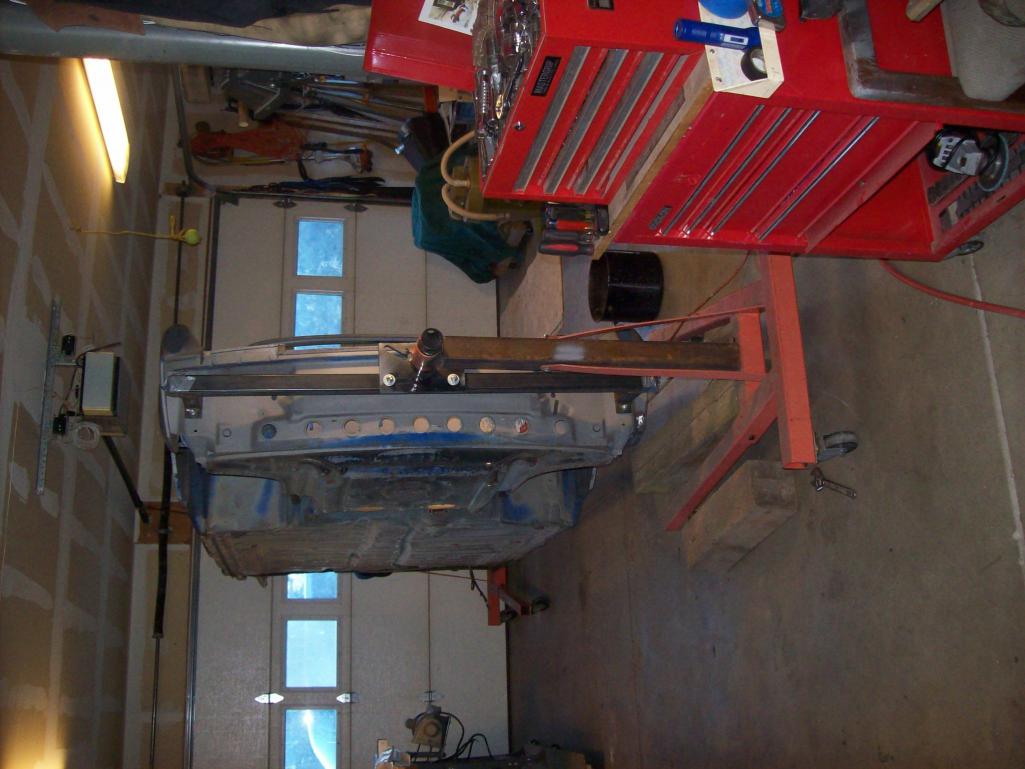
Trial fit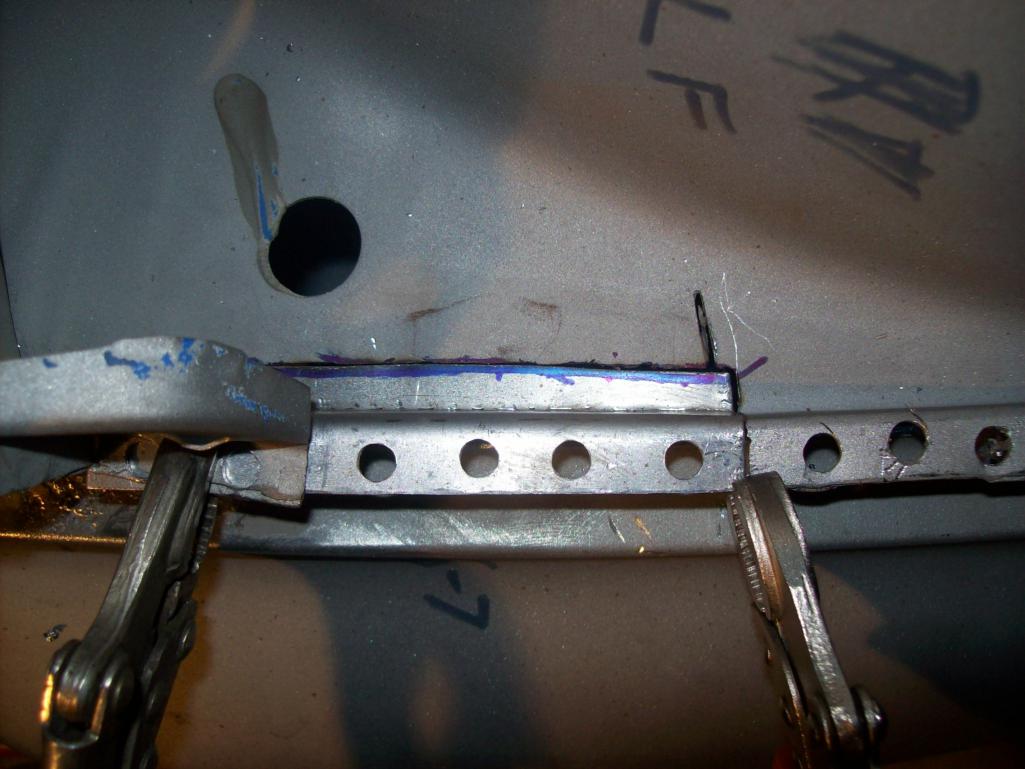
Fitting the fender side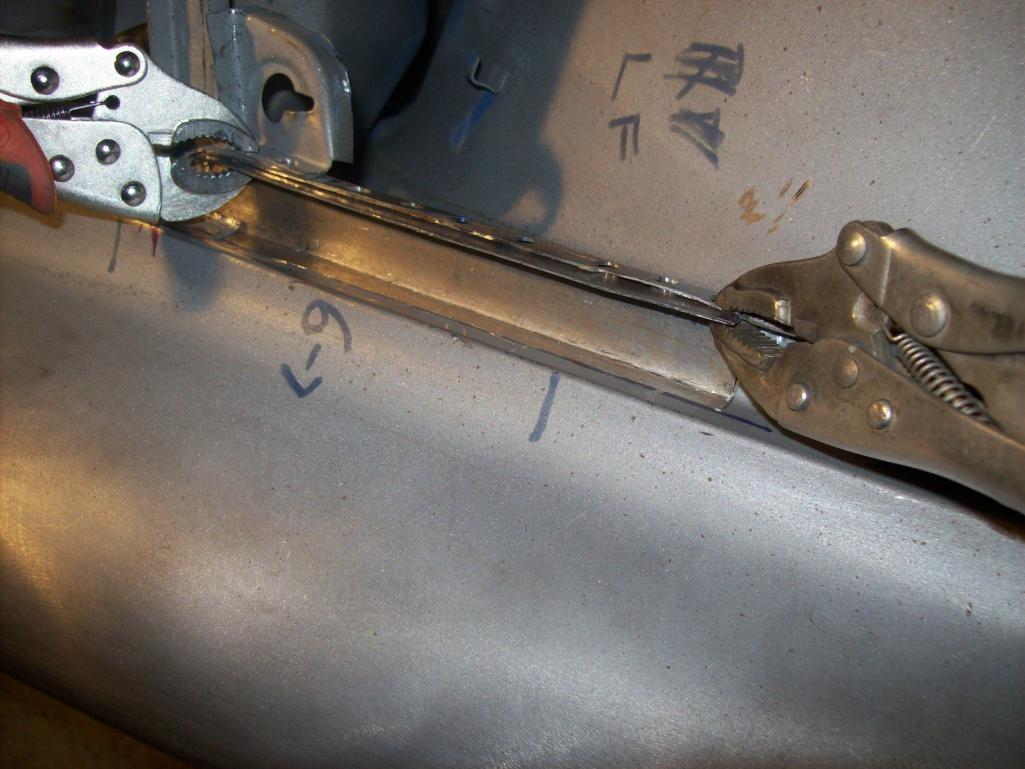
Posted by: Speedo Dec 8 2014, 08:43 PM
All in...fender patch welded to inner fender patch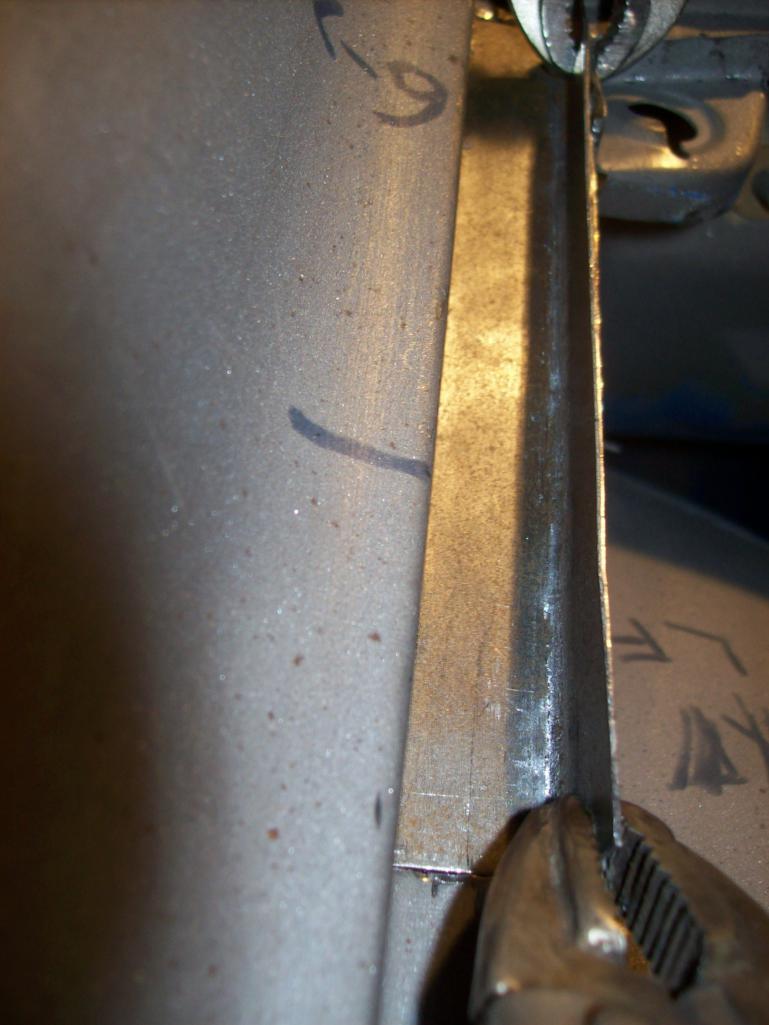
Done. Now I have some weak areas on the channel that need to be replaced or repaired. I normally would replace the weak sections, but I have been experimenting with building up the steel by welding in material. Kind of like welding toilet paper. I am using a MIG not a TIG so I have to be careful not to breathe or burp. This is how I set it up...
There were 6 areas in the front trunk area that had weak channels. I used the same copper back shield to build up material and a series of flapper wheels to take down the excess. Worked great. A lot easier than splicing in short pieces of angle.
Posted by: Speedo Dec 8 2014, 08:49 PM
Right side wiper divot is next as we go clockwise.
I have a transplant candidate that wants to play...
This will be tight. Need to figure out the smallest possible area to replace.
Next on the list is the corrosion at the door release/wing area on the passenger side.
Slowly but surely
Posted by: altitude411 Dec 8 2014, 08:53 PM
Nice work! Thank you for posting.
Posted by: haycait911 Dec 10 2014, 09:01 PM
you need some of these Lars. they keep a perfect gap and level the panels.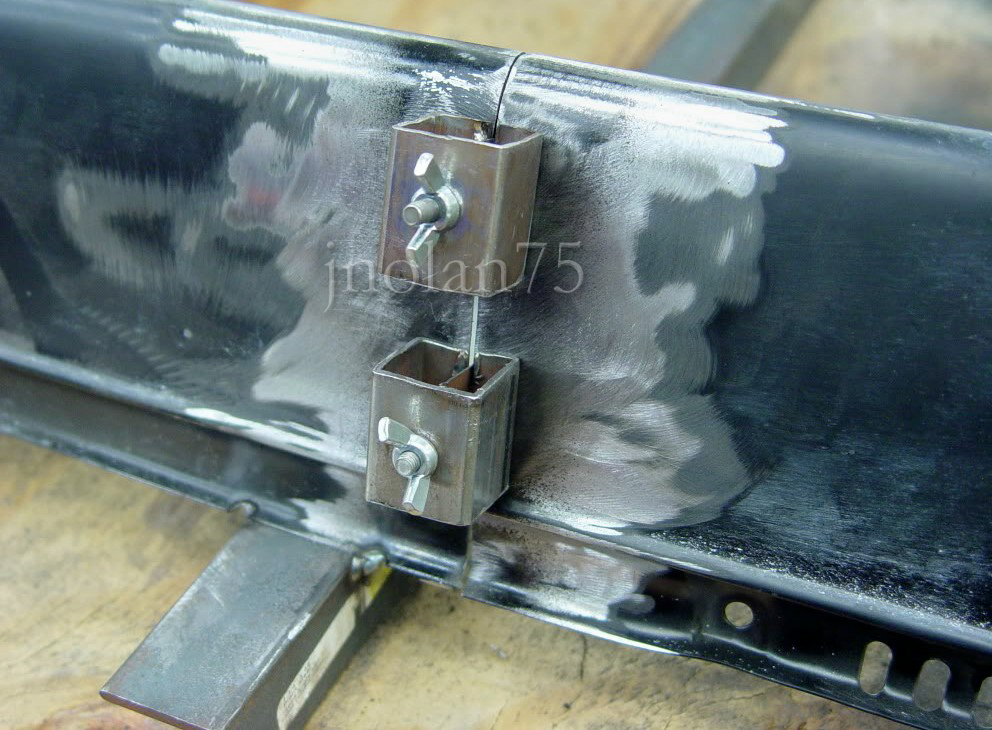
Posted by: Speedo Dec 10 2014, 10:45 PM
Ok wise-guy I have sets of those but they are only usefull in larger open areas. Not -so-much in tight areas with corners...have any cheap TTDs for sale?
Speedo
Posted by: veekry9 Dec 10 2014, 10:56 PM
2 small thin washers+pop-rivet.
use small dia shank rivets.
3/8"-1/2"dia spot to clear.
I used a rat tail file to clear the rivet shank if needed.
Works.
Any one here using Clecos?
http://www.aircraftspruce.com/search/search.php
Posted by: Speedo Dec 11 2014, 11:22 PM
I use clecoes...but your gap is 1/8th inch. Great for lap welding...like flares, but I am doing less lap welding and more butt welding. Clecoes do a great job. Grew up with them building experimental aircraft...good old EAA. Mis my trips out to Oshkosh.
Speedo
Posted by: Speedo Dec 13 2014, 08:01 PM
Trying to be better about documenting repairs. This one is tricky as it is non structural and visible. PO did a nice epoxy repair sometime in the past.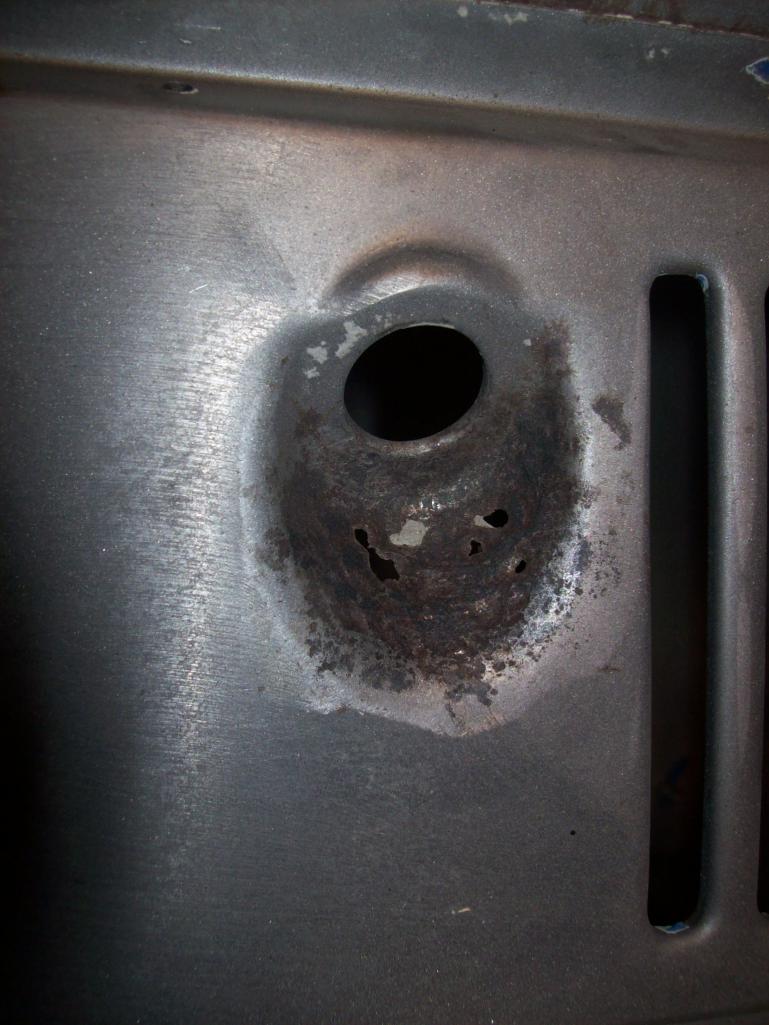
My donor steel and trimmed using my new old school B1 shear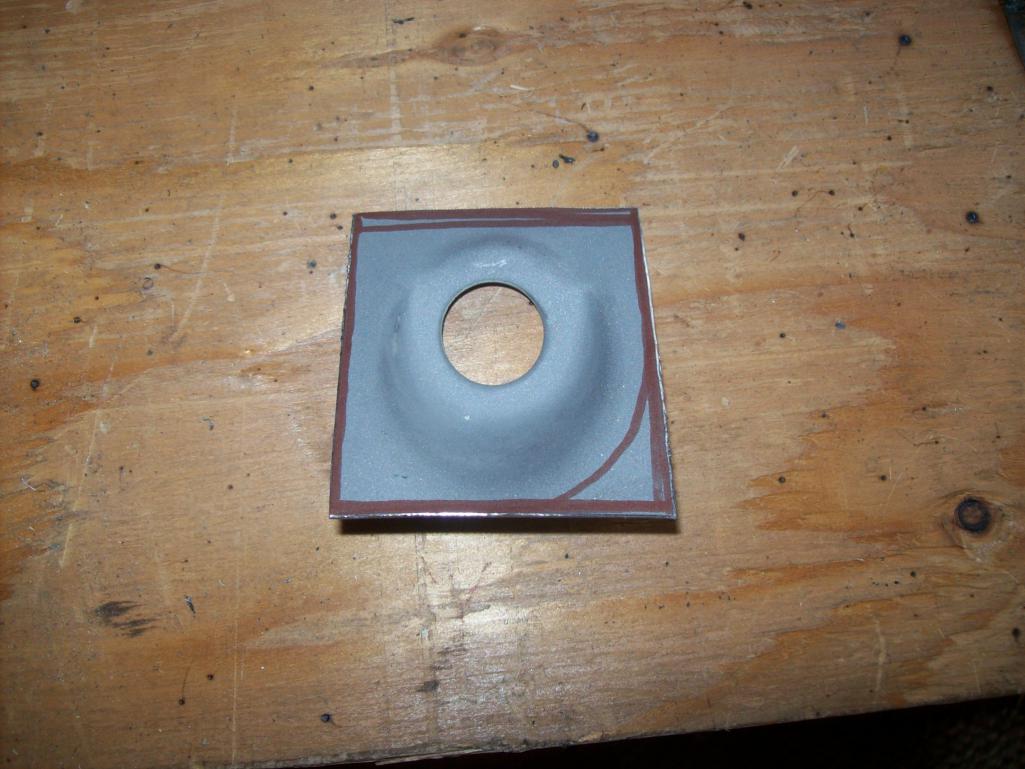
Attached thumbnail(s)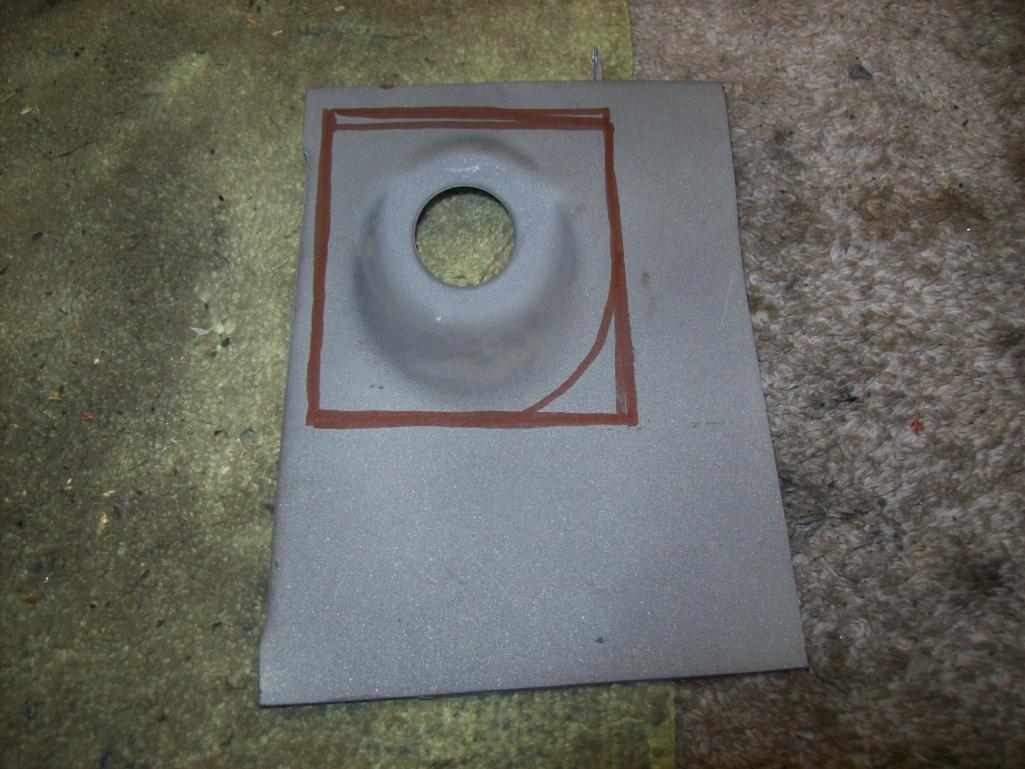
Posted by: Speedo Dec 13 2014, 08:09 PM
I was going to cut an oval to avoid the 90 degree corners but decided against it. Scribing using the donor to determine how much steel to remove...too little will be trying to weld rusted thin steel, too much will encroach on the vents in between the wipers.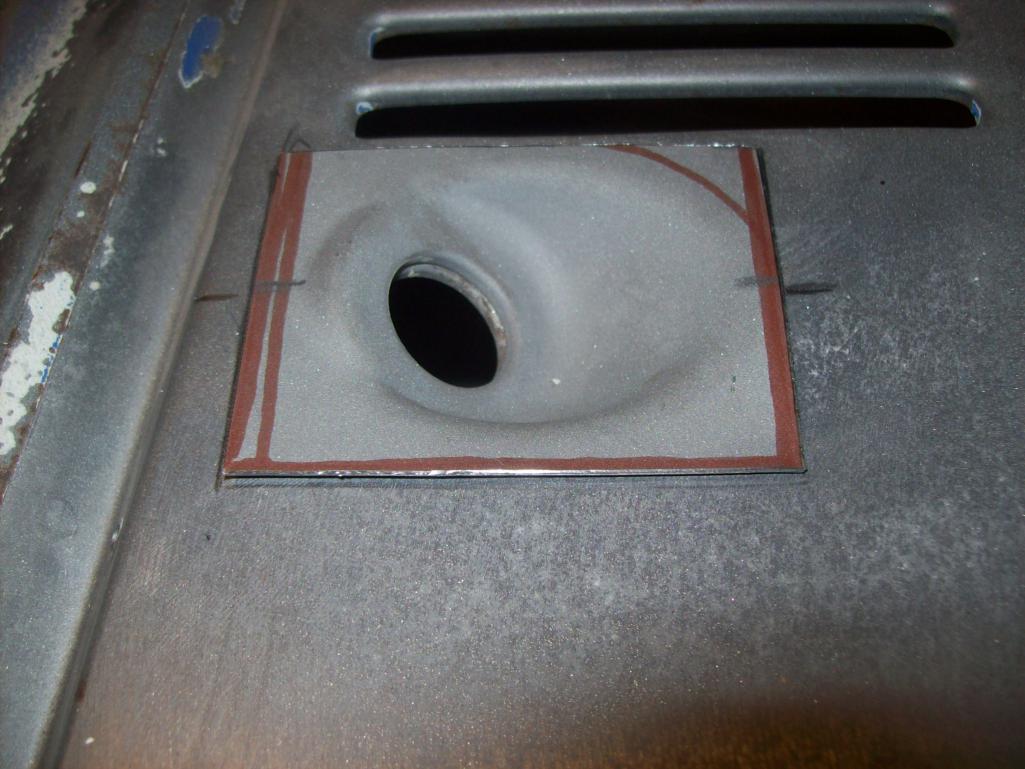
Comparing what was bad with the donor 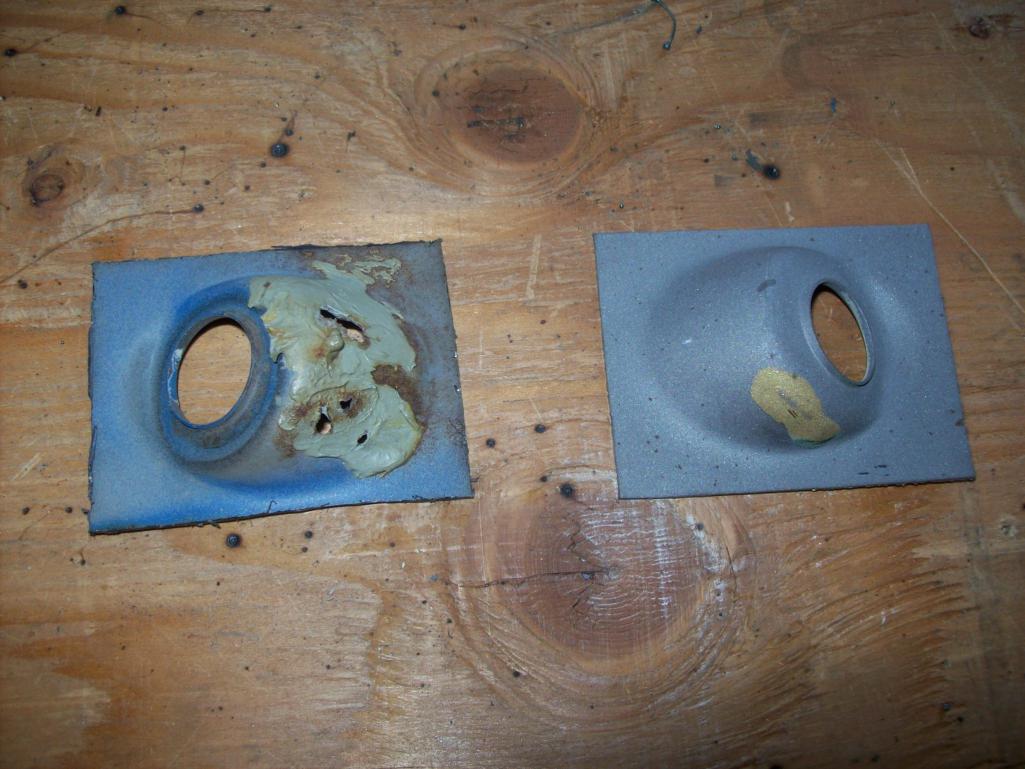
Trimmed and sized 
Tacked and welded
Posted by: Speedo Dec 13 2014, 08:23 PM
Cleaned up after massaging the welds
Passenger hood corner is thin and I will use some copper backing to build it up. Rust is all gone, and it is non structural...plust it will be hidden by the hood gasket 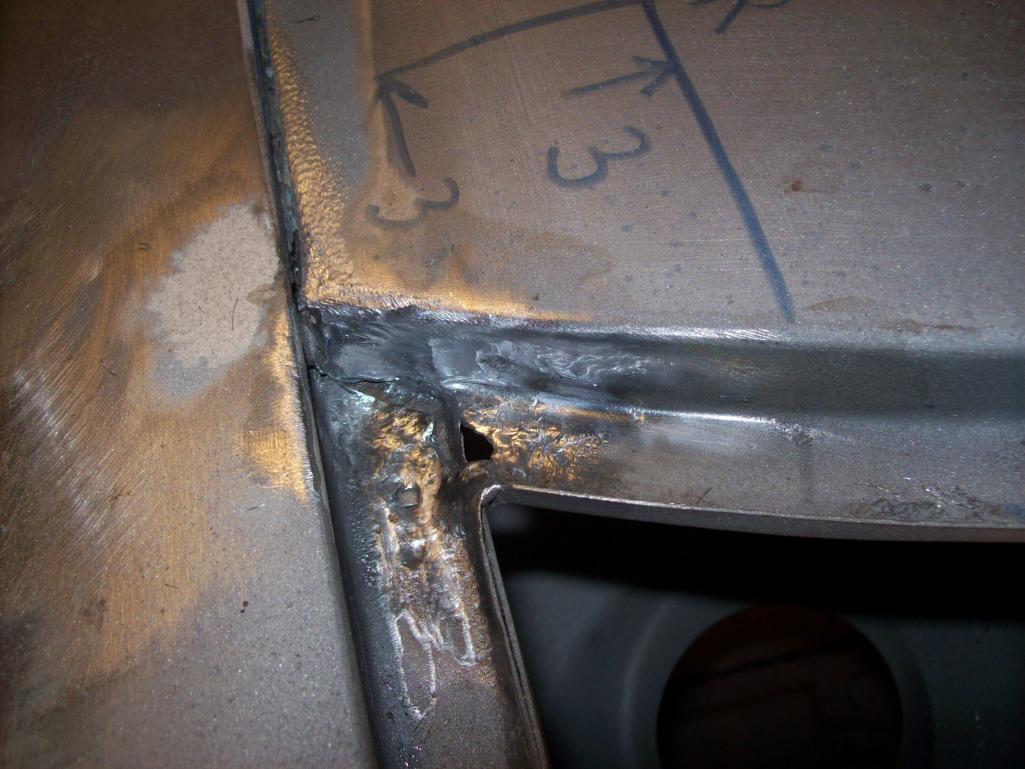
Backside shows that it is not serious 
With a copper heat sink behind this was welded, cleaned up and we moved on 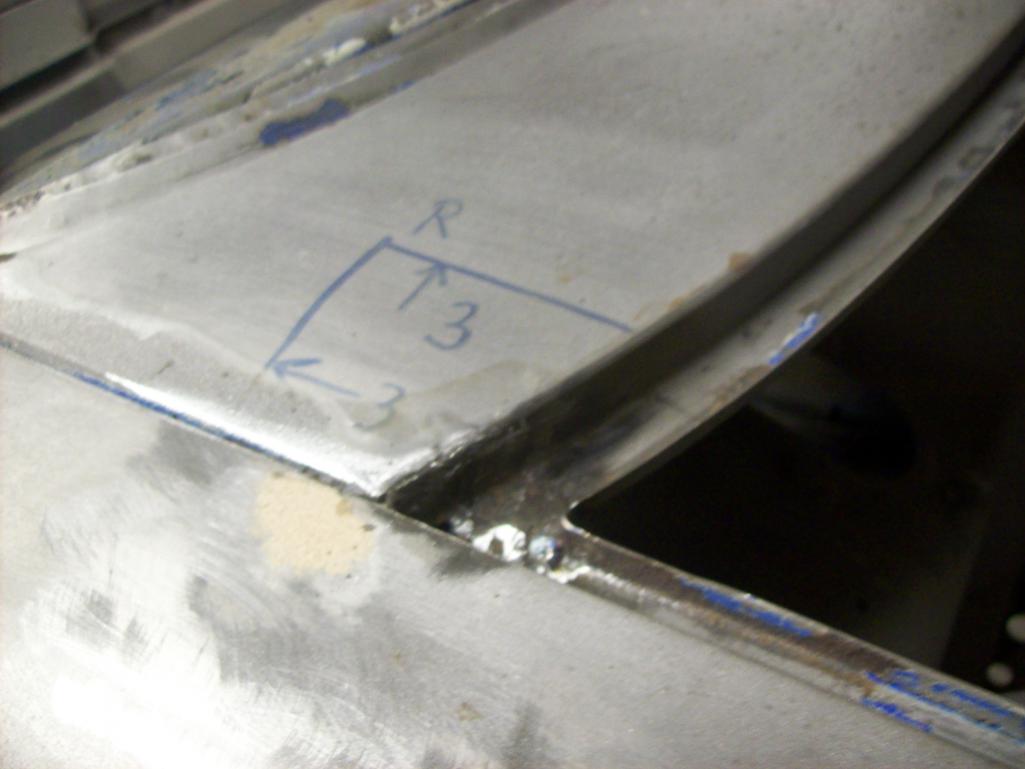
As we continue clockwise, I have an issue with the catch-all are behind the passenger door latch (I have the same issue on the drivers side). 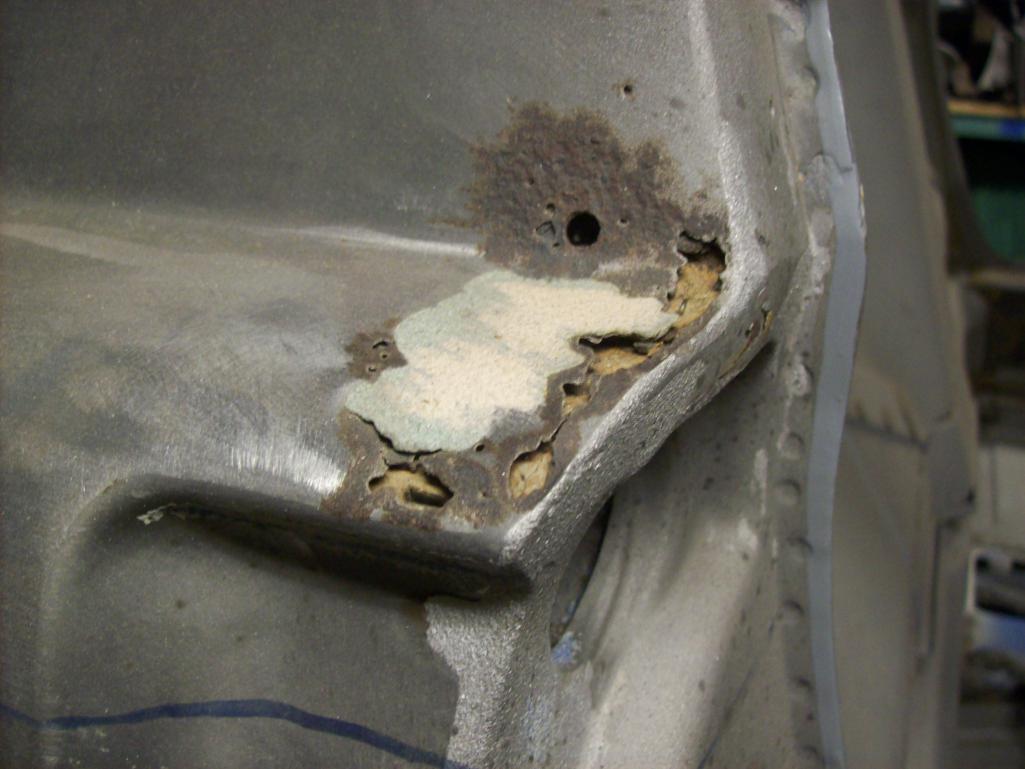
This too will be tricky as it is very visible and mistakes not easily hidden. I will peel back the layers of the onion tomorrow. Looking up from the forward side of the rear wheel well...there is a ton of factory under-coating and or seam sealer in this area. I am thinking I am going to be heating with a torch and scraping to get this area cleaned up so I can see exactly how far the rust has intruded.
Speedo
Posted by: dw914six Dec 13 2014, 08:58 PM
Hey Lars,
The 6 is looking good so far and Keep up the great work.
It's been a while since I saw a MFI setup running but it can't be too hard to make it work in a 914. Long ago a friend of mine had a 2.4 T MFI engine in his 914 but I can't recall how he did the fuel plumbing on it.
If you are going the MFI route then just copy the system off a 911.
I do remember him having some issues with trying to figure out the wiring. It can't be too hard now a days with all the info out on the web.
My 1970 orange 914-6 has MFI on a 2.2S engine. Runs flawlessly. Could not ask for a better setup. You will like it.
Posted by: Speedo Dec 14 2014, 07:14 PM
Great! I am looking forward to running the MFI. Can I get some help with install/plumbing/electrical questions when the time comes? 
Will you post some pics of your engine compartment for me?
Speedo
Posted by: Speedo Dec 14 2014, 07:27 PM
Need to keep up the pace...snowed here today and a perfect shop afternoon listening to KRFC out of Ft Collins, what a great radio station.
Time to attack...drew the cutting lines. Not really sure what to expect, but need to find out what is behind this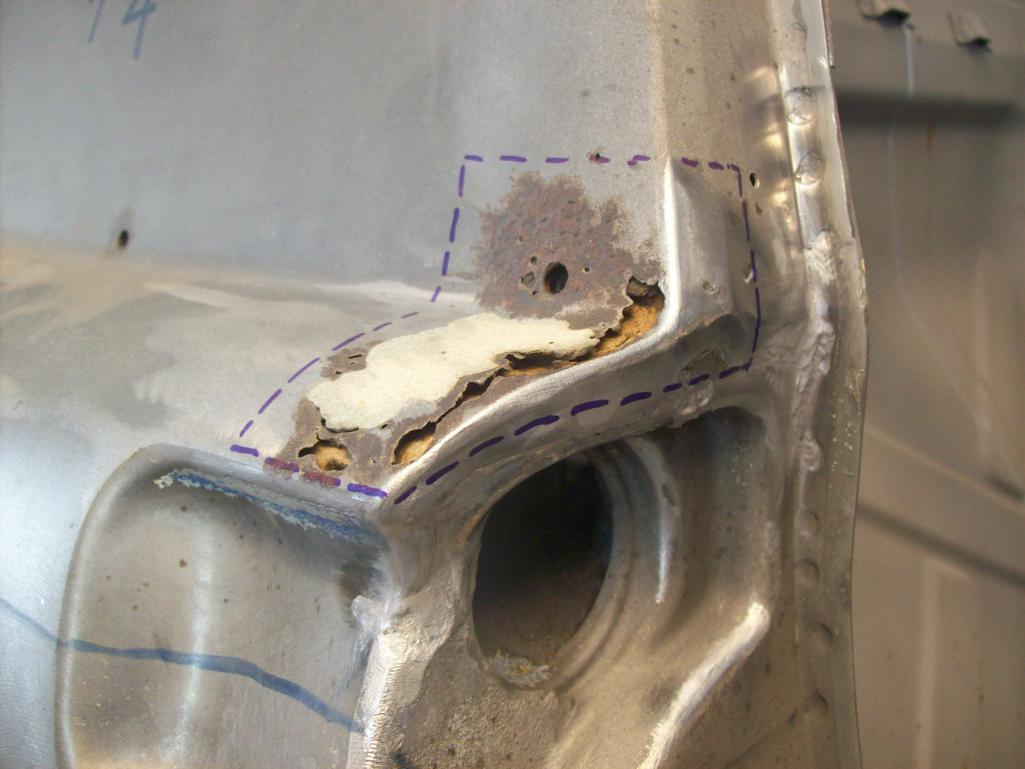
Nurse, scalpel please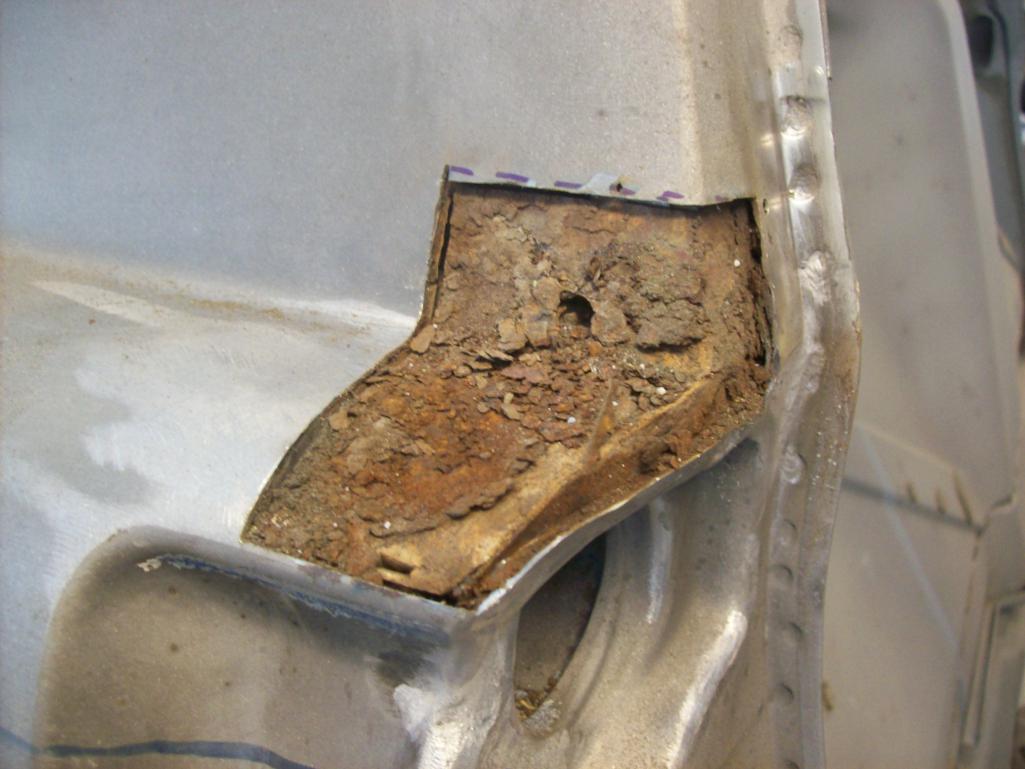
Ugh....this looks terrible. Not what I was expecting. Started to dig out the crap and realized that most of the "turd colored" stuff was the surface rust from the surrounding steel. The bulk of the mound was seam sealer. And it was a pain to get rid of. Very stiff unless heated. Softer when heated...and BTW the fumes are great. Took me an hour and a half to dig out to here 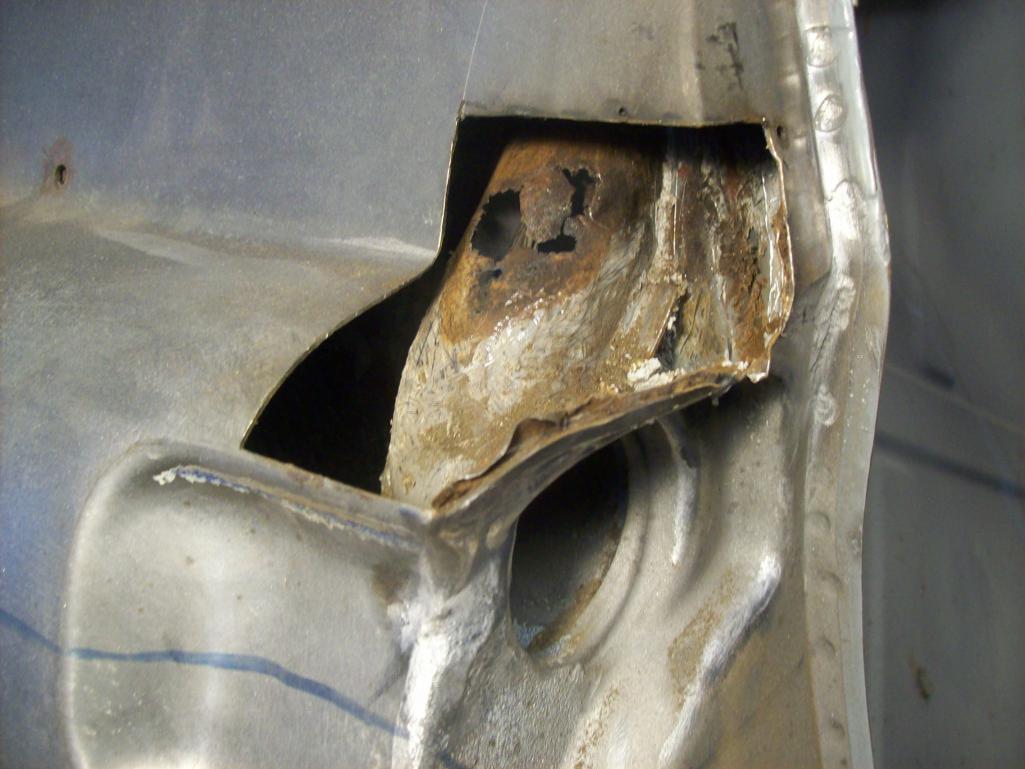
Didn't expect this...damn! 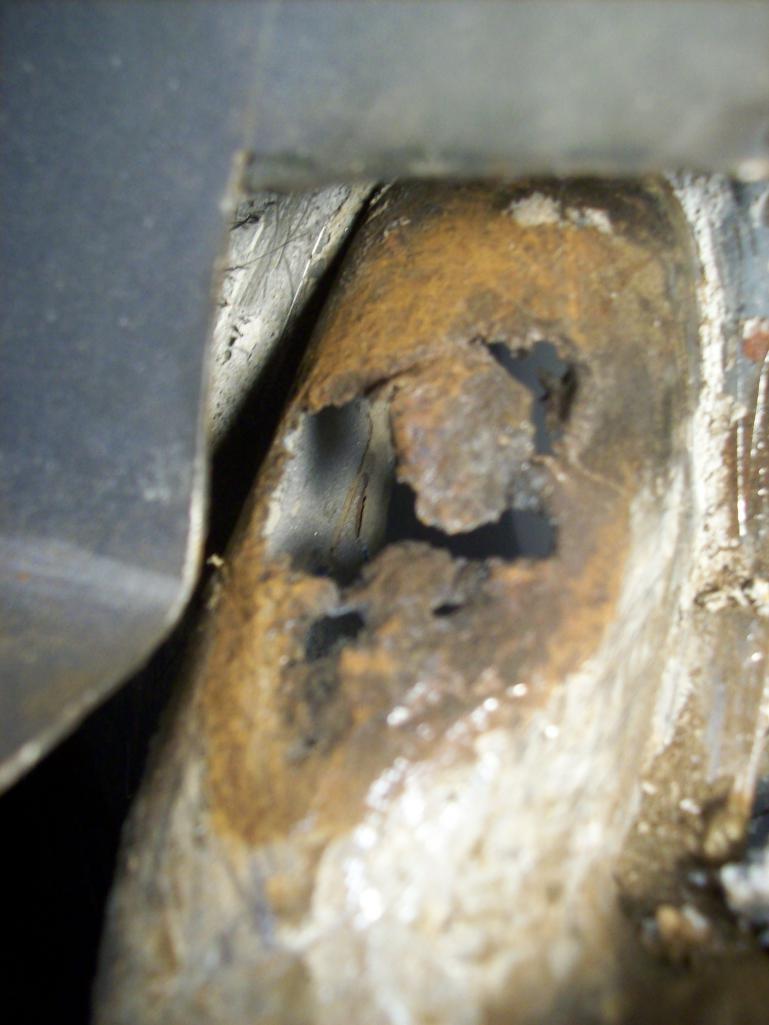
From inside the fender looking up 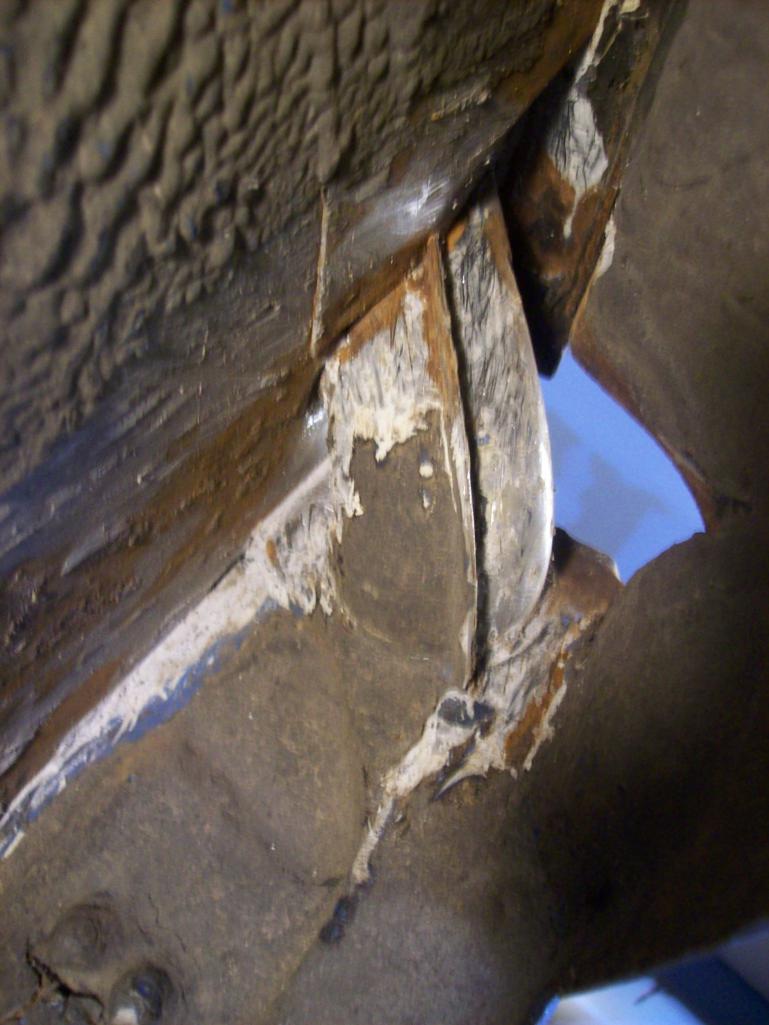
Posted by: Speedo Dec 14 2014, 07:51 PM
Ok, I am going to need more room to deal with repairing this vent tube.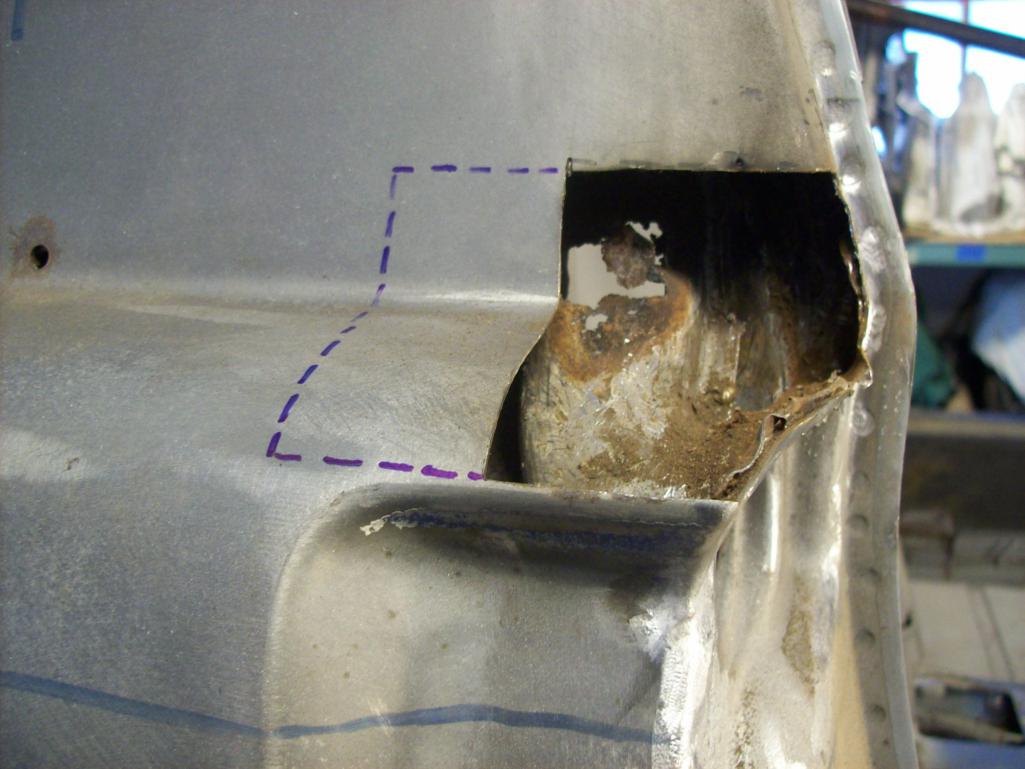
Looks sort of like "Freddie" in his hockey mask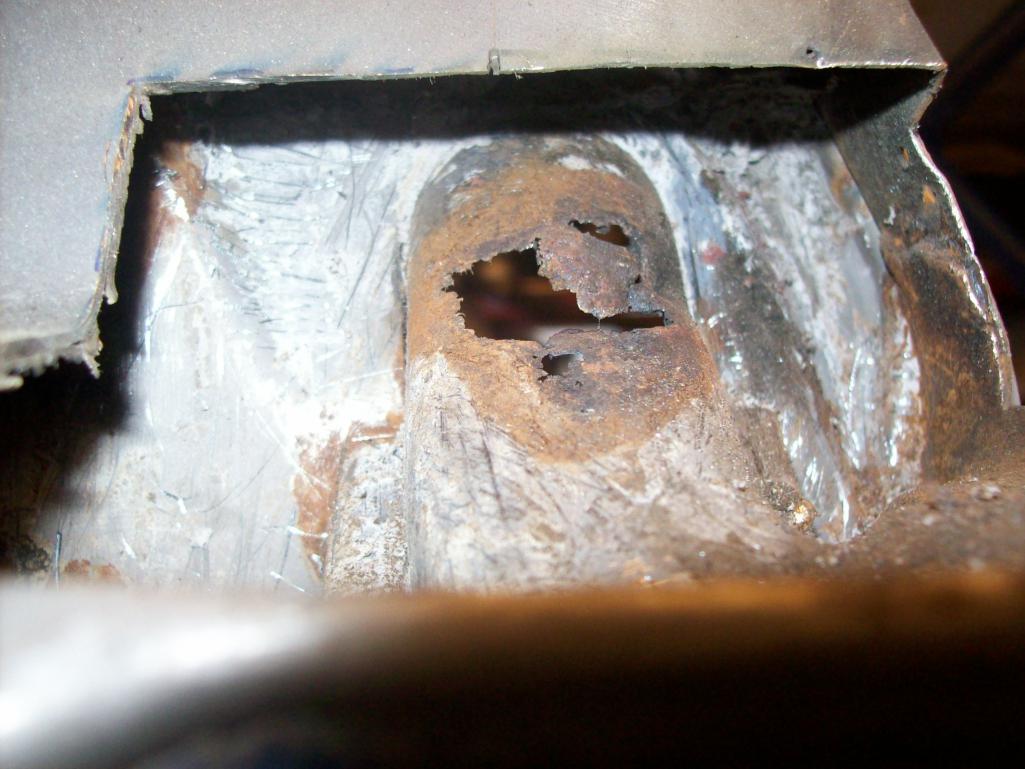
Gotta cut it out and splice a patch in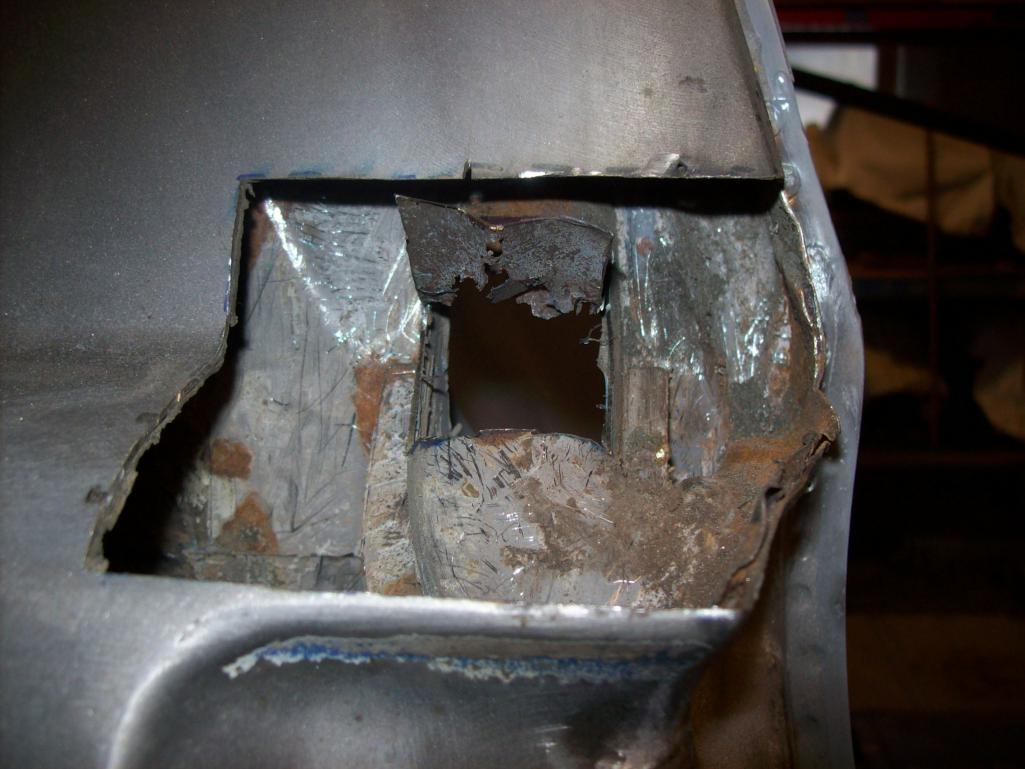
Tight quarters here, hard to access, clean up and prep
Inside looking out...rather rough factory finish to this tube...but I guess it is all covered up with the interior
Shaping the patch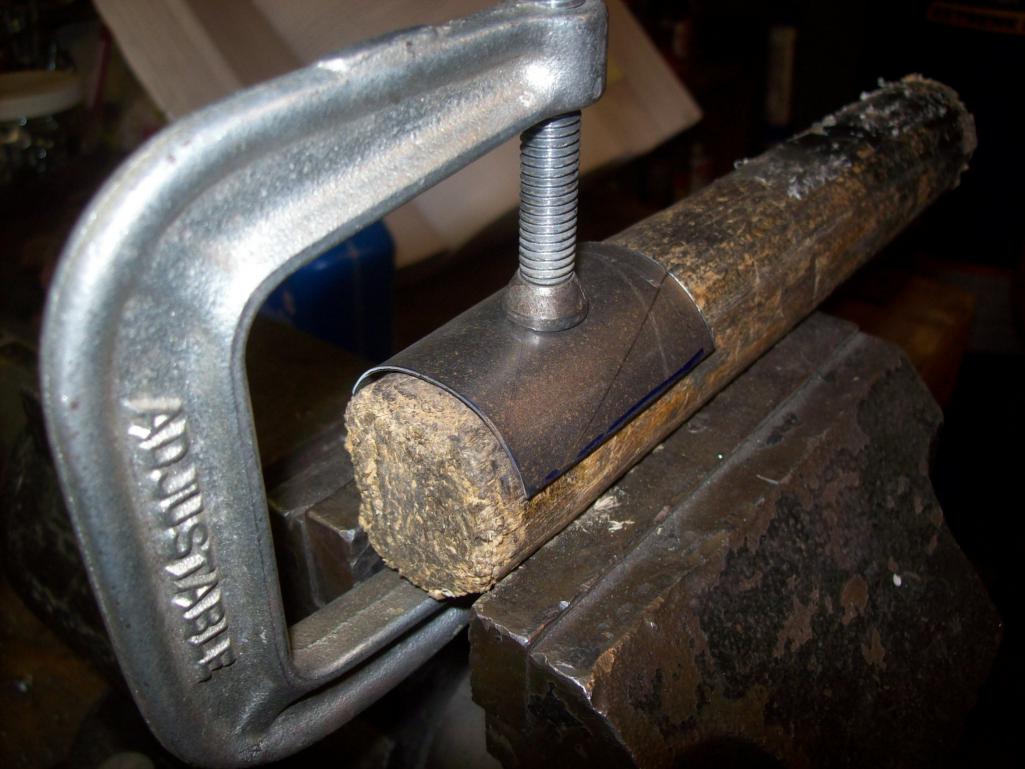
Posted by: Speedo Dec 14 2014, 07:58 PM
Fitting the patch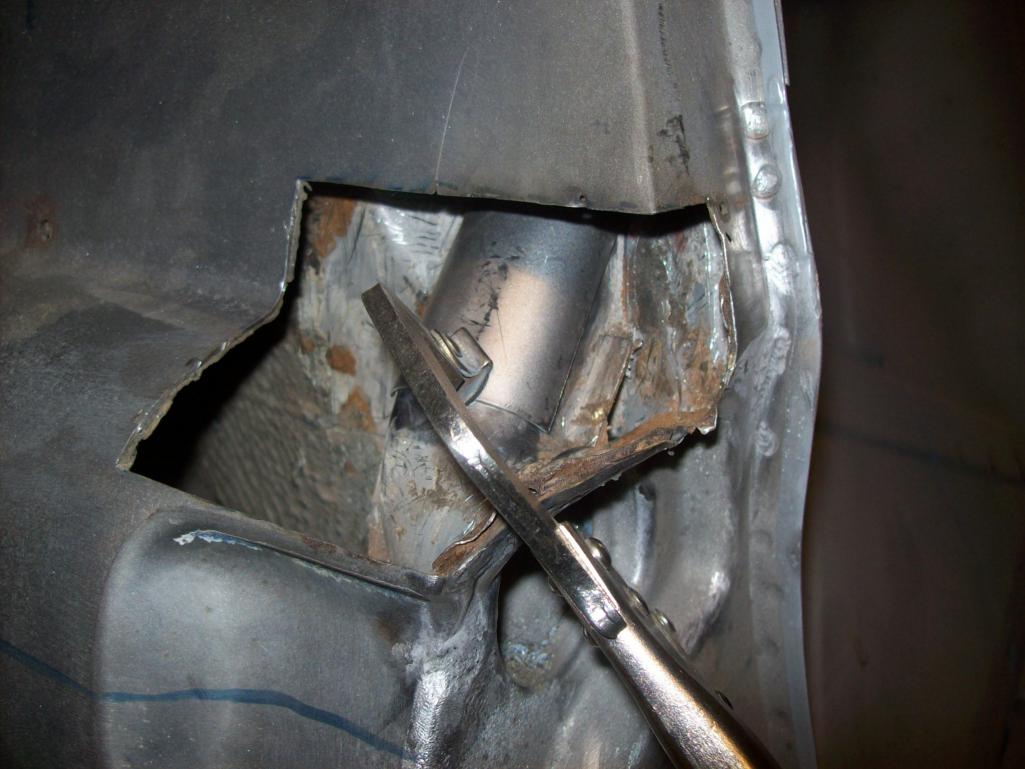
Trimmed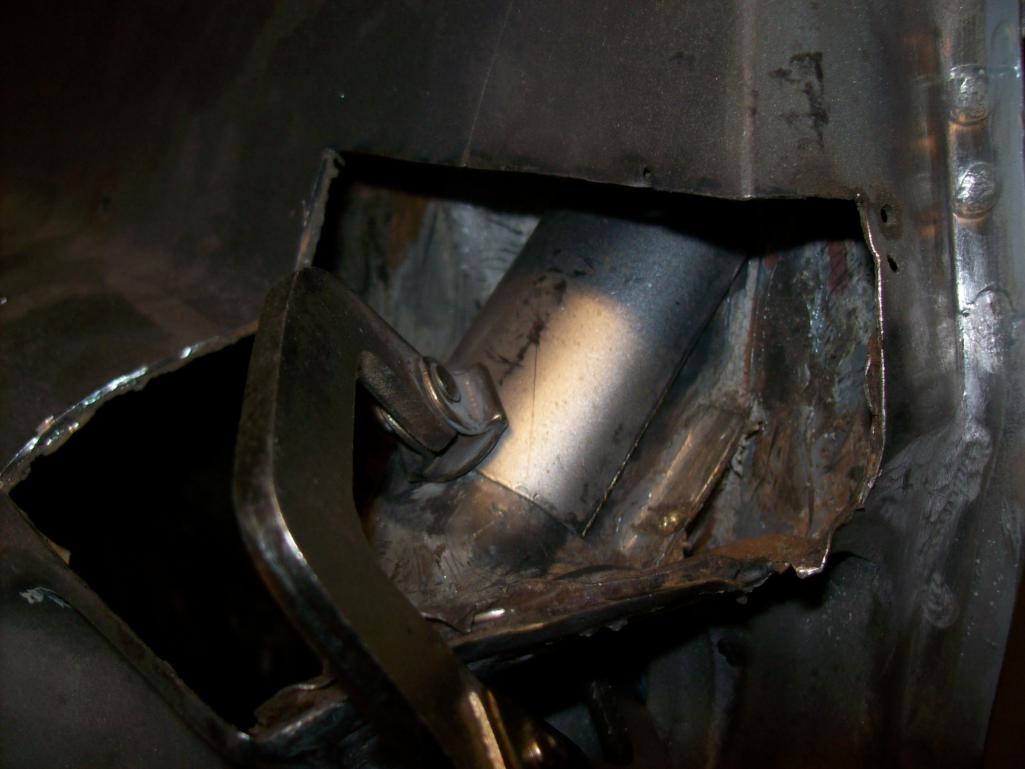
Tacked and welded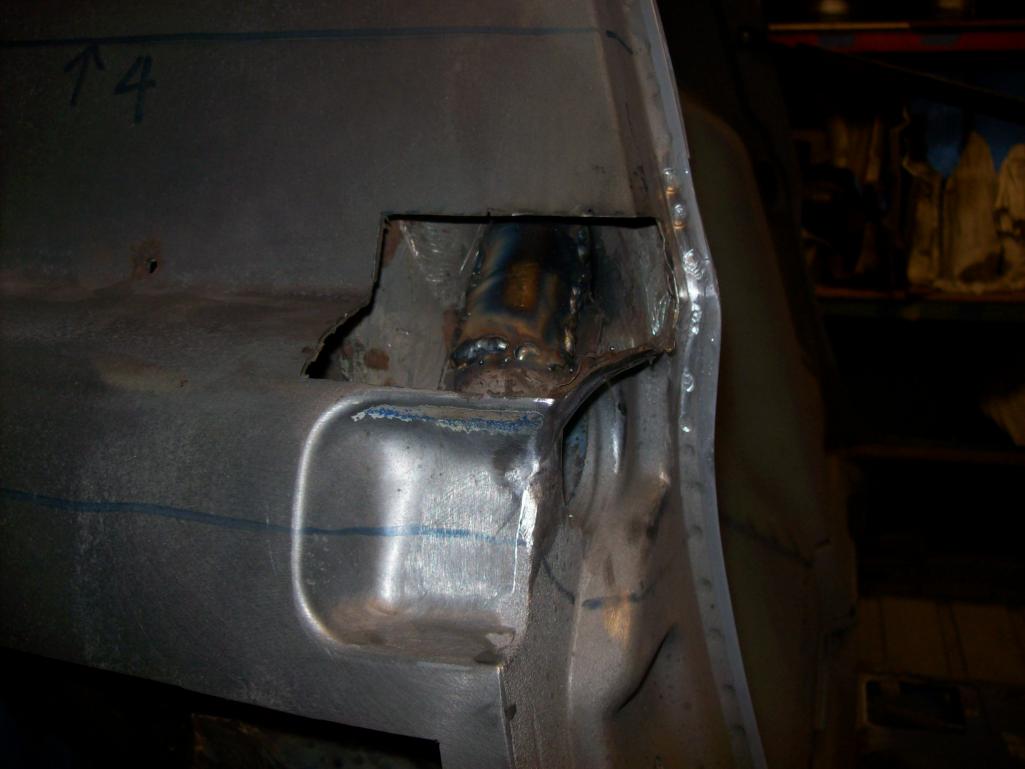
Had to do the top stitch from the inside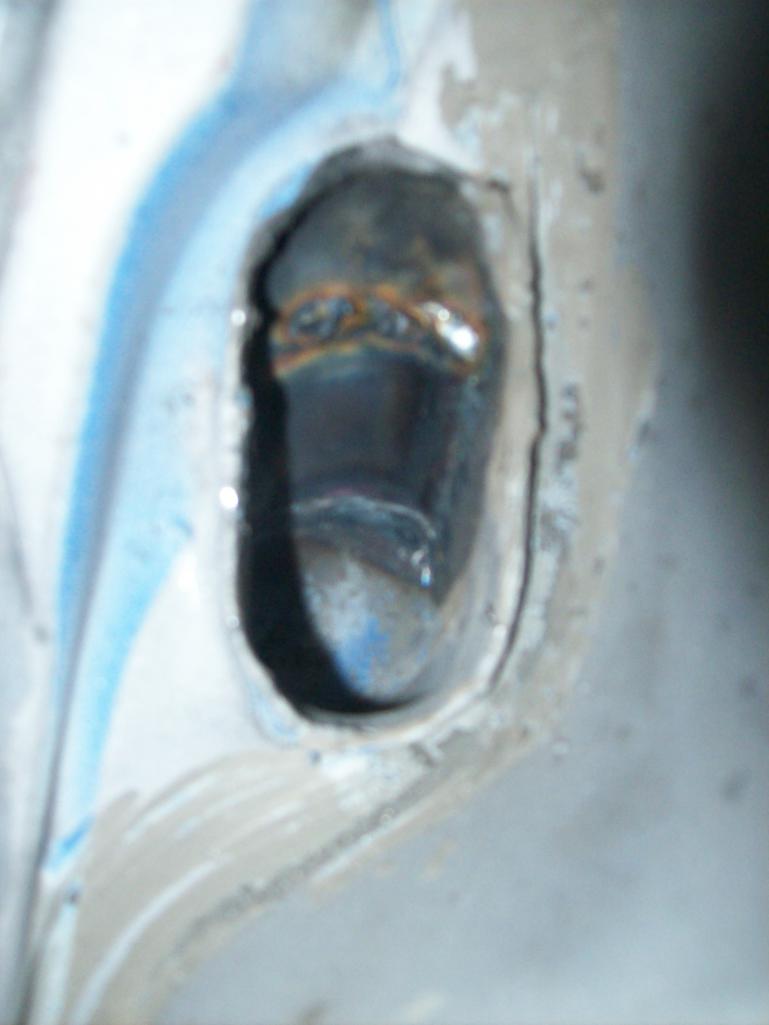
Cleaned up the patch and etch primered the repair.
Now on to the exterior skin. There is a lot going on in three dimensions here... I need to figure out the best places for the butt welds in the handle recess area.
Posted by: Ferg Dec 15 2014, 07:59 AM
nice job.
Posted by: Speedo Dec 15 2014, 03:12 PM
Just occurred to me that when I fix the perforations in this same area on the driver's side, that I am going to likely find the same mess of over-zealous use of seam sealer there too? Has anybody found the same carnage in that area before? Seriously...3-4 lbs of the muck.
Speedo
Posted by: Ferg Dec 15 2014, 03:57 PM
Just occurred to me that when I fix the perforations in this same area on the driver's side, that I am going to likely find the same mess of over-zealous use of seam sealer there too? Has anybody found the same carnage in that area before? Seriously...3-4 lbs of the muck.
Speedo
Yes, and in both rear fender corners above tail lights.
Posted by: Speedo Dec 21 2014, 09:21 PM
Just occurred to me that when I fix the perforations in this same area on the driver's side, that I am going to likely find the same mess of over-zealous use of seam sealer there too? Has anybody found the same carnage in that area before? Seriously...3-4 lbs of the muck.
Speedo
Yes, and in both rear fender corners above tail lights.
Yeah, I kind of figured that...back there. Just didn't figure on the amount applied at the door receiver. Thanks Ferg...looking forward to the rear corners. So I am still working on the passenger latch/lock area. This is tricky as it is a three dimensional area. And as my replacement piece is solid, I need to remove good and bad steel to make the replacement as easy as possible. Here is my replacement...lined up
I am feeling rather timid as this is a 3D replacement and it is not a scribe and cut situation. More of an extreme cut and fit X seven.

Posted by: haycait911 Dec 21 2014, 09:39 PM
Just occurred to me that when I fix the perforations in this same area on the driver's side, that I am going to likely find the same mess of over-zealous use of seam sealer there too? Has anybody found the same carnage in that area before? Seriously...3-4 lbs of the muck.
Speedo
Yes, and in both rear fender corners above tail lights.
Yeah, I kind of figured that...back there. Just didn't figure on the amount applied at the door receiver. Thanks Ferg...looking forward to the rear corners. So I am still working on the passenger latch/lock area. This is tricky as it is a three dimensional area. And as my replacement piece is solid, I need to remove good and bad steel to make the replacement as easy as possible. Here is my replacement...lined up
I am feeling rather timid as this is a 3D replacement and it is not a scribe and cut situation. More of an extreme cut and fit X seven.
make sure you check the fit of a door handle in the detent and compare both sides for an even gap all around. an eighth of an inch in the detent height will show up dramatically when you fit the handle/door. don't trust just measurements.
Posted by: Speedo Jan 6 2015, 09:41 PM
Santa brought me a Miller-Matic for being good last year. First thing I did was to practice...say hi to "Snork". Yeah, I am different : )
And I did do a bit more trimming on the passenger side door handle repair. Getting ready to weld up. This was a pain to get right.
 [attachmentid=482
221]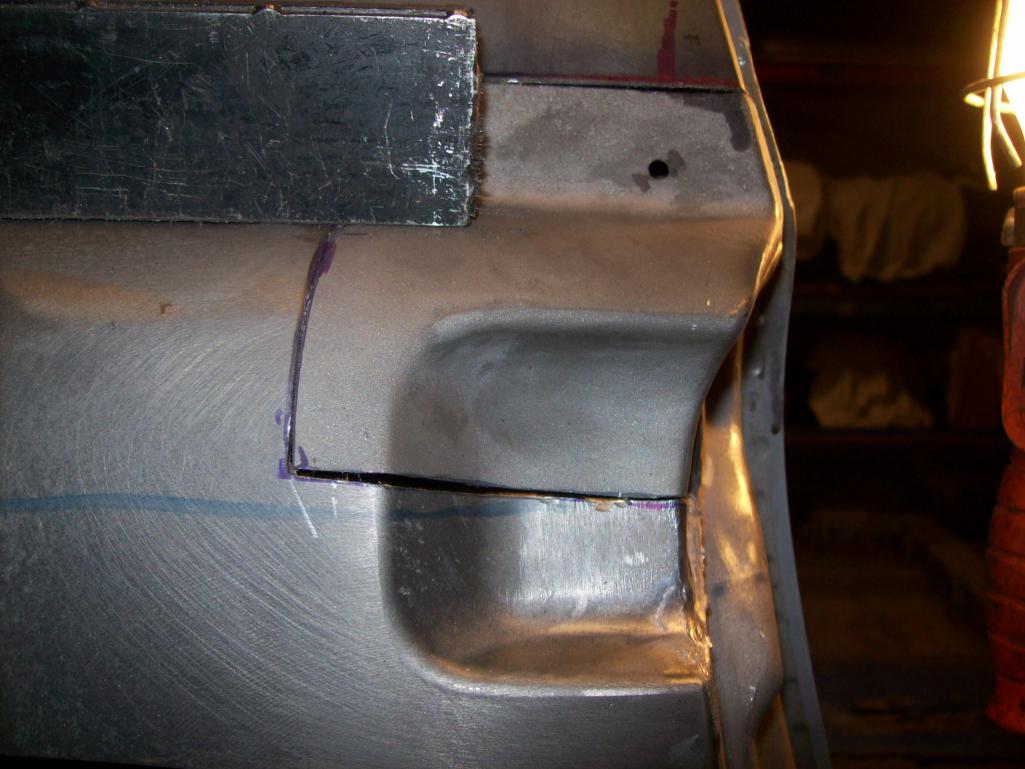
Posted by: Ferg Jan 7 2015, 09:12 AM
Snork is the perfect shop pet.
Posted by: brant Jan 7 2015, 04:48 PM
which miller did you get?
110V?
cool!
Posted by: Speedo Jan 7 2015, 08:03 PM
which miller did you get?
110V?
cool!
Got a Miller-Matic 211 both 120 and 240. The 240 is really for thick stock up to 3/8ths. I am running it on 120 for the time being although my other welder is set up for the 240 I have accessible in the shop...so that is simply a shift of two internal wires and I am good to go. Not much 3/8ths think steel on a Porsche.
Posted by: haycait911 Jan 7 2015, 08:49 PM
which miller did you get?
110V?
cool!
Got a Miller-Matic 211 both 120 and 240. The 240 is really for thick stock up to 3/8ths. I am running it on 120 for the time being although my other welder is set up for the 240 I have accessible in the shop...so that is simply a shift of two internal wires and I am good to go. Not much 3/8ths think steel on a Porsche.
try some test welds. same metal, with 120v then 240v. you'll see a difference.
Posted by: Speedo Mar 6 2016, 07:21 PM
Ok...
I am back. Other projects got in the way...but I am now on a mission. I trimmed the replacement steel to repair the passenger handle area, and stopped there. Very delicate repair and I decided to wait to weld it back up. A small rust hole on the back of the passenger sail forced me to open it up...couldn't just weld up the area...not the right way to do a repair. Once in there...it got worse. Then it got even worse.
Time to cut it out, clean it up and use good steel to replace the bad.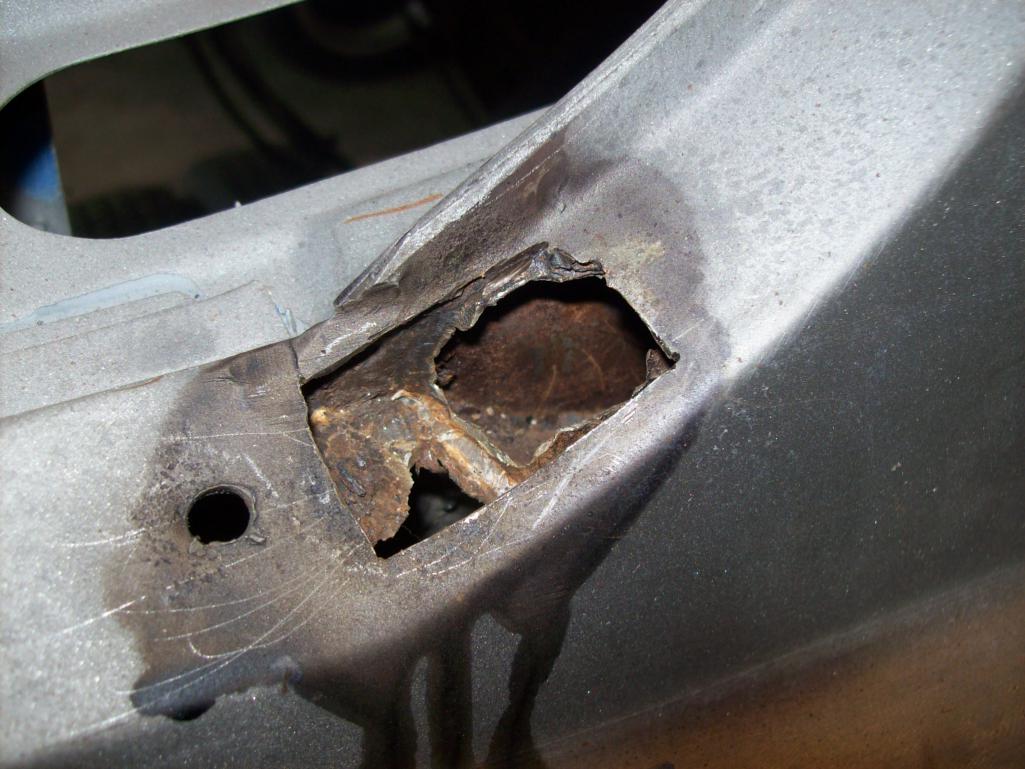
Posted by: haycait911 Mar 6 2016, 07:25 PM
that's pretty ugly. I wouldn't bother going any further. obviously a basket case. probably best to unload it cheap on a dumb Canadian that doesn't know any better 
Posted by: Speedo Mar 6 2016, 07:25 PM
I had a donor sail that I disassembled and harvested the needed part.
Posted by: Speedo Mar 6 2016, 07:27 PM
Harvested and cleaned up...needs a little bit of fitting yet, and to be etched.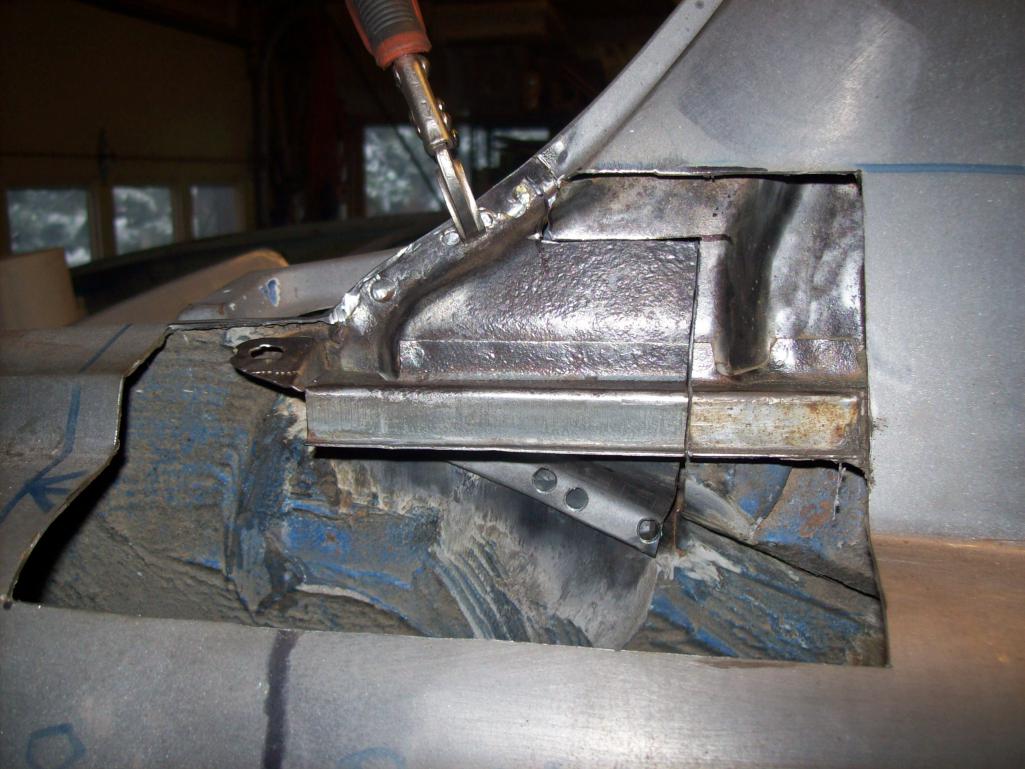
Posted by: Speedo Mar 6 2016, 07:31 PM
Clean the area up, treat and weld in place.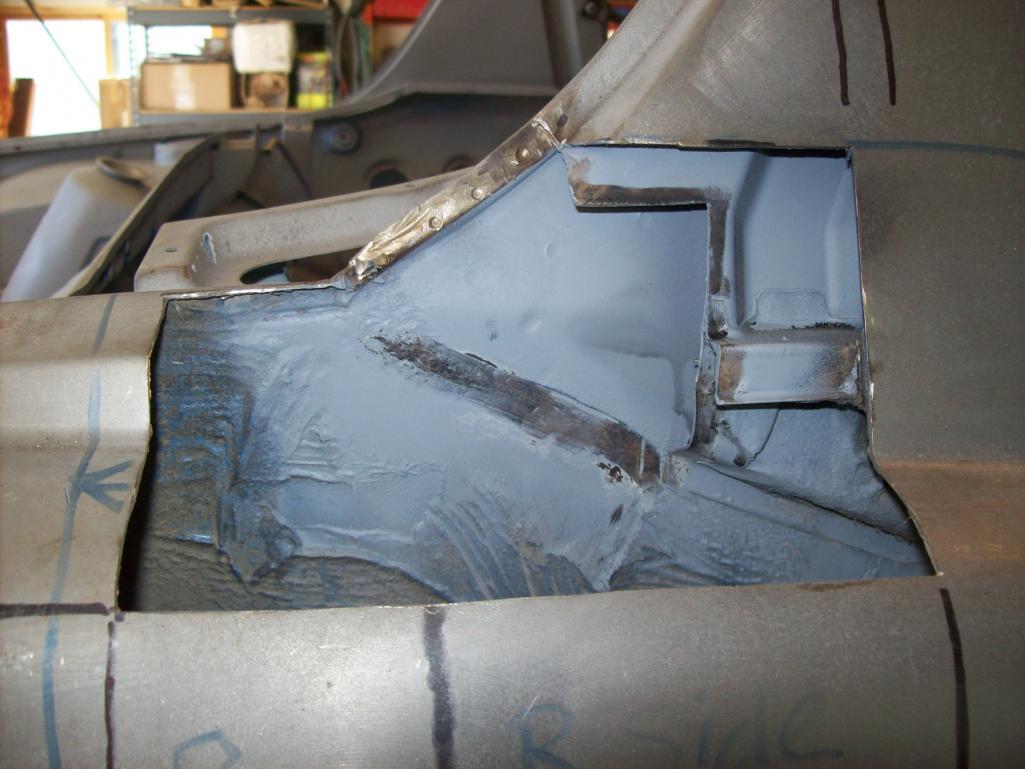
Posted by: Speedo Mar 6 2016, 07:34 PM
Clean it up and close it up. More skin harvested from donor sail. I have a full repro from RD but I didn't want to scalp it for a small piece. This took a bit of effort to trim, but it worked out.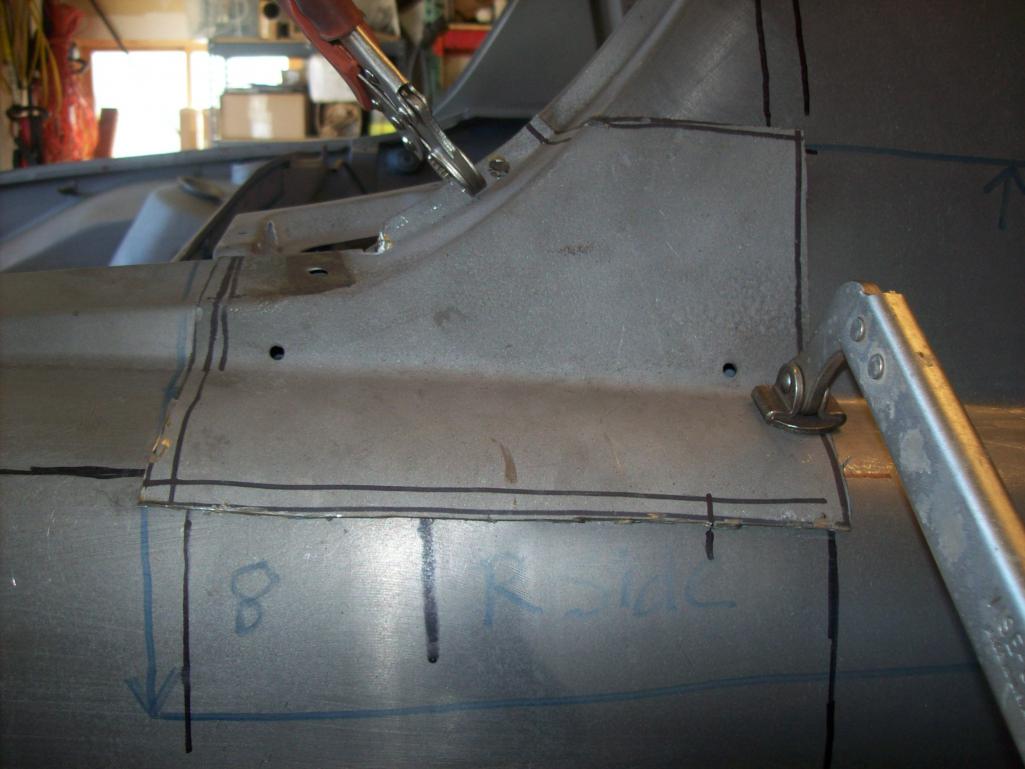
Posted by: Speedo Mar 6 2016, 07:37 PM
Now I need to close up the passenger rocker/jackpost repair. Spent way to long dinking around...with this. Picked up some 18 gauge steel at DenCol and I am on my way...pics of progress this week.
Speedo
Posted by: haycait911 Mar 6 2016, 08:48 PM
that spray-on etch/weld-thru primer is shite. get some proper automotive epoxy, mix it up and use a brush to work in into all the nooks and crannies. it'll keep for a few days sealed in the fridge, but use the beer fridge, it'll make food taste funny.
Posted by: brant Mar 6 2016, 11:06 PM
Nice work!
Posted by: porschetub Mar 7 2016, 03:58 AM
sixnotfour,
Wow! That's the car alright! No, not much has changed. There is a little rust at the top rear of the drivers fender by the bonnet and in your pic I can almost see it! And it was missing the front bumper top rubber trim 20 years ago. Thanks a bunch for posting. I will do the car justice. I picked up the square stock for the door jam braces today. I'll post better pics of the good, the bad and the ugly. This car (in terms of what I normally drag home) is in much better shape (at the outset).
I will start to accumulate a list of needs...like to swap the later wrong rear bumper for a 1970 right bumper. Did any of the early 6s that were not GTs ever have 2 in 2 out sport exhausts? If I am out of line (purists) with the muffler...just shut me down. I make nice 2 in 2 out sport exhausts for my 911s.
Speedo
Good to see you over here man ,your 911 threads on Pelican supplied me with hours of great reading,you would never know what nasty bits can hide in these cars but you will be used to that ,the 914 just rusts in different places than the 911....same shit different day really.
You have great skills ,go hard,
 will be watching this one.
Posted by: Luke M Mar 7 2016, 08:23 AM
Well it's about time... oh I guess I shouldn't talk..lol
Carry on
Posted by: Luke M Mar 7 2016, 10:35 AM
Hey Lars,
Did you happen to add a piece of foam/weather stripping along this strip to keep the outer panel from rattling against it ? I know the factory had something on there.
Attached image(s)
Posted by: Speedo Mar 9 2016, 08:39 PM
Hey Lars,
Did you happen to add a piece of foam/weather stripping along this strip to keep the outer panel from rattling against it ? I know the factory had something on there.
Good question. Going out on a limb here...but all of the foam that Porsche put into the 914 tended to attract moisture and rot the steel. I am inclined to seal up areas with chemicals an not use any moisture "wanting" foam anywhere. If needed I can slide something up in that channel even after the skin is welded completely...if needed, I will. I am focusing on this area...
Posted by: Ferg Mar 10 2016, 12:12 PM
Nice work Lars!
Posted by: Speedo Mar 18 2016, 06:18 PM
Turns out the inner rocker I received is for the drivers side which I don't need. I actually need the last six inches of the rocker on the passenger side. I called Alex at RD ad asked if they could stamp the last 12 inches and not trim it for me (good luck!)...nope. Yeah, well ok. I need to fabricate it then as it doesn't make sense to kill a perfectly good 4 ft inner rocker for the last few inches. This is what I need...
Like this end...but this is the drivers side.
So I fabricated the last few inches. This will be spliced to the patch to the inner wheelhouse and then the jack support will complete the repair.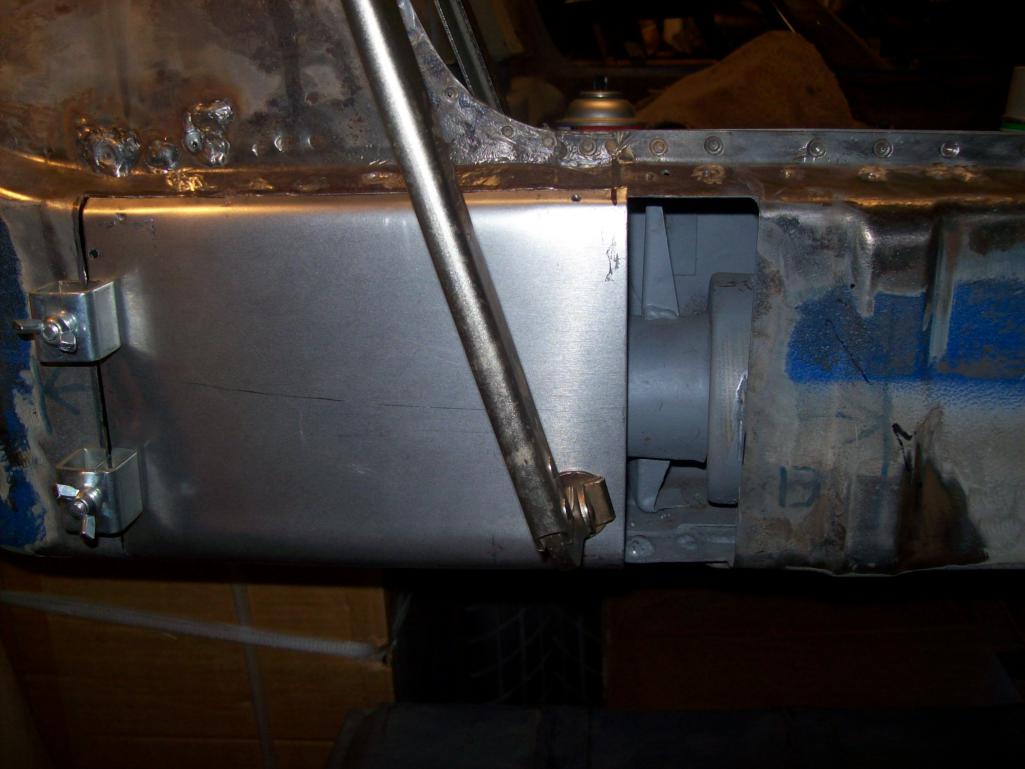
 [attachmentid=546
364]
Attached thumbnail(s)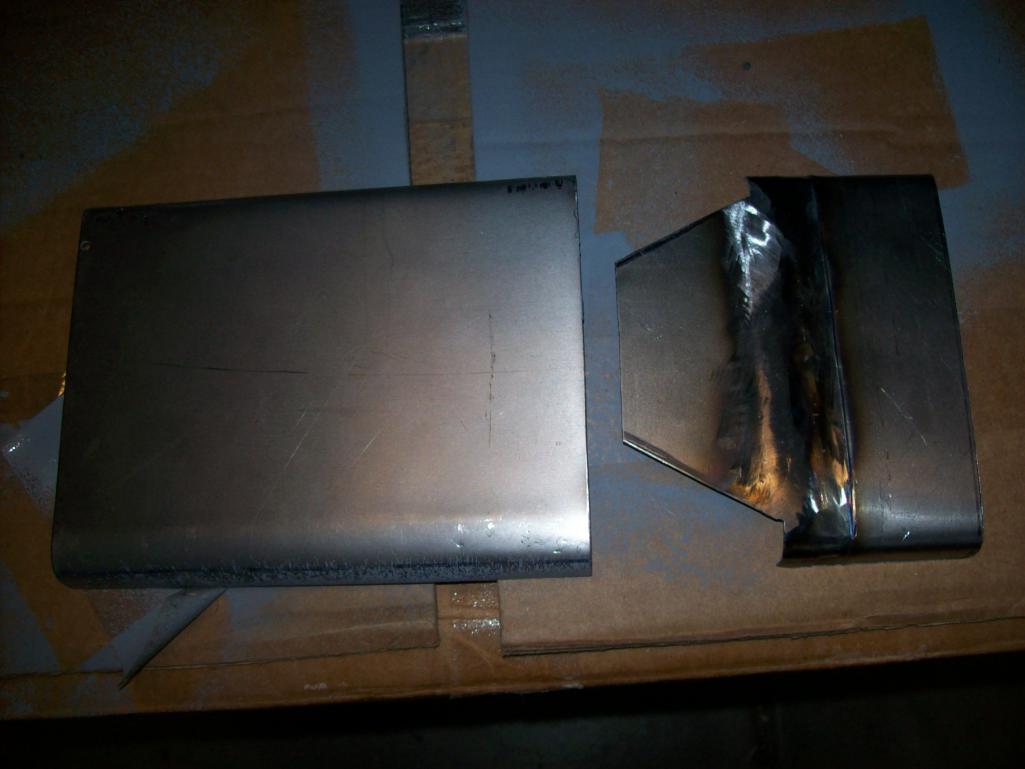
Posted by: Speedo Mar 18 2016, 06:32 PM
I want to get these pieces trimmed perfectly before welding in place. No room for error here. I guess the triangular extension/overlap on the inner rocker that slips behind the wheelhouse extension is to add some extra rigidity to the jack point? From my rusted removed parts, I couldn't see where the overlap was welded...so I will just plan to drill the wheelhouse repair to rosette weld to the inner rocker extension behind it. Cleaned, fitted, dressed and primed.
Posted by: Luke M Mar 19 2016, 09:21 AM
Hi Lars,
The work looks good. I looked at the same area on my 6 and it appears that it's spot welded like this..
Check this thread out where Rick fixed the same area on a 6.
Start at post 72. Looks like Rick added an inner sleeve to help with rigidity.
http://www.914world.com/bbs2/index.php?showtopic=226585&st=60
If you look at the RD part # 331 it has a sleeve welded to the inside of the part.
Attached image(s)
Posted by: Speedo Mar 19 2016, 02:24 PM
Hi Lars,
The work looks good. I looked at the same area on my 6 and it appears that it's spot welded like this..
Check this thread out where Rick fixed the same area on a 6.
Start at post 72. Looks like Rick added an inner sleeve to help with rigidity.
http://www.914world.com/bbs2/index.php?showtopic=226585&st=60
If you look at the RD part # 331 it has a sleeve welded to the inside of the part.
Interesting...not sure who I talked with a week ago at RD, but I specifically asked if this area (behind the jackpoint was a single layer or if it was sleeved...nope, told it was single layer. Mine was too far gone to tell. Obviously their inner wheelhouse steel is sleeved. I wonder what gauge the sleeve is? Ricks fix with the sleeve makes sense. Mine is a bit more complicated as I am not replacing the entire inner rocker. But as I am replacing the wheelhouse area behind the jackpoint and mating it to the left end of the inner rocker, I suppose I could assemble them off the chassis, and weld a sleeve behind the welded pieces...then weld the unit to the chassis. Either way I get it done, it would be a bonus to have the reinforcement "doubler" behind the jackpoint.
Thanks for the heads up Luke...glad I didn't weld this up yesterday : )
Posted by: Luke M Mar 19 2016, 04:16 PM
You may want to run the sleeve behind all 4 pieces. That should tie things up really good. Glad you didn't weld it up too.. much easier to do it now vs later.
Posted by: Speedo Mar 19 2016, 06:57 PM
A sleeve or doubler makes sense. I will need to do it differently than Rick as I am not replacing the entire inner rocker. I will sleeve the area from the inner wheel house to behind the jackpoint, and then the area behind my inner rocker repair. I want the sleeve to lay flush with the inner rocker and wheel house repair so I can get good welds. I think I can engineer the sleeve to fit up after welded to my repair.
I want to figure out where the jackpoint fits first.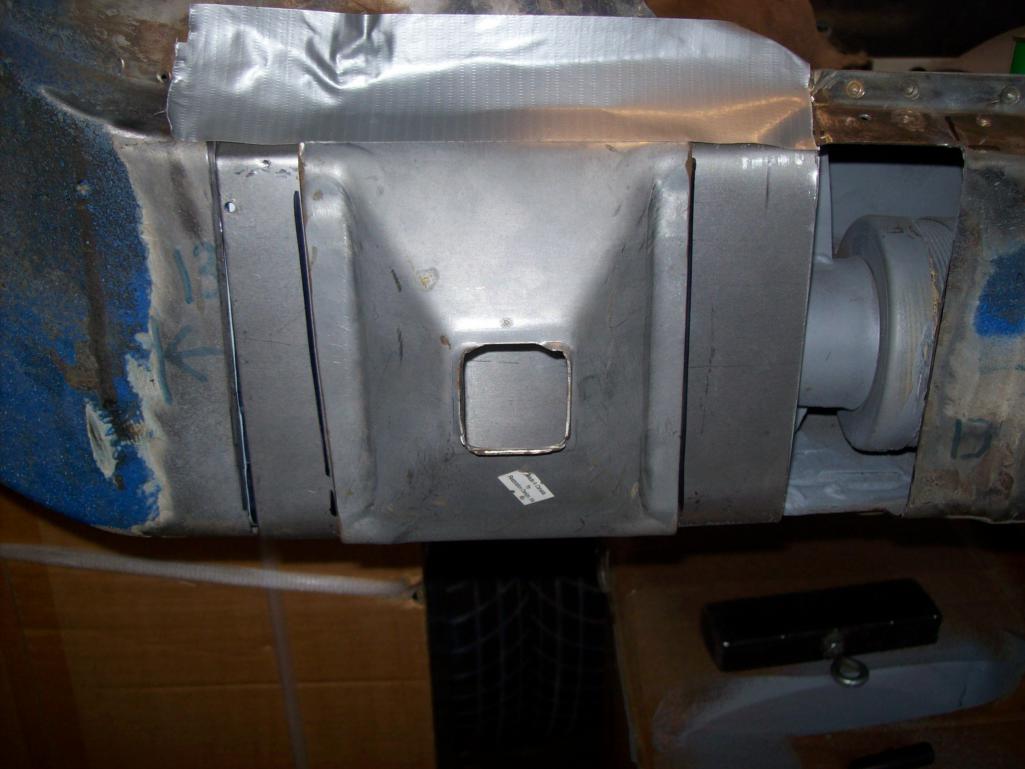
Then fit the sleeve behind my repairs[attachmentid=546595]
Sleeve fitted behind wheel house repair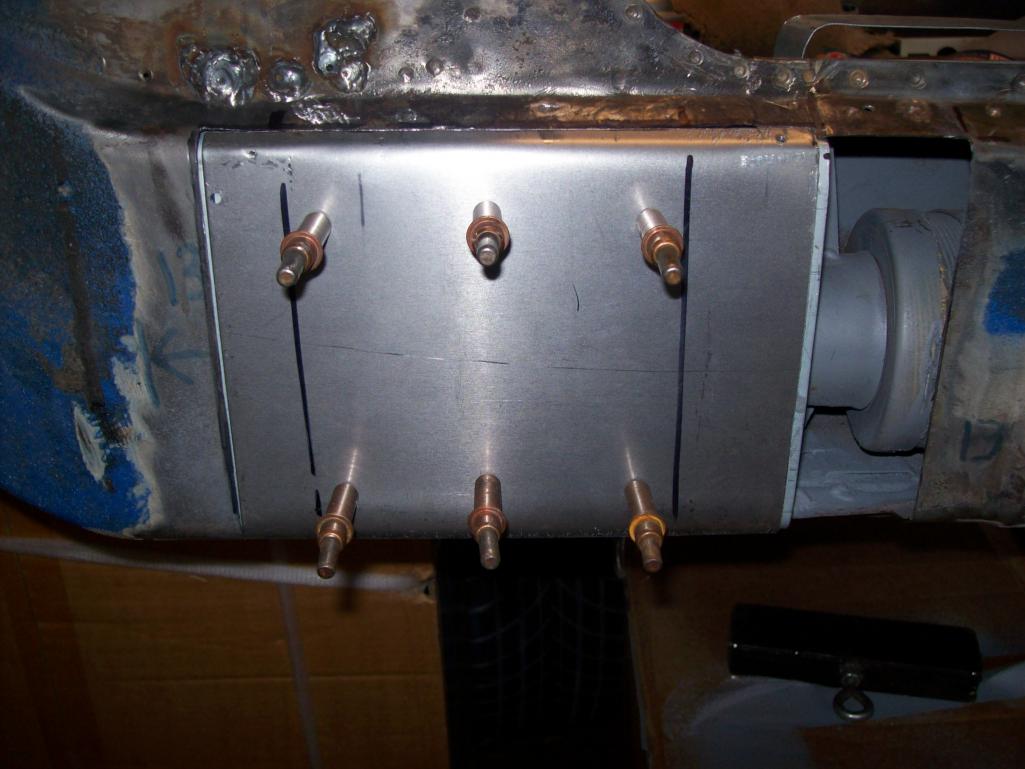
Inner rocker sleeve
Everything tied in and fitted
Posted by: Speedo Mar 20 2016, 02:06 PM
So on a side note...the original engine is stored (pickled). The plan is to build up a 2.7 RS spec MFI engine. In fact it is all ready to be assembled. I don't want to cut the nose of the car. Is there room in either front fender (and airflow) that will allow me to put a cooler up there? What do most people do for cooling when they transplant engines?
Speedo
Posted by: Cairo94507 Mar 20 2016, 05:29 PM
So maybe for a 2.7 you won't need an external additional cooler. I seem to recall that if you were 3.0 and up you needed some help with cooling.
I have a 3.2 going in my Six and went through all of the various cooler designed and permutations. Ultimately, I decided that if I had to have one, I wanted it to work really well and be bullet proof. I did the GT style cooler, lines, thermostat and shroud. As much as I did not want to cut up the front, I decided I would rather have it function as good as possible to keep the 3.2 cool. Good luck.
Posted by: Luke M Mar 20 2016, 07:43 PM
The factory 911 2.7rs came with a front fender mounted oil cooler.
That being said I'll be running a 2.7rs spec engine in my 6.
My plan is to run a 914-6 GT shroud like the PMS setup.
I will not be cutting my front panel . I'll be using the factory holes along with two fans attached to the cooler. I think that should work fine.
Posted by: Ferg Mar 21 2016, 08:19 AM
Lars, you will need a cooler with a 2.7. I doubt the fender will have enough space and work well. Some (myself included) have had some success mounting one under the rear trunk above the axle shafts. Key would be directing some fresh air to it.
Posted by: Speedo Mar 26 2016, 08:00 PM
Progress...you could put a Sherman tank on the right side of this car and jack it up. Sleeve inside the repair makes this stiff as hell (how stiff is hell?). 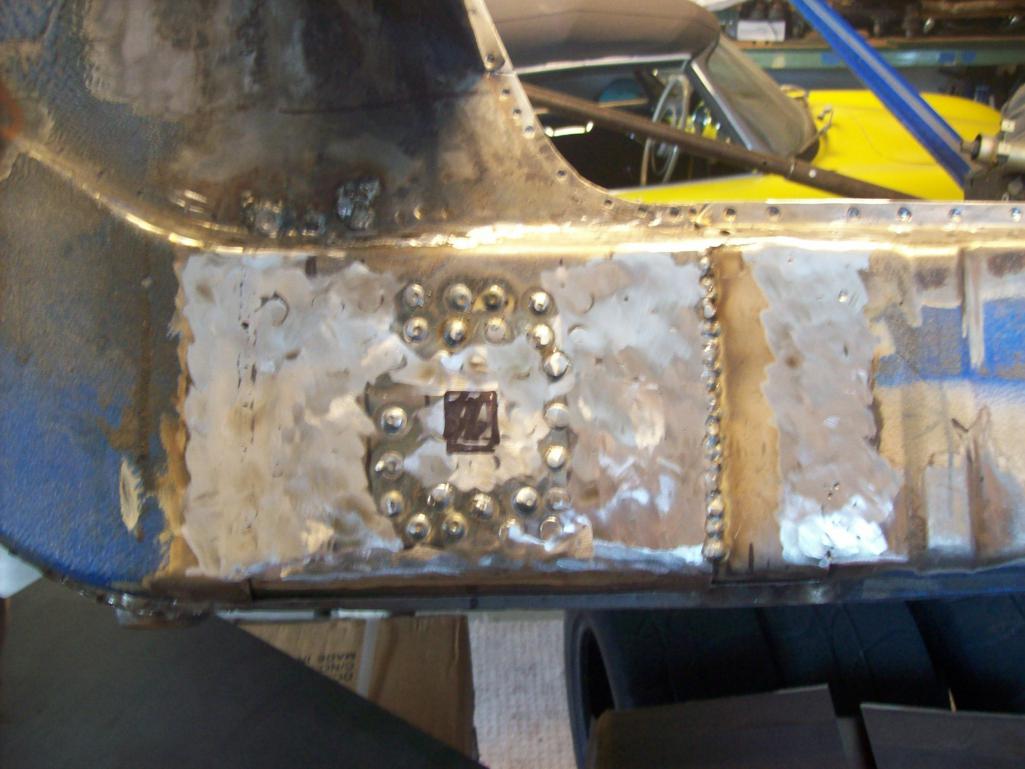
I need to position the new jackpoint. Checked the right side and looks as though the center of the jackpoint is directly above the outer rocker panel nut below it. The other means I have to find the location is using the new outer rocker from RD and trying to center the hole for the jackpoint in the opening. I measured the driver side and it appears to be centered above the outer rocker nut. 
My fear is relying on the repro outer rocker....and having the rocker not be exact. There is not much margin for error. Suggestions would be helpful.
The sill triangle needs to be massaged also...stamping is relatively correct, but does not fit my car well. The flange on the inside needs to be longer. Compared to the original...
So I added 3/8ths to give me something to work with.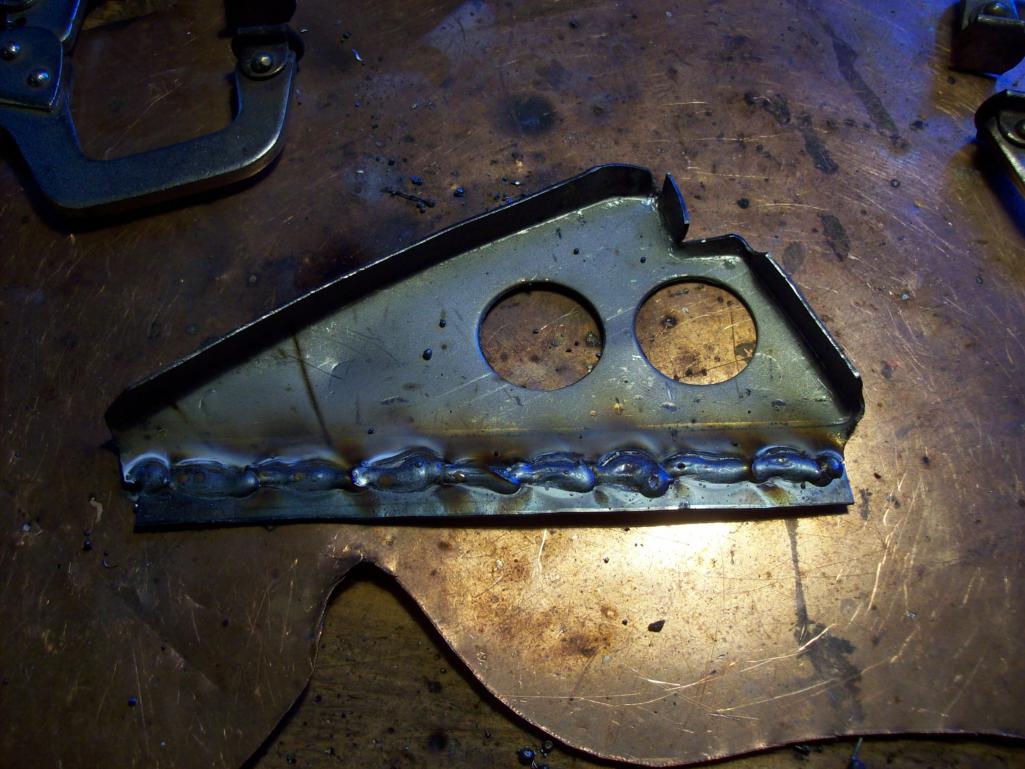
Posted by: Speedo Mar 26 2016, 08:10 PM
So I have a couple questions...obviously the jackpoint location question. Next, what is the best way to weld up the jackpoint? My guess would be rosettes (in place of spot welds) and then a few stitches along the outside? It will be covered up? I am going to re-use the bottom of the door jam, and 12 inches of the sill I removed for access to the rocker for repair. I am not concerned about re-using and re-welding these areas as they are covered by the aluminum door sill trim...?
As it relates to the cooler for the engine...I am going to explore using a pair of narrow coolers in the front fender wells. The rotating wheels produce a lot of turbulence up there...a lot of moving air. I can also resort to my 911 fan pulley trick, where I use the largest crank pulley and the smallest fan pulley to create a 1.3 ratio advantage to the factory in fan air volume. More tomorrow.
Posted by: brant Mar 27 2016, 11:16 AM
do you want me to get measurements from my car for the jack reinforcement position?
I would use the (aftermarket) rocker panels as a guide too....
you will need a cooler
there is also no air flow into the front wheel well... no slots for air to come in around the bumper (aka 911)
I'd go with mikes rear cooler option
I've done it once, its not as good for cooling as a front cooler in clean air
but its still a benefit, and although it only knocks 20degree's off.... that's 20degree's more than not having a cooler.
Posted by: mepstein Mar 27 2016, 11:41 AM
So on a side note...the original engine is stored (pickled). The plan is to build up a 2.7 RS spec MFI engine. In fact it is all ready to be assembled. I don't want to cut the nose of the car. Is there room in either front fender (and airflow) that will allow me to put a cooler up there? What do most people do for cooling when they transplant engines?
Speedo
The smaller T engines did not get front coolers but all the S engines did. I would plan for additional cooling since your using a high performance engine.
914 fenders don't get airflow or have width like 911's.
Posted by: Speedo Mar 27 2016, 01:39 PM
I need the measurement of the outer rocker bolt hole under the jack point. The driver side of my car has that hole pretty close to centered under the jackpoint. Mr rear quarter in front of the wheel was removed to gain access to do this repair. I cannot use the RD replacement outer rocker to position the jackpoint as I need to center it using the edges of both wheel arches...and I only have the front wheel arch till I weld the q-panel back on. If someone can tell me "yeah the hole is directly under the jackpoint", I will go with that. Otherwise I need to be patient and get the correct placement. Not inclined to weld the jackpoint in the wrong place.
So I am ok to use rosettes around the jackpoint and then a few "beads" on the outside edges?
Speedo
Posted by: Luke M Mar 27 2016, 01:51 PM
I need the measurement of the outer rocker bolt hole under the jack point. The driver side of my car has that hole pretty close to centered under the jackpoint. Mr rear quarter in front of the wheel was removed to gain access to do this repair. I cannot use the RD replacement outer rocker to position the jackpoint as I need to center it using the edges of both wheel arches...and I only have the front wheel arch till I weld the q-panel back on. If someone can tell me "yeah the hole is directly under the jackpoint", I will go with that. Otherwise I need to be patient and get the correct placement. Not inclined to weld the jackpoint in the wrong place.
So I am ok to use rosettes around the jackpoint and then a few "beads" on the outside edges?
Speedo
Hi Lars,
I have a set of factory outer rockers that came off my 6. I can go out and take some measurements for you. I can also measure the center line of the jack post if need be.
Let me know what you need and I can take a few pics for you too.
Happy Easter
Posted by: Speedo Mar 27 2016, 01:56 PM
Thanks Luke! In Ricks's thread post #73 the pics show the jack receiver and the bolt hole for the outer rocker underneath it. This is the measurement I need....
http://www.914world.com/bbs2/index.php?showtopic=226585&st=60
Posted by: Luke M Mar 27 2016, 02:24 PM
This is what I got from the outer rocker panel.
From the bottom side of the jack post ( rocker mount hole ) to the center of the next (forward/center mount hole) is: 20 3/4 '' center to center .
Attached image(s)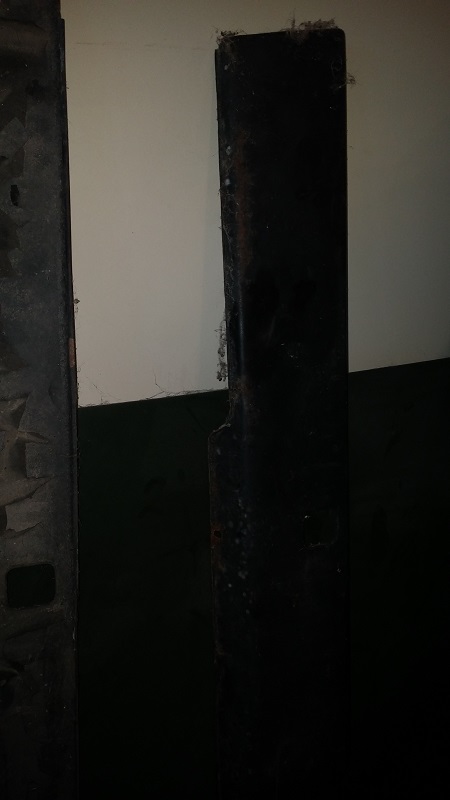
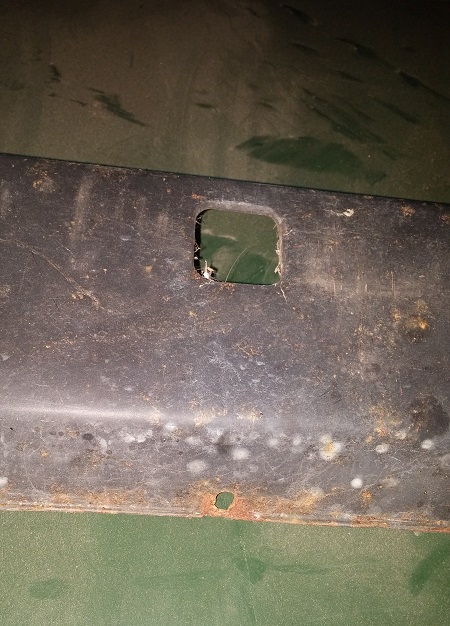
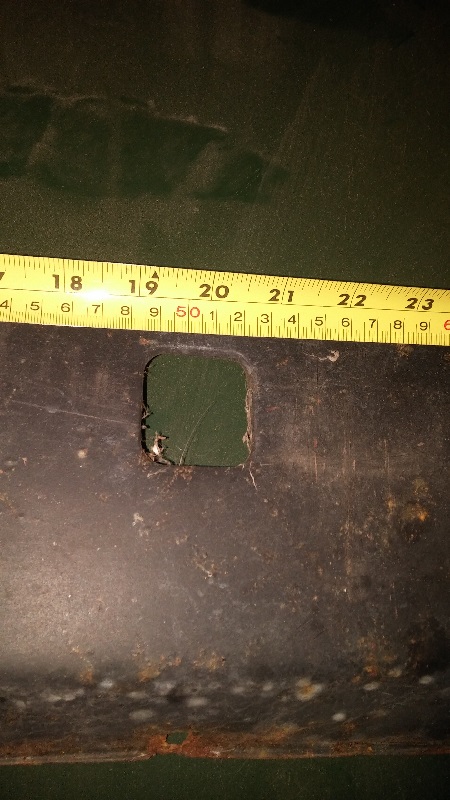
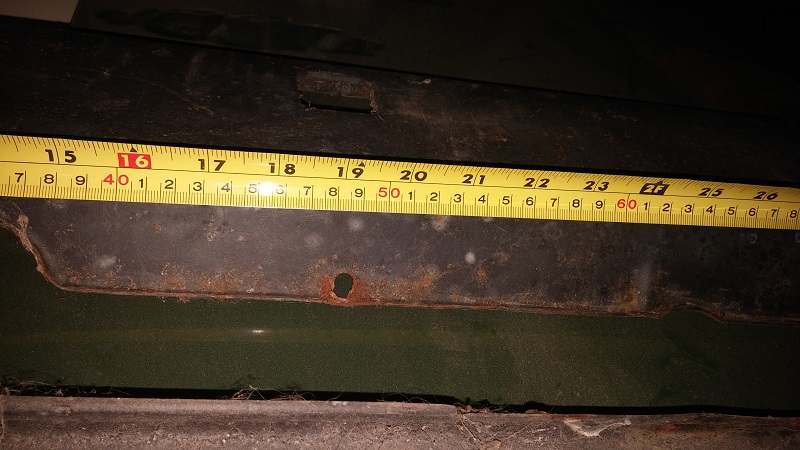
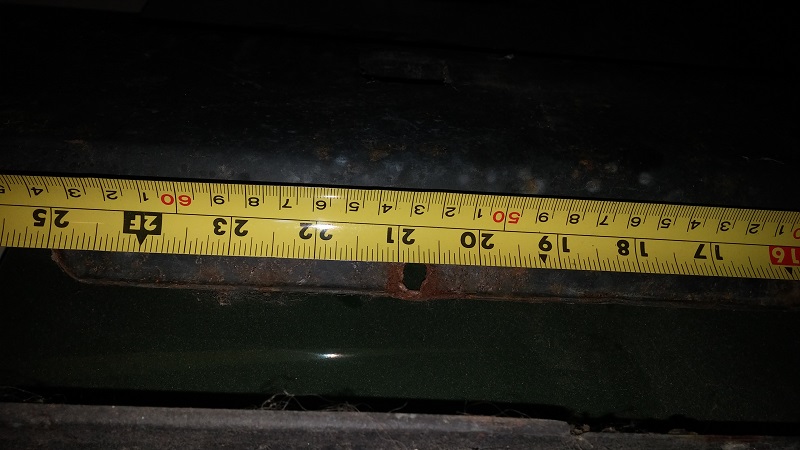
Posted by: rick 918-S Mar 27 2016, 03:11 PM
Did you get what you need? If not I can get you accurate measurements off my Alien or my 6.
Posted by: rick 918-S Mar 27 2016, 03:17 PM
Progress...you could put a Sherman tank on the right side of this car and jack it up. Sleeve inside the repair makes this stiff as hell (how stiff is hell?).
I need to position the new jackpoint. Checked the right side and looks as though the center of the jackpoint is directly above the outer rocker panel nut below it. The other means I have to find the location is using the new outer rocker from RD and trying to center the hole for the jackpoint in the opening. I measured the driver side and it appears to be centered above the outer rocker nut.
My fear is relying on the repro outer rocker....and having the rocker not be exact. There is not much margin for error. Suggestions would be helpful.
The sill triangle needs to be massaged also...stamping is relatively correct, but does not fit my car well. The flange on the inside needs to be longer. Compared to the original...
So I added 3/8ths to give me something to work with.
I don't get this. The triangles work perfect. Use the sill piece above as a guide for setting those up. If you had to weld a strip of metal to those to get them to fit you need to recheck the parts you are attaching them to.
The only issue with fit is the tail of the triangle needs to be curved to replicate the original.
Posted by: Luke M Mar 28 2016, 09:02 AM
Did the measurements help ?
I found a few pics of the jack post/rocker mount hole if it helps you.
Attached image(s)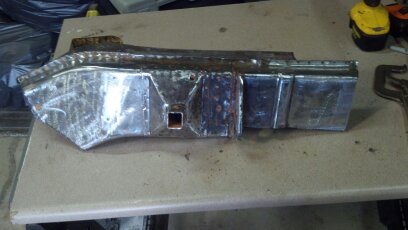
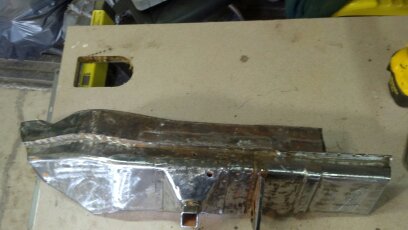
Posted by: Speedo Mar 28 2016, 08:14 PM
I figured it out. Staged the outer rocker with a temporary fit of the rear quarter panel. Used the repro outer rocker as a guide. Centered the jack receiver, and the outer reinforcement.
BTW, triangles were not perfect.
I had to massage the steel triangles on every side to make them fit. My old removed triangle was too rusty and twisted to compare. I have never been able to use a repro steel part whether 911, 356 or 914 that was plug and play. I expect it to be close, but do not expect it to fit first try.
I am ready to be done with the passenger rocker...and move on.
Posted by: rick 918-S Mar 29 2016, 06:34 AM
I figured it out. Staged the outer rocker with a temporary fit of the rear quarter panel. Used the repro outer rocker as a guide. Centered the jack receiver, and the outer reinforcement.
BTW, triangles were not perfect.
I had to massage the steel triangles on every side to make them fit. My old removed triangle was too rusty and twisted to compare. I have never been able to use a repro steel part whether 911, 356 or 914 that was plug and play. I expect it to be close, but do not expect it to fit first try.
I am ready to be done with the passenger rocker...and move on.
Are you saying the fold or shape of the triangle was correct just the weld flange was too short allow you to comfortably weld to the rocker? I think I got what your saying. In my case I use a spot welder and attach the triangle to the rocker before I close up the rocker. Then install the sill shelf after the rocker is welded in place. Either method works. Stay on it.
Posted by: rick 918-S Mar 29 2016, 06:57 AM
A message for all who read this thread. Luke pointed out that I installed a double layer in the rail on Ben's 6 when I did the rail repair. This serves two functions. One, less important but functionally as important is heat transfer. This will allow the single outer layer to transfer weld heat into the thicker two layers slowing the transfer and help reduce warping and shrinking.
The second and most important reason in a unit body car is structural. When your talking about trying to butt weld a rail section and count on your weld to carry a vertical, horizontal and angular flexion you will very likely not succeed. By adding the stiffener or backer you ensure the joint is safe.
One word of caution though. The ribs on the outer panel serve two functions. One is strength the other is weakness. Strength in the design, but a designed weakness as a crush zone to allow the chassis a place to give and absorb energy in a collision. The energy transfer passes around you instead of into you. You will not want to bridge these or eliminate them. They serve a function.
Sorry for the hi-jack. I hope it doesn't cause a debate in your build thread. I felt it was important that your readers understand the function of the chassis and proper repair methods.
After I posted this I figured I should start a thread on this as a resource. So here's the link for those that want to expand and not muddy up this great build.
http://www.914world.com/bbs2/index.php?showtopic=280027
Posted by: Speedo Mar 29 2016, 07:14 PM
Rick,
No issue with the resourceful information. No hijack interpreted.
Lots of different ways to skin this cat. An old mentor of mine, Grady Clay was always pushing me to reinforce the weak points on this chassis....and not for purposes of racing, but strength and longevity. The inner rocker is fluted for stiffness, and to allow for the stamping to retain shape. The jackpoint however staunchly reinforced, will transfer impact through the rear cockpit wall separating the two sides of the longitudinals. My reinforcements in this area provided strength but also allowed for easier welding of my splices.
I jigged my sectioned q-panel in place...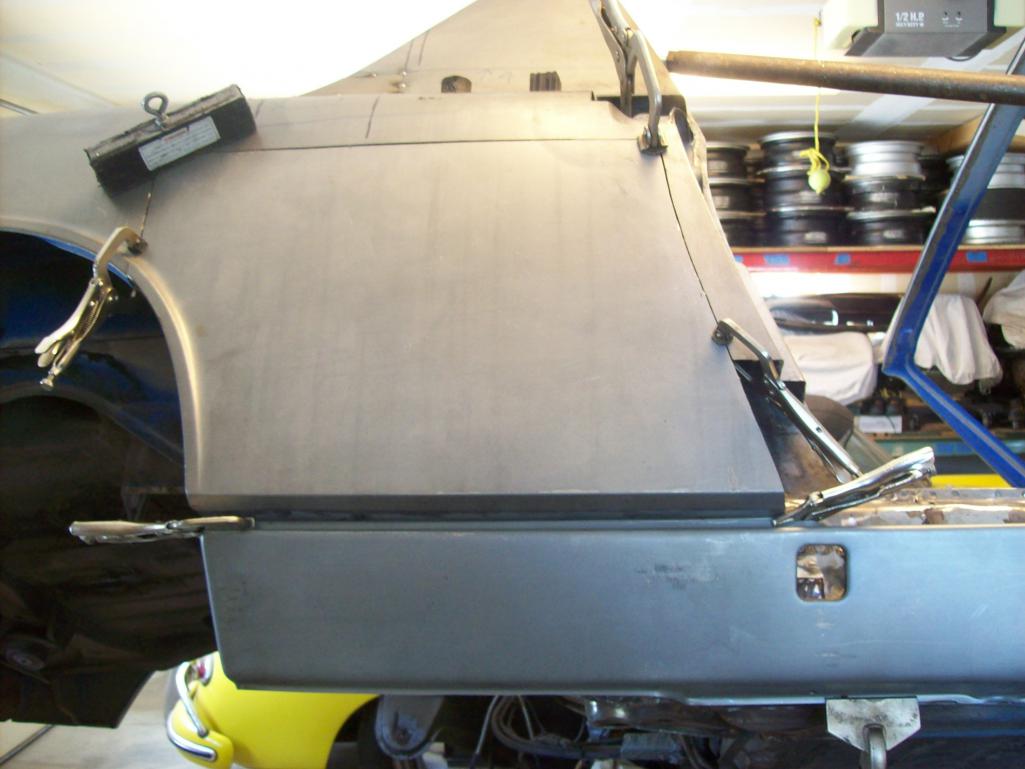
And clamped up the "centered" outer rocker
This allowed me to figure out exactly where the receiver and reinforcement needed to be. The captured nut under the inner rocker was not exactly centered under the outer rocker receiver hole. Glad I didn't assume that...and thanks to Luke and Brant for sending me pictures to try to help position the outer rocker. This was the correct way to do it.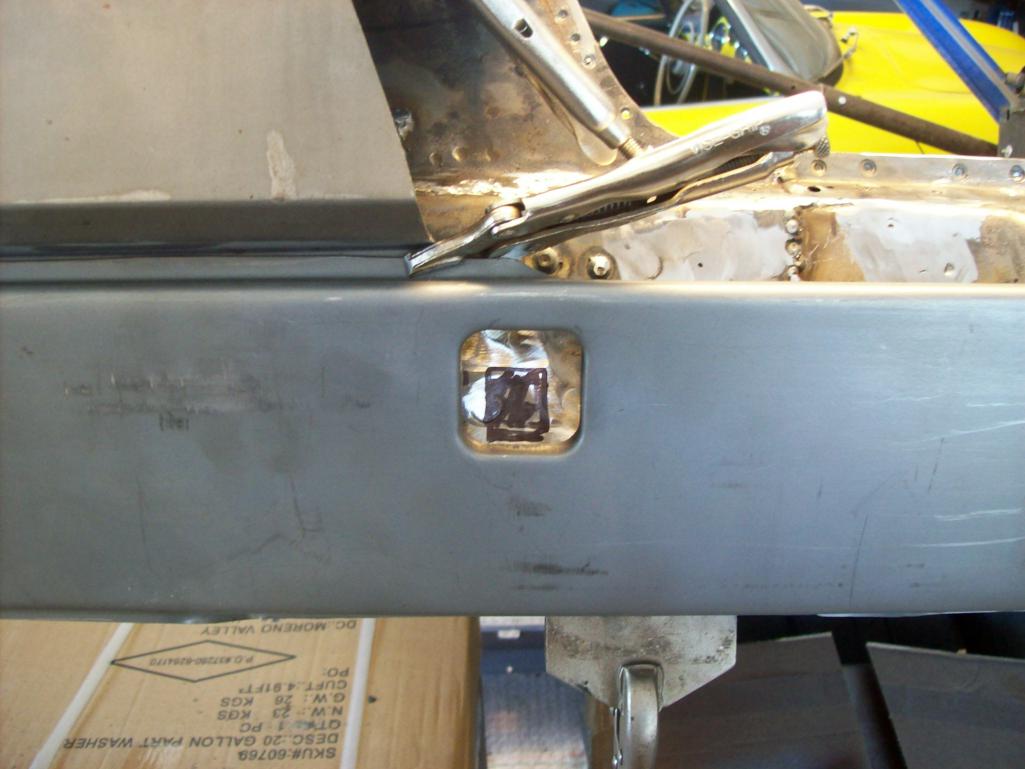
My original placement marks for the receiver against the inner rocker would have been "off" by 1/4 inch...not a deal breaker, but that would have required making up the difference by modifying the opening in the outer rocker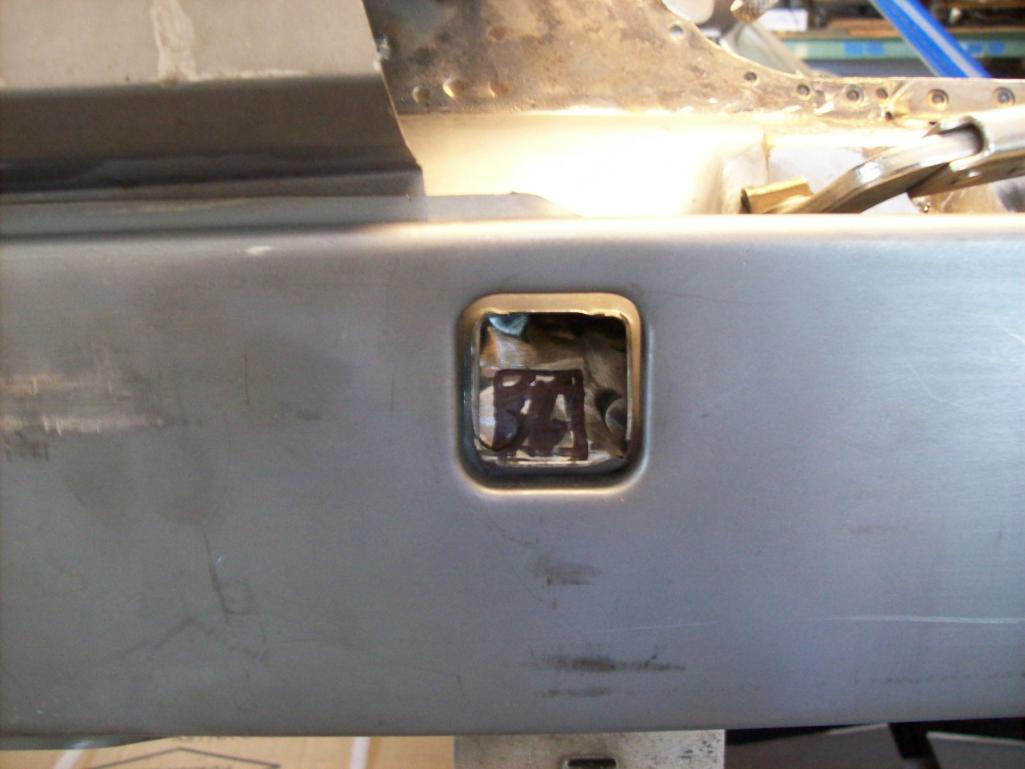
Squared up in the correct position and ready to be prepped for welding. I will probably use rosettes around the perimeter then spaced beads along the outside. 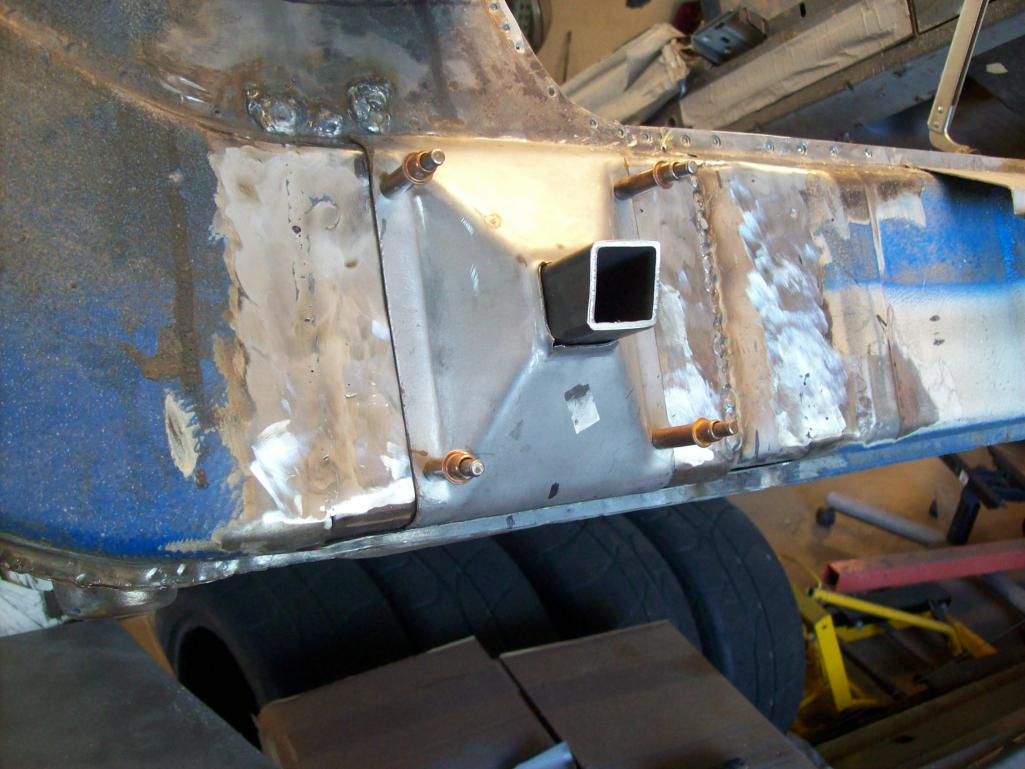
Luke, why is your entire longitudinal sectioned and removed from the chassis? Do I want to know?
Posted by: Speedo Mar 29 2016, 07:19 PM
Bottom of the lock post is weak and need to be rehabbed before being spliced back in. I think I can clean it up.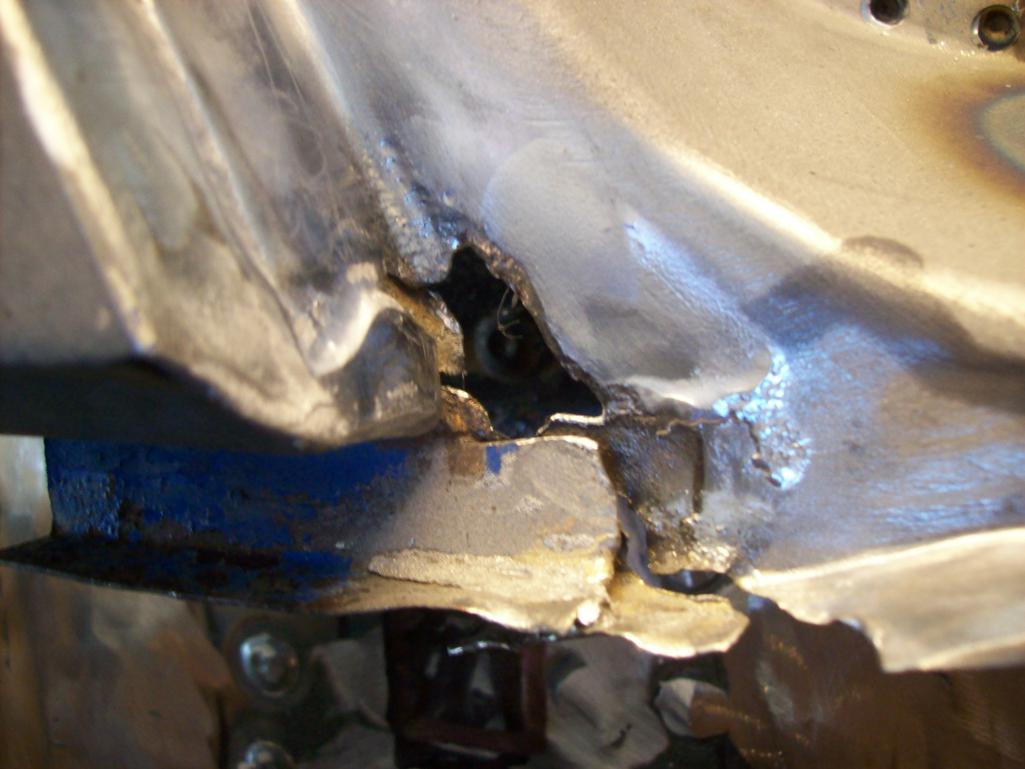
Need to remove the rot and add good steel back in. Most of this damage was hidden behing gobs of lead which once removed...showed the damage. This is the backside of the area where the lower lockpost meets the sill plate. A strange area of overlap with a lot of lead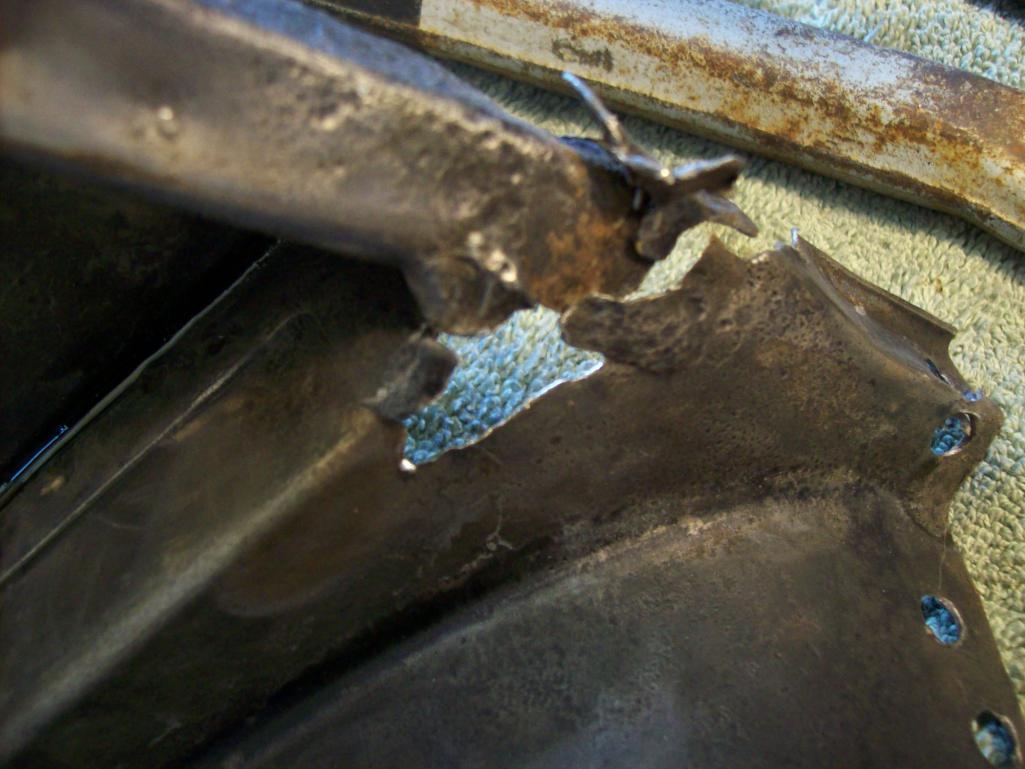
Progress is slow here...
Posted by: brant Mar 29 2016, 07:43 PM
Progress is great. !
Posted by: Luke M Mar 30 2016, 07:12 AM
Luke, why is your entire longitudinal sectioned and removed from the chassis? Do I want to know?
Hi Lars,
The repair on your 6 is looking good. On my 6 the hole right side is shot. It's not worth fixing a piece here n there. The more I dug into it the more rust and damaged sheet metal I found. I have purchased all of the new metal ( some from RD and some NOS ) for the repair. The more I looked at the car the more I wanted an NOS replacement part for the repair. It would be easier for me to just cut out all of the rusted metal and replace it with the new piece. It will not be an easy fix but it's the only way that I can see it being fixed properly. My other option ( if I can't locate an NOS part ) is to buy a good parts car and cut that section off it for the repair. I'll see what Hershey brings in and go from there.
Keep up the great work and post pics as you go.
Posted by: Speedo Mar 30 2016, 07:40 PM
Last few inches of the passenger sill were lingerie. Not sure they would have survived a re-weld. Need to cut fit flange and weld.
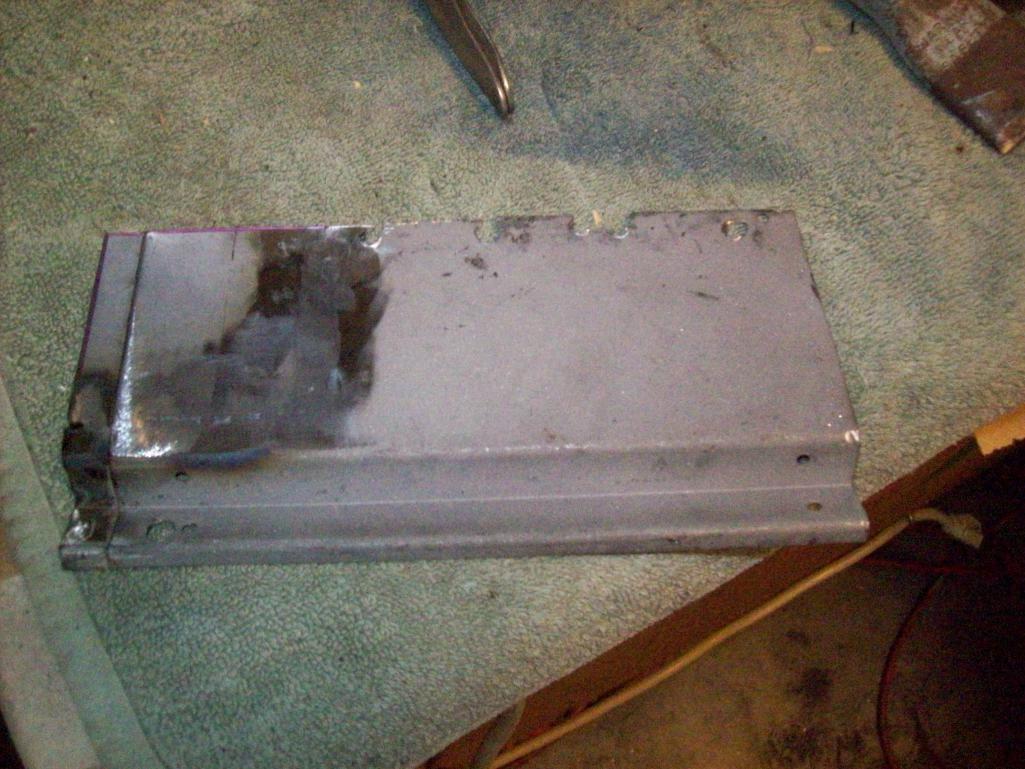
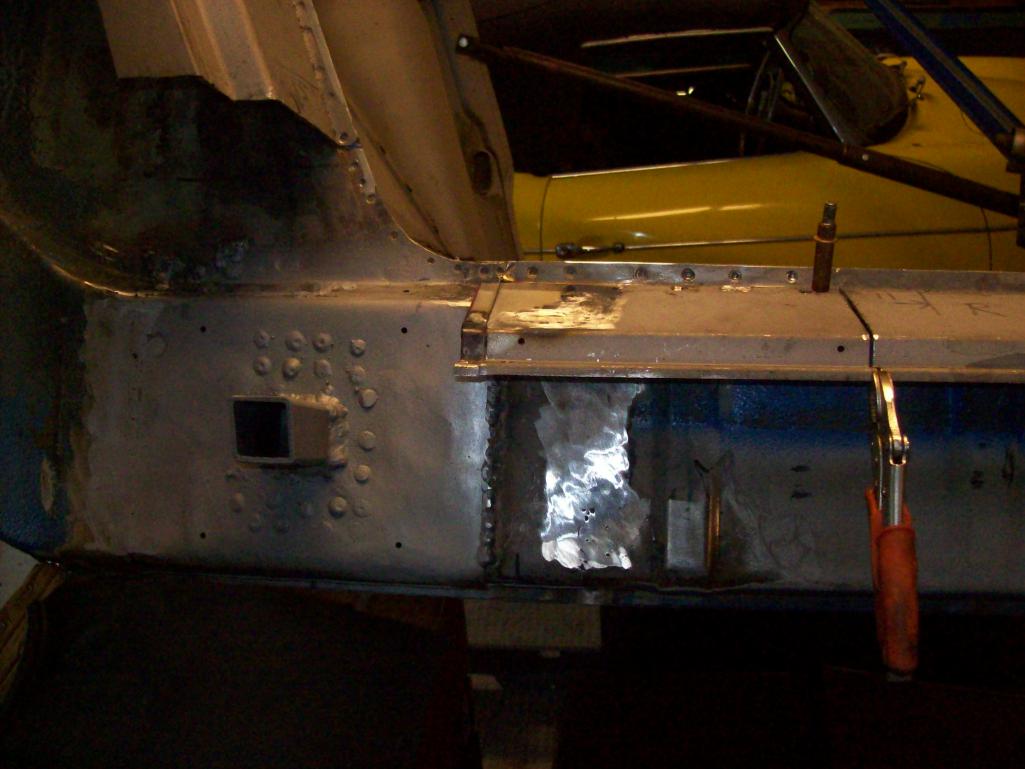
Now that I have the jackpoint centered...
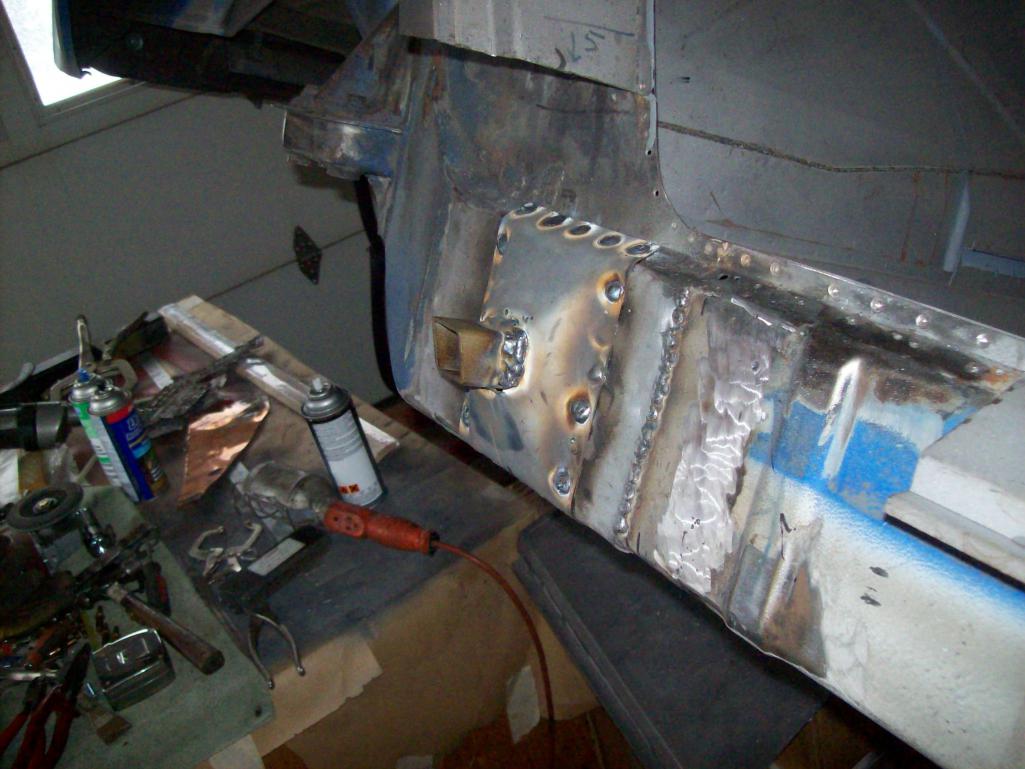
Very ready to close up this section of the car. I'm a 911 guy and this is my first foray into the "dark side". Taking longer to do things correctly...but that's the way it is.
Posted by: 76-914 Mar 31 2016, 08:07 AM
![]()
Posted by: DCJosh Mar 31 2016, 07:30 PM
This thread has me afraid of what I might find.
Posted by: Speedo Mar 31 2016, 08:08 PM
This thread has me afraid of what I might find.
This was a "dry" car. I paid what I felt was fair given that I was pretty sure...what I was going to find. After sandblasting I found way more than I ever anticipated. Thank god this was not an east coast car...sorry Luke!
But, there is a tremendous amount of satisfaction bringing the chassis back after finding all the "problems". These cars are "erector sets" for adults. And the restorations become addictive. Engine rebuilds are a piece of cake compared to bringing back a rusty chassis...me thinks.
Speedo
Posted by: Speedo Mar 31 2016, 08:31 PM
Oh and Brant.....
I am reminded. Maybe I have actually morphed?
post Jun 20 2012, 06:57 PM
Post #40
you're moving much too fast to be a real 914 guy...
all this in 2 weeks and the thing isn't on jack stands yet
you need to slow down for a year or two if you want to be a true teener fan....
Posted by: Ferg Apr 1 2016, 10:24 AM
Oh and Brant.....
I am reminded. Maybe I have actually morphed?
post Jun 20 2012, 06:57 PM
Post #40
you're moving much too fast to be a real 914 guy...
all this in 2 weeks and the thing isn't on jack stands yet
you need to slow down for a year or two if you want to be a true teener fan....
Whoops
Posted by: Speedo Apr 3 2016, 01:05 PM
Before I re-attach the bottom of the latch panel and outer rear quarter, I want to evaluate the access I need to finish up the longitudinal repair under the hell hole. I have looked through a lot of threads on this repair...many ways to skin this cat. RD steel for the inner longitudinal confused me. Top of mine appeared to be two layers, their panel was one layer and looked like my inner steel. This thread cleared it up...
http://www.914world.com/bbs2/index.php?showtopic=281275&st=0&gopid=2325382&#entry2325382
I will now deconstruct and evaluate.
Posted by: Speedo Apr 6 2016, 07:12 PM
I realize that you guys have seen tons of hell hole repairs before. So if you are bored with this sitcom, don't watch. As I am new to 914s, and having never repaired this area...I am going to try to repair my car as true to the original construction process as possible, while strengthening this area. You have seen this before...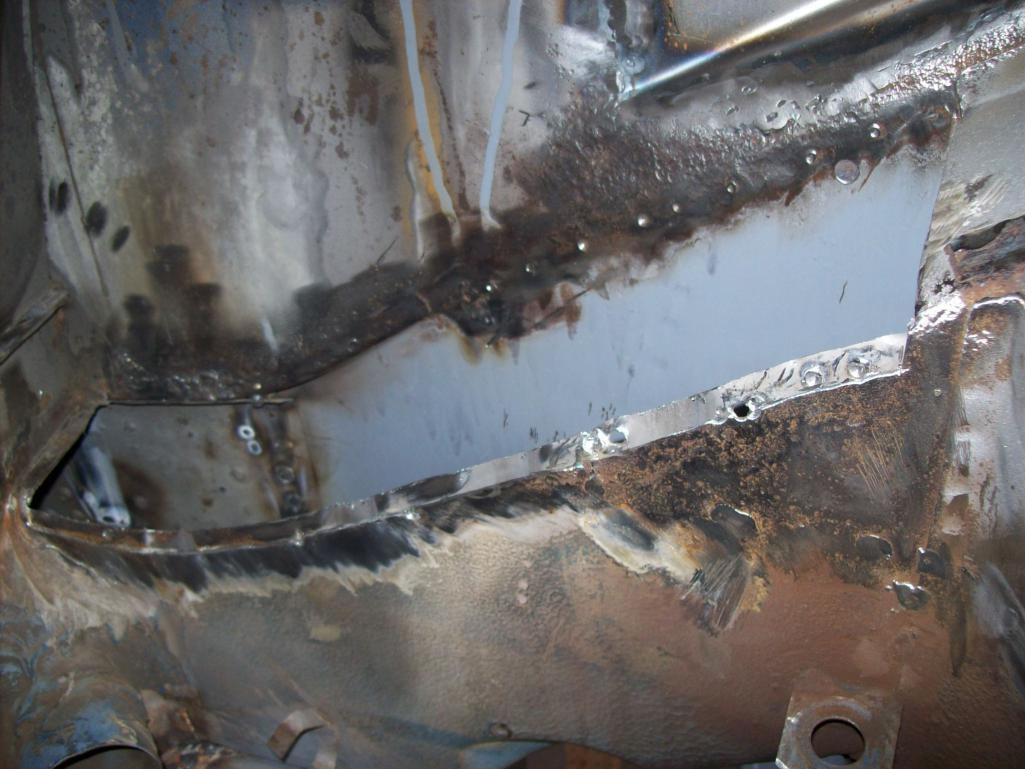
Outer top of the longitudinal and obviously why it was kicked off the team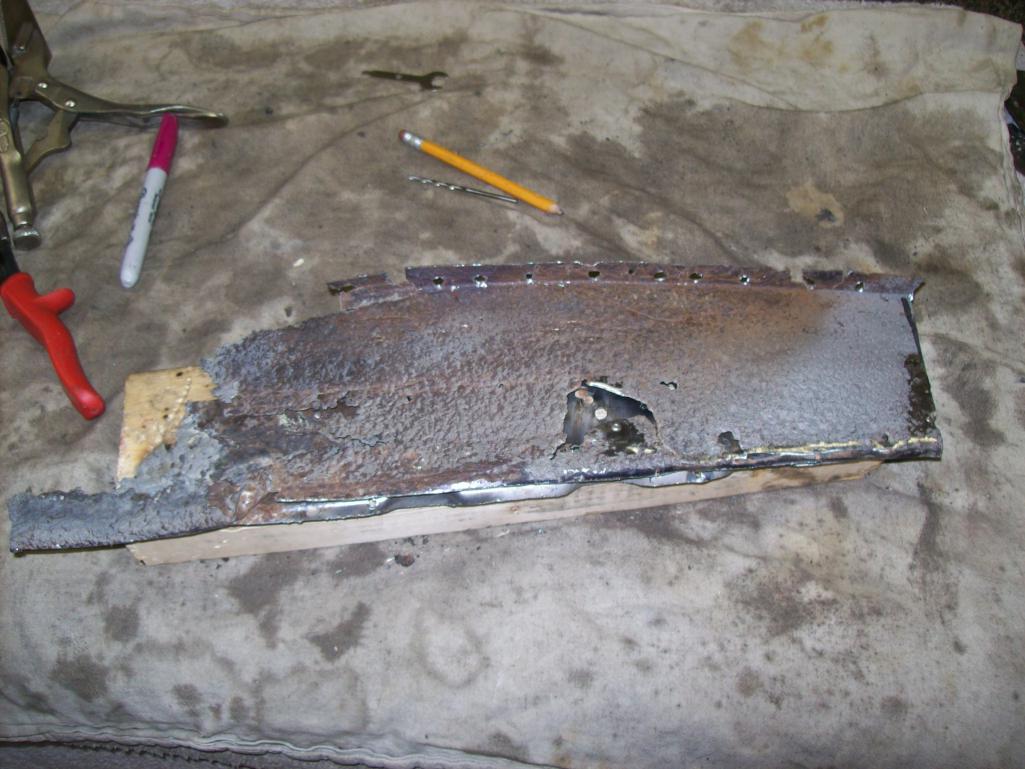
The inner reinforcement which I was considering reusing. However, it is swiss cheese currently. I could weld up the holes and extend a patch to replace the forward rusted area....but how much of its original reinforcement quality would remain? 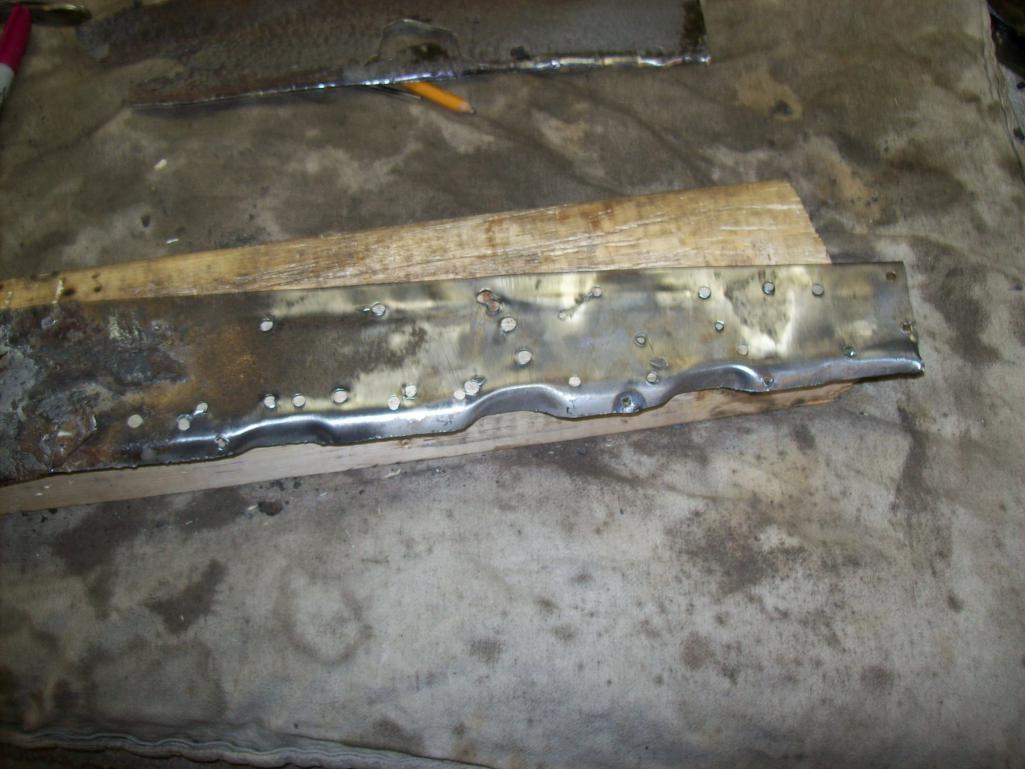
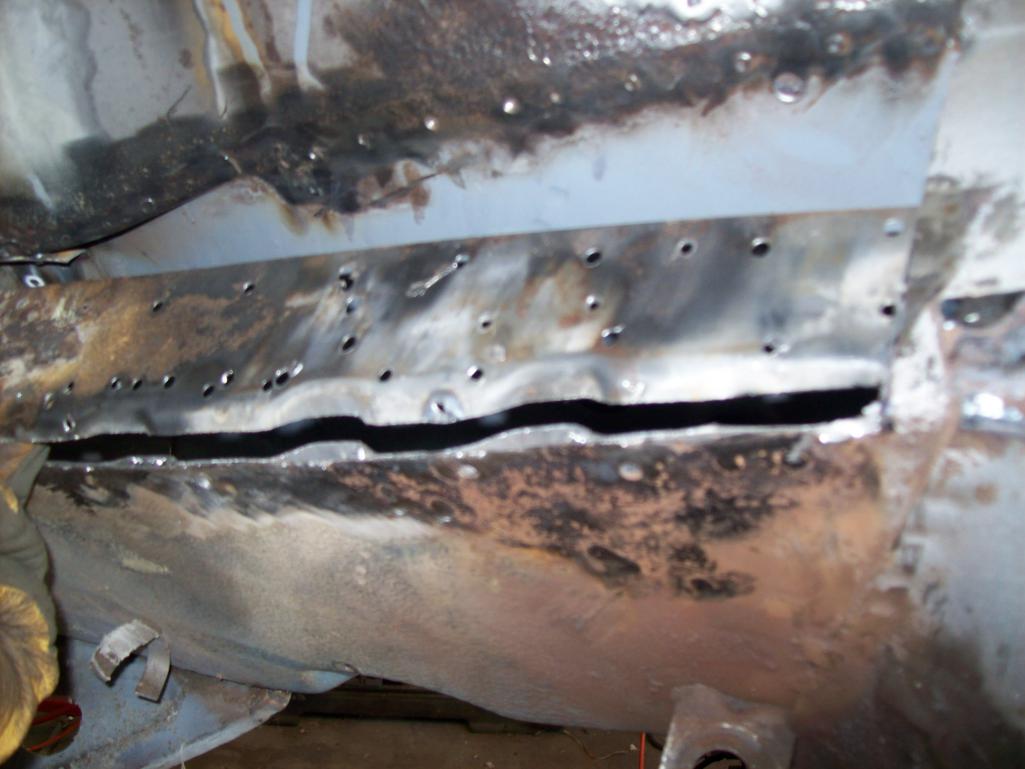
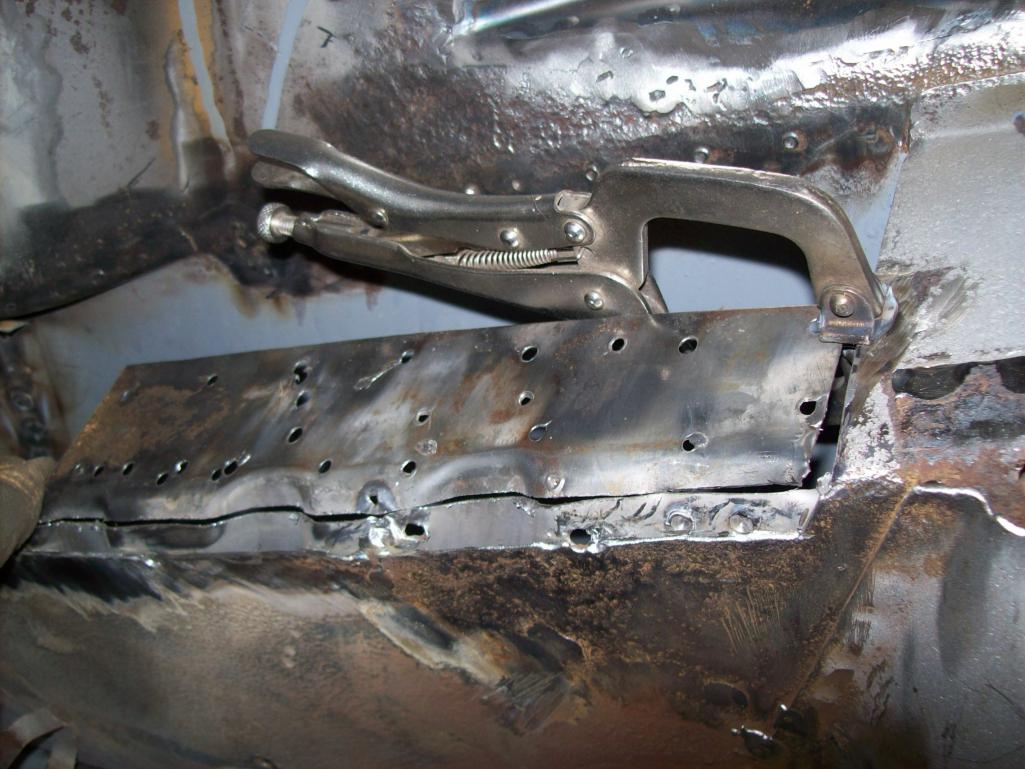
Posted by: Speedo Apr 6 2016, 07:35 PM
I made a buck to help shape the inner
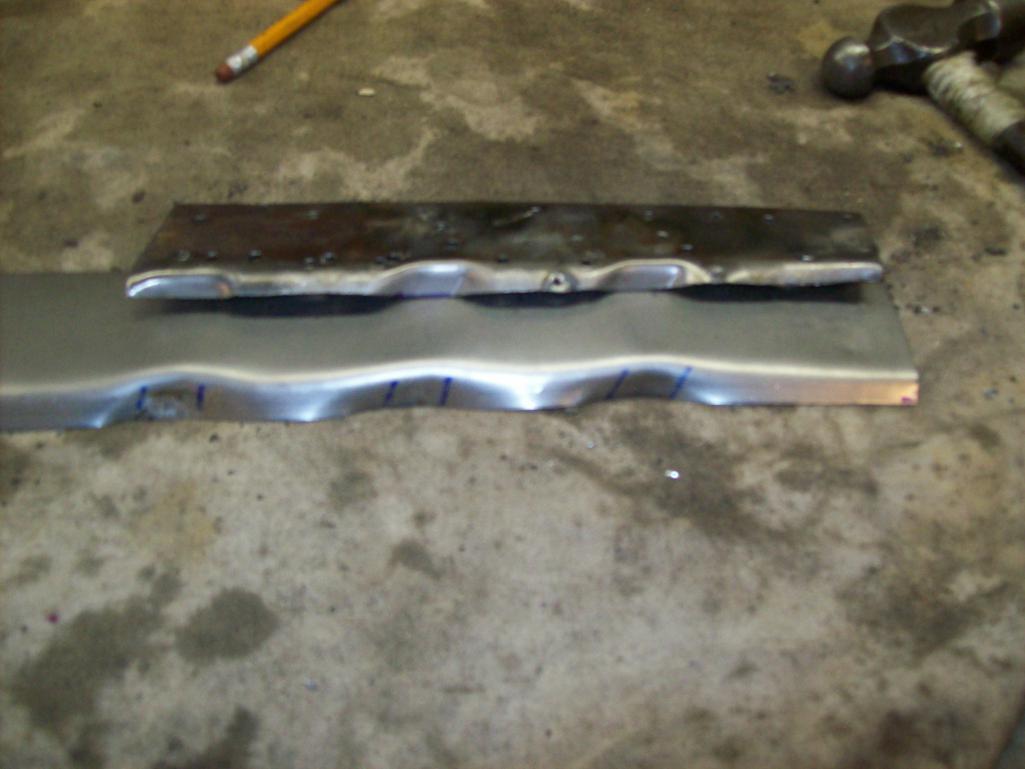
Fitted and trimmed but notice I had to trim the outer long lower to be able to attach the inner reinforcement. This will get spot welded/rossetted to the outer patch.
I used the RD outer long as a template for the patch
This is a PIA but it will be stronger in the long run
Attached thumbnail(s)
Posted by: Speedo Apr 6 2016, 07:45 PM
Continuing with the outer patch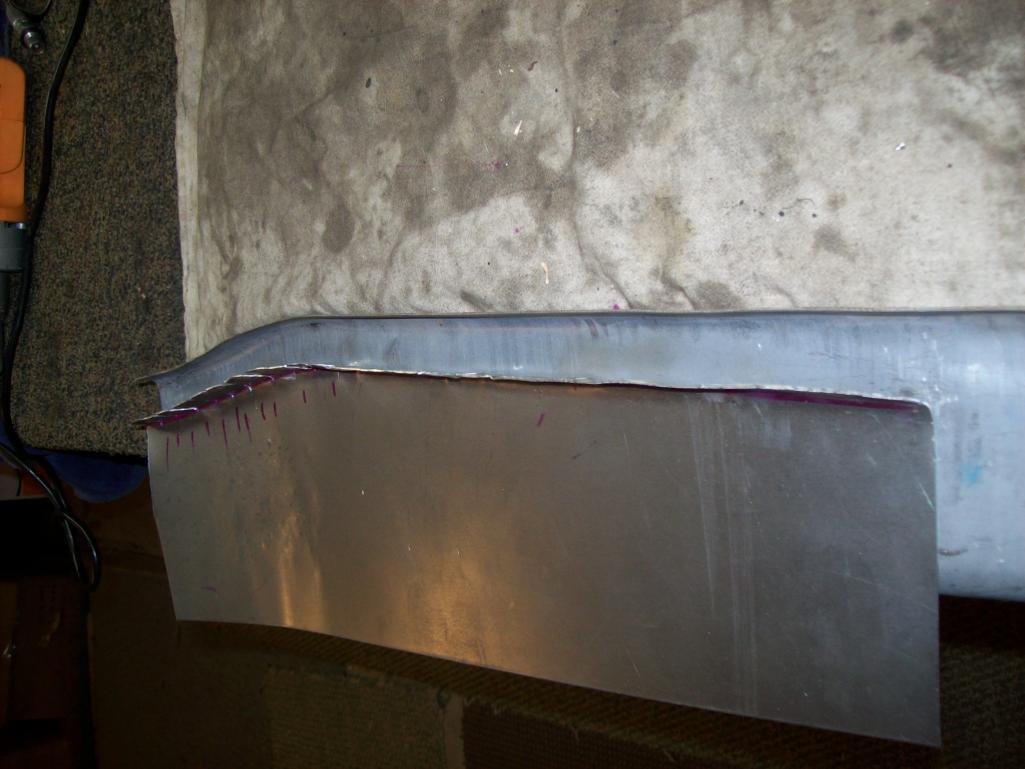
Fitting the inner...which has to be exact so the outer lays snugly over the inner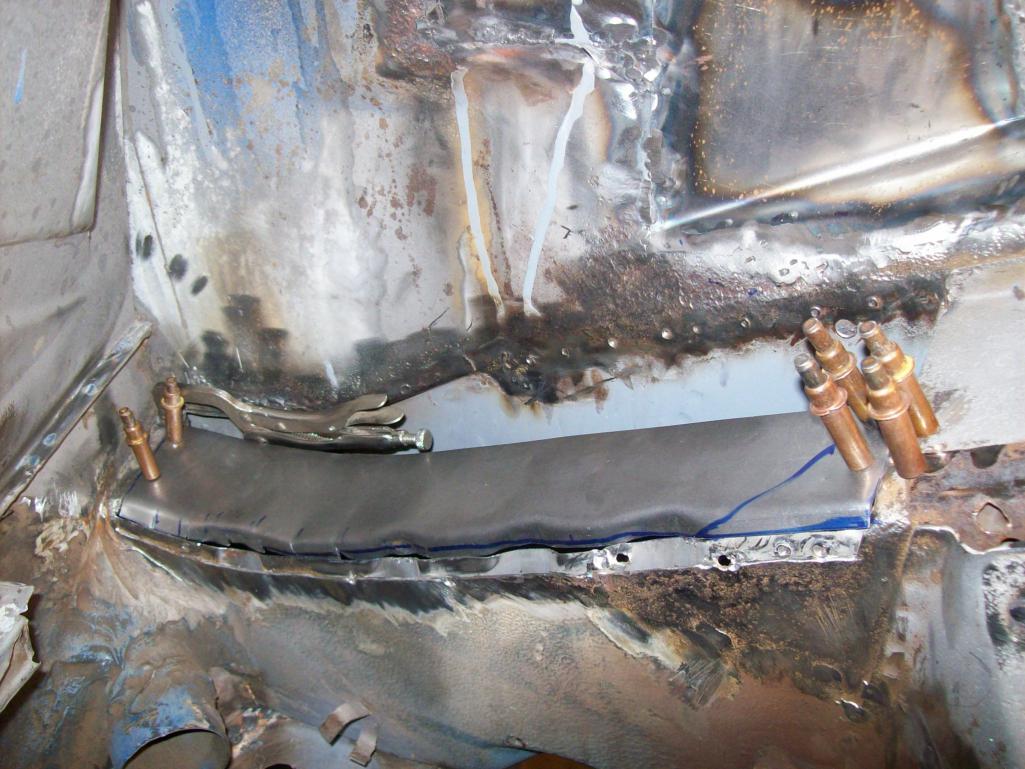
Trimmed 
The inner needs to be carefully positioned so that when the outer patch is laid over it, the rosettes can be easily welded in creating the strength necessary. Yes it would have been easier to splice in the top of the RD repro piece and be done with it. Cleaned out the long and primed it for welding. I cannot shape and trim the outer patch till the inner is welded and finished. My pressure relief valve on my compressor crapped itself....today. Otherwise I would have been welding.
Posted by: porschetub Apr 7 2016, 12:42 AM
No one is bored speedo,having seen you carve up rotten 911's on the bird,what you are doing is same shit different car really.
Good work following with interest
Posted by: Cairo94507 Apr 7 2016, 06:42 AM
I love these restoration threads. Talk about seeing behind the curtain to what makes our cars the wonders they are. The talent we all see here and other build threads is very impressive. 
Posted by: Luke M Apr 7 2016, 06:51 AM
Hi Lars,
The repair looks good. The problem with the RD part (which is actually a AA part) is that it's missing the smooth outer sheet metal. I was told it's just a cosmetic piece that could be added by the end user.
When that replacement part was designed it was made in a thicker gauge metal so there was no need for the outer sheet metal. Obviously anyone could tell that there was a repair done if it was left as is. RD was nice enough to offer building me an outer shell but I decided to look for an NOS replacement part.
I did locate a new NOS right long but it's currently not for sale.
So my backup plan is to buy a good or at least better section from a parts car.
Keep up the good work ...
Posted by: Speedo Apr 11 2016, 07:09 PM
Inner reinforcement is done and trimmed...feels pretty solid. I used a sleeve on both ends.
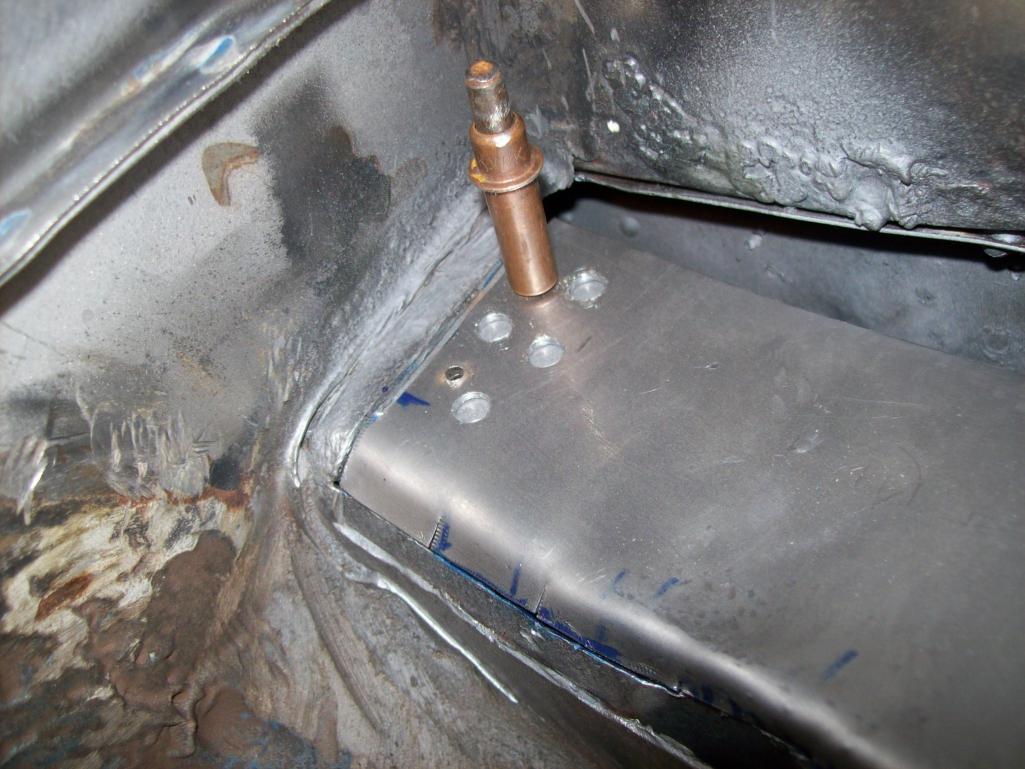
Which should add even more rigidity to the repaired area. Clecoes to align and rosettes to secure 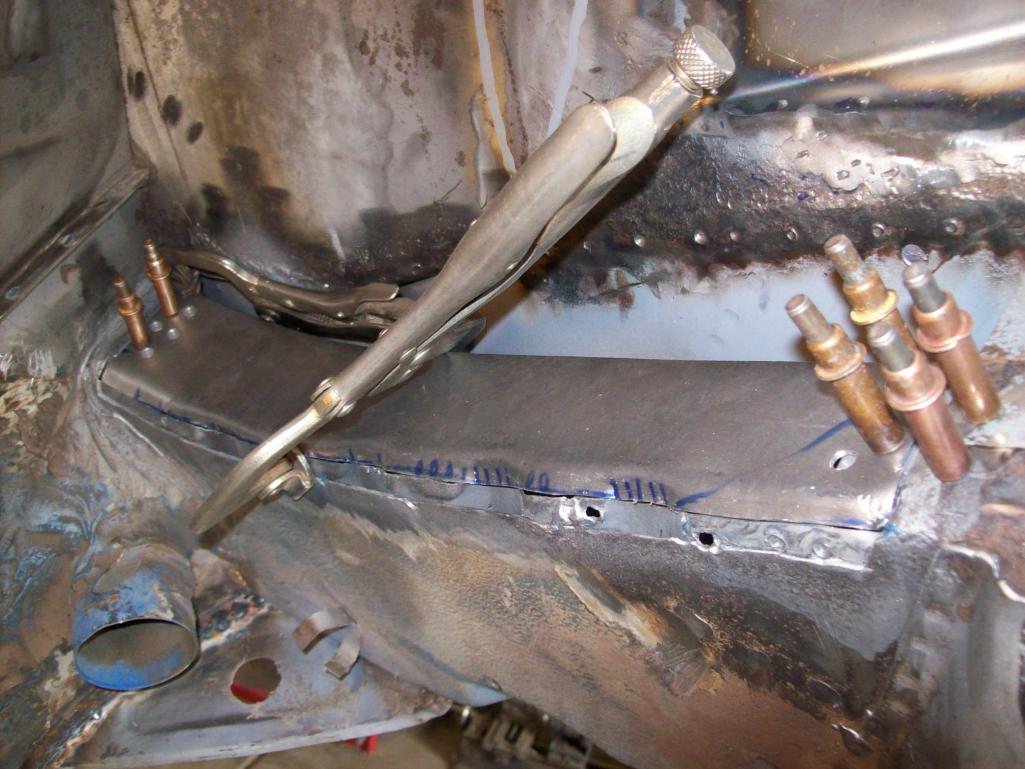
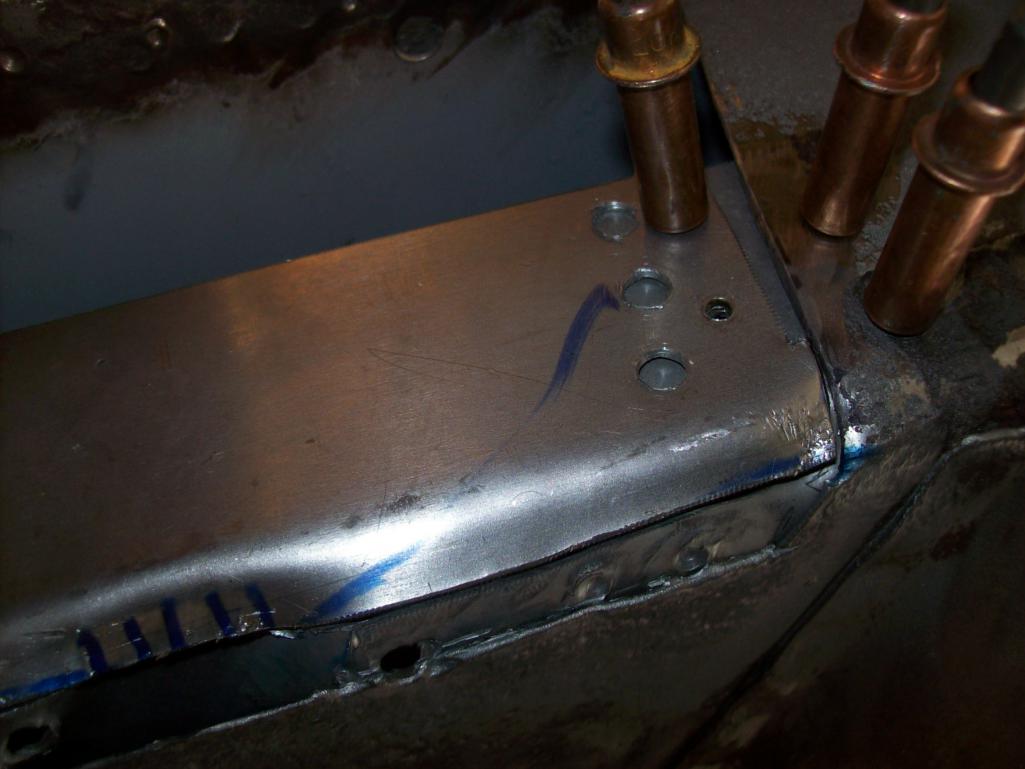
And secured and trimmed. I am pleased with how this inner panel turned out. It will
provide a great form for fitting the outside longitudinal repair. 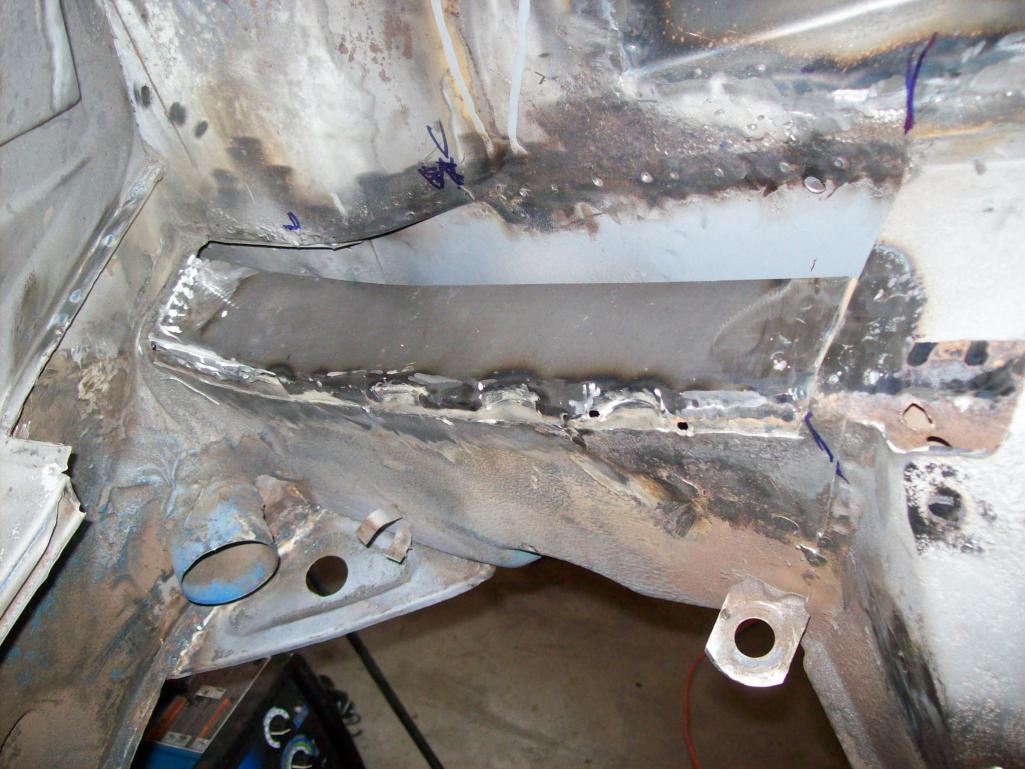
Posted by: Speedo Apr 11 2016, 07:29 PM
I now need to finish the outer patch to the longitudinal. My original piece fabricated using the RD 14 gauge "all in one" wasn't as close as I wanted...it ended up being short. I didn't have a way to fit the RD piece in that area to determine the fit, without cutting it up...so I went on faith. Here is the fit of my piece.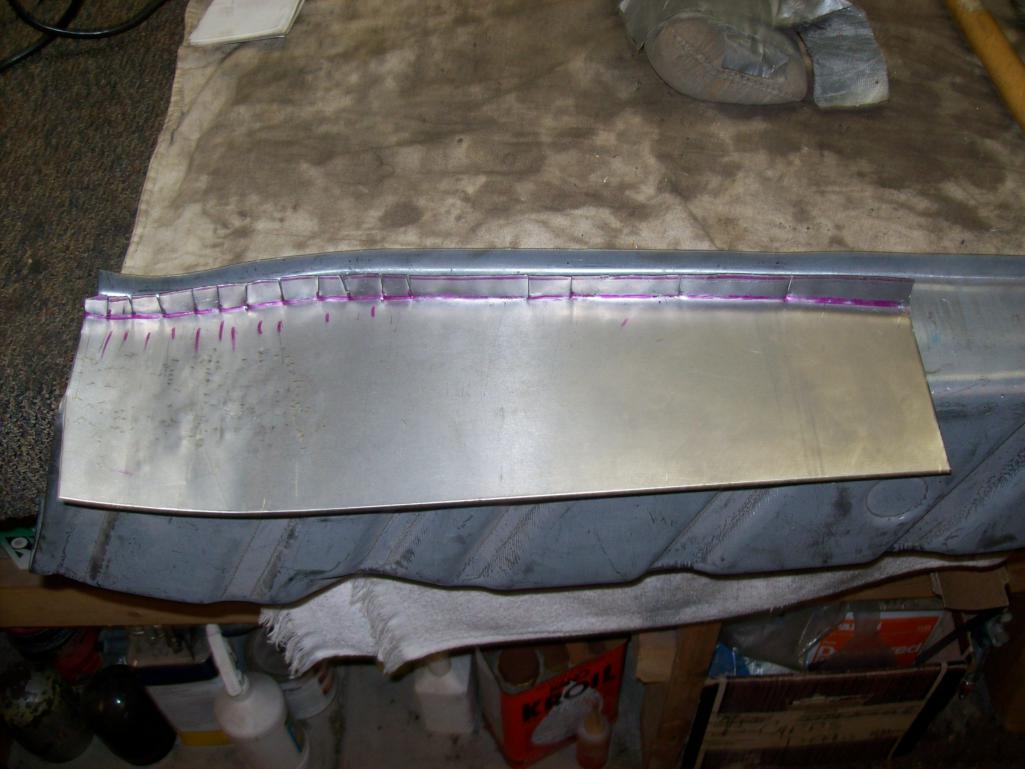
And here is how short the fabricated piece is, fitting tight to the wheel housing wall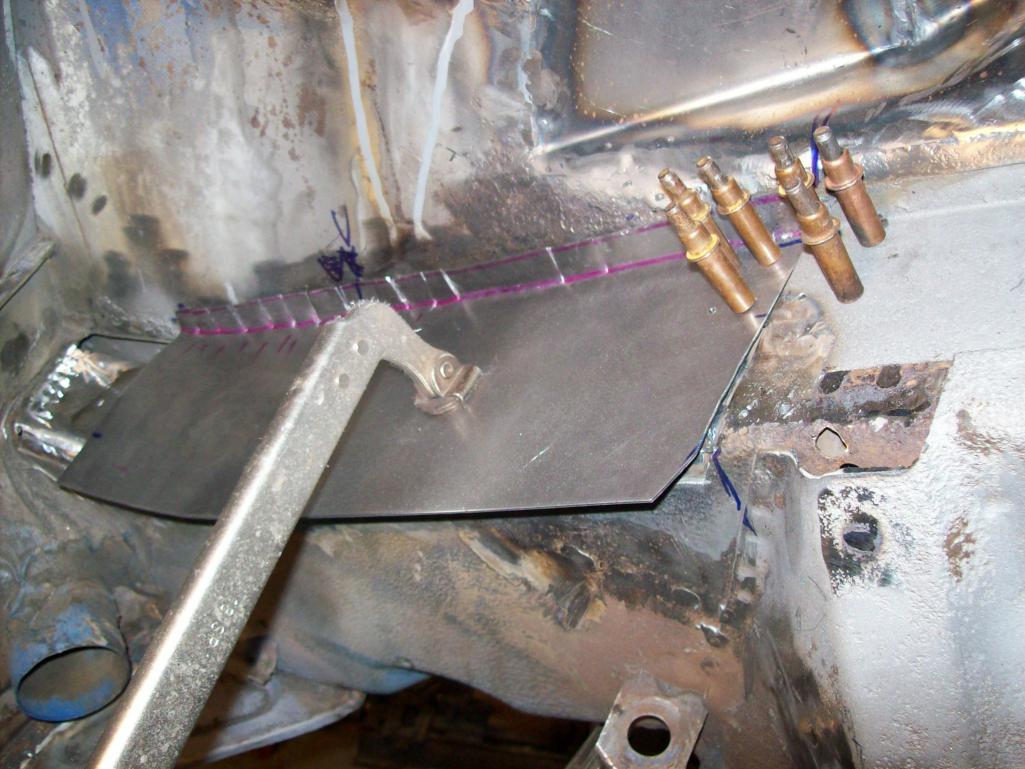
No big deal, I added an extension. Preliminary fitment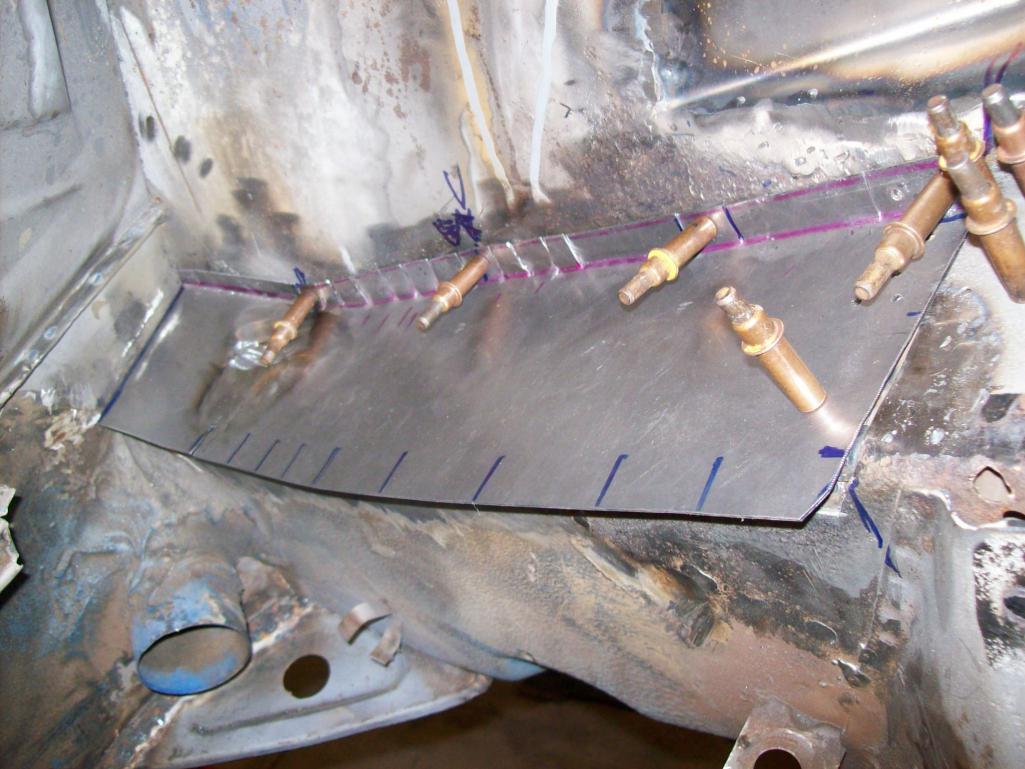
Massaged a bit 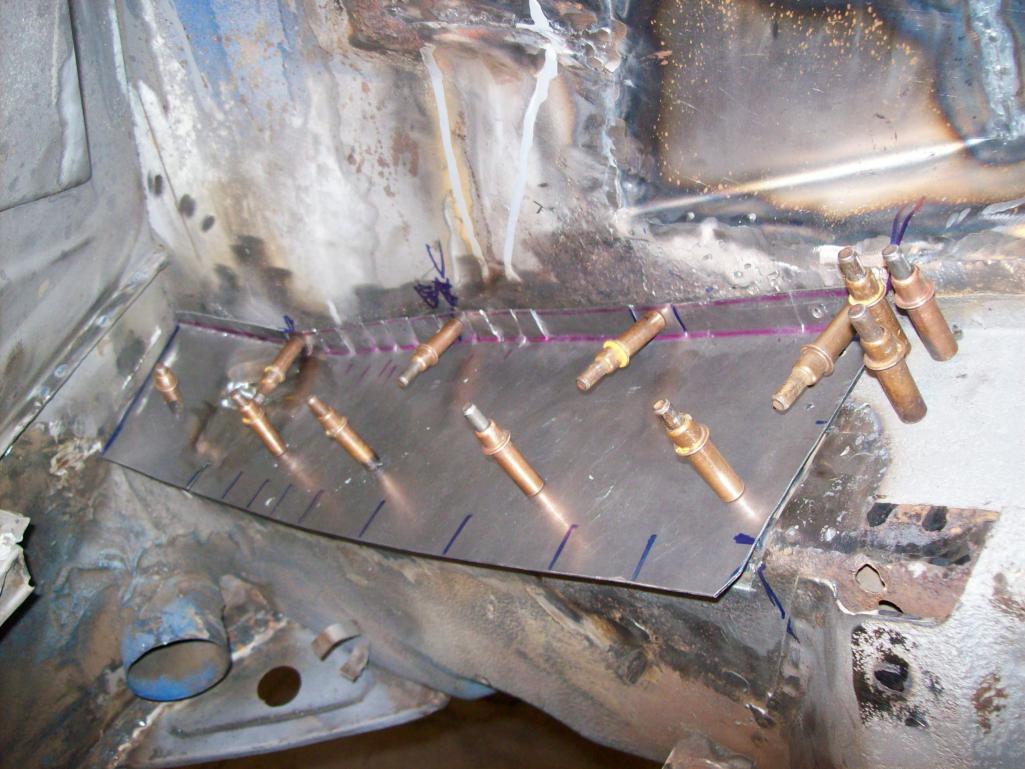
And starting to roll the edges to mimic the original contour of the factory outer longitudinal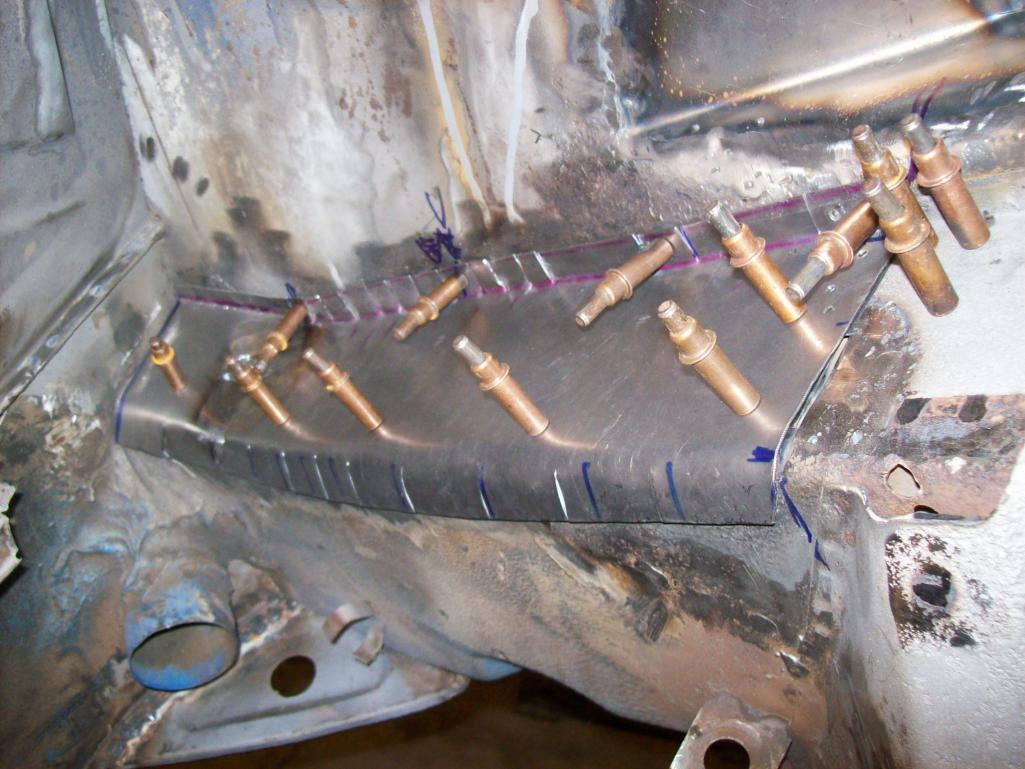
Once trimmed this will get buttoned up and I will be able to address the battery support and tray
Posted by: brant Apr 12 2016, 07:13 AM
Great work.
Posted by: Speedo Apr 15 2016, 07:37 PM
I'm about to close up the hellhole. I have a new pedestal and battery tray (thanks Ferg) and am wondering about positioning both on the repaired longitudinal. Are there any measurements I need to be concerned with?
Speedo
Posted by: Speedo Apr 15 2016, 08:09 PM
Looking forward to not working in the engine compartment. This longitudinal repair is going to be robust. I have not considered welding in the plate reinforcement kit for the car for a couple reasons...1) it is a real six, 2) it will be driven but not tracked, and 3) it will not receive a monster engine. Comments are welcome.
Wanted the outer long cap to fit tight. So I need to trim and massage it.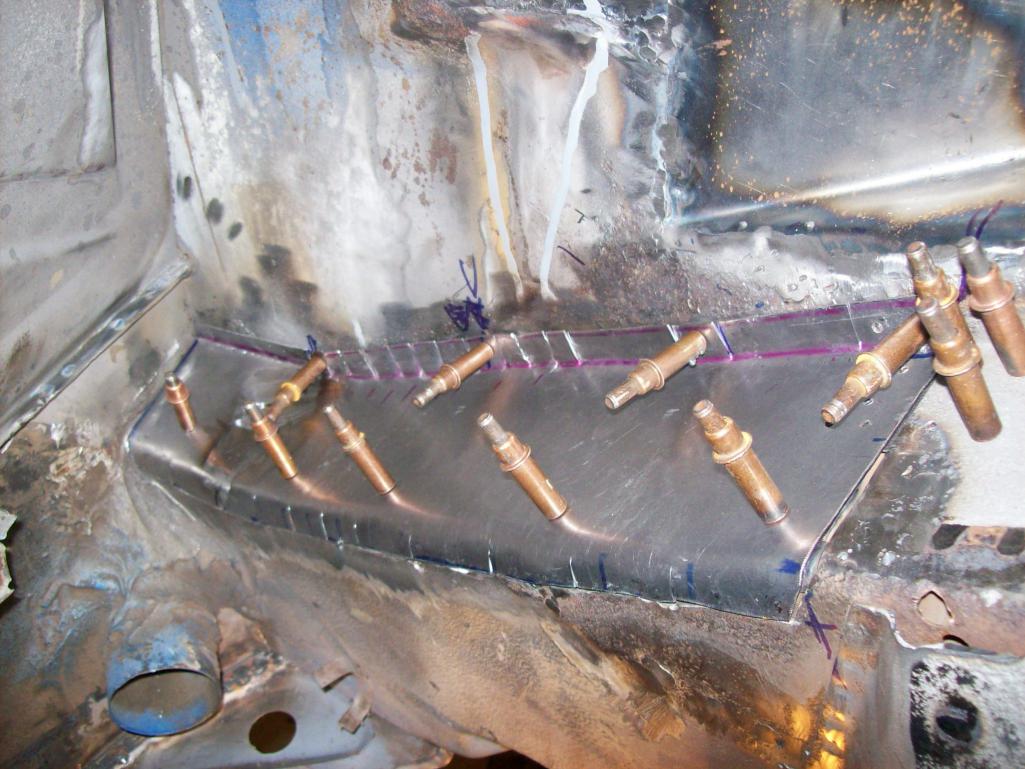
I want it to look clean (recognizing it is buried in the engine compartment and pretty much obscured by the battery tray) so everything needs to be close tolerance. 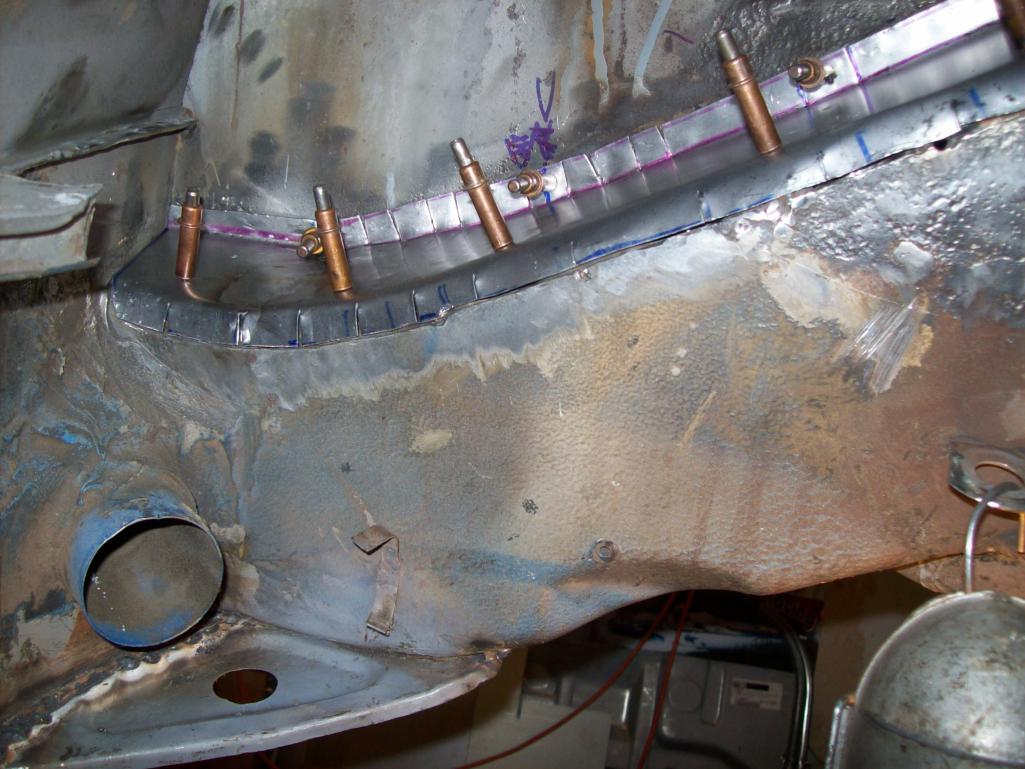 [attachmentid=550825]
Fit, positioned and drilled for rosettes.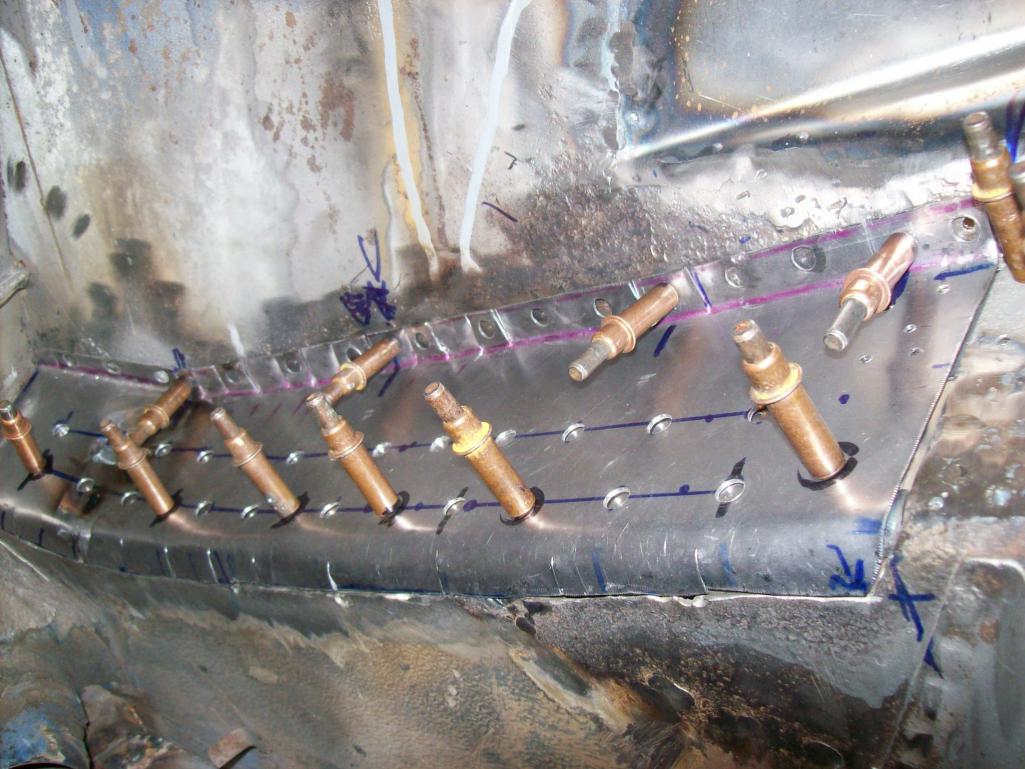
This is a long ways from what I started with...much different than the replacement one piece RD part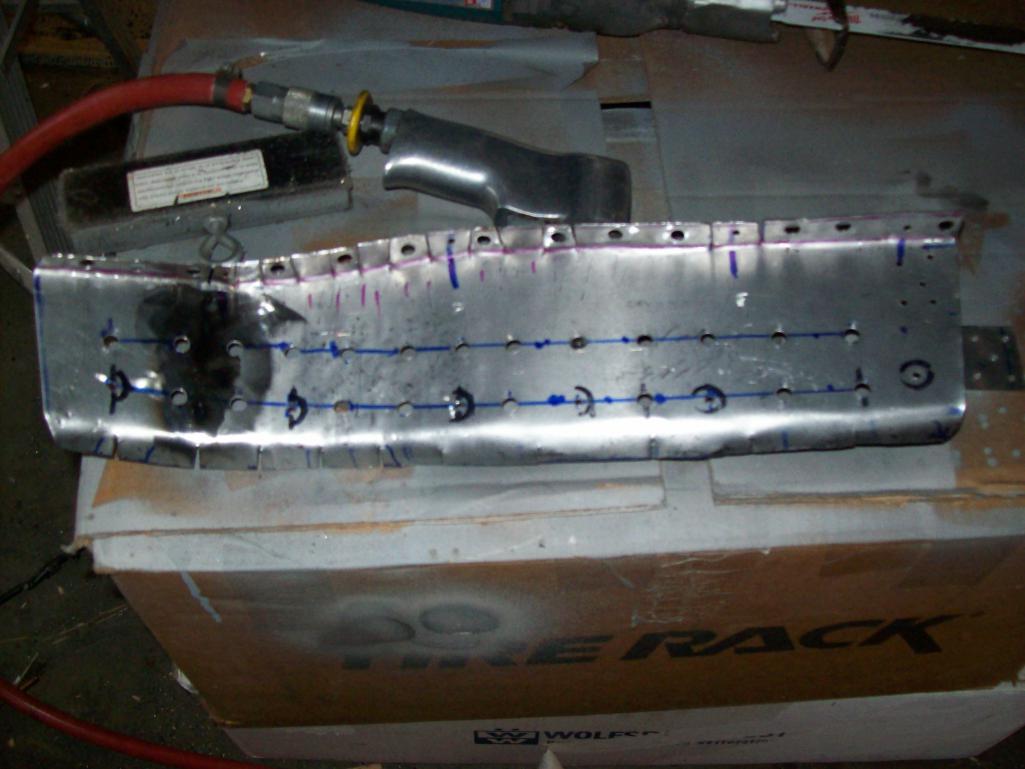

Posted by: Speedo Apr 15 2016, 08:20 PM
A little bit more fitting is required. Comparison to the RD repro...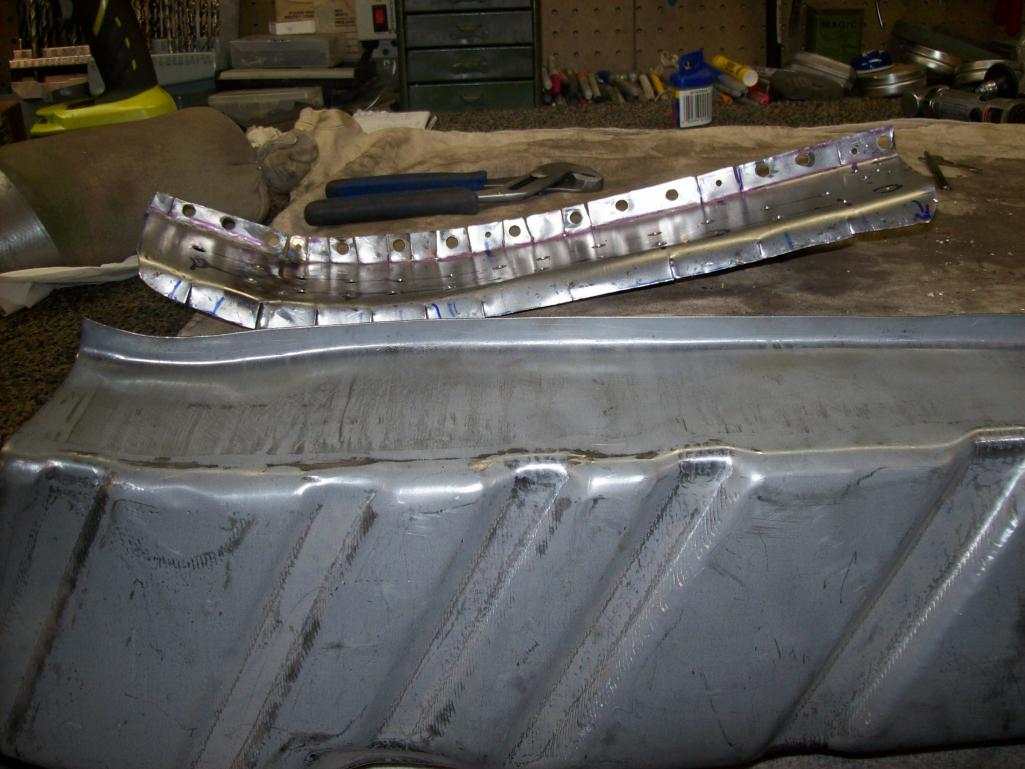
Not to dis RDs repro parts as they are what I consider to be the best repro parts out there...but they still are not perfect. My cap on the long is particular to my car which was built "sort of" by hand in the factory 46 years ago.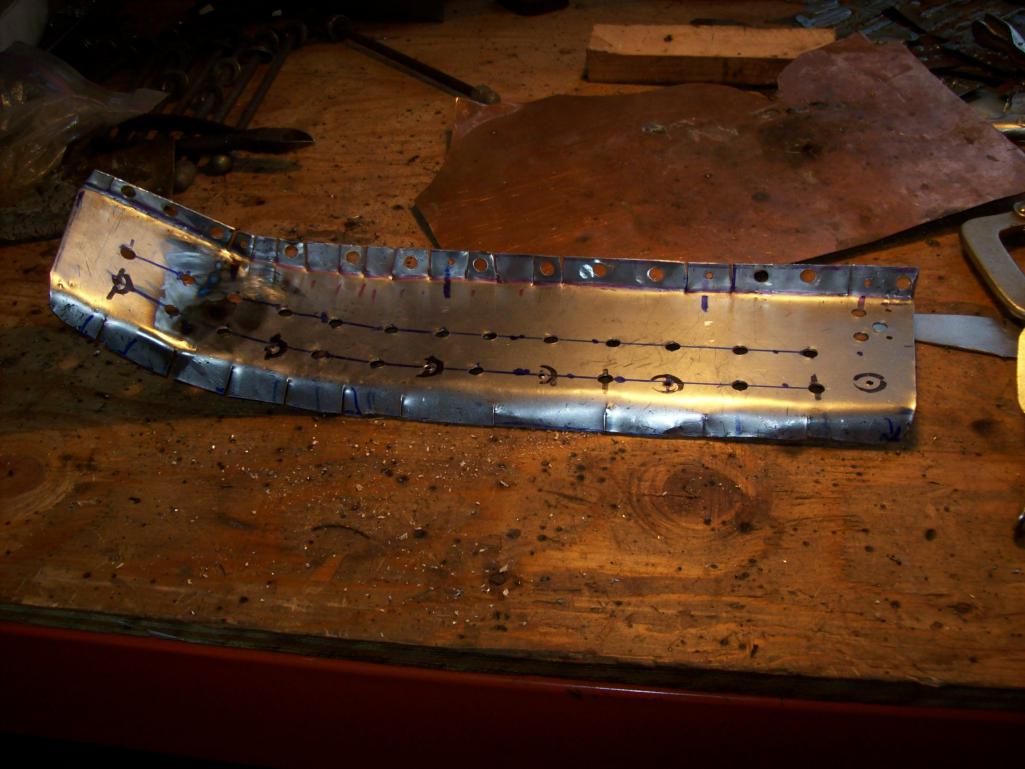
The assistant 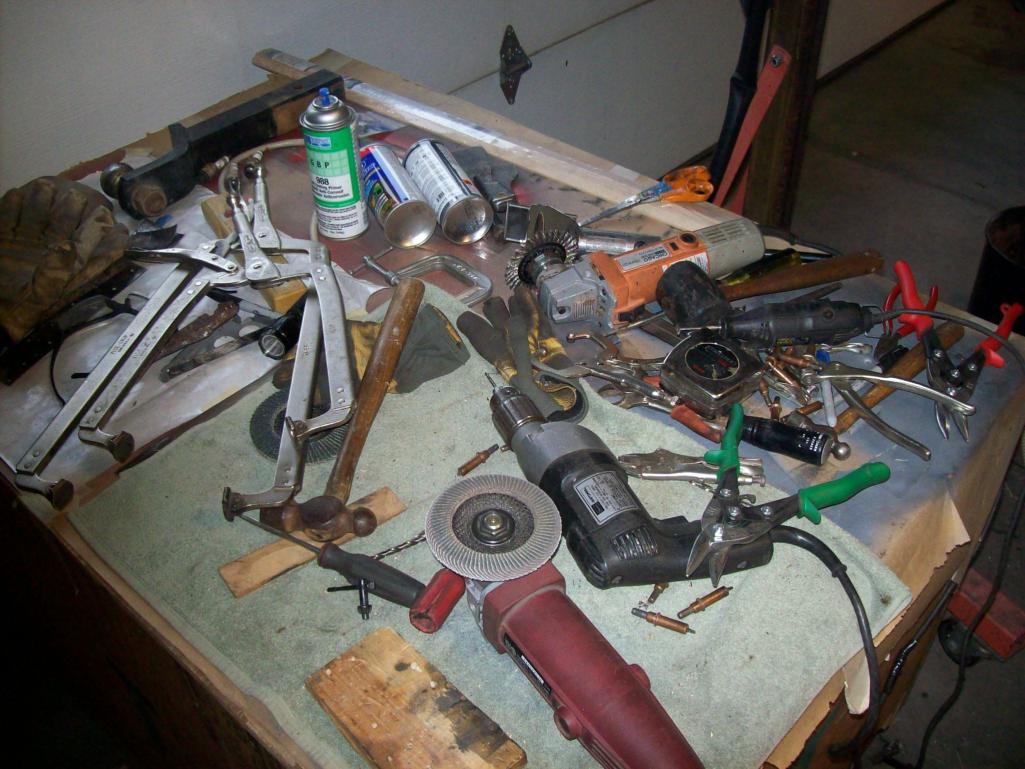
Posted by: Cairo94507 Apr 15 2016, 09:43 PM
Terrific job. I appreciate the effort you are putting in, especially since it is a Six.
I added the inner Engman kit in my Six just because I know these cars can flex. I also am putting a 3.2 in mine and though I will not be racing the car, I know the 3.2 has double the HP and torque of the stock 2.0. I figured it goes on the inside and will be invisible when finished. Shhhhhh....don't tell anyone it is installed.
Posted by: Speedo Apr 17 2016, 07:42 PM
I continue to look at other longitudinal repair threads. People are all over the spectrum with how the repair is approached. I am very comfortable with my repair.
Replacing the inner sleeve...as well as "sleeving" the patch makes sense for me.
New vs old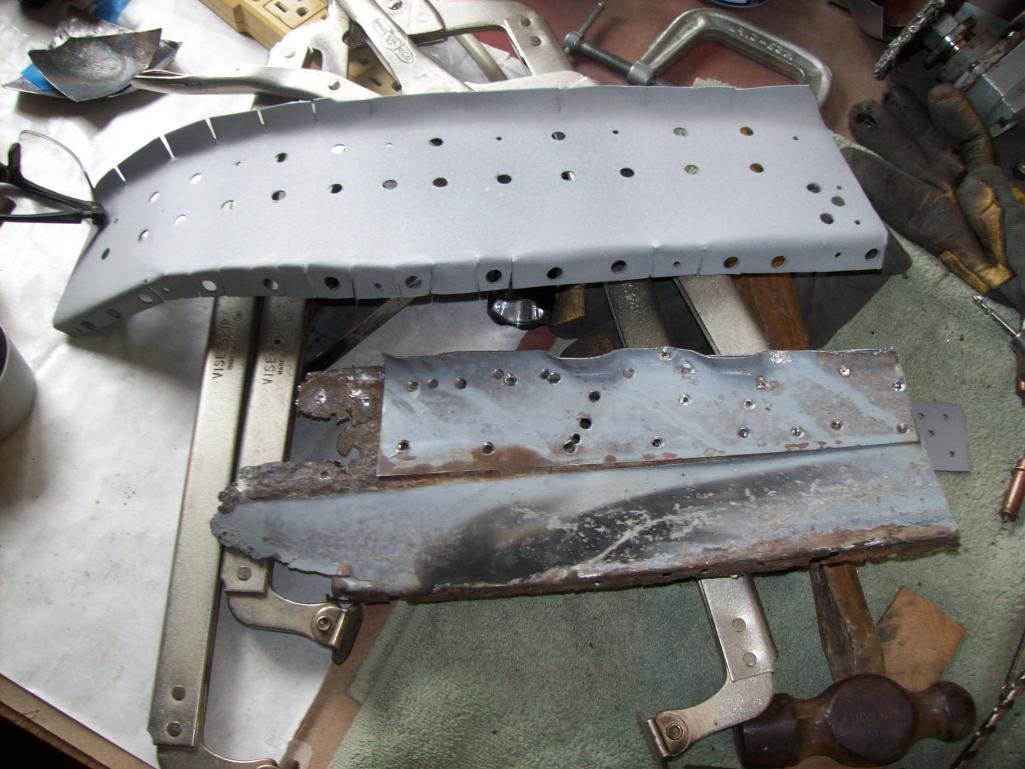
No reason not to make this permanent 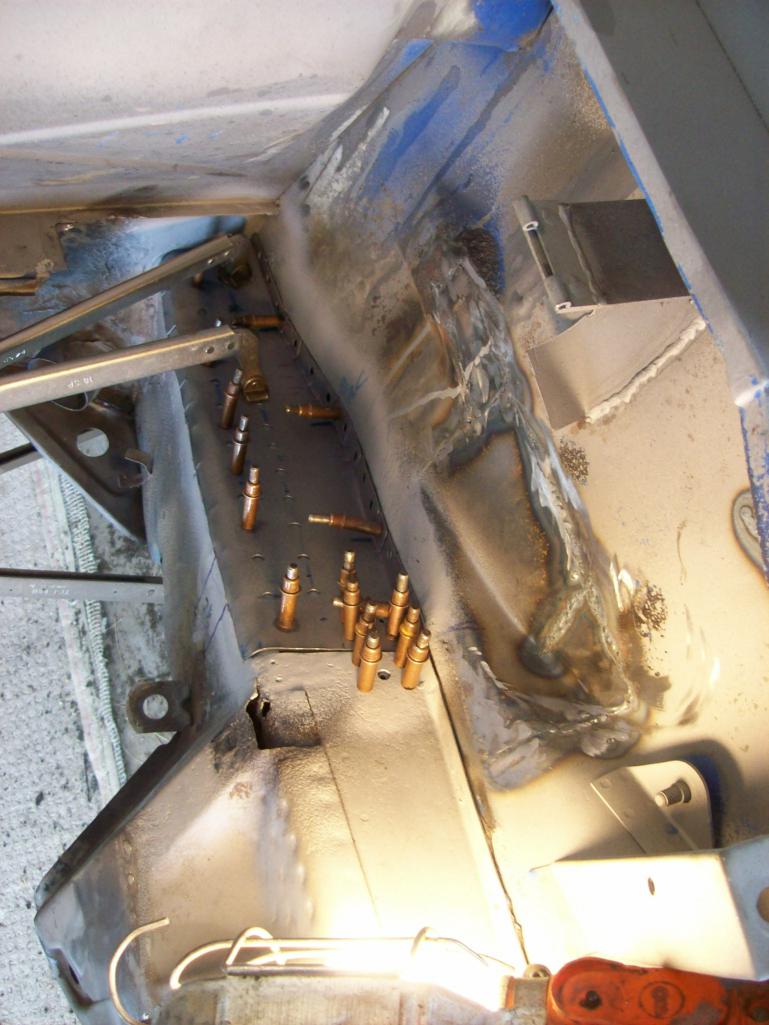
I am challenged with weather at this point...don't like to weld in a closed environment. But the garage door opened is about 29 degrees because of this...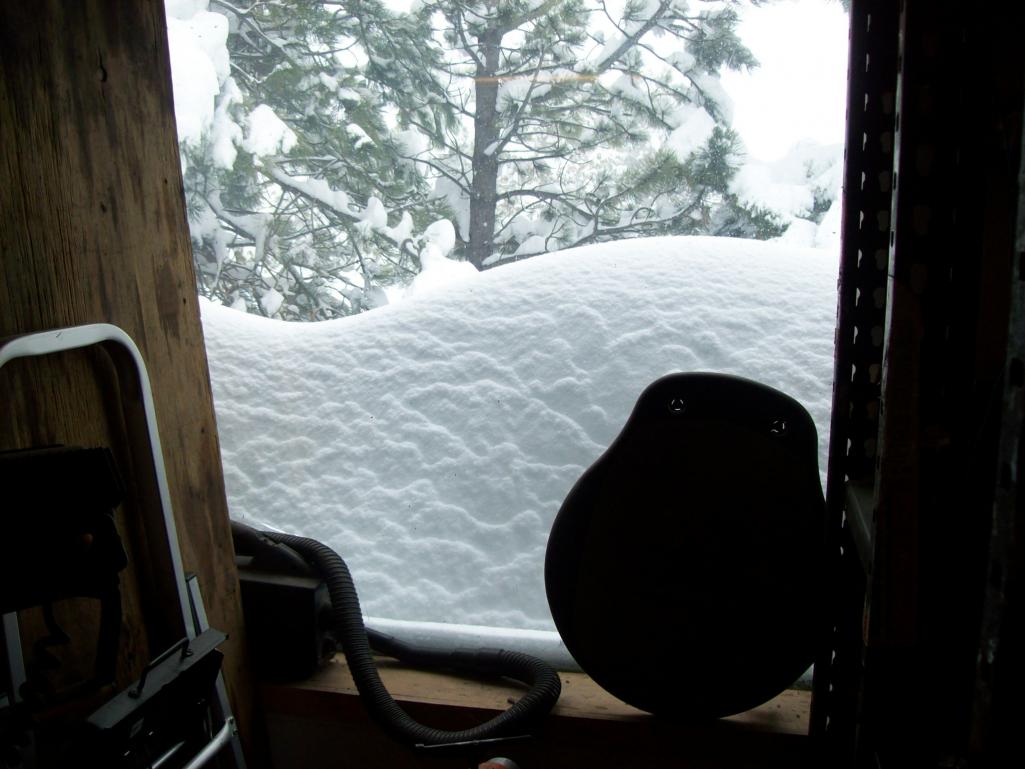

Posted by: Speedo Apr 17 2016, 07:59 PM
I will weld this in this afternoon...if I can open the garage door, but I need to accomplish a small repair to keep the juices flowing. Battery support was replaced at one point...and not very well. Here is my support and tray... 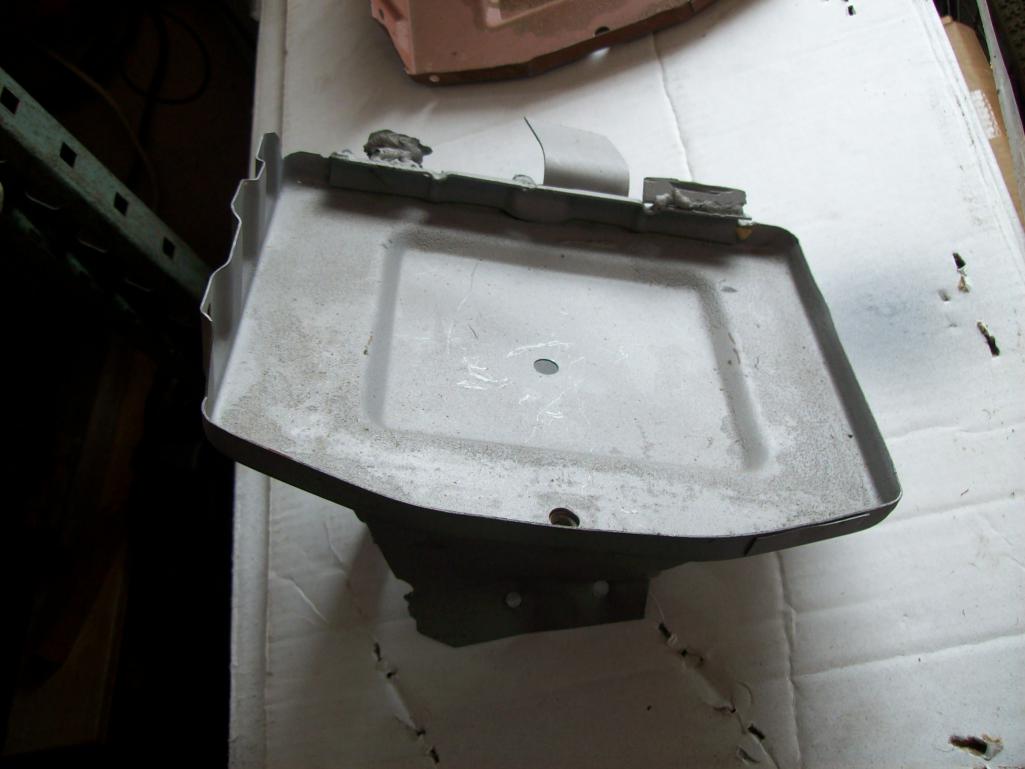 Not the best of shape
Part of the problem is the previous repair and part of the problem is what was needed to remove the stand from the weakened longitudinal. 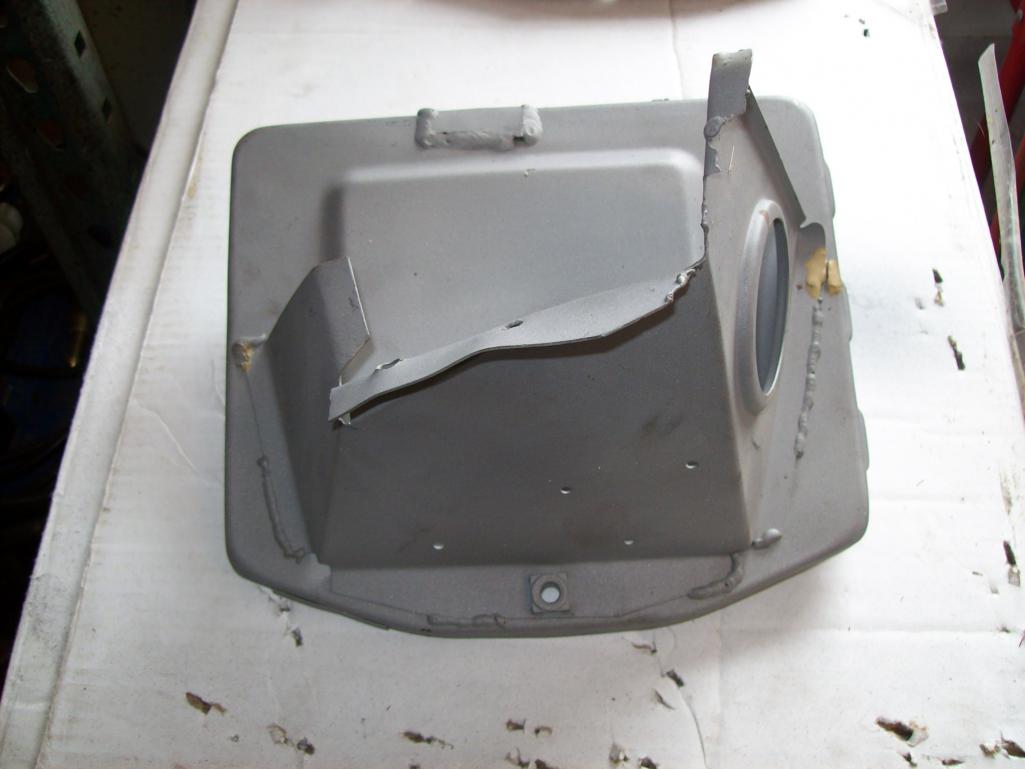
 [attachmentid=551139]
I removed the support from the tray 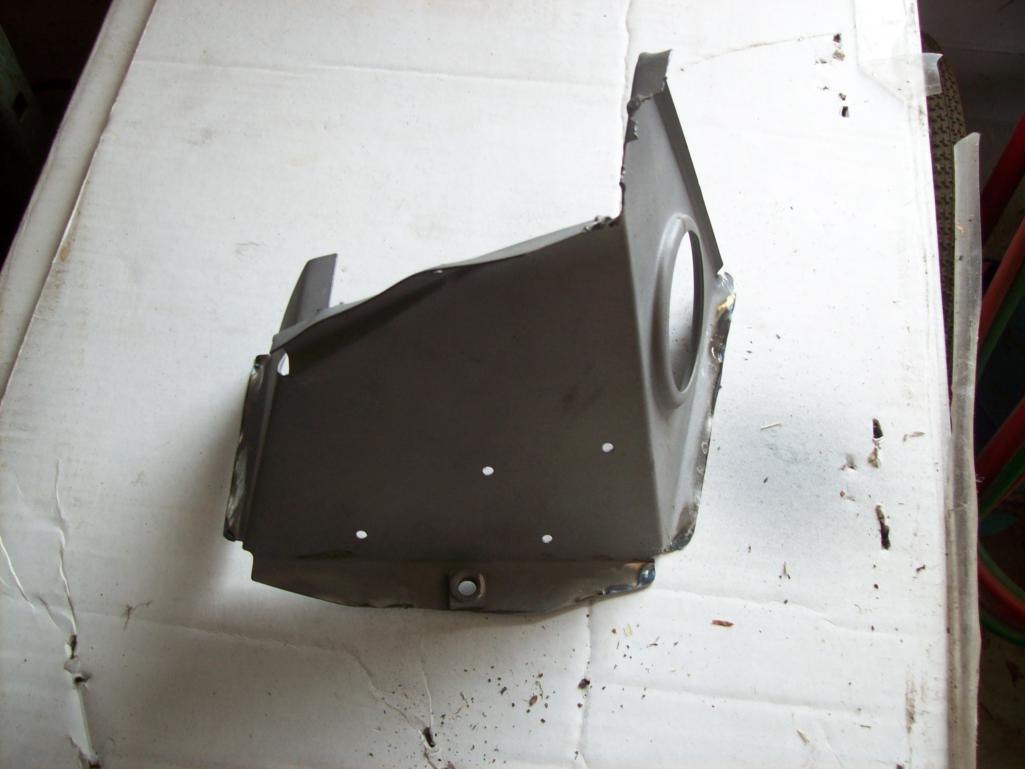
It wasn't in great shape.
Posted by: Speedo Apr 17 2016, 08:33 PM
So with the stand removed from the tray....there were some areas that needed attention. This needs to be repaired...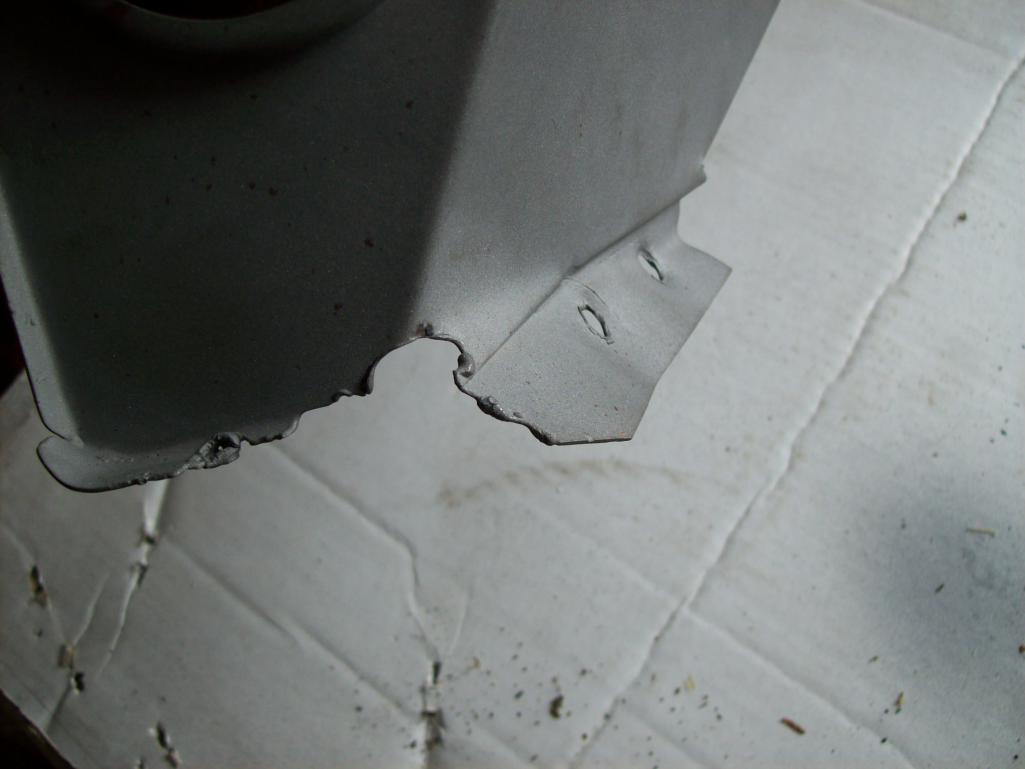
And this 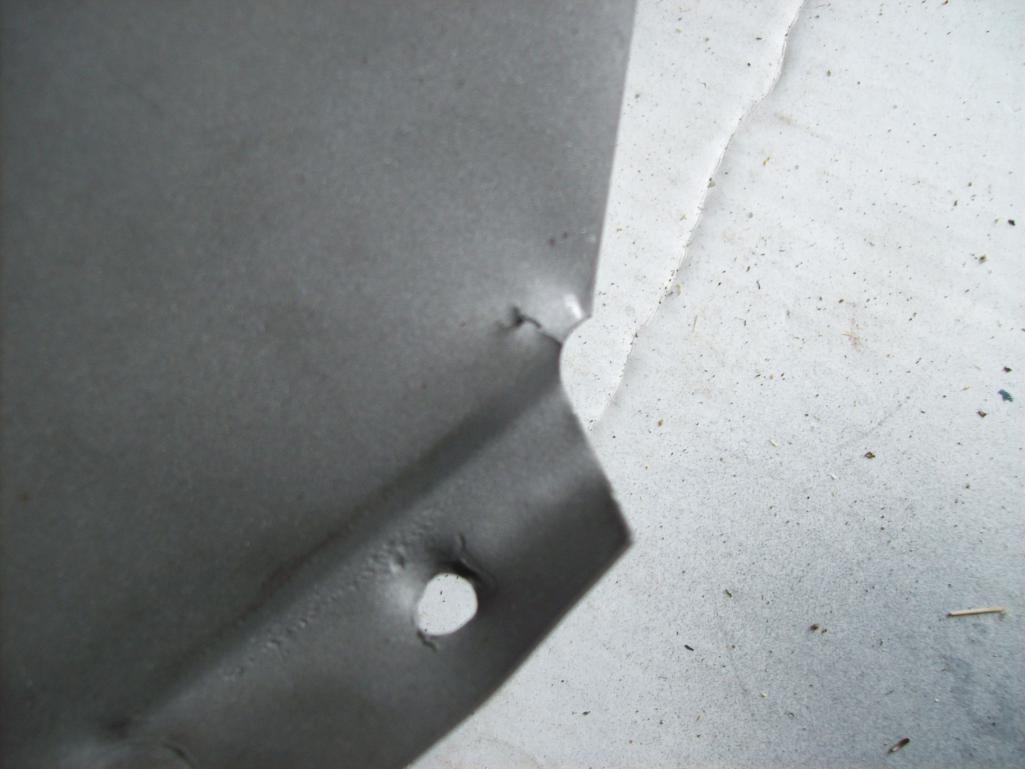
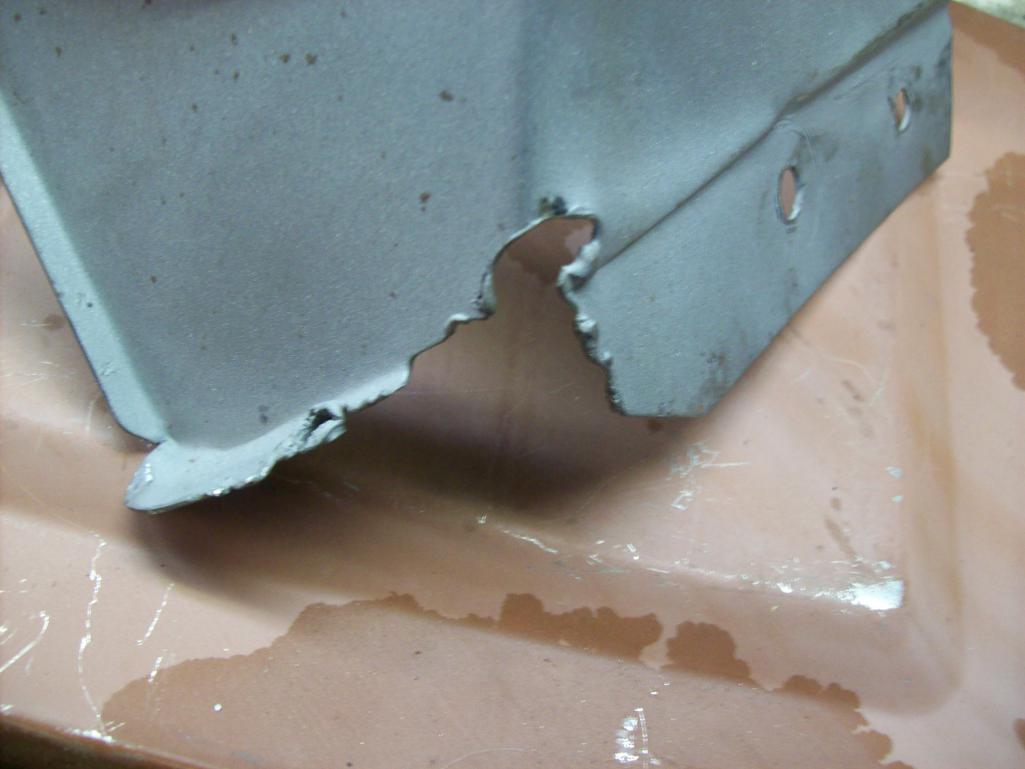
Made some repairs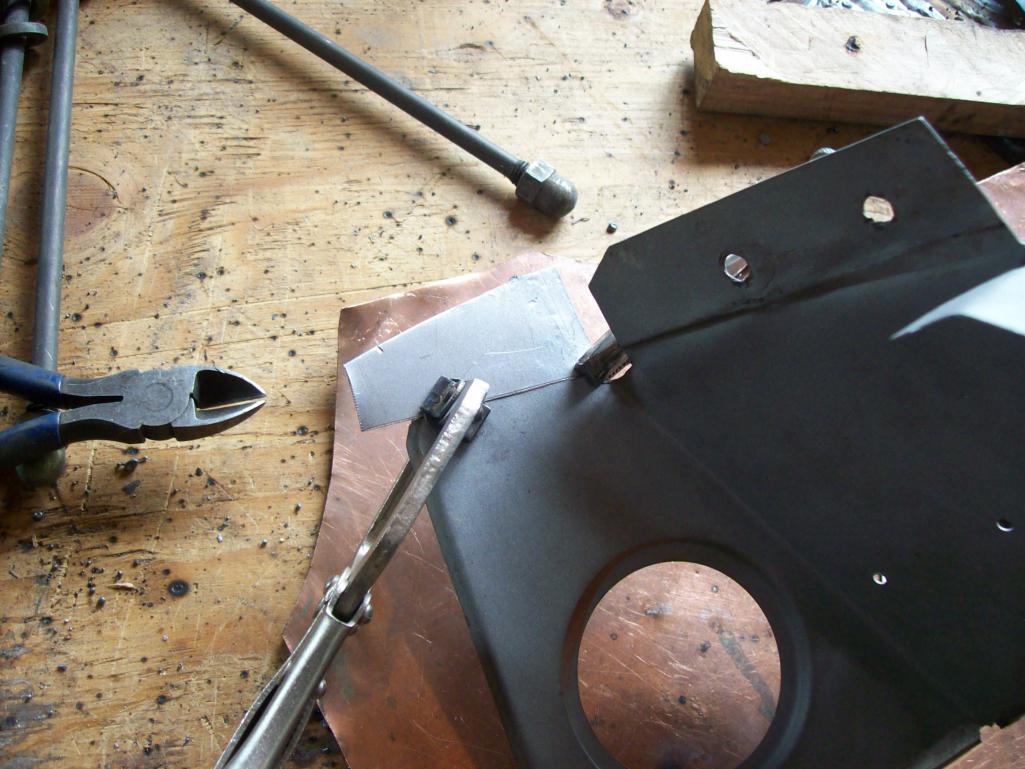
And reshaping 
Posted by: Speedo Apr 17 2016, 08:42 PM
And the repairs...[attachmentid=551148]
and totally repaired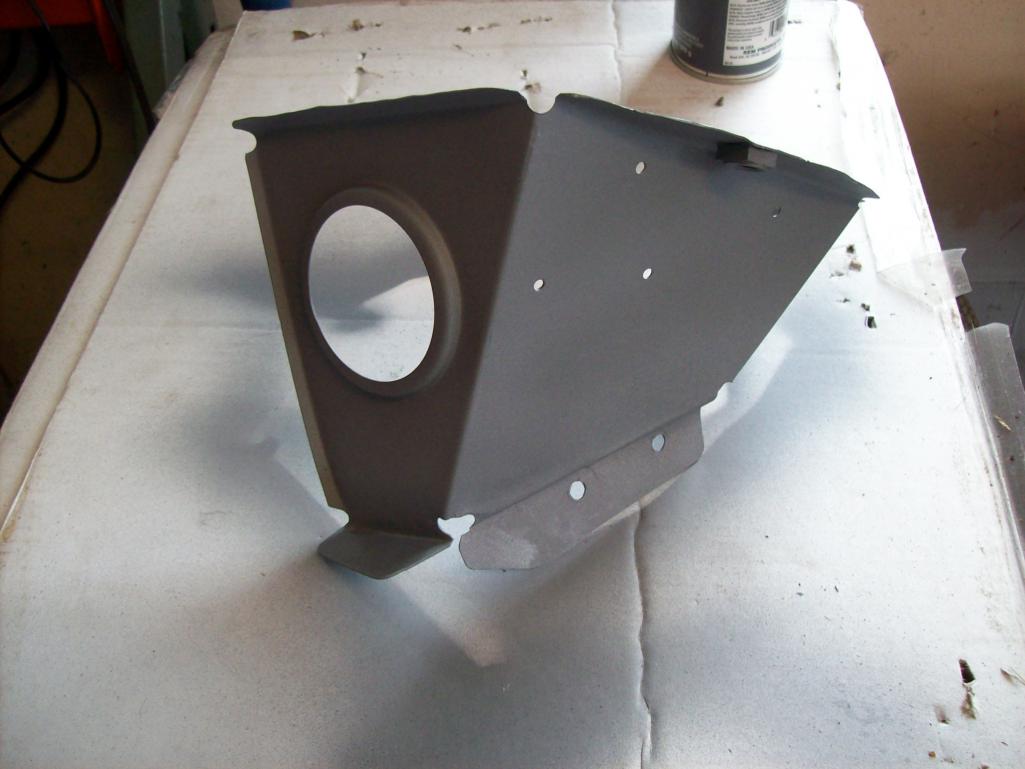
This needs to be dialed in for positioning on the longitudinal.
[attachmentid=551152]
And done 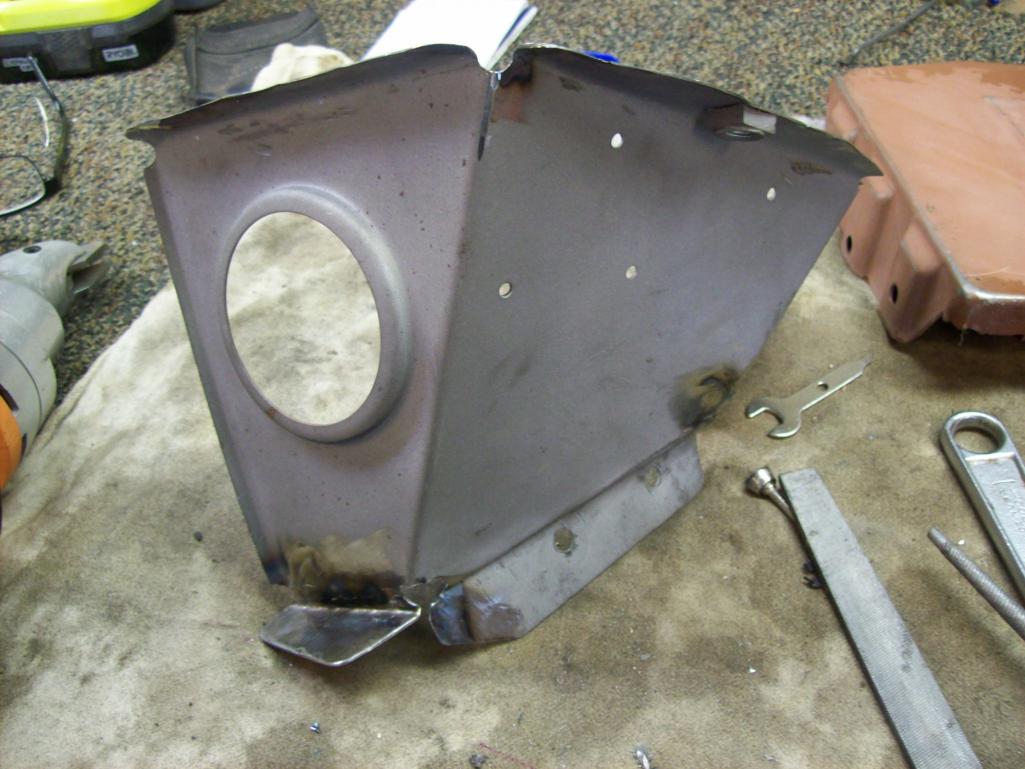 [attachmentid=551154]
Posted by: Speedo Apr 18 2016, 09:11 AM
Mounting question for the battery support. I have no reason to believe the support I have is aftermarket. It is now repaired and ready to be reinstalled. There are three sides to it...downhill, engine side and uphill. The downhill and engine side flanges are pointing away from the support. The uphill side points into the support. I would think this should also point away? In fact it looks that the correct way to mount the tray would be to weld the tray to the support, then weld the combination to the longitudinal. With this flange pointing inside, the access to weld this flange would be very limited. If I welded the support first to the longitudinal, then access to weld the support to the underside of the tray would be very limited. I cannot tell from the RD website and picture of the support which way that uphill flange points...inside or outside. I am inclined to reverse the flange direction and have it point away from the support. Comments?
This picture is looking down at the inside of the support, showing the uphill flange pointing "in".
Posted by: 914fahrer Apr 18 2016, 10:35 AM
Hello,
I only replace my Tray and drill a few holes for welding into the Tray ,this works fine .
Biggest problem is the rust protection after welding in this Area.I use a little brush first.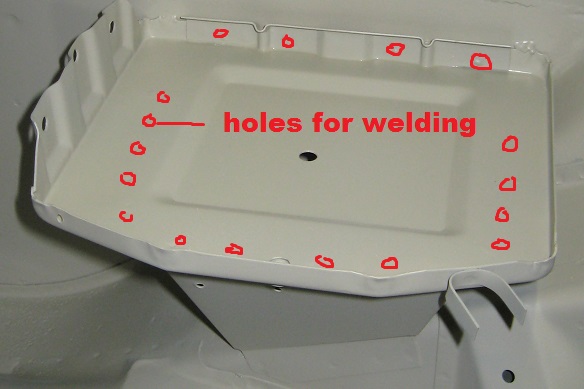
Ralf
Posted by: Speedo Apr 18 2016, 05:47 PM
914fahrer,
Thanks for the picture and suggestion...makes sense. I am thinking now that my battery support and tray were either modified (repaired) or replaced. The tray itself was poorly mig welded underneath to the support. And the same person repeated the poor welding when the tray was welded to the inner wheel house. I believe the factory spot welded the tray to the inner wheel house as well as put a small bead on both ends...which I will also do.
I then called Peter at RD to ask if the "uphill" flange on my repaired battery support was pointing the wrong direction...in (to the left). He kindly sent me some pics of a factory longitudinal with the support, but without the battery tray. Voila! looking down into the support, the "uphill" flange did indeed point to the left.
I then watched the RD battery support install on Youtube. Adam did spotweld the left and facing sides of the support, but as he had already assembled the tray to the support, he did not weld the uphill, flange as it was inside the support. He aslo did both spotweld the rear lip of the tray, and put a bead on both ends to connect it to the inner wheel house.
My plan is to clecoe the tray to the support and line everything up. Once satisfied with the position on the long, I will spotweld the left and engine facing flanges. Then I will remove the clecoes and the tray, so I can weld a bead on the "uphill" flange inside the support. Finally I will spotweld the tray to the support, and the tray to the wheelhouse.
Comments are welcome...criticism too! 
Posted by: Speedo Apr 20 2016, 08:32 PM
So the long repair is in place. I have posted some questions recently, with zero responses. I have come to realize that getting a response from this forum...involves beer, and I am ok with that...but you need to come pick up the beer. Not the case with other forums I associate with...but I am ok. So the damage to the hell hole is repaired and I am working on the battery support/tray and shelf. Is this the factory tie down for the battery? This is terrible.
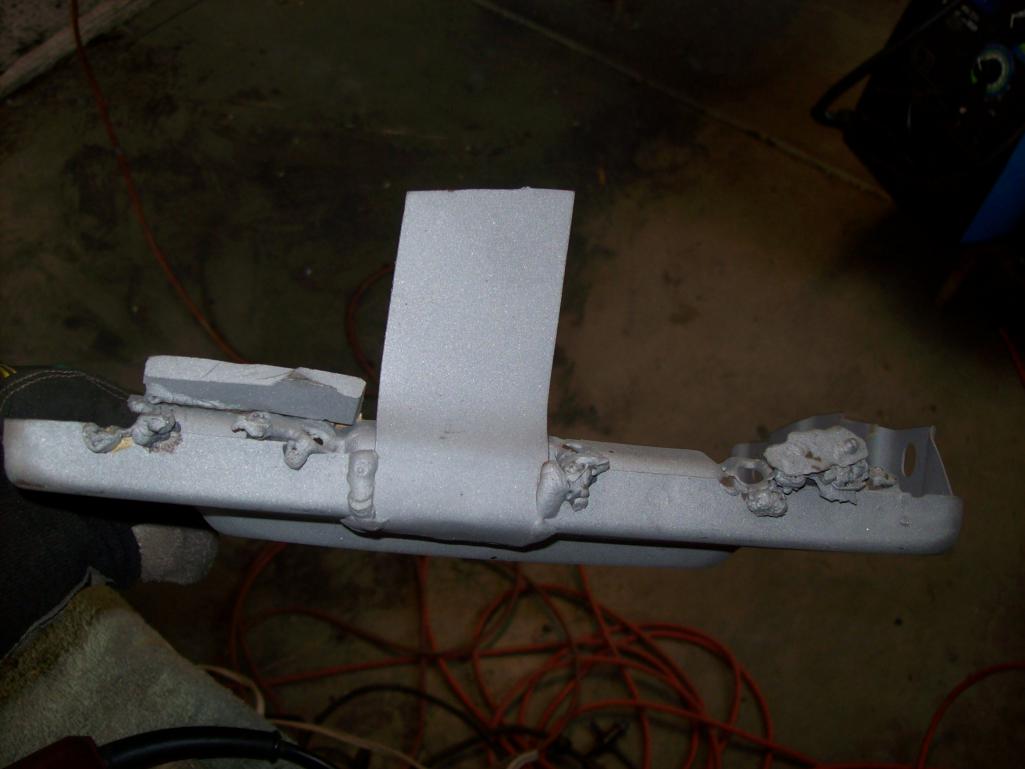
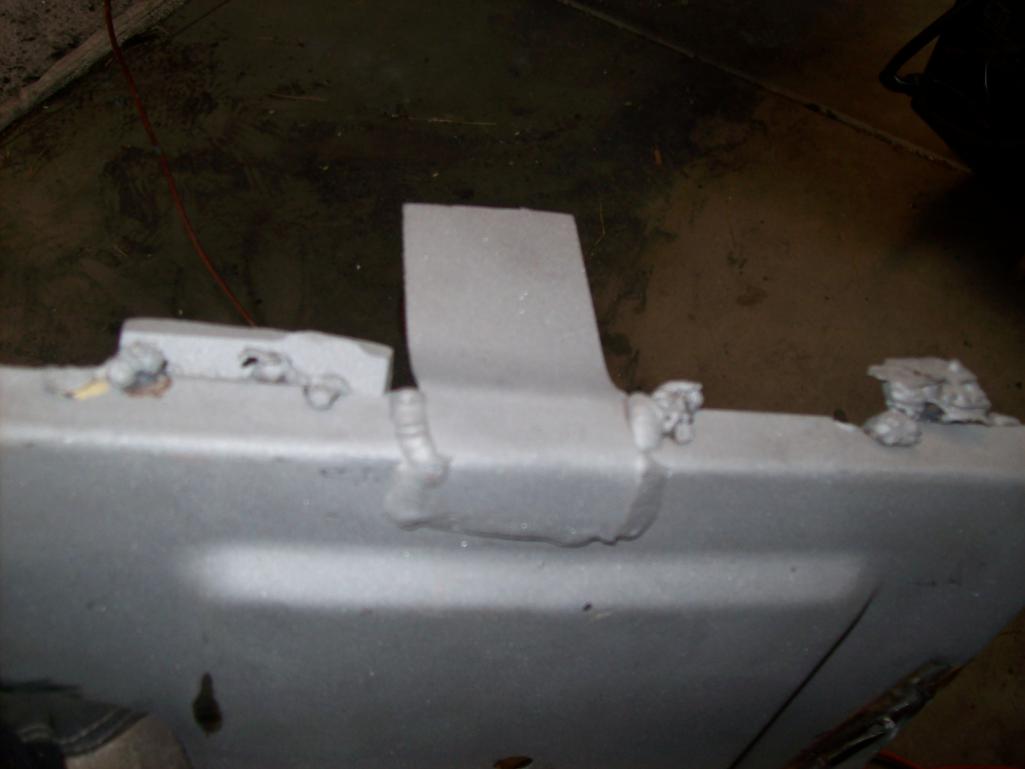
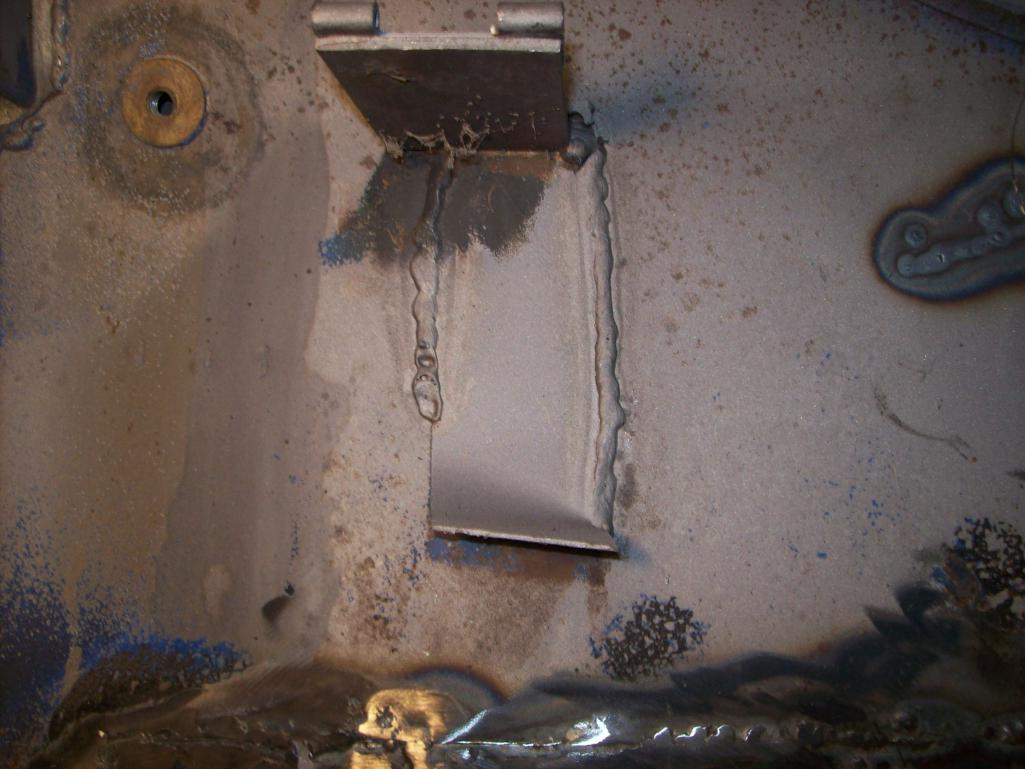
I am preparing the refurbished support to mate with the tray Ferg graciously handed me 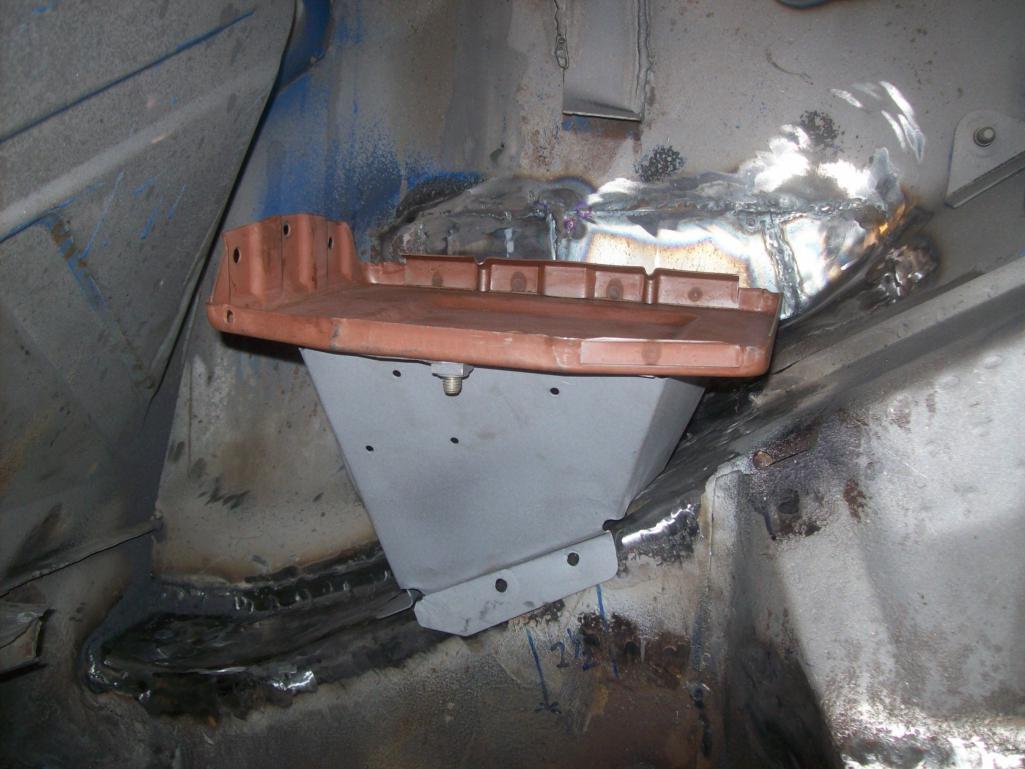
Posted by: Speedo Apr 20 2016, 08:34 PM
Here is the long repair[attachmentid=551788] 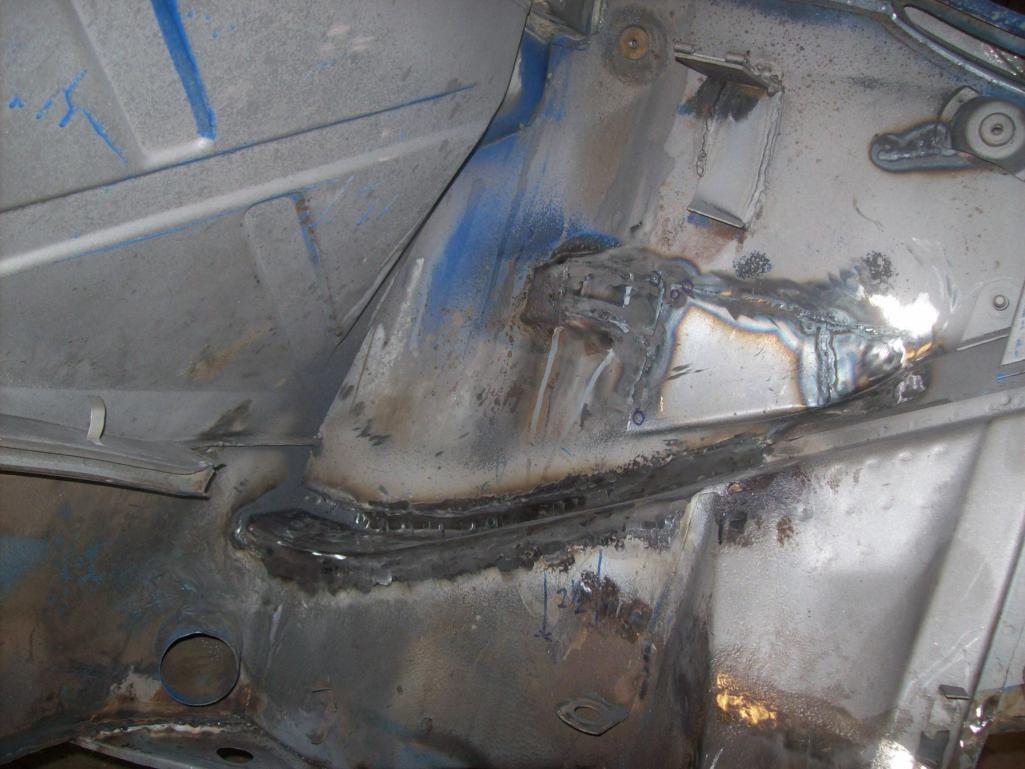
Posted by: Luke M Apr 21 2016, 07:08 AM
Hi Lars,
The repair looks good. That battery hold down is not factory. The battery is held in place by some tabs located on the upper part of the battery tray then you bolt down a clamp (P315) to the most inner (engine side) through the upper tray. That's all you get unless you go aftermarket.
What other questions do you have as I may have the answer for you.
Attached image(s)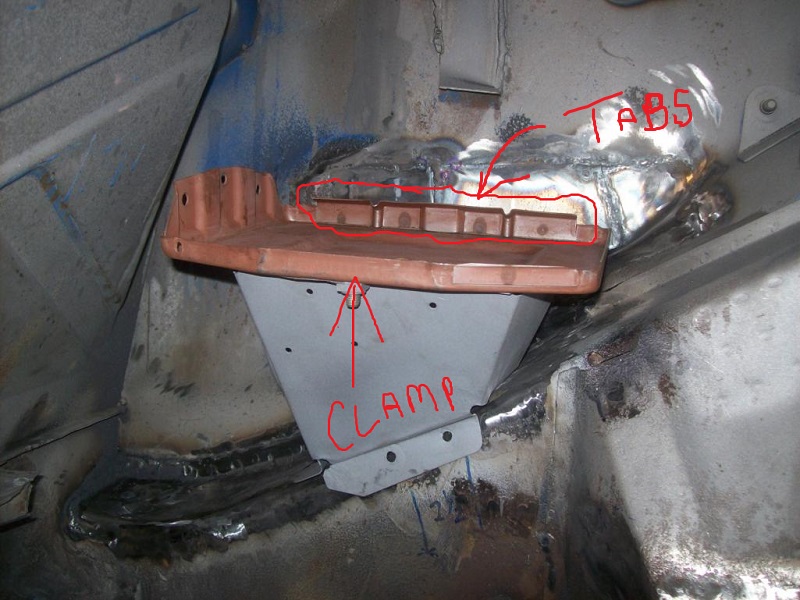
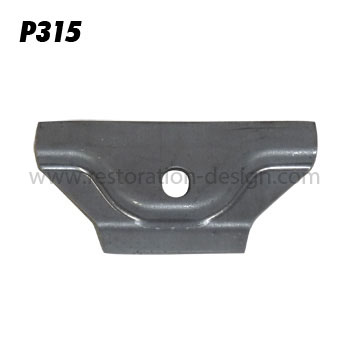
Posted by: Speedo Apr 21 2016, 10:20 AM
Thanks Luke! I actually already have the P315! Funny, it looks like the piece of steel that holds the floorboards down in a 911. I ordered all my steel from RD a while back, and guess I had the premonition to order that part! So I need to remove the cruelly welded after market hold-down before I do anything else. What a disaster.
Posted by: Luke M Apr 21 2016, 11:44 AM
Thanks Luke! I actually already have the P315! Funny, it looks like the piece of steel that holds the floorboards down in a 911. I ordered all my steel from RD a while back, and guess I had the premonition to order that part! So I need to remove the cruelly welded after market hold-down before I do anything else. What a disaster.
Yup, cut this part off and grind smooth..
Attached image(s)
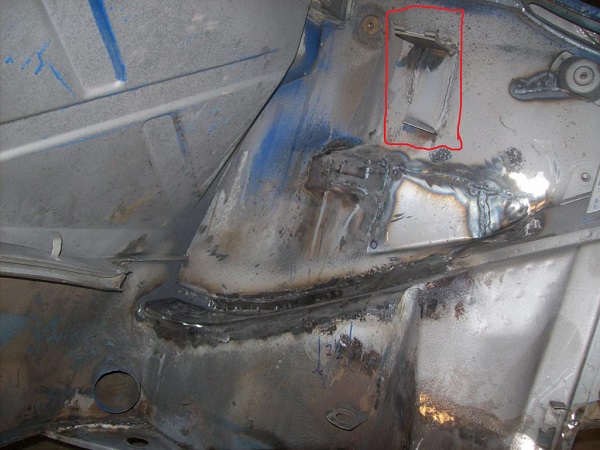
Posted by: Speedo Apr 22 2016, 06:57 PM
Yessir...tomorrow. Will report back.
Need to guilt Mike and Brant (skinny man) into coming up to survey the damage. Luke...you should come up too!
Posted by: Luke M Apr 23 2016, 06:30 AM
Yessir...tomorrow. Will report back.
Need to guilt Mike and Brant (skinny man) into coming up to survey the damage. Luke...you should come up too!
Don't tempt me... I could use a vaca.

I found some nos sheet metal at the Hershey swap meet but I'm still looking for the right long section to start on my car. I have a few inquiries out so see how that turns up. Thinking of going to the Stoddard meet also.
Keep posting progress pics..
Posted by: Speedo Apr 30 2016, 01:52 PM
So I see most of the trays have a small bead on both ends of the tray, welding the tray to the inner wheel house. This diagram shows the four spot welds across the back also. These spot welds are coincident with the spot welds that were used to weld the back support to the tray. Should I add four spot welds back there also or are the beads on the end sufficient?
Hello,
I only replace my Tray and drill a few holes for welding into the Tray ,this works fine .
Biggest problem is the rust protection after welding in this Area.I use a little brush first.
Ralf
Posted by: Speedo Apr 30 2016, 07:28 PM
You guys must all be out playing golf. Too busy drinking beer and playing a game you will never get better at...instead of helping a "newbie" brother soldiering on in good faith. Oh well, at least the weather here is not conducive to golf...even if I were playing with an orange soccer ball, I would lose it. 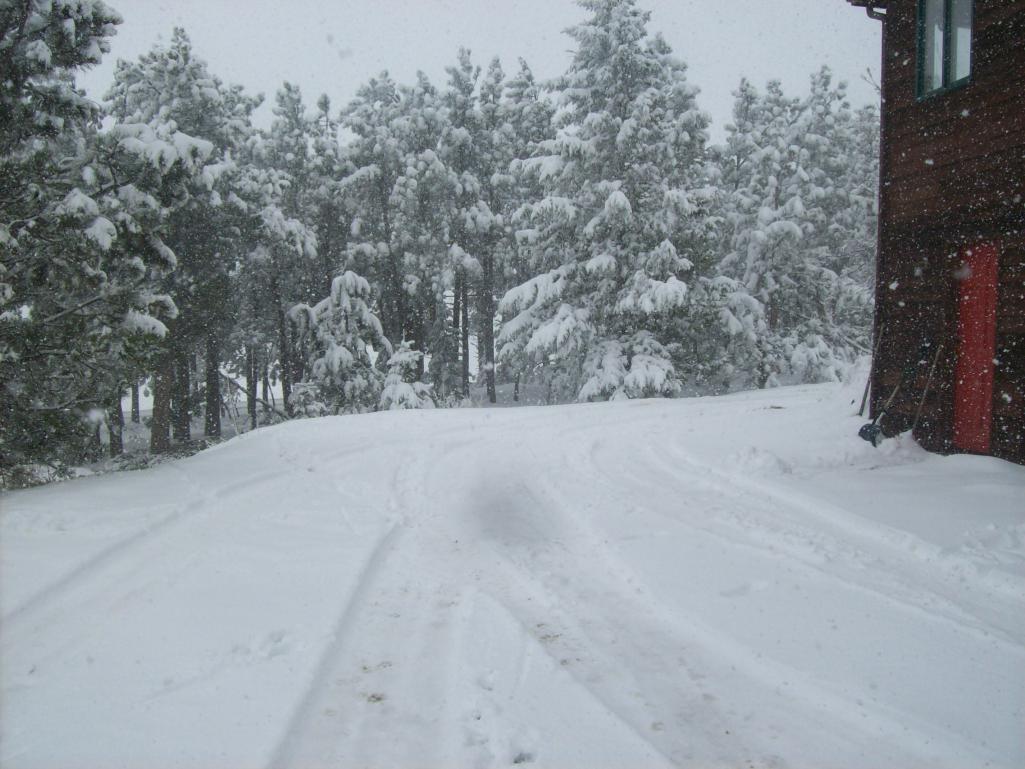
Thank god my dog has a tail...like in the second picture or I might have lost her.
So I will continue without help looking over my shoulder...fine.
Oh yeah...BTW, tomorrow is May first and the snow is supposed to stop by Tuesday
Posted by: Speedo Apr 30 2016, 07:47 PM
You guys have seen this a thousand time so I am going to skip the narrative. I am done with SEM weld through primer. Product sucks and I have wasted a lot of cans do to clogging. Sherwin Williams distributor is sorry, noting that they have received lots of complaints about the issue. Seems the paint congeals and screws up the nozzle. Anyway done with them. This is the new primer...and it works well. 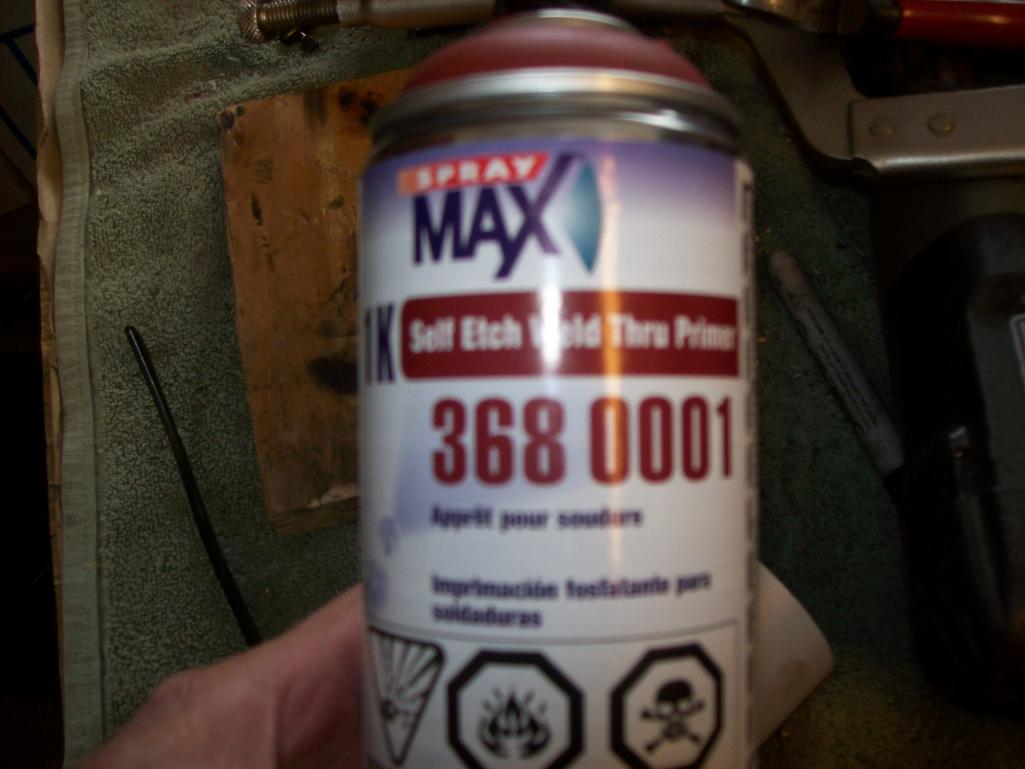 Small repair on the top of the suspension tower...
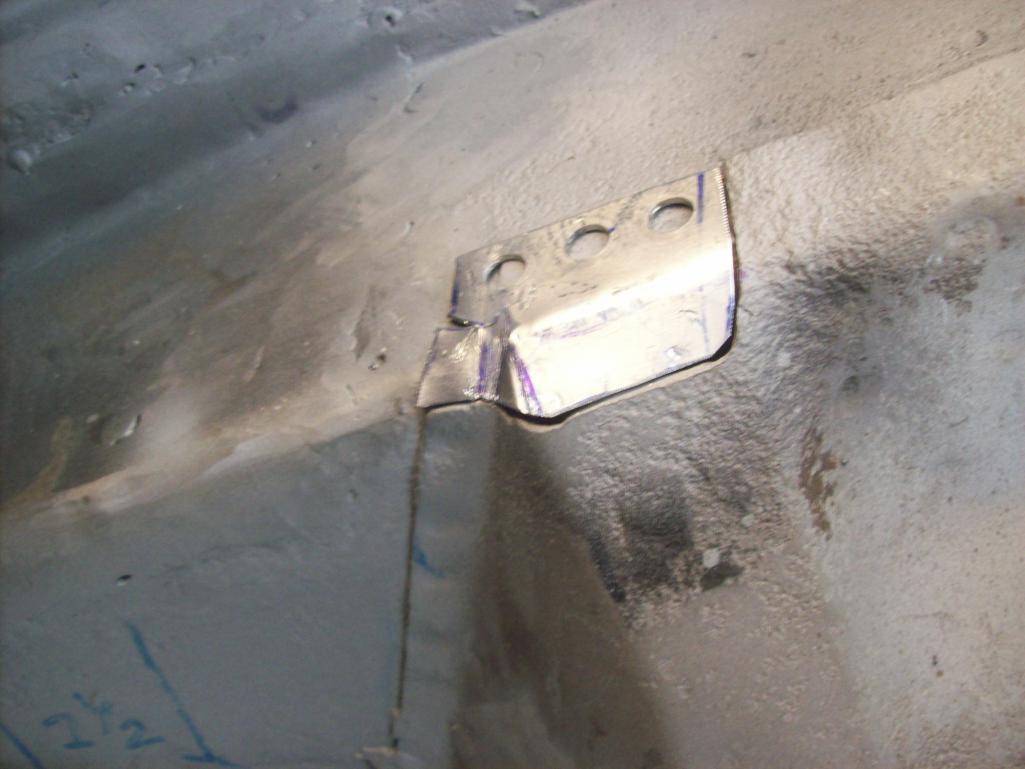
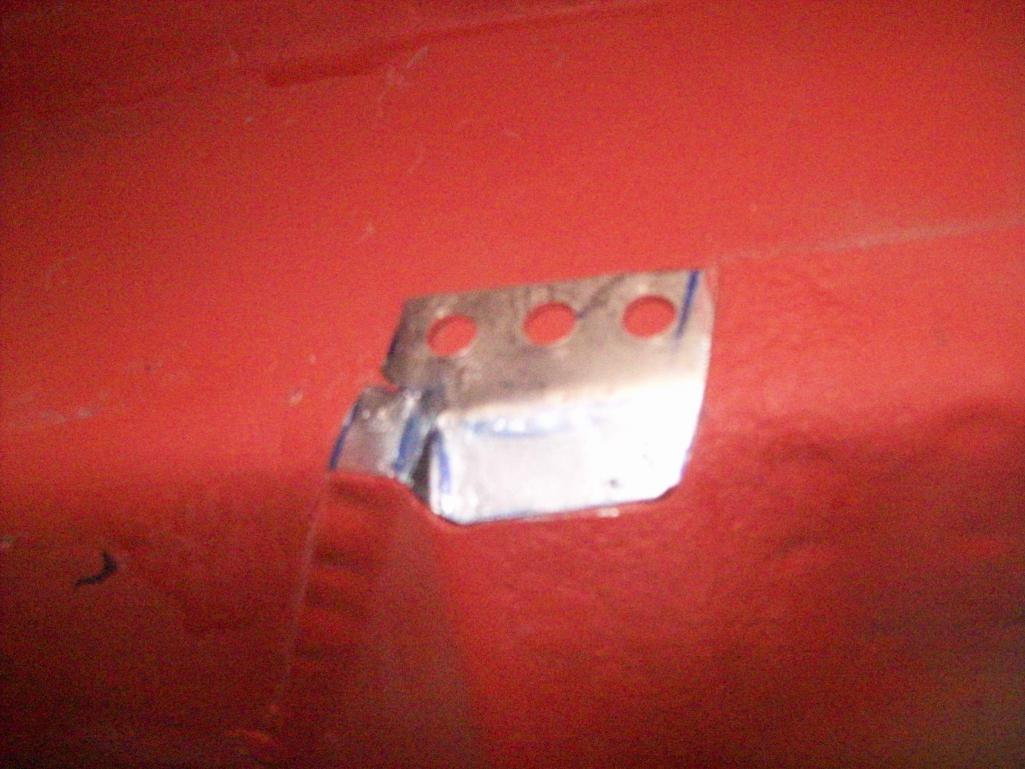
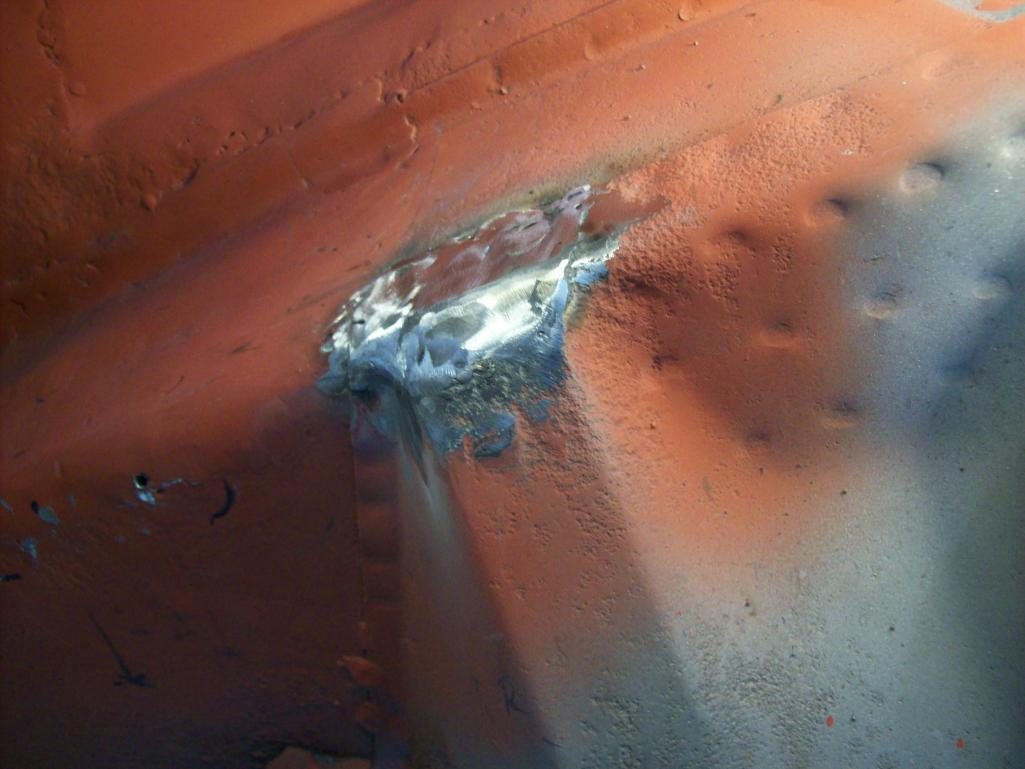
Posted by: Speedo Apr 30 2016, 07:51 PM
Support and battery tray.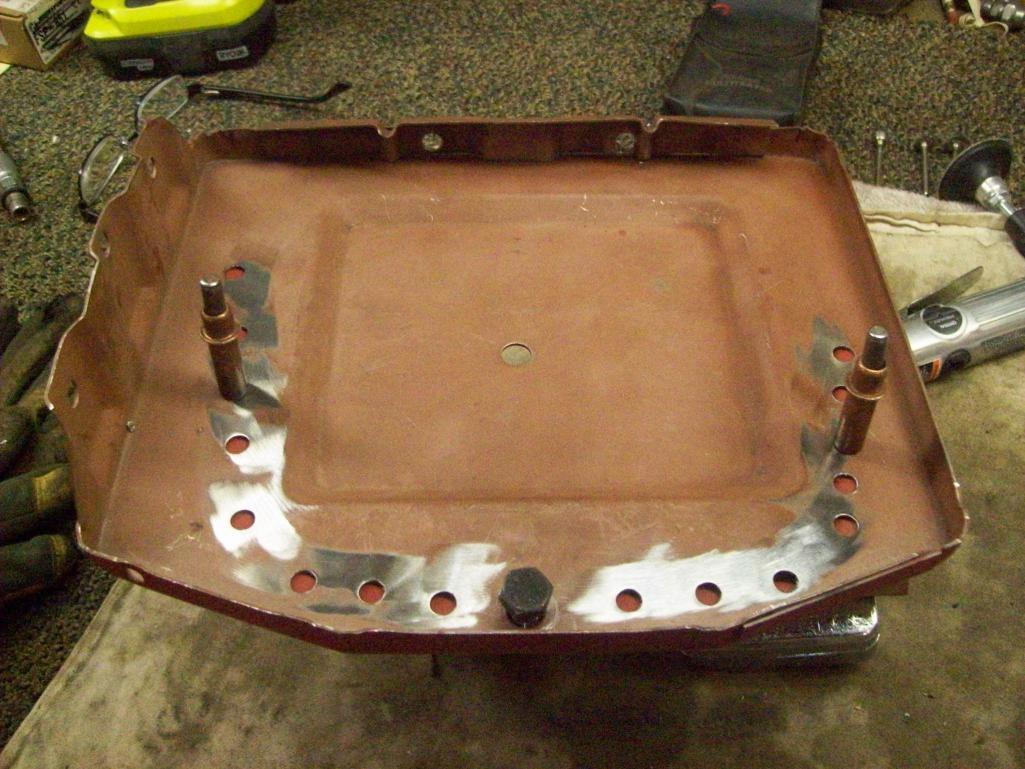
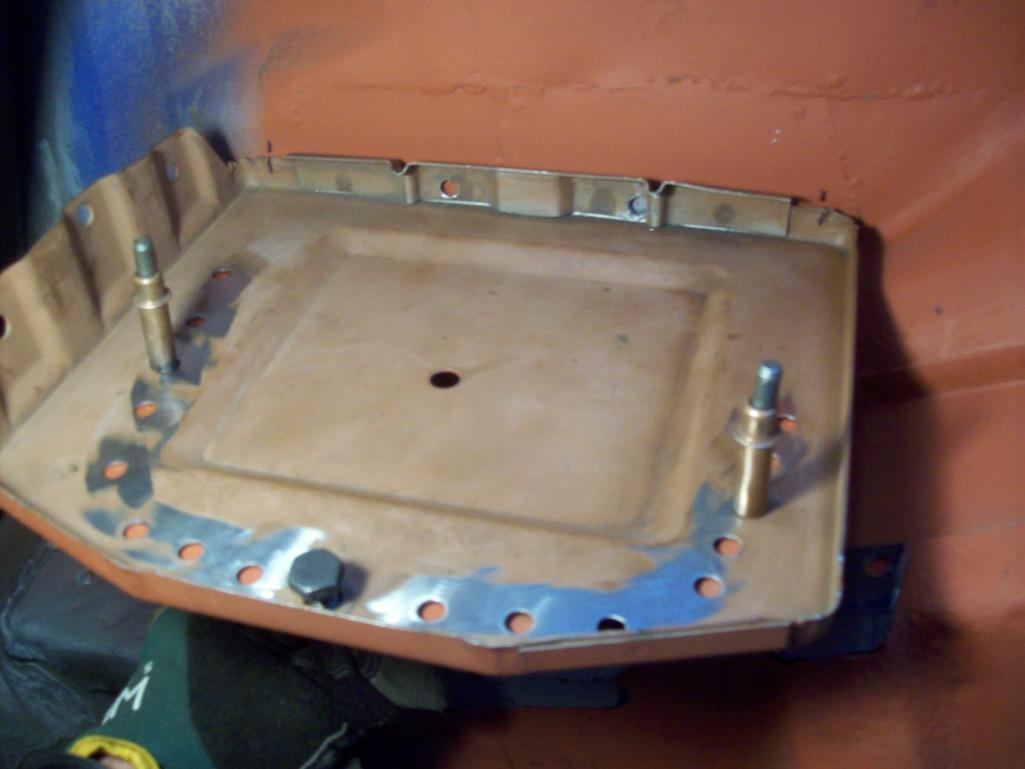
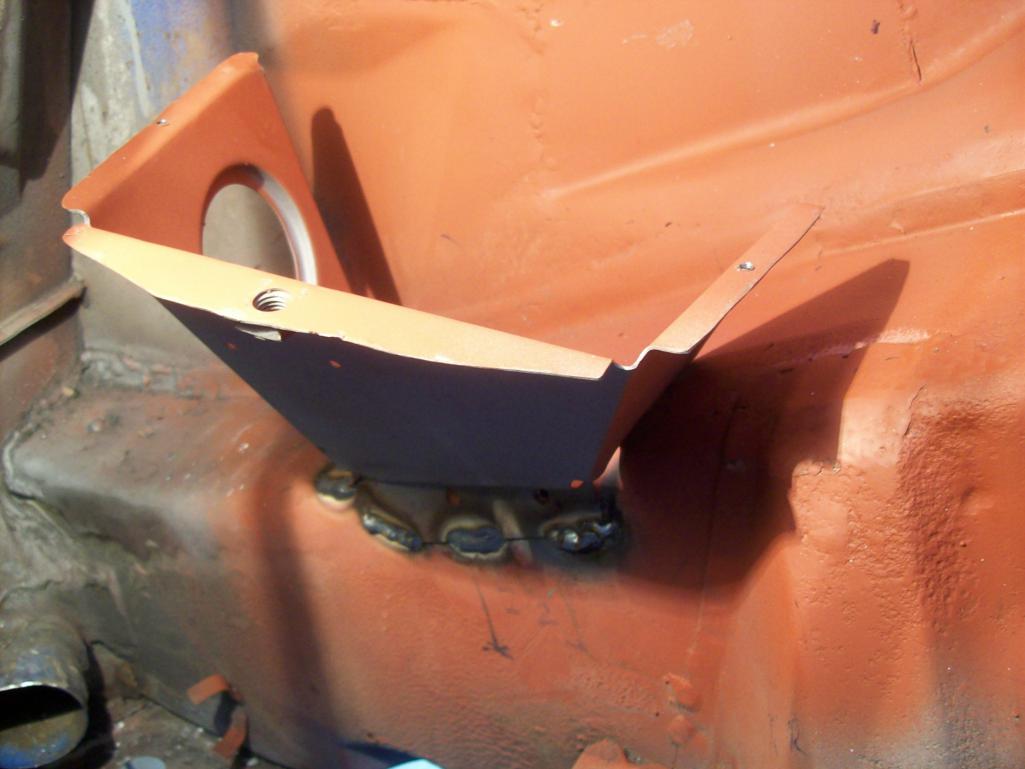
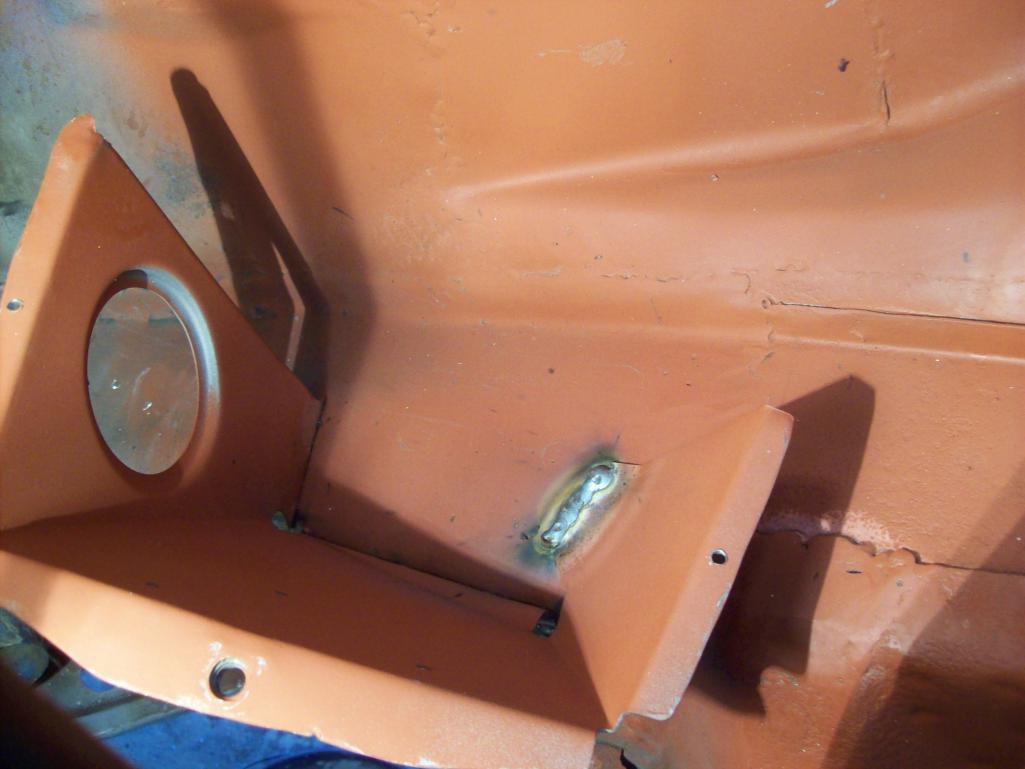 [attachmentid=553
235]
Attached thumbnail(s)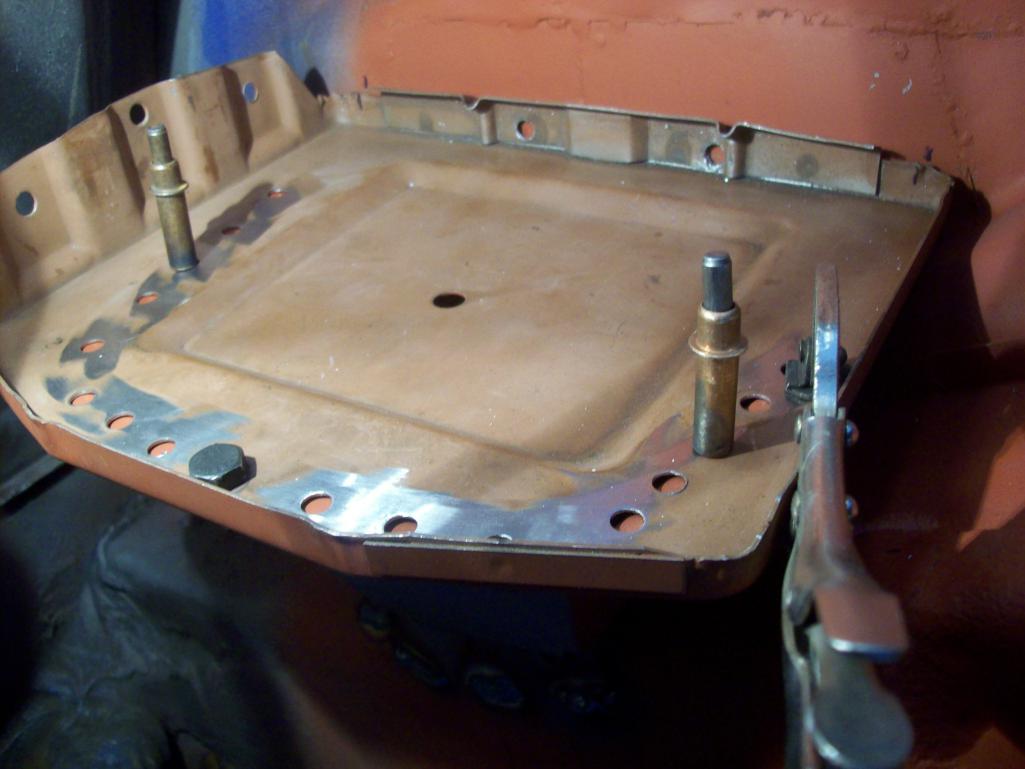
Posted by: Speedo Apr 30 2016, 07:57 PM
The factory didn't weld in that uphill flange...but I decided to do it, we are tight except for the beads and spot to the inner wheelhouse. I need to roll the car on the rotisserie to get a good angle for those...tomorrow. Spot welded, flappered and primed.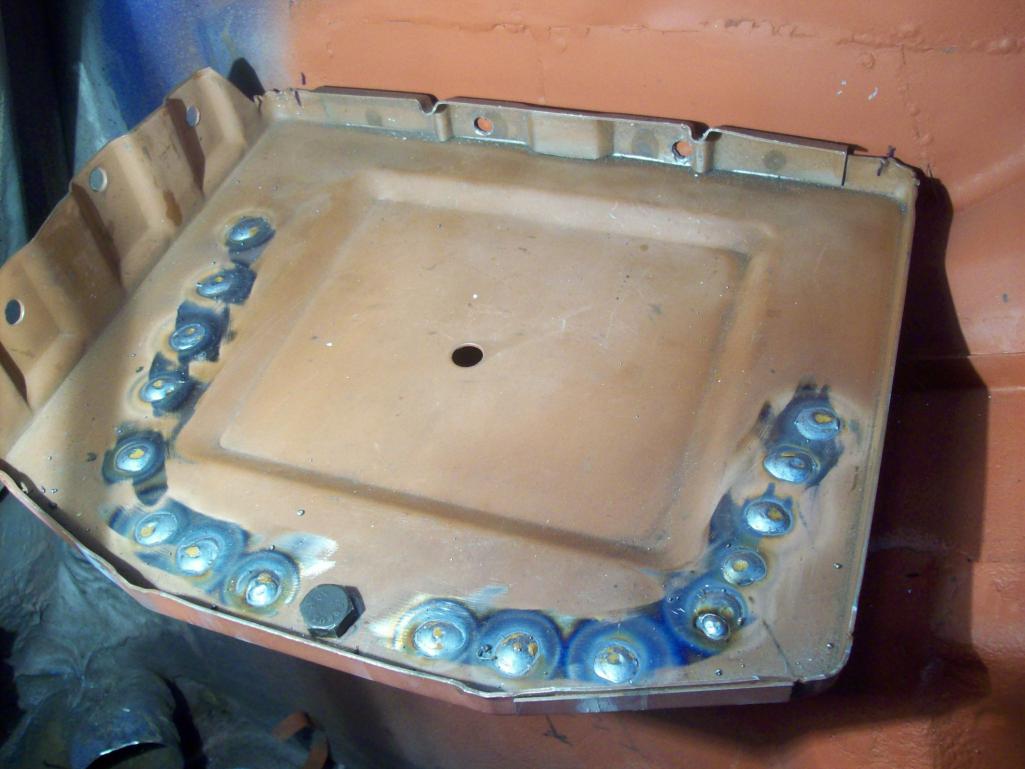
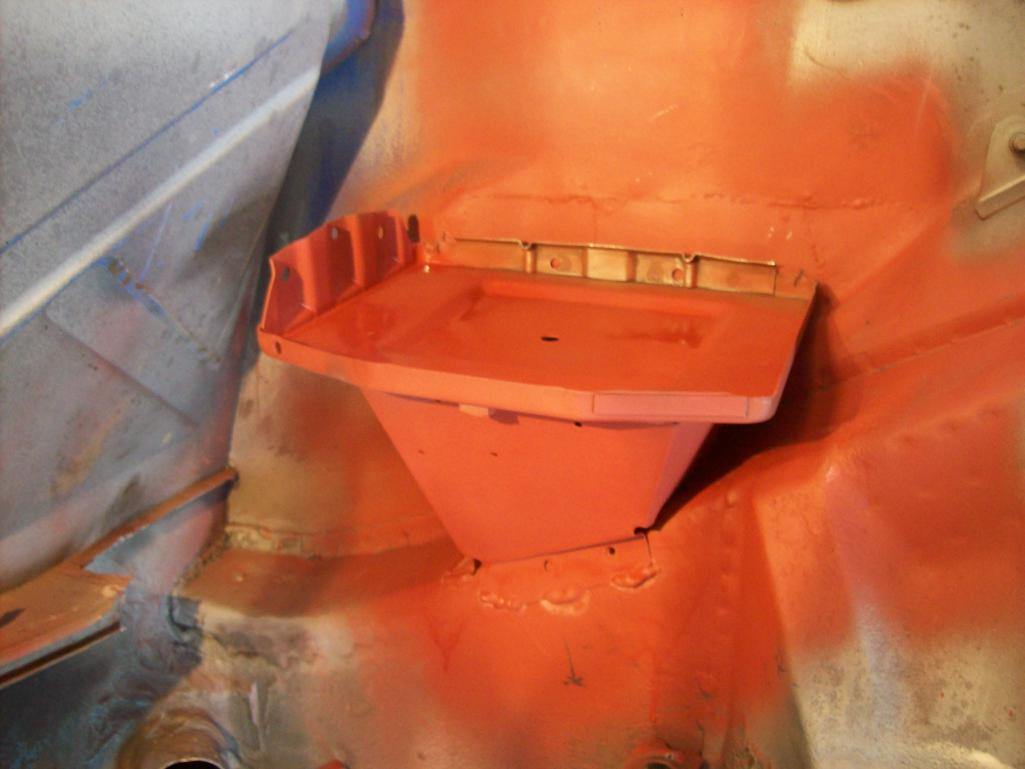
I want to get this engine compartment/hell hole done so that I can close up the quarter panel and finish the sail and lockpost repair. I am tired of this side of the car.
Posted by: Luke M May 1 2016, 05:59 AM
Hi Lars,
The battery tray install looks good. The engine shelf install is pretty straight forward.
If you have time here's a install video from RD.
https://www.youtube.com/watch?v=uZGf9yaFHEk
BTW, you can keep all that snow. We had a mild winter here which was nice and long overdue.
Take care,
Luke
Posted by: Cairo94507 May 1 2016, 06:51 AM
Nice job. That is the only way to fix these cars IMHO; do it once, do it right, and never have to worry about it again.
Posted by: Speedo May 1 2016, 09:44 AM
Right side engine shelf. Install looks basic. Thanks for the video link. When I removed my crusty shelf and battery box, I seem to remember the shelf had to come off first...meaning it was installed after the battery box support. But we saw how hacked up the whole battery box structure was. Does it matter which gets installed first or second? The support or the shelf. I had just planned to grind down the left corner bead weld on the support and lay the shelf over it.
Posted by: Speedo May 1 2016, 07:52 PM
Welded to back of the tray...two end beads and two interior spots. 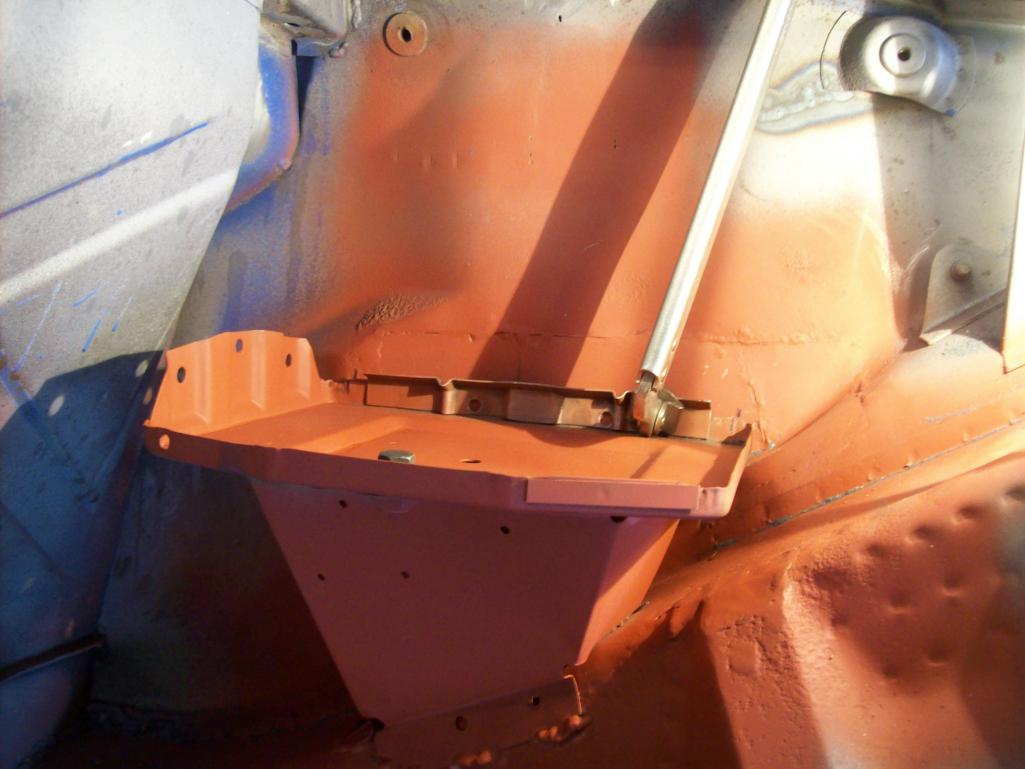
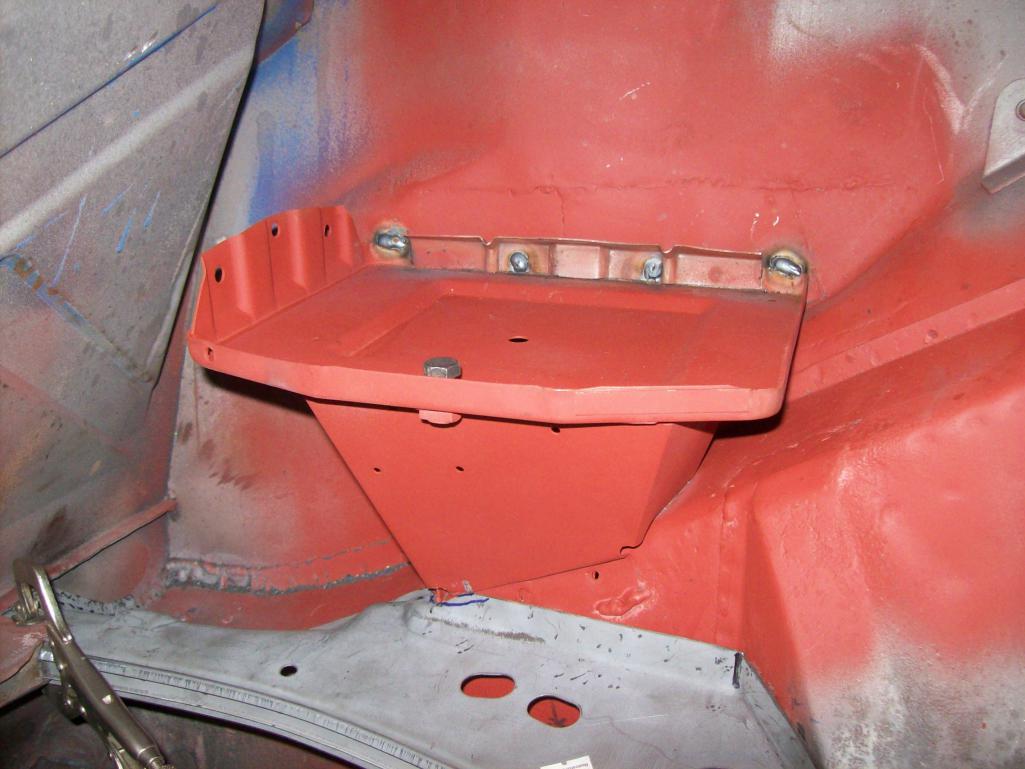
Time to fit the shelf. Like the video says...needs to be massaged a bit while being fitted. This look to be positioned ok? 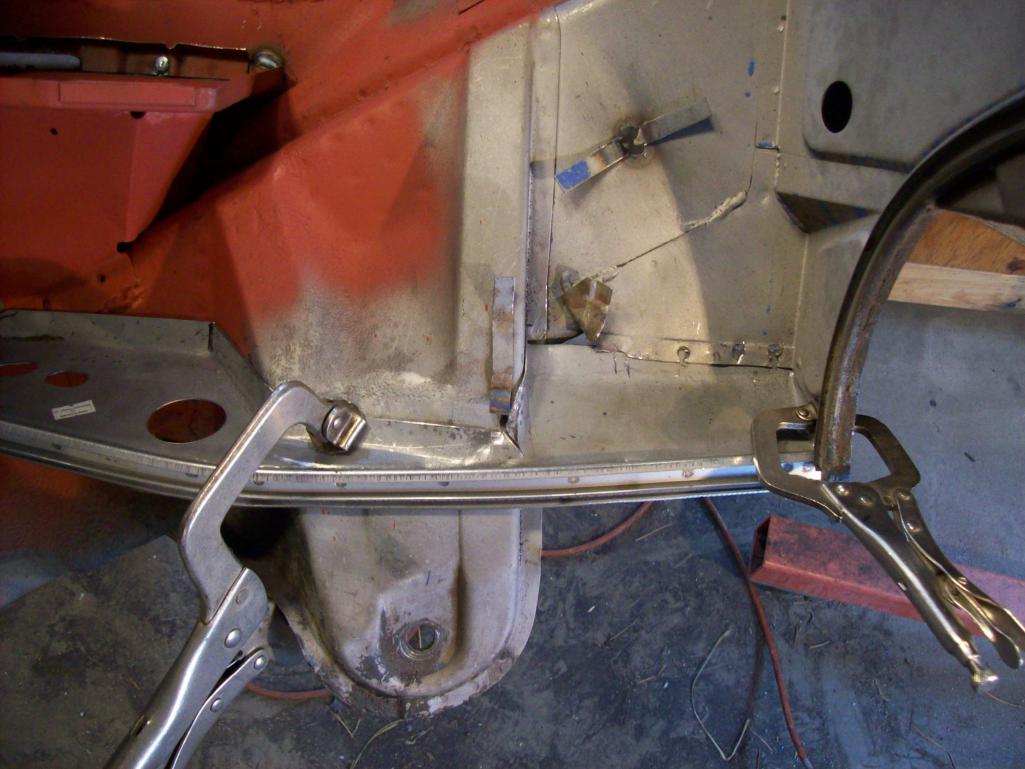
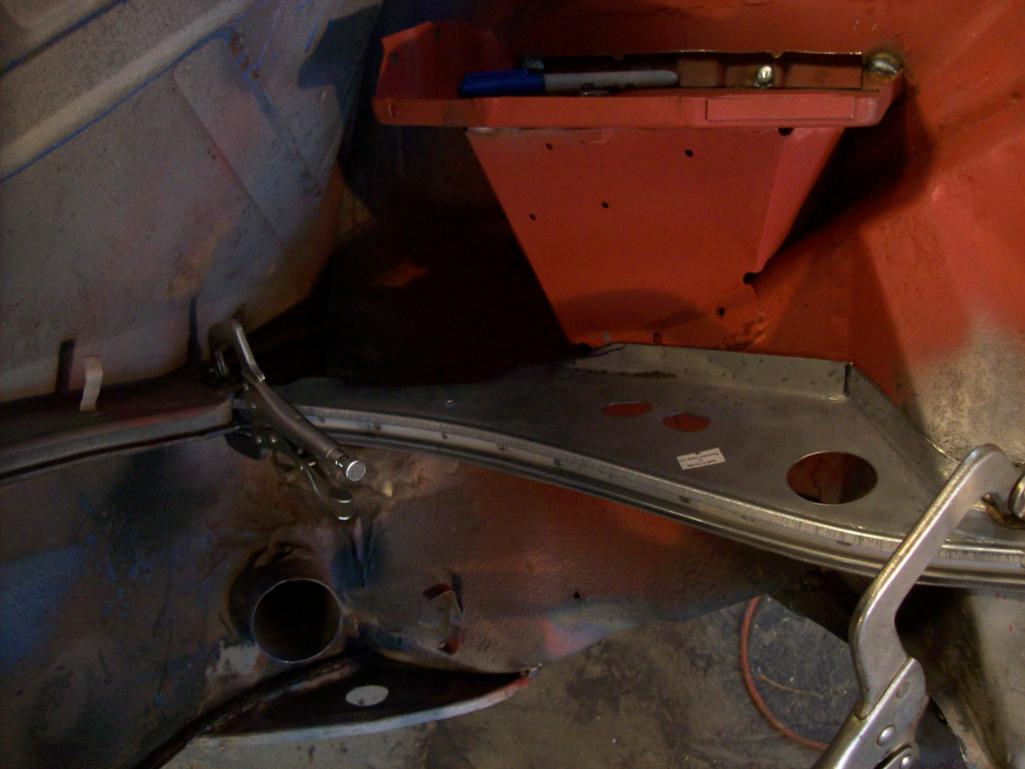
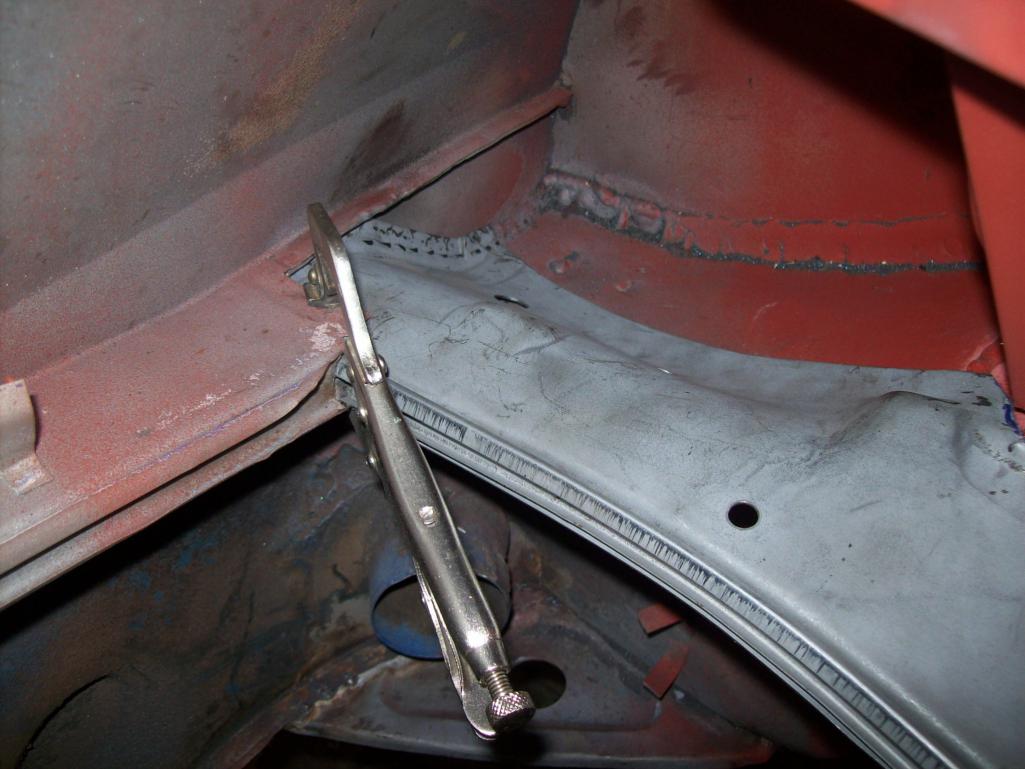
Posted by: Speedo May 1 2016, 07:57 PM
Couple more pics before I remove and drill for plug welds and prime.
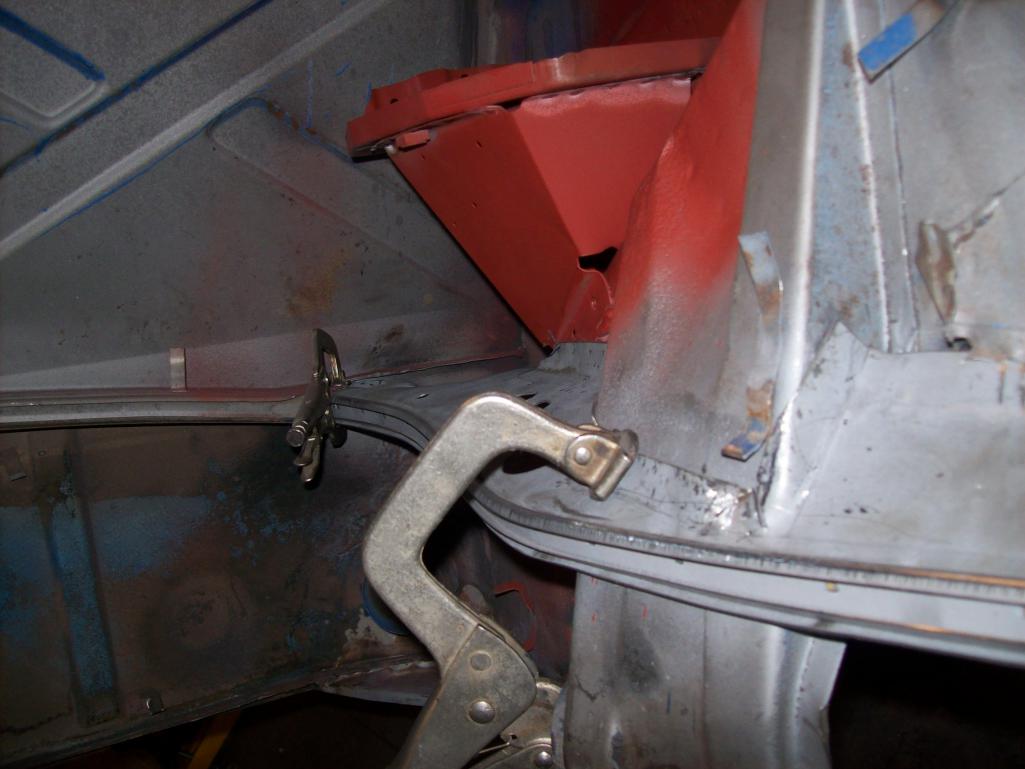
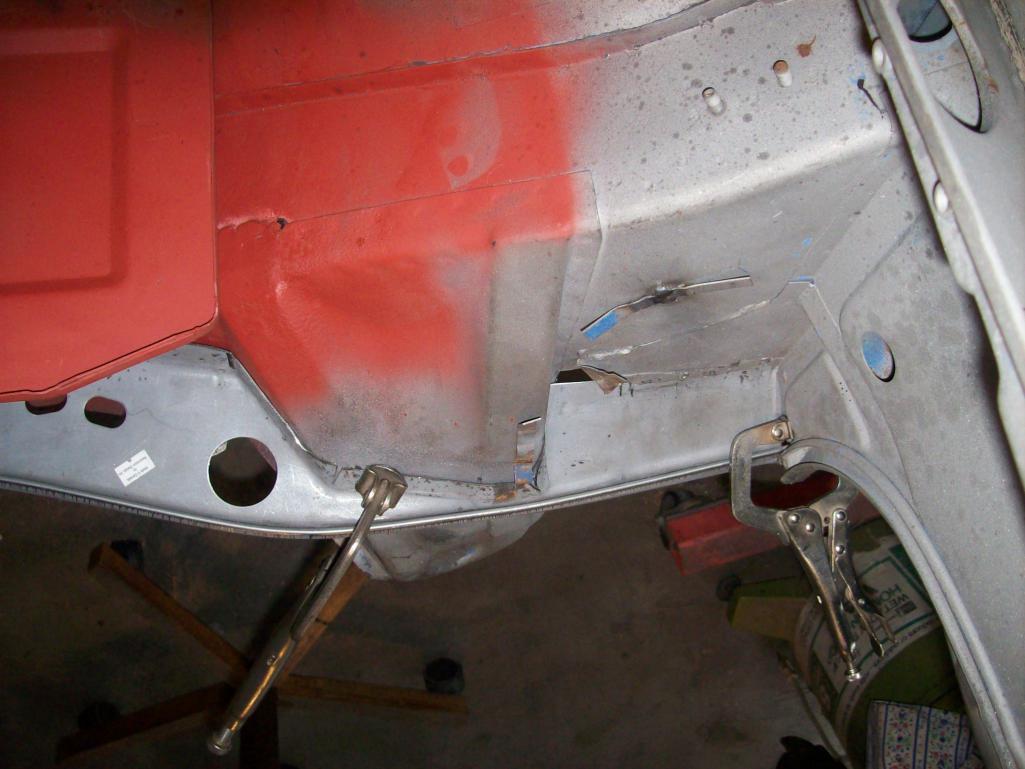
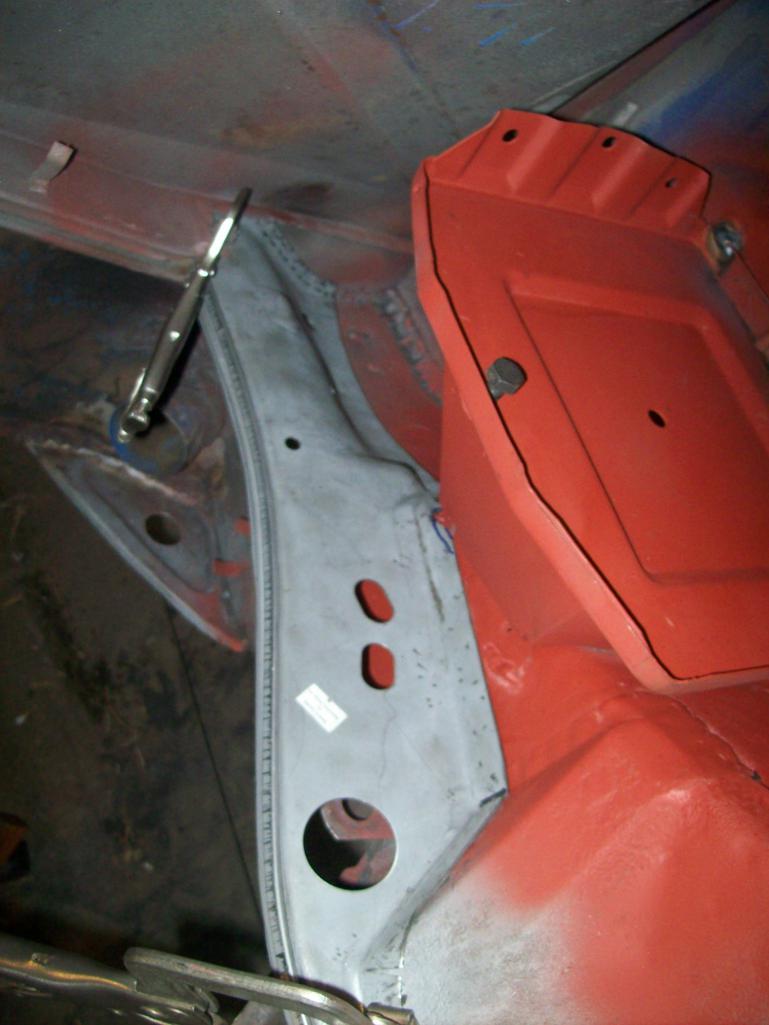
Everything look ok? No glaring problems? In retrospect, Had I waited to weld the tray on, I would have had more room to weld the lower section of the shelf...NBD.
Speedo
Posted by: Luke M May 2 2016, 07:04 AM
Lars,
I think the shelf needs to be lowered a little . I circled it in the pic. Give me sometime here and I'll go measure the one on my 6. Otherwise the ends look good.
Here's what I got on my 6..
#1 : from the top of the brake line bracket to the bottom of the shelf is 1 3/4''
#2 : from the top of the shelf to the top of the inner control arm mount is 4''
#3 : from the top of the shelf to (middle) top of chassis is 2 1/2''
hope this helps you out.
Attached image(s)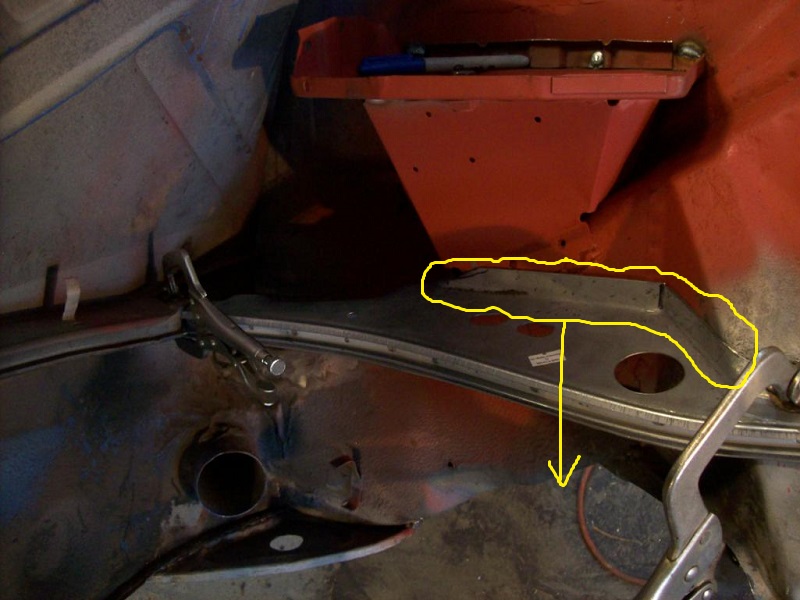
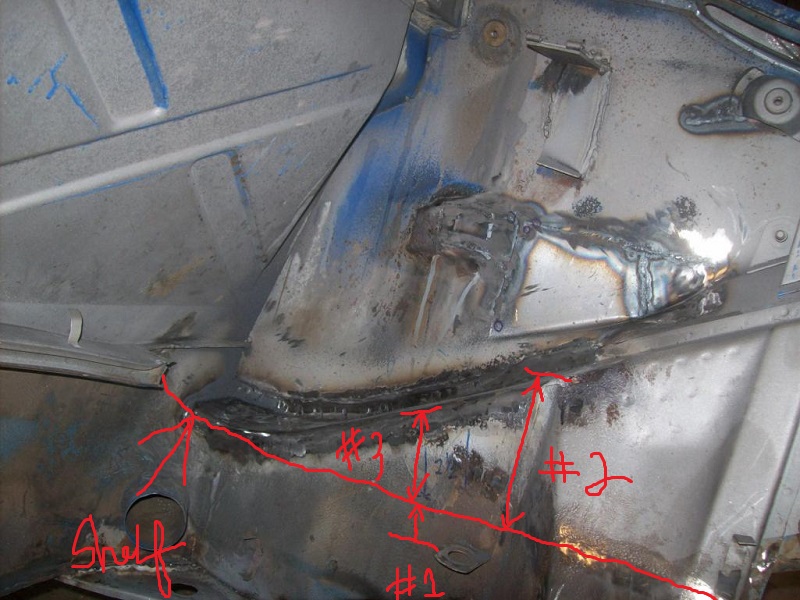
Posted by: Speedo May 2 2016, 11:43 AM
Thanks Luke. For your generous measurements...what part of the shelf are you measuring to? I am going to presume roughly the area where the shelf physically touches the chassis, not the outer lip with the rubber channel?
Figured it makes sense to ask as all I have left from the old shelf are a few barely visible ground down spot welds.
Posted by: 914fahrer May 2 2016, 12:33 PM
Hello Speedo,
perhaps this picture helps a little bit.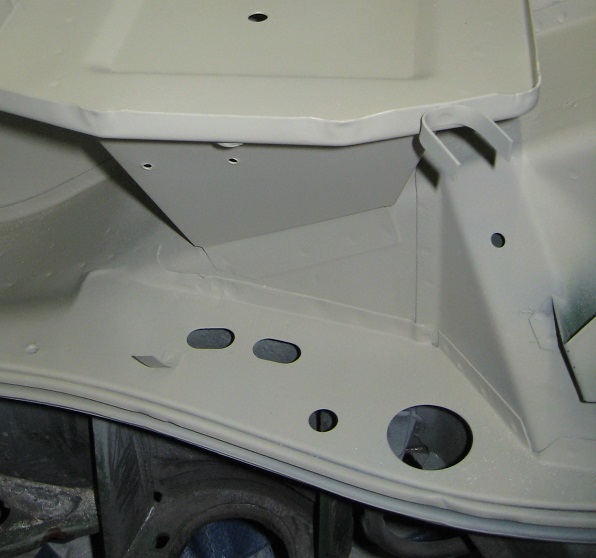
Ralf
Posted by: Luke M May 2 2016, 03:47 PM
Thanks Luke. For your generous measurements...what part of the shelf are you measuring to? I am going to presume roughly the area where the shelf physically touches the chassis, not the outer lip with the rubber channel?
Figured it makes sense to ask as all I have left from the old shelf are a few barely visible ground down spot welds.
I took the measurements as close to the chassis as possible. On the shelf itself not the lip that's bent up. Make any sense to you?
Posted by: Speedo May 3 2016, 11:07 AM
Excellent...thanks guys!
I was going by where the shelf seemed to fit best "out of the box".
Glad I asked the question.
Down it goes....
Posted by: porschetub May 3 2016, 03:35 PM
Excellent...thanks guys!
I was going by where the shelf seemed to fit best "out of the box".
Glad I asked the question.
Down it goes....
do you still have the original mounting bracket for the cdi unit ?,attaches to the front of the battery box.
Posted by: Speedo May 3 2016, 07:33 PM
Uh oh...what does it look like?
I am good with recognizing shapes and colors....at least me pre-school teacher told my mom something like that.
Excellent...thanks guys!
I was going by where the shelf seemed to fit best "out of the box".
Glad I asked the question.
Down it goes....
do you still have the original mounting bracket for the cdi unit ?,attaches to the front of the battery box.
Posted by: Luke M May 4 2016, 07:26 AM
Uh oh...what does it look like?
I am good with recognizing shapes and colors....at least me pre-school teacher told my mom something like that.
Excellent...thanks guys!
I was going by where the shelf seemed to fit best "out of the box".
Glad I asked the question.
Down it goes....
do you still have the original mounting bracket for the cdi unit ?,attaches to the front of the battery box.
Lars,
The cdi bracket mounts to the front of the battery box like in the pic.
It's hard to tell what the bracket looks like mounted. Let me see if I have a pic of just the bracket.
#2 in the parts diagram is the cdi mounting bracket.
Attached image(s)
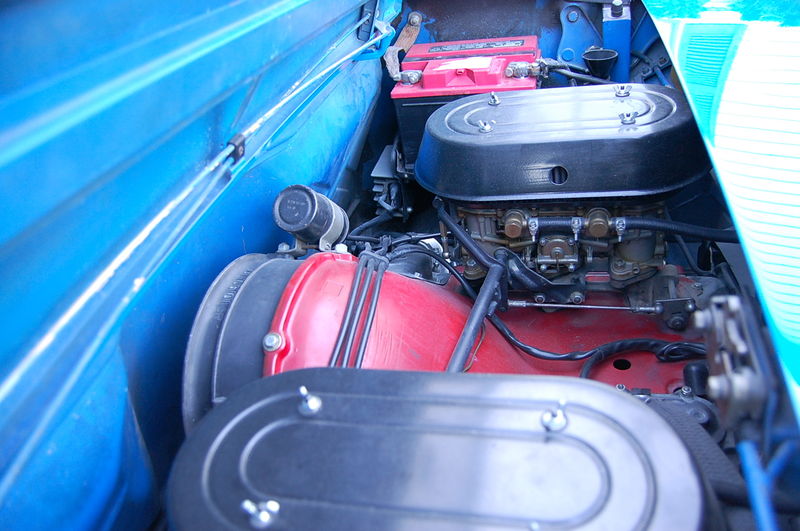
Posted by: Speedo May 4 2016, 07:09 PM
I can't remember where the CDI was mounted, but it wasn't on the battery tray...that I remember. I will need to find it in my 6 stuff ...maybe I removed it with the bracket? Does RD stamp those?
Posted by: Luke M May 5 2016, 07:55 AM
I can't remember where the CDI was mounted, but it wasn't on the battery tray...that I remember. I will need to find it in my 6 stuff ...maybe I removed it with the bracket? Does RD stamp those?
I don't think RD makes repo cdi mounting brackets.
If you check ebay they show up here n there.
IIRC AA makes a repo one (they call it a Control Unit Bracket, 914-6).
I'm not a fan of AA but not sure if anyone else carries them.
Posted by: gereed75 May 5 2016, 08:34 AM
Check with CDI unit as it generally stays with the unit. Don't do what I tried- bolt the bracket in then try to mount the CDI........duh
Posted by: porschetub May 5 2016, 05:15 PM
I can't remember where the CDI was mounted, but it wasn't on the battery tray...that I remember. I will need to find it in my 6 stuff ...maybe I removed it with the bracket? Does RD stamp those?
I don't think RD makes repo cdi mounting brackets.
If you check ebay they show up here n there.
IIRC AA makes a repo one (they call it a Control Unit Bracket, 914-6).
I'm not a fan of AA but not sure if anyone else carries them.
Yes saw the AA one,looked a bit roughly made,pretty sure they are the only people making them.
I intent to make something similar and don't really care if its not the same,my cars not a pure breed
Mounted as they are in the original -6 appears they are tucked away from the weather is this the best place?.
Speedo appears you are powering thru this build @ your usual pace,I guess it must be a learning curve working on a different model?.
Keep up the good work,watching this resto with interest
Posted by: Speedo May 7 2016, 09:50 PM
Dug through all my 6 stuff. PO had gone to Pertronix and it was mounted somewhere...just not on the battery tray. So I guess I need to find a repro somewhere...or an original, or make one
Posted by: Speedo May 9 2016, 07:58 PM
First up, is the CDI mount stamped steel, or aluminum. I have never seen one. Does anyone have a used one for sale or to lend so I can make one?
Second...here is the "massaged" shelf. I took for granted (bad idea) that the self as stamped was pretty close. It was sort of close...but needed to be wacked a bit. Me thinks it looks much better. Comments?
Lastly I am reconsidering the 2.7 idea. It would need a cooler...period. I have looked at many threads involving creative "coolering" and I haven't found anything I am excited about. Maybe I just build a hot 2.2 and do my pulley modification to bring the temps down. As this is a stock six, I should minimize the modifications...whadayathink?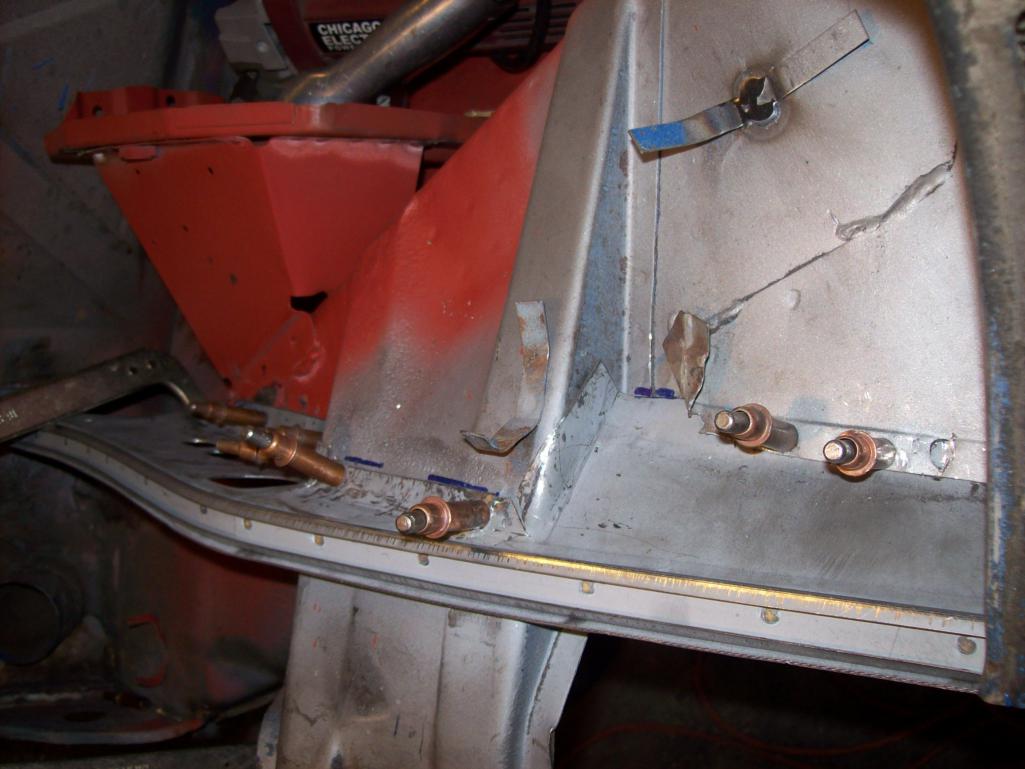
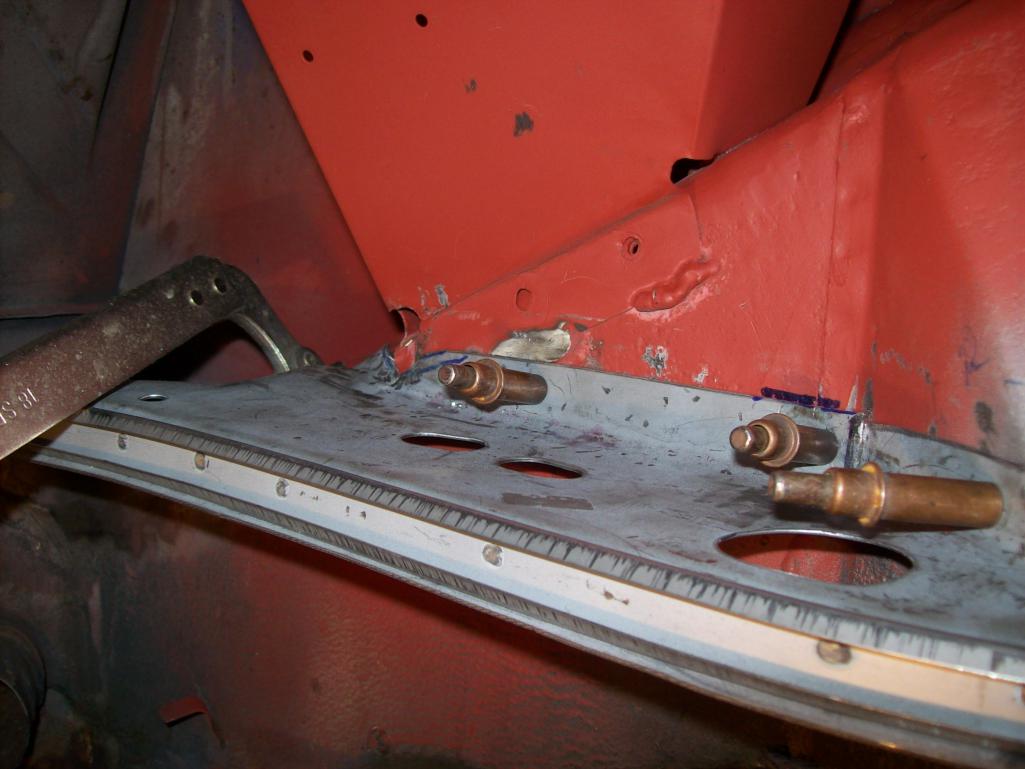
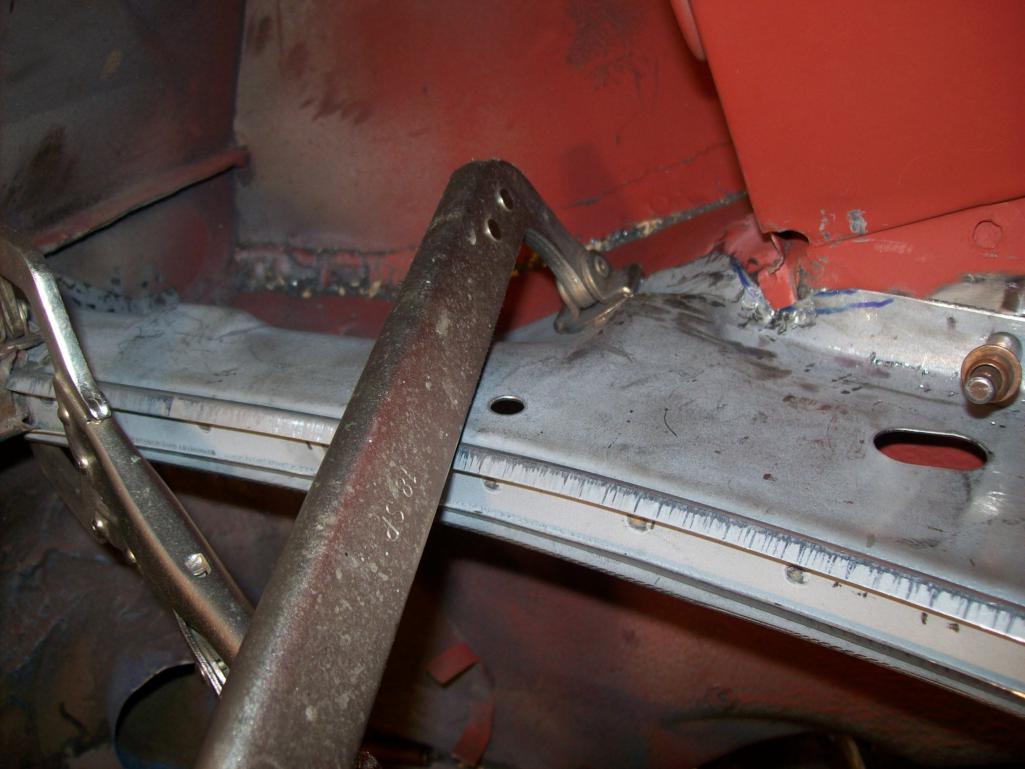
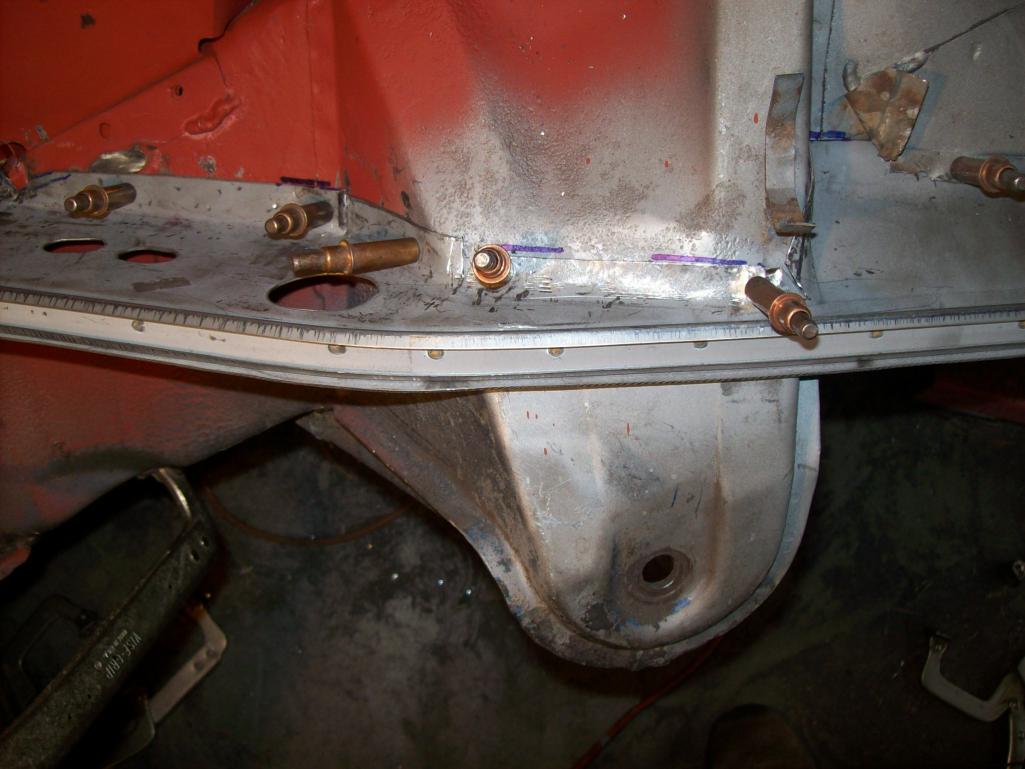
Compared to the left side of the engine compartment...nice factory welding 

Posted by: brant May 9 2016, 08:33 PM
Keep plugging away....
Posted by: gereed75 May 9 2016, 10:35 PM
I have kinda an S spec 2.4. Very entertaining and has not run over 180 degrees yet on a stock cooler. Highly recommended.
Great thread, impressive fab skills !!
Posted by: Luke M May 10 2016, 05:59 AM
Hi Lars,
The shelf position looks good. When we installed the shelf on my brothers 914 I tried to weld the shelf at points where it's kinda hard to see once the engine is in. The sides along the inner mount you can't get away from but you can still do a clean install.
The cdi mount is made from steel. I have the one off my 6 somewhere and cold take some close up pics for you. It should be easy enough to make unless your going for that org look?
I didn't want to butcher my 6 doing a front oil cooler install too. What I came up with was doing something close to what Elephant Racing sells. I'll be using the GT/PMS oil cooler kit in the front trunk with the least amount of cutting as possible. I'm going with the 2.7 RS spec engine so a front cooler is a must.
Attached image(s)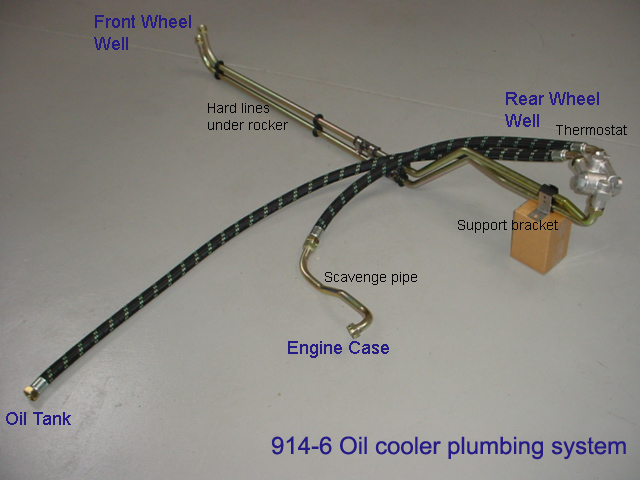

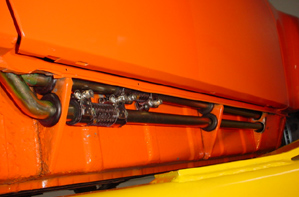
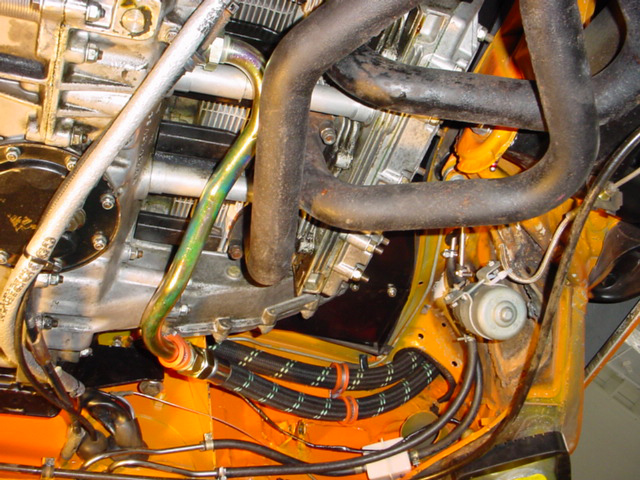

Posted by: Ferg May 10 2016, 09:30 AM
I vote 2.2, you may be able to squeak by without one, and if one is needed it could be a small rear mount.
Who is going to paint this? 
Posted by: Speedo May 16 2016, 07:16 PM
Who is going to paint this?
You are

Posted by: Ferg May 17 2016, 08:39 AM
Who is going to paint this?
You are
Six pack of PBR should do it...

Posted by: Luke M Jun 2 2016, 09:00 AM
![]()
Posted by: Speedo Jun 10 2016, 12:35 PM
Welding and grinding plug welds...some ongoing progress. Working on shop addition for the next few weeks (weather depending). Need the space and a place for a lift.
Think I am going to pull the trigger on an oscillating multi-tool and one of these...
Dynazip 18255, the Dent Fix DF701 or the Sunex SX8200
Started a thread on PP on these and the general consensus was dry ice, dry ice. For flat surfaces I get it. And yes with a rotisserie, I can make any surface flat...technically/sort of. But I think specific tools for working inside wheel wells and other tight quarters would be productive. And nobody answered the question as to how well dry ice works with 50 year old "hardened by dinosaurs" seam sealer. I have the tool credit on Amazon...if I don't like it I can return it. Pics shortly...
Posted by: Speedo Jun 12 2016, 12:21 PM
The finished (mostly) shelf area...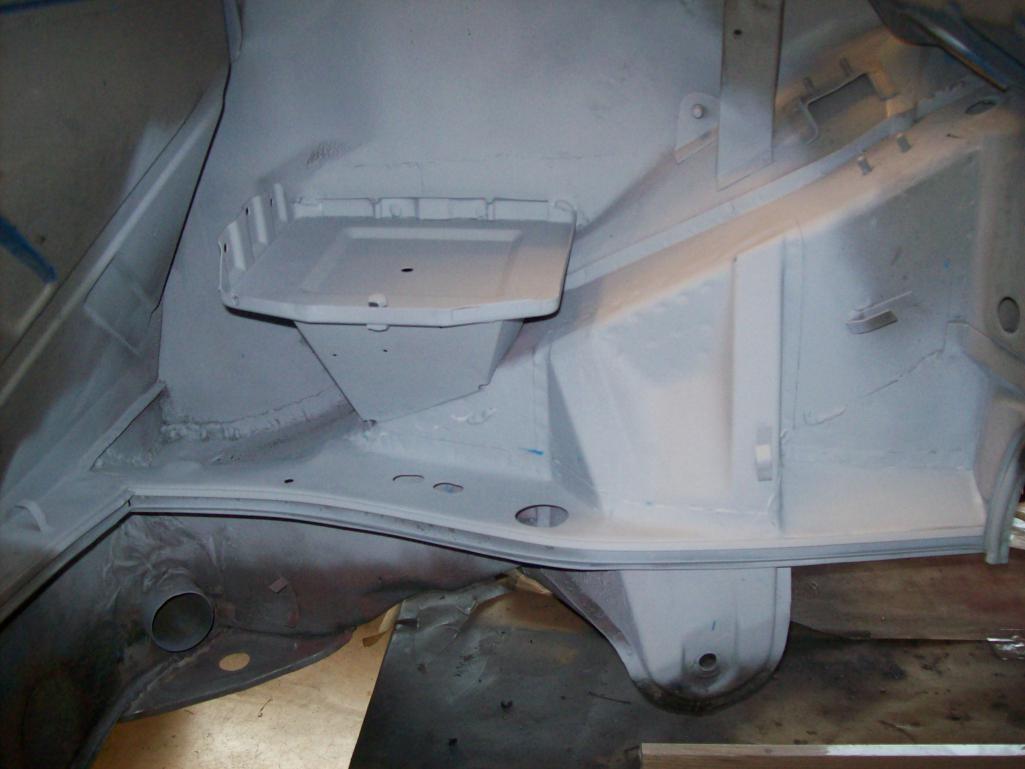
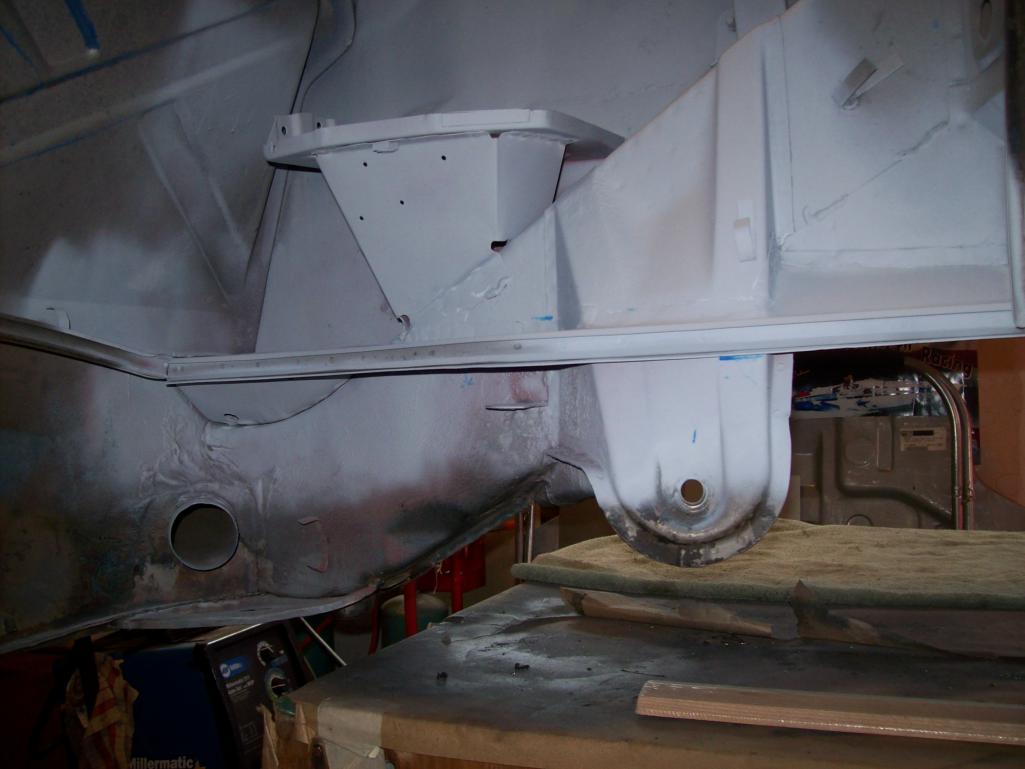
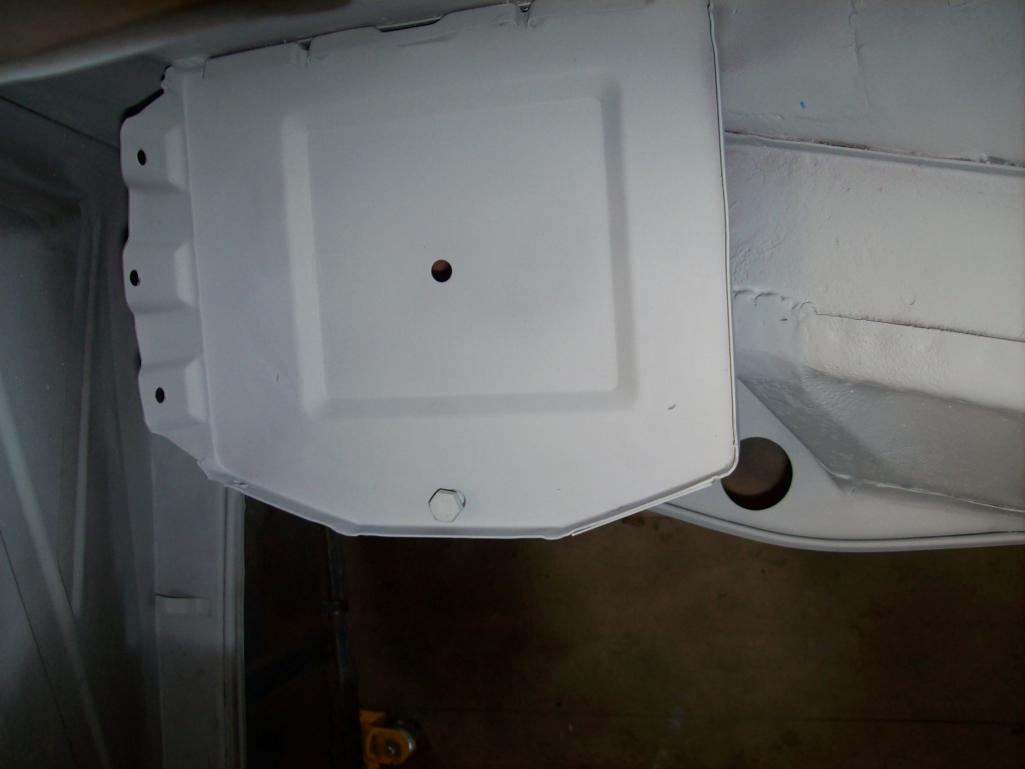
Posted by: Ferg Jun 13 2016, 08:52 AM
Looks good!
About time for Lunch with racer boy don't you think?
Ferg
Posted by: Speedo Oct 16 2017, 06:46 PM
Been quiet, but working. Almost all the way around the car. Now on the aft end of the drivers front fender...peeling the onion back. So where the fender is welded to the "bonnet" (lower horizontal below the windscreen), there is lead. Like on the 911 fenders, the 914 fender tends to rust by the fender joining panel and mine was no different. With that corner removed...it would make sense to splice the corner in and then re-lead. Obviously I cannot re-lead and then weld that corner back in.
Shiny area is where the lead is below the A pillar.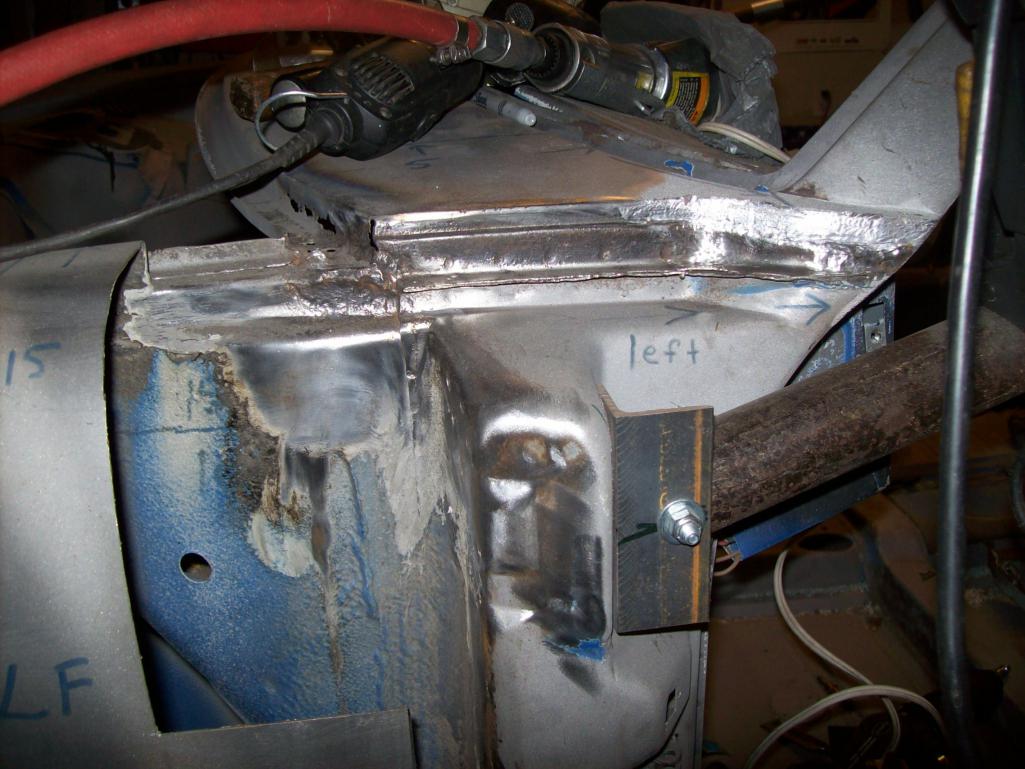
Posted by: Speedo Oct 16 2017, 06:57 PM
My question is...on 911s the fender is bolted up to the inner fender in this area and a thin plastic separator is inserted as the fender bolts are tightened. Any lead work in this area on the 911 is done prior to painting. On the 914, given that the fender is welded up...is the required lead work in this area done after the fender is welded up? and how do you keep the slot between the top rear of the fender and bonnet from filling up with lead? Seems like you would need the equivalent of a concrete sidewalk trowel tool to maintain the gap as there is no vinyl to insert. Am I overthinking this?
I still need to repair the perforations in the lip in front of the bonnet before welding the fender splice in place, and there will probably be some leading going on there. But it can be done after the steel is welded in. BTW the Eastwood wire wheel undercoating removal tool is the bats ass in this area. 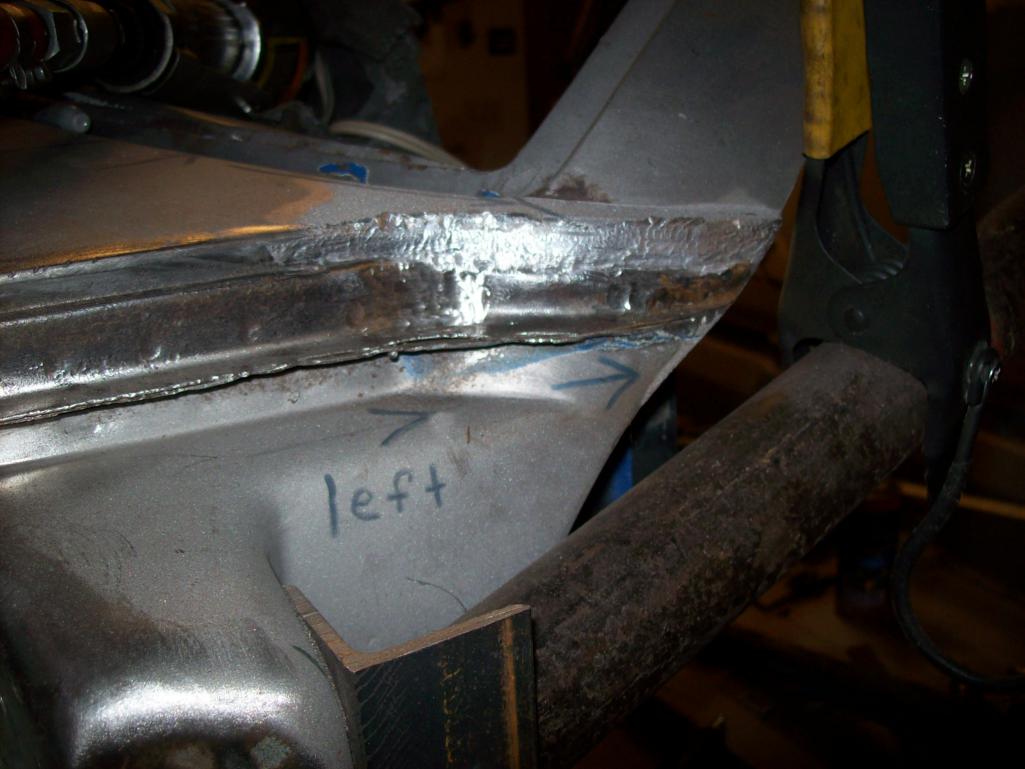

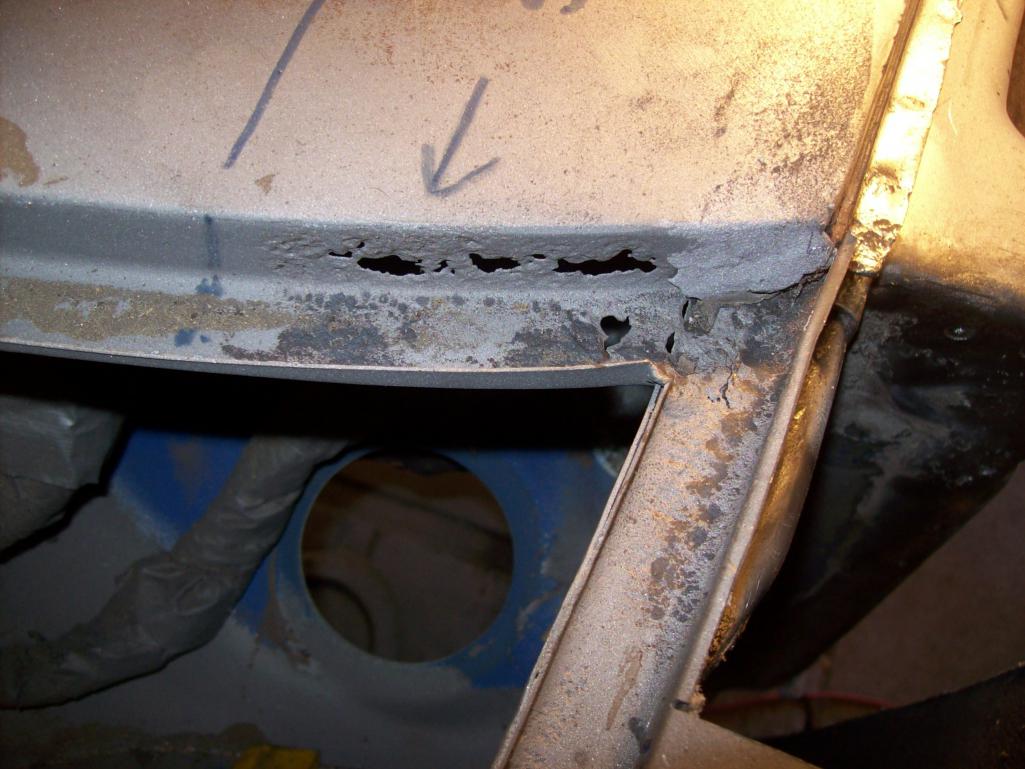
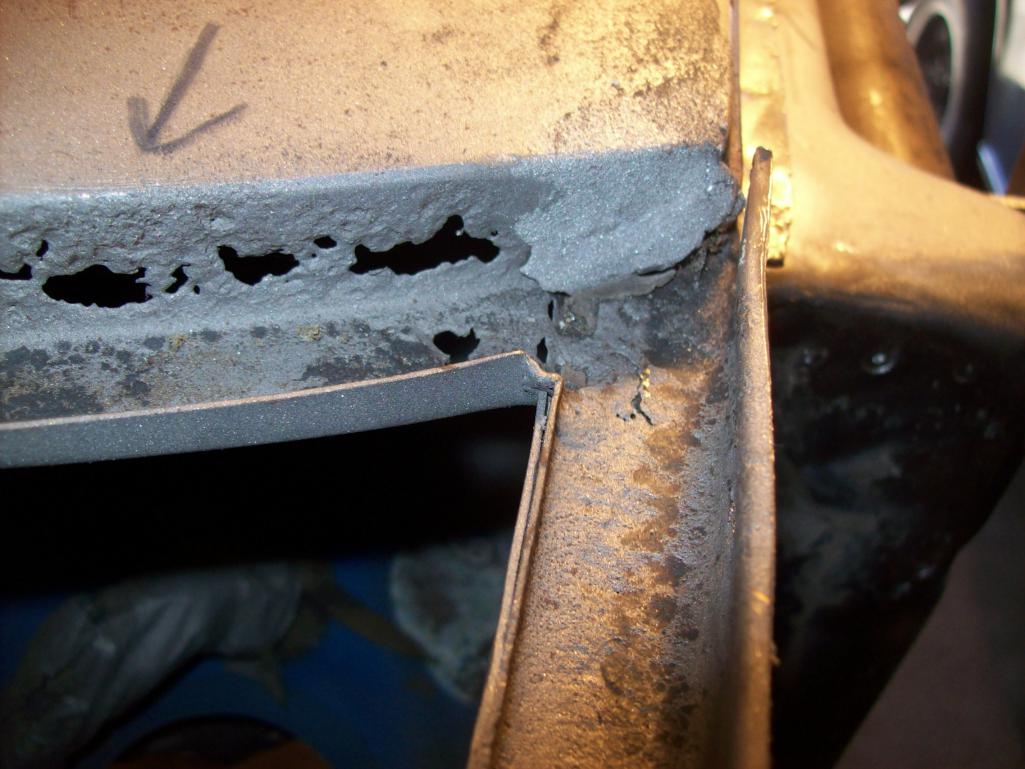
Posted by: rick 918-S Nov 8 2017, 12:46 PM
I've used lead back in the day. There is a serious learning curve that's for sure. My explanation of the process is to install the fenders then go through the tinning/leading process. The key is the warming and paddling of the filler. You want to get it to a plastic state. It should not run. Lead is usually soft enough to sand, scrape and file. If you need to apply more to fill a low spot after filing it is important to finesse the plastic material and get the rewarming just right to allow the new layer to adhere to the filed layer.
As far as the seam goes, a piece of sheet metal should work as a form or a dam. Just leave enough space to slip a piece of 36 grit sand paper in there to final shape.
The one drawback with using this Archaic process is it burns the primer and any paint off the back side of the panel. If you have no access to retreat these areas you are opening the car up to rust forming from the inside out.
Posted by: nihil44 Nov 9 2017, 12:47 AM
Speedo,
Could you possibly post a photo as in post # 266 but zoomed a little way out so all of the vertical surface of the fender can be seen.
I hope to be moving into that area soon and I haven't got a good understanding of the anatomy of that area. I am intending replacing the whole fender and not sure where or how to attach the replacement.
Thanks heaps
David
Posted by: tygaboy Nov 9 2017, 08:42 AM
Cary is wrapping up a detailed rebuild of this same area. Check starting at post #400 here:
http://www.914world.com/bbs2/index.php?showtopic=249327&st=400
Posted by: Speedo Jan 1 2018, 06:52 PM
Moving along...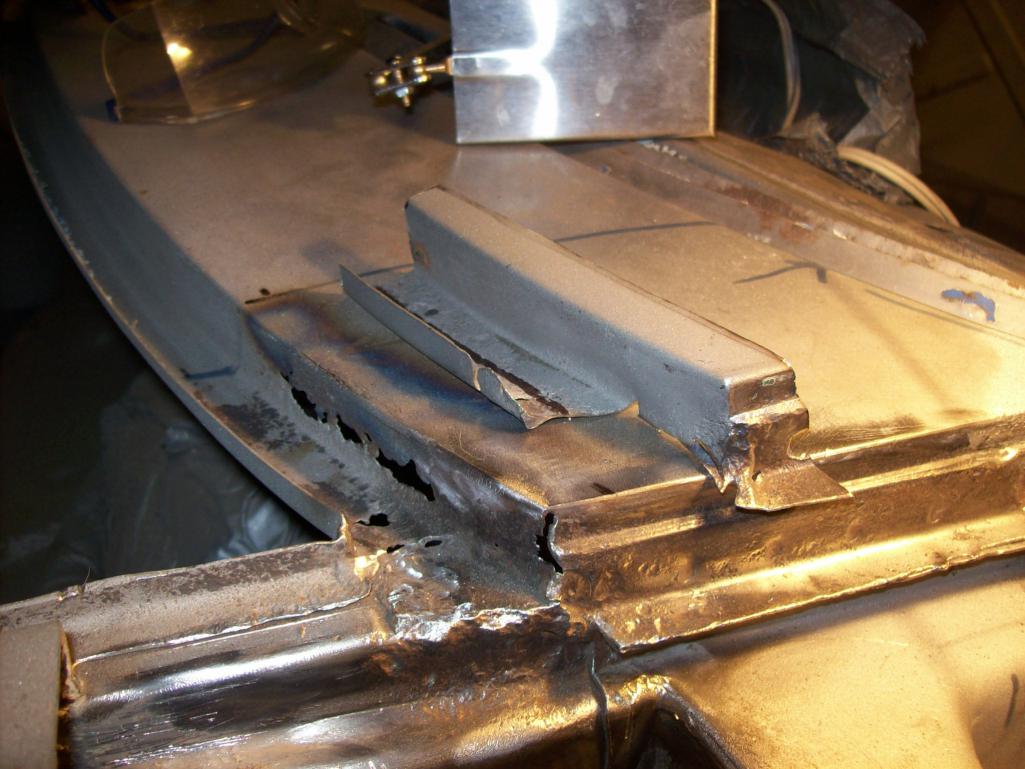
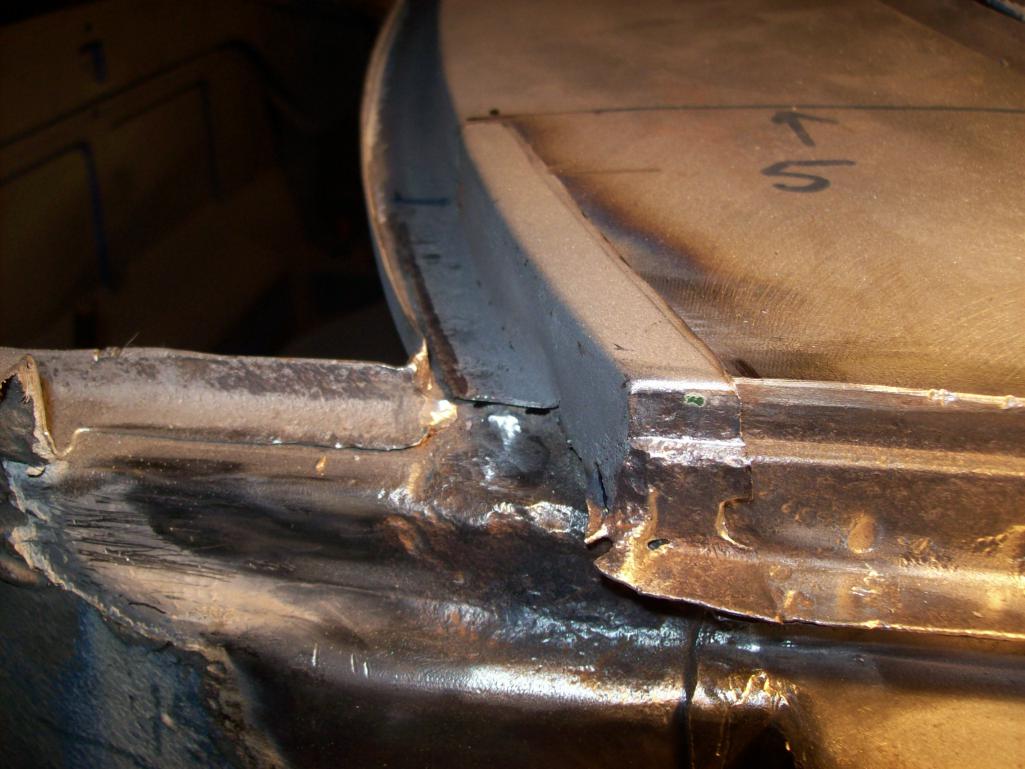
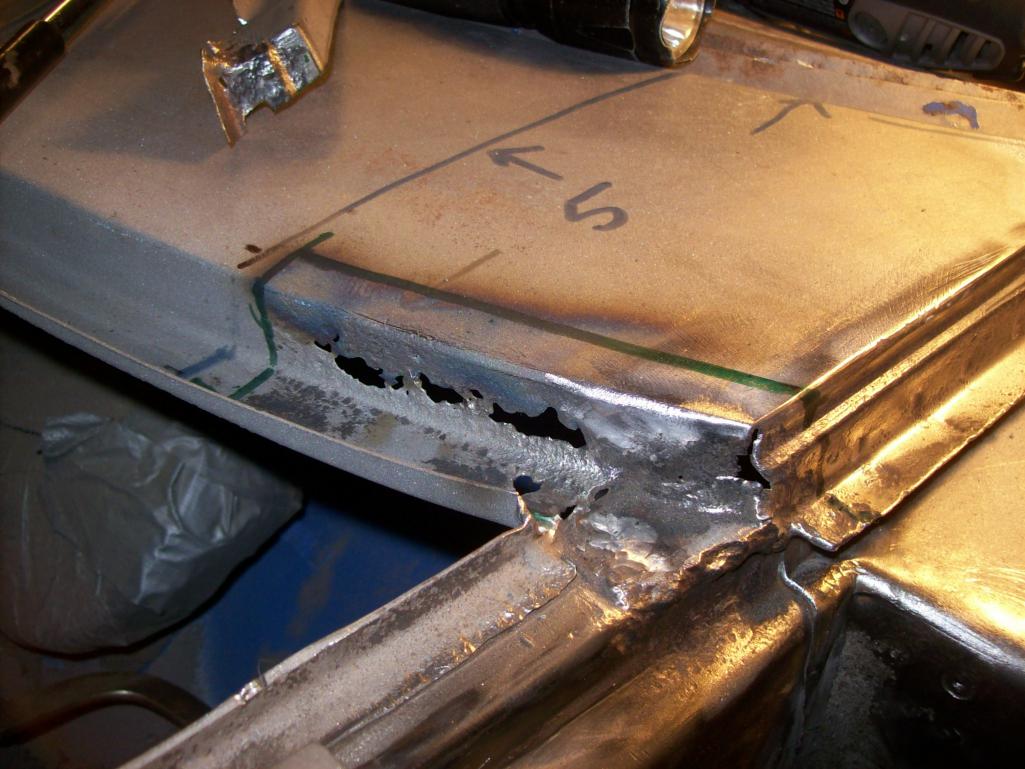
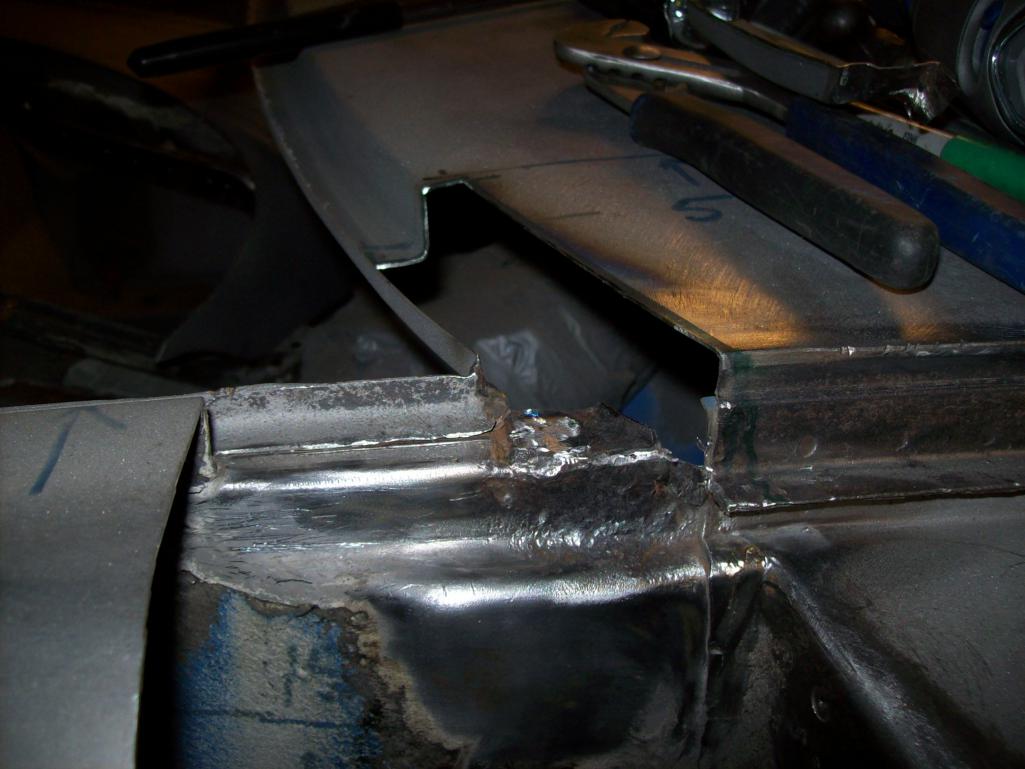
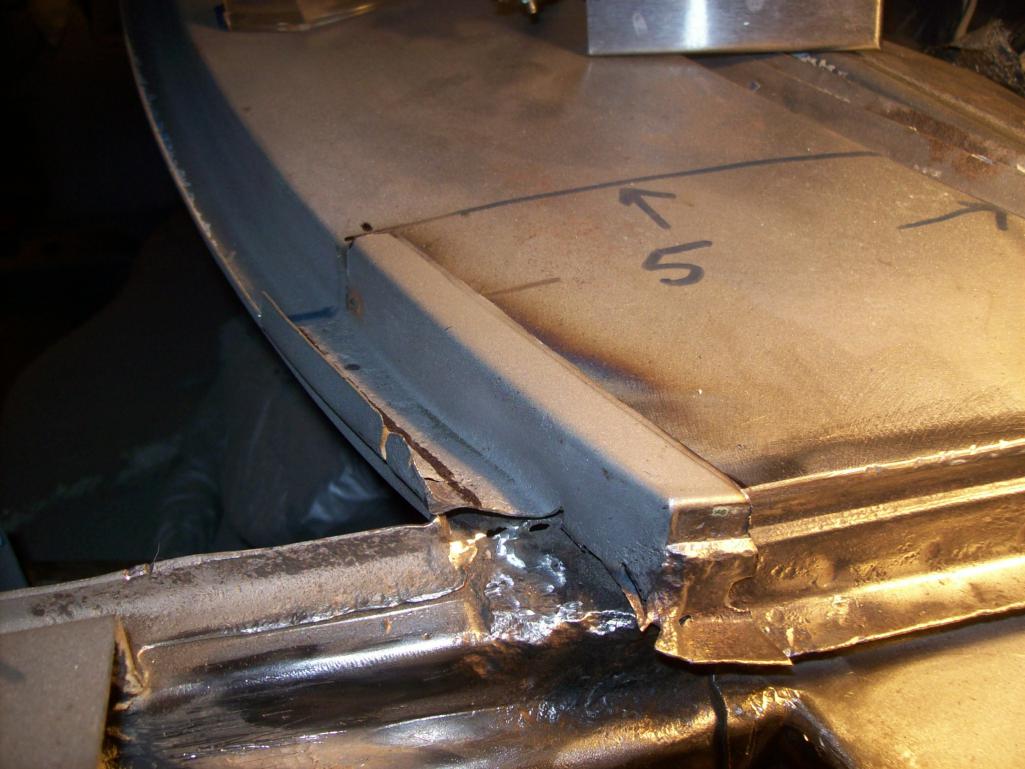
Posted by: Speedo Jan 1 2018, 07:00 PM
Cut and fit and...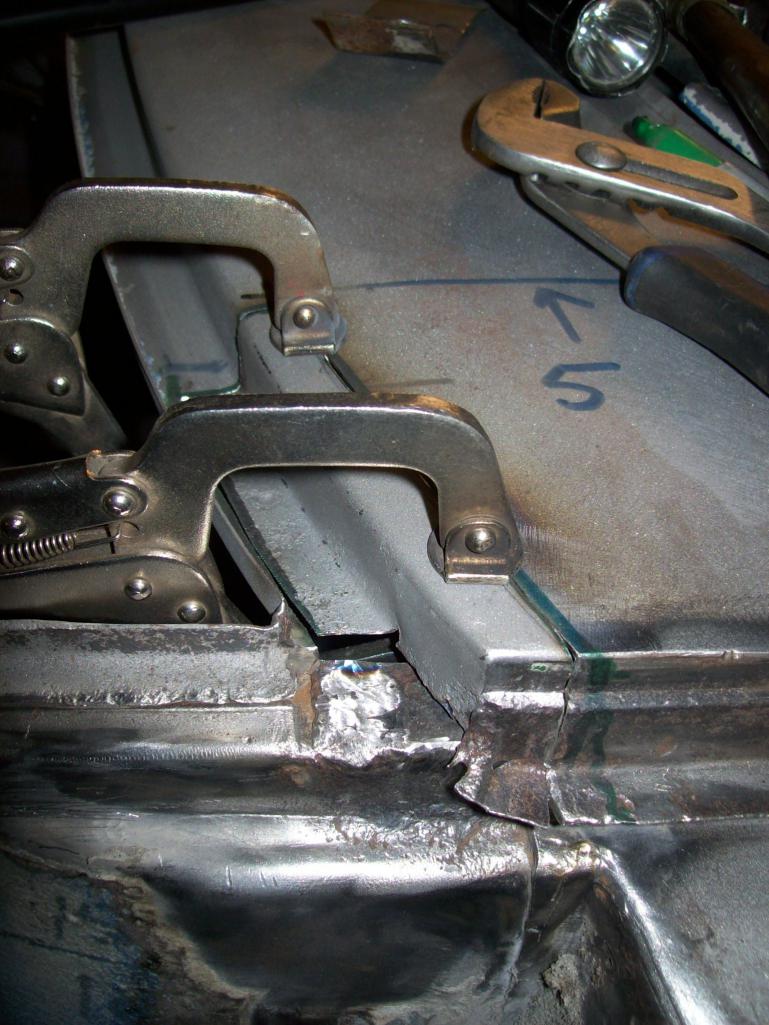
[attachmentid=633454]
[attachmentid=633455]
[attachmentid=633456]
[attachmentid=633457]
Posted by: Speedo Jan 1 2018, 07:18 PM
And more...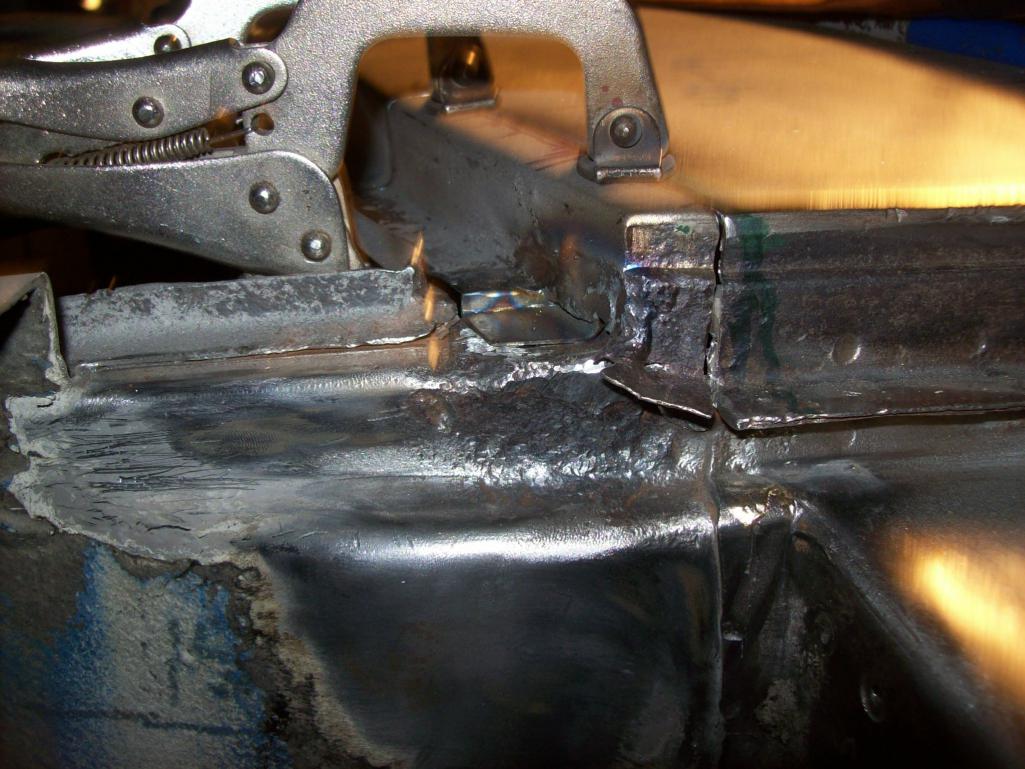
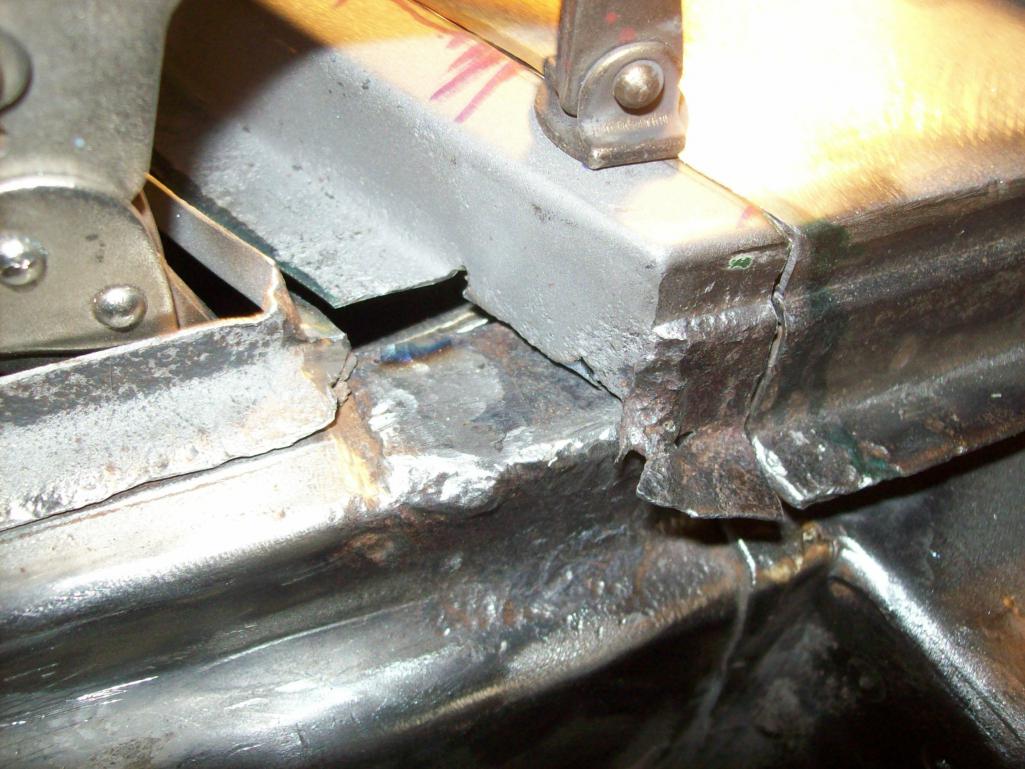
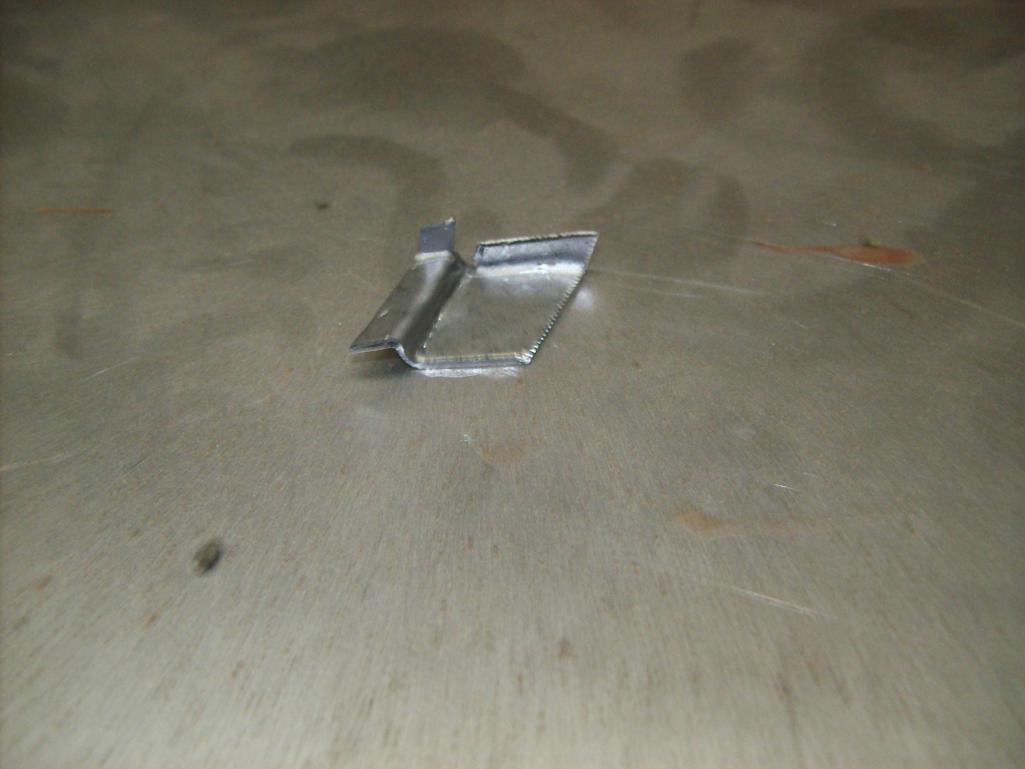
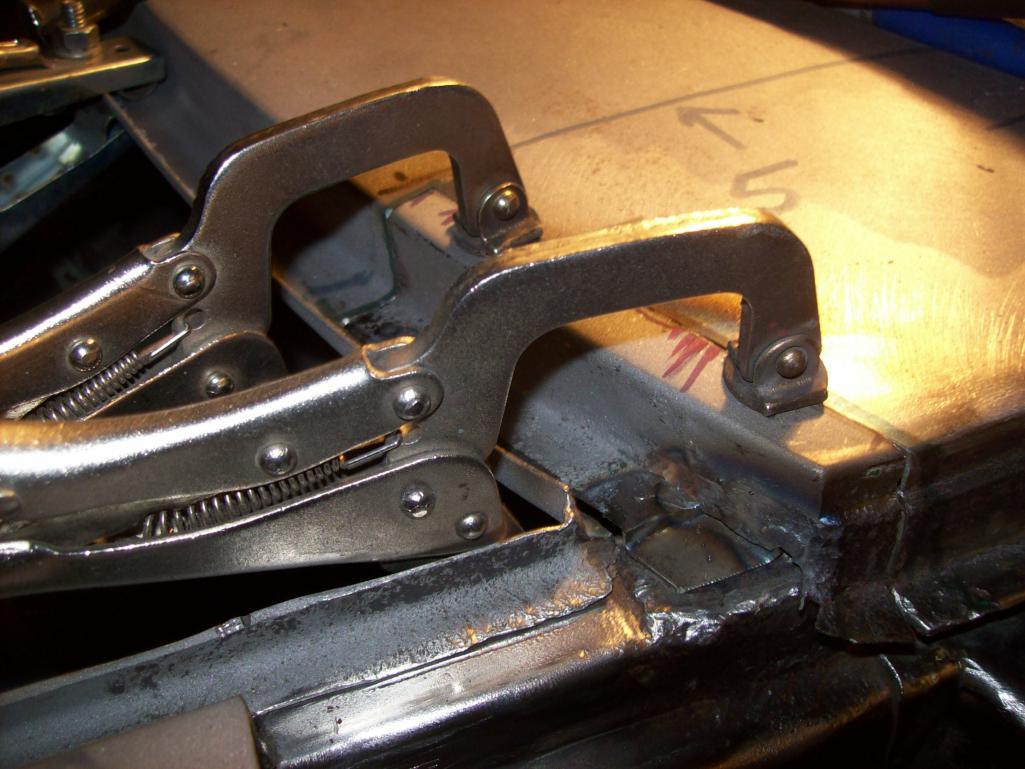
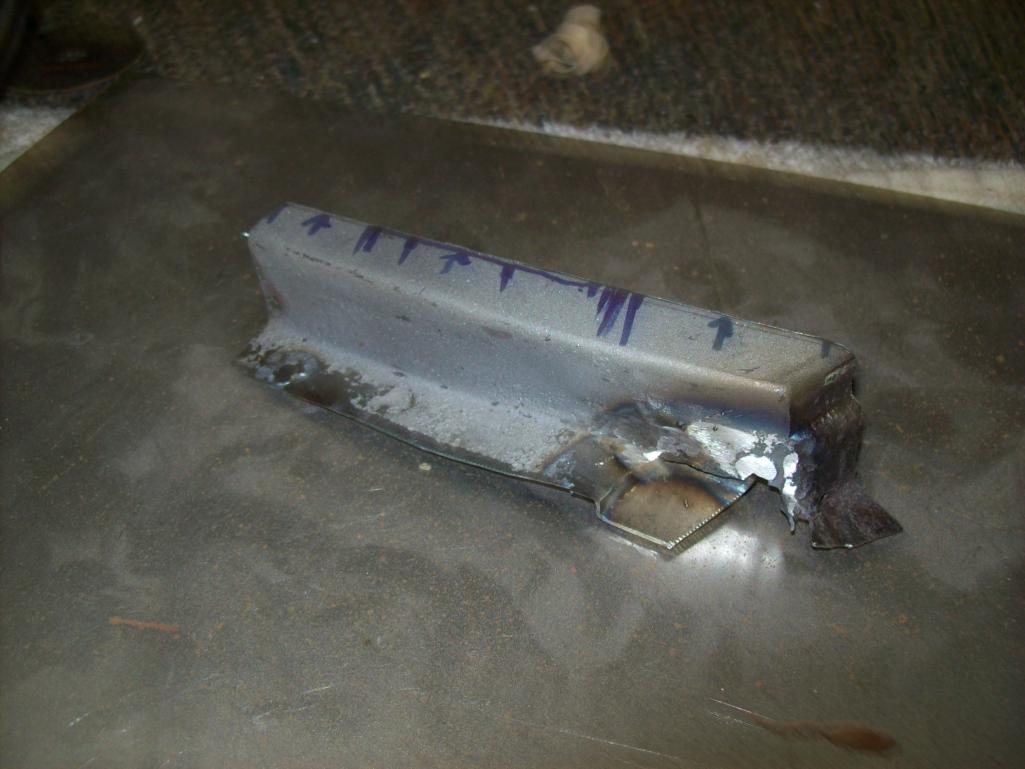
Posted by: Speedo Jan 1 2018, 07:22 PM
And finishing this corner of the cowl...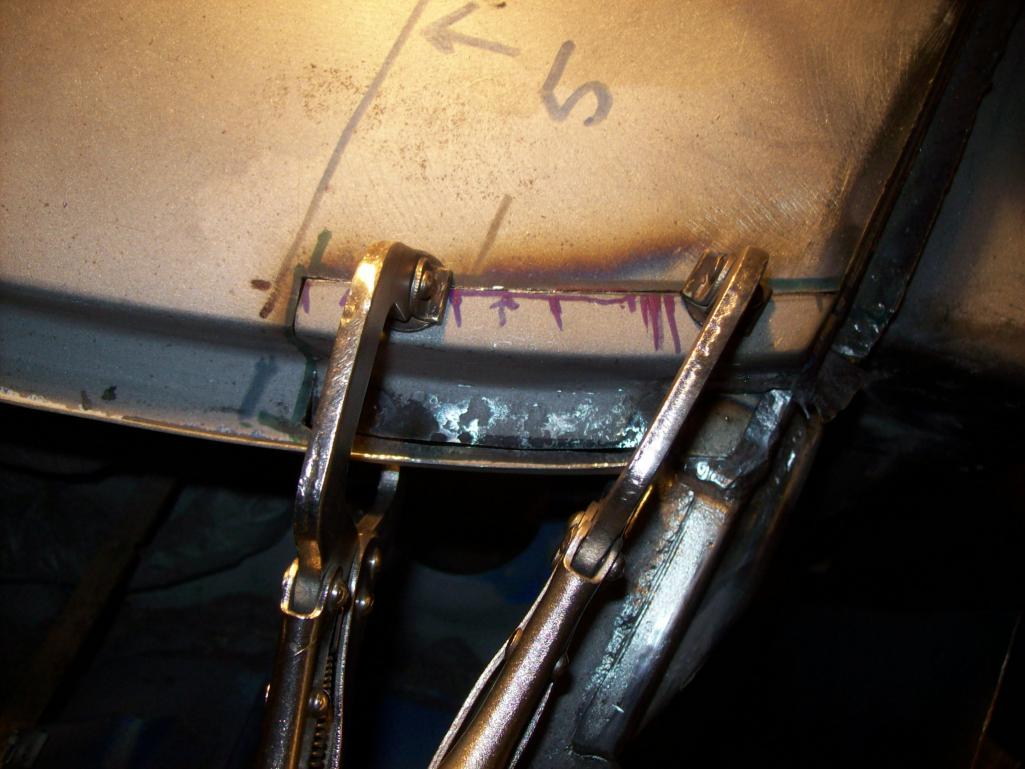
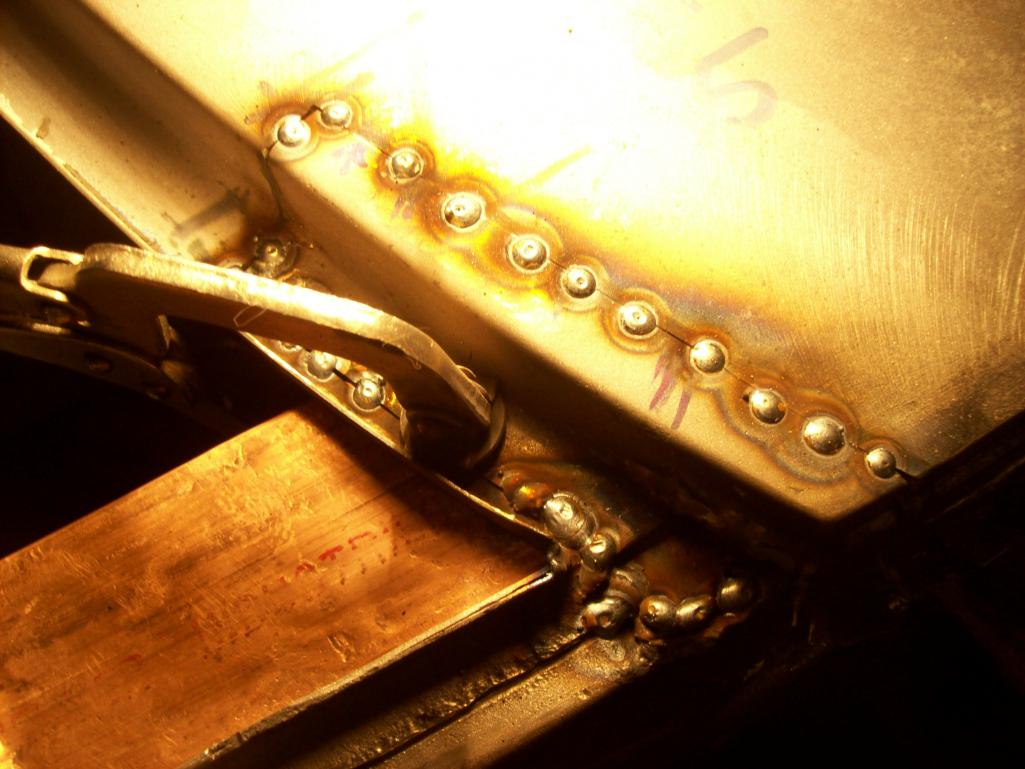
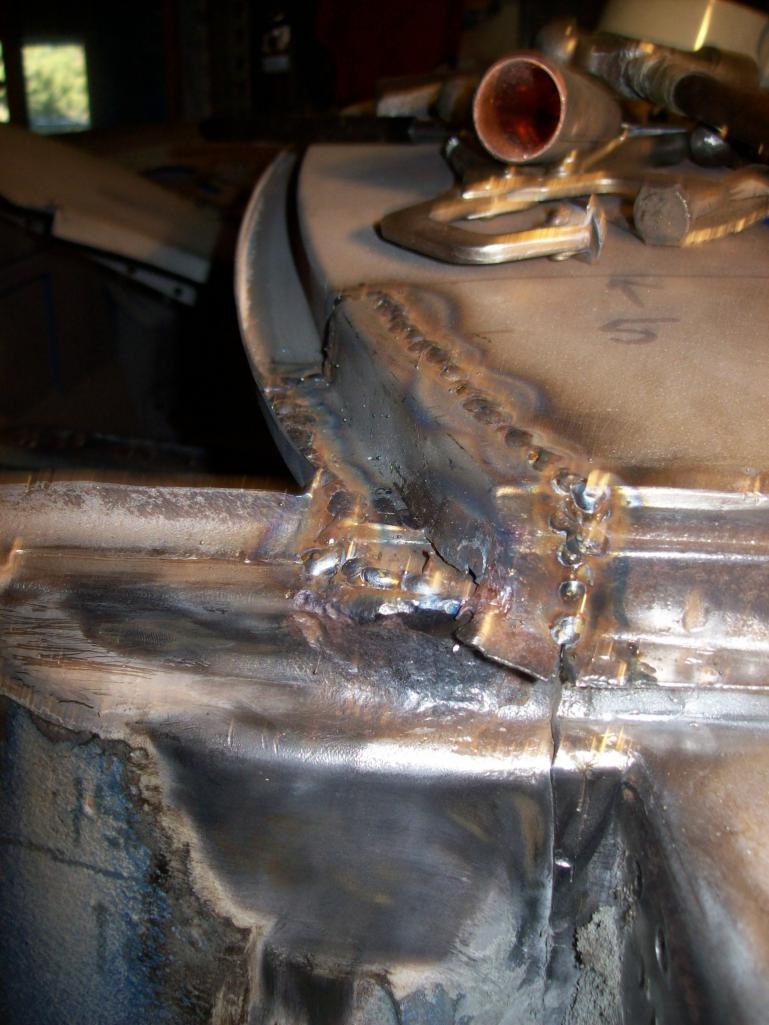
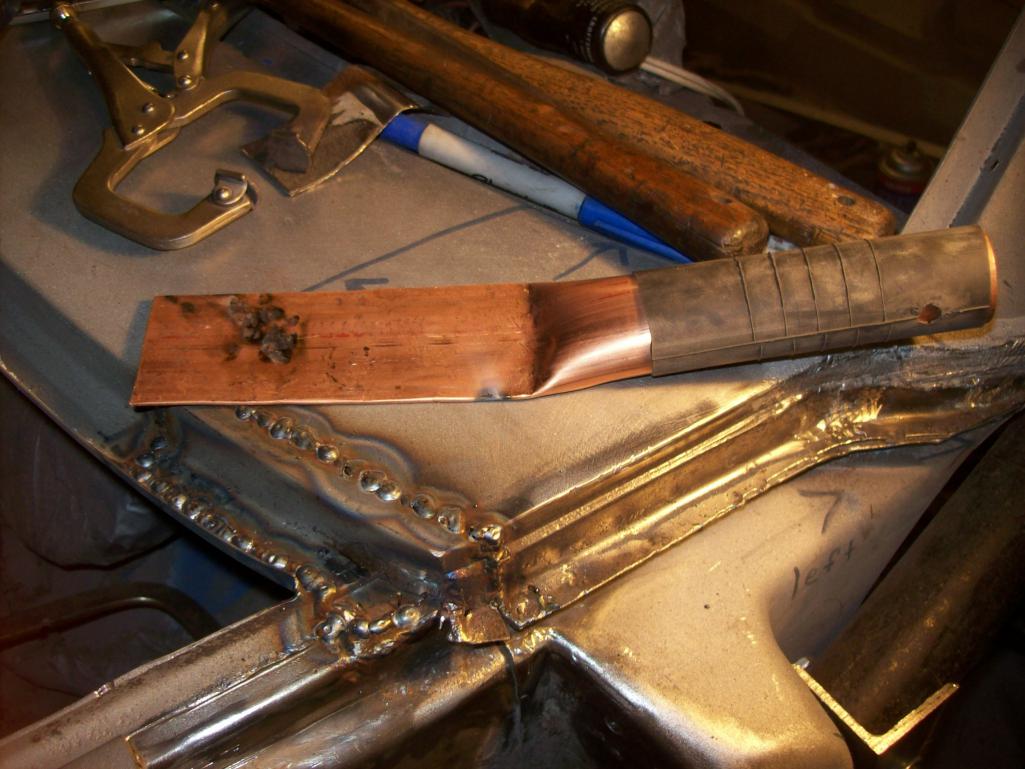
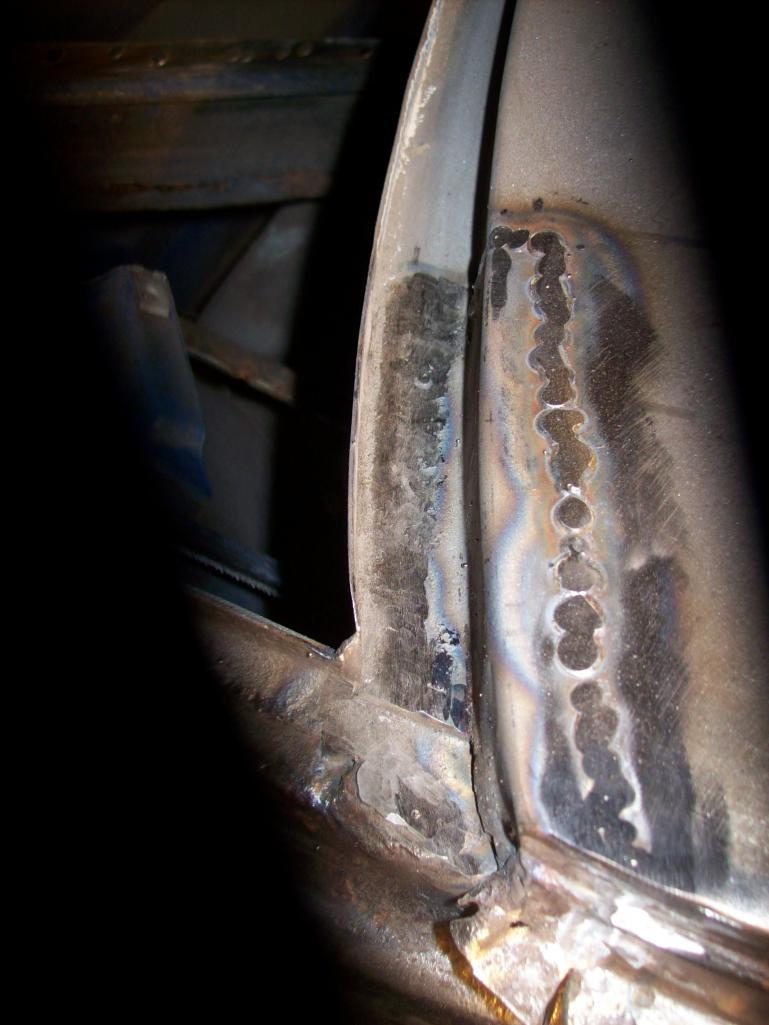
Posted by: Speedo Jan 1 2018, 07:28 PM
And now the fender...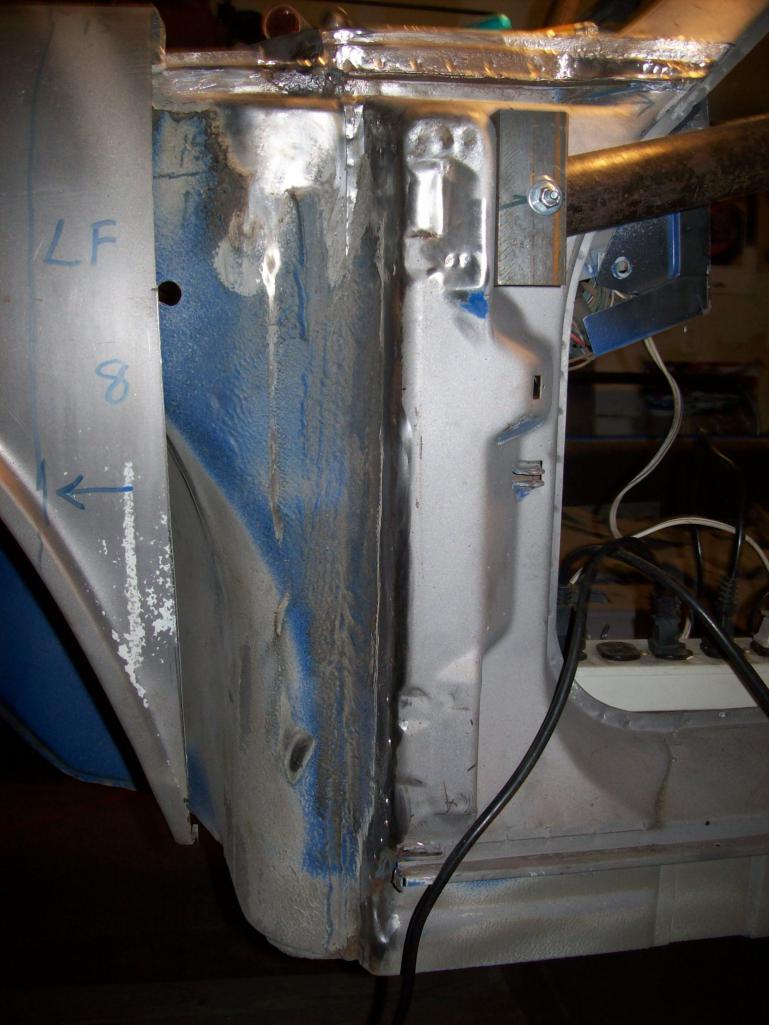
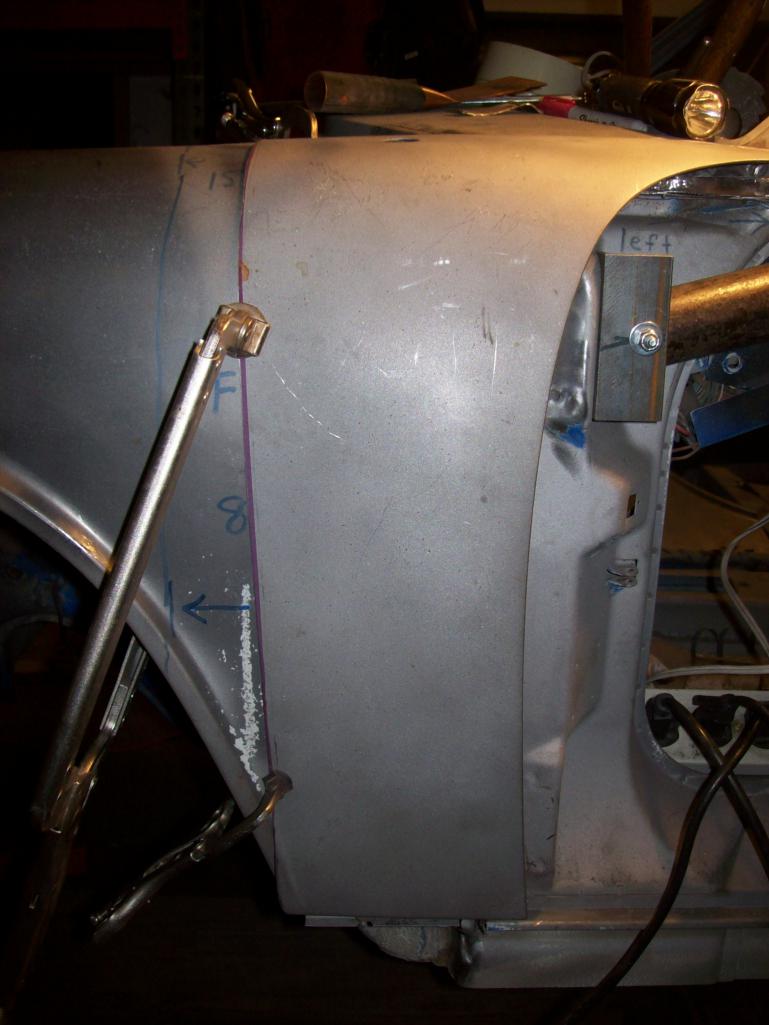
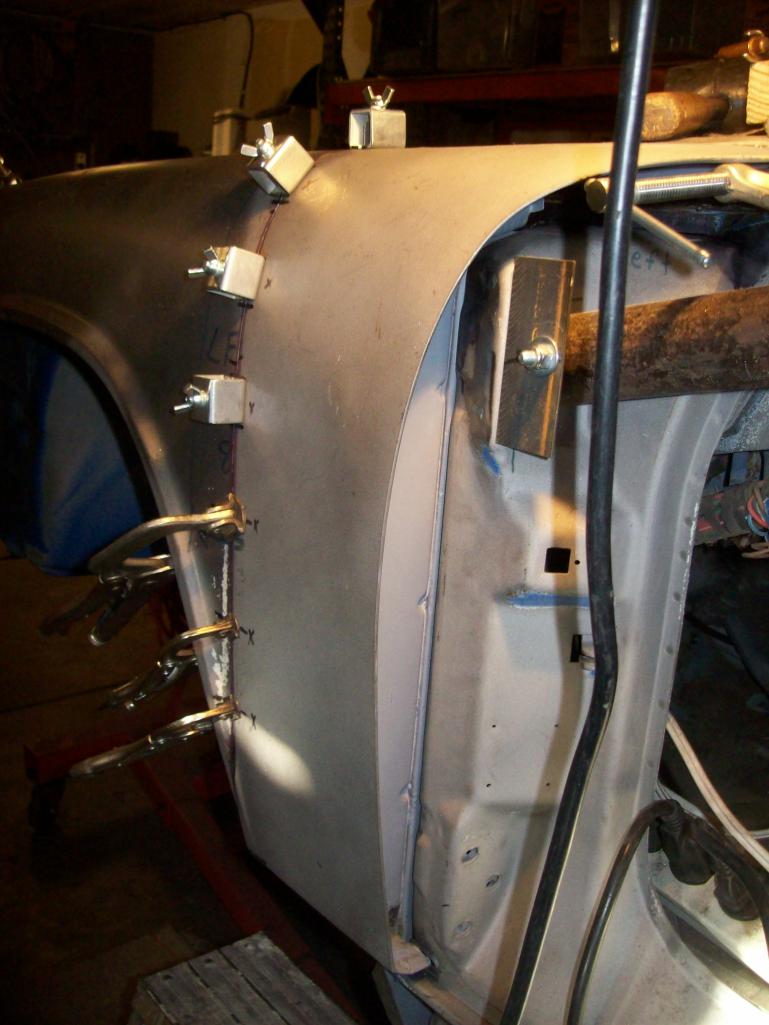
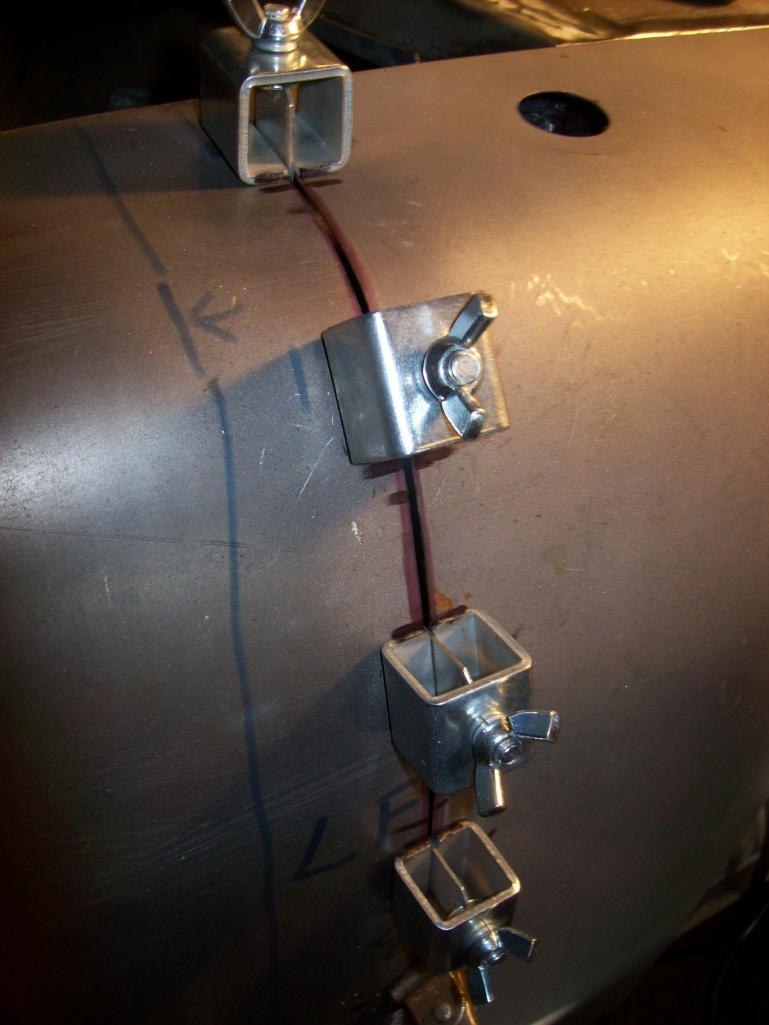
Attached thumbnail(s)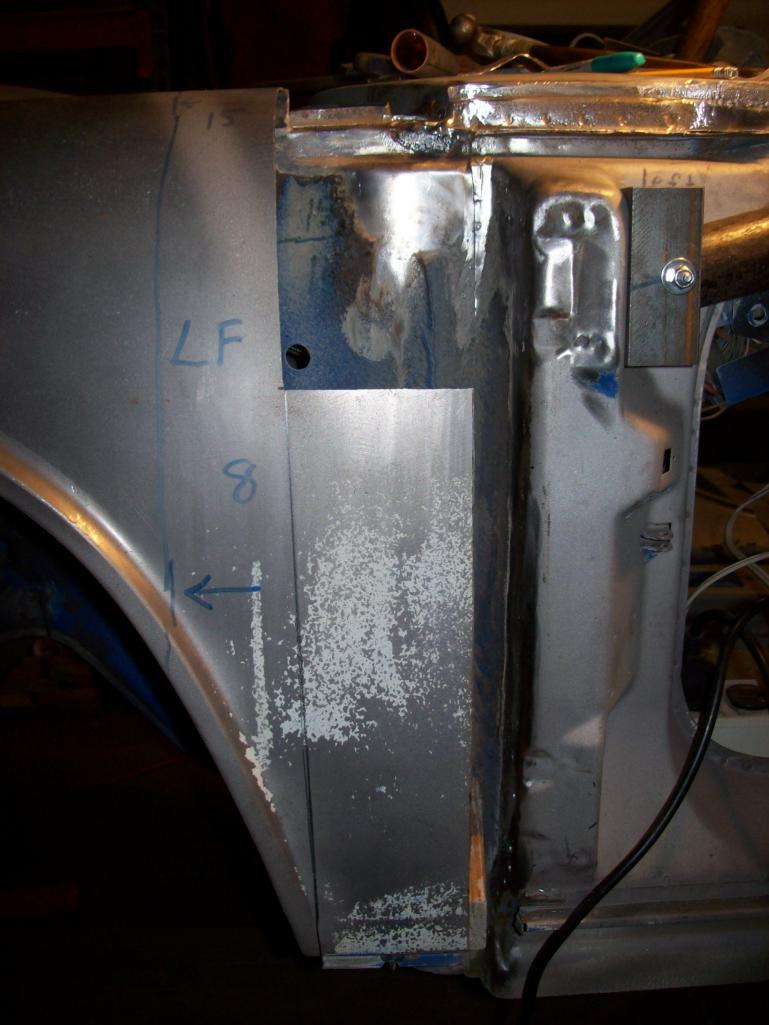
Posted by: Speedo Jan 1 2018, 07:37 PM
Couple more getting ready to weld... 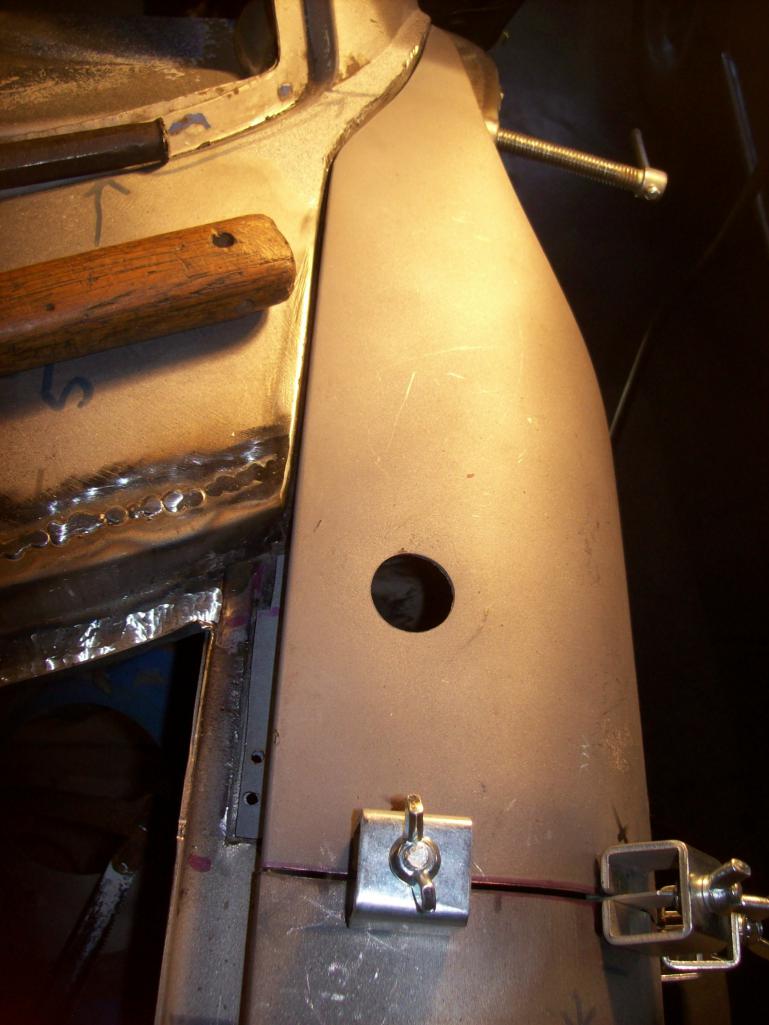
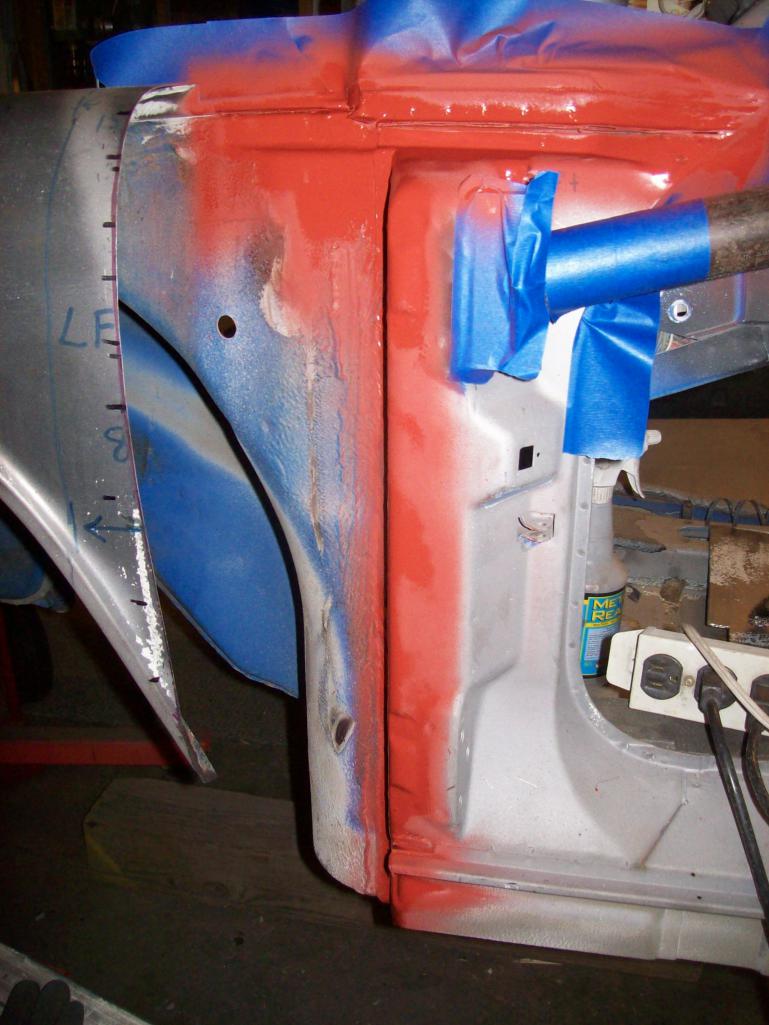
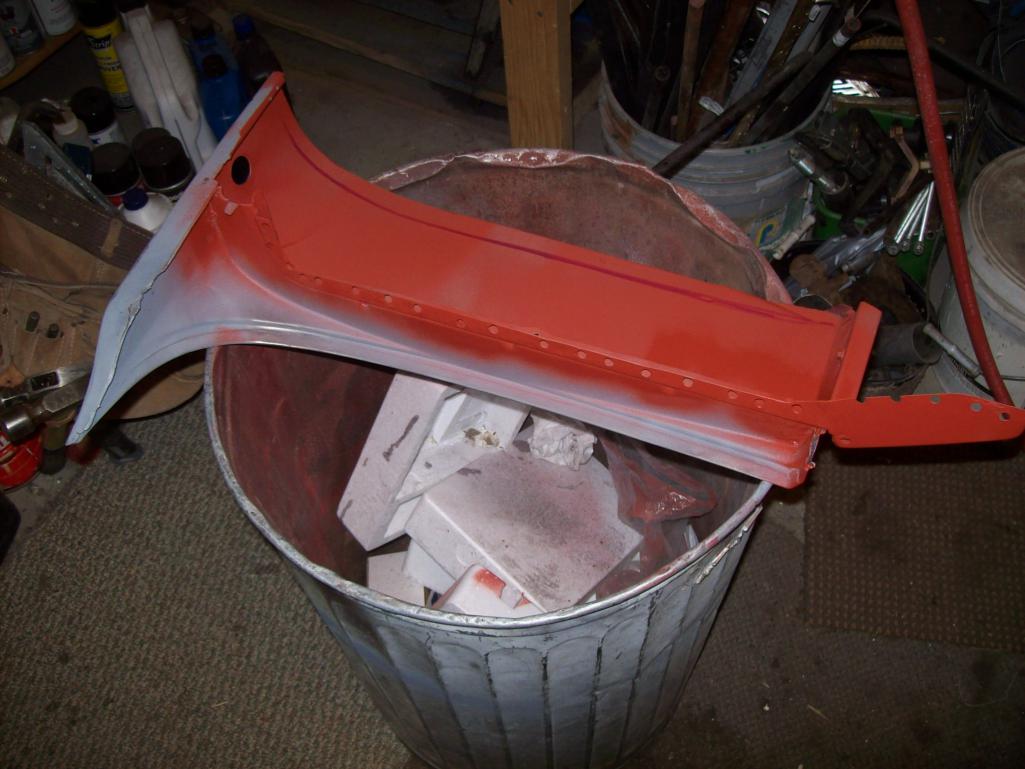
Posted by: Ferg Jan 2 2018, 02:38 PM
Nice work Lars, keep it up.
Posted by: Speedo Jan 15 2018, 08:27 PM
So a couple of the 914 "grand masters" came up today to see if I have totally screwed up the splice of the driver side aft fender. Word was that it looked ok to close it up. I have measured and measured...comparing the driver side opening with the passenger side.
I went ahead and committed the splice.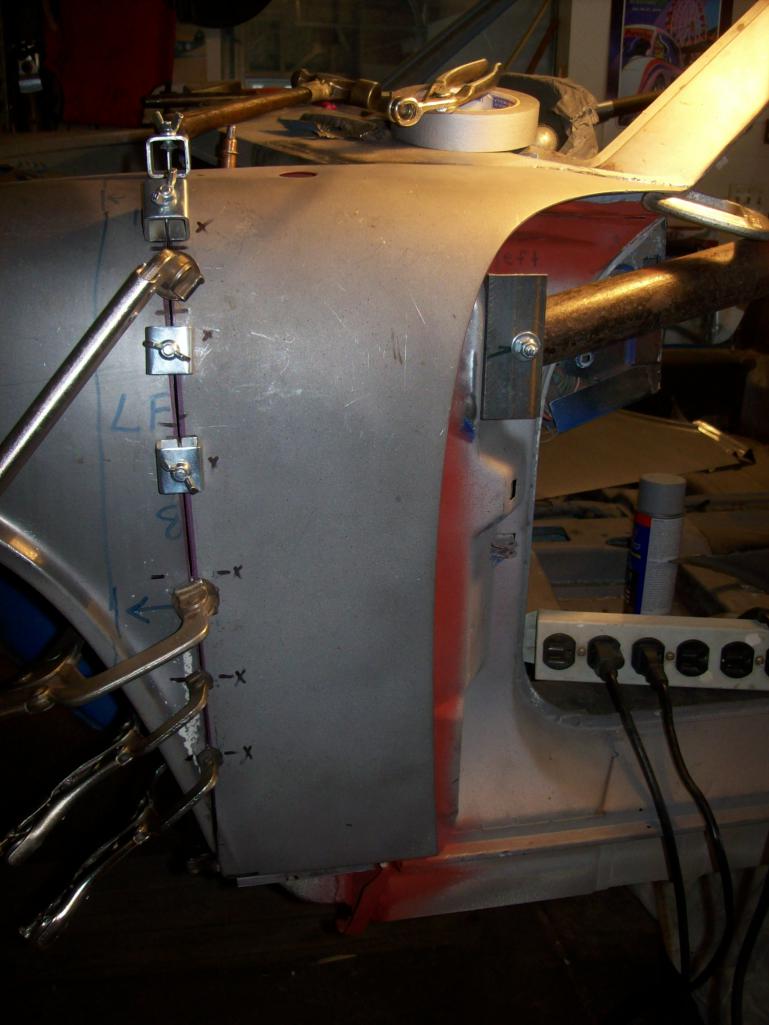
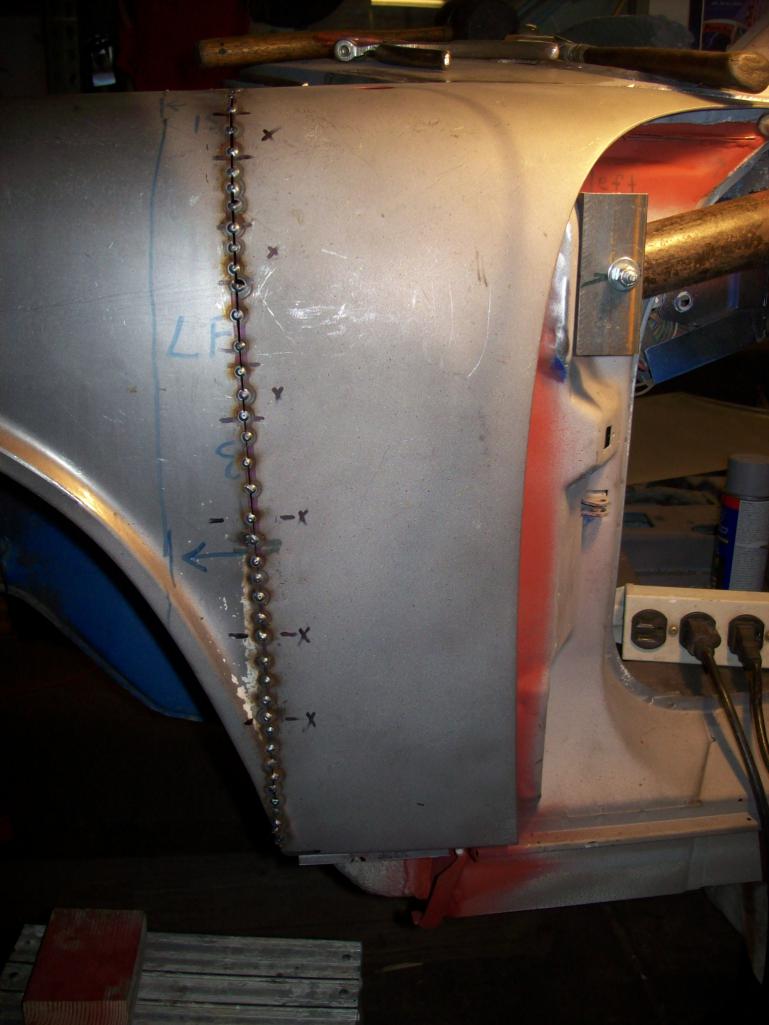
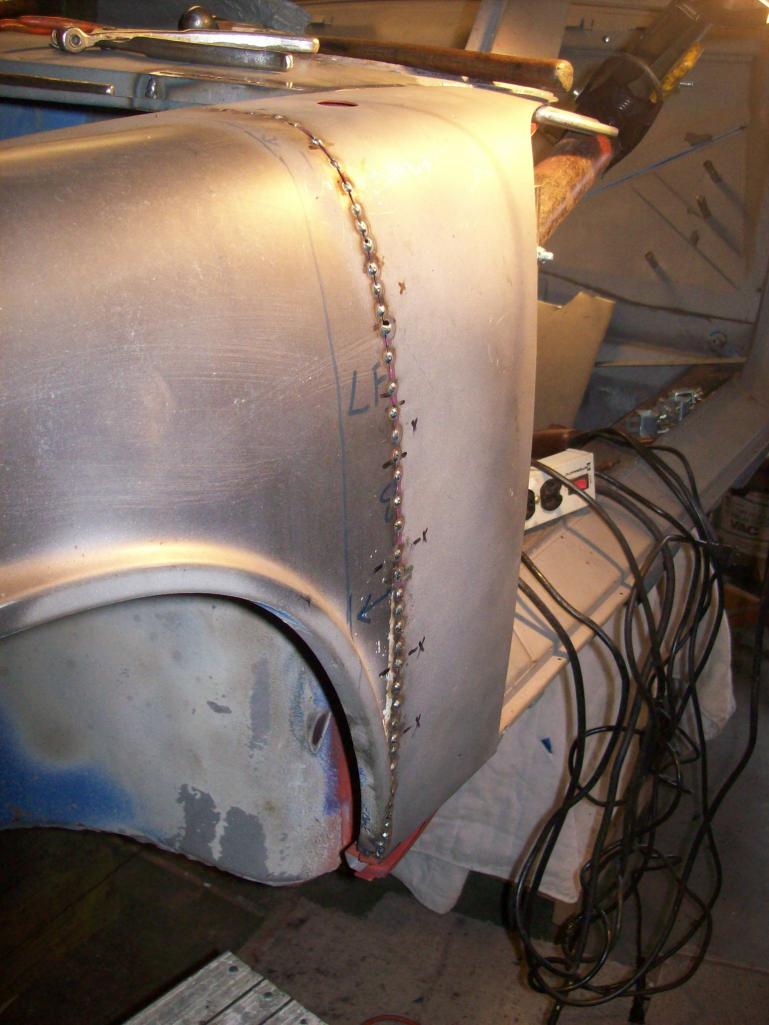
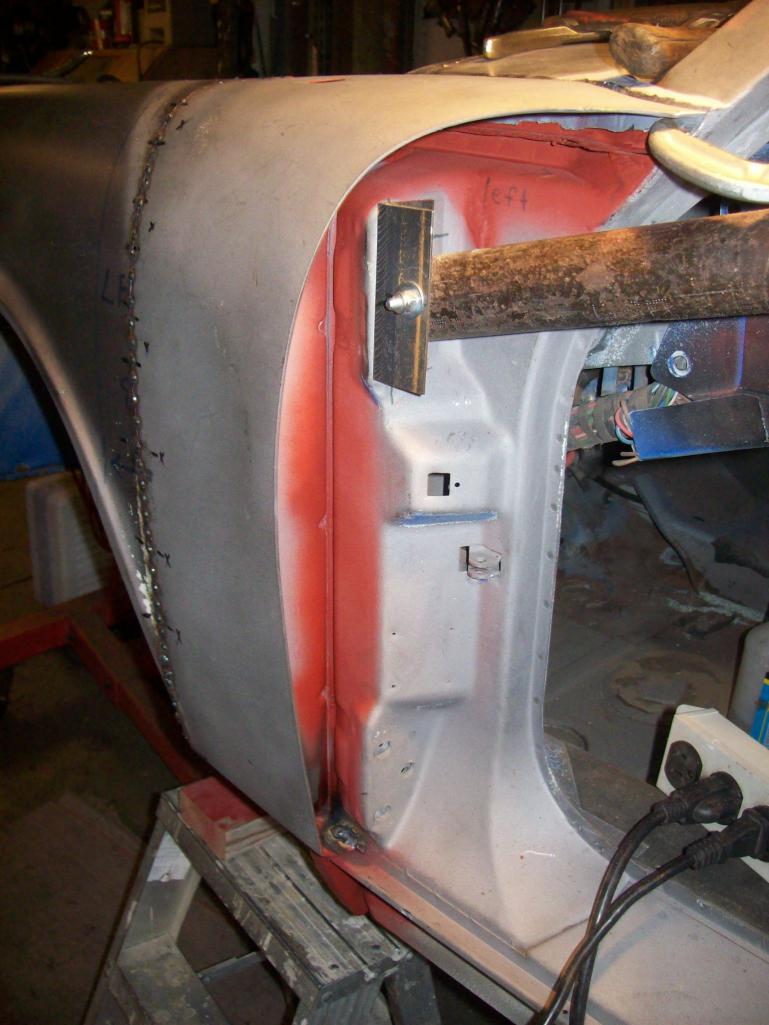
Posted by: brant Jan 15 2018, 09:13 PM
Nice!
Posted by: Ferg Jan 16 2018, 10:45 AM
Posted by: Speedo Jan 21 2018, 07:02 PM
The splice is committed and the inner fender welded up. Starting to rotate the car on the rotisserie to "finish" the welds.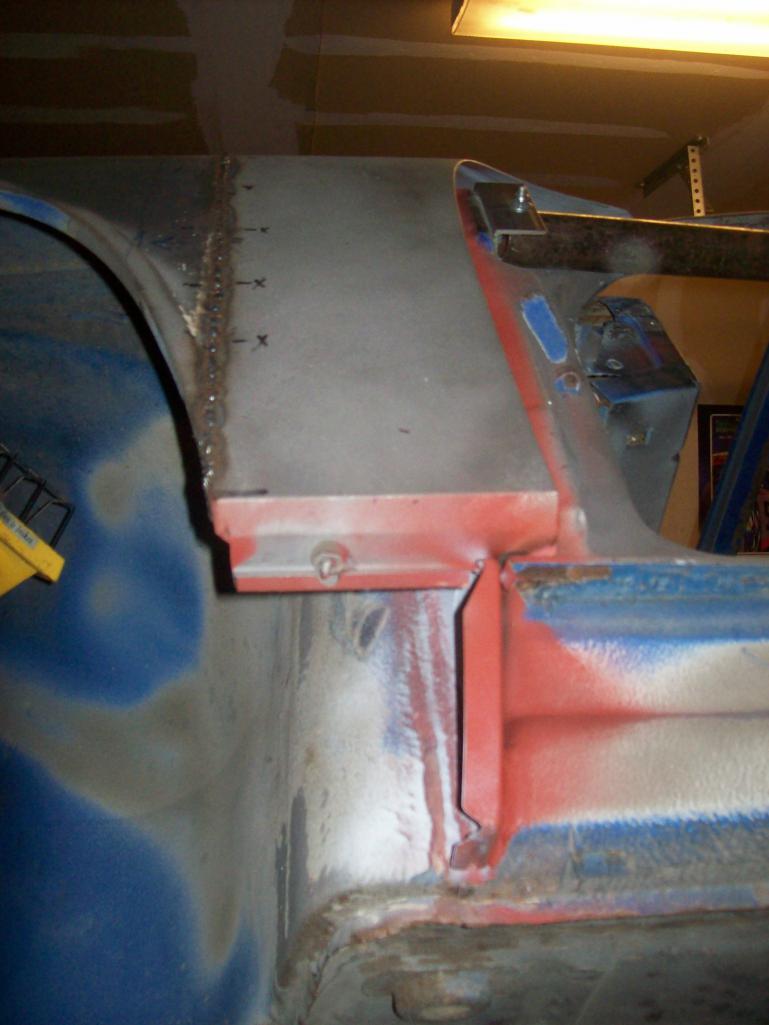
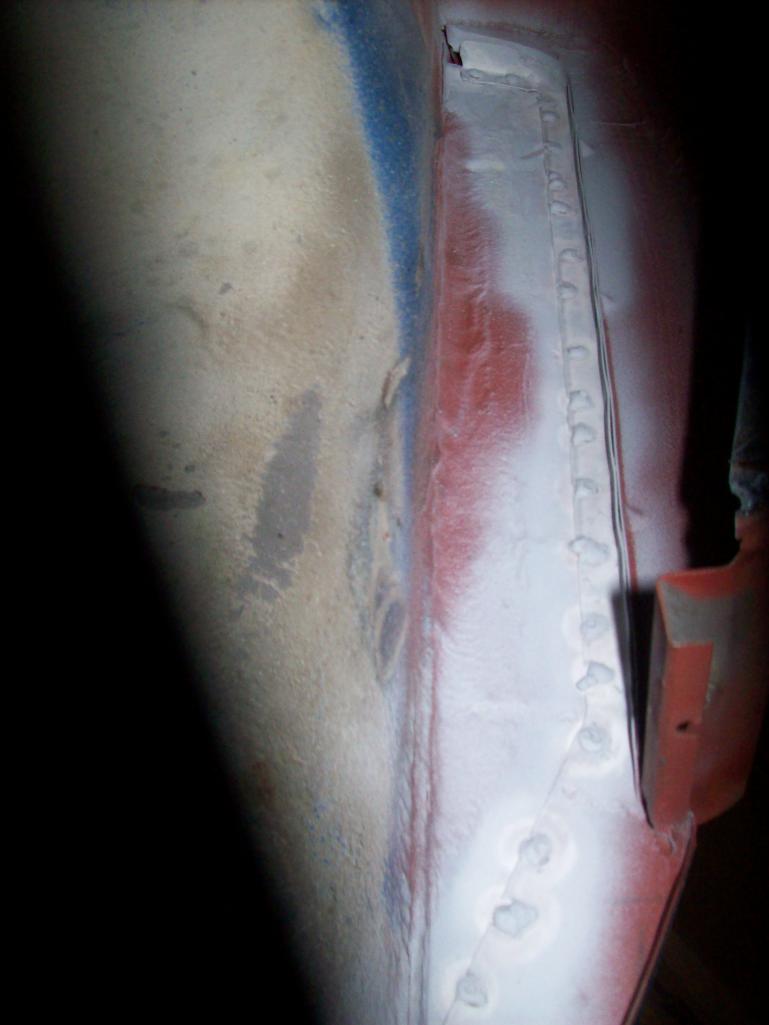
So if I am not going to track the car and the rocker/longs repairs have been done correctly, is the stiffening kit still necessary?
Posted by: Speedo Jul 12 2018, 03:51 PM
Long time since posting...but a lot of progress made. Decided not to add stiffening kit as chassis was not bad, repairs were correct and it is not a "tracked" six.
You guys have seen all this a thousand times so the dialogue will be minimal. At this point I have gone around the car 360 degrees and I am back where I started.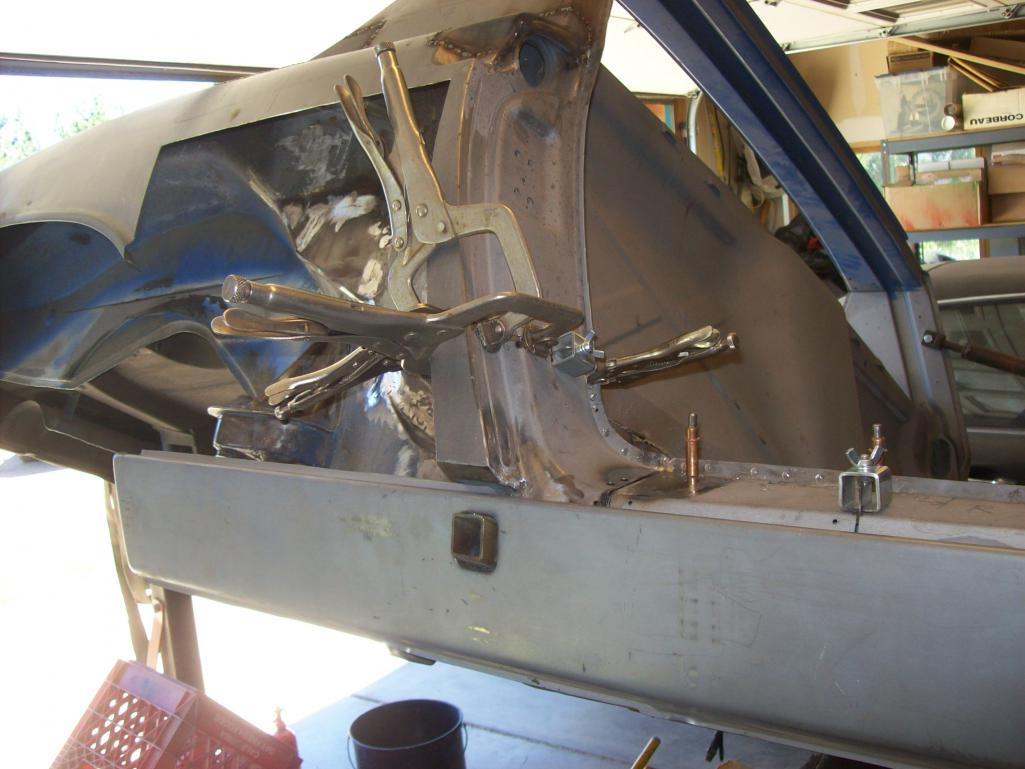
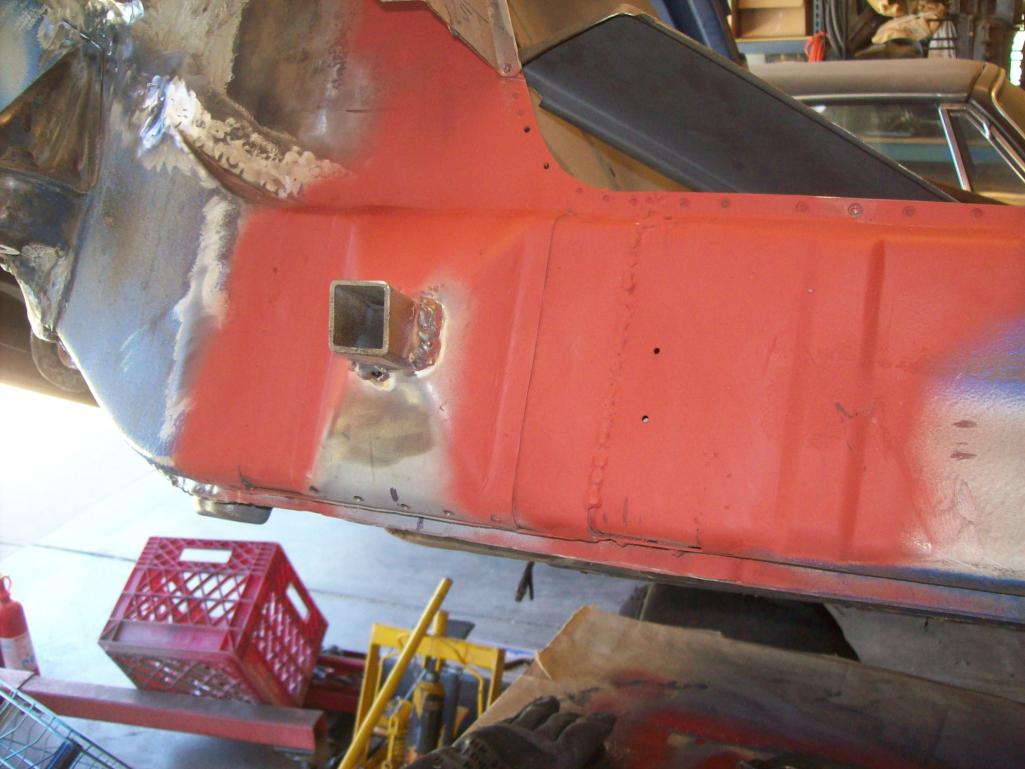
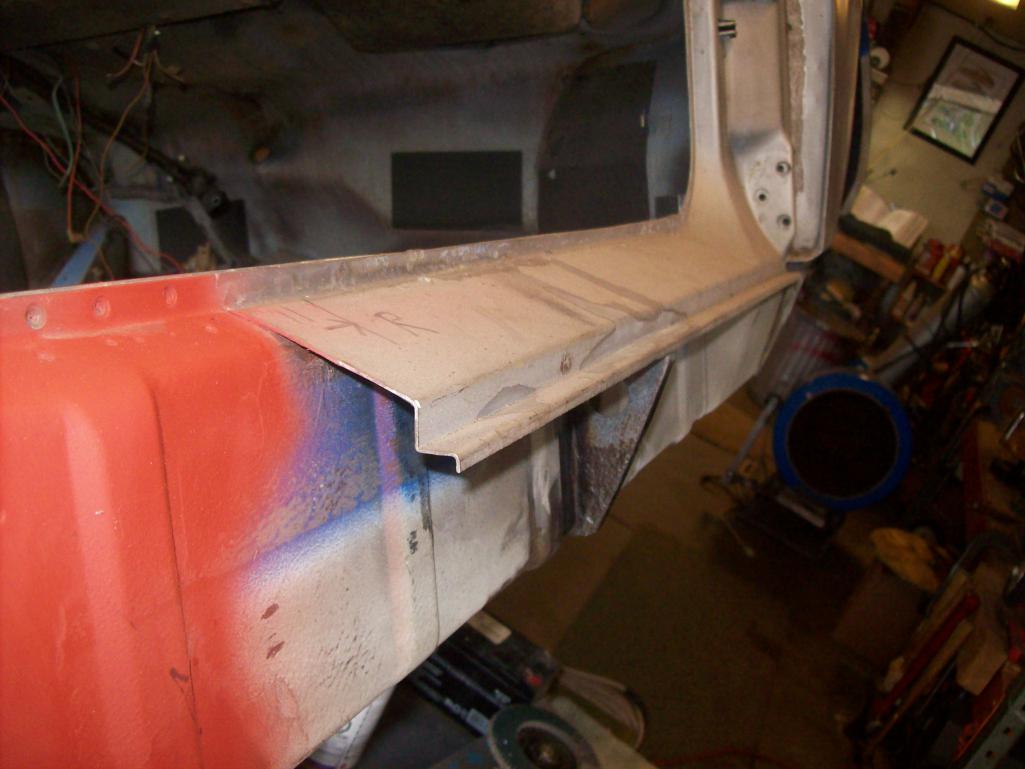
[attachmentid=658861]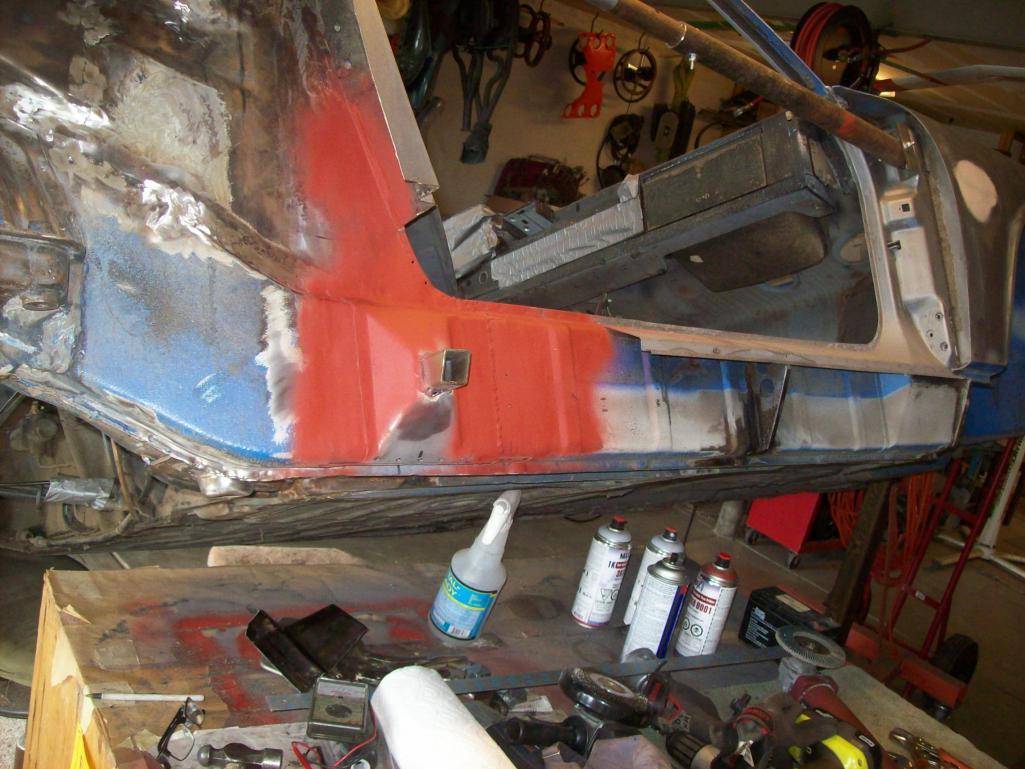
Posted by: Speedo Jul 12 2018, 03:59 PM
Moving on...welding back in the repaired bottom of the lockpost worried me. Quarter panel was removed which allowed the lockpost to "float". The bottom of the lockpost had welded so the shape might have changed slightly. I measured and triangulated and compared the dimensions with the drivers side 1000 times. I had to "muscle the steel in place to weld using clamps and voodoo. 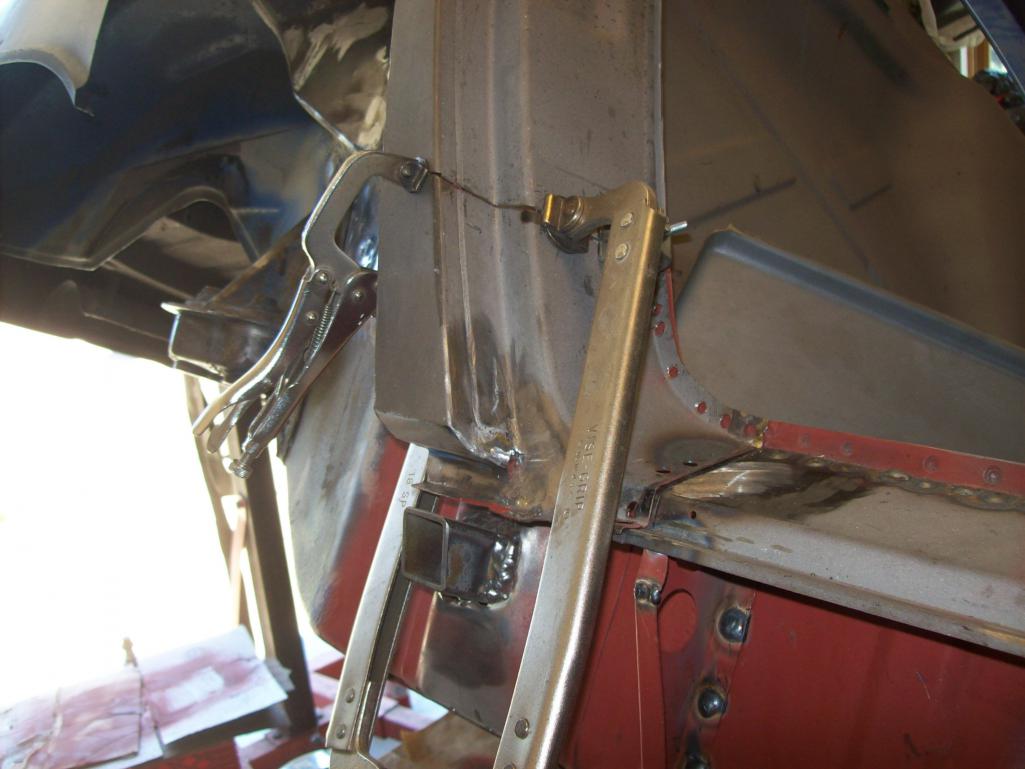
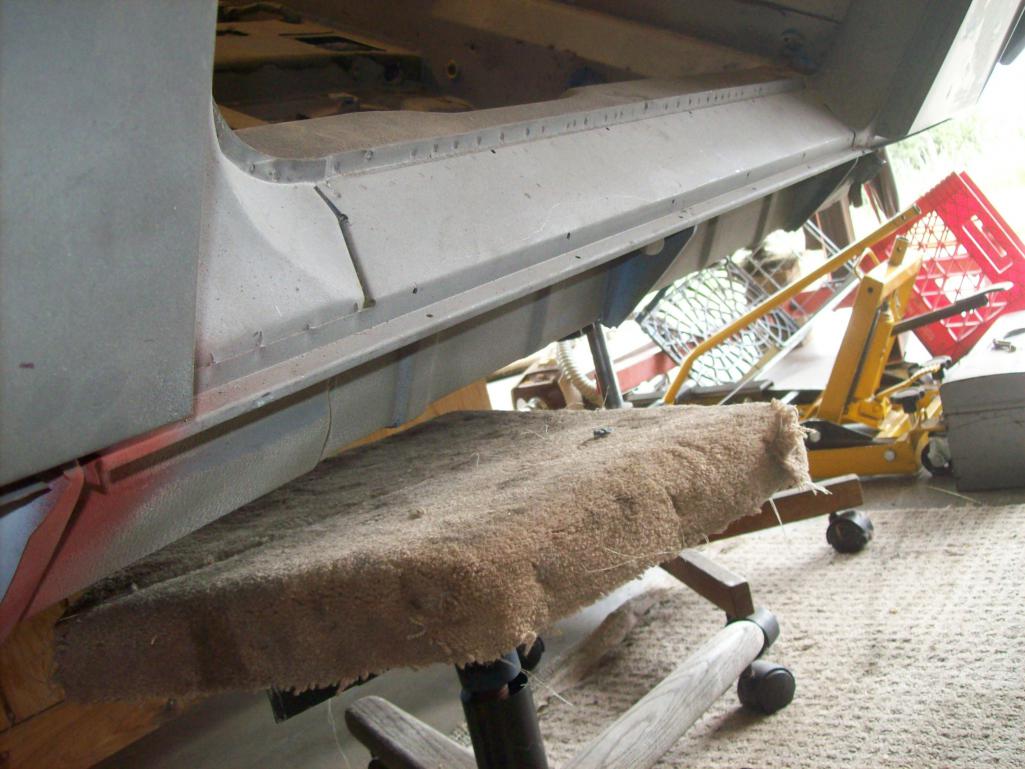
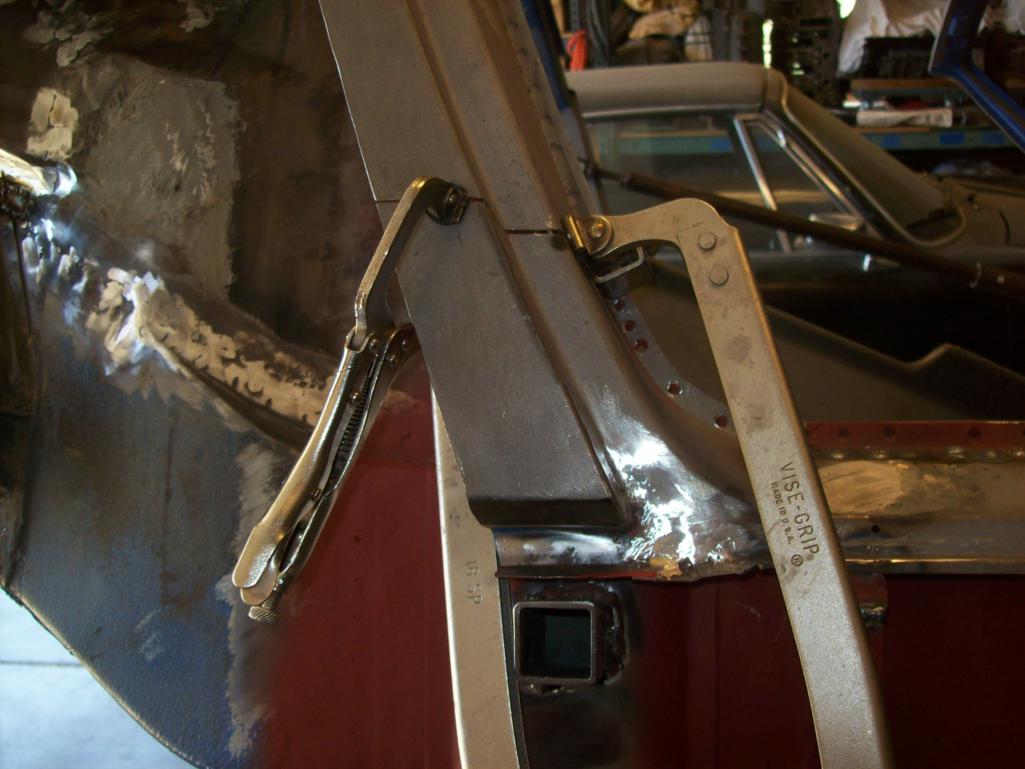
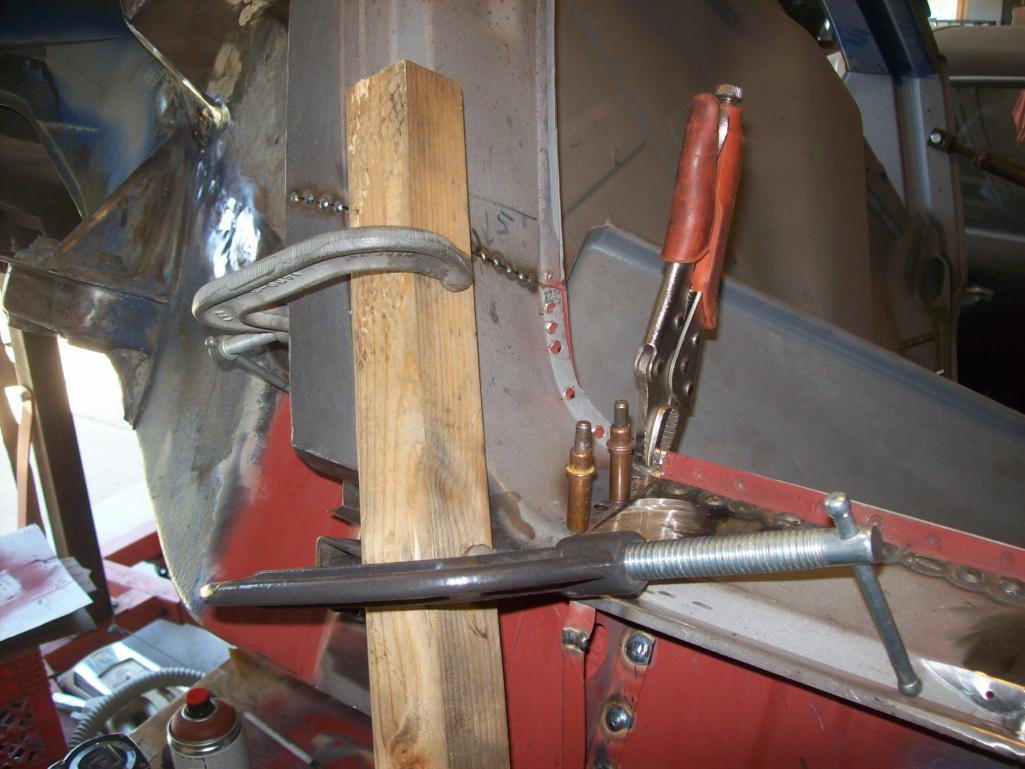
Posted by: Speedo Jul 12 2018, 04:08 PM
Closer...
With the chassis on the rotisserie, and the bracing in place...no way for me to mount the door to check for fitment. All I can do is measure and measure...and then measure a last time. Quarter panel seems to fit back in ok. A real bummer would be that it was either too large (needing something to be re-assessed), or too small leaving large gaps. Would really like someone to come look over my shoulder before I commit this back to the car. Better to have someone look at it and say..."no wait!!!" now than after it is all welded back up. I have beer... 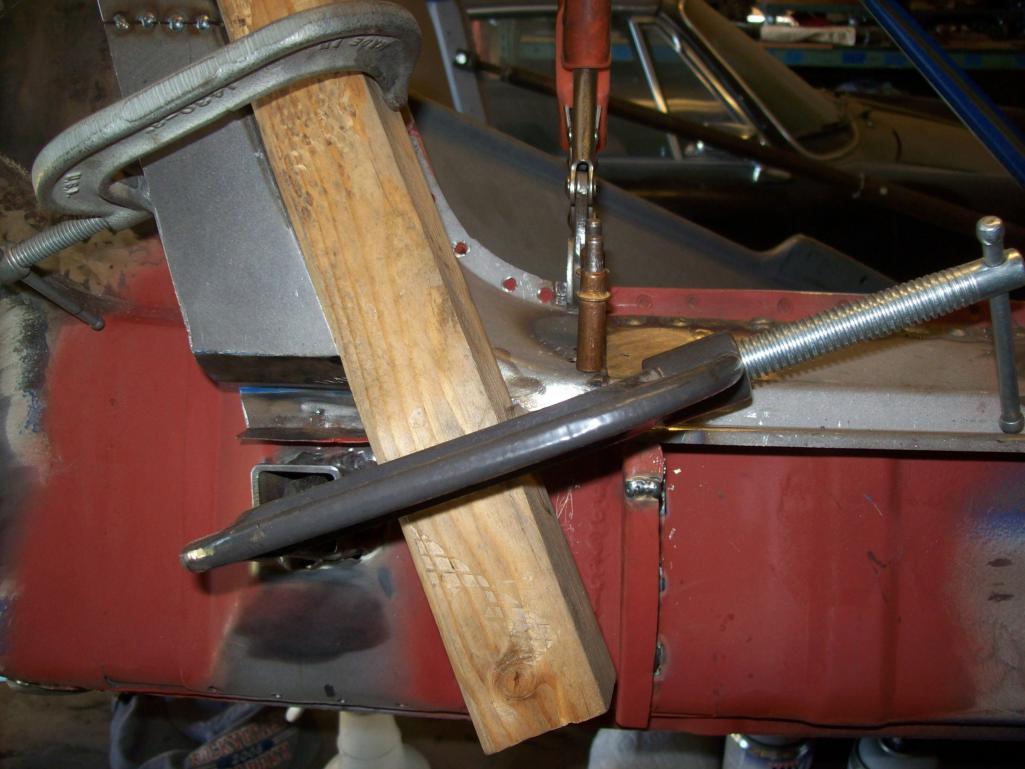
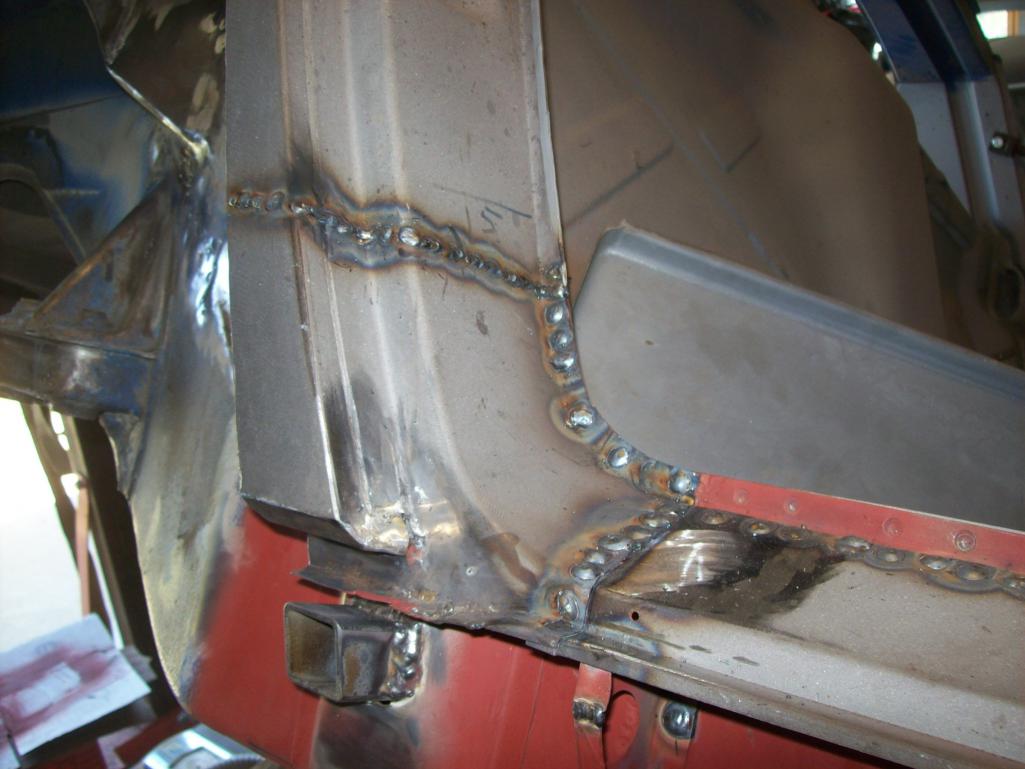
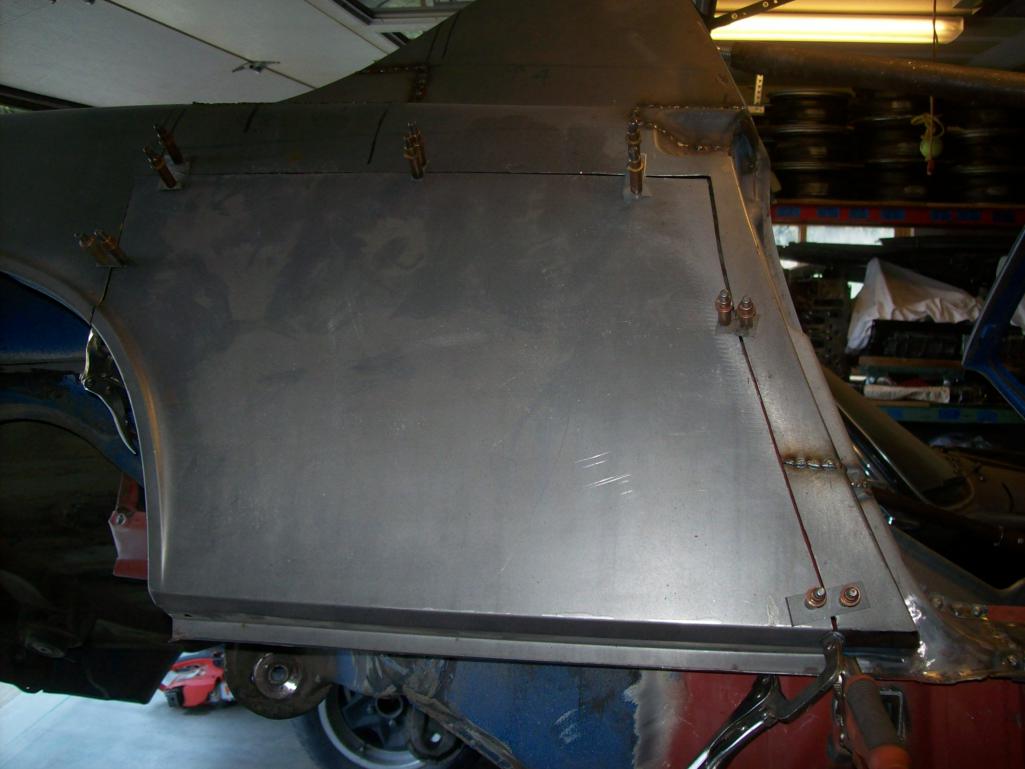
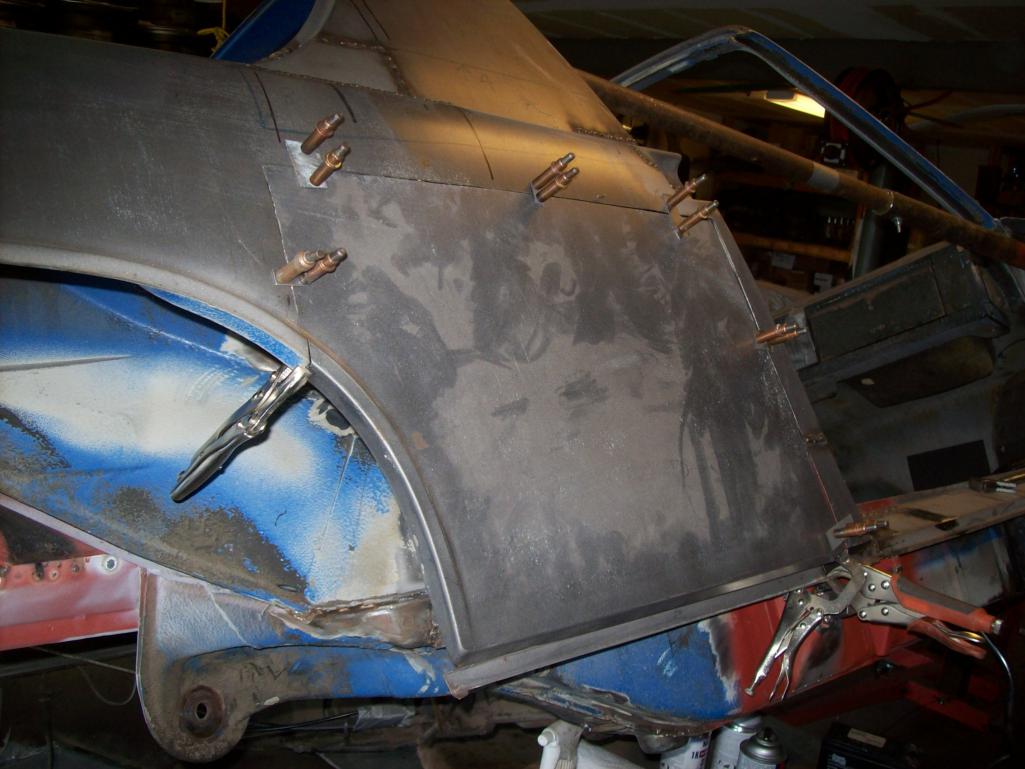
Posted by: Speedo Jul 12 2018, 04:18 PM
Once the q-panel is back on, I have a bit of welding to do on the bottom of the passenger side with the chassis upside down, (thank ggodness for the rotisserie). Then it comes back upright for a lot of weld massaging, and dolleying. Then leading all around (new challenge for me) and paint prep. First round of sandblasting didn't do a very good job on the underside of the chassis. Not sure whether to send it back to them for a second round now that I have a chassis dolley, allowing them to get under the car.
http://forums.pelicanparts.com/porsche-911-technical-forum/963381-mom-look-what-i-made.html
We'll see. I am ok with stubborn undercoating staying on the car, but there sill is a lot of crap (dirt and grease) stuck to the inner fenders, engine compartment etc. that I would like to have removed before I repaint.
Then the question of a painter...?
Posted by: Ferg Jul 12 2018, 04:39 PM
I have a guy
Posted by: Speedo Jul 12 2018, 05:30 PM
I have a guy
Perfect! Same guy?
BTW, anybody need these?
http://forums.pelicanparts.com/porsche-914-used-parts-sale-wanted/999609-914-suspension.html
Posted by: peteyd Jul 13 2018, 06:16 AM
Lookin' good Lars
Pete
Posted by: Speedo Jul 14 2018, 08:16 AM
I'm serious about having someone look this over before I close up the panel.
Brant, Ferg...someone knowledgeable local? The beer is cold.
Posted by: brant Jul 15 2018, 10:02 AM
I can look at it. But not sure I would be more than a guess either
The measurements should be adequate.
Plus your dog not have the deep sheet metal and experience you have
Posted by: Speedo Jul 21 2018, 09:15 AM
I can look at it. But not sure I would be more than a guess either
The measurements should be adequate.
Plus your dog not have the deep sheet metal and experience you have
What about my dog? Why bring her into this? She doesn't weld very well...no opposeable thumb thing.
Posted by: Speedo Jan 1 2019, 11:37 AM
Happy New Year!
I am done welding. Didn't want to bore folks with welding pictures. I have dressed my welds and ready to prep for paint, but I have some remaining questions...
I had to remove lead in areas that needed repair ...door handle access, wiper recess and gasket tracks in front and rear as well as bottoms of windshield corners. Picked up a 70/30 Eastwood kit and watched a bunch of videos, so ready to attack. You cannot sand this stuff, only file. Not sure how I am going to be able to finish "contour" some of these areas prior to priming. On outside bodywork (fenders, quarters), filing will be easy, but intricate areas are going to be impossible... like the door latchpost next to the door handle...lots of lead. Am I better off picking up some of the leadfree sandable solder? Or just go plastic? Hate to revert to bondo as it can't be an edge, it dries and shrinks over time and its not original. Never saw any videos of Porsche workers body finishing with lead.  Maybe they used disposable workers?
Help would be appreciated...
Speedo
Posted by: sixnotfour Jan 1 2019, 12:54 PM
II dont have a clue but good article ,,Wilhoit Restorations
http://www.willhoitautorestoration.com/leadvspolyester.php
Posted by: Speedo Jan 5 2019, 05:32 PM
Lot of welding done here to mitigate rust. B pillar area at lockpost/vent area when I have leading "contour" concerns. Having a painter (no Ferg, not him again ) come take a look tomorrow to see how much prep he wants me to do. Gonna put some paint on this puppy...eventually!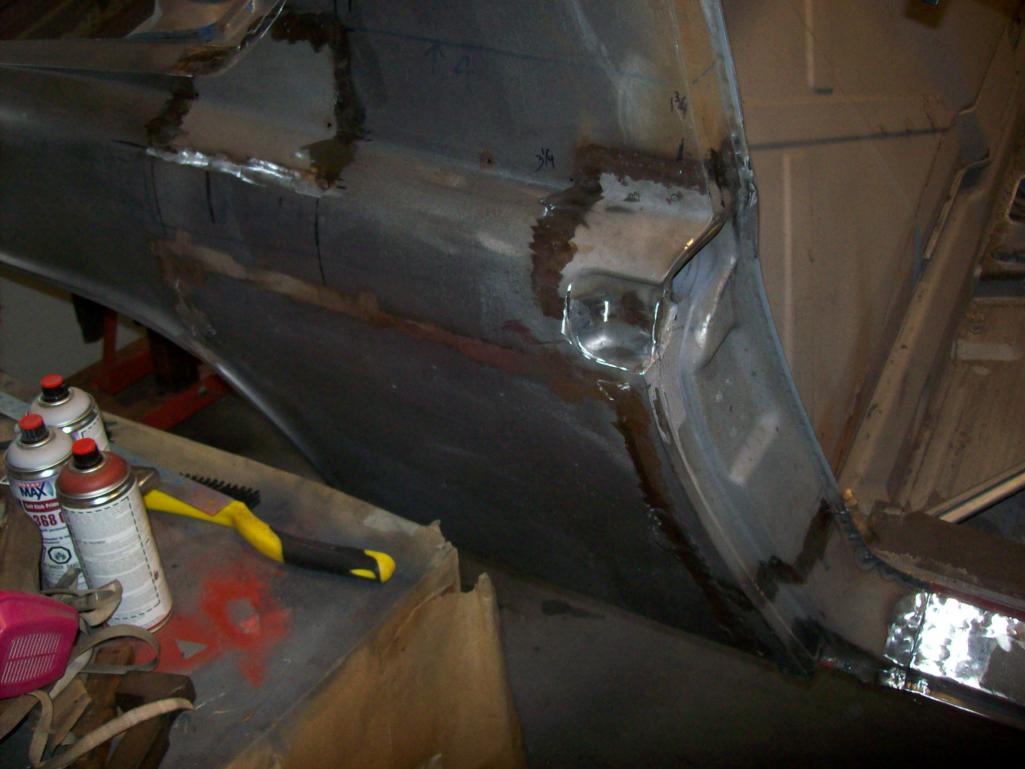
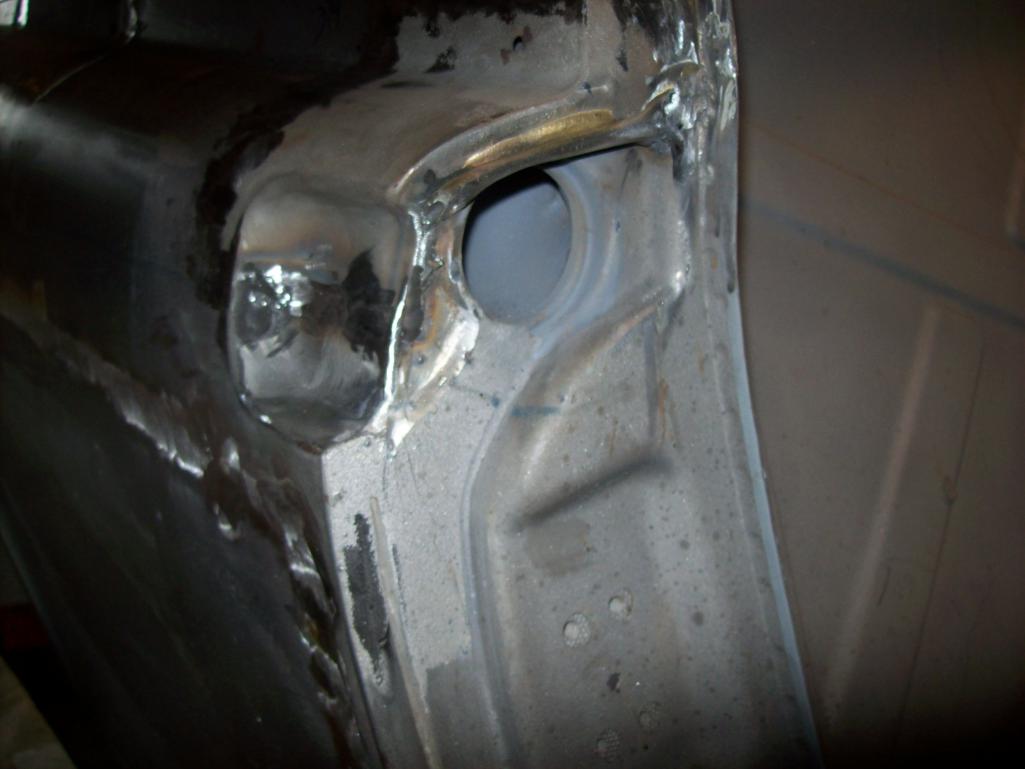
Posted by: Bulldozer27 Jan 5 2019, 06:16 PM
I've examined this entire thread as well as your softie conversion thread on Pelican. Utterly amazing....
Would you be interested in addressing the rust issues in my car? ![]()
Posted by: Speedo Jan 5 2019, 07:02 PM
I've examined this entire thread as well as your softie conversion thread on Pelican. Utterly amazing....
Would you be interested in addressing the rust issues in my car?
Thanks for the compliment, but I am a hack. Self taught that stumbles through my own projects trying to learn along the way. You are supposed to learn from others mistakes.
I (apparently) on the other hand like to learn from both my own and others mistakes.
Now I need to figure out "to lead where necessary, and to not lead where not necessary"?
Posted by: sixnotfour Jan 12 2019, 07:31 AM
saw this on r3dplanet thread...lead alternative ?
Attached image(s)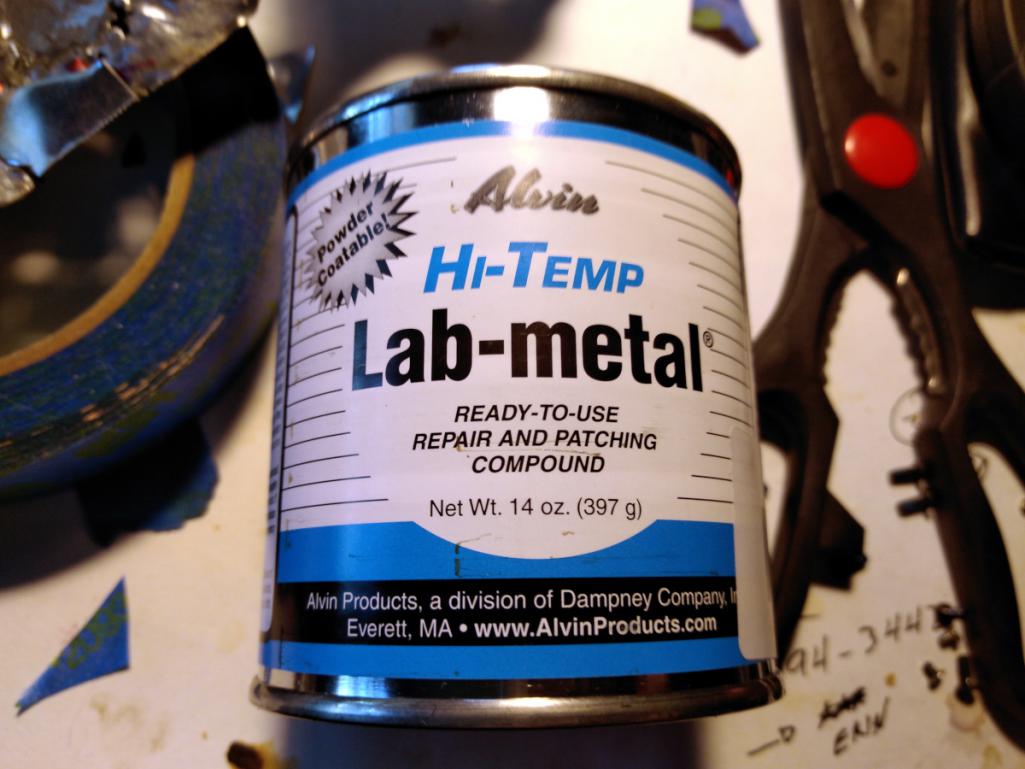
Posted by: Speedo Jan 14 2019, 10:47 AM
Met with my potential painter yesterday. He doesn't do lead, but he loves All-Metal. Not sure how much more I am going to do before "handing off". I will dolly some of the welds, and level the floor dings...and probably some last minute welding. Initially I proposed getting the car upside-down and scrubbing the floor and wheel-wells to get down to undercoating or where the undercoating is scraped off... to steel. Then I was going to prime the bare metal and Schutz the floors. He suggested not doing that and instead allowing him to mount the chassis on his rotisserie and take it back to his sandblaster in Denver. With the chassis on its side they will be able to remove all the undercoating, grime and oil so that the underside of the car is bare like the top of the car. Then he will prime the entire car, and I will come back and seam seal and undercoat the bottom of the chassis. He will then prep and paint top and bottom. Let me know what you guys think...
This raises another question as to the layering and what gets painted body color vs black.
I am of the mindset that the layers go like this...
bare steel
prime
seam seal
undercoating
color
clearcoat (top side)
Also, Adriatic Blue is single stage then clear coat, yes? Modern paints are far different than 58 year old paints. What is the general consensus for type of paint to use these days? He will/can shoot anything.
Thanks...getting closer.
Posted by: Speedo Jan 20 2019, 08:33 PM
Needed to clear out some room in the shop today which required moving the hood and rear lid. Painter had suggested that I check fitment soon...as there has been a lot of metal added and metal heated after all the metal repair. Both fit well, and I was reminded that the rear lid needs some massaging above the latch where I discovered dents under the bondo. Not a bad or complicated fix. Front fits great, and I have to admit it starts to get the juices flowing.
Posted by: Ferg Jan 21 2019, 08:46 AM
Looks great Lars.
Posted by: bbrock Jan 21 2019, 09:21 AM
That is cool. Really nice work! I'd be getting excited too.
Posted by: Speedo Mar 4 2019, 12:01 AM
Working on my pre-paint checklist...
There was this nagging pinhole in the drivers jackpoint. I was sure it was just a flaw in the steel. No rust anywhere to be seen, so probably just a fluke. It was bugging me...and no sense working on massaging the body and ignoring this little bugger. I drilled a larger hole through the pinhole, and unfortunately the drill bit went right through with little resistance. Now looking inside, I see a lot of debris. Some of it is blast media (of course) but some of it is flaky and rust colored. I drill a couple more hole as I am in denial, and it looks worse. Dammit! I cut the lower half of the outer reinforcement off exposing the inside of the jackpoint. More pinholes, so I need to head into the rocker. Fortunately the weak steel is limited to an area 1.5 x 4.5 inches which I remove. I needed to get in here to vacuum media anyway. Once cleaned out, I was able to etch prime.
Posted by: Speedo Mar 4 2019, 12:03 AM
Created the inner rocker patch, and used the old lower reinforcement to fabricate the replacement.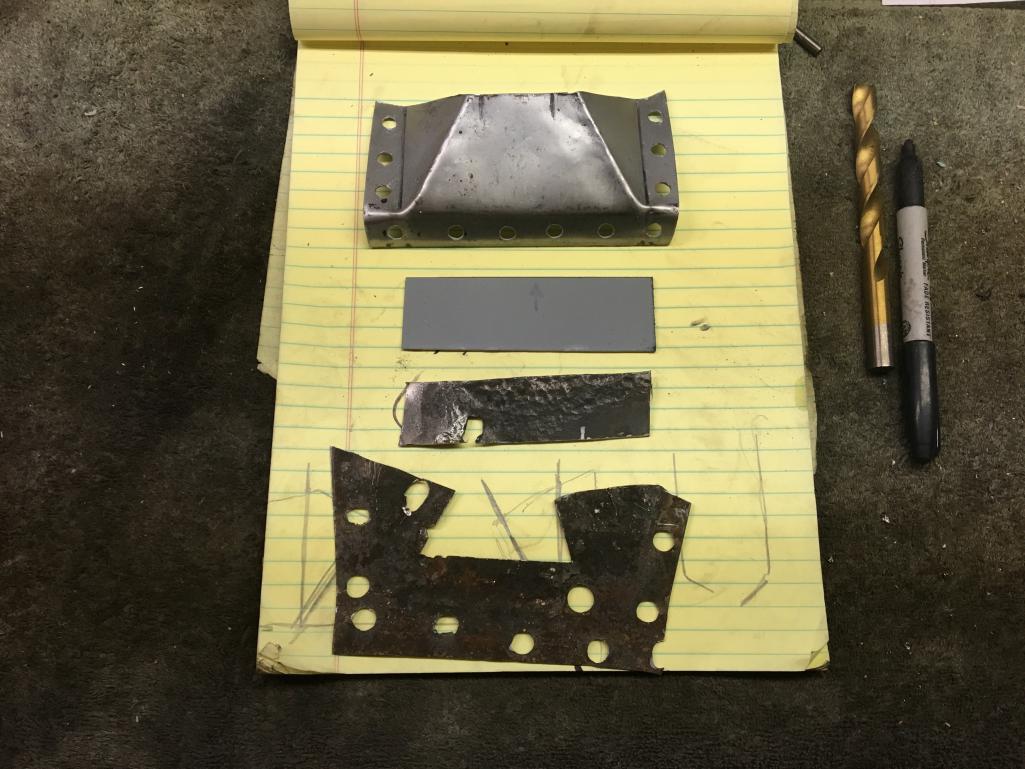
Posted by: Speedo Mar 4 2019, 12:05 AM
Patch tacked and rough finished...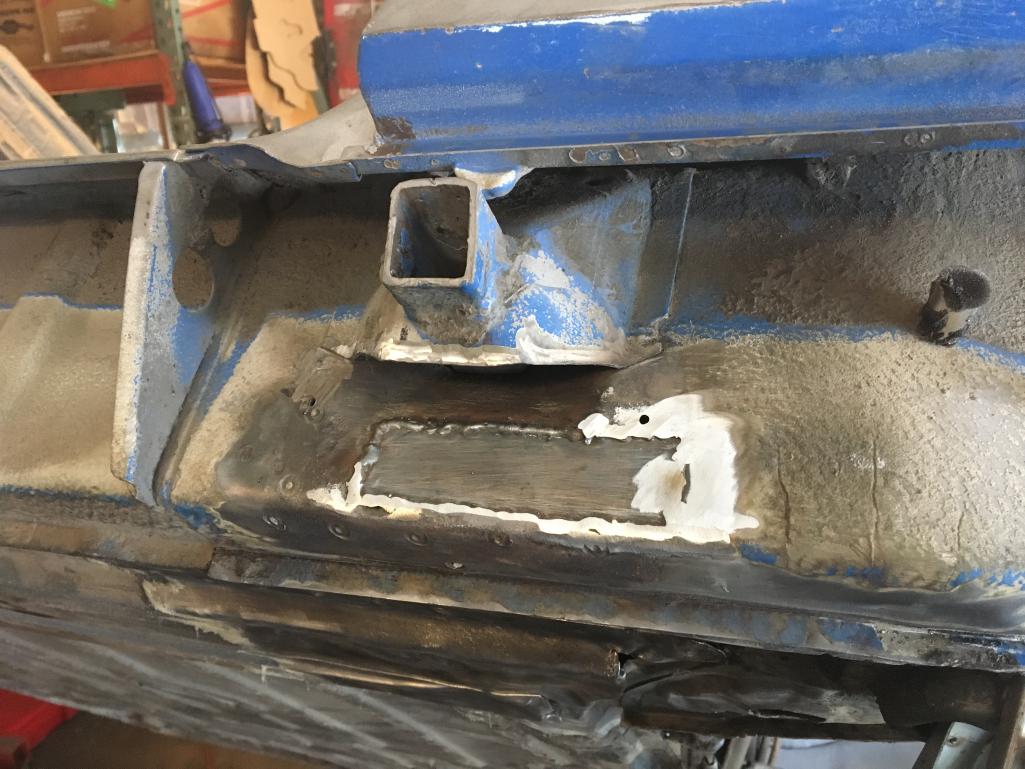
Posted by: Speedo Mar 4 2019, 12:07 AM
Fitting lower jackpoint replacement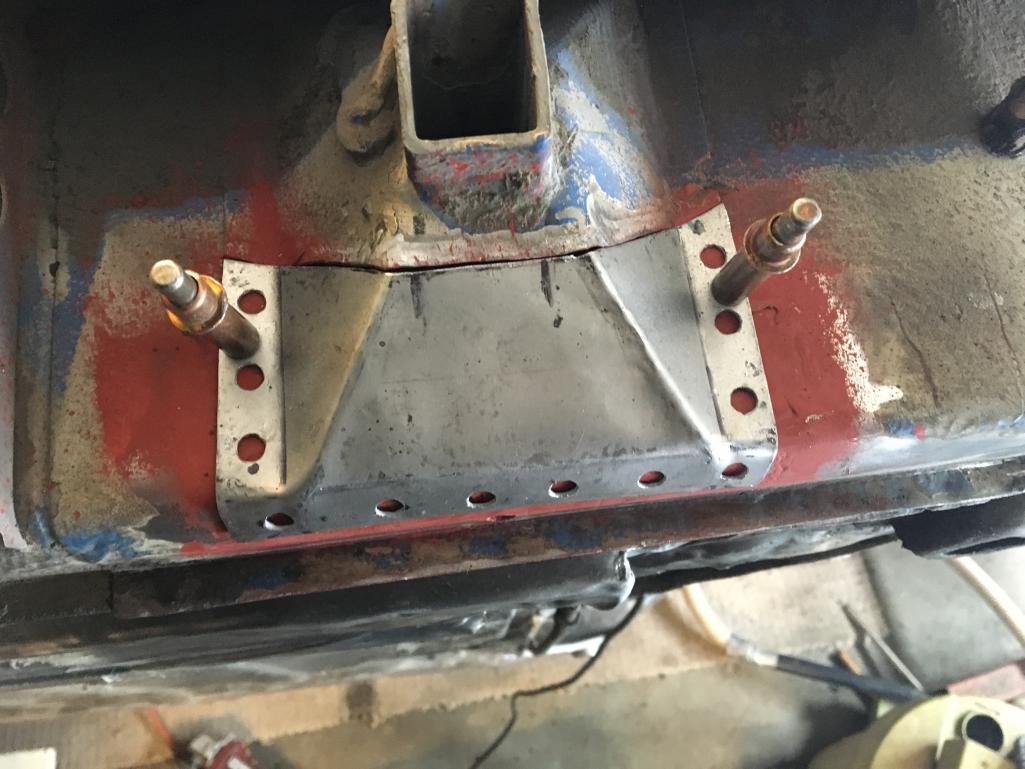
Posted by: Speedo Mar 4 2019, 12:08 AM
Tacked in place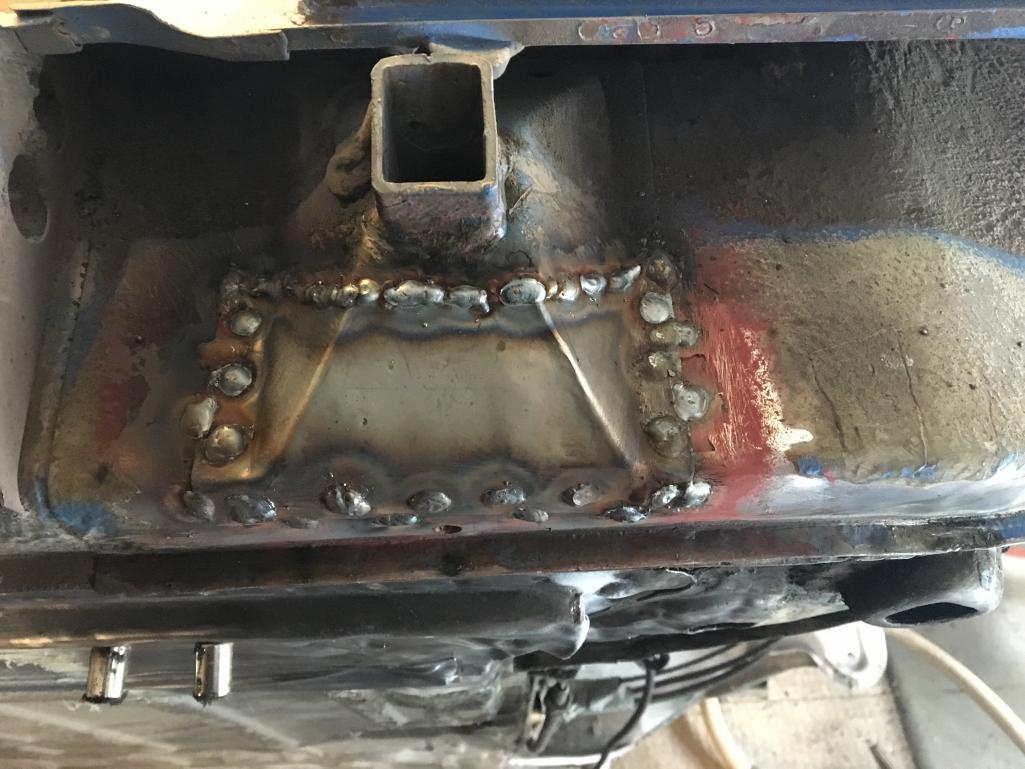
Posted by: Speedo Mar 4 2019, 12:09 AM
And finished. Bye bye pinhole...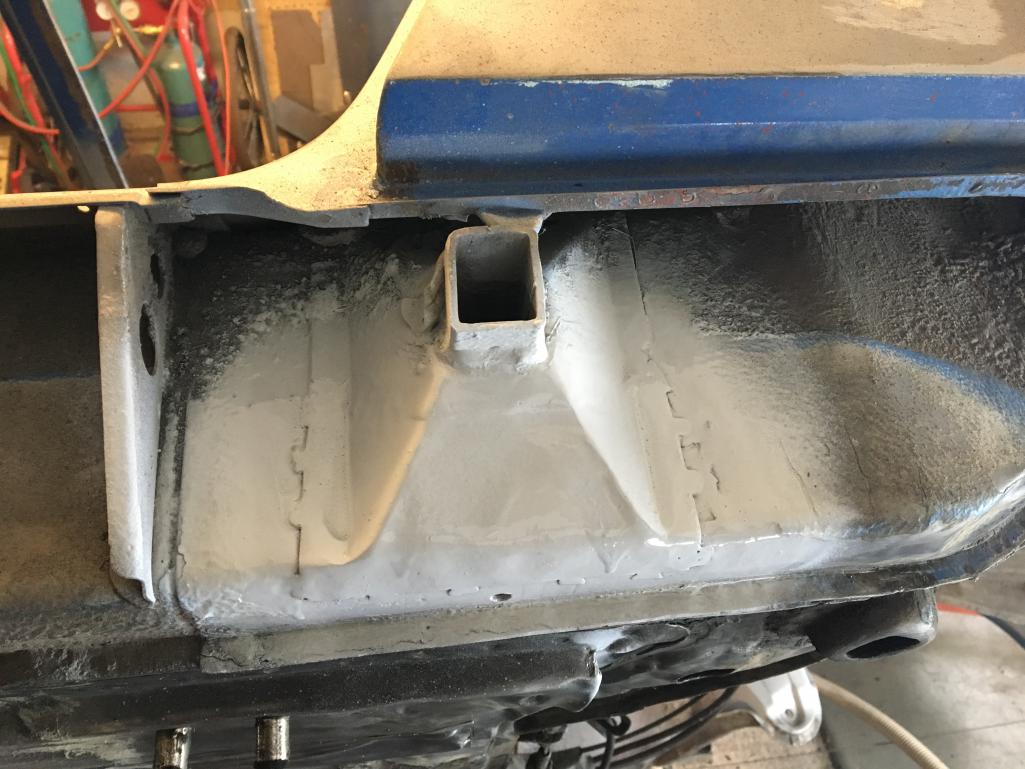
Posted by: Speedo Mar 4 2019, 12:23 AM
Checked that box. I keep saying that I am done welding...but it ain't so just yet. There will be more issues of "hmmm, didn't notice that before" and in good conscience I can't ignore these little issues. I have another couple weekends of massaging my panel butt welds before the painter comes to take this off my hands. He wants to run the chassis back through the sandblaster one more time...mostly to remove the grunge from underneath the rear of the chassis where the first sandblaster missed/ignored. I'm ok with that...beats me heating and scraping.
I guess in the scheme of things, at least I don't have to worry about what color to paint it, as we are just going to keep it the original Adriatic blue.
I am going to need guidance from the board with respect to paint ...where and what color. Plan is to prime, seam seal, and paint. Then under coat and paint black what is supposed to be black...fender wells, underside of pan etc. I'm ready for the paint wizards to weigh in. In addition, I'll need help with the inside of the cockpit...what gets body color and what gets black. If you have experience and an opinion...or just an opinion, feel free to advise. Some of my suspension is already powdercoated, but I have yet to do the front struts and rear shocks (Konis) and the rear control arms. Konis will be orange, and I am guessing the control arm is black?
Posted by: djway Mar 4 2019, 01:00 AM
On my dash the black was found around any area that could possibly catch light from a separation in the materials that covered that spot.
Behind the dash metal where the defrost vents pop up below the glass that area was also black on the firewall.
The dash metal itself was a light coating of body color then painted the black in the areas mentioned above.
The rest of the car is body color.
Posted by: bbrock Mar 4 2019, 09:00 AM
In addition, I'll need help with the inside of the cockpit...what gets body color and what gets black. If you have experience and an opinion...or just an opinion, feel free to advise.
I kind of went overboard with putting the flat black in the cockpit back the way the factory had it. You can see what I did starting here:
http://www.914world.com/bbs2/index.php?s=&showtopic=307290&view=findpost&p=2668463
Yes, control arms were semi-gloss black. http://www.914world.com/bbs2/index.php?showtopic=101921 in the O&H forum has lots of good reference shots I use a lot for figuring out correct finishes.
Posted by: bbrock Mar 4 2019, 09:04 AM
I am going to need guidance from the board with respect to paint ...where and what color. Plan is to prime, seam seal, and paint. Then under coat and paint black what is supposed to be black...fender wells, underside of pan etc. I'm ready for the paint wizards to weigh in.
Also, there are also a few threads on undercarriage finishes, but for a six, I like the pics of Bob's ( @http://www.914world.com/bbs2/index.php?showuser=7414 ) #41: http://www.914world.com/bbs2/index.php?s=&showtopic=313302&view=findpost&p=2506810. There are more pics in his build thread.
Posted by: Ferg Mar 5 2019, 11:21 AM
Looking good Lars, who is painting it? Is it going up north to Crusty?
Posted by: brant Mar 5 2019, 11:33 AM
Lars,
there is very little black on a stock car
the interior floor boards are body color
the wheel wells are body color
everything is body color....
the original -6 did have a black coating (undercoating really... not paint) on the top of the front struts where they mount inside of the front trunk...
otherwise everything on the chassis is body color
the removable components... swing arms, suspension, etc... those are all black
Posted by: mepstein Mar 5 2019, 11:41 AM
Lars,
there is very little black on a stock car
the interior floor boards are body color
the wheel wells are body color
everything is body color....
the original -6 did have a black coating (undercoating really... not paint) on the top of the front struts where they mount inside of the front trunk...
otherwise everything on the chassis is body color
the removable components... swing arms, suspension, etc... those are all black
Little bit of black on the side of the engine lid under the screens but that gets added after it’s painted.
Posted by: Speedo Mar 5 2019, 12:04 PM
Thanks everyone...So I am ok instructing my painter to prime after blasting (again), allow me to seam-seal over primer, then undercoating? And for the undercoating (Wurth), obviously the floor and inner wheel wells, how about inside the front and rear fenders? And what about longitudinals and under the rear trunk? Then once undercoated where required...body color everywhere?
Ferg, my painter is a guy that has painted my 74 911 each time someone has used it for "parking target practice"...also known as "hang up and use your mirrors". He is local, experienced and has a 1.8 914 we will use as a reference. He also has a trailer and a rotisserie that will allow him to get the chassis to Blastec (in Denver) and back to his shop. My rotisserie will not accommodate that transfer. He will fit it in between jobs and I will give him 60 days leeway. That extra floor space in the shop for that two months will allow me to get "other cars" in queue.
Posted by: Speedo Apr 13 2019, 05:13 PM
Tidying up the chassis for a hand-off. The heat shield for the muffler was impeding
my ability to straighten the rear valence behind the bumper. Not sure why it was wavy back there but it bugged me and I wanted to straighten it. Found phillips head screws under seam sealer in trunk that look to be supporting the shield? Really? Dug out the seam sealer and they came right out. Is the shield not supposed to be straight? Let me know before I attempt to straighten it.
Trying to get one more painter to look at it before I commit...Apex in Denver has mixed reviews. Anybody here have anything to add? PM me if you don't want to publicly give them a thumbs up or down. 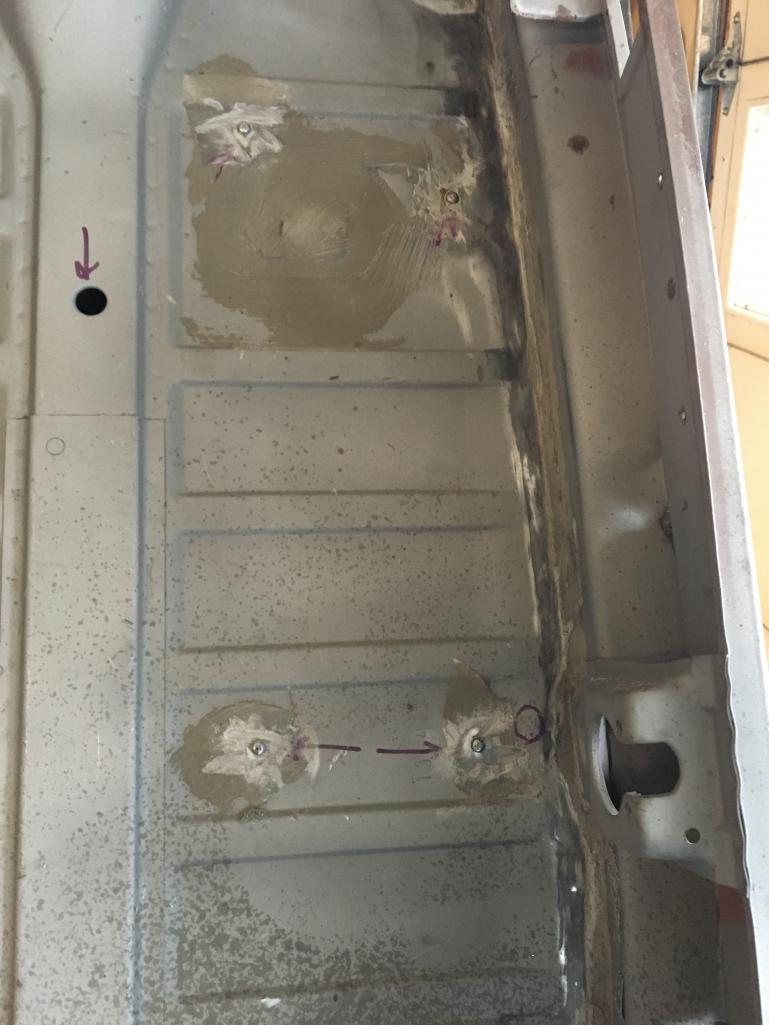
Posted by: Speedo Apr 13 2019, 05:15 PM
And more...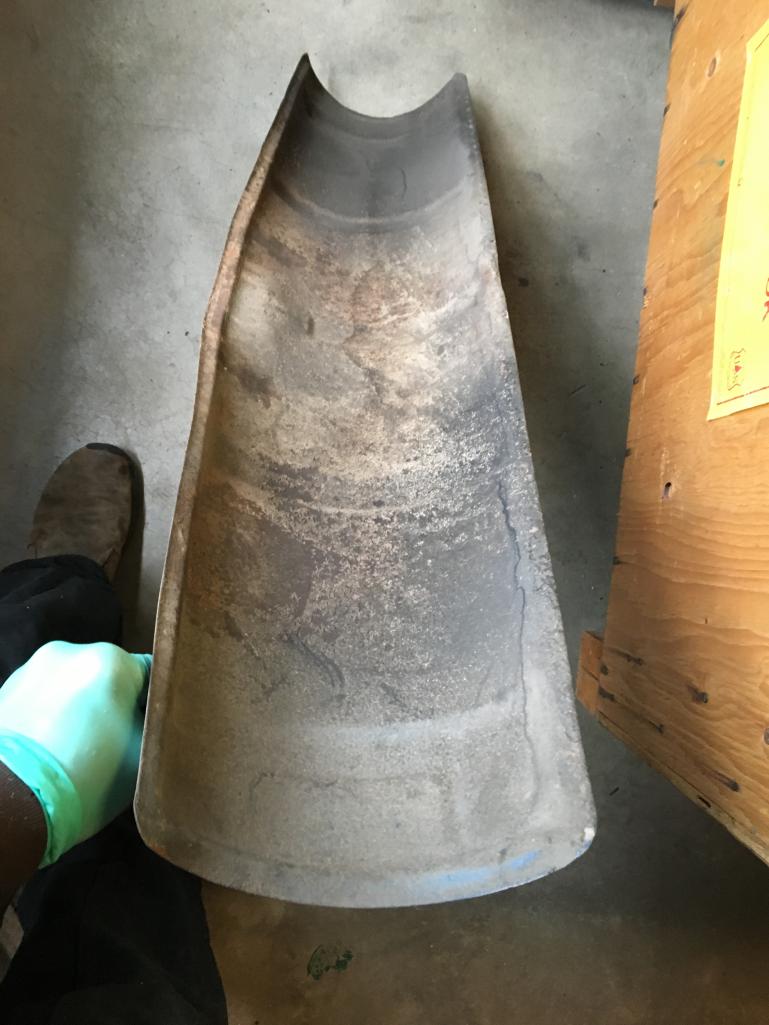
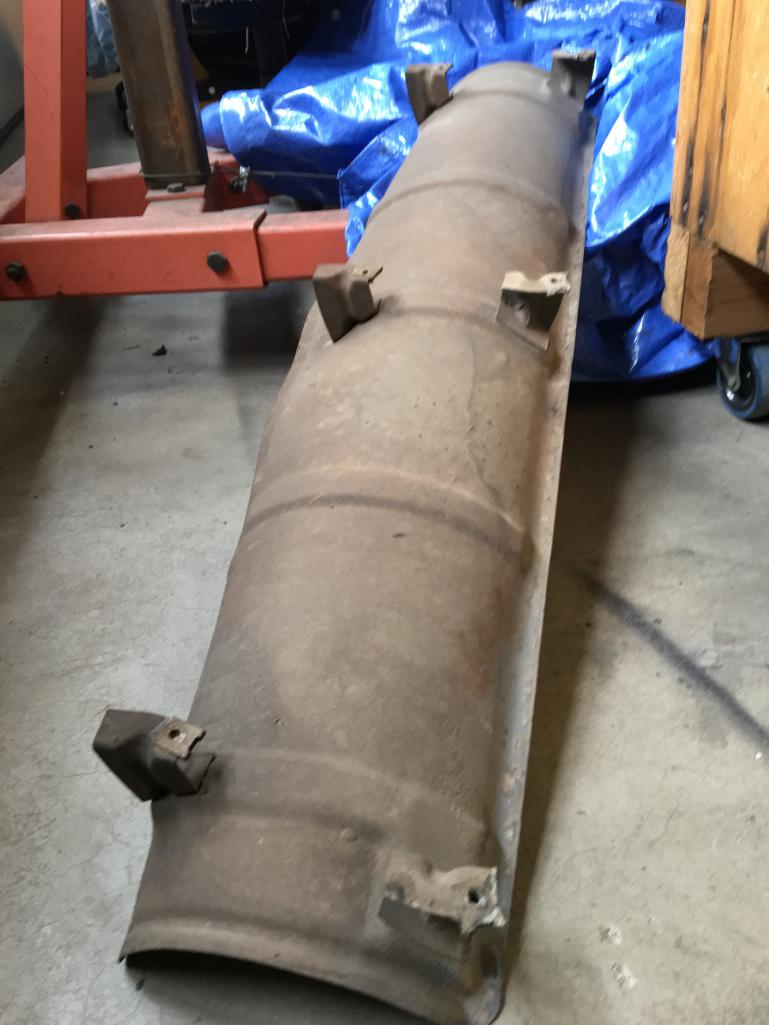
Posted by: Speedo Apr 13 2019, 05:16 PM
What I needed access for to straighten...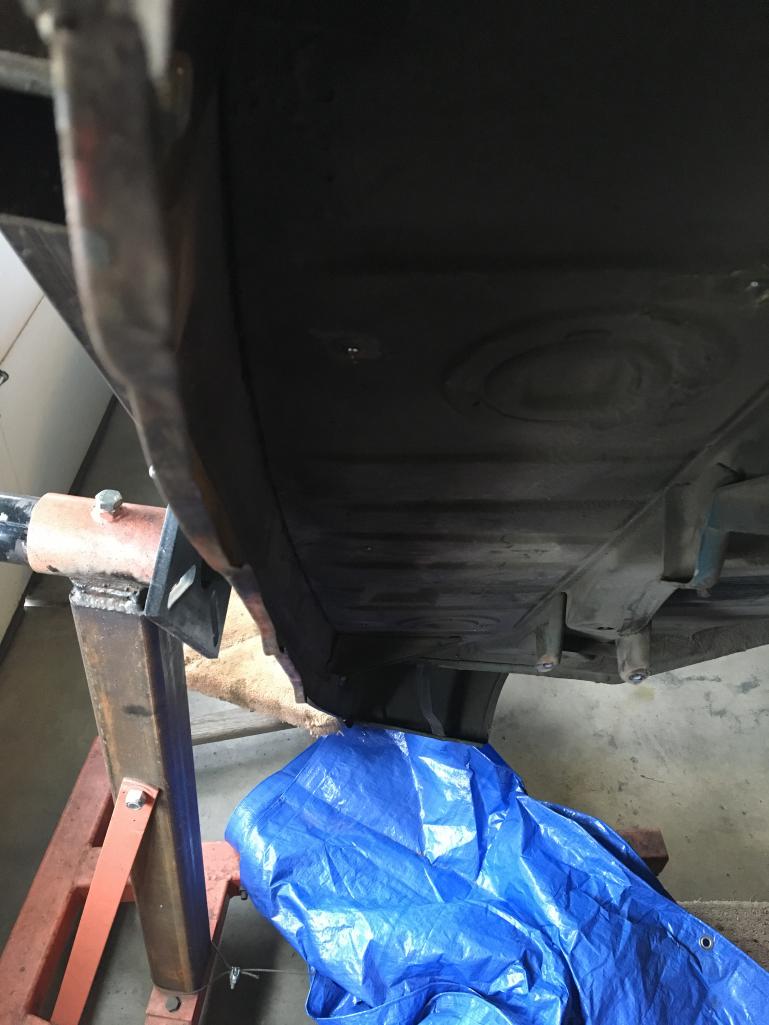
Posted by: sixnotfour Apr 14 2019, 08:49 AM
http://www.themetalsurgeon.com/
has done a few 914s
Posted by: Speedo May 5 2019, 10:43 AM
Ok...closer to paint. Hand-off may be as soon as next week. Mean time sandblasting parts and rebuilding the pedal cluster. Today, starting to sort parts that have not been powder coated or plated. It would be incredibly convenient if there was a thread which listed parts and their correct finish
As I couldn't find one...I guess I have to start from scratch. Feel free to add to the list and/or comment. If I list a finish that isn't correct, please set me straight. Here goes...
gas tank-black
oil tank-black
front struts-grey
trailing arms-black
steel front crossmember-black
A arms-black
hood and trunk latches-white zinc
nuts bolts-yellow zinc
brake dust shields-yellow zinc
sway bars/drops-black
sway body brackets-yellow zinc
sway lever arms-yellow zinc
rear mesh-black
engine lid hinges-body color
engine lid springs-black
headlight assembly-who knows?
strut tower tops-black
strut tower hardware/yellow zinc
dash face-satin black
rocker decos-satin black
You guys take it from here....
Posted by: Speedo May 19 2019, 10:23 AM
"You guys take it from here...."
This was where you guys were going to weigh in...hmmm, everybody must be out in the shop wrenching.
I may get most of these questions answered the easy way as Brant gave my son a killer deal on an extra 72 1.7 project he had. I will let him start his own thread as he dives into the beast. Fortunately for me, I can answer a lot of my "finish" questions by simply looking at his car...as it looks to be completely original. So thanks Brant!
Posted by: Speedo Jul 12 2019, 08:37 AM
Paint time.
Decision has been made to go with Apex Autobody in Denver.
He (Dave) came and looked at the car a couple months ago and I have been waiting for my turn in queue. I will trailer it down tomorrow am, and do the hand-off. A bit nervous as I haven't worked with them before, but during my visit to the shop, they had some $$ Porsche cars in progress and the metal work looked very good. My recent history with painters has not been great...so this time around I am going to get a written contract with a "not to exceed" clause. He assured me that any further sandblasting would be done on site.
I will need some guidance from the board as to how the body should have been correctly finished. To be specific...the steps involved in the application of "product". Such as ...
primer-seamsealer-undercoating-color and where on the chassis this all goes. I am of the impression that chassis was primed, then seamsealed then undercoated, then color over the entire chassis. Hopefully this is easier than figuring out specific year 911 paint.
He will get the car for as long as he wants...and that will allow me to decide what I will do for the engine. Original engine is pickled. I can rebuild it, or leave it on the shelf and build something different. I have a 2.7 RS spec engine ready to go back together, as well as a twin plug 3.0 MFI waiting to be rebuilt. The EASIEST thing to do would be to build the original engine, and save the hot-rod engines for another day/project.
I'll throw some pics up shortly.
Posted by: brant Jul 12 2019, 08:52 AM
Nice progress
I'm sure the paint will be a much better experience than you have had in the past
I'm not even sure if the seam sealer is under the primer or above.
anyone??????
Posted by: Ferg Jul 12 2019, 09:59 AM
So what you are saying is that you have space in the garage 
Posted by: Speedo Jul 12 2019, 12:19 PM
So what you are saying is that you have space in the garage
Briefly. His older (mid-engined) brother is coming in early August.
Leif's yellow 914 stole the space under the lift. Cut-fit-weld...repeat.
Posted by: Speedo Jul 12 2019, 12:24 PM
I'm not even sure if the seam sealer is under the primer or above.
anyone??????
These are the questions I need to get a handle on...anyone x 2?
Posted by: Luke M Jul 12 2019, 03:41 PM
I'm not even sure if the seam sealer is under the primer or above.
anyone??????
These are the questions I need to get a handle on...anyone x 2?
Hi Lars,
Spray epoxy sealer first, seam seal, spray high build primer over the seam sealer then spray the color. I'm not a painter but pretty sure that's that way to do it.
If you want the correct answer pm Kent ( 914350 ). He painted a few 6's for some of the guys on here.
Posted by: Cairo94507 Jul 12 2019, 03:52 PM
Yup. Kent is your man. 
Posted by: BPic Jul 12 2019, 05:27 PM
For plating and some other answers to questions I had I went here:
http://www.914world.com/bbs2/index.php?showtopic=101921
The photos are perfect for this sort of thing.
Posted by: Speedo Aug 4 2019, 11:34 AM
Finally send the beast to Apex after a few minor delays. He has become quite the Porsche place...speedsters to RSRs with everything in between. We disagree on a few things with respect to paint...so he will focus on prep and I will figure out the paint details. My shop dolly was designed to roll around the shop. Wasn't intended to deal with lateral loads...so I secured the chassis to the dolly, then the dolly to the trailer, then with some extra ratchets, the chassis to the trailer. And I still drove like a grandmother. Good news was that it worked fine with no issues, bad news was that he decided he wanted to keep and use my dolly vs his dollys. Probably the best thing about him keeping the dolly is that it will keep me from diving into another project. I need to quickly decide what I am going to do for an engine...
a) rebuild original 2.0
b) plug in a 2.0 or 2.2 S MFI engine (both needing rebuild)
c) rebuild 2.7 RS spec engine (webers) which came with the car
d) ...there is that 3.0 twin plug MFI Andial engine up on the shelf 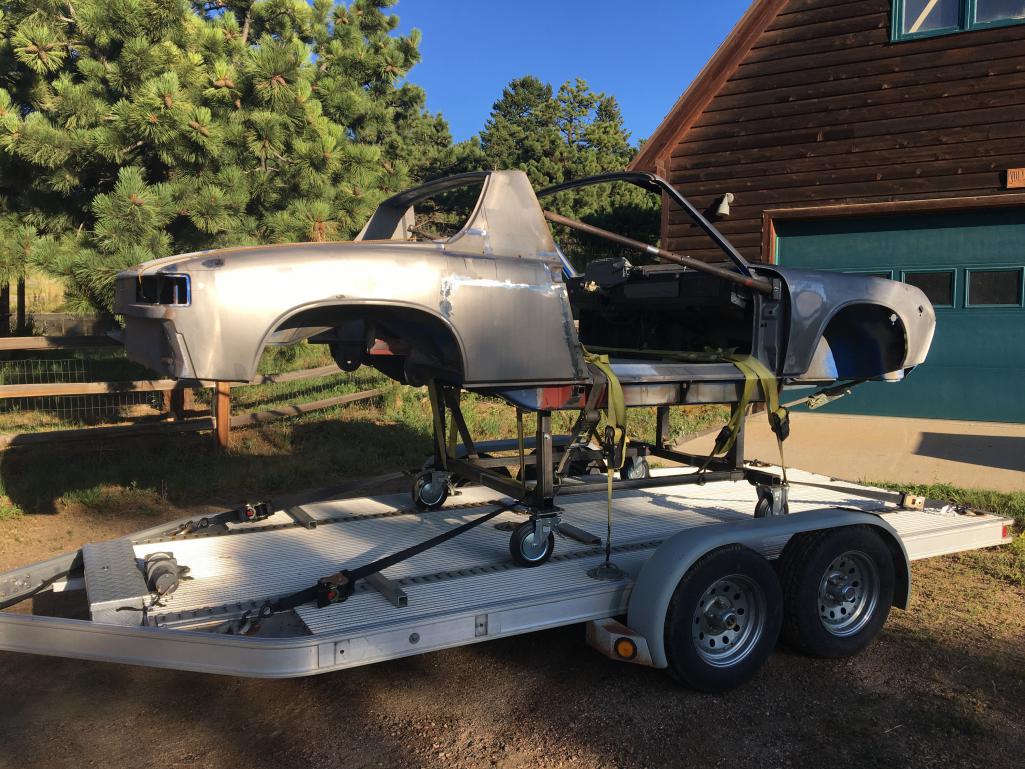
Posted by: sixnotfour Aug 4 2019, 12:21 PM
c) rebuild 2.7 RS spec engine (webers) which came with the car
make it a 2.4S
Posted by: Speedo Aug 4 2019, 06:16 PM
12 straps...I use 4 to secure my race car...

Posted by: Speedo Aug 15 2019, 06:51 AM
[/quote]Spray epoxy sealer first, seam seal, spray high build primer over the seam sealer then spray the color. I'm not a painter but pretty sure that's that way to do it.
If you want the correct answer pm Kent ( 914350 ). He painted a few 6's for some of the guys on here.
[/quote]
I have crickets from 914350 (Kent). If anybody knows him, tell him I'm not stalking him and it is ok to answer.
I agree with your steps Luke, now I need clarification on where undercoating goes (underside of floors and wheelwells?) and where body color paint goes. My painter is adamant that some areas like 911s are black. I am pretty sure the entire body gets color, and there are some select areas that get a limited amount of black such as the dash and strut tops.
I have determined that I will (store the original 6 and stroke a 2.2 T engine with 2.2 S P and Cs to 2.4 S specs and run some rebuilt Weber 40 IDAs. I could do an MFI engine...but that would be more complicated. And the Webers will look original. If I have cooling issues, I will figure out an aux cooler setup.
I am needing a 2.4-2.7 crank and rods, so if anyone here has an extra please PM me. Looks like a shop in CO Springs can open the heads up for me to 36-35mm and I have pretty much everything else. Engine teardown starts this weekend.
I am going to run 6 x 15 fuchs instead of the 5.5 x 14s., so I need to send a set off to Al Reed soon. Rear fenders are already rolled and from what I understand, a simple 205 50 15 tire profile won't have fitment issues.
Posted by: Speedo Sep 28 2019, 11:02 AM
So I have pressed out the bearings and cleaned up the control arms, and primed them. Plan is to press new bearings in and repaint. Two questions 1) as I will be using a hydraulic press, is it necessary to refrigerate the bearings prior to installation or is that the approach to take when you are using the PVC and bolt and nut method? And 2) black semi-gloss on the control arm for paint?
Thanks!
Posted by: mepstein Sep 28 2019, 11:56 AM
So I have pressed out the bearings and cleaned up the control arms, and primed them. Plan is to press new bearings in and repaint. Two questions 1) as I will be using a hydraulic press, is it necessary to refrigerate the bearings prior to installation or is that the approach to take when you are using the PVC and bolt and nut method? And 2) black semi-gloss on the control arm for paint?
Thanks!
The guys at our shop just press them in. When I told them about freezing they just sort of looked at me and said why? But they don't often have the time to prep the bearing in the freezer. I do freeze them because they go in straight and eazy with very little force. I feel like that is a plus for a bearing you want to last for a while.
Posted by: rjames Sep 28 2019, 08:25 PM
Mine slide right in by hand after freezing. I could’ve used a press, but why make it harder than it needs to be?
Posted by: Speedo Sep 29 2019, 07:09 AM
Ok, in the freezer they go.
Next question was black semi gloss for the control arm?
And the square backing plate that secures the bearing...black or zinc?
Mine was so cruddy it was hard to tell how it was originally plated.
Something tells me yellow zinc.
Posted by: Luke M Sep 29 2019, 08:47 AM
Ok, in the freezer they go.
Next question was black semi gloss for the control arm?
And the square backing plate that secures the bearing...black or zinc?
Mine was so cruddy it was hard to tell how it was originally plated.
Something tells me yellow zinc.
Hi Lars,
I'm working on the rear control arms of my 6 as well. I'm going to have my rear control arms powder coated gloss black (just my preference) and the hardware yellow zinc.
I'm using a 911 e-brake setup with Boxster calipers so not stock to begin with.
Freeze the bearings prior to install, I believe the arms came semi-gloss black from the factory, and yellow zinc on the bearing plates.
Post some pics of the 6 when it gets back from paint.
Posted by: bbrock Sep 29 2019, 08:59 AM
Ok, in the freezer they go.
Next question was black semi gloss for the control arm?
And the square backing plate that secures the bearing...black or zinc?
Mine was so cruddy it was hard to tell how it was originally plated.
Something tells me yellow zinc.
Yes, semi-gloss black for the arm and yellow zinc for the backing plate.
BTW, VHT gloss black Roll Bar and Chassis paint is a pretty good match for the black chassis parts. It isn't a full gloss.
Posted by: Speedo Sep 29 2019, 09:50 AM
Thanks guys! No word from painter...but that is par for me.
I need to do a big trip to the re-finishers soon. Other than basic nuts and bolts, what should my list look like for needing yellow zinc. Here's what I have so far...
carb crossbar and drops and bellcrank
backing plate
door latches
hood/lid latches
brake dust shields
suspension/engine mount bolts
shift linkages
front sway bar arms
Feel free to correct or add to the list.
Posted by: bbrock Sep 29 2019, 09:56 AM
BTW, I should say my comment on control arm and backing plate finish is based on 914/4 and assuming it was the same for a six. You might want verification on that.
Posted by: gereed75 Sep 29 2019, 10:22 AM
Weighing in with an amateur opinion -
Car bottom finish - I know there are a variety of experts who have strong opinions on this both ways, but i think that the correct underside finish is the undercoating caught with whatever amount of overspray (underspray in this case??) happened that day at the factory. I hold that belief based on two things:
1) "Original" examples like this http://www.914world.com/bbs2/index.php?showtopic=338927&hl= and several others. (the example in that thread can also serve as a guide to a variety of original finishes IMHO)
2) I tend to believe that these cars were painted on the ground (or maybe on low stands) at the factory by humans, not on rotisseries. With that in mind, I see no way that Franz or Hanz crawled under the car on his back and painted the bottom.
Man you have some interesting engine choices, and while I am here, my engine preference for a narrow body car would be:
1) a 66 x 90 2.4+ short stroke with either MFI or EFI based on MFI components (S throttle bodies and 70-71 mag stacks)
2) the same motor carbed
3) 2.2 carbed S motor (nod towards originality but with a party under the engine lid!)
Love the idea of more torque and HP, but save the 2.7 RS and 3.0 for sale or a 911 hot rods. I have a 71 x 84 carbed mod solex cammed S motor which I think matches the persona of a real six almost perfectly, but there is something about the siren song of the short stroke, quick reving motors that take it all to the next level - sublime!!
Do some research over on Pelican for posts by Henry Schmidt under what he calls the "best motor Porsche never built". He is a long time six aficionado, could build what ever he wanted for his personal six, and guess what he had??
Fabulous resto by the way !!!
Posted by: Speedo Sep 29 2019, 07:19 PM
Freezer burn was the way to go. Piece of cake. I'll paint them and get them ready.
They have hard bushings up front with zirk grease fittings.
I need to evaluate the struts and strip and repack the drive shafts.
Posted by: Speedo Sep 29 2019, 07:28 PM
I am going (can't stop now) with a stroked 2.2 S to a 2.4 S carbed engine.
I could go MFI but that is complicated and uses a lot of the engine compartment.
I have completely stripped a pair of Weber 40 IDAs that I will build back up.
They were pretty nasty...and need both side shafts replaced. Probably going fiberglass amber rain shields for ease of maneuverability in the engine compartment.
Experts please advise on the refinishing as I am accumulating stuff. Also Denver/Boulder
people ...if you want to piggy back on my refinish order, let me know. Cheaper to do a mass order.
Posted by: gereed75 Sep 29 2019, 09:39 PM
Great choice. Big fun!
Posted by: Speedo Mar 4 2020, 08:33 PM
So I am painfully aware of the fact that this 6 resto is now 8 years long in the tooth.
A lot has passed through the garage in that time, but there is no justifiable apology.
I just looked at the date on the beginning of the thread and it is embarrassing. In the last six months, my son accumulated a 1.7 from a good friend Brant and that has taken a bit of time to sort. We have "worked" most of the exterior rust and are now about to attack the hell hole. He is not much for posting on the board, and I am not inclined to post for him...his choice.
In the mean time, I am building up the 2.2 T engine to a 2.4 S Weber engine...parts on their way. I promised myself I would check in on the painter at the end of March...coming soon. Benefit of helping my son with his 914 is that I get to remember where everything goes back together.
So our goal for my son's car is to get it back together in time to do the 4 corners 914 epic drive in the summer.
Brant, how much time do we have?
Posted by: Speedo Mar 23 2020, 02:59 PM
Still thinking about oil coolers. There is a local guy to Denver doing some interesting re-configuring of the old trombone coolers. They can be made in all kinds of contorted shapes and they are always in the airflow. And they were pretty effective at dissipating heat. Anybody have pics of these being used in 914's before? And I presume they are made of copper with soldered fittings?
Posted by: Mark Henry Mar 23 2020, 03:26 PM
I need to quickly decide what I am going to do for an engine...
a) rebuild original 2.0
b) plug in a 2.0 or 2.2 S MFI engine (both needing rebuild)
c) rebuild 2.7 RS spec engine (webers) which came with the car
d) ...there is that 3.0 twin plug MFI Andial engine up on the shelf
I vote 3.0 twin plug ....because that's what I have.
Posted by: Speedo May 21 2020, 09:54 AM
Fast forward...or back up slowly.
Apex called and they anticipate three weeks.
Said my "metal work" was all done...not sure what that means...?
I plan to go visit and do the seam sealing after the epoxy sealer.
He says he has the seam sealing products...and he has everything in the shop from speedsters to RSRs so I'll go with his product recommendations.
The 914-6s were brushed seam sealer, correct? He also has the body "shutz" for me to apply under coating...so I will need to be clear on where to apply that too.
My sons car (70 1.7) is on the lift and we are finishing up the hell hole. So while it is in the air, we will have a good opportunity to walk around underneath and figure out where the color is supposed to go vs black and where the "shutz" starts and ends.
This was the butt kick I needed during this sheltering in place. Been getting a lot of "other" car projects done (sons 914)...but the 2.4 S engine kept getting kicked back down the list.
Case is cleaned and prepped, crank and rods assembled. Parts are all here and all the machining is done. Weber 40s are rebuilt and the shroud is repaired and repainted.
Need to inspect the oil pump...decide on 574 vs 3bond for the case adhesives and put it together. No excuses now.
I am going to be sending a batch of hardware to be refinished...so I need to double check what needs to be silver vs yellow zinc (son's 914 should be telling) and send it off. Anybody local that wants to "piggyback" on my refinishing, let me know asap.
When I go to look at it I will grab some pics.
Posted by: Speedo May 27 2020, 06:55 AM
Seam sealer question...
Some areas of the car look brushed (trunks) and some looked sprayed (cockpit). Is there a thread that explains what gets brushed or sprayed and exactly where? And source for both products?
Thanks!
Posted by: sixnotfour May 27 2020, 07:25 AM
Still thinking about oil coolers. There is a local guy to Denver doing some interesting re-configuring of the old trombone coolers. They can be made in all kinds of contorted shapes and they are always in the airflow. And they were pretty effective at dissipating heat. Anybody have pics of these being used in 914's before? And I presume they are made of copper with soldered fittings?
IDK...but here is one,, maybe in the pas. fender well?
http://www.914world.com/bbs2/index.php?showtopic=188776
Attached image(s)
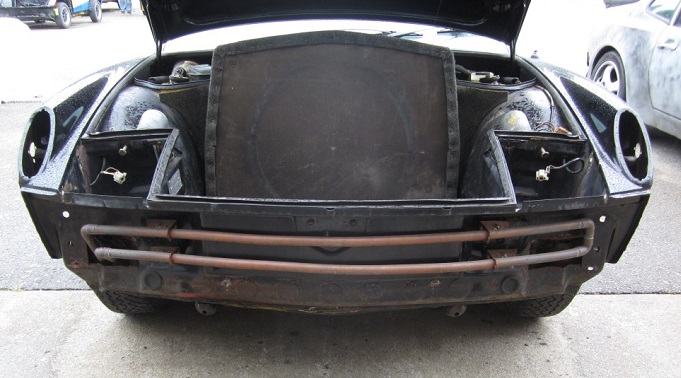
Posted by: Speedo Jun 2 2020, 02:28 PM
Scheduled to go check the car out in primer this Friday. I am wondering if the seam sealer and undercoating (where both are needed) are ok to be applied after primer? I was wondering if they should be applied before primer. If they are applied after primer...should those areas be resprayed with primer before color?
Also going to pic up two trombone coolers to try to engineer a system underneath the rear of the car to help keep the 2.4 cool(er). If I kill one, I'll have a backup
Posted by: Cairo94507 Jun 2 2020, 04:55 PM
That is my car above with my original oil cooler system on my Six running a 3.0 w/Webers. According to the 2nd owner it never overheated and he used to traverse the Santa Cruz mountains regularly in the summer.
Posted by: Speedo Jun 3 2020, 06:25 AM
I just realized that my car is missing the rear valence. Was it supposed to have one or was that an option? If it came with the six and it is missing, I need to source one quickly.
Posted by: Speedo Jun 26 2020, 06:22 PM
After spending three hours under my car priming the recently re-sandblasted floor, I realized my 1970 chassis does not have the oil line hook. Did all 6s get them, or some not? Do I need to source one?
Posted by: porschetub Jun 26 2020, 06:53 PM
After spending three hours under my car priming the recently re-sandblasted floor, I realized my 1970 chassis does not have the oil line hook. Did all 6s get them, or some not? Do I need to source one?
Easy enough to make for a man of your skills
.Posted by: mepstein Jun 26 2020, 06:58 PM
I think RD and McMark sell them.
Posted by: Cairo94507 Jun 26 2020, 08:37 PM
As far as I know, all Sixes had the oil line hook. Well, I can only really confirm '70 & '71 had therm, I have not owned a '72 Six.
Posted by: Speedo Jun 27 2020, 07:09 AM
Ok, I need to get one of those on the chassis before it gets paint. I also need to source the front trunk plug as mine has gone missing. Does anybody have dimensions by chance and measurements for positioning that piece? Why is it that I am only now discovering all the schwagg I need that I don't have...now that my car is at paint? Have two more small items to mig...close up the emblem holes on the front hood, and thr extra holes in the door top for the Vitaloni mirrors that will not be re-used. Color is imminent.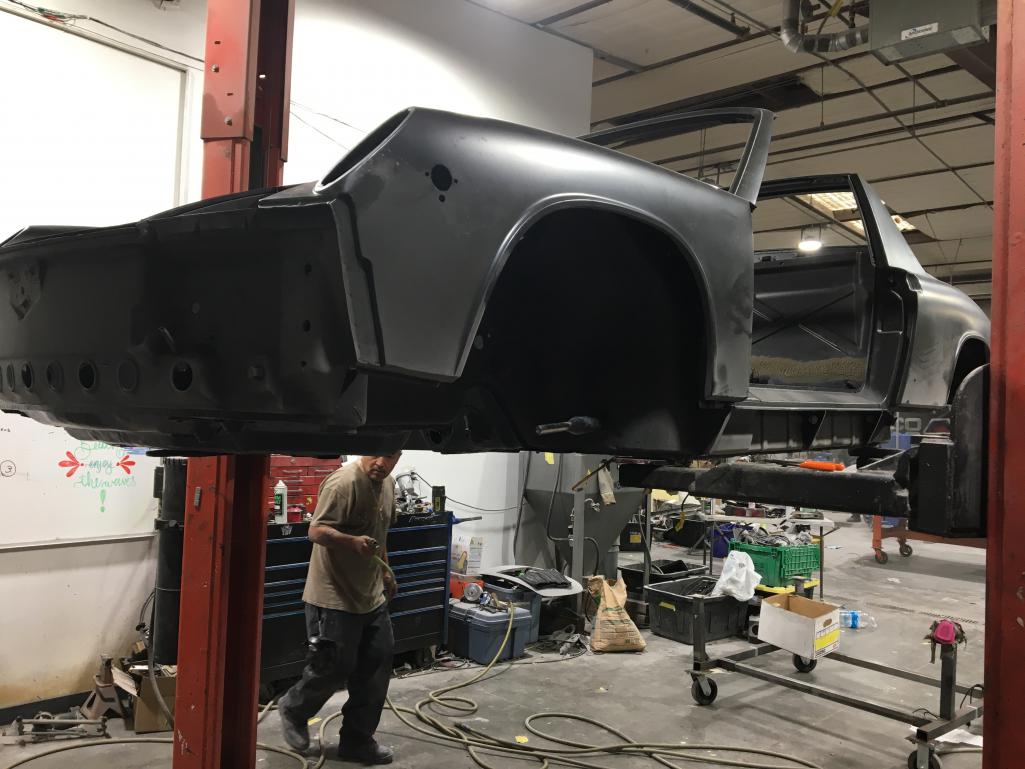
Posted by: Speedo Jun 27 2020, 07:11 AM
more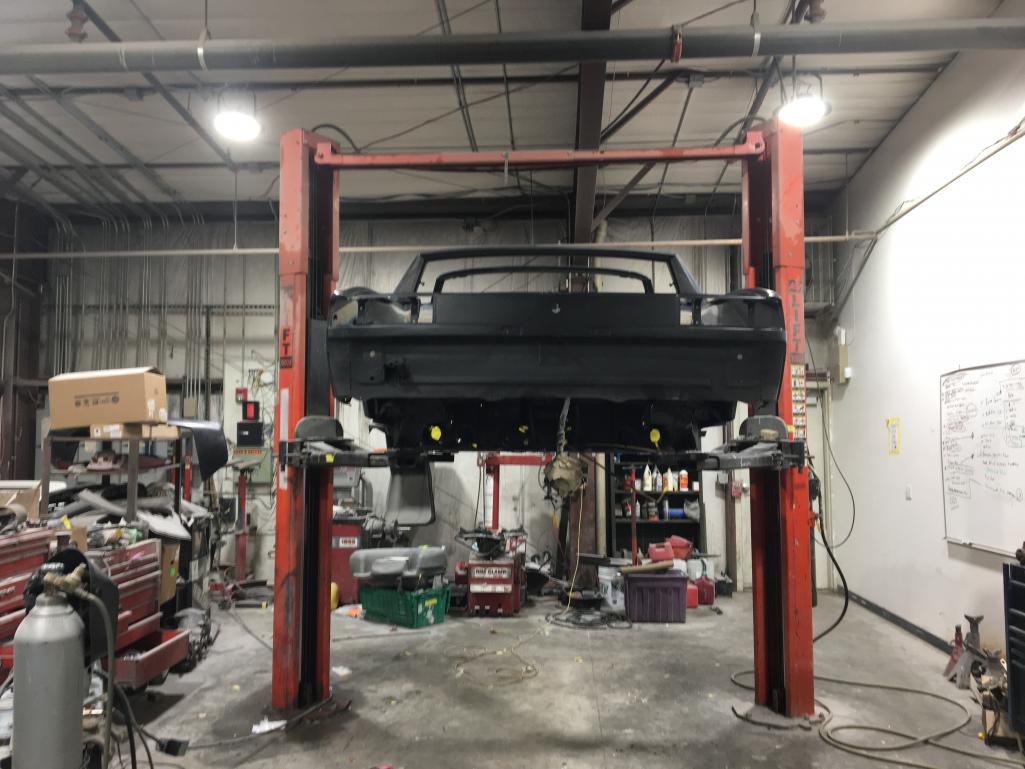
Posted by: Speedo Jun 27 2020, 07:12 AM
and more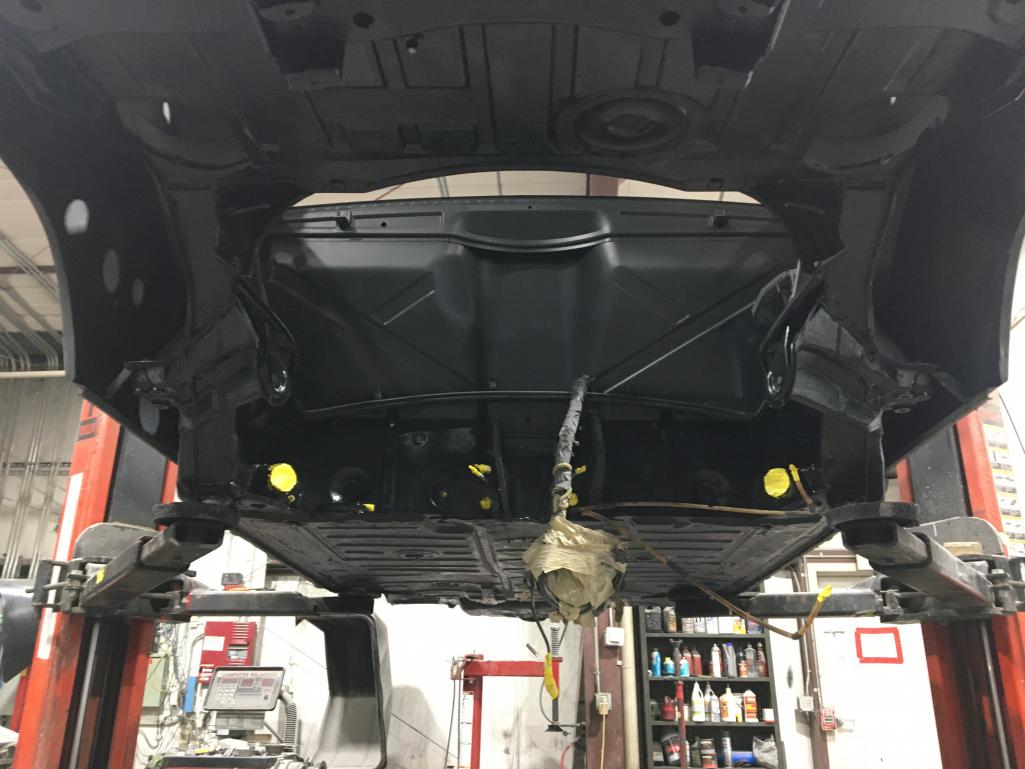
Posted by: Speedo Jun 27 2020, 07:13 AM
last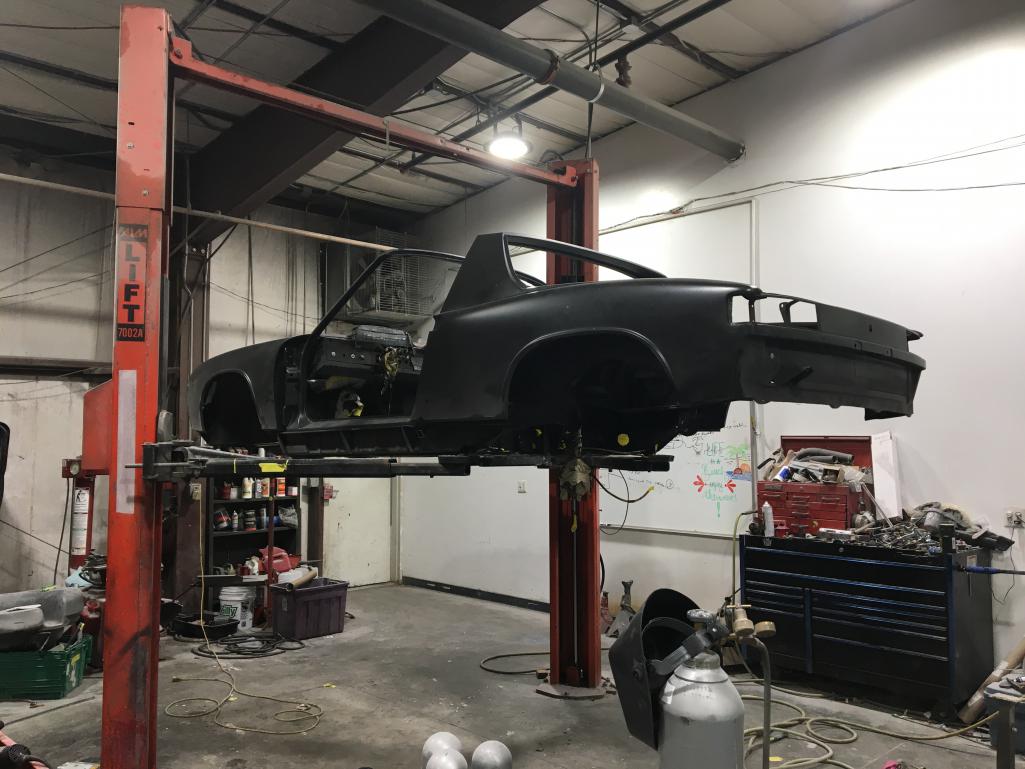
Posted by: Speedo Jun 27 2020, 07:16 AM
I guess the quick way to figure out the oil line hook would be for me to measure someones six for both the hook dimensions and location. If anybody in the Denver area has a six available I would appreciate it...there is beer in your future. With a mask of course!
Posted by: brant Jun 27 2020, 07:34 AM
Lars,
it looks good.
ferg might be able to hook you up with a -6 owner
also I need to introduce you to Ginter
he has a -6 over here closer to me.
brant
Posted by: Luke M Jun 27 2020, 12:04 PM
Hi Lars,
The 6 looks good and coming along nicely.
The hook gets welded by the left rear suspension reinforcement plate. On my 914-6 there's a 5 mm gap between the plate and the hook. Posted a few pics for you.
Which trunk plug do you need? Is it the one on the trunk floor that turns and locks?
I may have a spare if so. The hook is being made and sold by RD.
Attached image(s)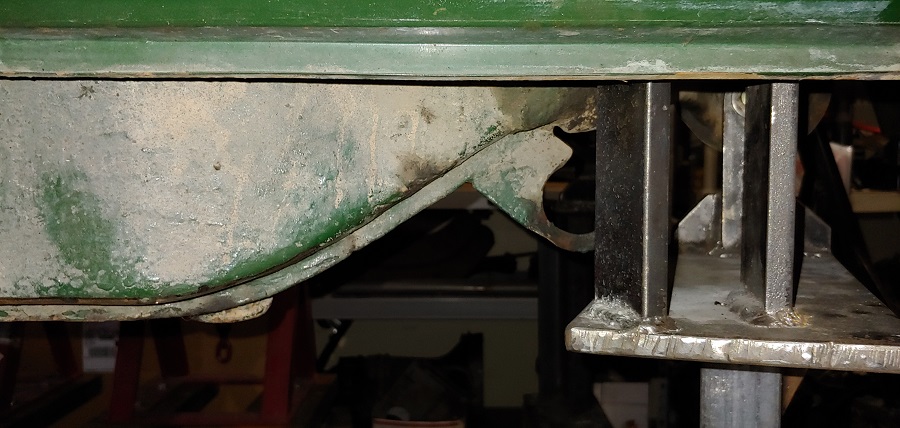
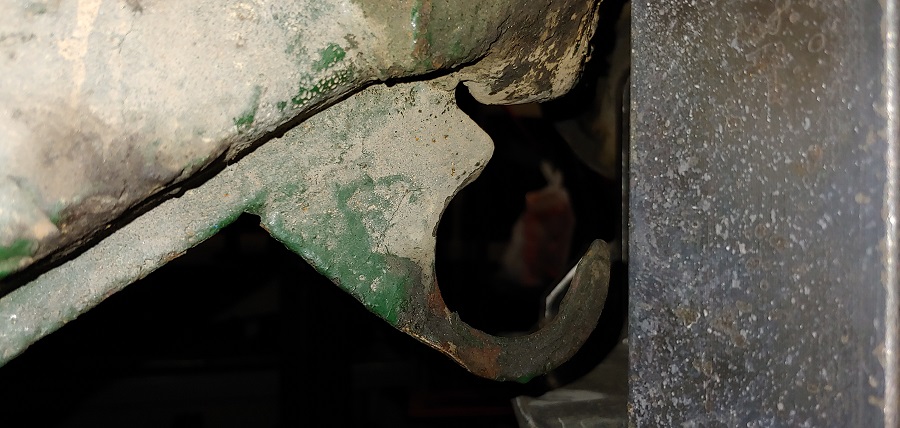
Posted by: gandalf_025 Jun 27 2020, 01:07 PM
Another set of pictures
.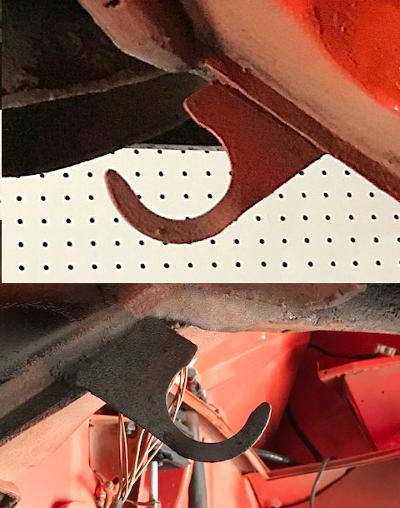
Posted by: Speedo Jun 27 2020, 06:47 PM
Thanks for the pics guys...why would the PO (or anybody) remove the "hook"?
Yes I think the front trunk circular plug is the one that turns and locks? I will look in my sons car tomorrow.
Posted by: restore2seater Jun 29 2020, 09:54 AM
Thanks for the pics guys...why would the PO (or anybody) remove the "hook"?
Yes I think the front trunk circular plug is the one that turns and locks? I will look in my sons car tomorrow.
Sent you a PM. @http://www.914world.com/bbs2/index.php?showuser=7170
Posted by: Speedo Jul 1 2020, 09:06 AM
So "restore2seater" graciously sent multiple pics and dimensions of his oil line hook
and I was able to fabricate the "hook". My new short term dilemma is sourcing the two drain plugs/plates for the front trunk. Per Porsche these are NLA so my only option is to harvest these from another chassis. My understanding is that once the old seam sealer is wire-brushed off...they can be tapped out easily. I will post in the classified section a WTB, but in the interim if anyone has these, please send me a PM. The picture is of my son's 72 1.7, and I'm pretty sure he doesn't want me to steal these from his car. 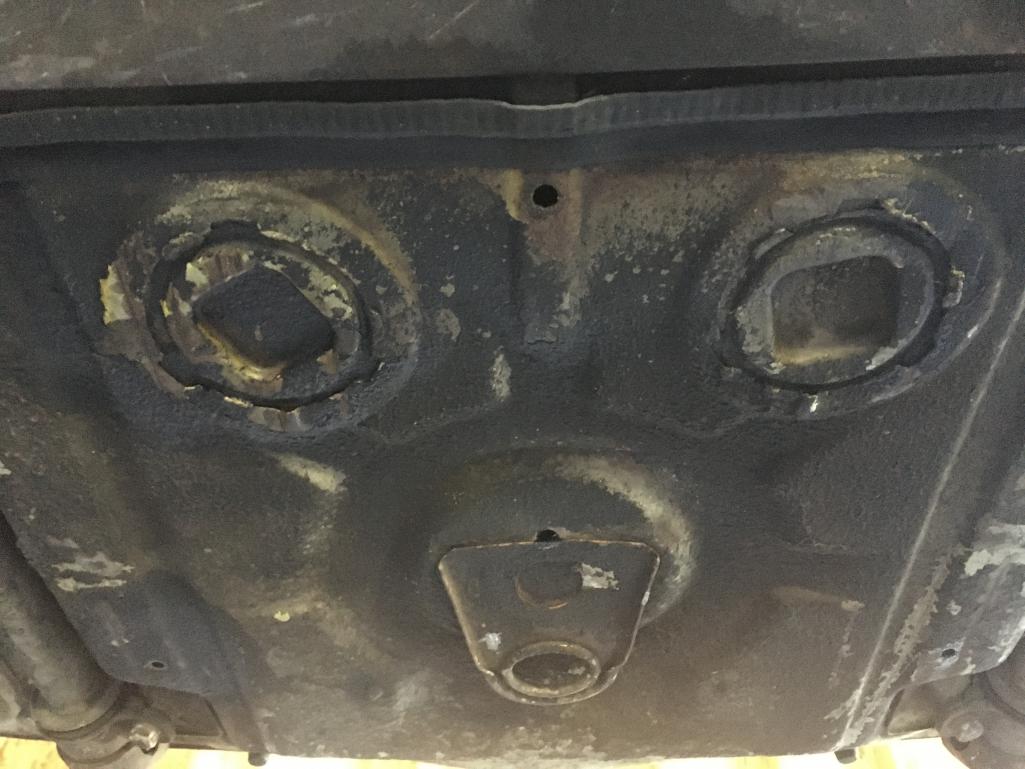
Posted by: mepstein Jul 1 2020, 09:11 AM
Yes, the seam sealer (other than rust) is the only thing that secures them.
Posted by: Speedo Jul 1 2020, 10:38 AM
Oil line hook attachment question. In the first two pics of the green chassis, it looks like the hook is "butt" welded to the edge of the flange. In the second set of pics it looks like the hook lays over the flange and is welded at the base to the outside of the flange. Which is correct? I fire up the Lincoln in an hour
Posted by: sixnotfour Jul 1 2020, 11:00 AM
lays over, factory is spot welded to existing flange..pancake #41
Attached image(s)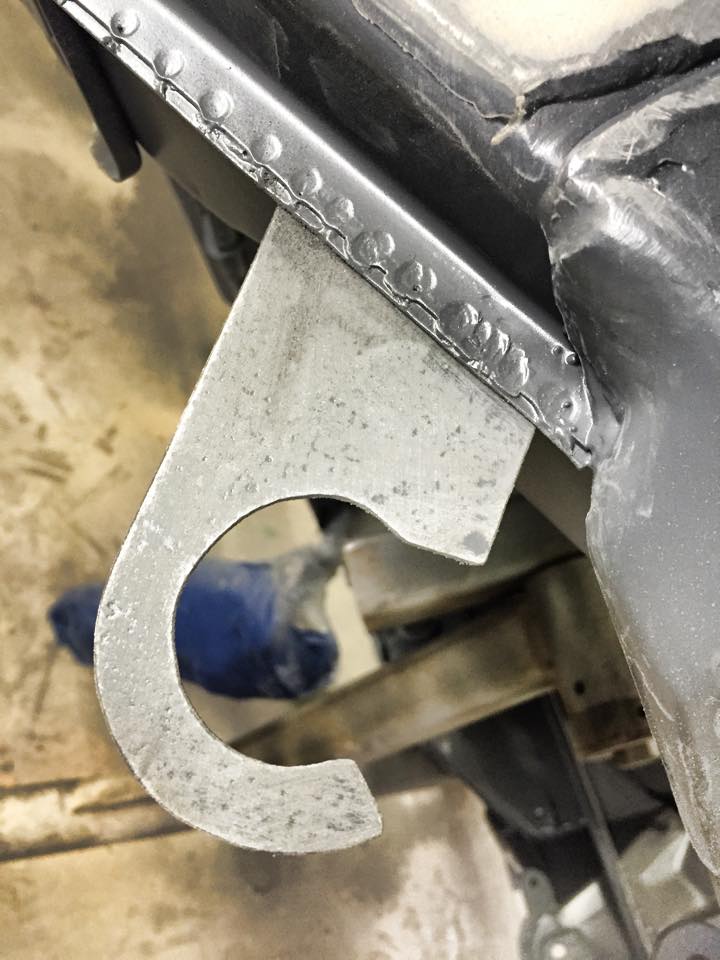
Posted by: Speedo Jul 1 2020, 11:24 AM
That looks like it is spot welded to the inside of the flange? Not the outside?
Posted by: sixnotfour Jul 1 2020, 11:49 AM
#390 I bought from Steam Boat Springs, CO. 1978
1st pic engine compart. out
2nd pic outside looking in
mig it,, leave a hanger..
@http://www.914world.com/bbs2/index.php?showuser=7170
Attached thumbnail(s)
Attached image(s)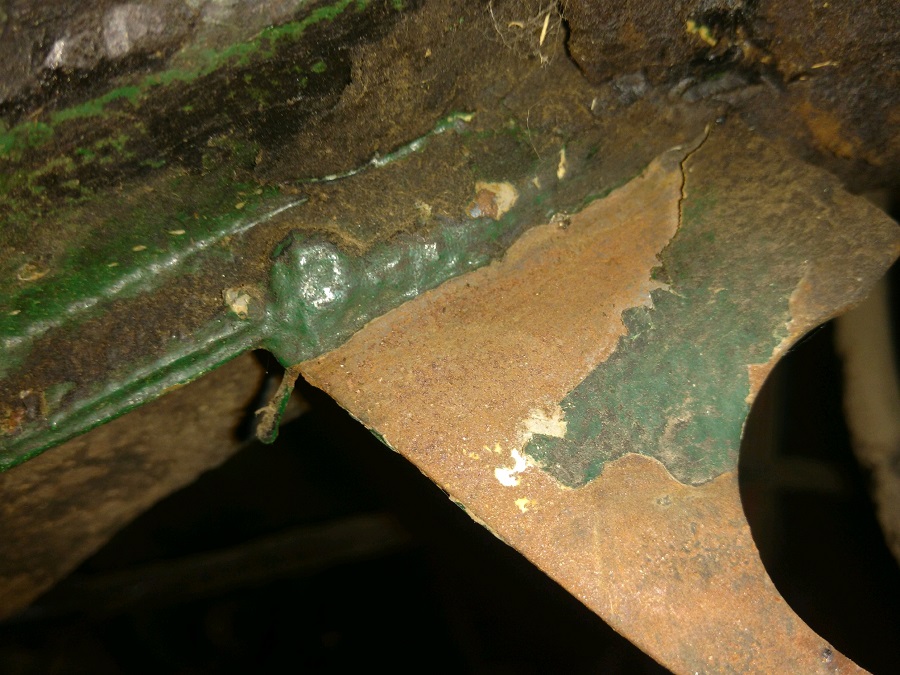
Posted by: Speedo Jul 1 2020, 06:17 PM
Mig welded the hangar. Spent the afternoon with chassis black. Friday is undercoating. Then color. I'm getting burnt on the underside of this car.
Posted by: Cairo94507 Jul 1 2020, 06:51 PM
Going to be well worth it when it starts to go back together.
Posted by: Speedo Jul 3 2020, 04:09 PM
Moving along now...
Posted by: preach Jul 3 2020, 04:26 PM
Oooo, nice color!
Posted by: Speedo Jul 4 2020, 05:07 PM
Making sure my painter has all my "bits" and starting a pile of parts for refinishing. Curious about clear vs yellow zinc...my internal door latches are obviously yellow, but it looks as though my lid and trunk latches are clear? Which is correct? Sure would be easier if all the hardware was either clear or yellow. And in one of my boxes I ran across this parts which I cannot identify (looks like it was refinished yellow). On a 911 it reminds me of a bracket that supports the fresh air vent. Can someone id this for me please?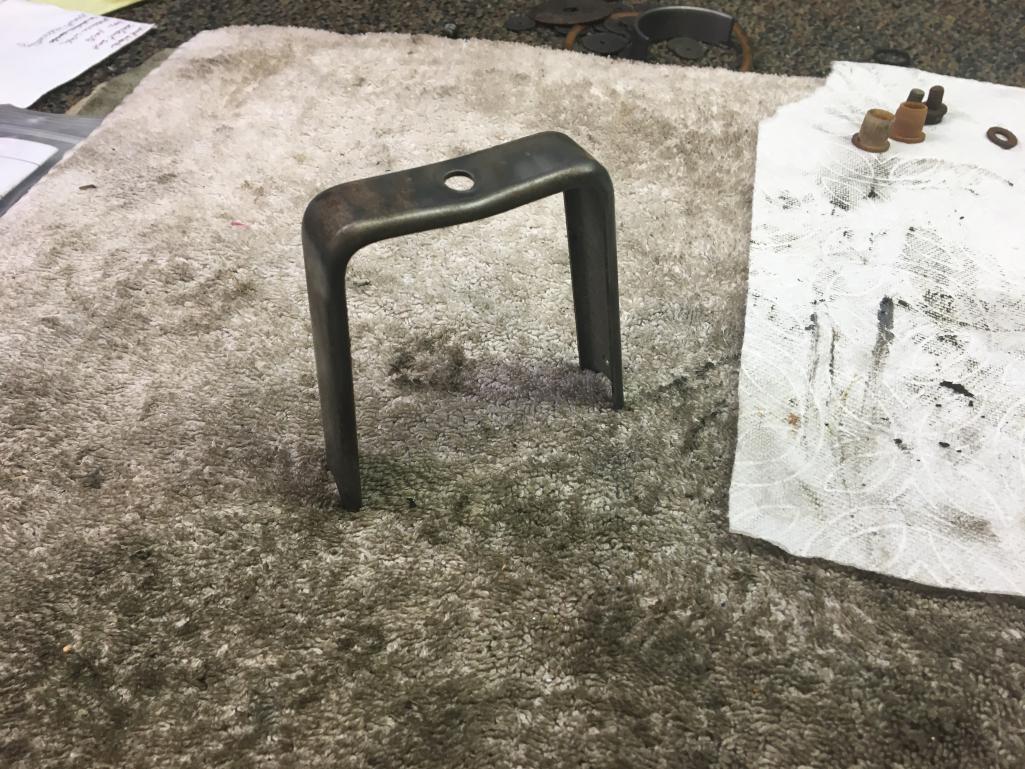
Posted by: Speedo Jul 4 2020, 05:08 PM
Another view...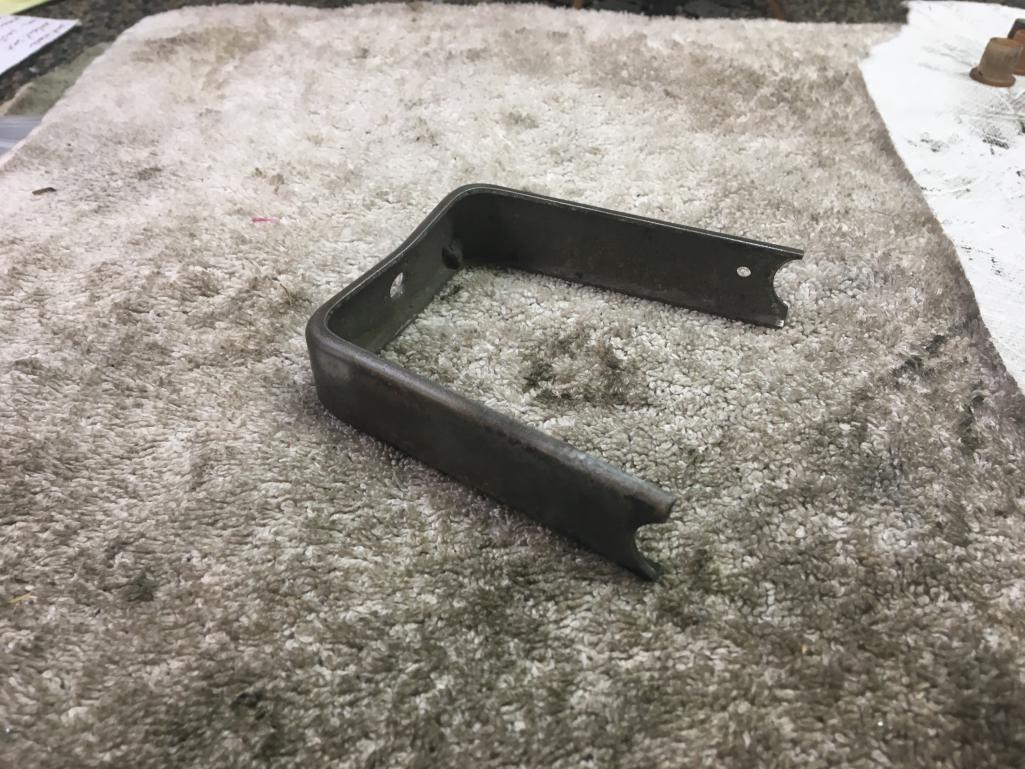
Posted by: zoomCat Jul 4 2020, 11:54 PM
It looks like the bracket that holds the front turn signal into the fender. I may ba able to get a better pic tomorrow.
Posted by: BPic Jul 5 2020, 05:45 AM
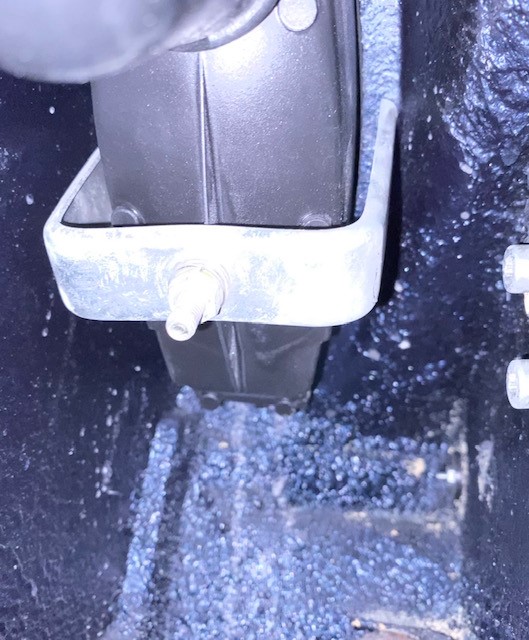
Posted by: Speedo Jul 5 2020, 12:43 PM
Yeah, that's what it is and why I have two of them. Yellow plating?
Posted by: BPic Jul 5 2020, 01:03 PM
That’s what I did. But not sure if it’s correct.
Posted by: 914Sixer Jul 5 2020, 08:35 PM
Yellow is correct color
Posted by: Speedo Jul 6 2020, 08:30 AM
So to be clear...any metal refinishing is to be yellow? No clear used anywhere on car?
Posted by: Speedo Jul 18 2020, 02:15 PM
closer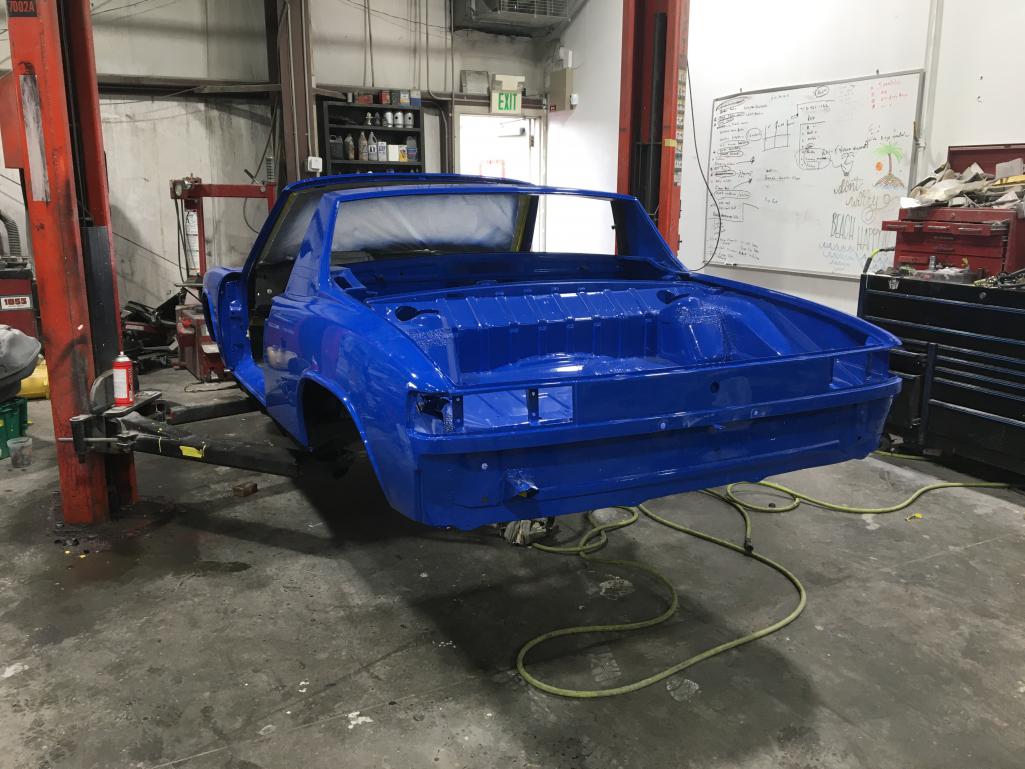
Posted by: Speedo Jul 18 2020, 02:16 PM
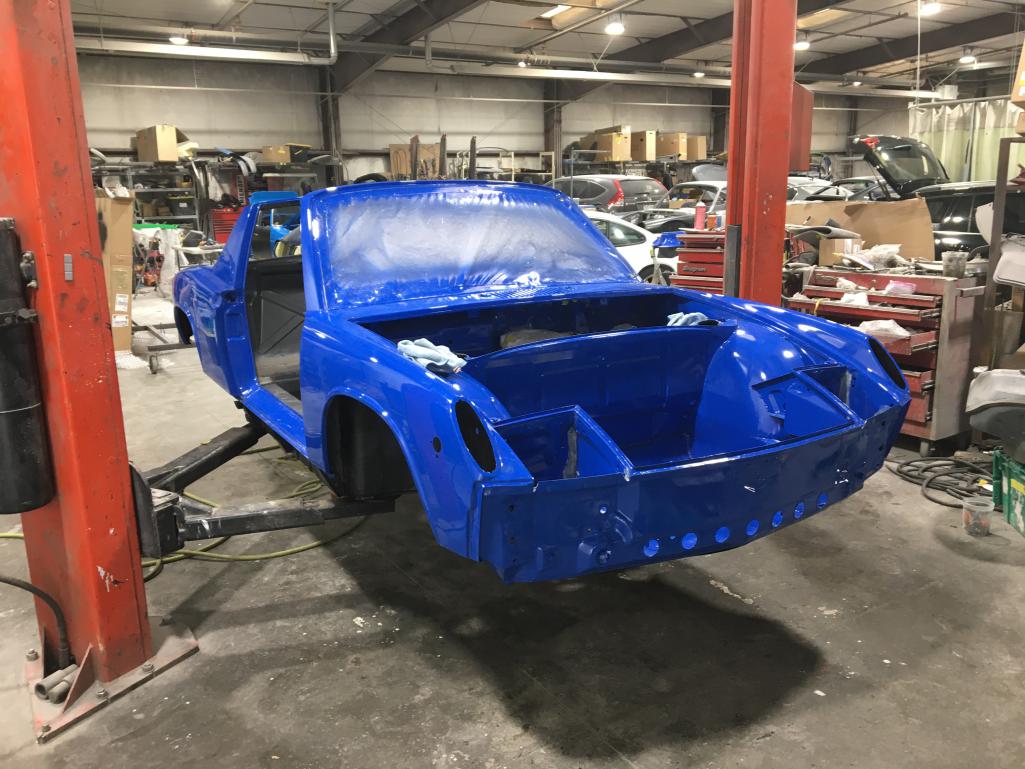
Posted by: Speedo Jul 18 2020, 02:17 PM
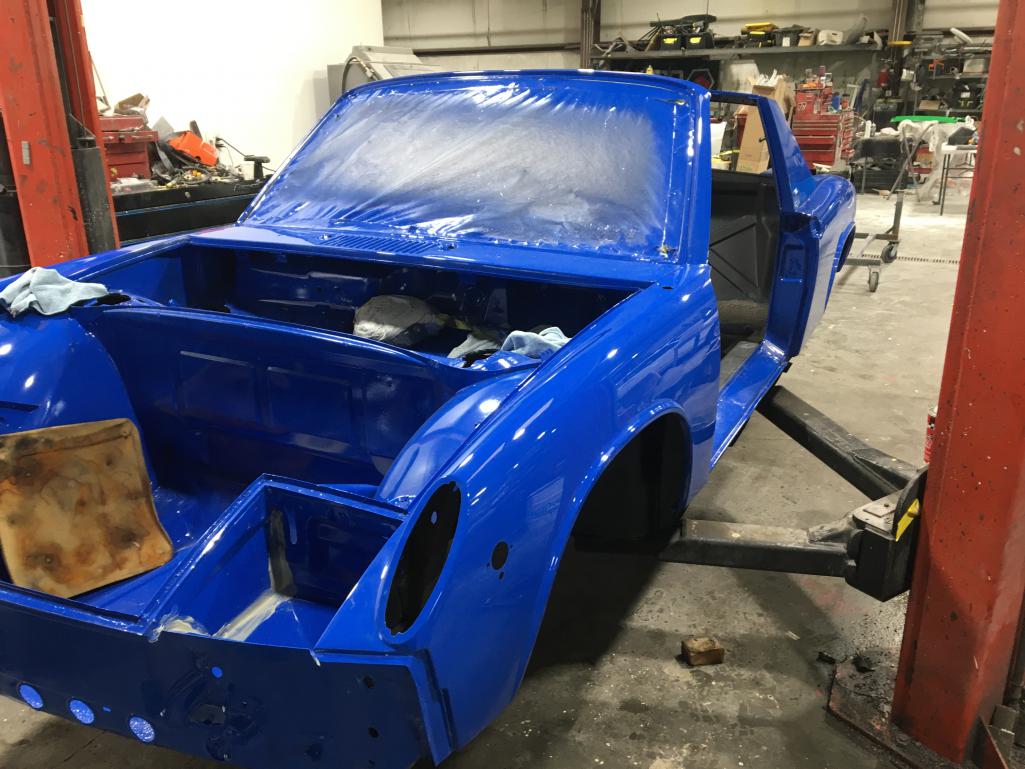
Posted by: Speedo Jul 18 2020, 02:17 PM
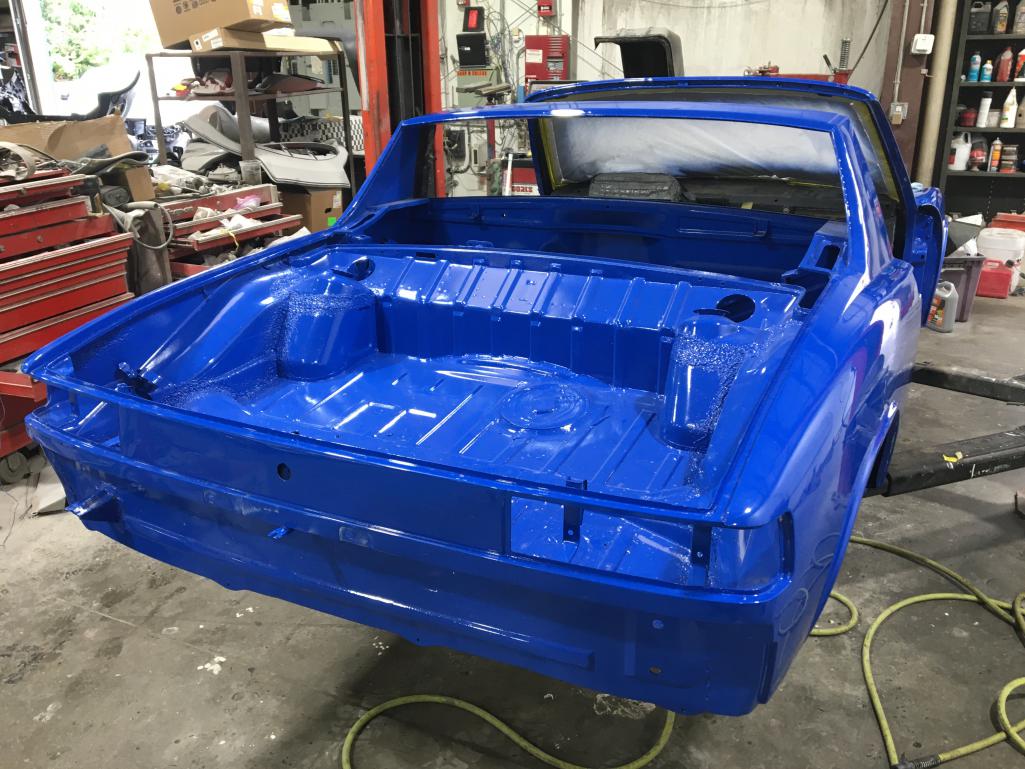
Posted by: Speedo Jul 18 2020, 02:20 PM
Now time for the cockpit. Have to do this by hand. Before....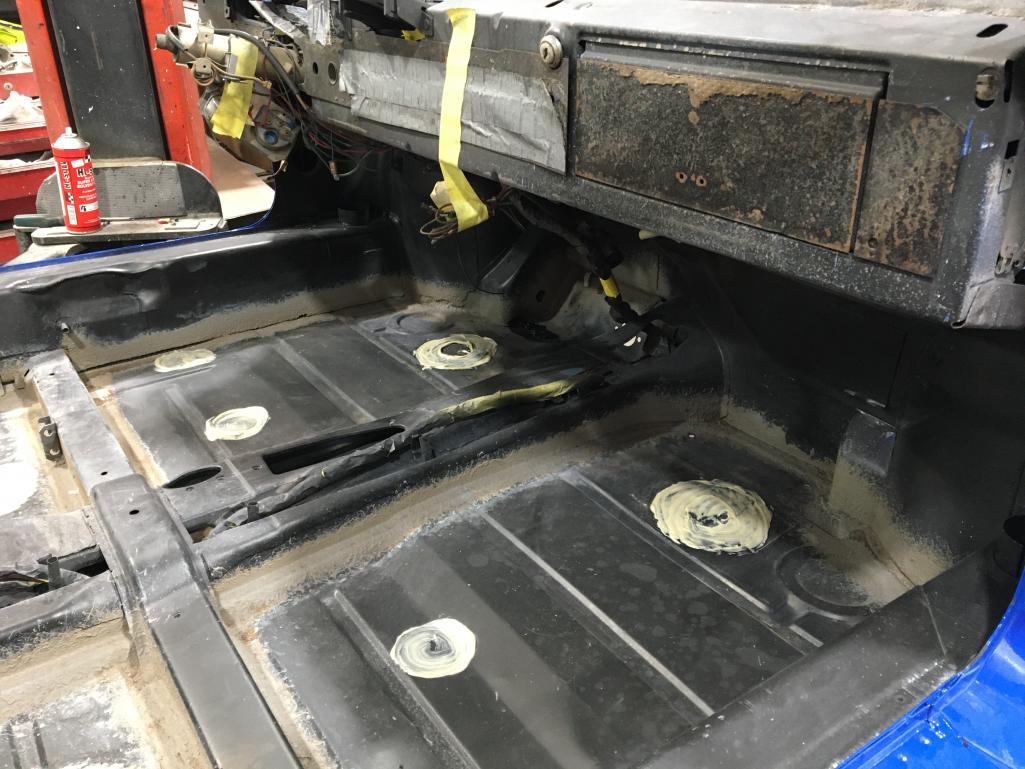
Posted by: Speedo Jul 18 2020, 02:24 PM
Posted by: Speedo Jul 18 2020, 02:24 PM
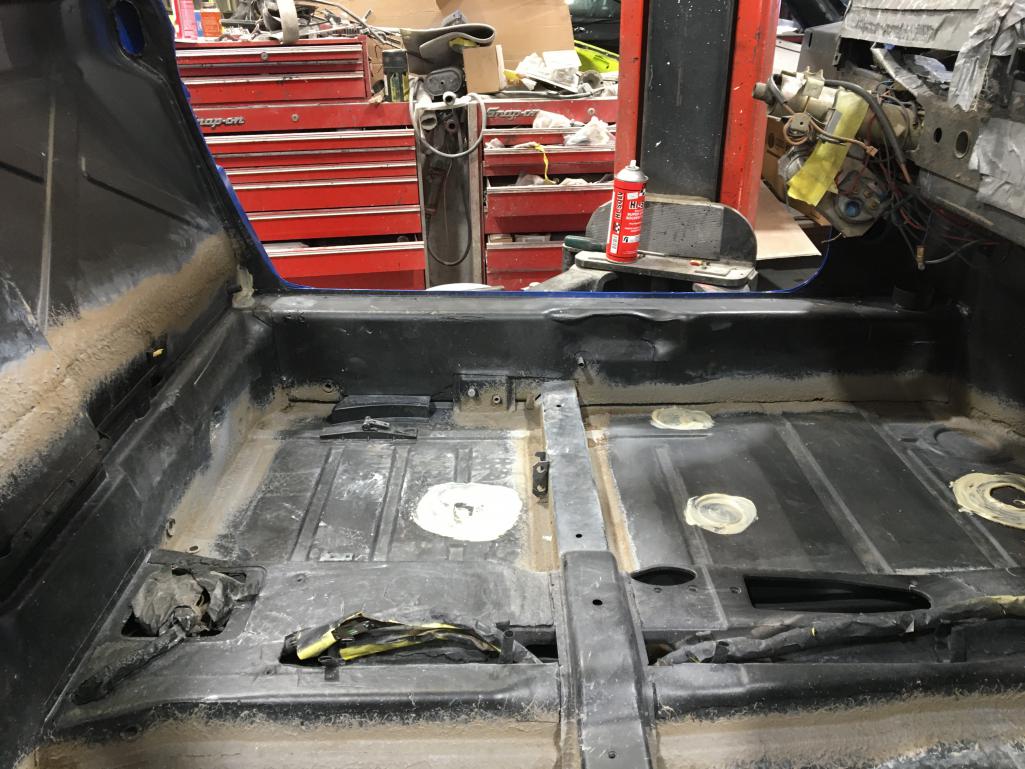
Posted by: Speedo Jul 18 2020, 02:25 PM
And after...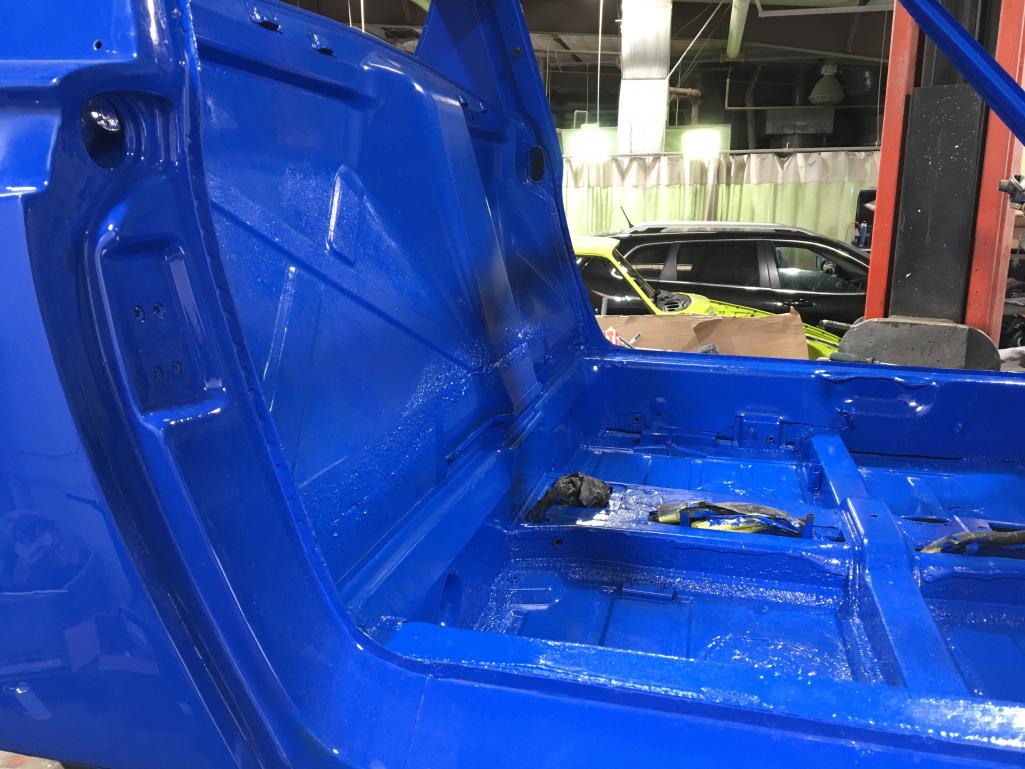
Posted by: Speedo Jul 18 2020, 02:26 PM
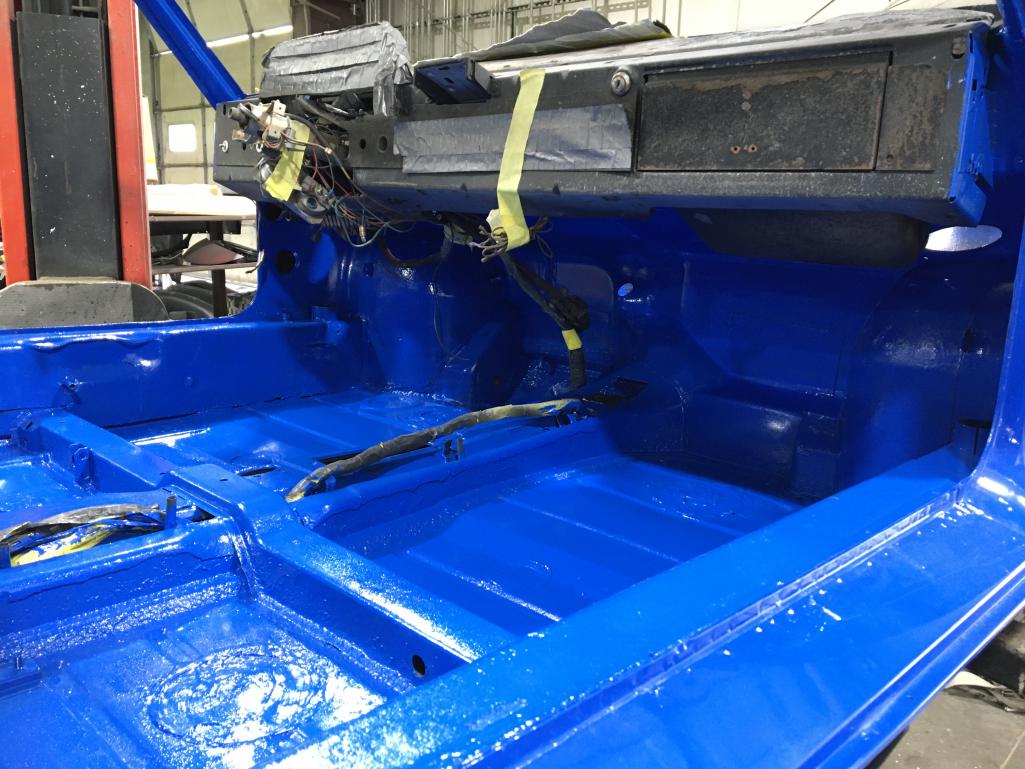
Posted by: Speedo Jul 18 2020, 02:26 PM
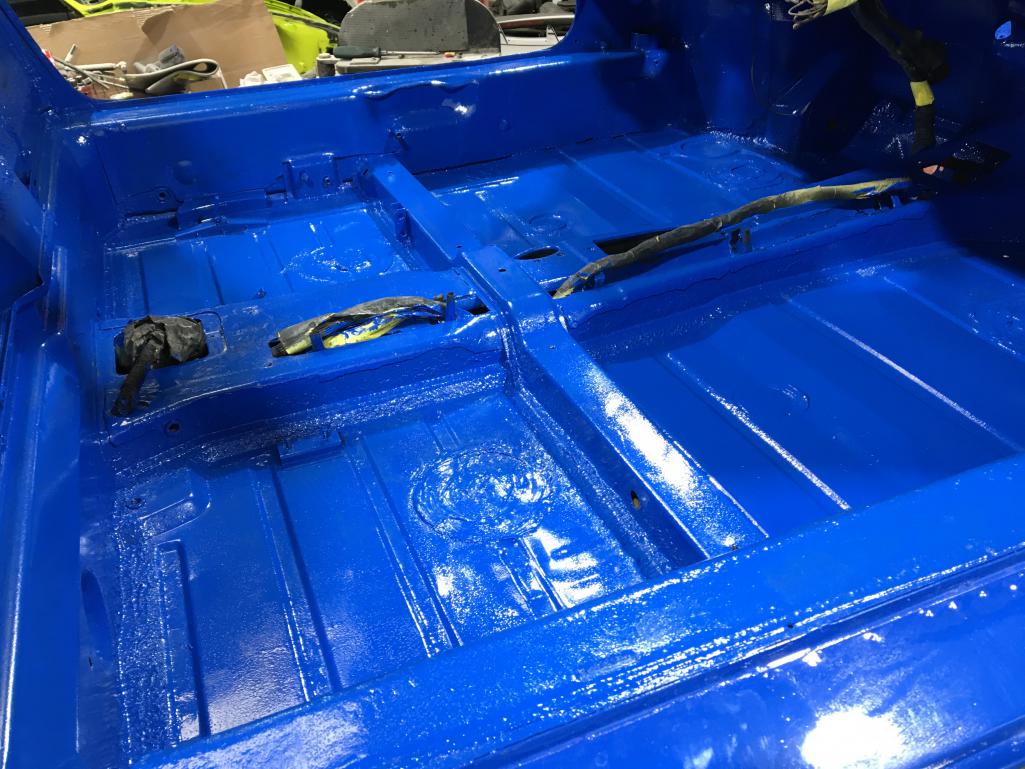
Posted by: sixnotfour Jul 18 2020, 02:28 PM
Beauty...just installed an engine..in one the same color
Attached thumbnail(s)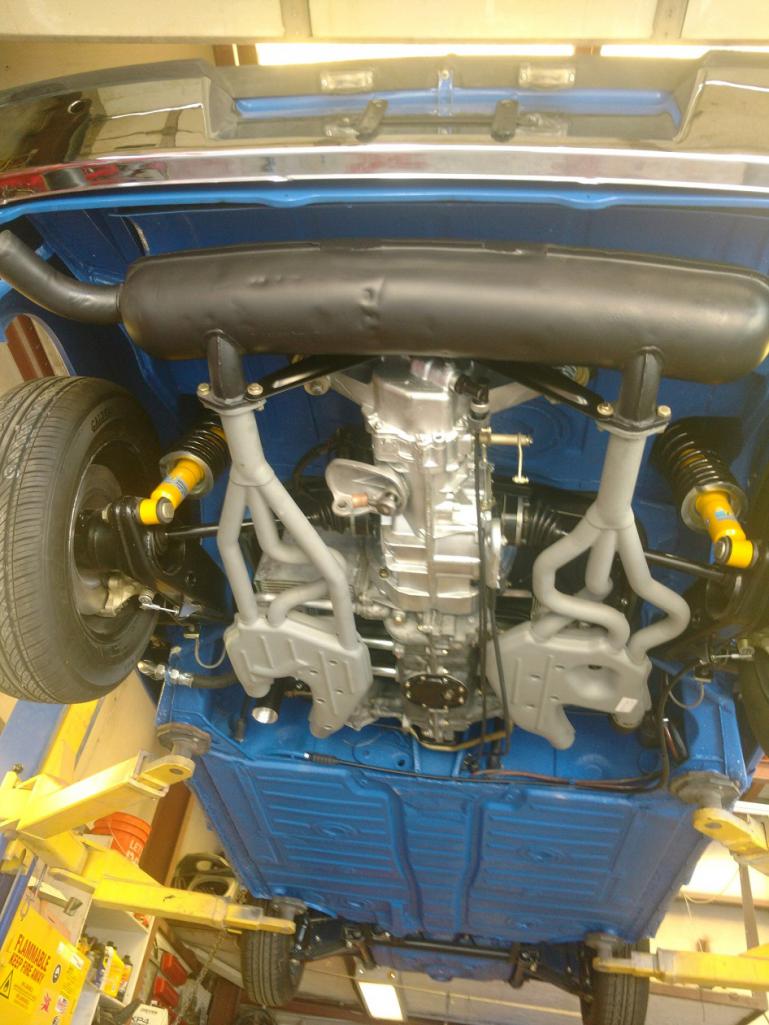
Posted by: BPic Jul 18 2020, 02:39 PM
@http://www.914world.com/bbs2/index.php?showuser=7170
Looks great!! Isn’t this milestone an awesome feeling? Congrats!!

Posted by: Speedo Jul 19 2020, 05:32 PM
Putting together a box of parts to get plated. Basically 99% of the plating will be yellow zinc. I only have a few bits to be clear. Door striker and targa latch...anything else?
Posted by: Speedo Jul 19 2020, 05:34 PM
Posted by: Cairo94507 Jul 20 2020, 06:38 AM
@http://www.914world.com/bbs2/index.php?showuser=7170 Man that looks great. Huge milestone to get the chassis corrected and color on. Now the fun stuff begins.
Posted by: brant Jul 20 2020, 12:23 PM
paint looks GREAT
nice job Lars
brant
Posted by: bkrantz Jul 20 2020, 08:05 PM
Wow, that's very blue!
Posted by: Speedo Jul 22 2020, 06:39 PM
Wow, that's very blue!
Yes it is very blue...like a blue milkshake. Wait till you see the bottom, that was a ton of work. Next (if there is a next) time I may forgo the undercoating. I had to do something as the rear half underside of the car was covered with a nasty 50 year old coat of CRUD=crap+rust+undercoating+petroleum(oil). I know I will have some touch-up on the bottom when I get it home. Now I have to clear some working space in the shop...car was dropped off at the painter in August 2019...yeah no comment. Stuff just happens to fill up a void when created.
So I have asked the question a few times...for the plater, I have 99% going yellow zinc.
The only clear zinc I have going is the targa latches and the door strikers. Before I commit finishing seppuku please tell me what I am missing...
Posted by: mepstein Jul 22 2020, 07:33 PM
Wow, that's very blue!
Yes it is very blue...like a blue milkshake. Wait till you see the bottom, that was a ton of work. Next (if there is a next) time I may forgo the undercoating. I had to do something as the rear half underside of the car was covered with a nasty 50 year old coat of CRUD=crap+rust+undercoating+petroleum(oil). I know I will have some touch-up on the bottom when I get it home. Now I have to clear some working space in the shop...car was dropped off at the painter in August 2019...yeah no comment. Stuff just happens to fill up a void when created.
So I have asked the question a few times...for the plater, I have 99% going yellow zinc.
The only clear zinc I have going is the targa latches and the door strikers. Before I commit finishing seppuku please tell me what I am missing...
Door hinge hardware at the front of the door is clear.
Posted by: Speedo Jul 23 2020, 09:34 AM
[/quote]Door hinge hardware at the front of the door is clear.[/quote]
I just ran out and checked my son's 72 914 and the door hinge bolts are painted? You mean the door stay hardware?
Posted by: Speedo Jul 25 2020, 11:56 AM
"Not everybody is a car guy"....
Brought the blue beast home this morning. At a stoplight with the windows rolled down, a guy next to me in a Mazda sedan says..."is that a Corvair"? I replied, "no it is a Porsche 914-6". His response was "Porsche huh, wow they sure have changed". I could think of nothing to say so I just smiled and nodded. 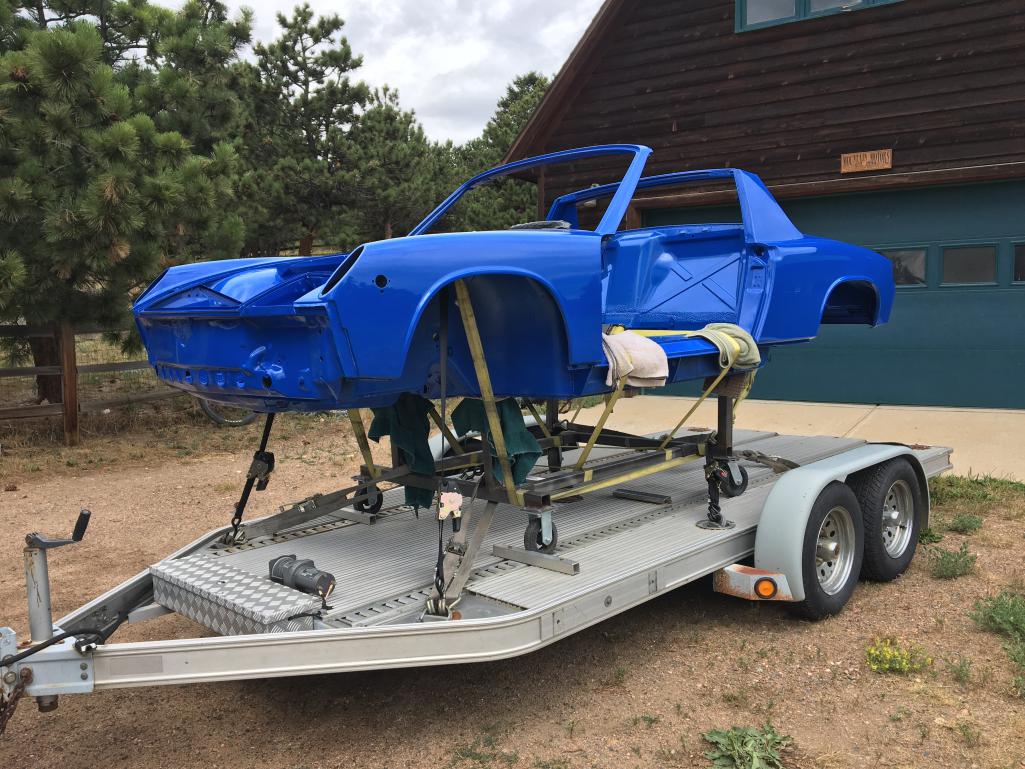
Posted by: porschetub Jul 25 2020, 03:36 PM
"Not everybody is a car guy"....
Brought the blue beast home this morning. At a stoplight with the windows rolled down, a guy next to me in a Mazda sedan says..."is that a Corvair"? I replied, "no it is a Porsche 914-6". His response was "Porsche huh, wow they sure have changed". I could think of nothing to say so I just smiled and nodded.
Looking great,oh well atleast the guy didn't say is that a Fiat ?
.Posted by: Cairo94507 Jul 26 2020, 06:44 AM
Bet you can't wait to begin installing parts to get that 6 back on its wheels.
Posted by: Root_Werks Jul 28 2020, 03:04 PM
..."is that a Corvair"?
Nah, just nod and say; Yup, you nailed it buddy!
Posted by: Speedo Jul 28 2020, 07:55 PM
Bet you can't wait to begin installing parts to get that 6 back on its wheels.I just need to figure out where to begin. It was a long time ago when I took this apart for a "quick" resto. I am making lists and getting organized...
I have already restored the suspension and steering. I want to make sure I don't get ahead of myself. I think I will work backwards from the front of the car focusing on electronics first.
Posted by: Luke M Jul 30 2020, 08:54 AM
Looking good Lars..
Keep the pics coming.
Posted by: Speedo Aug 9 2020, 11:22 AM
Dash paint question. I now have completely removed my dash to paint the firewall under and behind it. With the dash out, I now need to decide what color paint goes where on the dash. I presume the cockpit side is all black (satin or semi or both?), but the firewall (backside) is not clear. There is both blue and black on the backside...thoughts? Be easiest to just prime and paint the entire dash (inside and out) black, but not sure that is correct. What did the factory do?
Posted by: Speedo Aug 15 2020, 01:43 PM
Hornets nest and spaghetti...is what I am starting with.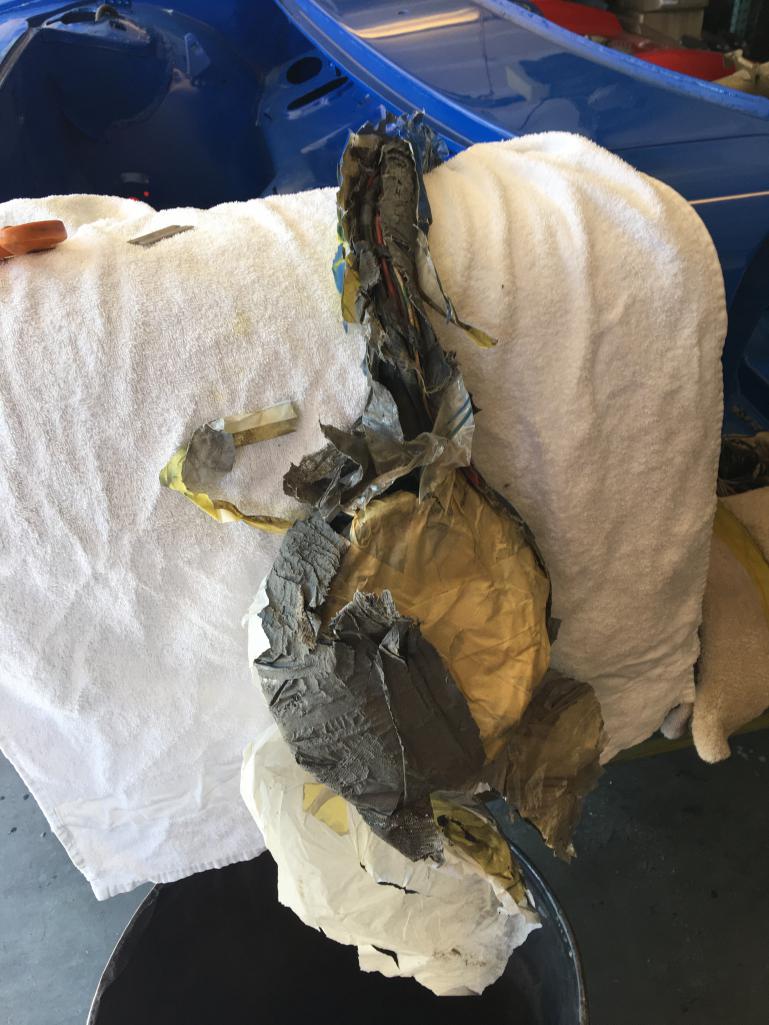
Posted by: Speedo Aug 15 2020, 01:44 PM
Attractive...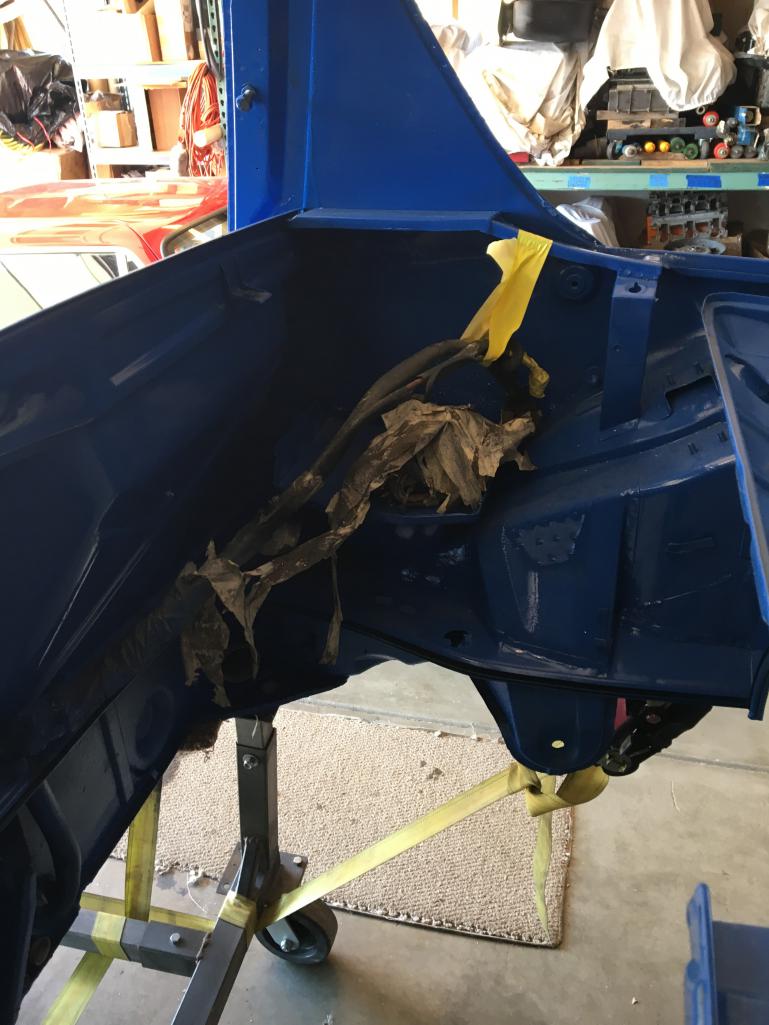
Posted by: Speedo Aug 15 2020, 01:45 PM
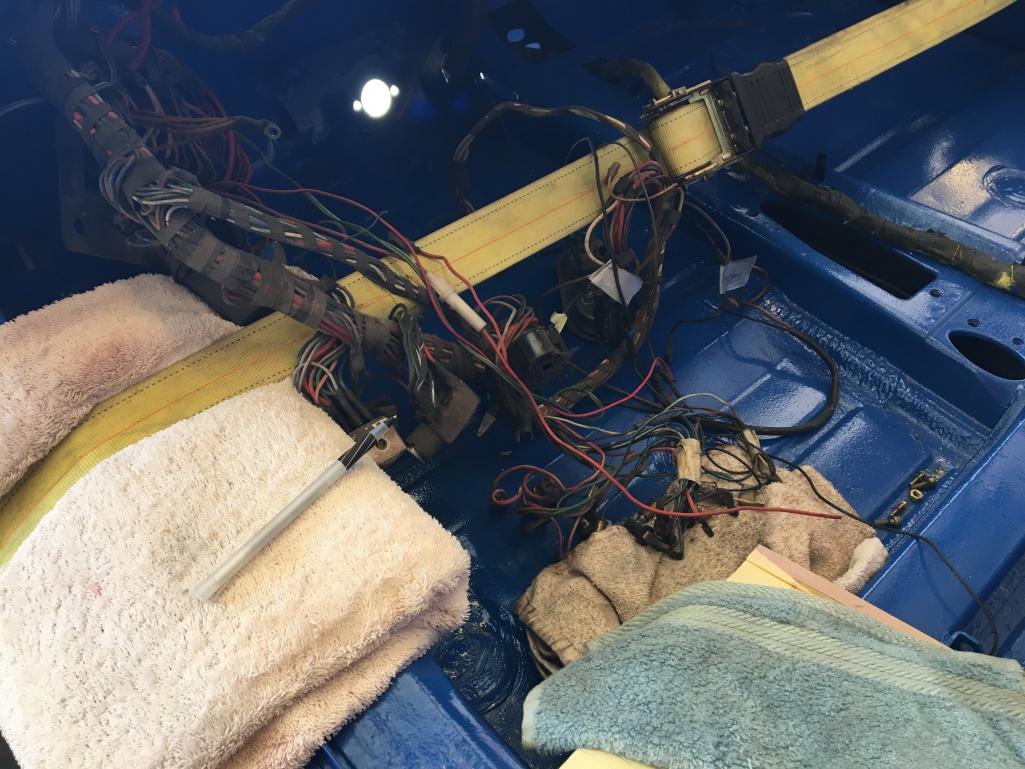
Posted by: Speedo Aug 15 2020, 01:51 PM
I'm using my son's 72 1.7 to figure out my wiring harness. Front and rear trunks are accessible. Behind the dash and under the gas tank not so much. Can someone post a pic or two of how the harness is routed across the back of the dash and down through the bulkhead/firewall into the front trunk please? I need to order some grommets (914 Rubber) and some black cloth wiring harness tape (vendor?) before I secure the harness to the chassis. Is black shrink wrap the best way to re-cover the wire "hold-downs"?
Suggestions are appreciated.
Posted by: bkrantz Aug 15 2020, 09:05 PM
914 Rubber has the cloth tape.
Posted by: Luke M Aug 16 2020, 07:16 AM
Hi Lars,
The 6 looks good in paint. 914Rubber has all that you need, tape, grommets, and the wire hold down inserts. I got all of my parts from them so I'll be ready when my time comes.
As far as wiring layout check out the links. It'll will give you an idea where the harness goes. Hope it helps.
http://www.914world.com/bbs2/index.php?showtopic=78492
http://www.914world.com/bbs2/index.php?showtopic=335629&st=0
Posted by: Speedo Aug 22 2020, 04:31 PM
Thanks Luke! Getting organized to put in my rubber order. I probably need 80% new rubber, but just can't decide which kit to order...early, later, just out of paint etc. Anybody have any recommendations? I also need the engine compartment pieces and windscreen gaskets.
Unwound the hornets nests and started working on cleaning up the wiring. PO had done a hack job on the harness. I had a stereo wired in, and a few extra gauges for oil pressure and voltage as well as a plug for a trailer (PO was big on auto cross and me thinks he had a tire trailer. Got rid of the un-necessary and cleaned up the harnesses. All of the cloth tape was trash, but fortunately my replacement black cloth tape had just arrived. Looks a lot better...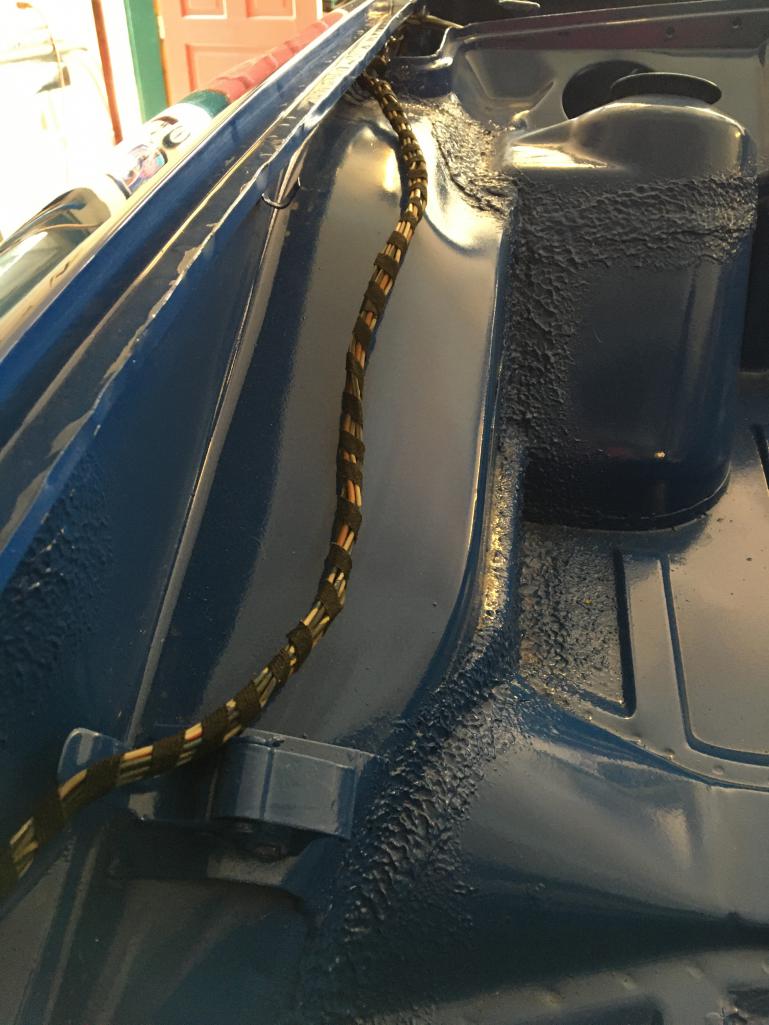
Posted by: Speedo Aug 22 2020, 04:32 PM
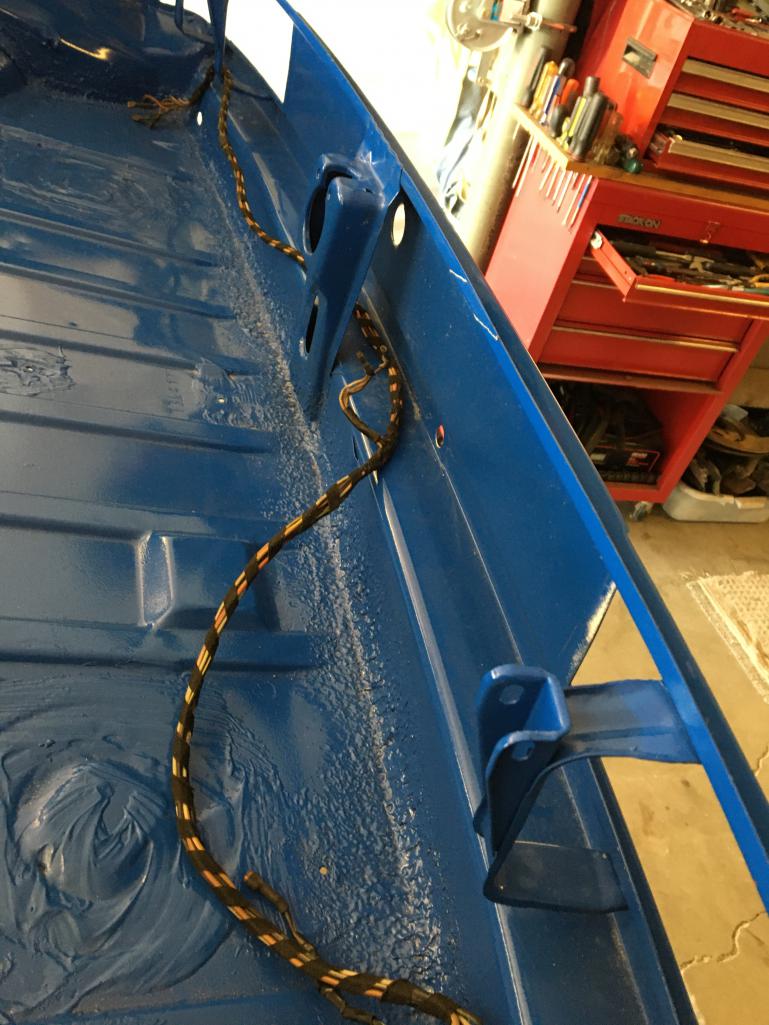
Posted by: Speedo Aug 22 2020, 04:33 PM
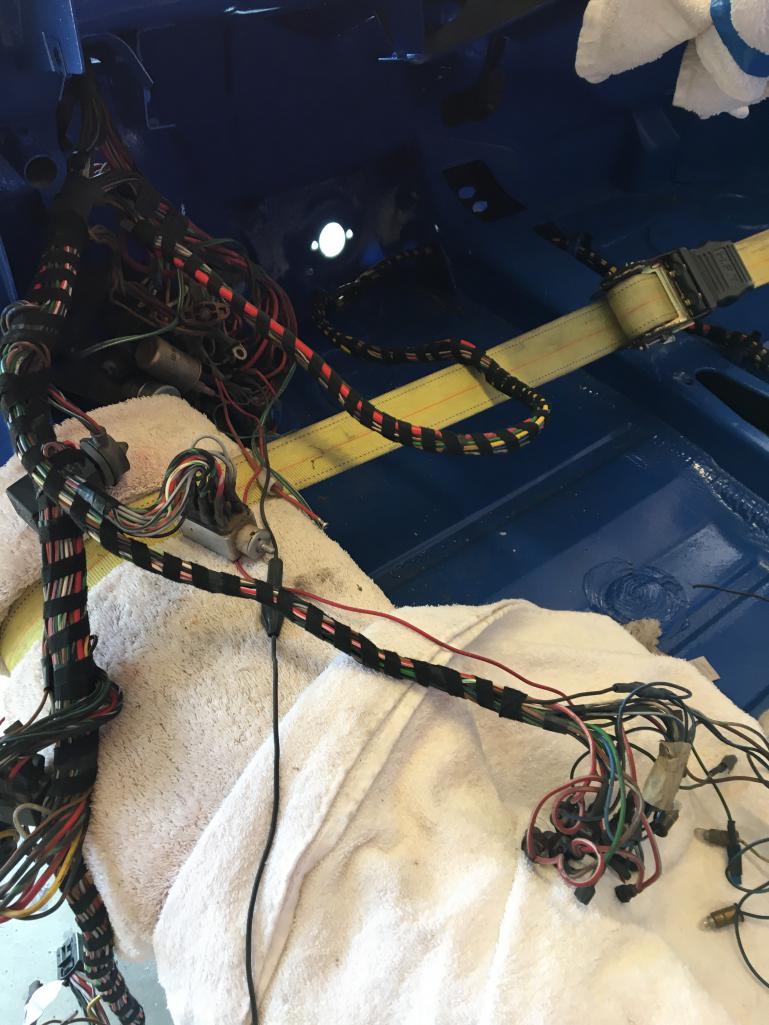
Posted by: Speedo Aug 22 2020, 04:34 PM
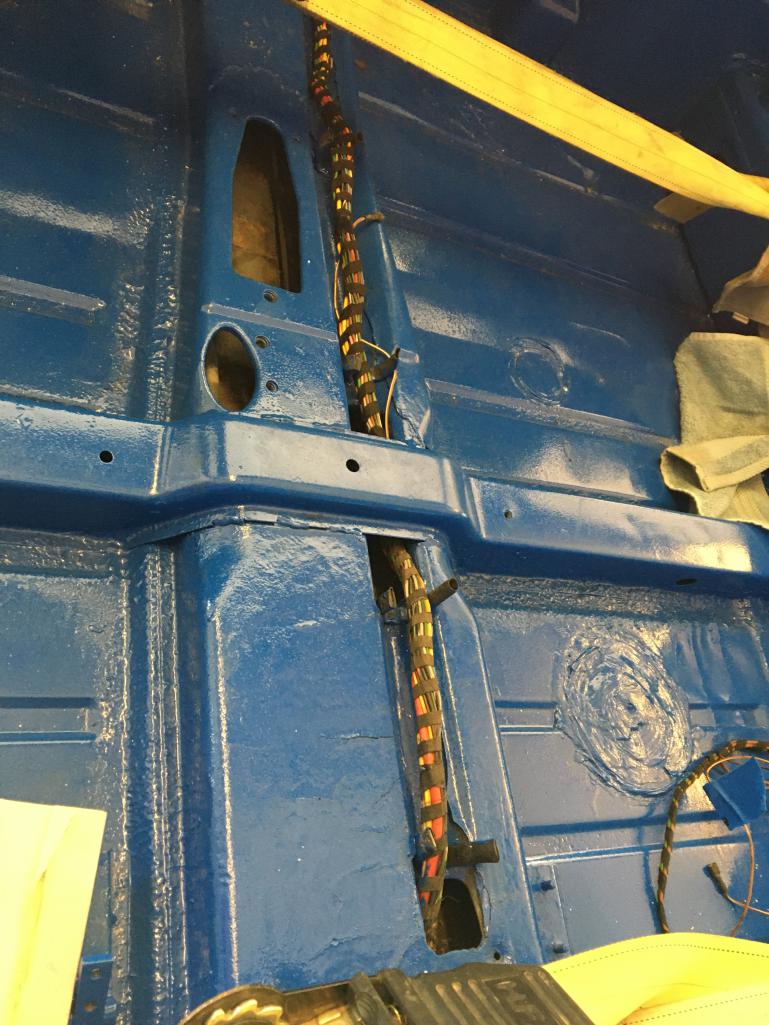
Posted by: Speedo Aug 22 2020, 04:35 PM
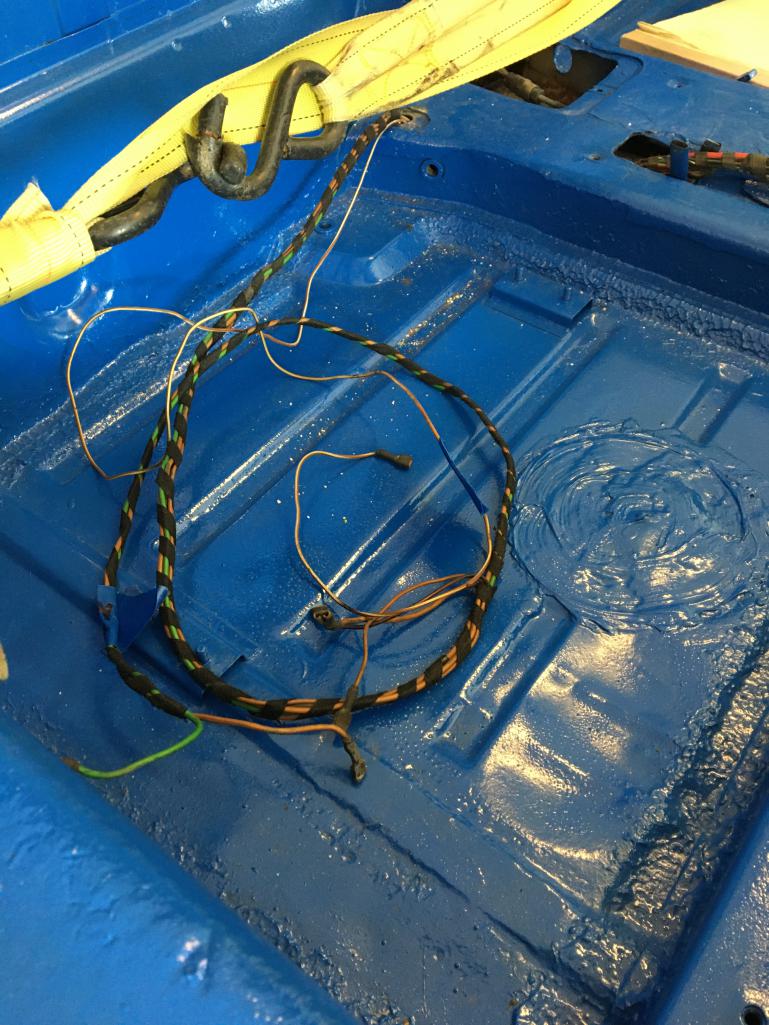
Posted by: Root_Werks Aug 25 2020, 09:59 AM
Spaghetti! Wiring takes time, cleaning up hack jobs to wiring takes even longer. It's looking great, very clean.
Posted by: Luke M Aug 26 2020, 07:45 PM
Hi Lars, maybe a little late but I found this.
https://www.youtube.com/watch?v=meuFs3HaUj0&feature=youtu.be
Posted by: Speedo Aug 31 2020, 07:25 PM
Thanks Luke! Not too late. Those guys up at RD have been very helpful...especially Peter.
Just ordered a big rubber batch from 914 Rubber and my stainless fuel lines from Tangerine racing.
Lots going to get done this weekend. Spent a few hours on Sunday making my trannie look less like a baked on grease bomb.
Posted by: Cairo94507 Sep 1 2020, 06:34 AM
Thanks for posting that link Luke. Even though my car is done, I thoroughly enjoyed that harness installation video.
Posted by: Speedo Sep 6 2020, 05:26 PM
Four big boxes of stuff arrived from 914Rubber. New dash, bumpertops and miles of rubber seals. Going to work from the front to the rear of the car. Lights horns and fogs first. The mechanisms were incorrectly painted black by the painter, They are now the correct grey. 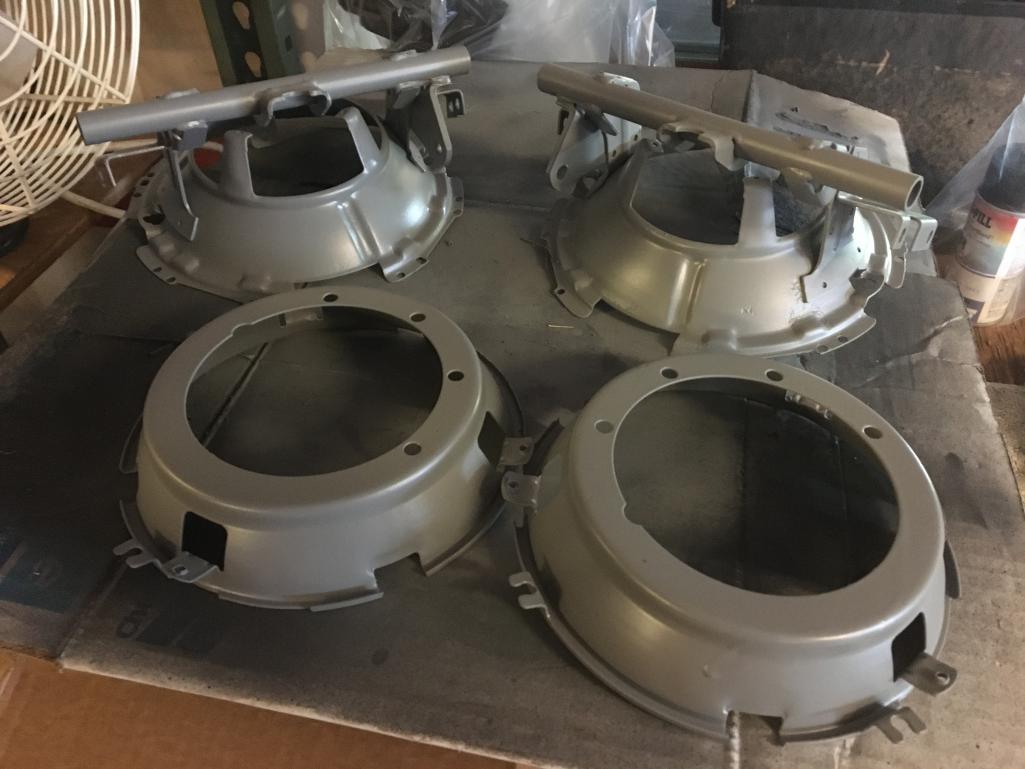
Posted by: Speedo Sep 6 2020, 05:29 PM
I was going to paint the faded plastic headlight surrounds but was coached to bleach and scotchbrite instead...worked great.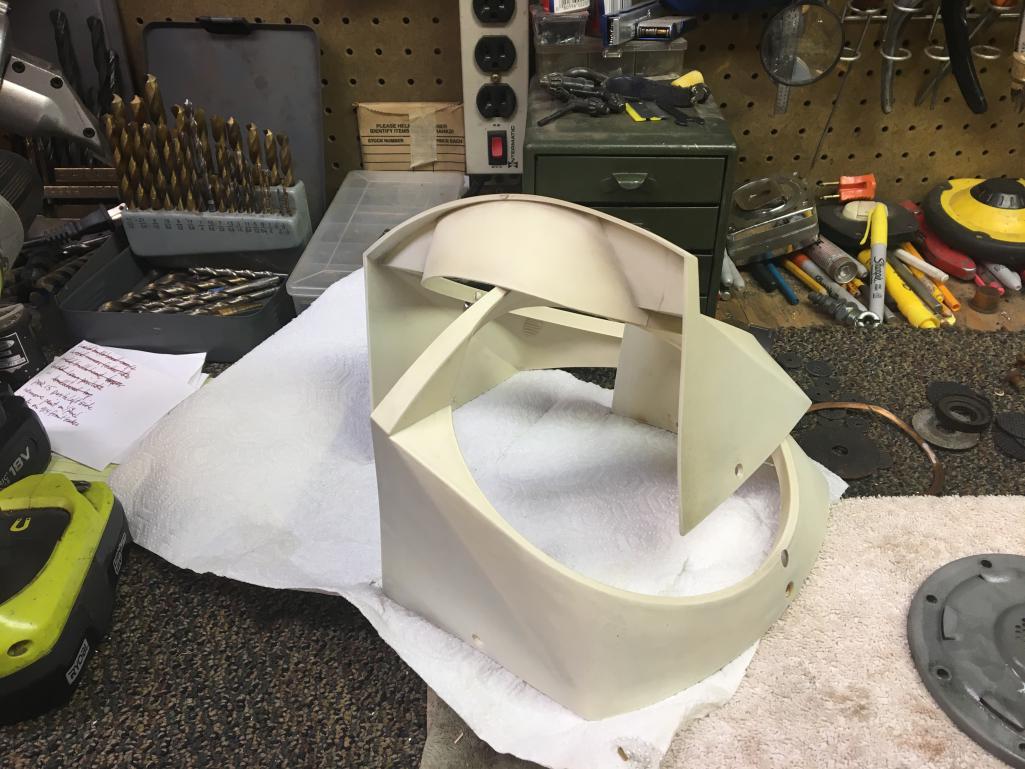
Posted by: Speedo Sep 6 2020, 05:33 PM
One of my horns worked (barely) and the other not at all. I disassembled the horns, repaired them, sandblasted and now will paint. I am to assume the same grey as used on the headlight mechanism?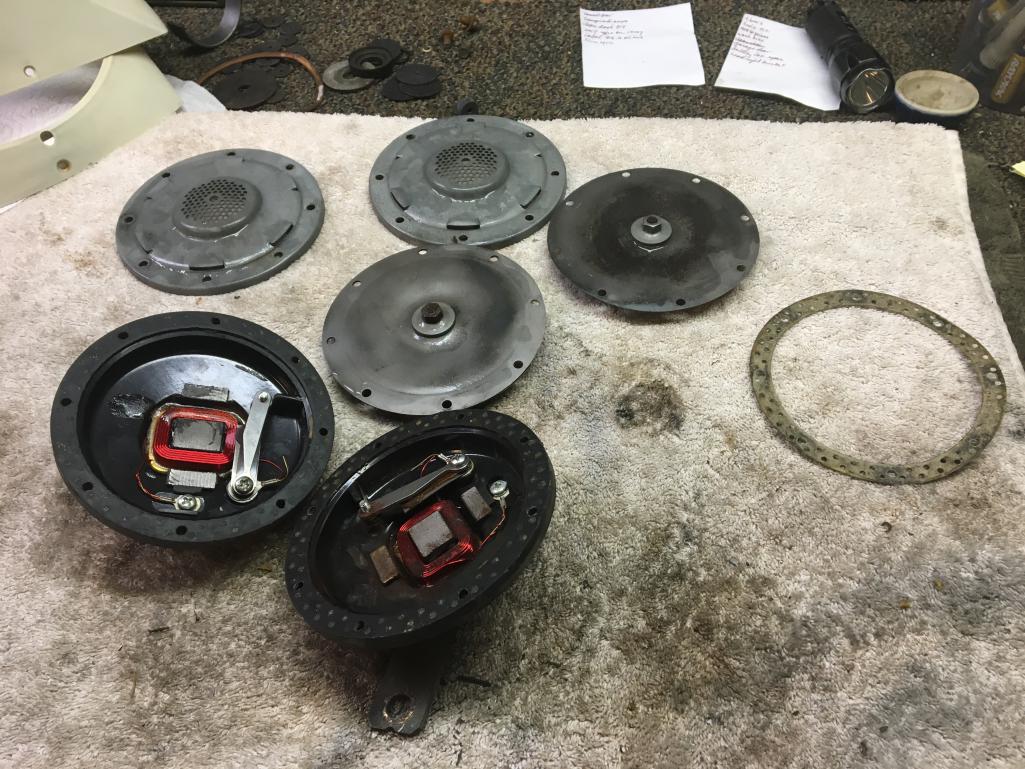
Posted by: Speedo Sep 6 2020, 05:41 PM
Final challenge for the day. I am trying to emulate the yellow zinc on my rear calipers...for my front alu Bremtek race calipers. Back and forth over what is the best way to do this...without sending them out. Picked up some yellow anodize colored rattle can high temp paint. Tried on some raw alu and color didn't come close. I picked up a rattle can of high heat gold and will spray the gold and then try to "dust" the gold color with the yellow anodize to see how close I can come.
Posted by: Speedo Sep 6 2020, 05:44 PM
Where do I get these nylon bushings for the headlight mechanism axle shafts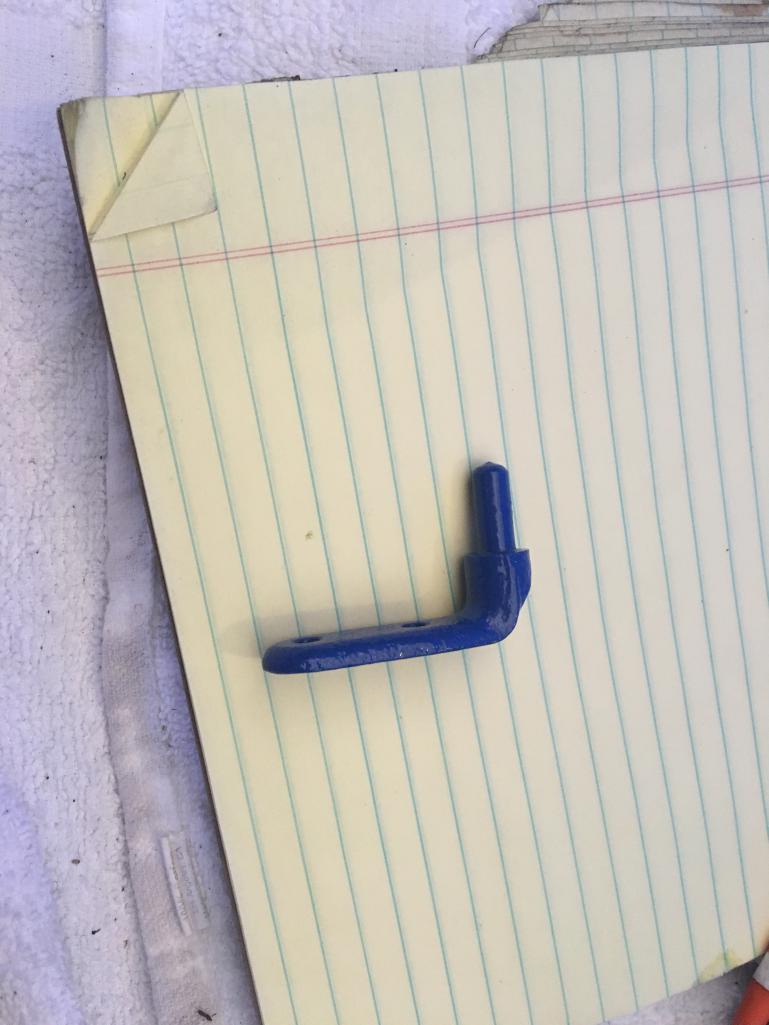 ?
?
Posted by: bigkensteele Sep 6 2020, 06:12 PM
Where do I get these nylon bushings for the headlight mechanism axle shafts
?On you next 914rubber order.
Posted by: Speedo Sep 13 2020, 07:20 AM
Where do I get these nylon bushings for the headlight mechanism axle shafts
?On you next 914rubber order.
Ok, got that order coming today.
Were these brackets body color or grey headlight assembly color?
Posted by: mepstein Sep 13 2020, 07:26 AM
Where do I get these nylon bushings for the headlight mechanism axle shafts
?On you next 914rubber order.
Ok, got that order coming today.
Were these brackets body color or grey headlight assembly color?
grey. They only get painted body color when they get hit with a cheap respray.
Posted by: Cairo94507 Sep 13 2020, 08:21 AM
Agreed- they never came body color.
Posted by: rgalla9146 Sep 13 2020, 08:39 AM
Agreed- they never came body color.
Make that three.
Posted by: Speedo Sep 13 2020, 10:21 AM
Thanks guys! Working on the front of the car today, and the calipers. I have the parts diagram for the headlight assembly, but it would be a lot easier if I had a picture of the mechanism without the surround and louver so I could see the assembly. I also have the L and R black plastic covers for the sides of the lights. My understanding was that the covers were on 72 and later cars? A lot of what I am finding would suggest some parts of the front of the car are not original...but I have seen no evidence of a "hit" or repair. Maybe just PO doing minor repairs/upgrades?
Posted by: Speedo Sep 13 2020, 05:43 PM
Horns restored and wired in. Rest of headlight parts sandblasted, painted and waiting for plastic bushings. Louver motors cleaned, turn housings degreased and ready for sandblasting and paint. Boots installed on wiring corners.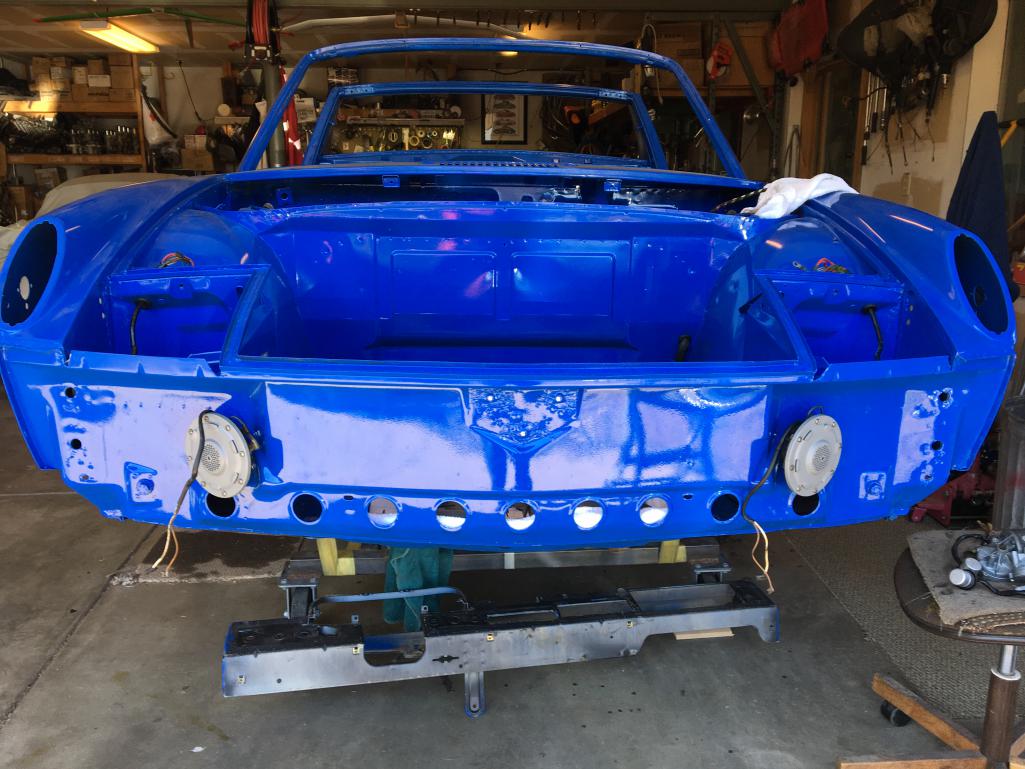
Posted by: Speedo Sep 13 2020, 05:46 PM
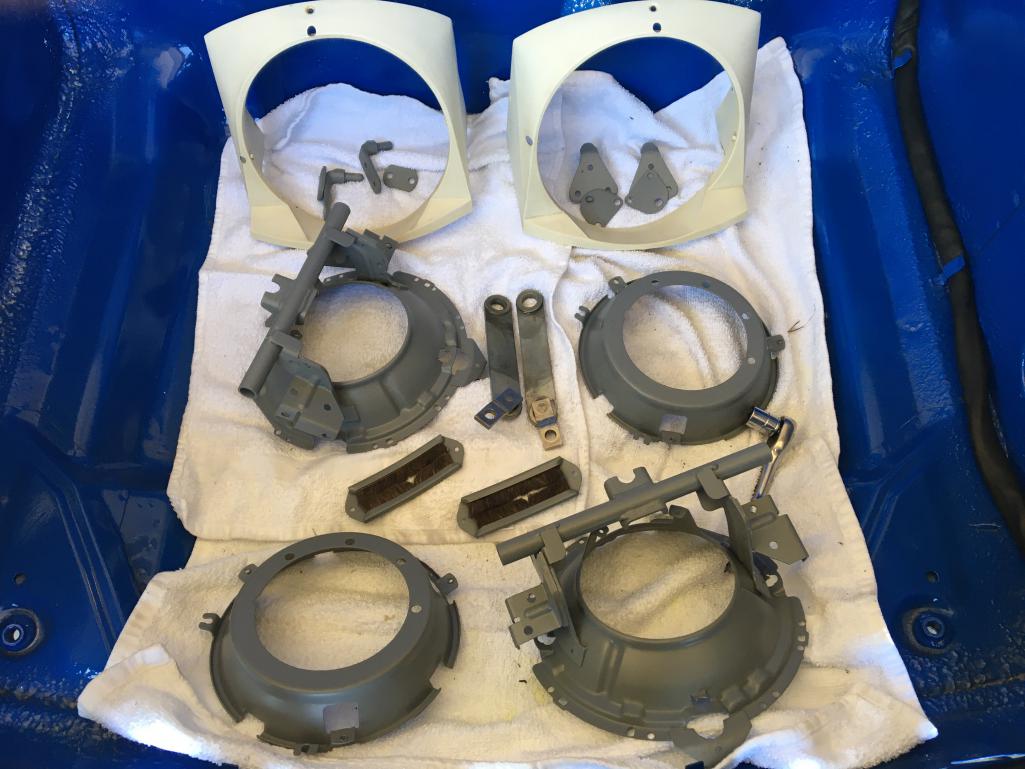
Posted by: Speedo Sep 13 2020, 05:48 PM
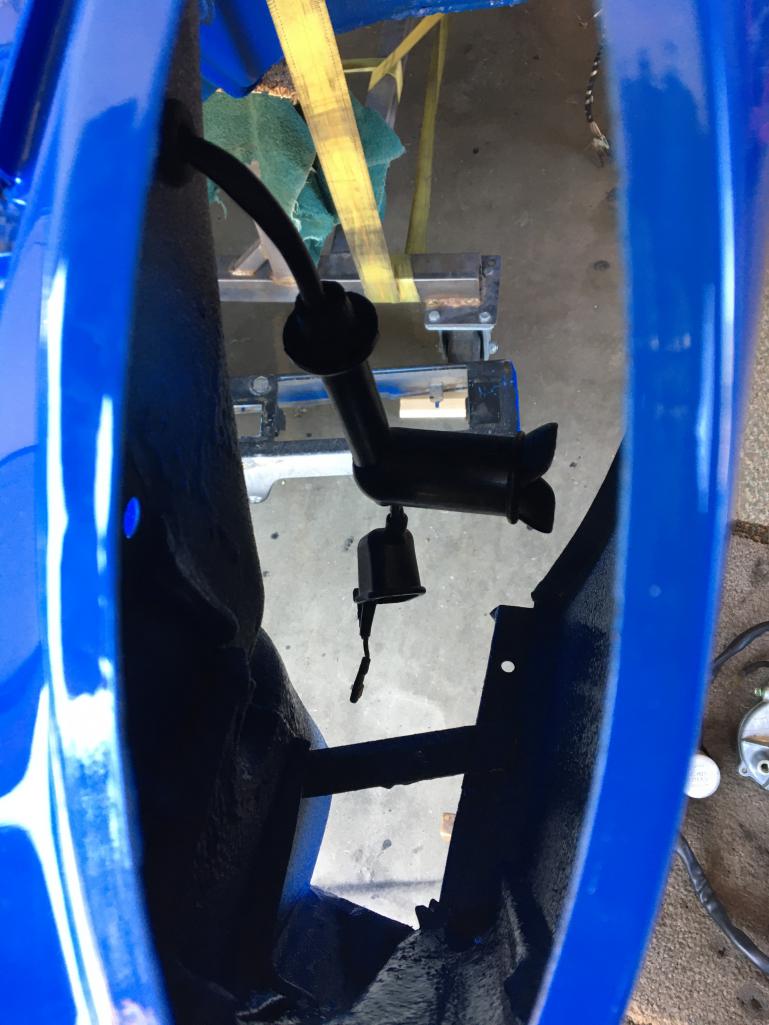
Posted by: Speedo Sep 13 2020, 05:55 PM
So I think I have achieved a close approximation to the yellow zinc (on my rear calipers), on my front aluminum calipers. I used hi heat paint and it took a lot of experimentation.
Base coat is gold and I dusted metallic silver and yellow anodizing. Pretty damn close. The rear zinc'd caliper for comparison. You will like it or hate it. I am ok with it. The calipers are hidden behind the fuchs. The only time you will see the calipers, is when the car is on the lift, or if I have just driven over you and you happened to look up.
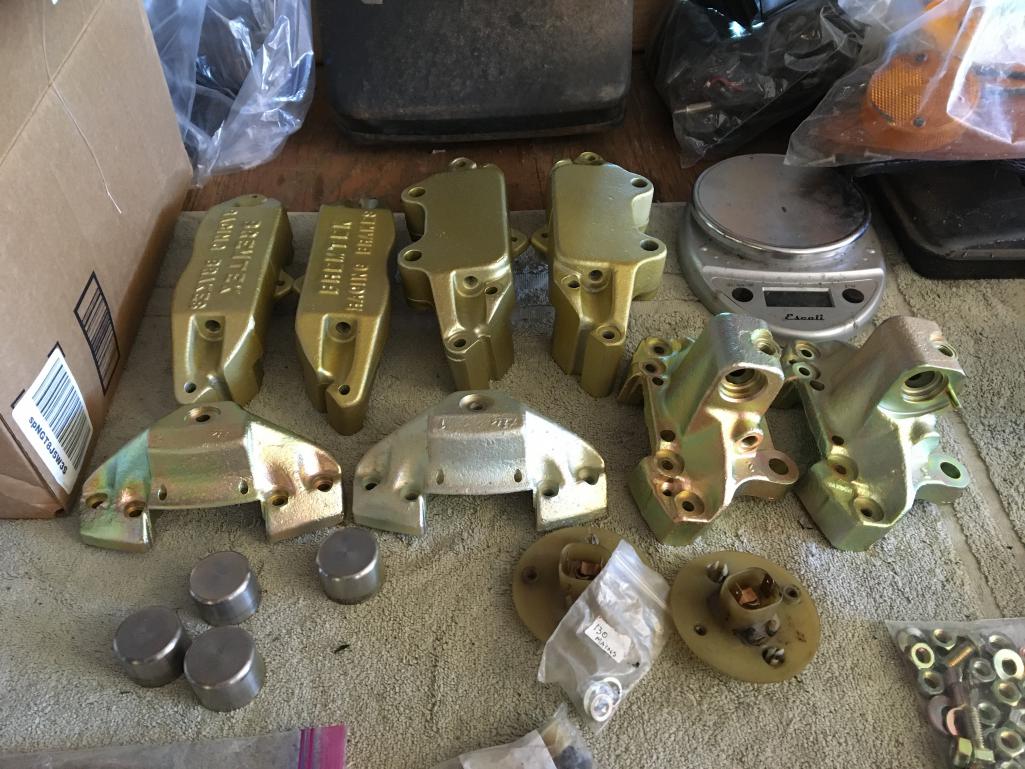
Posted by: Speedo Sep 13 2020, 05:57 PM
Vin plate adds a degree of reality.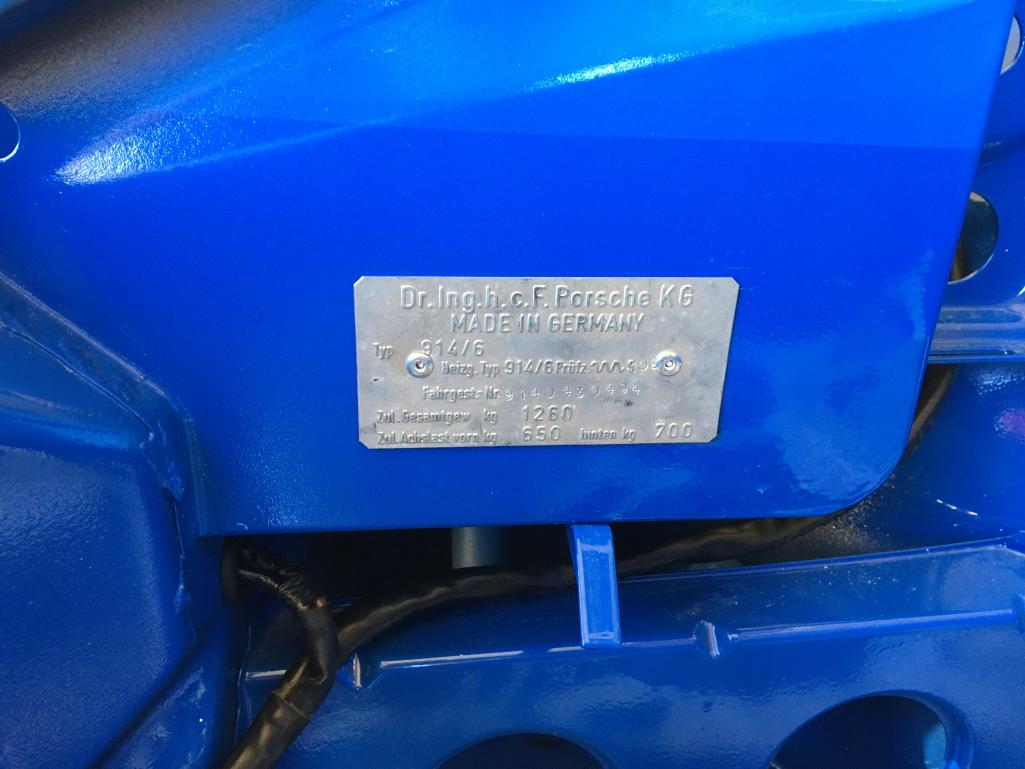
Posted by: mepstein Sep 13 2020, 06:49 PM
Thanks guys! Working on the front of the car today, and the calipers. I have the parts diagram for the headlight assembly, but it would be a lot easier if I had a picture of the mechanism without the surround and louver so I could see the assembly. I also have the L and R black plastic covers for the sides of the lights. My understanding was that the covers were on 72 and later cars? A lot of what I am finding would suggest some parts of the front of the car are not original...but I have seen no evidence of a "hit" or repair. Maybe just PO doing minor repairs/upgrades?
I’m pretty sure I have plastic covers on all my early cars. They are fours, not sixes but I think they were on sixes as well. Anyway, I’m sure someone who knows for sure will chime in.
Posted by: Cairo94507 Sep 14 2020, 06:15 AM
I have had 2 '70 6's and my current '71 6, all came with the plastic covers installed. I have never seen a stock car that did not come with them.
Posted by: Speedo Sep 20 2020, 10:13 PM
Sandblasted and painted the turns.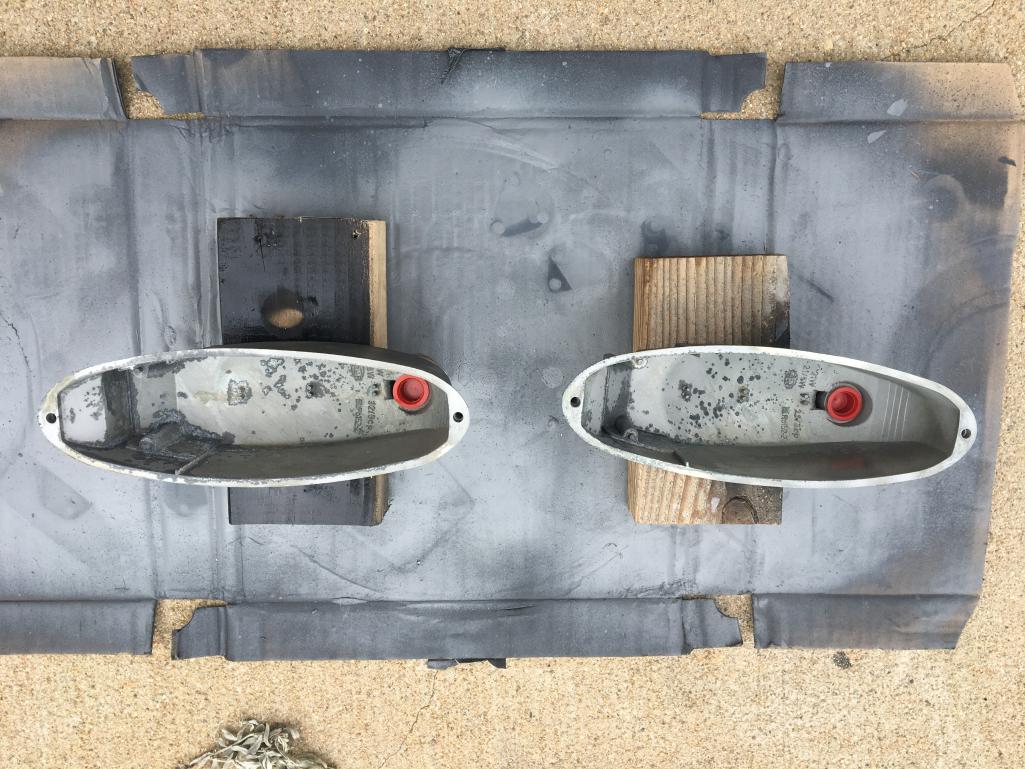
Posted by: Speedo Sep 20 2020, 10:15 PM
Done....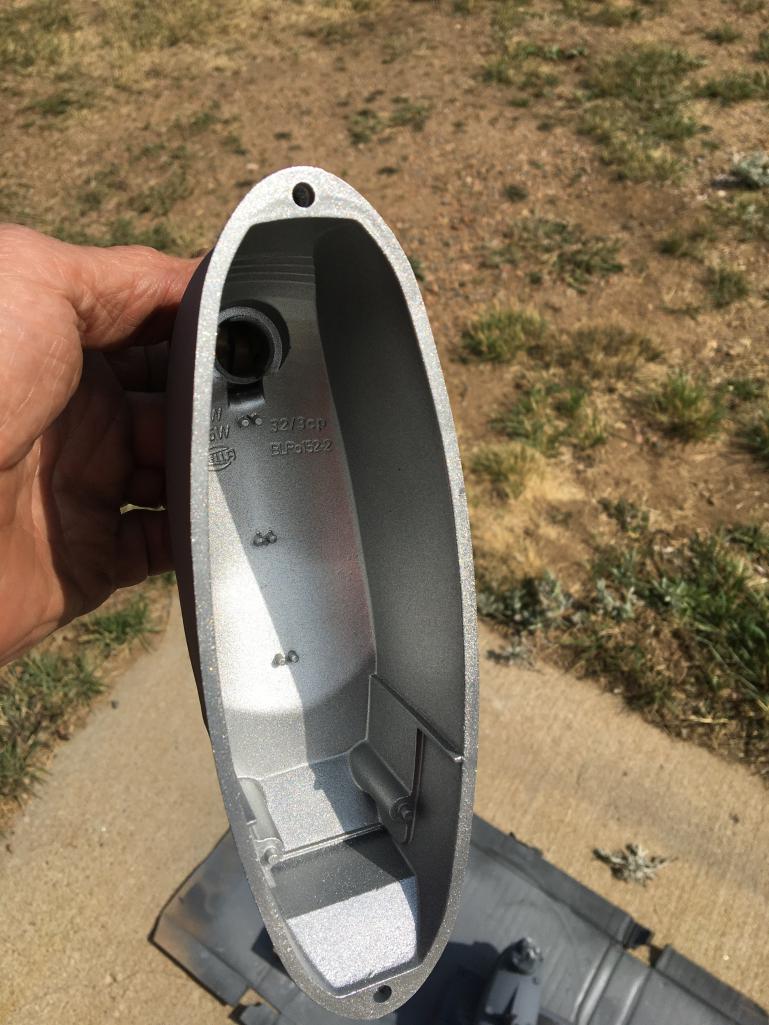
Posted by: Speedo Sep 20 2020, 10:16 PM
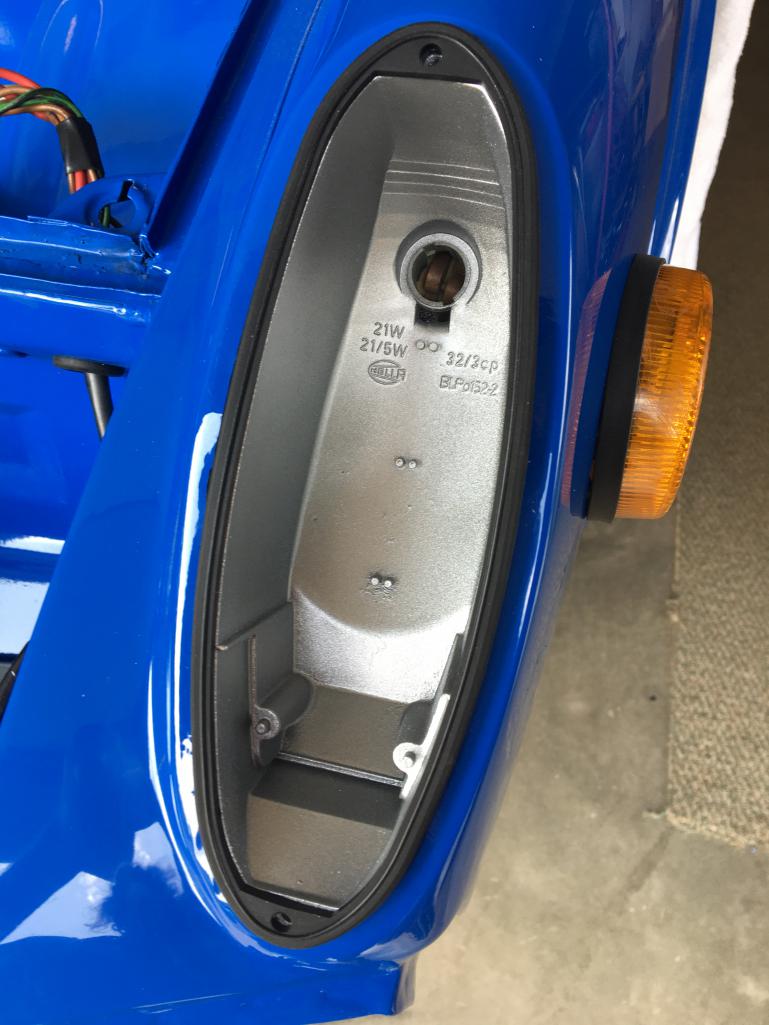
Posted by: Speedo Sep 20 2020, 10:17 PM
Headlights done... 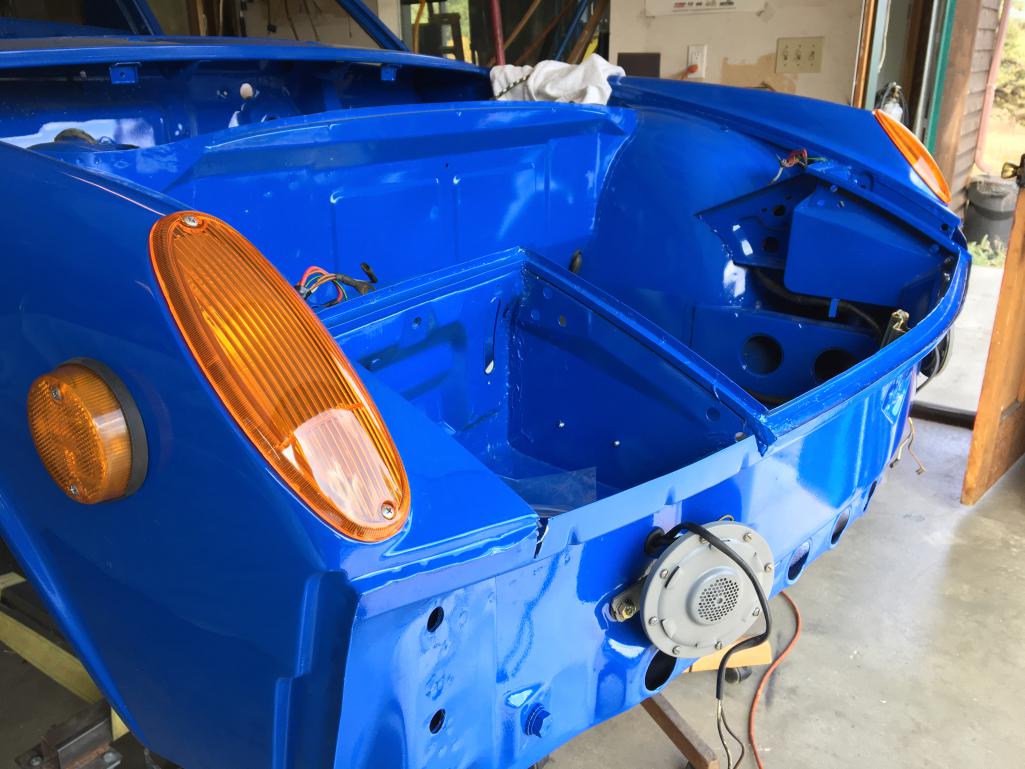
Posted by: Speedo Sep 20 2020, 10:19 PM
Headlights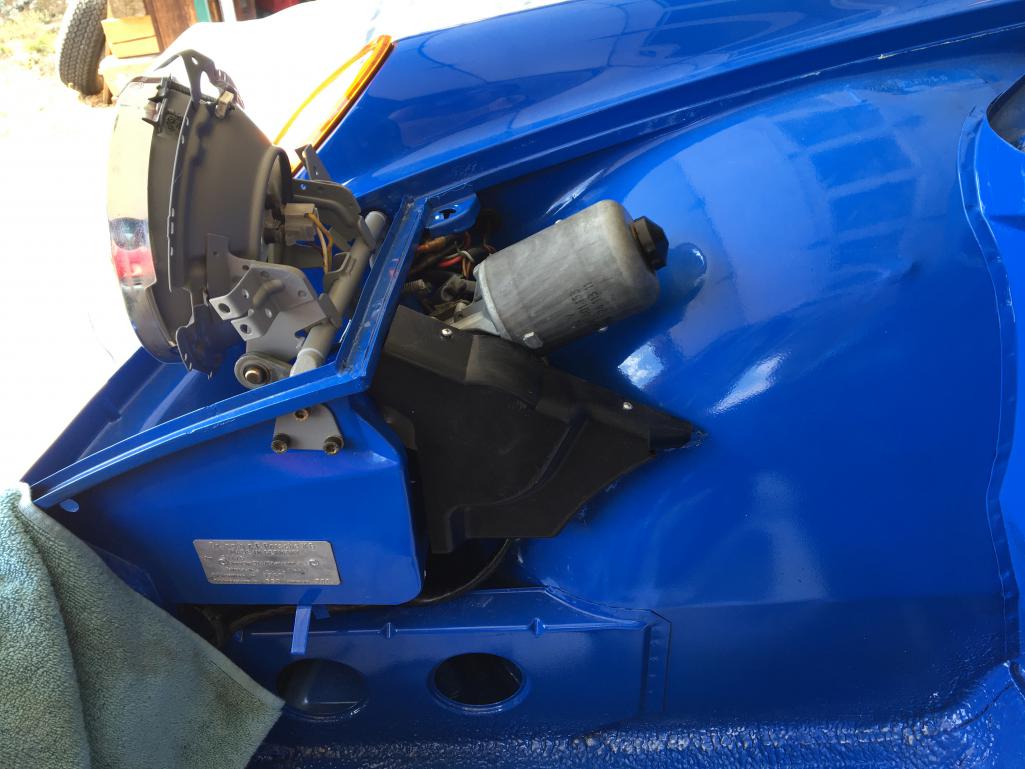
Posted by: sixnotfour Sep 20 2020, 10:20 PM
Bremtech ,,, cool old period calis
Posted by: Speedo Sep 20 2020, 10:20 PM
More...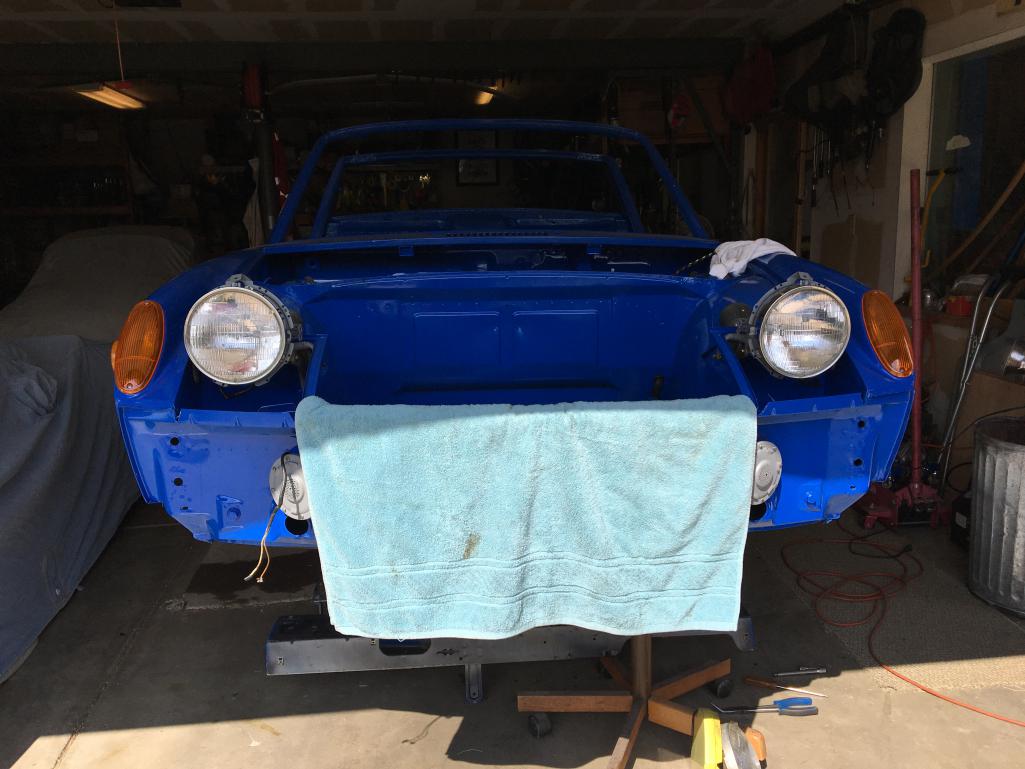
Posted by: Speedo Sep 20 2020, 10:41 PM
More..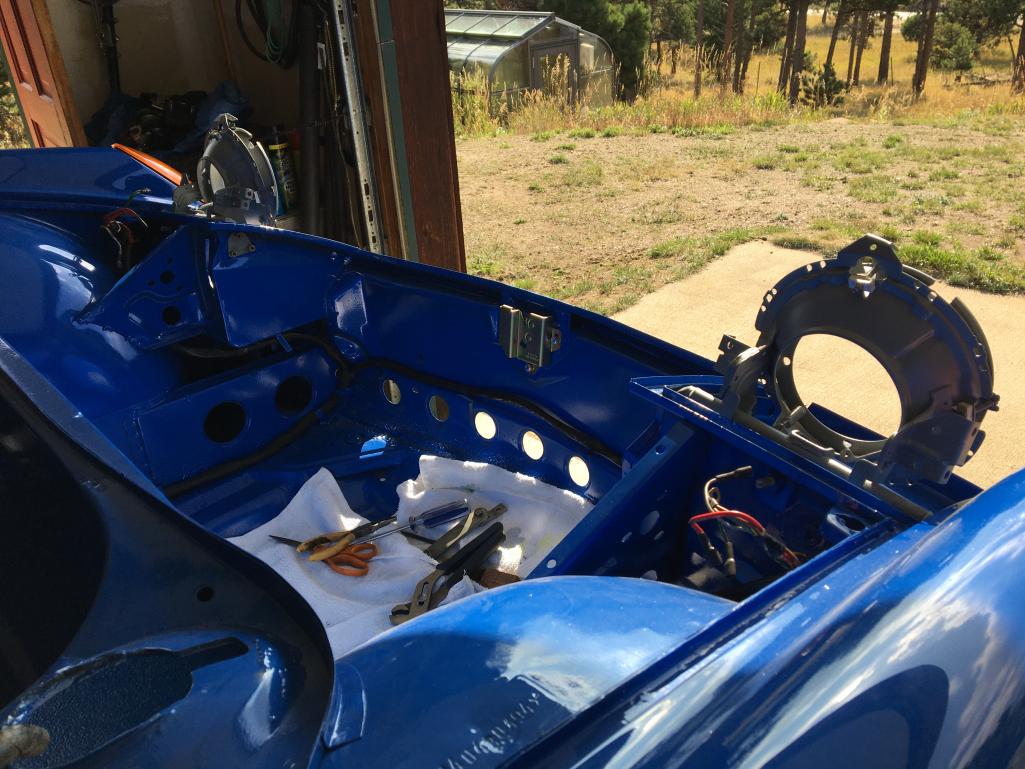
Posted by: porschetub Sep 21 2020, 12:34 AM
Done....
look good but try chrome spray can for better reflection with lamps, great progress ,used to follow your 911 builds on pelican, great work as usual, cheers.
Posted by: Speedo Sep 21 2020, 11:03 AM
So is the gas tank a satin black or semigloss? And the sheath for the front trunk release...polyethylene or nylon? Mine shattered in several places.
Posted by: Speedo Nov 15 2020, 06:59 PM
Behind the scenes working on my son's 1.7 and haven't been able to get much done on my car. We want to get him to paint, and to do that the engine goes back in after his hell hole metal work (wish that was the extent of it ) and need to get him running.
Still working behind the dash on my car. Hardest grommet I have ever installed is the through the panel grommet for the 3 wire heater controls to the blower. Cannot install the blower till I run the wires. Can't run the wires till I have the dash in place. Can't put the dash in place till the top is re-upholstered and new dash installed. Gotta re-basket-weave the face at the same time. Worked on the front of the dash today, finished the caliper re-builds and installed the new fog lenses (thanks Brant!).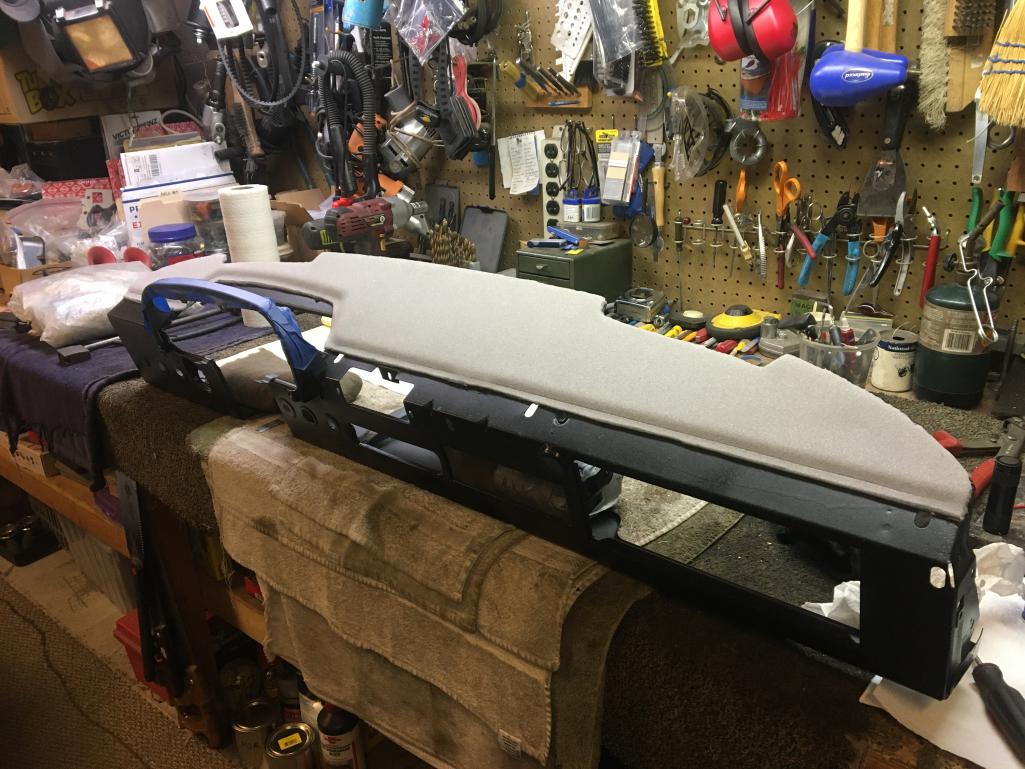
Posted by: Speedo Nov 15 2020, 07:00 PM
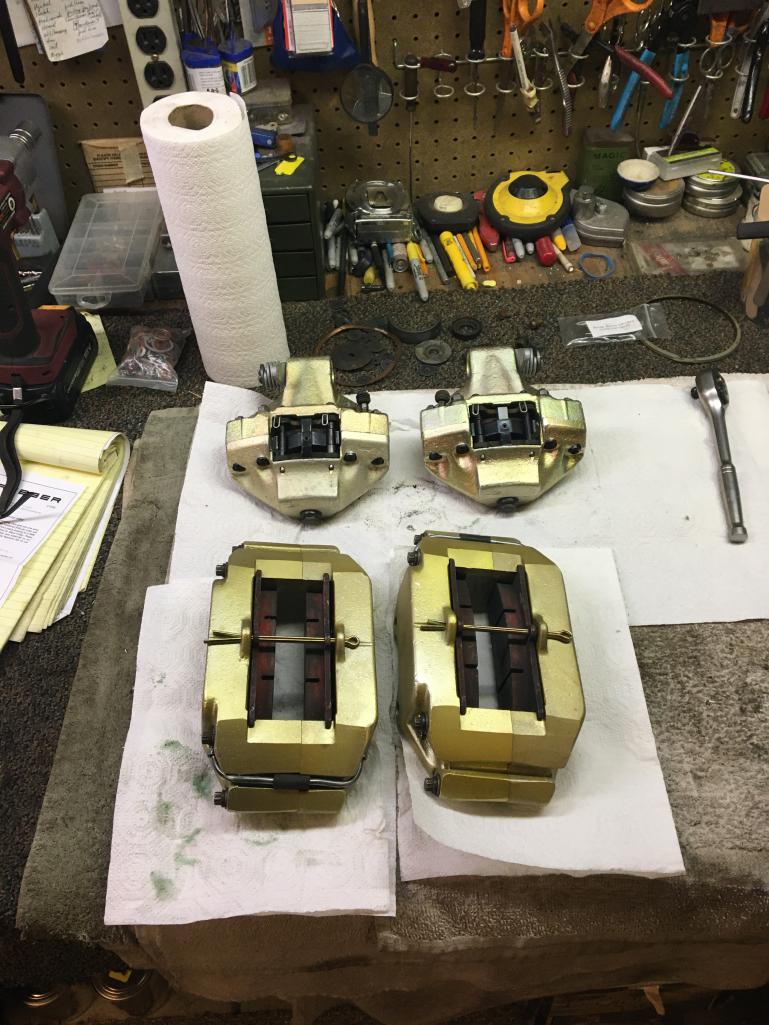
Posted by: Speedo Nov 15 2020, 07:02 PM
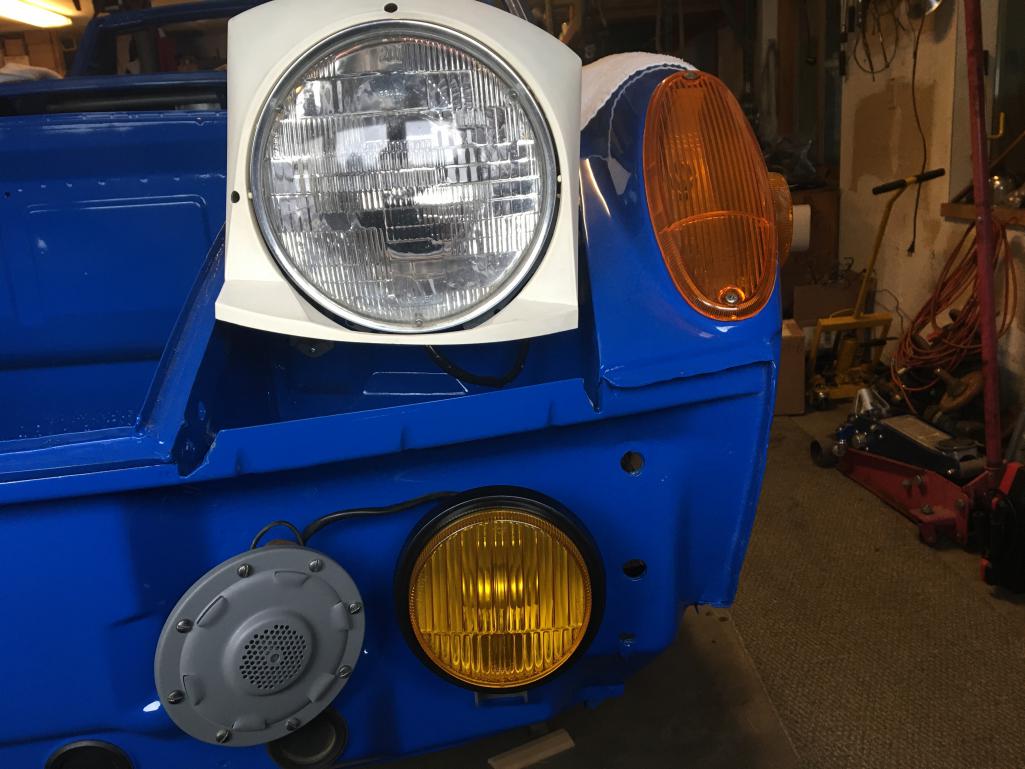
Posted by: altitude411 Nov 15 2020, 07:46 PM
I was going to paint the faded plastic headlight surrounds but was coached to bleach and scotchbrite instead...worked great.
Speedo you are killing it.
Fantastic work ...Your surrounds came out great. Can you give a quick #howIdidit.
Posted by: Speedo Nov 15 2020, 07:47 PM
Will be finishing up the dash and installing this week. When that is done, the instruments go back in and I get to figure out all the wiring. The control for the blower gets installed and the blower goes in. Having trouble finding the seals for the master cylinder lines from the brake fluid reservoir. 914 Rubber doesn't have them, and cannot find a source. Would like to get that box checked. With the dash in place, I guess the steering can be connected. Want to hold off on adding any suspension, although I am tempted as it is all refurnished...concerned that it will just get in the way. Next will be to restore and install the fuel tank and windshield washer reservoir etc. Trying to work my way from the front of the car to the rear...methodically. I keep finding more rubber items that need to be replaced. Feel like I should just cave in and get a 914 Rubber Visa for the points. More pics this week.
Posted by: brant Nov 16 2020, 07:51 AM
Awesome
Posted by: Cairo94507 Nov 16 2020, 01:47 PM
@http://www.914world.com/bbs2/index.php?showuser=7170 did you try Eric Shea at PMB Performance for the master cylinder seals?
Posted by: Speedo Nov 17 2020, 07:24 PM
@http://www.914world.com/bbs2/index.php?showuser=7170 did you try Eric Shea at PMB Performance for the master cylinder seals?
I did check PMB and like other suppliers, they only sell the "grommet/seals" with new MCs. I rebuilt mine, and just need the seals. Looks like PP has them so ordered and we will see.
Posted by: bigkensteele Nov 17 2020, 11:24 PM
@http://www.914world.com/bbs2/index.php?showuser=7170 did you try Eric Shea at PMB Performance for the master cylinder seals?
I did check PMB and like other suppliers, they only sell the "grommet/seals" with new MCs. I rebuilt mine, and just need the seals. Looks like PP has them so ordered and we will see.
I would suggest giving him a call. He is far more passionate about seeing projects come together than adhering strictly to what might seem available on his site.
Posted by: Cairo94507 Nov 18 2020, 08:05 AM
I agree. Eric is a great guy and true lover of our cars.
Posted by: Speedo Nov 18 2020, 10:35 AM
I agree. Eric is a great guy and true lover of our cars.
I agree...he has helped me before.
I did call and spoke to one of his salespeople.
She told me the seals were only available with a MC purchase.
I did source them through PP and they are en-route.
Posted by: Speedo Nov 30 2020, 09:17 PM
Not sure why the dash has intimidated me. Maybe because I can't weld it...anyway finished up the 914Rubber rebuild and replacement top. Looks great.
Posted by: Speedo Nov 30 2020, 09:21 PM
I'm guessing the wiring once tha dash is installed is whats bugging me. PO had all kinds of crazy "back woods" crap wired into the bundle. I selectively removed a lot of the stereo and alarm stuff that looked sketchy.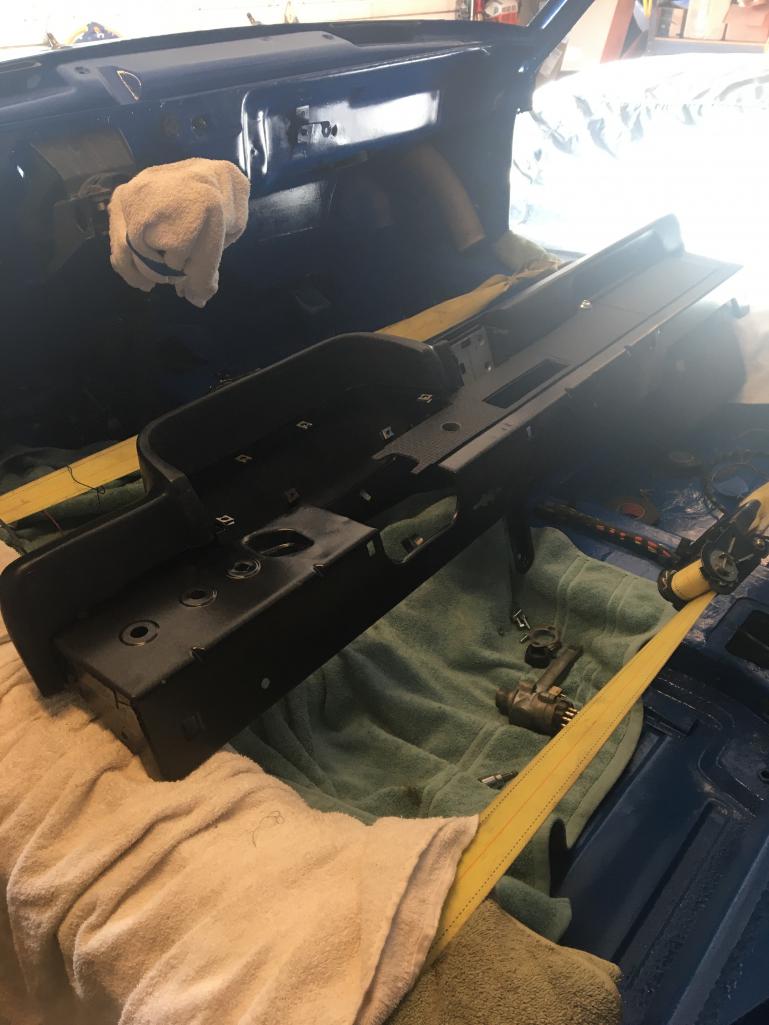
Posted by: Speedo Nov 30 2020, 09:23 PM
Installed....and the fun begins?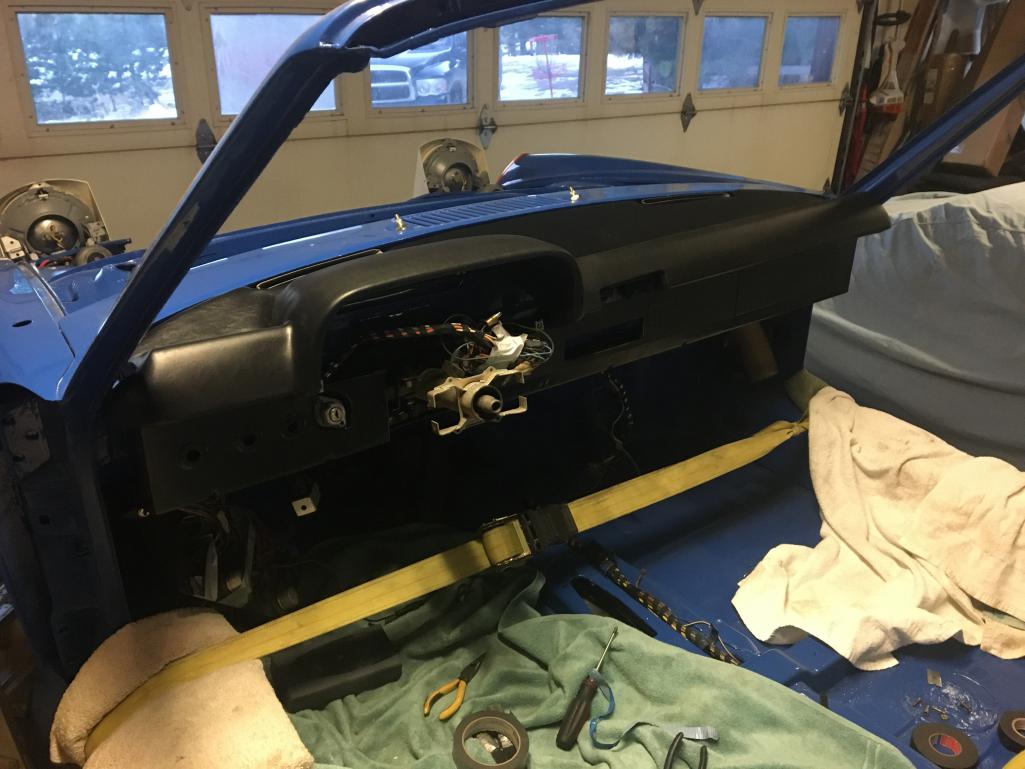
Posted by: Speedo Nov 30 2020, 09:31 PM
I added foglights to the dash. I am going to begin the wiring connections and reduce the unknowns by wiring up the obvious. I emailed Ian Karr (little guilt in advance) as it was his dash cover video that compelled my to go after mine...to see if he has any behind the dash wiring guidance.
Finished up the re-assembly of the calipers...they are all completely rebuilt. Master cylinder is now installed and lines from reservoir connected. The infamous grommets on the top were sourced from PP.
Posted by: Speedo Nov 30 2020, 11:48 PM
Meanwhile the son's 914 engine re-install is completed and Houston, we have ignition.
This is now a rust-free 72 1.7 apparently soon to receive a stroked 2.2 six. I just want my lift back.
Posted by: Root_Werks Dec 1 2020, 09:44 AM
I always like coming to check on your progress, very inspiring. Makes me realize just how much my 914-6 needs.
Posted by: Speedo Dec 6 2020, 11:27 AM
So while I have your un-divided attention ...
Cleaning up the PO's wiring experiments, and I am left with these "jumpers" to the fuse panel.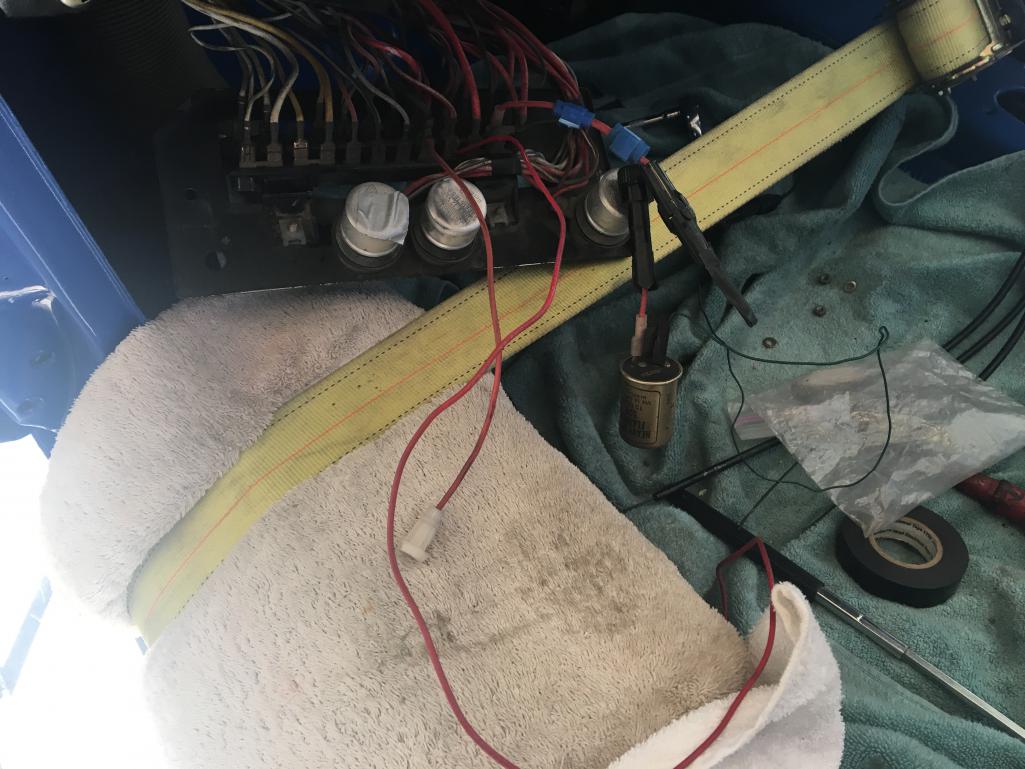
Posted by: Speedo Dec 6 2020, 11:28 AM
Looks like they are all hot, pulling 12volts for additional gauges? I am to presume I can just delete them?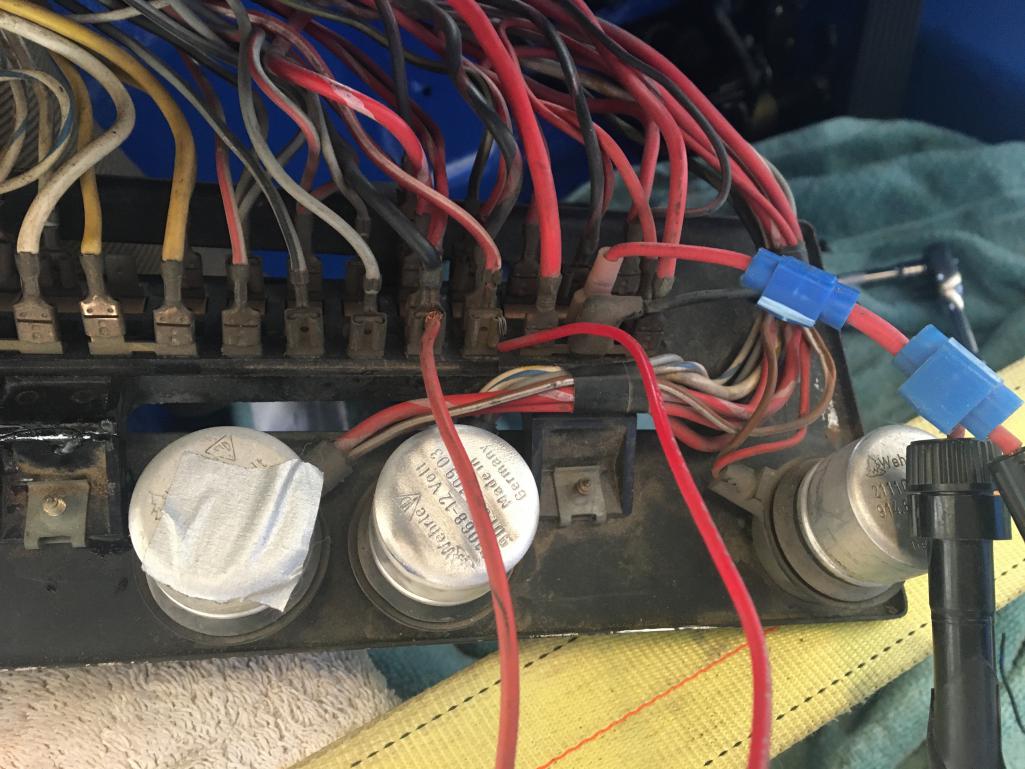
Posted by: Cairo94507 Dec 6 2020, 01:21 PM
I don't see any reason not to get rid of those. I think getting rid of all the previous decades worth of BS shade-tree wiring is half the problem in sorting electrical issues. Get the wiring all back to factory and then add whatever you need for your needs correctly.
Posted by: Speedo Dec 6 2020, 05:59 PM
Ok! Extra wiring goes bye bye. What the heck would this flasher relay have been used for? PO did actually have a tire trailer he towed to autoxs...could this have been for his trailer lights? Completely understandable to me. If I saw a 914 towing any kind of trailer. I would expect ALL the lights on both car and trailer to be flashing and probably not in harmony.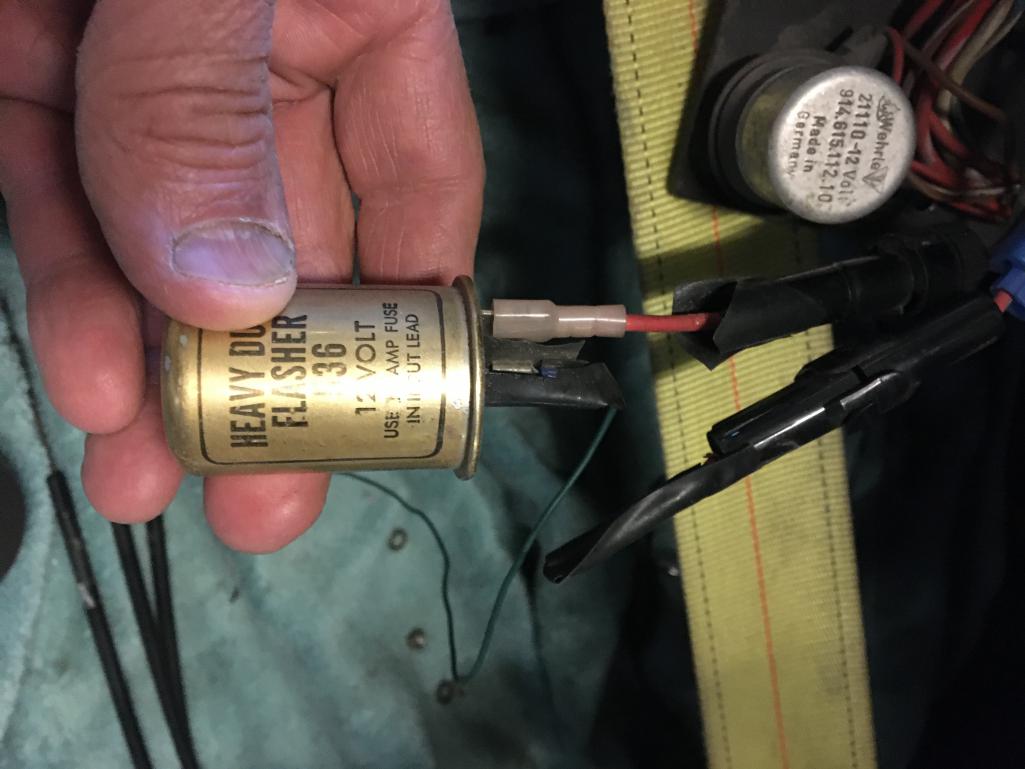
Posted by: Speedo Dec 6 2020, 06:12 PM
Turns out my rear defrost switch was taken by trolls...went missing. I have learned that it is actually the same switch as the foglight switch. I have an extra light switch which may or may not work in its place. So I may need one or the other...and if you have one or the other extra laying around please PM me. Once I get that sorted...it will be the climate control that goes in next wiring and then the blower unit...and then the instruments. Then cockpit wiring. Probably not going to install the gas tank and wiper reservoir until I can check all the electrics...so I don't risk having to pull things out again.
This is my first 914 rodeo, so feel free to interject if I am addressing things out of order.
Feel free to post if you see a silly mistake. If you see a REALLY big problem with what I am doing...no need to go public, send me a PM.
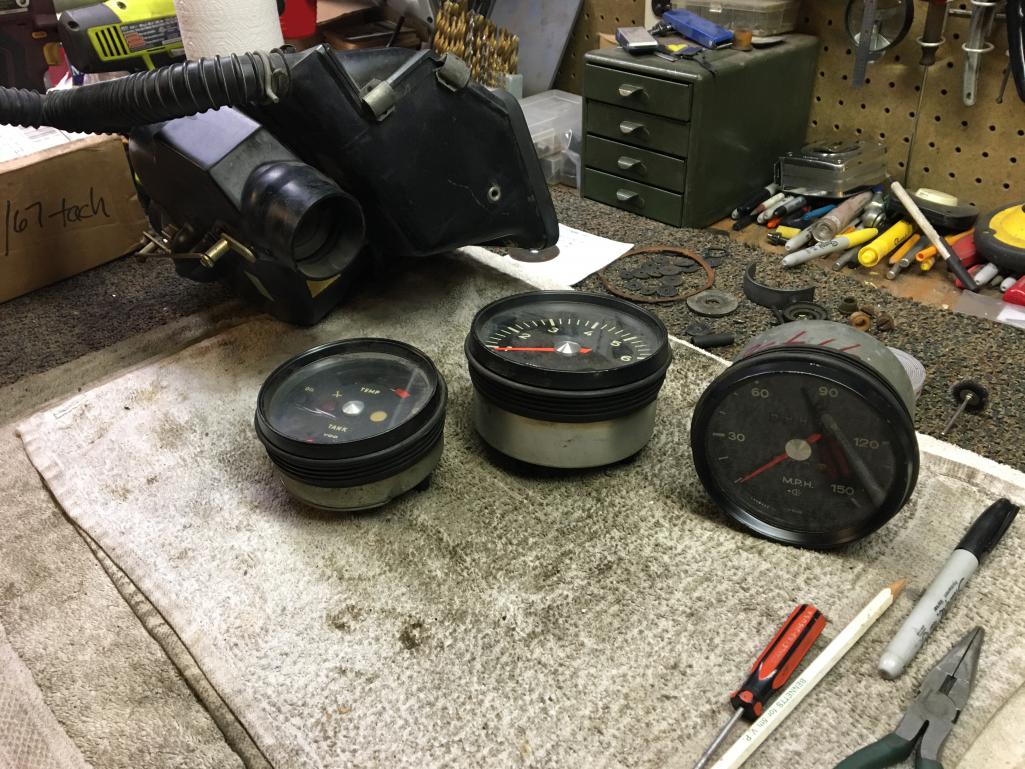
Posted by: Speedo Dec 13 2020, 10:05 PM
So I need some help deciphering this red lead off the back of my ignition console.
Large red wire entering console, and it is confirmed as being connected to my fuse panel at #11 and the console at #30. The small red wire comes off the console at "R" and has a female spade. Tell me what this connects to please. 
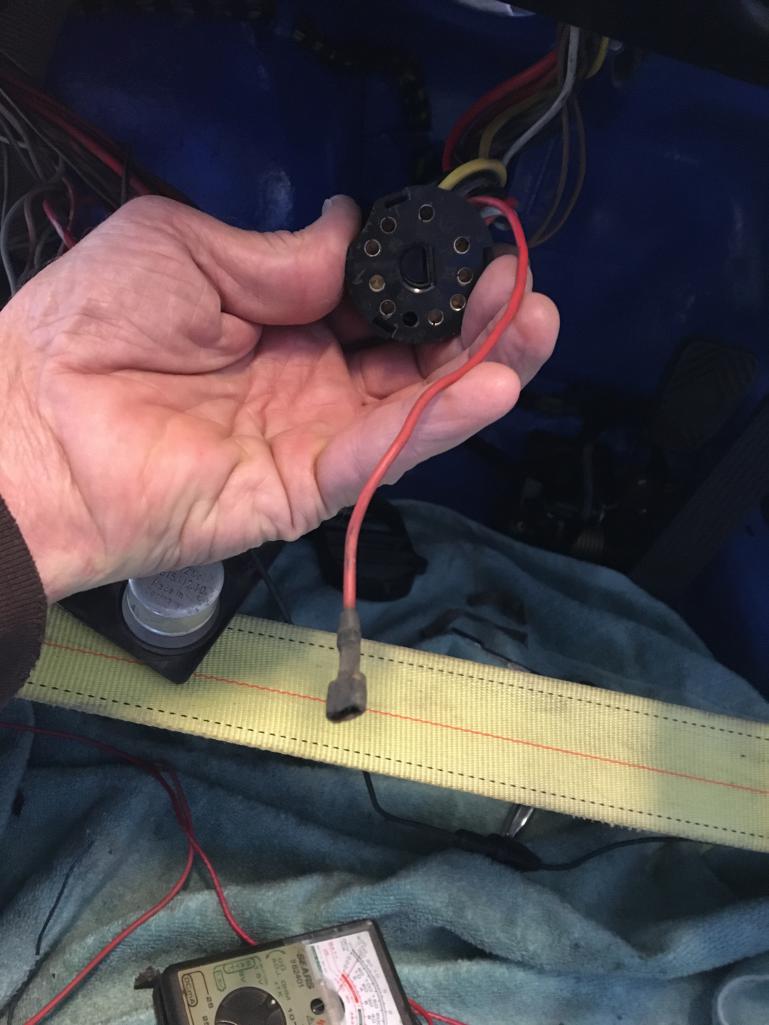
Attached thumbnail(s)
Posted by: Speedo Dec 21 2020, 04:07 PM
Had some success with the "rat's nest" of wires in the dash. Getting to be really good at this point in reading schematics and chasing down wire colors. We'll see how successful I am when the system gets to the point of being hooked up to a battery. Instruments in... 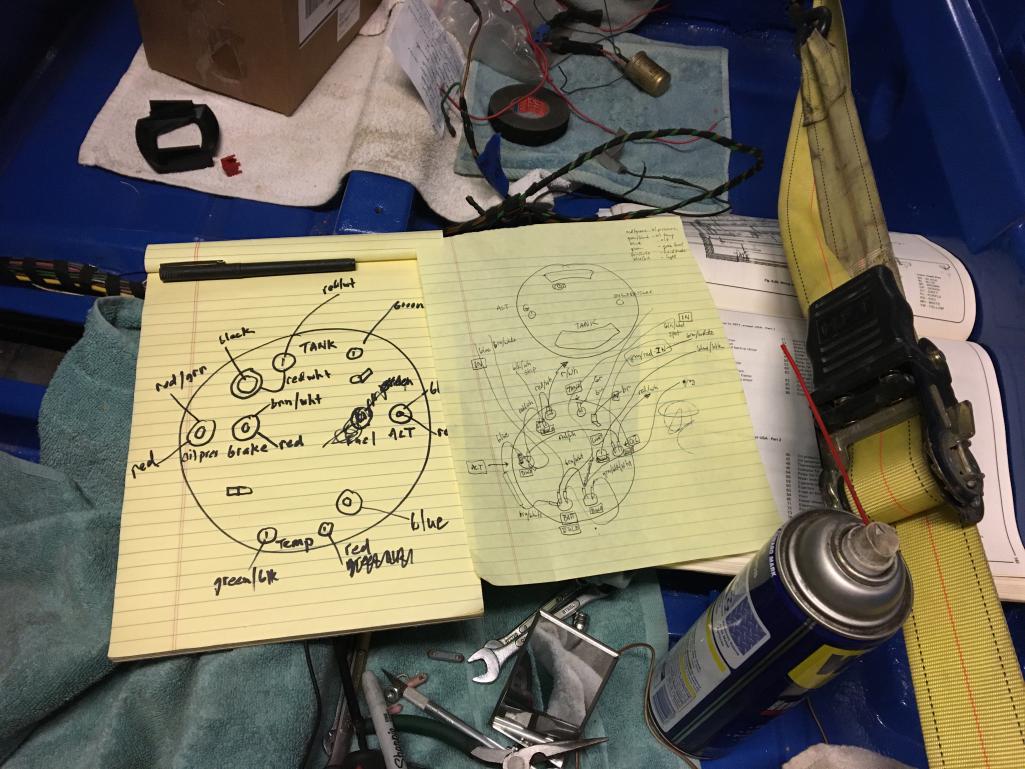
Posted by: Speedo Dec 21 2020, 04:08 PM
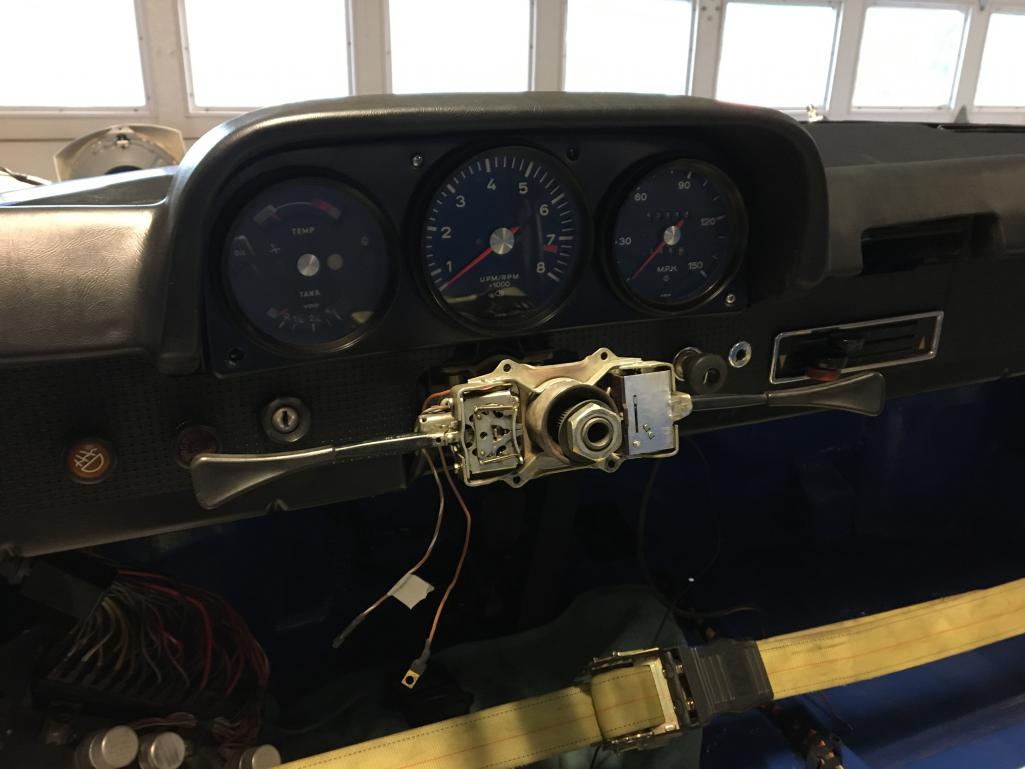
Posted by: Speedo Dec 21 2020, 04:09 PM

Posted by: Cairo94507 Dec 21 2020, 06:08 PM
Big step getting the instruments back in the car and sorting all of the previous owner(s) shade tree add ons. Now it will be a nail biter when you put juice to it for the first time. I would leave the battery ground just snug enough so it works but so if you need to pop it off quickly, you can. Of course fire extinguisher and an extra set of eyes help too.
Posted by: brant Dec 22 2020, 08:53 AM
Nice work!!!
Posted by: jaredmcginness Dec 22 2020, 01:25 PM
Restoring and installing the gauges in my car was such a big moment for me. All part of the big picture. Keep it up!
Posted by: Speedo Dec 22 2020, 08:07 PM
The steering wheel will be a stock size, but a surprise. My son and I are working with a wood-working friend on an alternative to the plastic rim. It will still incorporate the batwing horn center. Nuff said...
Posted by: altitude411 Dec 22 2020, 08:13 PM
The steering wheel will be a stock size, but a surprise. My son and I are working with a wood-working friend on an alternative to the plastic rim. It will still incorporate the batwing horn center. Nuff said...
Posted by: Speedo Feb 15 2021, 07:16 PM
So I have been working on getting my son's car ready for paint, to paint, and then back from paint. It is now back, but will need to be re-assembled and then taken back to the painter for touch up and some PDR for dings...long story. While getting ready for paint, we realized he was missing a front valence. At that point...wondering where my front valence was, I realized that I too was missing a front valence. This did not surprise me as the car was flogged for years as an autox dog. Brant thought he had a couple extra valences and after looking, determined that he had two...one nice and one needing rehab. The son grabbed the nice one and I have been working on the "rehab dude"...sort of fitting I guess. It had some dents, and needed some welding...both of which I am capable. I didn't grab any before pics, but here is what we have achieved. First was a bit of wire brush to remove the old paint, to see what we were working with. A good part of the challenge was rebuilding the protrusions covering the front of the torsion bar attach points. They were missing some steel...likely from years of parking to close to, or on top of the concrete parking barriers at the front of mall parking slots. It involved welding enough steel to be able to grind down and re-shape what was missing. Here is stripped, welded and welds massaged.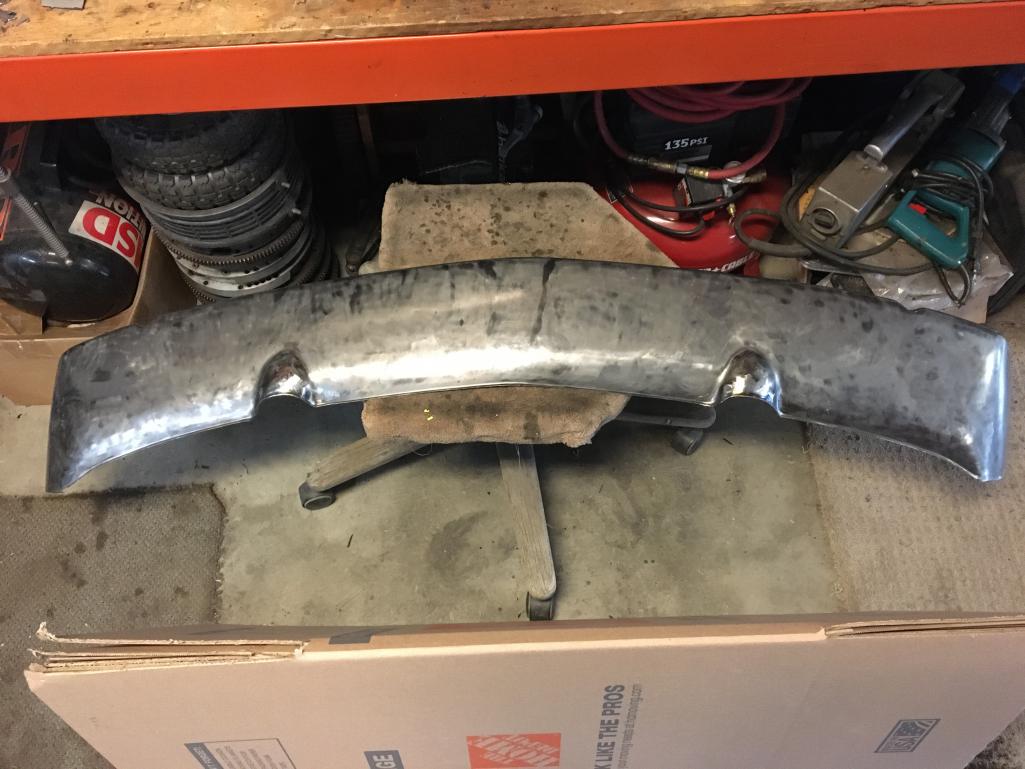
Posted by: bigkensteele Feb 15 2021, 07:24 PM
The steering wheel will be a stock size, but a surprise. My son and I are working with a wood-working friend on an alternative to the plastic rim. It will still incorporate the batwing horn center. Nuff said...
This is what I want to do to match the shift know that Zack made. Can't wait to see how yours turns out!
Posted by: Speedo Feb 15 2021, 07:25 PM
Next step is to identify areas that still require massaging. Metal work by "feel" has it's limitations. I added some high build primer which will allow me to sand and identify high and low spots. I can work the steel more...or use filler where it makes sense. This area on the front of the car is low to the ground and will receive a lot of abuse. I am going to use a Wurth stone guard product which has a texture to it, so some of the imperfections will not be visible anyway. And the finish will likely be a satin or flat black...coupled with being low to the ground, so I'm not too worried about minor stuff. Re-engineered t-bar front covers/humps.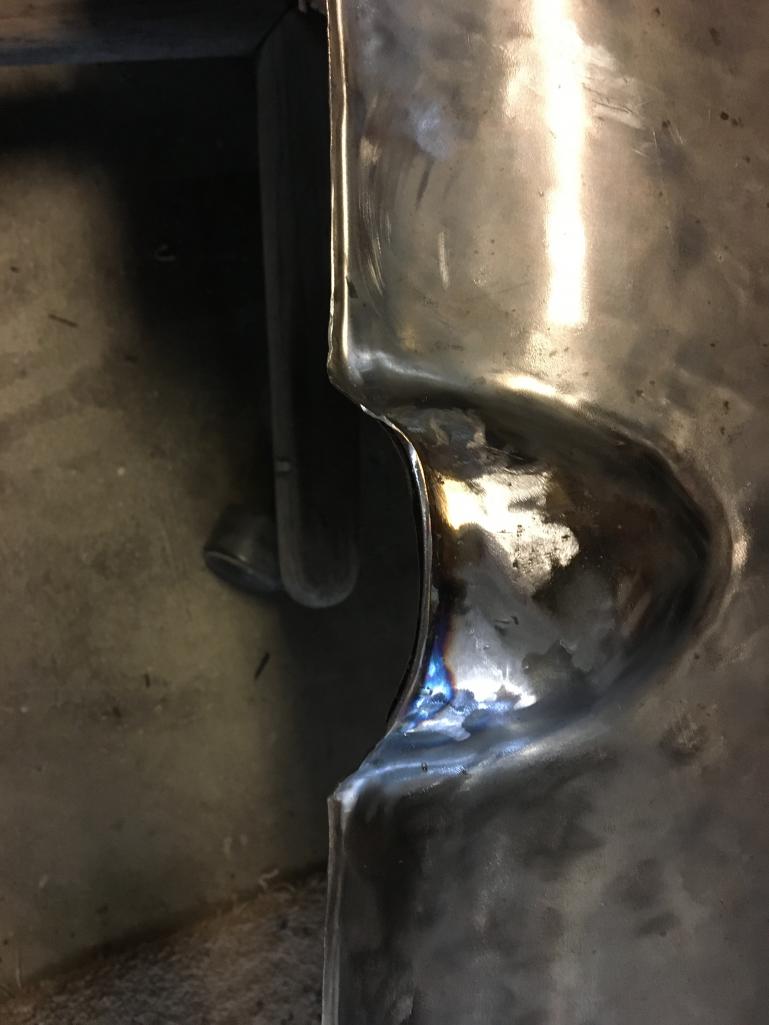
Posted by: Speedo Feb 15 2021, 07:26 PM
And the other side...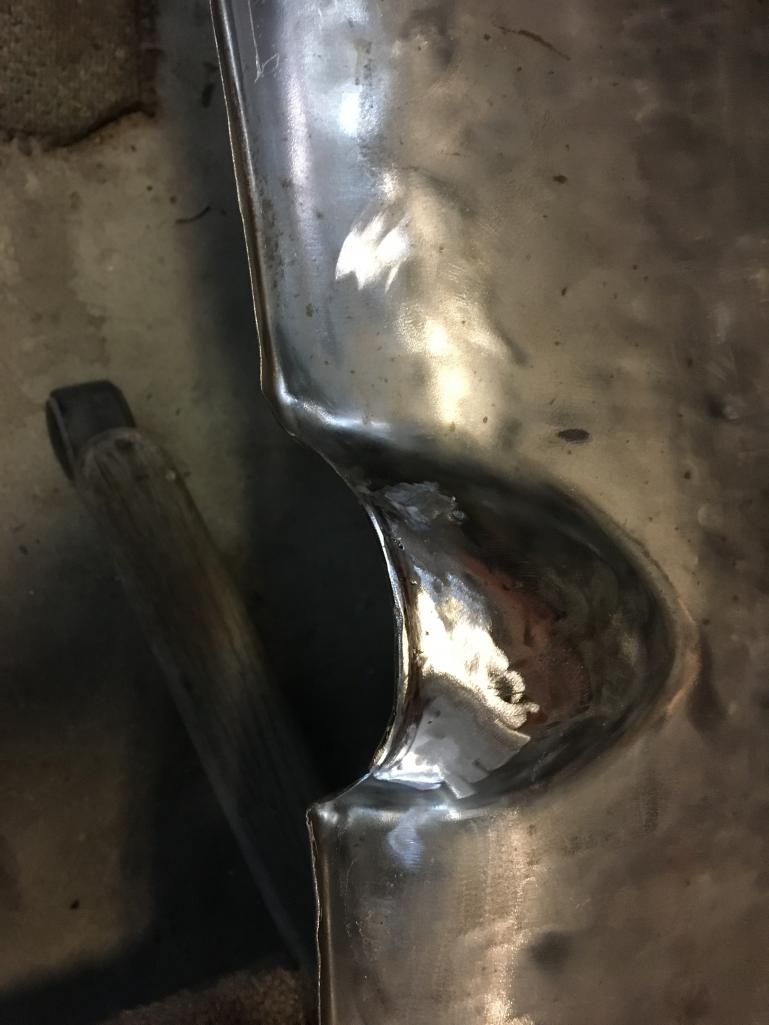
Posted by: Speedo Feb 15 2021, 07:30 PM
High build prep... you can see the planishing hammer strikes.
Posted by: Speedo Feb 15 2021, 07:32 PM
And with high build primer coats...Much better although I still have some work to do. 
Posted by: Speedo Feb 20 2021, 07:09 PM
Even with Wurth stone guard, the imperfections are going to be obvious so I want to create a better canvas. I feel like a dermatologist...marked the high and low areas for more attention.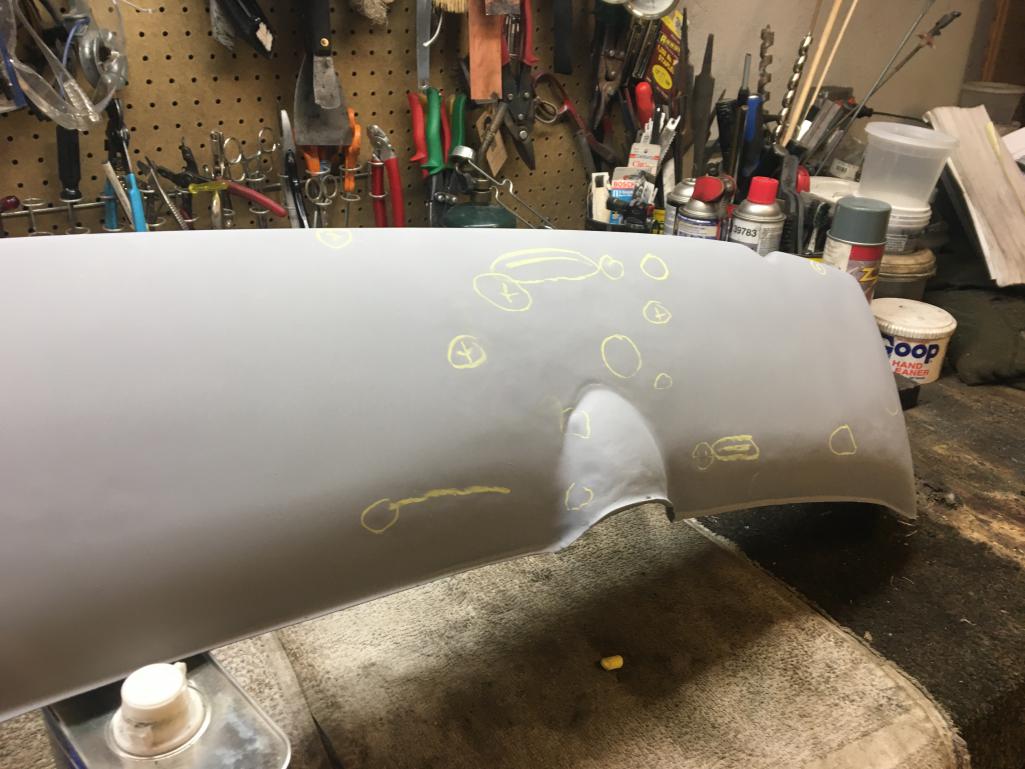
Posted by: Speedo Feb 20 2021, 07:10 PM
And...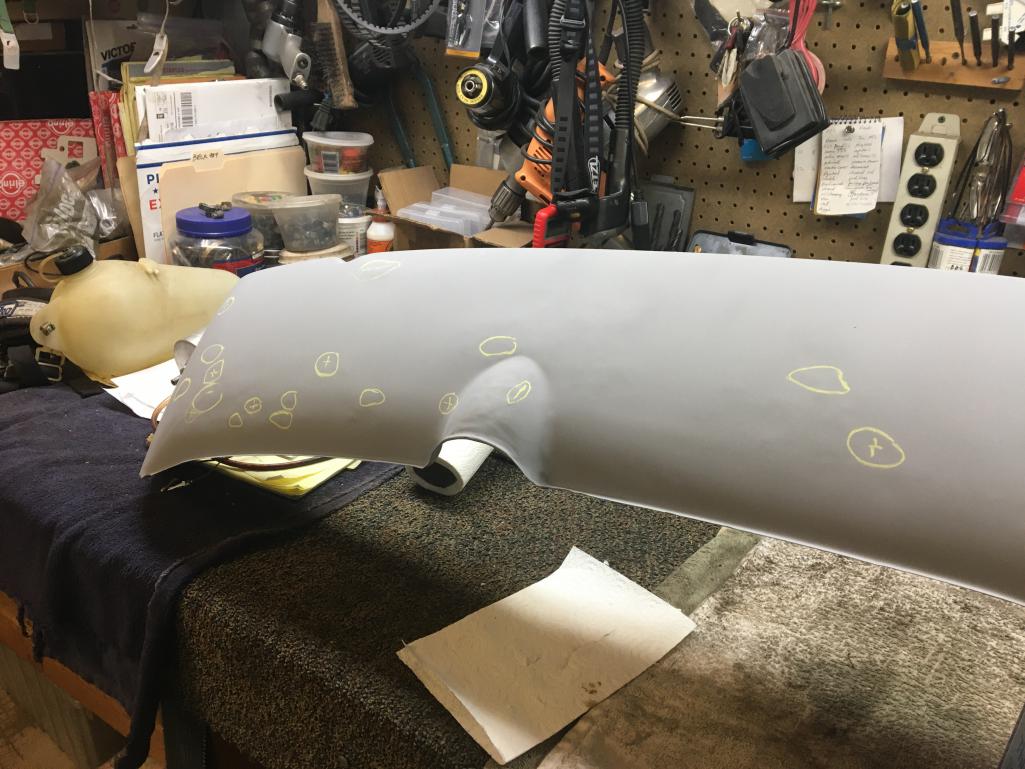
Posted by: Speedo Feb 20 2021, 07:12 PM
At this point, I am going to use some filler for the remaining irregularities. This is about as far as I can go...with hammer and dolly.
Attached thumbnail(s)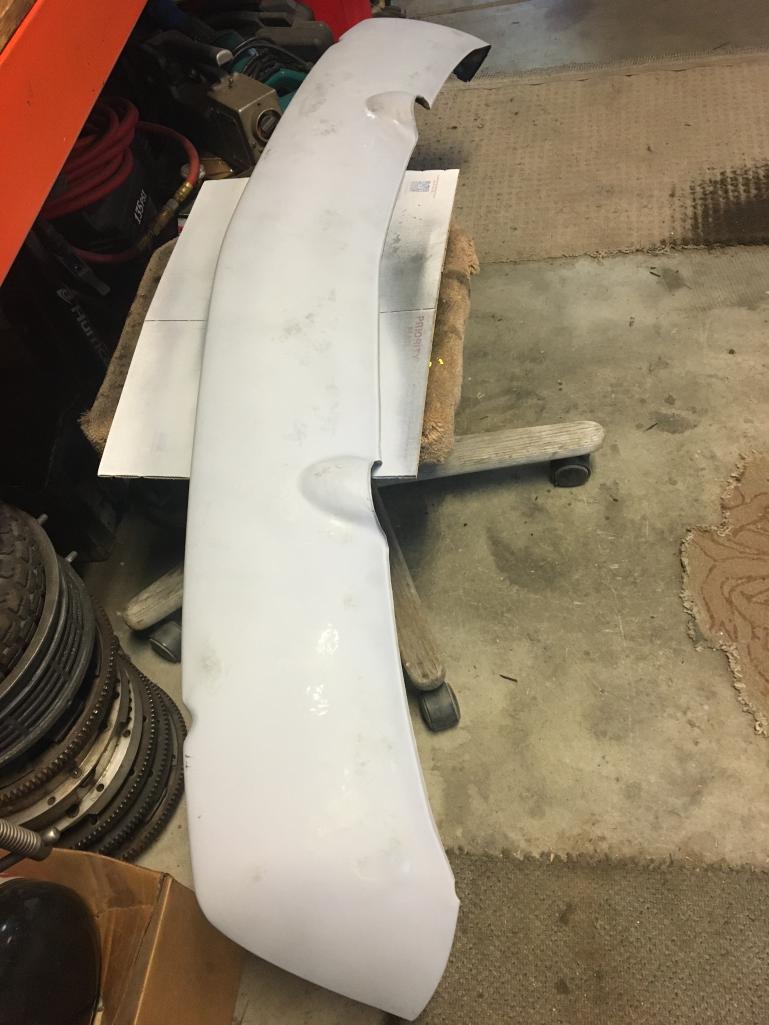
Posted by: Speedo Feb 20 2021, 07:19 PM
Head lights...and all the related dash wiring still has me a bit stressed. I need to finish up the under bonnet stuff...washer reservoir, lines, pump etc. I have everything except for the teats that hold the pump to the firewall, and fresh clear lines. Once those and the reservoir are in place I will install the steering rack. Holding off on the fuel tank till I can test some of my electrics. Speaking of which...(Thanks Ian), I watched his headlight resto youtube and saw how he tested the headlight motors. I tested both of mine which are all installed and they both work as expected (hoped)...yesss!
Posted by: Luke M Feb 20 2021, 07:53 PM
Looking good Lars...
Don't let the wiring get to you. You got it almost done then move onto something else.
Posted by: Speedo Mar 28 2021, 05:16 PM
Gas tank got pulled off the shelf and dis-assembled this weekend. Tank looked new inside, fuel sender seemed to be working correctly. Got rid of a few scratches, primed and painted. New gaskets and back together. Going back into the car as soon as I get a new filter screen, the outlet gaskets and the correct fuel line to connect the tank to my new stainless lines. BTW what is the verdict on the length of the new fuel lines...keep them short and access them and the clamps from underneath the car through the opening in the suspension cavity, or make them long enough so you can connect them from above and such that they will coil under the tank as you lower it into position?
Next, I don't remember my tank having a charcoal canister mounted on top of it...although the parts diagram tells me it did? I also looked at my son's 72 1.7 and he has the whole setup from the charcoal canister through the drivers inner fender along the underside of the door sill and into the engine compartment. My six is missing the holes in the chassis for all those "vapor lines" to the engine compartment. Is the system on the 6 different? In my PET diagrams I only see two configurations for the charcoal "re-circulation" systems...and the one similar to my tank shows the system exactly like my son's 1.7 but I don't remember removing all that stuff. I'm hoping my 6 eliminates some of that so please make my day.
Pics coming shortly...
Posted by: mepstein Mar 28 2021, 05:37 PM
There's a discussion thread about early sixes and charcoal canisters. IIRC, the early 70's didn't have one, later 70-72 did.
http://www.914world.com/bbs2/index.php?showtopic=317791
Posted by: Speedo Mar 29 2021, 07:29 PM
So it looks like I dodged a bullet. My inner drivers fender only has the hole for the antenna.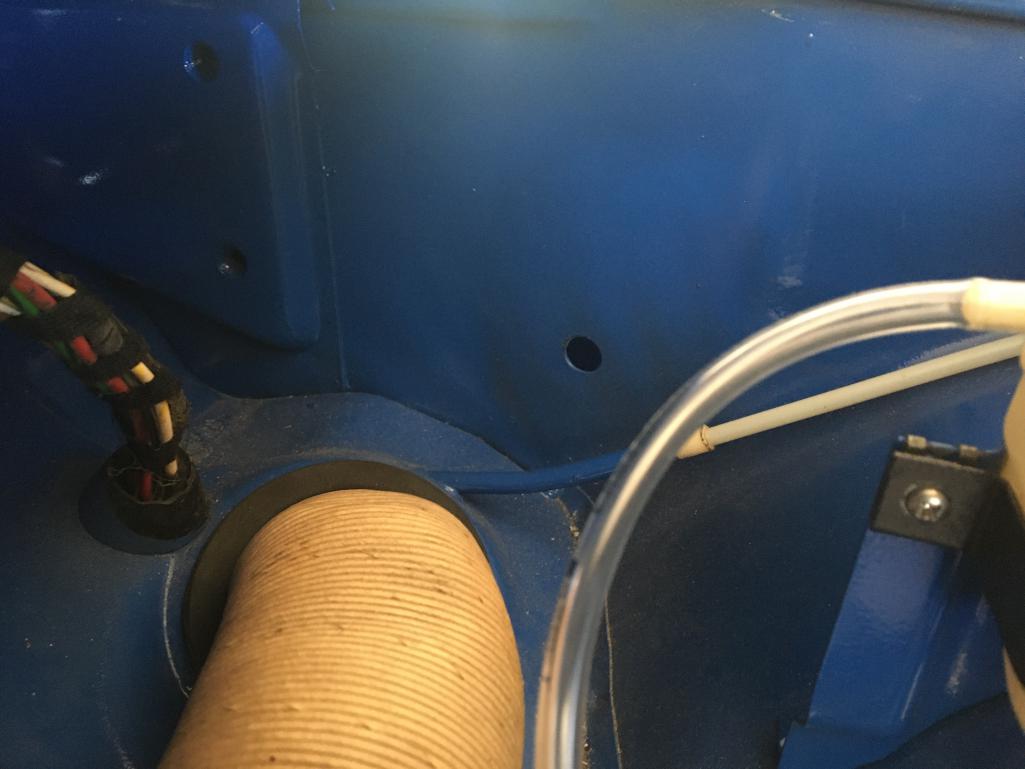
Posted by: Speedo Mar 29 2021, 07:33 PM
That means my car never had the charcoal canister and the entire evaporative system.
So when I get my antenna installed and fuel line from 914 Rubber to connect to the bottom of the tank and the new stainless lines...it gets installed. My tank wasn't in bad shape, but it is now better.
Posted by: Speedo Mar 29 2021, 07:34 PM
Some cosmetic surgery...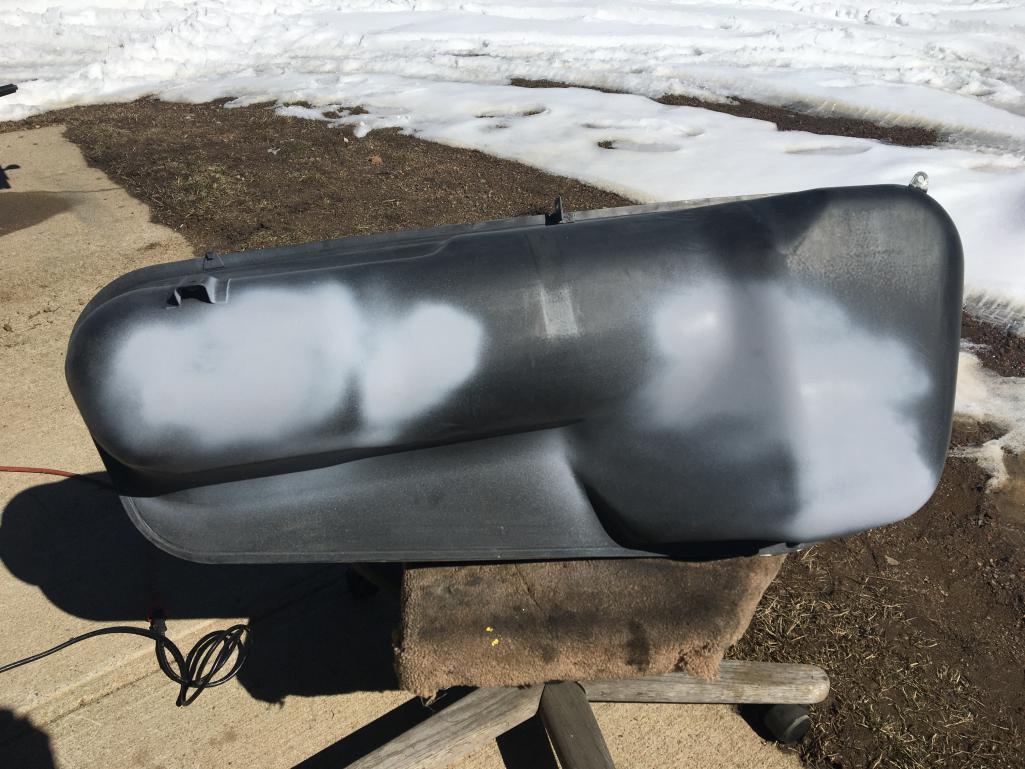
Posted by: Speedo Mar 29 2021, 07:36 PM
Looking a bit better. Thanks to Luke for all my stupid questions on paint and finishes and holes to look for...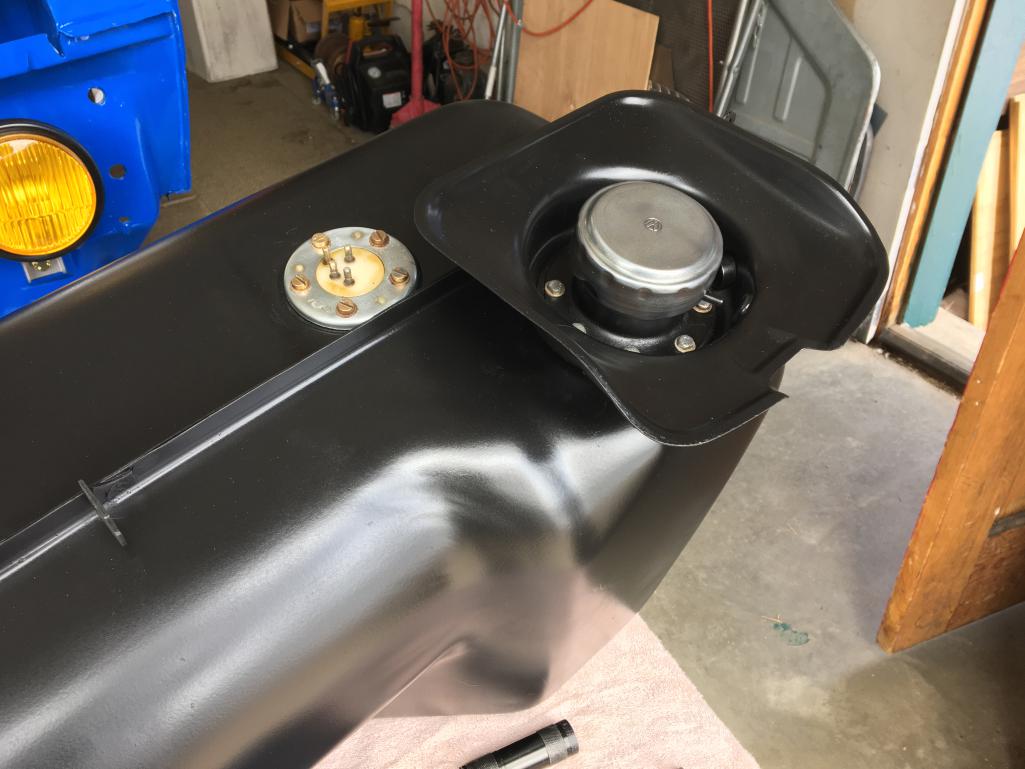
Posted by: Luke M Mar 29 2021, 08:01 PM
Looks good Lars. Looks like no evap for you then.
Glad to help..
Posted by: Speedo Apr 19 2021, 04:34 PM
Almost ready to install the gas tank. New fuel lines, screen and clamps. I purposely am using high pressure line vs the cloth woven rubber low pressure lines. But I have a question...when we installed the gas tank in my son's 1.7, the access hole made installing and clamping the fuel lines difficult, and the line ended up with a pinch (which we had to remedy) making a tight turn from the tank fittings to the stainless new fuel lines. I have heard that a way to avaoid that hassle is to install longer fuel lines that will coil under the tank when installed. I measured the length needed and it looks like 30-32 inches would allow me to comfortably install the lines first on the tunnel fuel lines (from above), then with the tank supported, bring those lines up and install on the tank (easy access), and then sit the tank in place with the lines coiling up underneath. This sounds like the way to go. And in the event I need to un-install the tank, I just lift it out with the lines not needing to be disconnected through the access hole. Thoughts...suggestions?
Posted by: krazykonrad Apr 19 2021, 05:44 PM
What paint did you use for the tank? I've been trying to figure out which finish is factory correct.
Thanks,
Konrad
Posted by: Speedo Apr 19 2021, 06:57 PM
What paint did you use for the tank? I've been trying to figure out which finish is factory correct.
Thanks,
Konrad
Pretty sure I went with flat black...based on the advise I got here.
Posted by: Speedo Apr 19 2021, 07:06 PM
As I definitely don't like to get overly aggressive and install parts that will impede my ability to install other parts without un-installing the parts I shouldn't have installed...
I am trying to get everything ready to install the gas tank for good. Once the gas tank is in place...nothing else is accessible. I don't plan on having a radio in the car, but the antenna will be installed and the cable will be routed to where a radio "might" be in the future. So I have the antenna cleaned up and ready to install, but I don't want it in the way of other things...hood, windshield, wiper blade etc. Does the cable disconnect from the antenna itself? I need to get the cable installed...but want to hold off on the antenna.
It doesn't look like it disconnects here... 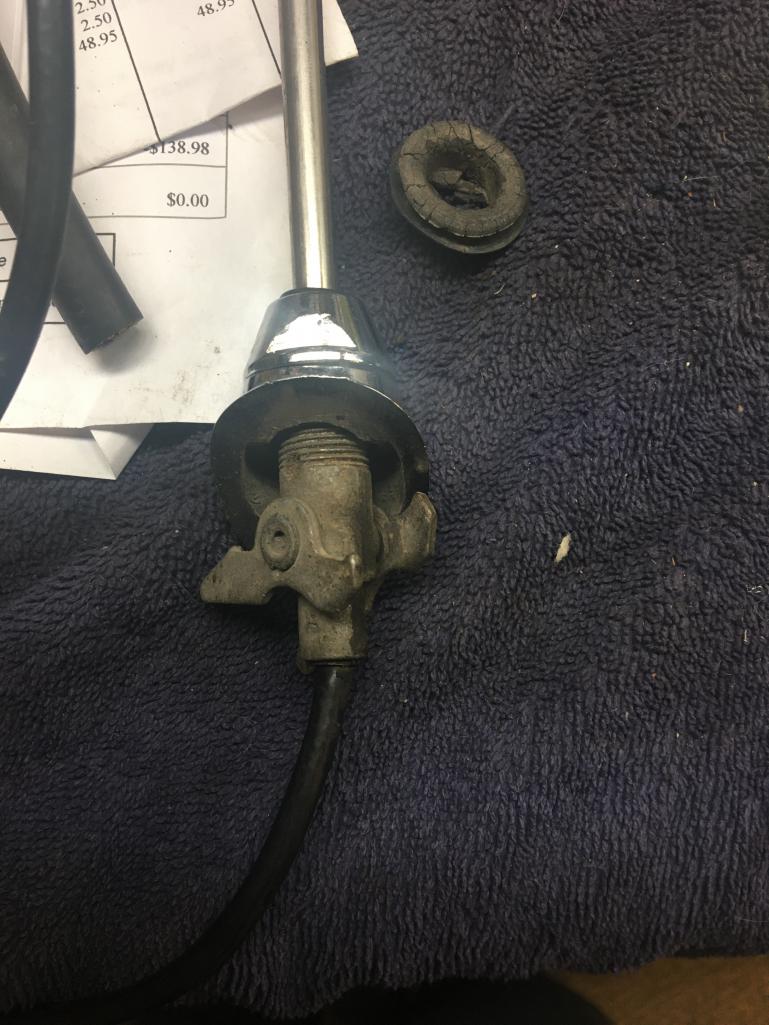
Posted by: Speedo Apr 19 2021, 07:19 PM
Next is the steering rack which (now that I have the firewall bushing...thanks Bruce) will go in shortly. Cleaned and serviced with a freshly powdercoated crossmember.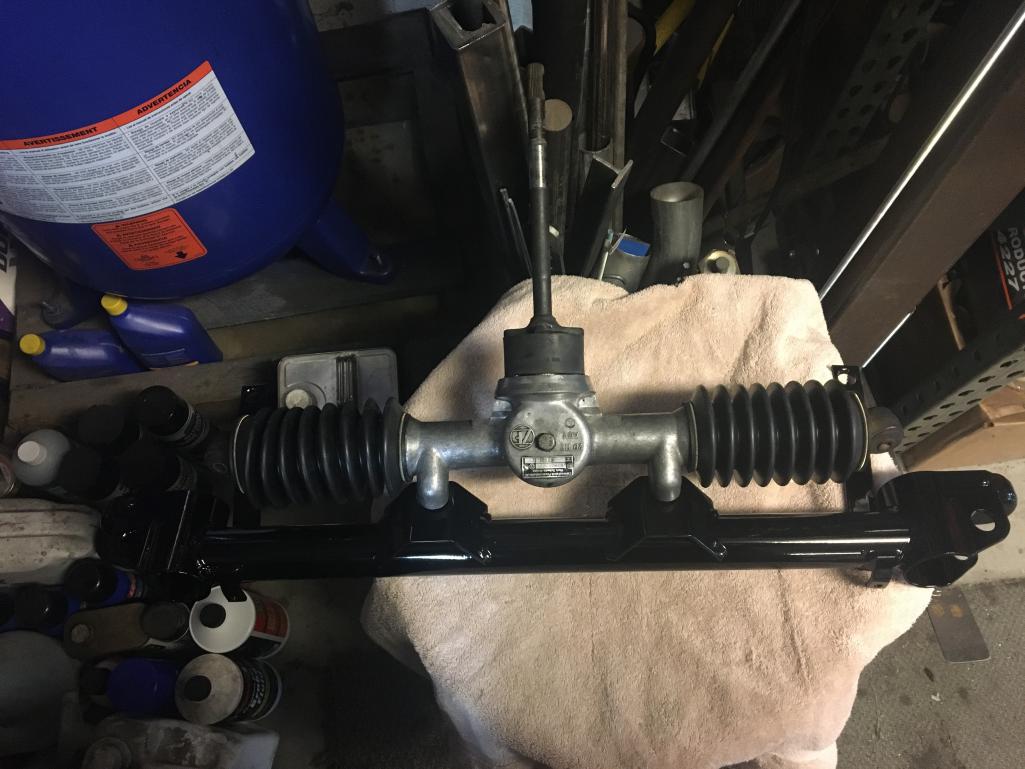
Posted by: Speedo Apr 19 2021, 07:22 PM
Most if not all of the dirty work in here has been done. Let me know if you see something out of sort or incorrect so I can fix it.
Posted by: Speedo Apr 19 2021, 07:23 PM
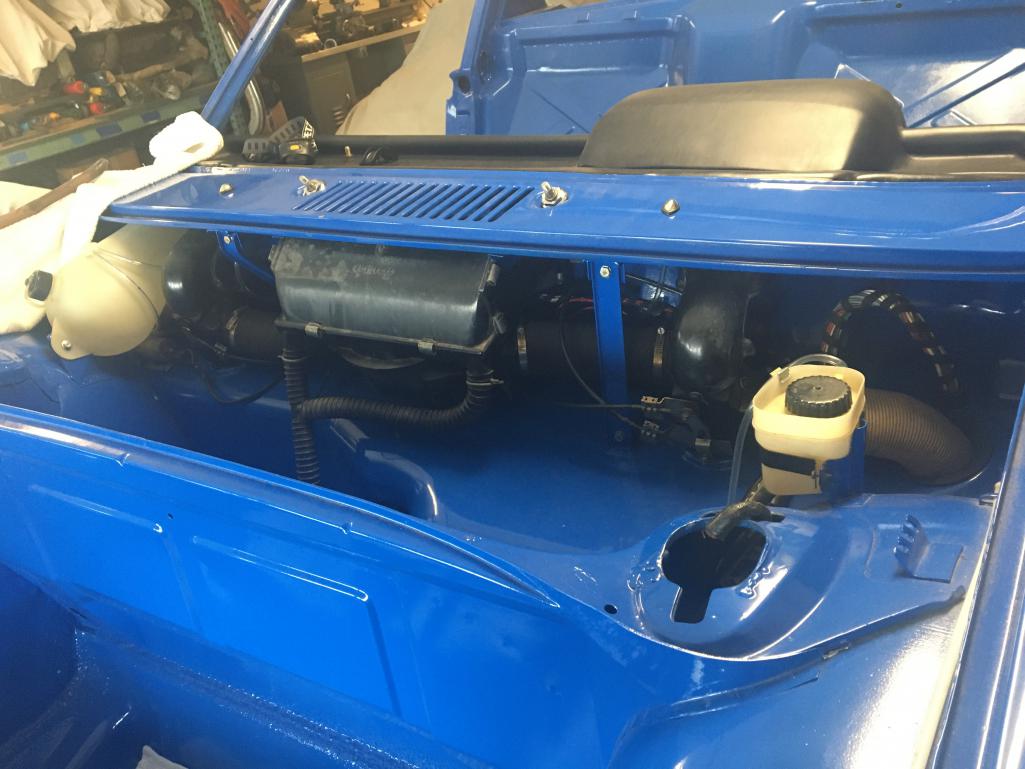
Posted by: Speedo Apr 19 2021, 07:25 PM
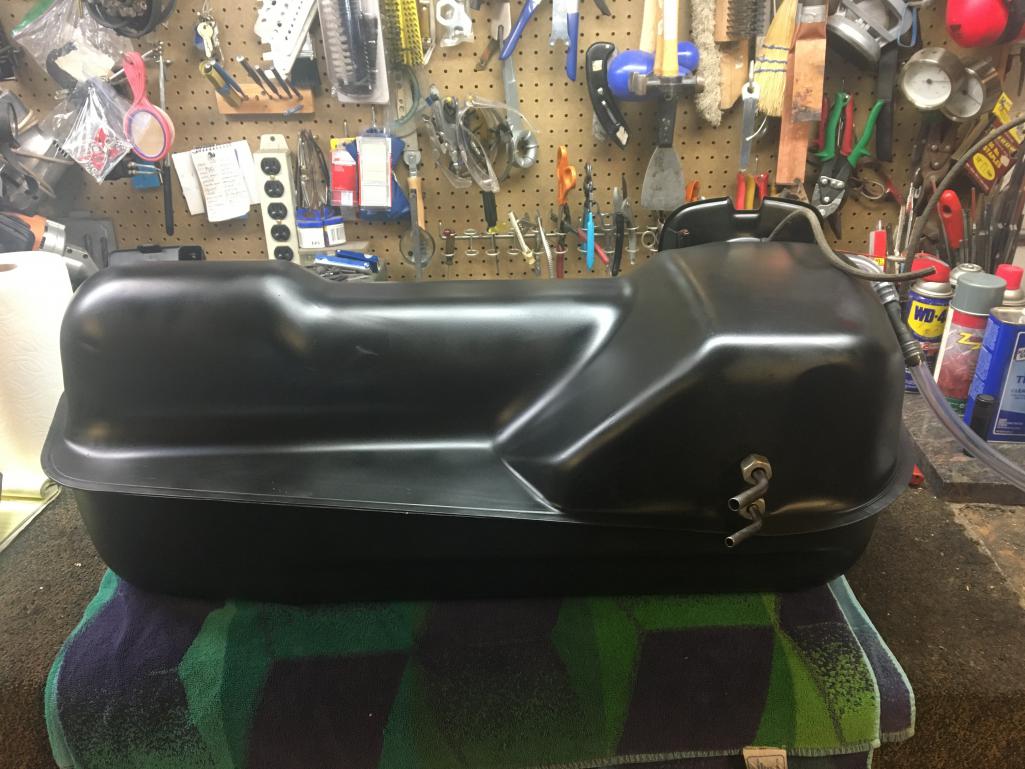
Posted by: Speedo Apr 19 2021, 07:26 PM
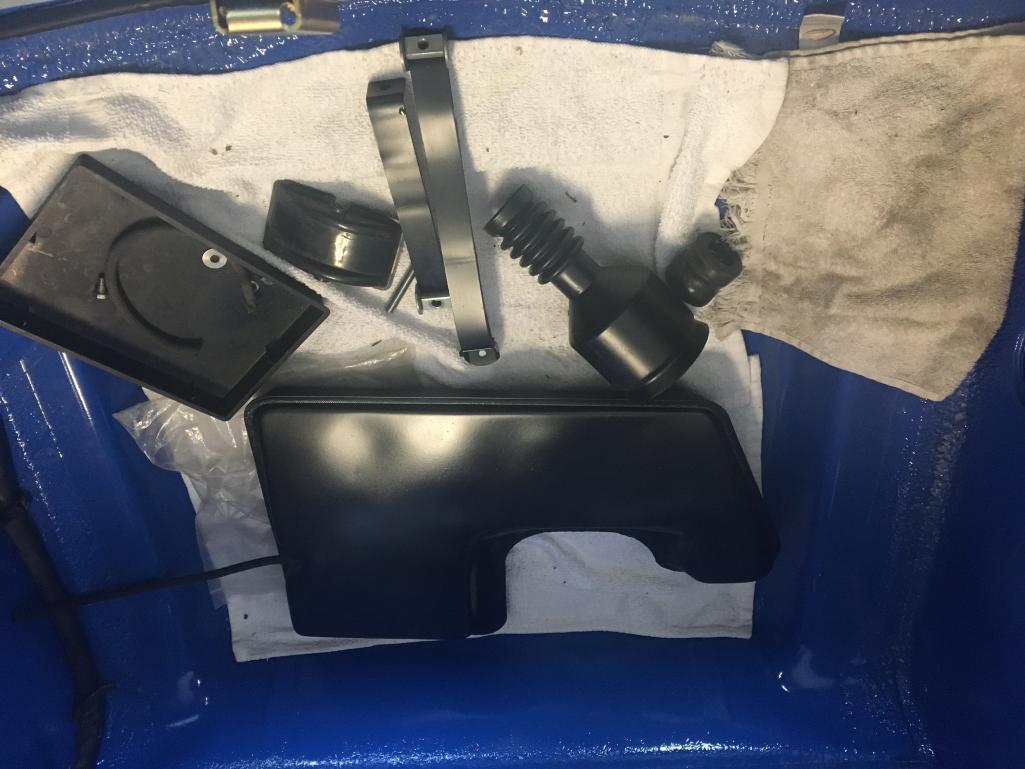
Posted by: Speedo Apr 19 2021, 07:28 PM
Once the crossmember and steering rack are installed, new turbo tie rods are waiting.
Ready to be done with the front of the car and move to the cockpit mechanicals.
Posted by: Root_Werks Apr 19 2021, 08:49 PM
One of the fun parts about putting a 914 back together is all the nice new clean parts. So much nicer than rusty, greasy take apart.
Posted by: Luke M Apr 20 2021, 05:40 AM
Most if not all of the dirty work in here has been done. Let me know if you see something out of sort or incorrect so I can fix it.
Looks good Lars. A few things. I take your putting in the rack prior to tank install.
Looks like you are missing the felt pads for under the tank. Most replace them with rubber or neoprene pads. I posted a pic of my 6 for the location.
Also is your steering rack cross member correct? Hard to tell if it's the early/6 style. Post a pic of the t-bar area. It should be flat not round on the end.
Don't forget the two rubber side pieces for the tank. They get wedged between the tank and chassis.
Attached image(s)
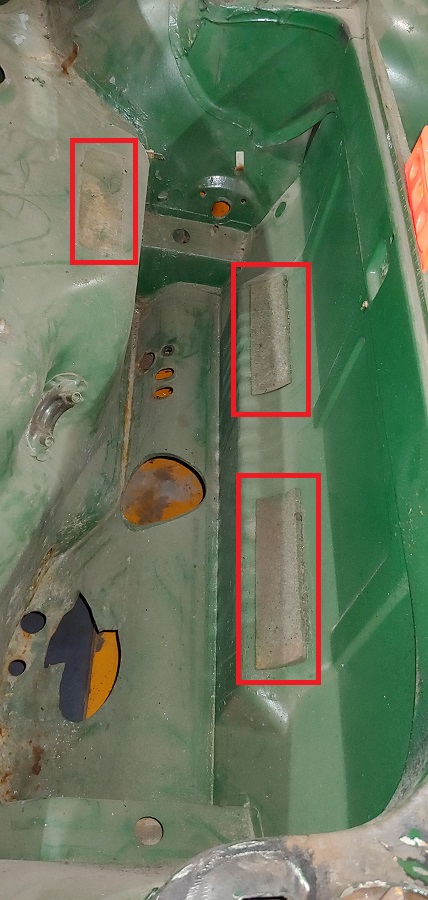
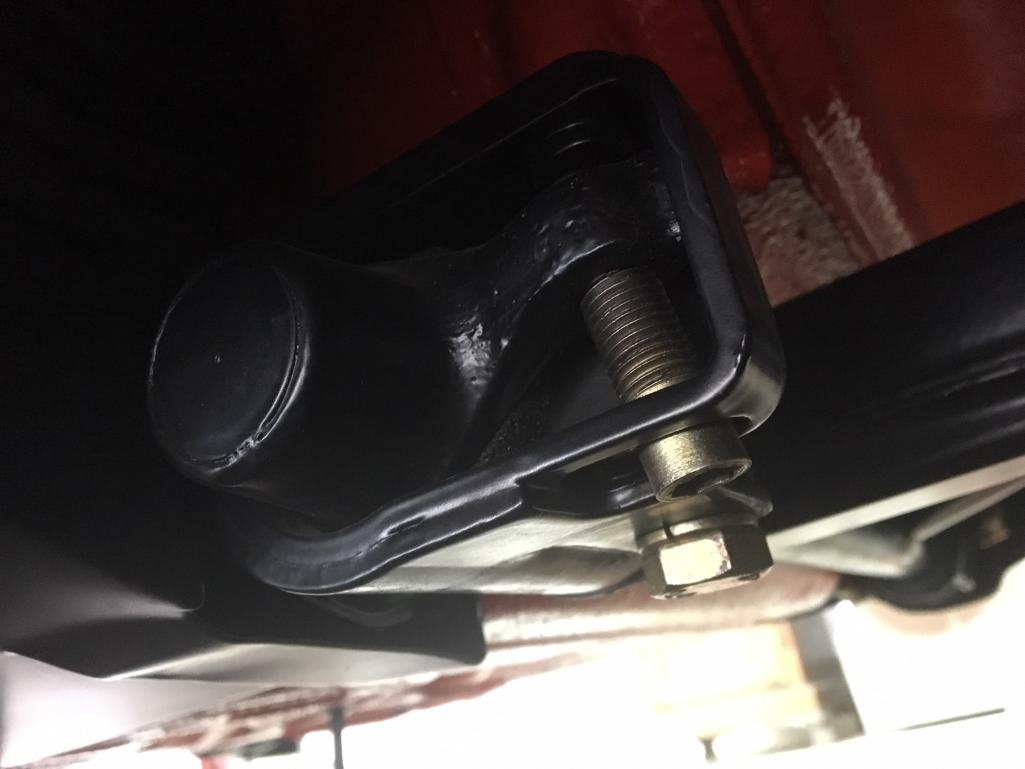
Posted by: ClayPerrine Apr 20 2021, 09:32 AM
So it looks like I dodged a bullet. My inner drivers fender only has the hole for the antenna.
The charcoal canister on a 70 six was only installed on cars originally sold in California. Our 70 six has one, and all the holes for the lines. The lines had been removed by the DAPO's DAPO (Not Rusty). I have a set of lines in my vast plethora of 914 parts, and I will be cleaning them up and installing them.
Clay
Posted by: Speedo Apr 20 2021, 09:34 AM
Most if not all of the dirty work in here has been done. Let me know if you see something out of sort or incorrect so I can fix it.
Looks good Lars. A few things. I take your putting in the rack prior to tank install.
Looks like you are missing the felt pads for under the tank. Most replace them with rubber or neoprene pads. I posted a pic of my 6 for the location.
Also is your steering rack cross member correct? Hard to tell if it's the early/6 style. Post a pic of the t-bar area. It should be flat not round on the end.
Don't forget the two rubber side pieces for the tank. They get wedged between the tank and chassis.
Luke,
Good call on the felt. I have it somewhere...and or rubber to replace is a good idea.
I have the rubber wedges for the sides all ready to go. I have one picture here, but I'll get better picks of the crossmember. I removed it from the car with the A arms and struts and immediately took the package to get sandblasted and powder coated. Been stored ever since. If it is not correct the PO must have swapped it out? Car was never hit up front so not sure why it might have been replaced? The pictures will tell the story...
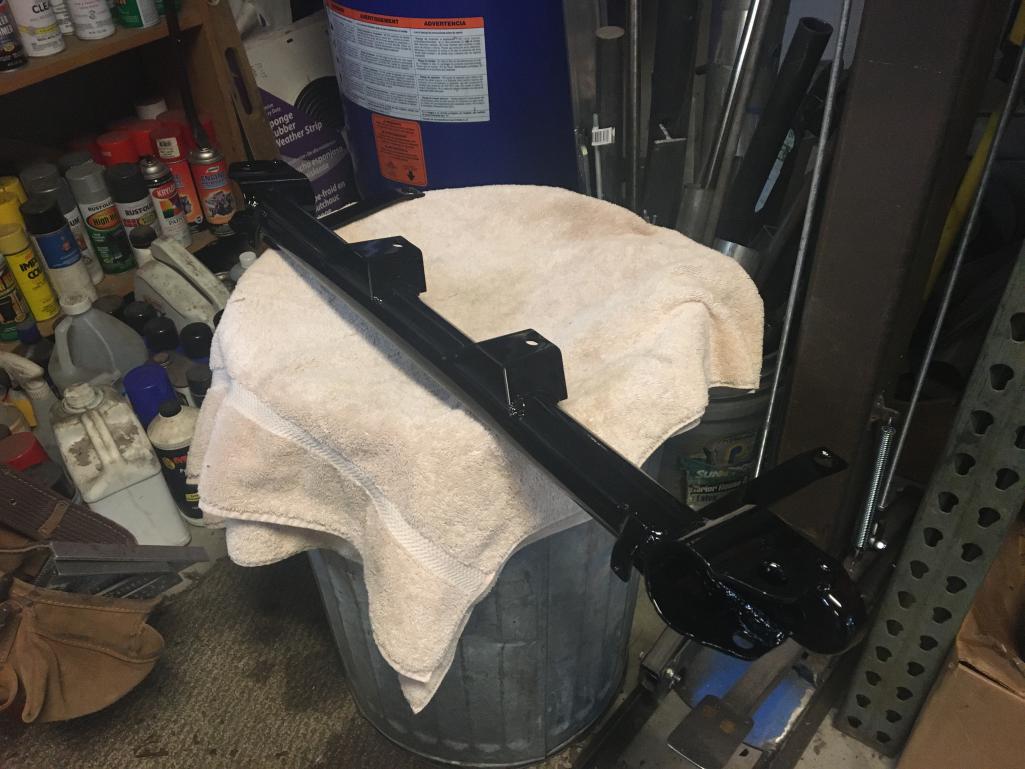
Posted by: ClayPerrine Apr 20 2021, 09:37 AM
The crossmember looks correct.
If you need pictures of how something goes together on a 70 six, let me know. I can take a picture of ours for you. It is mostly unmolested.
Clay
Posted by: Luke M Apr 20 2021, 10:17 AM
The crossmember looks correct.
If you need pictures of how something goes together on a 70 six, let me know. I can take a picture of ours for you. It is mostly unmolested.
Clay
Clay, The cross member is not correct. Look at the ends where I have it circled.
Go look at your 6. I bet it's flat like I have posted above. The one I took off my 6 is flat as well.
Here's a link to one.. Same as early 911/914-6.
https://www.thesamba.com/vw/classifieds/detail.php?id=2277967
Attached image(s)
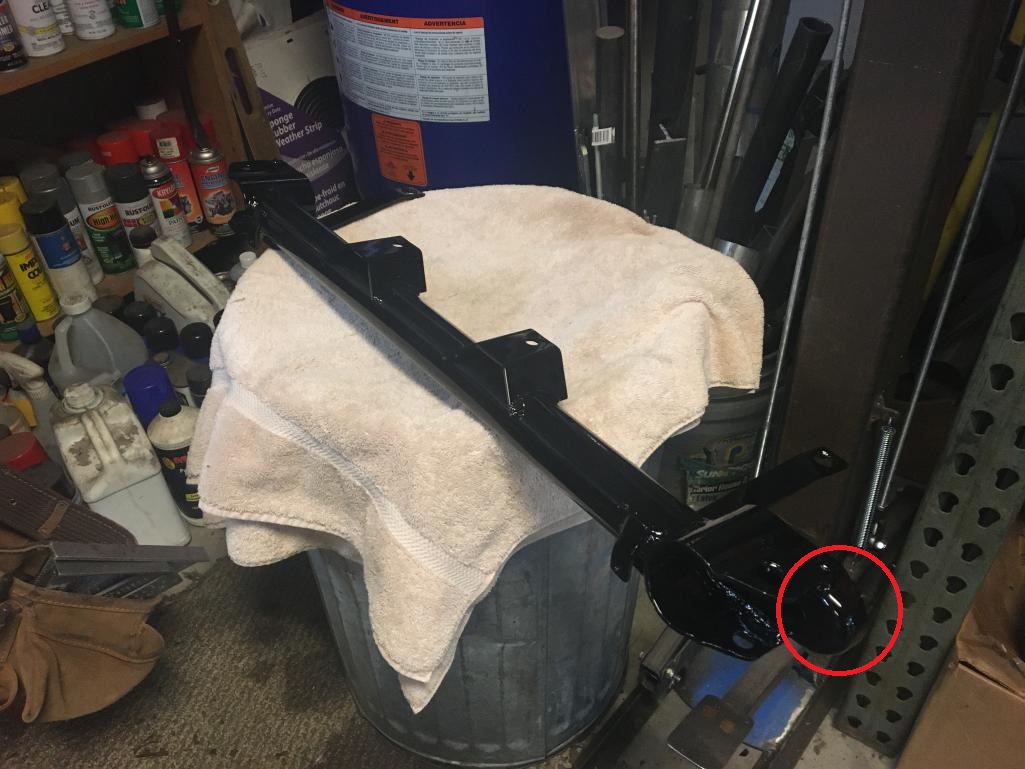
Posted by: ClayPerrine Apr 20 2021, 12:04 PM
The crossmember looks correct.
If you need pictures of how something goes together on a 70 six, let me know. I can take a picture of ours for you. It is mostly unmolested.
Clay
Clay, The cross member is not correct. Look at the ends where I have it circled.
Go look at your 6. I bet it's flat like I have posted above. The one I took off my 6 is flat as well.
Here's a link to one.. Same as early 911/914-6.
https://www.thesamba.com/vw/classifieds/detail.php?id=2277967
You are right.
I went out and took pictures of the crossmember on the six, and one in the parts pile in the garage. In all my years of owning 914s, I never noticed this difference. The /4 has a rounded end, the /6 has a square end.
You learn something new every day.
Clay
Posted by: Ferg Apr 20 2021, 02:55 PM
Is it done yet Jk
You have my # when u need a hand
Posted by: mepstein Apr 20 2021, 03:04 PM
The crossmember looks correct.
If you need pictures of how something goes together on a 70 six, let me know. I can take a picture of ours for you. It is mostly unmolested.
Clay
Clay, The cross member is not correct. Look at the ends where I have it circled.
Go look at your 6. I bet it's flat like I have posted above. The one I took off my 6 is flat as well.
Here's a link to one.. Same as early 911/914-6.
https://www.thesamba.com/vw/classifieds/detail.php?id=2277967
You are right.
I went out and took pictures of the crossmember on the six, and one in the parts pile in the garage. In all my years of owning 914s, I never noticed this difference. The /4 has a rounded end, the /6 has a square end.
You learn something new every day.
Clay
There's a long thread on world from a couple years ago about the difference. Some six owners swear their four crossmember was original but it would be odd since Porsche built the six pieces onto the Karmann built bodies at the Porsche factory and would probably not have the 914-4 pieces in the parts bin - but stranger things have happened with these cars.
Lars - I have a powder coated 911 crossmember if you want one. I can't guarantee the finish is the same sheen as your other pieces. Price is half whatever the going rate is (you decide) plus ship.
Posted by: Speedo Apr 20 2021, 05:18 PM
Where do I go from here...
Luke, you were correct. The crossmember ends are round...which makes it a 914 crossmember? 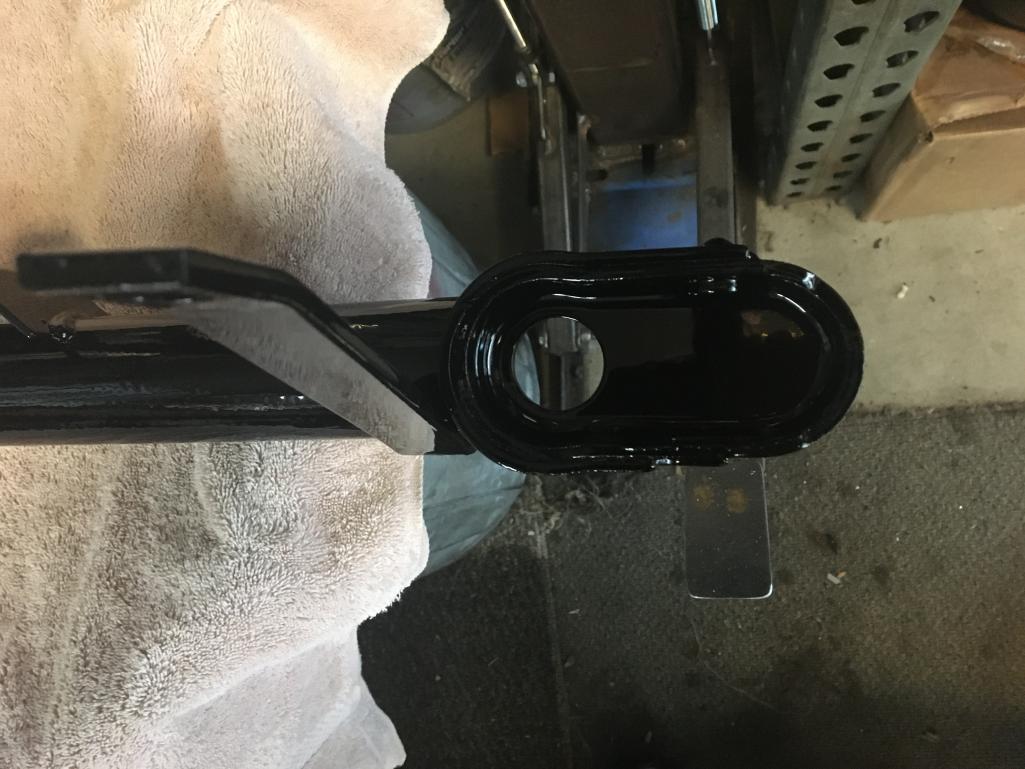
Posted by: Speedo Apr 20 2021, 05:23 PM
The bigger question is how did this car end up with this crossmember? I looked in my stash and fortunately I have two 911 crossmembers. And while they both have square ends, they are different. I'm guessing the bottom one is early, maybe SWB 65-68 and the upper is later, say 69-whenever they came out with the aluminum version.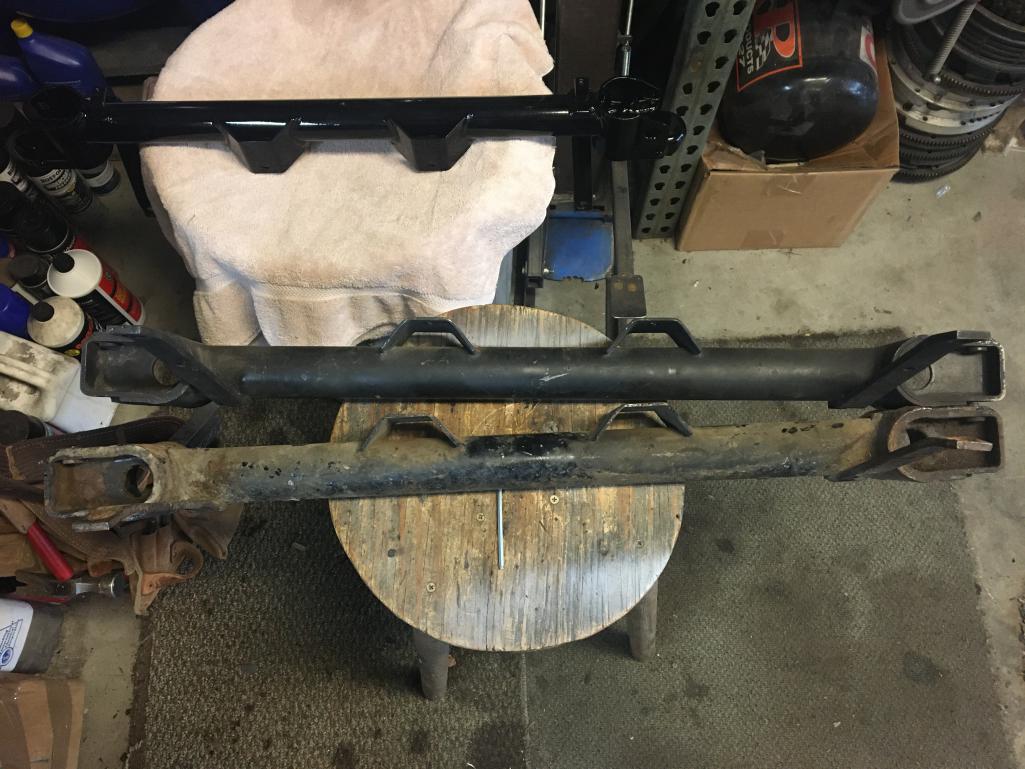
Posted by: Speedo Apr 20 2021, 05:24 PM
I'm guessing I need the upper 69-later version?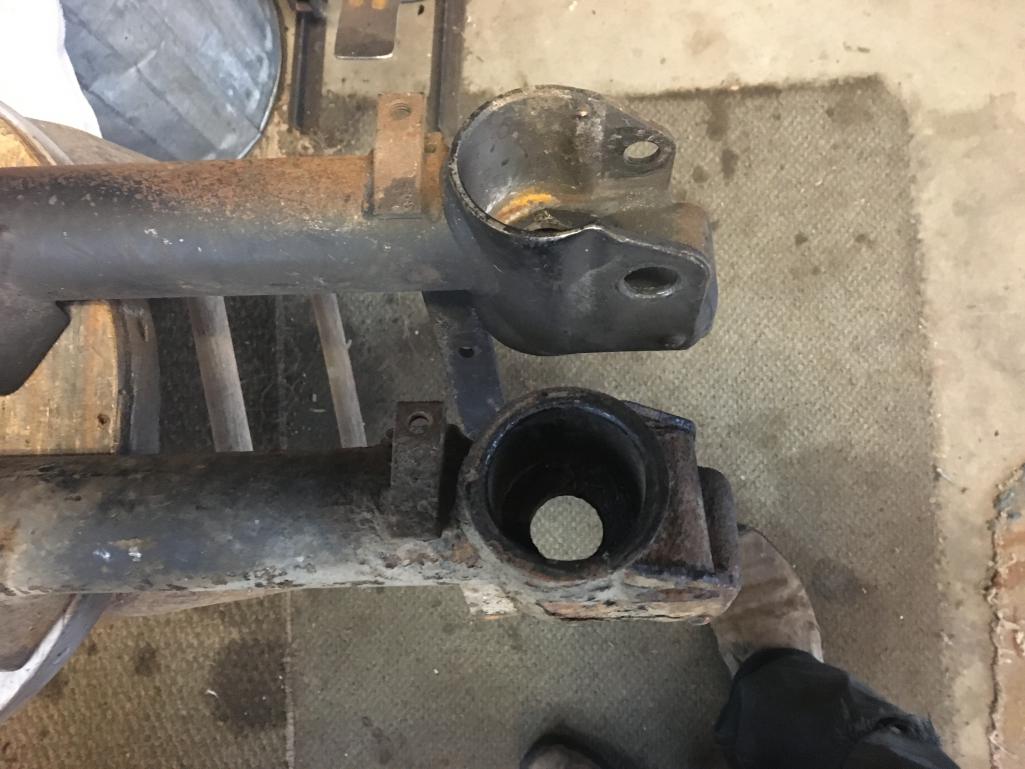
Posted by: Speedo Apr 20 2021, 05:28 PM
Just another item to get sandblasted and powdercoated
Nobody responded to the antenna question...
I don't want to install the antenna now, as it will be in the way. But I also don't want to install the gas tank now and have to fish the antenna cable behind everything and through the grommet in the firewall when I'm ready to install. But, if the antenna is not able to be separated from the cable at the base...I don't have any options?
Posted by: Luke M Apr 20 2021, 06:20 PM
I'm guessing I need the upper 69-later version?
Lars,
You need the 69 to 73ish 911 cross member. Looks like you may have one on hand.
Just line the 911 one up with the 914 unit . If all lines up use that one.
The antenna wire I believe is crimped into the base so that will not come out.
I recall cutting the one off my car and it was crimped.
You got my # so throw me a text if you need a hand.
Posted by: Speedo May 4 2021, 06:40 PM
So now that my son's car is "almost done" I get to focus on the 6. One thing that troubled me is that I have the new rear lenses, but can't find the housings...anywhere.
Thought I was losing my mind. I looked through all his boxes of spares, nothing. Looked through all my shelves and boxes of parts, nothing. Started to wonder if his tail lights were actually mine...texted Brant and he assured me that the tail lights on Leif's car were the ones it came with as a project. Ok, one more 3 hour afternoon lap around the shop looking in obscure places for the housings ...and nada. So I posted a WTB expecting to meet the new "scammer du jour" who knows that his buddy has just what I need and was I ready to purchase...ugh
Posted by: Speedo May 4 2021, 06:43 PM
Made a few calls...found some leads but just odds and ends. Nothing clicked. Thinking I was going to have to buy a left and right separately and restore...wasn't appealing. I hate losing or misplacing "stuff". 
Posted by: Speedo May 4 2021, 06:48 PM
Tada...trumpets in the distance
So I am not going nuts...yet. I mentioned my frustration to my son in not being able to find the tail light housings, and that I had literally torn up the shop to look for the parts.
He asked if there was any way I had taken them with the car to the painter to assist in dialing in the replacement corners I had welded in prior to paint. Car went to the painter in August 2019...yes it is possible. I texted the painter who said there were a set of housings sitting in an old rusty targa with a lot of other spare 911 parts. I drove down to Denver not knowing what to expect, and there they were...not crushed, still with the old cracked lenses. Fortunately they hadn't been thrown into a dumpster with the rest of the spent 911 parts! He used them to fit the housings and put them somewhere while painting...and forgot. Thus they spent 18 months outside. No big deal, I will remove the old lenses, clean them up. New seals and lenses and we are good to go.
Posted by: Speedo May 4 2021, 07:23 PM
Progress on the fuel tank this weekend when I wasn't looking for the lost tail lights.
New fuel lines and clamps and filter and hose (high pressure) getting ready to re-install tank.
Posted by: Speedo May 4 2021, 07:30 PM
Fuel lines installed. Need another hand to install tank.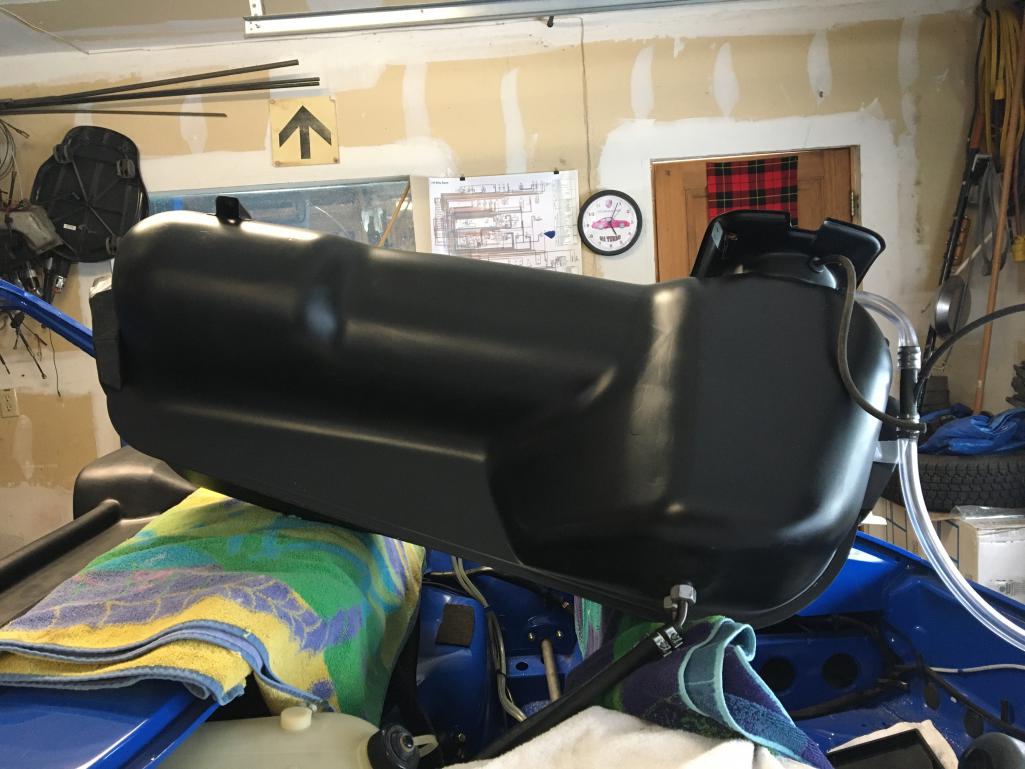
Posted by: Speedo May 4 2021, 07:31 PM
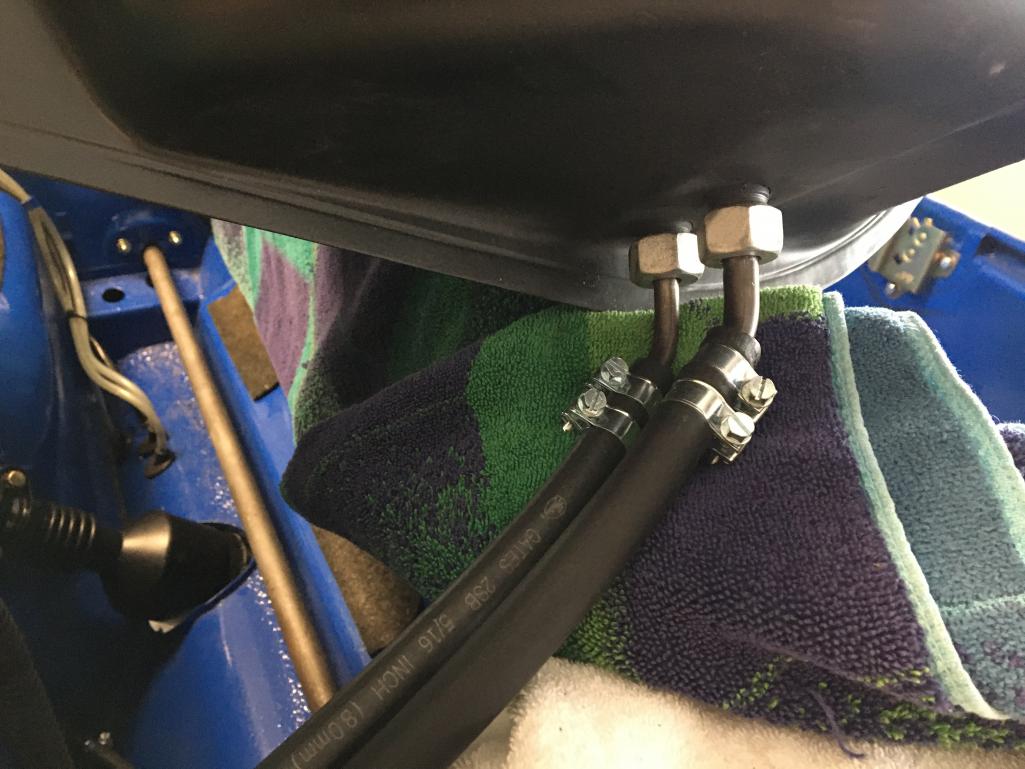
Posted by: Speedo May 4 2021, 07:32 PM
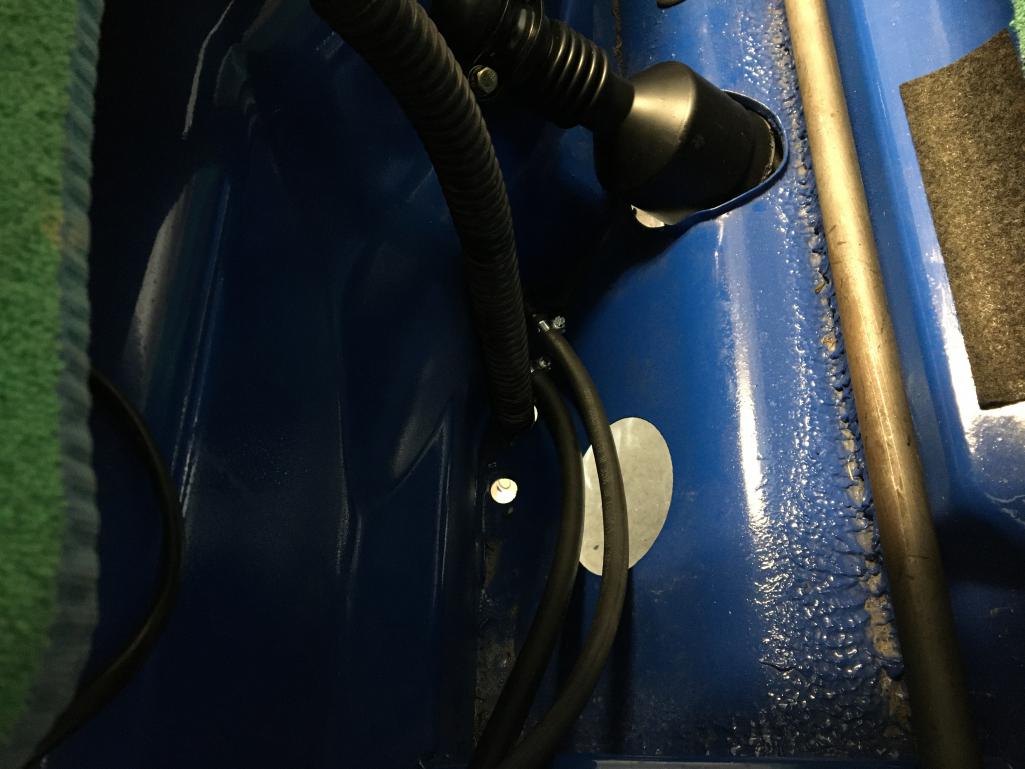
Posted by: Speedo May 4 2021, 07:33 PM
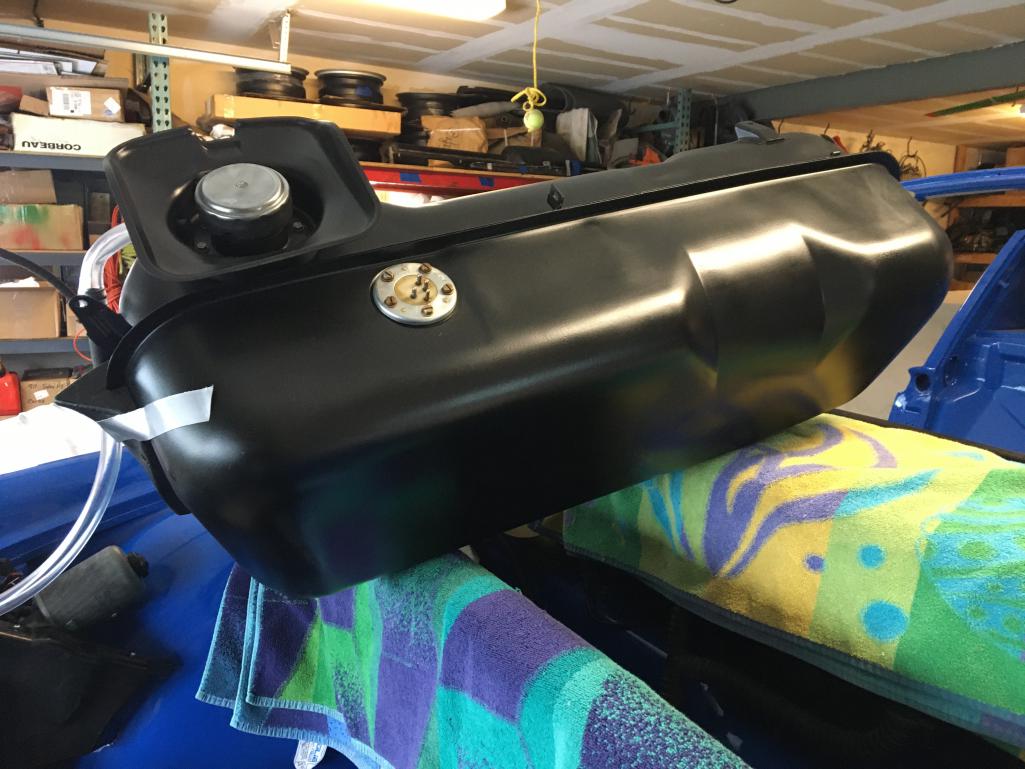
Posted by: brant May 4 2021, 07:46 PM
Glad you found those lights.
Ready for plaiting?
I have a bag needing to be silver before long
Posted by: Speedo May 9 2021, 07:23 PM
All the other stuff that needed to be done to install the gas tank...is finally done. Actually that is a lie. When I installed the tank, I had to remove it two times...once for the overflow drain, and second for the tank straps. Now all good.
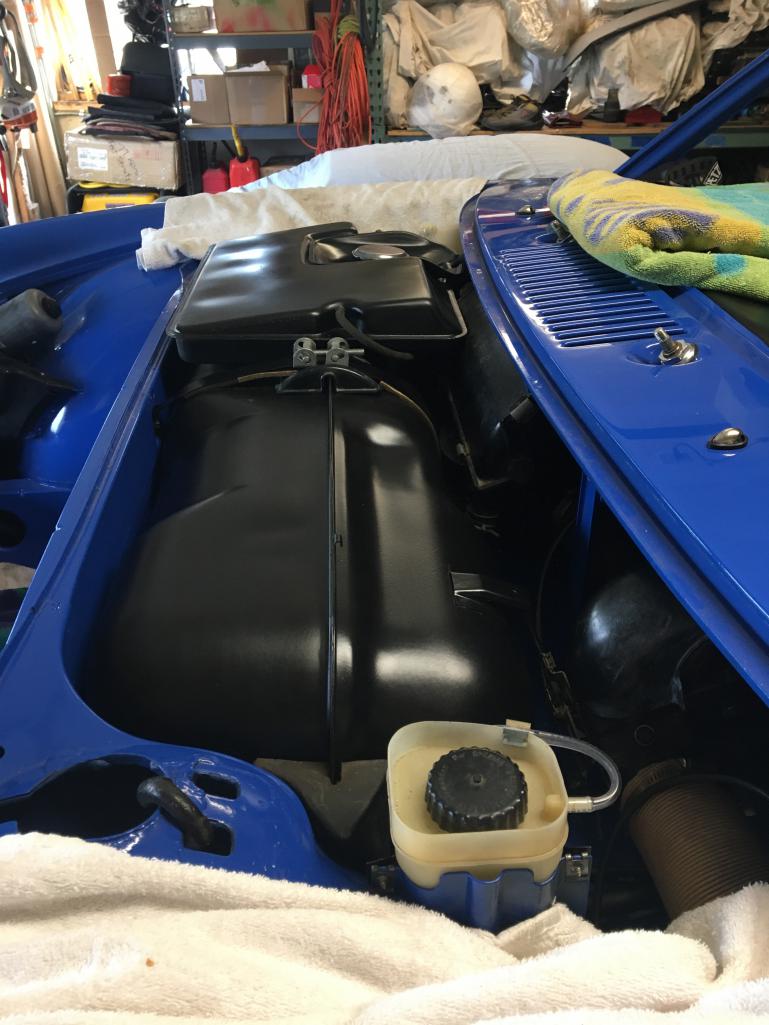
Posted by: Speedo May 9 2021, 07:25 PM
Added the A-arms and tbars today. Bumped the tbars to 21mm just because I like a firm ride.
Posted by: Speedo May 9 2021, 07:27 PM
All done...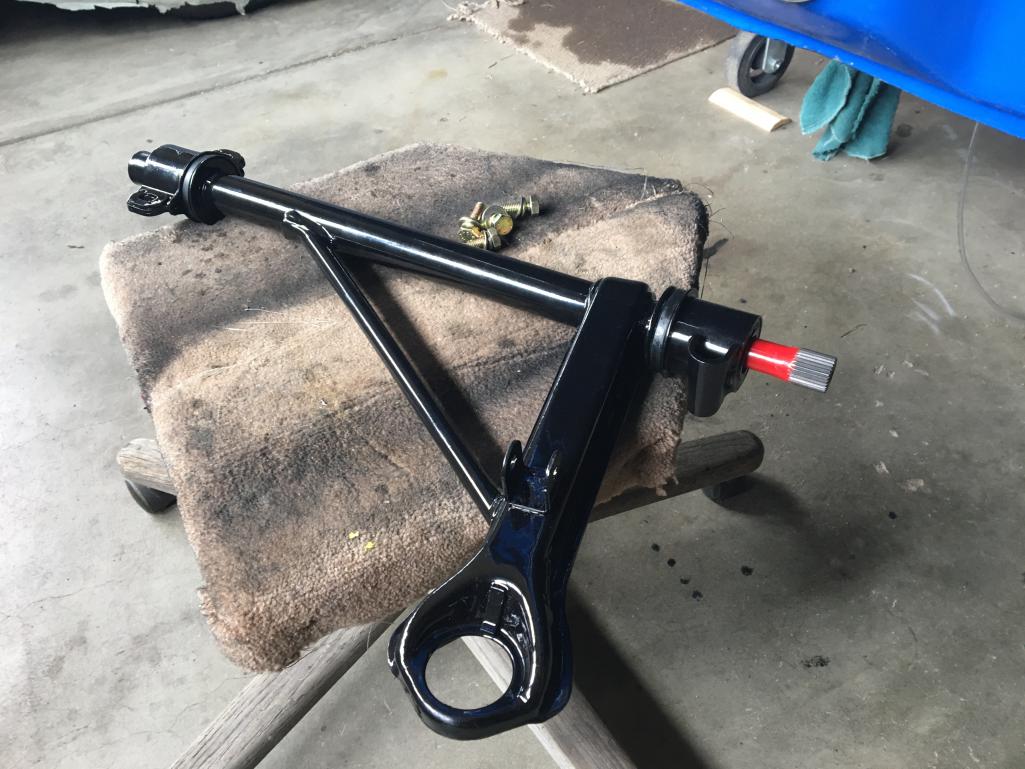
Posted by: Speedo May 9 2021, 07:29 PM
Competed...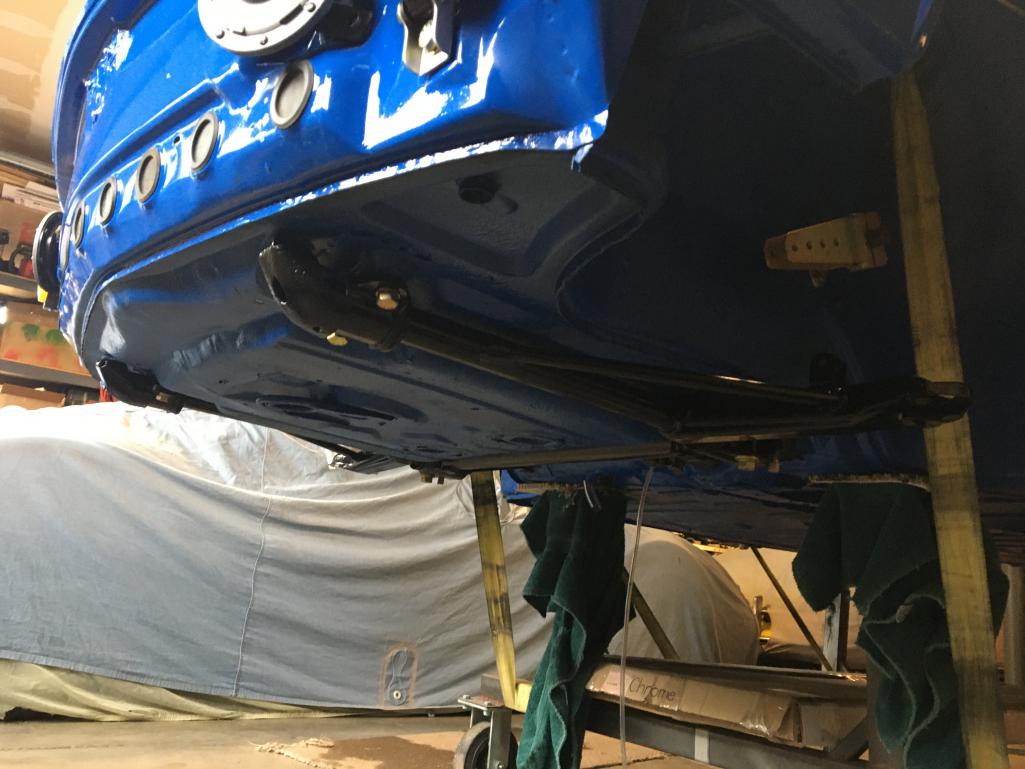
Posted by: Speedo May 9 2021, 07:30 PM
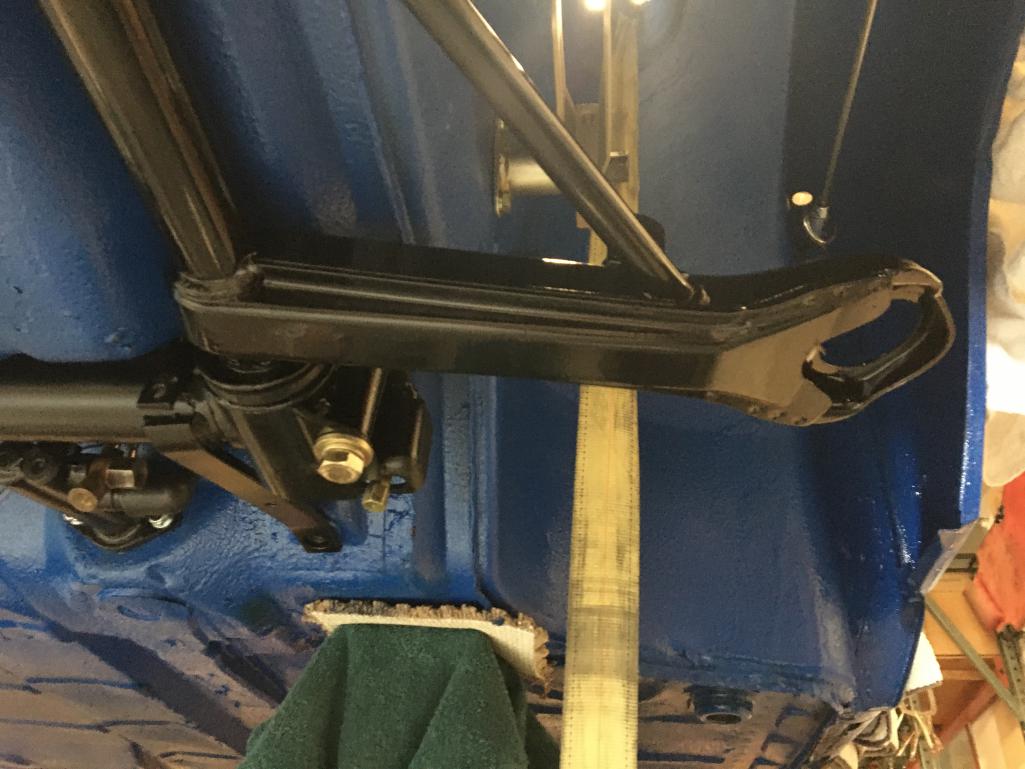
Posted by: Root_Werks May 11 2021, 08:53 AM
More great progress! Meanwhile, I'm taking apart a 914-6 I didn't want to. Sigh, at least you are going in the right direction!
Posted by: Speedo May 16 2021, 06:40 PM
Brake lines, axles and suspension. Cleaned up (scotchbrite/paint-thinner/clearcoat) my brake lines and refurbed my pressure regulator. I'm pretty pissed off at the guy (me) that bent the crap outta the brake lines when he dis-assembled the car. Re-fitting the lines has been a challenge as none of them wanted to fit. Felt like I was trying to install Toyota brake lines on a 914. Pressure regulator rehab...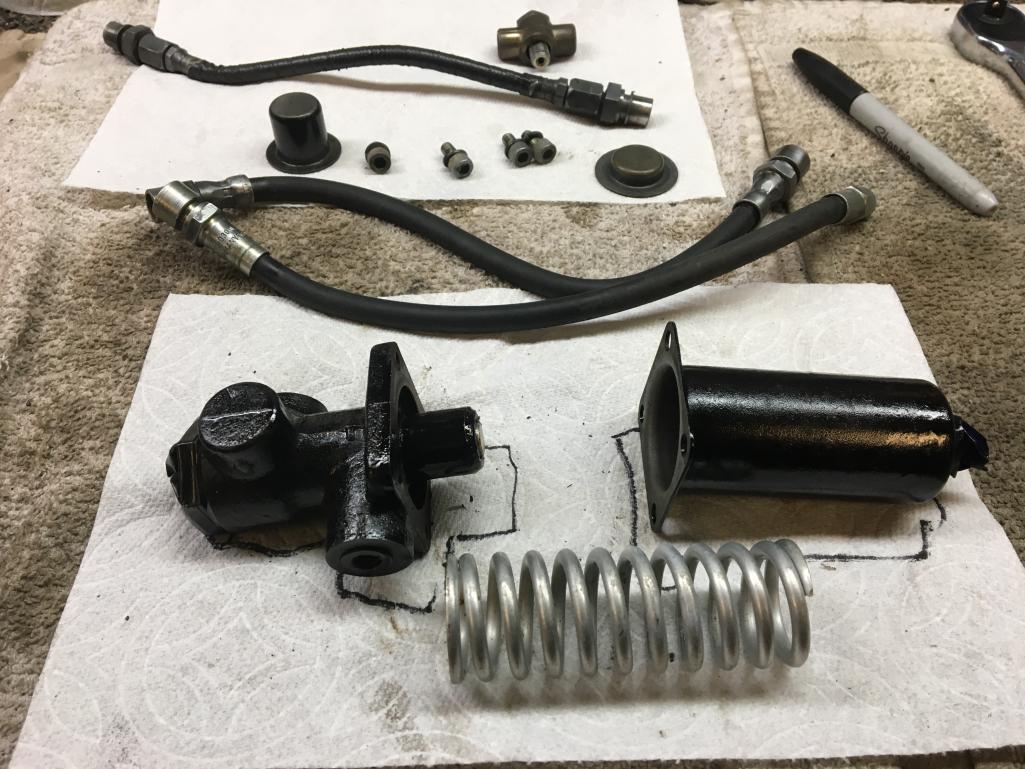
Posted by: Speedo May 16 2021, 06:42 PM
Completed...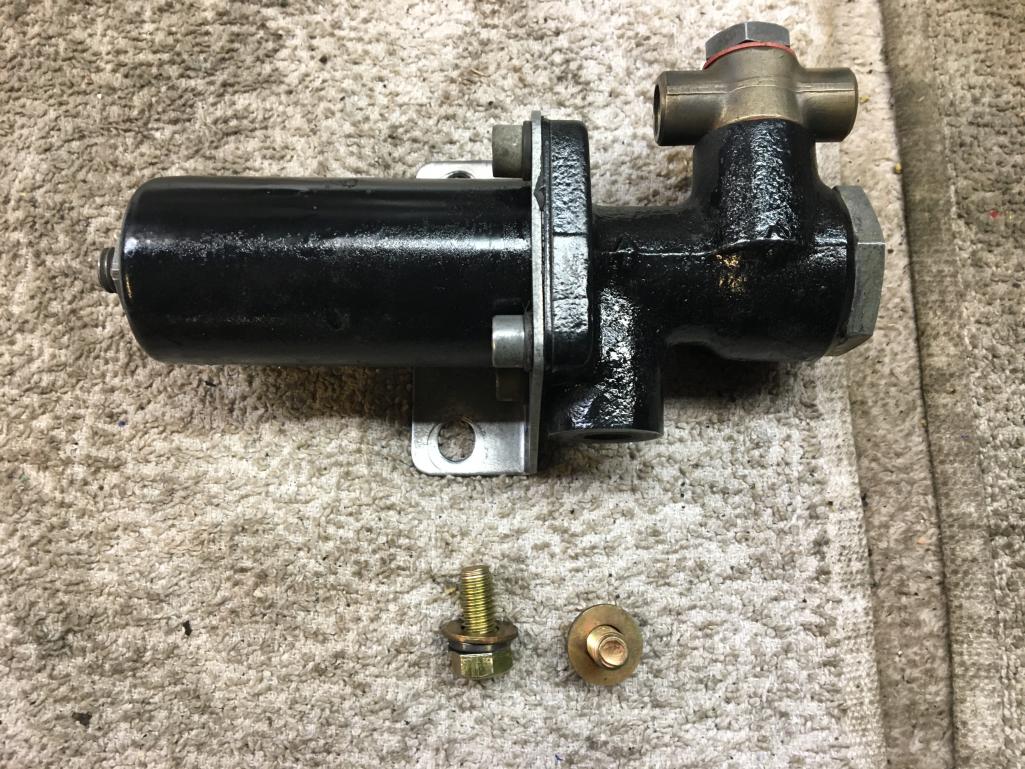
Posted by: Speedo May 16 2021, 06:51 PM
Installed with lines in the rear.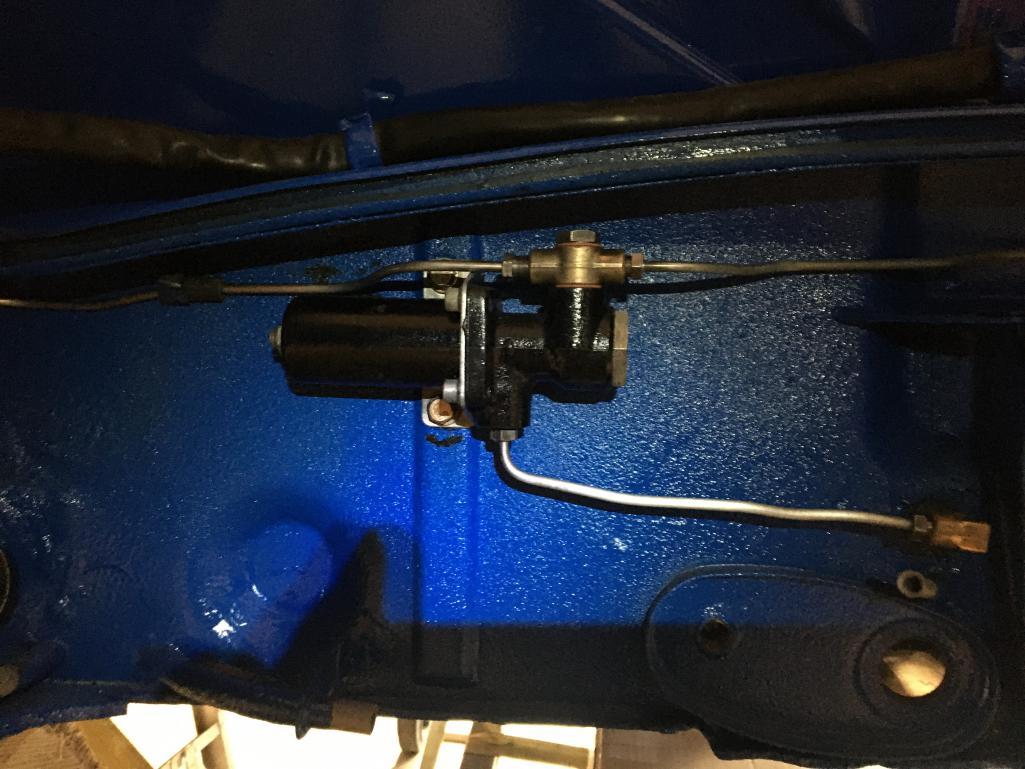
Posted by: Speedo May 16 2021, 06:54 PM
And the front. Installed bump steer bushings at the same time.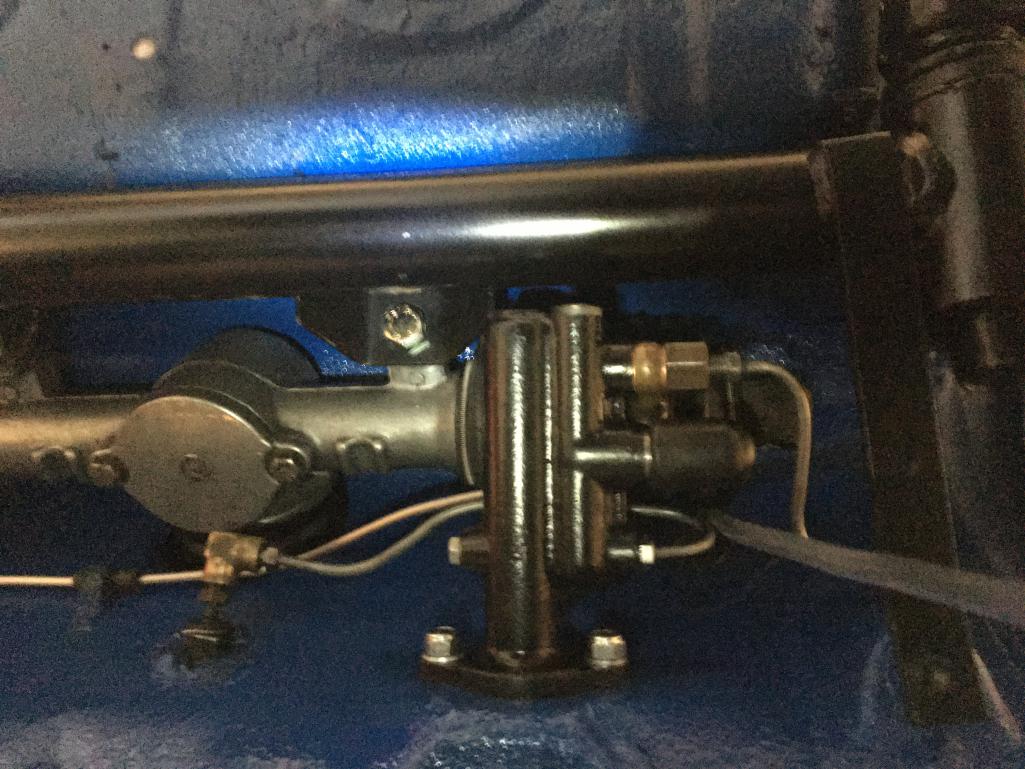
Posted by: Speedo May 16 2021, 06:55 PM
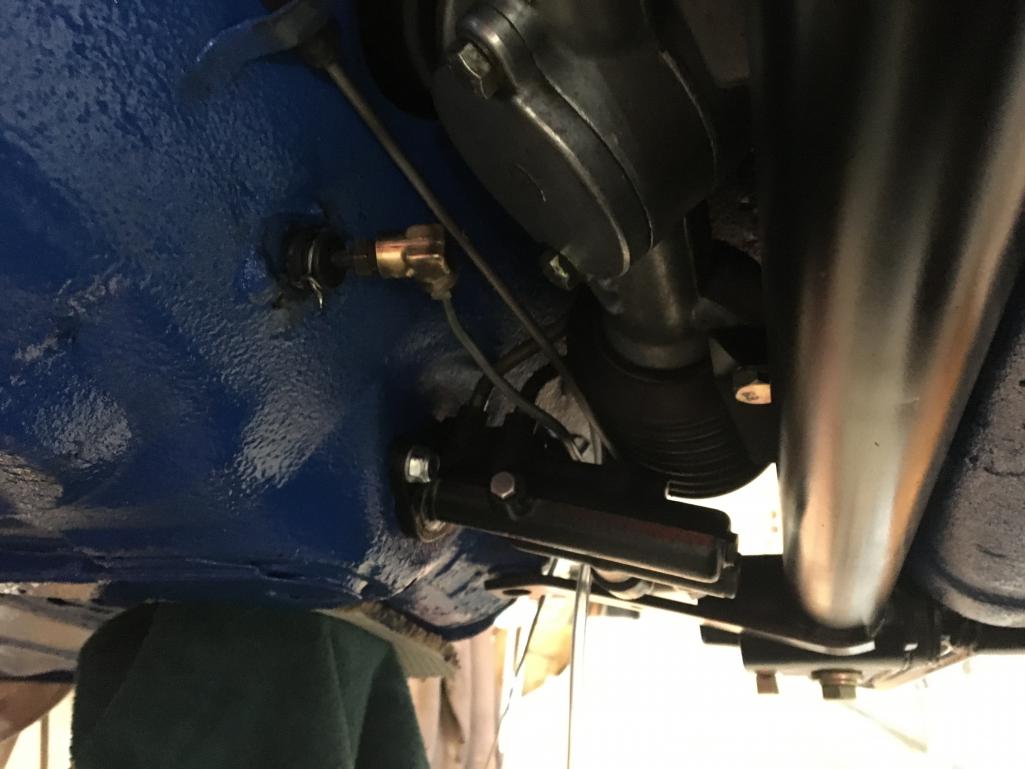
Posted by: Speedo May 16 2021, 07:04 PM
Ran into some trouble with the rear axles. Inner CVs were nasty but acceptable. Outer rubber boots were solid but the CVs were filled with crud...a mix of dirt and sand that made me wonder how they could have turned. Once everything was de-cruded, the inner race on the left side outer was badly pitted. I started a new thread on options and found that early 911 axles have the same diameter and splines as the 914-6. I had an extra 911 axle and stole the inner race from the CV. I am waiting for new boots and clamps to re-assemble.
The rear control arms are ready to re-assemble. 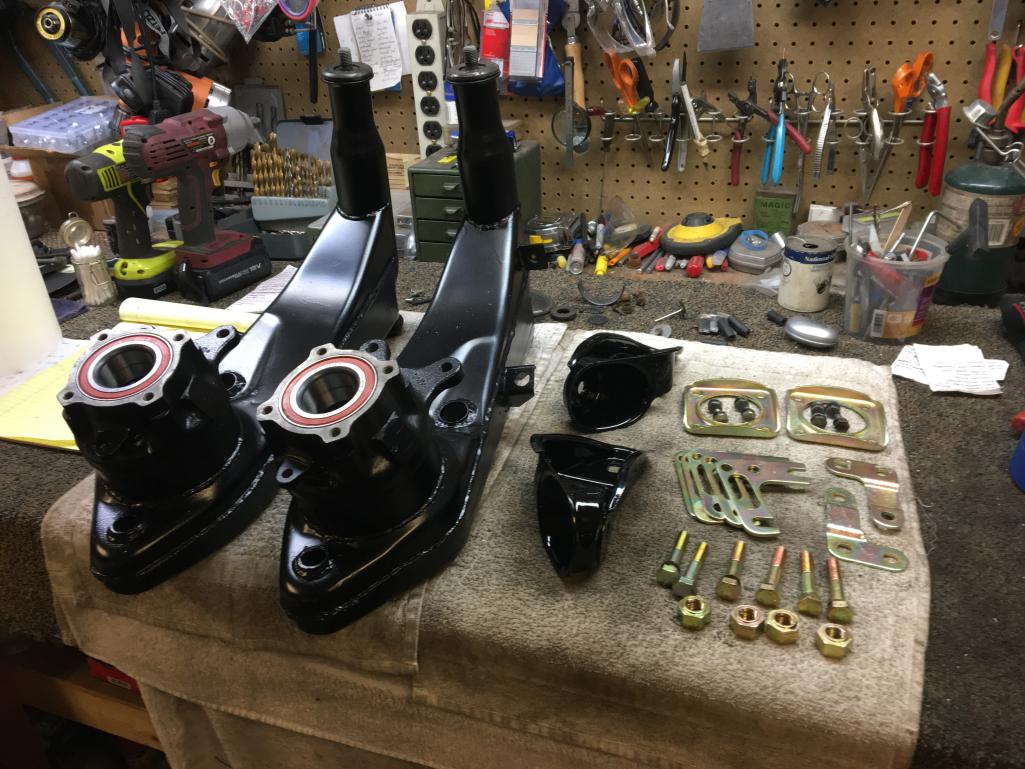
Posted by: Speedo May 16 2021, 07:11 PM
But I have a couple questions. The PET is unclear as to where the washers go on the front of the control arms. It shows washers on only one side of the nuts shown on the bottom right of the previous picture. Shouldn't there be washers on both sides?
Second, the spacers/shims that mount on top of the link bearing...what is a default starting setup? I have three 4mm and two 3mm?
Lastly, what is the "stopper" shown in item #4 on the PET illustration 501-00? Is that something to hold the shims in place?
Posted by: Speedo May 22 2021, 12:46 PM
Sourced a better set of rear turns as mine were severely "heat compromised"...thanks Luke. I wanted to re-chrome the internals and while preparing to mask off the reflectors from the housings I realized that the reflectors could actually be removed from the housings entirely. This was good news as I had two different types of reflectors, and of the four (old set and new to me set) only two were undamaged. Being able to remove the reflectors allowed me to mix and match. So now I have two reflectors that are the same.
Cleaned them up and used chrome paint...big improvement. Housings separated from reflectors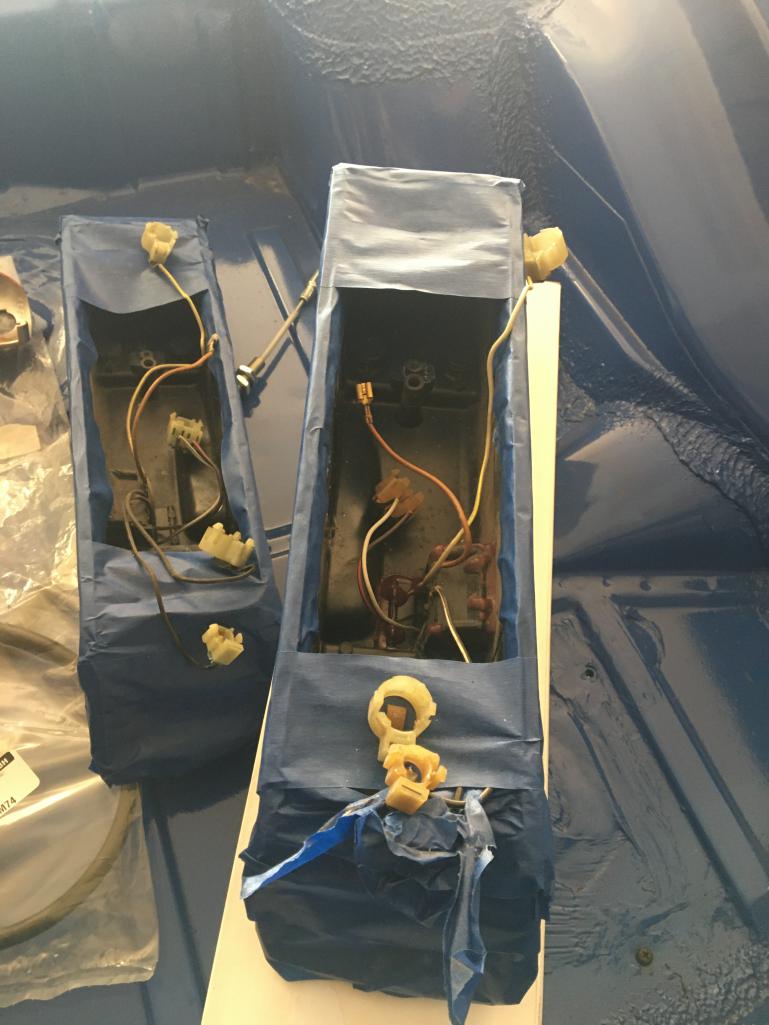
Posted by: Speedo May 22 2021, 12:48 PM
Reflectors before...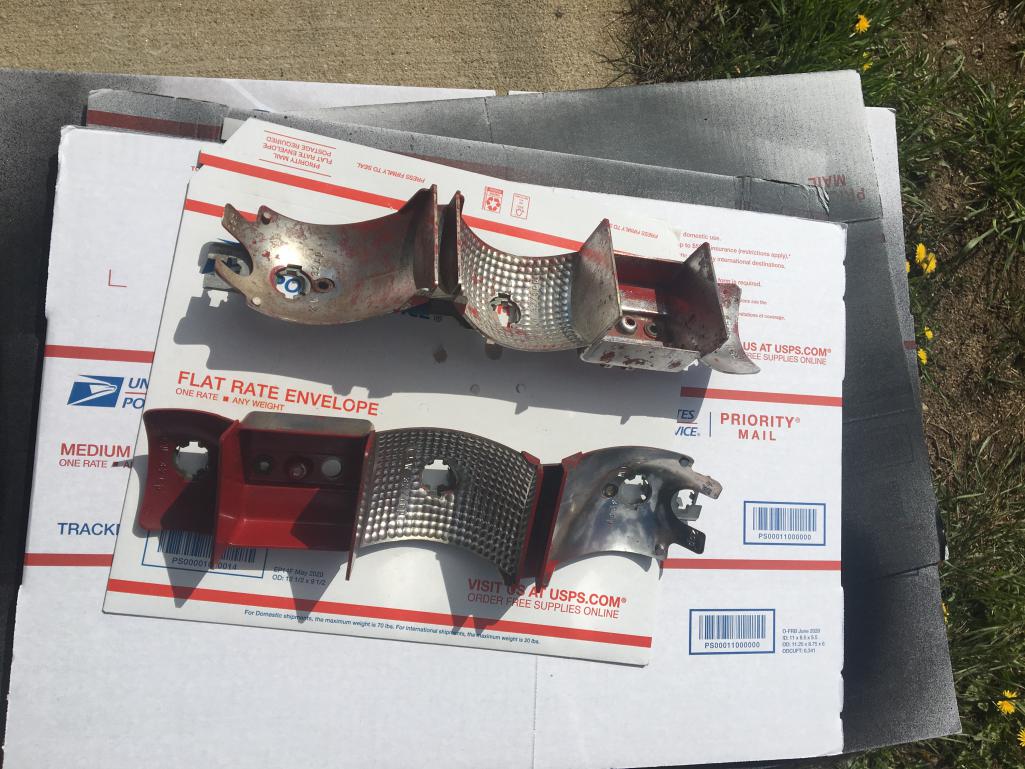
Posted by: Speedo May 22 2021, 06:13 PM
These look a lot better...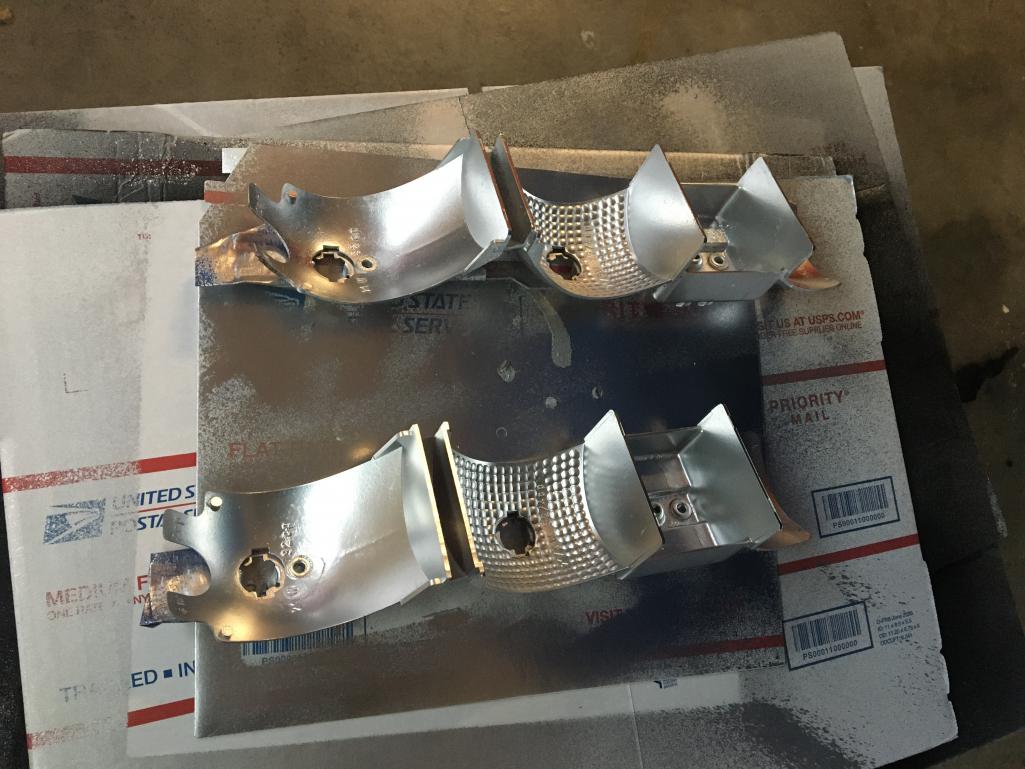
Posted by: Luke M May 23 2021, 11:53 AM
Posted by: raynekat May 23 2021, 03:41 PM
This car is getting somewhere....and it all looks great.
Well done!
Posted by: Speedo May 30 2021, 04:54 PM
Managed to pull my hubs into the new bearings in the control arms without destroying the inner race. I had a large washer behind the bearing but I was still concerned. Really didn't want to ruin a bearing and start all over again.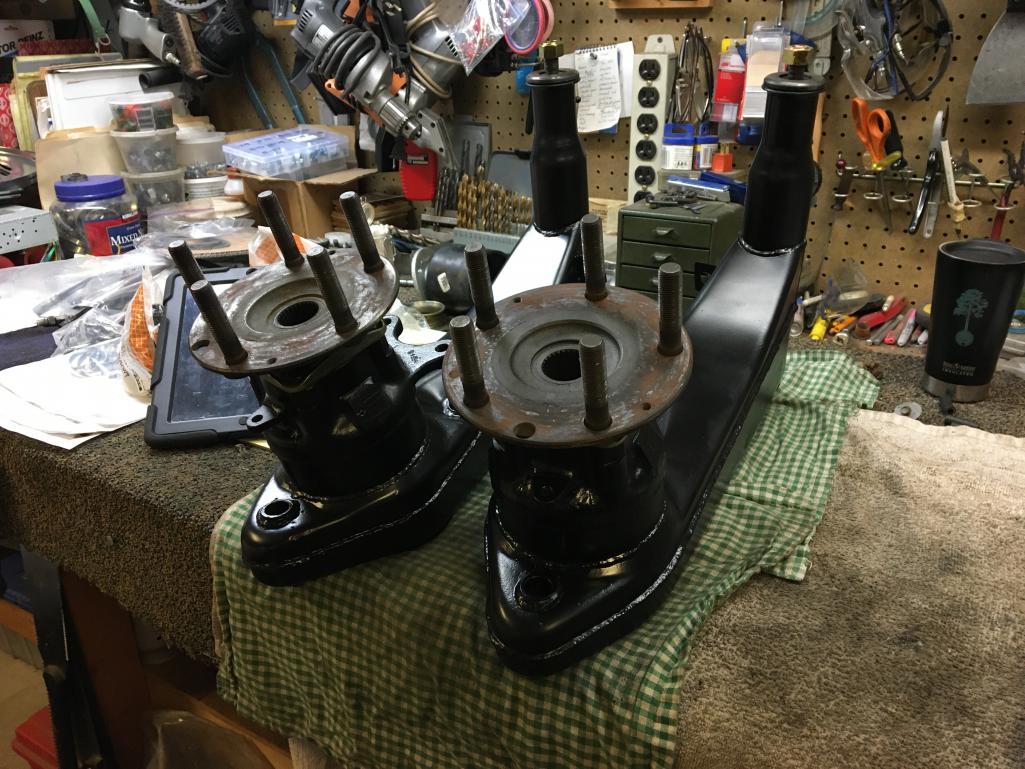
Posted by: Speedo May 30 2021, 04:59 PM
And while I was at it, I went ahead and mounted things up. I want to mount the coil-overs but I don't want to get the chassis too heavy as the dolley wasn't designed to support an assembled car. I plan to do that when I get the car on the lift.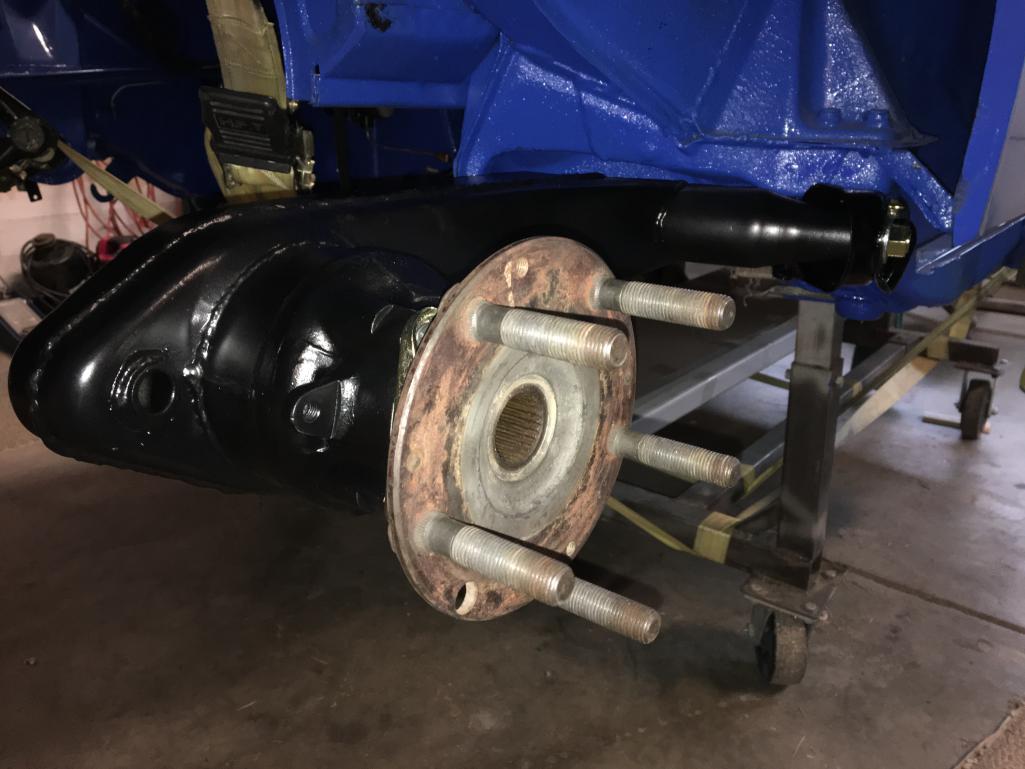
Posted by: Speedo May 30 2021, 05:04 PM
Speaking of coil-overs...This is my first experience with these. I disassembled planning to repaint the struts and coils and noticed that the cartridge in the strut had no "return" and basically the same resistance being pushed in or pulled out? Is this normal or do I need to get new cartridges? Or do I just send them back to Koni?
In....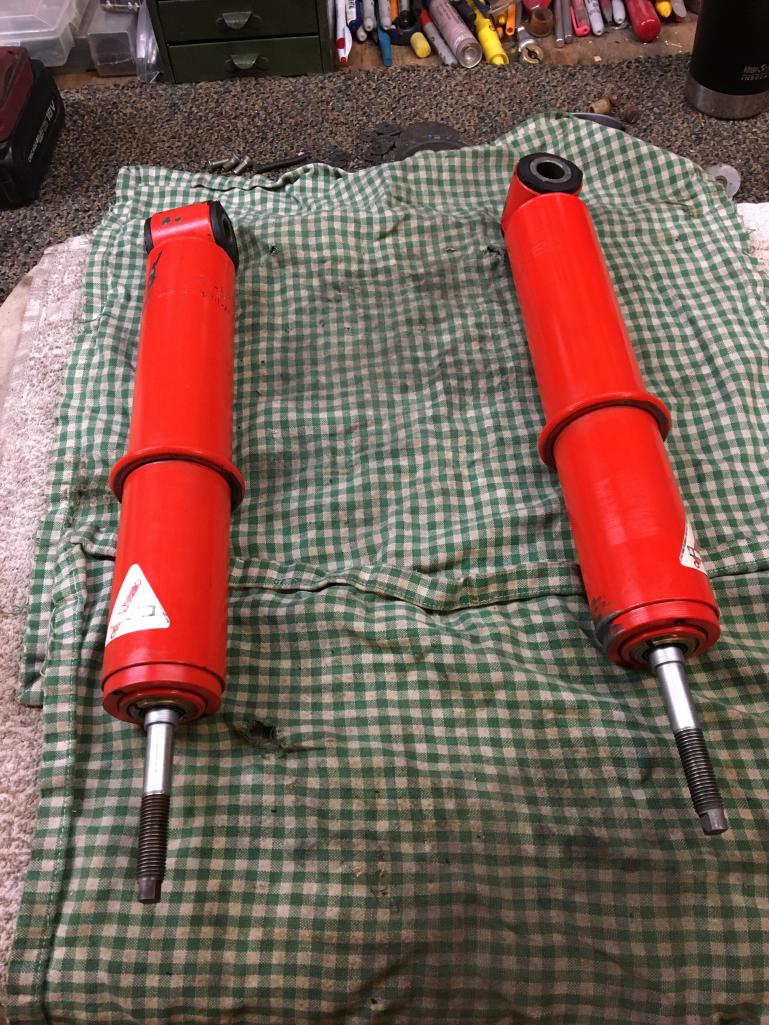
Posted by: Speedo May 30 2021, 05:05 PM
And out...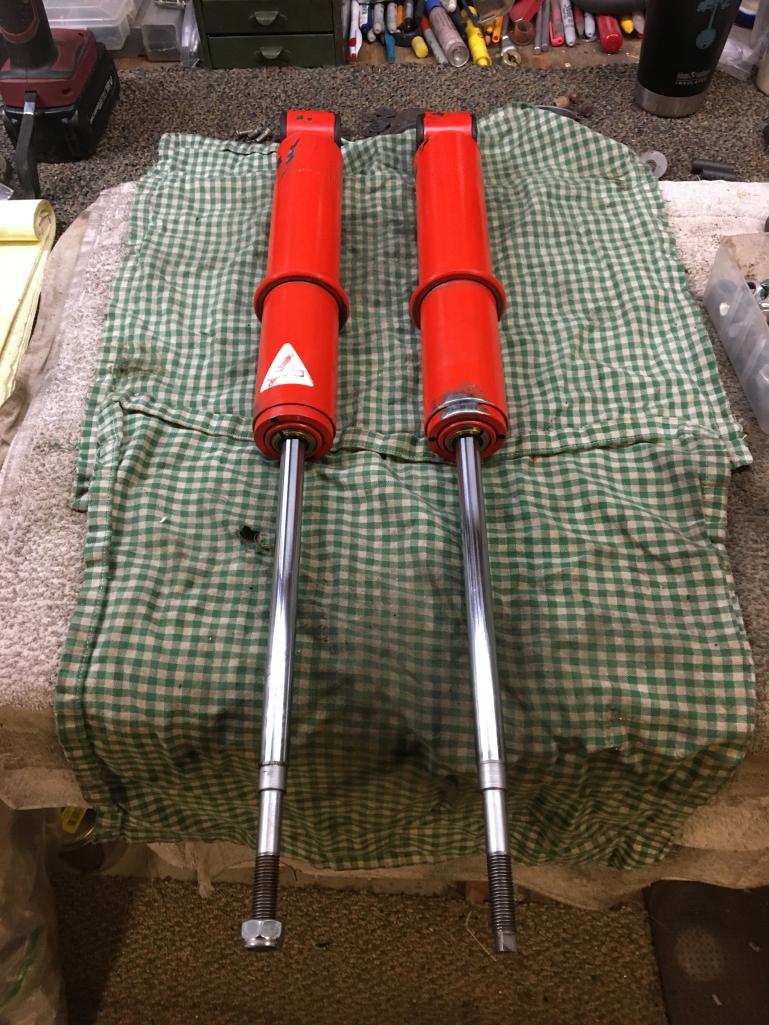
Posted by: Speedo May 30 2021, 05:11 PM
Also I was preparing to install the tail light housings and couldn't remember where my wiring notes ended up. The L and R turns are obvious, but need to figure out what goes to 54, 58, RF and 31. Obviously running lights, brake lights, back up and ground. If someone has those handy that would help. 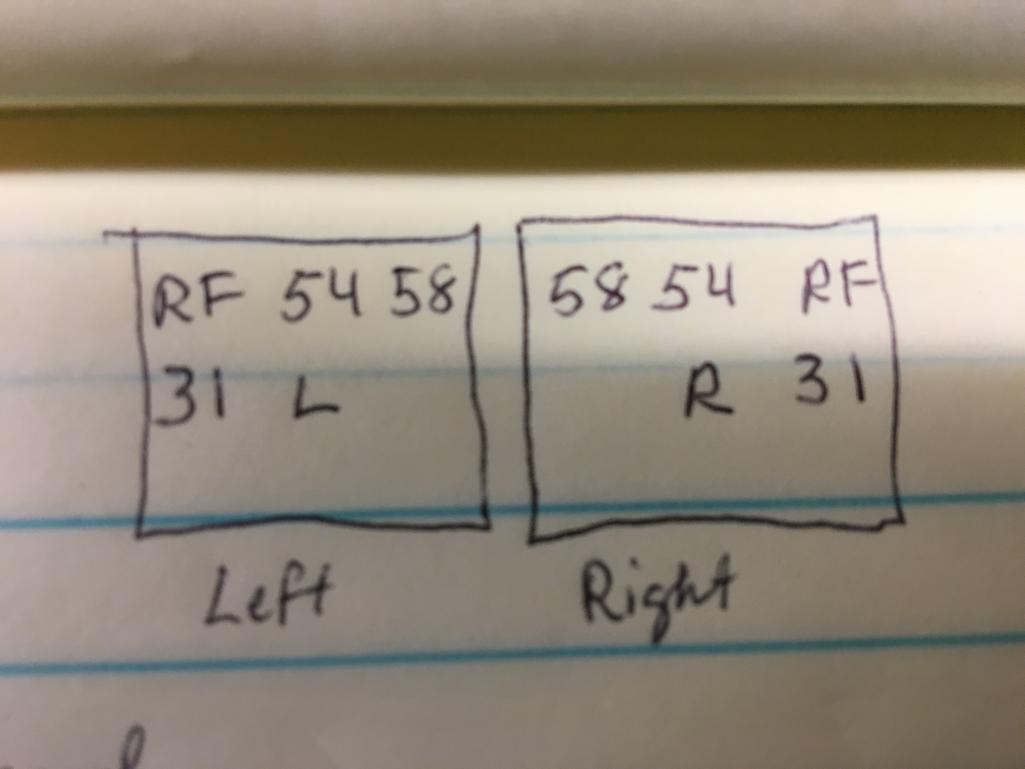
Posted by: Speedo Jun 20 2021, 05:44 PM
Big day...got my lift back
Son came home for two weeks to push through the post-paint re-assembly of his 72 1.7 yellow beast. Had to spend some time going back and forth to the painter to get it right. Done except for the interior. Very nice.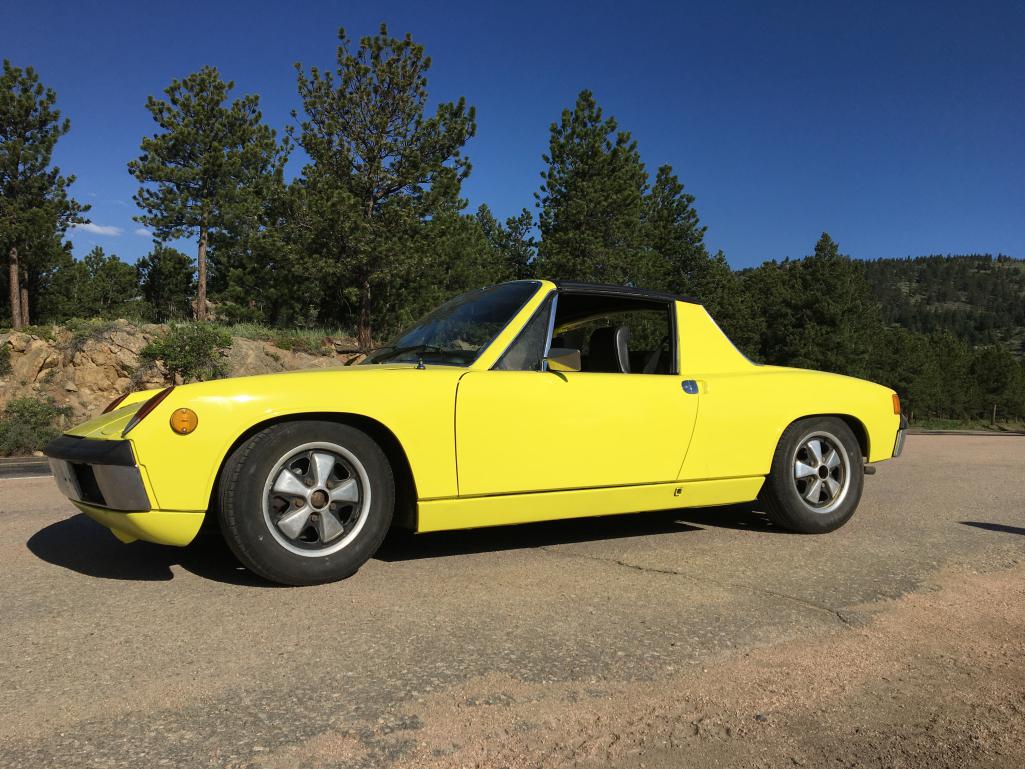
Posted by: Speedo Jun 20 2021, 05:46 PM
This changes everything. No more crawling under the dolly. My knees are thankful.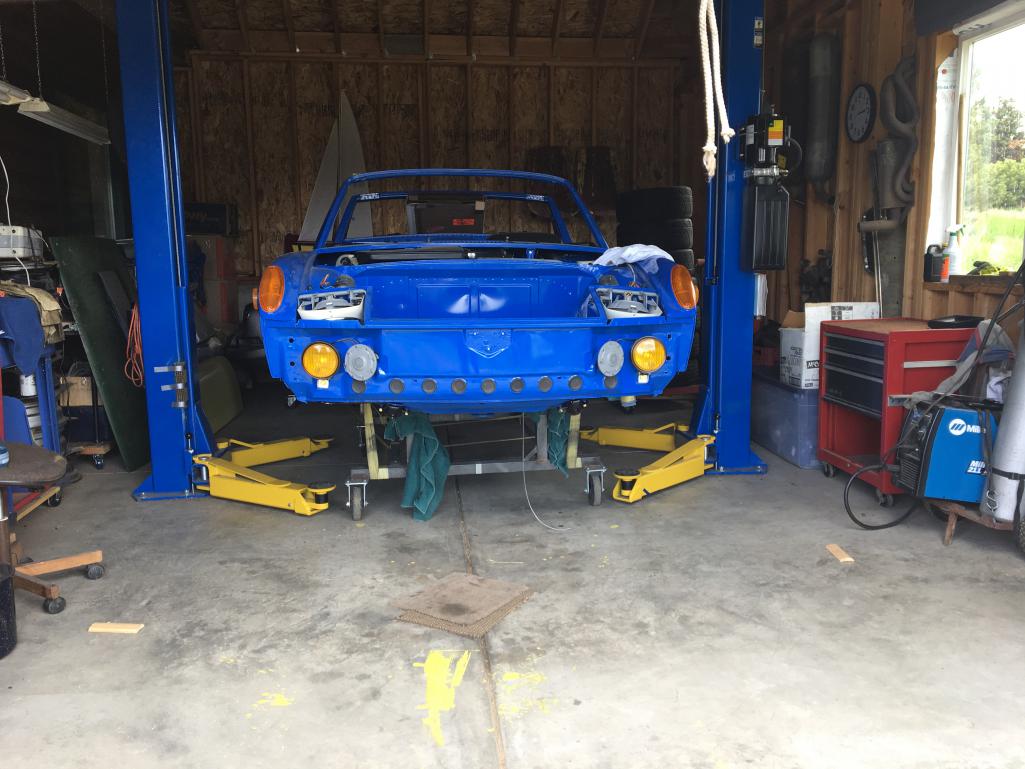
Posted by: Speedo Jun 20 2021, 05:48 PM
Almost...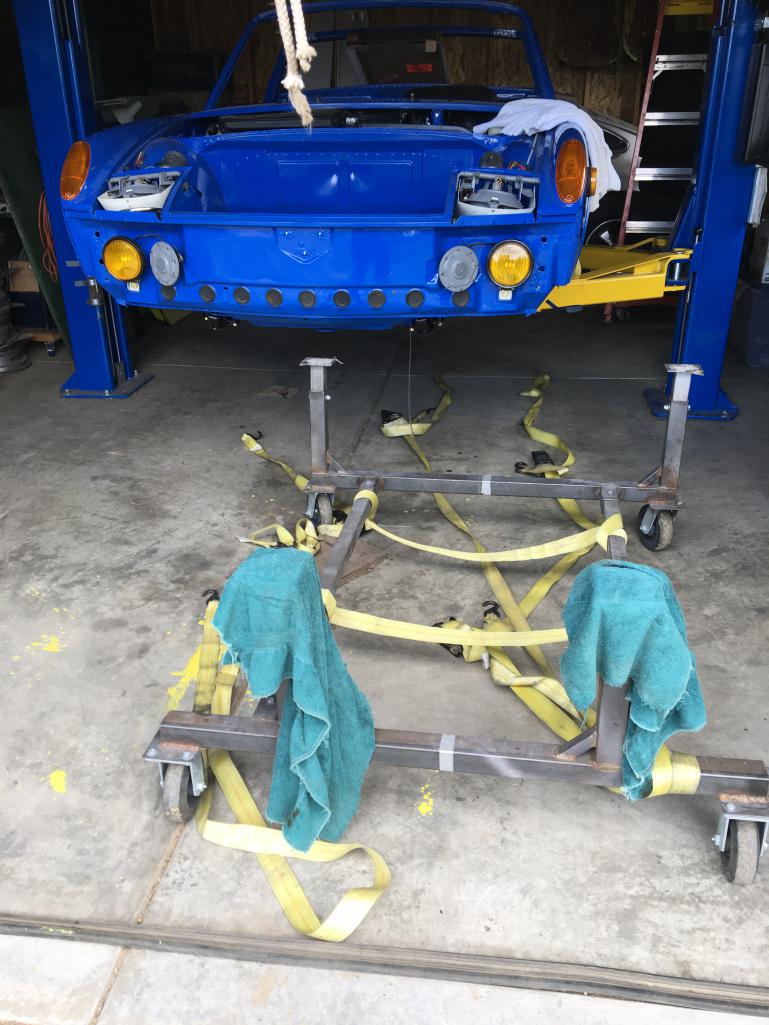
Posted by: Speedo Jun 20 2021, 05:49 PM
Liftoff...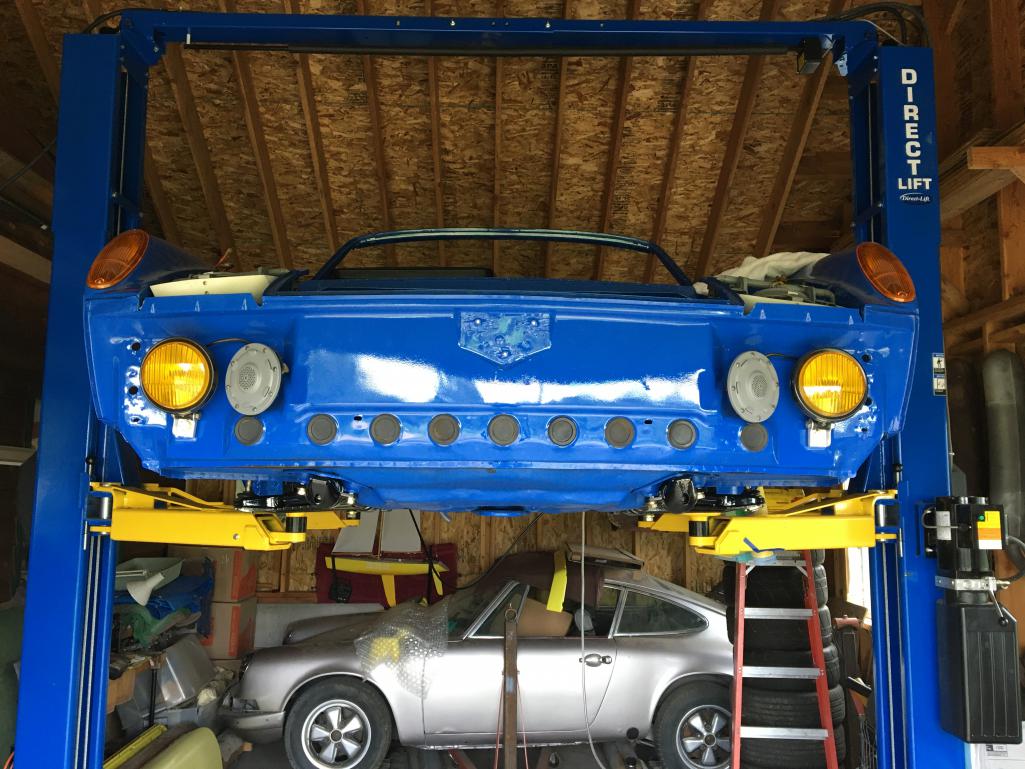
Posted by: Speedo Jun 20 2021, 05:51 PM
Time to finish up the suspension and send my wheels off to Al Reed.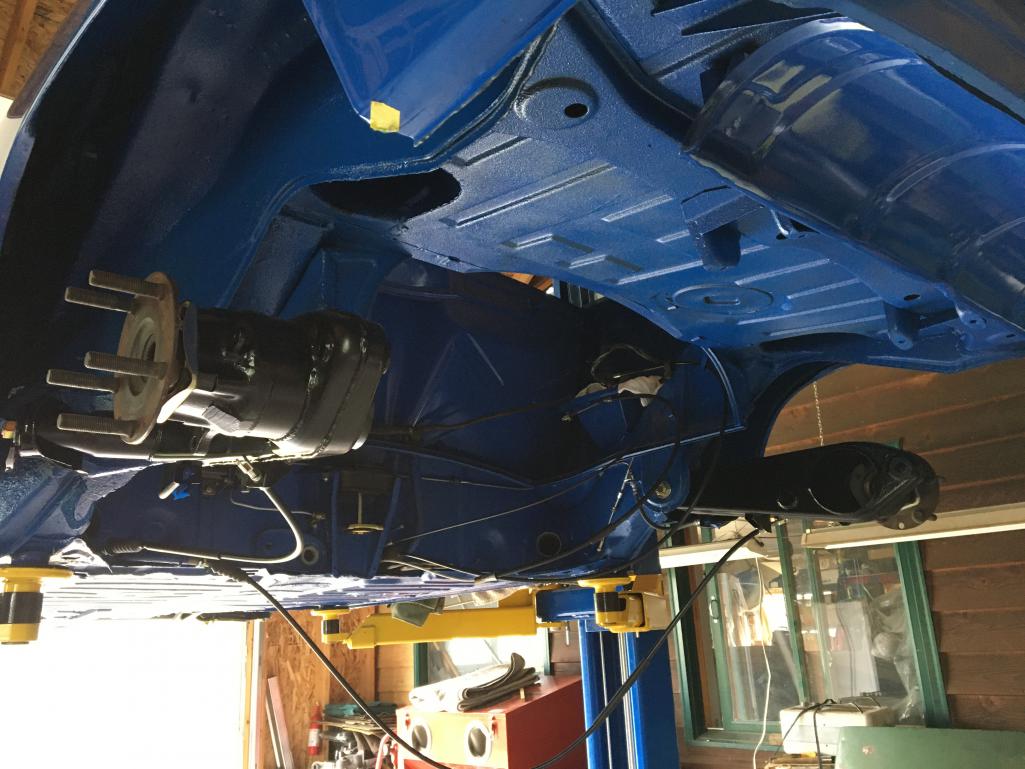
Posted by: Speedo Jul 3 2021, 05:15 PM
Started cleaning up my oil tank...bad decision. What looked solid covered in road grime wasn't. Small perforations along the top seam where the rear wheels picked up debris and deposited it there. It held moisture which over time ate through the copper and then the steel. As the perforations were along the top edge, it suffered no obvious leaks. Rest of the tank is very solid so I am going to repair this one. No sense in mig welding it, and as it is not structural, I think I can get by with brazing it. Pretty small holes. Once brazed it will get completely wire brushed and sealed. Before... 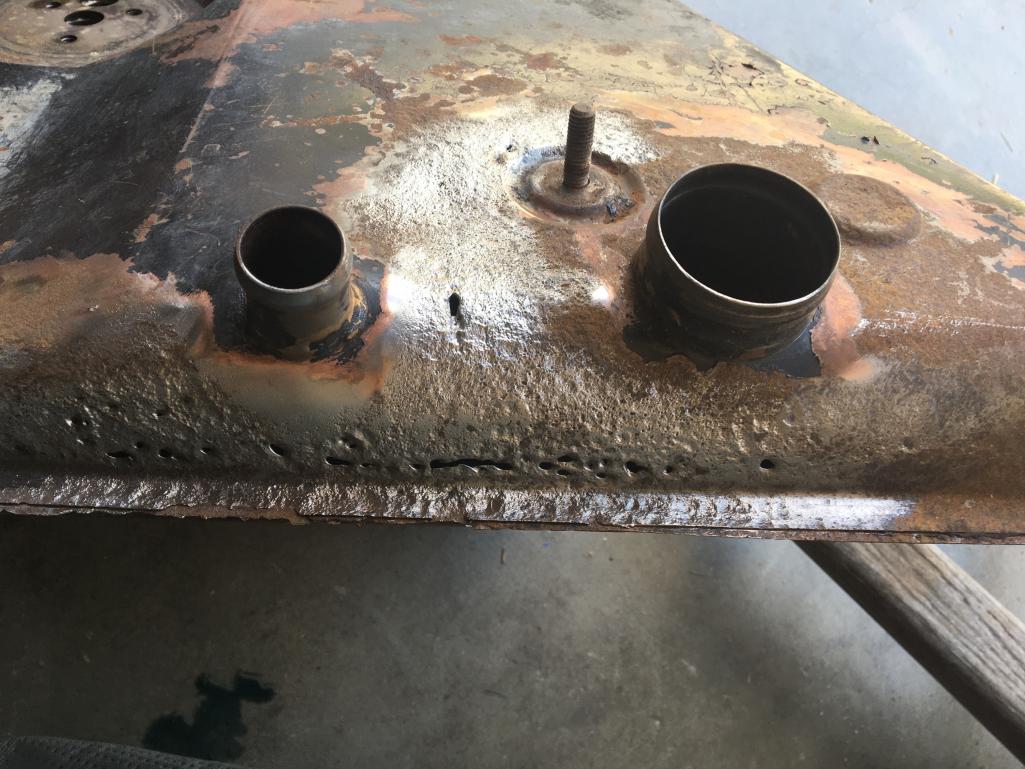
Posted by: Speedo Jul 12 2021, 06:06 PM
During...
So the brazing went well and the tank was wire brushed and etched. It looks pretty sketchy at this point...completely de-nuded
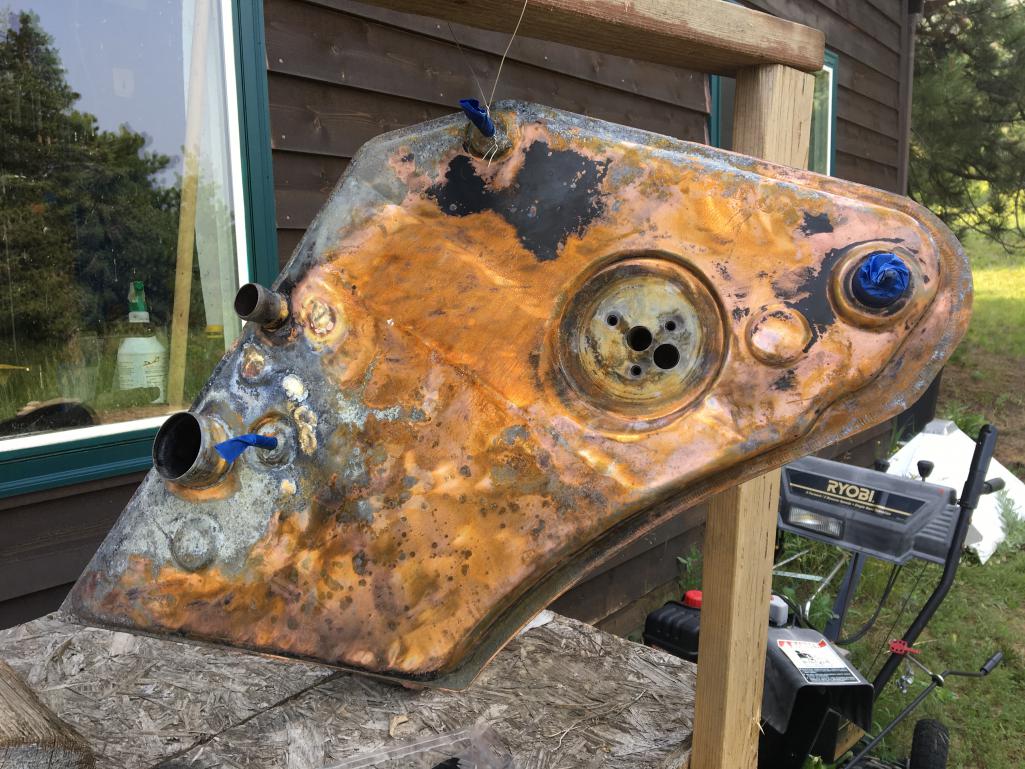
Posted by: Speedo Jul 12 2021, 06:08 PM
And after...
Treated to a couple liberal coats of POR 15 and it looks much better.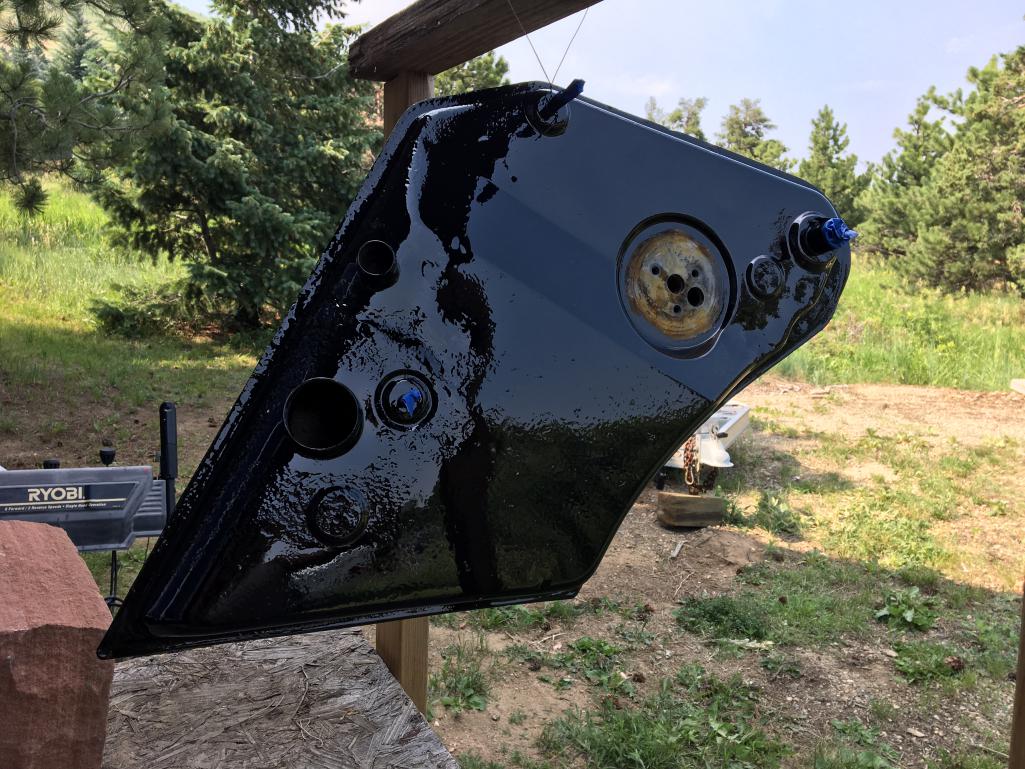
Posted by: Speedo Jul 13 2021, 06:51 AM
Working away on the front suspension. Something very satisfying about bolting up fresh parts. Slight dilemma with my bump steer modification...upper two U-joints were binding.
Figured out where the binding was happening, and removed about an 1/8th on the washer and binding disappeared so everything got tightened back up. 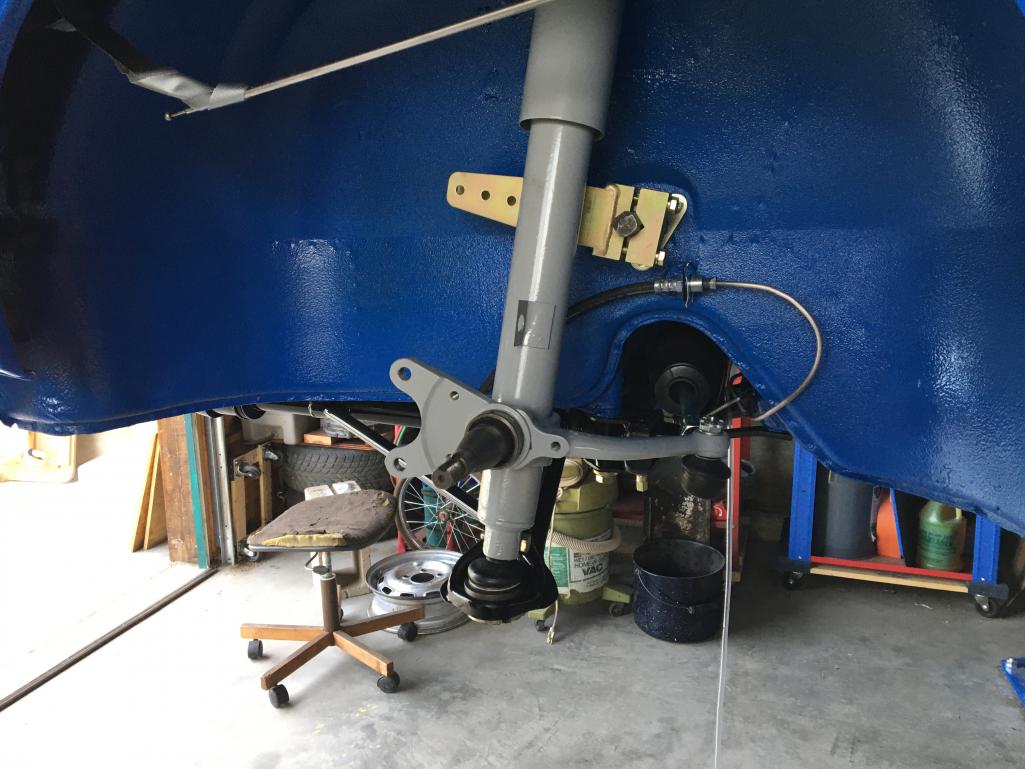
Posted by: Speedo Aug 5 2021, 06:05 PM
Could this be the correct mirror for my 6? Wasn't where it was supposed to be...but it is long and narrow with the correct base.
Posted by: mepstein Aug 5 2021, 07:34 PM
Could this be the correct mirror for my 6? Wasn't where it was supposed to be...but it is long and narrow with the correct base.
Looks correct to me.
Posted by: Root_Werks Aug 6 2021, 03:12 PM
Having a lift is a game changer. My last shop had one and I used it often. Looking great!
Posted by: Cairo94507 Aug 6 2021, 03:18 PM
That is definitely the correct mirror for your Six.
Posted by: Speedo Aug 14 2021, 06:09 PM
Suspension and brakes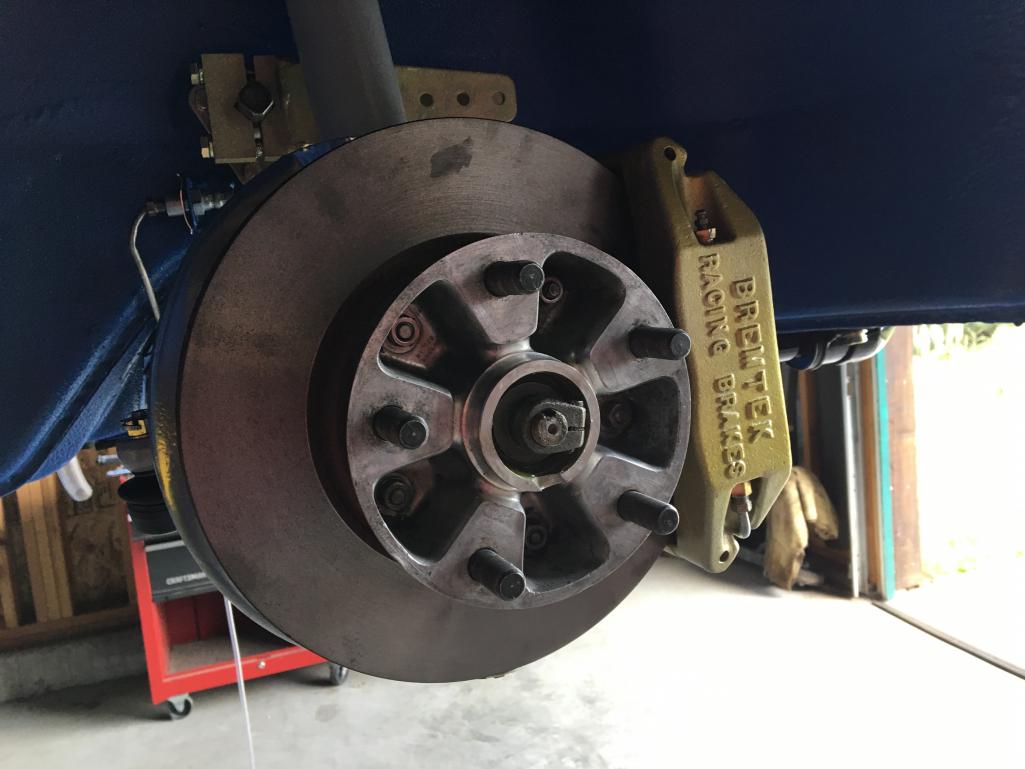
Posted by: Speedo Aug 14 2021, 06:10 PM
These front brakes are monsters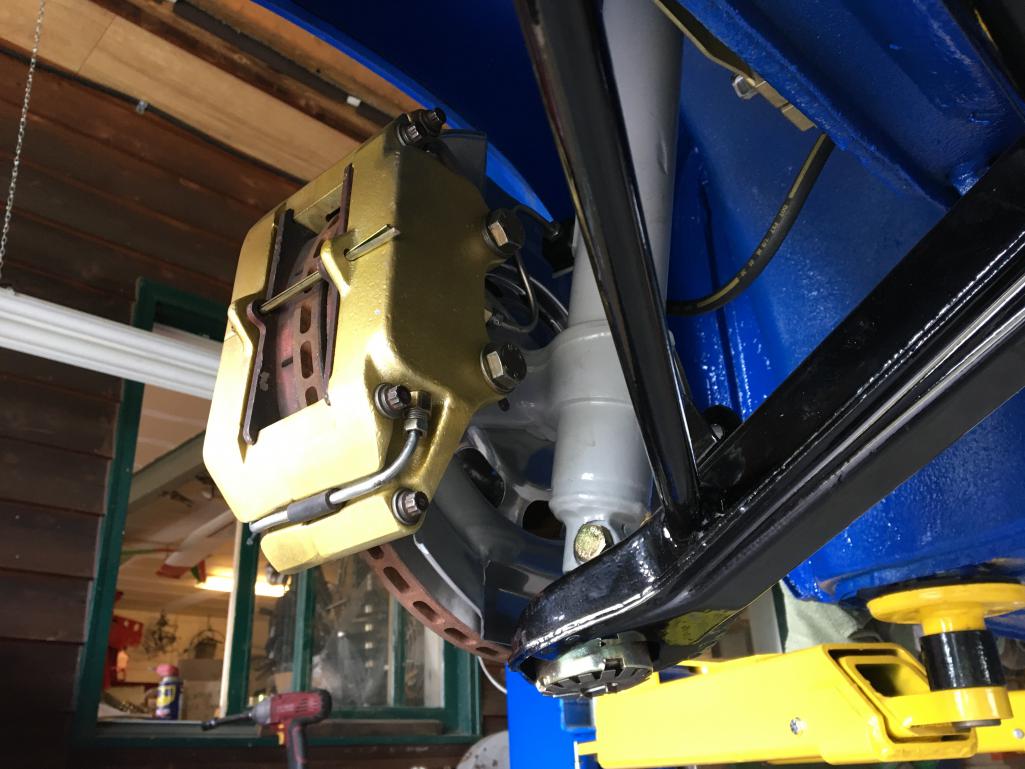
Posted by: Speedo Aug 14 2021, 06:14 PM
Rears are done except for dust shields and e-brakes. New coil overs and hardware. PET does not show where the bracket that supports the front of the rear brake dust shield goes. Is it under the head of the bolt and lock washer?
Posted by: Speedo Aug 14 2021, 06:15 PM
And the frosting on the cake...
Posted by: Speedo Aug 14 2021, 06:17 PM
Waiting for the tires to arrive and get mounted...then I will have a roller after many years.
Oil tank install tomorrow...
Posted by: KELTY360 Aug 14 2021, 06:25 PM
Oh man! You show the box and not the goodies? Guess I’ll have to be in suspense til the next edition. Love following this build.
Posted by: raynekat Aug 14 2021, 08:32 PM
Rears are done except for dust shields and e-brakes. New coil overs and hardware. PET does not show where the bracket that supports the front of the rear brake dust shield goes. Is it under the head of the bolt and lock washer?
From memory, doesn't the dust shield need to go behind the rotor such that you need to remove the calipers as well. I did this so many times in my build, you'd think I certainly know this by heart?
Posted by: Speedo Aug 19 2021, 03:47 PM
Rear dust shields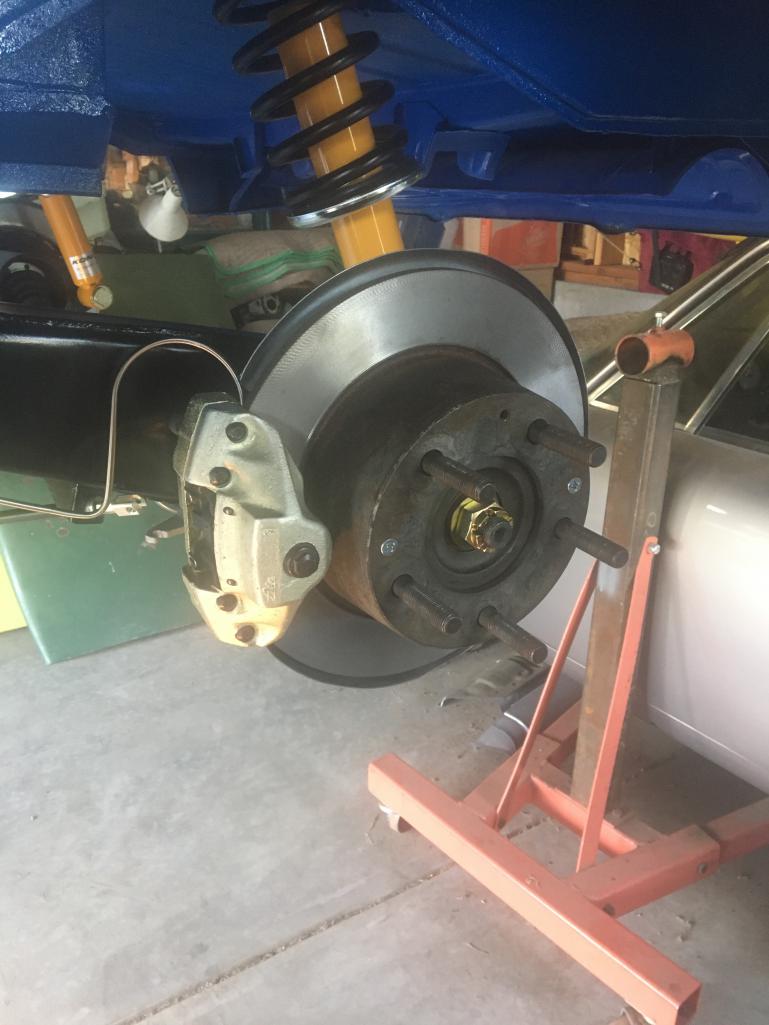
Posted by: Speedo Aug 19 2021, 03:48 PM
Re-built axles
Attached thumbnail(s)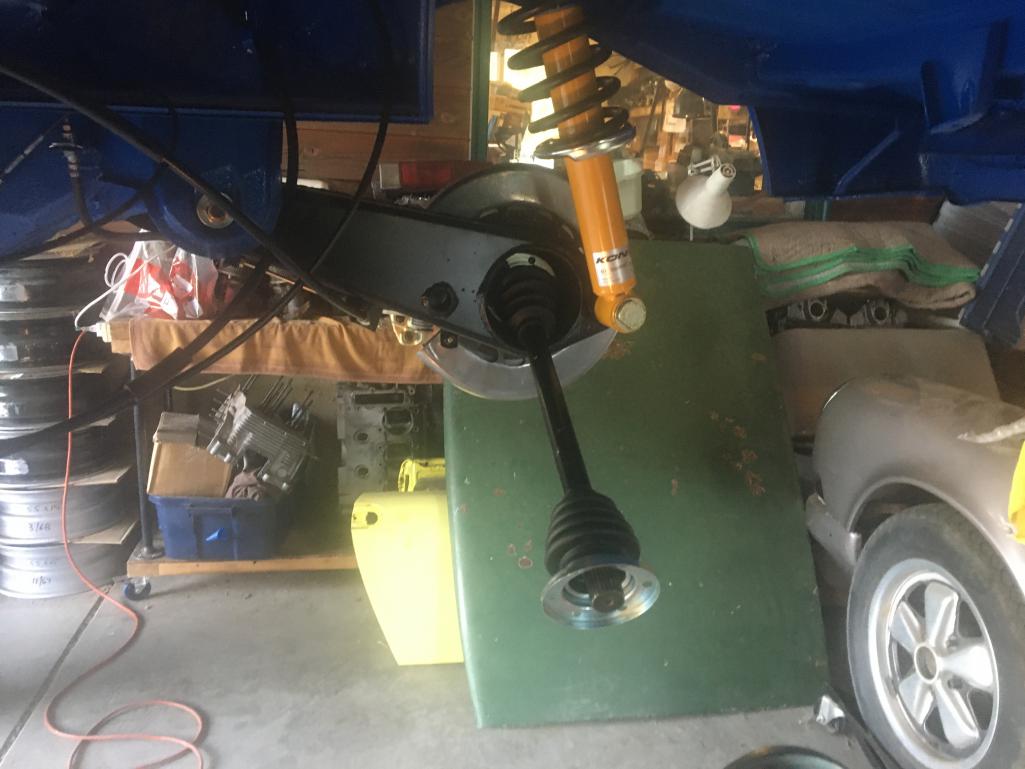
Posted by: Speedo Aug 19 2021, 03:50 PM
And fresh Fuchs. Thanks to Al and Diane Reed. 15 x 6 wearing 205-50-15 Kumhos.
Attached thumbnail(s)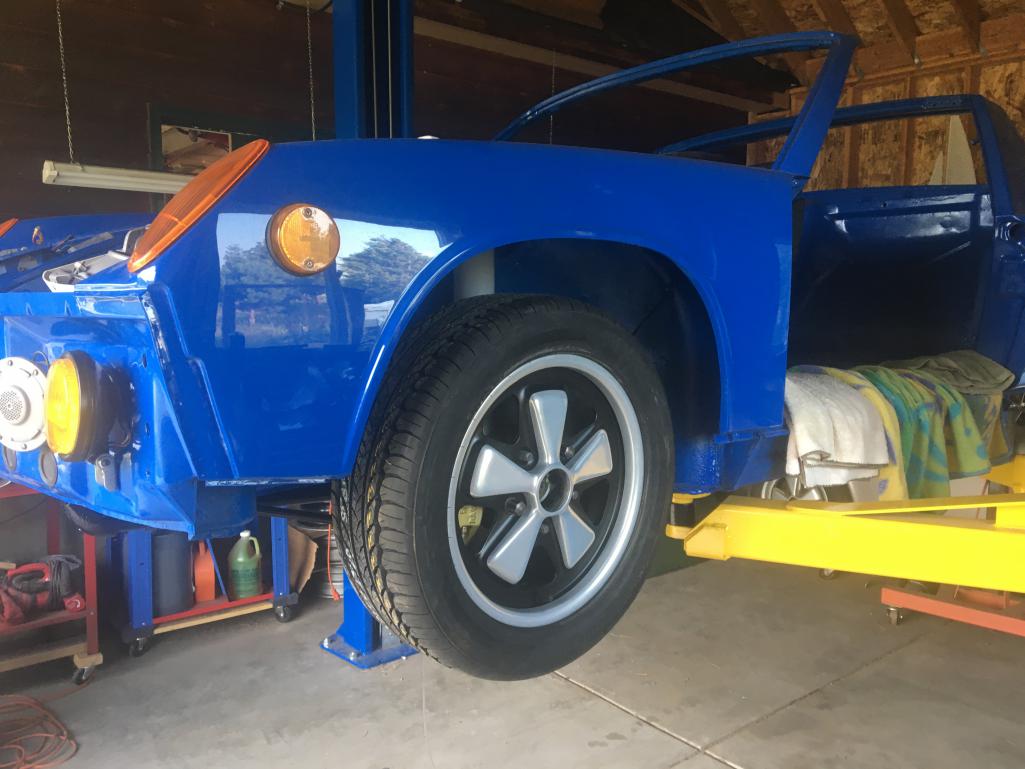
Posted by: Speedo Aug 19 2021, 03:51 PM
Been a long time since this beast has worn rubber.
Attached thumbnail(s)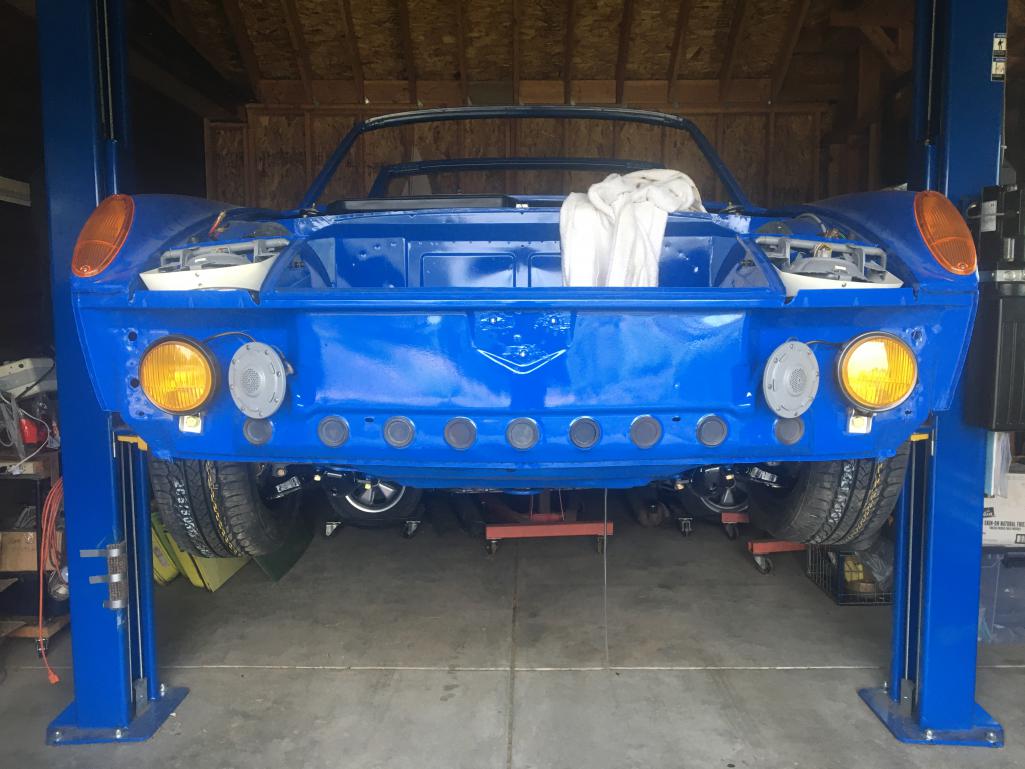
Posted by: Speedo Aug 23 2021, 11:42 AM
Finished up the dust shields, torqued the castle nut, and attached and adjusted the e-brake cable. The underside of the car will never be this clean again.
Attached thumbnail(s)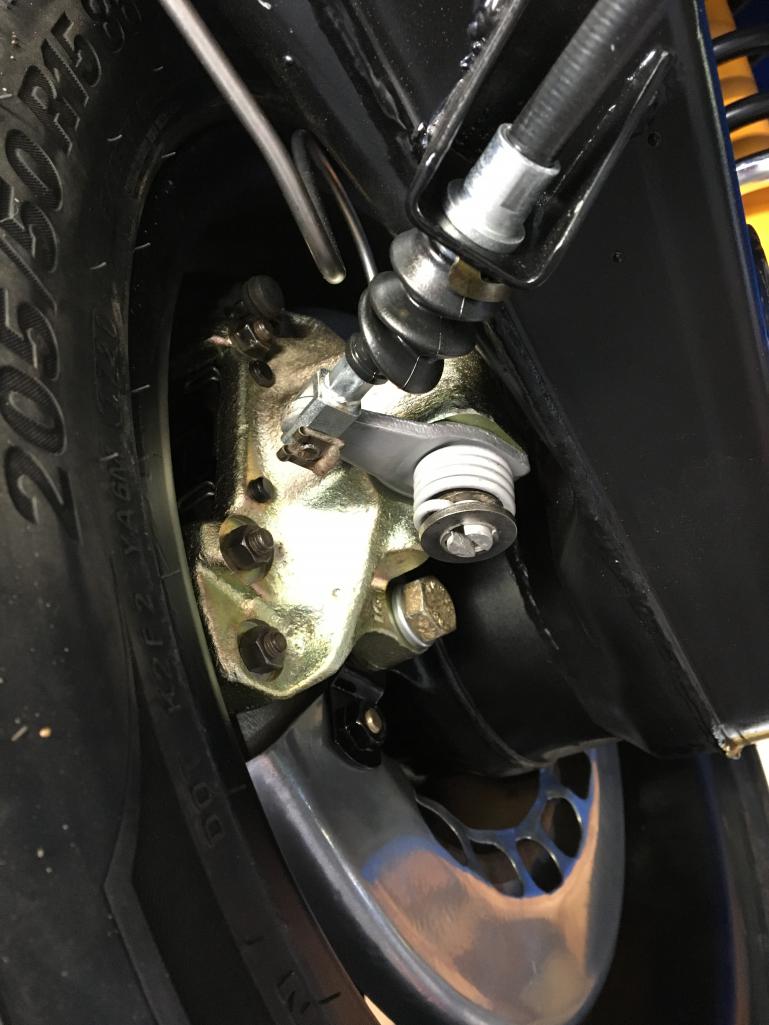
Posted by: Speedo Aug 23 2021, 11:43 AM
Underside
Attached thumbnail(s)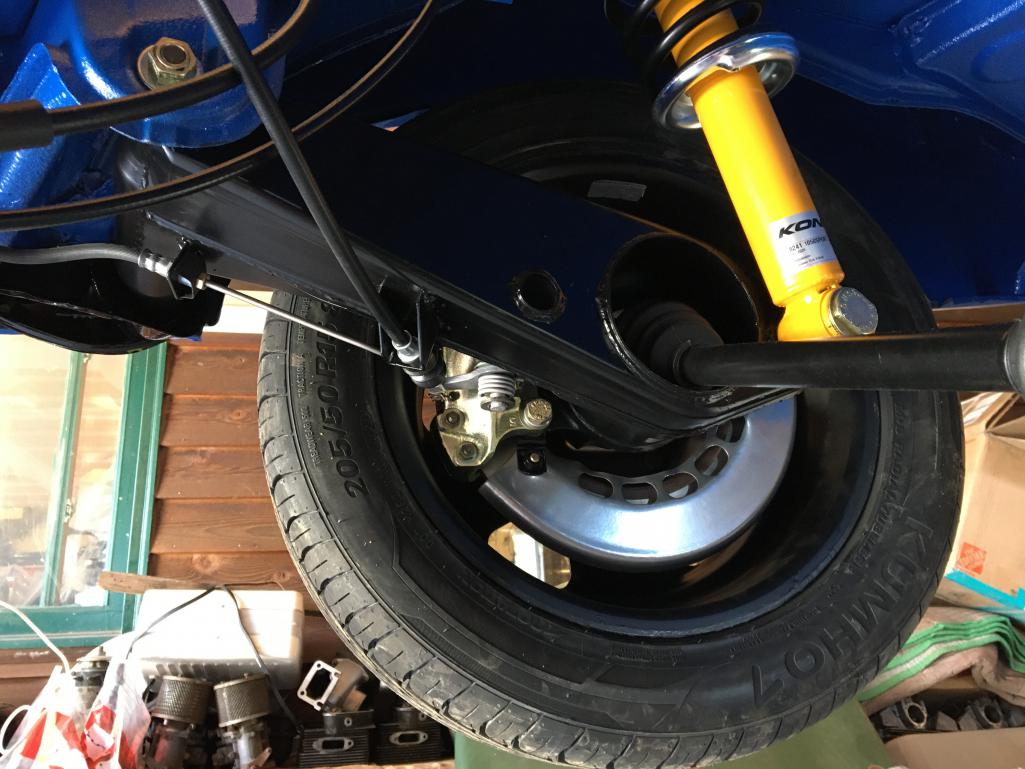
Posted by: Speedo Aug 23 2021, 11:44 AM
Last time the beast was on his wheels was a long time ago.
Attached thumbnail(s)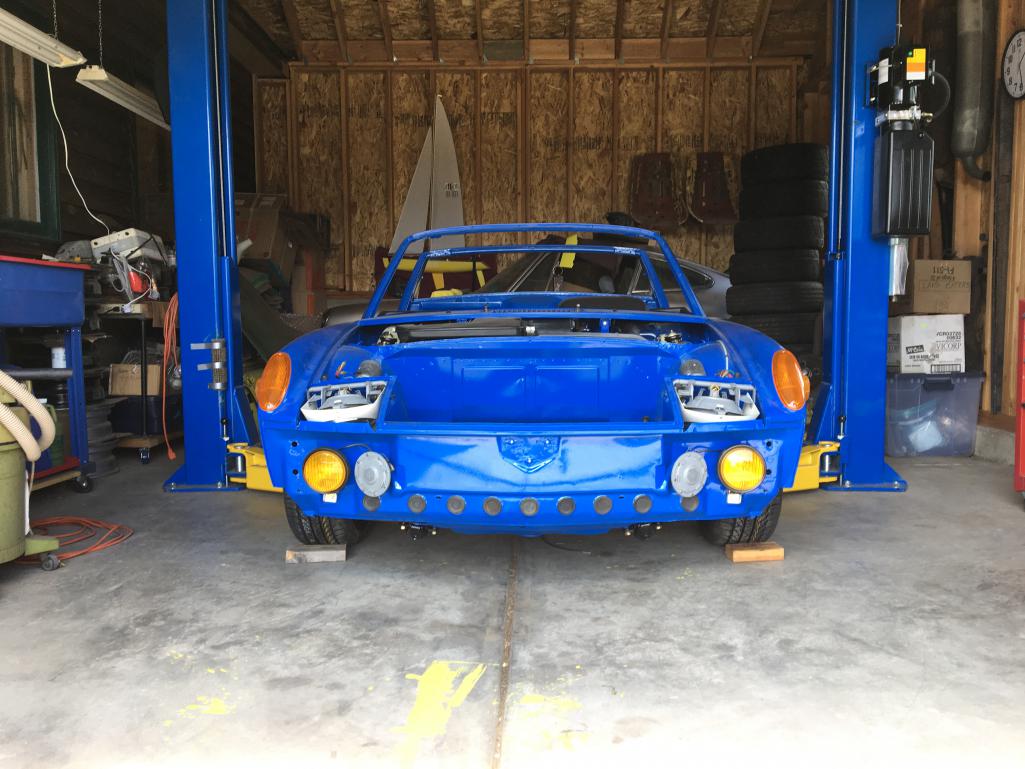
Posted by: Speedo Aug 23 2021, 11:45 AM
New wheels and tires...I lied, refinished wheels, but new rubber.
Attached thumbnail(s)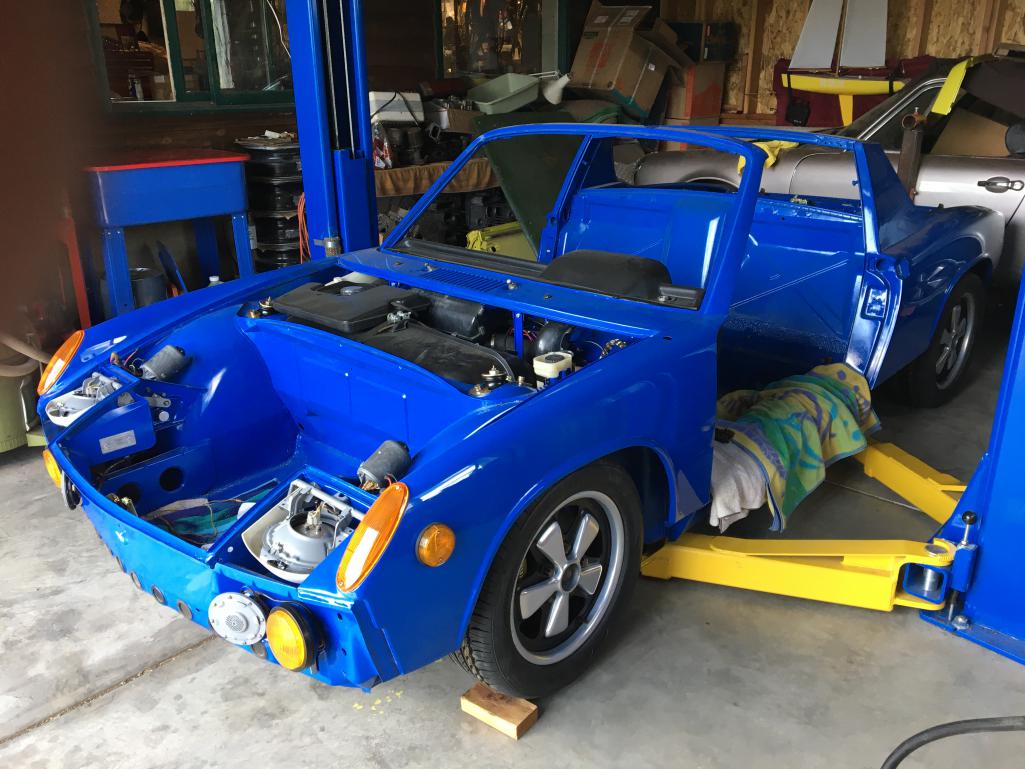
Posted by: Speedo Aug 23 2021, 11:47 AM
Definitely getting harder to resist the temptation to just start bolting things onto the car...out of order. Hood, lids, doors etc. I hate having to un-do something to get better access.
Attached thumbnail(s)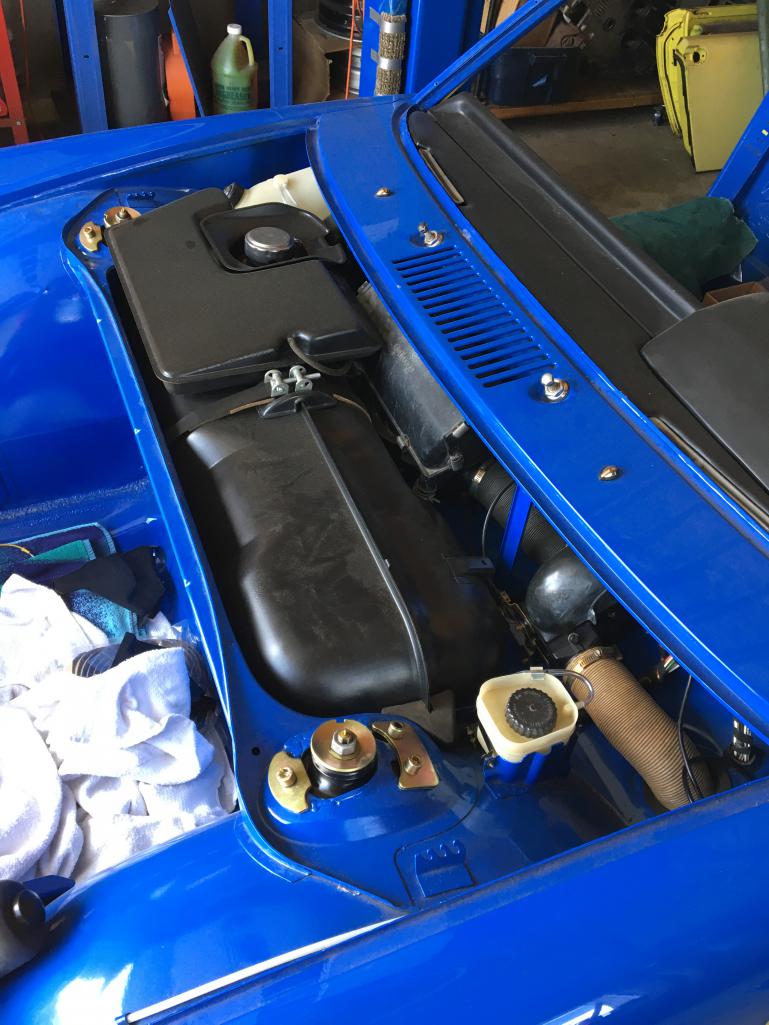
Posted by: Speedo Sep 2 2021, 09:55 AM
Meanwhile, Bullethead supplied me with a decent suspension cover that needed some love. Metal worked it a bit, took it down to bare steel and treated, primed and painted in satin black. A little bit of love with new edges from 914Rubber and we are good!
Attached thumbnail(s)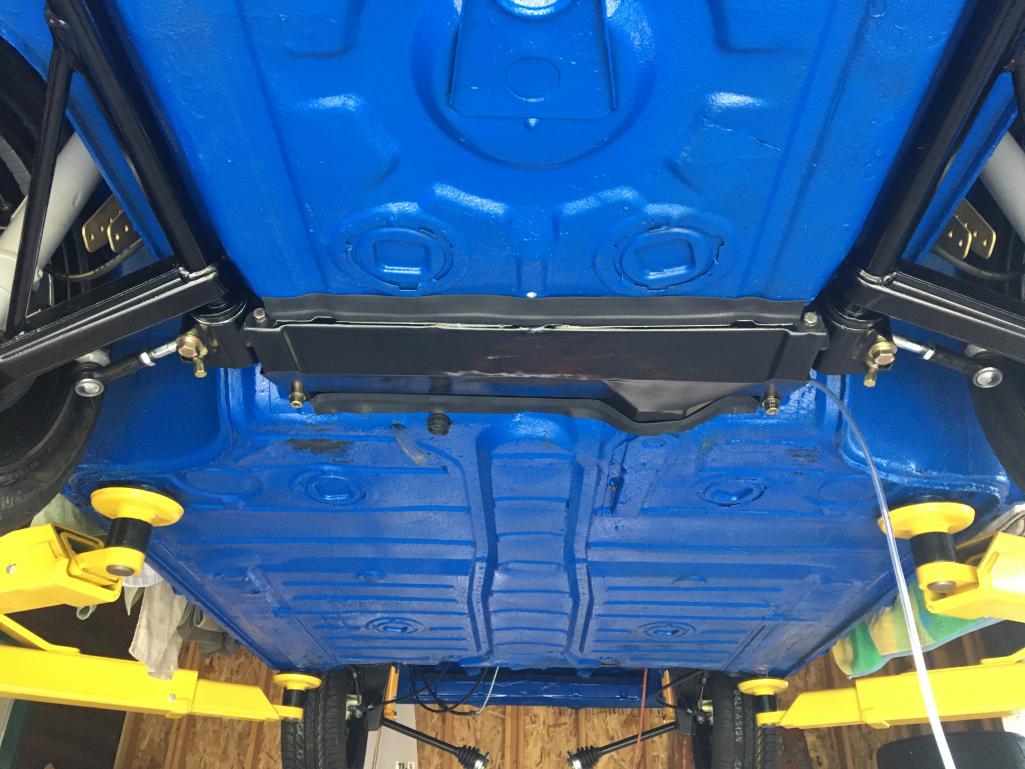
Posted by: Dion Sep 2 2021, 10:02 AM
Simply beautiful!
Posted by: TRS63 Sep 2 2021, 01:25 PM
This car is turning out amazing 
Thanks for sharing,
Antoine
Posted by: Speedo Sep 7 2021, 10:32 AM
More progress...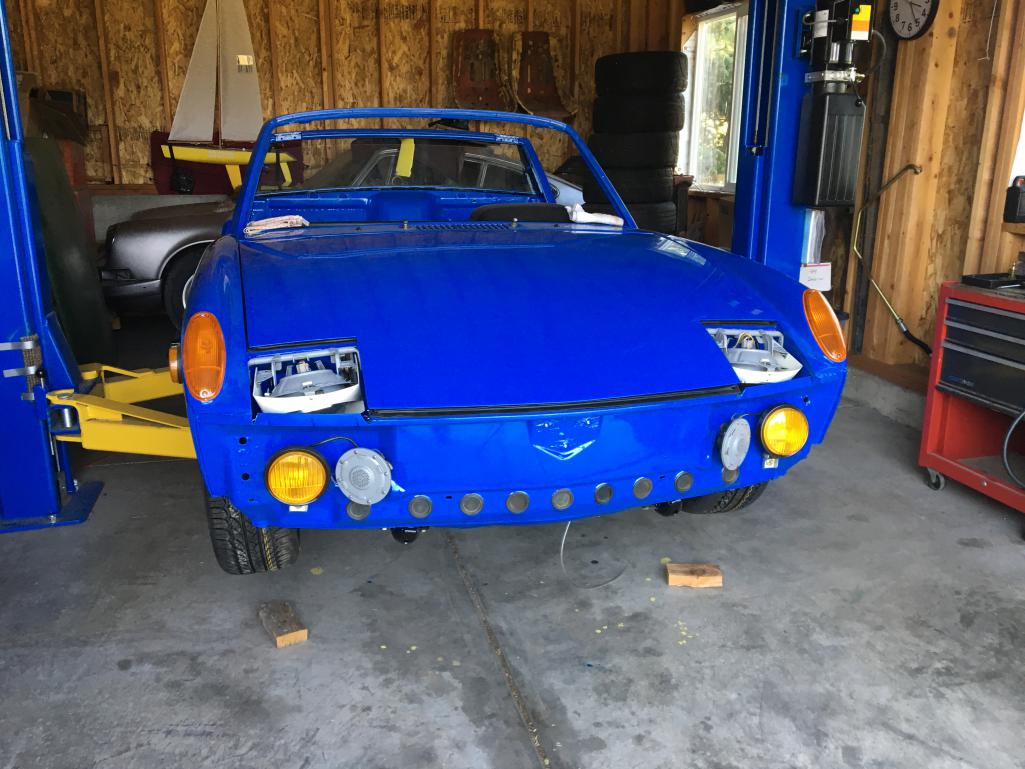
Posted by: Speedo Sep 7 2021, 10:34 AM
More...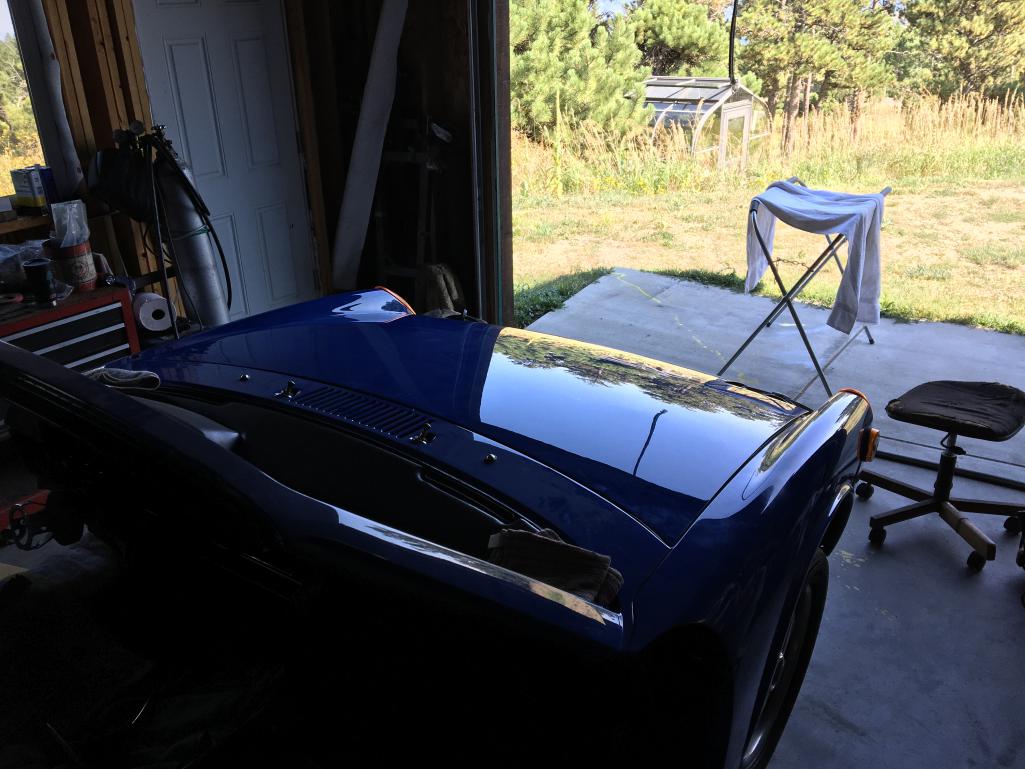
Posted by: Speedo Sep 7 2021, 10:34 AM
More...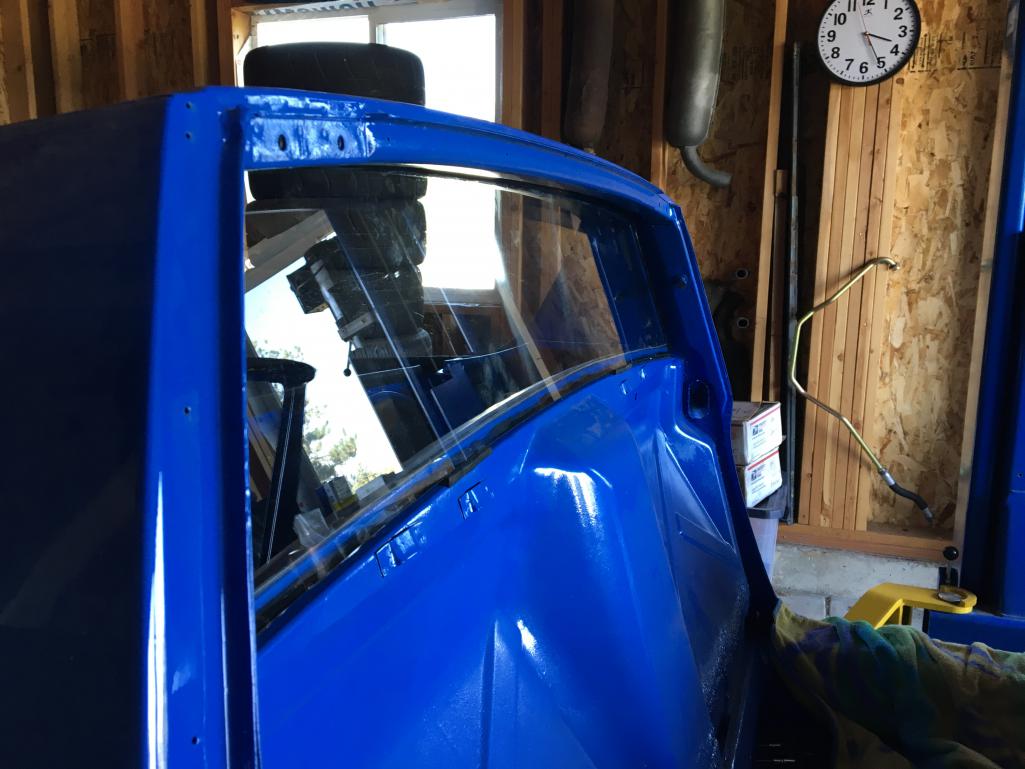
Posted by: Speedo Sep 7 2021, 10:41 AM
Engine lid... came out nice. Removed all the letters to re-finish the grill. Scribed the back of the grill to remember where the letters went. Paint completely obscured my scribe marks. Lucky to have my son's car nearby to measure his lettering to replace mine. 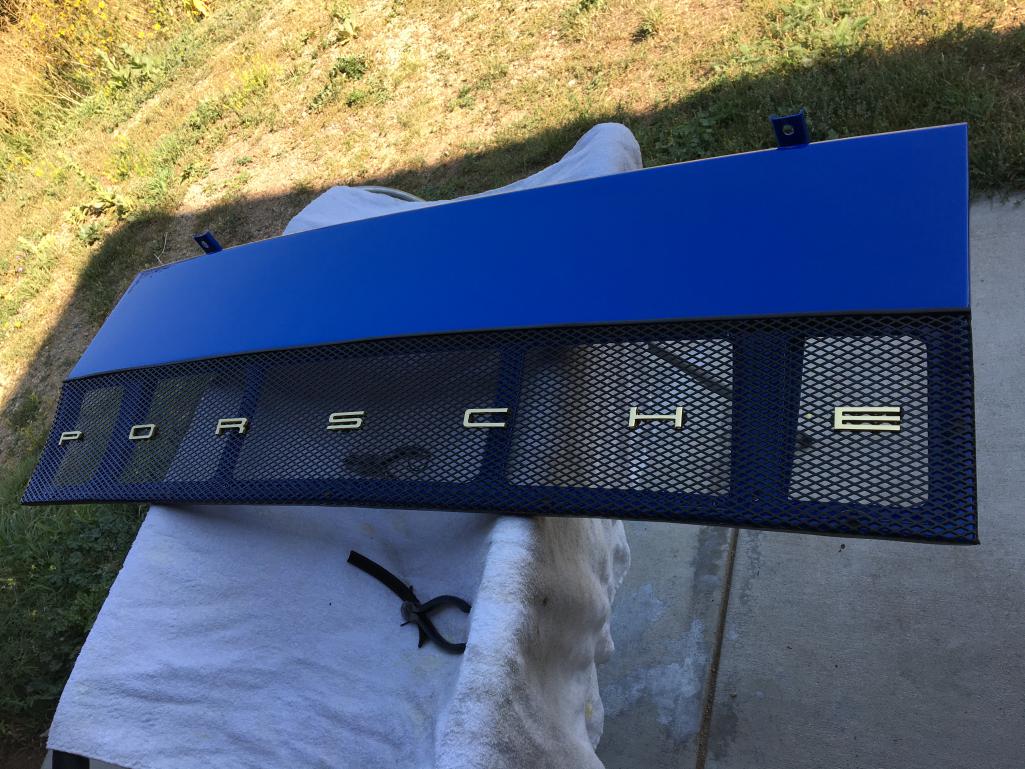
Posted by: Cairo94507 Sep 7 2021, 10:53 AM
Looking really nice. Fun to see it all going back together and looking like new.
Posted by: Speedo Sep 7 2021, 10:53 AM
Need to level the hood and get the headlight covers and brows dialed in. Engine lid gets attached when I get an extra set of hands, and then I figure out re-attaching the rear lid and springs without killing myself in the process. Doors, decos and bumpers are next...and if someone will remind me where I safely stored the front windshield I would appreciate it.
Posted by: Luke M Sep 7 2021, 12:54 PM
Need to level the hood and get the headlight covers and brows dialed in. Engine lid gets attached when I get an extra set of hands, and then I figure out re-attaching the rear lid and springs without killing myself in the process. Doors, decos and bumpers are next...and if someone will remind me where I safely stored the front windshield I would appreciate it.
Looks good Lars. Do you have the rear trunk spring tool ?
This tool will help make the install easier and safer.
https://914rubber.com/rear-trunk-spring-pressure-relieving-tool
Won't be too long....
Posted by: Speedo Sep 7 2021, 01:28 PM
[/quote]
Looks good Lars. Do you have the rear trunk spring tool ?
This tool will help make the install easier and safer.
https://914rubber.com/rear-trunk-spring-pressure-relieving-tool
Won't be too long....
[/quote]
I don't have the tool. When re-installing the springs in my son's car we realized that that tool works to un-hook the springs from the rollers when everything is installed in the car. Nothing was installed in the car so we were able to use a deep 1/2 drive socket and ratchet and four arms to tension the springs onto the rollers. It was sketchy but nobody died. We'll probably do the same for my springs.
Wait till you see the tool I used to stretch and secure the hood springs...it was perfect, and only used one arm!
Oh yeah...not driving too soon as the original 2.0 is pickled on the shelf. The 2.4 S engine gets built this fall.
Posted by: Speedo Sep 17 2021, 05:43 PM
Couldn't find a used windshield...get the impression they mostly get broken while being un-glued. Didn't want to spend $700 getting one shipped from Sunset Porsche, so did the next best thing and picked up one locally from Auto Glass Now for $180 and hope that it fits. Maybe glass install this weekend? Then wipers? Then shifter and linkages?
Posted by: Speedo Oct 3 2021, 12:01 PM
Need to re affix my paint code. The alu rivets are steep thread and measure 1.75mm x 5mm. Anybody have a source for these?
Posted by: mepstein Oct 3 2021, 02:52 PM
Aase might. They have a lot of the small stuff.
Posted by: Speedo Oct 3 2021, 04:15 PM
Shifter, hand throttle and heat...making headway.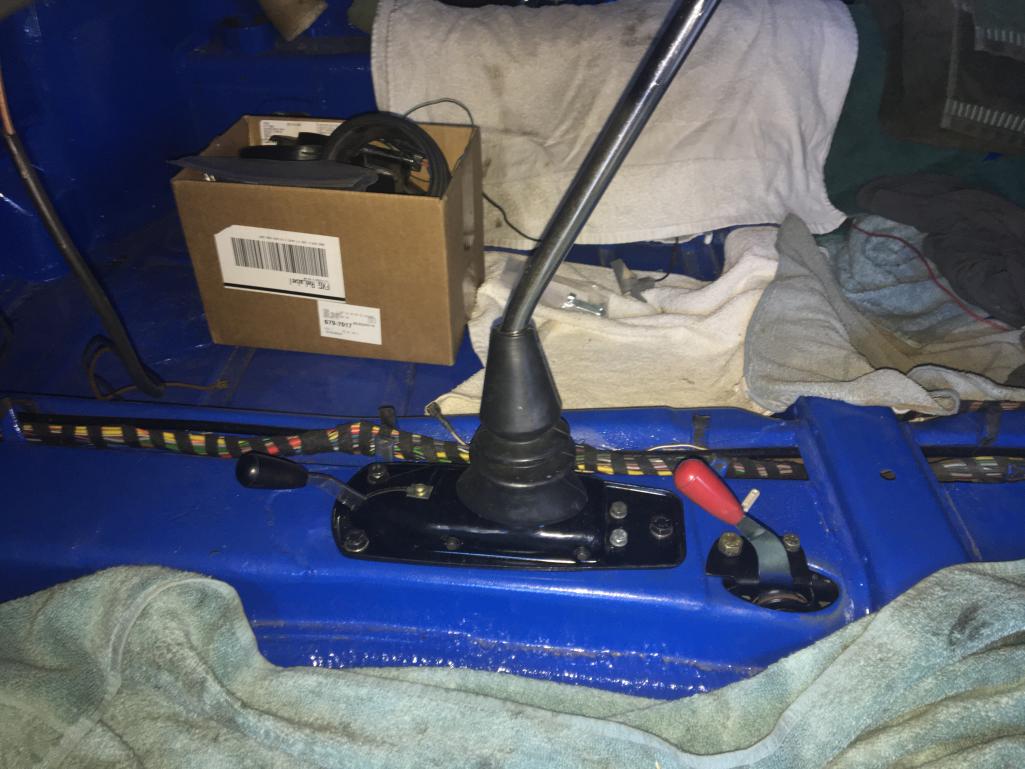
Posted by: Speedo Oct 3 2021, 04:17 PM
Engine lid and grill done as are the grill pontoons...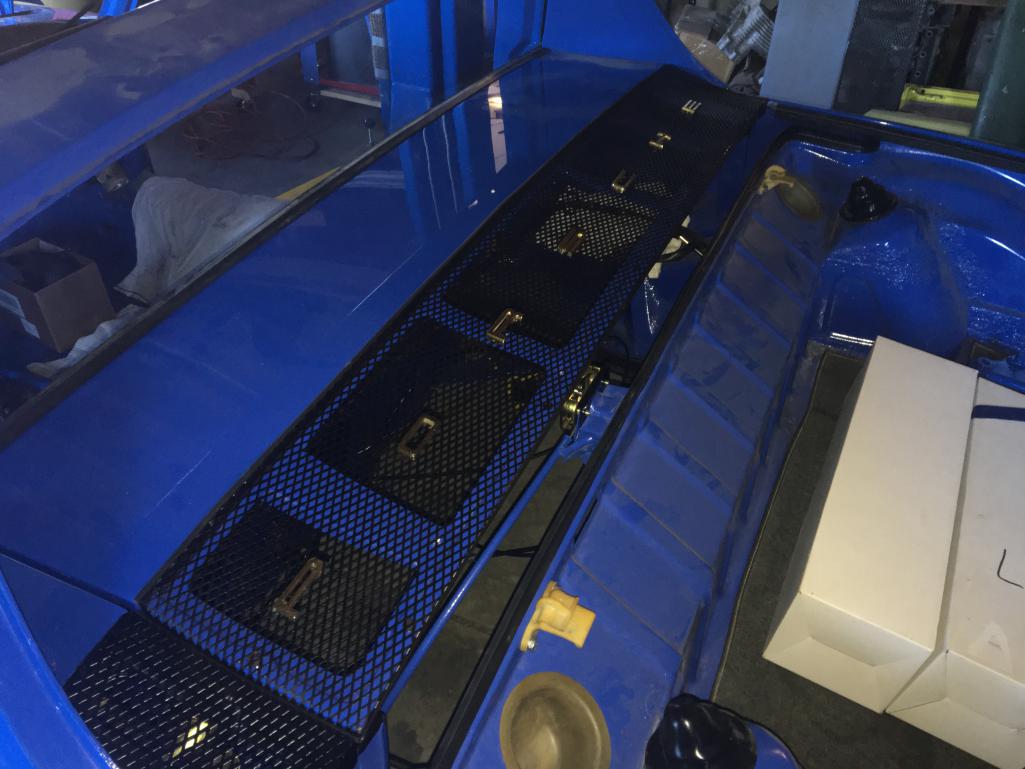
Posted by: Speedo Oct 3 2021, 04:19 PM
Found the front trunk shelf. Carpet was pretty clean.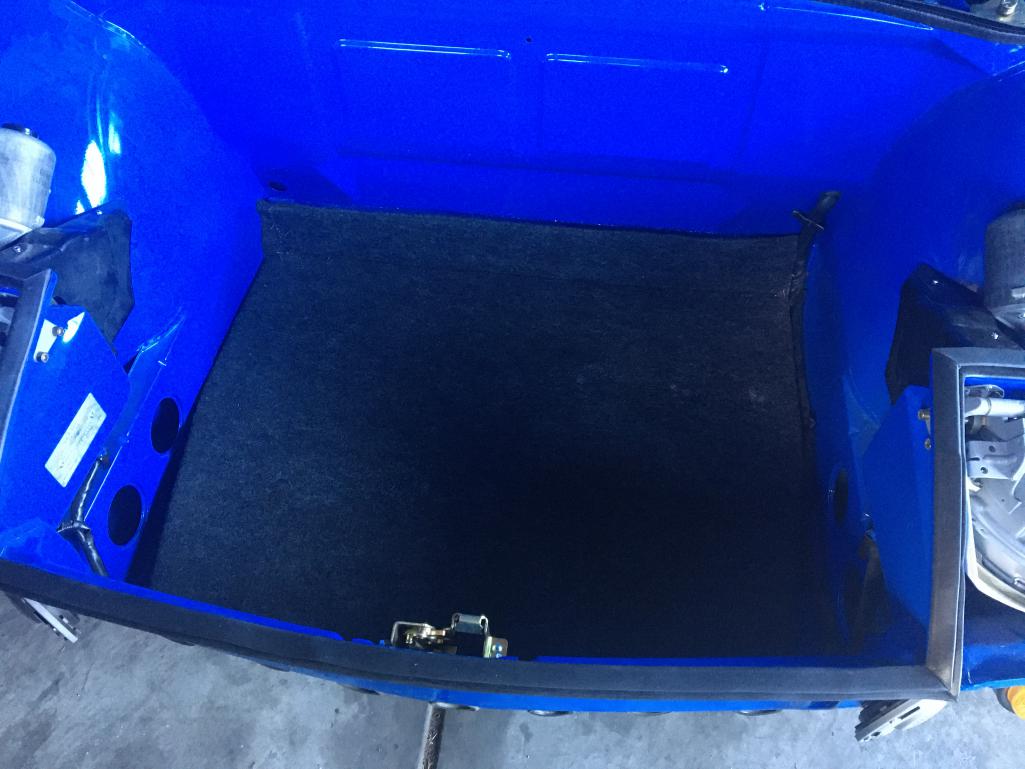
Posted by: Speedo Oct 3 2021, 04:22 PM
Targa top has been sanded and rolled with three coats of satin...still looks too glossy to me. Maybe that is because so many tops are sun faded?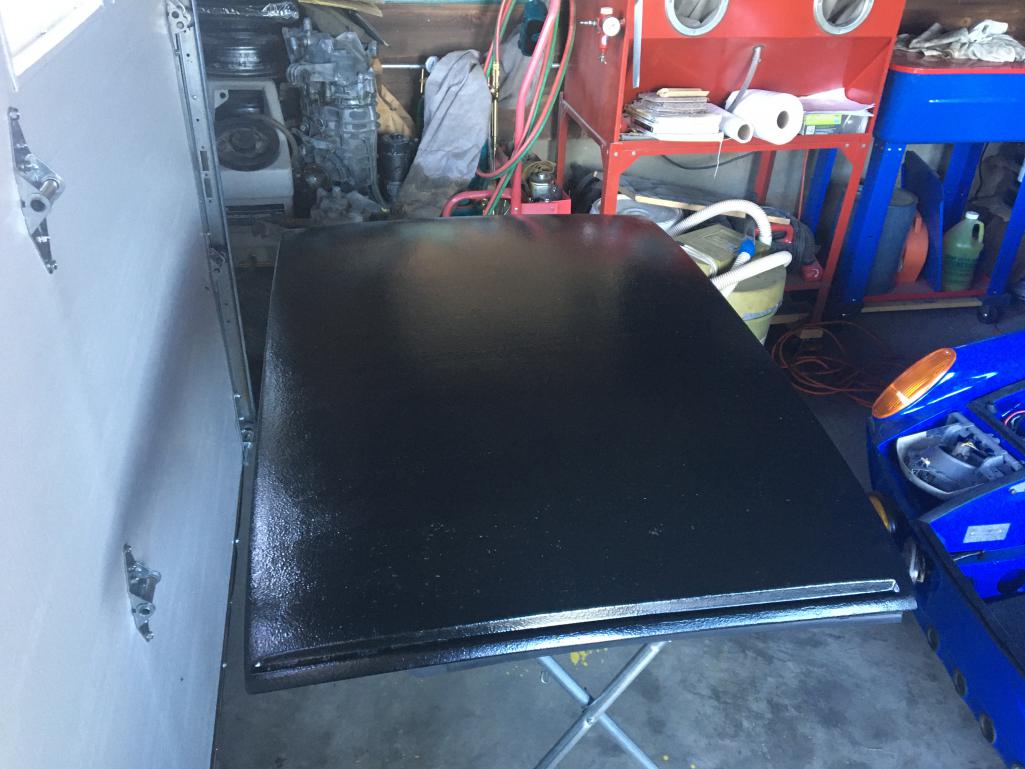
Posted by: Speedo Oct 17 2021, 07:31 PM
I installed the windshield today...prepped everything. Lined it up and marked it on all four sides. Laid the rubber stops and the butyl was perfect. Looked great till I installed the trim. Unfortunately several of the plastic trim pieces broke. I was using new 914 Rubber trim and plastic retainers. I was gentlely taping the trim in place but it seemed like the plastic clips just cracked imeadiately. I am 90 % secured but don't like the fact that my lower left corner, upper left corner and right top next to the joint are floating. Really don't want to remove the windshield and start all over. Can I use urethane glue on the corners that didn't work...or should I pull it and start all over.
Posted by: ctc911ctc Oct 18 2021, 07:34 AM
I am up against this same issue - decided to outsource the project. I also purchased new clips from another Porsche parts house that claimed OEM, They seem pretty solid.
Windshield guy tells me he can save the windshield, reset and install trim - NP
We shall see.
I installed the windshield today...prepped everything. Lined it up and marked it on all four sides. Laid the rubber stops and the butyl was perfect. Looked great till I installed the trim. Unfortunately several of the plastic trim pieces broke. I was using new 914 Rubber trim and plastic retainers. I was gentlely taping the trim in place but it seemed like the plastic clips just cracked imeadiately. I am 90 % secured but don't like the fact that my lower left corner, upper left corner and right top next to the joint are floating. Really don't want to remove the windshield and start all over. Can I use urethane glue on the corners that didn't work...or should I pull it and start all over.
Posted by: iankarr Oct 18 2021, 02:49 PM
I installed the windshield today...prepped everything. Lined it up and marked it on all four sides. Laid the rubber stops and the butyl was perfect. Looked great till I installed the trim. Unfortunately several of the plastic trim pieces broke. I was using new 914 Rubber trim and plastic retainers. I was gentlely taping the trim in place but it seemed like the plastic clips just cracked imeadiately. I am 90 % secured but don't like the fact that my lower left corner, upper left corner and right top next to the joint are floating. Really don't want to remove the windshield and start all over. Can I use urethane glue on the corners that didn't work...or should I pull it and start all over.
If the trim is secure and just the corners aren't locked, I'd use some 3M weatherstrip adhesive or something like that and just tack those corners down. Sucks when they break. A few have done that on mine in the past. The important thing is that enough clips are holding the trim so it doesn't fly off while driving.
Posted by: Speedo Oct 21 2021, 02:41 PM
Talked with Mark at 914Rubber and he suggested trying to glue the loose spots with either trim adhesive or double stick tape. I have the 3M adhesive and gorilla tape, but I'm not sure about lifting the trim high enough to get either product in place. He also mentioned that if that didn't work that I could use a special tool to release the trim that did catch the clips, remove the trim, replace the broken clips and re-install new clips and them re-install the trim again. It is going to be tight no doubt. Anyone know what that tool looks like? I really don't want to destroy the trim in the process.
Posted by: Speedo Oct 25 2021, 11:04 AM
I think I have wrestled the trim into submission. Got focus on the headlight covers and brows. No beam adjustment just yet. So far... 
Posted by: Speedo Oct 25 2021, 11:05 AM
Left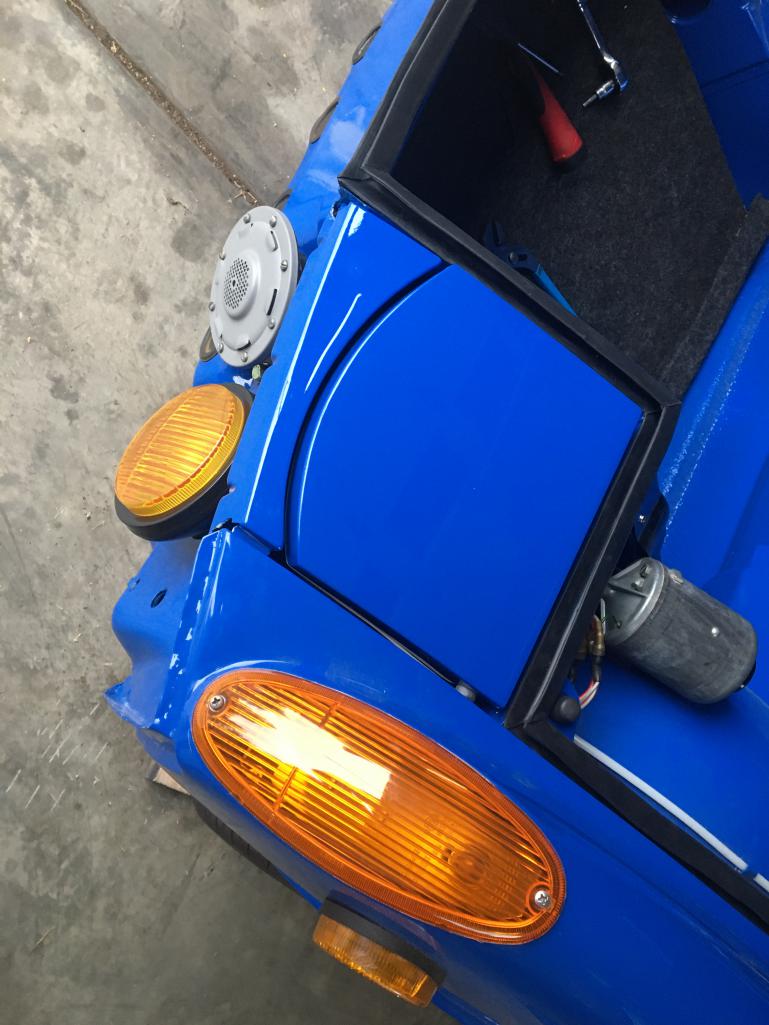
Posted by: Speedo Oct 25 2021, 11:06 AM
Right
Posted by: autopro Oct 25 2021, 11:48 AM
Amazing work! I love the color, I am going with something very similar on my build.
Posted by: 914Sixer Oct 25 2021, 12:22 PM
Love the work. Under the engine lid grill is supposed to be black along with the two side pieces.
Posted by: Speedo Oct 25 2021, 06:23 PM
Love the work. Under the engine lid grill is supposed to be black along with the two side pieces.
I realized after the fact. I actually like the blue -black contrast. I'm not feeling guilty just yet
Posted by: Speedo Oct 30 2021, 04:07 PM
Need to re affix my paint code. The alu rivets are steep thread and measure 1.75mm x 5mm. Anybody have a source for these?
Small victory. Actually four small victories. Consolidating some left-overs today, I found this A pillar section I saved from a donor car. I happened to see the paint code was still attached...with the rivets I need.
Posted by: partwerks Oct 30 2021, 08:13 PM
A sleeve or doubler makes sense. I will need to do it differently than Rick as I am not replacing the entire inner rocker. I will sleeve the area from the inner wheel house to behind the jackpoint, and then the area behind my inner rocker repair. I want the sleeve to lay flush with the inner rocker and wheel house repair so I can get good welds. I think I can engineer the sleeve to fit up after welded to my repair.
I want to figure out where the jackpoint fits first.
Then fit the sleeve behind my repairs[attachmentid=546595]
Sleeve fitted behind wheel house repair
Inner rocker sleeve
Everything tied in and fitted
What are those acupuncture gizmos sticking in there?
Posted by: Speedo Oct 31 2021, 08:09 AM
Elusive rascals
Posted by: Speedo Oct 31 2021, 08:11 AM
Ba-da-bing. Re-secured without problem and door switch with new rubber.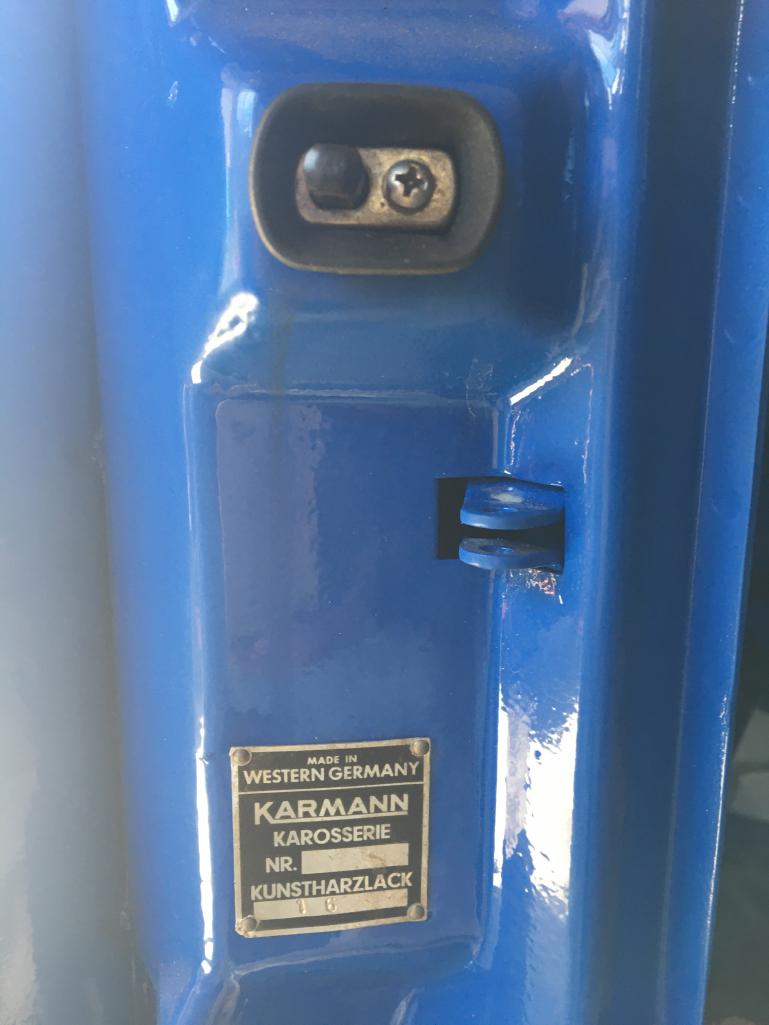
Posted by: Speedo Jun 25 2022, 05:24 PM
I have been on a sabaticle...working on reviving this 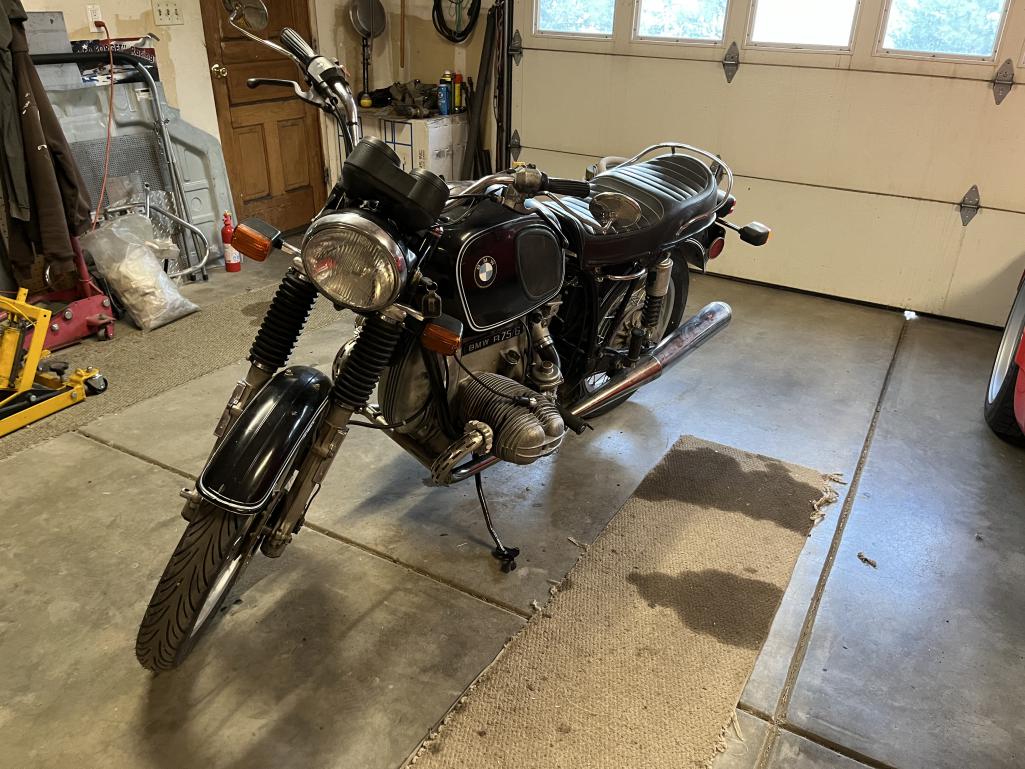 and now that it has been returned to life, I will pic back up where I left off.
Posted by: Speedo Jun 25 2022, 05:31 PM
Been working on the front valance from Brant. Needed welding, metal shaping, priming, texture and finishing. Ready to install.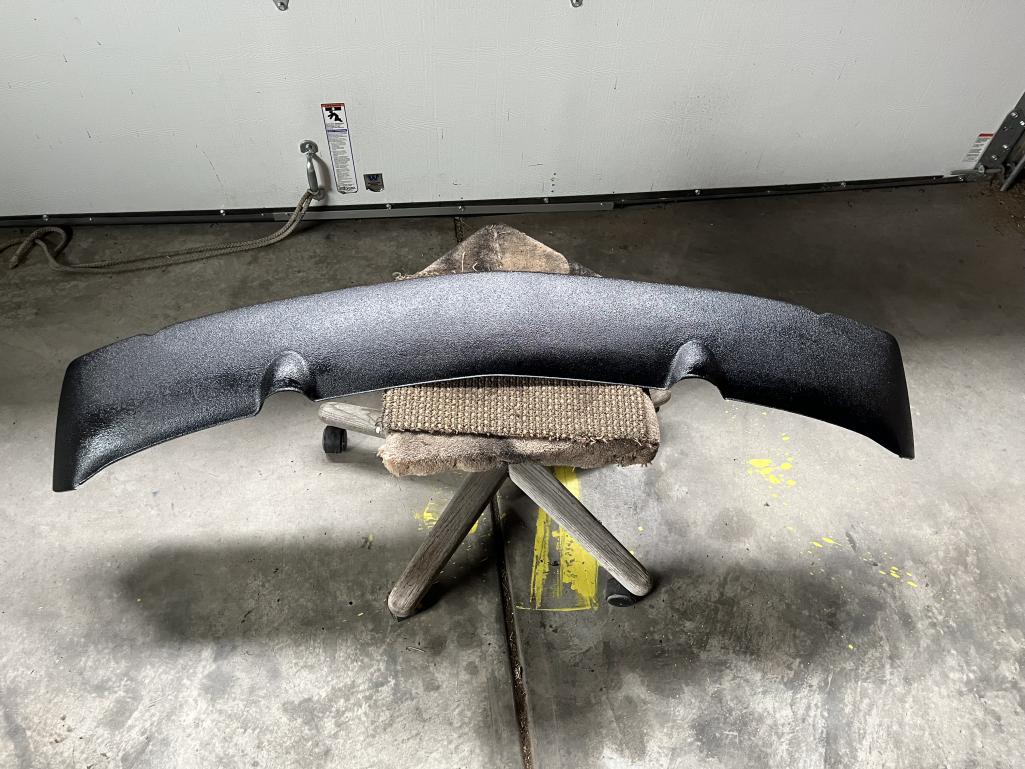
Valance and bumper get installed tomorrow. Then I need to get the foglight grills finished and installed. I also have made three attempts to refinish the top and I have had both paint and dust issues...third coat applied today with a 3 " roller and I think we are good. Pics forthcoming...
Posted by: brant Jun 26 2022, 07:25 AM
Nice!
Posted by: Speedo Jun 26 2022, 01:45 PM
My fourth attempt on the targa top. A little bit of dust found its way to the top as the paint was drying...  ...again. This will suffice.
Powered by Invision Power Board (http://www.invisionboard.com)
© Invision Power Services (http://www.invisionpower.com)