Printable Version of Topic
Click here to view this topic in its original format
914World.com _ 914World Garage _ GT rockers to GT flare
Posted by: ruby914 Jul 4 2012, 03:28 PM
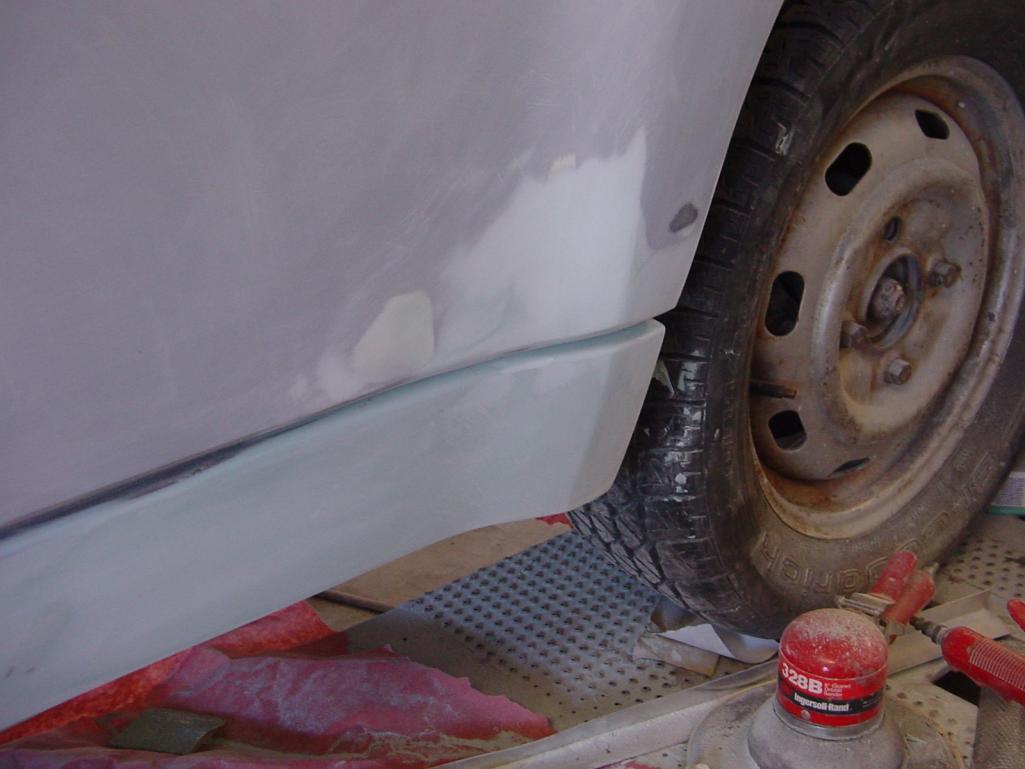
I got some budget rockers that  needed lots of work.
First cut about 1" off the top and had to add 3/4" to the bottom.
Cut about 1/4 off the front but I still don't like how it flares out different than the body lines.
On the bottom of the door there is a bevel in the body that the rocker follows until it flares out. At that point the rocker flares as much as the body, not staying set in as much as the bevel. I am thinking it would look better If the rocker didn't flare out so much. Is that clear?
I would like to see how others have handled this trasition.
Attached image(s)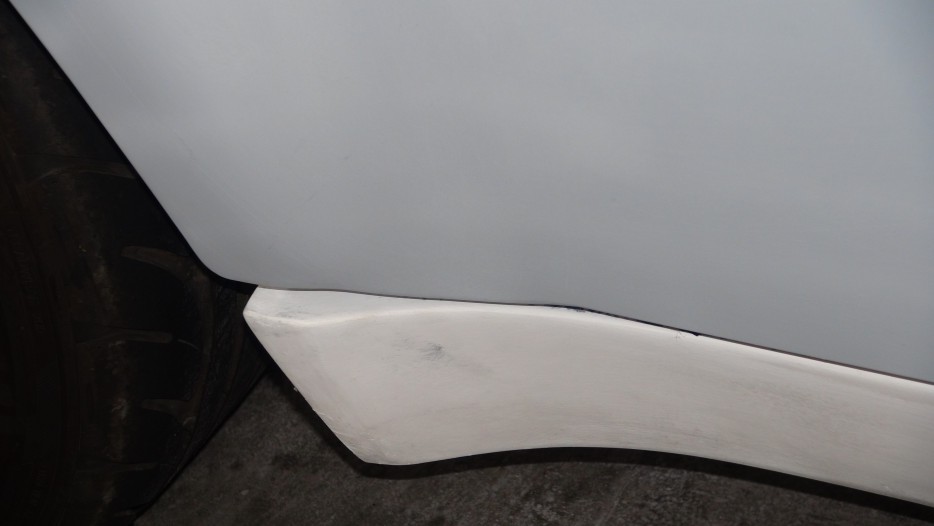
Posted by: RON S. Jul 4 2012, 06:25 PM
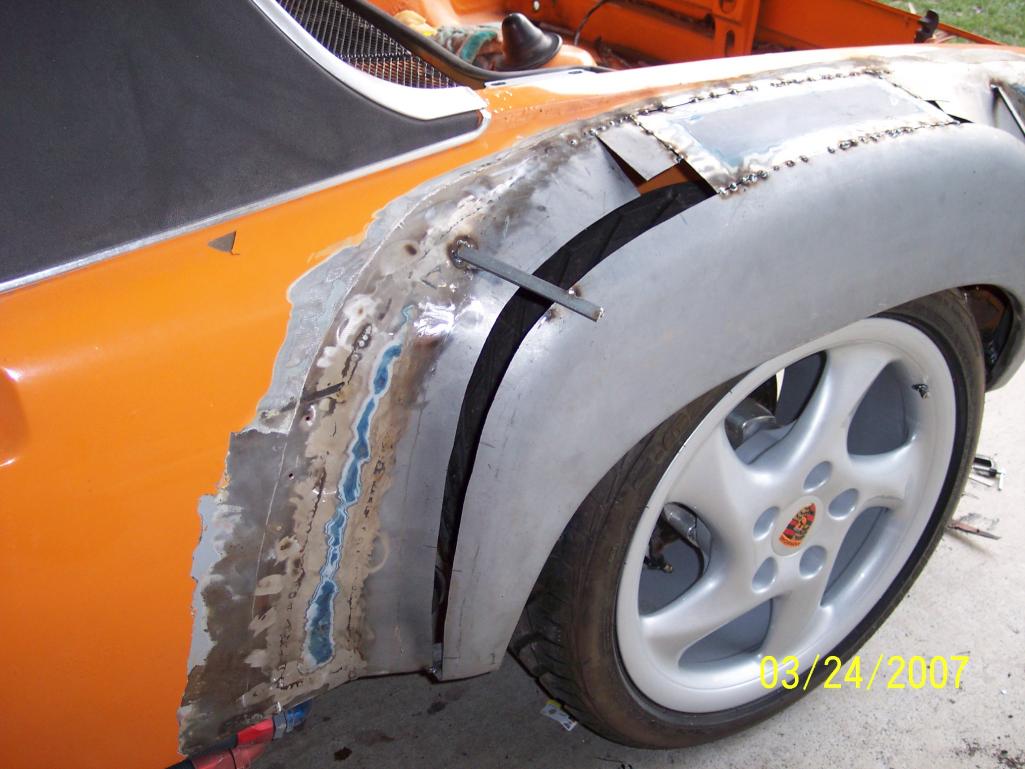
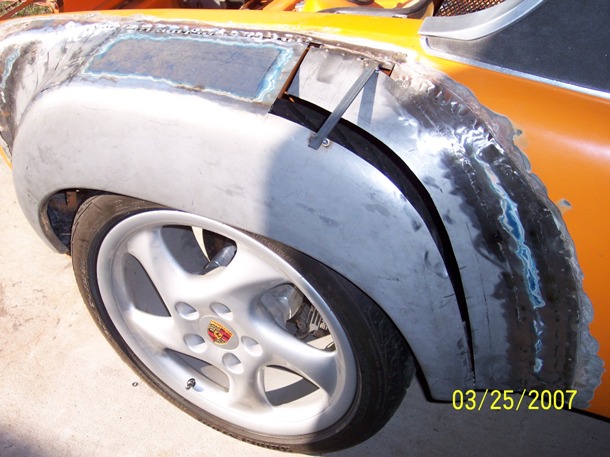
I made my switch from fiberglass to steel flares on my car back in 2007.
What I noticed about the flares after the initial install, was that I don't think the ends really weren't designed to match anything in particular.
I to wanted all the edges to line up cleanly after all was painted and all the rockers & valances were bolted down for the final time.
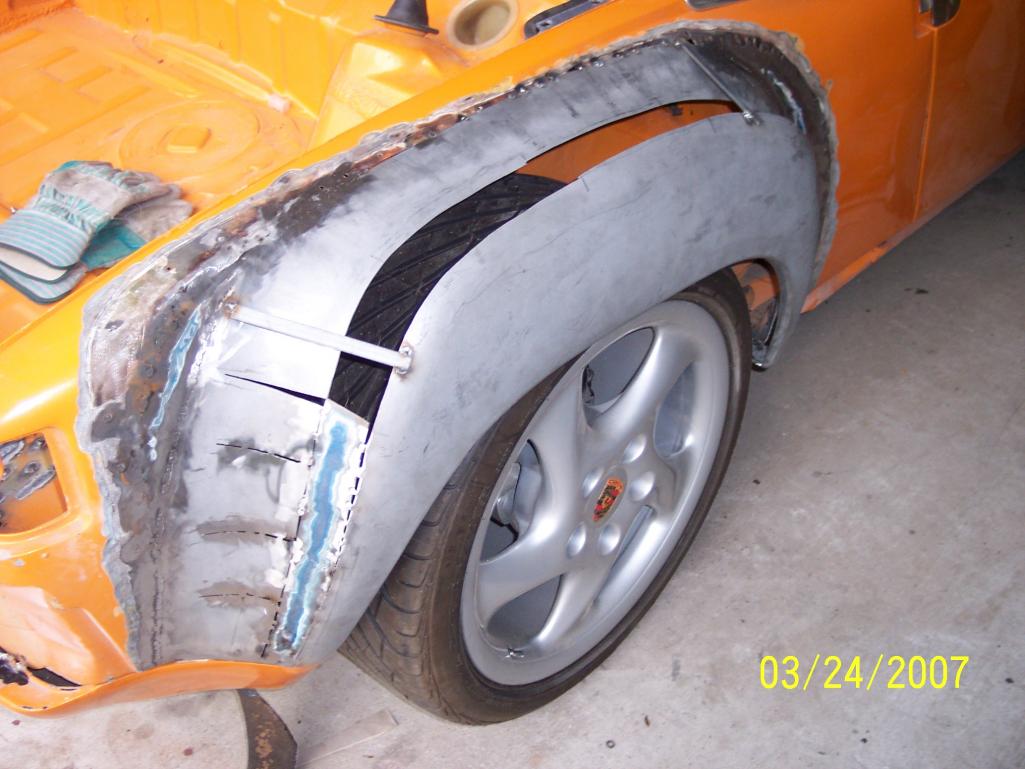
In the case of the rockers. After I finished welding the flares on, I cut the ends of the flares off and made sheet metal templates hat matched the existing shape of the rocker flare as it was bolted to the chassis.
Then I tacked the patterns to the bottom of the flares. Then proceeded to section the flares out to meet the edges of the patterns. Then weld up the gaps, and grind down the welds. Put the rockers and valances back on to check the line up. Remove and continue to repeat until you get the right look. That is do everything before any priming or painting. Keep repeating the on and off of the valances and rockers until the factory look is achieved. Also, after all was done, I also drilled and bolted the rocker ends to he flare ends, gapping the parts with faucet washers for an even gap.
I found it was easier to form the metal to mimic the rockers because with the metal it was cut, notch, weld, check fit. Immediate results. Unlike with fiber glass, it was notching, mixing resin, pasting the glass. and waiting for everything to harden to be able to check fit.
In the end, I did have a little of both forming the metal and forming the glass part. But it was heavier towards the metal work.
check the pics, and zoom up on the edge work. 5 years on it still looks good.
Ron
Attached thumbnail(s)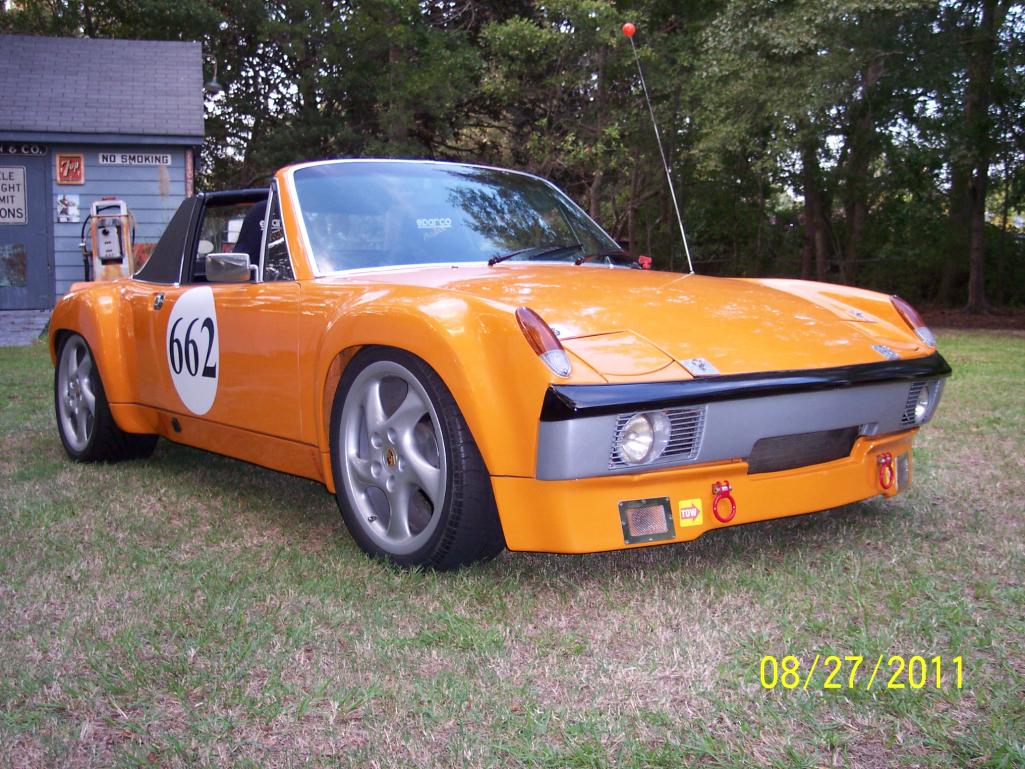
Posted by: porbmw Jul 4 2012, 06:42 PM
Can I jump in here to say...
Sweet car, Ron S. 
and
Is the silver on the bumpers paint or some other product?
Posted by: gothspeed Jul 4 2012, 06:57 PM
Great pics!! IMO there is never enough pictures of flared 914s!! 
Posted by: ruby914 Jul 4 2012, 07:13 PM
Yes, that's a very nice car Ron.
Nice work.
I did see someone section out the bottoms of the flares, maybe it was you.
It's still not too late for me to do the same, I like the look.
Are your rockers Getty Design? My thinking was, if they all fit like  just get the cheap ones and make them work.
I am sure it helps with a good rocker to start with.
Posted by: ruby914 Jul 5 2012, 12:12 AM
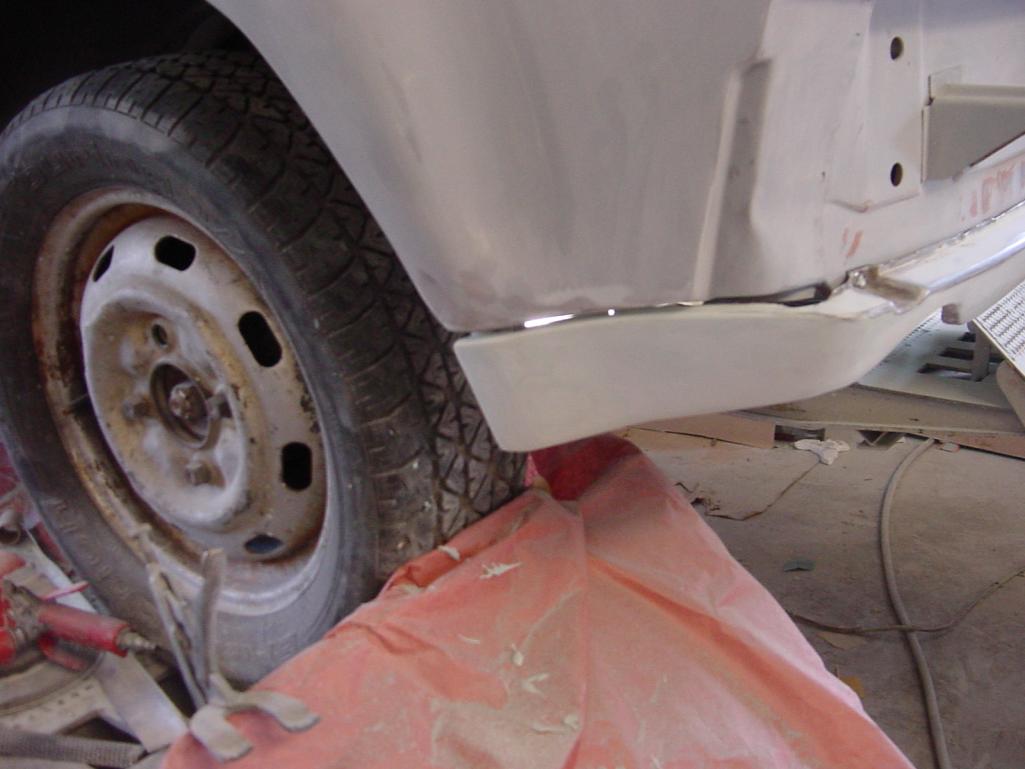
Here is another photo of what I am up against. Ron, It looks like you did a lot of nice work to your lower flares to remove the bevel at the yellow lines.
Seems this is they way the flares should have been stamped.
It also looks like you did some work to give the flares a constant radius at the bottom. Where my AA flares have a ramp (red line in the photo) before the radius into the flare.
Before seeing yours, I was thinking of building up the rocker to fill between the yellow lines, keeping a constant gap and or trimming it at the green line.
Is this much rework a common practice on the flares?
Any other approaches out there?
Attached image(s)
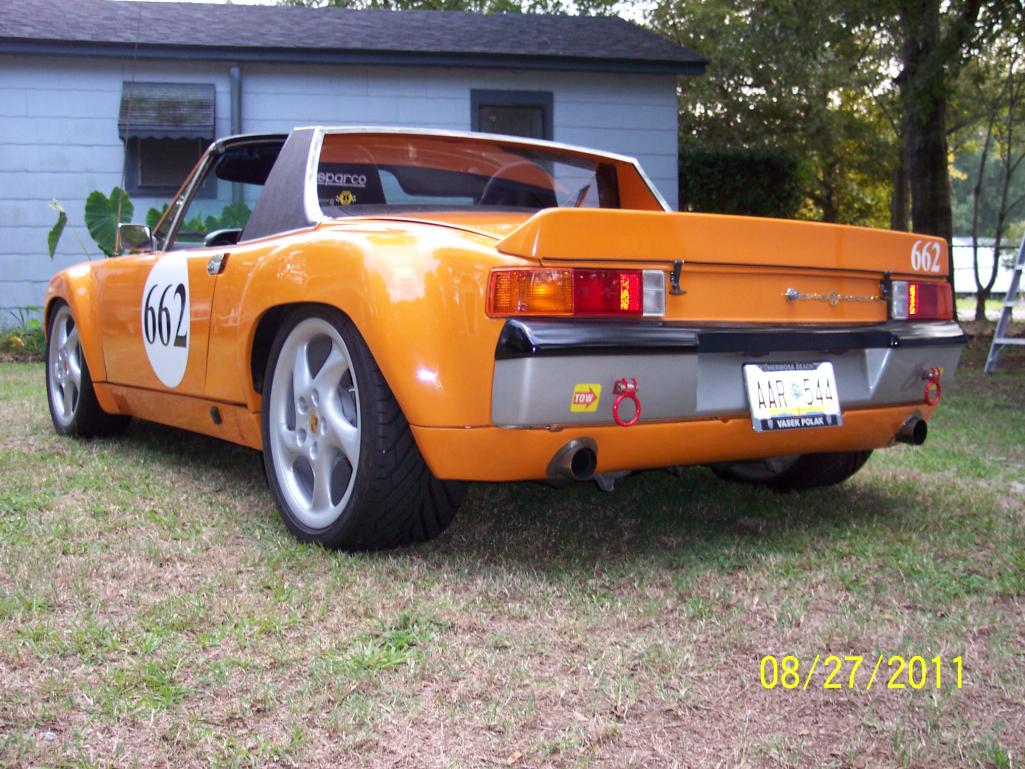
Posted by: RON S. Jul 5 2012, 12:35 PM

Can I jump in here to say...
Sweet car, Ron S.
and
Is the silver on the bumpers paint or some other product?
The bumpers were just painted with a semi-gloss black on the tops, and gloss silver enamel on the bottoms.
Yes, that's a very nice car Ron.
Nice work.
I did see someone section out the bottoms of the flares, maybe it was you.
It's still not too late for me to do the same, I like the look.
Are your rockers Getty Design? My thinking was, if they all fit like
just get the cheap ones and make them work.I am sure it helps with a good rocker to start with.
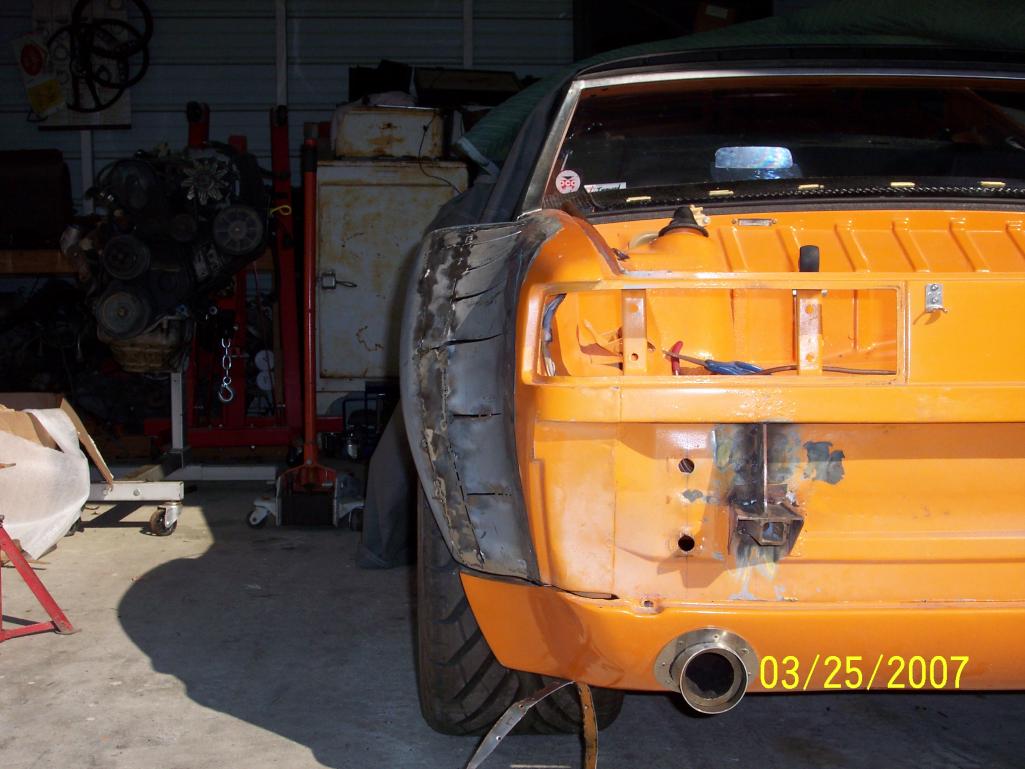
I did most all of the fit work on the flare bottoms. The rockers had a some what flat edge to them so I made the flares to match the rockers. The front spoiler, rear valance and the rocker panels were all AIR products. The front spoiler and the rear valance were heavily sectioned then bolted to the car, then re fiber glassed while in place to form to the car. Doing this removes the stresses on the panel when locked down and in operation. No worries about cracks or broken mounting ears after years of road use. The rockers were pretty much a bolt on only. They were bought for 11'' wide rear flares, so again when I fit the rear flares I made the ends match the rear end of the rockers. My flares were AA flairs also. They were a really good product to work with. They key is to take your time and get it looking the way it needs to look before you shoot the paint.
Ron
Attached thumbnail(s)
Attached image(s)
Posted by: ThePaintedMan Jul 5 2012, 12:49 PM
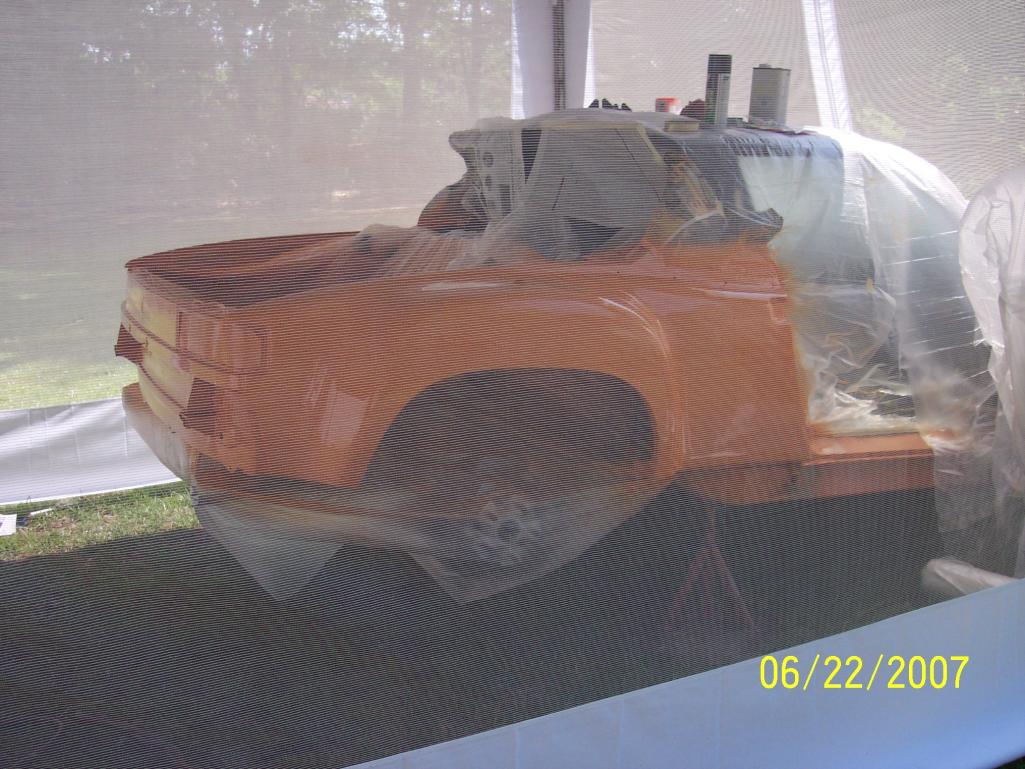
Props to a great backyard paint job! Thats how I do mine! No reason why they can't look great if you do it on the right day. Beautiful car. 
Ron
Posted by: ruby914 Jul 5 2012, 02:13 PM
I did most all of the fit work on the flare bottoms. The rockers had a some what flat edge to them so I made the flares to match the rockers. The front spoiler, rear valance and the rocker panels were all AIR products. The front spoiler and the rear valance were heavily sectioned then bolted to the car, then re fiber glassed while in place to form to the car. Doing this removes the stresses on the panel when locked down and in operation. No worries about cracks or broken mounting ears after years of road use. The rockers were pretty much a bolt on only. They were bought for 11'' wide rear flares, so again when I fit the rear flares I made the ends match the rear end of the rockers. My flares were AA flairs also. They were a really good product to work with. They key is to take your time and get it looking the way it needs to look before you shoot the paint.
Ron
 Gotta love that paint booth.
 Thanks your photos helped a lot.
I also looked over many photos on the pbase site.
Its hard to tell from photos but it looks like every car is a little different.
Even your first photo I didn't understand clearly that you expanded to 11" wide.
Makes me want to do the same.
Anyhow, I am reminded that no component I purchase is the real thing and all will need some sort of tweaking.
Thanks
Posted by: ClayPerrine Jul 5 2012, 03:11 PM
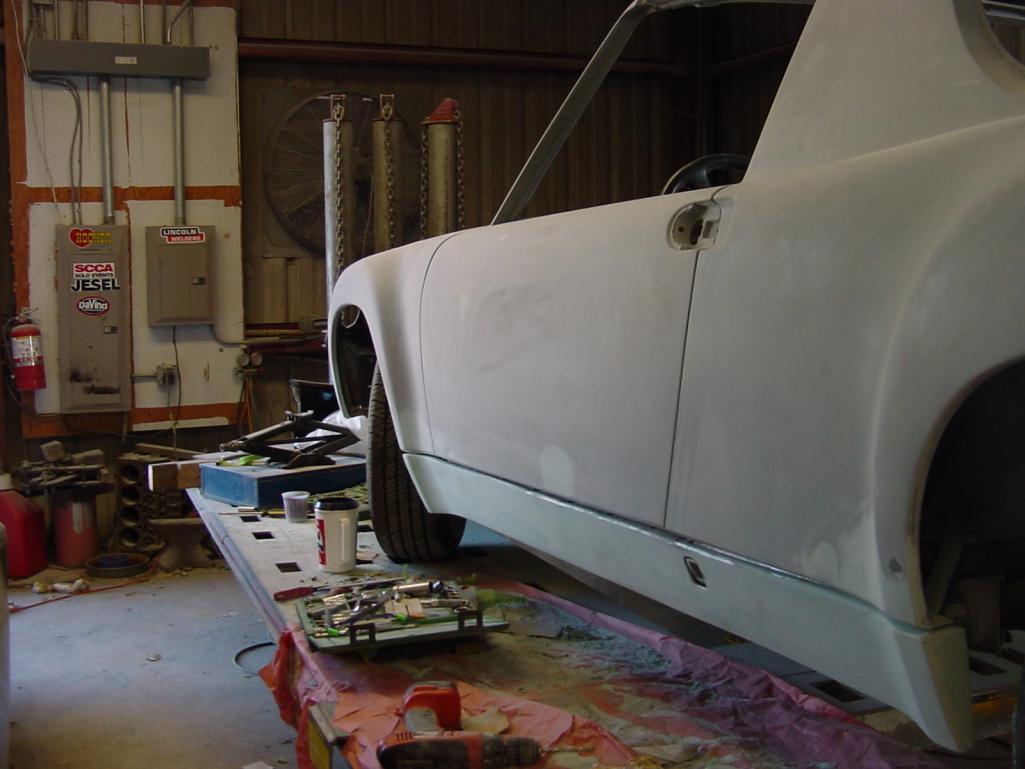
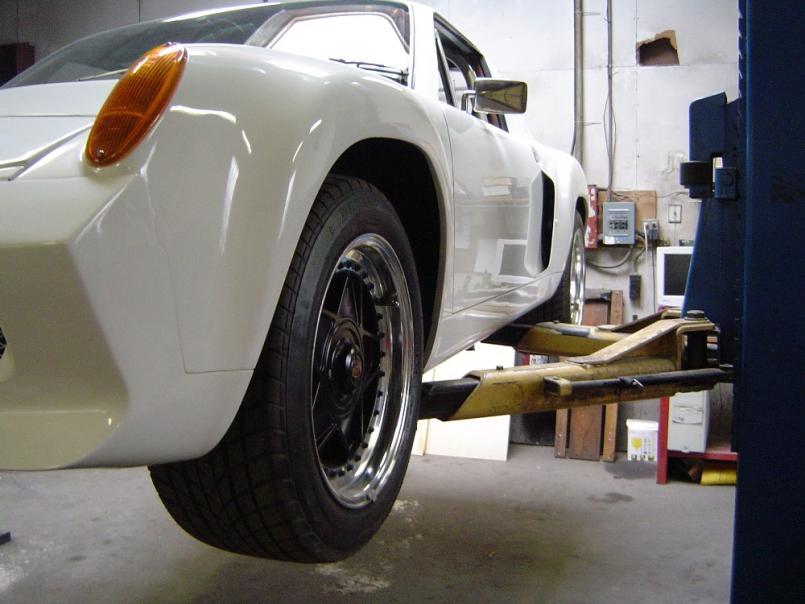
This may help.. this is my car when the body work was done. I didn't do this, I just paid the body shop. But they took metal rockers and valences and flared them to match the GT flares that I bought from Porsche. They also enclosed the open front end of the rockers to keep the crud out.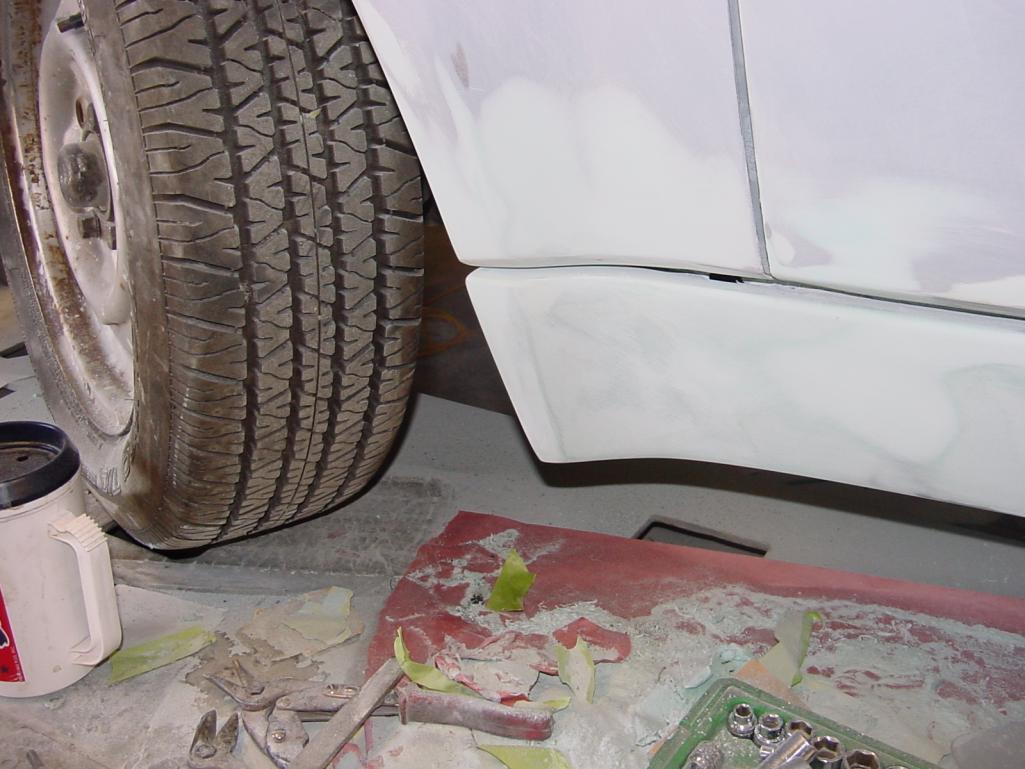
Posted by: 3d914 Jul 5 2012, 03:41 PM
Ruby,
I've been concerned about the same issue on my rebuild - fortunately I have numerous other body issues and haven't gotten back to this one.
However, I have collected a lot of images of examples over several years and they are interesting to compare. If you want, I'd be glad to post them for review.
Posted by: ruby914 Jul 5 2012, 03:58 PM
This may help.. this is my car when the body work was done. I didn't do this, I just paid the body shop. But they took metal rockers and valences and flared them to match the GT flares that I bought from Porsche. They also enclosed the open front end of the rockers to keep the crud out.
Ruby,
I've been concerned about the same issue on my rebuild - fortunately I have numerous other body issues and haven't gotten back to this one.
However, I have collected a lot of images of examples over several years and they are interesting to compare. If you want, I'd be glad to post them for review.
Clay, it is good to see flared steel rockers. I have an old set of steel rockers but they have a lot of rust. kicking them out seems to follow the red line in the photo that I marked up. Your look good.
3d914, the rear flare fwd end is of most interest to me. Post away! More in one place the better.
Thanks
Posted by: 3d914 Jul 6 2012, 06:24 PM
. . .
Before seeing yours, I was thinking of building up the rocker to fill between the yellow lines, keeping a constant gap and or trimming it at the green line.
Is this much rework a common practice on the flares?
Any other approaches out there?
Ruby, lets start with your pic above. The angle formed by your yellow lines is typical for the bottom of the flares and the doors. If you fill it in as described the doors will drag bottom along the top of the flares.
Here's an extreme example I found. Here it is evident that the angled door edge was eliminated by extending the bottom edge to meet the outer face. The flare could then be set with a constant gap - needed for opening the door.
In the following pic you can see how this was continued along the length of the car - eliminating any "gap" between the panels (rockers & valances).
Posted by: 3d914 Jul 6 2012, 06:32 PM
Here are examples of more conventional approaches - closing the gap between the bottom of the door and the rockers, but not changing the geometry of the door.
Close-ended flares with a minimal gap between the body and rockers, resulting a slightly large gap at the doors due to its chamfered outer edge.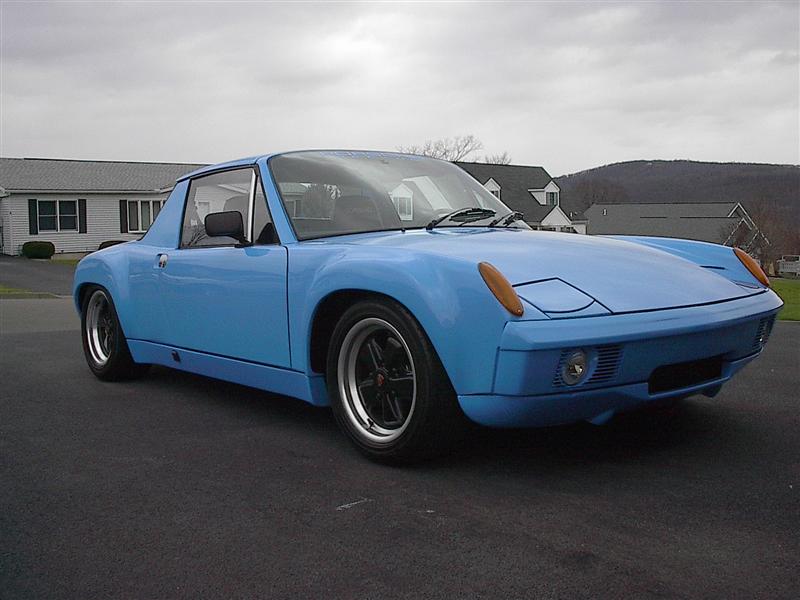
Another example of the same.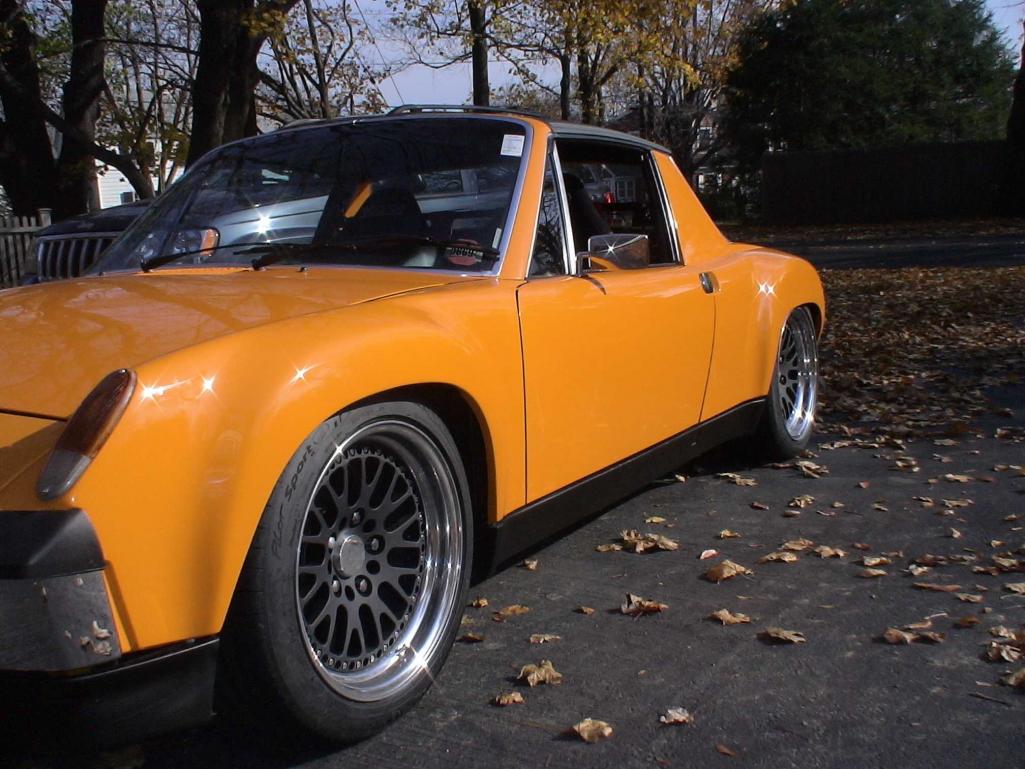
Here's a 916 example where the chamfer & gap is more evident.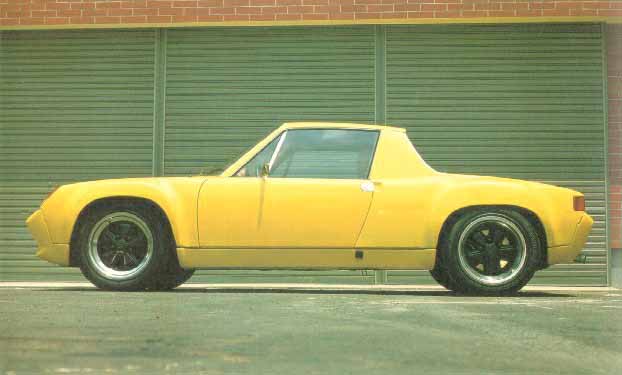
Posted by: 3d914 Jul 6 2012, 06:38 PM
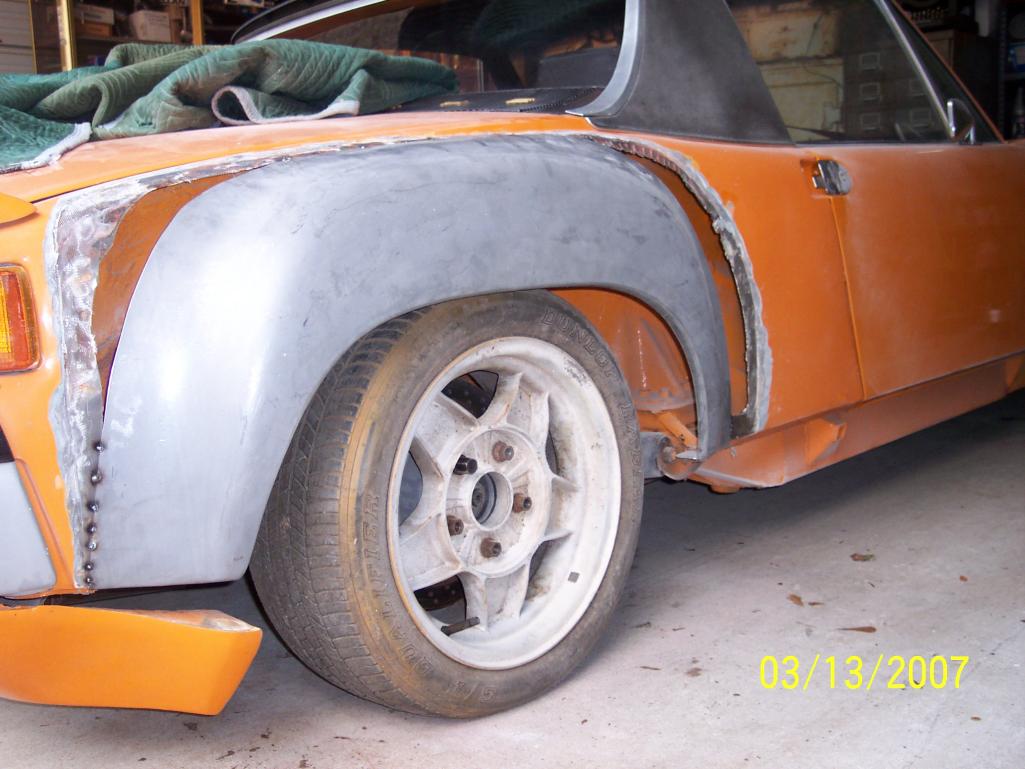
Here's a 914-6 in progress so we can see better. Hopefully the owners will stumble onto this thread and add details.
The rocker is set close to the base of the chamfer in the body - yet still results in a slight gap at the flares. My fitting tests indicate this is related to the downward angle of the flares. The larger the angle from vertical - the more obvious the gap.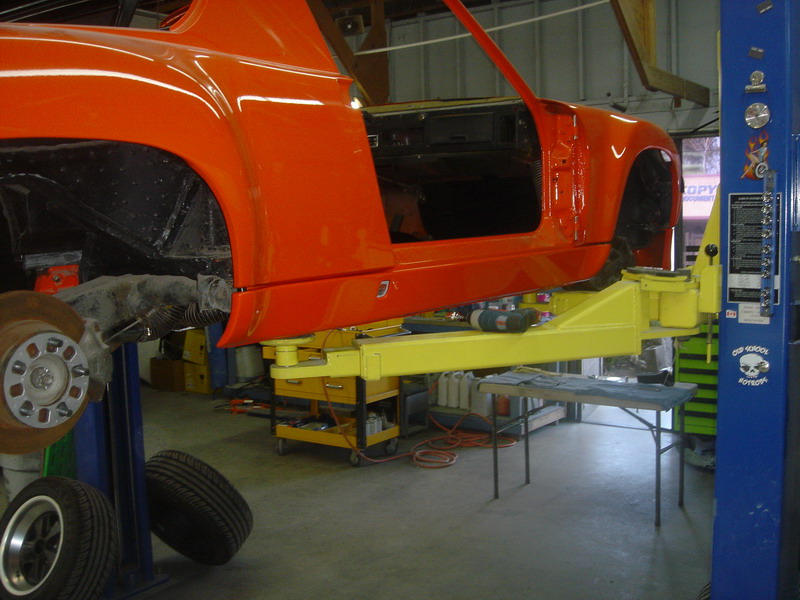
Same at the back.
One at the rear.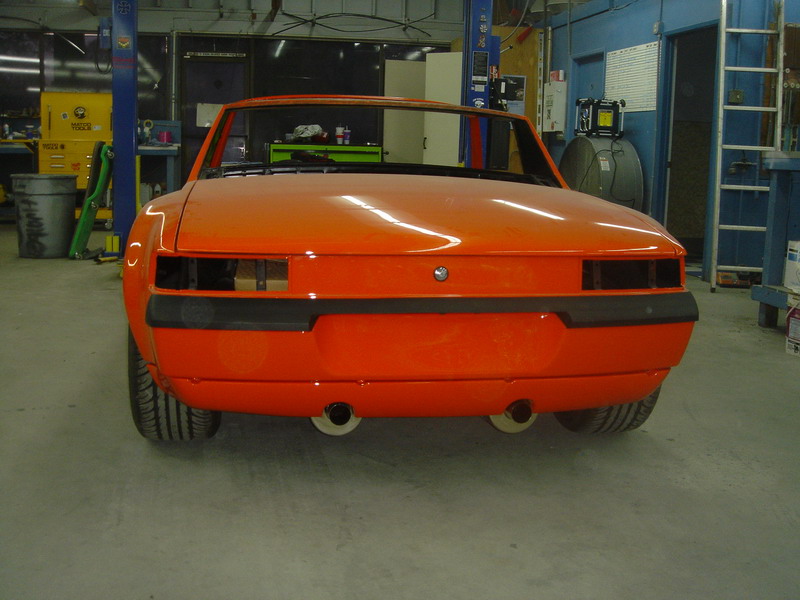
And finally the opposite side.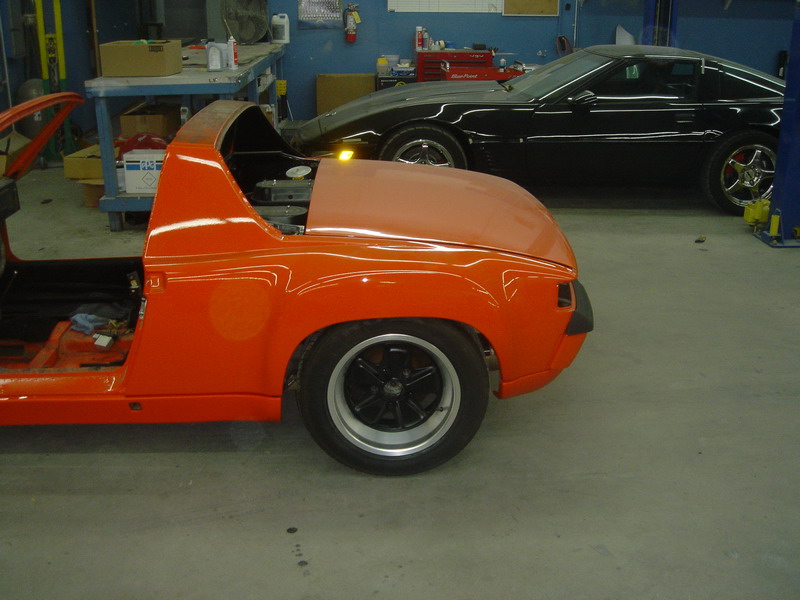
Posted by: ruby914 Jul 7 2012, 01:45 AM
3d914,
Nice collection of photos.
The white car is very nice and interesting but nothing I had considered.
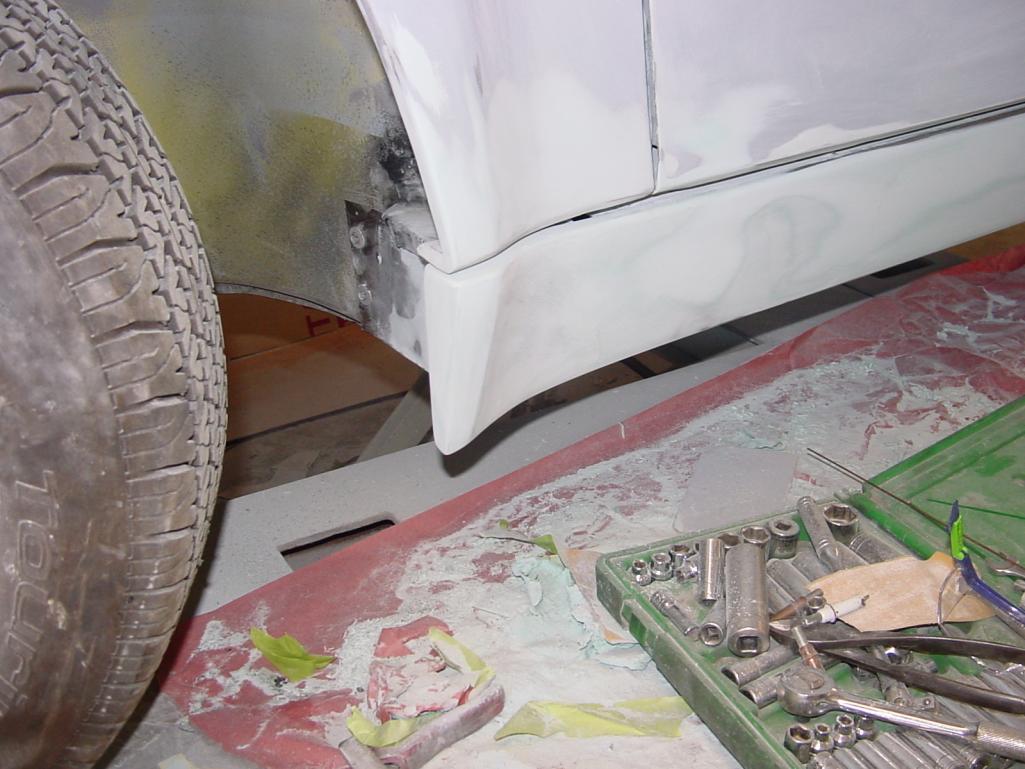
I don't know if I made any progress but I did some work filling that gap, only where it flares.
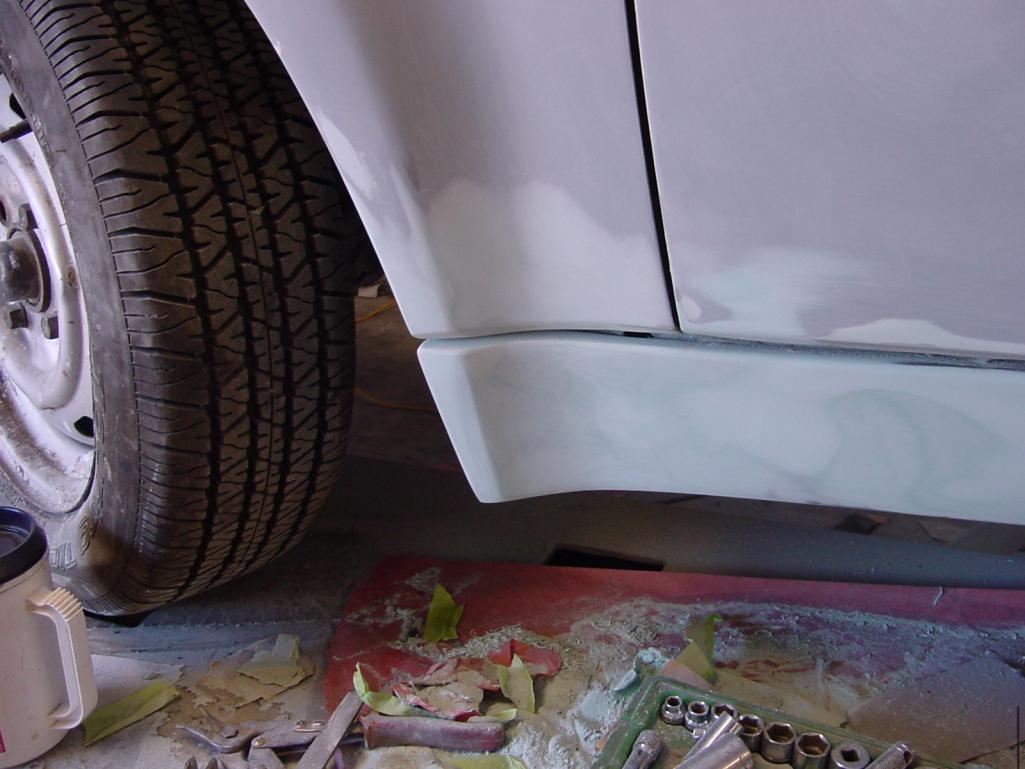
Here I have maintained a constant gap.
I don't think it is a bad look, don't know if I will go with it...
I have the steel rocker on the other side, thinking about that way also.
The thing about the bevel on the flare is that it is different than the bevel on the door.
If you look at this photo you can see some sharpie marks on the flare.
In my first photo it is where the red line is. I looks like I will be cutting on that line and moving some metal. I may also cut and pull the flare bevel down horizontal.
before I do that I want to look at the steel rocker some more.
It looks like if I bend the steel rocker out at that same angle, the rocker will make a smooth transition from the lower bevel to the outer edge of the flare.
Attached image(s)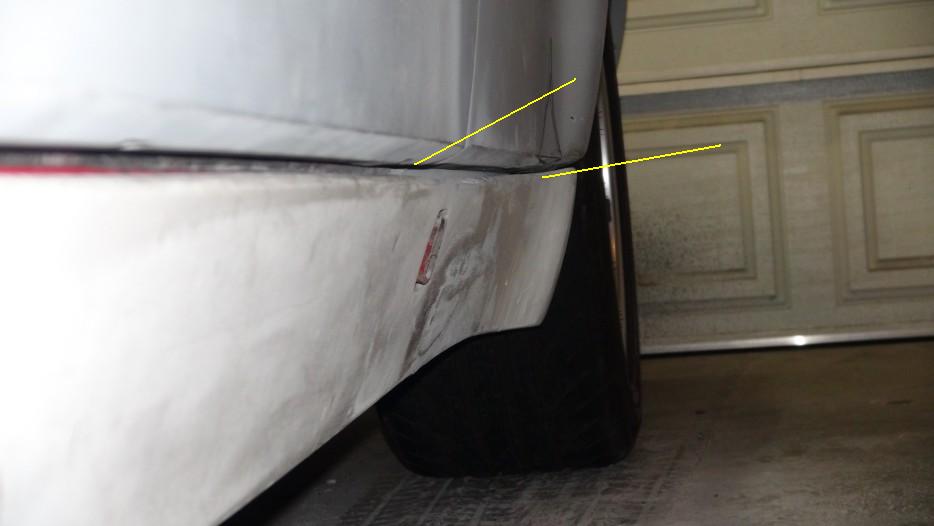
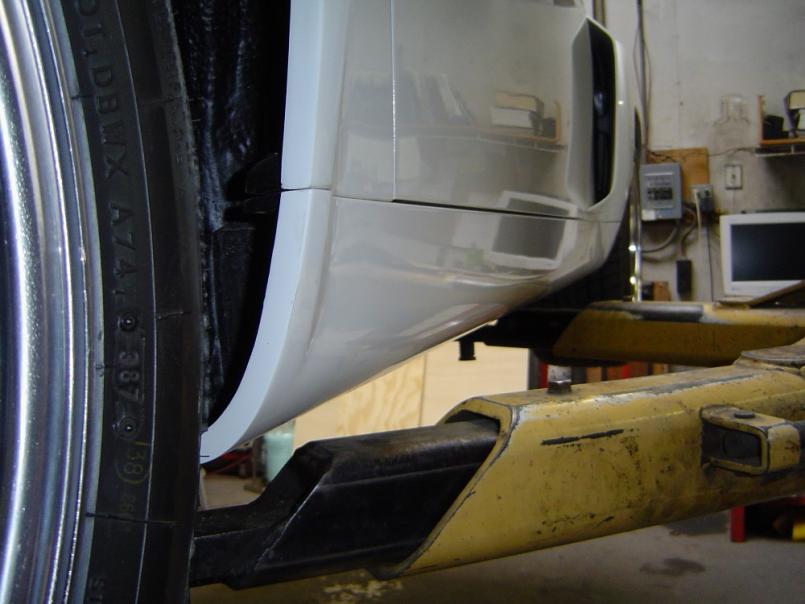
Posted by: ruby914 Jul 7 2012, 02:13 AM
Here is a fine example.
I would like to see a front view.
Attached thumbnail(s)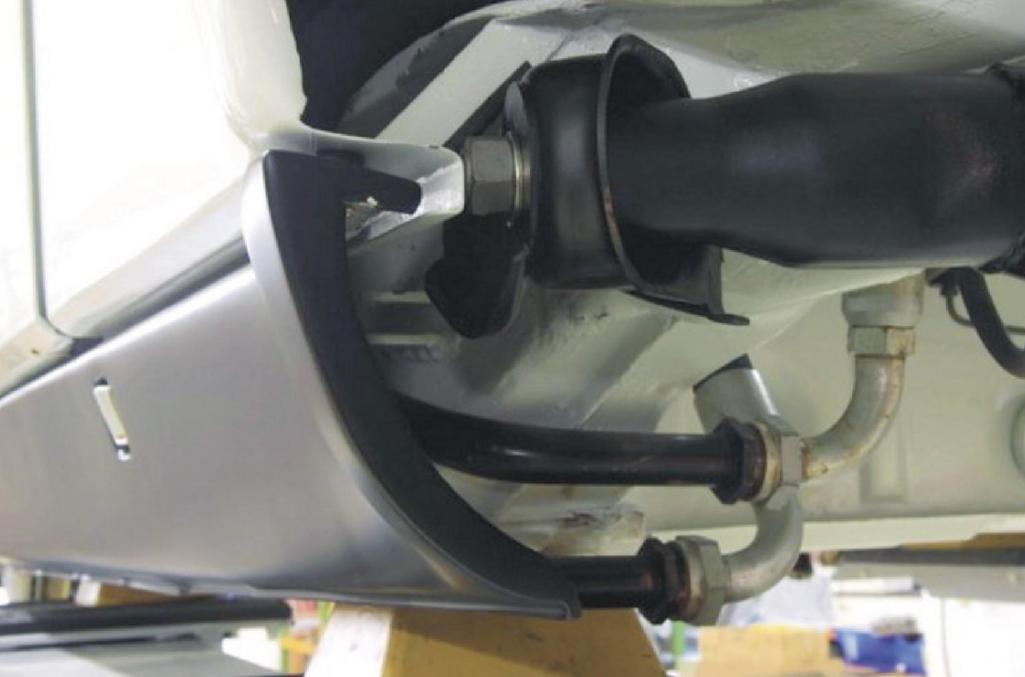
Posted by: 3d914 Jul 7 2012, 09:14 AM
Ruby, that's looking pretty good. Can't tell completely without a side shot, but I like the affect. My FG flares had no chamfer - they came down to a flat horizontal. 
Not sure what kind of bumper you're using, but here are a few that I found.
A flared stock-like valance.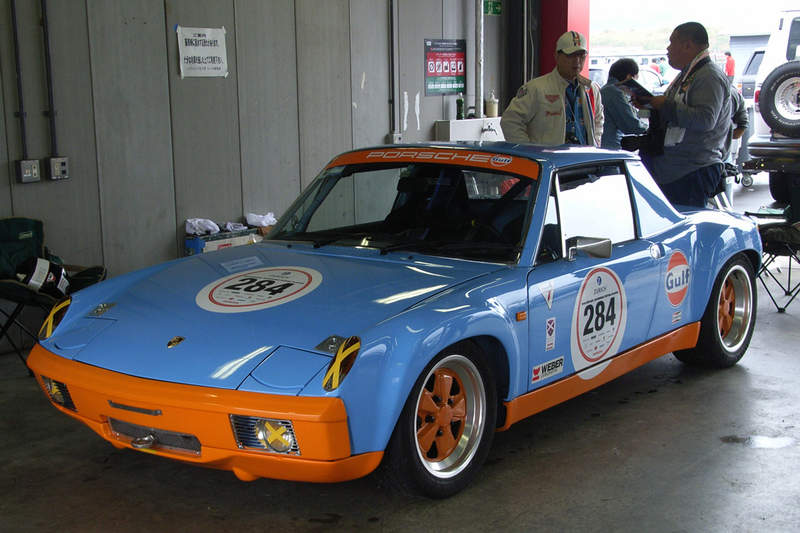
Another
Can see the rear of the front well, but not the front of it.
Hope this helps.
Posted by: gothspeed Feb 6 2013, 01:59 PM
Here is a fine example.
I would like to see a front view.
Sorry to revive this thread but I wanted to know if anyone knows what brand of GT Rocker this is? who makes them and are they still available?
Also has anyone yet installed their AA GT rockers from the group buy?? If so please post some pics!

Attached image(s)

Posted by: bulitt Feb 6 2013, 02:40 PM
Nice thread! I added it to the steel flare install thread.
http://www.914world.com/bbs2/index.php?act=ST&f=2&t=162554&st=0#entry1602460
Powered by Invision Power Board (http://www.invisionboard.com)
© Invision Power Services (http://www.invisionpower.com)