Printable Version of Topic
Click here to view this topic in its original format
914World.com _ 914World Garage _ My rusty 73 1.7 build thread
Posted by: metalmorphosis Jul 31 2012, 08:41 PM
Hello 914 world! Ive been lazily lurking here for way too long and finally decided
to change that tonight. So heres my 1st contribution to all this 914 awesomeness.
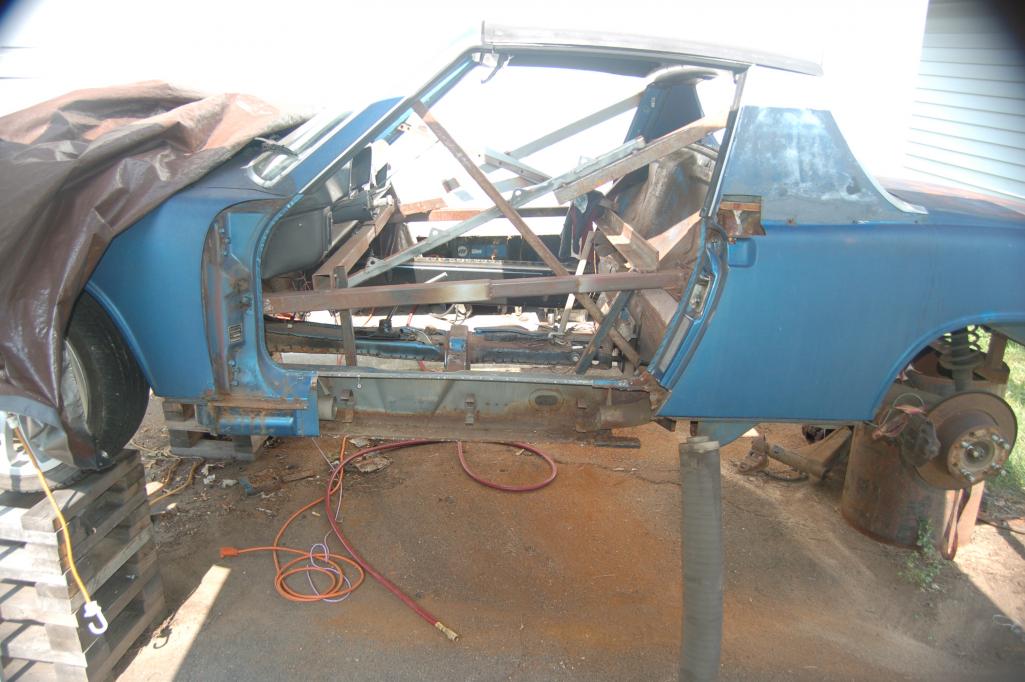
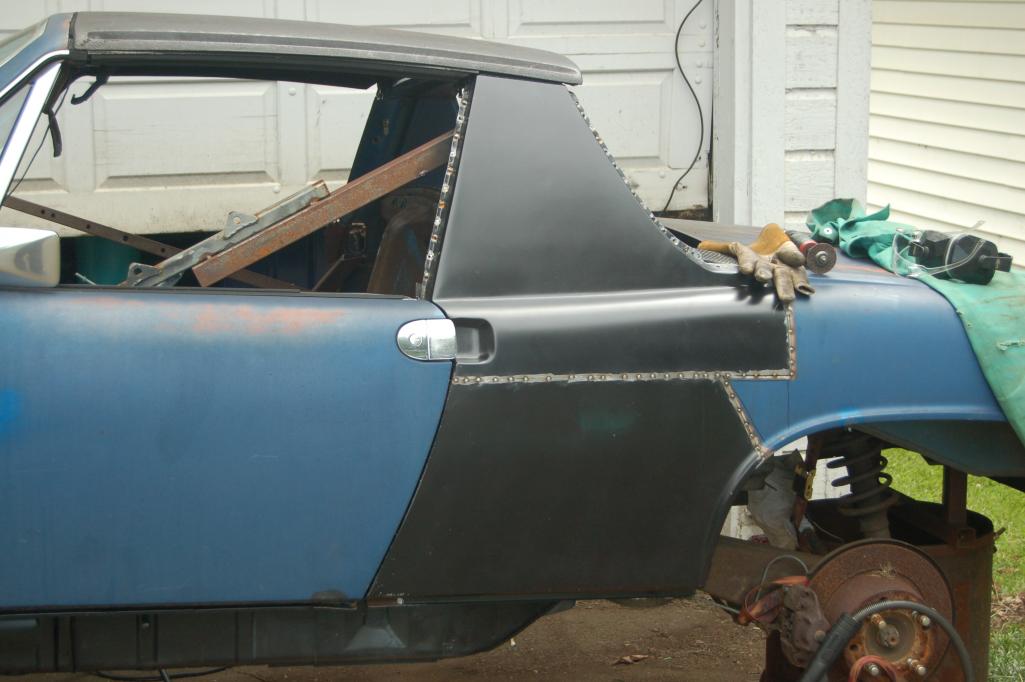
This is my 914 back in 2010 when I started the rust repair. I'm almost done with
rust repair now and I have lots of pics but I have to resize and post latter. It seems like these pics are gonna work even though they are big so I guess we'll see what happens.
Attached thumbnail(s)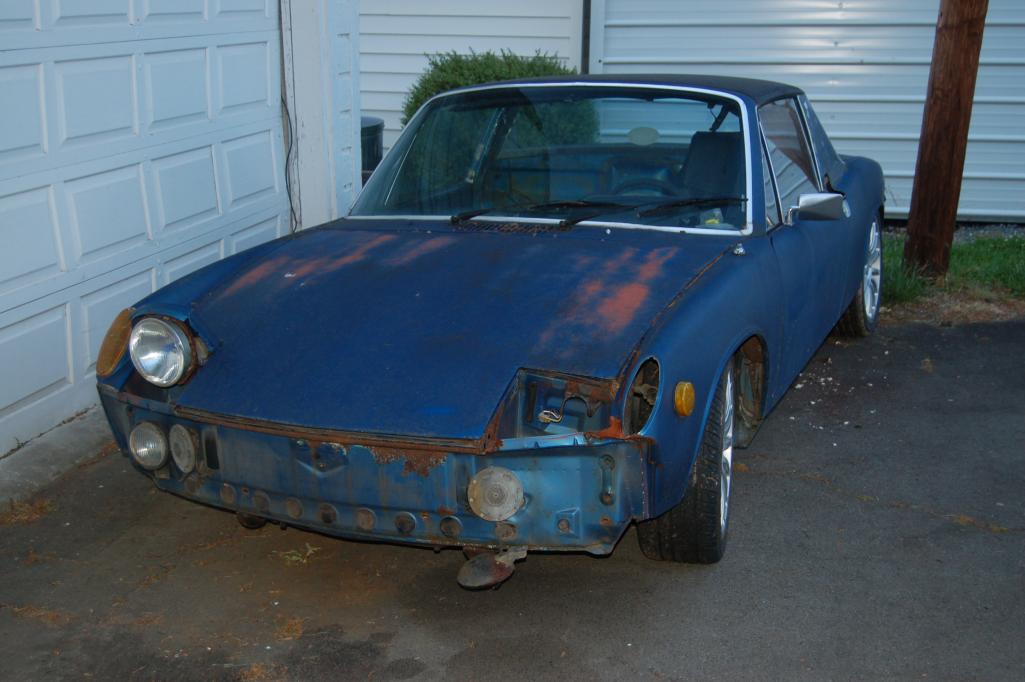
Posted by: dlee6204 Jul 31 2012, 08:52 PM

Winston Salem eh? You're awfully close  I'm always on the lookout for more locals.
Posted by: metalmorphosis Jul 31 2012, 09:11 PM
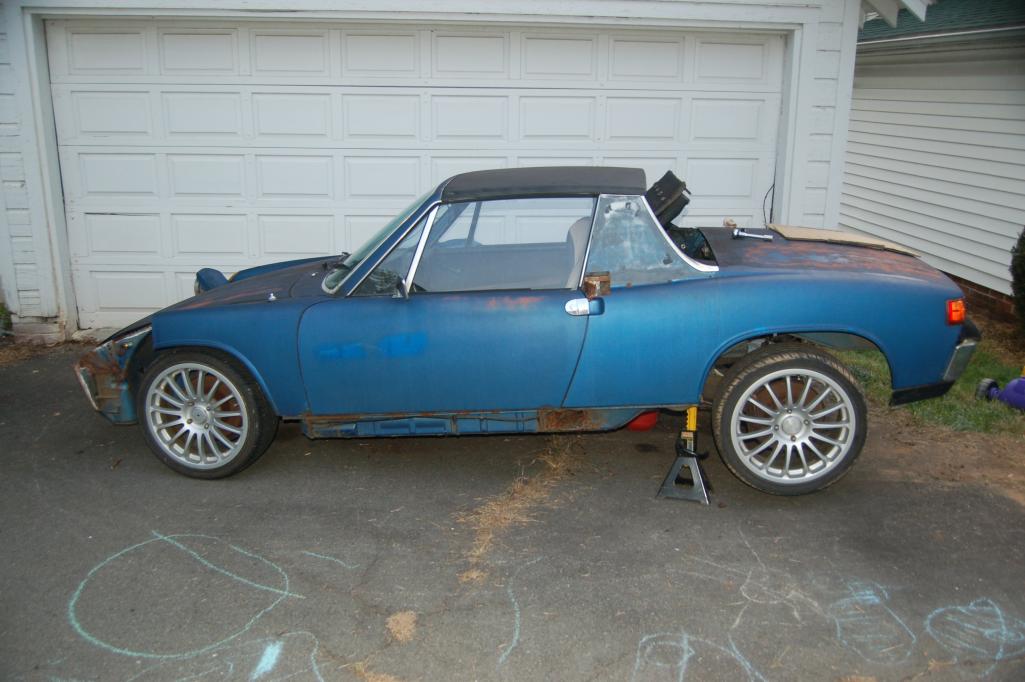
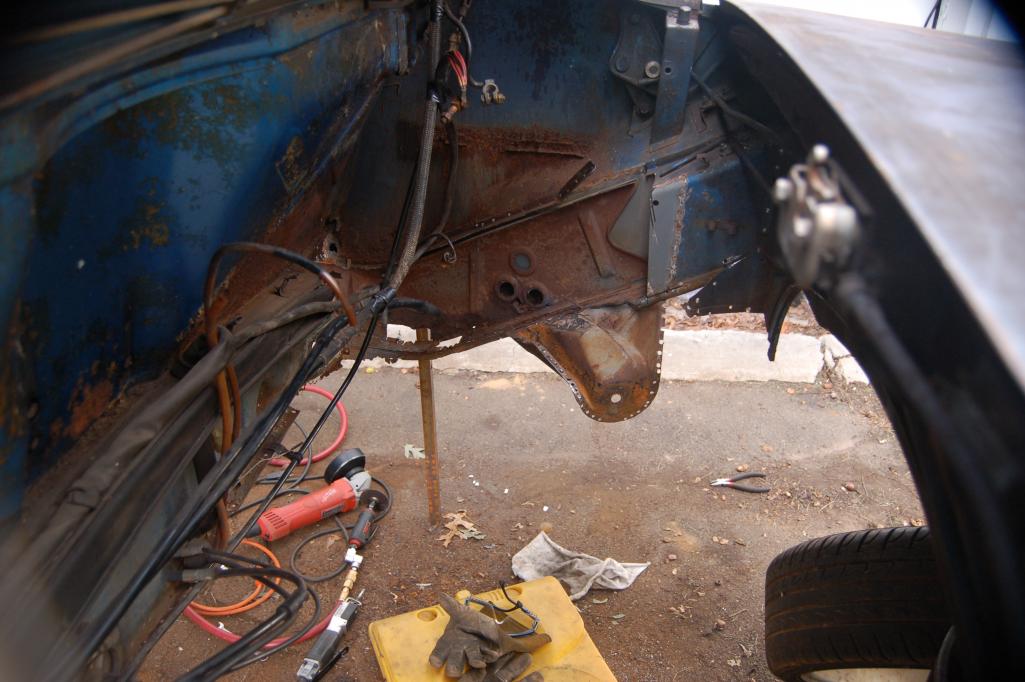
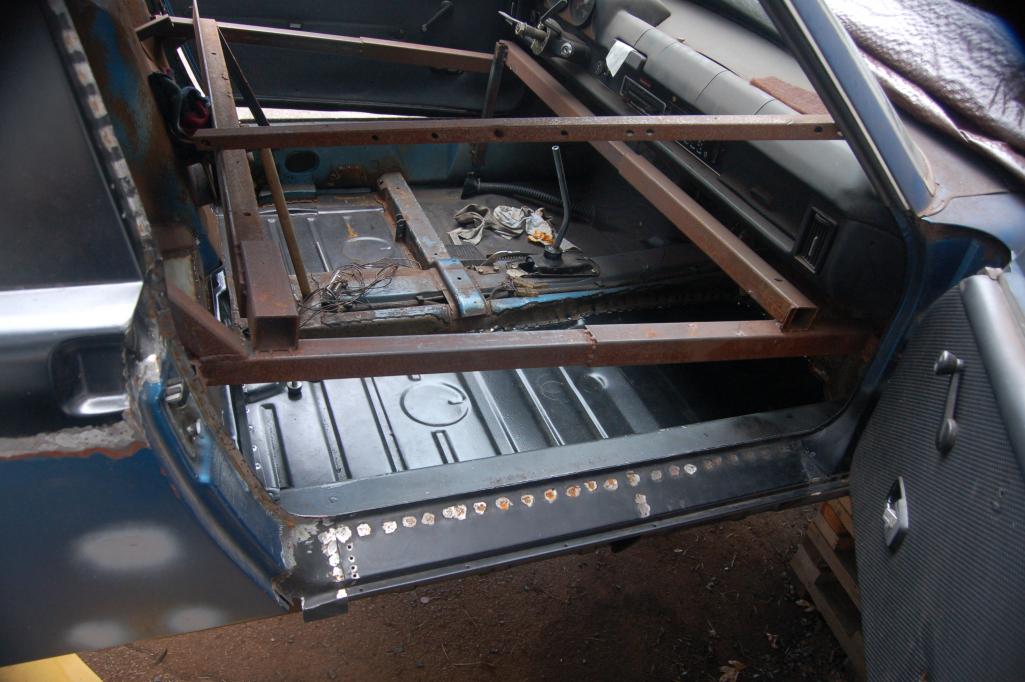
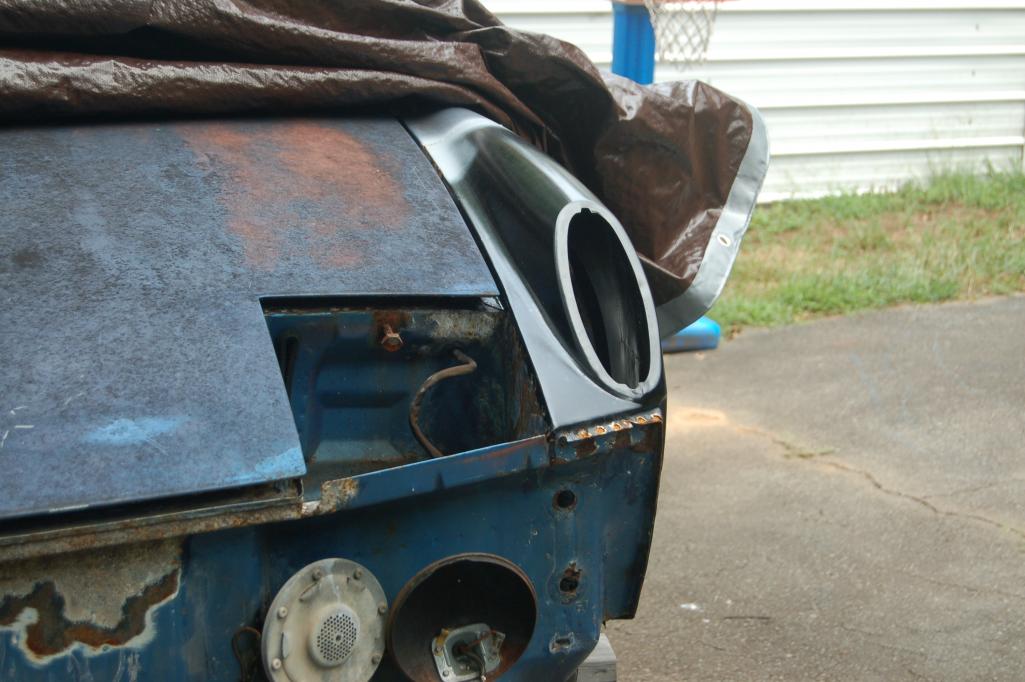
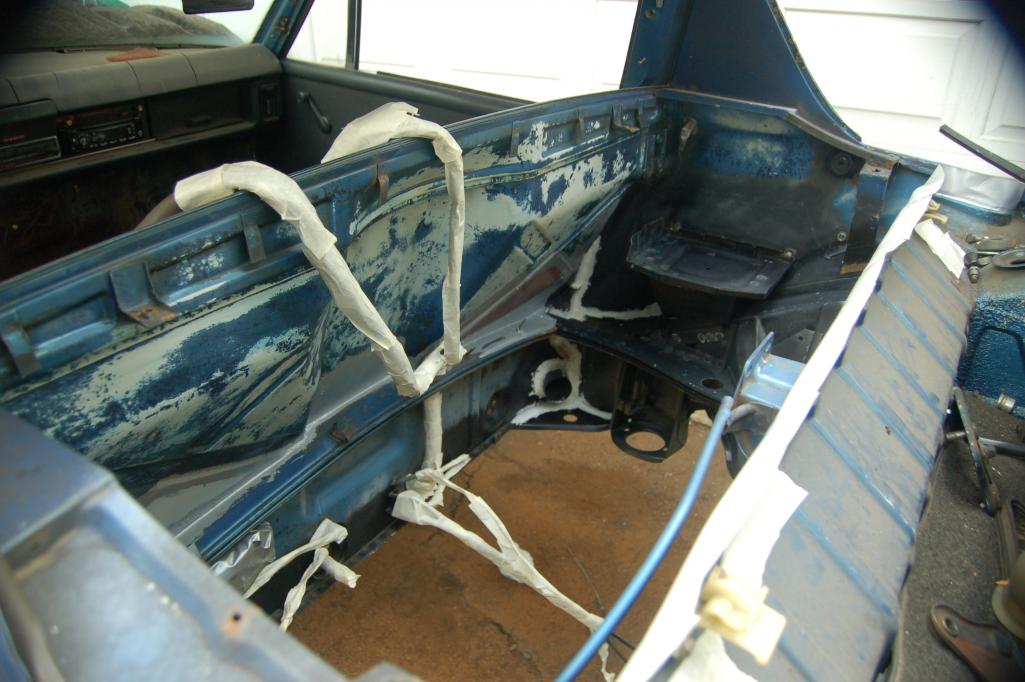
Heres a few more from 2010. Kind of k-rusty. Hey Doug it would be awesome to
meet another 914er in winston hopefully I'll be back on the road by the end of aug or eairly sept. By the way I think this thread is in the right place if not let me know.
Attached thumbnail(s)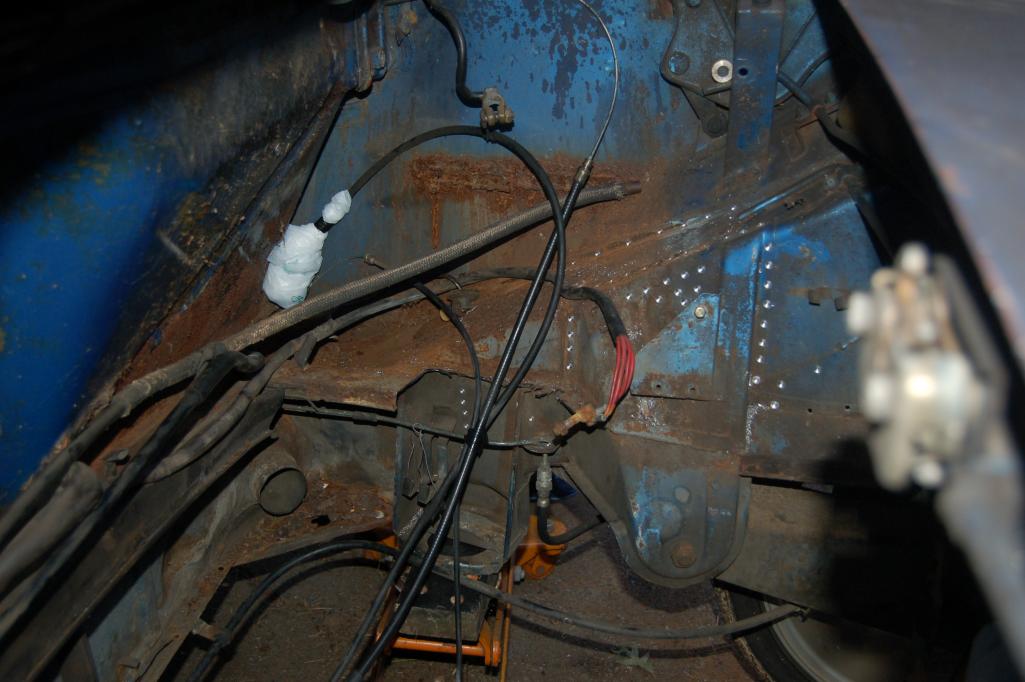

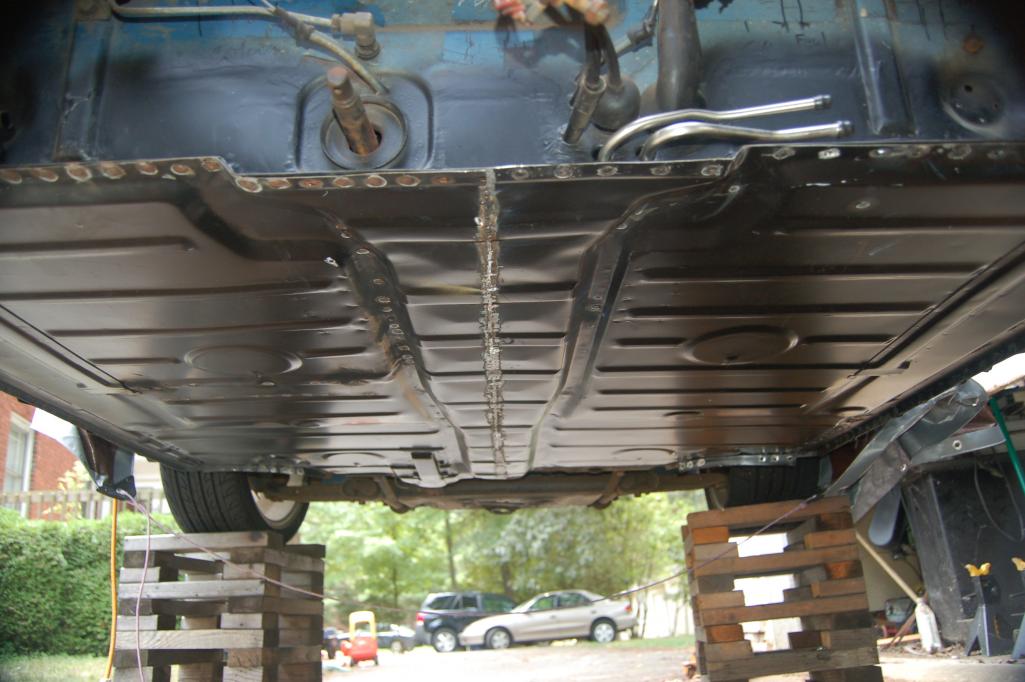
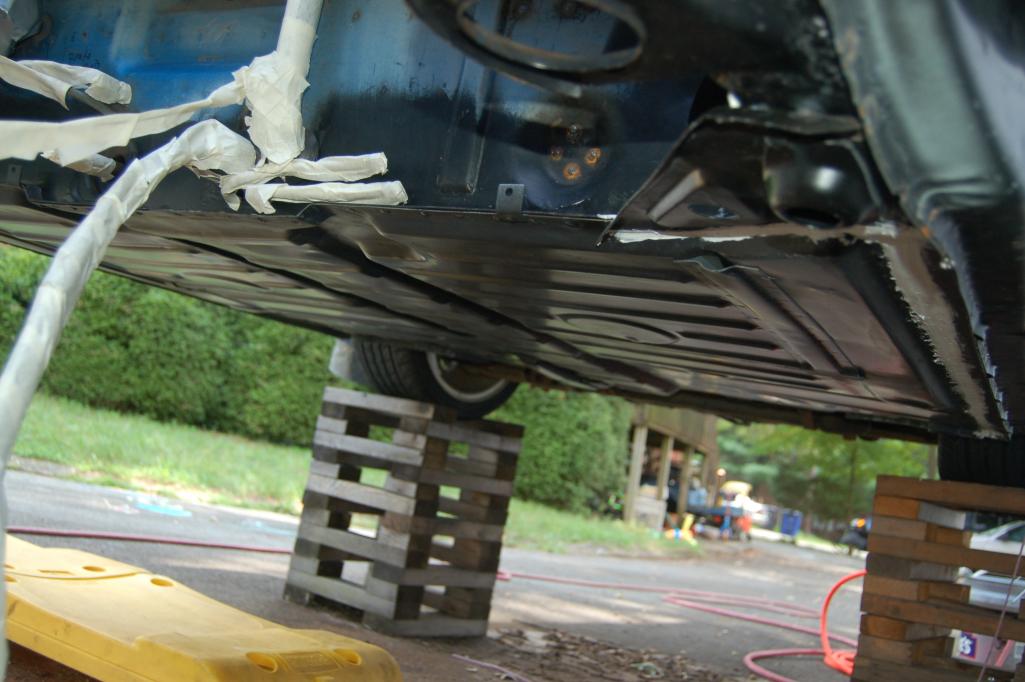
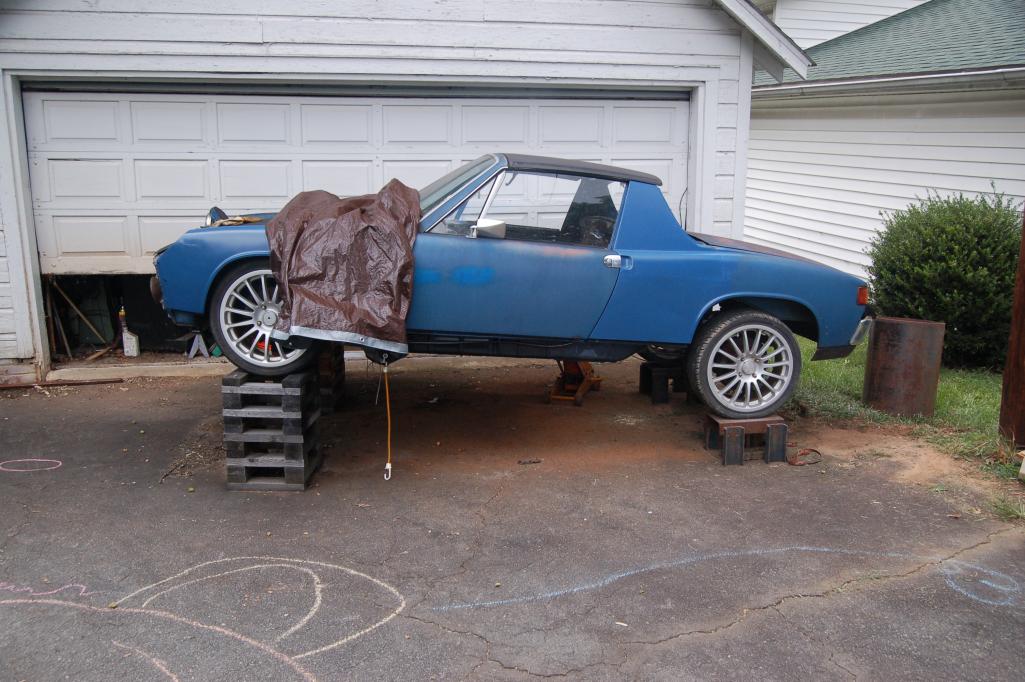
Posted by: metalmorphosis Jul 31 2012, 09:15 PM
Check out my "jackstands"
Attached thumbnail(s)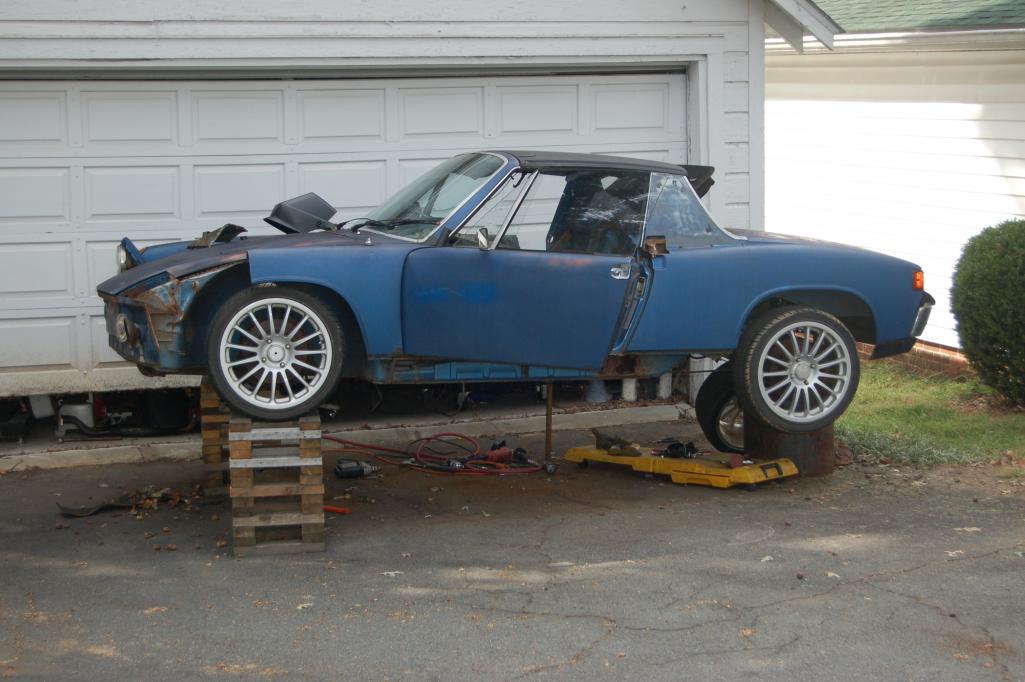
Posted by: scotty b Jul 31 2012, 09:45 PM
That's trouble just waiting to happen. Nice knowing ya 
Posted by: billh1963 Aug 1 2012, 04:41 AM
Wow! That's quite a project
It"s always good to see one being saved! 
Posted by: Porschef Aug 1 2012, 06:00 AM
Stylin' rims...what are they? Nice project; indeed, you should do something about your elevation system.... 
Posted by: JawjaPorsche Aug 1 2012, 06:07 AM
When you said RUSTY build thread, you were not kidding! Good luck with your project.
Posted by: mepstein Aug 1 2012, 06:08 AM
Please add me to your life insurance. $$$
Posted by: arkitect Aug 1 2012, 08:08 AM
Looks like you have it braced thru the doors and across the width. Are you putting it on a rotisserie?
How do you have your car supported in the back?
Dave
Posted by: Spoke Aug 1 2012, 10:11 AM
Good luck with the rustoration.
As others said, get some real jackstands under the car. Your blocks may work well but having redundant supports are a good thing.
Posted by: metalmorphosis Aug 1 2012, 11:12 AM
Hey guys I appreciate all of y'alls concern about my "jackstands" but the car is rocksolid. And no jackstands that I know of will go as high as I have the car. Plus the foot print of my stands are are aprox 2' sq. The front is 2 x 4 cribbing and under the back is 24" pipe w aprox .75" wall w a frame I made that bolts to the trans mounts. Now gettin it up there was very sketchy and hopefully in 2 to 4 wks its coming down but I've had it up there for 2 yrs of beatin and bangin and welding.
Also as soon as I reduce the size of my pics I'll post alot more because I finished the metalwork this past weekend and all the structural rust is long gone.
So I guess this means nobody wants to come hang out under it w me?
Gabe
Posted by: fasthonda Aug 1 2012, 07:25 PM
Rust wise that car really isn't too bad imo. Nice job taking out the spotwelds. Did you use a spotweld removal bit or just a drill?
The supsension console did'nt look to bad, not sure if I would have cut that out.
Keep up the good work.
Michael
Posted by: metalmorphosis Aug 1 2012, 08:21 PM
Hey Michael I just use a drill I do own a spot weld cutter but I always go for the drill.
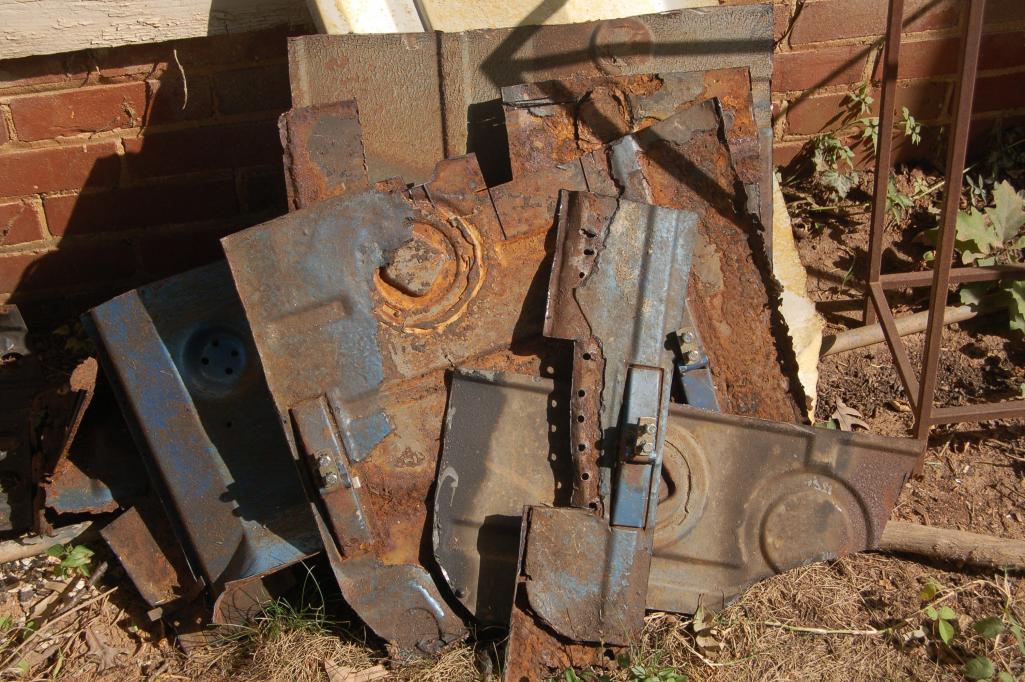
And yea the suspention console needed work not to mention everything it mounted to had to go. Also I see your from gville sc thats my hometown. Anyway heres more pics of the bad from around sept oct 2010. And I haven't resized yet but I guess that doesn't really matter other than I can only fit 2 per post. What do you guys use to resize pics?
Attached thumbnail(s)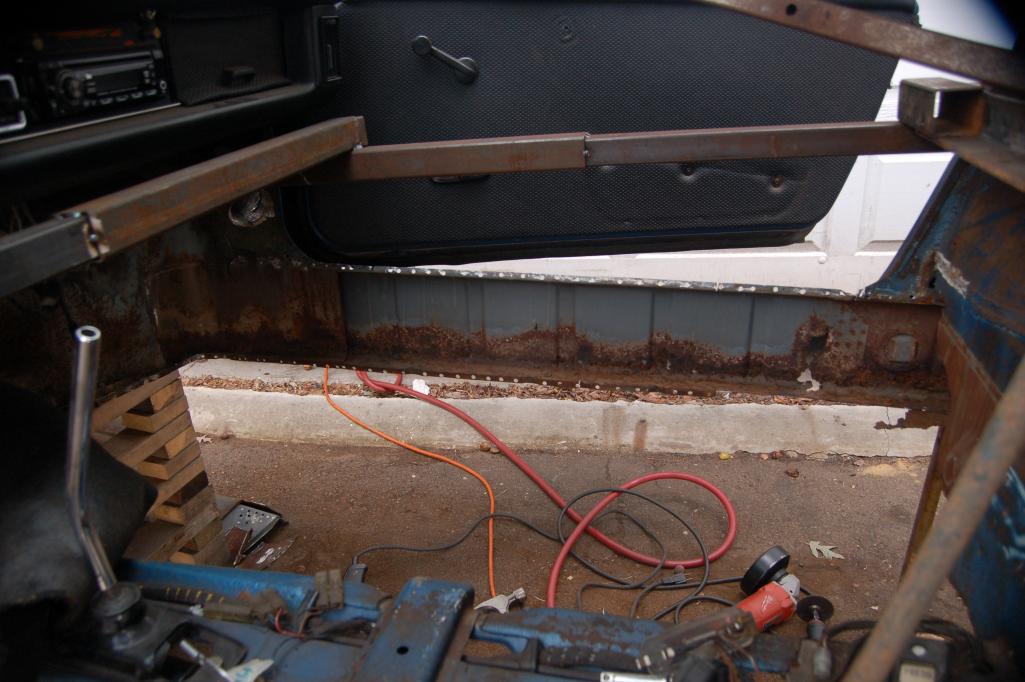
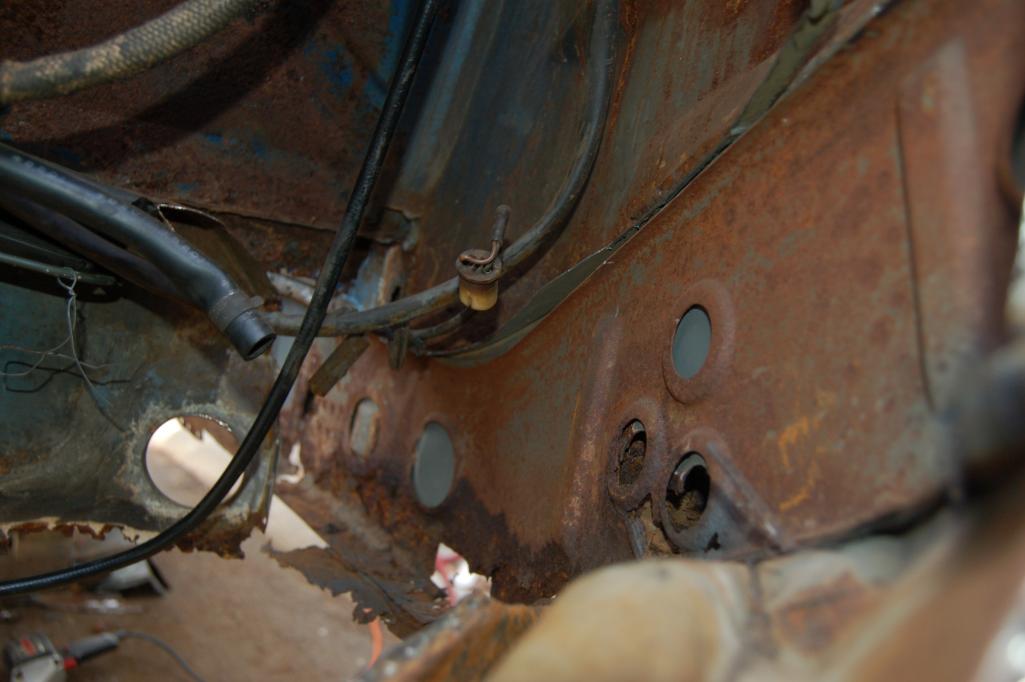
Posted by: metalmorphosis Aug 1 2012, 08:24 PM
more k-rust
Attached thumbnail(s)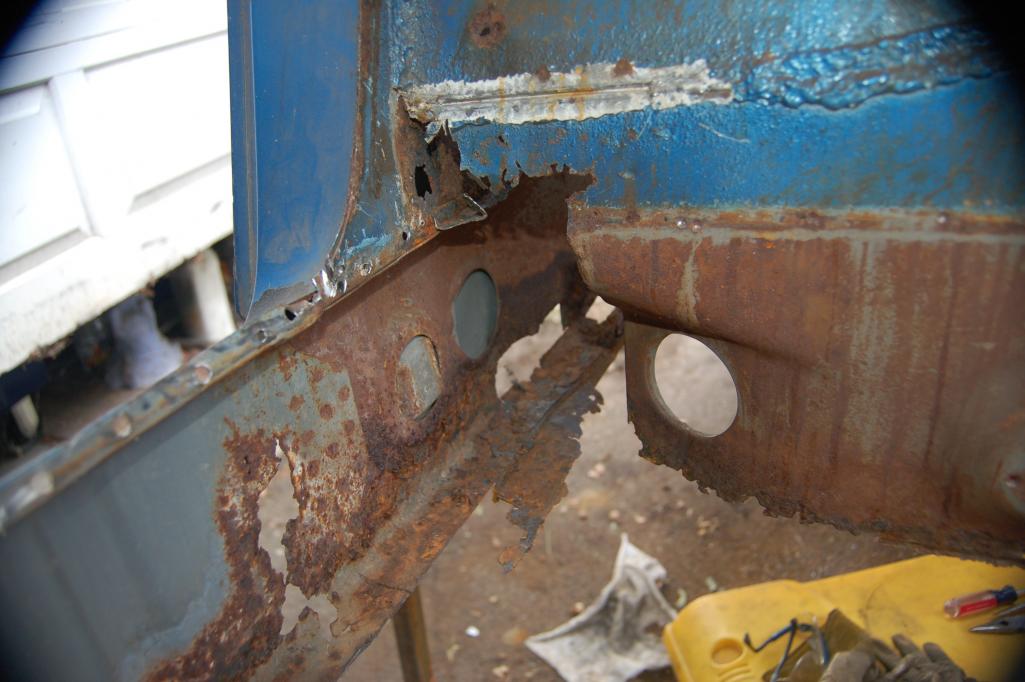
Posted by: tscrihfield Aug 1 2012, 08:25 PM
Howdy!
Looks great thus far! Keep it up!
Thomas
Posted by: metalmorphosis Aug 1 2012, 08:55 PM
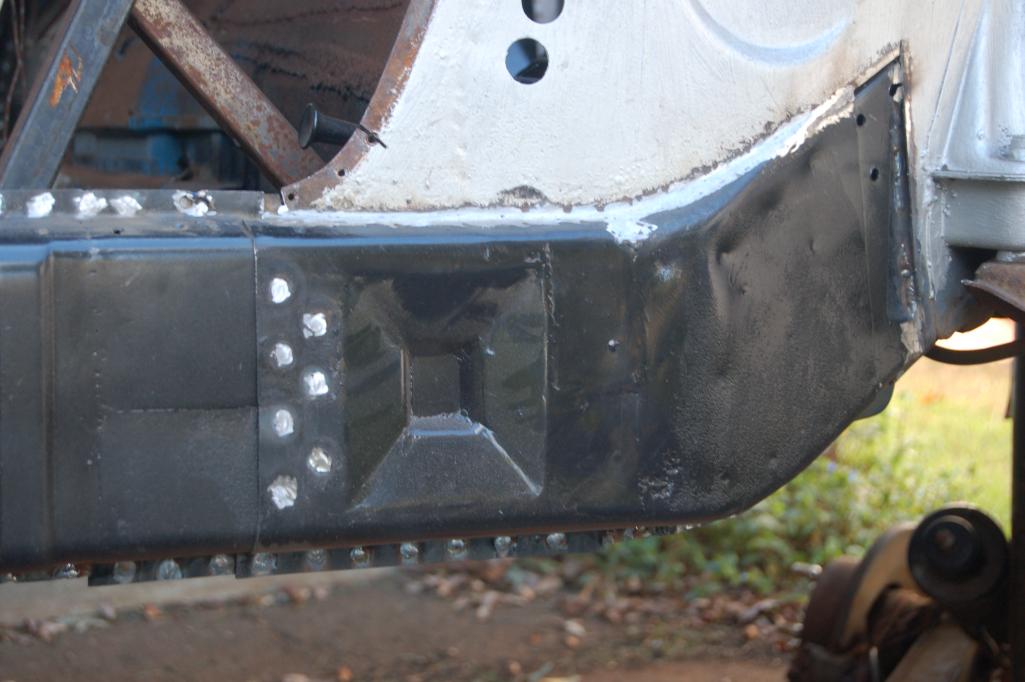
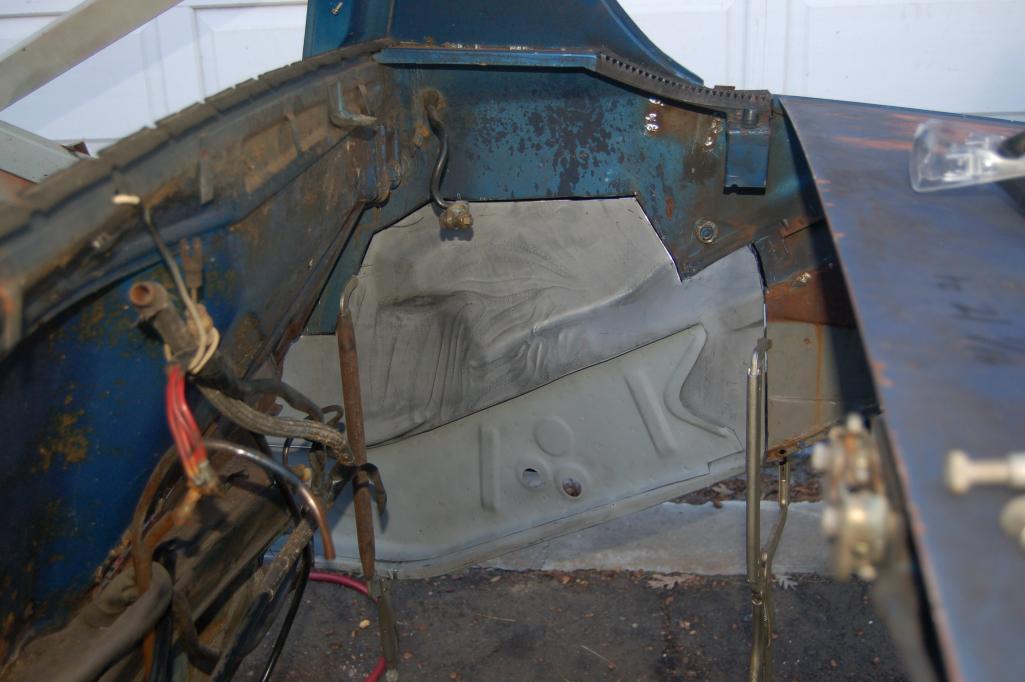
So I think I've posted enough doom and gloom rust pics from 2010, I think its time for a ray of hope. Jumping ahead to May of 2011 some repair wok done. I can't find (or didn't take) pics of pass long and wheel house goin in. But if its more rust you want wait till we get to the drivers side. More on that latter.
Attached thumbnail(s)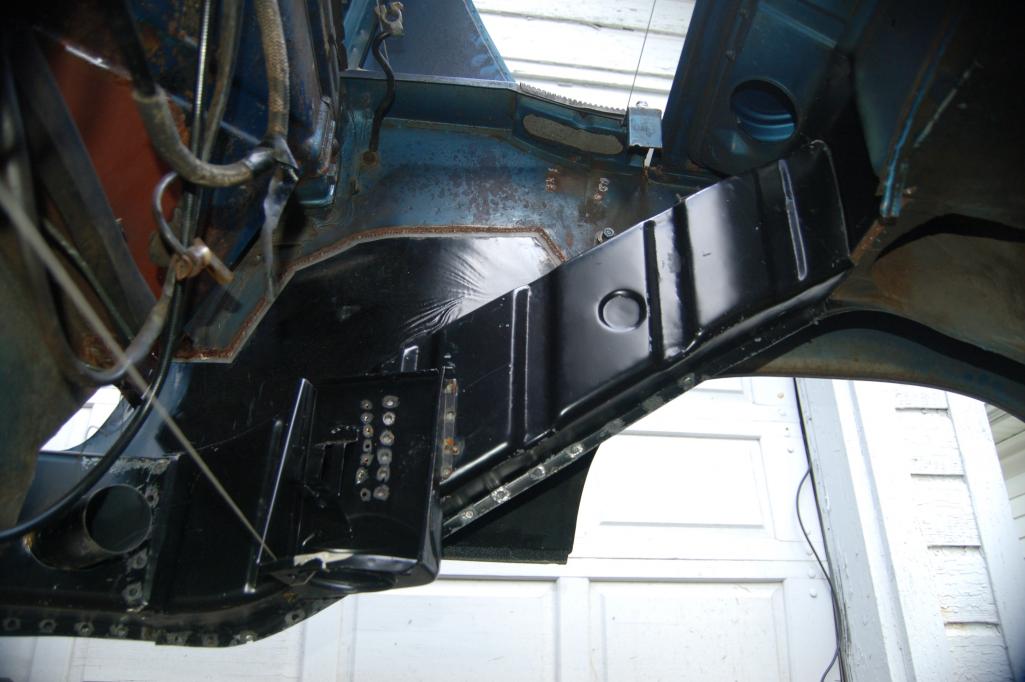
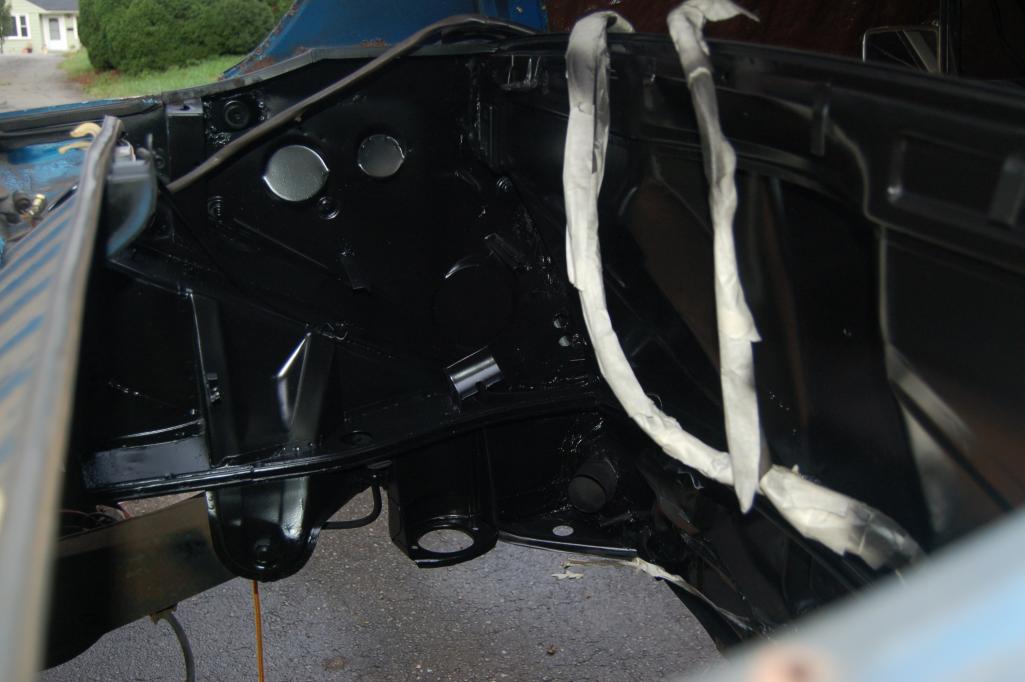
Posted by: metalmorphosis Aug 1 2012, 09:05 PM
Ok 2 more the btm of the firewall and a sneak peek at that drivers side.
Attached thumbnail(s)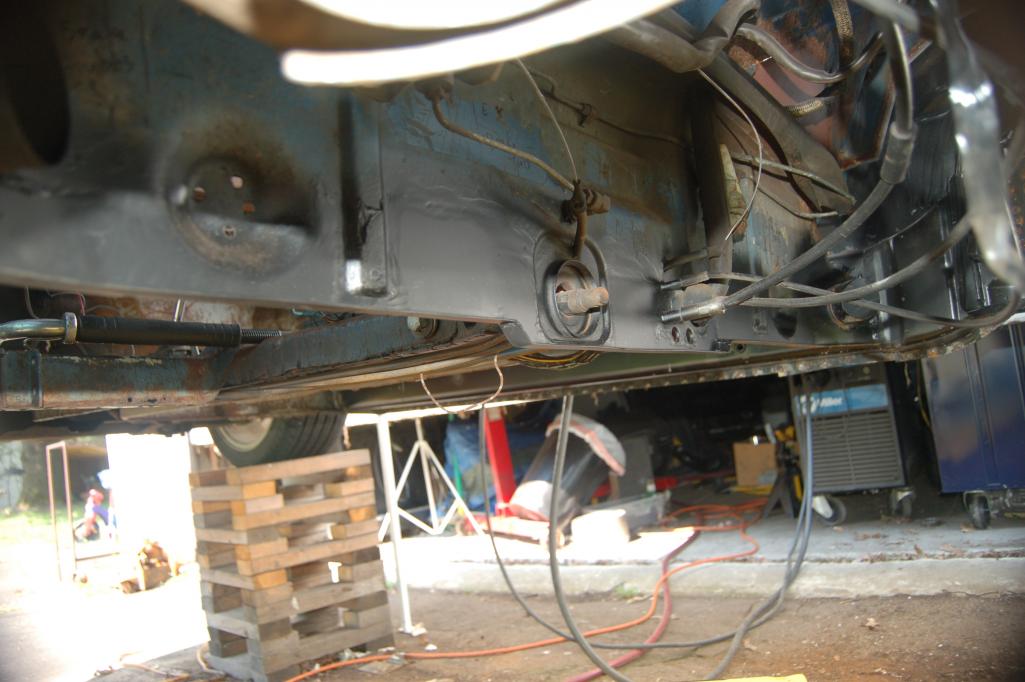
Posted by: tadink Aug 1 2012, 11:38 PM
YOU are doing great work - keep it up! hat's off to saving one of these things - don't lose your mojo!
td
Posted by: jsconst Aug 1 2012, 11:53 PM
Great job! You're taking on quite the project there, you're way more ambitious and talented then I am, to me that would have been a parts car.
Good for you!
Jeff
Posted by: saigon71 Aug 2 2012, 06:00 AM
Taking on a project like this is a huge endeavor. Your work looks good - keep rolling and keep the pics coming.
To re-size pics, I open them in paint.
Posted by: rnellums Aug 2 2012, 06:48 AM

Taking on a project like this is a huge endeavor. Your work looks good - keep rolling and keep the pics coming.
To re-size pics, I open them in paint.
If you have Microsoft office, Microsoft picture manager has a handy resize function.
Posted by: metalmorphosis Aug 2 2012, 06:52 PM
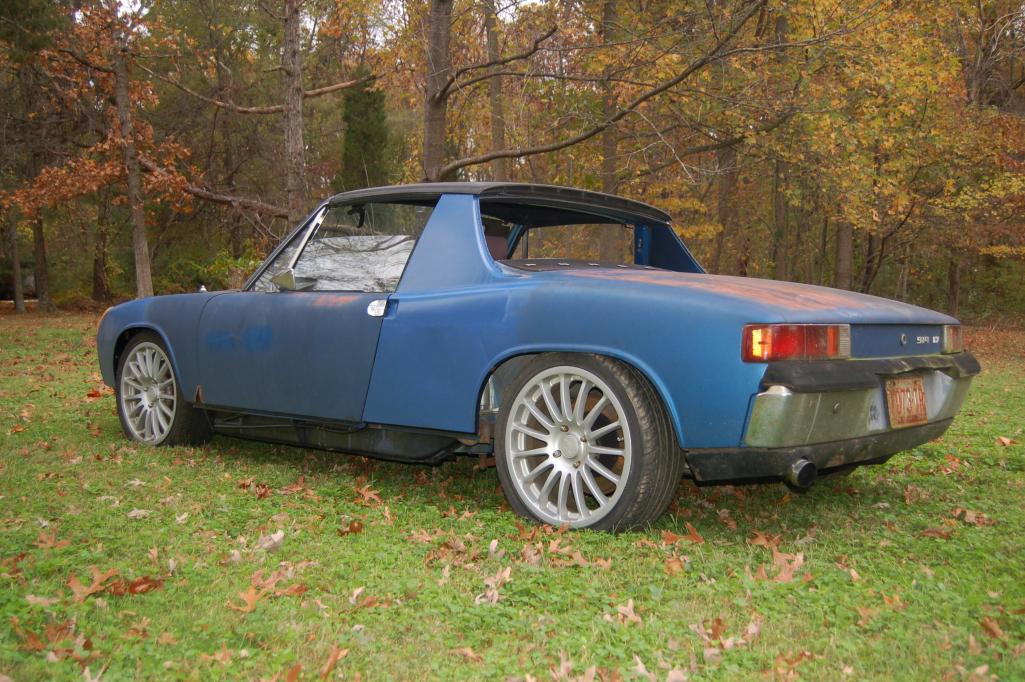
Heres a little more of the pass side going back together. Everything seemed to line back up really nicely I spent alot of time measuring all this stuff before tacking it in place. And to get back to Porschef's question about the wheels they are... I hate to admit it but aftermarket honda prelude wheels. They are 17 x 7s and I got them for super cheap from a guy i used to work with. I'm out of time for now , more later.
Attached thumbnail(s)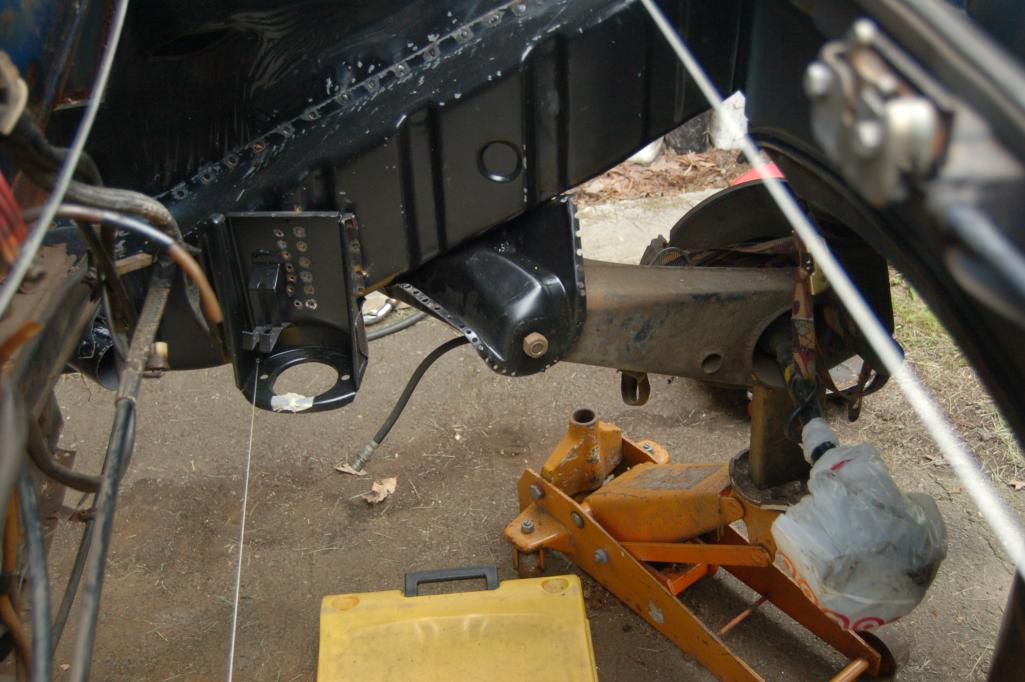
Posted by: metalmorphosis Aug 4 2012, 07:09 PM
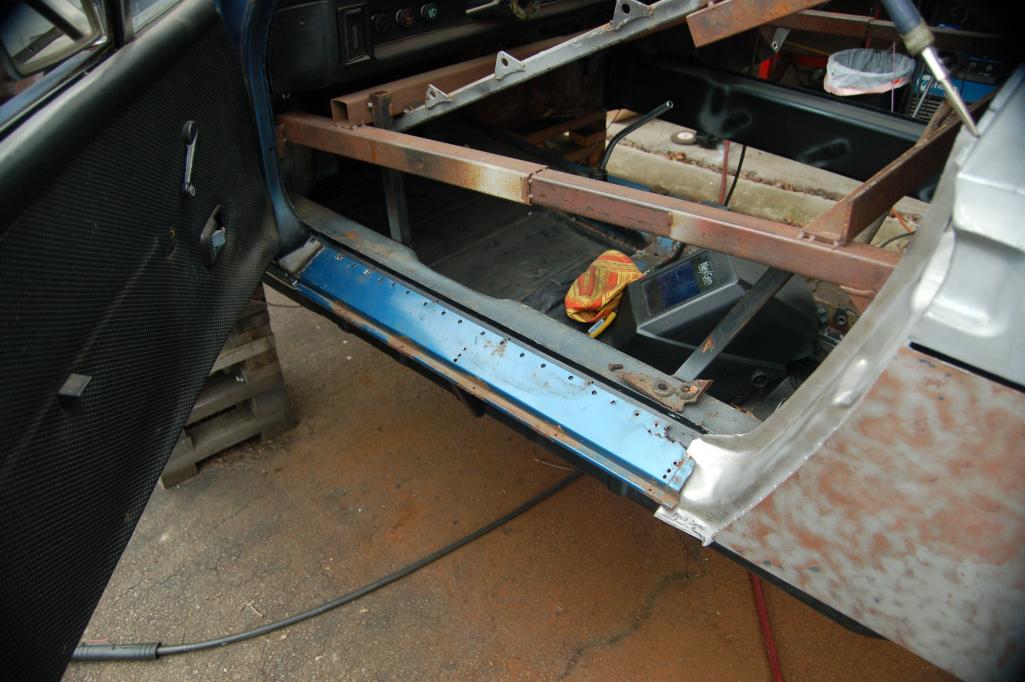
So I got to re-meet dlee6204 today and see his sweet 914. Its awesome to have all you guys collection of knowledge and meet up with nice folks locally who love 914s. Can't wait till I can go ridin around w some of you 914 peps. So back to the build pics, these are from July 2011 and are of the bad dr side. I remember being so bummed about having to open up the whole dr long. I guess I was in denial, that I might not have to. Wrong! But I had to get rid of all the rust I could see. So out came the drill and grinder and welder.
Attached thumbnail(s)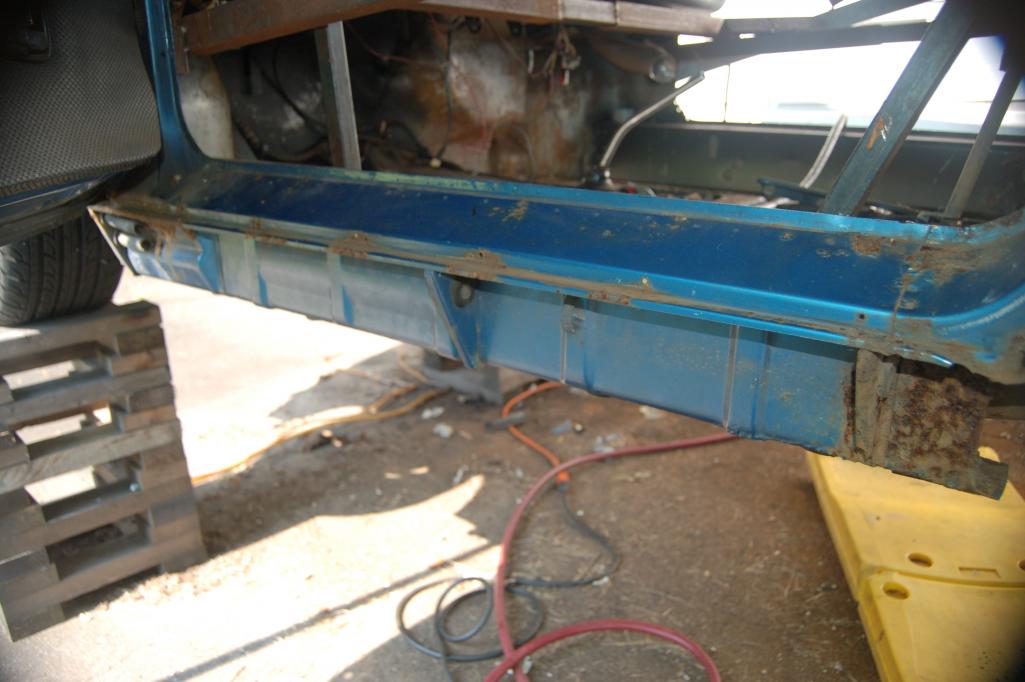
Posted by: metalmorphosis Aug 4 2012, 07:12 PM
A lil more
Attached thumbnail(s)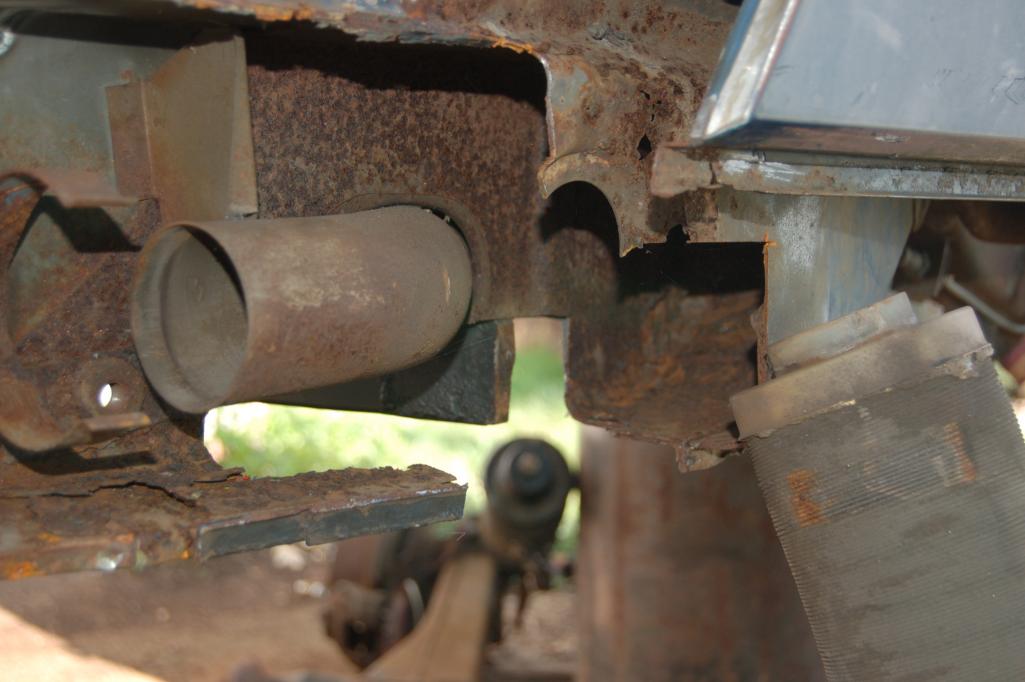
Posted by: metalmorphosis Aug 4 2012, 07:24 PM
And here its starting to get some repairs and some good ol Rust Bullet.
Attached thumbnail(s)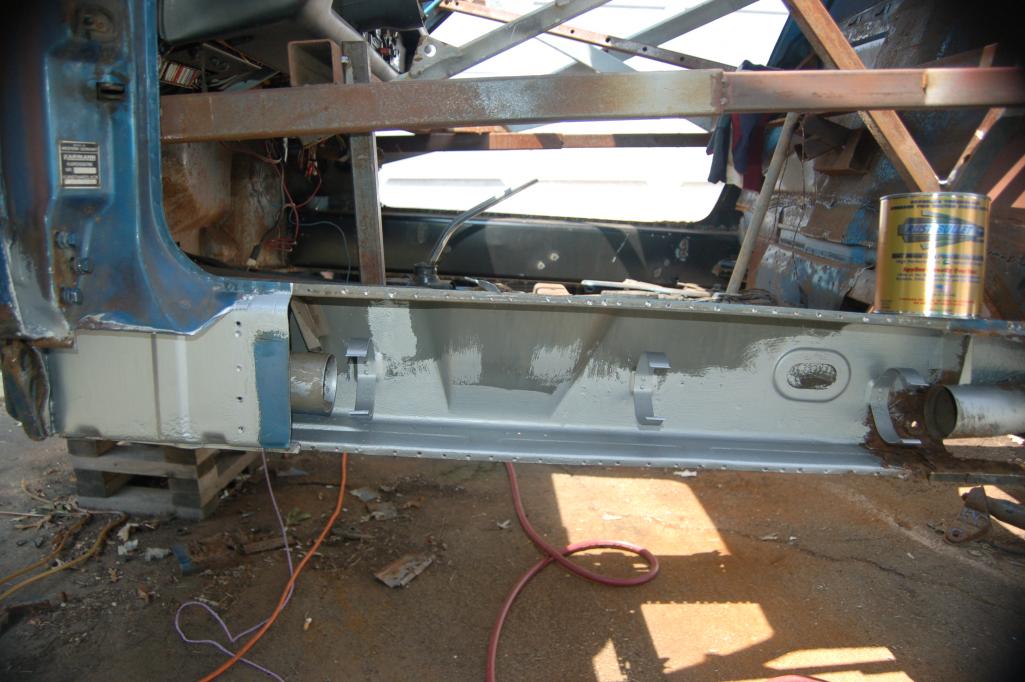
Posted by: metalmorphosis Aug 4 2012, 08:09 PM
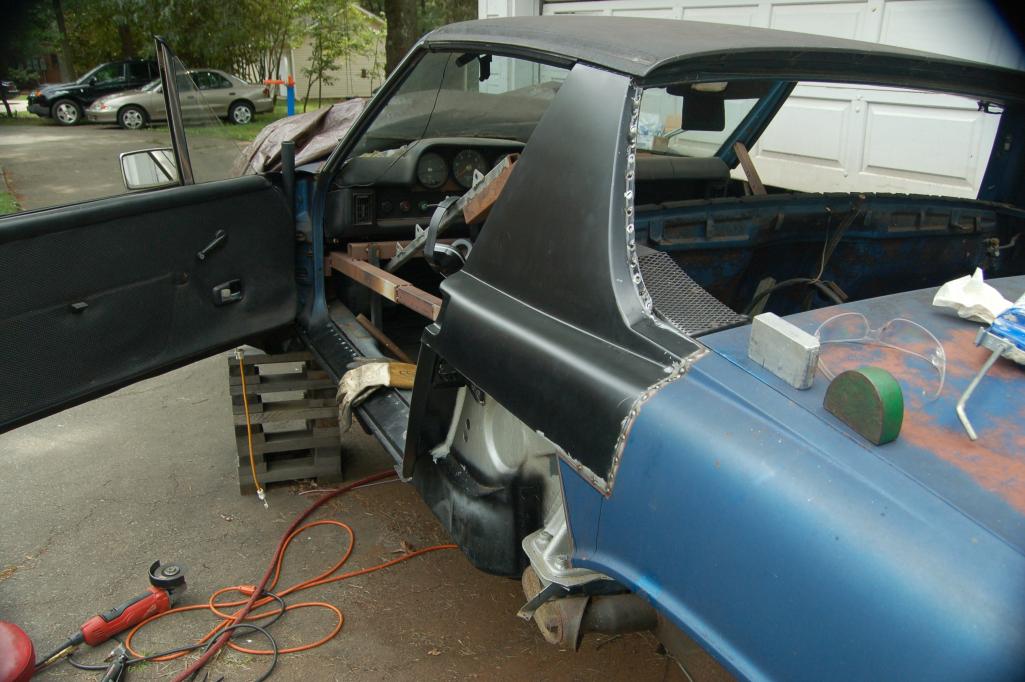
Sometime in aug 2011 I guess I felt the urge to cut half the dr side off. I repaired and reinstalled the pc at the btm of the frt door jam. And checkin fittment of the og outter long along w some of the pass long to patch the dr side back up.
Attached thumbnail(s)
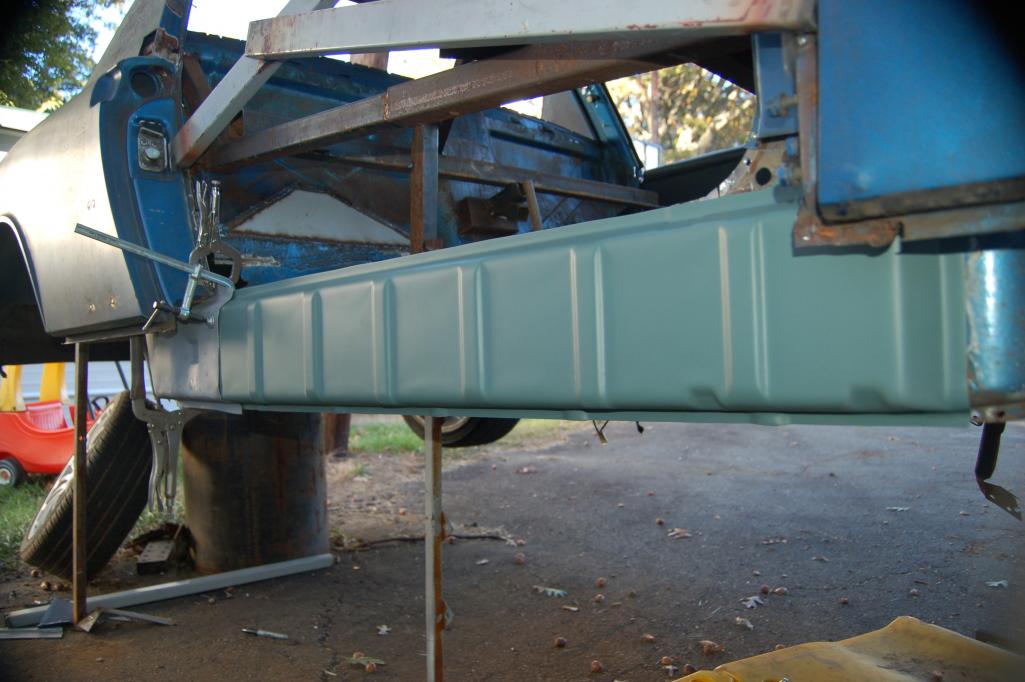
Posted by: metalmorphosis Aug 5 2012, 07:19 PM
Well I had hoped to paint my engine compartment and the bottom of the floors this wkend but fell just short. But aside from masking off a few things and minor prep work I am ready to paint next work session. Anyway back to the build pics, these next 2 are a little out of chronological order and are from around oct 2010. They just show the first test fit of the driver side floor. I was probably tring to decide where to cut the front edge of the floor. Thats all for now may get more posted in an hr or so.
Attached thumbnail(s)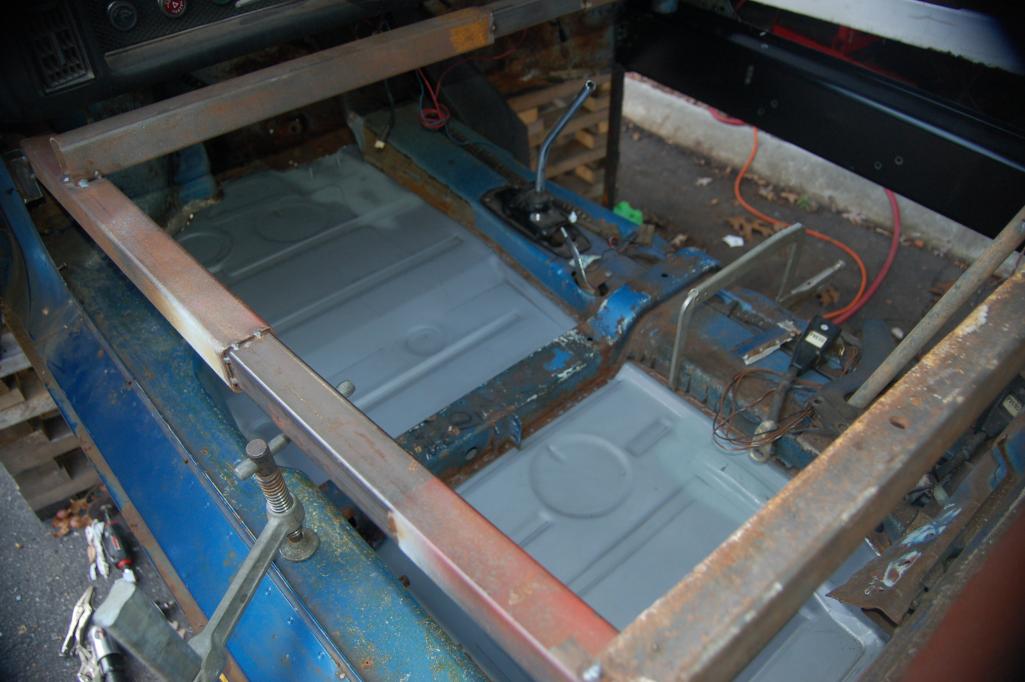
Posted by: tscrihfield Aug 5 2012, 08:42 PM
Is that an red/orange tree fiddy six (356) in the background... If so do tell!
Thomas
Posted by: metalmorphosis Aug 5 2012, 09:17 PM
No Thomas I wish it was a 356 but its only my 70 vw fastback, which is no longer mine. If I would've had $2000 back in the mid/late 90's I could have had one. O well I guess almost all of us have the one that got away stories. But at least I have my rockin, rusty 914! And thank goodness its not so rusty anymore! I almost can't believe its been 2 yrs that I've been workin on this thing. My goal now is to fire it up before the end of aug. So i'll get back to the pics so y'all can get caught up to how it currently looks. Heres 2 of the dr long pretty much buttoned up. And I'll find a pic of the fasty and post it later, if I don't forget.
Attached thumbnail(s)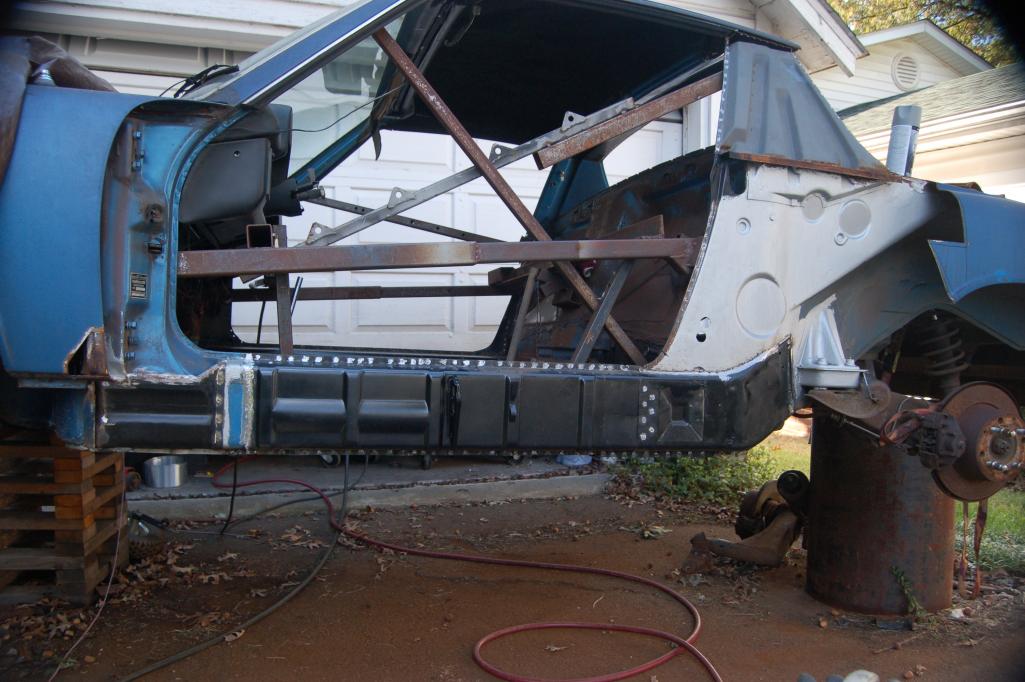
Posted by: billh1963 Aug 6 2012, 02:40 PM
Looks like great progress!!!!!!!!!!!!! 
Posted by: tscrihfield Aug 6 2012, 04:30 PM
No Thomas I wish it was a 356 but its only my 70 vw fastback, which is no longer mine. If I would've had $2000 back in the mid/late 90's I could have had one. O well I guess almost all of us have the one that got away stories. But at least I have my rockin, rusty 914! And thank goodness its not so rusty anymore! I almost can't believe its been 2 yrs that I've been workin on this thing. My goal now is to fire it up before the end of aug. So i'll get back to the pics so y'all can get caught up to how it currently looks. Heres 2 of the dr long pretty much buttoned up. And I'll find a pic of the fasty and post it later, if I don't forget.
Ahh now I see. Sure had me fooled for a minute. Well don't discount the 914 or yur work! It looks awesome!!!
Thomas
Posted by: RON S. Aug 6 2012, 05:00 PM
Very good work!!!
I've been there and done that, and you'll have no better day, than the last day you'll need to turn on your welder.
One thing to watch for constantly is keep an eye on the body, ever so slightly twisting like a bread tie.
All that welding will cause metal to move. if it is ever going to twist, you'll notice it in the roof lid alignment.
You should put that left side sail panel back on, and always keep checking the back end of the lid for a proper fit.
Keep it up, looks great... 
Ron
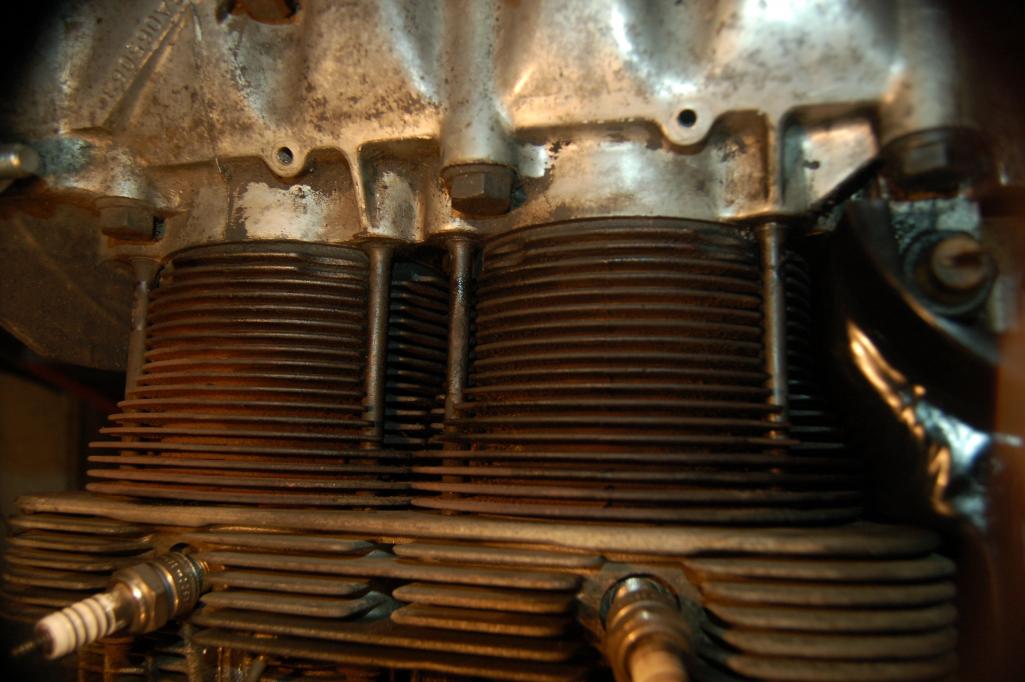
Posted by: metalmorphosis Aug 19 2012, 06:24 PM
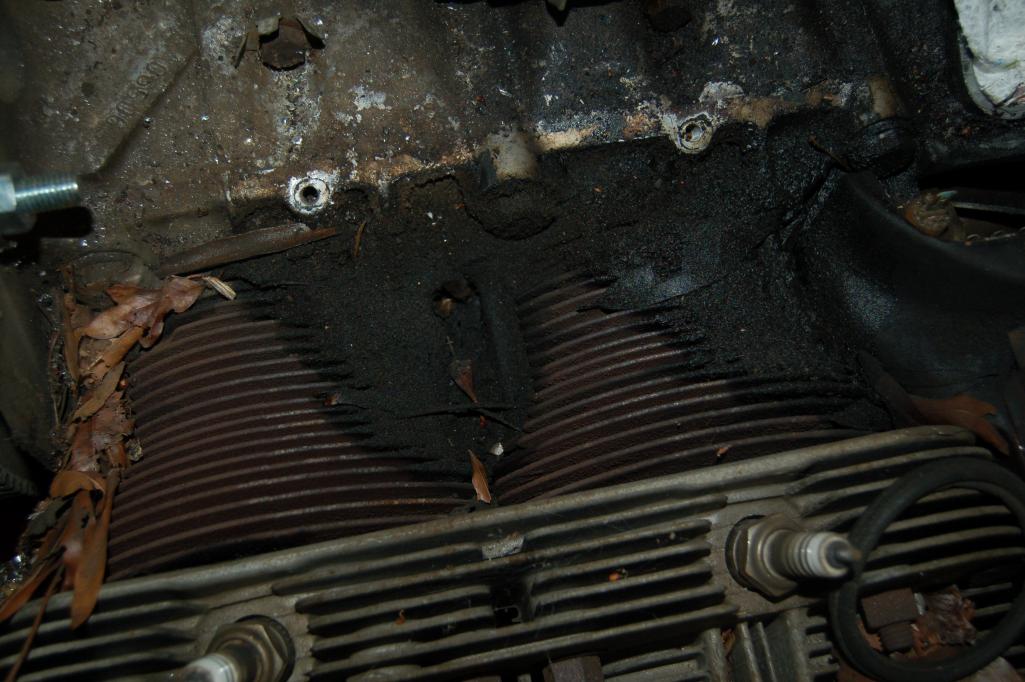
Hello again everyone, its been almost 2 wks since posting anything. I just got back from my whirlwind trip to new england and I'm glad to be back in the land of sweet tea and biscuits. Anyway back to the build thread pics, heres some of the motor when I started takin it apart to clean it up. I didn't rebuild it as it runs fine just wanted to clean it. Once I removed the tins I found all this, don't know how the poor thing cooled itself.
Attached thumbnail(s)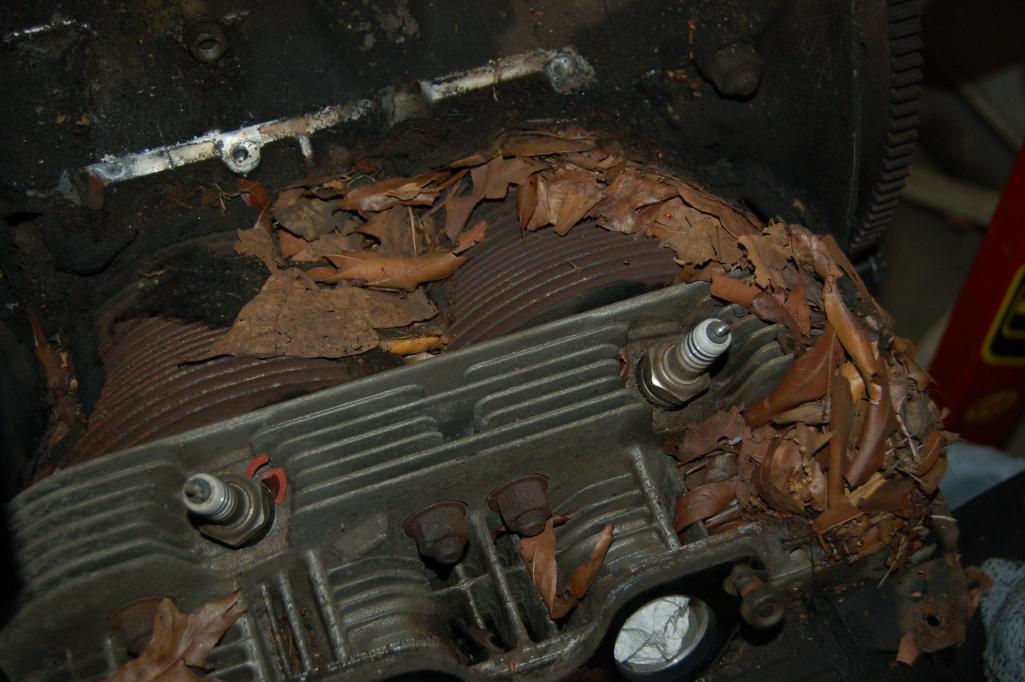
Posted by: metalmorphosis Aug 19 2012, 06:26 PM
Heres a few after shots.
Attached thumbnail(s)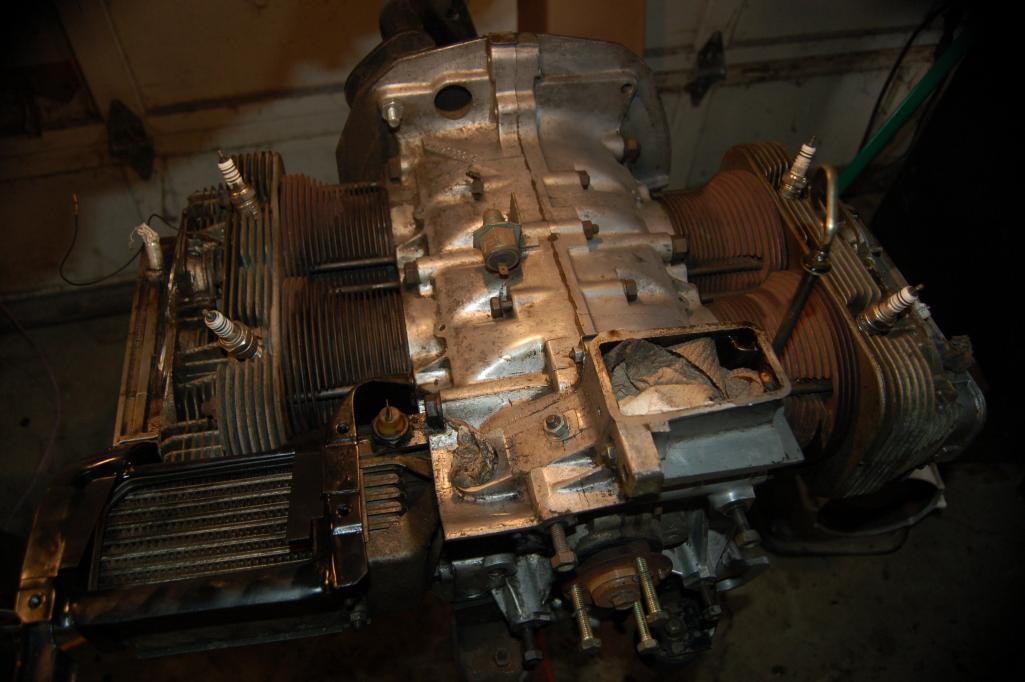
Posted by: metalmorphosis Aug 19 2012, 09:38 PM
Before I get back to the body, I forgot to mention that the motor got more than a major cleaning. It got new pushrod tube seals, oil cooler seals, heads torqued and valves adjusted, spark plugs, all new vacuum lines, powder coated tins,, and other new odds and ends. I'll have to find and/or take some pics of it now to post later. So now I'll get back to the body. These are from March of this yr I put the driver door back on to start the fitment of the sail panel, doorjam, and org fender. So everythings moving along fine so far, just takin my time tryin to get the panels just right.
Attached thumbnail(s)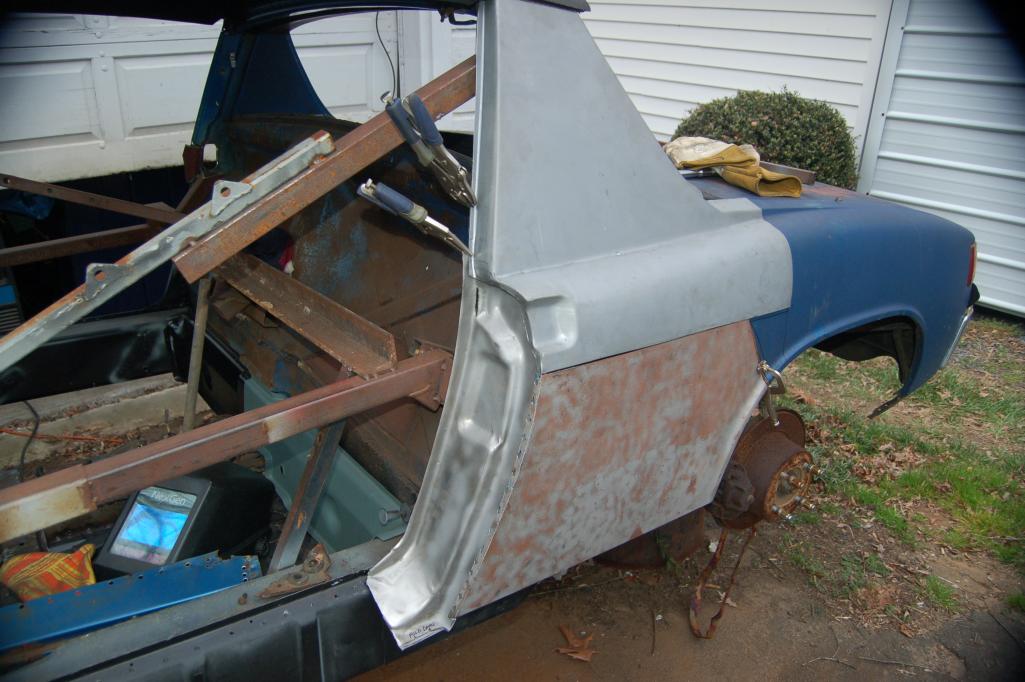
Posted by: metalmorphosis Aug 19 2012, 09:56 PM
And now for the sill plate.
Attached thumbnail(s)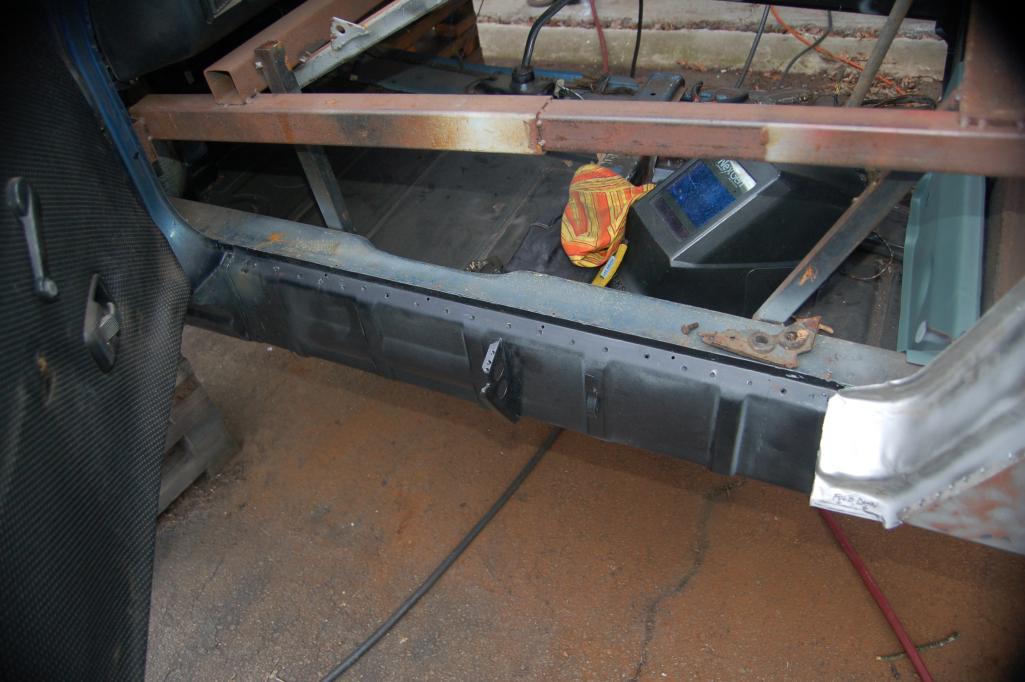
Posted by: metalmorphosis Aug 20 2012, 10:10 PM
Heres more of the drivers side goin back together except its permenent now. No more clamps and sheet metal screws, we have spot welds! Also, as you can see I've painted everything so my new metal is protected. So now I've got a bare doorjam that needs a new vin sticker. Although that will have to wait till it gets painted which may be awhile. On another note I found some pics last night that I couldn't find eariler that show more of the pass long repair in detail. I'll post a few of them later even though they will be a little out of order.
Attached thumbnail(s)
Posted by: metalmorphosis Aug 20 2012, 10:12 PM
A few more.
Attached thumbnail(s)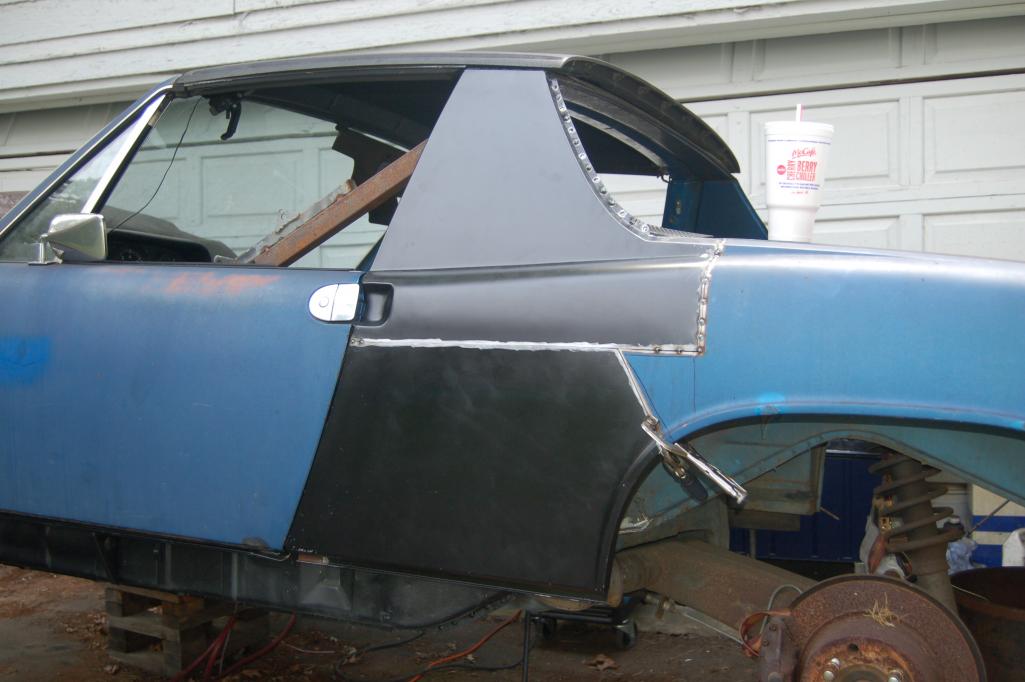
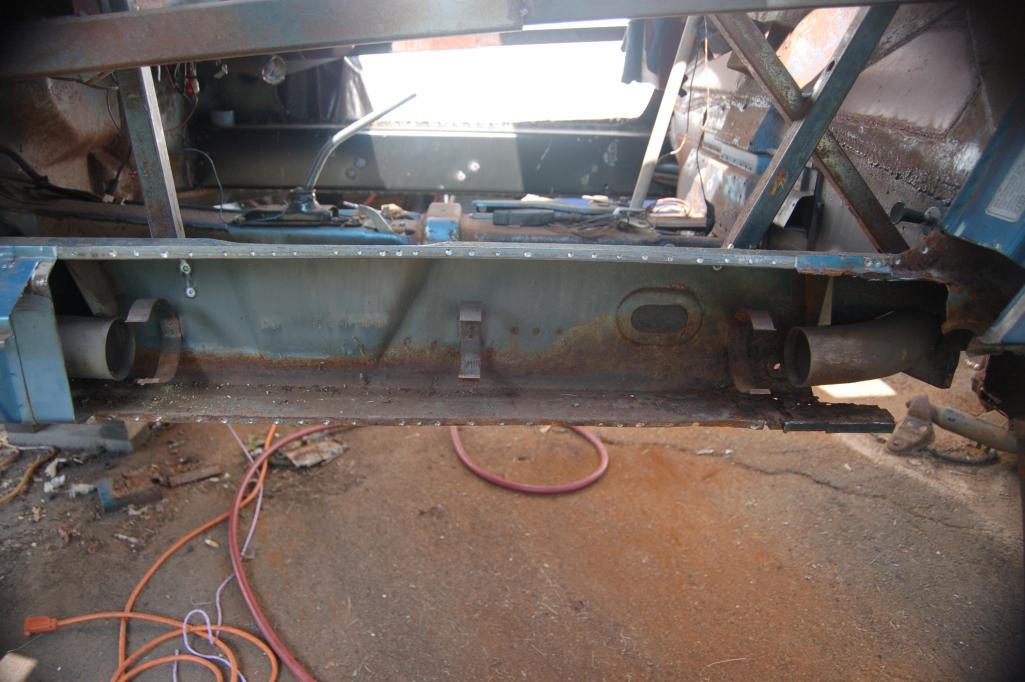
Posted by: metalmorphosis Aug 23 2012, 08:50 PM
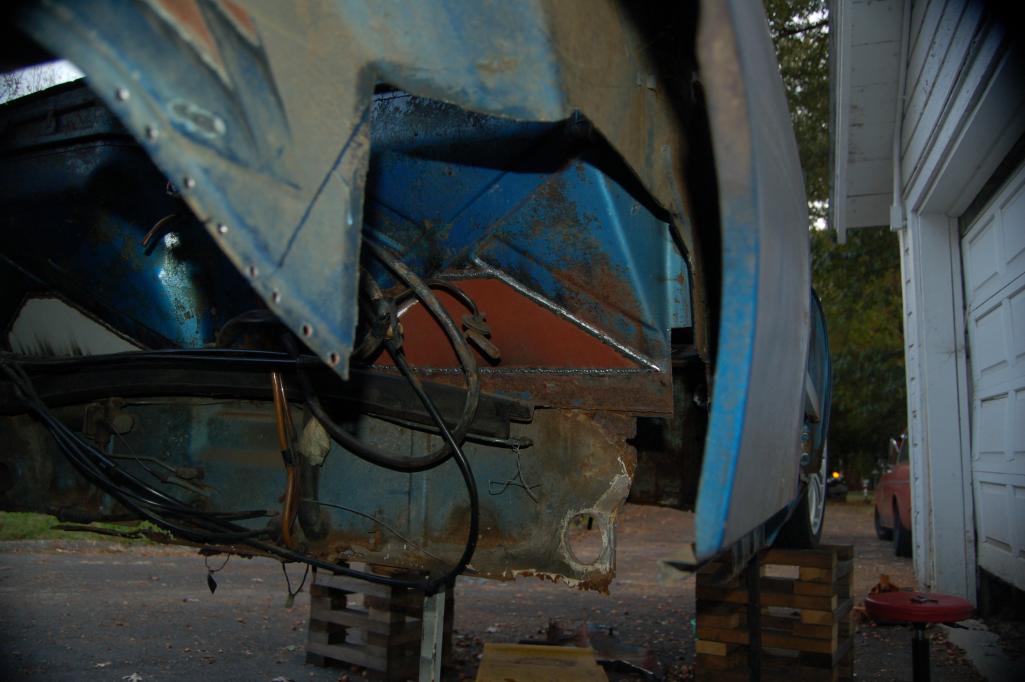
Here we go back to the lost but now found out of order pass long pics. Earlier you got pics of the k-rust still in place and then next thing you know the new metal is in. These are just some more details in the middle of all that. Hope you enjoy! So back to Oct 2010 when my poor little car was alomst cut in half and I had all my scrap tubing holding it together.
Attached thumbnail(s)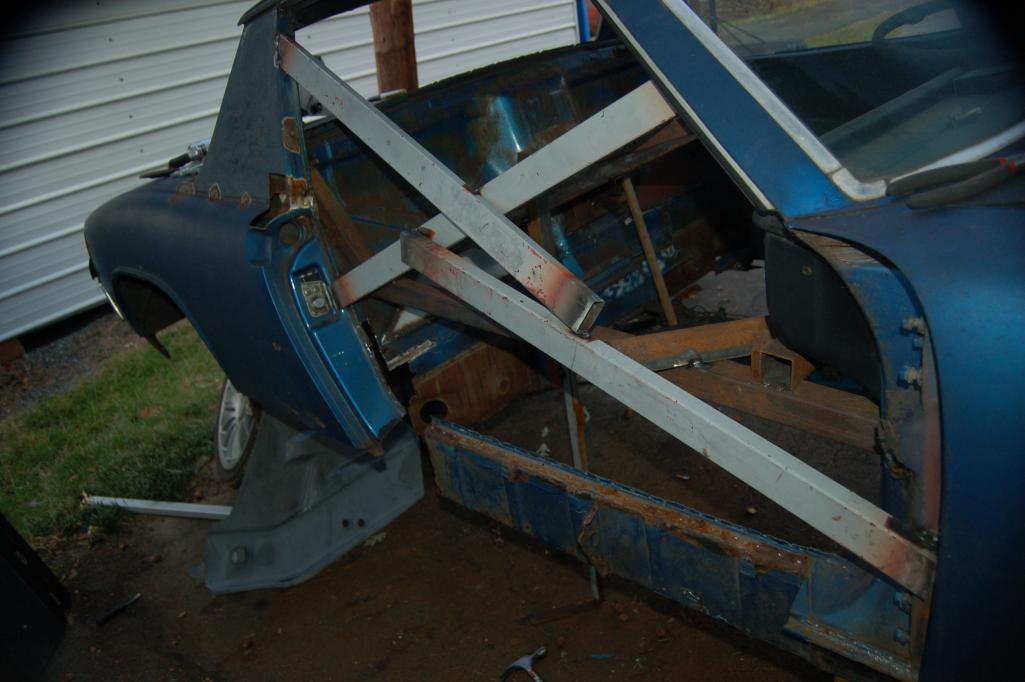
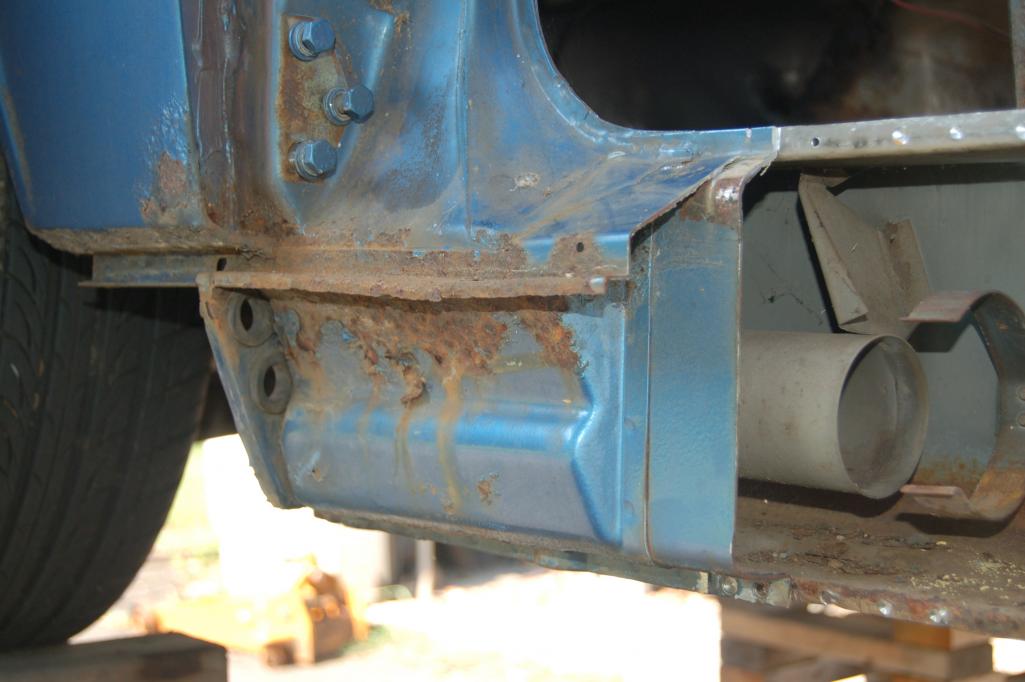
Posted by: metalmorphosis Aug 23 2012, 08:55 PM
Inner wheelhouse
Attached thumbnail(s)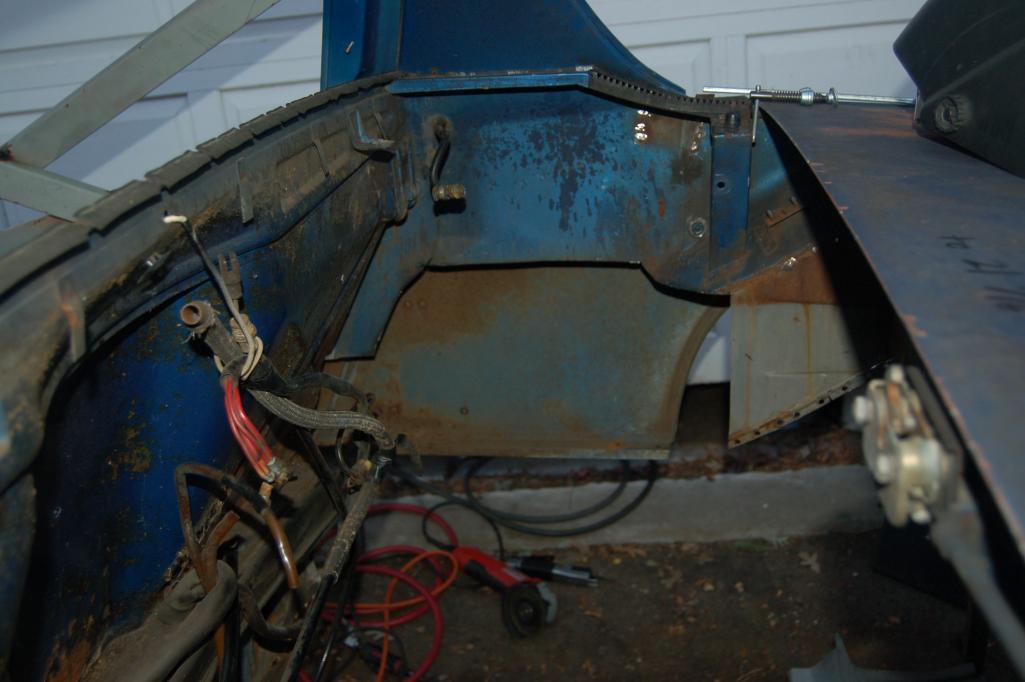
Posted by: metalmorphosis Aug 23 2012, 09:01 PM
All traces of the k-rusty long gone and the new pcs being test fitted.
Attached thumbnail(s)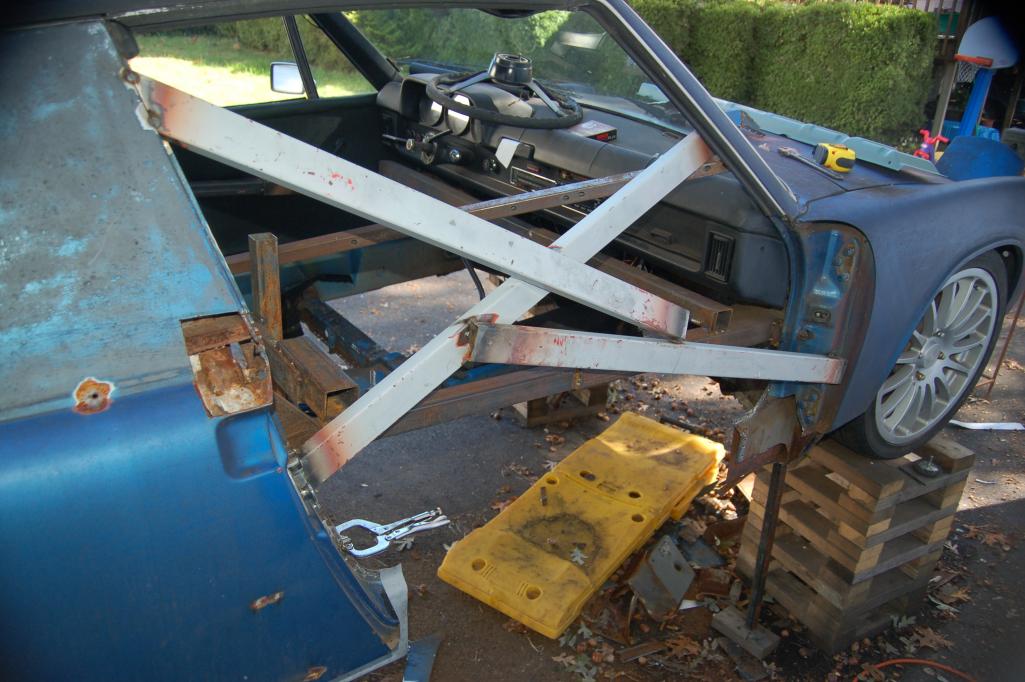
Posted by: dlee6204 Aug 23 2012, 09:04 PM
Holy Smokes! 
Posted by: metalmorphosis Aug 23 2012, 09:08 PM
Inner long half being installed and presto change-o no more rusty long.
Attached thumbnail(s)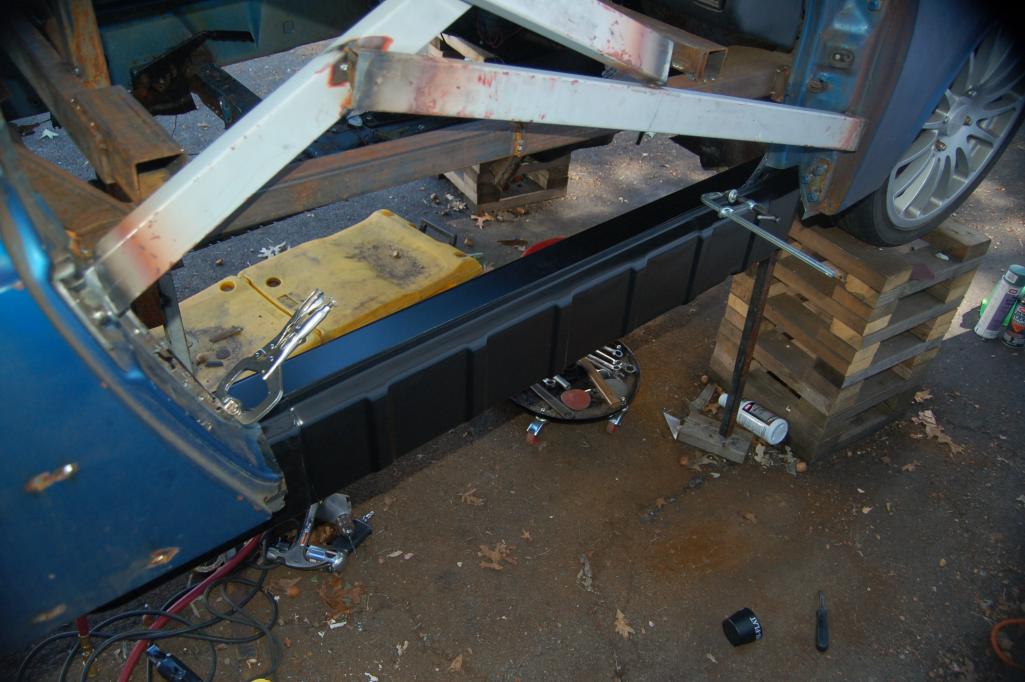
Posted by: metalmorphosis Aug 23 2012, 09:14 PM
Heres a little more of the engine compartment area. And this concludes my long lost out of order pics.
Attached thumbnail(s)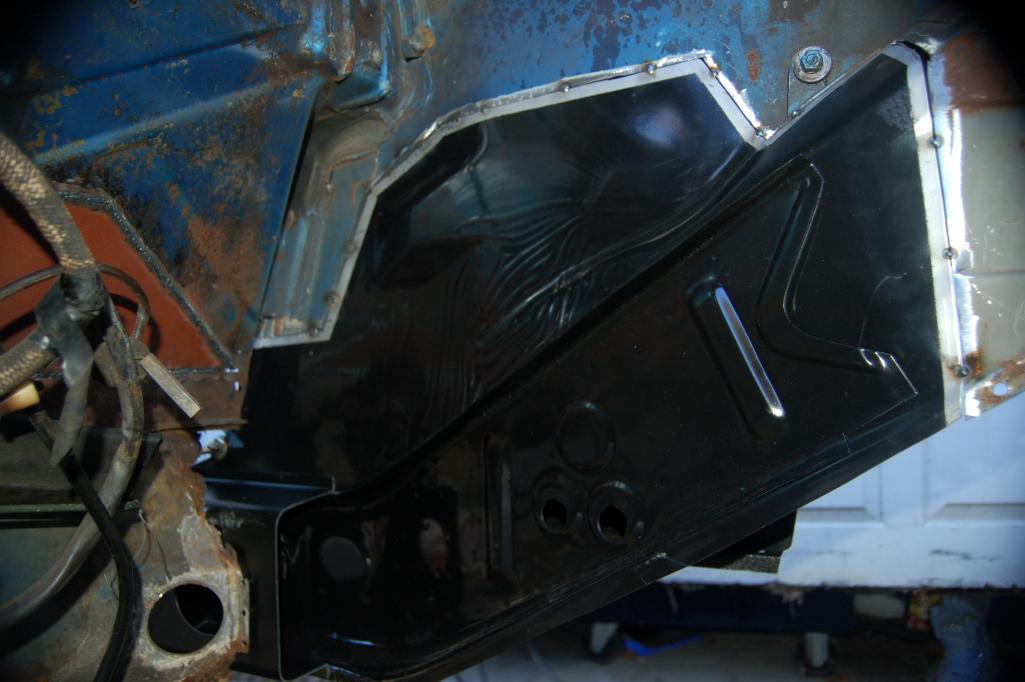
Posted by: billh1963 Aug 24 2012, 06:05 AM
Threads like these prove that almost any car can be saved!
Although the current values of 914's makes these kinds of repairs hard to justify (if you are paying someone), it is great to know that some people have the skill and perseverance to bring a car back from the brink!
Well done, sir...well done!
Posted by: JawjaPorsche Aug 24 2012, 06:19 AM
Man that is awesome! You are the man!
Posted by: draganc Aug 24 2012, 08:13 AM
Heres a little more of the engine compartment area. And this concludes my long lost out of order pics.
Very nice panel fit!! I have done some of that rust repair and can appreciate your work.
How do you like the "Rust bullet"? I have used in on my repairs and like it a lot, much better than POR15. And since I have a silver rust bucket, it almost fits perfect.
Dragan
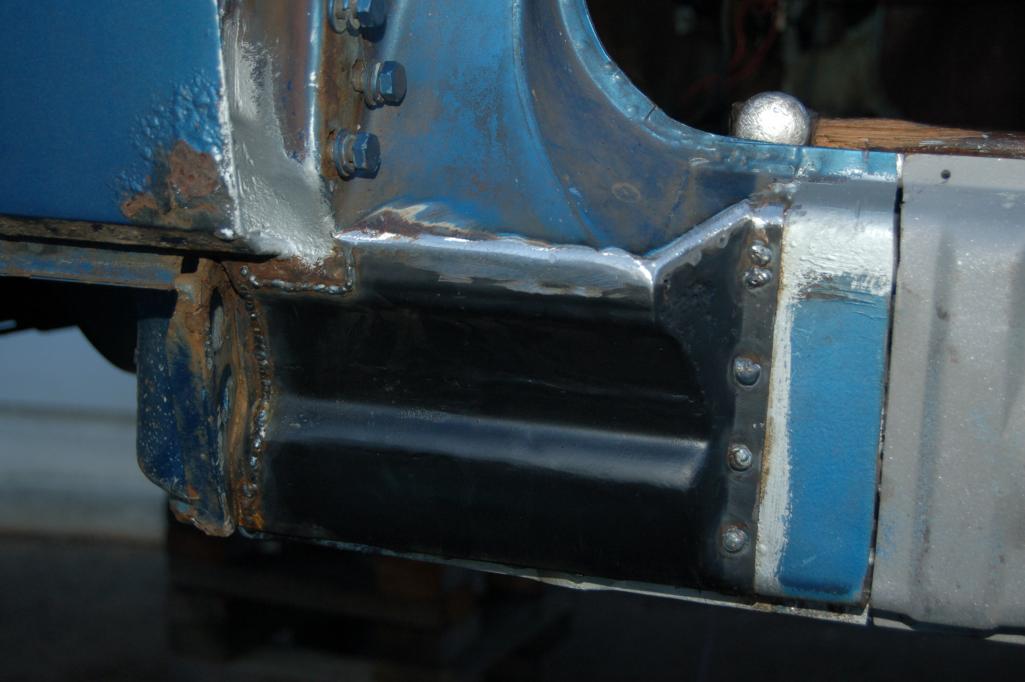
Posted by: metalmorphosis Aug 27 2012, 09:10 PM
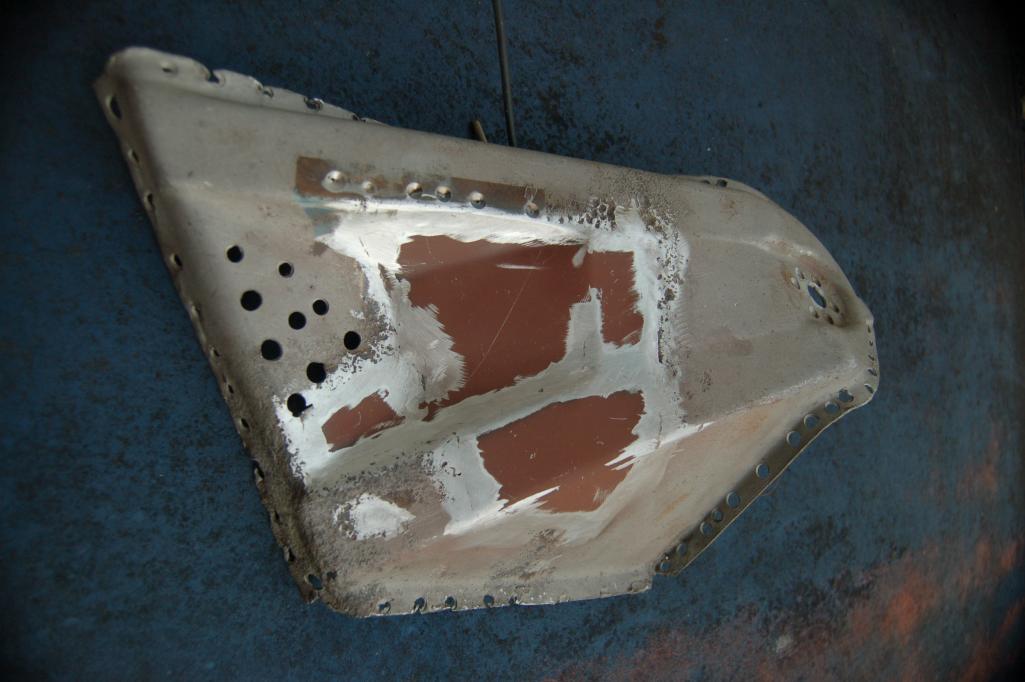
First I'd like to say thanks for the kind words about my old k-rusty 914! And yeah Dragan my experince w rust bullet is that its a great product, I do as it recommends and apply 2 coats. I've also used a rust converter called rust-mort which seems to do a good job too. I do my best to show rust no mercy. So far I've been jumping all around chronologically, so fire up the delorean and set the flux capacitor to June/July of this year. Heres a little pass side sail panel, door jam, sill plate repair pics.
Attached thumbnail(s)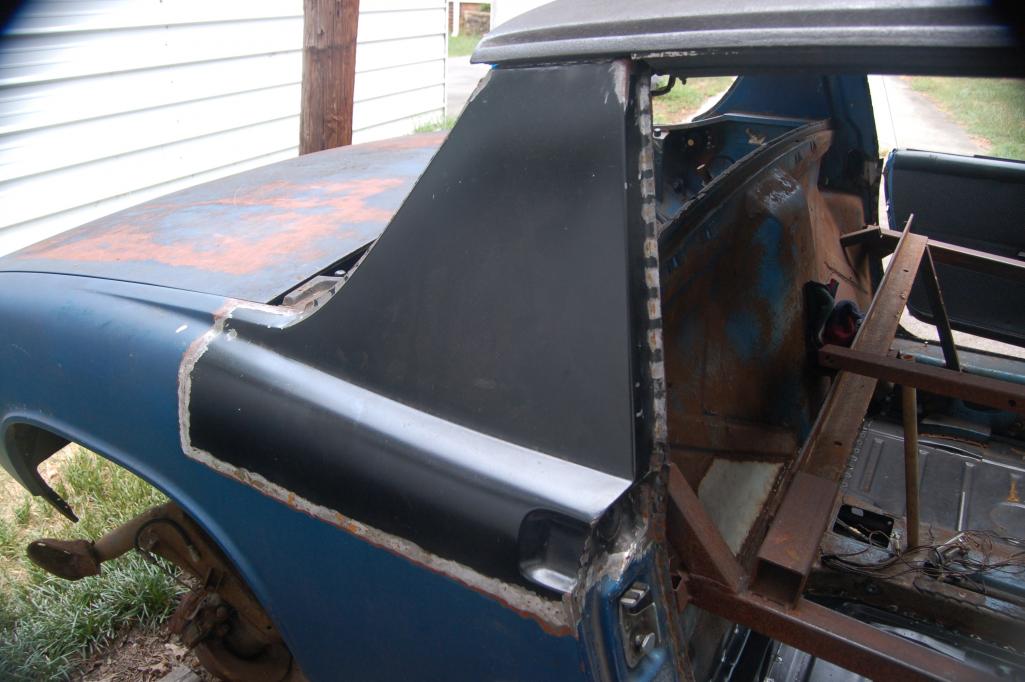
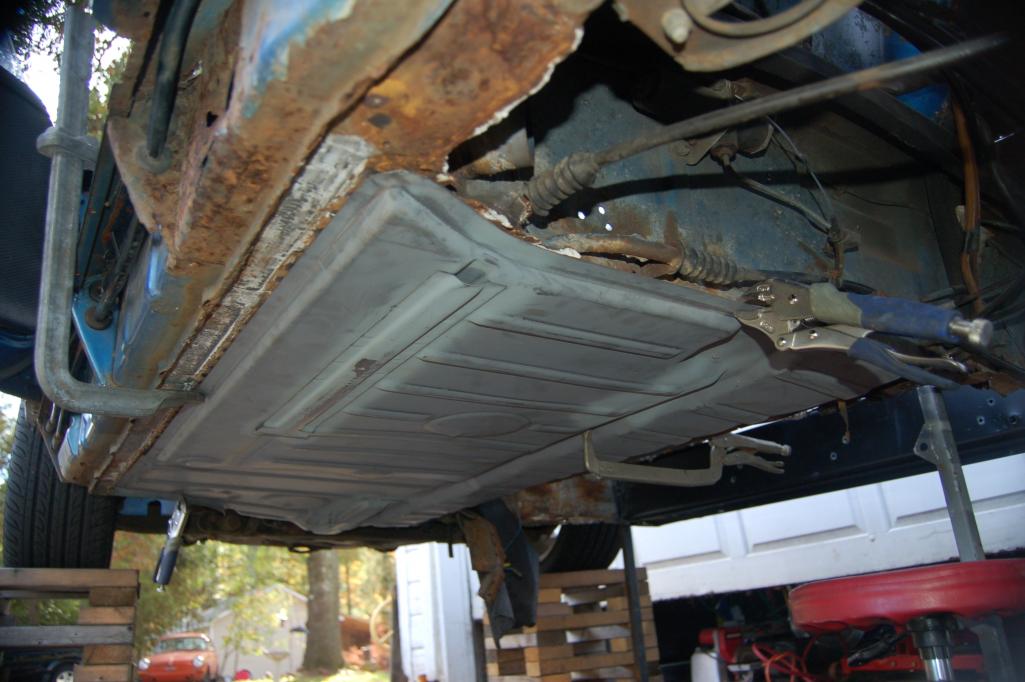
Posted by: metalmorphosis Aug 27 2012, 09:13 PM
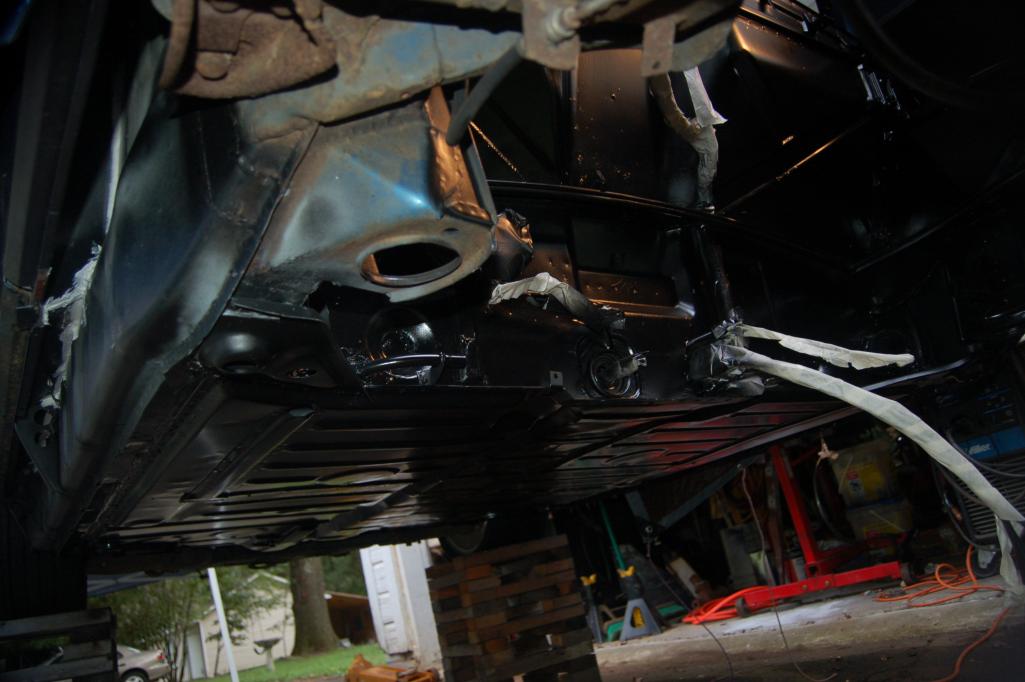
And some inner fire wall and btm of floor action.
Attached thumbnail(s)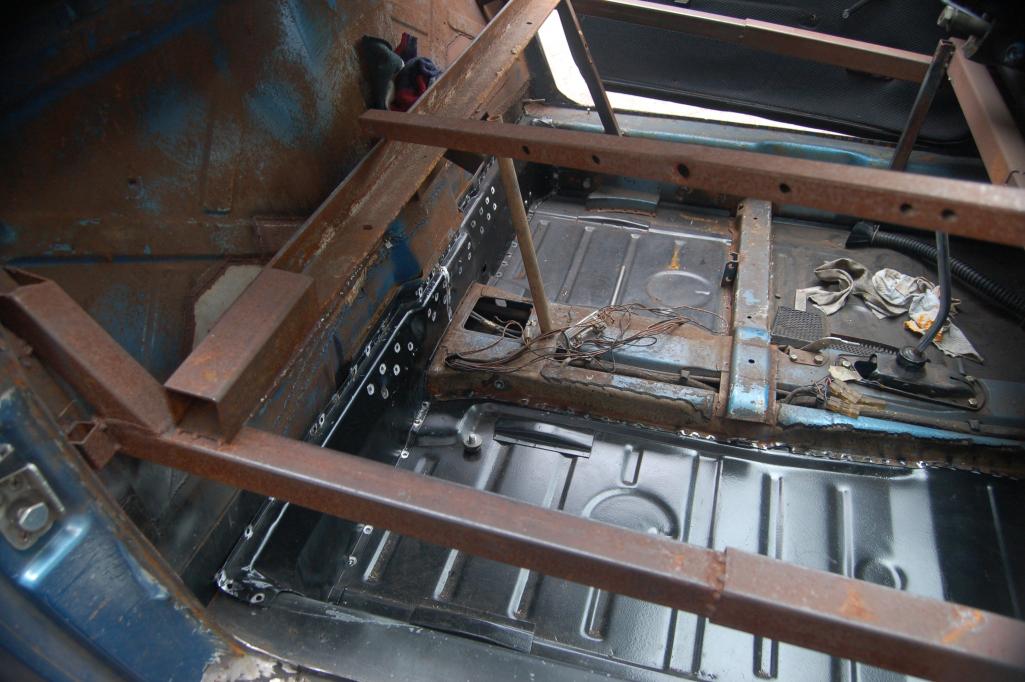
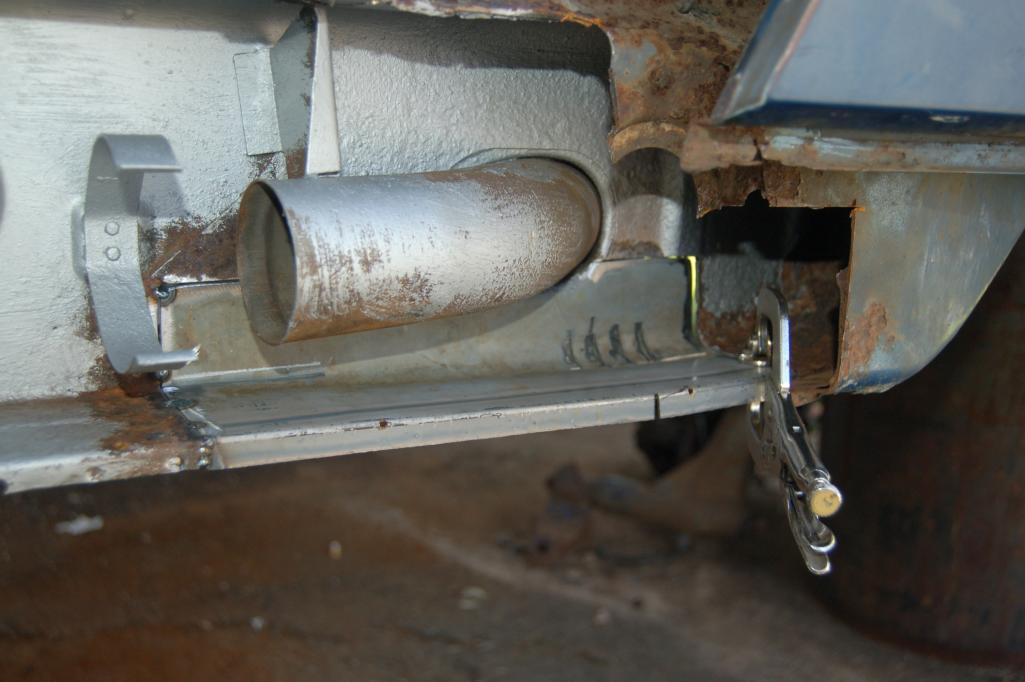
Posted by: metalmorphosis Aug 27 2012, 09:17 PM
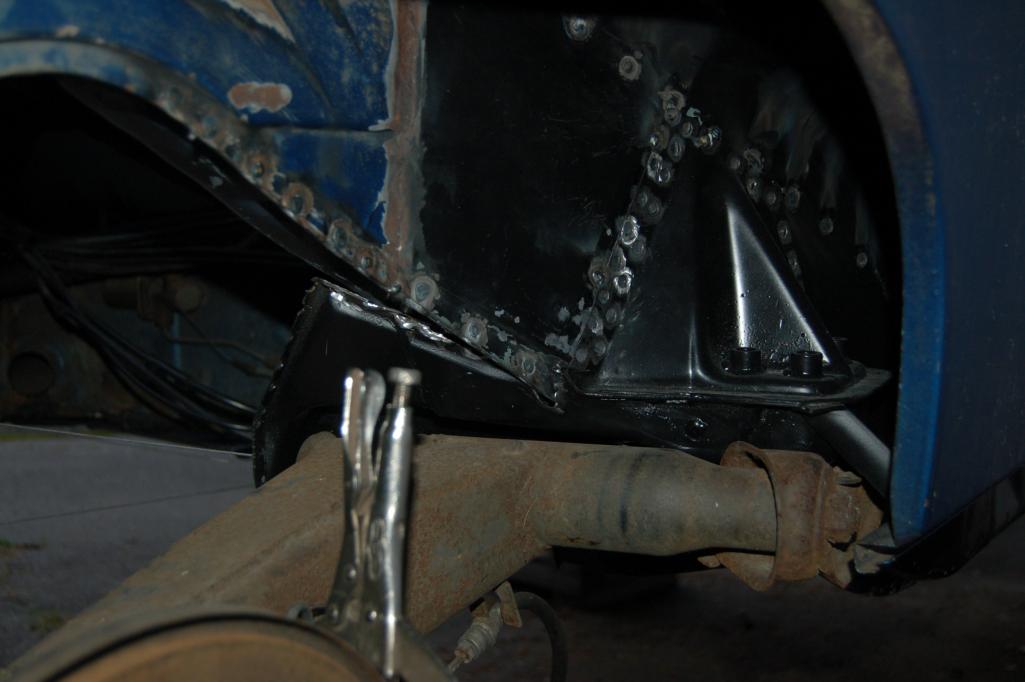
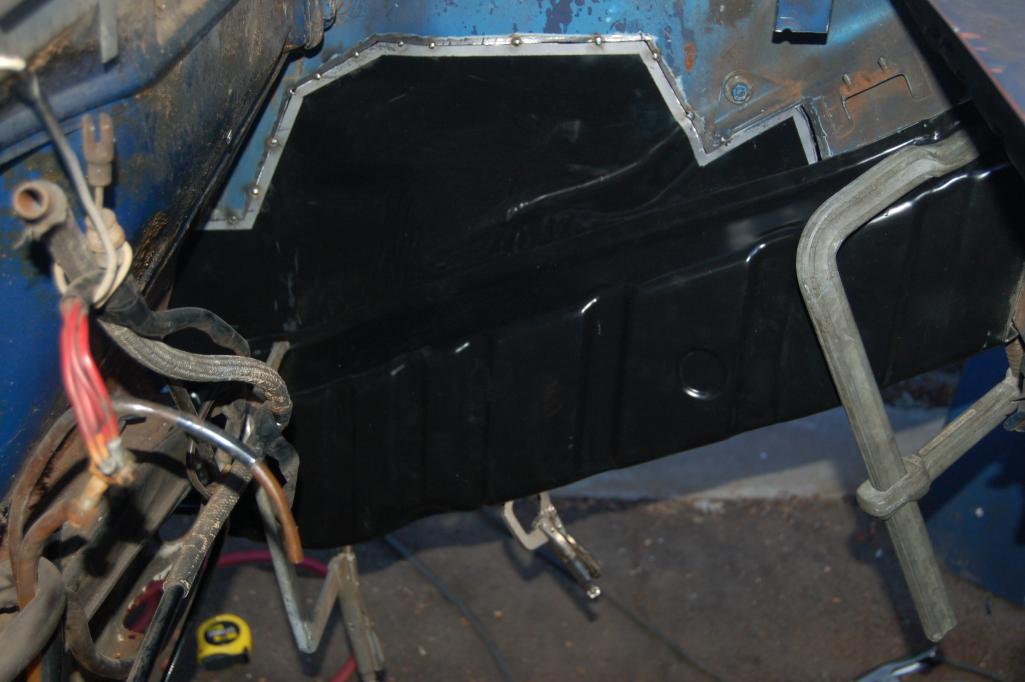
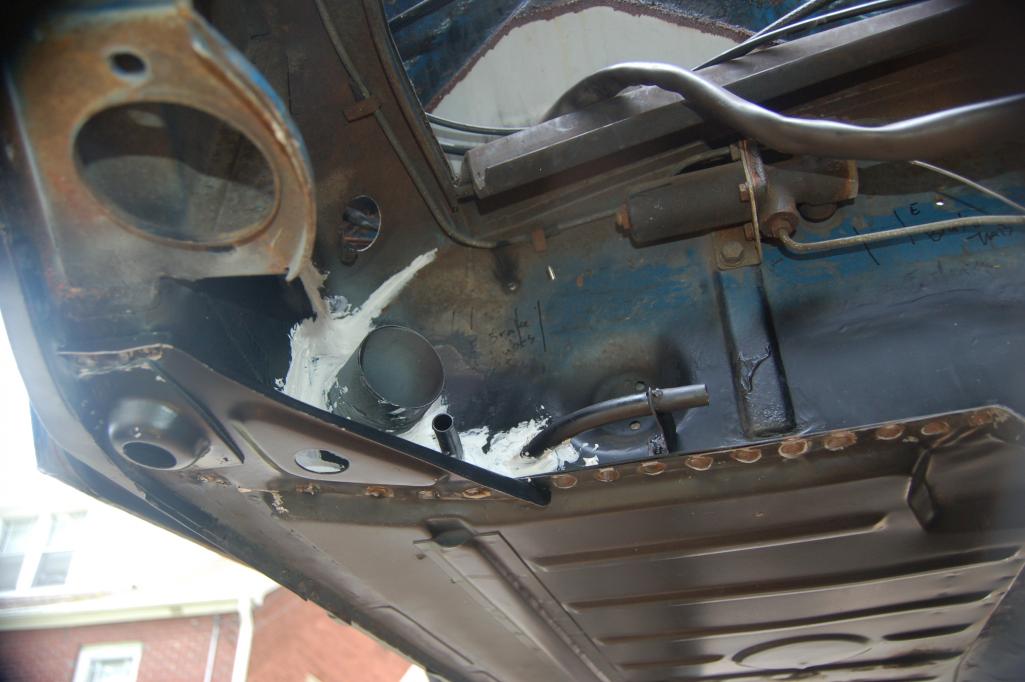
And from below the hell hole area pretty much done and e-brake tubes back on along w the rear jack point triangles on.
Attached thumbnail(s)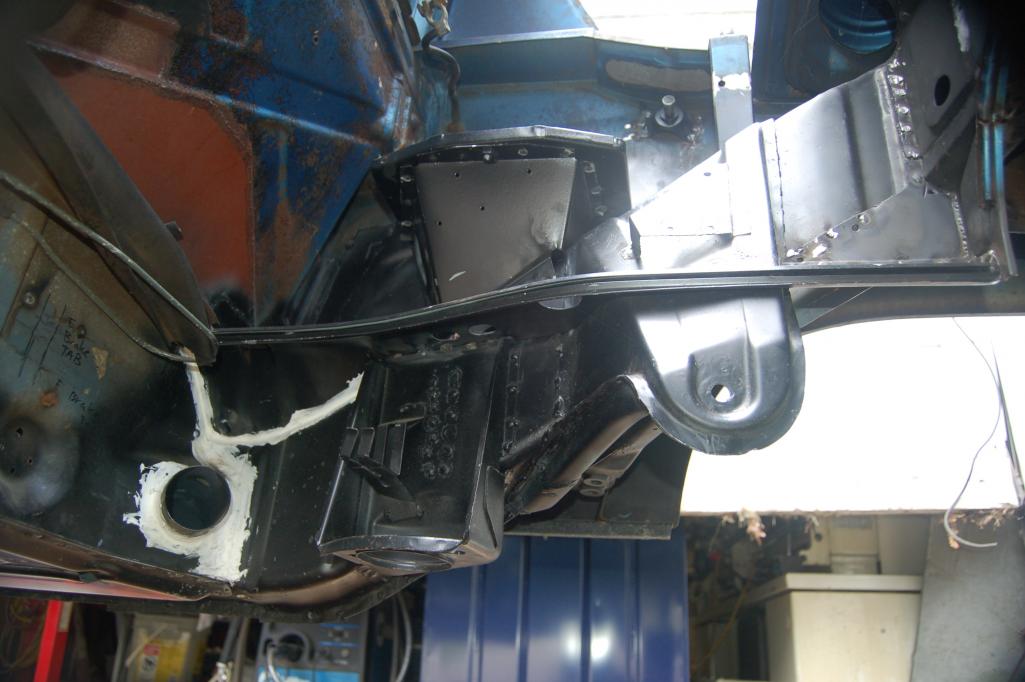
Posted by: metalmorphosis Sep 7 2012, 09:14 PM
Its been about 2 wks since posting any pics so its time to get back to it! Heres a few of the ft fender tacked back on. I'm leaving it just tacked for now because I think I'm gonna cut it back off again later. It seems a little low compared w the hood and years ago when I pulled the damage out from my fender bender I felt like it may need to be pulled up some more. Even though my car isn't getting any paint right now I want panel fit and gaps to be as good as I can get them. So we'll see how this ends up later.
Attached thumbnail(s)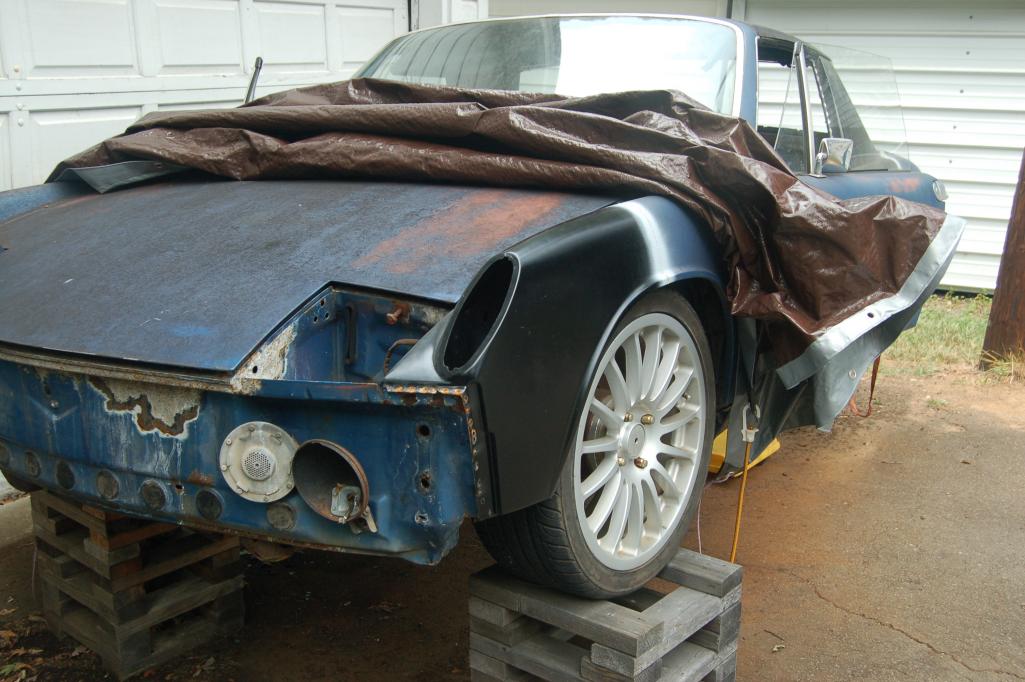
Posted by: metalmorphosis Sep 7 2012, 09:22 PM
Heres my air drier I made on the cheap and it seemed to work too! Its just coiled alum tubing in ice water then to a cheapy water separator. And the before pic of the engine compartment.
Attached thumbnail(s)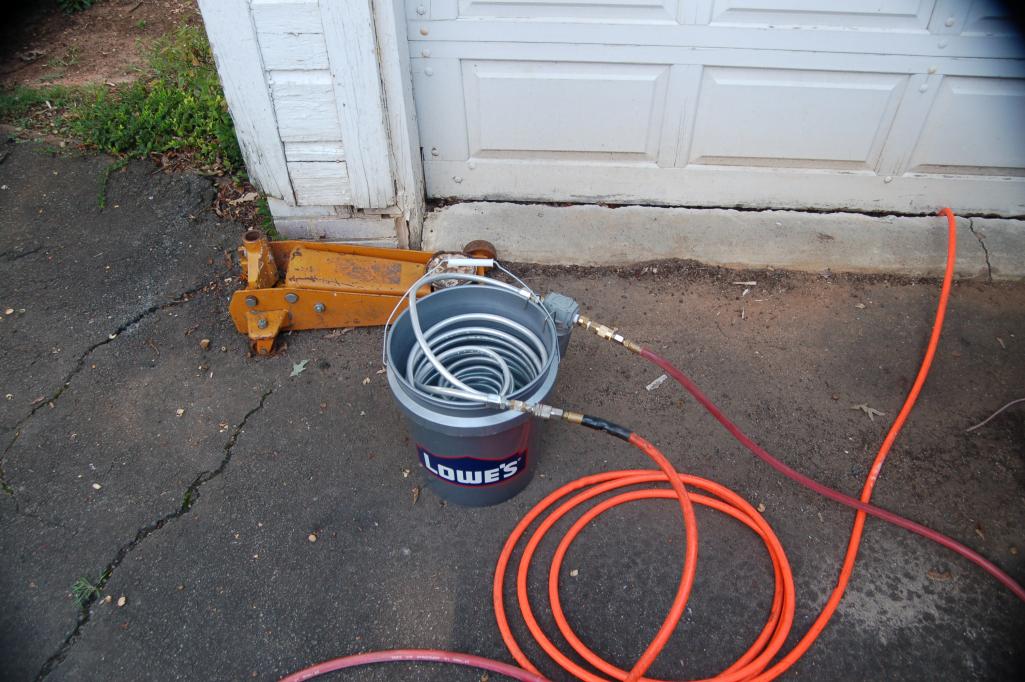
Posted by: metalmorphosis Sep 7 2012, 09:25 PM
A few more before pics
Attached thumbnail(s)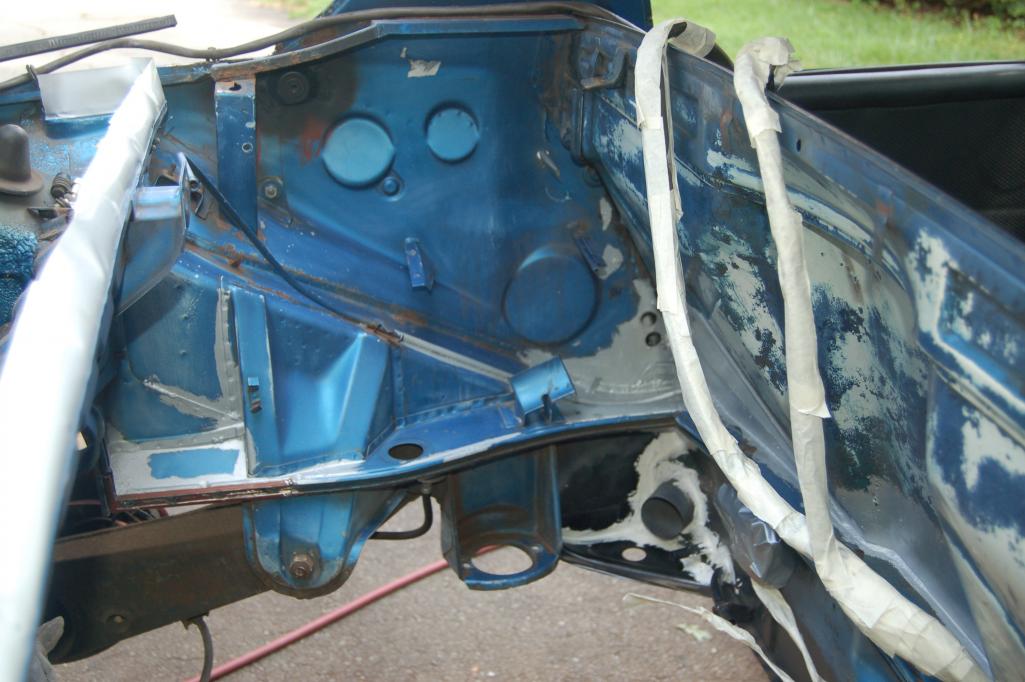
Posted by: metalmorphosis Sep 7 2012, 09:33 PM
Here I am in my crazy painting get up. It started raining as soon as I finished the first coat but that wasn't stopping me! And heres the engine compartment after painting.
Attached thumbnail(s)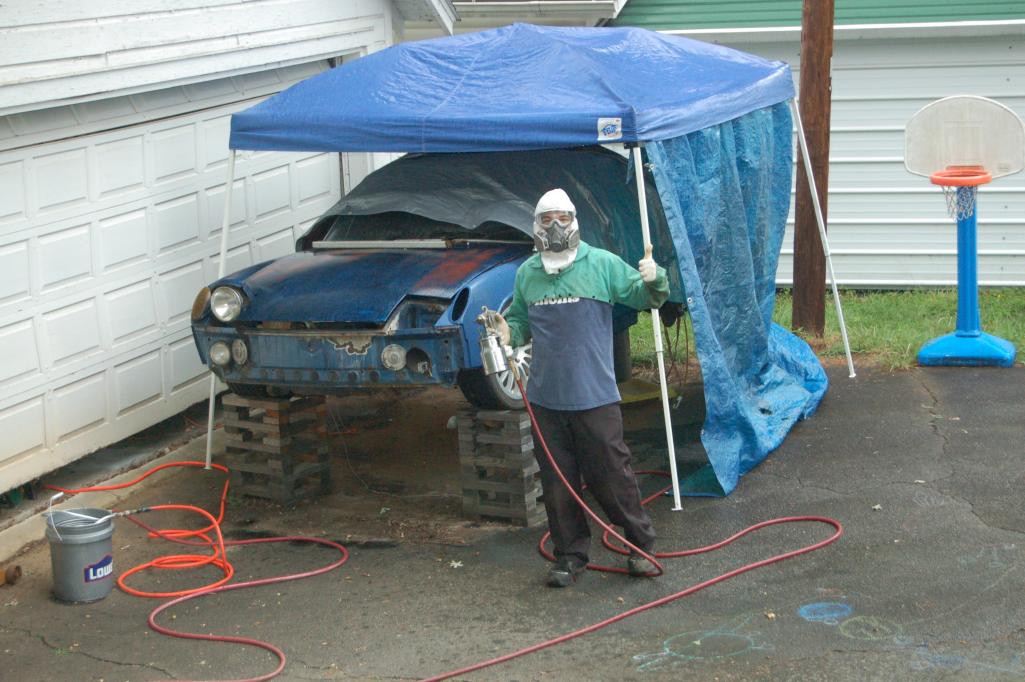
Posted by: metalmorphosis Sep 7 2012, 09:37 PM
Heres a few more after painting but due to bad lighting you can't see anything on the pass side. And one of the flr pans too.
Attached thumbnail(s)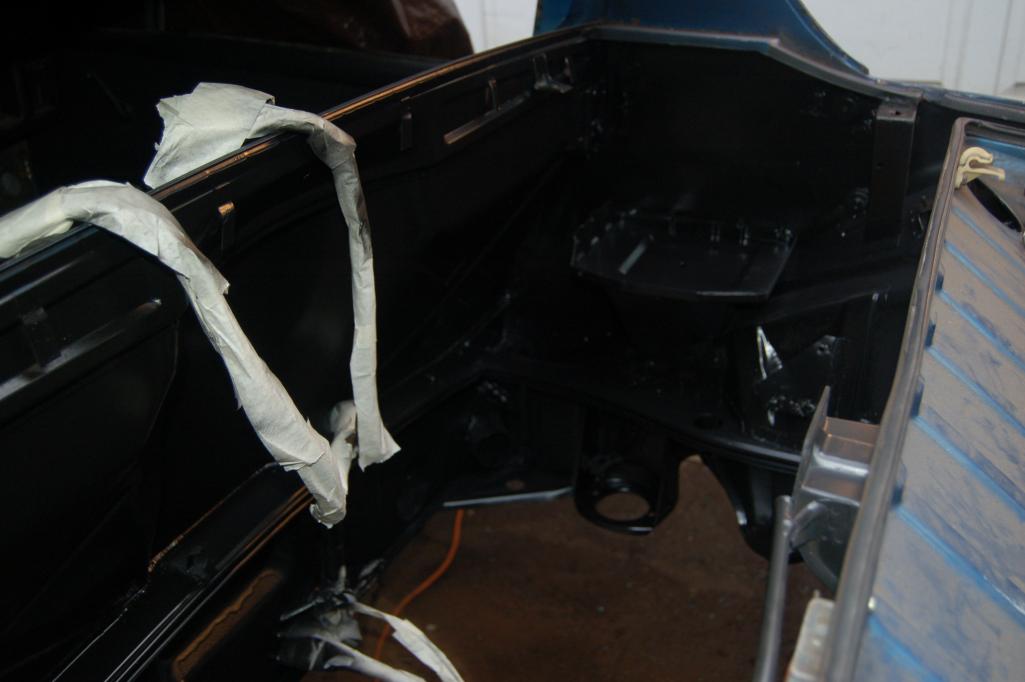
Posted by: metalmorphosis Sep 7 2012, 09:56 PM
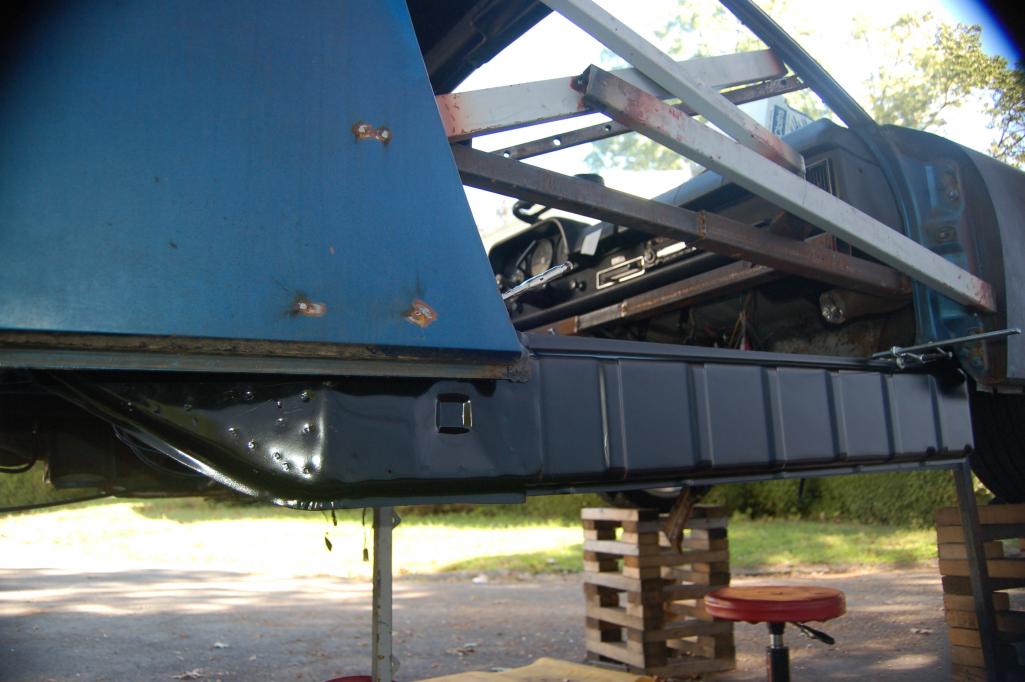
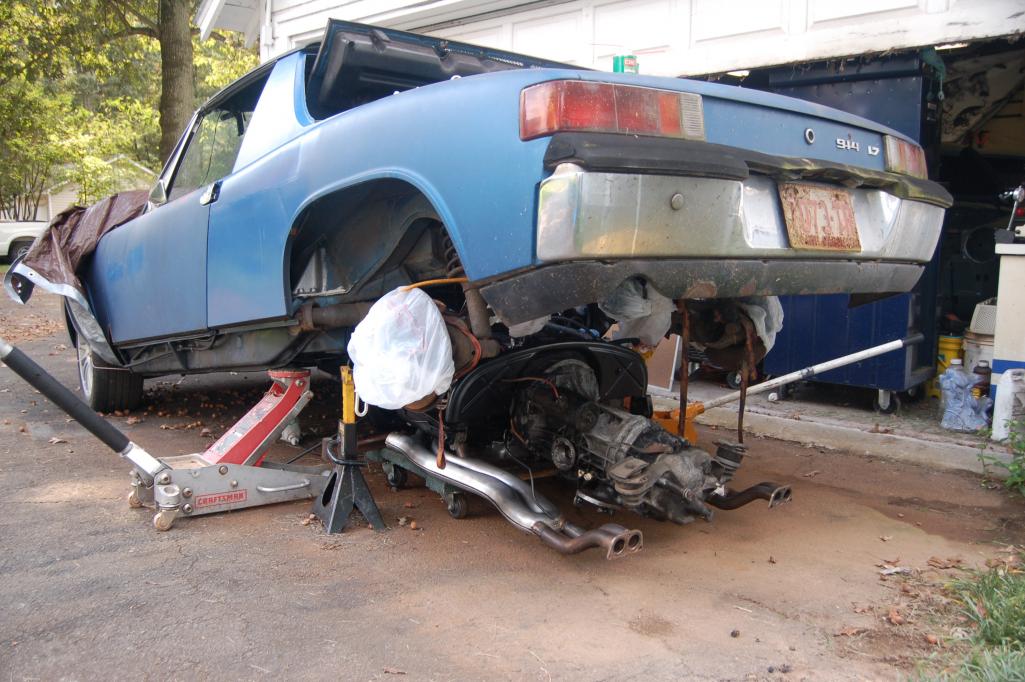
So weekend before last it was time to take it off the "jackstands"! Doug offered to help me with getting it down and I would like to say thanks again for the help! The first pic is from aprox 2 yrs ago when it was going up and the second is from 2 wks ago when it came down. I still can hardly believe its not in the air anymore!!!!
Attached thumbnail(s)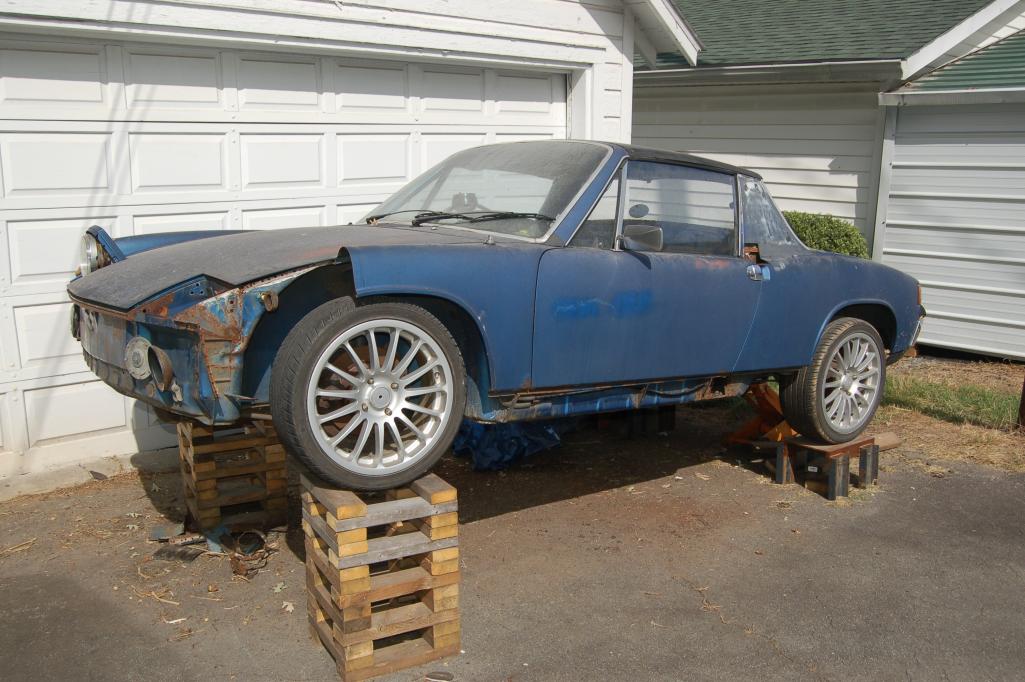
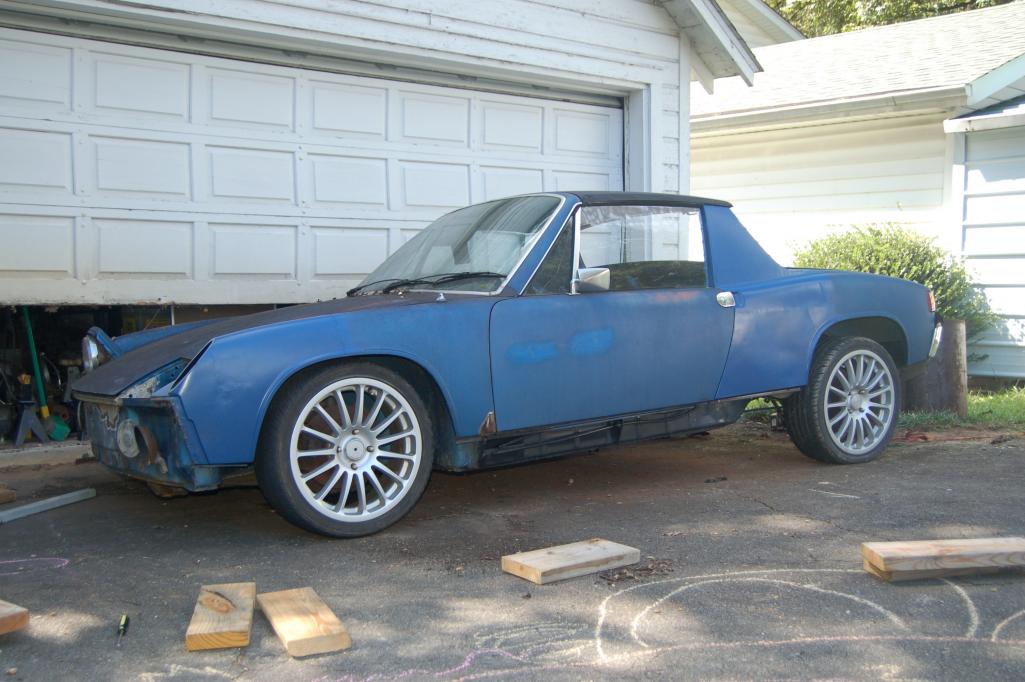
Posted by: metalmorphosis Sep 7 2012, 10:02 PM
Almost there, and finally 4 wheels on the ground!!!!!
Attached thumbnail(s)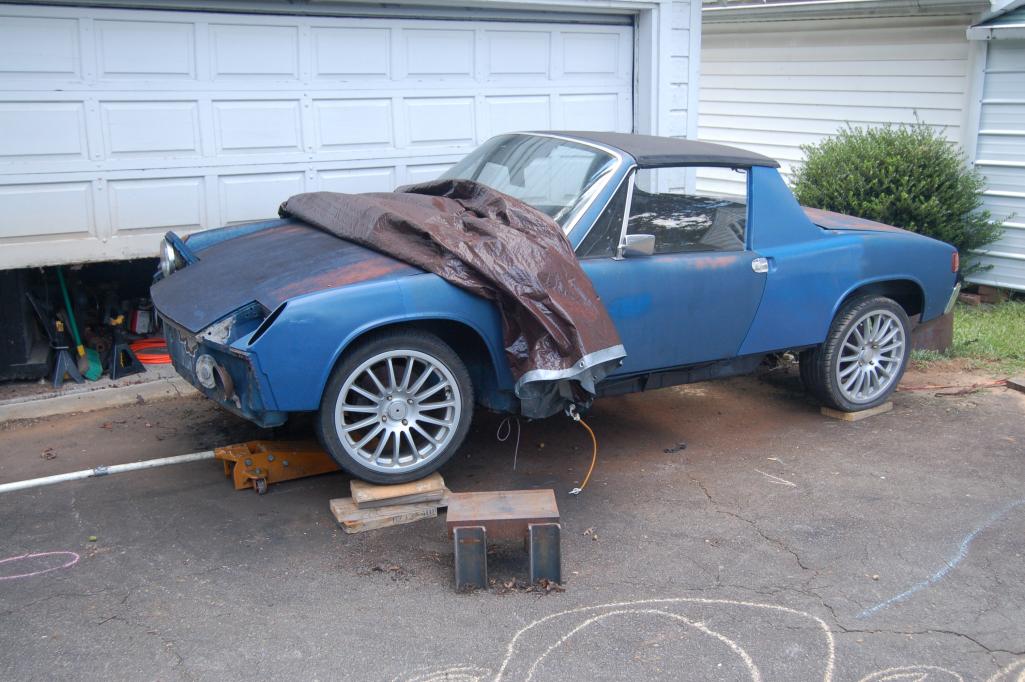
Posted by: metalmorphosis Sep 7 2012, 10:10 PM
One last one for tonight
Attached thumbnail(s)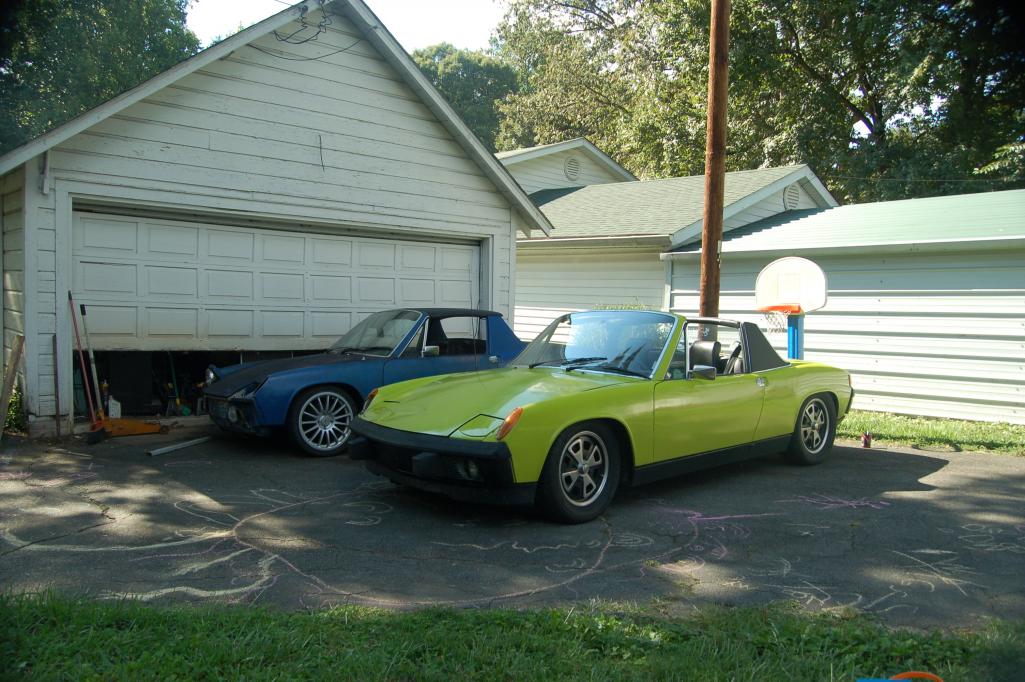
Posted by: tscrihfield Sep 8 2012, 11:05 AM
Sir, my hat is off to you for innovation and ability to overcome! This is some serious Work you've done! Post more!
Thomas
Posted by: dlee6204 Sep 9 2012, 05:38 AM
One last one for tonight

Posted by: trojanhorsepower Sep 9 2012, 07:32 PM
Man you W-S folks are killing me. I have to stop working on the DD's and get to work on the car that matters!
-Pete
Posted by: metalmorphosis Sep 10 2012, 06:13 PM
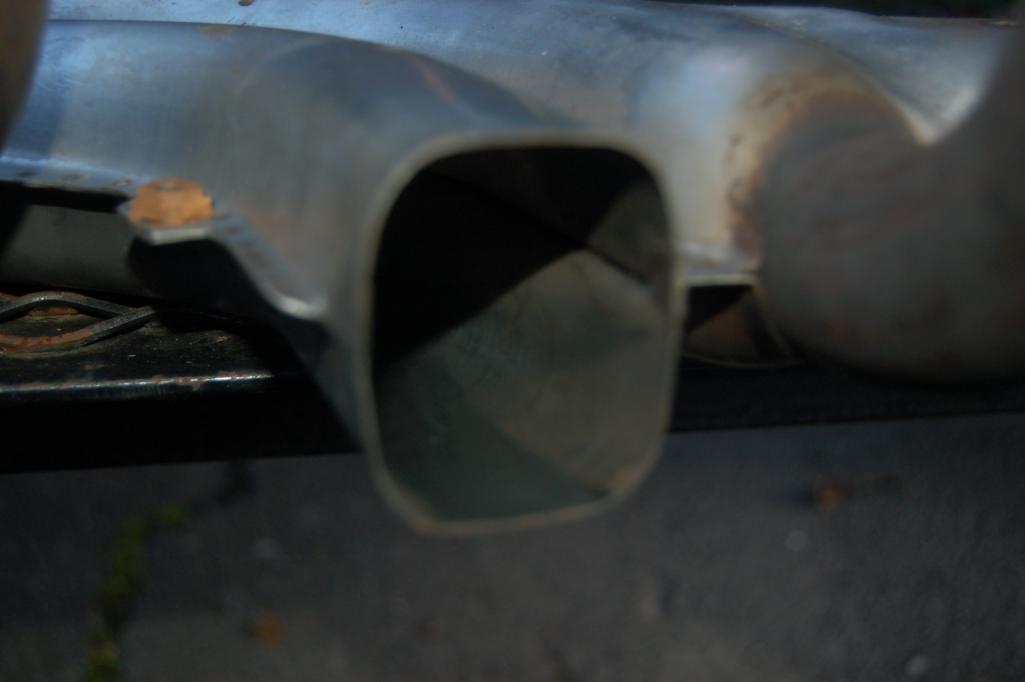
Hey Pete W-S is about to have another one back on the road, so yea get to work on the car that matters! Anyway I cleaned my stainless heat exchangers the other day and they were still grimmy on the inside. I want my heat to smell as non oily as possible so off to the radiator shop they went. The insides look great and didn't cost an arm and a leg. The 2nd pic is a little blurry but you get the idea.
Attached thumbnail(s)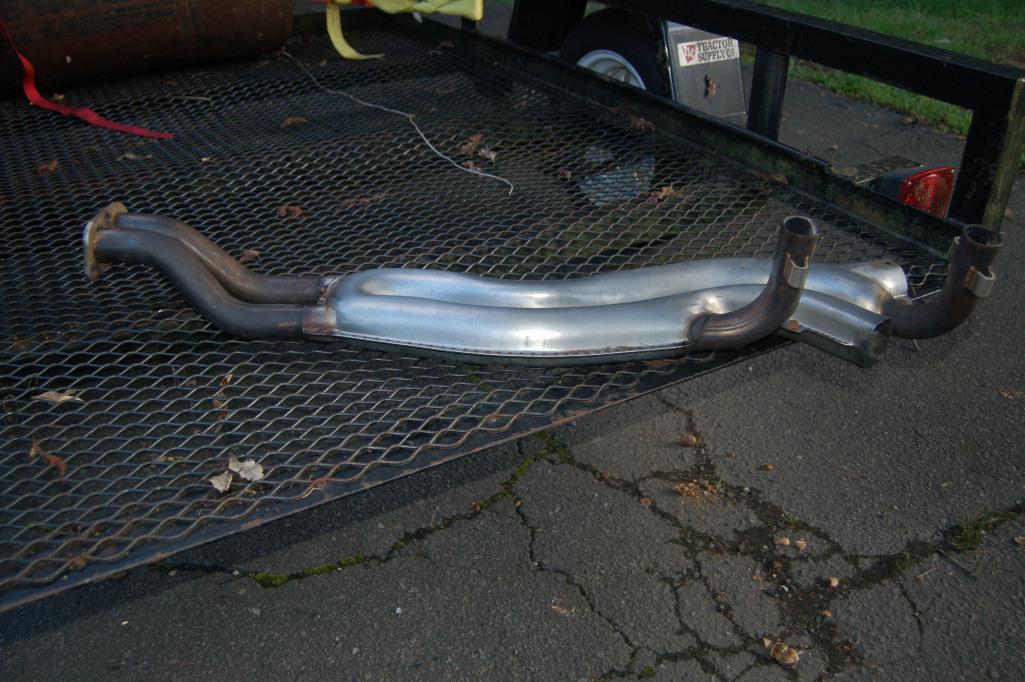
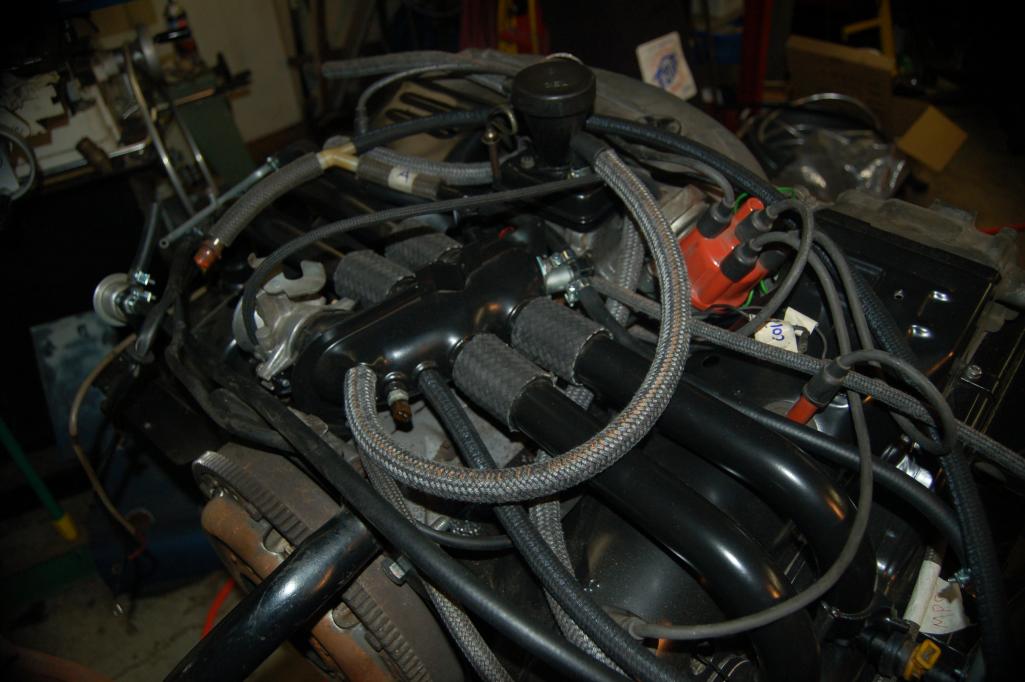
Posted by: metalmorphosis Sep 10 2012, 06:20 PM
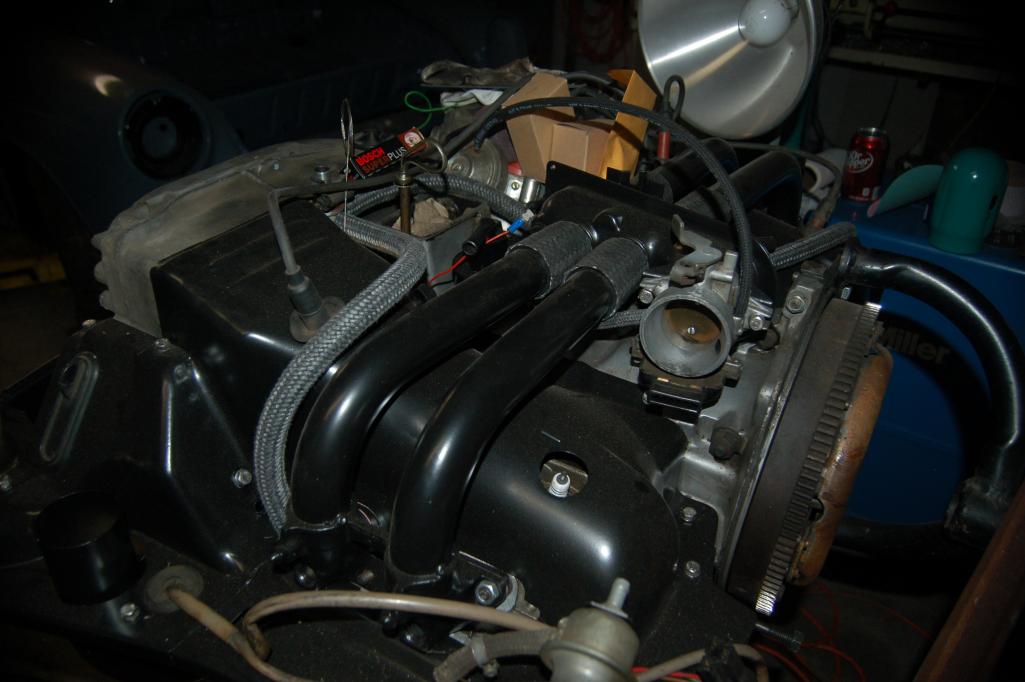
Also got my new 30r9 fuel lines from Tangerine racing today. Thanks Chris! Also throwin in a pic on the engine.
Attached thumbnail(s)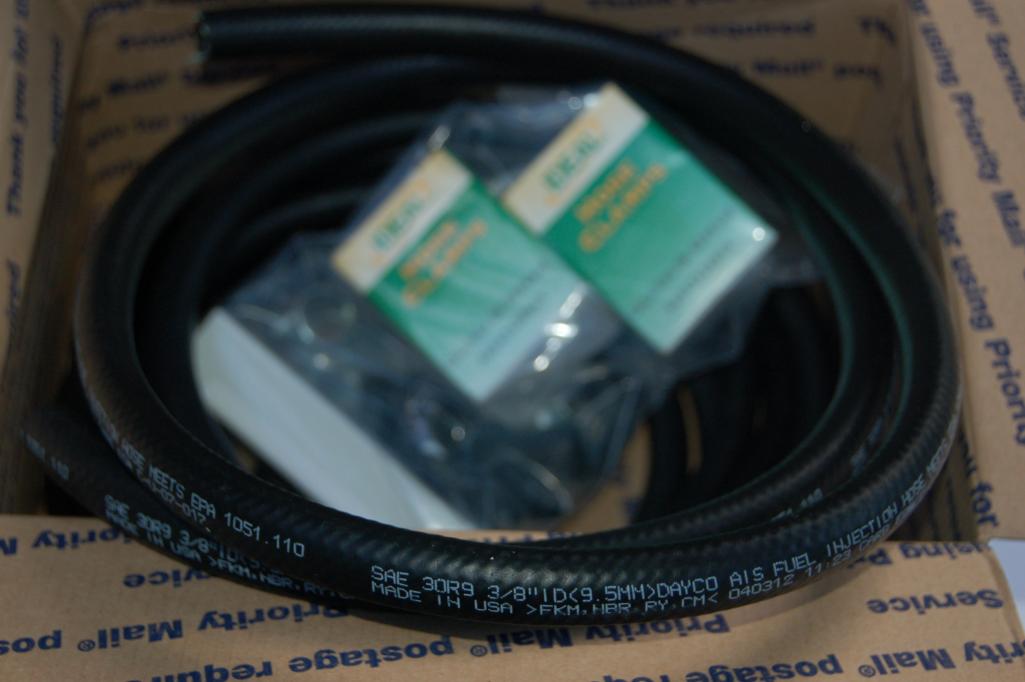
Posted by: metalmorphosis Sep 10 2012, 06:25 PM
Last one for tonight, heres whats next when the 914 is done. Notchback yeah!!!
Attached thumbnail(s)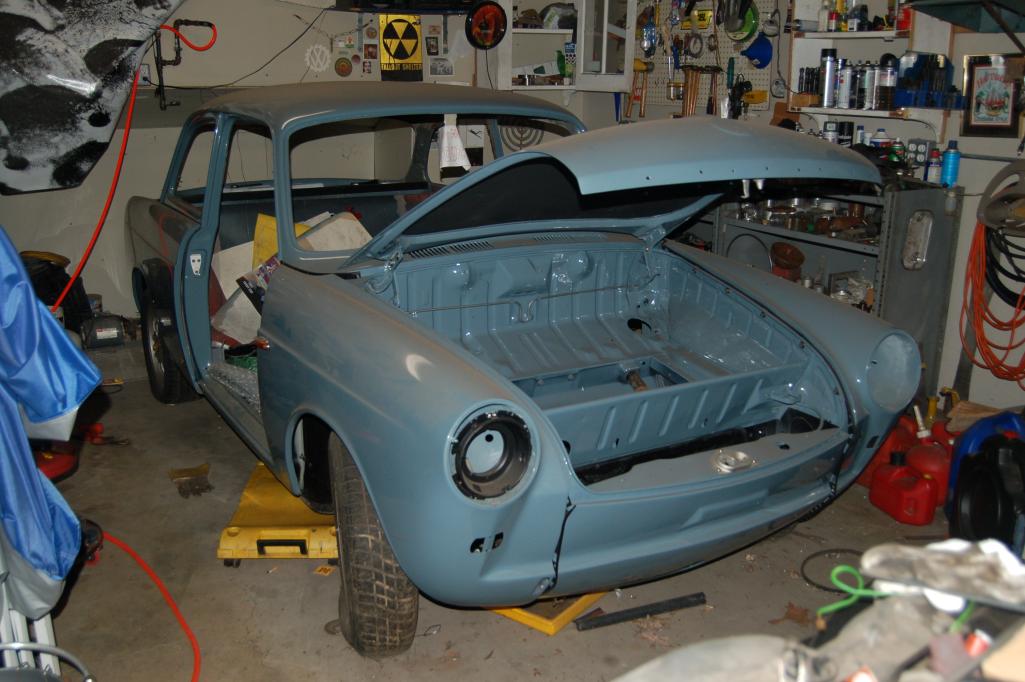
Posted by: metalmorphosis Sep 28 2012, 09:57 PM
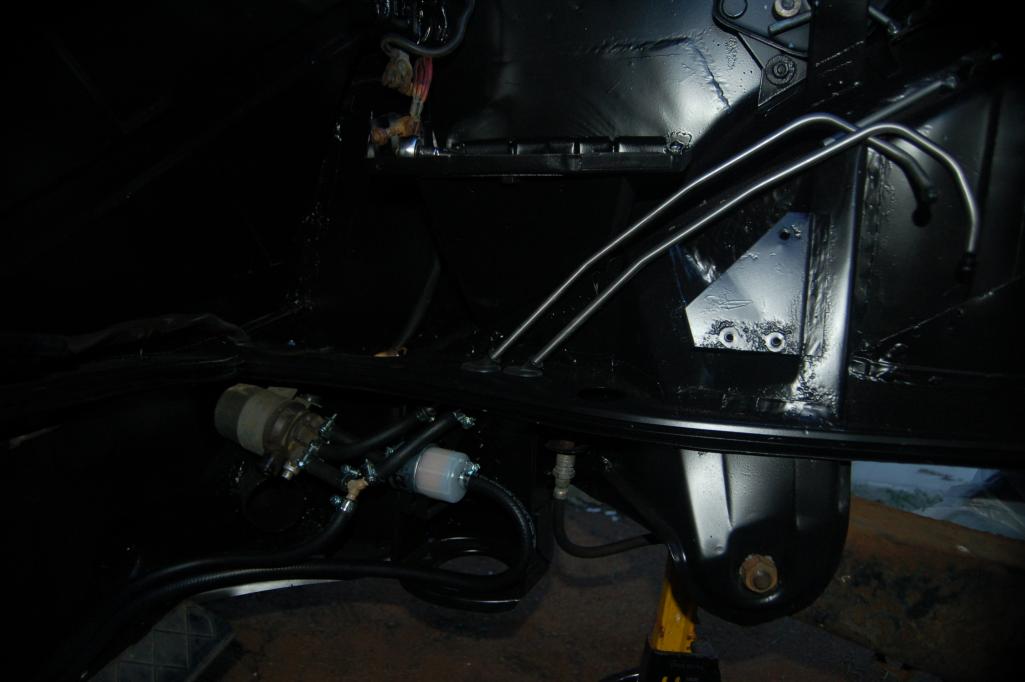
I haven't posted anything lately so its time to get back at it. Heres my nice new fuel lines and clamps installed. And another of the engine with all new vacuum lines, I hope to find me a black dist cap and get new spark plug wires sooner or later.
Attached thumbnail(s)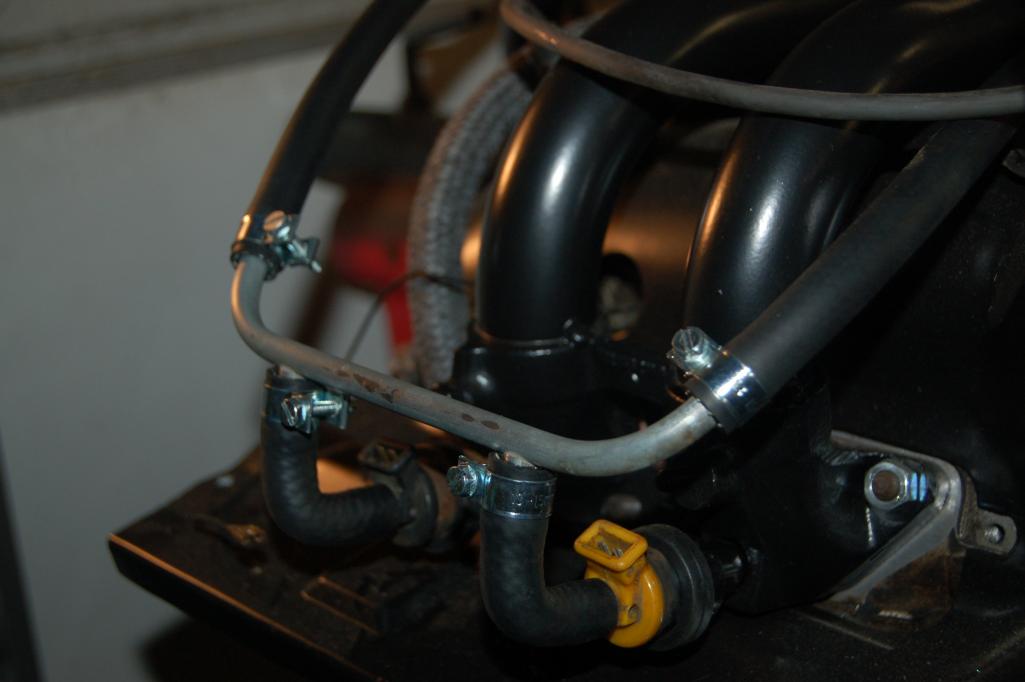
Posted by: metalmorphosis Sep 28 2012, 10:00 PM
Heres some fuel pump and stainless line action
Attached thumbnail(s)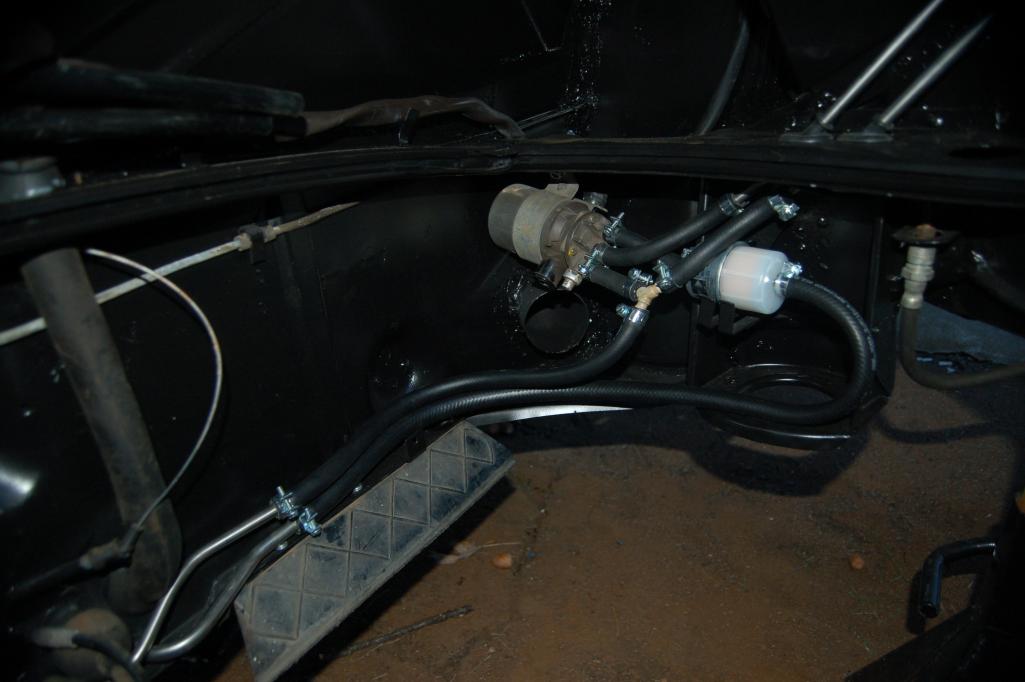
Posted by: metalmorphosis Sep 28 2012, 10:11 PM
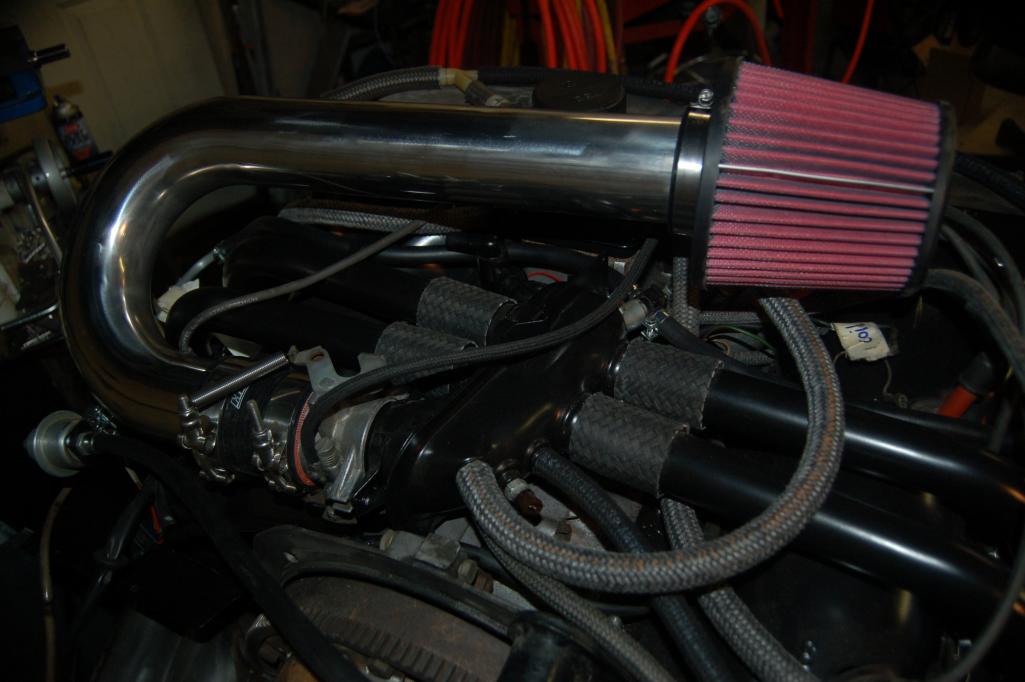
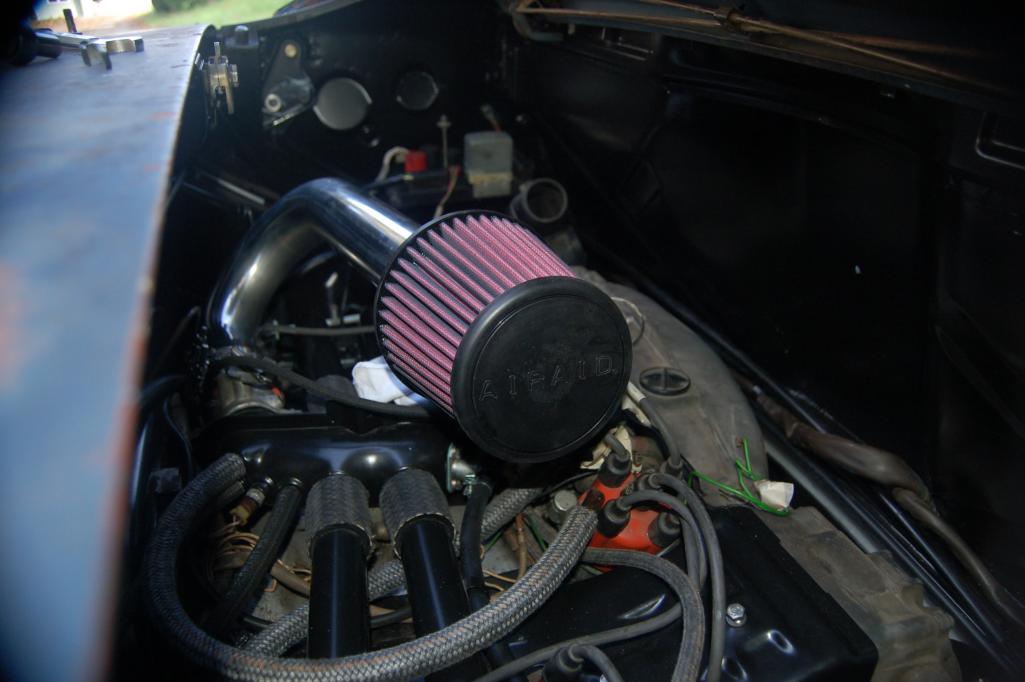
I don't want to reinstall the org air cleaner housing and hide the nice clean engine. So heres what I'm doing, silicone coupler, stainless clamps, stainless pipe, and cone air filter. The first pic is the coupler and the second is tring to decide where I want the air filter to end up.
Attached thumbnail(s)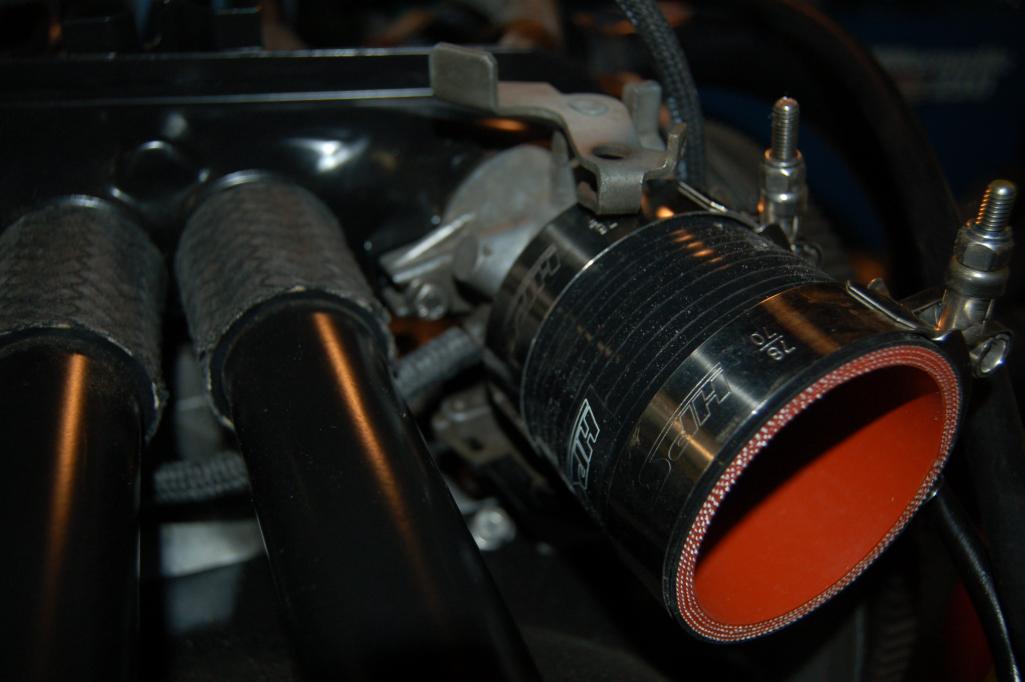
Posted by: metalmorphosis Sep 28 2012, 10:22 PM
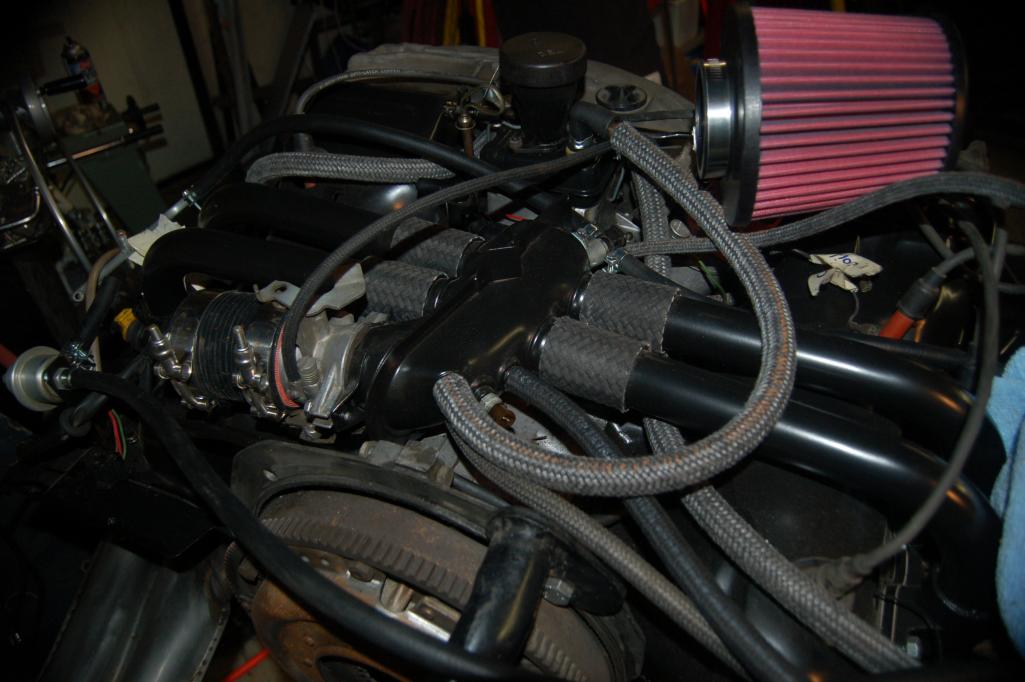
So heres what I've come up with. I still have to weld on a little bracket I made and some nipples for vacuum lines.
Attached thumbnail(s)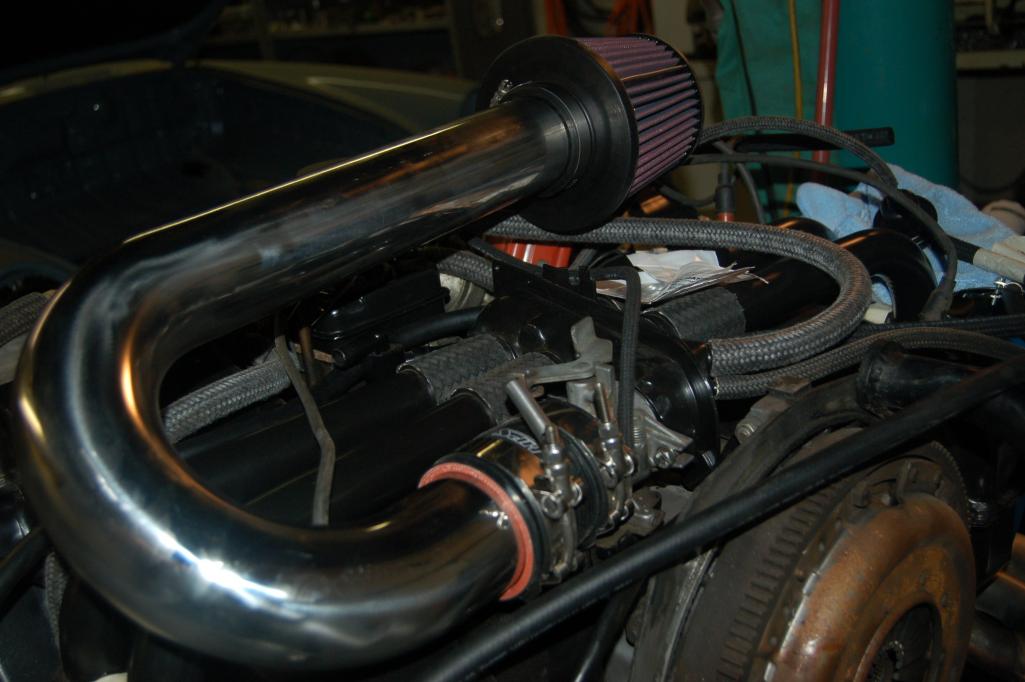
Posted by: metalmorphosis Sep 28 2012, 10:28 PM
last one for tonight
Attached thumbnail(s)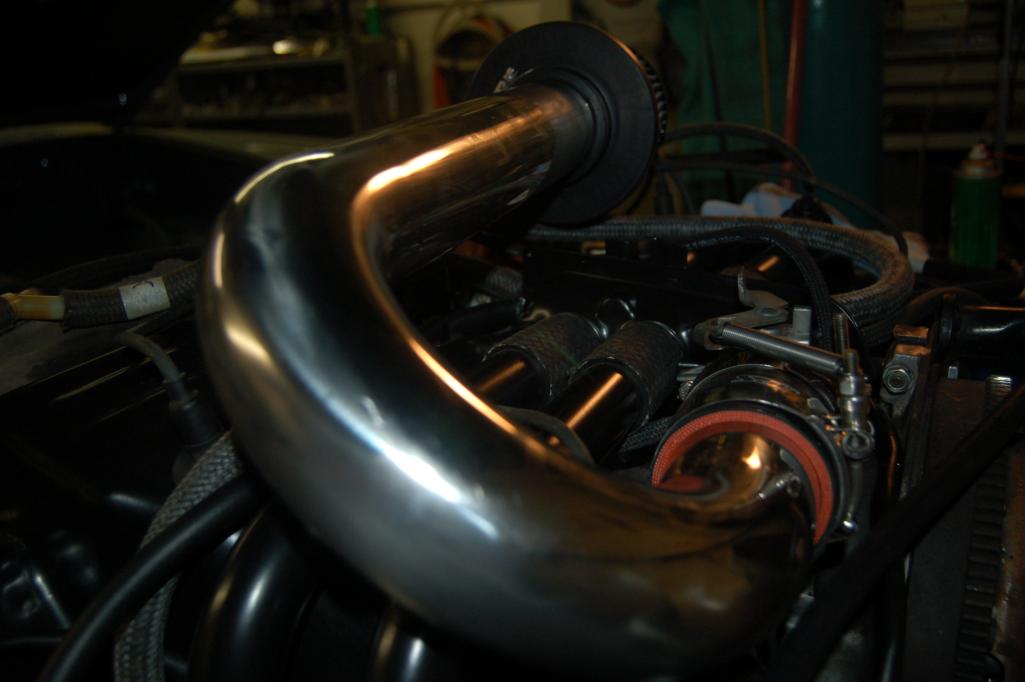
Posted by: jersey914 Sep 29 2012, 07:24 AM
Looks great ...... please don't do like so many before you, and stop the thread before the finish! I wanna see a pristine 73' when you are done!
Thanks for sharing!
Posted by: metalmorphosis Oct 6 2012, 10:16 PM
So today was the day for the motor to go back in my car!!!!!!!!!!!!! After 2 long yrs of rust repair I'm almost done w this phase of my 914 project. Doug was kind enough to come over and help me w the installation, thanks again Doug! Now all I have left to do is get the gas tank boiled out and reinstalled, the rear window and shift linkage, and a few wires and cables. Of course there are tons more to be done to this car like the interior and bodywork and paint, but those things will be later. So enough with the talkin here comes the pics.
Attached thumbnail(s)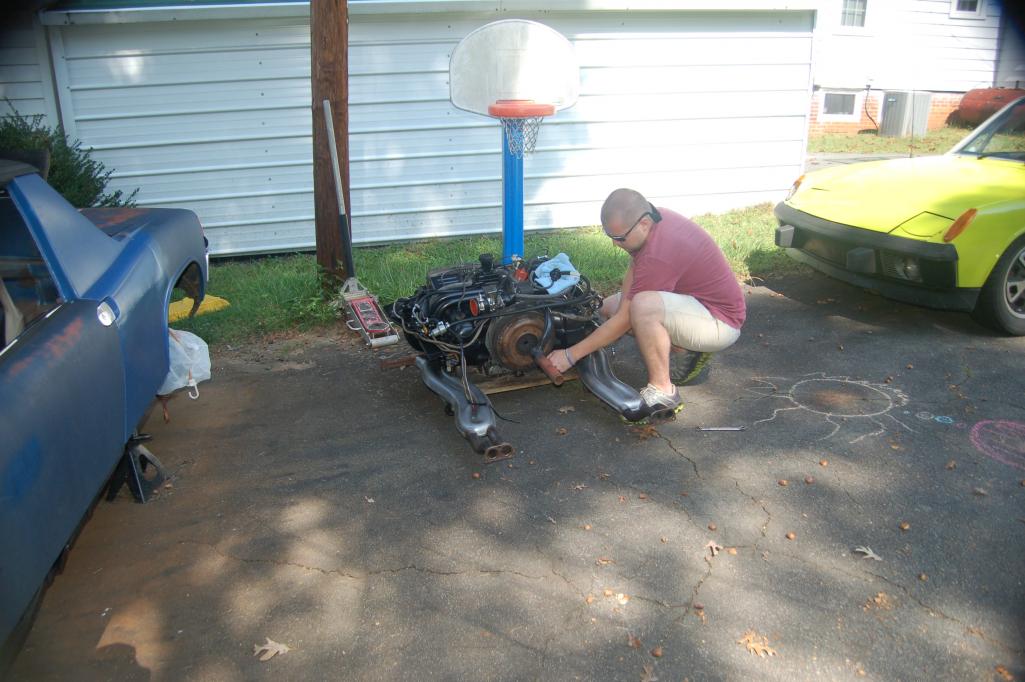
Posted by: metalmorphosis Oct 6 2012, 10:20 PM
Closer. And finally its in the hole!!!!!!!!!!!!!!!
Attached thumbnail(s)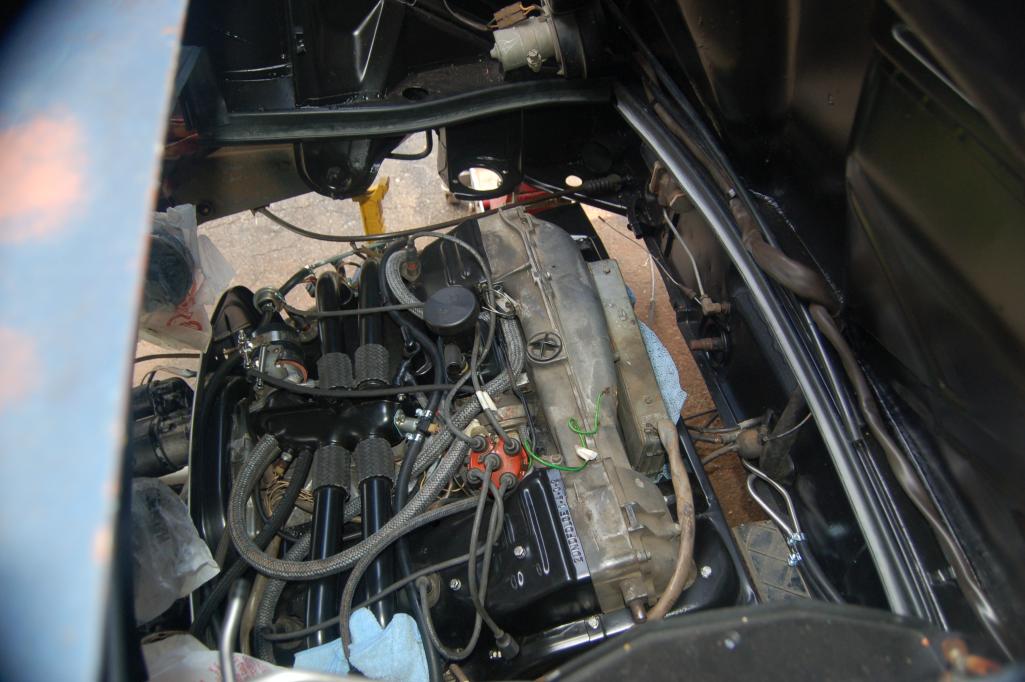
Posted by: jockellis Oct 6 2012, 10:49 PM
Could you talk some more about the wheels. Did you change bolt pattern on disks?
Very nice work.
Posted by: metalmorphosis Oct 6 2012, 11:18 PM
I got the wheels for super cheap from a guy I used to work with. They are 17 x 7 honda prelude wheels and when I first dry fitted them I could tell they would fit, although just barely. The front was the easy part, I just redrilled the rotors and pressed in studs(I'm a machinest and welder by the way). The back was a major pain since getting the hub off is such a hassle. So I machined a drill jig that bolted to the og bolt pattern and had the new pattern where it needed to be w drill bushings. Then I spent lots of time w a hand drill drillin holes in the hub, then I tapped the holes and used screw in studs. It was a major pain in the a@# like I said, but I was very determined to get them on. I was also concerned about runout and vibration but they run true.
Posted by: jockellis Oct 7 2012, 02:08 PM
I work in a machine shop with over 50 five axis CNC milling centers from Starrag, Leichti, Okuma plus a lot of old junk. But I do NDT. What kind of mill did you use for your project? Are you a programmer
Posted by: metalmorphosis Oct 7 2012, 03:59 PM
I did all this 3/4 yrs ago so I don't remember if I used my rung-fu bench top mill at home or the bridgeport at work. But I did it on manual equipment because it was onesie twosie work. And we only have 3 axis mills and 2 axis turning centers at work and I'm the shop forman so I do a little of everything including welding. And I do programing which I really enjoy doing, but I got into this trade as a welder so I still enjoy the molten metal thing too. Also I'd love to play w a 5 axis mill someday.
Posted by: metalmorphosis Nov 5 2012, 12:12 AM
I haven't posted anything in about a month but I have been tinkering when I've had time. The gas tank has been 1 of my hold ups, but its fixed and installed now.It has been boiled out, a rusty spot patched. and re-lined. But the big news is I started it today!!!!!!!!! It seems as though I have injectors not wanting to work on the 1/2 side. I have spark and signal to the injectors so I guess my next move is to soak those 2 injectors in some carb cleaner and/or a few other tests to figure out whats goin on. But it runs and idles ok for only 2 cylinders. I wish I had video of it running but I don't, yet. Its running in these pics so just use your imagination.
Attached thumbnail(s)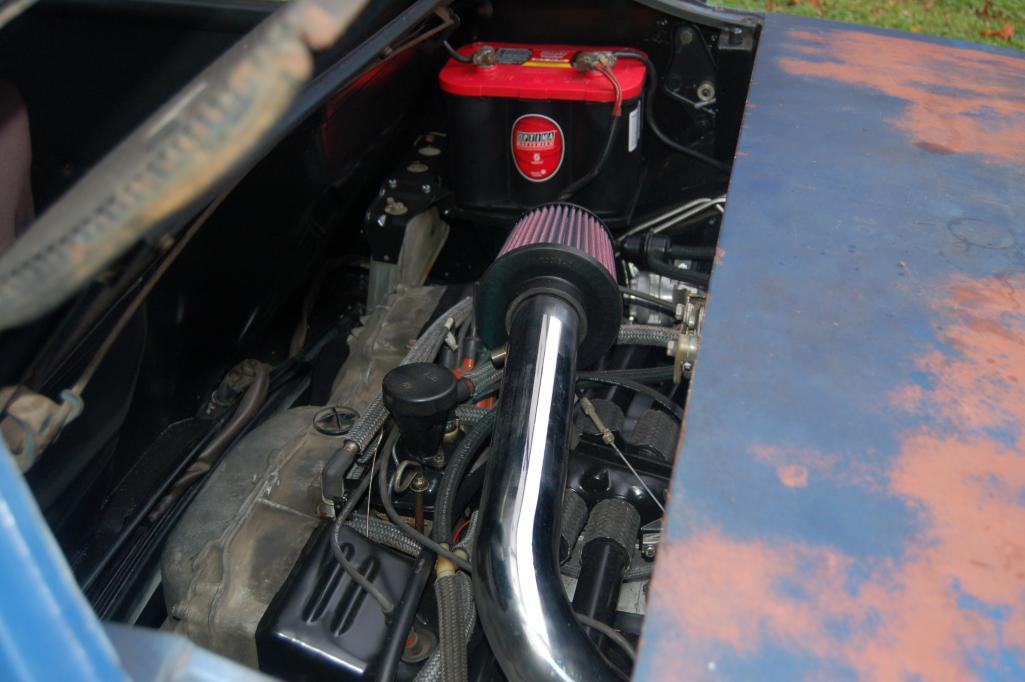
Posted by: metalmorphosis Nov 5 2012, 12:19 AM
Also I found some pics of my old fastback that was mentioned eariler so heres my last one for tonight.
Attached thumbnail(s)
Posted by: metalmorphosis Dec 8 2012, 08:27 PM
I DROVE MY CAR TONIGHT!!!!!!!!!! I got my injectors back from Witchhunter 2 days ago and got them installed today. I had to bleed the brakes and do a few other odds and ends then the time finally came. For the first time in over 2 years I legally drove on public streets. I definitely still have alot to do but it's almost done for now. I don't have any pics to post other than my injectors and sooner or later I'm gonna post some video but I gotta figure that one out first.
Attached thumbnail(s)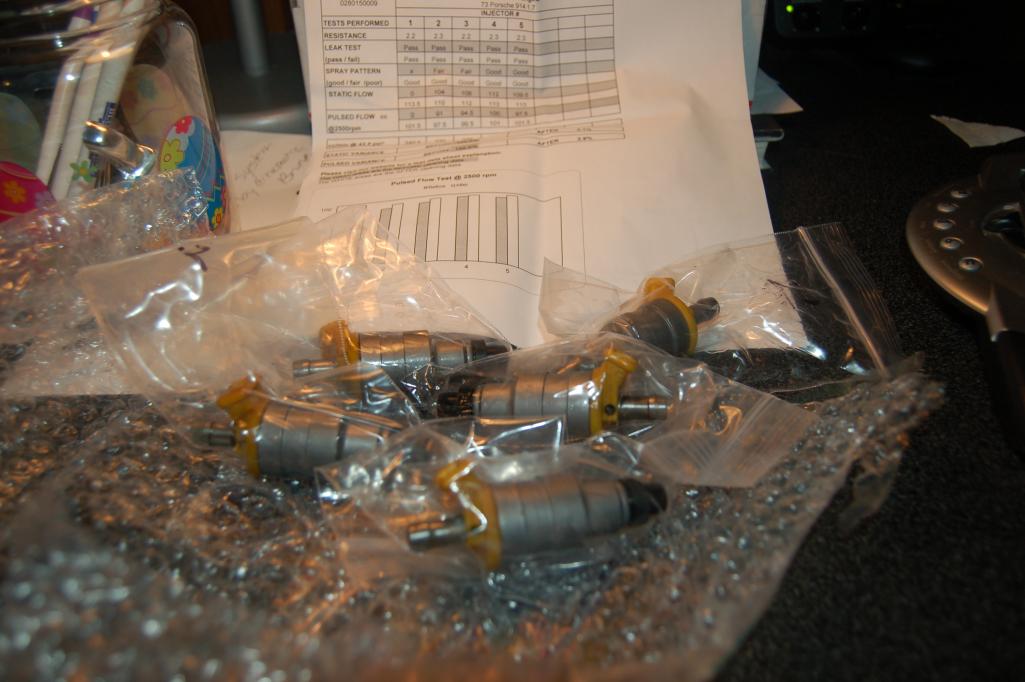
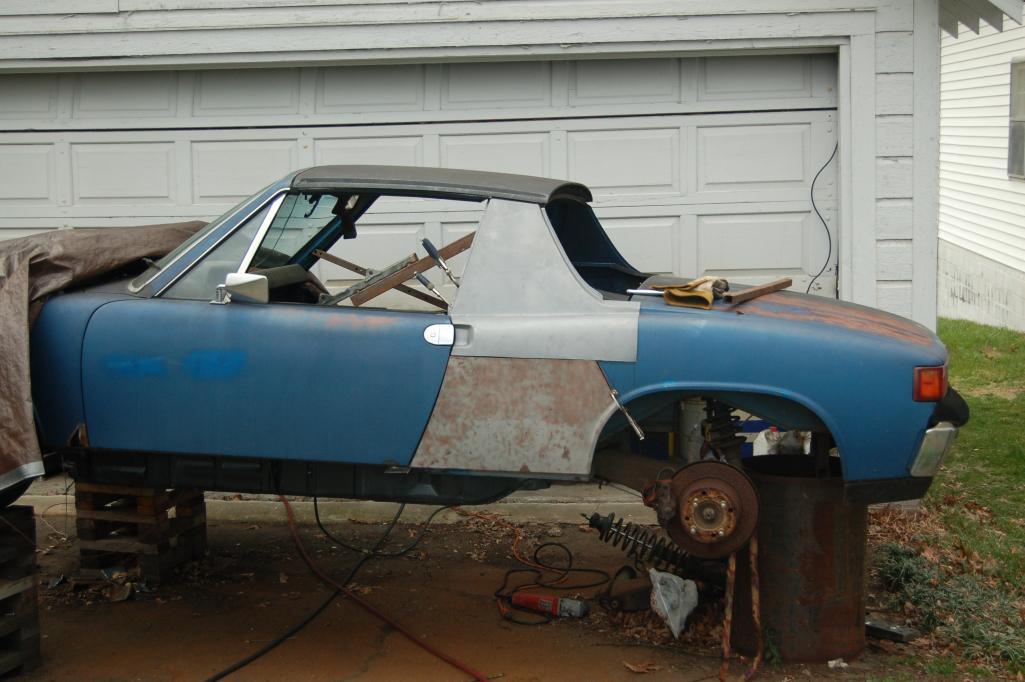
Posted by: metalmorphosis Jan 2 2013, 07:25 PM
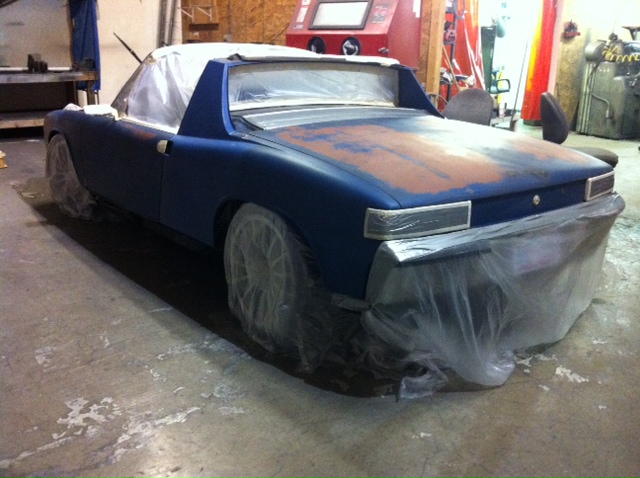
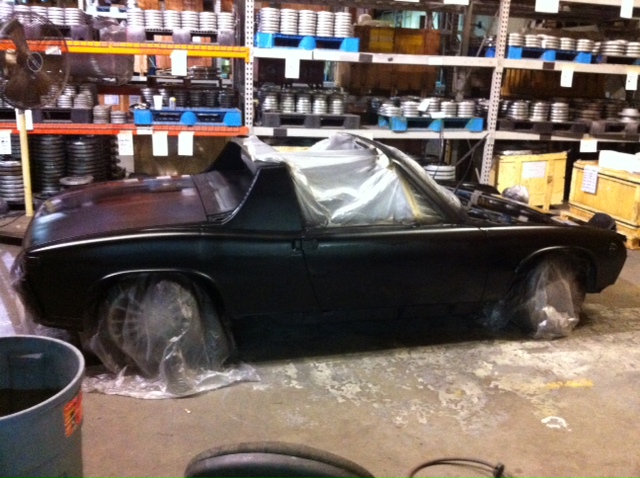
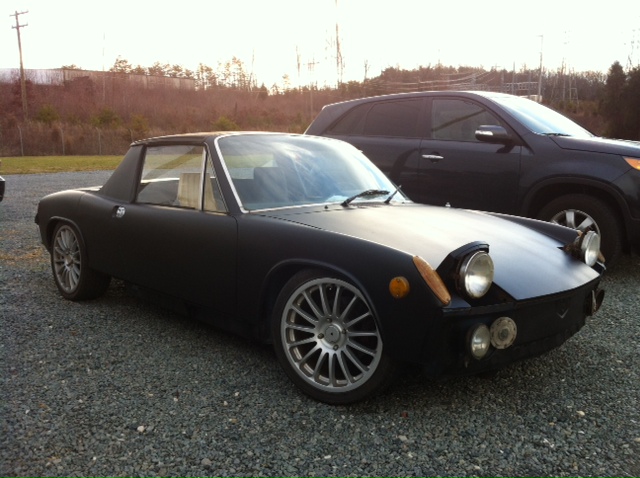
I just wanted to show y'all the latest and greatest thing I've done to my car. So as you'll see from the pics its flat black now. This was an unplanned thing and was a rush job and I must admit I kinda miss my krusty blue. The only other thing to report is I have some seatbelt retractors out of a boxster that I'm gonna be installing soon and since its cold out I'm about to get back on the upolstrey.
Both of which I'll probly start other threads to detail how that works out. Thats all for now.
Attached image(s)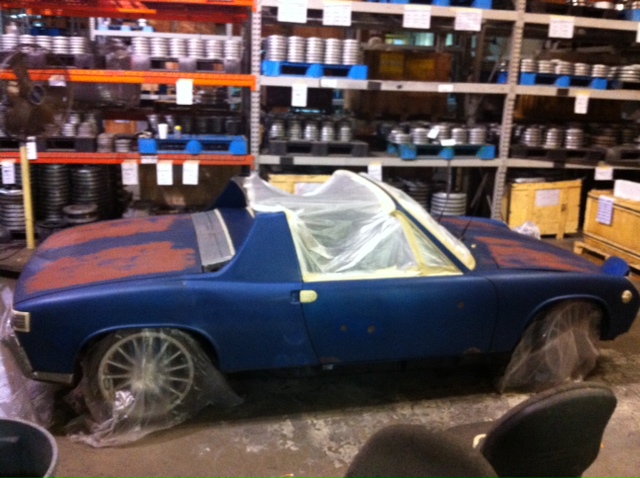
Posted by: jdlmodelt Jan 3 2013, 10:03 AM
I just wanted to show y'all the latest and greatest thing I've done to my car. So as you'll see from the pics its flat black now. This was an unplanned thing and was a rush job and I must admit I kinda miss my krusty blue. The only other thing to report is I have some seatbelt retractors out of a boxster that I'm gonna be installing soon and since its cold out I'm about to get back on the upolstrey.
Both of which I'll probly start other threads to detail how that works out. Thats all for now.
Nice work! Your welds are excellent. amazing panel repairs. sharp looking machine
Posted by: norville Jan 3 2013, 10:20 AM
I just wanted to show y'all the latest and greatest thing I've done to my car. So as you'll see from the pics its flat black now. This was an unplanned thing and was a rush job and I must admit I kinda miss my krusty blue. The only other thing to report is I have some seatbelt retractors out of a boxster that I'm gonna be installing soon and since its cold out I'm about to get back on the upolstrey.
Both of which I'll probly start other threads to detail how that works out. Thats all for now.
I like it, that was my plan on paint prior to you doing it so, I'm claiming it mine...
great save here..
Posted by: JawjaPorsche Jan 3 2013, 11:03 AM
What is on the shelves? Looks like gym weights.
Posted by: metalmorphosis Jan 3 2013, 01:52 PM
Hey Jawja its flanges, we make valves for the marine industry and thanks again for the injectors!
Posted by: dlee6204 Jan 3 2013, 03:06 PM
Lookin good!
When are we going for a drive? 
Posted by: metalmorphosis Jan 3 2013, 04:20 PM
Anytime Doug, so far I haven't went more than 10 miles from the house though. Gotta get my trust built up w it, but so far its running great. Still got some hooptyness w a few vacuum lines and need to get me a t stat ordered from awesome powder coat but hey the heat is even hooked up (on 1 side). Also want to find out more about the seatbelts mentioned in the current thread from seatbeltplanet.com?
Powered by Invision Power Board (http://www.invisionboard.com)
© Invision Power Services (http://www.invisionpower.com)