Printable Version of Topic
Click here to view this topic in its original format
914World.com _ 914World Garage _ Creamsicle Refurb - Extreme Budget Makeover
Posted by: poorsche914 Aug 23 2012, 05:52 PM
Since purchasing my LE in the spring of 2010, I have slowly restored/replaced/upgraded items as time and money allowed. Yesterday, I drove 600+ miles to central Illinois to visit my cousin for a few days of marathon wrenching and reconditioning. I arrived around 5:30 local time and after going over "the plan", started cleaning and blasting some miscellaneous parts.
Today my cousin has redone the starter, rear shocks, and springs. We also dropped the drivetrain and I stripped the FI system and engine tin. Had major leaks from the push rod tube seals so have cleaned the engine of oil & dirt. Will be dropping the front suspension for reconditioning along with turbo tie rods and 21mm torsion bars. Also planned is some rust cleanup in the cockpit area along with a bdstone reconditioned pedal cluster (thanks, Bruce. Package arrived today!) and a battery tray installed and some engine bay cleanup.
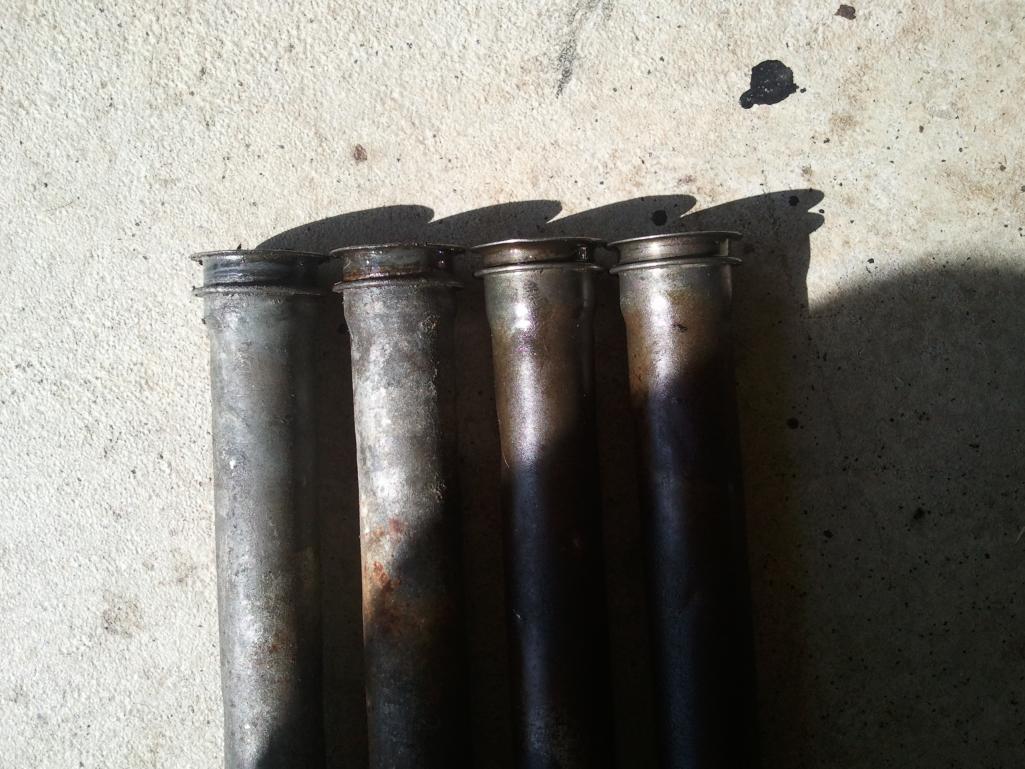
QUESTION #1: Look at the picture below. Notice the tubes on the right have a shorter distance where the seals go than do the tubes on the left. Which tubes should I use or does it even make a difference? The reason I ask is because 4-5 of the tubes were leaking at that end. Not sure if the seals were bad (were brand new when I installed them a few months ago.) or if the smaller area played a part by not letting the seal move and do its job 
QUESTION #2: I am installing a set of 140# Weltmeister springs and one end of them has a tighter coil. Does this end go up or down? Found a couple pics online but of course one had it up and one had it down 
Thanks! More pics later.
Posted by: dlee6204 Aug 23 2012, 06:51 PM
I can't help with your questions but good luck! ![popcorn[1].gif](style_emoticons/default/popcorn[1].gif)
Posted by: hot_shoe914 Aug 23 2012, 07:30 PM
You do know the damn thing will never get you back home after you do all that work. I have told you before, leave damn well enough alone. 
Posted by: poorsche914 Aug 23 2012, 09:19 PM
Yeah, I know, Shoe... tempting fate here.
Thanks, Doug. So far we haven't run into any major issues.
Posted by: The Cabinetmaker Aug 24 2012, 04:38 AM
Steve, I don't think the pushed tubes should be an issue. More than likely the seals were of the non viton material. Be sure to lube them and install the tubes with a twisting motion. They cut easily.
Posted by: poorsche914 Aug 24 2012, 06:35 AM
Thanks, Curt. I was thinking it was probably the seals rather than the tubes. Will replace with correct viton type.
Posted by: poorsche914 Aug 24 2012, 06:44 AM
Pictures!
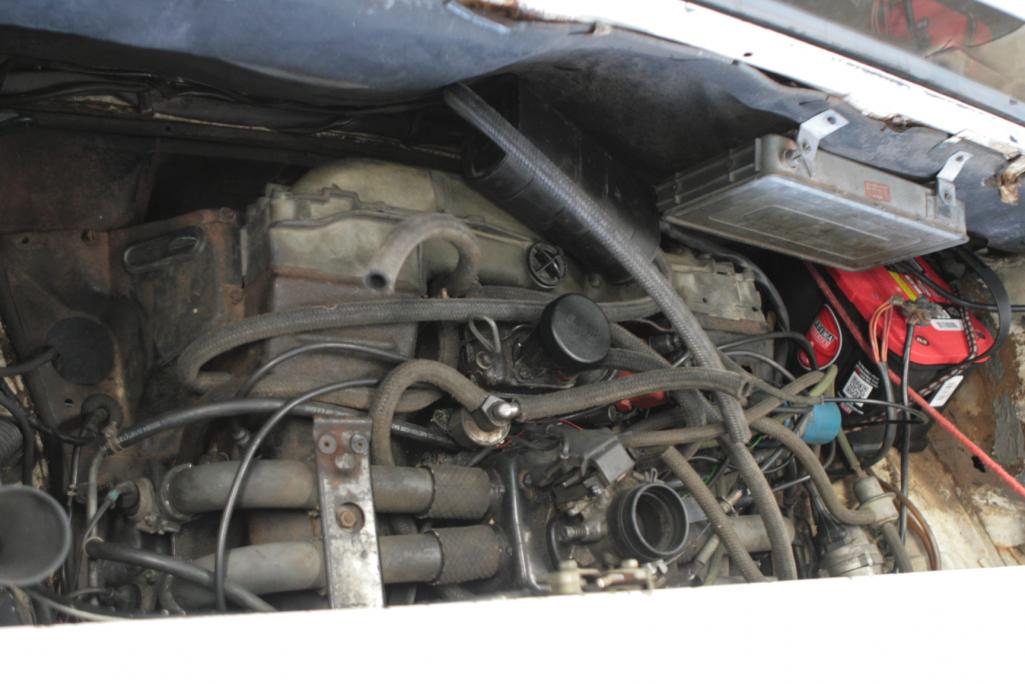
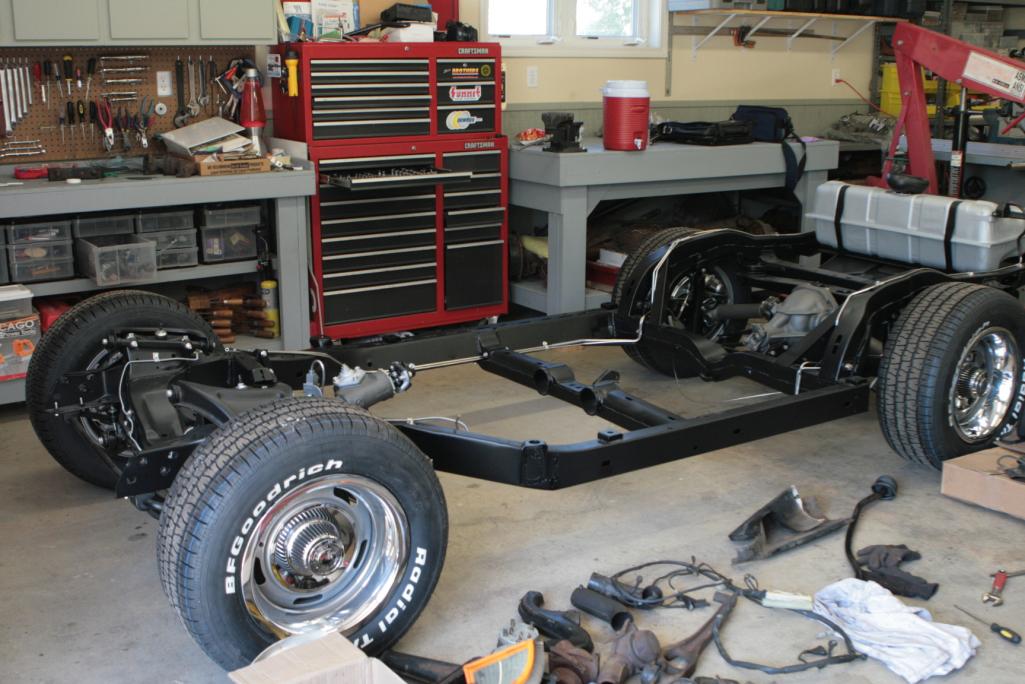
Engine bay 
Engine out!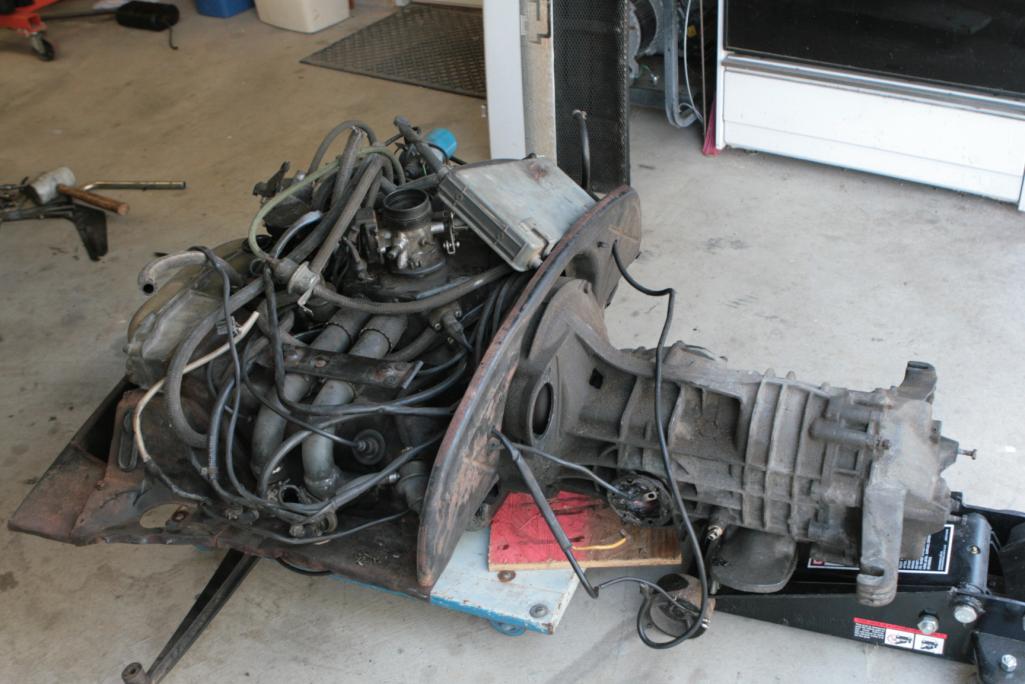
Minus tin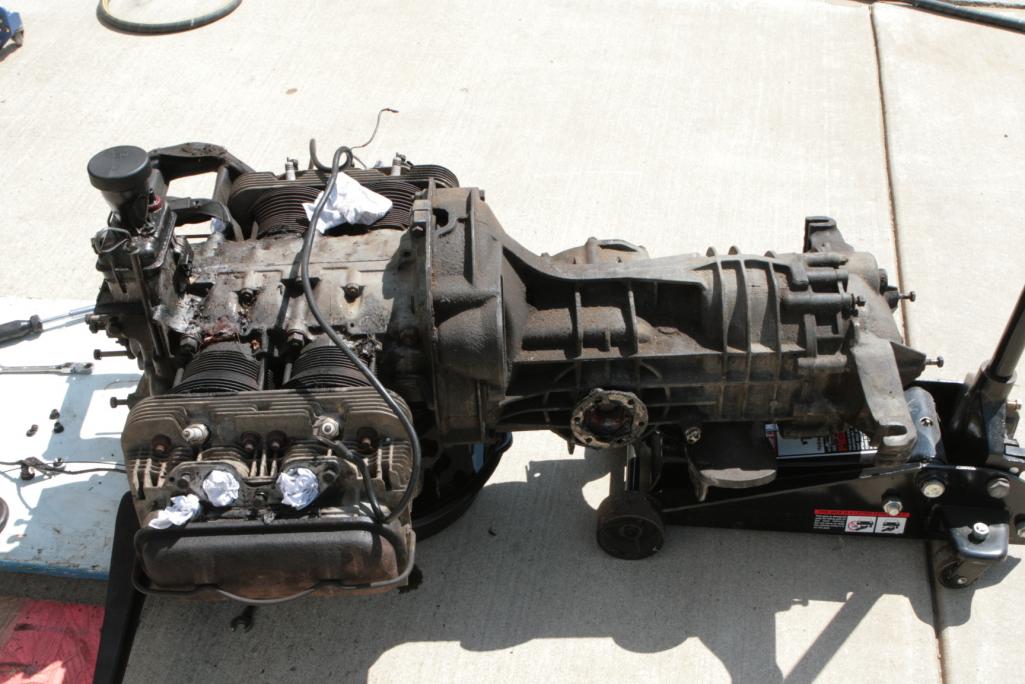
Pile o' Tin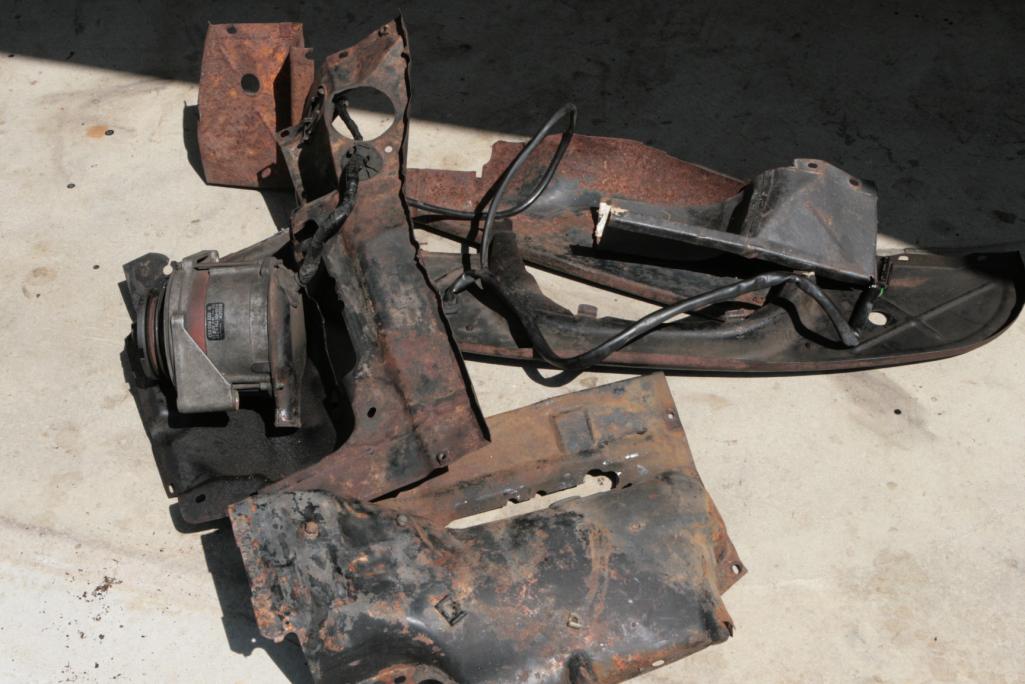
Posted by: poorsche914 Aug 24 2012, 06:48 AM
Pedal cluster from bdstone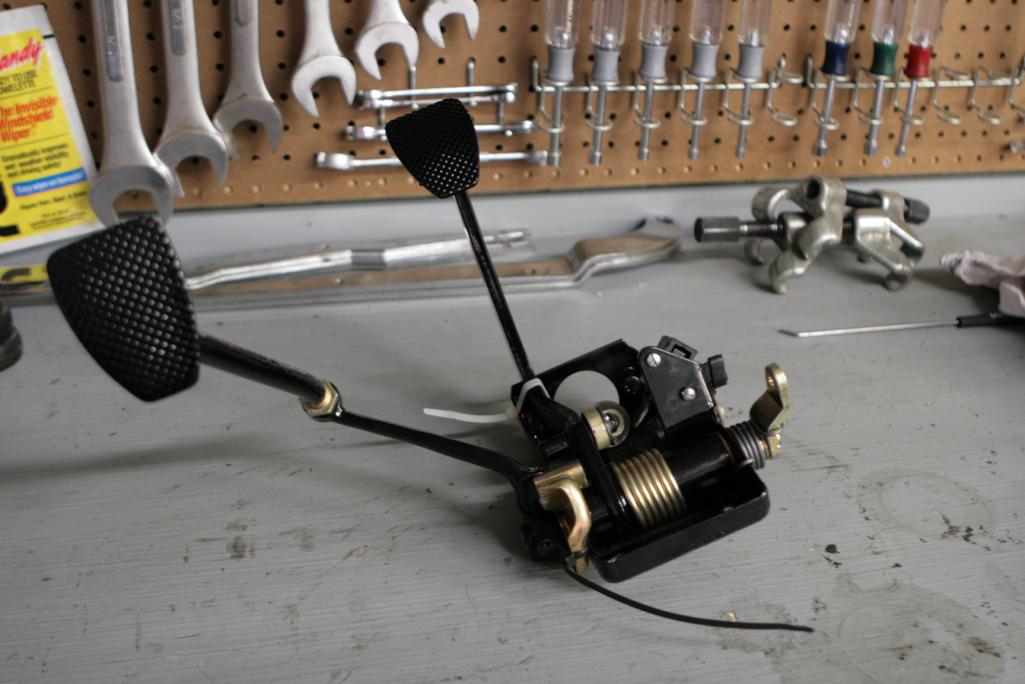
Starter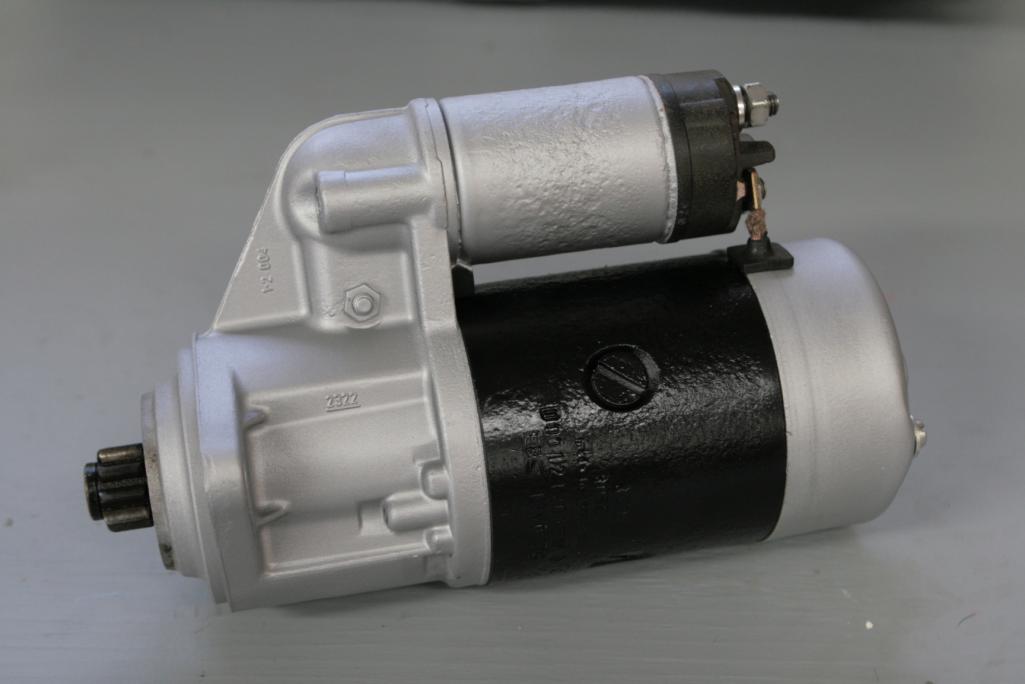
Air box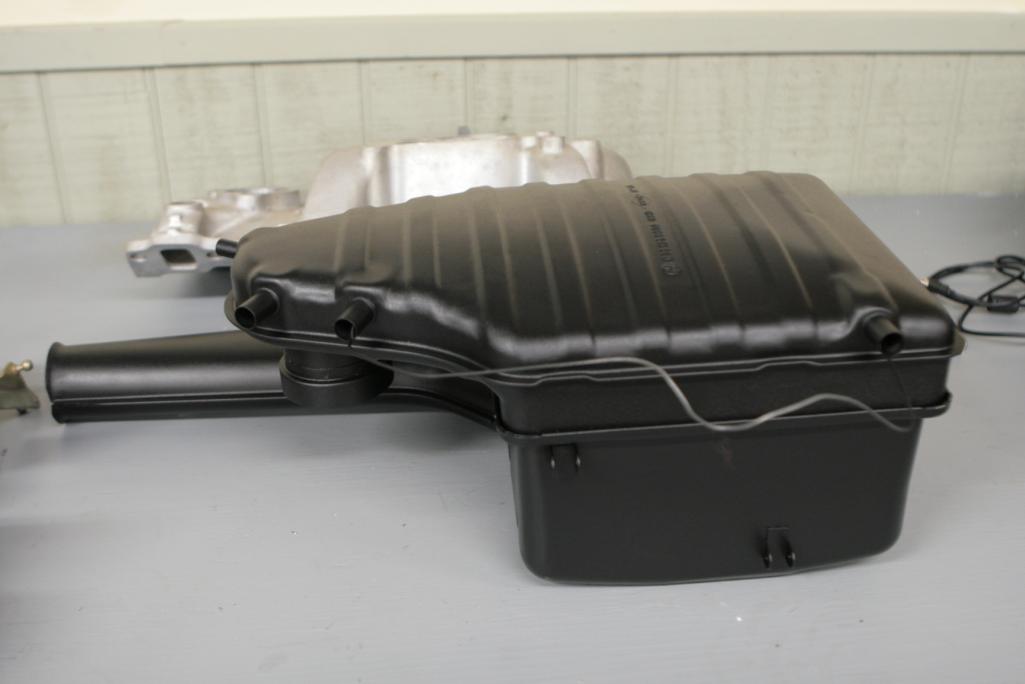
Posted by: rnellums Aug 24 2012, 07:41 AM
Looking good! As far as the springs go, It shouldn't matter, since the looser part of the coil will compress first regardless of orientation, maybe tight part towards the top so it looks more stock? Looking forward to seeing more progress!
-Ross
Posted by: poorsche914 Aug 24 2012, 11:24 AM
Thanks, Ross. We ended up putting the tighter coils at the top.
Visited Brad Mayeur and got a few needed items as well as some advice on how to move forward with disassembling the front suspension. My cousin is working on the front suspension while I install the cleaned up push rod tubes and then clean the engine to get it ready for the freshly painted tin. Things are moving along pretty much as planned. 
Here is a shot of one of his projects. Guess the vehicle 
Posted by: rnellums Aug 24 2012, 11:43 AM
Independent rear suspension?
Posted by: 87m491 Aug 24 2012, 01:41 PM

Here is a shot of one of his projects. Guess the vehicle
Sure looks Corvette to me...
Posted by: poorsche914 Aug 24 2012, 02:11 PM
You are correct... 1973 Corvette chassis.
Posted by: rex66m Aug 24 2012, 09:57 PM
Steve -
Glad to hear that you are continuing to make progress on the LE. Now down here in bama, but would like to get back up there and hit the dragon (or how about the cherohala - less stress!) some time soon. Hope all is well
- Rex in Bham
Posted by: poorsche914 Aug 24 2012, 10:24 PM
Day 2: rear shocks and springs reconditioned and ready to be installed. Front suspension apart and blasted. Will paint or powder coat all the parts early tomorrow and install later in the day.
Fan shroud cleaned and painted and back on the engine. Will finish blasting engine tin tomorrow and then paint and install.
Removal of old A/C lines started.
Rex... let me know when you might have a chance to visit east TN and I will get some guys together to run the Dragon and/or the Skyway.
Posted by: poorsche914 Aug 25 2012, 10:45 PM
DAY 3:
Rear shocks with 140# springs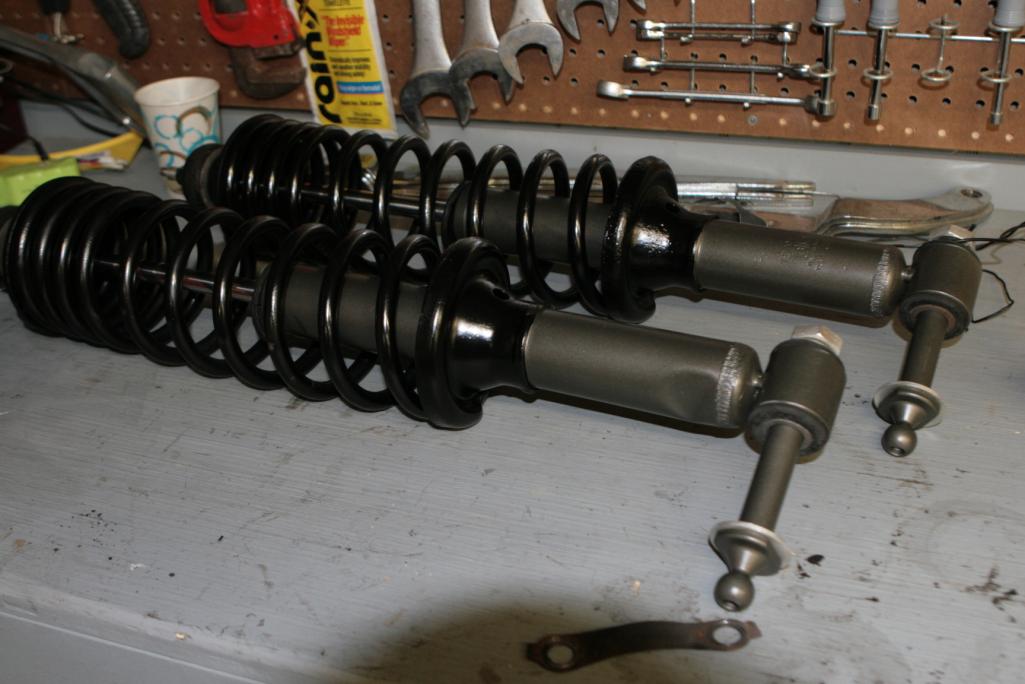
Front suspension with new bushings and 21mm torsion bars.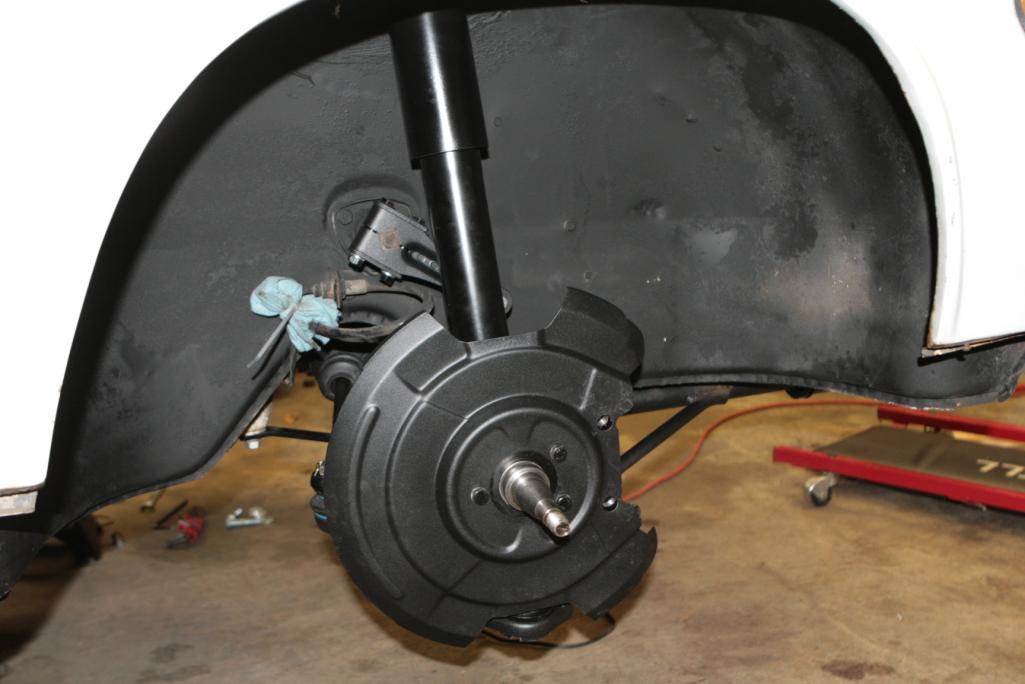
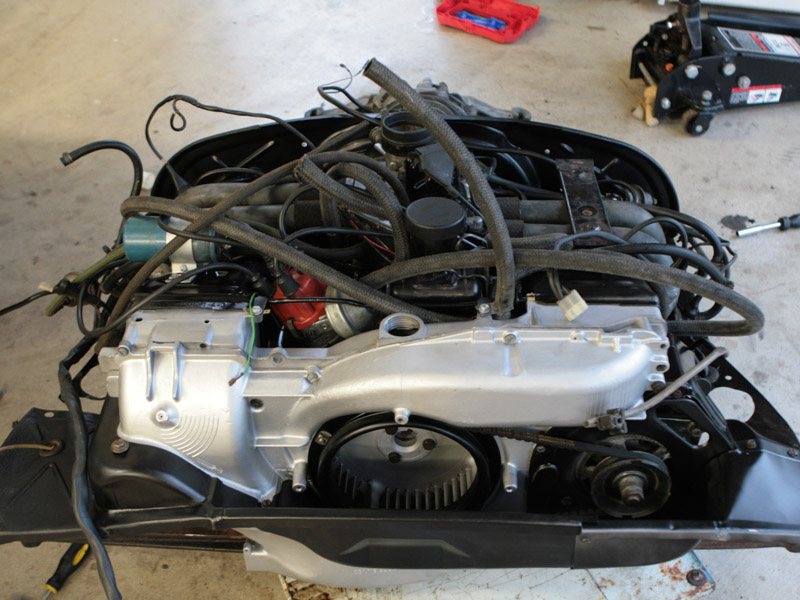
Engine cleaned up and just about ready to install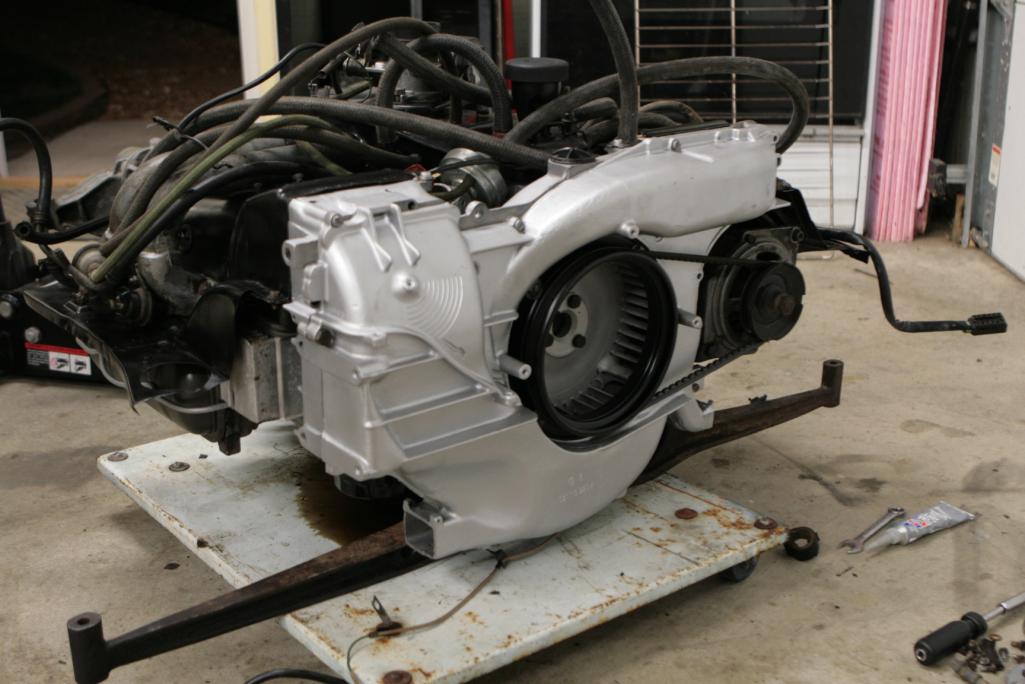
Decided to remove all A/C hoses and parts so now I have this...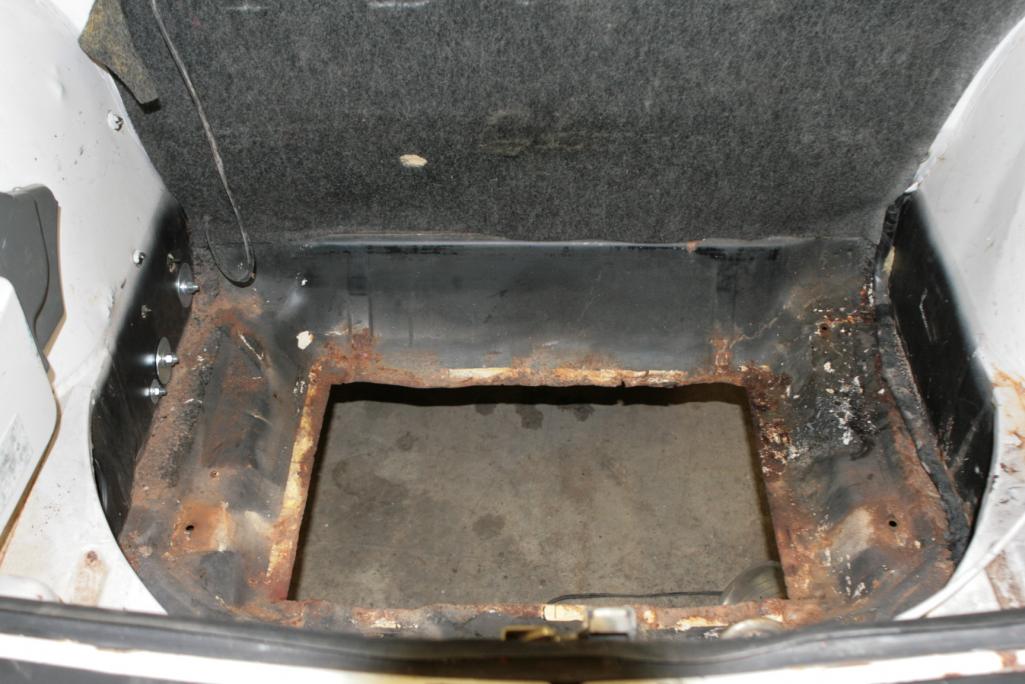
Posted by: BajaXJ92 Aug 25 2012, 10:48 PM
Subscribed. 
Posted by: MrHyde Aug 26 2012, 03:16 PM
What you need is this
Attached thumbnail(s)
Posted by: poorsche914 Aug 26 2012, 05:38 PM
 All in good time
It's going to be a while before any major bodywork/repair is done.
Day 4 is coming right along. Front suspension is on. Brakes still need to be bled. Engine is ready to go back in. I feel like I am in one of those "reality" shows where they have to finish in a certain amount of time. I have a 9am appointment to get the front end aligned so the car has to be back on the ground and running tonight!
Dinner time and then back to work 
Posted by: poorsche914 Aug 30 2012, 10:19 PM
Against all odds, we got everything put back together and I made it home.
Couple more pics...
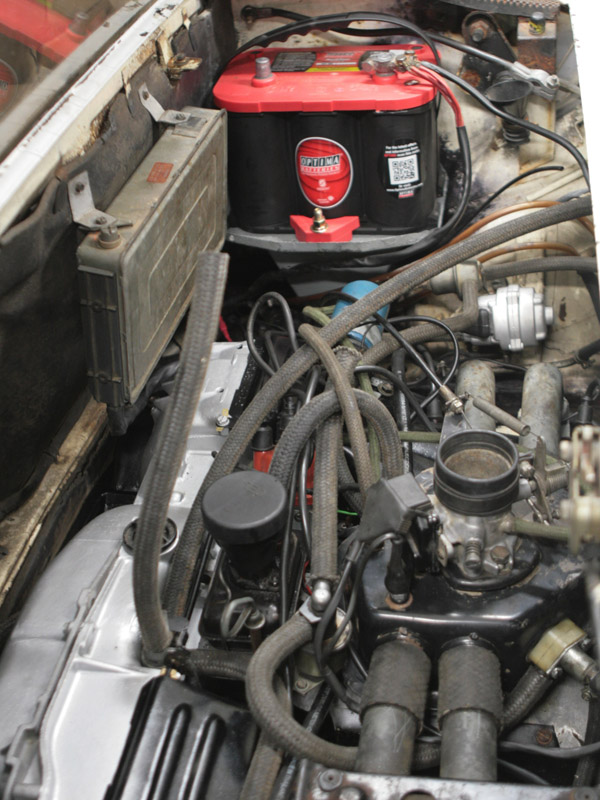
Cleaned up engine
Engine bay - now with battery properly held down to battery tray
Posted by: poorsche914 Aug 30 2012, 10:45 PM
To bring everyone up to date...
Day 4: remaining engine tin blasted, painted and installed, engine back in, front brakes installed (at which time we realized the right caliper had a frozen cylinder), pedal area got some rust repair including removing rusted/broken mounting studs for pedal box and accel. pedal, seat mount hinge and height adjustment "comb" mount repaired, rear shocks installed. Worked til well after midnight. 914 back on the ground but front height needs adjusted and engine not yet tuned.
Day 5: postponed 9am alignment appointment til 1pm. Set front suspension height, set timing, and replaced right front brake caliper. Got a replacement from Brad Mayeur (as well as many other bits and pieces to help us finish this project) and installed it and bled the brakes. During our visit to Brad's place, he had to drop off a 914/6 and pick up another 914/6. My cousin rode in one and I rode in the other. The one I rode in was powered by a 2.2 liter engine - very quick and smooth 
Took my 914 in for an alignment and finished up around 4pm. Cleaned up the garage, packed up my car, ate dinner and prepared for the trip home.
Between the two of us, we put in 80-85 hours of work in 4.5 days. Quite a bit was accomplished and my LE now enjoys a reconditioned & upgraded suspension, a better working braking system, a not-quite-so-leaky engine (slow drip at the taco plate but none at the push rod tubes) and miscellaneous repairs and clean-up.
I will be able to test out the upgraded suspension over the weekend as I will be shooting pictures on the Cherohala Skyway. My route to "work" will be the Foothills Parkway to the Dragon and then several miles down the Skyway.
Posted by: matt5596 Aug 31 2012, 09:12 AM
Very motivating 
I may actually get some work done this weekend.
Powered by Invision Power Board (http://www.invisionboard.com)
© Invision Power Services (http://www.invisionpower.com)