Printable Version of Topic
Click here to view this topic in its original format
914World.com _ 914World Garage _ Jim Kelly's 1975 914 Subaru Conversion and bumper backdate
Posted by: jimkelly Sep 19 2012, 04:32 PM
figured i could at least started on low cost areas of preping my tub for suby engine and trans conversion.
so started with removing big black bumpers.
Attached image(s)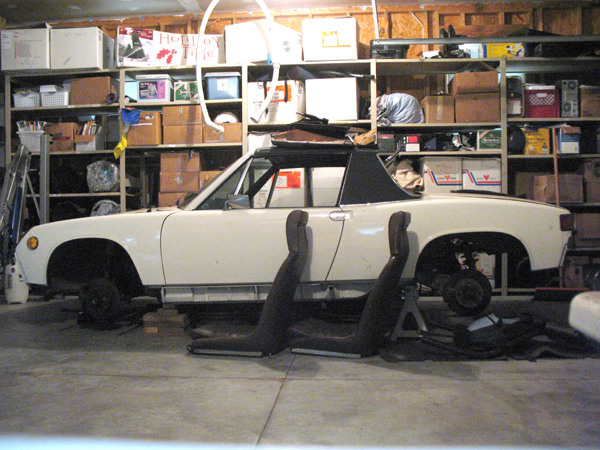
Posted by: jimkelly Sep 19 2012, 04:33 PM
selling my last set of 4 lug fuch so both my cars can have sport steel wheels on them. i think i found a place to affordably powder coat them gloss black.
Attached image(s)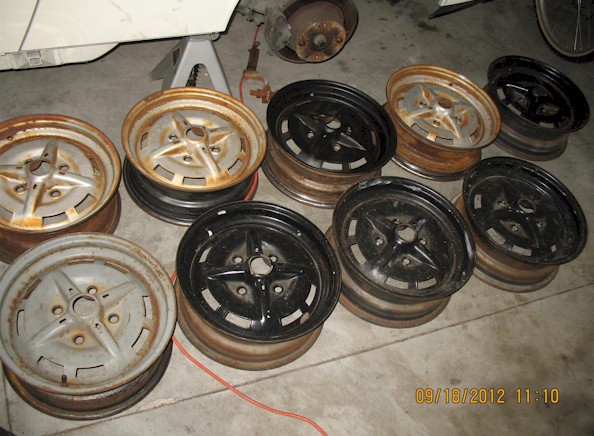
Posted by: jimkelly Sep 19 2012, 04:34 PM
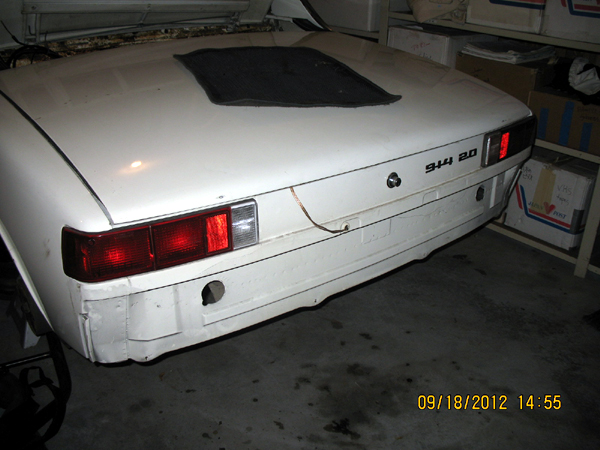
rear trunk as it currently looks - i know it will need at least a small mod to accomodate the starter.
Attached image(s)
Posted by: jimkelly Sep 19 2012, 04:36 PM
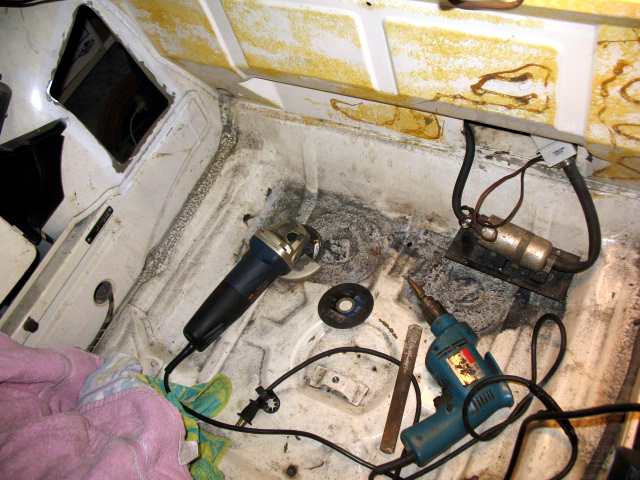
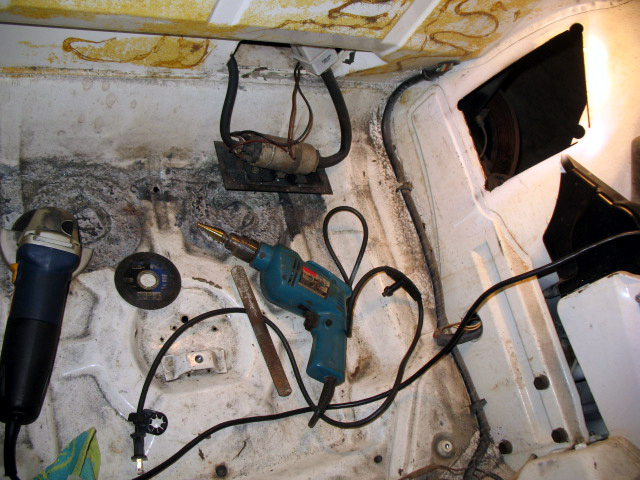
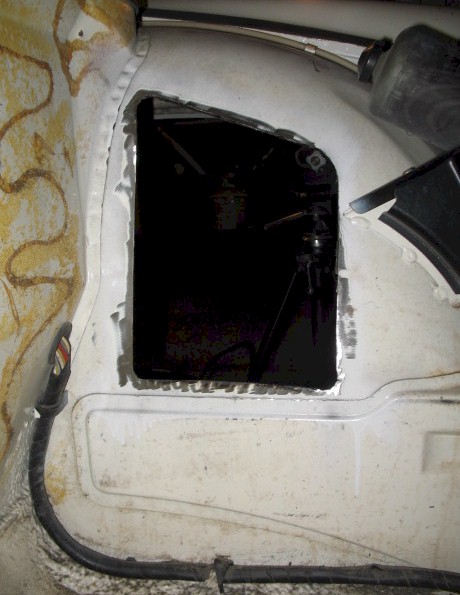
cut out for radiator air flow in and out.
used drill with step down bit, grinder with cut off wheel and then grinder with grinding wheel to finish the job.
Attached image(s)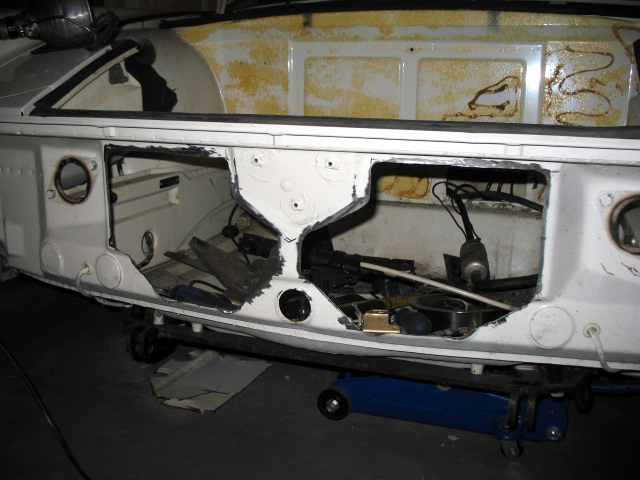
Posted by: jimkelly Sep 19 2012, 04:38 PM
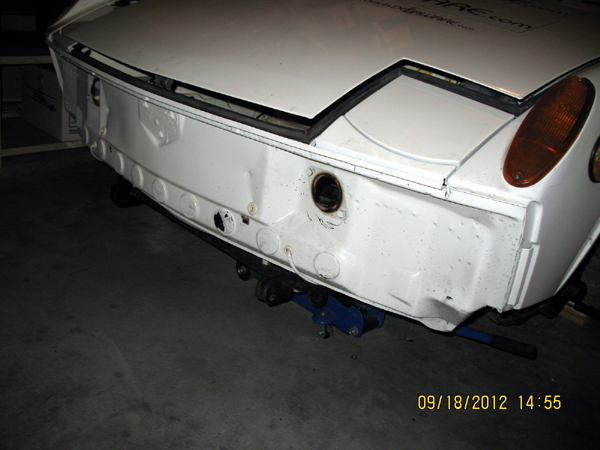
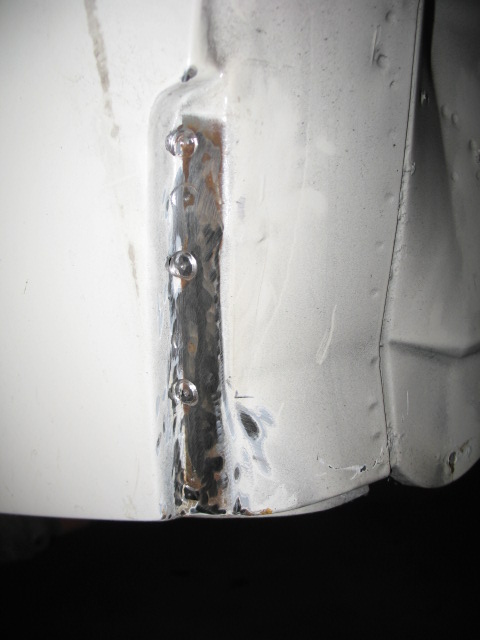
as for backdating the bumpers. i cut the tabs off at the four corners and ground the remaining metal flat with the body. i really doubt that removing the remaining metal that is spot welded to body is needed. still have to cut away wide front trunk tab.
Attached image(s)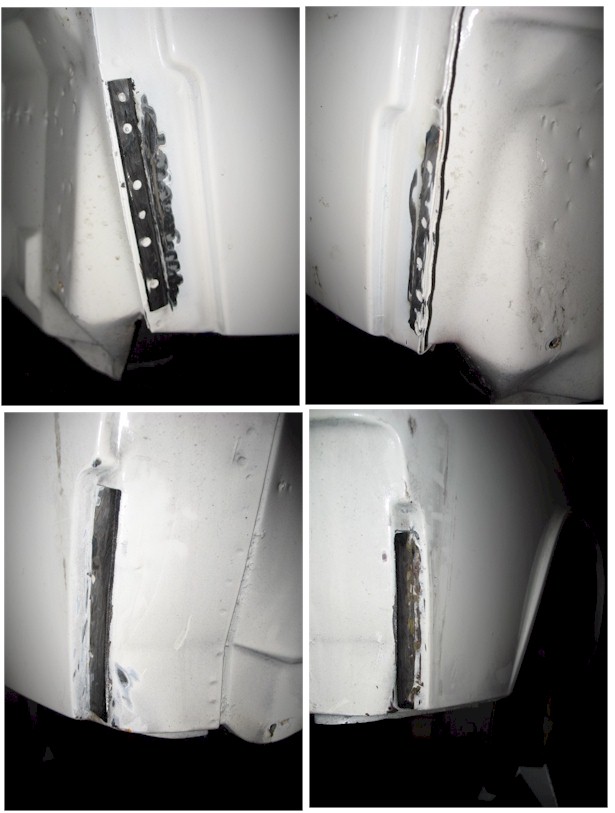
Posted by: jimkelly Sep 19 2012, 04:40 PM
question - should i be spraying all the exposed metal with, rattle can etch primer, after wiping area down with mineral spirits?
Posted by: mittelmotor Sep 19 2012, 05:03 PM
Lookin' good, Jim! Can't help you with the primer question, but it seems you have a very solid 914 as a basis for the project.
I'm still picking metal filings out of my feet from the Sawz-All portion of my conversion. 
Now that I look at it, the center part of my front cutout looks like the famous Scream painting.
Attached image(s)
Posted by: jimkelly Sep 19 2012, 05:15 PM
i have this welder - never used it - need to get a tank of argon, a helmut, gloves, jacket, cart - i have some rusty doors to practice on.
Attached image(s)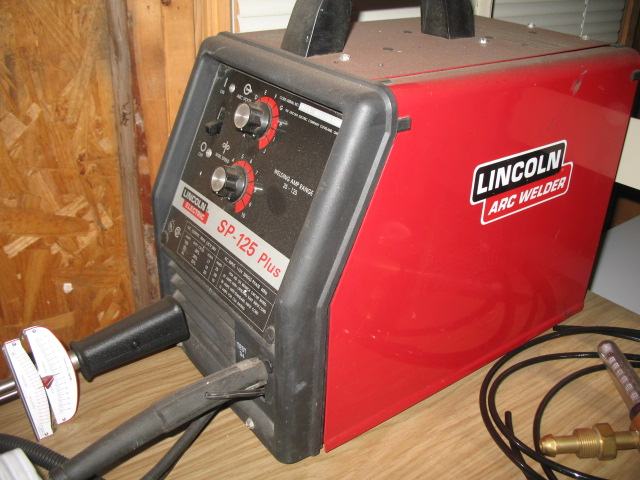
Posted by: matthepcat Sep 19 2012, 05:30 PM
Looks good. Keep posting progress. I need motivation to keep my car until I can afford a suby swap.
Matt
Posted by: bigkensteele Sep 19 2012, 06:12 PM

i have this welder - never used it - need to get a tank of argon, a helmut, gloves, jacket, cart - i have some rusty doors to practice on.
Andy, do you know anyone with a spare Helmut?

Posted by: Andyrew Sep 19 2012, 06:25 PM
question - should i be spraying all the exposed metal with, rattle can etch primer, after wiping area down with mineral spirits?
As long as it isnt lacquer, then you can spray any rattle can primer/paint on bare metal. You wont be using lacquer for the final paint so you dont want that anywhere as it could cause issues.
Posted by: mepstein Sep 19 2012, 07:00 PM
Is the V8 car done?
Posted by: jimkelly Sep 19 2012, 07:18 PM
not yet - but i'll need better MPG's until gas gets back down to $1.50 a gallon.
Posted by: ruby914 Sep 19 2012, 08:03 PM
Hey jim,
looking good.
I hear the top of the wheel well cutouts are prone to cracking due to flex.
I didn’t do it on mine yet, but I plan to add a doubler around the cutout to help prevent cracking.
You may want to do the same while you’re in there.
![popcorn[1].gif](style_emoticons/default/popcorn[1].gif)
Posted by: Lennies914 Sep 19 2012, 08:16 PM
not yet - but i'll need better MPG's until gas gets back down to $1.50 a gallon.
 $1.50
$1.50 Subscribed.
I'll start my thread for my conversion soon. In the mean time I look forward to watching your progress.
Posted by: bigkensteele Sep 19 2012, 08:38 PM
I am subscribing as well, since I want to backdate my bumpers over the winter. I know that there are countless threads, but I want to see how you locate the dog-bone holes. I have not found a thread yet that details that part to the level of comfort I desire. And, I enjoy your sarcasm.
Posted by: kg6dxn Sep 19 2012, 08:44 PM
Subscribed!
I love fabrication. 
Posted by: mepstein Sep 20 2012, 05:34 AM
I am subscribing as well, since I want to backdate my bumpers over the winter. I know that there are countless threads, but I want to see how you locate the dog-bone holes. I have not found a thread yet that details that part to the level of comfort I desire. And, I enjoy your sarcasm.
You just need the distance of the hole from the trunk lip for height then measure the with of the bumper holes from the centerline of the front trunk.
Posted by: mepstein Sep 20 2012, 05:35 AM
not yet - but i'll need better MPG's until gas gets back down to $1.50 a gallon.
Did you salvage the engine from your wife's wreck?
Posted by: jimkelly Sep 20 2012, 05:54 AM
no - i wish i did though - it was a 1.8 with one buggered spark plug hole - though i would like to begin with a small naturally aspirated and easy to come across engine. i'll need to track down a decent early legacy with a 5spd, i'd like to use its radiator too. just got to develope some welding/fab skills before then 
i did order one tool though - so i can remove some spot welds.
http://www.toolsource.com/spotweld-rotabroach-cutter-skipproof-pilot-p-76467.html
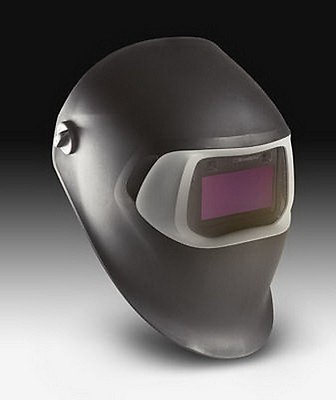
looks like tractor supply is going to be my local welding supply store - though i think i will take the recommendation here to get a low end variable shade speedglas helmut off of ebay.
Attached image(s)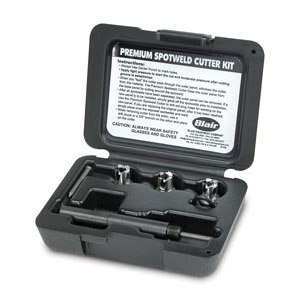
Posted by: IM101 Sep 20 2012, 11:48 AM
Very cool, looks like a great body to start with. Btw I'm no welding expert but do have some experience in the field and in class. I would suggest goingwith an 90-10 to 80-20 argon-CO2 mix on the gas. Pure argon is for tig and stainless normally, not mild steel body panals. The CO2 should help the weld flatten out and look nice. Oh and the speedglass, or most any quality auto darkening helmet, will be great and make learning much easier.
Posted by: 76-914 Sep 20 2012, 12:09 PM
Aren't those helmets the best thing since pockets on a shirt? I just missed an LL model complete car w/ a blown head gasket (EZ30D) for $800.00.  Way to go, Jim. Looks like everybody is getting a head start on me. I've set a limit of $1200 for a donor car or front clip so it may be a few more month's.
  In the meantime I will be following your thread in hopes that I can avoid skinning my knees.
Posted by: jimkelly Sep 20 2012, 12:13 PM
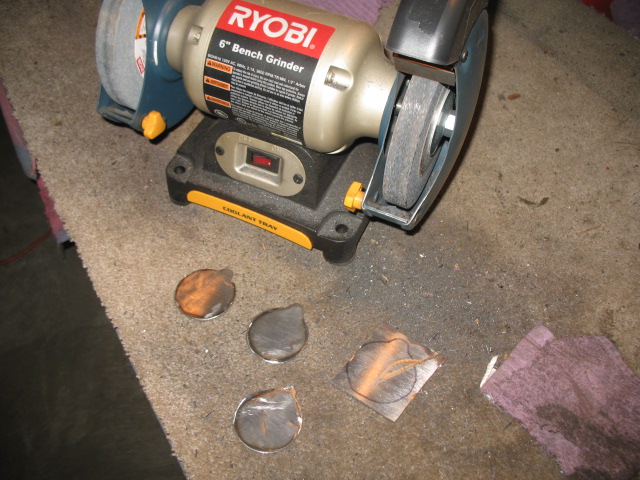
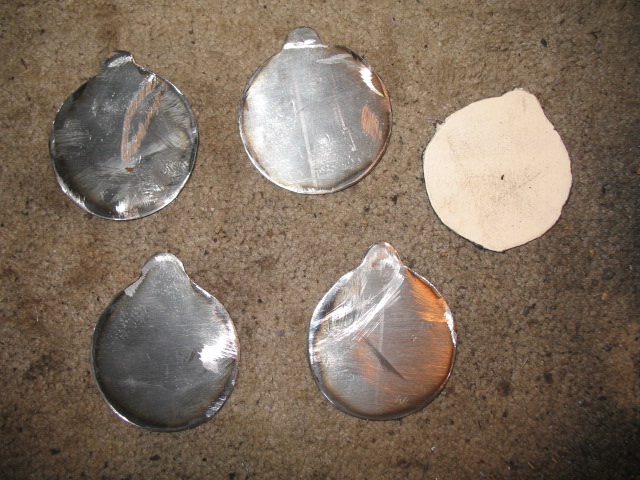
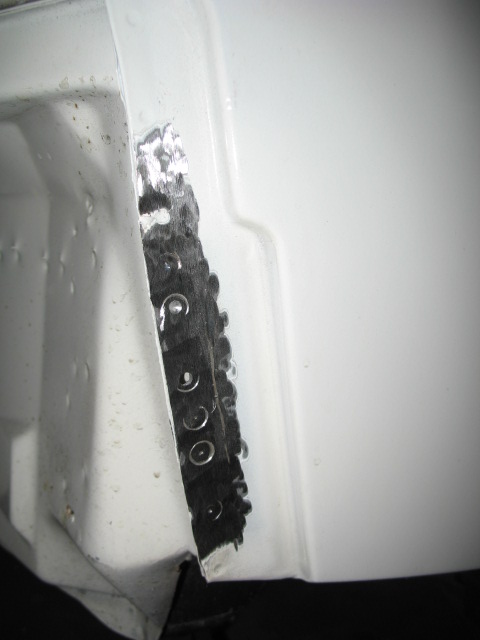
just finished fabbing the plugs for the holes left from removing the big black bumpers - only to later realize i could have used my sheet metal snippers to shape them FAR more easily 
Attached image(s)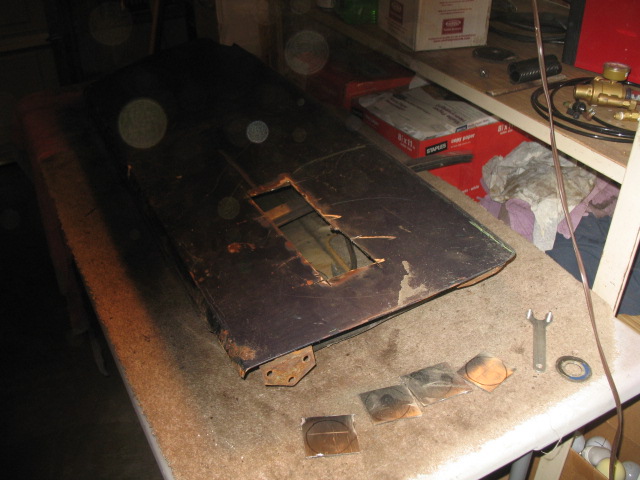
Posted by: zymurgist Sep 20 2012, 12:28 PM
not yet - but i'll need better MPG's until gas gets back down to $1.50 a gallon.
A Ninja 500 goes 54 miles on a gallon of 87 octane...

Posted by: bulitt Sep 20 2012, 04:37 PM
Tractor supply exchanges the small co/argon bottle for @22$. You need a bottle to start the process- check craigslist.
Catch a sale at Northern tool for an auto-darkening helmet (39$).
And get one of these at HF- you will never regret it. Find a coupon for one (29$)
http://www.harborfreight.com/power-tools/specialty-power-tools/14-gauge-swivel-head-shear-68199.html
Posted by: jimkelly Sep 21 2012, 06:27 AM
while i only drilled out about 12 spot welds so far - i feel this tool is a good one - i only went completely thru on one. next i will remove most of the engine tin shelf.
Attached image(s)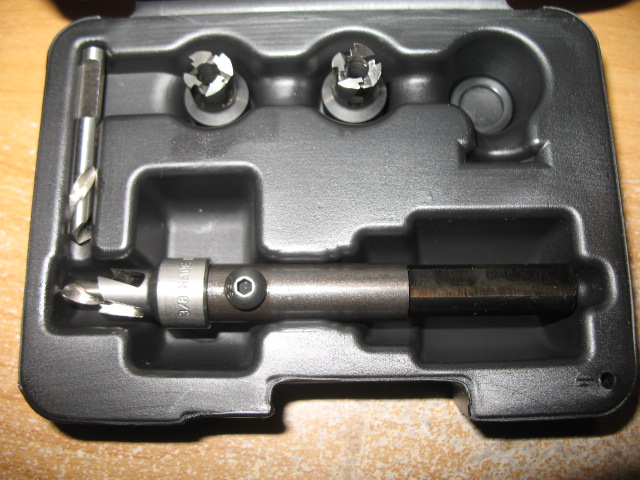
Posted by: Eric_Shea Sep 21 2012, 06:36 AM
What happened to the car Scotty b(iatch) was/is working on? I've heard good things about Adderall. 
Posted by: jimkelly Sep 21 2012, 06:45 AM
http://en.wikipedia.org/wiki/Adderall
all drugs have side effects.
that is why i will keep using them. 
Posted by: Evil914 Sep 21 2012, 07:15 AM
not yet - but i'll need better MPG's until gas gets back down to $1.50 a gallon.
Posted by: jimkelly Sep 21 2012, 11:05 AM
removed most of the passenger side tin shelf - hell hole seems ok - but there is a hole in the firewall to passenger compartment and thru fender panel and battery tray area.
oh yeah - some of the shelf is spot welded from the inside and some is spot welded from the other side - son of a bitch
Attached image(s)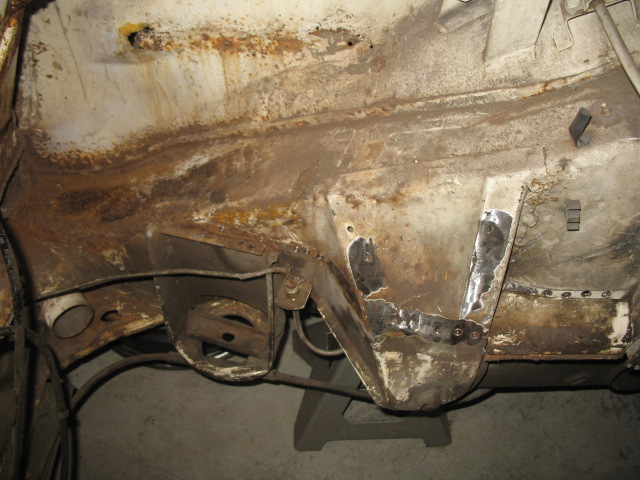
Posted by: Eric_Shea Sep 21 2012, 01:50 PM
Seriously... are you not going to finish the V8 car? I thought you had a lot wrapped up in that? 
Posted by: jimkelly Sep 21 2012, 02:20 PM
eric - i'll update my v8 thread after i work out the details.
question - what tools would one use to clean up my engine bay pictured above?
jim
Posted by: trojanhorsepower Sep 21 2012, 02:32 PM
That looks like a good spot weld cutter, who makes it?
Posted by: Porcharu Sep 21 2012, 02:32 PM
Wire wheel and or wire wheel cup (the nasty ones made out wire rope pieces) on an angle grinder. It will eat that paint and rust real quick. Make sure to wear some heavy gloves, if that wheel bites on something it may rip out of your hands and you don't want that spinning wheel digging into you.
A flap wheel on the grinder is nice for touching up the cut spot welds.
Posted by: jimkelly Sep 21 2012, 03:27 PM
Blair makes the spot weld remover - to buy link above.
i have a cup wire wheel - i'll give it a try tomorrow.
thanks guys!
Attached image(s)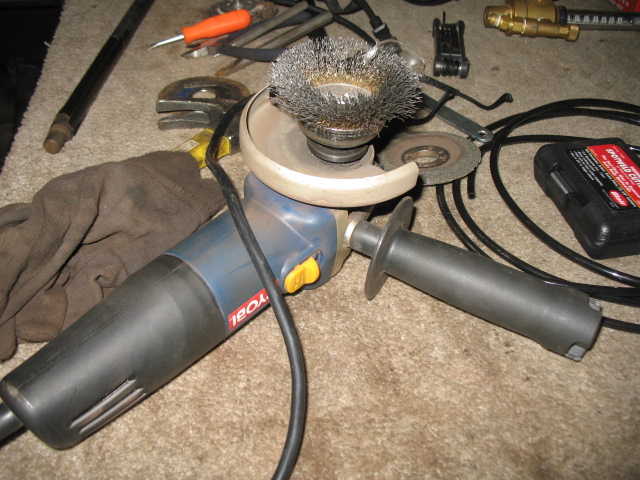
Posted by: strawman Sep 21 2012, 09:18 PM
Try a twisted-wire wheel; the one you've got is pretty light-duty. The twisted one will really dig out the nasty stuff. I use both a cup wheel and a flat wheel when removing paint, crud and rust.
The spot weld cutters work great if you're trying to save the piece you're removing, but if you're going to toss it anyway (like the engine shelf pieces), then I'd recommend just hitting each spot weld with a grinding wheel on an angle grinder, or a carbide burr on a die grinder (preferred). With a little practice, you'll be able to weaken the top piece enough to break it free and then follow up with a flapper disc afterward to clean everything up. It also eliminates the little leftover "halos" the spot cutters leave behind. I used that method when removing the engine shelves and I'm glad I did -- cuz there are a zillion of 'em! Just be sure to use eye and ear protection.
Geoff
Posted by: jimkelly Sep 22 2012, 06:01 AM
knotty wire wheel - got it
safety gloves and googles - got it
see this video - nice eastman product with especially nice attachment
https://www.youtube.com/watch?v=cm7W7Db5vdw
Posted by: smdubovsky Sep 22 2012, 06:24 AM
Looking good.
You want "C25" gas. 25% CO2, 75% argon. Its by far the most common mig gas and almost assuredly what all the settings charts for your welder are spec'd for (miller puts them on a sticker inside the door for the wire, don't know if lincoln does the same.)
Believe it or not, the cheap harbor freight auto-dark helmet works well. (note: this is about the ONLY time I'll recommend anything from HF.) I have a $$$ miller digital elite but I weld a lot. For the occasional user I don't think the extra $ for a nicer helmet is worth it.
Posted by: kg6dxn Sep 22 2012, 06:45 AM
I have a $$$ miller digital elite but I weld a lot. For the occasional user I don't think the extra $ for a nicer helmet is worth it.
How much is your site worth now? How much is your site worth when it's gone? Just sayin...
Posted by: jimkelly Sep 22 2012, 09:00 AM
man - i read and reread this exchange.
then i realized 
sight 
i think i am gonna spend the $150 and get a nice helmut - besides, it seems that variable shading is a must have feature.
and as for harbor freight, i think i will avoid whenever possible - thanks for the tips.
Posted by: smdubovsky Sep 22 2012, 11:24 AM
Yeah, took me a while too. sight... They all protect against UV even when off so you aren't going to go blind using any of them.
The HF *is* variable shade. It is a nice feature to have, but to be honest for 99.5% of steel welding you'll leave it at 9. Need more for aluminum or really high current (neither of which your box will do.)
I've used the HF and own a Jackson top of the line (executive hlts?) and a miller top of the line (digital elite.) The latter have bigger windows, are 'clearer' in the off state (about a 3 vs 5), and have more sensors so you don't get flashed as often when welding in goofy positions. I had to buy the miller for doing single-digit amp tig when I got the dynasty DX tig. It also has a cool 'x-mode' that doesn't use any sensors but detects the EMI of the arc. Useful for doing low amp work and roll cages where you're often welding around the back of something. But I digress.
Its just a lcd, not rocket science. So IMO if you aren't getting a bigger window, more sensors, or a clearer off state I would still recommend just saving your money. Either spend a little more and get more features or spend a lot less. But its your money.
Posted by: jimkelly Sep 22 2012, 12:19 PM
thanks for this additional info!
i just got back from lowes - i am ready to grind some more in the engine bay.
because i have to wear reading glasses to see anything clearly - i will use a face shield instead of googles.
Attached image(s)
Posted by: balljoint Sep 22 2012, 01:04 PM
thanks for this additional info!
i just got back from lowes - i am ready to grind some more in the engine bay.
because i have to wear reading glasses to see anything clearly - i will use a face shield instead of googles.
Okay. But if you have a pair of googles please take a picture of yourself wearing them and post it here. Thankyouverymuch.

Posted by: mepstein Sep 22 2012, 01:12 PM
Also a face mask/respirator to protect your lungs.
Posted by: kg6dxn Sep 22 2012, 01:20 PM
I agree with the face mask.
One day after using the wire wheel, I thought I had a splinter in my forehead. I had to pull it out with pliers. I then discovered it was a 3/4" strand that got buried in my head. No lasting damage, I think... But it was kind of scary after measuring it.
Posted by: bulitt Sep 22 2012, 03:24 PM
There's not many tools manufactured in the US anymore. Most manufacturer's farm it all out to Asia. China just reverse engineers our designs, so you may as well buy the cheap stuff, same design just cheaper.
Of course they do have quality issues so I would never buy any tools such as wrenches that could snap in your hand. Stay with the forged stuff from Husky, Snap-On, Kobalt, Craftsman etc.
I agree on the mask, lots of stuff in the air.
If you need magnifier safety glasses they are available-http://www.safetyglassestoday.com/magsafe-whole-lens-magnifying-safety-glasses.html
Posted by: scotty b Sep 22 2012, 06:35 PM
Also a face mask/respirator to protect your lungs.
lease leave your

Posted by: jimkelly Sep 22 2012, 07:19 PM
don't be like me and cust thru brake lines or the front trunk release cable 
Attached image(s)

Posted by: TargaToy Sep 22 2012, 07:52 PM
I agree with the face mask.
One day after using the wire wheel, I thought I had a splinter in my forehead. I had to pull it out with pliers. I then discovered it was a 3/4" strand that got buried in my head. No lasting damage, I think... But it was kind of scary after measuring it.
The meat on your forehead is deep enough to take a 3/4" strand of wire? Please post pics!!!

Posted by: jimkelly Sep 23 2012, 04:00 AM
If you need magnifier safety glasses they are available-http://www.safetyglassestoday.com/magsafe-whole-lens-magnifying-safety-glasses.html
definitely going to look into these - thanks - jim
and here are some more pics...
Attached image(s)


Posted by: jimkelly Sep 23 2012, 05:50 AM
draining the gas tank so i can pull it out.
will also remove parking brake cables,seat rails, seat belts today.
Attached image(s)

Posted by: jimkelly Sep 23 2012, 10:28 AM
ok - gas tank out - heater stuff removed - interior stripped - parking brake cables removed. hand brake handle shot.
Speedometer...
http://www.speedhut.com/gauge_products-gauge_type-speedometer_GPS.htm
http://www.914world.com/bbs2/index.php?showtopic=78501&st=200
Simulators for Subaru VSS Sensor and Rear Oxygen Sensor Signal...
http://www.enginewiring.com/catalog.htm#Featured
Attached image(s)


Posted by: jimkelly Sep 24 2012, 04:51 AM
i emailed the poster of this video (jeff) about his harness. he emailed back a nice reply below.
https://www.youtube.com/watch?v=uy--MW0rT6Y
http://www.youtube.com/watch?v=uy--MW0rT6Y&feature=plcp
"I do have a couple of harnesses done right now.
For the 90-94 obd1 and the 95 obd2 the only code that would turn on
the check engine light is the rad fan relay 1. There still has been a
couple of rare codes that pop up. If the ecm is from an automatic
car the is a wire to add to make it think it is in a manual car.
I would run a speed sensor in all. I do have a 92 harness that was
modified for a gyrocopter that didn't have a speed sensor, the 90-94
tolerate it better.
I have a 95 EJ22 in my van and the only code I get is p1101 neutral
safety switch, which there is none. It has only come on 2 times this
year in 3000 miles.
I am currently installing a 2.5 into a 71 Super Beetle.
Let me know what you need.
Jeff"
and
"Sounds good and yes.
Have you ever checked out the subaruvanagon yahoo site? Lots of info.
I currently have a KEP adapter plate that is in my project bug for
sale. trying to sell it as a package deal with a motor harness and
the VW trans.
I'm going to go with a reversed ring and pinion Subaru 5 speed instead.
Here is a few pics
Jeff"
Attached image(s)


Posted by: jimkelly Sep 24 2012, 08:39 AM
ok - fuel lines are out - peddle custer is out - hand brake pivot removed.
i was surprised to see the first foot or so of the fuel lines are metal.
Attached image(s)


Posted by: bulitt Sep 24 2012, 09:13 AM
You need some ospho and a hose end sprayer...and I agree the eastwood frame sealer works great! Are you going to completely disassemble this one? If so you may just want Scotty to blast it for you???
Posted by: jimkelly Sep 24 2012, 10:59 AM
i'd like to see this set up - i'm visual - i need to see stuff to understand it.
not going to completely disassemble - almost done dissing at this point.
want to remove cabin tar, epoxy prime cabin and engine bay, then paint.
You need some ospho and a hose end sprayer...and I agree the eastwood frame sealer works great! Are you going to completely disassemble this one? If so you may just want Scotty to blast it for you???
Posted by: jimkelly Sep 24 2012, 11:04 AM
a vaccum hose thru the tunnel got most of the loose stuff out - big difference.
had some gift cards - so i headed out lowes and home depot to get some hand cleaner, heat gun, and a couple of putty knifes.
10 mins with heat gun got this much removed. ge the gun close and let it get soft before trying to scrap it off.
this is going to be a low budget build - my next spend will be to get supplies for my welder, to get it up and running. helmut, tank of argon, etc etc.
Attached image(s)

Posted by: jimkelly Sep 24 2012, 12:22 PM
after 30 minutes - alot of it comes off in big chunks
Attached image(s)
Posted by: SUNAB914 Sep 24 2012, 01:57 PM
Don't burn out bro!
Posted by: jimkelly Sep 25 2012, 06:29 AM
now i can see these two, firewall/top of long, areas real well.
Attached image(s)


Posted by: jimkelly Sep 25 2012, 09:28 AM
drivers side, firewall/top of long, hole to be patched.
and yes - both long tops have at least pin holes 
Attached image(s)


Posted by: jimkelly Sep 25 2012, 10:50 AM
thought i woulod tackle an easy job - removing the axles at the swingarms.
problem is that is got all 8 cv bolts out and cvs are still stuck SOLIDLY to stub axles - i assume by the roll pins
Attached image(s)


Posted by: mittelmotor Sep 25 2012, 12:31 PM
Maybe you could remove the entire assembly by tapping out the stub axles. Once removed from the car, stub axle and CV/halfshafts can be easily separated. I found that driving a gasket scraper or screwdriver into the middle of the gasket's thickness, and then prying, worked great.
Use lots of PB Blaster before hammering the sub axles out of the hubs. On mine, one side came out with a single tap of the hammer; the other side needed repeated bashing.
Posted by: jimkelly Sep 25 2012, 02:26 PM
rear castle not - is it 32mm?
my 32mm socket feels a little sloppy on it.
i think i need an impact gun and a way to stop the axle from turning.
first i will PB blast it for a few days.
Attached image(s)

Posted by: scotty b Sep 25 2012, 02:43 PM
the castle nut is a 30mm. Soak it or try some MAPP gas on it. Get it good and hot then hit it wth the impact before it cools
Posted by: jimkelly Sep 25 2012, 03:10 PM
30mm - well that explains a lot - thanks
MAPP GAS - i will add it to my list of needed tools.
Posted by: bulitt Sep 25 2012, 04:36 PM
You can buy a deep 30mm impact socket at auto zone, advanced or pep boys for @ 9$
Posted by: jimkelly Sep 25 2012, 04:40 PM
thanks - i'll do that and then soak it in PB Blaster and try the breaker bar on it in a few days.
hope i do not need mapp gas - that stuff seems pricey for a one time use.
Posted by: jimkelly Sep 26 2012, 07:09 AM
just cut out a section of sheet metal behind the battery tray.
i'll cut it a little wider to not have to deal with the compunded bend at the left.
and i guess i'll repair the bottom right section seperately?
Attached image(s)


Posted by: Spoke Sep 26 2012, 07:50 AM
The impact wrench should work well to remove the nut.
The other possibility that will take about 5 min is to cut the nut with a dremel tool; put a chisel in the cut and crack the nut. I did this with internal bearing races on the rear of my 930. No heat needed.
Posted by: jimkelly Sep 26 2012, 10:16 AM
i went out an got a 30mm socket and some pb blaster- but when i got home i decide to cut the nuts off - primarily because i have two extra stub axles, castle nuts and washers laying around - plus now i do not need to buy an impact wrench.
i guess these threads and this spline are good places for anti seize compund?
Attached image(s)


Posted by: jimkelly Sep 26 2012, 01:54 PM
breaking my axle assy's down - i'll need 2 good cv assys for reassembly using ian's axle arrangement.
Attached image(s)
Posted by: jimkelly Sep 27 2012, 11:13 AM
my daily driver now has 30,000 miles on it and the tires were almost bald, so i replaced them at walmart today and had them put 2 baldies on RUSTY 914 steel wheels, then i put them on the front of my 914 and a furniture dolly under the rear. now i can get to the passenger side and remove the tar from the passenger side cabin floor and cut out the firewall rust section above the long. clearly i need to get me some 3M adhesive remover.
sheet metal reference...
seems like 18-20 guage sheet metal is idea for 914
http://www.914world.com/bbs2/index.php?showtopic=8377&hl=sheet+metal+guage
Attached thumbnail(s)
Attached image(s)

Posted by: jimkelly Sep 28 2012, 12:58 PM
rusted passenger side firewall area above long cut out and look i am going for.
Attached image(s)


Posted by: jimkelly Sep 29 2012, 08:15 AM
drivers side long - pics, pre and post vaccuming.
Attached image(s)


Posted by: charliew Sep 29 2012, 08:51 AM
Jim have you looked closely at the inside area where the handbrake is for cracks in the long? Also be careful about welding in metal and removing too much metal without keeping the tub straight.
Posted by: jimkelly Sep 29 2012, 09:01 AM
i will check it out and use caution - thanks
Attached image(s)
Posted by: jersey914 Sep 29 2012, 09:06 AM
Yikes!
Posted by: jimkelly Sep 29 2012, 02:14 PM
removed some more of the cabin tar. i assume every car varies, but i think removing it from my car could have been done in one hour using heat gun and spackle blade. my tar was about 50% loose.
for later reference - easy grind mig wire.
http://www.914world.com/bbs2/index.php?showtopic=156717&hl=
.023 is good for the 914
Thermodynamics = firepower
ESAB=spoolarc
and that 18 guage cold rolled steel is good too
http://www.914world.com/bbs2/index.php?showtopic=97717&hl=metal+guage
my928s4 is using - paint remover "Citrastrip" from HomeDepot.
supposedly good brake line bending tool
https://www.pegasusautoracing.com/productdetails.asp?RecID=6280
and harbor freight's
http://www.harborfreight.com/tube-bending-pliers-95782.html
Attached image(s)

Posted by: jimkelly Sep 30 2012, 04:28 PM
my plan is to lose the headlight motors and make my headlights permanently up.
Attached image(s)

Posted by: jimkelly Oct 1 2012, 02:02 PM
eric shea's brake venting thread ...
http://www.914world.com/bbs2/index.php?showtopic=90625
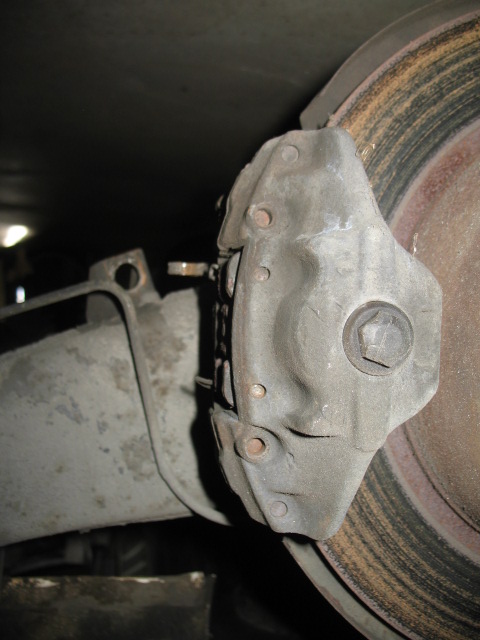
so here are pics of my rear calipers
i post this because the drivers side turns pretty freely but with a dry spinning noise but the passenger side is hgard to turn - my guess is venting is wrong. parking brake cables are already off.
by the looks of these calipers, they have not been rebuilt in a long time.
also, it seems that each calipers needs to be vented from both sides, oh.
Attached image(s)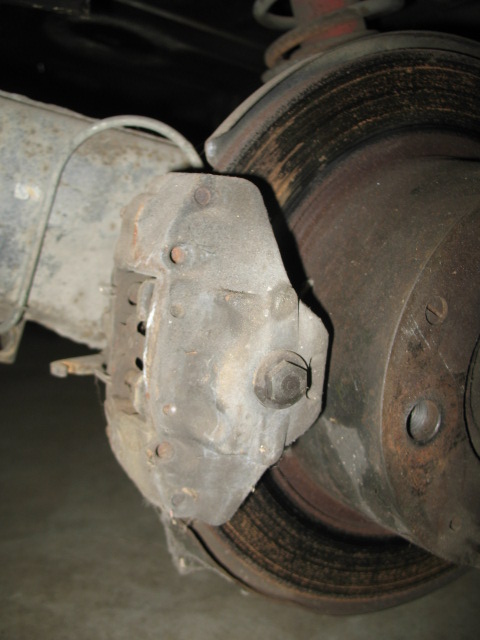
Posted by: bigkensteele Oct 1 2012, 02:17 PM
my plan is to lose the headlight motors and make my headlights permanently up.
Wasn't gas mileage one of your concerns? I have no idea if it would be a noticeable difference, but I am certain that they introduce some level of drag.
Posted by: jimkelly Oct 1 2012, 02:22 PM
for a little weight savings and to have less things that can go wrong - but since i always drive with my lights on - the drag would be there regardless. this is going to be a stripped down car, minimal interior, etc. good question though. 
a really nice relay board wiring thread...
http://www.914world.com/bbs2/index.php?showtopic=162535&hl=relay+board+diagram
a newbie welding setup thread...
http://www.garagejournal.com/forum/showthread.php?t=96096&showall=1
Posted by: jimkelly Oct 2 2012, 10:14 AM
a place to buy ospho ...
http://www.jamestowndistributors.com/userportal/product.do?process=checkout&part=11059
ace only had this, and an old navy guy/ace employee, told me how he used to use it back in the day : )
Attached image(s)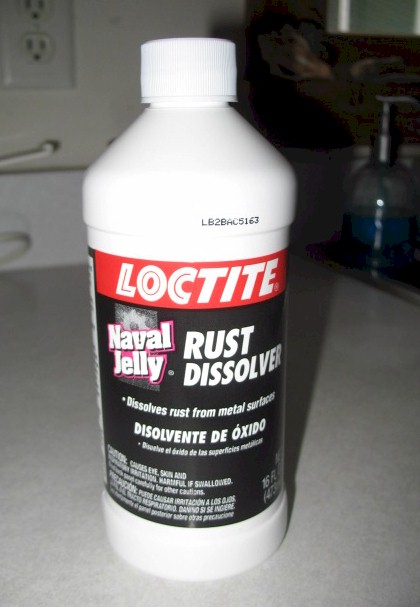
Posted by: bulitt Oct 2 2012, 02:40 PM
Sherwin williams paint stores.
Posted by: jimkelly Oct 2 2012, 05:17 PM
i called 3 delaware stores and 1 maryland store and they all gave me the same story - they use to carry it - but discontinued carrying it. i can only assume some recent state laws are the reason?
a good front rubber bushings thread
http://www.914world.com/bbs2/index.php?showtopic=195727
Sherwin williams paint stores.
Posted by: Porcharu Oct 11 2012, 05:33 PM
man - i read and reread this exchange.
then i realized
sight
i think i am gonna spend the $150 and get a nice helmut - besides, it seems that variable shading is a must have feature.
and as for harbor freight, i think i will avoid whenever possible - thanks for the tips.
Yep good idea, I have slight permanent eye damage from a decent quality (purchased from a welding shop along with my MIG 15 years ago.) Turns out the thing switched on too slowly and would not pass the newer requirements for welding helmets. I would usually have a sinus type headache after welding - especially if I was doing a bunch of tack welds. When I was really cranking out the heat no problem at all. I ended up spending $$$ on a Speedglass with the big eyeport and I love it. I can dial it way down for low power TIG or crank it up for big amp welding. No more headaches is nice as well.
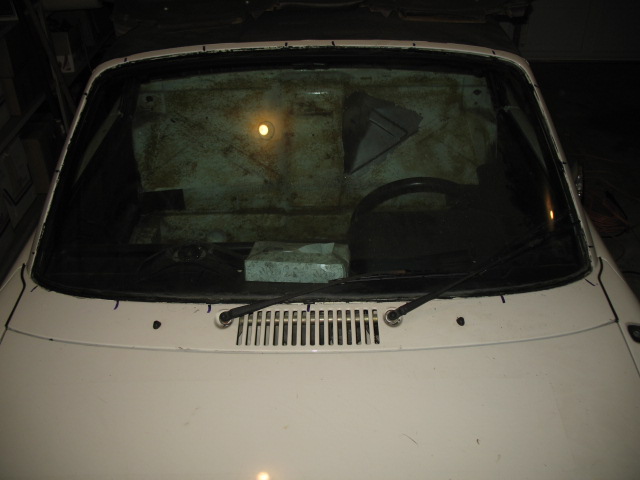
Posted by: jimkelly Nov 30 2012, 02:06 PM
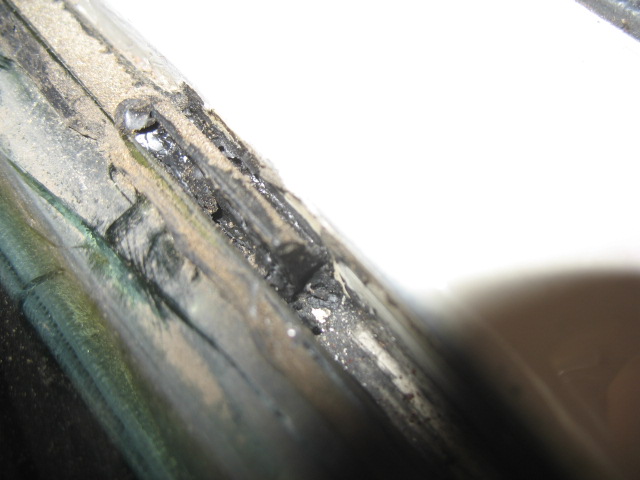
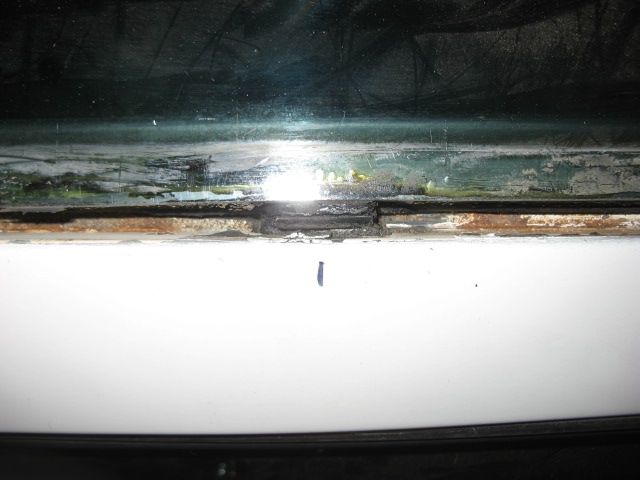
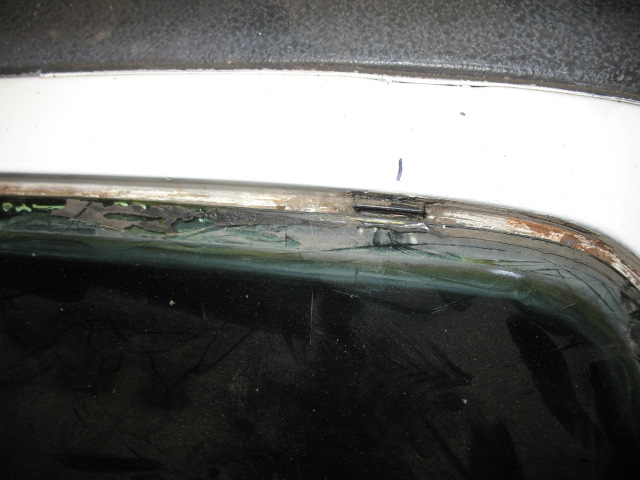
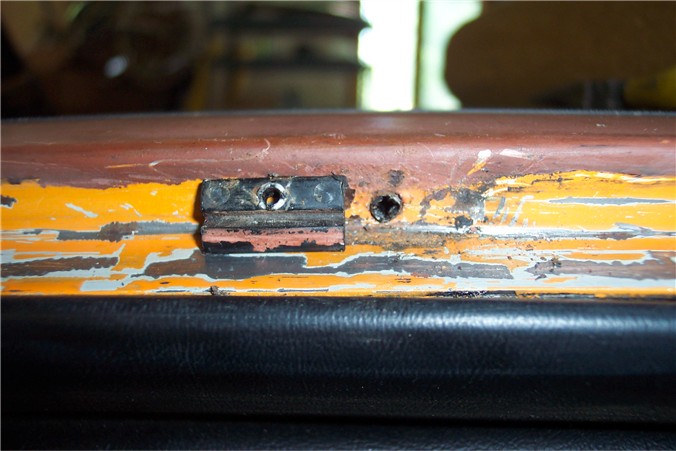
nothing going on - lack of cash and the holidays - so i decided to at least remove windshield trim and some butyl behind it - used heat gun and small flat screw driver.
19 clips - 7 at bottom, 6 at top, 3 on each side.
and pic lifted from another thread of removed clip.
Attached image(s)

Powered by Invision Power Board (http://www.invisionboard.com)
© Invision Power Services (http://www.invisionpower.com)