Printable Version of Topic
Click here to view this topic in its original format
914World.com _ 914World Garage _ Pariah
Posted by: preach Sep 29 2012, 12:01 PM
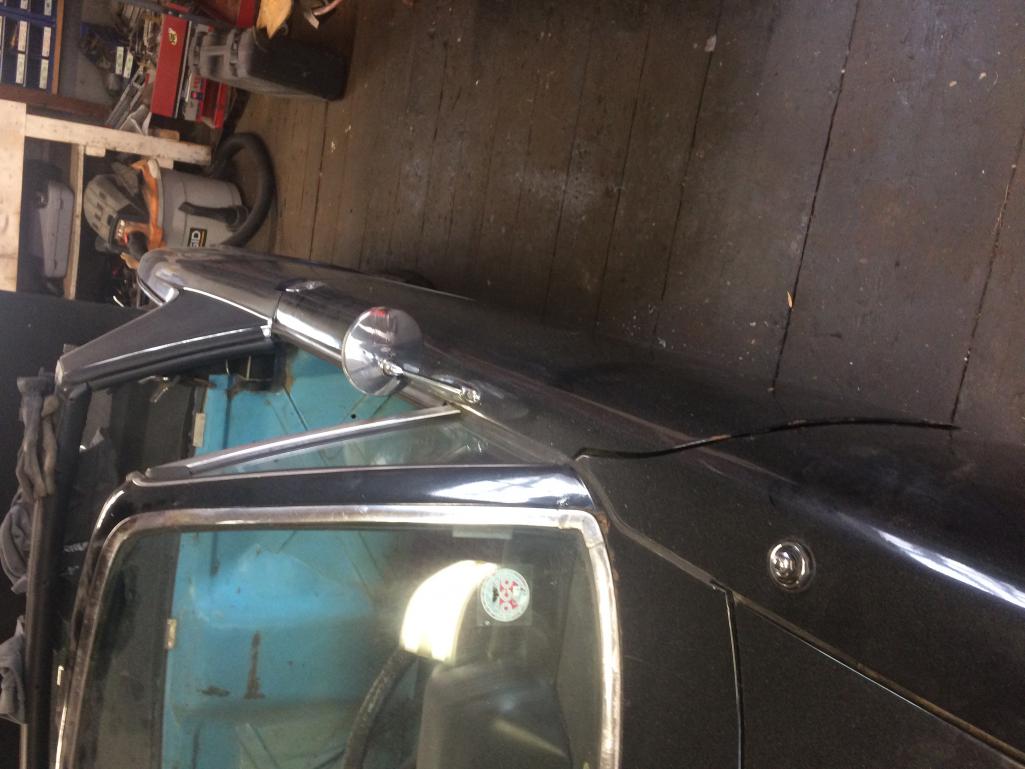
Just got this to my house: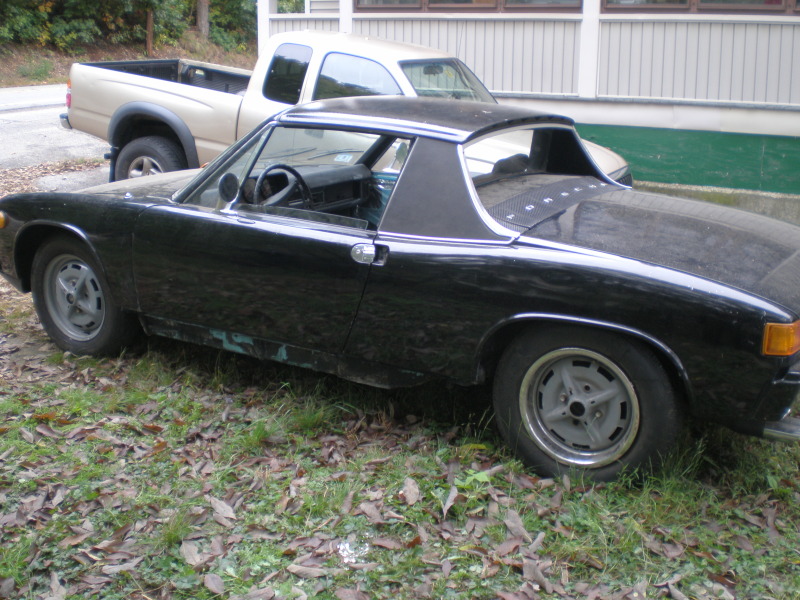

1974 1.8
Brought home for $700.
Needs floorpans, and a general go through to see what else is up.
PO had to move this weekend so he was desparate.
The build starts here.
Posted by: Zimms Sep 29 2012, 02:02 PM

Let the fun begin! 
Posted by: billh1963 Sep 29 2012, 02:10 PM
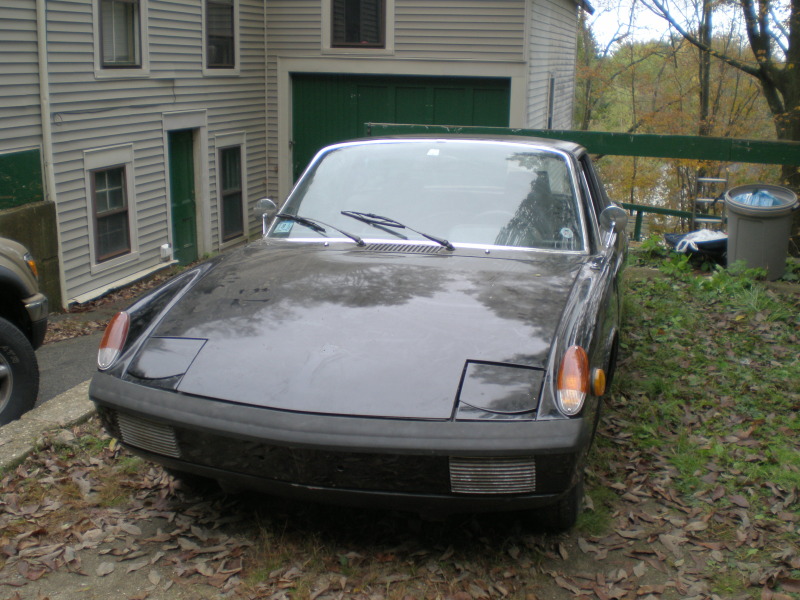
Congratulations! Looks like a good start on an originally blue car!
Posted by: preach Sep 29 2012, 02:47 PM
Originally blue for sure. I submitted my VIN, but need to fill in the rest of the info in the VIN thread.
Last inspected in MA in 2007.
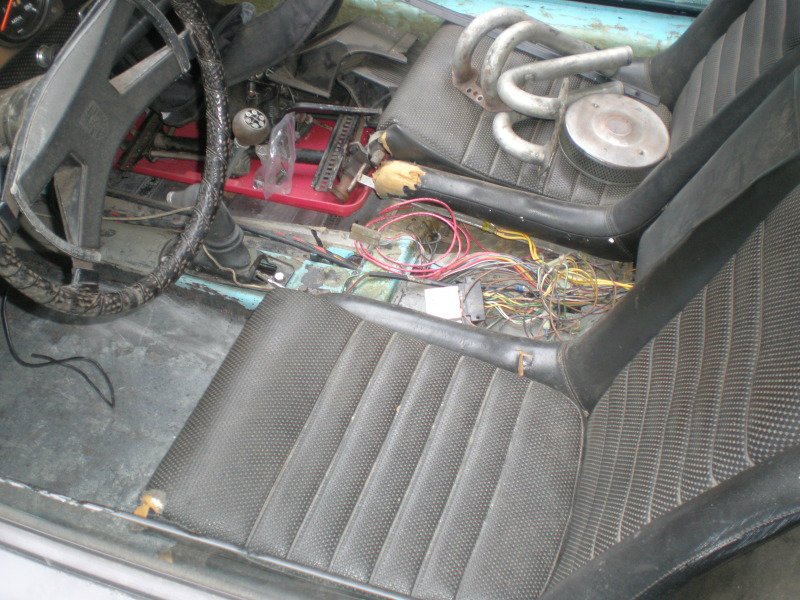
Wiring has me a little worried but I am no stranger to '70s VW wiring.
Current plans are driver AXer not really a looker.
Originally turned this down deciding to go for a nicer $7k-ish one, but some things you cannot pass up.
Thanks for the welcome, been lurking until I found my first and had it in the driveway.
As soon as I can get the rebuilt/locked/disc-ed rearend in my jeep the sooner the car will be in my shop.
Posted by: preach Mar 28 2017, 06:58 PM
So 4 1/2 years later, I am thinking of this again, not that I don't think about it all the time.
I got rid of the Jeep for a very fair price (for a project), and I am ready to get into this to safe streetability.
As soon as it warms up enough to be in the barn I am on it.
I have a soft target and a hard target for legally driving it. First weekend in August is a small vw show and I would like to take it there as it will probably be the only 914 to be there. I hope to show it and my '85 Westy.
I have changed my mind on the build, stock-ish, with a better engine size eventually.
In order to meet my target I took two weeks off in July to concentrate on the goal. Something like 13 days. I plan on working it like my job (I have 360ish hours of overtime since 1/1/17).
It will not be pretty, but it will function.
Posted by: GregAmy Mar 28 2017, 07:02 PM
What is it about repainting 914s black? I bought mine with a shitty Maaco black paint job over original red. Repainting back to original red was one of my first big expenses...

Mine came from MA too...maybe it's a Masshole thing...
Posted by: Unobtanium-inc Mar 28 2017, 07:02 PM
Looks like mine, I paid $1500, now i feel ripped off!
Enjoy it!
Attached image(s)
Posted by: preach Mar 28 2017, 07:12 PM
I bought a drool-able Cobalt Cayman last year, a 'teener would look so good in that color.
I like blue
Posted by: preach Jan 1 2019, 02:52 PM
It's funny how life get's in the way.
Thanks to a bunch of the repair threads that are 30+ pages and my admiration of the skills possessed and those that have progressed I have started my look into my 914.
NOTE: This car dropped into my lap way back when. I am in no rush to finish it, but that does not mean I do not want to work on it. Adulting and Priorities suck.
Southern NH in the winter sucks, especially if you do not:
1. Like the cold. I don't.
2. Don't have winter type toys, mostly due to 1.
3. Have a heated shop. See 1 again.
Today it was almost 50*. We just got about 4" of snow last night so it was a bit slushy walking in and out of the shop.
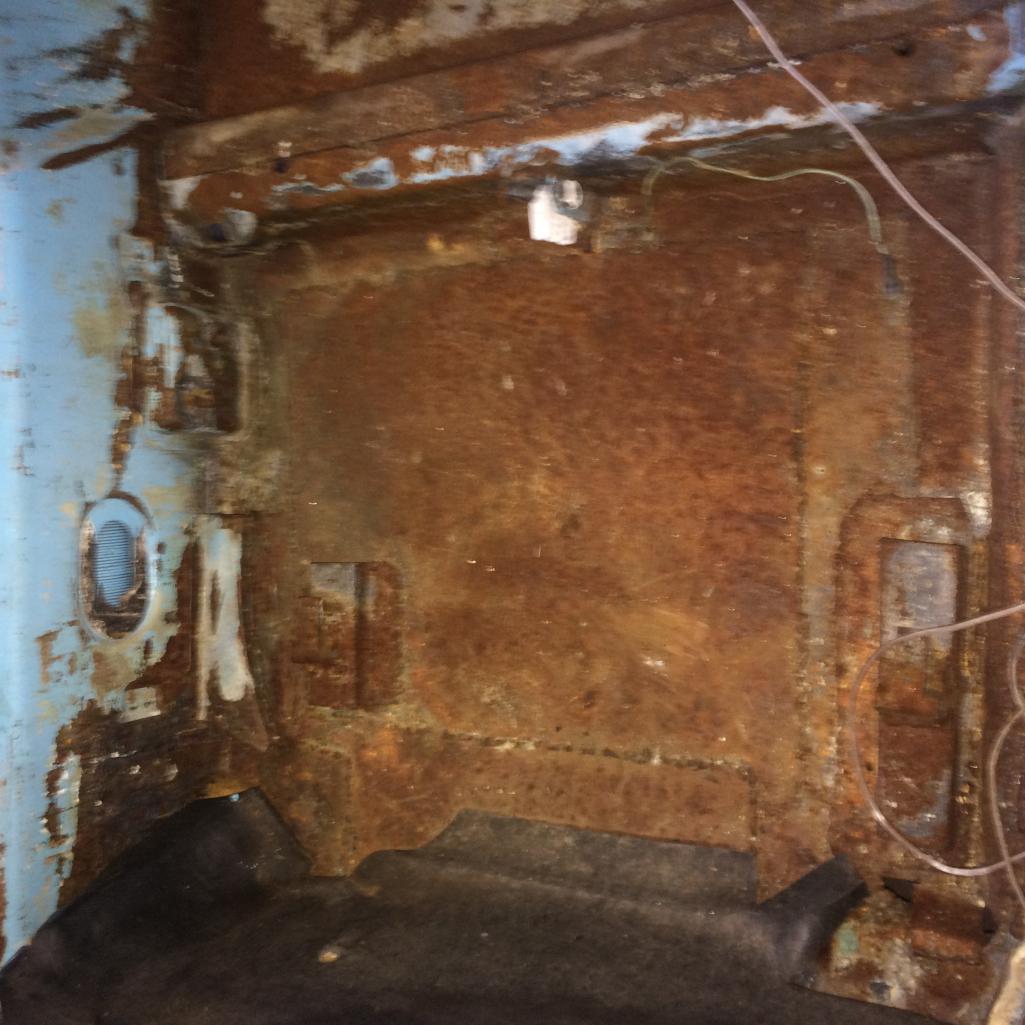
I started out at the trunk and took the shop vac to it and took a bunch of pics for initial inspection. I worked my way forward through each top side compartment. Then did some of the sides, longs mostly.
There is a lot of not good, but there is a lot of good...I hope.
I don't know if a gentle door slam is a thing, but mine are both beautiful with no top on. Gaps are ok too. Driver door gap is high above the front fender though.
Unfortunately I had to stop because I had no dust masks and could not find my respirator  .
.
Took a bunch of pics, but here are a few: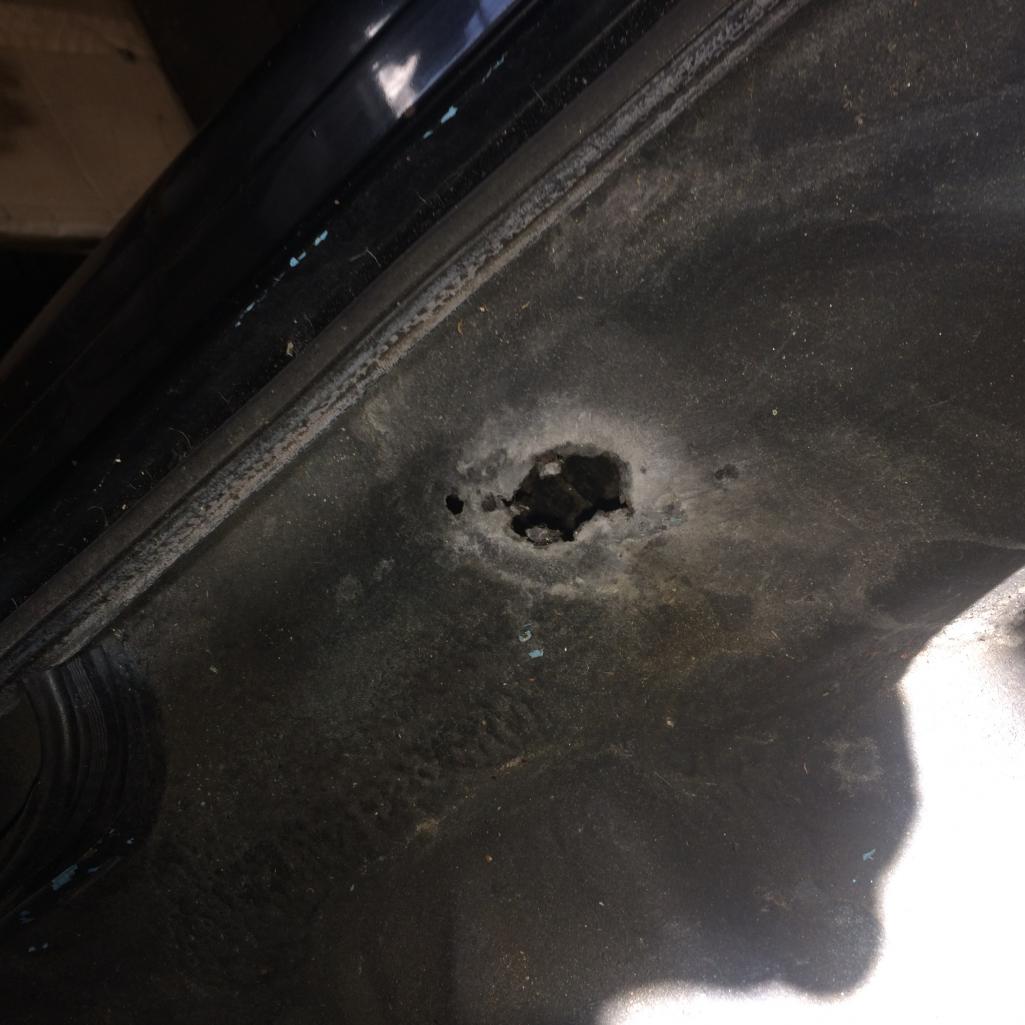
Posted by: preach Jan 1 2019, 02:55 PM
More trunk: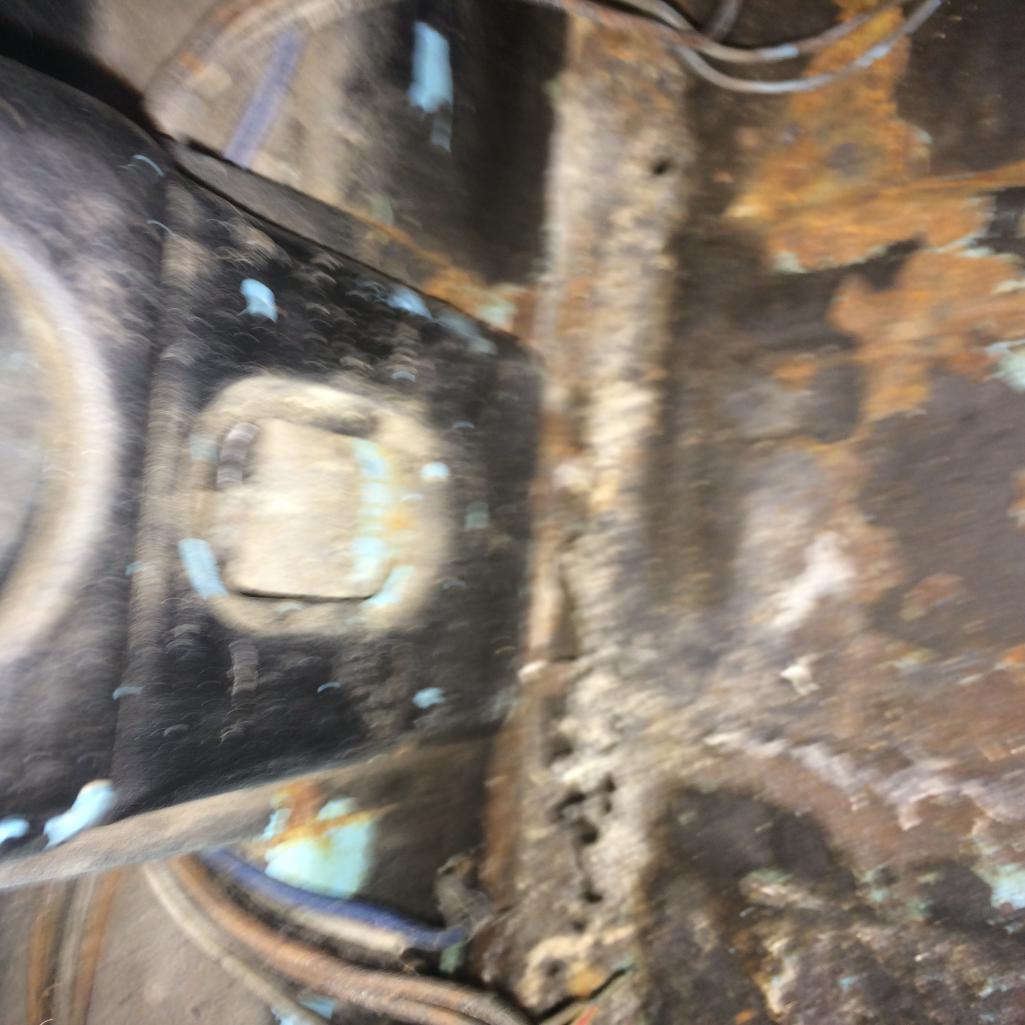
Well that first pic sucked sorry...
Posted by: preach Jan 1 2019, 03:02 PM
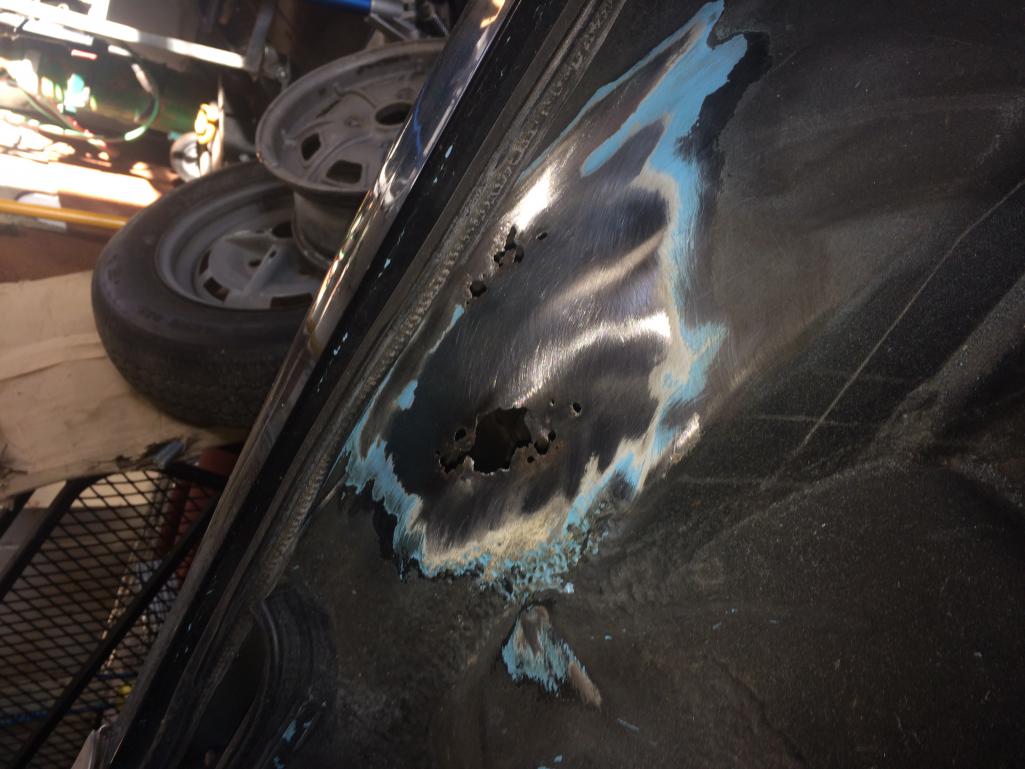
How about some ugly?
All right: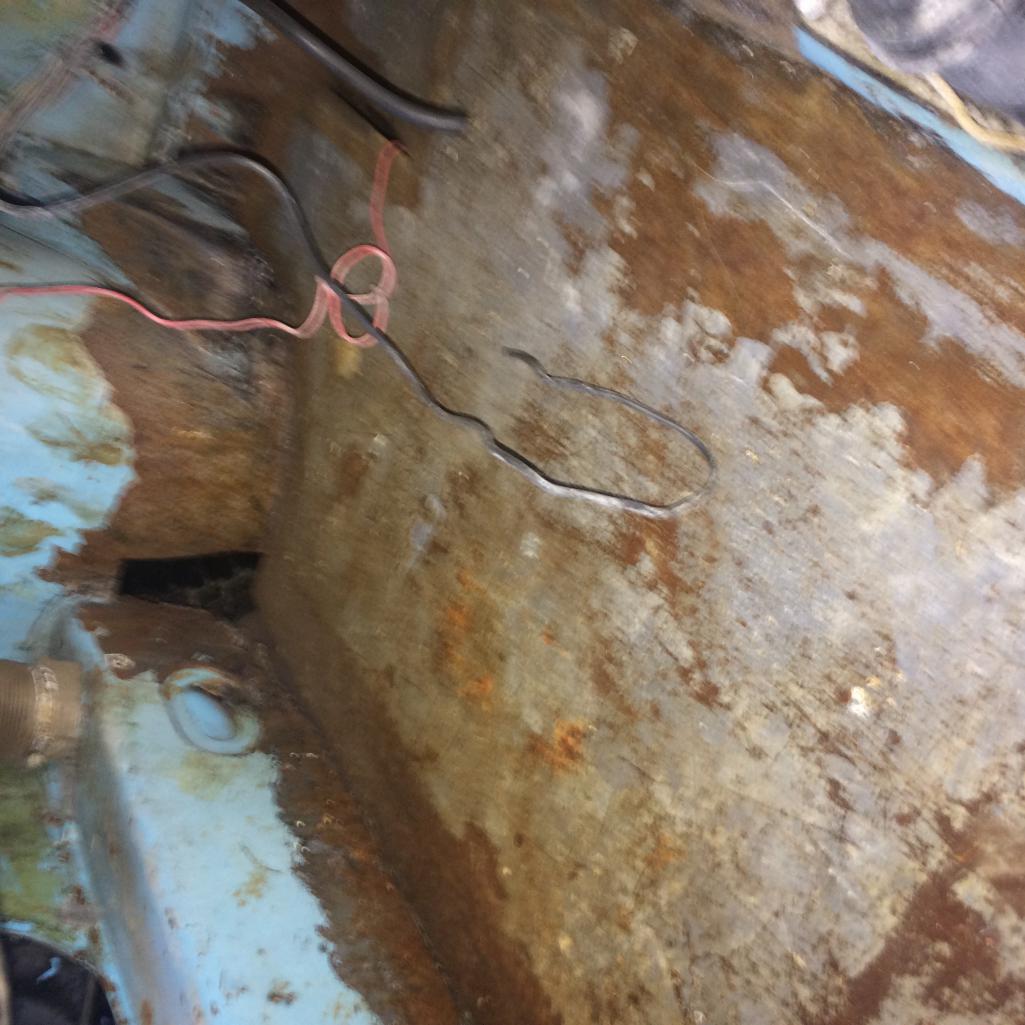
Posted by: preach Jan 1 2019, 03:04 PM
Floorboards for sure. That is D-side, here is P: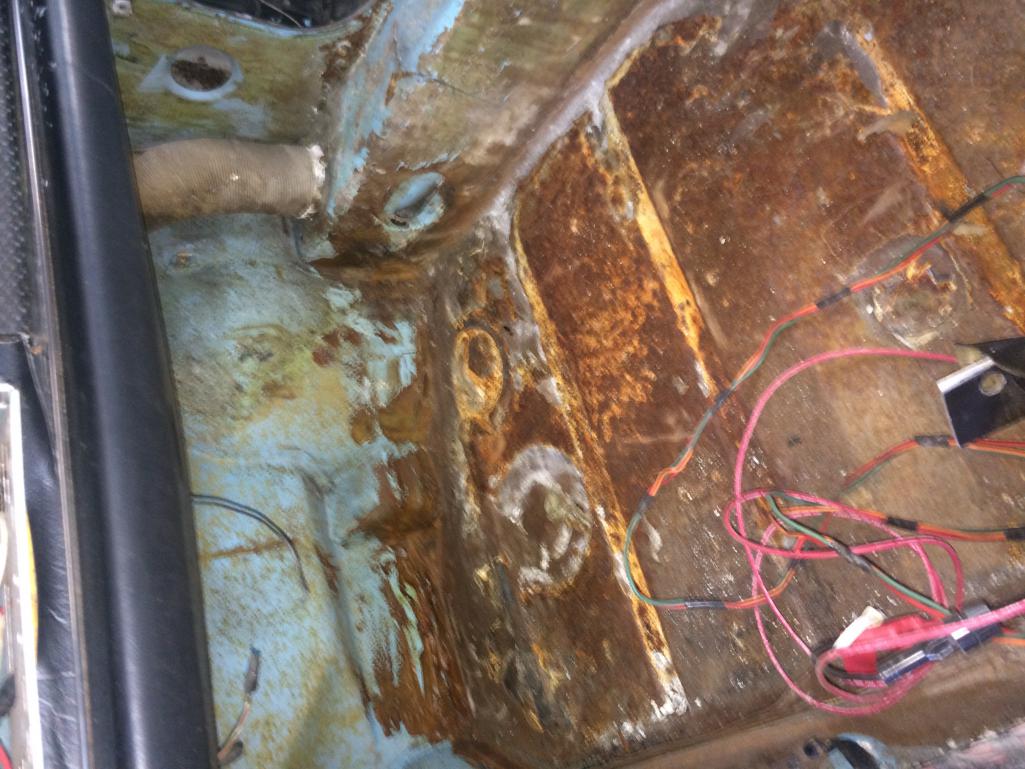
Posted by: preach Jan 1 2019, 03:12 PM
Not going to bore you with many more pics until the time comes.
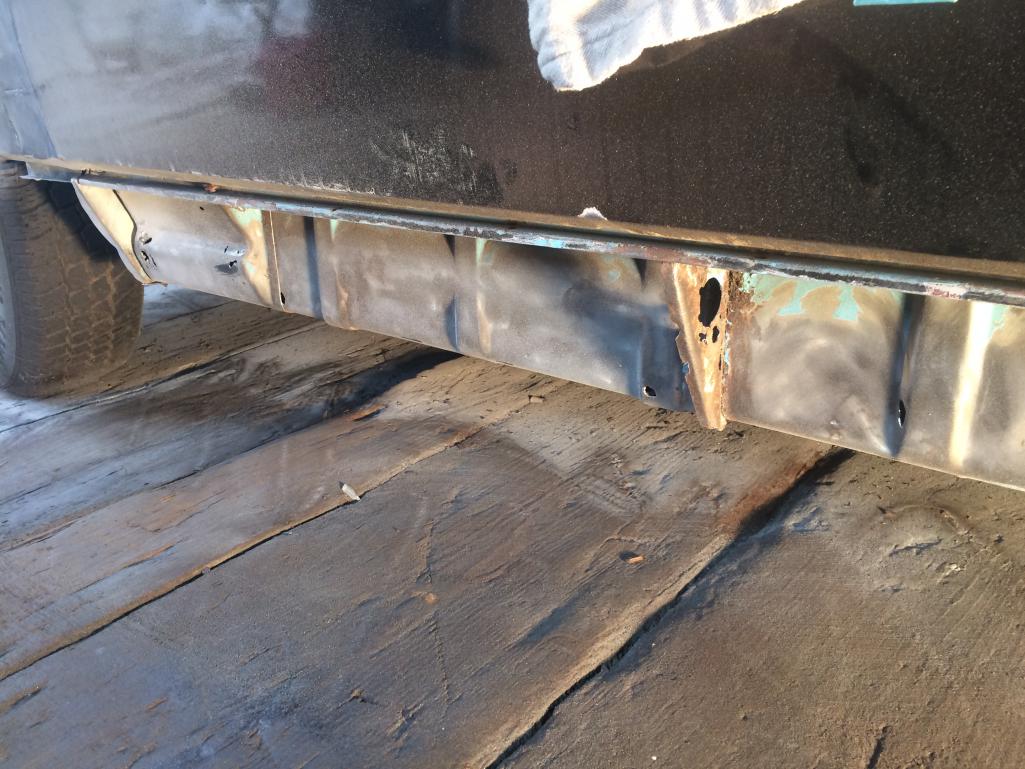
I have no jack points on the longs and some other patches and holes that are a concern...oh an a "repaired" hell hole. I also have a lack of trust for repairs I have not done/seen.
So, my first question, should I start with the small fixes like the trunk and the frunk (it's not bad at all) or go after the floorboards and long repair first?
Posted by: preach Jan 1 2019, 03:19 PM
Oh and you guys have me so paranoid about the ratchet type jack stands I have used for 30+ year I cannot decide if I should safety wire the handle to the frame or drill and pin right through the darn thing at the 914 height I need.
If I buy something it will be one of those mini lifts.
Posted by: SO.O.C914er Jan 1 2019, 03:50 PM
 looks like you’ve got some work ahead of you! Enjoy the journey.....Paul
Posted by: rick 918-S Jan 1 2019, 04:53 PM

Posted by: preach Jan 2 2019, 03:24 PM
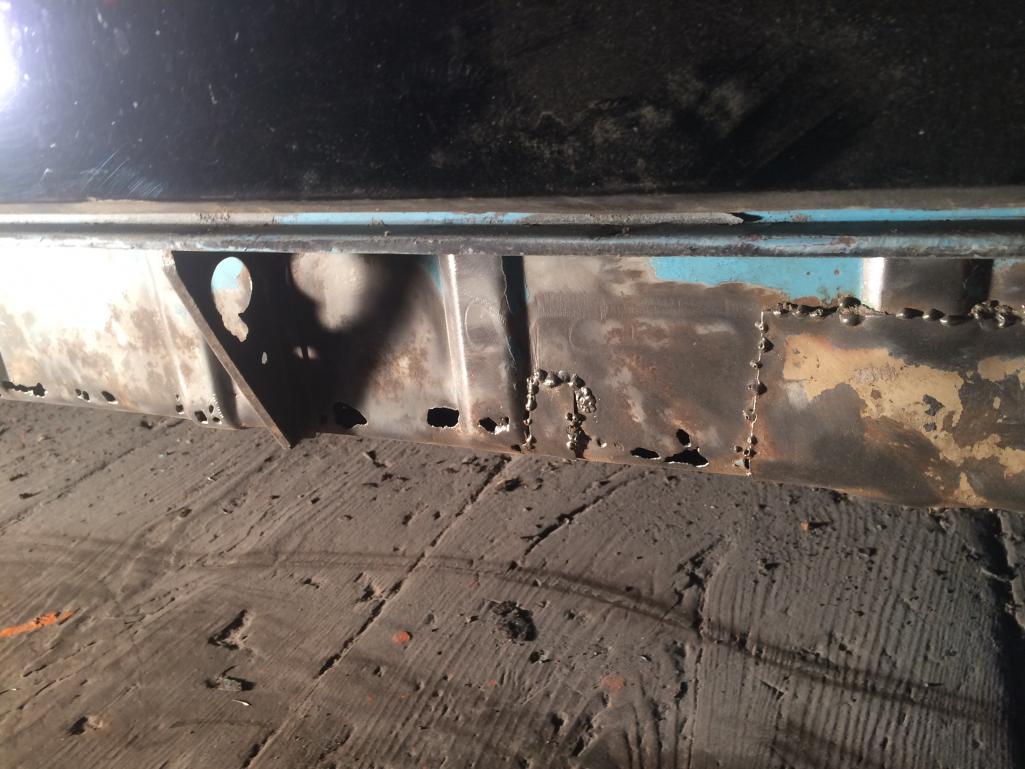
More trunk work today: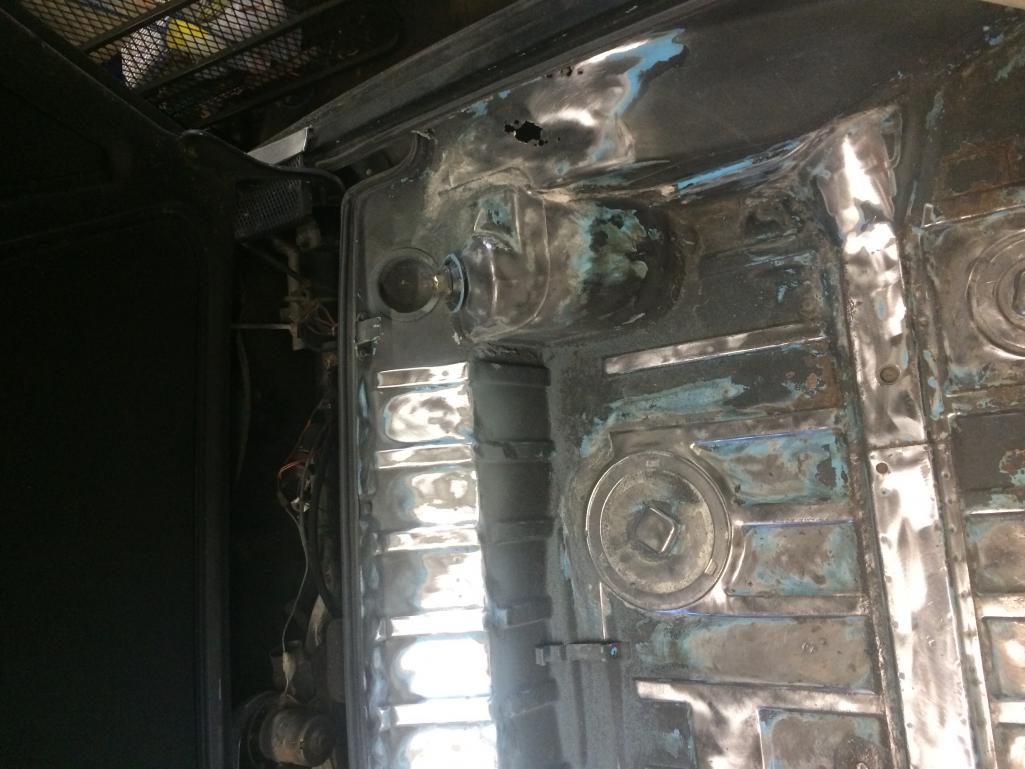
Nasty work and it was only 30* today.
Not a fan of the factory seam sealer. I guess it did it's job for the most part though.
Fender seems easy, floor might be a strip or maybe just replace the rear part.
Posted by: dr914@autoatlanta.com Jan 2 2019, 03:53 PM
It will look great in olympic blue again, congrats for taking it on, another 914 on its way to salvation!!!

Just got this to my house:
1974 1.8
Brought home for $700.
Needs floorpans, and a general go through to see what else is up.
PO had to move this weekend so he was desparate.
The build starts here.
Posted by: Cairo94507 Jan 3 2019, 07:27 AM
Great start. I guess it depends upon how comfortable you are with cutting and welding. Personally, I would brace the chassis and get it on a rotisserie and tackle the bigs jobs first to get them out of the way and then go after the little stuff.
But I would decide how far to go. Media blast the chassis to get rid of all of the old cosmetics or just repair what you can, sand, spray and assemble. Regardless, I always try to do it right the first time so you do not have to do it again. (If you checked out my build threads (Part 1 and Part 2) you will see despite having what appears to be a solid plan, stuff still happens that is out of one's control.)  Have fun.
Posted by: bbrock Jan 3 2019, 08:39 AM
So, my first question, should I start with the small fixes like the trunk and the frunk (it's not bad at all) or go after the floorboards and long repair first?
When I started my build, it was my welding skills that determined the order of repairs. They were rudimentary at best, and I was quite rusty from not haven done much welding for years. So I decided to tackle the trunks first to get in the groove before diving into structural. If I were more confident in my skills when I started, I probably would have completed all the long repairs first with the car level and well-supported on the ground. Then moved to the trunks only because it would have been difficult to complete those with the nose and tail bolted to a rotisserie. Then up on the rotisserie for the floor pan and remaining repairs. As was said, first step is to get some adjustable braces in and get the chassis measures correct.
Have fun! You are starting with a much better car than I did.
Posted by: dr914@autoatlanta.com Jan 3 2019, 08:50 AM
those rust spots in the inner trunk fender wells are unusual, have never seen one rust there
More trunk work today:
Nasty work and it was only 30* today.
Not a fan of the factory seam sealer. I guess it did it's job for the most part though.
Fender seems easy, floor might be a strip or maybe just replace the rear part.
Posted by: Jamie Jan 3 2019, 12:10 PM
those rust spots in the inner trunk fender wells are unusual, have never seen one rust there
More trunk work today:
Nasty work and it was only 30* today.
Not a fan of the factory seam sealer. I guess it did it's job for the most part though.
Fender seems easy, floor might be a strip or maybe just replace the rear part.
I was thinking the same thing George, rust through at the top of the wheel wells? Maybe the PO liked driving through the salty surf on a beach! :shoot2kill:If the wells had heavy undercoating that might have caught water and caused the rust in that position.
Posted by: bbrock Jan 3 2019, 12:16 PM
those rust spots in the inner trunk fender wells are unusual, have never seen one rust there
More trunk work today:
Nasty work and it was only 30* today.
Not a fan of the factory seam sealer. I guess it did it's job for the most part though.
Fender seems easy, floor might be a strip or maybe just replace the rear part.
I was thinking the same thing George, rust through at the top of the wheel wells? Maybe the PO liked driving through the salty surf on a beach!
+1 That was the first thing that caught my eye too. I thought the following pics would reveal a complete rust bucket based on the weird rust in the fender, but that wasn't the case luckily. I grew up in road salt country though so nothing surprises me too much.
Posted by: preach Jan 3 2019, 01:44 PM
Great start. I guess it depends upon how comfortable you are with cutting and welding.
As was said, first step is to get some adjustable braces in and get the chassis measures correct.
I am competent at the welding. Just used to much thicker material. I did Jeeps for almost 25 years and would MIG my own skid plates and roll cages etc. I would also test my roll cages too.

I need to figure out where to put jack stands first I think.
I think I am going to go after the trunk and frunk first, then the fenders...basically all the low hanging fruit.
Ultimately I kinda need to keep it mobile for a bit as we are trying to buy a new house/shop. I don't want it to be on a rotisserie and try to get it onto a jerdan flatbed with those little wheels.
I do happen to have 3 engine stands for some reason. 2 of which will end up making a rotisserie.
I may go after a "driver" first. As I probably mentioned, or not, I can wait until I retire to restore this to perfection.
I am glad to finally be spending some time on it though. I was shocked to find that I bought it in 2012. Does not seem that long.
My wife used to bitch about it as it takes up space in the barn where I could store my Cayman in the winter. I currently store my Cayman and my Westy to the tune of $300/mo. Then I showed her the Unicorn $85k auction and she said I could keep it. It only got better when I showed her the other Unicorn $78k auction.
She does not believe me when I tell her wait until you drive it.
Posted by: preach Jan 3 2019, 01:54 PM
those rust spots in the inner trunk fender wells are unusual, have never seen one rust there
I was thinking the same thing George, rust through at the top of the wheel wells? Maybe the PO liked driving through the salty surf on a beach!
+1 That was the first thing that caught my eye too. I thought the following pics would reveal a complete rust bucket based on the weird rust in the fender, but that wasn't the case luckily. I grew up in road salt country though so nothing surprises me too much.
New England.
I have not pulled off the wheel yet to look underneath the wheel well.
The Longs kinda scare me as there is PO rust repair there and I have no jacking bits. If the door slam is an indicator of straightness I am good though.
Ultimately though I am in to the car complete for $700 and I spent $175 (I think) on 4 Pedrinis.
This forum though...I see some of you guys get balls deep into a tub with no welding skill etc. I think I will be OK.
FWIW-I tore apart my first engine at 8, and I am a marine machinist by trade.
Time and Money. Wish I had more of both.
Posted by: preach Apr 13 2019, 04:12 PM
Life in the way again. I just got home from S. Cali. Got to meet some world folk on the trip at Crystal Cove C&C, that was cool.
Had a couple hours in the shop this afternoon. First 70* day in NH in a while. Started the day with the wife and a couple hour cruise in the Cayman. It was great, haven't really seen each other in 2 months. First real drive in the Cayman since last October.
Decided to leave the trunk for a bit and hit some other bubbly areas:
Not surprising living in the vent hole of the driver's door.
Then I got to work: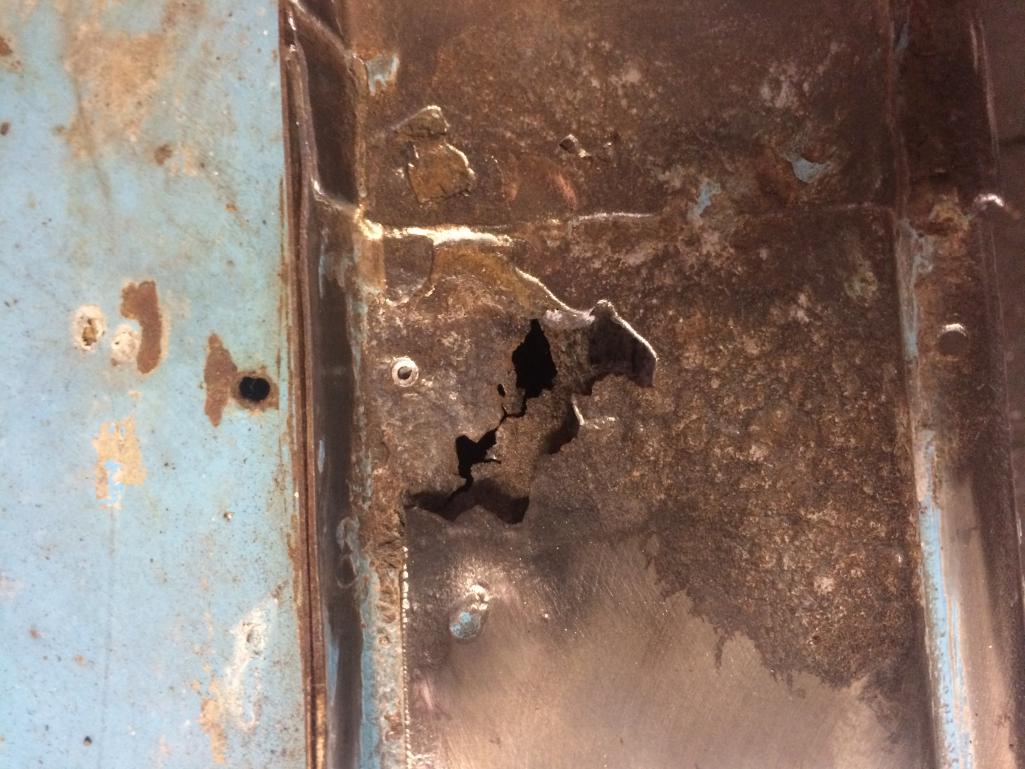
Driver door jamb. Through the threshold and into the long. Sad.
Posted by: preach Apr 13 2019, 04:17 PM
Then went after other bubbles: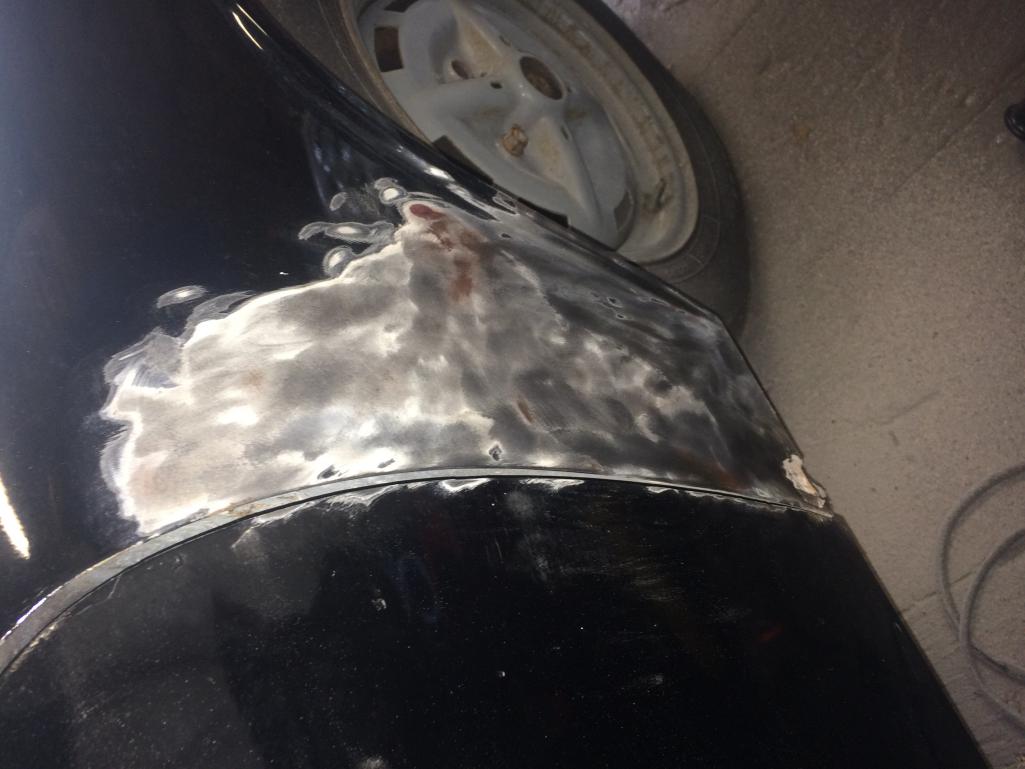
You can see the hole in the lower bit by the door. Then I found a bunch of bondo so I kept going.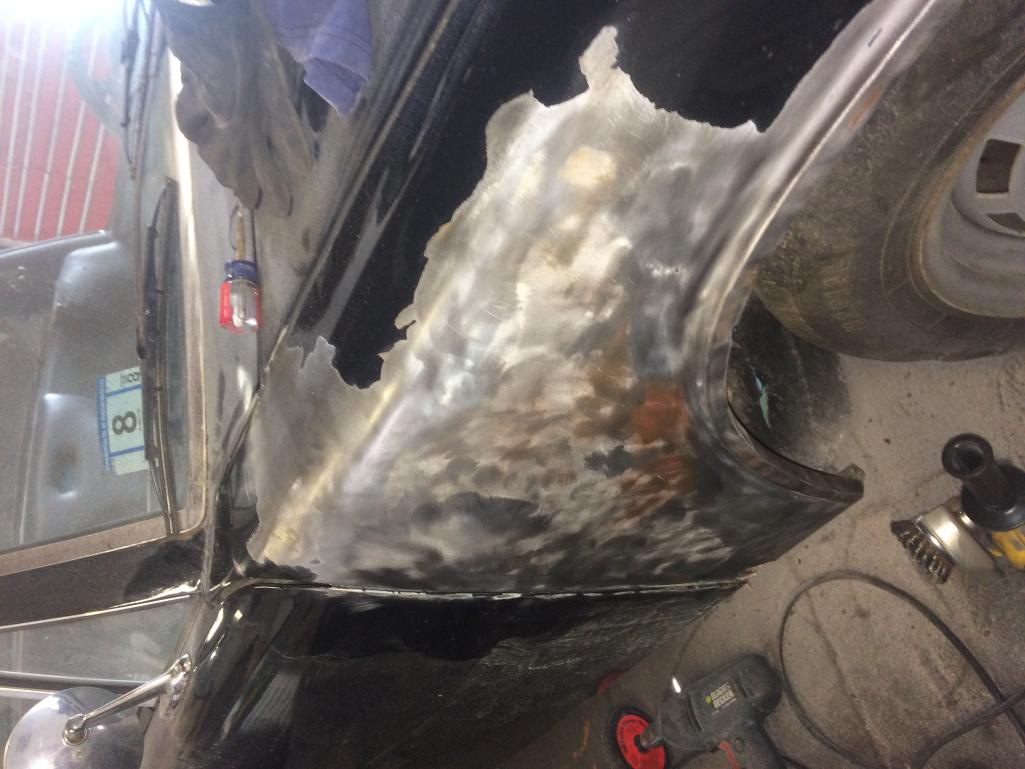
Posted by: preach Apr 13 2019, 04:24 PM
All that skim coat to cover and blend about a 3" dent where my finger is: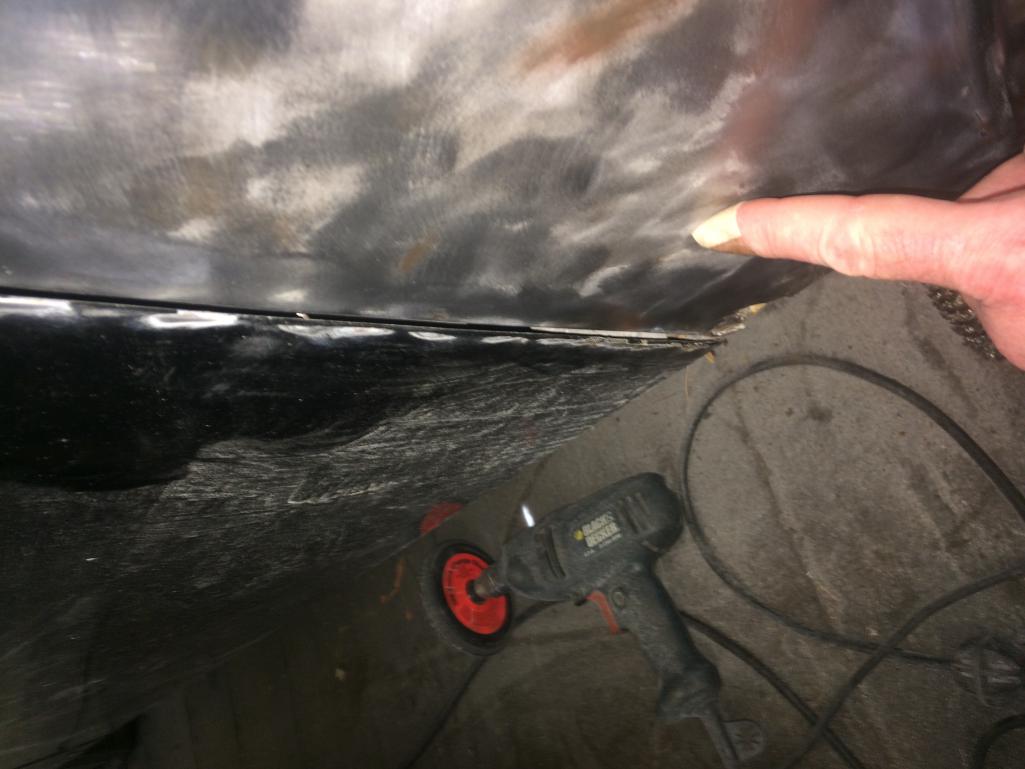
I went after a bubble by the passenger sail but apparently did not take pics. Sadly I trashed the lower trim piece on the sail panel attempting to remove it. I should have looked it up. Got the rust bubble but I have bondo going up the sail and stopped due to the trim piece and not wanting to deal with the vinyl yet.
Moving on. I already know the driver's floor is trashed so I went after the passenger side a bit.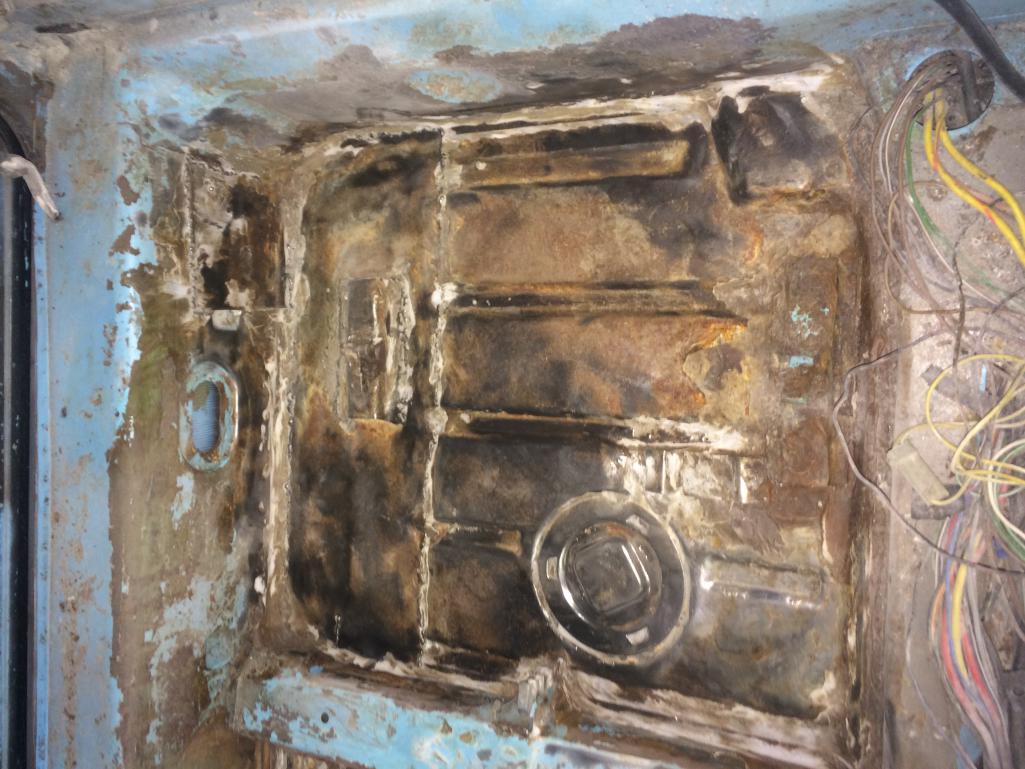
You can see a previous patch panel on the long where the seat belt attaches...
Posted by: preach Apr 13 2019, 04:27 PM
I finally took the back pad off and found this on the firewall near the hell hole and engine shrouding: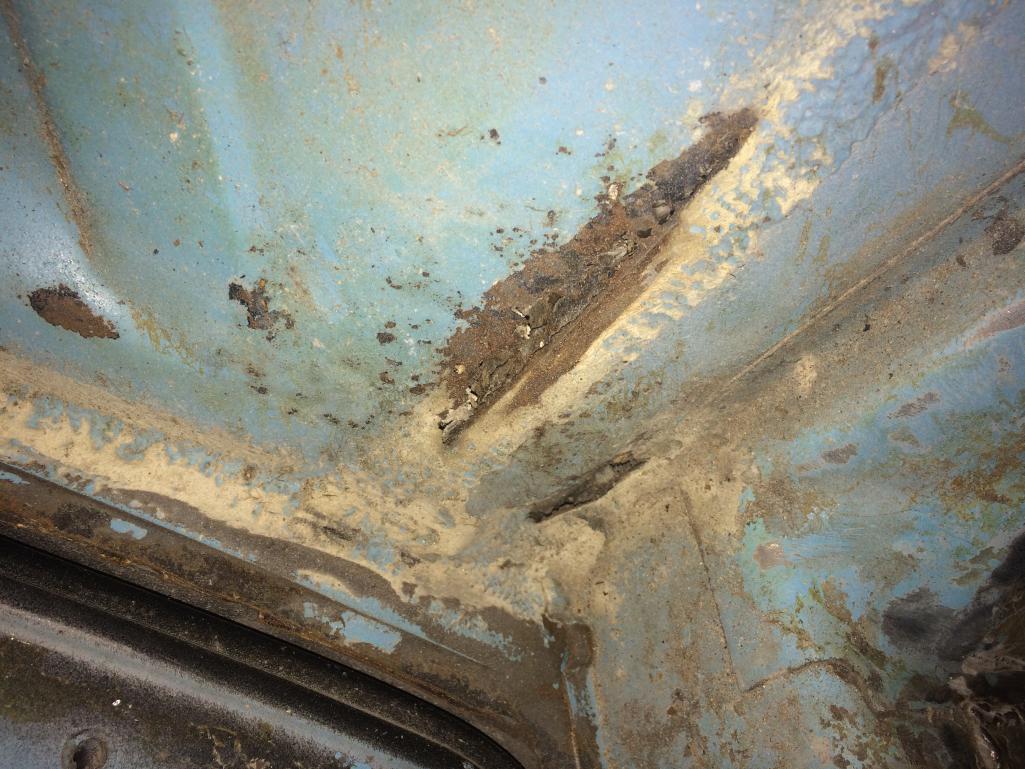
And I found some racing hold the rear glass up tabs!
Posted by: preach Apr 13 2019, 04:28 PM
Posted by: preach Apr 13 2019, 04:30 PM
Lastly, what are these mirrors? Not the flags but I love them. Driver's side is a bit screwed but the Pass side adjusts great but both probably need new mirrors.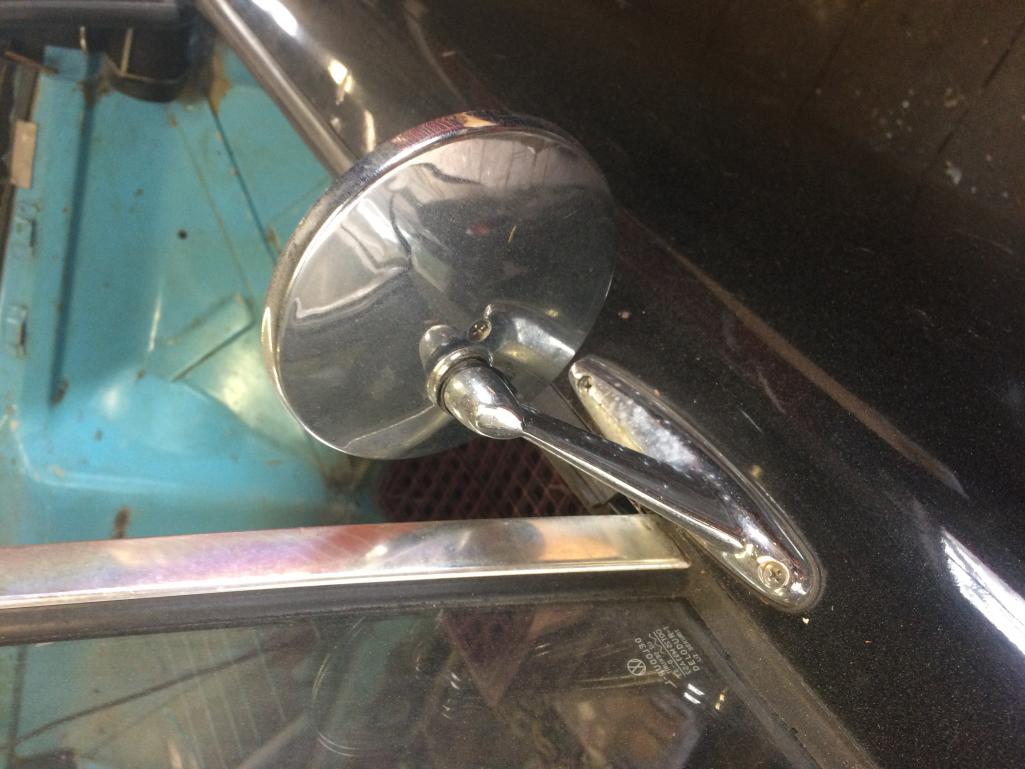
Posted by: preach Apr 13 2019, 04:36 PM
Sorry about the sideways pics, apple and microsoft do not work well together.
Posted by: preach Apr 14 2019, 03:08 PM
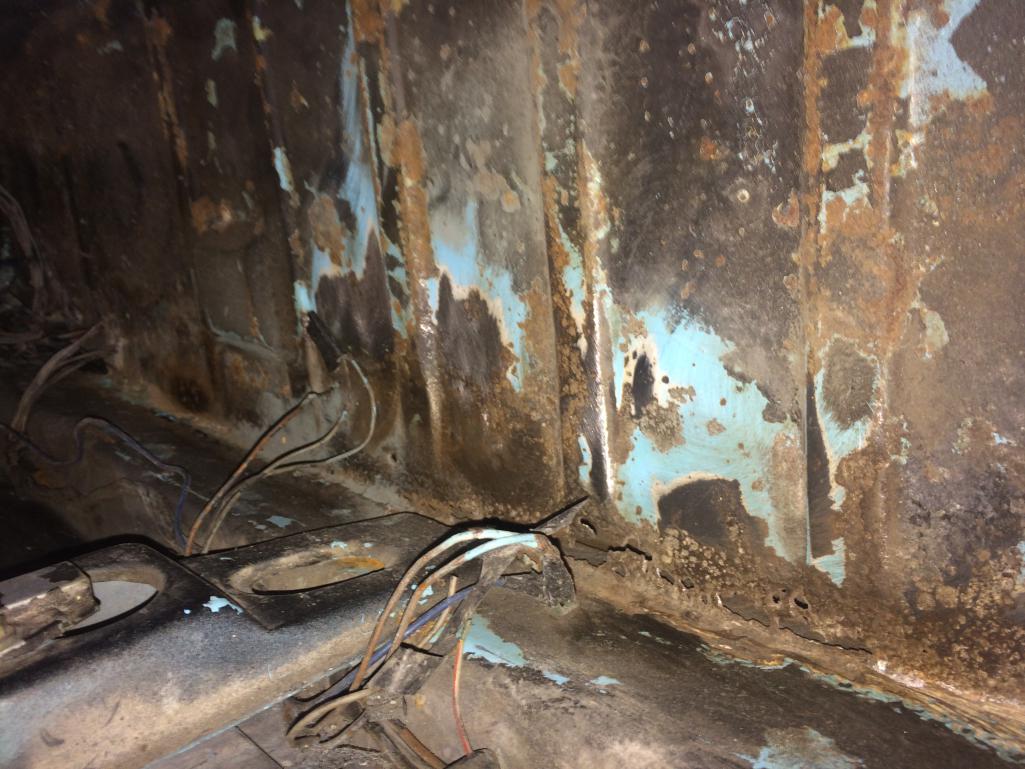
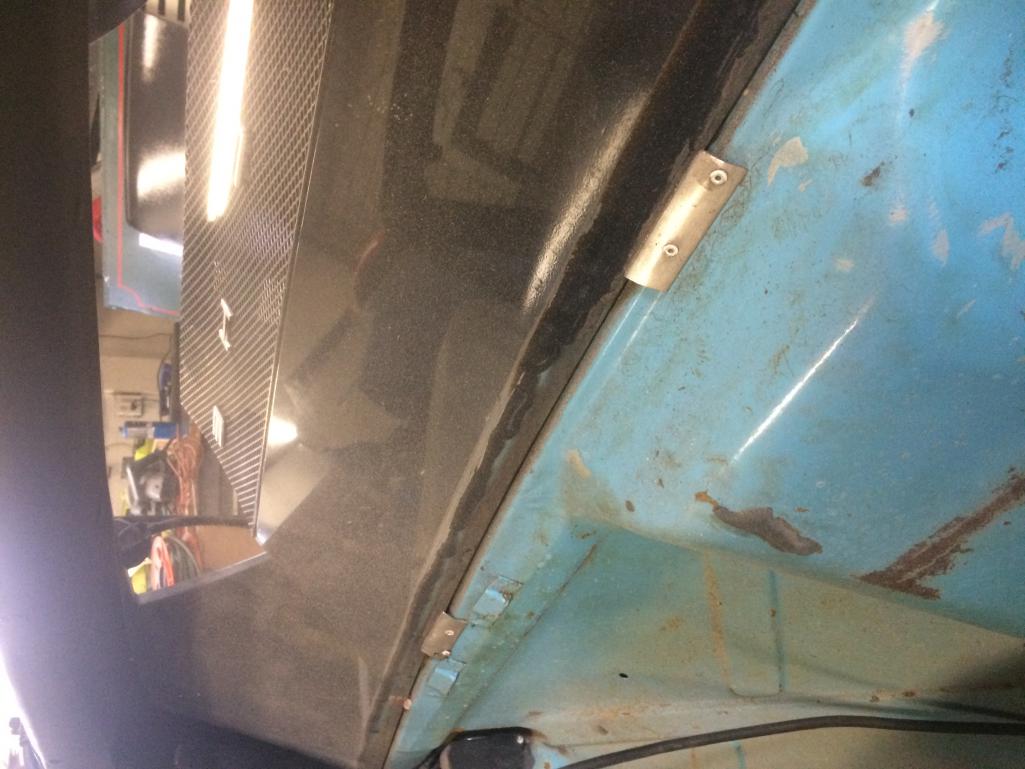
Went after the inner and outer longs today as well as that firewall bit.
I did not get pics of the interior as I forgot and had the car covered from dust.
Driver's outer: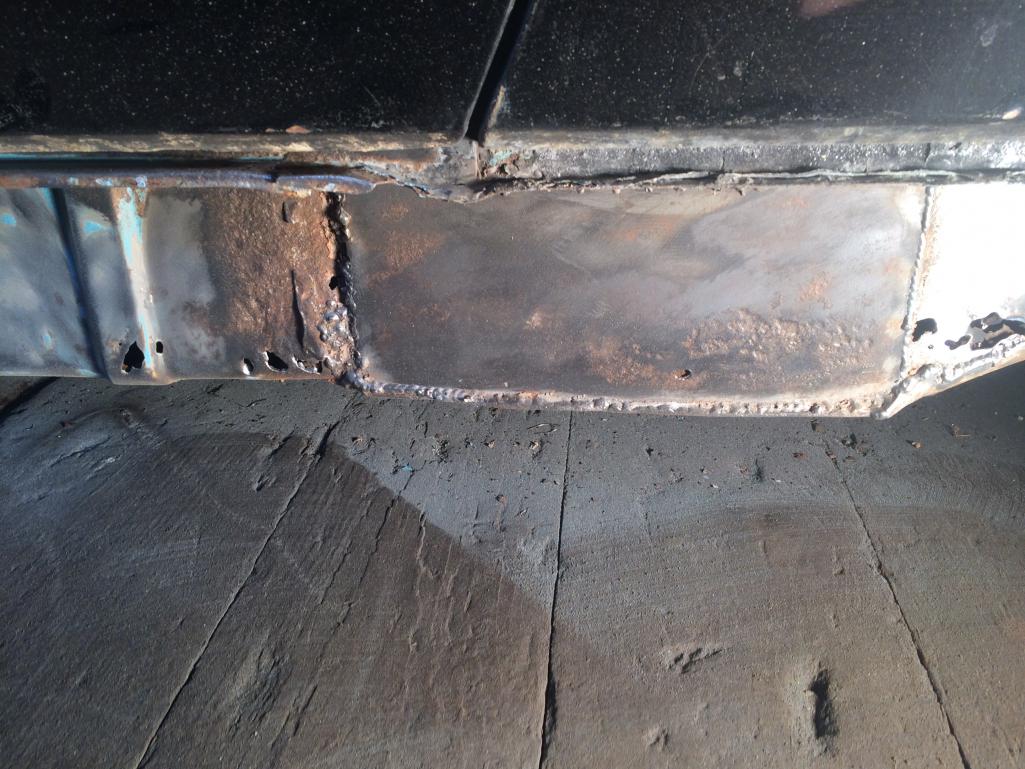
Posted by: preach Apr 14 2019, 03:08 PM
Posted by: preach Apr 14 2019, 03:09 PM
Passenger side: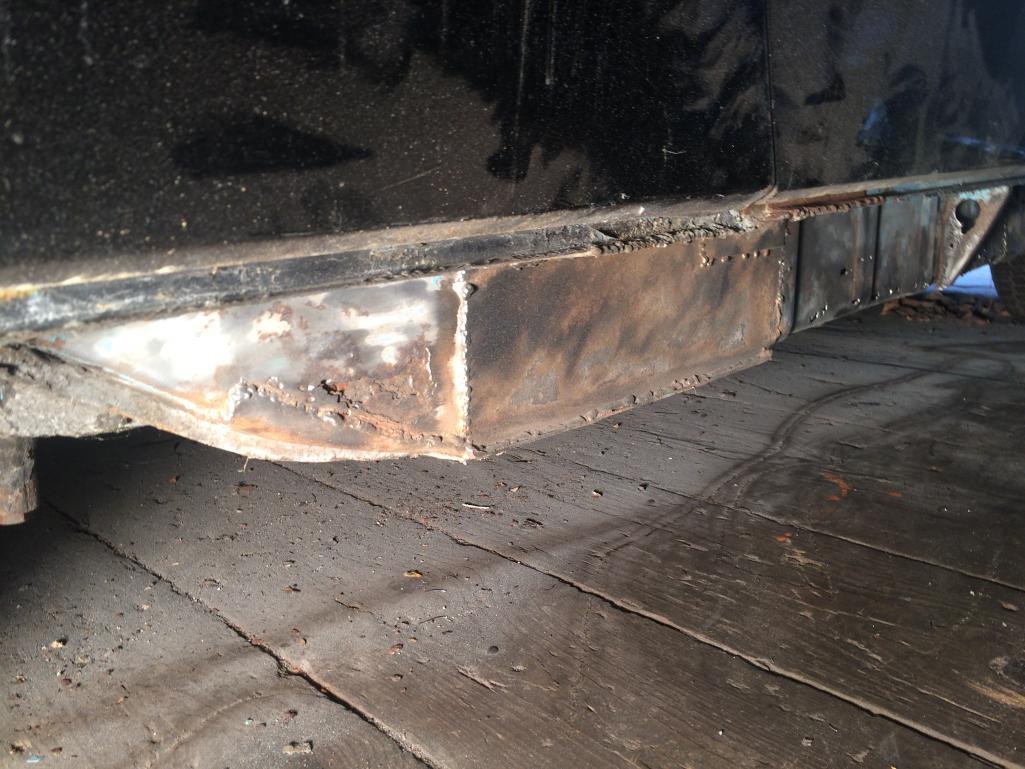
Posted by: preach Apr 14 2019, 03:09 PM
Posted by: preach Apr 14 2019, 03:12 PM
Found a repair on the aft of the driver's fender as well, not bad at all just needed a skim coat of bondo to finish.
I already knew the driver's side inner long was toast at the floorboard and was disappointed, but not surprised, that the passenger side had the same issue.
I do not know the whole history of the car but it is in great shape so far for a 40yo New England vehicle.
Posted by: preach Jul 5 2019, 06:32 PM
I’ve been home 5 weeks this year so far.
Hooked up power for the first time tonight, wipers started right away on low. Ok.
Blinkers work in the rear but not the front. Directional turn on both rear parking lights.
They come on with the headlight switch but not the fronts.
Headlight motors work as does one headlight.
Pretty pumped!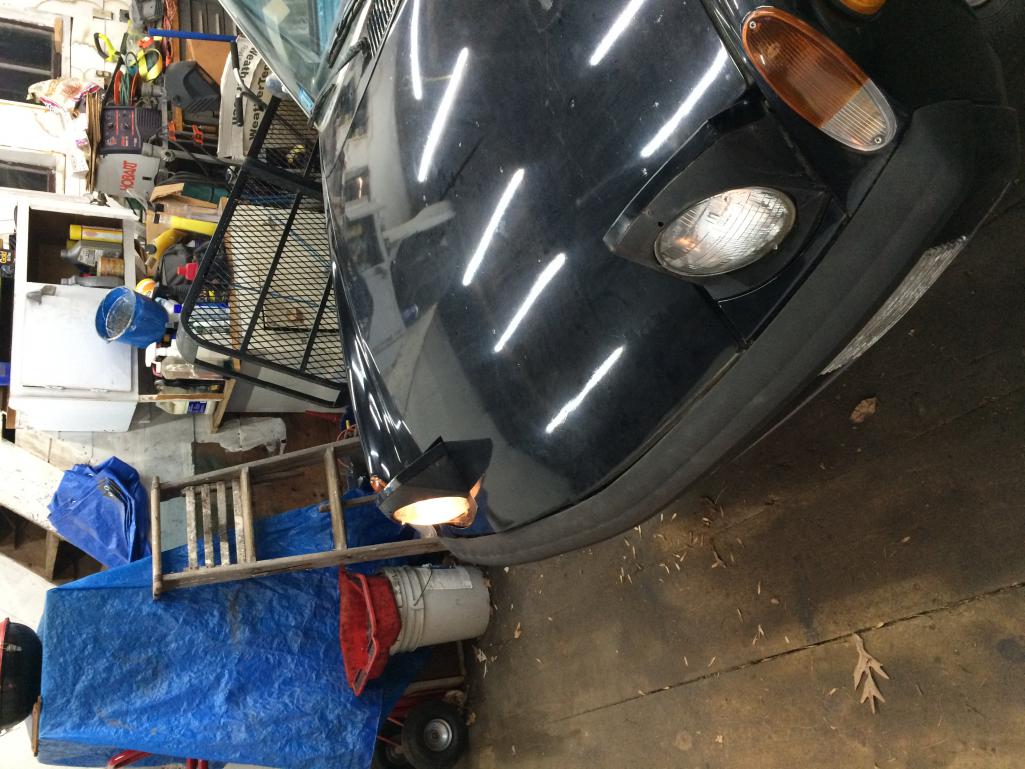
Posted by: tmc914 Jul 5 2019, 07:35 PM
I’ve been home 5 weeks this year so far.
Hooked up power for the first time tonight, wipers started right away on low. Ok.
Blinkers work in the rear but not the front. Directional turn on both rear parking lights.
They come on with the headlight switch but not the fronts.
Headlight motors work as does one headlight.
Pretty pumped!
Keep at it. Usually 5 steps forward and 2 steps back. Progress is progress. There is lots of help here if you get stuck.
Posted by: preach Jul 5 2019, 07:48 PM
@http://www.914world.com/bbs2/index.php?showuser=17068
and his 50 year post:
http://www.914world.com/bbs2/index.php?showtopic=338999
I don't know if I should thank him or tell him F-you, but the only reason I put power to it today was because of that post.
I can have a relatively safe vehicle and pass NH inspection with some work before next year. I may not be reliable nor pretty but I would run and drive for the 50th.
Leper Pariah. 
Posted by: Larmo63 Jul 5 2019, 10:28 PM
@http://www.914world.com/bbs2/index.php?showuser=17068
and his 50 year post:
http://www.914world.com/bbs2/index.php?showtopic=338999
I don't know if I should thank him or tell him F-you, but the only reason I put power to it today was because of that post.
I can have a relatively safe vehicle and pass NH inspection with some work before next year. I may not be reliable nor pretty but I would run and drive for the 50th.
Leper Pariah.

YES!!!!!! One more 914 hits the road soon!
Posted by: preach Jul 6 2019, 04:38 AM
After my excited post I found:
Rear parking lights are not from blinkers but from ignition on.
No horn.
No starter.
Brake, generator, turn signal lights on gauges all the time.
Today/tomorrow I will try to turn the motor over by hand.
Heading out of town for vacation next weekend so time is limited as usual.
Posted by: preach Jul 28 2019, 05:00 PM
Got back from 2 weeks gallivanting around the East Coast at about 2pm today. Headed straight for the shop.
Finally put the rear end in the 914 Position: up on jack stands. Local tire guy is going to save me 2 small 15" take off tires to put on my steel rims so I will have a roller. Current tires do not hold air. I like the $0 price.
12 year old oil changed with a new filter. Very loose and smelled of fuel. That cannot be great.
Pulled the spark plugs and they are dirty but looks like it ran well on it's single 2bbl. Hosed a little WD in there.
Tried 8 different sockets on the center of the fan, then looked at the Haynes. Cover not a bolt... 
Found the alt is a 22mm hex but had no wrench for it and the socket/ratchet would not fit. Said "F-it" and used an adjustable...it moved easy. Pulled the cap off and the rotor was moving too. Could not get much movement as I got sick of the adjustable really fast. Probably will buy a ratcheting set of bigger sizes really soon.
Plan is to get the roller tires on and roll it out so I can try to start it. We'll see...
50th Anniversary or Breakdown Tryin!
Powered by Invision Power Board (http://www.invisionboard.com)
© Invision Power Services (http://www.invisionpower.com)