Printable Version of Topic
Click here to view this topic in its original format
914World.com _ 914World Garage _ Fiberglass flare installation- Rivet on!
Posted by: Trekkor Nov 2 2012, 12:42 PM
Wanting more tire, the time finally came to go wider body.
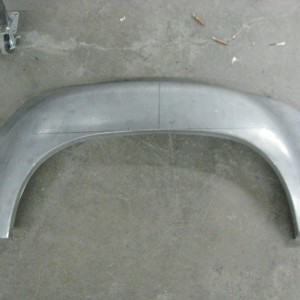
Here, you can see how easy and fast you can produce a good looking flare install.
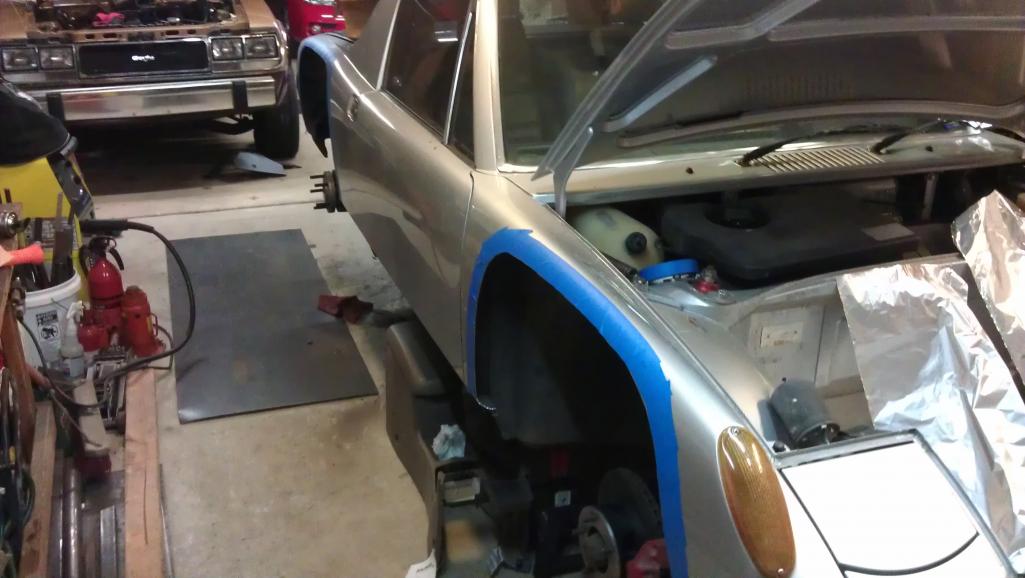
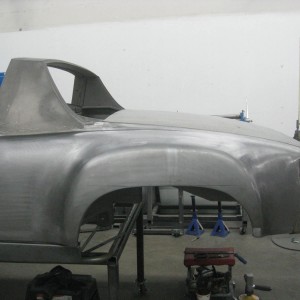
I started with professionally painted flares and plastic edge molding.
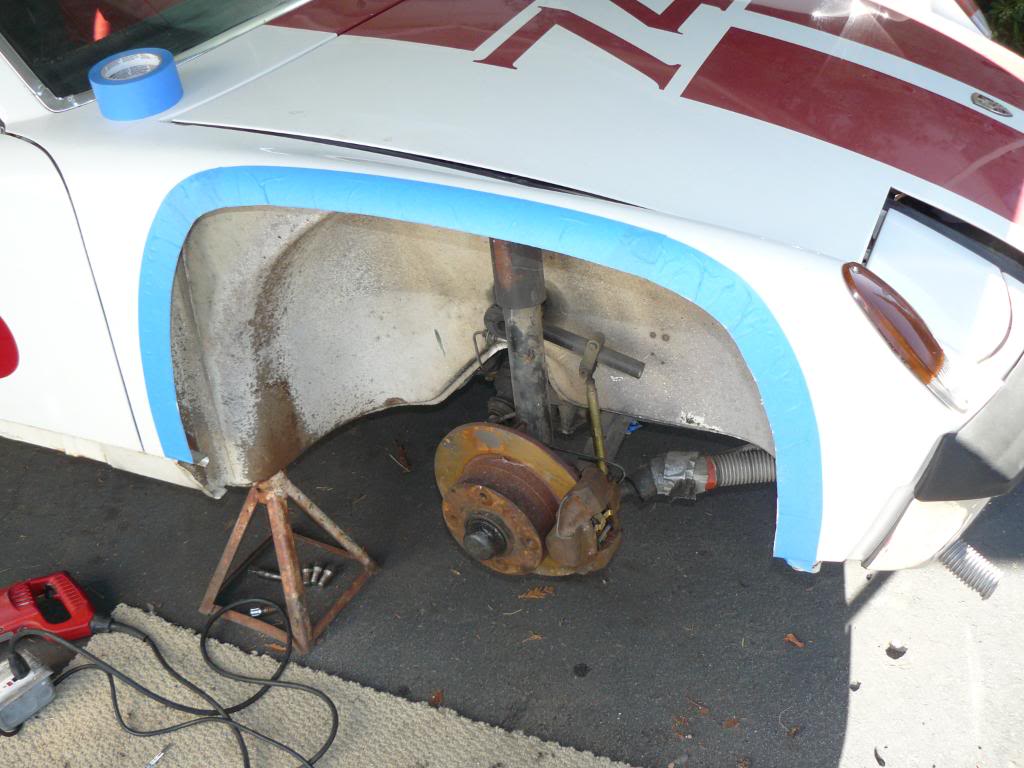
Measure and mark the car carefully before cutting: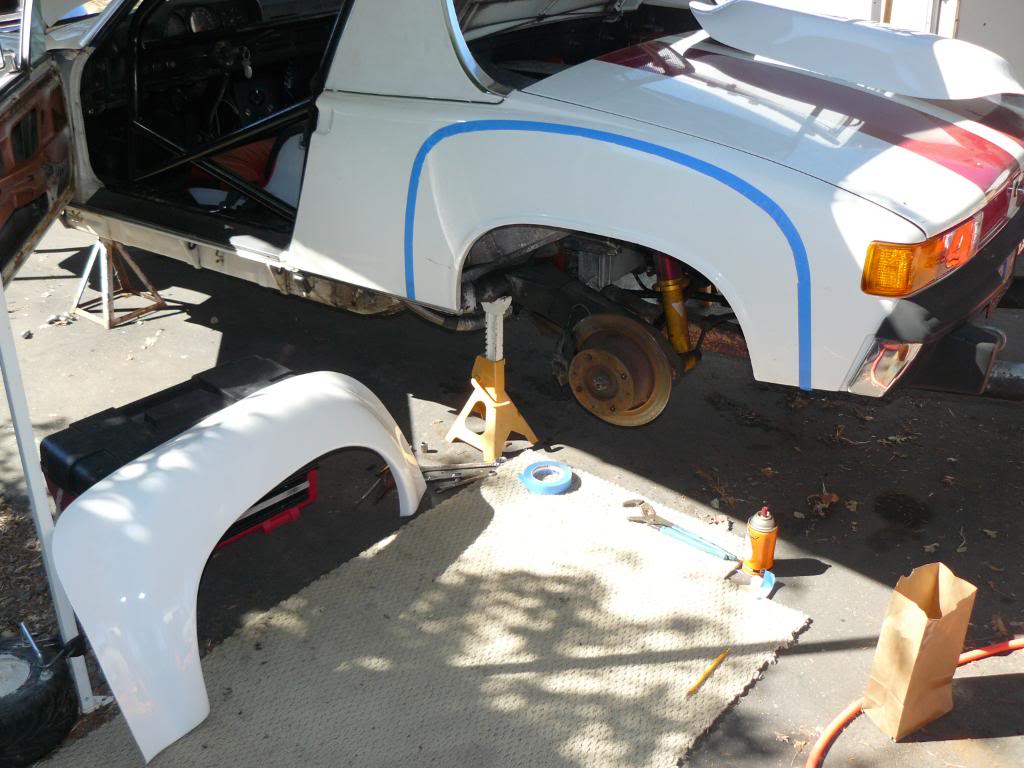
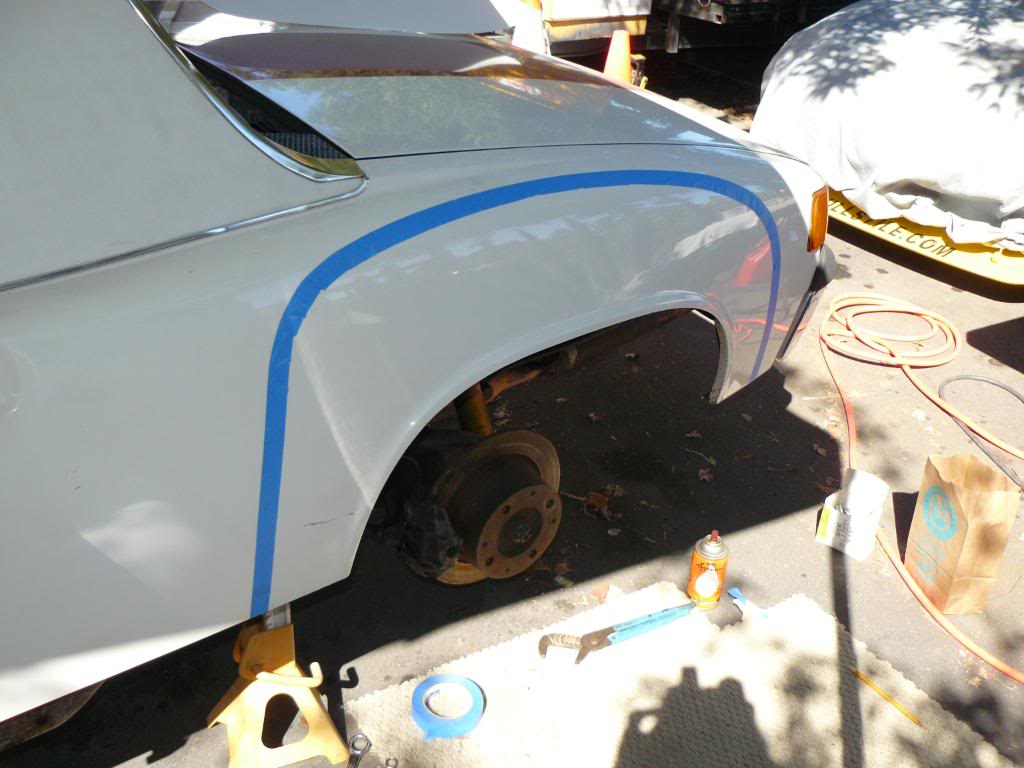
After holding/clamping the flares in their finished position, trace a light pencil line along the outside edge of the flare onto the car.
Apply 2" masking tape to the line.
The inside edge of the tape becomes your cut line: 

KT
Posted by: Trekkor Nov 2 2012, 12:45 PM
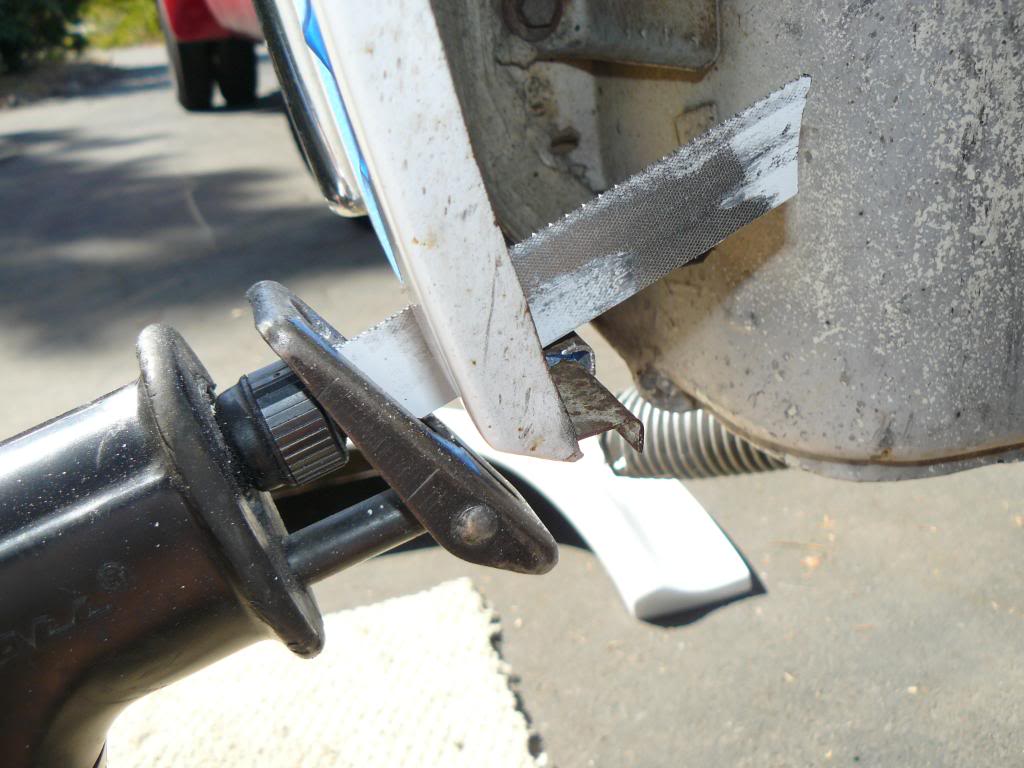
I used both the sawzall and a jigsaw with a metal cutting blade.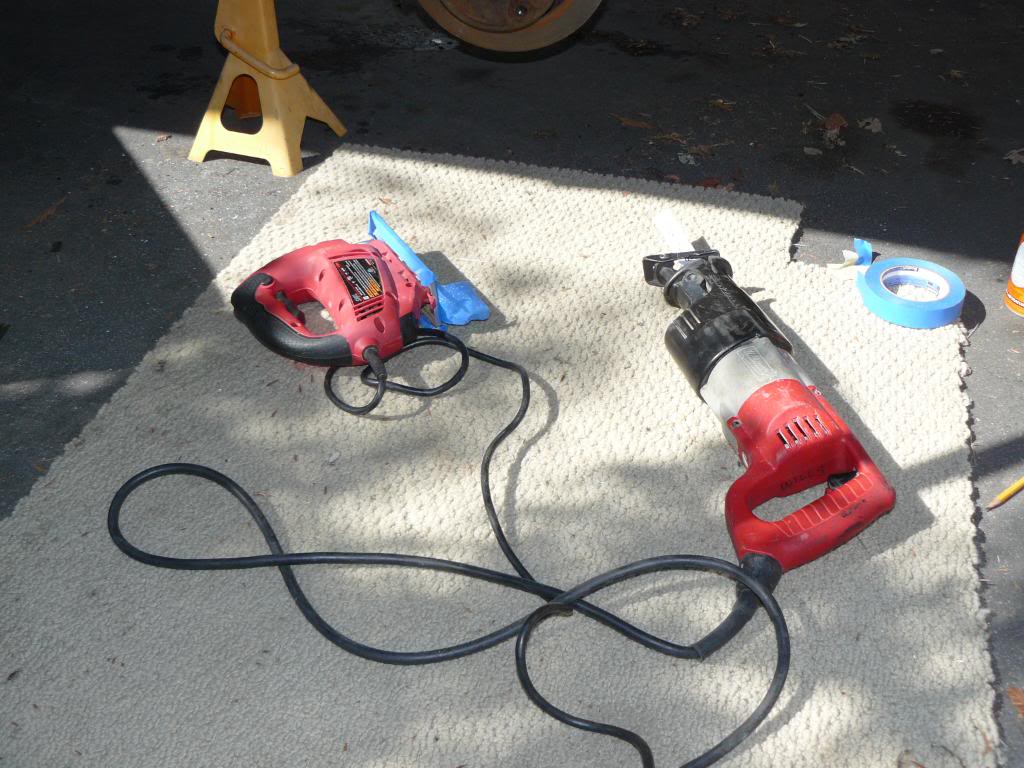
The sawzall was good for starting both ends and the jigsaw was good for the rest.
KT
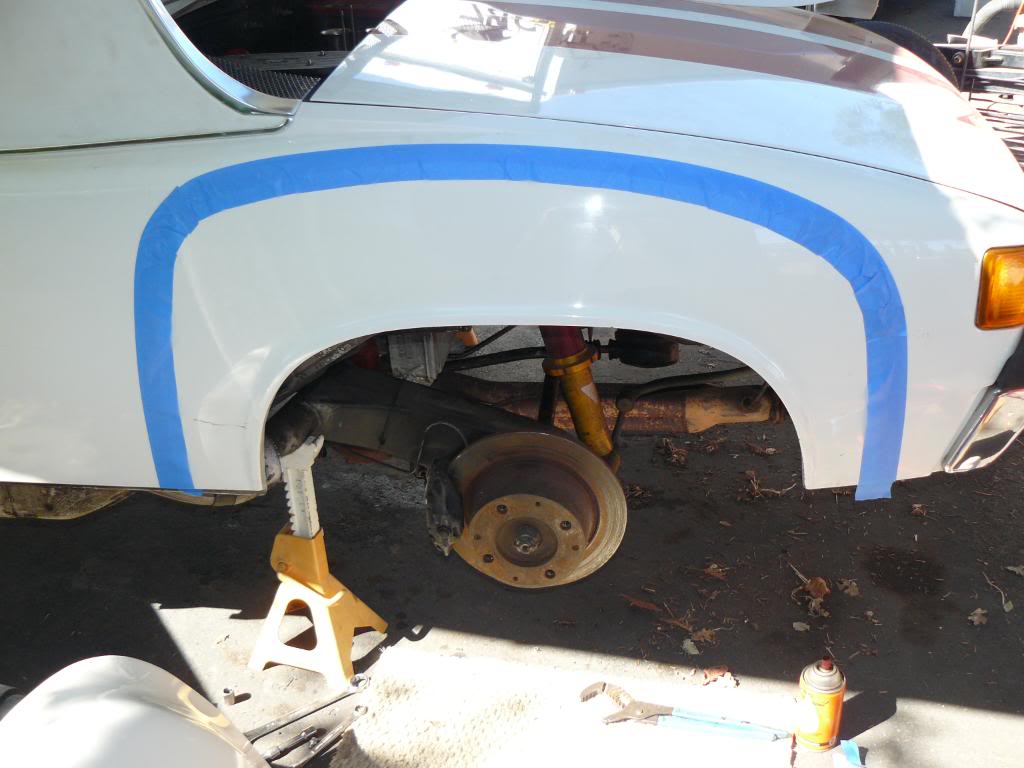
Posted by: Trekkor Nov 2 2012, 12:50 PM
Takes a bit of courage and confidence to hack into a really nice looking car!
KT
Posted by: Trekkor Nov 2 2012, 12:56 PM
Run the molding over the flare edges, leaving them long.
Hold/clamp the flare to the car and drill through both the flare and the steel to accommodate a large head rivet. A helper may be useful.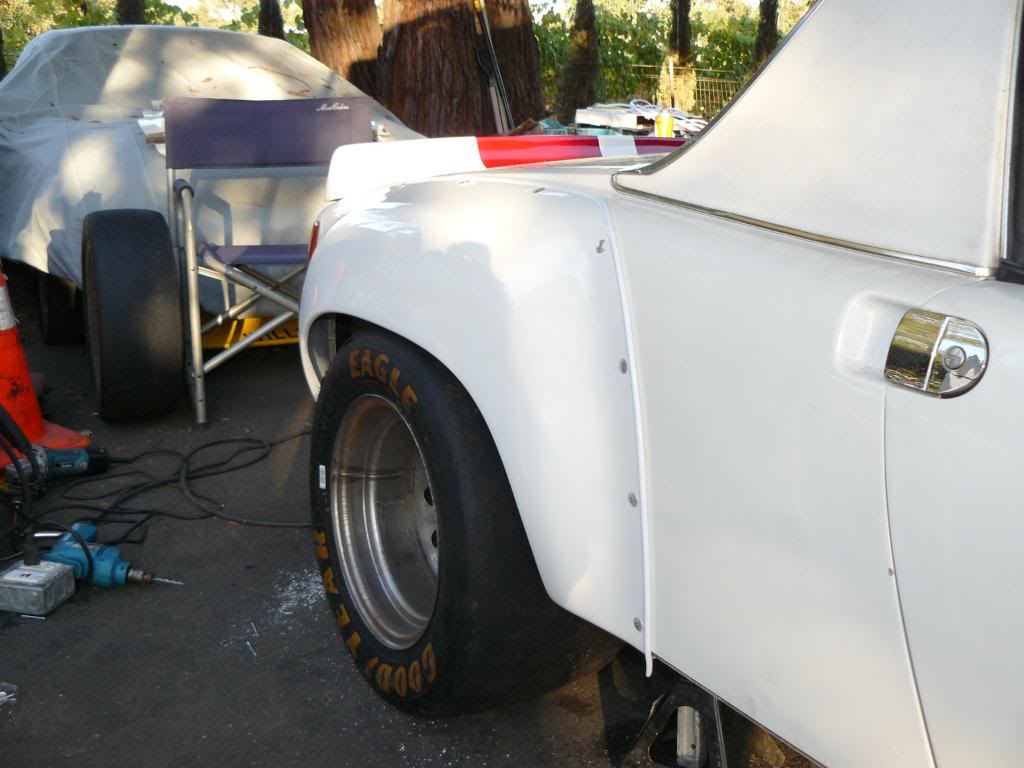
Start at each end and carefully fit the flare to the contour of you car.
You can decide how many rivet to use and the spacing you like.
Drill the holes about 1" from the molding.
Remember, there is 2" of surface to mount your flares.
KT
Posted by: Trekkor Nov 2 2012, 12:58 PM
Take your time, double check before any cutting or drilling.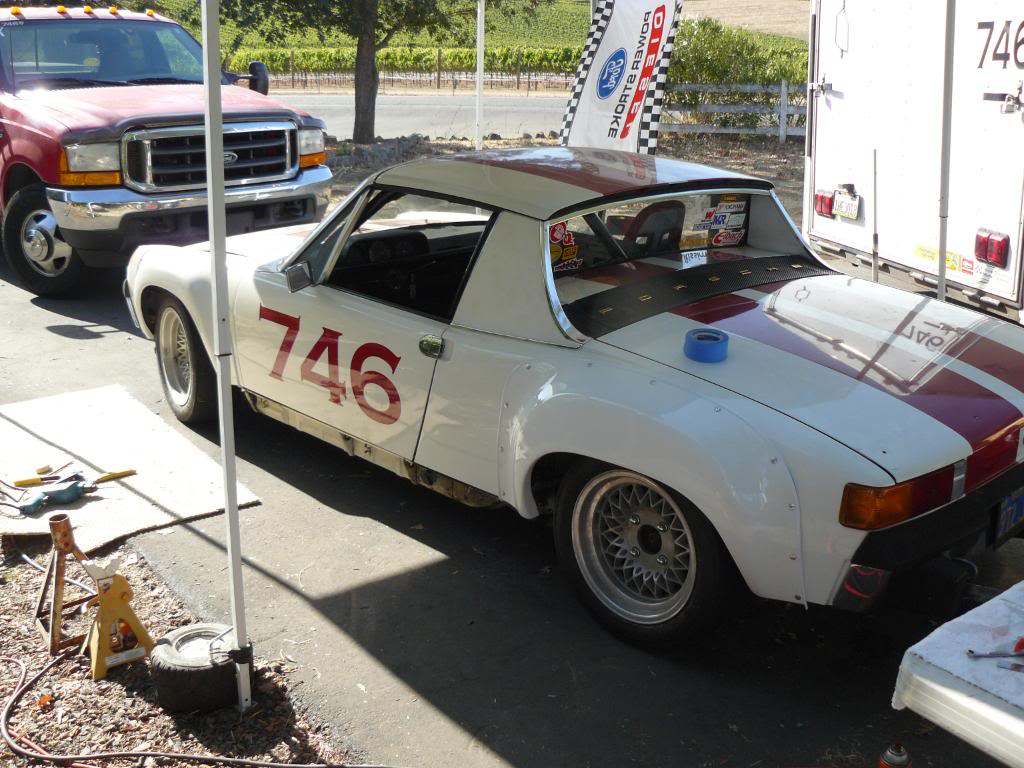
KT
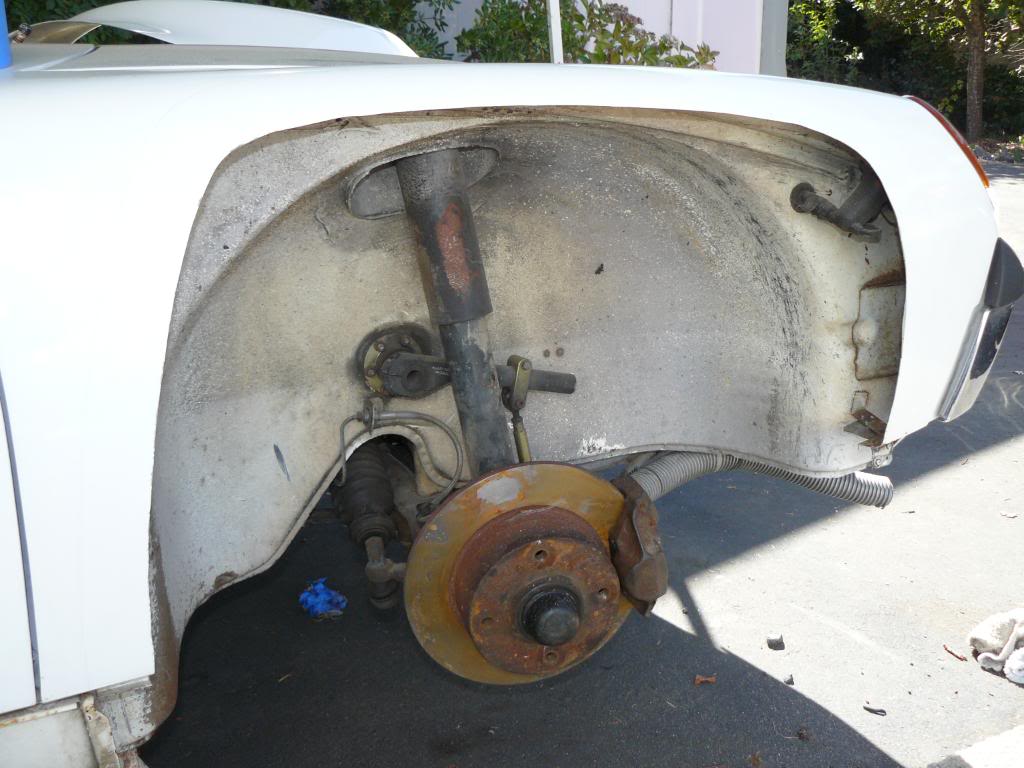
Posted by: Trekkor Nov 2 2012, 01:04 PM
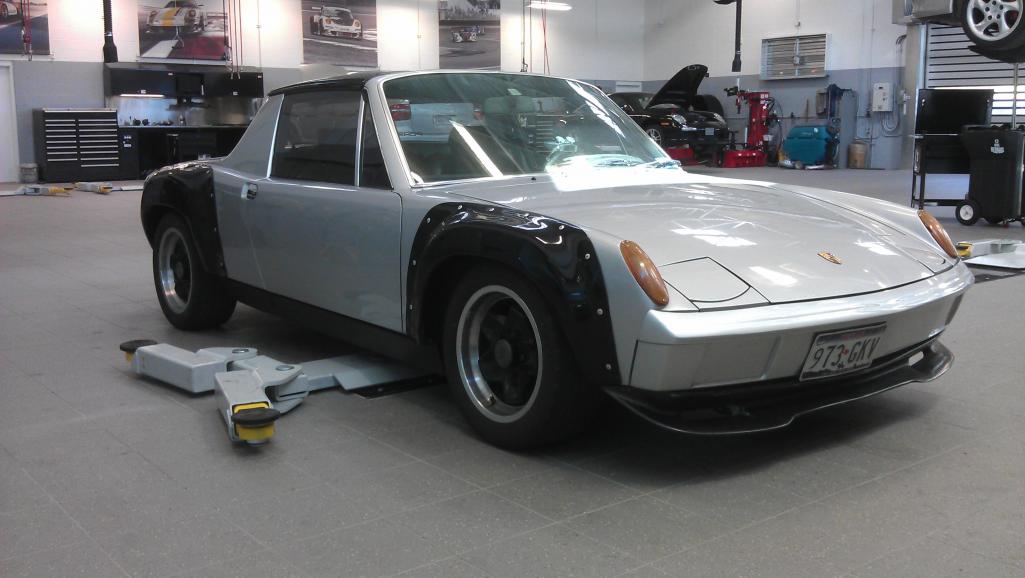
After you are done, trim the excess molding with a fresh razor knife.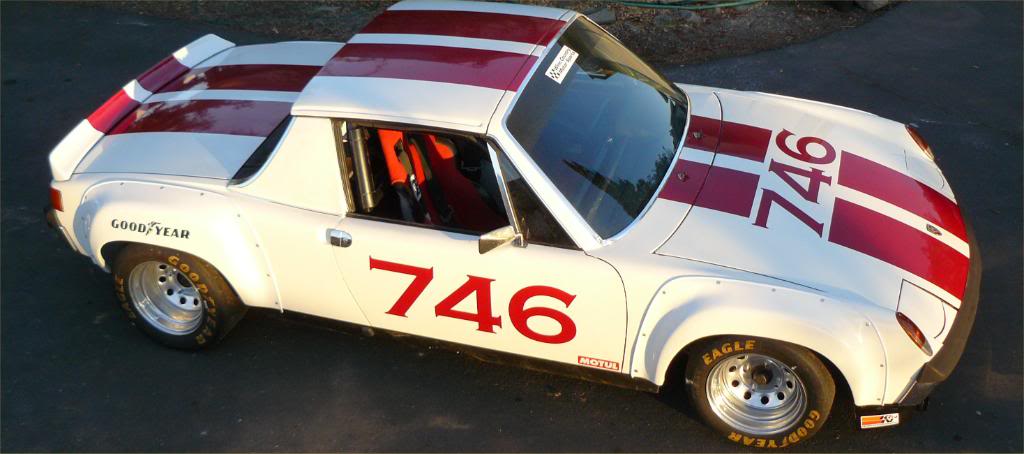
8" front wheels, 10" rears.
The flares can be quickly removed for repair or replacement.
Also, if you decide to go with metal flares in the future, nothing done will interfere with that process.
Hope this helps someone!
KT
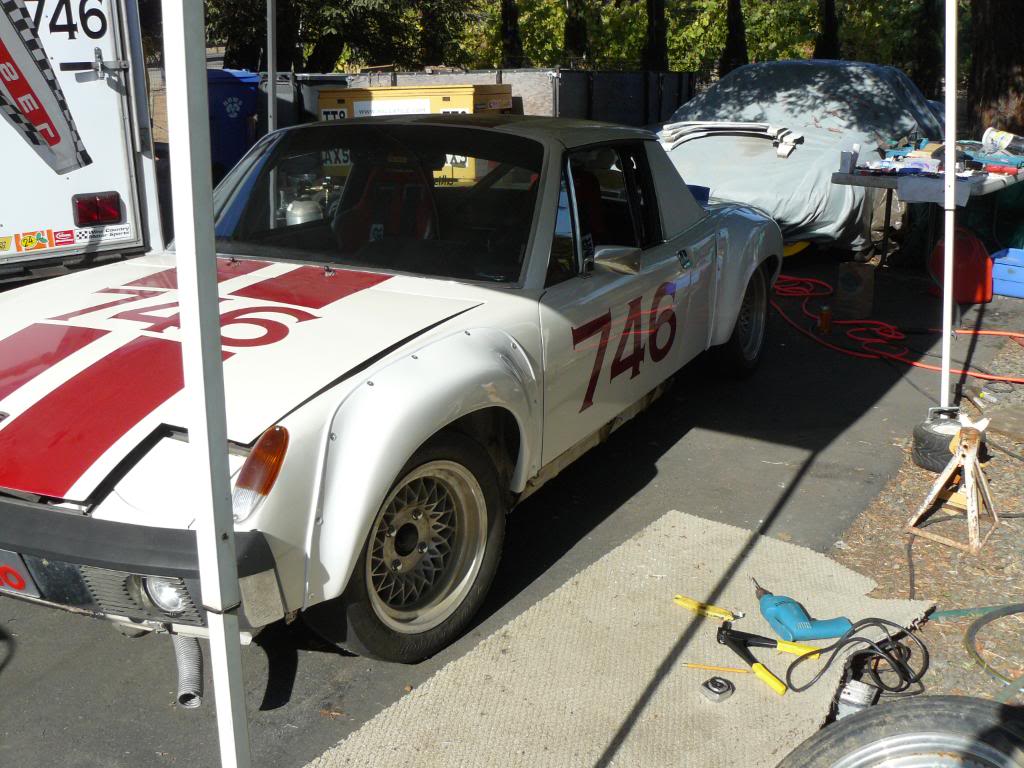
Posted by: Trekkor Nov 2 2012, 01:11 PM
This is how much rear tire I gained!!
11" tire on a 10" rim: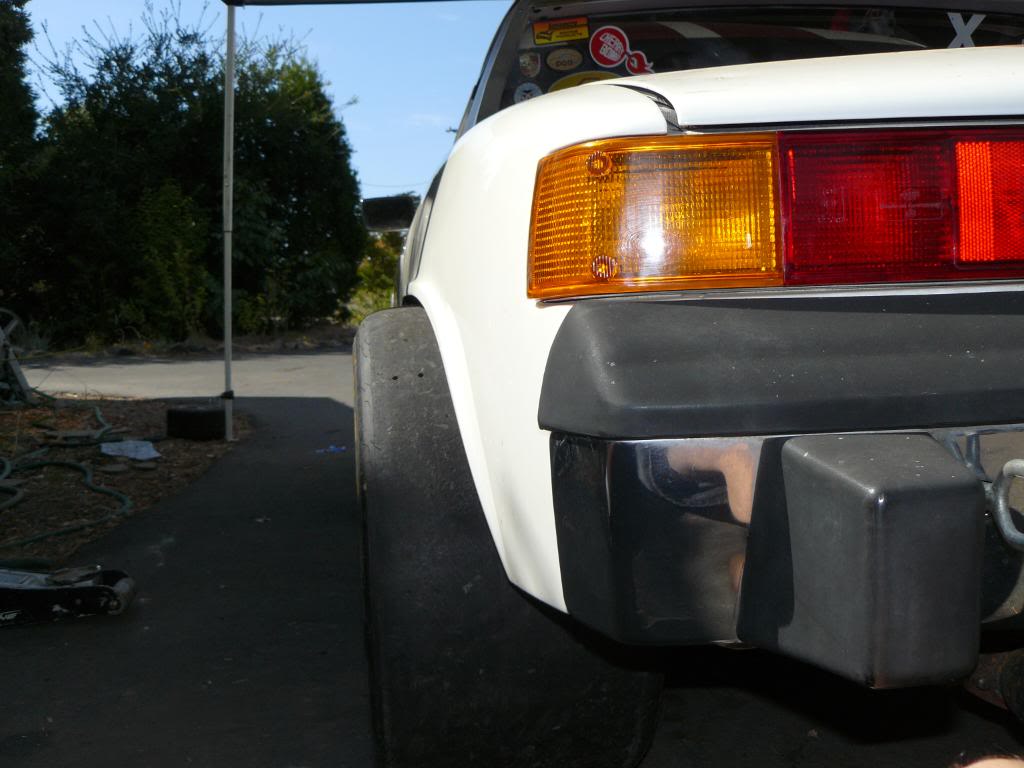
KT
Posted by: Woody Nov 2 2012, 01:40 PM
I have grown to really like the look.
Posted by: Trekkor Nov 2 2012, 01:46 PM
Me too. Nice look with the two tone.
Thanks for the post.
KT
Posted by: Woody Nov 2 2012, 01:59 PM
No problem buddy and thanks. I borrowed the look from the car on the Patrick Motorsports page which looks very similar to Randals car as well. I didn't use the fender beading as you did. Looking back I wish I had because gravel and other junk gets trapped in between the glass and sheet metal. 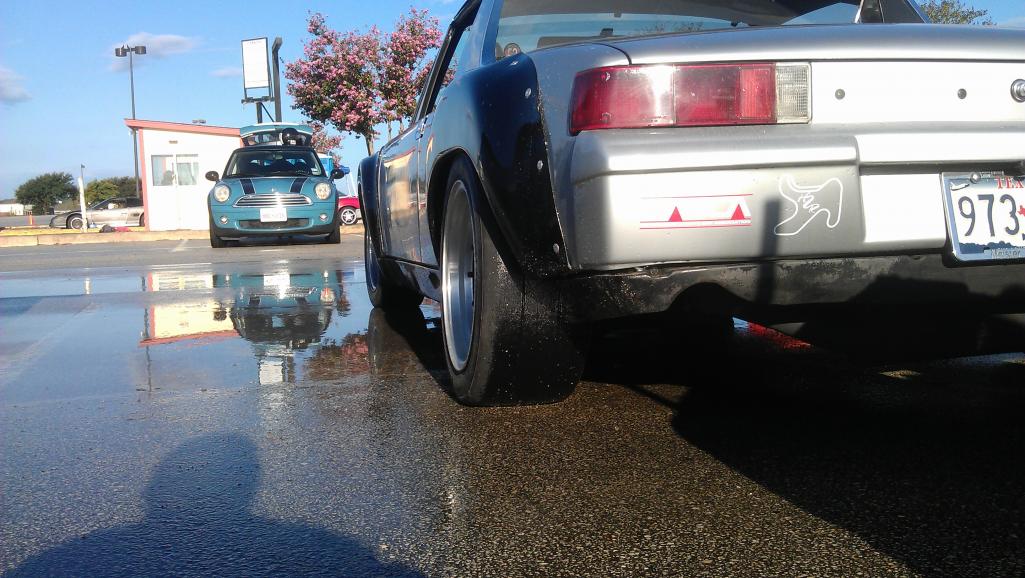
Posted by: gothspeed Nov 2 2012, 03:17 PM
Ahhhh wonderful flares ............. 
Hey woody, if you don't mind me asking, what size spacers are you running front/rear on your cookie cutter wheels?
Posted by: Woody Nov 2 2012, 03:27 PM

Ahhhh wonderful flares .............
Hey woody, if you don't mind me asking, what size spacers are you running front/rear on your cookie cutter wheels?
25mm on each wheel with the cookie cutters or the BBSs. The spacers are from a 944. Sometimes I will run an additional 5mm spacer on top of the 25s but only for street use. I wouldn't run stacked spacers for angry driving. Most sanctioning bodies wont allow bolt on spacers either, they must be the pass through type with longer studs.
Posted by: gothspeed Nov 2 2012, 03:34 PM
Stacked 25mm on each wheel with the cookie cutters or the BBSs. The spacers are from a 944. Sometimes I will run an additional 5mm spacer on top of the 25s but only for street use. I wouldn't run stacked spacers for angry driving. Most sanctioning bodies wont allow bolt on spacers either, they must be the pass through type with longer studs.
Right on man! ....... this info will help me choose stud lengths when I finally get my flares welded on ......

Posted by: Trekkor Nov 3 2012, 08:54 PM
I found a few more pics: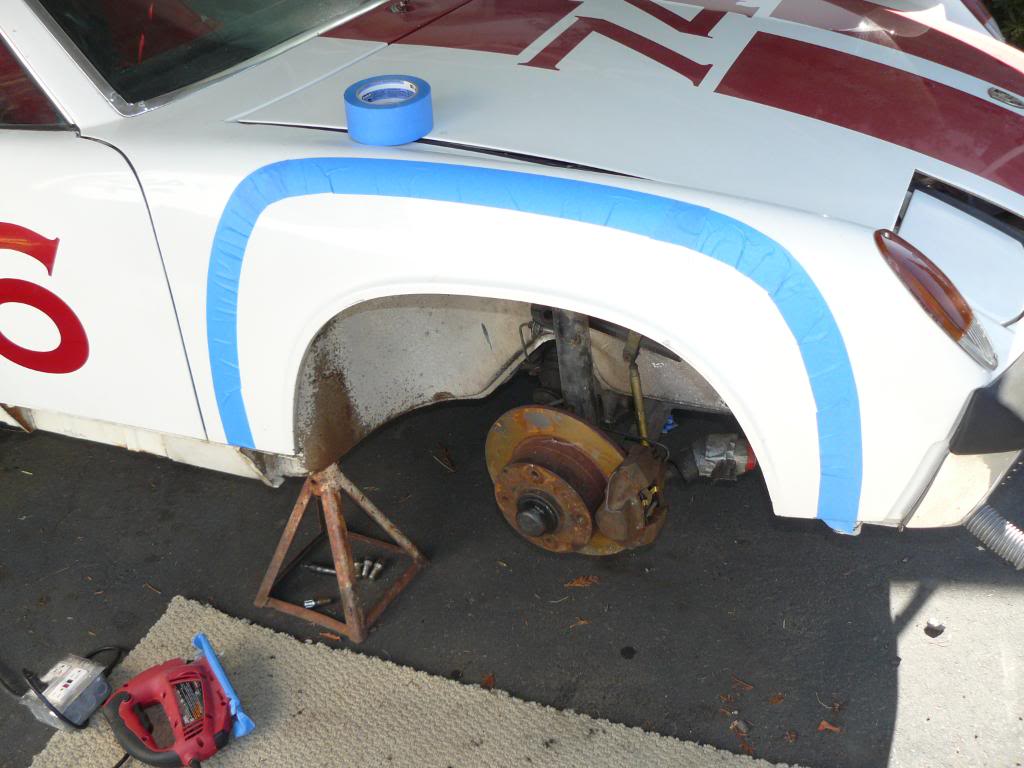
KT
Posted by: Dasnowman Nov 4 2012, 02:53 AM
Run the molding over the flare edges, leaving them long.
Hold/clamp the flare to the car and drill through both the flare and the steel to accommodate a large head rivet. A helper may be useful.
Start at each end and carefully fit the flare to the contour of you car.
You can decide how many rivet to use and the spacing you like.
Drill the holes about 1" from the molding.
Remember, there is 2" of surface to mount your flares.
KT
Love this write up what flares are these where they from link? So do they come with a template or you just outline the outside of the flare then measure 2" in?
I was thinking about doing this but this write up it's a forsure now! thanks
What prepwork did you do to the cars cut fenders to prevent rust?
Also have you ever thought of using plusnuts or http://www.google.ca/imgres?q=rivnuts+stainless+steel&um=1&hl=en&sa=N&biw=1280&bih=687&tbm=isch&tbnid=EdKotRFECOKhwM:&imgrefurl=http://www.ret-global.com/Rivet-nuts-in-Stainless-steel/Rivet-nuts-in-stainless-steel-Open-head.html&docid=SKfeplCRF7XQJM&imgurl=http://www.ret-global.com/upfiles/Rivet-nuts-in-stainless-steel-Open-headCH-KB-SS.jpg&w=190&h=165&ei=giyWULijEIfOigLwu4CgAw&zoom=1&iact=hc&vpx=594&vpy=186&dur=238&hovh=132&hovw=152&tx=125&ty=59&sig=105247154014378374340&page=1&tbnh=132&tbnw=152&start=0&ndsp=23&ved=1t:429,r:2,s:0,i:75 on the body then use SS button nose screws and washers to hold them on? I think thats the root I will go.
Posted by: Krieger Nov 4 2012, 09:35 AM
Dang KT those look good! Where were you when I did my flares?
Posted by: Woody Nov 4 2012, 09:38 AM
Run the molding over the flare edges, leaving them long.
Hold/clamp the flare to the car and drill through both the flare and the steel to accommodate a large head rivet. A helper may be useful.
Start at each end and carefully fit the flare to the contour of you car.
You can decide how many rivet to use and the spacing you like.
Drill the holes about 1" from the molding.
Remember, there is 2" of surface to mount your flares.
KT
Love this write up what flares are these where they from link? So do they come with a template or you just outline the outside of the flare then measure 2" in?
I was thinking about doing this but this write up it's a forsure now! thanks
What prepwork did you do to the cars cut fenders to prevent rust?
Also have you ever thought of using plusnuts or http://www.google.ca/imgres?q=rivnuts+stainless+steel&um=1&hl=en&sa=N&biw=1280&bih=687&tbm=isch&tbnid=EdKotRFECOKhwM:&imgrefurl=http://www.ret-global.com/Rivet-nuts-in-Stainless-steel/Rivet-nuts-in-stainless-steel-Open-head.html&docid=SKfeplCRF7XQJM&imgurl=http://www.ret-global.com/upfiles/Rivet-nuts-in-stainless-steel-Open-headCH-KB-SS.jpg&w=190&h=165&ei=giyWULijEIfOigLwu4CgAw&zoom=1&iact=hc&vpx=594&vpy=186&dur=238&hovh=132&hovw=152&tx=125&ty=59&sig=105247154014378374340&page=1&tbnh=132&tbnw=152&start=0&ndsp=23&ved=1t:429,r:2,s:0,i:75 on the body then use SS button nose screws and washers to hold them on? I think thats the root I will go.
I taped the fenders up till I got the position I liked, then outlined them with a sharpie, then used that line to lay my tape. I used 2" masking tape as my cut line. Then I used 1" tape on the fenders to plot where I was going to rivet. I painted all rough sheet metal edges with a stick of touch up paint. Looks like Trekkor and I used a very similar method.
Posted by: aircooledtechguy Nov 4 2012, 09:44 AM
I actually prefer the riveted/bolted-on look and really dig the two-tone look as well. 
Posted by: Trekkor Nov 29 2012, 03:31 PM
FYI:
The source of my tires!
KT
Posted by: Jeff Hail Nov 29 2012, 06:03 PM
I think you need to flare that open wheeled chair next. Just doesnt look right with all that rubber hanging out.
Attached image(s)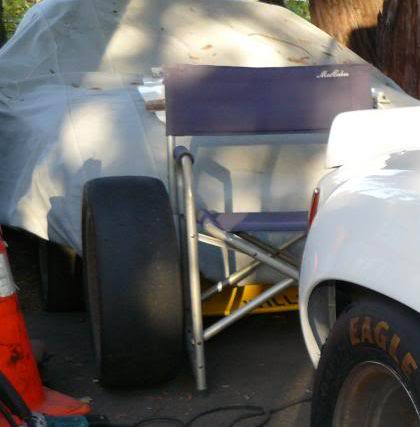
Posted by: Dasnowman Nov 29 2012, 10:21 PM
I'm exceited got an email saying me flares are at the depot for pick up, not sure if I'm more nervous or exceited... 

That's a lot of fender that's going to be coming off, I noticed that both cars don't have sidemarkers where do they end up being my car still has them?
Posted by: cary Nov 29 2012, 11:15 PM
DrChapman (Gary) has them on his 6. I think they look great.
Posted by: Trekkor Nov 29 2012, 11:34 PM
My side markers were welded up before I had the car painted.
KT
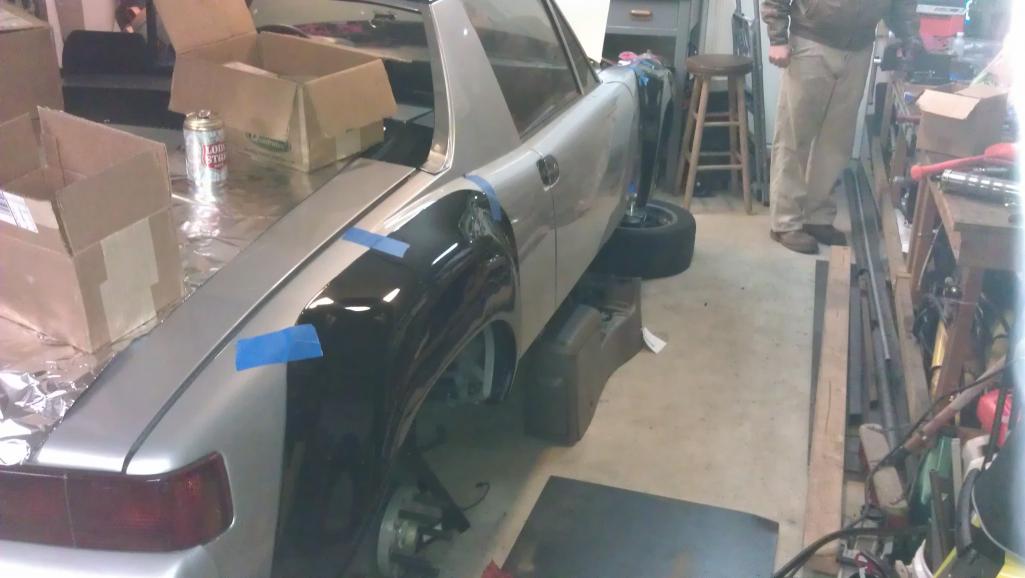
Posted by: The Metal Surgeon Nov 30 2012, 01:07 AM
I think you need to flare that open wheeled chair next. Just doesnt look right with all that rubber hanging out.
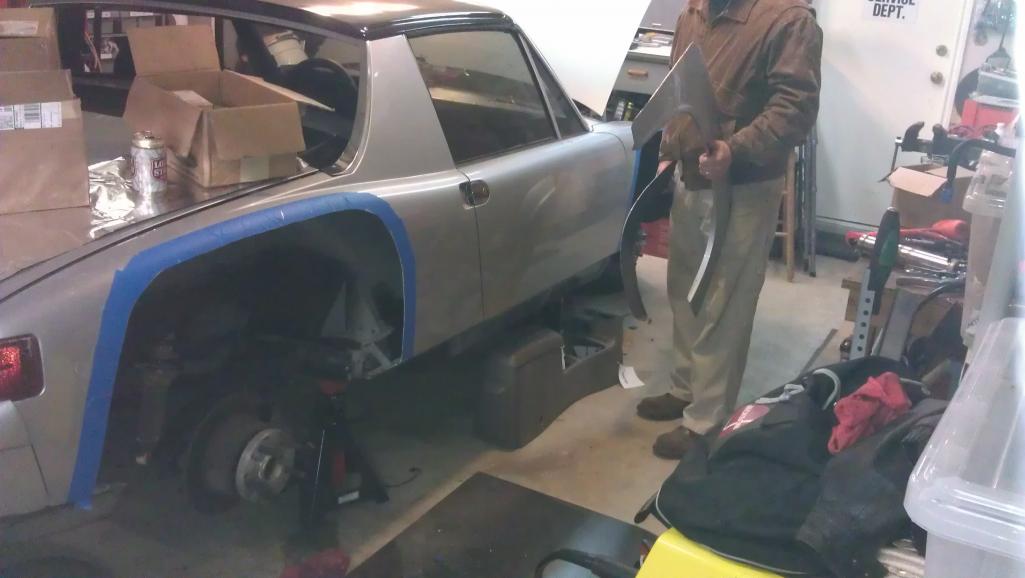
or you could do this......
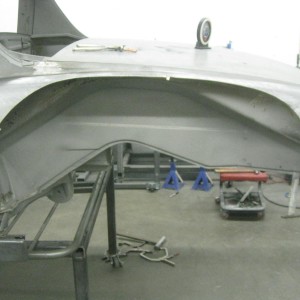
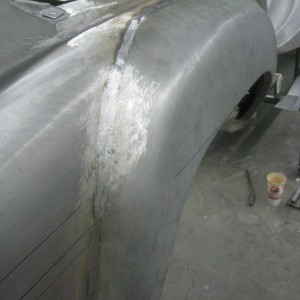
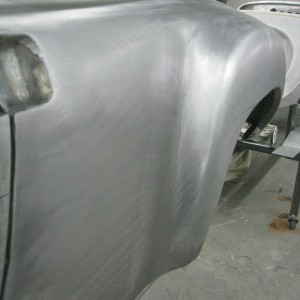
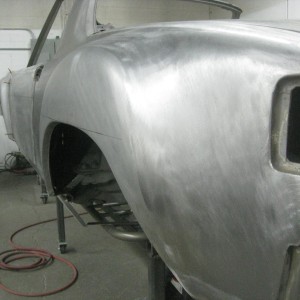
16hrs start to finish
Posted by: Bartlett 914 Nov 30 2012, 08:41 AM
I think you need to flare that open wheeled chair next. Just doesnt look right with all that rubber hanging out.
or you could do this......
16hrs start to finish
Looks really good. It would be nice to see more on the welding as you were fitting it in. Is this all weld? Did you need to use filler?
Posted by: pete-stevers Nov 30 2012, 11:10 AM
hope you where careful around the oil tank.... brings back memories...I didnt nick mine either
and it looks super!
Posted by: yeahmag Nov 30 2012, 12:25 PM
I'm so tempted to do this myself... I'm already heading down the slippery slope of dry sump and a 5 lug conversion with raised spindles.
Posted by: Vacca Rabite Nov 30 2012, 12:51 PM
This thread is not about welding. There are dozens of threads about that. This is about an alternative to welding, and I have always liked the riveted look.
That said, I think I would use Dzus fittings instead of regular rivets. Then it is really easy to take them off and on for maintenance or repairs.
Zach
Posted by: Dasnowman Nov 30 2012, 01:59 PM
This thread is not about welding. There are dozens of threads about that. This is about an alternative to welding, and I have always liked the riveted look.
That said, I think I would use Dzus fittings instead of regular rivets. Then it is really easy to take them off and on for maintenance or repairs.
Zach
Not sure what Dzus are but I'm going the riv nut/plus nut option instead of rivits. I used to use them all the time to install custom racks and tracks on people cars trucks etc the are strong removable and water proof if you want them to be.
I like the rivit on option for looks, ease of use for repair, and the easy option to go with metal weld on if I want without the mess of trying to take f/g molded ones off later.
Posted by: Chris H. Nov 30 2012, 03:38 PM
I think you need to flare that open wheeled chair next. Just doesnt look right with all that rubber hanging out.
or you could do this......
16hrs start to finish
Wow. Incredible...prettiest flare graft I have ever seen.... Just clear coat that panel and be done with it. No paint needed.
Posted by: Dasnowman Nov 30 2012, 05:01 PM
Wow. Incredible...prettiest flare graft I have ever seen.... Just clear coat that panel and be done with it. No paint needed.
It's nice but I will be in for a couple hunder bucks this looks more like a couple of Thousands more then I paid for the car and all it's parts so far.!
Posted by: Randal Dec 1 2012, 10:42 AM
Run the molding over the flare edges, leaving them long.
Hold/clamp the flare to the car and drill through both the flare and the steel to accommodate a large head rivet. A helper may be useful.
Start at each end and carefully fit the flare to the contour of you car.
You can decide how many rivet to use and the spacing you like.
Drill the holes about 1" from the molding.
Remember, there is 2" of surface to mount your flares.
KT
As usual, nice job Trekkor. You have an amazing eye for getting the look just right and the determination and skills to pull off the modification.
Ha, bet my car, with the new configuraiton, is wider than yours!
Posted by: Trekkor Dec 1 2012, 01:21 PM
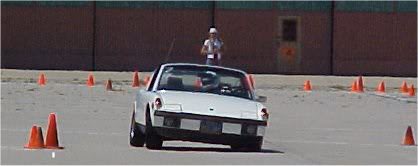
We need to do that three flared car a/x reunion next season!
Thanks, Randal.
I still owe you for the help back in 4/04 at Marina!
KT
Posted by: Randal Dec 2 2012, 06:34 PM
We need to do that three flared car a/x reunion next season!
Thanks, Randal.
I still owe you for the help back in 4/04 at Marina!
KT
What help?
My car in another 3/4" lower in the front now. Really slammed.
Posted by: Trekkor Dec 2 2012, 07:35 PM
What help?
You were my first a/x instructor ( 4/2004 )
KT
Posted by: bulitt Dec 3 2012, 06:09 AM
Ex Crackers Flares-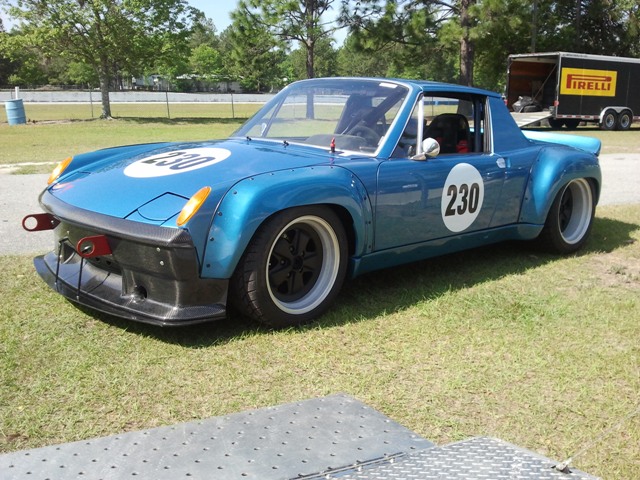
Posted by: 396 Dec 3 2012, 06:41 AM
I have grown to really like the look.
Woody,p
Quick question, where did you purchase the front spoiler?
You two have to be pretty BRAVE to do all that your selves!
Congrats!
Posted by: DBCooper Dec 3 2012, 01:34 PM
I like that riveted look. Says "Yeah, that's right, I'm bad and I'm gonna FUCK with you." Like tattoos did back in the days when only sailors had them.
Posted by: Woody Dec 3 2012, 01:55 PM
I have grown to really like the look.
Woody,p
Quick question, where did you purchase the front spoiler?
You two have to be pretty BRAVE to do all that your selves!
Congrats!
Bought it on eBay years ago. I may go with a different one but not sure yet.
Posted by: SirAndy Dec 3 2012, 02:23 PM
Ex Crackers Flares-


Posted by: SirAndy Dec 3 2012, 03:39 PM
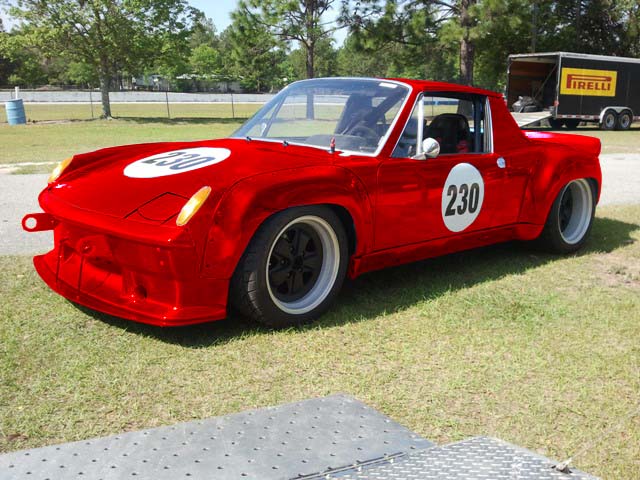
Quick mockup in red with red bumper ...
![popcorn[1].gif](style_emoticons/default/popcorn[1].gif)
Attached image(s)
Posted by: Rand Dec 3 2012, 03:44 PM
You anodized it! Nice! ;p
I like it. One body color is contiguous. Keep going though and you'll have to trailer it.
Posted by: bshounen Apr 16 2014, 08:59 PM
lov'n the fenders, i would like to see some old school stuff like sum cut front oem fronts weld'd to the rears. would do it on my 914 but, im going the lmp rt...
Posted by: CptTripps Apr 16 2014, 09:23 PM
I'll be riveting my next flares like this. There's a certain look I'm going for, and ultimately it'll just be easier.
Cool thread.
Posted by: waltonsm Nov 30 2016, 01:29 AM
To revive an old thread....
What flares/rockers are these? Widths, mfg, etc. Are they still available? I see the front flare actually is large/forward enough to probably cover the side marker cutout. Are there more pics of this car?
Steve
Ex Crackers Flares-
Powered by Invision Power Board (http://www.invisionboard.com)
© Invision Power Services (http://www.invisionpower.com)