Printable Version of Topic
Click here to view this topic in its original format
914World.com _ 914World Garage _ Project 1 hour a day 916 wannabe
Posted by: ONTHEGRIND Nov 16 2012, 11:07 AM
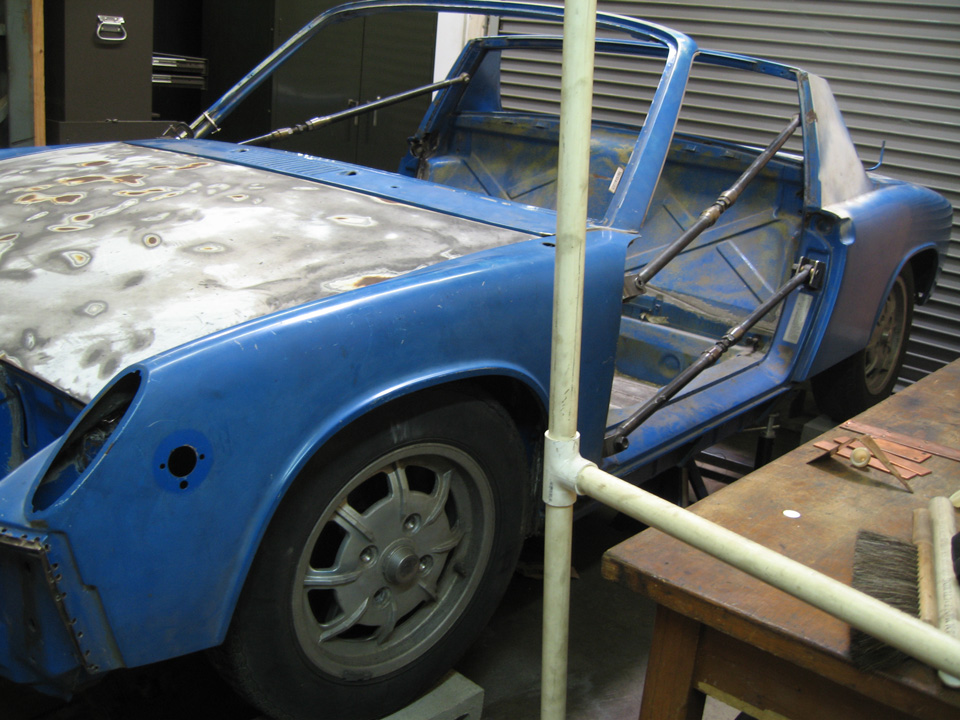
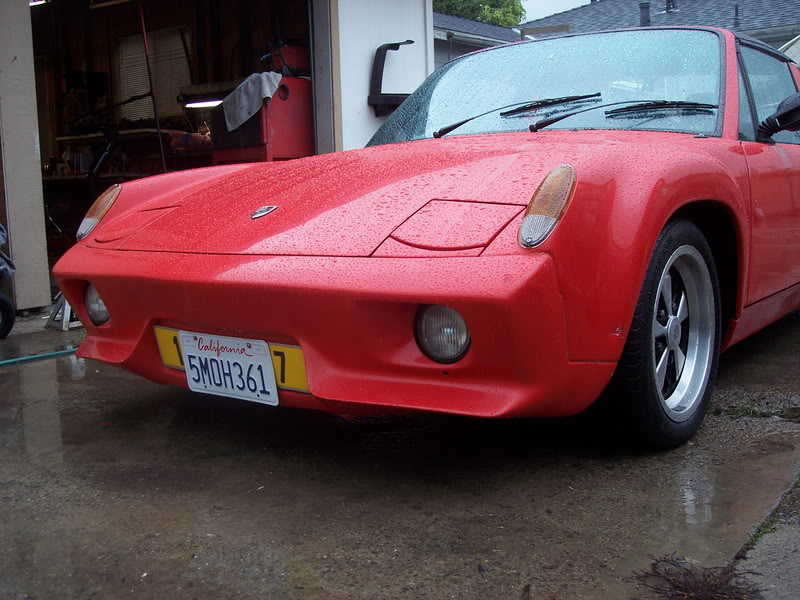
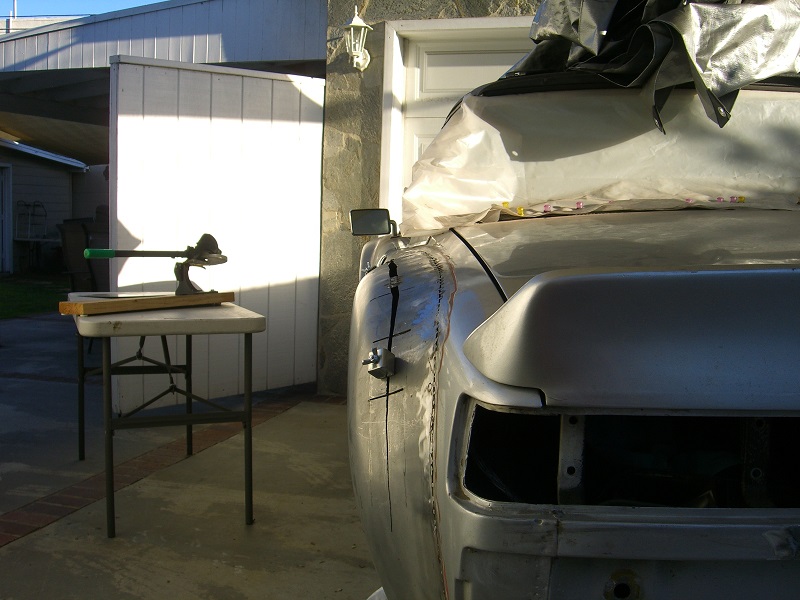
Going to widen the rear flare and repaint looks like a little more work then expected
Attached image(s)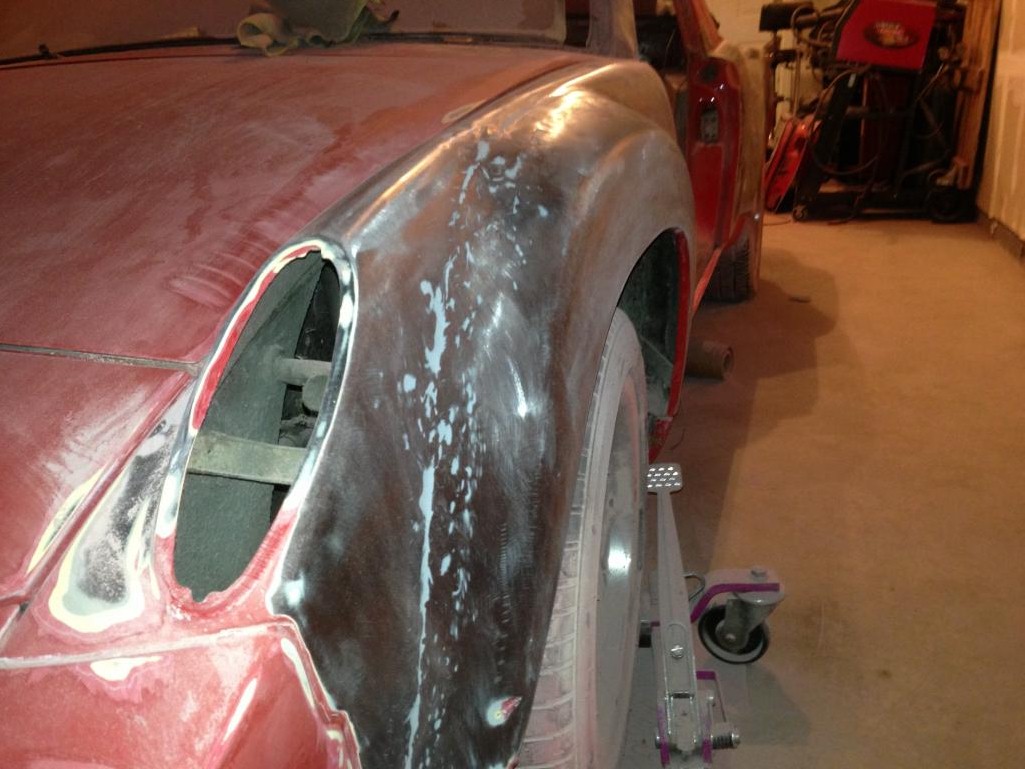
Posted by: ONTHEGRIND Nov 16 2012, 11:09 AM
Not sure why the pics are upside down taken with the iPhone
Posted by: ConeDodger Nov 16 2012, 11:14 AM
 When viewed on my iPad it stays upside down no matter how I turn it!
Posted by: mettelman Nov 16 2012, 11:14 AM
you have to stand on your head to take iphone photos 
Posted by: timothy_nd28 Nov 16 2012, 11:35 AM


Posted by: ONTHEGRIND Nov 16 2012, 12:44 PM
Thanks for. Flipping the pics pretty ugly don't you think I was thinking about wide ing the rear fenders
Posted by: brant Nov 16 2012, 12:49 PM
I don't see what is so bad about them?
all of the fender flares were added after the fact
so all of them have a welding seam
and usually a little filler to help smooth out that seam.
(as well as any warping that may have occured during the welding process)
that flare looks normal
Posted by: LotusJoe Nov 16 2012, 12:53 PM
The real question is how did you get the car to stick to the ceiling? 

Going to widen the rear flare and repaint looks like a little more work then expected
Posted by: 914itis Nov 16 2012, 02:08 PM
He forgot to read the instructions .
Posted by: Andyrew Nov 16 2012, 02:47 PM
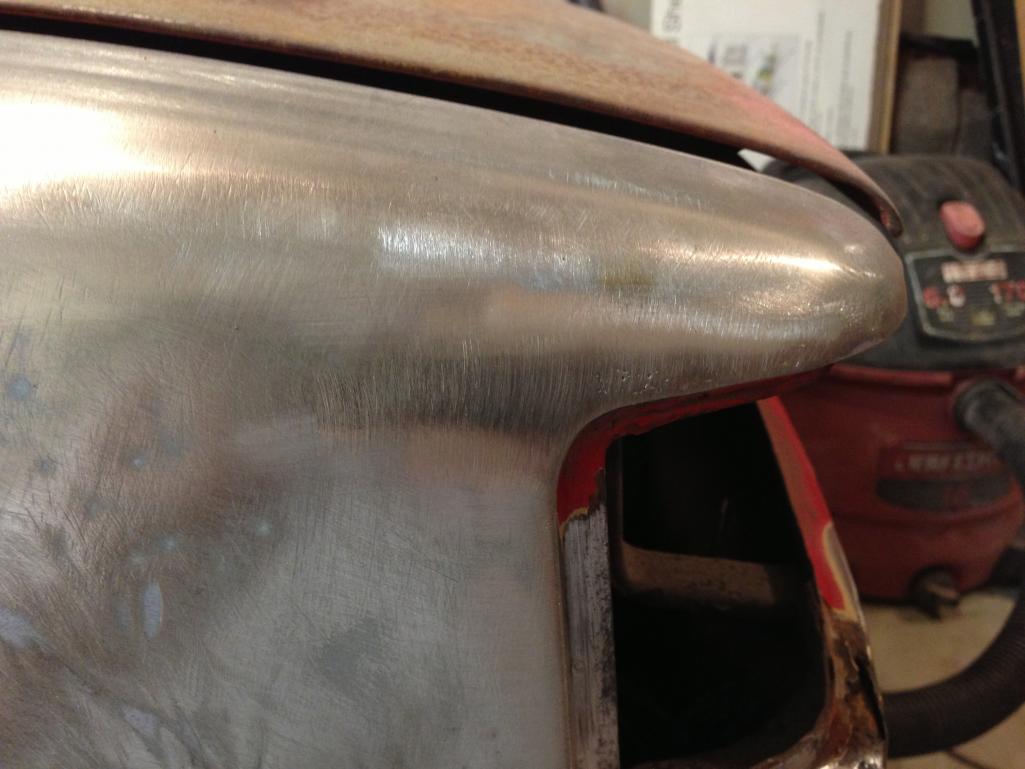
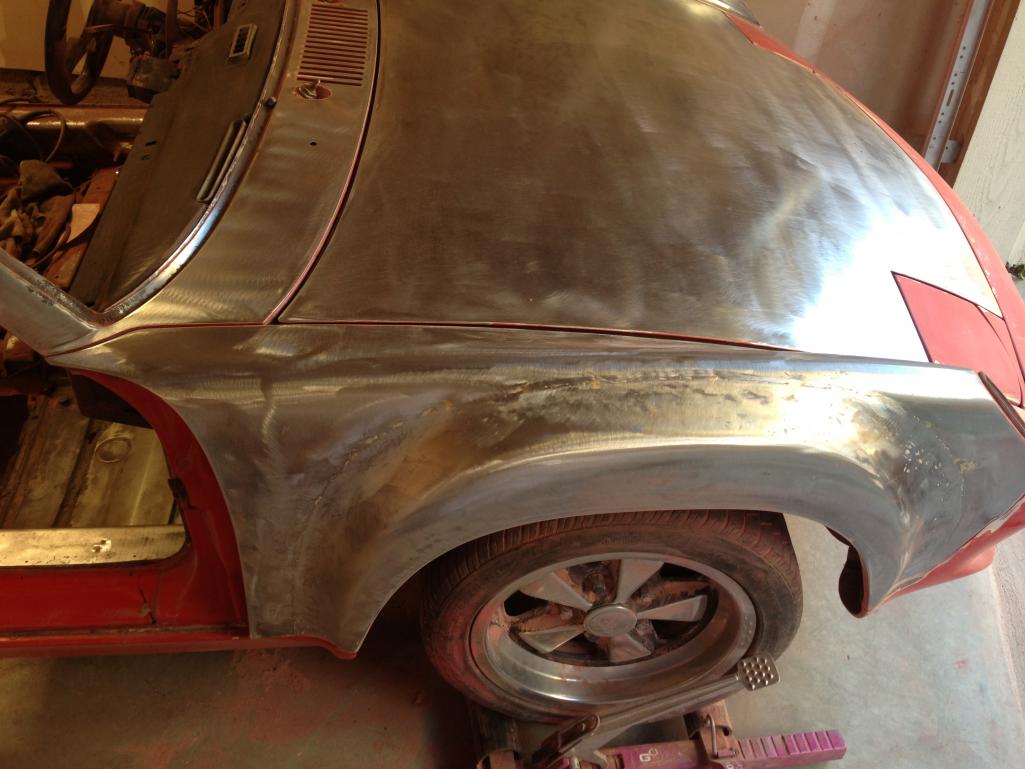
The flares look just sub par of a good body tech, but nothing awful. However the front of the rear fender was repaired in a way that really could have been done a LOT better.. You need to decide what thats worth to you.
A: cut out the bad metal and replace it
B: skim over it and be done. Again the work to get it looking straight has been done.. its just really patchy.. (Looks like they used a drill and slide hammer with quite a lot of holes, then bondo'ed over the holes vs welding them up)
Posted by: ONTHEGRIND Nov 16 2012, 03:04 PM
Unfortunately I'm not a body guy but I do happen to work at a well known porsche shop in to South Bay.. Which also mean I usually don't have much time to work on my own stuff... I would like to replace that 1/4 piece by the door jam anyone know where I can get one. ?
Posted by: ONTHEGRIND Nov 16 2012, 03:07 PM
Yeah I was just looking for rust gonna hammer and dolly what I can skim coat the rest just gonna me a driver with a built 3.0
Posted by: boogie_man Nov 16 2012, 04:09 PM
That doesn't look too bad at all, weld up and do your patching. Use a skim
of mar-glass at the seams with some honey oil in it (makes it smoother,easier to sand) gnarl it down with 36-40 grit. Double check you metal (high & low spots)
then re-cream with filler and block it to perfection........prime
Posted by: mr914 Nov 16 2012, 04:36 PM
Body man is blowing up your skirt. 
Trying to make you think he is best thing since sliced bread and get you to sign up for the big dollar resto 
Please post more photos, as what I saw is not that bad. 
Posted by: ONTHEGRIND Nov 16 2012, 05:05 PM
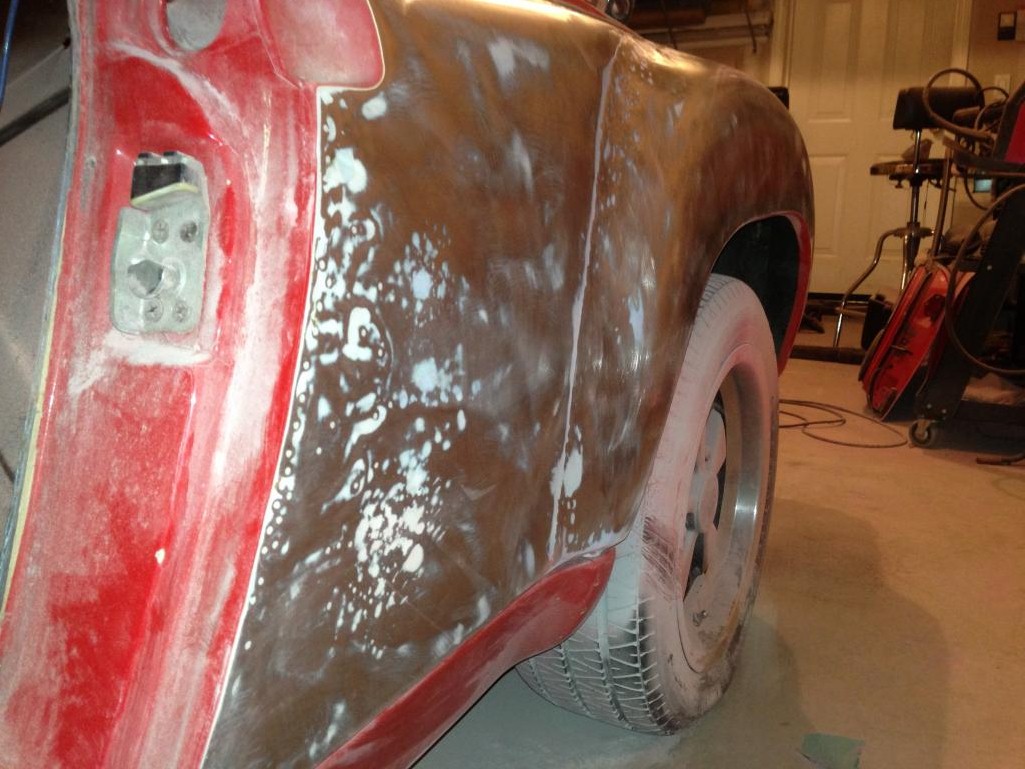
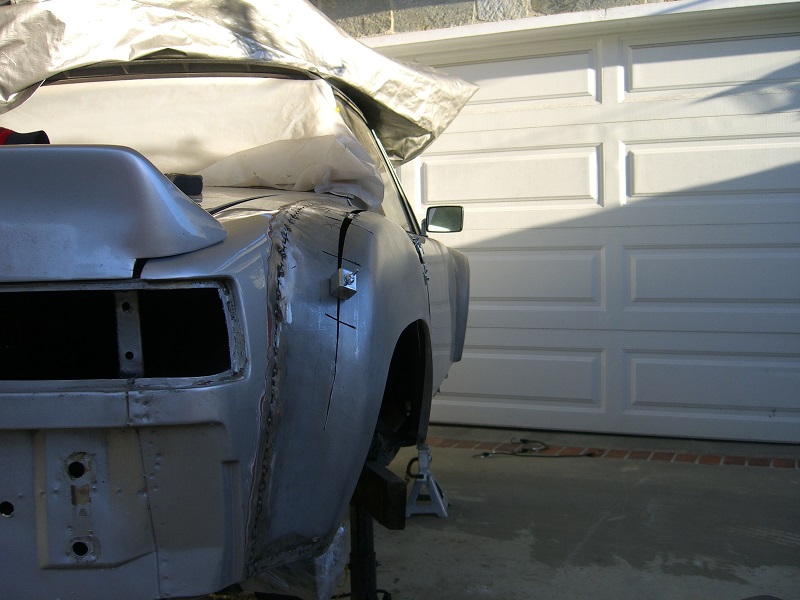
The body guy at my shop doesn't think it's all the bad but if you we're to look at the cars that I work around you'd want to hide this thing in the closet
Attached image(s)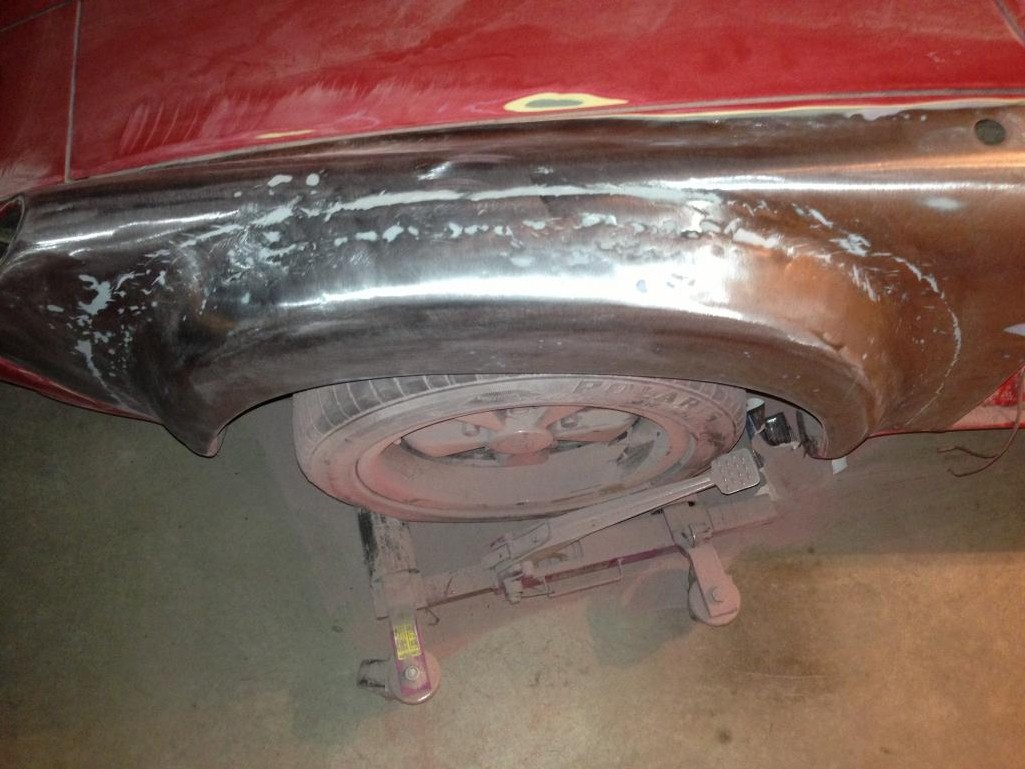
Posted by: brant Nov 16 2012, 05:08 PM
take a grinder to a 930 turbo from 1976- 1980-ish...
they hand welded all of those turbo flares onto those cars in the beginning
(remember the factory originally only intended to build 500 of them for homologation)
I'll bet you that a lot of those cars left the factory with similar welding seams and putty.
Posted by: dpires914 Nov 16 2012, 08:50 PM
The body guy at my shop doesn't think it's all the bad but if you we're to look at the cars that I work around you'd want to hide this thing in the closet
Is that a jack under the tire or a wheel dolly?
Posted by: ONTHEGRIND Nov 17 2012, 12:00 AM
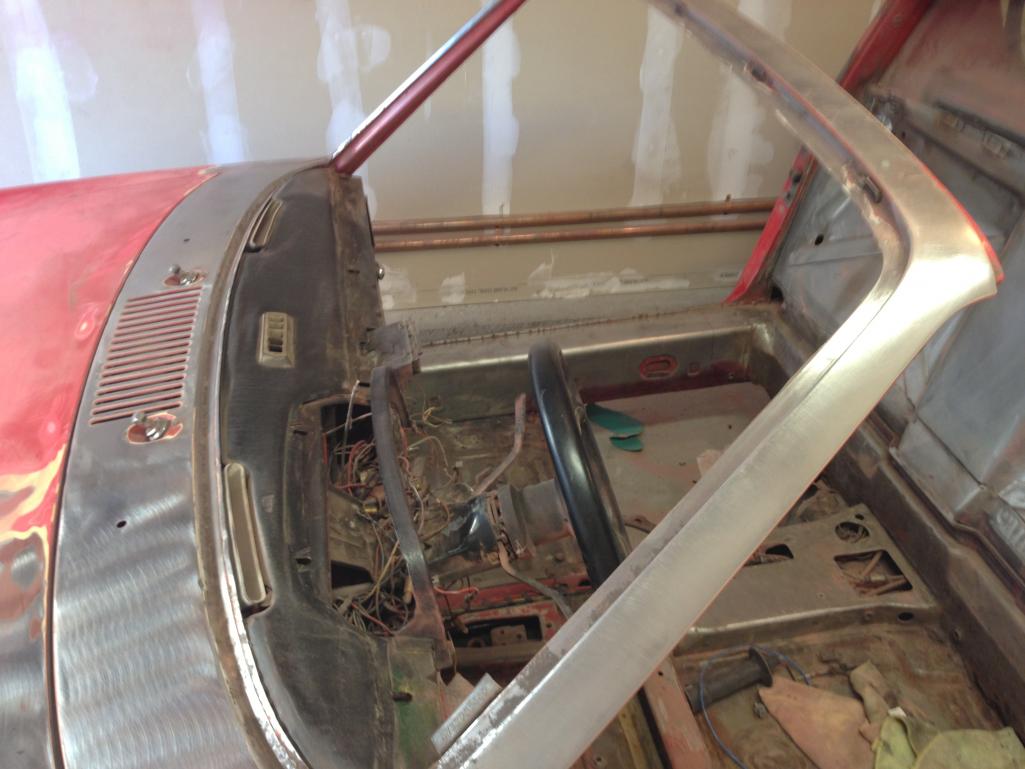
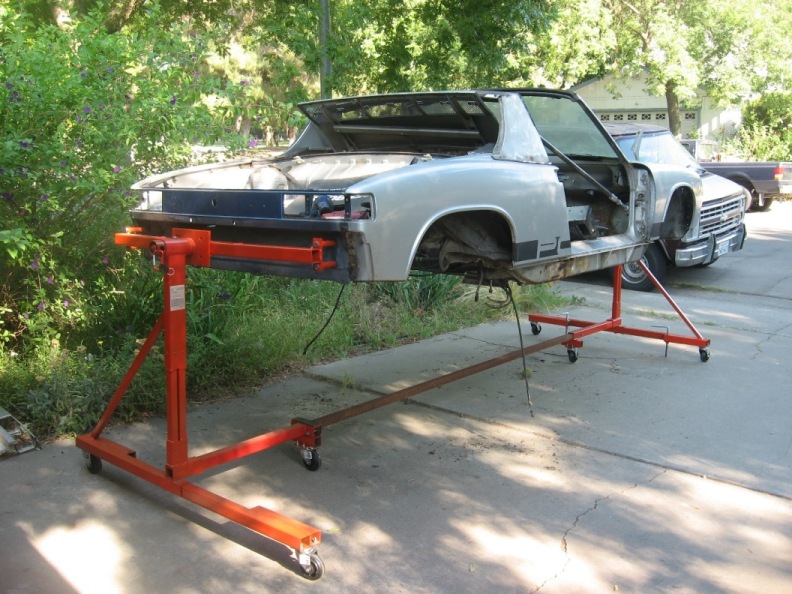
Well got rained out I was supposed to work at Infineon this weekend.. So I decided to spend and hour on the car. Looking better I was able to dig up a rotisserie from work I am gonna put it up hopefully next weekend so I can install the floor pan. I have a window to have the car painted next month.. I have also a differnt trunk lid btw lol 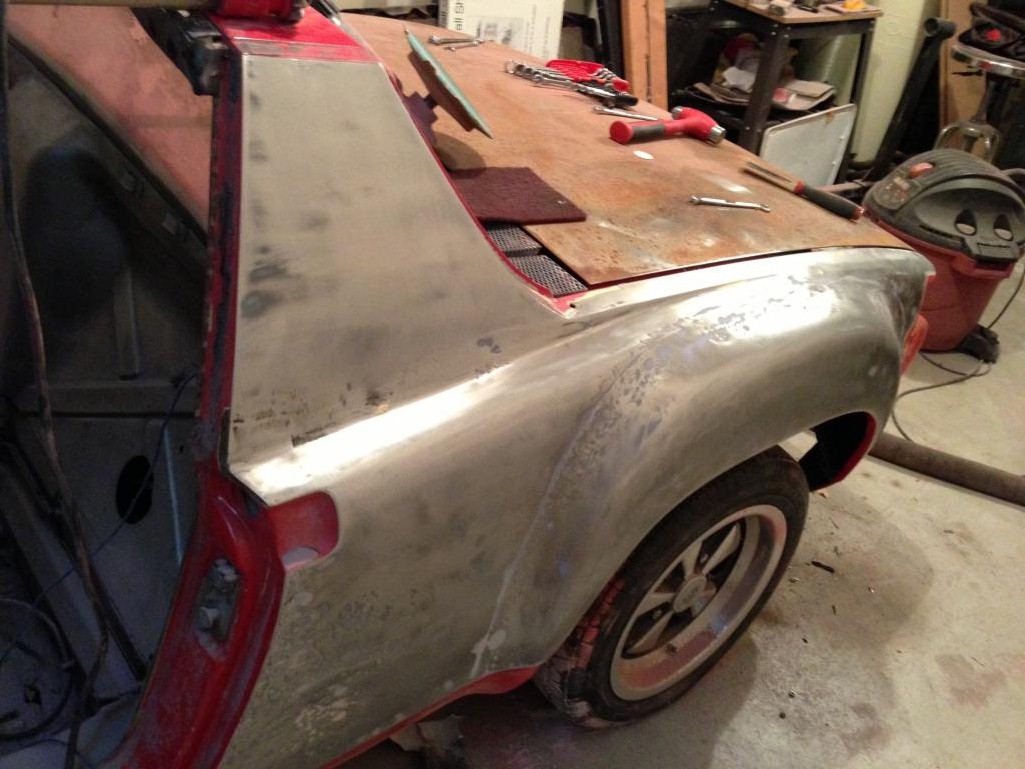
Attached image(s)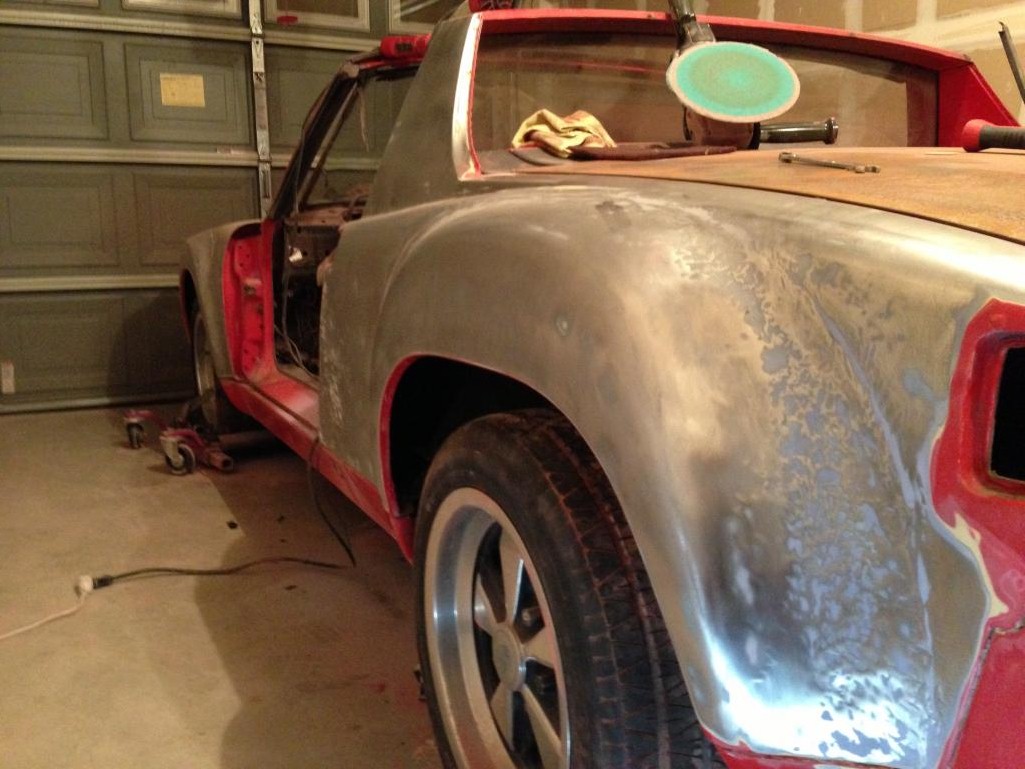
Posted by: Andyrew Nov 17 2012, 07:59 AM
Just got to keep at it! I painted Peter's 914 in about a month start to finish, working nights and weekends.
Posted by: ONTHEGRIND Nov 17 2012, 11:30 AM
I was thinking about widening the rear flares about an inch I have a 16x9 I wanna put in There with maybe a 275 tire any opinions ?
Posted by: bulitt Nov 17 2012, 04:13 PM
Check out the blog made by member
Ron S
Posted by: ONTHEGRIND Nov 18 2012, 07:25 PM
so i got a little lazy and only did about an hour og work on the car here is a few pics for updates pretty typical rust areas not really all that worried the rear half of the floor plan is going to be replaced..
Attached thumbnail(s)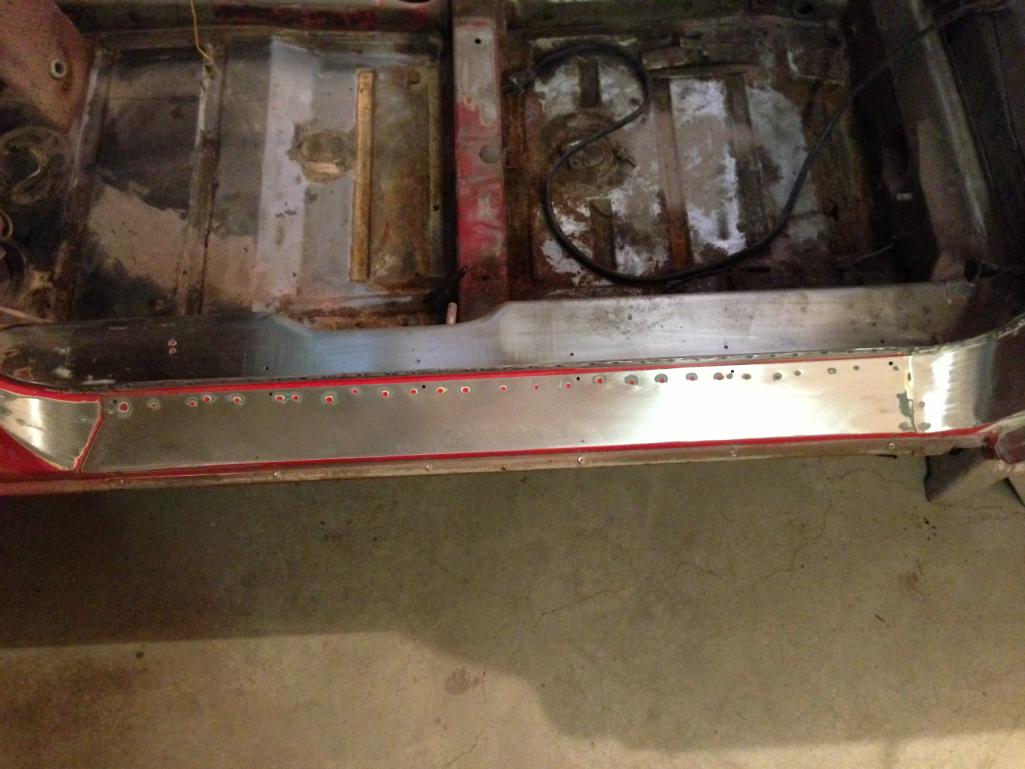
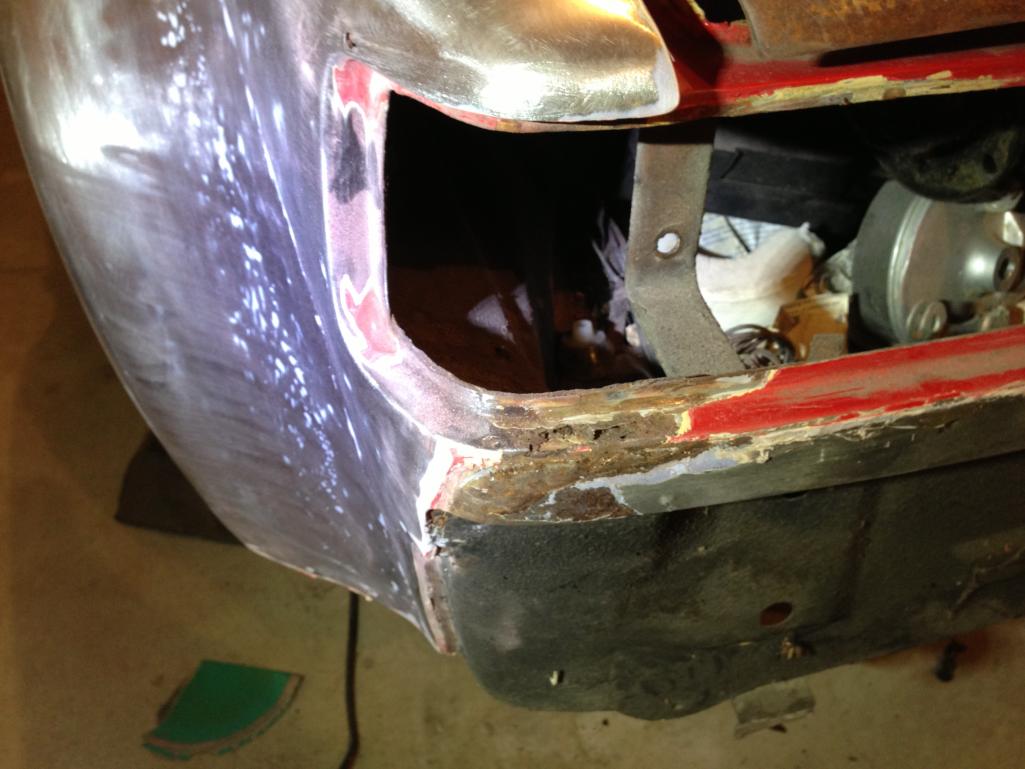
Posted by: ONTHEGRIND Nov 18 2012, 07:30 PM
this is the ugly part looks like the p/o hammered the fire wall pretty bad id like to cut this and replace if anyone has these corners they'd be willing to sell.. long longs look really solid other then the jack mount the car will be hitting the cellete before getting painted..
Attached thumbnail(s)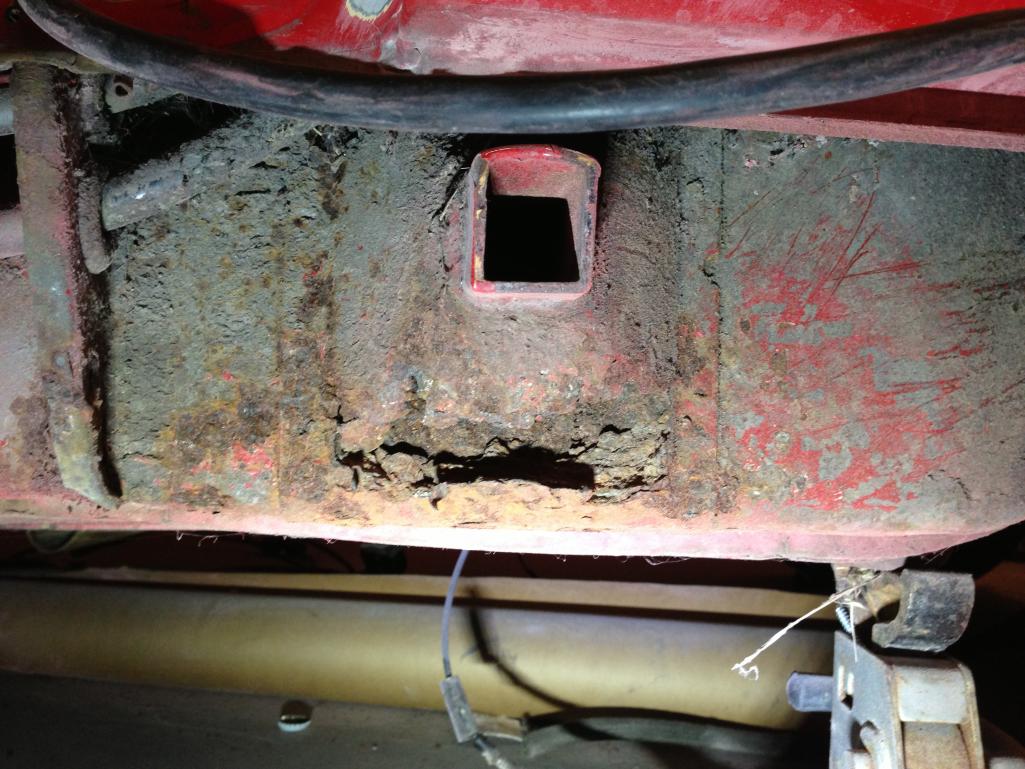
Posted by: ONTHEGRIND Nov 18 2012, 07:30 PM
firewall
Attached thumbnail(s)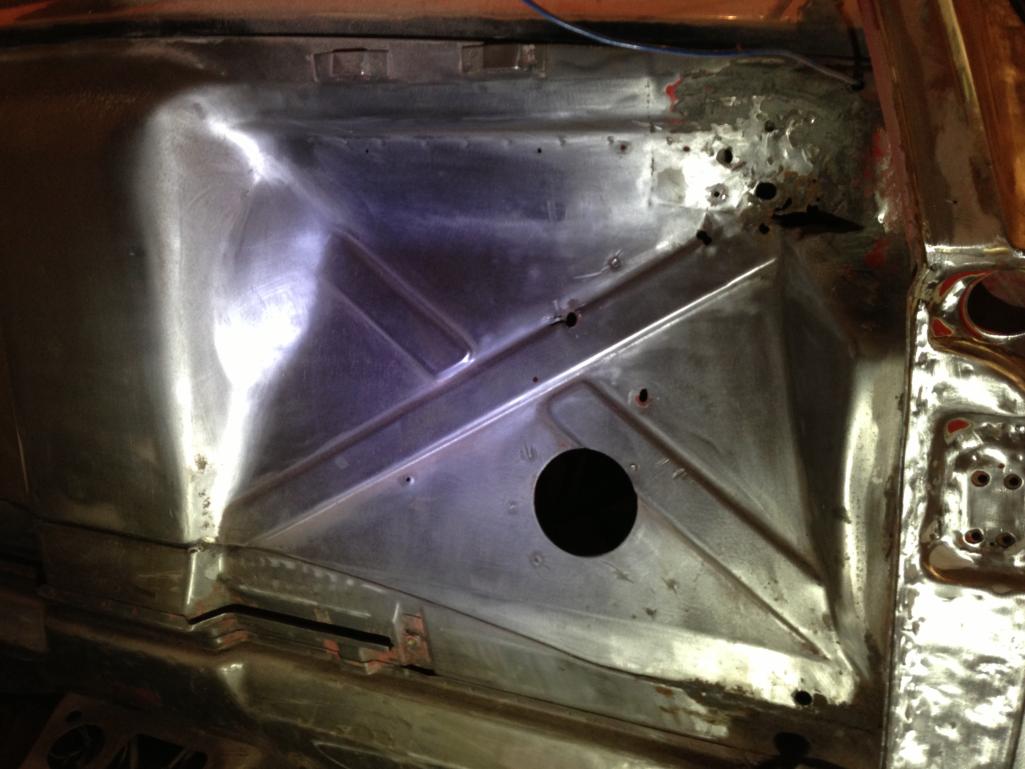
Posted by: ONTHEGRIND Nov 18 2012, 07:32 PM
door jam had alot of bondo..
Attached thumbnail(s)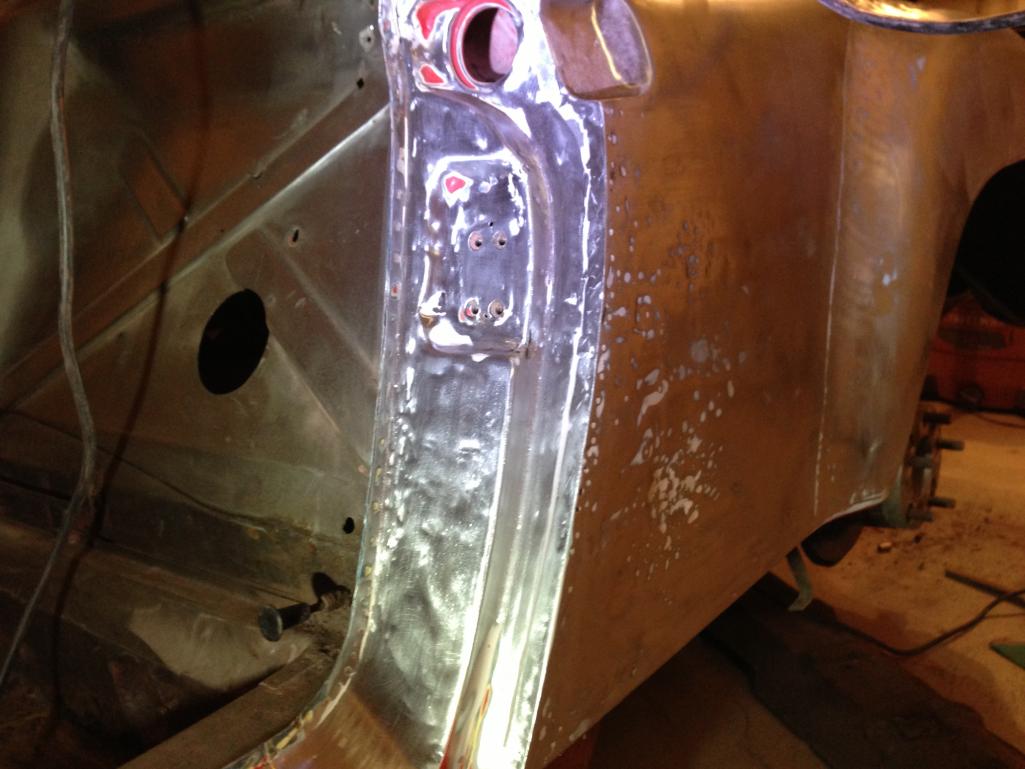
Posted by: ONTHEGRIND Nov 19 2012, 09:28 AM
Little rust repair
Attached thumbnail(s)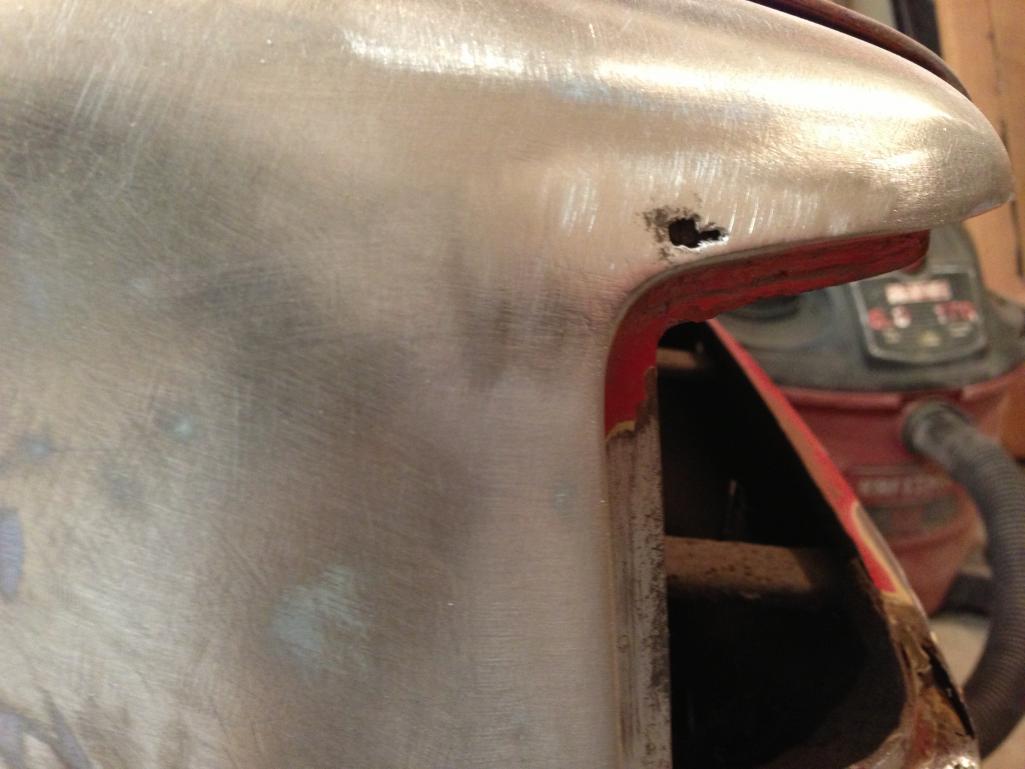
Posted by: ONTHEGRIND Nov 23 2012, 03:18 PM
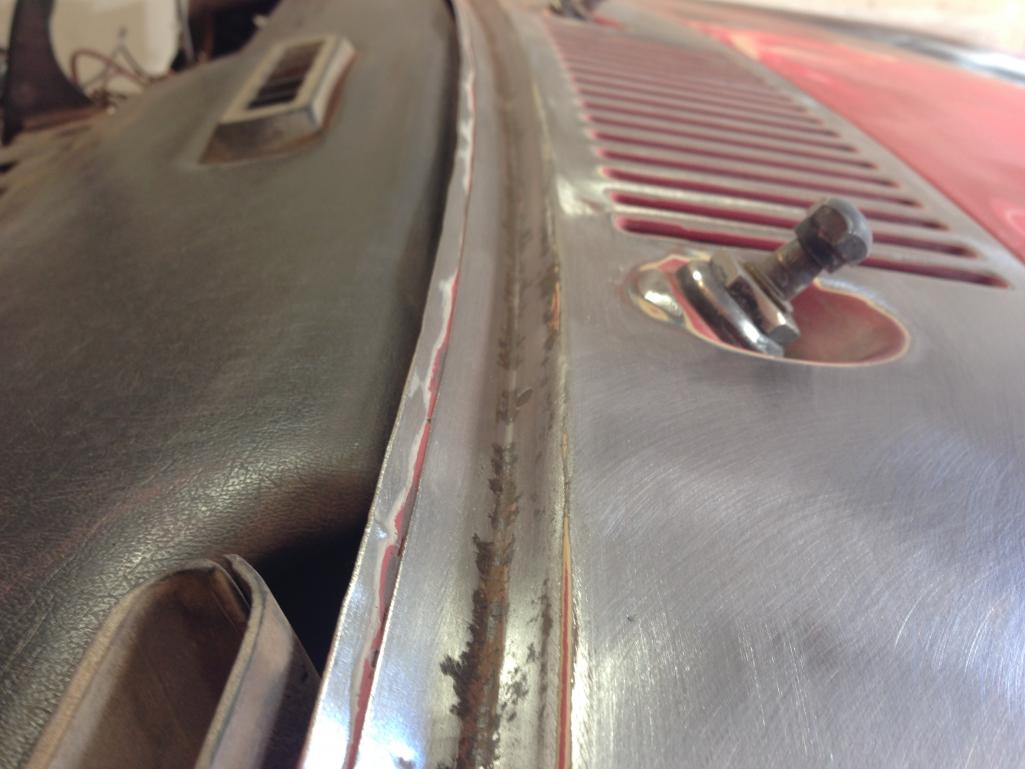
well worked on it for about an hour got the windshield frame stripped along with the front cowl not as much rust as i thought what would you guys do in my situation as far as preping the rust spots for paint cut and weld or rust treatment ? its not thin enough to poke through
Attached thumbnail(s)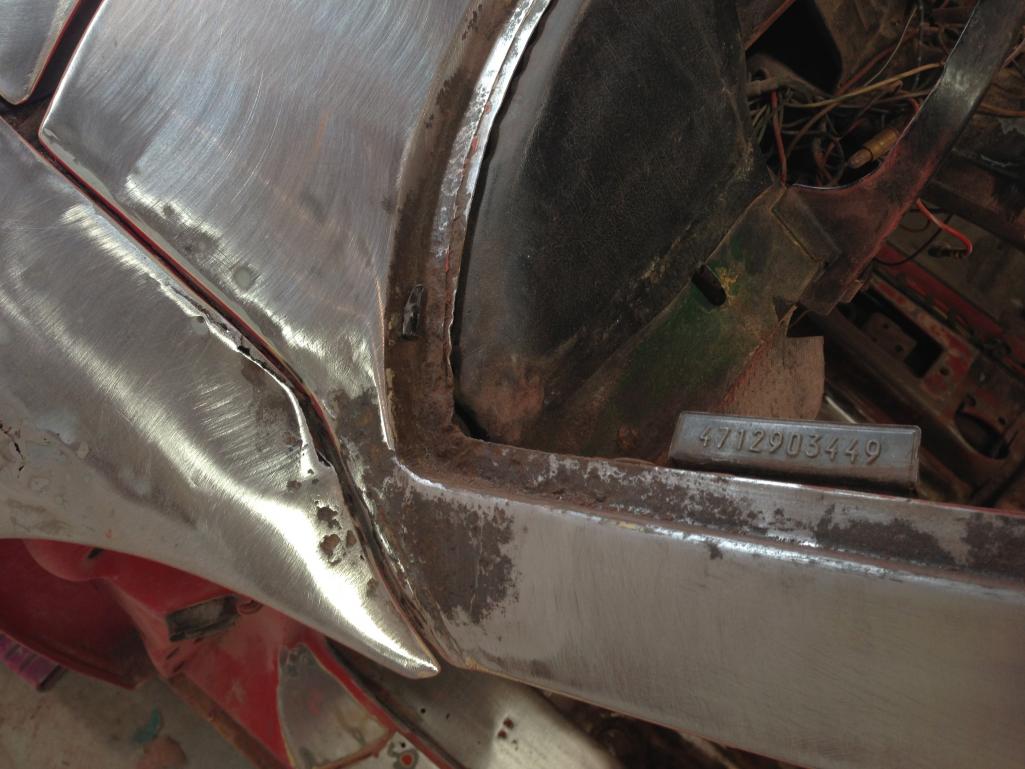
Posted by: ONTHEGRIND Nov 23 2012, 03:20 PM
more pics
Attached thumbnail(s)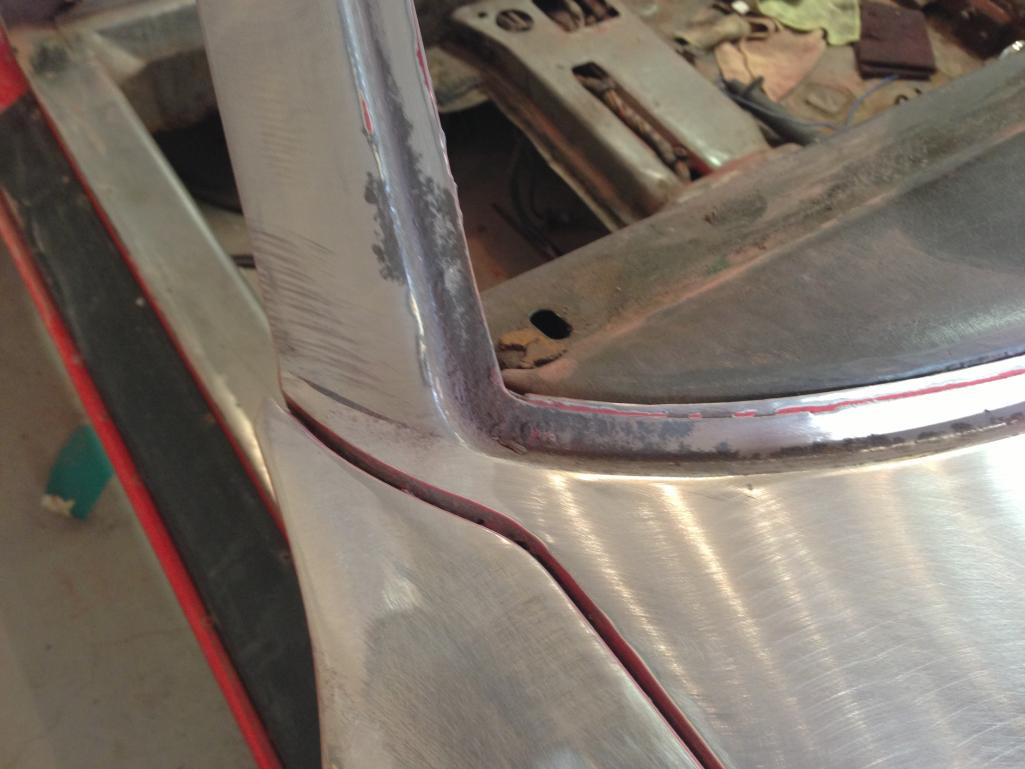
Posted by: ONTHEGRIND Nov 23 2012, 03:21 PM
one more until after my lunch
Attached thumbnail(s)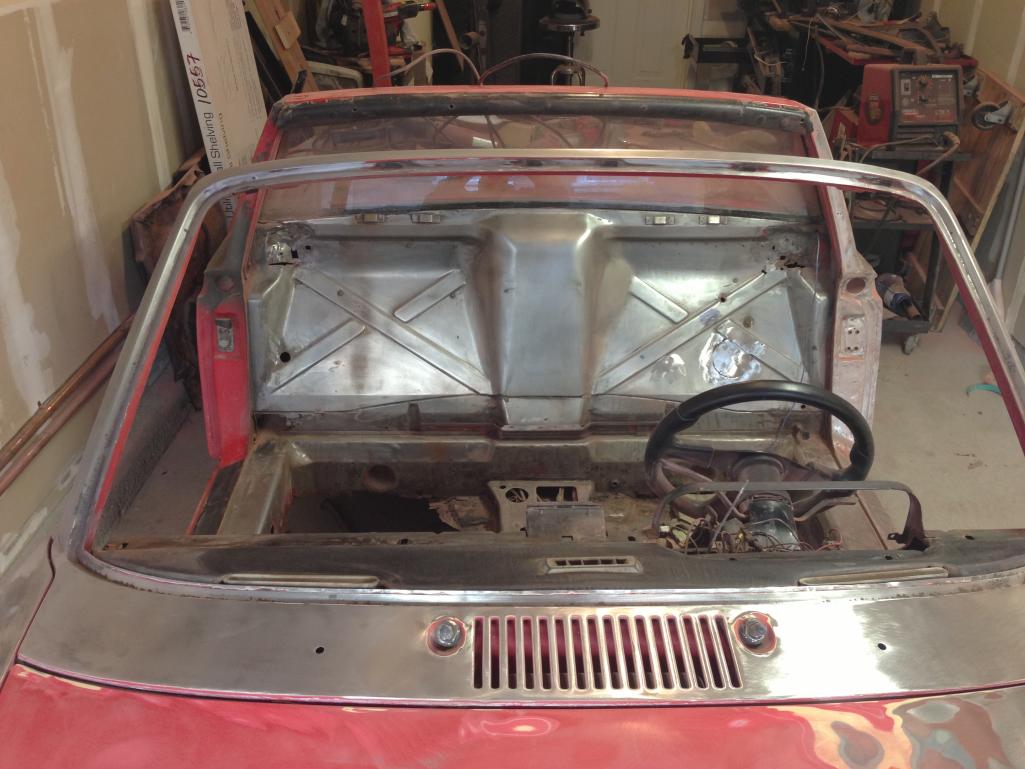
Posted by: SUNAB914 Nov 23 2012, 05:12 PM
Welcome to the club, it like a box of chocolates!
Your actually doing very well, keep going.
Posted by: ONTHEGRIND Nov 24 2012, 05:45 PM
Stripped the good today and the left front 1/4 going to remove the front bumper hopefully have most of it stripped by tomarrow and have it on the rotisserie for the floors hopefully by the end of the next weekend I got my pedal box parts back from the zinc plater and powder coater also ..
Attached thumbnail(s)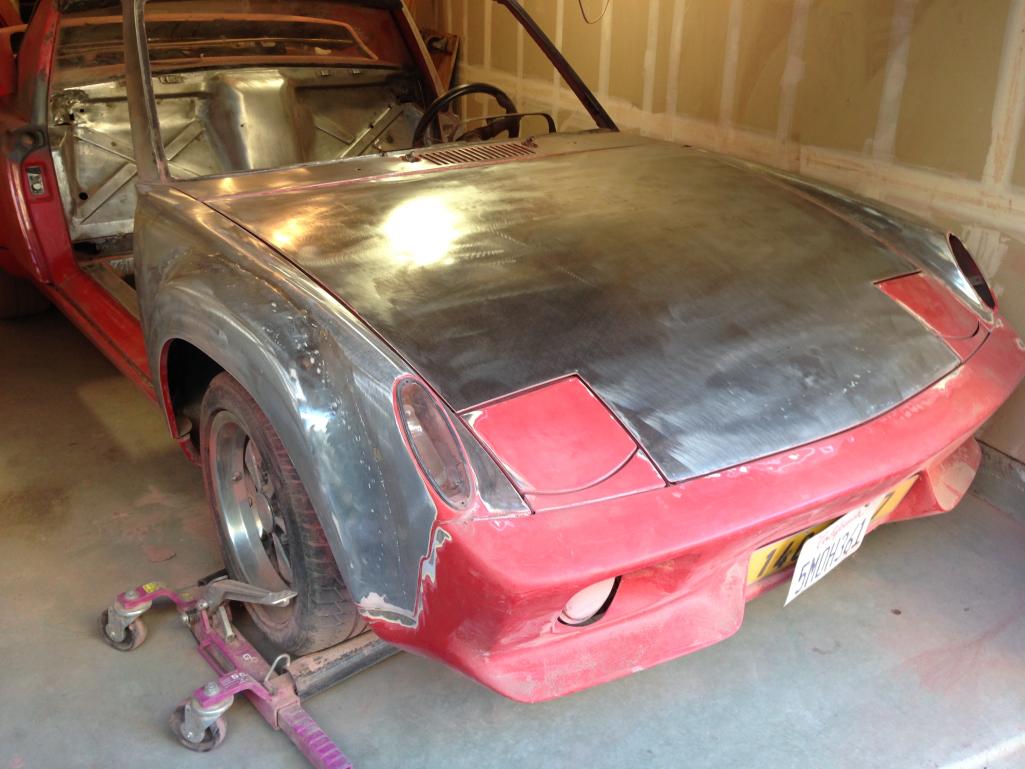
Posted by: ONTHEGRIND Nov 24 2012, 06:12 PM
one more
Attached thumbnail(s)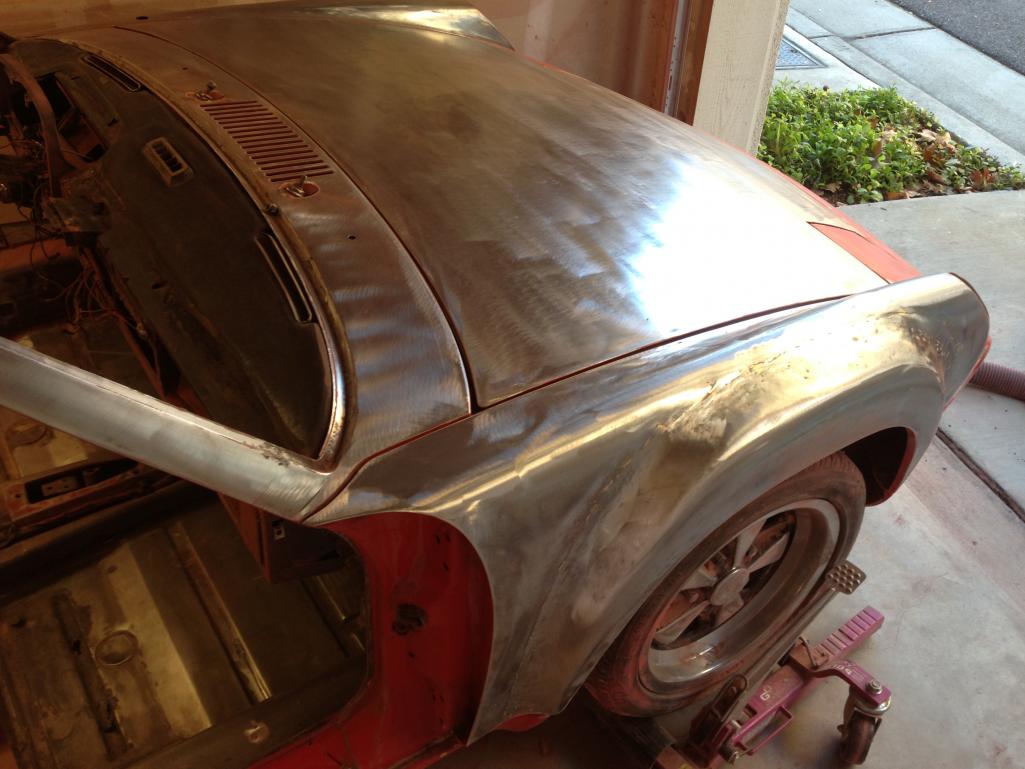
Posted by: Andyrew Nov 24 2012, 07:31 PM
What grit are you using to strip it? Looks like its coming off fast!
Posted by: ONTHEGRIND Nov 25 2012, 11:10 AM
Using 3m green 80 grit 8 Inch disc on a soft pads stripped the exterior with no more then 12 disc
Posted by: ONTHEGRIND Nov 25 2012, 10:51 PM
Well ran out if time an hour a day.. was going to buy a new piece but im going to cut it out tomarrow at lunch take it to work where I have the shear and brake see if i can repair it.. 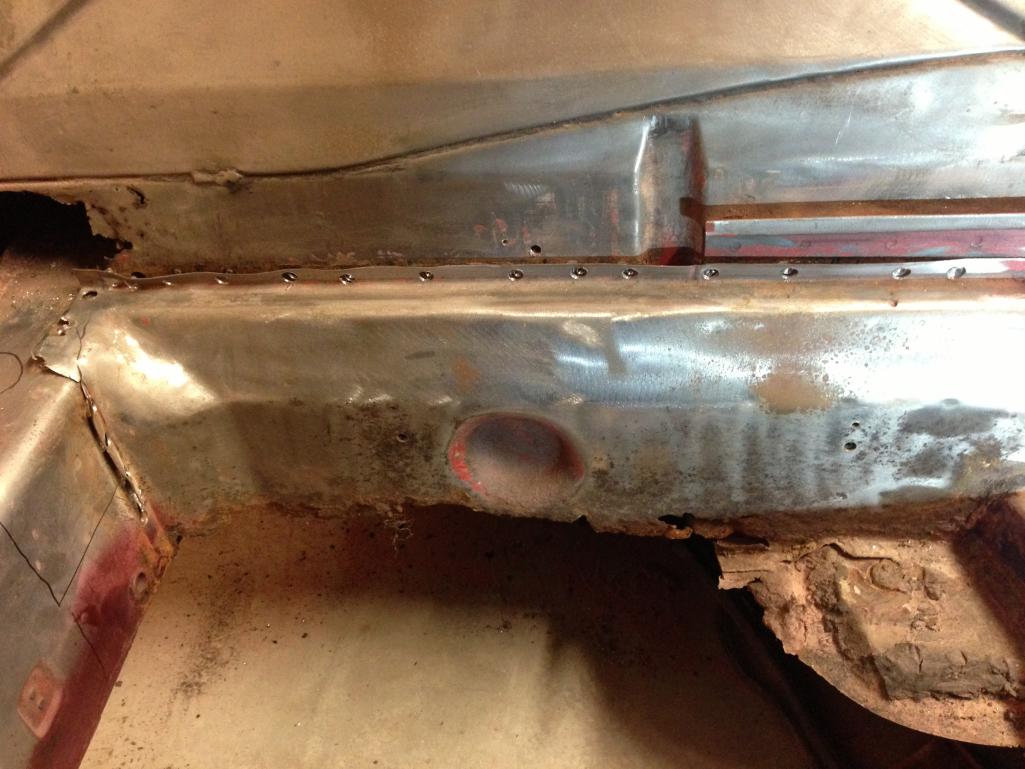
Posted by: ONTHEGRIND Nov 25 2012, 10:55 PM
Few more
Attached thumbnail(s)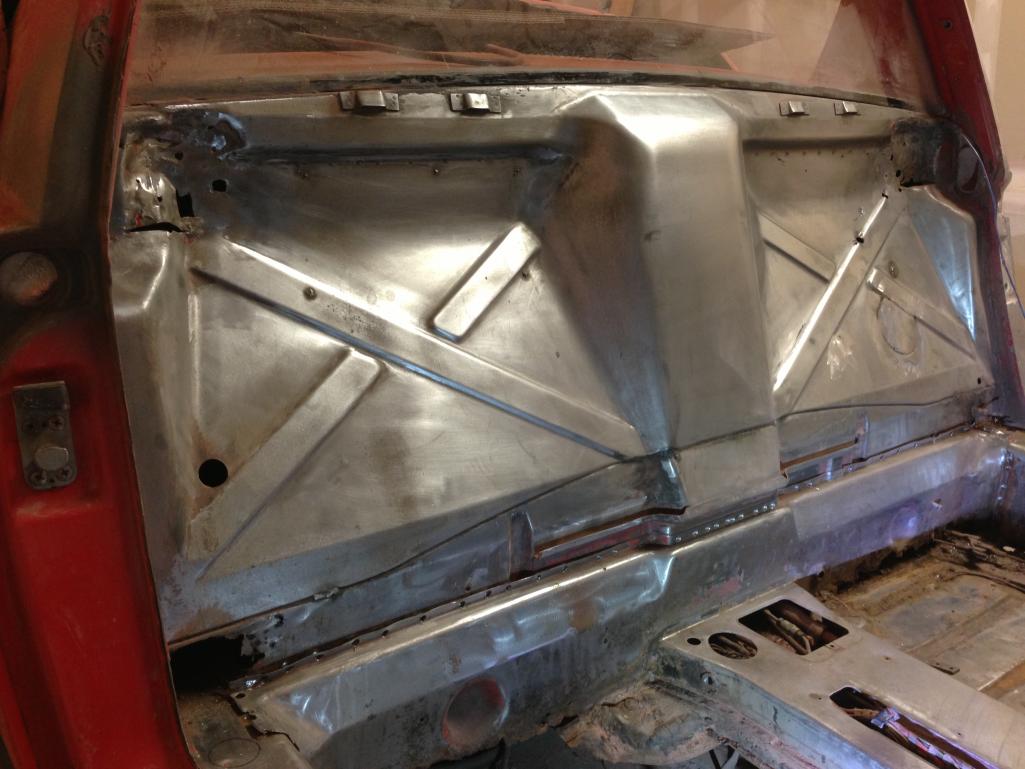
Posted by: SirAndy Nov 26 2012, 12:43 AM
Where is your bracing?
I wouldn't remove anything structural without bracing the hell out of the chassis first.

Posted by: ONTHEGRIND Nov 26 2012, 01:52 AM
Was going fab up something at the shop tomarrow I plan on putting it on our cellete before paint
Posted by: sixnotfour Nov 26 2012, 03:01 AM
So where you work you have cellete bench is it the old one that uses the 914 fixtures ? And where about in CA are you ?
Posted by: ONTHEGRIND Nov 26 2012, 08:33 AM
Campbell ca...
Posted by: ONTHEGRIND Nov 26 2012, 09:04 AM
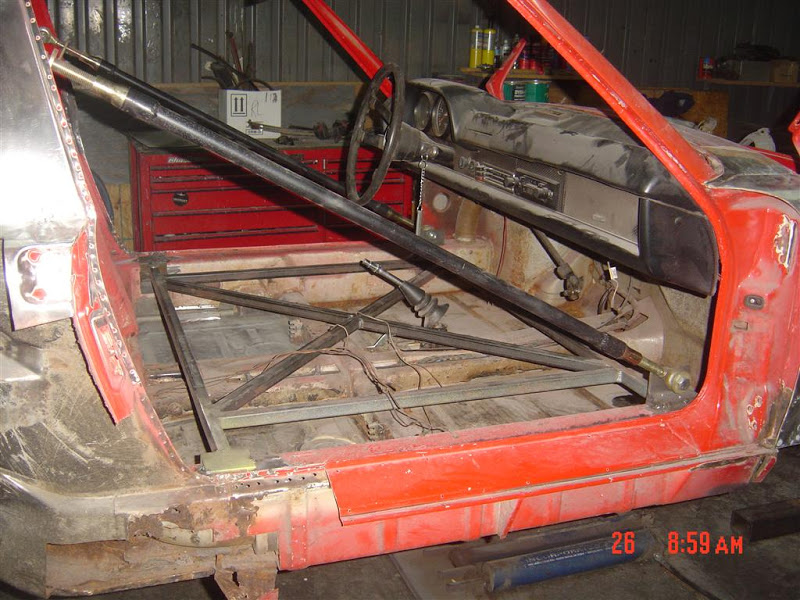
I was looking at door braces last night, I think I am you going to go with a set like brant made anyone have any issues with the type of bars ?
Attached image(s)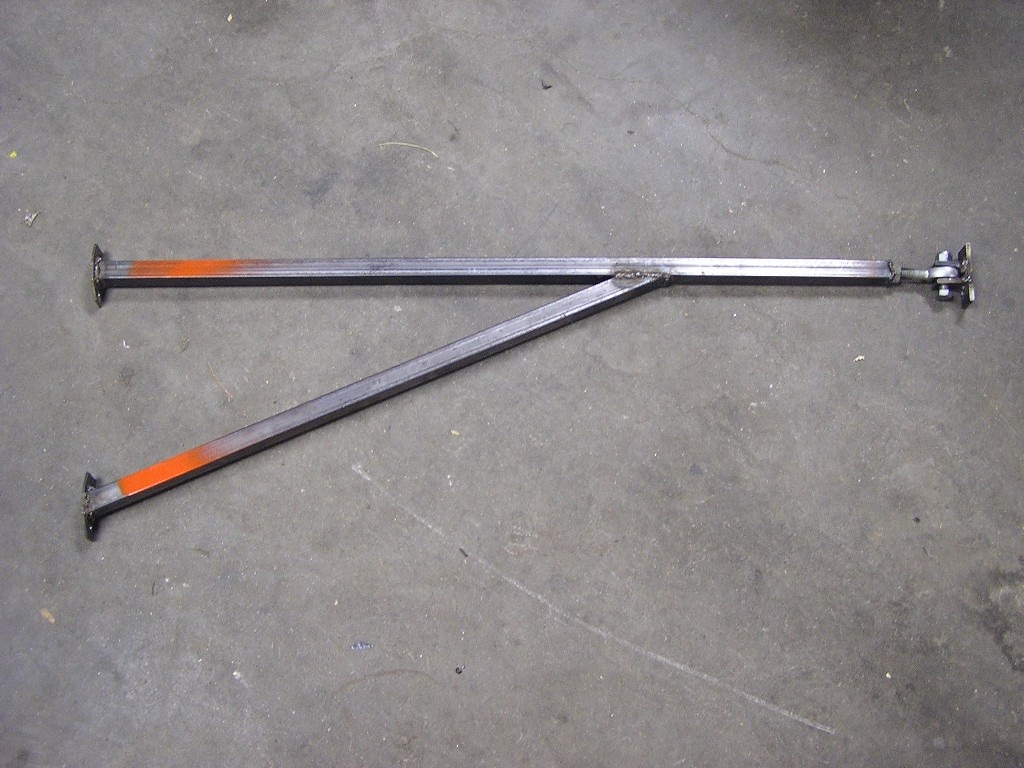
Posted by: r_towle Nov 26 2012, 04:19 PM
well.
The front part hangs off a flexible area that is for the door hinges and the back is also on a flexible part of the rear panel.
Pull on a rear fender and see how much the rear door gap changes.
For structure bracing I go from the inner long, just above it where the speakers would be up to the upper seat belt bolt.
One large bar will do on each side.
Then, given what you are replacing, build a square tube horizontal box inside the car, as low down as you can and once that is in place, weld an X onto that setup to hold the entire chassis square as you remove the rear firewall.
Posted by: ONTHEGRIND Nov 26 2012, 04:29 PM
Any pics ?
Posted by: ONTHEGRIND Nov 26 2012, 04:32 PM
I'm only removing the inner firewall skin you think I need to brace the Longs. ? Where can I find chassis dimensions ? ?
Posted by: SirAndy Nov 26 2012, 04:58 PM
Yes and http://www.914world.com/specs/914info.php

Posted by: SirAndy Nov 26 2012, 05:09 PM
Any pics ?
A simple search for "+floor +bracing" returned plenty of search results to look through.
Posted by: ONTHEGRIND Nov 26 2012, 10:06 PM
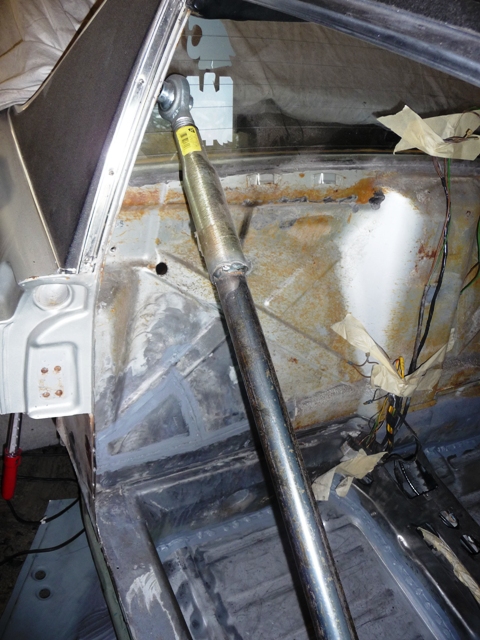
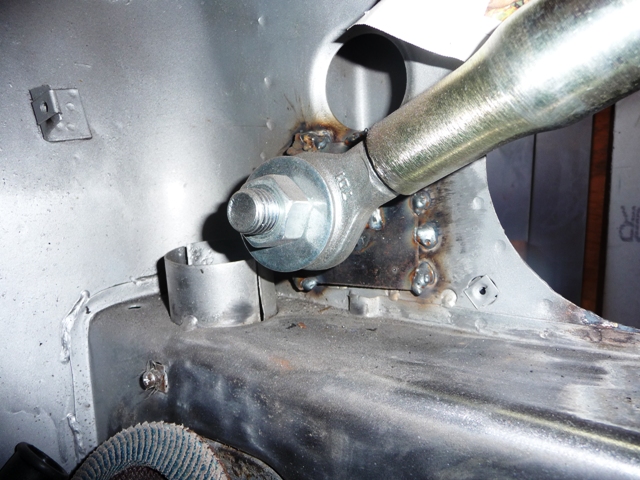
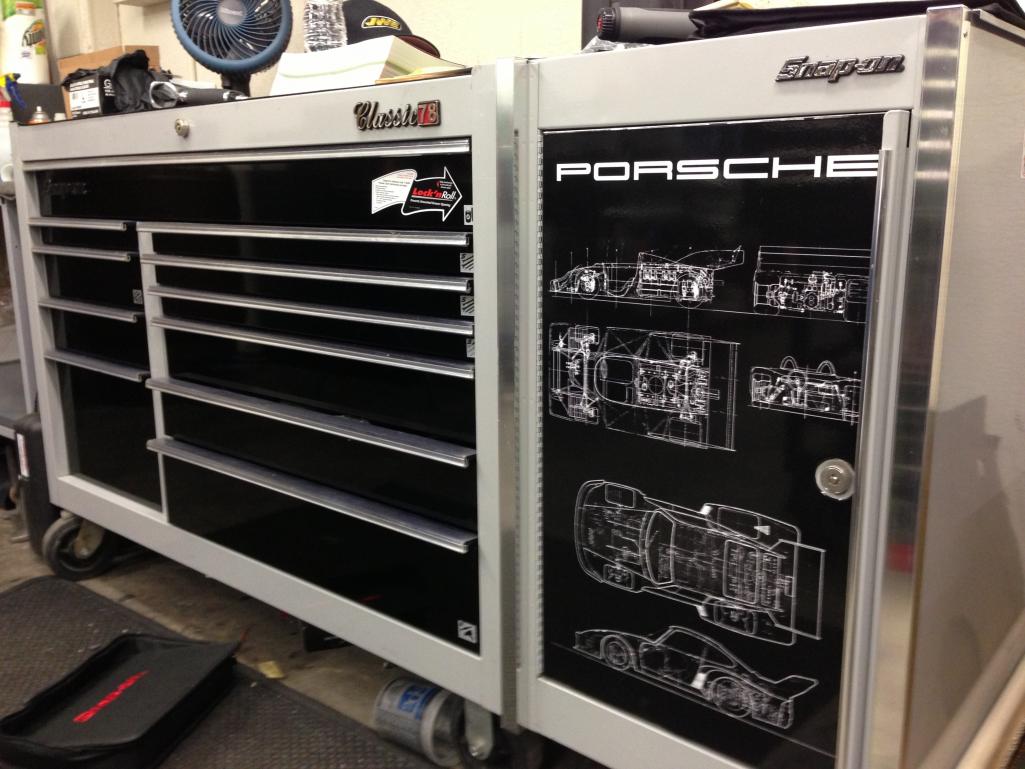
Well this was a tough to get off in an hour also added some art work to my tool box..
Anyone have a nice inner fire wall piece ..? Door supports are being fabbed tomarrow I bought some hiems from osh and have some 1inch round tubing
Attached thumbnail(s)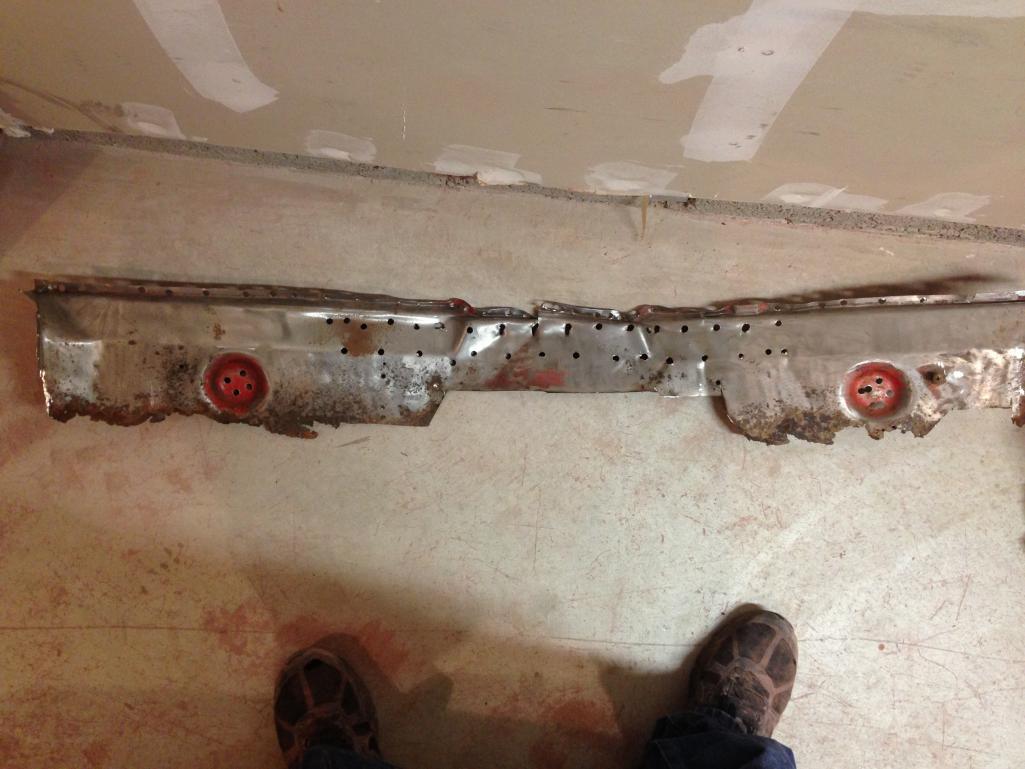
Posted by: SirAndy Nov 26 2012, 10:09 PM
http://www.restoration-design.com/Merchant2/merchant.mvc?Screen=CTGY&Category_Code=914

Posted by: ONTHEGRIND Nov 26 2012, 10:19 PM
Yeah wasn't sure is someone had a clean one locally.. I want to buy a floor pan from mcmark but everytime I'm out at Infineon I end up working too late to make a trip too his shop..
Thanks again Andy
Posted by: ONTHEGRIND Nov 27 2012, 12:25 AM
Anyone know the the bolt size for the upper seat belt hole ?
Posted by: Jon H. Nov 27 2012, 04:20 PM
Anyone know the the bolt size for the upper seat belt hole ?
I'm not sure of the size but I seem to recall it's imperial and not metric. I could be wrong though.
Jon
Posted by: mr914 Nov 27 2012, 04:35 PM
Looking good
Question....
How did you get the paint off in the nooks and crannys such as the ribs on the firewall? Can you actually get a 8" sanding disc in there?
Keep up the good work 
Posted by: ONTHEGRIND Nov 28 2012, 10:00 PM
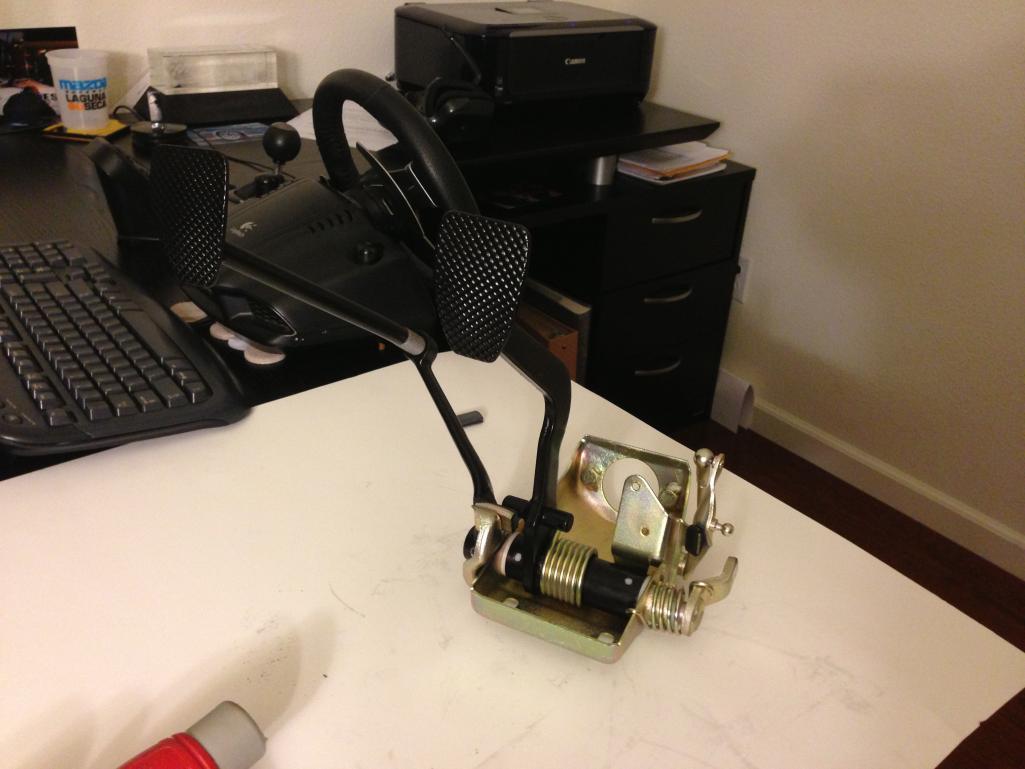
So I went to dinner last nite but did make some progress today kinda of waiting on parts didnt finish the pedal either need to press the roll pin in still and need the lock nut for clutch pedal.. i worked in the office tonite lol
Attached thumbnail(s)
Posted by: ONTHEGRIND Dec 1 2012, 02:03 AM
So I haven't been slacking just haven't takin any photos I will update tomarrow here is a pic of the car before and guesses on the color ? Bahia red or gaurds red car is a 71 don't have the code on the door.
Attached image(s)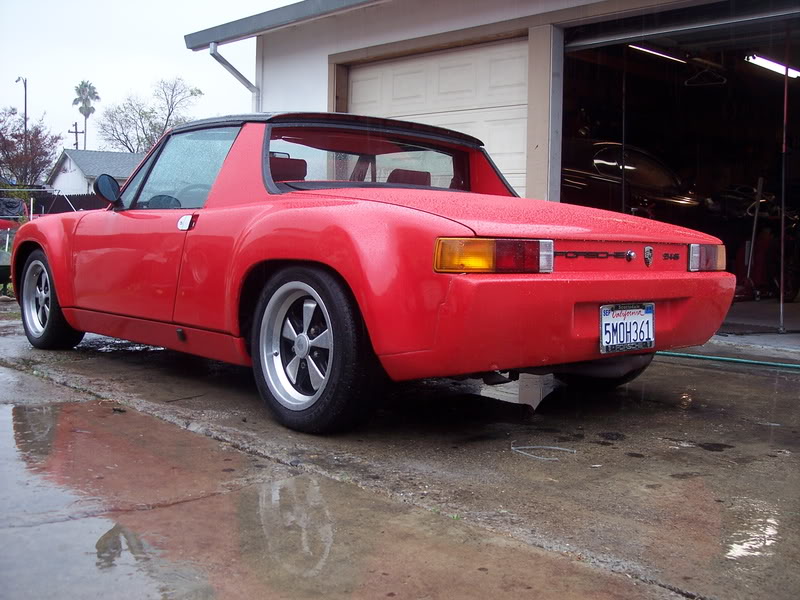
Posted by: sixnotfour Dec 1 2012, 02:59 AM
7/16-20
Posted by: ONTHEGRIND Dec 2 2012, 02:09 PM
Any ideas on the color ?
Posted by: messix Dec 2 2012, 02:24 PM
 what engine is that????????
Posted by: LotusJoe Dec 2 2012, 02:45 PM
what engine is that????????Lycoming IO-720
 maybe
maybe
Posted by: ONTHEGRIND Dec 2 2012, 06:44 PM
oops let me delete that pic that would be a 908 engine
Posted by: Andyrew Dec 2 2012, 11:47 PM
So I haven't been slacking just haven't takin any photos I will update tomarrow here is a pic of the car before and guesses on the color ? Bahia red or gaurds red car is a 71 don't have the code on the door.
Hard to tell with the rain and overcast.
Looks like faded guards red.
Point of reference, SirAndy's avatar shows guards red.
Posted by: ONTHEGRIND Dec 3 2013, 08:15 PM
Howdy all Here Is a update In video Form.. I decided to start working on the 914 again I finally got 1 hour into it today.. I work for Jerry Woods Ent. so I spend a lot of time with Porsche's so coming home to work on one hasn't been a high priority plus if anyone has been to the shop knows the level that the cars at the shop are held to and to try to replicate that at home in a one car garage is difficult.. Anyhow here are a few videos of where the car is at and would like some opinions.. I try to not ask the guys at the shop cause they are used to making things flawless and I don't have 6 figures to restore a 914 I just want a nnice cruiser not a concourse car..
http://www.youtube.com/watch?v=cjrNExtjGv8&feature=share&list=UUb4VThq4Uv04K8rKi4yGetQ&index=1
http://www.youtube.com/watch?v=slKaPURf60k&feature=share&list=UUb4VThq4Uv04K8rKi4yGetQ
Posted by: effutuo101 Dec 4 2013, 09:25 AM
Steady progress wins! I do the same thing on my lunch hour.
Looking good!
Posted by: ONTHEGRIND Dec 7 2013, 11:34 AM
Heres Some more video updates ..
http://www.youtube.com/watch?v=Xth2KBYaBkE&feature=share&list=UUb4VThq4Uv04K8rKi4yGetQ&index=2
http://www.youtube.com/watch?v=4mL4hhQy9p0&feature=share&list=UUb4VThq4Uv04K8rKi4yGetQ&index=1
http://www.youtube.com/watch?v=vJtJWJVD-OM&feature=share&list=UUb4VThq4Uv04K8rKi4yGetQ
How do I embed videos ?
Posted by: SirAndy Dec 7 2013, 11:49 AM
http://www.914world.com/bbs2/index.php?showtopic=97052
Posted by: ONTHEGRIND Dec 7 2013, 12:12 PM
Sweet I searched but couldn't find it thanks.. Bummer the weather sucked last nite I wanted to take the ducati to alice and my co worker had his 914 6 ready to roll.. guessing you didn't go either..
Posted by: SirAndy Dec 7 2013, 12:20 PM
Yeah, gotta go to the memorial for a friend who killed himself ...

Posted by: gothspeed Dec 7 2013, 02:09 PM
You are doing an amazing job!! you are making great progress for only an hour a day
I widened my rear steel flares a little, mostly to get the upper flat panel of the rear flare closer to the verticalish angle of the front. This was because after i installed them, i noticed the rear outer flat part tilted inboard as the panel went up. Whereas the same flat part on the front flares were near vertical.
I widened the rear by cutting along the top of the rears about 5/8" inboard of the top tangent point of the top outer fender bend. Then cut all the way around stopping about 5 -6 inches from the bottom on each side. As i went down the sides i reduced the 5/8" to about 1/2".
I then spaced out the outer part of the flare with wood spacers. I used 1/2" thick wood strips and located them about 10 and 2 oclock. After this you wil find the outer 'pushed out' part of the flare no longer matches the seam where it was cut from. I corrected this by making perpendicular cuts, 1" on the outer and 1.5" long on the inner part of the flare, about 5" apart from each other along the length of the first long cut.
This allows the inboard part of the flare to be reconciled with the outer. By forming the now independent tabs to match each other across the 1/2" opening. Then i made card stock paper templates of the 1/2" gap, cut them out in steel and butt welded them in. Then hammered and flattened the interface. The overall shape of the rear flares now look like the way they 'should have been'.
I think this method can work well with the 1" that you want to add to the rears. If i were to do this again i would have gone 3/4" to 1" instead of the 1/2" i went with. But it looks far better now than it would have, had I not widened them at all. 
If you are interested, i can dig up some pics i took of this process.
Posted by: ONTHEGRIND Dec 7 2013, 03:29 PM
Put in another hour today removed quite a bit of floor pan getting close to trimming it. then I will finish prepping the interior and move on to the firewall I am going to bolt the tub to the cellete at our shop before I start welding.. I was talking to our Fabricator at Jerry Woods and he explained a similar way of doing it Id love to see some photos if you have some... Here is a photo update
http://smg.photobucket.com/user/xr8ted/media/56D1B873-6307-453B-966A-0669155105F2-9950-000007313386EA28_zps38146f4c.jpg.html
Posted by: gothspeed Dec 7 2013, 04:25 PM
Here are some pics of my rear flare 'widen' process  . For some reason I thought I took a lot more pictures of this. I may have to check my other SD card.
But these illustrate the basic idea of what I did. On the third picture, you can see how much better the rear outer shape matches the front, due to the 'widening'. Also in that pic you can see the hand shear I used, to cut the strips that filled the gap I created. I hope this helps
BTW If anyone could use that rear trunk lid with the spoiler in my pictures below. It is straight and available for pick up in the low to mid two digit range ....
Attached image(s)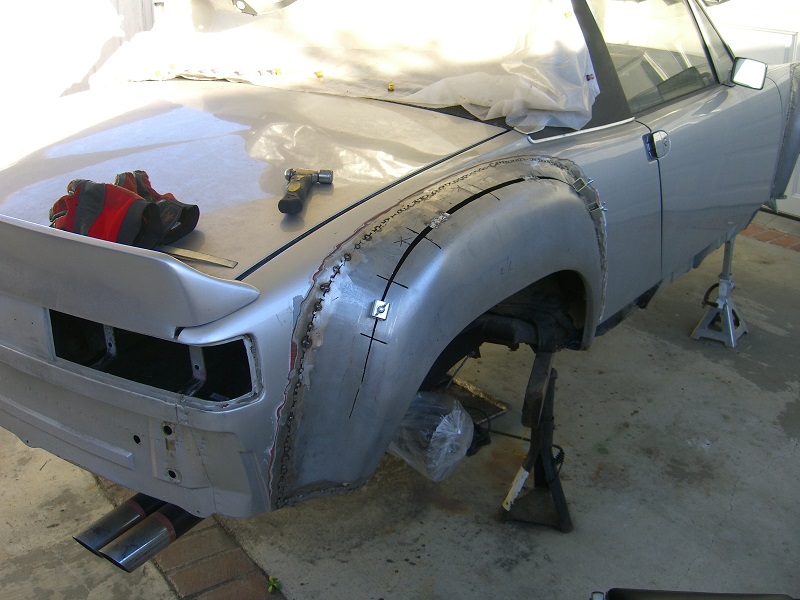
Posted by: ONTHEGRIND Dec 7 2013, 07:03 PM
I'd take the deck lid but I'm too far. I love the look of the wider fenders thinking 15x10 with Avons on the back
Posted by: gothspeed Dec 7 2013, 08:33 PM
Now that the filler and one coat of primer is on, I can barely tell the fenders are 1/2" wider than 'stock flares'. Most people would probably not notice they are wider unless I mentioned it, however overall, it does simply 'look better' than before.
That is one of the reasons I only went 1/2", because I did not want it to be 'obvious' the fenders were widened. But now I think I could have done 3/4" with the same subtle effect. 1" would possibly have slid under the radar too, excepting of course the added space for wider wheels . 15 x 10 should fit right in if you add that 1" . I will be running 951 8 x 16 fuchs on the rear, spaced out as far as possible of course ... 
Yeah, I am down near the coastal part of Long Beach ...... for someone who would actually use the rear lid, I would deliver 30 or so miles, to meet part ways with it.
Posted by: ONTHEGRIND Dec 10 2013, 12:55 AM
http://www.youtube.com/watch?v=5NHL_TIwV-o&feature=share&list=UUb4VThq4Uv04K8rKi4yGetQ&index=1
https://www.youtube.com/watch?v=5NHL_TIwV-o?
Posted by: Blue6 Dec 10 2013, 01:31 AM
Pm sent on decklid..
Posted by: ONTHEGRIND Dec 10 2013, 11:26 PM
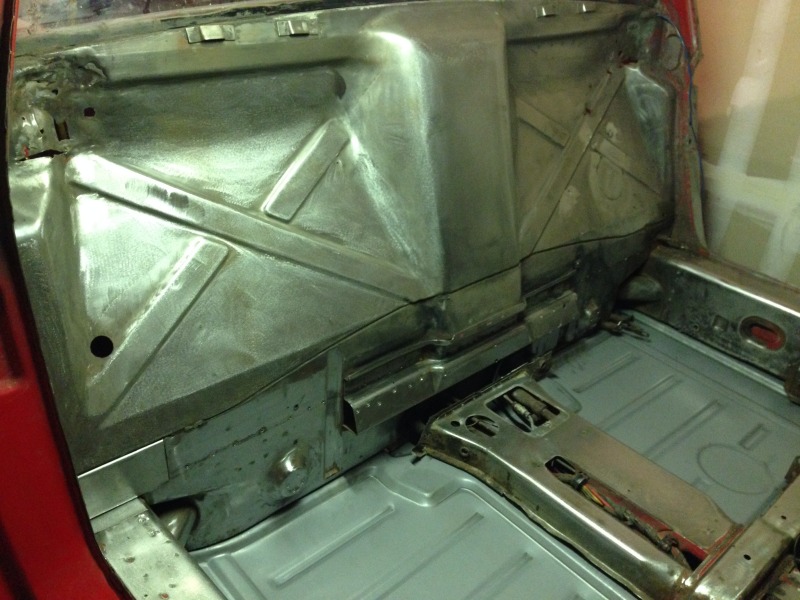
Few more Updates.. I was helping prep a 997 RSR all day today inside the tub so I figured since I was working in the interior of that I'd come home and try to work on the interior of the 914 ..
Cleaned up the firewall and and started to uncover the drivers side long..
http://smg.photobucket.com/user/xr8ted/media/F37D0CCD-83E1-4109-AAD5-3A6882EEC6D9-12821-0000094E33A5D02C_zpsdc112307.jpg.html
http://smg.photobucket.com/user/xr8ted/media/14AB04F8-3001-4A05-99C1-C89FC20E8F3C-12821-0000094E3C697884_zps17a55edd.jpg.html
http://smg.photobucket.com/user/xr8ted/media/8BB8A7B7-28A9-4101-B647-FC7764A92217-12821-0000094E45CF38E5_zps80c7f58f.jpg.html
http://smg.photobucket.com/user/xr8ted/media/CB4F3629-2647-44DE-AC03-C52A2D4EC2A6-12821-0000094E5D74D728_zps2199696e.jpg.html
http://smg.photobucket.com/user/xr8ted/media/E3A1E2C2-0980-434E-8FE4-EA9C25F82337-12821-0000094E6320D401_zpsab2a59be.jpg.html000094E6320D401_zpsab2a59be.jpg[/IMG][/URL]
Posted by: vw505 Dec 11 2013, 10:39 AM
What products are you using to remove the paint?
Posted by: ONTHEGRIND Dec 11 2013, 10:39 PM
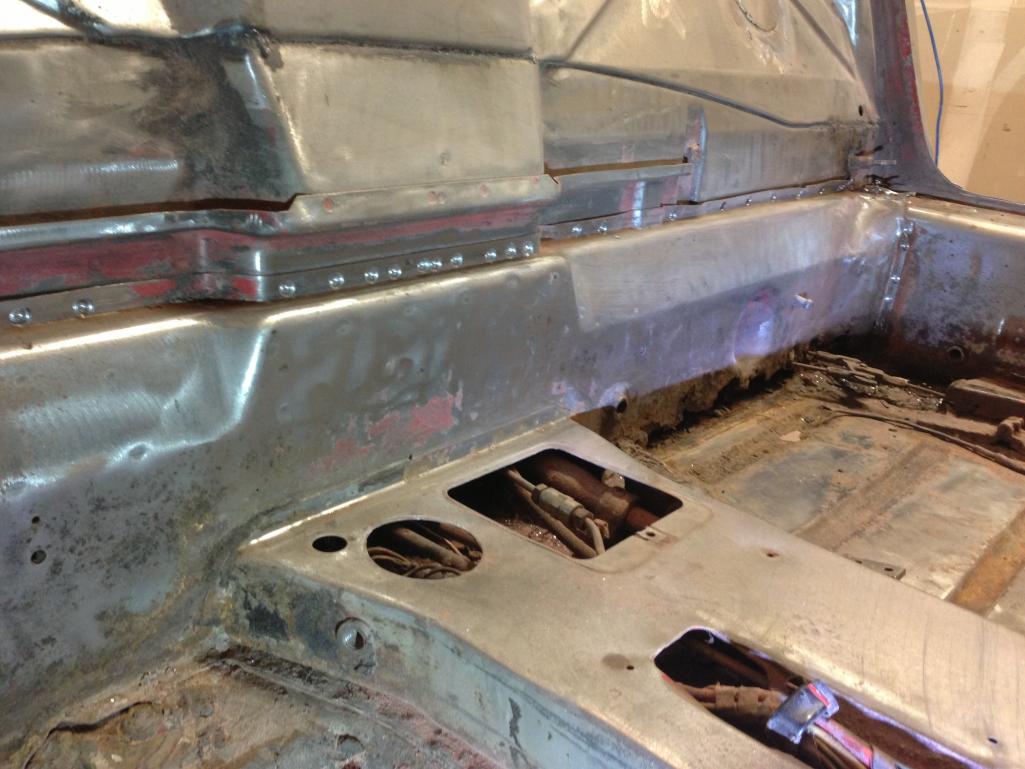
Well got into the hell hole area removed the battery tray also along with some more interior work.. I wish I would have studied the hell hole a little better I cut a piece probably bigger then needed. I wasn't aware there were two layers of steel but oh well I will fab up a piece tomarrow at.. as you can see in the photos the only real weak spot is were there was at the single layer of steel.. As for the tools I used today here is a photo Skil Grinder turned into a 1/4 collet by Jerry woods with a speed control and some roloc's you can probably grind threw the golden gate bridge lol..
http://smg.photobucket.com/user/xr8ted/media/2868C508-9E28-4FED-B02F-5900AA63131A-664-0000004F953252C2_zps705b5e18.jpg.html
http://smg.photobucket.com/user/xr8ted/media/2868C508-9E28-4FED-B02F-5900AA63131A-664-0000004F953252C2_zps705b5e18.jpg.html
http://smg.photobucket.com/user/xr8ted/media/8B33AEAB-191B-43E5-8308-6C20CC7CFF8A-664-0000004FBB1D368B_zpsbbc3fb5b.jpg.html
http://smg.photobucket.com/user/xr8ted/media/EFEBC41B-02AF-4565-B67C-CC058362B635-664-0000004FC6A9F831_zps32b61e8d.jpg.html
http://smg.photobucket.com/user/xr8ted/media/CBA4F864-9445-48D4-A1DB-2E66DA466971-664-0000004FCFEB74A0_zps2fbf63e9.jpg.html
http://smg.photobucket.com/user/xr8ted/media/EE736A71-7102-4C47-BD9C-ED1A862B8FFB-664-0000004FD5C753CE_zps5cc2f2a1.jpg.html
Posted by: ONTHEGRIND Dec 11 2013, 10:42 PM
Here were the tools of the day
http://smg.photobucket.com/user/xr8ted/media/3624DB1D-FE70-4266-859E-F38DF124CCC0-664-00000051DFAEDFEC_zps3a791908.jpg.html
Posted by: ONTHEGRIND Dec 12 2013, 11:18 PM
http://smg.photobucket.com/user/xr8ted/media/A72A35C4-B1F6-4378-A91F-C8DA7D85C60F-198-0000000E4841049F_zps970b427f.jpg.html
http://smg.photobucket.com/user/xr8ted/media/76B47F76-3E56-46CF-BBC1-D790D67D7F1A-198-0000000E5B940BE9_zps2bbd33e5.jpg.html
Posted by: gothspeed Dec 13 2013, 11:38 AM
Great work!! ....
Posted by: ONTHEGRIND Dec 14 2013, 12:14 PM
What should I spray inside the longs before I weld. ?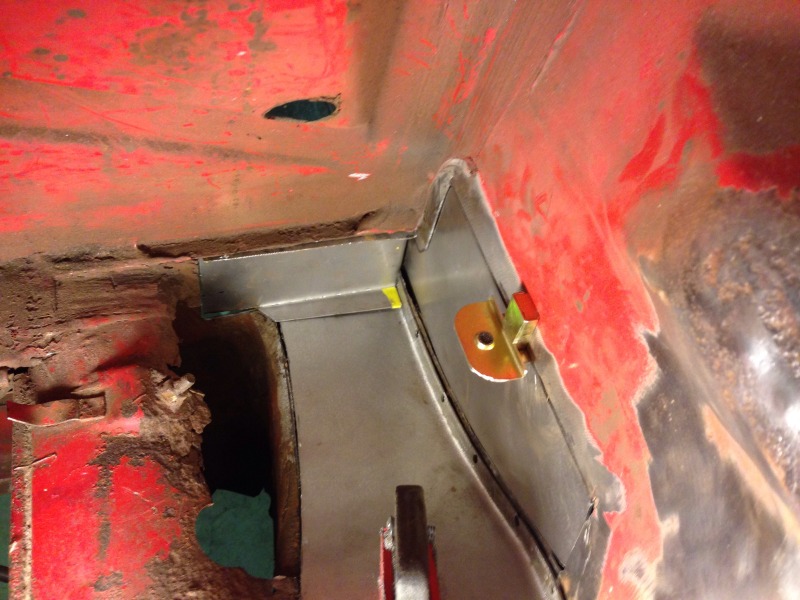
Posted by: Krieger Dec 14 2013, 12:47 PM
3M had a product called Weld Thru II that is supposedly pretty good. I've used in some places that are locked away so I can't tell you. Also sprayed a bannana muffler with it that has held up well.
edit: I reread your post. the 3M product is good for clean metal. For rusty metal, or metal that had been cleaned of rust I have used Home Depot's Rust Destroyer with great success. It comes in a spray and used to have a brush on can.
Posted by: ONTHEGRIND Dec 14 2013, 01:23 PM
Sweet I will try that.
Posted by: gothspeed Dec 14 2013, 09:08 PM
I think Napa has 'weldable primer' on the shelf ...
Posted by: ONTHEGRIND Dec 14 2013, 11:32 PM
I have some weldable primer but was thinking about for inside the longs I want to shoot something down inside there..
Posted by: gothspeed Dec 15 2013, 02:32 AM
I have some weldable primer but was thinking about for inside the longs I want to shoot something down inside there..
This is the stuff!! I used about 3-4 cans. I put it in all the enclosed structures, including the shift tunnel.
http://www.eastwood.com/internal-frame-coating-w-spray-nozzle.html
Posted by: ONTHEGRIND Dec 15 2013, 08:38 PM
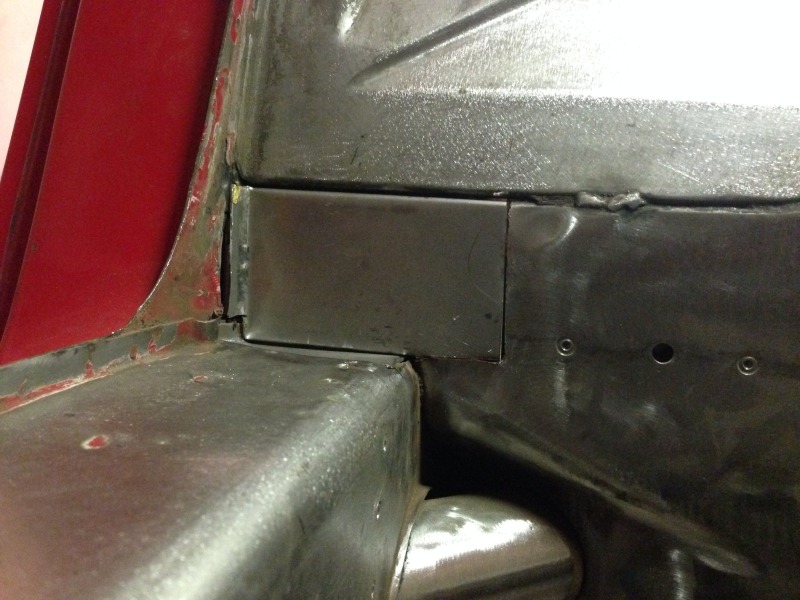
bolted up the floor then trimmed the existing piece going to patch up the bad parts of the front half.http://smg.photobucket.com/user/xr8ted/media/612610E9-4639-4C71-95F1-FF9E757F7F64-1927-00000158FCA908C2_zps03735c5d.jpg.html
http://smg.photobucket.com/user/xr8ted/media/41B8FAA9-4E32-4801-9B94-22DBA2842BC8-1927-00000159040C38C6_zps7c4f1972.jpg.htmlhttp://smg.photobucket.com/user/xr8ted/media/C3CA1BD5-9693-4C65-A011-BBFE23F05838-1927-00000159104DB443_zpsd5af3920.jpg.html
Posted by: gothspeed Dec 15 2013, 08:53 PM
Looks fantastic !!! ....... maybe rotate that nice looking patch 180°, so it can butt up directly to the new panel? But you were probably already gonna do that ..... ![popcorn[1].gif](style_emoticons/default/popcorn[1].gif)
Posted by: ONTHEGRIND Dec 15 2013, 11:27 PM
yeah I made a few of those patches I going to see if our fab guy can make me some fresh ones at the shop.. I swear that guy has some skills with steel we just converted a gt3 cup into a RsR and the tubs he made for the wheel wells were like art.. I'm an engines guys but I always try to help him out when I get a chance..
Posted by: ONTHEGRIND Mar 2 2014, 05:42 PM
This car is now for sale still in the current condition I just don't have the time for it ..
Car is located in San Jose ca if anyone is interested..
Posted by: Mike Bellis Mar 2 2014, 07:13 PM

What does it look like now?
Posted by: ONTHEGRIND Mar 2 2014, 07:15 PM
Same as it did in the last photos
Powered by Invision Power Board (http://www.invisionboard.com)
© Invision Power Services (http://www.invisionpower.com)