Printable Version of Topic
Click here to view this topic in its original format
914World.com _ 914World Garage _ N2Deep Build! Rusty '71 1.7L
Posted by: Dasnowman Nov 22 2012, 12:07 AM
Am I in 2 deep with my car? lol not the 90's awesome beat http://youtu.be/WVtRyrOaoZA even though I had to listen to it again and it made me smile! lol summer of 92.
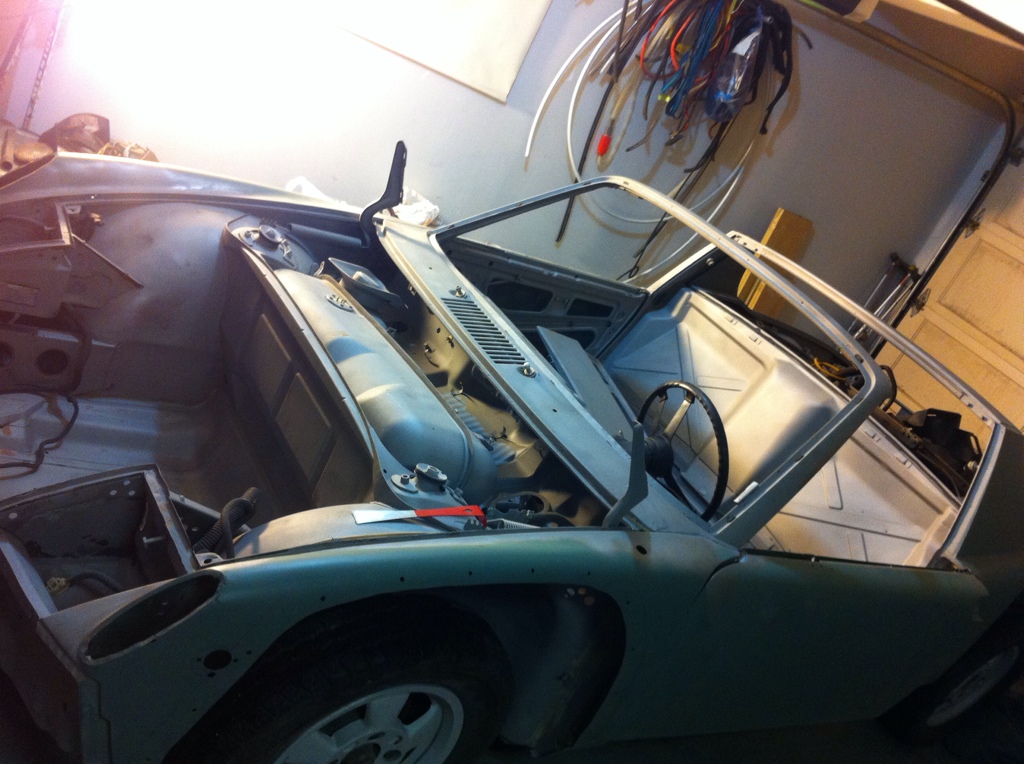
Anyway back to cars so I bought the 914 this pass summer got a killer deal $1500. Knew that the engine wasn't running guy said it was running/rebuilt when he bought it 20 years ago. but was missing efi system? Paint job was crap but all body seemed really straight Batt Tray was toast but came with a new one, hell hole, longs and everything else seemed ok rust wise. So I stripped all the exterior paint to metal 3-4 layers of paint and up to 2-3" of bondo in a few places.  Turns out this car must have been sideswippped on both sides and sandwiched in 3 car accicent over the years and that's why so many paint changes..
  Every panel on the car seems to dented or deeply guage in one way or another... need a new hood and passanger door for sure.
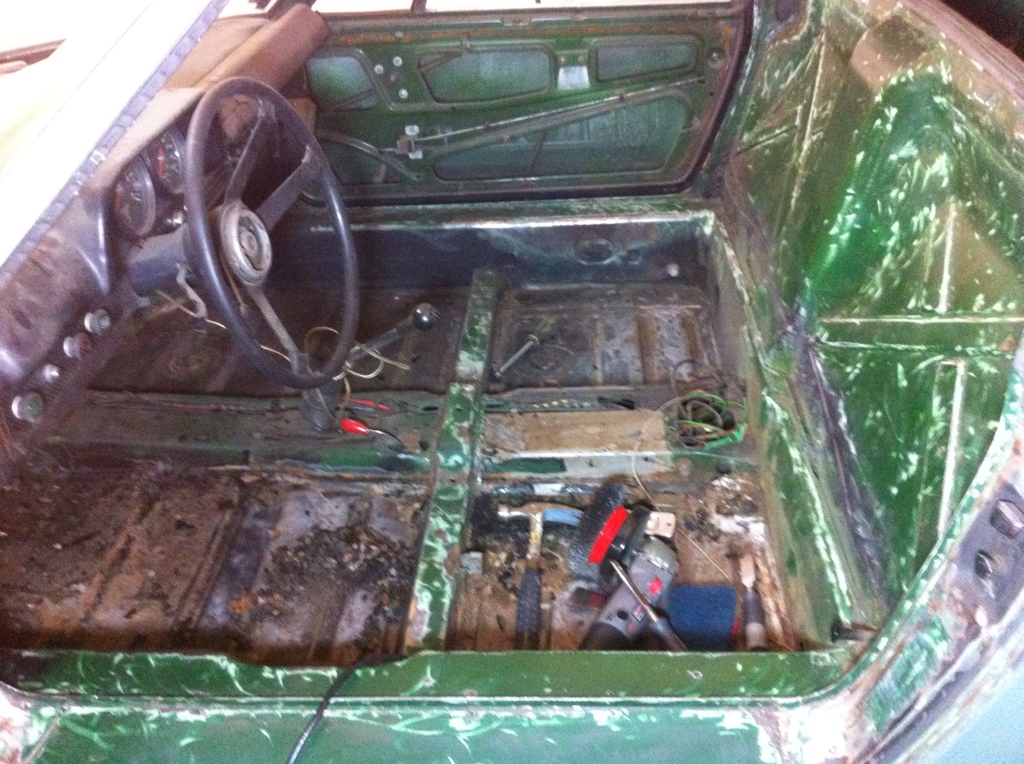
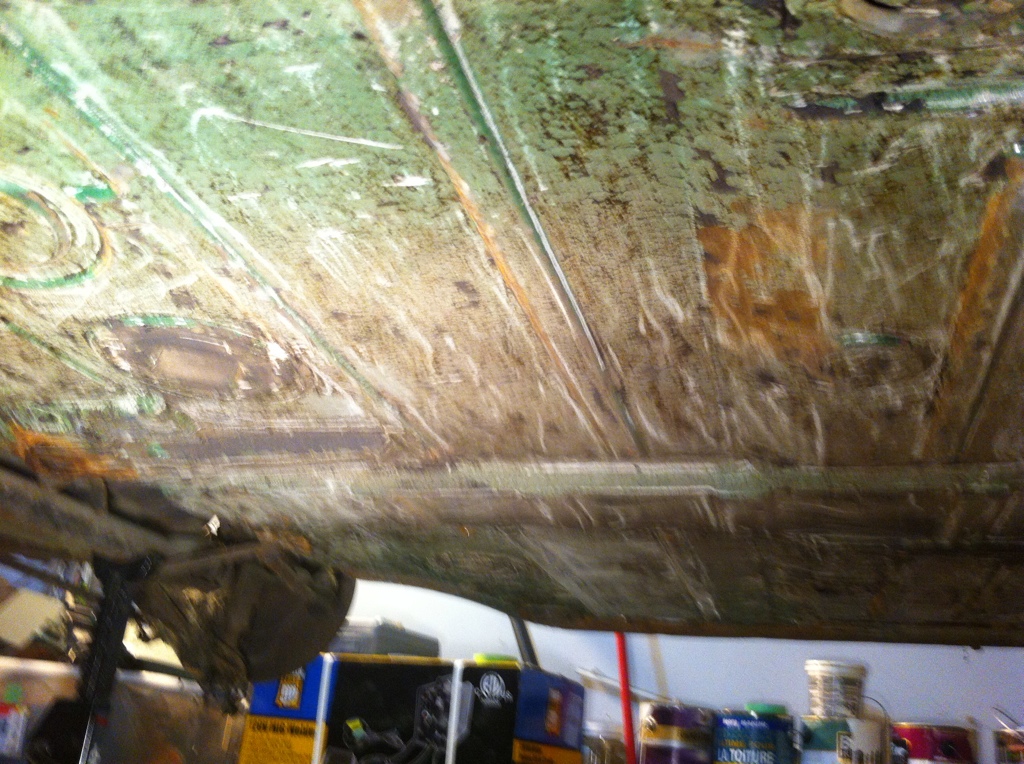
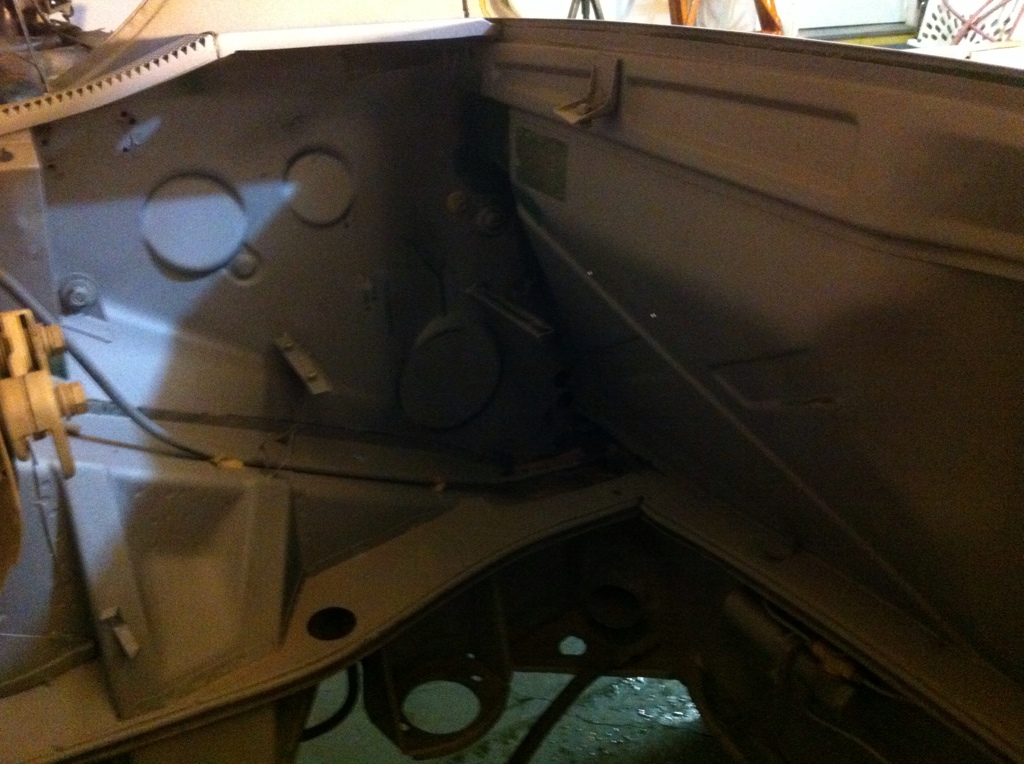
So now the car been totally primed in self edging primer on the outer panels. I'm remove the ratty interior and start removing the tar on the floor boards seem ok but there is 2 x 8" under the driver seat in the cannel that needs replacing. Start removing the under coating on the front drivers side wheel well rusted a few spots right through to the water channel for the hood weather stripping... and all the channel under the weather stripping seems to be half rotten
So here is my dilemma it's a 71 that was going to be a fun budget build to auto cross or do a few track days in and was planning to have it running for the summer. I'm on EI right now so I have the time between job interviews and job hunting but no money to get things done.
So what to do with the car I don't have the money to sand blast the underneth and it's not like a bug where you can take the front and rear fenders off to get in there. And I can't get into there with grinders and sand paper etc. to clean up the seams and dents etc under the under coating. But at the same time I don't want to leave it the way it is and the rust get worse.
So my original plan was just to.
1) get all the old paint off inside and out and primer it.
2) Though on some GT F/G flares front and rear. and 916 bumpers.
3) Pull interior out prime, paint maybe a roll cage and stiffening for chasis then though some racing buckets in.
4)Get some bigger tires
5) Pull engine, take off heads, check everything out, clean it up, maybe through a bigger cam for some carbs.
6) Run new gas lines maybe big enough for when I'm working again afford to do an STi swap. But for now just the 1.7. If the 1.7 is dead mabe have to buy a used one for now.
Now I'm looking at $$$ for body work, money $$$ for sand blasting, $$$ for new hood and door, money for all rubber on car just crumbles if you move or touch it, $$$ for a welder to fix the rust issues... and that's not even getting into the engine and tranny and brakes so ya I guess there is Nothing called a a budget build with these cars lol.
Anyway we will see where this build leads if you have the time you don't have the money and if you have the money you don't have the time and that sucks either way!
Now I know why so many of you are so pissed when people part a perfectly good car. I think the only a sane person would do that if they didn't have the title or the car was stolen.
start
http://s156.photobucket.com/user/dasnowman1/media/Porsche%20914/null_zps59c95361.jpg.html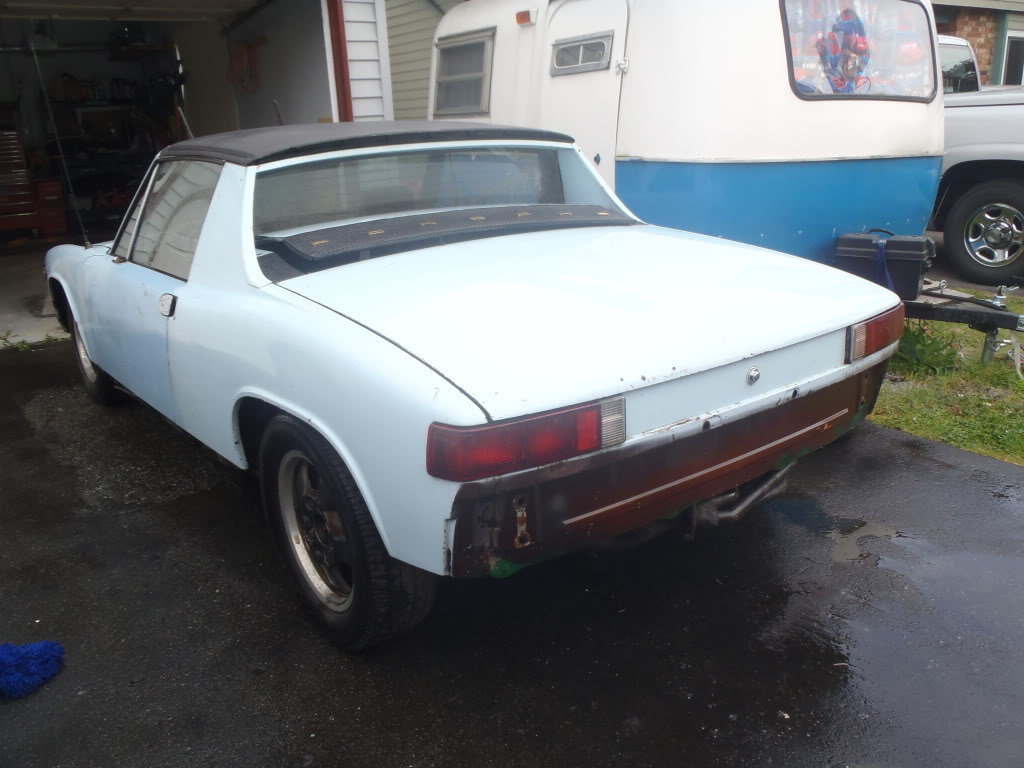
Posted by: billh1963 Nov 22 2012, 05:25 AM
I admire your perseverance to this point!
By doing the work yourself you are saving a LOT of money! The downside is that it will take a LONG to get finished.
When I first got into 914's I couldn't understand why people parted cars that looked worth saving. Now that I am almost through a major rust repair project (see the Scottyb thread on my car) I understand why rusty cars are scrapped. It is MUCH, MUCH, MUCH less expensive to buy a solid car at the outset!
Good luck with your project. You have made great progress!
Posted by: Dasnowman Nov 24 2012, 12:03 PM
Made some more progress last and this week! Good news yesterday was I was able to get the head lights, relays, power all working to the front, but the bad news was the lights barely poped up they were so rusty and seized up so I had to disasseble everything.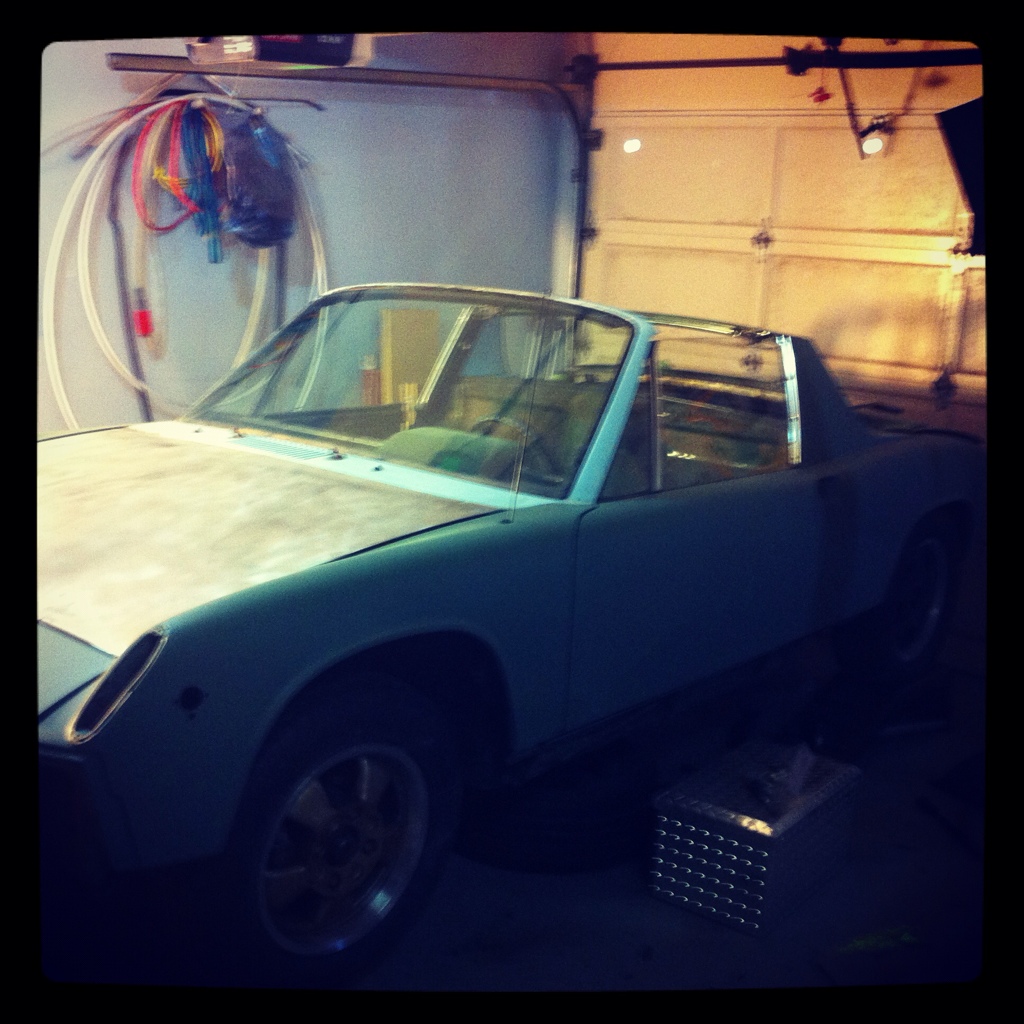
Posted by: 3d914 Nov 24 2012, 12:17 PM
snowman, looks like you're making progress. If you want to play around testing different color combinations, one of the guys here http://www.eggscollective.org/nathan/storage/914_configurator_j.html. Very cool. Here's the configuration I came up with for my 914-SHO V6.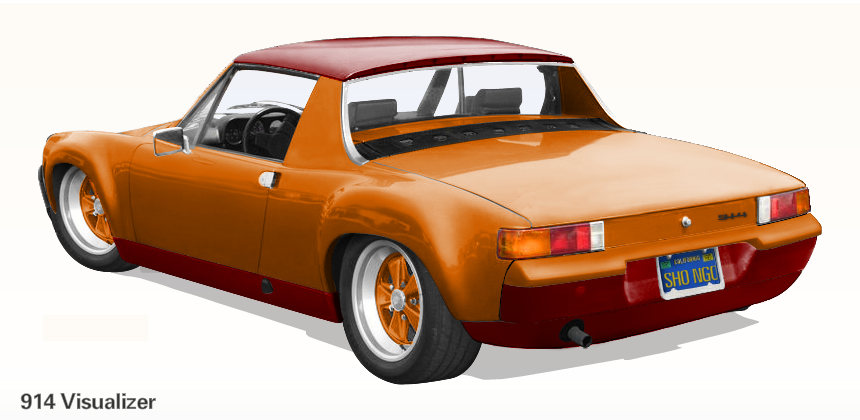
Posted by: Dasnowman Dec 5 2012, 03:45 AM

snowman, looks like you're making progress. If you want to play around testing different color combinations, one of the guys here http://www.eggscollective.org/nathan/storage/914_configurator_j.html. Very cool. Here's the configuration I came up with for my 914-SHO V6.
Nice build you have going on the SHO build, how did you manage to save the photo from the 914 configurator?
Been busy on my build this week so far!

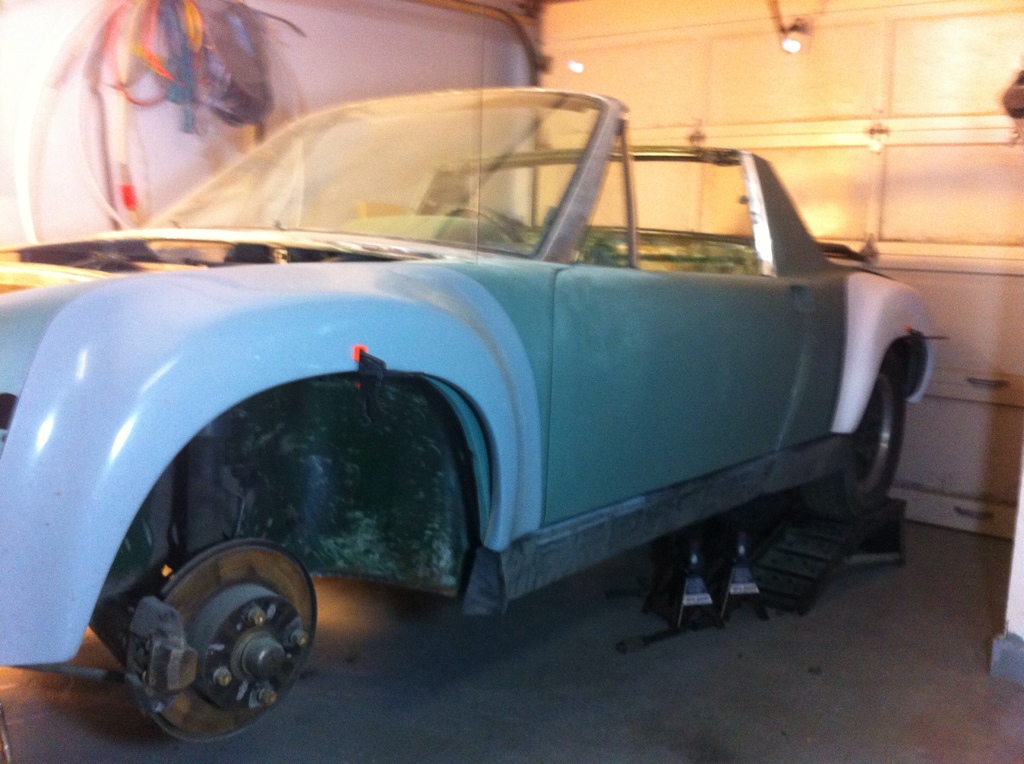
Did some mocking up of the fender flares, cut the fenders away and did some trimming on the f/g flares.
Posted by: Dasnowman Jan 6 2013, 02:07 AM
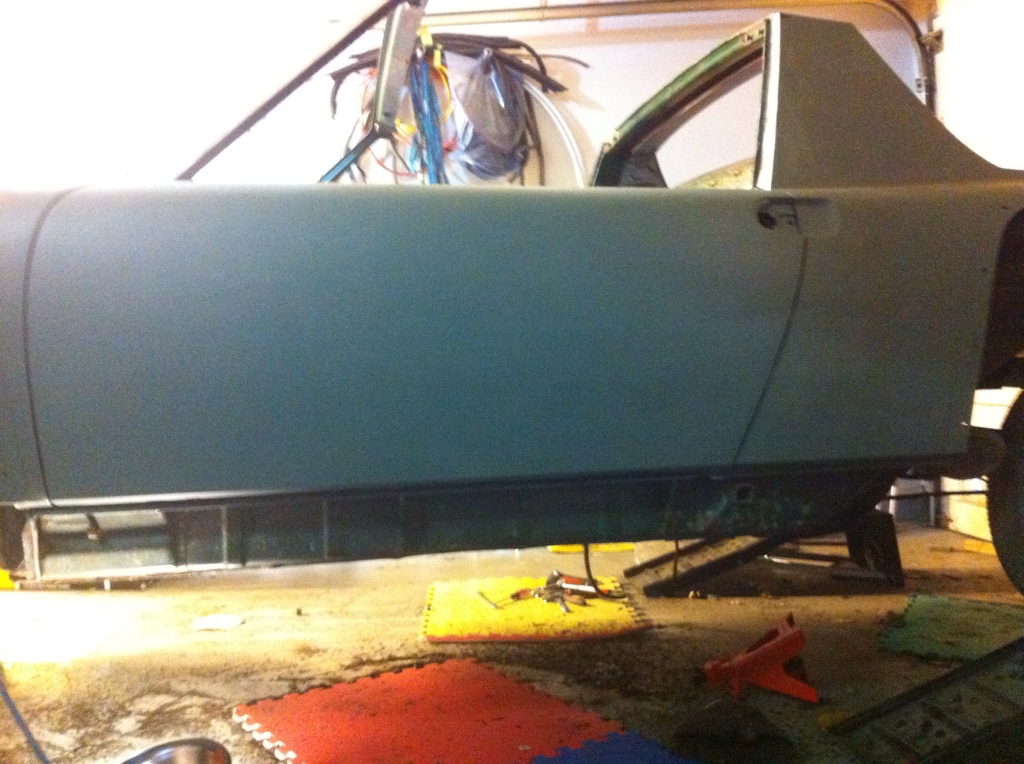
I don't know what's wrong with me but I guess I'm just to picky to stop at just having this done cheap and easy.. UP to now I have spent under 1500 for the car and about $200 in sand paper, wire wheels and self edging primer and another $250 on front and rear flares. Tools mig welder, dolly, rivnut gun, more sockets and primer and paint gun bring it up to another $600 not bad for all new not the best quality tools but it's not like I'll be painting or welding hundreds of cars.
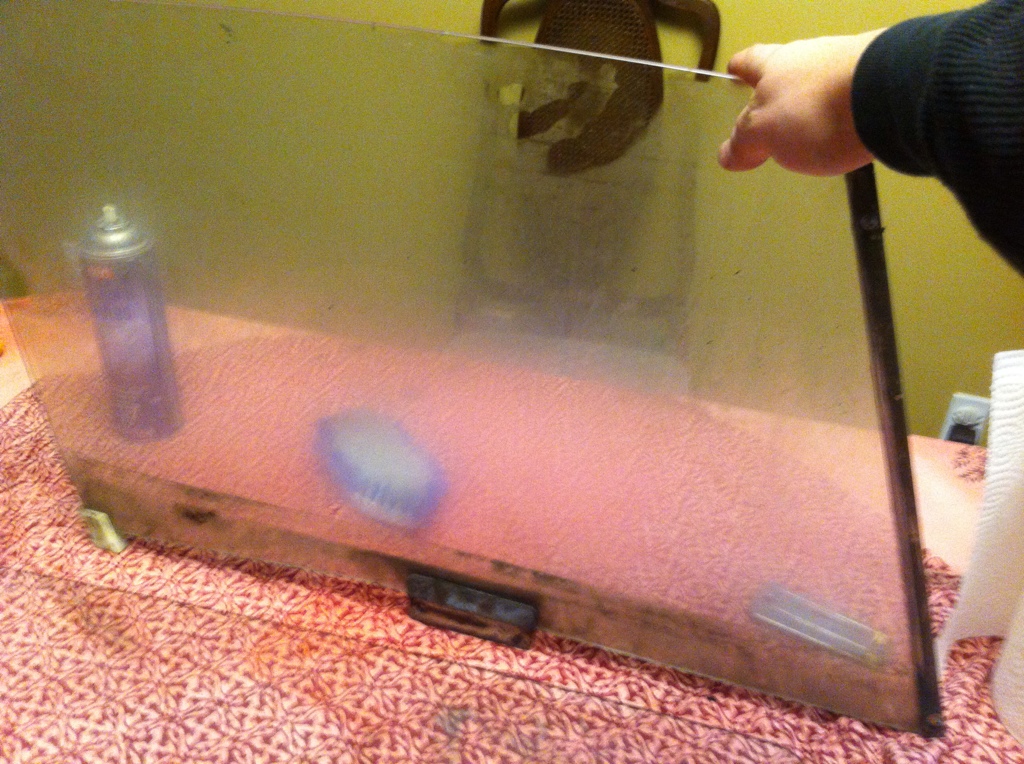
This week pulled all glass, gas tank, dash cap and top dash what a pain that was. Cleaned all glass and packaged it for storage but windshield didn't make it and side windows have some scratches not sure if they got scratched during removal or just covered under 20 years dust and didn't notice when I bought it.
Will have to pull the engine and figure out if I can manage to keep the wiring harness in for balasting or do that too, really want to keep in in and work around it to save time and headaches. It's not going to be a show car or anything just a weekend driver and mainly track or auto crossing.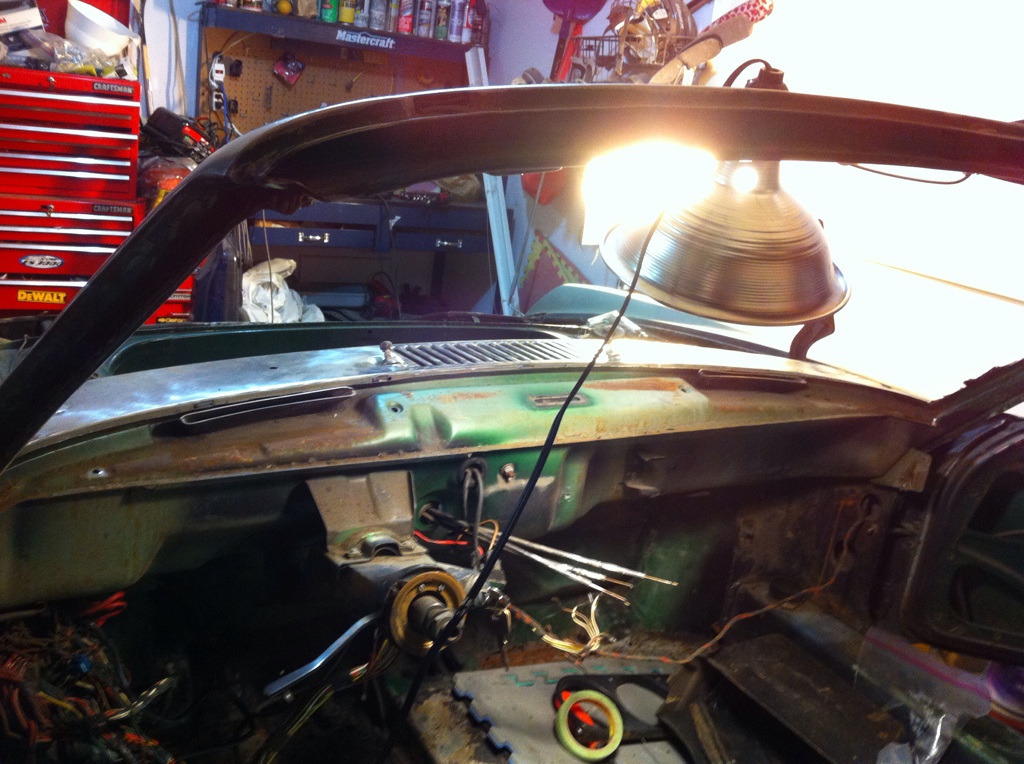

Posted by: euro911 Jan 6 2013, 04:07 AM
![popcorn[1].gif](style_emoticons/default/popcorn[1].gif)
Posted by: Dasnowman Feb 19 2013, 01:08 AM
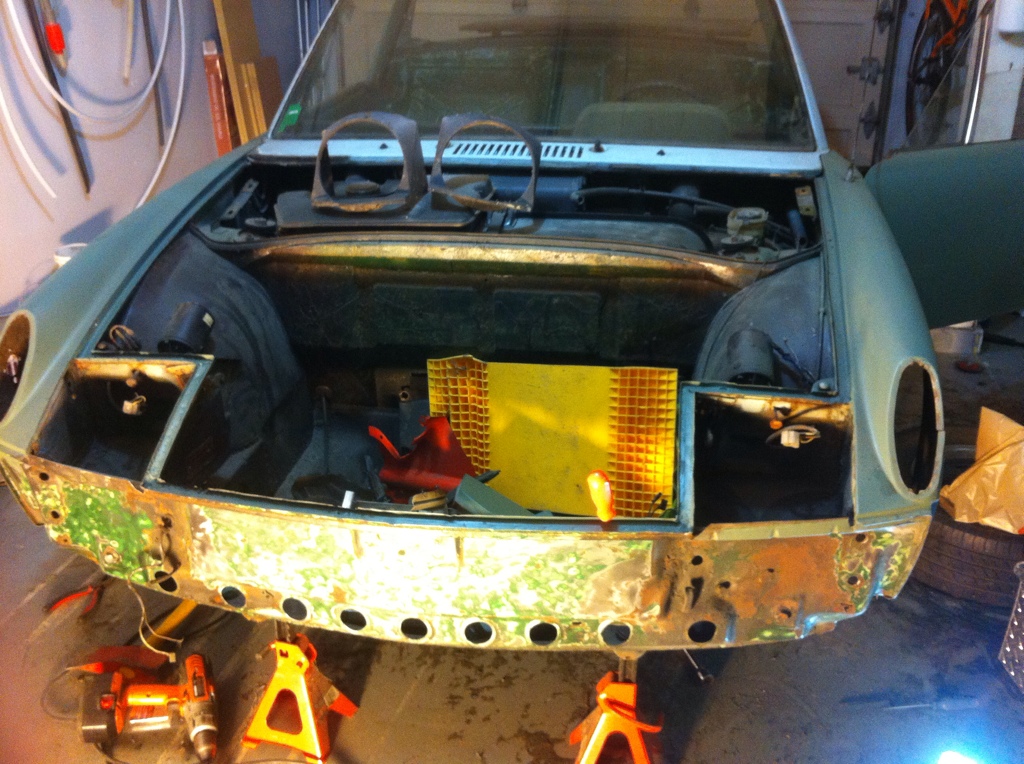
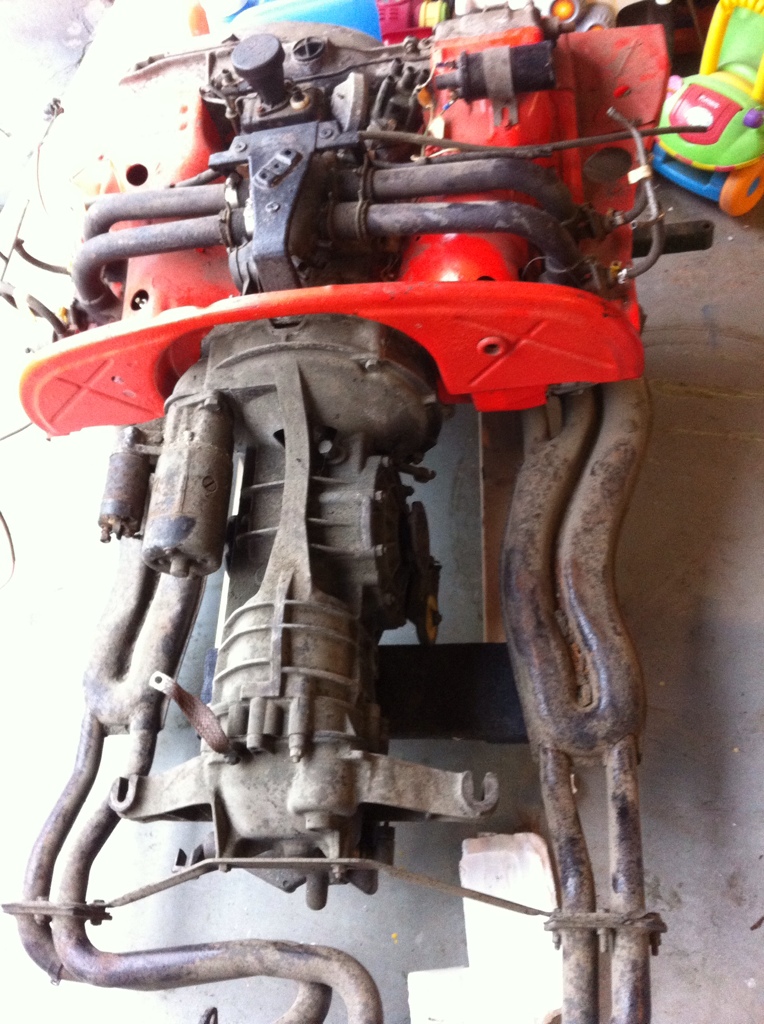
Finally some good news pulled the engine and tranny that was sitting in the car 20+ years, cleaned the intake tube and sprayed some lube in the intake valves, spark plug holes, and valve train. I also used some Lucus preassembly lube on all those areas too. Worked engine back and forth till it started moving freely then hooked up jumper cables from my truck to the starter + and - then used a little jumper to turn over the engine. Did a compression test, was amazed was 145-150psi in all cylinders so looks like engine wise I should be able to get this running for the summer.
Also have been busy stripping the rest of the car to get ready for sandblasting... Lumming wiring to protect it from sandblasting and scraping rest of the under the car need taller stands barely fit under the car.
Also for anyone stripping the interior tar or under coating make sure "YOU BUY A MULTI TOOL WITH A SCRAPPER ATTACHMENT" this will save you a ton of time trust me.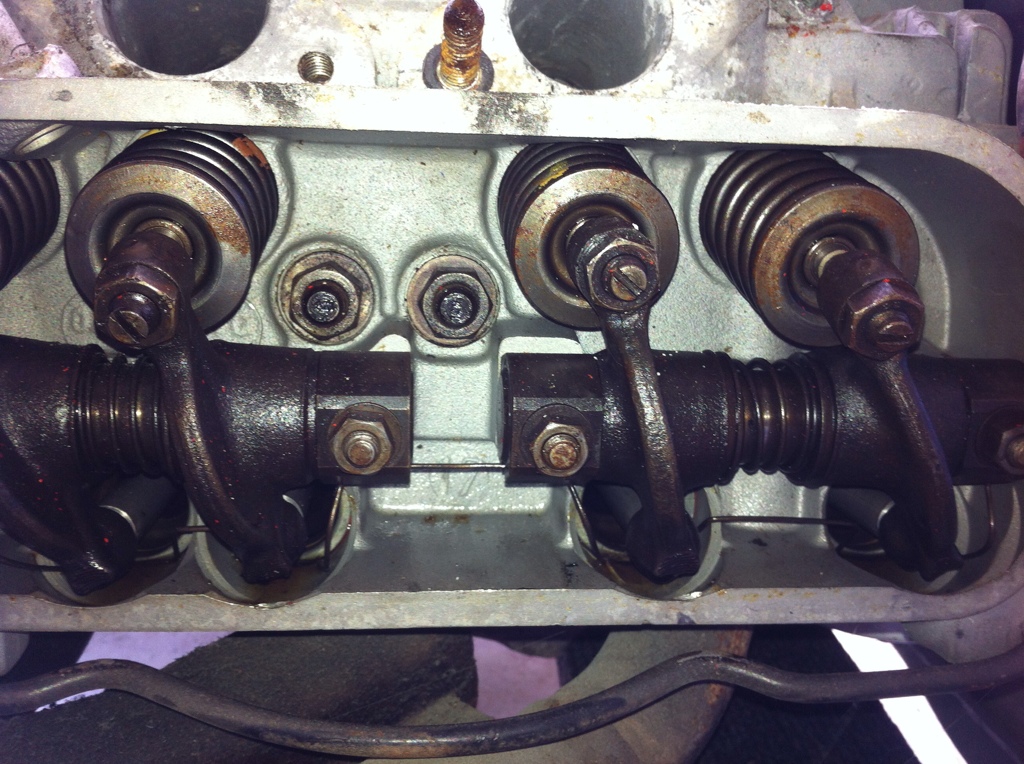

Posted by: euro911 Feb 19 2013, 02:09 AM
Cool on the compression test ... those are good numbers 
Posted by: Dasnowman Feb 22 2013, 01:58 AM
Some things never cease to amaze me first the case of the tranny was chipped and I knew the engine tray and inner right wheel house needed some work but this must be one of the grossest cover ups.
They used sheets of tin, a little sealer, hundreds of sheet metal screws, duct tape then spray painted over it. You would think they would have rust protect it or at least cut the rusty metal out??
I already have the replacement engine shelf and right upper wheel house metal sitting at the shipping depot hopefully there is no other suprises while I'm in there. I also picked up a Mig welder on a black friday sale I'm still dying to try out on the car..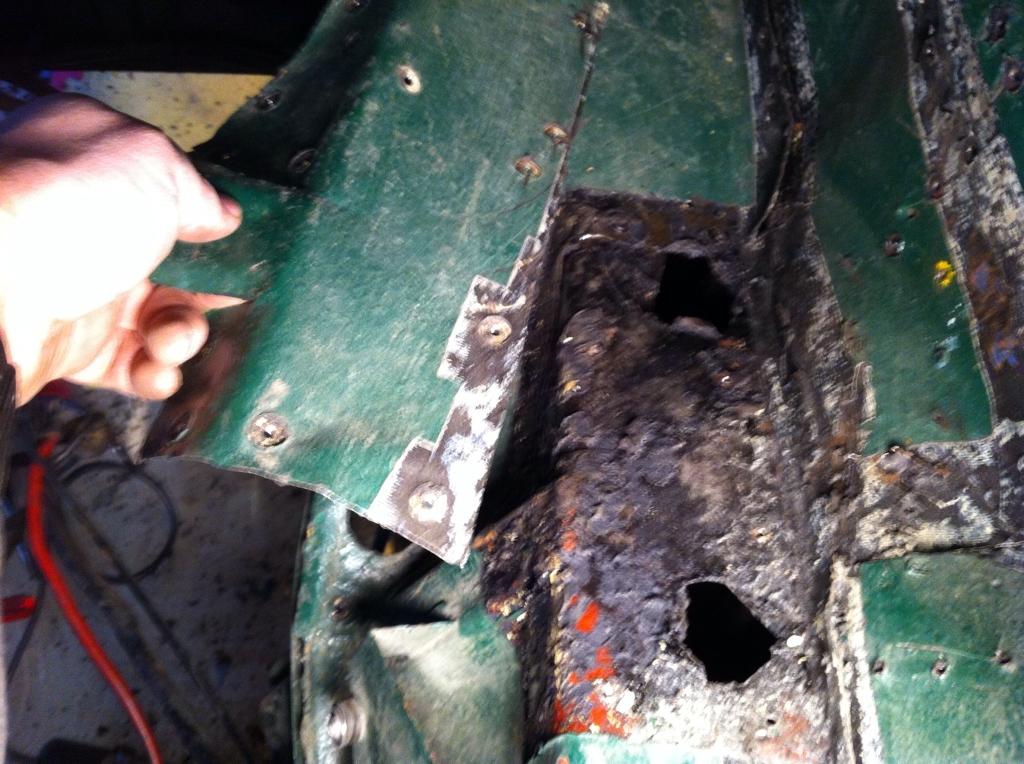
Posted by: Dasnowman Feb 27 2013, 04:37 PM
Needed a change on what I have been working on, decided to up date to gauges as the rims of the gauges where rusty so they needed to come a part anyway. I wasn't sure if I was going to like it or not, looks a lot cleaner and fresh..Hopefully they light up nice. Might get orange bulbs or LED's to Match my DEFI gauges I took out of my Suby.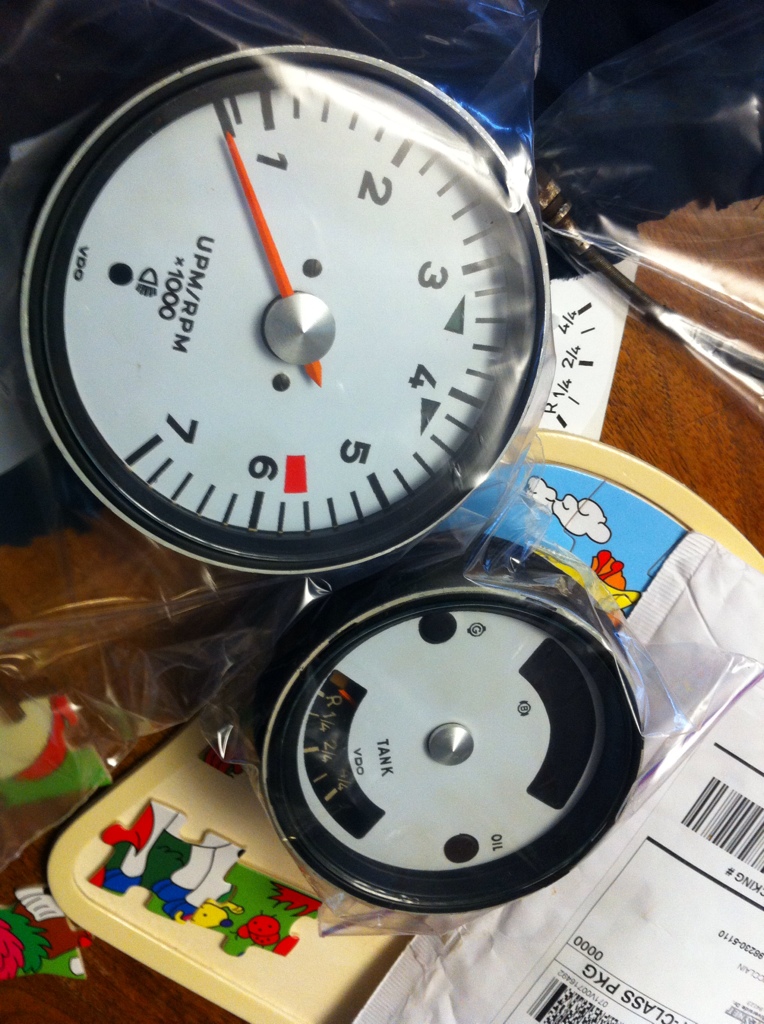
Posted by: Dasnowman Mar 9 2013, 08:50 PM
I'm really excited dropped the teener off on Friday to get sand blasted. I ended up sand blasting some smaller stuff head light buckets, fog lights, gauge holder, intake manifold or what ever it's called...
Today I picked up some omni epoxy white primer gallon and some other painting supplies and stuff....
Posted by: NORD Mar 9 2013, 11:36 PM
Where are you located? I see three locations in your signature.
I'm wright below the Aldergroove crossing, half way to Bellingham

Posted by: speed metal army Mar 10 2013, 12:48 AM
Where are you located? I see three locations in your signature.
I'm wright below the Aldergroove crossing, half way to Bellingham
Trickery Nord.....Hes a Canadian!Gasp!Living in Canada!

Posted by: Dasnowman Mar 10 2013, 02:33 AM
Where are you located? I see three locations in your signature.
I'm wright below the Aldergroove crossing, half way to Bellingham
Trickery Nord.....Hes a Canadian!Gasp!Living in Canada!
I'm down at the cabin every couple of weekends @ Lake Whatcome just now picked up the paint supplies at Wesco on Iowa Street great guys there really helpfull and gave a deal.

And yes I'm a Canadian that lives in PoCompton.

I never knew that the fog light rings are brass think I'll clear them and paint the housings black.
Posted by: NORD Mar 10 2013, 02:36 PM
You have a place on the Lake? Sounds like a good Teener party place for the
Summer. get your car done. 
Posted by: Dasnowman Mar 10 2013, 04:12 PM
You have a place on the Lake? Sounds like a good Teener party place for the
Summer. get your car done.
I wish it was mine it's the inlaws.
Ye Yes really want to get it going for the summer so much to do okok have to clean the garage so ther is room for the car when it comes back from blasting.
Posted by: Dasnowman Mar 14 2013, 12:38 AM
Last week dropped the car off to finally get sand blasted and while I was there I used the sand blast cabinet to clean up some smaller pieces. Like head light buckets, dash gauge holder, intake runners and a few other things.
Before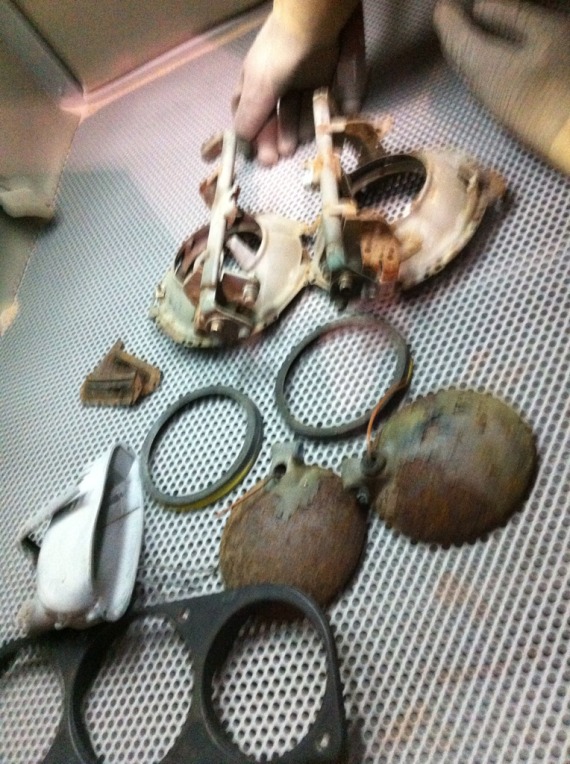
After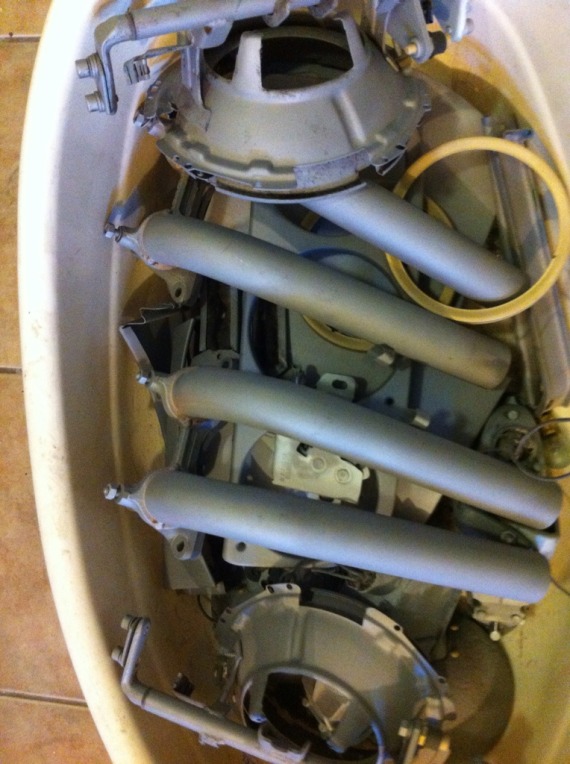
The Teener on the ride to the blasters!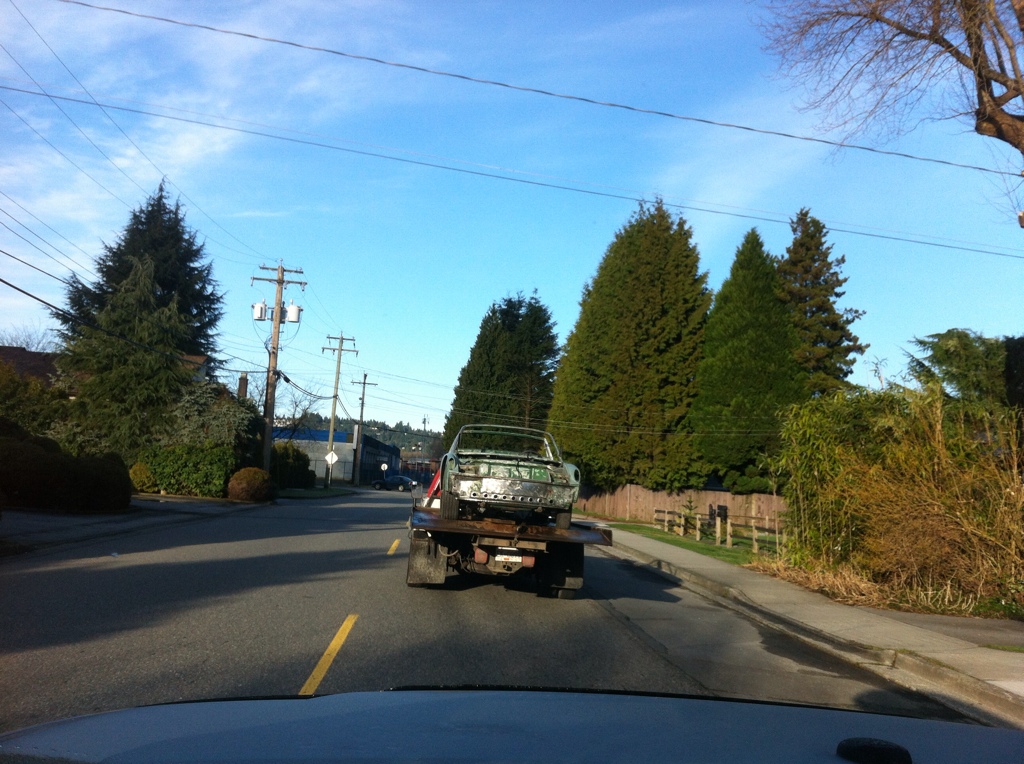
Cleaned up garage, had about five buckets of this under coating, seam sealer and tar sound deading... must have been about 30- 40lbs of it..
I left the wiring harness in the sand blaster said it wasn't going to be a problem to work around.. Then I realized when I epoxy prime and paint it, the harness will probably will get in the way anyway but I didn't want to cut or wreck the wiring harness or plugs !  I have loom on all the wires to protect them from sand and paint and have enough left over to recover harnesses after paint. I was also hoping that it will speed up the process of getting this car drivable for the summer.
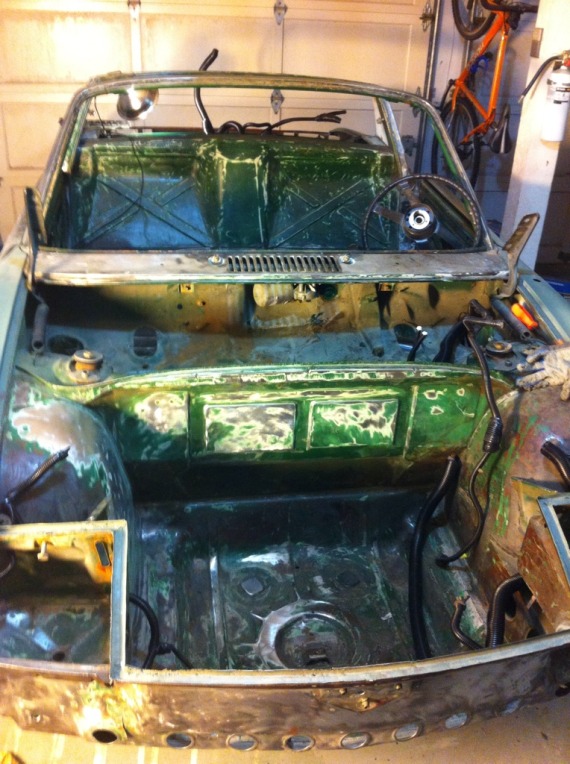
Posted by: euro911 Mar 14 2013, 04:22 AM
Make sure you get all the blast media out of those intake tubes, especially if they used glass bead in the blast cabinet. Glass bead(s) will destroy the internals of an engine in no time flat.
Posted by: Dasnowman Mar 15 2013, 01:57 AM
Thought I would add some sandblast photos as requested...lol
Didn't have them blast body panels as I already prepped them..
I also had them blast engine tin,gas tank & reserve, face of rims, dash blasted. I blasted a bunch of stuff myself today as well while I was waiting for them to finish up. Like a bunch of chrome trim that I`m going to do in semi gloss or flat black. I have to say blasting chrome is fun never knew it sparked like crazy looked like stars shooting out of the blasting gun!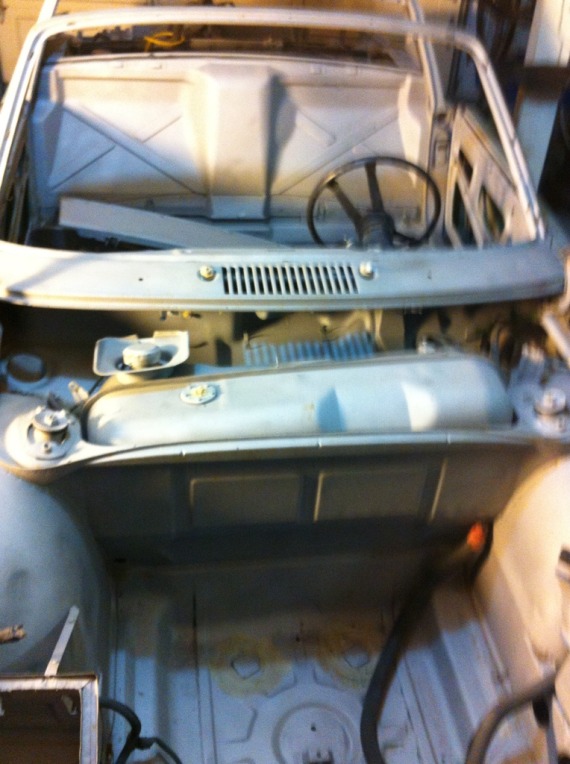
Posted by: Dasnowman Apr 2 2013, 12:23 AM
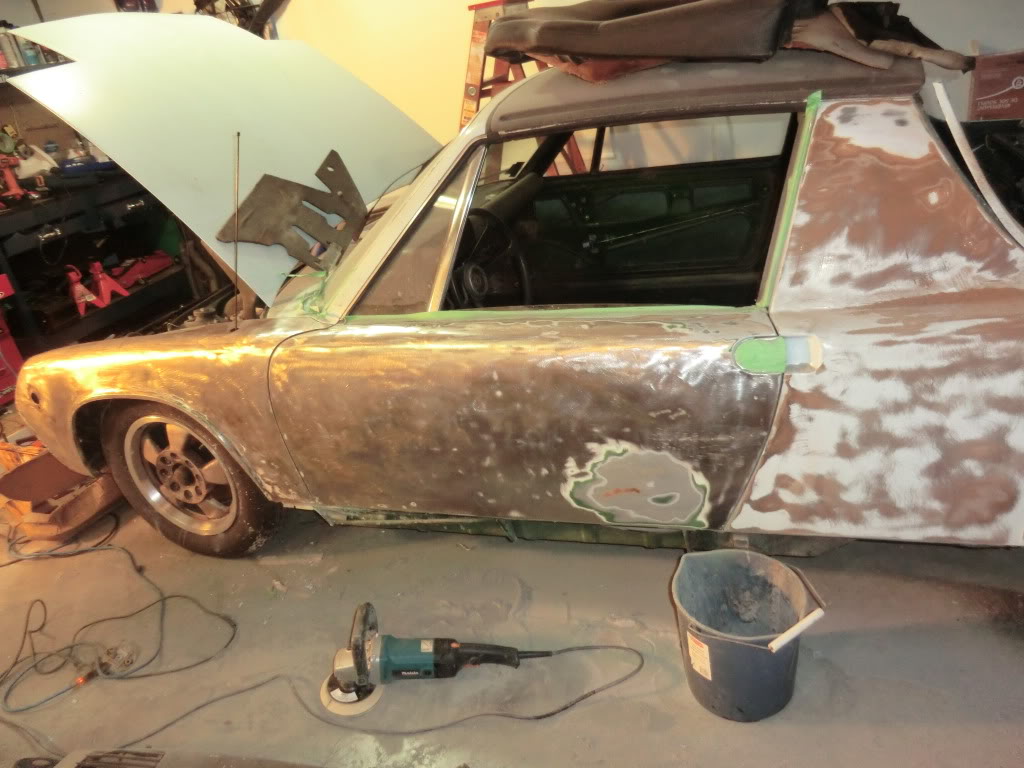
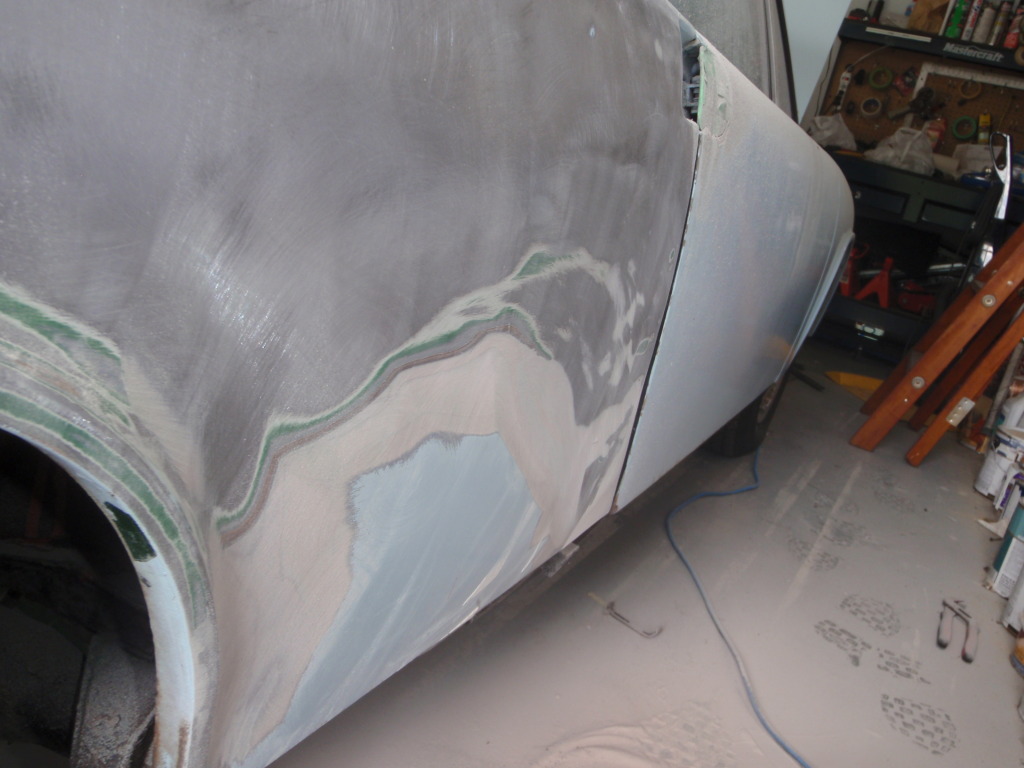
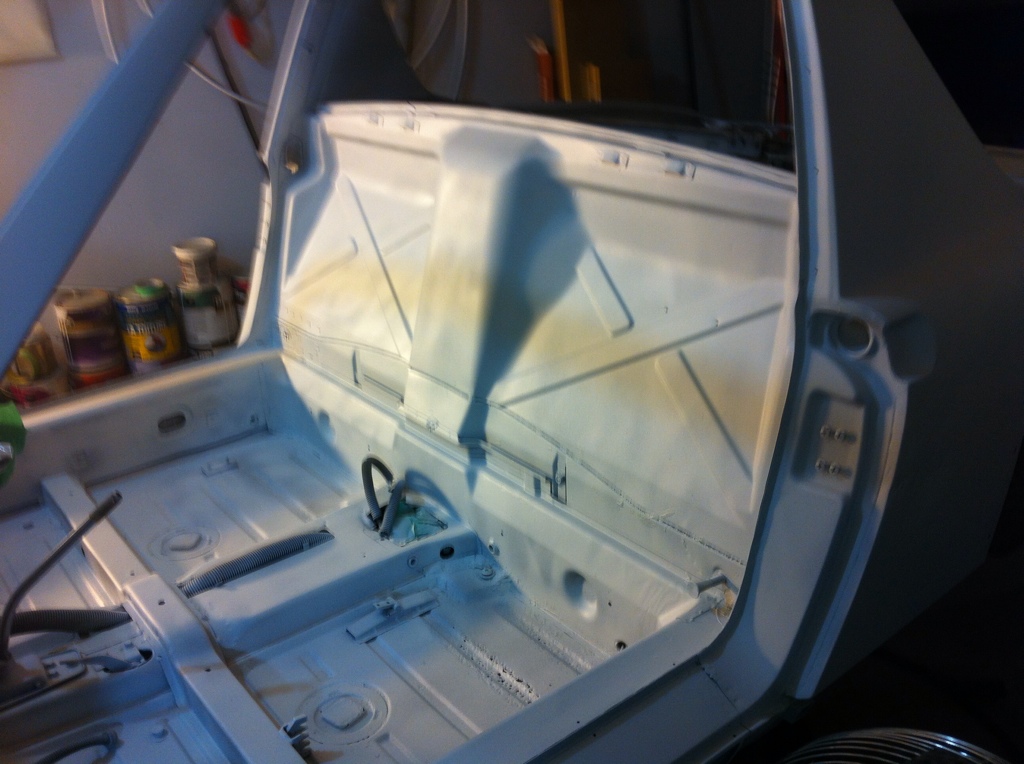
Here are some photo's of the first layer of primer going on. The gun seams ok for just the doing primer but might want something better for doing a final coat.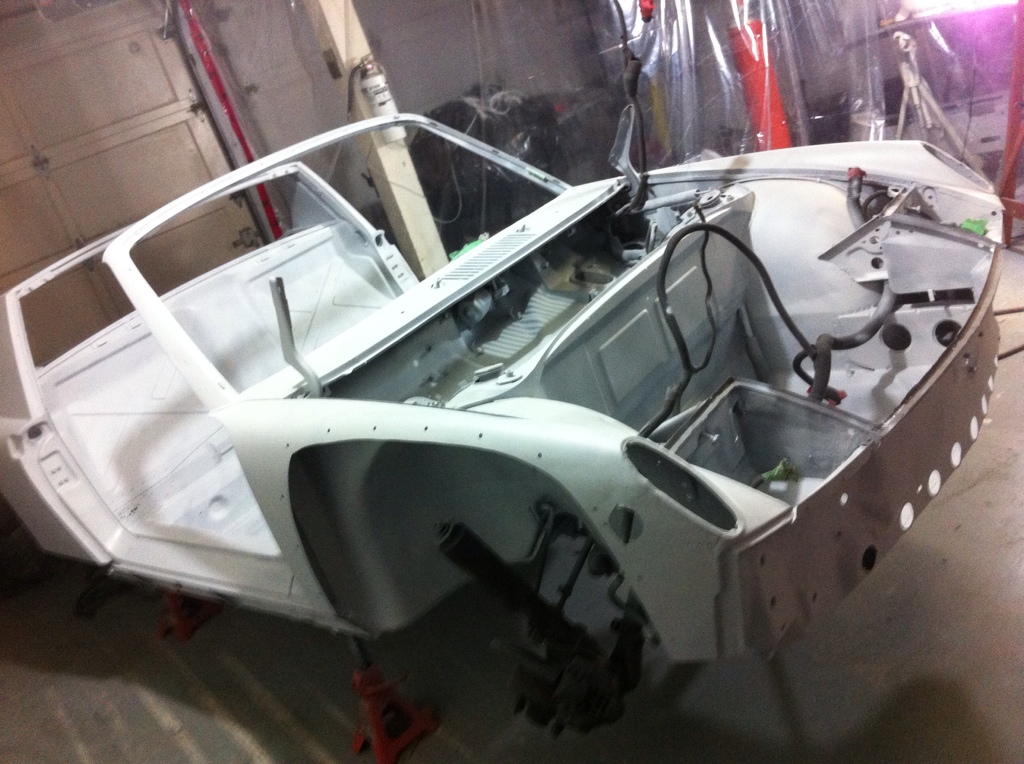
Posted by: Chris H. Apr 2 2013, 09:51 AM
Looks good my friend! Now you know exactly what you're dealing with. Just some pin holes on the drivers side floor and the hood seal channel? Not bad at all.
Posted by: FourBlades Apr 2 2013, 10:14 AM
Nice looking car.
That should give you a ton of motivation to get it done!
John
Posted by: abnrdo Apr 2 2013, 11:49 AM
Wow that is awesome progress!! Lots of inspiration to get my project going again.
Great work!
Posted by: ThePaintedMan Apr 2 2013, 12:03 PM
Really nice! I love the way primer looks! Audi actually had a color called Aviator Grey that I think would look killer on a 914.
One small tip that I have learned the hard way a couple times now... the lighting you have now or used to spray the primer will NOT be sufficient to do your color. You want it to be bright as day in there with no shadows at all if you can avoid it. Otherwise you'll never be able to see how the paint is laying down. Great work so far, congrats!
Posted by: porsche_dreamer Apr 2 2013, 12:07 PM
Look like you are making some good progress! Good Job!
Posted by: Dasnowman Apr 2 2013, 01:49 PM
Looks good my friend! Now you know exactly what you're dealing with. Just some pin holes on the drivers side floor and the hood seal channel? Not bad at all.
Yes my thoughts exactly, but the hell whole battery tray need some work but have all the panels already.
Yes I will have to get some better lighting before doing the final coat
Posted by: trojanhorsepower Apr 2 2013, 05:42 PM
Hey that is NC's state car color!
Posted by: Dasnowman May 9 2013, 11:44 PM
Got some inner long reinforcing plates in last week from mad dog they look great and seem to fit great with a few minor adjustments. I also picked up the GT rear 10 piece suspension stiffening kit but have to figure out where all the pieces go? Need a link to an install of them if anyone knows one.
Tonight I was messing around with the welder I think I figured out spot welds but not beads. Getting lot's of crackling not sure if using too much argon mix?
http://s156.photobucket.com/user/dasnowman1/media/Porsche%20914/B8FCF6E1-817F-4728-B289-AB7582E7FA30-2860-0000091520245EC4_zpse7cb7e55.jpg.html
http://s156.photobucket.com/user/dasnowman1/media/Porsche%20914/51FF88AF-D990-4BA7-94D7-3F59A0489AC6-2860-00000915179E377C_zpsd75239dc.jpg.html
Posted by: Dasnowman May 12 2013, 01:06 AM
Did some long prep, forming and welding.
http://s156.photobucket.com/user/dasnowman1/media/Porsche%20914/2E8AEF6B-1D2A-49A3-8BF0-F370AE4558BD-3547-00000B04554B96D4_zps0507659c.jpg.html
http://s156.photobucket.com/user/dasnowman1/media/Porsche%20914/187CEAE3-BB3D-4F45-9103-A7983968AE0E-3547-00000B045054DFB3_zpsbd4158a8.jpg.html
http://s156.photobucket.com/user/dasnowman1/media/Porsche%20914/EE388AF3-DC49-4C0A-AC74-D20EB361F695-3547-00000B044B6E7920_zpse42af656.jpg.html
http://s156.photobucket.com/user/dasnowman1/media/Porsche%20914/1D0625BE-8E95-43C1-8923-B453BE850919-3547-00000B04595A2FB9_zpsa8fddce6.jpg.html
Posted by: Dasnowman Jun 23 2013, 11:35 PM
http://s156.photobucket.com/user/dasnowman1/media/Porsche%20914/null_zps77269481.jpg.html
http://s156.photobucket.com/user/dasnowman1/media/Porsche%20914/null_zps2a4ff363.jpg.html
Some old ones from a couple of weeks ago!
Posted by: Dasnowman Jun 23 2013, 11:43 PM
Some from today upper and lower wheel house repair, hell hole and some engine tray fitting.
http://s156.photobucket.com/user/dasnowman1/media/Porsche%20914/null_zps3a779db2.jpg.html
http://s156.photobucket.com/user/dasnowman1/media/Porsche%20914/null_zps478eebdb.jpg.html
http://s156.photobucket.com/user/dasnowman1/media/Porsche%20914/null_zps54025157.jpg.html
I love this little tool picked it up on sale for $39 cdn takes 60 seconds to punch a dozen or so holes!
http://s156.photobucket.com/user/dasnowman1/media/Porsche%20914/null_zps3934d1c1.jpg.html
Also picked up this little baby, love the look and feel of it.
http://s156.photobucket.com/user/dasnowman1/media/Porsche%20914/1cabbb29-6daa-44ef-8042-669f5ca4531e_zps7c0ab35f.jpg.html
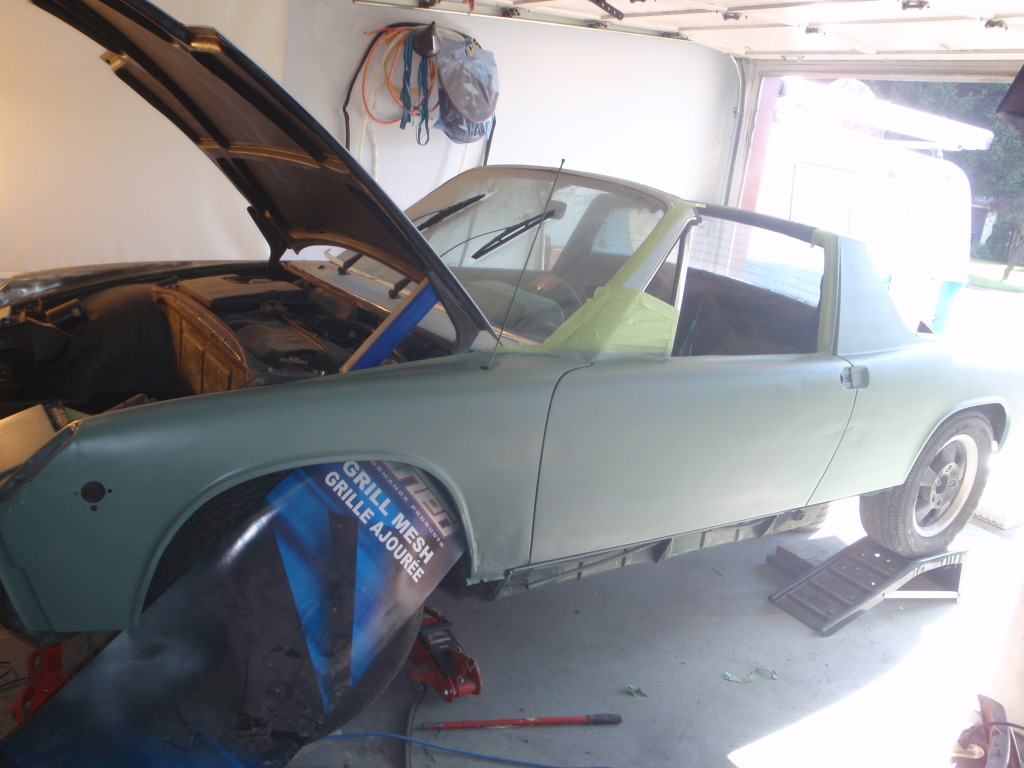
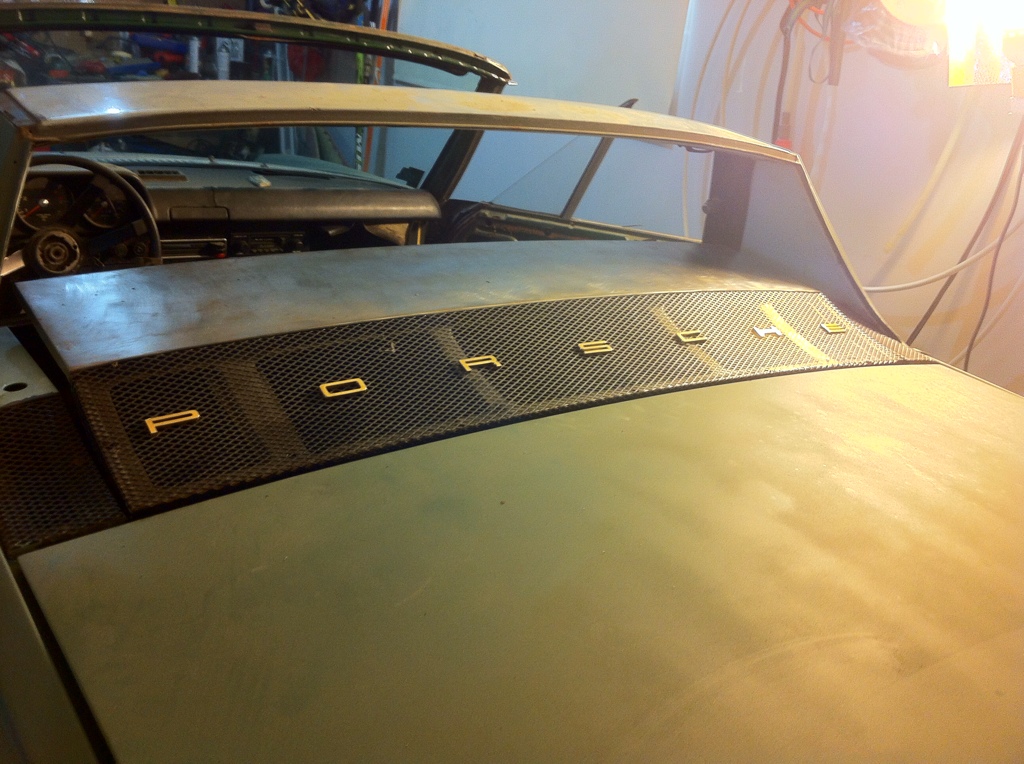
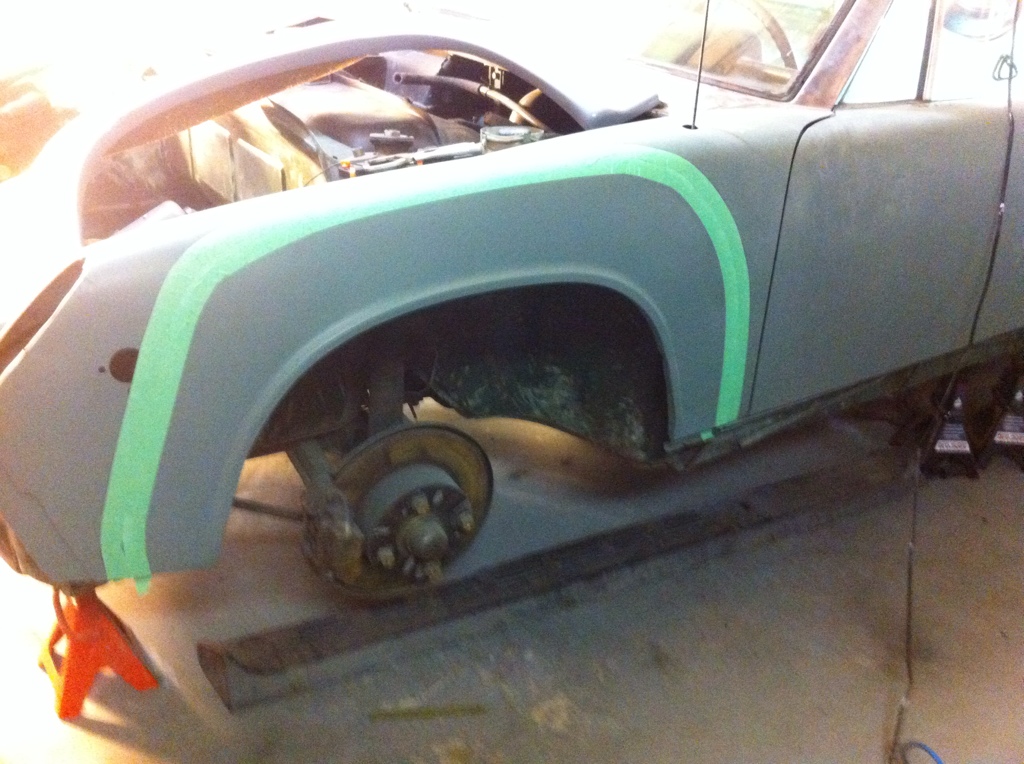
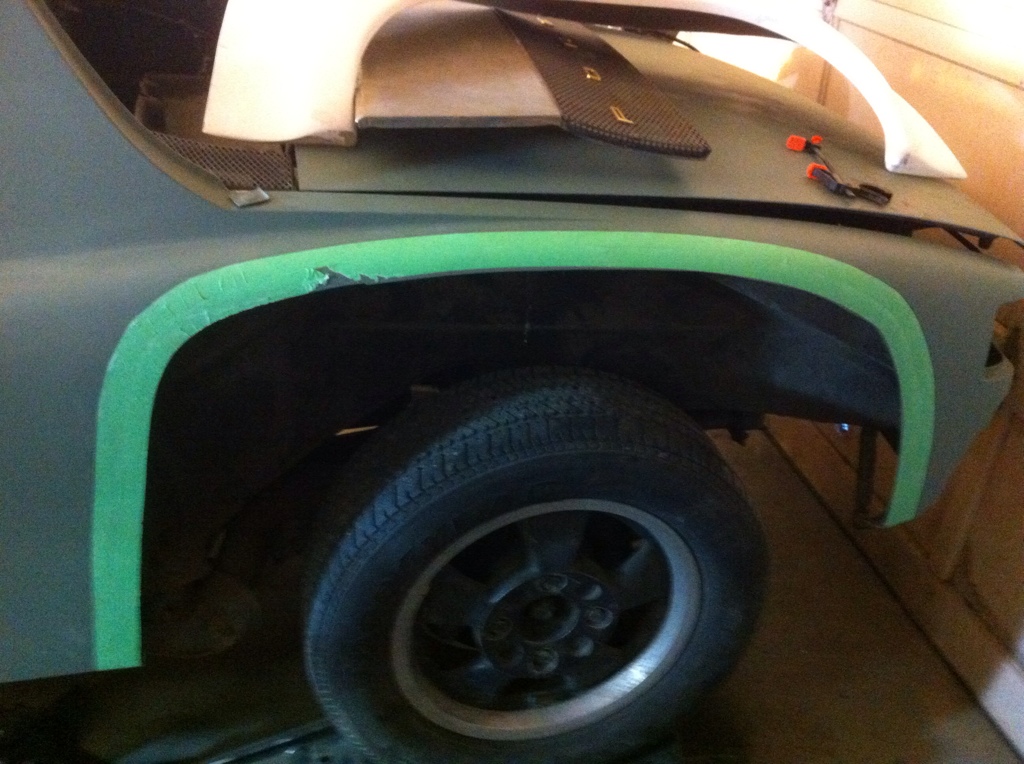
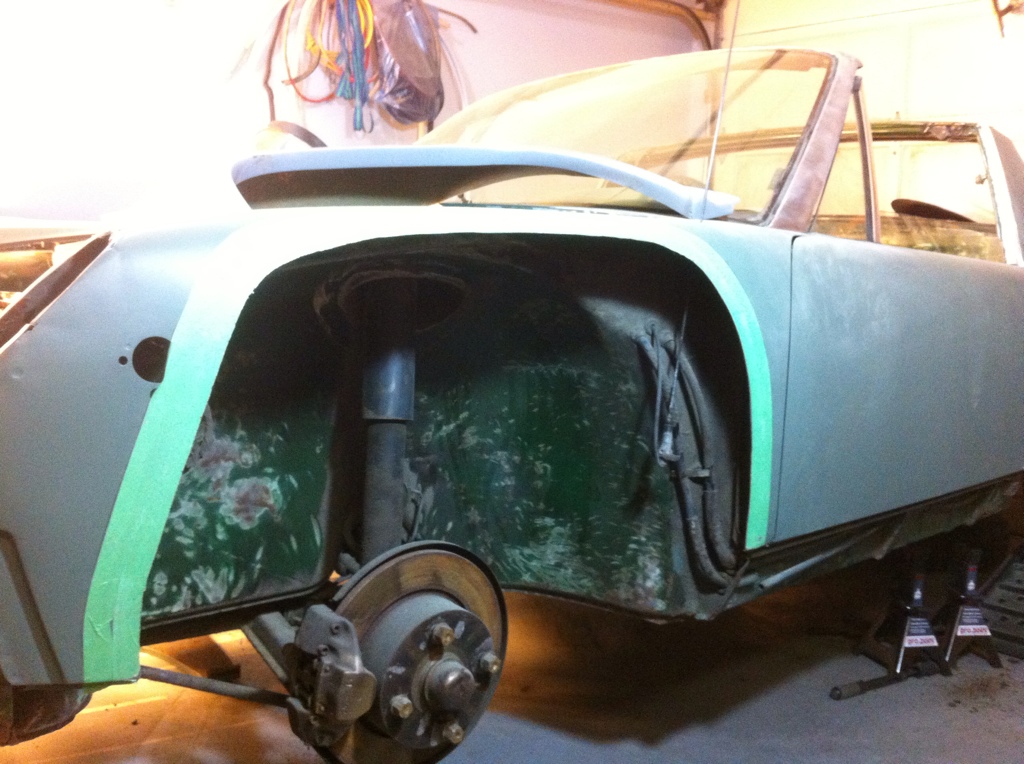
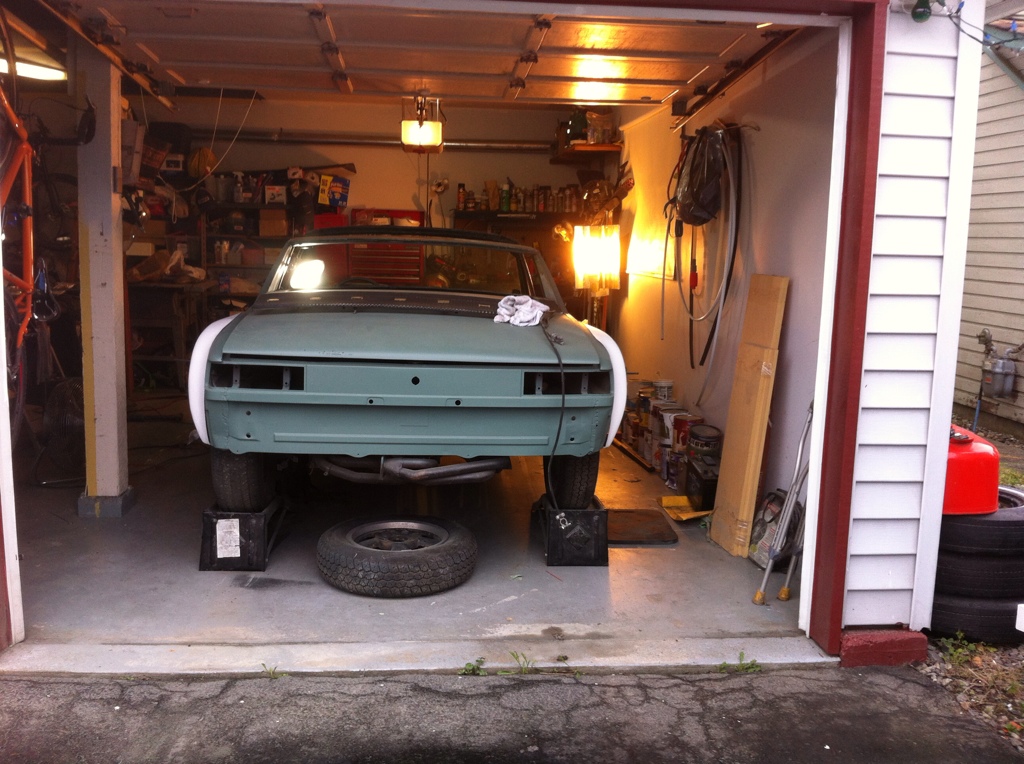
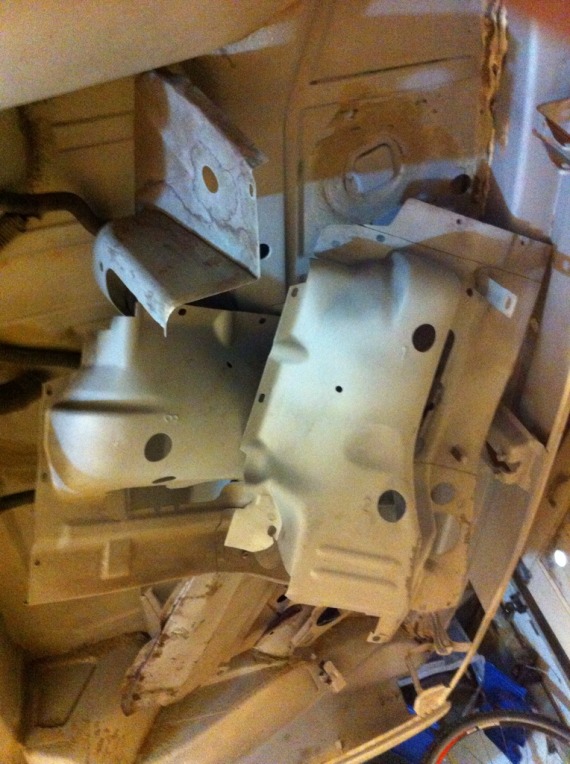
Posted by: Dasnowman Aug 9 2013, 12:18 AM
Been busy the last two days!
http://s156.photobucket.com/user/dasnowman1/media/Porsche%20914/224E04C3-8F1A-471D-B4B7-AF3F38BFFCB8-1300-000003CBC42FCF95_zpsa29b9113.jpg.html
http://s156.photobucket.com/user/dasnowman1/media/Porsche%20914/417D938E-2B8C-4908-9650-AEDEBC703AA7-1300-000003CBCCC3B48C_zps8f0d9945.jpg.html
http://s156.photobucket.com/user/dasnowman1/media/Porsche%20914/D1B808EF-D0DD-44F3-8F7F-6A385290C9EA-1300-000003CBE2D121ED_zps25ca0c1e.jpg.html
http://s156.photobucket.com/user/dasnowman1/media/Porsche%20914/52256793-1574-4FCE-BE70-84A5FE729A35-1300-000003CB9643714A_zpsca007f82.jpg.html
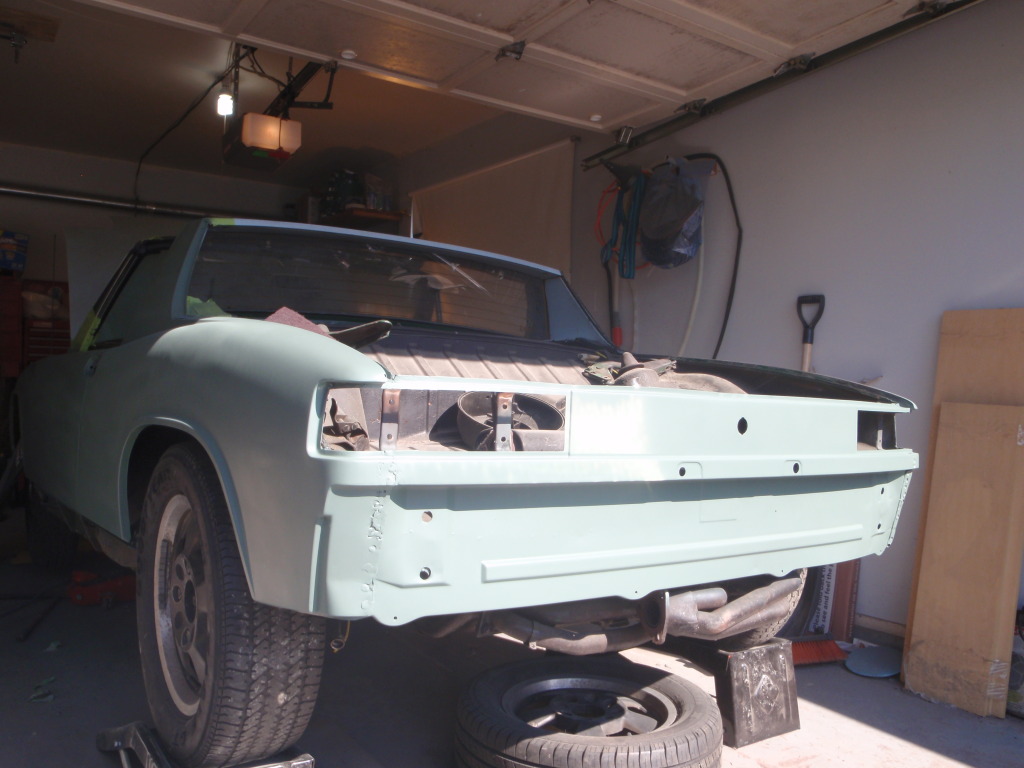
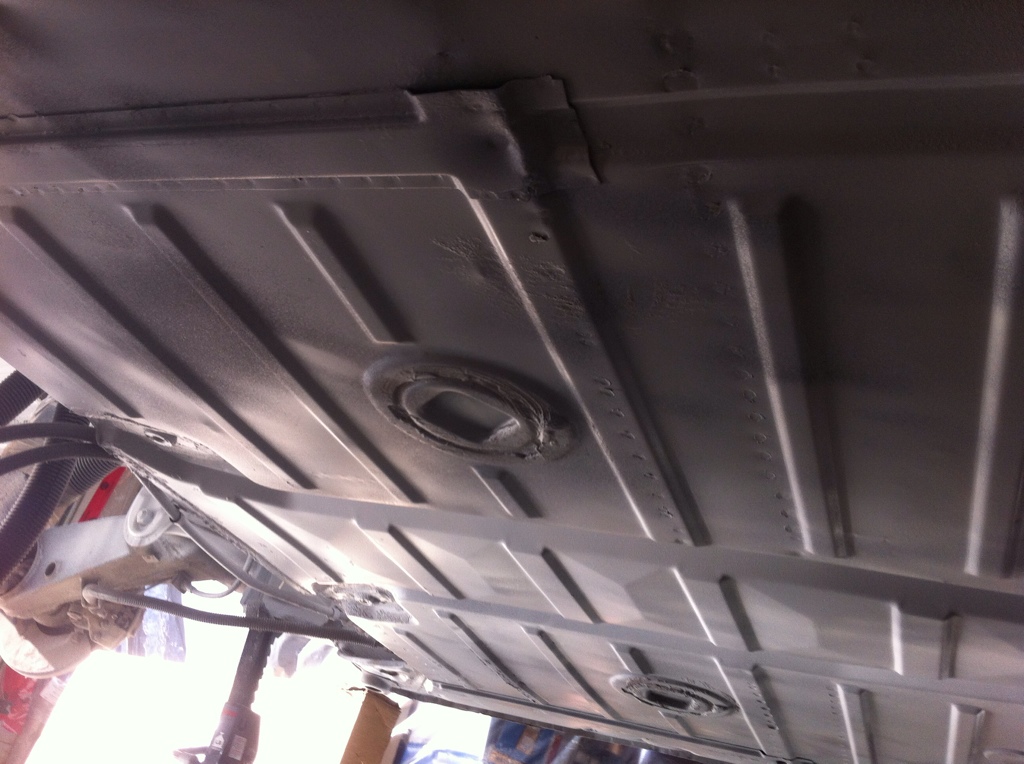
http://s156.photobucket.com/user/dasnowman1/media/Porsche%20914/null_zps59c95361.jpg.html
http://s156.photobucket.com/user/dasnowman1/media/Porsche%20914/null_zpsdf94fdda.jpg.html
I also picked up a new compressor for $199 CDN the old one couldn't keep up any more!
http://s156.photobucket.com/user/dasnowman1/media/Porsche%20914/9EEA2613-EA65-4759-A945-F93E778D9F2F-1300-000003CB74BE7D2A_zps6d837fb8.jpg.html
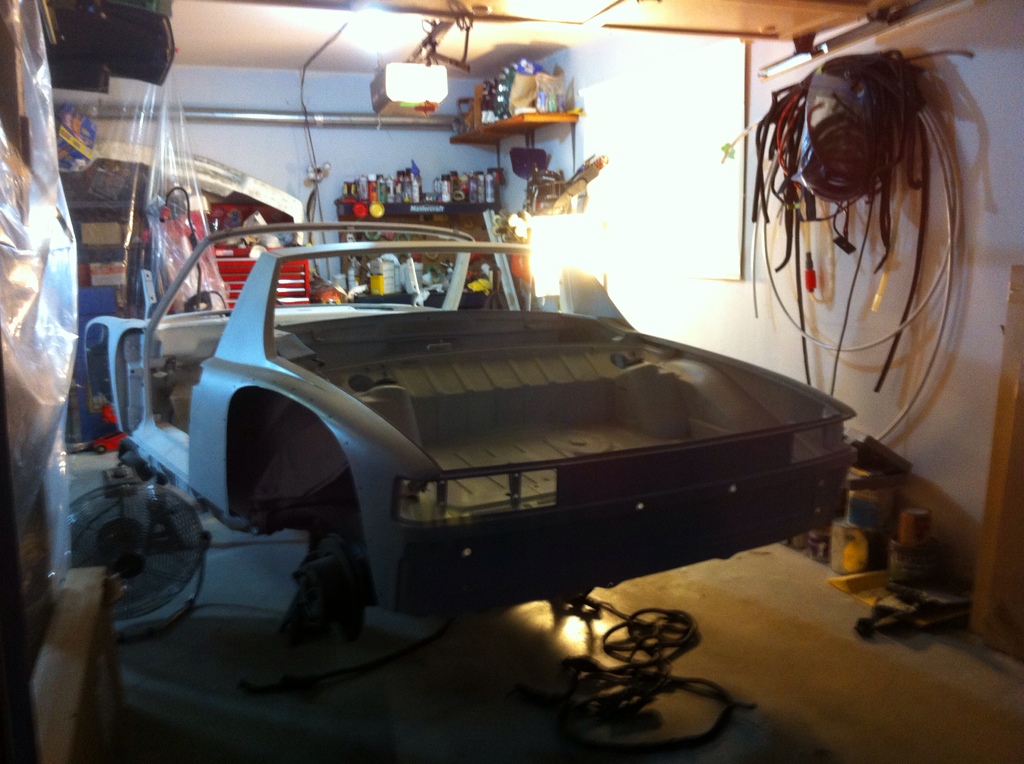
Posted by: Dasnowman Sep 12 2013, 01:03 AM
Anyway the last couple of nights the wife/kids have let me work on the car. :banana:
I decided to do the long and suspension reinforcing before dealing with the rust in the floors. I wanted to make sure the car stayed true and square to factory specs and gaps.
First step to section and remove rusty panels. To be honest I think I'm removing more good metal then needed but don't like the look of small patch repairs.
Second is to section the new replacement panels. Did a lot of test fitting and trimming. I also pre drilled holes or punched body panels for spot welding. I'm trying to do as much welding from the top not a fan of splatter and slegg falling on body parts from welding under the car... Wish I had a car rotisserie would make life so much easier.
I'm really trying to do a big push the next week or two to get metal work done. So I can prime and get a base coat in/on the chassis under body, engine bay, interior and trunk before the weather gets to cool to paint the car in the garage.
http://s156.photobucket.com/user/dasnowman1/media/Porsche%20914/P9040293_zps07eed7df.jpg.html
http://s156.photobucket.com/user/dasnowman1/media/Porsche%20914/P9040295_zps4686fb0d.jpg.html
http://s156.photobucket.com/user/dasnowman1/media/Porsche%20914/P9040296_zpsb569b933.jpg.html
http://s156.photobucket.com/user/dasnowman1/media/Porsche%20914/P9090327_zps14d24991.jpg.html
http://s156.photobucket.com/user/dasnowman1/media/Porsche%20914/P9090321_zps456d7d0d.jpg.html
http://s156.photobucket.com/user/dasnowman1/media/Porsche%20914/P9090324_zps52c65626.jpg.html
http://s156.photobucket.com/user/dasnowman1/media/Porsche%20914/P9090325_zpsc9a0e1ef.jpg.html
http://s156.photobucket.com/user/dasnowman1/media/Porsche%20914/P9090328_zpsefc238f2.jpg.html
Posted by: Eric_Shea Sep 12 2013, 06:29 PM
I love watching people do really nice work and fixing these cars properly.
Posted by: r_towle Sep 12 2013, 06:34 PM
I love watching people do really nice work and fixing these cars properly.

It makes me feel productive.
Posted by: Dasnowman Sep 13 2013, 04:36 PM
I love watching people do really nice work and fixing these cars properly.
Thanks don't have any experience doing this, learning as I go along!


Just have done a ton of bolt on etc on newer cars. This is a hole bucket of worms and a new truck load of tools needed to buy and use.
Posted by: Dasnowman Sep 29 2013, 11:51 PM
Hell hole has come a long way!
From this
http://s156.photobucket.com/user/dasnowman1/media/Porsche%20914/47911533-4607-4166-B3AE-7E99AC1A04CB-2067-000006A56761EF9B_zps89a93cf0.jpg.html
To this
http://s156.photobucket.com/user/dasnowman1/media/Porsche%20914/F271FABD-8826-4ACA-80D4-A7914B25B9C6-1104-000002AC005BD03A_zpse2ec390e.jpg.html
Floors welded in, new jack posts on both sides.
http://s156.photobucket.com/user/dasnowman1/media/Porsche%20914/C70F2504-7609-4AE2-BF2A-6CF2E774D823-1104-000002AC689BCDF8_zps9db568c9.jpg.html
http://s156.photobucket.com/user/dasnowman1/media/Porsche%20914/1398C99F-7125-4743-80B0-2E44CB97CDE3-1104-000002AC611986EE_zps54913edc.jpg.html
http://s156.photobucket.com/user/dasnowman1/media/Porsche%20914/084D91D3-D256-4EAE-913A-362468AA1140-1104-000002AC36447ACF_zpsf235d48a.jpg.html
Found a little 1" by 1" rotten spot need to weld some new metal in!
http://s156.photobucket.com/user/dasnowman1/media/Porsche%20914/9B269CD8-163D-43C7-9EB6-1B0E71565B8C-1104-000002AC6FC0F24A_zpsdb86f927.jpg.html
Posted by: Dasnowman Apr 2 2014, 02:16 AM
Ended up using metal trunk plug to replace the rusty one under driver seat.
Have a spare one..
http://s156.photobucket.com/user/dasnowman1/media/Porsche%20914/B79F01BF-039F-4953-995D-699F50591C4A_zps3afaujvl.jpg.html
http://s156.photobucket.com/user/dasnowman1/media/Porsche%20914/AE3E5587-0646-458D-95EE-B1AB77E948AA_zpsmfdaudfu.jpg.html
http://s156.photobucket.com/user/dasnowman1/media/Porsche%20914/72ACE72C-0587-4D66-B443-7A05F07DEC2F_zpsyqec12z0.jpg.html
http://s156.photobucket.com/user/dasnowman1/media/Porsche%20914/D49E95F4-E5F0-4B0C-947C-F6B1561CF0DB_zps17gea8xl.jpg.html
http://s156.photobucket.com/user/dasnowman1/media/Porsche%20914/6B7D57A3-513B-4FBE-944E-ECEFD54EE912_zpsu3ydrwe8.jpg.html
Posted by: Dasnowman Apr 2 2014, 02:26 AM
http://s156.photobucket.com/user/dasnowman1/media/Porsche%20914/93463F54-2060-4379-860F-78AA468960B2_zpsxl3jogf5.jpg.html
http://s156.photobucket.com/user/dasnowman1/media/Porsche%20914/86C1C73E-BAE2-4878-8ECE-9B6DE70CF8FF_zpsqxpnr229.jpg.html
http://s156.photobucket.com/user/dasnowman1/media/Porsche%20914/B08D2340-0CA7-4D91-A74A-BCF91BD3CB86_zpsaeavone3.jpg.html
http://s156.photobucket.com/user/dasnowman1/media/Porsche%20914/E26527CA-BD35-4E2E-844C-8401A0DD1F45_zpstjmhbiwy.jpg.html
http://s156.photobucket.com/user/dasnowman1/media/Porsche%20914/86C1C73E-BAE2-4878-8ECE-9B6DE70CF8FF_zpsqxpnr229.jpg.html
http://s156.photobucket.com/user/dasnowman1/media/Porsche%20914/A0A678F8-EF9A-4A59-AA47-56535512F457_zpsyvomdton.jpg.html
http://s156.photobucket.com/user/dasnowman1/media/Porsche%20914/4D86A724-2DB6-4C82-B0D7-A223B3A5D416_zps4toysvof.jpg.html
http://s156.photobucket.com/user/dasnowman1/media/Porsche%20914/E7838D4A-E588-4894-979F-FB085A89B938_zpsoz9oljq9.jpg.html
http://s156.photobucket.com/user/dasnowman1/media/Porsche%20914/E6180762-B772-4A23-9F09-20EFDA3FABEF_zps4liynymy.jpg.html
Posted by: Dasnowman Apr 2 2014, 02:31 AM
http://s156.photobucket.com/user/dasnowman1/media/Porsche%20914/EE8911B4-858A-4525-A4BD-060D946DAAFD_zpsmgivhjjc.jpg.html
http://s156.photobucket.com/user/dasnowman1/media/Porsche%20914/93463F54-2060-4379-860F-78AA468960B2_zpsxl3jogf5.jpg.html
http://s156.photobucket.com/user/dasnowman1/media/Porsche%20914/F01B45B7-9371-4A17-BFA5-D695B9DB4D79_zps9salt3je.jpg.html
Posted by: 2mAn Apr 2 2014, 03:36 PM
Nice work, I got so upset when I saw the DAPO's "repair". so happy to see you doing it right. This car will be a blast when its done. Are you going back to Zambezi Green? Im assuming thats the original color, but with the 3-4 previous jobs who knows 
Posted by: Dasnowman Apr 3 2014, 12:12 AM
Took the day off work to paint!
First ran out of seam sealer, then get back home and caulking gun broke, dam it`s hard to squeeze out sealer like a tube of tooth paste.
Halfway through painting my 8 month old compressor crapped out. 
 Of course they would not do an exchange had to be sent out... so Home depot rental it was.
http://s156.photobucket.com/user/dasnowman1/media/Porsche%20914/27D3DC6F-9B35-43D2-8A44-A5F0D34B4B2F_zpstuv9fbpf.jpg.html
http://s156.photobucket.com/user/dasnowman1/media/Porsche%20914/19E27F00-B1AD-417C-AA1F-129E1501DBF8_zpsidmd6ph8.jpg.html
http://s156.photobucket.com/user/dasnowman1/media/Porsche%20914/0B545958-9BC7-4B09-BAF0-30AB22D45A41_zps7zt5qetu.jpg.html
http://s156.photobucket.com/user/dasnowman1/media/Porsche%20914/077891DF-A3AC-4B8E-B478-EB53505475CD_zps6xl8okwg.jpg.html
http://s156.photobucket.com/user/dasnowman1/media/Porsche%20914/75689F4B-5209-437B-BB57-BBDC72FE48C9_zpspbc7g9wj.jpg.html
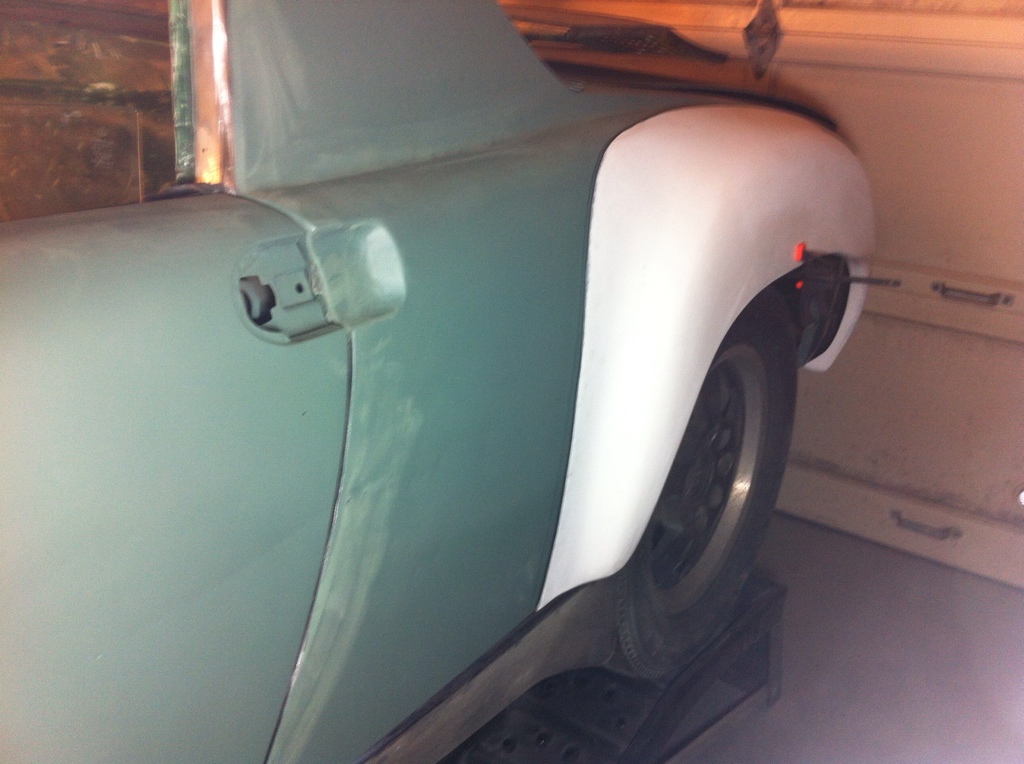
Posted by: Dasnowman Apr 4 2014, 01:23 AM
Took off the tape on body panel to protect over spray looks kinda funky white and tangerine. 
Painted wheels and put on front flares!
http://s156.photobucket.com/user/dasnowman1/media/Porsche%20914/A72ADBCA-4D9F-4913-BFB4-13614960C715_zpsefcobfdx.jpg.html
http://s156.photobucket.com/user/dasnowman1/media/Porsche%20914/D70777D9-407A-488A-BFE4-9E408D34BA34_zpslem2obbf.jpg.html
http://s156.photobucket.com/user/dasnowman1/media/Porsche%20914/A6C7840F-F7AC-452D-B4FC-EB576308CD74_zpsenc7zgee.jpg.html
http://s156.photobucket.com/user/dasnowman1/media/Porsche%20914/F930E623-4C88-45B0-8CC9-E2AB6661136A_zpssha8zuip.jpg.html
http://s156.photobucket.com/user/dasnowman1/media/Porsche%20914/8EBA36C9-3F79-4EFB-B52C-C1ED8E417EE4_zpsskxbw5tz.jpg.html
Powered by Invision Power Board (http://www.invisionboard.com)
© Invision Power Services (http://www.invisionpower.com)