Printable Version of Topic
Click here to view this topic in its original format
914World.com _ 914World Garage _ Will's progress Thread
Posted by: qa1142 Nov 7 2004, 05:16 PM
Ok, I'll start a thread and post as I go this winter.
Today I got it up on stands and pulled the rockers.
Long look OK. I knew the drivers jack plate was toast.
Take a look at these pictures and let me know if this will be worse to fix than I think....
Here is worst jack plate
Attached image(s)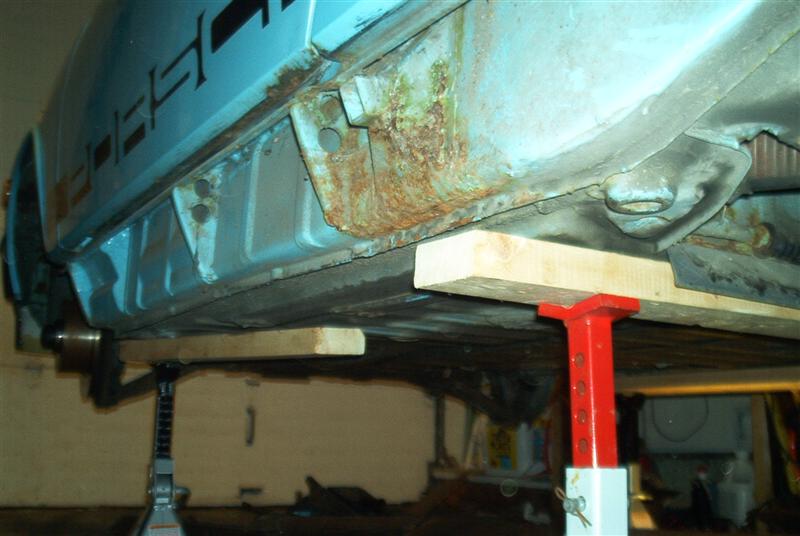
Posted by: qa1142 Nov 7 2004, 05:19 PM
Straight on view - passenger side
Attached image(s)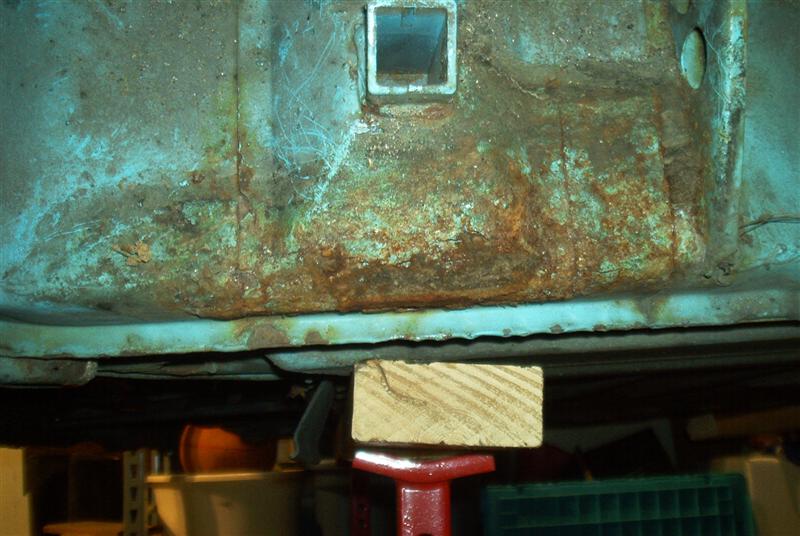
Posted by: qa1142 Nov 7 2004, 05:21 PM
drivers side
Attached image(s)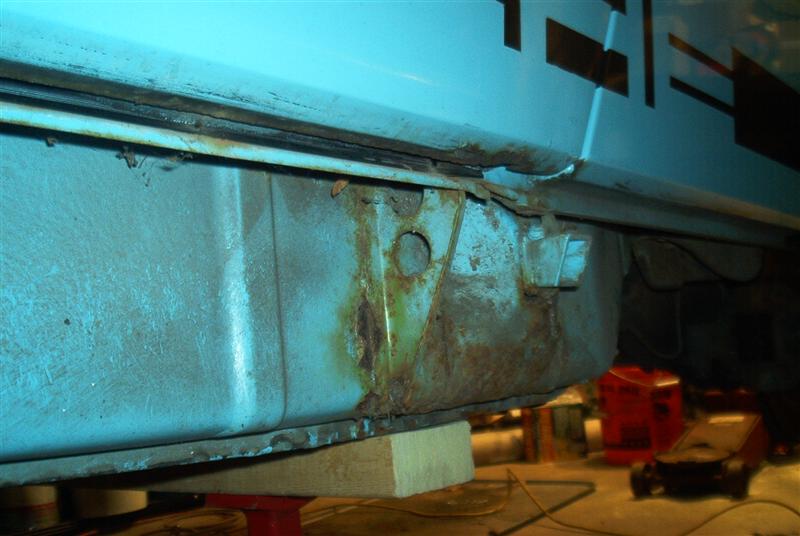
Posted by: qa1142 Nov 7 2004, 05:23 PM
Floors
Attached image(s)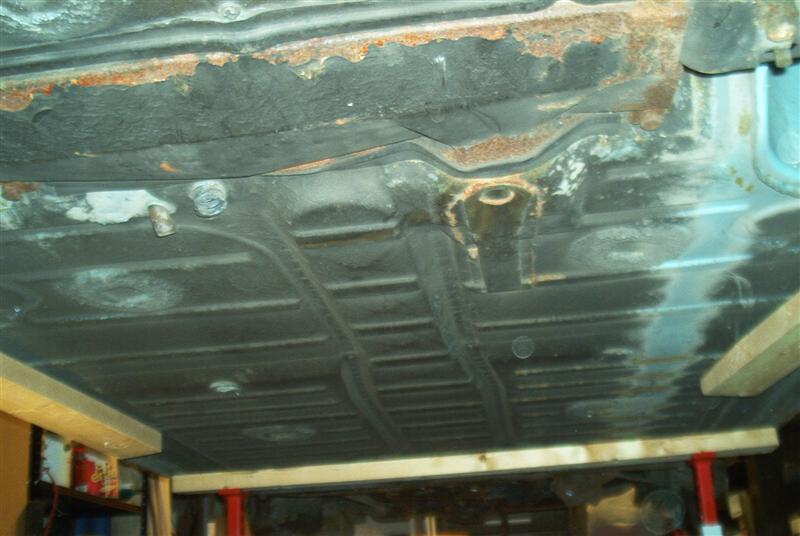
Posted by: Jeroen Nov 7 2004, 05:26 PM
doesn't look too bad on the pics
did you poke at it with a screwdriver? Is it still solid, or can you poke through it?
get a wirebrush drillbit and clean it up, before you start cutting...
Posted by: qa1142 Nov 7 2004, 05:28 PM
ok other close up was pass side
Attached image(s)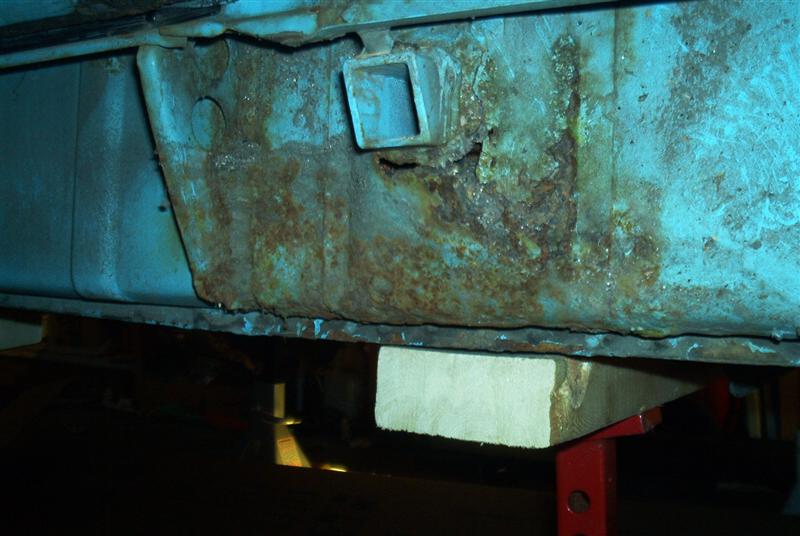
Posted by: hargray2 Nov 7 2004, 05:28 PM
'LOOKS' pretty damn good!
The one that says passenger side looks like the driver's side to me.
Posted by: qa1142 Nov 7 2004, 05:31 PM
all the longs were driver's side
here is pass side
Attached image(s)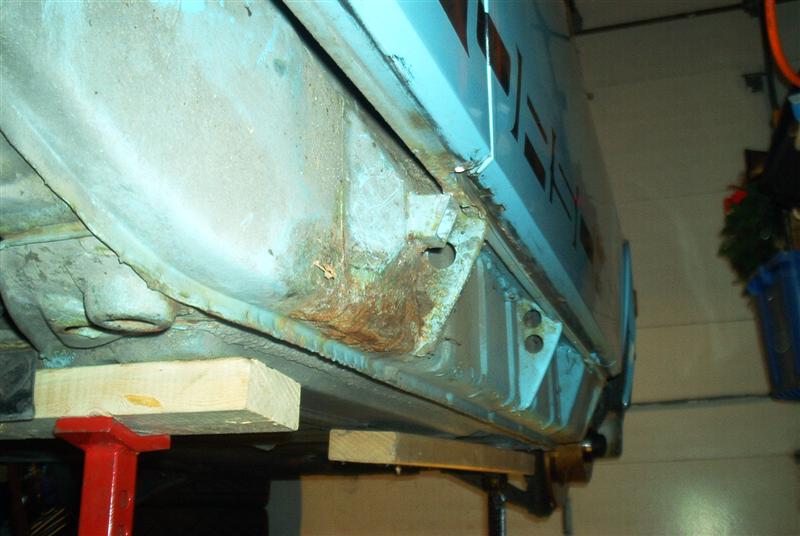
Posted by: jim912928 Nov 7 2004, 05:32 PM
that doesn't look bad at all. If it was like mine, the outside "cup" was soft but solid behind it...got a replacement piece from restoration design and had it installed...good as new!
Posted by: qa1142 Nov 7 2004, 05:37 PM
ear looks perfect
Attached image(s)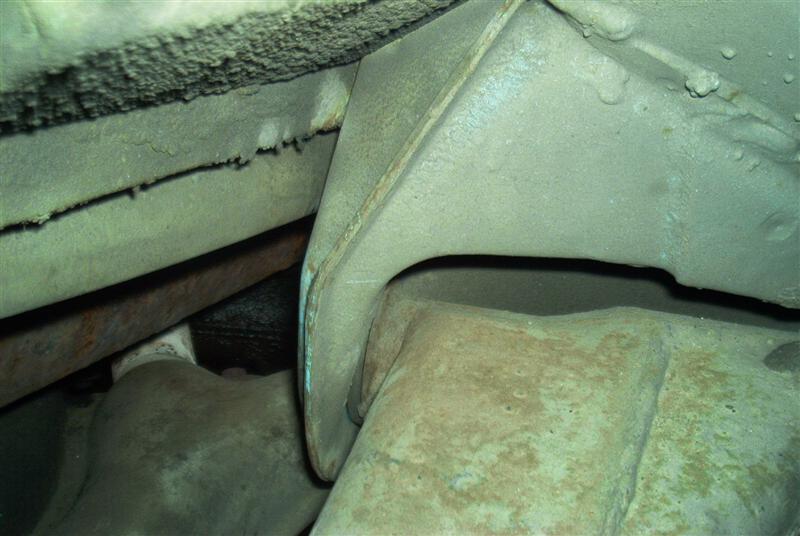
Posted by: qa1142 Nov 7 2004, 05:40 PM
Yes, I bought a Jack plate and tube from Brad M. (914ltd) knowing the drivers side was not good. I am hoping to have good metal under it. 
Are these spot welded on too?
Not a bad day one if I do say so.
Posted by: skline Nov 7 2004, 05:49 PM
Not a bad day 1 at all, that looks pretty easy to fix in my opinion. I have seen worse cars out here in Calirfornia where they say the cars dont rust out. You could fix that over a weekend if you had the parts. Good luck with it.
Posted by: Brad Roberts Nov 7 2004, 06:05 PM
I would be more worried about the bottom of the drivers side door...
Pretty easy fix. Looks like a good solid tub to me. Floorpans appear to be solid.
B
Posted by: qa1142 Nov 7 2004, 08:37 PM
Well, just finished pulling front and rear bumpers and valances. done for tonight.
I'll start on front suspension first. Drop stearing rack cover, pull fuel pump, drain last 3-5 gallons of gas. Pull tank. Clean off loose rust, por 15, re-paint blue. clean tap all holes. then....
Install front swaybar, new bushings, new ball joints, front shocks and maybe turbo tie rods . That will get me into early December. 
I wish I could do this for living, way more fun than working for Motorola. Its' good to have things to fall back on in this economy.
Posted by: qa1142 Nov 10 2004, 10:11 PM
Tonight's work
Pulled front suspension
Attached image(s)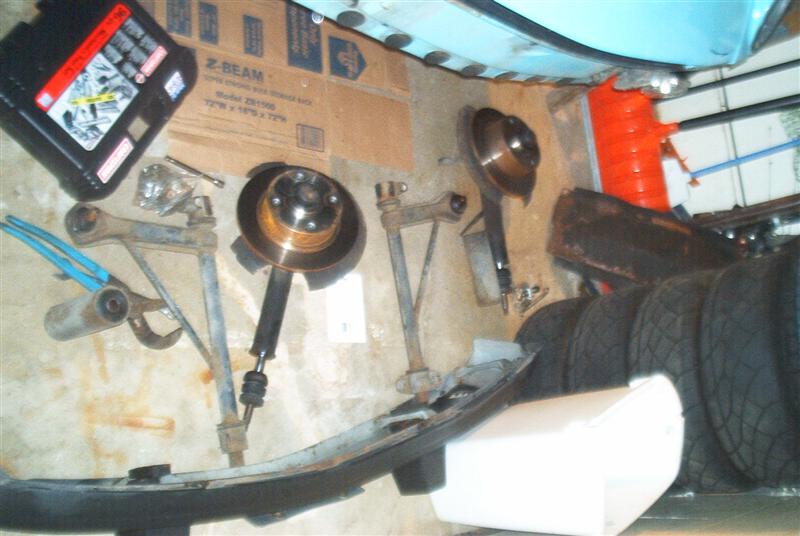
Posted by: qa1142 Nov 10 2004, 10:15 PM
another view
Clean up surface rust doors forward is next
Attached image(s)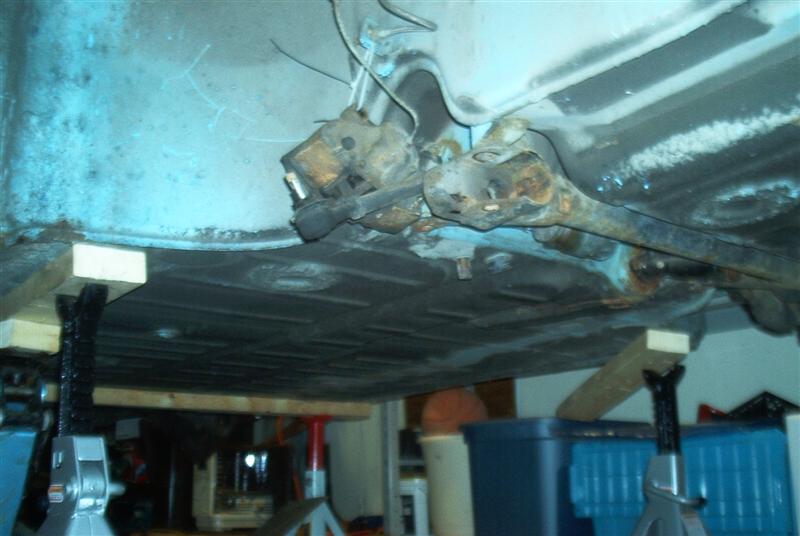
Posted by: Gint Nov 10 2004, 10:51 PM
Looks like a nice tub to me. A nice steady pace will get you there.
Posted by: seanery Nov 11 2004, 12:19 AM
Will, this scares me. You're not getting much surface area contact. That thing looks like it will spin real easily. I haven't tried this, but if you drilled a 2" hole, or 2 1" holes to match the contour of your jackstands it may get a bit more bit and not move. Sorry to but in, but I want to see you again at next year's FFC or MWC. 
Posted by: seanery Nov 11 2004, 12:19 AM
oh yeeah
Attached image(s)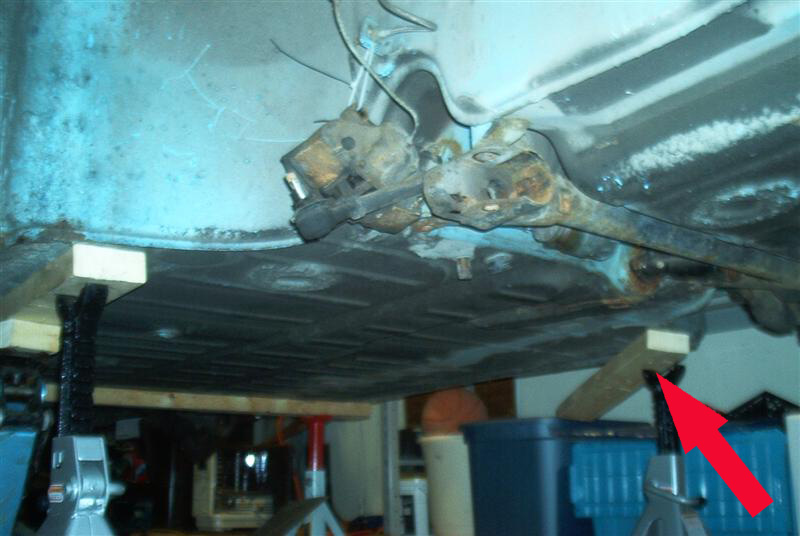
Posted by: redshift Nov 11 2004, 12:26 AM
heh
m
Posted by: qa1142 Nov 11 2004, 06:44 AM
yep
it is really sitting on only 3 stands, the one you marked is not touching. I put my jacks under the longs last night when I was popping ball joints, etc.
plan is,
clean surface rust
Touch up paint (this is all inside and underneath)
Put front suspension back on
Put front end back on ramps
then pull motor and work on bake end stuff.
Posted by: RON S. Nov 11 2004, 07:05 AM
Very good looking undersides.
That'll be a muchhhhh easier fix than a lot of us around here have been used to.
Ron
Posted by: qa1142 Nov 11 2004, 06:58 PM
Took my body saw to the left jack post support. I plan to replace bottom half only.
If I clean this up, Por15 and weld on the new piece I think it will last another 30 years (no winters and little to not rain days)
What do you all think?
Attached image(s)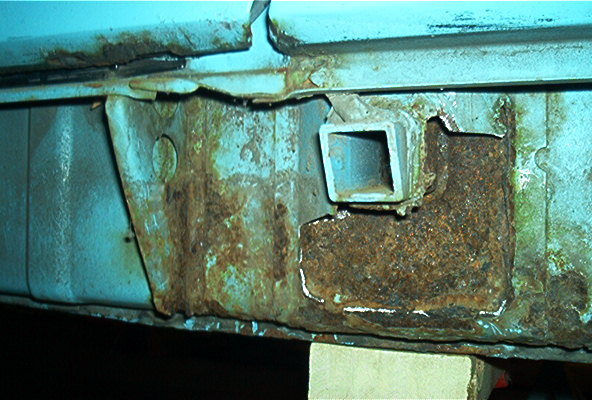
Posted by: qa1142 Nov 11 2004, 07:00 PM
another angle
Attached image(s)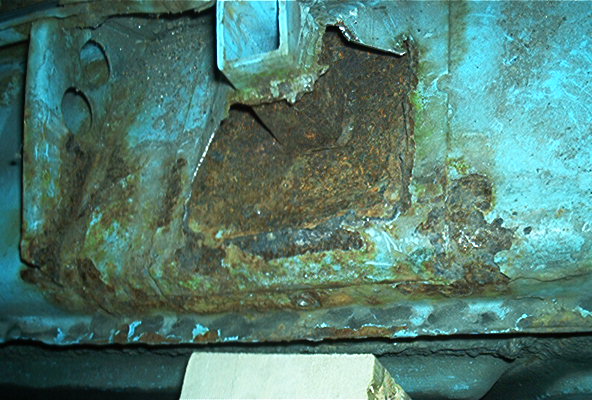
Posted by: qa1142 Nov 11 2004, 07:03 PM
Check out how clean the torsion bars came out. is this normal?
Attached image(s)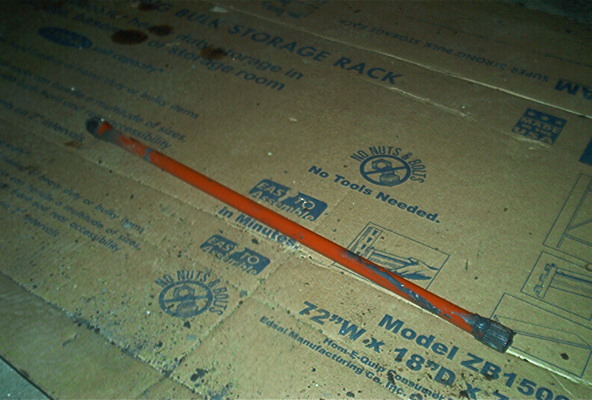
Posted by: qa1142 Nov 11 2004, 07:06 PM
Look how front arm rear bushings sagged! 
This is right side
Attached image(s)
Posted by: dakotaewing Nov 11 2004, 07:08 PM
Will,
Before anybody makes any comments on your jackposts, the metal needs to be ground clean before a true and accurate conclusion can be made....
Just my .0002...
Thom 
Posted by: qa1142 Nov 11 2004, 07:10 PM
Left (drivers) side
Front front looked fine
Attached image(s)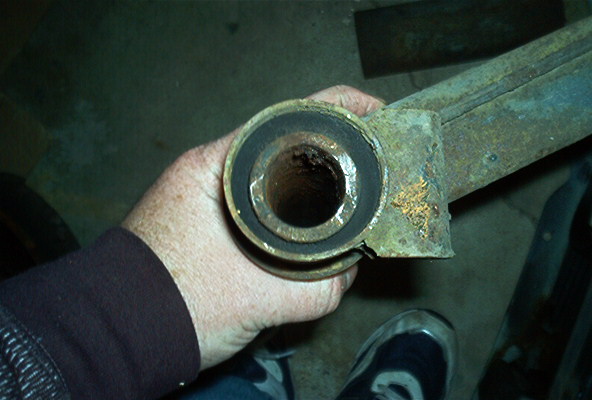
Posted by: william harris Nov 11 2004, 07:10 PM
Thanks for the pictures. This is exactly where I was about 1 year ago. Pulled a running 914 into the garage and began the same process. Problem was I couldn't stop. Now I have just (almost exactly one year later) brought the media blasted and primed tub home to continue the effort. I really want to finish the body and get the suspension back on the car this winter. This means installing the brake lines, fuel lines and wiring harness first. If you are going to keep the car on jack stands for long, I recommend 2x8s as they provide a great deal more support and height. I ran them completely across the the car at three points. Keep em coming. I feel like we are comrades in this effort.  My torsion bars looked just like yours, except almost no grease.
Posted by: qa1142 Nov 11 2004, 07:18 PM
Plan is to get the jack post rust in check.
Clean up treat and prep surface rust. cover in blue
then all mechanical - back to near new 
That will give me time to get back to full chassie restoration in a year or two.
Lynne is working tomorrow night, I plan to spend whatever it takes to get the one jack post ready. I'll get you those bare metal photos tomorrow.
Anyone want to come and help?
Posted by: itsa914 Nov 11 2004, 08:52 PM
I would but my weekend in booked.
 Nothing like learing how to do something on some elses car
Seriously, the week on Thanksgiving is open for me. If you need help let me know.
-Garold
Posted by: Root_Werks Nov 12 2004, 10:10 AM
Looks great Will! I see mostly surface rust, easy fixes. Like most have already said, get rid of the rust and poke with a screw driver to make sure things are solid. If you are solid, most of it can probably just be cleaned up and painted. POR-15 rocks. I bought a quart and didn't use all of it. If you put the lid back on, use a plastic bag (Keeps lid from sticking to can) and stick it in the fridge. It will last longer. I didn't do that to mine. Now I can't get the can open! 
Posted by: qa1142 Nov 12 2004, 07:10 PM
Well
Dug into left jack point today. metal is layered there??? looks like long goes behind the rear sub-frame???
Top layer is rusted through in spots. Clean solid metal all the way around where the jack post support was spot welded to the subframe.
Surface rust cleaned up well under the long/subframe.
If I weld this 1/2 post support in, will that be good enough? What is top layer here, the rear sub-frame? what bits would I need to patch in clean metal here??
Take a look at these pictures...
Attached image(s)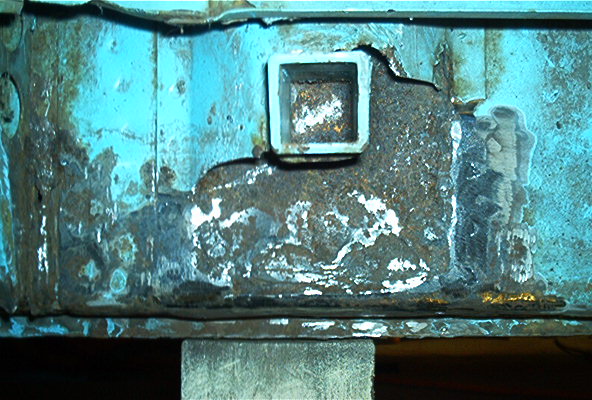
Posted by: qa1142 Nov 12 2004, 07:13 PM
another view
Attached image(s)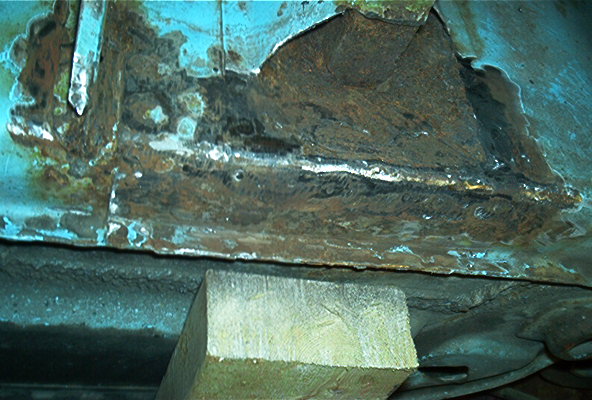
Posted by: qa1142 Nov 12 2004, 07:18 PM
If I por15 it and weld this piece in.... 


Attached image(s)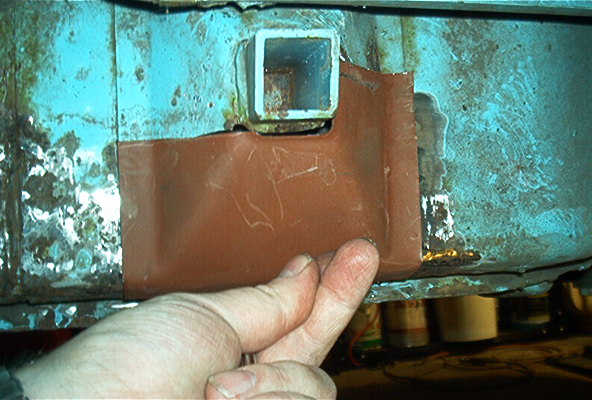
Posted by: qa1142 Nov 14 2004, 06:07 PM
Lazy today, Bears WON
I drained and pulled gas tank. pulling petals is next. Everything looks good (no real rust) couple of little spots where tank rubbed and I have surface rust.
Today's pictures
Attached image(s)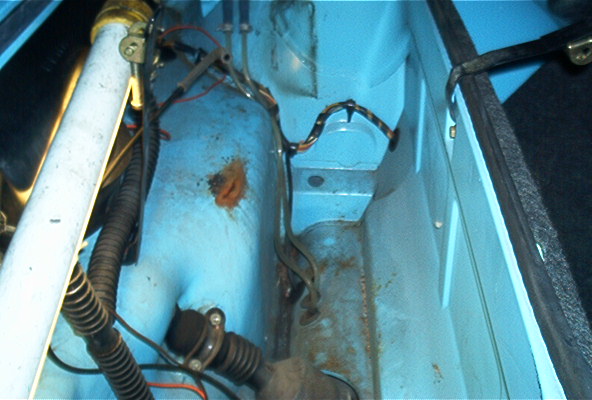
Posted by: Aaron Cox Nov 14 2004, 06:07 PM
while the tank s out..put a swaybar in. you wont regret it!
Posted by: qa1142 Nov 14 2004, 06:14 PM
picture 2
I'll install fuel lines and sway bar before tank goes back in.
Attached image(s)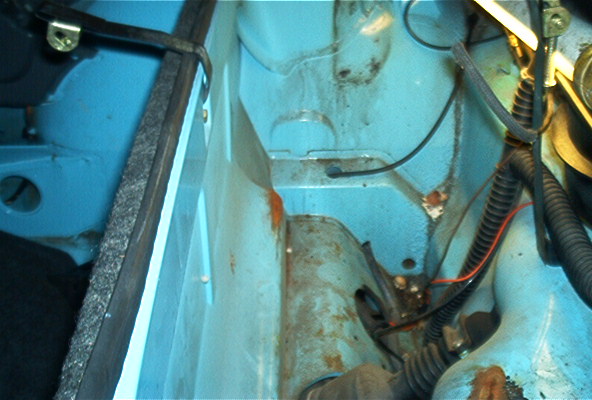
Posted by: aircooledboy Nov 14 2004, 06:15 PM
 Offense? We don need no stinking offense.
GO BEARS!!!!!!!!

Posted by: type47fan Nov 14 2004, 06:18 PM
Lookin' good. . . .
Wayne (type47fan)
Posted by: qa1142 Nov 14 2004, 06:19 PM
I have wesminster (Spelling) 19 mm from classifides and new bushings for it from PP.
Ball joints and turbo tier rods are ordered.
Need to get new front shocks..
Steering rack has little leak, is this an issue?
Attached image(s)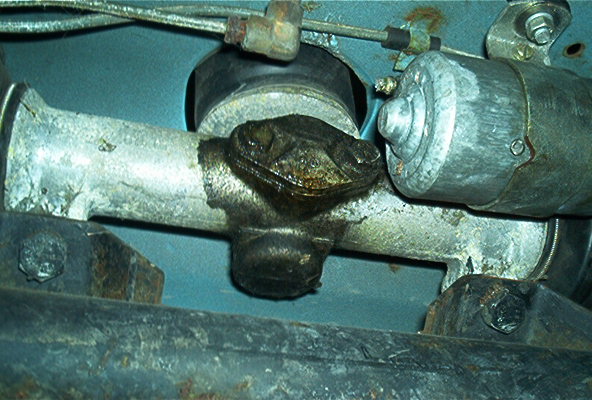
Posted by: qa1142 Nov 14 2004, 06:22 PM
little rust here to clean up
Attached image(s)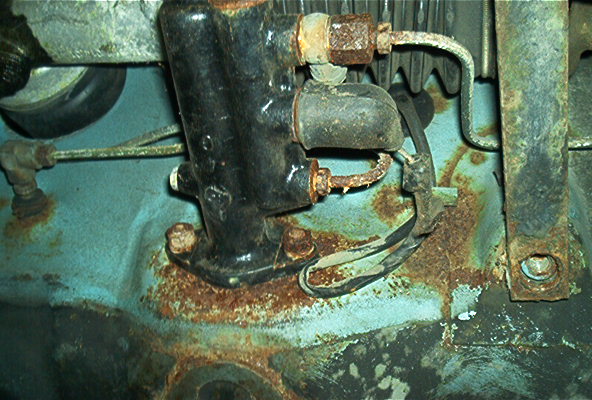
Posted by: qa1142 Nov 14 2004, 06:25 PM
anyone use this template?
Attached image(s)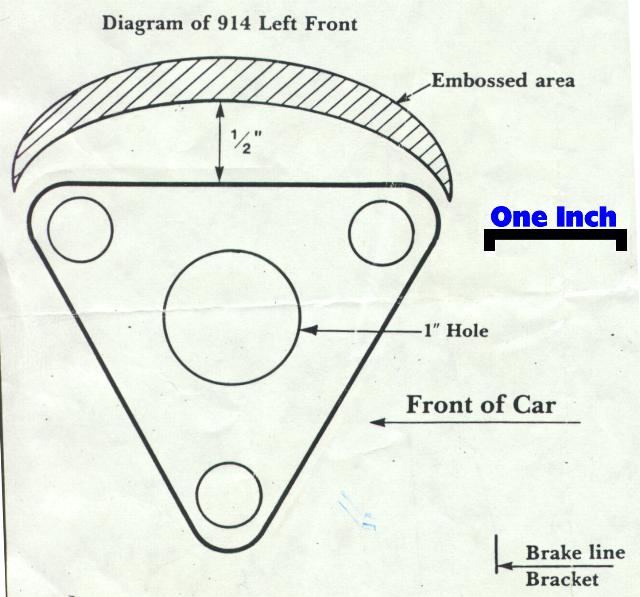
Posted by: Aaron Cox Nov 14 2004, 06:33 PM
thats the one i used....
worked well. i have a 23 mm bar, had to move it down a few mm to clear the gas tank
Posted by: qa1142 Nov 14 2004, 06:43 PM
Template looks a little too simple "1/2" from stamping lip.
Is there no better way to locate this?  Sorry when I industrial pump mechanic we worked in 1/10,000's
Posted by: qa1142 Nov 14 2004, 06:53 PM
just measure down 1/2"
Gotta be a better way
Attached image(s)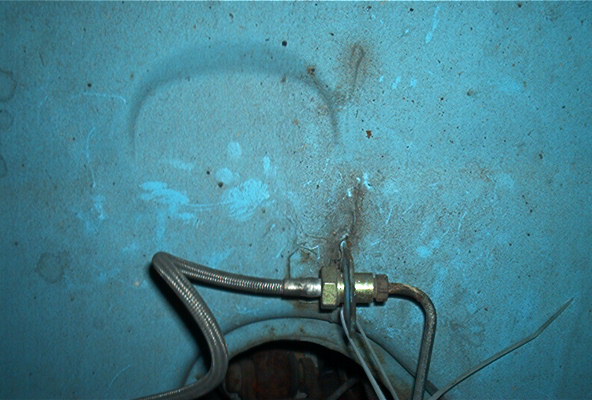
Posted by: seanery Nov 14 2004, 07:31 PM
I drilled pass side twice.
Posted by: type47fan Nov 14 2004, 07:36 PM
Anybody got a project with the swaybar removed that might be able to get Will a more exact measurement and possible picture/template?
Wayne (type47fan)
Posted by: seanery Nov 14 2004, 07:46 PM
the important thing (I think) is to make sure they are the same on both sides. Make yourself a little template and it's easy...I mean something that fits in the recess...I know I'm not clear, just keep both sides the same. If you don't adjustable droplinks should clear up the problem if it's not too bad. right?
Posted by: 9146986 Nov 14 2004, 08:12 PM
If you are going to do anything to the master cylinder, I'd suggest that you hit the brake line fittings with a wire brush and some PB Rustblaster or Liquid wrench. Give it a few days and hit it again.
What sort of tool are you using to remove the surface rust, a hard wheel? It looks too coarse to me, and it also looks like you've overheated the metal (the blue parts) when you ground it, which can cause problems in the future. Get a 3M Roloc holder and some 3M Bristle discs, they won't burn the metal and do a great job.
Overall, you seem to have a fine chassis, that most salt belt 914'ers would love to have.
I used to live in Elgin, IL and actually drove a 914 in the winter, back in '78 that is. Great handling car for snowy/icy roads, but I cringe when I think about all that salt 
Posted by: xsboost90 Nov 14 2004, 08:34 PM
looks similar to what im doing to my car, but mine is the rear floor against the firewall....
Attached image(s)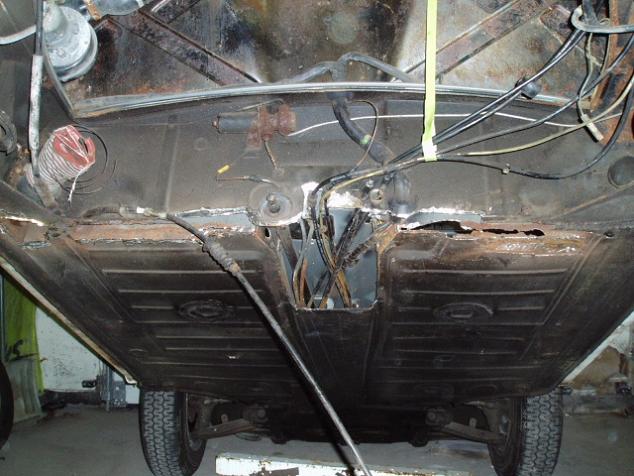
Posted by: qa1142 Nov 16 2004, 09:44 PM
Started restoration on the front arms (with sway bar tabs ) that I got off Evel-Bay for $10 (Shipping was $28 )
The heat and twist trick took the bushings off in like 15 seconds each (picked up tanks for may accetiline torch last week)
I could not break loose the ball joint nuts (didn't want to F the arms up so I didn't try real hard yet)
No pictures yet. More to come
Posted by: qa1142 Nov 22 2004, 02:24 PM
Ok, I split the ball joint nuts and just cleaned up the arms.
Pulled Boge inserts out of front struts, cleaned them and torqued in the Bilstiens
Quick coat of paint on A arms and I'll install ball joints.
then drill for grease fittings.
Posted by: Root_Werks Nov 22 2004, 03:04 PM
Looking great Will, keep the pics coming! 
Posted by: qa1142 Nov 23 2004, 11:27 AM
Ok, here come pictures from yesterday and this morning

Shocks
Attached image(s)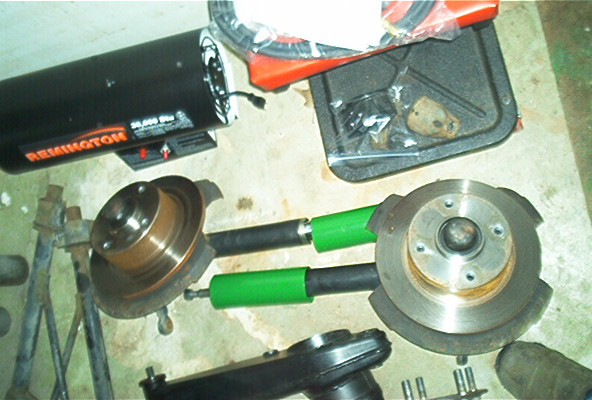
Posted by: qa1142 Nov 23 2004, 11:29 AM
Front bushings
Posted by: qa1142 Nov 23 2004, 11:34 AM
Attached image(s)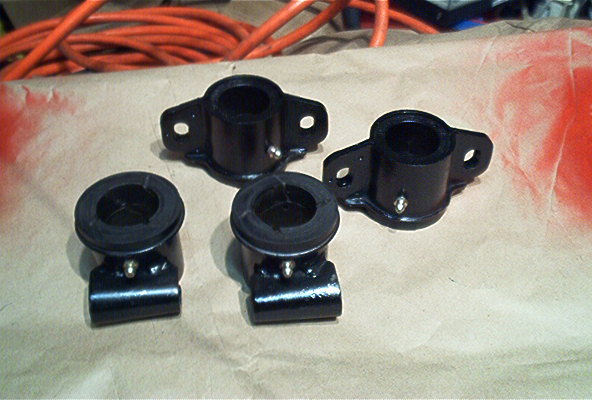
Posted by: qa1142 Nov 23 2004, 11:37 AM
Old cluster with a petrified friend
Attached image(s)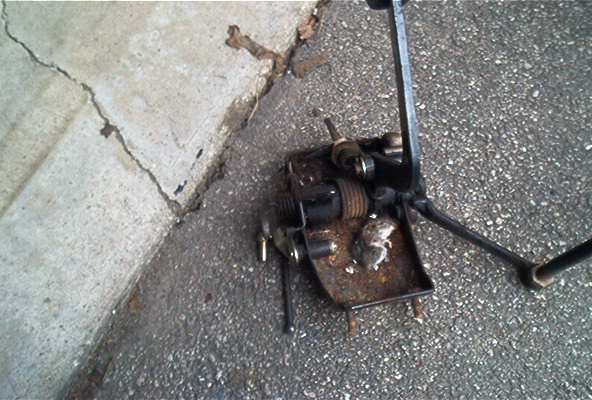
Posted by: qa1142 Nov 23 2004, 11:41 AM
This is just surface rust, but, where does the moisture come from???
Attached image(s)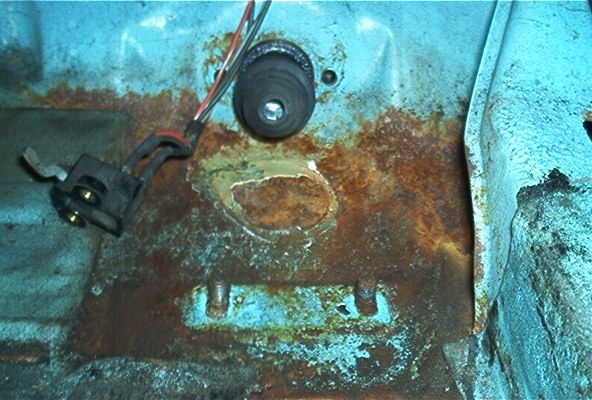
Posted by: qa1142 Nov 23 2004, 11:44 AM
rebuilt cluster
Attached image(s)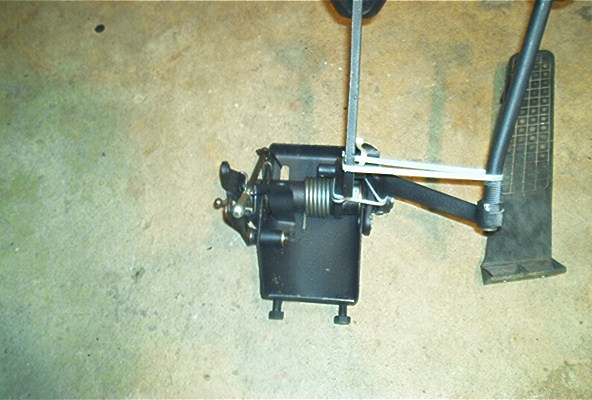
Posted by: qa1142 Nov 23 2004, 11:54 AM
wire brush and Por15
Attached image(s)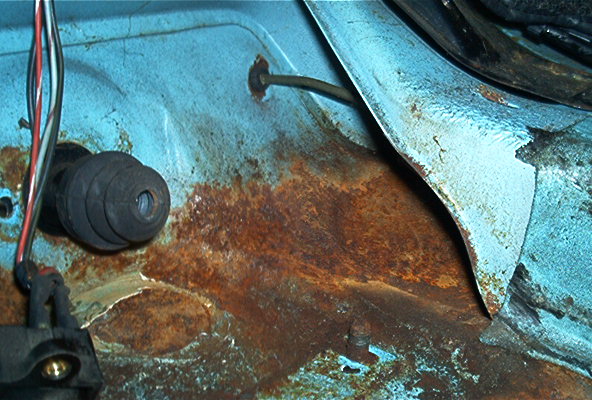
Posted by: Brett W Nov 23 2004, 12:59 PM
Damn, Will those parts look really good, Where did you get all that nice work done?
Posted by: qa1142 Nov 24 2004, 05:55 PM
Busy day
Front sway bar and suspension is back in!
Attached image(s)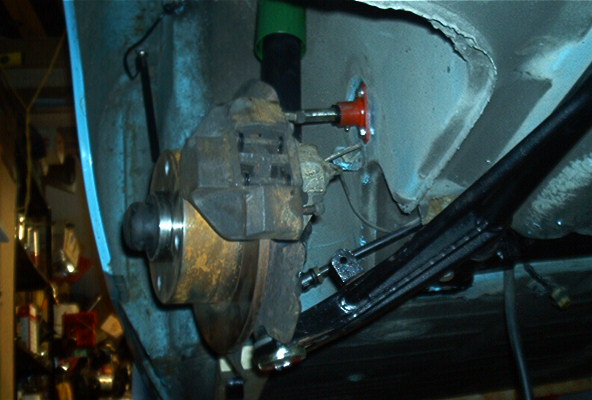
Posted by: qa1142 Nov 24 2004, 06:01 PM
Started with tie rods
Then drilled for swaybar
Attached image(s)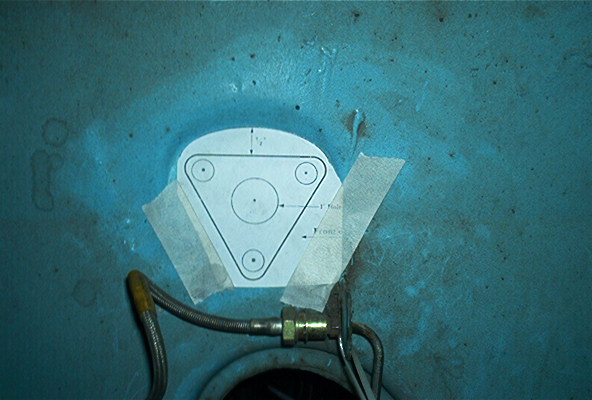
Posted by: Aaron Cox Nov 24 2004, 06:03 PM
very nice!
Posted by: qa1142 Nov 24 2004, 06:04 PM
to this!
Attached image(s)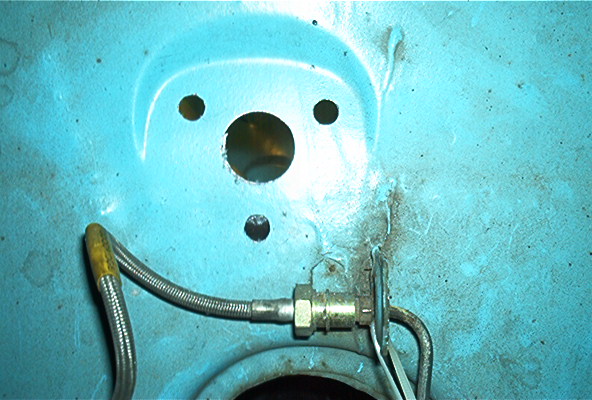
Posted by: qa1142 Nov 24 2004, 06:06 PM
to this
Attached image(s)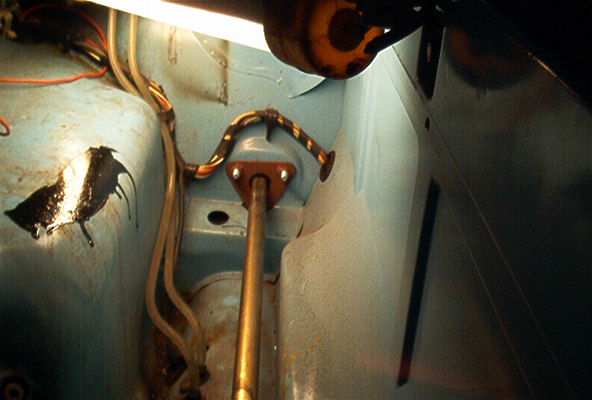
Posted by: qa1142 Nov 24 2004, 06:11 PM
last picture for the day
I'm tired ~ 8 hours.... under car, out, under car, out.....
Attached image(s)
Posted by: qa1142 Nov 24 2004, 06:15 PM
Now I just need to install drop-links on swaybar
mount a pair of tires - drop front end on ramps
Then start on back end! Dropping motor and trans.... maybe by next weekend????
Maybe Saturday
Posted by: qa1142 Dec 3 2004, 09:09 PM
yesterday I picked up a 75 2.0L motor - Thanks xsboost90
Today I started pulling it down, I have to get it small enough to get past my car into the back of the garage.
Attached image(s)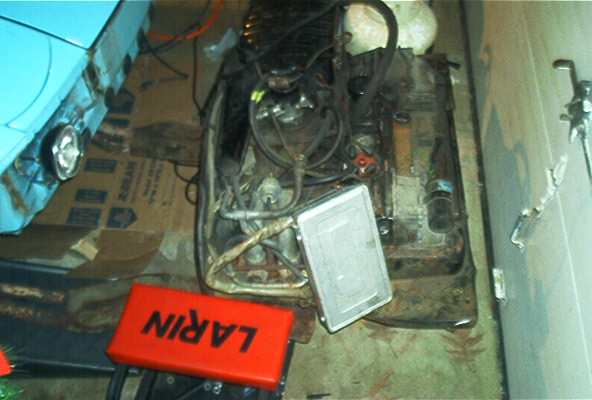
Posted by: qa1142 Dec 3 2004, 09:12 PM
After ~ 1 1/2 hours pulled computer and harness, air injection tubing, injectors, and runners.
More tomorrow
Attached image(s)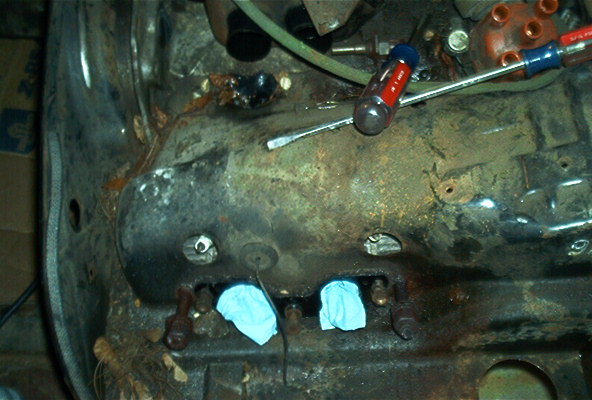
Posted by: qa1142 Dec 3 2004, 09:17 PM
last picture
Attached image(s)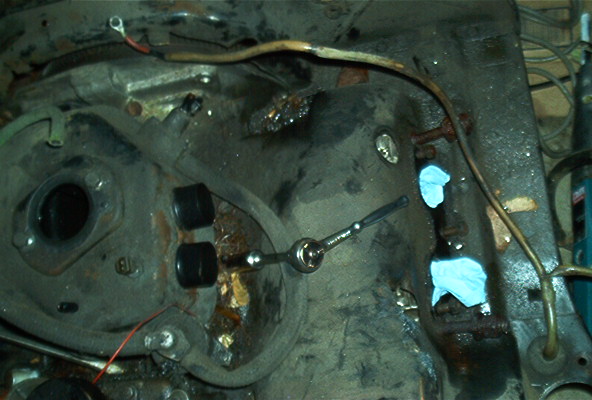
Powered by Invision Power Board (http://www.invisionboard.com)
© Invision Power Services (http://www.invisionpower.com)