Printable Version of Topic
Click here to view this topic in its original format
914World.com _ 914World Garage _ My 3.3L Subie Conversion Thread
Posted by: Chris H. Dec 27 2012, 11:02 AM
Finally starting the thread. First, I never would have done this if it weren't for several of you helping me out, especially Ian at:
http://www.coldwater914.com
Ian tolerated dozens of questions from me as I decided which way to go. Thanks again!
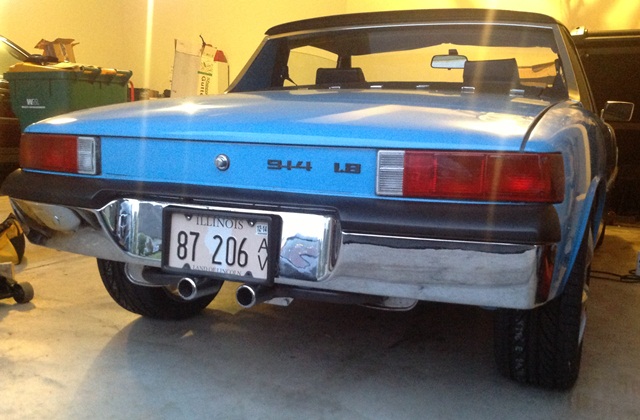
Here is the candidate (or victim, depending on what side of the fence you are on):
A 1975 1.8L with California Emissions...I've had it for almost 11 years. During that time I have logged about 2800 miles on it. I decided to swap it out for a modern drive train so my daughter could drive it so I started looking for a 2.2L Subie and a 2WD auto trans. This setup CAN be made to work with a custom hanger, but it's not a very exciting trans. Think early '90's Camry or Corolla acceleration. I'm sure it could be re-geared but an Audi trans would probably be a much better option.
Then I found and SVX for cheap and changed directions entirely. Looks like my kid will be learning to drive a 5 speed Subie!
So far I have: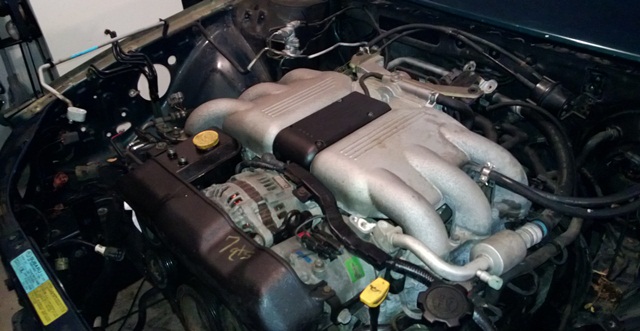
Strong running SVX engine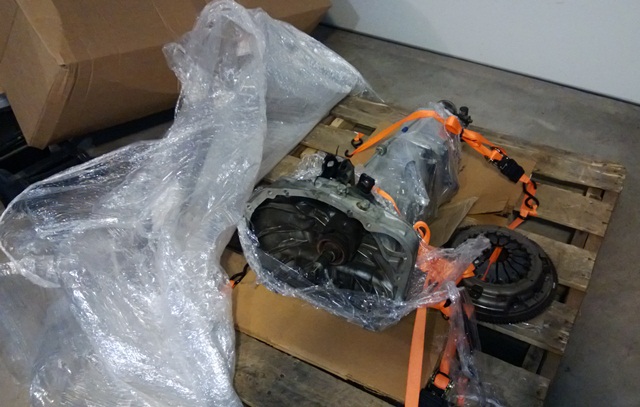
2006 WRX trans purchased from NASIOC
1990-1992 Honda Accord shifter Update - you cannot use this one unless you design something to reverse the shifter mechanism operation. Since it is designed for the trans in front of the car the mechanism moves in the opposite direction (mirror image) of what is needed. I ended up using an MR2 shifter.
If you don't feel like chasing this stuff down Ian will source it for you.
Next up I'll post the highlights of the SVX strip-down and note some of the pitfalls, valuable parts, and stuff to be careful not to break!
Any feedback, comments, questions, concerns are welcome. I want to do it right.
Posted by: DBCooper Dec 27 2012, 03:19 PM
Cool. I have a turbo, but really like that N/A horsepower.
Posted by: jimkelly Dec 27 2012, 03:55 PM
keep the pics coming : )
i see you are going with a later hydraulic activated trans - i assume that will be a little morre work and cost than a cable operated trans.
Posted by: Chris H. Dec 28 2012, 06:24 PM
Thanks guys. DBCooper I think I have seen yours in videos somewhere. Great setup.
Jim, I'll throw a few pics up every couple of days. Still working through the tear-down of the SVX. Ian and I think that we can get the older cable clutch parts and convert the trans to a push cable trans. If I have to go hydraulic I will since I need a strong trans to handle the HP and torque. This one is pushing it as it is, but I don't plan to race or autocross it.
A few humorous pics:
The DAPO...not just for teeners...
The sunroof leaks...step 1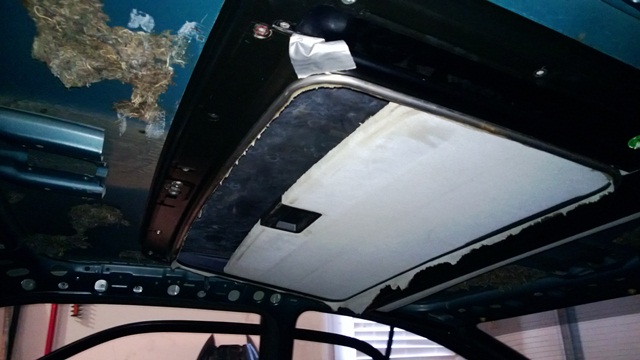
Tear out the entire headliner, duct tape leak
Step 2...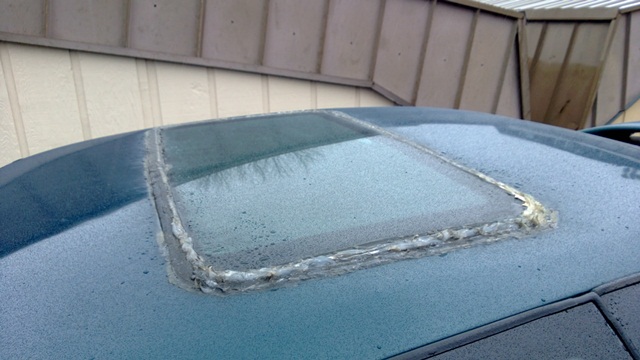
Use a tube of window caulk to seal sunroof...very subtle. Believe it or not it still leaks.
The SVX's "hell hole" appears to be the doors due to the odd window configuration. 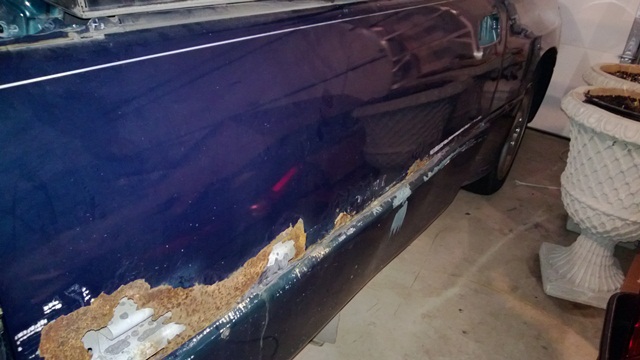
It was like old times when I tried to remove the driver's side lower seat-belt bolt. How many of us in the rust belt have had a huge chunk of rusty metal come off when you turn the bolt? 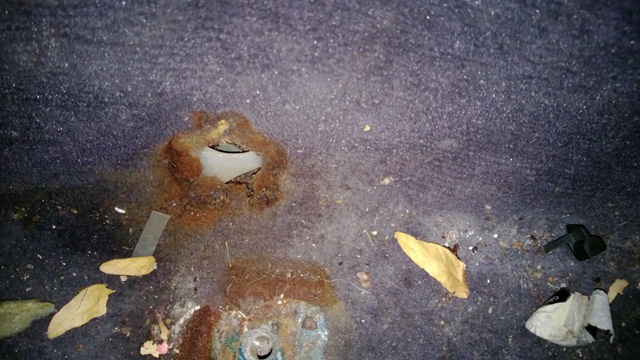
Another head-scratcher....these are the fuel lines...right underneath a plastic shield running up the drivers side long INSIDE the cabin. 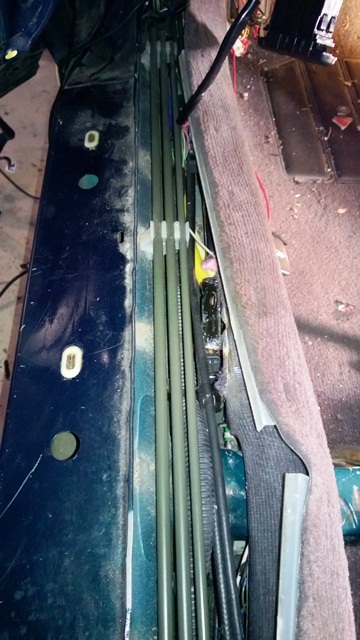
If you part one of these be careful...there are electronics everywhere.
Under passenger seat: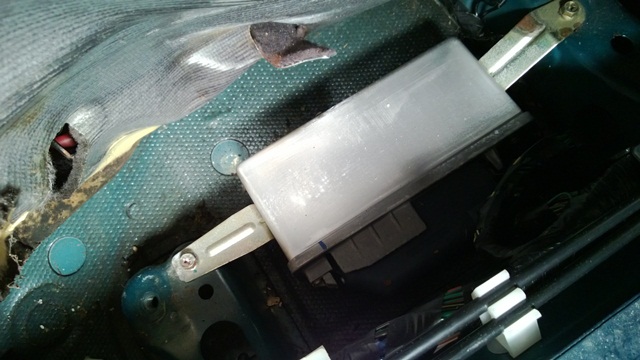
Behind dash: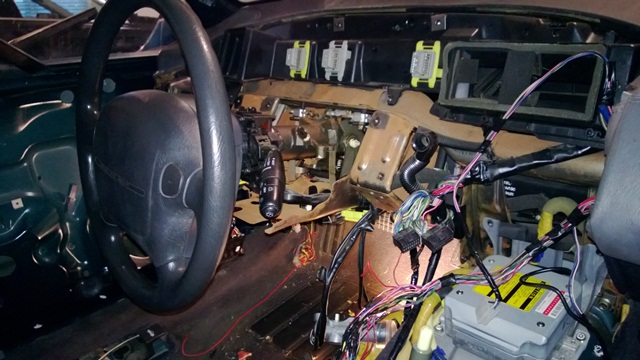
I plan to (try) to use some of the modern electronics.
Climate control: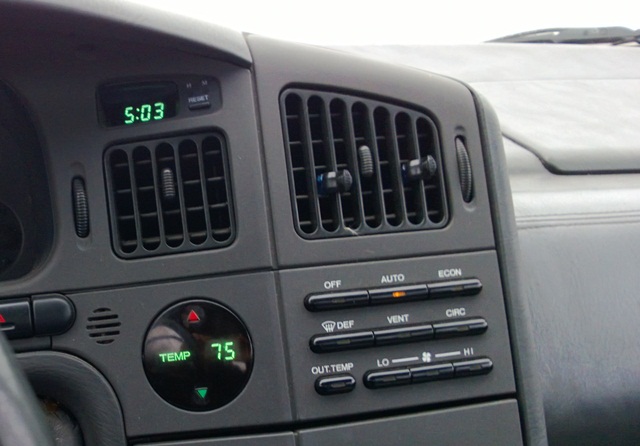
Cruise control: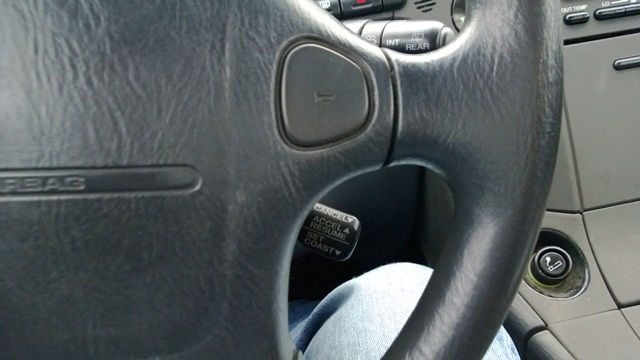
Posted by: a914622 Dec 28 2012, 10:37 PM
If our going to use the stock ecu (i recomend) the hole dash has to come out to get the wire harness "liberated". Big pain but just remove all the 10mm 12mm you can see and feel. There are bolts behind the ac vent covers.
Funny when the masive 8 foot wire bundle is cut down its almost as small as the teener.
You should check the engine wires harness for britleness, and plan on getting new vaccuum lines. I found most all the seals were hard or cracked on both of mine.
jcl
Posted by: Dr Evil Dec 28 2012, 10:51 PM
![popcorn[1].gif](style_emoticons/default/popcorn[1].gif)
Dont let Scotty B see this 
Posted by: Chris H. Dec 28 2012, 11:18 PM

If our going to use the stock ecu (i recommend) the hole dash has to come out to get the wire harness "liberated". Big pain but just remove all the 10mm 12mm you can see and feel. There are bolts behind the ac vent covers.
Funny when the massive 8 foot wire bundle is cut down its almost as small as the teener.
You should check the engine wires harness for brittleness, and plan on getting new vacuum lines. I found most all the seals were hard or cracked on both of mine.
jcl
Funny you should say that...I just came in from the garage. Wow there are a LOT of bolts in that dash. Will post pics in the am when I pull that wire bundle out. Couldn't take another minute of it for today. Definitely using the stock ECU and a good portion of the overall harness. Seems easiest.
This car is starting to remind me of the old days when I had VWs. Tools required:
10mm socket
12mm socket
14mm socket once in a while
screwdriver
I'll definitely replace all of the rubber lines and re seal the engine as well since it's out. More to come...
Posted by: brant Dec 29 2012, 08:34 AM
thank you for documenting this
Posted by: kg6dxn Dec 29 2012, 09:52 AM
Enjoy the striping! DO YOURSELF A FAVOR AND LABEL EVERYTHING!!! Label all the stuff you know. Label all the stuff you don't know. The electrical system and devices will look a lot different once it's removed.
Don't cut anything until you identify both ends of the circuit. Label everything!!!
Looks like fun!
Posted by: Chris H. Dec 29 2012, 03:34 PM
Thanks guys. Got the harness out...
Empty basket: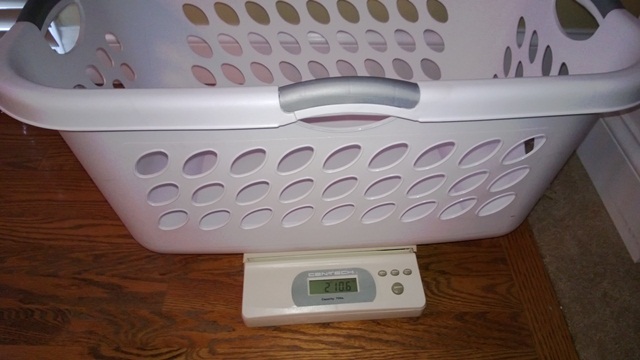
Overflowing basket: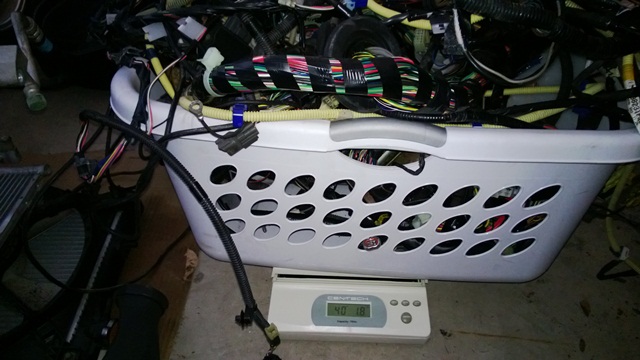
Looks like it weighs about 40 lbs.
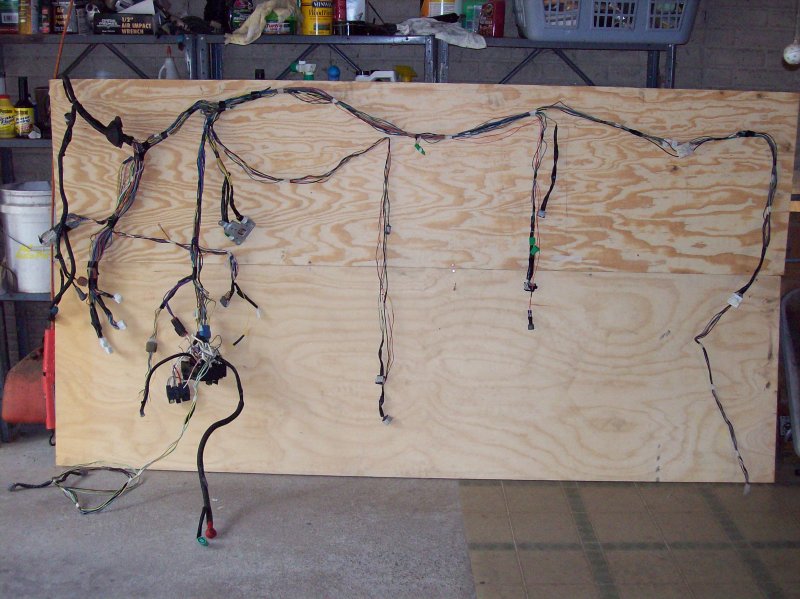
So far what I have tried to do is keep everything connected to everything else where possible, so the only things that are disconnected are the few things in the engine bay, which I color coded with several different shades of my daughter's nail polish. 
Posted by: 904svo Dec 29 2012, 05:25 PM
Heres my WRX harness before and after. Label all the connectors and cut the wires from the main harness., Power and Grounds leads are shared in the harness.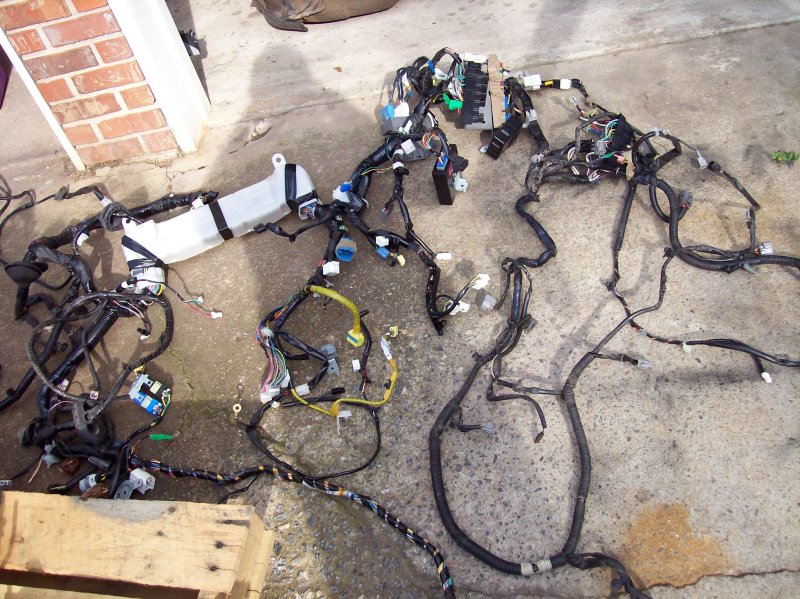
Posted by: speed metal army Dec 30 2012, 12:00 AM
Holy Moley!
Waaayy too much of the scary stuff for me!(wiring that is)
Awesome project. 
Posted by: 76-914 Dec 30 2012, 09:19 AM
Subscribed. Looks like your a couple month's ahead of me. I plan on doing the exact same thing so this is a good thing. Just stay ahead of me so I don't have to do too much head scratching.  Are you going to stay R-134 or convert it also? Talk about being wet behind the ears; I must have passed on 10 SVX's before I found out they only came with automatics. Duh!
  I hope you sort out the tranny/clutch set up before I get there.
Posted by: nsyr Dec 30 2012, 10:54 AM
Three quaters of that wire will be eliminated.
Posted by: Chris H. Dec 30 2012, 08:48 PM
Subscribed. Looks like your a couple month's ahead of me. I plan on doing the exact same thing so this is a good thing.
Just stay ahead of me so I don't have to do too much head scratching. Are you going to stay R-134 or convert it also? Talk about being wet behind the ears; I must have passed on 10 SVX's before I found out they only came with automatics. Duh! I hope you sort out the tranny/clutch set up before I get there. Haven't thought about the R134 conversion. Might have to...not sure. I had no idea that the US spec versions of the SVX were auto only either until I started asking folks if theirs was stick or auto....got the old
 It's really the weak link in the car. Tempted to find another SVX in better shape and do a 5 speed convert on it. With the right gearing it would be very fun. The AWD is really good without being too "controlling" if that makes sense.
 Andrew, glad to hear the wiring is going to be pared way down. I may need your help when I get to the tricky part where I should STOP cutting so that I don't have any CEL or "limp home" problems. Hoping the wiring design is old enough to where it's not so finicky... and when it looks like I am messing up along the way please don't be afraid to tell me...
Posted by: ruby914 Dec 31 2012, 10:42 AM
It's nice to see all the Suby conversions in work these days.
I would do my best to not cut any wires. I found myself reusing, unused wires, to extend used wires.
You may find something like a yellow / red wire in the A/T loom that you want to use on locating some thing like the FP regulator.
It is nice to find that extra Y/R wire in one peace.
I used a dental pick to unlock the connectors and to unlock each wire in the connectors.
Label everything (used and unused). A label maker would be a good investment.
Good luck.
Posted by: DBCooper Dec 31 2012, 10:55 AM
I was lazy, bought a plug and play engine harness and aftermarket ECU from Outfront and plugged it in. Well, not quite that simple, but pretty simple.
Posted by: a914622 Dec 31 2012, 11:05 AM
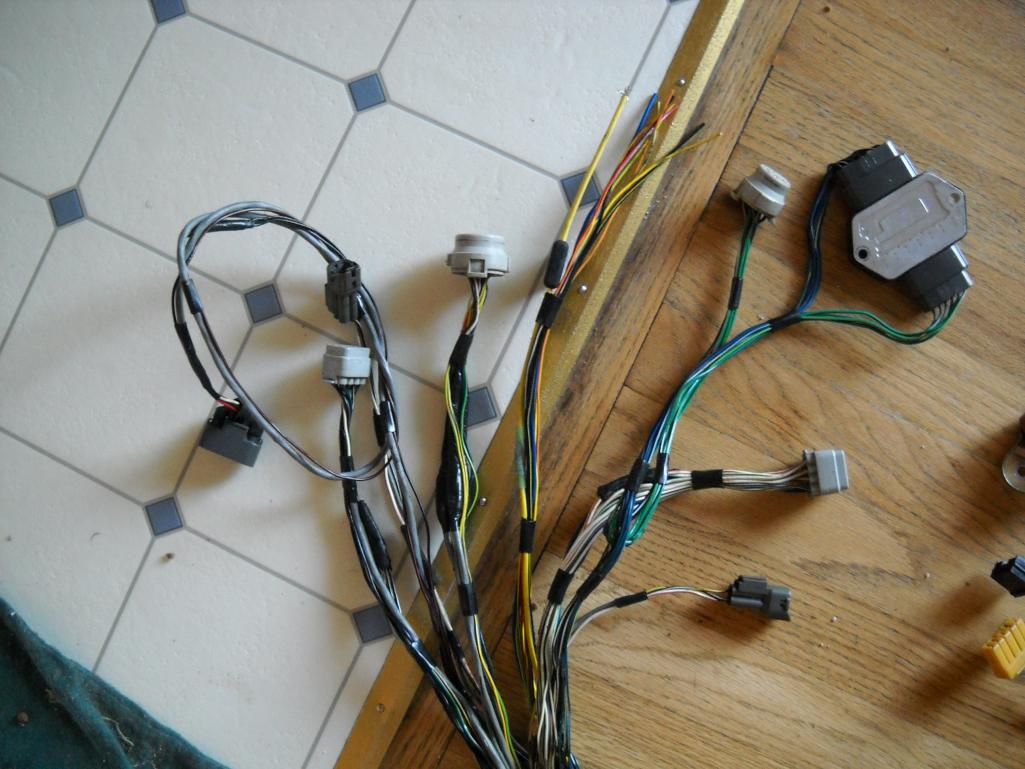
All the wires get trimed down to look like this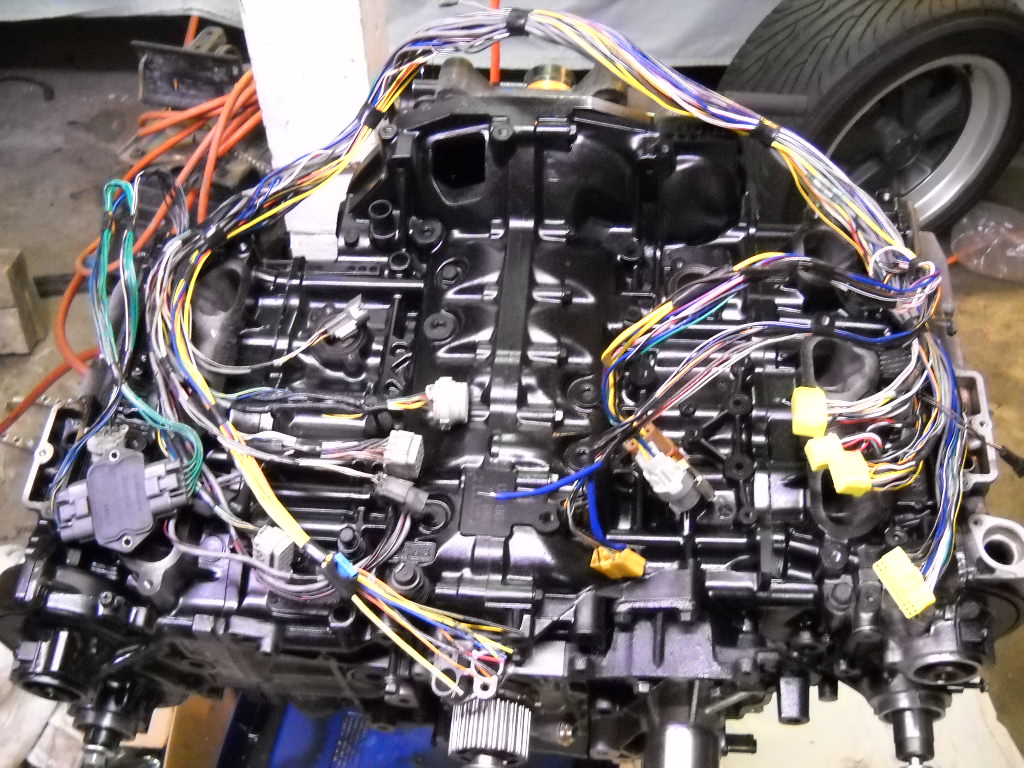
The svx is straight forward. The to engine side and the to 914 side. There are 2 o2's and the speed sensor need to be pluged into the subaru tranny. The svx ecu can also be upgraded to the "duel mode" stock/sport. but thats down the road.
jcl
Posted by: 3d914 Dec 31 2012, 03:41 PM
Great 3.3 conversion thread. Keep it coming and good luck on the project.
Posted by: BIGKAT_83 Dec 31 2012, 08:05 PM
All the wires get trimed down to look like this
The svx is straight forward. The to engine side and the to 914 side. There are 2 o2's and the speed sensor need to be pluged into the subaru tranny. The svx ecu can also be upgraded to the "duel mode" stock/sport. but thats down the road.
jcl
Nice job on the wiring harness. Thats more than one night of work there.
When I did mine I had a mistake in the cop wiring and burnt up 2 coils and the ignitor.
Posted by: Chris H. Jan 1 2013, 04:38 PM
Happy New Year everyone!
Just a bit more progress to report. Should drop the drive train today or tomorrow. A few pics...
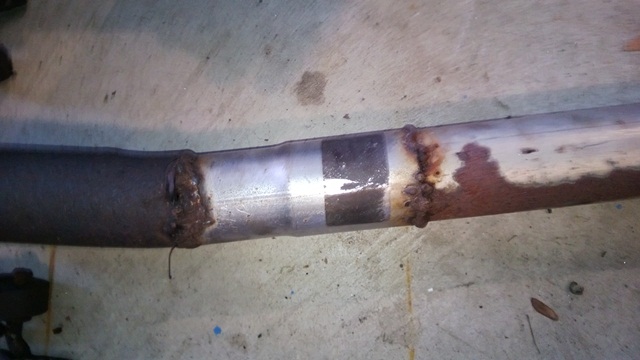
So here's the cause of the "slight" exhaust leak. This is the pipe coming off of the main cat... man that thing was loud... check out those welds! 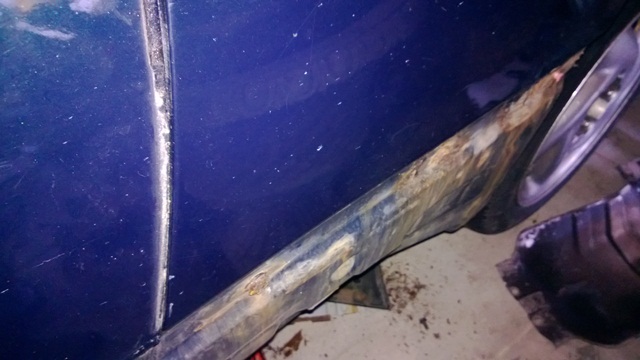
In case you are looking for an SVX to drive (not part out), the areas to check for rust are the doors as well as the whole belt line of the car. Like Honda Civics of that era and others, the SVX has a plastic lower panel. Water can get trapped under the plastic and cause rust. Other than that it seems OK aside from the leaky sunroof issues.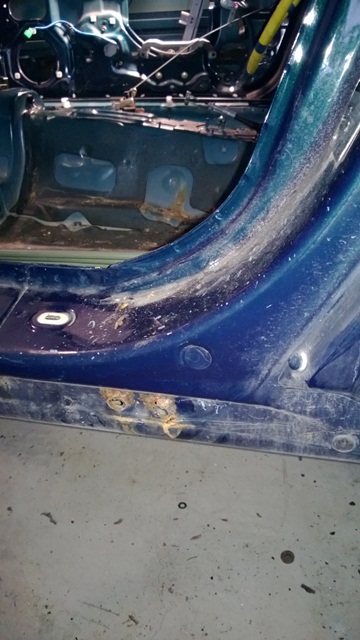
Oh no rust in the long! not really...just surface. 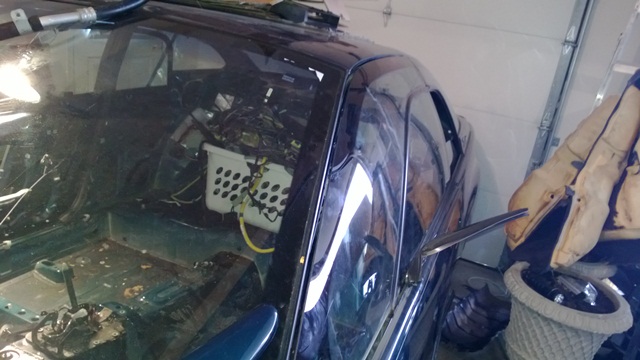
The windows are a PAIN to get out...Step 1 is to undo all of the bolts you can reach with the windows UP. Then roll them down and do the rest. The windows will not come out if they are rolled up. Best to leave the battery hooked up or close by in case you have to roll them up or down again. 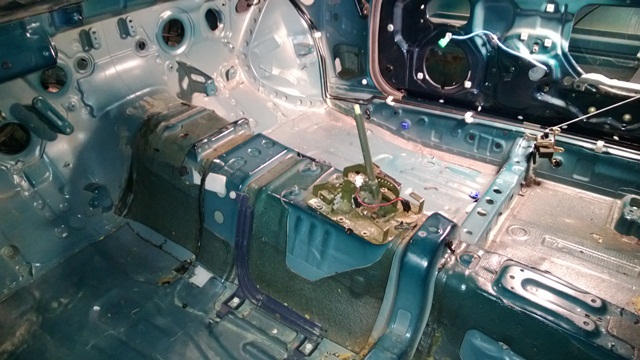
Don't wrestle with the shifter from the top. You can take off the trim but it's almost impossible to remove that way due to the position of the cable bolts. Get it from underneath. 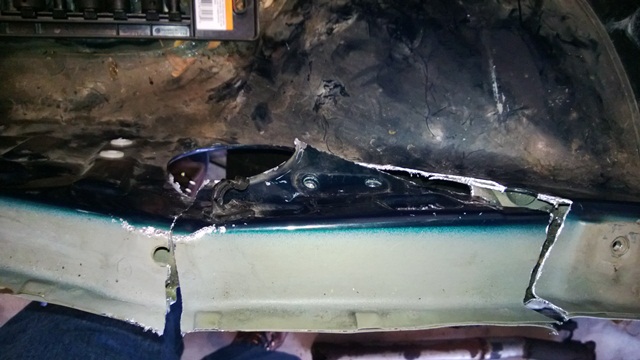
To disconnect the engine fuse box/wiring harness you do not need to cut a section of fender like I did. Just follow the wiring into the cabin and they are connected to the back of the main fuse panel. Pull the engine panel out and connect it RIGHT BACK. 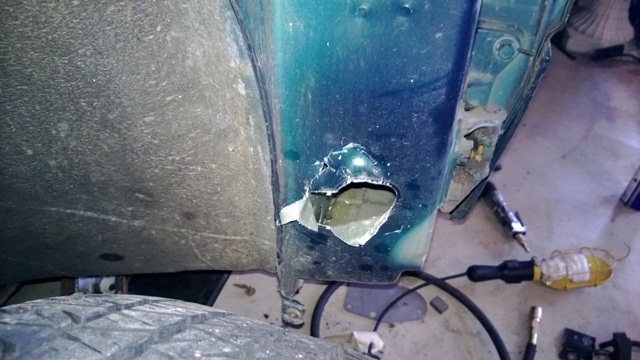
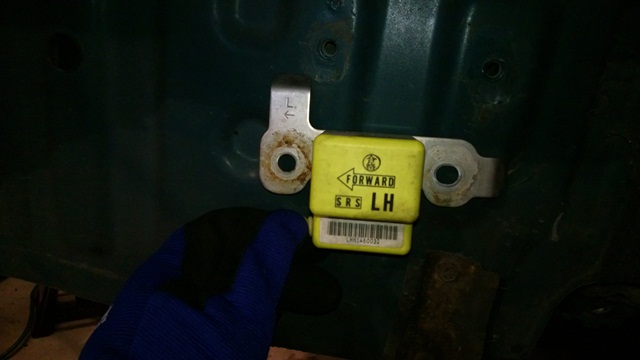
Conversely the best way to remove the SRS sensors from the fenders without cutting the wires is to cut a slightly larger hole and push them through so they end up in the interior of the car. Don't wrestle with trying to remove the wires from the main control module. There is something more to that process that is not worth wasting time figuring out...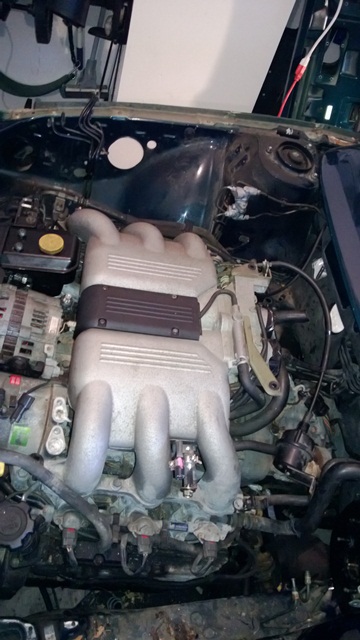
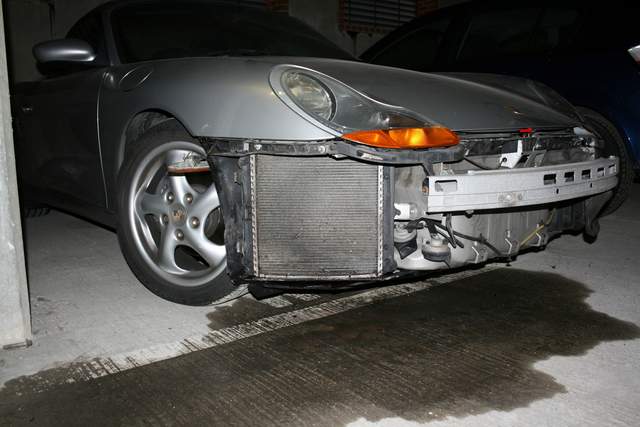
Plenty of room around the engine once you get the peripherals out. My plan is to cut the front area where the radiator was and roll it out the front of the car. We'll see if it works!
Thanks for all of the support and suggestions! We should do a "best practices since these swaps are becoming pretty common. Love the dental pick idea, and ruby914 I followed your build on Club NARP. Awesome work. Your dash is amazing. Wish I could use a WRX gauge cluster...
Posted by: Chris H. Jan 2 2013, 06:55 PM
Finally wrestled the engine and trans out...
First I cut the front section out where the radiator was so I could (hopefully) slide it out the front. 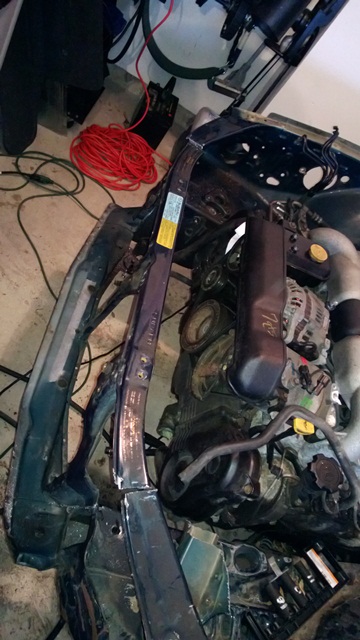
Pre-cut look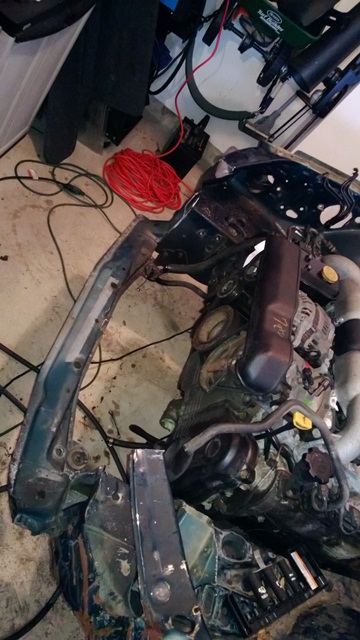
Top bar cut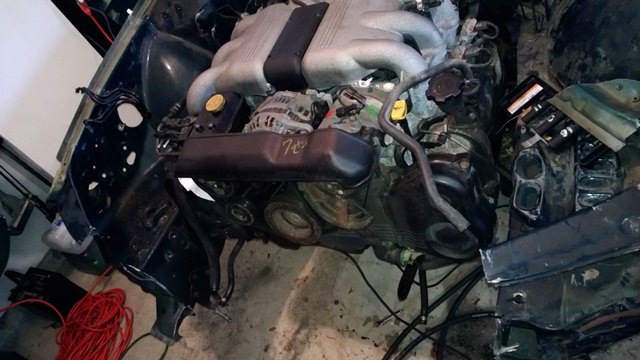
Bottom bar cut
There are 6 17mm bolts on either side of the front suspension. It's fairly obvious that they are the front sub section. Then undo the struts, jack the car way up and the engine, trans, etc will allow you to wrestle it out and forward. 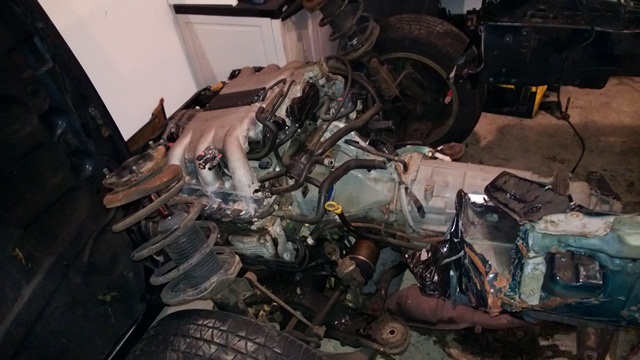
The engine naturally leans forward a bit due to the weight but it IS NOT resting on the accessories/drive belt. The oil pan is a roundish shape. 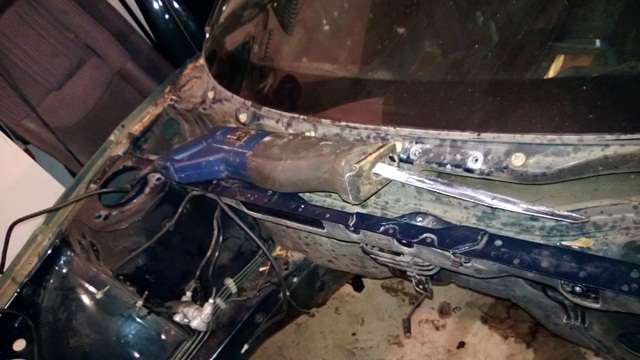
As the saying goes...the sawzall always wins. Godspeed Mr SVX...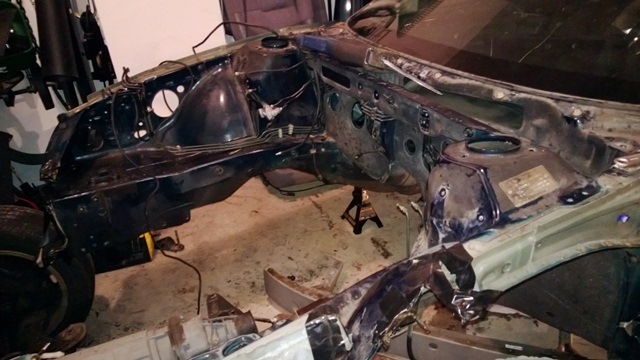
By the way make sure to duct tape any sawzall cuts or you will very likely cut yourself badly or at least tear your clothing.
Still have to take out the gas tank and rear diff, but that's not too bad.
Posted by: euro911 Jan 8 2013, 02:47 AM
Posted by: Chris H. Jan 8 2013, 07:34 AM
Parts are en route! Lots of parts! Some I don't even need yet!
Posted by: charliew Jan 8 2013, 08:26 PM
Nice thread, I have great respect for guys that take the time to take pictures and do the write ups under them. I don't have that skill yet. I can barely send pictures in a email.
Most of the connectors I have removed wires from were done with a very small allen wrench. It's flat on the end but still worked great for me or the little flat blade micro screwdrivers that you get in little sets from hf.
I bought more than one suby motor just to get the fasteners so keep all the boltsand clips/fasteners that you can remove. I also have lots of vw bolts but very seldom are the threads the same pitch.
Posted by: cwpeden Jan 8 2013, 10:46 PM
Had an offer to co-buy an SVX today. An aquaintance has a 240 and wants the rear end of the SVX. That may a market for your rearend if you dont have a buyer.
He and I are both autocrossers and i was telling him about my suby plans. They dont include SVX.
Posted by: Chris H. Jan 8 2013, 11:11 PM
Thanks Charlie. Been coming here 10 years so it's about time I did something constructive! Figure I've saved $5k or so by fixing everything myself using the search function here and advice from members.
Conrad, thanks for the info. Would never have guessed you could use an SVX rear end for a 240 (Z I assume). Probably a good match, and if you blow it up just buy another one for cheap.
One thing I learned from BIGKAT_83 is that the seals for the SVX engines are not too cheap...so even though the car was like $500, I'll need about $500 in seals as well. Might want to check that when shopping around... That's OK...have to do the timing belt anyway so why not do it all at once. I'll just pretend its a 911 engine for a while... $500 is a GREAT deal then.
Should get some parts this week but first I will throw the engine on a stand and change the seals. Looks pretty easy but I'll post some pics anyway.
Posted by: a914622 Jan 8 2013, 11:47 PM
Subaru parts . com is the best pricing you will find on your seal kit. If i remember it was 260.00 for the complete kit. It comes with every thing. It is an internet only site run out of a subaru dealer in Tacoma. Super good peaple to work with. I would only use a subaru timing belt!
Head bolts are reusable no need for new ones. ACL racing bearings for the 2.2 fit but you have to buy 2 sets to get a 6 back together. No kit for svx. Hoses should be converted to silicon if possible.
the engine under the wire harness pic was just rebuilt. Amazing motors! I have an extra one that i may have to add boost, lots of boost. Have 2 engine cradles , street and STI killer. Hummm..
PM me if you want detailed pics of the harness cut down. I can probably save you a week of BS.
jcl
Posted by: Chris H. Jan 9 2013, 07:16 AM
Thanks jcl! Wow that is very helpful.
Posted by: BIGKAT_83 Jan 9 2013, 04:29 PM
Chris here is a picture of my fuel tank with the intank pump.
You can see the AC evaporater behind the tank fits like a glove. Im working on venting this to the dash vents.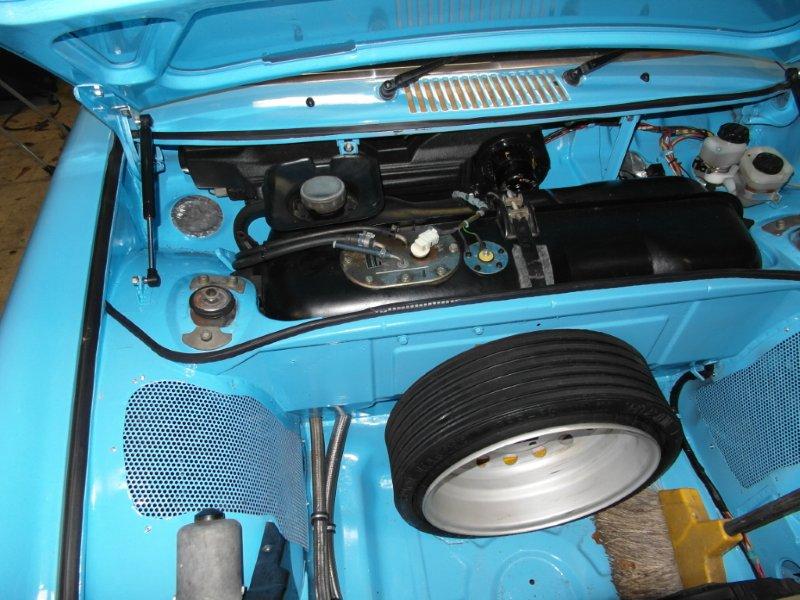
Bob
Posted by: Chris H. Jan 9 2013, 09:08 PM
Very nice Bob! Thanks! I finally got the fuel pump out of the tank and got the gas drained. Tomorrow I'll be calling the tow truck!
BTW I also see your slave cylinder reservoir for the hydraulic clutch. Looks great.
Posted by: Tilly74 Jan 10 2013, 10:23 AM
Chris here is a picture of my fuel tank with the intank pump.
You can see the AC evaporater behind the tank fits like a glove. Im working on venting this to the dash vents.
Bob
Sorry to "hijack" but is there any more information about this AC evaporator setup? I've searched everywhere for more info on installing an evaporator where the fresh air box is and can't find much of anything. What brand/model is that evaporator? This is exactly what I want to do with my car eventually.
Posted by: Chris H. Jan 10 2013, 03:16 PM
Chris here is a picture of my fuel tank with the intank pump.
You can see the AC evaporater behind the tank fits like a glove. Im working on venting this to the dash vents.
Bob
Sorry to "hijack" but is there any more information about this AC evaporator setup? I've searched everywhere for more info on installing an evaporator where the fresh air box is and can't find much of anything. What brand/model is that evaporator? This is exactly what I want to do with my car eventually.
Let's transfer you here:
http://www.914world.com/bbs2/index.php?showtopic=110974&st=40
Post 53. Bob has 2 subie threads...both very helpful.
And now, a moment of silence...
OK let's get on with the show! Engine seals ordered....
Posted by: Chris H. Jan 23 2013, 06:44 AM
Just some minor updates...the exciting stuff will start next week.
Separating the SVX engine from the trans is not quite as easy as expected. Since it is automatic you have to unbolt the flex plate from the torque converter. If you don't you can tug all day and it's not going to budge. Ask me how I know...
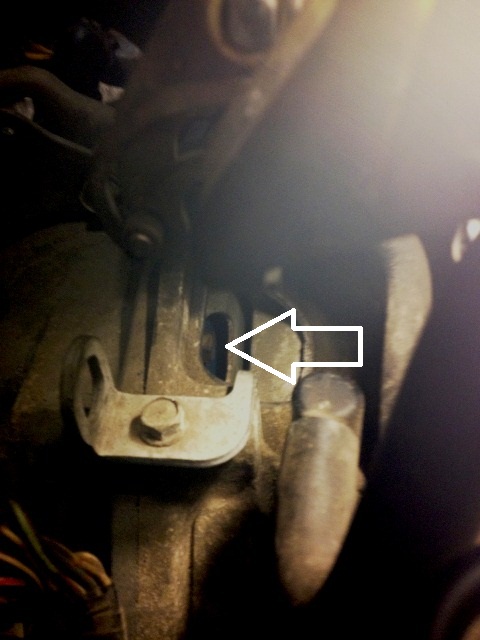
Under the intake on the snorkel end (rear) you will find a plug just to the passenger side. Take that off and there is a hole that will allow access to the 12mm bolts one at a time. Rotate the engine CLOCKWISE ONLY using a 21mm socket on the crank pulley until all 4 are removed. 
The engine and trans won't usually just come loose like a 914's will. Seems like the lower bolts are pointed slightly outward or something because they are TIGHTLY mated. What you have to do is start prying them apart with something slim like a putty knife and gradually and very carefully move up to wider prying tools. At some point it gives up. 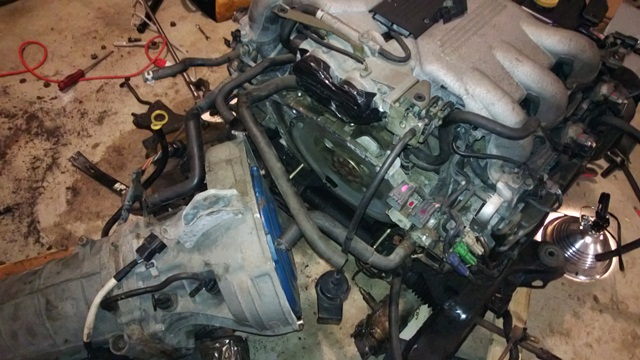
Make sure you have something like a furniture dolly positioned under the trans. It's one heavy SOB. Not something you can normally just lift. 
On the stand...this is the part where I usually say "I WIN!" and point at the object I have been wrestling with...crazy but at least I feel better. That sucker is also very heavy compared to a type 4. Might want to remove some of the accessories before you hoist it up there.
Posted by: Chris H. Jan 23 2013, 06:44 AM
So the angle of the intake has gotten my attention. Bob and I spoke of flipping it which can be done but might require rearranging of the alternator. 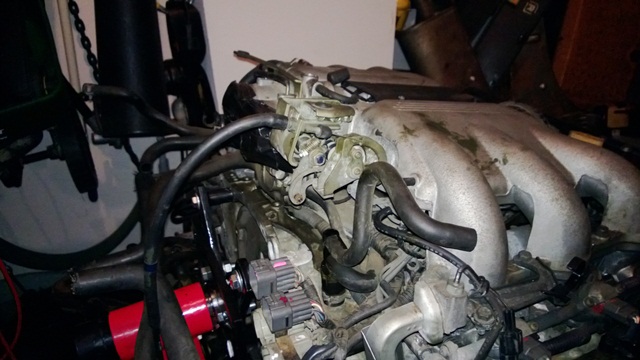
When you look at it from the top it looks like it will clear since the angle is so steep....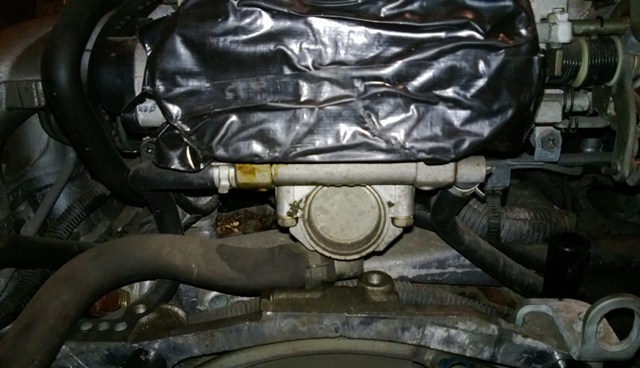
But under the intake snorkels is this little guy which will probably make it harder. I suppose a spacer could work...we'll see. Otherwise the alternator could be moved...
Posted by: Chris H. Jan 23 2013, 06:54 AM
Here's a better shot of the angle...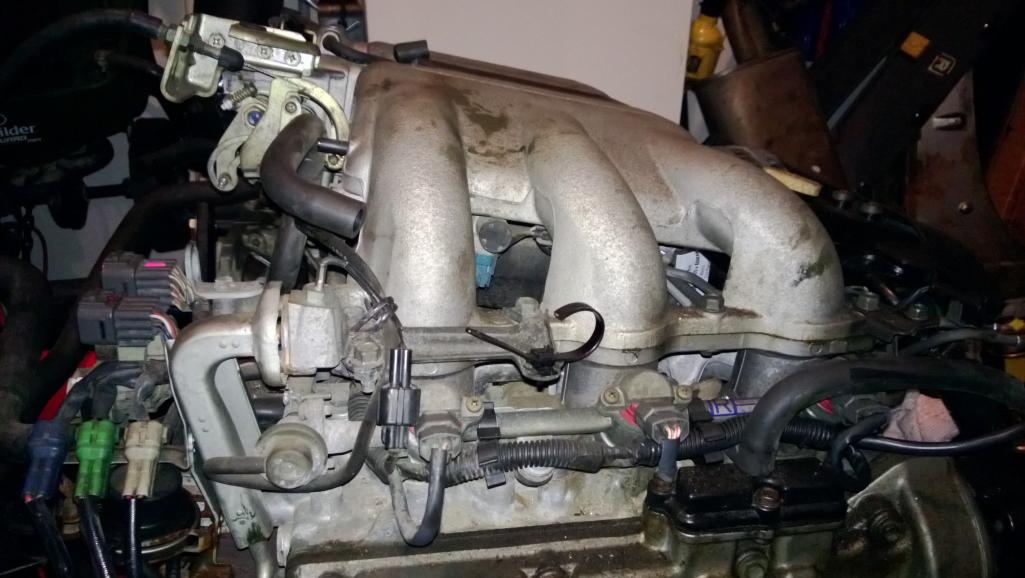
And the front again...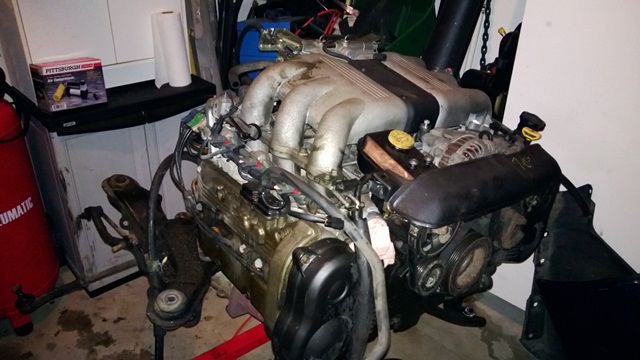
Posted by: 76-914 Jan 23 2013, 08:11 AM
Chris, what is the issue with the TB and Alt? I didn't understand what you are showing under the intake snorkels, either. Kent
Posted by: Chris H. Jan 23 2013, 10:27 AM
Sorry what I was saying is that it appears that I could flip the intake around so it faces the front of the engine, thereby eliminating the need to cut into the rear trunk (or at least lessen the cutting). The angle upwards makes it look like you could just flip it, but right under the air intake holes (snorkel) which are taped off now there is some sort of module (don't know what it is yet) that will probably be in the way. Might have to move the alternator to the end where the power steering pump resides now. I want to retain the A/C as well.
Posted by: scotty b Jan 23 2013, 04:51 PM
If you flip it, will you still have enough room to put whatever filter system you plan to use without hitting the firewall ?
Posted by: wingnut86 Jan 23 2013, 09:12 PM
94' had an EGR valve in the location under the intake.
What year is it again?
Posted by: Chris H. Jan 25 2013, 10:10 AM
Sorry guys I was out for a couple of days...
wingnut - It's a 95....could be the EGR...
Scotty - That's a very good question...I think it will fit but we'll find out very soon. The stock breather box adds a couple of inches to the end of the intake and then exits to the left passenger side like this:
Sorry for the grainy photo. Let me know if you need any measurements when you start your install. I'll keep you posted.
Posted by: BIGKAT_83 Jan 25 2013, 11:36 AM
Its the Idle Air Control valve.... You need this if your running the stock ECU.
Bob
Posted by: Chris H. Jan 25 2013, 12:31 PM
Well there you go...that thing is not going anywhere! In my mind it seems like the alternator should move to where the power steering pump is so that the stock serpentine belt could be used and it's more balanced. Just need to fab a strong bracket.
Posted by: 76-914 Jan 25 2013, 01:59 PM
Just stay 3 month's ahead of me so I don't have to do any thinking, Chris. 
Posted by: scotty b Jan 26 2013, 09:45 AM
Sorry for the highjack, but it is somewhat related. Do you guys think a GT front valance, with a coulpe of moderate sized cutouts on the front panel ( I'm thinking about cutting the three center factory holes to one large oval hole, and two additional cutouts on either side of the trunk latch ) combined with a puller fan and shroud like Ruby914 made, would cool well enough in the worst of conditions ( idling in town in 95* temps )? My intent is to make this as stock looking as possible. Kind of like Porsche " could have done "
We really need a Sooby forum here 
Attached image(s)

Posted by: DBCooper Jan 26 2013, 10:25 AM
That's what BIGKAT did (with just the GT opening), and it apparently worked well: 
My radiator opening is just a few square inches larger than what I measure the GT opening to be: 
I only have a 2.0 liter turbo in mine, with the Renegade radiator, and it's never been hot in summertime south Texas or the California desert. The fans have come on when I've been thrashing it and then pull into stop and go traffic, but the needle's never moved. Air for both the radiator and intercooler go through that opening.
That radiator opening was cut into a painted bumper to test the size hole I'd need. I cut it small and was going to keep opening it up till it was large enough to cool well, but that's still the original "small" hole because I never had to enlarge it. I just bought a narrow body GT valance and now I'll cut the chrome bumper to match the GT valance, knowing that opening will be large enough. I believe BIGKAT had a big 3.3 liter six in his, so should work for that motor as well. I don't know this for a fact and it seems counter-intuitive, but I think radiator capacity and the air exits from the trunk are more critical than the size of the inlet.
We really need a Sooby forum here
Yup, sure do.
I always feel like I'm offending purists. 
.
Posted by: Chris H. Jan 26 2013, 02:32 PM
BIGKAT and I were talking radiators last week. Since the stock rad in my car is new I am thinking of doing it PJHAUN style (Brad Mayeur did it as well in his V8 car). In through the front, out the bottom of the car. The stock rad is pretty big, really too big for most temps in this setup. Just hate cutting the fender wells. If I had the skills I would do what Ruby did and then I could live with the cutting.
The inlet only needs to be 1/2 the size of the outlet(s) so your plan should work Scotty. Check out SpeedMetalArmy's. He just has a few holes in the bumper for his LS1.
Hijack any time guys. Seriously...I learn more from every one of them.
Posted by: scotty b Jan 26 2013, 03:51 PM
The wheel well cutting is definitely an area to be concerned about. One thing I plan to do that I have yet to see someone do, is cut a clean hole the same size as the duct running to it, then reinforce the perimiter by welding on a piece of 1" wide 16 gauge. I have also considerd cutting the hole, then making a patch panel to fit back in that had been punched with louvers, giving a nice finished look instead of a big hole, but I'm worried the louvers would block/disrupt the flow to much to be effective
Posted by: DBCooper Jan 26 2013, 04:42 PM
Give it a go. I think that area works because it's low pressure, and if that's so it should suck hot air out through louvers, lots of small holes (like mine), or one big one.
My outlet, done with a template (so both sides are identical) and a hole saw, so it still retains some strength. I don't drive it in the rain (California) so it works for me.
Posted by: Dr Evil Jan 26 2013, 05:03 PM
I would like to make a two radiator system like the 911s. If there was a way to intake behind the doors and exhaust some place aft of that in a way that keeps the looks and functionality, then I would be all over that.
Posted by: kg6dxn Jan 26 2013, 05:30 PM
I would like to make a two radiator system like the 911s. If there was a way to intake behind the doors and exhaust some place aft of that in a way that keeps the looks and functionality, then I would be all over that.
Porsche uses both a 2 and 3 radiator setup but it's not in the engine compartment. it's in the front bumper and exits air into the fender wells. Not unlike a water cooled 914.

Posted by: a914622 Jan 27 2013, 12:28 AM
Yes the intake can be flipped around, but the injector wiring needs to stay the same. Thats what im working on now. I think a thin toyota or mazda alt will do the trick in place of the power steering pump. Still working on it. The coolant hoses to the throtle body need to be in place for proper cold start.
I am going to try to use the stock intake hoses out to the air sensor. I have seen the 2.2 of the same year react to the shortening the intakes on the vanagons. But i was just reading about the hack for the ecus so injector timing could be shortened if needed.
Iv eyeballed the 2 radiator idea but with out hacking up the front body lines i cant see it. FYI the audi 4000 radiator fits almost perfect in the front.
jcl
Posted by: Chris H. Jan 27 2013, 11:06 AM
Thanks for the insight jcl... the alternator setup is going to be key...
Hey carrying over my hijack of strawman's thread (sorry man) ... been looking at stock Subie gauge clusters... does anyone know if the tach needs calibration like a 914's? How about compatibility?
The reason I ask is that the bone yards and e-bay show compatibility with either 4 cylinder or 6 cylinder cars. Example:
http://www.ebay.com/itm/SPEEDOMETER-CLUSTER-Legacy-2001-01-2002-02-Manual-/150790556847?_trksid=p2045573.m2042&_trkparms=aid%3D111000%26algo%3DREC.CURRENT%26ao%3D1%26asc%3D27%26meid%3D5174120468905582082%26pid%3D100033%26prg%3D1011%26rk%3D2%26sd%3D150985386299%26
Note how it says either 2.5L or 3.0L...Could be a mistake...
my ideal setup would be something like this:
http://www.ebay.com/itm/2004-Subaru-Impreza-WRX-5spd-MT-Instrument-Cluster-Tach-/150293654553?pt=Motors_Car_Truck_Parts_Accessories&hash=item22fe332c19&vxp=mtr
Or this:
http://www.ebay.com/itm/SUBARU-IMPREZA-WRX-STI-JDM-EJ20T-VERSIO-8-04-05-GAUGE-CLUSTER-SPEEDO-METER-V8-/181067797852?pt=Motors_Car_Truck_Parts_Accessories&hash=item2a287b555c&vxp=mtr
Just not sure if it would be possible without more $$$$ than the Speedhut setup.
Any insight would be appreciated.
Posted by: 76-914 Jan 27 2013, 12:11 PM
Hey Chris, what's that cluster from the SVX look like. Any possibility of grafting that one in?
Posted by: Chris H. Jan 27 2013, 12:43 PM
SVX's are all automatics...the cluster is a little large and squareish..
Here it is: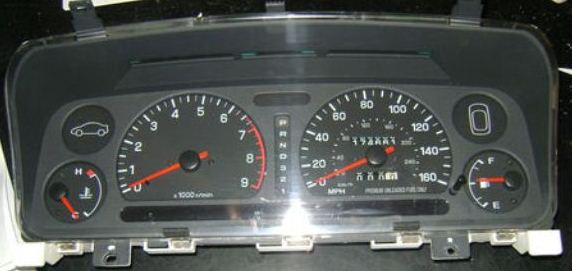
I don't mind the gauges themselves too much but no need for the other stuff and the PRND321. Maybe I could Frankenstein these into a new cluster...I thought about transplanting the guts into the VDO's but they don't line up at all...
Posted by: strawman Jan 27 2013, 01:58 PM
... been looking at stock Subie gauge clusters... does anyone know if the tach needs calibration like a 914's? How about compatibility?
IMHO, the easiest solution is to match the cluster's native number of cylinders with the sixer in your car. But I'm sure there's a way to use resistors, amps or clamps (or some other techie solution!) in-line between the ECU and Suby cluster if you choose to go with a WRX cluster. All of the Legacy gauges I looked at were too wide for my liking, but if you're gonna hack up the 914 dash anyway (like I did!), I guess it really doesn't matter.
904svo (Larry) is an electrical whiz and REALLY helped me build a converter to use the 914 tach.
I've still got the converter (see below) and could pass-it-forward if you can use it, though you'd need to convert it to work with the six-cylinder signal. PM me if you're interested (and be sure to thank Larry!). 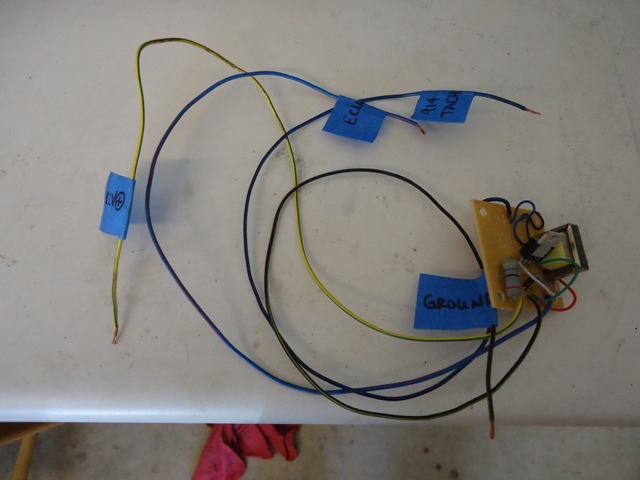
You'd still be challenged with the speedo, since the Suby uses a VSS signal versus the cable-driven 914 speedo. I looked at using a VSS-based 911 speedo, but my cheap-ass couldn't stomach paying ~$100 for a questionable used one and prolly need to send it in for a $350 rebuild... most of the cheap ones are 85mph, too.

Keep up the great work!
Geoff
Posted by: 904svo Jan 27 2013, 04:33 PM
... been looking at stock Subie gauge clusters... does anyone know if the tach needs calibration like a 914's? How about compatibility?
IMHO, the easiest solution is to match the cluster's native number of cylinders with the sixer in your car. But I'm sure there's a way to use resistors, amps or clamps (or some other techie solution!) in-line between the ECU and Suby cluster if you choose to go with a WRX cluster. All of the Legacy gauges I looked at were too wide for my liking, but if you're gonna hack up the 914 dash anyway (like I did!), I guess it really doesn't matter.
904svo (Larry) is an electrical whiz and REALLY helped me build a converter to use the 914 tach.
I've still got the converter (see below) and could pass-it-forward if you can use it, though you'd need to convert it to work with the six-cylinder signal. PM me if you're interested (and be sure to thank Larry!). You'd still be challenged with the speedo, since the Suby uses a VSS signal versus the cable-driven 914 speedo. I looked at using a VSS-based 911 speedo, but my cheap-ass couldn't stomach paying ~$100 for a questionable used one and prolly need to send it in for a $350 rebuild... most of the cheap ones are 85mph, too.
Keep up the great work!
Geoff
That tach adapter will drive a 911 tach off a 6 cylinder engine also.
The trouble with using the Subaru Speedo is that it will only read the correct speed if you use the same tire size as the Subaru, also there is no way to fix it as it control by the speedo chip in the gauge panel.
Posted by: Chris H. Jan 27 2013, 05:35 PM
Thanks guys.... Geoff if I end up using the stock tach I will definitely let you know. Appreciate the offer. Larry, thanks for the info on the speedo... the stock wheel size for the SVX is 205/55/16. Have to check that against our wheel calculator.
Posted by: strawman Jan 27 2013, 06:49 PM
Guys on NASOIC have had success with the http://www.healtech-electronics.com/. Cost is about $120, but it can be used with any VSS-equipped motorcycle or automobile. I was planning on using one of these...
Posted by: DBCooper Jan 27 2013, 10:49 PM
There's an aftermarket VDO electrical speedometer that works with the Subaru sender. it has an LCD odometer, but the size, color, bezel and fonts match the original 914 style. It was about $100. I have a photo somewhere if any interest.
Posted by: Chris H. Jan 28 2013, 08:00 AM
Is it this one? 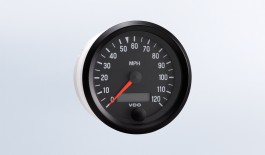
Certainly a good option. Fits right in the slot... says it has "auto-calibration" so that must make it compatible with multiple senders.
I might be heading back to the SpeedHut setup....a little pricey but all the gauges I want.
Posted by: DBCooper Jan 28 2013, 09:13 AM
Yup, that's it. Found a photo: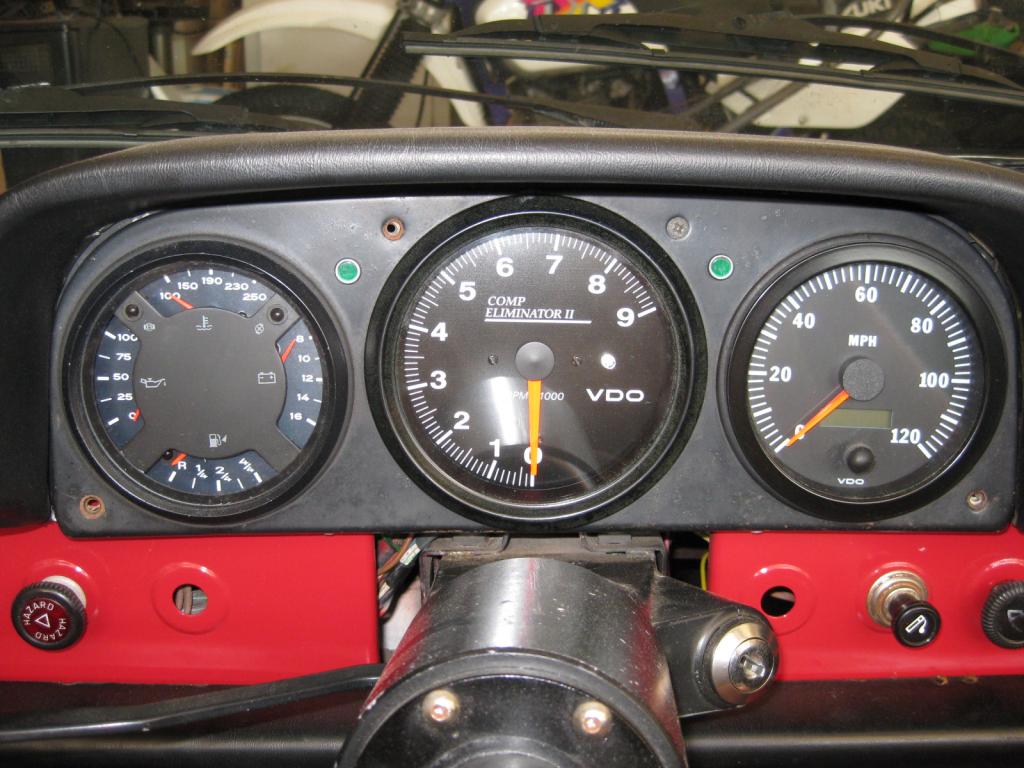
Fully programmable so you can change tire height and correct the speedo. The tach is also VDO, with a programmable shift light (that LED just above the VDO logo). The shift light looks small but it's pretty bright, without looking like a drag racer. And it goes up to 9K, appropriate for a Subaru engine that spins higher than a T4. It was about $100 from e-bay new in the box. The fonts and style are the same so it leaves the dash looking "in the style of" the original, but with modern instruments. The tach and speedo needles have absolutely no bounce, are perfectly steady. They work well and are simple to install. Important to note that I use an aftermarket EMS, so no need to retain any Subaru compatibility for ECU function.
They're great, the only real problem is lighting at night, they're all a little different. I still haven't changed the bulbs in all so they match. That photo makes the needle colors look different, which is odd, but in real life I can't tell the difference.
.
Posted by: 904svo Jan 28 2013, 11:07 AM
It's answer like these that take the scare out of doing a transplant!!
Posted by: Chris H. Mar 21 2013, 08:52 PM
Wow, it's been a long time since update! Sorry about that.
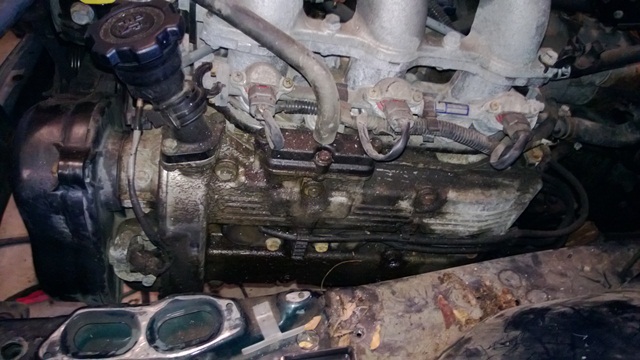
Spent the last several weeks doing cleanup and re-seal of the engine, timing belt, getting rid of various SVX parts, collecting parts, and just finished converting the 2006 WRX trans to 2wd and installing the stub axles. Not very exciting visually but I'll throw a few pics up anyway.
The engine was extremely dirty and grimy. The oil that eventually leaked out of the seals turned to tar over time and it took several days to get it all off.
Before: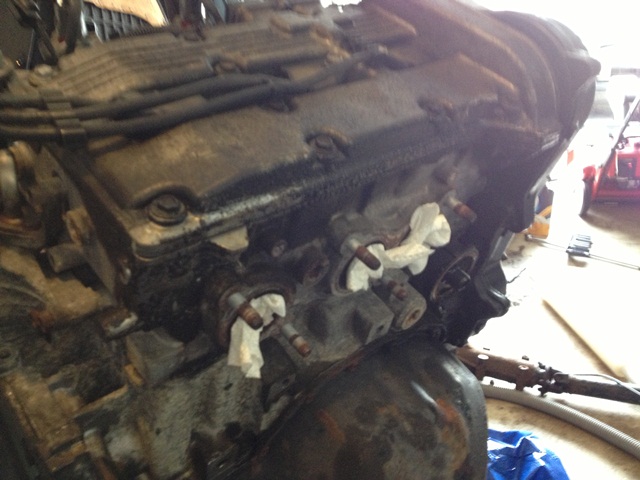
After: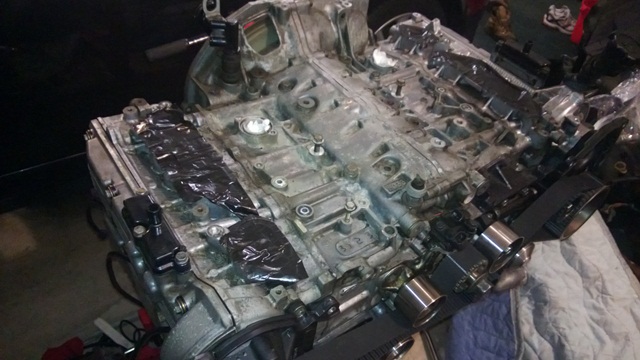
High pressure car wash would have been great, but unfortunately I don’t know these engines well enough to know what to spray and what not to so it was the old slow method of smear and wipe. Tried several different products including brake cleaner, Goo Gone, Simple Green, but the best results came from Goop. A big tub can be had for about $8 at Harbor Freight.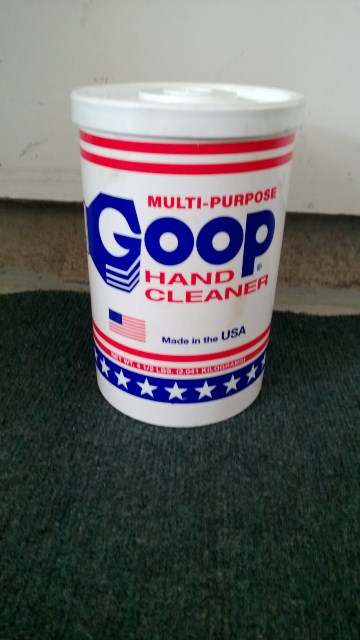
Put it on, it turns from white to clear, wipe/rinse it with warm water. Repeat, repeat.
Bought the full engine reseal kit from Subaruparts.com. 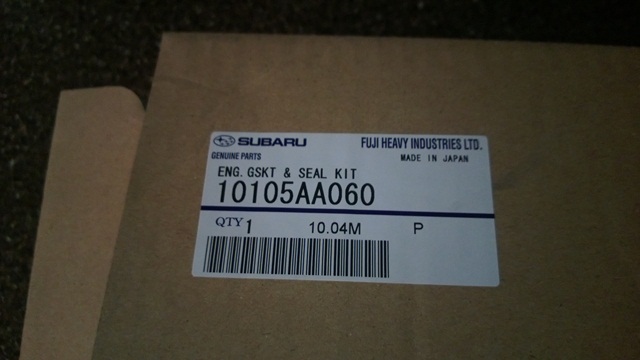
It has some seals you won’t need but pricing the stuff piece by piece it’s still a good deal. Not doing the head gaskets at this point but have them for later. It’s amazing how unfamiliar the seals look. 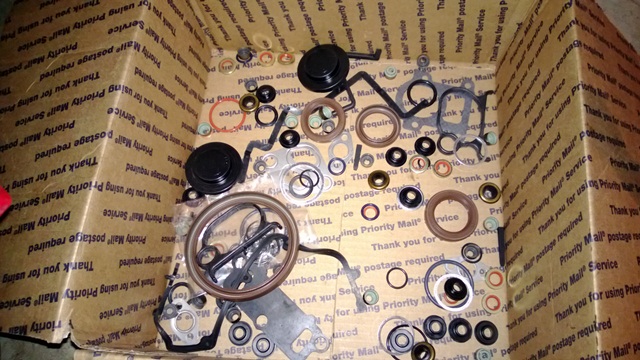
If these were 914 seals it would be easier to tell what the heck they all are. Just compare the old ones with the new ones. Should be an exact fit.
Posted by: Chris H. Mar 21 2013, 09:00 PM
Never done a timing belt before so I wasted a lot of time re-doing it because I thought it was incorrect. Lined up the marks perfectly…cranked the engine one revolution…and the dang belt marks never realigned with the marks on the engine. Apparently they don't have to. The marks are for the initial alignment, so as long as the arrows on the engine line up with the ones on the belt wheels it’s all good. Hope that saves someone a couple hours. And if you screw it up, no worries. The EG33 is a non-interference engine. Didn’t expect that but it’s true. The car won’t run, but you won’t bang the valves against the piston tops.
Left side: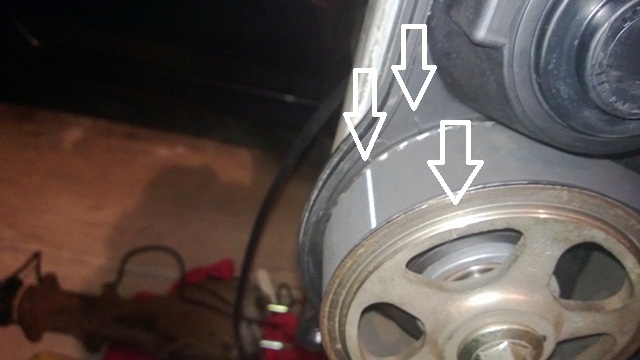
Center: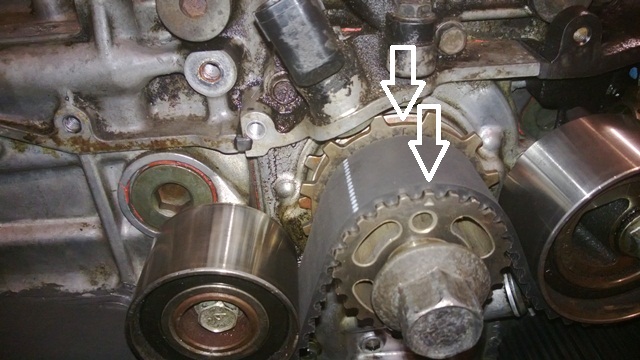
Right Side: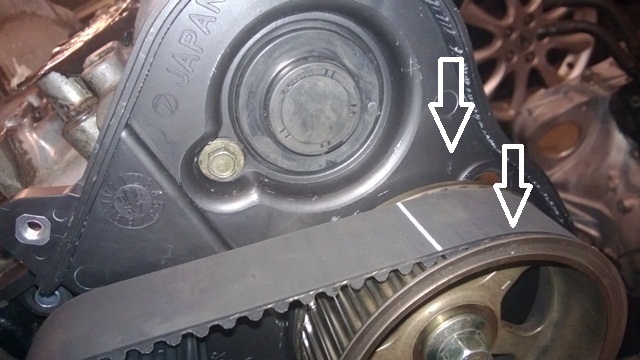
Note how after one revolution the arrows on the wheel line up with the ones on the engine but the timing belt marks do not.
Posted by: Chris H. Mar 21 2013, 09:24 PM
Don’t have any pics of this, but I did try flipping the intake…I’m not confident enough in my skills to do it this time. Too many variables if it doesn’t start once I get it done. When I flipped both the FI runner section and the top section there was interference with the AC unit. Found a company called Outlaw Engineering who will do a ¼” phenolic spacer for the SVX, but even with that it would still interfere. When I flipped just the top piece the fuel lines underneath didn’t cooperate. It can be done though, maybe version 2.0.
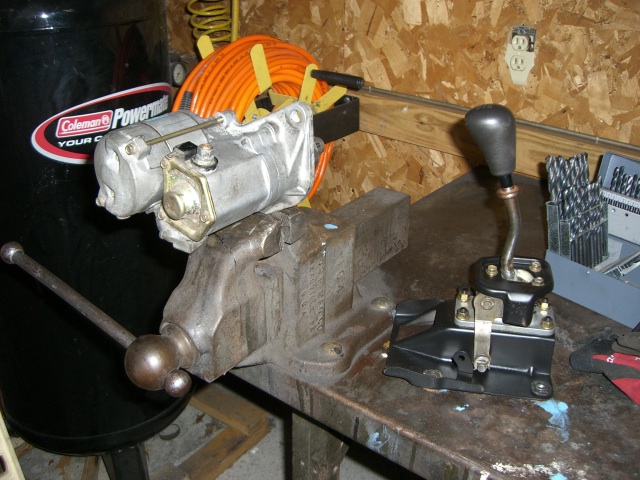
So on to the trans…mine is 2006 WRX unit, so it is a “turbo” trans (2.5T). Bought Ian’s kit to lock the diff and change to the older stub axle style. Ian is assembling a very concise set of photos to explain the process so I won’t outline all the steps since his will be better.
First, the when you take off the center diff, which is the tail section of the trans it’s not immediately obvious what to do next.
Just pull out this stuff: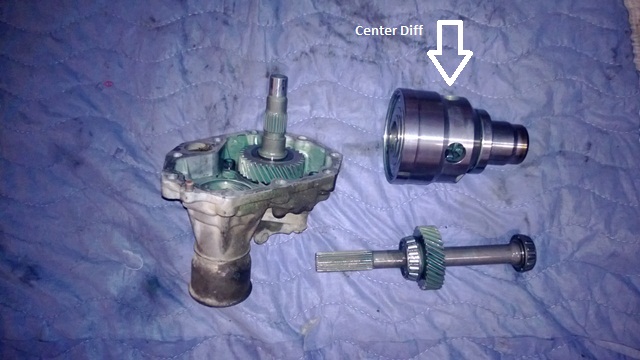
The center diff is worth between $150 and $300 depending on the year and how many people need it at the time you want to sell it.
Here's the diff lock installed: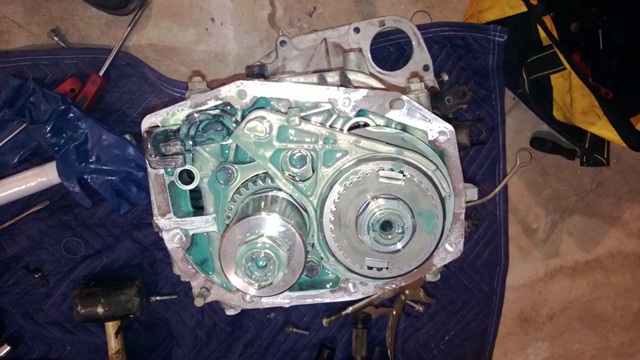
To get the nut off for the diff lock you need to take the next section of trans cover off. You'll probably need a new gasket or some gasket maker. Mine tore into several pieces. It's made of a paper-ish material.
New stubs in...ready to go. 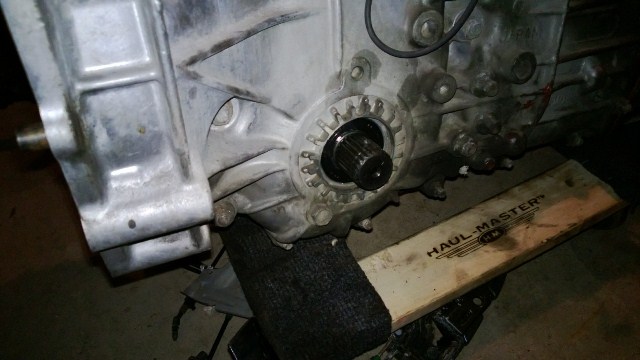
Tail end...the stock bolts are way too long for the cover. Shorter ones are provided in the kit.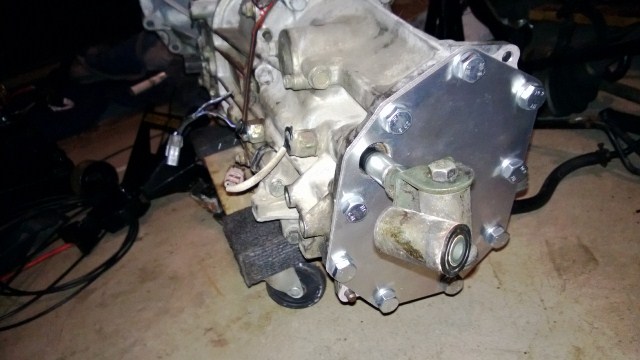
Some "gotchas":
1. If you are installing stub axles be very careful with the axle seals. I bent one by slightly tapping it with a wrench. They should sit flush with the axle holes. I also pushed one in a bit too far but was able to get it out.
This is "way too far" in: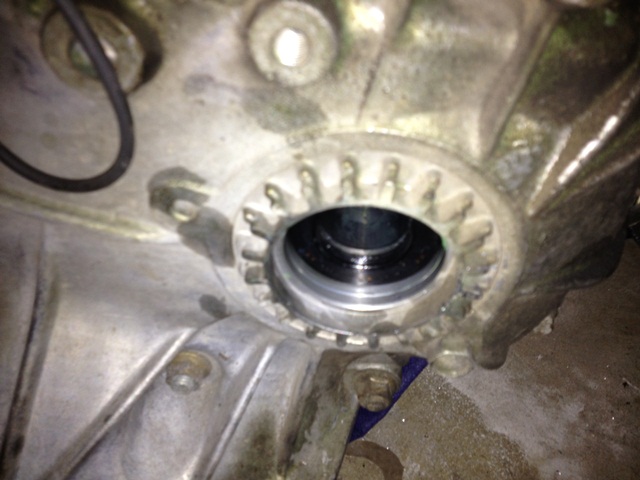
Not quite German quality engineering we're dealing with so things don't all fit with a crisp snap like we are used to.
2. When you remove the middle section of the trans cover to get at the differential nut the gear selector shaft will just fall out onto the floor which is alarming. Don't worry, you did not break it.
Posted by: Chris H. Mar 21 2013, 09:43 PM
Also bought a very inexpensive 2006 Impreza gauge cluster from e-bay. Thought I could take it apart and not feel bad if I break it for $36. I'd like to see if I can separate the cluster into three separate gauges similar to the stock 914 look....not sure if it's possible but we'll see. I'm torn between this and using an electronic Porsche VDO speedo.
Front: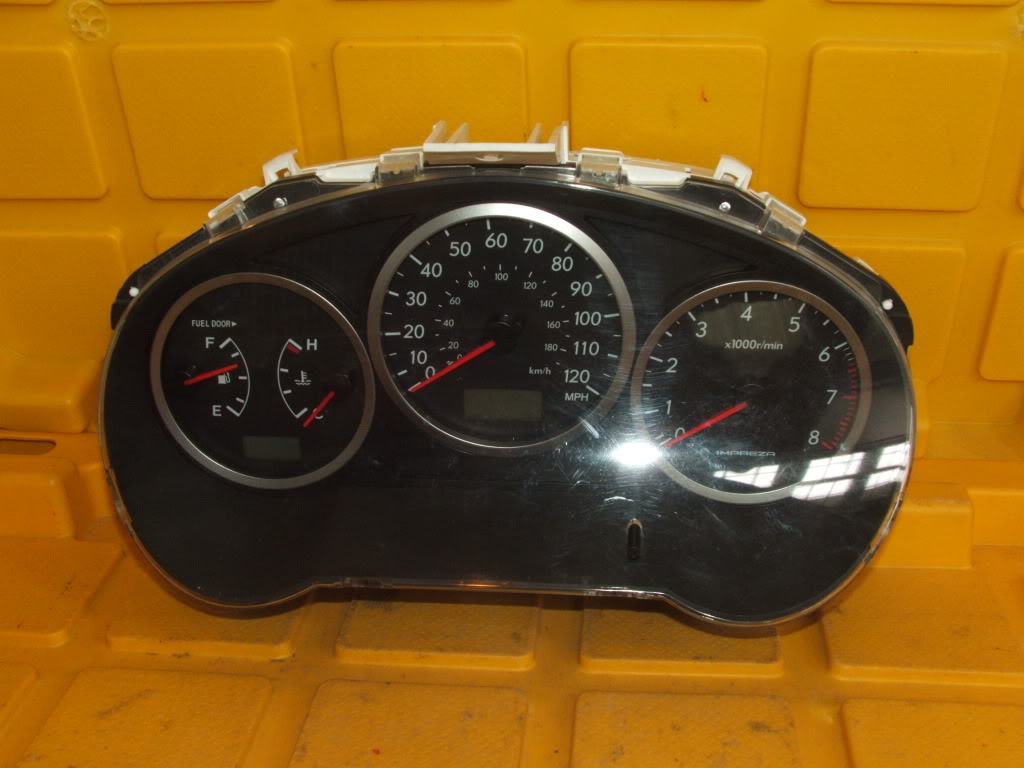
Back: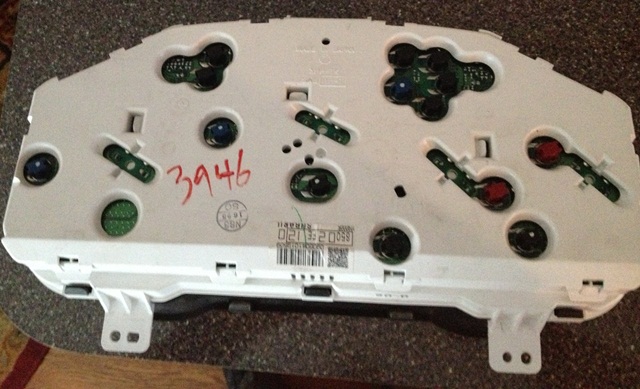
Since the gauge is from a 2006 as is the trans the speedo should work. The tach will need an adapter like this one:
http://www.ashlocktech.com/TACH-ADAPT.html
Temp will be directionally correct and I plan to use an Impreza fuel pump per BIGKAT's recommendation.
Posted by: Chris H. Mar 21 2013, 09:50 PM
Next step is the engine wiring. I hear that's A LOT OF FUN.
Here are a few links that were helpful so far:
http://www.rs25.com/forums/f128/t84339-best-ever-h6-swap-thread.html
http://www.dunebuggyarchives.com/static/attach/1/3801/Subaru_5sp_transaxle_conversion.pdf
http://www.phantomotaku.com/SVX/MSA5TCD95S_8_Engine.pdf
http://www.seccs.org/forums/showthread.php?p=127607
Questions and comments are welcome as always.
Posted by: a914622 Mar 21 2013, 10:10 PM
Sweet. I just started on a second harness cut down. If you run into problems I could send some pics your way. I found a good deal on a hole swap set up. (Maybe turbo ver 2.0)
You will want to change most of those seals in that box pic.
The top manifold can be flipped but it is a PITAss. It took 2 days to figure relocations of needed stuff and removal of the exahust gas regurgitater system. I would stay stock if you can, But done forget the vacuum lines. They will be hard and brittle.
Keep up the good work. 
Posted by: Chris H. Mar 22 2013, 07:03 AM
Thanks jcl. Yes most of those seals are on the engine. I have a list of them all if anyone needs it.
JCL when you removed the EGR stuff did you just block off the connection at the intake? Was planning to do that but just making sure I'm not overlooking anything.
Pic:
Posted by: a914622 Mar 22 2013, 08:35 AM
Yep. I plan on making long tube headers. A lot of the vanagon guys yake it off.
Posted by: Chris H. Mar 22 2013, 09:04 AM
Nice. Picked these up from Bob (BIGKAT) along with a custom built exhaust. One less thing to mess up for me! 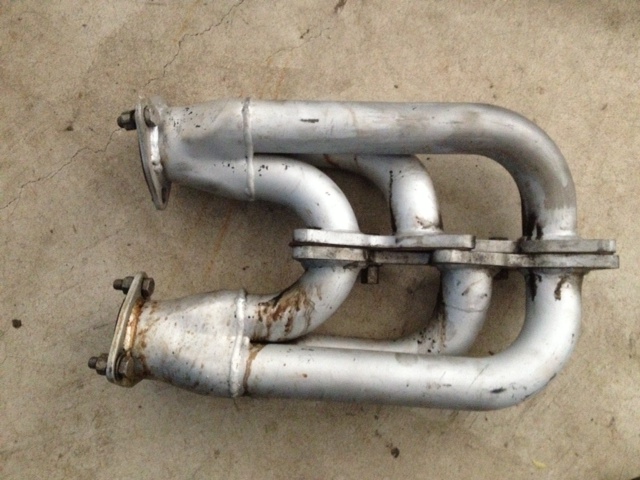
Posted by: a914622 Mar 23 2013, 07:33 AM
sweet. And it looks like they dont have the "gas regurgitator" bung.
Hey and its way off topic but the Goop is also great for cleaning Granite counter tops if they havent been sealed. Goop keeps from drying and cracking the granite. I didnt even think about using it to clean engines. I have always used Jacobs paint stripper and a power washer.
All right back to building...
Posted by: Chris H. Mar 24 2013, 02:56 PM
sweet. And it looks like they dont have the "gas regurgitator" bung.
Hey and its way off topic but the Goop is also great for cleaning Granite counter tops if they havent been sealed. Goop keeps from drying and cracking the granite. I didnt even think about using it to clean engines. I have always used Jacobs paint stripper and a power washer.
All right back to building...
No bung. That thing is impossible to get off of the stock header....it's baked on. By the way I found a really good resource for the vacuum line info. Spellis it out very well in terms of what is needed, diagrams, etc.
http://www.subaru-svx.net/forum/showthread.php?t=61204&highlight=vacuum+lines
Hope it helps someone....
Posted by: Chris H. Mar 28 2013, 08:58 PM
Time to start reinstalling the accessories onto the engine. The AC/alternator bracket had a lot of surface rust so I had to clean it up a bit:
Before: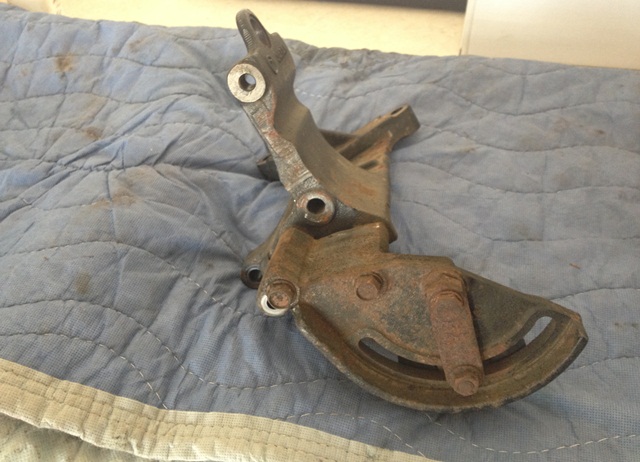

Ground off the chunky rust: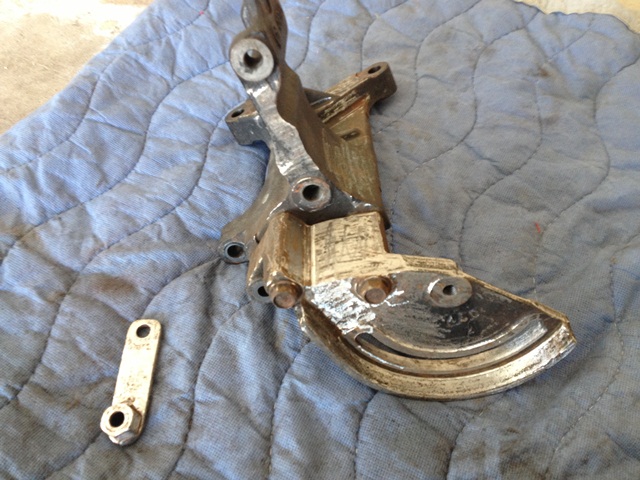

Painted with high temp paint:
Posted by: Chris H. Mar 28 2013, 09:04 PM
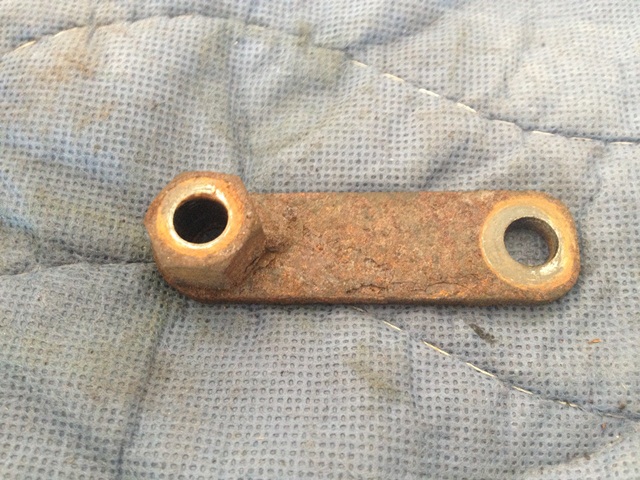
I heard the knock sensors were one of the keys to a smooth running Subie engine. On the subaru-svx site the experts say if there are ANY cracks at all replace them. Just checked mine and both are cracked. You can find them cheap, just ordered two for $12.99 ea on e-bay. Free shipping.
Badly cracked:
One crack:
Link to the e-bay site:
http://www.ebay.com/itm/320545016968?ssPageName=STRK:MEWAX:IT&_trksid=p3984.m1438.l2649
Posted by: 76-914 Mar 28 2013, 09:09 PM
Nice. Picked these up from Bob (BIGKAT) along with a custom built exhaust. One less thing to mess up for me!
Nice snag Chris. Did Bob make those?
Posted by: Chris H. Mar 28 2013, 09:31 PM
He special ordered them from somewhere...I THINK Outfront Motorsports but could be wrong on that.
Here's a link to something similar...
http://www.outfrontmotorsports.com/primary_tubes.htm
He did make the exhaust system that mounts to it. It's jammed in the corner of my garage or I would post some pics. There are some in his blog if anyone wants to check it out.
Posted by: Chris H. Apr 2 2013, 09:25 AM
Tackled the engine wiring harnesses....
Because there was a gathering of nesting materials under the intake the wiring needed to be checked pretty closely. Mice love to chew through 914 wires as we know, but it looks like Subie wires don't taste quite as good.
Before: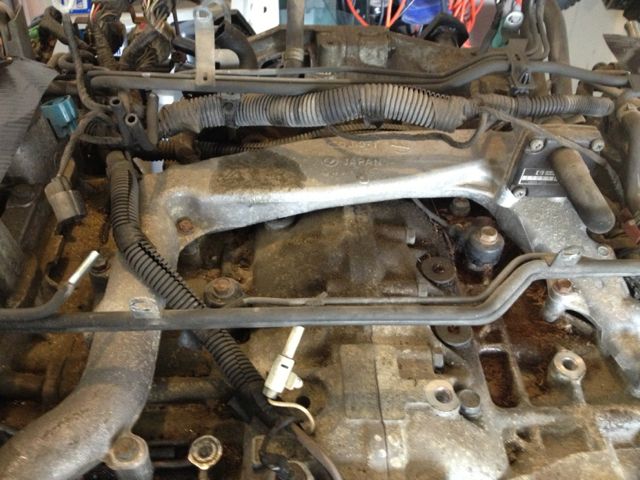
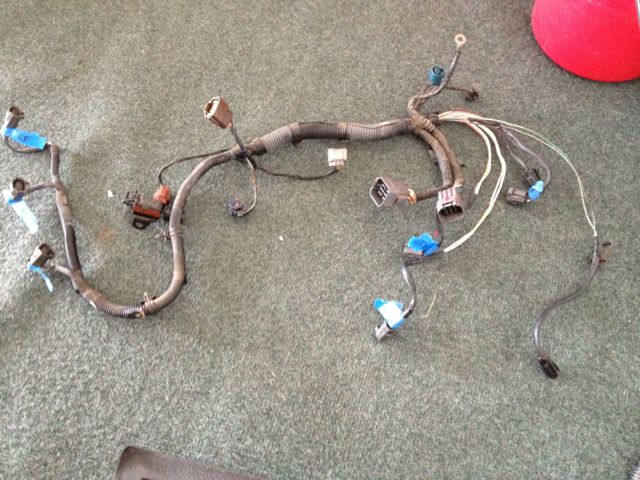
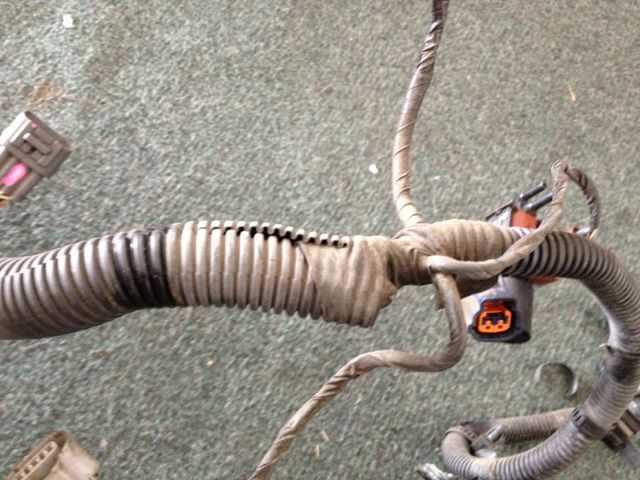
Nothing was chewed, but there were some nicked wires, which likely explained the blinky lights on the dash. It was raining when I bought the car and every time I started it a different set of warning lights lit up. The engine ran great so I figured it was a wiring issue...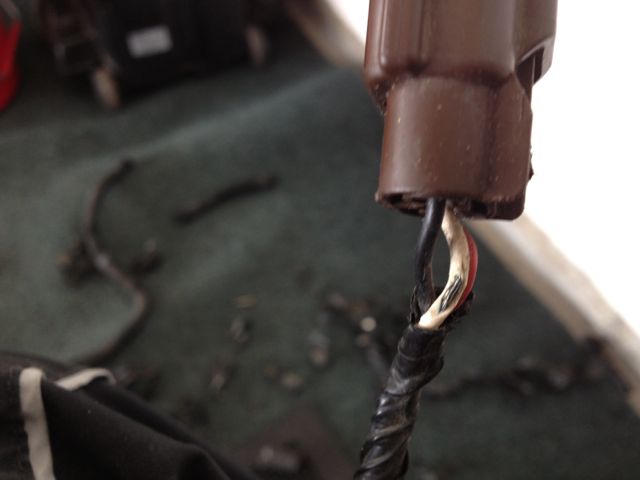
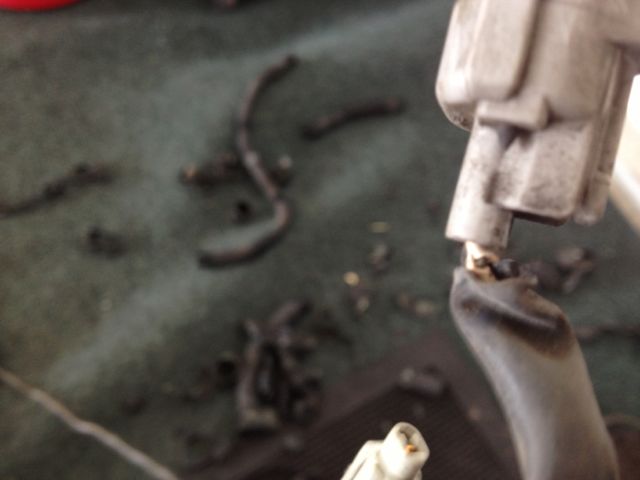
A little liquid tape..then regular electrical tape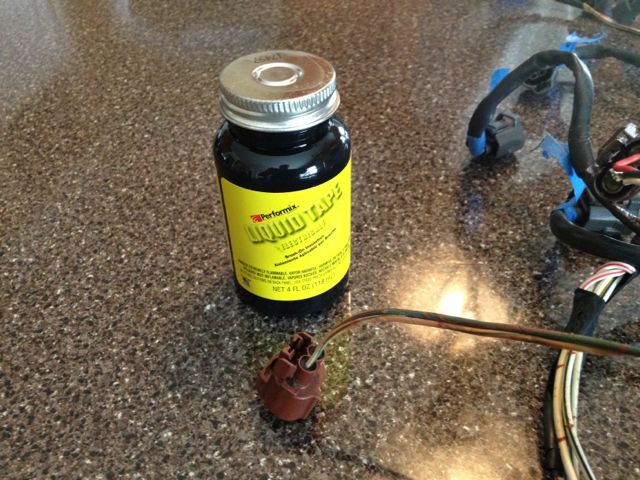
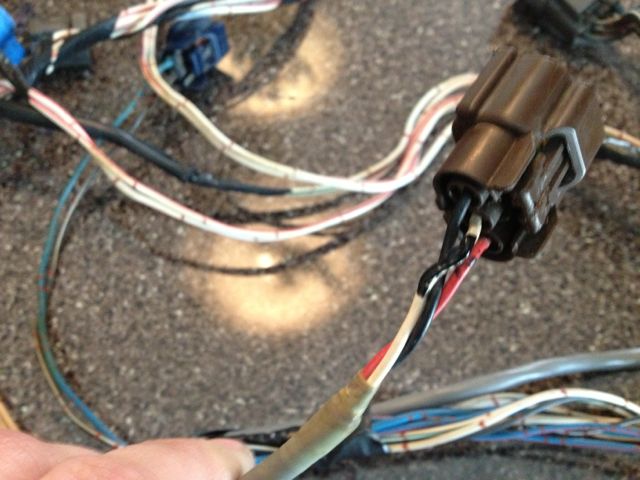
And the end result: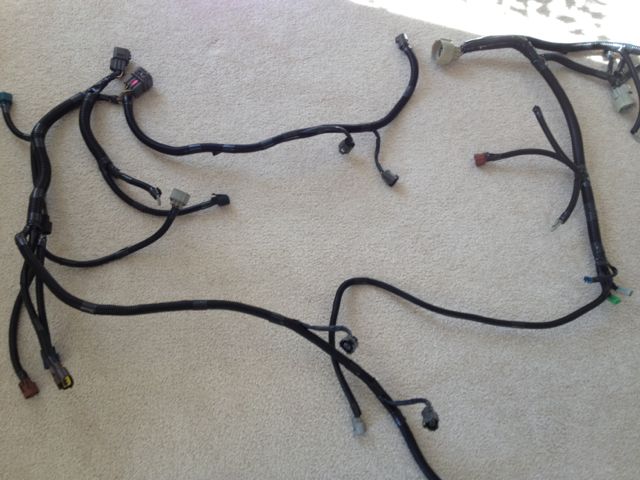
The OEM covering was plastic tubing that can be found at Harbor Freight. It held up surprisingly well so that's what I replaced it with. The wiring underneath was very healthy and pliable. Of course I covered every last one even though it was not necessary...
Next up are the vacuum hoses, reinstall intake, alternator, etc. Then the main wiring harness. I want to test fire the engine before I put it in the car so that it will be easy to troubleshoot if there is something not connected right, etc.
Posted by: wingnut86 May 4 2013, 08:49 PM
Subd:-)
Posted by: Chris H. Jun 4 2013, 05:44 PM
Well things have slowed down a LOT but they are about to get back on pace. Been working on the main wiring harness...FUN!
This is below "Andy's camera" quality...did I even point it at the harness? 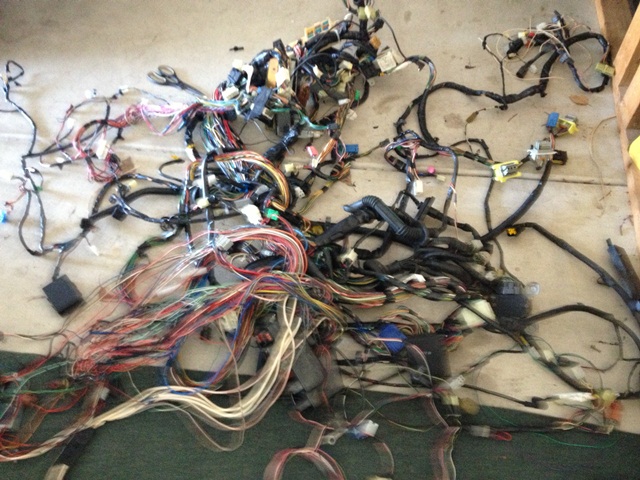
A laundry basket full of electrical tape...from unwrapping the main harness...probably a couple miles of it there.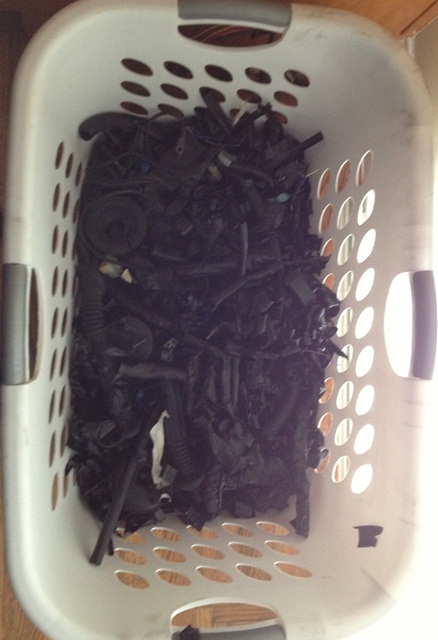
Got the engine harness back in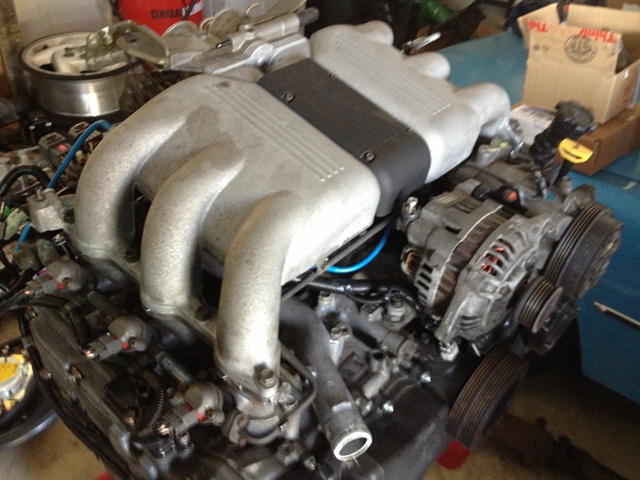
Refinished the flywheel even though it might have been OK - looks much better.
Hydraulic clutch bits...still need to decide whether to use metal or poly lines...leaning towards poly. 
Posted by: Chris H. Jun 4 2013, 05:59 PM
Couple of notes....
1. Be very careful to choose the right clutch kit. For example, my trans is a 2006 WRX, which supported a 2,5T. Although many sites and ebay sellers will say that the cheaper KSB03 or KSB04 clutch kit works, they DO NOT. The one you need is the FJK1001. It's $100 more but if you use the cheaper one it won't engage properly and will chew up the clutch disc...search NASIOC for cross-reference for the clutch that works with your trans.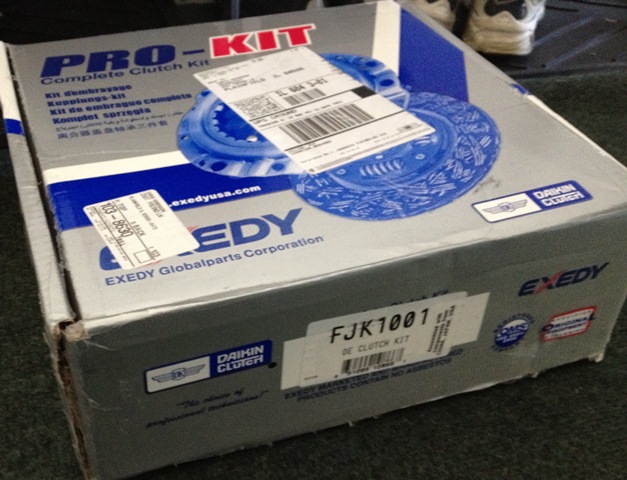
2. Apparently Subaru changed the oil separator that is under the flywheel from metal to plastic in the '90's...and it wasn't a good idea. Then they went to aluminum...still bad. Now the replacement is steel. If your engine has one made of plastic or aluminum change it. Both leak like crazy.
Good thing I poked a hole in mine trying to lock the flywheel! YEAH! Meant to do that! 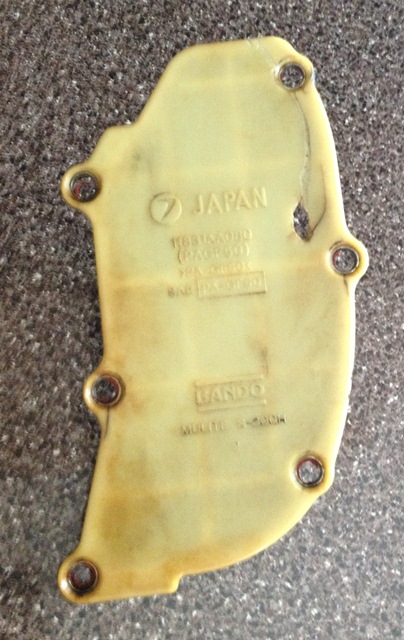
Here's the old one and new one...universal and fits several models. The new part # is 11831AA210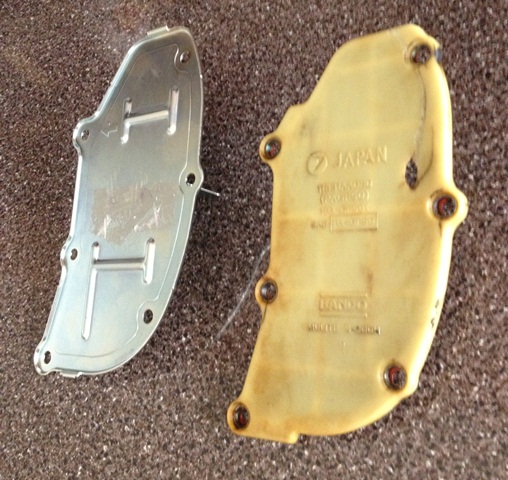
Posted by: Chris H. Jun 4 2013, 06:12 PM
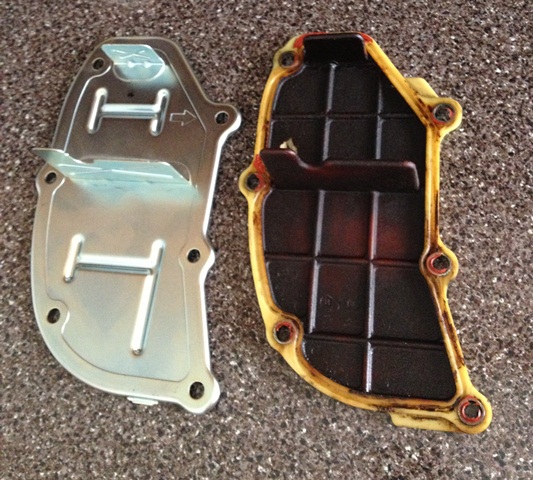
Here's what the oil separator plate looks like installed: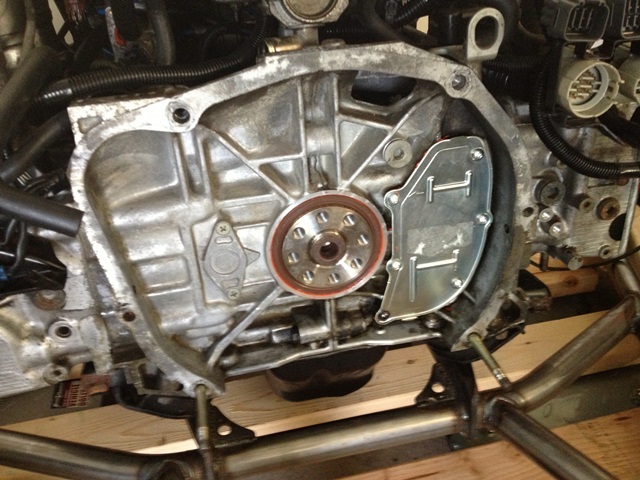
Lately it's been a game of hurry up and wait...I failed to realize that the bolts that hold the flex plate on the 3.3 are shorter than what is needed for the flywheel...now I had to order the bolts! No Subie dealer has them: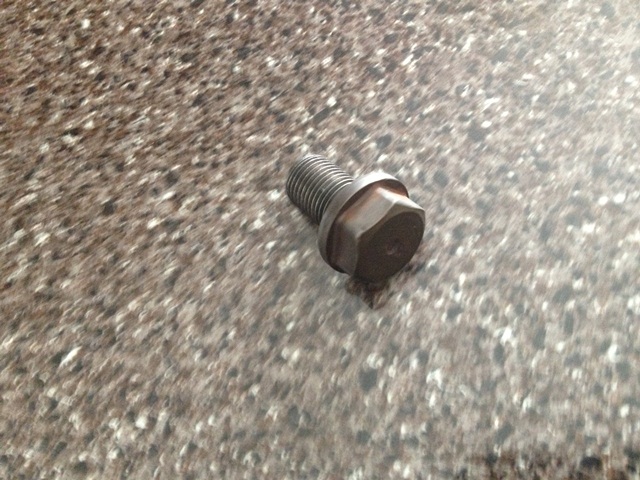
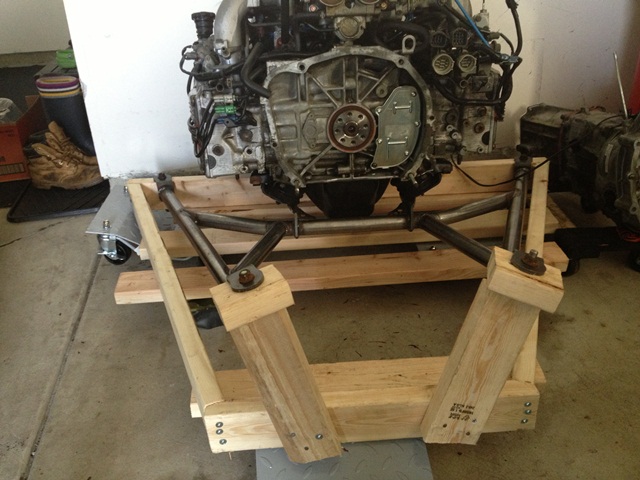
Attached the engine mount (fits great so far) and got the engine down off the stand. I made this boxed wood frame so that the weight is evenly distributed and the engine and trans will be in the positions they will be in the car. It was VERY easy. Plus it keeps the oil pan off the ground. 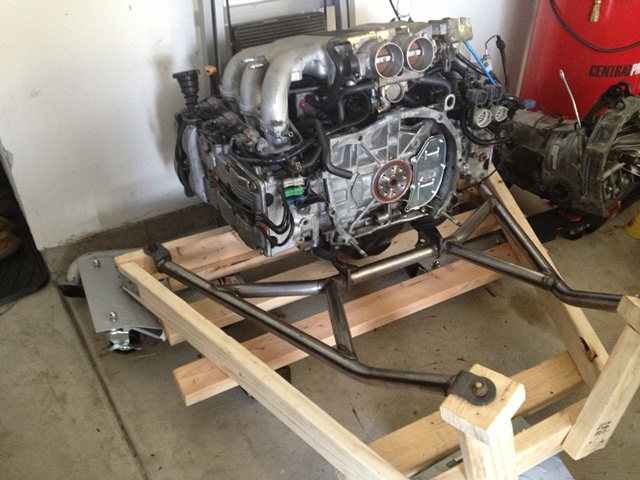
Once my bolts come in (and a couple of other issues come up and get resolved) we'll mount the engine to the trans and test fire it. Still have a lot of wiring work to sort through...
Posted by: euro911 Jun 4 2013, 11:40 PM
What supports the front of the engine, Chris?
Looking good
Posted by: nsyr Jun 5 2013, 06:32 AM
nothing. the engine mounts are towards the back of the engine. the transmission keeps it from leaning foward.
Posted by: Chris H. Jun 5 2013, 07:50 AM
nothing. the engine mounts are towards the back of the engine. the transmission keeps it from leaning forward.
You are correct sir, nothing up front. Without the trans it is very "front heavy" but that's why I tied everything together with the wood frame.
Posted by: jimkelly Jun 5 2013, 01:14 PM
but in your pic there is no trans on the motor. I assume the motor is resting on a wooden cross member of your stand?
jim
Posted by: Chris H. Jun 5 2013, 03:57 PM
Hey Jim,
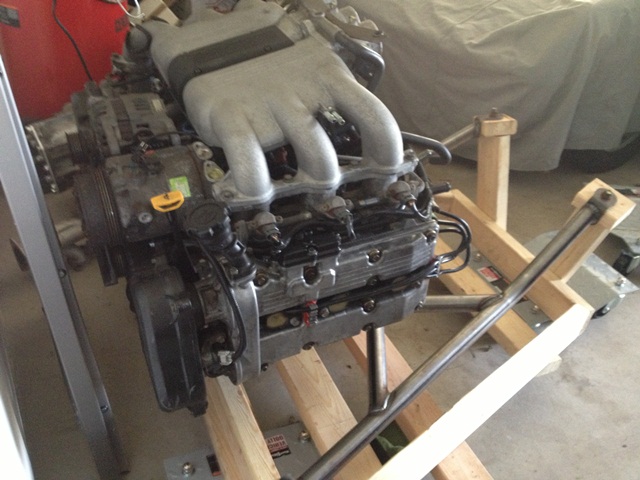
Believe it or not the engine is being held in place almost entirely by the mounts coming up from the engine bar. They are VERY strong: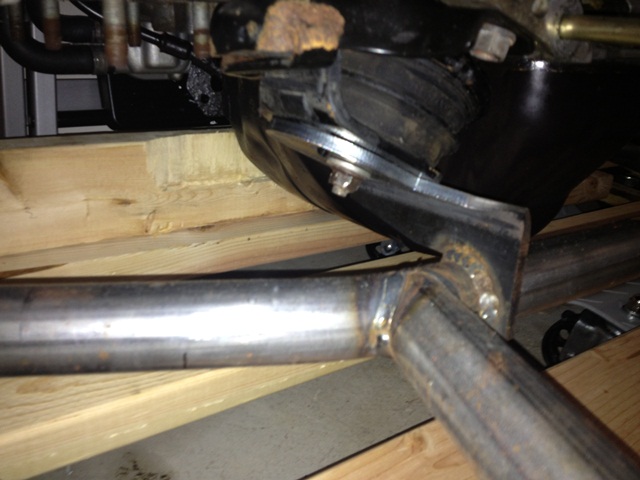
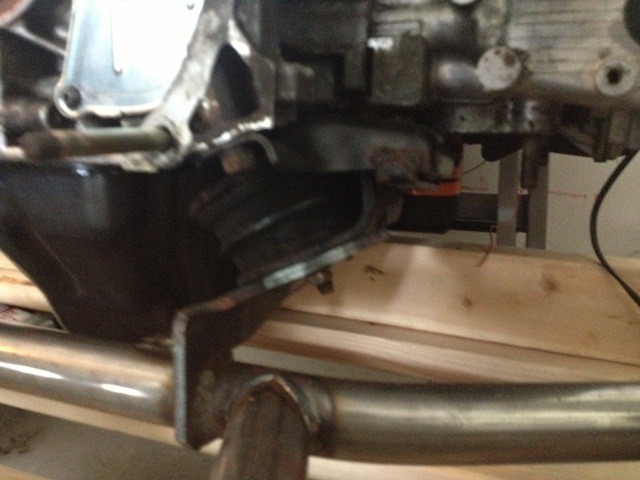
Although the front wood piece does provide a small amount of support it's barely touching the pan. It does stop forward movement at some point though and I think that is critical until the trans is hooked up. We're talking 80/20 weight distribution here....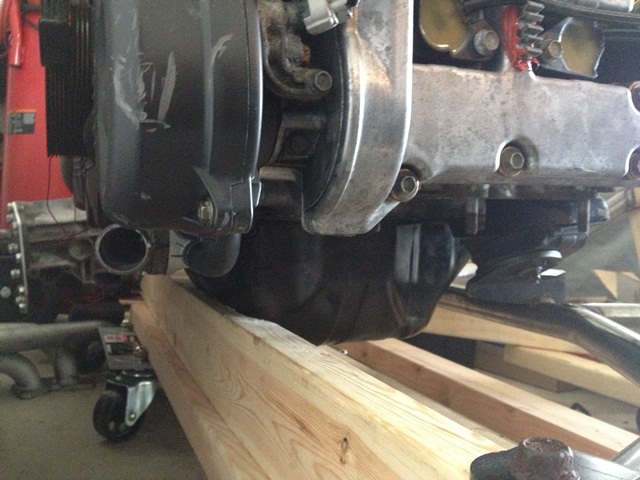
The initial idea behind the wood frame was to keep the oil pan above ground when I lowered the engine down from the stand. Then I realized it could be extended back to the trans mounts and slightly change the weight distribution so that the engine doesn't flop forward onto the floor. If it wasn't for my novice mistake of forgetting the flywheel bolts the trans would already be in and the lump would be pretty evenly weighted. I want to get it running before I put it in so that will be next. Hopefully Ian will make some cable kits so I don't have to fab my own.
Are you done with your conversion Jim?
Posted by: nsyr Jun 5 2013, 05:33 PM
I would be careful with those mounts. They are fluid filled and known to come apart. Both of mine have come apart. The replacement cost I believe is around 200 each! I will be replacing mine with sti mounts which have to be retrofitted.
Posted by: Chris H. Jun 5 2013, 05:56 PM
I would be careful with those mounts. They are fluid filled and known to come apart. Both of mine have come apart. The replacement cost I believe is around 200 each! I will be replacing mine with sti mounts which have to be retrofitted.
Thanks Andrew, very good point. Yes they are vulnerable and pricey ($271 each at last check). I literally have not moved that thing an inch to keep stress at a minimum. Didn't plan to leave it like that for this long but they seem fine. Seems like this is not the first set for the engine... The bolts arrive tomorrow.
Posted by: Chris H. Jun 8 2013, 09:28 AM
Look what came today....flywheel bolts...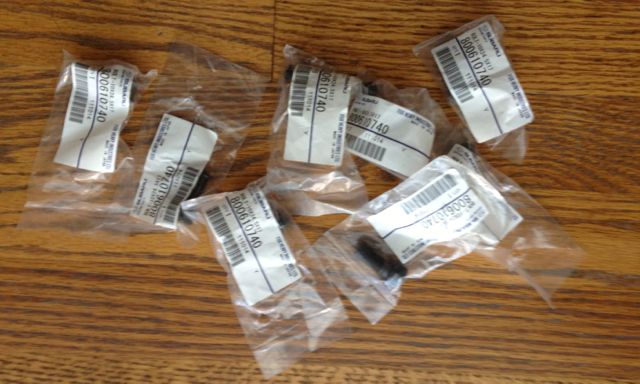
These work great for the SVX. Part # is 800610740.
Comparison of the flex plate bolts vs. flywheel bolts. There's a joke in here, but it's too obvious...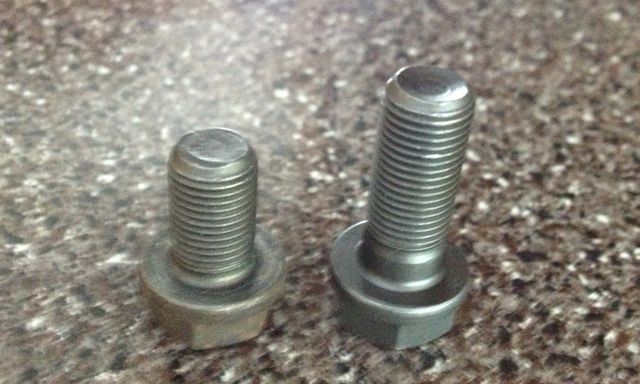
Hey do you guys recommend using a small amount of blue loctite for these or is it not necessary? Unless someone HATES the idea I think I will.
Posted by: Chris H. Jun 8 2013, 12:31 PM
It's one of those weeks where you get a surprise every day in the mail...here's today's: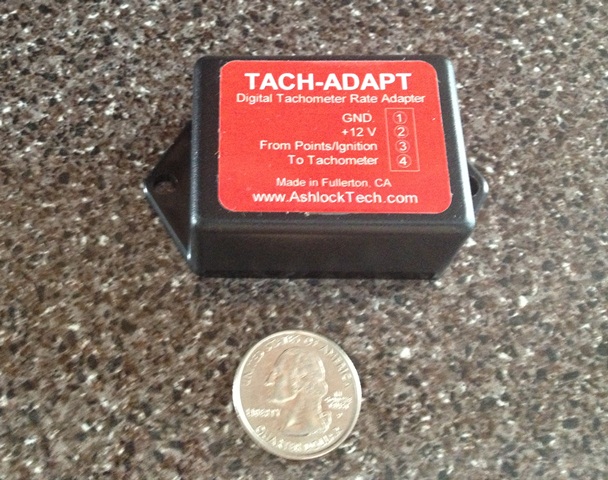
Thanks to SpeedMetalArmy for the heads-up. Apparently this thing will not only translate a 6 or 8 cylinder pulse onto your stock tack but will stop the "tach bounce" that many of us get with 4 cylinder engines. Haven't tried it yet. It's pretty compact..
Posted by: kg6dxn Jun 8 2013, 03:54 PM
Hydraulic clutch bits...still need to decide whether to use metal or poly lines...leaning towards poly.
I ran a -3AN stainless braided PTFE line in mine. Worked great! I did buy some extra fittings and leave some slack in the line. This came in handy when the transmission side leaked during bleeding. I ran the line inside the factory clutch tube, slid in without effort.
Posted by: 76-914 Jun 8 2013, 06:23 PM
That's a good tip Mike. Wow Chris, your moving right along. Can't wait to see your post/video of it running. I like your wooden engine stand. Clever! Just looking for good ideas to steal.
Posted by: Chris H. Jun 8 2013, 07:38 PM
Thanks Mike. Definitely looking to copy a good idea on the clutch. If yours works well I will do the same. Your conversion turned out awesome BTW. You always finish your projects.
Kent, I would give you my "stand" if you lived closer. It's literally just a few pieces of 2X4 though. I'll post the measurements. It can be constructed in about 20 minutes. Are you using Ian's mount or fabbing one?
Posted by: 76-914 Jul 23 2013, 07:42 AM
I'm building my own because he is out of commission for a while. I really just used this as an excuse to ![]() this. Anything lately?
this. Anything lately?
Posted by: Chris H. Jul 23 2013, 01:55 PM
Kent, I'm just about to pull the engine! Planning for this weekend.
Also think I figured out what to do for a water temp gauge. The 924 combo gauge is allegedly the same diameter as the 914 (100mm). It has water temp, fuel level, plus all the warning lights we need (oil pressure, alternator, low fuel, brake). It has a pointed plastic bezel, but I'll either swap that out for a flat piece of glass or swap the guts into the 914 combo gauge. Not sure if the fuel gauge will work well, but I can cannibalize my current one if need be. For $25 you can't go wrong.
Pic of a similar gauge from the interweb: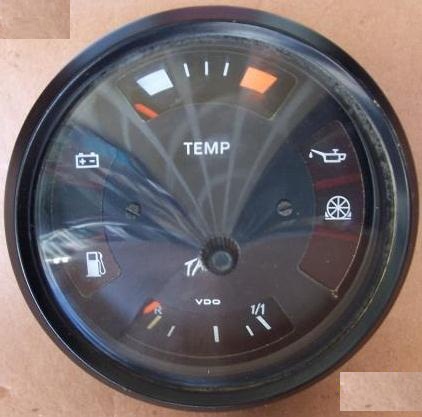
Posted by: 76-914 Jul 23 2013, 03:14 PM
Very nice! Keep the pic's coming and the build going on.  I should talk! So damned busy with work I have to steal time to work on mine. Plenty of spare time = no work, which = no $$. No spare time = lots of work, which = plenty of $$. Vicious cycle.
Posted by: euro911 Jul 23 2013, 05:04 PM
I got tired of living that 'vicious' cycle, so I retired.
... and still don't have enough time to get everything done 
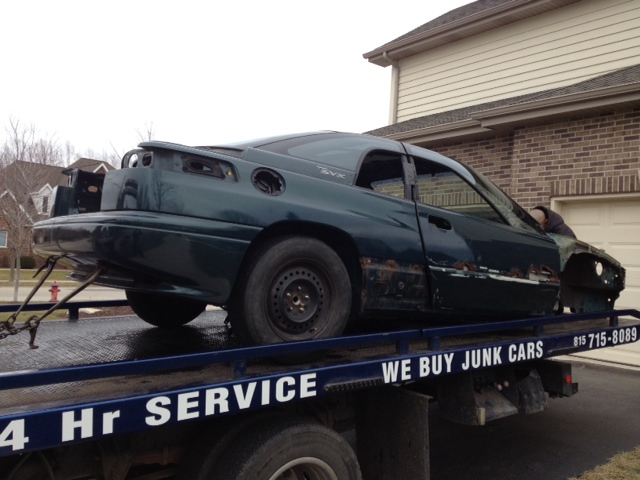
Posted by: Chris H. Aug 1 2013, 06:23 PM
Got the old engine out! I'm feeling a little bad about the engine swap but I think I'll get over it. The 1.8l is so original and unmolested... (but dusty)
Amazingly similar....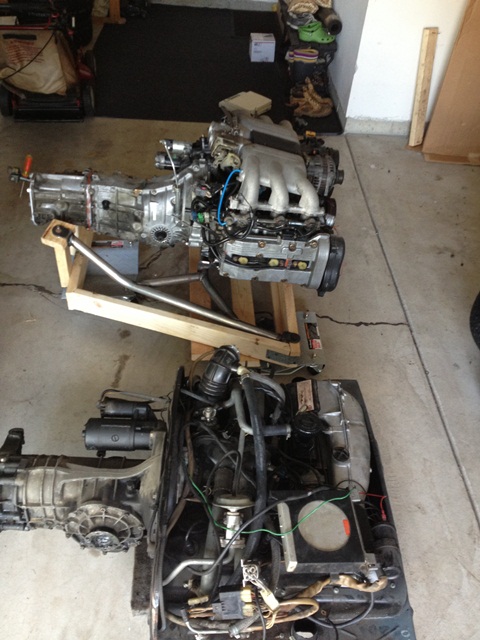
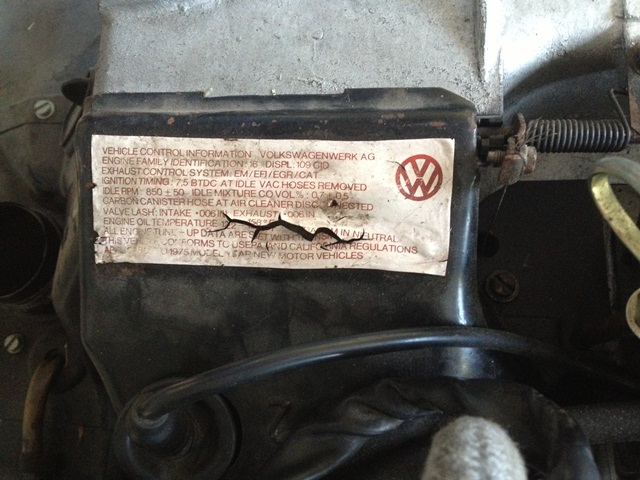
What do these numbers mean?
a 1.0L!?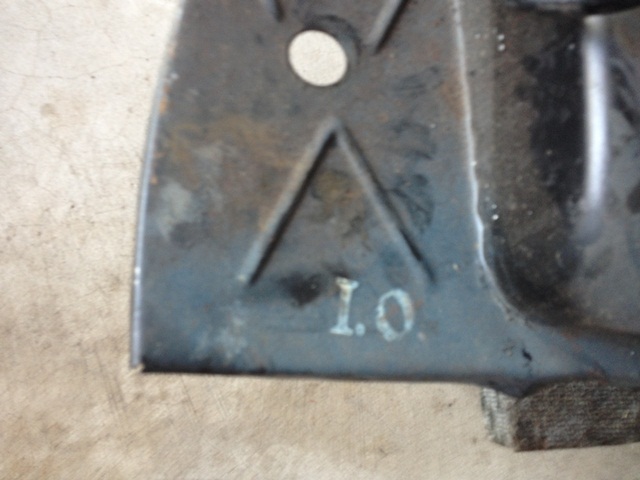
All the heater tube clamps are the original VW embossed ones...
Back pad is awesome - just some paint on it but otherwise very good. 
When I got back from my last drive of 2012 it was running a little rough....this MIGHT by why....#2 plug wire ripped out of its sheath. Ran pretty good on three cylinders for a few miles! 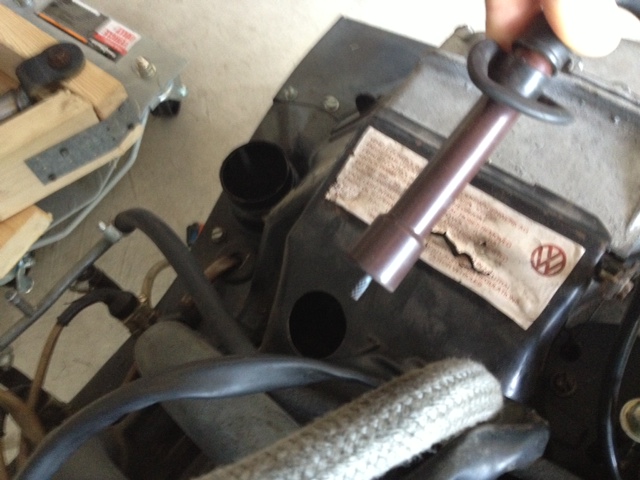
Got the rear hubs pressed
Engine hole - anyone know how to remove the glue that holds the back pad on? The paint under it is pristine!!! 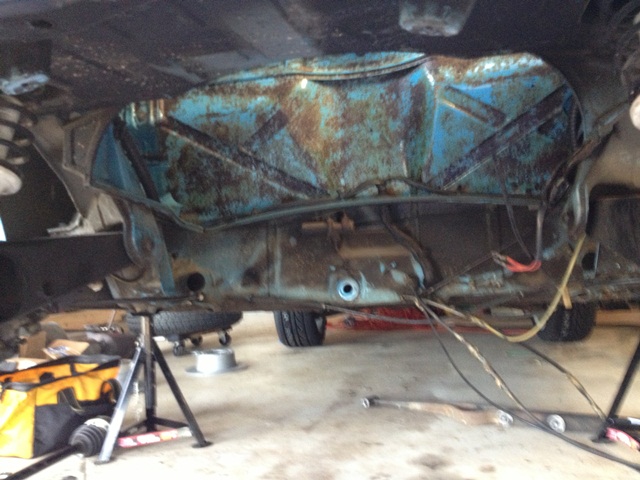
Posted by: Chris H. Aug 1 2013, 06:28 PM
To confirm the early 924 gauge seems to be a perfect swap-out. Same size, same warning lights needed. Still need to verify the fuel gauge but I can always use the 914 one. I'll see if the Subie water temp sender is in any way compatible but if not the 924 sender is super cheap. 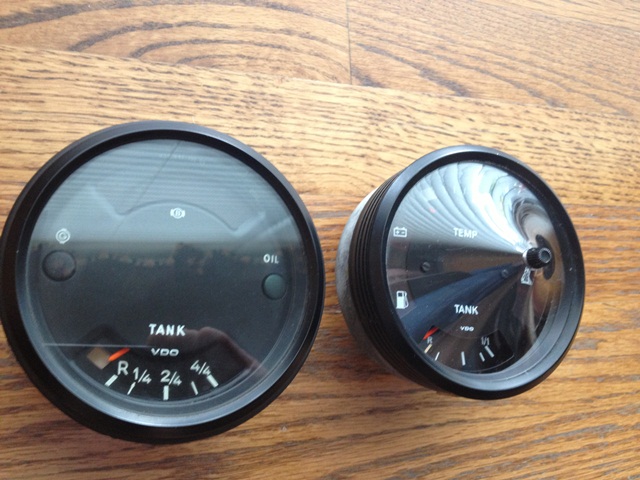
Posted by: jimkelly Aug 1 2013, 07:00 PM
3m has an adhesive remover - I think these might be it
http://www.premiumboatcare.com/3m-adhesive-remover-32.html?productid=3m-adhesive-remover-32&channelid=FROOG
or
http://www.uline.com/Product/Detail/S-17291/Aerosols/3M-Adhesive-Remover?pricode=WU353&gadtype=pla&id=34610436922&gclid=CP_ujfTH3bgCFYai4Aod2AIANQ&gclsrc=aw.ds
jim
Posted by: Chris H. Aug 1 2013, 07:07 PM
Thanks Jim!
Posted by: 76-914 Aug 2 2013, 08:09 AM
Way to go, Chris. I wasn't aware that the OG engine was still in the car! Did you sell it? I went a different route and sold mine first so that I couldn't "chicken out" when the going got rough. Glad you are back on track and staying ahead of me so that I don't have to figure this stuff out by myself.  In fact, your recent post on the flywheel bolts was perfect timing.
  Chris, where on Nasoic did you find the section on transmission/clutch cross referencing? BTW, thx for the Bremmer link. Got that done last nite, sans the spool itself. Keep up the good work!
Posted by: Chris H. Aug 2 2013, 08:56 AM
Thanks Kent!
I didn't sell the engine yet...probably should have.
On the clutch thing I just did a bunch of searches and found people complaining about how they had the wrong clutch....what year and model is your trans?
BTW that spool nut needs like 95 lbs of torque. And you use the thicker washer when you reinstall (there are two when you take the nut off between the gear that is removed to lock the diff).
Posted by: Chris H. Aug 2 2013, 09:07 AM
And have you figured out the cable shifter thing yet? Still intimidated by that.
Posted by: Chris H. Aug 2 2013, 10:37 AM
Kent, I checked your thread and it looks like the KSB03 is the clutch kit you need. I would do a search on NASIOC in the transmission section for 2003 WRX and KSB03 to be sure it's the right one. If it isn't no doubt you will find someone who installed it and it chewed up the disc. I think its correct though. Buy the whole kit if you can, apparently the pressure plate is not worth reusing. EXEDY is the OEM I think, seems like the one the Subaru guys like.
Posted by: 76-914 Aug 3 2013, 07:34 AM
Kent, I checked your thread and it looks like the KSB03 is the clutch kit you need. I would do a search on NASIOC in the transmission section for 2003 WRX and KSB03 to be sure it's the right one. If it isn't no doubt you will find someone who installed it and it chewed up the disc. I think its correct though. Buy the whole kit if you can, apparently the pressure plate is not worth reusing. EXEDY is the OEM I think, seems like the one the Subaru guys like.
Wow, thx Chris, Good info. I walk on egg shells when on Nasioc. Get flamed in a second there. Whilst on the subject; I found a Suby board that is on keel with this site. Smaller but very friendly and eager to assist. It's USMB. "Ultimate Subaru Message Board". As far as the cable shifter. I'm looking forward to that part. I should get my shifter this week and will start this week or next. Have you ordered cables yet?
Posted by: Chris H. Aug 3 2013, 08:41 AM
Yeah TELL ME ABOUT IT re NASIOC! Sheeesh this board is so polite compared to that one. I posted a couple of questions that they must have thought were so stupid they didn't even reply with a smart a$$ remark! Thanks for the link to USMB!
No I haven't bought cables yet. Where did you buy yours? I'll just buy the same ones and copy what you do!
Posted by: 76-914 Aug 4 2013, 01:52 PM
Yeah TELL ME ABOUT IT re NASIOC! Sheeesh this board is so polite compared to that one. I posted a couple of questions that they must have thought were so stupid they didn't even reply with a smart a$$ remark! Thanks for the link to USMB!
No I haven't bought cables yet. Where did you buy yours? I'll just buy the same ones and copy what you do!
Haven't ordered any yet. My MR2 shifter should arrive in the next day or two. I'll be able to size those once I get the shifter. I'm more interested in durability than price but I'll keep you in the loop as soon as I get it. I'll probably get flamed at Nasioc for my stupid starter question. Do you remember a thread where indexing the starter was discussed? How much ground clearance do you have on your exhaust at it's lowest point?
Posted by: jimkelly Aug 4 2013, 01:56 PM
chris
looks like zaney is possibly the go to guy for the shifter as he managed to recreate the design in dbcooper's car which appears good to me.
http://www.914world.com/bbs2/index.php?showtopic=94994
jim
Posted by: Chris H. Aug 4 2013, 06:53 PM
Kent,
I'm using an Accord shifter and I am definitely looking for quality and durability over price as well. No skimping on this one.
Are you using aftermarket starter or something? If you use a stock starter you shouldn't need to shim it. My stock starter is hitting the trunk floor...might gave to go aftermarket myself. Don't remember any indexing threads but Bob would probably know. He used a high torque aftermarket one as I recall.
I got the engine test fitted yesterday but the exhaust isn't in yet. I'll get it installed tomorrow and measure it and take some pics. I was worried it wouldn't fit but it looks like it will. Have to take the mount bar off to get it in.
Jim,
Thanks for the link! How did I miss that awesome build? So it seems like once again I am making it harder than it is....so the top able is up down, the bottom is left right....is it really that easy?
Posted by: BIGKAT_83 Aug 4 2013, 07:06 PM
Kent,
I'm using an Accord shifter and I am definitely looking for quality and durability over price as well. No skimping on this one.
Are you using aftermarket starter or something? If you use a stock starter you shouldn't need to shim it. My stock starter is hitting the trunk floor...might gave to go aftermarket myself. Don't remember any indexing threads but Bob would probably know. He used a high torque aftermarket one as I recall.
I got the engine test fitted yesterday but the exhaust isn't in yet. I'll get it installed tomorrow and measure it and take some pics. I was worried it wouldn't fit but it looks like it will. Have to take the mount bar off to get it in.
Jim,
Thanks for the link! How did I miss that awesome build? So it seems like once again I am making it harder than it is....so the top able is up down, the bottom is left right....is it really that easy?
Here is the starter and shifter I'm using. No problems with clearance using them.
Bob
Posted by: Chris H. Aug 5 2013, 07:25 AM
Thanks Bob! No clearance issues because you are a master craftsman. Looks like the same starter I am using. I'm gonna have to ding my trunk floor a bit. It's the solenoid that is hitting.
Posted by: 76-914 Aug 5 2013, 09:23 AM
Kent,
I'm using an Accord shifter and I am definitely looking for quality and durability over price as well. No skimping on this one.
Are you using aftermarket starter or something? If you use a stock starter you shouldn't need to shim it. My stock starter is hitting the trunk floor...might gave to go aftermarket myself. Don't remember any indexing threads but Bob would probably know. He used a high torque aftermarket one as I recall.
I got the engine test fitted yesterday but the exhaust isn't in yet. I'll get it installed tomorrow and measure it and take some pics. I was worried it wouldn't fit but it looks like it will. Have to take the mount bar off to get it in.
Jim,
Thanks for the link! How did I miss that awesome build? So it seems like once again I am making it harder than it is....so the top able is up down, the bottom is left right....is it really that easy?
Here is the starter and shifter I'm using. No problems with clearance using them.
Bob
Which starter is that, Bob? Source, price?
Posted by: BIGKAT_83 Aug 5 2013, 10:22 AM
Its a stock Subaru starter for a 2005 2.5 RS with manual transaxle. I'm sure it fits other Subarus. I got a rebult one off Ebay for $39 with shipping.
Posted by: Chris H. Aug 5 2013, 11:19 AM
Bob always finds the deals...
I think I'm going to shim my cradle a bit to lower the engine and trans an inch so the clutch fork and starter will clear. The trans stub is a little higher than parallel so it should be fine.
Posted by: jimkelly Aug 5 2013, 02:13 PM
I was told that one does not want the axle to be perfectly square to trans, cause then the cvs don't lubricate as well.
Posted by: Chris H. Aug 5 2013, 04:03 PM
Good to know thanks Jim! The trans stubs are a little forward of the wheel axle so they won't be straight on.
Posted by: a914622 Aug 6 2013, 10:02 PM
So im haveing a little problem getting the wire pics to upload? I think its the home internet. I will try again tomorrow.
jcl
Posted by: a914622 Aug 7 2013, 07:19 AM
Some of the conections at the ecu are spliced just to shorten. It is pretty straight forward. keep the diode, subarus wont run with out it. (can be pulled for a start kill).
out put wires are:
big yellow= battery +
blue = fuel pump +
blk/wht = ign+
blk/yellow = starter crank
red/yellow = check engine
yellow small= tack signal
yel/red = vss/speed sensor
ornge = back up power/ bat+
yel/black,yel/grn= ecu power out(fans)
I left the pics huge so you can click and zoom in. hope this helps. 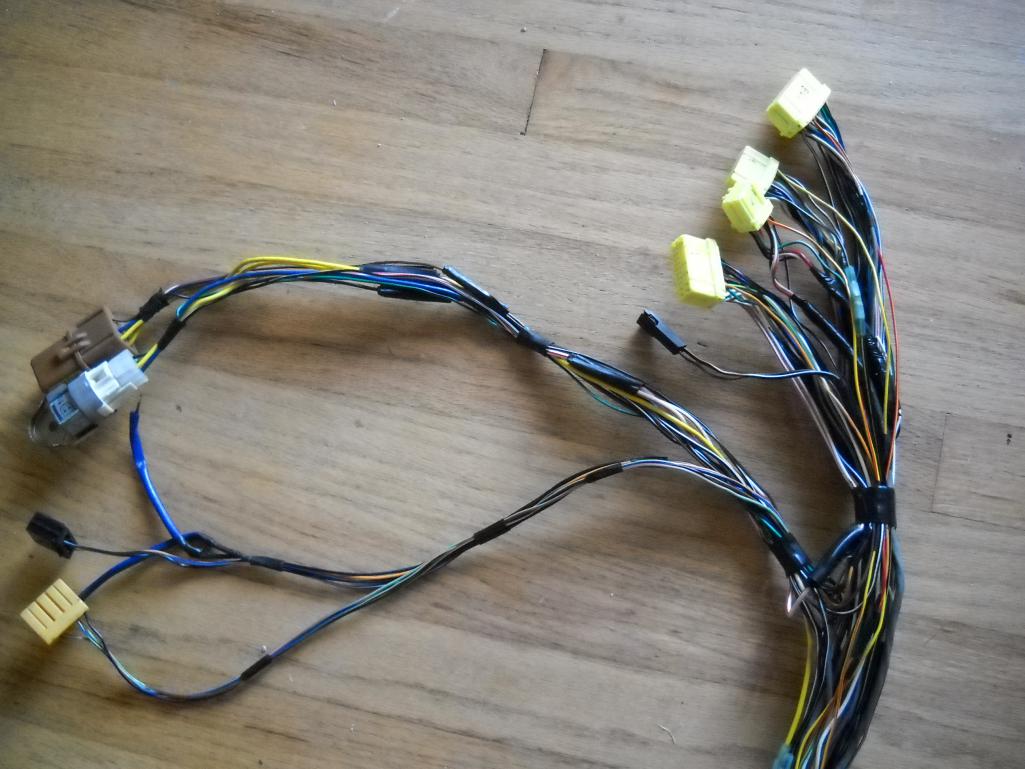
Posted by: Chris H. Aug 7 2013, 07:30 AM
Thank you Jeff!!!!!
Posted by: Chris H. Aug 7 2013, 09:27 PM
Hey Jeff,
I'm not recognizing the two plugs arrowed below. Any idea what they are for? I have separated the engine harness from the main one but those two plugs weren't part of it I don't think. I still have the whole wiring harness so should have them somewhere if needed...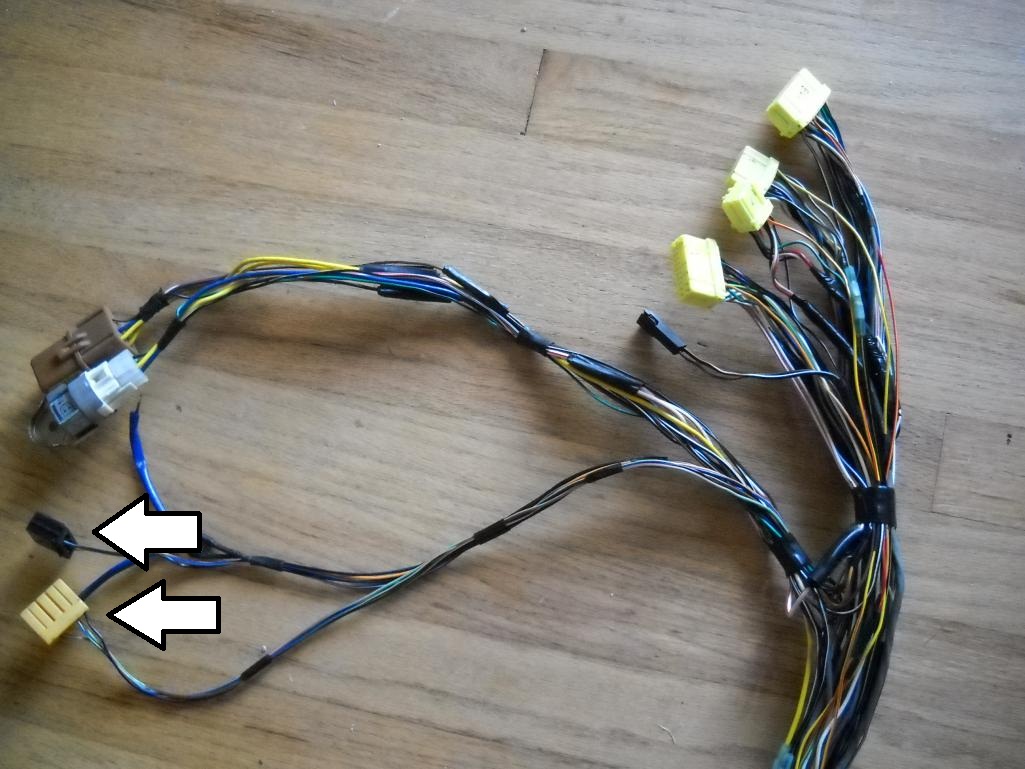
Posted by: euro911 Aug 7 2013, 10:20 PM
Black = blinker fluid reservoir, low level sensor
White = muffler bearing wear sensors (L & R)
Looks like you're making good progress, Chris
Posted by: Chris H. Aug 8 2013, 07:24 AM
Thanks Mark! I'm thinking these are wires I have in the harness but I cut the plugs off. Not the fun part for sure. Jeff's pics are extremely helpful! Hopefully he recognizes these last couple plugs.
Posted by: 76-914 Aug 14 2013, 04:46 PM
Guess where I found this? Page 5. Either you've been too busy working on your car or you've been neglecting it. I thought it my duty to bring this back to page 1. So I read in another post you are re-using the OG 914 CV's?
Posted by: Chris H. Aug 14 2013, 06:31 PM
Guess where I found this? Page 5.
Either you've been too busy working on your car or you've been neglecting it. I thought it my duty to bring this back to page 1. So I read in another post you are re-using the OG 914 CV's?Yes I need to update this....I'll get to it tomorrow. Got a lot done actually and my engine is in. I'm sure it will have to come back out for some reason but it's in for now.
I did reuse my CV's but my setup is different than yours..only use 914 CV's on the outers.
This was an EXTREMELY helpful how-to guide...
http://www.youtube.com/watch?v=LsytyVzokBg
It's messy to repack them...verrrrry messy. Plan on throwing the shirt you wear away and whatever gloves, rags and stuff you use as well. You can tell very easily if your CV's are still good or not. The guy even shows an example of a bad one. And there is an extra set left over for when I break one later...
Posted by: DBCooper Aug 14 2013, 08:34 PM
That's my CV configuration too, bus CV's inside, weaker 914 CV's out. The thinking was that I'd keep the 914's as the intended weak link, a "fuse" to protect the more expensive transmission. Well, I've blown that fuse three times already, and I can say that it isn't that easy to get to all the shards of the outer CV's out of the trailing arms after they've exploded and the screws are sheared off. I still like the idea of an easily replaceable fuse protecting the drive line, but sometime soon I'll convert the outers to 944's so I have a better chance of breaking the inners. Just a heads-up.
I dropped a greasy exploded CV onto a yellow t-shirt while under the car, made an abstract shape right in the middle of the chest. Wouldn't wash out so I took a sharpie and framed it, then signed it illegibly, as art, and now wear it proudly when I mow the lawn.
Posted by: Chris H. Aug 14 2013, 08:43 PM
Yeah I'm thinking the same thing. Once the first CV blows I am moving to 944 outer CV's. My inner CV's are actually Subie, so that makes the "fuse" even more vulnerable. If I ever updated this thread it would be easier to see that!
Dropping a CV full of greasy metal would make quite a mess! I threw 4 pairs of Harbor Freight gloves away myself...and left fingerprints on everything in the garage. Had to wash most of my tools with Simple Green!
Posted by: 76-914 Aug 14 2013, 08:58 PM
Can't wait to see some pic's. What is your ground clearance? An epoxy coated floor helps some when it's time to clean up the grease.
Posted by: Chris H. Aug 15 2013, 08:02 PM
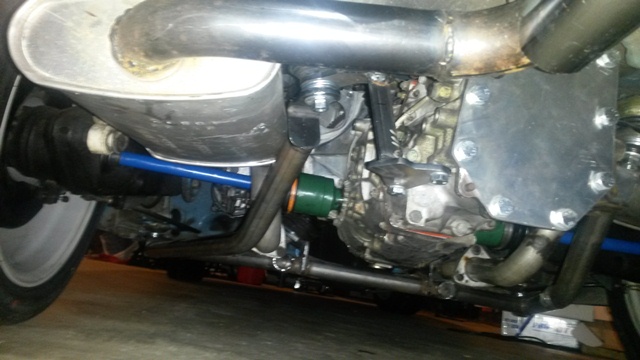
OK Kent, here you go!
These wheels were the best things I ever did to the car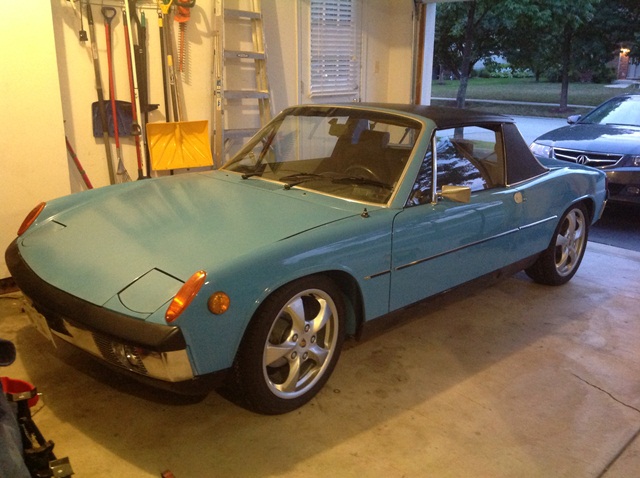
The passenger side is a little tight...might have to roll it. 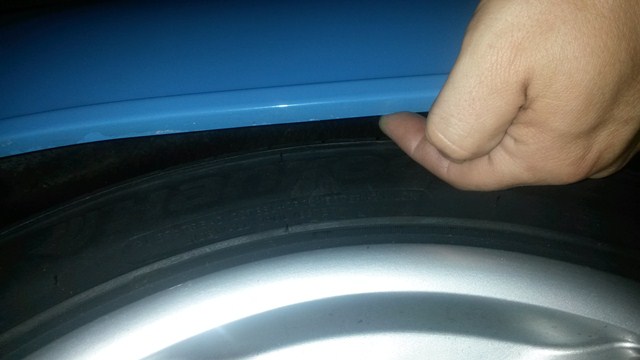
View from the back..note the exhaust system Bob made...the mufflers will be totally hidden when the valance is replaced. Tips are a bit high because the mount is slightly different but easily fixed with some heat...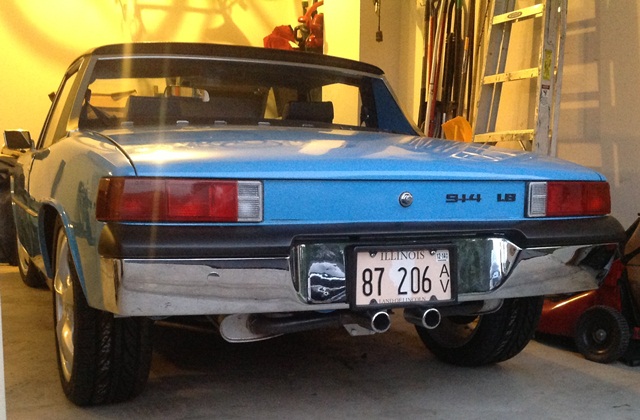
The lowest point of the car has 5 inches of ground clearance... I had to cut the mount bracing to fit the headers but will replace before driving the car. 

Ordered the radiator...it's 31X11...anyone want to guess the crazy idea I have for it?
From the top: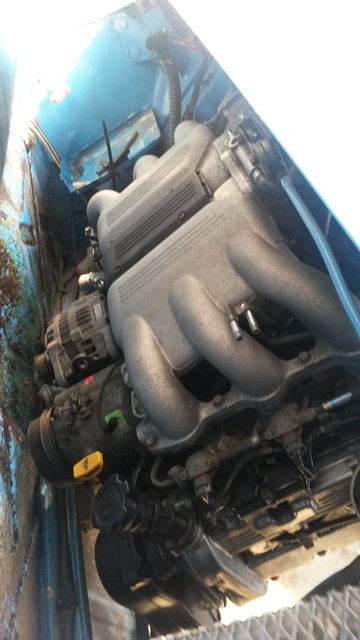
To do:
- cooling system
-cable shifter (Kent did you order your cables?)
-fuel lines
-complete the engine wiring harness (almost done)
Posted by: kg6dxn Aug 15 2013, 08:50 PM
While I agree it would be great to fit the rad in the rear... Water is heavy. Pivoting a heavy radiator as an engine lid is fraught with peril.
Engineering a pivot point that will allow a HOT radiator to open so you can access the engine will be a challenge.
The ability to remove all the air from the system will be critical. Think about designing a self bleeding system. This will require a holding tank "T"ed into the water pump suction line. A bleeder valve (smaller Orifice than the radiator hose) at the highest point will spill into the holding tank. This can be a modified overflow line at the radiator cap. So as the system is pumping, the air will dump into the holding tank. Water in the tank will displace the air. Most German cars since the 70's have a system that works this way.
Good Luck!
Posted by: Chris H. Aug 15 2013, 09:13 PM
Thanks Mike! Very thoughtful comments. It's just a crazy idea until the radiator gets here. Might not work but the rain tray is thicker than the radiator so who knows? I did buy a couple of reversible 10" fans so I have the option to blow the air out of the engine bay if I go that way. In speaking with Bob last week I think I will need a self-bleeding system either way so the cost to try it is really just a few feet of radiator hose...thanks for the explanation. As usual I was over-thinking the requirements.
If it doesn't work I always wanted to use the Cherokee radiator anyway. Should fit very well up front.
Posted by: 76-914 Aug 15 2013, 10:24 PM
Wow! Look's great.  Your way ahead of me Chris. I haven't ordered cables yet. I have a mock order but I am holding off until I can get my oval exhaust piece fabbed. It would be a costly and unnecessary expense to find that I needed to reroute. I'm 5.25" clearance for now. The bottom of those plastic diffusers are the same and they never would scrape so I think we're good. BTW, hope to get those exhaust pieces fabbed this week. I don't know if I can be of any help in that our measurements will be different because of our shifter differences. Great progress Chris.
Edit: those wheels look great and you have a beautiful car.
Posted by: Chris H. Aug 16 2013, 05:24 AM
Thanks Kent! Yours is going to turn out awesome as well. Just keep in mind I didn't have to fabricate an engine/trans mount. You'll catch up for sure. On the cables Bob (as usual) gave me a pretty good idea of how it works. The shifter has to be modified slightly but that's OK. I'll focus on the fuel lines next. Bought a Walbro 392 pump (stole the idea directly from DBCooper) and will put it in the stock location. You can ditch the stock 914 fuel filter since the Subie one resides in the engine bay and is much larger.
Posted by: euro911 Aug 16 2013, 09:35 AM
You can run straight exhausts? ... no cross-over needed?
Looks great so far
Posted by: Chris H. Aug 16 2013, 10:34 AM
Yes there was some debate about that a while back but yes you can on a flat 6er.
Posted by: euro911 Aug 16 2013, 12:27 PM
I'd love to have an SVX in the Westy camper, but as age creeps up, I think more about fuel economy. I think the CARB approved 2.2L is all I'll be doing when it comes time.
Posted by: Chris H. Aug 16 2013, 12:44 PM
Mark have you joined the Yahoo Subaru Vanagon Group? If not you really should do it today. Lots of really cool info.
http://autos.groups.yahoo.com/group/subaruvanagon/
SWAP IT!!!! Also before you decide against an SVXANAGON watch this vid:
https://www.youtube.com/watch?v=hCO4I4Am8x4
Posted by: Chris H. Aug 16 2013, 12:50 PM
So I open my fuel tank...the GREAT part is that the thing is clean as can be inside...looks new....the funny part....looks like I'm not the only DAPO! What's this?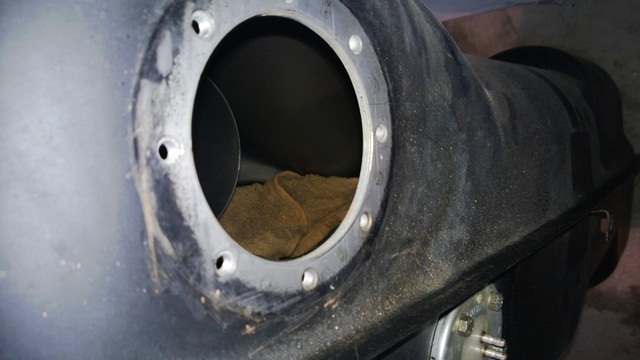
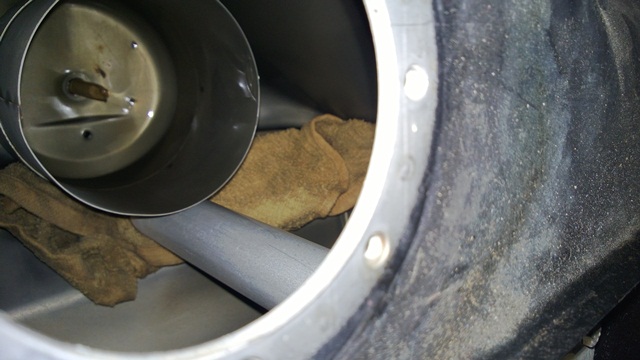
Looks like an old wash cloth! I picture someone's wife coming into a garage about 20 years ago and asking, "Honey where did you set that wash cloth when you were done with it?"...guy responds with "Ummmm....dunno sorry..." And there she sits...
Posted by: wingnut86 Aug 16 2013, 01:11 PM
Nope,
OSHA approved hazmat cleanup tool for "leaded" fuels;-P
Posted by: 76-914 Aug 16 2013, 01:12 PM
Wow, that is super clean. Everybody is somebodies DAPO. 
Posted by: euro911 Aug 16 2013, 05:05 PM
Thanks for the link, Chris. Just submitted my request
I'm watching your progress too, Kent
Posted by: a914622 Aug 16 2013, 07:31 PM
Chris
Sorry to leave you hanging but that stupid work messed up a prefect week!!
So the black one is diagnostic hook up for the obd1. you only need the blue/orange/black. this is also were you get in to reprogram or turn off things.(16 pin at the ecu)
the other is slect monitor for tranny if your using an auto.
the 2 big blue ones are a nutrual swith that never camr to the states. can be use for engine kill or im going to use it as a clutch in.
jeff l
Posted by: a914622 Aug 16 2013, 07:53 PM
They i forgot to ask were did you get the engine crale from? Im running out of time to fab up the one in my head. I want to hear mine rumble before the snow flys.
jeff
Posted by: Chris H. Aug 16 2013, 08:40 PM
Thanks Jeff! I figured you were busy. I had a million other things to do anyway so no worries, but my harness is getting very close thanks to your help.
I bought the cradle from Ian. He started a business called cold water conversions and has a lot of the stuff we converters need. I think he just got married and moved so not sure exactly what his plans are moving forward.
Link to the site is:
http://www.coldwater914.com/category/products/
It's a very simple mount...but sturdy.
Posted by: Chris H. Aug 16 2013, 08:44 PM
Nope,
OSHA approved hazmat cleanup tool for "leaded" fuels;-P
Yeah in the leaded fuel days they just poured it down the drain! Remember when leaded fuel was referred to as "regular" gas? "Unleaded" was weird, unusual stuff.
Posted by: Chris H. Aug 16 2013, 08:45 PM
Wow, that is super clean. Everybody is somebodies DAPO.
I'm a DACO!
 (and the c stands for current).
A good example of this would be on page 7 where I ponder rolling the rear fender lip on a car that has 15mm spacers on it...HELLO????..MCFLY????? How about just taking a few mm off of the SPACER and not bending the fender out on one side? DUH!
I didn't do it yet so no harm done.
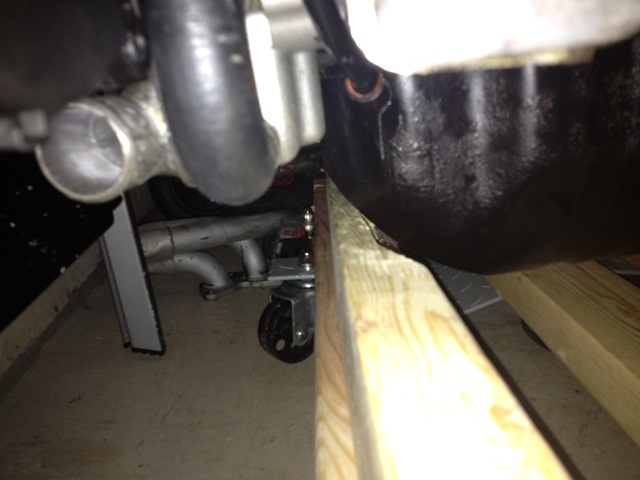
Posted by: Chris H. Aug 23 2013, 09:35 AM
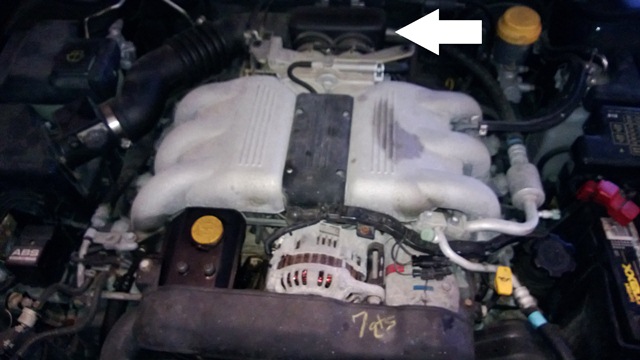
Got the radiator attached to the engine lid, but first....
A lesson for newer 914 owners. Can anyone tell me what is wrong with this fuel line?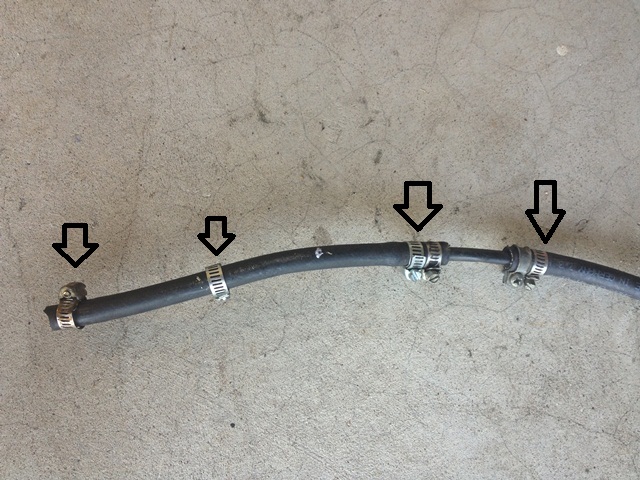
Yes...slotted non-fuel injection clamps. They will eventually poke holes in the fuel line ends causing a fire in the engine bay.
See how they dig into the hose?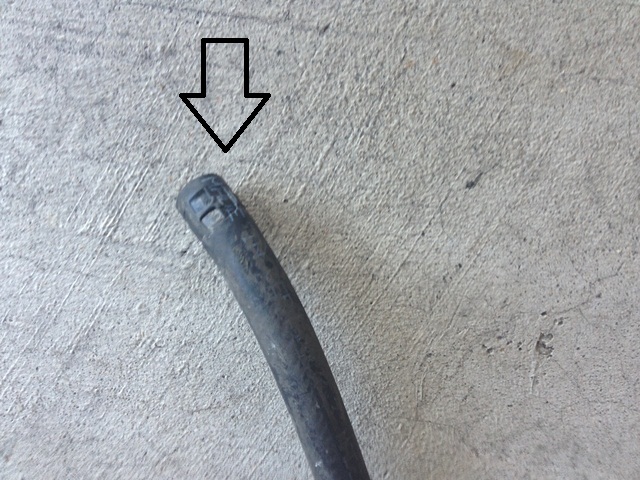
Should have removed them years ago.
Posted by: Chris H. Aug 23 2013, 09:57 AM
So the radiator...well the good news is it's very wide @ 36 inches (36x11). That is also the bad news since it was listed as being 31 inches...(must have been just the finned part measurement). It will not fit in the front trunk (MYTH BUSTED). So if this doesn't work I'll need a new radiator. For $65 it seemed like a fairly cheap gamble.
The very heavy mounting brackets were removed from the rad which weighed as much as the rest of it and I attached some 10" fans to what is technically the front. Due to the slight curve in the lid the fans fit great between the rad and the lid. So air can be pulled through rather than pushed. The lid will need some louvers in the upper part if this works...Don't want a GT lid at this point. For cooling while the car is moving I'm playing with a crazy idea involving pushing air through the former heater tubes...we'll see.
Here's how it looks....as I hoped the rad is actually higher than the rain tray was clearance-wise...you have to remove the cross brace in the lid. I'm aware that the rad cap will need to be dealt with and I ordered the recovery tank stuff Mike B. recommended in his commentary (and also in a flurry of PM's which he kindly responded to). 
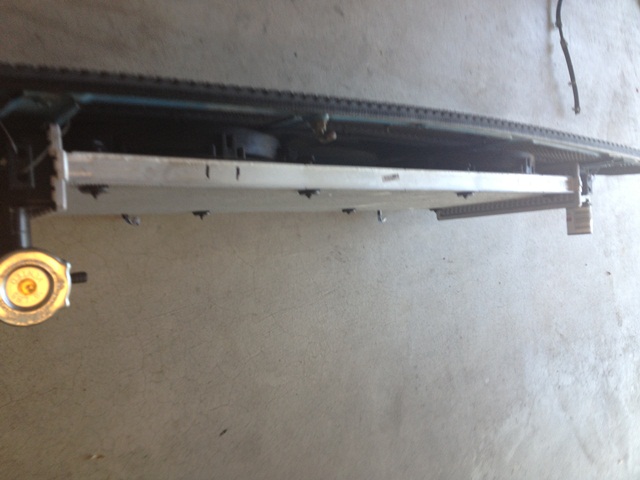
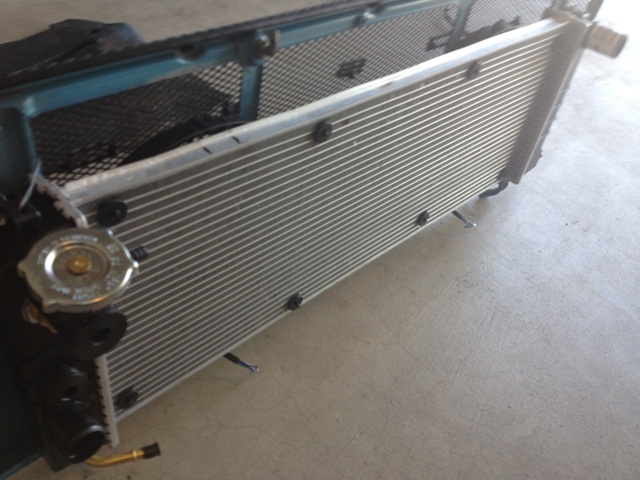
I don't expect this to work perfectly out of the gate but I have to see if it works at all. If not...at least we can check it off the list.
Posted by: Chris H. Aug 23 2013, 10:37 AM
Speaking of radiators and such...been working on the wiring. If you're doing your own radiator setup rather than going with Renegade, etc, the fan wiring is not as simple as it seems. If using the stock ECU you really should consider using the engine fuse/relay box that came with the donor car. Based on searches of previous setups you should not just wire the fans to the fuse box or to an unused 914 relay unless you like the smell of burning wires and plastic. Each of my 10" fans is 80 watts. There's a sequence in the ECU re: when the fans come on and how fast they spin based on the engine temp. The Subaru relays are the only way to ensure you don't burn the harness up. I'll post how I did it once I get through miles of unneeded wires.
Posted by: kg6dxn Aug 23 2013, 06:40 PM
Speaking of radiators and such...been working on the wiring. If you're doing your own radiator setup rather than going with Renegade, etc, the fan wiring is not as simple as it seems. If using the stock ECU you really should consider using the engine fuse/relay box that came with the donor car. Based on searches of previous setups you should not just wire the fans to the fuse box or to an unused 914 relay unless you like the smell of burning wires and plastic. Each of my 10" fans is 80 watts. There's a sequence in the ECU re: when the fans come on and how fast they spin based on the engine temp. The Subaru relays are the only way to ensure you don't burn the harness up. I'll post how I did it once I get through miles of unneeded wires.
You are correct. Fans should always be on a relay. I like to use Bosch or equivalent. I have a thermostatic fan relay trigger a pair of Bosch relays for my dual fans. The system is setup so the fans can run even when I turn off the key. They usually stop running within 2 minutes of stopping.
For your setup, I am concerned with forced air flow. Fans cannot push air through a radiator effectively. They must pull air. The 914 engine bay air flow through the engine bay is very weak due to the design. It was never meant as a forced air cooling device. The flaps at the rear pan created a low pressure area so the T4 fans could preform better. The engine tin divided the top and bottom of the engine air flow. The roof line creates turbulence, the bottom of the car creates turbulence. There is co consistent flow and I'm not sure which way the natural flow without engine tin travels.
With the radiator up front, forced air while driving travels threw the core without the aid of the fan. At slower speeds or hotter days the fans supplement the natural flow of air. In your radiator location, your fans will need to run all the time and once the temps exceed the fans flow cooling delta, the engine will overheat.
I think you have your work cut out for you. You may need to create a scoop on the underside of the car to force the underbelly air up through the engine bay. Vortex generators on the trailing roof line will help mitigate turbulence on top. I also think your fans will need to be on top of your radiator pulling and not below pushing air.

Posted by: Chris H. Aug 23 2013, 06:56 PM
I was waiting for you to chime in Mike!
So the good news is that the fans are between the radiator and the lid so they will be pulling air through the radiator rather than pushing. I was planning to engineer some sort of intake system to force air from under the car or from the front through the heater tubes and up through the rad.
I'll play with it for a while and then most likely go to a front mount like everyone else. We'll see what happens!
If you have any ideas throw em out there.
Posted by: ruby914 Aug 23 2013, 10:12 PM
I was waiting for you to chime in Mike!
So the good news is that the fans are between the radiator and the lid so they will be pulling air through the radiator rather than pushing. I was planning to engineer some sort of intake system to force air from under the car or from the front through the heater tubes and up through the rad.
I'll play with it for a while and then most likely go to a front mount like everyone else. We'll see what happens!
If you have any ideas throw em out there.
Don’t want to be a drag but…
My first thought is burping the air out will be a PITA, 2nd thought is the heat from the engine will naturally want to rise thru the radiator.
Posted by: kg6dxn Aug 23 2013, 10:24 PM
Don’t want to be a drag but…
My first thought is burping the air out will be a PITA, 2nd thought is the heat from the engine will naturally want to rise thru the radiator.
Assuming he burps it with the engine lid open, most of the air will get out. Maybe a custom filler neck on the radiator so it is level with the ground.
Really the bigger issue is F-ing around with the engine, dodging the hot radiator, while the fan screams in your ear...
Posted by: Chris H. Aug 24 2013, 10:08 AM
Burping shouldn't be too bad. I can point the rad nearly straight up or even leave the lid off the hinges to burp it. That way it will be the highest point of the system. I'll leave the water hoses long so it will be a little more flexible.
There are actually two fans Mike. So twice the fun. Also just realized that I will have the ability to grill things on my engine lid. YEAH! Who wants a burger? 
We'll see if I can get some flow directed through the lid while the car is moving. If not it's probably not going to work but AT LEAST I TRIED IT! I won't drive it far so if it gets the slightest bit too hot I'll just shut it down.
Now back to the wonderful wiring harness...
Posted by: CptTripps Aug 24 2013, 10:17 AM
Would you be able to mount the fans under the radiator? The heat would pull-THROUGH instead of push-TO the radiator.
Posted by: euro911 Aug 24 2013, 11:49 AM
I think Chris IS pulling from the bottom up and blowing out the grille on the engine lid.
With the total weight of a full radiator and all, you might need to install some gas struts to help open the engine lid and a latch to hold the lid in the open position to work in the engine bay ...
Posted by: Chris H. Aug 24 2013, 12:36 PM
Yes, the fans are installed to pull through the radiator and out. They are reversible as well which is cool if I need to reuse them on a "normal" system.
Mark, you're right on the struts...been thinking about that as well. IF this works I will need stronger lid hinges and springs as well as a prop bar of some kind. Pretty sure Mike B thinks I will burn myself otherwise...  I'm sure that's right.
Speaking of Mike...he must be a Star Wars fan...here's the tank he recommended for the recovery tank...I love it and will have my daughter paint it like the Death Star, which is what is looks like . BTW I did see a picture of it before I bought it so I was aware of what it looked like beforehand. There are dozens of shapes and sizes you can buy. I think the round shape is a great design. It's a VW/Audi item that is on Jettas, A6's, Beetles, etc. 
Posted by: euro911 Aug 24 2013, 02:38 PM
Yeah, I thought the 'Beetle Bottle' looked familiar 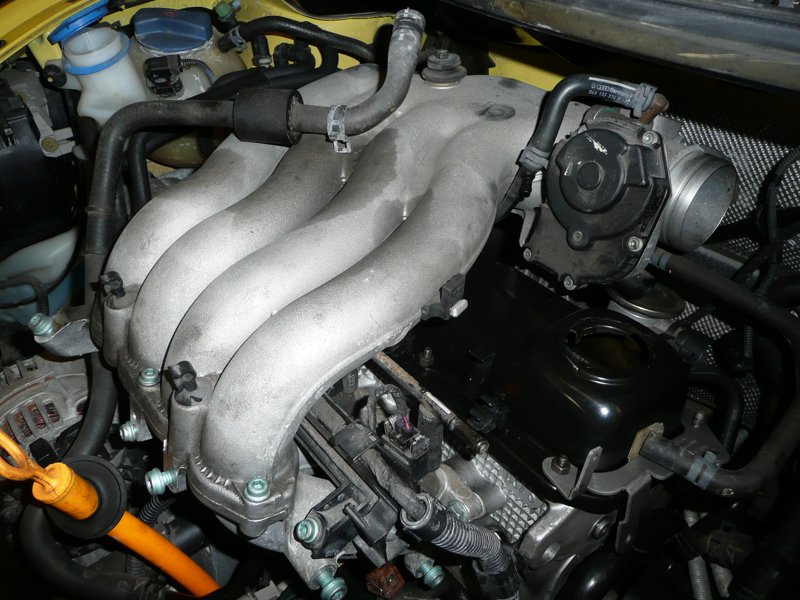
Posted by: kg6dxn Aug 24 2013, 05:06 PM
Now, go to a wrecking yard and cut the wiring plug off a car to fit the bottle. You can rig and idiot light to it so you will know when the water is low.
Just mount it up high and your system should always have available water.
I was going to use the same bottle but settled on the Passat triangular one. My engine compartment is stuffed full of things. The round bottle took up too much real estate.
Posted by: Chris H. Aug 25 2013, 04:04 PM
Well, the engine lid radiator idea is dead...just not enough room up top. Think I'll keep the Cherokee rad for another project...who knows...
Ordered the 00-05 Celica radiator (~$100, not bad). The SVX stock fan setup will fit on it. Now I have to convince myself to cut the pristine front trunk. I want to make a fiberglass splitter that will cover the holes for a cleaner look (like Ruby914s).
Posted by: 76-914 Aug 25 2013, 06:19 PM
Good luck with that radiator and the shipping goons. Mine had a Big GD footprint on it.  Your blazing away. I know what ya mean about getting back to that wiring.
EDIT: Chris, I have Greenlee hole punch's if you go that route up front.
Posted by: kg6dxn Aug 25 2013, 07:33 PM
I was hoping you would be the one that could make an engine lid radiator work. It's a good idea in theory but a PITA in practice. You could try Boxster dual front fender radiators. I might go this route some day. I miss having a front trunk.
Posted by: Chris H. Aug 25 2013, 08:19 PM
Yeah Mike, I was hoping the same thing. Hate the idea of cutting my trunk. My brother and I messed with it for quite a while today. Nothing lined up well. The radiator was too far back to close the lid, then when we moved it forward the filler was in the way. It's also pretty close to the engine...as you predicted there is no way you could work on the car without some special bracket so you can remove the rad entirely while still connected to the engine.
Here are the miscellaneous cooling ramblings we were considering:
- a ram air scoop forcing air down through the fresh air vent between the wipers back through the heater ducts with 3" hose running right to the radiator (would have to remove the air box that is there)
- a scoop under the car forcing air up - although it would be very hard to direct it through the radiator , lots of air would go out the sides of the lid
- running some light weight ducting under the car (as straight as possible) from front to back, then right up to the radiator. Something similar to a house gutter down spout (but bigger or more of them). It would have to be light weight or you'd have to drill a bunch of mounting holes.... This would probably be effective but it would be pretty low on the car and could be ripped off fairly easily. Hate to lose it at say, 70 mph...
At that point we realized it still might not be enough air for the EG33. This could certainly work for a smaller normally aspirated Subie conversion(2.2, even 2.5) but this rad isn't quite as big as the stock SVX rad...Maybe next time!
Posted by: euro911 Aug 26 2013, 12:49 AM
Can you mount it flat in the rear trunk?
Cut out an opening in the floor, add a ducting scoop below to suck cool air up, then duct the exhaust flow through a nice mesh grille between the tail lights
You might still have room to stow the targa top too ???
Posted by: Chris H. Aug 26 2013, 05:29 AM
The exhaust system is in the way back there...plus my rear trunk is prettier than the front one... .
Posted by: Chris H. Aug 26 2013, 07:45 AM
BTW Mike if you want to mess around with the radiator I will ship it to you. "For the good of the community" ya know.... I can't return it anyway since I mounted the fans and made some ugly indentations in the fins. I don't have the confidence to do any major surgery on it but you can. What would be ideal is to use a roller or parts car to play around with the configuration.
Posted by: 904svo Aug 26 2013, 06:23 PM
check out what this guy did for cooling.
http://clubnarp.com/
wrx914 build.
It will give you some ideas.
Posted by: euro911 Aug 26 2013, 07:09 PM
Yeah, that's Mike (Ruby914's) thread
Here's the direct link http://z8.invisionfree.com/ClubNARP/index.php?showtopic=5431&view=findpost&p=3888228
Posted by: Chris H. Aug 26 2013, 07:45 PM
Yeah that carbon fiber front trunk air ducting is awesome. Might try to do one in fiberglass. Better learn fiberglassing then....make a mold, plug, glass it...
Posted by: kg6dxn Aug 26 2013, 10:08 PM
Yea, this is pretty awesome. 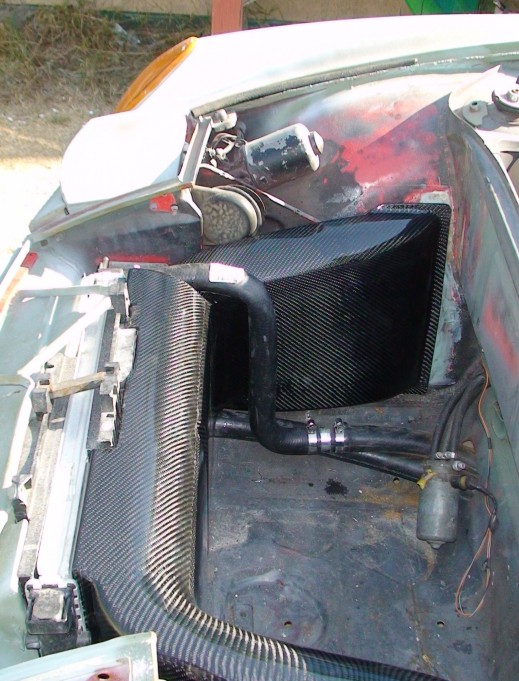
Posted by: ruby914 Aug 27 2013, 12:46 AM
I was hoping you would be the one that could make an engine lid radiator work. It's a good idea in theory but a PITA in practice. You could try Boxster dual front fender radiators. I might go this route some day. I miss having a front trunk.
 Mike, Chris, I think your on to something good. Thanks for the good words on my duct but that is so 2011. You can one up me and use the Boxster dual front fender radiators in the rear fenders. Inter through rear flares and exhaust through the engine bay
Posted by: Chris H. Aug 27 2013, 05:26 AM
Well, maybe on the next one....if I hadn't found the 3.3 I would have gone with a 2.5 non-T and that would have worked with my setup (I think) because I could have built a cradle for the rad and it would not have needed so much air. The 3.3 is fairly large physically compared to the 2.5 or 3.0. No room for that. Plus I like having arm hair. 
Posted by: BRZCory Aug 27 2013, 09:29 AM
Hello there from RS25. I was googling EG33 stuff and found your build! Very interesting!
If you need any wiring help, I can give you a little help and advice. I have an EG33 swapped impreza, and it's been running on the stock SVX Ecu for nearly a year now. I am swapping over to a megasquirt though, in preparation for a supercharger. 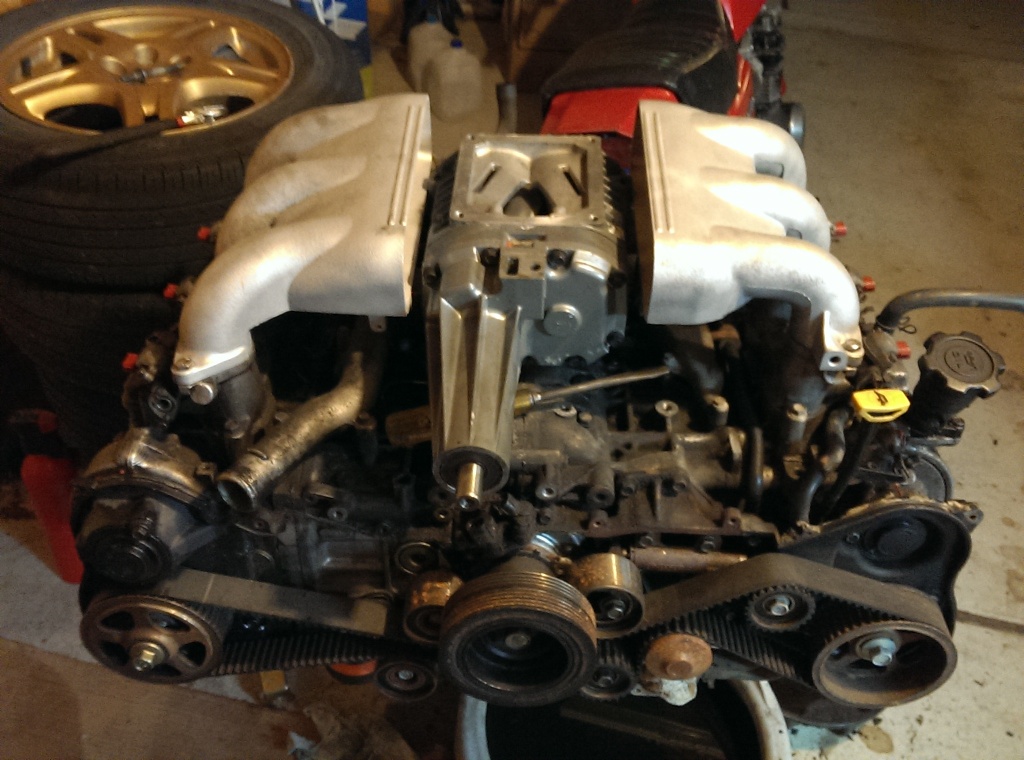
I saw earlier you were worried about the coolant temp sensor? Just a little heads up, the EG33 uses 2 temp sensors, located right next to eachother. The 2 wire sensor is for the ECU, and the single wire sensor is for the gauge cluster. If you know what the stock porsche sensor's resistance curve looks like, I know I've got the resistance curve for the subaru sensor around here somewhere to compare it to. Alternatively you could just replace the subaru cluster sensor with the porsche sensor, though you may have to make an adapter, or drill/tap the hole for a different size.
Also, I'd recommend hooking up the Check Engine Light to something. The OBD1 ECU allows you to pull CEL codes by connecting 2 wires (no external code scanner required!). It does this by flashing the CEL at you (it's kind of like morse code, long long short short short would be code 23, etc.) This can be MAJORLY helpful in troubleshooting (My ECU coolant temp sensor got damaged somehow when I was installing my motor, and it wouldn't fire without it! I wouldn't have been able to diagnose this without the flashing CEL telling me!).
The EGR system can be removed without any big fanfare. Just leave the solenoids connected to nothing and the ECU will be happy. Block off the hole in the header if you're using the stock subaru headers, and block off the opening on the intake manifold. I've gotten a CEL once from this, and it was because I gassed it immediately after filling up the fuel tank. No big deal.
The radiator is always a pain. Comes with the territory. Good luck on that! I can tell you though, that with my Griffin (think it's a 26"x13"x3"thick) double-pass radiator, my fans have never kicked on under normal conditions. It just doesn't get hot enough. I let it idle for 2 hours once just to test this (during the summer) and nothing. Soon as I unplugged the coolant temp sensor they kicked right on (so they were connected properly). I don't know if you've got room for that, but it works well for me. Part number: GRI-2-58190-X
Also, you probably want to replace the water pump. I've had several of them leak on me (the seal for the water pump shaft goes bad). When you do, use a stock subaru thermostat. The aftermarket thermostats tend to be junk and cause problems.
Here are a few of our build threads that may be of use to you:
http://www.rs25.com/forums/f145/t173252-bob-s-backwoods-buggy-ghetto-beater-eg33tt-powered-pantie-dropper.html
http://www.rs25.com/forums/f145/t71120-rice-delivery-wagon-now-230-na-hp.html
Best of luck to you on your build! I'll be following along!
(Also, whatever you do, make sure the IRIS system is functioning properly. Replace all the old and brittle vacuum lines under the manifold while you've got access. The IRIS system is responsible for ~30hp in the midrange, due to it's variable intake geometry)
PPS: Don't go to nasioc. They're pretty much the devil. I only go there for cheap parts and local guys. RS25 is much friendlier. Subaru-SVX is also a great forum with some dedicated fellows who will hate you for "Chopping up a perfectly good SVX"
Posted by: Chris H. Aug 27 2013, 10:00 AM

Wow Cory thank you so much for the info and for bridging the Subie-Porsche 914 gap. I have found RS25 to be very helpful. In fact many of the things you mentioned I did because of that site. Bought a new iris valve, changed all of the vacuum hoses (which were as brittle as uncooked spaghetti), eliminated the ECU but left the solenoids plugged in etc. I'm tackling the wiring now, so thanks for the CEL insight. I think 95 was the last year for OBD1 which is good. I also did replace the water pump. I re-sealed the engine but did not do the head gasket (hope that doesn't come back to haunt me).
On the temp sensor I think I will hook up both gauges and see how they read...the Porsche sender is only $20 so I can add that if need be.
I think I speak for all Subie swap people when I say thanks for introducing yourself. Your comments are welcome! Can't wait to peruse your build (Might have seen it but not the photobucket link).
Posted by: Chris H. Sep 12 2013, 09:55 AM
Well thanks to some help from Jeff and others, I figured out the wiring harness. The little SOB runs. Only ran it for a minute or so because it's not plumbed for a radiator yet but it RUNS! Wow that is very motivating. It's very smooth and you can just feel the power when you rev it. I'll miss the clacketyclacketyclack of the valves but probably will get over it when I hammer the throttle.
Some pics of my custom intake...didn't want to use the stock one and started researching....seems the SVX guys debate about the effectiveness of a cold air intake. The issue is that the stock airbox pulls air from the fender, which is cooler. A cone air filter generally goes in the engine bay to prevent hydrolocking...so the air is hotter. No increase in hp and some say it's a decrease. I noticed a lot of LS1 guys have their intakes in the trunk. It was very hard to find a dual-inlet "snorkel" intake that the SVX has. The one I used was a 300GTVR4. The tubes are 2" vs 2.75" with the SVX, so silicone reducers were used. I could cut the intake where it bends to gain more trunk room but I kind of like how it looks now.
Pics:
The first cut is the deepest....OUCH! 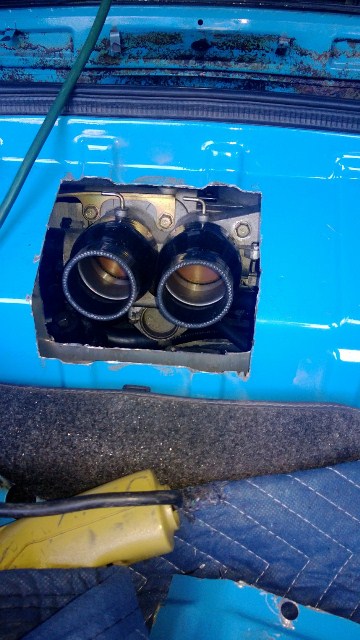
If you want to do a cone filter conversion for the SVX, find a MAF adapter for a "Z32" Nissan, which is 90's 300ZX, Infiniti J30, I30 through 1997. The MAF itself IS NOT THE SAME, but the casing is exactly the same. I bought this one:
http://www.ebay.com/itm/370758666338?ssPageName=STRK:MEWNX:IT&_trksid=p3984.m1497.l2649
It has a seal and is made of plastic so it works well with the plastic MAF.
More pics: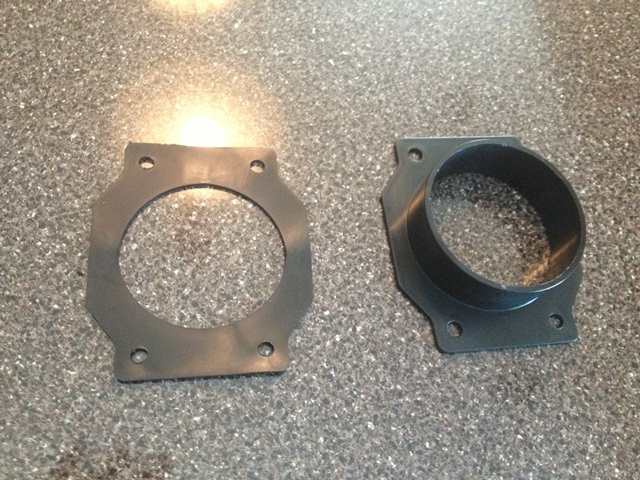
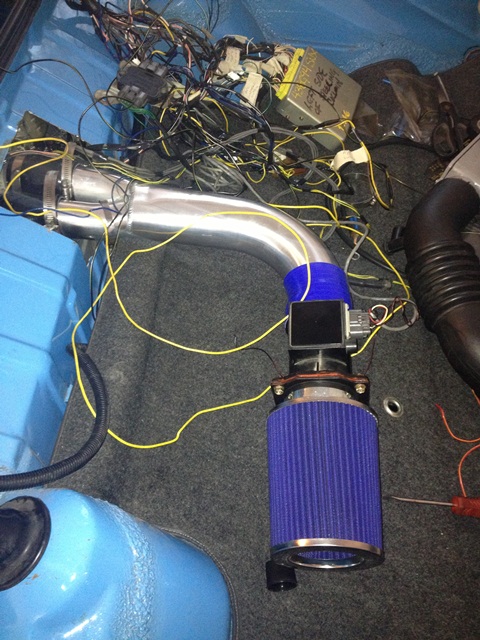
Posted by: Chris H. Sep 12 2013, 10:00 AM
The one issue I am having is that my alternator belt is squeaking like crazy. It only has 3 ribs which is likely the problem but it also might not be quite tight enough. The power steering pump bracket has a tensioner on it, but once you remove that you cannot tension this belt. I know Bob made a tensioner for his. Anyone else have a recommendation for a belt that is approximately 25 inches long with 4 or 5 ribs? What have others used for a belt in this situation?
Posted by: CptTripps Sep 12 2013, 01:07 PM
That's awesome man. Great work.
Damn-satisfying to finally be at a point where you can see the end.
Posted by: DBCooper Sep 12 2013, 01:10 PM
Don't have that motor so can't help, but are you sure it's the belt? Drip some water onto the belt's grooves when it's running and if the squeaking stops it's the rubber, if not it's something else. Might juust need tightening, might need to be replaced. Belts can also get glazed and when the alternator's pulling a lot of power for a low battery it can slip the belt, then once it's not charging as much it'll improve. If it's not the belt making the noise it could be an idler or alternator bearing, especially if the belt's over-tight.
If it's not stock you can get any belt you want at any parts store, just take in yours and measure. You have a three-rib belt? On four or five rib pulleys? Sounds odd, but it's all still stock, isn't it? If so just get the right replacement.
Posted by: Chris H. Sep 12 2013, 01:27 PM
Don't have that motor so can't help, but are you sure it's the belt? Drip some water onto the belt's grooves when it's running and if the squeaking stops it's the rubber, if not it's something else. Might juust need tightening, might need to be replaced. Belts can also get glazed and when the alternator's pulling a lot of power for a low battery it can slip the belt, then once it's not charging as much it'll improve. If it's not the belt making the noise it could be an idler or alternator bearing, especially if the belt's over-tight.
If it's not stock you can get any belt you want at any parts store, just take in yours and measure. You have a three-rib belt? On four or five rib pulleys? Sounds odd, but it's all still stock, isn't it? If so just get the right replacement.
Yeah I'm sure it's the belt DB but thanks for the ideas....I can smell it...it must be a little too loose or too thin for the application so its slipping. It's not stock, normally there is a 4 rib belt (I think) driving both the alternator and the power steering pump. I removed the pump which also housed the tensioner. So the stock belt is way too big now. Unfortunately this means I have to figure out EXACTLY what size belt to buy or make a tensioner somehow. Initially I used a 25inch belt, so I might try a 4 rib 24.5 inch and see if that works.
Posted by: Chris H. Sep 12 2013, 01:57 PM
That's awesome man. Great work.
Damn-satisfying to finally be at a point where you can see the end.
Thanks! Getting it started is the most concerning part. If it doesn't start it could be a million things. You start thinking about the things you might have messed up along the way. I thought maybe the timing belt wasn't right because it wasn't idling, but realized I just needed to take up the slack in the throttle body and its fine now. Except for the SQUEEAAAAAAAAAKing.
Posted by: BIGKAT_83 Sep 12 2013, 03:59 PM
Belts that small are a problem to find in anything but a three rib. You need to make a tensioner. What I made was just a right and left hand thread set of hiem joints and a peace of tubing welded a nut on each end and then a jam nut worked great and looked good.
I've been looking for it and as soon as I find it I'll send it your way.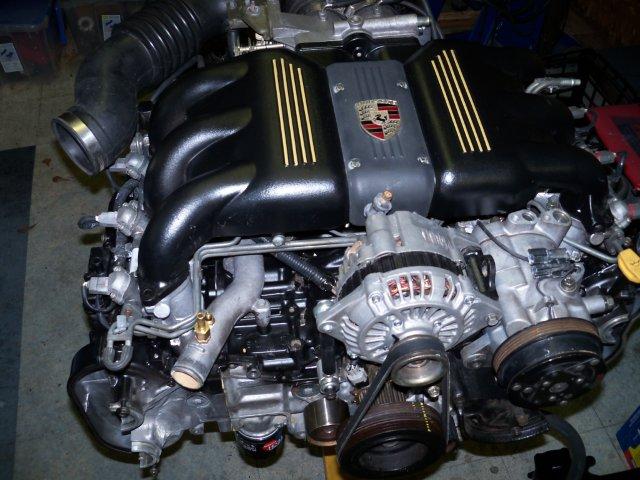
Hows it sound??
Posted by: Chris H. Sep 12 2013, 04:27 PM
Thanks Bob that would be awesome! I think I might have found a 4 rib but that still might not fix the problem. I don't want it too tight or it will mess up the bearing.
It sounds REALLY good now that I took that dang belt off! REAALLLLLY good. Very 911ish but with less whoooshing because there isn't a cooling fan. At idle it's almost silent. I'll try to get a video together....
Posted by: BIGKAT_83 Sep 12 2013, 04:30 PM
Thanks Bob that would be awesome! I think I might have found a 4 rib but that still might not fix the problem. I don't want it too tight or it will mess up the bearing.
It sounds REALLY good! REAALLLLLY good. Very 911ish but with less whoooshing because there isnt a fan. At idle it's almost silent. I'll try to get a video together....
A three rib belt is fine. The only load on it is the alternater. unless your using the ac compressor now..
Posted by: Chris H. Sep 12 2013, 04:40 PM
Nope just running the alternator. The AC runs on a different belt luckily and can be tensioned. I won't get to that til next year.
Posted by: 76-914 Sep 12 2013, 05:48 PM
Wow! Way to go Chris. Your making great time. I'm hoping Mine is ready to start in 3-4 month's. Once that first cut in the trunk happens the others will be easy. I finally made headway with my exhaust though it will be awhile before I post on that. I've been dicking around with the wiring and discovered that blk doesn't always mean ground and some of the wires I cut need to be spliced back in. I bought the factory manual and it is awesome, So awesome that I was able to determine that I had screwed up quite a few wires. Thanks for the motivation.
Posted by: scotty b Sep 12 2013, 06:22 PM
I was hoping you would be the one that could make an engine lid radiator work. It's a good idea in theory but a PITA in practice. You could try Boxster dual front fender radiators. I might go this route some day. I miss having a front trunk.
Mike, Chris, I think your on to something good. Thanks for the good words on my duct but that is so 2011. You can one up me and use the Boxster dual front fender radiators in the rear fenders. Inter through rear flares and exhaust through the engine bay Have any of you actually looked into this as far as to get the boxter rads and see if they fit ? This was something I had also thought about doing, with Ruby's shroud as my fail safe plan. I tried a 911 fender mounted oil cooler and it is a bit big for the front wheel wells ( in front of the tires at least. ) I haven't tried it in the rear wells yet.
Posted by: kg6dxn Sep 12 2013, 07:55 PM
Have any of you actually looked into this as far as to get the boxter rads and see if they fit ? This was something I had also thought about doing, with Ruby's shroud as my fail safe plan. I tried a 911 fender mounted oil cooler and it is a bit big for the front wheel wells ( in front of the tires at least. ) I haven't tried it in the rear wells yet.
I was at Parts Heaven a couple weeks ago looking at a Boxster that was half stripped. I think it could be done with a Sheridan fender or a similar removable fender. The Boxster rad sits at a 45° angle with the leading edge closest to the center of the car. There is a built in shroud with it. I think it would be possible to use the fog light grills as intakes. The headlight bucket would need some re-working for air flow. With my headlight setup, this area is all wasted space. With a factory setup, maybe a little more work. The Boxster has way more room in the fender well than a 914. So you would have to utilize the space under the headlight bucket for sure, possibly even cut out the bottom of the bucket and have the radiator shroud as the new bottom. I'm just not sure if the flip down headlamp system would fit back in the hole.
My next water cooled project will go this way for sure. Maybe with a water cooled 3.6L flat 6...
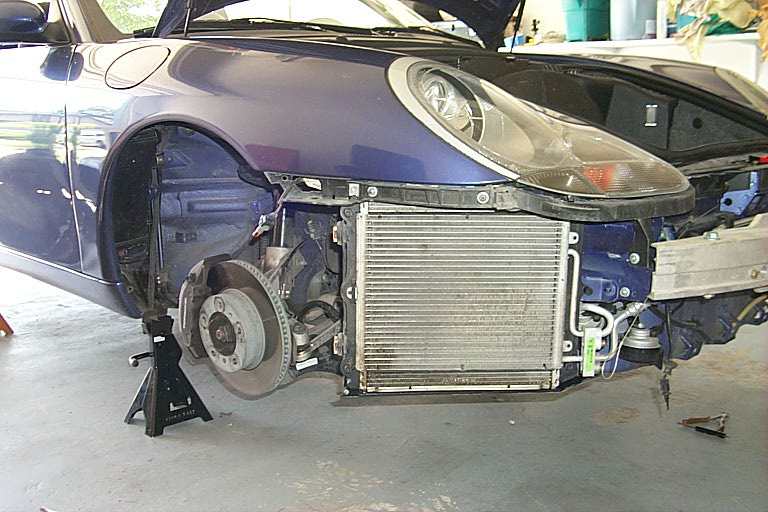
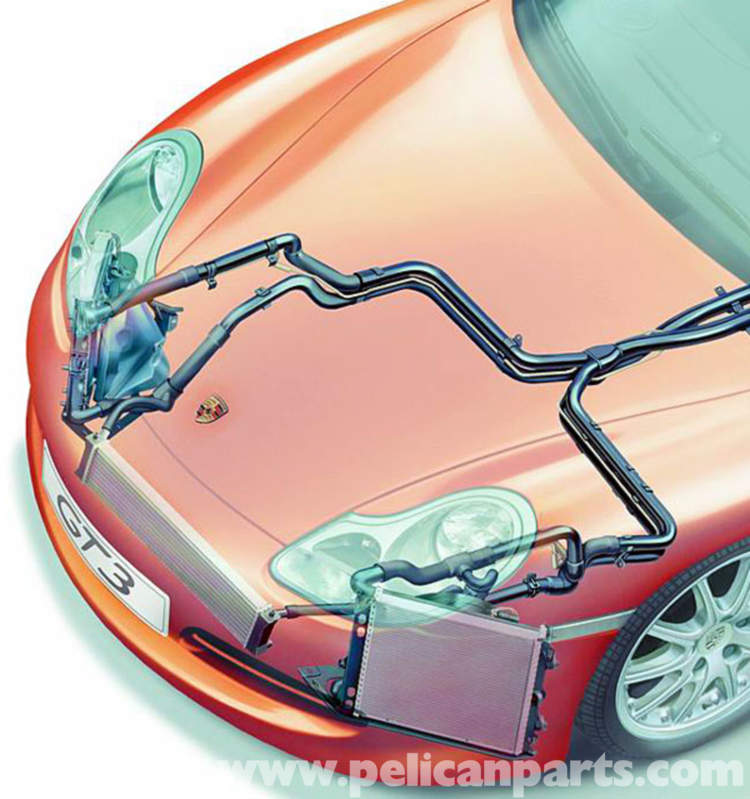
Posted by: scotty b Sep 12 2013, 08:16 PM
The front mounted cooler is another thought I had. 2 of those, one in each rear wheel well, behind the wheel. I think airflow in would be o.k., but it would need some sort of exit. Fan setup could be tricky too due to the long thin shape of the front cooler
Posted by: Chris H. Sep 13 2013, 06:32 AM
The Cherokee rad would be great if you could get some space between the front spoiler/valance and the body. It's 36x12, 2 pass. Could work with the Sheridan kit or the IMSA front spoiler thing...
Posted by: rhodyguy Sep 13 2013, 09:16 AM
noticed the tank sock is sucked flat. did you replace it?
Posted by: Chris H. Sep 13 2013, 09:43 AM
I did Kevin, thanks.
Posted by: a914622 Sep 15 2013, 08:37 PM
SWEET!! I go hunting for a couple of weeks and you get it running..
jcl
Posted by: Chris H. Sep 16 2013, 06:57 AM
Yeah man! Your clarification of the wiring was very helpful...the first time you turn that key it's pretty scary. For anyone who is going to do this soon be advised that the ground wire for the sensors (o2 sensor, etc) is black with white stripe, as is the ignition wire (which is really dumb). Be VERY SURE you connect the right one. Luckily I only twisted the key for a second...the wire got hot, I swapped them, all good.
Hey one question Jeff...so the black with yellow stripe wire that comes from the ECU...the "cheat sheets" identified this as the starter crank wire. When I plugged that into the starter nothing happened when I cranked it. Could only get the starter to spin when I ran a wire directly from the yellow starter wire at the 14 pin 914 harness (that used to connect to the relay board) to the starter. Works great like that, but should I also connect the starter crank wire from the ECU to the starter or leave it as is? Let me know if that makes sense.
Posted by: 904svo Sep 16 2013, 08:51 AM
Yeah man! Your clarification of the wiring was very helpful...the first time you turn that key it's pretty scary. For anyone who is going to do this soon be advised that the ground wire for the sensors (o2 sensor, etc) is black with white stripe, as is the ignition wire (which is really dumb). Be VERY SURE you connect the right one. Luckily I only twisted the key for a second...the wire got hot, I swapped them, all good.
Hey one question Jeff...so the black with yellow stripe wire that comes from the ECU...the "cheat sheets" identified this as the starter crank wire. When I plugged that into the starter nothing happened when I cranked it. Could only get the starter to spin when I ran a wire directly from the yellow starter wire at the 14 pin 914 harness (that used to connect to the relay board) to the starter. Works great like that, but should I also connect the starter crank wire from the ECU to the starter or leave it as is? Let me know if that makes sense.
Thats the singal wire to the ECU to turn off the fans,ac and other devices that are
drawing power so the starter has full batery voltage.
Posted by: Chris H. Sep 16 2013, 09:02 AM
Ah thank you sir! Makes sense.
Posted by: a914622 Sep 16 2013, 09:47 AM
yep as stated above. that wire tells the ecu the engine is starting.
jcl
Posted by: ThePaintedMan Oct 5 2013, 07:45 PM
Hey Chris,
I never could get a very good view of the engine cradle you used in this setup. Any chance you could post more of them?
This is WAY off, but one day I'd like to do the SVX swap as well. The limitation is that I'd have to keep the stock 901 transaxle, which, in theory would really simplify the swap in some ways, but also make it more complex in others (need a VSS sensor, engine adapter, gauges, high torque starter, etc). Is there any way that a cradle that bolted to the stock /4 locations would work without running all the way back to the transmission mounts, since this engine is a bit heavier than the 2.2?
Do I read this right: its essentially the same case as the 2.2, so you'd just use a Kennedy 2.2 transaxle adapter?
Posted by: 76-914 Oct 6 2013, 07:15 AM
George, that is Ian's cradle of Coldwater conversions. He is a member vendor and has a beautiful cradle. They're about $600 and worth every penny, I'm sure. You asked "Is there any way that a cradle that bolted to the stock /4 locations would work without running all the way back to the transmission mounts, since this engine is a bit heavier than the 2.2?" The Suby engine mounts are located at the rear of the engine as compared to the front on a type 4. So much so that it is almost the datum point once the engine and trans are bolted together. That being said, the mount you want would need to be a distorted "C" shape. Don't know how that would hold up w/o some bracing from the body to mount as it would become a "lever" if left in that configuration.
Posted by: Chris H. Oct 6 2013, 11:15 AM
Hey George,
Kent is correct, my mount is from coldwater conversions.
It's a very good strong mount. I modified mine a bit because of a clearance issue with the headers. Need to do a bit of work on it in the next few days so I will post some pics of it installed. Just got it shimmed up to the perfect angle last week.
http://www.coldwater914.com/cradle-500/
You don't HAVE to use a cradle mount if you use a 901 trans, but I would go with one myself because the 3.3L engine is very front heavy and weights quite a bit more than the 4 cylinder engine @ ~350#. With a cradle mount the engine has some additional bracing front to back aside from just being attached to the trans, so your trans ears are under far less stress (reduces the "lever action" that Kent describes).
Other options: You could modify the smallcar mount that is used in Vanagon conversions and mount it to the stock engine bar like Amenson did.
http://www.914world.com/bbs2/index.php?showtopic=58431&hl=subaru&st=0
The thing is that the smallcar mount is $359 for the 3.3 and then you have to modify it. The coldwater mount is $500..much stronger....bolts right in.
You could also do what Kent, Bob (BIGKAT_83) and others have done and that's fab a mount yourself. After seeing your skills on the resto of your car you could definitely handle it.
Give the Subie trans idea a while and you will probably change your mind.
BTW there are 3-4 SVX's up here for sale CHEEEAAAP. Craigslist.
Posted by: mepstein Oct 6 2013, 12:37 PM
BTW there are 3-4 SVX's up here for sale CHEEEAAAP. Craigslist.
Same here. $400 on up. The 400 one has a bad trans which is normal in these cars but perfect for the swap.
Posted by: ThePaintedMan Oct 10 2013, 07:06 AM
Thanks for the reply guys. That makes a lot of sense, especially the "lever" action of the engine. I really like Ian's cradle, but it's my understanding he isn't doing any more, at least for the time being.
It's one of those tough things, figuring this all out without ever having seen an SVX up close.
Again, I'll preface this with the fact that any kind of conversion is still years away for me, so humor me. But within the Chumpcar rules, these engines are the perfect way to add some power and reliability. The 914 is valued at $250 under the new Chumpcar rules, which extend into 2016. The goal is to keep the car's total value under $500, which means you can swap out another engine, sell the original and if it's under 500, then the car does not receive any kind of penalty. Unfortunately that means that the transmission swap is probably out. In general, this is all theoretical though - more important things to spend money on in life at the moment
Chris, have you been keeping a running tally of what you've spent so far? Anyone care to take a stab at a rough estimate of what a bare-bones SVX swap would cost, retaining the original transmission? Here's what I've roughly compiled.
Used engine, ecu and harness - $400
Radiator and fan - $150
Hoses - $100
Cradle - up to $600
TransAdapter and clutch - $800
Exhaust - $150
Fuel pump - $100
Fuel lines - $50
HiPo Stater - $150
Gauges - $150
Neighborhood of $2700 with that. My general rule is to double everything though, so probably closer to $5000?
Posted by: d914 Oct 10 2013, 07:19 AM
buy a svx cheap,, partially wrecked.. Bob bought one for $400.. scrapped it for $212..
You can weld you can make a engine mounts
tranny?? not in a SVX unless there was a conversion.
Posted by: Chris H. Oct 10 2013, 09:09 AM
Your numbers are directionally right George. I don't have a running tally, but the "nickel and dime" stuff is what gets you on a conversion. If you have the patience to part out an SVX you can get the engine free or even make a few bucks. My donor was $600. I definitely ended up on the + side but have spent it all and more on the conversion. I'm not a fabricator so most of my $ was spent on the mounts, axles and such. You can get the costs down significantly by fabricating the mount yourself.
One area that needs to be addressed almost 100% of the time is re-sealing the engine. They leak in the same places as their German counterparts and after 15-20 years they are usually caked with oil. The total reseal kit is about $260, but the main area of leakage is the rocker/valve covers. Might get by with just doing those, the coolant stuff that requires o rings, and the cam covers. The oil pan does not have a “seal” per se; you use RTV to reseal it. The timing belt is non-interference, so you don't HAVE to do that immediately but you could. The exhaust might be a bit more than your estimate since the stock headers hang down really low. A set of aftermarket headers is ~$300ish. You could modify the stock ones I suppose. It's a race car so you aren't going for "pretty".
If the adapter kit for a 901 and a new clutch is $800 I'd (again) encourage you to consider a 5MT Subie. Bolts right up with no adapter, better gearing, stronger, etc. You can also use a stock Subie starter which in many cases comes with the trans. Bob might be able to help you source one cheaply if you give him some lead time.
As I said before there are several SVX's in my area CHEAP. If I had someplace to store them I would buy them all.
Posted by: ThePaintedMan Oct 10 2013, 08:03 PM
Greg, thanks for the confidence. I'm sure I could fabricate a mount, it's more the mock-up and tube bending I'm confused about. I know that the Suby engines need to be in a pretty specific position, and I guess I just need to do some more reading to see how I would go about the whole process.
Chris, glad we think along the same lines. I too will not install and unknown engine or transmission in ANY car without going through the seals thoroughly. No sense making more work for one's self in just a few miles when it can all be done easily, and for relatively low cost before it goes into the car. "Preventative maintenance" as my dad always taught me. Speaking of the oil pan, do you not have any clearance issues? I know a few of the other conversions with different Subies people had to make pretty drastic changes to the oil pan to get adequate clearance.
Regarding the transmission, it's more the complication of fabricating all of the parts for a cable shifter, adapting the CVs/axles, etc that is a pain for me. Also, that's an added value component that would have to somehow fit under the $500 threshold, and most likely all of the other things would tack on value too. Again, lots of things to think about over the next year or so.
Your car is coming along great though, glad to see it! You're definitely doing it right, and I envy you, as well as Greg, who has a conversion of his own well on it's way.
Posted by: Chris H. Oct 10 2013, 09:49 PM
No need to clearance the pan with the EG33. I think the EZ30 is fine as well. Maybe the 4 cylinder pans are taller/deeper? If I ever get the close up trans pics posted to the cable shift thread as promised you'll be able to see the pan. Hopefully tomorrow! I'll throw a measuring tape against it.
If we can get the cable shifter thing solved between the 5-10 of us who need them the Subie trans will be more attractive. You can get a starter much cheaper, you use the inner Subie CV's which are cheap and rarely fail, and the 914 axles can be re-splined. But if you want to stick with a 901 that's fine too. It's your ride and many conversions use it.
Posted by: Chris H. Oct 12 2013, 07:15 PM
This is a terrible angle, but here's a shot of the oil pan. The clearance measurement is actually about 5.5 inches, which is the same as stock clearance at the cooling flaps (thanks Kent!). Most importantly the pan does not hang too low in proportion to the mount, which you can see surrounding it. 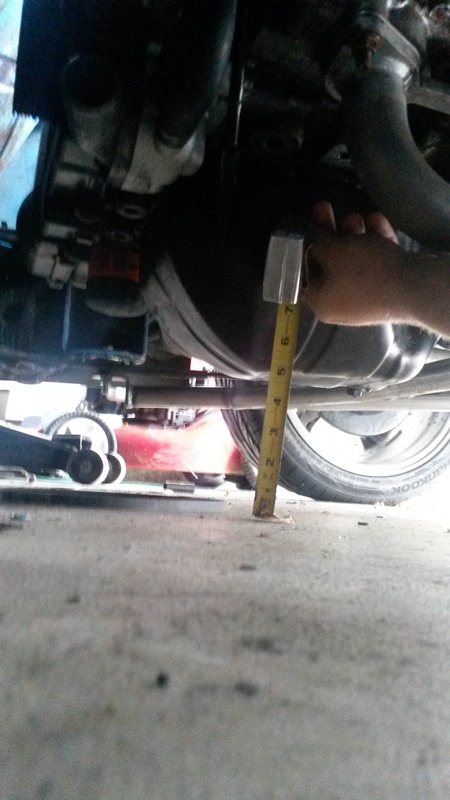
Posted by: d914 Oct 13 2013, 12:21 PM
Greg, thanks for the confidence. I'm sure I could fabricate a mount, it's more the mock-up and tube bending I'm confused about. I know that the Suby engines need to be in a pretty specific position, and I guess I just need to do some more reading to see how I would go about the whole process.
Chris, glad we think along the same lines. I too will not install and unknown engine or transmission in ANY car without going through the seals thoroughly. No sense making more work for one's self in just a few miles when it can all be done easily, and for relatively low cost before it goes into the car. "Preventative maintenance" as my dad always taught me. Speaking of the oil pan, do you not have any clearance issues? I know a few of the other conversions with different Subies people had to make pretty drastic changes to the oil pan to get adequate clearance.
Regarding the transmission, it's more the complication of fabricating all of the parts for a cable shifter, adapting the CVs/axles, etc that is a pain for me. Also, that's an added value component that would have to somehow fit under the $500 threshold, and most likely all of the other things would tack on value too. Again, lots of things to think about over the next year or so.
way.
Hey forgot,, Craigslist transmissions with a bad center diff VERY cheap $100.... and since we don't use the center diff.... I have an old clutch that I didn't use....
Cable shifter junk yard $17
cables a little tougher about $140
Budget is getting better.... AN SVX is doable..... We have the technology!!
Posted by: Chris H. Oct 13 2013, 03:18 PM
Good point Greg. I think Dean (now JRusts car that lucky %^%&*() paid something ridiculous like $65 for his.
I was also thinking for George's chumpcar he might want to use a FWD Subie trans. Might not be geared quite as well but it's already 2WD so he wouldn't have to convert it. Those are probably $100 at the junkyard as well. No diff locker or rear plate to buy though...
Hey Greg I've been meaning to bug you for some pics of your Honda shifter setup. Even if I can't use mine this round I'm still going to keep it for something else. I think you had to flip the orientation around on it...(Bob mentioned)
Any chance you could post a few whenever you have time?
Posted by: d914 Oct 13 2013, 04:18 PM
[
Good point Greg. I think Dean (now JRusts car that lucky %^%&*() paid something ridiculous like $65 for his.
I was also thinking for George's chumpcar he might want to use a FWD Subie trans. Might not be geared quite as well but it's already 2WD so he wouldn't have to convert it. Those are probably $100 at the junkyard as well. No diff locker or rear plate to buy though...
Hey Greg I've been meaning to bug you for some pics of your Honda shifter setup. Even if I can't use mine this round I'm still going to keep it for something else. I think you had to flip the orientation around on it...(Bob mentioned)
Any chance you could post a few whenever you have time?
Look up turbo the epic..d914... start from the back..it shows the preliminary set up.. I'm going to reinforce the console..
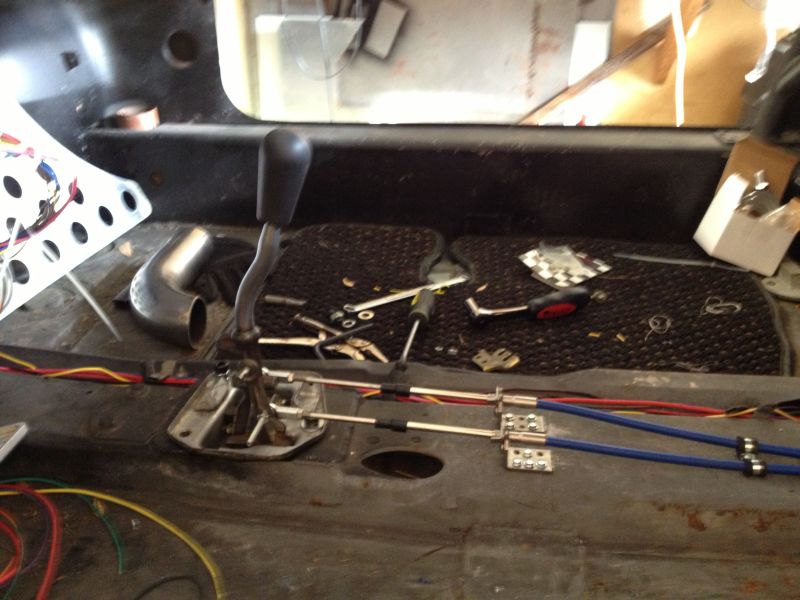
Posted by: d914 Oct 13 2013, 04:23 PM
here is the whole thing.. reversed is how it worked in the car I do believe.. Cable went forward in the car.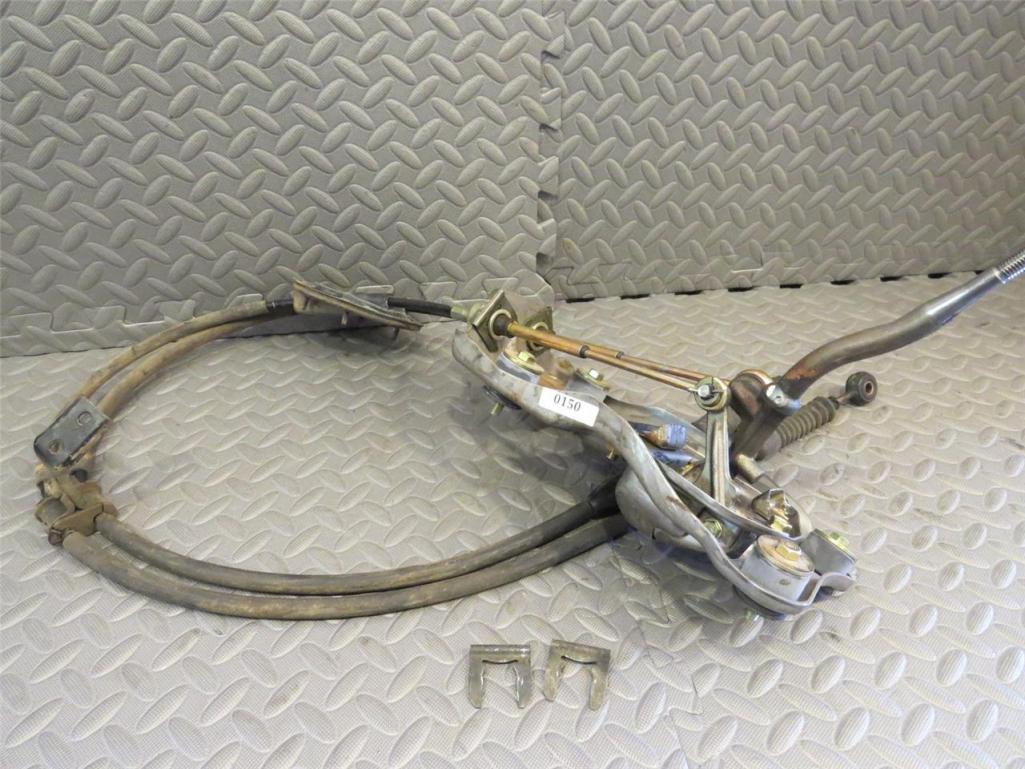
Posted by: Chris H. Oct 14 2013, 08:54 AM
Thanks Greg. Man that is a beast you're building. The louvered hood looks cool. Almost stole the louvers idea when I was going to push my airflow through the trunk floor. A hole would cause a lot of debris and water to splash up, but louvers would keep most of it out. I DID steal your Celica radiator idea though ! Not gonna lie!
So for the shifter you really just drilled a hole farther down towards the base in the left-right cable peg...OK I get it...looks like a really smooth install.
Here's the link to Greg's project so the search function isn't overloaded:
http://www.914world.com/bbs2/index.php?showtopic=99947&hl=turbo+the+epic
Posted by: IM101 Oct 14 2013, 09:41 AM
Awesome progress man, haha not too sure if i like the modifications to the cradle but hey, if it works who cares...
Also I like the avatar
Posted by: IM101 Oct 14 2013, 09:54 AM
Sweet I didn't even see this! So I went back and forth on the clearance issue, the first revolution I tried to position the engine low enough to avoid cutting the rear trunk all together. haha that ended up with about 1.5" of oil pan clearance when I got the car off jack stands . on my second time around I focused more on oil pan clearance and tried to get the pan on the same plane as the floor of the cabin. On the 4's the drain plug extends about 3/4" - 1" below the floor, which is acceptable to me. Plus this way if someone was really worried they could pick up a shortened pan from small car and actually have the pan recessed into the engine bay a little.
This is a terrible angle, but here's a shot of the oil pan. The clearance measurement is actually about 5.5 inches, which is the same as stock clearance at the cooling flaps (thanks Kent!). Most importantly the pan does not hang too low in proportion to the mount, which you can see surrounding it.
Posted by: Chris H. Oct 14 2013, 10:41 AM
Yeah I'm not done with that mount...it’s a little ugly now but bear with me...the headers (or any headers) interfered with the cross braces. Probably unique to the EG33. My plan is to run a bar straight across underneath the trans just behind where the original braces connected at the rear which will connect the two sides and make the mount more rigid since it lost some rigidity when I removed the bracing. Then I will bring two pipes from that bar to the bar that the engine is bolted to. That will brace the engine and keep the torque flex to a minimum (which I think was the reason for the original bracing). Should be just as strong or stronger than the original. Then I grind off the nubs and paint it. Already have the materials, just need to get er done! BTW that .95 tubing is heavy!
And plan B is I mess it up and send it to you for repair .
Re: pan clearance, it's as good as you can get with the eg33. I did have to cut the trunk for the starter but there are other starters that can be had that you would not have to clearance. Would much rather clearance the starter than bang the oil pan on the ground at speed or cut the oil pan and re-weld it (Lord knows we wouldn't PAY to have someone do it right!? ). Kent and DB did a great job with their starter covers, I'll just copy theirs.
edit: Then someday I'll add mounts for wheels like Kent did so I can easily roll the drive train around when I take it out. Genius.
Posted by: Chris H. Apr 9 2014, 09:53 AM
Wheeew! This thing is dusty!
Time to get back at it. Really learned a lot over the long winter from watching others so it might have been a good thing that the extreme weather and my schedule brought this build to a grinding halt.
Next steps:
- figure out the accelerator cable
- build an alternator belt tensioner like Ross's (aka copy it, it's what I do)
- pull the rear calipers(or all of 'em) and send to Eric for rebuild
- new shocks/struts/springs probably (Eric again)
- strengthen my modded engine mount bar with some bracing
- plumb the radiator
- get the hydroclutch installed
- fix drivers side wheel spacing (it's too close to the inner fender well)
Hope to drive it to Garold's if he decides to tolerate us again this year...
BTW for the Subie guys with actual accelerator cables (not drive-by-wire)...where did you get your cables? I think I remember you can order one from Terry Cable with a custom end so it works with the Subaru engine, or you can make one by cutting the end off of a stock 914 cable and putting a 3/8 cable stop on it. Sound right? Is the stock length OK? I'd rather order one with the Subie end attached professionally so let me know if you have a resource.
Posted by: nsyr Apr 9 2014, 11:11 AM
For acc cable I went an additional 18 inches longer custom. Stock length was causing excessive wear and breakage.
Posted by: Chris H. Apr 9 2014, 11:45 AM
Thanks. The stock one looked too short so glad I asked. Happen to remember where you got it? If not I'll call Terry Cable and report back.
Posted by: 76-914 Apr 9 2014, 12:16 PM
Wheeew! This thing is dusty!
Time to get back at it. Really learned a lot over the long winter from watching others so it might have been a good thing that the extreme weather and my schedule brought this build to a grinding halt.
Next steps:
- figure out the accelerator cable
- build an alternator belt tensioner like Ross's (aka copy it, it's what I do)
- pull the rear calipers(or all of 'em) and send to Eric for rebuild
- new shocks/struts/springs probably (Eric again)
- strengthen my modded engine mount bar with some bracing
- plumb the radiator
- get the hydroclutch installed
- fix drivers side wheel spacing (it's too close to the inner fender well)
Hope to drive it to Garold's if he decides to tolerate us again this year...
BTW for the Subie guys with actual accelerator cables (not drive-by-wire)...where did you get your cables? I think I remember you can order one from Terry Cable with a custom end so it works with the Subaru engine, or you can make one by cutting the end off of a stock 914 cable and putting a 3/8 cable stop on it. Sound right? Is the stock length OK? I'd rather order one with the Subie end attached professionally so let me know if you have a resource.
Glad your back, Chris. Left me sitting in this foxhole by myself. Misery loves company. Did it start snowing when you re-entered the garage? Re: the stock acc cable (and I'm talking out my ass because I haven't driven mine yet) seems like it will work. I changed it's pathway i.e. I removed it from the hole in the shelf and attached it to the firewall. The end fits my TB perfectly but then again mine might be different being a 3.0. As far as copying Ross' tensioner; "Emulation is the sincerest form of flattery", I doubt he will care. Order Eric's rebuild kit and do them yourself. It's easy and you will enjoy the rebuild. Glad your back.
Posted by: Chris H. Apr 9 2014, 12:54 PM
I sure did leave ya hanging out there didn't I Kent? But you did fine without me that's for sure! It was cold enough to snow a couple of days ago but today is great.
So the end of the stock cable fit eh.... ? Interesting. Thought the ends were different. I Also thought you had drive-by-wire so that shows what I know.
Yeah my rear caliper rubber is really shot. Might not want to chance doing it myself but we'll see.
Hey does anyone know if you can stack wheel spacers? my drivers side rear wheel has a 15mm and I'll need to add another 5-7MMish...but could add more if I want.
They look like this...(not mine, I borrowed this from an e-bay ad):
Might be a terrible idea..that's why I'm asking.
Posted by: 76-914 Apr 9 2014, 04:44 PM
Yep, the barrel end fits my TB cam perfectly. DBW came in 2004, IIRC. Did you get a chance to see how much the brake MC hole needs to be enlarged for the 19mm MC? Stephan came up with 1/8" but I'd like to hear from you a Doug too. There is enough "meat" to go to 1 7/8" but I'd like to go to 1 3/4" if possible.
Posted by: matthepcat Apr 9 2014, 04:45 PM
I did on my conversion with no problems, but I was running 100mm wheel studs.
I think the key is having enough stud meat for the lug to bite on.
I sure did leave ya hanging out there didn't I Kent? But you did fine without me that's for sure! It was cold enough to snow a couple of days ago but today is great.
So the end of the stock cable fit eh....
? Interesting. Thought the ends were different. I Also thought you had drive-by-wire so that shows what I know. Yeah my rear caliper rubber is really shot. Might not want to chance doing it myself but we'll see.
Hey does anyone know if you can stack wheel spacers? my drivers side rear wheel has a 15mm and I'll need to add another 5-7MMish...but could add more if I want.
They look like this...(not mine, I borrowed this from an e-bay ad):
Might be a terrible idea..that's why I'm asking.
Posted by: nsyr Apr 9 2014, 05:02 PM
Thanks. The stock one looked too short so glad I asked. Happen to remember where you got it? If not I'll call Terry Cable and report back.
It was Terry Cable. Awesome people to do business with. I believe I paid around $45 or so.
Posted by: Chris H. Apr 9 2014, 05:51 PM
Yep, the barrel end fits my TB cam perfectly. DBW came in 2004, IIRC. Did you get a chance to see how much the brake MC hole needs to be enlarged for the 19mm MC? Stephan came up with 1/8" but I'd like to hear from you a Doug too. There is enough "meat" to go to 1 7/8" but I'd like to go to 1 3/4" if possible.
Oh you mean the piece that fell down into my old engine when I was taking it out and I've been meaning to fish out from under the engine tin?
You mean I might need that? I haven't pulled the MC yet to measure but I'll try to do that this weekend. Still wondering whether I might switch back to a 17mm. I went with a cheap 19mm a few years back. I'll still measure for you either way.
Thanks Matt and Andrew for the responses as well! Matt, good point on the stud length. I might have to pull the ^(&#ing axle and remove the studs and put new ones in since I neglected to check the inner fender clearance before cutting the studs. So that's dumb move #.... emmmm...
what number am I on Kent? It's way up there.... Posted by: 76-914 Apr 10 2014, 07:48 AM
Yep, the barrel end fits my TB cam perfectly. DBW came in 2004, IIRC. Did you get a chance to see how much the brake MC hole needs to be enlarged for the 19mm MC? Stephan came up with 1/8" but I'd like to hear from you a Doug too. There is enough "meat" to go to 1 7/8" but I'd like to go to 1 3/4" if possible.
Oh you mean the piece that fell down into my old engine when I was taking it out and I've been meaning to fish out from under the engine tin?
You mean I might need that? I haven't pulled the MC yet to measure but I'll try to do that this weekend. Still wondering whether I might switch back to a 17mm. I went with a cheap 19mm a few years back. I'll still measure for you either way.
Thanks Matt and Andrew for the responses as well! Matt, good point on the stud length. I might have to pull the ^(&#ing axle and remove the studs and put new ones in since I neglected to check the inner fender clearance before cutting the studs. So that's dumb move #.... emmmm...
what number am I on Kent? It's way up there....Quit bragging. I'm at least 10 fuch ups ahead of you. I'll try to get a pic of the throttle cable tonite.
Posted by: Chris H. Apr 11 2014, 08:29 AM
Still struggling with whether to run my coolant lines through the longs or under the car but I'm about 75% sure I'll use galvanized electrical conduit under the car in the recesses.
Question: Why do some of the conversions have different sized coolant lines? The line to the radiator is smaller than the return line? Is that necessary if I'm going under the car? I'll do it if it will help. I could do a 3/4 i/d to the rad and a 1" i/d return line or a 1" both ways as planned. Any thoughts on that?
Posted by: 76-914 Apr 11 2014, 08:40 AM
I asked Bob the same question. I was told that the discharge side is always larger. Maybe because of the expansion. I think we shall find what does and does not work soon, as many of us that are doing this conversion. I hope the long route works. I like the clean look.
Posted by: Chris H. Apr 11 2014, 08:51 AM
So yours are 3/4 and 7/8 Kent? That's the inner diameter?
Posted by: Phoenix-MN Apr 11 2014, 09:50 AM
Still struggling with whether to run my coolant lines through the longs or under the car but I'm about 75% sure I'll use galvanized electrical conduit under the car in the recesses.
Question: Why do some of the conversions have different sized coolant lines? The line to the radiator is smaller than the return line? Is that necessary if I'm going under the car? I'll do it if it will help. I could do a 3/4 i/d to the rad and a 1" i/d return line or a 1" both ways as planned. Any thoughts on that?
I did mine sort like how the Pontiac Fiero is setup. In almost all cooling systems that I researched the lines are diffrerent sizes. Mine are 1" and 1 1/4" and I'm running a GM 3.8L V6 and so far has worked very well.
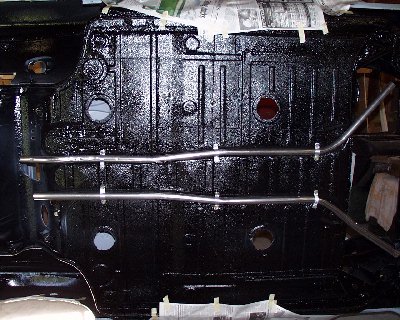
Posted by: Chris H. Apr 11 2014, 10:13 AM
I know your build very well Paul! I almost posted your photo above as the poster child for great looking underbelly piping. Thank you for the feedback.
Posted by: rnellums Apr 11 2014, 12:10 PM
Are you going to have to worry about galvanic corrosion of your engine/block with running galvanized lines?
Posted by: 76-914 Apr 11 2014, 12:38 PM
Yes, mine are 3/4 & 7/8, as is Bob's. That's why I'm sure those sizes will work. I don't know if those sizes will handle all the bends I've introduced but it works on Bob's which is a more direct route. As I said earlier, I'll stick with those sizes but may have to reroute them like Bob's if they won't circulate properly in this configuration. Paul's post substantiates that as his are only one size larger and he is heating a GM 6. I think the Suby's require a bit less. Ross raises a valid question re: material choice. The engine, your radiator and the connectors you use are all on the noble end of the galvanic chart.  You could go with aluminum T-6061 tube which is very hard but not cost effective in this instance.
Posted by: Chris H. Apr 11 2014, 12:42 PM
Maybe...
Here's what it says:
- Galvanized steel construction resists flattening, kinking and splitting
- Flo-Coat coating combines zinc, a conversion coat and a clear organic top-coat for protection against corrosion and abrasion
Would the fact that it has a protective coating help?
Is there an aluminum option that's easy to bend I wonder ?
Maybe I re-look at through-the-longs...rather not do the radiator hose underneath...
If so I'd try to do the oil-line-routing style.
Similar to these setups I found in the archives: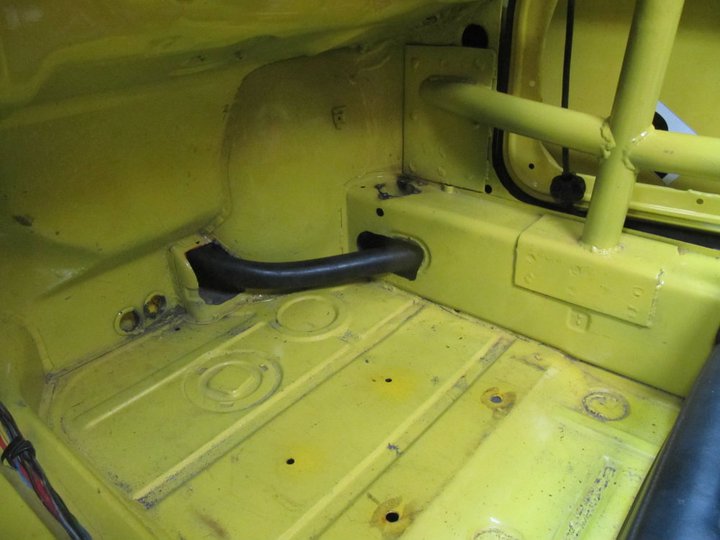
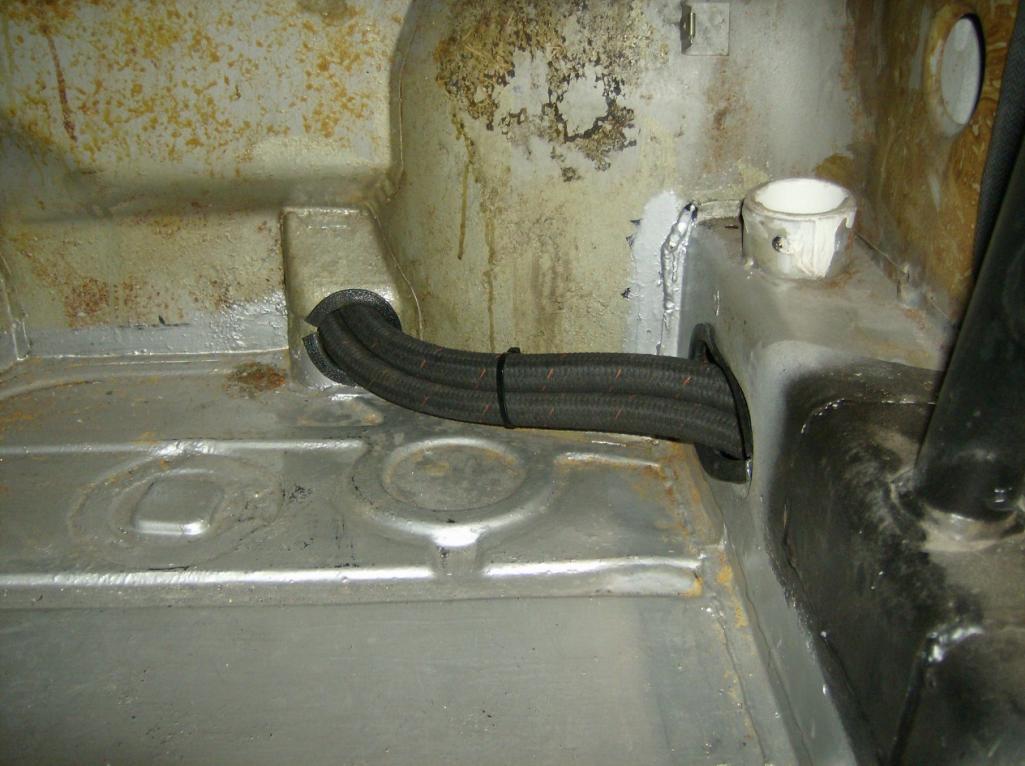
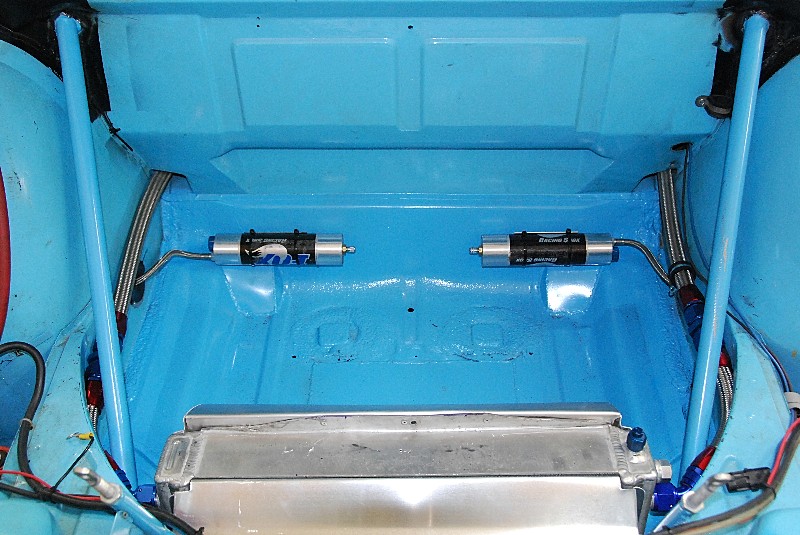
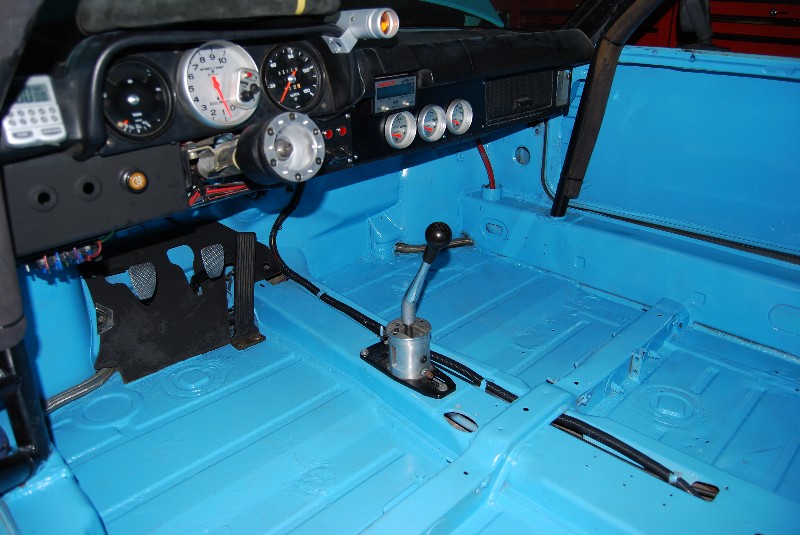
Posted by: Chris H. Apr 11 2014, 12:44 PM
The engine, your radiator and the connectors you use are all on the noble end of the galvanic chart.
You could go with aluminum T-6061 tube which is very hard but not cost effective in this instance.Yikes, it looks like I'm gonna have to actually read up on this!
Posted by: rnellums Apr 11 2014, 01:15 PM
Maybe you could get larger 1.25" steel tube and build a protective shroud that you could run the tubing through? I plan to go through the longs if I route up front myself.
Posted by: Chris H. Apr 11 2014, 01:33 PM
Maybe you could get larger 1.25" steel tube and build a protective shroud that you could run the tubing through? I plan to go through the longs if I route up front myself.
Yeah I was just looking at that too. It's actually 70 degrees so I might just go out there and poke around later. Need to de-clutter it and get to work!
BTW ordered my TerryCable throttle cable. 18" longer than stock. The throttle body on this thing is much farther away than the stock engine so I went with Andrew's advice. They're just going to throw in a handful of cable stops for me to try. Really nice people.
Posted by: ruby914 Apr 11 2014, 07:53 PM
Chris,
Where did you find this photo? It's from Kent's thread. Is it where you got your CVs from?
I am looking for just the front inboard CVs and boots for an 02 WRX. Having a hard time finding them with out the complete axle setup.
Thinking about the pick a part but not sure if most pre 02 will fit and I think I would stay cleaner if I get them on line.
Hey Kent, I see you peeping on Chris's thread. We need updates from you too.
Attached image(s)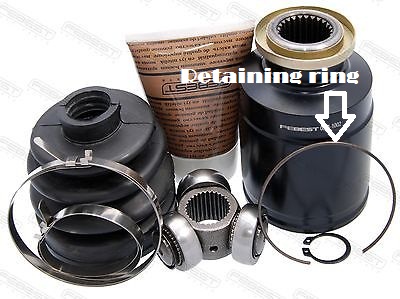
Posted by: Chris H. Apr 11 2014, 09:46 PM
Hi Mike,
I found that picture on the net. Didn't buy that setup I was just showing Kent the retaining ring so he didn't bend the crap out of it like I did someone I know did. I bought entire front axles used off of NASIOC and harvested the inner CVs. I heard not to go with new aftermarket or remanufactured. They aren't as good. Used OEM are fine and don't fail very often. Looks like the prices have gone up a bit...I paid ~ $50 for my set. You want to look for "female" CV's, the OEM are usually painted green. I don't know how far before 2002 you can go before the spline count changes, but if you post WTB on NASIOC you should get some hits and be able to find 2002 axles...I see some in the classifieds over there. A pick n pull would be fine too. Again, just make sure to get OEM. Don't pay too much. There's a set for $250 on NASIOC..that's WAAAYYY too much!
Posted by: 76-914 Apr 12 2014, 07:11 AM
Mike, try ebay. I found one there. Is yours 29 tooth? I have an extra your welcome to but it is the older style. I've been too busy with work / to work on the car.
Posted by: 914forme Apr 12 2014, 08:17 AM
Who's 914 is the blue car in the pictures above? That is an insanely clean install, I would like to check it out.
Posted by: rnellums Apr 12 2014, 08:35 AM
I bought entire front axles used off of NASIOC and harvested the inner CVs. I heard not to go with new aftermarket or remanufactured. They aren't as good. Used OEM are fine and don't fail very often. Looks like the prices have gone up a bit...I paid ~ $50 for my set. You want to look for "female" CV's, the OEM are usually painted green.
So the general consensus is that the CVs on rock auto are garbage?
Posted by: Chris H. Apr 12 2014, 09:01 AM
Well, all I know is a lot of the guys on NASIOC say so. I think Bob (BIGKAT_83) told me the OEM used ones were the best bet as well. And Chris (my928S4) ordered a set of EMPIs and the spline count was wrong so they didn't fit. That SHOULD NOT happen since you order each set specific to the year of the trans and I'm sure he knew what year his trans was.
Stephen, the blue car is known as "Papa Smurf". It's owned by member naro914. You'll enjoy learning the details. It's a nasty little beast with quite a racing history.
HANG ON!!!
https://www.youtube.com/watch?v=9VmxplmLGKs
Posted by: Chris H. Apr 12 2014, 09:25 AM
OK so back to the coolant lines thing. If I run them through the longs and then keep them low and run them like oil cooler lines...what about heat in the interior? Should we be worried about that? Seems like 180 degrees or so would make it pretty warm where the hoses come out of the longs...mine would be right by my feet without a lot of room to put insulation. Could probably encase it in a tube of some kind....guess I better look at it closer.
My flapper boxes were stuck JUST SLIGHTLY open for two summers and that was pretty irritating.
Posted by: 76-914 May 1 2014, 10:23 AM
Hey Chris, I'm having withdrawals. Got any updates? 
Posted by: Chris H. May 1 2014, 12:38 PM
Hey Kent,
Wish I had more visual updates but I'm mostly collecting parts right now. Got all my hose and stuff. Right now I'm waiting for Jags That Run to call me back so they can send the last few bits for my cooling system setup. Spent way too much time over-thinking my coolant filler neck because the SVX high-point is at a weird angle just a few inches from the firewall. 
Finally came up with something I think will work...
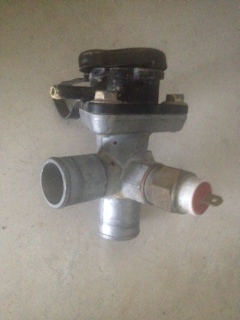
This is a Yamaha snowmobile/large motorcycle filler. Very durable (seems like an aluminum alloy of some kind...) and the filler neck extends quite a bit above the coolant hose "hole" which is needed since the engine line is larger and we're connecting it there. The sender on there can be removed and capped. The cap is loose BTW... The 7/8 hose fits great, although I think the original hose was 1" nope it measures 7/8". The lower hose exits the bottom and should easily make the turn without an elbow and run under the car.
I also bought this Honda 1000rr filler which has the same size hose outlets. Might try it as well but I like the Yamaha so far. 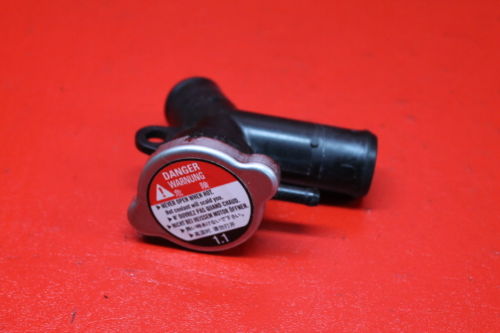
Next I'll steal phoenix-hobbies' idea and weld nuts to the underside of the floor pan to mount the coolant lines so I don't have to drill holes in the floor. The lines barely protrude below the grooves in the floor pan.
But first I need to install the clutch master...that little 90 degree elbow should be on my porch by now.
Posted by: 76-914 May 1 2014, 01:00 PM
Cool! Great find. If you don't use that Honda neck I'll buy it from you. Are those jam nuts that you will be welding to the pan? I can't imagine a regular nut working well. You'd only catch 3 to 4 threads.
Posted by: Chris H. May 1 2014, 01:47 PM
I haven't picked the nuts yet...(that sounded weird ) but I'll let you know .
I'm glad you asked about the Honda filler because I was gonna offer it to you in the last post but didn't want you to think I didn't like your current setup (which I do like). It's just that it's copper so at some point you'll probably want to change it. This will work great whenever you decide to swap it out. The 7/8 return line goes in the upper hole which is your high point, then you can run another 7/8 hose from the lower outlet down to a tee where those larger hoses intersect, done deal. It has an attachment loop so you don't have to worry about it slumping over. I got it for $6.95 SHIPPED so I won't sell it to you but I'll be happy to give it to you when I'm done. I only bought it because the hose sizes looked bigger than they are in the e-bay pic. I think they are actually 7/8" now that I put a ruler to them. The angle of the lower inlet even kinda follows the contour of the firewall if you have the room (and I don't).
BTW the Yamaha filler is from a mid-90's VMAX snowmobile for anyone interested. Like $20 on e-bay. There are many models, 500, 600, etc.
Posted by: 76-914 May 1 2014, 03:53 PM
LMK, I'll paypal ya whenever. Re: welding nuts to the pan. You know what I'm getting at, right? The screw will stop as soon as it hits the pan. Why not drill your holes, insert a bolt and weld it in place giving you studs beneath?? Or did I miss something completely? 
Posted by: Chris H. May 1 2014, 04:23 PM
I just don't want to cut a bunch of small holes in the floor. Our weather isn't as good around here so I don't want ANY water in the cabin. If you weld the nut to the pan underneath you can screw the bolts in and not cut any holes. Just have to weld the side not through the middle and use short bolts. I'll look for a deeper than normal nut. As long as I use enough straps it'll hold fine.
You're not Pay Pal'ing me pal. I'll just send it to you when I'm done. If I need six dollars someday I'll know who to call.
Posted by: 76-914 May 1 2014, 05:21 PM
Thanks Chris.
Posted by: 76-914 May 1 2014, 06:32 PM
I think this is the an 90
http://www.summitracing.com/parts/aer-fbm1120/overview/
Posted by: Chris H. May 1 2014, 06:46 PM
That's it! Just got it today. I searched the straight one I bought originally and it was easy to find with your pic. No excuses now I guess. Better get at it. 
Posted by: 76-914 May 27 2014, 09:26 AM
***NOTICE*** This thread needs action or risk exposure in the "Slacker's Thread"! 
Posted by: Chris H. May 27 2014, 09:54 AM
Duly noted sir. I'll get some updates in here pretty soon.
Posted by: ruby914 May 27 2014, 10:30 AM
Duly noted sir. I'll get some updates in here pretty soon.
As soon as he gets his car started, he call you out.
Posted by: Chris H. May 27 2014, 10:54 AM
It's the adrenaline . I do need to update this thread though. Pretty much just posting on Kent's the last couple of months!
BTW what gauge aluminum/sheet metal is best for radiator shrouding and where do you get it? I went to Home Depot and the stuff they stock is too thin. I see special order thicknesses but not sure which is the best mix of firm yet flexible. I assume aluminum is what everyone uses?
Posted by: 76-914 May 27 2014, 11:49 AM
I used some sheet metal I had laying around. You'll get some mild oxidation with the aluminum where it comes in contact with the body steel. I'd go steel. For your aluminum needs; aircraftspruce.com We will be looking for lots of pic's. And yes Mike, Chris will be chiding me next but that's how it works in this suby group. We're a Mutual Prodding Society.
Posted by: Chris H. May 27 2014, 02:22 PM
Yeah I'm saving mine up...
So...sheet steel..what gauge?? Can I get it at a home improvement place?
Posted by: 76-914 May 28 2014, 07:40 AM
20 0r 22ga? I'll check it this evening. Yes, you can get it at the depot or lowe's. TIP: Bobco metals in LA will cut and ship just about any piece of metal. Go get 'em Hot Rod.
Posted by: Chris H. Jun 8 2014, 07:29 PM
Finally finished my hydraulic clutch setup! Whew! Nerve wracking. Normally I don't do much measuring and re-measuring but this time there could not be a mm of extra space. My car is rust free and any car enthusiast from the Midwest knows that you better be REALLY careful cutting holes in or near the floor of an un-galvanized VW product. I think the extra time was worth it, because it's gonna be well sealed.
If you have a 19mm MC and are going to use a bracket like this you might as well drill out the original MC pedal cluster bolts because they will be too short. Be careful not to mangle the surrounding area. It takes a lot of abuse getting kicked with your feet so the metal can't be weak. I used a dremel with a cutoff wheel and then the sand stone grinder. 
Just need to re-paint it now.
Found these 30mm long metric bolts at HD with the lock washer heads. very nice because they grip the cluster so you don't have to clamp them to tighten them. The nut is 13mm just like stock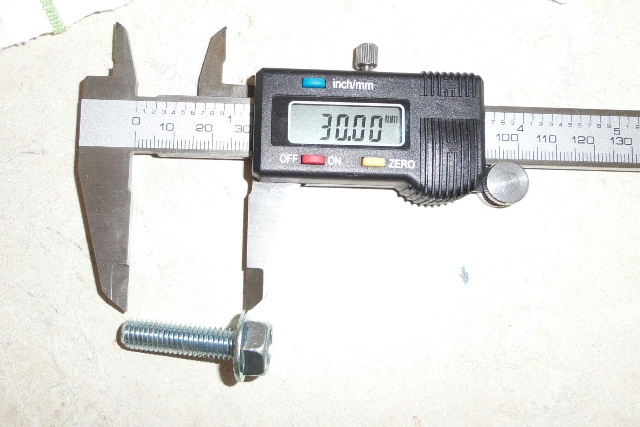
Here's the wide shot. I had to trim mine because the MC had a groove in it. It's a little loose so it looks like it's sagging left (it is). The hole next to it is for the hydraulic line. Used a 5/16 bit and then widened it a little more. 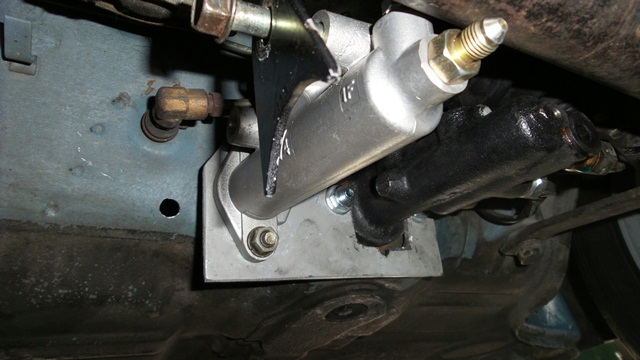
And the side shot. You can see how I measured out for the hole. Just bolted up the bracket without the MC on it and traced out the outline for reference. DO NOT cut the entire hole out. Then I drilled a hole just below the center line starting with small bits and going larger until the hole was large enough to test fit the setup. Need to trim just above the pin as you can see, but the hole is still very small. NOTE: the rubber baffle seal is not installed yet which will seal it up nicely. 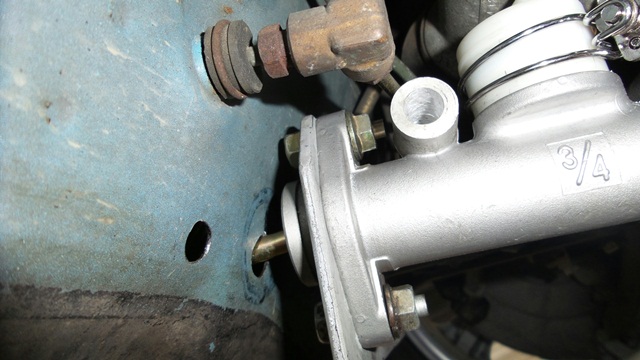
Inside shot. Man the clutch action feels soooooo smooth. I know it will firm up when pressurized but it feels a lot different (better).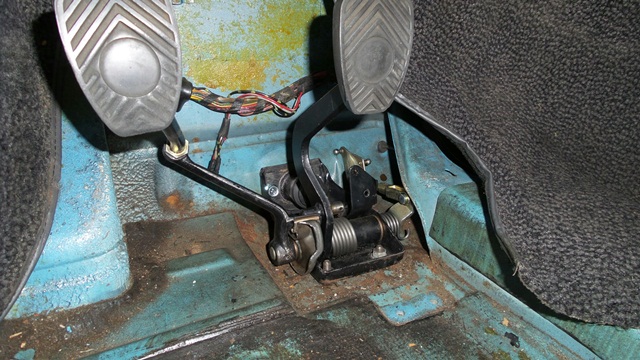
Floor shot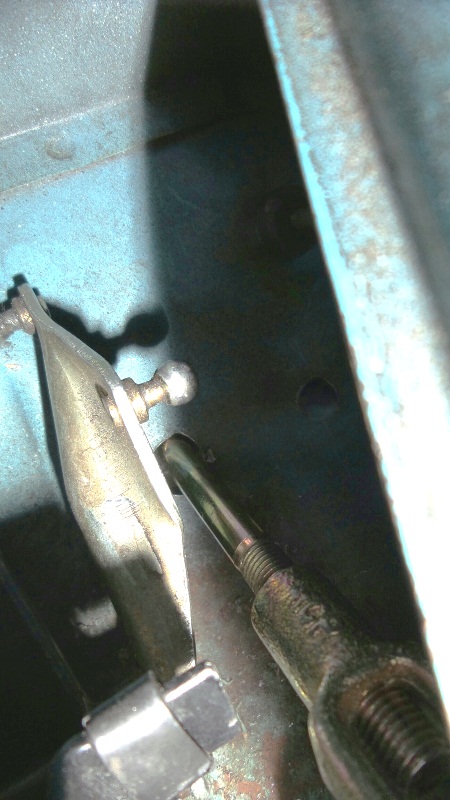
Gotta say very nice engineering Kent! Even though my brake MC required me to trim the bracket, it's still just as strong as before. Once I hook up the brace it'll be awesome.
Next on the list: I cut 2 more holes in the ^&*&^ing trunk for the radiator hoses (small ones) and attach the hoses underneath.
Posted by: Chris914n6 Jun 8 2014, 09:15 PM
Find a local steel supply place. A 4x8 of .050 aluminum is near $50. .050 is what RH uses.
Posted by: CptTripps Jun 9 2014, 06:24 AM
It's a VERY tight fit in there for sure.
One thing I did differently was to double-brace on either side of the clutch master. I was getting a little movement there and the additional brace seemed to work well.
You're also going to want to make the hole through that wall a little bigger. I found that there is a little up/down movement when pushing the clutch in/out.
Just a thought or two...
Attached image(s)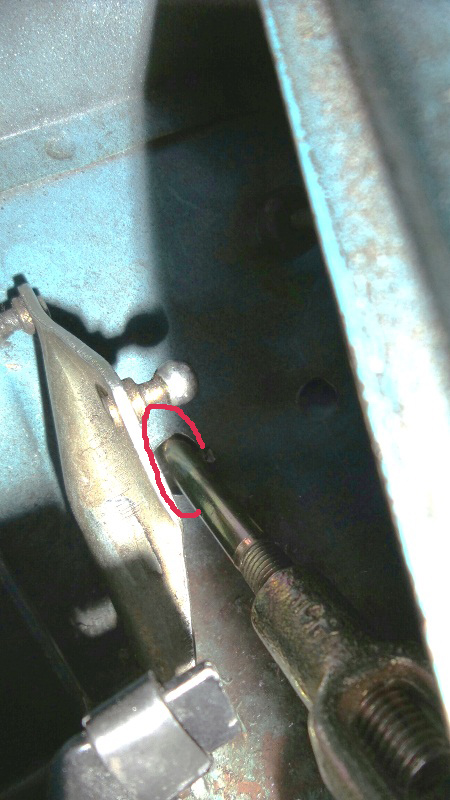
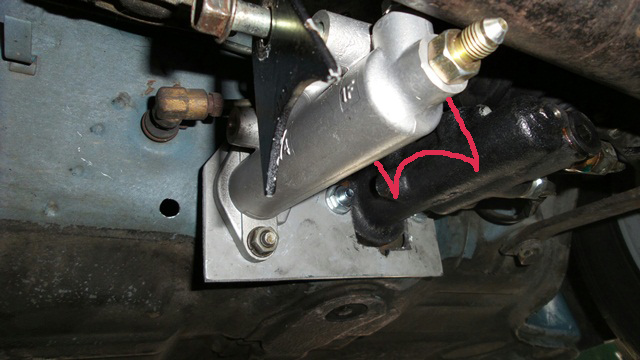
Posted by: Chris H. Jun 9 2014, 07:41 AM
Good call on the extra brace Doug. I enlarged the hole a bit last night after the test fit, just wanted to remove as little as possible. It's probably about 3-4mm larger above the pin. Should be enough but we'll see.
Posted by: CptTripps Jun 9 2014, 07:45 AM
You should be fine with that. I just bigger than I thought I would need....because I usually under-estimate things.
Posted by: 76-914 Jun 9 2014, 08:05 AM
Great job, Chris. Doug is correct. There is about 3/8" up n down movement on that rod due to the movement of the pedal cam thru it's cycle. I ended up with a 3/4" hole which I thought was small but I don't live in lower Slobovia, either. That bellows seal will cover any hole up to 1.5". Once you've determined the clutch pedal travel, set the stop nut on the end of the pedal. I suspect this is where Doug "felt" flexing or his floor metal is thin. You shouldn't have to exert more than 5lb pressure to engage the clutch so if the pedal flexes and adding one brace 2" to the right side helps, I'd look elsewhere. IOW, if it flexes, the left side of the cluster is receiving the down force and the right side the up force, so a brace on the right should be unnecessary but it won't hurt anything either. Good to see you posting again, Chris. Hurry, you only have 3 weeks until Winter strikes Chicagoland again.
Posted by: Chris H. Jun 9 2014, 09:17 PM
Well, I finally headed back to the engine bay to work on the exhaust/engine mount stuff and noticed this: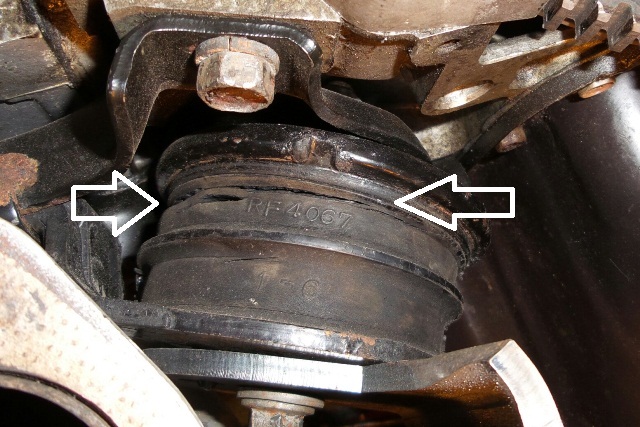
Left Subie motor mount.... I knew it was cracked before but over the winter it really opened up. Probably can't ignore it any more or it will crack in half. It's 20 years old...can't be too surprised. Looks like the SVX guys do one of three things:
1. replace these with STI "Group N" mounts ($150 shipped per pair)
2. Fill the cracked mounts with urethane and let them harden (sounds sketchy)
3. buy new ones for ~$300+ (nope)
I noticed the PrecisionChassis 3.3L looks like the engine cradle is bolted directly to the engine at the motor mount points without any rubber isolators. Always wondered if I could do something like that since I have rubber mounts at both ends of my cradle.
Posted by: mgp4591 Jun 10 2014, 05:23 AM
Well, I finally headed back to the engine bay to work on the exhaust/engine mount stuff and noticed this:
Left Subie motor mount.... I knew it was cracked before but over the winter it really opened up. Probably can't ignore it any more or it will crack in half. It's 20 years old...can't be too surprised. Looks like the SVX guys do one of three things:
1. replace these with STI "Group N" mounts ($150 shipped per pair)
2. Fill the cracked mounts with urethane and let them harden (sounds sketchy)
3. buy new ones for ~$300+ (nope)
I noticed the PrecisionChassis 3.3L looks like the engine cradle is bolted directly to the engine at the motor mount points without any rubber isolators. Always wondered if I could do something like that since I have rubber mounts at both ends of my cradle.
I wouldn't want to trust that for a couple of reasons. First, I think the engine vibration could promote cracking at weld points on the cradle or possibly more. The 3.3 has a good amount of torque- might pretzel up a cradle. Second, vibration into the rest of the car could make a harmonic howl that drives you crazy!
Posted by: Chris H. Jun 10 2014, 07:00 AM
Yeah the vibration is what I'm worried about. Looks like the Group Ns are pretty stiff. Another project! Yeah!
Posted by: BIGKAT_83 Jun 10 2014, 07:15 AM
Found the right side mount,still looking for the left. PM me your address and I'll ship you a set.
Bob
Posted by: Chris H. Jun 10 2014, 07:22 AM
Thanks Bob! Will do! That saves me a huge pile of money and time!
Posted by: 76-914 Jun 10 2014, 02:40 PM
FYI, I just noticed that the pic Doug posted has the brace on the wrong side. That might induce some flex. Also, I recommend that you take a piece of 2" PVC x 1.5" long and when looking at it from the end, cut out a section from 12 o'clock to 4 o'clock. This piece will "snap" over the steering rack. Once on, rotate it until the void (12-4) is facing down. This will give the clearance needed for the steering cover to bolt up w/o interference. There will be enough room for this piece to fit between obstacles but only on the left side. The reason for this PVC piece is twofold. 1st is to protect the metal on the steering arm from the harder steel brace and secondly it should have some quietening effect upon the pedal assm.
Posted by: Chris H. Jun 10 2014, 03:49 PM
FYI, I just noticed that the pic Doug posted has the brace on the wrong side. That might induce some flex. Also, I recommend that you take a piece of 2" PVC x 1.5" long and when looking at it from the end, cut out a section from 12 o'clock to 4 o'clock. This piece will "snap" over the steering rack. Once on, rotate it until the void (12-4) is facing down. This will give the clearance needed for the steering cover to bolt up w/o interference. There will be enough room for this piece to fit between obstacles but only on the left side. The reason for this PVC piece is twofold. 1st is to protect the metal on the steering arm from the harder steel brace and secondly it should have some quietening effect upon the pedal assm.
My brace is on the correct side then? I think it is. Great call on the PVC. I was planning to use some extra rubber welting or something.
Posted by: 76-914 Jun 11 2014, 12:47 PM
FYI, I just noticed that the pic Doug posted has the brace on the wrong side. That might induce some flex. Also, I recommend that you take a piece of 2" PVC x 1.5" long and when looking at it from the end, cut out a section from 12 o'clock to 4 o'clock. This piece will "snap" over the steering rack. Once on, rotate it until the void (12-4) is facing down. This will give the clearance needed for the steering cover to bolt up w/o interference. There will be enough room for this piece to fit between obstacles but only on the left side. The reason for this PVC piece is twofold. 1st is to protect the metal on the steering arm from the harder steel brace and secondly it should have some quietening effect upon the pedal assm.
My brace is on the correct side then? I think it is. Great call on the PVC. I was planning to use some extra rubber welting or something.
The brace goes between the two M/C's, the left side of the clutch MC.
Posted by: CptTripps Jun 11 2014, 01:13 PM
I forget what I switched it to, but one side gave me a ton of flex, and the other was solid. I did have it wrong at one point. I ended up adding a second just to be safe. Now it's solid as a rock.
Posted by: Chris H. Jun 11 2014, 02:40 PM
So I had it on wrong too then...is what you're saying very nicely Kent...
See that's why I'm going slow...been a little stressed lately...I'm surprised you didn't notice this...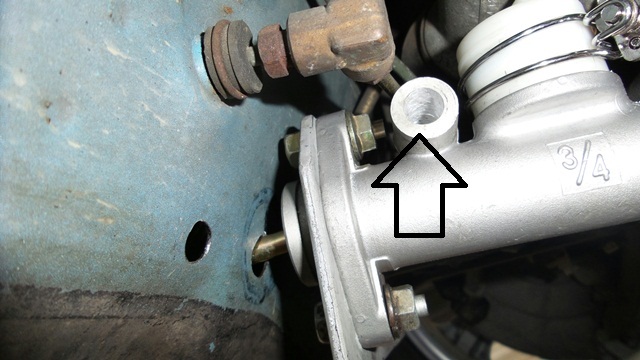
Yeah I drilled out and widened THE WRONG HOLE for the brace initially. No harm done but I felt pretty stupid. That's when I stopped for a week or so and gathered more parts. Back at it now though!
Posted by: Chris H. Jun 17 2014, 01:45 PM
Wellll....really good day today!
Got my speedhut gauges:
And even better, I got this from BIGKAT_83. 
I bought my exhaust setup from Bob last year and knew it might take some fiddling to get it to fit with Ian's cradle but I wanted it. Then I recently found a cracked motor mount (has nothing to do with the cradle or exhaust, it's just 20 years old). So Bob GAVE ME his old mount which bolts directly to the engine. It's similar to the smallcar mount and very sturdy and strong. Can't wait to get it bolted up! Everything will fit perfectly now. Thanks again Bob!!!!
Posted by: Chris H. Jun 17 2014, 03:18 PM
Keeps getting better.... Got a package from Kent! Some pedal cluster stuff and half a map cylinder to attach to the front valance. Just in time too! My pictures were not legible enough to post but I'll take some more later. Thanks Kent!
Posted by: 76-914 Jun 17 2014, 05:11 PM
Wellll....really good day today!
Got my speedhut gauges:
And even better, I got this from BIGKAT_83.
I bought my exhaust setup from Bob last year and knew it might take some fiddling to get it to fit with Ian's cradle but I wanted it. Then I recently found a cracked motor mount (has nothing to do with the cradle or exhaust, it's just 20 years old). So Bob GAVE ME his old mount which bolts directly to the engine. It's similar to the smallcar mount and very sturdy and strong. Can't wait to get it bolted up! Everything will fit perfectly now. Thanks again Bob!!!!
Those are sweet. Hide the bill from your wife.
I'm just jealous. Shoot us a pic of your cracked mount. I want to be sure I didn't miss that and a pic would help. FWIW, I shit canned those stamped metal pieces (w/3 bolt holes on the front mounts) and replaced them with 3/16" plate steel. Keep after it my brother. You only have 2 more weeks of summer in Chicago.
Posted by: euro911 Jun 17 2014, 10:37 PM
Got my speedhut gauges:
... ... Did you get them to eliminate the 'Speedhut' printing?
Posted by: Chris H. Jun 18 2014, 08:06 AM
No, the logo is prominently displayed . I didn't get anything special actually, just the blue lighting which I thought was cool. Man these things are thin. 2" or less.
Kent, I'll try to get those mounts off and shoot you some pics today.
EDIT: Also BTW Kent the good news is I've collected so many gauges I can probably recoup 60% of my Speedhut cost! Now...if I can just allow myself to sell 'em! They're like family now!
Posted by: Chris H. Jun 21 2014, 12:09 PM
OK here are the pics of the dead mount....
The cracks seem to form where the indentions are in the rubber. They are almost all the way around it. 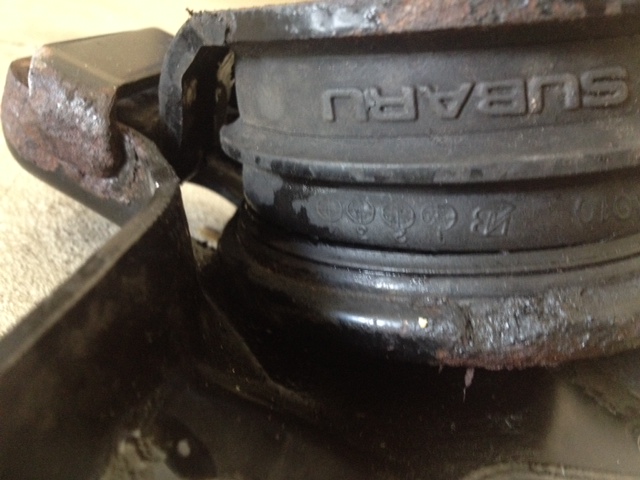
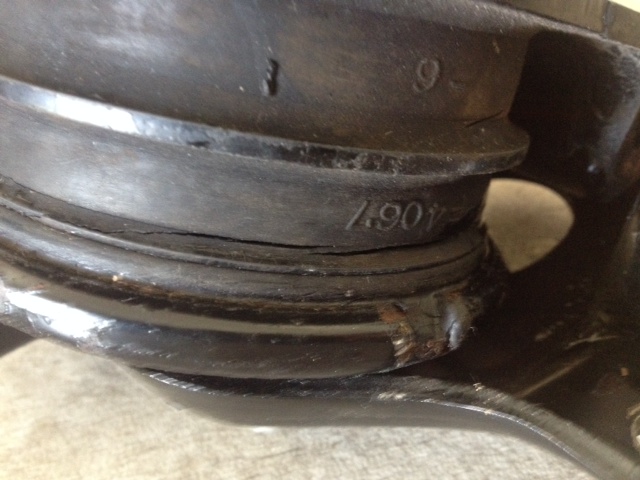
It started losing its magic fluid too...looks and smells like some sort of gear oil.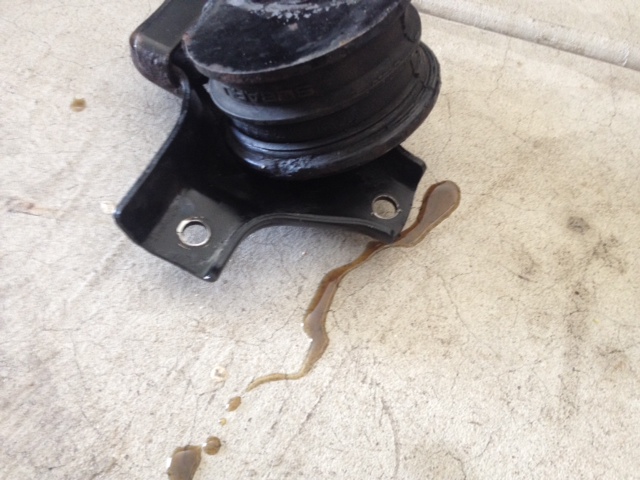
I had one of the 911 sport mounts go wonky on me so had to order a replacement...in the meantime I'm cleaning up the engine bay. The entire firewall was covered with glue residue...whaddayaknow it's BLUE under there!!! 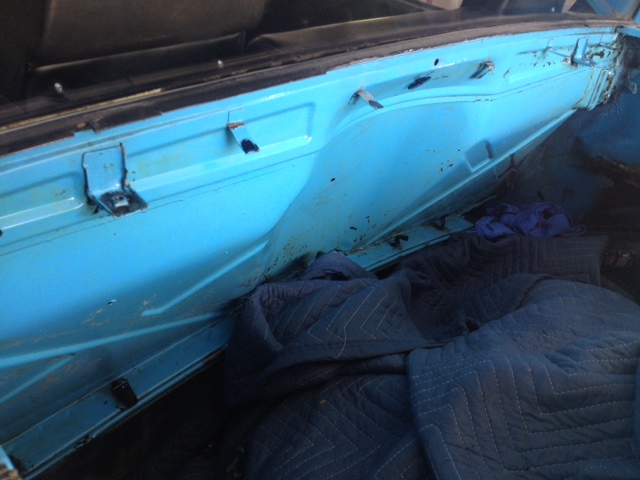
Still have to mount the battery tray on the other side, etc.
Posted by: 3d914 Jul 31 2014, 07:54 AM
Great project Chris. Keep at it.
Posted by: Chris H. Jul 31 2014, 08:02 AM
Thanks Gerard! Yours is looking good too! I like the way you extended your firewall without losing the stock shape. I have lots of updates, just haven't had time to post them but will try to get at it soon.
Posted by: Chris H. Aug 7 2014, 08:49 PM
OK finally time to update this. The most exciting news is is that I put water in the radiator and started it.
https://www.youtube.com/watch?v=ajYeJMkHopY
For those working on or planning conversions, make sure the first time you fill your car, use WATER ONLY (distilled if possible), especially if you have animals or small children. There were a few small drips here and there and also found an extra threaded port hole the radiator that I didn't notice .
The bad news is there was a small oil leak. Didn't expect that at all since I (thought I) re-sealed everything. It was coming out of the timing belt cover in the middle. Had to take the &(*&ing alternator, compressor, timing belt cover, pulley, etc off. There was no oil on the belt or anywhere else except the bottom of the oil pump housing. Guess what the ONE THING WAS THAT I DIDN'T re-seal....
The good news is that after a couple dozen searches I found a guy who instructed someone with the same problem to take a 10mm socket and tighten the crap out of the bottom oil pump bolt. IT STOPPED LEAKING!!!! Hopefully it stays that way. I'll re-seal it when I do the head gaskets next year.
Posted by: Chris H. Aug 7 2014, 09:10 PM
Got the Speedhut gauges hooked up. 
Couple of notes here...
You have to lengthen the wires for the water temp and the oil pressure. The sensors are also 1/8 NPT fittings, which means you will need adapters for use with the Subaru. I am using the stock ECU so I was hesitant to remove the stock temp and oil pressure sensors for fear the ECU would get upset that the readings were zero.
The Speedhut oil pressure sensor is 1/8 NPT, Subaru is 1/8 BSPT. NEVER EVER (EVER) try to force the Speedhut sensor into the stock hole without an adapter. You'll have the mother of all oil pressure problems if you do.
For oil pressure I found this cool adapter:
http://www.ebay.com/itm/261514997950?ssPageName=STRK:MEWNX:IT&_trksid=p3984.m1497.l2649
It allows you to run both the stock and the Speedhut sensors at the same time. There are two other ports as well which I plugged with these:
http://www.summitracing.com/parts/SUM-G1480
Here's what it looks like installed: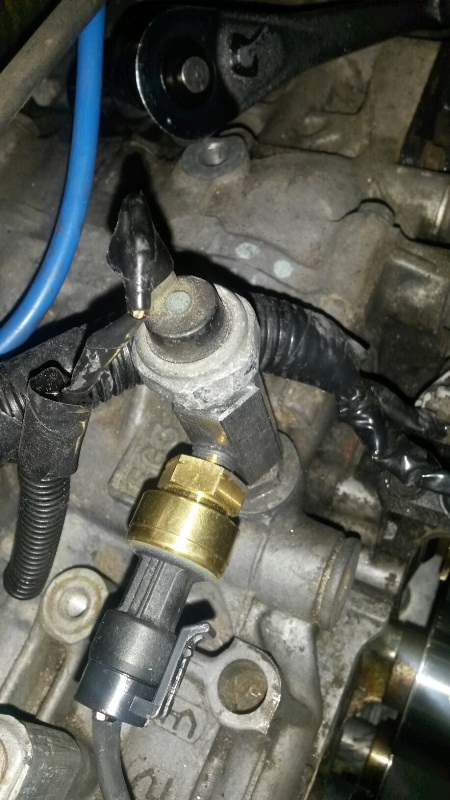
BARELY clears the alternator but it does.
I got lucky and was also able to find an adapter for my Yamaha filler neck (16mmx1.5 to 1/8 NPT) to replace the sender that was in there so that is where my temp sensor is.
Posted by: Chris H. Aug 7 2014, 09:18 PM
Can't go any farther without mentioning Bob. He gave me his mount as I mentioned before, which really helped. The EG33 is the longest of all Subie engines and with Ian's mount the AC compressor was touching the firewall. Now it's back about 4 inches with much more room to work. 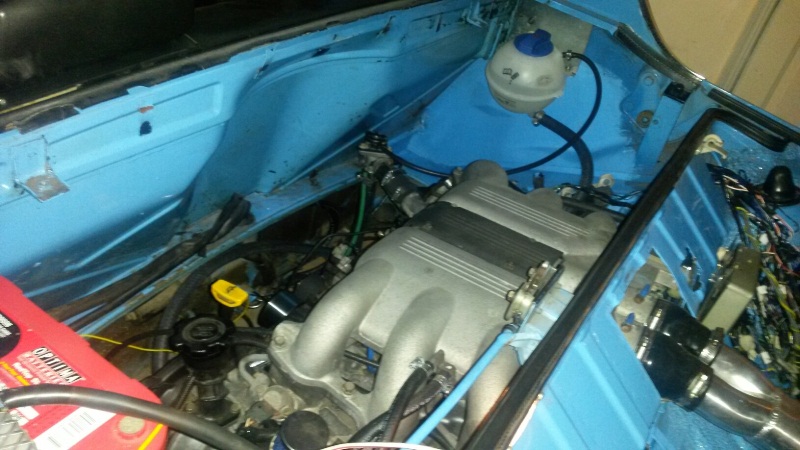
Thanks again Bob!
Posted by: Chris H. Aug 7 2014, 09:28 PM
I moved my battery over to the other side using the stock tray AND support. Just bent it around the opposite way and tweaked it a bit. 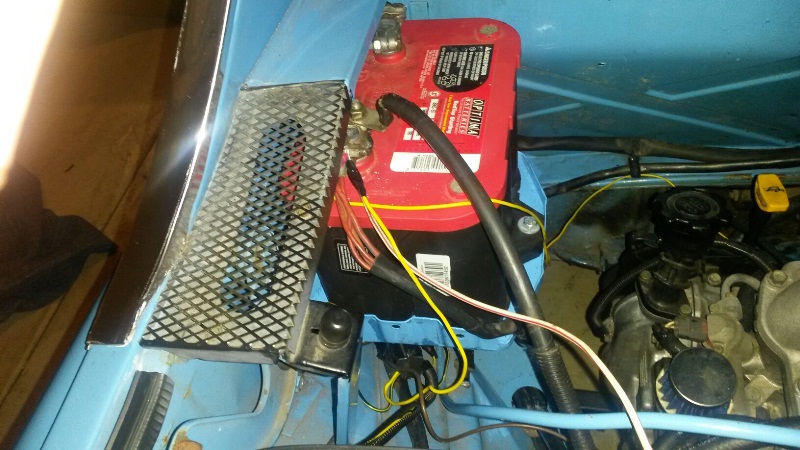
BTW that optima is 11 years old and still charges like the day I bought it. Had to keep it turned that way so that the + lead would reach.
Posted by: Chris H. Aug 7 2014, 09:44 PM
Here's the radiator setup. 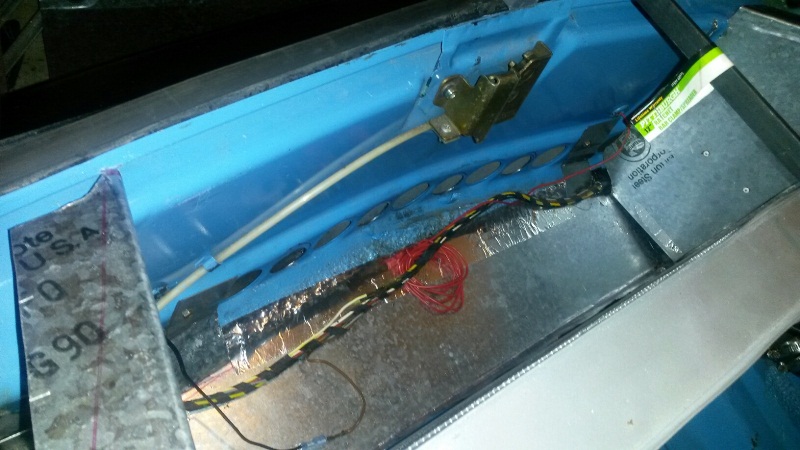
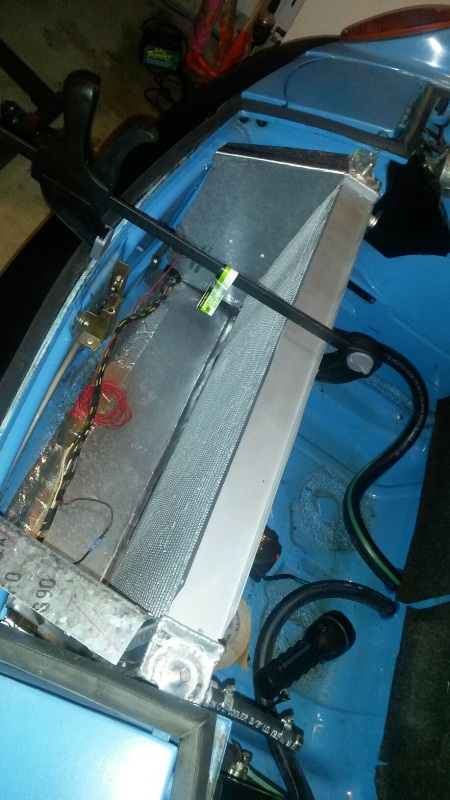
Celica rad is very easy to install (idea from Bob). I have the top completed, just want to be sure that all is well before I seal it up, plus I need to cut the hole in the valance and two of the screws/bolts are up front there.
I used 3/4 and 7/8 gates green stripe underneath. It sits right in the recesses, barely even protrudes below. 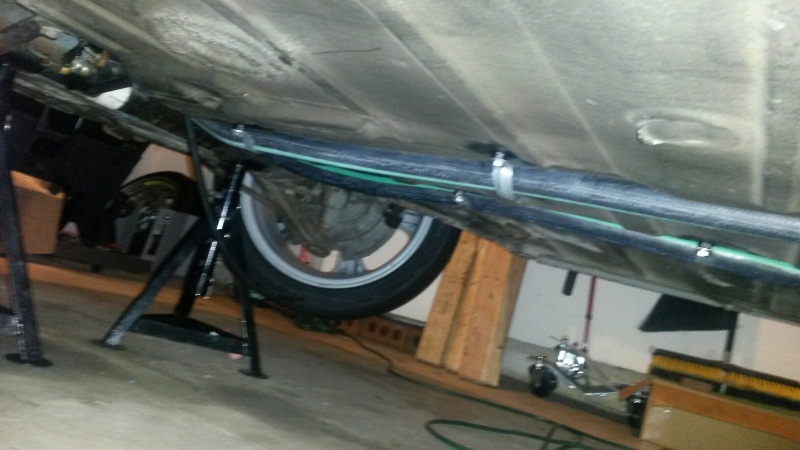
Posted by: 76-914 Aug 7 2014, 10:00 PM
Wow! Your there my man. Way to go. A drive is near. I laughed at your extra radiator hole. I did it to. Makes you feel kinda dumb, don't it? Does your ECU miss it's link to temperature? I had no idea your engine sat the far forward before. What was your axle alignment like then? Was it also way forward? The EZ 6 is 1.5" longer than the 4 cyl. Shoot some pics of your mount. More pic's.
Edit: I've got hole punch's if you need 'em.
Posted by: Chris H. Aug 7 2014, 10:18 PM
BTW I will be re-taping the joints on the rad...had to remove the aluminum tape when I took the radiator out to seal up the threaded hole. Should be pretty air-tight.
The one odd issue I am having is that it seems like the thermostat is acting weird. I tapped the return line for the reservoir at the lowest point right at the water pump.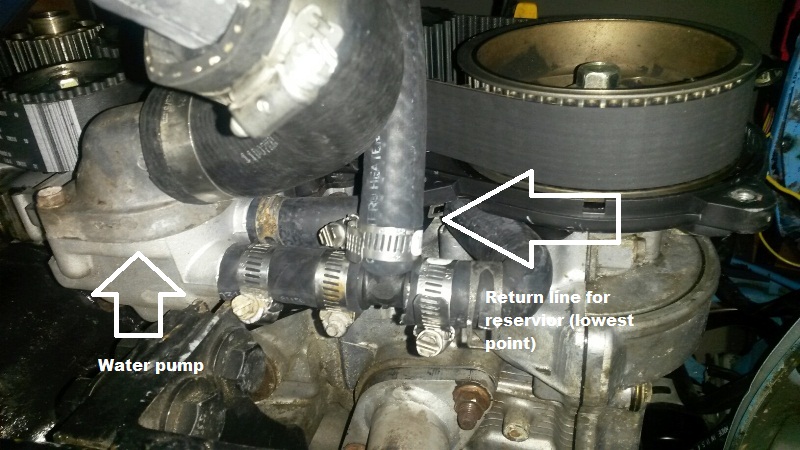
Should be drawing a nice vacuum there. The temp sensor is on the return line side and doesn't register at all for a long time, then shoots up pretty high all at once. The return line gets VERY HOT and the pump doesn't seem to run until the engine is pretty hot. The lines under the car are cold for quite a while.
Might be air in the system...any thoughts?
Posted by: Chris H. Aug 7 2014, 10:20 PM
Does your ECU miss it's link to temperature?
That might be the issue I am describing above. It seems like the water pump is not running right away. I didn't remove the temp sensor. Are you having that problem?
EDIT: I still have the stock temp sensor installed. FYI
Posted by: mgp4591 Aug 7 2014, 10:53 PM
Your temp sensor acting strange does sound like air in the system but the way you have it set up should eliminate all that. And I hope you're talking about your radiator fans turning on- the water pump always runs as it's driven by the timing belt. If you've got the engine hot enough often that will drive air out or when the neighbors won't complain, rev it up to get the speed up for your coolant. That may drive out the air also. After you get all that out I'd recommend a water wetter- by helping to eliminate surface tension in the water it also helps the air move along out of the path if the problem reoccurs during future maintenance. Good luck- great build so far! And I'm picking up all kinds of ideas as mine is using the same parts... when I can work on it...
Posted by: Chris H. Aug 8 2014, 12:17 AM
No I don't have the fans hooked up yet. I was wondering if maybe the thermostat on the water pump was staying closed for too long....it won't actually allow the water to flow up to the radiator until the engine is hot enough. Looks like it opens at 172 degrees. After some searches I found that many people drill holes in them to get some flow going beforehand. Wish I could just remove it entirely...some say the water would move too fast and not cool, others say it's fine. Anyone have insight to share?
I already have some water wetter ready to go. Once I'm sure I won't have to drain the system I'll throw it in.
Good luck with your build!
Posted by: mgp4591 Aug 8 2014, 12:37 AM
Thanks! And true, alot of t-stats already have holes in them to promote flow at low speeds. I suppose you could drill one without a problem and keep it less than a 1/8th" hole- the stock ones are about 1/16th but have a little stem in them. Maybe size one up or see what options your dealer or local parts store have in that style. I'd also think that eliminating it may be a bad idea. You've already got a very long way to the radiator which has to dissipate alot of heat to and from the engine so you may never come up to temp. It can make other problems harder to diagnose if your engine isn't running up to temp. Maybe ask Bob- everyone else does! He's probably had that problem before or may know more about it than you and I (and others) put together. It won't hurt to run like that for awhile, but if you're looking at a dd I wouldn't do it for too long.
Posted by: 3d914 Aug 8 2014, 04:20 AM
Motor sounds really nice, Chris.
What are your plans for exiting air behind the radiator. You're not going to cut holes in the sides of those beautiful fenders are you?
Posted by: Chris H. Aug 8 2014, 07:22 AM
Wow! Your there my man. Way to go. A drive is near. I laughed at your extra radiator hole. I did it to. Makes you feel kinda dumb, don't it?
Does your ECU miss it's link to temperature? I had no idea your engine sat the far forward before. What was your axle alignment like then? Was it also way forward? The EZ 6 is 1.5" longer than the 4 cyl. Shoot some pics of your mount. More pic's.Edit: I've got hole punch's if you need 'em.
Sorry Kent I was wrapped up in temps and missed your questions.
Yeah I heard trickling at the front of the car and thought "oh no....I bought this radiator a year ago...they will never take it back!..."
I left my stock temp sensor hooked up so the ECU should see the temps. The EZ30 is WAY smaller and lighter than the EG33. I'll measure mine today. I like the looks of the EG33, it looks kinda like a mini 928 engine. I might polish the intake someday like the younguns do. I tried to get pics of the mount last night but didn't get any good ones. I'll shoot more today. It's basically an early mount bar with tabs welded to similar to the smallcar mount. At the back the trans hangers are a lot like Ian's.
Posted by: Chris H. Aug 8 2014, 07:25 AM
Thanks! And true, alot of t-stats already have holes in them to promote flow at low speeds. I suppose you could drill one without a problem and keep it less than a 1/8th" hole- the stock ones are about 1/16th but have a little stem in them. Maybe size one up or see what options your dealer or local parts store have in that style. I'd also think that eliminating it may be a bad idea. You've already got a very long way to the radiator which has to dissipate alot of heat to and from the engine so you may never come up to temp. It can make other problems harder to diagnose if your engine isn't running up to temp. Maybe ask Bob- everyone else does! He's probably had that problem before or may know more about it than you and I (and others) put together. It won't hurt to run like that for awhile, but if you're looking at a dd I wouldn't do it for too long.
Yes I need to call Bob on this one, or maybe he will reply. I have a couple of other quick questions anyway and want to see how his Mustang hood intake is going. I think I might get a new t-stat since they are $9 as well.
Posted by: Chris H. Aug 8 2014, 07:32 AM
Motor sounds really nice, Chris.
What are your plans for exiting air behind the radiator. You're not going to cut holes in the sides of those beautiful fenders are you?
Emmmm...yeah that IS a problem. Haven't decided exactly. I like Mike's shroud a lot that covers the holes entirely (will insert pic when I find it), but also might consider some other alternatives.
Posted by: CptTripps Aug 8 2014, 07:40 AM
Keep at it man...this is an awesome build. I wish I was that far along.
Posted by: 76-914 Aug 8 2014, 08:03 AM
BTW I will be re-taping the joints on the rad...had to remove the aluminum tape when I took the radiator out to seal up the threaded hole. Should be pretty air-tight.
The one odd issue I am having is that it seems like the thermostat is acting weird. I tapped the return line for the reservoir at the lowest point right at the water pump.
Should be drawing a nice vacuum there. The temp sensor is on the return line side and doesn't register at all for a long time, then shoots up pretty high all at once. The return line gets VERY HOT and the pump doesn't seem to run until the engine is pretty hot. The lines under the car are cold for quite a while.
Might be air in the system...any thoughts?
According to Bob, that is an air pocket that gives the rapid rise in temp, Steam pockets. I called him before I got to that pointe and asked how would I be able to determine if I had an air pocket and he said I'd see what you just described! And no, I haven't connected my fans to the ECU yet. I will after I get my new cable. They sent the wrong one. I was running wired in low speed. My plan is to run it a few miles to get it up to temp then connect to the ECU. Hopefully they will fire right up, at high speed, confirming that the ECU connection is working. Then I will disconnect them, one at a time to determine which is hi/lo.
Posted by: Chris H. Aug 8 2014, 08:29 AM
Well sheeeeit then...that's what it is I guess. Nothing, nothing, nothing....then it shoots up suddenly. I thought the gauge wasn't working, that's how long it was taking. Probably just have to run it a few times. I could run an overflow tank up front too, but would prefer not to.
Notice most of us had air pockets but we're all surprised we have them? Now that's funny.
Hey Doug, you're farther along than you think. Get the turbo plumbing sorted and it'll fly from there. I still have a lot to do.
- cable shifter
- clutch reinstall
- fans install
- rear brakes re-do
- figure out how I'm gonna exit the radiator exhaust air
- install throttle cable
And a few other things I forgot I'm sure.
Posted by: Jon H. Aug 9 2014, 06:12 AM
If you have a coolant system pressure tester you can use that to pressurize your system and get the air out. Thats how I bled my SVX/Vanagon swap, worked great.
Jon H.
Posted by: rnellums Aug 9 2014, 07:40 AM
Harbor freight has a tool that uses compressed air and the Bernoulli effect to suck all the air out. Then you open a ball valve and the vacuum in the system pulls coolant in. I have also heard that backfilling the engine from the outlet is essential. It took me two weeks to get mine bled right.
Posted by: BIGKAT_83 Aug 9 2014, 11:53 AM
No problem with bleeding the air fom the system if you plumb it up like the picture. I have removed the small pin in the thermostat and drilled the hole out to 1/8th inch.
Fill it with the expansion tank. Make sure the recovery tank is about half full.
If the radiator has a air bleed at the top open until water starts to flow out. If not remove the top hose at the radiator(high pressure hose from the pump)reinstall hose or close bleed.Start the engine up and run it through a couple of heat cycles and add water if necessary. I have 8k miles on my EZ30 conversion now and have not added water or done anything to it since start up. Runs at the thermosat all the time 180 degrees.
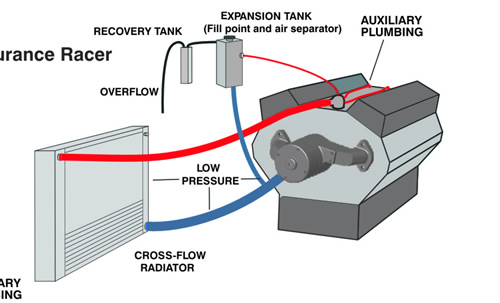
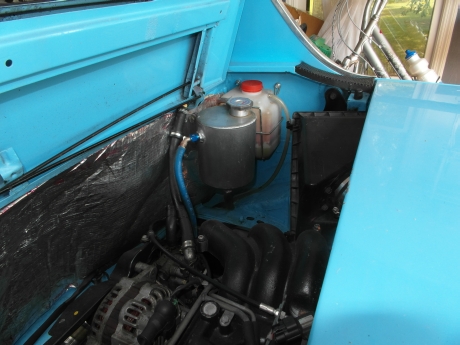
Posted by: mgp4591 Aug 9 2014, 02:21 PM
And if you have or get a thermostat with the pinhole in it, make sure the t-stat is installed with that pinhole at the 12 o'clock position!
Posted by: Chris H. Aug 9 2014, 04:18 PM
Bob,
Well, I do have the system set up that way for the most part. My only concern is that in some cases I'm pulling from the hot side instead of the cool side and vice-versa. Here's the situation...
Radiator is the Celica...no upper hose but there is an overflow outlet. I was wondering if I should install a bleeder there. I capped it off for now. Do I need one? 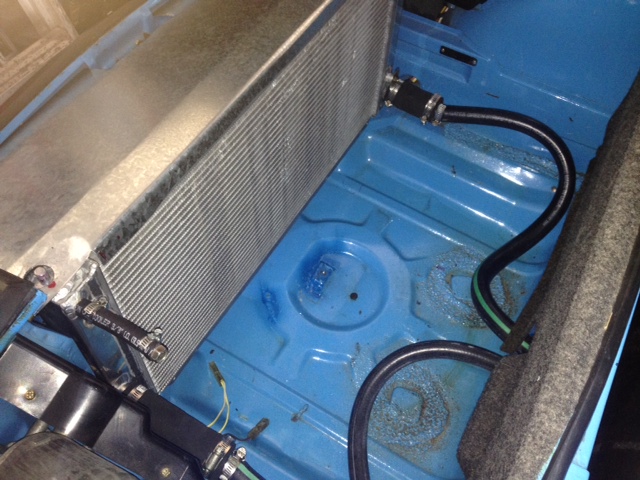
I have an overflow tank which is the water fill point.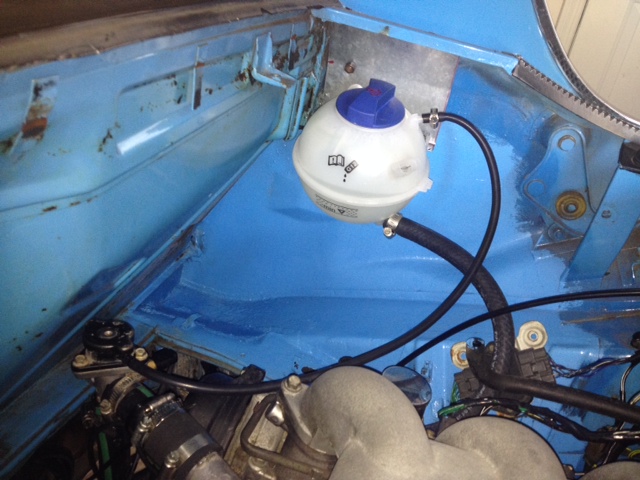
I have topped it up several times after it cools down a bit so that tells me something is happening. The small line connected to the fitting coming off of the engine which is the high point. 
I think that's similar to how you had it on your SVX engine, except I think you just tapped the water pipe on the engine itself. The only contradiction here is that this is the COOL SIDE when the diagram says it should be the hot side, but it's practically connected to the engine and it is the highest point which from my understanding is the most important part. I guess I could run one off that port on the radiator....
The larger hose on the overflow tank tees into a hose that connects to the water pump. 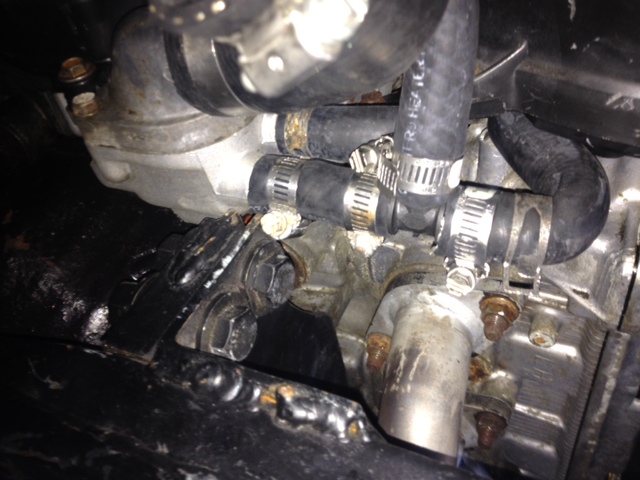
That's the lowest point in the system and also the best vacuum I'll get from the pump. Only concern here is that this is the HOT SIDE. According to the diagram the return line should be on the cool side, but again, I think the lowest point in the system is the most important thing. I think this is where you teed in to your EG33 also, so if it worked for you then I should be good. I did notice this line gets HOT pretty quick.
See anything I should change?
I'll probably drill the thermostat as well. Seems like a good idea. (And make sure it's at 12:00!)
Posted by: BIGKAT_83 Aug 9 2014, 06:36 PM
This is your problem. You have the small hose connected to the pressure release of the radiator cap.. You need to get this out of the system. What ever that is its not needed. Move the small hose to a high point on the line and you will have a constant flow of water.
Is the blue cap on the header tank a high pressure cap?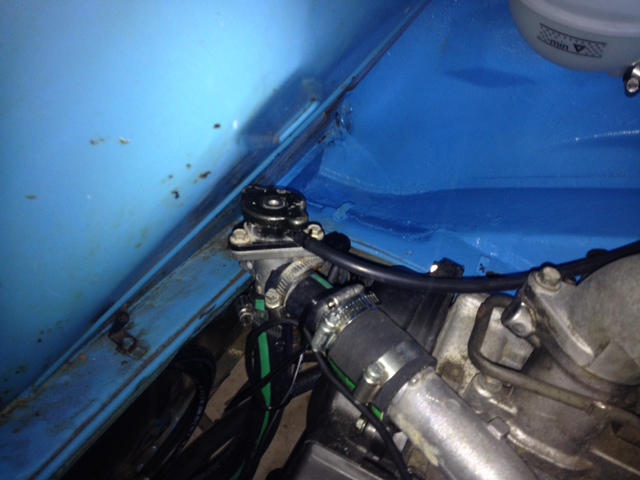
Posted by: 76-914 Aug 9 2014, 07:02 PM
Posted by: Chris H. Aug 9 2014, 07:53 PM
This is your problem. You have the small hose connected to the pressure release of the radiator cap.. You need to get this out of the system. What ever that is its not needed. Move the small hose to a high point on the line and you will have a constant flow of water.
Is the blue cap on the header tank a high pressure cap?
Aha! Got it. Thanks Bob. That explains a lot. So either run a long line from the radiator or tap in to the water pipe intake like you did. The blue cap is pressurized.
Posted by: Chris H. Aug 9 2014, 11:31 PM
Bob, one more question....I just went out and looked and it seems like the radiator vent outlet that I capped off and the high spot on the engine where I thought I was venting before are very close to the same height. So technically I could probably use the radiator vent...
So the question is:
If I run a line from the radiator back to the overflow tank from the front it would obviously have to be routed down and then back up again. I'd probably run it down through the heater channel, through the long and out right under the overflow tank. Is that OK since the line diameter is so small (1/4" probably) or do you think I'd get some air trapped at the high point in the line? Seems like with a line that small the water pressure would push the air out pretty well. For less than $10 worth of hose I guess I can give it a shot and see what happens unless you really hate the idea. Let me know what you think. Thanks again.
Posted by: Chris914n6 Aug 11 2014, 06:56 PM
You want a bleeder at the top of the rad. No reason to do the whole return hose thing. If you can make a place for the air to collect.
I used one of these. http://www.homedepot.com/p/Powermate-1-4-in-NPT-Tank-Drain-Valve-072-0001RP/202592885
Posted by: Chris H. Aug 11 2014, 07:55 PM
Caught up with Bob. In order to be sure the system is continuously bled you need the return line. It will be high pressure, so I don't think the air in the line will be an issue. If it is I'll move it to the back and do a bleeder in front. The line is only 5/16.
In other good news, my rear calipers are completely functional. I thought they would be stuck or messed up in some way for sure. Just need to install new piston seals and muster up the energy to get DIRTY getting the brake dust off of them.
Now it's mostly hurry up and wait for all the parts I ordered today and yesterday! Got the throttle cable installed, so that's done, and I reinstalled the gauge pod. I moved the e- brake warning light to where the "CAT" warning light was. About 20 seconds with some nail polish remover and the CAT and EGR symbols rub right off. Pics tomorrow...battery is charging. Waiting for a strap wrench to reinstall the alternator.
EDIT....waiting for a strap wrench to tighten the crank pulley to 116 lbs, THEN reinstall the alternator so it will charge the battery itself . Yeah..that makes more sense.
Posted by: 904svo Aug 11 2014, 08:01 PM
I order to burp a Subaru engine, what I found you have to do it the heater circuit
due to the way that they control the thermostat. Here is a picture of how I burp
my engine.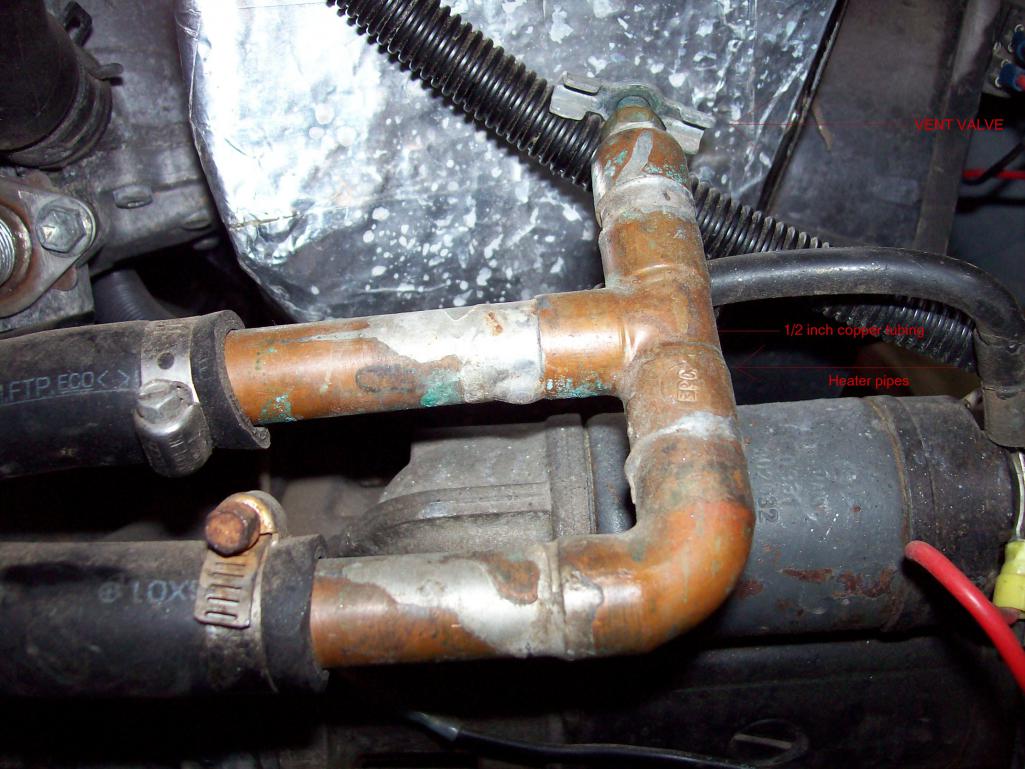
Posted by: JRust Aug 11 2014, 08:14 PM
Burping is an art with these. With my v8 it was a bit of a chore to learn how to get all the air out of the system. I found making the high loin really high helped. I would jack up my ass end. Let it run & then shut it off. Crack the bleeder from the top in front. Took a little while to get it all out but I did. Running the extra return line Bob suggest is probably the most efficient way. Much less work to burp the system. Bob knows this stuff & you'll save time doing what he says over some dipshits (Myself )
Posted by: Chris H. Aug 17 2014, 12:35 PM
TBM= The Bob Method for cooling water cooled 914s Use it.
So I could tell right away that the system was working better even before I started the car.
Although my garage is pitched unfavorably to this so that the front end is higher than the back, I could hear the water moving through the system as I filled it up, which I could not hear as well before.
https://www.youtube.com/watch?v=pOmJoViuj9A
I removed the Yamaha filler cap and added a temp sender fitting. 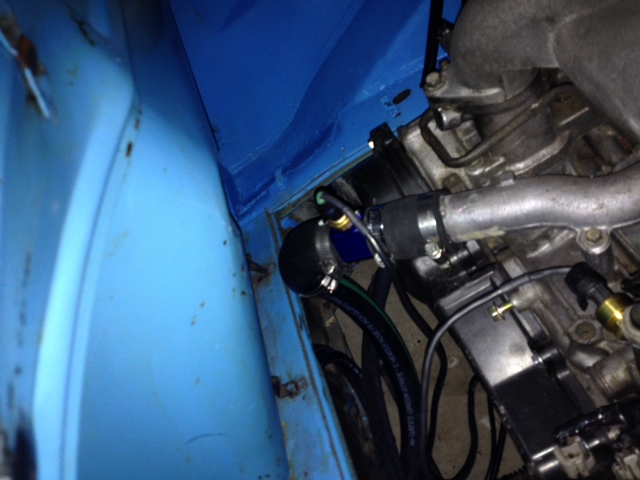
And ran the 5/16 hose front to back. 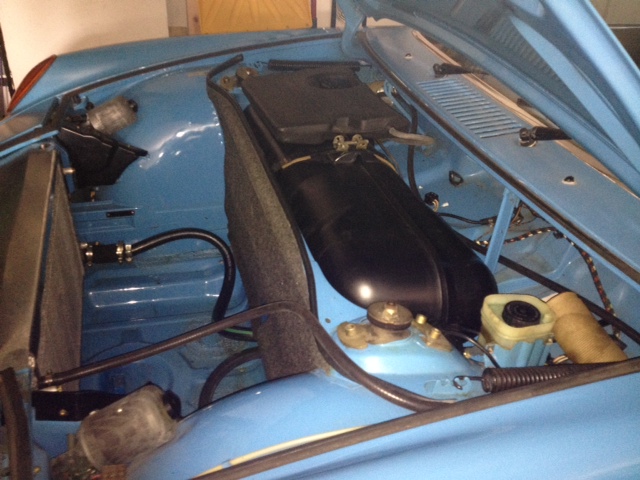
I also removed the pin from the thermostat and drilled it to 1/8" (which was barely more than before).
When I started it it was clearly running differently, not nearly as hot. Before there was a lot of heat coming from the engine bay, now hardly any. Next week we (and by "we" I mean Kent, who is doing all the work) should have the clutch setup done and be able to take it out. I'm not waiting on him, he is waiting on my MC to show up from e-bay. Still need to do the rear brakes and cable shifter as well. Should be done just about the same time I get the stuff.
Posted by: Chris H. Aug 17 2014, 12:49 PM
Just a little FYI if you have EGR and CAT lights...you can use one to relocate the e-brake warning light. The white lettering rubs off in about 20 seconds with any kind of thinner (I used nail polish remover). Probably use the other one for the CEL. I have a '95 so it's OBD 1. Uses a morse code type system apparently.
https://www.youtube.com/watch?v=aEwgdcRYfO0
Posted by: JRust Aug 17 2014, 12:50 PM
TBM= The Bob Method for cooling water cooled 914s Use it.
 I like it TBM
Posted by: Mike Bellis Aug 17 2014, 02:44 PM
Just a little FYI if you have EGR and CAT lights...you can use one to relocate the e-brake warning light. The white lettering rubs off in about 20 seconds with any kind of thinner (I used nail polish remover). Probably use the other one for the CEL. I have a '95 so it's OBD 1. Uses a morse code type system apparently.
https://www.youtube.com/watch?v=aEwgdcRYfO0
Why do you post a video that is private and can't be seen?
Posted by: Chris H. Aug 17 2014, 02:48 PM
Oh you can't see it? It should be able to be seen by anyone who I share the link with, which should be everyone since I posted it. That's how all of mine are usually done. No one can see it? I'll change it if so.
Posted by: Chris H. Aug 17 2014, 02:51 PM
OK try it now...not terribly exciting, but at least you can see it
Posted by: Mike Bellis Aug 17 2014, 03:53 PM
OK try it now...not terribly exciting, but at least you can see it
Works now. Best 9 seconds of my life!
Posted by: 76-914 Aug 17 2014, 05:00 PM
Way to go, Chris. Another one bites the dust. That punch list is getting smaller and smaller. Once your very close to completion that list will get a growth spurt. BTW, I bled the last of the air out of the clutch line this morning and got a 6 min test drive. (I had cherry/banana nut bread in the oven and then it was off to do some shopping with the wife.) The system is working great. Release is about 4/5th's in, not to the floor as I told you earlier. My wife could drive this car.
Posted by: Chris H. Aug 17 2014, 05:27 PM
Yeah Mike, for you that's video is child's play. Did you install that Porsche projector thing? How did the new cradle turn out? Easier on your CVs I hope.
Kent that's great news on your clutch. I ordered mine Friday but haven't gotten a shipping confirmation. If it doesn't go out tomorrow I'm calling. The clevis should get there tomorrow. Working on the cable shifter now!
Posted by: Mike Bellis Aug 17 2014, 07:14 PM
Yeah Mike, for you that's video is child's play. Did you install that Porsche projector thing? How did the new cradle turn out? Easier on your CVs I hope.
Kent that's great news on your clutch. I ordered mine Friday but haven't gotten a shipping confirmation. If it doesn't go out tomorrow I'm calling. The clevis should get there tomorrow. Working on the cable shifter now!
I modified the cradle rather than rebuilding it. I did have to make new motor mounts to bolt onto the cradle.
BTW, I do like the "idiot" light. I was thinking the same thing before I decided to install the dash cluster. There have been plenty of one step forward and two back on my build. Most of those did not make it into my build thread(s). Now I'm getting ready to swap out the 6 speed for the 5 so I can send the 6 to Dr. Evil. Time for new bearings.
Posted by: Chris H. Aug 17 2014, 07:59 PM
New bearings? Man you are driving that thing like it should be driven aren't you?
Well the "idiot" light is perfect for me . Apparently on the OBD 1 you can rig it to blink out the codes so you just have to find out what they mean. The nice thing is that it does not go into "limp mode".
I'm also installing a momentary switch where the block off plate for the rear defroster switch is. Got a 40 amp relay as well. My old Rabbit switch (it's what the factory used) frequently takes a couple turns to crank and I've read that the new ones are made in China. I know the Subie relay is easier on the ignition switch but I'd rather not dig into the steering column and swap it only to have the new one break soon after.
Got this:
It looks huge but it's not. It's the same size as the block off plastic piece. most people won't even notice it since it looks the same. If it ends up being a temptation for others to push I will use it as the windshield washer pump switch and get a different one later.
Posted by: Chris H. Sep 2 2014, 06:57 PM
The good news is that I finally drove it... WOW is it fast!
The bad news is that 2 blocks away I snapped a CV . Didn't even get a chance to give it much juice really. No tire spin or anything, just snapped.
So the question is...do I use another 914 CV that I have stashed away or just upgrade to 951's now? Leaning towards the 951s.
Posted by: Mike Bellis Sep 2 2014, 07:47 PM
Upgrade!
Then you can drive without worry. 
Posted by: Chris H. Sep 2 2014, 08:17 PM
Yep, that's what I thought Mike. Just bought some from e-bay.
On a lighter note, this thing is sooooo much faster and more responsive than any 914 I've ever driven. I let the clutch out expecting one thing, and get something totally different! The noise it makes is pretty sweet too.
Posted by: Mike Bellis Sep 2 2014, 08:18 PM
Drive over here so we can race. 
Posted by: Chris H. Sep 2 2014, 08:30 PM
It ain't that fast Mike. Keep in mind it was pushing ~72hp before. Not used to having to AIM it first before I hit the gas.
Posted by: mgp4591 Sep 2 2014, 09:09 PM
It ain't that fast Mike. Keep in mind it was pushing ~72hp before. Not used to having to AIM it first before I hit the gas.As another who is doing the EG33 thing that's great to hear! I'm looking into using a Subie front bearing instead of the Porsche so I can use the hub and axles designed for that power. Got some fabricating to do for it tho...
Posted by: 76-914 Sep 2 2014, 09:10 PM
Congrats on completing a very nice addition to the Suby Conversion Stable.  If you move quickly you can be on the road again this weekend. OH, I almost forgot...........
Posted by: mgp4591 Sep 2 2014, 09:13 PM
Congrats on completing a very nice addition to the Suby Conversion Stable.
If you move quickly you can be on the road again this weekend. OH, I almost forgot........... AND SOUND!!!
Posted by: Chris H. Sep 2 2014, 09:34 PM
Congrats on completing a very nice addition to the Suby Conversion Stable.
If you move quickly you can be on the road again this weekend. OH, I almost forgot........... I did put 2 miles on it but "completed"...well...technically! I HOPE the axles come before the weekend. I'll start dis-assembly tomorrow. Since the axle floats maybe I can wrestle the thing out without taking the whole axle off. The one thing I haven't been able to bring myself to do is cut the front trunk holes. Hopefully by Friday I'll get up the guts to get that done. Was looking at some other options but I think I'd better stick to the standard way. Kent, what size are your holes?
I'll get some video going when we get the axle back together. Right now it sounds a lot like Andyrew's "broken CV autocross video". Vrooommmm.....clunkclunkclunkclunkclunkclunk.
Posted by: 76-914 Sep 3 2014, 08:52 AM
Well, while waiting on parts you could drag your camera into the garage and take tons of pics then post them here.
Posted by: Chris H. Sep 3 2014, 09:23 AM
Funny thing is I just realized I don't THINK I have to take the thing quite as far apart as I thought...The floating axle might make it fairly easy to remove/replace that CV... I have two more 914 CVs... ...still gonna go 951's regardless but I'm pretty impatient. Might be Monday before they get here. I guess I'll see how easy it is to remove and go from there.
Kent, have you removed your axle pins (Subie side)? Assume I just need a punch (but NOT a wood punch). Also, what size are the OUTLET radiator vent holes (in the fender wells) on your car?
Posted by: Chris H. Sep 3 2014, 02:12 PM
Whew I needed I good laugh.
Searched what size punch to use to get the roll pin out (3/16) over on NASIOC. A younger gentleman was having trouble getting his out. Plenty of great suggestions, then someone said "Try hitting it with your purse.".
Posted by: mgp4591 Sep 3 2014, 03:18 PM
I took one of my longest and narrow necked punches with a flat tip and ground it down til it fit the pin size. The modified section is over 3 inches long and easily taps out the roll pin. When you put it back in, make sure the chamfered sides of the hub match the VERY SLIGHTLY chamfered side of the stub axle- that's the only way they'll go in. Plus the holes are offset from the centerlines so it makes it easier. Trying to pin it from the other side just creates frustration and releases language you haven't heard in years... may ruin the pin too. Great progress!!
Posted by: 76-914 Sep 3 2014, 04:47 PM
Funny thing is I just realized I don't THINK I have to take the thing quite as far apart as I thought...The floating axle might make it fairly easy to remove/replace that CV...
I have two more 914 CVs... ...still gonna go 951's regardless but I'm pretty impatient. Might be Monday before they get here. I guess I'll see how easy it is to remove and go from there. Kent, have you removed your axle pins (Subie side)? Assume I just need a punch (but NOT a wood punch). Also, what size are the OUTLET radiator vent holes (in the fender wells) on your car?
Not yet but they should push thru easily as new as they are. Get a set of drive pins at HF, <$5 and worth it. The holes are 1.5".
Posted by: Chris H. Sep 3 2014, 05:34 PM
The Harbor Freight 3/16 long punch (comes in a 5 pack) works perfectly. Bottom line is if you tap it good a few times and it doesn't move you're tapping the WRONG SIDE.
BTW got the axle out, pix pf the carnage are forthcoming. Thinking very seriously about throwing another 914 CV in there. OK I can wait...the 951's shipped today and should be here Friday. Why do it twice ?
Posted by: ruby914 Sep 4 2014, 02:03 AM
Attached image(s)
Posted by: Chris H. Sep 4 2014, 06:36 AM
Thanks Mike. I'd love to post pics of the CV carnage but there WAS NONE. Seems I must have been (un)lucky enough to twist the axle just right while the conversion was going on to work one of the bearings loose or something since the engine was installed/removed several times. No metal fragments at all, everything was just loose in there. Weird.
Anyway I have the thing apart and still need to finish a few things in the cooling system so might as well wait one more day and get the 951 CVs. After hearing from a few 6 cylinder/V8 conversion folks that the 914 CVs will inevitably fail I'd rather not worry about it.
Posted by: 76-914 Sep 4 2014, 08:49 AM
Now we need to get a group buy on decals of your avatar. Anyone here make them?
Posted by: CptTripps Sep 4 2014, 09:00 AM
Now we need to get a group buy on decals of your avatar. Anyone here make them?
I'd rather put the effort into new lettering for the engine grill that says PORSCHARU.
Posted by: Chris H. Sep 4 2014, 09:46 AM
I don't own that avatar BTW...found it somewhere. Like the ideas though.
Posted by: 76-914 Sep 5 2014, 09:04 AM
I don't own that avatar BTW...found it somewhere. Like the ideas though.
Yeah, I found them on the net once. I think it was a bus conversion place. What do you wanna bet they don't own or have any copyrights on that bit of fusion.

Posted by: Chris H. Sep 5 2014, 09:42 AM
Oh you don't think Fuji Heavy Industries and Volkswagen are OK with it?
Posted by: mgp4591 Sep 5 2014, 09:51 AM
Oh you don't think Fuji Heavy Industries and Volkswagen are OK with it?
Well, them 2 countries ain't known for their sense of humor...
No disrespect intended... now their technology, that's another issue entirely!

Posted by: Chris H. Sep 5 2014, 10:28 AM
Well since the Subie boxer 4 bears a STRIKING resemblance to the type 4 VW motor I'm pretty sure the two companies aren't too friendly with each other either. Tonyakavw's thread has some cool photo comparisons I think.
Posted by: Chris H. Sep 5 2014, 01:54 PM
OK got it all back together...hope to report back good news (and videos, pics, etc) soon. STand by....
Posted by: 76-914 Sep 5 2014, 04:07 PM
Have you guessed what happens that makes those roll pins "directional? After all this teasing you better have some gooood video.
Posted by: Chris H. Sep 5 2014, 04:32 PM
Well, I figured out which way NOT to pound out my pedal cluster roll pin if you recall that.
The 944 CVs were the wrong spline count (must be 33, not 25...roughly pre-1987 is what you need) so I just slapped another 914 CV in and it works fine. I think one of the bearings popped out during the multitude of times I took the inner one on and off the trans stub. Ran it around the block...and now it's RAINING ! Video is coming though...2nd gear is good!
Posted by: 76-914 Sep 5 2014, 10:38 PM
I knew you'd like it. Bob had warned me but was still surprised.
Posted by: Mike Bellis Sep 6 2014, 03:46 PM
What does rain look like?
Posted by: Chris H. Oct 30 2014, 07:01 AM
Really need to do some updating here, but just thought I'd post the best cut of a VERY SHORT video I made for a friend who's recovering from surgery. It's a wobbly cell phone video but the sound is worth it. Had to keep it hands-free. The car isn't done, but at least I can drive it now. Need to finish the interior and button up the wiring better. Then once I get it done I will take it all apart and get it painted.
Anyway, here it is:
https://www.youtube.com/watch?v=TDn43wU498E
Pretty familiar noise eh? Bob made the exhaust for his EG33, which of course sounds great. He kept saying it was "gonna be loud", but I like it just how it is. Any softer and it'd be too quiet. Wish I would have shut up entirely during the vid but the adrenaline takes over.
Thanks to all who offered advice, help, posted pics, fixed stuff I broke, sent me free parts, etc. I'll try to return the favor any time I can.
Next up is the interior and a little work on the wiring harness to pretty it up.
Posted by: 76-914 Oct 30 2014, 07:34 AM
You da man. Sounds great, Fun as Hell, huh? It was worth it, right? Congrats.
Posted by: Chris H. Oct 30 2014, 07:45 AM
Definitely worth it. Wouldn't be driving it without that clutch plate you made. Holding up nicely and the clutch is very light...
Posted by: ThePaintedMan Oct 30 2014, 08:16 AM
So cool!!! Congrats Chris!
Posted by: Chris914n6 Oct 30 2014, 05:25 PM
I'd rather put the effort into new lettering for the engine grill that says PORSCHARU.
You can get individual auto style letters on ebay. Ran across them looking for certain numbers...
Posted by: 76-914 Oct 30 2014, 06:07 PM
Hey Chris, I forgot to ask, how's the cooling system performing?
Posted by: Chris H. Oct 30 2014, 06:59 PM
Well the weather has been a lot cooler around here so it's been cooling fine. Haven't taken it on a ride longer than about 15 minutes but the temp hasn't spiked at all. TBM is confirmed for cooling. Finally got the Renegade Hybrids front valance (they had to make some more), need to install that this weekend and it should direct the air in a little better.
Also noticed that the brakes are really good. Those porterfield R4-S pads make quite a difference.
Posted by: DBCooper Oct 31 2014, 08:04 AM
Sure does sound good. If it goes even half as well as it sounds then you got yourself a winner.
Posted by: Chris H. Oct 31 2014, 08:15 AM
Goes pretty good DB. It won't beat the turbocharged red monster I've seen videos of but it's fun. If you're ever in town let me know.
Posted by: BIGKAT_83 Oct 31 2014, 09:42 AM
Does this mean I get a ride Sunday?
Posted by: Chris H. Oct 31 2014, 10:00 AM
Sure, but I want you to drive it as well if you want to.
Posted by: Chris H. Nov 2 2014, 10:08 AM
Man is it gonna be a great 914 day. BIGKAT_83 is on his way to my house!
https://www.youtube.com/watch?v=gVFFxllJEhQ
Posted by: scotty b Nov 17 2014, 08:11 PM
Man is it gonna be a great 914 day. BIGKAT_83 is on his way to my house!
https://www.youtube.com/watch?v=gVFFxllJEhQ
Attached image(s)

Posted by: 76-914 Nov 17 2014, 08:19 PM
Yea Chris, I want an update on that controller. That is as soon as you finish shoveling snow. When you gonna start one Scoot? It'd be easy for a man of your skills.
Posted by: scotty b Nov 18 2014, 07:05 AM
Yea Chris, I want an update on that controller. That is as soon as you finish shoveling snow. When you gonna start one Scoot? It'd be easy for a man of your skills.got a car
got a plan
got the engine ( SVX )
got 90% of the parts
don't have the time right now
Posted by: mepstein Nov 18 2014, 07:31 AM
Yea Chris, I want an update on that controller. That is as soon as you finish shoveling snow. When you gonna start one Scoot? It'd be easy for a man of your skills.got a car
got a plan
got the engine ( SVX )
got 90% of the parts
don't have the time right now
Scatty's svx build wil be practice for when he builds mine
Posted by: mgp4591 Nov 18 2014, 09:36 AM
Yea Chris, I want an update on that controller. That is as soon as you finish shoveling snow. When you gonna start one Scoot? It'd be easy for a man of your skills.got a car
got a plan
got the engine ( SVX )
got 90% of the parts
don't have the time right now
Speaking of your plan, are you using Ians cradle or building one of your own?
Posted by: scotty b Nov 18 2014, 10:17 AM
Yea Chris, I want an update on that controller. That is as soon as you finish shoveling snow. When you gonna start one Scoot? It'd be easy for a man of your skills.got a car
got a plan
got the engine ( SVX )
got 90% of the parts
don't have the time right now
Speaking of your plan, are you using Ians cradle or building one of your own?
Probably make my own. I've not been able to get hold of him. Tried 2-3 times to buy one from him as I don't need to try and find the time to fab one myself
Posted by: Chris H. Nov 18 2014, 12:04 PM
It was fun.
Ah just playin'
Bob was really helpful as usual. The car still needs some work for sure, it still runs a tad hot after a while and my trans is still whining a bit on decel. Unfortunately the weather has dropped to 20 degrees around here so no further work has been done . I think we have it all figured out though.
On the cooling thing I just need a bigger opening up front and it'll be good. Pretty much EXACTLY what Kent did in his thread. As Kent mentioned we also decided to switch over to a universal fan controller which is much simpler. I think Mike Bellis uses one. You just jam a sensor into the rad fin and the fans come on at the preset temp. The ECU was not flipping over from low speed to high which is probably a sensor...not spending $200ish on that when I can get a more reliable complete setup that has a built in relay and provision for A/C switching as well as an override wire you can hook up to a switch to turn on the fans any time you want for ~$40. I'll post pics when I install it.
Scotty, PM me....you probably should fab a mount for the EG33. The engine is a little long for Ian's cradle in my opinion. Mine was almost touching the firewall so I switched to Bob's custom fabbed mount. I'll be happy to shoot some pics of the mount for you. It's very simple. You could make it in a day (or less) out of a early 914 mount. Have to take the engine out this winter anyway...
Posted by: 76-914 Nov 18 2014, 03:39 PM
Make your own Scoot. Ian is busy starting life. Or at least he was last year. That's what prompted me to make my own mount. <$150 in materials. You've got an Aircraft Spruce on the East Coast. Order the 4130 .090" Chromoloy. You'll need a bender. HF has them for $99 on sale. You might look at some EZ30's, also. Lighter and much shorter.
Posted by: Mike1981 Nov 18 2014, 05:13 PM
Hello Chris
Conversion looks great
May I ask what did you use for the grommets for the coolant lines running through the front firewall to the radiator?
I currently have a conversion and am looking to improve the grommet protection I currently have
Thanks
Mike
Posted by: Chris H. Nov 18 2014, 05:56 PM
Hi Mike,
Thank you. Still working out a few kinks but I learned a lot. Also made some good friends which I actually like better than the car.
What I did for the grommets was to take a couple of pieces of extra rubber vacuum hose and cut them length-wise so that they can be pushed onto the metal lip like a grommet. They are about the same diameter and type as windshield washer sprayer hose. Then I trimmed them to size width-wise and glued them in place using a very small amount of rubber cement.
Posted by: mgp4591 Nov 18 2014, 06:08 PM
Make your own Scoot. Ian is busy starting life. Or at least he was last year. That's what prompted me to make my own mount. <$150 in materials. You've got an Aircraft Spruce on the East Coast. Order the 4130 .090" Chromoloy. You'll need a bender. HF has them for $99 on sale. You might look at some EZ30's, also. Lighter and much shorter.
I've heard (and read) that they're not the ideal setup for an EG33 so I was planning on making my own also. If you've got ideas let's throw them around until we've got a plan. I've got ideas of my own but then I tend to overengineer things a bit... they work tho!
EZ30s work great but I've already got a complete SVX with everything that's needed for cheap- I don't really want to get into a different setup with more expense at this time...
Posted by: Mike1981 Nov 18 2014, 06:31 PM
Very Clever Chris
Thanks for sharing this tip
Mike
Hi Mike,
Thank you. Still working out a few kinks but I learned a lot. Also made some good friends which I actually like better than the car.
What I did for the grommets was to take a couple of pieces of extra rubber vacuum hose and cut them length-wise so that they can be pushed onto the metal lip like a grommet. They are about the same diameter and type as windshield washer sprayer hose. Then I trimmed them to size width-wise and glued them in place using a very small amount of rubber cement.
Posted by: scotty b Nov 18 2014, 06:32 PM
Scotty, PM me....you probably should fab a mount for the EG33. The engine is a little long for Ian's cradle in my opinion. Mine was almost touching the firewall so I switched to Bob's custom fabbed mount. I'll be happy to shoot some pics of the mount for you. It's very simple. You could make it in a day (or less) out of a early 914 mount. Have to take the engine out this winter anyway...
Glad you told me this.
Posted by: Chris H. Nov 19 2014, 08:17 AM
Yeah it still works, but very close quarters. I actually changed mine because the exhaust setup I had didn't work with the cradle style mount. The EG shorty manifolds I got from Bob interfered with the cross-braces so I cut them and planned to relocate them, but it still hit the rear mounts a bit. With this particular engine it's just easier to use a mount similar to amenson's. Literally a couple of pieces of very strong iron bolted and welded to an early mount up front and some trans hangers out back.
Not knocking Ian's cradle at all BTW, it's very high quality at half the cost of other ones out there. Very hard to design one that fits every single engine Subaru makes. It should fit every other motor quite well.
Based on the ad (or what I remember of it...) that's a good engine you have Scotty and should last a long time. I'd stick with it. You'll love the power and sound. Use a long magnaflow muffler turned sideways like speed metal army's or 911 exhaust and it'll sound pretty 911ish. Same firing order and everything. Once you're ready to get it going I'll be glad to talk to you about the process and what I messed up along the way so you can avoid the same issues ... Anyone attempting an EG33 can ping me really.
Posted by: Chris H. Nov 19 2014, 01:33 PM
Here's the BIGKAT mount when it arrived this summer: 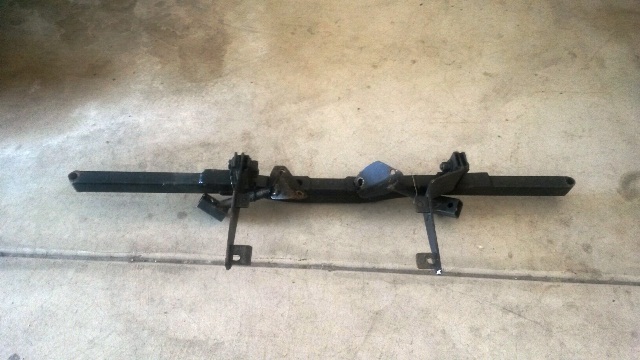
The trans hangers are attached for shipping but you should be able to get the idea for now. Is that easy (looking) or what? The geometry will take some thought but there are reference points at the holes on the mount I can measure. Pretty much just need to get it level and straight side to side. If you're not a welder it would be worth paying someone to do the final welds. Only hits two of the three engine mount holes but keep in mind you really only use one bolt per side when using stock mounts (which are not used in this scenario). Plenty strong and you have more room for exhaust options.
Posted by: BIGKAT_83 Nov 19 2014, 02:07 PM
If I only had the money$$$$ I'd pay this guy to build a mount and headers.
By far the best out there.
Precision Chassis Works..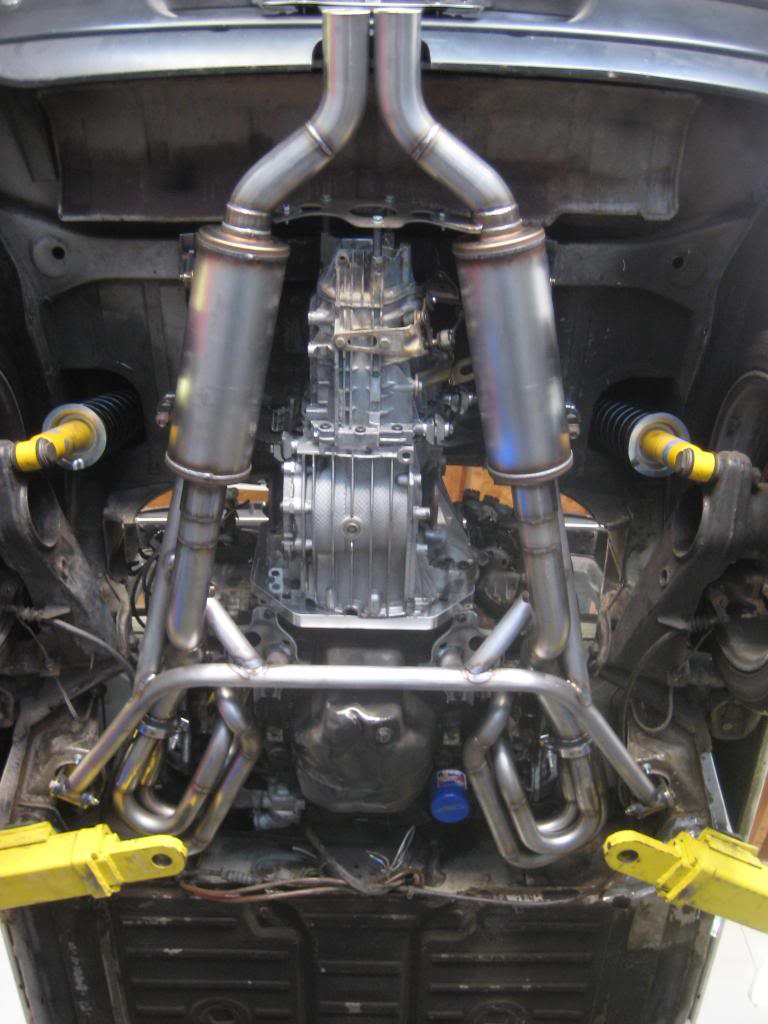
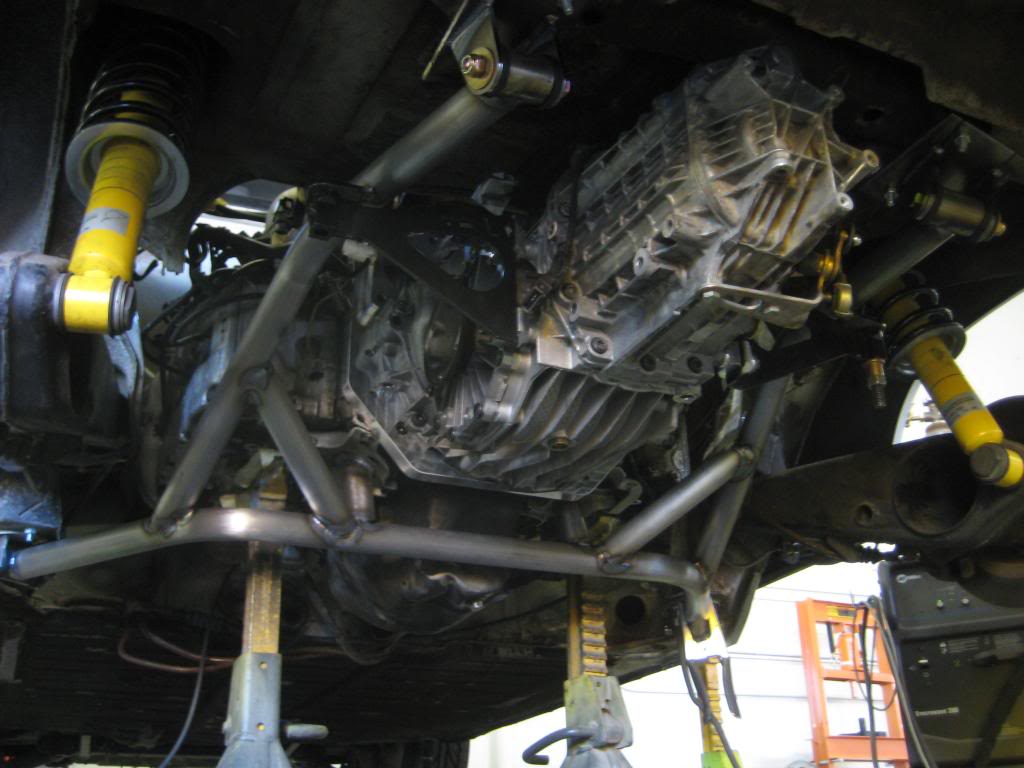
Posted by: Chris H. Nov 19 2014, 04:30 PM
Yeah that is a tasty setup Bob. I look at that thing all the time now that you pointed it out. Boxster 5 speed trans? Love how they pushed the exhaust forward and then back.
Sounds pretty good too:
https://www.youtube.com/watch?v=Fe_vWc87e1c
Were those magnaflow mufflers or some exotic expensive things?
Posted by: 914forme Nov 24 2014, 02:30 PM
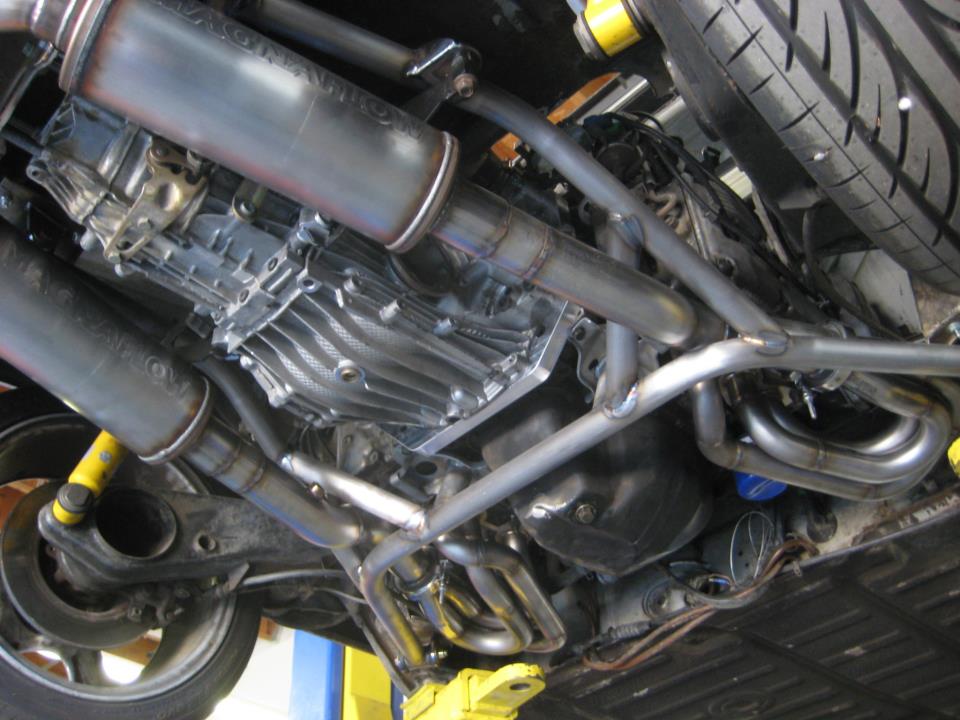
Looks like Magnaflow rounds to me, and Burns SS pieces where use to fab the collectors. Pretty easy when you get right down to it. Easy of me to say, now me getting it done, thats another matter. Oh Santa, please bring me a plasma Cutter and Tig Welder. 
Posted by: Chris H. Nov 25 2014, 07:46 AM
EASY? If that's easy for you Stephen I can't wait for your build thread!
FYI all I MIGHT be getting a close look at Bob's car in a few weeks. I'll post videos and pics if so. It'll be great to see a really nice well-known car that's done, sorted, and has some miles on it. I might even DRIVE it
 . He's just about got the LS car done too. Here's a couple of pics I snagged from his blog:
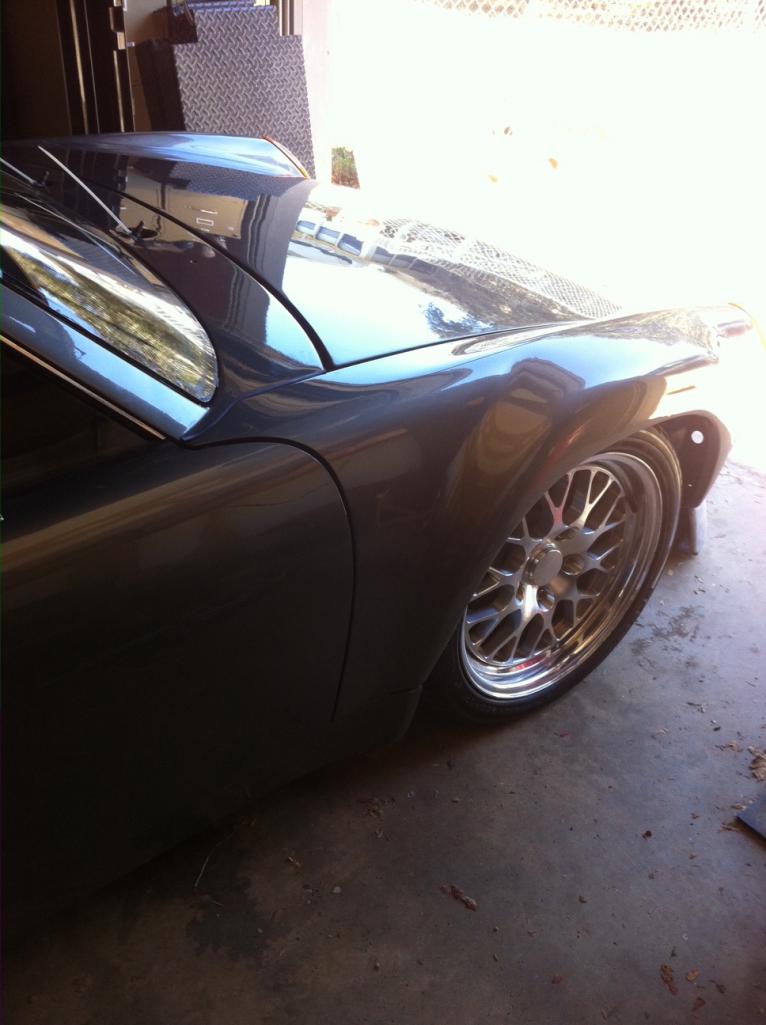
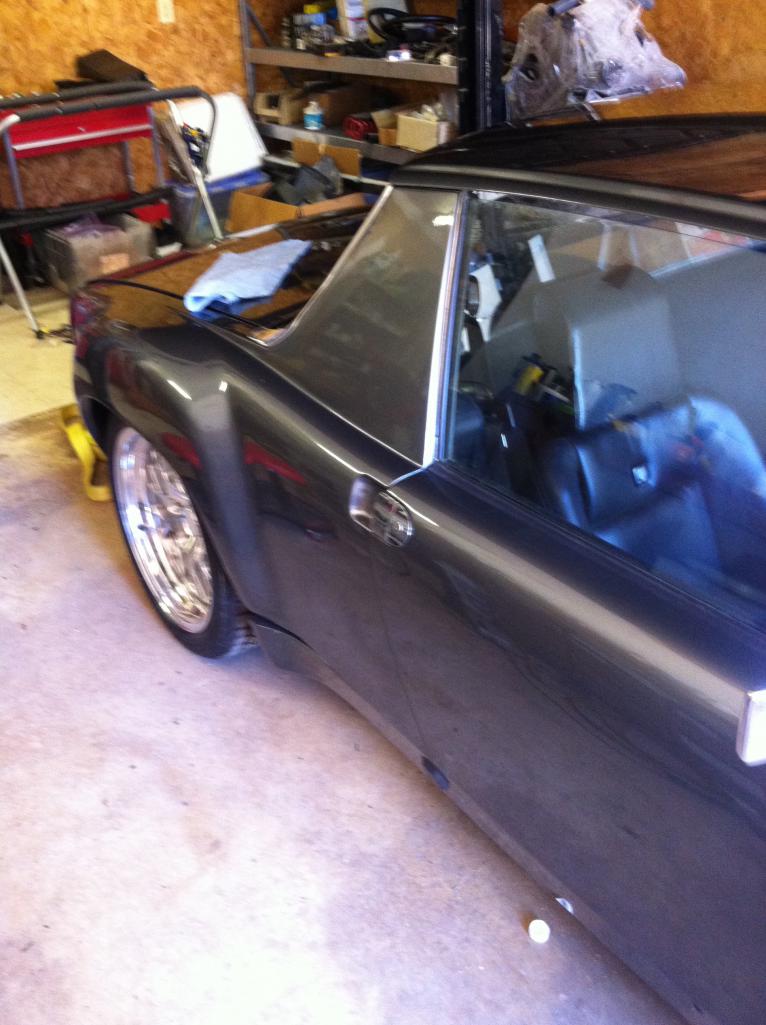
How 'bout that paint?
Posted by: BIGKAT_83 Nov 26 2014, 08:30 AM
2 more 
Posted by: Chris H. Nov 26 2014, 11:32 AM
Bob,
That thing looks amazing. So it's an LS Corvette engine mated to a Boxster trans... Can't wait to see it in person.
Those two teeners look like caged animals behind the fence (other one is a V8 conversion too) .
Posted by: euro911 Nov 26 2014, 11:39 AM
NICE
Posted by: 914forme Jan 20 2015, 06:27 AM
Chris, Uh yeah, we will see if my skills keep up with my mind. Luckily I have a pro welder that can do some work for me. Welds tanks all night for his job. Guy lays perfect dimes. So when are you going to see Bob's cars? Man we all need detailed shots of those cars. I think Bob has the marketing savvy of Hugh Hefner. Just give us enough of a picture that we want to see more and more. I would love for him to write up detailed threads of the builds, I know they guy is supper busy, and you have to respect the fact, his cars get done.
Posted by: 76-914 Jan 20 2015, 09:28 AM
Dang. Saw this pop up and thought you had begun work on your car again. Obviously, there are no Eskimo's or none of Admiral Byrd's DNA in your clan. . I guess it will be March before you get back into it again?
Posted by: BIGKAT_83 Jan 20 2015, 12:41 PM
Chris, Uh yeah, we will see if my skills keep up with my mind. Luckily I have a pro welder that can do some work for me. Welds tanks all night for his job. Guy lays perfect dimes. So when are you going to see Bob's cars? Man we all need detailed shots of those cars. I think Bob has the marketing savvy of Hugh Hefner. Just give us enough of a picture that we want to see more and more. I would love for him to write up detailed threads of the builds, I know they guy is supper busy, and you have to respect the fact, his cars get done.
I have been working in Toledo off and on for the last 2 couple of months. I drive down I-75 thru Dayton.
I've been thinking about giving you a call and stop by and check out your car.
Talk about being all over the place I'm working in Chile now. They run the DAKAR rally in South America now and it came within 6 miles of where I'm working. Got to see some of the trucks and bikes.
Bob
Posted by: DBCooper Jan 20 2015, 01:34 PM
Chile? Cool. You at least come and go through Santiago, I'm sure. You know that huge TV/Radio tower downtown that you can see from everywhere? I've been to the top of it.
Oops. Hijack, sorry, I won't do that again.
Posted by: BIGKAT_83 Jan 20 2015, 02:03 PM
Spent last weekend in Santiago.............Damn nice place(where I was at) Saw a few new Porsches.
Bob I
Posted by: Chris H. Jan 20 2015, 03:18 PM
Yeah I really need to update the thread on my trip to Bob's. Unfortunately there are no pics. It was a really weird, very cold, frozen-fog-in-the-air kind of day so pics were darn near impossible. I was able to spend a couple of hours there and will be going back soon to get some parts.
First, DB, no need to worry about hijacking. The thread is for interesting comments at this point, random or not!
So about the cars...
The blue EZ30 car is a “finished” conversion. It was cold when I got there, he cranked it up and then we looked around his shop for about 20 minutes. The thing just sat there idling, never even heated up all the way. You could hardly hear it running. We took it out and drove it for quite a while “spiritedly” (not crazy). It never got above 180 degrees and the needle didn't move at all, just like a stock Subie. Seemed like you could cruise along all day in it. Just felt solid. The exhaust system has an extra center muffler in it (look in his blog) which makes it sound really nice. Porsche-ish. It has power windows also. His shifter is like butter, a little longer throw than the MR2 and you hardly have to touch it to move it. Might have to reattach my extension. Also noticed than my shifter needs adjustment. 1st and 2nd gears are way too far left on mine. The suspension was tight too. I think it's all 911. It's a NICE driver, not a show car, and man does it run, stop, and turn well.
Bob's selling it for what sounded like a very fair price, so if anyone is thinking about a conversion but hasn't done much yet, you should take a look at this car. Skip the headaches. If I hadn't owned my car for 13 years I'd be all over it.
He also has an EZ30R engine and a trans already set up with a locking spool he's about to sell. The EZ30R is rated at 250hp. If anyone wants a cool engine for a conversion jump on it before he puts it on NASIOC.
The gray LS car is going to be a show quality car. He was working on getting the trans connected to the engine properly when I saw it. The adapter plate wasn't cooperating but he'll figure it out. Anyway it has Wilwood brakes, needle bearing suspension, Fikse wheels, the paint is very nice, he has deleted the vent grill up front and the fender seams, the hood will have a Mustang GT350 vent in it for radiator exhaust (looks really cool). The interior is super nice as well with all new inserts and seats. Looks like he used the Boxster center console too. The gauge console is all digital. There are a lot of cool little details; like he zinc plated the hood hinges, stuff like that. The suspension is set up to handle the engine power, which is key. Should be a very well balanced beast. And it WILL be a beast.
Did you get that Camaro yet Bob? Let's see that thing.
And Hi Kent  . It warmed up a little around here. I'm hoping to get that new radiator fan switch installed this weekend if I can stand it in the garage. Also got new fans for my rad. The SVX ones pull air in weird directions. Picked up the ones for the Celica GTS rad.
Posted by: euro911 Jan 20 2015, 09:51 PM
Now I understand what prompted you to parachute out of the back of that 727 over Oregon
Posted by: DBCooper Jan 20 2015, 10:44 PM
Yeah. About that. I just want to point out that all the speculation was correct and I didn't survive the fall, I swear. Plus the statue of limitations has expired. Long, long expired.
Posted by: 914forme Jan 29 2015, 08:34 AM
Chris, I have been working on my car, its just been under cover like the Manhattan Project.
Pondering engine and transmission mounting currently. Had a design i my head, bringing the engine and trans under the car just did not make it work for me. So back to the drawing board.
And I still have not brought myself to cut the car, I have a cut it up before not thinking about the future value, when the cars where cheap it was easy. Need a huge front sway bar, put it in. Build the mounts weld it up. Need to stiffen the frame, weld the parts in. So why ca't I cut a trunk, or an engine shelf.
To that end I did flip the manifold which brings up a huge set of other issues, but it does fit better.
Not sure if I am going to do it this way or not.
Posted by: 76-914 Jan 29 2015, 09:05 AM
Steve, if you have a chance; weigh the complete drive train. I'd like to know the difference.
Posted by: Chris H. Jan 29 2015, 10:23 AM
Stephen,
Interesting...I'm seriously thinking about flipping mine and welding up the hole I cut for the intake. How hard was it? I hate that hole too!
EDIT: and did you flip JUST the top portion of the intake or both sections (it has 2 pieces)?
Posted by: mgp4591 Jan 29 2015, 01:14 PM
Posted by: 914forme Jan 30 2015, 08:51 PM
Stephen,
Interesting...I'm seriously thinking about flipping mine and welding up the hole I cut for the intake. How hard was it? I hate that hole too!
EDIT: and did you flip JUST the top portion of the intake or both sections (it has 2 pieces)?
I flipped the entire thing, you will have to move the alternator! It is pretty easy if you ditch a bunch of stuff, you will have to move the air solenoid.
Looking at it today, I am thinking about doing something a little different. Keeping the bottom half flipped, and moving the return line, and inlet to feed from both sides of the engine. Ever since reading what SDS did for an intake on a 3.3, I have been thinking about making one myself. They did it out of steel, but for some reason, I am thinking about doing lost foam carbon fiber intake. I have seen someone comment on flammability, but then you know the internet, it is full of clowns, who say their cousin's, father's, sister's husband's corvette go up in flames. The forgot he doused it in gas, and diesel fuel, with a touch of kerosene just to give it a nice look. I'll do my own research, I have three ideas right now.
Single TB, main plenum. easiest
ITBs
Or my current favorite, but of course the hardest of all, Stacks looking like MEFI off a 911, going into an 911 style airbox. The filter will be behind the Single TB, which would be mounted behind the air snorkel.
or 
Oh and I did have to cut a hole in my rear trunk today, so the first cut is done. Glad I am past that!!!! I had to make clearance for the clutch line. Might elongate it a little and pickup the fork, that would allow me to bring the engine up a little. But then we will see.
I will try and weight the drive train, I can squat 550 pounds right now. Not sure I want to dead lift a subie engine and trans and step on a scale.
In reality I am not sure I have a scale that will tell me. To bad I don't have a set of corner scales. I could give you the total and what the cross weights look like. Oh I know how I'll do it. But it will have to weight until spring, I'll load the engine in the truck, run down the grain elevator, and hop on the scale, the unload it, and get the weight difference. +-10 pounds okay for you?Bob, there really ain't to much to see right now,
, except a bare chassis, and a lot of pieces going in, and back out a few hundred times to get things mocked up, welded in, and then removed for paint work. Really kind of boring when you get right down to it. But your more than welcome to stop by. Just PM me hopefully Im in town, crazy work schedule right now also.I really need to update my thread, just been doing stuff, I'll get to it. Maybe by the time I update it, I will have covered all my mistakes and it will look perfect.
Posted by: Chris H. Jan 30 2015, 10:28 PM
Great, thanks for the info. Where can I see this SDS intake you speak of ?
One idea I had to add a little height was to use phenolic spacers in the intake. IIRC if there was just a LITTLE more height it would help with the fitment when flipping the intake. I have to pull the engine to fix a small leak at the oil pump so I might try it then. I'll keep you posted.
Posted by: 914forme Jan 31 2015, 08:47 AM
http://www.sdsefi.com/air42.htm
Posted by: Chris H. Jan 31 2015, 07:42 PM
Wow...I definitely don't have the skills for something like that. Cool though. The two hole-d throttle body is definitely a pain. Not an insurmountable problem but a pain nonetheless. Would be easier to pipe if it was one like the EZ series. Rocky Mountain Westy makes an intake for the Vanagon but it's $400 and doesn't do much more for the 914 setup than stock. Unless you flip the intake or use something like I did (3000GT intake) you have to use the stock setup and do a lot more cutting of the firewall.
So Phase 2 for me is fixing the screw-ups/band-aid fixes-just-to-see-if-it-would-actually-run of Phase 1
Posted by: 914forme Jan 31 2015, 08:04 PM
Okay I did a little experiment today with the flipped manifold. It will work, sort of
You will need to raise the intake up 3.75 inches, if you leave the alternator in its stockfish position. And yes it still clears the engine lid with out a rain tray. Now for the but!!
I took the PVC vent piece off the TB, made it that much easier to fit stuff up. That thing is huge!!!!
Now if you use the stock snorkel, you run into an issue. It needs to move back 1.5 inches rearward. It would just clear the firewall, but you might like to add a dent just to give you a little extra space. And you will have to clearance the latch brake for the engine lid. But no more cutting in the rear trunk, except for the slave cylinder banjo fitting.
Heres the pictures!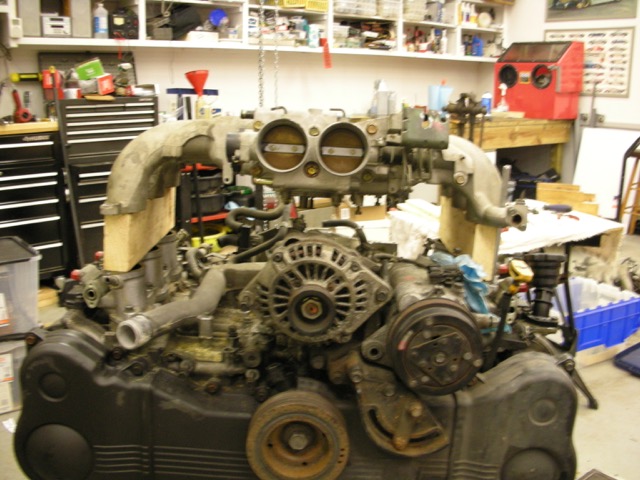

Posted by: 914forme Jan 31 2015, 08:08 PM
Here it is with out the snorkel, might still be able to make it work!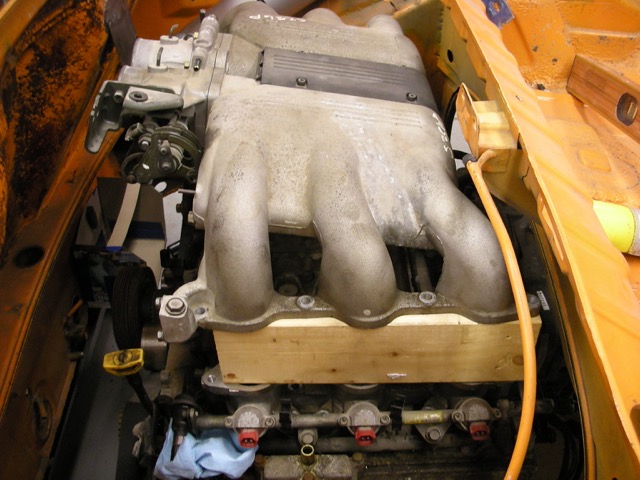
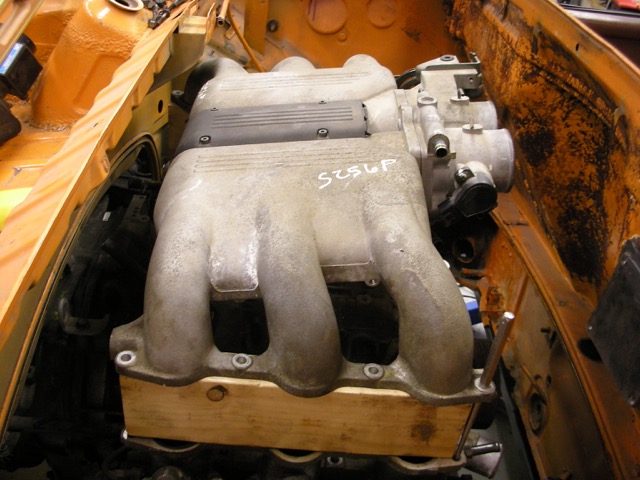
Posted by: DBCooper Jan 31 2015, 09:30 PM
Wouldn't it be easier to relocate the alternator? Need that A/C compressor? I think SmallCar or someone even sells a new bracket to do that. You might want to check, if nothing else than to see how they do it.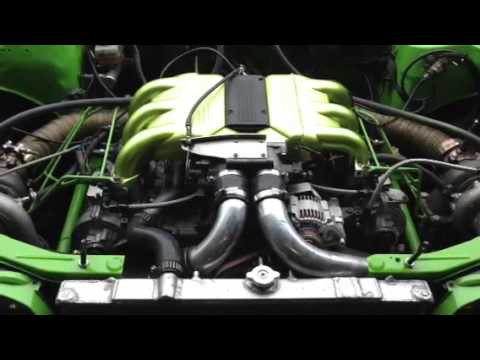

Posted by: mgp4591 Feb 1 2015, 01:03 AM
Wouldn't it be easier to relocate the alternator? Need that A/C compressor? I think SmallCar or someone even sells a new bracket to do that. You might want to check, if nothing else than to see how they do it.
Now there's an idea- twin turbo your EG33!! What trans would you use that wouldn't blow up??
Posted by: Chris H. Feb 1 2015, 01:12 AM
Yeah I heard somewhere that a Mazda alternator works well for relocation. Think one of the guys here mentioned it. It sort of looks like the stock alternator is used though. Good call DB, we need to look at Subie EG33 conversions and modified applications. Those twin turboe'd cars are probably unbelievable!
Posted by: 914forme Feb 1 2015, 09:33 AM
I have one with the flipped stock alternator if you don't want/need A/C.
Ditch cruise control also and you don't need to raise the manifolds at all. If you want cruise, then you will need 3/4" blocks. Might not be a bad idea anyway. Get some heat transfer out of the all aluminum heat mass. 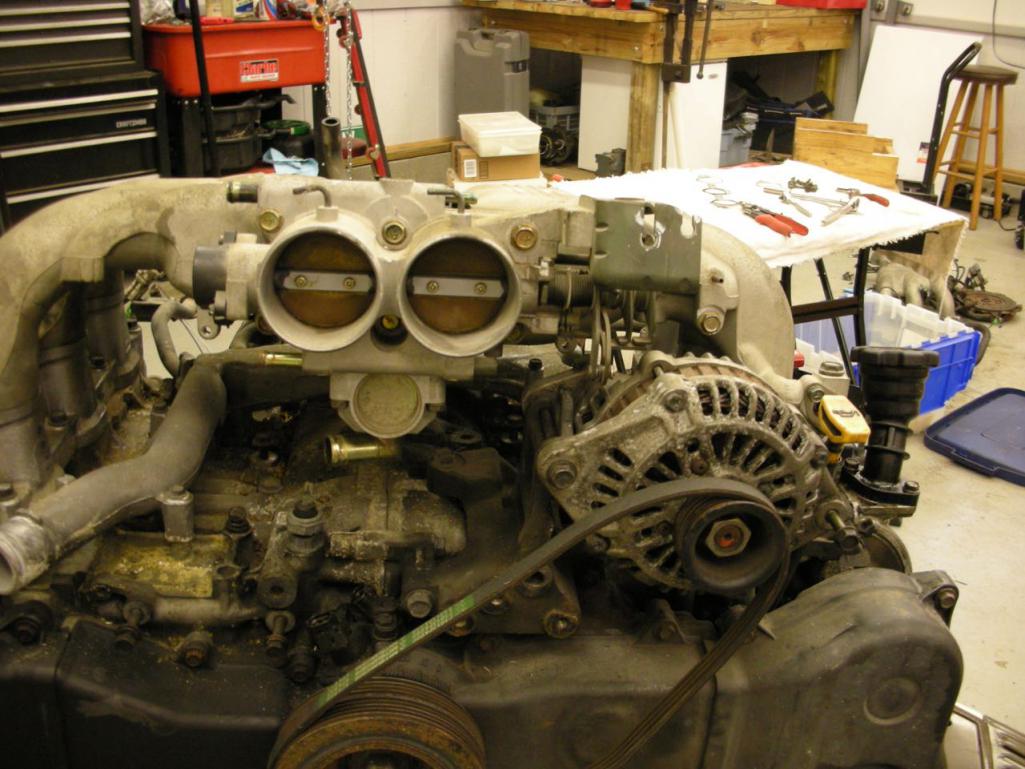
With out blocks cruise control piece hits alternator, use smaller alternator, or.....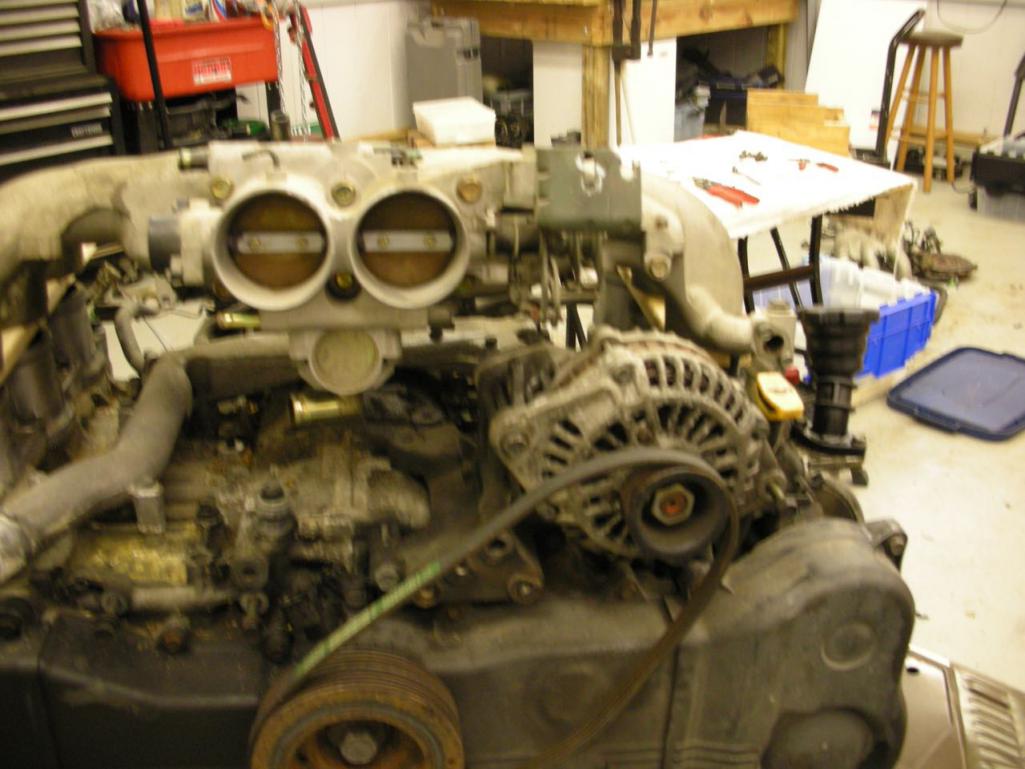
Much better Sorry for the blurriness of the picture, I have Sir Andyitist! And I don't have a picture of that setup in the car. I did it and it does work with out a single cut.
Last night I started to think about where to get the air and where to put the filter. GT Engine lid, and mount the filter box in front of the engine in the recess in the fire wall. Could make it a huge panel filter. Big question is will it draw enough air.
Oh nice twin turbo SVXs, very nice No No No, get the ideas out of my head!!!!!!
BTW, I think most of them go with a Subaru 4.44 autos, though the SVX autos are know to be pretty sought also. hmm I know where theres one of those right now, in PA in another 914 conversion donor pile!
Posted by: 914forme Feb 1 2015, 09:43 AM
If you want A/C and alternator, why not just put the alternator over where the Power Steering pump was? Will require a bracket, might require a smaller alternator. But that should work also. If I had Photoshop skills, I would move it over for you.
Wish I had photo shops skills, my CAD skills are limited to Network wiring diagrams. So thy are of limited help right now also. I'm old school, tape measure, pen knife, and cardboard. Make a template, and build. Like this battery box, I liberated the idea off another build. Nice and low, passenger side, between the axles. And plenty of room there.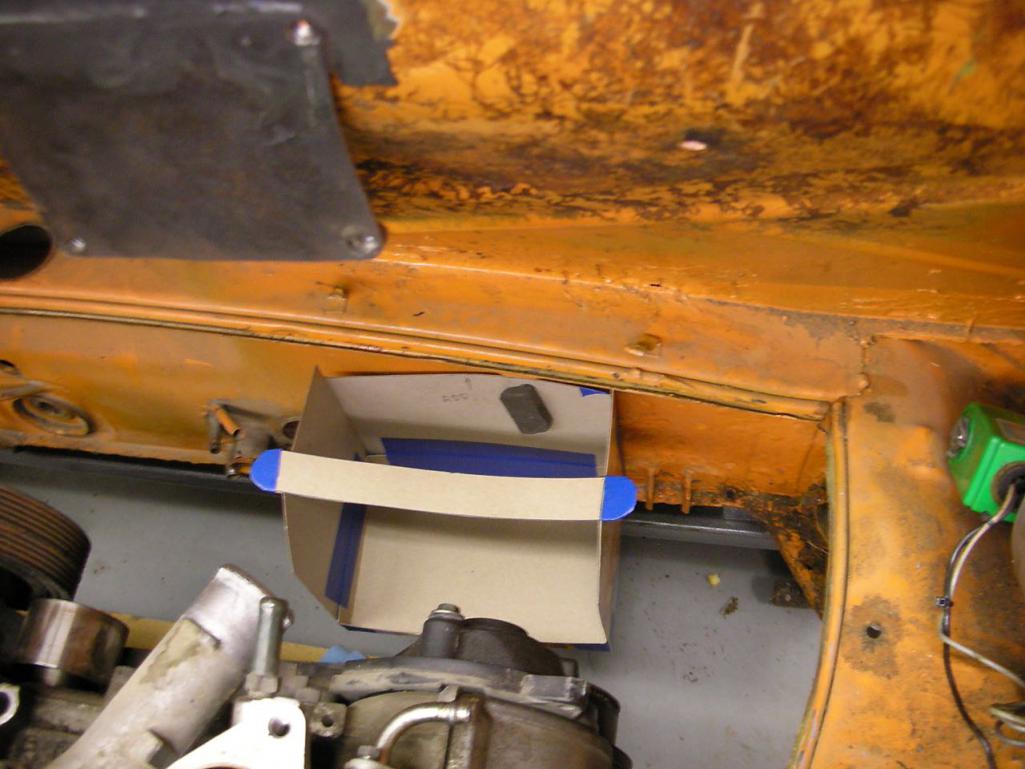
Posted by: Chris H. Feb 1 2015, 10:14 AM
I should have waited for you to do your conversion Stephen! So are you telling me I can just flip-flop the alternator into the space where the AC unit was??? I already took the AC out for now. The bracket has a tensioner on it too, so I can remove the heim joint. Not planning to run cruise so that can be removed and capped. AWESOME!!! Thanks very much for the info. Very excited. Now I just need to find a piece to cover up my hole in the firewall. Lots of cars getting cut up, I'm sure someone will have one.
BTW you might THINK you'd like cruise control but the car turns into an animal vs the SVX and it becomes a lot less desireable. It's too much fun to set the cruise control.
Posted by: rnellums Feb 1 2015, 10:18 AM
Here is a pretty cool custom intake for the EZ30:
http://forums.nasioc.com/forums/showthread.php?t=2299743&page=7
Attached image(s)
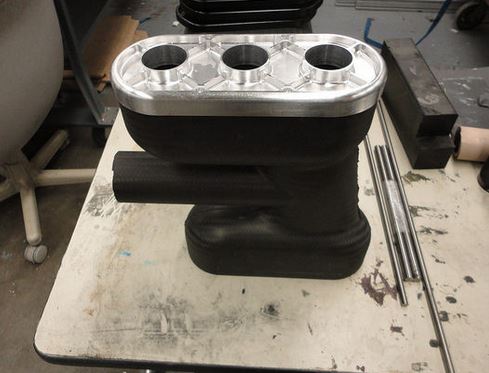
Posted by: mepstein Feb 1 2015, 10:25 AM
BTW, I think most of them go with a Subaru 4.44 autos, though the SVX autos are know to be pretty sought also. hmm I know where theres one of those right now, in PA in another 914 conversion donor pile!
my car was upgraded to a legacy auto. I would love someone to be able to use it. If not, it will go with the car to the crusher.
Posted by: Chris H. Feb 1 2015, 10:30 AM
Have you thought about posting it for sale on an SVX forum, with the caveat that they have to go get it/remove it? Might get $100 and someone would be happy.
AWESOME intake Ross.
Posted by: 76-914 Feb 1 2015, 10:43 AM
Ahhhh, activity! It's been the Boredom Bowl since Winter set in. I miss all the builds. I wouldn't worry about making cuts. Once that Suby, SBC, etc is installed the car is a bastard anyway. Just save the pieces that are cut out so they can be welded back in place. No worries! Now we just need to shake Doug's cage a little.
Posted by: 914forme Feb 1 2015, 05:45 PM
I should have waited for you to do your conversion Stephen! So are you telling me I can just flip-flop the alternator into the space where the AC unit was??? I already took the AC out for now. The bracket has a tensioner on it too, so I can remove the heim joint. Not planning to run cruise so that can be removed and capped. AWESOME!!! Thanks very much for the info. Very excited. Now I just need to find a piece to cover up my hole in the firewall. Lots of cars getting cut up, I'm sure someone will have one.
BTW you might THINK you'd like cruise control but the car turns into an animal vs the SVX and it becomes a lot less desireable. It's too much fun to set the cruise control.
Okay, well you'll be done before me. Now, you will still need the helm joint, as the tensioner you speak of is for the AC, and its a back pulley. You would have seen it, when you bolted it all up.
I want cruise control to keep me in check on the long drives I am planning on doing in the car. I'll kick it off when I get into the twists
Posted by: mepstein Feb 1 2015, 07:47 PM
Have you thought about posting it for sale on an SVX forum, with the caveat that they have to go get it/remove it? Might get $100 and someone would be happy.
Good thought but It's at my mechanics. I can't just send people over to work on the car.
Posted by: 914forme Feb 2 2015, 10:28 AM
Have you thought about posting it for sale on an SVX forum, with the caveat that they have to go get it/remove it? Might get $100 and someone would be happy.
Good thought but It's at my mechanics. I can't just send people over to work on the car.
Tell them they pay you $400 for trans they can have everything else on the car they want, and they must pickup and dispose of it, within X time. Requirement being they tow it off your mechanics lot, and you sign the title over to them. No liability on you after the title transfer, and you solved your dispose issue with 4 uncle Ben's in your pocket. Heck I would give my mechanic some
for his troubles also. Some really nice
Posted by: 914forme Feb 5 2015, 02:51 PM
Here is a pretty cool custom intake for the EZ30:
http://forums.nasioc.com/forums/showthread.php?t=2299743&page=7
Nice tip on that thread
Now I have another thread to keep up with, that guy's got some serious talent.
Posted by: 76-914 Apr 10 2015, 09:19 AM
Hey Chris, the snow is melting; time to dust off this build thread and get 'er going again.
Posted by: Chris H. Apr 10 2015, 05:31 PM
Darn right brother! Thank you again for the stickers.
Planning to at least get the new fan setup and fan controller installed this weekend. I'm also going to move my shifter slightly back and copy Roachghia's setup. Raises it up a bit so I don't have to extend it. The short shift throw is nice if you can make it work.
How's everyone else doing out there in Subie land? Anything cool to report?
Posted by: mgp4591 Apr 10 2015, 10:02 PM
Darn right brother! Thank you again for the stickers.
Planning to at least get the new fan setup and fan controller installed this weekend. I'm also going to move my shifter slightly back and copy Roachghia's setup. Raises it up a bit so I don't have to extend it. The short shift throw is nice if you can make it work.
How's everyone else doing out there in Subie land? Anything cool to report?
Got my trailing arm bushings from Eric installed, picked up the front bushings and new rear Bilsteins.... that's gotta count for something!
Posted by: veekry9 Apr 11 2015, 01:52 AM
http://www.sdsefi.com/air42.htm
http://www.kitplanes.com/magazine/engines/175-1.html
http://www.kitplanes.com/magazine/engines/174-1.html
http://www.kitplanes.com/magazine/engines/173-1.html
A composite Subaru intake manifold for a custom that worked,a thing of beauty.
Requires some fab skill in the medium,he used a hi-temp epoxy/s-glass layup on a foam core.
https://www.google.ca/search?q=subaru+performance+turbo+intercoolers&espv=2&biw=1097&bih=550&source=lnms&tbm=isch&sa=X&ved=0ahUKEwjG1Na749LNAhWI7IMKHRBqCtgQ_AUIBigB
https://www.youtube.com/watch?v=7rS7in5COiw
another material.
Posted by: 76-914 Apr 11 2015, 07:46 AM
http://www.sdsefi.com/air42.htm
http://www.kitplanes.com/magazine/engines/175-1.html
http://www.kitplanes.com/magazine/engines/174-1.html
http://www.kitplanes.com/magazine/engines/173-1.html
A composite Subaru intake manifold for a custom that worked,a thing of beauty.
Requires some fab skill in the medium,he used a hi-temp epoxy/s-glass layup on a foam core.
http://www.ch601.org/resources/subaru_faq.htm
https://www.youtube.com/watch?v=7rS7in5COiw
another material.
Uh, that's a 2.2, not a 3.3. I spent 20 yr's in the Homebuilt Aircraft Industry and never saw an auto conversion that merits the work required. An exercise in WTF! An adequate analogy would be, "Would you put an A/C engine in a car and why?"
Posted by: Chris H. Apr 12 2015, 05:46 PM
Changed my fans out today...you can buy the Celica GTS radiator on e-bay with or without the 12" fans. Trust me, they are worth the extra $86.
I started with a set of 10" fans because I had them, made a shroud out of metal that I had...just wasn't pulling enough. 
Then I tried adapting the SVX fans, which seem very sturdy and fit perfectly onto the radiator. The problem there was that the air flowed down and to the sides rather than straight through the fans. 
Here are the correct, 12" slim fans (they come in black too)
Here they are running. Great flow. So much better than the 10". Note the carpet flapping in the breeze.
https://www.youtube.com/watch?v=fzsG92HWl0g
BTW don't worry about the rattling sound. The shroud was loose since the top was off and vibrating against something.
Posted by: Chris H. Apr 12 2015, 06:03 PM
I also stopped using the SVX ECU fan controller to power my radiator fans. It never quite acted right. Don't know why but even though I had them wired together, when they both needed to be running in high speed mode, only one of them would run. Not good. Got tired of troubleshooting it for hours. Even Bob was a little baffled.
With Bob's recommendation I went to this: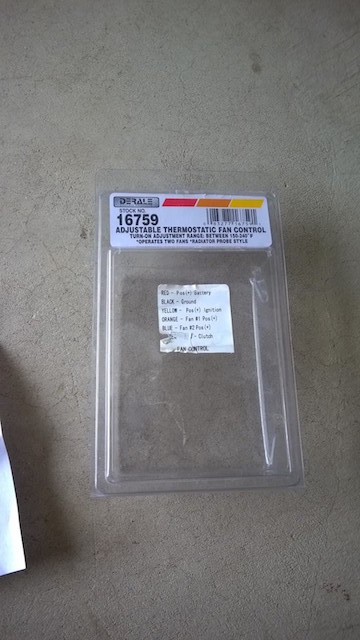
No it's not invisible, but it's pretty small. Fits nicely on the bumper support: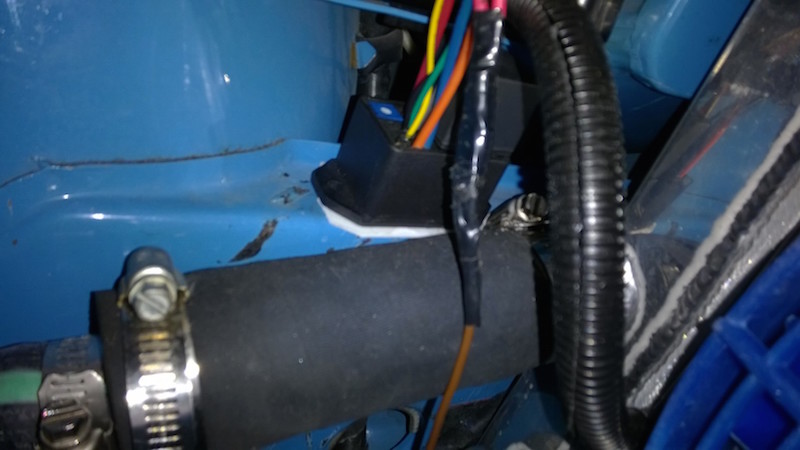
It wires up so easily and can control two fans. It also has an AC wire that would switch the fans on regardless of temp. I wired that up to a switch and will be using it temporarily as an override to run the fans constantly if I want to while I'm getting the cooling system dialed in. 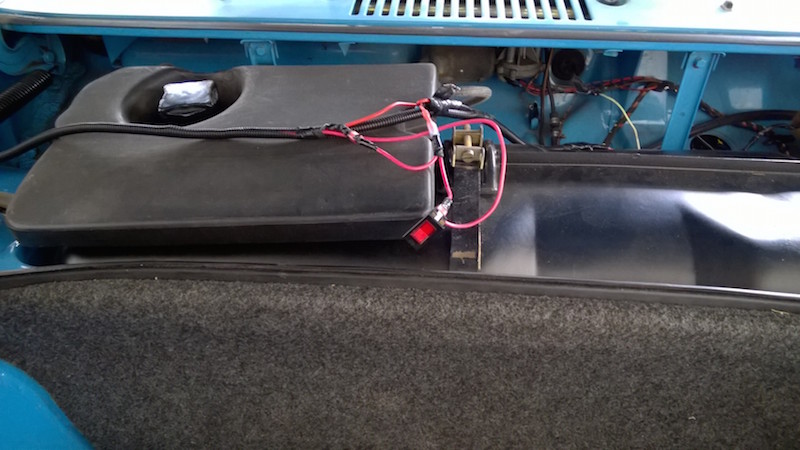
Easy instructions: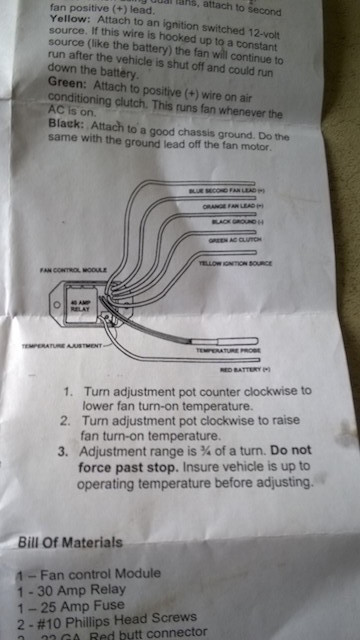
I need to get my Renegade valance installed and the front opening cut out a little larger so I can drive it around. The engine hasn't gotten warm enough so I can set what temp to kick the fans on at. It's not quite a perfect science since the sensor is in the radiator core, not in the coolant flow. I'll keep y'all posted on the performance.
Posted by: 904svo Apr 12 2015, 08:12 PM
I also stopped using the SVX ECU fan controller to power my radiator fans. It never quite acted right. Don't know why but even though I had them wired together, when they both needed to be running in high speed mode, only one of them would run. Not good. Got tired of troubleshooting it for hours. Even Bob was a little baffled.
With Bob's recommendation I went to this:
No it's not invisible, but it's pretty small. Fits nicely on the bumper support:
It wires up so easily and can control two fans. It also has an AC wire that would switch the fans on regardless of temp. I wired that up to a switch and will be using it temporarily as an override to run the fans constantly if I want to while I'm getting the cooling system dialed in.
Easy instructions:
I need to get my Renegade valance installed and the front opening cut out a little larger so I can drive it around. The engine hasn't gotten warm enough so I can set what temp to kick the fans on at. It's not quite a perfect science since the sensor is in the radiator core, not in the coolant flow. I'll keep y'all posted on the performance.
FWIW, Subaru uses the power steering oil pump switch to control the fan speed.
Posted by: Chris H. Apr 12 2015, 08:43 PM
That's very strange. Probably part of the problem since I'm not running a power steering pump and had removed that circuit from the harness.
Posted by: 76-914 Apr 12 2015, 10:25 PM
I also stopped using the SVX ECU fan controller to power my radiator fans. It never quite acted right. Don't know why but even though I had them wired together, when they both needed to be running in high speed mode, only one of them would run. Not good. Got tired of troubleshooting it for hours. Even Bob was a little baffled.
With Bob's recommendation I went to this:
No it's not invisible, but it's pretty small. Fits nicely on the bumper support:
It wires up so easily and can control two fans. It also has an AC wire that would switch the fans on regardless of temp. I wired that up to a switch and will be using it temporarily as an override to run the fans constantly if I want to while I'm getting the cooling system dialed in.
Easy instructions:
I need to get my Renegade valance installed and the front opening cut out a little larger so I can drive it around. The engine hasn't gotten warm enough so I can set what temp to kick the fans on at. It's not quite a perfect science since the sensor is in the radiator core, not in the coolant flow. I'll keep y'all posted on the performance.
FWIW, Subaru uses the power steering oil pump switch to control the fan speed.
And since none of us have pwr steering, you can take that lead to ground for a 50rpm boost in idle.Chris, your fans sound serious. Driving time is very near.
Posted by: Chris H. Apr 13 2015, 08:03 AM
Hey Kent! Yeah I already grounded the PS wire which you figured out last year for me. You just reminded me I need to reconnect it! In addition to the idle increase it also provides a constant "load" to the system which is important for the SVX ECU. I was very tempted to drive it around but it's better if I work through the issues first. The hole up front is too small so it won't cool enough. No reason to subject it to overheating. The shifter cables are also slightly melted, which I need to replace. I have new ones.
Next up:
- Get the valance fitted and cut the front trunk hole bigger. Probably also have to adjust the shroud angle on the sides since the hole will be a little wider.
- Need to get to Bob's to pick up my second trans and some other stuff. My trans has a whine which may or may not be fixable. Bob says no, so it's 99.9% no. Probably work for a while, but not indefinitely. Regardless, I want the trans he has at his place and to see his newest project. It will be warm enough to take pics this time!
- Fix minor oil leak at the oil pump. For you EG33 guys, the oil pump must be re-sealed using a bead of RTV...I had the whole damn engine apart and did the timing belt and water pump but didn't re-seal that SOB.
- Swap out my cables, try a new shifter position/option
- Flip the intake if I can make it work.
- Install my louvered floor pan
Lots to do, but I also want to start enjoying it, so the priority is getting it driveable for long distances.
Posted by: 76-914 Apr 13 2015, 08:10 AM
Much to do in one respect; very little in a other. I'll bet your done within 30 days.
Posted by: 904svo Apr 13 2015, 08:26 AM
Here the circuit I used.
This circuit can control other power circuits only when the engine is running.
Posted by: Chris H. Apr 13 2015, 08:34 AM
Very interesting stuff! Any thoughts on how to solve the dreaded SVX stall issue that is (allegedly, according to the SVX guys) caused by the fact that all SVX's are automatics and the ECU expects a load of some kind at all times? I've had it happen. Engine idled perfectly in the SVX. Now it will sometimes stall when you put the clutch in, especially when coming from high rpms. Seems to happen after warmup. When cold it's fine. Even with the power steering pump wire grounded it wasn't 100% cured. I know smallcar had a chip you can install for ~$260, but it's not on their website any more.
Posted by: 904svo Apr 13 2015, 09:30 AM
Very interesting stuff! Any thoughts on how to solve the dreaded SVX stall issue that is (allegedly, according to the SVX guys) caused by the fact that all SVX's are automatics and the ECU expects a load of some kind at all times? I've had it happen. Engine idled perfectly in the SVX. Now it will sometimes stall when you put the clutch in, especially when coming from high rpms. Seems to happen after warmup. When cold it's fine. Even with the power steering pump wire grounded it wasn't 100% cured. I know smallcar had a chip you can install for ~$260, but it's not on their website any more.
Two things that I know of that cause the problem ,the brake switch and the clutch
switch must be hook up, and the ECU must have the AUTO lead to the ECU grounded
Most importation thing is the VSS must be wire to the ECU.
Posted by: Chris H. Apr 13 2015, 11:11 AM
Thank you! The brake switch and clutch switch would be hooked up to...? The brake light circuit for the brake I assume? Clutch would be what? And both are powered +?
Posted by: 904svo Apr 13 2015, 12:15 PM
Thank you! The brake switch and clutch switch would be hooked up to...? The brake light circuit for the brake I assume? Clutch would be what? And both are powered +?
With out the wiring diagram I'm not sure where the clutch switch would be connected.
The brake switch would be wired normally, the VSS signal must goto the ECU.
If you are using a Auto ECU I would guess the clutch switch would be wired to
the TCM lead to the ECU.
The ECU must get all the signals from the TCM to operate propely, these signals
can come from another source (fake) to make the ECM think it coming from the
TCM
Posted by: Chris H. Apr 13 2015, 12:27 PM
OK thanks. The VSS is definitely connected so that's good. I doubt the Auto wire is grounded. I'll start with that and see what happens. I'll dig up the wiring diagrams too. Thanks for the help! So just to confirm, I just need to connect the brake wire into the brake circuit somewhere?
Edit: BTW I still have the TCM...but would think that might complicate things to hook it back up...maybe not?
Posted by: Chris H. Apr 14 2015, 08:32 PM
Dug up one of the ECU pinouts I used (Found on an SVX site). The ECU does not have a clutch or brake switch wire, those are on the TCM. I do see a few wires that might be helpful in evening out the idle issue
- Pin 16 in the top plug labeled B59 is called "atmospheric pressure sensor / A/T control unit" No voltage required, I may ground it and see what happens.
- Pin 20 in the top plug..."torque control signal"...how about that one? requires 5 volts to "trick" it.
- Pin 11 on B60 - speed sensor 2 - should I connect this to the VSS on my trans? I don't have it connected currently. Thought I did. 
Posted by: 904svo Apr 14 2015, 10:30 PM
Dug up one of the ECU pinouts I used (Found on an SVX site). The ECU does not have a clutch or brake switch wire, those are on the TCM. I do see a few wires that might be helpful in evening out the idle issue
- Pin 16 in the top plug labeled B59 is called "atmospheric pressure sensor / A/T control unit" No voltage required, I may ground it and see what happens.
- Pin 20 in the top plug..."torque control signal"...how about that one? requires 5 volts to "trick" it.
- Pin 11 on B60 - speed sensor 2 - should I connect this to the VSS on my trans? I don't have it connected currently. Thought I did.
From what I read on SVX sites the VSS has to be connected up.
The brake an clutch switchs are used to control cruise control.
Posted by: Chris H. Oct 14 2015, 09:09 PM
Few updates you might be interested in.
First is the trans whine "issue", which was not an issue at all, just a misunderstanding in the directions when installing the locking spool. The instructions were to remove the thinner of the two washers from the original assembly when installing it. That is ONLY IF you have two small diameter washers at the END of the assembly. There is a larger diameter washer that goes in BEFORE the spool. DO NOT REMOVE THAT ONE!!! It will seem like the right thing to do, but it's not. You won't be able to get the nut tight enough and gears 3-5 will be slightly mis-aligned and whine. I only drove it about 10 miles that way, so no harm done. Apparently there are Subie guys who tolerate this kind of whine for thousands of miles. Once I reinstalled the washer it was totally quiet. The trans only has 64k on it, and there were no signs of wear at all.
More info here:
http://www.914world.com/bbs2/index.php?showtopic=260829&hl=trans+whine
Once I fixed the trans, the drive train immediately started eating 914 CV joints. The Subaru end also slipped out once. Turned out to be worn out CVs.
See more on that here:
http://www.914world.com/bbs2/index.php?showtopic=262634&hl=trans+whine
Like a lot of the Subaru converts I used the MR2 shifter. I positioned it close to the stock setup, but the shift lever is a little too short. Didn't want to extend it too much since the short throw is nice. After trying several shift knobs and I heard that the stock MR2 knob is one of the best to use. Unfortunately when you screw that one on the shaft is WAY too short. Ordered this stainless steel extender:
http://www.ebay.com/itm/STAINLESS-STEEL-SHIFTER-KNOB-EXTENDER-EXTENSION-TOYOTA-SCION-SUBARU-M12X1-25-TC-/281184495750?hash=item4177e6e886&vxp=mtr
Just need an MR2 shift knob. Got mine from MR2Parts4U on e-bay. There are a couple of nice ones on there from other sellers too.
http://www.ebay.com/itm/1985-85-TOYOTA-MR2-USED-OEM-SHIFT-KNOB-BLACK-IN-GOOD-CONDITION-5-SPEED-MANUAL-/252123611863?hash=item3ab3bd02d7&vxp=mtr
Here's how it looks before assembly...WAY too long right? 
No!
Here it is installed: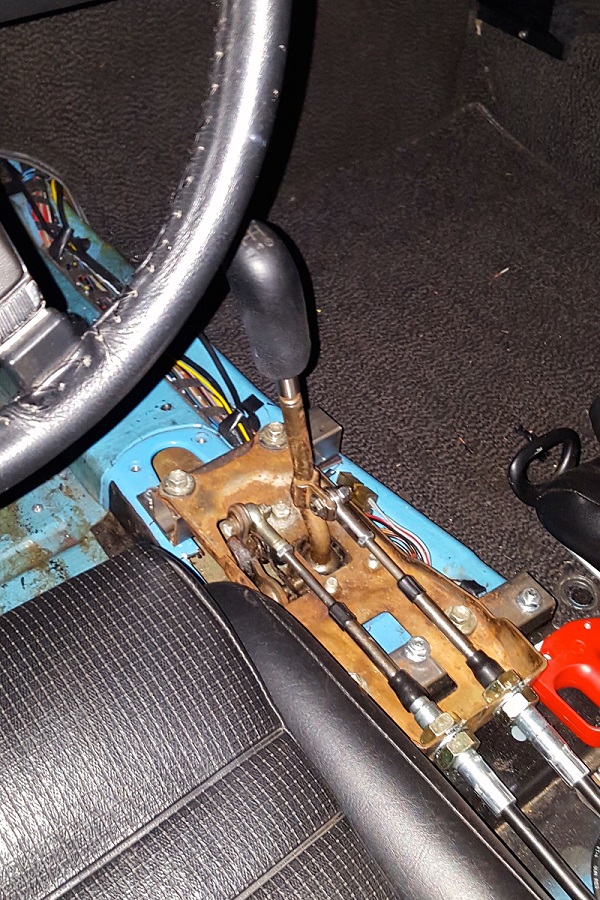
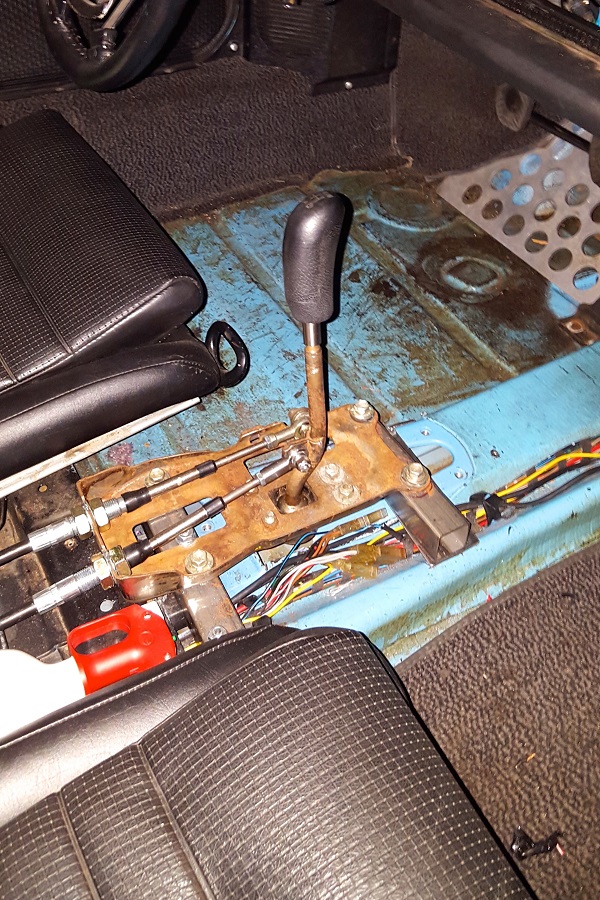
You grab the shift knob sideways instead of on top so the throw wasn't extended much.
Couple of things I learned:
- Avoid aluminum extensions. They will eventually break.
- If you buy one with a hex nut on it, make sure it's removable like this one is.
Need to work on the interior soon! Probably grab an MR2 boot and build a cover around it for the shifter and center area.
The other thing I did was properly connect the alternator directly to the battery. It's a common SVX upgrade, so I followed the process on the Subaru-SVX site.
Used 4 gauge wire and installed a 100 amp slow blow fuse just in case...
Here it is installed...bolts to the old FI box holes... 
The SVX battery also has 2 ground points, one chassis ground and one engine ground. I re did those with 4 gauge wire too. Here you can see the upper wire from the alternator to the battery, and the lower engine ground wire. 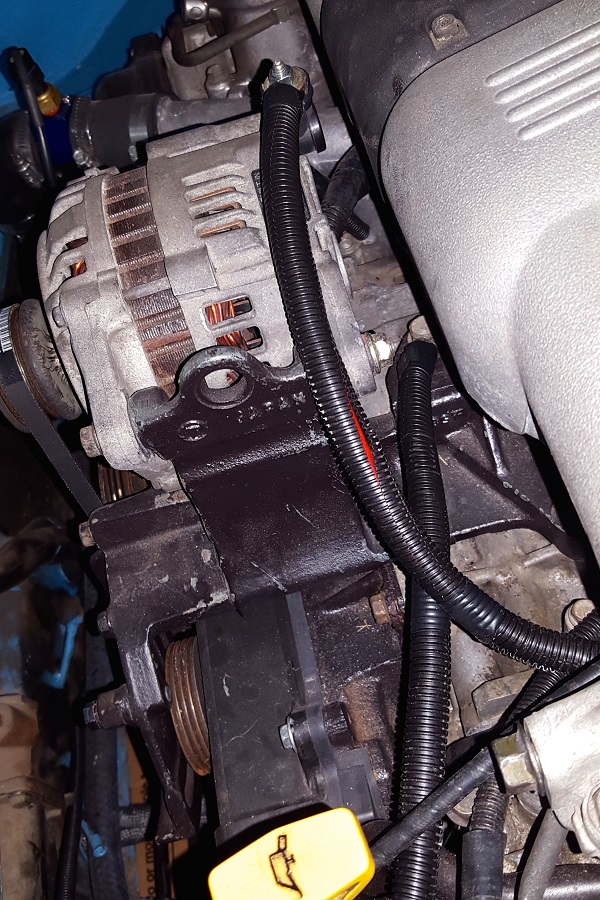
It's running well, staying at or below 185 degrees now. Next up is to connect the VSS, flip the intake, and make it look prettier.
Posted by: 76-914 Oct 15 2015, 10:08 AM
6 mo's between updates? Are you sneaking into the "Build off" threads? I need to connect my VSS to the ECU as well. Scares the shit out of me every time the ECU looks for that signal. For those of you that are converting to Suby and using the OEM ECU; if you don't connect that circuit the car will cut off for 2-3 seconds after driving at a constant speed for extended periods of time. As long as your throttle position changes e.g. town driving, it never occurs.
Good to see you posting again! Did you decide what to do for the floating 1/2 shafts and CV's. Was "the floating" shaft the culprit? Kent
Posted by: ThePaintedMan Oct 15 2015, 10:26 AM
Very nice Chris! Hate to add some doubt, but I'm in the process of flipping the intake on my engine stand. Unfortunately, there is a possibility some of those new wires may not work, depending on where you put the alternator when you flip it. I'll get around to posting pictures of how I flipped it soon. There is a lot more work than it initially looks like.
Posted by: Chris H. Oct 15 2015, 12:31 PM
Hey guys!
Yeah Kent I realized I had stopped posting stuff in my build thread. Not good for anyone building an EG33. Although the floating axles do offer a LOT of "float"..like...enough to fit two 914 CV's on the Porsche end of the shaft, I actually think the root of the problem was combining the floating axle with a very weak CV joint on the 914 end. If the 914 CV is floppy the floating axle will move A LOT. Not only can the cage get moved into a precarious position and break, but the Subaru end, which is very strong but not secured at the end, can slip out, causing the bearings to come off of the "tulip" (you know what I mean). I think it happened to Ross once. Ended up adding 944 CVs with the adapter from Bob which added about 1.5 inches or so to the end length, so the axle is fully compressed into the Subaru end. Even had to let the trailing arm down to reinstall it. Works great!
George, thanks for the feedback. Always like to hear it "straight". Post pics when you can! I purposely left the wire long just in case. WAY long . My plan is to POSSIBLY move my alternator into the spot where the AC compressor was. That puts the positive terminal upside down I think, which might be a bad idea... My battery is on the opposite side from normal, which might have to change if I go back to the stock intake setup (which is recommended BTW). Or maybe I put the stock airbox there and do a small battery on the other side. I also saw there is a guy who makes phenolic spacers for the SVX that might help with clearance. Gonna check into that. Hope your new little one is well .
Posted by: Chris H. Oct 18 2015, 12:58 PM
Another small thing...when we buy these 5MT transmissions they may or may not come with the clutch/flywheel area cover plate. Mine didn't and I hated the huge gap and exposed flywheel. Always assumed there was a cover of some kind but my only experience with a Subaru engine was an automatic.
Finally took a few minutes to find this: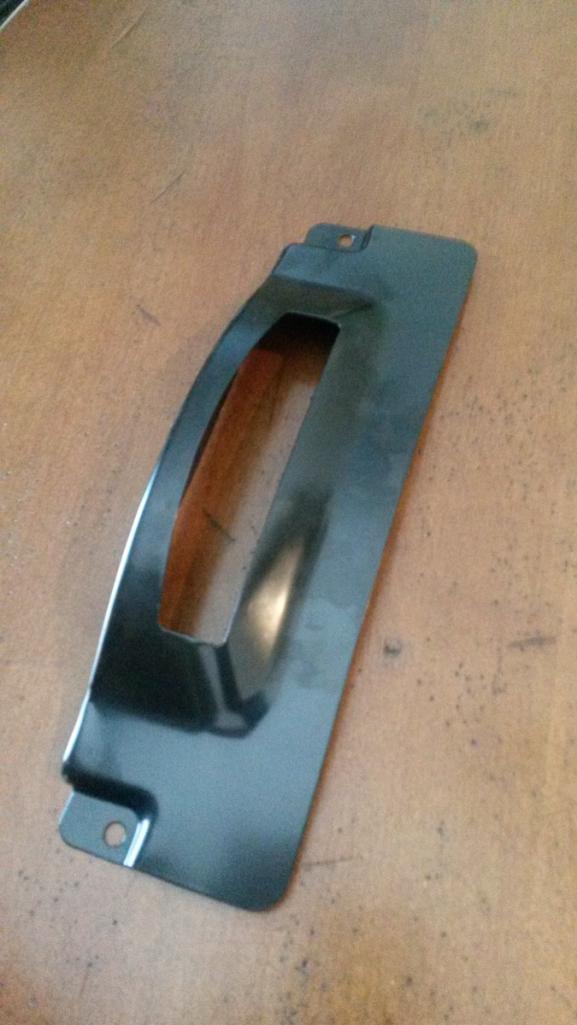
Part number is 30216, followed by sub numbers for different years. Mine for the 2006 was 30216AA0020. E-bay, $17.XX
Posted by: DBCooper Oct 18 2015, 01:31 PM
So are you driving it regularly now? Do you have more detailed impressions? Fun to drive? Worth all the work? Anything you'd do differently?
Posted by: A&P Mech Oct 18 2015, 01:53 PM
How funny, I was just looking for one as well. I will check eBay.
Posted by: 76-914 Oct 18 2015, 03:44 PM
Me too! Thx a bunch, Chris. That was bugging the  out of me and I thought I would have to make something. That will keep the road debris out of the TO bearing.
Posted by: Chris H. Oct 18 2015, 07:10 PM
So are you driving it regularly now? Do you have more detailed impressions? Fun to drive? Worth all the work? Anything you'd do differently?
I'm driving it...have about 350 miles on it for the year which is A LOT since I did 2000 in the previous 12 years, most of which was done in the first 5. The VSS is not hooked up. Not going another mile until I do that. I think it's hindering the performance a bit as I posted on Kent's thread. I definitely have some feedback on your questions above. Let me but a list together.
Posted by: Chris H. Oct 18 2015, 07:13 PM
Me too! Thx a bunch, Chris.
That was bugging the out of me and I thought I would have to make something. That will keep the road debris out of the TO bearing.Sure guys. I'll install it in the next day or two and confirm that it bolts up OK...can't imagine why it wouldn't...
Posted by: 76-914 Feb 17 2016, 09:17 AM
![]() It's been 4 mo's since your last post. You don't write, you don't call. Do I need to dig up my "Slackers" thread again. Any hang ups or just the weather? Hope everything on the home front is good. Kent
It's been 4 mo's since your last post. You don't write, you don't call. Do I need to dig up my "Slackers" thread again. Any hang ups or just the weather? Hope everything on the home front is good. Kent
Posted by: 76-914 Feb 18 2016, 02:56 PM
![]() Relentless, huh?
Relentless, huh?
Posted by: Chris H. Feb 19 2016, 06:00 PM
Yeah lot going on at work but thanks for checking in Kent. Supposed to be a nice weekend. Maybe I'll twist some wrenches. I just got a big package from Bruce Stone. Pretty front suspension bits. I should at least open the box tomorrow!
Posted by: 76-914 Feb 19 2016, 08:57 PM
Don't stay away from it too long, Chris.
Posted by: Justinp71 Feb 24 2016, 03:35 PM
Yeah, give us your driving impressions! This might have to be the new 914-6 since porsche motors are becoming unobtainium these days!
Posted by: 76-914 Feb 24 2016, 06:14 PM
C'mon Chris. We're dying for some Subie chat. 2yr's ago there were 4 of us posting conversion stuff everyday. I miss those days. Working on your conversion awhile and that evening reading about what others had done that day. I'm going to be doing some "major changes" with my cooling system. I anticipate my current system will not handle AC sitting in traffic and 100F. Worst that could happen is overkill. I'm leaning on waiting until after RT66 so I don't feel rushed. Kent
Posted by: Chris H. Feb 24 2016, 07:29 PM
Yeah those were fun days. Where is Doug?
https://www.youtube.com/watch?v=fpLQ0wtQ0R0
Let's get back on track! I'm in a slight funk. Just need to put it up in the air and get started. Phase 1 was really "can I actually DO THIS?" Now I need to route the wiring right, make it look nice overall, secure the radiator better, etc.
You ever decide whether you want to swap out your radiator hoses ? 1.25 gates #28445 is the way to go I think. We can split 50 feet for about $100 each. Not quite ready for that but keep it in mind. You might want to do it before the RT66 deal. Remember you whipped that engine like a mule and it got hot last time? Why do you think you're AC system won't work well when it's hot? It's a pretty small area to cool.
Posted by: 76-914 Feb 24 2016, 10:00 PM
Yeah those were fun days. Where is Doug?
https://www.youtube.com/watch?v=fpLQ0wtQ0R0
Let's get back on track! I'm in a slight funk. Just need to put it up in the air and get started. Phase 1 was really "can I actually DO THIS?" Now I need to route the wiring right, make it look nice overall, secure the radiator better, etc.
You ever decide whether you want to swap out your radiator hoses ? 1.25 gates #28445 is the way to go I think. We can split 50 feet for about $100 each. Not quite ready for that but keep it in mind. You might want to do it before the RT66 deal. Remember you whipped that engine like a mule and it got hot last time? Why do you think you're AC system won't work well when it's hot? It's a pretty small area to cool.
I'm fine with cooling the engine as long as I keep the rpm reasonable. IOW, not in 2nd when I should be in 4th. And I'm pretty sure that is due in part to the hose size causing the pump to cavitate at high RPM. It's whether it will cool the engine with the AC on in extreme conditions. The frigging AC is big enough for a Fairlane.
I have a dual core sitting in the garage that will handle the added load of the AC. I'll see if the higher RPM still brings the temp up with the new radiator. If it does then we split a roll. So how many days to tidy up your wiring?
Posted by: Chris H. Feb 24 2016, 11:07 PM
Next step is to pull the engine. Wish I didn't have to but I have a few things to do to it and it's much easier with it out. Will try to get that done this weekend. Really want to drive the car more this year.
I see what you're saying about the AC...you're worried about keeping the engine cool not the car's interior. I'm pretty set on going to wider hoses just to be sure it never gets hot on one of those long drives with the hammer down. What radiator did you pick up?
Posted by: ThePaintedMan Feb 25 2016, 08:18 AM
Kent/Chris,
I have done some research on this phenomenon. There is a website where a few guys who have raced these motors documented their issues and solutions. I'll work on finding that for you in my links when I get home. Essentially the cavitation issue is caused by low volume entering the thermostat housing during sustained high RPMs, which is partially solved by welding a larger diameter inlet on the thermostat housing neck and using a larger hose (1.5 would probably work, but some suggested even as large as 1.75). The other solution is to move the thermostat to the outlet side, prior to entering the radiator. That hose can remain 1.25. I'm planning to do both of these on my build.
The only issue I've thought of is how low the larger hose will fit when run underneath the car. And of course, the Celica radiator outlet would have to be cutoff and the appropriate sized one welded back on.
Posted by: Chris H. Feb 25 2016, 08:46 AM
Thanks George. No rush but I'd like to see what you found. That will be especially applicable in your case. I expect you'll be running at high RPMs a LOT. Can't wait for you to get it in the car. The EG33 is quite an engine.
Posted by: 76-914 Feb 25 2016, 09:00 AM
Next step is to pull the engine. Wish I didn't have to but I have a few things to do to it and it's much easier with it out. Will try to get that done this weekend. Really want to drive the car more this year.
I see what you're saying about the AC...you're worried about keeping the engine cool not the car's interior. I'm pretty set on going to wider hoses just to be sure it never gets hot on one of those long drives with the hammer down. What radiator did you pick up?
The Celica GTS one. For $167 shipped with fans. Just like a sore Peter; ya can't beat it! Let me know when you want to order that hose and I'll get you some $$$. I'll probably run the hoses just for comparison purposes. That and to get some "hard" numbers. IOW, what works for the EZ30 using the cooling configuration that "I" have. I've found that what works on someone else car may not be the ticket for yours or mine given slight variations between each vehicle. Should come up with some "hard" numbers for my setup. I'd really like to come up with a proven "package" for guy's that want to convert but not experiment like we do.
Pull the engine. I know it's grunt work but in a couple of hours it is out and your back in the "work groove". I'd bet you could be finished in a month with full on weekend attacks. Let's get this thing on the road and "out of your hair".
Oh, I forgot to add; don't know what happened to Doug's project. Poor guy. Life jumped up and Bitch slapped the poor dude. He went thru a lot with the divorce and selling his business. I emailed him a few month's back and he did not respond so I left it at that. I'd like to see him get back in the pool. I even entertained the idea of finishing his project. Kent
Posted by: 76-914 Feb 25 2016, 09:04 AM
Kent/Chris,
I have done some research on this phenomenon. There is a website where a few guys who have raced these motors documented their issues and solutions. I'll work on finding that for you in my links when I get home. Essentially the cavitation issue is caused by low volume entering the thermostat housing during sustained high RPMs, which is partially solved by welding a larger diameter inlet on the thermostat housing neck and using a larger hose (1.5 would probably work, but some suggested even as large as 1.75). The other solution is to move the thermostat to the outlet side, prior to entering the radiator. That hose can remain 1.25. I'm planning to do both of these on my build.
The only issue I've thought of is how low the larger hose will fit when run underneath the car. And of course, the Celica radiator outlet would have to be cutoff and the appropriate sized one welded back on.
Sounds correct. Find that article and post it, Jorge. Nothing like new info!
Posted by: Chris H. Feb 25 2016, 10:59 AM
Next step is to pull the engine. Wish I didn't have to but I have a few things to do to it and it's much easier with it out. Will try to get that done this weekend. Really want to drive the car more this year.
I see what you're saying about the AC...you're worried about keeping the engine cool not the car's interior. I'm pretty set on going to wider hoses just to be sure it never gets hot on one of those long drives with the hammer down. What radiator did you pick up?
The Celica GTS one. For $167 shipped with fans. Just like a sore Peter; ya can't beat it! Let me know when you want to order that hose and I'll get you some $$$. I'll probably run the hoses just for comparison purposes. That and to get some "hard" numbers. IOW, what works for the EZ30 using the cooling configuration that "I" have. I've found that what works on someone else car may not be the ticket for yours or mine given slight variations between each vehicle. Should come up with some "hard" numbers for my setup. I'd really like to come up with a proven "package" for guy's that want to convert but not experiment like we do.
Pull the engine. I know it's grunt work but in a couple of hours it is out and your back in the "work groove". I'd bet you could be finished in a month with full on weekend attacks. Let's get this thing on the road and "out of your hair".
Oh, I forgot to add; don't know what happened to Doug's project. Poor guy. Life jumped up and Bitch slapped the poor dude. He went thru a lot with the divorce and selling his business. I emailed him a few month's back and he did not respond so I left it at that. I'd like to see him get back in the pool. I even entertained the idea of finishing his project. Kent Will do on the hoses. And the engine
. Supposed to be 50ish here this weekend. I think the last post I saw from Doug he had gotten a really good CFO gig somewhere. Dream job. I hope he's just making so much money he can't be bothered with us (kidding...if you know Doug it's hilarious). He'll be back. They always come back. George when is your engine gonna be ready?
Posted by: ThePaintedMan Feb 25 2016, 11:12 AM
Found it! The impetus for all of this is that the Suby water pumps are actually too efficient at higher RPMs, perhaps 6000+. The restriction of the thermostat and pump inlet cause a backup of water that at a certain point can't keep up with the pump. On a street car, under 6k, no problem. But on a car seeing extended RPMs, the VE of the pump and the previous restriction causes cavitation (bubbles), which then boils the coolant in the motor and eventually a large air mass in the engine - not good. So a 50mm, or 1.75 in+ inlet and a relocation of the thermostat to the engine outlet/radiator inlet is the solution.
Well documented here:
http://www.mrtperformance.com.au/resources/technical-documents/984-keeping-your-engine-cool-when-all-others-are-boiling-theirs
Other supporting articles:
http://www.subaru-svx.net/forum/archive/index.php/t-61824.html
http://thefactoryfiveforum.com/showthread.php?18338-Know-subaru-engine-problems-when-tracked
http://www.dirally.com/forums/archive/index.php/t-12965.html
Not sure when the engine will be ready. Still fighting through deaths in the family, low pay and lots of diapers to buy/change. I live vicariously through YOU GUYS!
Posted by: 76-914 Feb 25 2016, 12:53 PM
Found it! The impetus for all of this is that the Suby water pumps are actually too efficient at higher RPMs, perhaps 6000+. The restriction of the thermostat and pump inlet cause a backup of water that at a certain point can't keep up with the pump. On a street car, under 6k, no problem. But on a car seeing extended RPMs, the VE of the pump and the previous restriction causes cavitation (bubbles), which then boils the coolant in the motor and eventually a large air mass in the engine - not good. So a 50mm, or 1.75 in+ inlet and a relocation of the thermostat to the engine outlet/radiator inlet is the solution.
Well documented here:
http://www.mrtperformance.com.au/resources/technical-documents/984-keeping-your-engine-cool-when-all-others-are-boiling-theirs
Other supporting articles:
http://www.subaru-svx.net/forum/archive/index.php/t-61824.html
http://thefactoryfiveforum.com/showthread.php?18338-Know-subaru-engine-problems-when-tracked
http://www.dirally.com/forums/archive/index.php/t-12965.html
Not sure when the engine will be ready. Still fighting through deaths in the family, low pay and lots of diapers to buy/change. I live vicariously through YOU GUYS!
That's a good read, George. Thx for the post. After reading those it seems I am on the right track. The thermo relo / upsizing the "old thermostat housing" looks to be key. For those reading these links: skim down about 4/5's of the way down the last link. Doesn't touch on cooling till the end of the article. Thx again.
Kent
Posted by: 914forme Feb 25 2016, 12:57 PM
I thought this was a know issue, and you guys had read this stuff. Sorry.
In reality, if your planning lots of high RPM stuff, I would suggest 2" in, and move the thermostat for good measure.
Sorry again for not clueing you all in on this.
Posted by: ThePaintedMan Feb 25 2016, 02:07 PM
Not a problem Kent. Chris - sorry we're hijacking your thread.
Stephen - my question still is, will I still be able to reliably run a 2" hose underneath the car without the danger of it rubbing/getting caught on stuff? Also, on the Celica radiator, is there enough room to weld on a new 2" outlet?
Posted by: mgp4591 Feb 25 2016, 02:28 PM
Not a problem Kent. Chris - sorry we're hijacking your thread.
Stephen - my question still is, will I still be able to reliably run a 2" hose underneath the car without the danger of it rubbing/getting caught on stuff? Also, on the Celica radiator, is there enough room to weld on a new 2" outlet?
With the added volume of a 2" hose I would think the (potential) restriction issue of running through the longs would be resolved and eliminate your under car issues. So dumping the stock thermostat location and relocating to the upper engine bay is a viable solution? Or would another location be even more effective? My EG33 is still out of the car and I'm looking around for a solution to getting the car where I can weld in my floors and other strong bits - that's when I want to install the coolant hoses in the longs where I can get to them easier.

Posted by: 76-914 Feb 25 2016, 02:47 PM
Not a problem Kent. Chris - sorry we're hijacking your thread.
Stephen - my question still is, will I still be able to reliably run a 2" hose underneath the car without the danger of it rubbing/getting caught on stuff? Also, on the Celica radiator, is there enough room to weld on a new 2" outlet?
With the added volume of a 2" hose I would think the (potential) restriction issue of running through the longs would be resolved and eliminate your under car issues. So dumping the stock thermostat location and relocating to the upper engine bay is a viable solution? Or would another location be even more effective? My EG33 is still out of the car and I'm looking around for a solution to getting the car where I can weld in my floors and other strong bits - that's when I want to install the coolant hoses in the longs where I can get to them easier.
Didn't one of those articles speak to keeping the newly located thermostat housing close to the engine? It's not a high jack if it's informative.
Posted by: 914forme Feb 25 2016, 03:07 PM
2" would be hard to get through the logs. But that being said let us do a little math.
2" hose has an area of 3.14", that is pretty large area. You can get close with a square 3"x1" AL. Rectangular Tube. That reduces your ground clearance issues going along the bottom. Rick did something similar with the Alien. I think Rick used tube, we talked about it last week.
Most people would say I'll run 2 1" tubes but that give you an area of 1.58", so you would need to run 4 of them to get resemble close. You can not fit 4 1" tubes down the logs. You can do two per side.
Boxster Rads again. 
So the lowest profile method would be rectangular box.
Now if you have the logs wide open, then running a 2" Tube through there would be about perfect.
If you where not worried about rust, a 2.25" "piece of DOM would also work And I have thought about this also, as I need a raised section to bring the shifter up etc. If built correctly it could provide extra support for the chassis also. Same idea as the Early Lotus Elan chassis, that had a box section, that provided the strength of the chassis. Herb Adams also did a kit car "JackRabbit" in the 80s with this same idea, stiff as all git out.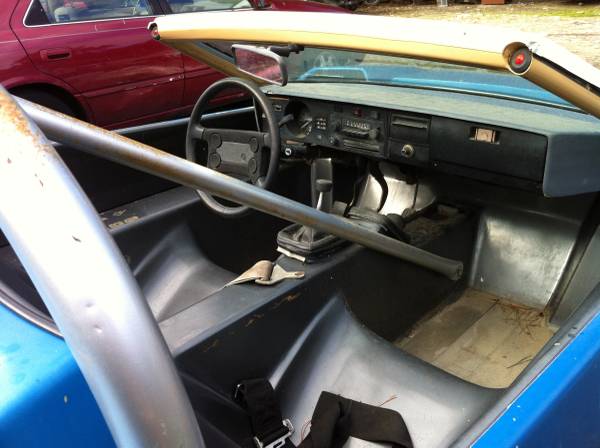 ]
]
BTW, do not follow this builders lead and use thin wall tubing for a roll cage. See the small dents in the upper bar, and how he swaged the petty bar and bolted it into the chassis in a single shear. Not the proper way to do that
Posted by: 914forme Feb 25 2016, 03:15 PM
Didn't one of those articles speak to keeping the newly located thermostat housing close to the engine? It's not a high jack if it's informative.
Yes it is right off the cross over pipe right in front of the engine. The upper one, You can not block off the heater tubes, I am sure none of you have. But that is just a reminder not to cap them, engine would get hot very fast, block would be pressurized, and could help cause a leak. Suction hose would also go into a vacuum state, and maybe collapse.
This engine pumps ton of water or would like to. I think if you had a flooded basement, it might be better to hookup a long 2" hose, fire up your 914 and let it run until you pumped the basement close to dry.
Posted by: Chris H. Feb 25 2016, 03:40 PM
Not a problem Kent. Chris - sorry we're hijacking your thread.
Stephen - my question still is, will I still be able to reliably run a 2" hose underneath the car without the danger of it rubbing/getting caught on stuff? Also, on the Celica radiator, is there enough room to weld on a new 2" outlet?
No need to apologize. Chat away everyone! It's very motivating. Gives me great ideas.
2" hose is HUGE man!
Posted by: BIGKAT_83 Feb 25 2016, 04:01 PM
15k miles on my Subaru conversion with no cooling problems what so ever. It ran at the thermostat180 on 100 degree summer days in Atlanta freeway traffic. I was using 3/4 and 7/8 size hoses to a 10 x 26 radiator.
.
Posted by: DBCooper Feb 25 2016, 04:11 PM
I'm at 1.25" and 1.5" and also no issues, though through a big honkin' Renegade V8 radiator.
Posted by: 76-914 Feb 25 2016, 04:14 PM
15k miles on my Subaru conversion with no cooling problems what so ever. It ran at the thermostat180 on 100 degree summer days in Atlanta freeway traffic. I was using 3/4 and 7/8 size hoses to a 10 x 26 radiator.
.
I'm running the same Bob but if I maintain a high RPM uphill in 97F+ I will overheat. Bob, did you ever get the AC finished in that car?
Posted by: ThePaintedMan Feb 25 2016, 04:16 PM
Bob, I think the main concern, at least on my part, is how it will cool at extended 6k+ driving. I for one would like to get it right the first time as I don't have the expendable income to redo the system over. However, when I'm done, if it stays cool on my car, on the track, it should be a good baseline for everyone else.
That being said, Bob's car was a work of art - truly beautiful engineering. I am tempted by his own results, but because my car will see very different driving, I am at least a little concerned about getting the hose size right.
The square tubing is a good idea, except for the bending required to get it to follow the contours under the car. I'm interested to try fitting the hose in the longs, but that's also just one problem to overcome. After that, one would still have to figure out how to route it past the gas tank and to the radiator.
And yes, the inline thermostat should be located as close to the water outlet from the engine as possible. That hose inner diameter (stock) is 1.5 inches, or 39.5 ish mm for those keeping track at home.
Finally, I'm usually not one to try to re-engineer something that the factory guys spent so much time on. However, it's clear that Subaru never intended these engines to see that many rpms for that length of time. So I'm glad I have you guys to help sort through this one.
Posted by: ThePaintedMan Feb 25 2016, 04:23 PM
By the way, Chris, have you ever heard of this one regarding the hesitation you were talking about before? I wonder if this is somehow linked to the lack of a VSS, or masking it somehow?
http://svx-iw.com/svxiw/article/?article=31
Posted by: jimkelly Feb 25 2016, 04:24 PM
fwiw, I've been running a celica radiator with my chevy v8 for 2 months now. I have a 190 degree thermostat on the engine and a 190 thermoswitch for the fans. engine temp go to about 210 before fans kick in. i'm thinking I need to drop to a 180 degree thermostat and thermoswitch before summer rolls around.
Attached image(s)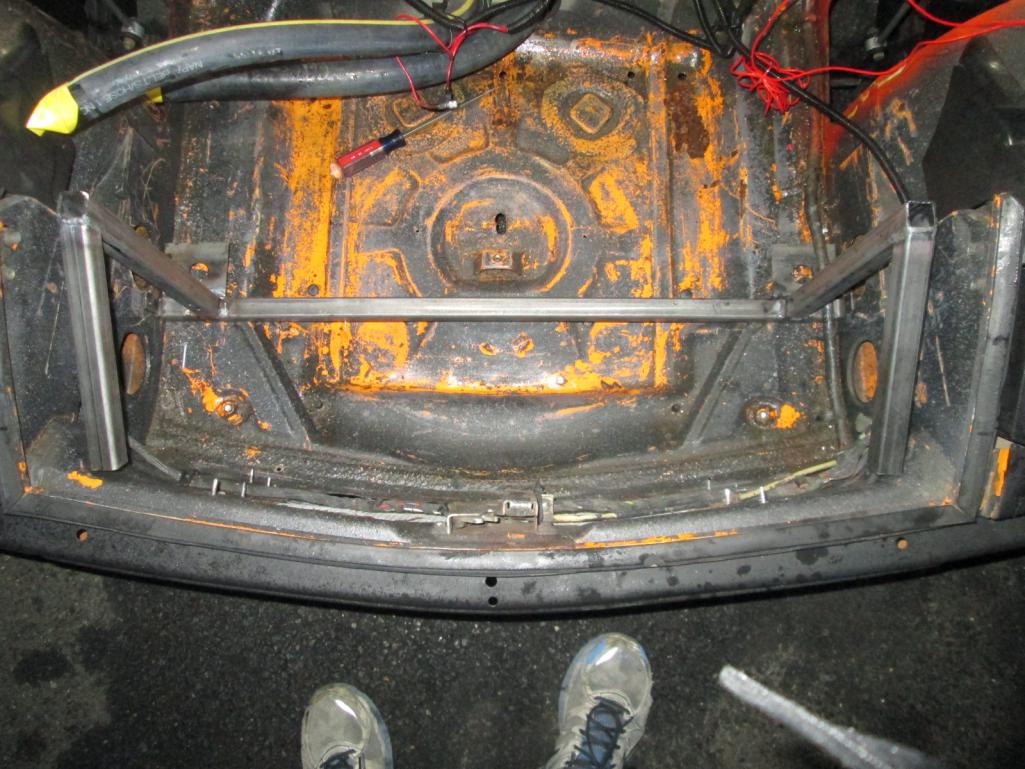
Posted by: Chris H. Feb 25 2016, 04:40 PM
By the way, Chris, have you ever heard of this one regarding the hesitation you were talking about before? I wonder if this is somehow linked to the lack of a VSS, or masking it somehow?
http://svx-iw.com/svxiw/article/?article=31
I have George. Interestingly enough that only applies to one or two years. 92 definitely, maybe 93. They removed that suppressor eventually due to the complaints. The SVX guys call that " resistor crush mod". Thanks for the info though.
I finally did hook up the VSS and it's even more finicky now. I think I have a loose wire somewhere, or the temp sensor is bad, or the MAF is acting up, or the IAC valve is sticking. I'll check all of those things soon.
Posted by: BIGKAT_83 Feb 25 2016, 05:18 PM
Chris.......I've been out of the country for 3 weeks. Hope to get home Sunday. Keep a eye out for the big brown truck next week.
Posted by: ThePaintedMan Feb 25 2016, 05:39 PM
This thread got me motivated to start getting down to really figuring out the wiring harness.... which also gets me more depressed. Anyone want to make a few bucks de-tangling it for me? Did I mention how much I hate wiring?
Posted by: BIGKAT_83 Feb 25 2016, 05:52 PM
This thread got me motivated to start getting down to really figuring out the wiring harness.... which also gets me more depressed. Anyone want to make a few bucks de-tangling it for me? Did I mention how much I hate wiring?
Mega squirt you will be happy you did. The 33 works great with all the stock sensors . It's easy to set this up full sequential with the Subaru trigger wheel and cam sensor. I would not go any other way.
Posted by: 76-914 Feb 25 2016, 06:34 PM
By the way, Chris, have you ever heard of this one regarding the hesitation you were talking about before? I wonder if this is somehow linked to the lack of a VSS, or masking it somehow?
http://svx-iw.com/svxiw/article/?article=31
I finally did hook up the VSS and it's even more finicky now. I think I have a loose wire somewhere, or the temp sensor is bad, or the MAF is acting up, or the IAC valve is sticking. I'll check all of those things soon.
That doesn't make sense to me. It totally improved mine.
 Oh there is one thing. Once the car moves more than 2 mph the idle goes to 2000 rpm. Come to a complete stop and it drops back to normal. It only does this the first 2 blocks then it stops and doesn't return until cold again. Sure it had something to do with the automatic trans & behemoth station wagon it came from. Anyway, glad your back in the spiirt and your thread will prove a valuable resource for future EGr's.
Posted by: Chris H. Feb 25 2016, 11:21 PM
Chris.......I've been out of the country for 3 weeks. Hope to get home Sunday. Keep a eye out for the big brown truck next week.
Awesome! Thanks Bob! I'll send you another label.
Hey George I drove Bob's car with Megasquirt. It was SO SWEET. I want to go that way soon. Consider this for your gift registry:
https://www.diyautotune.com/product/diypnp-nippon-denso-76pin-unassembled-kit/
We could do a workshop someday. Everyone could chip in a few bucks and retain Bob to supervise us. Octeenerfest or something.
Kent, I know the VSS thing is weird. Bob is sending me some stuff which will really help troubleshoot. I'll post pics when I get everything. I expect it will be just like the trans...one little tweak and it's fine again.
Posted by: 914forme Feb 26 2016, 07:00 AM
Hey George I drove Bob's car with Megasquirt. It was SO SWEET. I want to go that way soon. Consider this for your gift registry:
https://www.diyautotune.com/product/diypnp-nippon-denso-76pin-unassembled-kit/
We could do a workshop someday. Everyone could chip in a few bucks and retain Bob to supervise us. Octeenerfest or something.
So whats the retainer fee Bob?
And I am down with that, it would be nice to do it in a facility with a rolling dyno, but that is more dollars.
As far as the DIYPNP kit, Desno plug and $430 with some time soldering away, looks like a deal to me for EFI.
An internal 2.5 bar sensor
I am starting to lean words putting a snail on mine Get that idea out of your head and continue on fabrication You all are very dangerous proud to be hanging with.
Posted by: 914forme Feb 26 2016, 07:06 AM
Only issue I see on the SVX is that you can not run the coil on plugs according the specs. It only supports 4 of them, so you would need to go wasted spark, not a huge deal, just something to keep in mind.
Am I correct on that observation?
Posted by: 914forme Feb 26 2016, 07:16 AM
The basic features are all pluses to me
Feature List – Here’s what you can do
OEM ECU Connector to plug right into the factory harness!
Speed Density, Alpha-N and Hybrid Alpha-N (both SD and A-N algorithms hybridized) Supported
2 fuel outputs standard, 2 additional outputs optional
2 Ignition Inputs (for dual wheel ignitions)
4 Spark Outputs (Up to 4 Cylinder Coil On Plug, up to 8 Cylinder Wasted Spark)
Enhanced Acceleration Enrichment (EAE)
Boost Control 
Knock Control
Launch Control
A/C idle up
Flat Shift
Tachometer Output
Fully Adjustable Rev Limiter
Table Switching
4 General PurposeOutputs
4 General Purpose Inputs (2 analog, 2 digital)
Support for Flex Fuel E85 for race day
Optional Realtime Baro Correction
Closed Loop O2 Correction
So what is the downfall here except two items. You build it, and well you support it.
I see neither as a downfall, the you build you support thing is easier as you know everything about it.
One downfall I currently see is lack of being able to connect the sim board, I have at least two engine harness one could become a Sim test harness, make the build and testing easier.
Only other downfall I see is the location of the harness and Oh crap, I don't have any from the engine side to the ECU.
Posted by: Chris H. Feb 26 2016, 08:08 AM
Yes you run wasted spark Steve. The best thing about the DIYPNP is you just plug the stock harness right in to it, no cutting. You don't have to install a different trigger wheel or anything. Bob swears it's not that hard to build. Maybe one of these days I'll get down there and have him supervise my build, then take a bunch of pics and stuff. Not sure he'd actually want to spend any Octeenerfest time watching us do ECUs but if we got one done correctly that's all we need. If you look at the instructions it IS pretty fiddly but patience is apparently the key.
Posted by: Chris H. Feb 26 2016, 05:19 PM
Forums for Megasquirt. You could get lost in there for a day or two :
http://www.msextra.com/forums/
Posted by: mgp4591 Feb 26 2016, 05:48 PM
Forums for Megasquirt. You could get lost in there for a day or two
:http://www.msextra.com/forums/
Just for grins (and me lacking in knowledge), why is the Megasquirt better than the stock ECU?
Posted by: 914forme Feb 26 2016, 07:10 PM
Forums for Megasquirt. You could get lost in there for a day or two
:http://www.msextra.com/forums/
Just for grins (and me lacking in knowledge), why is the Megasquirt better than the stock ECU?
See that long list of features that is what makes it better, and tuneablility.
In reality you can do a lot to the stock ECU, but you are still limited to the basic ECU functions, while way better than D-jet or L-Jet it is still a dated ECU.
Posted by: Chris H. Feb 26 2016, 07:46 PM
Right, tunability, and also there are some quirks associated with the fact that the ECU is for a different car.
For the EG33, stock ECU concerns are:
- Some experience a sudden stall issue because all US SVX's are automatic. When you convert to 5 speed there is not a constant "load" on the engine and it can stall.
- There is also sometimes an idle issue for the same reason
- Lot of extra wires going to things you won't use like the PS pump, etc
- EGR and old school atmospheric pressure sensor (eliminated with Megasquirt)
- The "learning mode" is eliminated with MS which is a pain when you unhook the battery
- The rev limit is 6500. With MS you can go to 7400ish
But the ability to tune it to your liking is the best part.
Posted by: 914forme Feb 26 2016, 08:11 PM
Don't forget the 2.5 bar sensor that lets you add one of them funky turbo things!! Oh wait you can't turbo a 914 or an eg33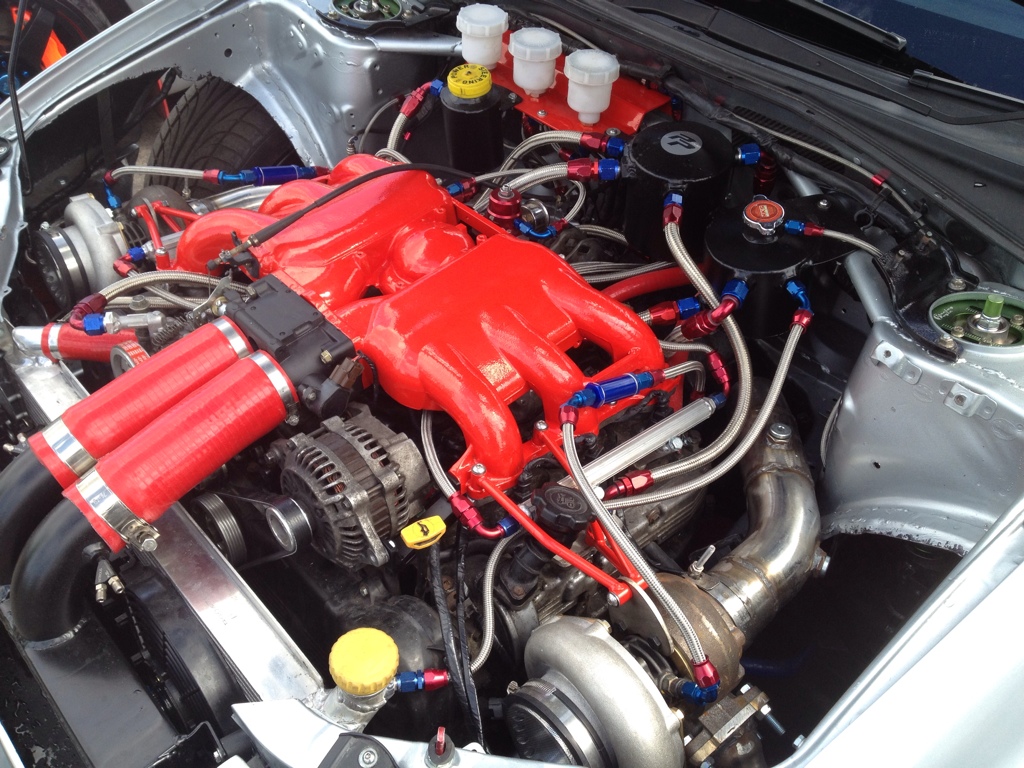
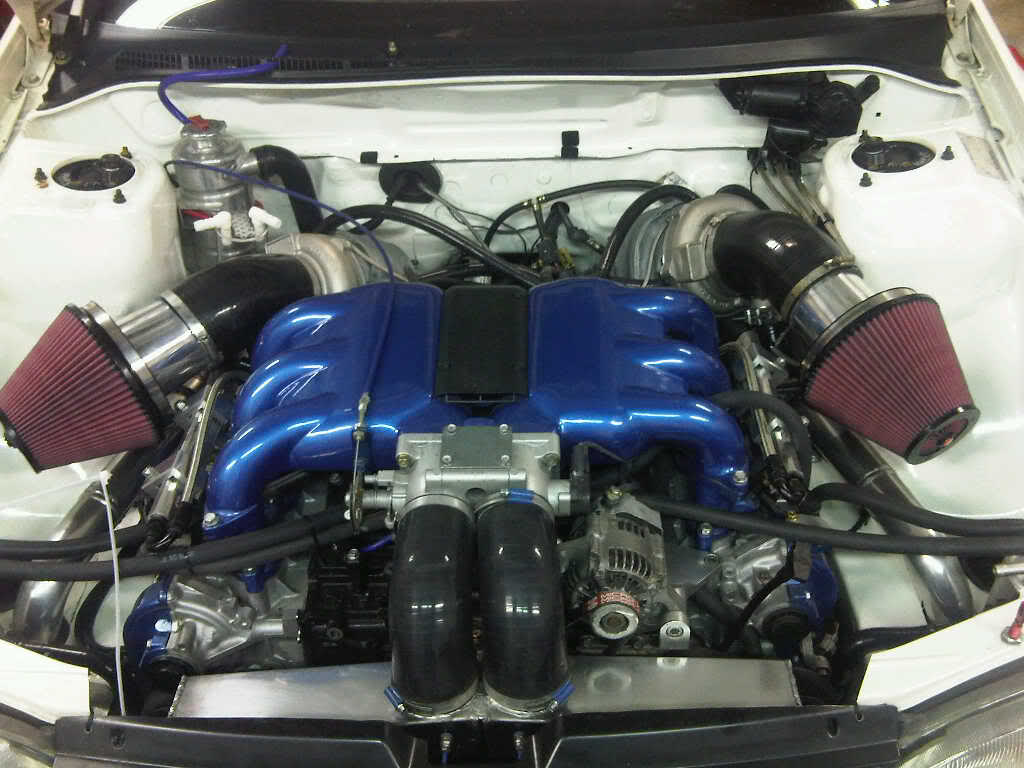
Posted by: mgp4591 Feb 26 2016, 08:49 PM
As in bang for the buck (I'm a CSOB...) in cost comparison, remapped ECUs are supposed to be great for their upgrades, helping the engine to get up slightly over 300 hp without them there turbo thingies... they tend to shorten the fuse a bit. They're not exactly giving away the MS systems so I'm wondering if they're really worth the extra cash?
Posted by: jd74914 Feb 26 2016, 09:39 PM
As in bang for the buck (I'm a CSOB...) in cost comparison, remapped ECUs are supposed to be great for their upgrades, helping the engine to get up slightly over 300 hp without them there turbo thingies... they tend to shorten the fuse a bit. They're not exactly giving away the MS systems so I'm wondering if they're really worth the extra cash?
Can you remap a SVX ecu? They're pretty old and OBD1 (right?) which generally limits tuning options without going standalone.
Posted by: mgp4591 Feb 26 2016, 10:36 PM
As in bang for the buck (I'm a CSOB...) in cost comparison, remapped ECUs are supposed to be great for their upgrades, helping the engine to get up slightly over 300 hp without them there turbo thingies... they tend to shorten the fuse a bit. They're not exactly giving away the MS systems so I'm wondering if they're really worth the extra cash?
Can you remap a SVX ecu? They're pretty old and OBD1 (right?) which generally limits tuning options without going standalone.
I'm not sure if "remapped" is the correct term. SubieChips and a couple of others offer a revamped stock ECU that raises rpm limits and handles larger injectors, etc. They've been tested and reported as a good upgrade and you still can pass stringent IM tests in most regions where the Megasquirt says they're not legal for street use. Maybe some CA folks with the equipment can tell of their experiences with the EPA for clarification.
Posted by: Chris H. Feb 27 2016, 04:23 PM
The Subiechips chip does remap the ECU but it's a static map. You can't adjust it. It also eliminates the EGR and raises the rev limiter. The issue is that the chip is $329 now. A new Megasquirt DIYPNP (unassembled) is $430. Back when the chip was sub $200 I would consider it but now it's a little much. You can get group discounts with the Subiechips guy but I doubt you'd get it back to where it used to be.
The SVX was OBD1 until 1996 when it switched to OBD2.
Posted by: ThePaintedMan Feb 27 2016, 05:29 PM
... If one were to spend the money for someone else's tune, I'd rather go with the MS and my own ability to dial in a tune. In fact, I'd rather dial the rev limit down with the water pump issues we discussed earlier.
Posted by: mgp4591 Feb 28 2016, 01:19 AM
... If one were to spend the money for someone else's tune, I'd rather go with the MS and my own ability to dial in a tune. In fact, I'd rather dial the rev limit down with the water pump issues we discussed earlier.If I was dealing with a finicky engine so far as a tune goes, i.e. race type engine or wild cams, etc., I'd agree with you. And someday I may even want a hair dryer on it but with their experience with the engine pushing a 3700 lb AWD vehicle down the road, I'd think that a chipped system on the EG with the right gearing would positively THROW a 914 down the road. And you'd keep the EPA happy with relatively stock equipment depending on your local requirements. Everything is relative though... now Cracker done stuffed a 427 detuned to 600+ hp in his street/race car! It's one of the signs of the Apocalypse!
Posted by: Chris H. Feb 28 2016, 03:25 PM
Yeah I do like the Subiechips offer with the Nissan injectors, etc. but the simplicity of Megasquirt is calling me a little more. We'll see how the car behaves when I fire it up in the Spring.
Hey look, I did a little work!
The beast is off the ground: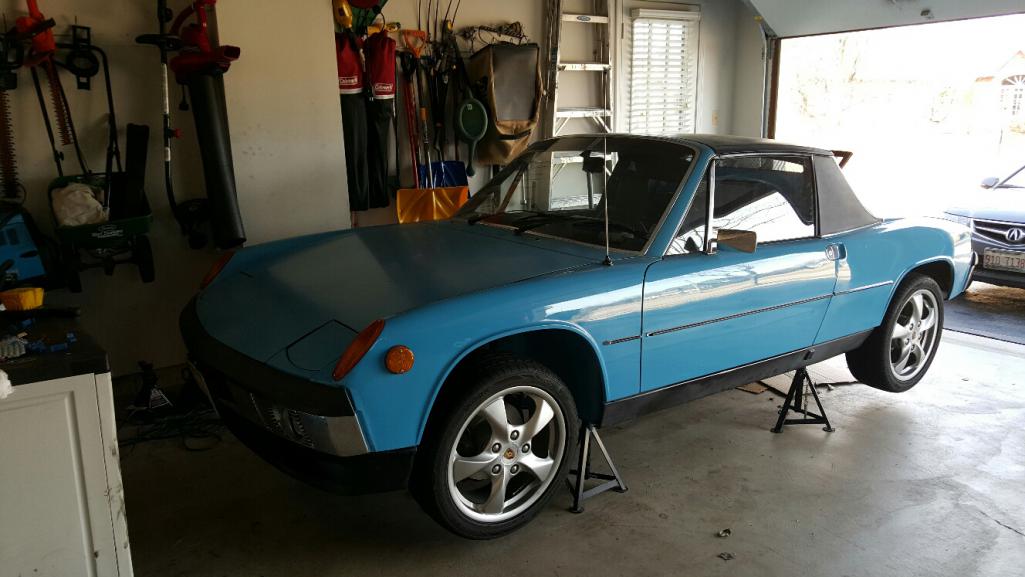
Made this primitive engine holder thing (took longer than you think!):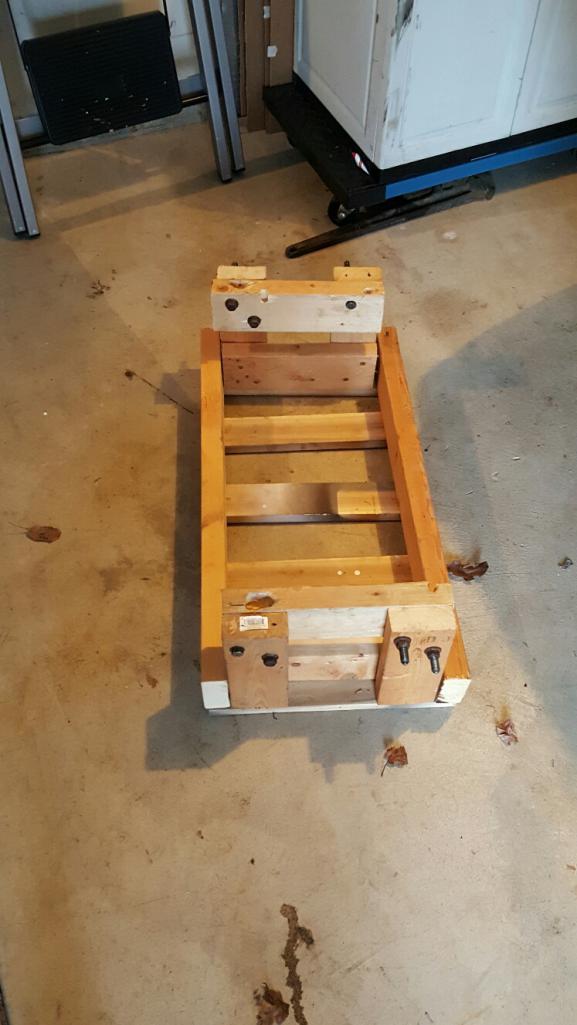
Finally finished my LED tail light conversion
Pile of stuff:
Hard to describe how much better the light is.
Can't really capture it well on camera: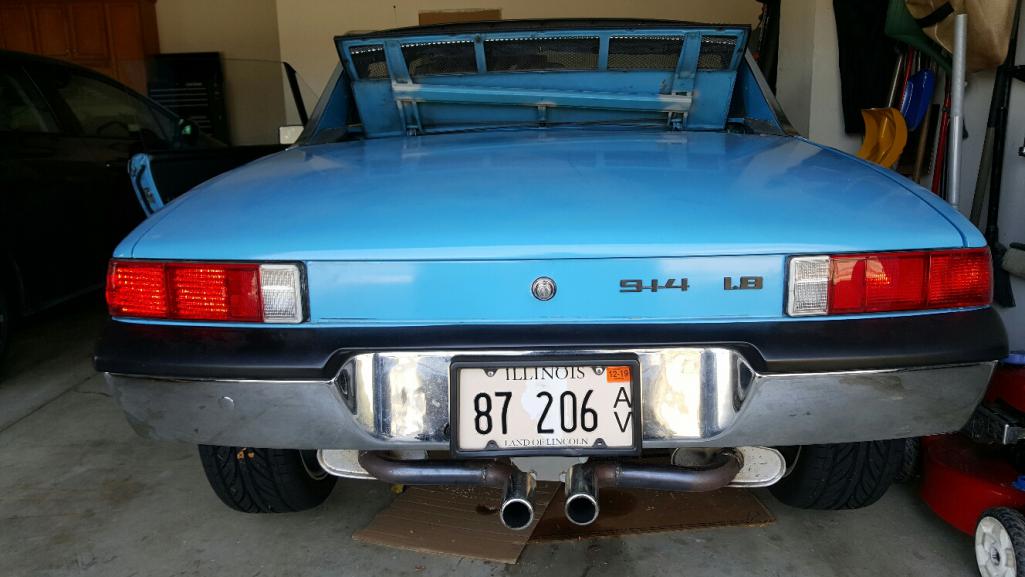
The LED (left side) is not only brighter but clearer. It catches the eye better. The right side old school lighting is barely detectable.
Here's the end result: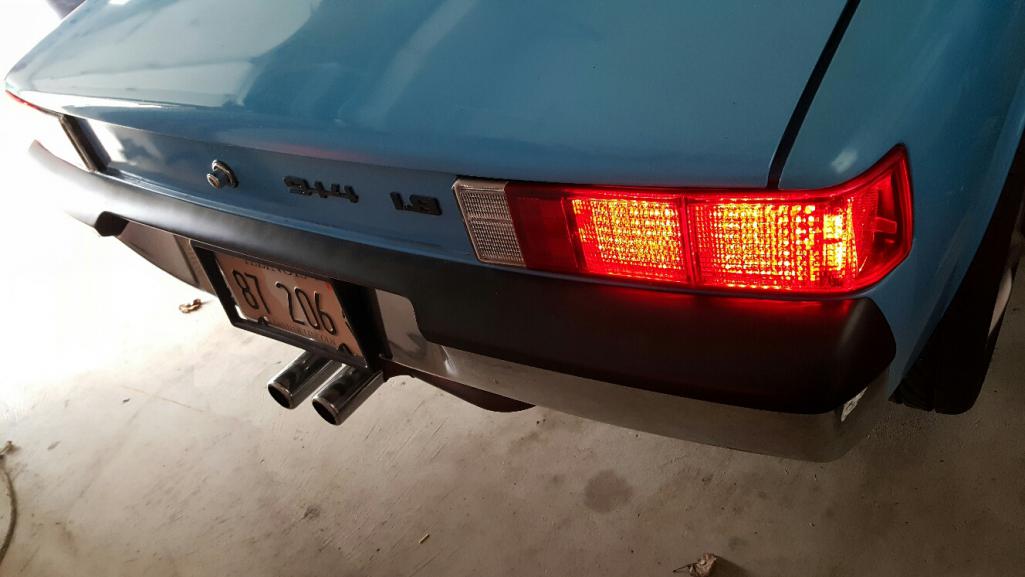
Nice work Jerry (Spoke) .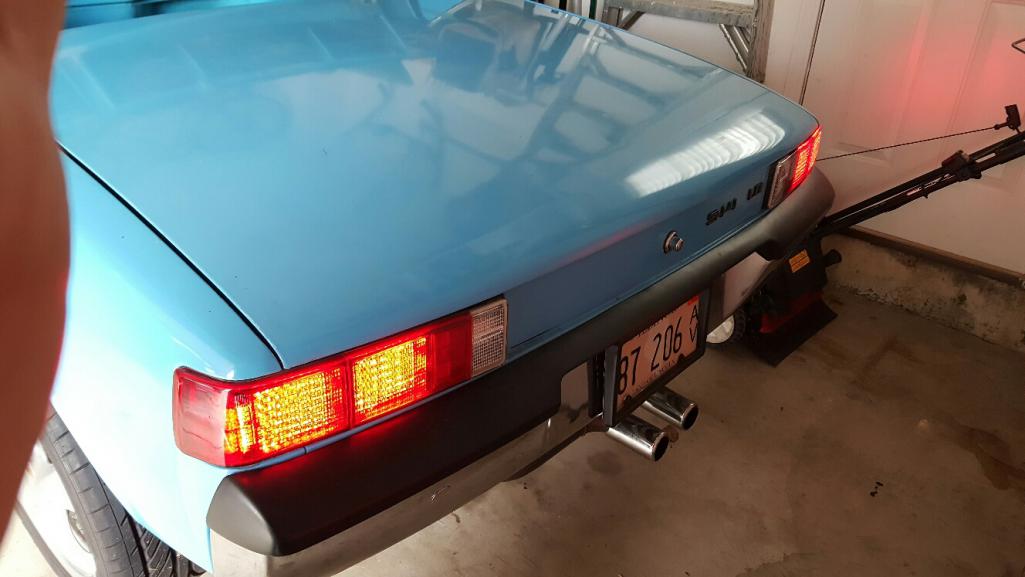
Next it's time to drain some fluids and disconnect some cables and wires, then the engine drop.
Posted by: mgp4591 Feb 28 2016, 03:39 PM
Nice job Chris! I've thought about those from time to time but may go another direction. Spoke puts out a great product though- after seeing them in person, they're a big improvement!
Posted by: 76-914 Feb 28 2016, 05:11 PM
Alright Chris Way to go. The car looks great, too. I ordered Spoke's front LED's so I'm sure I'll follow up w/ his taillights, later. BTW' everything thing takes longer than you think. I started 2 different things this weekend and didn't finish either one. What's happening while the engine is out? Looking forward to seeing your progress. Kent
Posted by: Chris H. Feb 28 2016, 06:03 PM
First I need to reseal the oil pump. Needs a bead of RTV. Missed that the first time. Changed every other seal on the thing! Next I'll try to flip the intake. Bob has some extra EG33 parts he is sending me including a nice painted manifold so I'll probably use that along with the known good IAC valve. Then I'll get the wiring looking a little better and find a couple of small patch panels from a parts car for the holes I cut in the trunk firewall the first time around. Also might want a new engine lid at some point. I'll test all of the sensors while I'm at it and replace the small vacuum lines with OEM ones. The intake might force me to move the battery back to the stock location, and I might go to a smaller one if so.
Posted by: 914forme Feb 28 2016, 06:56 PM
Nice work there.
Chris you don't happen to have an extra ECU to Engine harness? I have a bunch of engine harness, think I pitched my ECU harness
Posted by: Chris H. Feb 28 2016, 07:15 PM
Sorry I don't Steve. Does anyone else out there have an extra one? If not you can post on these sites with a WTB and someone will likely have one:
http://www.subaru-svx.net/forum/
or
http://svxworldforums.com/
Posted by: 76-914 Feb 29 2016, 09:20 AM
First I need to reseal the oil pump. Needs a bead of RTV. Missed that the first time. Changed every other seal on the thing! Next I'll try to flip the intake. Bob has some extra EG33 parts he is sending me including a nice painted manifold so I'll probably use that along with the known good IAC valve. Then I'll get the wiring looking a little better and find a couple of small patch panels from a parts car for the holes I cut in the trunk firewall the first time around. Also might want a new engine lid at some point. I'll test all of the sensors while I'm at it and replace the small vacuum lines with OEM ones. The intake might force me to move the battery back to the stock location, and I might go to a smaller one if so.
I'm expecting lots of pics.
Posted by: Chris H. Feb 29 2016, 09:39 AM
You'll have some my friend. Appreciate the . Definitely want to document the manifold flip.
Posted by: Chris H. Mar 13 2016, 07:43 PM
Well I finally got the engine out. There she sits. 
That's a lot of work. Still need to clean up the mess. I'll be working on it this week.
Lesson #1 - NEVER EVER do anything "for now". I have a list of stuff I wish I did all the way the first time but wanted to get the car running and driving quickly. It's a long list. 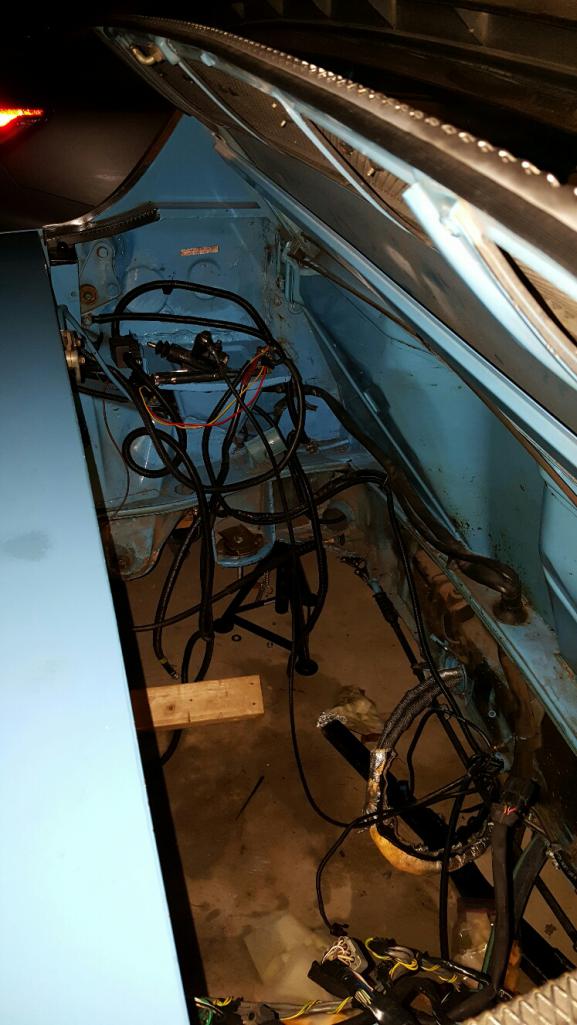
Look at that hole. Always makes you think "hey, what else could I shove in there?" Starting to get an itch for an LS engine...but we'll stick with this one for now.
Posted by: 914forme Mar 13 2016, 07:56 PM
LS and a boxster transaxle share looks tempting, but then like you, I'll stick with what I go for now.
Posted by: Cracker Mar 13 2016, 08:06 PM
Do it and you'll never look back...I promise.
Tony
Always makes you think "hey, what else could I shove in there?" Starting to get an itch for an LS engine...but we'll stick with this one for now.
Posted by: Chris H. Mar 14 2016, 07:50 AM
If I go that way might as well get a new crate motor. Bob was saying you can get one for ~$5500ish if you wait for a sale. That's without the ECU but still...good deal for a new one. The days when you could find a nice used Camaro SS for $2k and pull the engine are gone. Then there's the Boxster 6 speed and the very expensive adapter plate....wow! How's the gearing on the 5 speed? Go big or go home? 6 speed or nothing?
It's a couple years out but why not start planning it now.
Posted by: mgp4591 Mar 14 2016, 08:18 AM
If I go that way might as well get a new crate motor. Bob was saying you can get one for ~$5500ish if you wait for a sale. That's without the ECU but still...good deal for a new one. The days when you could find a nice used Camaro SS for $2k and pull the engine are gone. Then there's the Boxster 6 speed and the very expensive adapter plate....wow! How's the gearing on the 5 speed? Go big or go home? 6 speed or nothing?
It's a couple years out but why not start planning it now.
I didn't catch why you were pulling your engine - installing a Subaru trans? Engine reseal? Bored??
Posted by: 76-914 Mar 14 2016, 08:22 AM
Alright Chris, you cut a fat Hog in the ass. Feels better now doesn't it. And you hit the nail on the head about that "do it for now" construction. That engine bay looks clean as a whistle. BTW, I'm giving you a "C" on pic's. Are you using a Polaroid and can't afford the film? Seriously, take lots of pics. There are other guys using the EG that will benefit from those pics'.
Other than the manifold flip what's on your plate now that the engine/trans are out?
Posted by: Chris H. Mar 14 2016, 10:29 AM
LOL very funny Kent . Yes I will definitely pick up the pics thing. Confession...I feel pretty dumb that I did not put a coolant drain valve in...and made a pretty big f&*(&*(ing mess draining the coolant. No other way to put it. One of the many things I should have done correctly the first time . No matter how many times I thought it was dry, more kept coming when I leaned the car this way or that way. So because we have small dogs it was like a haz mat spill every time more than a few drops hit the garage floor. Clean, scrub, wipe floor, rattle the hoses again, etc.
So Kent and Mike, I need to reseal the oil pump, flip the manifold (not as easy as it sounds as George mentioned), check all the sensors, clean the engine and trans a little better, tidy up the wiring.
Posted by: ThePaintedMan Mar 14 2016, 10:47 AM
Good stuff Chris! If you decide to try the spacer route for flipping the intake, the best version I found is made by this guy:
http://svxworldforums.com/forum9/6230.html
Also, sorry to hijack (once again) - Chris, do you remember, in your reseal kit, are the coolant crossover tube gaskets included with it?
Posted by: jimkelly Mar 14 2016, 11:03 AM
interesting. gives some points to a 4 install from a 4 car that had a 5 spd. clearly i need to read this thread from the beginning : ) nice work!
--
Right, tunability, and also there are some quirks associated with the fact that the ECU is for a different car.
For the EG33, stock ECU concerns are:
- Some experience a sudden stall issue because all US SVX's are automatic. When you convert to 5 speed there is not a constant "load" on the engine and it can stall.
- There is also sometimes an idle issue for the same reason
- Lot of extra wires going to things you won't use like the PS pump, etc
- EGR and old school atmospheric pressure sensor (eliminated with Megasquirt)
- The "learning mode" is eliminated with MS which is a pain when you unhook the battery
- The rev limit is 6500. With MS you can go to 7400ish
But the ability to tune it to your liking is the best part.
Posted by: Chris H. Mar 14 2016, 11:58 AM
Good stuff Chris! If you decide to try the spacer route for flipping the intake, the best version I found is made by this guy:
http://svxworldforums.com/forum9/6230.html
Also, sorry to hijack (once again) - Chris, do you remember, in your reseal kit, are the coolant crossover tube gaskets included with it?
Excellent info, thanks George! You can comment or ask questions any time. I don't mind at all.
So I think you are talking about this pipe:

If so then yes. They are just little donuts. Small but very important. Also comes with one for the dip stick holder thing. One of the most likely areas to leak.
Jim, MS has a plug and play model for certain 4 cylinder cars, which means you could literally just plug it in to a stock harness and it would already have a base map set up and everything. 2002-2005 WRX I think.
Posted by: mgp4591 Mar 15 2016, 04:12 PM
Chris, while your engine is out how about some pics of your cradle showing a little more detail for us curious types?
Posted by: a914622 Mar 15 2016, 05:36 PM
Chris
The problems you listed on page 25 are mainly caused by no speed sensor or the one that "fools" the ecu. Did you rig up a 5 pulse speed sensor? The vss probably needs cleaning as well.
The computer chip can be hacked and changed. I have yet to do the svx but I have done a obd1 for the 2.2. I will need to did up the info on the chip set. BUT I think the performance end is pretty good.
I didn't read thru the hole post. I will later.
Did you need an extra ecu harness? I probably have at least one.
Jeff
Posted by: Chris H. Mar 15 2016, 05:55 PM
Hi Jeff,
Nice to hear from you. Hope all is well. I hope I describe this correctly...
So when I had no speed sensor hooked up at all the car just had an occasional stall issue and an idle issue, which I think is common since the SVX is automatic. If there wasn't enough load the car would stall. Late last year I took the speed sensor that I had saved from the SVX trans and installed it in the 2006 WRX trans I am running. Screwed right in just fine. Although I noticed a huge improvement in the idle and some behaviors, it seemed to bog down and stutter, especially when I opened it up, but also on takeoff from a stop. It's a '95 so it doesn't have that '92-'93 issue that some might be thinking of where the car bogs down off the line. I was wondering if it was just a loose wire or something. Maybe the IAC valve was sticking...something like that. I think there are two speed sensors on the SVX. Do I need to rig something else up too? Would a different VSS be better?
Steve (914forme) was looking for an ECU harness, but if you have MORE than one I'd take one too. Happy to throw some $ your way. If you just have one Steve is welcome to it. He deserves it after welding about a mile of sheet metal .
Posted by: 76-914 Mar 15 2016, 06:42 PM
Damn sure sounds like the VSS is screwy. I'd change it out but I don't know whether it's a mis-match or simply defective. Wonder how you can test one?
Posted by: a914622 Mar 15 2016, 09:20 PM
Chris
Thanks good to be back. Iv been helping a guy with the 95.5 basterd child swap into a type 3.
Is the vss all the way closed just sitting? I would pull it out and see if crap has cloged it. Second the vas is conected to the outside port on the switch valve?
As far as flipping the manifold hang on .. I am working on a fix for the svx to fit the vanagons and the 914. I just did one for the type 3 2.2 but I'm not sure on the svx. I'm working on an extra manifold as I write.
You have inspired me to get this think back to smoking tires.
Posted by: Chris H. Mar 15 2016, 09:41 PM
I'll pull it and shoot some pics tomorrow. I wired it up exactly as it was before using the stock wiring harness end.
Let me know on the manifold situation! Sounds like something quite a few people would like.
Posted by: Cracker Mar 16 2016, 04:47 AM
Chris - Sorry for the late reply...I don't have any experience with the 5 speed. Several of the members here have them behind Subbies I believe. The ONE thing I do know is they have a smaller R&P - if your car would ONLY be a hot rod/street car. I highly doubt you'd ever have a problem. I don't know if the adapter, flywheel and clutch pack is dynamically cheaper than the 6-speed - maybe.
It is not generally a cheap way to go (Unless you're are BOB)...he can make anything happen for nothin'!
All the best and enjoy what you've got!
Tony
How's the gearing on the 5 speed? Go big or go home? 6 speed or nothing?
Posted by: Chris H. Mar 16 2016, 08:58 AM
I don't know if the adapter, flywheel and clutch pack is dynamically cheaper than the 6-speed - maybe.
Hey no problem Tony. I thought maybe the adapter would be a lot cheaper on the 5 speed...if not then the 6 speed seems like the only way to go. Is the adapter really that much more complicated that it costs $3k vs the usual $550 or so? Must be.
Posted by: Cracker Mar 16 2016, 09:03 AM
Again, I don't know if the adapter, flywheel and clutch are different between the two - someone here surely can chime in (who has a 5 speed version - same as the audi/vw variants). It is NOT just the adapter plate - that price includes the entire assembly (adapter, flywheel, PP an clutch). For the 6 speed - it is quite impressive and much more robust than the standard set up.
Tony
I don't know if the adapter, flywheel and clutch pack is dynamically cheaper than the 6-speed - maybe.
Hey no problem Tony. I thought maybe the adapter would be a lot cheaper on the 5 speed...if not then the 6 speed seems like the only way to go. Is the adapter really that much more complicated that it costs $3k vs the usual $550 or so? Must be.
Posted by: 914forme Mar 16 2016, 09:38 AM
Hi Jeff,
Steve (914forme) was looking for an ECU harness, but if you have MORE than one I'd take one too. Happy to throw some $ your way. If you just have one Steve is welcome to it. He deserves it after welding about a mile of sheet metal
.It is yours Chris, for what I am doing with the car I would like things like launch control etc.... That being said I am still really thinking about SDS, as they have done EG33s and turbo EG33s.
So I am ditching the intake upper section at a bare minimum. Trying to determine if I am going single manifold or ITBs. Part of me really wants to do ITBs
But Single manifold is a lot easier to turbo if I wish to do that latter. Maybe build both as I like to buildPosted by: a914622 Mar 17 2016, 10:15 PM
So it looks like the manifold mod is a little more than I was going for. I was going to cut the Tbody surface 90 deg to the secondary manifolds and install keenserts to bolt the throttle body back on. Not enough meat on the svx manifold. I'm going to make a plate and see if the welder can/will spark things back together?
It should move the Tbody .5 inch froward and point straight back not up and back.
I pulled an extra vss out of the stash to check the bottom bushing. It had a lot of wear and I suspect was hanging up or leaking air.
Posted by: motoTrooper Mar 18 2016, 07:59 AM
Hey there! I've been avidly reading the EG33 builds here and wanted to comment and thank you all for your pioneering work. I am planning a conversion but into a different car -a 1977 Lancia Scorpion. Seems apropos as like the 914, the Scorpion was a weird cast-off stepchild with a lot of potential. Just needs love, understanding, and an infusion of triple the power to show what it can do...
Best regards,
Christopher
Posted by: Chris H. Mar 18 2016, 05:04 PM
So it looks like the manifold mod is a little more than I was going for. I was going to cut the Tbody surface 90 deg to the secondary manifolds and install keenserts to bolt the throttle body back on. Not enough meat on the svx manifold. I'm going to make a plate and see if the welder can/will spark things back together?
It should move the Tbody .5 inch froward and point straight back not up and back.
I pulled an extra vss out of the stash to check the bottom bushing. It had a lot of wear and I suspect was hanging up or leaking air.
Sounds interesting Jeff. BTW...the VSS you're describing doesn't sound like mine.
Here's the one I am using.
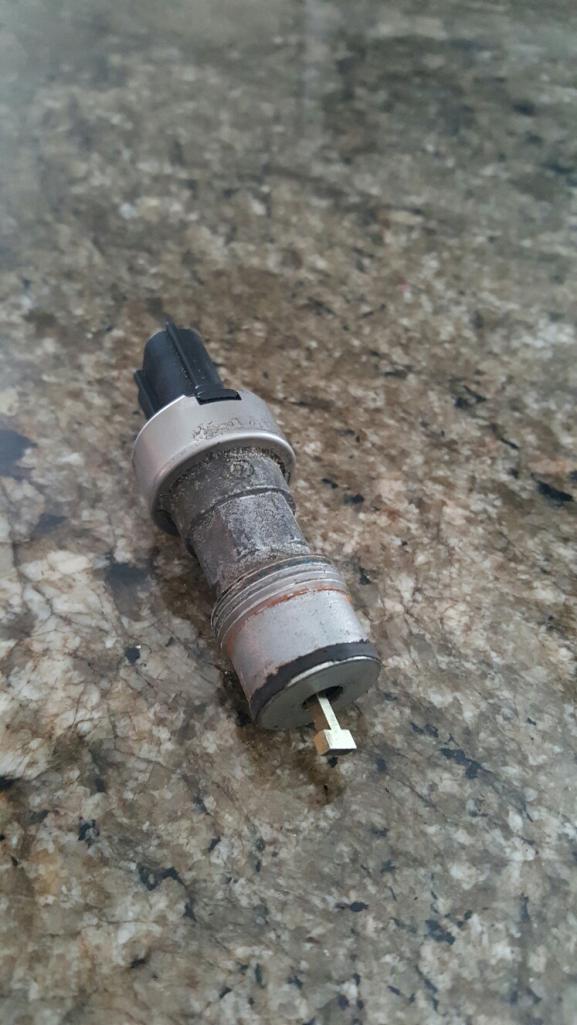
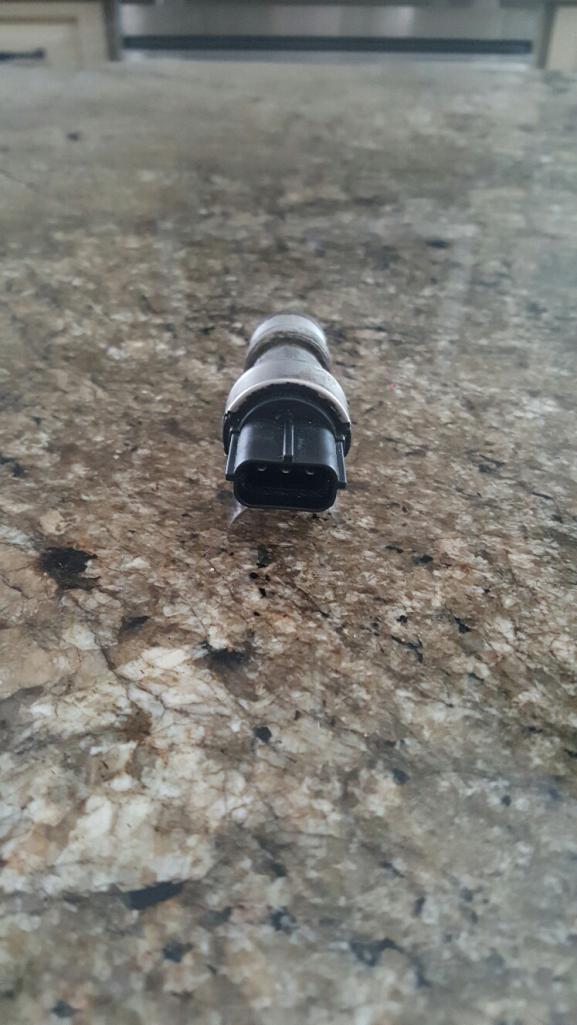
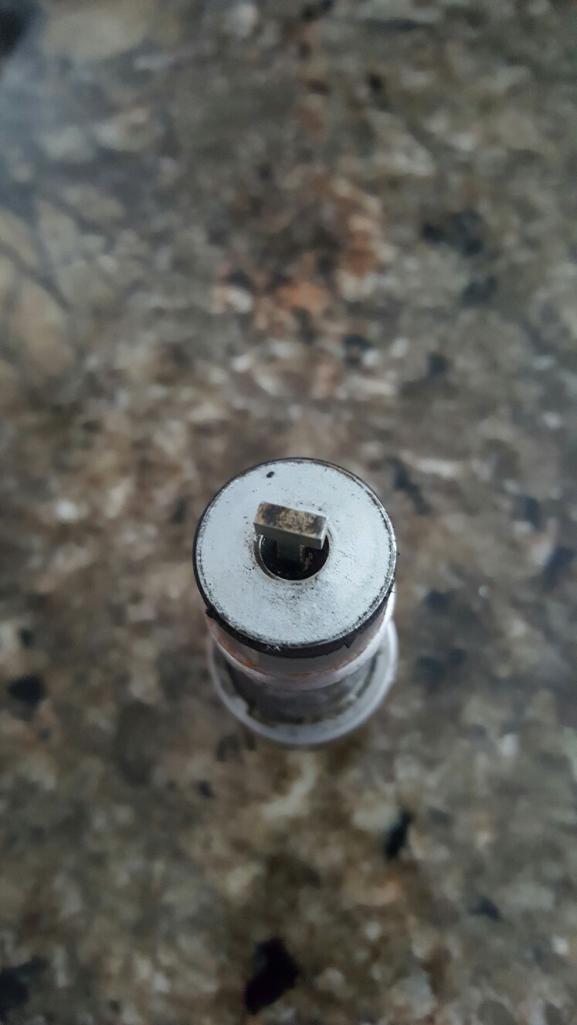
Screws right in to the WRX trans but it's from the SVX trans. The T shaped part spins which is the speed indicator. It has 3 leads on top. Power, signal, ground. seems to spin OK. Don't see any bushings unless they are missing? Maybe I need to lube it and put some RTV on the threads to make sure it gets a good seal on the trans.
Christopher,
I'm familiar with the Scorpion. Very cool little car. Not many left out there. You're putting an EG33 in it??? Post some pics!
Posted by: mgp4591 Mar 18 2016, 05:23 PM
Hey there! I've been avidly reading the EG33 builds here and wanted to comment and thank you all for your pioneering work. I am planning a conversion but into a different car -a 1977 Lancia Scorpion. Seems apropos as like the 914, the Scorpion was a weird cast-off stepchild with a lot of potential. Just needs love, understanding, and an infusion of triple the power to show what it can do...
Best regards,
Christopher
The Scorpion has a transverse layout if I'm thinking correctly. An ideal candidate for an MR2 drivetrain or a Honda B16-18 setup- that little bugger would fly!! Good luck with your build!
Posted by: 76-914 Mar 18 2016, 07:48 PM
Chris, can you look inside the trans to see the where it seats? I ask because I don't remember if mine looks like that on the trans side. Then again at this age I can't remember what I had for breakfast.
Posted by: motoTrooper Mar 18 2016, 09:33 PM
The Scorpion I got is a basket case. I have run the mental gamut of putting in an Alfa 164 V6 (cool but they have their own issues and it's been done repeatedly), a Honda/Acura K20/K24 IL4 (powerful & cool but a four banger and sounds like one), a Honda V6 (not a total fan of the transverse layout), the Subaru flat 4 (they all sound like a subaru flat 4 but have the longitudinal layout I like), which brought me to the EG33 (strong, smooth, low center of gravity, balanced longitudinal layout, and sounds like a Ferrari BB512!) The EZ30's appealed also but are more expensive as I'm sure you're aware.
I need to fabricate all the floorpans and address rust issues too so it's going to be a long row to hoe. I'll happily share my progress if you're interested. I love modding vehicles, I've built a few cars and a bunch of motorcycles. I like the friendly camaraderie that I have seen reading through the threads here.
Posted by: Chris H. Mar 18 2016, 10:05 PM
Chris, can you look inside the trans to see the where it seats. I ask because I don't remember if mine looks like that on the trans side. Then again at this age I can't remember what I had for breakfast.
Here's what the other end looks like Kent:
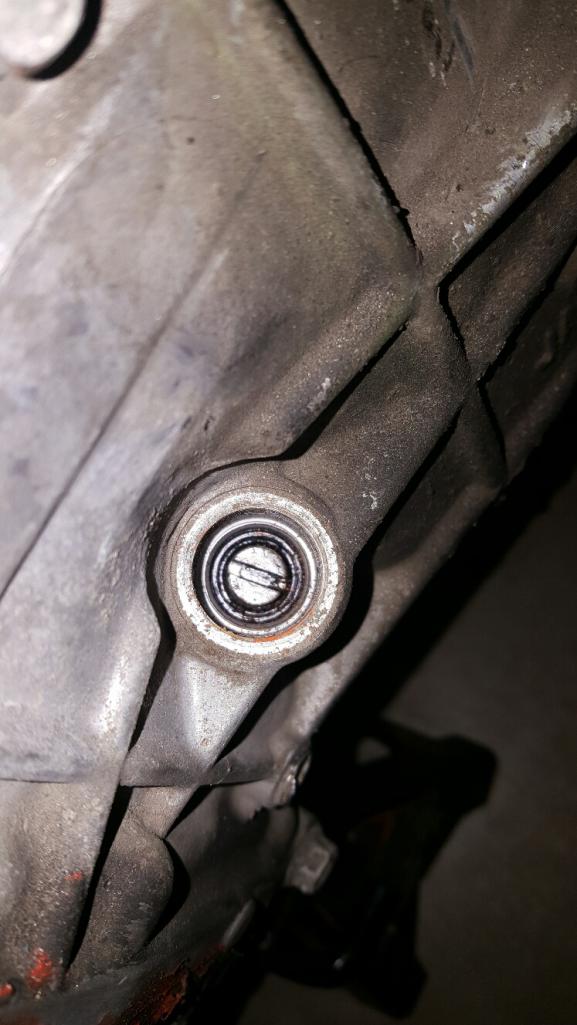
The T piece fits in that slot (or it won't screw in). The WRX one looked pretty strange on top. Couldn't tell where the wires went. It was just a round piece. The lower part was the same. It was made of plastic.
Christopher, post away! We like pictures
. FYI the EG33 is fairly heavy for a car of the Scorpion's size and weight but if you like it, go for it. A VW VR6 might work transversely... . Only if the longitudinal layout didn't end up working out. The Audi 2.8 is also a nice small motor (not the narrow angle V6). Could mount that to a Boxster/Passat Trans.
Posted by: a914622 Mar 19 2016, 09:05 AM
Chirs my mistake. I had an air leak on the vain in the intake. I was thinking if yours was sticking or leaking air that might be the shuttering problem. The vacuum valve it hooks up to had a crack on mine so it wasn't fully opening or closing the "air splitter" in the intake.
The trans pulse should be rock solid. The trans had one or did you have to put it in? Some of the ty756 trans didn't come with it and the have no gear inside. If you have a wrx tran it's probably a ty755?
Posted by: motoTrooper Mar 19 2016, 09:59 AM
Quick question -could you give me some dimensions of the engine/trans assembly?
Assembly length, engine width, distance from front of engine to trans axle stubs would be greatly appreciated!
Posted by: motoTrooper Mar 19 2016, 11:11 AM
Just found these for comparison sake, the 914 has a 6" longer wheelbase but they seem pretty close...
http://s1111.photobucket.com/user/motoTrooper/media/Scorpion/fe3be9c9-c58e-4779-bfe4-b8e8ac0ae373_zps50pm7etp.png.html
http://s1111.photobucket.com/user/motoTrooper/media/Scorpion/Screen%20Shot%202016-03-19%20at%2010.01.20%20AM_zps81vs2lyd.png.html
Posted by: 914forme Mar 19 2016, 01:11 PM
Just found these for comparison sake, the 914 has a 6" longer wheelbase but they seem pretty close...
http://s1111.photobucket.com/user/motoTrooper/media/Scorpion/Screen%20Shot%202016-03-19%20at%2010.02.06%20AM_zpsyxv8x9rm.png.html
http://s1111.photobucket.com/user/motoTrooper/media/Scorpion/Screen%20Shot%202016-03-19%20at%2010.01.20%20AM_zps81vs2lyd.png.html
Well the entire thing from front pulley to end of the shift rod is just under 51"
It is just under 33" wide
And from the stub axle center to the front pulley you have 29" approximately.
All the numbers are approximates but they will get you close enough with a little bit of tape work or a couple card board boxes you can figure out if it will fit
Posted by: Chris H. Mar 19 2016, 01:36 PM
Chirs my mistake. I had an air leak on the vain in the intake. I was thinking if yours was sticking or leaking air that might be the shuttering problem. The vacuum valve it hooks up to had a crack on mine so it wasn't fully opening or closing the "air splitter" in the intake.
The trans pulse should be rock solid. The trans had one or did you have to put it in? Some of the ty756 trans didn't come with it and the have no gear inside. If you have a wrx tran it's probably a ty755?
Ah that explains it. That would definitely cause issues. I decided a while back to switch back to the stock intake just to make sure I eliminate any potential compatibility problems. The engine ran fine in the SVX. Just something simple I'm sure. The trans is a 2006 and the gear was in there before. Pretty sure it should work the same way.
Posted by: Chris H. Mar 19 2016, 03:12 PM
Measurements for you Christopher...these are approximate.
About 28" wide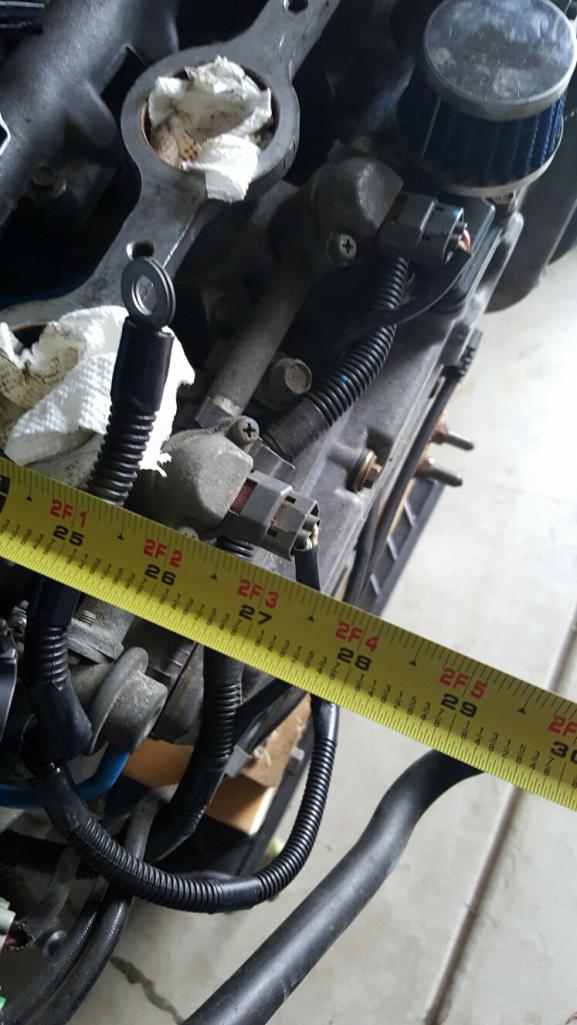
The engine itself is just under 22" deep, then you have to add the snorkel for the stock intake manifold, which would add about 4" or so 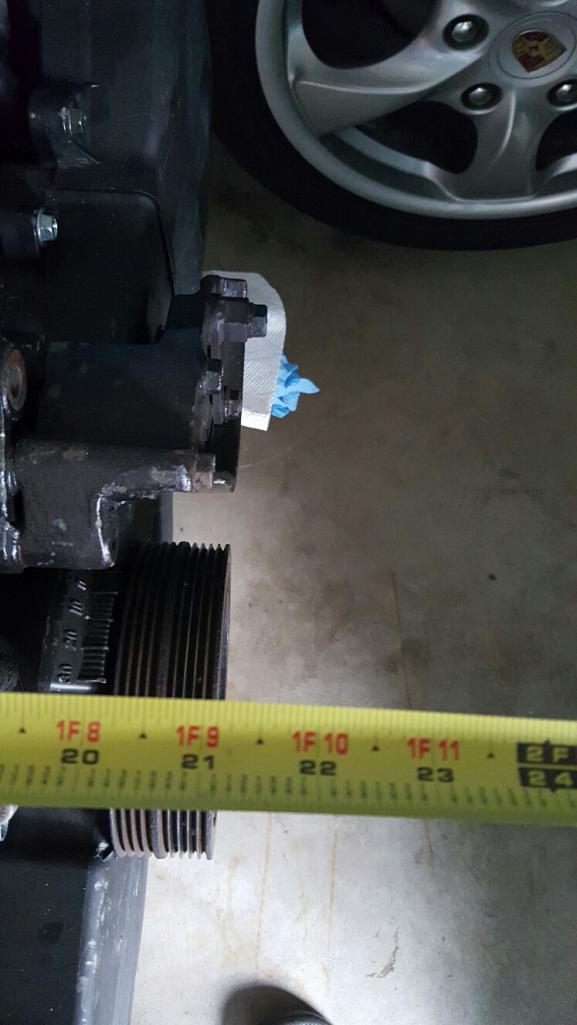
The engine and trans are about 48.5 front to back, again, add 4" or so for intake. 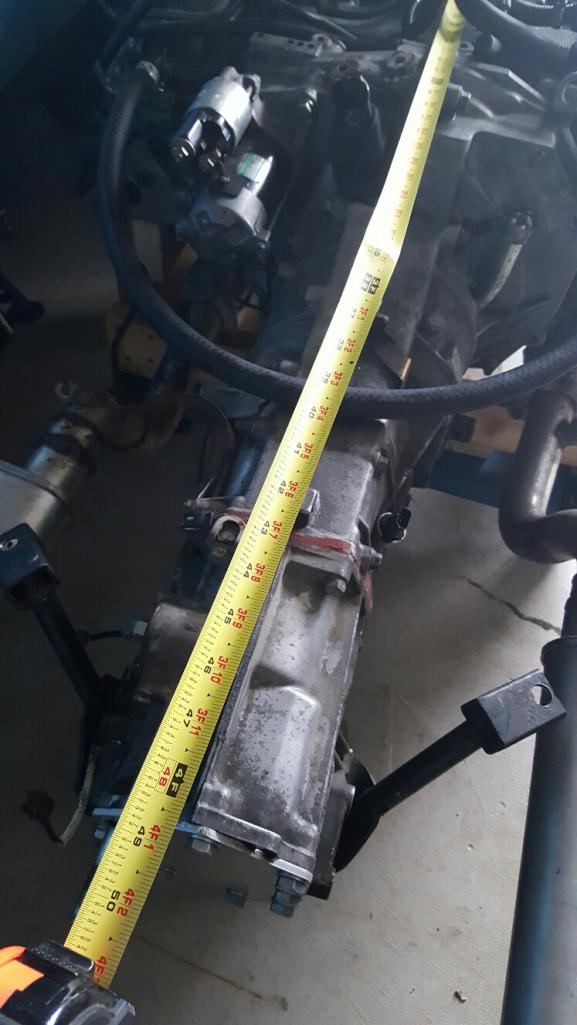
The height of the engine is tough because I pulled the manifold off but I would guesstimate it at about 26" from oil pan to the top of the manifold.
Posted by: motoTrooper Mar 19 2016, 03:14 PM
Thanks to both of you!
Posted by: Chris H. Mar 19 2016, 03:20 PM
And then I did a tiny amount of work .
Got the timing belt cover off, pulley, etc: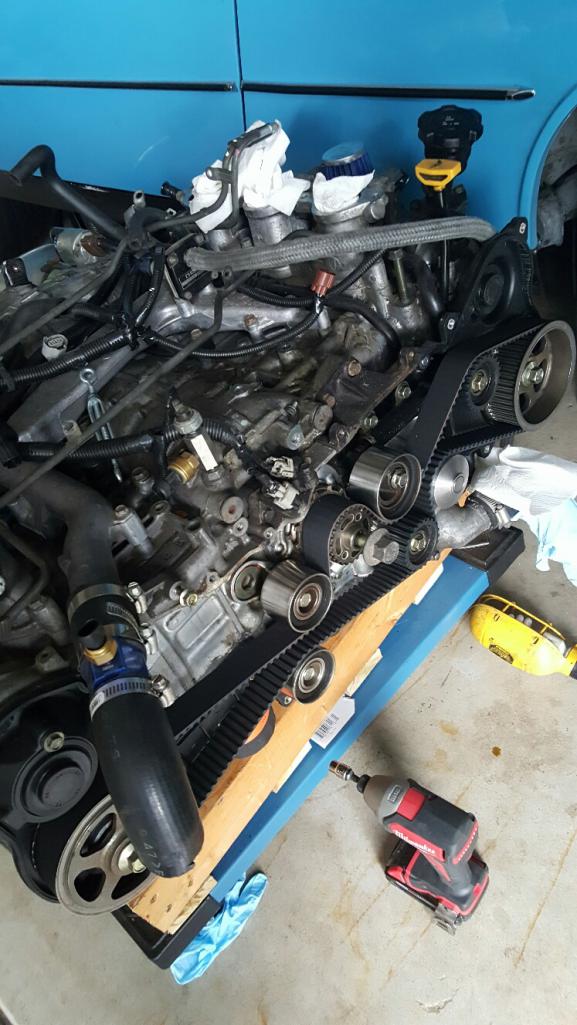
The leak is right here...VERY small one but I hate oil leaks. 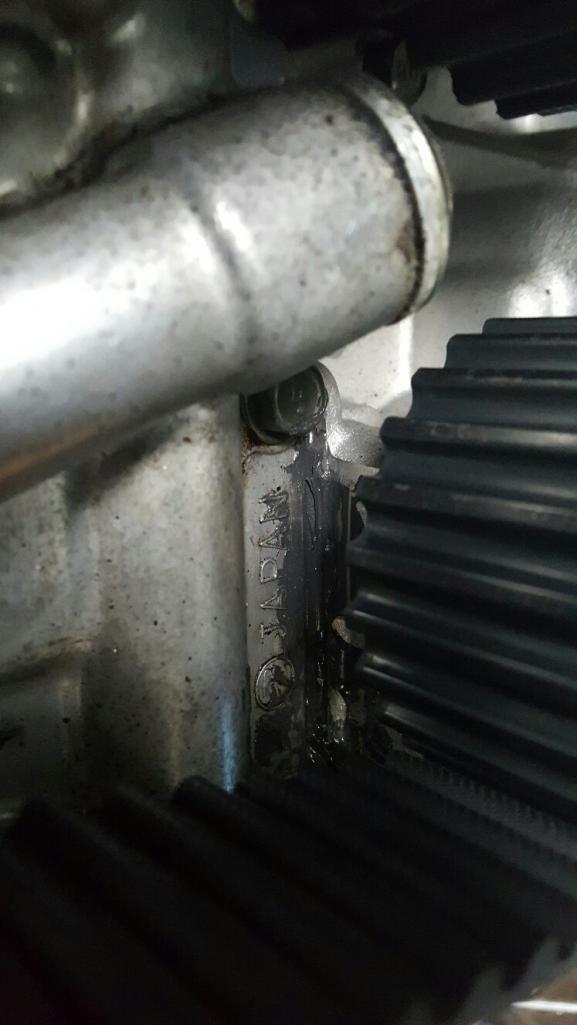
At first I was a little panicked because that black stuff looked like JB Weld....which would mean something bad. But it's not. It's black RTV. Scraped right off and is pliable. Someone tried to stop the leak temporarily with it. Any idea how much work that was in an SVX? Brings lazy to a new level.
Posted by: 76-914 Mar 19 2016, 04:58 PM
Once that engine is out most everything else is easy; except diagnosis of course. p.s., Received the controller, Chris Nice neat little package. Good tip. Thx.
Posted by: Chris H. Mar 19 2016, 08:59 PM
Cool man. Very easy to install. Remember you'll probably have to adjust the thermostat a bit. I'm sure you can see the dial on the housing with temp #s. My fans came on way too early initially. Think its set at 165 from the factory which means they wont go off until the temp gets to 155...so...not until you turn the car off. . Put the sensor right by the HOT inlet on the rad. Then a few tweaks and you'll be good. I doubt they'll come on much until you kick the AC on. Pretty sure we can stick with the rad hoses we have now after all .
Posted by: 76-914 Mar 20 2016, 08:54 AM
After reading the wiring instructions I see why some people were claiming them to be "DOA". The Futsie's probably missed the part where "neg" fan connects to "pos" on the unit and wired pos to pos and neg to neg instead.
Posted by: Chris H. Mar 20 2016, 03:46 PM
Totally stumbled on this one but it's a good lesson. Check the crank and cam angle sensors! The car ran fine so I ASSUMED they were OK.
There are two Crank Angle Sensors that are located on top of the oil pump right under the alternator next to each other. I was removing them to take the oil pump out and one of them just didn't want to budge. The outer metal sleeve had come loose and was stuck inside the hole. I tested it and found the sensor was bad so I manhandled it out. 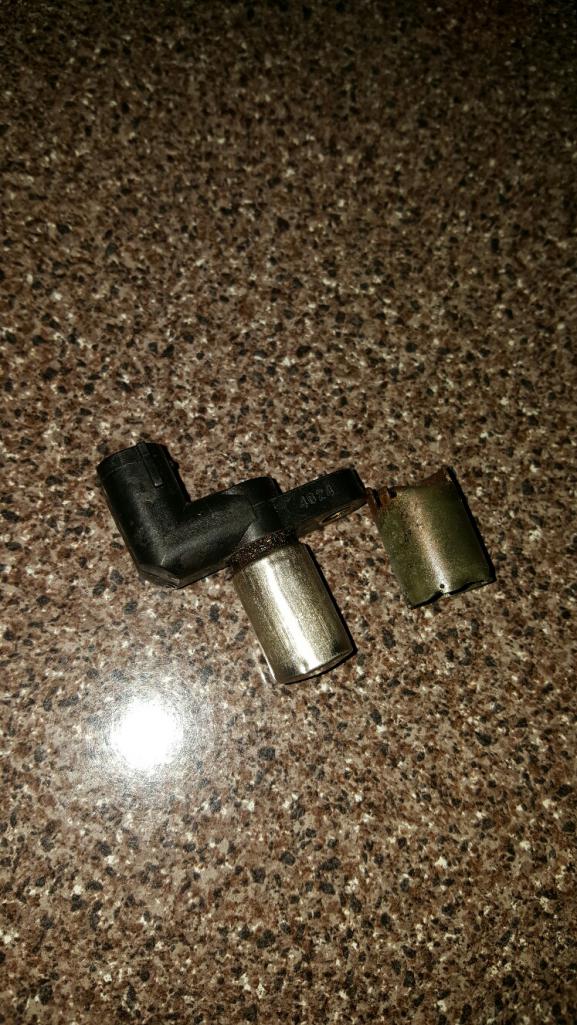
Looks like a small amount of water must have gotten between the sensor and the pump housing: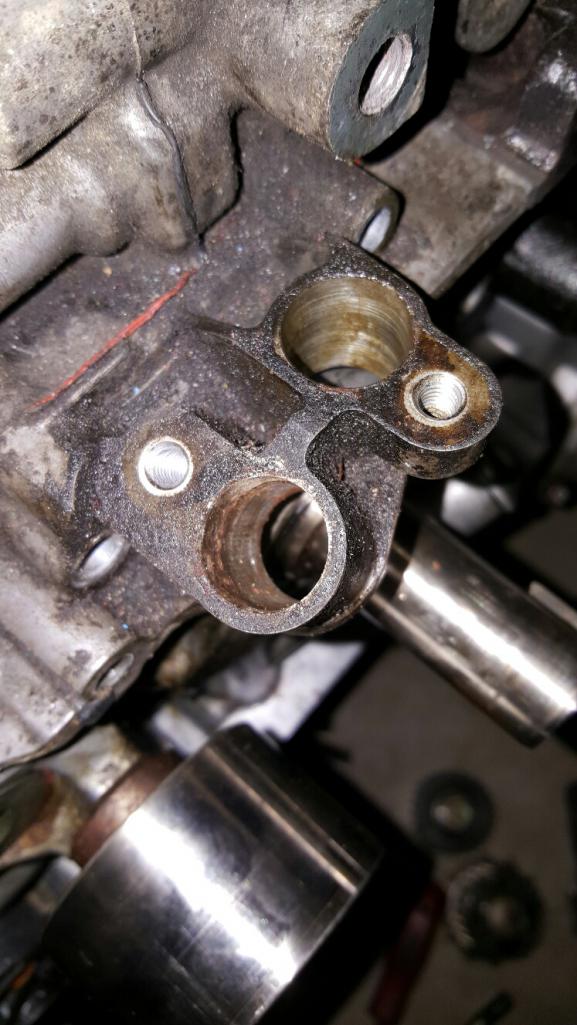
That's the one area I didn't mess with when I resealed the engine (of course).
When you test these using an Ohm meter it should read ~2600. The other two are very close...
The bad one...nothing...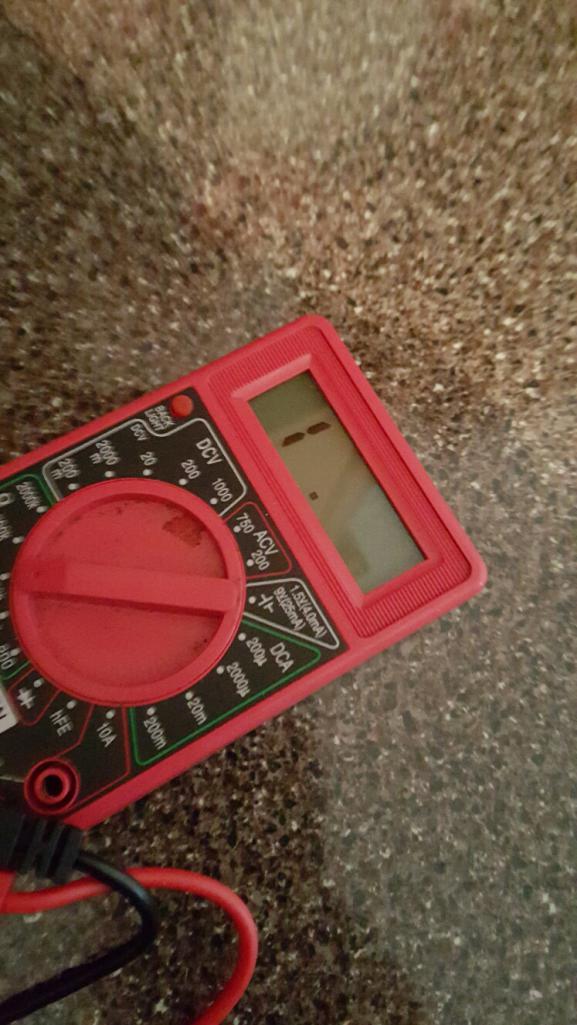
These are very simple magnetic sensors, they are technically all interchangeable. The only difference is the angle of the plug. 
Of course the one I need is #1, and the plug end is pretty unique. Just need to do some searches to see what other Subaru sensor is close enough. You can find these for $20 -$30 each. Tempting to replace all 3. Definitely not spending ~$250 for the SVX one.
Posted by: 914forme Mar 20 2016, 05:18 PM
Chris I have 1 complete set, and the two on the engine, the cam sensor was trashed on my mockup engine. If you don't find one I can pull them next weekend. I am traveling this week for work, will be back in town next Friday.
Posted by: Chris H. Mar 20 2016, 05:47 PM
Thanks so much Steve. Very nice of you. I'll definitely let you know but will try to use the Legacy ones first so you can keep those as spares. The price for a new #1 is RIDICULOUS.
Posted by: a914622 Mar 21 2016, 09:12 PM
I have heard rumours the Nissan crank sensor plugs in from the top or 45 deg like the svx. I have not confirmed that but I will have a look next time I'm pocking around the wrecking yard.
Posted by: Chris H. Mar 22 2016, 09:44 PM
Interesting. Thanks Jeff. I ordered a couple of Legacy ones for a whopping $16 each. They are the OEM replacement on Rockauto so not the el-cheapo ones.
Slight progress while we wait...
Oil pump is off. Never resealed in 21 years. Seems like it might have been leaking slightly from both the seal around the pump housing and the front seal around the crank ( I think referred to as the front main seal). I got the seals I need in the Subaru reseal kit, just never used them. 
Look at the crap behind that thing. 
O-Ring is not very pliable. It broke later. 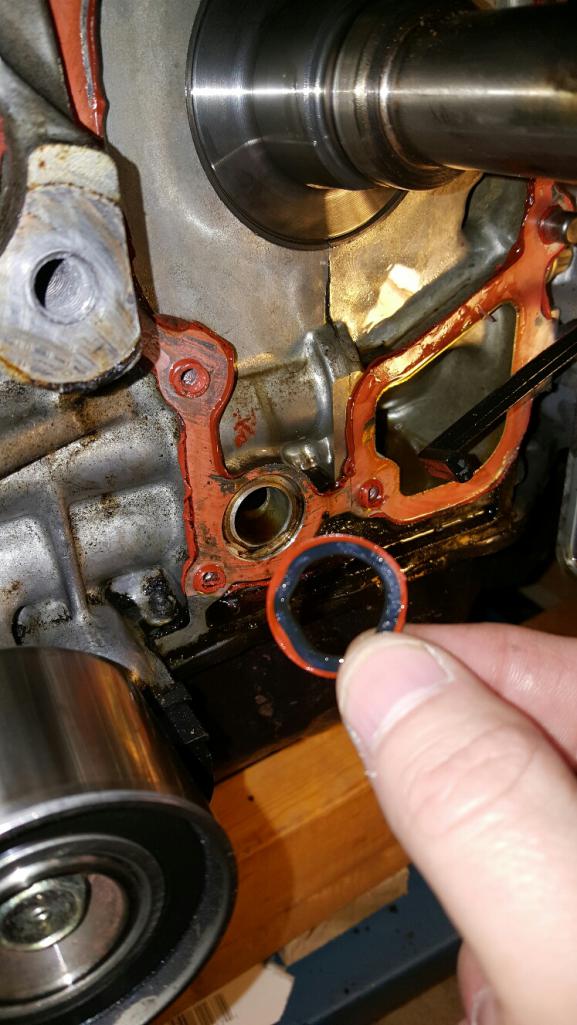
Got the RTV removed from both surfaces. RTV is the OEM way to seal the oil pump. Same with the oil pan. 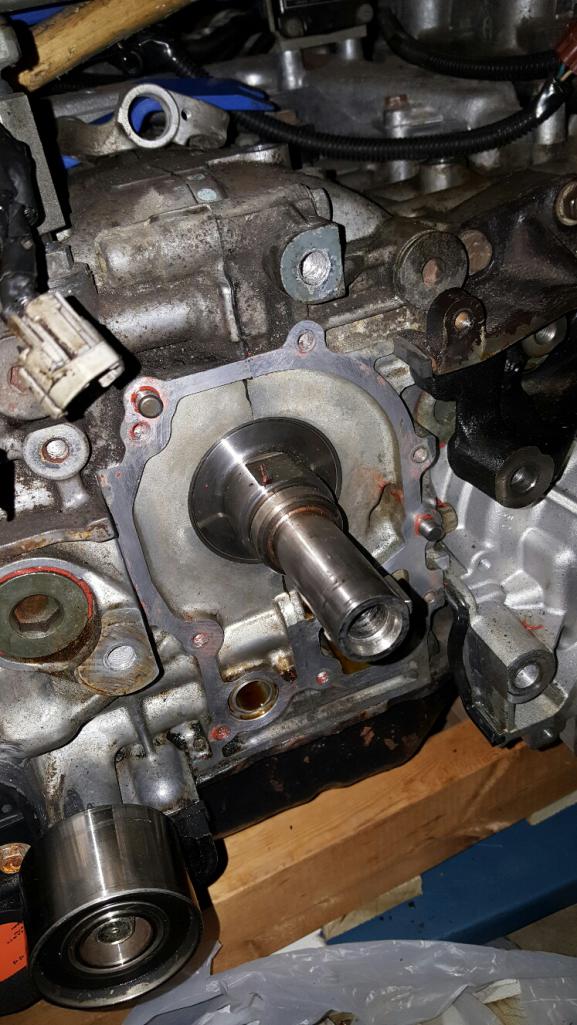
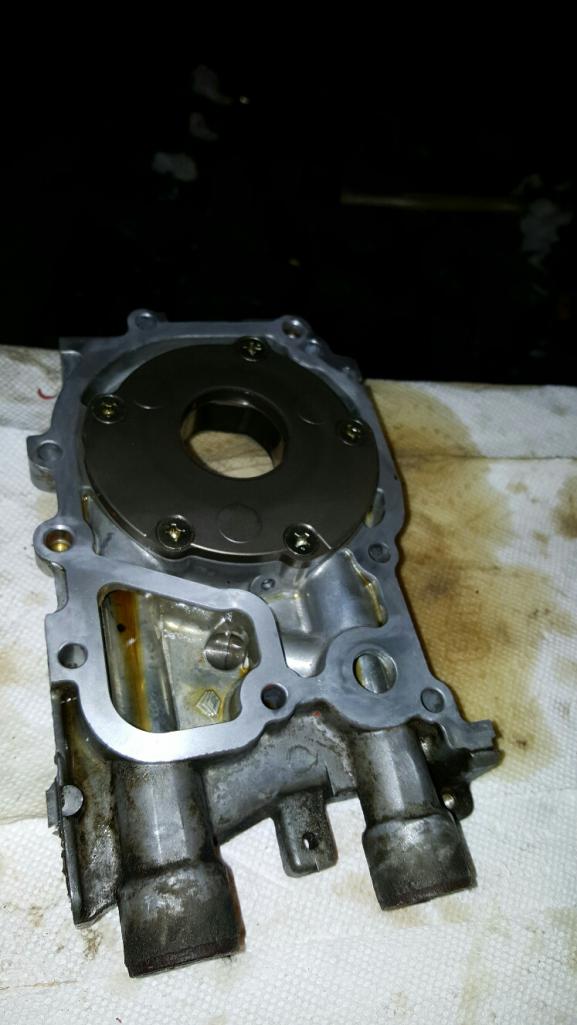
Tomorrow we clean the gunk off from on and behind the oil pump, re-seal it, get the timing belt back on. I'll detail the procedure for doing the timing belt when I reinstall it. Easiest one I've ever done (3 times now ). Non-interference too. It's gonna be flying down the road in no time .
Posted by: motoTrooper Mar 22 2016, 10:26 PM
I am working on my 3.3 vicariously through you! Great photos and description, you are saving me so much time when I actually get my donor car. Looks like that Celica radiator will fit the Scorpion too as the old one I pulled today is 31(l)x10.5(h).
I do not wish to hijack your thread but want to share pics. So shall I post a link to one of the Lancia/Fiat sites that I have build threads on?
Best regards -Christopher
Posted by: Chris H. Mar 23 2016, 06:01 AM
Sure that's fine. Go for it.
Posted by: 76-914 Mar 23 2016, 06:53 AM
Great progress Chris. So tell me, I've never used siliconed as a gasket. Is the proper technique to apply and tighten or apply, tighten some, let cure then complete the tightening.
Posted by: Andyrew Mar 23 2016, 07:10 AM
The Audi factory manual for the oil pan says to torque the bolts to 5lbs the wait one hour and torque to 10lbs.
I did the same thing for all my other things I RTVed. Hopefully it works....
Posted by: Chris H. Mar 23 2016, 07:12 AM
Yes that's it Kent. I'm gonna pick up some fresh RTV today since I'm out so I don't remember the exact timing but you apply the stuff, put the parts together but only tighten them a bit, then finish torquing when the stuff is almost completely set.
It'll work Andrew, believe it or not (I was skeptical). My oil pan has held up fine for 3 years.
Posted by: ThePaintedMan Mar 23 2016, 09:24 AM
That's good info guys. I was wondering what the factory procedure was with the RTV, as I had never used it on two machined surfaces before. I saw that the factory RTV was the orange stuff when I pulled my oil pump, however, I'm inclined to go with the black RTV - more oil resistant. I really like the grey/Hondabond/Yamabond, but it might be a little too thin for this application.
Posted by: Chris H. Mar 23 2016, 09:37 AM
That's good info guys. I was wondering what the factory procedure was with the RTV, as I had never used it on two machined surfaces before. I saw that the factory RTV was the orange stuff when I pulled my oil pump, however, I'm inclined to go with the black RTV - more oil resistant. I really like the grey/Hondabond/Yamabond, but it might be a little too thin for this application.
Yes I went with the black on my oil pan George. Might use it on this too.
Posted by: Sleepin Mar 23 2016, 09:44 AM
I really like the grey/Hondabond/Yamabond, but it might be a little too thin for this application.
I love Hondabond! Some of the best stuff made IMO.
Posted by: ThePaintedMan Mar 23 2016, 09:55 AM
I do too. A great candidate for metal-metal seals, but not sure with the case halve parting lines and other irregularities in machining, it might not be a good candidate here. If the factory orange RTV lasted 20 years, I bet the black RTV will be just fine.
Posted by: Chris H. Mar 23 2016, 10:53 AM
....If the factory orange RTV lasted 20 years....
Let's call in 19...
..ah just kidding I know exactly what you're saying. The oil pump was still really stuck to the motor. When I took the bolts off it didn't budge at all. Had to carefully pry it a bit.And BTW the oil pump o-ring and seal you need do come in that kit I sent the info on...the mega-every-seal-kit.
Posted by: 76-914 Mar 23 2016, 03:10 PM
If you store your tube of silicone in the fridge it will keep for 2 years or more.
Posted by: mgp4591 Mar 23 2016, 03:48 PM
On ALL applications involving aluminum to aluminum, i.e. oil pans, etc., we used Hondabond exclusively according to the manuals and never had a leak. With the oil pans, we'd use a bead and let it set up 15 minutes before installation - I don't think I'd use a bead on the oil pump though. A light skim of no more than 1/16th inch would probably work, maybe a tad thicker. Let it set up a bit til it's sticky/hard, them bolt it in but make sure to avoid getting too close to the inlet/outlet holes. Should work fine! Just make sure all surfaces are clean and dry with brake kleen and a dry cloth.
Posted by: Chris H. Mar 23 2016, 04:02 PM
If you store your tube of silicone in the fridge it will keep for 2 years or more.
Yeah my tube is older but that's good to know for next time. Might replace my oil pan someday.
What's this Hondabond you guys speak of? Never tried it. Probably stick with RTV since that was OEM but good to know.
Posted by: mgp4591 Mar 23 2016, 04:12 PM
It's specially made for bonds with aluminum. It's stickier and sets up differently than RTV, has more consistency to it also like it's got a fibrous matrix to it. I've never had it fail but it's only available at dealers or so I understand. If RTV is OE, I'd go with their brand of it.
Posted by: ThePaintedMan Mar 23 2016, 05:07 PM
This has turned out to be one of the most informative threads ever! Thanks for the info. Chris - Permatex Grey is darn close to Hondabond/Yamabond and intended for similar uses.
Posted by: Chris H. Mar 23 2016, 05:28 PM
This has turned out to be one of the most informative threads ever! Thanks for the info. Chris - Permatex Grey is darn close to Hondabond/Yamabond and intended for similar uses.
You going with grey George? Might be a good call. Just looked at it.
This?
http://www.permatex.com/products-2/product-categories/gasketing/gasket-makers/permatex-ultra-grey-rigid-high-torque-rtv-silicone-gasket-maker-82194-detail
Great info guys. Hey we're getting pretty excited about silicone gasketing material
.
Posted by: 76-914 Mar 24 2016, 07:40 AM
Back to the cam sensor; What change can you expect after it is replaced? Was it performing on a sub par level with only one sensor working?
Posted by: 914forme Mar 24 2016, 08:12 AM
This has turned out to be one of the most informative threads ever! Thanks for the info. Chris - Permatex Grey is darn close to Hondabond/Yamabond and intended for similar uses.
You going with grey George? Might be a good call. Just looked at it.
This?
http://www.permatex.com/products-2/product-categories/gasketing/gasket-makers/permatex-ultra-grey-rigid-high-torque-rtv-silicone-gasket-maker-82194-detail
Great info guys. Hey we're getting pretty excited about silicone gasketing material
.Yes, i have only used Yamabond and Mercrusier Bellows Cement. You need to glue a piece of hose to metal, and never have a leak Bellows Cement will do just that. Do it fast, it is not designed to dillydally around with! Yamabond, is great stuff, easily sourced at your local Motorcycle dealer or on http://www.amazon.com/gp/product/B00545V1ZE/ref=pd_lpo_sbs_dp_ss_1?pf_rd_p=1944687542&pf_rd_s=lpo-top-stripe-1&pf_rd_t=201&pf_rd_i=B003B3A9HM&pf_rd_m=ATVPDKIKX0DER&pf_rd_r=1VT03R5ZBQ692TNFY3G2.
https://www.shopyamaha.com/yamalube-products/adhesives?ls=yamalube&taxo_productdepartment_ss_facet=36&taxo_productcategory_ss_facet=111&dealernumber=I normally use 4, that being said is that if your pieces have wide gaps the 6b works wonders. One thing to note they out gas a lot, so you might want to work with some ventilation. Now that we are heading out of winter this is much less of a problem.
Posted by: Chris H. Mar 24 2016, 09:20 AM
Back to the cam sensor; What change can you expect after it is replaced?
Was it performing on a sub par level with only one sensor working? Yes it was performing sub-par-ly. And I think when I hooked up the VSS it flushed out the problem. So thanks Kent! I hooked mine up because you did. Bet she'll be even faster when I get this fixed
I THINK the symptoms were due to cam sensor #1...but...maybe not. Technically the car should not start if #1 is dead, but my hunch is that it was barely working and I broke it fully when I tried to remove it. Did some searches on the SVX sites and one person mentioned the exact symptoms I was having, which I thought were more than one problem, which were:
- occasional backfiring on hard acceleration
- hard starting
- that whole hesitation thing I described before.
Since the crank and cam sensors set the timing, this makes a lot of sense now. Hopefully this is it! I ordered a couple of sensors, they should be here in a day or two. Didn't get a chance to put the oil pump back in but did get the grey RTV last night.
Posted by: motoTrooper Apr 12 2016, 10:25 AM
Hey Chris, hope you're well and progressing on your build. Here's the link to my Lancia if you want a quick read. Good news is I do have the space for the EG33, thanks again for the measurements!
http://xwebforums.org/showthread.php?t=28514
Posted by: rhodyguy Apr 12 2016, 11:21 AM
What? Rusty 914s aren't enough for you? That is some scary stuff going on in the interior.
Posted by: motoTrooper Apr 12 2016, 04:21 PM
Seems to be a rite of passage for Scorpion ownership. Still I'd rather be doing this than doing this...

Maybe see how I'm doing in a year and ask me if I want to change my mind.
p.s. Some of these smilies are out there. End thread hijack.
Posted by: Chris H. Apr 12 2016, 05:56 PM
Looks like a 914 barn find...scary until you clean it up a bit, then not that bad once you vacuum the mouse crap out. Nice Cromodoros! That engine bay is set up for a transverse layout. What about a Lotus (Toyota V6) style setup? Could use a lot of MR2 parts most likely.
Posted by: mgp4591 Apr 12 2016, 07:58 PM
Looks like a 914 barn find...scary until you clean it up a bit, then not that bad once you vacuum the mouse crap out. Nice Cromodoros! That engine bay is set up for a transverse layout. What about a Lotus (Toyota V6) style setup? Could use a lot of MR2 parts most likely.
That's what I was seeing when he first posted - a Toyota or Honda transverse setup would be the best, easiest, and most balanced setup for that chassis....
Posted by: 76-914 Apr 13 2016, 09:06 AM
Hey Chris, any updates or pic's?
Posted by: Chris H. Apr 13 2016, 11:08 AM
Yes sir. I got the oil pump resealed. Don't think it was really leaking as much. It was the front main seal primarily but hey...you can't leave 20 year old RTV on there when it requires removal of the timing belt to redo.
No pics of that since it's a messy job that requires both hands, but here is the diagram from the manual. 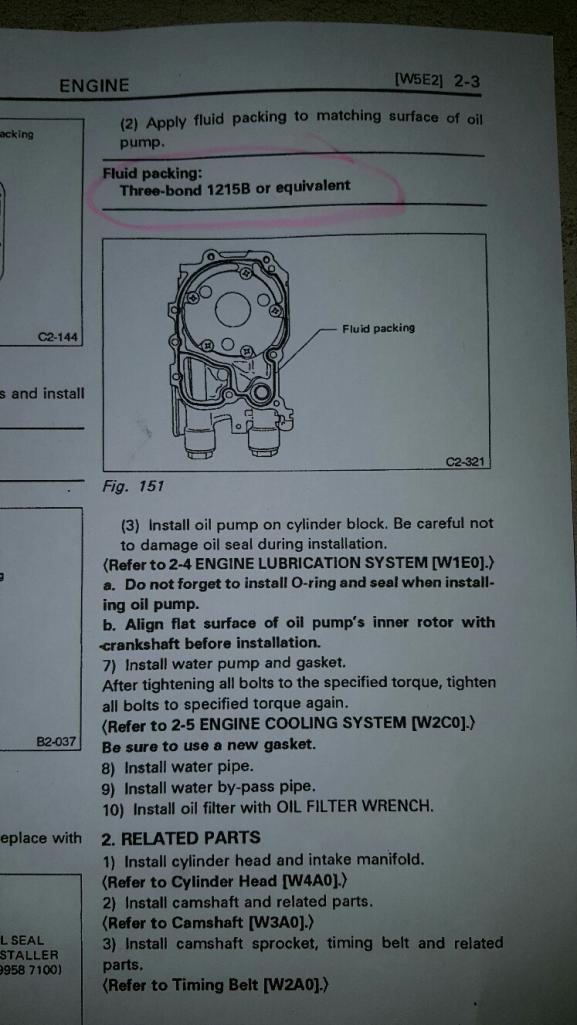
Just follow that line with the RTV and you're good.
And then the timing belt reinstall. This is one of the easiest TB to reinstall...The most important thing to remember is to line up the marks before you remove it.
There is an arrow on each cam sprocket. They both must be pointing UP. There is a notch on the outside edge that lines up with one on the black plastic piece behind it. 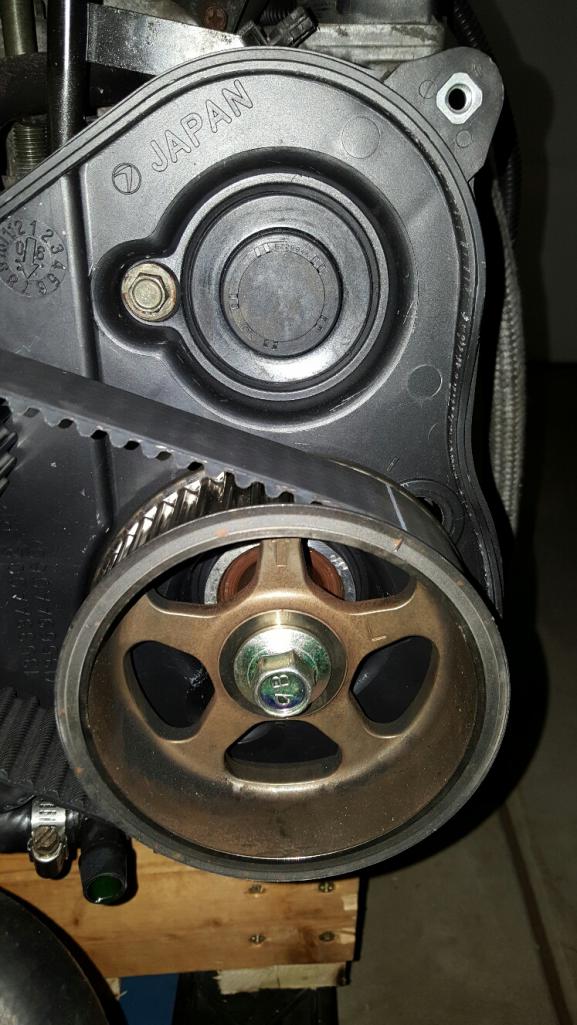
At the same time the lines on the crank sprocket and the notch above it must line up. 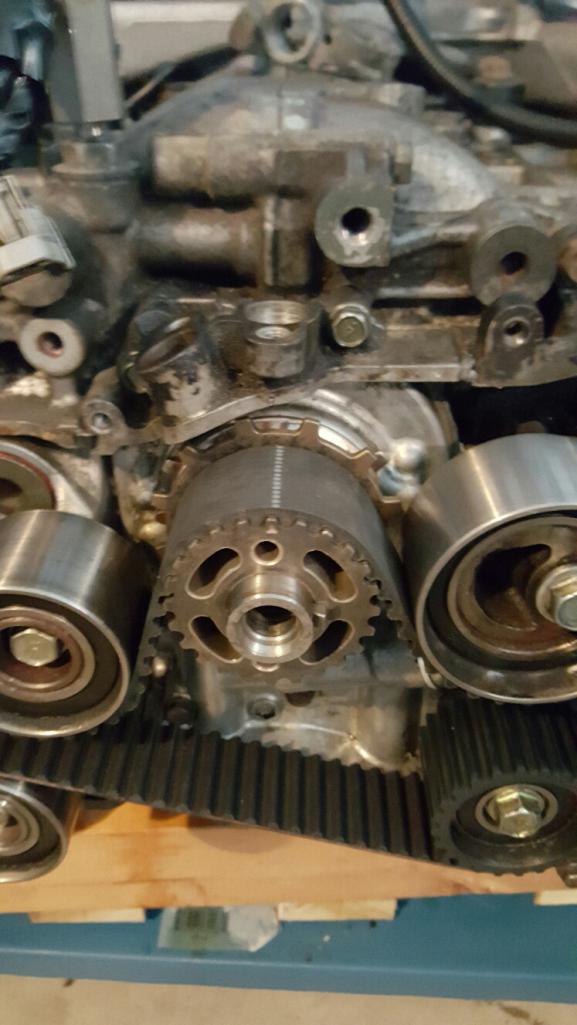
If you take it off that way it most likely won't move.
For reinstalling, first take the belt tensioner off, compress the tensioner and stick a small allen key in the holes keeping the pin in the middle from moving forward. Unfortunately I had to redo mine several times last time and the back side snapped off, so I added some JB Weld to the end. 
It worked just long enough to reinstall the belt then crumbled off. I could drill new holes but it seemed to hold OK with just one and the JB Weld subsitute. Go ahead and bolt the tensioner back on but don't tighten it down.
Putting the belt on can be fiddly, so get a Harbor Freight $5 wood clamp and clamp the left side JUST ENOUGH to hold it in place, lining the white line up with the marks on the cam and plastic piece. 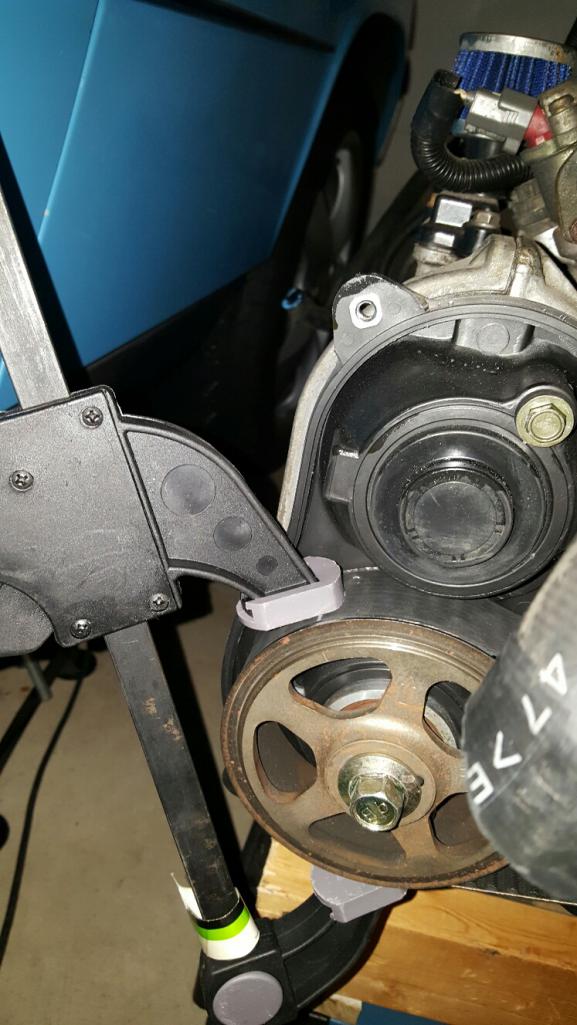
That keeps it from repeatedly flopping off, skipping notches, and keeps you from swearing a lot.
You most likely won't be able to get the belt stretched over both cam sprockets, so remove one of the non-geared idlers and line up the belt. 
The dotted line goes on the crank sprocket marks, and there is another solid white line for the right bank. Reinstall the idler pulley, double check your work, un-clamp the left side, triple check your work, make sure the belt is on all the teeth with no skips, then push the tensioner to the left and tighten it to spec (I think 35-40 lbs). Check the belt again...do a drum roll....and pull the pin out. 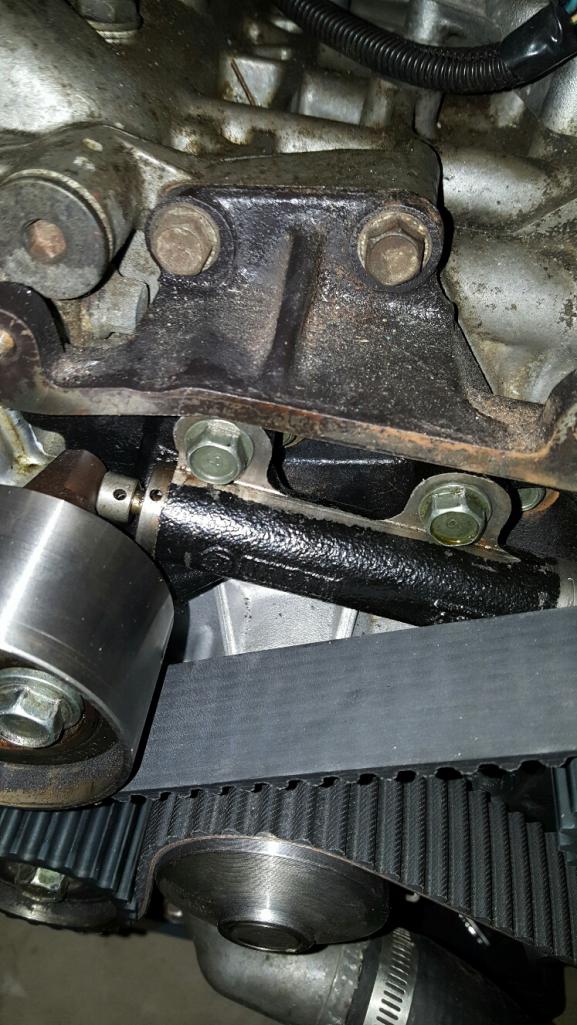
You are done. Put the covers back on. Say "Yeah". High five yourself. 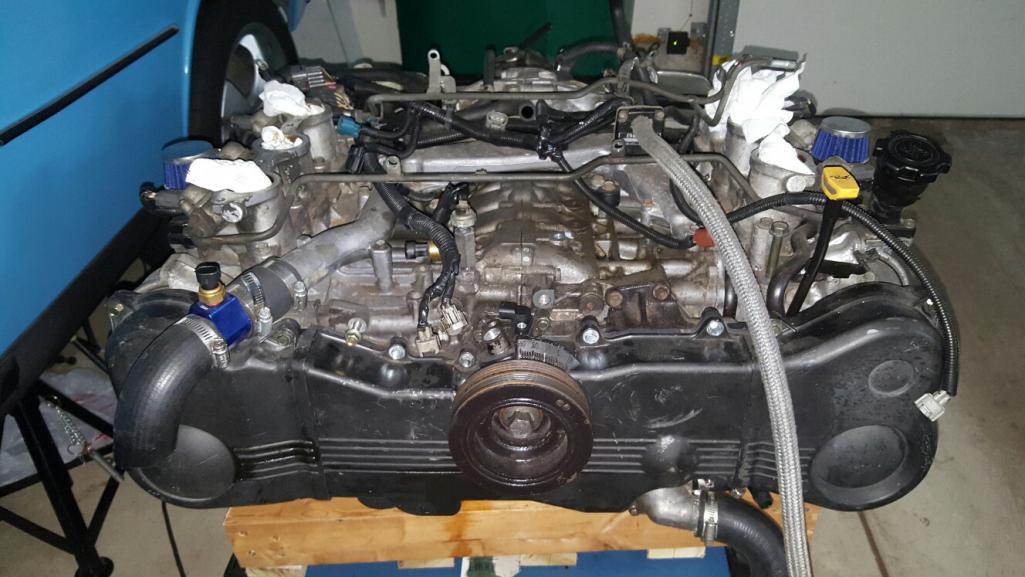
Posted by: Chris H. Apr 13 2016, 11:56 AM
Question for the engine cleaning gurus...is there something I can get to attach to a drill to clean the crevices of this engine? There are a lot of little pockets that need to be scrubbed out a little better. 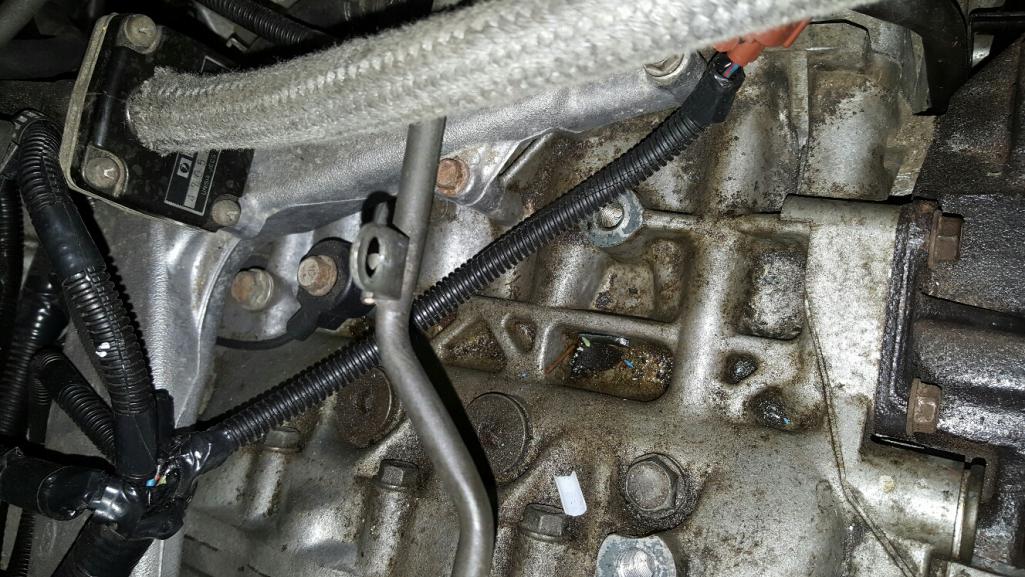
Looks worse than it is in this pic but you get the idea.
Posted by: 76-914 Apr 13 2016, 07:11 PM
Wow, you got a lot done. Have you ever counted the number of times you've dropped the drive train. A 1/2 or 3/4 wire cup brush will do 98% of those areas but not the corners. Gunk engine cleaner in the corners?
Posted by: Andyrew Apr 13 2016, 07:47 PM
Question for the engine cleaning gurus...is there something I can get to attach to a drill to clean the crevices of this engine? There are a lot of little pockets that need to be scrubbed out a little better.
Looks worse than it is in this pic but you get the idea.
I used a pressure washer for that kind of stuff.
Posted by: Chris H. Apr 13 2016, 09:42 PM
Yeah thanks Kent. Such small little sections. Was hoping there was some sort of scrubber pad I could mount on a drill. Looks like the old fashioned way...
Andrew...yeah the little bit of water I used last time seemed to find its way into my ^&^* crank sensor! . Not the cheap one of course...the one-of-a-kind $300 one.
Posted by: 76-914 Apr 14 2016, 08:08 AM
They do mount in a drill. https://www.waresdirect.com/products/commercial-products/weiler/crimped-wire251289?trackURL=froogle&gclid=CKrkkZimjswCFc5hfgod1JUDFA
Posted by: rhodyguy Apr 14 2016, 08:12 AM
The ones pictured in the link are very agressive . You can find similar brushes with brass bristles.
Posted by: 76-914 Apr 14 2016, 08:54 AM
It shouldn't be ?? It's SS and not the "wire rope" style. I would caution that you keep the rpm below 1500 rpm. They will shoot out little wire darts if run too fast. Just don't use a Steel brush on aluminum.
Posted by: motoTrooper Apr 14 2016, 10:12 AM
Maybe a dremel with a small wire brush attachment? You can sleeve it with a bit of shrinkwrap to keep the wire under better control and use low rpms.
Posted by: mepstein Apr 14 2016, 10:21 AM
Brake clean and a brush. The brake clean does most of the work.
Posted by: Chris H. Apr 15 2016, 07:47 AM
Thanks guys. I was thinking of a 3m green scotch brite pad material in a bullet-ish shape that could be used with a drill linke one of those rim cleaner/buffers but I guess soft metal brushes and cleaner will have to do.
Feel free to invent that green pad thing and I'll test it .
Posted by: mgp4591 Apr 15 2016, 01:57 PM
Brake clean and a brush. The brake clean does most of the work.
Brake cleaner is amazingly versatile and does a helluva job. With the supplied spray head tube, it reaches everywhere and dissolves everything. A soft brush or sponge should take care of everything else that you can't take off by scraping or brushing. Take off all the thick stuff first, then use the spray for everything else. It works!
Posted by: Chris H. May 19 2016, 08:39 PM
I'm back at it. Kent didn't even have to me this time! My kid graduated from high school last weekend so my schedule is getting much more open.
Cracked into my goodies from Bob's...there's gotta be 10 coils in that pile along with the rest of the stuff. The smell of old gas is dominating the air for now...but I'm working on that. Just a small amount in the fuel rails is all it takes. That stuff was sitting at his house for a while. 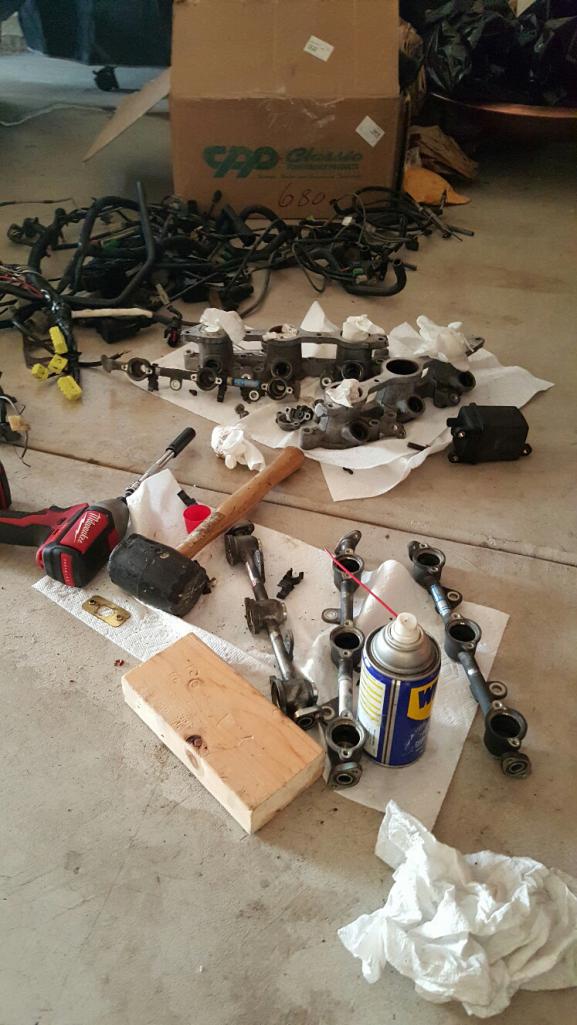
2 sets of injectors!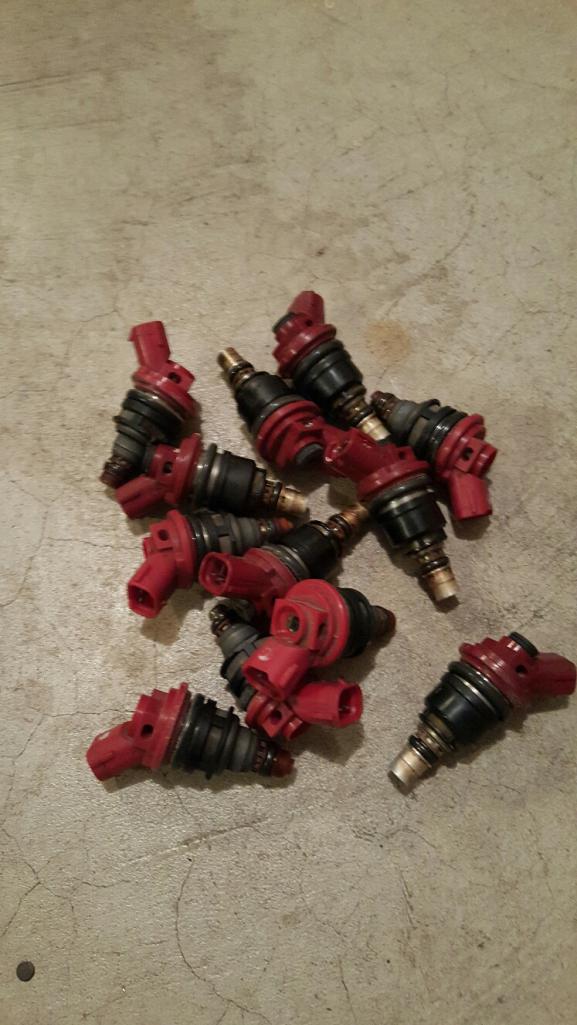
Here's a riddle for you...the larger, more substantial (temporarily smellier) injectors came from Bob's car. The all plastic smaller wimpy ones came from mine. 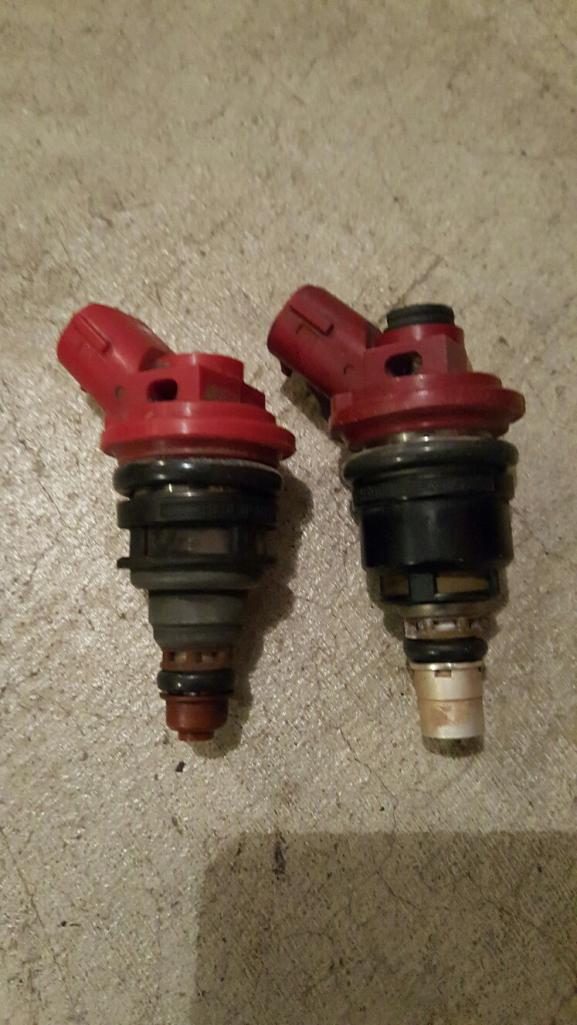
My car ran fine with the smaller ones. I'm thinking I'll use the ones from Bob's car though. They have a larger metal tip and when I search the OEM part number (16611AA310) the pic looks like the bigger ones. Don't know for sure if the later cars used the more plastic-y ones or if these were replacements. Anyone hate the idea or am I good? I'll send the injectors to Mr Injector for a cleaning and re-sealing.
BTW the plastic ones' pintle caps (plastic piece at the end) were VERY brittle. 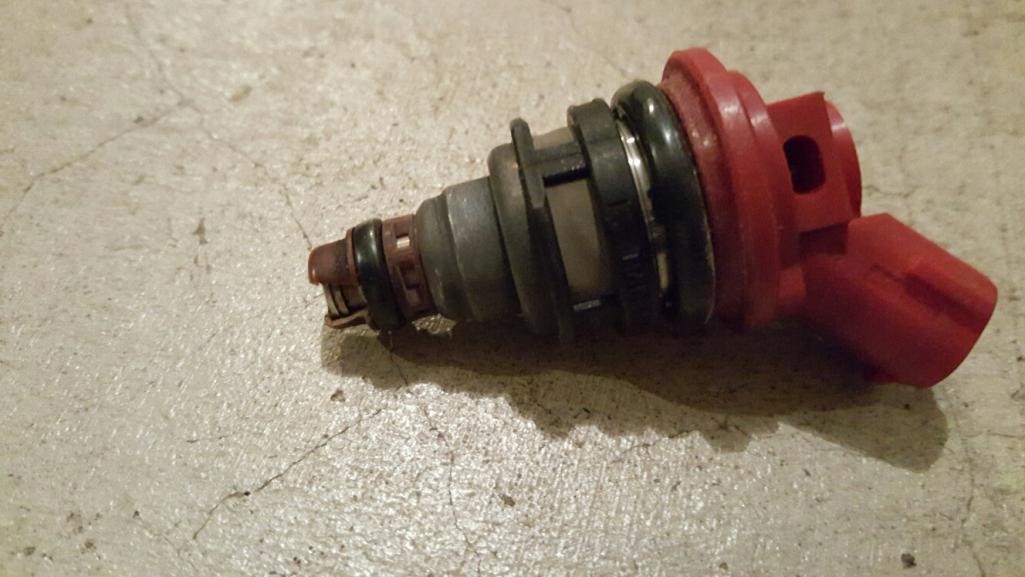
Three of them just crumbled off when I touched them. Mr Injector replaces those as part of the service. I might get both sets serviced, we'll see.
Next up I'm cleaning up the engine and intake parts, getting ready to flip the intake. Back to the garage and I'll update later.
Posted by: Chris H. May 19 2016, 09:52 PM
This is the vacuum canister that is attached to the underside of the intake. I had to JB Weld one of the tubes on mine. Now I can swap it! 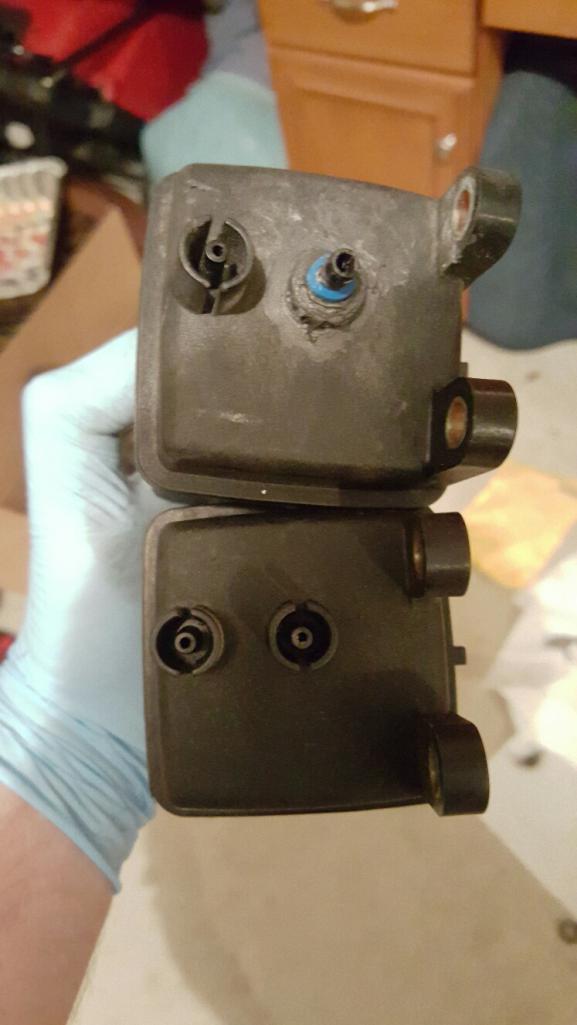
Here's a good example of Bob's skill level. You have to make a blockoff plate if you eliminate the EGR system. Mine is a piece of scrap metal. Bob of course pinched and perfectly welded the end of the original piece right down the center. Think I'll use his . 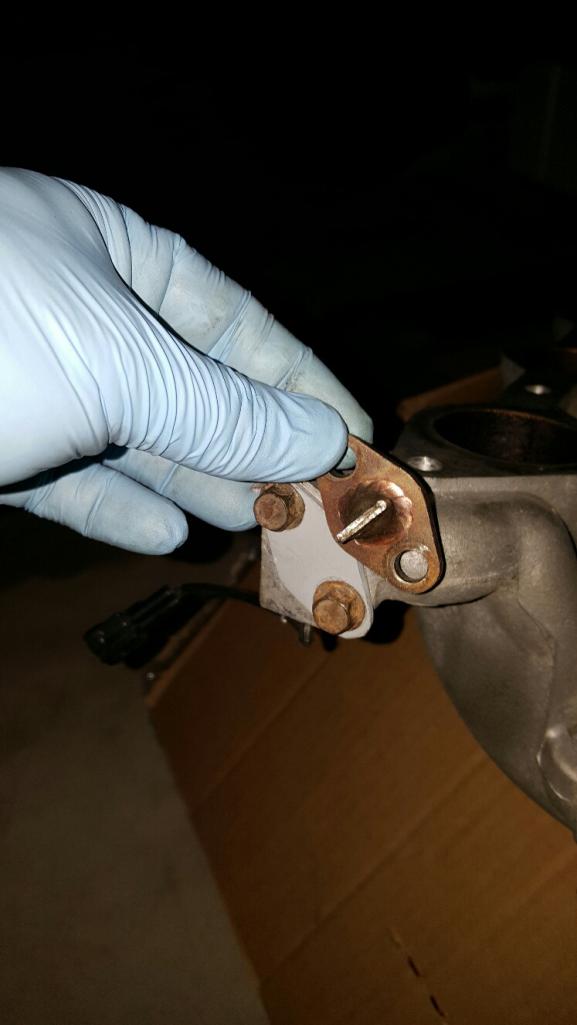
Air tight seal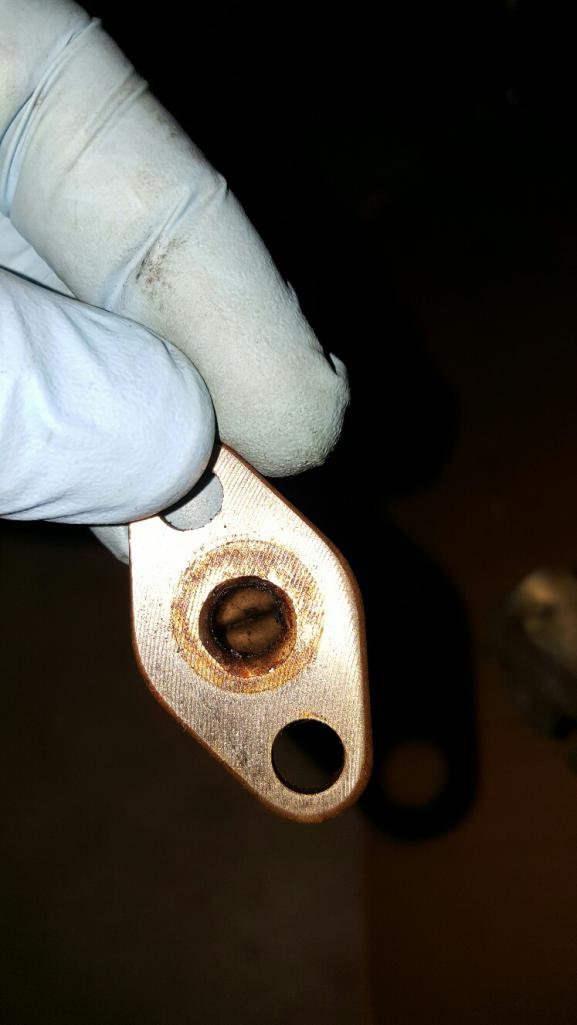
Next (when my dremel recharges) I'll be fixing a small problem that's a real PITA for me. This little nipple helps regulate the fuel tank pressure in the SVX. Not needed for the 914. 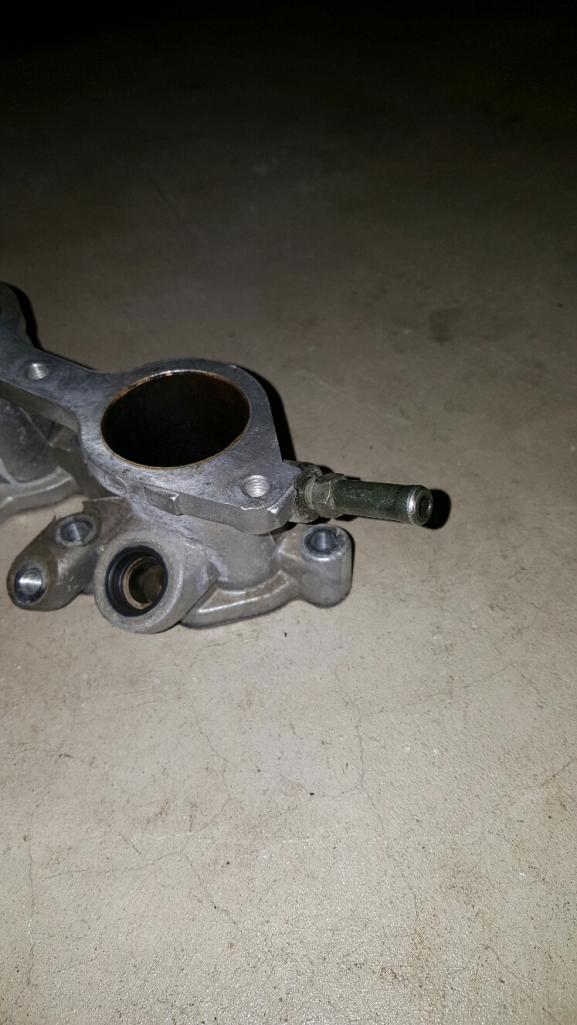
I left this on there in phase 1 and it really got in the way of things at the back. I'm planning to cut the nip off right past the nut and fill it with JBWeld. I have an extra one if anything happens but it should be fine.
Posted by: Chris H. May 20 2016, 07:45 AM
And now it's just a bolt .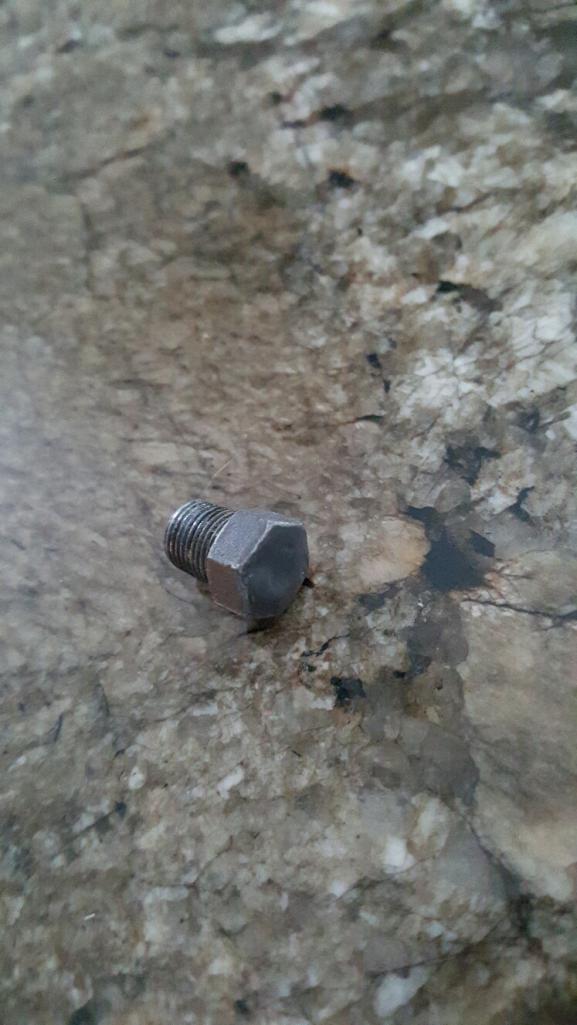
I tried looking for a bolt to fit into the hole but it's tapered and it's a strange size (I think M10x1.0). Since there can be NO leakage I didn't want to risk using something that might fail. I'll wait a week and this sucker will be solid.
Posted by: ThePaintedMan May 20 2016, 07:50 AM
Cool stuff Chris! Did you remove the injectors from the rails, or did Bob do that before you got them? I have not been successful at getting mine out and I'm really worried about breaking them.
Posted by: 76-914 May 20 2016, 08:11 AM
I'm back at it. Kent didn't even have to
me this time! My kid graduated from high school last weekend so my schedule is getting much more open. You cut it close.
Glad to see your back on it. You need to start planning your first trip to an event in your car, now. Our trip to AZ was a good shake out run and I'm in the process of tweaking little things. Re-doing the exhaust for the 4th time. I'll post after I have it nailed. Keep the pics coming.
Posted by: Chris H. May 20 2016, 08:48 AM
Cool stuff Chris! Did you remove the injectors from the rails, or did Bob do that before you got them? I have not been successful at getting mine out and I'm really worried about breaking them.
I removed them and honestly they were a bitch to get out. They're in there so tight that I didn't know if they were keyed with a notch or not. They are not keyed, and technically rotate "freely". I sprayed a small amount of WD40 into crack between the injector and the rail underneath and that got them a little loose. The technical procedure is:
- rotate injector 90 degrees so that the top is over either lip where the cover screws in
- use a VERY WIDE screwdriver to pry the injector up (1/2")
- if that doesn't work find a fairly soft surface, set the rail on it evenly and gently tap the rail a bit with a small rubber mallet.
Here's a set of directions I found.
http://www.weidefamily.net/vanagon/Pending_Content/Engine_Conversion/11Fuel_VacuumLine/SubaruFuelInjectorRemovalAndInstallation.pdf
Hey George what do your injectors look like? Bob's or mine?
Posted by: ThePaintedMan May 20 2016, 09:14 AM
Yeah, I tried the service procedure with no luck. Was super worried about breaking something. I'm thinking of building a little jig to grab them at the top, tighten a screw and pull them out, sort of like a mini 2-jaw puller. Since I haven't gotten them out, I don't know for sure, but they have the pintle caps on the bottom, so I think they're the smaller version.
Posted by: Chris H. May 20 2016, 09:49 AM
Pintle cap should = smaller one. weird that Bob's are so much bigger!
Posted by: Chris H. May 20 2016, 10:54 AM
Yeah so I'll just  OK George ? So on Rockauto all of the injectors pictured for the SVX are Bob's style. I think either is fine but most likely ours have been replaced with cheaper ones. So that means unless one or more of his are bad we'll have some extras of the pintle cap variety. Good news for you !
Posted by: 914forme May 20 2016, 11:02 PM
Keep it up or else I might beat you back on the road
Don't worry that was the optimistic project manager in my head, he tends to over estimate the rate of work and severely underestimate the amount of time it will take.
I have a bunch of parts I should send your way also, as I don't need them anymore. I just ordered up my new EFI system. It is an SDS, a little primitive compared to the MegaSquirt Pro or III. I finally decided to  as I have liked the design for a long time, and they do lots of EG33 work in aircraft. Yeah I don't have launch control, flat throttle shifting and a million other options. But If I wanted all that stuff, I would buy a new car. The 914 needs to have a certain basic raw feel to it, make it to nice and it becomes a Cayman!
Posted by: Chris H. May 30 2016, 09:46 AM
You just might beat me Steve. You're a welding madman.
Got a bunch of small stuff done which I will update, but working on flipping the intake now.
Question for George (The Painted Man)...
So when I put the intake in place backwards the ^*&^*ing (gosh darned) diaphragm for the induction control valve hits the coolant pipe. This keeps me from bolting the manifold down by about 1/2 inch or so on the left (passenger) side. 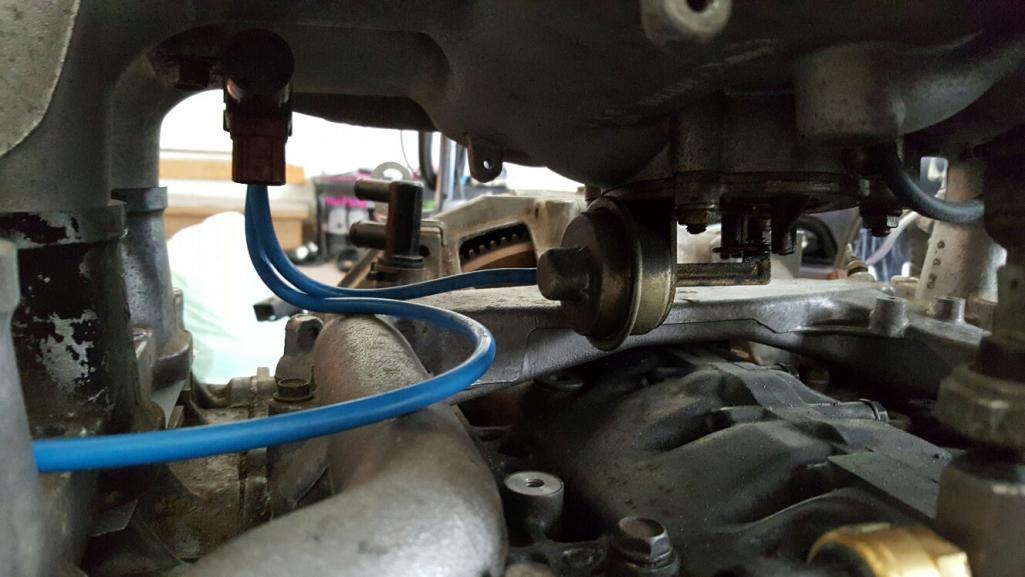
Just BARELY off!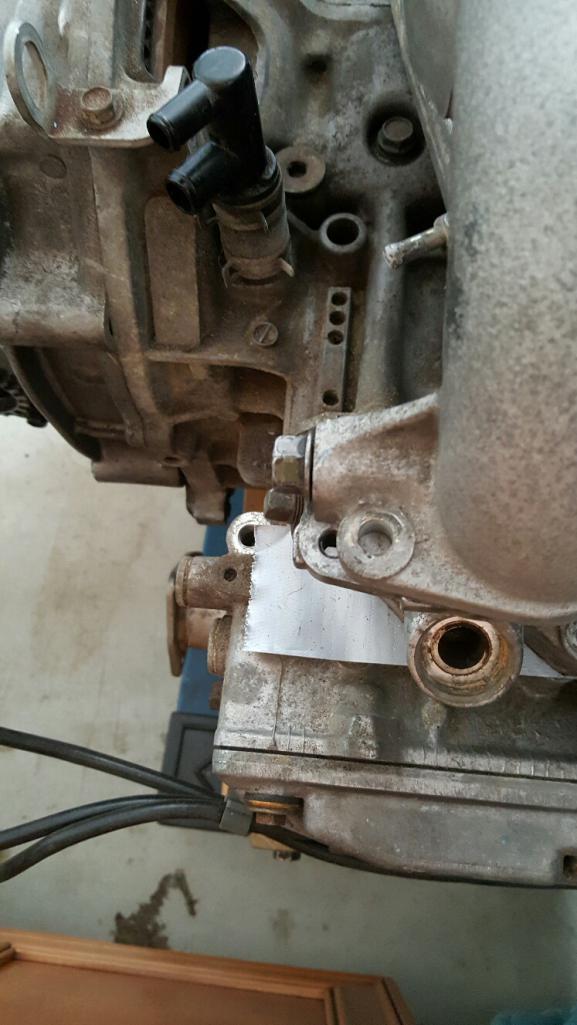
But it seems like even with a spacer it'd hit a little. 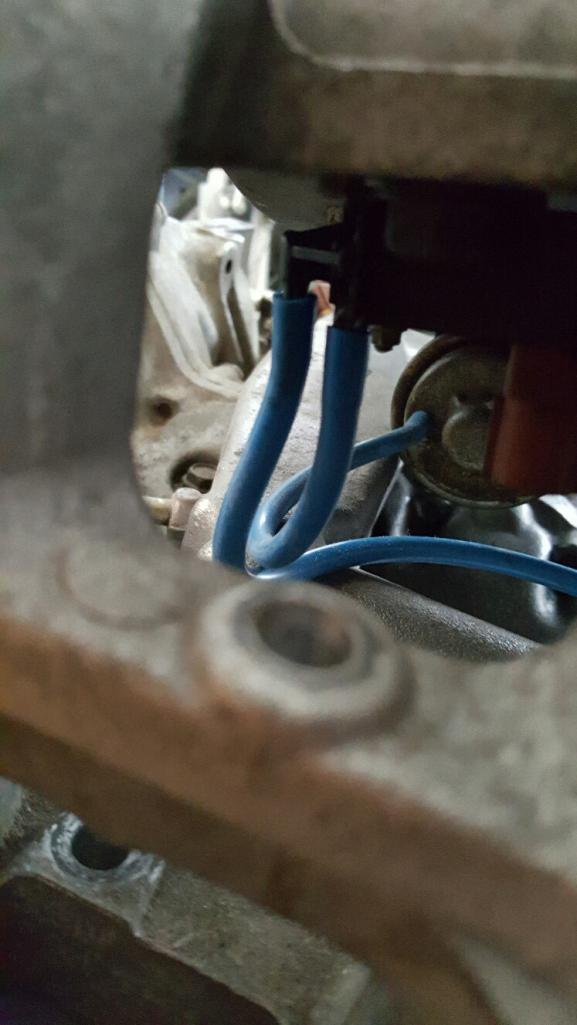
It's also pretty amazing how HIGH the intake is flipped around. WOW! 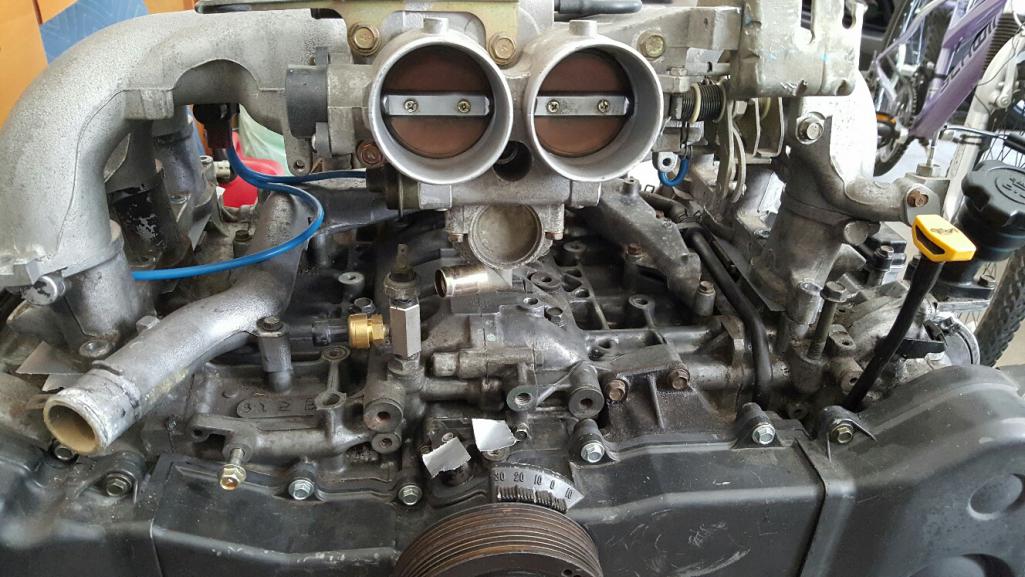
Did you run into this George? I know Bob mentioned he ran his without the induction control and didn't notice anything. I'd like to run it if I can though. The coolant pipe is aluminum so I'm not skilled enough to carve a notch in it and weld it up, and I'm not sure if the flow would be too restricted either. Still thinking about it...
Well, If I would have looked at George's thread for 5 seconds I would have gotten the answers. Looks like he addressed this in his flip. Be back soon!
Posted by: 76-914 May 30 2016, 02:24 PM
Ha ha. I was just thinking to myself that he addressed that. Looking for more from you!
Posted by: flmont May 30 2016, 06:37 PM
Hey Chris H,....is this a new belt and re-seal or did u do any performance work,..like cams,and injector's,...??? Iam trying to decide 3.3 or 3.6 install ,..I have the 3.6 ,but not alot of info for that install,..I'am thinking 3.3 if you can get the pwr from them...??? Thanks Frank
Posted by: Chris H. May 30 2016, 07:57 PM
Mine is stock, so it should be about 230 hp. That's quite a bit for a 914 really. If you already have the 3.6 I'd run it stock rather than spending big $$$ on massaging an EG33.
Posted by: flmont May 30 2016, 08:02 PM
Yea,..I know , its about another 4500.00 to get the 3.6 on the road,..but I like the EG33 looks,..and they do sound good,...I have no idea what the 3.6 will sound like,..Good luck man,..!!! and Thanks
Posted by: mgp4591 May 30 2016, 08:13 PM
A 3.3 can be modified without much cash really - the Z32 throttle body from a Nissan Z and the 370 cc injectors with a chip should get you over 300hp. You'd want to team that up with a free breathing intake and exhaust system to fully realize that but the 3.3 is a very restricted engine from the factory by their own admission. A tweak here, a tweak there and you'll have plenty of power. Not Tony power of course but much better than stock!
Posted by: mgp4591 May 30 2016, 08:17 PM
Ha ha. I was just thinking to myself that he addressed that. Looking for more from you!
So, with the valve disabled and fixed in position, would this would get by the issue people are running into when they turbocharge?
Posted by: flmont May 30 2016, 08:21 PM
Yea,..I didnt know it could get to 300,...any piston work needed,..?? what do u think a 3.6 can do on a Extreme link ECU,...???
Posted by: mgp4591 May 30 2016, 08:34 PM
Yea,..I didnt know it could get to 300,...any piston work needed,..?? what do u think a 3.6 can do on a Extreme link ECU,...???
It's overbuilt and will easily stand that type of stress - there's folks who've put 10lbs of boost on a stock engine and run it 200k miles. Pretty much bulletproof especially when naturally aspirated.
Like you were saying, it could cost a bunch to install a 3.6. The 3.0 six is the engine a lot here have gone with because of the lighter weight and smaller size. Not too expensive but more so than the 3.3.
Posted by: flmont May 30 2016, 09:38 PM
I have indeed been thinking of going EG33,...and dumping the 3.6,..??,...sorry Chris H,..for hi-jacking...FM
Posted by: Chris H. May 31 2016, 07:50 AM
I think you'd find the sound to be pretty comparable. Mine sounds a lot like the EZ30. Depends quite a bit on the exhaust you use. Why would the EZ36 cost so much more to get running? $4500?
Posted by: flmont May 31 2016, 08:04 AM
Well I need the ecu,..and adapter kit ,.plus,...misc..items exhaust ,fuel pump..etc...
Posted by: DBCooper May 31 2016, 11:19 AM
Well I need the ecu,..and adapter kit ,.plus,...misc..items exhaust ,fuel pump..etc...
Don't you need all those same things no matter which engine you choose?
Posted by: Chris H. May 31 2016, 01:33 PM
Well I need the ecu,..and adapter kit ,.plus,...misc..items exhaust ,fuel pump..etc...
Don't you need all those same things no matter which engine you choose?
That's what I was thinking...
The 3.6 is a solid engine Frank. There are a few differences...it has advancements like variable valve timing, drive by wire, etc. Why not run what you got? I would run the hell out of that thing. It's an oversized EZ30. There's a guy with a 911 on NASIOC working on a 3.6 conversion running Megasquirt 3.
http://forums.nasioc.com/forums/showthread.php?t=2701304&page=3
Do you have the wiring harness? Start a thread with what you have and get some comments. Lot of experienced guys here who can help.
Posted by: mepstein May 31 2016, 01:52 PM
A 3.3 can be modified without much cash really - the Z32 throttle body from a Nissan Z and the 370 cc injectors with a chip should get you over 300hp. You'd want to team that up with a free breathing intake and exhaust system to fully realize that but the 3.3 is a very restricted engine from the factory by their own admission. A tweak here, a tweak there and you'll have plenty of power. Not Tony power of course but much better than stock!
Once I get mine running I'd like to get a second engine to do the mods and see 300hp. With flares, suby trans and 911 running gear it should have no problem keeping it all together.
Posted by: flmont May 31 2016, 06:19 PM
Yes,..DB...I do,..But the 3.6 is also so new right now now much is being done with it ,.and, its just cheaper to do SVX stuff and get on the road much sooner ,..its a tried and true set-up from what I see,..and there is just more support for SVX..so it seems,..??
Posted by: Chris H. Jun 2 2016, 09:45 PM
Here's a few updates...fuel injectors checked out fine and will be back tomorrow.
Some modifications I did to simplify things:
First I eliminated some coolant lines. There is a set of lines that run to the heater core on the SVX which I ran a loop of 5/8 " hose as a temp solution initially but realized I just don't need it. If/when I install a heater I'll pipe it from up front rather than running lines all the way up from the engine. I also eliminated the smaller lines that pass through the throttle body. These heat up the throttle body to help the engine run better out of the gate when it's cold, but I don't think it's necessary since I won't be driving my car during the winter and I'm flipping the intake anyway. MANY SVX guys disconnect and do a pass-through on this line because they don't like the fact that it keeps the throttle body hot all the time. They also claim small hp gains . It's just cleaner for me. You can see the lines arrowed here, plus there is another one coming out of the silver crossover pipe on the other side. 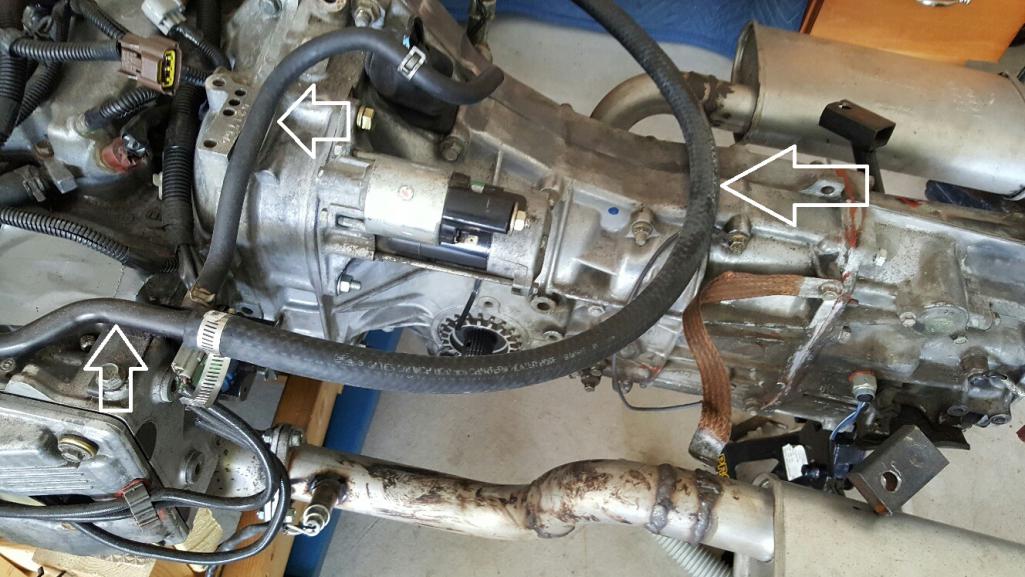
The one on the driver's side runs all the way down to the water pump so it really freed up some space when I took it out. I don't have a good picture of the one connected to the crossover pipe on the passenger side, but here it is cut down to the nub. 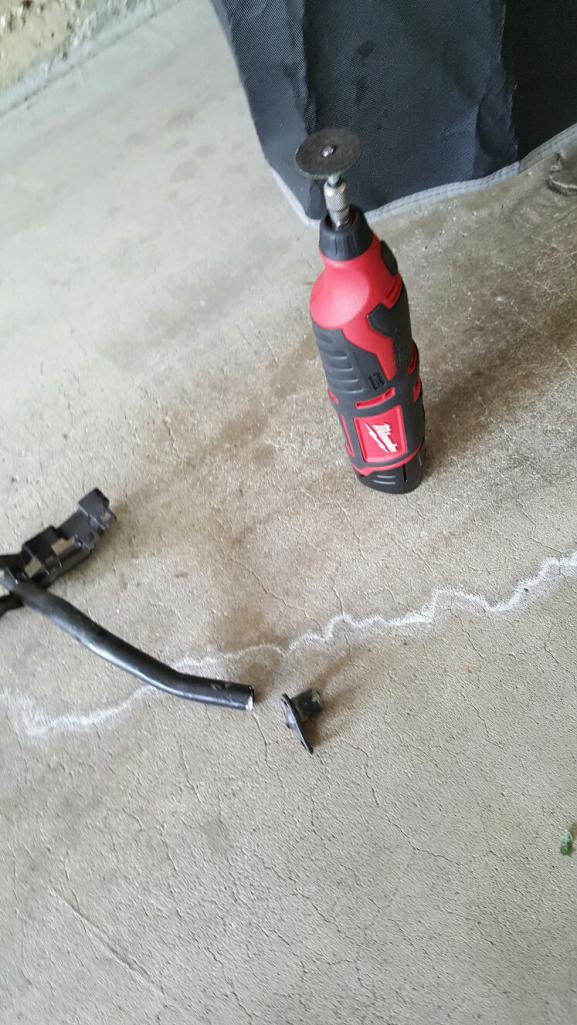
This is where it gets a little JB Weld crazy...I filled the "nub"with a special JB Marine Weld that has the properties of JB Weld but also can be submerged in water/mildly corrosive liquids indefinitely. It's hard as a rock now and about an inch thick. Not going anywhere. I also filled the smaller port that connected to the throttle body. (The nub is not fully installed yet. I have to paint some stuff.)
But did I stop there? Nooooo....I have eliminated my EGR system, but never cut these suckers off...they are in the way. 
So...I cut them off, taped the underside and...you guessed it...JB Weld!!! If you do this make sure to leave little extra on top and grind it off later. It will settle a bit as it dries over several hours or a day. Then shine a flashlight through to make sure you filled it completely. The holes at the TB underside are VERY small.
Glop on top:
30 seconds with the sandpaper dremel attachment
And since I eliminated the throttle body coolant line...why not cut these off and save some room since the manifold flip jams a bunch of stuff together? 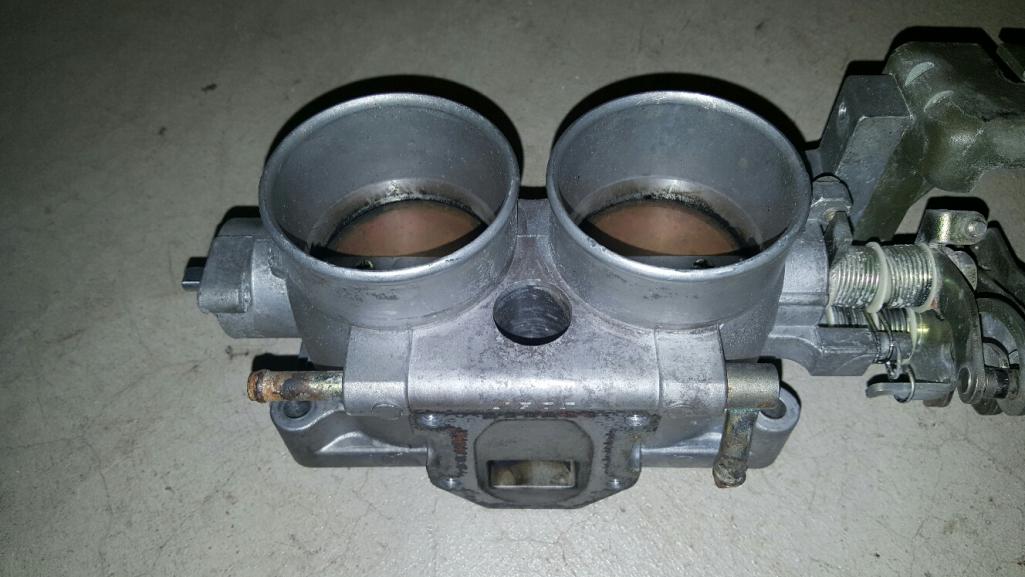
Now what could I stuff in the empty hole... ...is there some kind of JB Weld putty? YES. 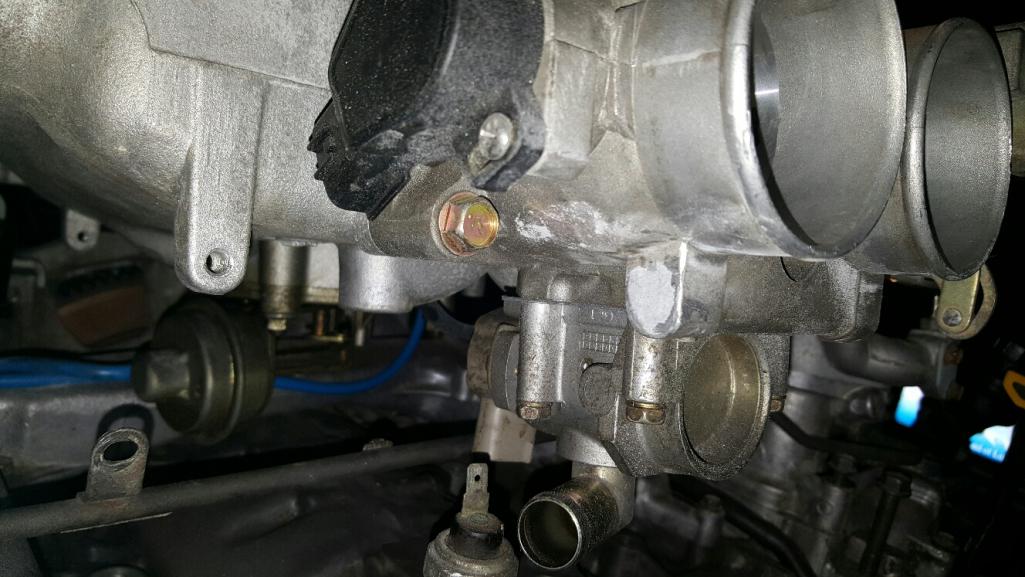
Next I have to slightly reposition my intake valve so I can complete the manifold flip, install the injectors, and get this thing ready to reinstall. I think the alternator positioning is going to cause me problems. We'll see.
Posted by: ThePaintedMan Jun 2 2016, 10:06 PM
Really nice job Chris. You'll also notice two other things -
1) The oil dipstick is now occluded by the intake hose unfortunately. I am thinking of a way to bend mine. For you, not a big deal. For us, checking the oil quickly during a pit stop is important, so I need to figure out how to relocate it without changing the dimensions.
2) The oil filler is occluded too. Again, all you need to do is unclamp the intake and move it out of the way. But for me, I'm having to machine an adapter that allows me to move the filler neck out of the way so we can add oil during pit stops.
Question - do you have a link to the place where you got the blue silicone emissions hoses? I haven't gotten that far yet, but it would be nice to have a known place to shop at.
Great job man, can't wait to see it back in action.
-G
Posted by: Chris H. Jun 2 2016, 10:26 PM
Thanks George. Yikes I had not noticed the oil filler thing yet. Will have to think about that one too. The blue silicone hose I have is from e-bay, BMW 3.5MM. Here's a place that has it for pretty much exactly what I paid 3 years ago:
http://www.ebay.com/itm/BMW-E10-E24-E28-E30-etc-Vacuum-Hose-3-5-X-7-5-mm-Blue-Silicone-OEM-CONTITECH-/350623780390?fits=Make%3ABMW&hash=item51a2ce4e26:m:mIyT1Zizqy0SBqcEiNICr0A&vxp=mtr
Sold by the meter. I think I bought 3M and had a lot left.
Posted by: Chris H. Jun 2 2016, 10:39 PM
Hey George what about turning the air intake (black snorkel piece) the other way so the tube is on the passenger side? Some of the hoses connected to it would need to be longer but it should work the same.
Posted by: Chris H. Jun 3 2016, 10:03 AM
Got the injectors back! They look brand new. I'll leave them in the bag until I reinstall them on the rails. If yours haven't been cleaned in a while...take a look at this:
Not terrible, but all it takes is one not flowing well and you have a problem. I had two in the weak category. Should see a difference for sure. Bet the other set is worse since most of the pintle caps broke off in my hand. $17.50 each. Not bad at all.
***EDIT***: Hey BTW I read on the subaru-SVX site that Mr Injector will take the injectors off of the rail for you. I don't think he charges for it. You just send the whole thing. It was an old thread so you might want to confirm.
Posted by: flmont Jun 3 2016, 10:26 PM
Outfront carries a modded Alt. Bracket for the intake flip,..and small car carries a flexable dip stick,..as I remember it,..??? FM
Posted by: Chris H. Jun 12 2016, 12:19 PM
Thanks Frank, I think I got it figured out.
Whoa boys ...I realized I was about to get into the DWD zone. I need to finish this and drive it! It's June!
So here are the pretty injectors...Who knew the tips were silver and not gold?? The other two were already on the rail by the time I remembered to take a pic!
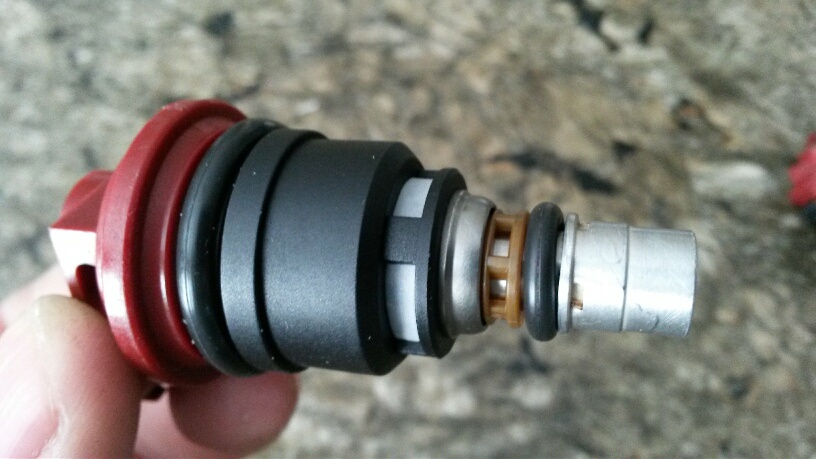
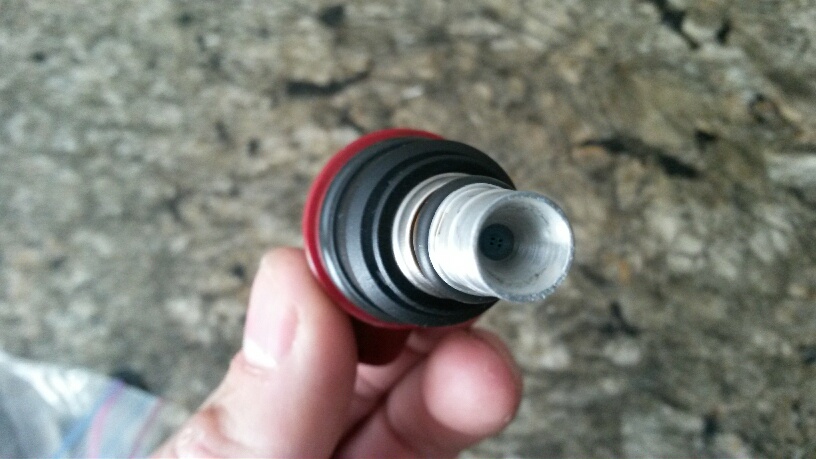
A little oil and they snap back onto the rail easily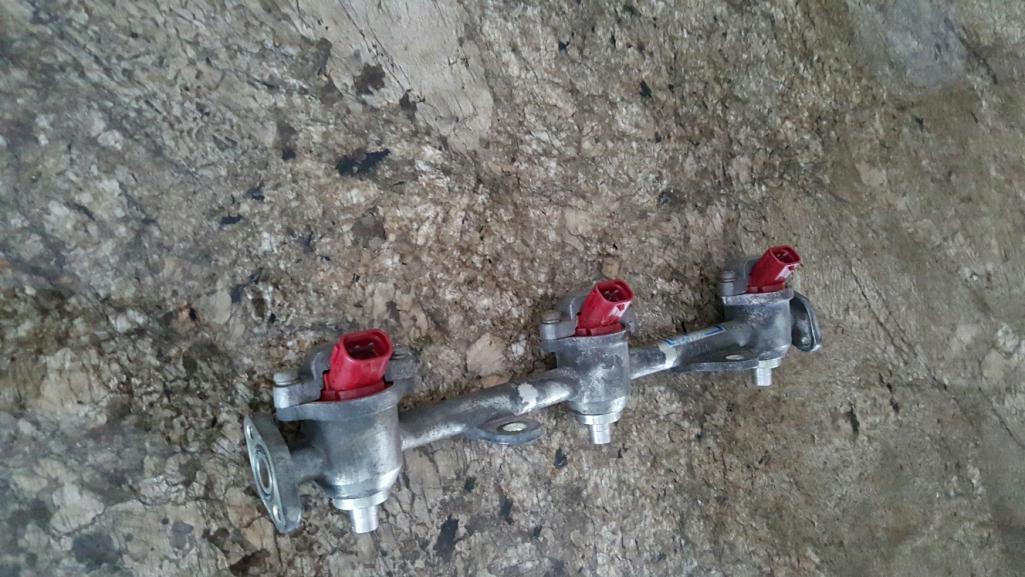
Moving fast now...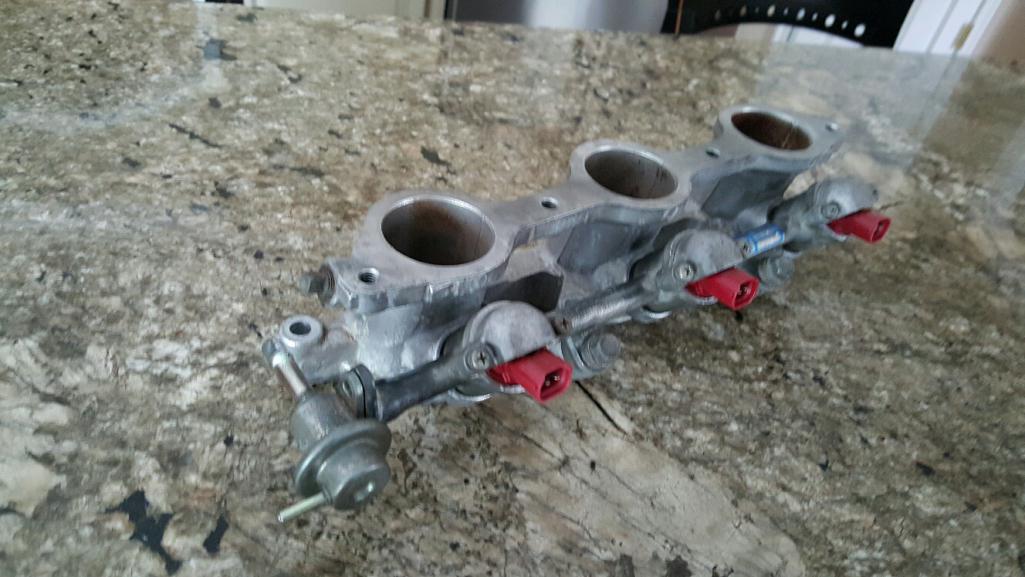
Figured out what I'm going with the fuel lines since they are routed to pop out the other side. This is pretty exciting since I HATED it that they were on the opposite side from stock 914.
Cut the intake line from the others and bent the line a bit (OK a lot) with a tubing bender ($7.99 at HF)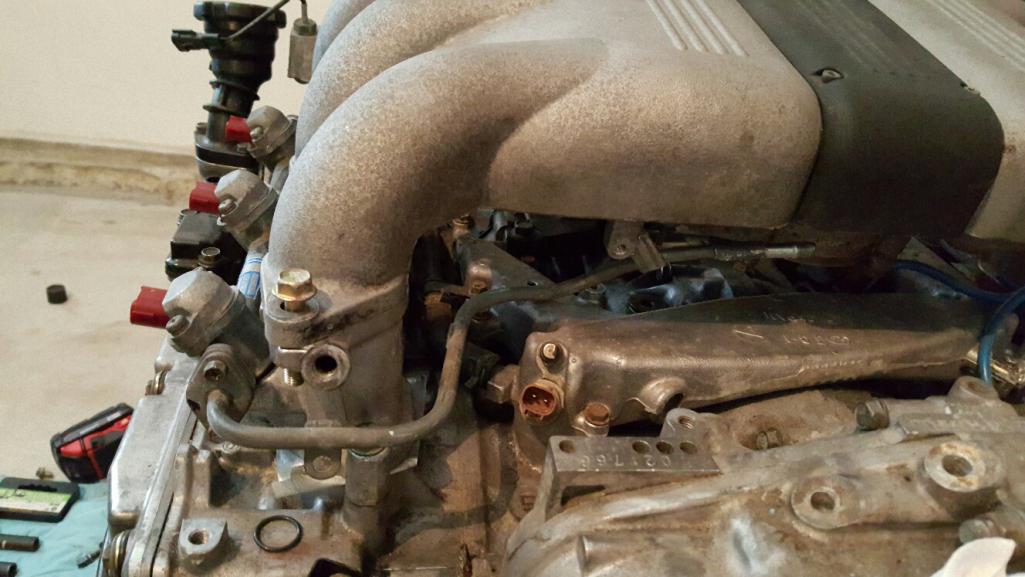
The return line comes off of the regulator. 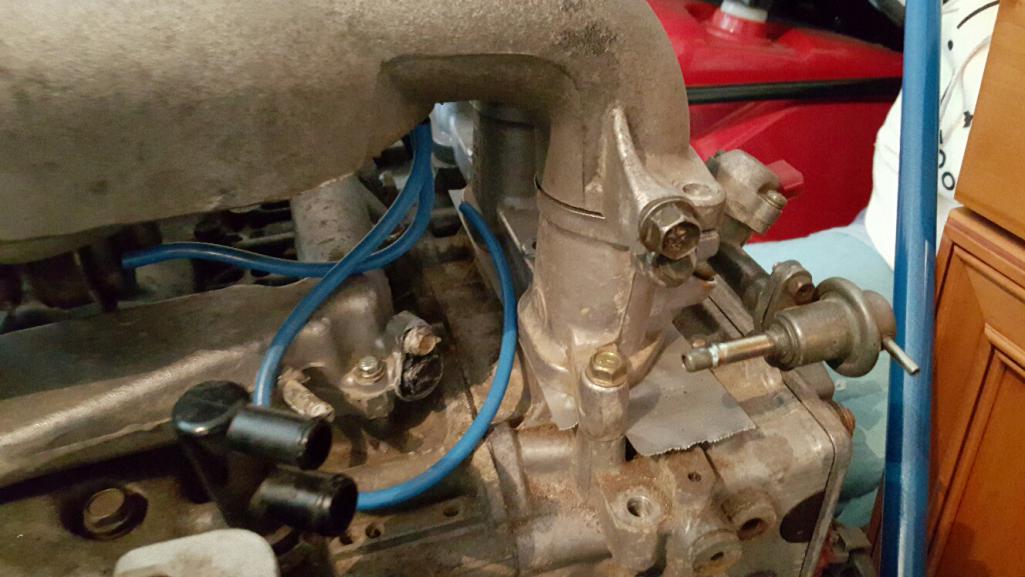
I don't see why I can't just run it from here. I'll run the lines under the intake and secure them as stock SVX so it should be fine.
As for the alternator, I uses George's idea of redeploying the empty power steering holder (it's adjustable) and flipping my alternator using the stock holder to the other side. 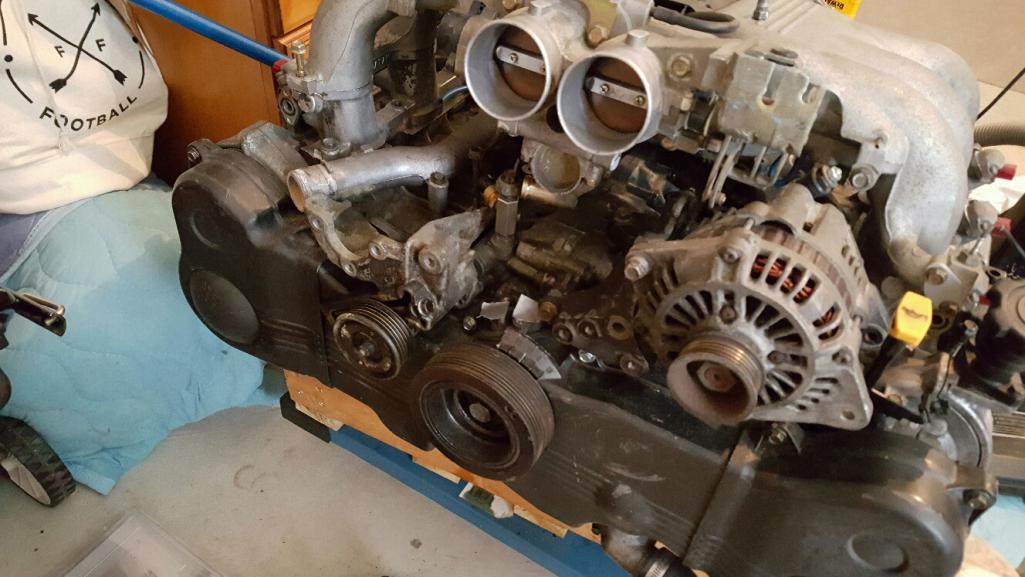

I'll secure it to the manifold and where the 5/8 return line used to attach. Looks like I can use a Miata belt (I'll post the part # when I get it, the pic is on my other phone). It's 940mm, or just over 37 inches. BTW I have a TON of WD40 on the adjuster so it will loosen up a bit. That's why it looks nasty .
Almost ready to put her back in!
Posted by: 76-914 Jun 12 2016, 03:11 PM
Way to go Chris. Some righteous progress. Looking good now get off the computer and back in the garage. More pics pls, Senior.
Posted by: motoTrooper Jun 13 2016, 09:13 AM
Always wanting to see what your next progress post is all about.
One question that crept into my mind when I review your build, is when you switched from the Coldwater cradle to the one from bigkat you stated that the engine was moved back 4 inches so where were the transaxle axle stubs relative to the hubs? Were they 2 inches in front before and then 2 inches behind after the switch? I understand that, for lubrication purposes, you don't necessarily want them perfectly aligned with the hubs but you want them close(ish) yes?
I am going to pick up an engine this week for the Scorpion. So progress.
Posted by: motoTrooper Jun 13 2016, 05:56 PM
Have you seen this semitransparent pic of the SVX? Quite the inclined assembly there!
http://s1111.photobucket.com/user/motoTrooper/media/Scorpion/2f1df99b-2171-4e29-bf06-19009cd6fb98_zpslbrlvtt0.png.html
I had read that positioning it more horizontal requires a lot more oil in the transaxle. Makes a lot more sense after seeing this.
Posted by: Chris H. Jun 13 2016, 08:14 PM
Cool photo. Yes the trans does require a lot more oil when installing more level or even slightly tipped upward.
To answer your previous question, my axles are aligned pretty straight across at this point. As long as they aren't binding there can be an angle to them, in fact some angle is preferred. Stock 914 axles have a fairly pronounced downward pitch to them. Good news that you found an engine!
Posted by: Chris H. Jun 30 2016, 10:59 PM
Hey look at that...it still fits!

She's down on all four tires!!!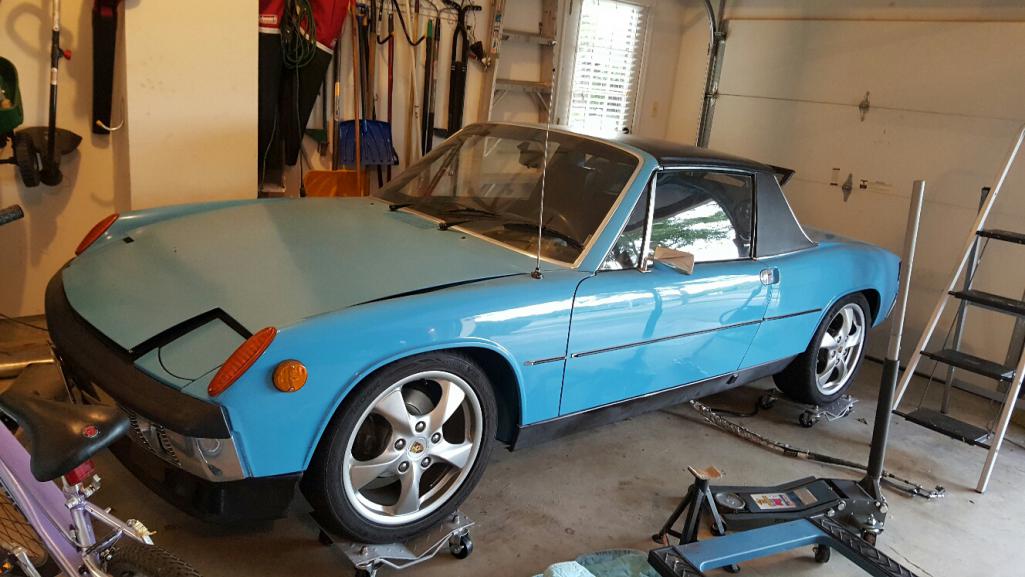
Time to reassemble and drive this thing. Mostly cleaned up the work area and removed the ECU and wiring in prep to attack it this weekend. I'll post pics of the flipped intake setup, etc as it goes in. Right out of the gate it was easier to install with the extra little stuff I removed. No getting caught on the old engine seal lip, etc. There were a lot of little hooks and metal o rings attached to the engine, plus the extra plumbing that really took up a lot of space.
Posted by: 76-914 Jul 1 2016, 08:02 AM
Looks like it will be back on the road again in < 10 days. Way to go, Chris. I know you've got to be amped.
Posted by: Chris H. Jul 1 2016, 09:01 AM
Yes I'm working like a dog to get it back on the road.
I continue to be amazed by the generosity of the people here. Bob took the time to strip an EG33 and give me a ton of parts from it, and now Stephen (914forme) just sent me another box of stuff. Even after I made it pretty clear that the SVX sensors and whatnot are pretty valuable he gave them to me. Also some injectors, etc. Wow. There was one sensor that I had to MacGuyver back together that Bob didn't have...and of course it was in Stephen's box.
Which one of these would you use? (yes, that's JB Weld SO WHAT? I HAVE A PROBLEM! I KNOW! )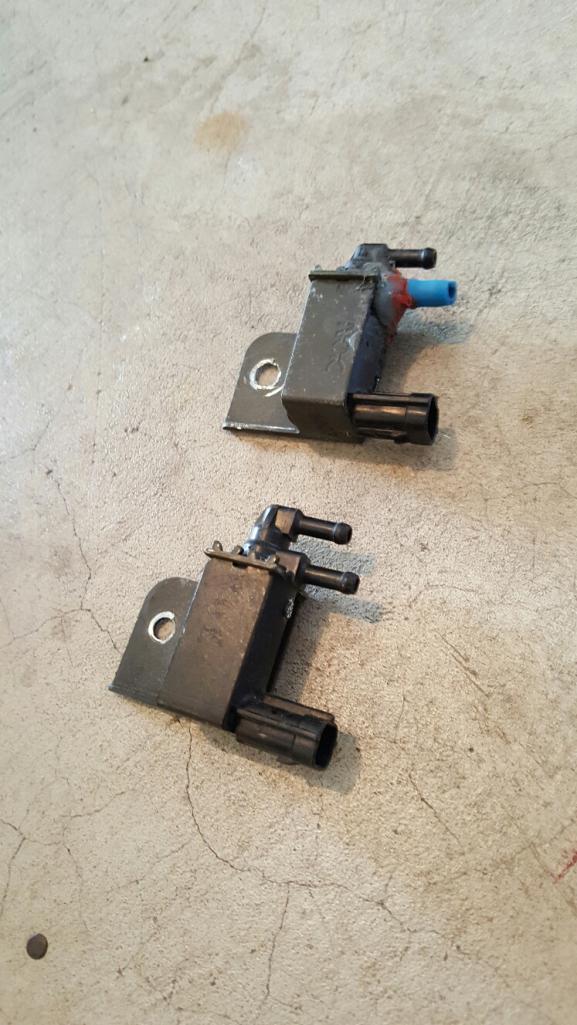
So I finished the intake. Realizing that most of you people are just a little smarter than I am. George pointed out that you have to swap the sensors around so the harness lines up correctly. Also you have to slightly rotate the valve mechanism by drilling the holes out a bit. Don't over-tighten it or it won't open/close well in it's new configuration. 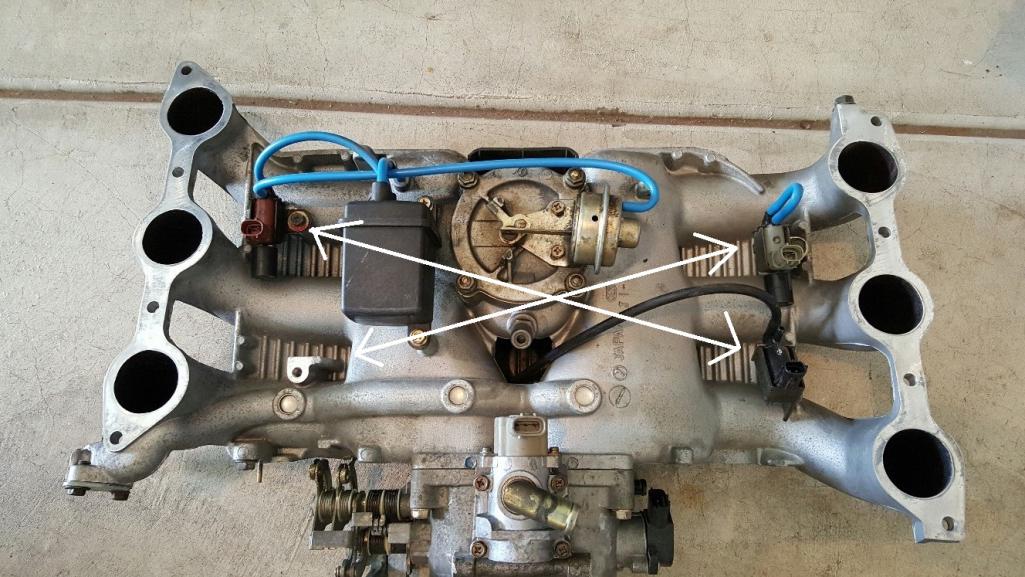
Posted by: 914forme Jul 1 2016, 07:53 PM
Looking good, get this thing fired up.
Posted by: motoTrooper Jul 2 2016, 09:16 AM
Getting very close! Also I like the 'Batman' camera angle shot of the engine/transaxle assembly.
You originally mentioned in your opening post that this was going to be your daughter's car? 
With all the fine work you've done have you changed your mind? Is it 'dad's car' now? I imagine I'll have some reluctance to part with mine when I get my project finished.
Posted by: Chris H. Jul 2 2016, 10:03 AM
Ha! Well the funny thing is I consider it her car due to the many times that she has stopped me from selling it over the past 14 years. I was planning to do an automatic trans but after discussing it with several members like Bob the options weren't that good. It would have severely hampered the performance if I chose one that was short enough to fit under the car. There are other better options now but I'm down the road. My daughter is going to learn to drive it. I think I MIGHT get it running this weekend. She is chomping at the bit to give it a shot. She will get it someday when she has a place to keep it I'm sure. She's off to college in the fall.
Now this is when you know you're getting old:
That's her waiting for a ride a FEW years ago.
Posted by: mepstein Jul 2 2016, 10:31 AM
Mine's off to college in the fall. No interest in one of Dad's wierd 914's.
Posted by: BIGKAT_83 Jul 2 2016, 01:06 PM
Got a 13 year old grand daughter that thinks my gray car is for her.
Don't really think that's going to happen.
Bob
Posted by: Chris H. Jul 2 2016, 01:57 PM
Ah no....not with that engine in it. You'll fix her up with something I'm sure Bob.
Posted by: 76-914 Jul 2 2016, 04:31 PM
Ha! Well the funny thing is I consider it her car due to the many times that she has stopped me from selling it over the past 14 years. I was planning to do an automatic trans but after discussing it with several members like Bob the options weren't that good. It would have severely hampered the performance if I chose one that was short enough to fit under the car. There are other better options now but I'm down the road. My daughter is going to learn to drive it. I think I MIGHT get it running this weekend. She is chomping at the bit to give it a shot. She will get it someday when she has a place to keep it I'm sure. She's off to college in the fall.
Now this is when you know you're getting old:
That's her waiting for a ride a FEW years ago.
What a cutie! Does she OWN Daddy?
Posted by: Chris H. Jul 2 2016, 04:50 PM
Well YEAH! Her car is 10 years newer than mine. Great kid though.
Posted by: veekry9 Jul 3 2016, 04:57 PM
RepeatOffender:
"Uh, that's a 2.2, not a 3.3.
I spent 20 yr's in the Homebuilt Aircraft Industry and never saw an auto conversion that merits the work required.
An exercise in WTF!
An adequate analogy would be, 'Would you put an A/C engine in a car and why?'"
http://www.914world.com/bbs2/index.php?showtopic=200844&st=424
http://77e21.info/mstunedintake.htm
https://flycorvair.net/page/5/?s=cleanex
https://www.eaa.org/en/airventure
Some flyers arrive with auto engined 'Experimental'aircraft and have done so since the '60s.
Perhaps you've visited the big show,it's in Wisconsin.Maybe not.
https://www.google.ca/search?q=composite+intake+manifold&espv=2&biw=1097&bih=550&source=lnms&tbm=isch&sa=X&ved=0ahUKEwiUj_mO6tLNAhUsyoMKHcyyA80Q_AUIBigB
https://www.google.ca/search?q=fabricated+intake+manifold&espv=2&biw=1097&bih=520&source=lnms&tbm=isch&sa=X&ved=0ahUKEwiUxOOD-dLNAhXDzIMKHQSoD3oQ_AUIBigB#imgrc=NPoW-vWF_gAohM%3A
The point of the post was the composite manifold tech he used to fit the powerplant into the space limitation,which he did,successfully.
Later,he flew his aircraft with the composite manifold and oil tank,on his Subaru engine without failure.
Having milled,and welded,a billet manifold to reduce weight,the composite method appears to exhibit good advantage in both cost and weight.
I no longer have those pix of the induction system they built some 32+ yrs ago.Perhaps someone in the kitplane industry would have a few.
It was a well thought out and executed solution to the problem to be solved.Made his own manifold design,to fit,perfectly.
https://www.google.ca/search?q=aircraft+engined+cars&espv=2&biw=1097&bih=520&source=lnms&tbm=isch&sa=X&ved=0ahUKEwiK9tuL89LNAhWF5IMKHXe7CjAQ_AUIBigB
https://www.youtube.com/watch?v=42w7z7GDmp4
Obviously,for mo' power.WTF.
Why would you put a different engine into a 914 when the original is sufficient?
The answer to that is,the freedom to do so,wanting to and knowing how.
Last year I read of the install and made the observation that a custom composite intake manifold would fit perfectly.
Now,making the female forms and vbagging a cfrp layup would allow one to perhaps market a manifold to others who like the idea of the 914-H6.
A potential sales of a dozen or so world wide,for those who can make the sum of rusted 914 + cheep boxer six.
"To the fundamentalist,the liberated imagination is a sinful taboo.
He not only enslaves his own imagination to his ideology,but wishes to enslave our imaginations too."
So,go ahead and build one yourself,for your custom 914-'x' engine install.
/
http://www.dsmtuners.com/threads/making-a-composite-intake-tube.257621/
https://www.google.ca/search?q=composite+intake+manifold&espv=2&biw=1097&bih=550&source=lnms&tbm=isch&sa=X&ved=0ahUKEwiUj_mO6tLNAhUsyoMKHcyyA80Q_AUIBigB#tbm=isch&q=diy+carbon+fiber+intake+manifold
https://www.youtube.com/user/matthieutje65/videos
/
https://www.youtube.com/watch?v=p_4a-KLS1AM
/
Posted by: Chris H. Jul 6 2016, 09:02 AM
Today is the day....stand by!
- engine back in
- intake flipped - worked GREAT
- wiring is done
- battery connected, no magic smoke
- fuel in the tank
- cooling system full
- re-engineered alternator pulley/belt system done
- modified stock air intake snorkel complete
Just need to run the larger vacuum lines since they are pointed the other way and we're set. Taking my time so there are no mistakes. I'll post everything I did and the pics later today. I got on a roll so I just kept going. 5 day 914 bender when I wasn't working.
Here are the few "minor" things I found that were wrong...
1. The MAF sensor wire that was labeled "test mode" on several conversion docs was actually the GROUND WIRE. So...I don't need to be Mike Bellis to realize that if the plug is not grounded...the air flow meter is not working. Be VERY CAREFUL using conversion documents for wiring.
2. One of the crank angle sensors was bad as mentioned before
3. There were so many little metal hooks and hangers left on the engine that it did not "hang" straight in the engine bay. I took off all of the unneeded stuff and it is perfectly level now.
4. One of the large vacuum hoses (again it was advised I did NOT need this) was not hooked up. Yeah...it's required.
Don't know how it ran much at all, but have to think the crank sensor went bad gradually. I bet it's WAY faster now. It never idled quite right but it probably will now.
Posted by: veekry9 Jul 6 2016, 09:21 AM
Press on regardless,to the other side.
https://www.youtube.com/watch?v=qyHO6fkvEGU
/
Posted by: 76-914 Jul 6 2016, 04:52 PM
So did you start it?
Posted by: 914forme Jul 6 2016, 05:00 PM
I'll be gripping a steering wheel tomorrow so 6 weeks will be nothing. I am more worried about running my fingers into the console while shifting than gripping the wheel.
Posted by: Chris H. Jul 6 2016, 06:27 PM
So did you start it?
I found a couple of small cracks in the plastic intake snorkel...probably not even all the way through but can't take a chance. Waiting for the epoxy to dry. It's killing me. Should be another hour or so.
Posted by: 76-914 Jul 6 2016, 06:53 PM
Your killing us you know. Slowly but surely your killing us.
Posted by: flmont Jul 6 2016, 06:58 PM
Yea,..I cant wait for the update,..on sound and how it drives,..!!!
Posted by: A&P Mech Jul 6 2016, 07:56 PM
So did you start it?
I found a couple of small cracks in the plastic intake snorkel...probably not even all the way through but can't take a chance. Waiting for the epoxy to dry. It's killing me. Should be another hour or so.
Is the glue dry yet? Is it running yet? Come on we need an update!
Posted by: Chris H. Jul 6 2016, 10:12 PM
Yep it started! I just got done with it 10 minutes ago and I started it...it ran like crap. Then I came inside and stewed and then remembered that I moved the wires around for the injectors so they would be more secure...and did not reconnect 2 of them . It seems to run better on all 6. Sorry I can't post a vid tonight (new neighbors with very young ones. Tomorrow morning driving vid!
Posted by: 76-914 Jul 7 2016, 01:08 PM
It's afternoon and no video. lol 
Posted by: Realcarfreak Jul 7 2016, 05:29 PM
He must still be driving around in it.
Posted by: DBCooper Jul 7 2016, 05:32 PM
I sure hope you're right, and he's not walking home right now.
Posted by: 76-914 Jul 7 2016, 06:13 PM
I think he made a number of changes so anything is possible. Whatever it is he'll work it out. I just want for him to feel "the power" for once.
Posted by: DBCooper Jul 7 2016, 06:15 PM
Actually this is the fun/exciting part, isn't it? No matter what happens.
Posted by: 914forme Jul 7 2016, 07:07 PM
wanting to hear vroom vrooom
Posted by: 76-914 Jul 7 2016, 07:21 PM
Actually this is the fun/exciting part, isn't it? No matter what happens.
Well, yes and no. I'm sure Chris is ready for some "fun & exciting" moments before he has to do more work. Kinda like the carrot/Donkey formula.
Posted by: wingnut86 Jul 7 2016, 07:28 PM
Careful guys...
Fun can also mean:
F-ire
U-nder
N-eath
Let him complete a self-paced shakedown cruise...
Posted by: DBCooper Jul 7 2016, 07:39 PM
Fun can also mean:
F-ire
U-nder
N-eath
OMG, PLEASE don't say that out loud. Ouch. Think it, fine, but not out loud, no.
Posted by: Chris H. Jul 7 2016, 08:14 PM
Wow what a long walk ! What day is it! ?
Nah not really it rained most of the afternoon. Had to head out early this morning and couldn't even drive it. Streets just dried out.
Video is uploading! 20 minutes and it should be ready. It's not very exciting but it's a video.
Posted by: DBCooper Jul 7 2016, 08:19 PM
So until the video, how did it go? You a happy guy?
Posted by: Chris H. Jul 7 2016, 08:34 PM
Overall yes definitely. It runs a lot better. Way more responsive. The engine fits a lot better in the car. Still have a minor issue with low idle but I think I just need a new MAF. Meant to order one anyway.
Posted by: Chris H. Jul 7 2016, 09:56 PM
Finally!
https://www.youtube.com/watch?v=0xAJjwLiMmU
You'll notice the temps edged up to 190 near the end. there was an air pocket in the system that eventually worked its way out. Added almost a half gallon of coolant when it cooled down. Once it's air-free it stays around 180 or so.
Posted by: flmont Jul 7 2016, 10:58 PM
Great video Chris,...could U remember the MPH as U go thru the gears,..and yea,.man sounds great too,...!!!
Posted by: 914forme Jul 8 2016, 05:22 AM
Sounds great BTW wasn't that Bob's complaint about his EG, he would forget it was running at idle. Nice to see it go, all that hard work paid off, and glad to see you got the intake flip worked out.
Posted by: mgp4591 Jul 8 2016, 06:05 AM
So when you get your new MAF, have you given thought to the Z32 unit from Nissan? It's a larger diameter piece for more airflow and it's supposed to be fairly easy to wire up even though you may be tired of conversion projects by now...
Also, do you think the torque increase is from the added intake runner length? It makes sense that it would but I thought the whole object of this exercise was the fitment issues without cutting into the trunk space.
Great job and thanks for the video - I think that's going to be a project for me also when the time comes. Thanks for the inspiration and the intensive documentation!
Posted by: A&P Mech Jul 8 2016, 06:53 AM
Congratulations! You guys are making think I need to pull the 2.5L 4 cylinder out and replace it with a six!
Posted by: 76-914 Jul 8 2016, 07:54 AM
Super fantastic results and you deserve it. I'm proud of you for sticking with it. None of us talk about it but when things go awry, as the often do, it is disheartening at best. Not to mention the effect it has upon your attitude. Ya did good Bud. I'm glad that you finally can "feel the power". awesome, isn't it? It's as if the car thanks you for the transplant and repays you with the feel of force and a six cylinder symphony. Your probably going to find any excuse you can in order to drive it for the next several months. And you will, so have you updated your insurance to reflect your cars value? Did you take your wife and daughter for a ride yet? My wife starts screaming and punching me whenever I floor it. What video recorder did you use? It picks up the sound very well. At what point did you realize that this wasn't "Your Father's 914" and would need some time to learn how to harness the new found power.
Again, congratulations. I'm happy for you. kent
Posted by: 76-914 Jul 8 2016, 07:56 AM
Congratulations! You guys are making think I need to pull the 2.5L 4 cylinder out and replace it with a six!
That 2.5 is nothing to sneeze at. Besides, we all have the same Speed Limit signs to deal with.
Posted by: DBCooper Jul 8 2016, 08:08 AM
That's funny. My sister lives in France, thirty years of tiny Fiats and other tin econo boxes. When she was over visiting for a summer I gave her a ride, top off, cute little red car, same size as what she's used to. As soon as we were out of the neighborhood I hit it hard and she stuck her arms and legs straight out, bracing for whatever was exploding and about to hit. Straight out, rigid, terror. I laughed like a fool, got her just like when we were kids. Later I let her take her husband out and she did the same thing to him.
My granddaughter used to laugh like crazy, too, but now that she's bigger and more responsible, she says "Grandpa, too fast!!"
Posted by: Chris H. Jul 8 2016, 08:56 AM
Thanks everyone for all the support. Really appreciate it. Thanks for all the parts Bob and Steve! The flip was very successful and I got several small issues resolved I didn't know I had! The oil leak is fixed too. Funny thing is that one of the main problems is still there (idle issue) but since I pretty much changed everything else out or tested it I am nearly 100% sure it's the MAF (which rolled off the trunk...). No one was home when I took it out but I'm sure they will all want rides. Works for me!
The MAF is a known issue with the SVX. They get old and are extremely sensitive to vibration. Some people re-solder them (might try that). You can use a Legacy MAF from the same era. $35 vs $150. I don't know how a Nissan Z32 MAF would react with stock injectors. Anyone have an opinion on that? I know there would be no performance improvement. Just need a different connector to use that I would assume.
The performance improvement is just due to the fact that I replaced the sensor (s) and fixed the MAF wiring. The old intake was actually much longer. Now you can be going 20 in 3rd and step on it and it picks right up. Bob liked the fact that you could literally drive the Subaru 6s around in 5th gear all the time if you wanted. And yes he sometimes couldn't hear his at idle and he did my exhaust. I painted it with ceramic paint. Will post pics right after this.
Frank, I don't know the speeds but I shifted around 5k RPM. Can't really get past 2nd that way in town. Then on to 3rd if you want to keep the revs up...
Ray, if you knew how many times I said "if this doesn't go well I'll buy a late model 2.5 and BE DONE WITH IT" you'd feel great about your engine. I like the EG33 a lot but my next motor will probably be a 4. Maybe the BRZ when it gets cheaper or an EJ25.
Posted by: Realcarfreak Jul 8 2016, 11:58 AM
Thanks very much for posting the test drive video!
It is really inspiring to see them and helps keep me motivated to work on my project.
Thanks again for sharing the progress of your build.
Posted by: A&P Mech Jul 8 2016, 12:48 PM
Hey Chris, it looks like you are running SpeedHut gauges. How big of a job was it to install them? It looks like your running the GPS speedometer. Can you give me some feedback. I am getting ready to order a set.
Posted by: Chris H. Jul 8 2016, 01:23 PM
Thanks very much for posting the test drive video!
It is really inspiring to see them and helps keep me motivated to work on my project.
Thanks again for sharing the progress of your build.
Hey you bought your stuff from the right guy. Bob is very knowledgeable. I'm pretty familiar with the parts you bought. Good stuff. Did you buy the R motor or the D motor?
Hey Ray, the Speedhut gauges are very easy to install.
The few very minor challenges are:
- The gauges are just slightly smaller than the openings for the stock 914 cluster. You can wrap them a but with tape and then use the rubber rings, or add a little filler inner ring piece, or make your own face plate. They are BARELY smaller. And you need the 4 1/2 tach and 4" speedo and quad. They measure the faces, not the barrels like VDO.
- The senders for the quad gauge for water temp and oil pressure are 1/8 NTP. Not the same as Subaru at all. For oil pressure I found a nice adapter. Let me look it up and post it here later tonight. For water temp I just got an aluminum 1.25 hose adapter with a 1/8 NPT in it that is made for water temp.
- The oil pressure and water temp wires are too short because they are made for a car with the engine up front so you have to extend them. You COULD put the water temp up front but it really should be very close to the engine. You CANNOT replace your Subaru temp sensor with it. That one has to stay where it is.
The GPS speedo is so easy it's ridiculous. Power it, plug the antenna in. You could also get one that hooks to your trans VSS but I like the GPS better.
Posted by: 914forme Jul 8 2016, 01:31 PM
Hey Chris, it looks like you are running SpeedHut gauges. How big of a job was it to install them? It looks like your running the GPS speedometer. Can you give me some feedback. I am getting ready to order a set.
(I live in my own reality)I think Speed Huts would be a great solution. E-mailed them today and asked if they could put a boast gauge into the speedo or quad gauge. On the MAF to read the Z MAF you need a ROM Flash, if you can find a stage 2 tune chi,p I say go for it, but you also need bigger injectors. I see a slippery slope ahead sign there to your right.
Grab a 35 dollar MAF, or let me see if I still have mine, and I will ship it up. I sure as hell don't plan on using it.
Posted by: CptTripps Jul 8 2016, 01:40 PM
Awesome job man!
Posted by: 76-914 Jul 8 2016, 01:58 PM
Thanks very much for posting the test drive video!
It is really inspiring to see them and helps keep me motivated to work on my project.
Thanks again for sharing the progress of your build.
Hey you bought your stuff from the right guy. Bob is very knowledgeable. I'm pretty familiar with the parts you bought. Good stuff. Did you buy the R motor or the D motor?
Hey Ray, the Speedhut gauges are very easy to install.
The few very minor challenges are:
- The gauges are just slightly smaller than the openings for the stock 914 cluster. You can wrap them a but with tape and then use the rubber rings, or add a little filler inner ring piece, or make your own face plate. They are BARELY smaller. And you need the 4 1/2 tach and 4" speedo and quad. They measure the faces, not the barrels like VDO.
- The senders for the quad gauge for water temp and oil pressure are 1/8 NTP. Not the same as Subaru at all. For oil pressure I found a nice adapter. Let me look it up and post it here later tonight. For water temp I just got an aluminum 1.25 hose adapter with a 1/8 NPT in it that is made for water temp.
- The oil pressure and water temp wires are too short because they are made for a car with the engine up front so you have to extend them. You COULD put the water temp up front but it really should be very close to the engine. You CANNOT replace your Subaru temp sensor with it. That one has to stay where it is.
The GPS speedo is so easy it's ridiculous. Power it, plug the antenna in. You could also get one that hooks to your trans VSS but I like the GPS better.
Bob has a "30D" for sale?
Posted by: Chris H. Jul 8 2016, 03:28 PM
Thanks Doug! Nice to see you!
You can look at my gauges at Garold's and see what you think Steve. I might try soldering my MAF but if you have one that's awesome.
Kent I think Bob just had an EZ30R left come to think of it. That one was fairly low mileage too. Now the aftermarket systems have finally caught up with the OEM technology so you can run the variable valve timing and stuff.
Posted by: 914forme Jul 8 2016, 05:25 PM
I think Speed Huts would be a great solution. E-mailed them today and asked if they could put a boast gauge into the speedo or quad gauge.
Got my response back from Speed Hut, they can not or will not do it. Bummer
Posted by: mgp4591 Jul 8 2016, 06:20 PM
[quote name='Chris H.' post='2369171' date='Jul 8 2016, 03:28 PM']
Thanks Doug! Nice to see you!
You can look at my gauges at Garold's and see what you think Steve. I might try soldering my MAF but if you have one that's awesome.
Aw, c'mon Chris... Looking at posts on the SVX says that the Z32 plus 370 injectors with an chipped ECU will give you over 300 hp. Wouldn't you like that??
On the other hand if I were you, I'd probably be satisfied (for awhile!) with your current upgrades and just wanna drive the damn thing!
And was your previous setup functioning so poorly that you weren't getting all of the engine to the ground? I never saw that in your posts so now you have me wondering...
Posted by: mepstein Jul 8 2016, 06:29 PM
[quote name='mgp4591' date='Jul 8 2016, 08:20 PM' post='2369224']
[quote name='Chris H.' post='2369171' date='Jul 8 2016, 03:28 PM']
Thanks Doug! Nice to see you!
You can look at my gauges at Garold's and see what you think Steve. I might try soldering my MAF but if you have one that's awesome.
Aw, c'mon Chris... Looking at posts on the SVX says that the Z32 plus 370 injectors with an chipped ECU will give you over 300 hp. Wouldn't you like that??
On the other hand if I were you, I'd probably be satisfied (for awhile!) with your current upgrades and just wanna drive the damn thing!
And was your previous setup functioning so poorly that you weren't getting all of the engine to the ground? I never saw that in your posts so now you have me wondering...
[/quote]
Who does the upgrade on the eg33 to get to 300hp? I remember seeing a website at one time but didn't save the info. Thanks.
Posted by: flmont Jul 8 2016, 10:11 PM
mepstein,... it may be Subiechips LLc,.. he said a couple months back he no longer builds SVX motors,.but his website offers those upgrades,But he has no phone number listed ,..So Iam not sure how safe it is to order from that site,..?? plus when I asked about HP and Torque numbers he said he didn't have that info,..??,..But delta cams ,will do cams for SVX engines....
Posted by: Chris H. Jul 8 2016, 10:22 PM
Aw, c'mon Chris... Looking at posts on the SVX says that the Z32 plus 370 injectors with an chipped ECU will give you over 300 hp. Wouldn't you like that??
On the other hand if I were you, I'd probably be satisfied (for awhile!) with your current upgrades and just wanna drive the damn thing!
And was your previous setup functioning so poorly that you weren't getting all of the engine to the ground? I never saw that in your posts so now you have me wondering...
Yeah we'll see. It's plenty fast for me really. The MAF sensor plug was not grounded and I had a bad crank angle sensor so the timing was way off before. Suddenly had a lot of backfiring and loss of power after I hooked up the VSS. Maybe a coincidence but the VSS does provide input that can affect the performance. That's why the power was way down. Initially it was good so the sensor must have gone bad gradually.
Mark, here is some info on the upgrade to Nissan MAF/Injectors/rechip
http://subiechips.com/modifiedSVX.htm
On the Subaru-SVX site the guy who makes these offers group buys (same guy). It's $13 off for every person who orders one, up to a certain number. They can be the standard rechip that just remaps the ECU or the modified one. So if we had say, 5 people buy one the price for each would go down $65 per.
http://www.subaru-svx.net/forum/showthread.php?t=63606&page=4
Posted by: DBCooper Jul 8 2016, 10:31 PM
Sounds like fun and would get you into pretty fast company. When did Porsche sixes get to 300 hp, do you know?
Posted by: Andyrew Jul 9 2016, 12:42 AM
Sounds fan tastic!!!!!
Congrats on the accomplishment!
Posted by: mgp4591 Jul 9 2016, 01:00 AM
Aw, c'mon Chris... Looking at posts on the SVX says that the Z32 plus 370 injectors with an chipped ECU will give you over 300 hp. Wouldn't you like that??
On the other hand if I were you, I'd probably be satisfied (for awhile!) with your current upgrades and just wanna drive the damn thing!
And was your previous setup functioning so poorly that you weren't getting all of the engine to the ground? I never saw that in your posts so now you have me wondering...
Yeah we'll see. It's plenty fast for me really. The MAF sensor plug was not grounded and I had a bad crank angle sensor so the timing was way off before. Suddenly had a lot of backfiring and loss of power after I hooked up the VSS. Maybe a coincidence but the VSS does provide input that can affect the performance. That's why the power was way down. Initially it was good so the sensor must have gone bad gradually.
Mark, here is some info on the upgrade to Nissan MAF/Injectors/rechip
http://subiechips.com/modifiedSVX.htm
On the Subaru-SVX site the guy who makes these offers group buys (same guy). It's $13 off for every person who orders one, up to a certain number. They can be the standard rechip that just remaps the ECU or the modified one. So if we had say, 5 people buy one the price for each would go down $65 per.
http://www.subaru-svx.net/forum/showthread.php?t=63606&page=4
That sounds like the site - I didn't save it either but the group buy info has me thinking hard on it! Using the Outfront headers that they build will help alot also... The idea for cams I'm not too hip on considering the cost involved vs. the performance gains. A turbo or two would be nice also but that's a huge step cost wise - the power out of those engines is pretty crazy, even without really going into the engine for upgrades and keeping that high compression setup. Over 400hp without going into internals for a stock block EG is pretty tempting.
Okay... I'll concentrate on my project and stop dreaming.
Posted by: mepstein Jul 9 2016, 05:50 AM
Sounds like fun. That would get you into pretty fast company. When did Porsche sixes get to 300 hp, do you know?
Later version of the 3.6.
Posted by: mepstein Jul 9 2016, 05:56 AM
Aw, c'mon Chris... Looking at posts on the SVX says that the Z32 plus 370 injectors with an chipped ECU will give you over 300 hp. Wouldn't you like that??
On the other hand if I were you, I'd probably be satisfied (for awhile!) with your current upgrades and just wanna drive the damn thing!
And was your previous setup functioning so poorly that you weren't getting all of the engine to the ground? I never saw that in your posts so now you have me wondering...
Yeah we'll see. It's plenty fast for me really. The MAF sensor plug was not grounded and I had a bad crank angle sensor so the timing was way off before. Suddenly had a lot of backfiring and loss of power after I hooked up the VSS. Maybe a coincidence but the VSS does provide input that can affect the performance. That's why the power was way down. Initially it was good so the sensor must have gone bad gradually.
Mark, here is some info on the upgrade to Nissan MAF/Injectors/rechip
http://subiechips.com/modifiedSVX.htm
On the Subaru-SVX site the guy who makes these offers group buys (same guy). It's $13 off for every person who orders one, up to a certain number. They can be the standard rechip that just remaps the ECU or the modified one. So if we had say, 5 people buy one the price for each would go down $65 per.
http://www.subaru-svx.net/forum/showthread.php?t=63606&page=4
I see the site and the info. Thanks!
Version 1 will have a stock eg33 to get car running.
Version 2 - a 300 hp NA engine would be a fun ride. The suby trans and running gear is all being built to handle that kind of power.
Posted by: 914forme Jul 9 2016, 04:23 PM
400HP on an EG is a pretty easy make to hit. They are a very stout engine. Run E85 and I see no reason to touch the internals to hit the 400HP mark. You have to add some positive pressure to get there though.
https://www.youtube.com/watch?v=48DbdMO7M9A&feature=youtu.be internally stock EG33 with a turbo. Puts out 447HP on 7 PSI of boost.
Seems like a great idea to me
Posted by: Chris H. Jul 9 2016, 04:46 PM
Thanks Andrew!
I finally found that sensor tee. Here's what I used for the oil pressure sensor:
http://www.ebay.com/itm/1-8-BSPT-Oil-Pressure-Sensor-Tee-to-NPT-Adapter-Turbo-Lexus-Toyota-Subaru-Mazda-/131381172959?hash=item1e96ed9adf:g:GqMAAOSwaNBUkNGT&vxp=mtr
This isn't quite the cheapest one but it gives the best explanation. Most Japanese cars have 1/8 BSPT sender threads, while the more common one speed hut comes with is 1/8 NPT. This one allows you to use both. The Subaru sender is pretty big so it sits on top.
I used this for water temp.
http://www.ebay.com/itm/38MM-LCD-Car-Water-Temperature-Temp-Meter-Sensor-Gauge-Radiator-Hose-Joint-Pipe-/172139508200?hash=item28145071e8:g:glcAAOSwHgVW7XXZ&vxp=mtr
Don't think I bought it from Taiwan but who knows... Just added a small section of hose and put it it right by the outlet. You could also tap the pipe itself on the engine, I just wasn't quite confident enough to do that with aluminum.
Posted by: flmont Jul 11 2016, 06:24 PM
where did U get those headers,.??? Thanks
Posted by: 914forme Jul 11 2016, 06:27 PM
Bob Bigkat_83, but I do believe they are from outfront motorsports items.
Posted by: flmont Jul 11 2016, 06:57 PM
I hope to be all over the Z32 plus injectors,with re-ground cams, if the cams are worth the trouble, the subie chips guy said he would only do the intake cams....But, I assume that you need to go duel Z32's and duel MAF's ??
Posted by: 914forme Jul 11 2016, 07:16 PM
I am so confused.
Z32 you only need one, as it is a MAF. Will require an ECU reprogram or PROM
Cams yes intake, you have two of them on the EG33
Header, they are short tube non equal length from outfront. I did calculate the proper length of header, and am still trying to figure out how to cram ~36" from port to collector into the back of a 914.
BTW, one way around the cams is forced induction. The EG is not a bad breathing engine, it is just not great.
Posted by: Chris H. Jul 11 2016, 09:09 PM
Side note: last time I visited Bob (BIGKAT_83) he had a nice pair of EG33 cams. If he still has them he'd probably sell them reasonably. Always wise to have a second set reground so you have the originals in case there is a problem at the machine shop.
Posted by: flmont Jul 11 2016, 10:17 PM
914forme,...Ha ha,..well I didn't know the Z32 was a MAF,..I thought it was a throttle body,..and since the 3.3 had 2 intake's that it would take 2,So MAF is a airflow sensor,..?? the subiechips site talks about installing 2 ea,..IDK,SO ,.good ,.I only need one.....
Posted by: 914forme Jul 12 2016, 10:52 AM
EG33 uses one MAF.
You need one Z32 MAF, these are from Nissan Products, can be found as the day is long on eBay. It is a 300zx MAF.
You will need one ECUTune Stage 2 upgrade chip. NLA as far as I can tell. Or use http://www.subiechips.com/modifiedSVX.htm stuff.
You will need larger injectors 370cc is what it is setup for, they can also do others. Nissan skyline injectors stock units.
Unless you are turning the engine, you do not need twin MAFs just complicates the build, that would then be twin turbos, air cleaners, mucho bigger injectors and then rough transitions that can come from mucho bigger injectors.
Other way around is an aftermarket ECU, then you can do all sorts of crazy things, like staged injectors, etc...
It would take all the above mods, and then performance cams, and headers to get close to 280HP, maybe E85. After that your looking at forcing more air into the engine and E85, and aftermarket ECU, and intercoolers..... list goes on and on, don't forget oiling system modifications.
Did that make it clearer than mud?
Now back to Chris' thread  sorry Chris
Posted by: Chris H. Jul 12 2016, 11:27 AM
Nah, I like this kind of discussion. Go for it. It's VERY HARD to tune a car with 2 MAFs. Leave that for the youngsters. 300 HP in a 914 will scare you pretty good. If you want more than that you need an LS1 or a turbo.
Yes I got my headers from Bob who got them from Outfront. They are very compact.
BTW I painted them up real nice.
Before: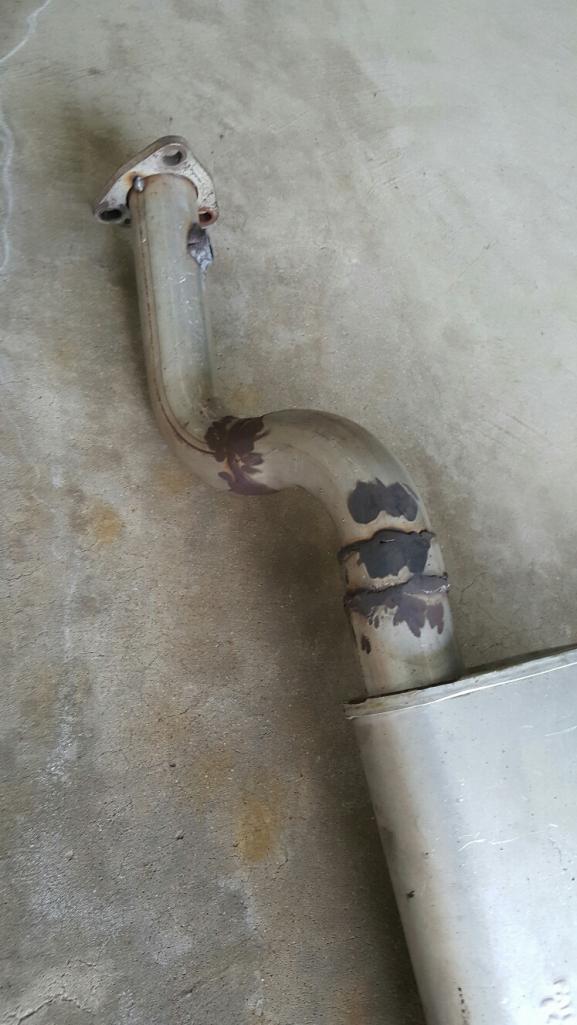
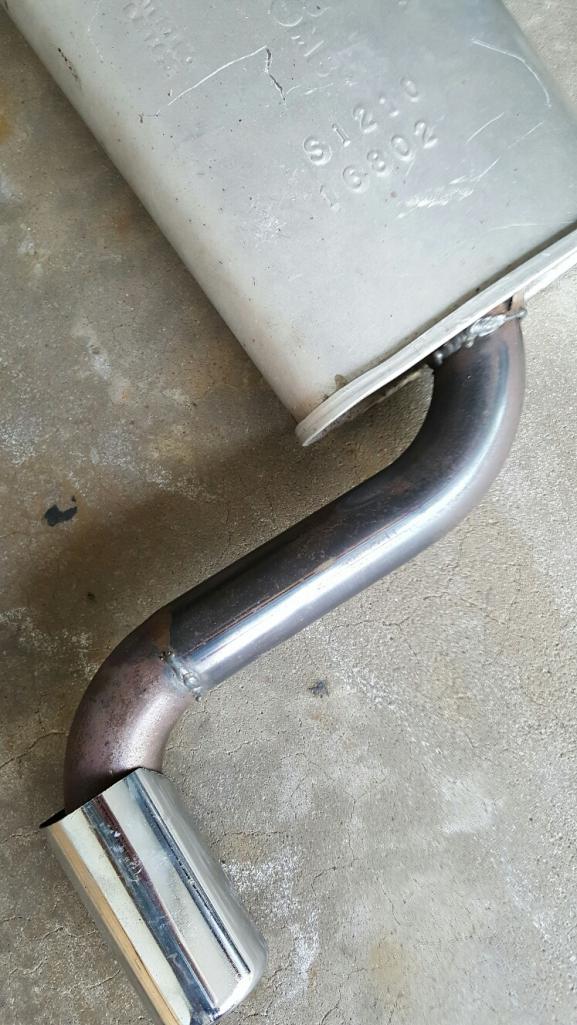
After: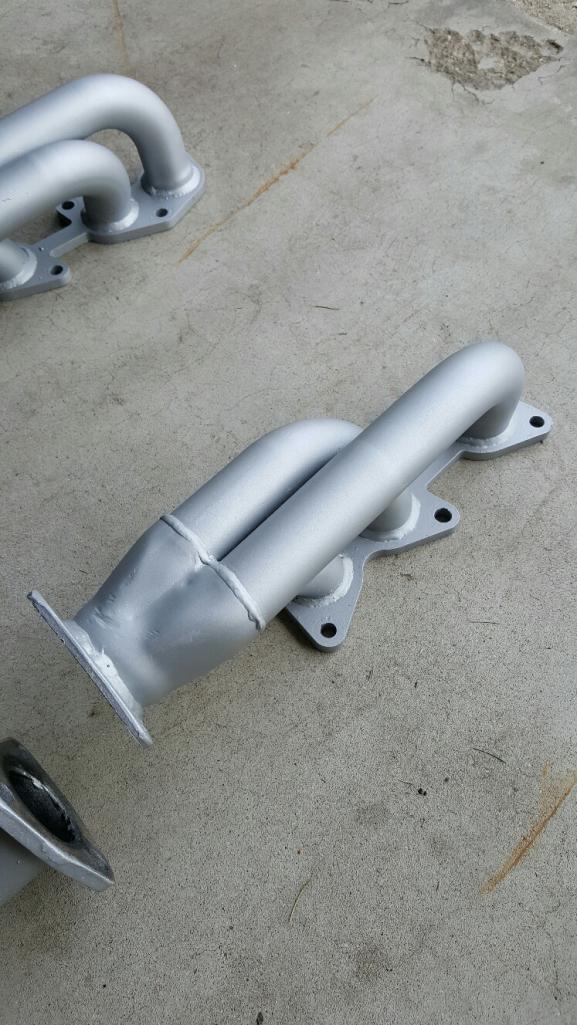
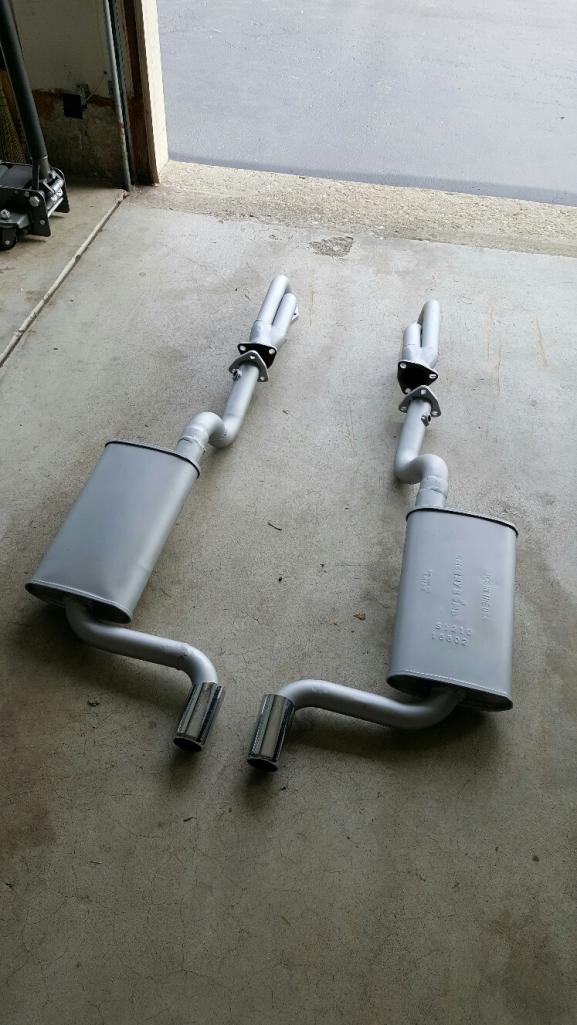
This ceramic paint is really good: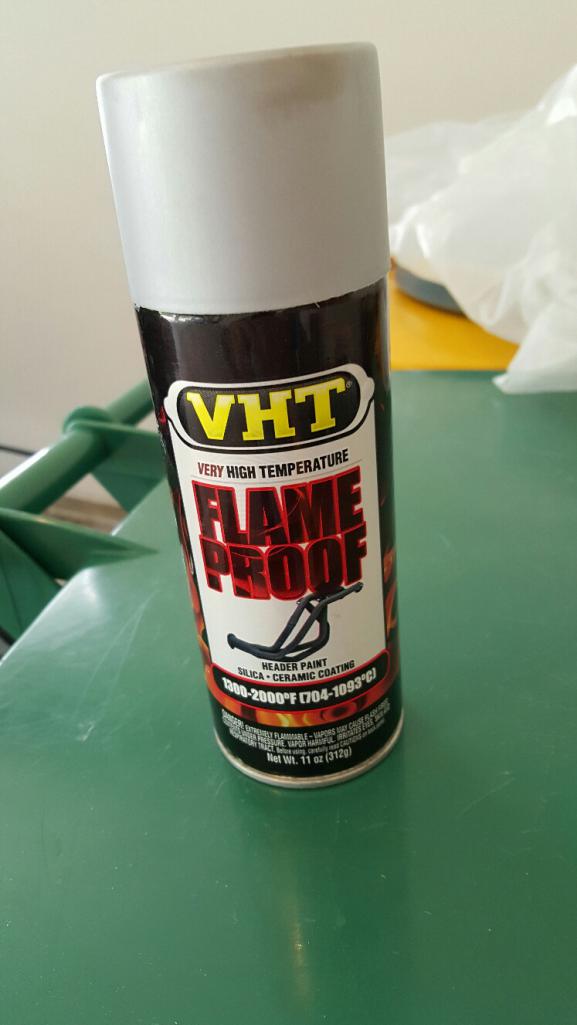
Stinks and smokes a little while it's curing for a couple minutes, then it's on there for good. Was pretty sure the wires were melting until I figured out where it was coming from. Then it stopped and no smell at all since.
FYI I think ECUTune and Subiechips might be the same thing.
Posted by: 914forme Jul 12 2016, 11:47 AM
one thing of note about the out front header, the collectors are un-finished, meaning no flange provided.
Turbo EG33 is still cheaper than an LS swap, unless you dry sump it with an aftermarket kit. I have a spreadsheet, lol, to much time to think on my hands, as fingers are still down and out for the count.
And I see it is listed as Miami Fl, so could be the same guy
Posted by: flmont Jul 12 2016, 08:21 PM
No,..I would be happy with a EG33,..Stk but just built a little,..injectors, EZ32 and maybe cam's ,..are aftermarket ECU's for that engine crazy expensive,..??
Posted by: flmont Jul 12 2016, 08:23 PM
Oh,..Chris,..I wanted to ask about the oil pan,is it stk,or cut down or a small car version,..?? Thanks...Frank
Posted by: Chris H. Jul 12 2016, 08:56 PM
Stock. It's fine, no need for a cut down version. Although the smallcar one is very nice looking. The stock ECUs are expensive. About $150-$200 aftermarket. $400 OEM.
Posted by: mgp4591 Jul 13 2016, 01:10 AM
No,..I would be happy with a EG33,..Stk but just built a little,..injectors, EZ32 and maybe cam's ,..are aftermarket ECU's for that engine crazy expensive,..??
That's cheap for a reworked ECU vs. an aftermarket like AEM or the others out there. Cams would be a pain in the butt - welding and regrinding just doesn't feel right to the metallurgist in me... The 4 cam setup and chamber design isn't too bad so throw a larger turbo on it to keep a cooler charge and have it come on later. Those headers keep your ground clearance up and would really work well to pipe up for a turbo. There's a lot of discussion on the SVX threads about proper tuning for a turbo, so investigate thoroughly.
I'm still jazzed about Chris' intake flip and how well everything fits! It sounds great and kicks him in the seat down the road - that's what it's all about!!
Posted by: flmont Jul 13 2016, 07:27 PM
Yea,..ahh No turbo stuff for me,..I cant do all the fab work that's needed,.But hell ya that would be fun,..I would have to learn how to drive a car with that much power,..Iam thinking z32,injectors,and what ever type of ECU needed to run all that,..and maybe cams,..as I say if its worth the trouble...I gotta get started first,..!!
Posted by: 76-914 Jul 13 2016, 07:42 PM
When compared with a 4 banger, 6's are like Poontang. Any damned 6 you install will be a thrill whether it be a Porsche 2.0, a 3.6 Subaru or anything in between. Just remember that the worst piece you ever had was wonderful and it will be the same with a 6.
Posted by: flmont Jul 15 2016, 06:40 PM
and I remember my 1st,...So Iam with U on that,..!!!
Posted by: mgp4591 Jul 16 2016, 12:22 AM
Another question Chris - with the intake flipped, do you get more induction sound in the cabin? That may not be a bad thing unless it's way too loud. Just a little extra whine and/or wooshing sound on acceleration may be better for getting your blood going!
Posted by: Chris H. Jul 16 2016, 12:15 PM
Not really. Pretty much the same. It's very quiet at idle and then when you lean on it the exhaust is way louder than the intake. Neither is that loud compared to an air cooled engine. I can hear the fuel injectors clicking with my head in the engine bay. That's how quiet it is.
Posted by: mgp4591 Jul 17 2016, 02:18 AM
Not really. Pretty much the same. It's very quiet at idle and then when you lean on it the exhaust is way louder than the intake. Neither is that loud compared to an air cooled engine. I can hear the fuel injectors clicking with my head in the engine bay. That's how quiet it is.
Great! Now I just have to go over your thread to find all the parts I need to flip this sucka before I install mine...
Posted by: flmont Jul 22 2016, 10:19 PM
What is the best route for a aftermarket ECU harness set-up for a EG33,..??? or best vendor options,.??
Posted by: a914622 Jul 22 2016, 10:52 PM
Congrats Chris!!! That video sounds great.
Can you mesure the top of the flipped manifold to the bottom of the deck lid. Just a rough idea. Thanks
Posted by: Chris H. Jul 22 2016, 11:22 PM
Thanks! Sure I'll get that for you tomorrow. I owe Kent some pics too. Kent that coolant hose is not here yet! Monday at the latest.
Posted by: 914forme Jul 23 2016, 11:36 AM
What is the best route for a aftermarket ECU harness set-up for a EG33,..??? or best vendor options,.??
So your asking for an opinion?
How much work do you want to do.
Nothing at all, SDS - it will be a custom harness, they will work with you, done lots of EG33 you just need to do a final tune
Outback is the same
You love doing it all - MegaSquirt
Start a new thread for your build. We need another EG33 build thread for entertainment.
The stock ecu is a very capable unit, look at Chris' build he is moving down the road with force. Need a little more the chips are a viable option.
Posted by: flmont Jul 23 2016, 12:25 PM
SDS is for me, whats the cost on that system.
Posted by: flmont Jul 23 2016, 12:27 PM
Oh i would do the chips,injection,and the Z32,
Posted by: Chris H. Jul 23 2016, 01:31 PM
You can do that with the subiechips setup. Stock ECU, upgrade chip is about $300, then just buy 300zx injectors and MAF. I think you need the wiring connectors too. The guy on the subaru-svx forum will help you. Same guy who does the group buys is the subiechips guy.
The SDS is money but a great system. You can really tune the engine to exactly how you want it. Someday soon I'll go aftermarket. Tired of guessing if it's running right or not.
Posted by: Chris H. Jul 23 2016, 05:25 PM
Alright a few updates. I have the coolant drained again since my new 1.25 lines are coming Monday. Kent you must be pacing the floor. I'll make sure to get the package turned around quickly.
Here is a pic of where my lines come through the front trunk. I have them following the indentations in the floor underneath. 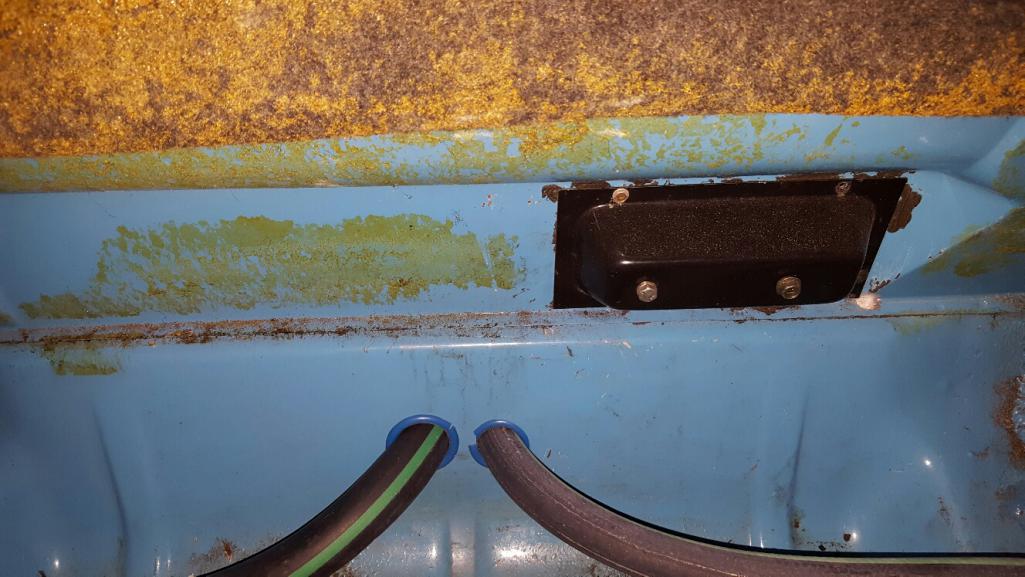
Someone was asking about fuel pump relocation in another thread...well...there is the fuel pump behind that black plate. Walbro pump fits in the stock location. BTW it is running much quieter now.
Here is the engine with the intake flipped. 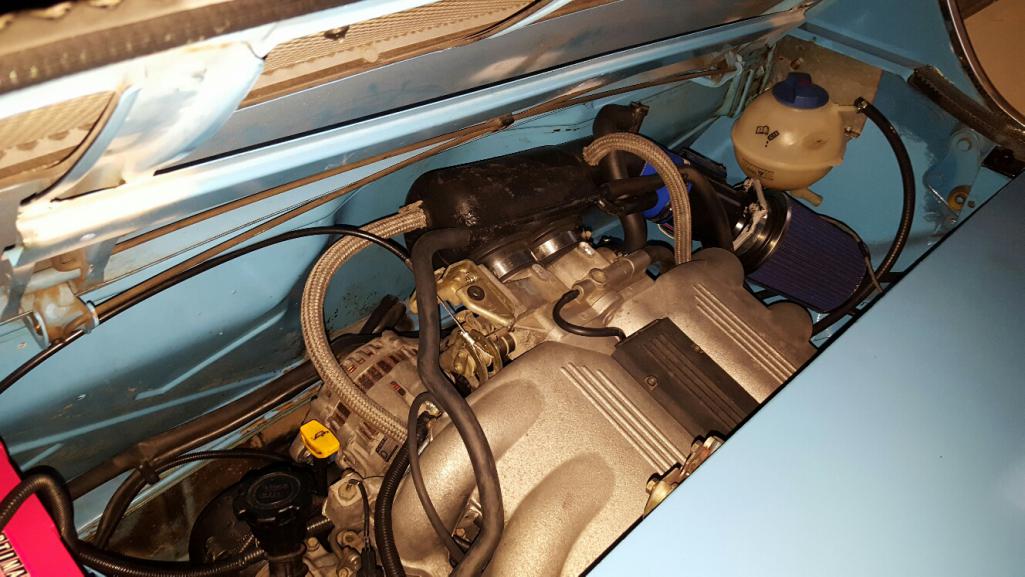
The stock plastic intake piece is actually flipped as well because it would not fit the other way (battery). You can see it is slightly tipped up and higher on the right side because it is hitting the firewall on that side. The intake is very thick so I think I can shave a little off of it and get it to fit. I had to shorten it quite a bit. Luckily I have another one. If my Optima ever dies on me I will use the battery tray as a support for the stock air cleaner and put a small battery on the other side.
Here's an idea of how high the intake is in relation to the engine lid. 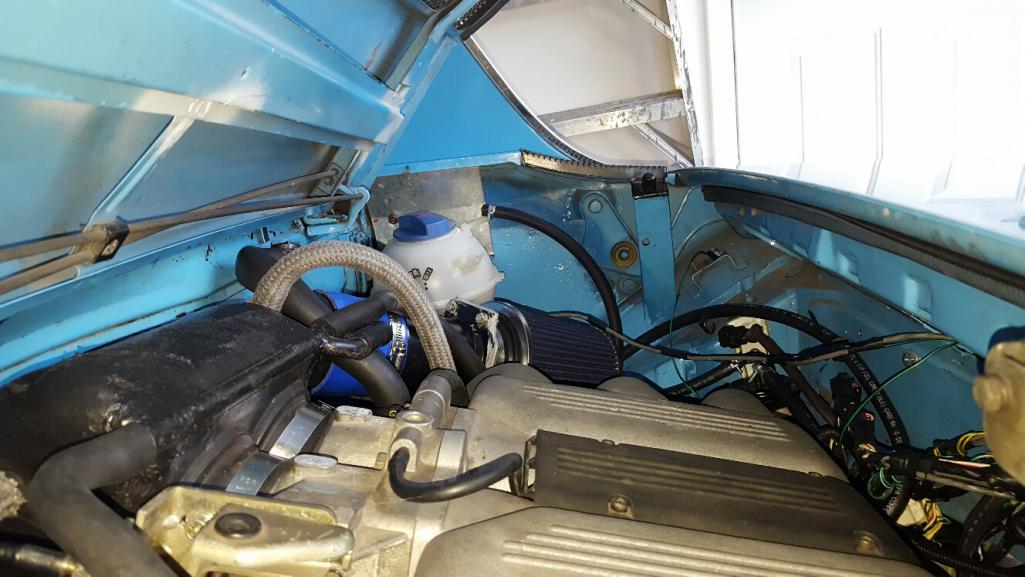
The intake itself clears easily, with about 3.5 to 4 inches of room. Here I used the MAF because its is the same height but easier to show measurement to the lid hinge.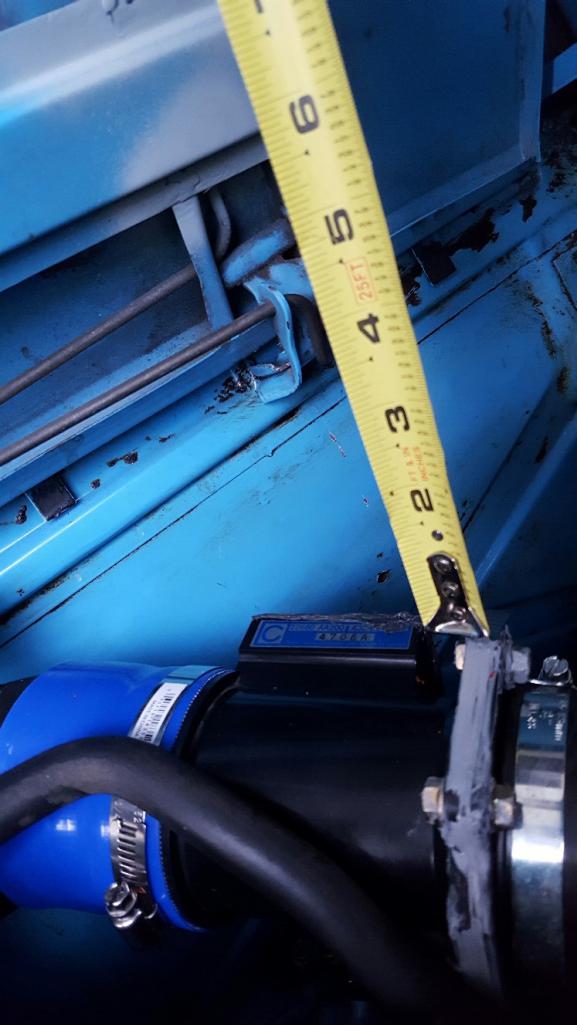
Could put the rain tray back in I guess. The plastic snorkel piece is close to the lid but that is mainly because it is upside down so the IAC valve hose is on top. It would be behind the rain tray anyway.
Posted by: 76-914 Jul 24 2016, 08:43 AM
Wow! That's a clean install, Chris. Where did you hide all of the wiring? Take your time on the hose. I'm waiting on a reverse lite switch that I destroyed yesterday. In the interim, I may connect it back to the old water lines to see if I destroyed the engine or repaired it.
Posted by: 914forme Jul 24 2016, 01:01 PM
Looking great Chris. The intake snorkel is ABS so you could put it and weld it to give you clearance.
Also why are you updating the coolant lines?
Posted by: Chris H. Jul 24 2016, 07:40 PM
Good to know thanks Steve. I'm just moving to 1.25" hoses from 3/4 and 7/8. Kent and I have been talking about it for a while and now that he just did some work to his engine it's a good time. Not having any cooling issues myself but I haven't done any long trips and also always wanted to do a square radiator laying flat like Ross's (rnellums). Then put a false bottom in and have a water tight smaller usable trunk area and keep the heat down up there.
Posted by: 914forme Jul 25 2016, 11:44 AM
Make sure you test the intake abS idea, there should be a number of the plastic type on it somewhere. I would just take a piece of ABS and see if you can weld it over one of the tubes your not using. Worse case you can always redo it in fiberglass though.
Oh okay, interesting, I am planning on going strawmann and doing a nice rad ductwork on my project. With a board, figured waterproof bags under the floor, nice stuff above, we will see, it will be a small trunk for sure. Also thought about moving my fuel tank, lower and infront of the firewall. Building a fake floor above the swaybar where to old fuel tank was and putting it in there. Could open it up if I wanted to do some tubing and tie in, and make a larger from trunk.
All have their merits, all have their downsides. If I run E85 I will need to keep a semi large fuel tank to allow me a decent amount of distance between gas stations. Starting to wonder if the E85 thing should be done. Plan for it for now, if I boost my engine then I have no worries about what I have done. Guessing I need to draw up a few designs and play with the space. I still got time. Still welding in the rear trunk area.
Posted by: A&P Mech Jul 25 2016, 12:17 PM
The engine installation looks great! I really like the flipped intake.
Posted by: a914622 Jul 26 2016, 07:10 PM
Chris
Thanks that's perfect. I have had a brain storm on the flipped intake. Based on that pic I'm going forward with it. I will pm you pics when I'm done with the machining.
Jeff
Posted by: Chris H. Jul 26 2016, 08:08 PM
Ha! Can't wait to see what it is . Guessing it's a custom intake. Let me know if you need more measurements. I'm gonna be working on it the next few days now that it's not so hot.
Here's the precision chassis one...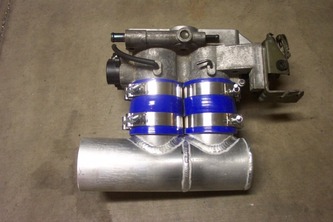
I have extra parts if something goes wrong. Throttle body, TPS, etc.
Posted by: 914forme Jul 27 2016, 04:45 AM
I am shockedPrecision Chassis did not add beads to the ends. At minimum a set of welded beads would have worked. I come out of the turbo TDI world, so beads go on everything after having issues with hoses blowing off. Yes even on the intake low pressure side beads = insurance
Would not be to hard to duplicate their work. Getting a TIG in-between the two inlets would be a pain in the.... That is why they welded the two pieces separate and then put them together. Almost think this piece would be easier in fiberglass / Carbon wrap. Use the AL pipes for the hose connection points. Bond it up with fiberglass, epoxy resin, do the final wrap in carbon.
Welding it, you could build a small chamber to hold the unit, fill it with argon, and run the tungsten out of your cup super deep. That would avoid having to split the tube to do the welds.
Or go old school and use gas welding, everyone forgets about that one.
I guess if you want to play with fire, you could also cast it.
For that matter you could cast it out of plastic.
Or just take ABS pipes and make your own version with ABS cement, that is a Lowes plumbing isle item.
All would work, I really like the ABS idea, as it is the simplest for the home mechanic. You can also worse case do the assembly with with a minor tool investments. A hole saw would be nice with a drill press not need just be nice. Of course a Mill or Tubing notcher would do the trick in no time, so many ways to do this.
Posted by: Chris H. Jul 30 2016, 06:12 PM
Found something cool today on the EG33 engine, especially for all you speed hut gauge guys. I've been wanting to change my air bleed system slightly to shorten the distance and get it to the highest point which happens to be right at the water outlet on top. That's where I had my temp sensor mounted with an aluminum extender piece. I just figured out that on the crossover bar on the engine itself there is both a water temp sensor (which you can NOT remove) and a water temp GAUGE sender. The gauge sender seems to have the same thread setup as the speed hut temp sender! 
I trimmed the end of the speed hut sender just to be sure it fit in there OK (the other one is VERY short) and put that thing in! Now I can use the aluminum piece for my air outlet. I'll install a small bleeder valve on the radiator to bleed it too just to speed up the process. I haven't tested this yet with the car running but don't see why it won't work. Although the water temp sensor is required, the one right above it to the gauge should not be.
More updates to come, I'm installing the hoses this weekend. Mostly swearing and talking to myself now. It's going pretty well though.
Posted by: Chris H. Aug 12 2016, 10:56 PM
Got the hoses in. It runs VERY cool now. They don't look too much different than the old ones so there's not much to see. I'll have a new video update this weekend once it stops raining.
More lessons learned:
1. When you make changes to correct small problems, do them ONE at a time. I installed the Speed Sensor AND re-did my vacuum hoses under the manifold that control the iris valve. When I did that I followed a set of instructions that incorrectly showed the 1-way valve for the vacuum canister that connects to the iris valve installed backwards. It's amazing how something the size of a pen cap could jack things up so much.
All the popping, weak acceleration, etc is gone. I forgot how FAST the thing was initially. Forget those 4 cylinder N/A comments. Can't go backwards from this!
2. Don't forget what you've learned. After years with L-Jet, I can't believe I didn't clamp every hose. What an improvement! (the unclamped ones do not have any vacuum and are not connected to the intake air flow so no worries)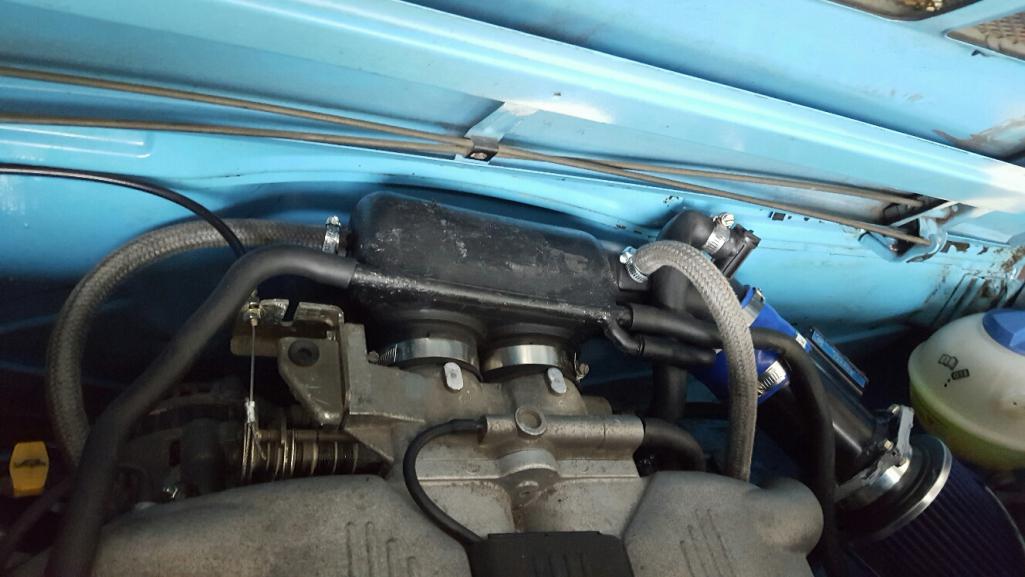
3. Bob's system for cooling lines setup is great. Make sure your return line is at the highest point and keep the hose setup simple. I have one continuous hose going to the radiator, one coming back. No extra clamped elbows, nothing. I had ZERO air pockets. The pressurized expansion tank has a screw on cap with a 5/8 lower line that goes to the water pump and a smaller upper line that comes off of the upper engine coolant tube (high point of system).
Pics: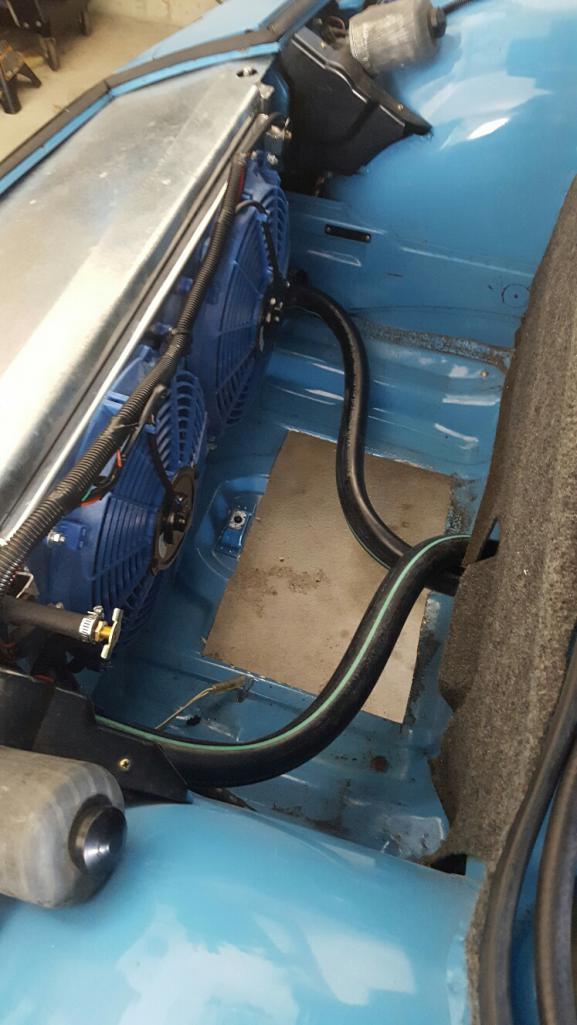
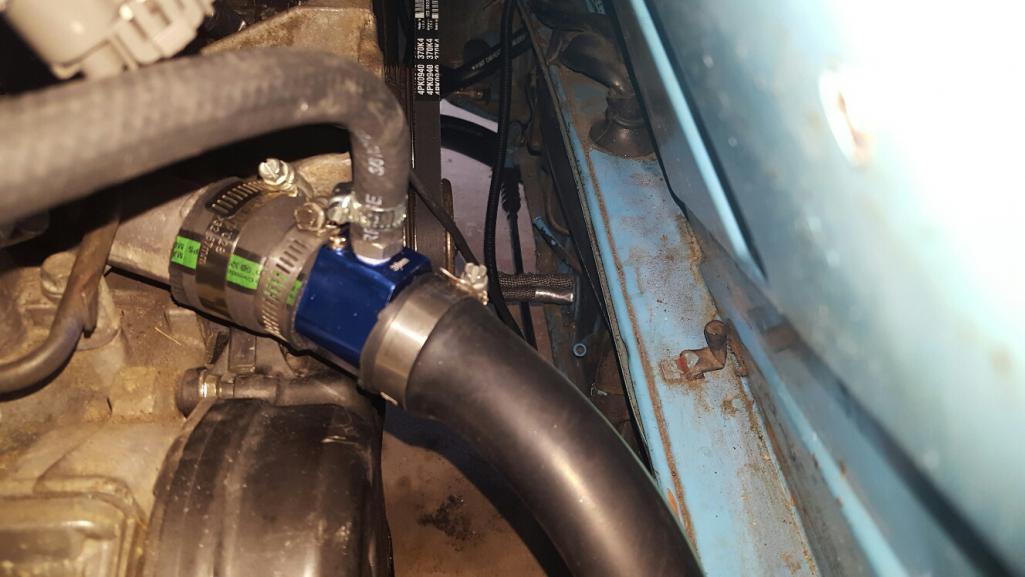
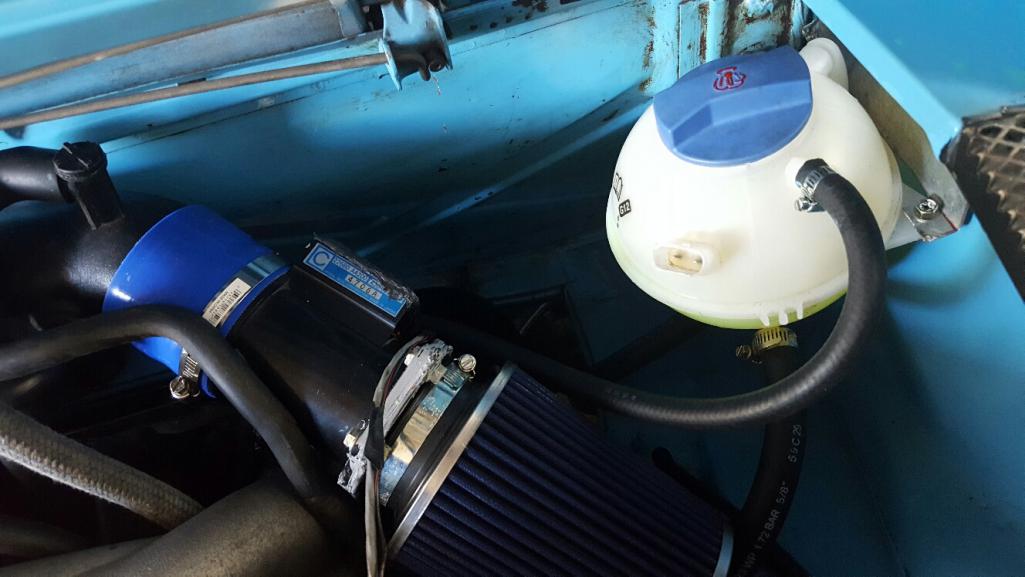
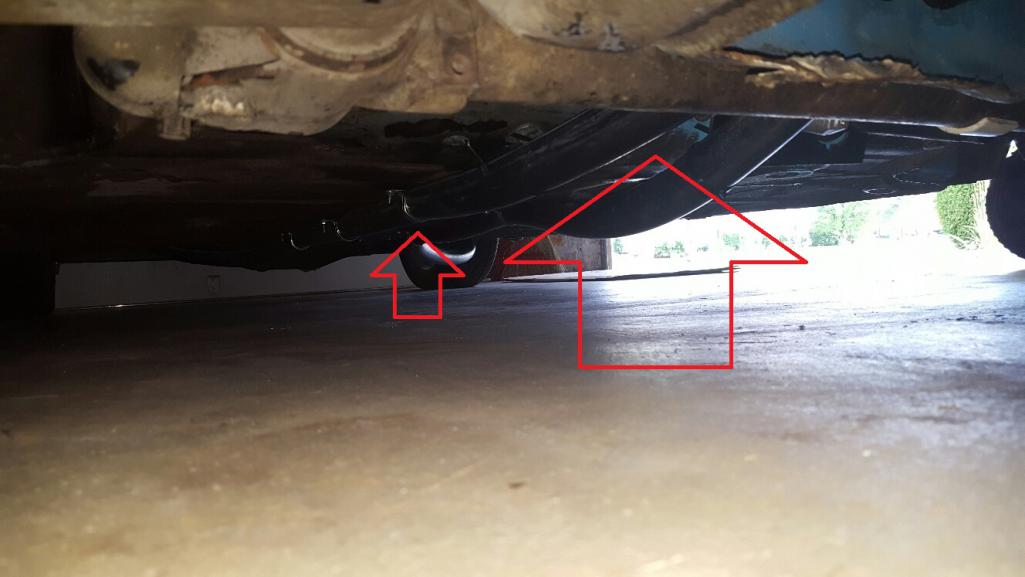
Definitely a lot fatter hoses but they fit fine. Seeing temps only to 180 and when the fans come on they drop immediately. Ignore the arrows in the last pic. Those are for Kent.
4. You may recall that I removed some of the hoses on my engine since I flipped the intake. One thing I realized was that I inadvertently deleted most of the "warm up" loop that the coolant circulates within before the car warms up. I decided to take the thermostat out for that reason. It actually warms up just as quickly as before. Just made a small aluminum circle of the same diameter and inserted it into the rubber seal. Not a drop.
Video tomorrow if the deluge stops!
Posted by: 914forme Aug 13 2016, 06:32 AM
Looking good.
My big question is did the speed hut sensor have any ill effects from the shorting procedure. Since your have listed temperatures, I presume not. Just want verification before I do the same thing.
Now get out and enjoy the car, maybe bring it to Okteenerfest?
Posted by: 76-914 Aug 13 2016, 07:36 AM
Looks great Chris. And yes, the EZ's also have the iris valve. It has the smallest spring that I have ever seen inside. Like a human hair. Do not open to inspect. I repeat, do not open to inspect. The plastic bodies are very fragile as well and I recommend using a razor to open the hose when removing the old hose. They are unobtanium from Subaru. Now go do what Stephen said.
Posted by: Chris H. Aug 13 2016, 07:39 AM
No it works fine and it's much less..."roller-coaster-y" I guess is the word. The needle moves much more slowly like the stock gauge. Needs to be connected TO the engine if possible like the stock sensor to keep it from swinging erratically which is pretty alarming. I think where I had it before may have been prime air pocket space, so I put the return line there. The thing bled itself in 2 starts. 3 gallons!!!
The instructions say you can trim that sensor no problem but since your engine is apart you can eyeball it and see if you need to. I couldn't quite tell. You can take the pipe out of the spare engine I f you can't get an eyeball on it easily. Be CAREFUL with the sensor. Don't use a socket on it. And be careful with the threads for the crossover pipe in the engine, at least on the good engine. They are bitchy.
Posted by: Chris H. Aug 13 2016, 09:04 AM
Ha! Yeah Kent we may be talking about two different things but that sounds crazy! Every model has something you can't find new any more like the EG33 Cam sensor #1. Used ones aren't as expensive as I had hoped (was wanting some $$$ for the guys who gave me extras for Octeenerfest!, maybe I'll ebay a couple) but a NEW ONE is between $250 and $400.
In the pic above with the spare change the black piece is just a 1 way check valve, so when it was supposed to be building pressure it was RELEASING it. That would pretty much ruin your timing, let a bunch of unmetered air in, never get the iris system moving, etc. The iris valve, or iris system in the SVX is a big dome like thing that rotates underneath the intake at different RPMs to redirect air flow inside the manifold (see below). I think the EZ30R might have it too. 
I don't THINK yours has this monstrosity but NO DOUBT you have something called the iris valve in your car that probably has something to do with air metering. They do that to confuse us .
Posted by: 76-914 Aug 13 2016, 09:08 AM
Ha! Yeah Kent we may be talking about two different things but that sounds crazy! Every model has something you can't find new any more like the EG33 Cam sensor #1. Used ones aren't as expensive as I had hoped (was wanting some $$$ for the guys who gave me extras for Octeenerfest!, maybe I'll ebay a couple) but a NEW ONE is between $250 and $400.
In the pic above with the spare change the black piece is just a 1 way check valve, so when it was supposed to be building pressure it was RELEASING it. That would pretty much ruin your timing, let a bunch of unmetered air in, never get the iris system moving, etc. The iris valve, or iris system in the SVX is a big dome like thing that rotates underneath the intake at different RPMs to redirect air flow inside the manifold (see below). I think the EZ30R might have it too.
I don't THINK yours has this monstrosity but NO DOUBT you have something called the iris valve in your car that probably has something to do with air metering. They do that to confuse us
.Your correct. It has that small check valve, also. Same rules; leave it alone.
Posted by: motoTrooper Aug 13 2016, 10:02 AM
Really nice work there AGAIN. I was wondering about the size increase of the hoses. Jeebus buddy, you've got boa constrictors under yer car! I'm all for it, gonna copy you like Xerox. I also may be interested in the ECU chip buy pool if that's still going on. Maybe one of those sensors too...
Posted by: ThePaintedMan Aug 13 2016, 09:18 PM
Chris -
Thank you for trudging the road before I had to. I am utterly impressed with everything you've done. I wish I was at a different stage in life so I could keep up better/contribute more. But I live vicariously through ye.
I was considering going up to 1.5 inch hose for the inlet, but seeing how much of a PITA it is with the 1.25 hose, I guess that's as far as I'll go. Again, my car will see a lot more extended periods with high RPM, but your data has been pretty promising to me thus far.
For others who are reading, the primary issue with the EG33 is that the water pump is too good. At high RPMs, at least in the SVX, the pump is pushing enough water that there isn't enough volume coming back in behind the impeller to keep up. This causes cavitation, thus steam and a hot spot in the motor. Not good. Several SVX sites have threads dealing with this issue which essentially recommend resizing the inlet hose to 1.5+ inches and also resizing the thermostat housing and relocating the thermostat to the outlet side. I think Chris' 1.25 hose seems to work well because of the added length of the hose coming into the inlet (compared to the very short hose from the radiator on the SVX, providing enough volume for those high RPM moments and effectively eliminating those cavitation events experienced by others.
Posted by: Chris H. Aug 13 2016, 10:32 PM
Mototrooper - you can test the sensors with an ohm meter. should read 2600. As long as yours do they are fine. Just put one needle on each prong. All three (2 crank, one cam) work the exact same way. They are just simple magnetic sensors. You can substitute one for the other and they will fit/work. The angle of the tops just make clipping to the wiring harness a little different. You CAN use other subaru sensors of the same year but they only measure 1900 ohms. People do it all the time but I don't like the idea that they are that far off. I'd definitely be in for a chip group buy if he came down enough on the price.
George, the way you did your intake flip REALLY helped me. I might not have chanced it without your posts. Would have waited until "next time" ) When you're 100% ready to go PM me and I can give you a few more thoughts/ideas that you can use or not use. On the hoses, the 1.25 are really good enough in my opinion. I don't see an extra .25 inch doing much for you given the added hose length as you said. The 1.25 are a little bit of a pain to stretch onto the engine inlet/outlet but once you get them on there they will NOT come off accidentally I can tell you that. I soaked the ends in hot water then put a little dish soap on the metal piece. You could remove the thermostat/extra hoses on the engine like I did. I have a sheet of aluminum I can cut you a blank out of if you want. Just a large washer to put the rubber seal in so the water pump doesn't leak. The diameter is 2.2" so there is not a washer that size available that's paper thin.
And don't worry about stepping away for a while. I paused my build several times. My car sat on jack stands with no engine in it for several months this year. Last year I didn't do much at all to it and felt like I just did this constantly when I worked on it . Just take your time.
I detailed the hose swap in Kent's thread so he could do his. It's very easy.
http://www.914world.com/bbs2/index.php?showtopic=201776&st=720
I just did a quick night time run. Stand by it's uploading. I THINK we were out there at 9:14 so here's to Ron (SLITS) and all our other pals who have moved on to greener pastures .
Posted by: Chris H. Aug 13 2016, 11:20 PM
Here it is...not too exciting but the engine sounds good.
https://www.youtube.com/watch?v=6t7X0bSQkgY
Posted by: A&P Mech Aug 14 2016, 07:16 AM
Thanks Andrew!
I finally found that sensor tee. Here's what I used for the oil pressure sensor:
http://www.ebay.com/itm/1-8-BSPT-Oil-Pressure-Sensor-Tee-to-NPT-Adapter-Turbo-Lexus-Toyota-Subaru-Mazda-/131381172959?hash=item1e96ed9adf:g:GqMAAOSwaNBUkNGT&vxp=mtr
This isn't quite the cheapest one but it gives the best explanation. Most Japanese cars have 1/8 BSPT sender threads, while the more common one speed hut comes with is 1/8 NPT. This one allows you to use both. The Subaru sender is pretty big so it sits on top.
I used this for water temp.
http://www.ebay.com/itm/38MM-LCD-Car-Water-Temperature-Temp-Meter-Sensor-Gauge-Radiator-Hose-Joint-Pipe-/172139508200?hash=item28145071e8:g:glcAAOSwHgVW7XXZ&vxp=mtr
Don't think I bought it from Taiwan but who knows... Just added a small section of hose and put it it right by the outlet. You could also tap the pipe itself on the engine, I just wasn't quite confident enough to do that with aluminum.
Chris,
I ordered my SpeedHut gauges last night!
Thanks for the above information.Ray
Posted by: 76-914 Aug 14 2016, 07:37 AM
Here it is...not too exciting but the engine sounds good.
https://www.youtube.com/watch?v=6t7X0bSQkgY
Not too exciting, huh? What are you talking about? I could hear you grinning in that video.
That thrill doesn't go away either! Congrats again, Chris. That "School of Stick to IT-ness" is Hell but once you go thru it you gain an invaluable life experience.
Posted by: 914forme Aug 14 2016, 07:40 AM
For others who are reading, the primary issue with the EG33 is that the water pump is too good. At high RPMs, at least in the SVX, the pump is pushing enough water that there isn't enough volume coming back in behind the impeller to keep up. This causes cavitation, thus steam and a hot spot in the motor. Not good. Several SVX sites have threads dealing with this issue which essentially recommend resizing the inlet hose to 1.5+ inches and also resizing the thermostat housing and relocating the thermostat to the outlet side. I think Chris' 1.25 hose seems to work well because of the added length of the hose coming into the inlet (compared to the very short hose from the radiator on the SVX, providing enough volume for those high RPM moments and effectively eliminating those cavitation events experienced by others.
Thus the reason I switched to an electric water pump. The correct volume not dependent on engine RPMs.
Also no T-stat needed with the setup.
And I think I can bleed the coolant with out running the engine. At least that is my theory, yet to be proven.
Posted by: KELTY360 Aug 14 2016, 07:45 AM
Here it is...not too exciting but the engine sounds good.
https://www.youtube.com/watch?v=6t7X0bSQkgY
Sounds great! Loved the giggles.
Posted by: 914forme Aug 14 2016, 07:46 AM
Just watched the video Chris And yes that is exactly what a 3.3 in full song should sound like. Great job
Posted by: Chris H. Aug 14 2016, 11:14 AM
Thanks everyone. It's been a long road and I would never have gotten this far without the help. Another example of how great the site is. BTW flmont (Frank) bought an EG33 so he's officially in the fold now. He'll be starting a build thread soon.
I realized recently that I like tinkering with the dang thing as much as driving it, but at least it's good to go now and I can start on the cosmetics and smaller stuff. I definitely will go to Megasquirt at some point but not quite yet.
Next steps:
- build a console to enclose the shifter and hide the cables, etc.
- swap stock WRX starter with one that does not poke through the trunk. I THINK 23300AA560 will do it. Will let you know.
- pick up some rear trunk sheet metal from someone's parts car to close in the holes from the original manifold configuration and the stock starter. I know a guy who is addicted to welding. Maybe he'll when his fingers heal in trade for some stuff . Or maybe grind some seam welds for him (yes Kent, I WILL wear eye protection  !)
!)
- Move the ECU into the passenger compartment within the new center console and keep tidying the wiring.
- possibly change the way my radiator vents. maybe not though. Why mess with it? At least do some sort of seal that directs the air only to the exit point. Precision Chassis' EG33 car with the 6 speed Boxster trans has their radiator leaning back and venting out the floor. Its totally sealed to ensure the air flow is maximized.
Posted by: ThePaintedMan Aug 14 2016, 11:40 AM
Thus the reason I switched to an electric water pump. The correct volume not dependent on engine RPMs.
Also no T-stat needed with the setup.
And I think I can bleed the coolant with out running the engine. At least that is my theory, yet to be proven.
Stephen, can you point me to some pictures of how you did it then? I know the stock pump would need to be gutted, but not sure about how to go about that.
Posted by: Chris H. Aug 14 2016, 05:28 PM
Yeah there are two ways to do it. 1. "Helper pump" where you keep the other pump and the electric pump just closes the gap when needed and then 2. just having an electric pump only. I'd assume you just take the impeller off with the 2nd way and just let whatever's left spin freely or grind the vanes down.
PRETTY sure you could bleed the system without running the engine with an electric pump Steve. Definitely 90% of the way if you had a simple hose layout. The only thing you don't get is heat, which does help, especially with the last few stubborn air bubbles.
Ray, let me know if you have any questions on the gauges. Given what you've done on your car you are probably more advance than me on the wiring side. It's very easy. You might be able to do what I just did with the coolant temp sender as well. Not sure what the configuration is on the 2.5. The SVX has a sender for the fuel gauge and a sensor for the ECU. Got lucky and the gauge sender was the same thread size as the Speedhut one.
Posted by: mgp4591 Aug 14 2016, 05:50 PM
Yeah there are two ways to do it. 1. "Helper pump" where you keep the other pump and the electric pump just closes the gap when needed and then 2. just having an electric pump only. I'd assume you just take the impeller off with the 2nd way and just let whatever's left spin freely or grind the vanes down.
PRETTY sure you could bleed the system without running the engine with an electric pump Steve. Definitely 90% of the way if you had a simple hose layout. The only thing you don't get is heat, which does help, especially with the last few stubborn air bubbles.
Chris, would you think that leaving the stock water pump in place would help to keep the water in the engine long enough to complete the heat soak cycle? Just using the helper pump up front to push fluid back from the radiator so the stock pump isn't overworked? My setup isn't running yet so I wouldn't know...
Your build is kickin' it and I'd love to see it sometime, but you know this whole distance thing is a bitch...
Posted by: Chris H. Aug 14 2016, 06:02 PM
Yeah any time you're in the area let me know. Steve would be better to answer the electric pump question. I just shared all the knowledge I have . I'm just running the stock one. It works fine for the street. I think Mike Bellis uses an electric pump maybe? Andrew might? Or is planning to? Someone will chime in.
Posted by: mgp4591 Aug 14 2016, 06:28 PM
Yeah any time you're in the area let me know. Steve would be better to answer the electric pump question. I just shared all the knowledge I have
. I'm just running the stock one. It works fine for the street. I think Mike Bellis uses an electric pump maybe? Andrew might? Or is planning to? Someone will chime in.Mike does use an electric pump with the return from the radiator being helped but I think he gutted his stock pump. I hadn't read the post before about your pump being TOO efficient causing cavitation - that's one area where the electric would help out by making sure there's enough water for the pump to draw on.
Also, you mentioned Precision Machine about their project with an EG33 hooked up to an Audi trans? Is that the place in Pennsylvania? I didn't see that listed as one of their projects but that might be a great alternative...
Posted by: Chris H. Aug 14 2016, 07:40 PM
No they are in Arizona. Precision Chassis Works. Most of their info is on Facebook
https://www.facebook.com/Precision-Chassis-Works-131482893551716/photos?ref=page_internal
Boxster 5 speed trans apparently (Audi):
The headers are a work of art.
Here's a short vid of the car:
https://www.youtube.com/watch?v=Fe_vWc87e1c
Bob has been there. The place is like a candy store for people like us.
Posted by: mgp4591 Aug 14 2016, 07:42 PM
That looks pretty industrial, damn sexy... I may have to go that way if it's practical and not too pricey! Thanks for the link!
Posted by: Chris H. Aug 14 2016, 08:24 PM
Go for the 6 speed if you go Porsche/Audi. Otherwise you might as well do a Subaru trans. Don't need an adapter that way. I thought you were going automatic? The screaming redline shifts are getting to you aren't they?
Posted by: motoTrooper Aug 14 2016, 10:26 PM
From what I glean, the guy from Precision Chassis Works cut his teeth doing a 911 eg33 swap in fine fettle.
https://www.youtube.com/watch?v=g4cVMmJKyLg
here's the build thread, really pushed me over the edge on doing an eg33 swap along with Chris H.
http://forums.pelicanparts.com/porsche-911-technical-forum/357151-putting-3-3-my-sc.html
Posted by: Andyrew Aug 15 2016, 07:53 AM
No they are in Arizona. Precision Chassis Works. Most of their info is on Facebook
https://www.facebook.com/Precision-Chassis-Works-131482893551716/photos?ref=page_internal
Boxster 5 speed trans apparently (Audi):
The headers are a work of art.
Here's a short vid of the car:
http://Fe_vWc87e1c
Bob has been there. The place is like a candy store for people like us.
Yup, looks like the 5 speed trans with 100mm flanges. Just about the perfect combo for that engine IMHO.
Posted by: 914forme Aug 15 2016, 09:37 AM
Electric water pump I am using and Andrew is using is the only pump we have. It actually reduces the flow rate to optimize the engine ability to transfer the heat to the coolant. Yes sometimes things can move to fast or be to big for the combination of systems you have working out.
SVXs have a wonderful ability to stagnate the pump unless you run a huge hoes into the water pump. We are talking 2" large. This comes into play with high RPM.
Now for the catch, I doubt most people will see the issue in normal street driving. In auto-x where I might hold a high RPMs for an extended period of time, it could be very bad.
Would I make the same decision again, yes I would, I think it is the perfect solution for my car, and combo. YMMV
Posted by: rnellums Aug 15 2016, 10:52 AM
Electric water pump I am using and Andrew is using is the only pump we have. It actually reduces the flow rate to optimize the engine ability to transfer the heat to the coolant. Yes sometimes things can move to fast or be to big for the combination of systems you have working out.
I see this argument a lot on the forums amd I can't for the life of me make sense of it from a heat transfer perspective, maybe someone can help me understand what im missing.
The radiator is in essence a heat sink with forced convective flow through the fins. For a given radiator set up the heat transferred from the radiator to the air depends on only two things, air velocity (and the associated Reynolds and prandtl numbers), and temperature differential between the radiator and the cooling air.
If you are pumping faster, the temperature drop across the radiator will be less, but the volume of coolant cooled will be greater, and since the radiator temperature will be increased on average, the heat transferred out of the system should be greater. This should result in more efficient cooling, and should continue to improve with increased flow with diminishing returns infinitely.
Can anyone poke any holes in this?
Posted by: timothy_nd28 Aug 15 2016, 10:58 AM
Electric water pump I am using and Andrew is using is the only pump we have. It actually reduces the flow rate to optimize the engine ability to transfer the heat to the coolant. Yes sometimes things can move to fast or be to big for the combination of systems you have working out.
I see this argument a lot on the forums amd I can't for the life of me make sense of it from a heat transfer perspective, maybe someone can help me understand what im missing.
The radiator is in essence a heat sink with forced convective flow through the fins. For a given radiator set up the heat transferred from the radiator to the air depends on only two things, air velocity (and the associated Reynolds and prandtl numbers), and temperature differential between the radiator and the cooling air.
If you are pumping faster, the temperature drop across the radiator will be less, but the volume of coolant cooled will be greater, and since the radiator temperature will be increased on average, the heat transferred out of the system should be greater. This should result in more efficient cooling, and should continue to improve with increased flow with diminishing returns infinitely.
Can anyone poke any holes in this?
Spoken like a true engineer, even though you are the Purdue type. Go ND
Posted by: A&P Mech Aug 15 2016, 12:36 PM
Electric water pump I am using and Andrew is using is the only pump we have. It actually reduces the flow rate to optimize the engine ability to transfer the heat to the coolant. Yes sometimes things can move to fast or be to big for the combination of systems you have working out.
I see this argument a lot on the forums amd I can't for the life of me make sense of it from a heat transfer perspective, maybe someone can help me understand what im missing.
The radiator is in essence a heat sink with forced convective flow through the fins. For a given radiator set up the heat transferred from the radiator to the air depends on only two things, air velocity (and the associated Reynolds and prandtl numbers), and temperature differential between the radiator and the cooling air.
If you are pumping faster, the temperature drop across the radiator will be less, but the volume of coolant cooled will be greater, and since the radiator temperature will be increased on average, the heat transferred out of the system should be greater. This should result in more efficient cooling, and should continue to improve with increased flow with diminishing returns infinitely.
Can anyone poke any holes in this?
All I know is if you poke holes in it the coolant runs out on to the floor!

Posted by: Andyrew Aug 15 2016, 01:25 PM
The electric water pumps (EWP) can either be run by themselves or as a helper. When you do have an EWP you want to remove the thermostat as when the pump is not spinning it essentially wont let any water through if its running as a helper.
If you run a constant return coolant system (Like you should...) You can either bleed the system slowly by turning the key on and letting it cycle at low speed (I dont recommend), you can apply 12v to the pump and get most of the air out of the system, or you can start the car and just fill it up as it warms up (Recommend).
My recommendation is that for all 6cyls and below regardless of turbo should run no mechanical water pump unless your build requires you to be below 160deg temp all the time. However most modern engines are efficient up to 225deg this is not a concern.
For V8's especially SBC's I think they might need a high GPH water pump or to run a mechanical and electric pump.
I have been driving my 4cyl around in 90deg weather for about a month now and most of the time its cycling the water pump between slow speed pulses and full and I have it set to not go over 160deg for testing purposes which means that its not even working hard at all to maintain that. I rarely if ever see the fans turn on even putting around. The only time they come on is when the engine shuts off, the water pump and fans turn on until the system has cooled down to 140deg or 2-3mins later. This has an added benefit for me as it cycles the water for the turbo as well cooling it down. Again this is just for testing purposes and to make sure everything is circulating as I flog the turbo.
Posted by: Andyrew Aug 15 2016, 01:26 PM
Back to the OP's original video which I watched saturday and forgot the comment. The car sounds great!! Loving that engine combo. I think that should be the new SBC swap as it just make so so much sense in this car.
Posted by: jd74914 Aug 15 2016, 01:40 PM
Electric water pump I am using and Andrew is using is the only pump we have. It actually reduces the flow rate to optimize the engine ability to transfer the heat to the coolant. Yes sometimes things can move to fast or be to big for the combination of systems you have working out.
I see this argument a lot on the forums amd I can't for the life of me make sense of it from a heat transfer perspective, maybe someone can help me understand what im missing.
The radiator is in essence a heat sink with forced convective flow through the fins. For a given radiator set up the heat transferred from the radiator to the air depends on only two things, air velocity (and the associated Reynolds and prandtl numbers), and temperature differential between the radiator and the cooling air.
If you are pumping faster, the temperature drop across the radiator will be less, but the volume of coolant cooled will be greater, and since the radiator temperature will be increased on average, the heat transferred out of the system should be greater. This should result in more efficient cooling, and should continue to improve with increased flow with diminishing returns infinitely.
Can anyone poke any holes in this?
Yeah, that forum argument has always bugged me too; it doesn't make any sense at all. Many people seem to think that increased residence time has some ability to increase energy transferred. That's true in stagnant systems since conduction comes into play, but really has no bearing in convection dominated systems.
"Too fast" flow is not a problem for heat exchange since higher than average coolant temperature across the radiator and higher flow rates always correlate to better heat transfer through increased exergy (available energy for transfer) and higher convection coefficients. The air side is really the limiting portion so there are diminishing returns to increasing water flow rate. Ideally there is some optimal flow rate which trades heat transfer effectiveness for pumping losses to reduce parasitic engine loads.
My recommendation is that for all 6cyls and below regardless of turbo should run no mechanical water pump unless your build requires you to be below 160deg temp all the time. However most modern engines are efficient up to 225deg this is not a concern.
Coolant temperatures of 160F are really, really, low. Published studies by Caterpillar have shown engine wear at those temperatures to be very high. IMHO it's much better to be operating at the high end of the coolant temperature limit with a higher pressure radiator cap for safety.
Posted by: Andyrew Aug 15 2016, 01:49 PM
My recommendation is that for all 6cyls and below regardless of turbo should run no mechanical water pump unless your build requires you to be below 160deg temp all the time. However most modern engines are efficient up to 225deg this is not a concern.
Coolant temperatures of 160F are really, really, low. Published studies by Caterpillar have shown engine wear at those temperatures to be very high. IMHO it's much better to be operating at the high end of the coolant temperature limit with a higher pressure radiator cap for safety.
This i know. The old issue with the small block chevy's was that if it started to creep up in temp and get over 200 then it just was never going to get back down. Thats why they would put 160deg thermostats on it and run the fans at 180deg.
Posted by: 76-914 Aug 15 2016, 06:28 PM
Electric water pump I am using and Andrew is using is the only pump we have. It actually reduces the flow rate to optimize the engine ability to transfer the heat to the coolant. Yes sometimes things can move to fast or be to big for the combination of systems you have working out.
I see this argument a lot on the forums amd I can't for the life of me make sense of it from a heat transfer perspective, maybe someone can help me understand what im missing.
The radiator is in essence a heat sink with forced convective flow through the fins. For a given radiator set up the heat transferred from the radiator to the air depends on only two things, air velocity (and the associated Reynolds and prandtl numbers), and temperature differential between the radiator and the cooling air.
If you are pumping faster, the temperature drop across the radiator will be less, but the volume of coolant cooled will be greater, and since the radiator temperature will be increased on average, the heat transferred out of the system should be greater. This should result in more efficient cooling, and should continue to improve with increased flow with diminishing returns infinitely.
Can anyone poke any holes in this?
I'm with you. Was wondering the same thing. Could higher volume place some air in the system? Or turbidity that impedes flow?
Posted by: mgp4591 Aug 15 2016, 07:23 PM
No they are in Arizona. Precision Chassis Works. Most of their info is on Facebook
https://www.facebook.com/Precision-Chassis-Works-131482893551716/photos?ref=page_internal
Boxster 5 speed trans apparently (Audi):
The headers are a work of art.
Here's a short vid of the car:
http://Fe_vWc87e1c
Bob has been there. The place is like a candy store for people like us.
The video link isn't working for me though... The automatic plan is still up in the air but I'll pull some measurements off of cars at RRC here in a few weeks to make my final decision. I'd go with the Audi 6speed but I'm sure they're not giving away the adapters, flywheel, and clutch setups either! If I can get some reassurance that I'm not gonna blow up a Subaru 5 speed I'll probably go that way eventually but if the automatic fits, I'll use it for awhile just to prove it can be done!
Posted by: Chris H. Aug 15 2016, 10:06 PM
Fixed the vid! The 5MT Subaru trans is a pretty nice setup for the $. Shifts very smooth. The clutch is light. I don't see how you could blow it up unless you miss gears a lot. I haven't even ground a gear yet!
Andrew thanks for the kudos. Yours is coming along great too. You built that engine right. It's running very cool. I like all the data you get from it.
Hey on the cavitation thing there are lots of threads on the Subaru-SVX.net forum. Apparently the coolant boils because it can't get through the pump fast enough in extreme conditions. Very high revs for prolonged periods. The flow just gets impeded despite the fact that the water pump is working well (too well). It's like traffic waiting around a curve. They even make a high flow water pump inlet with a larger midsection.
Posted by: 914forme Aug 16 2016, 05:35 PM
Electric water pump I am using and Andrew is using is the only pump we have. It actually reduces the flow rate to optimize the engine ability to transfer the heat to the coolant. Yes sometimes things can move to fast or be to big for the combination of systems you have working out.
I see this argument a lot on the forums amd I can't for the life of me make sense of it from a heat transfer perspective, maybe someone can help me understand what im missing.
The radiator is in essence a heat sink with forced convective flow through the fins. For a given radiator set up the heat transferred from the radiator to the air depends on only two things, air velocity (and the associated Reynolds and prandtl numbers), and temperature differential between the radiator and the cooling air.
If you are pumping faster, the temperature drop across the radiator will be less, but the volume of coolant cooled will be greater, and since the radiator temperature will be increased on average, the heat transferred out of the system should be greater. This should result in more efficient cooling, and should continue to improve with increased flow with diminishing returns infinitely.
Can anyone poke any holes in this?
I'm with you. Was wondering the same thing. Could higher volume place some air in the system? Or turbidity that impedes flow?
You are spot on in your engineering text book knowledge.
Issue is with the EG33 (maybe others)is that pump actually stops pumping as it creates suction cavitation. Once it cavities, it no longer pumps the coolant thus spiking temperatures in the engine. So I still think my design and understanding of the system is spot on.
Solutions increase inlet hose size 2" was the preferred size in testing. And remove the thermostat. My systems solves the cavitation issue by not being tied to engine RPM. And thus eliminates the need for a larger volume for the inlet hose. And with this system I am able to remove the thermostat as the pump controller will optimize the coolant movement based on temperature.
Other solutions, increase the pressure the system produces. Higher pressure cap. Change coolant to a none water based coolant might also work, but never tested that one.
It must be a know issue with Subaru pumps as killer B makes a modified water pump / thermostat housing to fix the issue. Or maybe to sell more product
Posted by: ThePaintedMan Aug 16 2016, 06:43 PM
My systems solves the cavitation issue by not being tied to engine RPM. And thus eliminates the need for a larger volume for the inlet hose. And with this system I am able to remove the thermostat as the pump controller will optimize the coolant movement based on temperature.
So Stephen, the question is, do you also still run the stock pump with a piggybacked electric pump? Or did you figure out a way to gut the stock pump? Since it is driven off the timing belt, that pulley must remain in the loop.
Posted by: 914forme Aug 17 2016, 02:35 PM
My systems solves the cavitation issue by not being tied to engine RPM. And thus eliminates the need for a larger volume for the inlet hose. And with this system I am able to remove the thermostat as the pump controller will optimize the coolant movement based on temperature.
So Stephen, the question is, do you also still run the stock pump with a piggybacked electric pump? Or did you figure out a way to gut the stock pump? Since it is driven off the timing belt, that pulley must remain in the loop.
Gut the pump, you just cut the impellers off the pump. I keep the pump face so the bearing still has a thrust to it, generalization of the process. We will see how well t works over the long haul.
Posted by: mgp4591 Aug 17 2016, 08:29 PM
My systems solves the cavitation issue by not being tied to engine RPM. And thus eliminates the need for a larger volume for the inlet hose. And with this system I am able to remove the thermostat as the pump controller will optimize the coolant movement based on temperature.
So Stephen, the question is, do you also still run the stock pump with a piggybacked electric pump? Or did you figure out a way to gut the stock pump? Since it is driven off the timing belt, that pulley must remain in the loop.
Gut the pump, you just cut the impellers off the pump. I keep the pump face so the bearing still has a thrust to it, generalization of the process. We will see how well t works over the long haul.
Okay...since the stock pump works well and just needs more fluid at higher engine speeds, doesn't the electric pump only come on when needed? So in case the pusher pump fails (I know electric pumps NEVER fail...) you can still have the stock pump to get you through...?
And sorry for the hijack - this is an interesting subject and inquiring minds want to know!
Your build is always on my mind and I've already copied a bunch of your ideas and methods - the car sounds right on the money!
Posted by: Chris914n6 Aug 17 2016, 10:19 PM
Electric water pump I am using and Andrew is using is the only pump we have. It actually reduces the flow rate to optimize the engine ability to transfer the heat to the coolant. Yes sometimes things can move to fast or be to big for the combination of systems you have working out.
I see this argument a lot on the forums amd I can't for the life of me make sense of it from a heat transfer perspective, maybe someone can help me understand what im missing.
The radiator is in essence a heat sink with forced convective flow through the fins. For a given radiator set up the heat transferred from the radiator to the air depends on only two things, air velocity (and the associated Reynolds and prandtl numbers), and temperature differential between the radiator and the cooling air.
If you are pumping faster, the temperature drop across the radiator will be less, but the volume of coolant cooled will be greater, and since the radiator temperature will be increased on average, the heat transferred out of the system should be greater. This should result in more efficient cooling, and should continue to improve with increased flow with diminishing returns infinitely.
Can anyone poke any holes in this?
Easily
If the engine is adding 50F and the radiator is only cooling 30F because of the high flow then you get heat creep.
The stock water pump should be designed to deliver the best cooling and consistent temp for the engine concerning flow volume.
I don't know the subie well enough to discuss captivation theories and I didn't read back too many pages so that's all I got to offer today
Posted by: 914forme Aug 18 2016, 06:14 PM
Okay...since the stock pump works well and just needs more fluid at higher engine speeds, doesn't the electric pump only come on when needed? So in case the pusher pump fails (I know electric pumps NEVER fail...) you can still have the stock pump to get you through...?
And sorry for the hijack - this is an interesting subject and inquiring minds want to know!
Your build is always on my mind and I've already copied a bunch of your ideas and methods - the car sounds right on the money!
It's not an airplane, if I started thinking like that, I would run it like a datacenter.
Twin EG33s
Posted by: motoTrooper Oct 20 2016, 09:11 AM
Hey Chris, I hope all is well in your corner of this mad world. So any updates? You mentioned talk of console fabrication... You've earned a rest from the posts with the last video but that was months ago! The autumn leaves are turning and make for lovely acceleration videos at golden hour.
Posted by: Chris H. Oct 23 2016, 06:28 PM
Well I do have a few small updates. Haven't started on the interior yet. Been very busy lately but wanted to get the engine sorted before it was time to put it away.
Just wanted to go through the idle-affecting stuff one more time. First, I was able to get my intake to sit normally by slightly trimming the rubber snorkel part. I didn't document it but will post the pics from where I borrowed the idea. I DID NOT trim as much off as it shows in these pics. I cut about a mm beyond the stock thicker clamps. This person was converting a Vanagon, and apparently there is even less space there than a flipped-intake 914.
From The Samba site thread titled 3.3 Subaru SVX/Vanagon Syncro Conversion: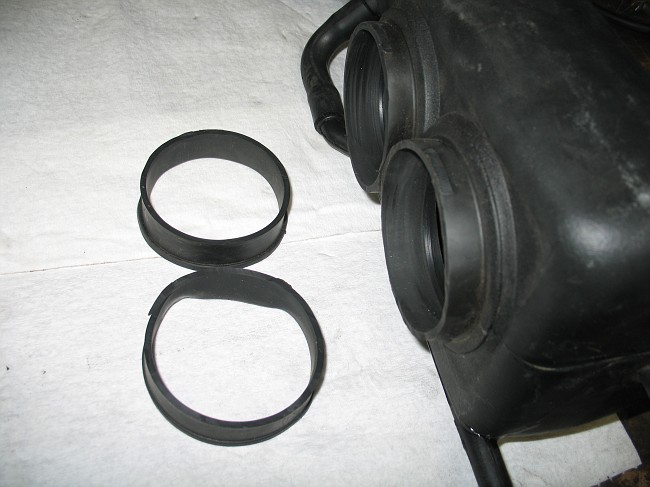
Reminder my trim was not that drastic. See below for my pics.
Then I also shaved a little off the lip of the throttle body so that the snorkel would slide further on to it. Again, not my photo.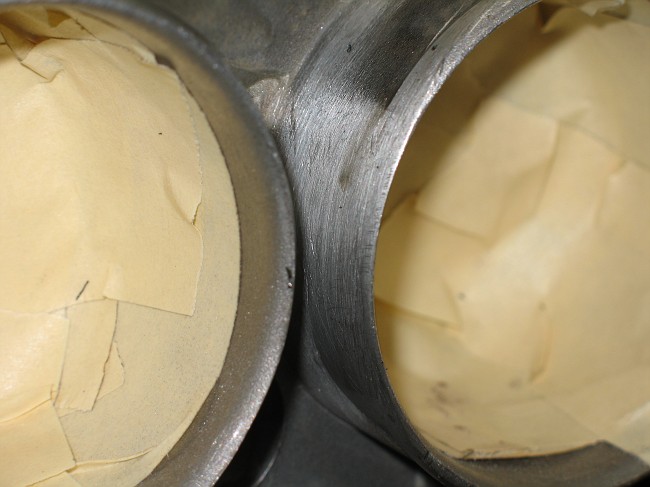
Here's how it looks back on the car (finally my pics):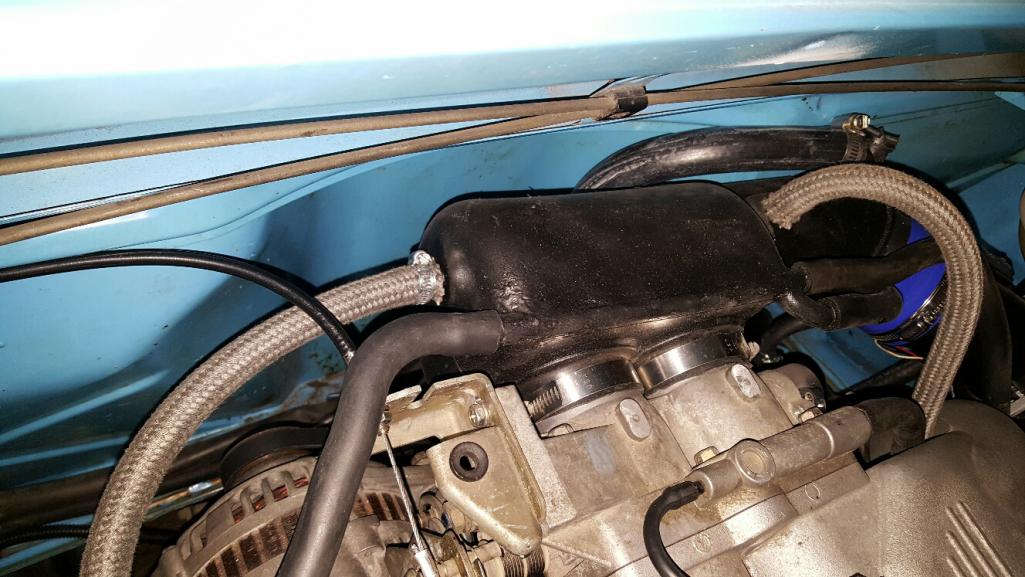
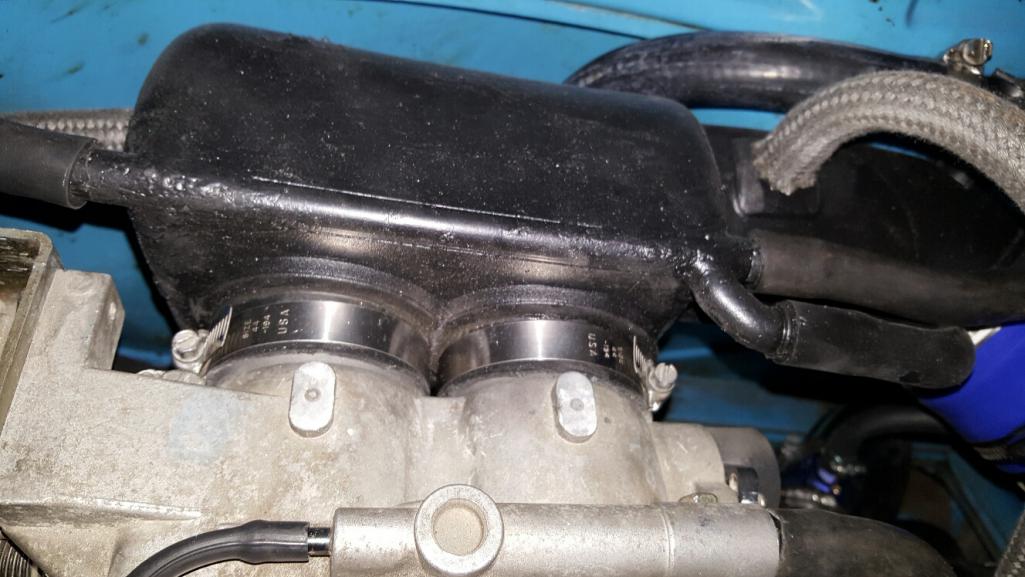
Fits very well and the clamps are holding it tightly. No doubt there was some air getting in before with it twisted up on the passenger side like it was. I also found that the throttle position sensor was probably bad. I'll post a video of how to check that later tonight. Very easy.
Posted by: motoTrooper Dec 12 2016, 10:00 PM
Hey Chris, had a quick question - I just got a 2004 WRX trans for the build and I've been reading about the conversion to front wheel drive for mid-engine use. Is there any reason why after modding the center diff you couldn't just re-use the rear cover and block off the driveshaft hole? Or does a flat plate serve a purpose other than being lighter and 2.5" shorter? Thanks and happy holiday wishes!
-Christopher
Posted by: Chris H. Dec 12 2016, 11:51 PM
Christopher,
Well, I'm not really an expert, but I suppose it's possible as long as all of the gears and stuff were removed from that end and you completely plugged the hole. It would require a lot more fluid.
Here's a pic of the removed parts:
In the case of the 914 that extra few inches is pretty important. The trans would be very close if not touching the rear apron with that piece on. It's so easy to make a cover from an aluminum piece I'd recommend you do that. Always nice to save some room and weight if you can.
Posted by: mgp4591 Dec 13 2016, 03:06 AM
Plus the center diff is worth some cash on Ebay, so why not cash in and save some weight in the process?
Posted by: rnellums Dec 13 2016, 07:08 AM
I guess the question is why not use a block off plate? I just spec'd them out and am having a few cut if you want one.
Attached thumbnail(s)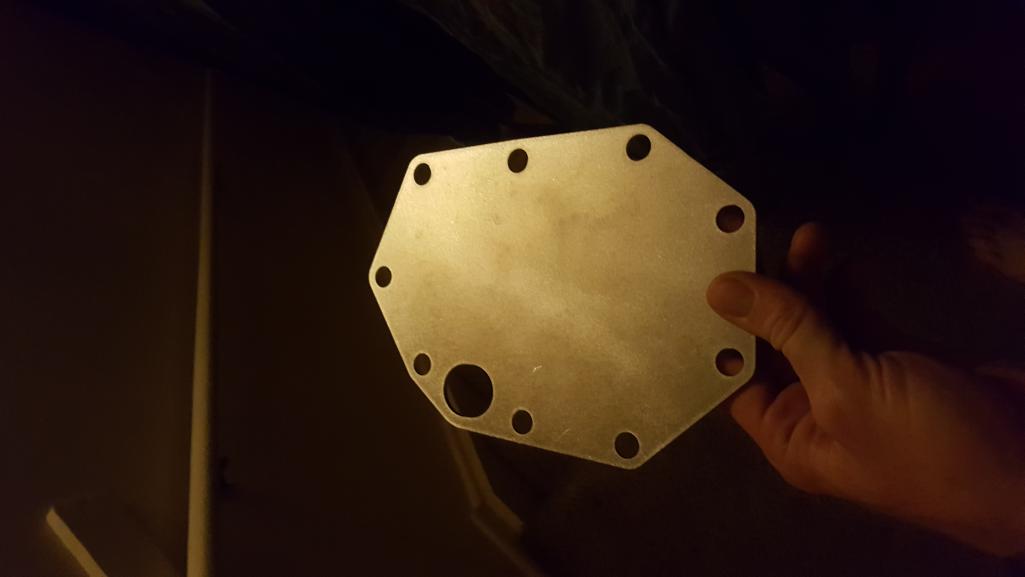
Posted by: Chris H. Dec 13 2016, 10:01 AM
^^^ Take Ross up this! I think you'll have more options for your cable mechanism with no tail on the trans too. Can't really visualize how it will fit in there.
Posted by: rnellums Dec 13 2016, 10:02 AM
^^^ Take Ross up this! I think you'll have more options for your cable mechanism with no tail on the trans too. Can't really visualize how it will fit in there.
I'm coming up with a solution on that front too!
Posted by: motoTrooper Dec 13 2016, 10:54 AM
Ok guys so (don't laugh too hard at me) but my question if more about aesthetics.
Anyway, the styling on the Lancia in the rear gives it a very exposed undercarriage and the bottom half of the rearend of the Subaru transaxle will be fairly visible. Ala Ferrari 288GTO:
https://goo.gl/images/QCPvKl
The flat plate is all flatty and plain but for the bolts whereas the stock rear cover has cool contours and structure. But if the drive shaft opening is cut flush with the rest of the structure and plugged it's ~2.5" inches longer than the plate. When I get the assembly located in the engine bay I'll decide then which way I'm going but I was initially curious about possibilities. If I'm showing the world what's under my skirt I'd like it to be interesting at least!
Also, I'm way too close to the beginning of this stuff but thanks for the offer Ross! I miss Colorado still, winters and all.
Posted by: motoTrooper Dec 13 2016, 11:27 AM
Here's a shot of the Scorpion for reference:
http://s1111.photobucket.com/user/motoTrooper/media/Scorpion/DSC03162_zpsqvn5wzjh.jpg.html
See the jacking point structure just left of center? The bottom of it is flush with the floor of the car and will be removed and replaced with Subie transaxle butt (centered between the suspension points though)
Posted by: 914forme Dec 13 2016, 12:21 PM
Subaru Gears
Bremar
Of course seeing these should give you the idea you can do hat ever you want. Machine a pattern in, weld some stuff on, or laser engrave a picture if you want. Sky is the limit here. Biggest issue is really space.
Of course the 288GTO is just 
Posted by: BIGKAT_83 Dec 15 2016, 08:46 AM
Chris are these the ECU connecters at the engine side for a EG33?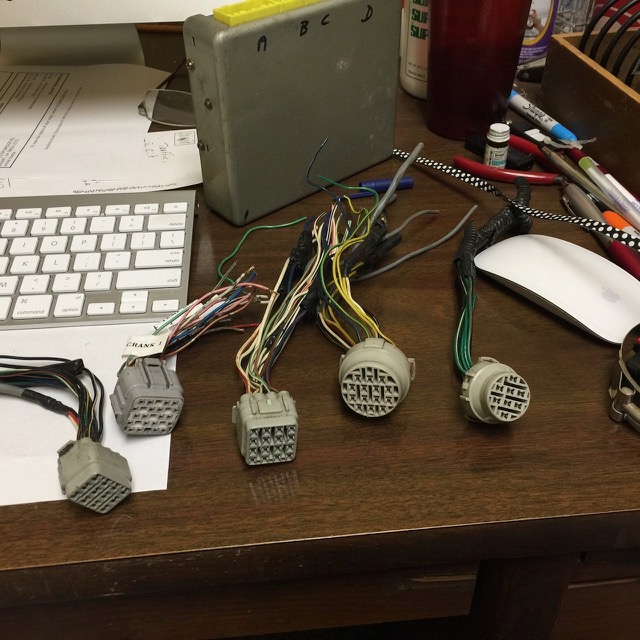
Merry Christmas
Posted by: Chris H. Dec 15 2016, 10:39 AM
Yes they are Bob! I see you found that ECU too . I'll send you something for all that. You can't give everything away! Really appreciate you digging it all up.
BTW all Bob might be selling his flared orange car. He's putting a 6 speed Boxster trans in it first but it'll be ready next year. It has a 383 in it that runs perfectly. I'm kind of a wimp in the passenger seat but that one is a real neck snapper even with the 901 in it. The interior is tan with a neat high bolstered drivers seat. He is re-doing the flares with steel ones and then will paint it. If you get to him beforehand you can choose your own color. If I had the room I would have (tried to at least) bought it a while ago. Just throwing it out there early for anyone looking for a V8 car.
Posted by: mgp4591 Dec 16 2016, 04:53 AM
Yes they are Bob! I see you found that ECU too
. I'll send you something for all that. You can't give everything away! Really appreciate you digging it all up. BTW all Bob might be selling his flared orange car. He's putting a 6 speed Boxster trans in it first but it'll be ready next year. It has a 383 in it that runs perfectly. I'm kind of a wimp in the passenger seat but that one is a real neck snapper even with the 901 in it. The interior is tan with a neat high bolstered drivers seat. He is re-doing the flares with steel ones and then will paint it. If you get to him beforehand you can choose your own color. If I had the room I would have (tried to at least) bought it a while ago. Just throwing it out there early for anyone looking for a V8 car.
I'll have to see that one next time I'm out...
Posted by: BIGKAT_83 Dec 16 2016, 04:57 AM
Yes they are Bob! I see you found that ECU too
. I'll send you something for all that. You can't give everything away! Really appreciate you digging it all up. BTW all Bob might be selling his flared orange car. He's putting a 6 speed Boxster trans in it first but it'll be ready next year. It has a 383 in it that runs perfectly. I'm kind of a wimp in the passenger seat but that one is a real neck snapper even with the 901 in it. The interior is tan with a neat high bolstered drivers seat. He is re-doing the flares with steel ones and then will paint it. If you get to him beforehand you can choose your own color. If I had the room I would have (tried to at least) bought it a while ago. Just throwing it out there early for anyone looking for a V8 car.
I'll have to see that one next time I'm out...
Maybe I'll be at home then. Retired last month
Posted by: ThePaintedMan Dec 20 2016, 08:01 AM
Hey Chris, or anyone with the Celica radiator,
I searched for pictures, but can't tell. Does the Celica radiator fit between the headlight buckets well enough that it could be slanted forward?
Sorry for the bump, but that's all for now.
-George
Posted by: Andyrew Dec 20 2016, 09:11 AM
Yes. Mine is slanted forward.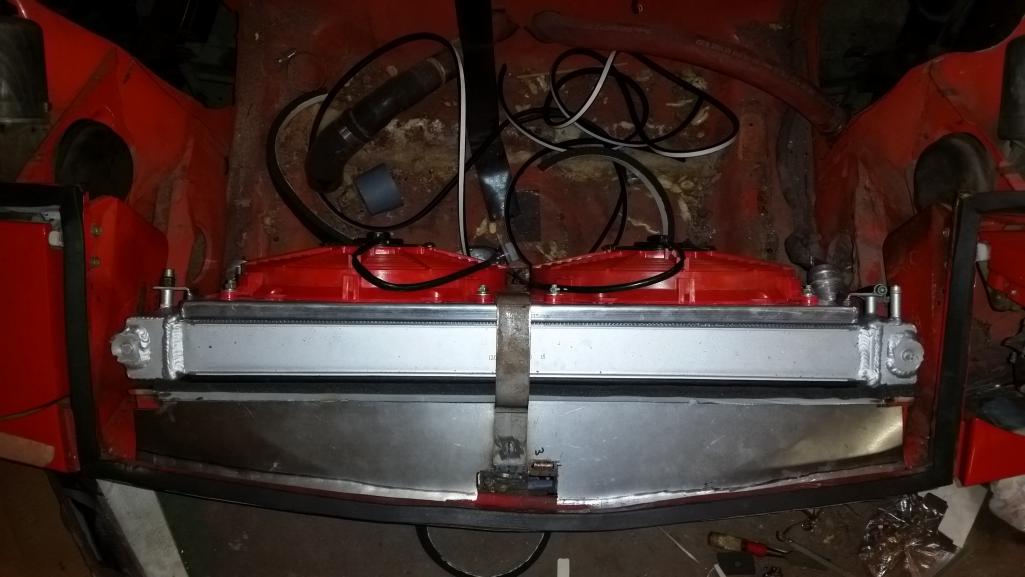
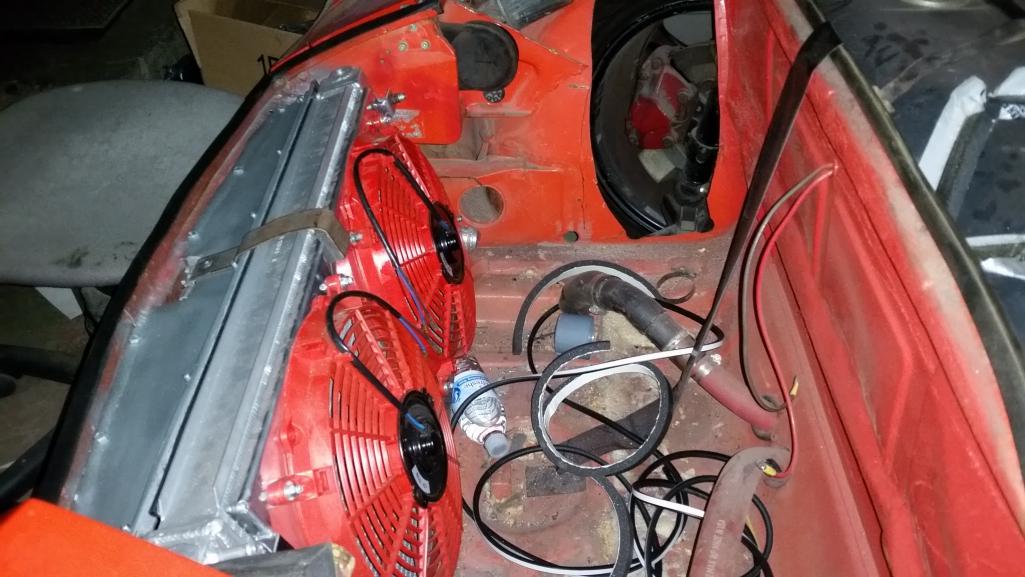
Posted by: matthepcat Jan 4 2017, 01:57 PM
I am not looking for a V8 car specifically, but I do want to own a 914 with a nice modern transmission swap. Why wouldn't you want the orange color it is now!
If it was built by Bob, I am sure it will be a great driver. Add a fuel injection kit to the 383 along with the Boxster trans will make for a reliable hotrod.
Yes they are Bob! I see you found that ECU too
. I'll send you something for all that. You can't give everything away! Really appreciate you digging it all up. BTW all Bob might be selling his flared orange car. He's putting a 6 speed Boxster trans in it first but it'll be ready next year. It has a 383 in it that runs perfectly. I'm kind of a wimp in the passenger seat but that one is a real neck snapper even with the 901 in it. The interior is tan with a neat high bolstered drivers seat. He is re-doing the flares with steel ones and then will paint it. If you get to him beforehand you can choose your own color. If I had the room I would have (tried to at least) bought it a while ago. Just throwing it out there early for anyone looking for a V8 car.
Posted by: Chris H. Jan 4 2017, 05:29 PM
I am not looking for a V8 car specifically, but I do want to own a 914 with a nice modern transmission swap. Why wouldn't you want the orange color it is now!
If it was built by Bob, I am sure it will be a great driver. Add a fuel injection kit to the 383 along with the Boxster trans will make for a reliable hotrod.
I said the same thing about the color. Not much better than a fresh coat of Signal Orange. It'll be nice car that you can drive anywhere.
Posted by: Chris H. Feb 18 2017, 11:57 PM
Update...working on the "heater core in the fresh air box". First I had to take the wiper assembly out to lube it and change the rubber mounting bushings. Dang that thing is not fun to reinstall!
Here is the modified airbox. 
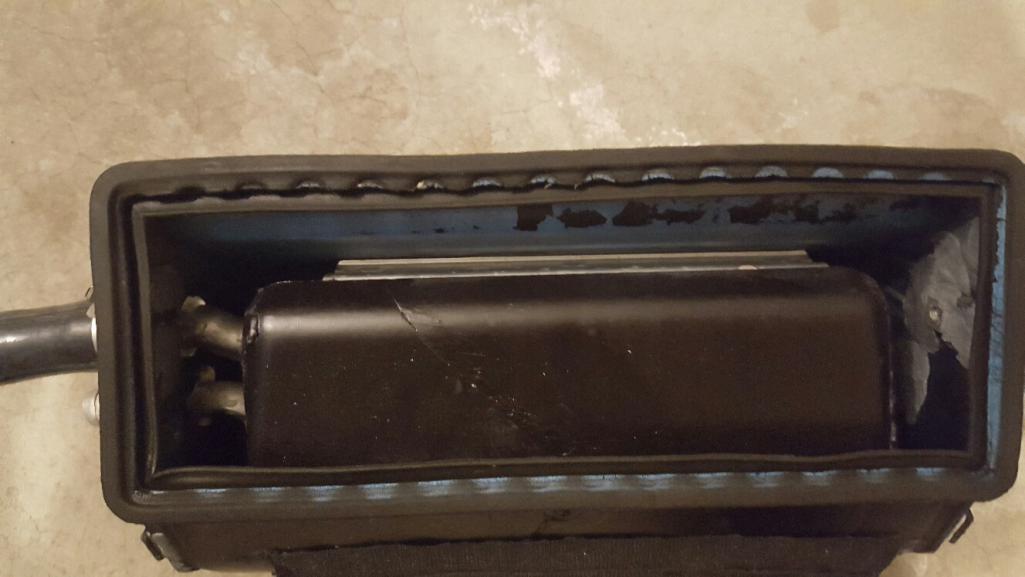
FYI the STOCK mid-90's mustang heater core is a little too thick to fit inside the fresh air box. I had to modify mine a bit. I'd go for the thinner aftermarket one if you're going to do this.
I'll have a bleeder valve on the higher line and a Rabbit open/close valve on the lower intake line.
So if you do this you will be eliminating the tube that comes up from the passenger compartment and connects to the heat/fresh air distribution system up front through this: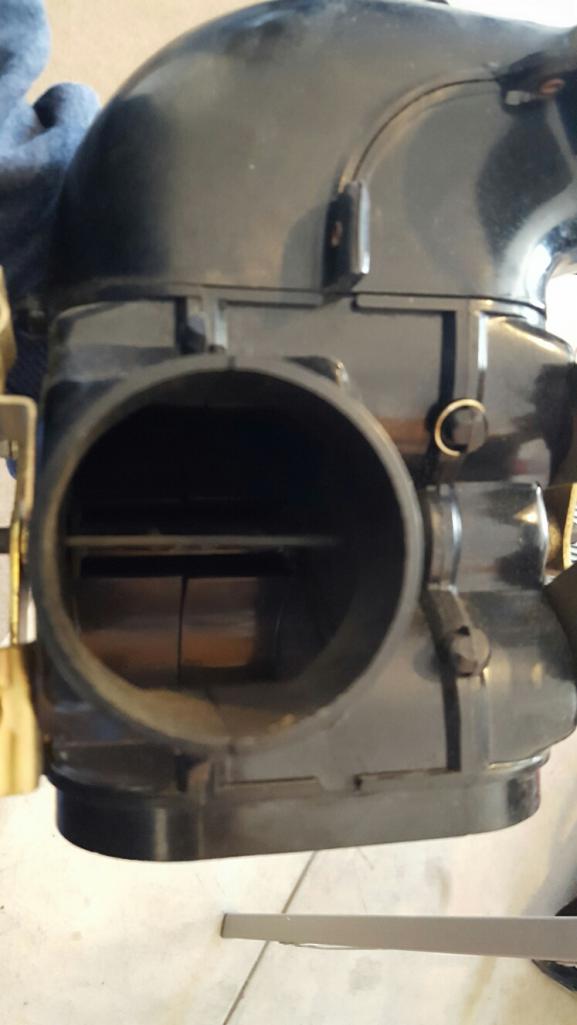
You can seal them up with these 2" rubber plugs from the plumbing aisle at Home Depot:
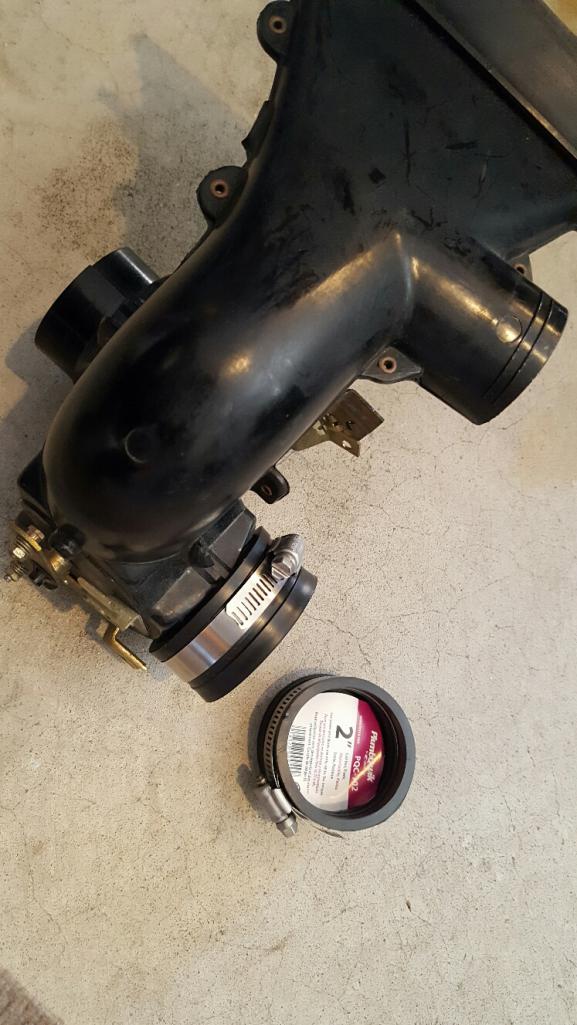
You also want to lock the flapper in the up position to keep any heat/fresh air from escaping or coming out the wrong area. 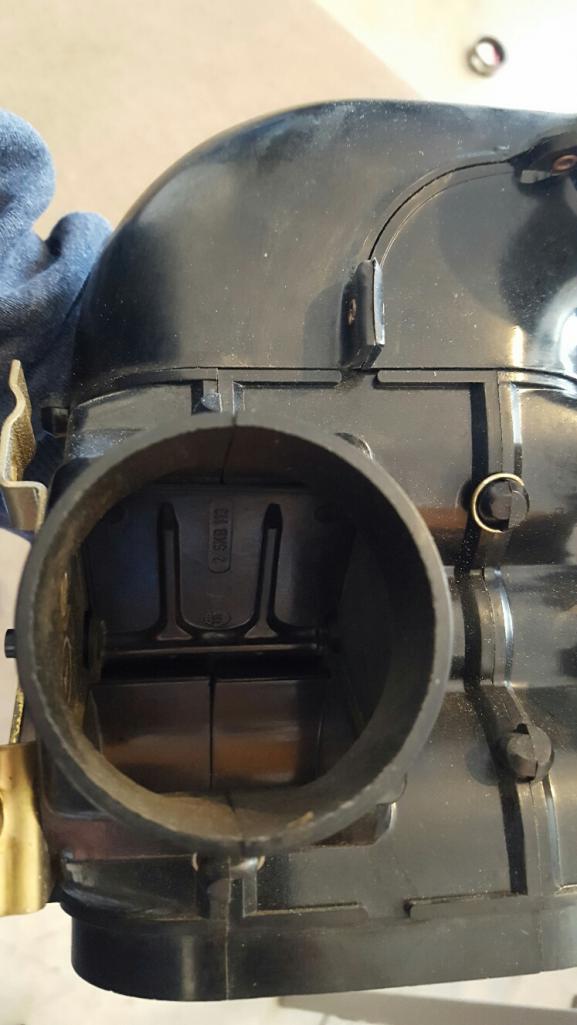
Permanently lock this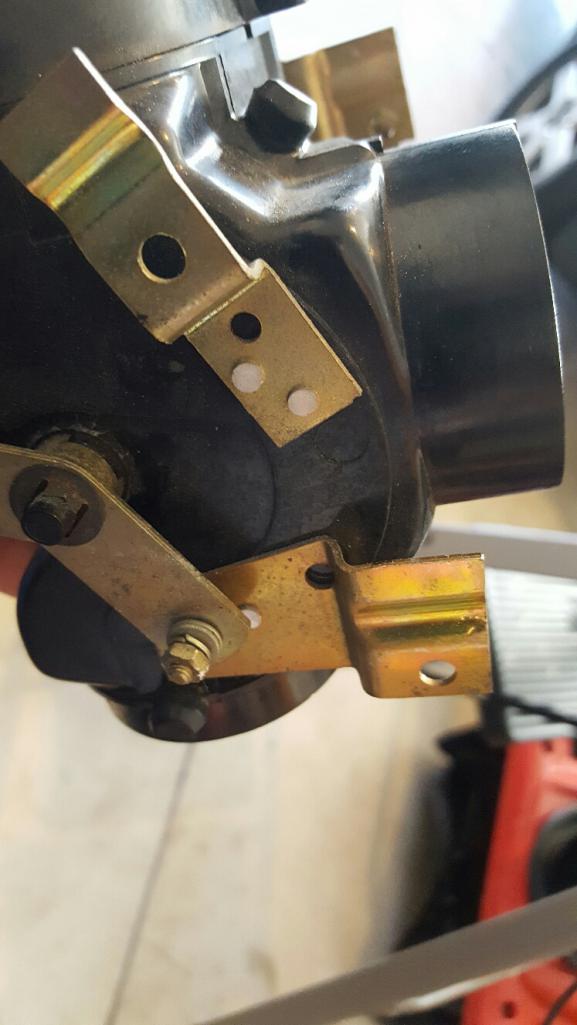
Now...couple of quick questions...
Does anyone know how the wires that connect to the fresh air box go back in to the connector they go in?
Could someone look at their 914 and see which way their lower heater outlets under the dash are pointed? Does the wider opening point towards the middle of the car or towards the door?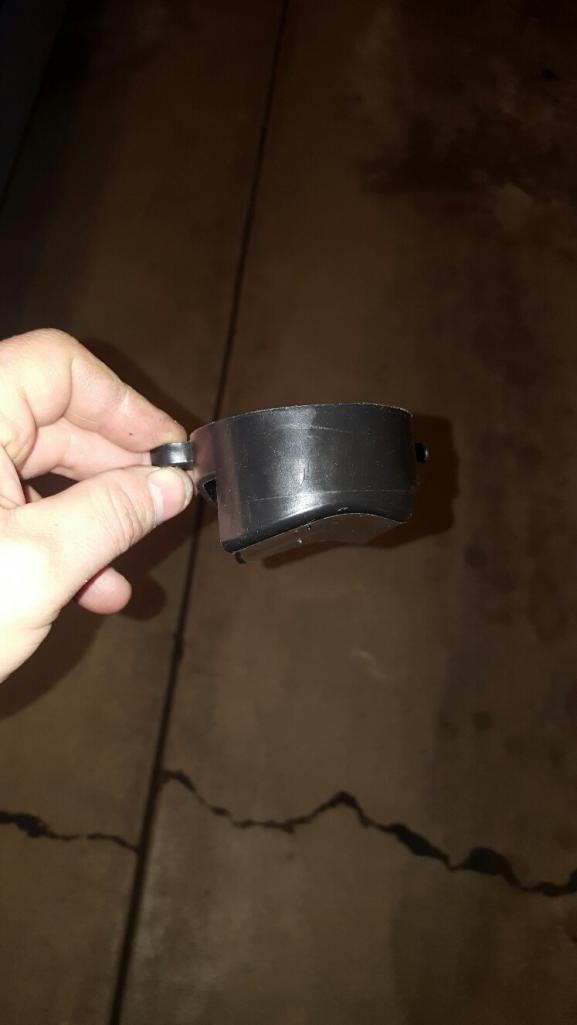
Posted by: Chris H. Apr 6 2017, 10:13 AM
I just keep looking at this thing...the simplicity...why did I wait so long?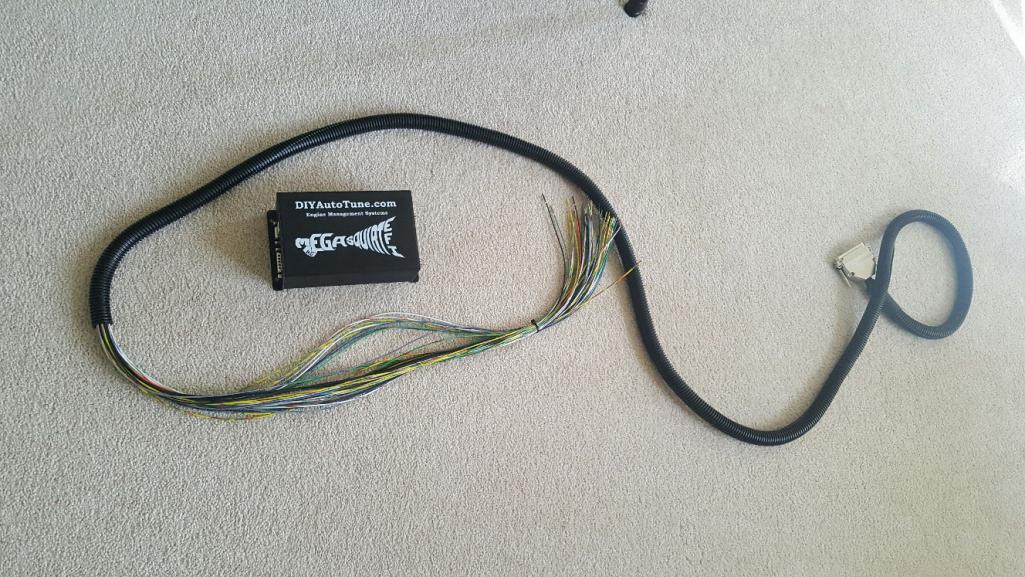
Every wire is imprinted with the function. 
The EG33 ECU itself has 76 wires. There are also ~4 more that connect to other things. This harness has 36 wires, many of which won't even be used. 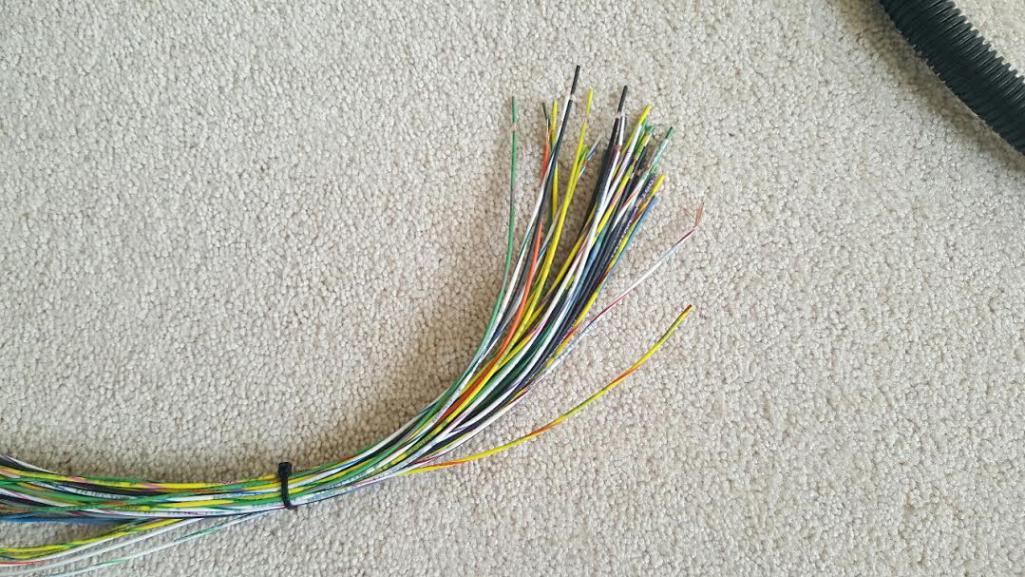
Posted by: Chris H. Apr 6 2017, 10:17 AM
BTW also could someone PLEASE look at the plug that is connected to his/her fresh air fan up front and tell me which wire goes in which slot here? It's the 4 connector power source for the fan. Thanks! 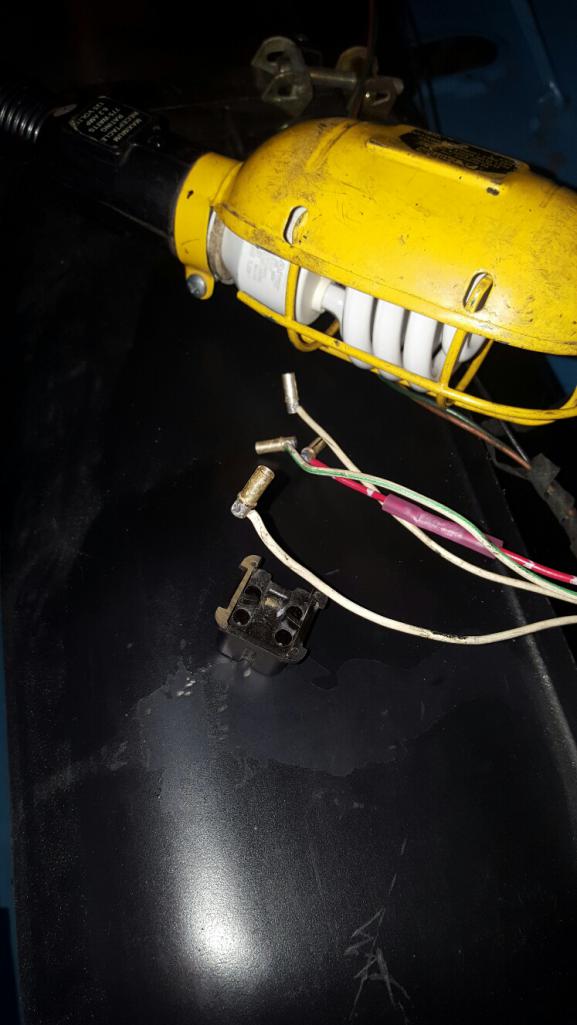
I have LOTS of updates but need to prove they work before posting them. Will document the MS3 install as well.
Posted by: Andyrew Apr 6 2017, 12:59 PM
I just keep looking at this thing...the simplicity...why did I wait so long?
Every wire is imprinted with the function.
The EG33 ECU itself has 76 wires. There are also ~4 more that connect to other things. This harness has 36 wires, many of which won't even be used.
Wow, making me jealous with that.... I've got about 60lbs of wiring in my car...
Posted by: 914forme Apr 6 2017, 01:19 PM
about time
Posted by: 76-914 Apr 6 2017, 02:51 PM
I can check my 76 when I get home. Pm me so I don't forget!
Posted by: Chris H. Apr 6 2017, 05:10 PM
When you take those out of the holder you think "of course I won't forget how these went..."
Posted by: 76-914 Apr 6 2017, 06:33 PM
Hard to get to. Even after I removed the expansion chamber from the gas tank. Looks like I used Andy's camera. 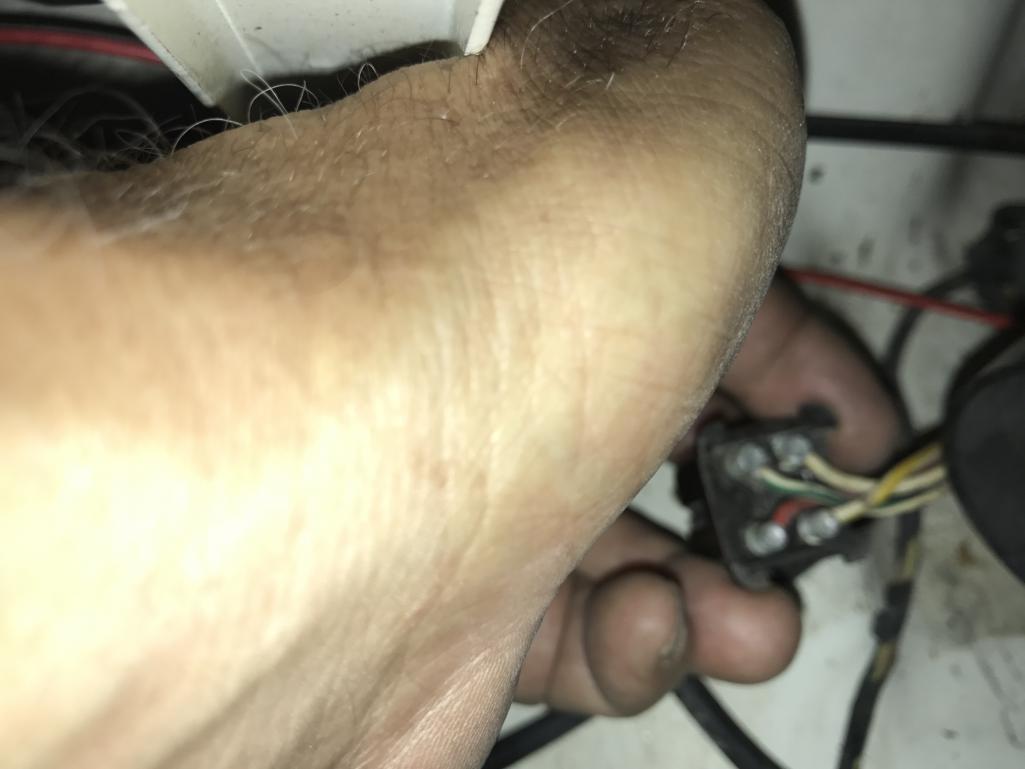

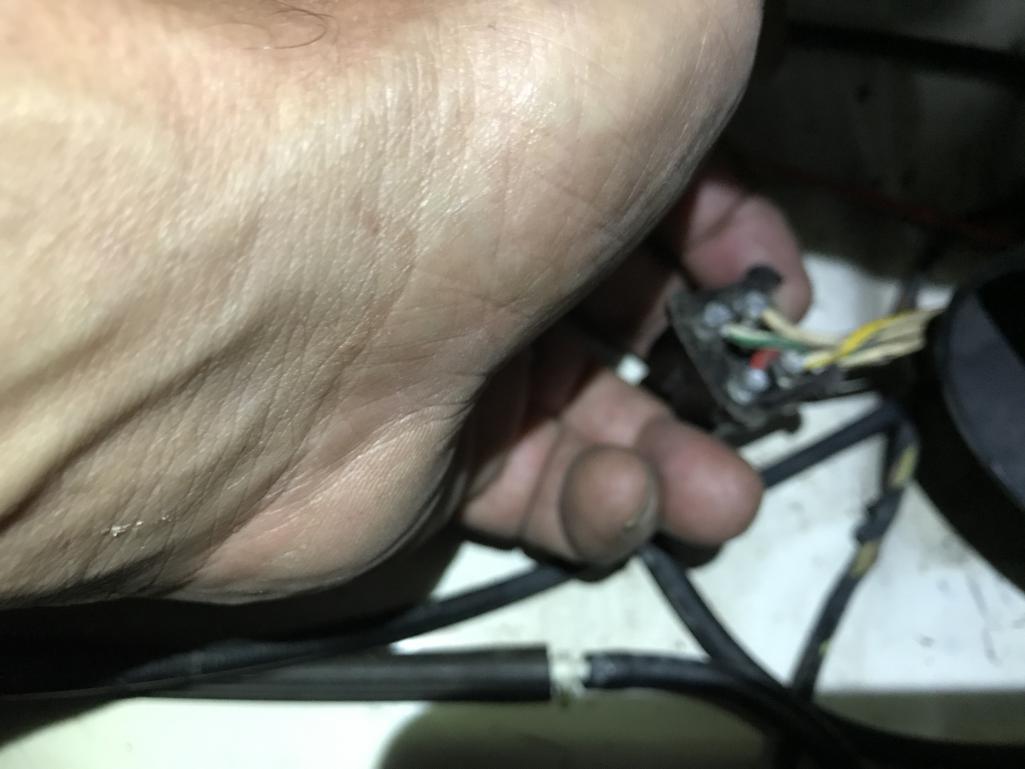
Posted by: Chris H. Apr 6 2017, 10:17 PM
Perfect! Thank you Kent! Now I can test my heater. Have to finish the timing belt job on my wife's Volvo then I'm 100% finishing the 914 refresh.
Posted by: flmont Apr 6 2017, 10:33 PM
what does that Mega squirt box do,..enhance the ECU or replace it..??? TIA Frank
Posted by: Chris H. Apr 7 2017, 06:47 AM
Totally replaces it. Also eliminates many of the unneeded stuff like the EGR, complicated fuel pump/fuel delivery system, etc.
Posted by: ThePaintedMan Apr 7 2017, 07:56 AM
Very cool! So is there a MegaSquirt map already available for the EG33? What are you doing with that old harness?
Posted by: Chris H. Apr 7 2017, 08:31 AM
Hi George,
There are maps on the msextra site. I have a crap-ton of wiring I can give you when I'm done. I'll also have an extra ECU I can pass on.
Posted by: flmont Apr 7 2017, 08:38 AM
Hmm,..how much is that..?? if I can ask..
Posted by: rnellums Apr 7 2017, 08:45 AM
I picked up a used MS3 with the expansion boards and ignition modules needed to run the advanced came on the EZ36 for 750$ earlier this year.
Posted by: rnellums Apr 7 2017, 08:51 AM
Update...working on the "heater core in the fresh air box". First I had to take the wiper assembly out to lube it and change the rubber mounting bushings. Dang that thing is not fun to reinstall!
Here is the modified airbox.
FYI the STOCK mid-90's mustang heater core is a little too thick to fit inside the fresh air box. I had to modify mine a bit. I'd go for the thinner aftermarket one if you're going to do this.
I love what you did here Chris! I'm going to be working something similar in the next month or two, but I may try to make a custom core to size. Love seeing the ingenuity!
Posted by: Chris H. Apr 7 2017, 09:10 AM
Yes you definitely want one that fits in the box, preferably one that exits out the side. In a stock 914 everything in that area fits PERFECTLY without a mm to spare although it doesn't look that way. Mine was a PAIN IN THE ARSE to install because it's so close to the fuel tank filler. I think an aftermarket Mustang one that is thinner might work. You could trim off the circular piece above the fan right down to the box (which is necessary for any heater core) and then take it to an auto parts store and have them find one for you.
Ah....hindsight...at least it's useful for others...
Posted by: Chris H. Jun 6 2017, 08:23 AM
So "how's it going" with the MS3X install? I think it's best summed up by the first 43 seconds of this clip.
https://www.youtube.com/watch?v=CgOfuBB6Mf4
Bob's been helping me a lot but the MS forum has been poor. I think I might post some stuff here in case anyone has other ideas...
Posted by: 76-914 Jun 6 2017, 09:08 AM
Remember the post card with the Cow standing on her own utter which read "So you think you've got problems!"? Well don't feel alone my friend. I damned near took mine out back and shot it this last weekend. I won't pollute your thread with my problems though. But, as with every problem there lies an answer within and I finally found mine. Looks like we may be posting in tandem again.
Posted by: Madswede Jun 6 2017, 09:51 AM
So "how's it going" with the MS3X install? I think it's best summed up by the first 43 seconds of this clip.
...
Bob's been helping me a lot but the MS forum has been poor. I think I might post some stuff here in case anyone has other ideas...
Please do. I have an older MS installation on my 3.2 twin plug, cammed build with EDMIS and PMO throttle bodies. I've had some of the inevitable bugs to work out after the masterful build by Series9 (Joe O'Brien) that I could share. I've been thinking of improving the current setup with a Clewett TPS (basically a "wide band" TPS) for the PMOs to take advantage of the Megasquirt ability to do ITB tuning maps which is a blend of MAP at lower loads and RPMs and alpha-n under loads/acceleration. I want to get rid of my backfire issues and improve performance. It's complicated!
Posted by: Keyser Sose Jun 6 2017, 09:53 AM
Remember the post card with the Cow standing on her own utter which read "So you think you've got problems!"? Well don't feel alone my friend. I damned near took mine out back and shot it this last weekend. I won't pollute your thread with my problems though. But, as with every problem there lies an answer within and I finally found mine. Looks like we may be posting in tandem again. Wait. So the solution is to shoot it? Or just threaten?
Posted by: 914forme Jun 6 2017, 10:23 AM
So "how's it going" with the MS3X install? I think it's best summed up by the first 43 seconds of this clip.
Bob's been helping me a lot but the MS forum has been poor. I think I might post some stuff here in case anyone has other ideas...
Your spoiled by this forum. I'm on lots of others and this place hands down has much less of the
factor. I can name a few others I never go back to., unless I really must. Post away I will try to help all that I can, you need the coil pack back? Or are you running the coil on plugs still?
Posted by: Chris H. Jun 6 2017, 10:43 AM
So "how's it going" with the MS3X install? I think it's best summed up by the first 43 seconds of this clip.
Bob's been helping me a lot but the MS forum has been poor. I think I might post some stuff here in case anyone has other ideas...
Your spoiled by this forum. I'm on lots of others and this place hands down has much less of the
factor. I can name a few others I never go back to., unless I really must. Post away I will try to help all that I can, you need the coil pack back? Or are you running the coil on plugs still?
Yes I AM spoiled by this forum and the people. Totally agree. Bob has spent HOURS with me but he really didn't use MS on the EG33 for too long before switching engines plus he's 700 miles away. And MS3X is slightly different than MS2. I'm sticking with COP so we're all good on the coil pack (for now at least
 ). So are you buying Bob's old car? PM me if so. I'll tell you all about it.
 MadSwede, will do. Post whatever you want to share! The firing order on the 3.3 is the same as the 3.2. Might be able to adapt some tuning. BTW you should have heard the backfire I got when I tried to start this SOB. Luckily the engine was not cycling at that moment and it came out the exhaust. It was right after I stopped cranking it. Sounded like an M80 going off. kaBOOOOOOM.
Kent's what's wrong with your car?
Posted by: 76-914 Jun 6 2017, 03:51 PM
Well let's just say my last diagnosis was completely inaccurate. IOW's, I was wrong. I'll detail it in my thread so others won't make the same mistake. I will be using the other half of that roll of hose soon if just to clean up the front trunk area. EDIT: I didn't answer your question, "What is wrong with your car?" Answer; the builder!
Posted by: Chris H. Jun 6 2017, 04:13 PM
Ah...still getting a little hot? It'll cool WAY down with the 1.25s. Just try not to have any detours or bends in the hoses. Straight back...think about going underneath this time...way less drama. I can send pics if you need them.
BTW I REALLY want ITBs but the cost is just too much I think. Would look SO GOOD too.
Posted by: 76-914 Jun 6 2017, 05:42 PM
Ah...still getting a little hot? It'll cool WAY down with the 1.25s. Just try not to have any detours or bends in the hoses. Straight back...think about going underneath this time...way less drama. I can send pics if you need them.
BTW I REALLY want ITBs but the cost is just too much I think. Would look SO GOOD too.
Yep. Engine and radiator temps are perfect but the radiator heats the gas tank. Turns out I'm not the 1st. Tony (cracker) had the same problem. He gave me several pointers. The best being; start by enlarging the wheel well openings!
Posted by: mgp4591 Jun 7 2017, 12:12 AM
Has anyone done any successful ducting to exit out the wheelwells? That seems to solve alot of the problems in other cooling systems in exotics, etc. It would isolate the heat from the gas tank and anything else much better and could be relatively light if it's done correctly.
Posted by: 914forme Jun 7 2017, 06:52 AM
Yes several examples.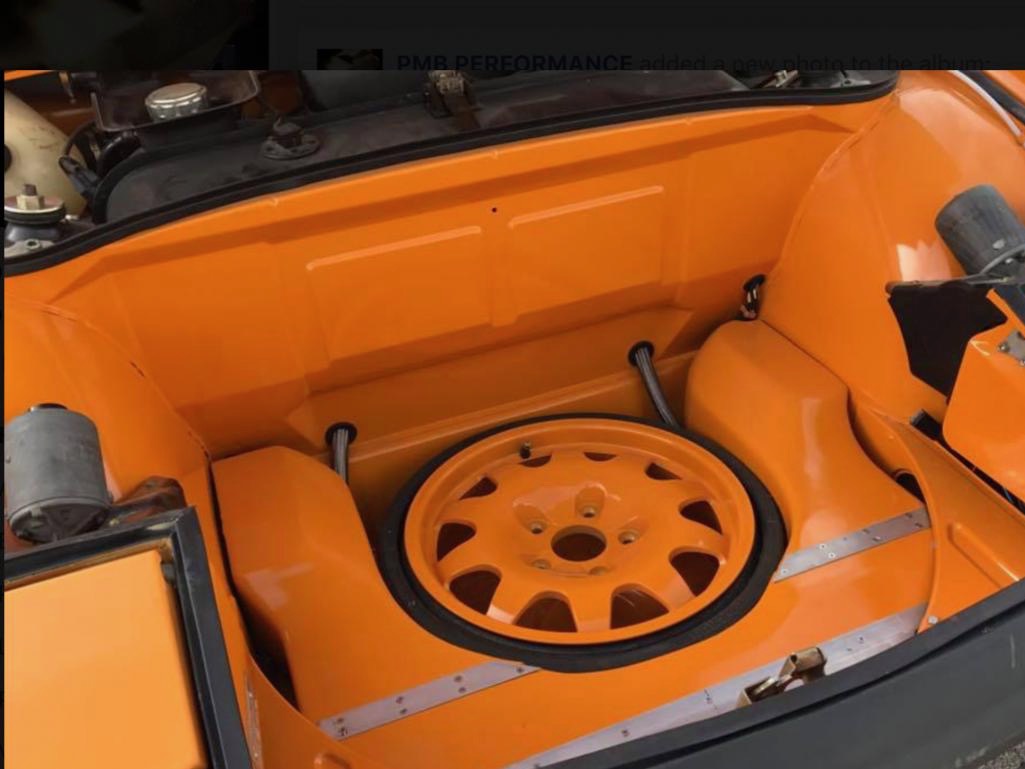
As much as I like the above unit it is for a oil cooler. I 
This is for a Radiator
Posted by: mgp4591 Jun 7 2017, 09:04 AM
Those are great examples but the radiator is what we're concerned with and while the carbon fiber is really cool, most of us don't have the skills for that so I'm looking for possibly a sheet metal creation of some sort. I'm currently working on the brakes and suspension but when I get to that point I think I'll need to come up with something functional for ducting. I'll probably be making some bends with the hose so I'll need all of the help I can get.
Posted by: 76-914 Jun 7 2017, 09:08 AM
Those are great examples but the radiator is what we're concerned with and while the carbon fiber is really cool, most of us don't have the skills for that so I'm looking for possibly a sheet metal creation of some sort. I'm currently working on the brakes and suspension but when I get to that point I think I'll need to come up with something functional for ducting. I'll probably be making some bends with the hose so I'll need all of the help I can get.
I've considered using canvas w/ metal framing if I end up going this route. Quick and easy to fabricate or remove.
Posted by: Mueller Jun 7 2017, 09:41 AM
Clewett TPS (basically a "wide band" TPS) for the PMOs to take advantage of the Megasquirt ability to do ITB tuning maps which is a blend of MAP at lower loads and RPMs and alpha-n under loads/acceleration.
^Jon, do you have links to this setup configuration and more details about the TPS?
Posted by: Mueller Jun 7 2017, 09:45 AM
Those are great examples but the radiator is what we're concerned with and while the carbon fiber is really cool, most of us don't have the skills for that so I'm looking for possibly a sheet metal creation of some sort. I'm currently working on the brakes and suspension but when I get to that point I think I'll need to come up with something functional for ducting. I'll probably be making some bends with the hose so I'll need all of the help I can get.
I've considered using canvas w/ metal framing if I end up going this route. Quick and easy to fabricate or remove.
Sounds like an old airplane fabrication method, dope and fabric.
http://www.aircraftspruce.com/catalog/kitspages/copingvsrebuilding.php
Posted by: 914forme Jun 7 2017, 10:07 AM
Mike,
I think he is talking about the Hall Sensors for the PMO carb. TPS can not be a wideband. yOu could increase its ability to be more precise ultimately it ends as a voltage reading.
http://www.clewett.com/index.php?main_page=product_info&cPath=5_31&products_id=75
Posted by: burton73 Jun 7 2017, 10:12 AM
Those are great examples but the radiator is what we're concerned with and while the carbon fiber is really cool, most of us don't have the skills for that so I'm looking for possibly a sheet metal creation of some sort. I'm currently working on the brakes and suspension but when I get to that point I think I'll need to come up with something functional for ducting. I'll probably be making some bends with the hose so I'll need all of the help I can get.
I've considered using canvas w/ metal framing if I end up going this route. Quick and easy to fabricate or remove.
Sounds like an old airplane fabrication method, dope and fabric.
http://www.aircraftspruce.com/catalog/kitspages/copingvsrebuilding.php
You could build the shape out of canvas like you said and then coat it with fiberglass and polyester lamenting resin. I had a fiend do that to build a kayak when I was 11
You would have an item to sell if you used a standard cooling that guys building any water cooled 914 could use.
I had heat blowing into my cabin in my old SBC set up in the 70s. “If you want to run cool, you got run on heavy heavy fuel” No I just always thought it was not a good idea to warm up the gas.
Bob B
Posted by: Chris H. Jun 7 2017, 10:09 PM
Ruby914 made that carbon fiber masterpiece. Maybe he would be willing to make some fiberglass copies. Kent I think the thing you need to do is get all of the water lines away from the fuel tank. The larger ones would be a bitch to snake through your longs and then up through the body. I'd just go down the center of the car underneath like I did. None are near the fuel tank even though it looks like it. You could wrap the ends that will be inside the front trunk to keep the heat down too.
Hey Mueller, the latest MS manual has some good info in ITBs. Download the "setting up" manual here and start at page 64:
http://www.msextra.com/manuals/ms3manuals/
Posted by: Chris914n6 Jun 7 2017, 10:56 PM
You could build the shape out of canvas like you said and then coat it with fiberglass and polyester lamenting resin. I had a fiend do that to build a kayak when I was 11
You would have an item to sell if you used a standard cooling that guys building any water cooled 914 could use.
I had heat blowing into my cabin in my old SBC set up in the 70s. “If you want to run cool, you got run on heavy heavy fuel” No I just always thought it was not a good idea to warm up the gas.
Bob B
Fleece or tshirt cloth would be better, then fiberglass mat the inside for strength. It's how custom speaker enclosures are done.
http://www.tribalvisiontruck.com/newsubbox.htm
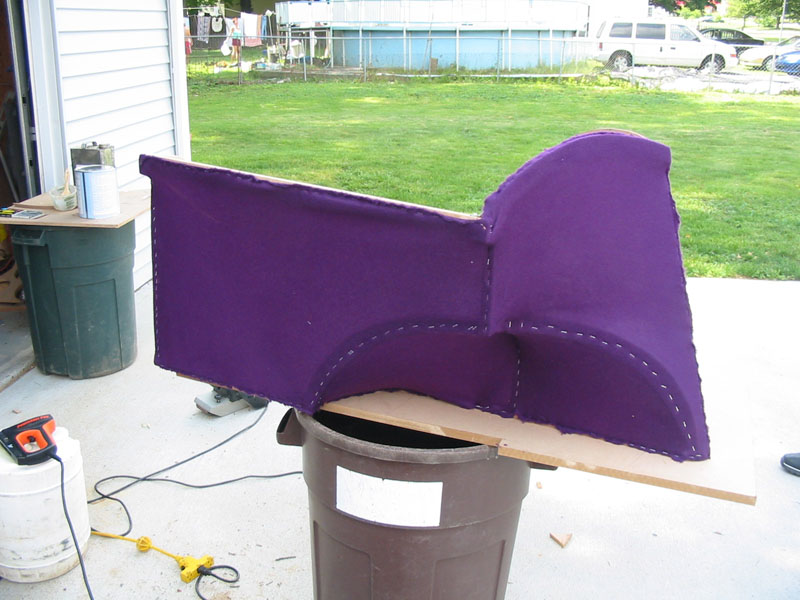
Posted by: motoTrooper Jul 17 2017, 10:14 AM
Just checking in on the thread here to see if Photobucket had erased all the awesome photo documentation on this site. Still there! Whoo hoo!
Posted by: motoTrooper Aug 24 2017, 03:54 PM
Hey Chris, I started a video series on my Lancia that you inspired with your build thread. This introduction is a bit long and raw and subsequent videos will be shorter and more focused. They will however still be somewhat silly, like me.
https://www.youtube.com/watch?v=u2MQ3dORePI
Posted by: 76-914 Aug 24 2017, 06:59 PM
914 world calling Chris. Looking for updates. We need our fix. Kent
Posted by: 914forme Aug 25 2017, 06:08 PM
You might get called out on the slacker thread
It would take the heat off me
Posted by: Chris H. Aug 26 2017, 09:33 AM
Ha! Yes I will update this weekend. The short answer is that unless you have "Bob level" skills, Megasquirting an older Subaru engine using the stock VR sensors is not that easy. I have it up and running on the stock ECU again and it's been behaving very well. I'll post some pics very soon. Was avoiding responding because people are subscribed to this thread and the update is a DUD .
I have to say very quietly that I am less interested in the 914 and more interested in the Vanagon now. Would love to get it up and running but wow what a chore! It's literally just like an old "garage find" 914. Someone put it away very carefully a LONG time ago and it's been sitting ever since. Every system, seal, pump, etc has to be gone through. The boys is totally rust free, amazingly. The engine has a broken head stud though, and that mother f&(*&(*&r does not want to come out .
Posted by: 76-914 Aug 26 2017, 10:33 AM
Ha! Yes I will update this weekend. The short answer is that unless you have "Bob level" skills, Megasquirting an older Subaru engine using the stock VR sensors is not that easy. I have it up and running on the stock ECU again and it's been behaving very well. I'll post some pics very soon. Was avoiding responding because people are subscribed to this thread and the update is a DUD
. I have to say very quietly that I am less interested in the 914 and more interested in the Vanagon now. Would love to get it up and running but wow what a chore! It's literally just like an old "garage find" 914. Someone put it away very carefully a LONG time ago and it's been sitting ever since. Every system, seal, pump, etc has to be gone through. The boys is totally rust free, amazingly. The engine has a broken head stud though, and that mother f&(*&(*&r does not want to come out
. If you ever get that 914 running correctly you'll forget about that Bus.
Posted by: A&P Mech Aug 26 2017, 12:34 PM
Ha! Yes I will update this weekend. The short answer is that unless you have "Bob level" skills, Megasquirting an older Subaru engine using the stock VR sensors is not that easy. I have it up and running on the stock ECU again and it's been behaving very well. I'll post some pics very soon. Was avoiding responding because people are subscribed to this thread and the update is a DUD
. I have to say very quietly that I am less interested in the 914 and more interested in the Vanagon now. Would love to get it up and running but wow what a chore! It's literally just like an old "garage find" 914. Someone put it away very carefully a LONG time ago and it's been sitting ever since. Every system, seal, pump, etc has to be gone through. The boys is totally rust free, amazingly. The engine has a broken head stud though, and that mother f&(*&(*&r does not want to come out
. If you ever get that 914 running correctly you'll forget about that Bus.
Posted by: 914forme Aug 26 2017, 03:10 PM
Not sure why your screwing with a broken head stud.
Join the dark side Luke er I mean Chris Seems to me that brick is calling for an Subaru of it's own.
Posted by: Chris H. Aug 27 2017, 10:25 AM
Not sure why your screwing with a broken head stud.
Join the dark side Luke er I mean Chris
Seems to me that brick is calling for an Subaru of it's own.Yeah I was hoping I could just get the current engine running with new seals and convert it when i had the time and energy. $100 for the awesome kit from Van-Again.com...why not? The heads look great...no cracks at all. Valves seats are fine.
Unfortunately where I am stuck is that the head stud snapped in a tough spot and I MIGHT have to take the cylinder barrels out....at that point you HAVE to re-ring it, which means "hey, might as well just rebuild it.." but it's a 1.9. Probably not worth the effort for 83 HP. You can buy an entire JDM 2.0L Subaru engine for about $700. 138 hp.
Which one of these is not like the other?
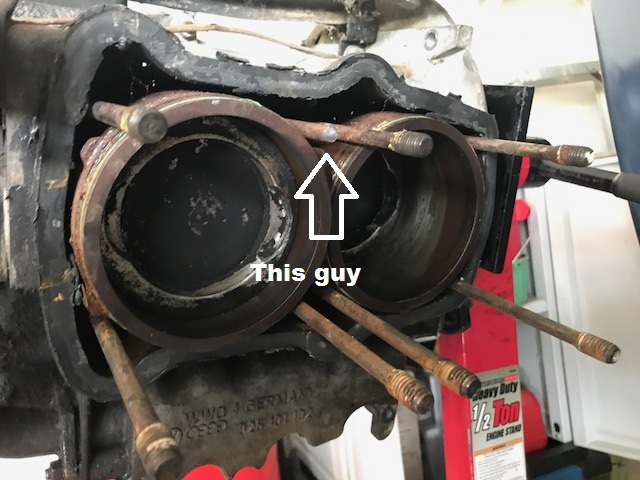
Question for you Steve, or another welding guru...I welded a nut on the end of that thing but it just would not adhere to it. a 12mm screws half way on so it was a great fit. I could fill the whole inside of the thing up but it would just twist right off. Not hot enough or what? The nut is not treated or galvanized. Assuming the stud is just a tougher material so it may need more heat.
Posted by: motoTrooper Aug 29 2017, 05:56 PM
Maybe preheat it with a blowtorch and initially weld a blob on the end to see if it sticks? Then try the bolt or nut trick?
Posted by: Chris914n6 Aug 29 2017, 06:59 PM
Maybe preheat it with a blowtorch and initially weld a blob on the end to see if it sticks? Then try the bolt or nut trick?
Studs are hardened steel so you need to weld a blob on the end then weld the nut to the blob. Before that PB Blaster the theaded end and let it soak overnight. I also like to tap it with a hammer a few time to try to break the corrosion bond. If you can get a pipe wrench in there sometimes that will work too.
Posted by: flmont Aug 29 2017, 07:53 PM
maybe a visegrip with a cheater bar,if you could even clamp it strong enough.
Posted by: Chris H. Feb 17 2018, 11:23 AM
I'm back at it people! Had a pretty strange year at work but you all know how that goes. Thanks to my pals who checked on me and who didn't get too upset when I went completely dark for several months.
So for the elephant in the garage let me just address the Megasquirting...the car would never quite run right above idle, so I went back to the stock ECU just to confirm everything was OK. It was very hard to start when I switched back, but ran fine once it got through the first minute or so. Turns out it was a bad temp sensor. No resistance at all. Unfortunately in the older Subaru engines the temp SENSOR is separate from the temp SENDER so there was nothing obvious that would tell me there was a problem. I think I will still keep the stock ECU in place for now. Lesson learned...change every inexpensive sensor on a donor engine. Even if it's ok at the moment, it will eventually go bad. This $20 sensor caused me hours of pain.
Another issue...the VW "globe" coolant reservoir started to leak a bit at the seam. I only noticed it while driving it that one last time for the season. Small amount of steam was coming out, barely visible and intermittent, but it would have been a big problem later on.
I'll be switching it to this:
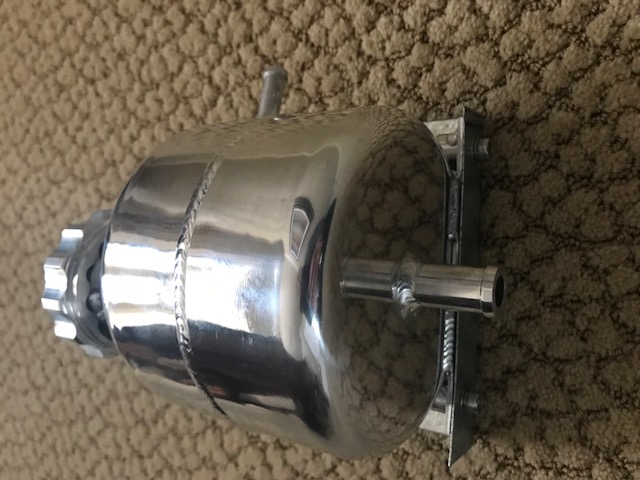
Aftermarket aluminum tank designed for the Mini (2000-2005ish). It's a nice size and not too pricey at ~$60. Disregard the mounting bracket I made. It doesn't come with that. His a nice mounting plate on the side with two allen bolts (included). Apparently the Mini plastic tanks had a tendency to split at the seam as well which is the reason these were made. I would recommend the one with the 3rd outlet at the filler neck so that you can attach an overflow tank hose to it. There are two types out there and one does not have a 3rd outlet.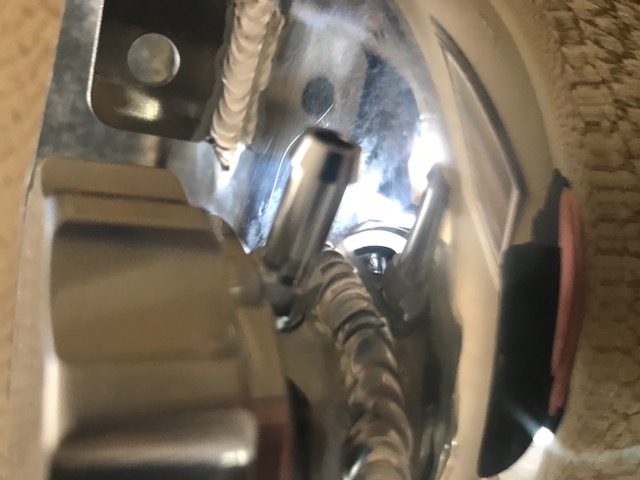
Then a universal unpressurized overflow tank. 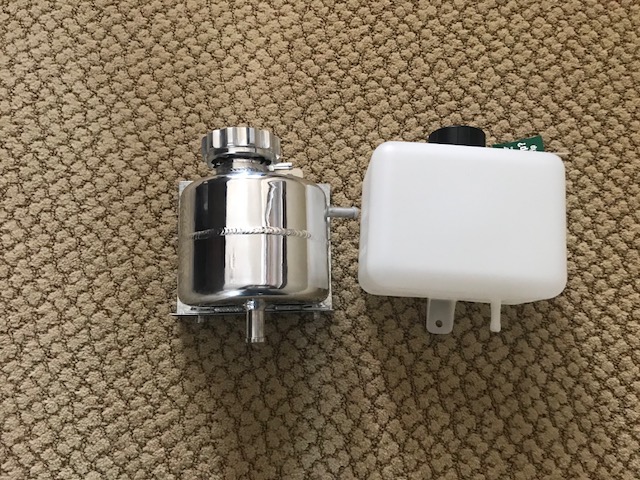
This will resolve the other ongoing problem with the globe, which was that during the "self bleed" period it would puke a small amount of antifreeze out the hidden drain hose in the back making a mess. It was fine once the level was set and all of the air bled out but not great for the first few runs.
Posted by: Chris H. Feb 17 2018, 11:30 AM
And hey check out my new "3.3" badge made by Mueller. Very nice quality aluminum emblem. Check the detail with the ridge on the outer edge and all. 
Note how wide the Porsche font is. The "3.3" is in the exact same scale as the 1.8. 
He can make any number/letter combo you want and it's very reasonably priced, especially for a custom request. I'll be painting mine black to match the "914".
Posted by: Andyrew Feb 17 2018, 11:58 AM
I like the coolant tank! And one can never have to many Mueller parts!
Posted by: Chris H. Feb 17 2018, 12:31 PM
Thanks Andrew. I'll be installing it early next week so I will report back on the performance.
BTW in case anyone is looking at the Vanagon engine posts, yes, I did finally get that stud out. Here that stubborn SOB is next to its replacement.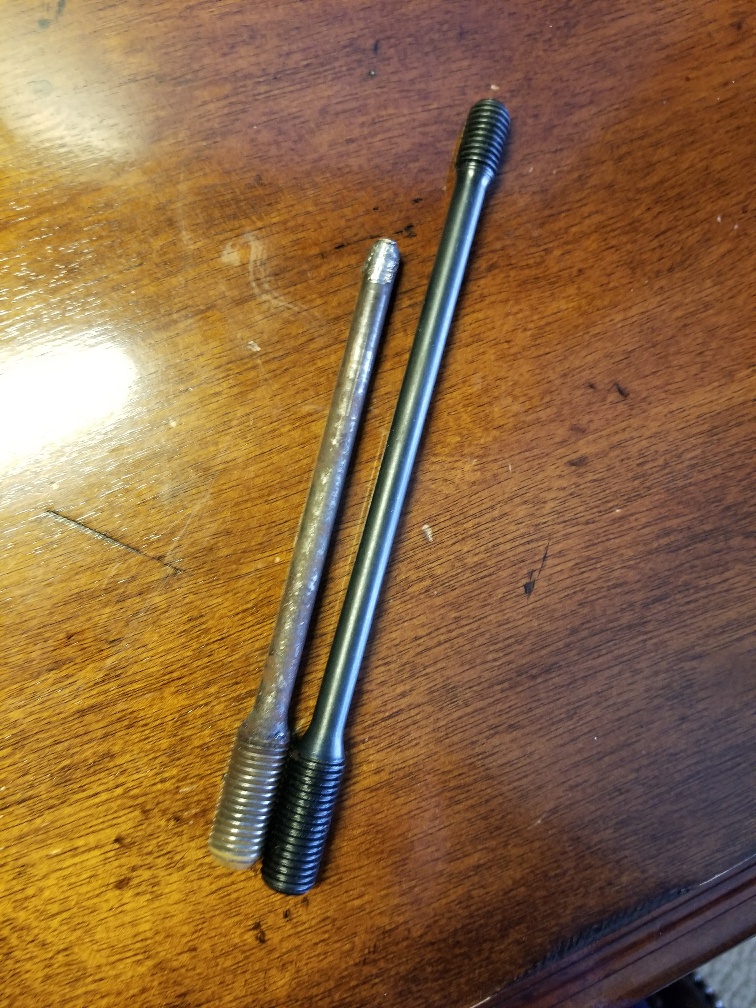
After trying several methods, including drilling a small hole in it and using a "tee", welding a nut to it, etc., I finally coughed up $20 on this extractor and it came out easily. 
I soaked it in PB Blaster for a week straight beforehand. That definitely helped.
Posted by: 76-914 Feb 17 2018, 07:17 PM
Yeah. Happy your back at it, Chris. Does this mean you’ll be posting pictures w:o being Hounded.
Posted by: 914forme Feb 17 2018, 07:55 PM
After trying several methods, including drilling a small hole in it and using a "tee", welding a nut to it, etc., I finally coughed up $20 on this extractor and it came out easily.
I soaked it in PB Blaster for a week straight beforehand. That definitely helped.
Yep, that is the correct tool for the job. Welding on a rusted hardened steel stud over 30 years old would never be my first choice. And if it was It would be my last.
If you are going to use the welder as the tool of choice. I would cut them off closer to the base of the stud. If you have some threads there that is even better, put a nut on it, screw it down as far as it can go, but leave a bit of it for a valley. So nut sits a bit proud. I would then heat it with a small torch, burn off the crap. You can't weld dirt. You then take your MIG, I would prefer to use a TIG for this. And you go for the center of the stud, you get it nice and hot. And then work your way out. I would use flux core as it can handle a bit of crap in the weld if something cuts loose.
If doing this with a TIG, you preheat the stud, to fire red, with a torch. That will allow impurities to burn off. And then you can TIG clean metal. With the TIG you can get the tungsten down and start heating the stud before you get into the nut. You can then get them to almost fusion weld the nut to the stud, then you can work out and start adding filler. With this, you could then grind it and polish it up and make it look like a bolt.
You want to get heat all the way down the stud length, if you don't part of it will not be hardened. When you apply torque to the stud to try and remove it, it will stretch and snap right at the transition from soft to hardened metal. And you will be
I have also been know to take a impact socket, prep it up, and weld it to the stud.
BTW, if you want the best stud freer around. You take some acetone, and automatic transmission fluid, you mix it together, and you spray, brush, drip, soak, whatever the offending part. It works like a champ
Another thing I like to do is  the head of the offensive stuck part, that allows the stuff to migrate down into the opening a bit easier. I even have a hammer that fits in an air chisel for just such an offensive item.
Posted by: mepstein Feb 17 2018, 08:14 PM
We use map gas on on the area around every stud then a snap on stud remover. Heat 2-3 min and then unscrew. I've done a couple hundred this way and never a problem. If I get any real resistance, I add another minute with the torch. Pretty effortless.
If the stud is broken close to the case, then I have our guy weld a nut, I heat the case and then remove.
If there is someone to help, one person heats one stud while the previously heated stud is removed.
We had some bozo cut off balljoints from a strut. Left the shaft in the strut. We welded on a nut, sprayed some penetrating oil and clamped the nut in a vise while turning the strut. Made it easy.
Posted by: Mueller Feb 19 2018, 08:11 AM
Bummer about the stud, on my 1.8 I used an electric heat gun from HF to heat the area on the case where the stud was. I used the double nut method since I broke my stud remover year ago and keep forgetting to buy a real one.
Glad to see forward progress on this. Keep it up!
Glad you liked the 3.3 , that ought to confuse a few people when they see that on the car.
Posted by: Chris H. Feb 19 2018, 09:33 AM
Thanks Mike! Yes I like it a lot. This year I have a bunch of little stuff to work on on the 914, nothing too serious.
And yes Kent, I will post more than one pic of each project !
I knew about the head stud beforehand so it was all good. Luckily it twisted right out once I got the correct tool. Explains why it was suddenly parked. On an air-cooled engine a broken stud would probably cause a little wobble, but when you lose a stud on a Waterboxer the coolant leaks out. I was all but sure I would do a conversion but now I am thinking about putting it back together and turbo'ing it with a low pressure turbo. That's for the other thread though .
Side note: If you are thinking about a displacement badge like I got, consider getting a matching "914" as well. My plastic "914" looks like crap next to the new one and has a broken post. Will probably be reaching out to you again soon Mike.
Posted by: motoTrooper Mar 10 2018, 07:52 PM
Hey Chris, making progress were ready to put an engine in!
https://www.youtube.com/watch?v=d-hHcJIREVE
Posted by: motoTrooper Apr 17 2018, 11:40 AM
Hey Chris, don't know if you're still having issues with the megasquirt but I happened upon this guy's videos and he seems like he's solved some stuff in his swap. Hope it helps or entertains at the least.
https://www.youtube.com/watch?v=2goHLEVvkh0
Posted by: Chris H. Apr 17 2018, 09:13 PM
Wow that is a great build! Thanks for the heads-up. They are turbo'ing it as well. Looks like you're Scorpion is really coming along!
Posted by: Chris H. Apr 21 2018, 05:13 PM
Well it's finally been warm enough to test out the new aluminum coolant tank I was so dang proud of. And...it leaks. At first I though the cap was the problem, but after looking closely at it while running it's definitely got at least one pin hole in the weld around the coolant neck. It just weeps a drip or two once in a while after it pressurizes. I'm not a good enough welder to fix it, and I don't HAVE a good enough welder to either. Just thought you should know in case anyone is thinking about buying one. 
Might go back to the globe if I can't get this fixed. There is a version with no puke valve in the back.
Posted by: A&P Mech Apr 21 2018, 07:35 PM
That's a bummer! I bought my expansion tank from Canton racing. It has worked out perfectly. https://www.cantonracingproducts.com/cgi-bin/commerce.cgi?preadd=action&key=80-202
I purchased it from the garage sale section and paid around 80 bucks because it was scratched. To be honest I still haven't found the scratch? Great product and good service.
Ray
Posted by: Chris H. Apr 21 2018, 07:47 PM
Thanks Ray! Not a bad option.
Posted by: A&P Mech Apr 21 2018, 09:38 PM
Here is a picture of it mounted. 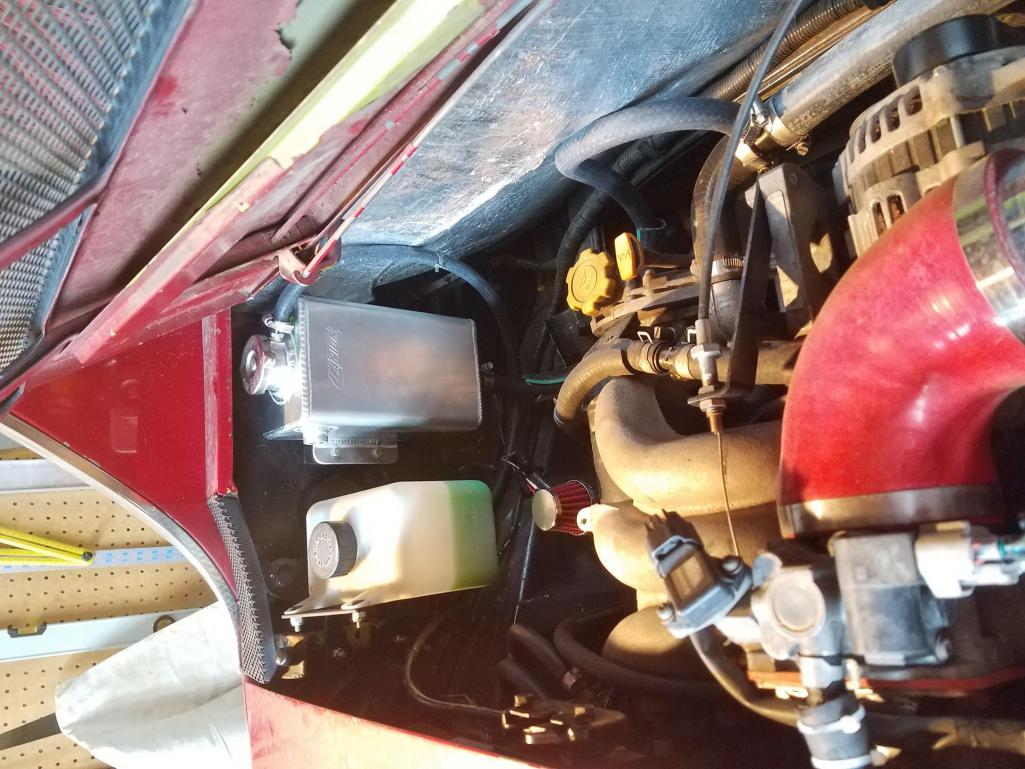 I made a bracket that allows me to bolt it into the stock relay panel mount.
Posted by: Chris H. Apr 22 2018, 09:18 AM
Here is a picture of it mounted.
I made a bracket that allows me to bolt it into the stock relay panel mount.Very nice Ray. Always rewarding to avoid making any holes if possible. I have no experience with aluminum but after a few searches it looks like it could be fixed. It takes quite a bit of pressure for it to start leeching coolant. Probably be able to use a brazing rod. I’ll try to get a video of it. If I mess it up no big deal.
Posted by: BIGKAT_83 Apr 22 2018, 07:52 PM
Send that tank down here and I'll welder it up
Bob
Posted by: Chris H. Apr 22 2018, 08:17 PM
Thanks Bob! I THINK I fixed it but we’ll see. If not I’ll send it right down. I brazed the holes with aluminum brazing rod. Now I just need to drive it around a while and see if it holds.
Posted by: Chris H. Jun 25 2018, 10:30 AM
Of course I can't leave the car alone...so I swapped over to a horizontal radiator similar to rnellums' setup last year and it's working fine, but can't stop thinking about this one: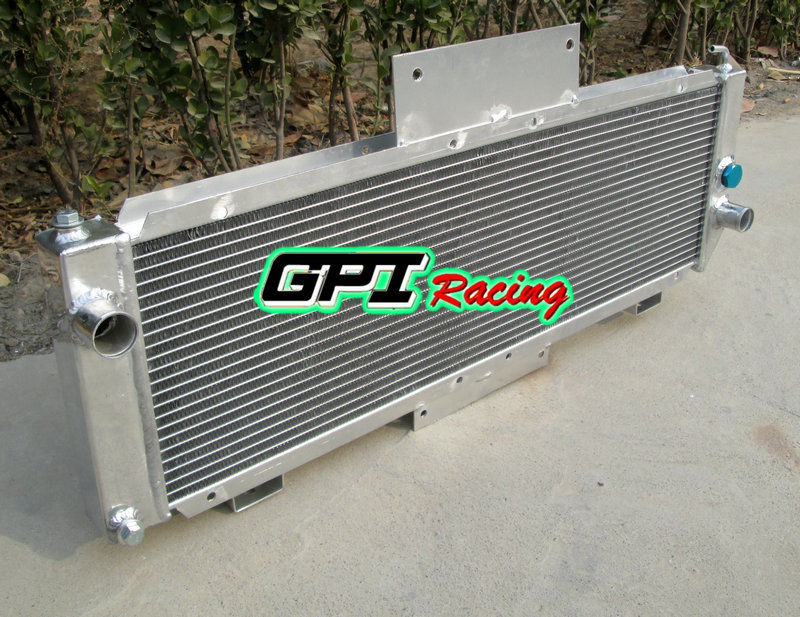
It's out of the Renault Alpine A310 V6 3.0. Monza-looking car that was not imported to the US.
So the original radiator I wanted to use years ago was the the 4.0 Jeep Cherokee rad but unfortunately it was too wide. This one is JUST narrow enough to fit. It's 10" tall and just under 31" wide. It would stand up vertically in front so I could push it almost flush with the front of the car. My only concern is whether it is large enough to cool the EG33. Assuming yes since the Renault is a V6 3.0l mid engine with radiator up front, but I guess there's only one way to find out. If it was a $50 RAD I would just go for it, but these are ~$200. What do you guys think?
Link to e-bay ad with more info:
https://www.ebay.com/itm/aluminum-alloy-radiator-radiateur-aluminium-Renault-Alpine-A310-V6-1977-85/252724332807?ssPageName=STRK%3AMEBIDX%3AIT&_trksid=p2060353.m1438.l2649
Posted by: 76-914 Jun 25 2018, 01:23 PM
Is that Celica set up not working for you Chris? How's everything else working? Did you get it running to your satisfaction?
Posted by: Mueller Jun 25 2018, 01:42 PM
Of course I can't leave the car alone...so I swapped over to a horizontal radiator similar to rnellums' setup last year and it's working fine, but can't stop thinking about this one:
It's out of the Renault Alpine A310 V6 3.0. Monza-looking car that was not imported to the US.
So the original radiator I wanted to use years ago was the the 4.0 Jeep Cherokee rad but unfortunately it was too wide. This one is JUST narrow enough to fit. It's 10" tall and just under 31" wide. It would stand up vertically in front so I could push it almost flush with the front of the car. My only concern is whether it is large enough to cool the EG33. Assuming yes since the Renault is a V6 3.0l mid engine with radiator up front, but I guess there's only one way to find out. If it was a $50 RAD I would just go for it, but these are ~$200. What do you guys think?
Link to e-bay ad with more info:
https://www.ebay.com/itm/aluminum-alloy-radiator-radiateur-aluminium-Renault-Alpine-A310-V6-1977-85/252724332807?ssPageName=STRK%3AMEBIDX%3AIT&_trksid=p2060353.m1438.l2649
How the heck did you stumble upon this radiator? Talk about rare and obscure!
I'm shocked someone is actually making this for such a small market, crazy...looks good. Posted by: Chris H. Jun 25 2018, 01:44 PM
Hi Kent! The Celica setup worked fine but I switched over to a BMW Z3 rad lying flat like Ross has so that I could reclaim the upper half of the front trunk. It's working well but this Alpine rad keeps calling my name. It SHOULD be a perfect fit and stand up right against the front trunk.
Car is running well. I bought a chipped ECU that really smoothed the power curve out. How about yours? Did you drive that V8 beast yet?
Posted by: Chris H. Jun 25 2018, 01:51 PM
How the heck did you stumble upon this radiator? Talk about rare and obscure!
I'm shocked someone is actually making this for such a small market, crazy...looks good.An embarrassingly lengthy internet search a while back Mike..
. Just kept searching for the dimensions until I found one that might fit. I agree...how many of these could they POSSIBLY sell??? I have never seen an A310 in person.
Posted by: mgp4591 Jun 25 2018, 02:07 PM
Hi Kent! The Celica setup worked fine but I switched over to a BMW Z3 rad lying flat like Ross has so that I could reclaim the upper half of the front trunk. It's working well but this Alpine rad keeps calling my name. It SHOULD be a perfect fit and stand up right against the front trunk.
Car is running well. I bought a chipped ECU that really smoothed the power curve out. How about yours? Did you drive that V8 beast yet?
Pictures of your flat radiator setup would be great to see! Do you vent out the bottom or somewhere else? And the Alpine radiator looks suspiciously like the stock SVX radiator that I've planned to use. If you go the way of standing it up in front, how will that affect the trunk space you've got left and where will you vent it? And it's good to see you have the chipped ECU also! It works great in the SVX now so I can only imagine the difference it makes in a smaller chassis.... Did you pick it up used or send yours out?
Posted by: Chris H. Jun 25 2018, 02:33 PM
Sure I can add some pics of my current setup. Right now it's sitting a little high on a somewhat temporary mount but you'll get the idea. I have not added any ducting yet so I assume the air flow is pretty undirected and could be refined. Before I finalize the install I want to be SURE this is what I'm sticking with. Air exits out the bottom. If I go to the alpine setup I could still build a shroud similar to (but much wider than) an oil cooler shroud angling downward to the floor vent.
The SVX rad is actually quite a bit taller than the Alpine rad. The Alpine is only 10" tall, whereas the SVX is about 15" tall and not quite as wide.
Regarding the chip, it's actually an earlier version of the ECUTune chip. Same map and also allows you to use 87 octane if you want. There is a switch that you install that retards the timing a bit in 87 octane mode...so...I won't be using it unless I do a long road trip or something. I actually bought the ECU with the chip installed from a guy who did a bunch of Vanagon conversions. Really smoothed things out.
Posted by: mgp4591 Jun 25 2018, 02:46 PM
Sure I can add some pics of my current setup. Right now it's sitting a little high on a somewhat temporary mount but you'll get the idea. I have not added any ducting yet so I assume the air flow is pretty undirected and could be refined. Before I finalize the install I want to be SURE this is what I'm sticking with. Air exits out the bottom. If I go to the alpine setup I could still build a shroud similar to (but much wider than) an oil cooler shroud angling downward to the floor vent.
The SVX rad is actually quite a bit taller than the Alpine rad. The Alpine is only 10" tall, whereas the SVX is about 15" tall and not quite as wide.
Regarding the chip, it's actually an earlier version of the ECUTune chip. Same map and also allows you to use 87 octane if you want. There is a switch that you install that retards the timing a bit in 87 octane mode...so...I won't be using it unless I do a long road trip or something. I actually bought the ECU with the chip installed from a guy who did a bunch of Vanagon conversions. Really smoothed things out.
Since the Alpine engine is a 3.0, I'd think the cooling would be sufficient. It's also mounted in the front too, correct? And I didn't know it was only 10 inches tall! I'm measuring around 17 on the SVX radiator and I'm still thinking about the venting solution but I don't want to go out the bottom - I'm trying to keep it as stable as possible at speed and in crosswinds since we have more than a few of when I drive out of state - almost anywhere results in desert.
And the switch on the chipped ECU is a neat option especially if forced induction is added. The availability of fuel options on road trips is nice to manage too - I'll have to look into that as an option. Thanks for the info!
Posted by: 76-914 Jun 25 2018, 03:20 PM
Chris, freessm is the program I mentioned in the pm. Check it out. Youtube has some videos it in use.
Posted by: 914forme Jun 26 2018, 02:47 PM
The SVX rad is actually quite a bit taller than the Alpine rad. The Alpine is only 10" tall, whereas the SVX is about 15" tall and not quite as wide.
Regarding the chip, it's actually an earlier version of the ECUTune chip. Same map and also allows you to use 87 octane if you want. There is a switch that you install that retards the timing a bit in 87 octane mode...so...I won't be using it unless I do a long road trip or something. I actually bought the ECU with the chip installed from a guy who did a bunch of Vanagon conversions. Really smoothed things out.
Great Tip on the Alpine RAD, Ebay also has one listed that is a 56mm core thickness instead of the 40mm in your listing. Just in case you need a bit more cooling, in close to the same size.
Glad to hear the ECU Tune chip does the trick, stage one tune. That is, watched the videos on the turbo build with the EG and all the stuff he went thru to get it to run correctly with an MS unit.
Love to see this project continue to evolve and become more refined.
Posted by: motoTrooper Jun 30 2018, 04:10 PM
Thanks for sharing your experience so far with the chipped ECU, Chris. Nothing like hearing from actual users of a product.
Posted by: Chris H. Jul 2 2018, 10:04 AM
FYI I asked several vendors of the Renault A310 rad on e-bay what the widths of the two version were last week. Not all gave the same answer but based on the "most frequently used" measurements the 56mm thick version is allegedly 5mm wider than the 40mm (810 vs 805mm). Makes no sense but based on that it does not look like the 56mm version would fit vertically up against the front trunk without modifications. 5mm makes a pretty big difference this time. The 40mm version MIGHT fit but it's hard to tell without having it in hand. You could angle it forward and it would fit very low like an oil cooler under the headlight area (almost) for sure. And BTW I'm comparing/pondering all of this on a later 914. Pre-'75 you will have that semi-circle hoop up front to deal with.
I did some volume calculations of the rads (core length X core width X thickness)
Celica rad = 650
40mm A310 = 509
56mm A310 = 710
Baseline is the Celica which we know works very well. The 40mm is 22% smaller, the 56mm is 10% larger. Unfortunately the 56mm rad has shot up in price to ~$300 for the US import (the rest are straight from China). The 40mm is still $185.
Stephen I saw in another thread you might have one at your shipping depot. Let us know if you give it a try...
Probably should have kept the Celica rad and left it alone!
Posted by: 914forme Jul 2 2018, 03:02 PM
I went with the A310 52mm RAD due to the fact I plan on adding some forced air to the mix at some point.
And well......
Attached thumbnail(s)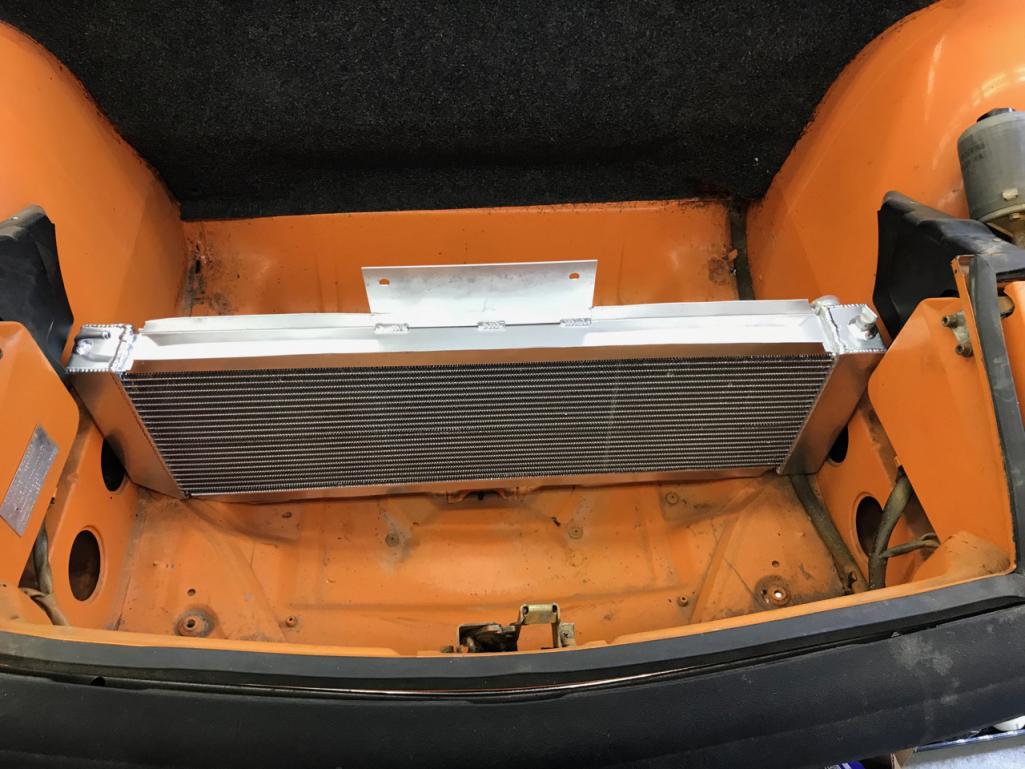
Posted by: 914forme Jul 2 2018, 03:06 PM
Even like that it is a bit tight on the sides, would make the mount easy enough, and does leave a bit more of the trunk as usable space. If I tilt it at a angle, might make it work, that being said a bit of will make it fit also. And we all know I am not afraid of any of those tools.
Large Power Sanders = Respect 
Posted by: Chris H. Jul 2 2018, 03:29 PM
Wow you got one! Cool! How does it fit if you angle at about 45 degrees so it's right under the headlight boxes like this? See my crudely drawn lines in the pic below: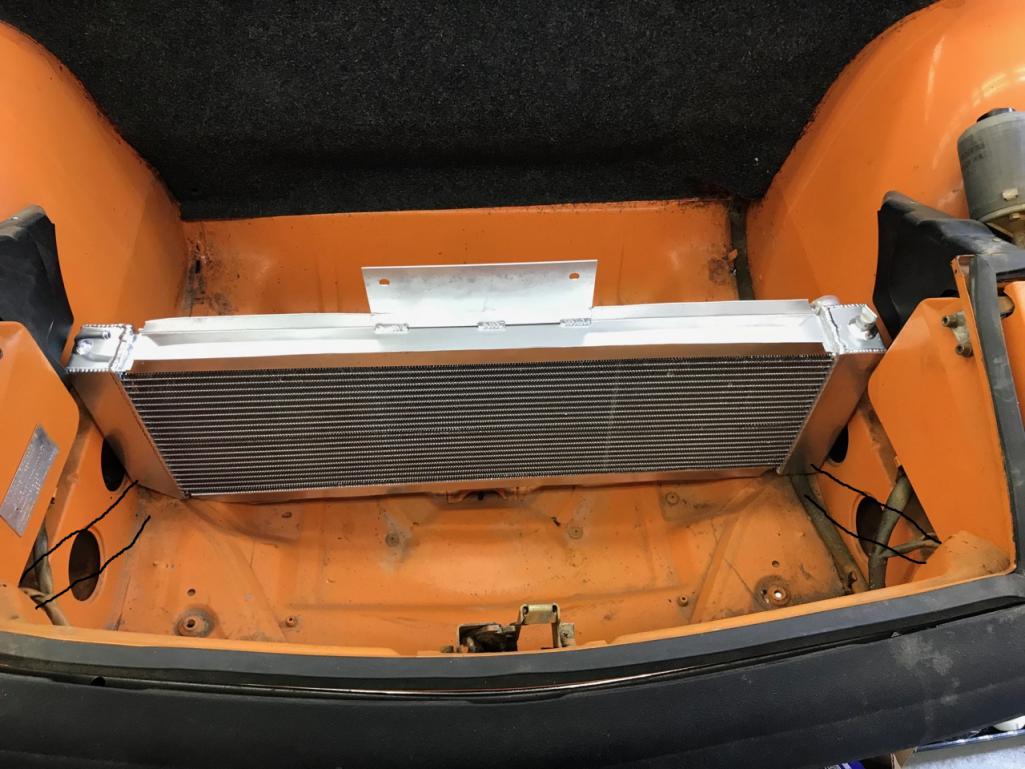
I vent out the bottom so it would be easy to build an oil cooler type shroud.
Posted by: 914forme Jul 2 2018, 06:55 PM
Chris I took your idea and inverted it, but I think it will work, not optimal but should work.
From this angle it looks not that bad.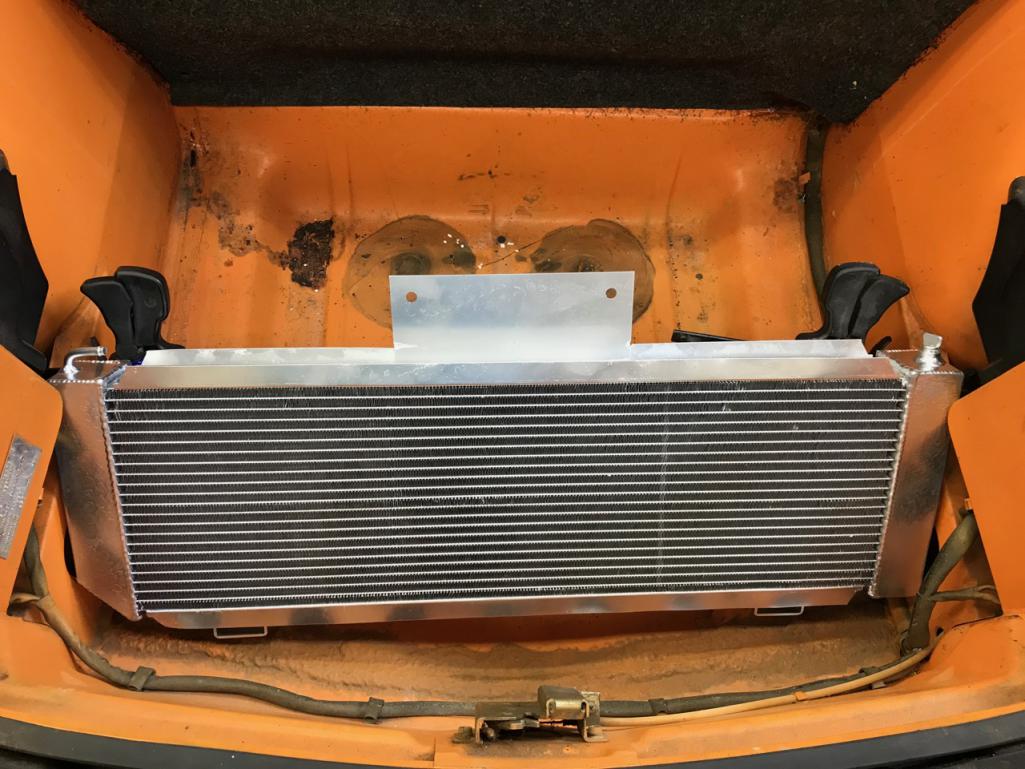
But from this one it is a bit worse.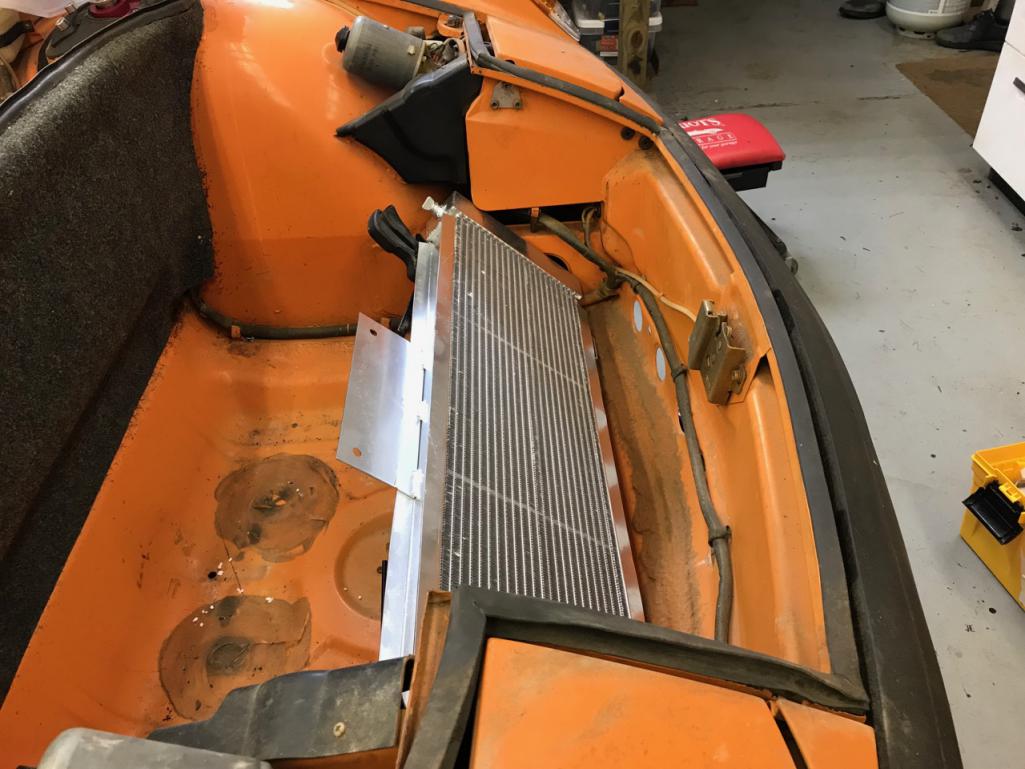
It gets it down with a little bit of a hump and then you can put a cover over the rest. It would be the same height as the standard board over the spare tire. Front duct work would go right below the front latch. The one that will be hard for me is the condenser for the AC. Alpines come with A/C Build the ductwork and put a coke cooler in the front trunk. In reality I will most likely put a fiberglass tub up there, and toss a couple of water sealed bags for tool, and other 914 emergency items....
Posted by: Mueller Jul 5 2018, 08:08 PM
^looking at the radiator, any issue with finding fan(s) with a small enough diameter so they are not sticking out the top or bottom?
Posted by: 914forme Jul 10 2018, 07:59 PM
10" fans use 3 for good measure
Posted by: Mueller Jul 10 2018, 08:02 PM
10" fans use 3 for good measure
That'll give it a unique look as well.... I like it.
Posted by: Andyrew Jul 10 2018, 08:14 PM
What about notching the headlight buckets?
Posted by: Chris H. Jul 10 2018, 08:25 PM
What about notching the headlight buckets?
That just MIGHT work. Seemed like it was less than an inch too wide the way I measured it. If so you don't need much to get it to fit.
Posted by: 914forme Jul 11 2018, 09:45 AM
I was planning on using a notch, but not the head light buckets. Where it sits now, should be good for my setup. I will be adding a notch in the support to allow the rad to slide down into it. A couple of U's with foam to support the rad and let it float separate from the chassis, and still be sealed. Another U up top to seal the deal, build the duct work front and rear and then a fan shroud and the rear ductwork. I will still have a bit of the Frunk to use.
My biggest challenge now is finding a A/c Condenser that fits. Have not found one for a Renault Alpine. So off to get one custom made, and well that will equal $$$, and once I started looking at dollars I looked at Restomod Air system, and very bad came about.
Posted by: ThePaintedMan Jul 11 2018, 10:13 AM
With the Alpine radiator, could you not have someone notch the tanks or shorted the radiator at a local shop? We're just talking a half inch on both sides, right?
Also, what size are Boxster radiators? Or how bout MR2?
Posted by: Chris H. Jul 26 2018, 03:39 PM
Dang, I placed an order on Tuesday afternoon and got my 914rubber order TODAY already!
Check out my engine lid-to-body seal. It was so brittle it was breaking off in huge chunks. 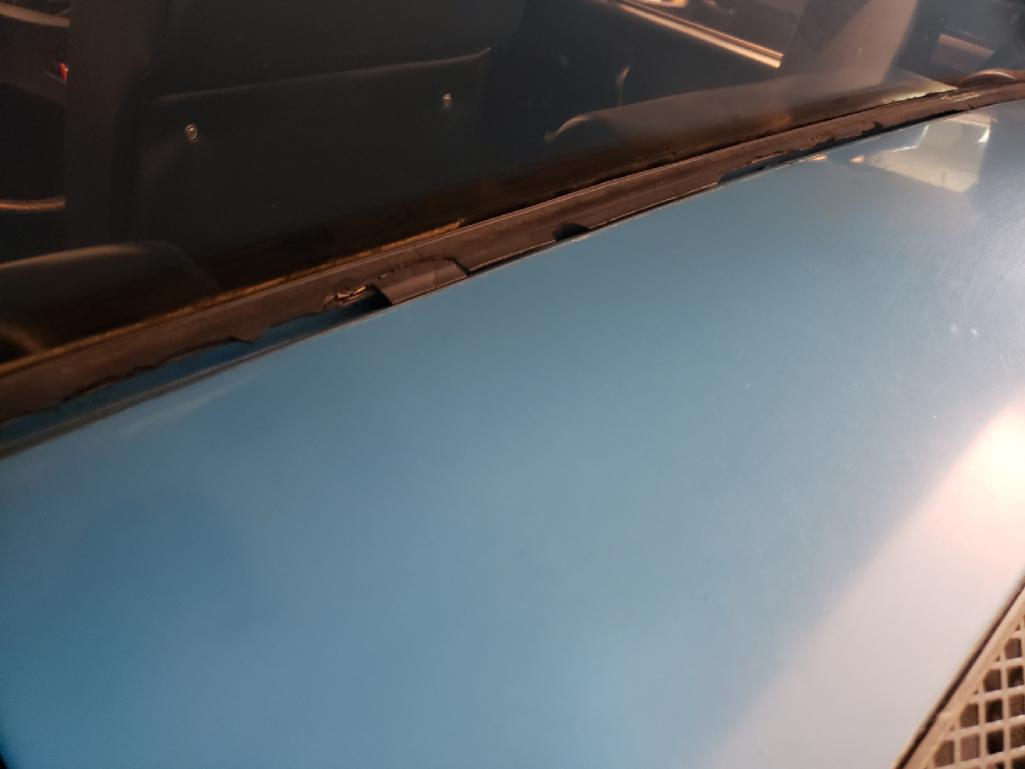
And the new purty one: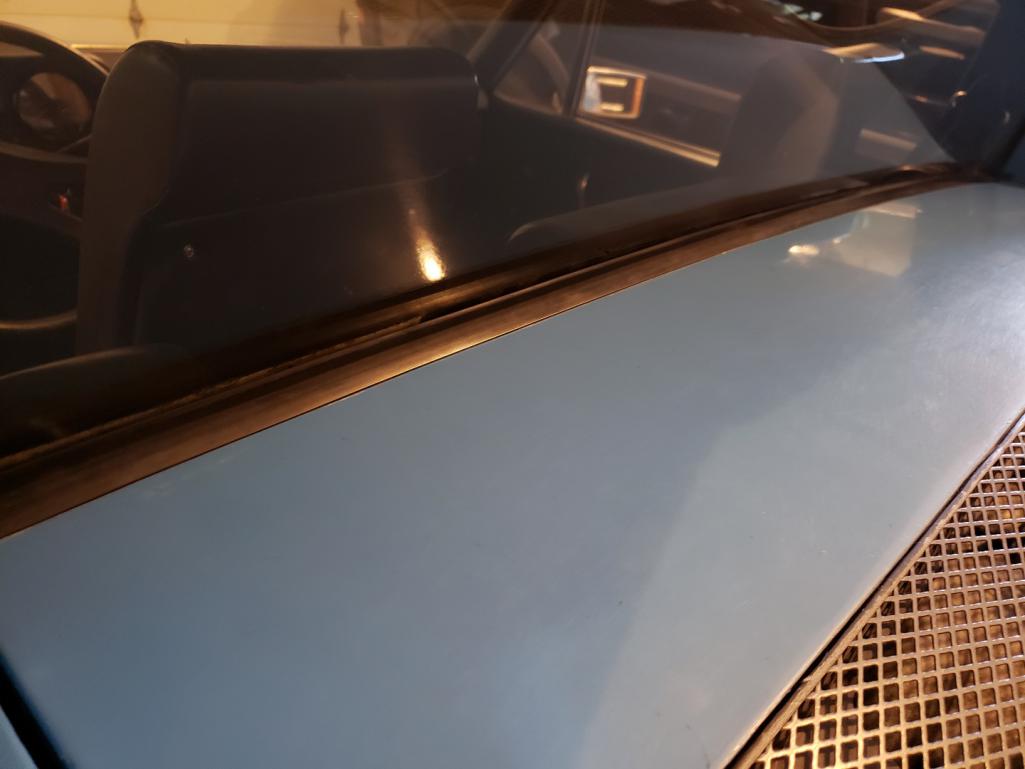
Think maybe I needed new wiper caps?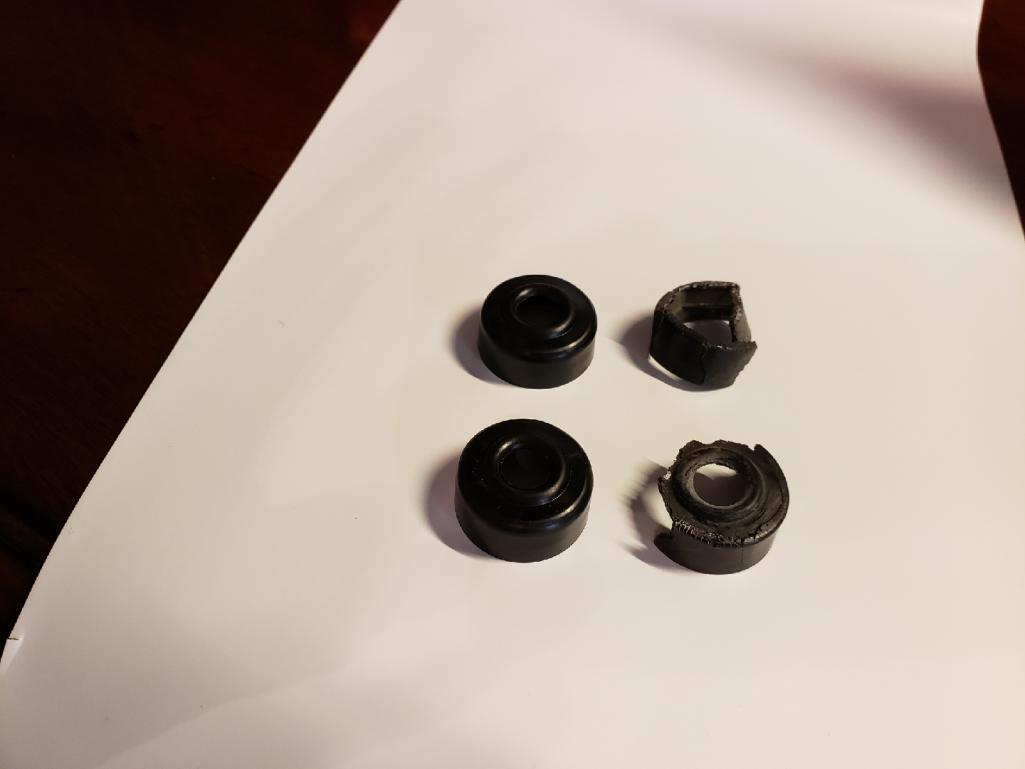
The new ones are on the left...just FYI .
Next I reinstall my rubber bumper tops with new rubber base spacer things. They should fit a lot better.
All this satisfaction for less than $40. You just can't beat it.
Posted by: Chris914n6 Jul 26 2018, 04:04 PM
10" fans use 3 for good measure
If its sealed, the fan(s) don't actually need to be attached to the rad. You can do 1 big fan in a hole in the floor for example, or make ducts like Kent did and put a fan on each exit.
Look into aftermarket "hotrod" condensers, they come in many sizes. They even make one that will fit under half the engine lid, though I would run 2 to be effective.
Posted by: 914forme Jul 26 2018, 04:36 PM
I have not seen that A/C condenser in any of my hotrod air searches, so please do tell?
Posted by: Chris914n6 Jul 26 2018, 09:16 PM
I have not seen that A/C condenser in any of my hotrod air searches, so please do tell?
Search "Universal AC Condenser". I think I figured out a 11"x20" would fit under the engine lid. Remove the rain pan and make a shroud so all the air has to pass thru it. Likely need 2 end to end with either Y fittings or parallel to cool well enough plus fans when your stopped. It was part of the brainstorming when I was designing the under cowl AC unit.
I have the parts to build a machine to do large enough vacuum forming for the shroud but it will be a while before I have the free time.
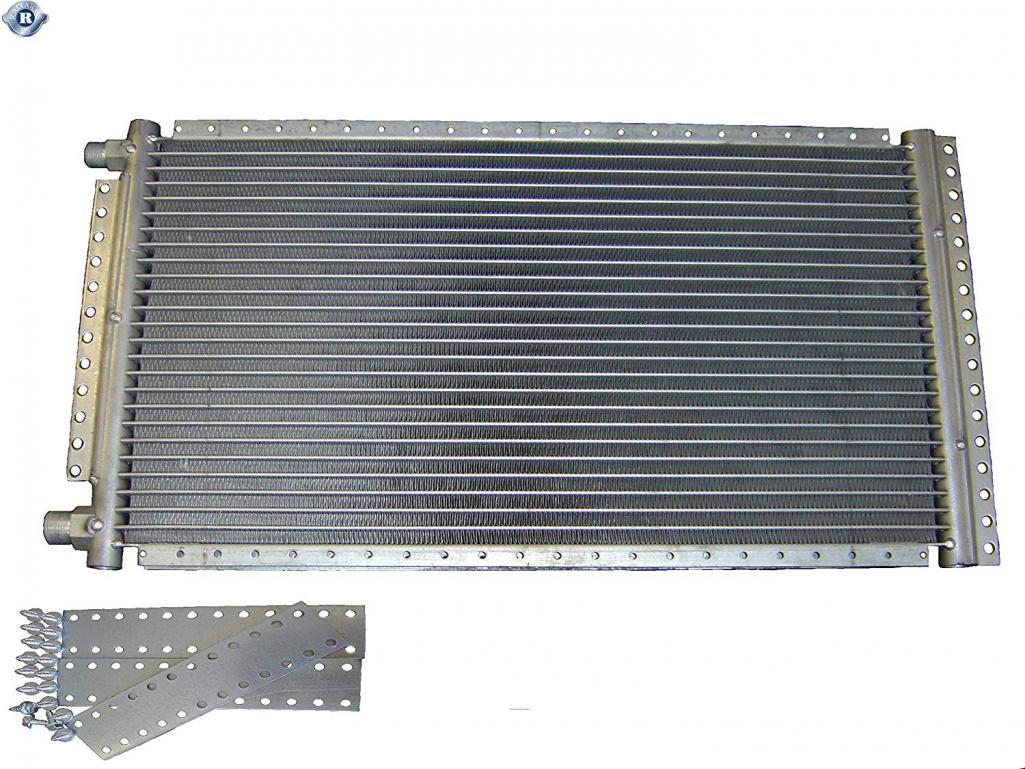
Posted by: 76-914 Jul 26 2018, 10:18 PM
I was planning on using a notch, but not the head light buckets. Where it sits now, should be good for my setup. I will be adding a notch in the support to allow the rad to slide down into it. A couple of U's with foam to support the rad and let it float separate from the chassis, and still be sealed. Another U up top to seal the deal, build the duct work front and rear and then a fan shroud and the rear ductwork. I will still have a bit of the Frunk to use.
My biggest challenge now is finding a A/c Condenser that fits. Have not found one for a Renault Alpine. So off to get one custom made, and well that will equal $$$, and once I started looking at dollars I looked at Restomod Air system, and
very bad came about.Stephan, you get a universal one that is a close to the radiators size as possible. I say this to maximize airflow, not to improve AC cooling.They come with "L" brackets so you can hang them in front of your radiator.
Posted by: Andyrew Jul 27 2018, 05:26 PM
I have not seen that A/C condenser in any of my hotrod air searches, so please do tell?
Search "Universal AC Condenser". I think I figured out a 11"x20" would fit under the engine lid. Remove the rain pan and make a shroud so all the air has to pass thru it. Likely need 2 end to end with either Y fittings or parallel to cool well enough plus fans when your stopped. It was part of the brainstorming when I was designing the under cowl AC unit.
I have the parts to build a machine to do large enough vacuum forming for the shroud but it will be a while before I have the free time.
Why not run it in front of the radiator? I'm not a fan of running rubber lines to something that moves often. Worst case, run it in the fender with a fan. That's what the 911s do.
Posted by: JRust Feb 2 2019, 01:17 PM
How about angled the other way with the top towards the front? Sorry I know this is a bit old. Just borught to life in my thread & Chris linked me to this. I bought this same radiator to play with
Chris I took your idea and inverted it, but I think it will work, not optimal but should work.
From this angle it looks not that bad.
But from this one it is a bit worse.
It gets it down with a little bit of a hump and then you can put a cover over the rest. It would be the same height as the standard board over the spare tire. Front duct work would go right below the front latch. The one that will be hard for me is the condenser for the AC. Alpines come with A/C
Build the ductwork and put a coke cooler in the front trunk. In reality I will most likely put a fiberglass tub up there, and toss a couple of water sealed bags for tool, and other 914 emergency items....Posted by: 914forme Aug 16 2019, 11:45 AM
Okay so @http://www.914world.com/bbs2/index.php?showuser=129 , I am really late to the answer. No reason not to, just would need to figure out the tanks. In reality if you go with the 40mm version it should fit with out issue.
Chris re-read the entire thread over that past couple days lunches, still impressed, lets have that conversation
Powered by Invision Power Board (http://www.invisionboard.com)
© Invision Power Services (http://www.invisionpower.com)