Printable Version of Topic
Click here to view this topic in its original format
914World.com _ 914World Garage _ Project Time! 71 garage build
Posted by: dfelz Jan 14 2013, 12:59 AM
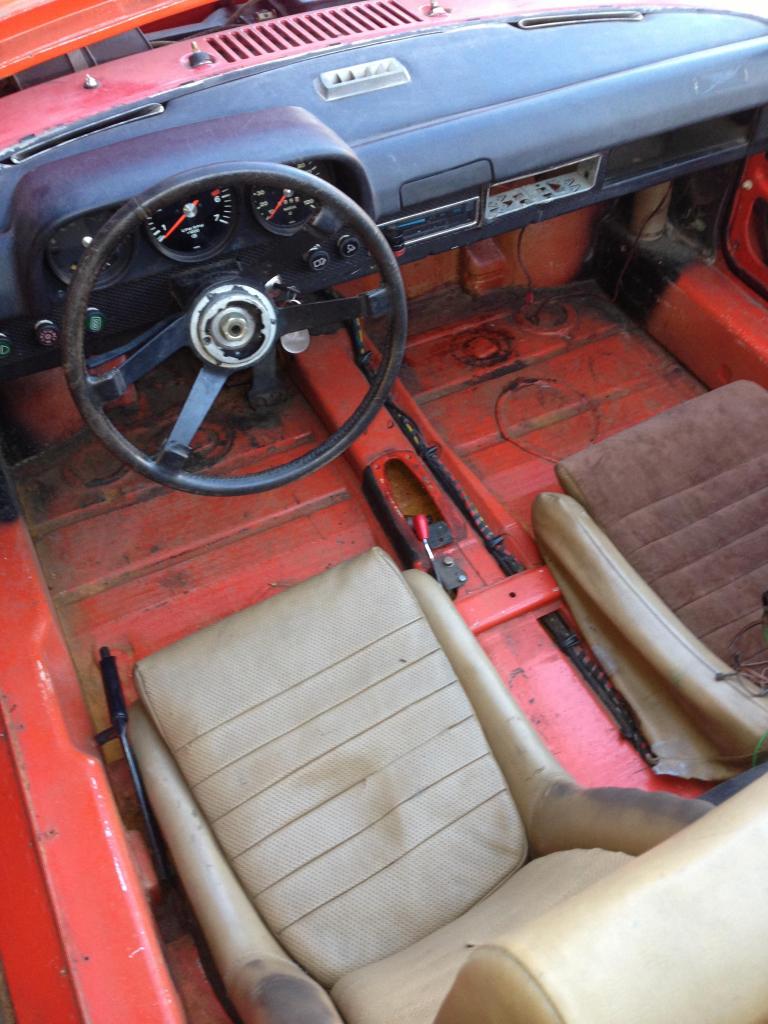
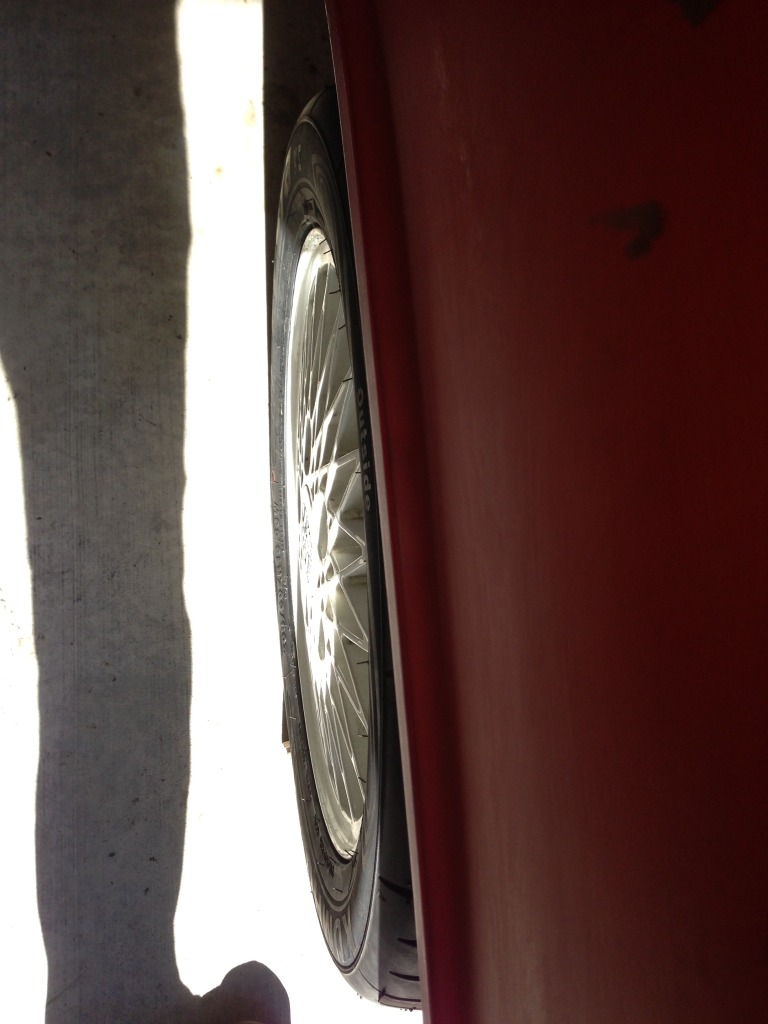
So today I bought a new shell for my project build, and I am extremely happy with my purchase! The body is in wonderful condition, perfectly straight, clean title, very minimal rust (and the rust it does have can be easily fixed without having to purchase RD pieces), and most importantly it was the right price 
Looks better in person but here are some pics.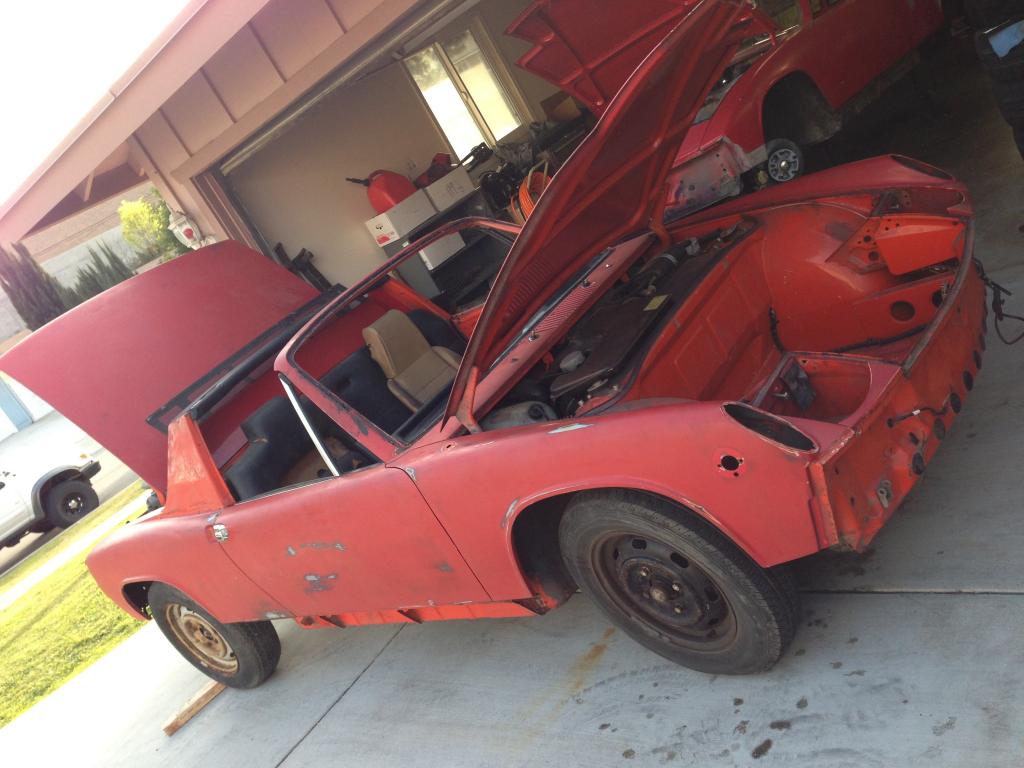

Already swapped on the tail lights from my 72 parts car (the one in the garage)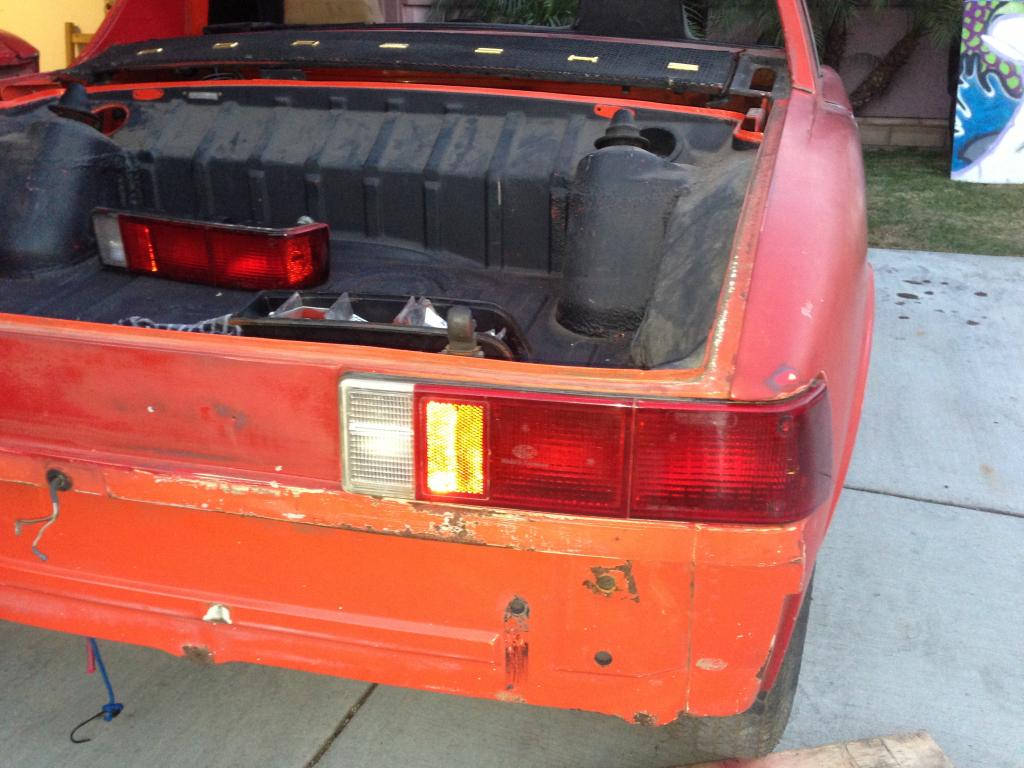
Car has no front or rear windshield or engine/trans, but thats what parts cars are for. The car does have all the wiring in tact and non-molested, yay. So i have all of the parts needed to put this guy on the road plus lots of extras that will be added at a later point (one piece front fiberglass flared clip, rear 7" FG flairs, FG 911 dash with 5 gage pod..etc)
If anyone was watching the thread called 20 year hibernation, you would see that i indeed got the little 1.7 to fire up, and idle nicely too, That wil be going in this beauty. So this week one of the tasks is to drop the engine and pop the top end off and take a look inside, hopefully it doesn't need too much work...
I'm really excited now that I have a "rustless" roller to play with!! 
Posted by: mrbubblehead Jan 14 2013, 01:21 AM
CONGRATS David. Looks like you got a nice tub. I live in Yucaipa, about 30 minutes from you. If you need a hand with anything give me a shout. I would be happy to help.
Doug
Posted by: rnellums Jan 14 2013, 08:43 AM
That looks swell!
Posted by: 76-914 Jan 14 2013, 09:55 AM
nice find and the dash looks good, also. your in a good area for support. lots of us sickies all around you.  be sure to block out some time each day or each week to work on your project. good luck.
Posted by: dfelz Jan 14 2013, 02:59 PM
Thanks for the support guys! I really appreciate the lending a hand offer Doug!
76-914, you don't have to worry about me not putting in time, the cars been in my driveway for 20 hours, I have already put in 7 hours, 8 of the twenty was spent sleeping and the rest was eating 
Posted by: boogie_man Jan 14 2013, 03:41 PM
Was that the car in Running Springs ??? Good looking project and congrats.
Scott
Posted by: FourBlades Jan 14 2013, 06:21 PM
That puts you 75% of the way there!
Now you can start on the other 75%!
(Kidding, I think 75% there is probably right).
John
Posted by: effutuo101 Jan 14 2013, 07:37 PM
Great find! Looking forward to watching this build.
Posted by: dfelz Jan 14 2013, 11:27 PM
HaHa, I'm gonna guess the 75% left case, cause I will always want to make it better
Just put another 4 hours in after i got home from class. Right now my bigest priority is getting the 5-lug suspension on this car and getting the 4-lug on the other so i can have them switch spots and have my new baby in the garage!
So i started by taking off the rear suspension on both cars. I am also switching out the shock bearing pins with the kind that has the ball on the end for a rear sway bar. Although i wont be installing the bar right away it will be easier to do it now rather than later. 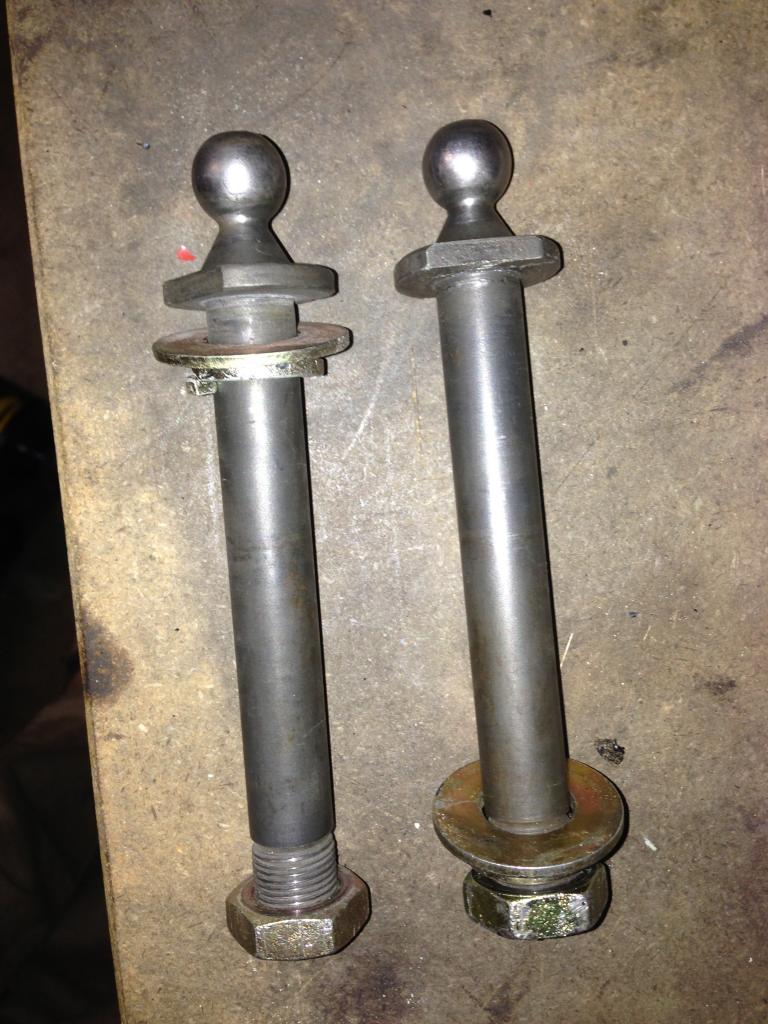
So before i started working on the suspension, i took out the relay board from my engine/parts car to clean up and examine. noticed one small problem on the backside of one of the regulator terminals. It pops out when you push the posts on the regulator side in.... hmm, should i epoxy over this void area to hold it in place and protect it from the elements???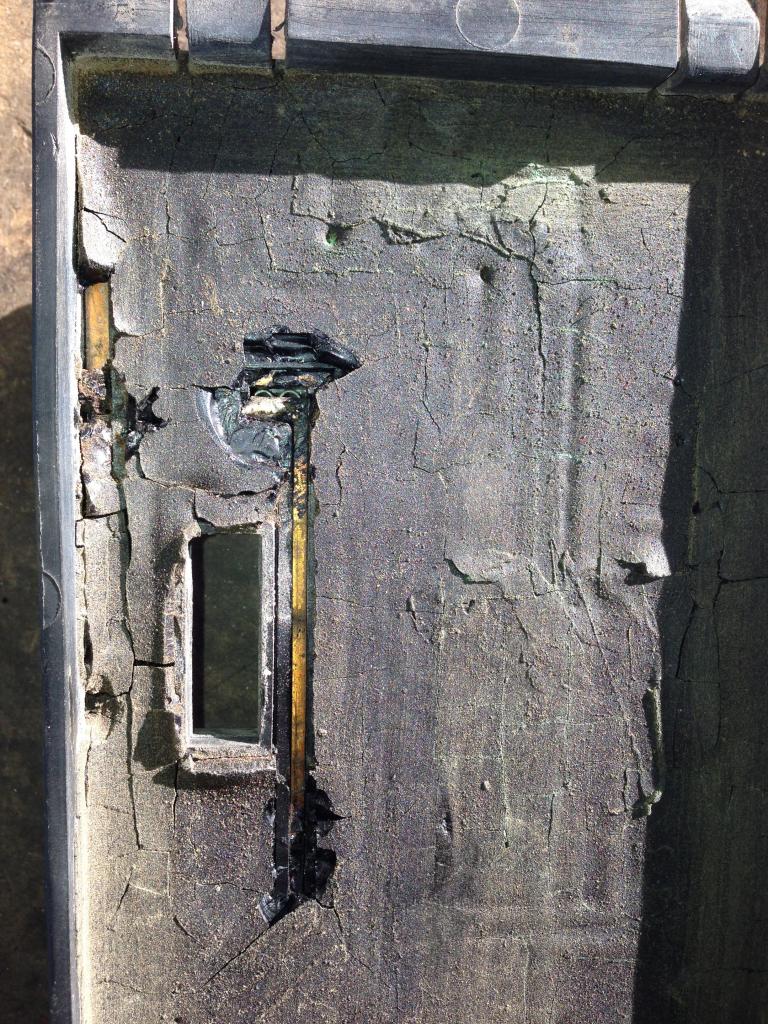
Posted by: euro911 Jan 14 2013, 11:43 PM
Carefully dig out all that old potting material, VOM all the connections and re-pot it.
Nice find 
Posted by: dfelz Jan 14 2013, 11:56 PM

Carefully dig out all that old potting material, VOM all the connections and re-pot it.
Nice find
VOM stands for...????
Where can i get the re-potting material, whats it called?
Thanks Mark
Posted by: mittelmotor Jan 15 2013, 12:04 AM
Carefully dig out all that old potting material, VOM all the connections and re-pot it.
Nice find
VOM stands for...????
Where can i get the re-potting material, whats it called?
Thanks Mark
I think the factory used sun-baked adobe clay, spray-painted black.
They all seem to crack like that. Maybe you could use 2-part epoxy to re-seal. Mark??Nice solid car there, Dave. And no lack of enthusiasm on your part!
Posted by: dfelz Jan 15 2013, 12:36 AM
Carefully dig out all that old potting material, VOM all the connections and re-pot it.
Nice find
VOM stands for...????
Where can i get the re-potting material, whats it called?
Thanks Mark
I think the factory used sun-baked adobe clay, spray-painted black.
HAHAHAHA


Posted by: '73-914kid Jan 15 2013, 12:44 AM
Clean out the old insulating material, and pour over liquid electrical tape. It's acts similarly as the old stuff. http://www.homedepot.com/h_d1/N-5yc1v/R-100119178/h_d2/ProductDisplay?catalogId=10053&langId=-1&keyword=liquid+electrical+tape&storeId=10051#.UPT7Jyf7KSo
BTW, what major are you? I'm surprised we haven't met yet around campus.
-Ethan
Posted by: dfelz Jan 15 2013, 01:13 AM
Clean out the old insulating material, and pour over liquid electrical tape. It's acts similarly as the old stuff. http://www.homedepot.com/h_d1/N-5yc1v/R-100119178/h_d2/ProductDisplay?catalogId=10053&langId=-1&keyword=liquid+electrical+tape&storeId=10051#.UPT7Jyf7KSo
BTW, what major are you? I'm surprised we haven't met yet around campus.
-Ethan
I'm a fourth year Mechanical Engineering major, so I spend all of my time in building 9! What about you? I know we have a few friends in common though, some from the cpp imports group, like Kyle Graves... I know i have seen your car on campus a few times too. The other day i actually saw two 914s in the same parking lot on the same row, it made my morning. Both i had never seen on campus before either, one was white and the other was a turquoise-ish color.
Thanks for the link on liquid electrical tape!
Posted by: '73-914kid Jan 15 2013, 01:35 AM
2nd year aero major, so i'm all over the place for the next few quarters..haha and yeah, i havent seen Kyle at all this year. I'm always parked right at the front of the parking structure, but ive definetely seen a few 914's on campus every now and then.
Posted by: dfelz Jan 15 2013, 01:42 AM
2nd year aero major, so i'm all over the place for the next few quarters..haha and yeah, i havent seen Kyle at all this year. I'm always parked right at the front of the parking structure, but ive definetely seen a few 914's on campus every now and then.
Good deal man, one of my roommates is an aero major, his name is charlie welch, dont know if you have run into him at all, hes technically a fourth year but i think only at junior standing as far as areo goes. I believe he just took aero 301 last quarter.
Posted by: euro911 Jan 15 2013, 02:00 AM
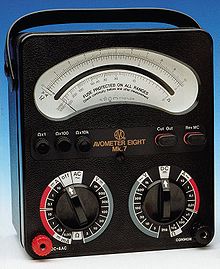
You young college kids 
Volt Ohm Meter http://en.wikipedia.org/wiki/Multimeter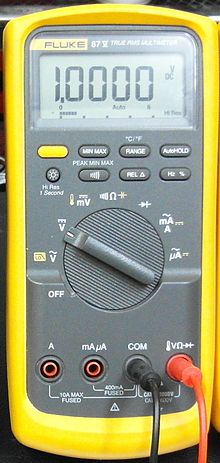
... or what they looked like when I first started using them 
Yeah, liquid electrical tape, or Plasti Dip will do the trick.
Posted by: oldschool Jan 15 2013, 09:48 PM
Clean out the old insulating material, and pour over liquid electrical tape. It's acts similarly as the old stuff. http://www.homedepot.com/h_d1/N-5yc1v/R-100119178/h_d2/ProductDisplay?catalogId=10053&langId=-1&keyword=liquid+electrical+tape&storeId=10051#.UPT7Jyf7KSo
BTW, what major are you? I'm surprised we haven't met yet around campus.
-Ethan
You back in town. Sorry for the (HJ)....
Posted by: dfelz Jan 15 2013, 10:17 PM
HELP
Was taking off the trailing arm and one of the bolts sheared off inside the suspension console!! What do i do!?! 
anything besides drilling it out and ruining the threads????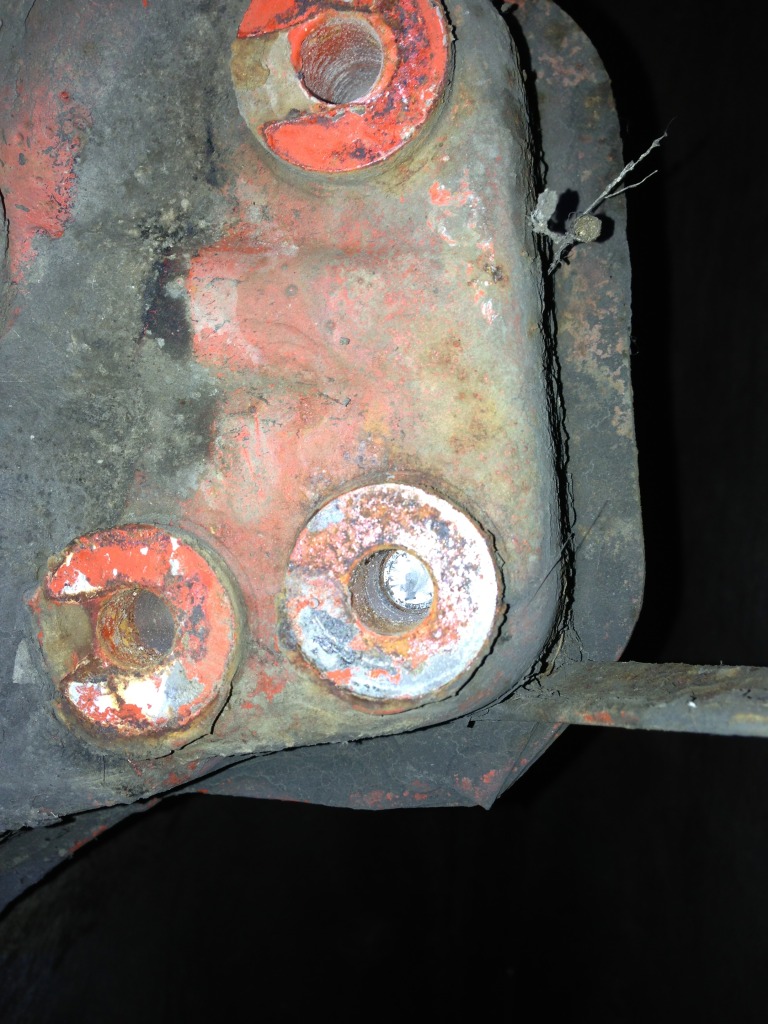
Posted by: euro911 Jan 15 2013, 11:44 PM
Before trying to drill out the whole bolt, soak the bore with PB Blaster or Liquid Wrench (for a day or two), drill the center of the bolt with a 1/4" bit and try an easy out.
Looks like all those threads are gonna need chased anyway.
Posted by: dfelz Jan 15 2013, 11:53 PM
Before trying to drill out the whole bolt, soak the bore with PB Blaster or Liquid Wrench (for a day or two), drill the center of the bolt with a 1/4" bit and try an easy out.
Looks like all those threads are gonna need chased anyway.
Do i have access to those holes from the top?? it looks like there are plastic covers up there, do those just pop off??
Posted by: mrbubblehead Jan 16 2013, 12:01 AM
Before trying to drill out the whole bolt, soak the bore with PB Blaster or Liquid Wrench (for a day or two), drill the center of the bolt with a 1/4" bit and try an easy out.
Looks like all those threads are gonna need chased anyway.
Do i have access to those holes from the top?? it looks like there are plastic covers up there, do those just pop off??
Yes they just pop off. Try everything you can to get it out. If you end up jacking it up, all is not lost. Tangerine Racing make a replacement insert to weld in there. Dont sweat it, yours isnt the first to break off in there. I used anti seize and grade 10 bolts in mine.
Posted by: euro911 Jan 16 2013, 12:01 AM
I haven't had a rear suspension apart (yet), don't know 
Somebody will pop in with the answer (and I'll be watching - I need to rebuild a couple of suspensions myself) ![popcorn[1].gif](style_emoticons/default/popcorn[1].gif)
Jeremy and I just got home from our auto shop class and I saw your voice mail. I thought it might be too late to return your call ...
Posted by: mrbubblehead Jan 16 2013, 12:15 AM
If you try the easy out be very careful not to break it off in there. Easy outs are hardened and extremely difficult to get out. If your lucky the broken bolt will loosen up while your drilling the hole for the easy out. I would keep increasing the size of your bit and use the biggest easy out you can get in there. the first hole you drill will be the most important. It's gotta be STRAIGHT thru the bolt. Lots of rapid tap on your drill bits. and like mark said, soak the shit out of it with pb blaster from the top. Maybe pound on it with a punch too to loosen it up. I will be around if you need some help pm me.
Posted by: dfelz Jan 16 2013, 12:30 AM
Thanks guys!! I'll start soaking it tonight!
Mark i left the message so you wouldn't have a missed call from a random number and no explanation. now you have my cell too!
I also have your battery ready to go, charged it today at school. I'm open the whole weekend so when ever works for you is good for me 
Posted by: dfelz Jan 17 2013, 01:19 PM
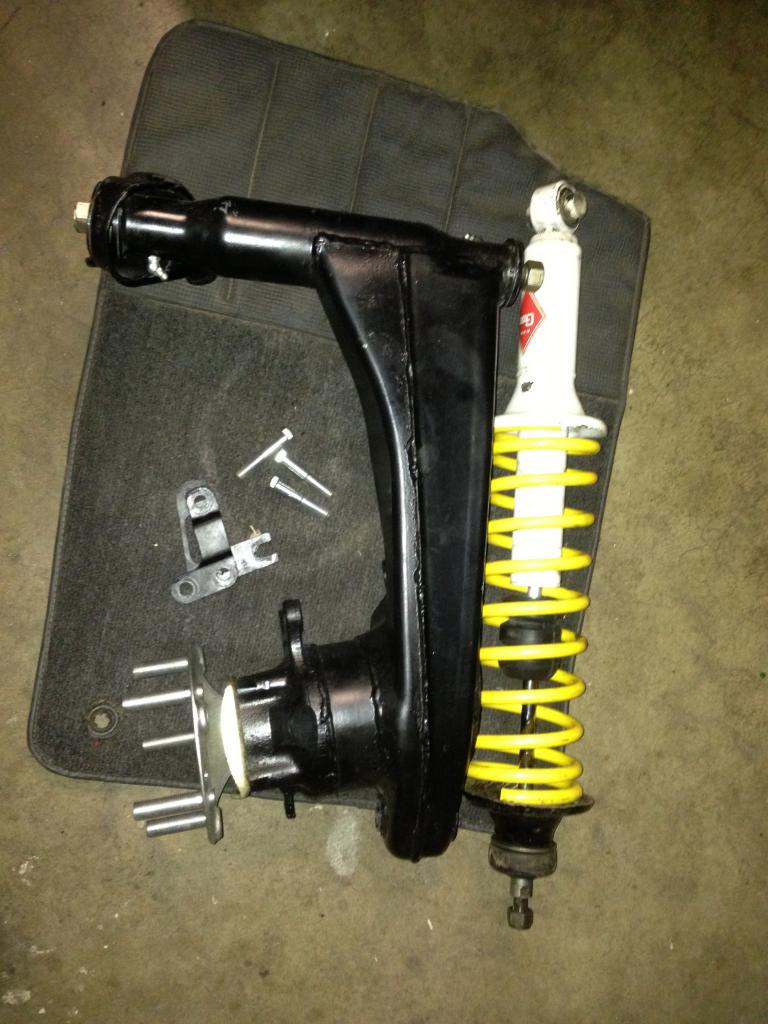
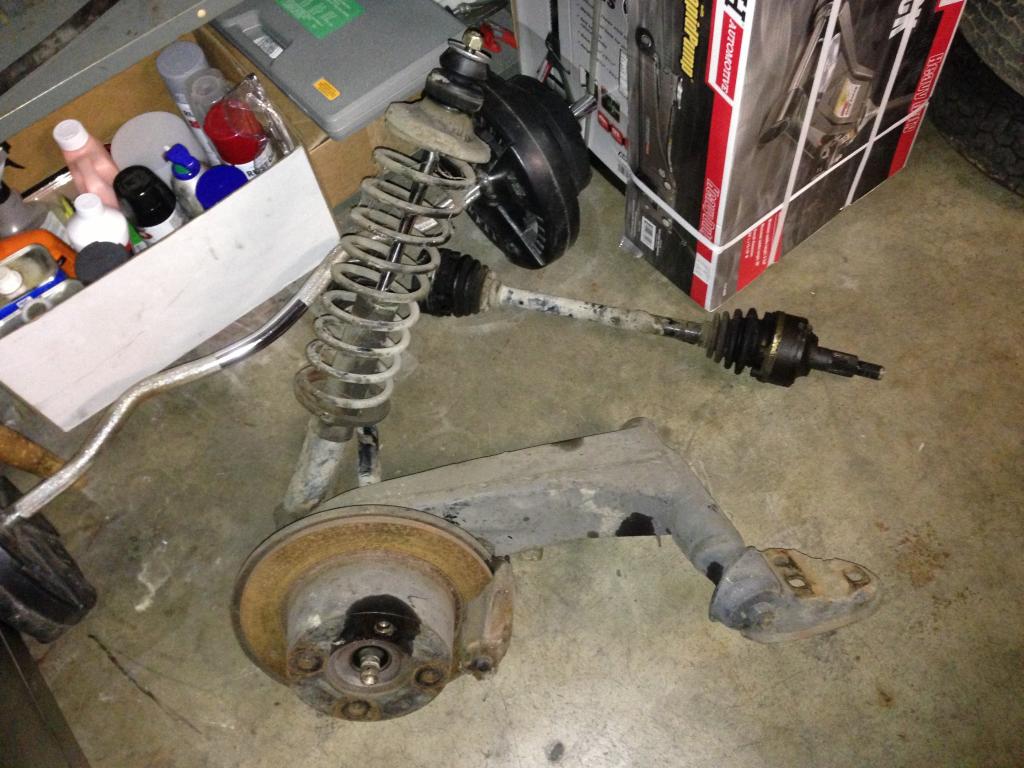
Got the front suspension all swapped! New five lug is on the car with the turbo tie rods, m-calipers and all.
Old one off in one piece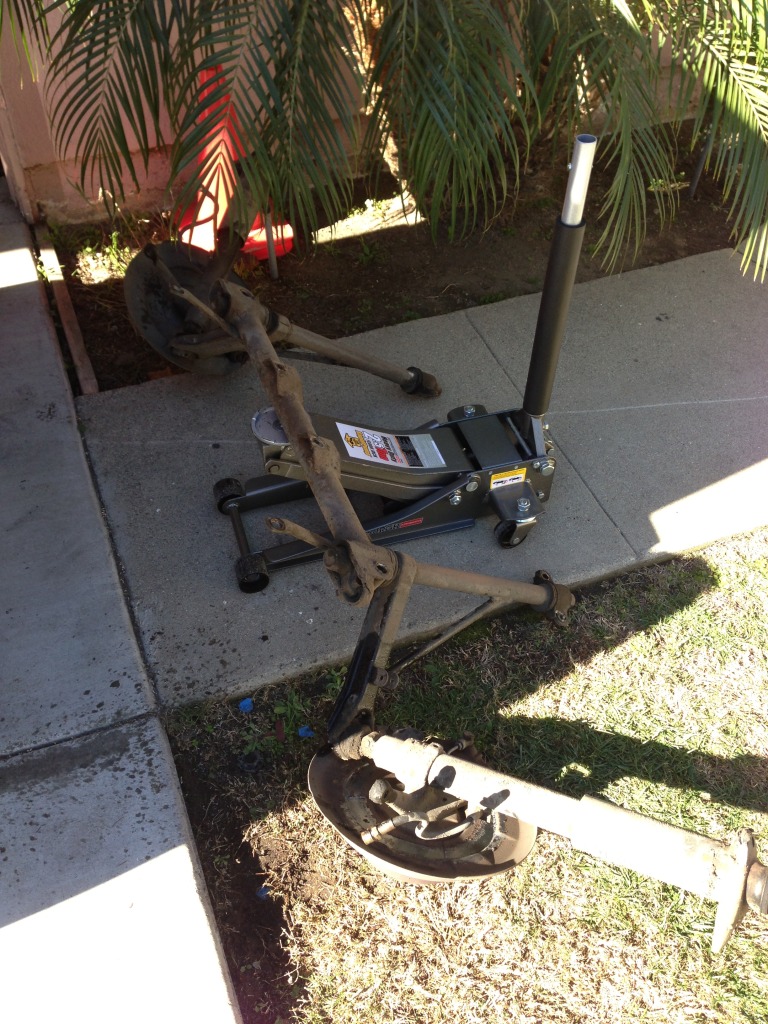
New one on! 
My question though is about those pressure plates at the upper strut mount. The Haynes book was saying that adjustment of those will alter your steering geometry. So I how do i know it its set up correctly.
Next question is in regards to the torsion bar cap and adjuster screw. Since the car is on jacks right now, its at full droop, so at what angle should those caps start at and should the screw be hitting the top as is or should there be a gap and let it make contact once the car is set down???
I'm going to attempt to get that sheared bolt out of the suspension console tonight, wish me luck!!! 
Posted by: euro911 Jan 17 2013, 03:12 PM
You'll probably want to take it to an alignment shop specializing in P cars, but to get you started, just line the brackets up to where the originals were.
Posted by: FourBlades Jan 17 2013, 03:42 PM
Nice progress man!
John
Posted by: oldschool Jan 17 2013, 03:54 PM
Got the front suspension all swapped! New five lug is on the car with the turbo tie rods, m-calipers and all.
Old one off in one piece
New one on!
My question though is about those pressure plates at the upper strut mount. The Haynes book was saying that adjustment of those will alter your steering geometry. So I how do i know it its set up correctly.
Next question is in regards to the torsion bar cap and adjuster screw. Since the car is on jacks right now, its at full droop, so at what angle should those caps start at and should the screw be hitting the top as is or should there be a gap and let it make contact once the car is set down???
I'm going to attempt to get that sheared bolt out of the suspension console tonight, wish me luck!!!
very cool man..
Posted by: dfelz Jan 18 2013, 02:45 AM
Got some hours loged tonight... did some good things, found some bad, cant complain.
I'll start with the good.
Got one wheel on the front right side. Would have got the left front one on too but then there is the bad, i think one of the lug studs is a little crooked and a tad long, any ideas on getting that situated....?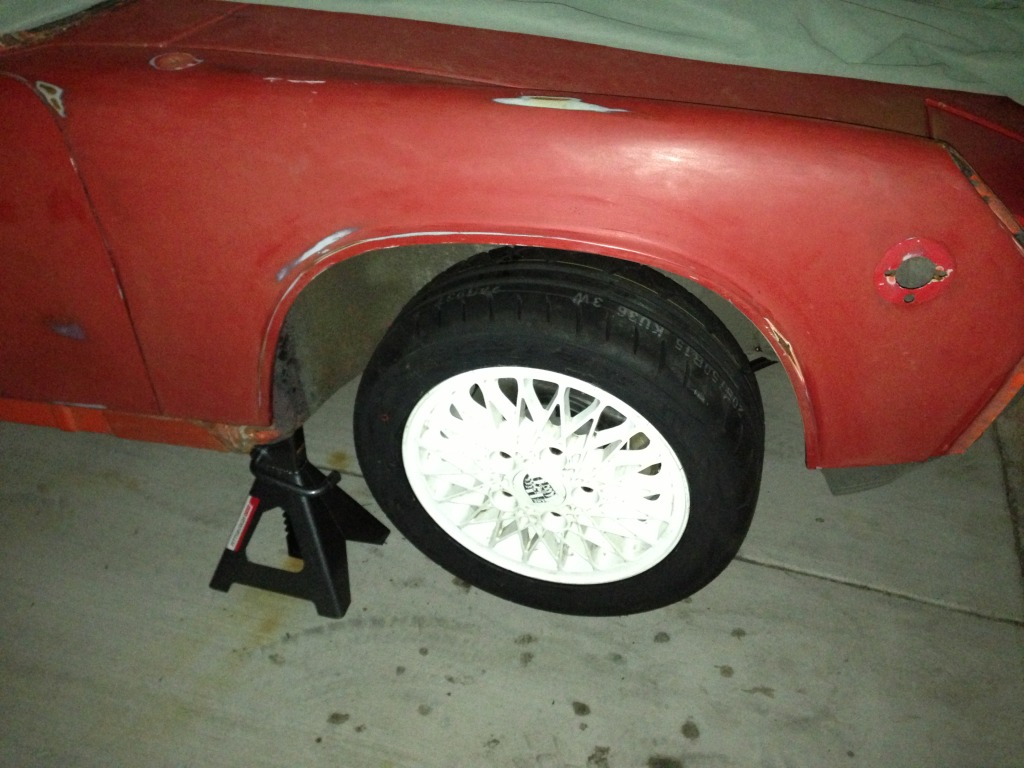
Next I attempted to get that sheared bolt out of the suspension console, was unsuccessful... eventually drilled out the hole trying to spare the threads enough to go over them with a tap and make all better. Drill wasnt perfectly straight so that didnt work... next idea is drill out bigger and tap to an M12
After i got over that situation i went onto the engine bay, drained the gas through the engine compartment fuel lines then removed the stock fuel pump and fuel filter. Will take out the rest of the stock fuel lines and replace with single tunnel SS line for carb set up this weekend.
Posted by: dfelz Jan 18 2013, 04:44 PM
I would like to drop the engine/tran this weekend but have never done this before so any advice would be appreciated.
Prior to that task i am trying to find out where everything is hooked up and what everything is. so i have taken lots of pictures, but i do not know what this is and it doesn't look completely stock, at least some of the wires dont look original so any one know?? One of the larger gauge wires goes directly to the positive terminal of the battery post if that helps.... 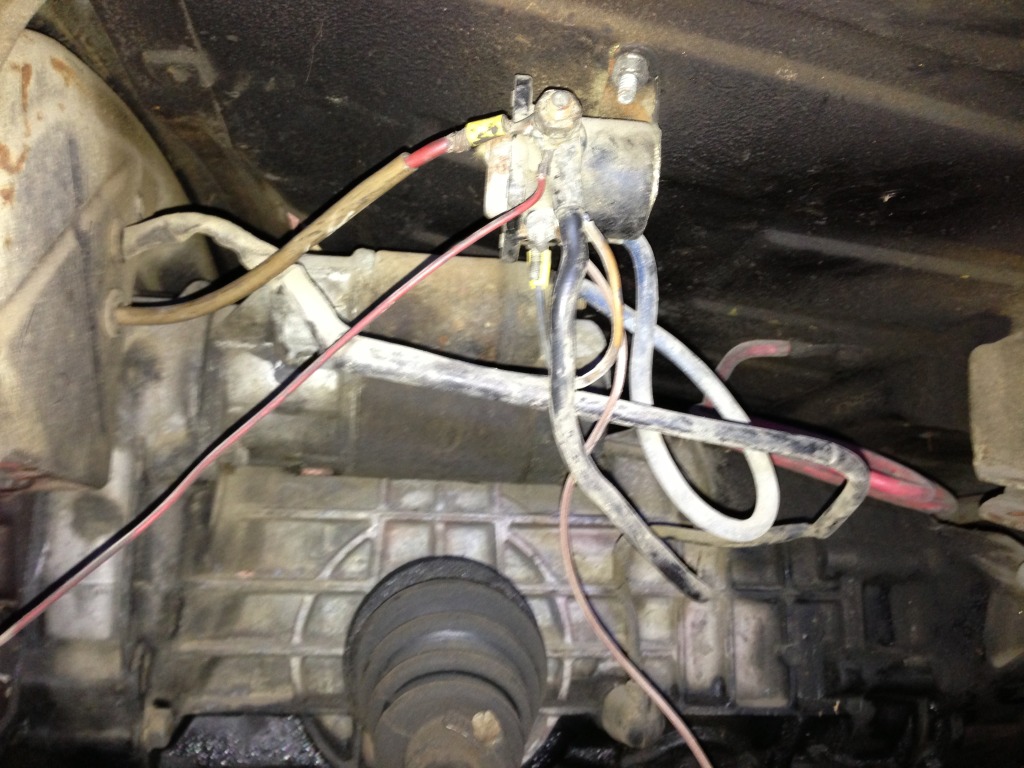
(i am referring to the thing with all the cords hooked up to it)
Thanks!!
Posted by: Kirmizi Jan 18 2013, 04:53 PM
Your mystery item is a an add-on starter solenoid, to compensate for a no-start condition when hot.
Mike
Posted by: mittelmotor Jan 18 2013, 05:29 PM
Looks great, David! I've got the M-calipers on my V-8 car, and they work surprisingly well even with the additional weight. Have to use a lot of leg so I don't ![]() into another car.
into another car.
Check out this thread on engine drop. The safest way is using the furniture dolly method, and as a plus, once the engine/transaxle is out of the car, it's very easy to move around the garage.
http://www.914world.com/bbs2/index.php?showtopic=200610
--Doug
Posted by: sfrenck Jan 18 2013, 05:47 PM
Nice to see you found a shell for the right price without the title issues Did you get it from that contact you made in San Diego?
I'd recommend getting somebody close to help you with the drop. I've done four now and the second set of eyes and hands are invaluable resources (shout out to Bryan (brenz) and Mark (mepstein)) .
Posted by: dfelz Jan 18 2013, 08:11 PM
Thanks Mike and Scott for the info on my mystery item. Now to the real question, is it needed? i mean i am in SoCal, and it never gets too hott and never too cold.... always just right Or shall i leave it to just tag along for the ride??
And if i were to not reattach it on the new car what do i do with the wires that are attached, some are coming off the wiring harness.. have those just go directly to the stock starter motor?
Doug thanks for that link, ill look over it tonight!\
sfrenck, I actually picked up the shell from a guy named Glenn in LA, his company is Nine One Four Restorations, he does all 914s, he had about 10 cars on site, some complete some shells, and about 15 motors, ranging in size form 1.7 to 2.8 as well as a buick v6 in his personal toy. He really knows what hes doing, been in the bizz for 30 yrs, when he came over to drop off the car he was the one that got my engine to start for the first time in 20+ years after noticing some wiring errors on my part.
As far as dropping the engine, I have my roommate that is helping me out with the whole project. Oldschool also lives down the street from me and said he is willing to lend a hand (as well as multiple other members) but i think he is busy this weekend so i may have to go without him this time around....
Posted by: Kirmizi Jan 18 2013, 08:34 PM
Ultimately, you'll have to determine if the car will start (or not) after getting "hot".
Some consider it a "quick fix" to compensate for 40 year old wiring, others say it's cheap insurance.
You can leave it off and see what happens, then go from there.
Mike
Posted by: dfelz Jan 19 2013, 02:14 PM
Ok thanks Mike, I think I will initially leave it off and if the time comes where i feel i need it i can always add it back on.
Next wiring question.
On the 12 pin relay board harness, what is the white cable labeled Aux Air Valve?
There is also a green with black stripe wire separating from the harness near the starter coil wires that was taped down by the PO, and its not on the relay board diagram. Anyone know what that is for?
Shown in the picture are both the wires i am referring to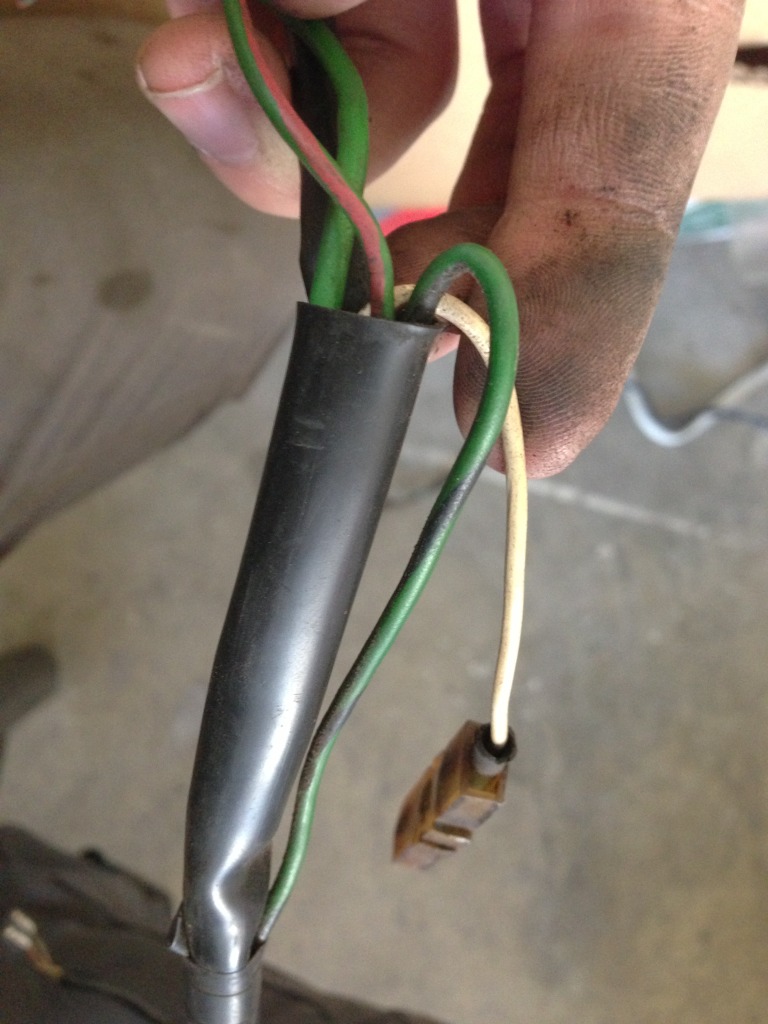
Thanks!!
Posted by: Chris H. Jan 19 2013, 03:58 PM
Thanks Mike and Scott for the info on my mystery item. Now to the real question, is it needed? i mean i am in SoCal, and it never gets too hott and never too cold.... always just right
Or shall i leave it to just tag along for the ride??And if i were to not reattach it on the new car what do i do with the wires that are attached, some are coming off the wiring harness.. have those just go directly to the stock starter motor?
Doug thanks for that link, ill look over it tonight!\
sfrenck, I actually picked up the shell from a guy named Glenn in LA, his company is Nine One Four Restorations, he does all 914s, he had about 10 cars on site, some complete some shells, and about 15 motors, ranging in size form 1.7 to 2.8 as well as a buick v6 in his personal toy. He really knows what hes doing, been in the bizz for 30 yrs, when he came over to drop off the car he was the one that got my engine to start for the first time in 20+ years after noticing some wiring errors on my part.
As far as dropping the engine, I have my roommate that is helping me out with the whole project. Oldschool also lives down the street from me and said he is willing to lend a hand (as well as multiple other members) but i think he is busy this weekend so i may have to go without him this time around....
Yes those solenoids were almost always added to fix a hot start issue that happened pretty frequently on a specific car. I haven't heard of many added proactively "just in case". It's not so much the weather but how hot the engine/starter gets. As Mike said, at least keep it just in case. Like in the trunk
Posted by: Kirmizi Jan 19 2013, 07:00 PM
Try looking here for your specific wiring diagram:
http://www.pelicanparts.com/914/914_electrical_diagrams.htm
Posted by: 3d914 Jan 19 2013, 07:28 PM
Next wiring question.
On the 12 pin relay board harness, what is the white cable labeled Aux Air Valve?
Thanks!!
David, The auxiliary air valve is the cold-start air source. It has a single 12v wire going to it. The air valve is mounted next to the air plenum (box) - forward & slightly left. I'll have to check my schematics to verify wire color. (Verified wire is white and comes from the 5-wire connector at the rear-right of the relay board)
Making good progress. Keep it up.
Posted by: dfelz Jan 19 2013, 09:42 PM
Next wiring question.
On the 12 pin relay board harness, what is the white cable labeled Aux Air Valve?
Thanks!!
David, The auxiliary air valve is the cold-start air source. It has a single 12v wire going to it. The air valve is mounted next to the air plenum (box) - forward & slightly left. I'll have to check my schematics to verify wire color. (Verified wire is white and comes from the 5-wire connector at the rear-right of the relay board)
Making good progress. Keep it up.
So if i have carbs and no air box i have no need for this wire correct?
Posted by: euro911 Jan 19 2013, 09:54 PM
Correct.
You gonna be home tomorrow? ... I can bring up a motorcycle jack if you want to drop the drive train ...
Posted by: dfelz Jan 19 2013, 10:27 PM
Correct.
You gonna be home tomorrow? ... I can bring up a motorcycle jack if you want to drop the drive train ...
Mark, that would be f***ing awesome of you! I will be home all day tomorrow, and be up and ready to go by 10am.
Lunch will be on me!
Posted by: dfelz Jan 20 2013, 07:25 PM
Alright! So yesterday i messed around with some of the wiring harnesses. The 71 had the ends cut off so sliced them off the 72 and soldered and heat shrink tubed all the individual wires together.
CUT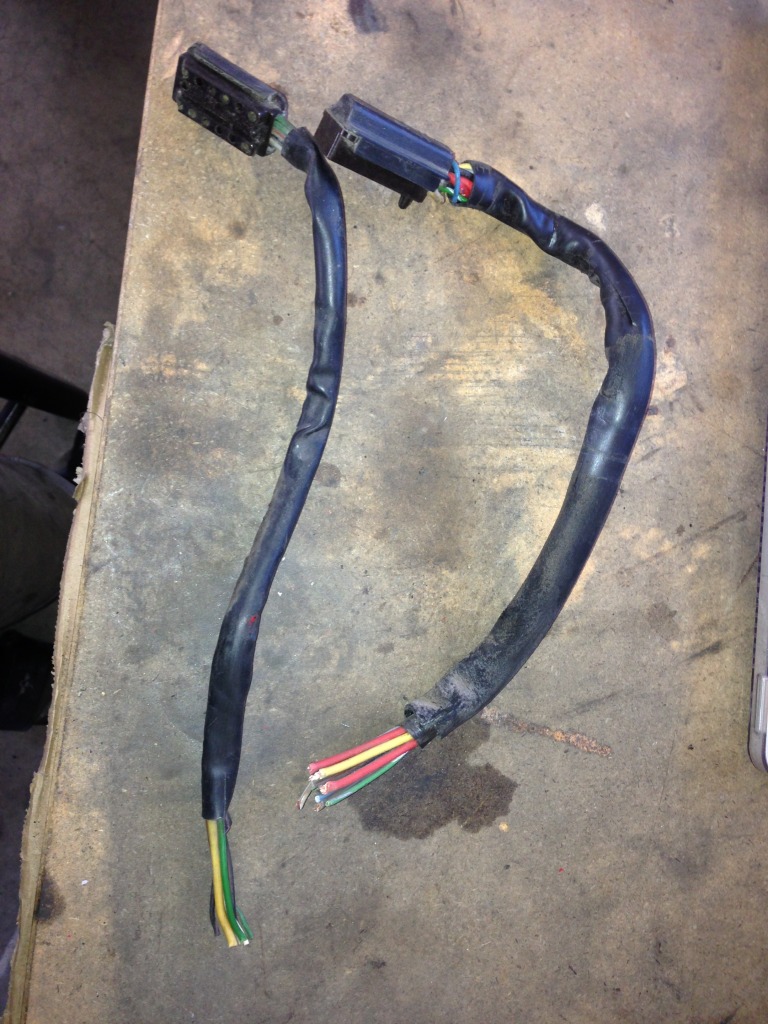
PASTE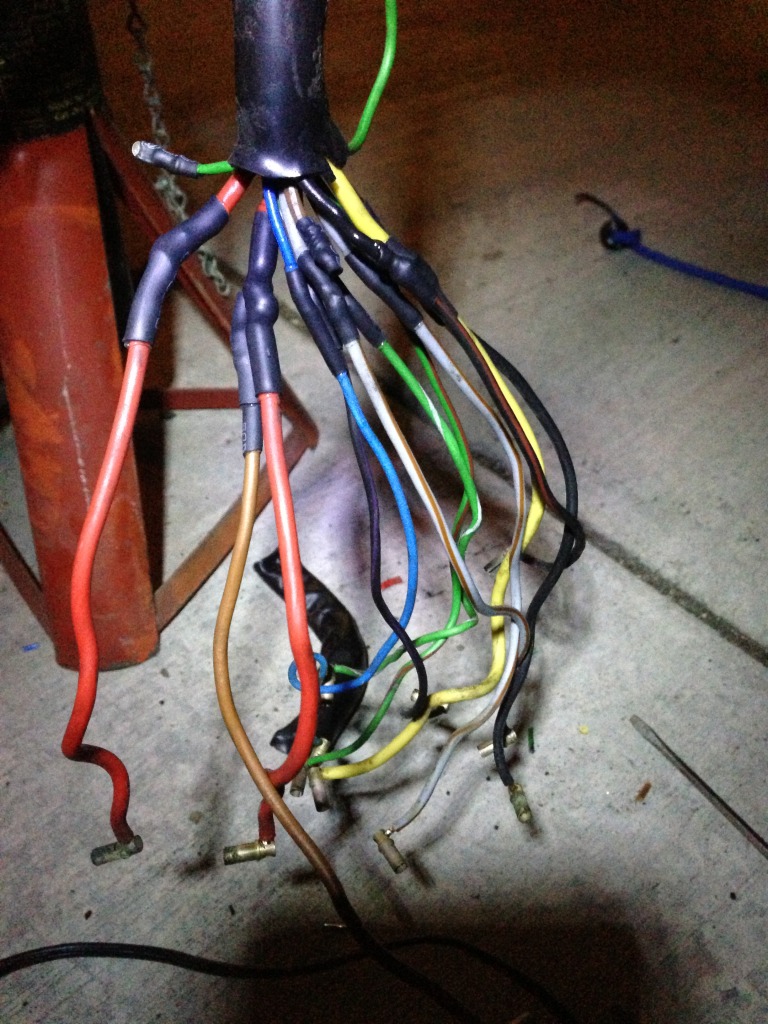
ORGANIZE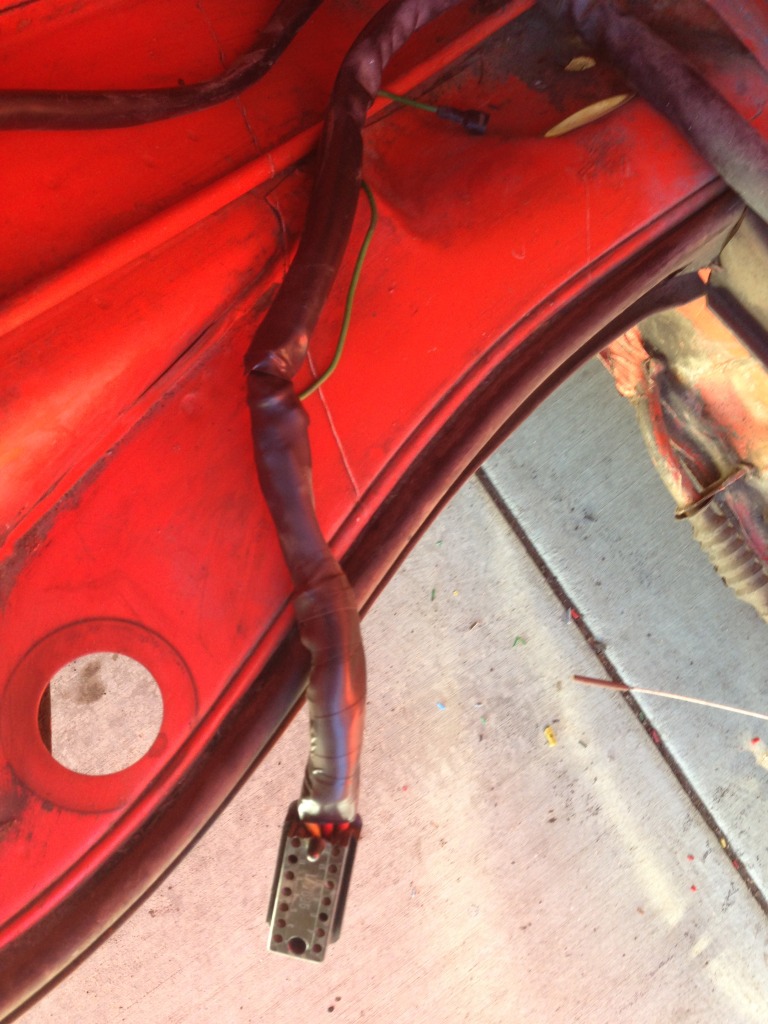
After that hooked it up to the relay board and plugged in the battery to do some minor test. Both headlights were put in and work fine, taillights work, flashers work, fuel sender works (but is week, need to tidy up the solders at the plug), the left turn signal works but the right is not quite working. when i flip the lever up for right turn signal is clicks once and then nothing. If i held the lever in the middle right before it would go to the staying up position, it would stay on.... any ideas.
Now moving on to some more exciting shit, Mark (euro911) came over today and we got the engine out of the 72!! 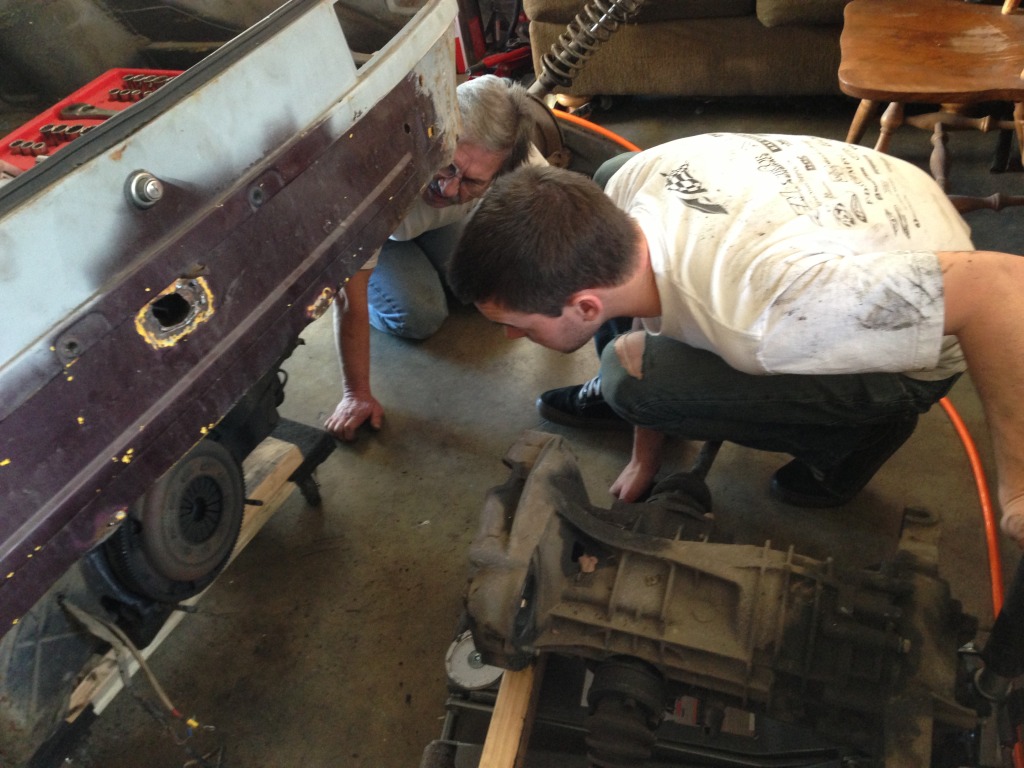
Now me and my roommate are going to pull valve covers off and see if we can find a source of the knocking we heard when it ran for 1 minute last week. if nothing we will proceed to the head and pull that sucker off...
Posted by: euro911 Jan 20 2013, 10:09 PM
The new tub looks good so far
Don't forget to pick up a triple square for your CV bolts. I don't remember what size they take
If I was a smart feller, I would have brought a set 
Posted by: mrbubblehead Jan 20 2013, 11:28 PM
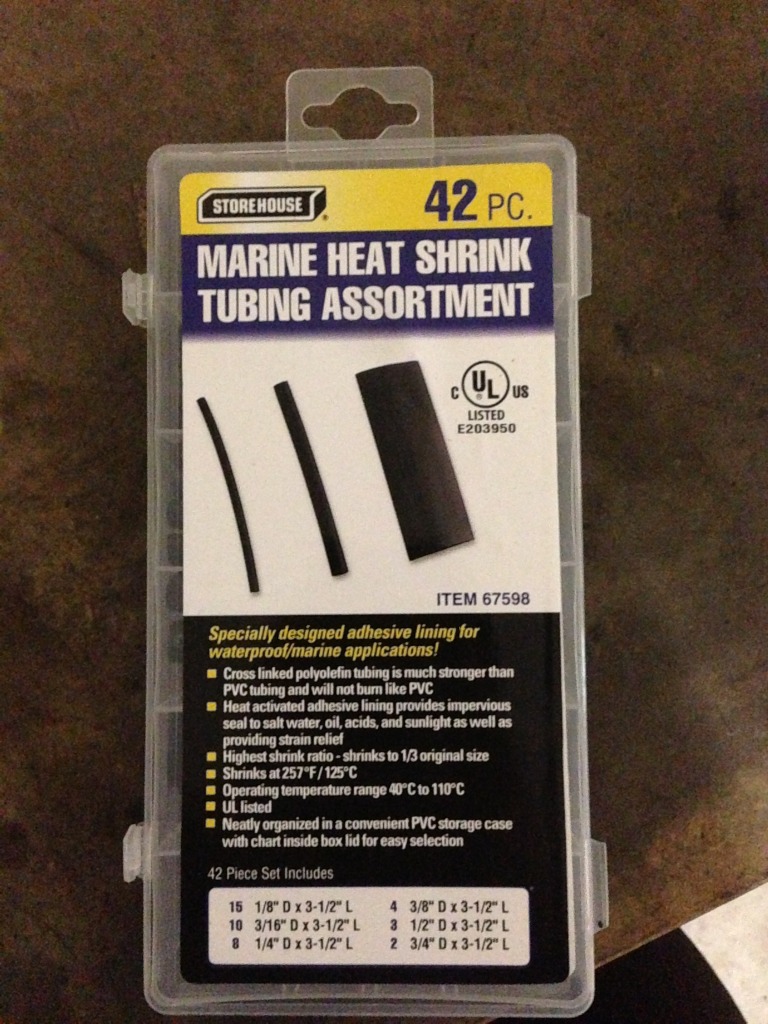
Hey David, I noticed that the heat shrink on your splices have glue inside. The glue is part of the tube right? Where did you get it? Locally?
Posted by: dfelz Jan 21 2013, 12:07 AM
Hey David, I noticed that the heat shrink on your splices have glue inside. The glue is part of the tube right? Where did you get it? Locally?
Ya they are the best heat shrink tubes, they release an adhesive/sealant when heated up. I got a variety pack/container from HF, only cost about $5 for a 42pc set.
Posted by: mrbubblehead Jan 21 2013, 12:24 AM
Right on. Thank you. Your car is coming along great. I saw you swapped front ends. When your ready let me know and i will come out and help you do a four wheel alignment. I did mine at home by using 4 jackstands and fishing line. It drives straight as an arrow. I did the camber with a protractor. We can aling your car in a few hours.
Posted by: dfelz Jan 21 2013, 12:26 AM
The new tub looks good so far
Don't forget to pick up a triple square for your CV bolts. I don't remember what size they take
If I was a smart feller, I would have brought a set
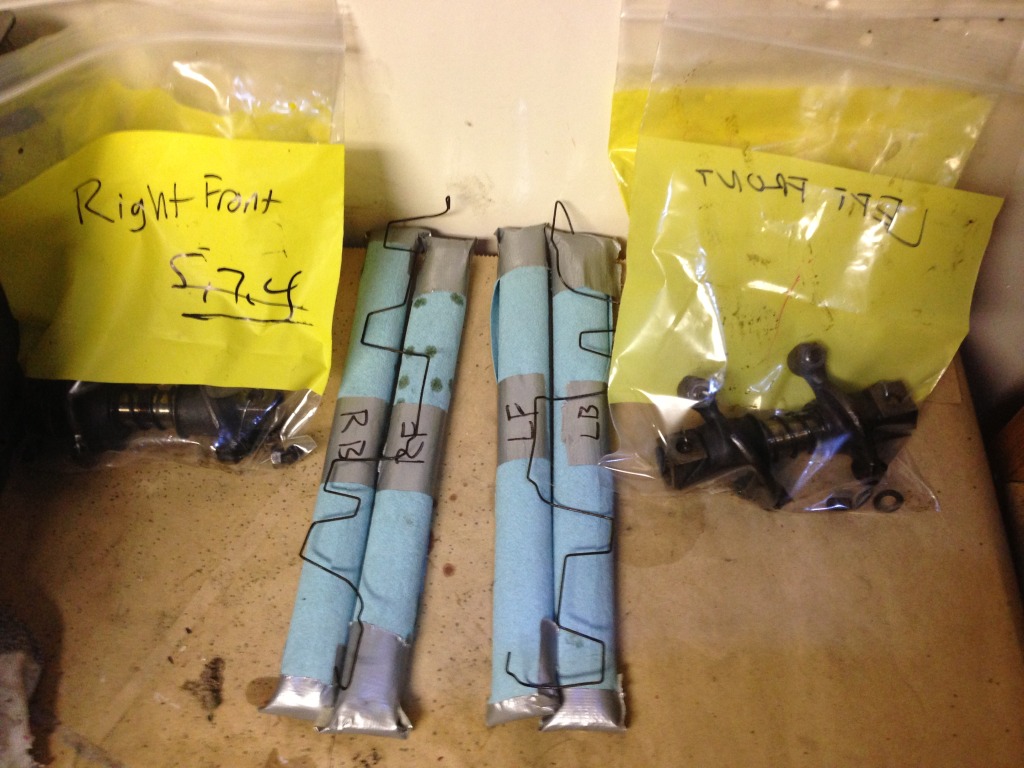
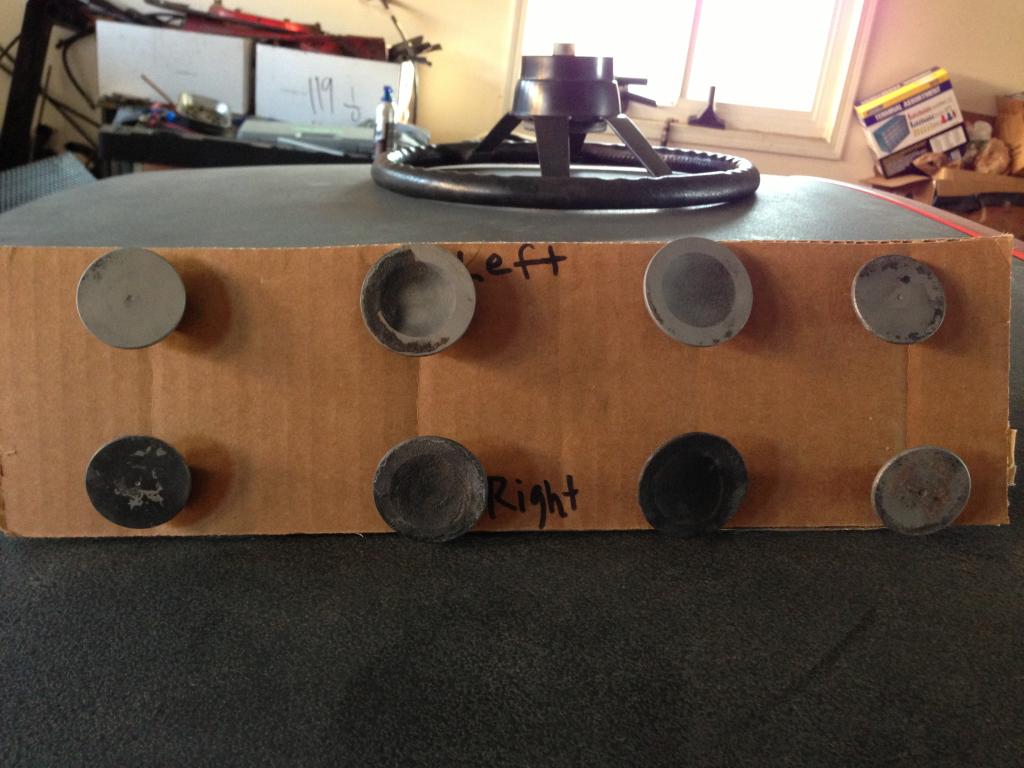
Thats ok! I need a set anyways, me and grant got the valve covers off and removed the rockers and pushrods, everything in there looked really good, only one blemish on one of the pushrods. Need everyones opinion on it. Its flush with the rest, just dulled in color....
Heres all of the rockers and push rods out, bagged, and labeled. Will do more engine work tomorrow.
Thanks again Mark for the help today, couldn't have do it without you, or at least in that amount of time, and correctly!
Posted by: dfelz Jan 21 2013, 12:38 AM
Right on. Thank you. Your car is coming along great. I saw you swapped front ends. When your ready let me know and i will come out and help you do a four wheel alignment. I did mine at home by using 4 jackstands and fishing line. It drives straight as an arrow. I did the camber with a protractor. We can aling your car in a few hours.
Thats awesome, thanks, I will definitely take you up on that when im ready (will save me $100!!)
My plan is to have this car finished enough to drive down to san diego where I'm from and where my parents still live for spring break (mid March.) So an alignment will be need just before that!
Also, side note, I will eventually be putting the car back to its original color, L 21E, Tangerine Orange, and am very excited for that when the time comes, i really like that color. I have the whole paint scheme worked out in my head. My rims are currently powder coated white from the factory (off a 924 turbo brumos edition) but i hate it, love the rims not the color, so i will get them re-powder coated some shade of gray, will go really well with the orange. will have black or grey interior and cant decide on the engine tin, either black, grey, or tangerine.....
 hmmmmm
well thats all i have for now, need to start my homework, im really behind since i have spent every waking hour of saturday and sunday working on the car, wooops.

Posted by: euro911 Jan 21 2013, 01:19 AM
... and post a want ad for the side shift components. Hopefully something will show up before you are ready to install the drive train into the 'new' car
Posted by: dfelz Jan 22 2013, 01:43 AM
Didnt get much done with the car today, since it was a three day weekend, monday became my sunday and i had a good amount of homework to do. BUT i did put the rear susp back on the '72, so it is now a full rolling car (and there is no e-brake conected, so once it starts rollin it aint gonna stop easily  ) But i am one step closer to getting it out of my garage and getting my new babe, the 71 inside before next monday (whether man says rain is coming!)
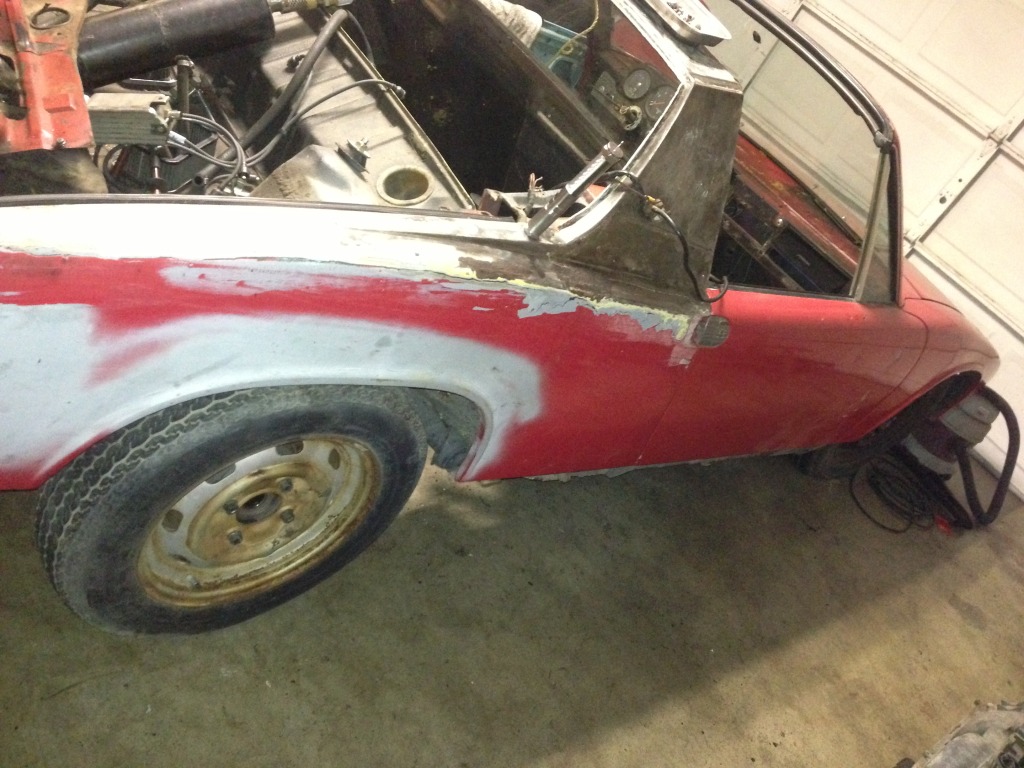
Anyone have any ideas about the odd dulling of one of the pushrods, pictured a few posts up.....
Posted by: jdlmodelt Jan 22 2013, 08:11 AM
Right on. Thank you. Your car is coming along great. I saw you swapped front ends. When your ready let me know and i will come out and help you do a four wheel alignment. I did mine at home by using 4 jackstands and fishing line. It drives straight as an arrow. I did the camber with a protractor. We can aling your car in a few hours.
DO you have a posting on here that describes the "at home" 4 wheel alignment?
James
Posted by: Millerwelds Jan 22 2013, 09:04 AM
Anyone have any ideas about the odd dulling of one of the pushrods, pictured a few posts up.....
[/quote]
It is from the spring that holds the lifters in place. It was not installed perfectly and rubbed the pushrod. If there is no real wear / loss of material you should be fine to reuse it.
Posted by: dfelz Jan 22 2013, 09:44 AM
It is from the spring that holds the lifters in place. It was not installed perfectly and rubbed the pushrod. If there is no real wear / loss of material you should be fine to reuse it.
Cool, thanks for the info!
Posted by: mrbubblehead Jan 22 2013, 01:45 PM
Right on. Thank you. Your car is coming along great. I saw you swapped front ends. When your ready let me know and i will come out and help you do a four wheel alignment. I did mine at home by using 4 jackstands and fishing line. It drives straight as an arrow. I did the camber with a protractor. We can aling your car in a few hours.
DO you have a posting on here that describes the "at home" 4 wheel alignment?
James
Bummer. The website is gone. I'll keep looking. I gotta find it again.
Posted by: dfelz Jan 22 2013, 02:00 PM
Got the Rear wheels on! she's half way to being able to roll around. fitment with stock fenders and 205 tires is gonna be close but i think it will fit just perfectly. Will be flaring front and rear eventually anyways.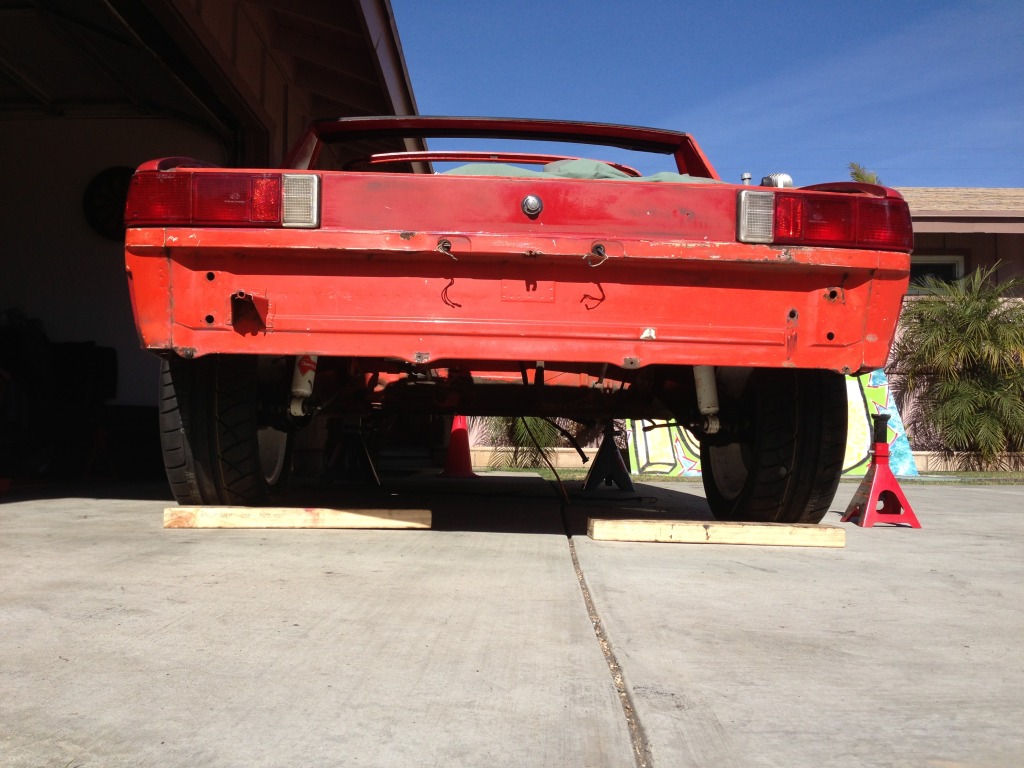
Posted by: mrbubblehead Jan 22 2013, 02:08 PM
Right on. Thank you. Your car is coming along great. I saw you swapped front ends. When your ready let me know and i will come out and help you do a four wheel alignment. I did mine at home by using 4 jackstands and fishing line. It drives straight as an arrow. I did the camber with a protractor. We can aling your car in a few hours.
DO you have a posting on here that describes the "at home" 4 wheel alignment?
James
Bummer. The website is gone. I'll keep looking. I gotta find it again.
Yup, the web site i used is gone. But this is the thread i found it it. This thread should give you a pretty good idea on how to do it. And the stock adjustment numbers should be in the Haynes manual. http://www.914world.com/bbs2/index.php?showtopic=125788&st=0
Posted by: sixnotfour Jan 22 2013, 03:44 PM
I have one one of those wheels was new, now just sitting outside, If you really like those and I sell mark my 64 911 flywheel, I wll ship it to you.
Posted by: dfelz Jan 22 2013, 05:01 PM
I have one one of those wheels was new, now just sitting outside, If you really like those and I sell mark my 64 911 flywheel, I wll ship it to you.
Sure, why not! Thanks
Posted by: sixnotfour Jan 22 2013, 10:50 PM
I saw Ray Scruggs win the Parade autocross years ago in his silver 914-6, I also watched the loser in his 914-6 protest, it was hilarious.
Home Alignment , By Ray Scruggs;
http://www.2l7registry.com/doc/georacing.pdf
Posted by: dfelz Jan 22 2013, 10:57 PM
I saw Ray Scruggs win the Parade autocross years ago in his silver 914-6, I also watched the loser in his 914-6 protest, it was hilarious.
Home Alignment , By Ray Scruggs;
http://www.2l7registry.com/doc/georacing.pdf
sweet thanks for the link!
Posted by: euro911 Jan 22 2013, 11:25 PM
Posted by: mrbubblehead Jan 22 2013, 11:59 PM
I saw Ray Scruggs win the Parade autocross years ago in his silver 914-6, I also watched the loser in his 914-6 protest, it was hilarious.
Home Alignment , By Ray Scruggs;
http://www.2l7registry.com/doc/georacing.pdf
Shit! I looked for for hours for that today. COOL!
Posted by: sixnotfour Jan 23 2013, 12:16 AM
one million dollars..............plus shipping
Posted by: euro911 Jan 23 2013, 12:49 AM
How much ya think shipping might be?
Posted by: dfelz Jan 23 2013, 09:30 PM
SO I was able to switch out my two 914s and get the new one in the garage, without even having wheels on the front!! just used a jack to hold up and steer the front. Went surprisingly well, only took about 5min so that was good. It looks good in there 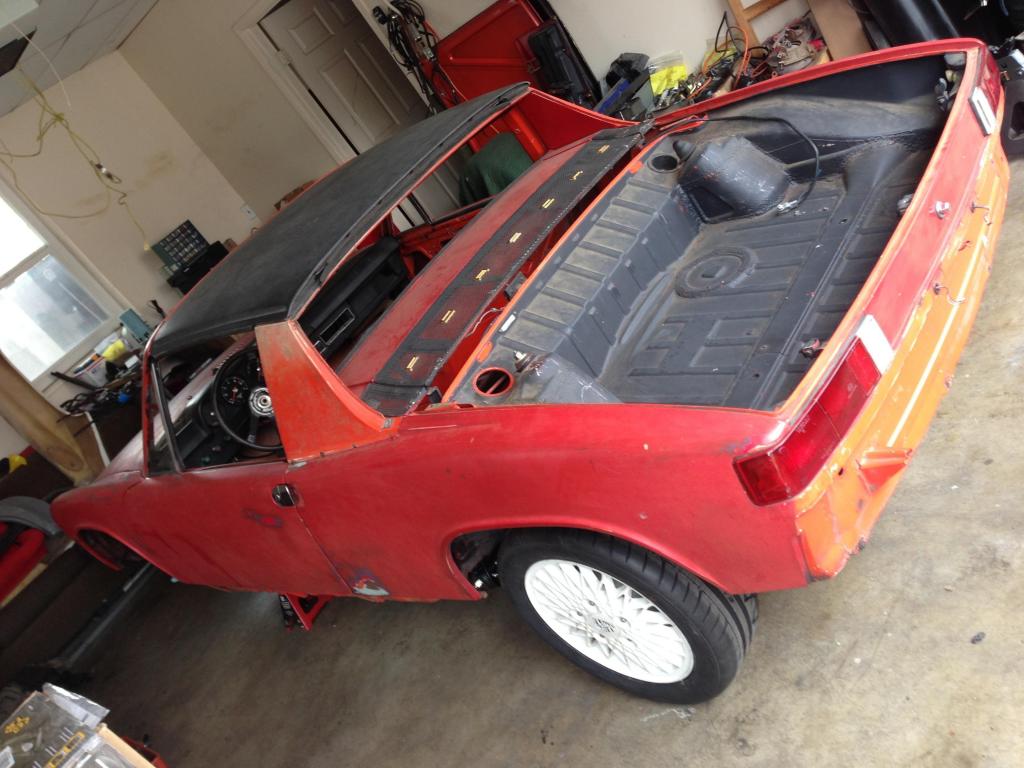
Although I am not quite at this point, i do have a question that needs to be addressed eventually. I have a FG rear deck lid, but its the racing one, so there are no supports or structures or mounting holes on the underside. So is there a way to mount it so that i can still have it on a hinge system, stock or not (would probably want to use a modern type of shock as apposed to a spring) but i know that i cant just bolt a bracket to it and call it good, there would be to much flex in the un-stability of having no support structure and it would crack the paint from flexing so much..... I know i could just have four deck lid pins, one at each corner, and no hinging action, but i really dont want to go that route. any ideas or anyone have experience with these types of FG pieces.
mocked up on the 72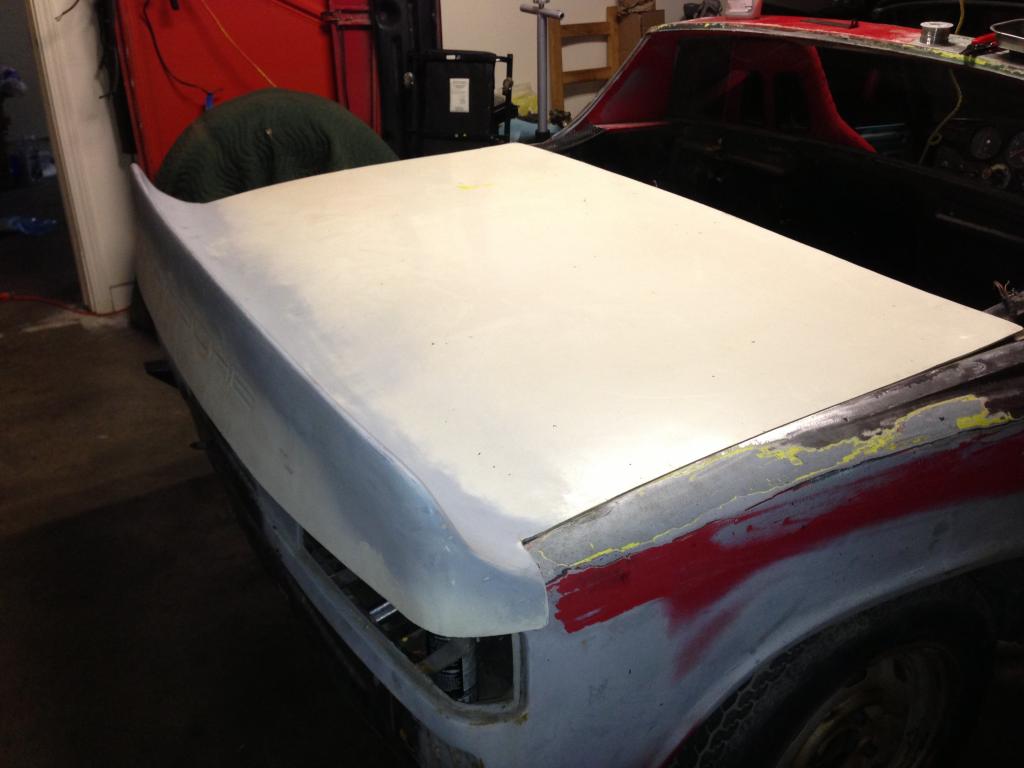
underside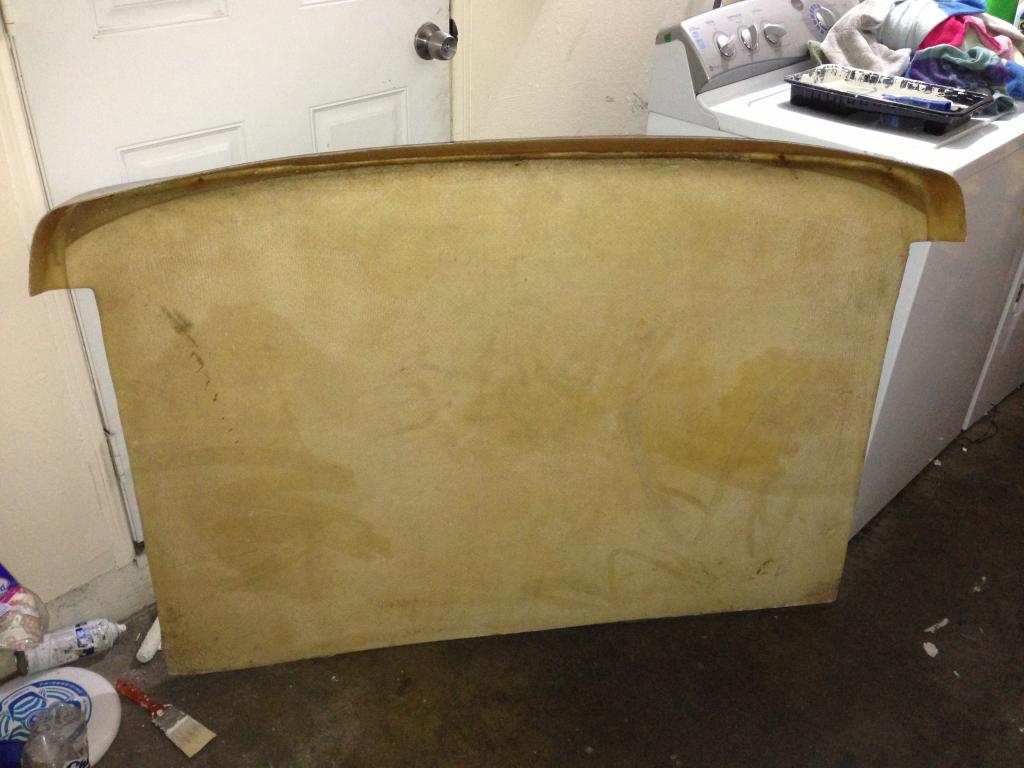
Thanks!
Posted by: bigkensteele Jan 23 2013, 10:24 PM
I think that it would take a hell of a lot of work to make that decklid work on hinges. If you really like it, it might be worth it, but if it were me, I would probably put it up for sale.
I have been paying close attention to this thread, but I missed how you got that broken bolt out of the suspension mount. What did you end up doing?
BTW - amazed at how much you have accomplished in 10 days! Having fun watching it happen.
Posted by: dfelz Jan 23 2013, 10:40 PM
I think that it would take a hell of a lot of work to make that decklid work on hinges. If you really like it, it might be worth it, but if it were me, I would probably put it up for sale.
I have been paying close attention to this thread, but I missed how you got that broken bolt out of the suspension mount. What did you end up doing?
BTW - amazed at how much you have accomplished in 10 days! Having fun watching it happen.
Thanks, I am trying to get this guy on the road by mid march, so there is a lot to be done
problem is my girl feels the opposite, she is amazed how little time i am putting into her, oops. its ok though she understands my passion, thankfully.Oh ya, that bolt..... hehe. I didnt post what i did with that. I drilled it out, and am currently only running two susp console bolts on the DS. i knew it would be fine for the time being, but WILL fix prior to driving. I'm planning on just drilling a little more to make it up to the next size, tap it to an M12, order an M12 x 1.5 x 80 PT bolt and call it a day.

Posted by: mrbubblehead Jan 23 2013, 10:49 PM
Just in time David. It looks like it might rain. About that bolt, maybe an american size bolt might be closer in diameter so you dont have to hog it all the way out to 12mm. I wonder if a nutsert would be strong enuff? I think I have a 10mm nutsert tool.
Posted by: mrbubblehead Jan 23 2013, 10:50 PM
Or thru bolt it....
Posted by: bigkensteele Jan 23 2013, 11:01 PM
problem is my girl feels the opposite, she is amazed how little time i am putting into her, oops. its ok though she understands my passion, thankfully.
Relationships come and go, but good cars are there forever. Or is it the other way around? Hell, I can't remember!
Back when I got my first 914, I was single and had a bunch of time but no money. Now, I have a family and some money, but no time. I love this thread because it makes me realize that when I thought that I had no money, I really could have pulled off a decent driver, but I was intent on a beauty queen.
Get that thing back together and have fun with it.

Posted by: dfelz Jan 23 2013, 11:18 PM
Or thru bolt it....
I thought of that too.... didnt really think about an insert though. I've never heard of "nutsert" kind of a funny word, makes the child in me giggle
Since I'm not familiar, my first question is with a 10mm "nutsert" (should always be in quotes so you know im laughing) is it meant to go in a damaged M10 and use a smaller bolt, or drill it out a little more put the "nutsert" in and use the original M10 bolt....?
Posted by: dfelz Jan 23 2013, 11:27 PM
problem is my girl feels the opposite, she is amazed how little time i am putting into her, oops. its ok though she understands my passion, thankfully.
Relationships come and go, but good cars are there forever. Or is it the other way around? Hell, I can't remember!
Back when I got my first 914, I was single and had a bunch of time but no money. Now, I have a family and some money, but no time. I love this thread because it makes me realize that when I thought that I had no money, I really could have pulled off a decent driver, but I was intent on a beauty queen.
Get that thing back together and have fun with it.
Oh im having fun even with it on jack stands!! I love this hands on shit.
Also the reason it's coming together relatively fast is because i had the first shell for over six months, and durring that time i was collecting parts and all that good stuff, and reading as much as i could about this little beauty of a car. And then i dumped that first shell (now posted in the FS section as of today) and got a way nicer shell that i could personally work with.
problem is i am completely out of money, recently started selling of parts i dont need that came with my shells. I actually need to call my parents and ask them to loan me some dough so i can finish the engine partial rebuild, thats pretty much the only thing i have left to buy. Once summer comes around and i am working at my internship in San Diego, i will pay them back! I hope they go for it, they know how much i love this project

Posted by: mrbubblehead Jan 24 2013, 12:20 AM
Or thru bolt it....
I thought of that too.... didnt really think about an insert though. I've never heard of "nutsert" kind of a funny word, makes the child in me giggle
Since I'm not familiar, my first question is with a 10mm "nutsert" (should always be in quotes so you know im laughing) is it meant to go in a damaged M10 and use a smaller bolt, or drill it out a little more put the "nutsert" in and use the original M10 bolt....?
I'm sorry. Not nutsert but a timesert. I'll check if I have a 10mm kit. Its similar to a helicoil but waaaay better. After you check out the link, let me know if you wanna use it. http://www.timesert.com/
Posted by: dfelz Jan 24 2013, 12:28 AM
Or thru bolt it....
I thought of that too.... didnt really think about an insert though. I've never heard of "nutsert" kind of a funny word, makes the child in me giggle
Since I'm not familiar, my first question is with a 10mm "nutsert" (should always be in quotes so you know im laughing) is it meant to go in a damaged M10 and use a smaller bolt, or drill it out a little more put the "nutsert" in and use the original M10 bolt....?
I'm sorry. Not nutsert but a timesert. I'll check if I have a 10mm kit. Its similar to a helicoil but waaaay better. After you check out the link, let me know if you wanna use it. http://www.timesert.com/
Those look cool! ya if you have one i would definitely be interested in giving it a try! thanks!
Posted by: mrbubblehead Jan 24 2013, 12:44 AM
Your in luck. I have a 10X1.0 kit and 10X1.25 kit. I don't remember the thread pitch you need so you'll have to check. Don't drill on the hole anymore. We will have to enlarge the hole an it take a special size. But I have the bit, its part of the kit. I have a few inserts but I dont think their long enuff. I think we should use the longest ones they make. They only cost a buck or two. Timesert is in Cali so if we got to order one they are only a day or 2 away. Other places sell the inserts so you can shop around. just make you get the steel ones. They come in aluminum too. When you figure out the pitch size, look at the timesert website for the part number. It will make googleing way easier.
Im glad I have the right kit. They are real lifesavers. especially when you strip an exhaust bolt on a sunday and have to drive your car to work on monday morning.... Or when you pull the friggin threads out when your changing spark plugs.
Posted by: dfelz Jan 26 2013, 11:34 PM
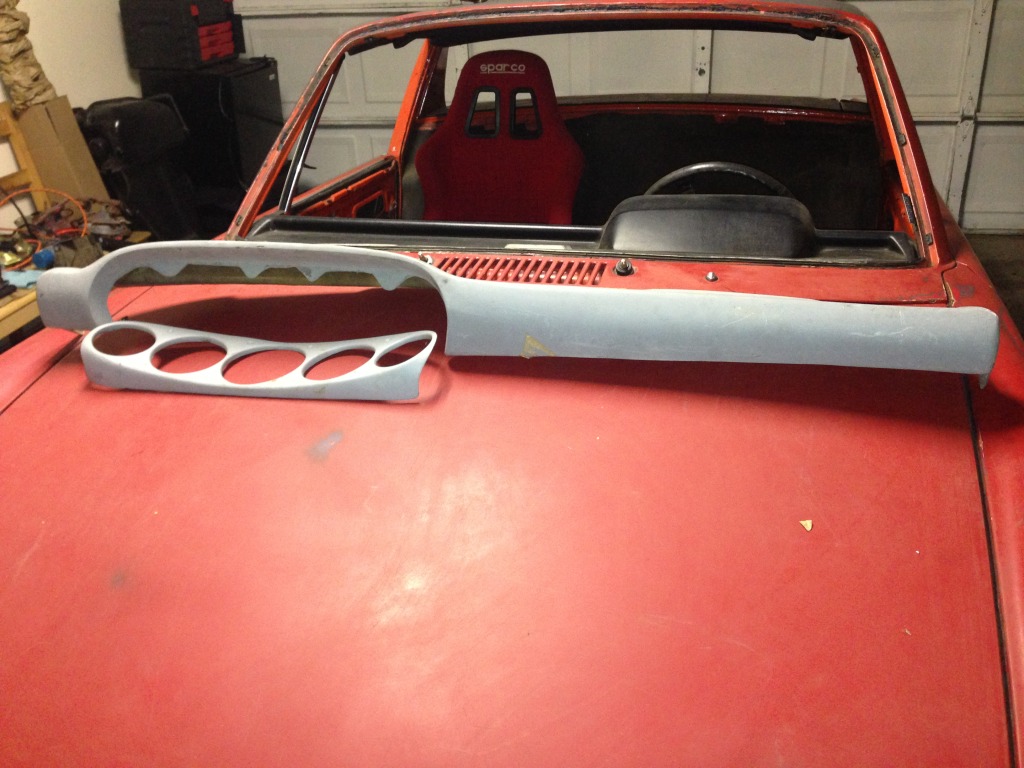
Havent updated in a few days...been sick Also didnt get much of anything accomplished in the past few days, just a few small things here and there. One thing i did do today was finally unpack a box of goodies (that i actually got from danny hunter a few months ago.) I unpacked a FG rear 916 bumper and a FG 911 5 gauge pod dash. They are in pretty good condition and will only need minor amounts of repairs to make perfect. I held the bumper on to see if i could get a feel for the fit, it looks decent, but will need some fine tuning, as do all FG parts.
Question regarding the condition of my starter motor. Since the PO had that extra starter solenoid, it leads me to believe that either the whole unit is weak, or just the stock solenoid is week. Because even when trying to start the engine, with the extra one on there, it had a hard time turning it over, and went very slowly. Should i just replace the whole unit? new solenoid is about $60, rebuilt stock starter motor complete is about $110... I would like to take it apart first but i dont know what i would be looking for 
Doug, thanks for looking and glad you have those kits, and in both sizes as well, I'll have to check what the pitch is. As far as getting the longest one they have, what about accounting for the fact that the hole is only partially threaded. The threads dont start until just under half way up..
Here are the pics of the new FG pieces.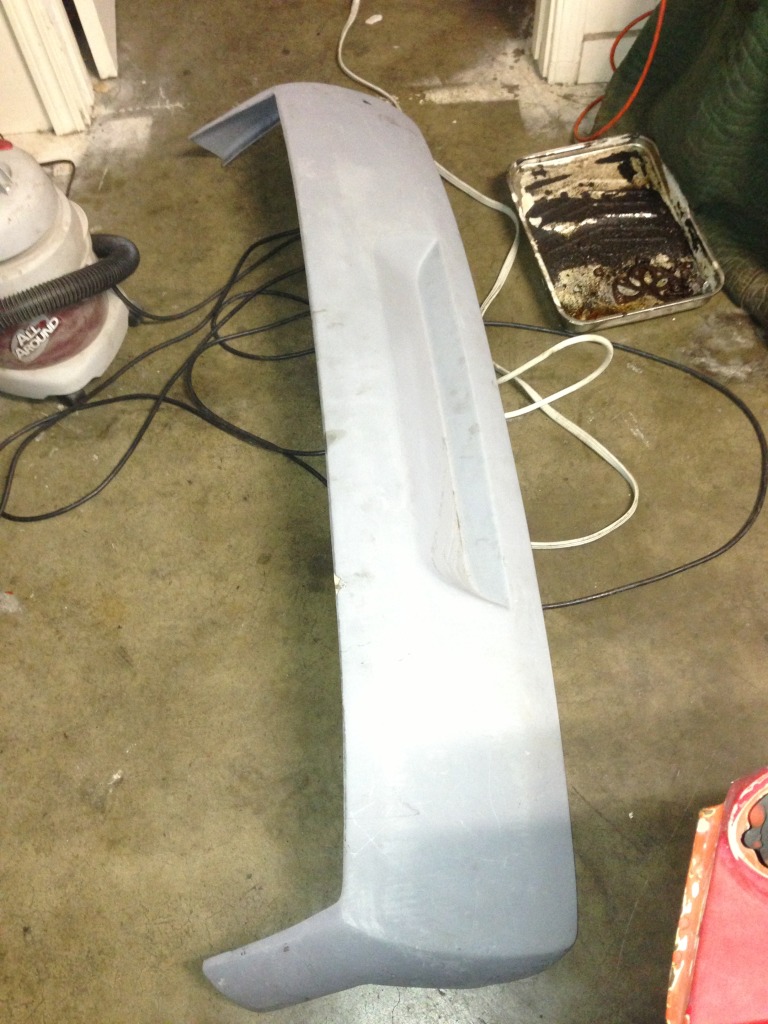
Cheers
Posted by: Kirmizi Jan 27 2013, 10:40 AM
Before spending money on a new starter and/or solenoid, I'd suggest checking the wiring of the starting system, including the ignition switch and grounds.
Mike
Posted by: dfelz Jan 27 2013, 06:47 PM
Before spending money on a new starter and/or solenoid, I'd suggest checking the wiring of the starting system, including the ignition switch and grounds.
Mike
Will definitely do that thanks
I want to take apart the starter motor too, just sounds fun and i love taking things apart. I'll clean the points, but i dont know what else i would do except have fun putting it back together.
Posted by: dfelz Jan 30 2013, 01:20 PM
Accomplished a few things last night on the car.
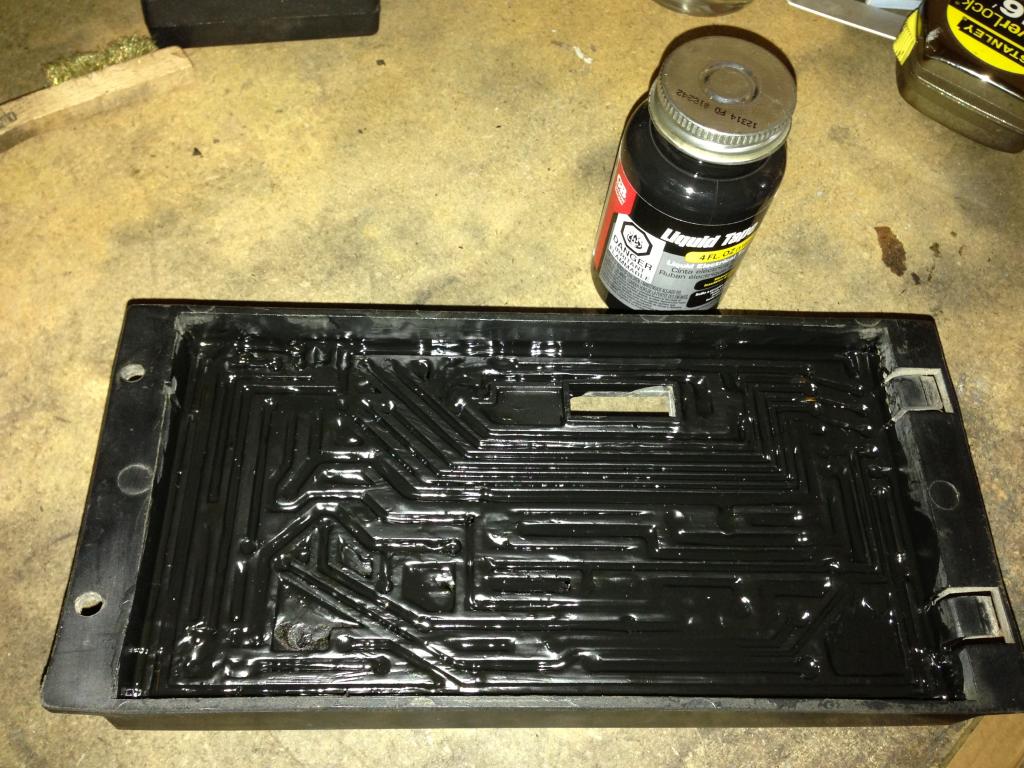
First thing i did was take off all the old cracking and crumbly insulation material on the backside of the relay board. Once it was all off i checked continuity of all the wires, all were good! Then i applied two coats of new liquid electrical tape, i hope it holds up well, i may add another coat just to make sure.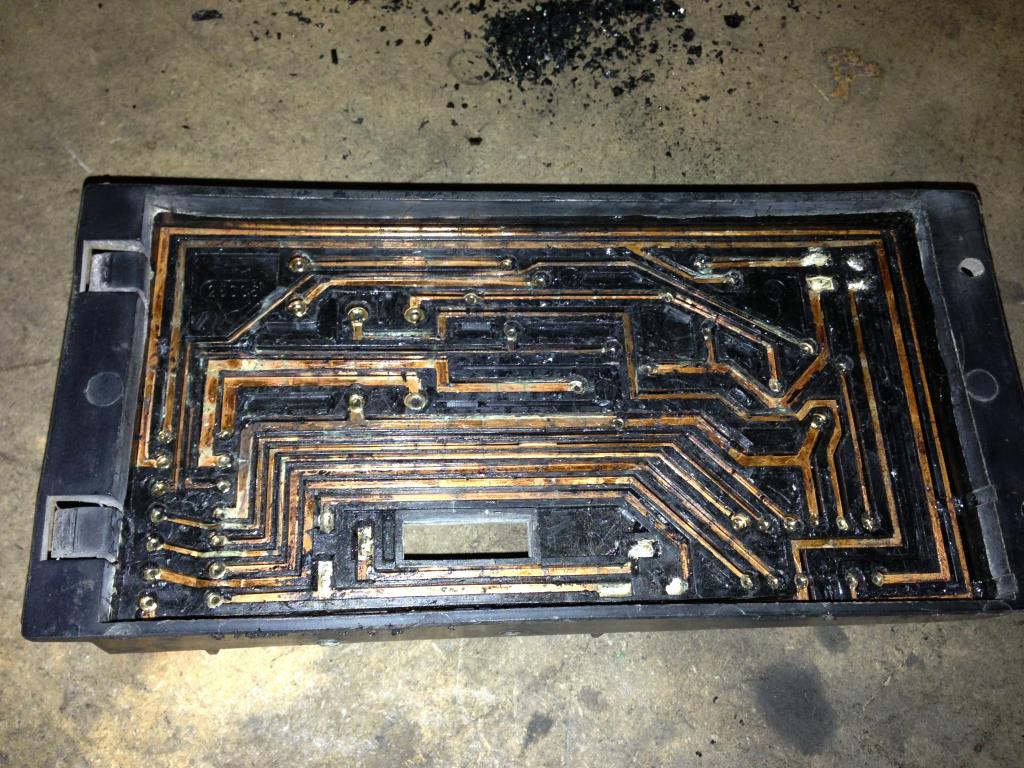
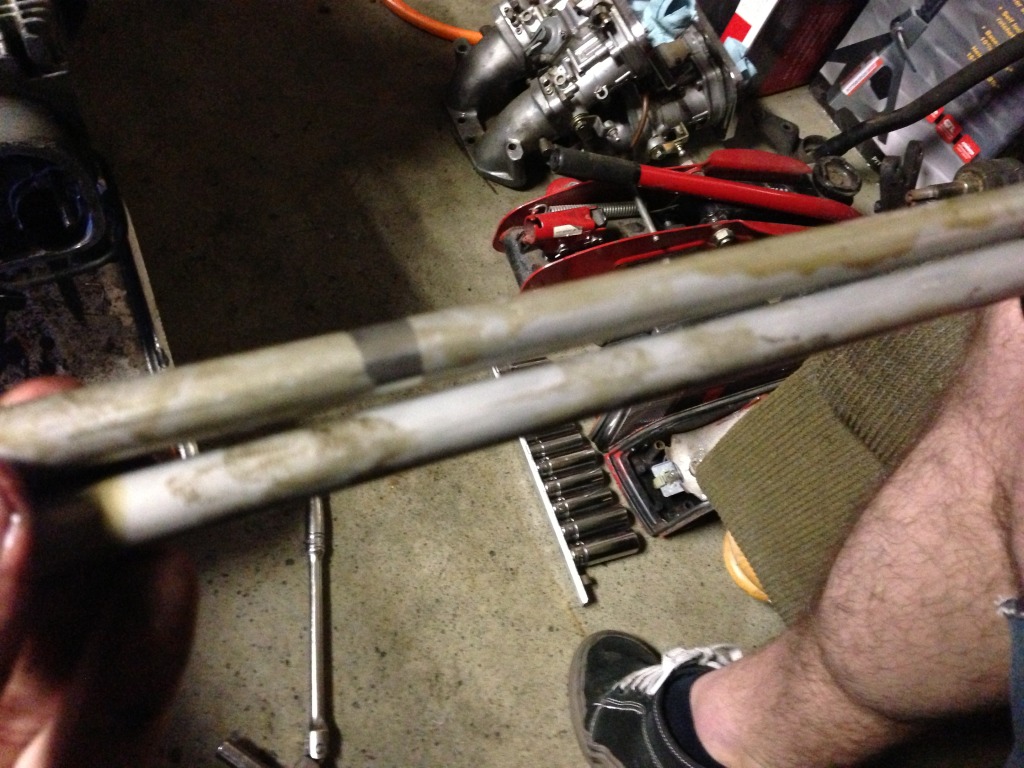
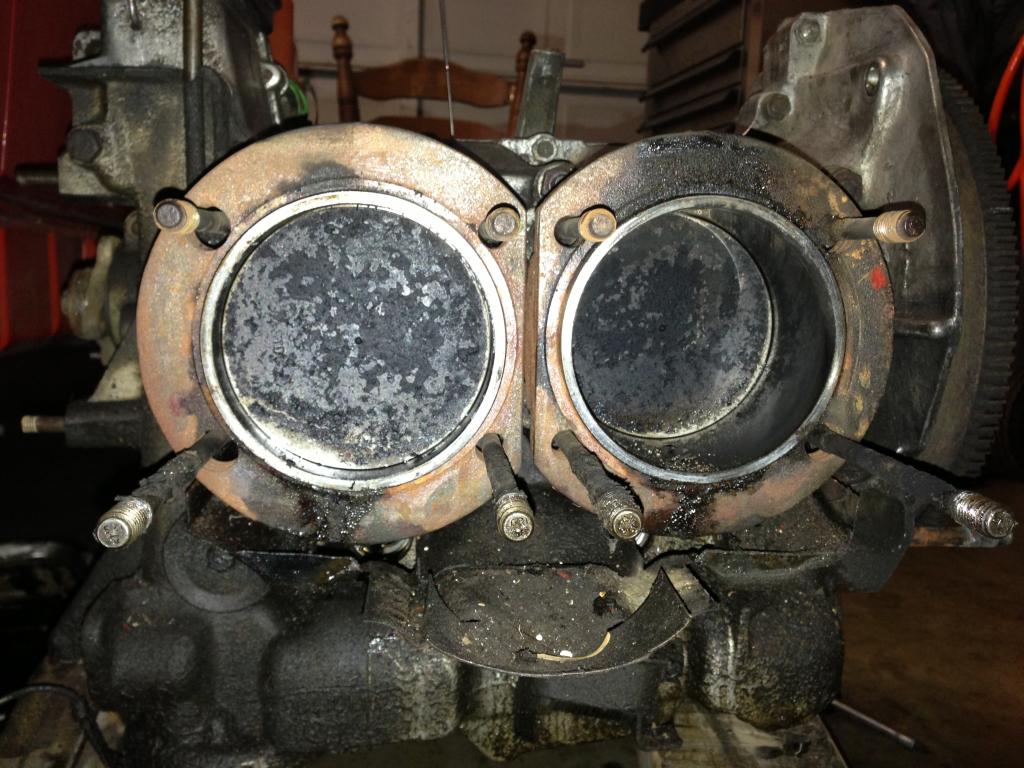
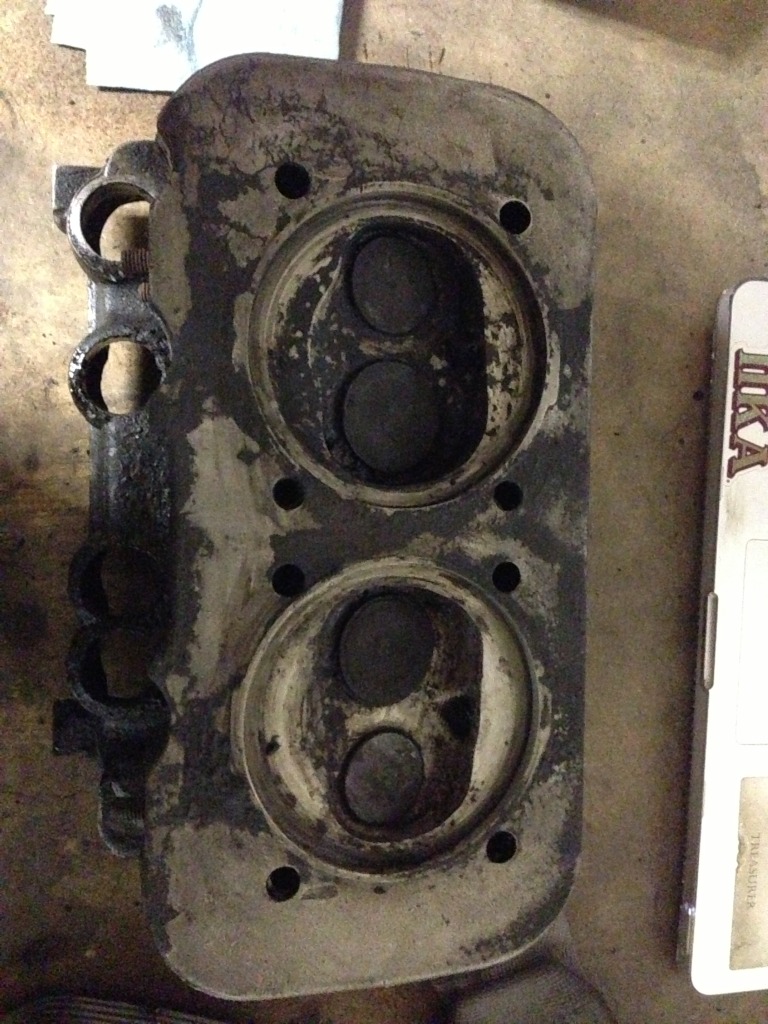
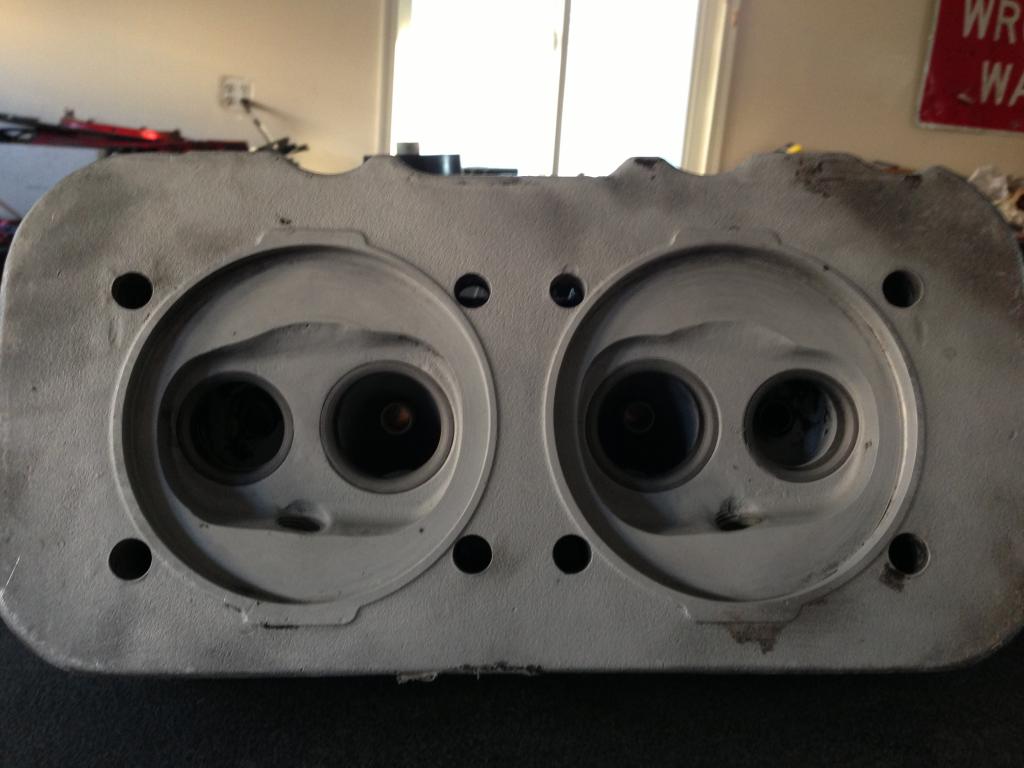
After that i took the heads off the engine to inspect the piston tops, cylinders and valves. Bent two push rod tubes in the process, there goes $20. The inside of the cylinders look really good, can still see the honing lines. The piston tops look ok, no dings or anything like that, but they are SOOO dirty, so much carbon build up. And same with the heads, the valves are just covered in carbon. I know why this engine didnt want to start easily, the engine was running extremely rich and probably wasnt tuned correctly.
I need everyones opinion, I would like to save and reuse them, so how and with what can i clean the heads and piston tops. I would like to not remove the cylinders because i couldnt source rings on either pelican or AA, and would need a ring compressor. so whats your take.... 
Thanks
Posted by: injunmort Jan 30 2013, 02:46 PM
the heads, i would take to local machine shop and have them hot tanked. to clean piston crowns, take a piece of heavy guage solder and flatten with a coulple hammer blows. use this soft scraper to scrape carbon off with a liberal amount of carb cleaner. finish it with a good scrub with a scotchbrite pad. the soldier is much softer tan the pistons and wont marr them.
Posted by: '73-914kid Jan 30 2013, 03:44 PM
That thing was running RICH to get that much carbon deposited.. tank the heads, or soda blast them would be my recomendation..
Once its reassembled, id try to look into rejetting the carbs.. wideband AFR is your friend..
Posted by: euro911 Jan 30 2013, 04:04 PM
Dave, I have a shitload of freshly plated push rod tubes here. Let me know how many you want (you can have a complete set of 8 if you want them)
Posted by: dfelz Jan 30 2013, 04:47 PM
I will have to look into purchasing an AFR! what does re-jetting entail, I have the rebuild kit for the carbs, will that do them justice?
Mark I will definitely take a few, Thanks! how much for a set of 8??
Also, i just calipered the cylinders and they are coming in at 96mm. Stock for a 1.7L is 90mm right?
Posted by: Kirmizi Jan 30 2013, 06:04 PM
96mm means you've got a "big bore" kit installed vs stock pistons.
Re-jetting is mostly a matter of pulling the emulsion tubes from the carb centers or idle jet holders from the sides, replacing the applicable jet and reassembling.
Posted by: mrbubblehead Jan 30 2013, 07:16 PM
hey david, if you wanna buy the soda your welcome to use my blasting cabinet. you could get all your blasting done in one day. carbs, pistons, cylinder heads. I can show you a couple of mods to do to those carbs also, before you put them back together....
Posted by: '73-914kid Jan 31 2013, 12:55 AM
Care to share those mods? I'm getting ready to do an all out carb re-jetting this weekend...
Posted by: euro911 Jan 31 2013, 01:55 AM
(1) Mark I will definitely take a few, Thanks! how much for a set of 8??
(2) Also, i just calipered the cy linders and they are coming in at 96mm. Stock for a 1.7L is 90mm right?
(2) Check the stroke of the crank. If you have 96mm pistons and 66mm stroke, you have a 1911
... if 71mm stroke, you have a 2056 
Posted by: Dasnowman Jan 31 2013, 02:12 AM
I know it looks like it's running rich but on the one set of heads looks like oil might be getting by the rings as well?
Did you see the engine running or did you do a compression test on it before you pulled it?
Might want to have a look at the rings are seated and lined up properly while it's torn down at this point.
Posted by: dfelz Jan 31 2013, 11:10 AM
(1) Mark I will definitely take a few, Thanks! how much for a set of 8??
(2) Also, i just calipered the cy linders and they are coming in at 96mm. Stock for a 1.7L is 90mm right?
(2) Check the stroke of the crank. If you have 96mm pistons and 66mm stroke, you have a 1911
... if 71mm stroke, you have a 2056 Will you be at the dawn patrol run this Saturday? I can get them then.
I will take measurements of the stroke to find out! Ill keep my fingers crossed for a 2056!
Posted by: dfelz Jan 31 2013, 11:43 AM
I know it looks like it's running rich but on the one set of heads looks like oil might be getting by the rings as well?
Did you see the engine running or did you do a compression test on it before you pulled it?
Might want to have a look at the rings are seated and lined up properly while it's torn down at this point.
That would actually make sense if one of the rings were broken, cause after I ran it the next day I noticed a puddle of oil on the ground. I'm gonna have to take the cylinders and pistons off to clean them anyways so I will inspect all the rings then.
Where is a good source for purchasing new rings?
Posted by: euro911 Jan 31 2013, 04:44 PM
Maybe someone else from down this way can grab them from me on their way up there
Posted by: '73-914kid Jan 31 2013, 04:54 PM
Call AA performance. Theres a good chance your big bore kit was from them originally. They will sell you a set of hastings rings i bet. Theyre off the I-60, west of cpp a little ways, so it might be worth the drive to go pick them up.
Posted by: dfelz Jan 31 2013, 04:55 PM
Maybe someone else from down this way can grab them from me on their way up there
If someone is right there in your area and is going that would be cool, but if not i can just grab them another time. I have a good amount of work to do prior to putting it all back together so we have time before i will need them.
Thanks
Posted by: dfelz Jan 31 2013, 05:06 PM
hey david, if you wanna buy the soda your welcome to use my blasting cabinet. you could get all your blasting done in one day. carbs, pistons, cylinder heads. I can show you a couple of mods to do to those carbs also, before you put them back together....
Doug, definitely forgot to respond to you, my bad. Thanks for the offer but i dont really want to blast any piece that will see the inside of the engine. You can never git it ALL out, and the last thing i want is sand floating around and getting in my cam bearings
, that would be a bad situation.I am gonna take the parts to the parts washer at school and see what i can do...
Posted by: euro911 Jan 31 2013, 05:27 PM
Soda (baking powder) won't hurt the internals, not like sand and glass bead would.
NEVER NEVER glass bead a case(or any other part that will see fuel or oil) unless you know absolutely for sure you have every opening sealed so tight, that a gnat's fart won't get in or out.
Posted by: zambezi Jan 31 2013, 10:49 PM
Large hose clamps can be used for a ring compressor when reinstalling the pistons into the cylinders.
Posted by: euro911 Jan 31 2013, 11:14 PM
... or one of these (oil filter removal tool)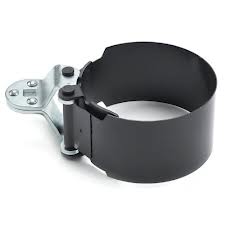
Posted by: dfelz Jan 31 2013, 11:45 PM
Cool, ya i think thats what my roommate said too.
Just measured the stroke, its 66mm Was definitely hoping it was a 71mm... oh well.
I still dont feel comfortable blasting those parts, I just went out and bought some oven cleaner and a scotch bright 6pack, so hopefully along with some elbow grease i can get those puppies nice and shinny!
Posted by: '73-914kid Feb 1 2013, 12:48 AM
It's still a 1911, And those are fun Revvy little motors. I think most people would describe them as Peppy... But I still bet those carbs are over jetted for it. Once you have it all running, weld a bung in the exhaust collector, and We'll throw my AFR on it to see what needs to be done to the jetting.
If the oven cleaner doesn't work, dissasembling the heads if you know someone with a valve spring compressor, and soda blasting them won't provide any issues down the road. Baking soda dissolves completely in water.
Posted by: dfelz Feb 1 2013, 02:34 AM
It's still a 1911, And those are fun Revvy little motors. I think most people would describe them as Peppy...
But I still bet those carbs are over jetted for it. Once you have it all running, weld a bung in the exhaust collector, and We'll throw my AFR on it to see what needs to be done to the jetting. If the oven cleaner doesn't work, dissasembling the heads if you know someone with a valve spring compressor, and soda blasting them won't provide any issues down the road. Baking soda dissolves completely in water.
Ahh ok thats why baking soda is good for this application, good to know. I may be coming to your place then doug if i cant get access to the one on campus in the foundry.
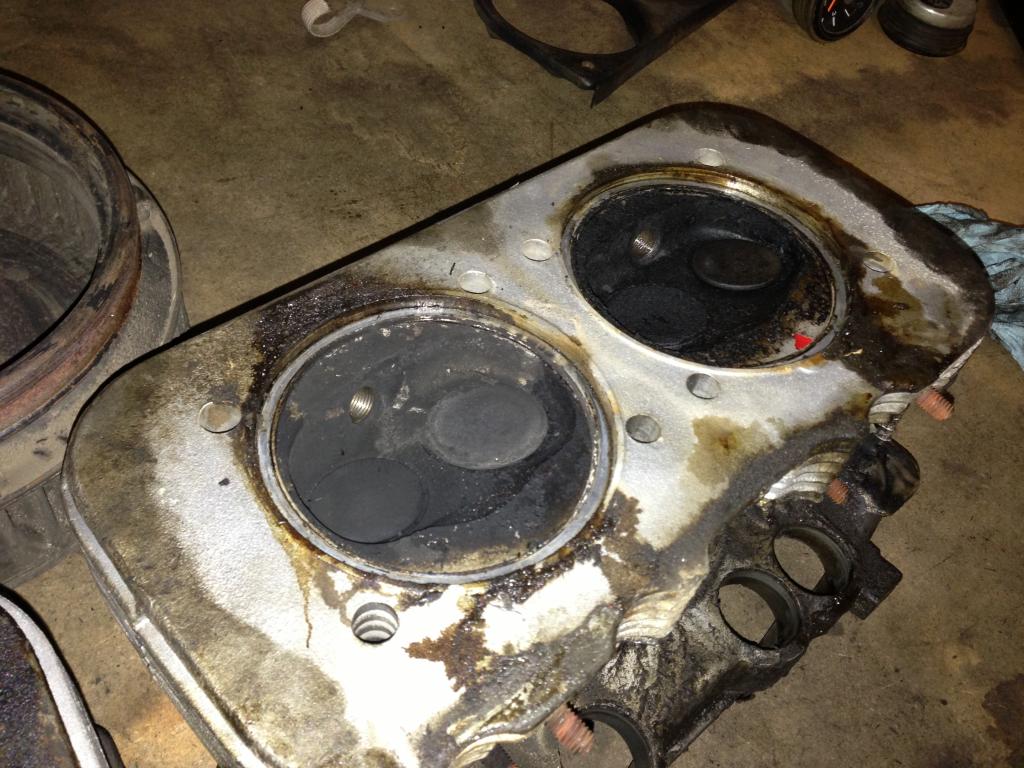
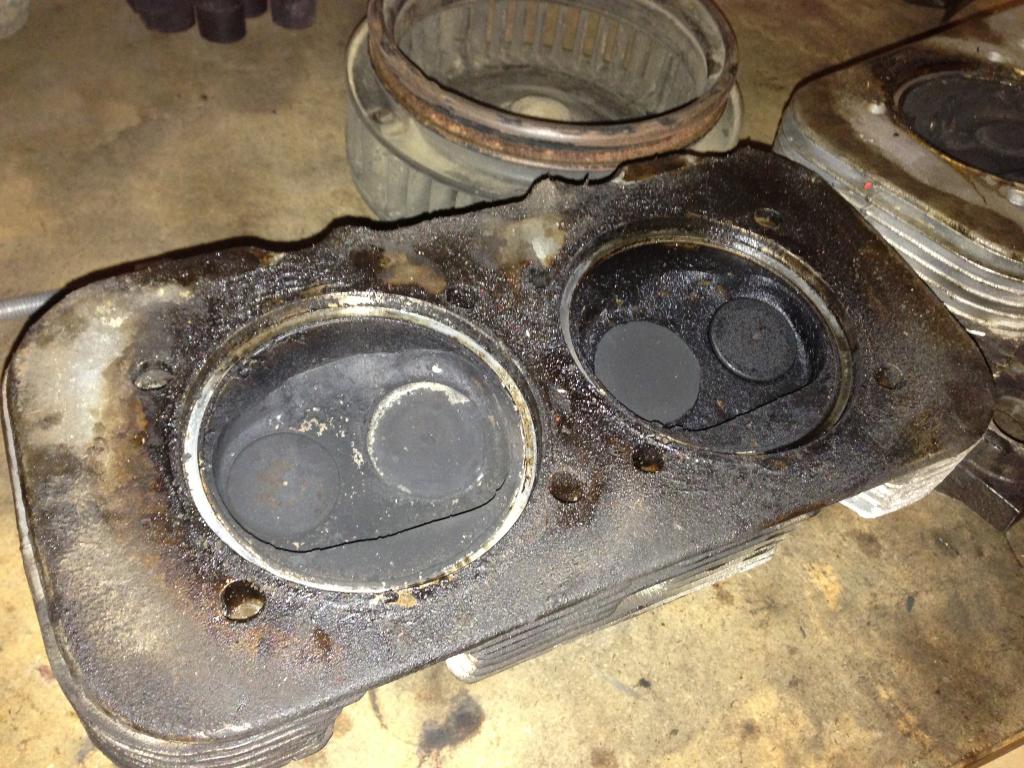
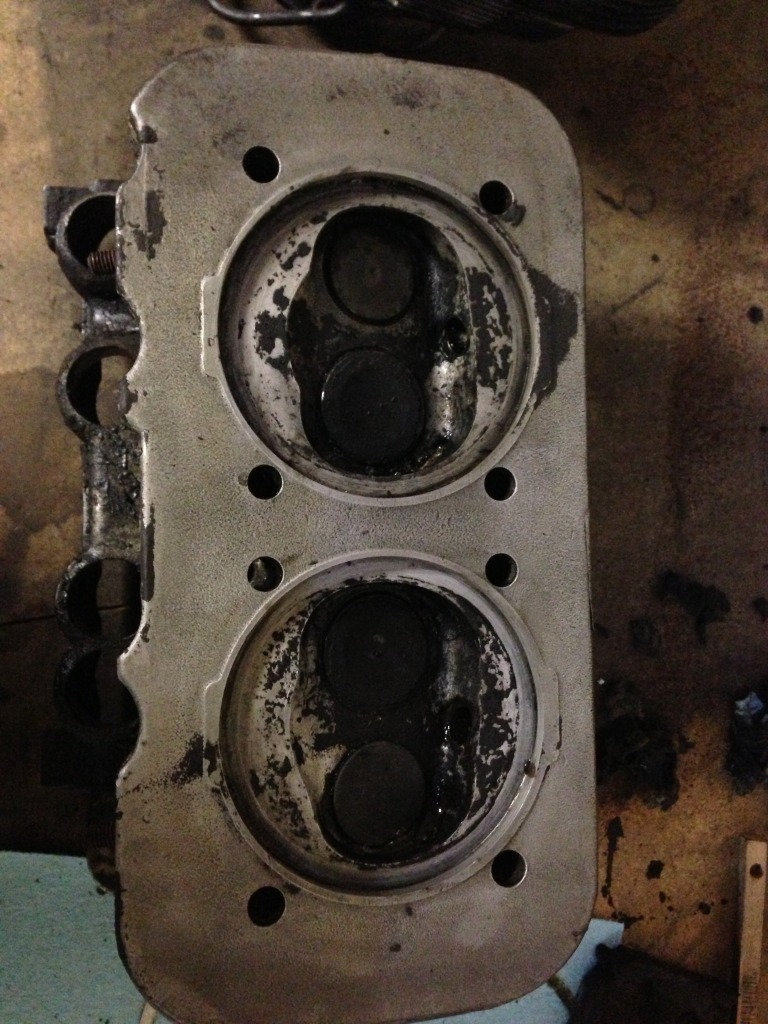
I attempted to clean them, got the basic shit off, but they definitely need some serious blasting!
Here is the dirtier of the two
Here was the cleaner of the two
so where do i get giant pales of baking soda???
Also anyone have a good source for piston rings, since i may have a busted one, or two...
Posted by: dfelz Feb 1 2013, 03:35 AM
I'm done for the night! my eyes are screaming at me to shut them for a few hours, so i must listen to them. I managed to finally cut and place the new fuel filter and fuel pump up front on the front side of the gas tank firewall. I removed the old plastic fuel lines last night, they slipped right on out. Next i need to get enough wiring for the two FP wires to head through the tunnel to the front of the car. Once i have the wire lengths cut, I can tape them to the SS tunnel line and push it through! 
I like those spots for drilling my holes cause they are at an angle and wont force the lines to make a 90 degree turn to get past the firewall.
On my way back from dawn patrol saturday I will get the some spools of wire, HB will be on my way home!
Posted by: '73-914kid Feb 1 2013, 11:20 AM
Call these guys http://aapistons.com/
They were the ones who made those pistons and cylinders in the first place, so they should be able to sell you a set of Hastings rings
Posted by: dfelz Feb 1 2013, 11:53 PM
Ethan, that helps a lot, thank you. I will call them on monday to order a set of rings.
I have a big exciting day planned for tomorrow.
First i am going to bruces (bdstone) place to cut out an engine shelf he said i could have. 
Then i am off to dougs (mrbubblehead) place to soda blast some parts!
WOooo, cant wait 
Posted by: mittelmotor Feb 2 2013, 12:28 AM
David, I have a perfectly good starter that I'll donate to the project if you pick it up (don't want to hassle with shipping). I'm in South OC (Laguna Hills). PM me if you want it.
--Doug
Posted by: dfelz Feb 2 2013, 02:40 AM
Today i also received two packages, one with a pair of front turn signal buckets and the other with one of my front hubs back from Eric.
I plugged in the turn signal buckets, hooked up the battery, put in some light bulbs in and tested out the functionality. Anyone got a picture of the wiring to the bucket or can tell me which of the three wires go where???? Because some things were a little off. when headlights were on the DS TS would be on but not blink, and the PS TS would not be on but would blink. With the lights off, both of them would blink when commanded to.....
Doug (mittelmotor), I will gladly pick up the starter from you, thank you very much for the offer, i really appreciate it. It will be good assurance for me to know that i have a strong working one. Can you please PM me your cell# so i can text you for your address and a convenient time i can swing by and pick it up.
Thanks!
Posted by: dlee6204 Feb 2 2013, 05:42 AM
Here's the wiring for the bucket...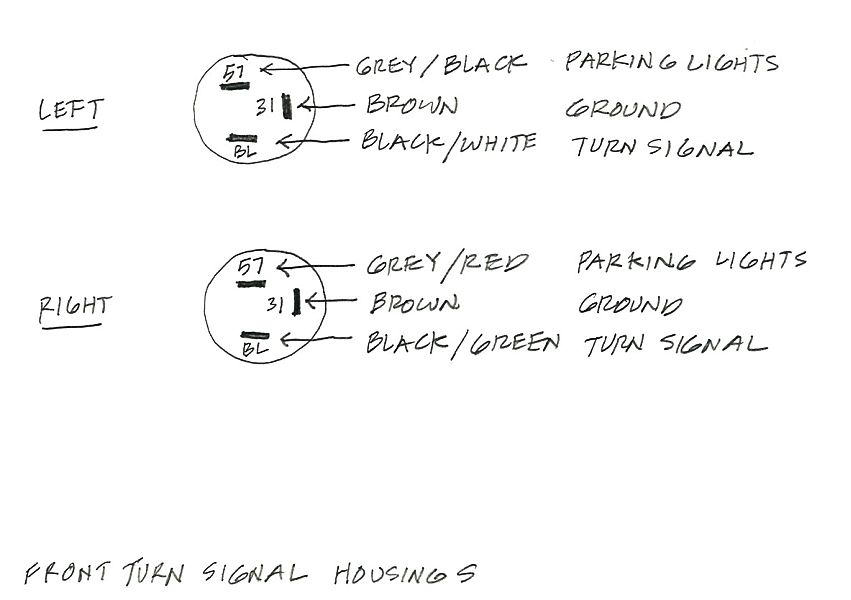
http://bowlsby.net/914/Classic/zTN_Elect_FrontTurnSignals.jpg
Posted by: mittelmotor Feb 2 2013, 04:15 PM
Today i also received two packages, one with a pair of front turn signal buckets and the other with one of my front hubs back from Eric.
I plugged in the turn signal buckets, hooked up the battery, put in some light bulbs in and tested out the functionality. Anyone got a picture of the wiring to the bucket or can tell me which of the three wires go where???? Because some things were a little off. when headlights were on the DS TS would be on but not blink, and the PS TS would not be on but would blink. With the lights off, both of them would blink when commanded to.....
Doug (mittelmotor), I will gladly pick up the starter from you, thank you very much for the offer, i really appreciate it. It will be good assurance for me to know that i have a strong working one. Can you please PM me your cell# so i can text you for your address and a convenient time i can swing by and pick it up.
Thanks!
Sure will!
Posted by: dfelz Feb 4 2013, 08:46 PM
Thanks Doug (dlee6204), (man there are a lot of Dougs helping me out on here) for the front turn signal wiring diagram, i had two wires wrong on the DS. Next time i plugin the battery ill test it out to make sure its all bueno.
This past saturday i went over to Dougs (mrbubblehead) place to soda blast my heads, got a lot of it done, but i will have to go back soon to finish up the job, mainly on the valves. But they look good so far!
Also got my front hub back from Eric for some stud adjustment. After a little sanding of the lug holes on one of my rims, it slid on. So i now have a fully rolling 5-lug 914! 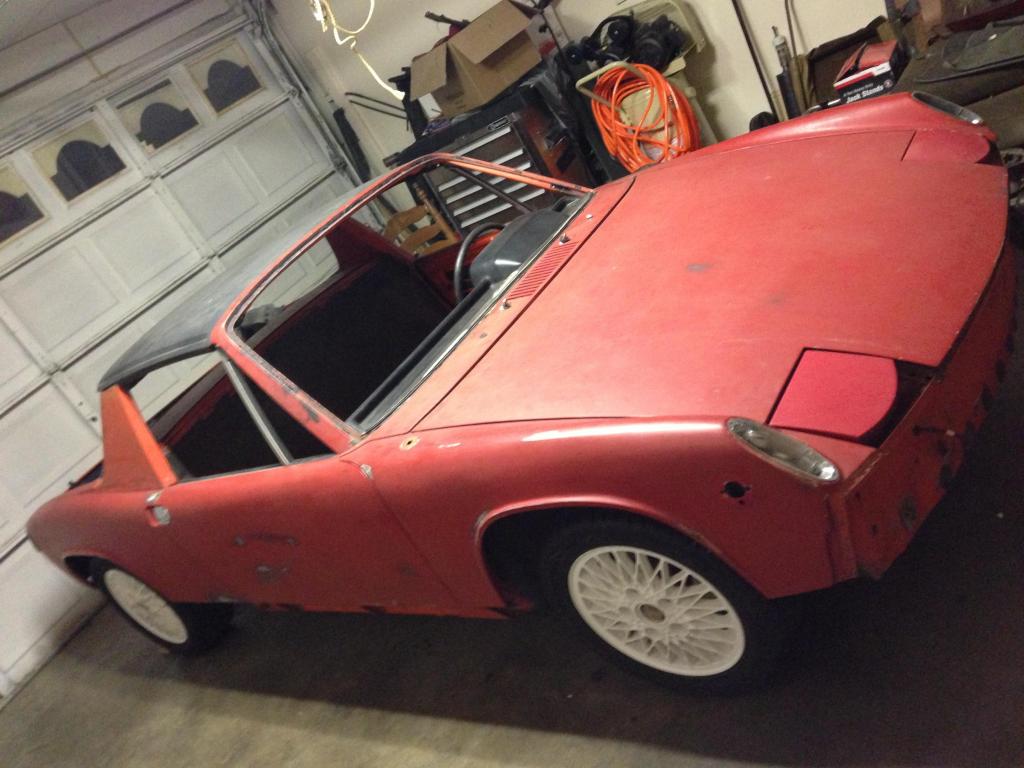
Posted by: dfelz Feb 7 2013, 03:33 AM
Yesterday I removed all of the heater controls and blowers, came out a lot easier than i originally anticipated. They wont be going back in the car since i am building for racing/weekend fun car.
I got my horn situation figured out as well. Since the wheel that came with the car had no dash pad and my momo wheel and hub adapter wont work for this car (hub adapter is for 72 or later car that i got when my project involved a 72 and not the current 71.) My roommate brought me a button from his work and i wired to the brown/white wire and grounded to steering column. It worked! yay. first attempt was short circuiting and when the key was turned the horn was on, with no stopping, haha, forgot to put heat shrink around the terminal ends on the button!
Tonight I also started the prepping for the installation of the new 911 FG dash. I really do dislike the task of removing the OEM dash, what a pain to get all those damn nuts off on the underside! I unhooked all the gauge wires (took lots of pictures prior to removal) but the only thing i cannot get off is the trip reset cable (the one with the nob on the underside of the dash) I know its supposed to unhook on the nob side and not the gauge side, but i cant get anything to move down there, not even the nob will turn with pliers... suggestions would be appreciated for this task.
Picture time!
Underside of cowl area with all the heater blowers and air box removed (and then scrubbed with a wire brush)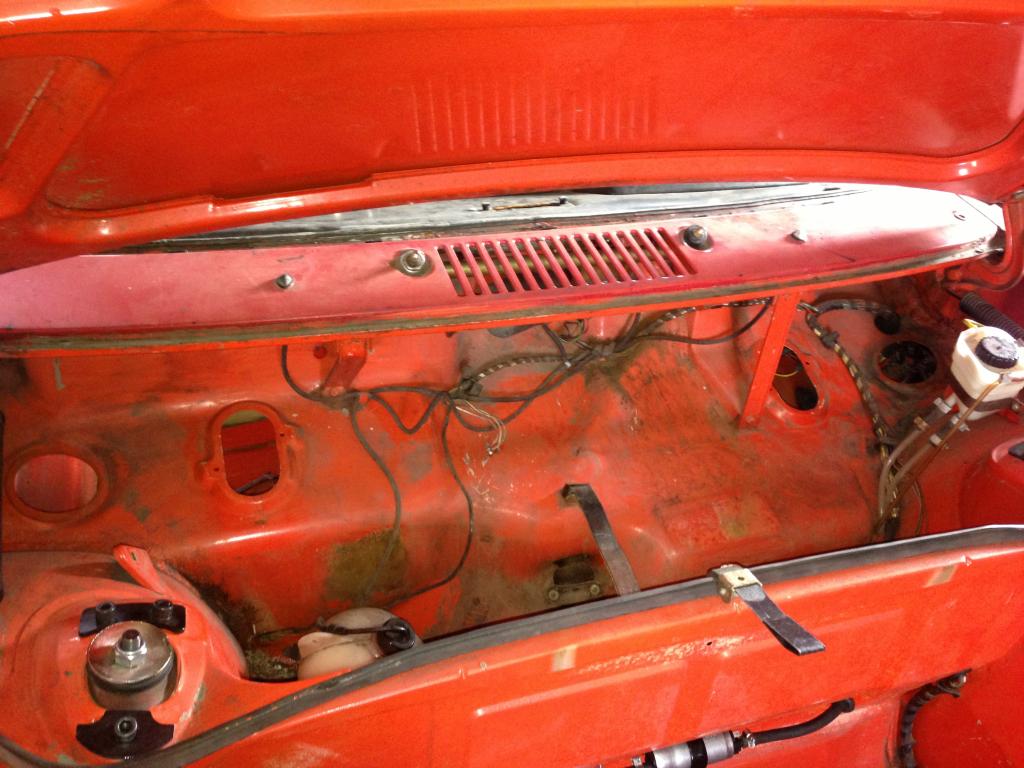
Horn button wired up (with important heat shrink added)
Button and wheel mounted and tested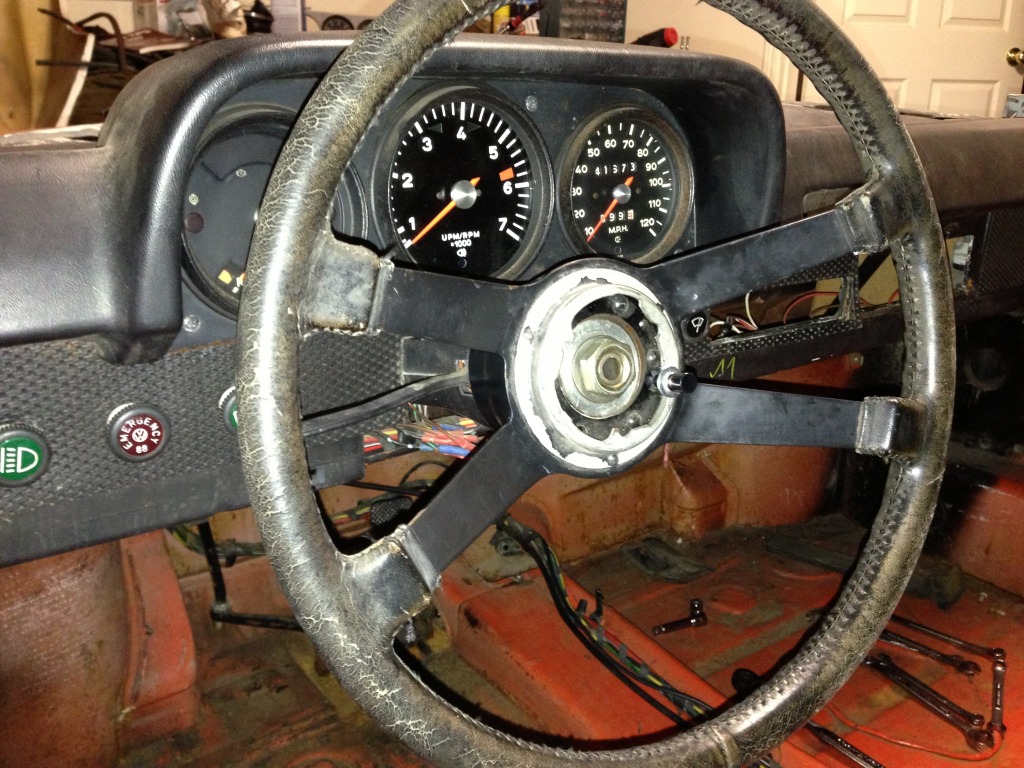
Posted by: dfelz Feb 10 2013, 03:08 AM
I am extremely swamped with school work this weekend, been working on senior project stuff from friday morning till now, basically the entire time! Therefore i cant do any physical work on the teener for a few days... but i can sure surf the forums on my 5 min breaks here and there!
But over these past two days i received two packages in the mail
First package was from superbrightLEDs.com, ordered my red LED strip for third brake light, after i saw Dougs in person last weekend i was 100% on board with that product. it was $11 for the 50cm strip, cant beat that! While i was making the order from them i also threw in some dielectric grease packets for application to all my connections, again, recommended by Doug. Also ordered a 25' roll of +/- 18 AWG wire, some of which will be used for sure on the wiring of the fuel pump from the stock harness wires through the tunnel to the new front location.
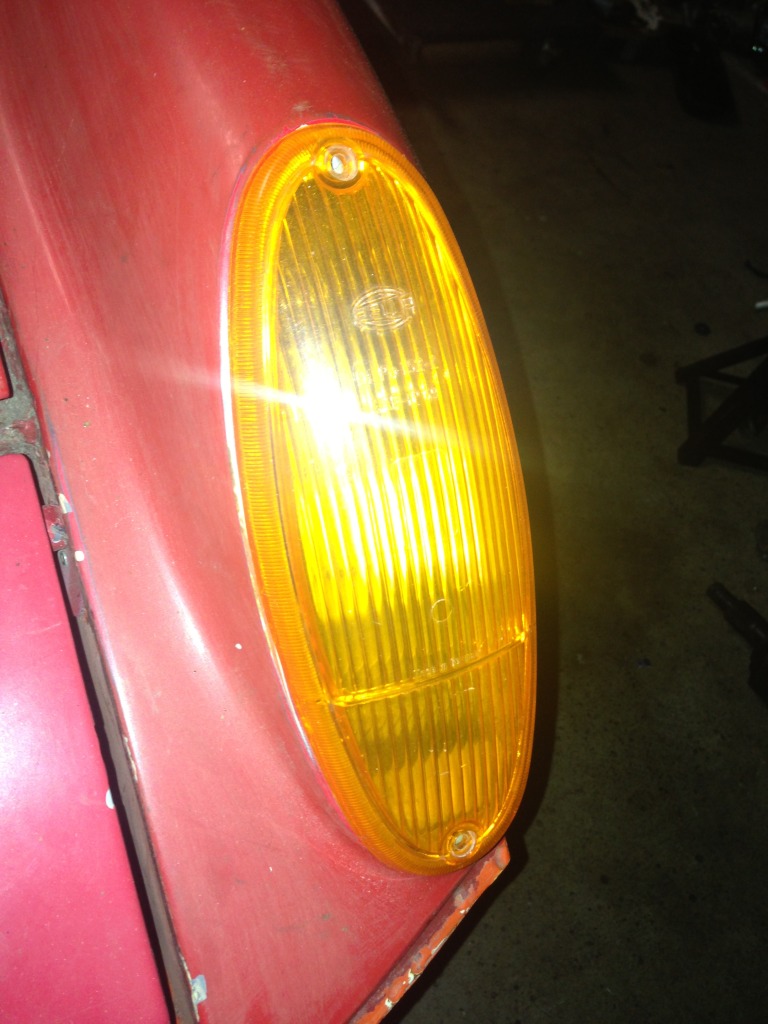
Second package was from 70-914nut, i purchased his front turn signal lenses and gaskets from is car part out. I obviously opened that package as well so i could see how they look
Third new item to the garage..... I picked up the starter motor from Doug (mittelmotor), thanks again for that! Your 914 was f**king SWEET!!! that LS1 V8 looked (and sounded) amazing in there, and the sleeper status is off the charts, no one would ever see that coming! (2.0L badge, one of two exhaust pipes hidden, narrow body...) love it.
Next topic.... so since i have been stressed with all my school work i did some cleaning of the garage yesterday, i usually resort to cleaning when i need to blow off steam (either garage, room, or one of my fish tanks haha.) This time though i ran across one of the parts that was left in the trunk of my new roller when i got it, when i originally pulled it out i thought it was a rear sway bar, i then put it away for later use. I was moving it and then noticed that it was different than the rear sway bar i already had, and then it hit me, its a front under body sway bar, stoked. i was happy because my 71 doesn't have the holes drilled on the chassis for the thru body type, and the linkages i have for my thru body bar off my 72 are ovaled as sh*T. So since i dont need the adjustability or have the $$ for an aftermarket thru body (for now at least, next few years wont be racing, it isnt necessary at all) the underbody will be perfect! I asked Bruce today if he had any of the brackets/mounting tabs for that style bar, and sure enough he does! so i will pick those up from him this up coming saturday on my way to Dougs for more soda blasting.
If only it were this easy to fill up a few paragraphs with words when i was writing my advanced measurements lab report! 
I love pictures, and even though i dont have much to show for this post, i still have some pictures! Talk to you all later 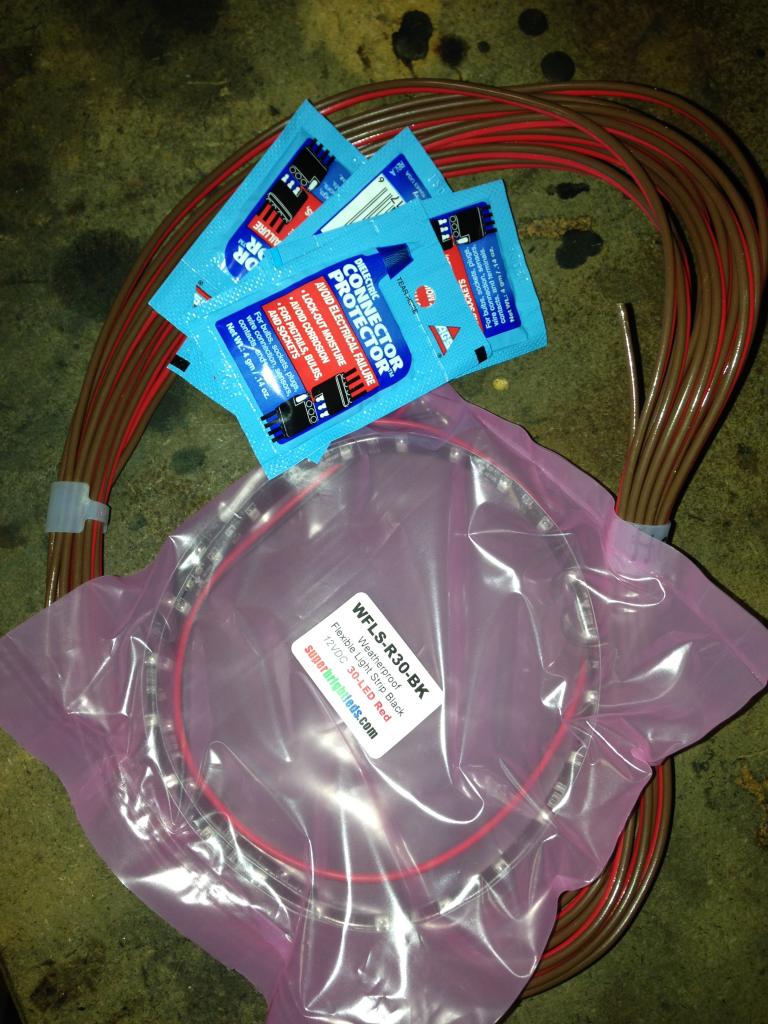
Posted by: Garold Shaffer Feb 10 2013, 06:24 AM
Tonight I also started the prepping for the installation of the new 911 FG dash. I really do dislike the task of removing the OEM dash, what a pain to get all those damn nuts off on the underside! I unhooked all the gauge wires (took lots of pictures prior to removal) but the only thing i cannot get off is the trip reset cable (the one with the nob on the underside of the dash) I know its supposed to unhook on the nob side and not the gauge side, but i cant get anything to move down there, not even the nob will turn with pliers... suggestions would be appreciated for this task.
Were you able to get the trip reset cable off? This is a 71 car, yes? if so then the knob should be a metal nurled (sp?) knob with a small set screw that holds it it on. Remove the set screw, pull knob off if it doesn't fall off then you will see a chrome ring that screws into the dash frame. Unscrew that and the cable will come out.
Sometimes that set screw won't come out so I just use a very small drill bit and drill it out.
Posted by: dfelz Feb 10 2013, 01:22 PM
Tonight I also started the prepping for the installation of the new 911 FG dash. I really do dislike the task of removing the OEM dash, what a pain to get all those damn nuts off on the underside! I unhooked all the gauge wires (took lots of pictures prior to removal) but the only thing i cannot get off is the trip reset cable (the one with the nob on the underside of the dash) I know its supposed to unhook on the nob side and not the gauge side, but i cant get anything to move down there, not even the nob will turn with pliers... suggestions would be appreciated for this task.
Were you able to get the trip reset cable off? This is a 71 car, yes? if so then the knob should be a metal nurled (sp?) knob with a small set screw that holds it it on. Remove the set screw, pull knob off if it doesn't fall off then you will see a chrome ring that screws into the dash frame. Unscrew that and the cable will come out.
Sometimes that set screw won't come out so I just use a very small drill bit and drill it out.
Correct, its a 71. I was looking at it last night again really quick to see if i saw anything i didnt see before, and did notice that small set screw on the knurled nob. I am pretty sure it will have to be drilled out then, cause the nob wont turn freely at all. I will attempt later, thanks Garold!
Posted by: mrbubblehead Feb 10 2013, 04:42 PM
good move on the dielectric grease david. put that shit on every connector you take off. i put it on every single connector in the whole car. i even fill up the turn signal and windshield wiper levers. they operate super smooth afterward.
Posted by: dfelz Feb 11 2013, 12:00 AM
I like your style Doug!
Well i woke up this morning with a text from Mr. Shea, and he was questioning my decision for the underbody sway bar. After many texts, mainly from his end since he is the knowledgable one, he convinced me to drill the holes for the thru body, and fix the links i have by converting them into 930 style ones, which actually shouldn't be too bad. To sum up his arguments, which are very convincing, the under body bar was designed for a car 1000lb heavier than our 914s, and since i will only be doing around the town shit for the next couple of years, it will be a harsh ride with no adjustability from the sway bar. I trust Eric very much, he has done my entire suspension system for the most p thus far, and when i got a text from him a 8:30am this morning, only 6 hours after my post, with his concerns, i knew i should just listen to what the man has to say!  Cause if there is one thing i know, i dont know sh*t about these cars.
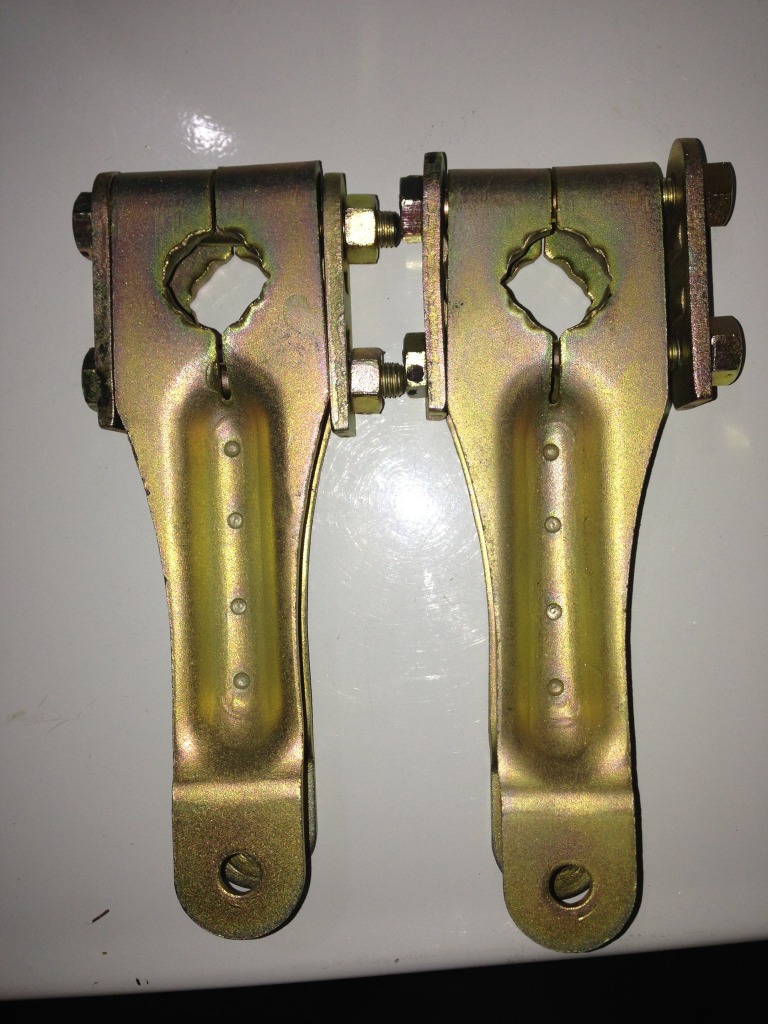
So i will be going "thru"(play on words, haha) with the modifications shown in the pictures below. First picture is the current condition of my linkages (thanks PO) and second is Erics inspiration picture for this side project. I have the hallow bar stock that be able will get the job done too, just have to do some grinding and welding I'll be sure to keep you posted! hope everyone had a wonderful weekend! I know i didn't 
Posted by: dfelz Feb 13 2013, 09:07 PM
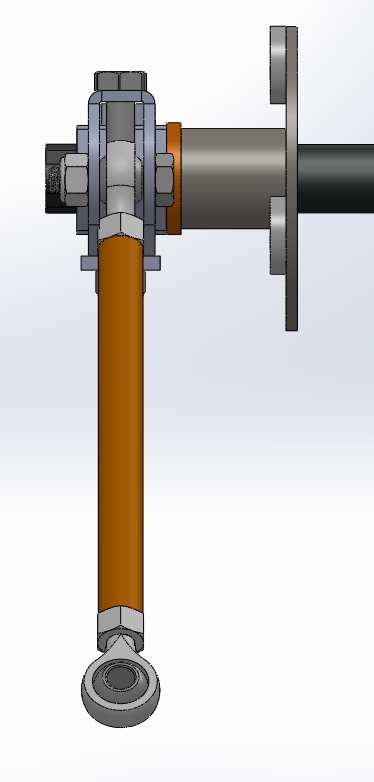
Ok so I have my thru body sway bar modeled up in Solidworks (So wish I had ProE, my last job used it and it was sooooo nice, too bad its a 10K license and my student edition of SW is free.99) I am also going to model the control arms so that i can do a motion simulation and geometry analysis at the different linkage holes. If this was next quarter i could also do a full fledge FEA analysis in Nastran, but since i am not taking finite element analysis until next quarter, the basic knowledge i have of solidworks FEA simulation should give me a good idea of week points in the components and where all the stress concentrations will be.
My design concept was to take the OEM arm, make it adjustable, add the 930 style 90 degree through brackets for more stiffness in part and less chance of rounding the square design, and use spherical bearings on the drop link (top spherical bearing will be right hand thread, bottom will be left hand thread, this will make adjustment super easy by just having to loosen the jam nuts on both sides and then just spinning the drop link tube to adjust the tension/compression.) The clamping method is the same style the stock one uses, i like it more than other methods i have seen on aftermarket ones that have just one bolt on the end. Two bolts with the bar in between distributes the clamping force to ensure all four flats on the bar receive equal forces. I also designed a new bushing bracket so that i could use a a custom oil-impregnated brass bushing. its a simple flange style bushing but it will be pressed in from the wheel side. I will also have some kind of rubber washers in between the back of the bushing bracket and the frame sheet metal. Since the car this will be going on without a stock thru body bar i will be making a backing plate for the gas tank side with the nuts welded on for capture of the 3 M8 bolts.
The backing plate, bushing bracket and link arm will all be laser cut 1/8" 1018 cold rolled steel (with the link arm obviously being bent into formation and then tig welded together. Will hopefully have them normalize since all the components will see some welding time, and will then be plated.
Please keep in mind this is my first run at this system and would love everyones input and considerations that i may have overlooked. Just for reference, there are 5 holes for adjustment, the middle one is the exact distance the single stock one is at. I worked in the medical device industry for 6 months full time for an internship and i was doing hardware and tooling design (designing components for the manufacturing line and testing systems for pacemakers and implantable defibrillators) so i have some experience doing design work, am also on the SAE electric team. But like i said, i really want your input, so feel free to ask any questions you like and give any commentary.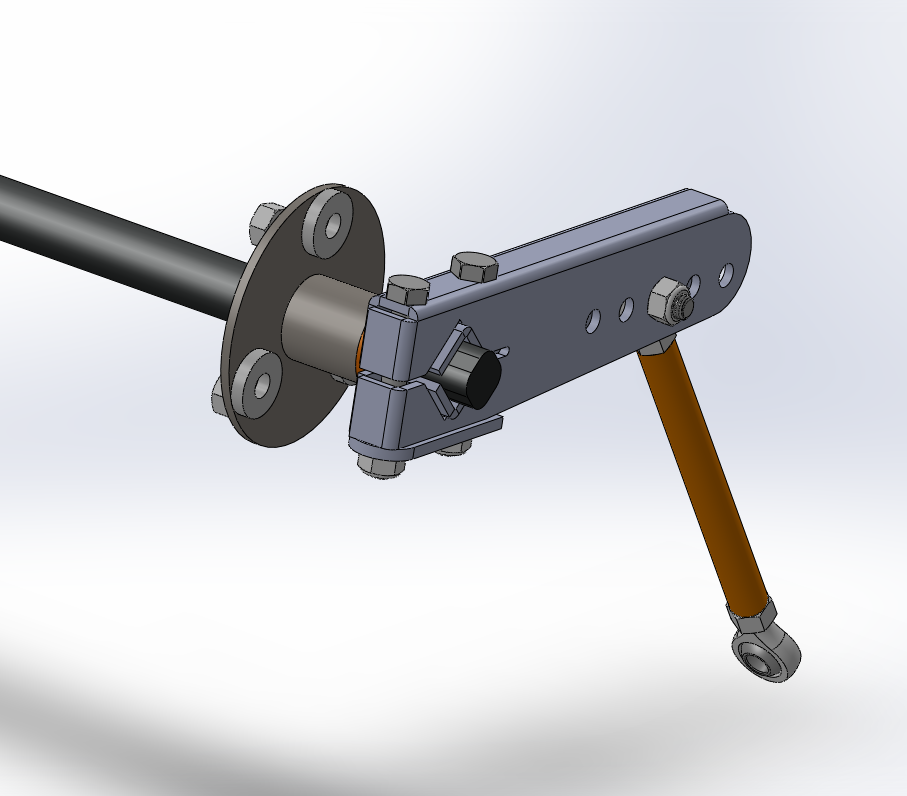

I can get more snap shots too!
Posted by: sixnotfour Feb 13 2013, 09:15 PM
Impressive wish drawing , Buy some H&H arms from like 30yrs ago, same but cheep.
Ya Im 52 and own the arm in your pic... 76 Turbo 1yr only
Posted by: mittelmotor Feb 13 2013, 11:12 PM
Mad computer skillz, David!  I still sketch things out on paper.
That U-channel arm looks plenty robust. So nice to have the adjustability.
Posted by: euro911 Feb 13 2013, 11:45 PM
We used SolidWorks to design and G-code the mill work for numerous custom cycle parts. Cool tool
Let me know when you get around to making a set (or more) of those arms
Posted by: dfelz Feb 14 2013, 12:16 AM
Thanks guys for the compliments.
Ya G-code and other programs like master-cam are on my bucket list too. CNC programing is a very helpful trait.
I actually designed the parts in the mind set that i could sell them to members that have stock bars and want some adjustability or their stock links are worn out (like mine) and in need of replacing but dont want to spend the $$$ on the $400 aftermarket kits. I priced out all the components and i think i could sell it all for under $100 for sure. BUT i will NOT sell this product to a single sole prior to me putting some many road miles on the system in my own car first! Although I dont currently have a running car and many of you do, including you Mark...and you seem interested in trying it, so maybe when i have the first batch made, i could have one extra made for you (or more for others interested) and if you were willing to pay only the at cost price to make the parts (basically just laser cutting and BOM, i do the welding and assembling) you could be a product tester and put some miles on it  and give feedback and suggestions .... just a thought
Posted by: euro911 Feb 14 2013, 03:46 AM
Cool
Posted by: dfelz Feb 14 2013, 06:52 PM
I started a cost analysis and for the link arm, with all the nuts and bolts, the 90 degree angle bar, drop link tube and rod ends (those are the most $$ piece at $7 a pop) it comes out to just under $40, mainly of which is the $28 from the rod ends. This number does not include the sheet metal the arm will be cut out of or the cost of laser/water jetting the piece. If i only make two or three i may be able to have it cut for free from my friend. If not though, and more people are interested in being product testers... the price shouldn't be too much to have them cut if we had 5 people or so interested....
Still need to look into it more..
Time to go to my next class
Posted by: dfelz Feb 15 2013, 12:17 AM
Oh ya i forgot to post yesterday...but I picked up an AFR digital gauge the other day. Picked it up from a local drag car company, Bismoto Engineering, in Ontario. They have a SWEEEET ass 911 that, twin turbo 771 hp, insane and sooooo sexy looking.
The guy waas selling them new for $155 and i need one badly so i figured i would take the opportunity now.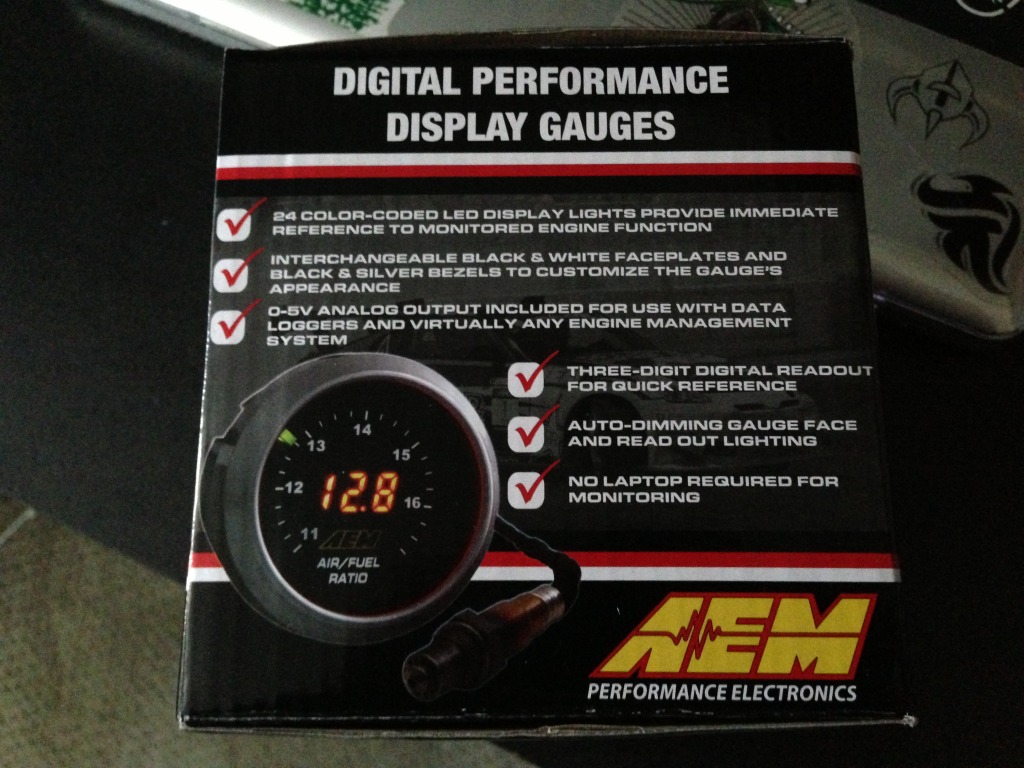
Posted by: euro911 Feb 15 2013, 01:10 AM
The guy was selling them new for $155 and i need one badly so i figured i would take the opportunity now.
Posted by: dfelz Feb 15 2013, 01:53 AM
The guy was selling them new for $155 and i need one badly so i figured i would take the opportunity now.
HAHA, ya i wish, i just saw a picture of the car
Ya i typed that in the wrong order oops, i was obviously referring to the AFR gauge
Posted by: Eric_Shea Feb 16 2013, 12:09 AM
Very nice arm and drop link design
Posted by: dfelz Feb 16 2013, 03:26 AM
Very nice arm and drop link design
Thanks Eric, I am glad i have your support.
Sway bar question, what was the stock bar size? cause I am calipering my bar at 19.5 mm.
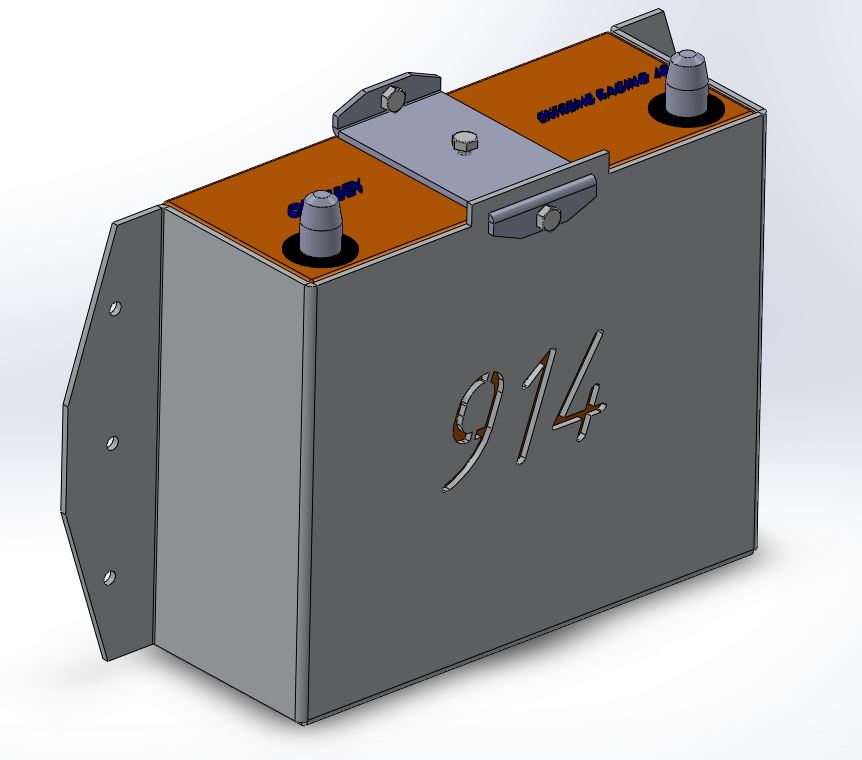
Since I will eventually be doing AX and DE and other racing of sorts, my battery can not be located in the stock location in the engine bay, according the the rules i looked up. So i have decided to move it to the front trunk. I am going to be using an Odyssey ER 40, which I already have, and now have my custom battery holder modeled up in solidworks. That top center bolt will be screwing into a rubber pad mounted on the battery top surface to prevent me from over tightening it and cracking the battery plastic. This part will be laser cut out of 6061 T6 (the easier to weld aluminum)
Also sometime this weekend I will post a separate thread requesting a few product testers of the sway bar arm and drop link, need to get a feel for how many people would be interested (want to send them out next week for cutting).... after laser cutting costs and me doing the bending and welding at school i think they will come out to around $60 total for material/manufacturing cost, with no profit to me. So if anyone is interested feel free to let me know....
Posted by: dfelz Feb 18 2013, 11:55 AM
Had a 914 work day this Saturday!
First stopped at Bdstone's shop to drop off/trade some non-plated for plated versions of a few miscellaneous parts. Also picked up a powder coated muffler bracket from him.
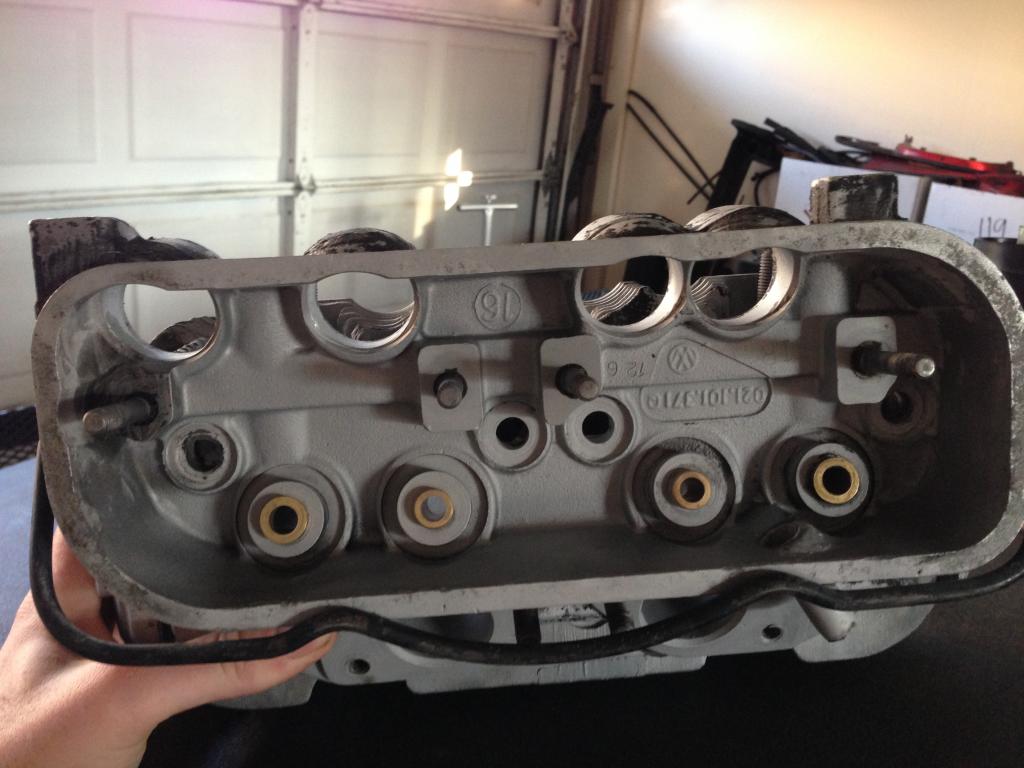
Then I went to mrbubblehead's place to finish up cleaning my heads. They look really good now! We used a fine lapping compound and lapped each valve to its own valve seat to make a really nice seal, then reassembled them, springs and all. Then we completely disassembled one of my webber 40s, Doug was showing me what all the parts were and inspecting them to see if anything need replacement, aside from all the gaskets and bits that come in the rebuild kit.
Hopefully tuesday night after my THREE midterms that day i will take off the cylinders and clean the piston tops and inspect the piston rings.
Picture of one of the heads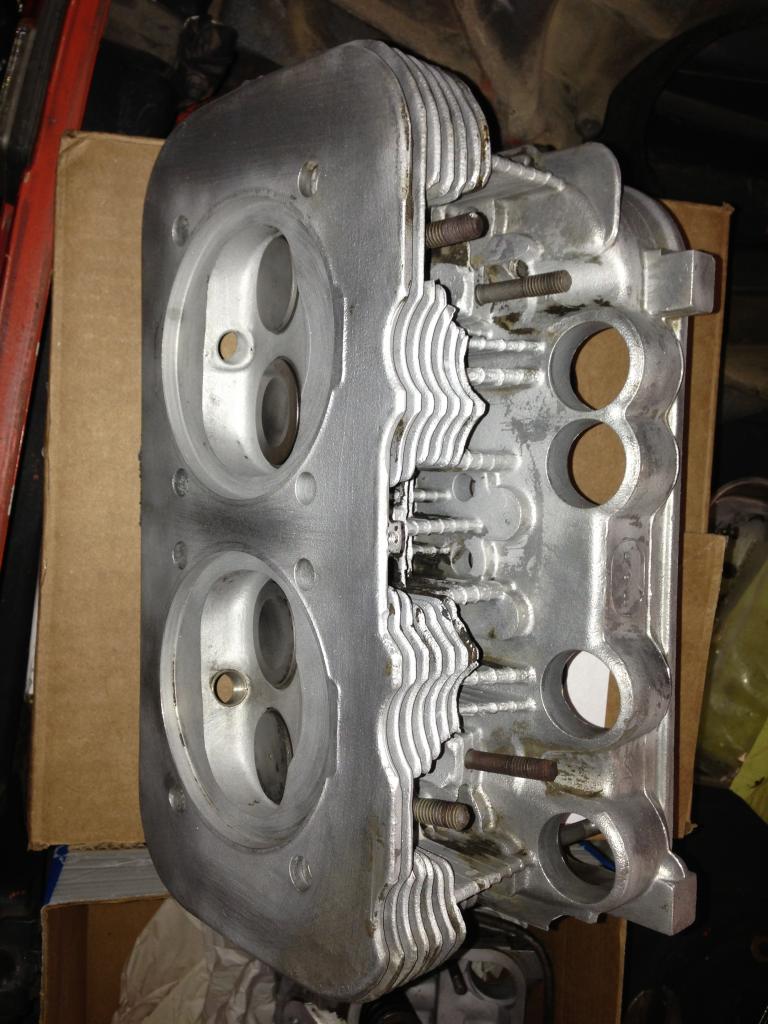
Posted by: euro911 Feb 18 2013, 12:56 PM
Also sometime this weekend I will post a separate thread requesting a few product testers of the sway bar arm and drop link, need to get a feel for how many people would be interested (want to send them out next week for cutting).... after laser cutting costs and me doing the bending and welding at school i think they will come out to around $60 total for material/manufacturing cost, with no profit to me. So if anyone is interested feel free to let me know....

In case I miss seeing the thread, put me on the list
Posted by: dfelz Feb 19 2013, 05:33 AM
Also sometime this weekend I will post a separate thread requesting a few product testers of the sway bar arm and drop link, need to get a feel for how many people would be interested (want to send them out next week for cutting).... after laser cutting costs and me doing the bending and welding at school i think they will come out to around $60 total for material/manufacturing cost, with no profit to me. So if anyone is interested feel free to let me know....
In case I miss seeing the thread, put me on the list
You are definitely on the list! And i believe Doug is on the list too...
The parts are being cut this wednesday and will be bent and welded shortly after that. Still need to place my McMaster order for the drop link tube stock, 90 degree angle pieces and rod ends, but having them local i will be able to place order in the morning and pick up later that day. I will have final manufacturing pricing once its all ordered and assembled.
For this first run I am making 6 pairs (2 link arms and 2 drop links), leaving 3 extra sets up for grabs at the moment! (since the current list is me, mark and doug)
These will be ready in time for the BBQ/Swap meet, so that will be a good time give them to the drivers that are interested.
Also, Mark, I am still interested in the set of 8 plated pushrod tubes that you offered to me earlier. Can i get them from you at the BBQ/swap meet weekend??
Its an all nighter kind of night so i better be getting back to my studying!


Sorry no pictures this post, nothing to really show for...
Posted by: mrbubblehead Feb 19 2013, 10:29 AM
hey david, are you makeing the drop links too?
Posted by: dfelz Feb 19 2013, 10:50 AM
hey david, are you makeing the drop links too?
Yup! will be given as a package.
The drop links are really easy to make, just have to cut each one to size from the 5ft bar stock then thread each end, one with RH tap and the other with LH tap. The bar stock i selected has an ID inside the min-max range for hole diam to tap an M8 thread, and has a wall thickness of .12" so plenty of material left on the wall with the threads and the only "machining" done to the piece after its length is cut is the tapping.
Was also hoping once I finished all six i could swing by your place and powder coat them to make them look even prettier
Posted by: mrbubblehead Feb 19 2013, 10:59 AM
hey david, are you makeing the drop links too?
Yup! will be given as a package.
The drop links are really easy to make, just have to cut each one to size from the 5ft bar stock then thread each end, one with RH tap and the other with LH tap. The bar stock i selected has an ID inside the min-max range for hole diam to tap an M8 thread, and has a wall thickness of .12" so plenty of material left on the wall with the threads and the only "machining" done to the piece after its length is cut is the tapping.
Was also hoping once I finished all six i could swing by your place and powder coat them to make them look even prettier
sure, we can powder coat em here. no prob. my drop links will have to be custom because my car sits so low. i will have to give you measurements. we used FK (iirc) heim joints on our offroad cars. they are the best. kartek in corona stocks them. are you useing metric hiems or american?
Posted by: dfelz Feb 19 2013, 11:16 AM
hey david, are you makeing the drop links too?
Yup! will be given as a package.
The drop links are really easy to make, just have to cut each one to size from the 5ft bar stock then thread each end, one with RH tap and the other with LH tap. The bar stock i selected has an ID inside the min-max range for hole diam to tap an M8 thread, and has a wall thickness of .12" so plenty of material left on the wall with the threads and the only "machining" done to the piece after its length is cut is the tapping.
Was also hoping once I finished all six i could swing by your place and powder coat them to make them look even prettier
sure, we can powder coat em here. no prob. my drop links will have to be custom because my car sits so low. i will have to give you measurements. we used FK (iirc) heim joints on our offroad cars. they are the best. kartek in corona stocks them. are you useing metric hiems or american?
they are metric, male thread specs are M8 x 1.25 x 25 mm
http://www.mcmaster.com/#59935K83
I will ask kartek for their price and specs (cause the current link arm has been designed around the rod ends from McMaster, didnt want spacers or bungs so i made the ID of the channel just wide enough to fit the rod end in there nice and snug.)
Posted by: dfelz Feb 21 2013, 02:09 AM
Had all the parts CNC plasma cut today and will probably bend them on Friday. Am planning on having at least three done before BBQ as well as all the backing plates for Eric.
As stated earlier, I will have six complete pairs (arm and rod end drop links)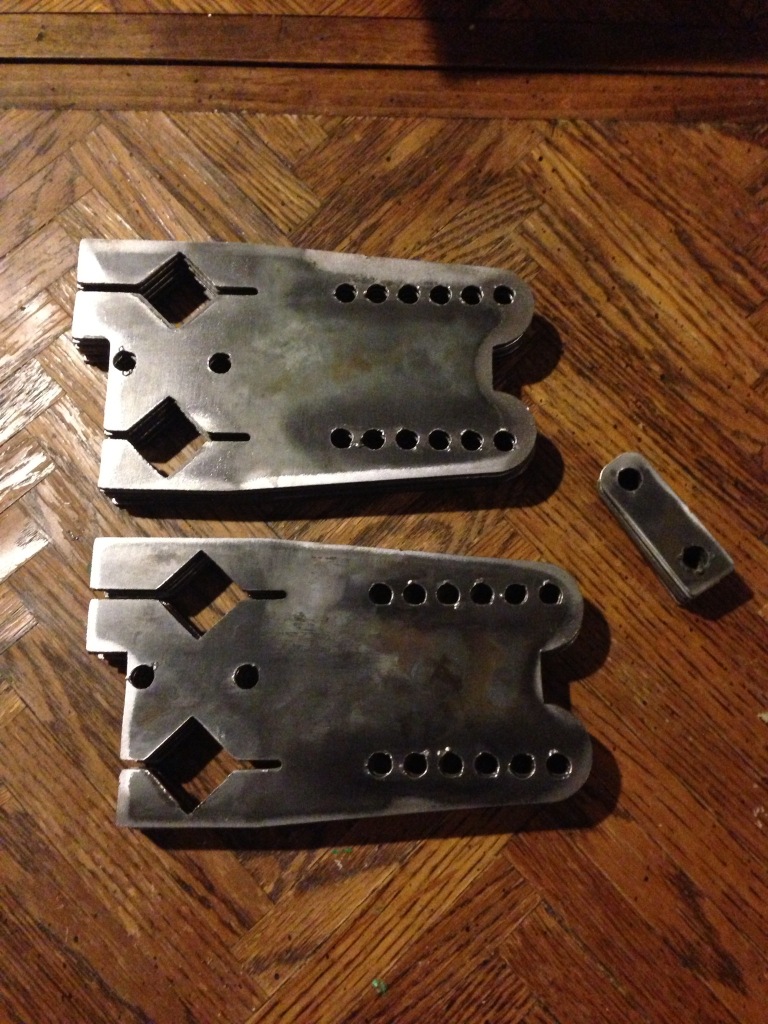
Before and after cleaning shot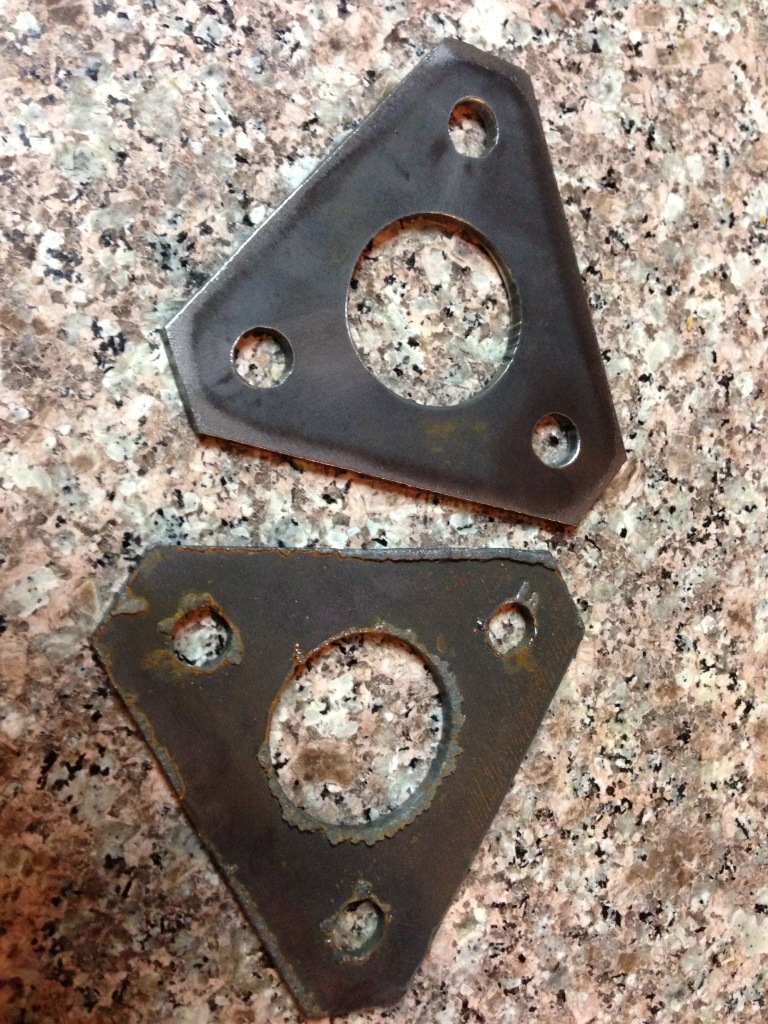
Posted by: euro911 Feb 21 2013, 03:14 AM
Nice. Not wasting any time
Yep, I'll bring the tubes to the BBQ. Let me know if there's anything else you need while I'm rooting through boxes 'o stuff ...
Posted by: dfelz Feb 21 2013, 06:20 AM
Nice. Not wasting any time
Yep, I'll bring the tubes to the BBQ. Let me know if there's anything else you need while I'm rooting through boxes 'o stuff ...
Haha, ya i dont like wasting time, which is why i prefer to always have something to do instead of just sitting around. Hence why i dont sleep much during the school year, cause i have too many things to do, aka its currently 4:20am and i just now finished my second cup of coffee

Hmmmmm, well if your offering and you happen to have a DS seat mount bracket, i would love to borrow one until i fab up some mounts for my sparco seats.....
Posted by: Eric_Shea Feb 21 2013, 08:12 AM
Very nice arm and drop link design
Sway bar question, what was the stock bar size? cause I am calipering my bar at 19.5 mm.
Since I will eventually be doing AX and DE and other racing of sorts, my battery can not be located in the stock location in the engine bay, according the the rules i looked up.
Are you micing the ends or the bar itself? The bar should be 15mm. The ends??
The battery thing is cool but, I've never heard of any rules that don't permit the battery in the sock location. I'm one of those that likes the stock location but...
Posted by: dfelz Feb 21 2013, 08:21 AM
Very nice arm and drop link design
Sway bar question, what was the stock bar size? cause I am calipering my bar at 19.5 mm.
Since I will eventually be doing AX and DE and other racing of sorts, my battery can not be located in the stock location in the engine bay, according the the rules i looked up.
Are you micing the ends or the bar itself? The bar should be 15mm. The ends??
The battery thing is cool but, I've never heard of any rules that don't permit the battery in the sock location. I'm one of those that likes the stock location but...
My bar must have been upgraded by the PO.... But the square section on all bars is the same, all are 17mm at each end to the best of my knowledge (i check some that bruce had at his shop too.)
Once i have a little time to spare (aka my english class later today, if i dont end up falling asleep in class after tonights all-nighter) i will find the rule section that i read it in. But for now anyways i will still be using the stock location since this car wont see the track for a few years...
Posted by: dfelz Feb 21 2013, 06:35 PM
The battery thing is cool but, I've never heard of any rules that don't permit the battery in the sock location. I'm one of those that likes the stock location but...
Just looked up it, I misread it, which i do a lot, it says "may" be relocated, not what i thought it said "must" be relocated
Thank you for making me double check that.
Posted by: euro911 Feb 21 2013, 07:06 PM
Yep, I'll bring the tubes to the BBQ. Let me know if there's anything else you need while I'm rooting through boxes 'o stuff ...
Hmmmmm, well if your offering and you happen to have a DS seat mount bracket, i would love to borrow one until i fab up some mounts for my sparco seats.....
Posted by: rsrguy3 Feb 22 2013, 08:38 PM
Dave, I wouldn't waste the money on pwder coat for your wheels. Just take the time to properly sand and paint those puppys, just put on plenty of clear and you'll be fine.
Posted by: dfelz Feb 23 2013, 12:34 AM
Dave, I wouldn't waste the money on pwder coat for your wheels. Just take the time to properly sand and paint those puppys, just put on plenty of clear and you'll be fine.
Doug has an a blast cabinet and oven for powder coating, both just big enough to fit a 15" rim inside them! So i just have to buy the powder and put in the elbow grease to blast the current coating off...
Otherwise your right i wouldnt pay to have it done, got a quote for all four, blasted and everything for $200, so ya ill do it myself
Posted by: dfelz Feb 25 2013, 03:08 PM
Small update.
Got all the plasma cut pieces cleaned up and buffed. Then cut the angle brackets down to 1" size pieces, and the drop link tubes down to size as well, then started taping the tubes for the rod ends.
Then this morning me and Grant (my roommate) started bending the link arms, but ran into some troubles since the channel is so skinny, only a half inch. So we decided to first shear them at one of the long bends and then bent them, so its now a two piece part that will be welded at three seams instead of two. We got to use the BIG BOY hydraulic press and hydraulic shears. They dont get used very often, the lab tech had never even used the press, only knew how to turn it on, so it was fun. Here are some pictures from this morning.
Two Piece Part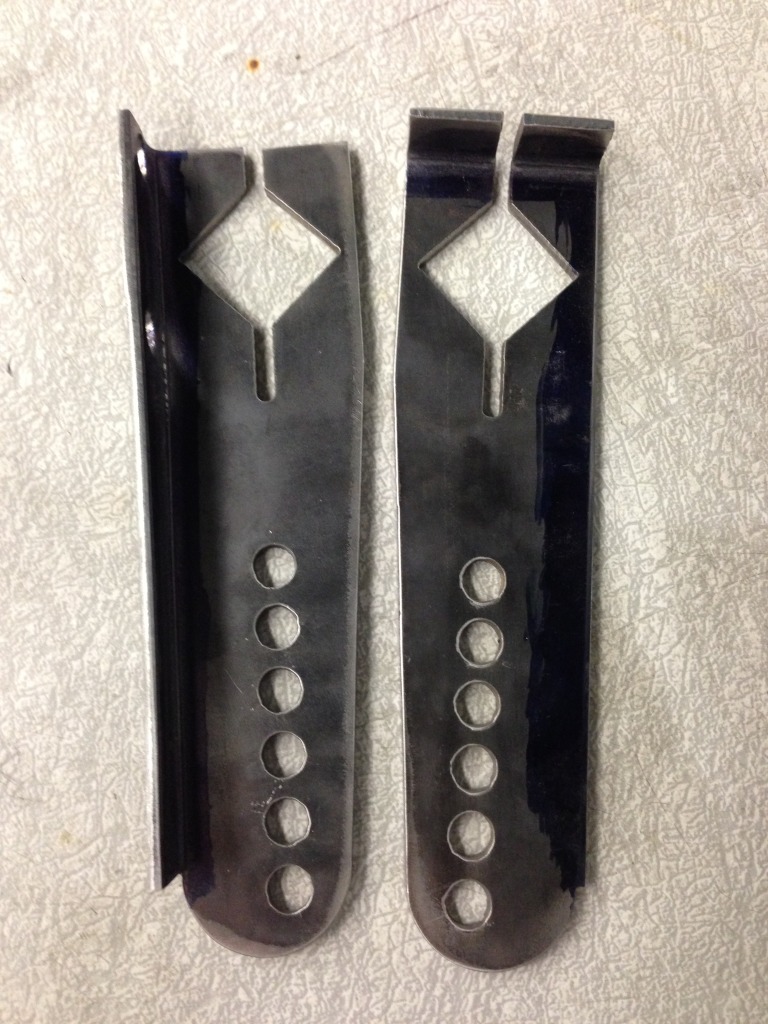
Hydraulic Press for bending the pieces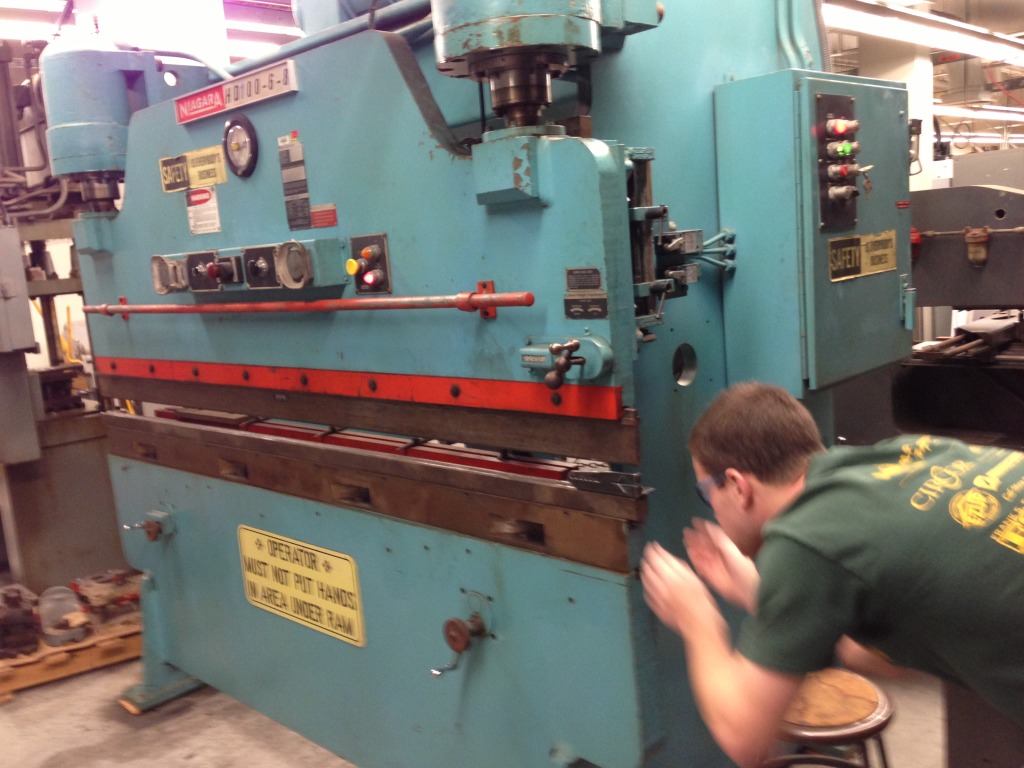
Hydraulic Shear (can cut up to .25" steel)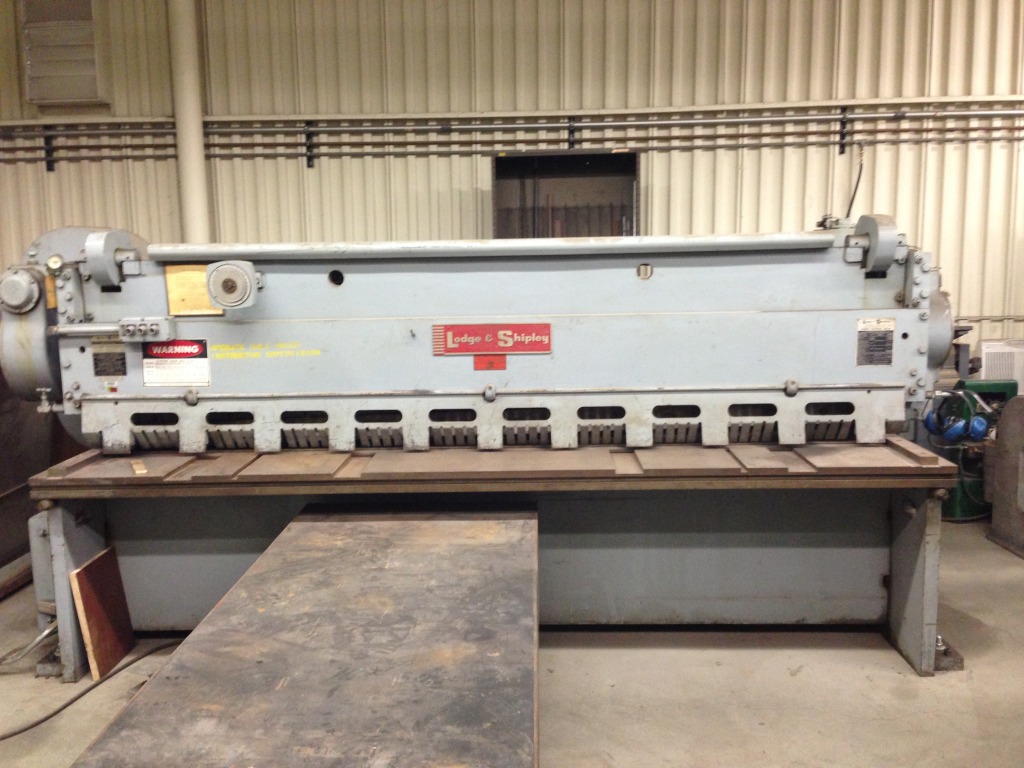
Posted by: euro911 Feb 25 2013, 03:32 PM
 They use a 'Clapper' to power it on and off?
Posted by: dfelz Feb 26 2013, 01:03 AM
Haha, good one mark.
Got one arm tacked together to test fitment, and it fits, very nicely too! It clamps on very well, holds the bar tight in there. We forgot our welding mask at school, so we could only tack tonight, but we will have it tomorrow so will probably finish it up then.
I am very excited to see it coming together though!
Now that i have all the parts ordered and in hand, i have a final manufacturing cost. One thing i changed from the original plan was getting the high strength rod ends instead of the regular ones, which are $5.50 more a piece, so that bumped up the price a little bit... Total comes out to $77.73
Mark, Doug, i hope this price still interest you enough to take one... let me know.
Even though i had enough pieces plasma cut to make 6 pairs, i new i would need a few to use as trial and error setting up the bending process, and am i sure glad i did!! went through 3 arms on the first run of bending before we decided to shear it first prior to bending. then also jacked one up on the shear the first run. I also only order enough rod ends to make 3 pairs (less upfront investment to me if it all went down the drain.) So if mark and doug take theirs, i will have one pair left up for grabs, if anyones interested, just say the word!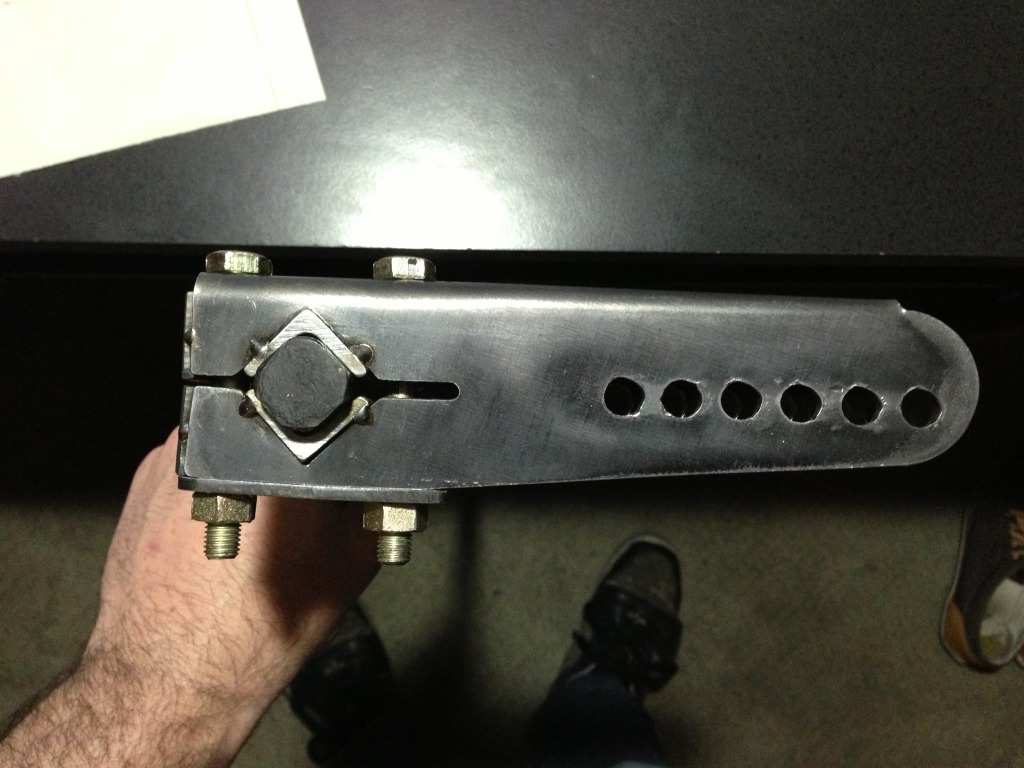
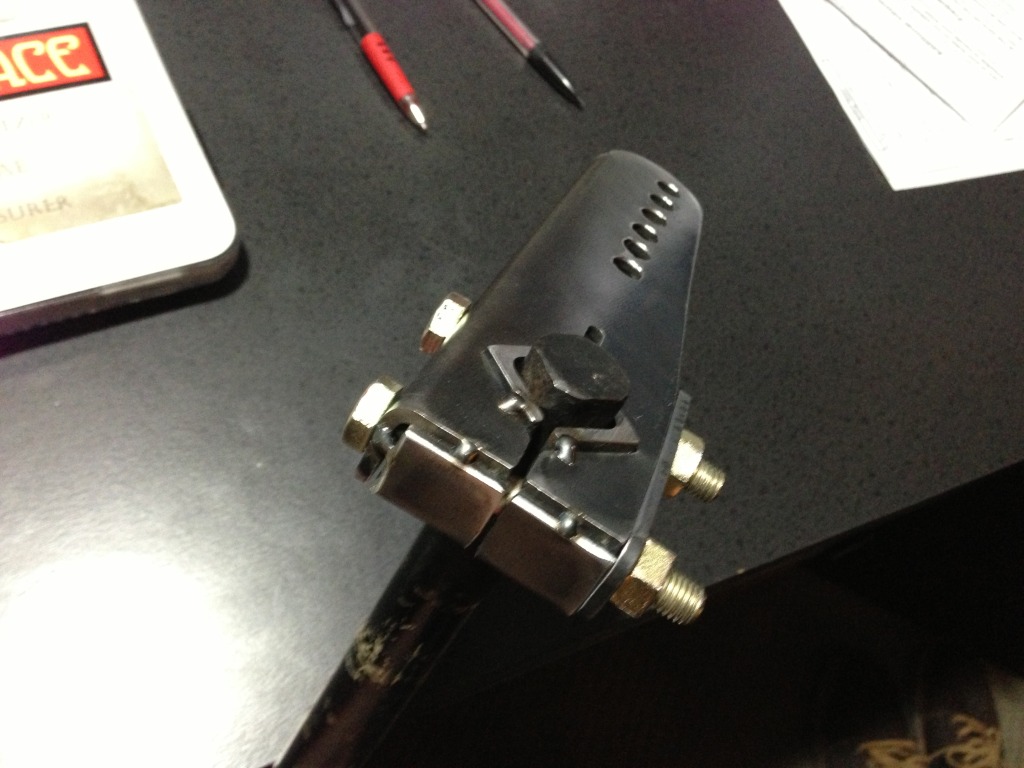
Posted by: mrbubblehead Feb 26 2013, 01:17 AM
those look really good david. im glad you chose to go with the better heims.
Posted by: euro911 Feb 26 2013, 02:11 AM
Oh yeah 
I'm still waiting on a pair of Engman (or =) reinforcement plates before I can install everything else ... so take your time 
Posted by: FourBlades Feb 26 2013, 07:48 AM
That is a nice project.
They look good. 
John
Posted by: monkeyboy Feb 26 2013, 10:11 AM
Nice progress.
Posted by: dfelz Feb 26 2013, 02:21 PM
thanks guys for the kind words! I cant wait to finish the welding tonight!
Received my CA blue plates in the mail today! I bought them on ebay for $18.
When i register the car i want to do it at a AAA because they usually let little thinkgs slide, and although your alowed to register old plates to a car, they have to be period correct. the plates i have are the 7-digit sequence series of the blue plates, which started in 1980, so i would technically need the 6-digit sequence of the blue plate which ran from 1969-1980. So hopefully they dont car about that small little fact.
these plates are in great shape!! looks like they were only used one year! there is only one registration sticker on it, and its from 1980, these are time capsule plates 
Posted by: mrbubblehead Feb 26 2013, 02:32 PM
wow david those plates are sharp! hopefully you wont have any problems registering them.
Posted by: oldschool Feb 26 2013, 04:56 PM
My white car had blue plates... but only one So I just got reg.
Posted by: dfelz Feb 26 2013, 05:09 PM
My white car had blue plates...
but only one So I just got reg.Ya thats one of the requirements, must have both plates!
Posted by: nathansnathan Feb 26 2013, 05:39 PM
thanks guys for the kind words! I cant wait to finish the welding tonight!
Received my CA blue plates in the mail today! I bought them on ebay for $18.
When i register the car i want to do it at a AAA because they usually let little thinkgs slide, and although your alowed to register old plates to a car, they have to be period correct. the plates i have are the 7-digit sequence series of the blue plates, which started in 1980, so i would technically need the 6-digit sequence of the blue plate which ran from 1969-1980. So hopefully they dont car about that small little fact.
these plates are in great shape!! looks like they were only used one year! there is only one registration sticker on it, and its from 1980, these are time capsule plates
I bought a set of similar plates off ebay, but my research on "year of manufacture" plates in California, how it seemed to me is you have to have plates with the exact sticker, month and year that your car was made - you then put the current registration sticker in your glove compartment.
The problem is that no police officer actually knows this law and so you end up getting pulled over and trying to explain the law to a new cop every week.
A way to do it that might work is to pay for a custom plate with those numbers and then just hang the blue one - a custom plate is a custom plate
Posted by: dfelz Feb 27 2013, 12:38 AM
Finished welding the first sway bar arm link, turned out nice!
I am going back to the shop tomorrow morning to shear and bend more pieces, trying to have two pairs done by this saturday.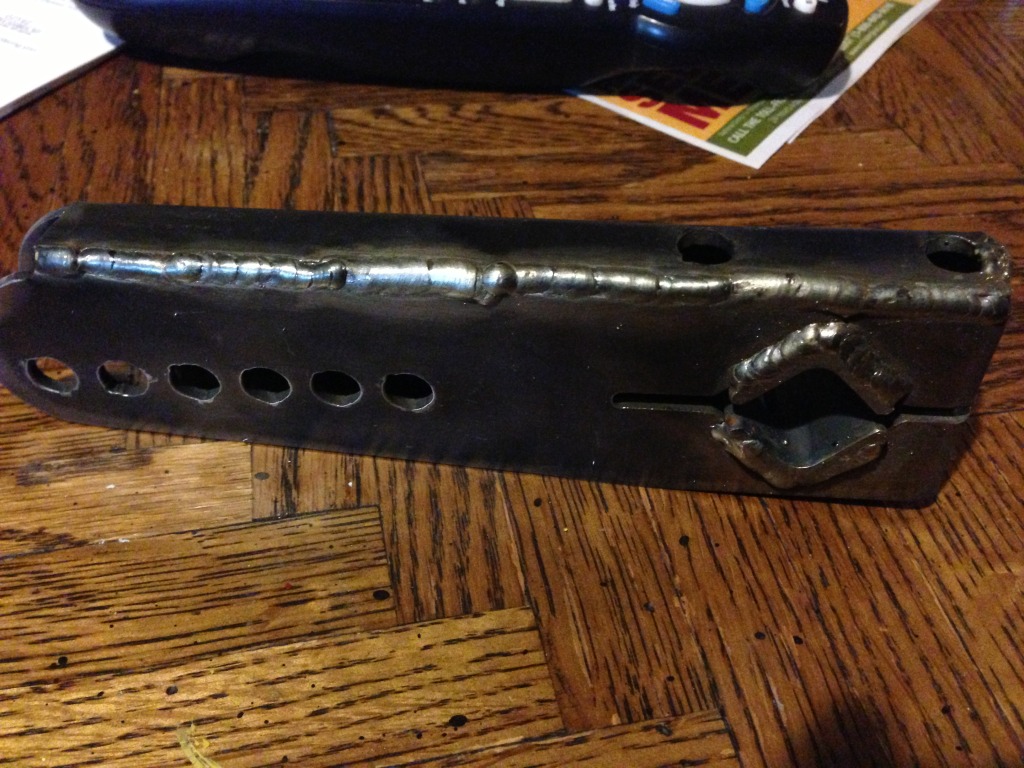
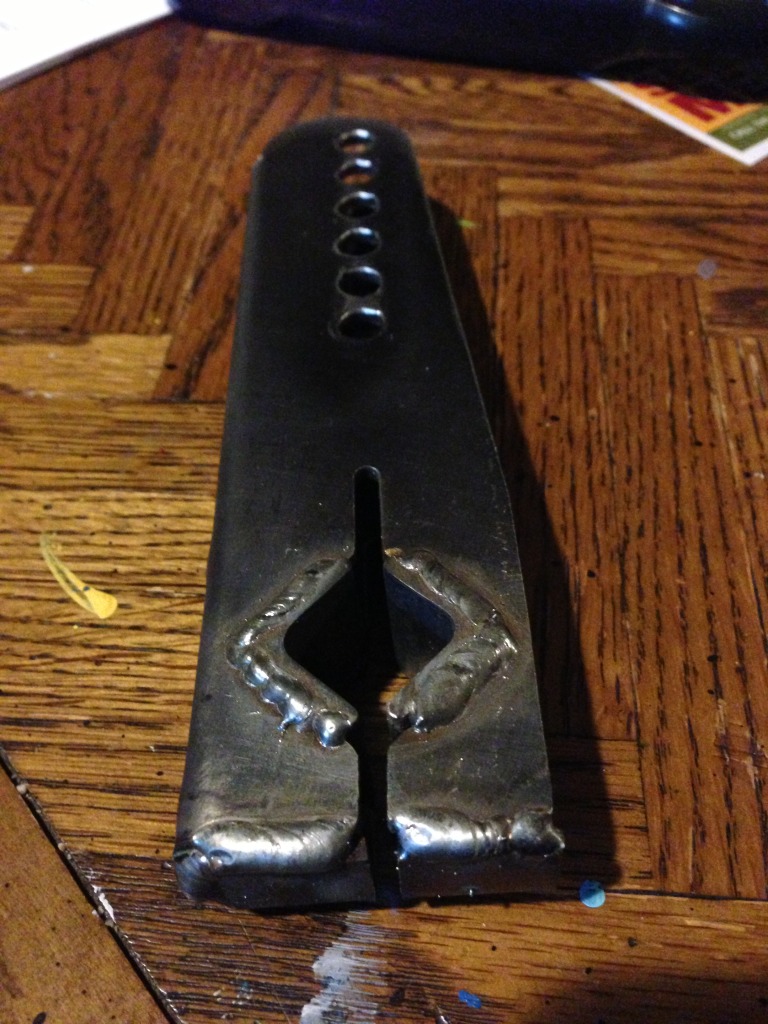
Posted by: euro911 Feb 27 2013, 02:37 AM
Cool. You are going to clean up those welds a little before powder-coating, right?
Posted by: dfelz Feb 27 2013, 02:45 AM
Cool. You are going to clean up those welds a little before powder-coating, right?
Haha, yes yes, indeed they will be cleaned up.
Hey i never got back to you about that DS seat mount you were going to see if you had an extra of laying around. I was referring to the part picture below.
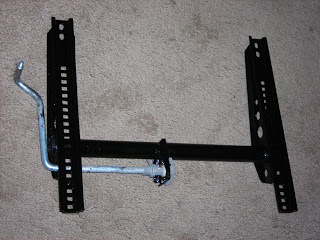
Posted by: euro911 Feb 27 2013, 03:04 AM
Thanks for the reminder ... I'll check to see if the one I have is a DS tomorrow (well, actually later today).
Posted by: dfelz Feb 27 2013, 03:08 AM
Thanks for the reminder ... I'll check to see if the one I have is a DS tomorrow (well, actually later today).
Sweeeeeet, thanks Mark!
Posted by: FourBlades Feb 27 2013, 07:39 AM
I am interested in a set of those arms if you have one available.
I will zinc chromate them so I don't want them powder coated.
Thanks,
John
Posted by: dfelz Feb 27 2013, 11:32 AM
I am interested in a set of those arms if you have one available.
I will zinc chromate them so I don't want them powder coated.
Thanks,
John
Cool John, thanks for the support in the product. I will let you know when I have your set done, should be by next weekend, and ill leave it plain for you to plate.
Posted by: '73-914kid Feb 27 2013, 11:56 AM
David, if you want, we can throw a set of your first arms on my car real quick and head out on the roads around Pomona and beat the crap out of them if you want to do strength testing.. If it can survive the potholes around school, it can survive anything. haha
Posted by: dfelz Feb 27 2013, 12:26 PM
David, if you want, we can throw a set of your first arms on my car real quick and head out on the roads around Pomona and beat the crap out of them if you want to do strength testing.. If it can survive the potholes around school, it can survive anything. haha
HAHA, Yes! That sounds perfect! Dude the potholes on Valley on the way to in and out were the worst!! I am so happy they fixed that road, cause thats how i get home from school everyday!
Posted by: '73-914kid Feb 27 2013, 02:19 PM
Haha, tell me about it! In all seriousness though, if you can finish a set before the weekend and want them tested, let me know if you want them strength tested on a car..haha
Posted by: dfelz Feb 27 2013, 02:37 PM
Haha, tell me about it! In all seriousness though, if you can finish a set before the weekend and want them tested, let me know if you want them strength tested on a car..haha
Thanks man i appreciate that. Should actually have a set finished tonight... you busy later?? (after 8)
Posted by: monkeyboy Feb 27 2013, 02:40 PM
Those potholes have been on Valley since I was at Cal Poly... That road has been crap for years.
Posted by: '73-914kid Feb 27 2013, 02:47 PM
I have vector statics from 8-9:15 tonight, but after that im good.
Posted by: 7TPorsh Feb 27 2013, 02:54 PM
Register your plate as a vanity plate but you will have a premium every year.
Posted by: dfelz Feb 27 2013, 03:41 PM
Those potholes have been on Valley since I was at Cal Poly... That road has been crap for years.
Haha, i bet! they fixed them this summer, so now its smooth sailing!!
I have vector statics from 8-9:15 tonight, but after that im good.
I loved statics! if you want any old quizes for practice problems i have all my old material from Izadi's class, got 20/20 on all but one (19/20) of his quizes that quarter, if only it were still that easy
Ill text you sometime after 930
Posted by: '73-914kid Feb 28 2013, 09:47 AM
Hey David, can you text me again? I had to drive ALL the way home last night to get a new phone and lost all my numbers..
Posted by: dfelz Mar 4 2013, 01:35 AM
So i havent made too much progress the past week plus on the car since school has been keeping me occupied a lot, but as always, i have been collecting parts! A few items on the list that came in the mail/picked up at the swap meet:
engine rebuild gasket kit, tons of various bushings (susp and shifting), front bumper (for temporary use), rebuilt pedal cluster from Bruce, tilton master cylinder and hard line (for hydraulic clutch set up, will talk about in a latter post), platted pushrod tubes (thanks mark!!), 911 gague pod items (big clock, oil temp/oil pressure, fuel level/oil level), driver side mirror, PCA orange coast region sticker, and probably a few more things i am forgetting...
Had a wonderful time at Joe Sharps BBQ yesterday and the swap meet today. Was able to chat with a bunch of cool 914 guys this weekend, so that was really enjoyable (also got to see everyones sweet cars for inspiration)!!
I have an important topic i would like to start discussing, external oil cooler. I have never seen or heard of this being done, but i really want to mount it under the cowl fresh air openings, essentially taking the spot of the fresh air box and blower (which have been removed for good.) The cooler, which i will probably be getting from bruce, is a smaller one that i will have 3 92mm fans on the backside of sucking air through and blowing it into a custom air box that will lead into two "dump pipes," which i think i might plumb to go into the long heater tubes (this part is up in the air, but seams like it would be good solution, the holes in the fire wall are there...) The actual oil transportation hard lines will follow the path of the charcoal filter lines, the holes and grommets are already there waiting to be used!
This cooler will be on a partial flow system, leaving the stock cooler there and having the sandwich adapter to get the oil into the cooler. The fans will be operated by a switch in the cabin as opposed to thermostatically controlled.
Would LOVE to hear everyones opinons!!
I have modeled up the cowl, cooler, fans, and air box to see how much room they will be taking up. I have a total of just over 9" to work with from the bottom surface of the cowl to the bulkhead, and so far these parts will only take up 5" of that (keeping in mind though that the funnel into the two side exit tubes have not been modeled.....
Cheers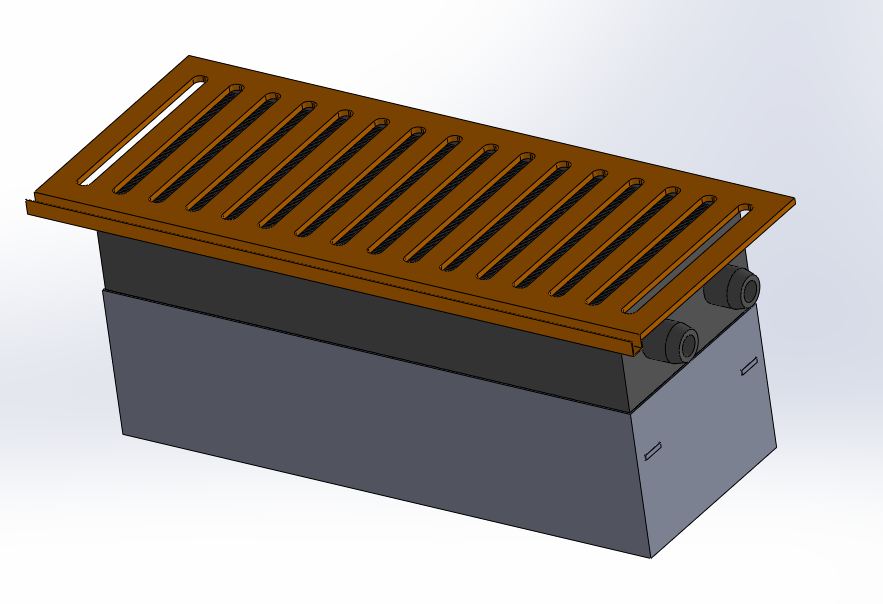
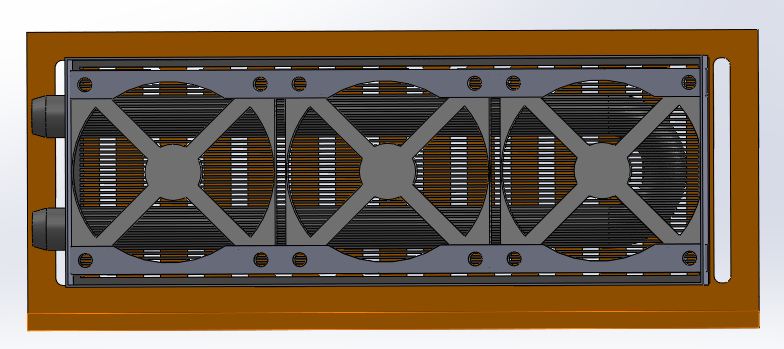
Posted by: euro911 Mar 4 2013, 01:48 AM
Ducting into a split valve for venting out to the atmosphere or heating the passenger compartment sounds cool (actually, hot) 
How about adding a lever operated cowl flap (scoop)?
Posted by: dfelz Mar 4 2013, 10:49 AM
Ducting into a split valve for venting out to the atmosphere or heating the passenger compartment sounds cool (actually, hot)
How about adding a lever operated cowl flap (scoop)?
I would like to add a small scoop over it, but not right away. Want to see how it performs without it, and then i can make one later and see if it helps...
Posted by: dfelz Mar 13 2013, 01:41 AM
Haven't posted in awhile since its now approaching the last week of this quarter, and this is when shit gets hectic so the teener fell to the sidelines.
Did have a little time here and there to sort a few things out though. I had a pile of random seals from both cars, so i went thorough those put them on the car and went through a list of all the ones i will need to order from 914 rubber. The other thing i accomplished this morning was test fitting the fiberglass pieces i have, 911 dash and 916 rear bumper. I came up with how im going to secure the dash in. Going to cut out a few holes on the top surface of the metal under piece that are the size of the OD of a washers that will have a nut wilded to the bottom of it, then weld that washer/nut assembly to that metal piece with the nut facing downwards. will then have matching holes on the FG dash and will use hex head bolts to make it easy for removal if needed. The bumper fits pretty decently, wont have to do much sanding for it to fit nice and snug.
BTW, does anyone have recommendations for painting FG parts!?!? they flex under stress and i feel like that will therefore cause cracks in the paint after a little while... tips, tricks, and techniques will be appreciated!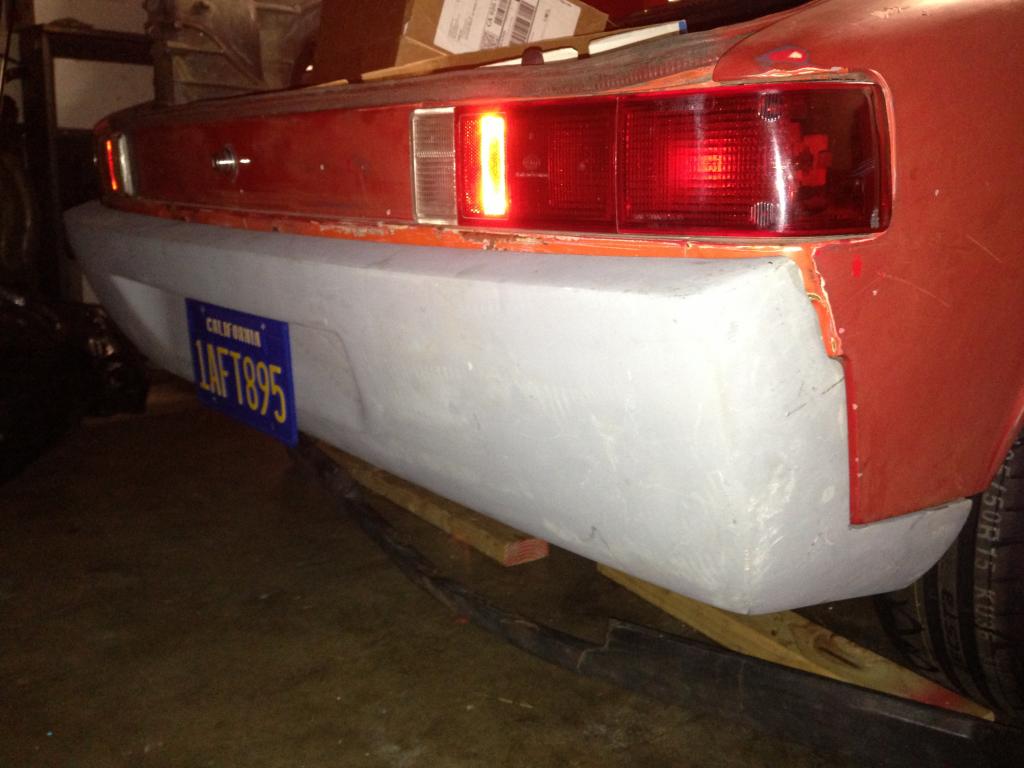
Cat wants to go for a test drive 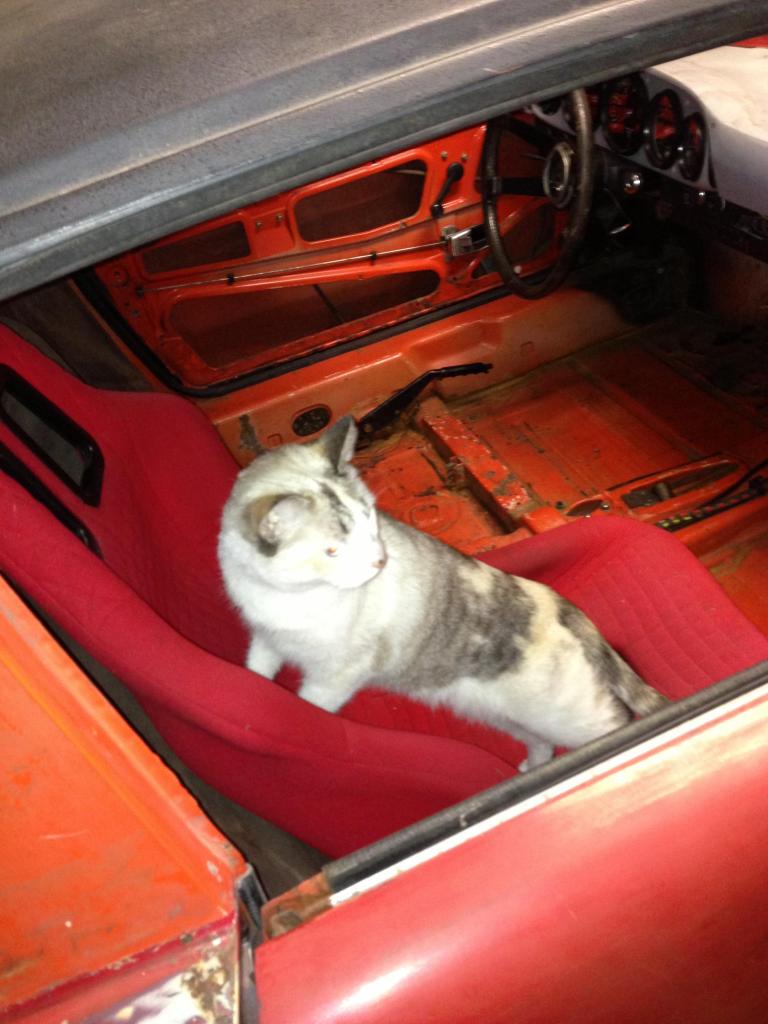
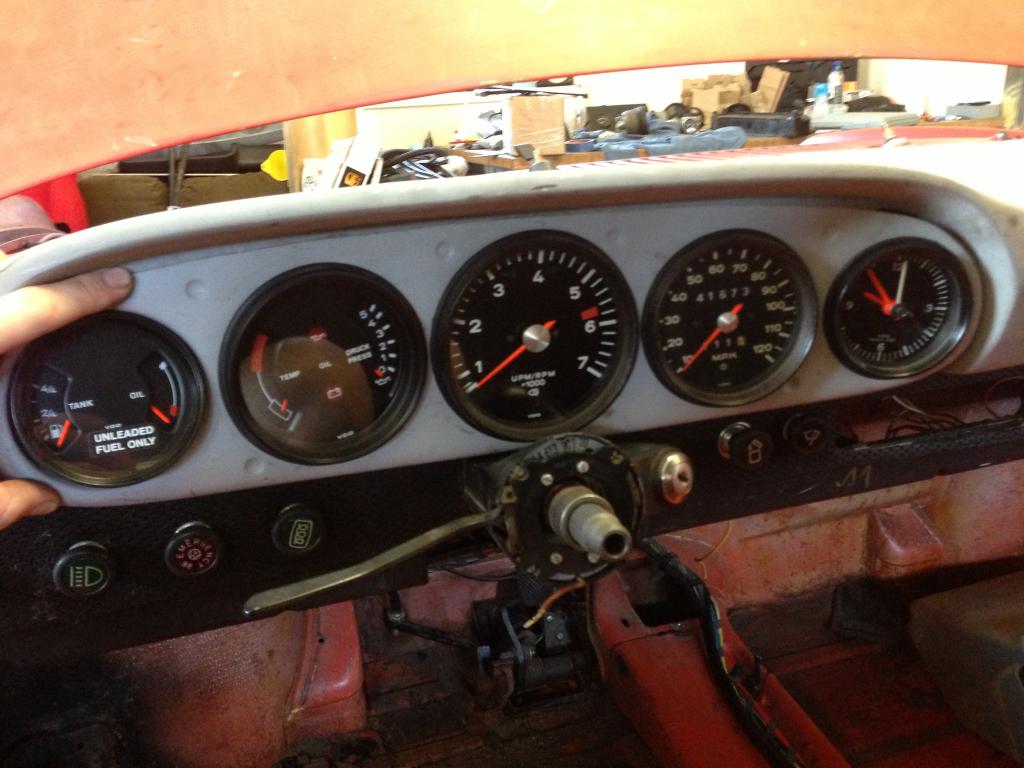
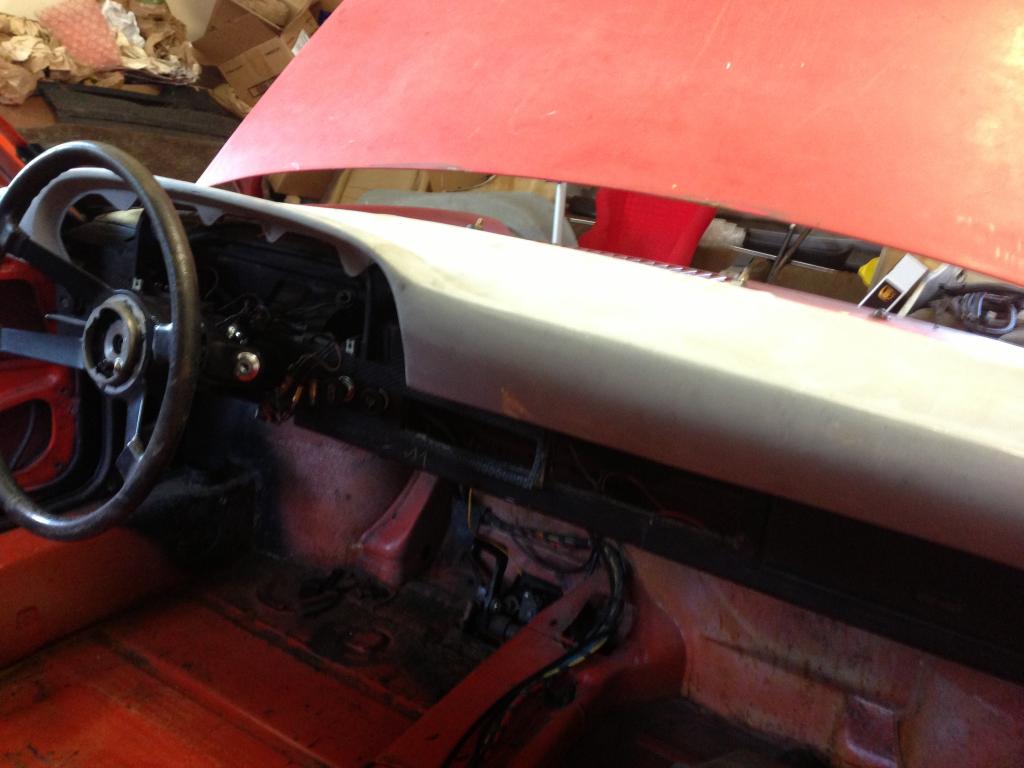
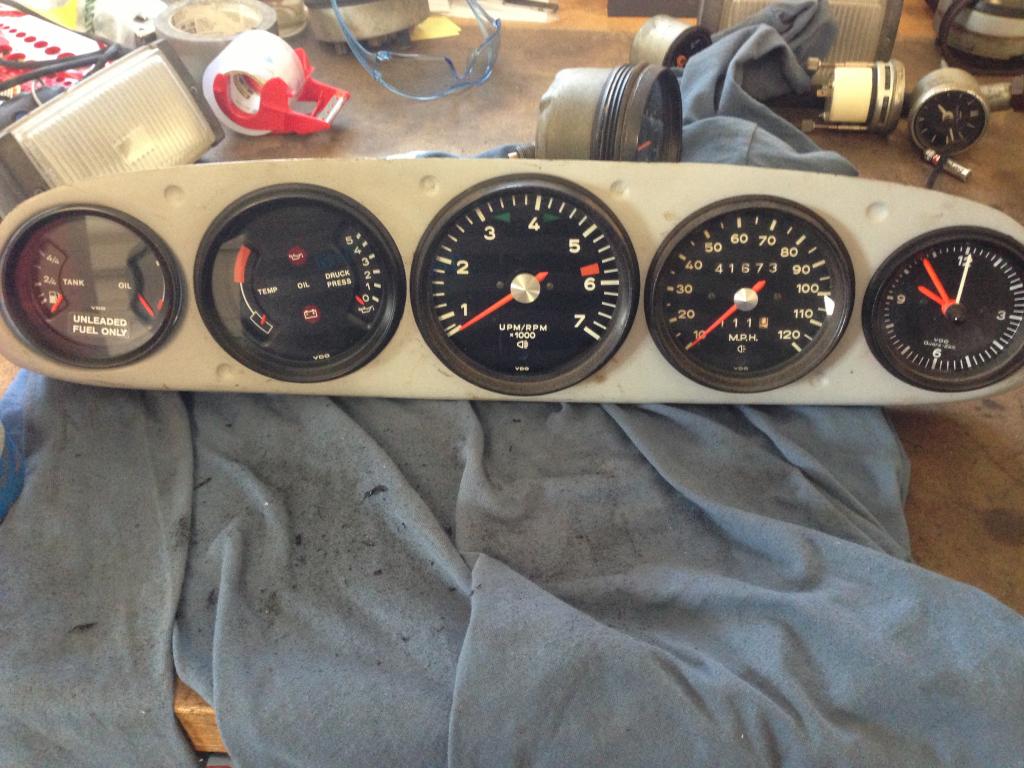
Posted by: mrbubblehead Mar 13 2013, 02:00 AM
hey david i read a great tutorial about changing from a 914 dash to a 911 and that guy didnt have to drill any holes. or make any real mods. i dont know where that tutorial is. but its out there.
Posted by: boogie_man Mar 13 2013, 09:43 AM
hey david i read a great tutorial about changing from a 914 dash to a 911 and that guy didnt have to drill any holes. or make any real mods. i dont know where that tutorial is. but its out there.
http://rockaria.net/914/gettydash/index.html
here's one of them, looks awesome. Looking good feltzy !!!!
Posted by: mittelmotor Mar 13 2013, 04:15 PM
Lookin' good, David. The 916 bumper looks really clean, and I'm sure saves a fair amount of weight.
You might try paint with a flex agent, used for modern cars with the urethane (?) bumper caps...that oughta prevent cracking. You might add some extra fiberglass on the back side of the piece to any areas that seem weak. And add an extra brace or two.
--Doug
Posted by: dfelz Mar 13 2013, 08:51 PM
Sweet thanks for the link boogie man, i think i read through that a while back but forgot about it. ill have to look through it later. My main thing is i believe they still used stock mounting holes and that CF piece came with mounting studs on it (i could be wrong on that, like i said i havent read that article in a long time). and what i want to avoid it using the stock mounting method, its a PAIN in the ass! i want it to be simple and clean, and dont mind doing an little cutting and welding to make that happen. Either way i need to got through that article since it talks about wiring the new gauges too!! need to know that for sure!!
Doug thanks for the tip, ill look into flex agent.... is like an additive to normal paint??
Posted by: boogie_man Mar 13 2013, 09:55 PM
Sweet thanks for the link boogie man, i think i read through that a while back but forgot about it. ill have to look through it later. My main thing is i believe they still used stock mounting holes and that CF piece came with mounting studs on it (i could be wrong on that, like i said i havent read that article in a long time). and what i want to avoid it using the stock mounting method, its a PAIN in the ass! i want it to be simple and clean, and dont mind doing an little cutting
and welding to make that happen. Either way i need to got through that article since it talks about wiring the new gauges too!! need to know that for sure!!Doug thanks for the tip, ill look into flex agent.... is like an additive to normal paint??
I Liked this one
http://www.phoenixhobbies.com/html/911_dash.html
Posted by: dfelz Mar 13 2013, 10:37 PM
Sweet thanks for the link boogie man, i think i read through that a while back but forgot about it. ill have to look through it later. My main thing is i believe they still used stock mounting holes and that CF piece came with mounting studs on it (i could be wrong on that, like i said i havent read that article in a long time). and what i want to avoid it using the stock mounting method, its a PAIN in the ass! i want it to be simple and clean, and dont mind doing an little cutting
and welding to make that happen. Either way i need to got through that article since it talks about wiring the new gauges too!! need to know that for sure!!Doug thanks for the tip, ill look into flex agent.... is like an additive to normal paint??
I Liked this one
http://www.phoenixhobbies.com/html/911_dash.html
i do like that too! but that would require me finding more parts!! haha, its cool that that can be done though. just read through the first one you posted and it looks like there are standoffs glassed into the Getty one, which are not on mine...
Posted by: mittelmotor Mar 13 2013, 11:22 PM
Sweet thanks for the link boogie man, i think i read through that a while back but forgot about it. ill have to look through it later. My main thing is i believe they still used stock mounting holes and that CF piece came with mounting studs on it (i could be wrong on that, like i said i havent read that article in a long time). and what i want to avoid it using the stock mounting method, its a PAIN in the ass! i want it to be simple and clean, and dont mind doing an little cutting
and welding to make that happen. Either way i need to got through that article since it talks about wiring the new gauges too!! need to know that for sure!!Doug thanks for the tip, ill look into flex agent.... is like an additive to normal paint??
I'm not sure exactly whether it's an additive, or a paint formulated for flexible bumpers. Any auto paint shop would know.
Posted by: dfelz Mar 13 2013, 11:33 PM
Sweet thanks for the link boogie man, i think i read through that a while back but forgot about it. ill have to look through it later. My main thing is i believe they still used stock mounting holes and that CF piece came with mounting studs on it (i could be wrong on that, like i said i havent read that article in a long time). and what i want to avoid it using the stock mounting method, its a PAIN in the ass! i want it to be simple and clean, and dont mind doing an little cutting
and welding to make that happen. Either way i need to got through that article since it talks about wiring the new gauges too!! need to know that for sure!!Doug thanks for the tip, ill look into flex agent.... is like an additive to normal paint??
I'm not sure exactly whether it's an additive, or a paint formulated for flexible bumpers. Any auto paint shop would know.
I did some google searching on flex agent for fiberglass painting, and like many car topics, some say use it some say its not necessary with modern paints, primers and top coats if done correctly from the beging. biggest thing is all the oils and wax need to be cleaned off and removed before any sanding or priming takes place....
and also like you said, if properly braced and extra thickness added to weaker areas, not much flexing should occur that would be large enough for cracking to take place.
Posted by: mrbubblehead Mar 14 2013, 12:10 AM
hey david i read a great tutorial about changing from a 914 dash to a 911 and that guy didnt have to drill any holes. or make any real mods. i dont know where that tutorial is. but its out there.
http://rockaria.net/914/gettydash/index.html
thats the one
here's one of them, looks awesome. Looking good feltzy !!!!
Posted by: boogie_man Mar 14 2013, 02:33 PM
Sweet thanks for the link boogie man, i think i read through that a while back but forgot about it. ill have to look through it later. My main thing is i believe they still used stock mounting holes and that CF piece came with mounting studs on it (i could be wrong on that, like i said i havent read that article in a long time). and what i want to avoid it using the stock mounting method, its a PAIN in the ass! i want it to be simple and clean, and dont mind doing an little cutting
and welding to make that happen. Either way i need to got through that article since it talks about wiring the new gauges too!! need to know that for sure!!Doug thanks for the tip, ill look into flex agent.... is like an additive to normal paint??
I'm not sure exactly whether it's an additive, or a paint formulated for flexible bumpers. Any auto paint shop would know.
I did some google searching on flex agent for fiberglass painting, and like many car topics, some say use it some say its not necessary with modern paints, primers and top coats if done correctly from the beging. biggest thing is all the oils and wax need to be cleaned off and removed before any sanding or priming takes place....
and also like you said, if properly braced and extra thickness added to weaker areas, not much flexing should occur that would be large enough for cracking to take place.
To paint over fiberglass will not need a flexible additive. I would sand it down
with 150 grit, put a 2 part primer on it, prep again with either 320 dry or 400
wet sand paper with a final scuff of 500-800 if needed. If you're close, bring it
by my shop to see what can be done.
Thanks
Scott
Posted by: dfelz Mar 14 2013, 04:01 PM
To paint over fiberglass will not need a flexible additive. I would sand it down
with 150 grit, put a 2 part primer on it, prep again with either 320 dry or 400
wet sand paper with a final scuff of 500-800 if needed. If you're close, bring it
by my shop to see what can be done.
Thanks
Scott
Thanks Scott, I appreciate the offer! If your shop is in san juan Capistrano your on my way to san diego! and i will probably be going down that way next friday... i may PM you later next week....
Posted by: boogie_man Mar 14 2013, 05:24 PM
To paint over fiberglass will not need a flexible additive. I would sand it down
with 150 grit, put a 2 part primer on it, prep again with either 320 dry or 400
wet sand paper with a final scuff of 500-800 if needed. If you're close, bring it
by my shop to see what can be done.
Thanks
Scott
Thanks Scott, I appreciate the offer! If your shop is in san juan Capistrano your on my way to san diego! and i will probably be going down that way next friday... i may PM you later next week....
Anytime/anything to help
Posted by: dfelz Mar 23 2013, 05:37 PM
Finals are finished!! So I will have a week to crank out work on the Porsche! I started Thursday night taking apart the carbs and cleaning them in carb dip, checking all the individual parts for damage. Of all the parts only one idle jet needs replacing, the hole is slightly twisted. I am trying to do a bunch of research on what sizing to go with, Doug and Ethan are helping me out a lot with that too! Currently have 30 venturies, 115 main jet, 50 idle, and an f11 emulsion tube (dual 40 webers) don't remember what the air vents are at... Any suggestions will be accepted!!
Right now and until Tuesday I am in San Diego! Wooooow I get to go surfing and hang out and eat good food!
Clean parts from one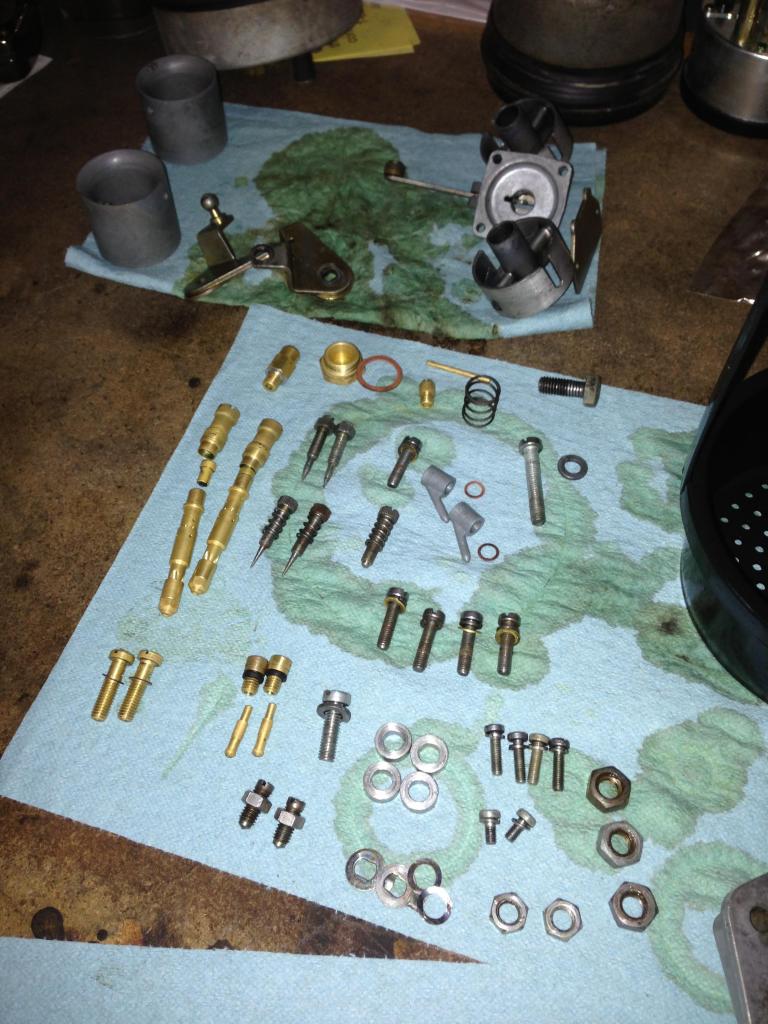
Idle jet that needs replacing
Posted by: dfelz Apr 14 2013, 10:11 PM
Hey guys, It's been a long time since I last gave an update, and I have been getting work done on the car, but its been slow and little by little, so nothing every seemed worthy of giving an update for...
But heres where I am at with the engine: I have removed all of the pistons and cylinders for cleaning/inspection. Once the piston heads were cleaned of the layers of carbon build up they turned out looking pretty nice. The cylinders all look pretty clean in my opinion, all still have honing lines very visible. Only thing i noticed was that one cylinder at the base (side that goes into case, has a piece chipped off the edge. I feel that it shouldn't be much of a hindrance, but if someone thinks otherwise please interrupt. I have a set of new piston rings to go along with the rebuild, and when i do put it back together do i just need to oil the wrist pins and oil the cylinder walls? or is there anything else that needs lubed up?
The chip
http://s1293.photobucket.com/user/dfelz914/media/IMG_0949_zpsf6671e30.jpg.html
cylinder walls
http://s1293.photobucket.com/user/dfelz914/media/IMG_0948_zps3d61a7de.jpg.html
Pistons before
http://s1293.photobucket.com/user/dfelz914/media/photo_zps7f2a0d6f.jpg.html
Pistons being cleaned
http://s1293.photobucket.com/user/dfelz914/media/photo_zps8b9b7054.jpg.html
Cleaned Pistons
http://s1293.photobucket.com/user/dfelz914/media/photo_zpse290fd33.jpg.html
Carbs are also back together and ready to go, with brand new velocity stacks to go along with them. They are currently set up right now with F-11 emulsion tubes, 115 mains, 50 idles, 200 air, and 30 venturis. All parts were soaked in carb dip and scrubbed down clean!
http://s1293.photobucket.com/user/dfelz914/media/photo_zps575810e6.jpg.html
Theres a few other things i want to discuss, but ill wait for now.
Posted by: dfelz Apr 15 2013, 09:54 PM
Is there a way to tell if your flywheel is worn by just inspecting it while its still mounted? I ask because I discovered that my throwout fork on the tranny that came with the engine was heated and bent to a curve. I posted a question regarding this and some one had suggested that the flywheel was probably machined. I also anticipate that the clutch cable was significantly stretched, I say this because when i was disconnecting the cable, at the end there were two sockets used as spacers, one regular and one deep socket(!), before the final nut was threaded on the tip! thats a lot of stretch!
This cable was on the old car and will therefore not be used on the new one but i am still wondering if i should be looking deeper into this and be inspecting the flywheel and other close by components for wear? What are your opinions on the matter??
Here are the two forks i have, as you can see one was altered!
http://s1293.photobucket.com/user/dfelz914/media/photo_zpse39f35fd.jpg.html
I have no idea if this picture will help at all, but if you see anything odd, or have a direction for me to start looking in for possible wear spots, it will be very helpful
http://s1293.photobucket.com/user/dfelz914/media/photo_zps8cc06b64.jpg.html
Thanks!
Posted by: Black22 Apr 15 2013, 10:31 PM
Well for starters we can't see the flywheel. The picture you posted is of the pressure plate that is attached to the flywheel. The clutch disc will be between the above mentioned parts.
You can get an idea of wear from looking at the flywheel surface, but if you're not sure, let a pro inspect it.
Also, if those "fingers" around the center of the pressure plate have a groove worn in them, as they appear to have in the picture, I would replace it.
Posted by: '73-914kid Apr 15 2013, 10:34 PM
If you pull the flywheel, bring it to school on wednesday and we can have a look. If someone took the time to heat and bend the clutch fork though, it means that something in that pack is definetely not correct...
Posted by: dfelz Apr 15 2013, 11:00 PM
Thanks Mike for the rundown of the components, I appreciate it!
Ethan, I'll text you for your availability! Also, if your not in class tomorrow at 6, there is a presentation in the BSC by a NASA engineer that was on the challenger team that would not sign the consent for launch over the safety risks at stake that were ignored by the others, should be pretty good. Ill be there since my engineering ethics professor is requiring us to be there.
Posted by: dfelz May 3 2013, 03:45 AM
FINALLY STARTED ENGINE REASSEMBLY! Ethan came over and gave me a big hand in getting me on my way with the engine, YAAAAAY.
New piston rings all around
http://s1293.photobucket.com/user/dfelz914/media/2013-05-02233256_zps61838441.jpg.html
Clean cylinders
http://s1293.photobucket.com/user/dfelz914/media/2013-05-02233339_zps00c981b7.jpg.html
All four pistons and cylinders back on tonight
http://s1293.photobucket.com/user/dfelz914/media/2013-05-03012551_zpsf3bbe181.jpg.html
Posted by: boogie_man May 3 2013, 03:52 PM
Posted by: dfelz May 6 2013, 03:16 AM
Tonight i got both heads put on and torqued down, I reused the head gaskets because the ones that came in the engine gasket set were too small. The old ones were in great condition, i cleaned them up a little and they looked fine to use. Cleaned up and rattle caned the deflectors and put those back on too. Then cleaned up the oil cooler a little bit so it was shinny again
http://s1293.photobucket.com/user/dfelz914/media/IMG_1102_zps5a5c5b2e.jpg.html
http://s1293.photobucket.com/user/dfelz914/media/IMG_1101_zpsef62de60.jpg.html
http://s1293.photobucket.com/user/dfelz914/media/IMG_1103_zps881538b6.jpg.html
Going to try and work on the valve train next.
Posted by: monkeyboy May 6 2013, 04:39 PM
Arent the head gaskets Copper? I thought they needed to be annealed before being reused.
Posted by: dfelz May 6 2013, 04:55 PM
Arent the head gaskets Copper? I thought they needed to be annealed before being reused.
I think your thinking of the gaskets on the exhaust ports, which i have new ones of and will be annealing those before using. i believe the head gaskets on the cylinder side i was speaking of are aluminum.
Posted by: monkeyboy May 6 2013, 10:12 PM
OK. I haven't pulled the heads off on mine. I thought they were like the exhaust.
Posted by: dfelz May 7 2013, 04:42 AM
Mocked up the valve train tonight to see what im working with, and just become more familiar with how it goes together, not much too it really. First i swapped out the original rocker studs for the chromoly ones, which has a thicker stock and uses an M8 nut instead of an M7 (I red loctited the new studs in the heads, hope thats good practice.) I then put the pushrod tubes in with the new vitol o-rings and then the pushrods and retainer spring. Next I put the rocker assemblies on. The rocker assem is brand new, with HD shafts, solid alum spacer, and the elephant feet adjusters (also just realized i think i am missing the blocks that go on the ends of the shaft  .) Because of the geometry change using the elephant feet i will probably be getting cut-to-length chromoly pushrods to replace the stock alum ones. Anyone have experience using the stock alum ones WITH the elephant feet adjusters in place???
http://s1293.photobucket.com/user/dfelz914/media/IMG_1087_zpsc1da2977.jpg.html
http://s1293.photobucket.com/user/dfelz914/media/photo_zpsd1829be5.jpg.html
http://s1293.photobucket.com/user/dfelz914/media/photo_zpse8ca9090.jpg.html
Time for sleeeeeep! ![yellowsleep[1].gif](style_emoticons/default/yellowsleep[1].gif)
Posted by: '73-914kid May 7 2013, 07:39 AM
Oh, I almost forgot to mention... the Solid shaft spacers have to be sanded down so you can fit a feeler gauge in between the rockers and the spacer. I forget what the number is off the top of my head though..
Posted by: boogie_man May 7 2013, 11:33 AM
Lookin good Flezy !!!! keep those pix coming
Posted by: '73-914kid May 7 2013, 12:09 PM
Oh, and steal the rocker shaft mounting blocks of your old set of rocker arms...I'm pretty sure I remember seeing them in that bag of old rocker assemblies.
Posted by: dfelz May 11 2013, 11:02 PM
Yup, the old end blocks were there. I cleaned them up and put them on the rocker assemblies. I now have both sides of the valve train on and ready to go, just need to adjust the valve screws now per the specs. It looks like i may be able to just barely get away with using the stock pushrods, but ill leave that up to Ethan for a final decision.
I picked up my new flywheel this week and put that sucker on there. Fit like a glove!! Its a brand new 215mm flywheel from AA performance products. Before i took out the main oil seal and three stock shims, i bolted the flywheel up and the endplay was completely eliminated, absolutely wouldn't budge at all. I then took it off, took out the oil seal and shims, measured the shims and put the two thickest ones back in and bolted the flywheel on again (no oil seal present). I then measured the end play with my new clamping dial indicator, and the endplay was then .063", which is weird cause the shim removed was .011" thick.... and since i believe i want a few thou of end play i am going to try and get the next shim size down, which was the smallest one made, at .0095"
http://s1293.photobucket.com/user/dfelz914/media/2013-05-09211218_zps6db1e4f9.jpg.html
http://s1293.photobucket.com/user/dfelz914/media/2013-05-09222455_zps61053892.jpg.html
Posted by: bandjoey May 11 2013, 11:24 PM
Don't forget the spring pushrod tube keeper. It's not in the picture so just a reminder. Great looking motor!
Posted by: dfelz May 11 2013, 11:31 PM
Thanks for the complement Bill, Actually the pushrod tube keeper is in there though, you can see it in the pic too. What i thought was weird though is that it prevents the rocker shaft end blocks (not pictured) from sitting flush against the face of the head where the studs are screwed into... is that right??
Posted by: '73-914kid May 12 2013, 12:25 AM
the retaining clips get clipped in after the studs are all torqued and seated. i think theres a picture of it somewhere around here...
Posted by: dfelz May 13 2013, 01:56 AM
the retaining clips get clipped in after the studs are all torqued and seated. i think theres a picture of it somewhere around here...
Hmm, cause the haynes book said put it in first, but it probably assumed you would get it out of the way of the valve train when torquing it down... which i didnt, this time at least
Put a bunch of hours in today cleaning and prepping. Not that it can be seen once all together, but i got the entire half thats behind the fan case is now clean and shinny! Then prepped and painted some more of the tins.
http://s1293.photobucket.com/user/dfelz914/media/2013-05-12162626_zpsf7396b10.jpg.html
Posted by: dfelz May 17 2013, 08:50 AM
MAJOR UPDATE
While Ethan and I were trying to figure out the excessive amount of end play, we made a grueling find, the main bearing on the flywheel side (and possibly others) were shot and completely out of spec. We then performed a cost/benefit analysis on the situation to way all of our options. Figuring that if we ran it as-is the motor would probably blow-up after 10,000 miles, and make much of my valve train unusable after (which i just got new) because the wear would be so great. We landed on the best solution being that we should split the case, get it hot tanked and line bored, new bearings and journals, re-grind cam/lifters for a carbonated engine, and any other misc. things that must be done when splitting the case. Ethan has good shops to go to that he has personally used and recommends in San Diego, so since he was going there this morning, he took my case, crank, and cam with him to drop off for machine work.
Once the case was split, it was discovered that condition was much worse. Some of the bearing journals were being eaten up and our OG estimate of the engine lasting 10k went down the drain. So I am very happy we decided to go this route. Will hopefully have it all back in two weeks for reassembly. I obviously documented the process and will post pics below; I have some questions regarding specifics noted in some of the pictures so please see my individual comments on the photos to help me out.
This one cam follower only had a much thicker layer of carbon build up inside... mean anything to take note of?
http://s1293.photobucket.com/user/dfelz914/media/2013-05-16234637_zps0d35f82c.jpg.html
This bolt came out of the bottom butt crack just below and in between the pushrod tube entrance (only on one side) and i figured this isnt good. Ethan will be notifying the machinist to take a look and see if it needs drilled and time-sert, will obviously be getting the bolt replaced at the least. (anyone got a spare?)
http://s1293.photobucket.com/user/dfelz914/media/2013-05-17011201_zpsedf1bf2a.jpg.html
Oil pump was a bitch and a half to get off, case nuts had be loosened, which i knew, but even with them all loose, i really had to put my back in to it to get that sucker off there.
http://s1293.photobucket.com/user/dfelz914/media/2013-05-17014204_zps693cd61d.jpg.html
And split!
http://s1293.photobucket.com/user/dfelz914/media/2013-05-17015742_zpsc089867b.jpg.html
Cam looks to be in decent condition from what my newbie eyes could tell
http://s1293.photobucket.com/user/dfelz914/media/2013-05-17020155_zps3e24e644.jpg.html
http://s1293.photobucket.com/user/dfelz914/media/2013-05-17020201_zpse6412709.jpg.html
Picture didnt turn out that great, sorry
http://s1293.photobucket.com/user/dfelz914/media/2013-05-17020427_zpse8ec3e7c.jpg.html
Crank
http://s1293.photobucket.com/user/dfelz914/media/2013-05-17022422_zps50739aed.jpg.html
http://s1293.photobucket.com/user/dfelz914/media/2013-05-17022428_zps8100e083.jpg.html
hmmmmmm
http://s1293.photobucket.com/user/dfelz914/media/2013-05-17062109_zpsfd5fdbc3.jpg.html
oil baffle, and inside the case below the oil baffle was a large content of thick grey sludge all around the bottom
http://s1293.photobucket.com/user/dfelz914/media/2013-05-17064555_zps0385a04d.jpg.html
So, when i rebuild i will be installing my new tuna can that i got from the GB, can someone tell me whether it uses a mesh screen like the OG one??
http://s1293.photobucket.com/user/dfelz914/media/2013-05-17064629_zps9bd6ad3e.jpg.html
All in all, once we decided to split the case it took around 4 hours, with the last 2 and a half hours being done solo (which is why is took so long.) But i enjoyed it very much, and this depth of penetration into my motor will be a good learning experience!
Thanks in advance for your input on the questions listed above!
Posted by: nathansnathan May 17 2013, 09:49 AM
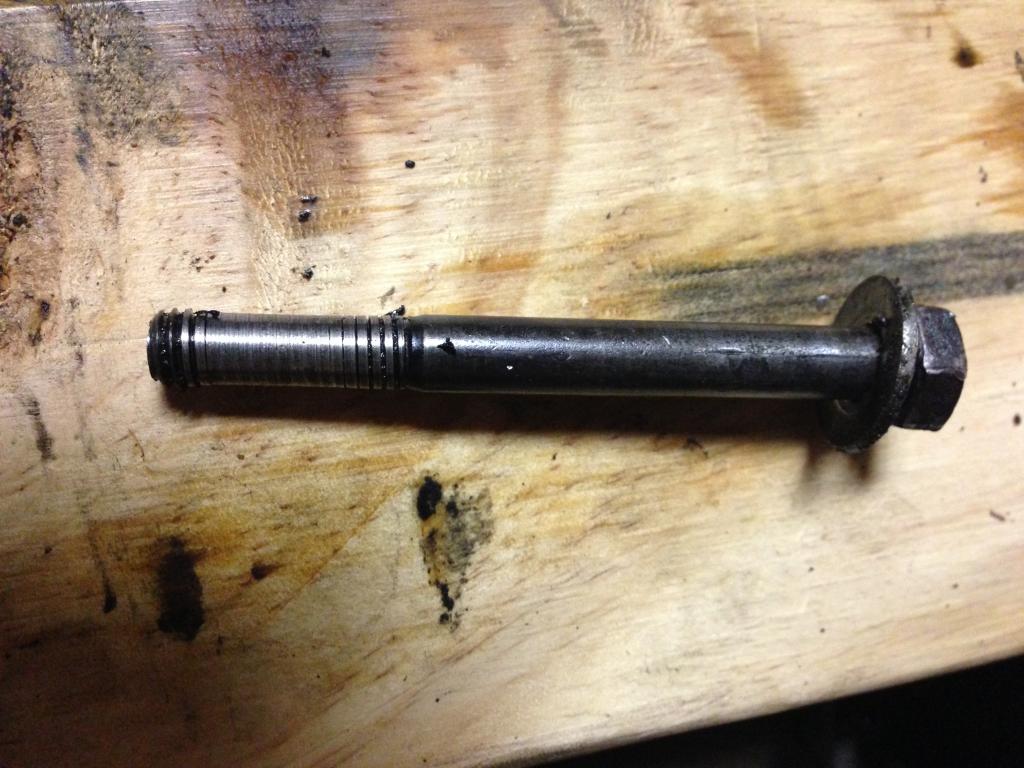
Seems like this is the wrong bolt, like too short. I think you are saying this is the one that holds up the oil pickup tube? The 'loop' on the pickup tube, this bolt goes through it. When they say "type 4 syndrome" it is over-tightening the oil pickup/strainer bolt at the bottom, which cracks the boss that bolt (that comes from the side) threads into. It looks like either the pickup tube loop is resting on the threads instead of the shoulder or it could have happened if you took out the bolt from the side before take off the sump plate/ taking the 'pull' off the pickup. It seems it should be threaded in further to the boss in the case, though -no way aluminum boss would strip out a steel bolt like that. Make sure those threads are good in the case and that you don't have 'the syndrome'.
Posted by: dfelz Jun 3 2013, 01:21 AM
Ethan arrived at my place this afternoon bearing gifts! He brought home my hot tanked/line boarded case, journal bearings, crank with new tid bits on it, and febi lifters. I then went to town on the case with a scotch brite pad before power washing it with water and drying it off with compressed air. Wanted to get all the little machining scraps out of any holes and corners. The engine and components are ready to be assembled, but i first have to get my hands on two more journal bearing case dowel pins, I only have 3/5 required, the other two must have abandoned ship during take-down. Gonna give the VW shop down the street a call, they should have some.
Once i get those two little buggers after class i will start the assembly, i have engine lube, cam lube, and case sealant, hoping it goes smoothly!
http://s1293.photobucket.com/user/dfelz914/media/2013-06-02230759_zps482dca09.jpg.html
http://s1293.photobucket.com/user/dfelz914/media/2013-06-02230807_zpsb020c776.jpg.html
http://s1293.photobucket.com/user/dfelz914/media/2013-06-02230829_zps8f8e068c.jpg.html
http://s1293.photobucket.com/user/dfelz914/media/2013-06-02230843_zpsf645319c.jpg.html
Posted by: Cairo94507 Jun 3 2013, 06:19 AM
You are doing it right. You will be much happier knowing the whole engine was gone through.
Posted by: dfelz Jun 3 2013, 06:36 PM
You are doing it right. You will be much happier knowing the whole engine was gone through.
I completely agree! I would have been F**KED if i didnt too, the guy who did the machining on the case said it wouldn't have lasted long enough to tune the carbs before blowing.... yikes!
Posted by: dfelz Jun 4 2013, 02:31 AM
Well I pretty much worked on the car ALL day today, got home from class at 11am, had a meeting from 3-5, and then right back to it, now off to bed!
To sum it up, the case halves are together and the 1/2 piston/cylinder and head is on! Heres a picture book of the day:
Picked up these two journal dowel pins from Dave's Little VW shop on my way to school (free ) nice guy
http://s1293.photobucket.com/user/dfelz914/media/2013-06-03093741_zps2b4383f0.jpg.html
Laid out all the journal bearings to make sure all was there, for a minute i freaked out thinking i was missing half of one, then Ethan told me i had one extra, phew!
http://s1293.photobucket.com/user/dfelz914/media/2013-06-03114518_zps64bc5a25.jpg.html
Placed the journal halves in there, fitment was spot on.
http://s1293.photobucket.com/user/dfelz914/media/2013-06-03120502_zpsdd9eea2e.jpg.html
Got out my lube  and case sealant
http://s1293.photobucket.com/user/dfelz914/media/2013-06-03121006_zps0ee0ecd9.jpg.html
Played connect the dots
http://s1293.photobucket.com/user/dfelz914/media/2013-06-03124533_zpse8c119c8.jpg.html
Took a few spins to ensure everything was seated properly
http://s1293.photobucket.com/user/dfelz914/media/2013-06-03124546_zpsd6236e19.jpg.html
Installed the oil baffle to the other half (was kind of a PITA)
http://s1293.photobucket.com/user/dfelz914/media/2013-06-03133242_zps9e400d54.jpg.html
Realized i only had 5 vibration dampeners....? luckily i dont take the garage trash out very often and was able to dumpster dive to find one old good one
http://s1293.photobucket.com/user/dfelz914/media/2013-06-03134759_zps8d292efc.jpg.html
Installed the M10 bolts and washers, then the vibration dampeners to the inside. For some reason the Haynes manual does not tell you to do that before putting the halves together... 
http://s1293.photobucket.com/user/dfelz914/media/2013-06-03140228_zps614da977.jpg.html
Diligently put the two halves of the case together and torqued down all 24 nuts/bolt combos. Then inserted the two pressure relief valves with new crush washers.
(Insert picture here)
Installed the oil pump and oil filter neck with new gaskets. Filled the oil pump with oil before installing to help with start up priming, per Ethans suggestion. Oil pump was a really tight fit and had to be with my rubber mallet (softly) to slide in.
http://s1293.photobucket.com/user/dfelz914/media/2013-06-03202350_zpsd1f6f8d1.jpg.html
Installed the flywheel with three shims (approx thickness: .014, .012, .012) and measured endplay, came out around .0035, perfect!
http://s1293.photobucket.com/user/dfelz914/media/2013-06-03225321_zpsb7216758.jpg.html
Installed the 1 and 2 p/c, then the head. No problems there, seeing it was my second time in the last few weeks
http://s1293.photobucket.com/user/dfelz914/media/2013-06-04003708_zpsda56f352.jpg.html
And now 
I'll be back with more tomorrow, should have the 3/4 side on and will start working on valve train
Oh ya, also, so that oil baffle case bolt that was torn to shreds! The case threads looked perfectly fine and that is the correct bolt size/length so i got a new one, and when i installed it i had no problems, threaded in normally with no extra resistance or anything. So problem still semi unsolved i guess, but wont be worrying too much about it... should be just fine. thanks for your help though Nathan.
Posted by: dfelz Jun 5 2013, 02:06 AM
Engine is almost now back together, I just finished getting the 3/4 p/c and head on then moved onto the valve train. Got the pushrod tubes in there and mocked up the rocker assemblies with pushrods to see how the elephant feet adjusters would work using the stock pushrods. Before i had split the case when i was doing this, it was cutting it very close, but since the cam was reground, that took some material off, making the pushrods sit inside the engine a little bit further. I believe they will work now, so thats good (saves me money!)
3/4 side on
http://s1293.photobucket.com/user/dfelz914/media/2013-06-04194630_zpsf6b12a37.jpg.html
the carb manifold stud on the head didnt look so hot....
http://s1293.photobucket.com/user/dfelz914/media/2013-06-04200927_zps6f0d56c1.jpg.html
So i replaced it!
http://s1293.photobucket.com/user/dfelz914/media/2013-06-04201714_zps76e2b3b6.jpg.html
Girlfriend snapped a pic while i was screwing in the tiny M5 x 5 bolt for the deflector plate
http://s1293.photobucket.com/user/dfelz914/media/2013-06-04213408_zps2760f0c3.jpg.html
With the solid spacer on the rocker shaft, there has to be a .003" gap when cold, so they had to be lightly sanded with a really fine grit. The gauging was done without the pushrods in there.
http://s1293.photobucket.com/user/dfelz914/media/2013-06-04232003_zps42873e84.jpg.html
looking better every time, i am getting really excited.
http://s1293.photobucket.com/user/dfelz914/media/2013-06-05000501_zps7e9d9dea.jpg.html
sleep time!
Posted by: monkeyboy Jun 5 2013, 09:52 AM
Looking good.
Posted by: FourBlades Jun 5 2013, 10:16 AM
You the man!
Thanks for posting all these step by step pictures.
Should help other people down the road.
John
Posted by: dfelz Jun 6 2013, 04:13 AM
Thanks for the compliments guys, and John that is exactly my reasoning for posting all the steps, I want to show that rebuilding these T4s is a job that can be done even by a novice, it just takes time and patience.
I logged another 5 hours just now and got a fair amount accomplished.
Started out by finishing the valve job, with gaps set to .006" on all valves, intake and exhaust alike.
Then installed the engine support bar case brackets and the dampeners, then the thermostat and cable pulley, a new oil filter, the warm air guides for both sides on the oil cooler half of the engine.
http://s1293.photobucket.com/user/dfelz914/media/2013-06-06003704_zpsd6a2613a.jpg.html
I have the Tangerine Racing breather can so following the instructions I had to drill a hole in the filler box which was then tapped to 1/8" NPT. I dont have a vise...so for the actual drilling part, i had to get a little creative.
http://s1293.photobucket.com/user/dfelz914/media/2013-06-06011605_zps9c733fe9.jpg.html
And voila!
http://s1293.photobucket.com/user/dfelz914/media/2013-06-06013917_zps6834f88c.jpg.html
Attached the filler neck and then put the fan housing and fan impeller on
http://s1293.photobucket.com/user/dfelz914/media/2013-06-06022753_zps9a16889c.jpg.html
Attached the cold air flaps
http://s1293.photobucket.com/user/dfelz914/media/2013-06-06022804_zpsa578b285.jpg.html
Anyone have some good pictures of how this spring is properly mounted to actually be useful??? Also i think the warm air guide on that side is not fully situated because that flap wont go all the way down...or is it not supposed to???
http://s1293.photobucket.com/user/dfelz914/media/2013-06-06022822_zpsa65c7472.jpg.html
Only a few more things to do before this engine is ready to rock and roll. I still need to put the flywheel oil seal and pilot bearing in, assemble the distributor, finish painting and then attach the tins, bolt down the carbs and manifolds, assemble the CFR carb linkage.....and maybe a few other small things. But that list is just for the engine unfortunately, still have some work on the car side before the install (SS fuel lines, pedal cluster, shift console and tunnel shift rod, then some electrical stuff...) Good thing I have finals week next week, i will have sooo much time to do all the above, NOT. oh well, i will try and be patient.
Posted by: nathansnathan Jun 6 2013, 06:28 AM
Anyone have some good pictures of how this spring is properly mounted to actually be useful???
Here you go
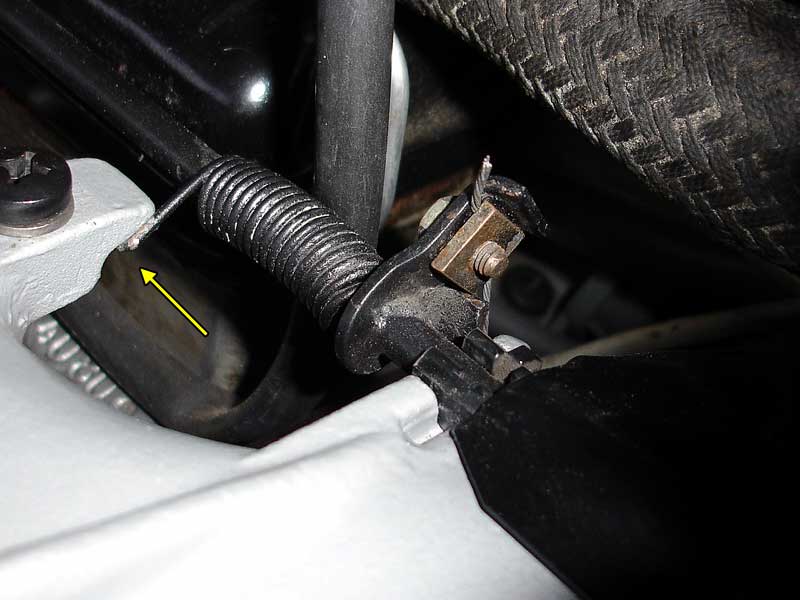
Posted by: monkeyboy Jun 6 2013, 07:15 AM
I will call you Friday about the engine stand. I have it ready, but I don't think I can get it in the truck by myself. You may need to drive down and help me load it.
Posted by: dfelz Jun 6 2013, 07:25 PM
Anyone have some good pictures of how this spring is properly mounted to actually be useful???
Here you go
Thanks Nathan, any chance you have a pic of were the the hook on the other side is going??? And am i correct in saying that the flap is supposed to be able to go completely flush with the opening in the cold position?
Posted by: nathansnathan Jun 6 2013, 09:05 PM
Thanks Nathan, any chance you have a pic of were the the hook on the other side is going??? And am i correct in saying that the flap is supposed to be able to go completely flush with the opening in the cold position?
Hopefully this shows the spring. The other was a photo off Ratwell's site. These I took of some parts lying around. Pardon the crustiness. You can see the little hook go under the 'arm' by the white bushing there.
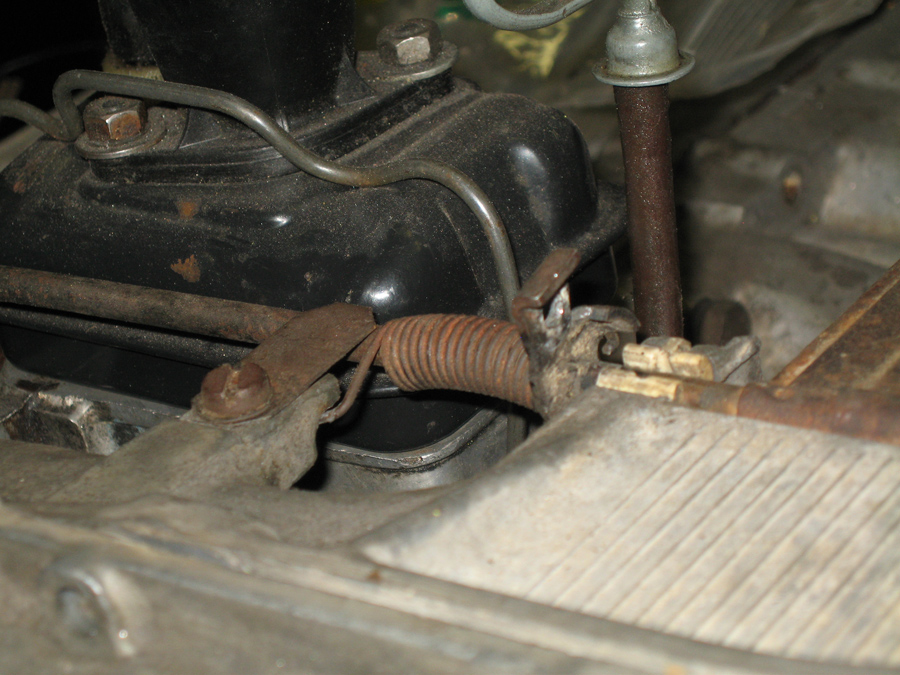
The pivot beam is quite pliable so you can tweak it a bit to close up the gap some. The nub on the fan housing should act as a stopper, rather than the other side pulling the connector piece apart. The fan has to hit that nub because there is a flange on the other side of the pivot beam that the other bushing locates it with.
As the pivot beam rotates through its axis, it seems like it should not cock out as it closes, but stay parallel in its axis to the lip of the fan housing. You may have to (un)bend the beam to get it moving freely. The spring pressure is pretty strong, but get the beam smooth, and oil the spring, and may sure the beam is not bent so it binds in the bushings or in the tin. Make it so it moves real easy. -unlike the crusty one I've got mocked up here. The one in my bus doesn't take nearly as much force to hold closed. Seems the smoother it functions, the longer the thermostat will hold up.
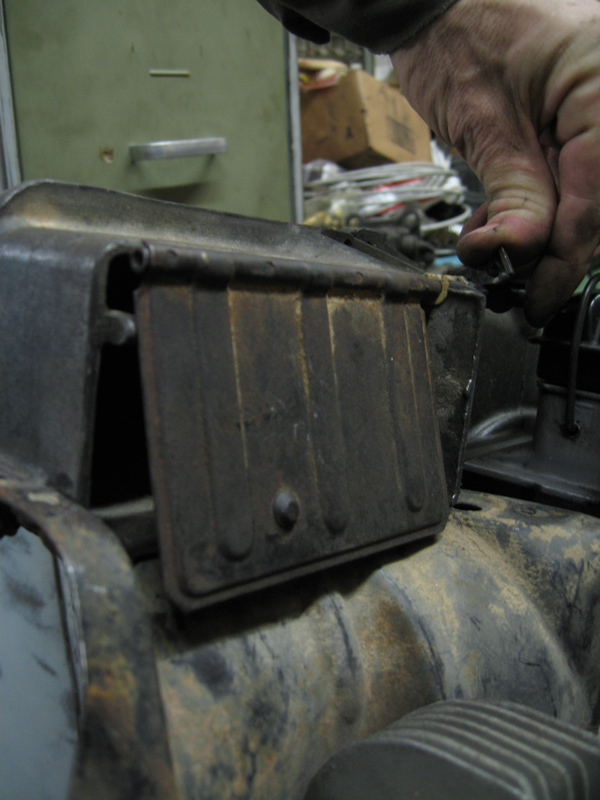
Posted by: dfelz Jun 7 2013, 11:38 AM
Thank you very much Nathan! Great walk through! Ethan came over last night too and helped me situate it (I didnt see your wonderful tutorial till now,) he fixed the spring positioning and told me the flap was going down to the correct spot. And now that that's taken car of, i started prepping the cylinder/head tins for paint. Also put the flywheel bearing and felt washer on along with the flywheel main oil seal.
Went over to Jims pad (monkeyboy) and grabbed an ATV jack, tranny drain plug tool, and a tranny main shaft to act as a clutch alignment tool. I ordered the clutch alignment tool from pelican, and the bag it was in had the sticker of the right part, but the part said FORD on it???... and it obviously did not fit, so ya gonna contact them about that...
Gonna go into the machine shop today and jump on the lathe to fab some battery terminal adapters. I am using an Odyssey ER40 that has M6 studs for terminals, so i need to make something to screw on that with an OD of the battery connect ID, shouldnt take too long, just have to take the correct measurements!
I'll post up later today how it goes!
Posted by: dfelz Jun 8 2013, 05:45 PM
I have now almost completed the cleaning and repainting of all the engine tins. Wire brushed by hand to get all the dirt grime build up, mainly off the bottom side, then moved onto the paint striper to finish up the job with a drill wire brush cup. Final stage was hand sanding to get the tough crevasses.
Start
http://s1293.photobucket.com/user/dfelz914/media/2013-06-06231938_zps0178e2e5.jpg.html
Middle
http://s1293.photobucket.com/user/dfelz914/media/2013-06-07141614_zpsd7f914b1.jpg.html
Finish, still have the 3/4 tin and two others though
http://s1293.photobucket.com/user/dfelz914/media/2013-06-08042942_zpsf412493b.jpg.html
Had to weld up this crack before moving on with paint on this guy
http://s1293.photobucket.com/user/dfelz914/media/2013-06-07202132_zpsc6ad3157.jpg.html
All done
http://s1293.photobucket.com/user/dfelz914/media/2013-06-07222649_zps24762224.jpg.html
Since i will be sealing in my windshield soon, i had to attend to this small rust spot on the bottom passenger side corner. This was as is
http://s1293.photobucket.com/user/dfelz914/media/2013-06-07202716_zpsdd84924a.jpg.html
This was after the dermal, prepping for weld, hole grew a little but that was expected, had to remove the cancer
http://s1293.photobucket.com/user/dfelz914/media/2013-06-07203408_zpscc2ba106.jpg.html
Welded, area was very thin and difficult, had the mig turned all the way down on everything, still burned holes right through, had to do really quick bursts on the edges and worked inwards.
http://s1293.photobucket.com/user/dfelz914/media/2013-06-07204619_zps294b6615.jpg.html
Grounded down to finished contour
http://s1293.photobucket.com/user/dfelz914/media/2013-06-07212959_zps3a620da9.jpg.html
Primed with rustoleum
http://s1293.photobucket.com/user/dfelz914/media/2013-06-07214619_zpsf6881363.jpg.html
I attached the thermostat cable to the flaps too, no picture though. Progress will slow down heavily until thursday unfortunately, its finals week, my time to shine, no excuses for slacking!!
Posted by: dfelz Jun 10 2013, 01:20 PM
I wasnt supposed to be working on the car this week because of finals, but when i got home last night from studying in the library at 1am, i had just finished my last cup of coffee, so i wasnt about to just go to bed!
First thing i worked on was the alternator mounting, I have the two brackets, the one half square and the curved one. For the square one, it had, as well as the shroud a square hole on one side and the haynes book labeled the bolt going through there as "special bolt," but the bolt i have is just a normal hex head with flange. Is the shank supposed to be square???
Next, how do i properly tension or know if the belt is at an acceptable tension?
Also, what screw is used on the hole with the green arrow and what screws into the threaded posts with the red arrows??
http://s1293.photobucket.com/user/dfelz914/media/fanhousingarows_zps3d4d57bc.jpg.html
After i did that shit worked on the pressure plate and clutch disk. Cleaned up the pressure plate and roughened up the flat surface that contacts the clutch disk with some sand paper. Then using the alignment tool Jim is lending to me, i bolted the combo to the flywheel with new M8 X 20mm grade 10.9 hex bolts and split lock washers. Dont know if i mention earlier but before mounting the flywheel for good, i hammered in new dowel pins to the flywheel after letting them sit in the freezer. I bought a bag of them from McMaster so i have extras if anyone is in need.
http://s1293.photobucket.com/user/dfelz914/media/2013-06-10024451_zps7dcfe621.jpg.html
http://s1293.photobucket.com/user/dfelz914/media/2013-06-10024513_zps8cddea68.jpg.html
http://s1293.photobucket.com/user/dfelz914/media/2013-06-10031144_zps68aa4d6f.jpg.html
http://s1293.photobucket.com/user/dfelz914/media/2013-06-10031205_zpsdc54fdb3.jpg.html
Also did a final check of the adjuster screw clearance to the valve stems using Ethans method, so they are all at .006" and good to go, then the valve covers went on with new cork gaskets from the rebuild kit (did those need to be slightly oiled before assem to the head??)
thats all i got for now!
Posted by: nathansnathan Jun 10 2013, 02:57 PM
It's a special bolt, like a carriage bolt but with part of the head missing so it is a D shaped head. The D part fit's the recess in the tin. the square part goes through the square part of the bracket. It makes it so you can loosen your alternator to put a belt on from underneath instead of needing 2 people. -No clue where you'd get one, part #021903231
Next, how do i properly tension or know if the belt is at an acceptable tension?
It's supposed to have 5/8" play iirc.
Also, what screw is used on the hole with the green arrow and what screws into the threaded posts with the red arrows??
Just a m6x30 hex, 10mm head in the one. The others, I don't think 914's use those other holes; they are for the fan screen in a bus. I could be wrong here...
did those need to be slightly oiled before assem to the head??
I would use a small amount of silicone to hold the gasket to the cover, dry on the head side.
Posted by: dfelz Jun 15 2013, 09:35 PM
As always, thank you Nathan for the wealth of helpful information.
I haven't updated the last few days but have done a good bit of work.
First, I received my new fog lights in the mail the other day, picked them up in the pelican 914 classifieds, I love them! Cant wait to see how they look on!
http://s1293.photobucket.com/user/dfelz914/media/2013-06-13134007_zps1061a0f3.jpg.html
http://s1293.photobucket.com/user/dfelz914/media/2013-06-13134034_zpsa3cb2589.jpg.html
Put the new belt on there
http://s1293.photobucket.com/user/dfelz914/media/2013-06-13161032_zpsd3ba137a.jpg.html
Plugged the hole that wont be needed
http://s1293.photobucket.com/user/dfelz914/media/2013-06-13162128_zpsece7c455.jpg.html
When i was trying to tighten down the bolt that clamps the end of the thermostat cable to the flaps i was noticing it not doing anything but spinning. it was stripped and had the cut the fucker off!
http://s1293.photobucket.com/user/dfelz914/media/2013-06-13170550_zps05df4304.jpg.html
Alternator harness had been cut from PO so i decided to undo their twist and tape together method and use my twist, solder, shrink wrap method
http://s1293.photobucket.com/user/dfelz914/media/2013-06-13174140_zps4516f9af.jpg.html
http://s1293.photobucket.com/user/dfelz914/media/2013-06-13174320_zps147e6e77.jpg.html
This guy was also all mangled up... and leaving plenty of wires exposed
http://s1293.photobucket.com/user/dfelz914/media/2013-06-13174453_zps297d93dd.jpg.html
All better
http://s1293.photobucket.com/user/dfelz914/media/2013-06-13174610_zps5e048d04.jpg.html
Scrubbed the pedal area with a wire brush to remove the top layer of rust dust, then sprayed the area with a "heavy rusted primer"
http://s1293.photobucket.com/user/dfelz914/media/2013-06-13182306_zps296efdc2.jpg.html
http://s1293.photobucket.com/user/dfelz914/media/2013-06-13182313_zps2c2f2032.jpg.html
Kinda blends in
http://s1293.photobucket.com/user/dfelz914/media/2013-06-13183056_zps15a97b10.jpg.html
Sprayed inside the tunnel too, it was all yellow with rust dust
http://s1293.photobucket.com/user/dfelz914/media/2013-06-13183104_zps5307db20.jpg.html
What was left of old battery tray 
http://s1293.photobucket.com/user/dfelz914/media/2013-06-13191709_zpsff6c2a69.jpg.html
Hell hole area
http://s1293.photobucket.com/user/dfelz914/media/2013-06-13191713_zps52ed83ac.jpg.html
Sprayed it with the rust primer, best i can do for right now. Will actually fix at a later time
http://s1293.photobucket.com/user/dfelz914/media/2013-06-14001449_zps1771238f.jpg.html
Engine is all together and ready to rumble! cyl head temp sensor in, spark plugs in, oil pressure/oil light sender hooked up, all tins on. Once installed will set up the dual carbs
http://s1293.photobucket.com/user/dfelz914/media/2013-06-14035136_zps3e66b051.jpg.html
Installed the SS fuel lines - feeding the line through the tunnel was CAKE, slipped in like a charm! thanks chris!
http://s1293.photobucket.com/user/dfelz914/media/2013-06-14035223_zpsbfa5a5c3.jpg.html
http://s1293.photobucket.com/user/dfelz914/media/2013-06-14035229_zps26444d93.jpg.html
Located the fuel pump lines, cut the terminals off them and attached new wire to them that was routed to the front
http://s1293.photobucket.com/user/dfelz914/media/2013-06-15153013_zpsfed6e25c.jpg.html
http://s1293.photobucket.com/user/dfelz914/media/2013-06-15155032_zps2d19f14f.jpg.html
Had to take a break to go to friends graduation party, but am going to slip back into the garage again right now!
Posted by: dfelz Jun 16 2013, 12:14 PM
Once back in the garage, I sorted out the gas tank. Since I only need one supply line, the other line needed to be plugged. The SS kit that i got from chris had a shank in one of the lines on delivery so it was perfect, clamped that guy into a short 5/16" fuel line that went to the unused nipple. I switched around the original position of the nipples, using the smaller OD one on the outer side, with a new fuel stock filter in there, and the larger OD nipple is the one being plugged. This is so I would not have to step down the fuel hose prior to getting to the fuel filter.
http://s1293.photobucket.com/user/dfelz914/media/2013-06-15225511_zps360f2916.jpg.html
http://s1293.photobucket.com/user/dfelz914/media/2013-06-16000832_zps42206fe3.jpg.html
http://s1293.photobucket.com/user/dfelz914/media/2013-06-16000823_zpscc208f4b.jpg.html
I also came up with a solution for the vibration pads that the tank sit on. Found this rubber adhesive backed pad on McMaster for $3 for two pads. The problem was that it was a bunch of smaller squares, which i knew prior to ordering, but i was hoping they woud stay together better when i removed the backing, that was not the case. Each square had to be individually laid down, hence why it looks like shit, but i dont really care since it is never visible!
http://s1293.photobucket.com/user/dfelz914/media/2013-06-15231413_zpse5d954b6.jpg.html
http://s1293.photobucket.com/user/dfelz914/media/2013-06-15233314_zps9ec9039b.jpg.html
Installed the short carb manifolds i have. Will set up the carbs and dual linkage today, then install the engine/tranny!
http://s1293.photobucket.com/user/dfelz914/media/2013-06-16005509_zpsa28dd076.jpg.html
Posted by: dfelz Jun 17 2013, 09:09 PM
Well to start with the good news, this engine is in the car!!!! Was working on the car all of sunday, literally all day before i had to depart for SD to start my new job monday morning. Ill start at the beginning of the day:
As i showed earlier, the bolt/square nut to clamp the thermostar wire had stripped and need replacing. I had to do a makeshift replacement but it worked out well. Used a t-nut and cut a section off to create a flat area, and so it could fit in the tight spot period.
http://s1293.photobucket.com/user/dfelz914/media/2013-06-16114721_zpsffcd316e.jpg.html
http://s1293.photobucket.com/user/dfelz914/media/2013-06-16115632_zps57acabe5.jpg.html
Next i installed the bdstone rebuilt pedal cluster. As you can see the right floor bolt isnt stock, the original one became rusted to the nut and sheared off upon removal. I drilled it out to just the right size to squeeze an M8 set screw in there; its nuted on the top and bottom. Clutch cable and accelerator cable are hooked up.
http://s1293.photobucket.com/user/dfelz914/media/2013-06-16130727_zpsa336708e.jpg.html
http://s1293.photobucket.com/user/dfelz914/media/2013-06-16131947_zps630a32c6.jpg.html
Next moved onto the shift rods. for the bushing shown below, I only had one, but realized i was supposed to have two... so i used an old oil cooler gasket on the other side; it fit nicely and seemed to accomplish the job. If this is a huge no-no, please dont be afraid to tell me. If this should get the job done for a bit, also please let me know!
http://s1293.photobucket.com/user/dfelz914/media/2013-06-16135839_zpsba142b41.jpg.html
http://s1293.photobucket.com/user/dfelz914/media/2013-06-16135853_zps1e9d516c.jpg.html
http://s1293.photobucket.com/user/dfelz914/media/2013-06-16135903_zps2e27d557.jpg.html
Installed the clutch fork and throwout bearing, new cup bushing on the fork and vibration dampeners on the bearing.
http://s1293.photobucket.com/user/dfelz914/media/2013-06-16151946_zpsc24f8077.jpg.html
cleaned up the starter motor
http://s1293.photobucket.com/user/dfelz914/media/2013-06-16151952_zps346f796c.jpg.html
mated the tranny to the case, please keep in mind i was by myself the whole day, so this task deemed to be tricky, especially seeing that the case was on wheels and slightly kilter at a downward angle...i had to get inventive.
http://s1293.photobucket.com/user/dfelz914/media/2013-06-16161428_zpsed4476ad.jpg.html
I still cant believe that this replaces all that was removed when using the tail shift components...looks so not upto par
http://s1293.photobucket.com/user/dfelz914/media/2013-06-16163445_zps0a84ca26.jpg.html
lifted the engine into place, and checked location after every pump of the jack to make adjustments, once again i only had myself to double check everything was lining up
http://s1293.photobucket.com/user/dfelz914/media/2013-06-16180433_zpsc8919b46.jpg.html
she's all in, the shift rod assemblies are in place and everything
http://s1293.photobucket.com/user/dfelz914/media/2013-06-16195447_zps3375881e.jpg.html
http://s1293.photobucket.com/user/dfelz914/media/2013-06-16195456_zps56886138.jpg.html
http://s1293.photobucket.com/user/dfelz914/media/2013-06-16195610_zpsff0df060.jpg.html
http://s1293.photobucket.com/user/dfelz914/media/2013-06-16195623_zps9d28b458.jpg.html
As she sits for the next week until i go back for the weekend to attempt start-up!
http://s1293.photobucket.com/user/dfelz914/media/2013-06-16195836_zps6e86bff2.jpg.html
I do have a few questions though!....
first, how do i transfer all the parts of the spedo angle drive from the tailshift to the sideshift...i couldnt get that unit out...?
http://s1293.photobucket.com/user/dfelz914/media/2013-06-16193803_zps3595c84e.jpg.html
Can someone please provide me with some good pictures of the two connection points of the sidesift rods, right behind the firewall at the rod coupling and at the stock (without that cover there obviously). I have all of it hooked up as of now, but it didnt feel right when trying to move around the shifter, and i think i forgot the friction ring bushing... so i will be redoing all that but would love some quality pics for reference.
Thanks everyone for all your help, dont think i would have gotten this far without your aid, but hang in there, i think the biggest challenge is coming up, STARTING it, and then tuning it!
Posted by: dfelz Jun 28 2013, 04:14 AM
Last weekend on sunday i worked on the car for the entire day with the assistance of Jim We were hoping to fire it up....but that'll have to wait till this weekend.
Once we found TDC (was actually 180 of TDC, but still worked just had to keep that in mind) we lubed the shit out the distributor driveshaft gear and washer and dropped that sucker in there (carefully). Then installed the distributor, but pior to that we checked the gap in the rotor contact.
http://s1293.photobucket.com/user/dfelz914/media/2013-06-23123639_zpsf5bd4506.jpg.html
Before Jim came over I was working on my CFR parts. positioned the breather can where i want it and cut all the hoses to length, then removed the can while the rest of the work was done on the engine, didnt want to scratch it, its so nice looking. Then moved onto the throttle cable pulley linkage. Got some bad news there, my manifolds are apparently to short, so it will be impossible to use with my current set up, the brackets that hold the cables interfere with the tins and dont come close to lining up the the holes they are supposed to bolt to..... So for now, I am using the old swivel type pull bars....
http://s1293.photobucket.com/user/dfelz914/media/2013-06-23173142_zpsacaabd31.jpg.html
Before going to grab some in and out for our lunch break, we poured in the brad penn break in oil, came back, and had a leak, i officially own a 914. Leak was coming from between the tuna can and case, was leaking a substantial amount! Going to drain the oil (save it and reuse it), pull the tuna can off and put some RTV gasket stuff on there, should seal it up, hopefully
http://s1293.photobucket.com/user/dfelz914/media/2013-06-23173152_zps38e0dfd7.jpg.html
http://s1293.photobucket.com/user/dfelz914/media/2013-06-23173206_zps97125665.jpg.html
Will be back up at the house starting tomorrow to work on the car, taking a half day at work to go up early and avoid LA traffic! 
Will hopefully be uploading a nice video this weekend of the car running, lets pray
Posted by: dfelz Jul 21 2013, 03:07 PM
SHE LIVES!!!!
The engine is now alive, cam break in is complete! Will need to finishing the timing with a timing light and then further tune the carbs before a first test drive around the block, but i am super happy right now that i have a running engine!
We had some hiccups along the way the to say the least! Previously, both stock starter motors i had on hand weren't powerful enough to turn over the newly rebuilt engine, even with 1600 crank amps connected (had two F-250 diesel truck batteries hooked up in series.) I purchased a new IMI hi-torque starter motor and am supper happy with it!
http://s1293.photobucket.com/user/dfelz914/media/photo_zpsd3f10c0a.jpg.html
But even yesterday when we were trying to fire it up, we made many attempts before realizing that the fuel pump had somehow been unhooked, probably my fault, but hey we all make mistakes! So once that was taken care of, and with a little futzing with the distributor to get the timing in line enough to fire, she woke up from her 23 year nap. That was yesterday, and at that point we had no muffler on, just stock headers, was painfully load, and were getting burst of fire out of the carbs during backfires. ran it for just a few minutes, let it sit all night and then this morning checked all the valve clearances, one needed adjusted and the rest were just re-tightened down. Then attached the muffler and after that is what you see in the video! 
http://www.youtube.com/watch?v=okagtfOz9BE
http://www.youtube.com/watch?v=bIW07-cHDVA
If someone could tell me how to get the actual video box to show in the post that would be great!
Posted by: FourBlades Jul 21 2013, 04:11 PM
Wow, that is super cool!
Great work getting to this point.
Soon you can enjoy the best part of these cars, driving them.
John
Posted by: dfelz Jul 23 2013, 09:41 AM
Thanks John, I appreciate the kind words, I am super excited to be at this point and even more excited to be one step closer to my next objective....DRIVING IT.
I also forgot to mention a funny story from this past weekend. Jim pointed out a "minor discrepancy" in my carb jetting... Both mains on the 1/2 side had a 110, but both mains on the 3/4 side had a 115. Then we also noticed it looked as though the idle jets had been brazed and then re-drilled, most likely to get a smaller hole, but i don't know what size it is now, and the hole wasn't centered... like i said, "minor discrepancies" haha 
So i am working on fixing those in the near future.
Posted by: oldschool Jul 23 2013, 10:12 AM
Dude I just went through all your post...very cool, It make's me think I can rebuild the 2 motor I have sitting
Posted by: monkeyboy Jul 23 2013, 10:38 AM
Lots of progress. It's been fun to help you.
Now lets get her off the jack stands and back on the road!
Posted by: dfelz Jul 24 2013, 04:05 AM
Jamie with some love, your engines could be troopers again too!!
Jim we are on the same page! Ill be at the house working on the car this wed and thurs afternoon this week plus the weekend, so it is doable for sure. I really do appreciate all you help though, thank you!!
Posted by: dfelz Aug 20 2013, 09:17 PM
For the first time ever, I drove my 914 around my neighborhood for a few victory laps! It was extremely exhilarating and fun. But there are some "issues" that need attended to and adjusted.
Here are the issues that i noted:
-Pops out of second gear. Will engage and drive but within 15 seconds or so it gently pops out of gear. It stays in first just fine.
-Brakes have to be pumped like 3 times to feel strong throughout the whole pedal travel, but i have to do it almost every time before i want to actually stop the car. So basically it looses pressure pretty fast is what it seams like to be, does this mean the MC has bad seals and needs replaced? I will bleed the brakes again and see if that helps.
-lights on the DS dont work (for the most part). with the headlights turned on: headlight works, brake light works when braking only, fog light does not work, turn signal only works when turn signal is on. Reminder, all lights on PS are working as they should, so is there a fuse or relay that should be checked that operates just the DS?
-Both PS tires rub, both DS tires do not?? front rubs on strut dust cover, back rubs on the inside wheel well. both front hubs now have 8mm spacers with 50mm studs, no more rubbing. pass rear now has two 5mm spacers and does not rub. For the rears, does the trailing arm just need some shims? Reminder, i have 944 rims, and the fronts are 911 hubs, so the offset is a bit different, but not much. My main concern is why its only on one side and not the other...
-Car fires up real quickly when cold, but when its already been on recently it just cranks for awhile (quickly because of my high power starter )
Thats all i can think of right now, so here are some recent pictures:
http://s1293.photobucket.com/user/dfelz914/media/2013-08-11172809_zps313c69e5.jpg.html
http://s1293.photobucket.com/user/dfelz914/media/2013-08-17124935_zpsd54eb86b.jpg.html
http://s1293.photobucket.com/user/dfelz914/media/2013-08-17121113_zpsb09005bf.jpg.html
http://s1293.photobucket.com/user/dfelz914/media/2013-08-17124903_zps86a3e5f9.jpg.html
http://s1293.photobucket.com/user/dfelz914/media/2013-08-17124912_zpsdfe9c968.jpg.html
http://s1293.photobucket.com/user/dfelz914/media/2013-08-11175433_zps8383d992.jpg.html
(front ride hight has been adjusted from where it sat in this pic)
http://s1293.photobucket.com/user/dfelz914/media/2013-08-11175406_zps1b99af0d.jpg.html
Cheers
Posted by: '73-914kid Aug 20 2013, 11:51 PM
Okay, some answers so most of your questions.. haha
1. The popping out of second gear is due to a bad synchro on second gear. Easy enough to replace with the gearbox in the car and just pull the stack. Hell, I even have a shift fork alignment jig to set it up
2. Definitely bleed the brakes again. Be methodical about it and do it old school with a buddy. Start at the far corner and move around the car. The low pedal is sometimes caused by the brand new seals in the calipers being stiff and pulling the pistons back immediately. So, bleed them again, and see if it improves. If it doesn't seem to, Stand on the pedal in the driveway. If the pedal slowly falls, then the MC is bad or the you have a leak in the brake lines.
More driving will break in the seals, so go drive it.
3. I can't remember if they're fused separately, but check fuses, and check for burned out bulbs, discontinuity in the system due to burned bulbs does weird things in these cars.
4. Check camber. One side may have too much positive camber or negative camber causing rubbing..
5. When you crank it once it's running, do you get a puff of gray smoke out of the exhaust? Once it's running and warm, shut the car off and look down the throat of the carb to see if the fuel is boiling over into the venturi due to heat soak.
Posted by: FourBlades Aug 21 2013, 08:13 PM
Congratulations, that is very exciting!
You got this far in your restoration very fast compared to most of us.
You just need to be methodical now about finishing it up.
John
Posted by: monkeyboy Aug 22 2013, 08:54 AM
Good show! Glad to see you were able to drive it.
Text me if you have anything you need help with. I wish I could help more, but it looks like the only weekend I will be in two for the rest of the summer is Labor Day.
Congrats Dave!
Posted by: dfelz Aug 26 2013, 10:19 PM
Thanks guys for all the help and support, having this amazing support group is really helpful!!
Ethan, thanks for all the responses.
1. For the syncro, we will have to figure out a time to get that sorted out using your awesome and wonderful jig and expertise for now i will just hold the shifter in its position, haha
2. i will have to re-bleed when i have a buddy again. Me and Jim did it together the first time and did back PS to front DS (the correct way as you pointed out) we even went at it for two rounds. When i was driving around a bunch this weekend i came to the realization i could just be being a pussy when it comes to braking and just used to power Brembo brakes  but i will definitely want to re-bleed anyways! But as you said the seals need breaking in, and i think after this weekends adventures it started to feel a little better already.
3. The lights are fused separately, the fuse for the DS lights was blown! what a coincident! replaced the fuse with a good one and all was well, except the fogs, i am still having problems with those, now both wont go on???
4. will have to check next time...
5. didnt check this weekend, will next time. Could it be from the battery being warm?... the batter is laying on the rear trunk floor and i felt the metal around it after a drive and it was warm, not scolding, but warm, could that be aiding in the not start when warm issue?
NEW:
Finished the mounting of the 911 FG dash! Question for the clock though, anyone know what terminal (if any) on a 71 fuse panel always has 12v power for me to tap the clock into? I inspected with my volt meter and it didnt seem to have one that would work. How would i go about getting a line directly from the battery to power the clock that wont fuck shit up (aka light my car on fire from f-ed up electrical planning)
http://s1293.photobucket.com/user/dfelz914/media/photo_zpsf7ff4b2b.jpg.html
Mounted the chrome bumper from my 72 (i think someone pointed out it is off a 74 though) it doesn fit completely right... is there a big difference between the 74 and 71 rears that would make it not fit correctly on the sides?? I got the license plate on there too From this angle in the pic, you cant really see the fitment issues. ALSO if anyone has a rear rubber top that i could have that is in any kind of condition, please let me know.
http://s1293.photobucket.com/user/dfelz914/media/photo_zpsdd688e31.jpg.html
I bolted in the bottom half of the passenger seat this weekend and took three of my roommates for spins, they enjoyed it a lot for just going around our neighbor hood a few times! I did go on a "more" main road (one with a light at the end of it) and passed a cop going the other way... I didnt have seat belts installed, a windshield, any mirrors, or a front license plate... so when he dove past looking at his comp screen not even noticing us, i would say i got a little lucky!! phew!
I cant wait to take this thing on the twisties!!
Posted by: Eric_Shea Aug 26 2013, 10:38 PM
Hot no start is a ground issue. Make sure the tranny grnd is clean. New ones can be had for dollars at your flaps.
Bleed from passengers rear to drivers rear to passengers front and end with drivers front. Bed the pads as per the tech tip on our site. It will bed the pads and help break in the new seals.
Posted by: boogie_man Aug 27 2013, 11:02 AM
Great job Dave, that's coming along great you lucky bastardo !!!
Posted by: dfelz Sep 10 2013, 12:21 AM
Had a great week/weekend! First step was having my front and rear windshields installed, was hooked up by Scott (boogie_man) with his glass guy to get it handled. Next in line was replacing the ball joint taper pin bolt with a new one from Bruce, the first one I installed on the passenger side got hung up and then bent while i was hammering it in. I then installed my new "space saver" spare tire i got from Bruce. I put that in quotations since i am installing it in the car fully inflated so i dont have to have a compressor on site if the time comes when i need it! Then installed the 916 front bumper i picked up on tuesday from another member here. I really like the look, and since i have aftermarket fog lights that are a half inch larger in OD than stock they fit perfectly in the round cutouts on the bumper. Now i just have to figure out where in the fog light wiring is being tripped up, since at one point just the passenger side fog would go on, now neither go on when the switch is activated.... I then moved onto hooking up the e-brake, always a good idea! Last but not least, i installed the seat belts and went for a drive!!!
When i went for a drive on wednesday i had a strange issue occur at the end of the drive. I had been driving for about 10-15 min before this incidence, all seemed fine, and then somewhat suddenly the engine started holding at a constant 3k during neutral idle. Previously the engine would idle under 1k. When i would put the car in gear and drive off from a stop the engine would act perfectly normal, but even in between shifts (while the engine was in neutral) rpms would jump and hold at 3k before engaging the next gear and going back to normal. I checked vacuum leaks, none to be found. Next day i started her up, and it idled just fine with no adjustments made from the previous night when this happened.
Also, can someone please give me a list of all the things to check for hot start problems. Starter cranks quickly as it always does but just doesnt catch. What gives!!??
Here are some pictures from the past few days!
Her first time filling up at the gas station! (with me)
http://s1293.photobucket.com/user/dfelz914/media/photo_zps18805f54.jpg.html
spare installed
http://s1293.photobucket.com/user/dfelz914/media/photo_zpsb13f50a4.jpg.html
http://s1293.photobucket.com/user/dfelz914/media/photo_zps74271df7.jpg.html
e-brake connection (i know thats not how the stock setup goes, but i couldnt find the OEM pieces...)
http://s1293.photobucket.com/user/dfelz914/media/photo_zpsba824070.jpg.html
Forgot to mention, I installed my temp fix for the sheared rear control arm bolt, a thru bolt. Need to get a little longer bolt though
http://s1293.photobucket.com/user/dfelz914/media/photo_zps5ce2b989.jpg.html
http://s1293.photobucket.com/user/dfelz914/media/photo_zps97f3cd0d.jpg.html
also picked up this sexy exhaust this morning. 2.0L straight pipe headers to a 911 muffler. The muffler had its original single side outlet cutoff and welded shut, then a dual tip center outlet weld on. I cant WAIT to mount this puppy!
http://s1293.photobucket.com/user/dfelz914/media/photo_zps278fb538.jpg.html
Sorry for the long post, hope you enjoyed!
Thanks for all the help and support everyone!
Posted by: '73-914kid Oct 11 2013, 09:21 AM
Well, since David hasn't updated this yet, I figured I would for him..haha
Proof that it can be done on a college students budget! woooooo!
Car is now driving around without too much issue.. I think the car is still fighting a small vacuum leak at the head, but that should be fixed soon.
http://s260.photobucket.com/user/perfectshot_12/media/bb1c2ae6-e388-48e4-b48b-f22821ec5f5d_zps20876357.jpg.html
Posted by: ThePaintedMan Oct 11 2013, 09:33 AM
Sweet! Congrats David! Looks like us young guys might know what we're doing afterall, though we have a long way to go to learn all of the ways of the force from you more senior folks
Posted by: 7TPorsh Oct 11 2013, 09:38 AM
Cool guys! You need to head out west for a drive.
Posted by: jbyron Oct 11 2013, 09:58 AM
That's just awesome
Posted by: FourBlades Oct 11 2013, 10:59 AM
Nice work!
John
Posted by: dfelz Oct 12 2013, 08:26 PM
Thanks for the update Ethan and the warm congrats from the rest! I am really happy to finally be at this point of the build, but there are a few more adjustments/additions that need to be made before its a real teener.
Tomorrow i have a tune-up on the schedule!
Posted by: dfelz Nov 16 2013, 07:23 PM
Been awhile since my last update, and have recently accomplished a few things on the car. First things first, i took here on the longest ride of her (new) life, drove all the way to Ron and Glens amazing G&R swap meet, was a fun 40 minute ride. I caravaned the way there with jamie, which was very comforting!
Here she is at the swap meet.
http://s1293.photobucket.com/user/dfelz914/media/Mobile%20Uploads/photo_zps253a8a08.jpg.html
One of the major things recently was redoing the battery cabling the right way. Ordered a bunch of 2 AGW wire and lugs, a terminal post and a battery kill switch (and Jim, lol) Turned out great!
http://s1293.photobucket.com/user/dfelz914/media/Mobile%20Uploads/photo4_zps2d9a550e.jpg.html
http://s1293.photobucket.com/user/dfelz914/media/Mobile%20Uploads/photo3_zps6c6eb0f0.jpg.html
http://s1293.photobucket.com/user/dfelz914/media/Mobile%20Uploads/photo1_zps24b7c1c8.jpg.html
http://s1293.photobucket.com/user/dfelz914/media/Mobile%20Uploads/photo2_zps47553176.jpg.html
http://s1293.photobucket.com/user/dfelz914/media/Mobile%20Uploads/photo2_zps2ea7152a.jpg.html
Then today i installed new air filter housings!! so shinny and they have just one single wing nut to remove the top, not four fucking stupid metal clips!!
http://s1293.photobucket.com/user/dfelz914/media/Mobile%20Uploads/photo5_zpsd85ecf47.jpg.html
More good stuff on the way soon!
Posted by: BMiller Dec 1 2013, 09:35 PM
Engine looks about clean enough to eat off of! Keep them coming!
Posted by: monkeyboy Dec 2 2013, 09:16 AM
No more fire hazard! Looking good.
Posted by: rick 918-S Dec 2 2013, 09:58 AM
Coming along nicely!
Posted by: dfelz Dec 2 2013, 01:57 PM
Thanks guys, much appreciated; definitely couldn't have gotten to this point without 914world!
Posted by: dfelz Feb 26 2014, 03:52 AM
Been awhile since my last update! And its mostly because I haven't done much, but in the past two weeks have started a few projects, but luckily they are all in the same area, and all need the gas tank pulled!
Problem A was a fuel leak right at the tank nut to feed line, not sure if the paper gaskets didnt seat correctly or what, but it was slowly leaking and had to stop. Once the tank was pulled, I removed the nuts/feed lines and noticed a lot of debris crowding the gasket area, which means my assumption was correct, not seating the gasket properly. The inside of the tank looks great though (according to Ethan, i didnt look just took his word for it) so i am just going to plug it up with a little gas inside and give a good whirl to get that grit out of there.
Next item was swapping the stock 17mm MC with a "new" 19mm MC to compliment my larger M-caliper front brakes. Install was a breeze with the aid of Ethan and Jim; and they even bled my brakes for me i just had to make sure to keep topping off the reservoir! And sure as shit they did a great fucking job, that brake pedal feels like it could stop a train! I cant wait to actually road test it and not just jack stand pretend test it, haha.
Last item (for this post at least, lol) was the scary retrofit of a front sway bar! Drilling holes into the chassis is never fun, and always scary, but this one wasnt all that bad fortunately. The hardest part was cutting a slot on the shelf in the gas tank side so that the "to be welded in" support bracket could fit and align with all three holes. I used a dremil to cut a line parallel to the shelf, then drilled holes and the two corners and then pried that section up and bent it off. It was tricky, but i have one side completed (minus welding) and the other just about there. Hopefully the welding will take place very soon!!!
Thats all for now! here some pictures to cap it all off!
http://s1293.photobucket.com/user/dfelz914/media/Mobile%20Uploads/photo4_zpsef786482.jpg.html
http://s1293.photobucket.com/user/dfelz914/media/Mobile%20Uploads/photo5_zps038ace52.jpg.html
New 19mm MC installed
http://s1293.photobucket.com/user/dfelz914/media/Mobile%20Uploads/photo2_zps68e8fbfe.jpg.html
New blue hose too
http://s1293.photobucket.com/user/dfelz914/media/Mobile%20Uploads/photo1_zps14e4bf74.jpg.html
Also!!! I dont think i posted this in here yet, but i have a new gauge in my pod. I 3D printed a custom housing to fit in the smallets hole of my getty dash and mount the fuel level unit itself. Went this route instead of using the stock 911 fuel level/oil level gauge because this is way cooler!!!
http://s1293.photobucket.com/user/dfelz914/media/Mobile%20Uploads/photo1_zpseaecaf50.jpg.html
http://s1293.photobucket.com/user/dfelz914/media/Mobile%20Uploads/photo3_zpsbbfbb722.jpg.html
http://s1293.photobucket.com/user/dfelz914/media/Mobile%20Uploads/photo2_zpsc6b3c1c1.jpg.html
Posted by: dfelz Apr 14 2014, 01:27 AM
Finally went back for the weekend to my old house where the teener still resides and was able to punch in a few measly hours. Welded in a the mounting brackets and then sprayed primer over the area to prevent rust, then attempted the bar install with new bushings. I got the bar all the way in, just need to center it more, one side has more of the bar protruding from the bushing bracket, need more hammer power
Going off to the Caribbean this tuesday for a scuba diving trip, so i wont be working on the car until the beginning May at the earliest. I really feel bad for her, she wants more road time!!!
http://s1293.photobucket.com/user/dfelz914/media/Mobile%20Uploads/photo1_zps37a9ff40.jpg.html
http://s1293.photobucket.com/user/dfelz914/media/Mobile%20Uploads/photo2_zps0a209d73.jpg.html
http://s1293.photobucket.com/user/dfelz914/media/Mobile%20Uploads/photo4_zpsdcb2f1a7.jpg.html
http://s1293.photobucket.com/user/dfelz914/media/Mobile%20Uploads/photo5_zps94b1292f.jpg.html
See ya'll in a month!
Posted by: sean_v8_914 Apr 26 2014, 05:19 PM
i have an SUV with a tow bar if any one wants me to drag anything back to san diego. I can even bring my 914 flat tow rig
Posted by: euro911 Dec 20 2018, 05:37 PM
Well ... anything new to report, young man?
Posted by: dfelz Dec 23 2018, 01:47 PM
Well ... anything new to report, young man?
I wish! I have been organizing my garage and sorting through all my 914 parts though...labeling boxes and such haha. Hopefully will have something to report in the next few months though, we’ll see. Thanks for the motivation though!
Posted by: Mendivil26 Aug 12 2019, 01:01 PM
Ok so I have my thru body sway bar modeled up in Solidworks (So wish I had ProE, my last job used it and it was sooooo nice, too bad its a 10K license and my student edition of SW is free.99) I am also going to model the control arms so that i can do a motion simulation and geometry analysis at the different linkage holes. If this was next quarter i could also do a full fledge FEA analysis in Nastran, but since i am not taking finite element analysis until next quarter, the basic knowledge i have of solidworks FEA simulation should give me a good idea of week points in the components and where all the stress concentrations will be.
My design concept was to take the OEM arm, make it adjustable, add the 930 style 90 degree through brackets for more stiffness in part and less chance of rounding the square design, and use spherical bearings on the drop link (top spherical bearing will be right hand thread, bottom will be left hand thread, this will make adjustment super easy by just having to loosen the jam nuts on both sides and then just spinning the drop link tube to adjust the tension/compression.) The clamping method is the same style the stock one uses, i like it more than other methods i have seen on aftermarket ones that have just one bolt on the end. Two bolts with the bar in between distributes the clamping force to ensure all four flats on the bar receive equal forces. I also designed a new bushing bracket so that i could use a a custom oil-impregnated brass bushing. its a simple flange style bushing but it will be pressed in from the wheel side. I will also have some kind of rubber washers in between the back of the bushing bracket and the frame sheet metal. Since the car this will be going on without a stock thru body bar i will be making a backing plate for the gas tank side with the nuts welded on for capture of the 3 M8 bolts.
The backing plate, bushing bracket and link arm will all be laser cut 1/8" 1018 cold rolled steel (with the link arm obviously being bent into formation and then tig welded together. Will hopefully have them normalize since all the components will see some welding time, and will then be plated.
Please keep in mind this is my first run at this system and would love everyones input and considerations that i may have overlooked. Just for reference, there are 5 holes for adjustment, the middle one is the exact distance the single stock one is at. I worked in the medical device industry for 6 months full time for an internship and i was doing hardware and tooling design (designing components for the manufacturing line and testing systems for pacemakers and implantable defibrillators) so i have some experience doing design work, am also on the SAE electric team. But like i said, i really want your input, so feel free to ask any questions you like and give any commentary.
I can get more snap shots too!
Sorry about reviving an old thread, but by searching the keyword "Solidworks" rendered this result and I noticed you said you were modeling control arms.
Did you ever get to model any other parts of the suspension besides the sway bar? I'm building an off road Baja 914 and would like to design some longer travel control arms, and it would save me a lot of time if someone has the model already.
Posted by: euro911 Aug 12 2019, 01:46 PM
I think David (@http://www.914world.com/bbs2/index.php?showuser=14538 ) finished his engineering courses at Cal Poly, so I'm not sure if he still has access to the cool machines and tools they have there
That reminds me though ... I have a pair of the arms and drop links that he made. I blasted the arms last year, but I still need to have them painted, plated or powder-coated
Posted by: dfelz Aug 13 2019, 01:12 AM
Hi ( @http://www.914world.com/bbs2/index.php?showuser=22344 ), sorry I don’t have the control arms modeled up unfortunately, and Mark is also correct in the fact I no longer have all the great tools and CAD software that was available when I was at CalPoly. I sure miss that.
Mark I also never got around to installing my sway bar and mounts but soon I hope
Posted by: barefoot Aug 13 2019, 05:30 AM
[I also picked up this sexy exhaust this morning. 2.0L straight pipe headers to a 911 muffler. The muffler had its original single side outlet cutoff and welded shut, then a dual tip center outlet weld on. I cant WAIT to mount this puppy!
http://s1293.photobucket.com/user/dfelz914/media/photo_zps278fb538.jpg.html
Sorry for the long post, hope you enjoyed!
Thanks for all the help and support everyone!
[/quote]
I think your un-equal length straight headers are going to crack because the different lengths will expand differently creating a fatigue crack cyclic stress condition. With both ends fixed the longer tube wants to expand more than the shorter one will let it.
A typical fatigue machine.
Posted by: dfelz Nov 15 2020, 06:18 PM
Well Hello 914 Community!! It has been quite sometime now, and I have felt the need to get my 914 back up and running. As an update, I had an engine issue about 5 years back now, and it has been sitting since then... other things in life got in the way, but id really like to get it back up and running again, then finish the job and get bodywork, paint and interior done as well once she is running again.
After taking the valve cover off on the driver side, it was very apparent what when wrong years back, had a valve spring failure, on cylinder #2 exhaust valve. This was probably a major oversite on my part when building the engine up, but I didn't replace the valve springs, and looking back now at some old pictures from the rebuild I can see that there is visible rust on the springs, probably from sitting in the engine for years unused before I bought and rebuilt it. So a $100 worth of new parts likely could have saved me form this mess... not sure why I didn't replace them... Lesson learned!
So here we are now. My plan is to drop the engine, take the heads off and inspect everything. Feeling the valve as it sits now, the valve guide still feels nice n snug on the valve stem, certainly no wobble or looseness. Hoping (praying) that there isn't bad damage to the piston head. This incident happened while tuning the engine in the garage, so we cut the engine as soon as we heard the large bang sound, but will find out soon what domino affect it had on surrounding parts. Don't see any damage to the rocker arms and that assembly, and all pushrods look to be in great shape, along with pushrod tubes.
Problem is that I cant find all the parts of the broken spring and one half of the valve retainer. Looked in the pushrod tubes and noting in there. My gut says that I need to fully crack the case open and clean out the inside to make sure there isn't any remaining pieces of the spring floating in the engine case, does that sound like the smart thing to do to everyone else as well?
From the visible damage we can see now, which doesn't look drastic, on the spring seat surrounding the valve guide, does that look like it needs to be machined or repaired, or can that be used as is?? Obviously replacing all the valve springs, retainers, and valve hats. Should I replace all the exhaust valves themselves as well while I'm in there?? I have been reading they have a shorter life anyway?
Any and all comments / suggestions welcome.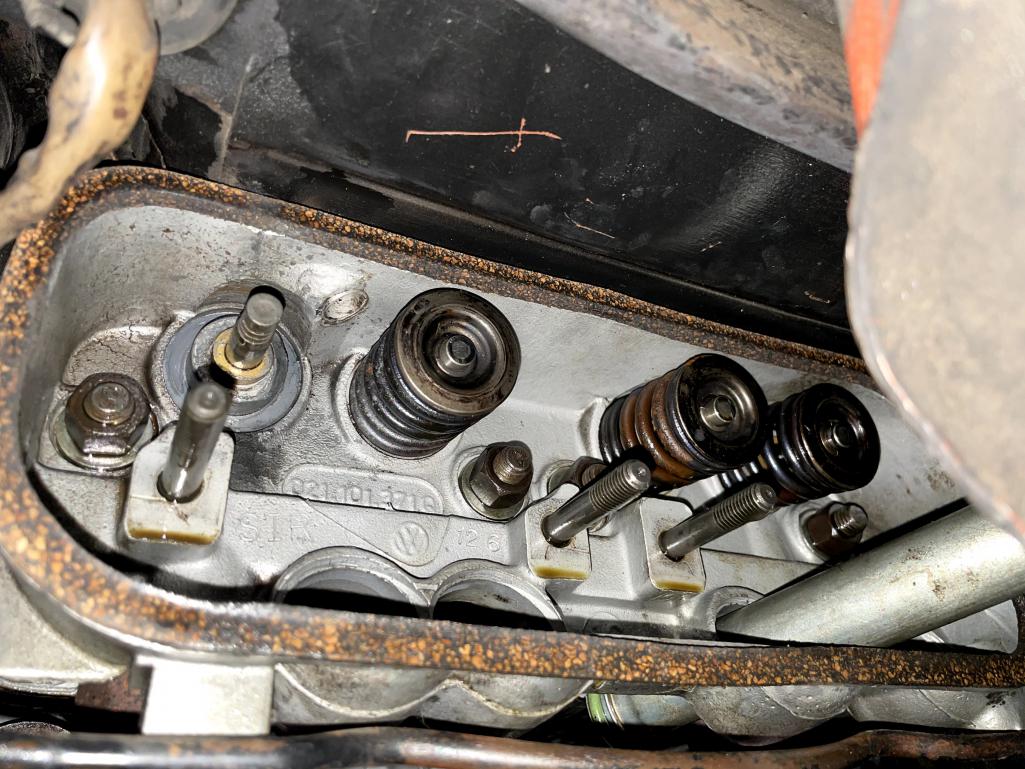
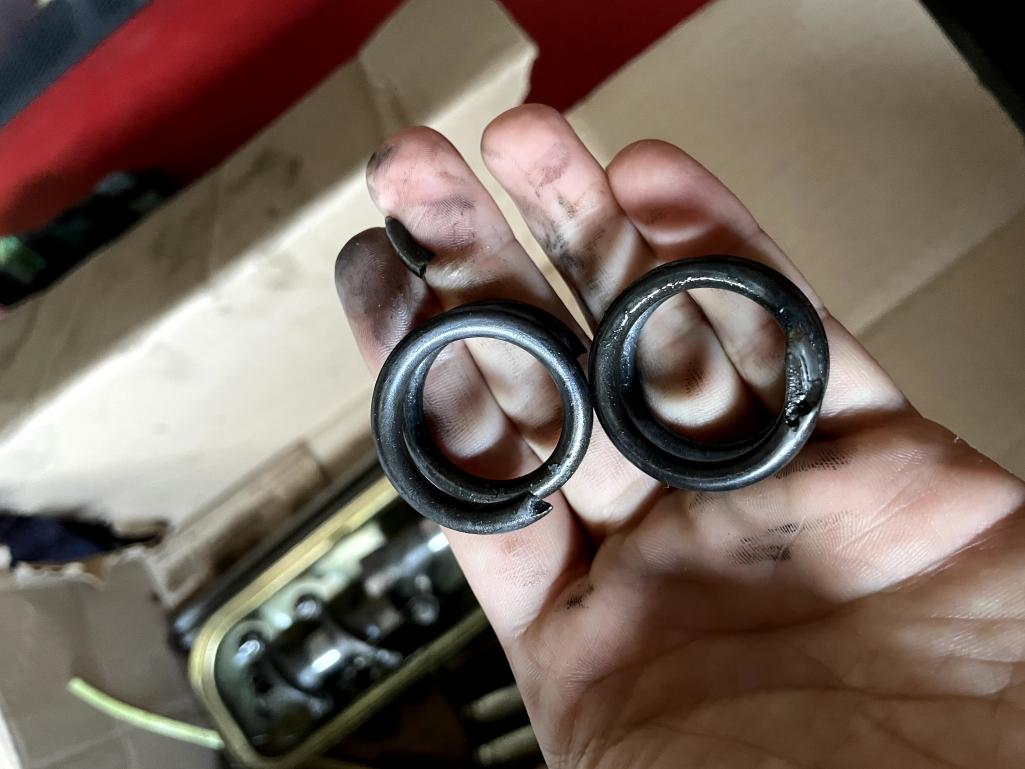
Powered by Invision Power Board (http://www.invisionboard.com)
© Invision Power Services (http://www.invisionpower.com)