Printable Version of Topic
Click here to view this topic in its original format
914World.com _ 914World Garage _ Porsche 914 - 8 GTT
Posted by: MATTYLITE Mar 14 2013, 12:17 AM
Hello 914 community,
Just wanted to let you all in on a 914 build to remember. This car was initially thought out on a napkin sketch, and has slowly been coming to life. The idea behind this project is simple, how would Porsche go about creating a 914 cup car today? Well, hopefully when the build is done, it'll meet our racing derived expectations that only a manufacturer like Porsche could (re) produce.
Brief Technical Specs (will list more as the build progresses):
-1974 Porsche 914 fully assembled by MSDSinc.
-Cayenne V8 TT 5.0 litre, derived from 2010 Daytona Prototype engineering, built by Lozano Brothers Porting (1000 / 1100 whp)
-Porsche 996 GT2 Transmission, built by California Motorsports
Some of you may ask why, we asked why not?
Enjoy,
Matthew Schneider
www.msdsinc.com
This is the condition that we bought her in,
http://imageshack.us/photo/my-images/42/9141t.jpg/
http://imageshack.us/photo/my-images/248/9142.jpg/
http://imageshack.us/photo/my-images/692/9143.jpg/
http://imageshack.us/photo/my-images/546/9147.jpg/
http://imageshack.us/photo/my-images/854/9148.jpg/
Don't know why I started cleaning this, it'll be replaced with new sheet metal fit for the Cayenne TT engine
http://imageshack.us/photo/my-images/543/914interior1.jpg/
http://imageshack.us/photo/my-images/805/914interior2.jpg/
Custom racing seat!
http://imageshack.us/photo/my-images/705/914interior3.jpg/
http://imageshack.us/photo/my-images/812/914interior4.jpg/
http://imageshack.us/photo/my-images/46/914interior5.jpg/
http://imageshack.us/photo/my-images/221/914interior6.jpg/
The 996 GT2 Transmission fully built by California Motorsport (CMS) for our 1000/1100 whp needs.
http://imageshack.us/photo/my-images/825/996gt2transmission1.jpg/
All about the details!
http://imageshack.us/photo/my-images/202/996gt2transmission2.jpg/
Sheridan wide body kit
http://imageshack.us/photo/my-images/832/bodykit6.jpg/
Carrera GT Exhaust Tips!!!
http://imageshack.us/photo/my-images/11/carreragteshausttips.jpg/
The heart of the beast when it was first received
http://imageshack.us/photo/my-images/28/cayennettmotor1.jpg/
What the engine will 99.9% look like when finished, and yes this is the 2010 Daytona Prototype (and Cayenne V8 all motor) winning car that you were just trying to remember.
http://imageshack.us/photo/my-images/10/daytona201020v20036.jpg/
Messing around with some ideas, just pretend you see a roof 
http://imageshack.us/photo/my-images/26/roofscoop.jpg/
lunch time at the shop
http://imageshack.us/photo/my-images/600/lunchbreakd.jpg/
Many more updates to follow, stay tuned!
Posted by: dfelz Mar 14 2013, 12:34 AM
Looking forward to watching his build come along, its going to be one SWEET ride when finished, and based on what i saw at the phoenix club the other weekend you guys wont disappoint us on this one!!! Keep the pics coming! 
Posted by: phillstek Mar 14 2013, 05:45 AM
![popcorn[1].gif](style_emoticons/default/popcorn[1].gif) Can't wait to see this
Can't wait to see this
Posted by: Cairo94507 Mar 14 2013, 06:33 AM
You have my attention.
Posted by: Woody Mar 14 2013, 06:38 AM
I think my balls just dropped a little further.
Posted by: mepstein Mar 14 2013, 07:05 AM
Awesome! - Looks like your going - all in.
Posted by: iamchappy Mar 14 2013, 08:22 AM
This will look nice next to Marty's flat fan turbo Monster.. You guys kill me...
Posted by: biosurfer1 Mar 14 2013, 08:27 AM
Nice... I take it that's the engine I checked out for you? Looks like it worked out ok...good luck with the build!
Posted by: 396 Mar 14 2013, 09:28 AM
Wow, looking forward to the build!
Posted by: Socalandy Mar 14 2013, 09:35 AM
this will be cool to watch
Posted by: JmuRiz Mar 14 2013, 09:46 AM
I agree, this is going to be so fun to watch!
Posted by: JRust Mar 14 2013, 09:57 AM
Subscribed for sure  . I'd like to add a big resounding HELL YEAH
Posted by: Maltese Falcon Mar 14 2013, 10:21 AM

Nice... I take it that's the engine I checked out for you? Looks like it worked out ok...good luck with the build!
Thanks once again Brett for checking out the mill for us.
Don't forget that you still have an Msds rewards card to cash in!
Marty
Posted by: RON S. Mar 14 2013, 04:21 PM
Sweet,
and by the way, MSDS makes great headers too....
Posted by: Andyrew Mar 14 2013, 05:38 PM
Umm... 1000whp/tq?
This is cool and all, but damn, thats a hell of a lot of money thrown in this car already... Im sure you have one hell of a connections list already to just get ahold of that engine/trani.. but Thats got to be at least 50k already spent on those two items and probably closer to 100k.....
Posted by: kid914 Mar 14 2013, 06:13 PM
A few months ago I was concidering this very same project. I had a lead on a cayenne v8 motor in my area..life prevented me from pulling the trigger and moving ahead with the idea.....! I went the 3.0l way. Maybe my next project 
Looking forward to learning from your experiences.....
Best Wishes. 
Posted by: kg6dxn Mar 14 2013, 06:19 PM
Subscribed!
Posted by: stateofidleness Mar 14 2013, 08:53 PM
how do you/did you remove the glue residue from where the backpad was in the engine compartment without removing the paint?
I'm in the same boat and I want to get rid of the residue left behind but I don't want to remove any of the paint if I don't have to.
<forgive me if that's a noob question>
Posted by: campbellcj Mar 14 2013, 10:00 PM
how do you/did you remove the glue residue from where the backpad was in the engine compartment without removing the paint?
I'm in the same boat and I want to get rid of the residue left behind but I don't want to remove any of the paint if I don't have to.
<forgive me if that's a noob question>
Brake cleaner works for this, or similar solvents. Wear a respirator, and test a small area first to make sure it doesn't hurt the paint.
Posted by: MATTYLITE Mar 14 2013, 10:29 PM
how do you/did you remove the glue residue from where the backpad was in the engine compartment without removing the paint?
I'm in the same boat and I want to get rid of the residue left behind but I don't want to remove any of the paint if I don't have to.
<forgive me if that's a noob question>
Brake cleaner works for this, or similar solvents. Wear a respirator, and test a small area first to make sure it doesn't hurt the paint.
I used carburetor cleaner and a wire brush, but don't think this will save your paint. No matter what kind of way you go about it, any abrasive measures will show in the paint, e.g. no smoothness..
Posted by: mrbubblehead Mar 14 2013, 11:32 PM
how do you/did you remove the glue residue from where the backpad was in the engine compartment without removing the paint?
I'm in the same boat and I want to get rid of the residue left behind but I don't want to remove any of the paint if I don't have to.
<forgive me if that's a noob question>
i used a gallon of goof off. its not so harsh on the paint underneath.
Posted by: jeeperjohn56 Mar 15 2013, 06:48 AM
Don't forget to make a youtube video when it's running.
Posted by: JmuRiz Mar 15 2013, 10:03 AM
how do you/did you remove the glue residue from where the backpad was in the engine compartment without removing the paint?
I'm in the same boat and I want to get rid of the residue left behind but I don't want to remove any of the paint if I don't have to.
<forgive me if that's a noob question>
i used a gallon of goof off. its not so harsh on the paint underneath.
That's great information to know...wonder if ScottyB knows about this trick...
Do you use a sponge/towel/scotchbrite pad?
Posted by: ruby914 Mar 15 2013, 10:12 AM
This build is truly inspirational. Somehow the best ideas always come from a napkin sketch. At what point do you cross the line into building a "supercar" , this may be it.
Subscribed.
Time to clean the shop and go on a supply run...
Posted by: URY914 Mar 15 2013, 10:37 AM
Good luck. You'll need it.
You might as well build a tube frame and hang that body on it.
Posted by: MATTYLITE Mar 15 2013, 03:07 PM
Don't forget to make a youtube video when it's running.
There will be many to come!
This build is truly inspirational. Somehow the best ideas always come from a napkin sketch. At what point do you cross the line into building a "supercar" , this may be it.
Subscribed.
Time to clean the shop and go on a supply run...
Thank you! and keep me posted on the progress
Good luck. You'll need it.
You might as well build a tube frame and hang that body on it.
By the time it's finished there will definitely be a mosaic (for lack of a better term) of tubes in conjunction with the original body. Our goal is to keep the OE platform as much as possible, to keep this project as much of a 914 when it's all said and done.
Best,
Matthew Schneider
www.msdsinc.com
Posted by: Maltese Falcon Mar 15 2013, 06:27 PM
An LBP 5.0 cayenne v8 n/a built to Daytona Prototype spec.
Circa 2010.
Marty[attachmentid=374811] [attachmentid=374812] 
Posted by: TomR Mar 16 2013, 08:12 PM
An LBP 5.0 cayenne v8 n/a built to Daytona Prototype spec.
Circa 2010.
Marty[attachmentid=374811] [attachmentid=374812]
Cool build! Are you going to stiffen stock chassis or build a tube chassis? What about weight distribution as well? That engine & tranny look heavy. Can't wait to see it come together! Good luck!
Tom
Posted by: MATTYLITE Mar 17 2013, 03:10 AM
Cool build! Are you going to stiffen stock chassis or build a tube chassis? What about weight distribution as well? That engine & tranny look heavy. Can't wait to see it come together! Good luck!
Tom
Since we're keeping the 914 chassis, we will be implementing a complete front to back stiffening program for the car. Weight distribution will be dealt with when the car is in the assembly stage, where in which we'll have the car weighed and balanced to meet our racing program's requirements, while also maintaining an ideal balance.
Matthew Schneider
www.msdsinc.com
Posted by: Maltese Falcon Mar 17 2013, 02:12 PM
This is the Loss of trunk space when using an inverted 996gt2
Transaxle. Our build will eliminate most of the trunk floor.
Photo courtesy CMS.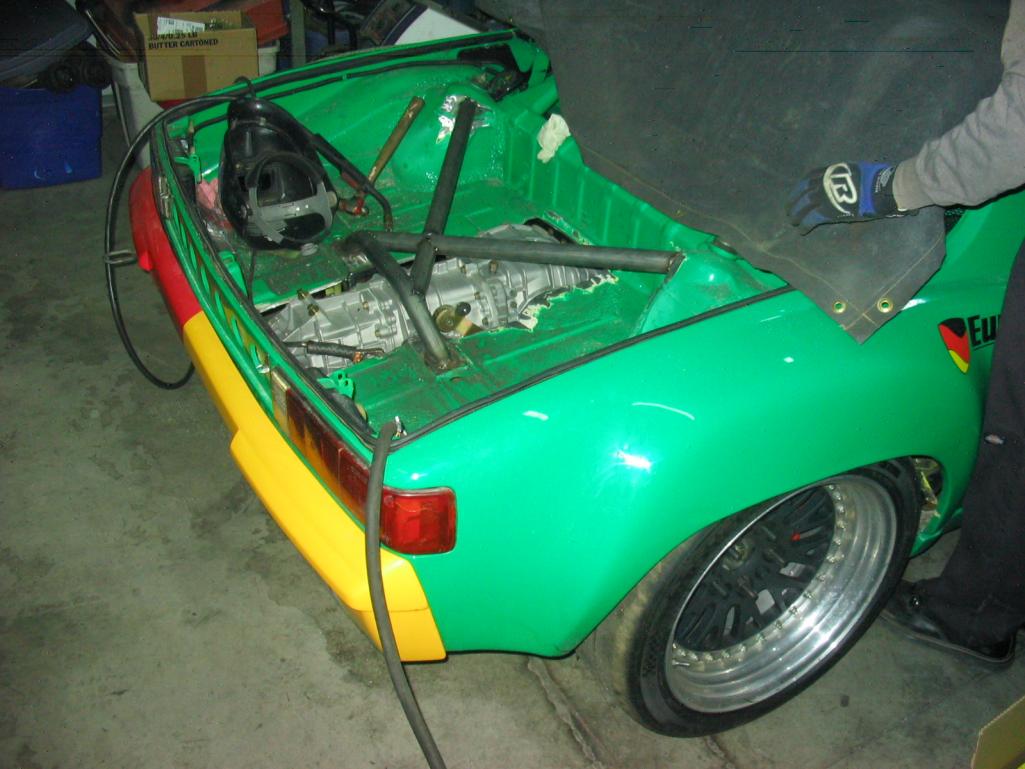
Posted by: John Jentz Mar 17 2013, 03:08 PM
how do you/did you remove the glue residue from where the backpad was in the engine compartment without removing the paint?
I'm in the same boat and I want to get rid of the residue left behind but I don't want to remove any of the paint if I don't have to.
<forgive me if that's a noob question>
I used Purple Stuff, worked fine.
Posted by: Maltese Falcon Mar 22 2013, 07:04 PM
One of the oe turbo exhaust manifolds.
You can just about pass a silver dollar through the discharge.
Too small for our turbonetics gtk.
Not even tubing, just 2 low grade stainless steel clam shells welded together.
We are designing some tubular Shorty turbo headers for decent spooling.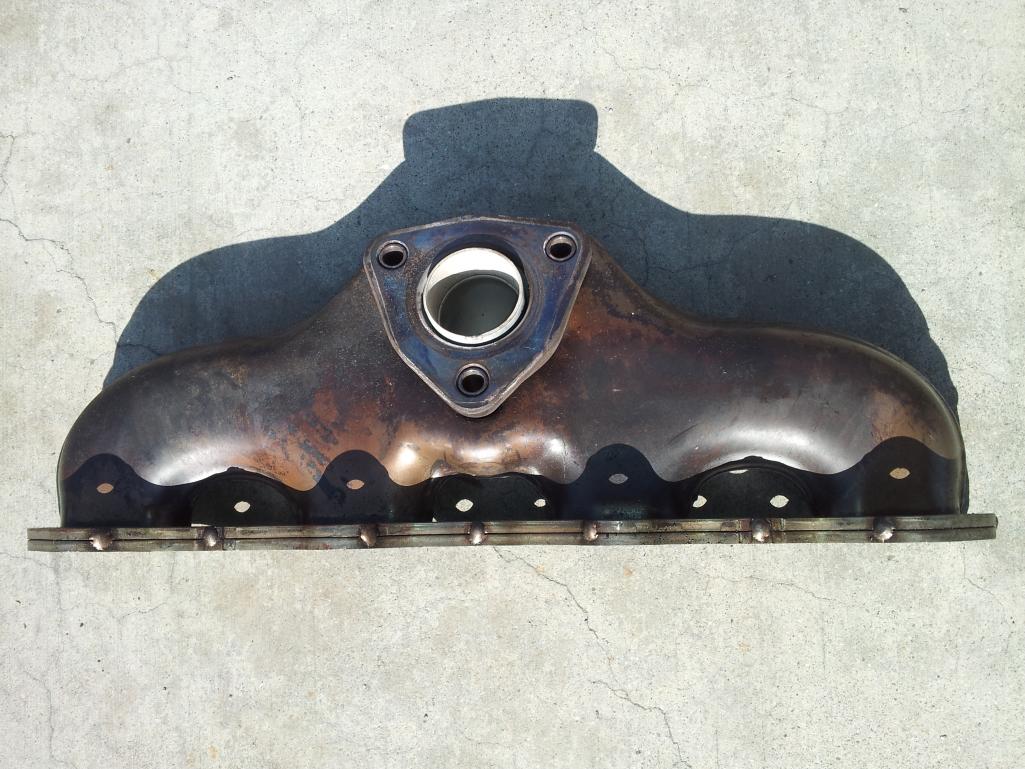
Posted by: Maltese Falcon Mar 22 2013, 08:38 PM
The "Flying mailbox" intake plenum.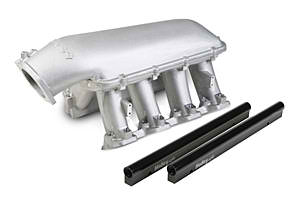
Posted by: speed metal army Mar 22 2013, 09:51 PM
Ambitious and super cool.
I cant wait to see video of it driving/burning the tires off! 
Posted by: BMiller Mar 22 2013, 10:21 PM
That's pretty crazy HP #'s for the little guy......I'll be watching this.
Posted by: Jake Raby Mar 24 2013, 08:10 PM
Awesome build!
Here is my 5.3 liter engine based from the 4.5 Cayenne. This is the normally aspirated configuration going into the LN Engineering Cayenne S. Next comes the 5.5 TT version for Beth's beast.
Genuine LN Nickies, our own billet rods, true 4 valve piston design from JE and all the other goodies. Having fun developing these components, engine designs and assembly procedures.
Nothing like doing it all from scratch... This is a 13:1 daily driver. The 6 liter stroker version is going to be a lot of fun to complete, for sure.

Posted by: sixnotfour Mar 24 2013, 08:14 PM
And what does this has to do with ????
Posted by: Jake Raby Mar 24 2013, 08:46 PM
And what does this has to do with ????
These are Cayenne engine internals..
Posted by: Maltese Falcon Mar 29 2013, 11:30 PM
Deep breathing for the new gtk's . Mandrel formed, Laser cut flanges ,
better spool up time. 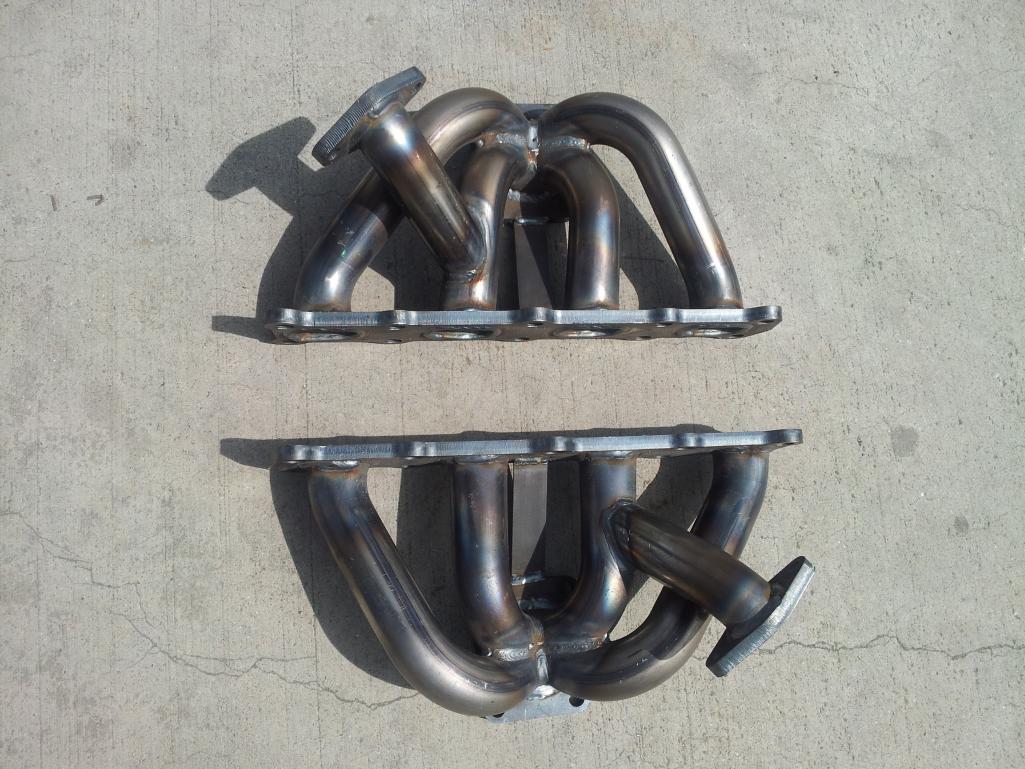
Posted by: MATTYLITE May 15 2013, 01:05 PM
Hello 914 community,
Here's the projects latest update. Please, excuse the picture sizes as some were taken on my phone and others on a point & shoot camera.
Here you can see the 35+ years of Germany's finest glue coming off the aluminum trim from the A pillar. Also, if anyone is looking for near perfect 914 aluminum trim pieces PM me.
http://imageshack.us/photo/my-images/10/aluminumtrimremoval.jpg/
These are the clear tail lights that came in from Auto Atlanta. They'll fit right in for that modern look we're going for.
http://imageshack.us/photo/my-images/16/cleartaillights.jpg/
Cutting out the trunk floor pans
http://imageshack.us/photo/my-images/442/removingthetrunkfloorpa.jpg/
Removing the rear view mirror from the windshield, boy was that fun....NOT!
http://imageshack.us/photo/my-images/703/windshieldremoval.jpg/
Removing the wire harness
http://imageshack.us/photo/my-images/138/wireremoval1.jpg/
And completely out! Pictures don't show the work it took to get this all out in one piece justice. PM me if you're interested in this.
http://imageshack.us/photo/my-images/10/wireremoval2.jpg/
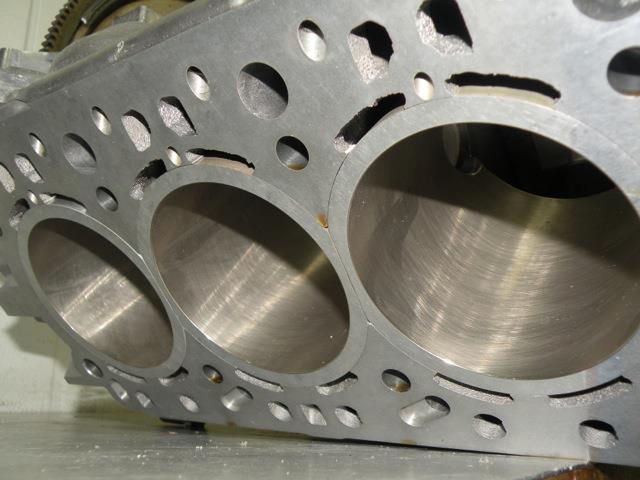
Several engine pics just in from Lozano Brothers Porting. Here you can see the cylinder head porting they have done.
http://imageshack.us/photo/my-images/6/cylinderheads.jpg/
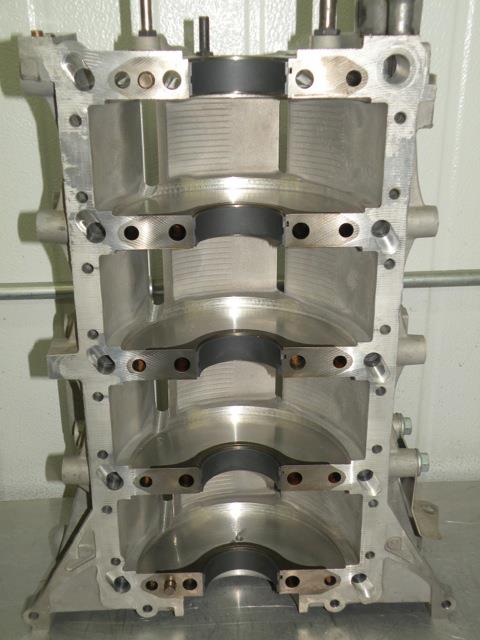
Here is the oil pump being fit, notice no oil pan as it is currently being CNC'd for bottom clearance.
http://imageshack.us/photo/my-images/6/oilpumpfrontview.jpg/
Oil Pump side view, and no you're not trippin' out, the picture is upside down to show the engine right side up.
http://imageshack.us/photo/my-images/607/ironsleeves1.jpg/
http://imageshack.us/photo/my-images/826/ironsleeves2.jpg/
Here is the block with the iron sleeves fitted
http://imageshack.us/photo/my-images/24/blockwithliners.jpg/
This is the carbon fiber dash that will bring that race car elegance to our project, can't wait till it's finished!
http://imageshack.us/photo/my-images/89/carbonfiberdash.jpg/
What the dash will primarily look like. (Picture taken from another forum member's car).
http://imageshack.us/photo/my-images/809/914dashdisplay.jpg/
Here is a pic from Neo914's car. This is what we need for our new headlights, if anyone knows anyone who has / makes or is willing to produce a pair please PM me.
http://imageshack.us/photo/my-images/593/clearturnsignal.jpg/
Air intake box idea from BBI's fabricator, "The_Fabricator" of Instagram, we'll be utilizing two of these for the twin turbo set up
http://imageshack.us/photo/my-images/153/airintakeidea1.jpg/
Throwing around some ideas for the turbos, how cool would this be!?
Photo courtesy of EuroTuner
http://imageshack.us/photo/my-images/12/turboidea1.png/
One thing is for sure though, our welds and pipe bends wont look like this!
http://imageshack.us/photo/my-images/802/turboweldfail.png/
And how could I leave you without your daily afternoon dose of eye candy. This pic should really be rated NSFW, but her top is still on so I guess it's okay?
http://imageshack.us/photo/my-images/542/9972turbos918edition.jpg/
Posted by: r_towle May 15 2013, 08:19 PM
So glad to see someone doing this.
Marty, you are the right guy for this project.
It's something we talked about as soon as that motor arrived, but we all needed to wait till a few of them ended up in the junk yards...
I look forward to this car getting done
Posted by: Maltese Falcon May 27 2013, 09:41 PM
So glad to see someone doing this.
Marty, you are the right guy for this project.
It's something we talked about as soon as that motor arrived, but we all needed to wait till a few of them ended up in the junk yards...
I look forward to this car getting done
Yes it's coming along...wish I had more hobby time though. Thank you for the PUSH, I'll dive right back in there on Tuesday !
Marty
Posted by: MATTYLITE Jun 9 2013, 02:29 AM
Hello community! Here is a small update, but too cool not to post!
I've been in communications over the last several months with a forum member on here, and created this beautiful masterpiece you see below. Let me just say, it was worth every penny. The quality and craftsmanship that went into this Carbon Fiber dash piece is bar none the best.
I think it'll look great with the black "texuede sp" I got to cover the dash with for that exotic race feel.
pretty much summed up my facial expression at first sight.. 
http://imageshack.us/photo/my-images/10/carbonfiberdash5.jpg/
http://imageshack.us/photo/my-images/542/carbonfiberdash1.jpg/
http://imageshack.us/photo/my-images/59/carbonfiberdash3.jpg/
http://imageshack.us/photo/my-images/706/carbonfiberdash4.jpg/
http://imageshack.us/photo/my-images/835/carbonfiberdash6.jpg/
http://imageshack.us/photo/my-images/59/carbonfiberdash8.jpg/
http://imageshack.us/photo/my-images/841/carbonfiberdash9.jpg/
Well that's it for the carbon fiber dash for now, but I'll be sure to post more dash pics once the texuede sp arrives.
Not to leave you so soon, here are some pics of the bulbs for the tail lights:
Over 120 LEDs per bulb! (excluding the smaller ones of course)
http://imageshack.us/photo/my-images/546/taillight1.jpg/
http://imageshack.us/photo/my-images/585/taillightbulb3.jpg/
http://imageshack.us/photo/my-images/208/taillightbulb1.jpg/
Posted by: r_towle Jun 9 2013, 06:49 AM
Love that dash....I wish they were in production, I would buy one.
Posted by: ruby914 Jun 9 2013, 09:46 AM
Matt,
Great dash porn, I took photos before sending it over but was never happy with the lighting.
So, what color will you paint the car?
R towle, producing as time permits, your in the queue, PM sent.
Posted by: MATTYLITE Jun 9 2013, 10:52 AM
It'll 'officially' be painted carrera white, but it'll be viynl wrapped (exterior only) in something crazy attention grabbing etc.
These were some of the ideas I was throwing around:
Gray Urban Camo,
http://imageshack.us/photo/my-images/94/grayurbancamo.jpg/
Orange Urban Camo,
http://imageshack.us/photo/my-images/818/orangeurbancamo.jpg/
Red Urban Camo,
http://imageshack.us/photo/my-images/600/redurbancamo.jpg/
Matt,
Great dash porn, I took photos before sending it over but was never happy with the lighting.
So, what color will you paint the car?
Posted by: Harpo Jun 9 2013, 06:29 PM
WOW that carbon fiber dash is sweet!
David
Posted by: gothspeed Jun 9 2013, 08:10 PM
Awesome dash  !!!
!!!
Where did you score those LED bulbs?
Posted by: MATTYLITE Jun 10 2013, 07:11 PM
Awesome dash
!!!Where did you score those LED bulbs?
I got some of the LEDs from here, you can get different LEDs that'll fit their respective sockets accordingly.
http://www.superbrightleds.com/cat/led-vehicle-replacement-bulbs/vehicle/1974-porsche-914--/49-209--/
Posted by: krazykonrad Jun 10 2013, 09:26 PM
Great project!!!
Are the outside dimensions (space it takes up) of your race engine the same as a stock Cayenne/Panamera engine?
What engine mounts/mounting system are you using to get it to bolt onto the 914 body?
Thanks,
Konrad
Posted by: Maltese Falcon Jun 10 2013, 10:55 PM
Great project!!!
Are the outside dimensions (space it takes up) of your race engine the same as a stock Cayenne/Panamera engine?
What engine mounts/mounting system are you using to get it to bolt onto the 914 body?
Thanks,
Konrad
The dimensions will be narrower in width as we are making
our own spec turbo exhaust , that will hug the block.
The lower portion of the engine will be approx 9" shorter than stock (for ground clearence ), by using
a spec cnc. billet oil pan. The oe Cayenne /panamera pan is way too low in stock form
to go into a 914. Final mounting will be our signature Msds motor mount, which can be made
available in our parts catalogue for additional conversions.
Marty
Posted by: Woody Jun 11 2013, 10:36 AM
Love the dash. Would love to buy one if they go into production.  How heavy is it compared to the OEM dash?
Posted by: MATTYLITE Jun 11 2013, 12:21 PM
The CF dash can be lifted with a pinky finger! The OEM one, not so much. I haven't had a change to weigh the dashes yet, but I'll comment back on that as soon as I can.
Thanks,
Love the dash. Would love to buy one if they go into production.
How heavy is it compared to the OEM dash?Posted by: kid914 Jun 11 2013, 04:11 PM
Wasn't someone on here looking to make a production run?
heard someone got a neighbourhood kid to help out????
maybe 2 months ago. haven't seen anything since then. 
Posted by: monkeyboy Jun 11 2013, 05:24 PM
That was Ruby914. I'm not sure if it's gone anywhere since then.
Posted by: erwan914 Jun 12 2013, 07:49 AM
Sheridan wide body kit
http://imageshack.us/photo/my-images/832/bodykit6.jpg/
hello
how much did you pay sheridan kit ?
thanks erwan
Posted by: Maltese Falcon Jun 12 2013, 10:41 AM
Erwan,
I recall the price was just north of $3,000 for all of the parts in the picture.
You can check the products out at Sheridan914.
Roger is a go-to guy for our 914s !
Marty
Posted by: Maltese Falcon Jul 1 2013, 06:33 PM
The new cnc aluminum oil pan , now 100% dry sump and a boatload of ground clearance compared to the oe Cayenne pan.
I wonder of this is what Porsche calls their new 4.6 "Flatcrank" engine design in the upcoming 918?
Marty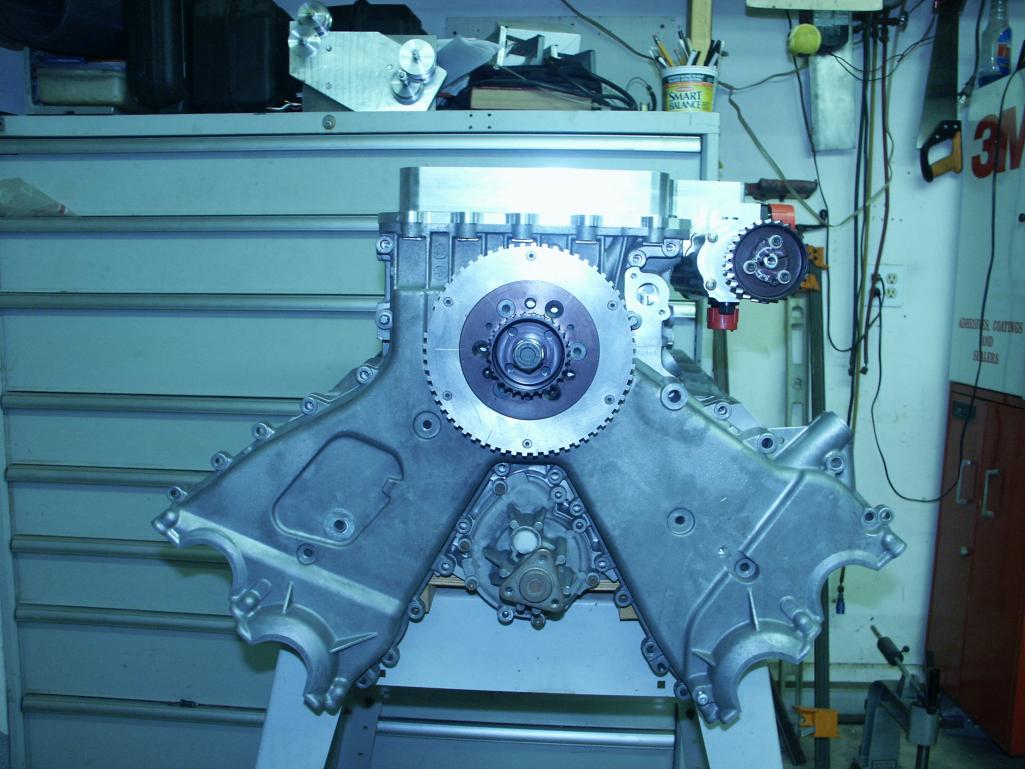
Posted by: Maltese Falcon Jul 1 2013, 06:48 PM
Another oil pan view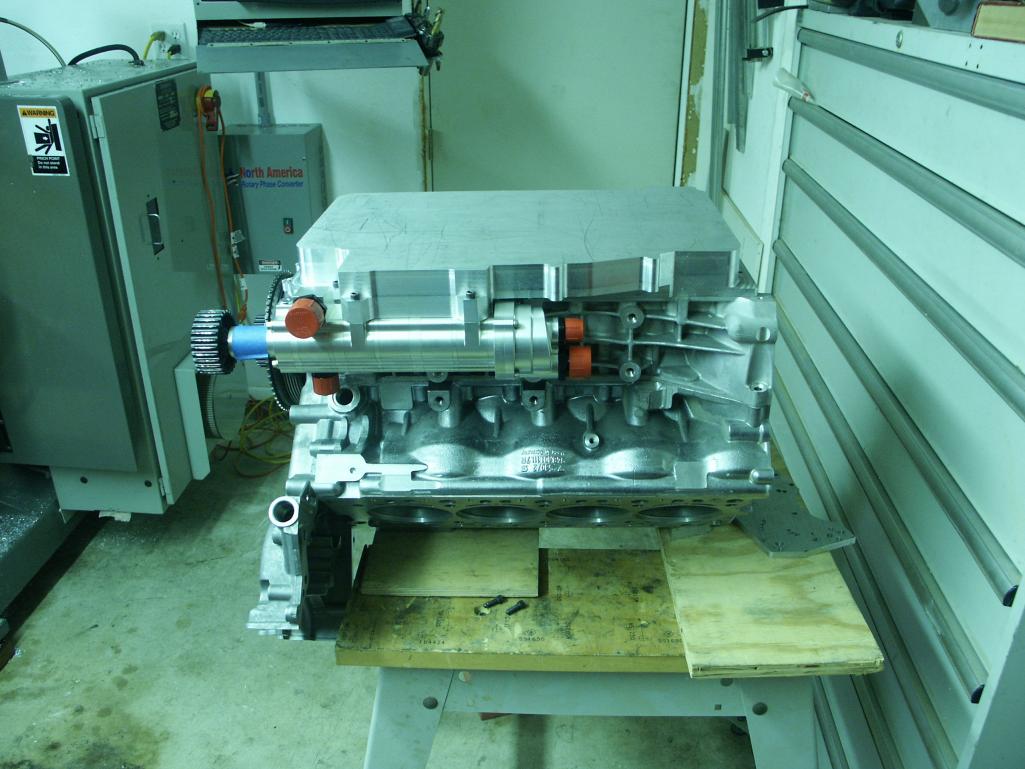
Posted by: Woody Jul 1 2013, 07:52 PM
Posted by: rick 918-S Jul 2 2013, 04:30 AM
Nice work on that pan.
Posted by: Maltese Falcon Jul 2 2013, 09:37 AM
Thank you Rick !
Posted by: Maltese Falcon Jul 3 2013, 12:32 AM
S'more machine work on the oil pan, dry sump chambers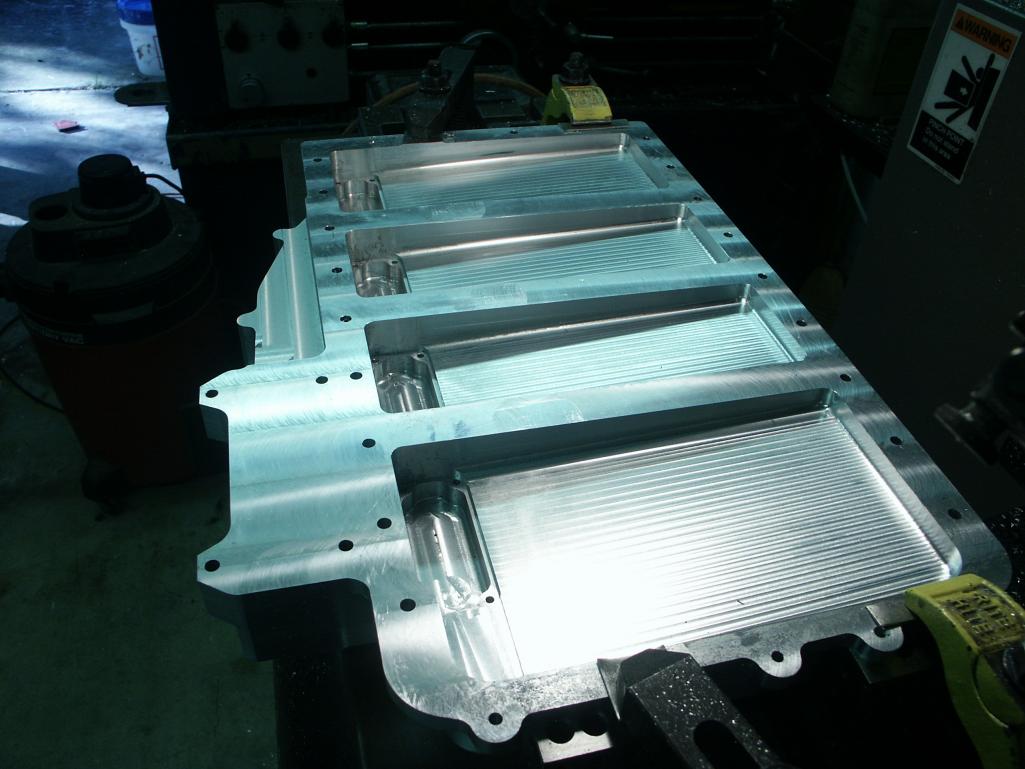
Posted by: Maltese Falcon Jul 13 2013, 12:57 AM
Just enough room in the edge (left +right )of the oil pan "Rail" for the #12 an turbo oil drains.
Posted by: R8CERX Jul 13 2013, 01:08 AM
.... I am totally at loss for words... this project is IMPRESSIVE!!
In my next life, I want to be a real builder... have no idea how many of you pull incredible stuff in this site!!
...not worthy!! 
I can barely get my inside light to work!!
Posted by: 396 Jul 13 2013, 09:21 AM
.... I am totally at loss for words... this project is IMPRESSIVE!!
In my next life, I want to be a real builder... have no idea how many of you pull incredible stuff in this site!!
...not worthy!!
I can barely get my inside light to work!!
Posted by: siverson Jul 15 2013, 11:44 PM
Awesome project!
> Porsche 996 GT2 Transmission
Do you have the basic dimensions of this transmission? Or anyone know where to find them?
- Overall length and width?
- Distance from bell housing to center of axle output flanges?
- Distance between output flanges?
Thanks - I have a new project I'm working on too...
-Steve
Posted by: Maltese Falcon Jul 15 2013, 11:59 PM
Awesome project!
> Porsche 996 GT2 Transmission
Do you have the basic dimensions of this transmission? Or anyone know where to find them?
- Overall length and width?
- Distance from bell housing to center of axle output flanges?
- Distance between output flanges?
Thanks - I have a new project I'm working on too...
-Steve
Next time I have the trans out in the work area, I will make some measurements and
post up !
Marty
Posted by: Maltese Falcon Jul 23 2013, 05:24 PM
Done, and # 12 a/n turbo oil drains in place.
Black fittings...other one on opposite side.
Pistons and rods coming in early August.
Marty
Posted by: MATTYLITE Oct 11 2013, 07:19 PM
Update:
The Haltech Platinum Series Sport 2000 came in today. This ECU is a complete a la carte set up.
http://imageshack.us/photo/my-images/834/5uqn.jpg/
Everything that came in was perfectly packaged.
http://imageshack.us/photo/my-images/707/k1pb.jpg/
Not to mention everything is already pre - labeled!
http://imageshack.us/photo/my-images/849/qi3l.jpg/
http://imageshack.us/photo/my-images/163/g90u.jpg/
GPS Certified MPH / KPH
http://imageshack.us/photo/my-images/22/v1mi.jpg/
The Haltech IQ3 Logging Dash w/ SD Card for saving everything.
http://imageshack.us/photo/my-images/11/h9z9.png/
Posted by: edwin Oct 11 2013, 08:45 PM
Pity there isn't a like button for that Haltech. They are a great system. I have two sprint ecu's and put a sport 1000 in a mates car
Shaping up to be a great build
Posted by: Dave_Darling Oct 11 2013, 10:16 PM
I love it--they even have wires to shock the Dreaded Previous Owner! (DPO wire.)
Not to mention everything is already pre - labeled!
http://imageshack.us/photo/my-images/849/qi3l.jpg/
Posted by: Maltese Falcon Oct 12 2013, 04:57 PM
Dave...DPO, that is so true
The previous owner of our project car had aftermarket Clifford alarm and DPD aircon wires running all through this chassis. We sent the entire harness to Jeff for his inventory. The Haltec harness gives us a good head start on wiring up the management system. I'm looking at a basic race car wiring set-up from Painless...do you have any experience with that Co. ?
Marty
Posted by: Dave_Darling Oct 12 2013, 08:34 PM
Not I, sorry. It would be interesting to see how their stuff meshes with the 914's systems layout, though.
--DD
Posted by: Joe Sharp Oct 13 2013, 10:39 PM
Marty: I did a Scout II with painless. Nothing is painless as it is still wireing a hole car, But thier system worked good and I never blew a fuse and every thing turned back on.
Posted by: Maltese Falcon Oct 14 2013, 10:45 PM
Marty: I did a Scout II with painless. Nothing is painless as it is still wireing a hole car, But thier system worked good and I never blew a fuse and every thing turned back on.
I hear you Joe, I'll buy the basic hot rod Painless kit. There are only about 10 functions that I need to power up, besides the basic ignition, B+, alternator and neg-.
No creature comforts . L+R turn signals will be a toggle switch Since this car will also be street registered , just to show up at an occasional cruise-in. I will be spending time with my Weller solder gun for sure !
Marty
Posted by: MATTYLITE Oct 24 2013, 11:50 PM
Hello World,
Here is a BIG update that we're very happy to share with you all. This has been several months in the works, and have finally arrived. Forgeline Motorsports set us up with a set of their GT Style Centerlock Long Nose adapters. They are Carrera GT inspired, red per the driver side, blue per the passenger side.
For your reference: (apologies for the grainy cell phone picks)
http://imageshack.us/photo/my-images/42/1wfw.png/
http://imageshack.us/photo/my-images/12/43vt.jpg/
http://imageshack.us/photo/my-images/19/enn9.jpg/
http://imageshack.us/photo/my-images/31/8muu.jpg/
http://imageshack.us/photo/my-images/692/gh7u.jpg/
http://imageshack.us/photo/my-images/707/s9t3.jpg/
http://imageshack.us/photo/my-images/833/7oa6.jpg/
Posted by: 396 Oct 25 2013, 01:37 AM
Pretty! How will this last in the real world?
Posted by: 914forme Oct 25 2013, 07:45 AM
Pretty! How will this last in the real world?
Just fine, These are some of the best built wheels know to man. The quality I am sure carries over these adapters.
Keep you the great work, subscribed.
Posted by: monkeyboy Oct 28 2013, 12:50 PM
Please tell me you will be running those brakes as well...
Those are beautiful.
Posted by: wndsrfr Oct 28 2013, 06:59 PM
Hello World,
Here is a BIG update that we're very happy to share with you all. This has been several months in the works, and have finally arrived. Forgeline Motorsports set us up with a set of their GT Style Centerlock Long Nose adapters. They are Carrera GT inspired, red per the driver side, blue per the passenger side.
MMMMMmmmmmmmmmm.......Pure Pornche!!
Posted by: MATTYLITE Oct 28 2013, 10:53 PM
Please tell me you will be running those brakes as well...
Those are beautiful.
Carbon Ceramic disk brakes aren't the go to race track abused rotors. Many gt3 / rs / cup guys swap out their carbon ceramic rotors for steelies, yet retain the oem Porsche (yellow) caliper. In any case, we're going with a steel based big brake kit set - up.
Posted by: Jeff Hail Oct 29 2013, 12:19 AM
Pretty! How will this last in the real world?
The Forgeline wheels and centerlocks should hold up fine long term. Its really just one BIG nut instead of five smaller ones.
Not much different than the factory setup except the Forgeline package is lighter than its German counterpart sans the titanium nut. Some extra parts I have laying around.
Starting the boy off right Marty! Nice project. See what Mulholland does to people?
Attached image(s)
Posted by: Maltese Falcon Nov 17 2013, 03:37 PM
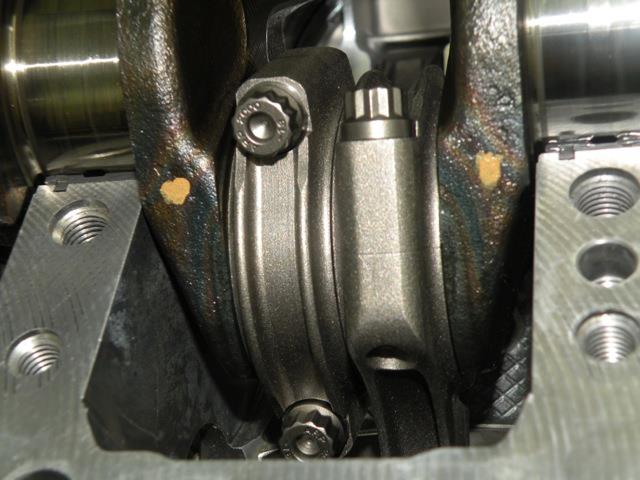
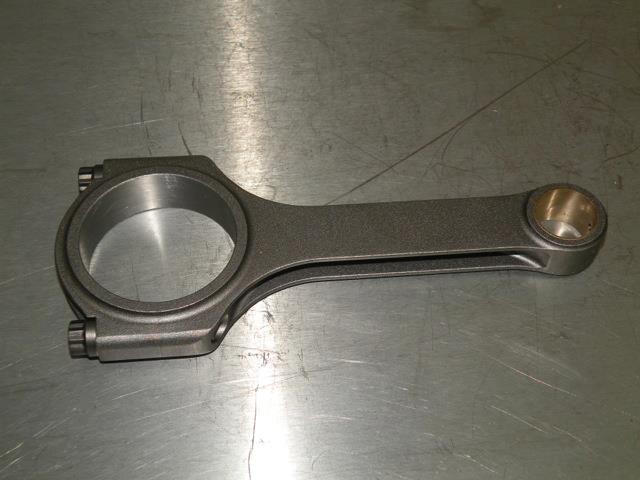
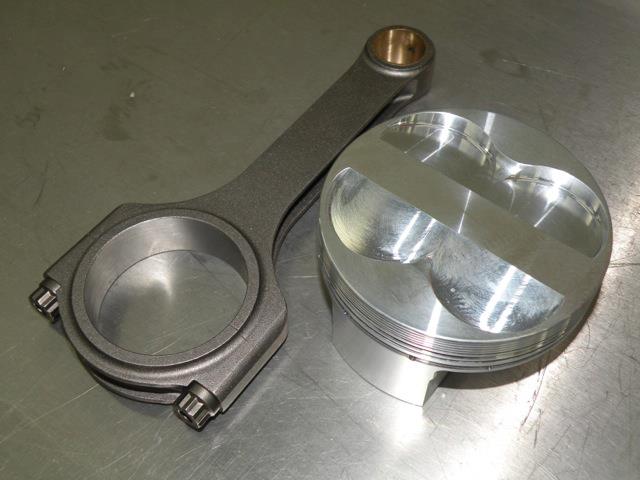
Pistons, rods + hardware arrived. 
Posted by: Maltese Falcon Nov 17 2013, 03:42 PM
8.5:1 cr, 5.0L displacement, Carrillo mfg.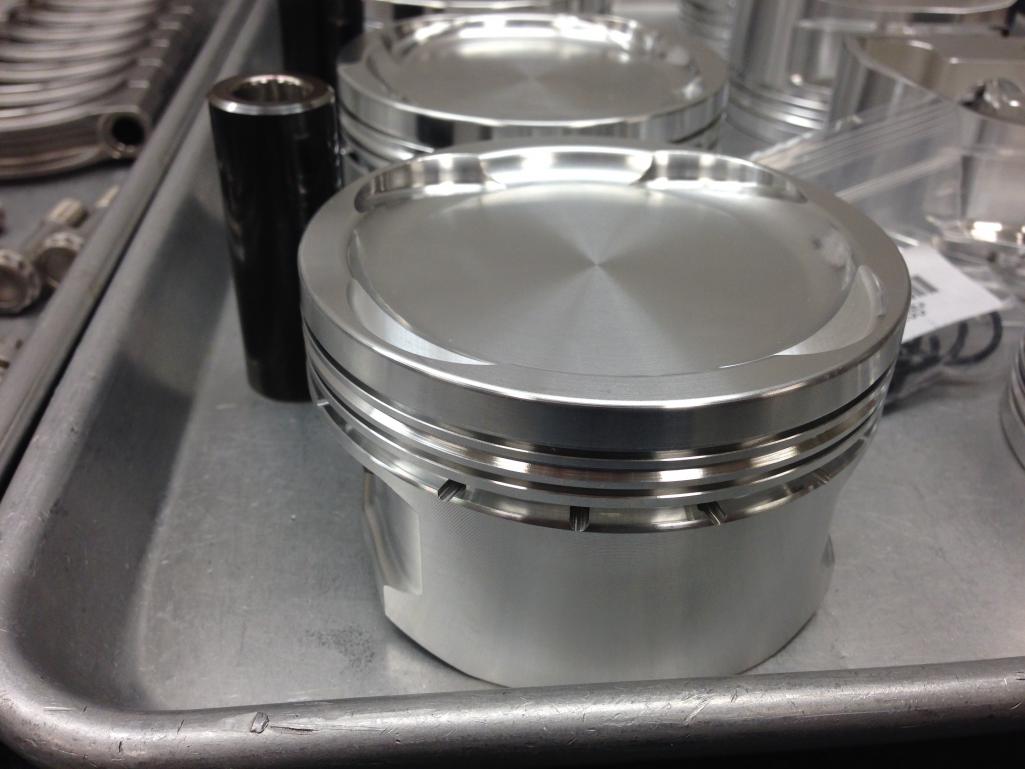
Posted by: Woody Nov 17 2013, 05:22 PM
Posted by: Mike Bellis Nov 17 2013, 05:32 PM
Marty,
Any special coating for the pistons?
Posted by: rick 918-S Nov 17 2013, 07:06 PM
Very nice!
Posted by: Maltese Falcon Nov 18 2013, 01:20 AM
Marty,
Any special coating for the pistons?
I'll be weighing in on this with the engine builder this week. We have several heat dissipating things going on in the engine; piston oil squirters , specific forced-induction forged pistons, and lots of external oil cooling.
I am a fan of ceramic coated piston tops + valve faces.
Posted by: Maltese Falcon Feb 15 2014, 03:29 PM
Two forklifts in unison placing the roller onto the dolly...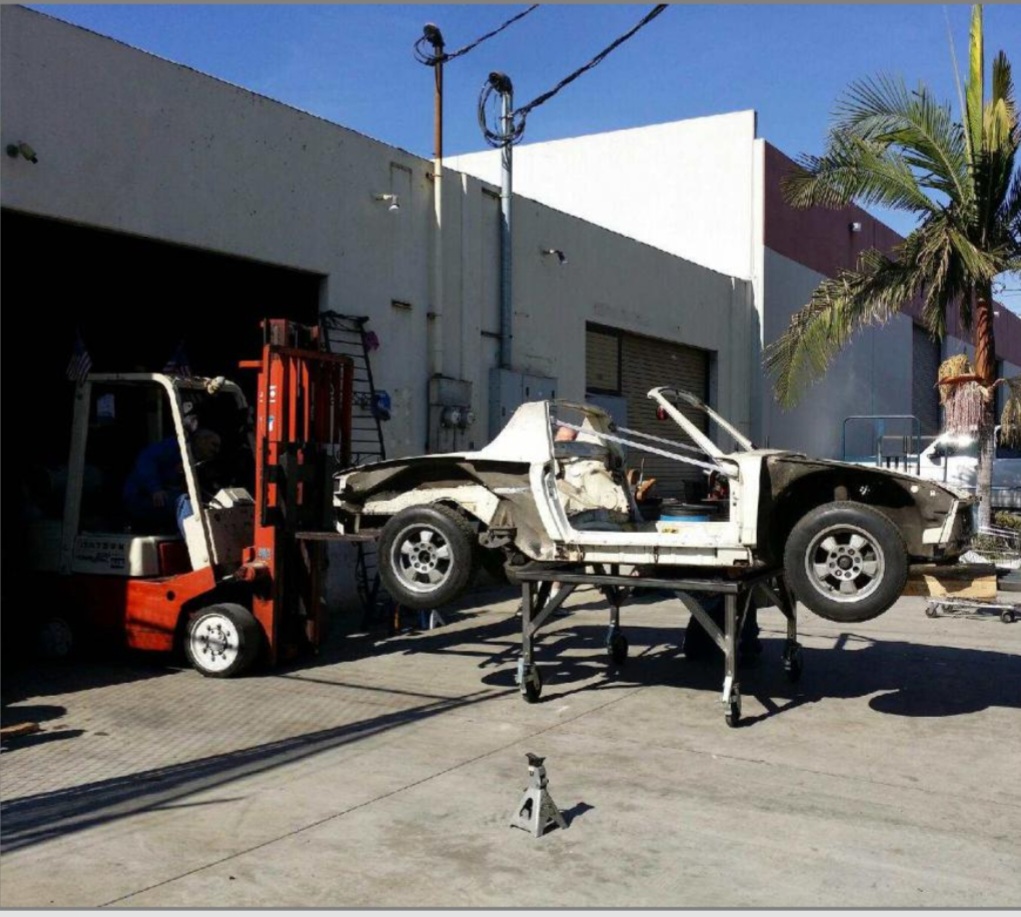
Posted by: Maltese Falcon Feb 15 2014, 03:35 PM
Removing the tar off the floorboards, heading out to the media blaster...then back to MSDS for more action.
Posted by: Dasnowman Feb 16 2014, 01:05 AM
^^ Ummmmmm isn't the heat bad? going to warp and distort the metal?
I used a multi tool with a scraper tip worker great before heading to media blasting.
Posted by: Maltese Falcon Feb 16 2014, 06:48 AM
Snowman, it is all in the " Time on target" and experienced torch skills. It works for us.
Marty
Posted by: MATTYLITE Mar 1 2014, 11:31 PM
Sorry these are all out of order, consider this a photo dump of the car's latest condition.
The car is back from the blaster, and will now be seam welded and the strengthening kit will be welded on as well leading to the roll cage.
https://imageshack.com/i/3ucptrj
https://imageshack.com/i/0vspwaj
https://imageshack.com/i/n17oi8j
https://imageshack.com/i/0i5g3qj
https://imageshack.com/i/jjsekxj
https://imageshack.com/i/fkcwkwj
https://imageshack.com/i/f2vzl2j
https://imageshack.com/i/ns3i0ej
https://imageshack.com/i/euujbuj
https://imageshack.com/i/0uf4tdj
https://imageshack.com/i/0wcbitj
https://imageshack.com/i/3olkduj
https://imageshack.com/i/5i6uvcj
https://imageshack.com/i/musy08j
https://imageshack.com/i/0nx70gj
https://imageshack.com/i/0si0l3j
https://imageshack.com/i/0oofzwj
https://imageshack.com/i/n70yd0j
https://imageshack.com/i/nspgv7j
https://imageshack.com/i/e9bdc2j
https://imageshack.com/i/n8h7ocj
https://imageshack.com/i/nltb6uj
https://imageshack.com/i/ng3mpbj
https://imageshack.com/i/e9tckkj
https://imageshack.com/i/gviekyj
https://imageshack.com/i/npxkjxj
https://imageshack.com/i/j7wsuij
https://imageshack.com/i/jwkyboj
https://imageshack.com/i/gixqj8j
https://imageshack.com/i/5s9p4gj
https://imageshack.com/i/5bivinj
https://imageshack.com/i/n1e5jgj
https://imageshack.com/i/0vcoo5j
https://imageshack.com/i/0l0k25j
https://imageshack.com/i/n7s7x9j
https://imageshack.com/i/mwpmeqj
https://imageshack.com/i/0v71v3j
https://imageshack.com/i/mazndqj
https://imageshack.com/i/0y892bj
https://imageshack.com/i/mkp3z4j
https://imageshack.com/i/nm33ujj
https://imageshack.com/i/0xji23j
https://imageshack.com/i/0kry0zj
https://imageshack.com/i/fk529wj
https://imageshack.com/i/0nhgcbj
https://imageshack.com/i/f6iarhj
https://imageshack.com/i/0oxfofj
Posted by: Maltese Falcon Mar 7 2014, 11:44 PM
SQS sequential shifter system for the 996gt2 transaxle.
We will need to have a longer cable made for mid engine application. 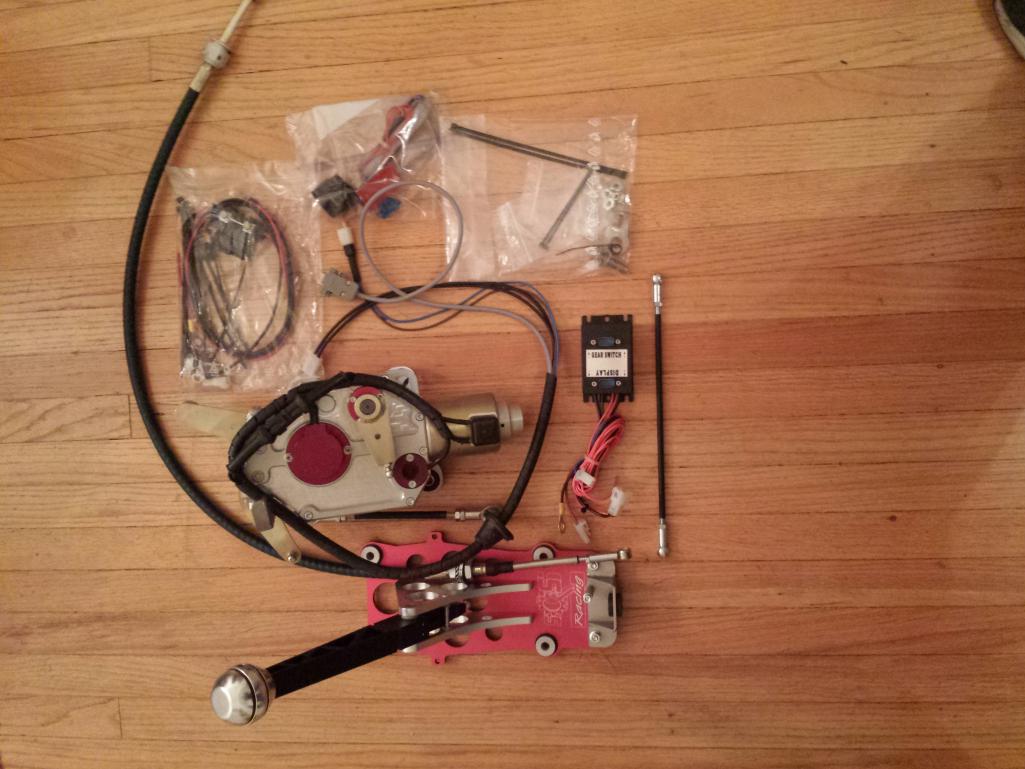
Posted by: Maltese Falcon Mar 7 2014, 11:55 PM
SQS, sequential 6 speed shifter mechanism.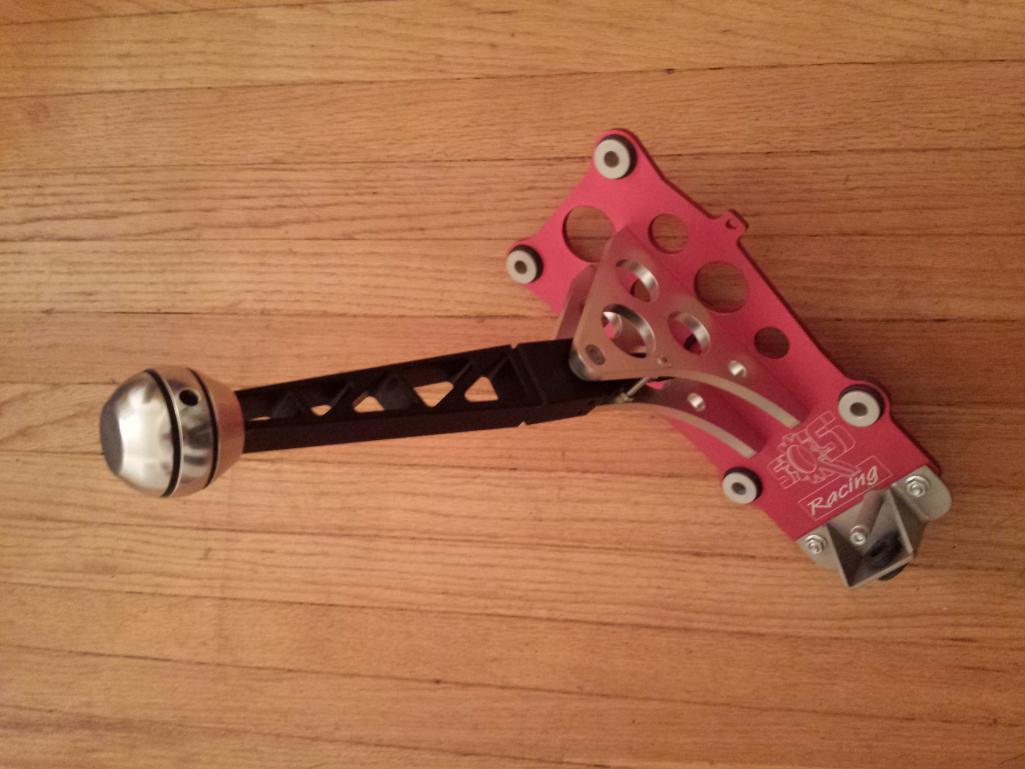
Posted by: mepstein Mar 8 2014, 12:10 AM
Budget build huh?
Posted by: Maltese Falcon Mar 8 2014, 08:56 AM
My philosophy is "Built not bought" so although some of these procured parts are pricey, I'm still ahead with my dollars by putting it all together. Anyone want to guesstimate what Ruf, Singer or Patrick would roll one of these out of their shops for ?!!
And then there is the fun factor of that first push on the start button + waking this monster up
Marty
Posted by: mepstein Mar 8 2014, 09:54 AM
My philosophy is "Built not bought" so although some of these procured parts are pricey, I'm still ahead with my dollars by putting it all together. Anyone want to guesstimate what Ruf, Singer or Patrick would roll one of these out of their shops for ?!!
And then there is the fun factor of that first push on the start button + waking this monster up
Marty
The people/companies you mention do nice work and I'm sure it would be multiples of what it's costing you. But none of those guys seem to really hang out in the 914 crowd so they typically don't have builds that interest me.
Posted by: sixnotfour Mar 8 2014, 04:02 PM
Flagship... 
Posted by: 396 Mar 9 2014, 10:24 AM
SQS sequential shifter system for the 996gt2 transaxle.
We will need to have a longer cable made for mid engine application.
Posted by: MATTYLITE Mar 9 2014, 11:01 AM
SQS sequential shifter system for the 996gt2 transaxle.
We will need to have a longer cable made for mid engine application.
This SQS Sequential Shifter is an adapter kit to the factory 996 GT2 Transmission, meaning it keeps the clutch in between shifting, but instead of throwing the gear lever in an H - pattern, you're shifting back and forth for secure shifting, every time.
More detailed info here:
http://www.sequentialshifters.com/
https://www.youtube.com/watch?v=M216DVI-TgU
https://www.youtube.com/watch?v=iHSkpKJ1nv0
Posted by: 396 Mar 9 2014, 11:23 AM
Oh ya, the EVOMS guys. Yes thanks for pushing my memory cells -
Posted by: MATTYLITE Mar 11 2014, 12:09 AM
Here are some high - res photos of the Sequential Adapter, and a mock up of how it'll look in the car, eventually...
http://s771.photobucket.com/user/MatthewEvanSchneider/media/20140309_180932_zps017fb14f.jpg.html
http://s771.photobucket.com/user/MatthewEvanSchneider/media/20140309_180955_zps399c0e0a.jpg.html
http://s771.photobucket.com/user/MatthewEvanSchneider/media/20140309_181014_zps3ad31cdd.jpg.html
http://s771.photobucket.com/user/MatthewEvanSchneider/media/20140309_181155_zps13435547.jpg.html
http://s771.photobucket.com/user/MatthewEvanSchneider/media/20140309_181317_zps6473d09e.jpg.html
http://s771.photobucket.com/user/MatthewEvanSchneider/media/20140309_181405_zps0899a9aa.jpg.html
http://s771.photobucket.com/user/MatthewEvanSchneider/media/20140310_161009_zps8ccb4fdb.jpg.html
Posted by: Dr Evil Mar 12 2014, 08:53 AM
Wow, sexy
Posted by: jaxdream Mar 13 2014, 08:15 AM
Cutting out the tunnel top is a great way for access to add needed controls and such. Are there any plans to fab a cover for the top or just leave it open ??? GR8 build so far !!!! Should be a hoot !!!!!!
Jack
Posted by: CptTripps Mar 13 2014, 10:40 AM
Wicked cool!
Seeing that tells me I definitely need to cut the top of my tunnel out too. There's a lot of room there to lay things out nicely if you have ready access to it. Adding in some braces every 10" or so should help make up for any lost rigidity. No?
Posted by: Johny Blackstain Mar 13 2014, 10:44 AM
This thing is gonna be a monster!
Posted by: Maltese Falcon Mar 13 2014, 07:49 PM
Cutting out the tunnel top is a great way for access to add needed controls and such. Are there any plans to fab a cover for the top or just leave it open ??? GR8 build so far !!!! Should be a hoot !!!!!!
Jack
Jack,Doug, sectional plates are being re-attached to the top of the front and rear tunnel areas.
These will be removable , so we can always go back in for running lines or other added cables+ circuits. The new plate that will be the foundation for the shifter is made from .250 cold roll metal plate, which will be welded in place.
If you don't have a way to put a top back onto your tunnel, I would not cut it off. It adds rigidity to the unibody.
Marty
Posted by: Maltese Falcon Apr 26 2014, 02:06 AM
Intake now finished up with RC injectors, rails, throttle body, tps. Aka the "Flying Mailbox" !
The Daytona velocity stack will not be used in our forced induction engine.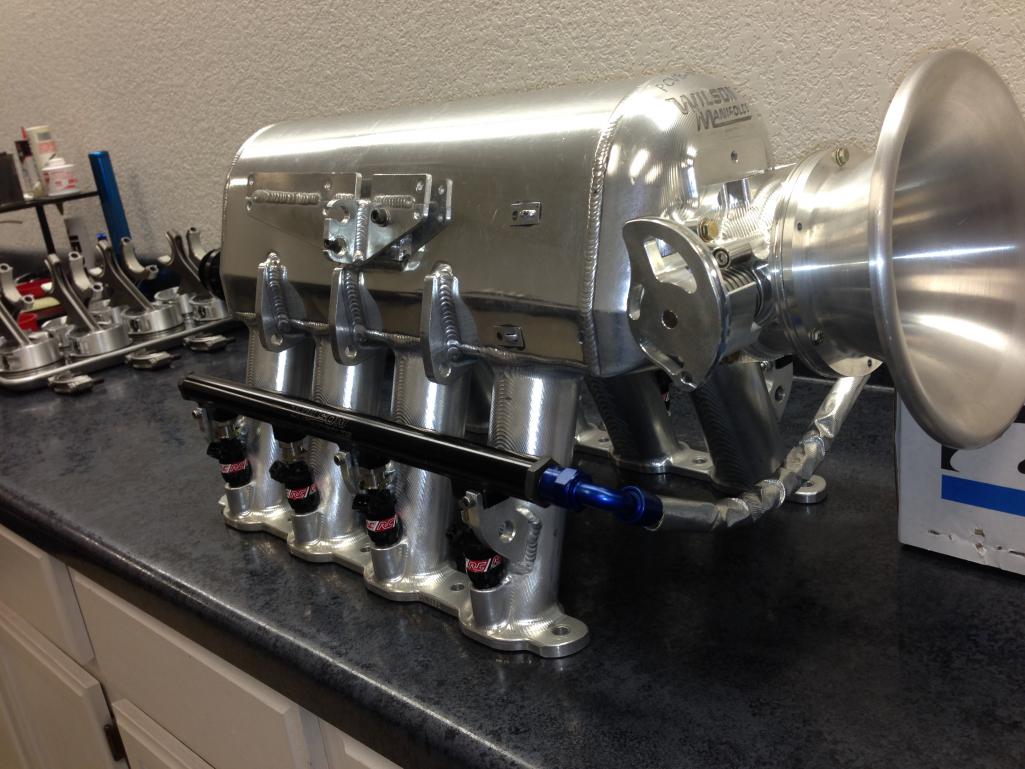
Posted by: Maltese Falcon Apr 26 2014, 02:13 AM
Windage screens installed in the cnc dry sump oil pan...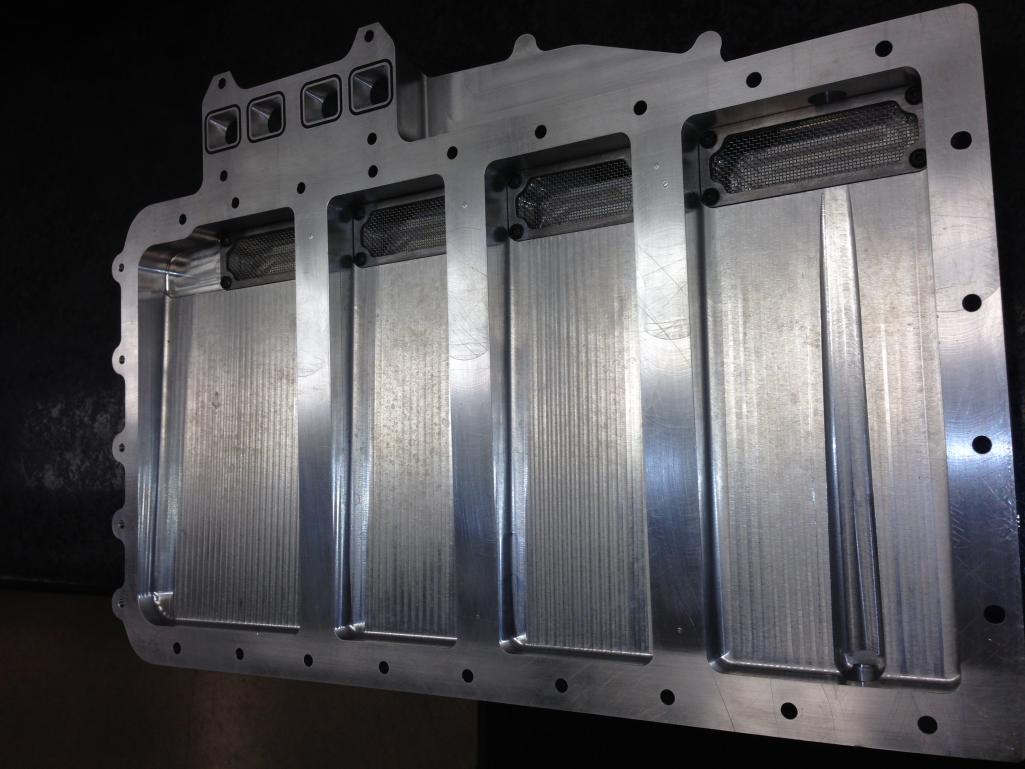
Posted by: Mike Bellis Apr 26 2014, 07:48 AM
Intake now finished up with RC injectors, rails, throttle body, tps. Aka the "Flying Mailbox" !
The Daytona velocity stack will not be used in our forced induction engine.
A work of art!
Posted by: Dave_Darling Apr 26 2014, 11:48 AM
Guys like that make it seem so easy. "Of course, don't all your welds automatically look like a perfect stack of nickels?"
Major league envy here...
--DD
Posted by: MATTYLITE Apr 26 2014, 08:52 PM
Seam welding every part of the car:
http://s771.photobucket.com/user/MatthewEvanSchneider/media/20140402_154824_zps6bda9b81.jpeg.html
http://s771.photobucket.com/user/MatthewEvanSchneider/media/20140403_151651_zpsae18ae8c.jpeg.html
As you can see in the background in the car, every seam has been welded:
http://s771.photobucket.com/user/MatthewEvanSchneider/media/20140409_203416_zps350ce824.jpeg.html
Inner long / Cabin stiffening kit welded in:
http://s771.photobucket.com/user/MatthewEvanSchneider/media/20140411_154830_zps25c3fb21.jpeg.html
http://s771.photobucket.com/user/MatthewEvanSchneider/media/20140403_171331_zpsc89e15bd.jpeg.html
Here is the rear quarter panel almost ready to fit some monstrous wide fender flares:
http://s771.photobucket.com/user/MatthewEvanSchneider/media/20140409_183208_zps43ec3521.jpeg.html
Posted by: MATTYLITE Jun 1 2014, 12:03 PM
Radiator came in:
http://s771.photobucket.com/user/MatthewEvanSchneider/media/20140521_134035_zps228b919b.jpg.html
http://s771.photobucket.com/user/MatthewEvanSchneider/media/20140521_134104_zps58bcf2d9.jpg.html
Finally, after several weeks of welding, all the seams are now fully welded:
http://s771.photobucket.com/user/MatthewEvanSchneider/media/20140523_141753_zps6f75ab02.jpg.html
http://s771.photobucket.com/user/MatthewEvanSchneider/media/20140523_142306_zps78b5407c.jpg.html
Here is the mock up of the strut bar braces that were welded in. And yes the wood is only a temporary holder for alignment. The actual strut bar that connects to these braces will be cnc'd from an aluminum block:
http://s771.photobucket.com/user/MatthewEvanSchneider/media/20140523_133758_zpsf58f4bb0.jpg.html
AND THE GRAND FINALLY!! WHAT YOU'VE ALL BEEN WAITING FOR... (well at least 14 months for me):
The engine in its completion!
Quick specs:
2005 Cayenne Twin Turbo motor, bored out from 4.5 to 5.0 Litre.
All new / upgraded everything internally.
Wilson Intake Manifold (yes the same intake manifold used on the 2010 Winning 24 Hour of Daytona, Prototype Cayenne V8 N/A powered car!)
http://s771.photobucket.com/user/MatthewEvanSchneider/media/securedownload-2_zps767034b4.jpeg.html
http://s771.photobucket.com/user/MatthewEvanSchneider/media/photo-4-1_zps7c19c6cb.jpg.html
http://s771.photobucket.com/user/MatthewEvanSchneider/media/securedownload-1_zpsf376b38a.jpeg.html
Posted by: aircooledtechguy Jun 1 2014, 12:48 PM
Holy high-power!! That is SICK!!! Congrats!!!
Posted by: wndsrfr Jun 1 2014, 04:21 PM
Pure PORNsche....
Posted by: MATTYLITE Nov 15 2014, 06:06 AM
Hello fellow forum members, sorry for the temporary leave of absence on updates. There have been massive amounts of progress on the project vehicle, and we’d like to take a moment to share it with you.
Back in July of this year we flew out to Texas for a meat and greet with Ben Lozano, one of the great guys behind Lozano Brothers Porting, and no that is not a typo, there was a lot of meat in Texas. A LOT OF MEAT! First things first of course after a 5 hour flight is to eat like a local.
http://s771.photobucket.com/user/MatthewEvanSchneider/media/20140711_151409_zps15416016.jpg.html
http://s771.photobucket.com/user/MatthewEvanSchneider/media/20140711_151523_zps1fbdaca9.jpg.html
http://s771.photobucket.com/user/MatthewEvanSchneider/media/20140711_152238_zps82ac8d54.jpg.html
After the best BBQ I ever had in my life, we finally made it to Lozano Brothers Porting to view the engine in its final form.
http://s771.photobucket.com/user/MatthewEvanSchneider/media/20140711_163851_zps596b0d73.jpg.html
http://s771.photobucket.com/user/MatthewEvanSchneider/media/20140711_164329_zpsffc29156.jpg.html
http://s771.photobucket.com/user/MatthewEvanSchneider/media/20140711_164634_zpsfb8872bb.jpg.html
http://s771.photobucket.com/user/MatthewEvanSchneider/media/20140711_164645_zpsdc61cbf9.jpg.html
http://s771.photobucket.com/user/MatthewEvanSchneider/media/20140711_170443_zpscea0dcca.jpg.html
http://s771.photobucket.com/user/MatthewEvanSchneider/media/20140711_170712_zps80030851.jpg.html
While we were there, we were treated to some of their other projects that were around their place of business.
2 ready to race Cayenne V8 N/A Daytona Spec Engines:
http://s771.photobucket.com/user/MatthewEvanSchneider/media/20140712_110947_zps7e0a2ba1.jpg.html
Used Cayenne V8 Engine Blocks:
http://s771.photobucket.com/user/MatthewEvanSchneider/media/20140712_140841_zps2fd7d3f8.jpg.html
http://s771.photobucket.com/user/MatthewEvanSchneider/media/20140712_135650_zps19366c19.jpg.html
http://s771.photobucket.com/user/MatthewEvanSchneider/media/20140712_135624_zps02c5d188.jpg.html
And of course you don’t leave Lozano Brothers Porting w/o a quick history lesson from Ben Lozano himself.
http://s771.photobucket.com/user/MatthewEvanSchneider/media/20140712_141606_zpsd9214628.jpg.html
Below is one of the most prestigious trophies in the history of motorsports, the Manufacturer’s Trophy. The story behind this one is as follows,
After the Action Express car won the 2010 24 Hours of Daytona, the award ceremony immediately commenced of course. When the presenter announced the award for the Manufacturer’s Trophy, Porsche Motorsport North America declined to accept the award, based on the facts that one, they did not supply the winning car’s power train, and two, Porsche (to this day) do not support or promote their V8 engines for racing purposes. So, who else was left to accept the trophy? None other than Ben Lozano himself of course! Not bad from a band of brothers from the Lone Start State.
http://s771.photobucket.com/user/MatthewEvanSchneider/media/20140712_124555_zps42a3d8ba.jpg.html
…When in Rome.. or should I say The Americas!
http://s771.photobucket.com/user/MatthewEvanSchneider/media/20140712_171003_zps6cf24224.jpg.html
http://s771.photobucket.com/user/MatthewEvanSchneider/media/20140712_171732_zps743ef24a.jpg.html
http://s771.photobucket.com/user/MatthewEvanSchneider/media/20140712_172237_zps7bd3d703.jpg.html
Didn’t I say this was a meat & greet trip?
http://s771.photobucket.com/user/MatthewEvanSchneider/media/20140712_182114_zpsa36ec4b8.jpg.html
I don’t always believe what I’m told.
http://s771.photobucket.com/user/MatthewEvanSchneider/media/20140712_182424_zps01789ce6.jpg.html
http://s771.photobucket.com/user/MatthewEvanSchneider/media/20140712_184611_zpsad27d05c.jpg.html
After leaving Texas, it was time to get back to work. Here we cut out some of the metal in the body to feed the radiator lines through the front into the inner longs and out the rear into the engine compartment.
http://s771.photobucket.com/user/MatthewEvanSchneider/media/20141011_192455_zps856ba3c8.jpg.html
http://s771.photobucket.com/user/MatthewEvanSchneider/media/20141011_183559_zps9d501213.jpg.html
Removing all of the caulking in the vehicle. At least 8 – 10lbs of caulking removed in total.
http://s771.photobucket.com/user/MatthewEvanSchneider/media/20141016_153441_zps22b88d2d.jpg.html
Oil Cooler mock – up: There will be 2, one on each side.
http://s771.photobucket.com/user/MatthewEvanSchneider/media/20141020_134209_zps47147f05.jpg.html
http://s771.photobucket.com/user/MatthewEvanSchneider/media/20141028_174337_zps9ec6a393.jpg.html
Once the engine arrived back at our headquarters in California, we immediately shipped it to our long time associates over at AASCO Motorsports for the necessary mating hardware.
Tilton Triple Carbon / Carbon Clutch:
http://s771.photobucket.com/user/MatthewEvanSchneider/media/20141104_154708_zps63367e62.jpg.html
http://s771.photobucket.com/user/MatthewEvanSchneider/media/20141104_155412_zps2f7e0967.jpg.html
http://s771.photobucket.com/user/MatthewEvanSchneider/media/20141104_155525_zpsa2b4ee08.jpg.html
And the mating plate itself:
http://s771.photobucket.com/user/MatthewEvanSchneider/media/20141104_160645_zpsc406222d.jpg.html
Just over an inch in width:
http://s771.photobucket.com/user/MatthewEvanSchneider/media/20141104_160634_zps0567c658.jpg.html
And Voila! A World’s first. Cayenne V8 TT mated to an inverted 996 GT2 Transaxle. A moment we’ve waited for, for so long, that we stayed way after closing time for the guys at AASCO. Sorry Vince, hope you can understand!
http://s771.photobucket.com/user/MatthewEvanSchneider/media/20141104_160654_zps1c199d13.jpg.html
More cage work progress in the rear:
http://s771.photobucket.com/user/MatthewEvanSchneider/media/Rearsupportbar_zpsdf857c80.jpg.html
http://s771.photobucket.com/user/MatthewEvanSchneider/media/20141114_113424_zpsfe732f72.jpg.html
http://s771.photobucket.com/user/MatthewEvanSchneider/media/20141114_083459_zpsddbabd5f.jpg.html
http://s771.photobucket.com/user/MatthewEvanSchneider/media/20141114_152830_zps737fe8d1.jpg.html
http://s771.photobucket.com/user/MatthewEvanSchneider/media/20141114_154655_zps8047fd2b.jpg.html
http://s771.photobucket.com/user/MatthewEvanSchneider/media/20141114_160314_zps9b08ece0.jpg.html
http://s771.photobucket.com/user/MatthewEvanSchneider/media/20141103_152800_zps35669970.jpg.html
And a quick glimpse of the wiring progress so far. Who would've thought Mercedes Benz made parts for Porsche? Well, it wouldn't be the first time..
http://s771.photobucket.com/user/MatthewEvanSchneider/media/20141106_193201_zps67945738.jpg.html
Many more pictures to follow!
All the best,
Matthew E. Schneider
MSDS Inc.
Posted by: mepstein Nov 15 2014, 07:28 AM
WOW!
That's all I got.
Posted by: Cairo94507 Nov 15 2014, 08:10 AM
This is the most over the top outstanding build I believe I have ever seen. The quality of the work and the extent of detail is mind blowing.
Posted by: veekry9 Nov 15 2014, 09:36 AM
This is exciting,the building of the ultimate Porsche V8 914.
All the right stuff.
Wow.
Posted by: Krieger Nov 15 2014, 11:30 AM
This thing is going to be really cool!
Posted by: JRust Nov 15 2014, 11:48 AM
OMG  . I can't wait to see how that sits in the car. How do you plan to do the engine lid? That is obviously going to stick out the top. Not that I care as I know you have some killer plan. I can't wait to see it man. Seriously sick build
Posted by: pete000 Nov 15 2014, 01:18 PM
there is still a little bit of the 914 left in there !
Posted by: Maltese Falcon Nov 15 2014, 11:48 PM
there is still a little bit of the 914 left in there !
Lots of Karmann and lots of Porsche drive train, alive and well in this 914 .
Just a little different in the power to weight ratio
Marty
Posted by: MATTYLITE Feb 10 2015, 02:29 AM
Hello World!
Here's a look at the progress so far.
We've cut the doors for the roll cage / "NASCAR" style door bars. Please excuse the 40 year old paint and surface rust. This will all be taken care of in the painting process soon to follow.
http://s771.photobucket.com/user/MatthewEvanSchneider/media/20141209_151339_zps330559c3.jpg.html
http://s771.photobucket.com/user/MatthewEvanSchneider/media/20141209_135116_zpsa3650c12.jpg.html
Here you can see the wooden mock up for the rear support bars. This was then cut to fit in metal and welded in.
http://s771.photobucket.com/user/MatthewEvanSchneider/media/20141210_154811_zps10225ae4.jpg.html
http://s771.photobucket.com/user/MatthewEvanSchneider/media/post-2755-1418509860_thumb_zpsa618fbb9.jpg.html
The Tangerine Racing Heim Rod Braces have been welded in.
http://s771.photobucket.com/user/MatthewEvanSchneider/media/post-2755-1421470437_thumb_zps9a05639f.jpg.html
The inner longs were then cut open so we can send the radiator lines through them from the front to the rear.
http://s771.photobucket.com/user/MatthewEvanSchneider/media/20150127_153310_zps28c45701.jpg.html
http://s771.photobucket.com/user/MatthewEvanSchneider/media/20150127_161416_zpsae4d1c83.jpg.html
The trailing arms were welded to their stiffening kits. We custom built the jigs for them while they were being welded to reduce any structural movements when they were expanding and contracting from the welder's heat.
http://s771.photobucket.com/user/MatthewEvanSchneider/media/post-2755-1418441184_thumb_zpsb30184ec.jpg.html
http://s771.photobucket.com/user/MatthewEvanSchneider/media/post-2755-1418408651_thumb_zps2ff808fb.jpg.html
The Dual Element carbon fiber wing from APR came in as well. It measures 71 inches across and is a really neat piece that we can't wait to attach to the car.
http://s771.photobucket.com/user/MatthewEvanSchneider/media/Screenshot_2015-01-20-10-40-18_zpsc2ee6d0e.jpeg.html
http://s771.photobucket.com/user/MatthewEvanSchneider/media/Screenshot_2015-01-20-10-40-03_zpsf54a49b7.jpeg.html
http://s771.photobucket.com/user/MatthewEvanSchneider/media/20150202_192456_zps3e8c268a.jpg.html
http://s771.photobucket.com/user/MatthewEvanSchneider/media/20150202_192551_zpsb1a8e73a.jpg.html
http://s771.photobucket.com/user/MatthewEvanSchneider/media/20150202_192525_zpsd6368579.jpg.html
http://s771.photobucket.com/user/MatthewEvanSchneider/media/20150202_192539_zpscac6294c.jpg.html
Quick interior shot
http://s771.photobucket.com/user/MatthewEvanSchneider/media/20150201_175632_zpsd04d5bc6.jpg.html
Also had sometime to install the Carrera GT exhaust tips into the bumper.
(For reference)
http://s771.photobucket.com/user/MatthewEvanSchneider/media/Picture2_zps36763f88.png.html
http://s771.photobucket.com/user/MatthewEvanSchneider/media/img11imageshackus-14843-136324187115_zps1cca50de.jpg.html
http://s771.photobucket.com/user/MatthewEvanSchneider/media/20150208_175852_zps4f13bdfc.jpg.html
http://s771.photobucket.com/user/MatthewEvanSchneider/media/20150208_175139_zps9566de3a.jpg.html
http://s771.photobucket.com/user/MatthewEvanSchneider/media/20150208_182552_zpse4c9bb34.jpg.html
Thankfully the fiberglass rear bumper is European spec so we we're able to have a wider spread between the exhaust tips.
http://s771.photobucket.com/user/MatthewEvanSchneider/media/20150208_182810_zps632aaef7.jpg.html
http://s771.photobucket.com/user/MatthewEvanSchneider/media/20150208_182734_zpsfa042f0f.jpg.html
http://s771.photobucket.com/user/MatthewEvanSchneider/media/20150208_182746_zps824b75c9.jpg.html
http://s771.photobucket.com/user/MatthewEvanSchneider/media/20150208_183316_zpsd38454b2.jpg.html
There will be an inner extension of exhaust tubing the comes out from the Carrera GT tips. Pics of this later.
Stay tuned!
Matt
Posted by: MJHanna Feb 10 2015, 07:49 AM
SO is the new time line to have it done for RENNSPORT Reunion?
Posted by: MATTYLITE Feb 10 2015, 09:44 AM
SO is the new time line to have it done for RENNSPORT Reunion?
Yes. We have already reserved our area in the vendors area to debut the car at that time. Please stop by to see it for yourself!
There will also be a second vehicle in our booth that is pretty cool as well. It has a V8 and uses futuristic magical hybrid technology.
Posted by: mgp4591 Feb 10 2015, 10:35 AM
Beautiful build! What size rectangular tubing is your rear chassis supports? They look strong enough to handle what you're doing to it!
Posted by: krazykonrad Feb 10 2015, 12:19 PM
This has always been a dream build of mine. Very cool.
Konrad
Posted by: Maltese Falcon Feb 10 2015, 12:28 PM
Beautiful build! What size rectangular tubing is your rear chassis supports? They look strong enough to handle what you're doing to it!
Thank you for your comment...the left +right longitude are
1×4 , the smaller side pieces are 1x3; both are .120" ga.
The mating back piece that is welded along the rear trunk section is 2x2 angle @ .250" ga.
Marty
Posted by: Chris Pincetich Feb 10 2015, 10:05 PM
I just caught up on this thread and now I am hungry 
Thank you for letting us all watch and for making our dreams come true. I always tell people "the 914 is the ultimate project car." This is one ultimate project. Now I want to go to Rensport Reunion for the first time.
Just please don't share how much this build would really cost!! 

Posted by: Maltese Falcon Feb 12 2015, 11:29 PM
I use a contractors EMT bender and tubing to create the sample bends for the cage work. Then the samples are used for the real bends which are mandrel formed in 1.750 x .120" wall.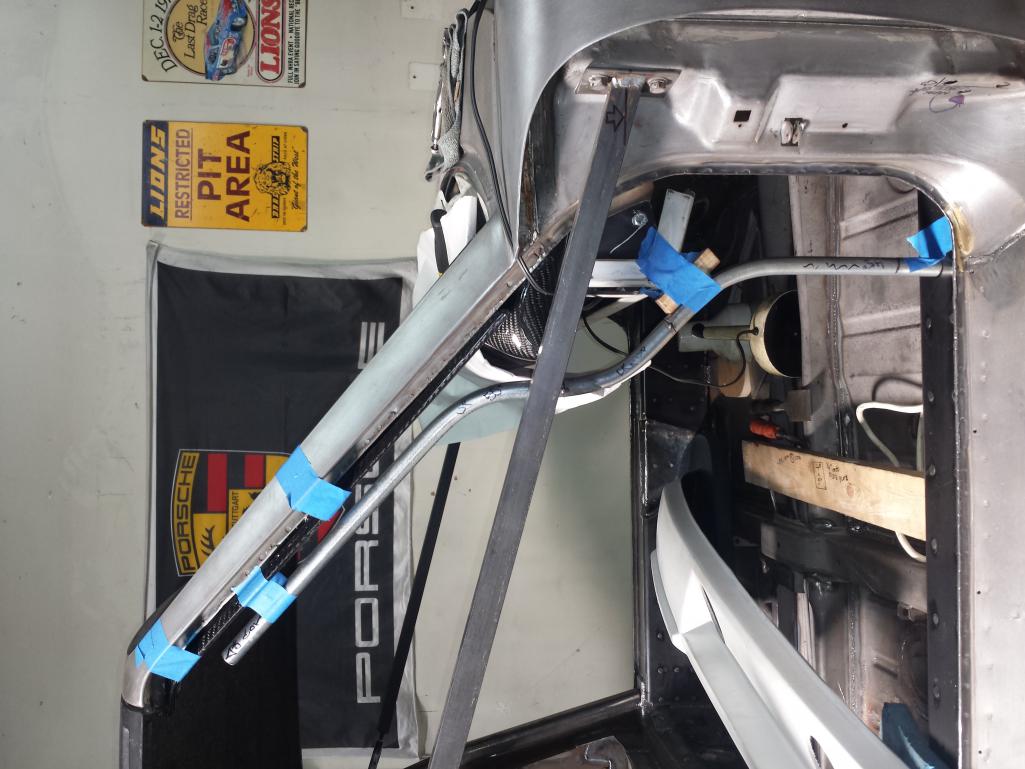
Marty
Posted by: Mueller Feb 13 2015, 08:58 AM
Awesome build....
The license plate is just PERFECT .... I'd rivet that sucker on so it doesn't end up on someones garage wall!
Posted by: Maltese Falcon Feb 13 2015, 09:55 PM
When the Cayenne was introduced, Matt sketched this concept on a paper napkin at Big Sur campgrounds. The final livery will be penned in a few months.
Marty
Posted by: Maltese Falcon Feb 21 2015, 10:27 AM
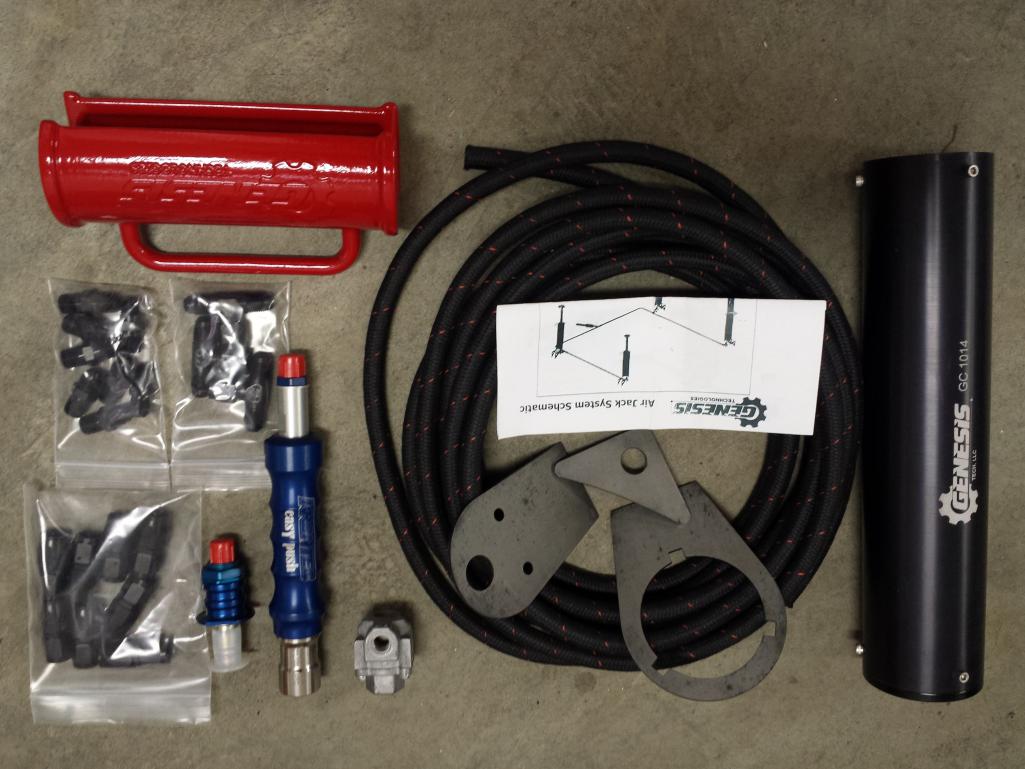
More welding chores this weekend:
On board air jack system, our car uses 3 total. The red looking "Beer stein" is a pit jack-stand that adds extra security during longer pitting. The air jack piston travels downwards approx.9" . With the car at 5" ride clearence, we should get another 4" ground clearence for tire changing. 
Posted by: MATTYLITE Apr 9 2015, 02:03 PM
Hello fellow 914 World members,
I thought it was time to give you all our April progress update, so let us dive right into it!
We are continuously welding in the roll cage pieces. Here you can see the finishing touches on the cabin to rear pieces.
http://s771.photobucket.com/user/MatthewEvanSchneider/media/20150307_095003_zpsv5014ctq.jpg.html
http://s771.photobucket.com/user/MatthewEvanSchneider/media/20150313_123714_zpsmeex3asj.jpg.html
http://s771.photobucket.com/user/MatthewEvanSchneider/media/20150307_133008_zpsv1jzudid.jpg.html
http://s771.photobucket.com/user/MatthewEvanSchneider/media/20150316_231009_zpshljxwib0.jpg.html
Next up is the dash. Upon further inspection, we hit a road block when it came to finishing the interior roll cage work because we were unable to fit the dash in after the roll cage would’ve been welded. So, we had to complete the dash in its entirety before we were able to continue the interior cabin roll cage work.
The idea for this dash was literally 3 years in the making and I’m very happy how it turned out. The idea behind the look of it came from GT racing cars, where they use what looks like the OEM dash, but highly modified for the car’s racing needs. We used alcantara and carbon fiber, sourced from a fellow board member. You know who you are! And thank you for helping us achieve such a design masterpiece. There will be a carbon fiber lower dash addition (not pictured) to hold all the switches.
http://s771.photobucket.com/user/MatthewEvanSchneider/media/20150324_215448_zps9uaeld5y.jpg.html
http://s771.photobucket.com/user/MatthewEvanSchneider/media/20150329_160244_zpsfj61iprn.jpg.html
http://s771.photobucket.com/user/MatthewEvanSchneider/media/20150329_183216_zpskljsschb.jpg.html
http://s771.photobucket.com/user/MatthewEvanSchneider/media/20150329_190818_zpsjotz4ycf.jpg.html
And back from the upholster:
http://s771.photobucket.com/user/MatthewEvanSchneider/media/20150408_194540_zps4k2yyqng.jpg.html
http://s771.photobucket.com/user/MatthewEvanSchneider/media/20150408_194632_zpsnl47vcuj.jpg.html
And installed:
http://s771.photobucket.com/user/MatthewEvanSchneider/media/20150408_231216_zpsethj5usl.jpg.html
http://s771.photobucket.com/user/MatthewEvanSchneider/media/20150408_231053_zpsggetljbs.jpg.html
http://s771.photobucket.com/user/MatthewEvanSchneider/media/20150408_231410_zpscmfc9hli.jpg.html
http://s771.photobucket.com/user/MatthewEvanSchneider/media/20150408_231246_zpso0c8kka7.jpg.html
FASTEN SEAT BELT!!
http://s771.photobucket.com/user/MatthewEvanSchneider/media/20150408_231432_zpsxymk9p7p.jpg.html
The Haltech Engine Management Elite 2500 came in. This supersedes our older Platinum 2000 unit and will offer us more tuning capabilities:
http://s771.photobucket.com/user/MatthewEvanSchneider/media/20150408_193849_zpsn00083fc.jpg.html
It even comes with a USB Key!
http://s771.photobucket.com/user/MatthewEvanSchneider/media/20150408_194007_zpsu9pjv9d9.jpg.html
The LED taillights came in from Spoke too!
http://s771.photobucket.com/user/MatthewEvanSchneider/media/20150408_200020_zpscnfmesrz.jpg.html
http://s771.photobucket.com/user/MatthewEvanSchneider/media/20150408_200031_zpsniipyiu1.jpg.html
Once the roll cage work is done, we will be moving on to Air Jack placement :
http://s771.photobucket.com/user/MatthewEvanSchneider/media/20150316_211300_zpspjutwbxw.jpg.html
That’s it for now!
-Matt
Posted by: Jeff Hail Apr 9 2015, 06:51 PM
9 inch airjacks, 5 inches of clearance and a 4 inches or ram stroke left over? Aint gonna work with full suspension droop to get the tires off the ground unless you limit the droop with straps. With straps at all 4 corners you creating another conundrum; tire lift when you really don't want lift. Straps on the rear ok, on the front its gonna go from sticky to no steering faster than you can pucker.
I love the dash!
Nice build.
Posted by: Maltese Falcon Apr 9 2015, 08:03 PM
I hear you Jeff on the suspension droop, but we are having the JRZ suspension tuned + set by Kerry at ERP. He is building in our "stops" internally in the shocks...so not a problem.
Have you checked your pm lately ?
Marty
Posted by: KlokWerk Jun 29 2015, 04:59 PM
What an amazing build!!!! This thing is going to be a beast!
More inspiration for my build.
Posted by: iamchappy Jun 29 2015, 05:51 PM
I'm in awe.......cant say anything, total jaw dropping....
Posted by: Maltese Falcon Jul 1 2015, 02:16 PM
Thanks guys for the kind words.
Not posting much on the build right now...but here's one 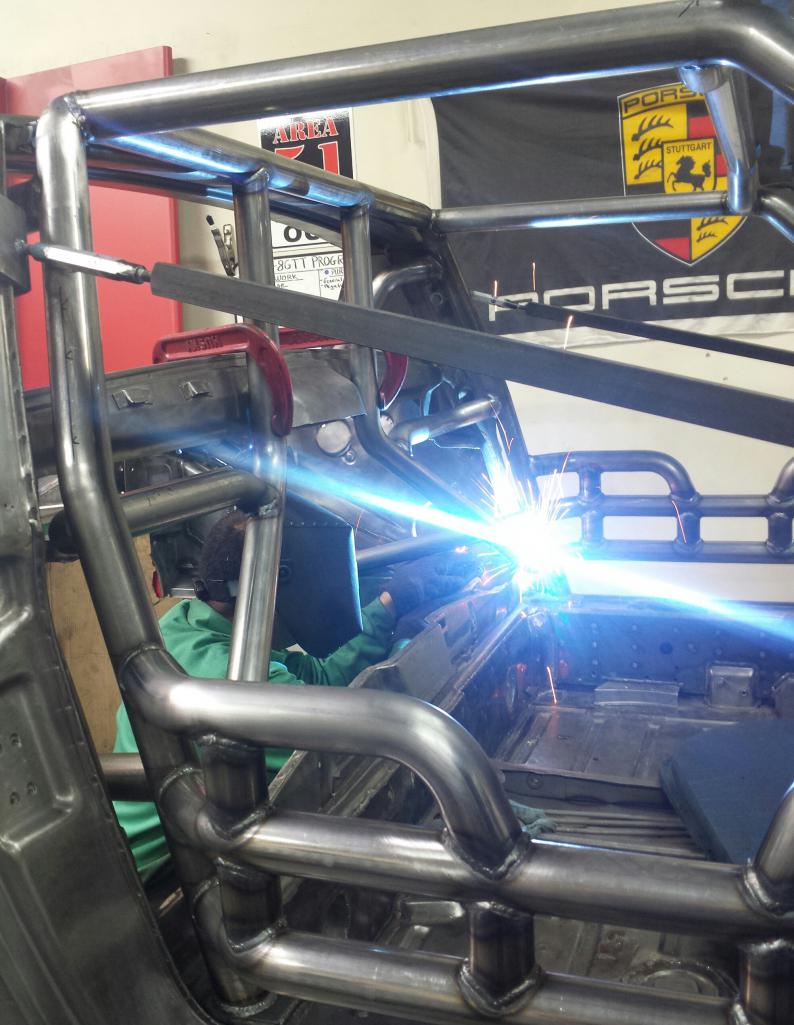
Posted by: Maltese Falcon Jul 1 2015, 02:17 PM
...one more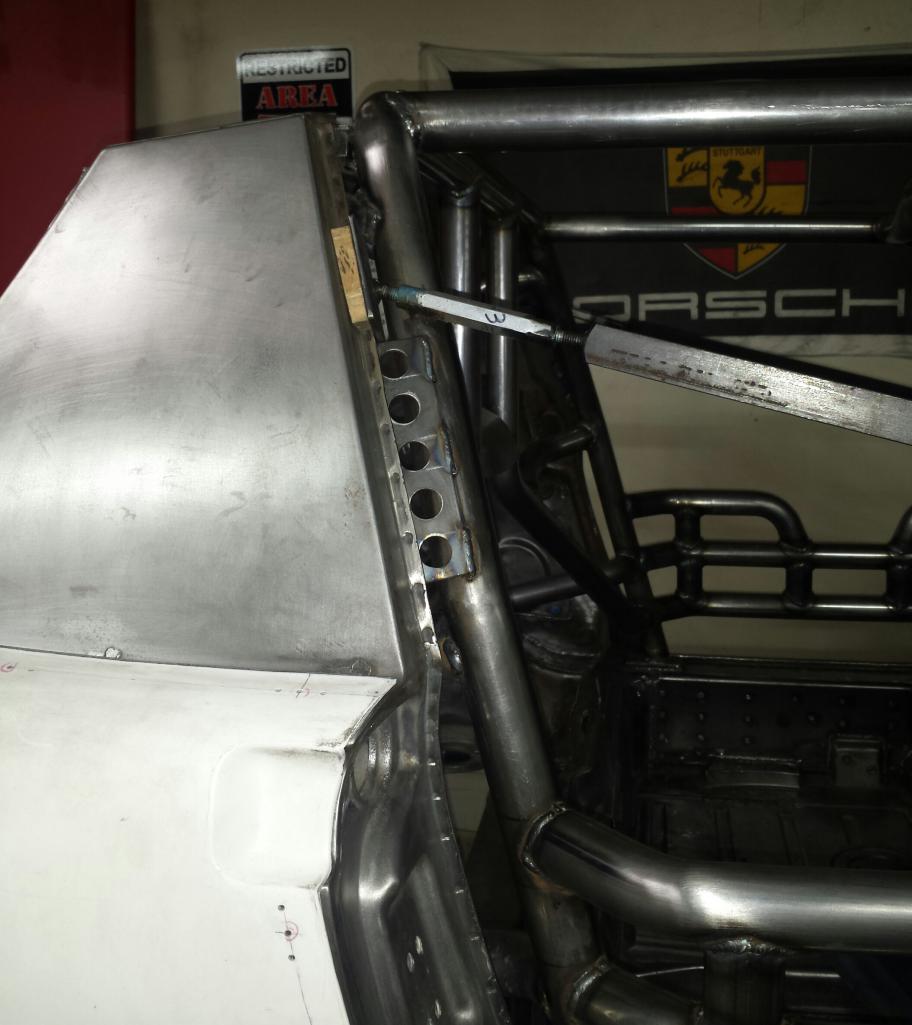
Posted by: Mueller Jul 1 2015, 02:28 PM
wow...that is one-helluva cage...the tubing is bigger than my exhaust!
Sweet!
Posted by: matthepcat Jul 1 2015, 06:01 PM
You should build in pivots on the entry and exit of the cage to make easier access.
Posted by: Elliot Cannon Jul 1 2015, 06:29 PM
You better get moving on this. The G & R is less than two weeks away.
Posted by: Maltese Falcon Jul 2 2015, 12:13 PM
Elliot on your way to the GR, I know that you are stopping into the shop to give me some Elyut critique, yes ?
Check your pm
Marty
Posted by: RobW Jul 2 2015, 12:29 PM
I'm jealous of people with 914 skills!
Posted by: tscrihfield Sep 2 2015, 06:05 PM
I just want to see this thing! Any updates?
Thomas
Posted by: MATTYLITE Sep 2 2015, 07:28 PM
I just want to see this thing! Any updates?
Thomas
Apologies for keeping this thread dormant for several months. We've been working on the car and also getting ready for Rennsport at the same time. No this car will not be attending =(. BUT Maltese Falcon's 914 - 6 GT Twin Turbo will be!
You can see some more updated pics in the "what did you do to your 914 today" thread for in meantime.
Will update this thread with more pics soon.
Thanks!
Matt
Posted by: Maltese Falcon Sep 2 2015, 08:02 PM
Work going on in the front trunk area, for the AeroLatch brackets 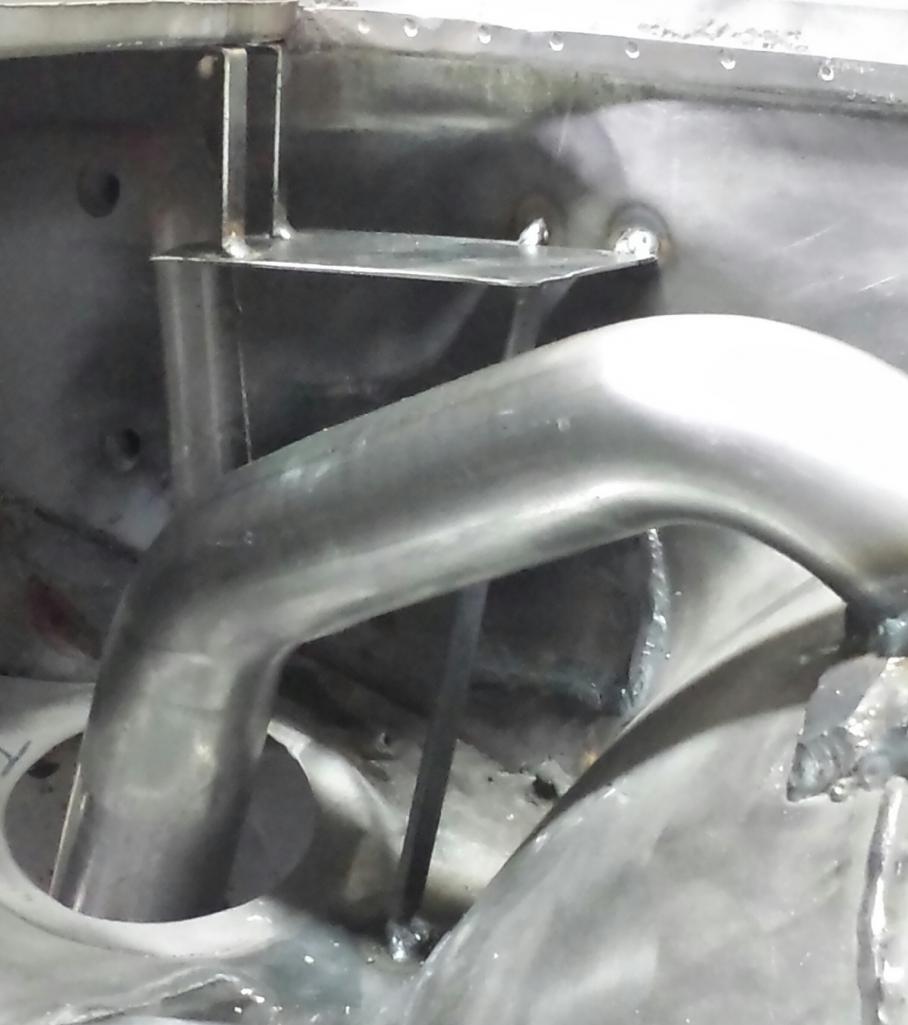
Posted by: Maltese Falcon Sep 2 2015, 08:10 PM
Forward area of the trunk, in the headlight bay. ..also for the AeroLatch.
Four in total to hold down the front trunk.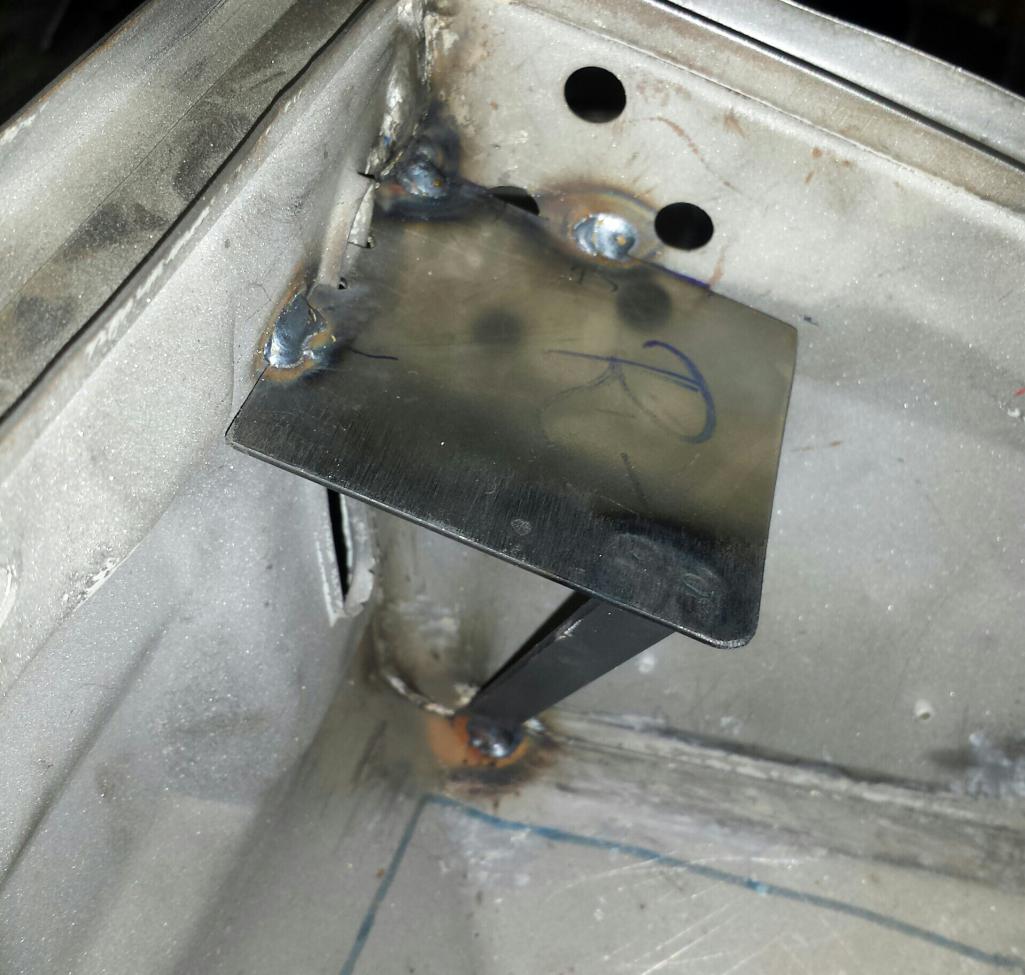
Posted by: Maltese Falcon Sep 2 2015, 08:34 PM
Rear trunk AeroLatch bracket layout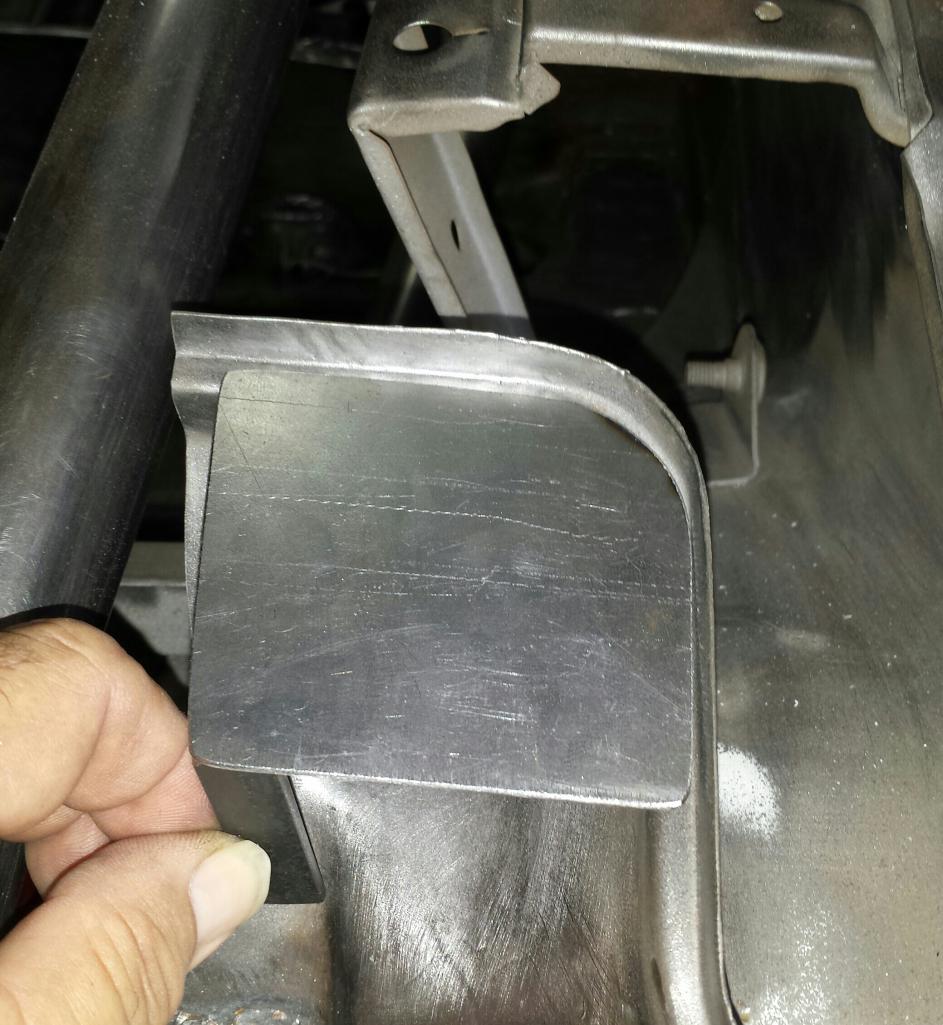
Posted by: Maltese Falcon Sep 2 2015, 08:43 PM
Total of 4 AeroLatch brackets in the rear trunk.
These small attachments are welded to the existing "Bumper stop adjuster" trunk lid plates....makes for a decent landing area for the latches.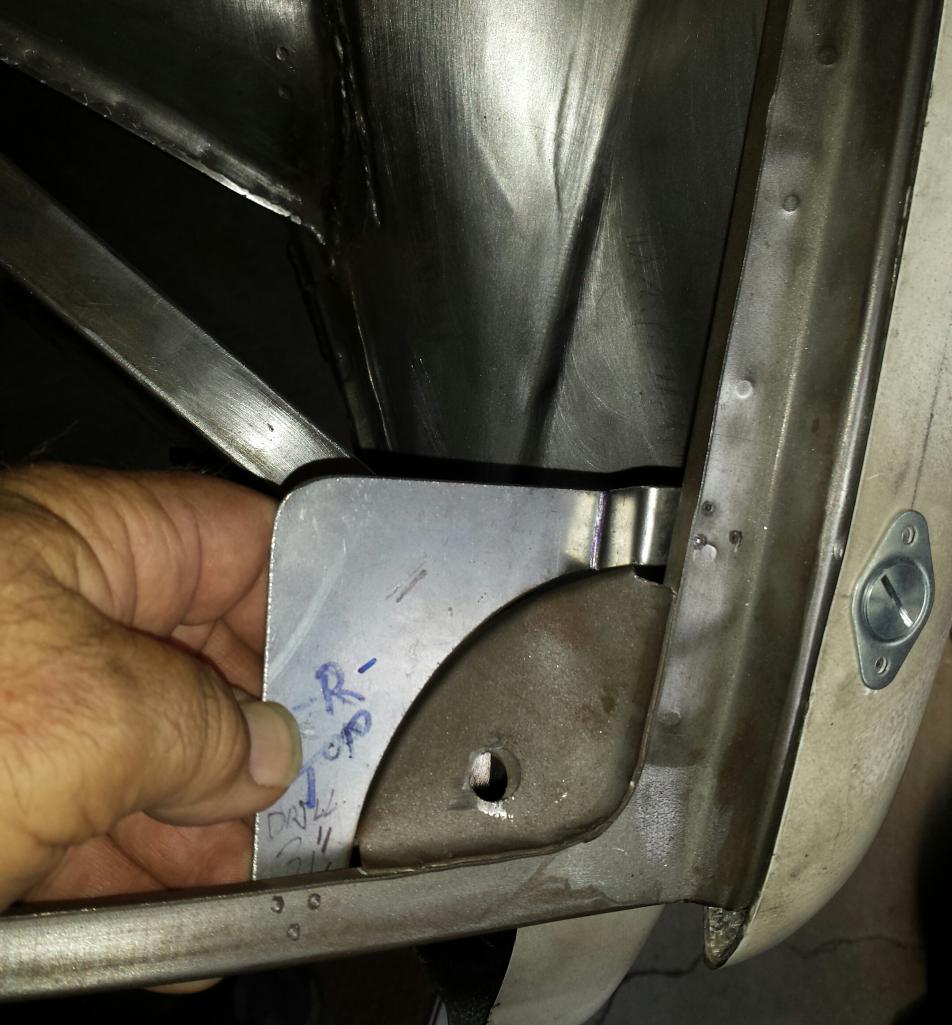
Posted by: Garold Shaffer Sep 2 2015, 08:50 PM
Wow Just Wow! Now this is a great build thread! Mad skills you guys have.
Posted by: whitetwinturbo Sep 2 2015, 10:04 PM
 so bad it's good
Posted by: Stacks914 Sep 3 2015, 12:43 AM
NICE!! the dream build I never knew existed!!!
Posted by: Maltese Falcon Sep 3 2015, 01:38 AM
Dzus fastener 101. This was my first experience with these fasteners.
Pegasus Racing supplied the parts, some racing buddies and the Internet gave me the education. So the rear quarter panels provided the learning curve. I should be A+ by the time I reach the fiberglass front end !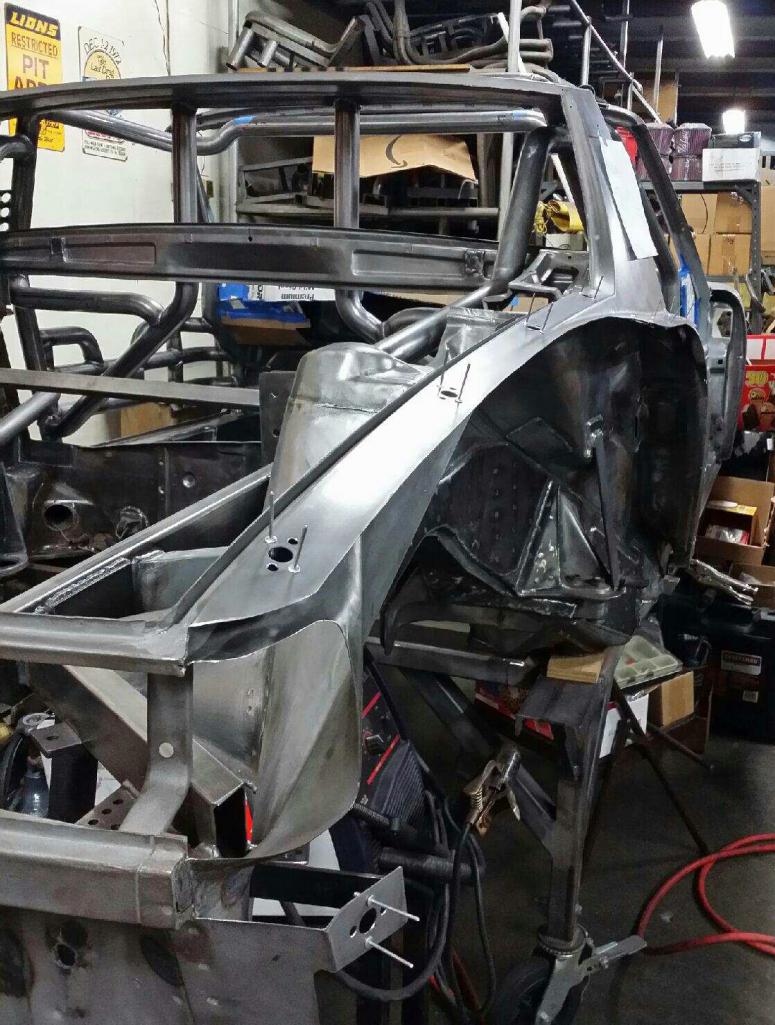
Posted by: Maltese Falcon Sep 3 2015, 01:41 AM
Leading edge test fit, Right quarter.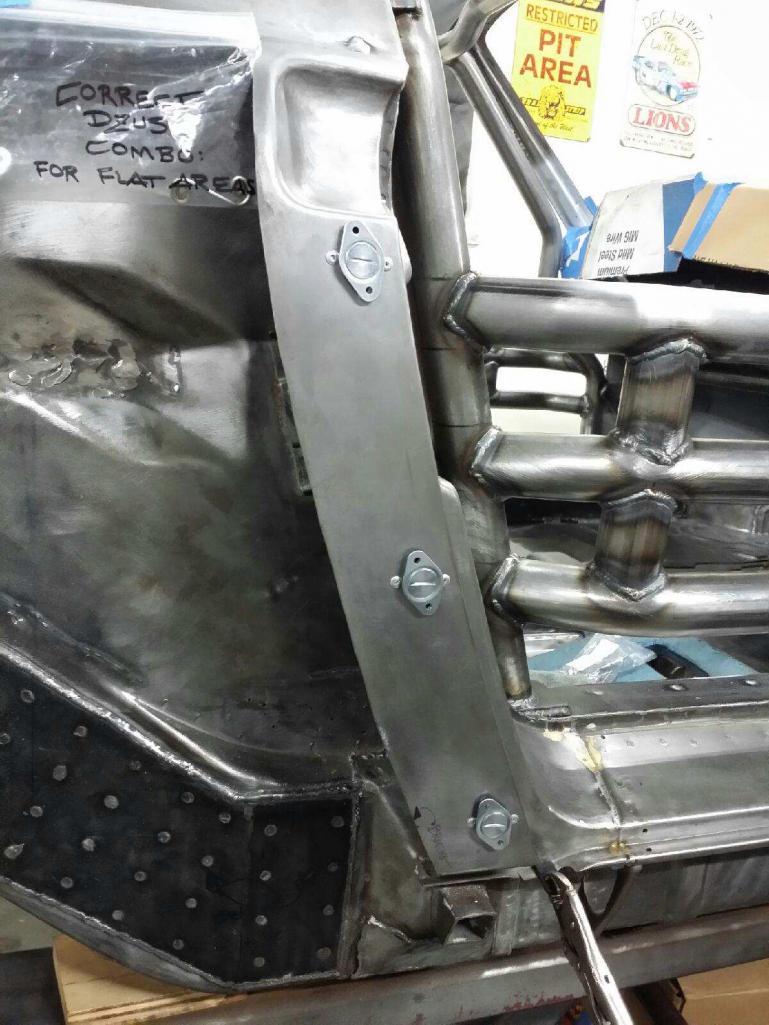
Posted by: Maltese Falcon Sep 3 2015, 01:49 AM
Right quarter taking shape on the 914 unibody.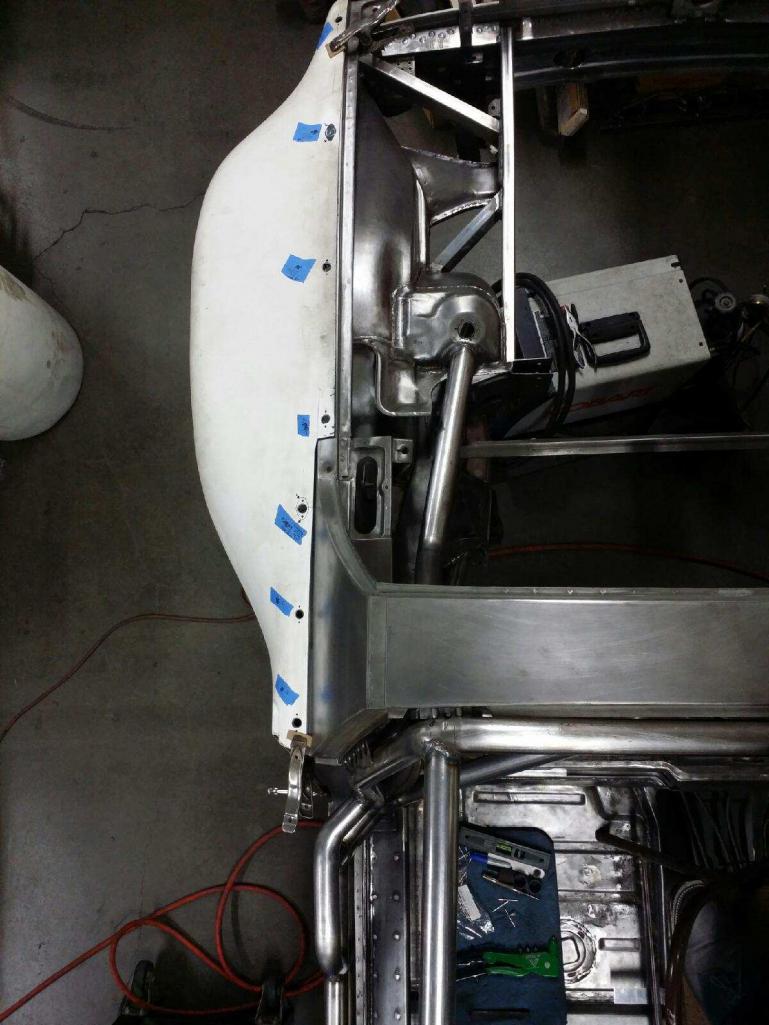
Posted by: Maltese Falcon Sep 3 2015, 01:54 AM
Left + Right quarters in place, starting to fasten it down. There are various combinations of Dzus fasteners and mating pins. The Pegasus kit has a variety of 4 fasteners and 4 pins. I spent lots of time getting these panels to fit tight by trial and error, finally getting the correct combination. The blue tape has notes jotted down, which were then recorded to my data log. 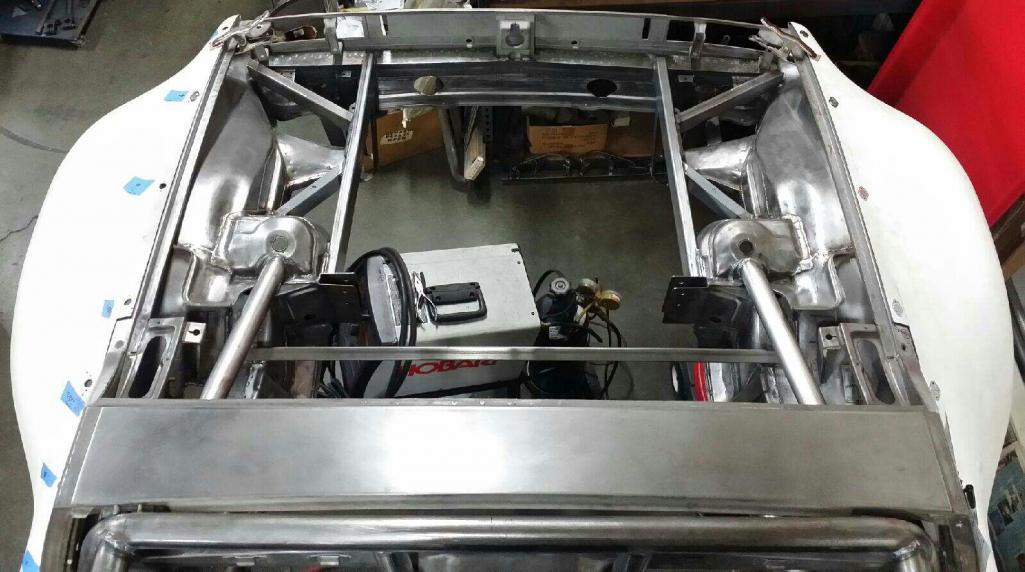
Posted by: Maltese Falcon Sep 3 2015, 02:07 AM
Rear quarter inboard support struts.
I made these bolt-in style, and built jigs so we can have replacement struts on hand. Small fasteners make set up work quick, then replace with Dzus fasteners for the final fit.
The small OE support bracket gets trimmed away.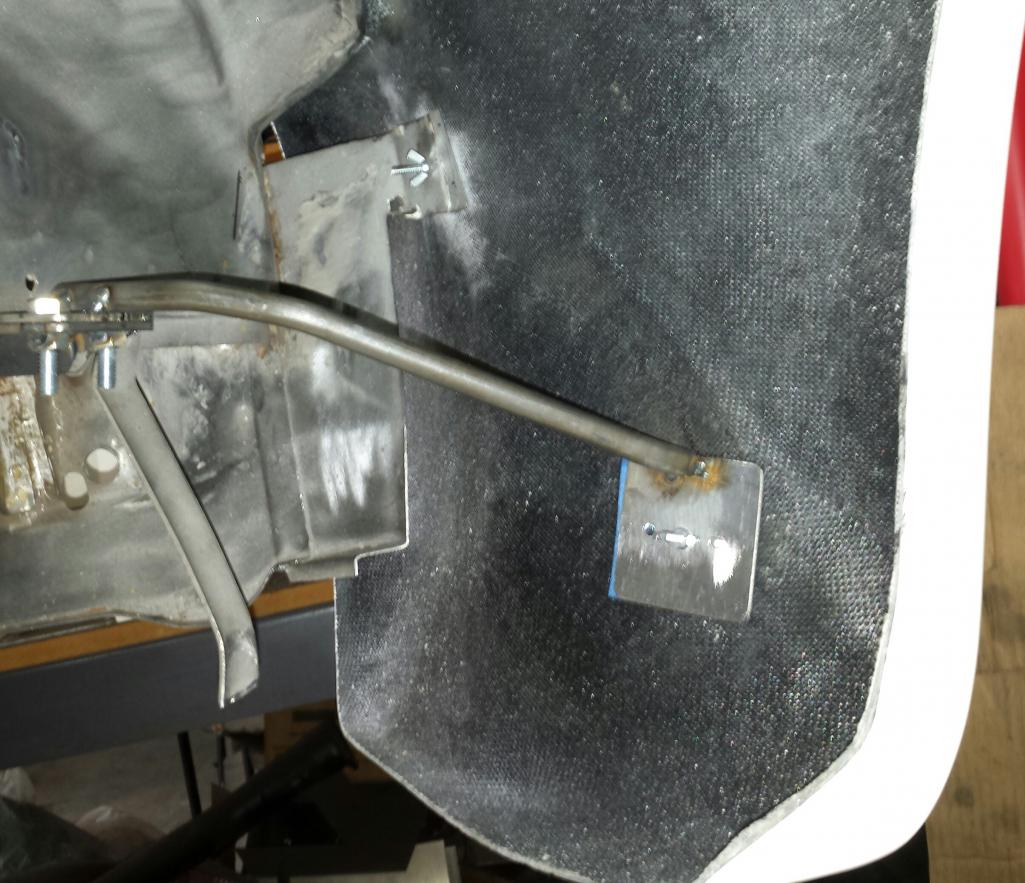
Posted by: Maltese Falcon Sep 3 2015, 02:14 AM
Support strut on the forward area of the rear quarter 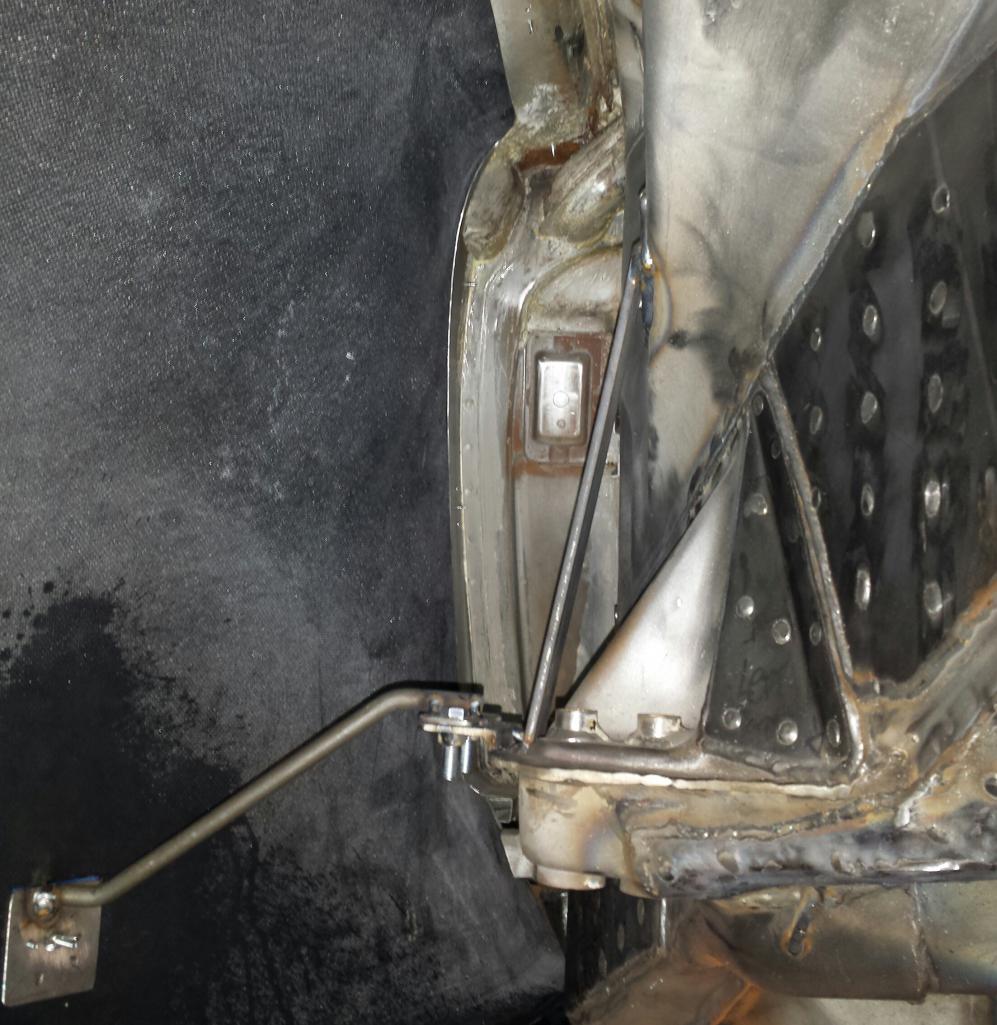
Posted by: Maltese Falcon Sep 3 2015, 02:26 AM
SafeCraft brand outer cage net set up, features a real clean quick- release design; beneficial for both driver and safety crew.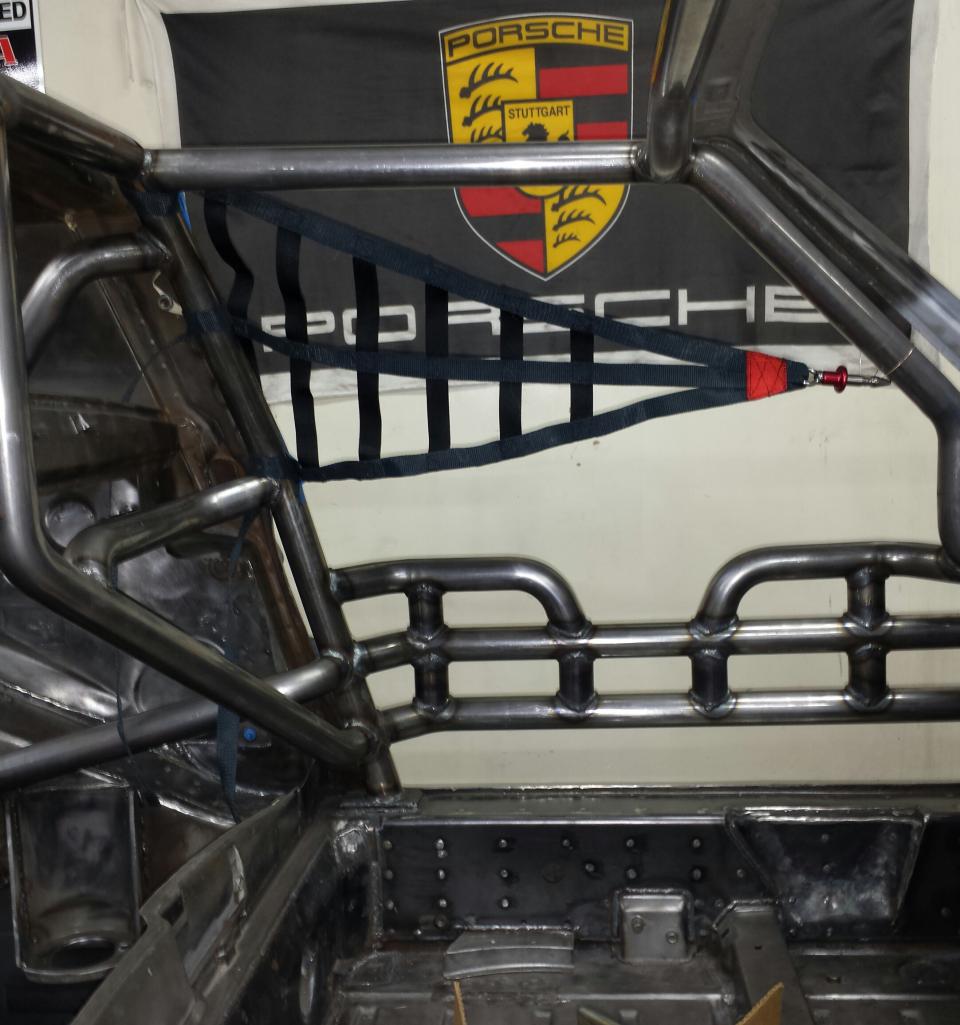
Posted by: Maltese Falcon Sep 3 2015, 02:35 AM
This is the small receiver for the quick release SafeCraft plunger, I machined the contour to match the roll bar where it will be welded.
I guess you can say that this is a Hand built U.S.hot rod 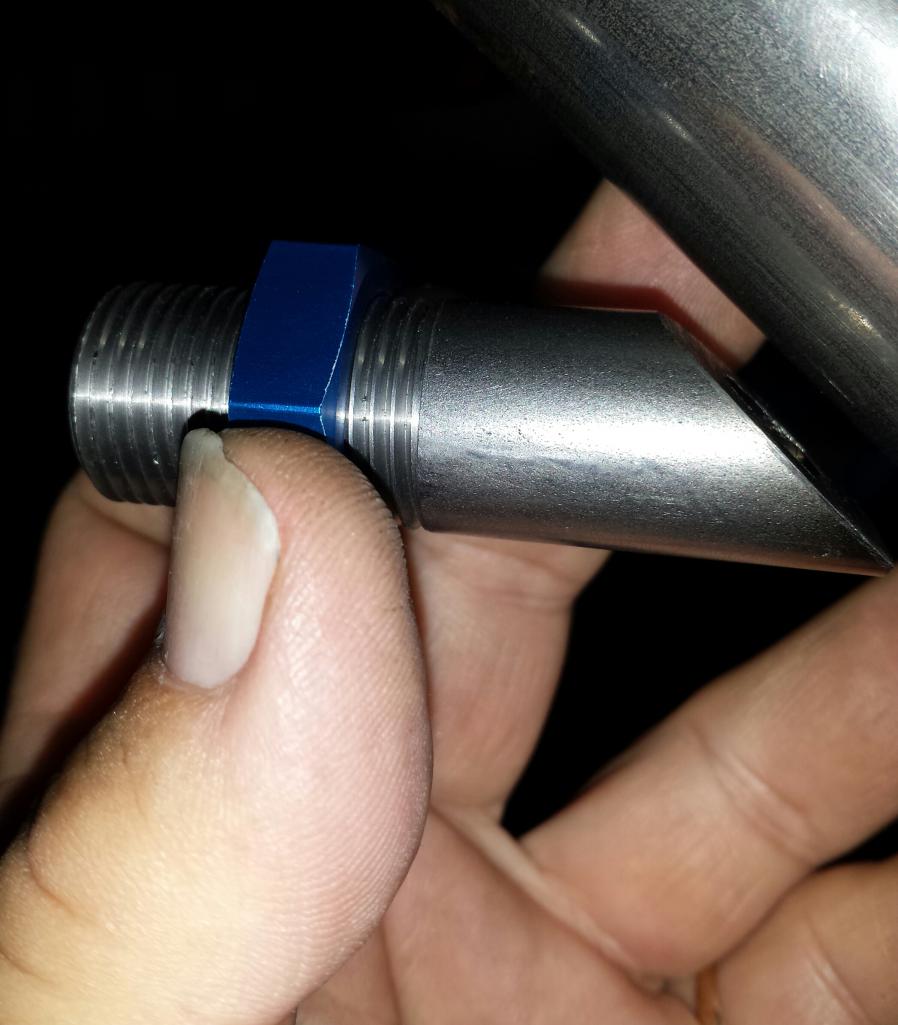
Posted by: Maltese Falcon Sep 3 2015, 02:38 AM
Getting into those tight spots with the mig welder 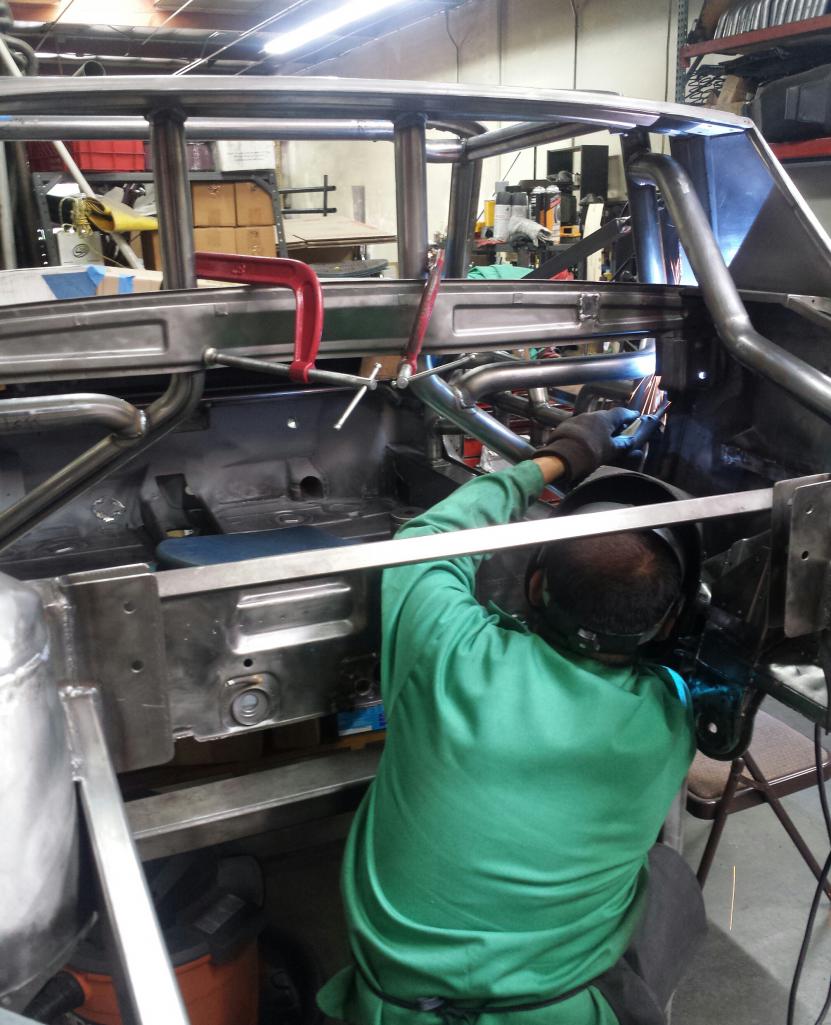
Posted by: Maltese Falcon Sep 3 2015, 03:42 AM
These solid steel "Circles" were cut to the contour of the trailing arm ends and welded in place.
Handy when lashing down the 914 while transporting in the trailer.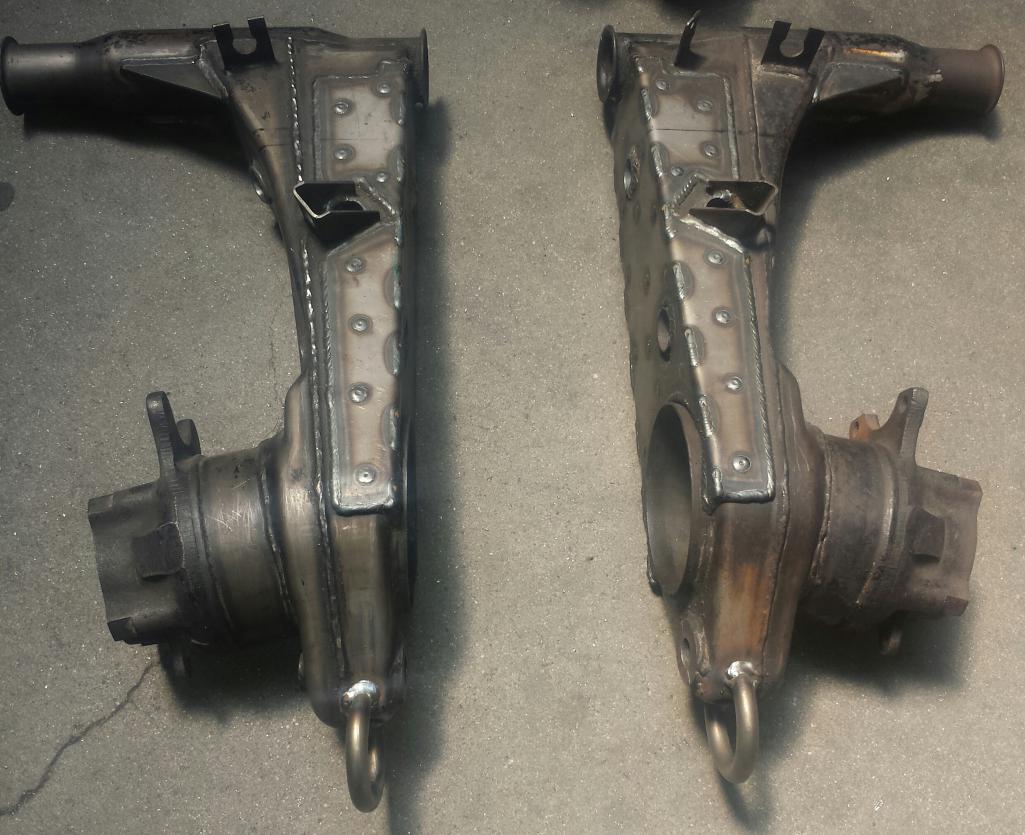
Posted by: Cracker Sep 3 2015, 06:34 AM
Amazing build...equally amazing amount of money to throw at this project! I love it. Just out of curiosity...what is the projected weight "range" of the finished car? Are you intending to have hinged doors or dzus fasteners? Will this car be street legal too?
Keep up the great work - I enjoy seeing the progress pics. THANKS for sharing!
PS: I am REALLY looking forward to seeing how you fit the turbo's and manifolds back
there - it will be a tight space with ALL that going on!
Tony
Posted by: MATTYLITE Sep 3 2015, 11:28 AM
Amazing build...equally amazing amount of money to throw at this project! I love it. Just out of curiosity...what is the projected weight "range" of the finished car? Are you intending to have hinged doors or dzus fasteners? Will this car be street legal too?
Keep up the great work - I enjoy seeing the progress pics. THANKS for sharing!
PS: I am REALLY looking forward to seeing how you fit the turbo's and manifolds back
there - it will be a tight space with ALL that going on!
Tony
Thanks for this Tony. Thankfully all the engineering / body work / metal fabrication is all done in house, which makes this project more cost effective than one would think, allowing us to budget for the more expensive items that we don't make in house such as the drive train / wheels etc.
The projected weight range was never an actual number we've built the vehicle around. When it's all said and done, it will be a very light car with a lot of horsepower. TBH, a little more weight wouldn't hurt at this point!
This car will have the OEM hinges for its doors and has already been cut around to fit the NASCAR style int. roll cage. We had planned on using fiberglass door skins, but the rigidity of the all metal doors is what changed our minds.
And yes, the car will be street legal, but we don't plan on driving it much on the street. Mainly to several local / very close car shows. Other than that, it will be on the trailer.
Thankfully Maltese Falcon (Marty / aka my dad) is a metal bending guru and will fabricate the entire turbo back exhaust system as if it came Straight Out Of Stuttgart!! (NWA Pun
 )
)Posted by: Cracker Sep 3 2015, 11:45 AM
All I can say is I'm very impressed! I understand (but am not personally capable and talented enough to execute such a build) what it takes to pull this off. Do you mind sharing with everyone how
you've built-out the front of the car? You have allot of good ideas...
With that said - I "challenge" your car to a duel of sorts, either at Road Atlanta or Barber Motorsports Park - your choice. Looser on "best lap time" pays transportation fees!
I'm (only) running an "itty-bitty-four-cylinder" - no brainer! The only caveat is the "owners" have to drive the cars. This might be the only way I see YOUR car in action...even if its only for awhile - my rear view mirrors are very small.
I (and many, many others) would love to see your car on the East Coast - I'm sure many enthusiasts would be willing to "travel-in" if it could be scheduled at a DE in advance.
Tony/Cracker
Thanks for this Tony. Thankfully all the engineering / body work / metal fabrication is all done in house, which makes this project more cost effective than one would think, allowing us to budget for the more expensive items that we don't make in house such as the drive train / wheels etc.
The projected weight range was never an actual number we've built the vehicle around. When it's all said and done, it will be a very light car with a lot of horsepower. TBH, a little more weight wouldn't hurt at this point!
Thankfully Maltese Falcon (Marty / aka my dad) is a metal bending guru and will fabricate the entire turbo back exhaust system as if it came Straight Out Of Stuttgart!! (NWA Pun
)Posted by: MATTYLITE Sep 3 2015, 01:49 PM
All I can say is I'm very impressed! I understand (but am not personally capable and talented enough to execute such a build) what it takes to pull this off. Do you mind sharing with everyone how
you've built-out the front of the car? You have allot of good ideas...
With that said - I "challenge" your car to a duel of sorts, either at Road Atlanta or Barber Motorsports Park - your choice. Looser on "best lap time" pays transportation fees!
I'm (only) running an "itty-bitty-four-cylinder" - no brainer! The only caveat is the "owners" have to drive the cars. This might be the only way I see YOUR car in action...even if its only for awhile - my rear view mirrors are very small.
I (and many, many others) would love to see your car on the East Coast - I'm sure many enthusiasts would be willing to "travel-in" if it could be scheduled at a DE in advance.
Tony/Cracker
Will have front pics for you shortly. Currently working our way to the front so we will be updating as we go with that.
We're always down for some friendly competition... this is after all a race car (not a wash n' shine car)... although it could be too..
We mainly follow the POC racing schedule (West Coast mainly), but plan on attending PCA events once the car is done, so I'm sure we'll be on the East Coast soon enough. We want to experience many tracks with this car as possible and can't wait for it to be on one!
Matt
Posted by: Cracker Sep 3 2015, 02:08 PM
Barber would be a meaningful location for you to visit since its home to their Porsche Sport Driving School (a very expensive Cup Car program - 10G's - for a weekend!). I believe I remember you stating your car would be an interpretation of a modern "Cup" car - of sorts. If so, there are very good baselines for comparison to that model at Barber. Another big benefit is its not nearly as "dangerous" (far more forgiving) as Road Atlanta...
Thanks for the pictures in advance...as you make progress.
Tony
We're always down for some friendly competition... this is after all a race car (not a wash n' shine car)... although it could be too..
We...plan on attending PCA events once the car is done, so I'm sure we'll be on the East Coast soon enough.
Matt
Posted by: Maltese Falcon Sep 3 2015, 09:51 PM
Keep up the great work - I enjoy seeing the progress pics. THANKS for sharing!
PS: I am REALLY looking forward to seeing how you fit the turbo's and manifolds back
there - it will be a tight space with ALL that going on!
Tony
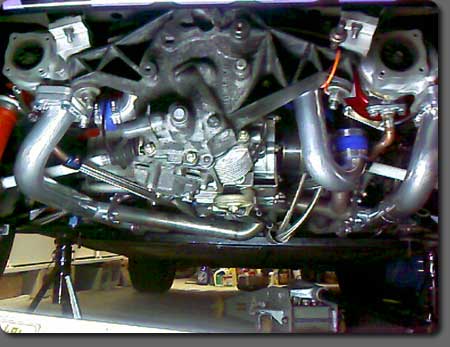
This is not the current v8 car we are building, but its sister.
This undercar pic reveals 2 of the Turbonetics gtk turbos tightly packed under a 914 trunk.The trunk is full of intercooler and the engine bay has a resident flat fan 3.3 living there. We actually have more real estate with the v8 build as there is no trunk floor
Posted by: Cracker Sep 3 2015, 10:12 PM
Thanks for sharing...although I have room, between the dry sump tank, cooler, intakes, and all - I just can't imagine finding ADDITIONAL room for all the extra items
you need to mount. I'm keeping two seats in the car but if not it would be a breeze. Keep'em coming!
T
This is not the current v8 car we are building, but its sister.
This undercar pic reveals 2 of the Turbonetics gtk turbos tightly packed under a 914 trunk.The trunk is full of intercooler and the engine bay has a resident flat fan 3.3 living there. We actually have more real estate with the v8 build as there is no trunk floor
Posted by: Maltese Falcon Oct 7 2015, 08:14 PM
Small update for October; making the template over the tunnel for the SQS sequential shifter. It will run a cable back to the inverted trans. Just getting a feel for the basic stance of my cabin space. That old 914 seat works perfect for today's test.
Marty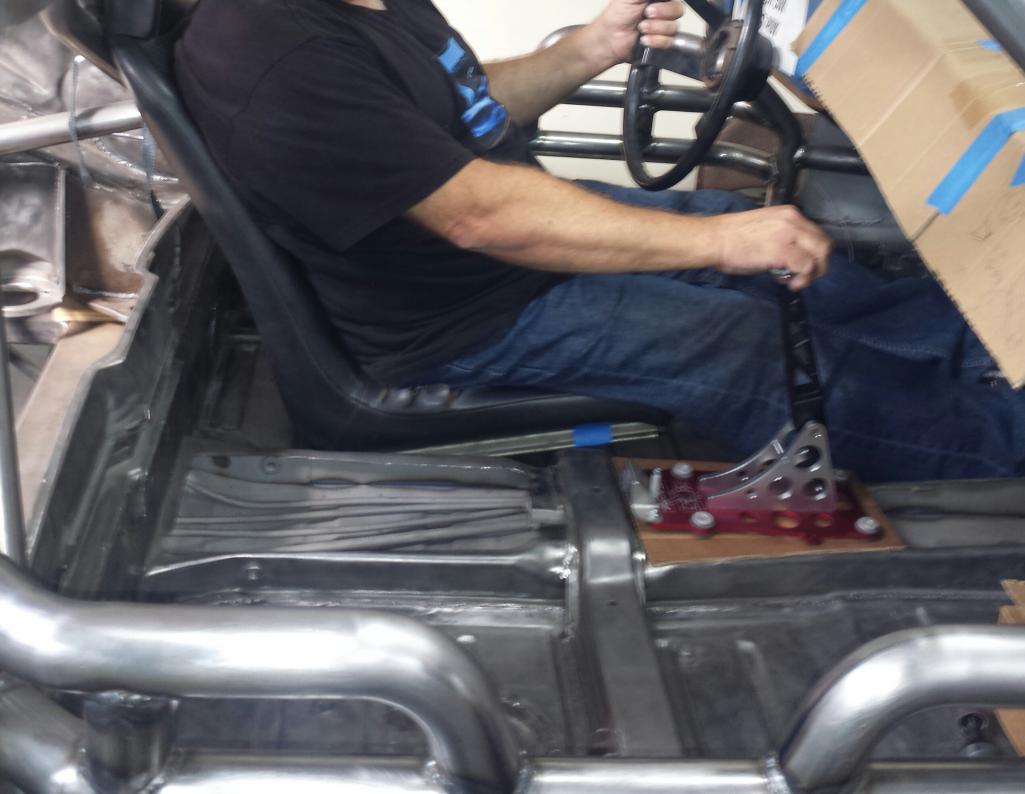
Posted by: r_towle Oct 7 2015, 08:23 PM
You are sick, in a good sort of way.
Could you post the table or jig you built to hold the car still while you do this welding?
I am looking for se ideas.
Posted by: Mueller Oct 7 2015, 09:14 PM
This build just keeps getting better and better...
Does the Cayenne/Panamera V8 bolt to any of "standard" Porsche or Audi'ish transaxles?
I like that the Audi 4.2 bolts to a Boxter transmission, however hard to pass up a fairly low mileage Porsche engine for a little bit more money.
Posted by: Maltese Falcon Oct 7 2015, 11:46 PM
You are sick, in a good sort of way.
Could you post the table or jig you built to hold the car still while you do this welding?
I am looking for se ideas.
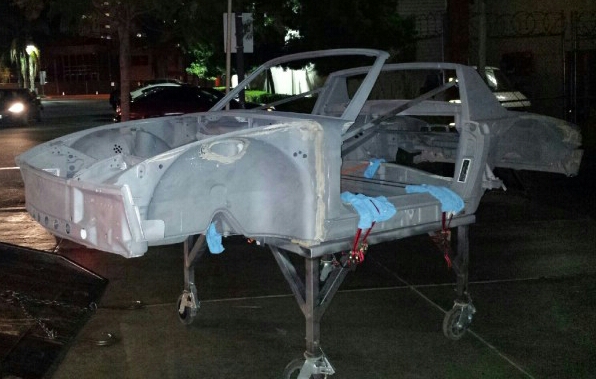
The jig that I use on this build was built from 2"x 6", .250" wall rectangular steel tube. This rectangular "Base" was built on a flat steel table.
We added legs and caster wheels/brakes so we can move around the shop. The 914 bolts down to the rectangular base in 4 places.
I bolt 2 adjustable side bars (solid 1" sq. steel) in the doorways/to Targa bar...record, check and adjust the dimension at the door openings. Two more support bars; 1 spanning across the front shock towers, and 1 spanning across the upper rear longs.
I also sent it over to the media blaster and paint shop on the rolling jig. I like this height for working around from all angles. It is also at the correct height to allow the v8 to roll underneath it.
Posted by: Maltese Falcon Oct 8 2015, 12:07 AM
This build just keeps getting better and better...
Does the Cayenne/Panamera V8 bolt to any of "standard" Porsche or Audi'ish transaxles?
I like that the Audi 4.2 bolts to a Boxter transmission, however hard to pass up a fairly low mileage Porsche engine for a little bit more money.
Unfortunately these v8 engines do not mate to any of the Porsche transaxles without a custom adapter plate. Our plate is cnc milled from T6 aluminum and is only .750" thick. That is a good dimension as I can't have a super long drivetrain that might protrude into the cabin. I'm not sure about the boxster transaxle bolt patterns-to-v8 Porsche. We also moved the starter motor into the standard transaxle location ; on the Cayenne it is mounted below the intake plenum in the V of the engine
Marty
Posted by: Cracker Oct 8 2015, 05:52 AM
Thanks for the updates...always a "treat" to see what (and how) you folks are building this car. Keep'm coming please.
Tony
Posted by: RobW Oct 8 2015, 07:50 AM
Posted by: horizontally-opposed Oct 8 2015, 09:50 AM
Been following this off and on, and now revisiting. All I can say is: whoa. What a cool father and son project, and what an ambitious project.
I always thought the flat-fan car would be impossible to top as the wildest all-Porsche 914 hot rod. I guess I was wrong.
pete
Posted by: Maltese Falcon Oct 8 2015, 12:24 PM
Been following this off and on, and now revisiting. All I can say is: whoa. What a cool father and son project, and what an ambitious project.
I always thought the flat-fan car would be impossible to top as the wildest all-Porsche 914 hot rod. I guess I was wrong.
pete
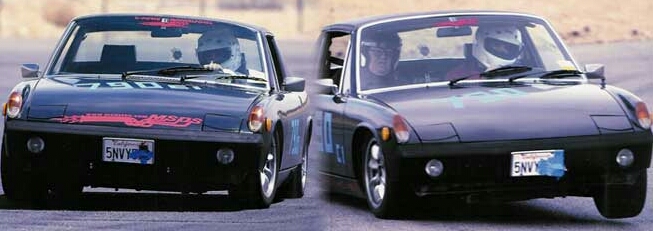
Thank you Pete for the kind words , my son has been involved with car projects early on. This is our 914 CI class (POC) that we started building when he was 15 1/2 years old. He had the class record when he was 18.
John Williamson (the late + great) out for some laps with Matt at Streets of Willow

Marty
Posted by: Maltese Falcon Oct 10 2015, 08:22 PM
Setting up the sheet metal for the new mono-wiper on the cowl. 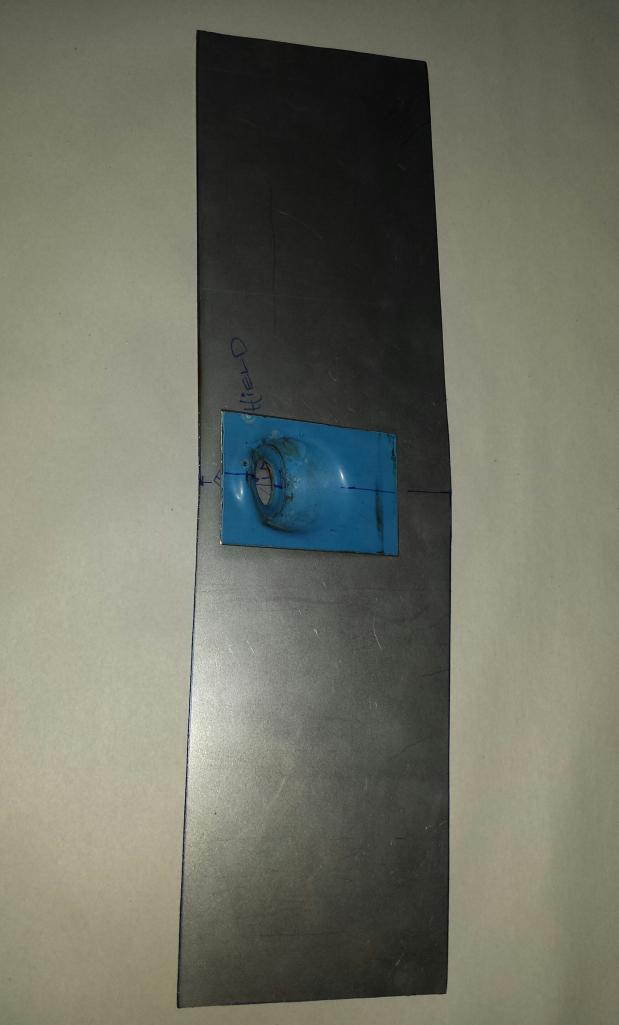
Posted by: Maltese Falcon Oct 10 2015, 08:28 PM
Placement and final trimming for rear bumper fitment.
With this brand (A.I.R.) fiberglass bumper, you can't use the factory dog bones...so I will shape my own custom spacers.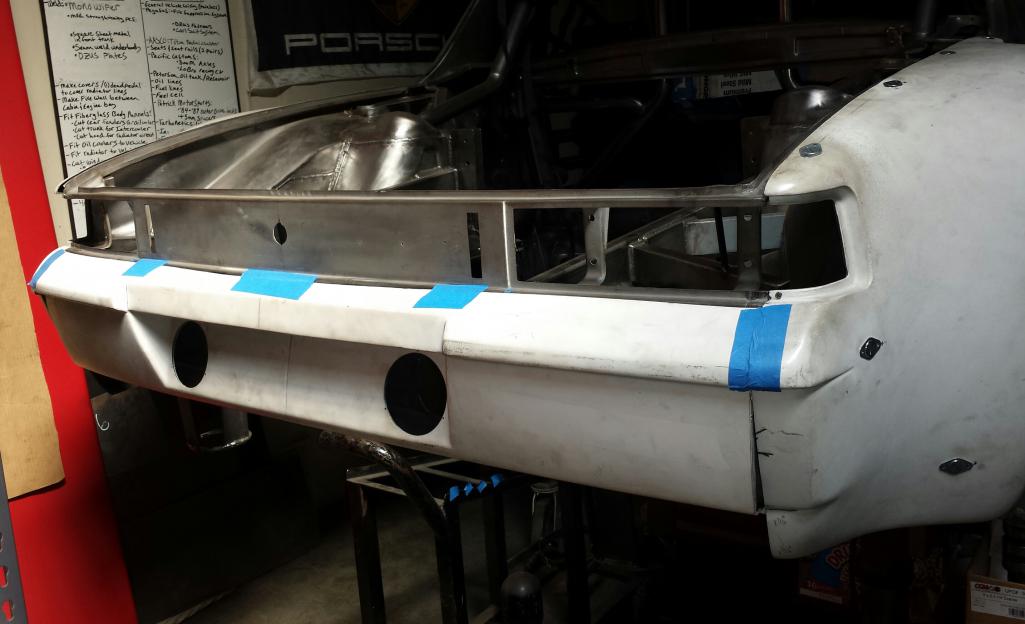
Posted by: Maltese Falcon Oct 10 2015, 09:15 PM
Just had to take a quick burger break, it's gotta be an In-N-Out 
Posted by: 914forme Oct 12 2015, 04:28 AM
Setting up the sheet metal for the new mono-wiper on the cowl.
Please so more details on your mono wiper :web:
Guess my real question ones down to motor setup. Hope your modifying something lite in weight. Later Model 911 motor is 4 pounds liter than my 914 motor, as I have modified a rack for that all ready, but, I would prefer to go mono. Which I did on my 914-4 with a Jetta Wiper Arm and Blade. IT was from the pass side location, did a great job, for what little rain the car sees. That and Rain-X. My plan includes filling the center vent, so I might as well do the cowl, and make it a true mono wiper.
BTW, love the build, and about to make a similar dolly as soon as the bottom of the car is sealed up.
Posted by: Maltese Falcon Oct 12 2015, 08:16 PM
The mono wiper is a combination of AFI and Marinco watercraft items.
The blade is 24", arm is adjustable from 10"-14". I chose this method as there are no rods or mechanisms involved. The sweep, park of the blade is adjusted by a cam inside the motor unit. It is also has 2 speeds. A simple bracket system to hold it, and a 5/8" shaft adapter bushing is all that's needed. 
Posted by: bulitt Oct 13 2015, 02:33 AM
Thats cool and probably period correct for racers. However the mono on my wifes old E320...well...it works good on sunny days 
Posted by: sixnotfour Oct 13 2015, 06:10 AM
monoemono Great choice of motor 
dont forget to get a chiwawa to ride shotgun a
that blade may be to long ,,unless you have a pantograph style arm ??
Attached image(s)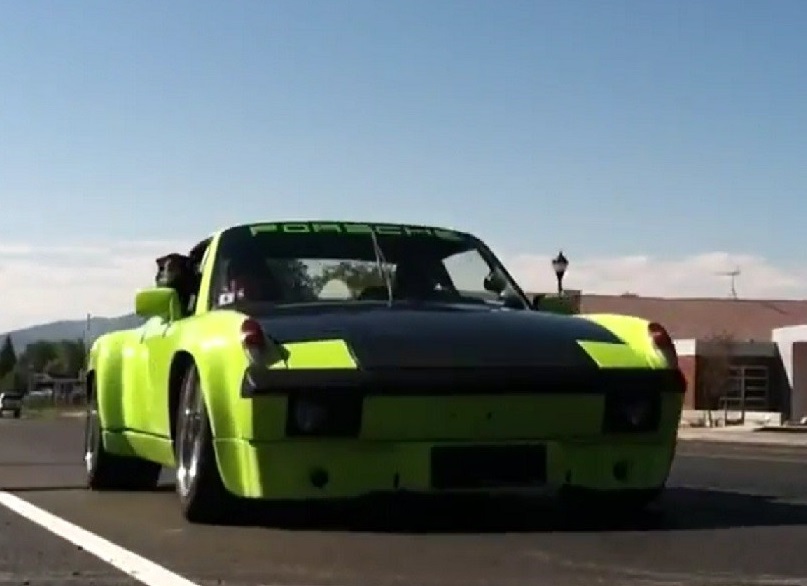
Posted by: Maltese Falcon Oct 16 2015, 09:48 PM
A custom tool that I fabb'd up, it holds the vents down in place on the cowl while I'm cutting away. The tool is held down on the sheet metal with one hand while I run the small saw with my other hand.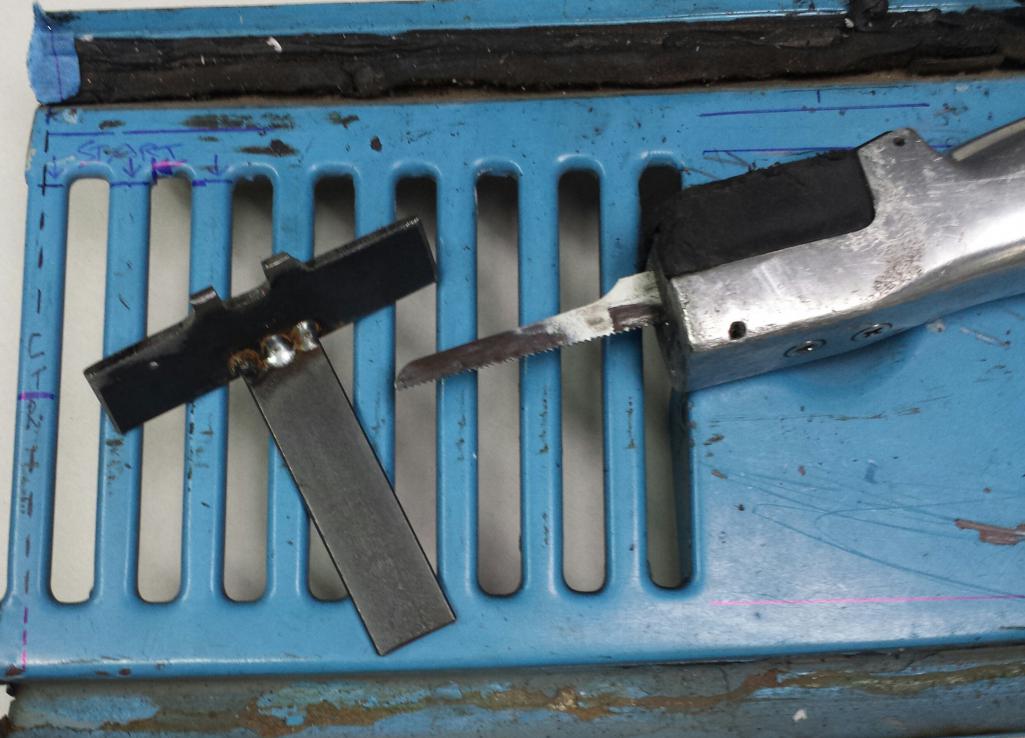
Posted by: Maltese Falcon Oct 16 2015, 09:54 PM
The placement of the holding tool; the grille "Fingers" stayed in place while cutting...nothing bent or damaged.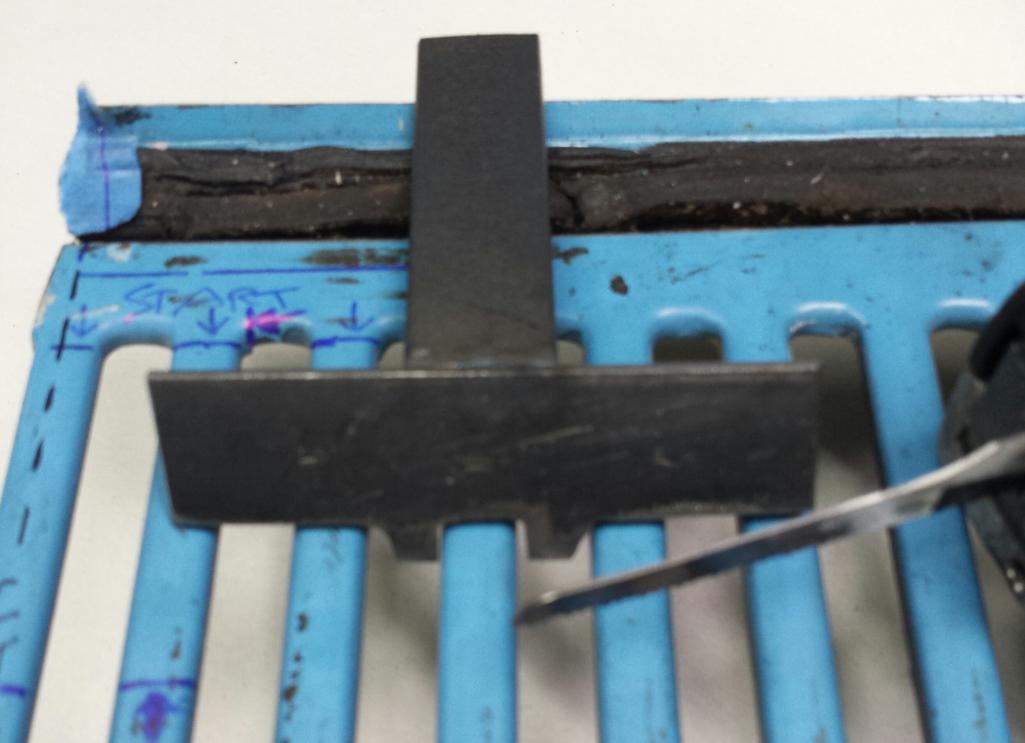
Posted by: Maltese Falcon Oct 16 2015, 10:02 PM
Cutting out the recess for the bottom of the new mono-wiper/ 18 ga. mounting plate. The hold down tool also doubles as a safety buffer for my fingers while cutting.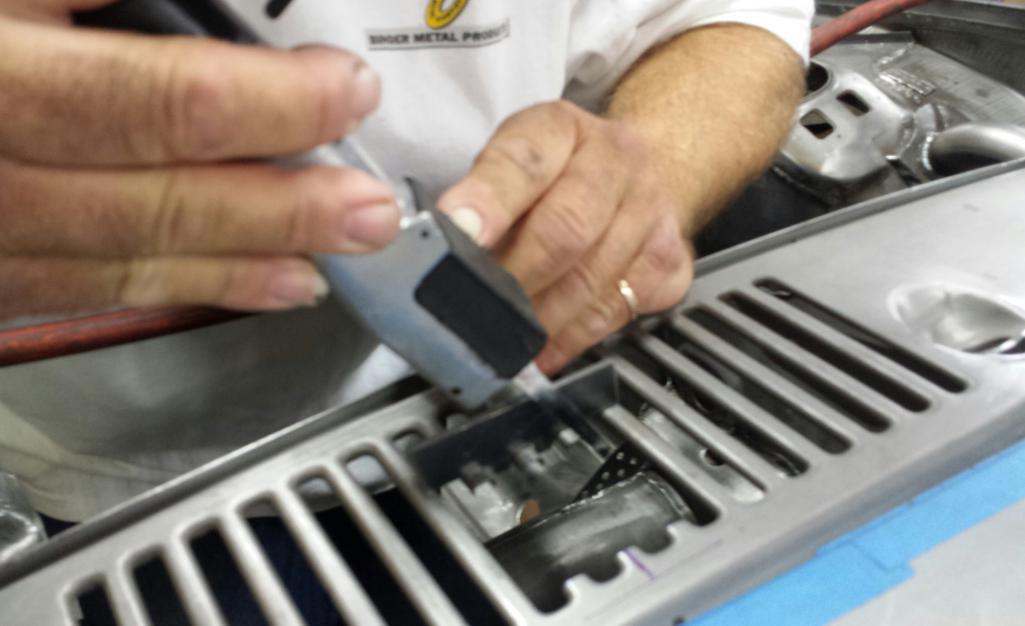
Posted by: Maltese Falcon Oct 16 2015, 10:05 PM
Trial fit and almost ready for welding in place.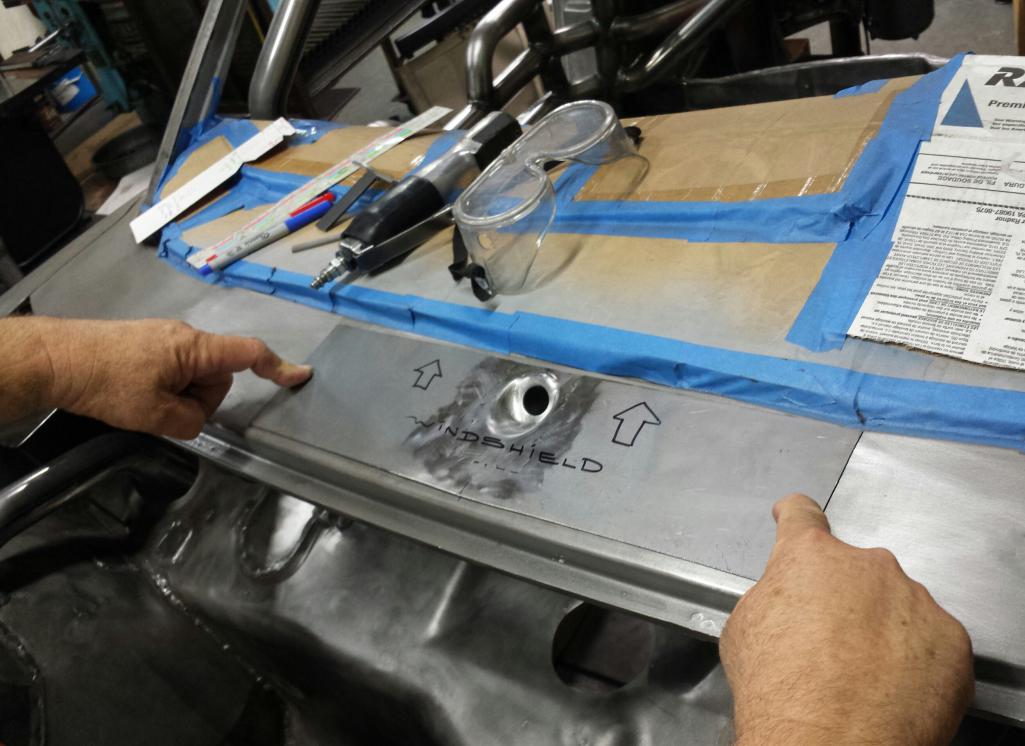
Posted by: Maltese Falcon Oct 16 2015, 10:09 PM
As viewed from under the cowl, recess is approximately 2" x 2" area.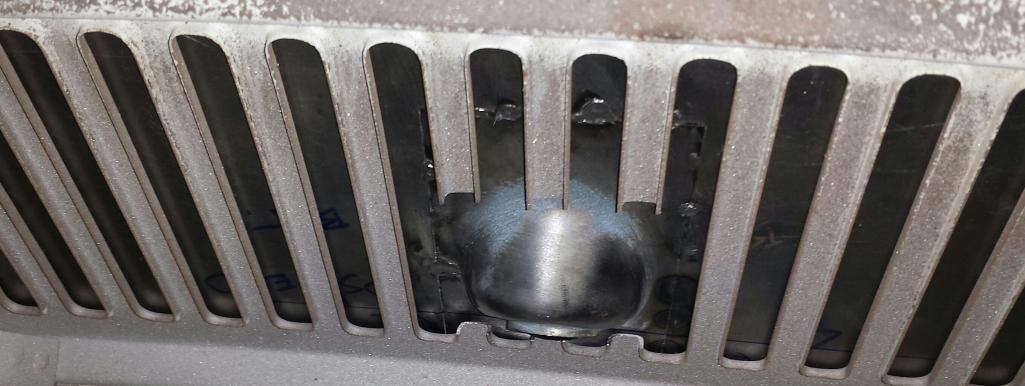
Posted by: Maltese Falcon Oct 16 2015, 10:17 PM
For kicks...I placed the wiper down into the wiper shaft area . There is enough adjustment in the arm for final dial-in...when the wiper motor gets fitted.
Posted by: Maltese Falcon Oct 16 2015, 10:18 PM
Another view...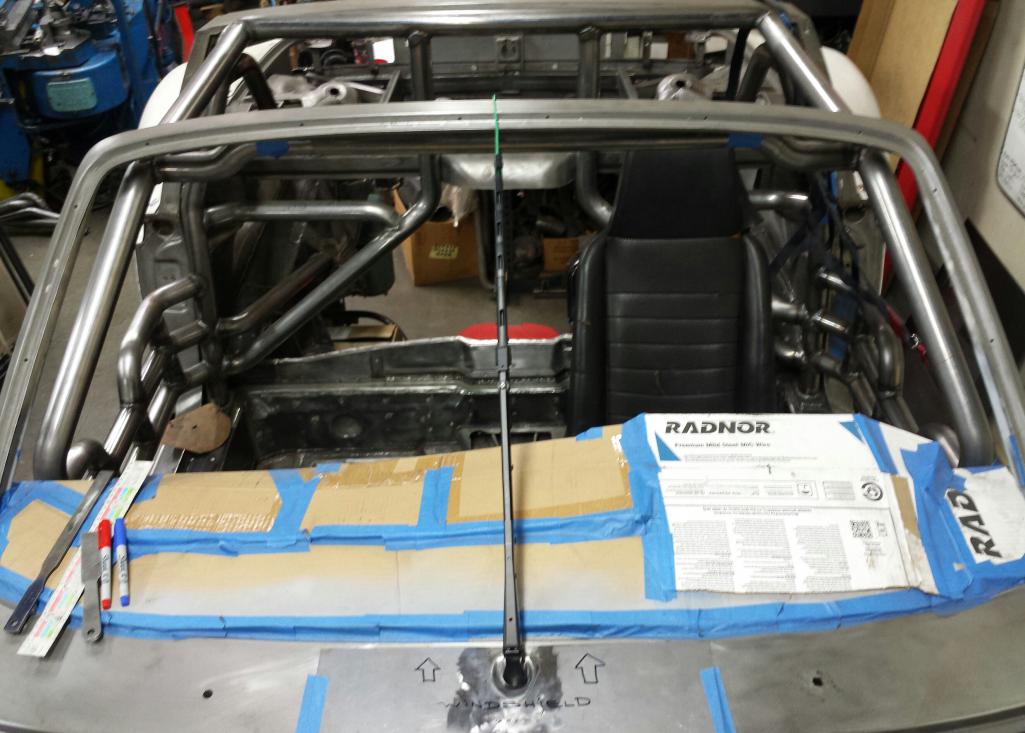
Posted by: Maltese Falcon Oct 16 2015, 10:27 PM
MSDS 9148-gtt photographer and good friend Sherwood, he's also a member here.
Posted by: 914forme Oct 18 2015, 10:55 AM
Thank you, all the motivation I need.
Posted by: Maltese Falcon Oct 25 2015, 02:59 PM
914-8 gtt projekt approval by a Factory official, our good friend Uwe (center in pic) stopped in the MSDS Zentrum for a visit. He has been following our hot-rod builds since the mid '80s. He wanted to know what this 914's nickname will be...good question
Lots of Porsche crew in California during Rennsport Reunion5.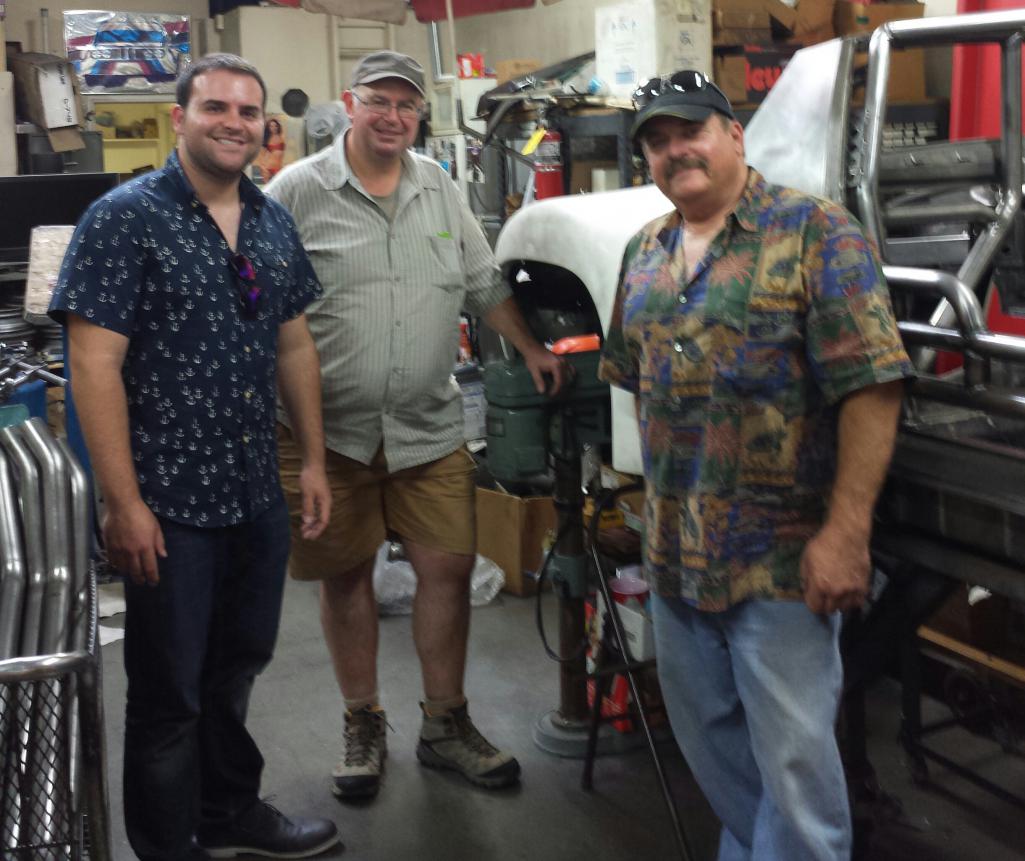
Posted by: maddog Feb 16 2016, 08:05 PM
any new pics you can share?
Posted by: Maltese Falcon Feb 17 2016, 05:10 PM
I need to get the PR man back into forum-mode as there are new updates.
Here's the drive train hoist that we fabricated for about 625 lbs.of engine/Trans placement.
Bottom view; foot pedal, hand control and extended base.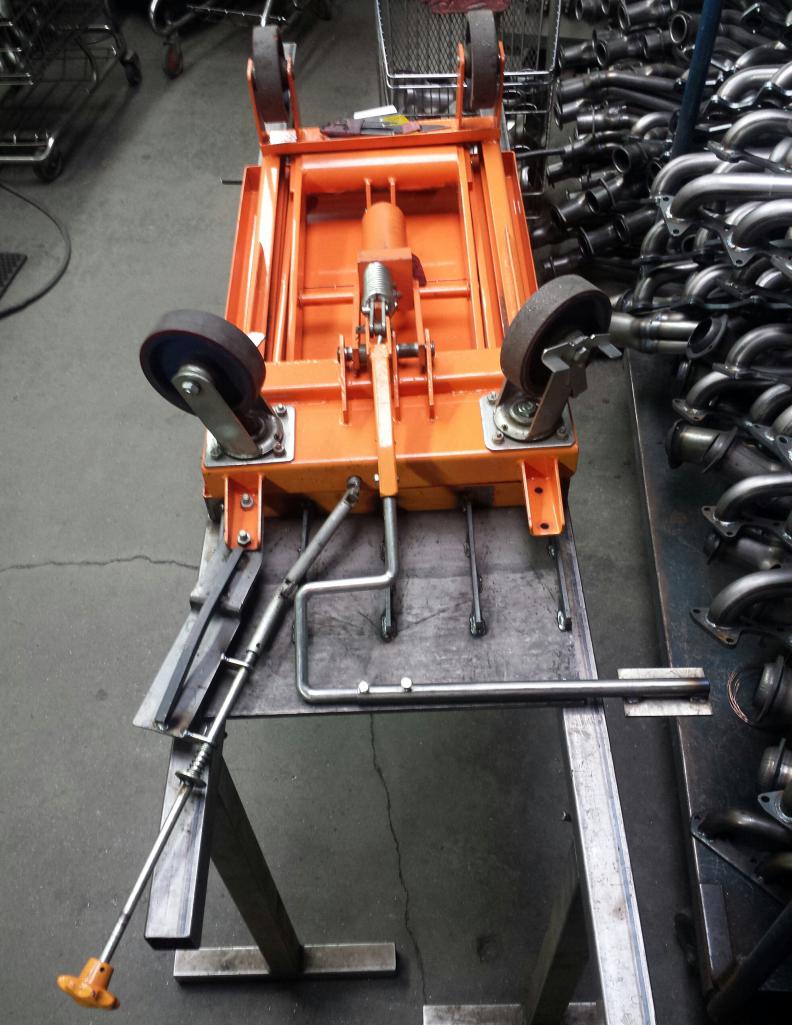
Posted by: Maltese Falcon Feb 19 2016, 12:44 AM
Another view of the quick release for the Safecraft net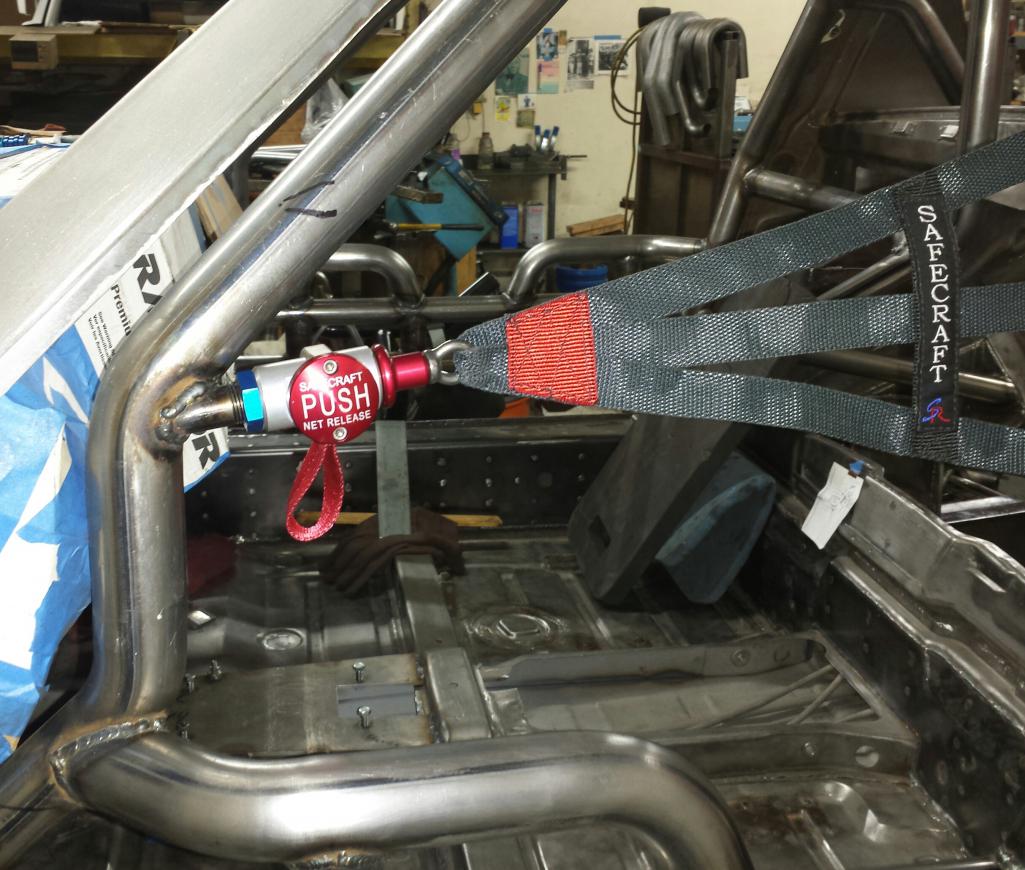
Posted by: Maltese Falcon Feb 19 2016, 12:48 AM
Stainless steel shift tower plate (.250") welded in place, across the tunnel.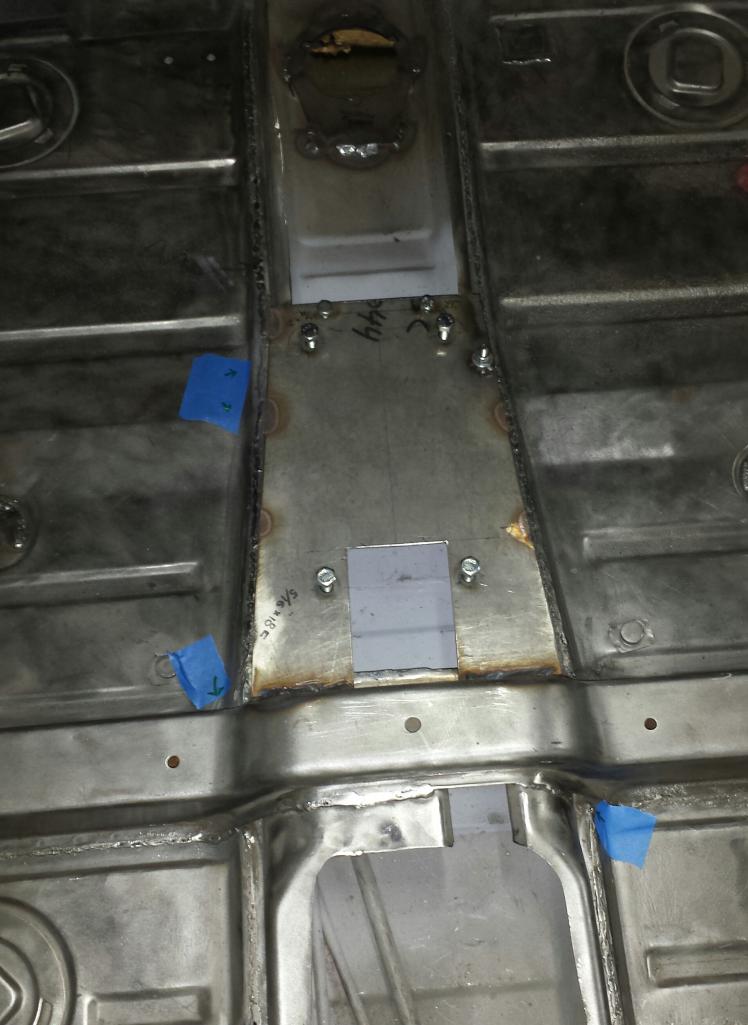
Posted by: Maltese Falcon Feb 19 2016, 12:50 AM
Mono wiper plate now welded down to the cowl.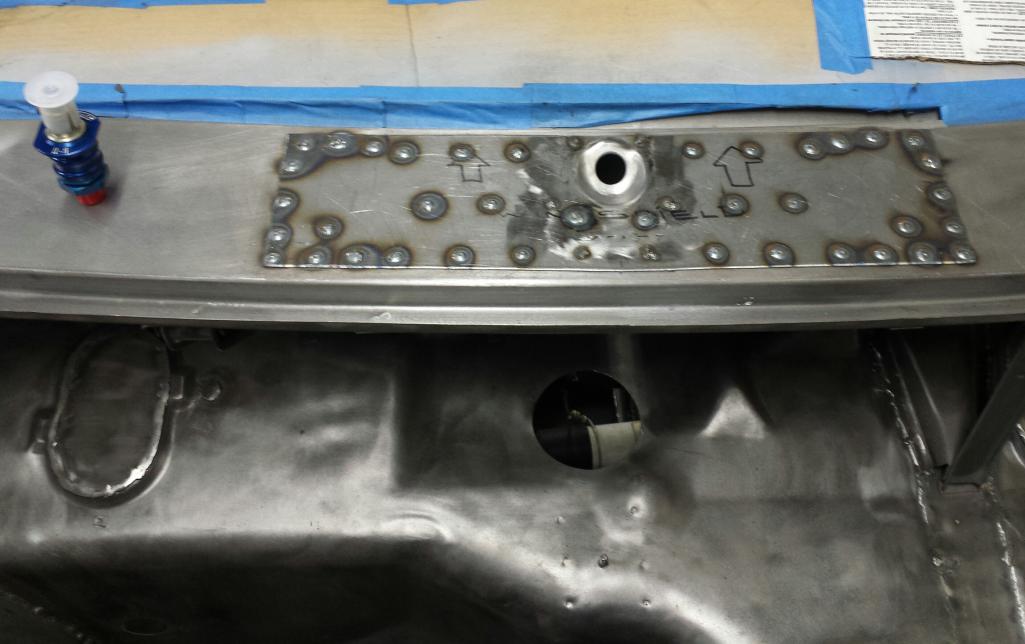
Posted by: 396 Feb 19 2016, 01:19 AM
Love all the mods, I guess POC will have to put you in the P1 class or an exhibition class if and when you decide to run this monster.
Posted by: Mueller Feb 19 2016, 01:49 AM
This car keeps getting better and better!
Posted by: Cracker Feb 19 2016, 07:37 AM
Marty,
I was just thinking the other day I probably need a net...I hope my copy-cat is taken as flattery. Would you kindly post a picture of how you fabricated the rearward mounts? Thank you in advance!
PS: Although my car is not even within the same league as your build...it would be an absolute thrill (for me) to get our cars together on track. My "new" engine arrives tomorrow from TX - it is "my version" of the perfect power plant. How quickly can you get that car finished? I'm heading to Road America later this year...
Tony
Another view of the quick release for the Safecraft net
Posted by: Maltese Falcon Feb 19 2016, 10:56 AM
Tony, they make the net-strap end real simple to install.
Each of the 3 horizontal straps wrap around the vertical section of the roll bar.
Each strap is held in place with a buckle, similar to the type used on your helmet strap (just wider for this net-strap). No welding at all, makes a real clean installation.
I don't know when we will trailer out to Atlanta, lots of tracks out west !
Once she's running, I'll be testing and tuning at Willow Springs (home track ) with some Haltech tuners.
More updates as the build continues
Marty
Posted by: Maltese Falcon Feb 21 2016, 11:48 AM
Took a measurement and made an outline off of a gt3RS quarter . I'll sketch it into the rear Sheridan 914 quarters, and install the factory gt3RS ducts.
These will feed air to the left + right rear oil coolers. Always handy to have another Porsche nut in the neighborhood 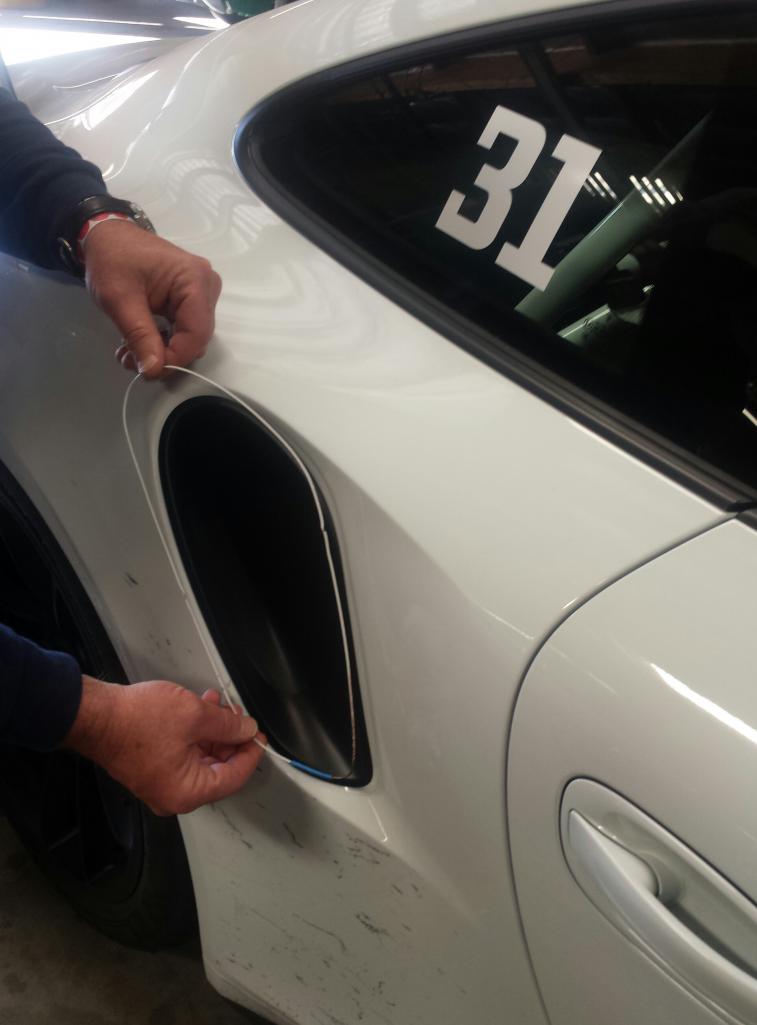
Posted by: MATTYLITE Feb 24 2016, 06:11 PM
Here's the layout on the quarter panel itself.
http://s771.photobucket.com/user/MatthewEvanSchneider/media/20160222_162920_zpszkomt44x.jpeg.html
Posted by: Cracker Feb 24 2016, 06:39 PM
Thanks Marty for the "push"...I've gone full Safecraft (harnesess, twin window nets, fire bottle system, etc). They have a unique edge about them...again, thanks to you for bringing them to our attention!
Your car continues to amaze me! At least I can say there is something in common with your car...our window nets! 
Tony
Posted by: Maltese Falcon Apr 2 2016, 07:28 PM
One more item completed; hand built ecu harness for the Haltech Elite 2500 management system. Designing the custom schematic and the harness build was fun , the Weller soldering gun got her done ! The Porsche Cayenne TT ecu is not tuneable for anywhere near the needs of this 5.0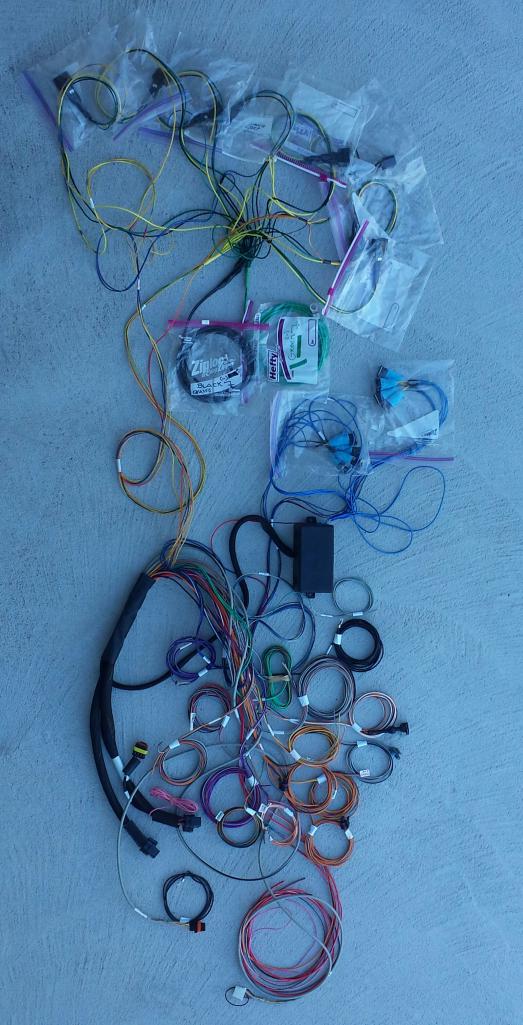
Posted by: Cracker Apr 2 2016, 08:14 PM
Very nice Marty...I'm glad those days are over!
T
Posted by: Alphaogre Apr 2 2016, 09:55 PM
What bender are you using? You got some mad bending skills! lookin good!
Posted by: Maltese Falcon Apr 2 2016, 10:30 PM
What bender are you using? You got some mad bending skills!
lookin good!Using our Teledyne-Pines N° 2 rotary hydraulic mandrel tube bender. After I sketch out the design, I use 3/4" dia. emt tubing / bend up with a contractors conduit bender. Then take the samples to the mandrel machine and produce the 1 3/4" dia ×".120 wall bends. The rest is cutting, and finishing to spec-fit, welding, repeat for the other side.
It's also what I've been doing since 1976...so it's kind of my craft...definitely no short cuts to it !
Posted by: Maltese Falcon Apr 2 2016, 10:41 PM
What bender are you using? You got some mad bending skills!
lookin good!Here is a "Continuation " product that I haven't made in about 35+ years, some customers want these again. For the Manx + dune buggy guys, the MSDS Baja Eliminator.
Cool angles and precise bending going on here in the extractor header, and 4 over the top exhaust tips.
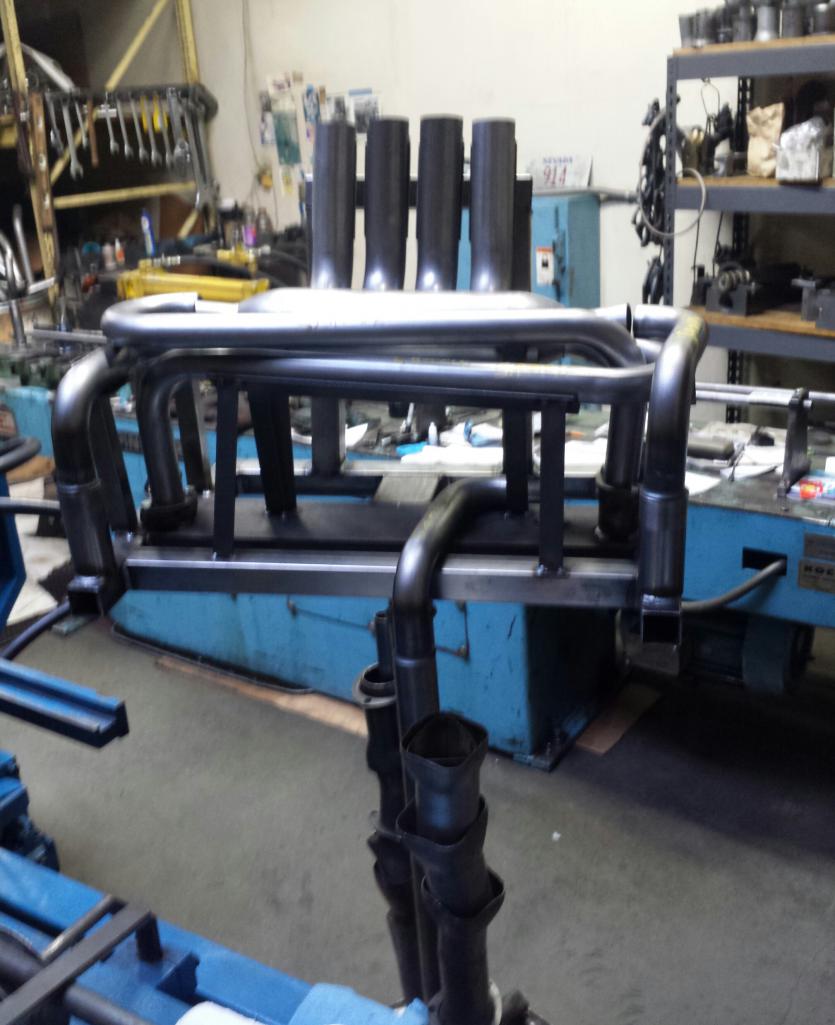
Posted by: sb914 Oct 21 2016, 07:41 AM
Hey Marty,we need a update also when's the next parking lot party ?
Posted by: Cracker Oct 21 2016, 07:54 AM
Hey Marty,we need a update
also when's the next parking lot party ?
Posted by: 396 Oct 21 2016, 11:51 AM
Sometimes, I think Marty just tend to surf this forum. I remember seeing other updates in the various Porsche forums.
Yes, I think the ones who really appreciate this out of the box track toy would love to see updates to this incredible build
Posted by: MATTYLITE Oct 21 2016, 03:18 PM
Hey Marty,we need a update
also when's the next parking lot party ?Small update for you all below!
Sometimes, I think Marty just tend to surf this forum. I remember seeing other updates in the various Porsche forums.
Yes, I think the ones who really appreciate this out of the box track toy would love to see updates to this incredible build
You are correct that he (and I) still very much frequent this forum, and others too.
We are very happy to know that you all still enjoy seeing our progress on this project. We are 99% done with fabrication / body panel fitting, and will hopefully be in paint by November 1st.
http://s771.photobucket.com/user/MatthewEvanSchneider/media/20160311_230814_zpsxthd4bll.jpg.html
http://s771.photobucket.com/user/MatthewEvanSchneider/media/20160624_225741_zpsh4po2fd0.jpg.html
http://s771.photobucket.com/user/MatthewEvanSchneider/media/20160731_115730_zps61eyjuba.jpg.html
The nuts and bolts behind the fiberglass fitment:
http://s771.photobucket.com/user/MatthewEvanSchneider/media/20160716_170342_zpsnznu2rpb.jpg.html
The wide opening intake for the radiator (note, the square opening on the bottom will be welded up):
http://s771.photobucket.com/user/MatthewEvanSchneider/media/20160828_132733_zpsibiivja4.jpg.html
The intake end for the radiator air flow with the maestro at work:
http://s771.photobucket.com/user/MatthewEvanSchneider/media/20160828_142858_zpsnmuj1vg9.jpg.html
Will post more as soon as we can.
Thanks!
Posted by: Mike Bellis Oct 21 2016, 05:07 PM
I expect to see this car at WCR 2017.
Posted by: Maltese Falcon Dec 5 2016, 09:35 PM
Some aerial photography today...off to the paint shop now. Don't you just love Body Shops ?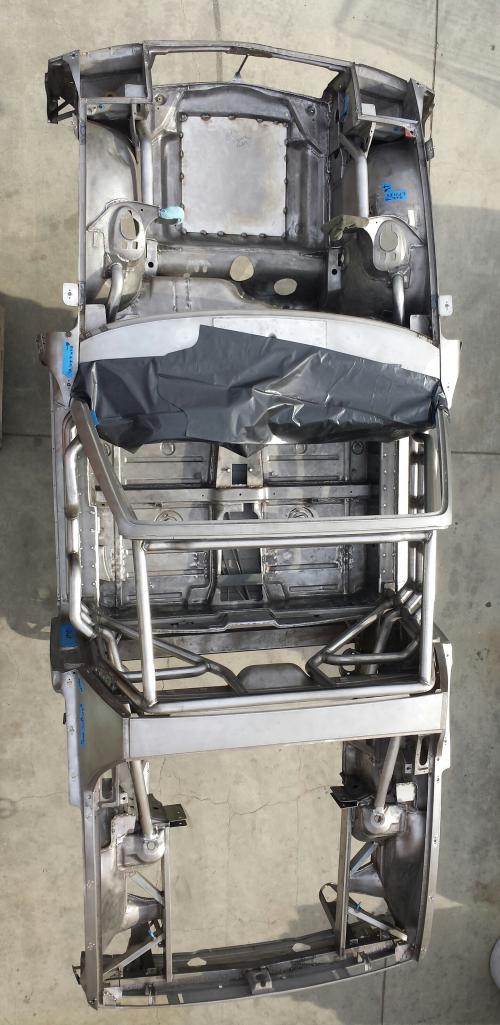
Posted by: sb914 Dec 6 2016, 06:15 AM
Badass can't wait to see this finished.
What color you going with?
Posted by: JmuRiz Dec 6 2016, 08:16 AM
Looking good.
I do love body shops....but that's because ScottyB is my body shop guy
Posted by: Maltese Falcon Dec 6 2016, 01:56 PM
Looking good.
I do love body shops....but that's because ScottyB is my body shop guy
All of past my body shop relationships have been lukewarm. I've been dealing with a new local shop for a couple years...looks like this roller should be smooth sailing.
Scotty is tops tho !
Posted by: Maltese Falcon Dec 14 2016, 03:31 PM
914 meets primer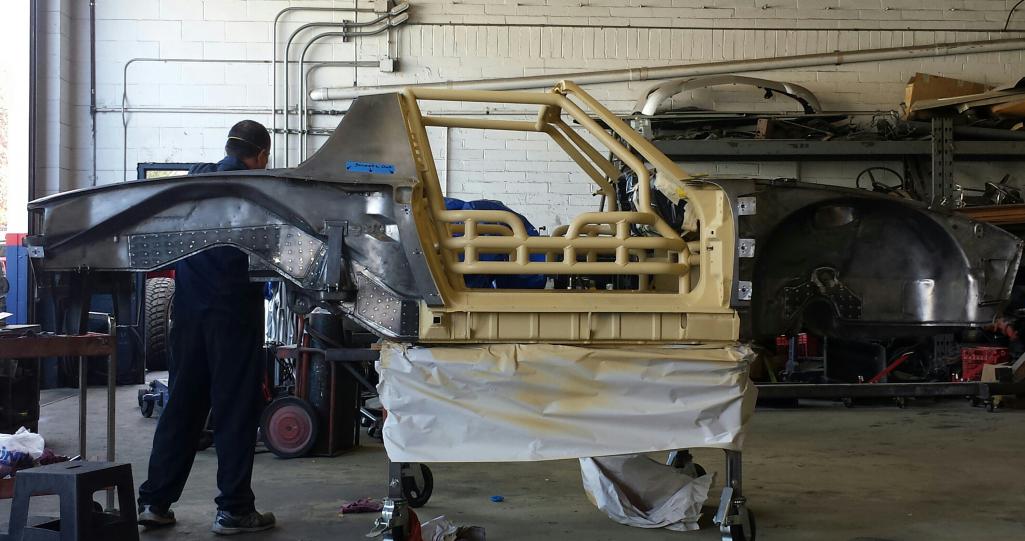
Posted by: siverson Dec 14 2016, 05:22 PM
That's going to be awesome!
-Steve
Posted by: pete000 Dec 14 2016, 06:30 PM
Such great metal work !
Posted by: Maltese Falcon Dec 14 2016, 06:56 PM
Thank you Steve + Pete...wait till you guys see what we're building next
Posted by: Maltese Falcon Dec 16 2016, 12:05 AM
Simple clip/screw attachment to the GT3RS fender ducts, this will keep them in place on the Sheridan quarter panels. After placing my template down to the fenders, I only had one chance to correctly cut the fiberglass...and I nailed it 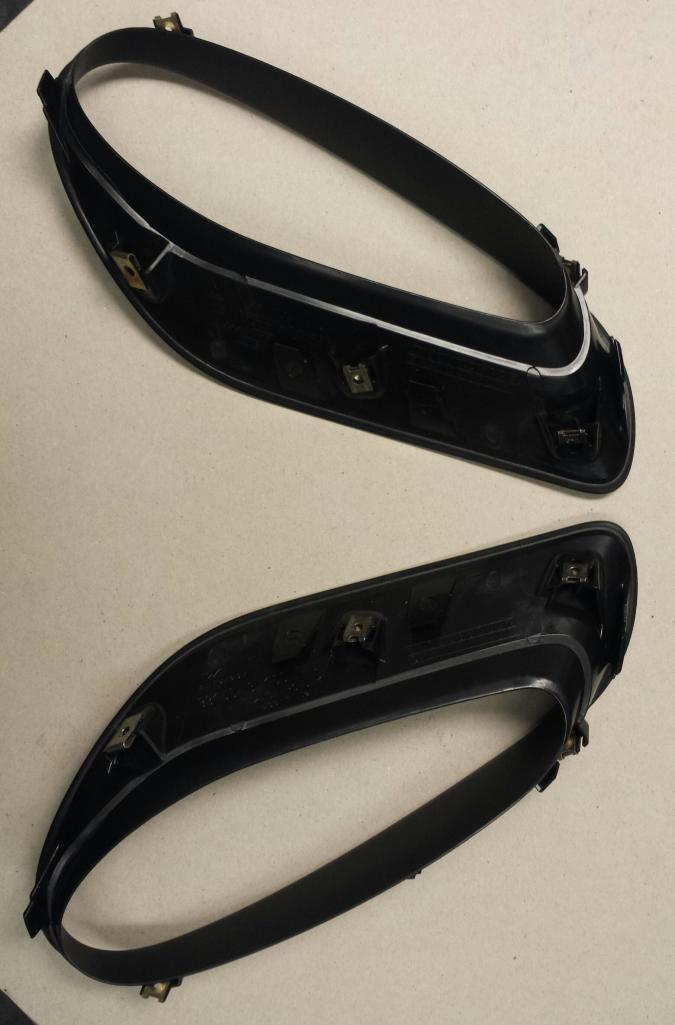
Posted by: Maltese Falcon Dec 16 2016, 12:13 AM
Just another 914-in-primer pic, she will be sprayed in Grand Prix white in Januaury . Happy Holidays everyone ¡!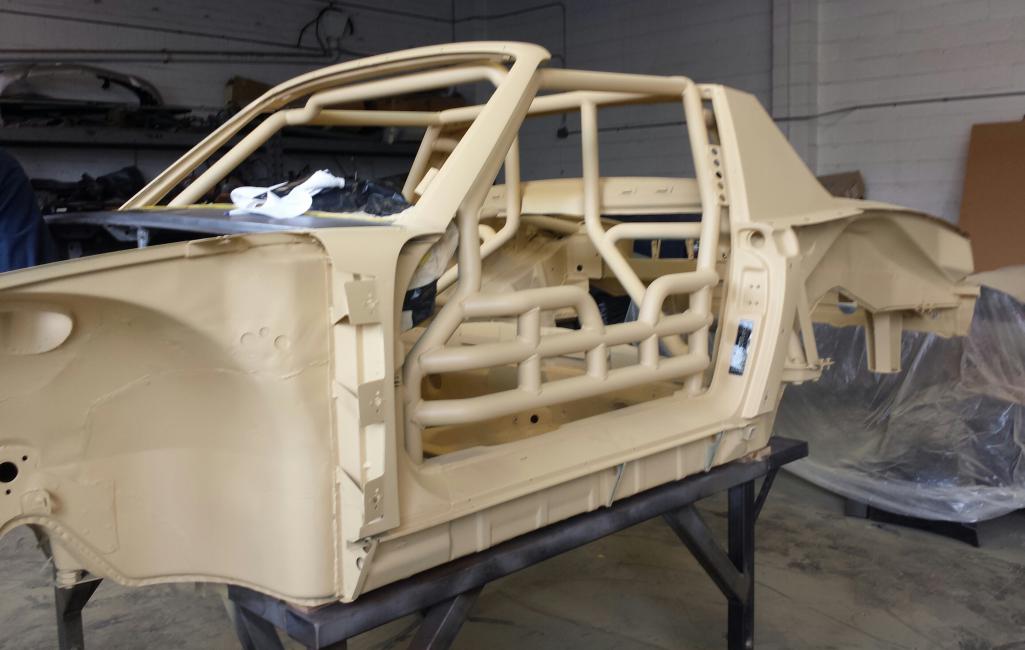
Posted by: Cracker Dec 16 2016, 05:54 AM
...if you keep this up, someone might even nominate you for COTM!
I know how much that means to you!
Tony
Posted by: jd74914 Dec 16 2016, 09:42 AM
Awesome!
Just out of curiosity, why did you go for standard primering, etc. instead of powder coating since this is really just the "hidden" frame?
Posted by: Maltese Falcon Dec 16 2016, 10:13 AM
Awesome!
Just out of curiosity, why did you go for standard primering, etc. instead of powder coating since this is really just the "hidden" frame?
Jim...we needed to install the custom dashboard prior to building our cage around that area (can't install post-cage) . Since powder coating involves the heat/oven cycle...that would be a no-go for the alcantara /CF dashboard. Body shop is using one of the best primers /2 coats, after full metal preperation
Marty
Posted by: jd74914 Dec 16 2016, 12:24 PM
Awesome!
Just out of curiosity, why did you go for standard primering, etc. instead of powder coating since this is really just the "hidden" frame?
Jim...we needed to install the custom dashboard prior to building our cage around that area (can't install post-cage) . Since powder coating involves the heat/oven cycle...that would be a no-go for the alcantara /CF dashboard. Body shop is using one of the best primers /2 coats, after full metal preperation
Marty
That makes sense-totally missed the installed dash.
Can't wait to see it in paint! Happy Holidays Marty and crew!
Posted by: Maltese Falcon Feb 18 2017, 08:34 PM
Fabricating the support brackets for gt3rs air ducts ; installing into rear Sheridan quarter panels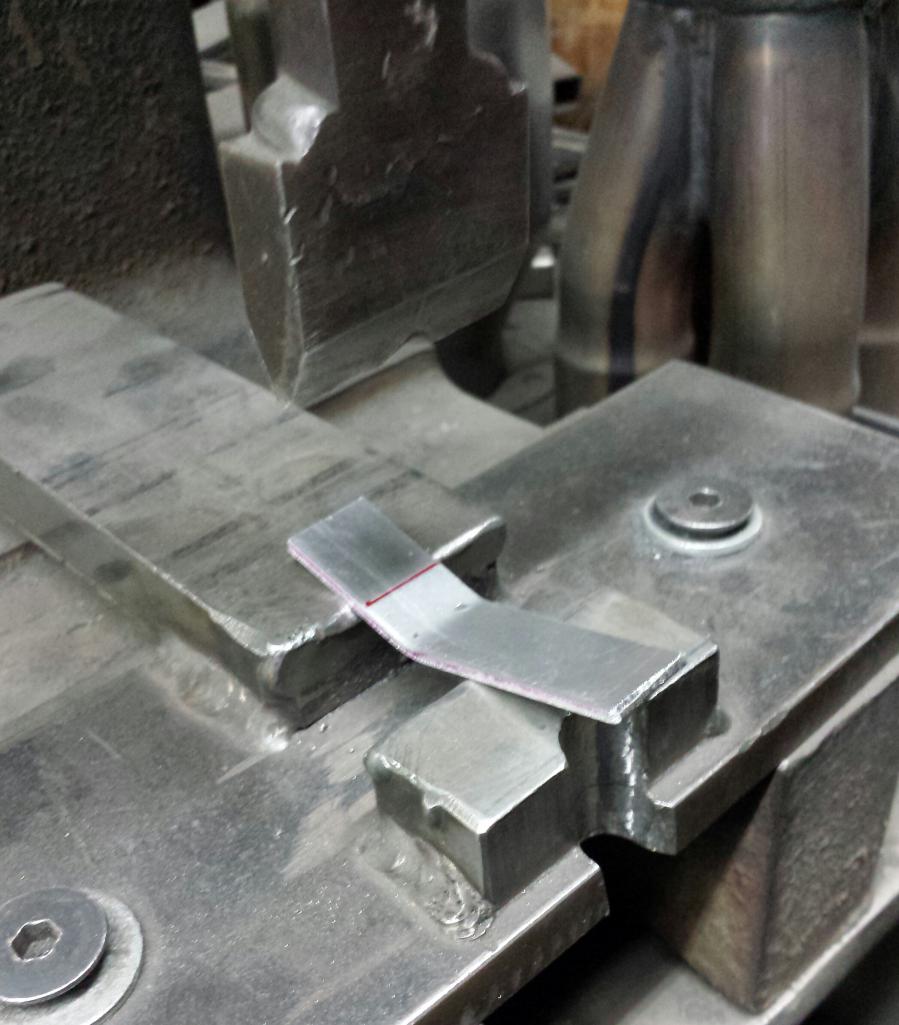
Posted by: Maltese Falcon Feb 18 2017, 08:47 PM
The set- up with rubber tipped vise grips, clamp; the contours of the ducts are made for 991 fitment; clamps help relax the duct into the Sheridan fender, which has a real close contour to the 991 but not exact. Each bracket (6 tot) has its own mating angle to the duct fastener. Simple JB epoxy and a 24 hour set up time, and complete.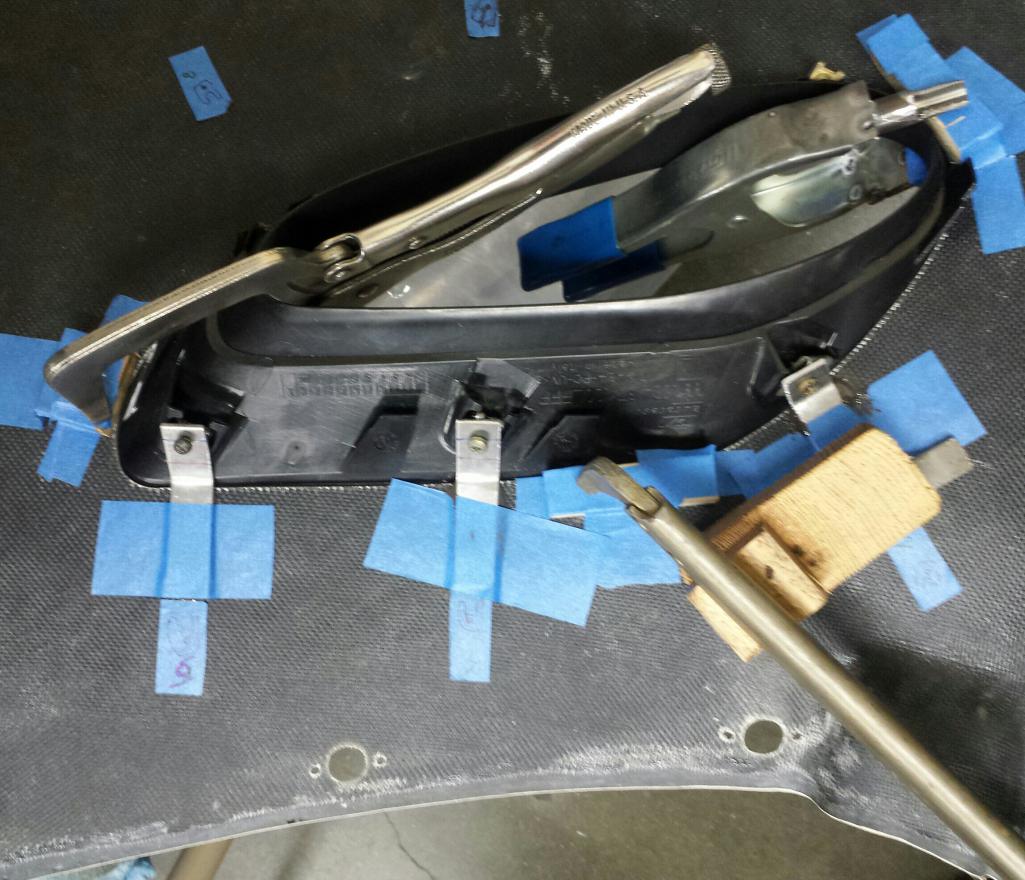
Posted by: Maltese Falcon Feb 18 2017, 09:07 PM
On to the Passenger side set-up...same procedure
Taking these over to the body shop this week to meet the maestro + his paint booth 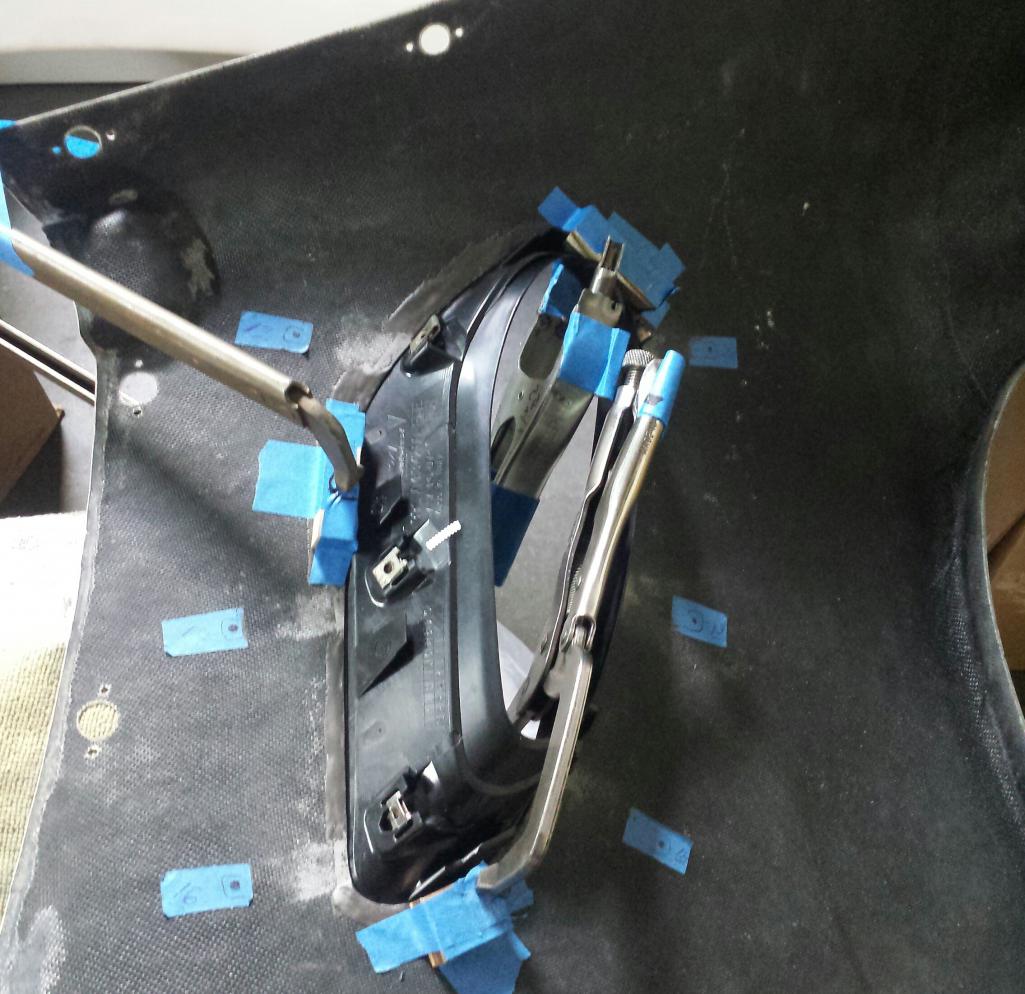
Posted by: Maltese Falcon May 22 2017, 07:57 PM
Some action in the paint booth : GP white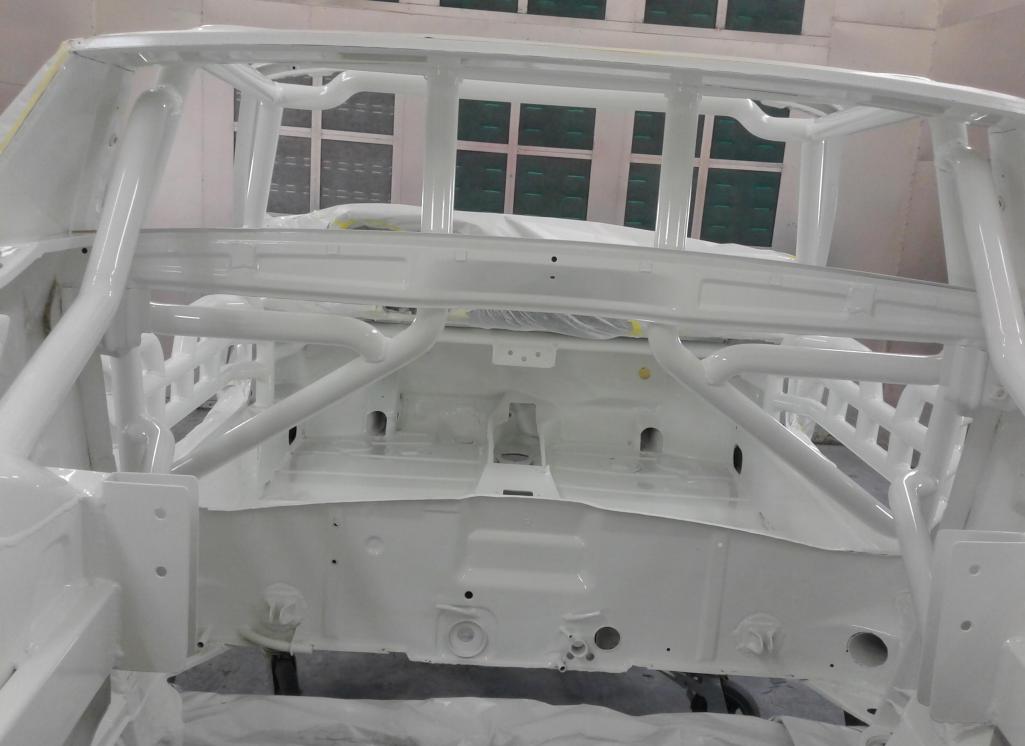
Posted by: Maltese Falcon May 22 2017, 07:58 PM
...one more GP white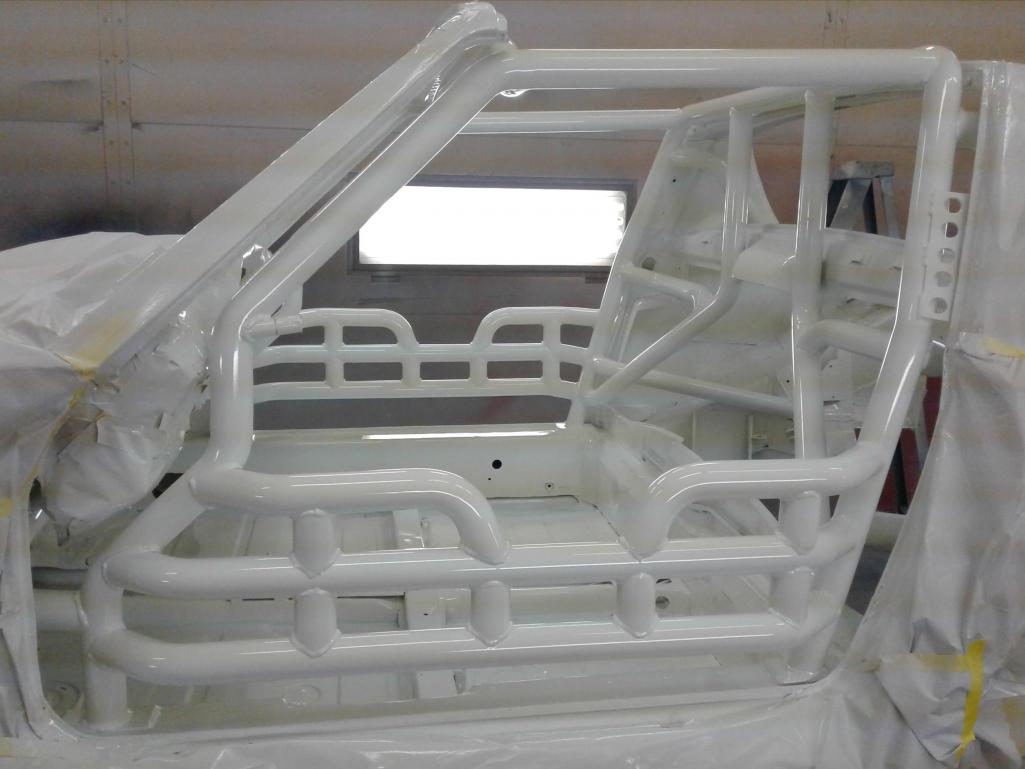
Posted by: Andyrew May 22 2017, 08:01 PM
Ooh la La!!!
Now thats a body in white!!
Posted by: Ferg May 22 2017, 08:51 PM
R
Posted by: My 914 May 23 2017, 07:55 AM
that's a frame for a 1000HP engine!
Posted by: Curbandgutter May 23 2017, 08:04 AM
Incredible work. I can really appreciate the incredible hours and thinking, tinkering, what if scenarios, load paths, usability, maintenance.....on and on. Wow wow fantastic job!
Posted by: Cracker May 23 2017, 08:20 AM
Posted by: horizontally-opposed May 23 2017, 10:52 AM
This is such a very cool project...
Posted by: Maltese Falcon May 23 2017, 02:50 PM
Thanks guys for your comments ! Another view from the paint dept.
Posted by: My 914 May 23 2017, 02:59 PM
I don't think you'll have any problems with twisting.
Posted by: Maltese Falcon May 23 2017, 03:35 PM
I don't think you'll have any problems with twisting.
Twisting is Verboten ¡!
Posted by: Maltese Falcon May 27 2017, 05:08 PM
...couple more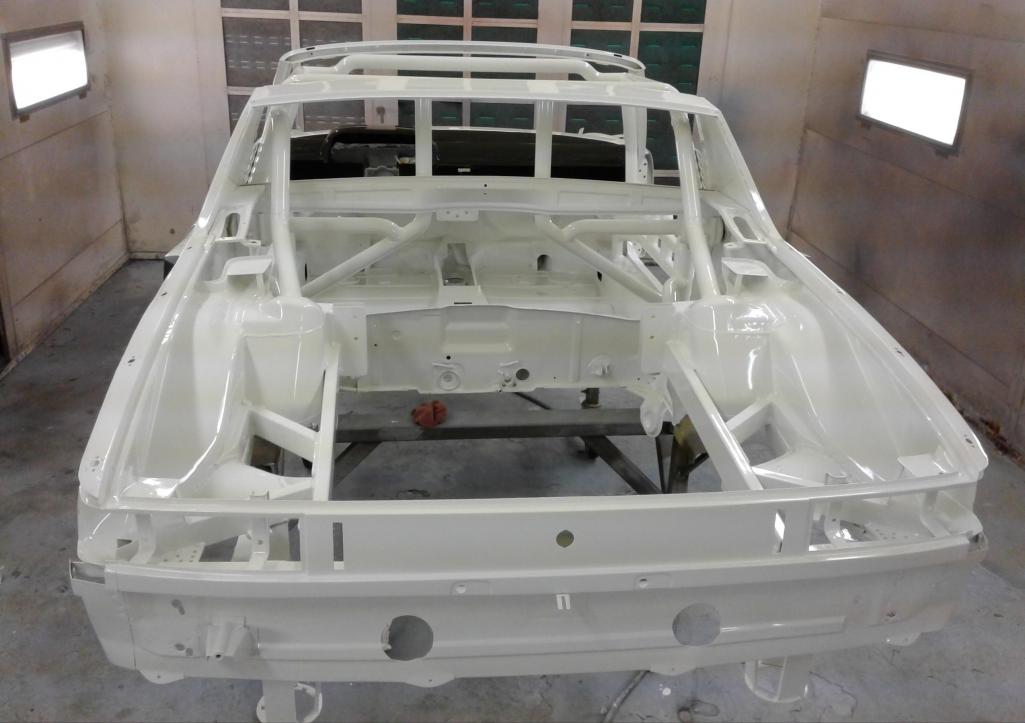
Posted by: Maltese Falcon May 27 2017, 05:20 PM
...last one for now ¡
Everyone have a safe + pleasant Memorial Day; my respect and gratitude to all who serve/ have served 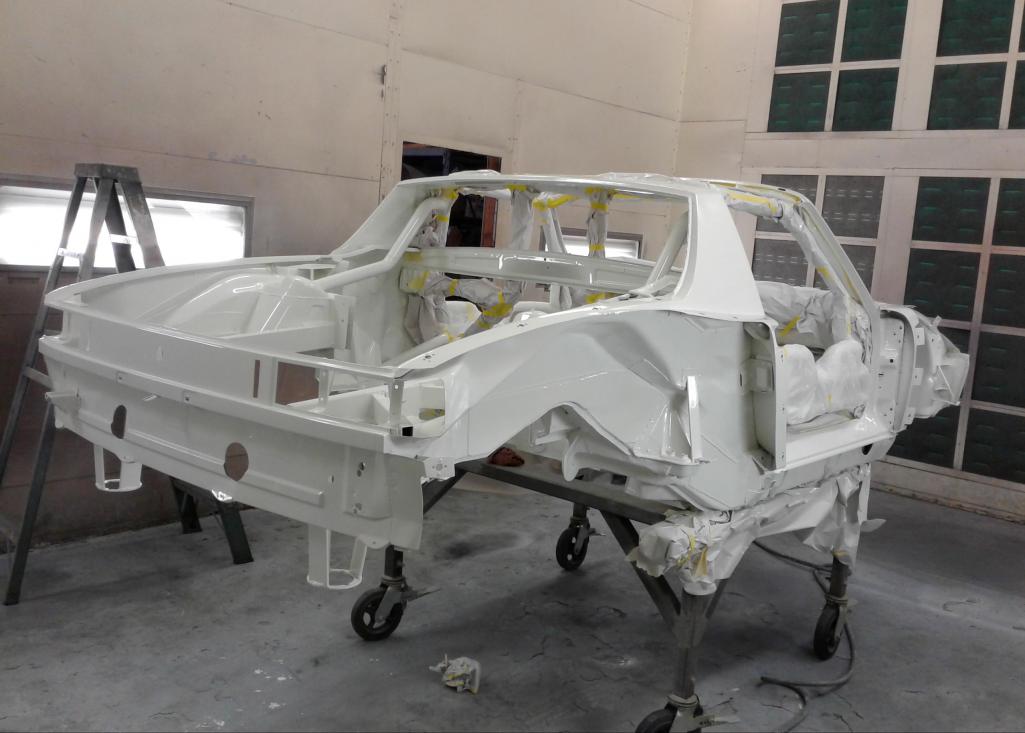
Posted by: Maltese Falcon Dec 23 2017, 05:21 PM
A couple of small detail parts complete: lightweight door-limit stops 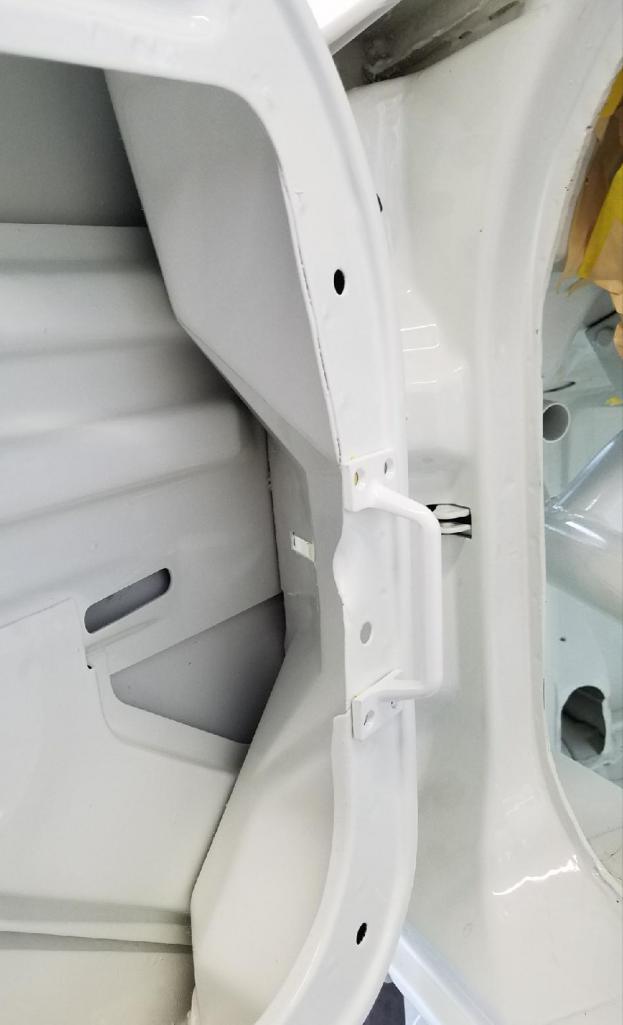
Posted by: Maltese Falcon Dec 23 2017, 05:29 PM
I saw this type of door-limit stop on a vintage 911 ( R gruppe ) at the Rennsport Reunion, so decided to stitch up a set for our 914 F Truppe 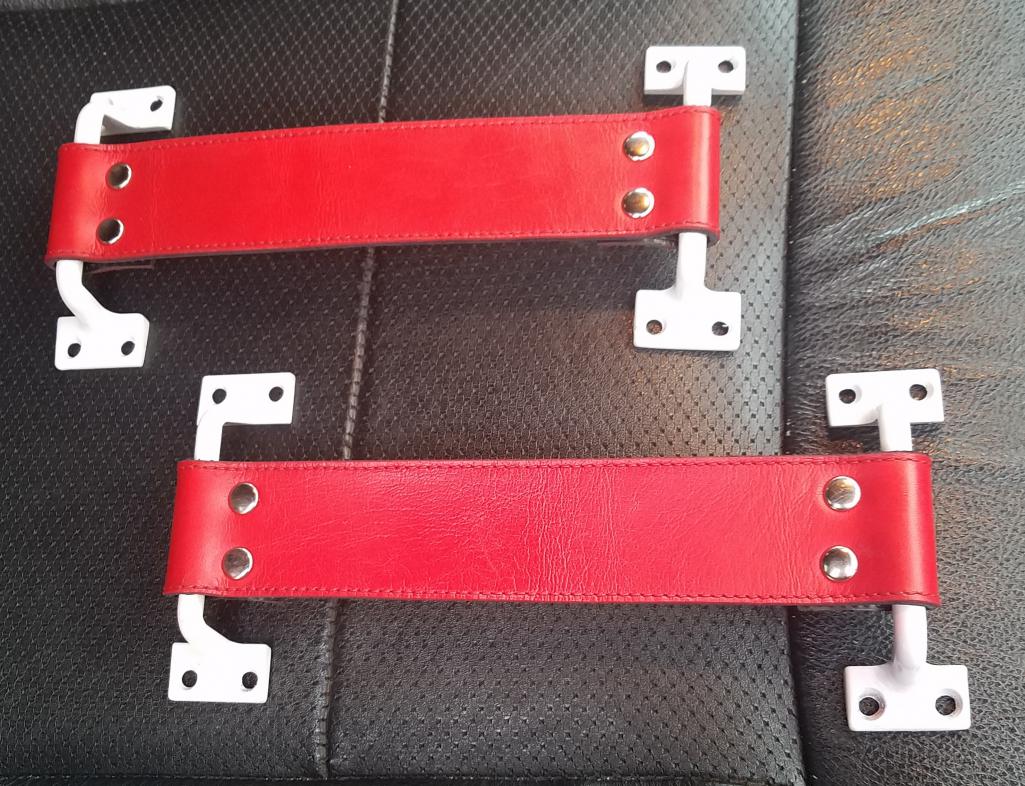
Posted by: Maltese Falcon Dec 23 2017, 05:34 PM
Got a head start on the rear trans support by using this 915 style beam, along with a pair of wevo semi-solid mounts. It will have additional steel gussets added, and will be bolted into the 914 beefed up framework. The inverted 996 gt2 transaxle weighs in at 175 lbs dry.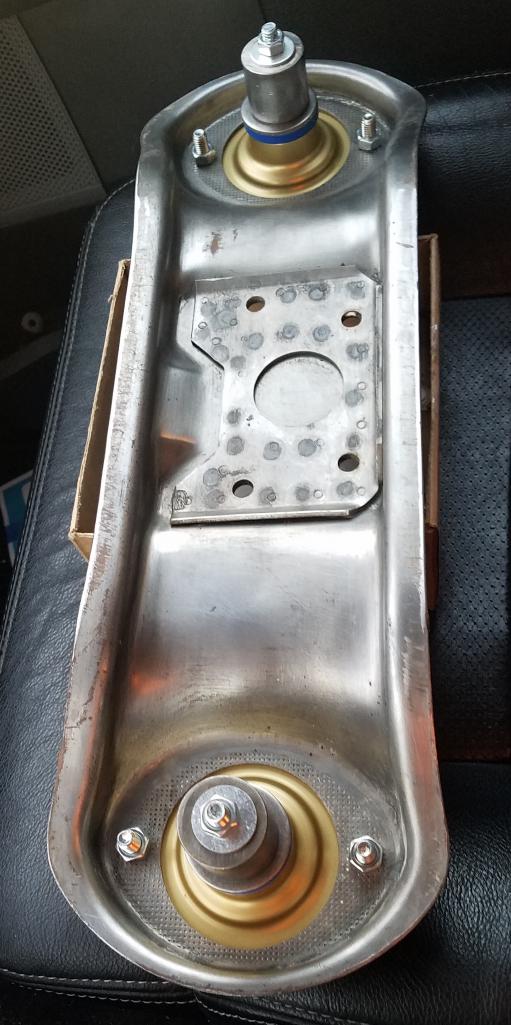
Posted by: Cracker Dec 23 2017, 05:38 PM
Its been so long I almost forgot about your mad project! Good to see it going again Marty...merry Christmas and happy new year! Get that crazy thing finished - I can't wait to see it rolling under its own power.
Tony
Posted by: Maltese Falcon Dec 23 2017, 05:39 PM
Prototype basic door-pull , Rennline red nylon lanyard should do the trick.Close match up on the red door-limit stops !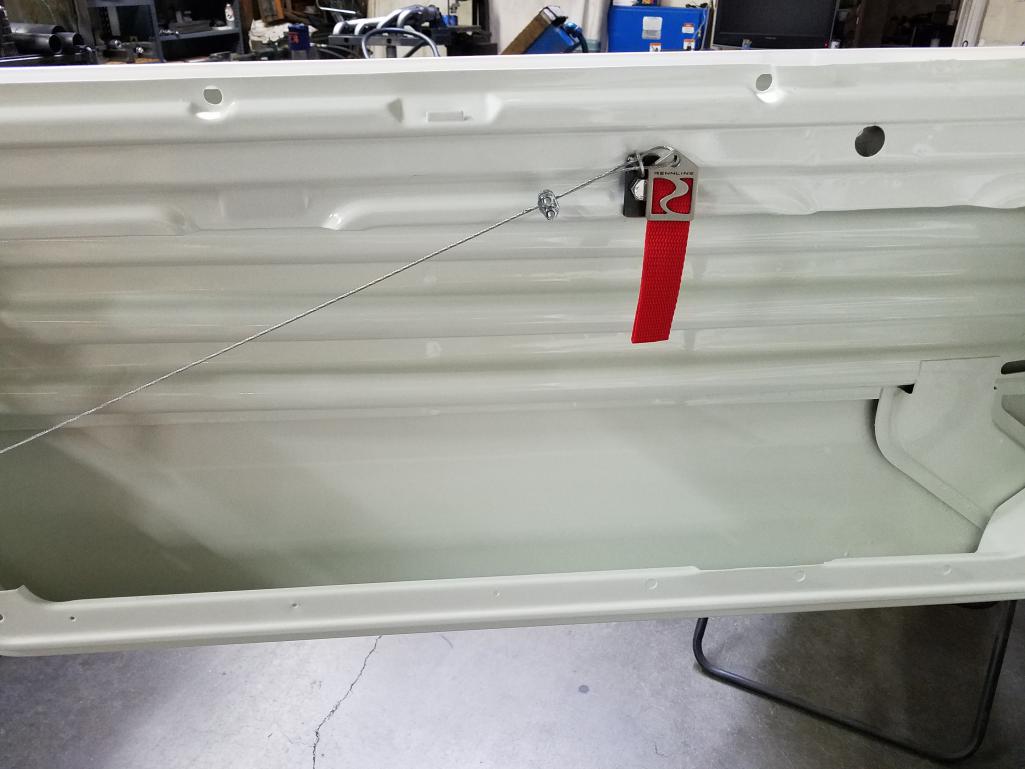
Posted by: Maltese Falcon Dec 23 2017, 05:41 PM
Its been so long I almost forgot about your mad project! Good to see it going again Marty...merry Christmas and happy new year! Get that crazy thing finished - I can't wait to see it rolling under its own power.
Tony
Always busy on this project, just not always posting...have a great Holiday Season as well Tony ¡
Posted by: Larmo63 Dec 23 2017, 06:44 PM
Wow, I can't wait to see this thing take shape. Looks cray cray so far....!!!
Merry, merry, Marty!!!!!!! 
Posted by: Maltese Falcon Dec 23 2017, 07:59 PM
Wow, I can't wait to see this thing take shape. Looks cray cray so far....!!!
Merry, merry, Marty!!!!!!!
Thank you Lawrence ! May your Holidays be very Merry, and a great 2018 to you ¡
Marty
Posted by: Edward Blume Dec 24 2017, 07:34 AM
Merry Christmas Marty! See you at Rennsport Reunion 2018!
Posted by: Maltese Falcon Dec 24 2017, 11:00 AM
Merry Christmas Marty! See you at Rennsport Reunion 2018!
Enjoy the Holidays Edward ! Rennsport will be awesome, see you there
Posted by: ConeDodger Dec 24 2017, 11:53 AM
A couple things. First, I love my MSDS headers, you guys are artists! Second, how did I miss this? This is an incredible build! I just went through it, start to finish and I feel like I need to smoke a cigarette! Dear God that’s hot!
Posted by: ablesnead Dec 24 2017, 12:06 PM
All those pre- bent pipes...seems wrong ...but a really nice job of wrong...
Posted by: Maltese Falcon Dec 24 2017, 12:55 PM
A couple things. First, I love my MSDS headers, you guys are artists! Second, how did I miss this? This is an incredible build! I just went through it, start to finish and I feel like I need to smoke a cigarette! Dear God that’s hot!
Thank you Rob for choosing my MSDS upgrade products, our crew is not about production line mfg ; each exhaust system is built by a craftsman who takes pride in his work . The 914-8 gtt is also being assembled with MSDS skilled man (and woman) power . There will be a cold one waiting for you ( at our exhibit) , and for all of the 914world members at the meet + greet in Monterey/ Rennsport Reunion 2018
Posted by: Maltese Falcon Jan 28 2018, 01:50 AM
Check fit of the Tangerine Racing rear suspension- console strengthening struts/ to any interference at the motor mount cross-bar; check ! Chris makes some awesome products for our cars. Next up; complete the Left and Right side plates of the engine mount. This set up is using the Wevo semi-solid (blue) 914 motor mounts, along with 911 semi solids at the rear to capture the nose of the transaxle. Cameo appearance of checkered Vans, comfy shoes to wear while cruising the Grand National Roadster Show this weekend 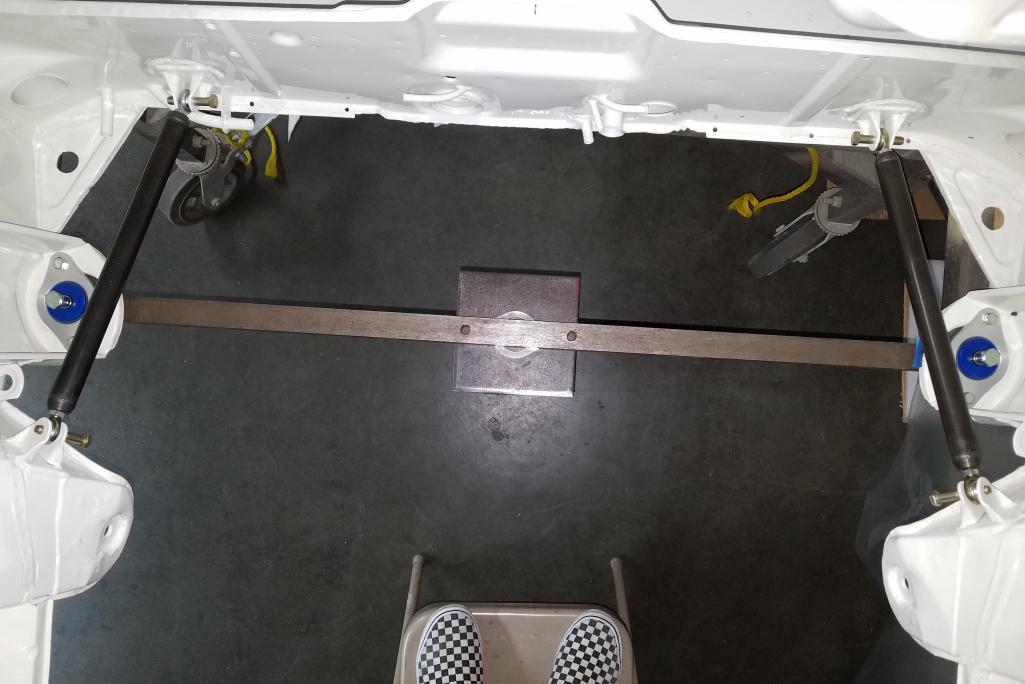
Posted by: Mike Bellis Jan 28 2018, 11:49 AM
How strong are those motor mounts? A good amount of torque and that bolt may rip through.
My first V8 conversion I used the best 911 mounts on the market (at that time). The first time it was running, I eased the clutch out at idle and ripped the 911 mount apart. I switched to solid steel after that. The mounts looked similar with red bushings.
Posted by: wndsrfr Jan 28 2018, 07:19 PM
Prototype basic door-pull , Rennline red nylon lanyard should do the trick.Close match up on the red door-limit stops !
If you're looking to save weight, you can cut out the heavy reinforcing bar in the door given the cage you've got to protect you....sweet work!!
Posted by: Maltese Falcon Jan 28 2018, 10:29 PM
How strong are those motor mounts? A good amount of torque and that bolt may rip through.
My first V8 conversion I used the best 911 mounts on the market (at that time). The first time it was running, I eased the clutch out at idle and ripped the 911 mount apart. I switched to solid steel after that. The mounts looked similar with red bushings.
Absolutely a concern of mine Mike, compared to the mount system that I'm using on the biturbo six (approx 1/2 the hp, and couple hundred pounds lighter) uses; oe rear 9146 trans mounts (nla) for my crossbar engine mount ( these were solid hard neoprene) and custom billet T6 rear solid mounts at the trans. Works great. In this v8 car I don't want to go solid and transfer a lot of vibration into the unibody. I've studied the Wevo design and have spoken to them in detail...it does have a fail safe design where the billet alum center will catch on another billet flange due to a failure of the semi-solid pillow mount. The center bolt is only an issue if the bolt itself fails...much out the ordinary to (but could) occur given the high strength rating of the fastener.
I might go back to solid rear trans mounts if the drivetrain looks spongey when underway
Posted by: Maltese Falcon Jan 28 2018, 10:36 PM
Prototype basic door-pull , Rennline red nylon lanyard should do the trick.Close match up on the red door-limit stops !
If you're looking to save weight, you can cut out the heavy reinforcing bar in the door given the cage you've got to protect you....sweet work!!
Thank you John...I will actually go back into this primary design of ours wherein we are using quite a bit of h/r and c/r steel in the mfg of brackets and mounting flanges ; remaking these in lighter weight aluminum. The original steel parts will become excellent jig fixtures from which spares can be mfg'd. Lighter is always better, even with big hp cars
Posted by: Maltese Falcon Feb 17 2018, 02:39 PM
Made these spacer plates that will fill the side-to-side gaps in the 914 motor-mount buckets. The Wevo mounts (actually rear trans mounts) will be 100% surrounded + supported now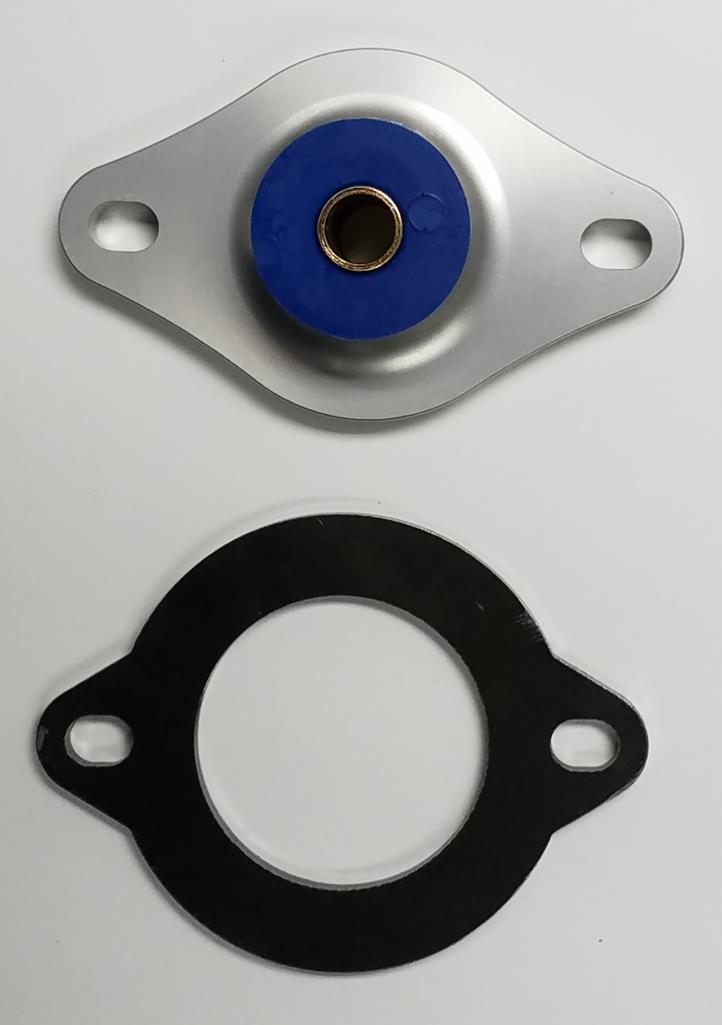
Posted by: Maltese Falcon Feb 17 2018, 02:41 PM
Another view 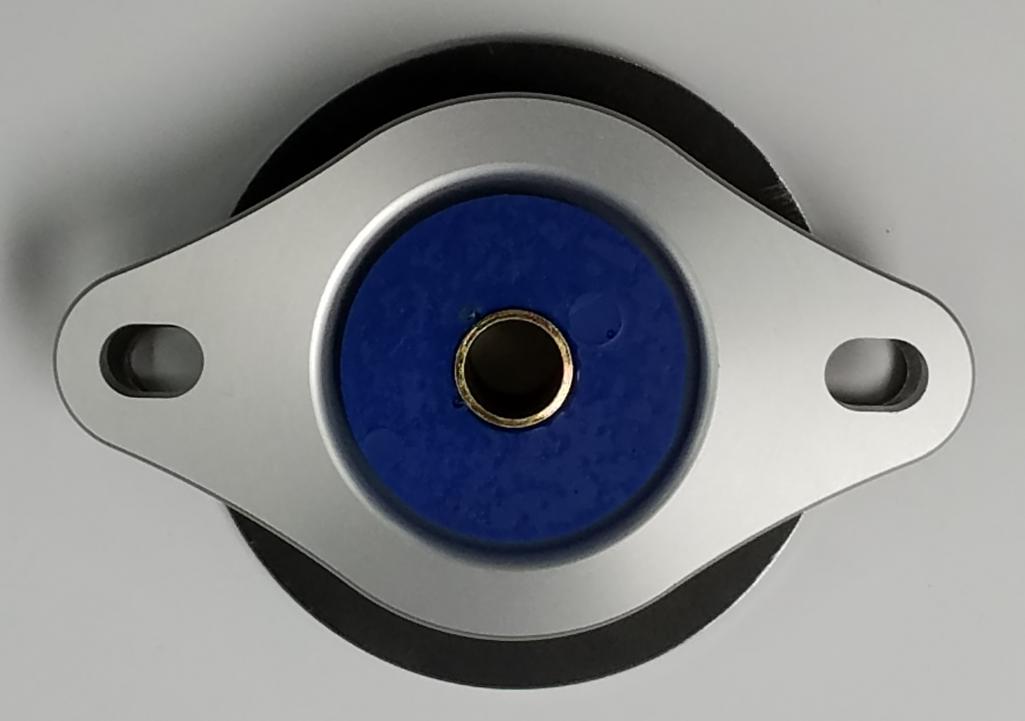
Posted by: Maltese Falcon Feb 17 2018, 02:46 PM
Viewed from the opposite side, as the assembly sits down in the bucket...
Thank you Mike Bellis for putting this "Bug" in my ear...stronger is better !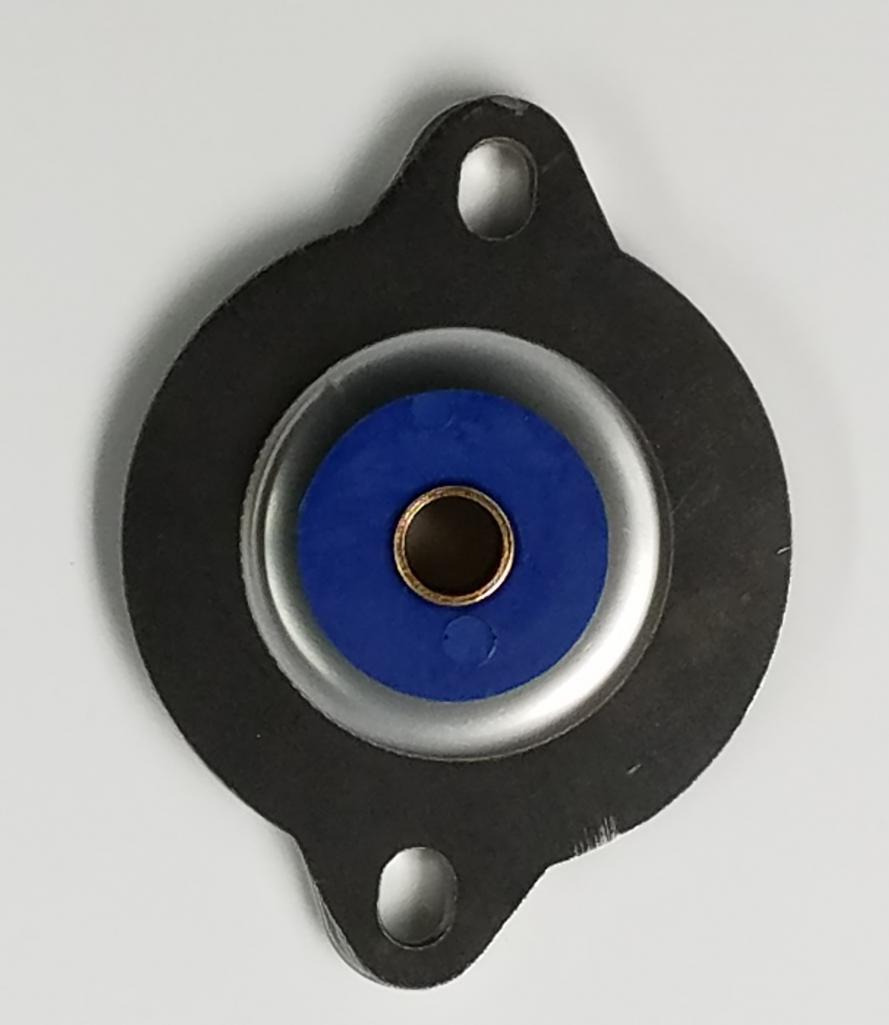
Posted by: horizontally-opposed Feb 17 2018, 02:57 PM
Check fit of the Tangerine Racing rear suspension- console strengthening struts/ to any interference at the motor mount cross-bar; check ! Chris makes some awesome products for our cars. Next up; complete the Left and Right side plates of the engine mount. This set up is using the Wevo semi-solid (blue) 914 motor mounts, along with 911 semi solids at the rear to capture the nose of the transaxle. Cameo appearance of checkered Vans, comfy shoes to wear while cruising the Grand National Roadster Show this weekend
This is one mod I wish I'd done when my engine was out—along with the outer toe links from PMS or similar.
Beautiful work, Marty!
Posted by: Mike Bellis Feb 17 2018, 03:01 PM
You should make a couple more of those plates with a smaller hole and sandwich that bushing in place. One on either side of the motor mount.
First time you launch that thing, those pretty blue bushings are going to pop out.
Posted by: Maltese Falcon Feb 17 2018, 04:31 PM
You should make a couple more of those plates with a smaller hole and sandwich that bushing in place. One on either side of the motor mount.
First time you launch that thing, those pretty blue bushings are going to pop out.
So on the other (500+hp flat fan) 914 I'm running similar mounts in the buckets, and solid T6 alum mounts way back at the nose cone. What is your opinion Mike on running solid mounts all around ?...kind of like this v8 when it was originally in a Riley/ Daytona 24 car
Posted by: Maltese Falcon Feb 17 2018, 04:38 PM
Check fit of the Tangerine Racing rear suspension- console strengthening struts/ to any interference at the motor mount cross-bar; check ! Chris makes some awesome products for our cars. Next up; complete the Left and Right side plates of the engine mount. This set up is using the Wevo semi-solid (blue) 914 motor mounts, along with 911 semi solids at the rear to capture the nose of the transaxle. Cameo appearance of checkered Vans, comfy shoes to wear while cruising the Grand National Roadster Show this weekend
This is one mod I wish I'd done when my engine was out—along with the outer toe links from PMS or similar.
Beautiful work, Marty!
Thanks Pete for your valued opinion , I also need to install these Tangerine Racing items into the black six. Good opportunity when we have the drivetrain out for clutch replacement

Marty
Posted by: Mike Bellis Feb 17 2018, 05:26 PM
You should make a couple more of those plates with a smaller hole and sandwich that bushing in place. One on either side of the motor mount.
First time you launch that thing, those pretty blue bushings are going to pop out.
So on the other (500+hp flat fan) 914 I'm running similar mounts in the buckets, and solid T6 alum mounts way back at the nose cone. What is your opinion Mike on running solid mounts all around ?...kind of like this v8 when it was originally in a Riley/ Daytona 24 car
Torque will pop it, not HP. That V8 is going to be torquey...
I run solid mounts. I've done this since I drag raced VW's in the 80's. Yes they are louder. But every time I tried poly or rubber, I've broken them.
I'm running a semi-solid in the front. Poly sandwiched between metal. totally solid in the rear. I do hear gear noise but I like it.
Posted by: MJHanna Feb 17 2018, 06:24 PM
Are you going to have it done by rennsport reunion? So we can come bum a beer and get googly eyed look at all your great worK.
Posted by: MATTYLITE Feb 26 2018, 08:48 PM
Well, it's taken a long time to get here, but here we are.
https://ibb.co/dUEHFx
https://ibb.co/fVv2hc
https://ibb.co/nti52c
https://ibb.co/mij1ax
https://ibb.co/hnwKTH
https://ibb.co/jBEjvx
https://ibb.co/dCpv2c
https://ibb.co/bWtNhc
https://ibb.co/m3tG8H
https://ibb.co/gQMxFx
https://ibb.co/kb5Pvx
Peek a boo, I see you!
https://ibb.co/kCRxFx
-Matt
Posted by: RoadGlue Feb 26 2018, 09:05 PM
Posted by: Steve Feb 26 2018, 09:07 PM
HP to weight, this reminds me more of a motorcycle. Can’t wait to see some track videos from Willow Springs when this is done. Be safe!!!!
Posted by: Larmo63 Feb 26 2018, 09:24 PM
WOW. Just wow, Marty. This is coming along nicely!!!!
By the way, my MSDS headers are a work of art under my car too.
I also used the Tangerine struts when I did my welding. I'm glad I did.
Posted by: Maltese Falcon Feb 26 2018, 09:52 PM
Are you going to have it done by rennsport reunion? So we can come bum a beer and get googly eyed look at all your great worK.
Beers, bench racing, MSDS products and should be a wicked white 914 in our tent as well
Someone needs to bring the 914 World banner, it looked real good hanging in the tent at Renn5
Marty
Posted by: Mueller Feb 26 2018, 11:19 PM
Wow, the wife was wondering why I was just using so much foul language right now, that is just so ##$@,-%@#$@%. amazing.
All business, I shall be sending your rear tires early condolence letters.
Posted by: Maltese Falcon Feb 27 2018, 12:17 AM
Wow, the wife was wondering why I was just using so much foul language right now, that is just so ##$@,-%@#$@%. amazing.
All business, I shall be sending your rear tires early condolence letters.
No cussing in front of the Girls
...do you think the rears will chirp from 5th to 6th ? 
Posted by: horizontally-opposed Feb 27 2018, 02:14 AM
This build is beyond cool. And it will sound NUTS through the gears.
Posted by: My 914 Feb 27 2018, 10:16 AM
Wow, beautiful engine! Looks great inside that white frame.
Posted by: Maltese Falcon Feb 27 2018, 11:42 AM
This build is beyond cool. And it will sound NUTS through the gears.
Thank you Pete for the kind words....going through the gears will need to wait ...as we press on with 9148-gtt's build
Posted by: Maltese Falcon Feb 27 2018, 11:50 AM
...really appreciate your interest in our build ! Randy, Steve, Lawrence Van and all you guys here for pushing this project along
Marty + Matt
Posted by: mb911 Feb 27 2018, 11:52 AM
That looks awesome.. Very cool
Posted by: siverson Feb 27 2018, 11:59 AM
Awesome!
Posted by: Maltese Falcon Mar 11 2018, 11:36 PM
Awesome project!
> Porsche 996 GT2 Transmission
Do you have the basic dimensions of this transmission? Or anyone know where to find them?
- Overall length and width?
- Distance from bell housing to center of axle output flanges?
- Distance between output flanges?
Thanks - I have a new project I'm working on too...
-Steve
Note that this view is showing the 996gt2 trans Inverted, drain plug is now vent, and vent is now drain plug. There are also internal mods for proper oiling due to inverted operation...
Sketched this up for you today (not to scale, but good measurements) ...some notes:
A) the 4 bellhousing bolt locations are not the same as on air cooled
transaxles...there are a couple machine shops that can mod the 996 gt2 (bolt locations) for use on an air cooled 6.
B) This large rectangular aluminum area of the trans serves some purpose when in its original position, but I might machine most of it away for better clearence.
C) these threaded 8 x 1.25mm (4 total) bores make for a good start point for the rear trans mount.
D) Oil cooler adds + 3" to side-to-side dimensions...which is approx 8" wide...to 12" dia. at the bellhousing.
E) Starter motor resides on the lower right (pass) side.
Measurement of the outer distance for the drive flanges; Left to Right is 10" (distance between output flanges).
Hope this is of use to you Steve
Posted by: Dave_Darling Mar 12 2018, 03:18 PM
I hope you're going to be doing some extra bracing of those rear suspension pickup points....
It looks like they're gonna need all of the help they can get!!!
--DD
Posted by: Maltese Falcon Mar 12 2018, 04:03 PM
I hope you're going to be doing some extra bracing of those rear suspension pickup points....
It looks like they're gonna need all of the help they can get!!!
--DD
Dave,
Big catch-net under the drivetrain
!¡!Posted by: Lucky9146 Apr 16 2018, 08:43 PM
Had a chance to see this beast in person over the weekend and it is quite the build.
Nice work Marty! and great thread! WOW 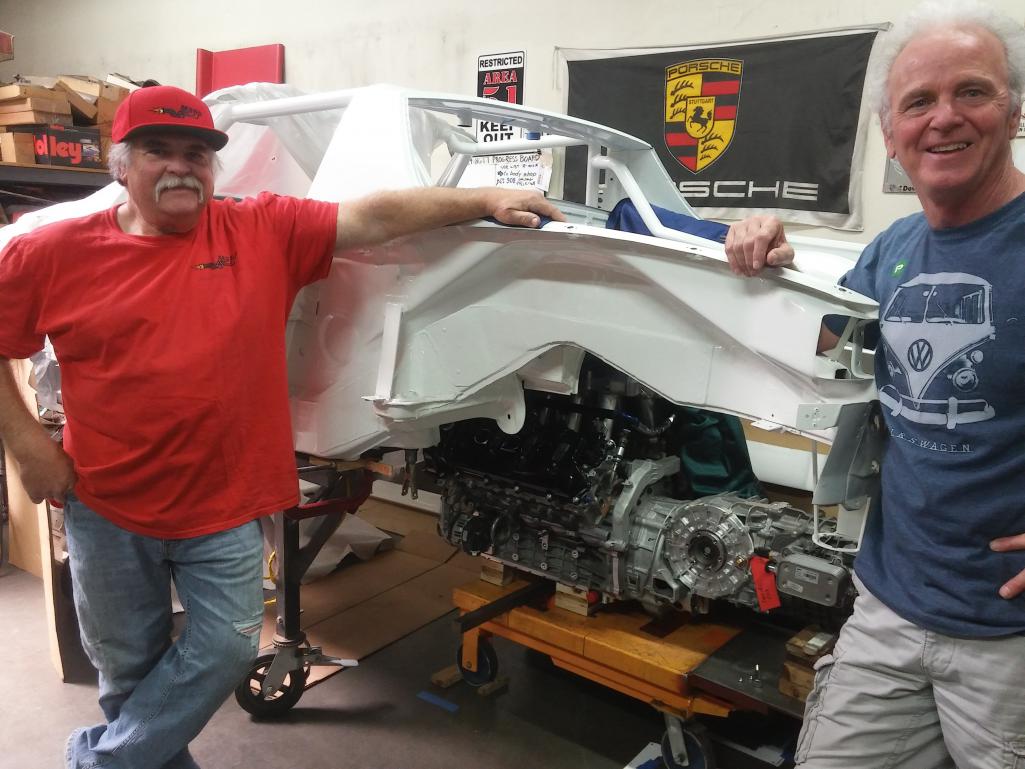
Posted by: Maltese Falcon Jun 30 2018, 03:02 PM
Engine mount assemblies in welding jigs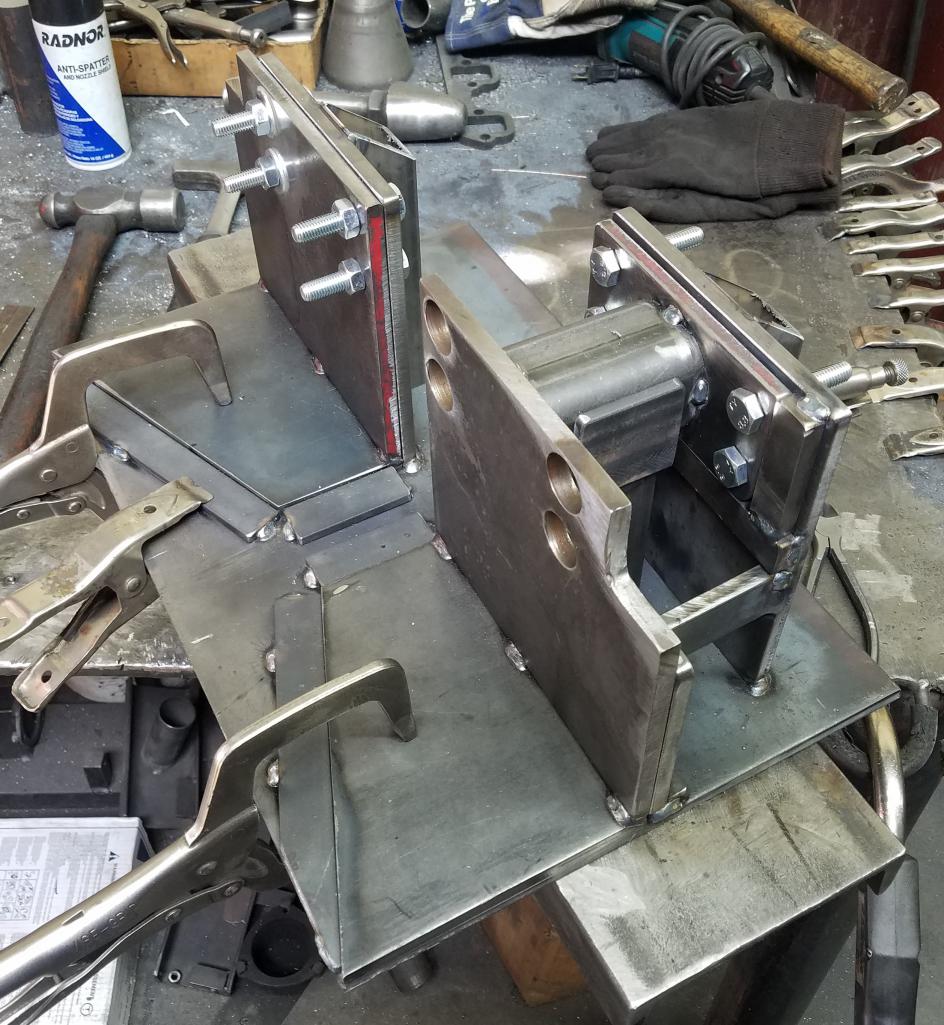
Posted by: Mike Bellis Jun 30 2018, 03:05 PM
I love jigs. Looks great. Burn 'em in!
Posted by: Maltese Falcon Jun 30 2018, 03:06 PM
Rear transaxle mounting / 2 part system
Left bracket (in fixture) attaches to the inverted trans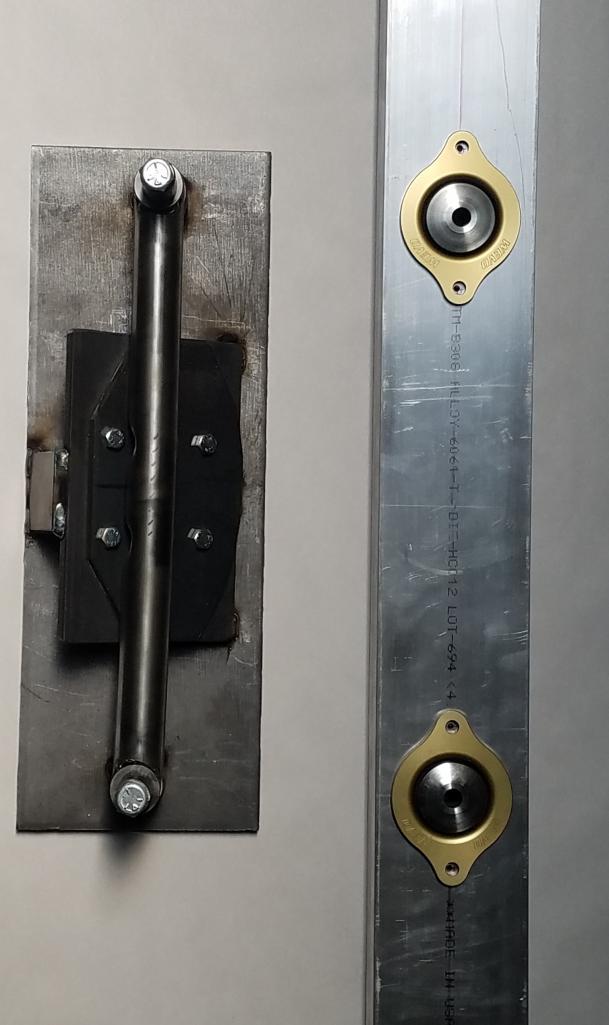
Posted by: Maltese Falcon Jun 30 2018, 03:09 PM
Mount system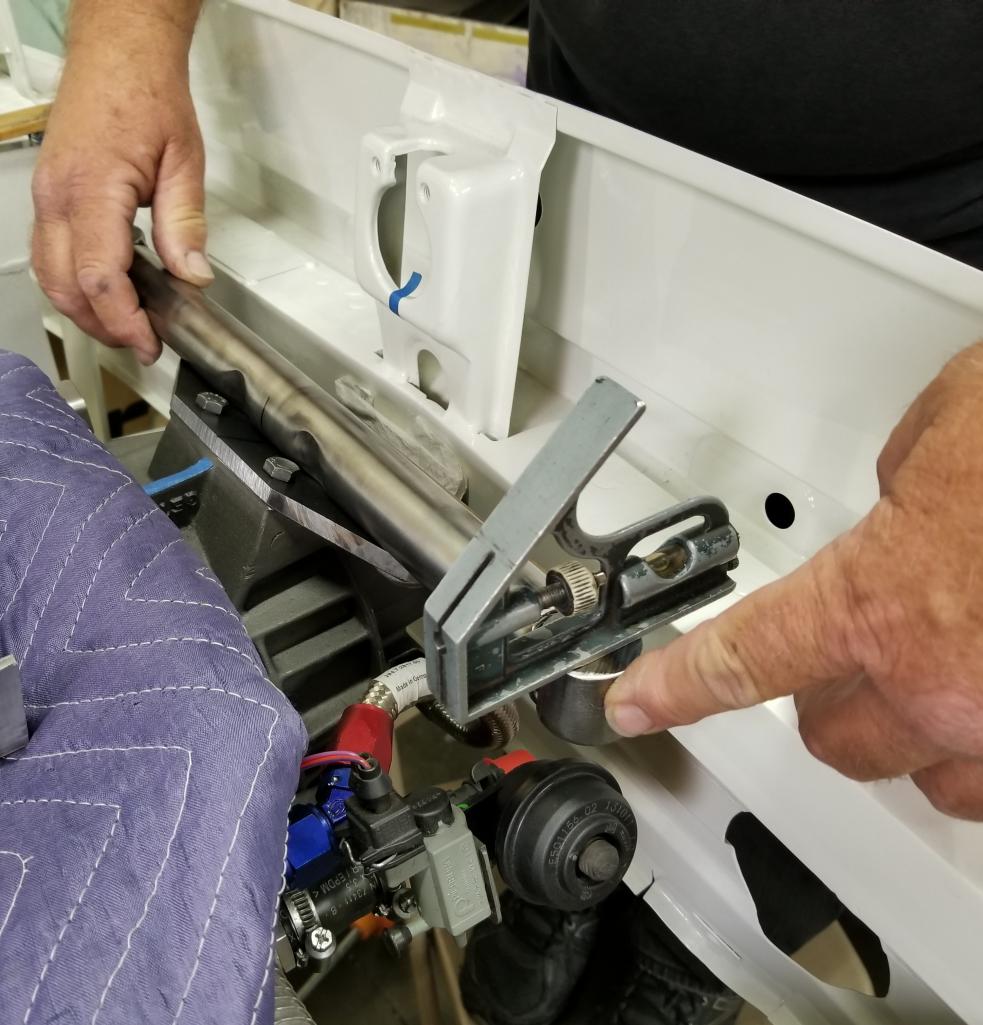
Posted by: Maltese Falcon Jun 30 2018, 03:23 PM
Top Alum piece connects everything to the unibody, transaxle rides on Wevo semi-solid mounts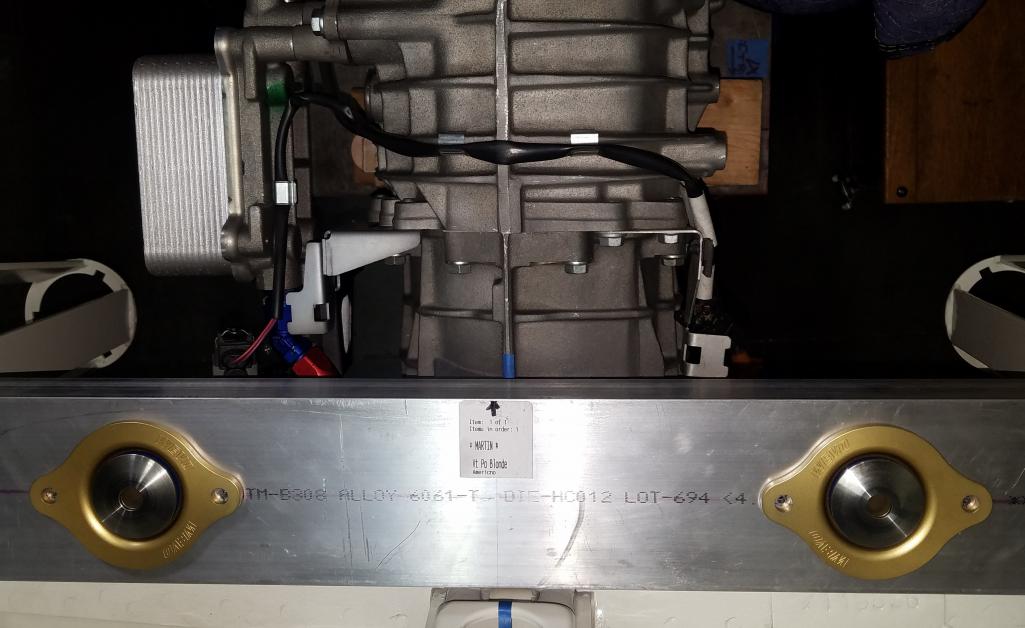
Posted by: sb914 Jun 30 2018, 05:03 PM
Marty is the man! Can't wait to see it.and when's the next parking lot party?
Posted by: Maltese Falcon Jun 30 2018, 05:20 PM
Aerial view...I actually brought the drivetrain up a bit higher so the underbody diffuser is flush to the floor pan 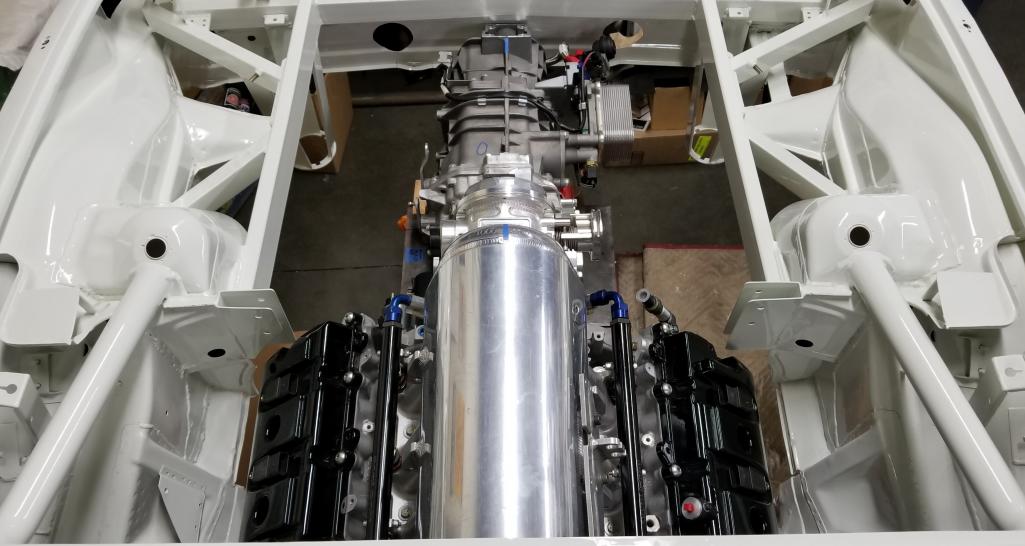
Posted by: Maltese Falcon Jul 1 2018, 02:02 PM
I love jigs. Looks great. Burn 'em in!
Will do Mike...burn 'em in first thing at 6am Monday morn !!
Posted by: Mueller Jul 1 2018, 02:12 PM
Looking great as usual.
Posted by: Maltese Falcon Jul 1 2018, 03:04 PM
Marty is the man! Can't wait to see it.and when's the next parking lot party?Next Hollywood Taco cruise-in will happen...but on the back burner due to the prediction of a hellofalotta horsepower
Posted by: Maltese Falcon Jul 1 2018, 03:08 PM
Looking great as usual.
Thank you Sir ! but only the Bodyshop guy and I know where the flaws are
Posted by: MATTYLITE Sep 4 2018, 02:30 PM
Hi everyone,
Just wanted to share our progress with you all as we near ever closer to Rennsport Reunion.
We're eagerly awaiting to show you this work in progress project of ours in person, so come stop by any time throughout the event and see for yourself, and don't forget to stop by our vendor booth at 5:00 pm on Saturday 9/29 for the 914 World get together!
We have been diligently working with Cary Eisenlohr of Eisenlohr Racing Products (ERP) in association with Tarett Engineering to create our 935 front suspension w/ full JRZ coilovers and extended reservoirs.
https://ibb.co/gdbmPe
https://ibb.co/kvKjAK
https://ibb.co/gdfPAK
https://ibb.co/ftvD4e
https://ibb.co/ihzjAK
https://ibb.co/ctDpcz
https://ibb.co/gVJpcz
Carey getting hands on
https://ibb.co/cLb9cz
https://ibb.co/mxMxVK
Also, a big shout out to 914 Rubber for the great turn around time on making our steering rack look and feel brand new!
https://ibb.co/eNbaHz
Below are our engine mounts & bar, in which we had ceramic coated.
(Don't mind the bolts in the pic as they're temp for fitment purposes)
https://ibb.co/mkYcVK
https://ibb.co/kDShxz
In the middle, you will notice our lower transaxle mount, which is part of a 2 mount set - up.
https://ibb.co/dp57VK
Below is the upper transaxle mount, which also supports the forthcoming wing upright mounts.
https://ibb.co/c2K6Pe
https://ibb.co/bSu6Pe
https://ibb.co/eKyBqK
It's all starting to come together.
https://ibb.co/mtUUcz
https://ibb.co/k3VwPe
https://ibb.co/nHzCxz
https://ibb.co/eLDi4e
The car will be on display showcasing the Foregline 5 lug Centerlock Conversion Kit, but due to this still being a work in progress, it will be rolled on the Panasports.
https://ibb.co/bLQMPe
https://ibb.co/itAAHz
https://ibb.co/fT6T4e
That's all for now!
Posted by: Curbandgutter Sep 4 2018, 03:47 PM
Here I am trying to get some work done and am in a state of shock at the rawness and beauty of this build.
Posted by: Dave_Darling Sep 4 2018, 04:30 PM
Damn, Matty's posting porn in the Garage again!
914 car part porn, that is. Love it....
--DD
Posted by: 914 Ranch Sep 4 2018, 05:25 PM
Even if I had your money my car would look cobie and dumpy.
Nice Marty...
Posted by: MJHanna Sep 4 2018, 08:19 PM
Whats the benefit/ rational on ceramic coating the motor mounts?
Posted by: Lucky9146 Sep 4 2018, 08:53 PM
Hi everyone,
Just wanted to share our progress with you all as we near ever closer to Rennsport Reunion.
We're eagerly awaiting to show you this work in progress project of ours in person, so come stop by any time throughout the event and see for yourself, and don't forget to stop by our vendor booth at 5:00 pm on Saturday 9/29 for the 914 World get together!
We have been diligently working with Cary Eisenlohr of Eisenlohr Racing Products (ERP) in association with Tarett Engineering to create our 935 front suspension w/ full JRZ coilovers and extended reservoirs.
That's all for now!
Best Father / Son Project Ever!
Looking forward to seeing that beast in person again at Renn6. You guys do amazing work!

Posted by: whitetwinturbo Sep 4 2018, 09:54 PM
Hi everyone,
Just wanted to share our progress with you all as we near ever closer to Rennsport Reunion.
We're eagerly awaiting to show you this work in progress project of ours in person, so come stop by any time throughout the event and see for yourself, and don't forget to stop by our vendor booth at 5:00 pm on Saturday 9/29 for the 914 World get together!
We have been diligently working with Cary Eisenlohr of Eisenlohr Racing Products (ERP) in association with Tarett Engineering to create our 935 front suspension w/ full JRZ coilovers and extended reservoirs.
Carey getting hands on
Also, a big shout out to 914 Rubber for the great turn around time on making our steering rack look and feel brand new!
Below are our engine mounts & bar, in which we had ceramic coated.
(Don't mind the bolts in the pic as they're temp for fitment purposes)
In the middle, you will notice our lower transaxle mount, which is part of a 2 mount set - up.
Below is the upper transaxle mount, which also supports the forthcoming wing upright mounts.
It's all starting to come together.
The car will be on display showcasing the Foregline 5 lug Centerlock Conversion Kit, but due to this still being a work in progress, it will be rolled on the Panasports.
That's all for now!
WOW...............I want those wing supports! How about it?
Posted by: KELTY360 Sep 4 2018, 10:01 PM
OMG
Posted by: Maltese Falcon Sep 4 2018, 11:34 PM
Here I am trying to get some work done and am in a state of shock at the rawness and beauty of this build.
Hope to see you on the Monterey Peninsula Rudy !!
Posted by: Maltese Falcon Sep 4 2018, 11:44 PM
OMG
Piece of cake >> I'm pleased that it hits the " Marc" for you ¡
WhiteTwinTurbo >>
I'm sure that we can adapt this wing mount system to a normal 914 trunk, just needs to directly push down on the rear suspension. Feel free to bug me after September for details !
Posted by: Maltese Falcon Sep 4 2018, 11:47 PM
Hi everyone,
Just wanted to share our progress with you all as we near ever closer to Rennsport Reunion.
We're eagerly awaiting to show you this work in progress project of ours in person, so come stop by any time throughout the event and see for yourself, and don't forget to stop by our vendor booth at 5:00 pm on Saturday 9/29 for the 914 World get together!
We have been diligently working with Cary Eisenlohr of Eisenlohr Racing Products (ERP) in association with Tarett Engineering to create our 935 front suspension w/ full JRZ coilovers and extended reservoirs.
That's all for now!
Best Father / Son Project Ever!
Looking forward to seeing that beast in person again at Renn6. You guys do amazing work!
Thank you Jim
Posted by: Maltese Falcon Sep 4 2018, 11:49 PM
Even if I had your money my car would look cobie and dumpy.
Nice Marty...
I actually think that your work is pretty Sharp, Joe
Posted by: Maltese Falcon Sep 5 2018, 12:04 AM
Whats the benefit/ rational on ceramic coating the motor mounts?
So the metallic ceramic coating was chosen for corrosion resistence, fast dissipation of heat (this biturbo engine will radiate lots), and we will be able to get our hands in there after a quick cool down>> for minor pit repairs. Nickel chrome= too much bling , and golden zinc was our first choice...but the zinc contractor
 guaranteed us that 10% of my parts would sink to the bottom of their automated tanks and lost. I also send large orders of product in weekly to the ceramic shop, so adding these mounts in was cost effective, all parts back in 3 days, nothing missing
Posted by: oldschool Sep 5 2018, 12:20 AM
Top Alum piece connects everything to the unibody, transaxle rides on Wevo semi-solid mounts
DUDE!..All I can say is WOW!
Posted by: Cracker Sep 5 2018, 06:17 AM
I can appreciate the lunacy of sinking so much effort into a project based upon
a 914 shape. Pretty damn cool Marty!
Cracker
Posted by: whitetwinturbo Sep 5 2018, 09:26 AM
OMG
Piece of cake >> I'm pleased that it hits the " Marc" for you ¡
WhiteTwinTurbo >>
I'm sure that we can adapt this wing mount system to a normal 914 trunk, just needs to directly push down on the rear suspension. Feel free to bug me after September for details !
Great build and I'm happy to bug you after Sept.
What does wing are you attaching?
Posted by: Maltese Falcon Sep 5 2018, 09:40 AM
OMG
Piece of cake >> I'm pleased that it hits the " Marc" for you ¡
WhiteTwinTurbo >>
I'm sure that we can adapt this wing mount system to a normal 914 trunk, just needs to directly push down on the rear suspension. Feel free to bug me after September for details !
Great build and I'm happy to bug you after Sept.
What does wing are you attaching?
Brand+ style of wing can be seen on the opening pages of this thread ; the two alum uprights are in our final design stage and will be water-cut to final shape
Posted by: Maltese Falcon Sep 5 2018, 09:41 AM
Top Alum piece connects everything to the unibody, transaxle rides on Wevo semi-solid mounts
DUDE!..All I can say is WOW!
Glad you approve Jaime ¡!
Posted by: Maltese Falcon Sep 5 2018, 09:46 AM
I can appreciate the lunacy of sinking so much effort into a project based upon
a 914 shape. Pretty damn cool Marty!
Cracker
Thank you Sir...when my wife walks by the car she YouTubes Ed Sheeran's song "The shape of you "....played of course for the 8gtt
Posted by: Larmo63 Sep 5 2018, 11:30 AM
I'm another 914 guy following this thread with anticipation and awe.
I'm trying to schedule myself to make it to Rennsport. If I do, I'll be by to see the beast and to say hi.
Great project!!!!!
Posted by: Curbandgutter Sep 5 2018, 11:48 AM
Here I am trying to get some work done and am in a state of shock at the rawness and beauty of this build.
Hope to see you on the Monterey Peninsula Rudy !!
I just may bring the Mrs and take a long weekend over there.
Posted by: Maltese Falcon Sep 5 2018, 08:47 PM
I'm another 914 guy following this thread with anticipation and awe.
I'm trying to schedule myself to make it to Rennsport. If I do, I'll be by to see the beast and to say hi.
Great project!!!!!
...Will be extra awesome when Lawrence attends RR6
Posted by: MATTYLITE Sep 24 2018, 06:15 PM
We can't wait to show you what we've been working so hard on these last several years, and especially these last several months just to get it into its roller state for Rennsport Reunion.
Here's a quick look of where we're at.
https://ibb.co/jx7UP9
https://ibb.co/mQyscU
The beefy motor mounts.
https://ibb.co/dtKnBp
https://ibb.co/hdr0Wp
The interior is finally taking shape.
https://ibb.co/jh5ij9
Posted by: Cracker Sep 24 2018, 06:32 PM
Pretty nuts...I love it!
Cracker
Posted by: My 914 Sep 24 2018, 06:32 PM
Now that I can see the engine in the car, I can't wait to see what you are going to do with the rear trunk cover and the grill to fit around it.
Posted by: burton73 Sep 24 2018, 09:59 PM
Marty – MSDS,
I know you have heard this but your workmanship and finish are the best. Great ideas
Bob B
Posted by: seanery Sep 25 2018, 07:31 AM
Marty & Matty, wow! I've been away for a few years, and just loved reading this entire thread! This is incredible!! I can't wait to see it - and hear it someday too!!
Posted by: Jetsetsurfshop Sep 28 2018, 07:15 PM
Absolutely awesome!
Keep those pictures coming. Looking forward to seeing that APR wing go on.
Posted by: EdwardBlume Sep 29 2018, 06:37 AM
I saw this car yesterday and it’s stunning. Art and skill and everything you could do to a 914 to race it, and do it exceedingly well. There are a handful of builds we’ve all seen through the years, this one is truly exceptional. Congratulations to Marty and his son!
Attached thumbnail(s)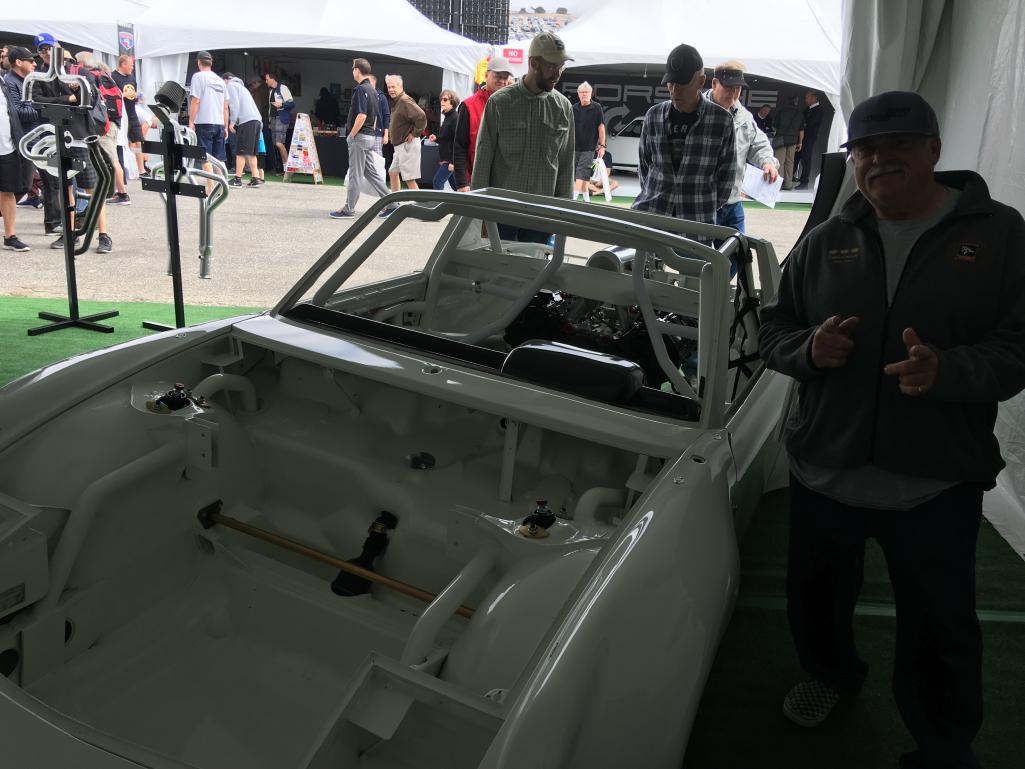
Posted by: Maltese Falcon Nov 2 2018, 09:05 PM
Pretty nuts...I love it!
Cracker
Thank you ...its not too far off from your build !
Posted by: Maltese Falcon Nov 2 2018, 09:07 PM
Now that I can see the engine in the car, I can't wait to see what you are going to do with the rear trunk cover and the grill to fit around it.
There won't be much left of the engine lid...but less IS more; it will be bikini size
Posted by: Maltese Falcon Nov 2 2018, 09:11 PM
Getting back into assembly of specialty equipment to the project; starting with the SQS sequential shifter module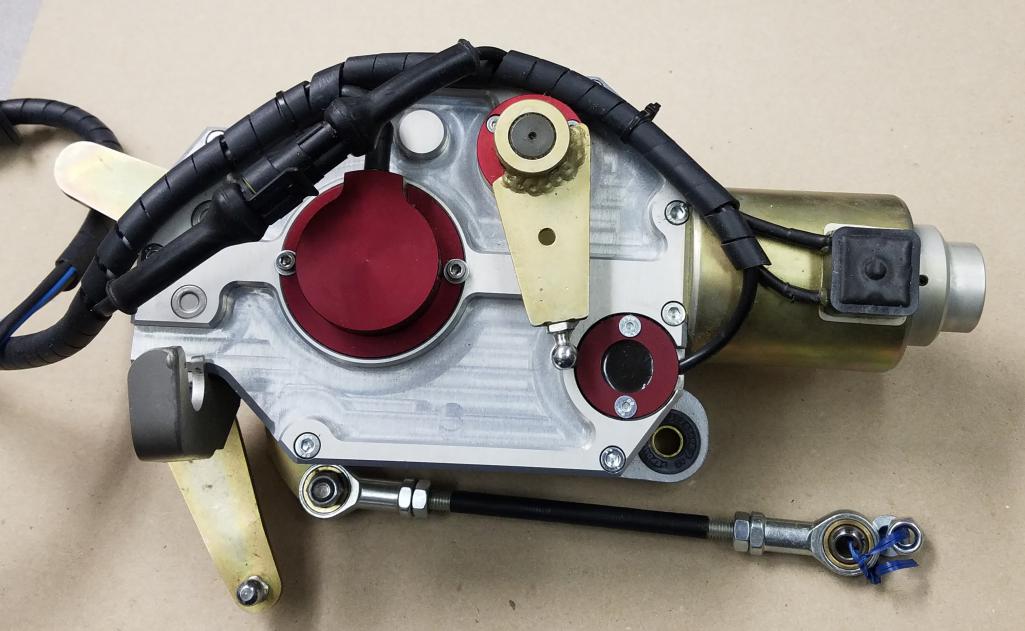
Posted by: Maltese Falcon Nov 2 2018, 09:13 PM
Marty – MSDS,
I know you have heard this but your workmanship and finish are the best. Great ideas
Bob B
Appreciate the positive vibes Bob, I'll need to visit with you when your ride returns from Utah
Posted by: Maltese Falcon Nov 2 2018, 09:15 PM
Marty & Matty, wow! I've been away for a few years, and just loved reading this entire thread! This is incredible!! I can't wait to see it - and hear it someday too!!
Thank you Sean...I do remember you from the early days here on the World ...hope all is well in Indy !
Posted by: Mueller Nov 2 2018, 09:16 PM
Getting back into assembly of specialty equipment to the project; starting with the SQS sequential shifter module
I bet some trick engineering went into designing and making that puppy. Wow.
Posted by: mepstein Nov 2 2018, 09:22 PM
Getting back into assembly of specialty equipment to the project; starting with the SQS sequential shifter module
I bet some trick engineering went into designing and making that puppy. Wow.
I bet it's spendy.
Posted by: Maltese Falcon Nov 2 2018, 09:27 PM
Absolutely awesome!
Keep those pictures coming. Looking forward to seeing that APR wing go on.
Thank you Shane, we actually started in on the wing side plates just before packing for Rennsport6...and put that aside for the moment.
The wing will just sit a tad over roof height and not require any funky guide-wires hanging on to it
Posted by: Maltese Falcon Nov 2 2018, 09:34 PM
I saw this car yesterday and it’s stunning. Art and skill and everything you could do to a 914 to race it, and do it exceedingly well. There are a handful of builds we’ve all seen through the years, this one is truly exceptional. Congratulations to Marty and his son!
Edward...pleased that you approve of what we have completed to date; a bunch of 18 hour days (like 5 weeks straight) to roll that 914 into the tent at Rennsport6 . We actually went through 99 cans of brew at the Saturday evening get together ! It was the highlight of the week for us to party on with y'all
Posted by: Maltese Falcon Nov 2 2018, 09:58 PM
Using a (3 phase) electric cord to get the sample length for the shift cable construction ; A local mfg. says about 1 week turnaround for the finished cable .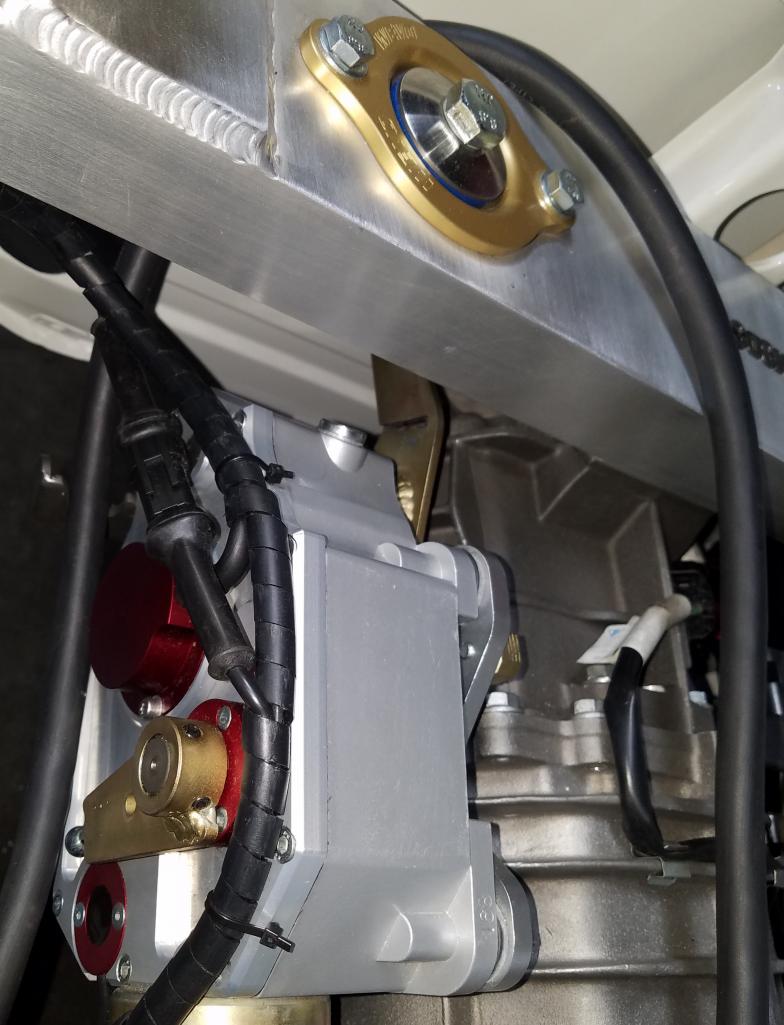
Posted by: horizontally-opposed Nov 2 2018, 11:33 PM
This build, put simply, brings a smile to my face.
Wow...love the build as a car, but also the heart and craft going into it.
Posted by: Maltese Falcon Nov 3 2018, 12:02 AM
The new JRZ suspension does not come with supports, nor brackets to hold the nitrogen canisters....just not for sale SO; building 4 of these tubular aluminum sectional housings to keep things in place. At Rennsport6 we just wrapped in small towels & zip tied !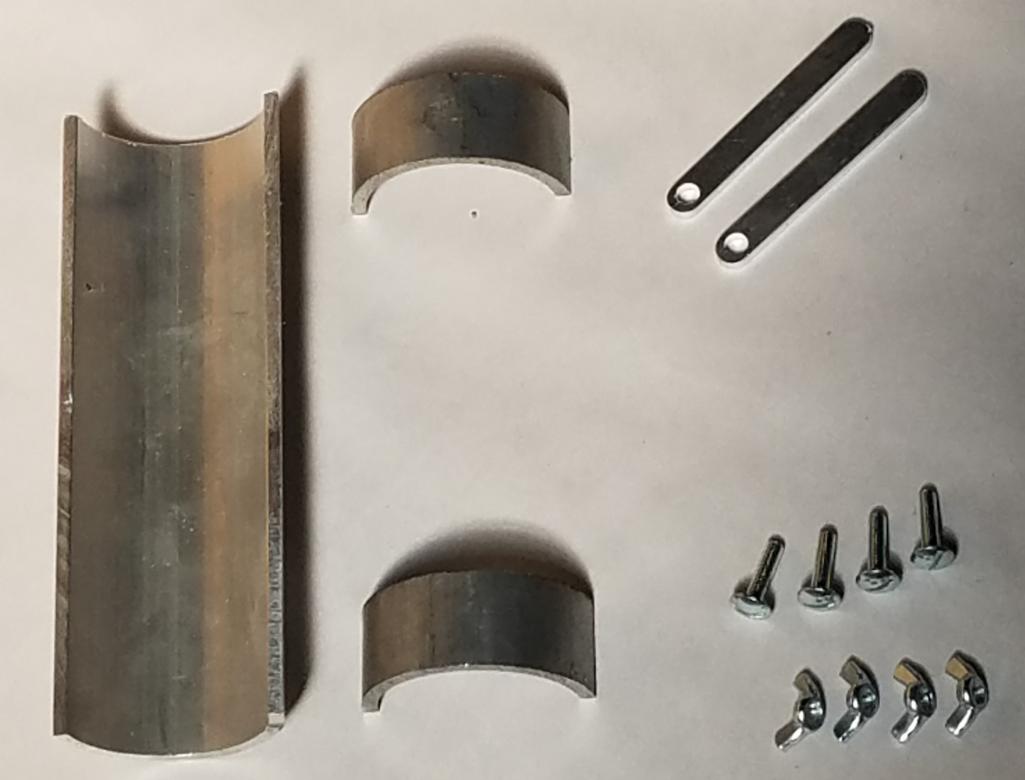
Posted by: Maltese Falcon Nov 3 2018, 12:17 AM
Pieced together, minus the tightening tabs ...which need to be cut to size and Tig'd in place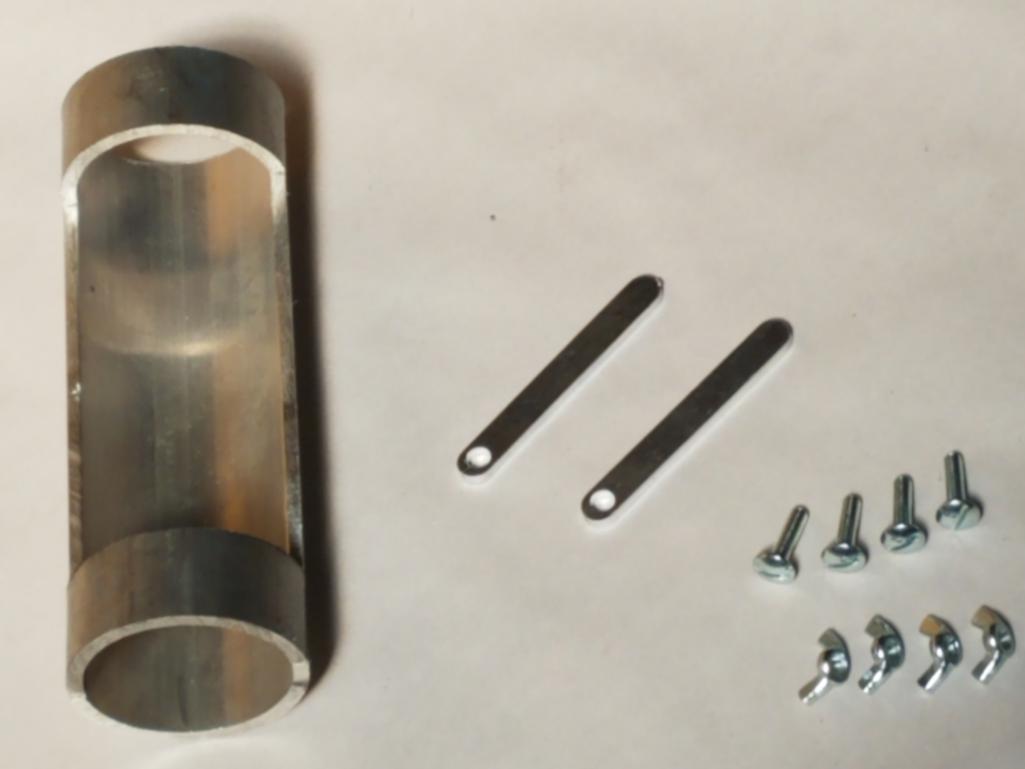
Posted by: Maltese Falcon Nov 3 2018, 12:19 AM
What do you say; leave alum sheen OR color match GP white ?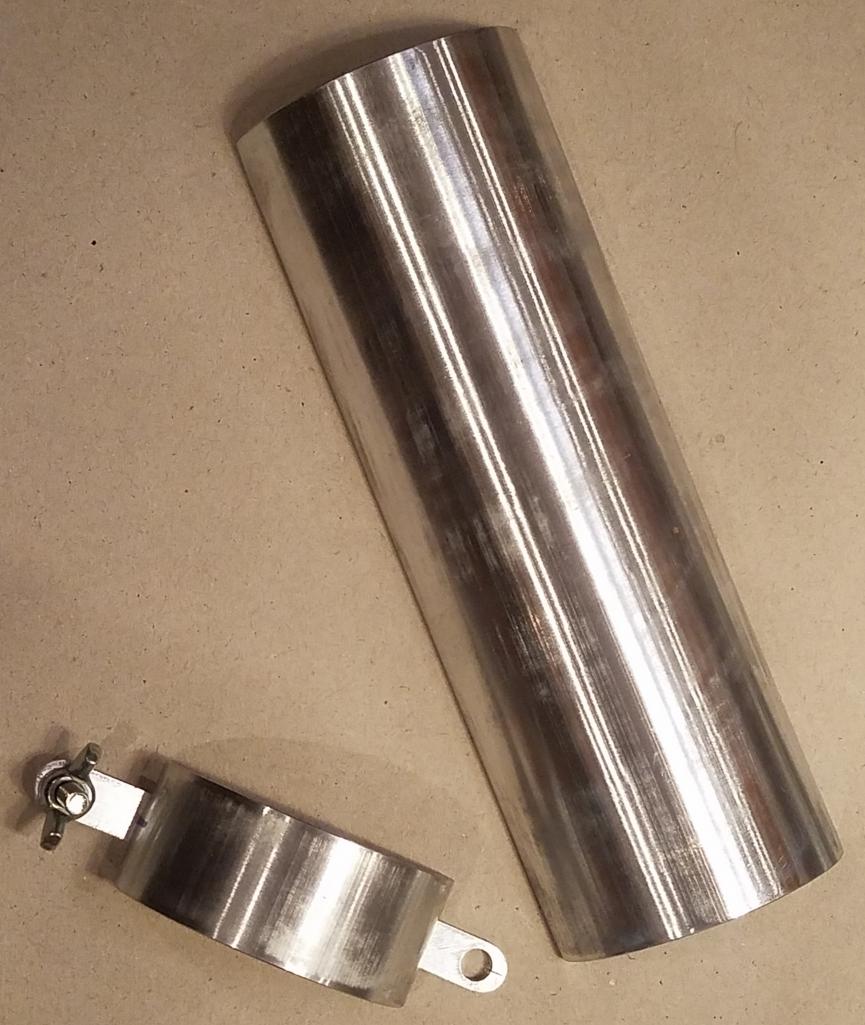
Posted by: Maltese Falcon Nov 3 2018, 12:27 AM
Getting back into assembly of specialty equipment to the project; starting with the SQS sequential shifter module
I bet some trick engineering went into designing and making that puppy. Wow.
SQS makes a large selection (various vehicles brands) of sequential shifter kits. They are good at what they design + mfg. The module is basically a blend of human input (you move the stick), changes into electronic command to solenoids which create shift linkage movement from the H pattern into a Linear pattern.
Posted by: Maltese Falcon Nov 3 2018, 12:29 AM
Getting back into assembly of specialty equipment to the project; starting with the SQS sequential shifter module
I bet some trick engineering went into designing and making that puppy. Wow.
I bet it's spendy.
It's worth every dime
Posted by: Maltese Falcon Nov 3 2018, 12:38 AM
This build, put simply, brings a smile to my face.
Wow...love the build as a car, but also the heart and craft going into it.
Dig that Pete, I'm on that page as well...need my min 4 hours daily on the project...some days more. The addiction is real !
Posted by: Maltese Falcon Nov 3 2018, 12:47 AM
At Rennsport6, the 914 project drew some good reviews from the Porsche boys at Weissach !¡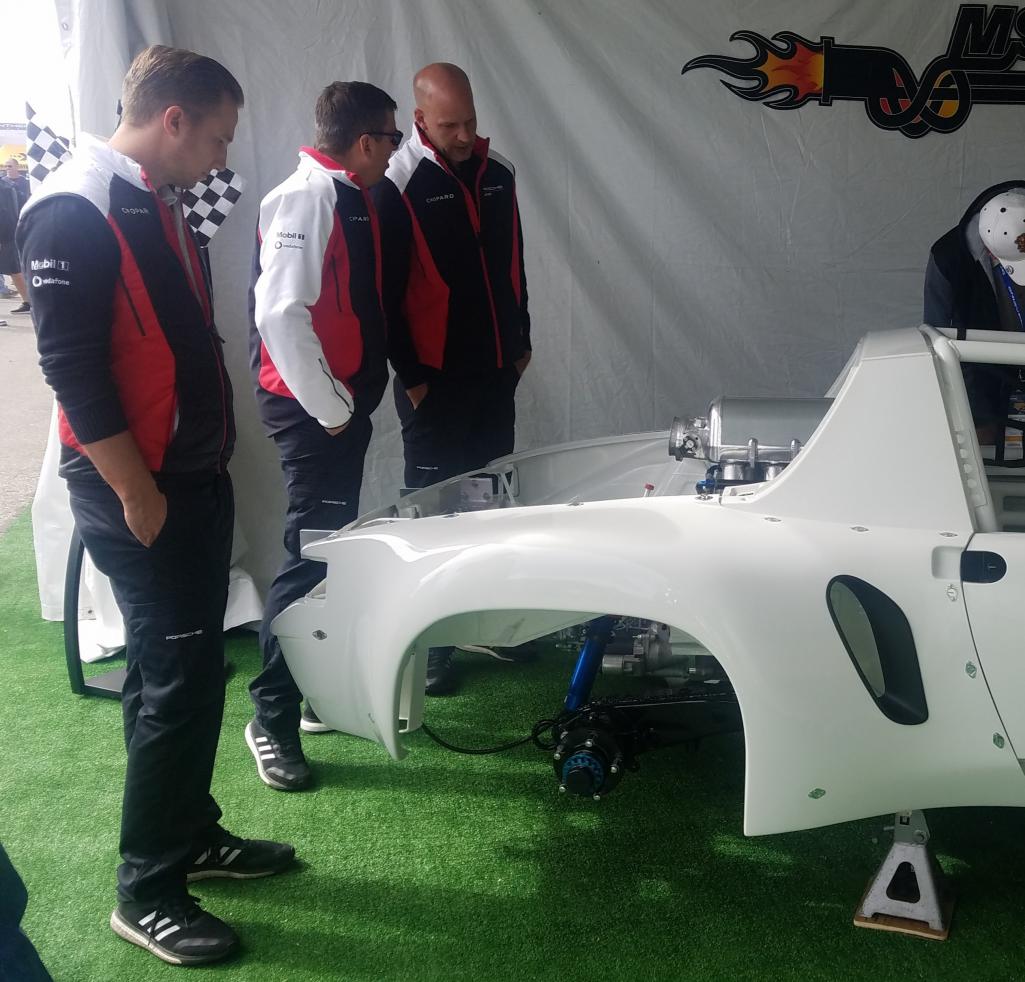
Posted by: Maltese Falcon Feb 3 2019, 07:41 PM
Moving on to the brakes, StopTech will be on our build. They are local to us in SoCal, offering us hands on engineering and design input on the project. I've been to their plants (2 in So Bay area) and the customer service is spot on.
Front calipers are their 6 piston units with 380mm x 32mm vented / floating discs that are built to bolt on to the 911 strut with 3 1/2" bolt spacing. The finish on the calipers will be their electroless-nickel, not red as in this factory pic. Minimum wheel dia is 18" with this brake setup and the 935 bits we have installed
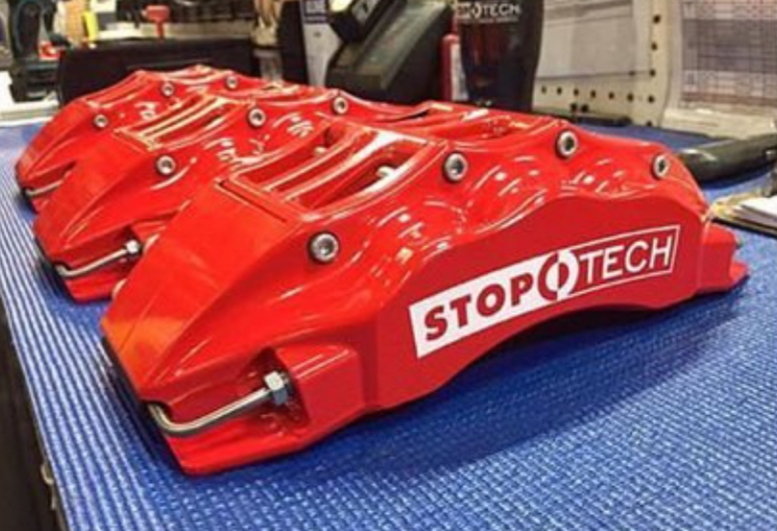
Posted by: Maltese Falcon Feb 3 2019, 08:12 PM
Rear StopTechs are their #ST40 4 piston model. Using the Rich Johnson style 986 Boxster adapters, the ST-40's are 99% in position on the trailing arm. I'll use 12mm washers to shim the caliper into final position, then remake the aluminum blocks to the new fitment spec. The white trailing arm in the pic (use it at trade shows) is my workhorse for the rear prototype; so dont mind the solid rotor in place>> just being used for reference. The final rear rotors are 355mm x 32mm vented floating discs.
Sharpies make for decent 12mm soft dowels 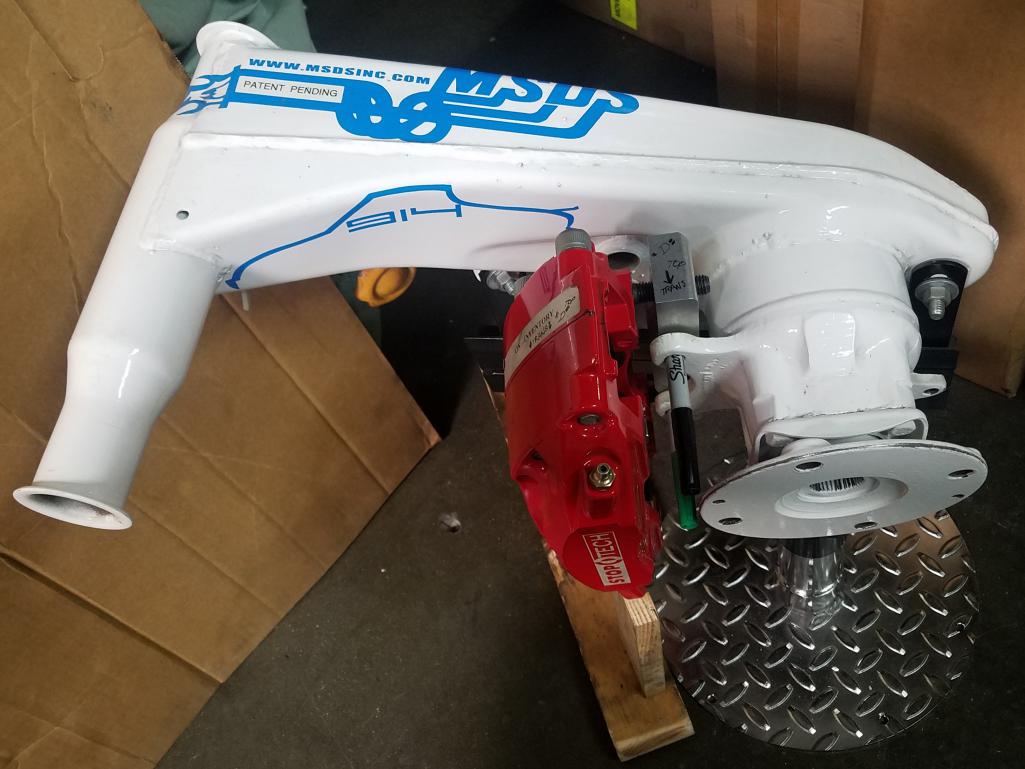
Posted by: Maltese Falcon Feb 3 2019, 08:15 PM
With the 12mm hardware in place...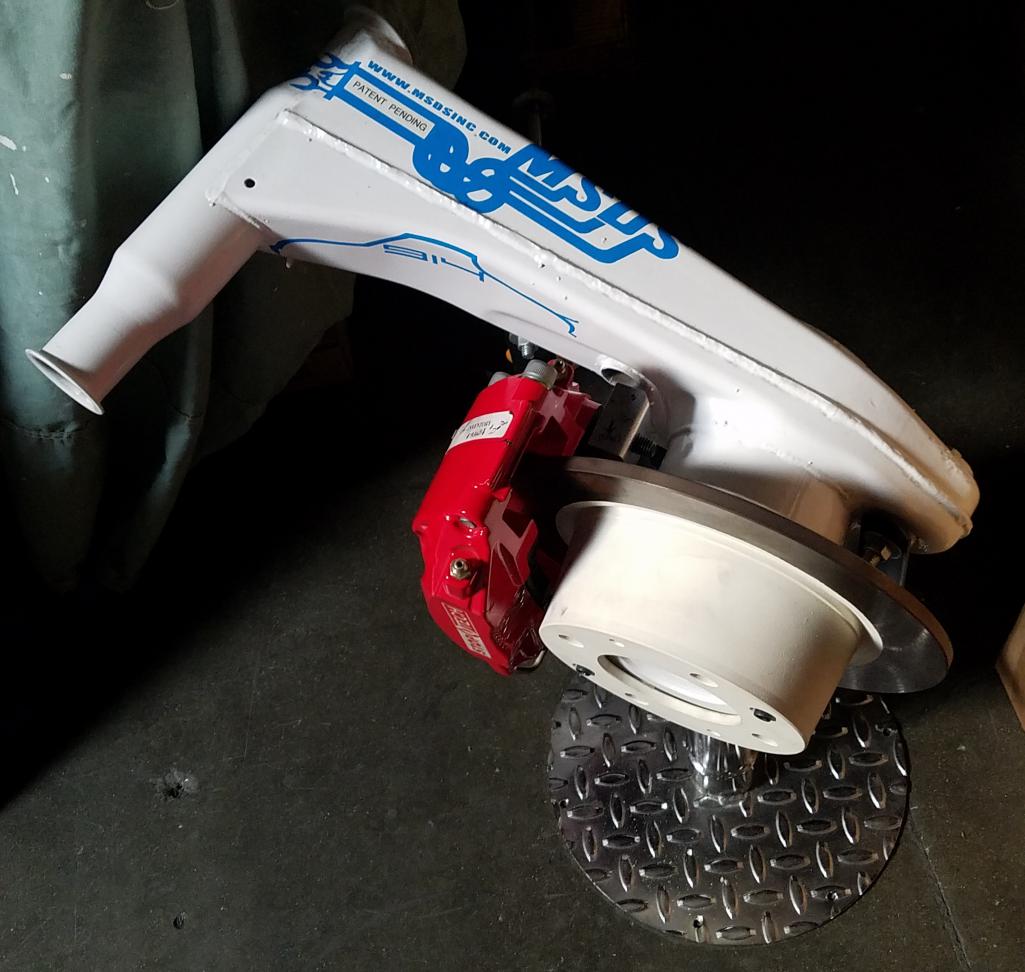
Posted by: mepstein Feb 3 2019, 08:27 PM
White suspension might look good on the right car. Hmmm
Thanks for the update. Looks great!
Posted by: Dave_Darling Feb 3 2019, 09:45 PM
You're not going to make your own semi-trailing arms? Really?
--DD
Posted by: Larmo63 Feb 3 2019, 10:35 PM
We want to see this car on the road!!!!!!!!!
Looks great Marty
Posted by: whitetwinturbo Feb 3 2019, 10:47 PM
Auto nirvana .........I still love and need your wing and it's support set up. What does it take to get a copy?
Posted by: Cracker Feb 4 2019, 06:39 AM
Off the hook Marty, off the hook...great job!
Tony
Posted by: rgalla9146 Feb 4 2019, 07:26 AM
Goodness gracious.
Unbelievable.
Posted by: Maltese Falcon Feb 7 2019, 01:12 AM
Auto nirvana
.........I still love and need your wing and it's support set up. What does it take to get a copy?I think that these wing supports can be easily duplicated , I can show you around the project and supply you with a few of the aluminum bits...then you can take it to the next level. Call me when you can & jump over here on a Saturday 818.five0seven.69three7
And thank you guys Dave, Mark, Lawrence, Tony & Rory for your support !!
Posted by: Maltese Falcon Mar 2 2019, 07:58 PM
Things to do while waiting on StopTech brake order...finish up the JRZ nitrogen cannister brackets. Once the brakes are received and mounted, I can then determine the offset measurements for the custom wheel order. Lots to do while waiting for special order parts...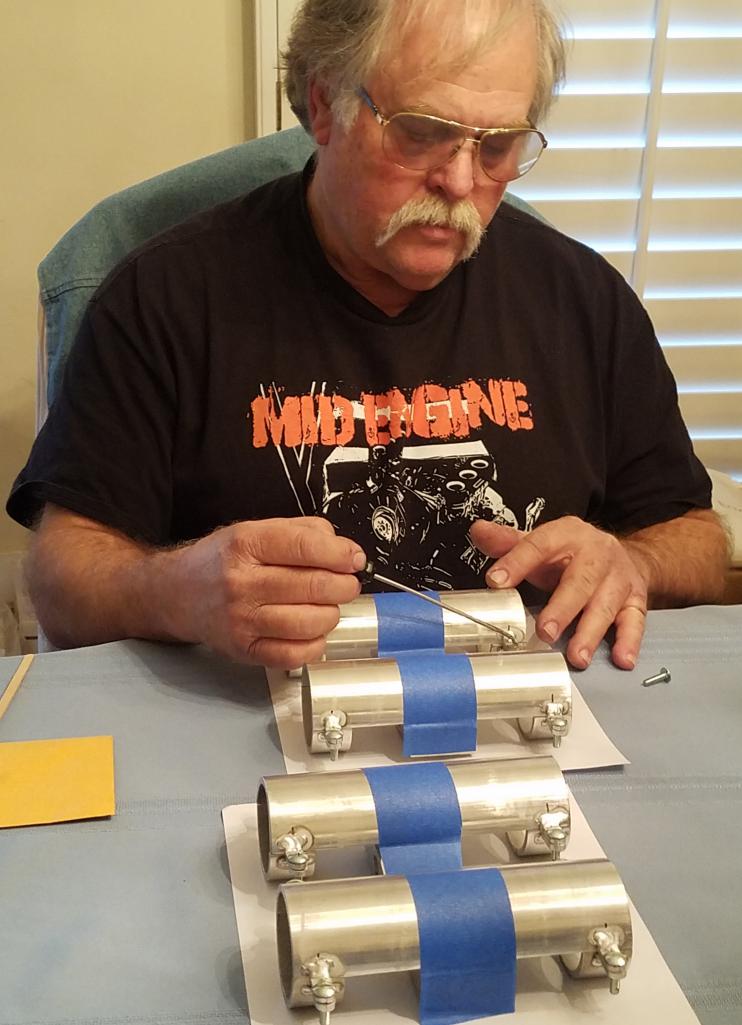
Posted by: Maltese Falcon Mar 2 2019, 08:00 PM
...another view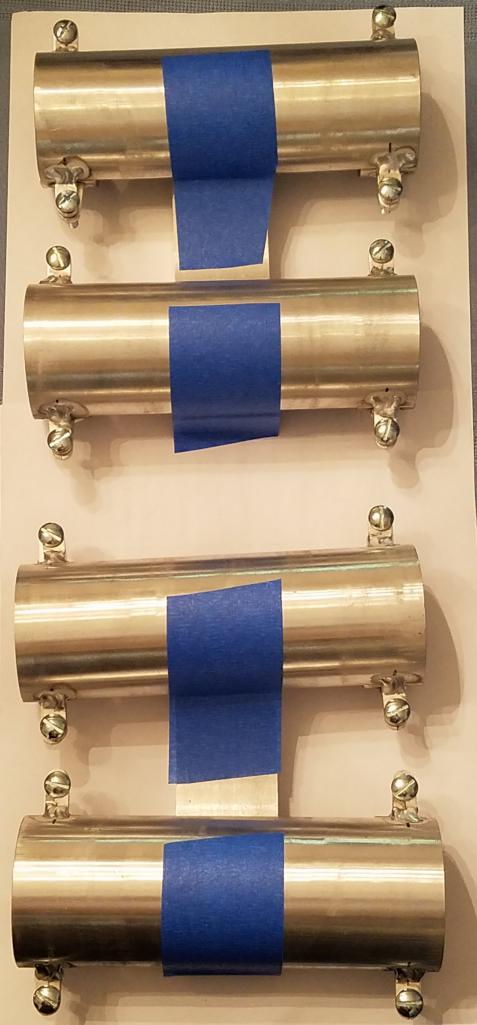
Posted by: Maltese Falcon Mar 2 2019, 08:02 PM
4 JRZ cannister brackets walk into a Starbucks...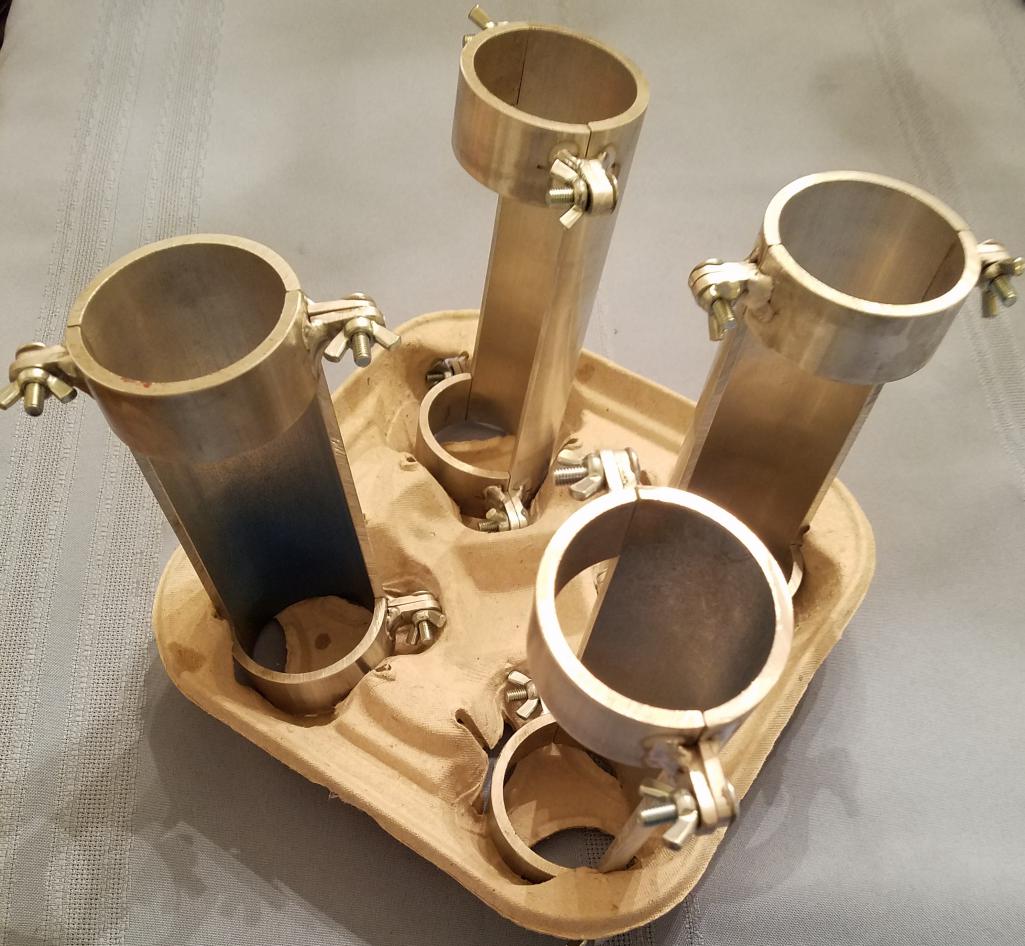
Posted by: sixnotfour Mar 2 2019, 08:11 PM
since you have time..your gonna need bigger wheel bearings...??
Posted by: Maltese Falcon Mar 2 2019, 08:41 PM
since you have time..your gonna need bigger wheel bearings...??
Jeff, just going to run new bearings and change these out as "Wear & Tear " parts through the race season. Would be great to have custom arms and run larger dia 934 c/v joints with bigger bearings, but even those will require change out intervals.
Posted by: sixnotfour Mar 2 2019, 10:04 PM
there is a guy that ended upwith a bunch of vellios castings..I know the history,,but,,easy . I believe he has some not fully machined castings still...
I bought the 2 fully machined sets one 3.o and turbp spacing...my other 914 has a machined set custom .from AZ.... time..
I am just sayin easy now..
Attached image(s)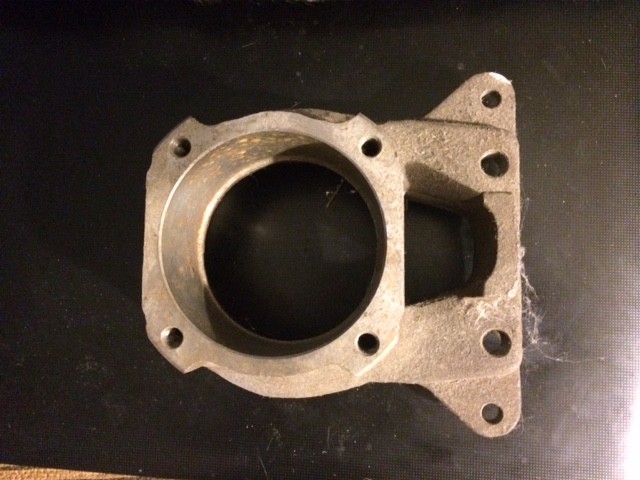
Posted by: KELTY360 Mar 2 2019, 10:18 PM
4 JRZ cannister brackets walk into a Starbucks...
......and?
There's got to be a barista joke in there somewhere.
Posted by: Maltese Falcon Mar 2 2019, 11:01 PM
there is a guy that ended upwith a bunch of vellios castings..I know the history,,but,,easy . I believe he has some not fully machined castings still...
I bought the 2 fully machined sets one 3.o and turbp spacing...my other 914 has a machined set custom .from AZ.... time..
I am just sayin easy now..
Wonder what George was up to making trailing arm bits ¿¿ I only knew about his 916 (style) trans castings. Looks impressive.
Posted by: Mayne Mar 3 2019, 08:29 AM
4 JRZ cannister brackets walk into a Starbucks...
That’s a latte fabrication.
Posted by: Maltese Falcon Mar 3 2019, 11:38 AM
4 JRZ cannister brackets walk into a Starbucks...
That’s a latte fabrication.
...the caffeine does help !Kelty360...
Barista says : "I will need to keep the 4 of you in this tray so you don't Shock the customers"
gotta be something better than that
Posted by: whitetwinturbo Mar 11 2019, 10:28 PM
Auto nirvana
.........I still love and need your wing and it's support set up. What does it take to get a copy?I think that these wing supports can be easily duplicated , I can show you around the project and supply you with a few of the aluminum bits...then you can take it to the next level. Call me when you can & jump over here on a Saturday 818.five0seven.69three7
And thank you guys Dave, Mark, Lawrence, Tony & Rory for your support !!
Will do soon via nine4nine.three78.sixteentwenty-five
Posted by: Maltese Falcon Mar 31 2019, 05:58 PM
Looking for JRZ mounting areas...front is good , rear should work tucked in a corner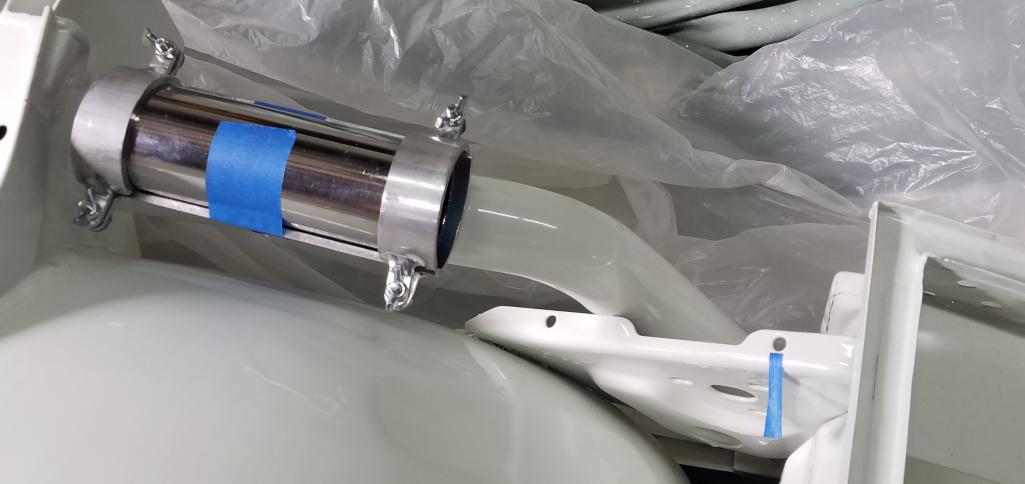
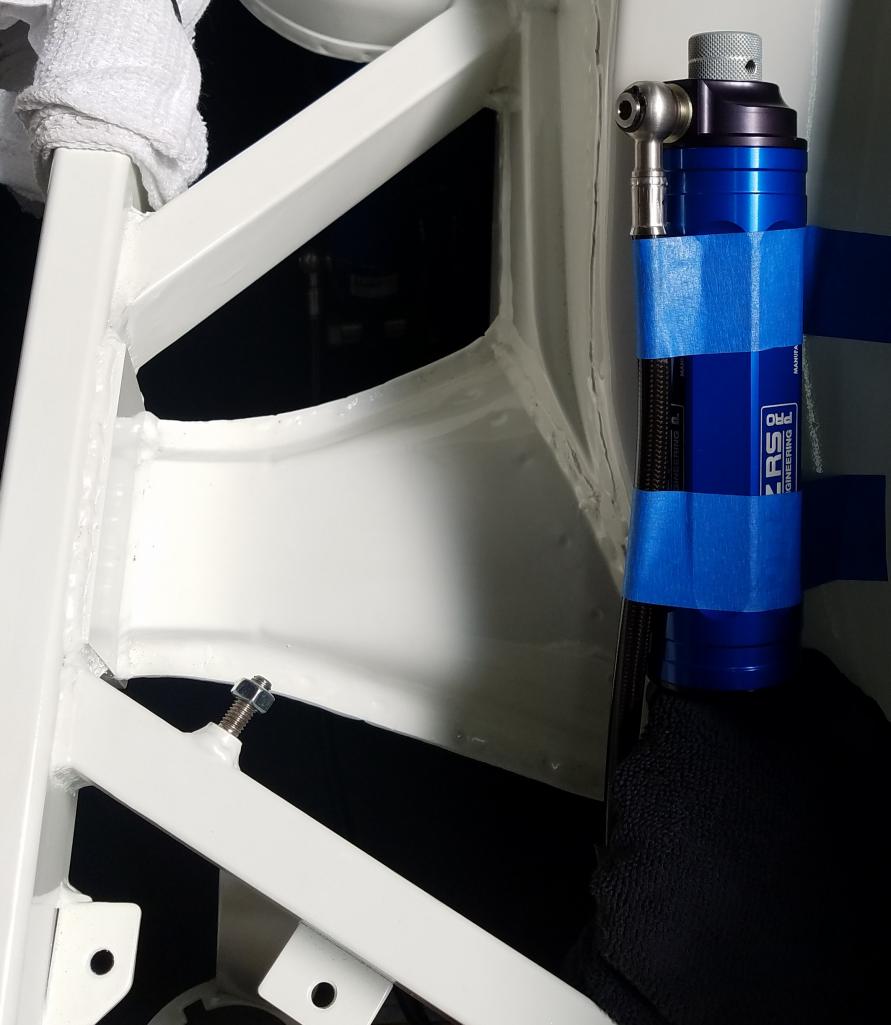
Posted by: Maltese Falcon Mar 31 2019, 05:59 PM
Getting into the new engine lid design
Posted by: Maltese Falcon Mar 31 2019, 06:02 PM
It's not a proper race car without some red registration-marks; these are for quick sight reference for neutral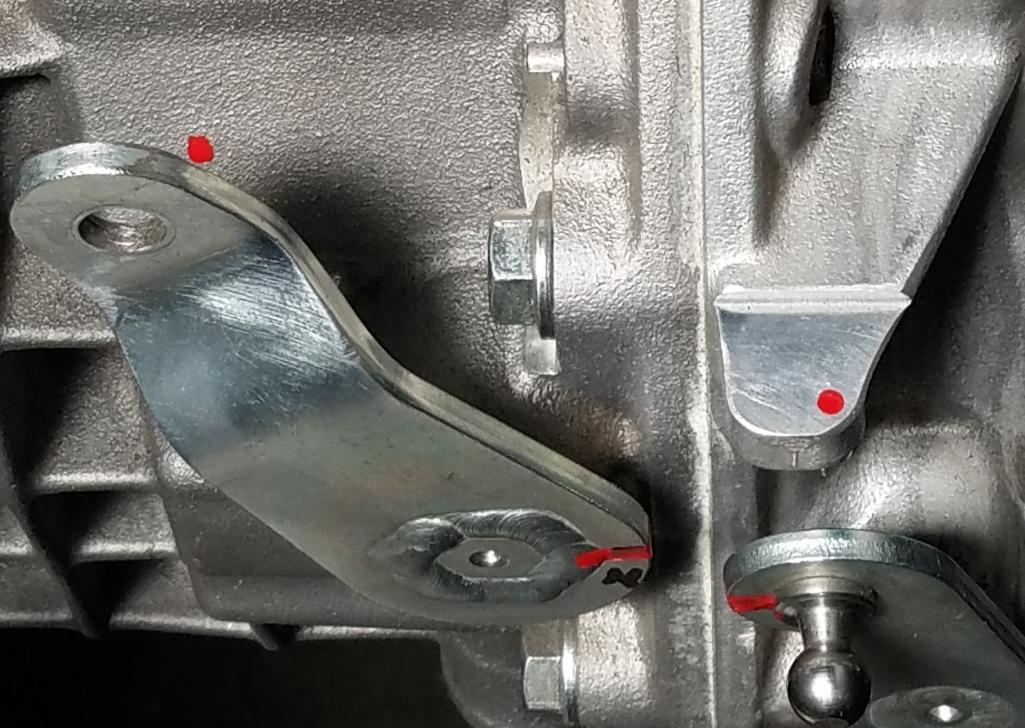
Posted by: Maltese Falcon Mar 31 2019, 06:08 PM
Harbor Freight didn't have a small dolly for the nitrogen tank, so had to custom make one with coffee cup holders 
Posted by: Maltese Falcon Mar 31 2019, 06:11 PM
Last mod needed on the SQS sequential shift module; a bit of an angle change to one of the brackets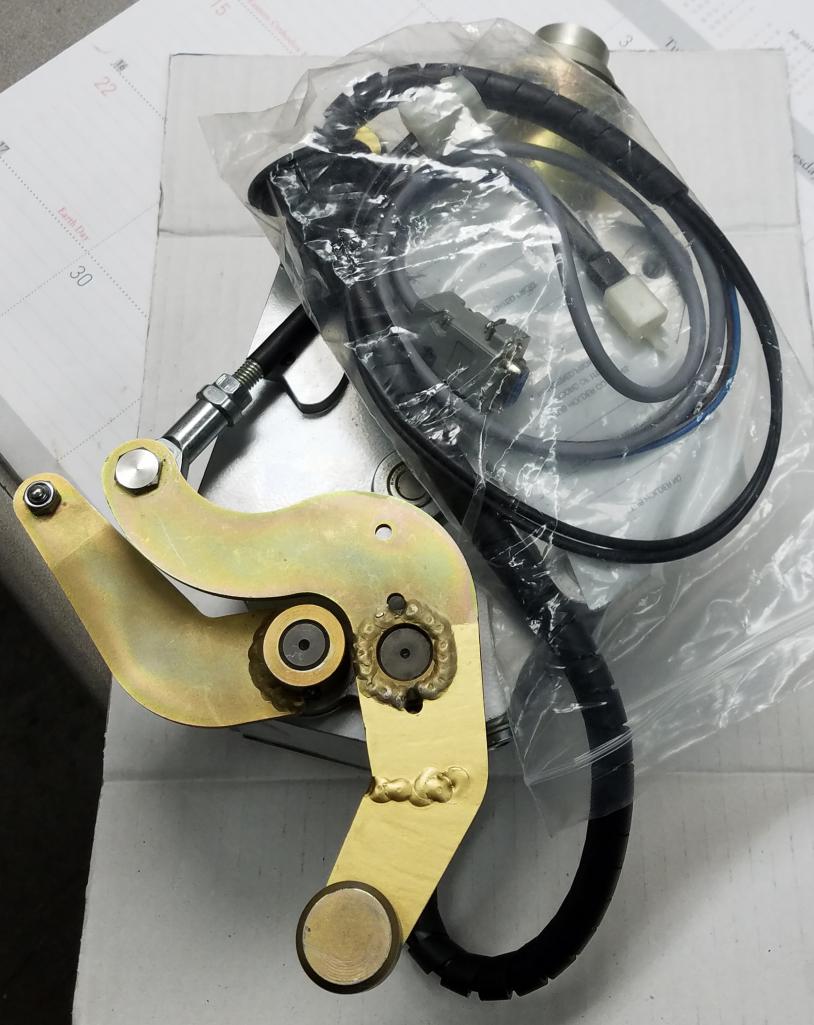
Posted by: r_towle Mar 31 2019, 06:20 PM
Didn’t you tell me that driving it was the goal?
I can’t wait to see it finished.
Please let us know when it’s running, I will make time to drop down to see it when I am on the west coast.
Posted by: Maltese Falcon Mar 31 2019, 06:41 PM
Didn’t you tell me that driving it was the goal?
I can’t wait to see it finished.
Please let us know when it’s running, I will make time to drop down to see it when I am on the west coast.
Absolutely ...everyone on board here with the "Build progress" will know when it's track ready
In the golden days of print media I would just show up in a (finished) trick car, get some pics snapped, write some copy and BOOM on the magazine racks. Today although with the speed of the internet, trick cars that are hand built... still happen at human speeds . So thank you all for your continued interest in project 9148-gtt
Posted by: moparrob Mar 31 2019, 08:01 PM
Thanks for sharing Marty. Looking forward to seeing the final product.
Posted by: whitetwinturbo May 1 2019, 11:10 PM
Marty..........I'm not worthy of your workmanship
Posted by: rgalla9146 May 2 2019, 03:00 PM
It's not a proper race car without some red registration-marks; these are for quick sight reference for neutral
The weld to the left of the N is art.
I marvel at your skill.
I'm friggin' jealous
Posted by: Maltese Falcon Jun 15 2019, 02:51 PM
OMG
. I can't wait to see how that sits in the car. How do you plan to do the engine lid? That is obviously going to stick out the top. Not that I care as I know you have some killer plan. I can't wait to see it man. Seriously sick build ....somewhat close to this (top view) ball point/napkin sketch; Left and Right grille sections remove independently. Thank you Bruce Stone & Garold for the engine lid grilles, & Chi-town for some misc brake fittings....and Montreal 914 for the targa bar trim
Posted by: Maltese Falcon Jun 15 2019, 02:57 PM
Sketching our latest Livery...goal is Less = More, I want the GP white to dominate most of the car. P-Crest is not my design, but going to use this "Stained glass " look for the hood crest 
Posted by: whitetwinturbo Jun 21 2019, 08:22 PM
Posted by: Maltese Falcon Jun 22 2019, 01:03 AM
Small bump in the front suspension progress; Stoptech rotors not happy with the ERP/ 935 style ball joints...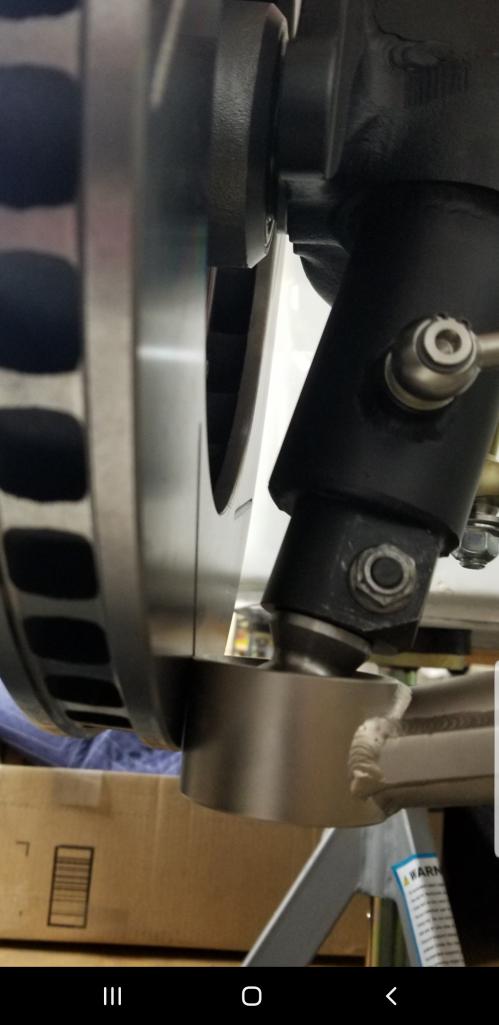
Posted by: Maltese Falcon Jun 22 2019, 01:09 AM
Cary over at Eisenlohr Racing Products (ERP) to the rescue with a pair of custom machined offset rotor-hats, sample on the Left .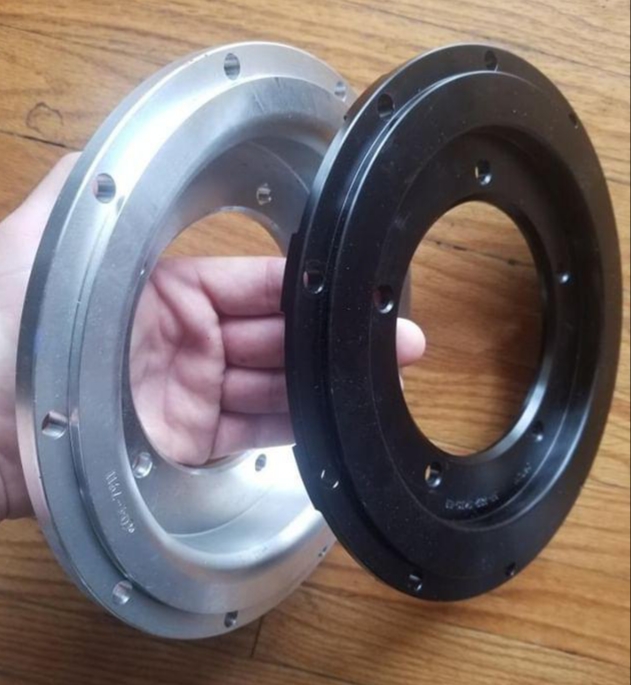
Posted by: campbellcj Jun 22 2019, 04:53 AM
It always helps to have friends in high places! Crossing fingers!
Posted by: wndsrfr Jun 22 2019, 05:25 AM
Cary over at Eisenlohr Racing Products (ERP) to the rescue with a pair of custom machined offset rotor-hats, sample on the Left .
Looking at Wilwoods?... I've been happy with them....
Posted by: MATTYLITE Jun 25 2019, 01:29 PM
Hello all,
A brief update on our end with where we are, and what we've been up to.
As Marty has mentioned, we're currently dealing with brake fitment.
We had Cary at ERP custom machine us the front hats to extend the rotor outward / away from the lower ball joint for clearance. Now that that issue is behind us, we've centered everything up, and we'll be moving on to wheel measurement!
Disclaimer:The below pictures are from fitting purposes. Missing hardware will not be missing during final install.
https://ibb.co/s9Wvm58
Original Hat:
https://ibb.co/9wFvDsb
ERP Hat:
https://ibb.co/bL69b9S
ERP Hat clearance:
https://ibb.co/6t50SJZ
Caliper fitting:
https://ibb.co/D5wf0wT
Stay tuned for more in the coming weeks!
-Matt
Posted by: Maltese Falcon Sep 21 2019, 05:00 AM
Small updates for now: our Forgeline GW3R centerlock wheels have arrived at Wheel Enhancement/ L.A.
Will proceed to fine-tune the clearence in the wheel wells, might trim out some excess fiberglass inner-lip of the Sheridan fenders.
12x18" rears and 9.5x18" fronts.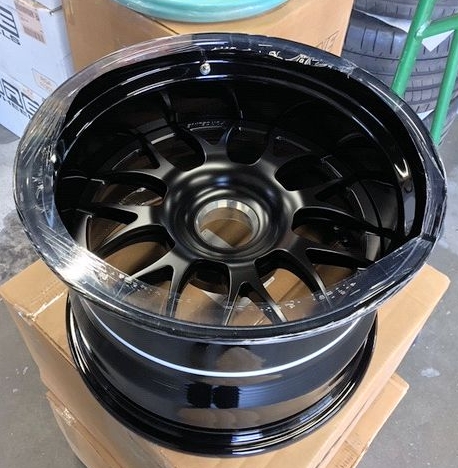
Posted by: Cairo94507 Sep 21 2019, 07:17 AM
Wow! Serious wheels for sure. They look nice.
Posted by: dan10101 Sep 21 2019, 09:45 AM
Small updates for now: our Forgeline GW3R centerlock wheels have arrived at Wheel Enhancement/ L.A.
Will proceed to fine-tune the clearence in the wheel wells, might trim out some excess fiberglass inner-lip of the Sheridan fenders.
12x18" rears and 9.5x18" fronts.
My dream wheels for sure.
I was just trimming my rear fender yesterday to clear my 11x18 with 295 Hoosier tires. But my fenders are bonded and fixed.
I long for that deep dish...

Posted by: Maltese Falcon Sep 21 2019, 12:30 PM
Wow! Serious wheels for sure. They look nice.
Many variants of Forgeline wheels we had to choose from, Thank you Sir ¡
Posted by: Maltese Falcon Sep 21 2019, 12:35 PM
Small updates for now: our Forgeline GW3R centerlock wheels have arrived at Wheel Enhancement/ L.A.
Will proceed to fine-tune the clearence in the wheel wells, might trim out some excess fiberglass inner-lip of the Sheridan fenders.
12x18" rears and 9.5x18" fronts.
My dream wheels for sure.
I was just trimming my rear fender yesterday to clear my 11x18 with 295 Hoosier tires. But my fenders are bonded and fixed.
I long for that deep dish...
Having dzus fastened Sheridan fenders and Qtr panels...makes the trimming process that much easier; Deep dish like Chicago pizza / the big meats like Arby's

Posted by: Maltese Falcon Sep 22 2019, 01:52 PM
Sketching some of the turbo exhaust routing/ Zork pipes of course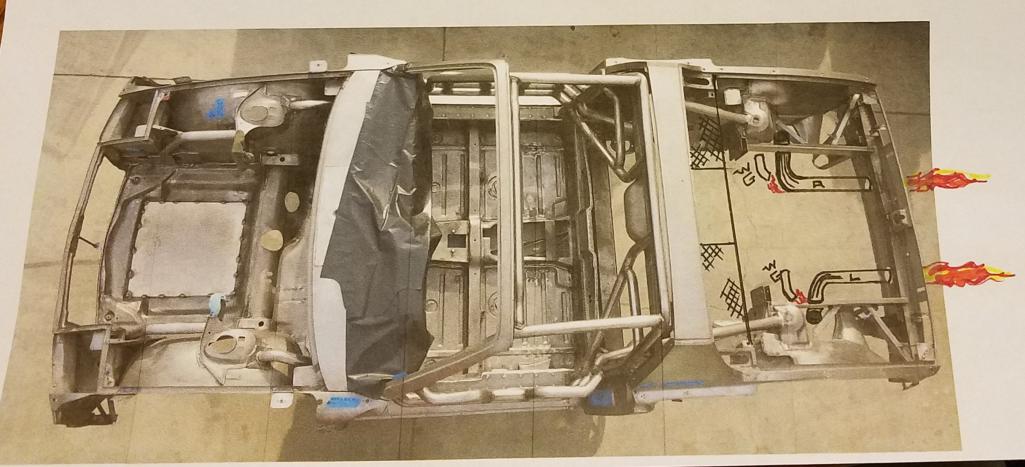
Posted by: horizontally-opposed Sep 22 2019, 05:17 PM
Thanks for the updates on this thread. Has to be one of the all-time coolest 914 builds, and the car as well as the creative thinking continues to stun me. Love it!!
ERP Hat clearance:
https://ibb.co/6t50SJZ
^ This pic stuck out to me, as it brought up a point made by Porsche engineer recently re: the size of 996 wheel bearings (ring design vs central bearing), and that Porsche really started having problems with wheel bearings on its air-cooled race cars when they went to 17- and then 18-inch wheels. Reason: The front tires, wheels, and brake sizes were asking a lot of a wheel bearing design that dated back to 1963-1964.
If I look at this pic, there's a lot of leverage on that wheel bearing, and while that's true for a 185 or 205 or even 225 front tire, I suspect you'll be at 245-285? There are probably people smarter than me with regards to this, and I suspect race cars with slicks are/were a different proposition—but this is one of those things you just want to be sure you're all good on because it's your safety in the car. Maybe a non issue, but raising it respectfully.
Keep on keepin on...this build is killer!
Posted by: Maltese Falcon Sep 22 2019, 07:37 PM
Good point Pete, and the wheel-bearing design-reference back to the '60s is a good point. The air cool era design could be inferior to the (newer) 996 design...however I'm using the latest ( slightly larger) bearing/ hub from the '87-89 Carrera. It's just one more wear + tear item on the car (as are the rear T- arm bearings) that will be inspected and changed out throughout the season of club racing.
I'll run this by my suspension guru Cary as well.
Appreciate your enthusiasm in our build project !
Posted by: Lucky9146 Sep 22 2019, 08:19 PM
Just catching up on this thread.
Simply stunning Marty, absolutely love all you are doing.
I think the build is the most fun part, figuring everything out along the way is what really drives people to improve on things.
Congrats of continued progress and thanks for posting!
Posted by: Maltese Falcon Sep 23 2019, 06:49 PM
JRZ performs this (RSR) structural "Gusset" mod to the late 911 Carrera struts when you order their shock absorber system. A bit more strength...I'll run with these & change out the bearings as needed.
Note; the excess black coating on the spindle is removed prior to use.
Posted by: Maltese Falcon Sep 23 2019, 06:57 PM
Checking it twice ; updated the Haltech Elite 2500 with mods to the 8 coil pack grounds (-)
ECU cables/ control boxes going in first/ basic car wiring going in secondarily. 
Posted by: Maltese Falcon Sep 23 2019, 07:01 PM
Just catching up on this thread.
Simply stunning Marty, absolutely love all you are doing.
I think the build is the most fun part, figuring everything out along the way is what really drives people to improve on things.
Congrats of continued progress and thanks for posting!
Jim
!!
Posted by: Maltese Falcon Sep 24 2019, 08:55 PM
Another Gran Prix white with v8 Cayenne power, this is the Riley from 2010 Daytona era . Action Express team/ Lozano Bros. Porting engine !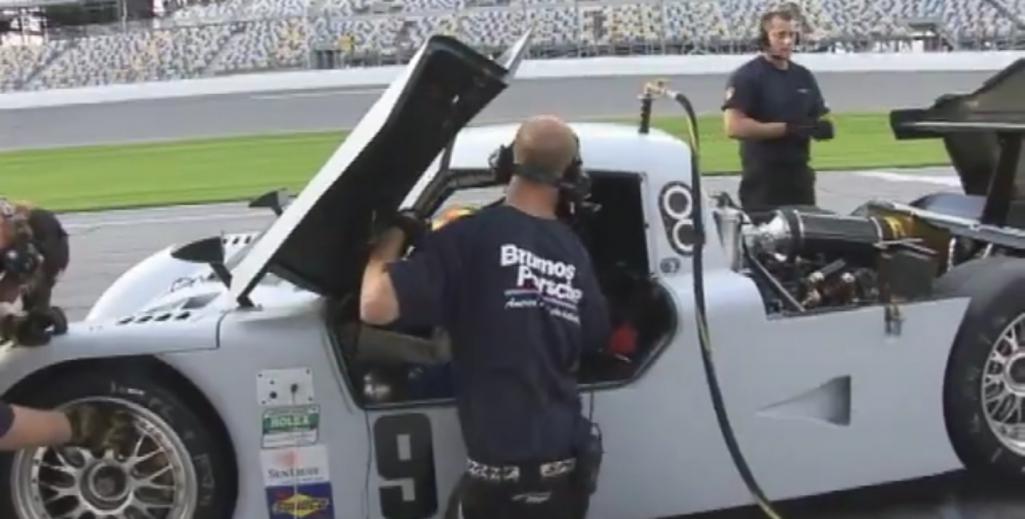
Posted by: Matty900 Sep 24 2019, 10:24 PM
Such an awesome build Marty & Matt. Let me know if there is anything we can do to help
Posted by: MATTYLITE Sep 25 2019, 12:31 PM
Thank you! We cannot express our gratitude enough to you guys over at 914 Rubber for the products we have on our project. Top notch quality all the way.
-Matt
Such an awesome build Marty & Matt. Let me know if there is anything we can do to help
Posted by: Maltese Falcon Oct 31 2019, 10:16 PM
Merting of the minds with Brian, founder of Sway-a-way products. Axel discussions ...lots of good info from him !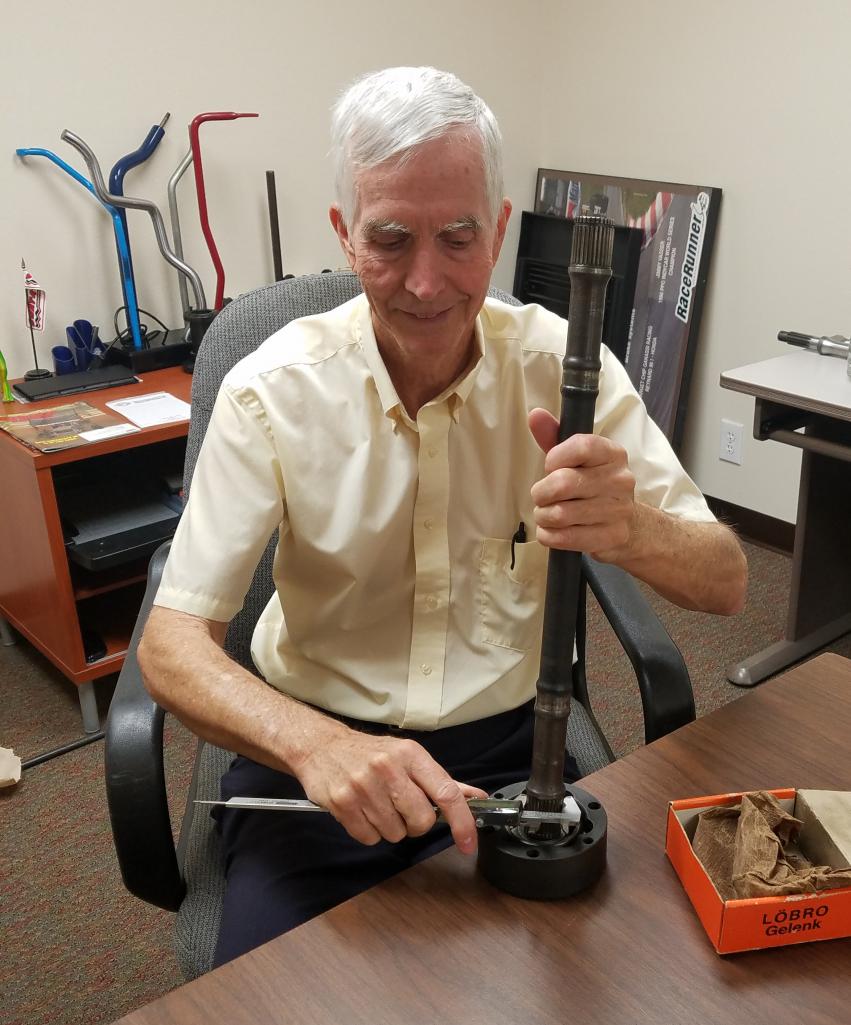
Posted by: Maltese Falcon Oct 31 2019, 10:33 PM
Since I haven't ordered custom length axels in a long time, Brian suggested this fail-safe measuring method: cut an old axel in 1/2, set into a 1 1/4" piece of angle iron, and using 2 gear-clamps (to hold final length in place)...measure the distance between c/v joints. Measurements taken in full rear suspension droop. The 996gt2 transaxle is not mfg with an off center case...so measurements will be within a 1/16" or so Left axel and Right axel lengths. Working direct with Sway-a-Way (approx 30 min from msds,inc) helps a lot too ! Our new axels are being made from 300M alloy, and have more spline (broach) lengths at both ends, so they float as opposed to being circlipped in place. Only using 1 circlip at the trailing arm side.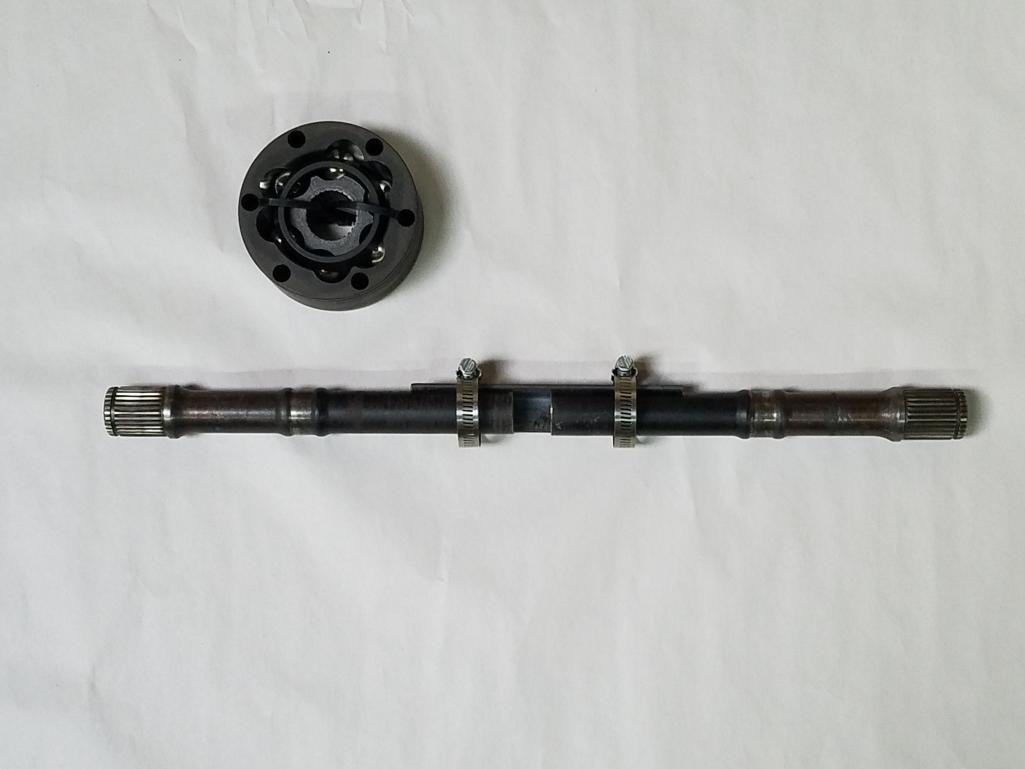
Posted by: Maltese Falcon Oct 31 2019, 10:43 PM
While waiting on axels...I jumped back on the left & right engine grill.
It's 2 seperate lift-off type.
Setting up some support plates and frame; transferring the grill-pattern (for 8/32 bolt holes) via spray paint ...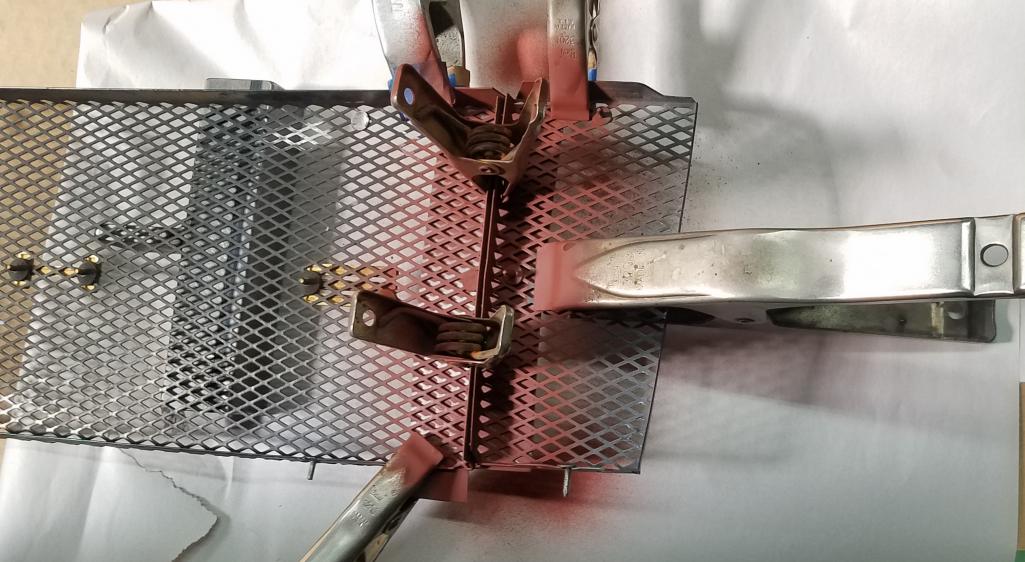
Posted by: Maltese Falcon Oct 31 2019, 10:53 PM
Drill transfer( grill pattern ) now visible on the 16 ga. metal side bracket. The lift-off grill sections will include the small side grill (next to targa sail) lifting out simultaneously. 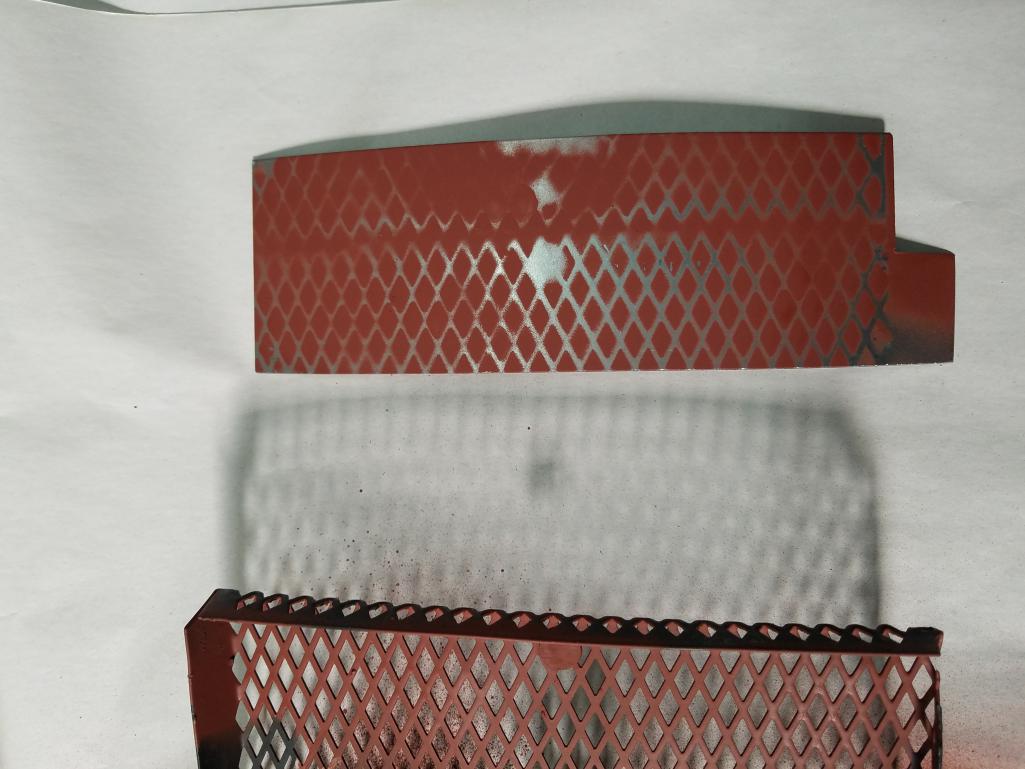
Posted by: Maltese Falcon Oct 31 2019, 10:57 PM
Left and Right grill brace plates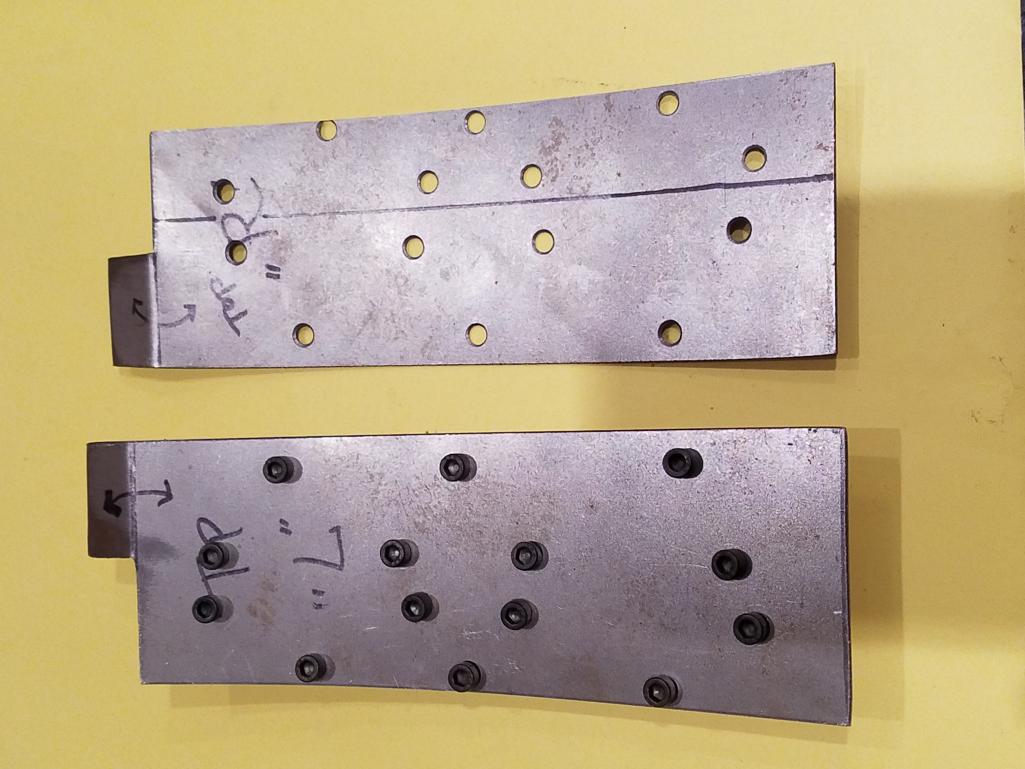
Posted by: Maltese Falcon Oct 31 2019, 11:01 PM
How the right side prototype looks, the 3/4" aluminum channel is the main backbone where the next section of grill is mounted to ; kind of like building a gt grill with an extra section of material ( donor grill).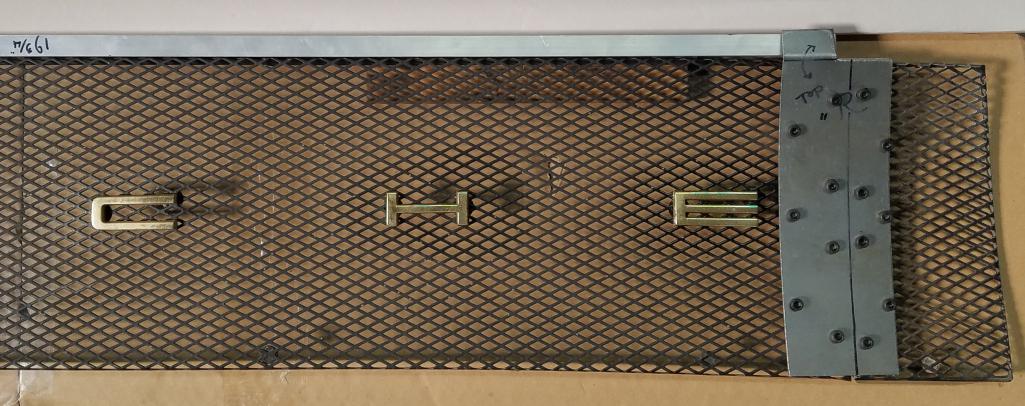
Posted by: Maltese Falcon Oct 31 2019, 11:07 PM
Extra benefit from the VW/ Karmann mfg of our 914s; the prongs on these engine grills are nothing more than roof-nails...cost effective !!
With a bit of coaxing...I was able to put a 3mm die on these, and now have xlnt anchor points for fastening all of this puzzle together.
Posted by: Maltese Falcon Oct 31 2019, 11:09 PM
Makes for a neat assembly...
Posted by: Maltese Falcon Oct 31 2019, 11:17 PM
I know that there is a Snap-on brand tool for removing these darn rubberized fasteners, but I just fabbed one up in 10 min...
Thank you Bruce Stone & Garold S. for being the Grill Sargents !!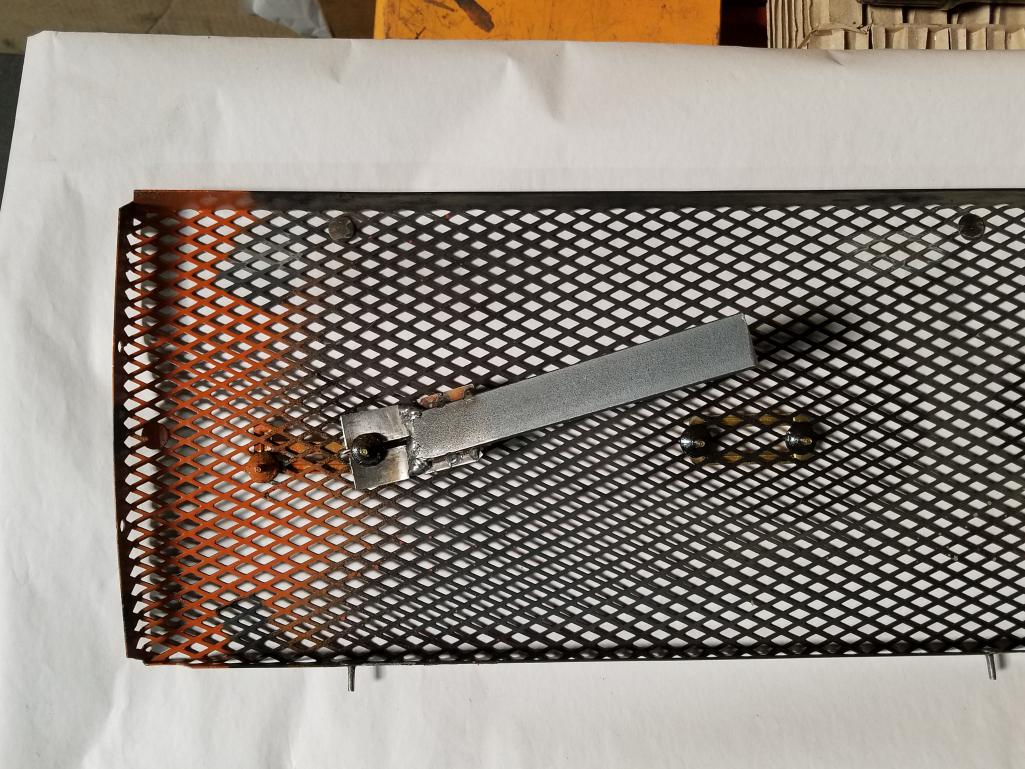
Posted by: Maltese Falcon Oct 31 2019, 11:28 PM
More on the twin lift-off grills as I make progress...now onto the custom rear tow-loop. GCR's in my club won't allow the 914 tow hook, and Rennline does not mfg a rear tow-loop for 914. 911 size thread is different...so built one this way:
Pegasus online has the SCCA approved loop diameter, made for the Ford Fiesta, but no threaded portion. I cut one of Auto Atlanta's new tow hooks then welded it to a machined piece of 3/4" barstock , it is durable and flips down when not needed. Same spot in the rear bumper as always !
Shown not yet fully TiG welded...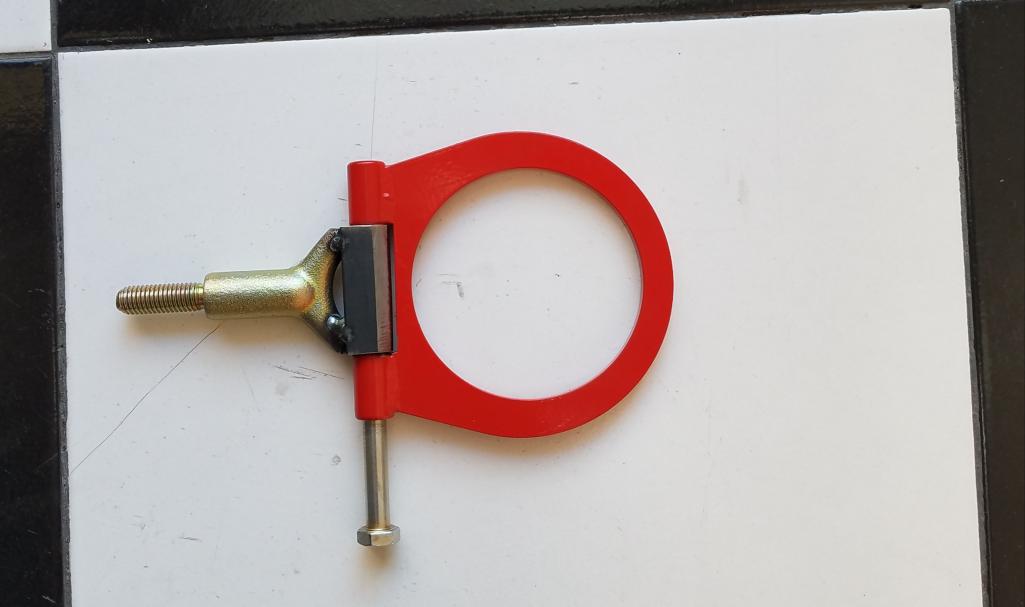
Posted by: Maltese Falcon Oct 31 2019, 11:29 PM
Folded down at 90° when not in use...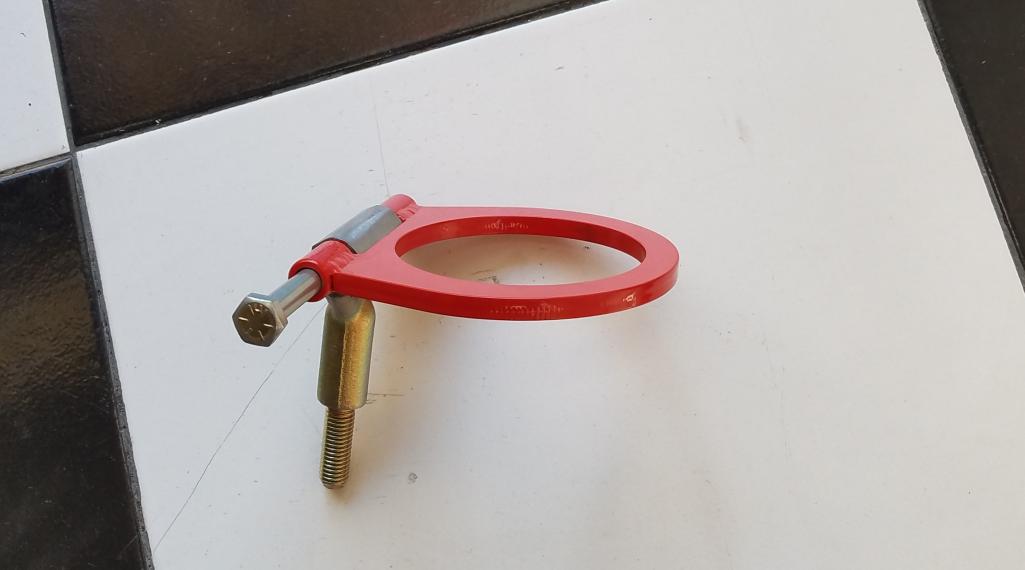
Posted by: Maltese Falcon Feb 14 2020, 11:33 PM
Pre-fitting Right side, make a few small adjustments, finish in satin-black, then black rubber edging, and add 2 hood pins...this is how I rock the 914 grill 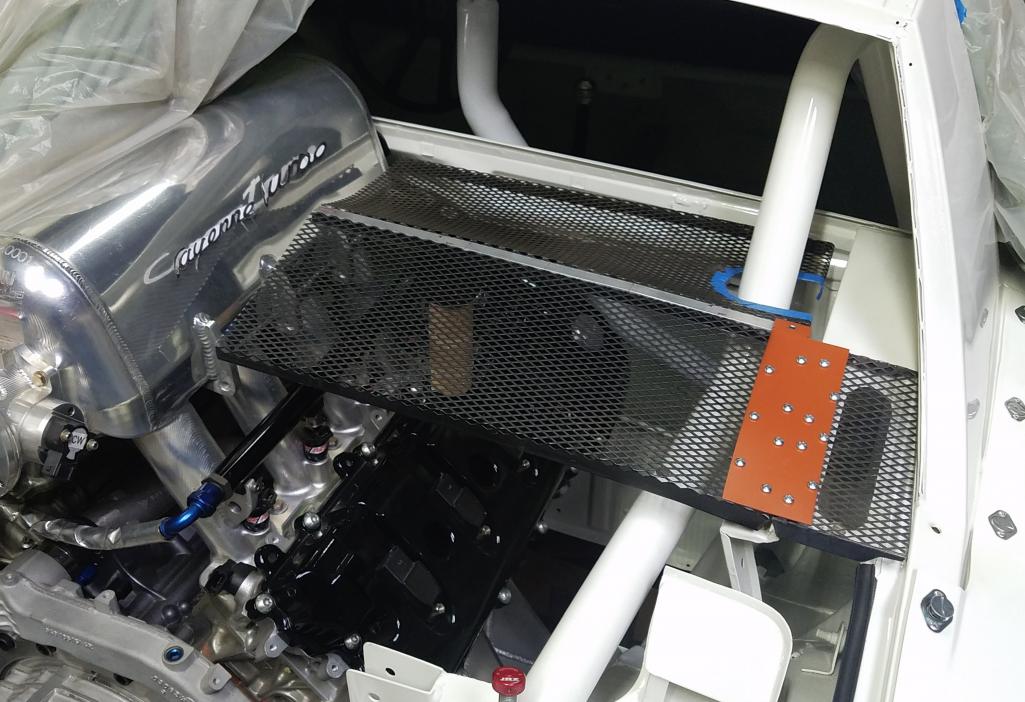
Posted by: Maltese Falcon Mar 6 2020, 09:10 PM
Driver side grill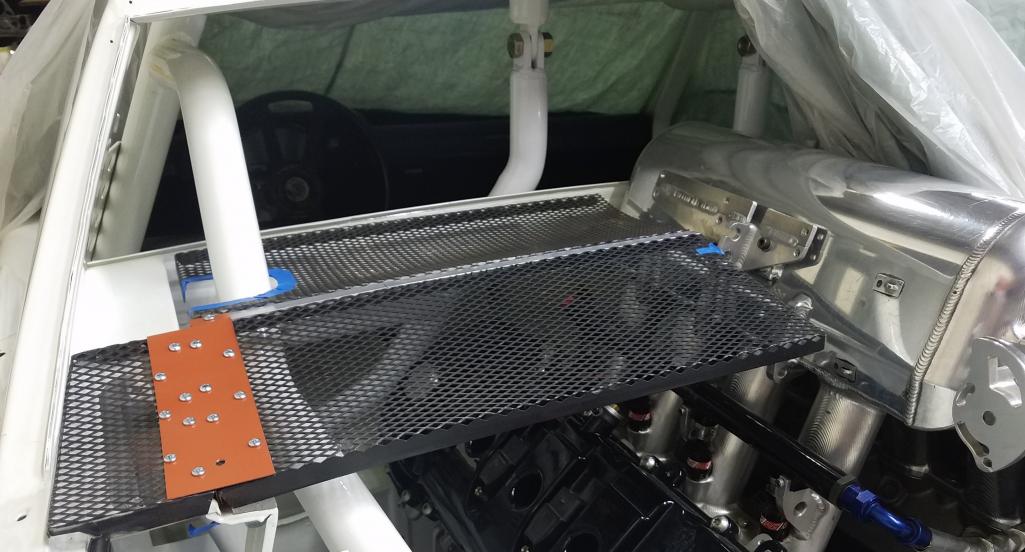
Posted by: Maltese Falcon Mar 6 2020, 09:11 PM
Aluminum block adapters for outer hood-pins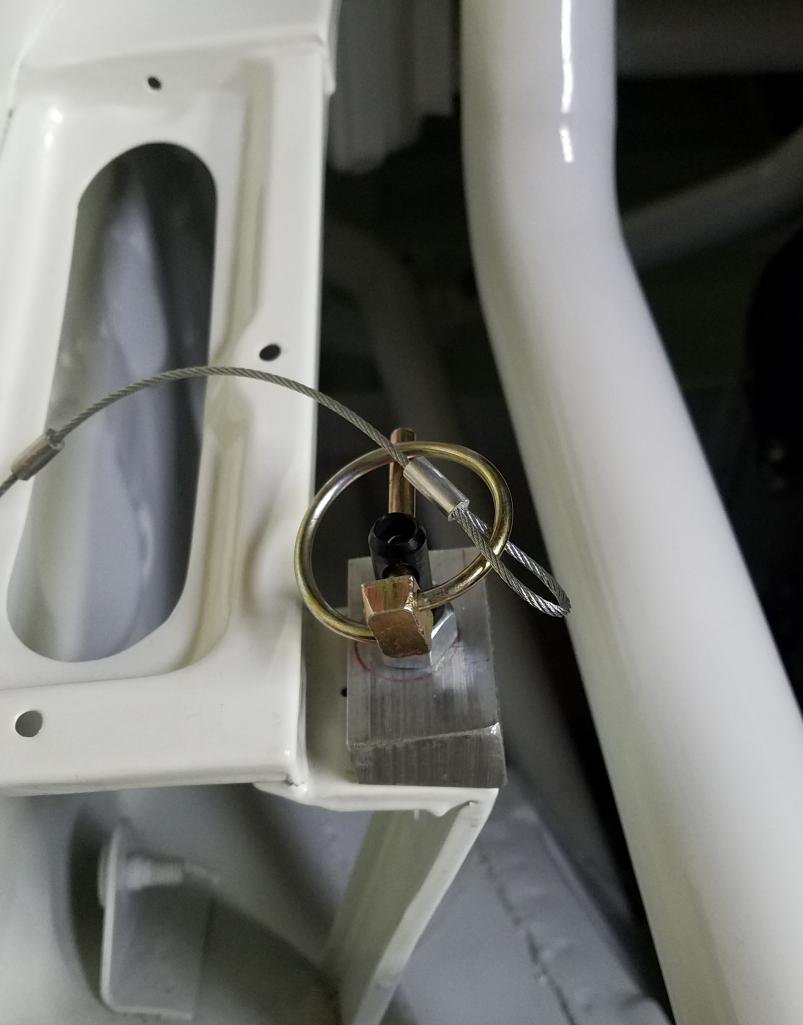
Posted by: Maltese Falcon Mar 6 2020, 09:12 PM
Rears looking grippy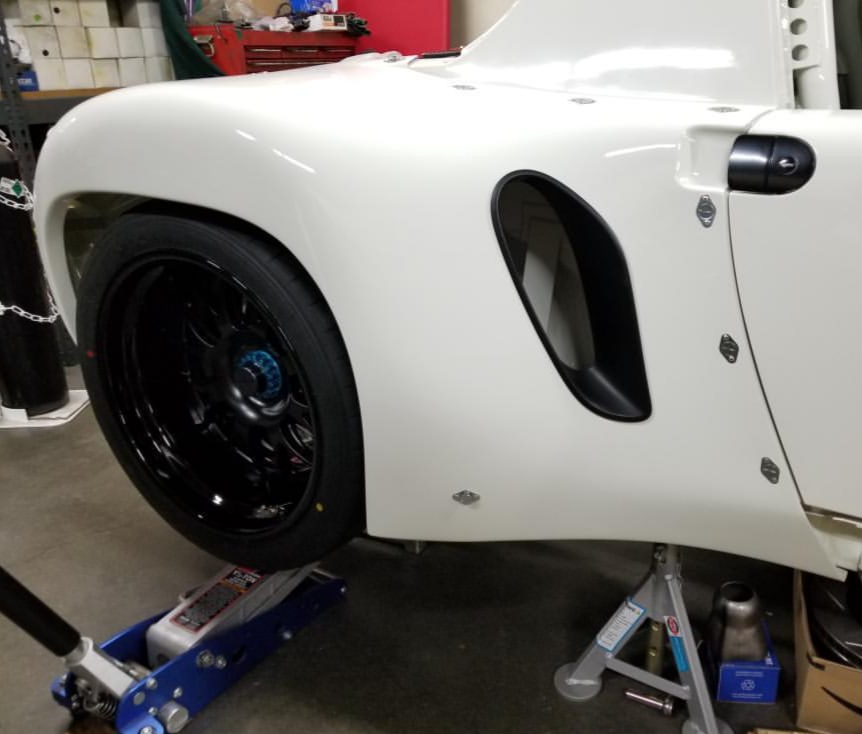
Posted by: Maltese Falcon Mar 6 2020, 09:14 PM
Front wheel & tire 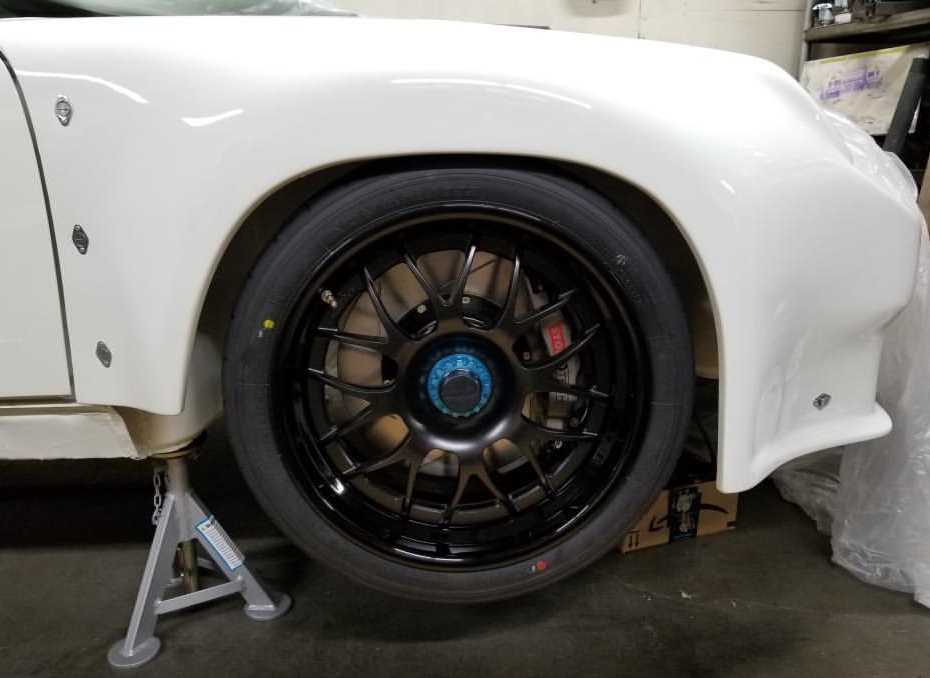
Posted by: Maltese Falcon Mar 6 2020, 09:16 PM
Some fun with center caps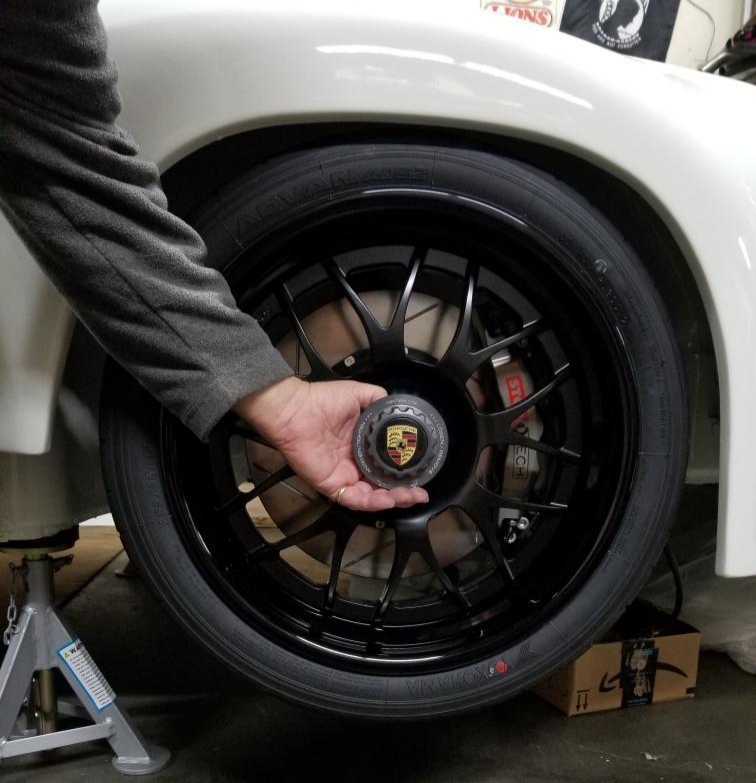
Posted by: Maltese Falcon Mar 6 2020, 09:25 PM
Body in white 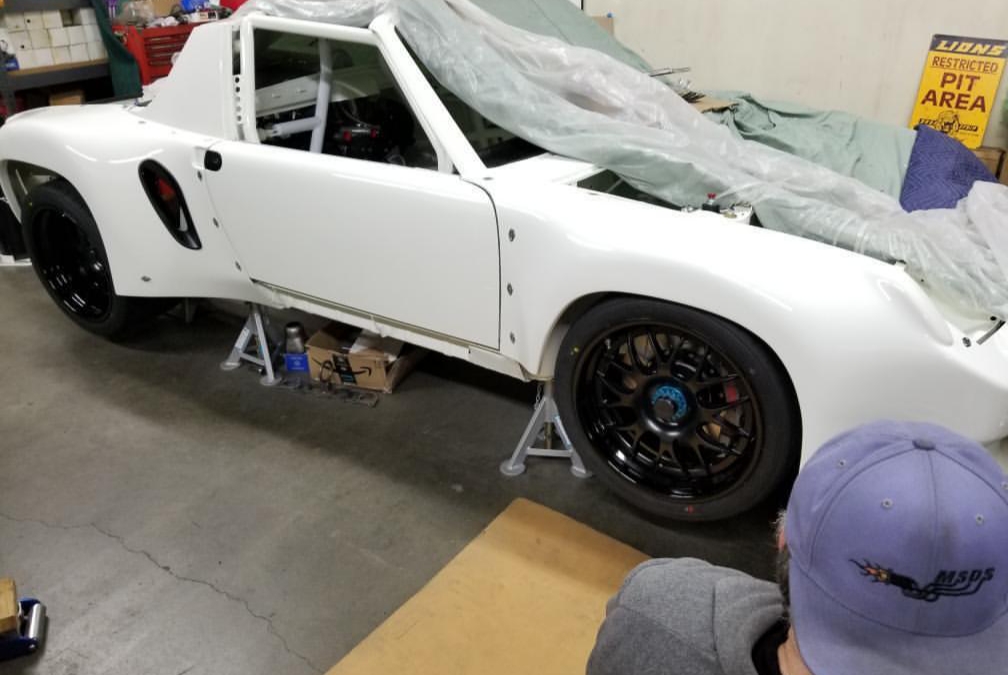
Posted by: eric9144 Mar 6 2020, 10:37 PM
Posted by: Maltese Falcon Mar 9 2020, 10:10 PM
Pre-fitting drivers side header (prototype is c/r steel)...production headers are made from stainless steel. View is looking upwards from ground level.
Tangerine Racing rear-suspension-console Bar in place !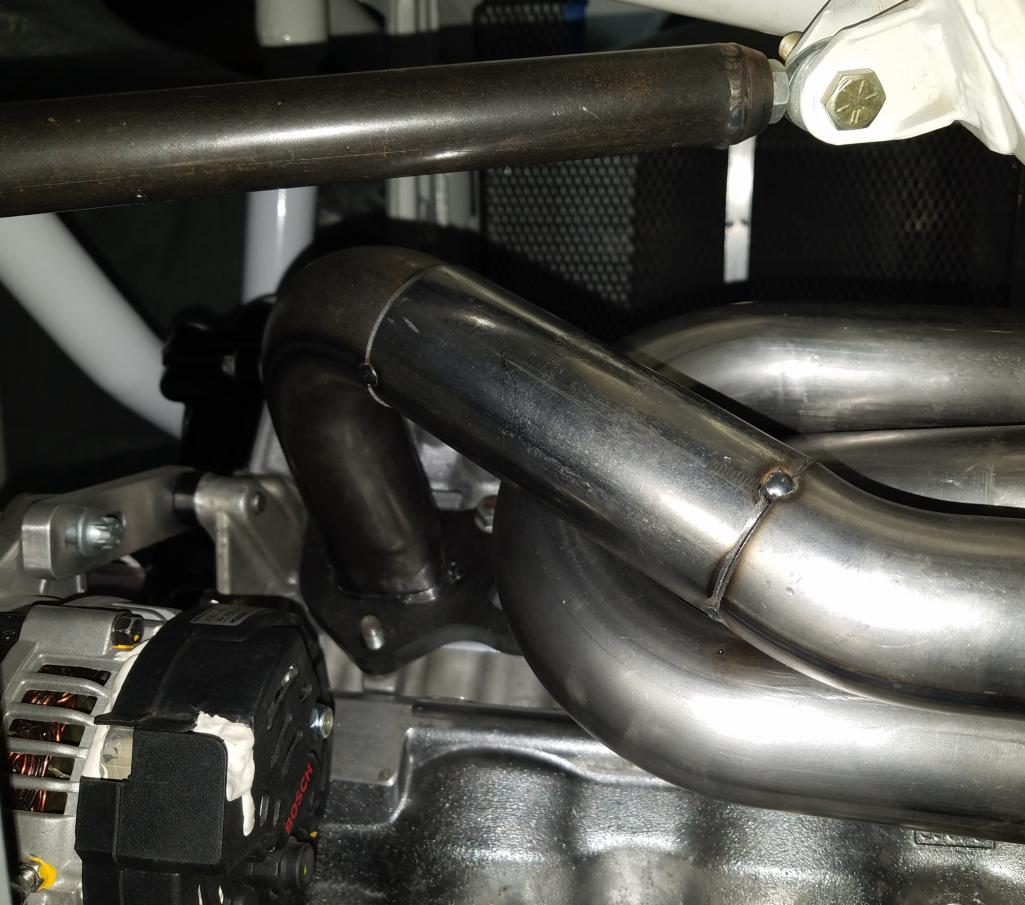
Posted by: Andyrew Mar 10 2020, 09:01 AM
Wheels look killer! Love the grill fab and cant wait to see the full exhaust!!
Posted by: Maltese Falcon Mar 17 2020, 10:55 PM
Right side prototype exhaust header ; the 4 tubes gather into the collector following the ignition firing order in a circular (rotational) pattern. This gives an extra swirl to the scavenging action and extra exhaust velocity towards the turbine inlet. Firing order is 1,3,7,2,6,5,4,8 . SO the R side fires: port 1,3,2,4 and the L side fires: port 7,6,5,8. Of course true 180° crossover headers would be 100% firing order tuned, but with the natural back-pressure created at the turbine inlets = nothing gained AND this would be a packaging + heat building fiasco in the confines of tight available space.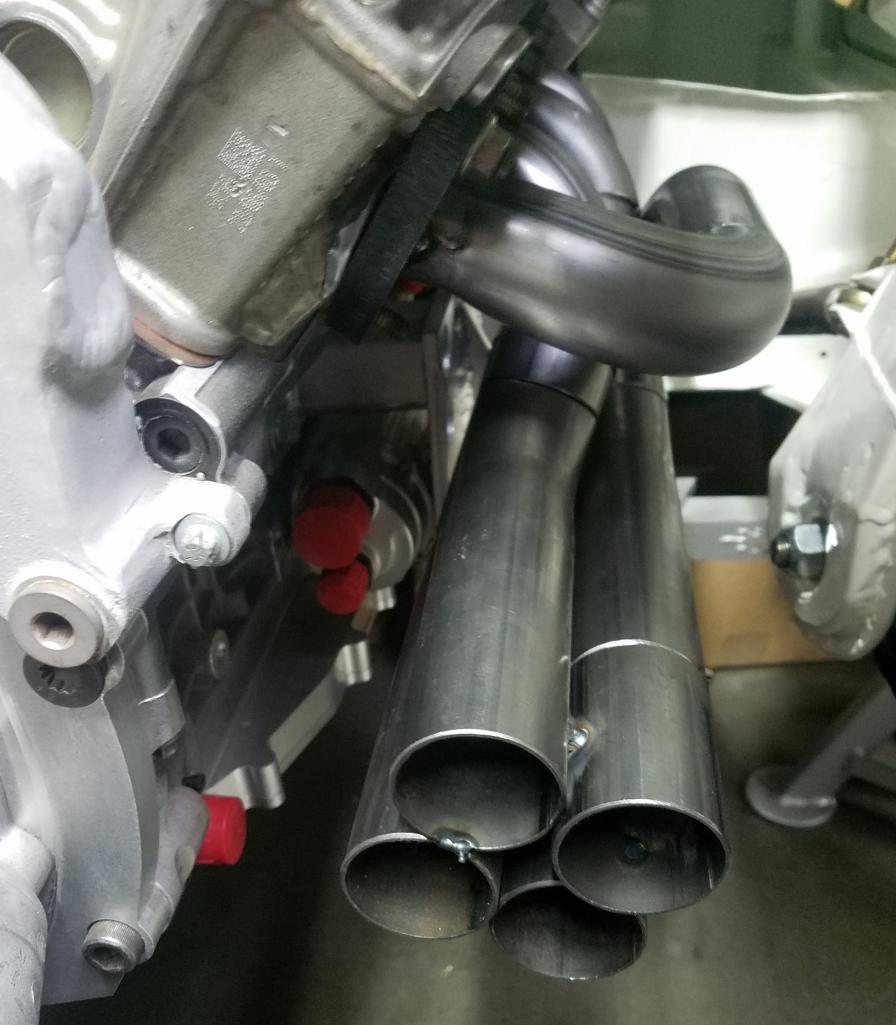
Posted by: moparrob Mar 17 2020, 11:31 PM
Very sweet, I would like to see your ultimate jig for that set up.
Posted by: Maltese Falcon Mar 17 2020, 11:46 PM
Very sweet, I would like to see your ultimate jig for that set up.
Jigs already in the welding/ fabrication dept. !¡
180° crossover SB Chev exhaust headers, n/a, firing order
18436572
Random media pic/not our mfg.
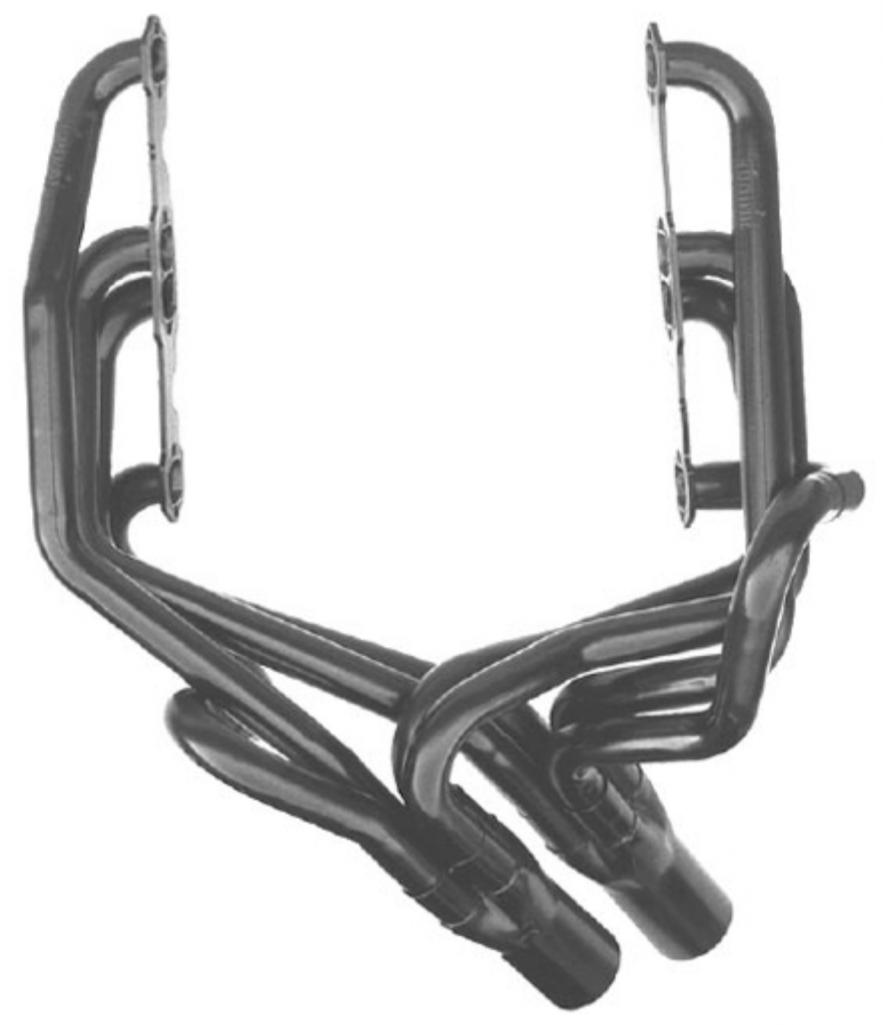
Posted by: Mike Bellis Mar 19 2020, 08:14 AM
That will sound awesome. Can hardly wait to hear it run.
Posted by: Jeff Hail Mar 19 2020, 08:57 AM
This is what happens when Marty shelters in place.
Coming along very nice.
Posted by: Maltese Falcon Mar 19 2020, 12:56 PM
This is what happens when Marty shelters in place.
Coming along very nice.
Jeff; as a Maltese Falcon needs to do occasionally
Posted by: Maltese Falcon Mar 19 2020, 12:59 PM
That will sound awesome. Can hardly wait to hear it run.
Mike...there are a couple youTubes out there with Lozano engine/ Action Express (v8) Rileys running around...they do sound righteous!
Marty
Posted by: Maltese Falcon Mar 28 2020, 09:53 PM
Several items that will go into this build ; id plates, stickers, emblems,
dig the 91 octane sticker . The door jamb plate will be stamped L 908 (Grand Prix white), and also with the assembly # from the original rear trunk floor stamp #.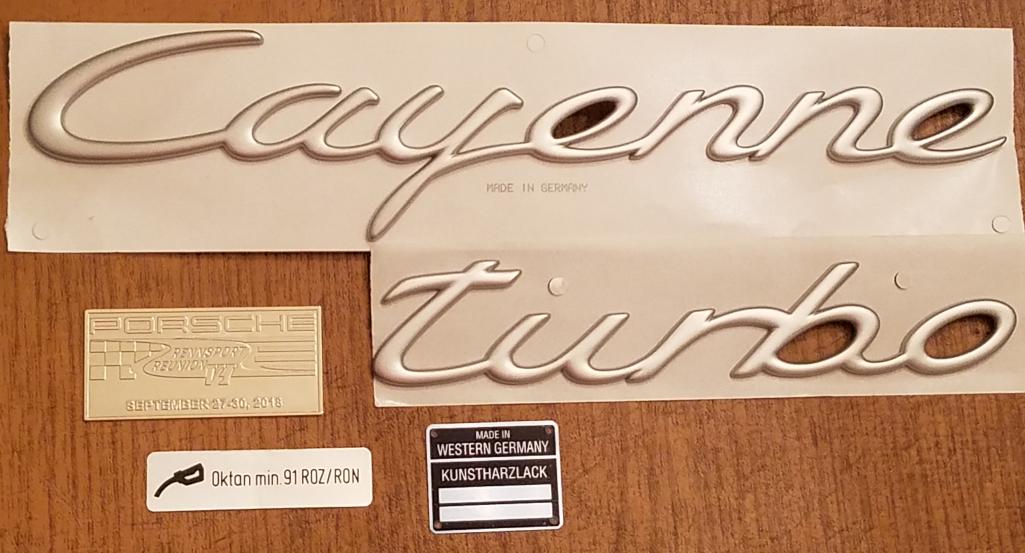
Posted by: Maltese Falcon Mar 28 2020, 09:58 PM
The stamped # in rear trunk floor assembly was carefully saved during the metal surgery on 9148gtt; then welded back into place in the rear trunk area. Small details are big deals on our build !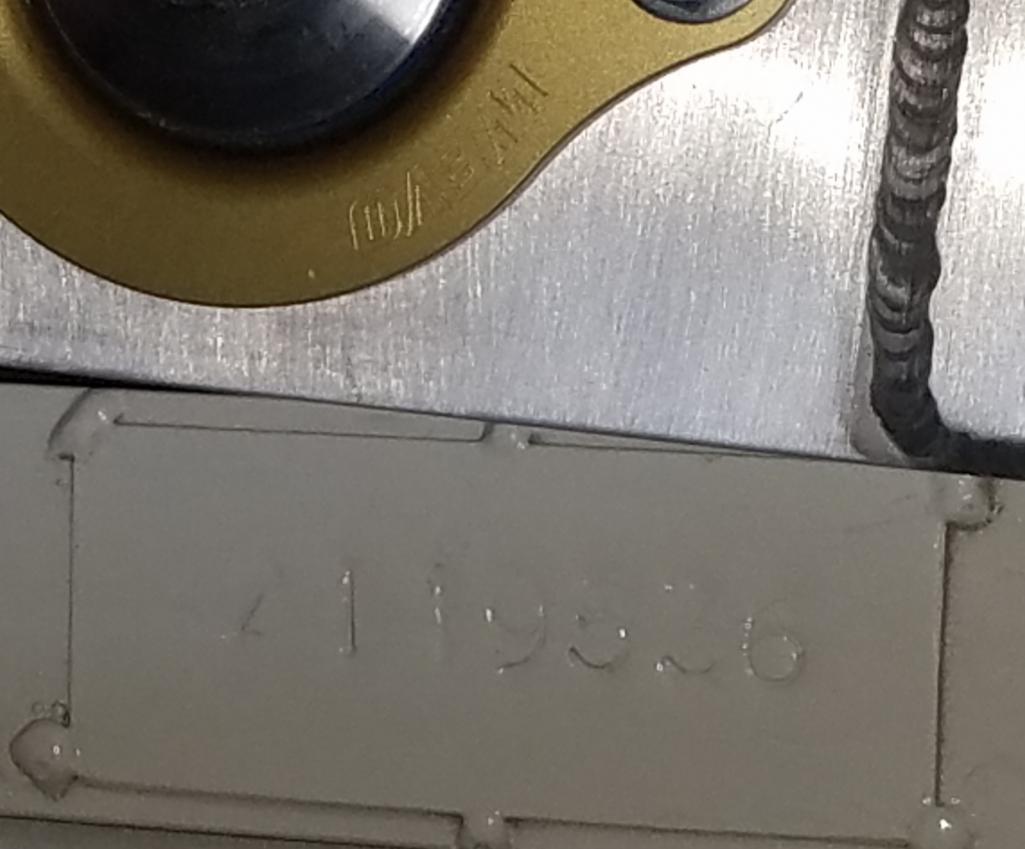
Posted by: 914 Ranch Mar 29 2020, 03:32 AM
Now that's what I'm talking about... Now you have put another smile on my face. I have no idea when I will be able to get back out to LA , you know Marty, I used to drool all over a sexy black teener with a horizontal fan. Then I find the same guy with a VW van with a 3.2 in it at Pomona. The headers on AR 14 I got from Marty in 05. Don't forget that he also built turbo kits for the 914's in the '70's. Now I believe that he and his son are building the cleanest, badass 914 in existence (IMHO).
I'm building a car out in left field, yes unique and quiet imaginative but my finish is mediocre.
Marty's products are AWESOME... I can't wait to see all the horses in this stable together ❤️.
Posted by: Dion Mar 29 2020, 10:31 AM
The Saturn V rocket build of the 914 world.
Awesome Marty!
Attached image(s)
Posted by: JRust Mar 29 2020, 10:40 AM
Damn that is looking sweet! I cannot wait to hear you fire that up
Posted by: Maltese Falcon Mar 29 2020, 11:33 AM
Now that's what I'm talking about... Now you have put another smile on my face. I have no idea when I will be able to get back out to LA , you know Marty, I used to drool all over a sexy black teener with a horizontal fan. Then I find the same guy with a VW van with a 3.2 in it at Pomona. The headers on AR 14 I got from Marty in 05. Don't forget that he also built turbo kits for the 914's in the '70's. Now I believe that he and his son are building the cleanest, badass 914 in existence (IMHO).
I'm building a car out in left field, yes unique and quiet imaginative but my finish is mediocre.
Marty's products are AWESOME... I can't wait to see all the horses in this stable together ❤️.
Thank you Joe for the kind words
I am missing your 914 cook-outs, and that bitchin blue six
Watch out for them gators !
Marty
Posted by: Maltese Falcon Apr 5 2020, 01:12 PM
As we are now with wheels + tires, today setting the total "Droop stop" limit of JRZ shock travel. We have 9" ram extension length on the Genesis air-jacks.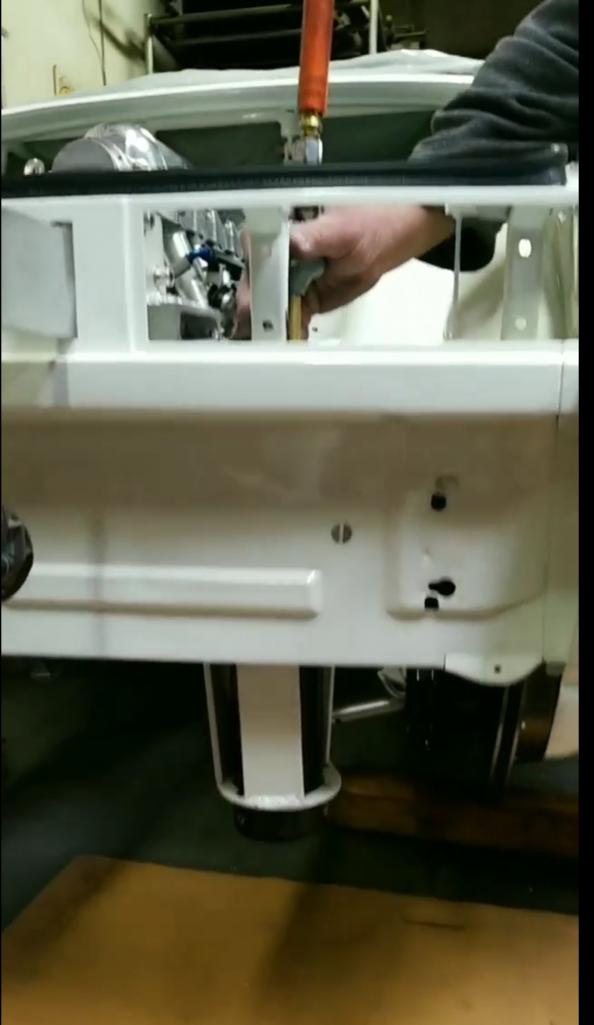
Posted by: Maltese Falcon Apr 5 2020, 01:16 PM
...apply about 100 psi of air (or nitrogen) for activation = aOK .
Def keep all fingers away from these bad boys 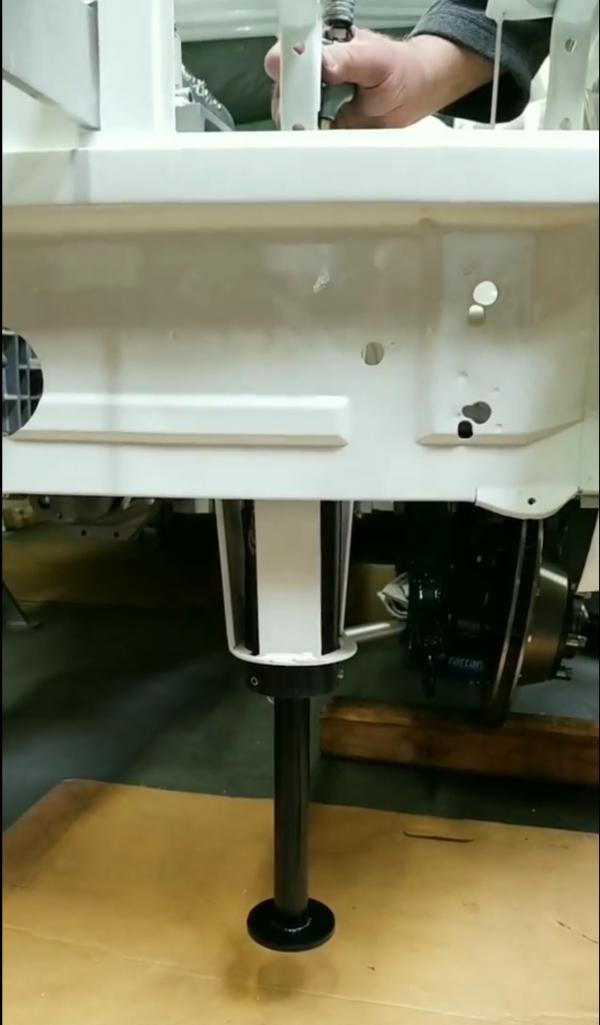
Posted by: 914 Ranch Apr 6 2020, 01:40 AM
There goes another smile on my face... Marty, I am coming to the Black and White Show.
Maybe I can bring AR 14 out and do A/X with the PCA OCR at the same time or something else just as eventful... You have much more work to do than I do. Probably going to take me more than a year but you'll be done first.
Posted by: Maltese Falcon Apr 9 2020, 06:28 PM
Schriftzug on the grills, but will probably be placed elsewhere on the build
Posted by: Maltese Falcon Apr 9 2020, 06:30 PM
Pipe dreams = reality...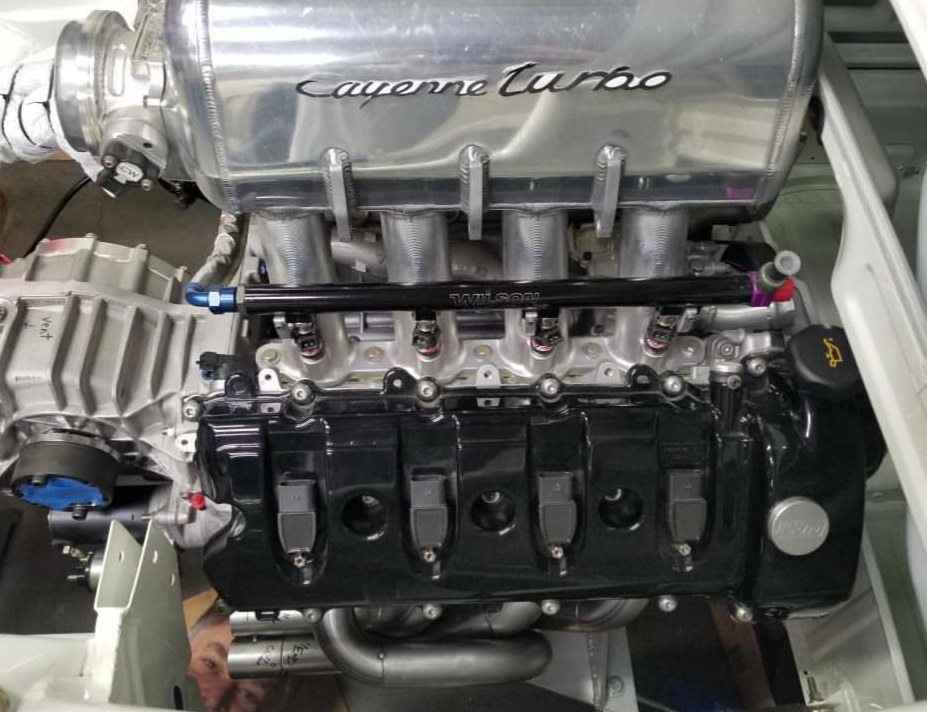
Posted by: Maltese Falcon Apr 9 2020, 06:32 PM
Driver's side header prototype, 1.75" od primaries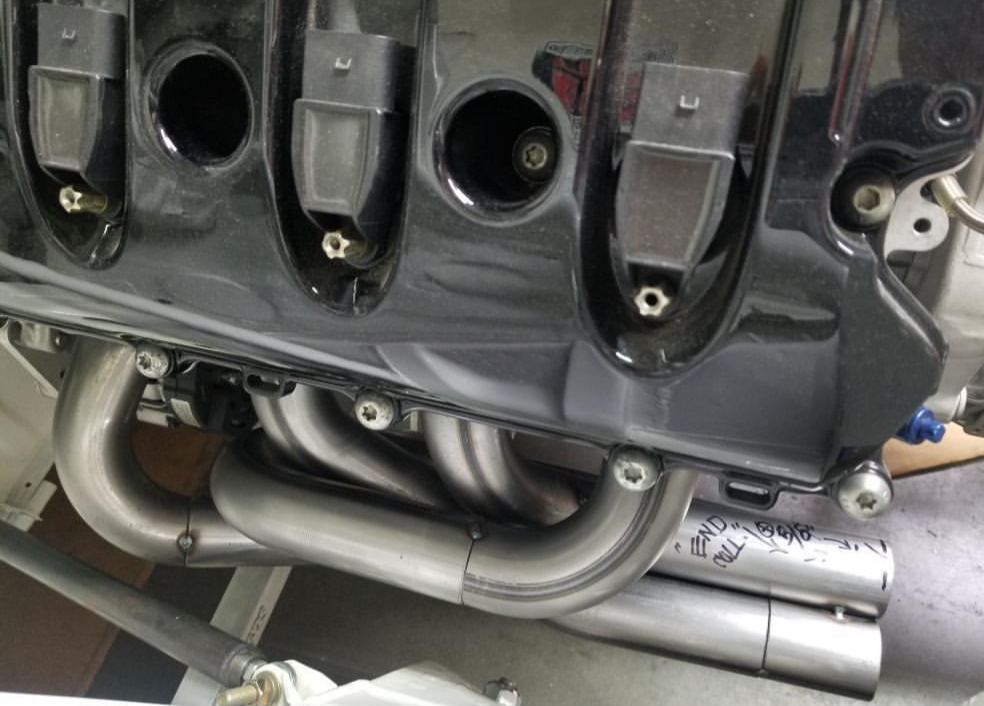
Posted by: Maltese Falcon Apr 9 2020, 06:34 PM
Lookin' back at it 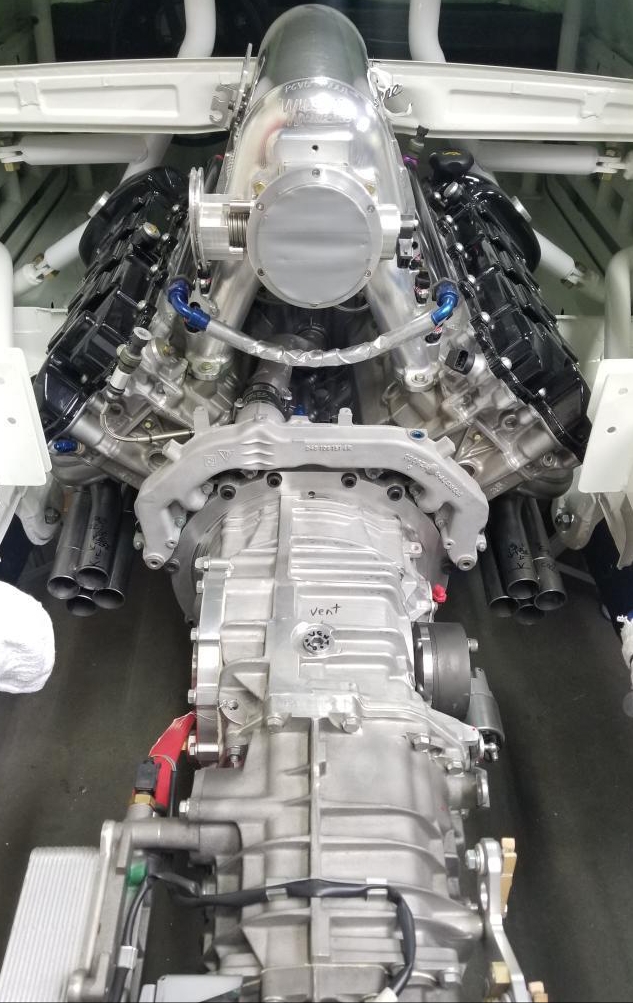
Posted by: whitetwinturbo Apr 12 2020, 07:15 PM
..............trunk full of SNAKES. 
Posted by: pete000 Apr 12 2020, 07:32 PM
I wonder if Marty knows how to build an exhaust system?
Posted by: Maltese Falcon Apr 12 2020, 07:55 PM
Feelin' the need to do some hand-punching on the paint-code plate with the number set today. While on an essential trip out of the house, hit my fave sugary spot in Inglewood "Randy's " ...thought this would give me the correct hammer control Came out more like my first day as a Gastarbeiter on the assembly line Well...it's going to hide in a little spot in a forward door jamb, so here it be ;
Posted by: Maltese Falcon Apr 27 2020, 08:47 PM
Feeling a little "Pinned In" this week , so finalized the measurments for the secondary hood pins. These are only 7/16" dia pins (normally 1/2") and sourced from Pegasus
Posted by: Maltese Falcon Apr 27 2020, 08:56 PM
A little too much "Droop" in the rear JRZ shock assemblies, so a bit of time spent down at ERP suspension. We took 1.75" out of the equation, so this allows the air-jacks to operate at max, and the rear tires now clear the tarmac. Fronts were spot on--no changes needed.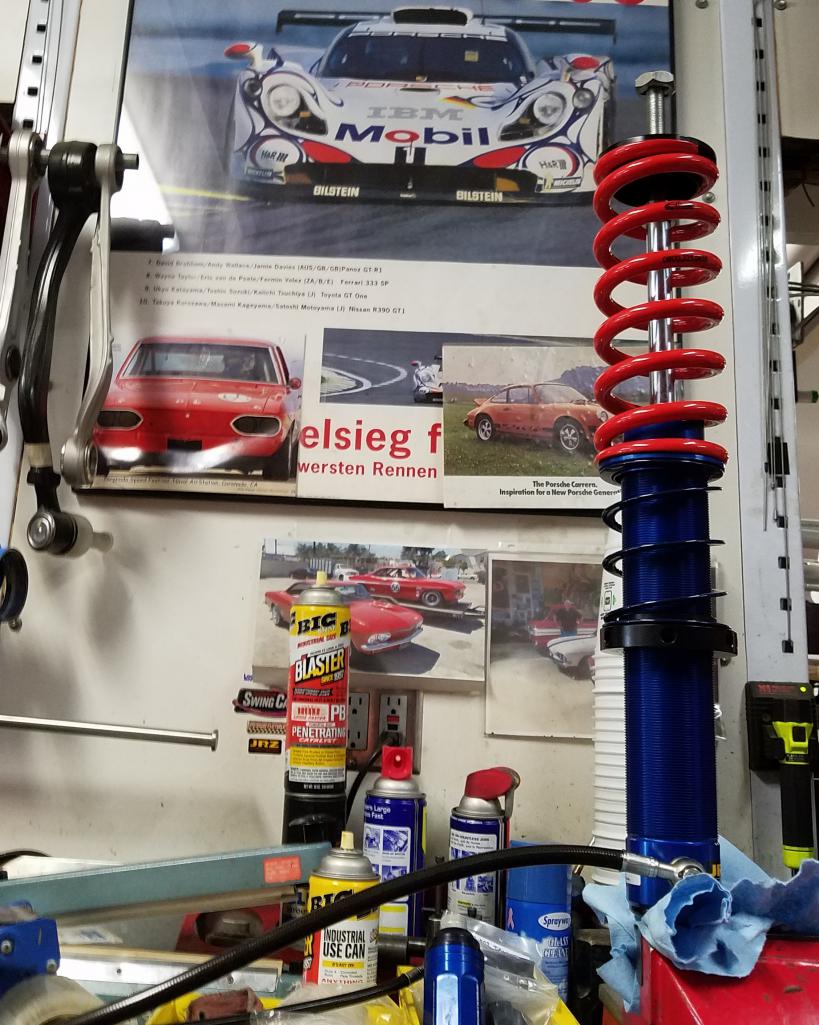
Posted by: Maltese Falcon May 10 2020, 05:29 PM
JRZ rear suspension now corrected at "Full-droop" , allowing just enough tire clearance-to-lower lip of quarter panel for tire changing during air-jack activation
Posted by: Maltese Falcon May 10 2020, 05:38 PM
The open space just above the 4x4 and .375" alum bar, is the tire-to- ground gap, which allows for tire changing when the air-jacks activate at 9" ram stroke.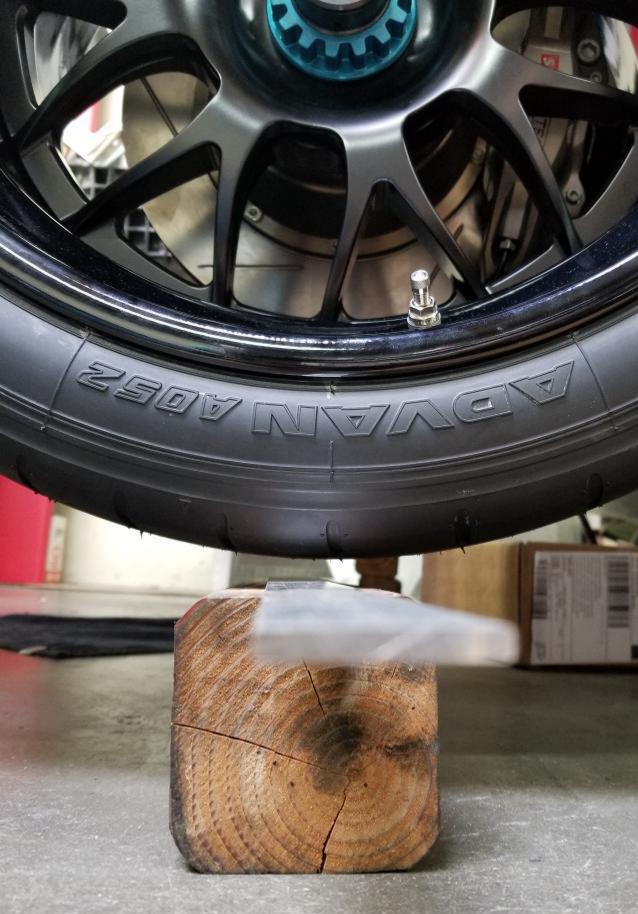
Posted by: Maltese Falcon May 10 2020, 05:41 PM
New combination Trans vent/ fill plug for the top of the inverted 996gt2 trans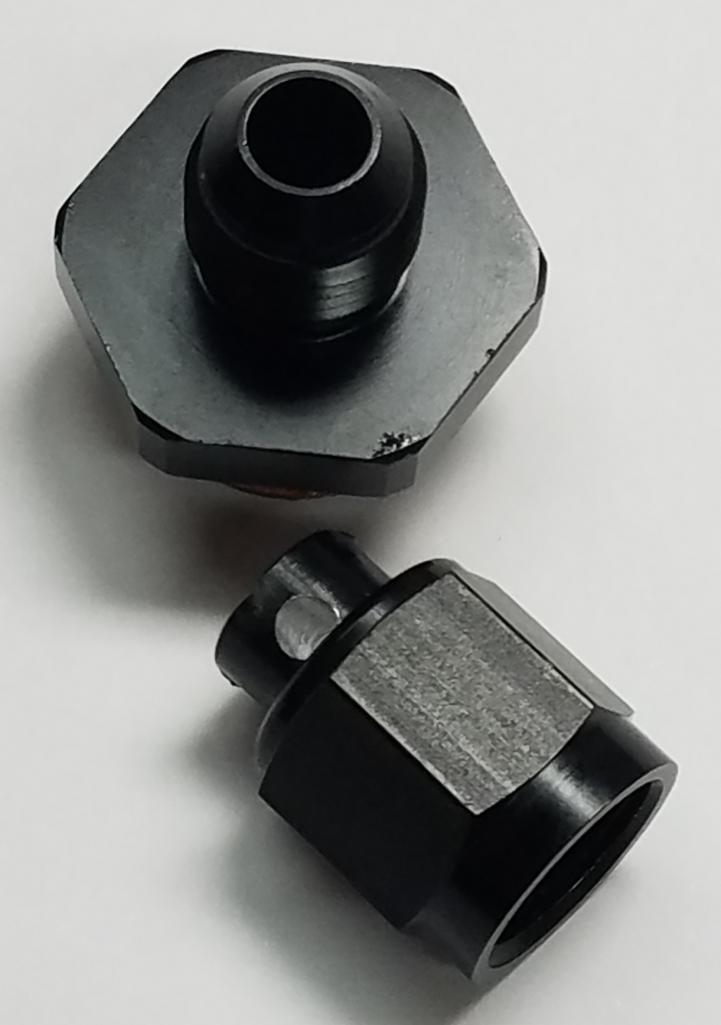
Posted by: Maltese Falcon May 10 2020, 05:48 PM
Installed...with a bit of Anti-seize on the threads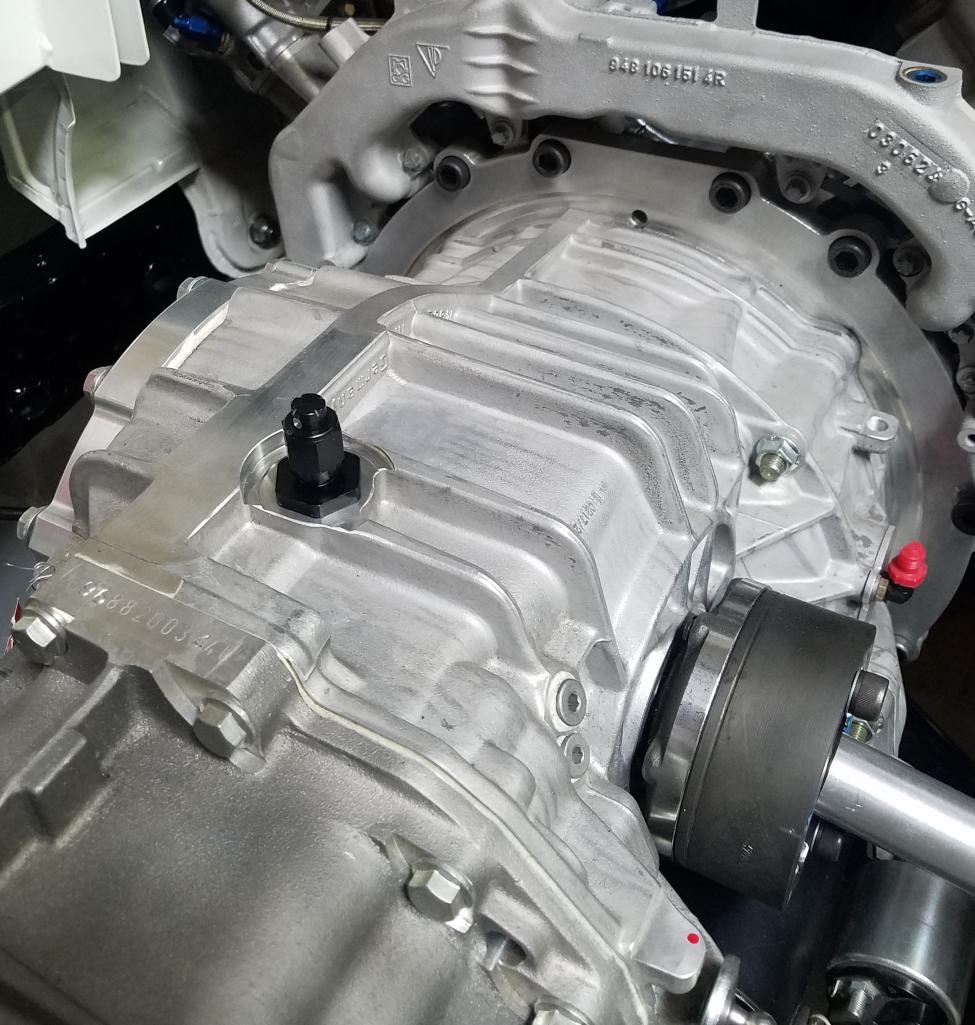
Posted by: Maltese Falcon May 12 2020, 09:00 PM
Header primaries 1.75" od x .125" ga. mandrel bending completed today. Precise assembly fixtures are the key in making the fitment to the Cayenne v8 engine 100% right on 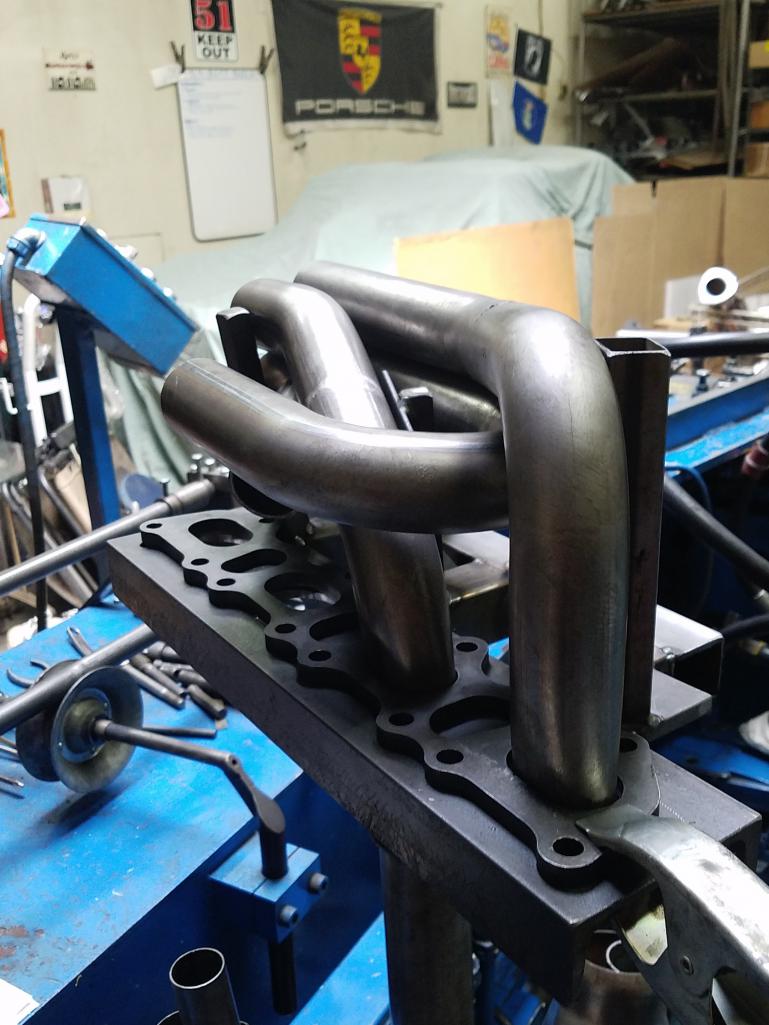
Posted by: Maltese Falcon May 12 2020, 09:10 PM
After the primaries are completed, the secondary portion of our exhaust system including all of the turbo, wastegate, and exit piping will follow in various sizes; ranging up to 3" od . Everything x 2, (left + right sides) as this is a twin (biturbo) system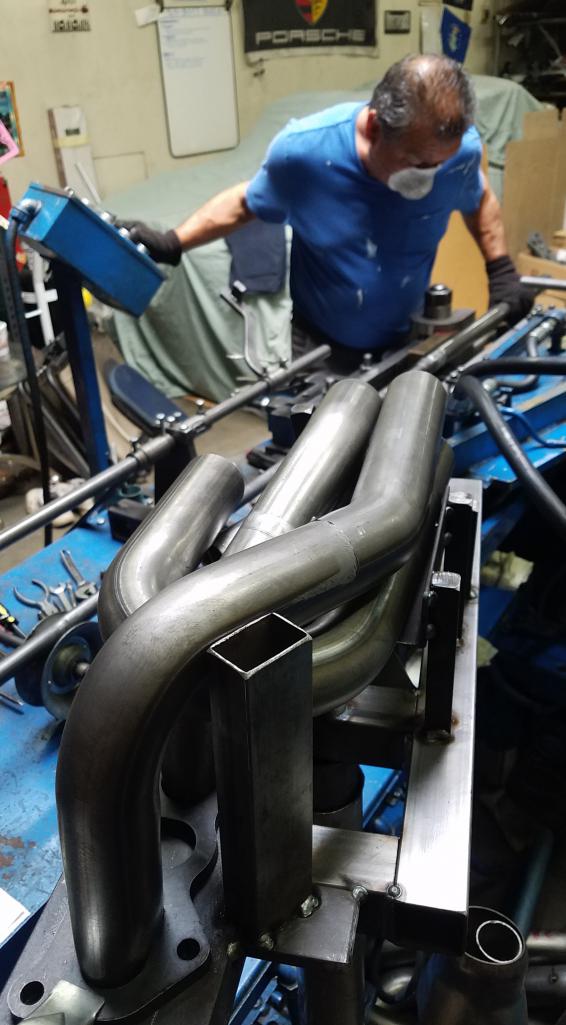
Posted by: Maltese Falcon Jun 13 2020, 10:53 AM
Shorty turbo headers in the finishing phase, then off for black ceramic coating. A few extra sets built for spares ¡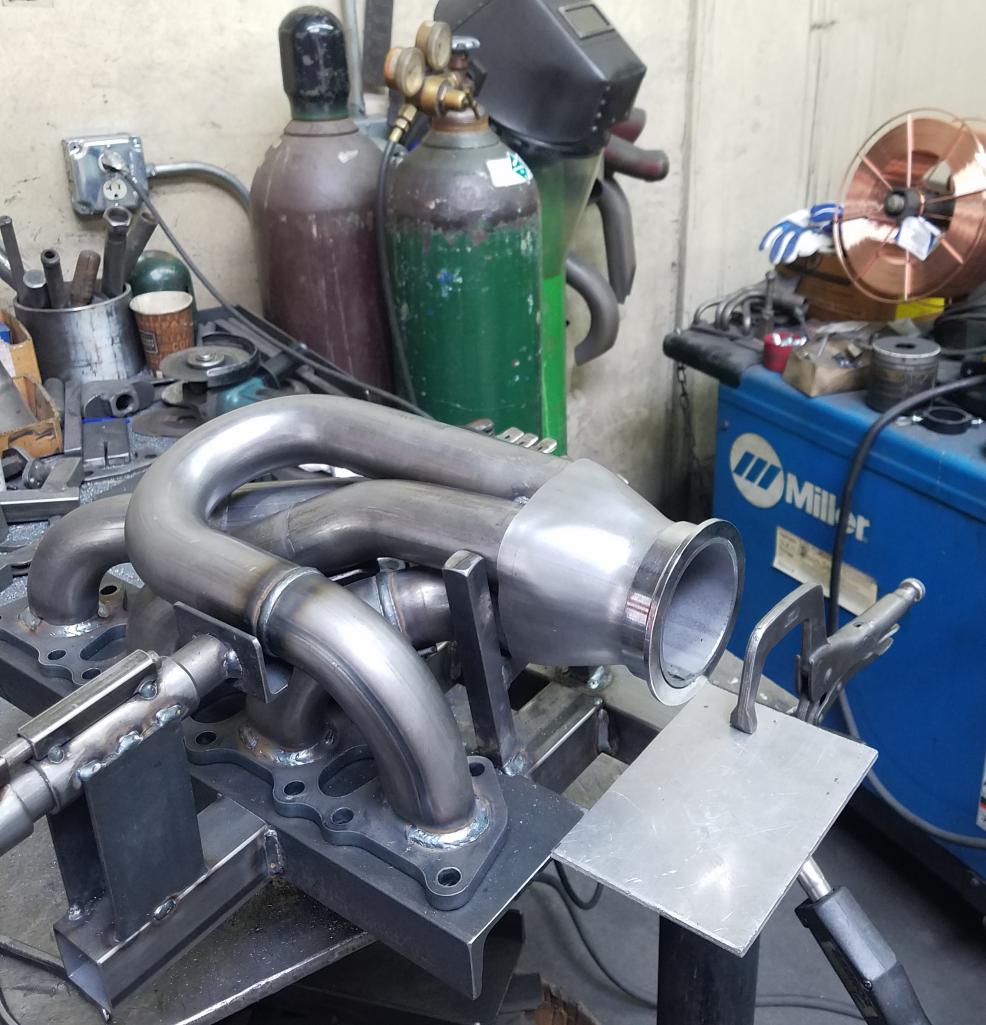
Posted by: Mueller Jun 13 2020, 12:56 PM
I dig it.
Great idea on that fixture for the exhaust.
Posted by: Maltese Falcon Jun 13 2020, 08:10 PM
I dig it.
Great idea on that fixture for the exhaust.
The fixtures make quick work of the mandrel bending, fabrication, welding; and keeping the symmetry of the Left and Right sides looking + fitting proper
Posted by: pete000 Jun 13 2020, 08:42 PM
Can Marty make an exhaust system or not WOW ! Nice
Posted by: MATTYLITE Jun 14 2020, 08:31 PM
Hello world,
Wanted to share with you some various updates & what we've been up to.
Finally installed the Auto Atlanta tail light buckets & smoked lenses. They really tie in well with the white & black theme of the car.
After some finessing of the Sheridan (914 Rubber?) tail light areas of the fenders, they popped right in.
https://ibb.co/rfpmSDy
https://ibb.co/d4r7fxz
https://ibb.co/BZgmrHL
https://ibb.co/zFz3XXw
We threw the rear bumper on just to see the car somewhat more complete. Soon enough.. soon enough..
https://ibb.co/bN0w94W
The amazing grill work Marty has been working on for some time now. As you can tell with most of this build, we're trying to remain as "914" as possible. This GT - esque grill was originally 2 separate grills. Almost time for paint!
https://ibb.co/2SJJ7B8
Marty has also been hard at work building the shorty headers w/ V band clamps for the Cayenne TT block. Once finalized, they'll be off for black ceramic coating, and we'll move on to the remaining portions of the exhaust.
https://ibb.co/DVF8QVD
https://ibb.co/XF60bwf
Gotta represent!
https://ibb.co/1Zs4nfF
Posted by: KELTY360 Jun 14 2020, 08:55 PM
We threw the rear bumper on just to see the car somewhat more complete. Soon enough.. soon enough..
https://ibb.co/bN0w94W
Those two empty holes in the rear panel are ominous. Can't wait to see them filled up.
Posted by: 914 Ranch Jun 14 2020, 11:34 PM
Damn!!!!
Posted by: Andyrew Jun 15 2020, 08:07 AM
Serious question. Is that a machine weld on the 45 deg tube to the 90deg tube?
Posted by: Maltese Falcon Jun 15 2020, 11:20 AM
Serious question. Is that a machine weld on the 45 deg tube to the 90deg tube?
For the welds in the "Compound" mandrel bends we use ; standard Miller .035 mig (hand held) with the assistance of a rotator machine.
Rotator has a foot control & vernier dial for any speed you choose to work with.
NO computerized/ programmable welding machines here at MSDS...those welds have no soul
!Several vids with this welding system on our iG feed, @msds_inc
Marty
Posted by: PlaysWithCars Jun 16 2020, 09:25 PM
Damn! Those are some quality welds, especially if done by hand. Been way too long since I've spent serious time with the welder in hand. On my best day, I maybe, occasionally, laid down a bead that was that nice. Today? Its not pretty.
Posted by: pete000 Jun 16 2020, 10:56 PM
Ummm, your intake is not going to fit under the deck lid...
Posted by: Maltese Falcon Jun 17 2020, 12:24 AM
Ummm, your intake is not going to fit under the deck lid...
Should be ok...this build is wicked in some of its aesthetic aspects !
Posted by: horizontally-opposed Jun 17 2020, 08:46 AM
Please tell me you're having another "It's all stock, trust me" plate frame made?
This project is amazing…so cool to see it coming together.
Posted by: Andyrew Jun 17 2020, 10:28 AM
Serious question. Is that a machine weld on the 45 deg tube to the 90deg tube?
For the welds in the "Compound" mandrel bends we use ; standard Miller .035 mig (hand held) with the assistance of a rotator machine.
Rotator has a foot control & vernier dial for any speed you choose to work with.
NO computerized/ programmable welding machines here at MSDS...those welds have no soul
!Several vids with this welding system on our iG feed, @msds_inc
Marty
Ahhhhhh that makes sense. Still QUALITY welds right there! Never seen a hand weld that nice!
Posted by: Maltese Falcon Jun 17 2020, 02:10 PM
Serious question. Is that a machine weld on the 45 deg tube to the 90deg tube?
For the welds in the "Compound" mandrel bends we use ; standard Miller .035 mig (hand held) with the assistance of a rotator machine.
Rotator has a foot control & vernier dial for any speed you choose to work with.
NO computerized/ programmable welding machines here at MSDS...those welds have no soul
!Several vids with this welding system on our iG feed, @msds_inc
Marty
Ahhhhhh that makes sense. Still QUALITY welds right there! Never seen a hand weld that nice!
Thank you Andrew, standard QC of the welding in the MSDS facility, has been this way since the doors opened !
Marty
Posted by: Maltese Falcon Jun 17 2020, 02:16 PM
Please tell me you're having another "It's all stock, trust me" plate frame made?
This project is amazing…so cool to see it coming together.
That's funny Pete...but that frame stays with the MaRsCh car !
Frame on this 9148 GTT plate should probably read:
"Not your Grandpas Oldsmobile"
that would be for the 1 dude (out of hundreds that viewed it at RR6) that couldn't wrap his mind around a Cayenne engine planted in there.
Kept telling his grandson that an LS-Swap'd 914 had NO business at the show
Posted by: rhodyguy Jun 17 2020, 07:11 PM
Is the black coating color an esthetic or performance choise?
Posted by: Maltese Falcon Jun 17 2020, 09:15 PM
Is the black coating color an esthetic or performance choise?
We normally use this Satin-Silver ceramic coating on the n/a headers. But for keeping the heat range a tad warmer (forced induction) ahead of the turbine inlets...the black is better. Better spool-up/ less lag

Posted by: Maltese Falcon Jun 17 2020, 09:20 PM
Please tell me you're having another "It's all stock, trust me" plate frame made?
This project is amazing…so cool to see it coming together.
License plate frame on the black six ...
Had a little message back there back in the JDM days
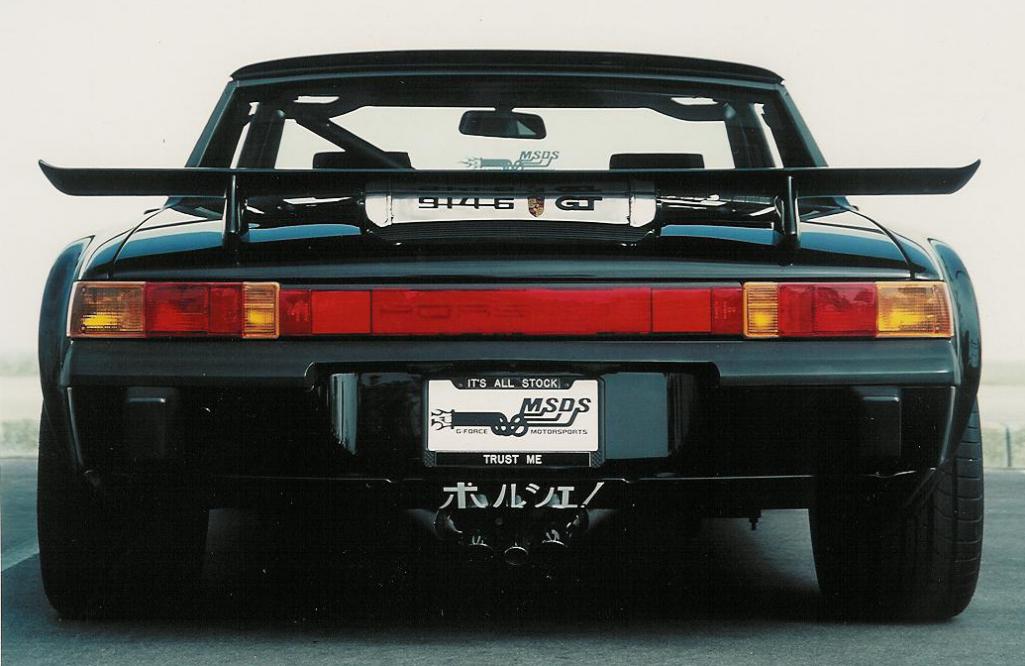
Posted by: KELTY360 Jun 17 2020, 10:34 PM
Had a little message back there back in the JDM days
Please translate.
Posted by: Maltese Falcon Jun 18 2020, 12:11 AM
PORSCHE !
scripted in (my best caligraphy attempt) Japanese. I knew lots of guys that had speed shops all around my Rosemead Blvd fabrication biz, 1985-1999. They just called my black 914 "Cool old school" . None of the guys knew what a Porsche 914 was, let alone one that could out thrust any of their Pocket Rocket Hondas, Nissans or Mitsu's
Posted by: Larmo63 Jun 18 2020, 06:58 AM
I had completely forgotten about this build......maybe it had something to do with a different 914 with the number 40 on the sides?
Damn, that thing looks lethal.
Posted by: eric9144 Jun 18 2020, 10:27 AM
Kept telling his grandson that an LS-Swap'd 914 had NO business at the show

Posted by: 2mAn Jun 30 2020, 10:16 PM
Just went through the entire thread again... my wife’s jealous that I don’t look at her the way I look at this car haha
Posted by: Maltese Falcon Jul 1 2020, 09:46 PM
Just went through the entire thread again... my wife’s jealous that I don’t look at her the way I look at this car haha
Posted by: horizontally-opposed Jul 1 2020, 10:19 PM
That's funny Pete...but that frame stays with the MaRsCh car !
Frame on this 9148 GTT plate should probably read:
"Not your Grandpas Oldsmobile"
that would be for the 1 dude (out of hundreds that viewed it at RR6) that couldn't wrap his mind around a Cayenne engine planted in there.
Kept telling his grandson that an LS-Swap'd 914 had NO business at the show
Oh, I was thinking it might be time for a second one.
So, it turns out my 914 has something in common with this one: a CA plate that ends in GTT...with one of them on there since late 1972.
Posted by: Maltese Falcon Jul 2 2020, 07:05 PM
That's funny Pete...but that frame stays with the MaRsCh car !
Frame on this 9148 GTT plate should probably read:
"Not your Grandpas Oldsmobile"
that would be for the 1 dude (out of hundreds that viewed it at RR6) that couldn't wrap his mind around a Cayenne engine planted in there.
Kept telling his grandson that an LS-Swap'd 914 had NO business at the show
Oh, I was thinking it might be time for a second one.
So, it turns out my 914 has something in common with this one: a CA plate that ends in GTT...with one of them on there since late 1972.
Random Cali DMV plate...or your Custom ordered plate...let's see it
Posted by: Maltese Falcon Aug 8 2020, 12:39 AM
Sway-Away custom 300m alloy axles have come in...time to join these up with the CV's !
21 1/16" is the length end to end 
Posted by: Maltese Falcon Aug 8 2020, 12:59 AM
The engineers over at Sway-Away use this slightly larger bump in shaft diameter, helps out with extra strength in high HP applications.
These are also floating style axles, with longer (than OE) dimension splines.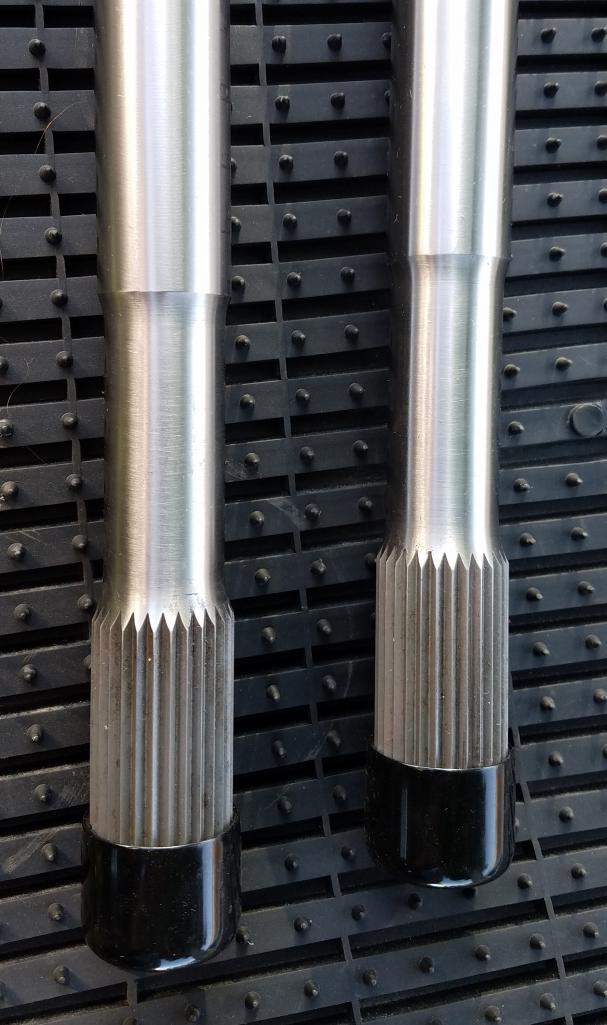
Posted by: MATTYLITE Sep 19 2020, 11:17 PM
Hello world,
Wanted to share some more progress with you all.
The SQS sequential shifter adapter has now been mated to the transaxle. Next step is adjusting & placement of the 2 shift actuator rods.
Also diving into the SQS module for gear selector circuit & gear display which will mount where the OE 914 battery used to sit. A handy 6-gang fuse box is also on the bracket. We will also use this fuse box for standard things like tail-lights, reverse lights, etc.
The custom manufactured length shift cable is approx 100", the SQS cable that came in the box was originally meant for a 996, and way too short for mid-engine use. We slipped the new cable through Goodridge fire-sleeve, keeping it safer as it will weave through a pretty hot environment!
https://ibb.co/pwnQfmv
https://ibb.co/QPKdLrD
https://ibb.co/Bn90RDN
https://ibb.co/LghZwSn
https://ibb.co/6XfmR81
https://ibb.co/gRJ6V2k
More to come!
Posted by: ri914 Sep 20 2020, 03:14 AM
Hello world,
Wanted to share some more progress with you all.
More to come!
This build is always impressive to see. Can't wait to see this car moving around under its own power
Posted by: Cairo94507 Sep 20 2020, 06:42 AM
I just love this build!
Posted by: ClayPerrine Sep 20 2020, 06:55 AM
Just went through the entire thread again... my wife’s jealous that I don’t look at her the way I look at this car haha
I am jealous that my wife doesn't look at me the way she looks at this car.
Posted by: Maltese Falcon Sep 20 2020, 12:35 PM
I'm kind of baffled on the way these plexi (Perfomance4Plastic, UK) 914 slider windows appear. On most racecars I've seen in the last 5 decades, the slider moves rearward so the opening faces forward in the window; these are made with the slider that moves forward so the opening is in the rear of the window ...And
Check out the curved contour cut at the bottom-rear of the window (see pointer) I couldn't find any early or late 914 window diagrams that indicate a cut-out like this (just a slight diagonal). No matter, as I'll be trimming most of the Below the Sill plexi in order to clear the side safety bars. I'll run these over to the shop today and test fit...I might need to get happy with these; although great QC in their product an order takes approx 4 months .What do you racers think on the positioning of these sliders ¿
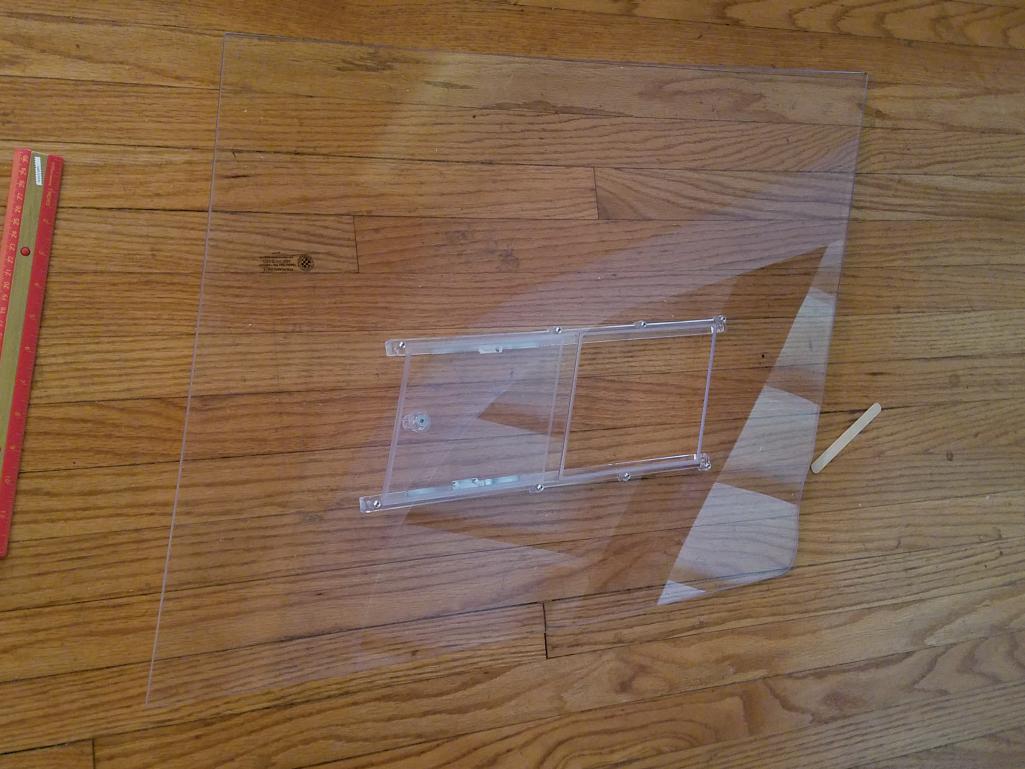
Posted by: Maltese Falcon Sep 20 2020, 12:39 PM
Another slider window assembly on their (P4P) website; the F40 showing the window opening in the way I'm familiar of seeing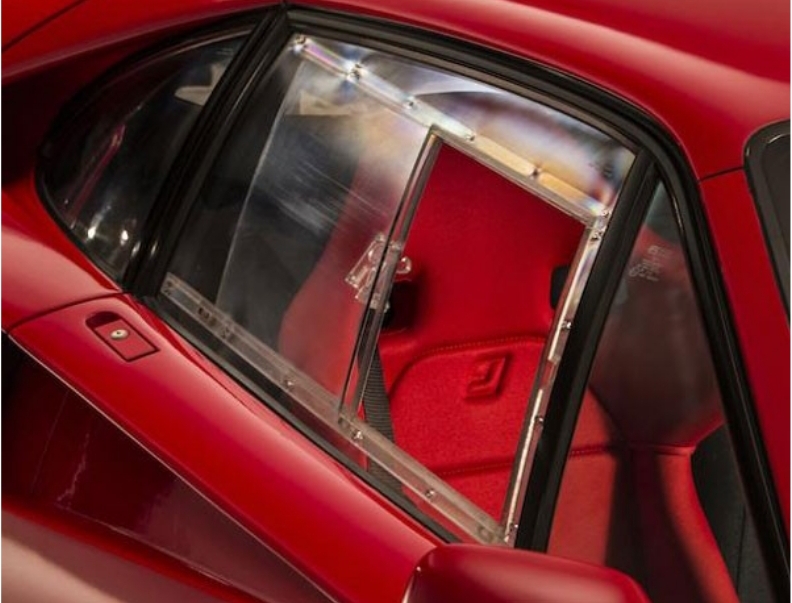
Posted by: ri914 Sep 21 2020, 06:28 AM
Another slider window assembly on their (P4P) website; the F40 showing the window opening in the way I'm familiar of seeing
Perhaps they switched the orientation on the slider because they knew it was going in the 914-8 GTT? I think you'll be able to open the window on acceleration if you use the standard front-to-back operation
Posted by: Maltese Falcon Sep 21 2020, 09:33 AM
Now that's a proper answer !
Posted by: Mueller Sep 21 2020, 10:43 AM
Those axles have some sex appeal to them, beautiful parts!
Posted by: Maltese Falcon Sep 21 2020, 05:30 PM
Those axles have some sex appeal to them, beautiful parts!
If this axle/ cv combo can't hold this power, I'll be knocking on the door of Metalore.com...nearby in El Segundo. They have a patented CV joint-axle combination that run on Indy and some F1 teams
Posted by: Maltese Falcon Oct 4 2020, 05:52 PM
Added a few items , and fished a couple of SQS control wires through the Goodridge fire-sleeve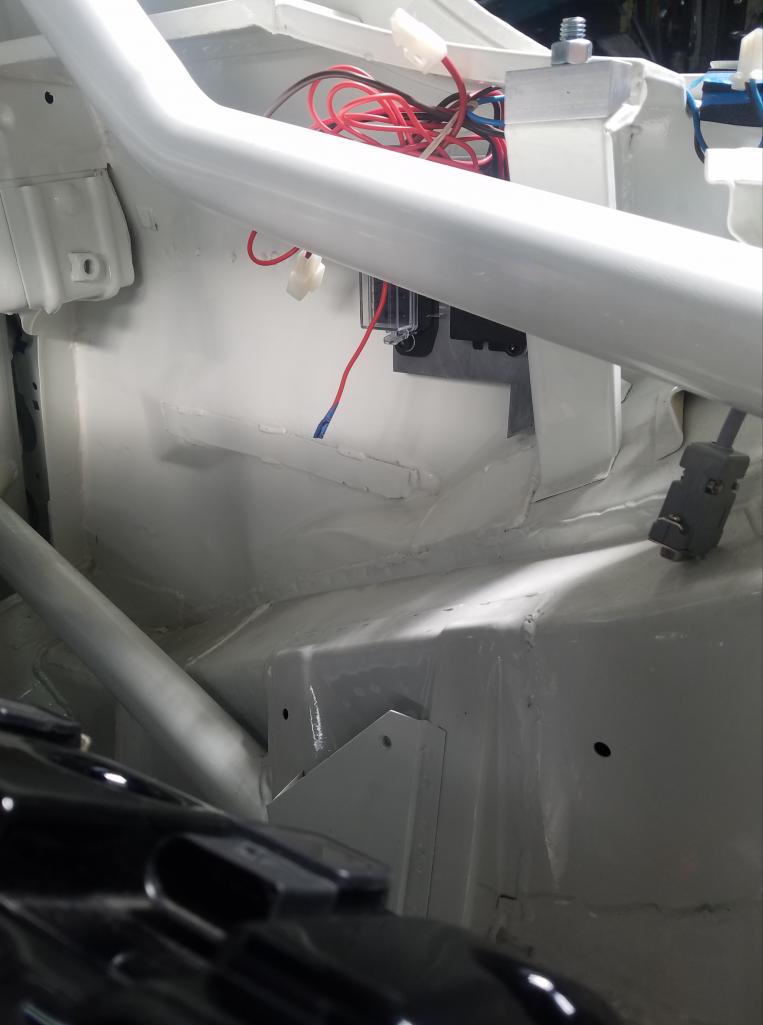
Posted by: Maltese Falcon Oct 4 2020, 05:53 PM
Ground strap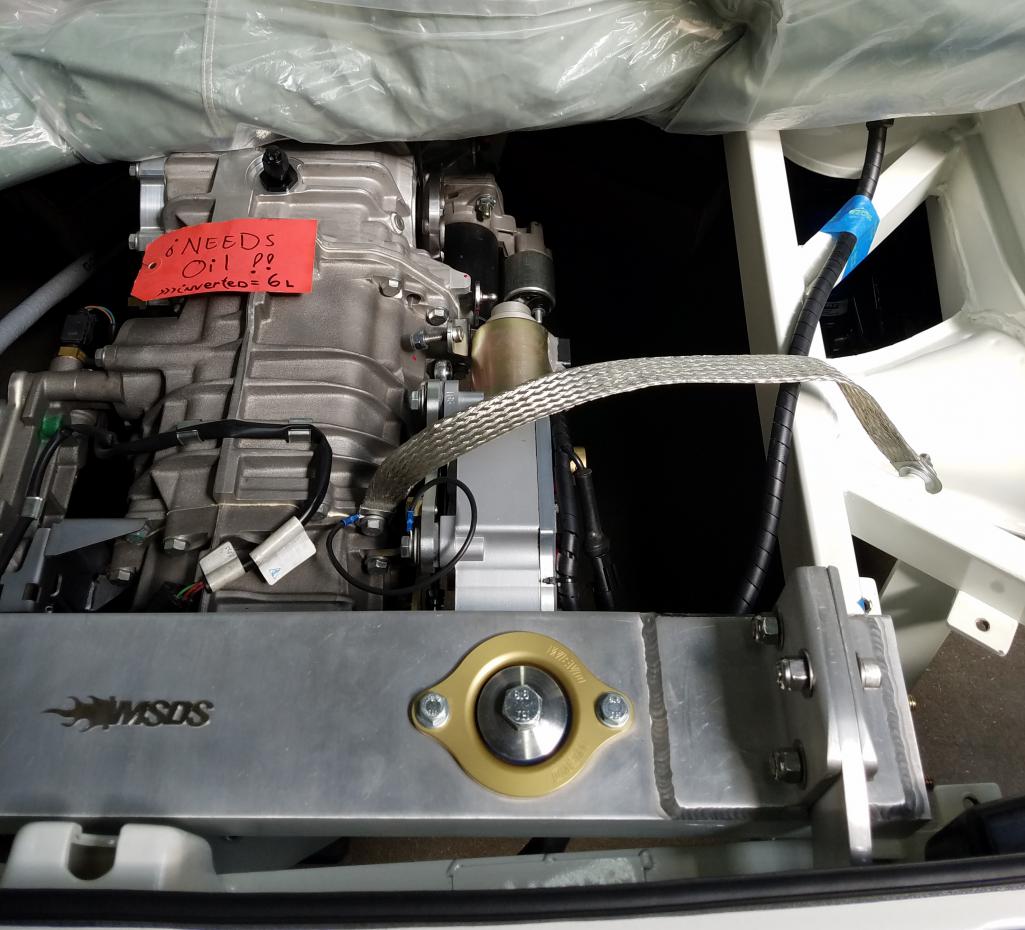
Posted by: Maltese Falcon Oct 4 2020, 05:55 PM
gone fishin'
Posted by: Maltese Falcon Oct 4 2020, 06:01 PM
Snug fit,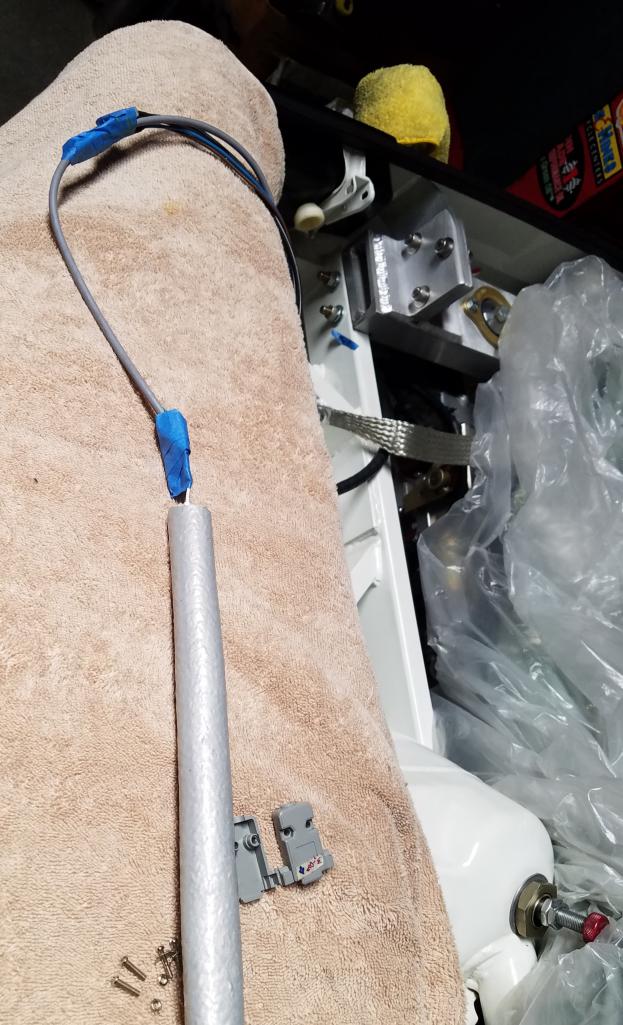
Posted by: Maltese Falcon Oct 4 2020, 06:06 PM
Adequate reach and a good fit to the control module...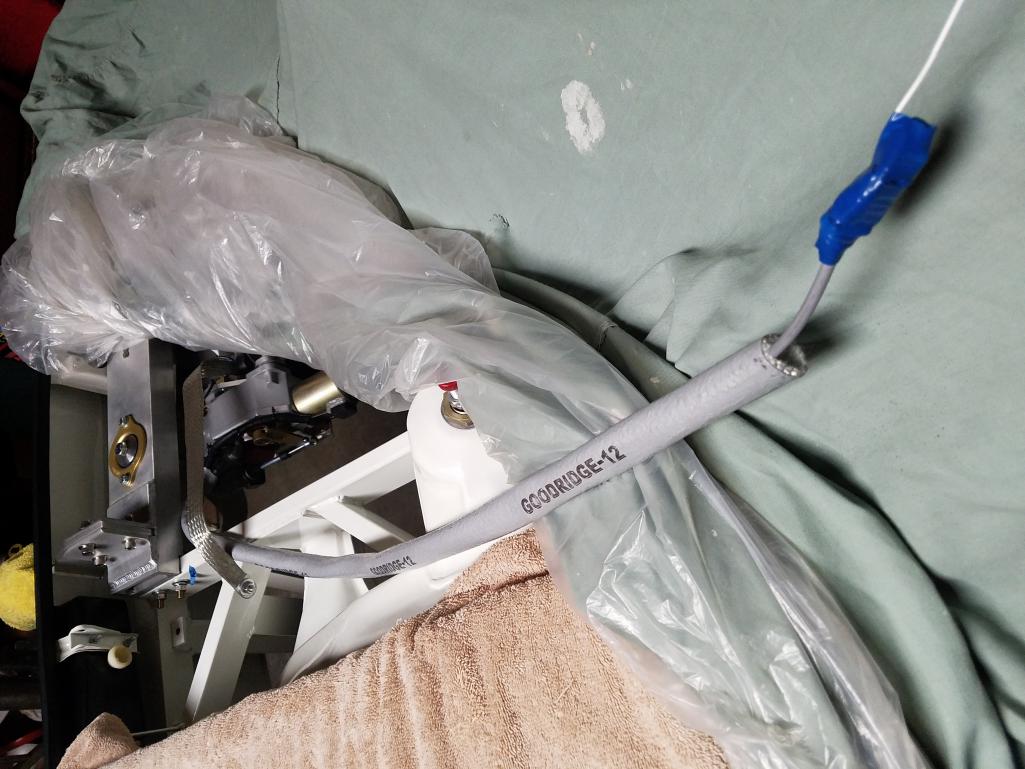
Posted by: Cairo94507 Oct 5 2020, 06:05 AM
Posted by: Maltese Falcon Oct 10 2020, 08:10 PM
SQS shift-solenoid module...as it comes out of the box , before modifying the counterweight for (mid engine) trans mount clearance
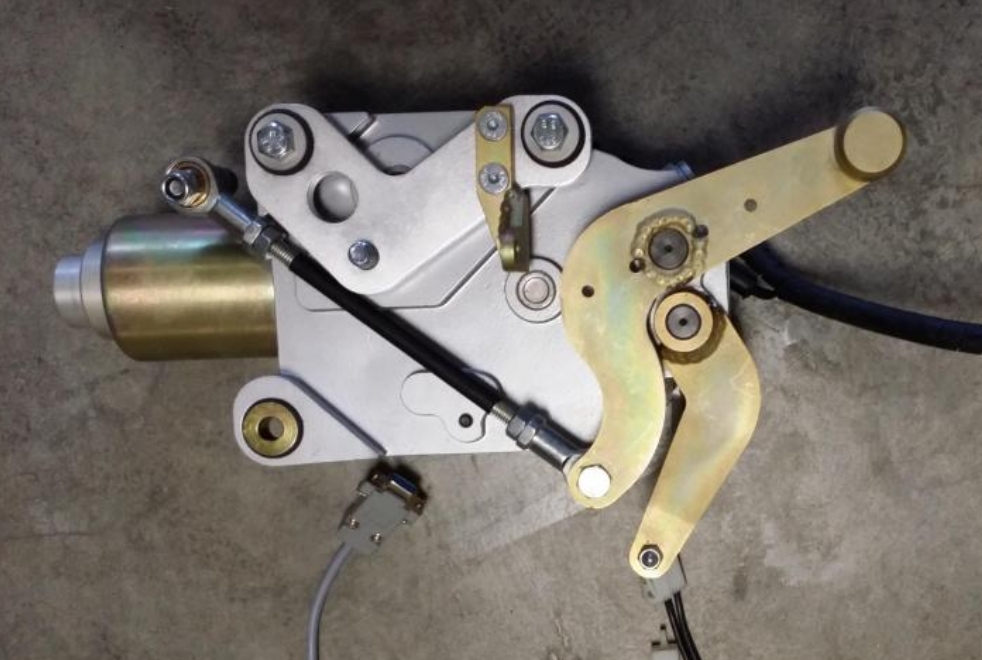
Posted by: Maltese Falcon Oct 10 2020, 08:10 PM
Mounted on the gt2 transaxle 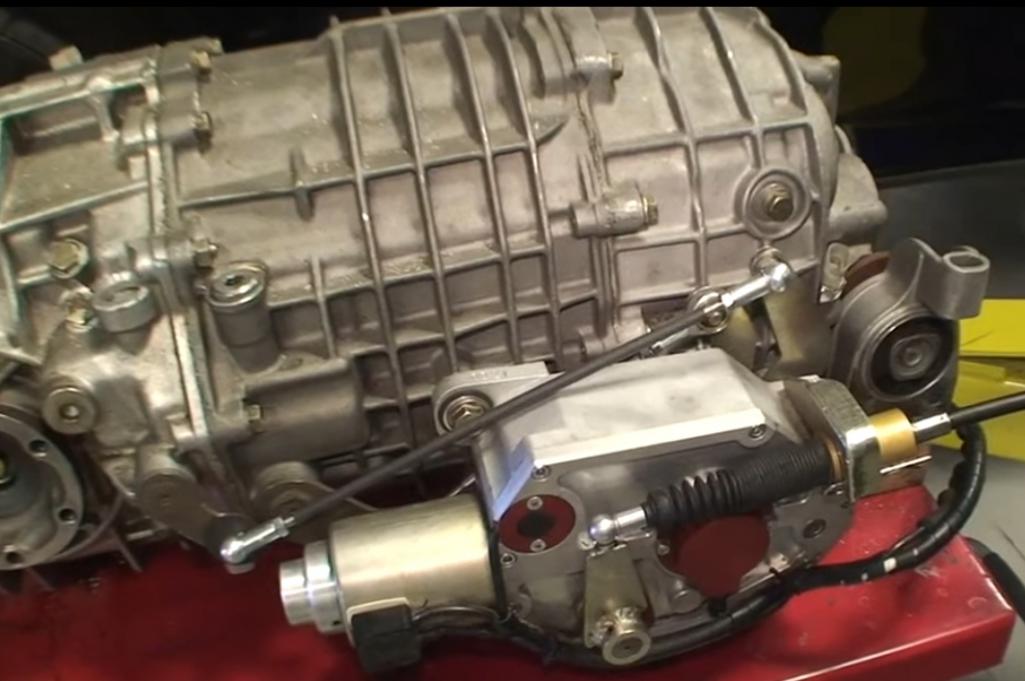
Posted by: Maltese Falcon Oct 10 2020, 08:16 PM
New arrival: GlowShift (brand) dual egt pyrometer, we can monitor both Left and Right bank exhaust temps at a glance 
Posted by: Maltese Falcon Oct 16 2020, 08:25 PM
Wiring therapy !
Attached thumbnail(s)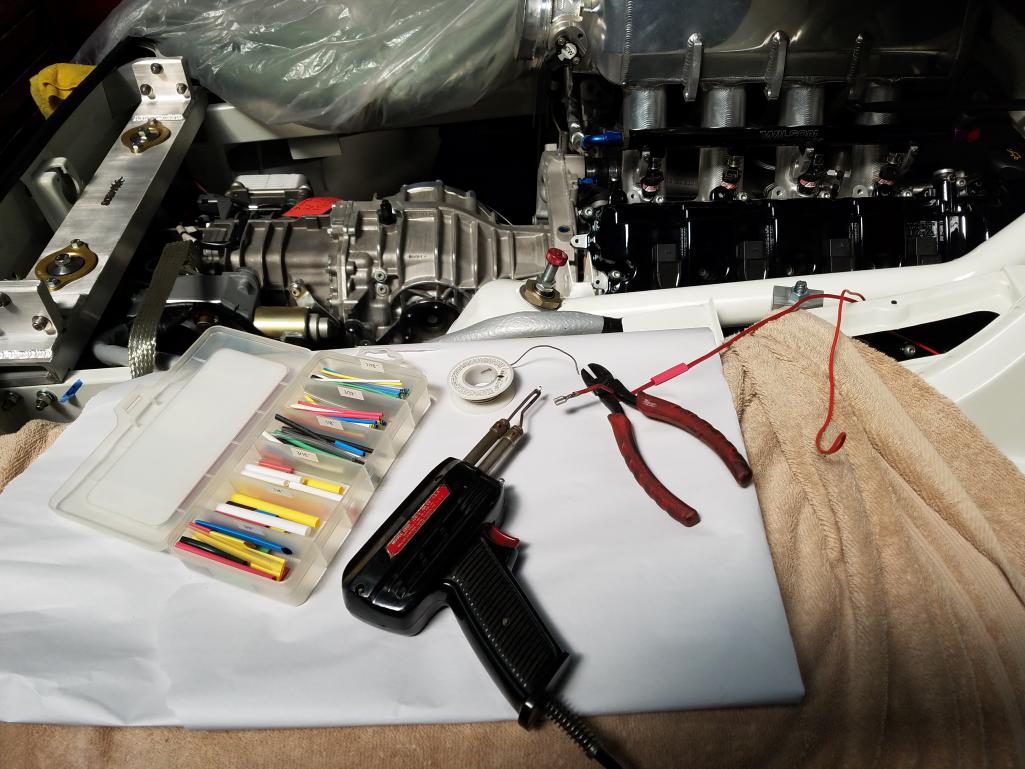
Posted by: Maltese Falcon Oct 16 2020, 08:28 PM
SQS gear display...looks like 4th 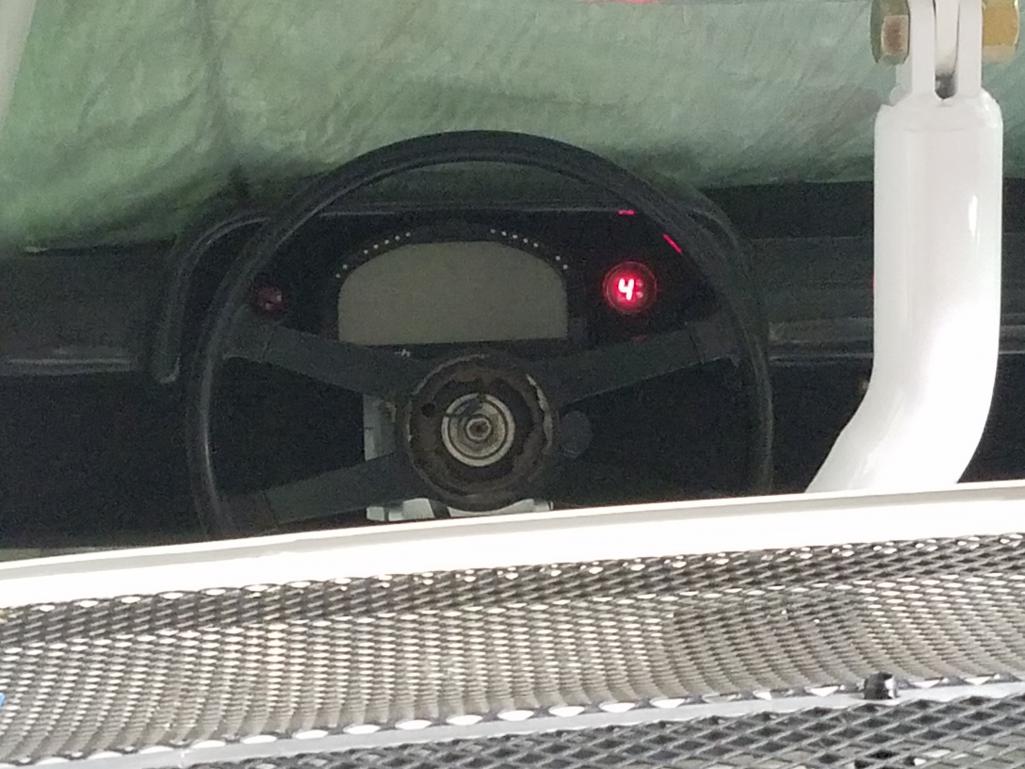
Posted by: Maltese Falcon Oct 16 2020, 08:39 PM
Daily grind...several steps in getting the flange surfaces flat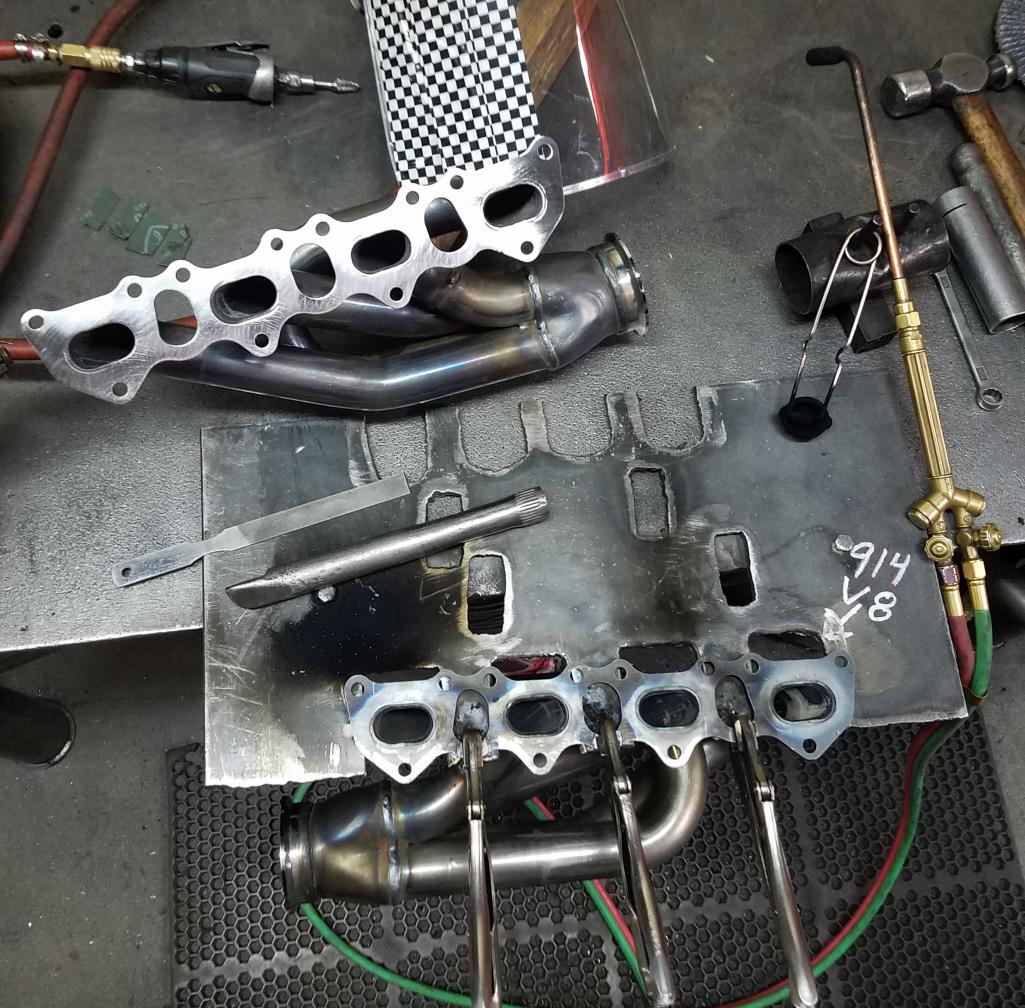
Posted by: Maltese Falcon Oct 23 2020, 08:08 PM
Some small details this week...finalized the SQS cable shifter in the cabin and at the transaxle, now on to filling the trans with 6L of Mobil ptx. The shift action is smooth as butter and only a 1" throw; upshift or downshift.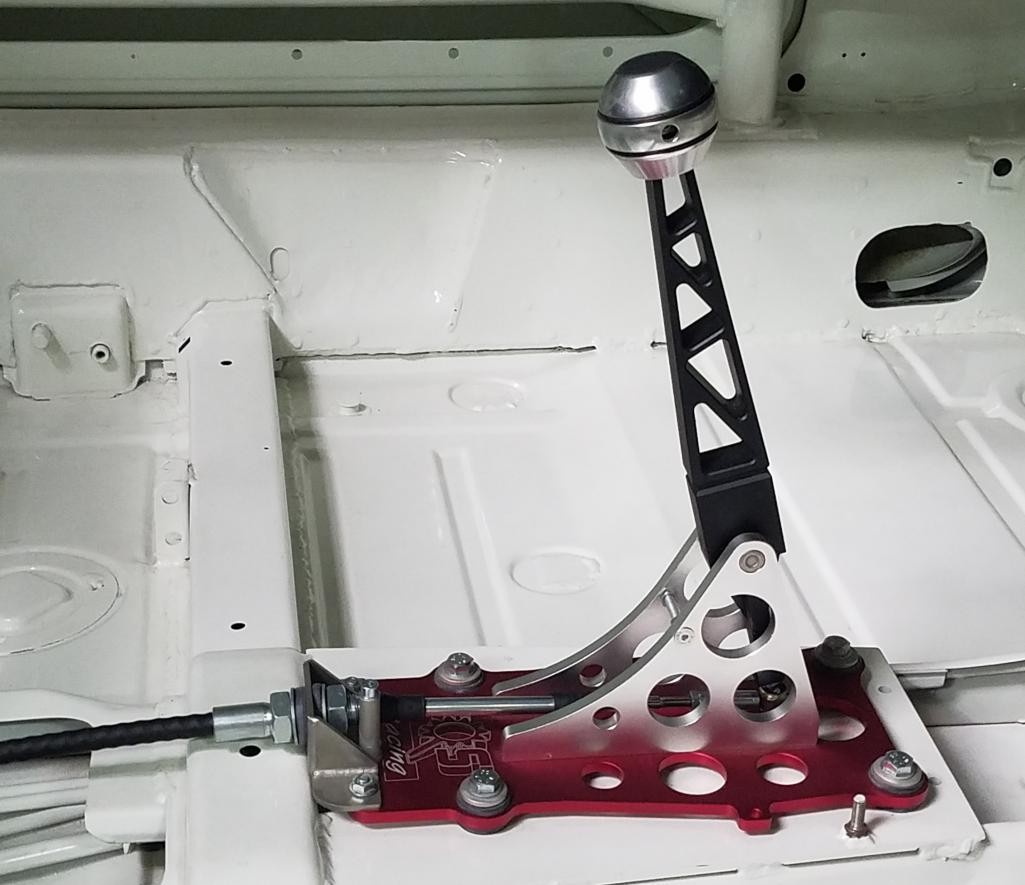
Posted by: Maltese Falcon Oct 23 2020, 08:11 PM
Pyrometer and Wideband o2 ports added to the shorty turbo headers
Posted by: Maltese Falcon Oct 23 2020, 08:17 PM
Air-jack attachment plates: Left rear/ Right rear/ forward Cabin, back from the powder painter. I like this hue aginst the GP white unibody 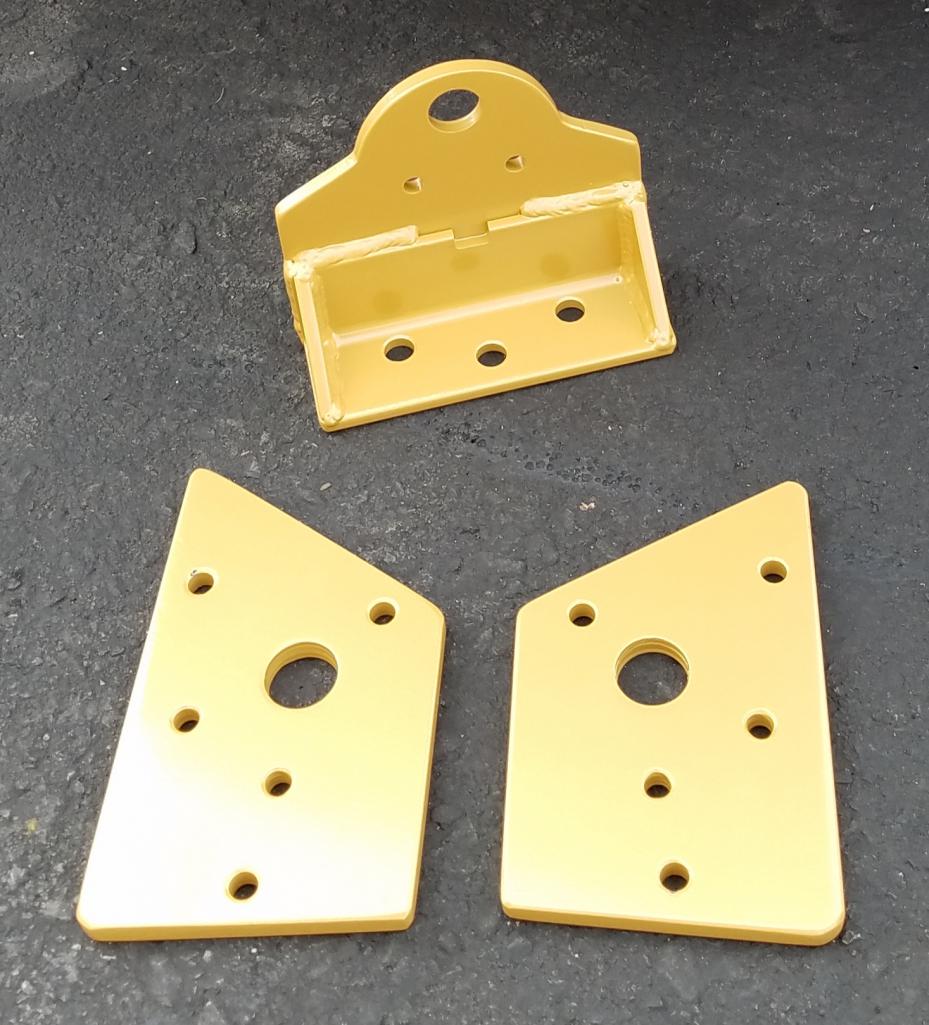
Posted by: Maltese Falcon Oct 23 2020, 09:10 PM
CV boot prep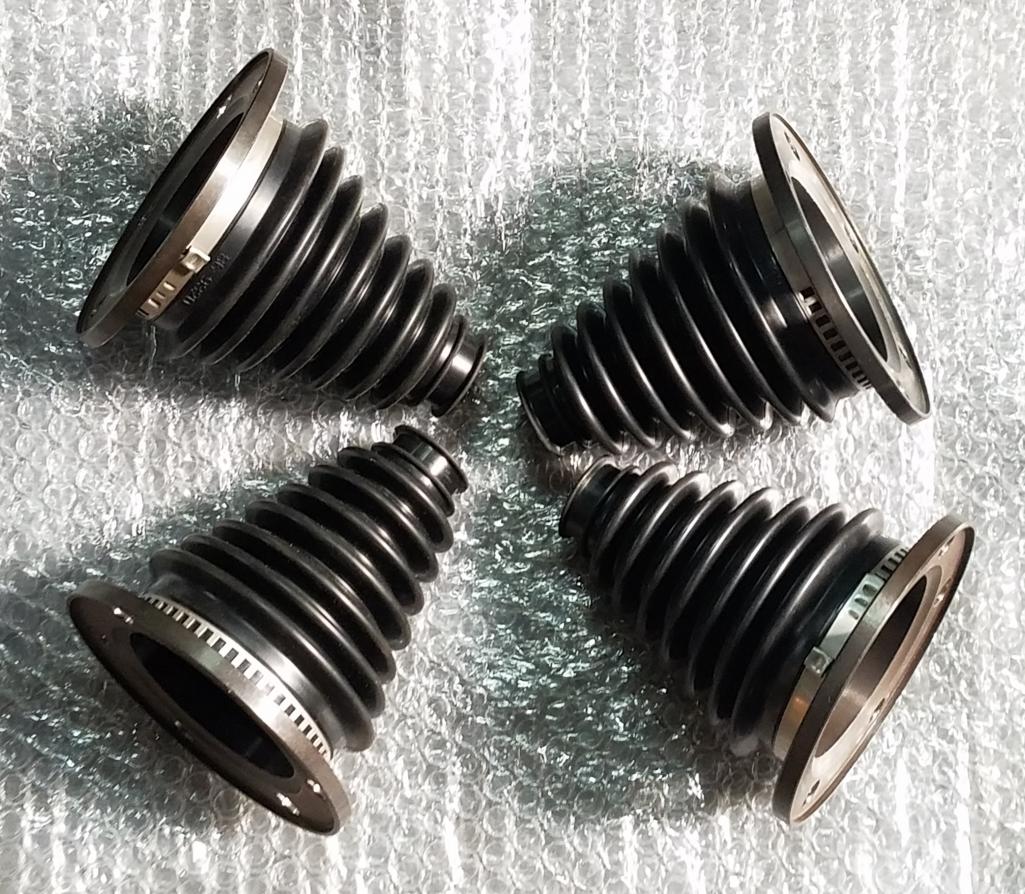
Posted by: Maltese Falcon Oct 23 2020, 09:20 PM
Quick O/T proj this week...while at the Laser Cutting shop; had this fresh 2-piece sump cover plate made for the driveway, winter season might bring Cali some rain 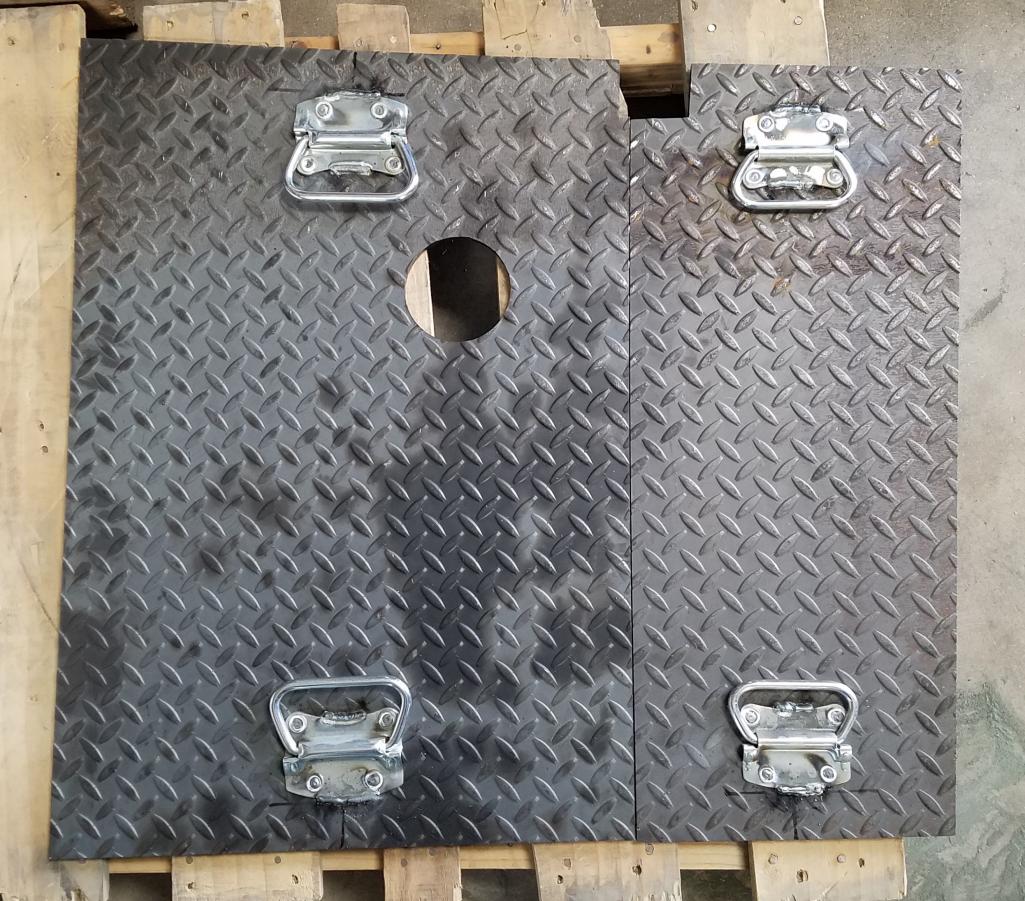
Posted by: Maltese Falcon Oct 25 2020, 05:26 PM
Pardon me...but do you have a spot of Mobil PTX ¿¿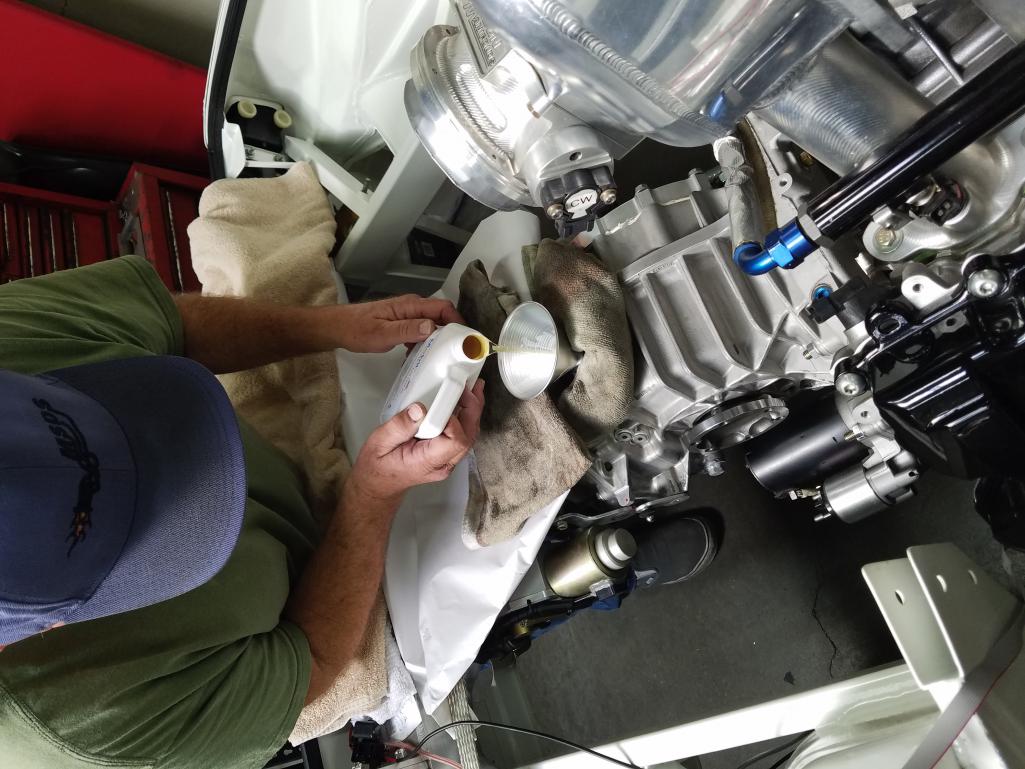
Posted by: Maltese Falcon Oct 25 2020, 05:30 PM
But of course 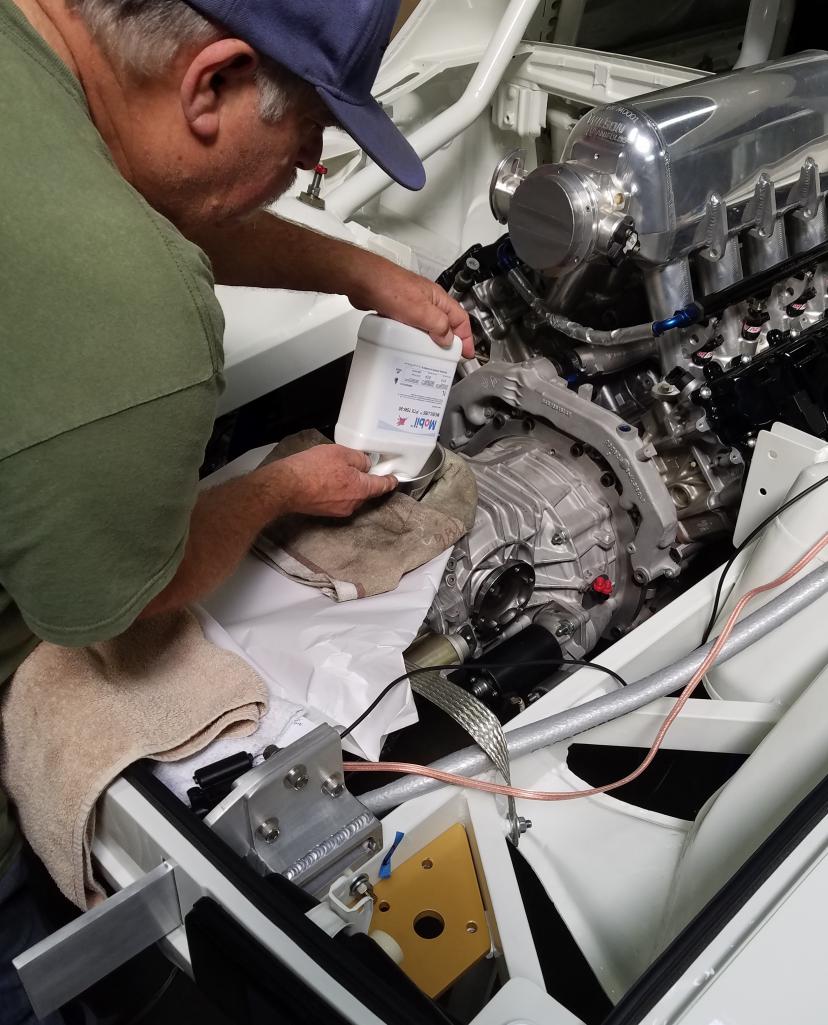
Posted by: Cairo94507 Oct 25 2020, 06:54 PM
Posted by: 914-300Hemi Oct 25 2020, 08:57 PM
One step closer.
Posted by: sixnotfour Oct 25 2020, 09:18 PM
One step closer.
Posted by: KELTY360 Oct 25 2020, 10:27 PM
Getting serious when you start adding fluids.
Posted by: Maltese Falcon Oct 25 2020, 11:01 PM
This phase of the 8gtt assembly deals with many items that we have already built early on and put aside until needed; the trans oil needs to be filled, as we wouldn't want to test shift the gearbox (while setting the SQS shift rods) if dry. Building the full Haltech management wiring harness was a 6 week project...but can now be dropped into the car in a few hours. I jump around different areas of the build, depending on the amount of time that I can spend on it...otherwise working on customer orders in the shop 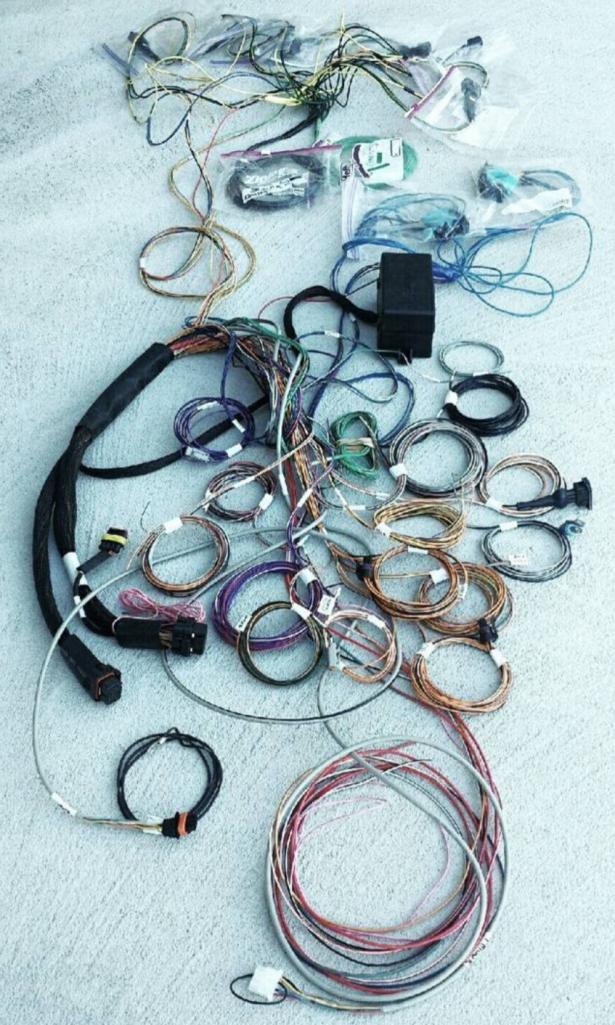
Posted by: MATTYLITE Oct 31 2020, 08:04 PM
Thanks for dropping by the shop today, Latigokid !
Enjoy your new set of MSDS T4 race exhaust headers !
https://ibb.co/X2qb4LB
Of course, we had to put in some hours on the build..
https://ibb.co/ph40ww4
Posted by: Maltese Falcon Nov 7 2020, 01:26 PM
For those who need to see the inside of the gt2 trans this is the spring-loaded selector which has 3 positions; at rest= neutral, up= 1,3,5,R and down= 2,4,6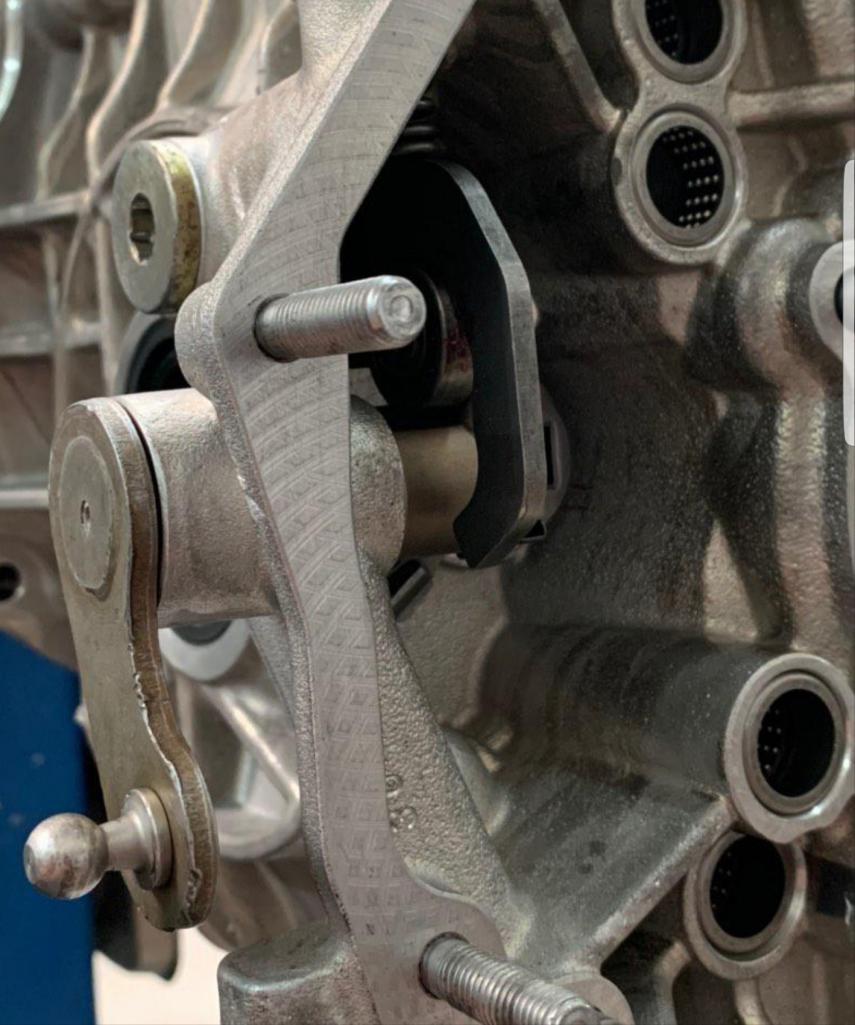
Posted by: Maltese Falcon Nov 7 2020, 01:29 PM
another view...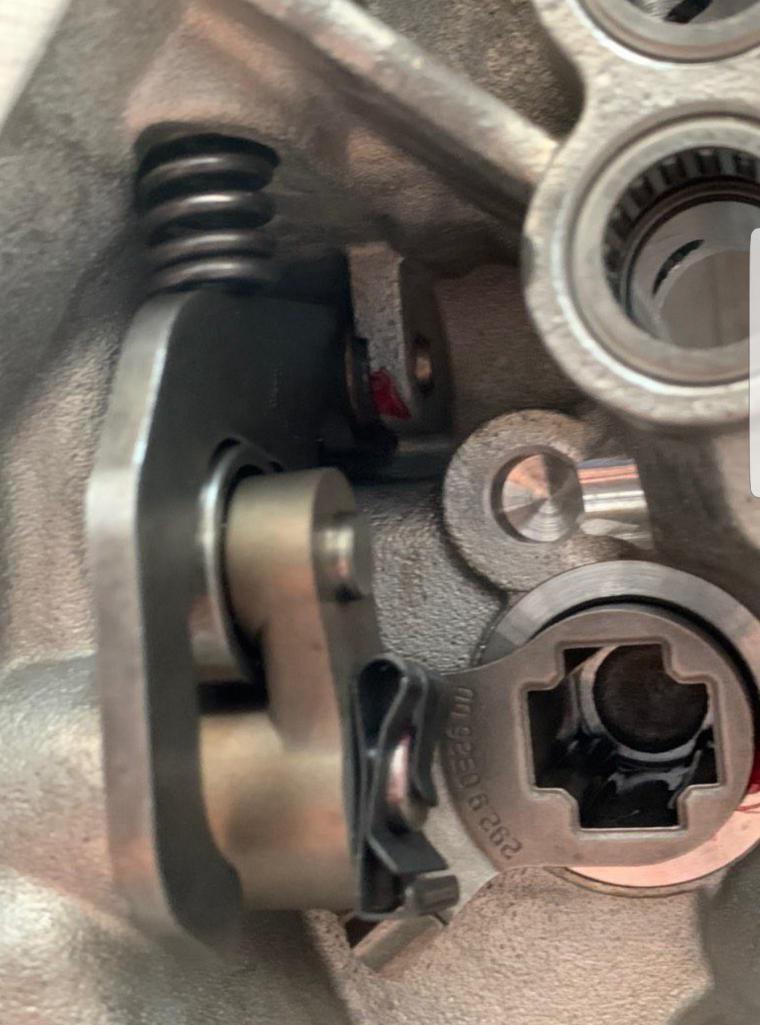
Posted by: Maltese Falcon Nov 7 2020, 04:37 PM
These cool polycarbonate vent windows just in, has a small Pop out vent- disc: use as a vent or spin around and use as an air scoop, or just snap down and close. "Performance4Plastics", UK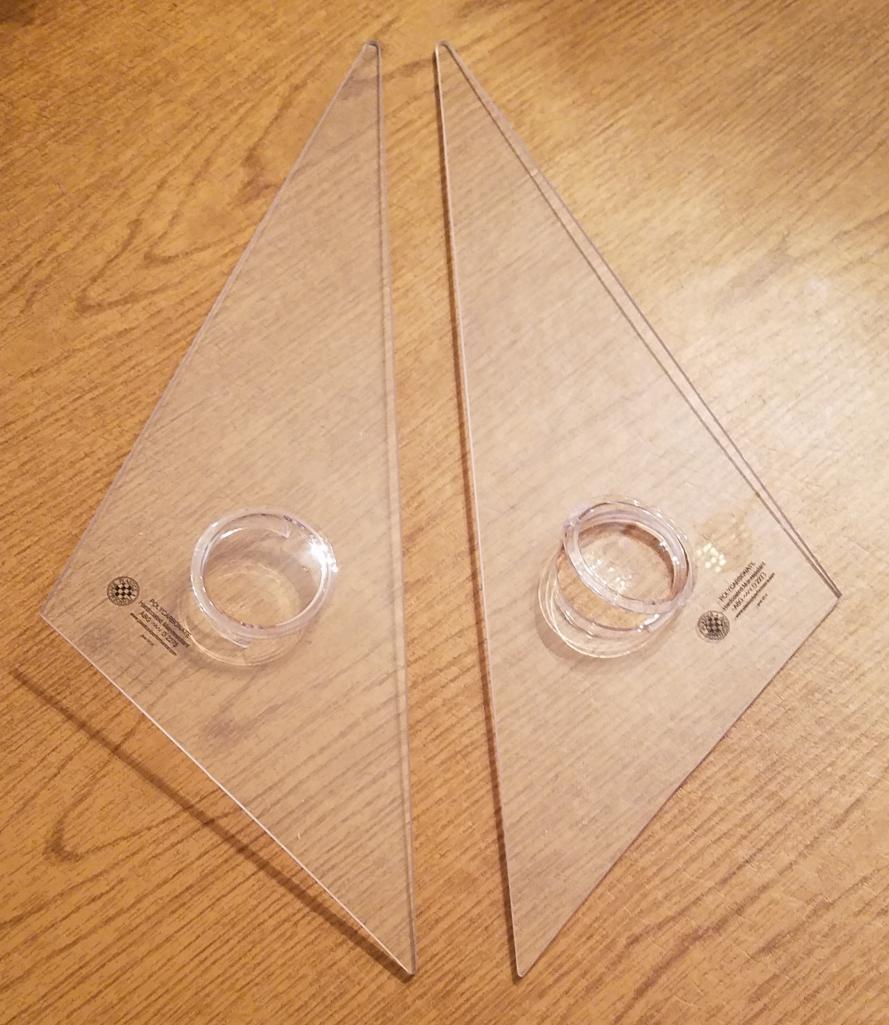
Posted by: Lucky9146 Nov 7 2020, 07:29 PM
Very cool Marty!
Always great to see new pieces!
Posted by: MATTYLITE Nov 8 2020, 11:32 PM
Houston. We've got shifting. Sequential shifting!
https://www.youtube.com/watch?v=LW7yCSh4-mo
https://www.youtube.com/watch?v=53x2lUFkdJk
Posted by: Cairo94507 Nov 9 2020, 07:57 AM
Jesus, that is so freakin' cool.
Posted by: tygaboy Nov 9 2020, 09:23 AM
I don't know... seems kinds shifty to me.
Of course you know I think that is too f-ing, epically, spectacularly cool.
Form and function. I'm so envious!
Posted by: Maltese Falcon Nov 10 2020, 10:23 AM
I don't know... seems kinds shifty to me.
Of course you know I think that is too f-ing, epically, spectacularly cool.
Form and function. I'm so envious!
Thx guys for the kind words !
Right on Chris...just add a bit of Fahrvergnügen to the Form and Function
Posted by: Shivers Nov 10 2020, 10:36 AM
Wow, that is awesome.
Posted by: MM1 Nov 10 2020, 10:44 AM
The stuff of sequential dreams . . . please keep the videos coming!
Posted by: Sway Bar Nov 10 2020, 03:45 PM
That's some positive shifting...should cut down on nicking the corners from 3rd to 4th
Posted by: djway Nov 10 2020, 11:36 PM
I don't know... seems kinds shifty to me.
Of course you know I think that is too f-ing, epically, spectacularly cool.
Form and function. I'm so envious!
I keep expecting you to show up with paddle shifters one day.....
Posted by: Maltese Falcon Nov 22 2020, 05:02 PM
I don't know... seems kinds shifty to me.
Of course you know I think that is too f-ing, epically, spectacularly cool.
Form and function. I'm so envious!
I keep expecting you to show up with paddle shifters one day.....
Not just yet on the Paddles ! but I'm going to incorporate this C/F center control panel design (GT3cup) for all required toggle, push switches, etc.
I've sourced a rectangular C/F sheet and it will double as a cover plate for the cabin air-jack cylinder, which sits right below the dashboard.
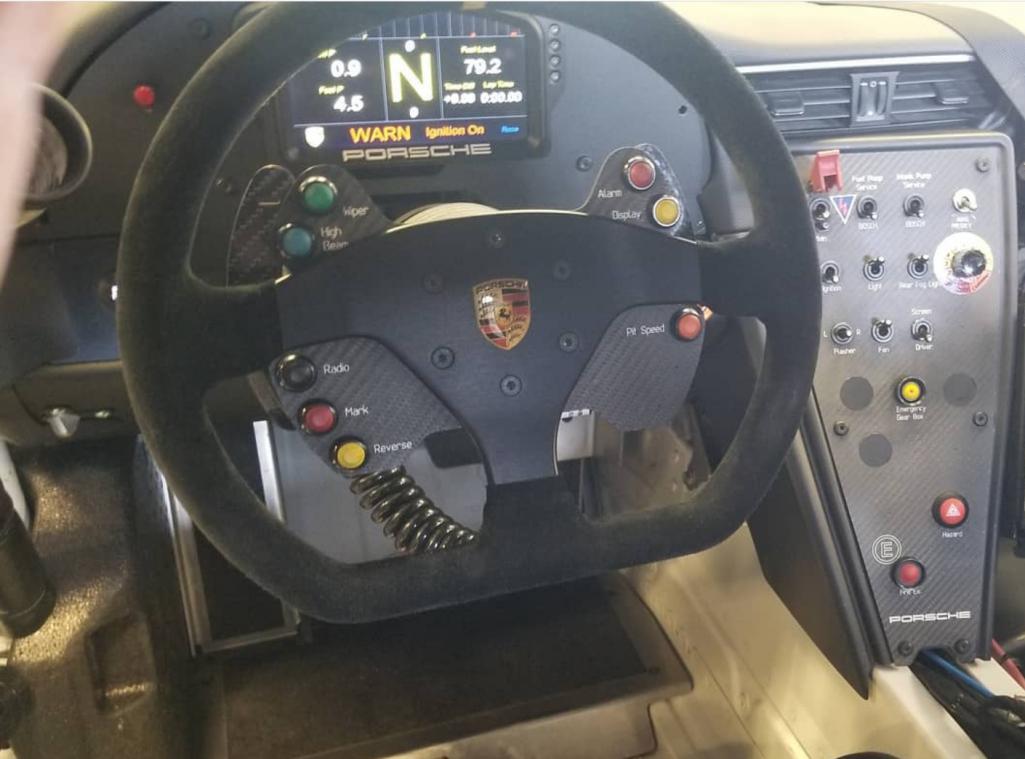
Posted by: Maltese Falcon Dec 4 2020, 08:26 PM
Making use of all of the OE lower firewall passageways
Posted by: Maltese Falcon Dec 4 2020, 08:28 PM
Mr. Snorkel taking on some new residents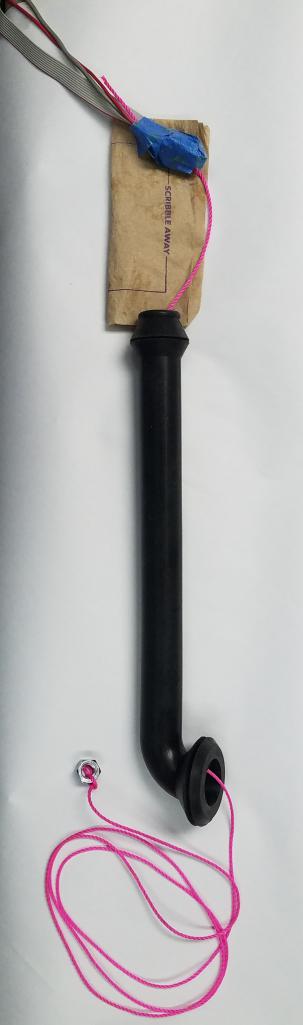
Posted by: Maltese Falcon Dec 4 2020, 08:33 PM
A couple of SQS control wires, and a 9-lead connector cable, easily pulled through. Still have more room in the Snorkel; keeping some OG style in the engine bay 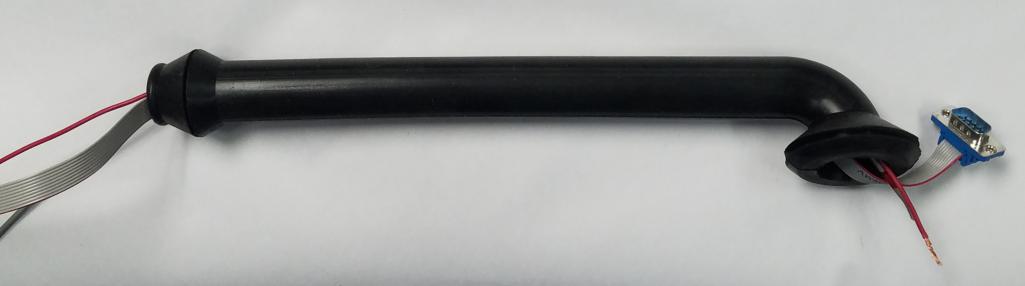
Posted by: Maltese Falcon Dec 4 2020, 08:43 PM
The exposed tunnel makes our wiring & cable routing easier !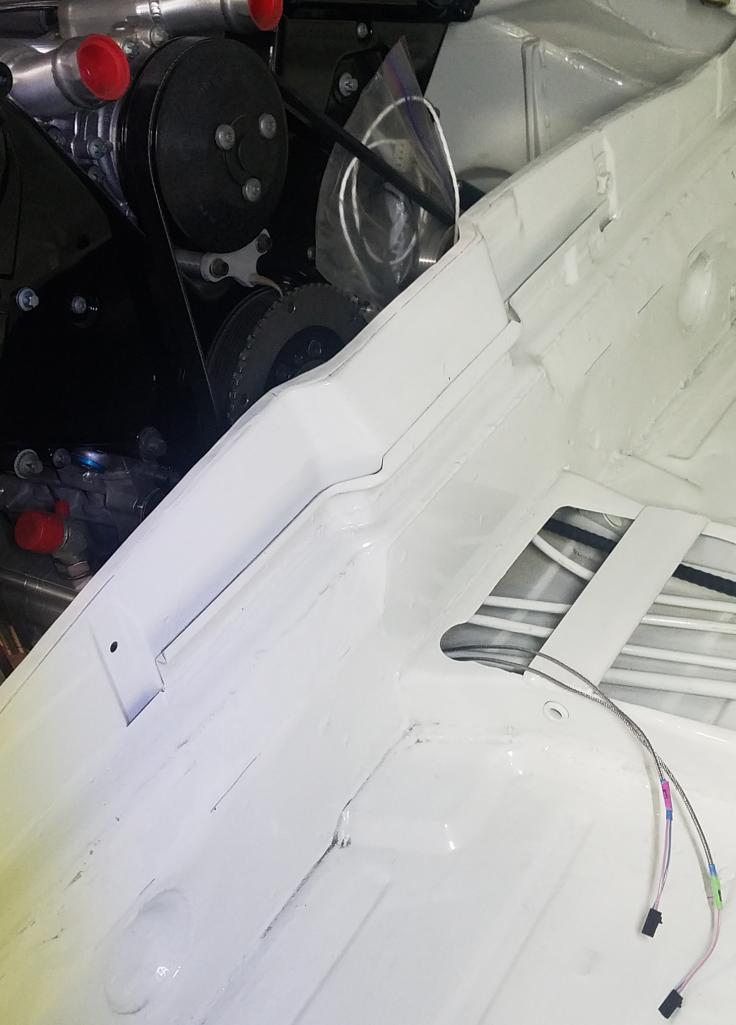
Posted by: Maltese Falcon Feb 28 2021, 10:47 PM
Aviaid Oil Systems is finishing up our 3 gallon dry sump tank; also using their in-tank oil heater, breather/ catch can, and filter stand.
Impressed with their QC !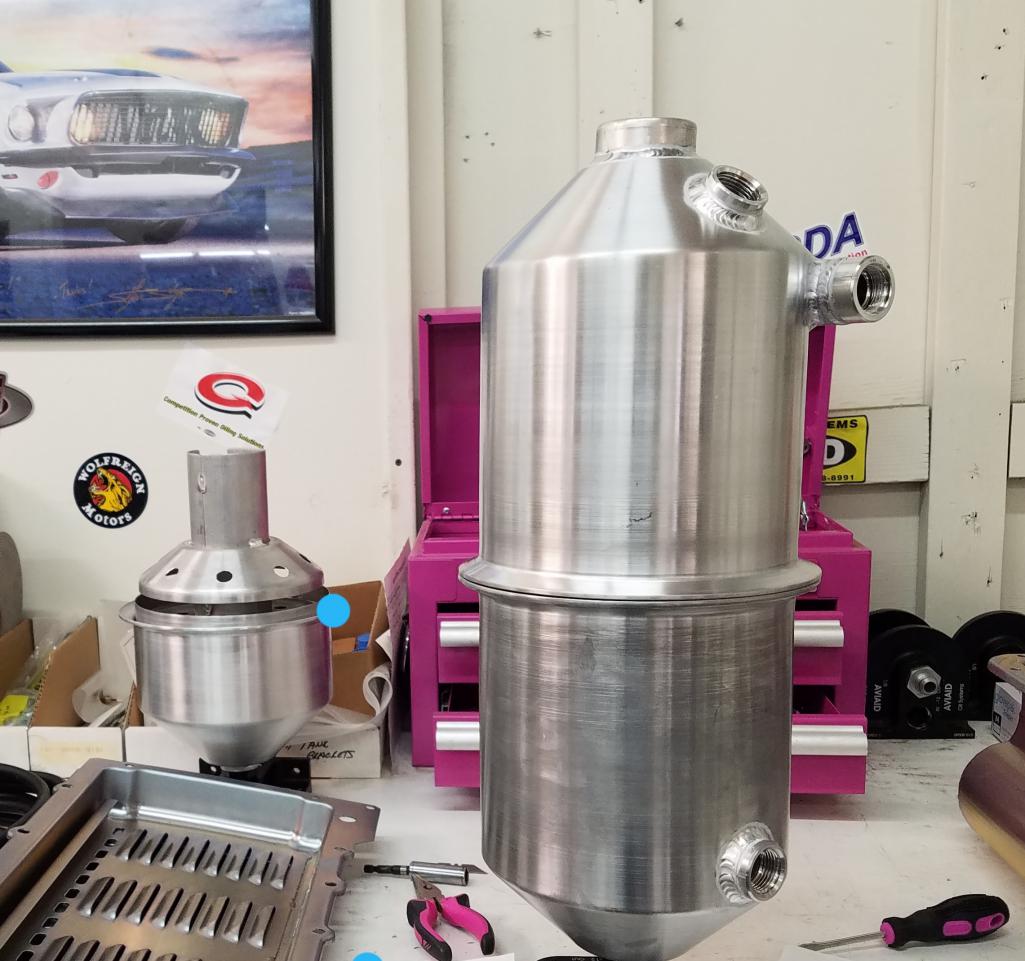
Posted by: Maltese Falcon Feb 28 2021, 11:11 PM
Locating brackets, and clearance areas for #12 oil cooler lines in the quarter panels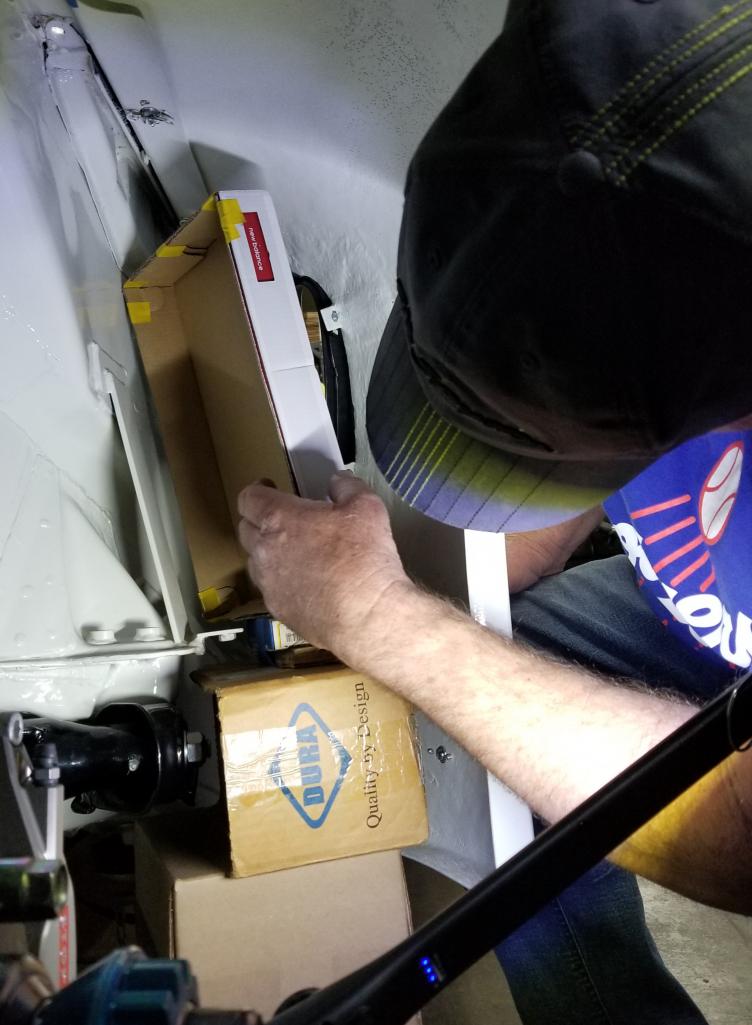
Posted by: Maltese Falcon Feb 28 2021, 11:16 PM
Snug fit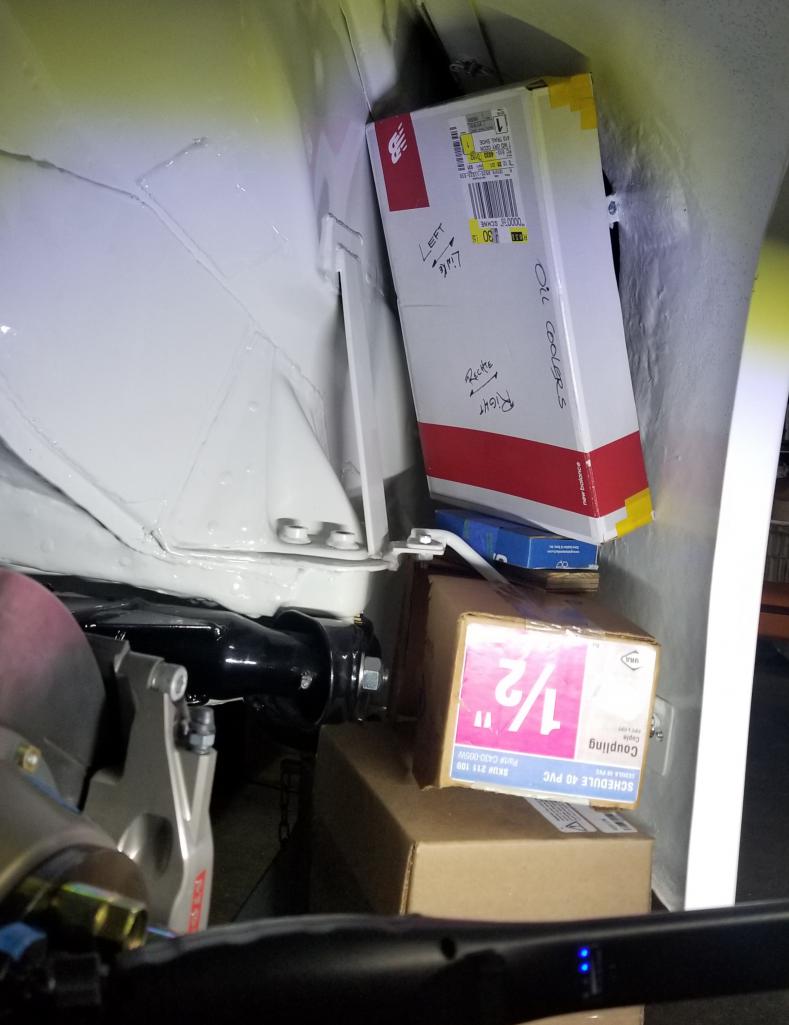
Posted by: Maltese Falcon Feb 28 2021, 11:19 PM
Exterior view, final fit will have mesh screen in this vent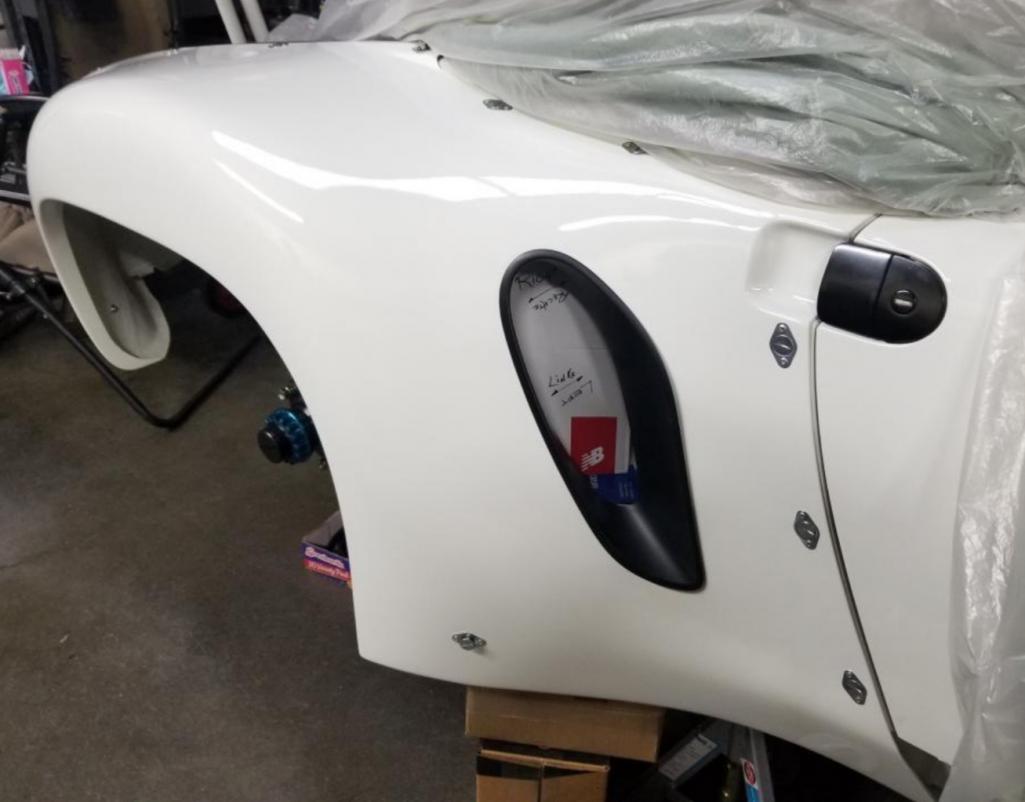
Posted by: Maltese Falcon Mar 1 2021, 11:46 AM
Our friends Sung Kang and Erick (engine builder +tuner) dropped in for a look at the 8gtt progress. Sung is building a big displacement 6 cyl 240Z, and we are supplying various exhaust header components for their R+D. Sung also drives a 914/sb chev powered hot rod, I believe he toured with the last WCC 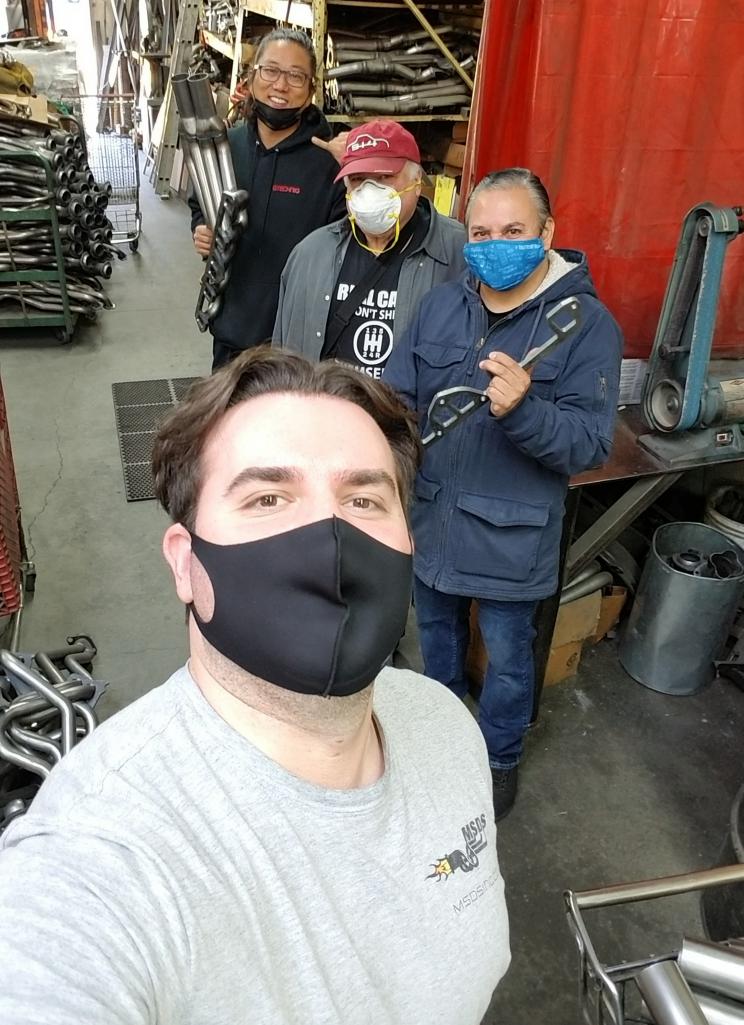
Posted by: Curbandgutter Mar 3 2021, 03:06 PM
This build is amazing. Should be a sticky!!!
Posted by: Maltese Falcon Apr 2 2021, 09:15 PM
New product from California Motorsports: billet drive-flanges for the GT-2 transaxle; just a bit more insurance for our drive train 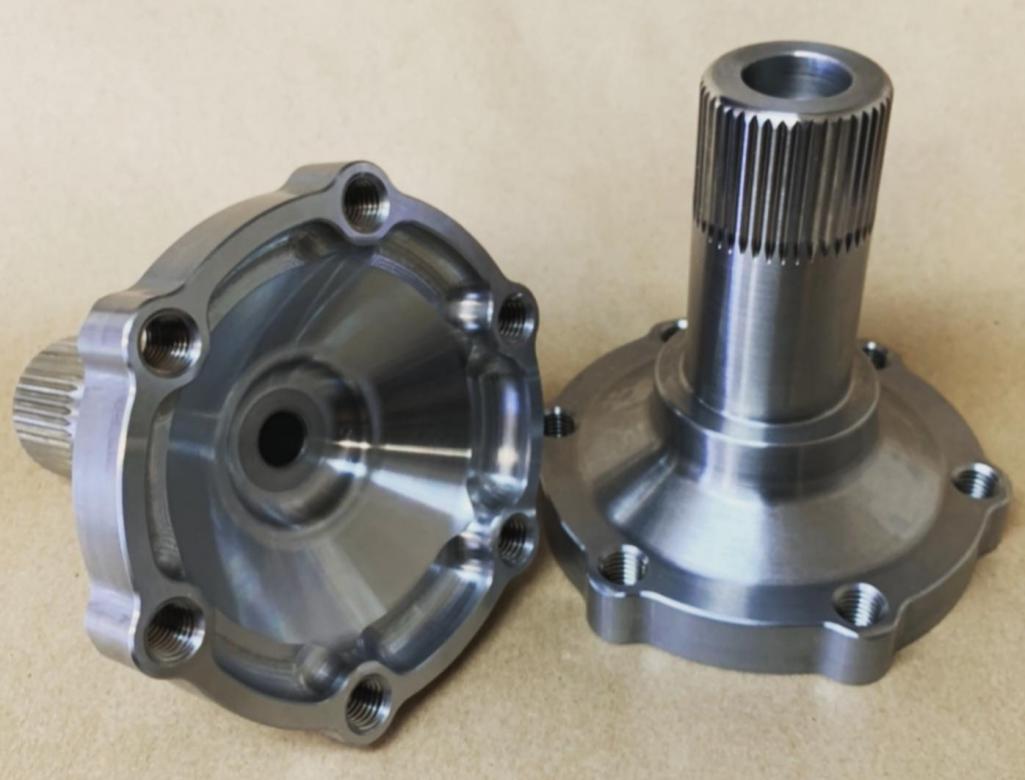
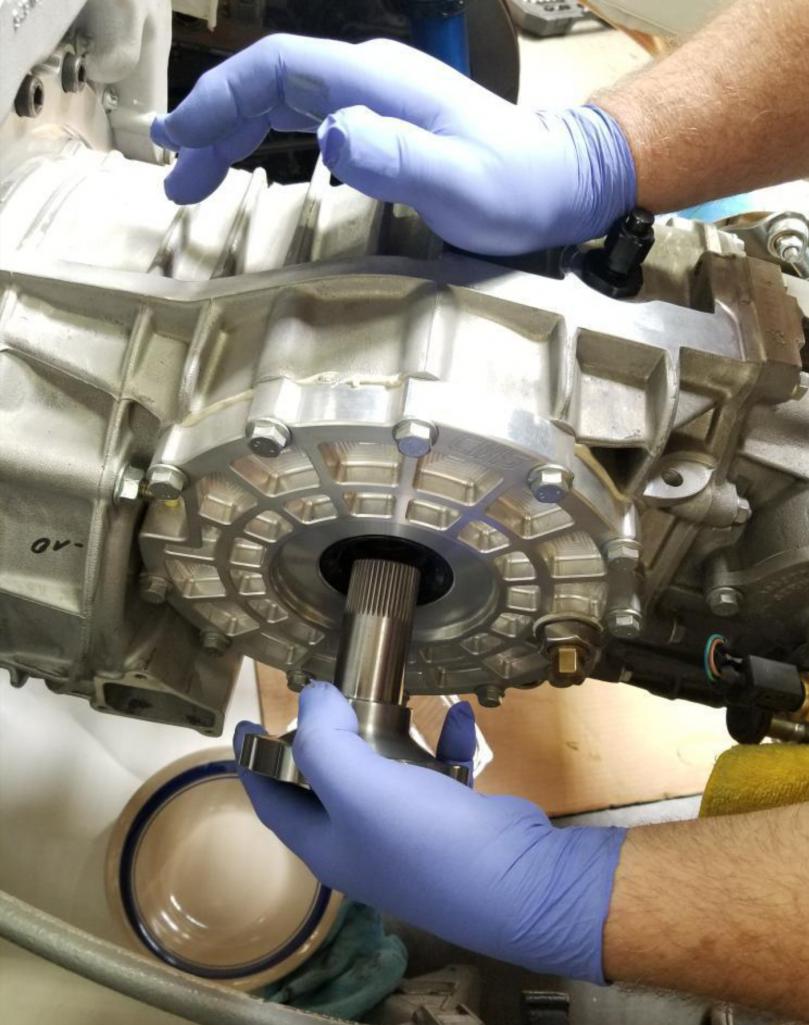
Posted by: Maltese Falcon Apr 2 2021, 09:18 PM
Good for 1,000 bhp...according to CMS
Posted by: Maltese Falcon Apr 2 2021, 09:29 PM
Sourced some cool weatherstrips for filling the gap on the custom engine grills; 1 piece at the targa window edge, and 1 at the grill edge
Posted by: Maltese Falcon Apr 2 2021, 09:33 PM
Fitment on to the grill, it's all about representing the 914 '70's Style 
Posted by: pete000 Apr 3 2021, 07:10 AM
Your fabrication is pure Art, outstanding !
Posted by: Maltese Falcon May 21 2021, 12:16 AM
Making custom brackets to hold the Aviaid 12 quart oil tank in its new home
Posted by: Maltese Falcon May 21 2021, 12:19 AM
Time for the DuPont Krytox grease + c/v joints to meet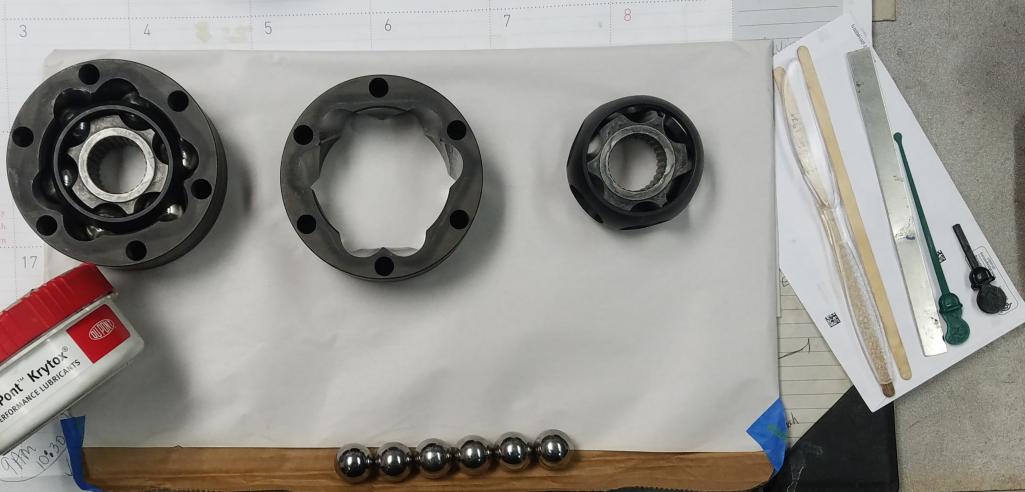
Posted by: Maltese Falcon May 21 2021, 12:27 AM
More main chassis wiring, this 8-gang cable will serve the rear tail lamp housings, trans temp + water temp gauges, low O/P warning light (big red one)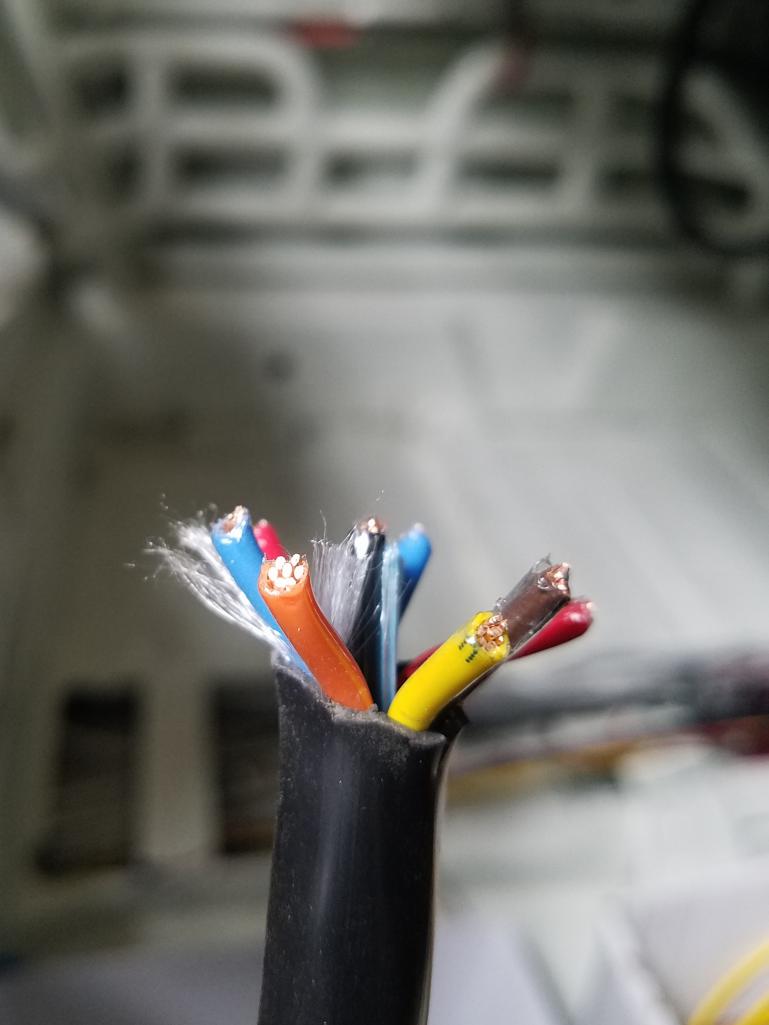
Posted by: Maltese Falcon May 21 2021, 12:29 AM
Reverse light switch connection
Posted by: eric9144 May 21 2021, 01:57 PM
Nice Oil tank location, cool that you have room to put it there, I'd imagine there's a lot less plumbing that way
Keep it coming!
Posted by: Maltese Falcon May 21 2021, 02:53 PM
Nice Oil tank location, cool that you have room to put it there, I'd imagine there's a lot less plumbing that way
Keep it coming!
Just enough room there for a .250" piece of aluminum plate which will help keep oil tank damage to a minimum, in the event of a wayward axle
Posted by: horizontally-opposed May 21 2021, 03:21 PM
Just enough room there for a .250" piece of aluminum plate which will help keep oil tank damage to a minimum, in the event of a wayward axle
Errant axles can wreak havoc alright. Lost a transmission in my 914 when a CV knocked the starter clean off the bell housing....
This project continues to amaze!!
Posted by: Curbandgutter May 21 2021, 04:32 PM
Amazing work there Marty. You certainly have set the bar very high!! By the way, where did you source the expanded metal. The one I've been able to source looks like yours but it appears to be a lighter gauge.
Posted by: Maltese Falcon May 21 2021, 07:45 PM
Amazing work there Marty. You certainly have set the bar very high!!
By the way, where did you source the expanded metal. The one I've been able to source looks like yours but it appears to be a lighter gauge.Hi Rudy, when I built the engine grills, several alternative suppliers of expanded metal were considered. The final style that won was of course the OE 914 grill. I used 2 914 grills to come up with what you see in the pics; sourced through
@http://www.914world.com/bbs2/index.php?showuser=865 and @http://www.914world.com/bbs2/index.php?showuser=1319
There's something about retaining a bit of old school 914 charm
Posted by: Maltese Falcon May 27 2021, 09:16 PM
Rear viewing camera location is the former trunk latch 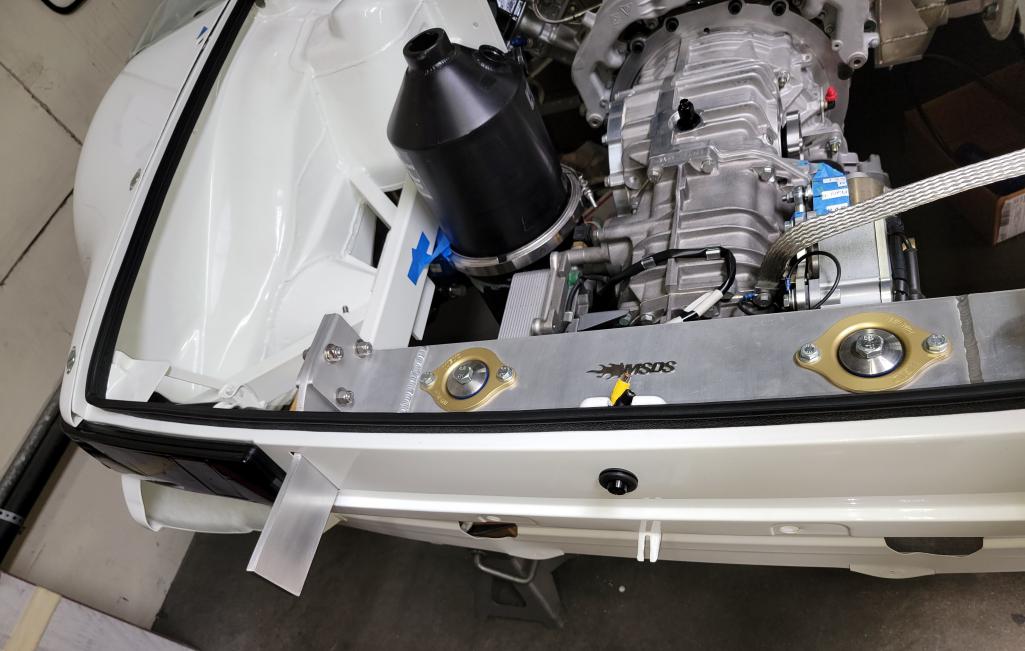
Posted by: Maltese Falcon May 27 2021, 09:20 PM
Very helpful when suited up with Hans Device and backing up; and as a big screen rear view mirror !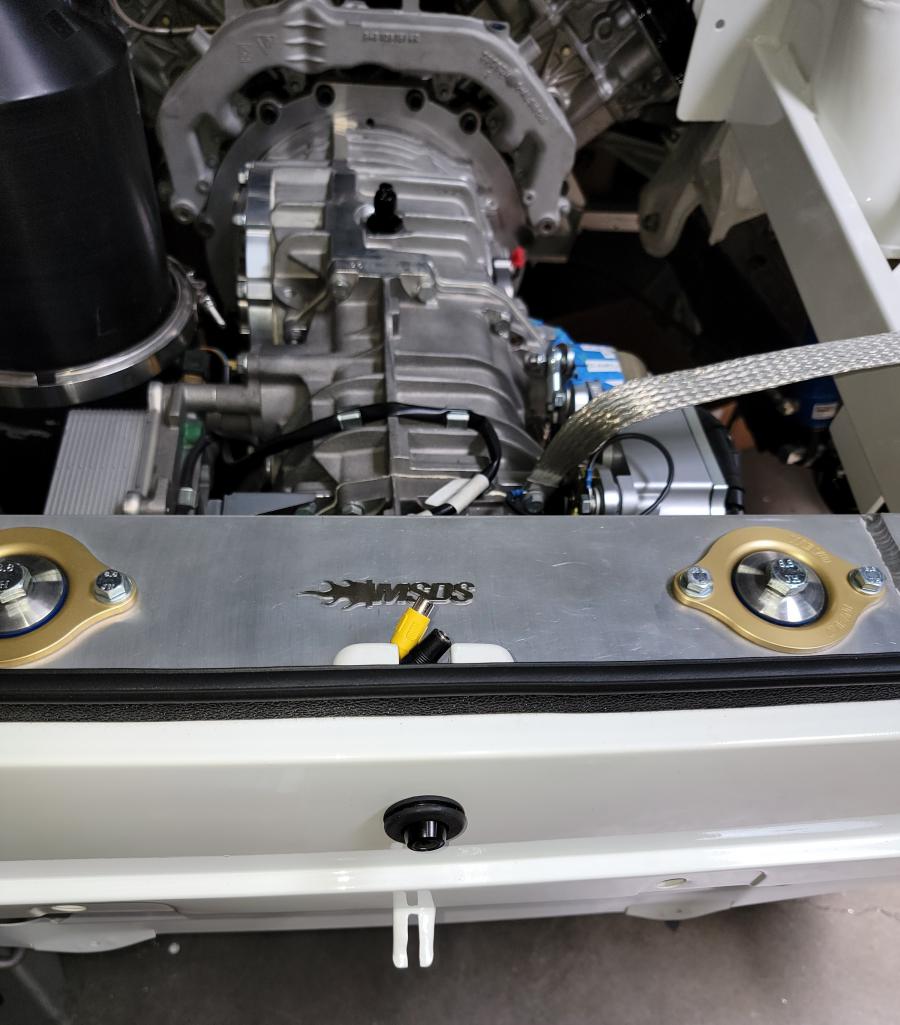
Posted by: Curbandgutter May 29 2021, 01:41 PM
Man this car looks so trick, everything is how Porsche would have done it. I love it! That rear view camera is going to be so useful. How big is the screen for it? Thanks by the way on that expanded metal. I'll have to source it differently since I need quite a bit of it.
Posted by: Maltese Falcon May 29 2021, 05:24 PM
Man this car looks so trick, everything is how Porsche would have done it. I love it! That rear view camera is going to be so useful. How big is the screen for it? Thanks by the way on that expanded metal. I'll have to source it differently since I need quite a bit of it.
Rudy, the screen is approx 6 x 10", and will accept a total of 2 camera inputs...so another camera placement will be a future option.
Have a good 3 day Holiday...I know you'll be in that garage
Posted by: Maltese Falcon May 31 2021, 09:57 AM
Made these quick-release connection circuits for the rear tail-lamp housings. Since the Left and Right housings are removed whenever the quarter panels are R+R, this system is way quicker than messing with 10 push-on connections. Yes this car comes with a new color coded schematic, several of them 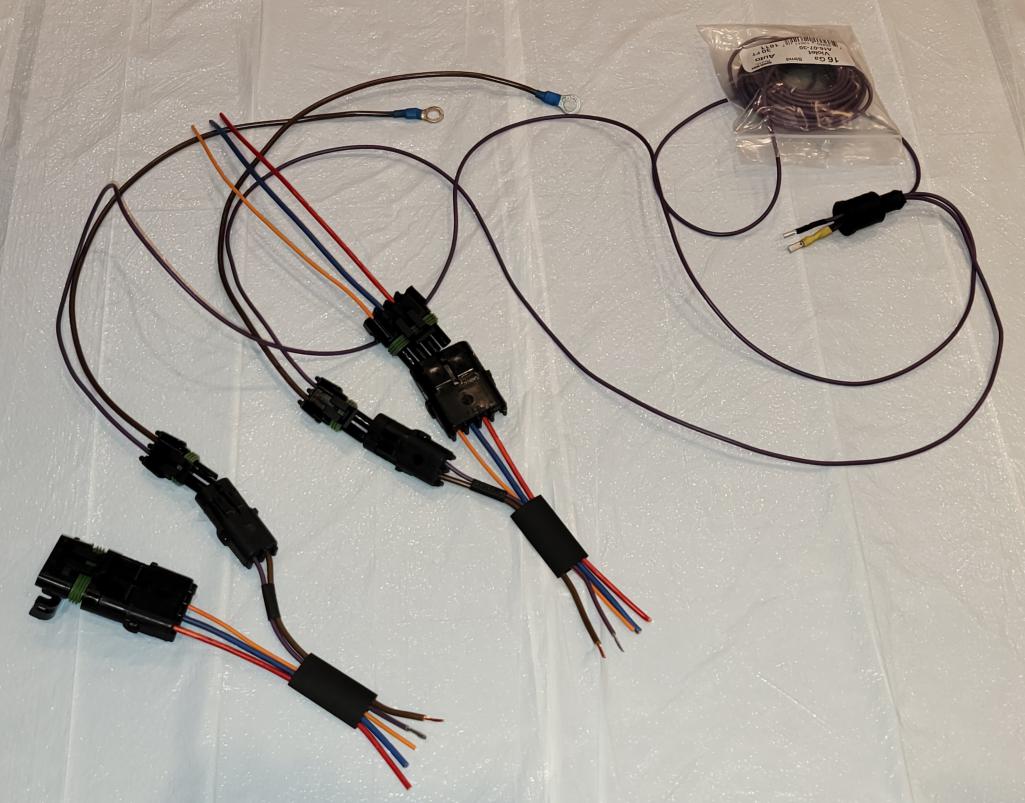
Posted by: Maltese Falcon Jul 8 2021, 11:52 PM
Small but major issue with the spec-mfg C/V boot -flange and 10mm bolts; just not made right ! The dia of the boot "Seat" where the clamp pulls the boot tight, is so tall that the bolts get canted...so one can not work the bolts into the joints. Even worse deflection when the clamp is installed.
Posted by: Maltese Falcon Jul 8 2021, 11:54 PM
Making some custom rings from 2 ¹/²" sched 40 steel pipe
Posted by: Maltese Falcon Jul 9 2021, 12:00 AM
Then using a small piece of 2 ¹/²" c/r .065" tubing, swedged to slip into the c/v boot flange, place the rings on the opposite ends for a New clamping area, =straighter shot for the bolts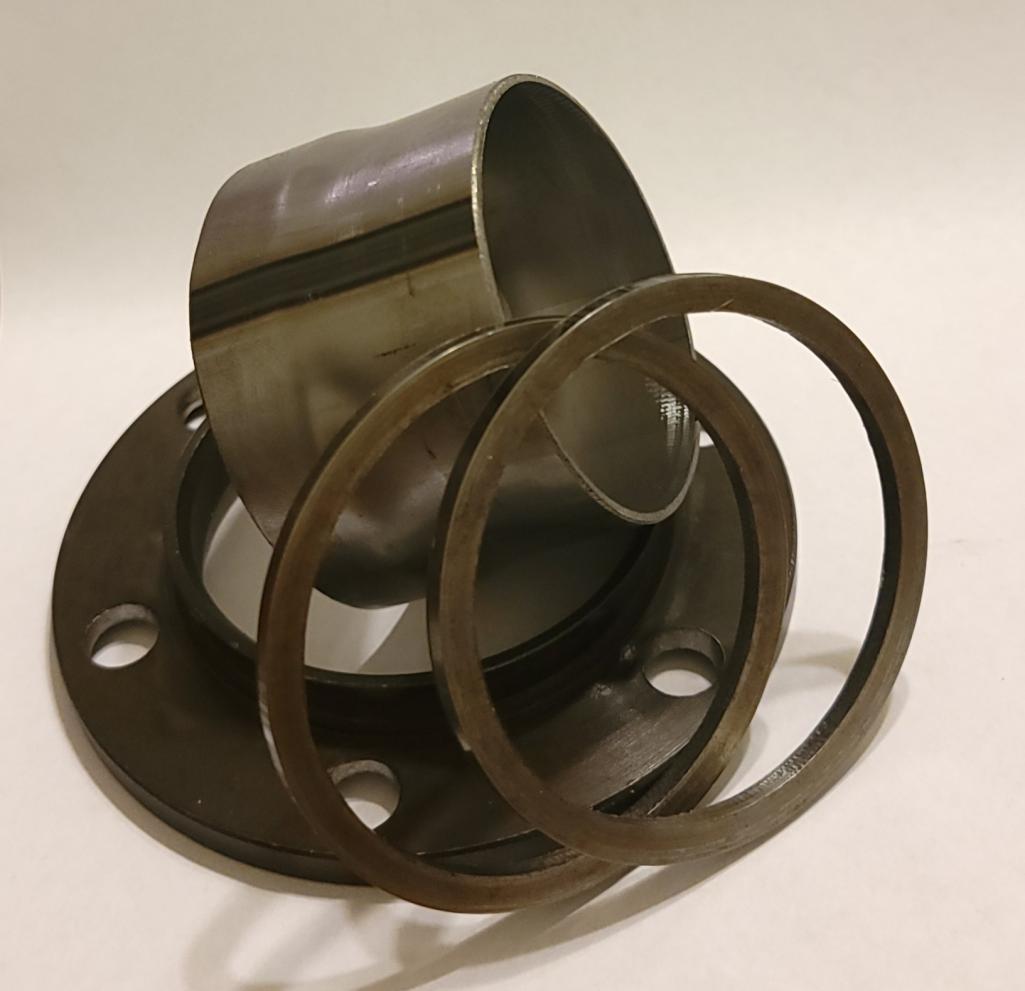
Attached thumbnail(s)
Posted by: Maltese Falcon Jul 9 2021, 12:07 AM
Just need to finish welding these components together, coat and get back to fitting the 300M Sway-Away axles to the rocket. Bolts are happy and can enter horizontally/ non binding
Posted by: Maltese Falcon Aug 2 2021, 08:38 AM
More wiring/ more Firesleeve, just about everything running through the mid and rear area of this build will need good protection...hotter than Mrs. Fields cookie kitchen 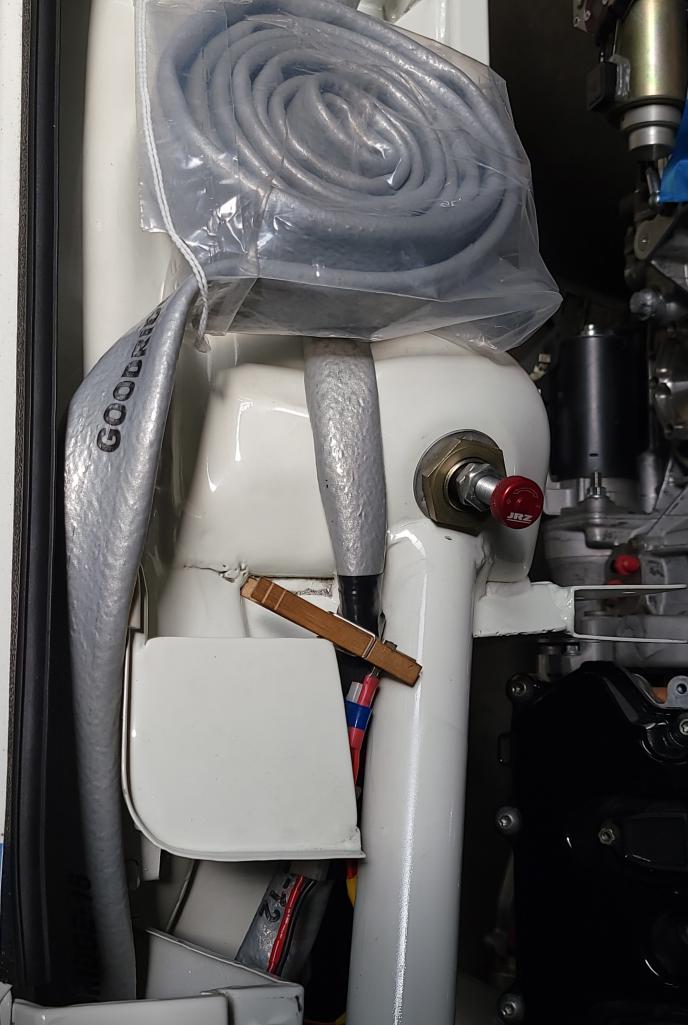
Posted by: Curbandgutter Aug 2 2021, 03:13 PM
Wow just wow..........Man the level of craftmanship here is way up there! Beautiful, beautiful work. 
Posted by: Maltese Falcon Aug 28 2021, 07:11 PM
Going to use this Gen-2 style; made from sched 40 2 1/2" pipe 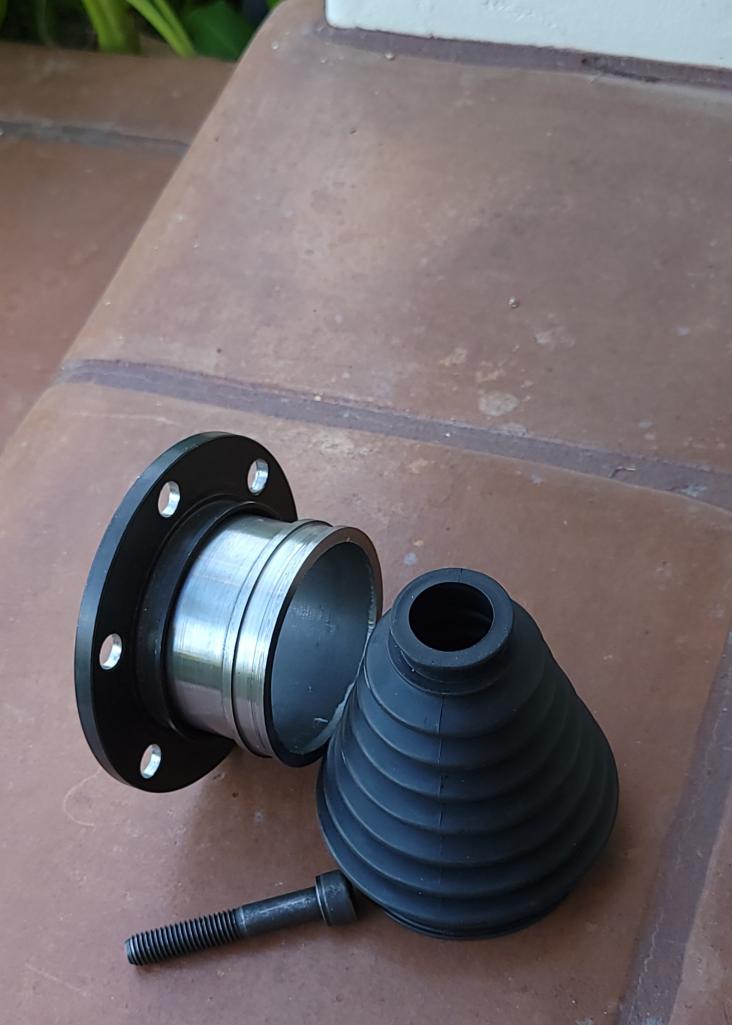
Posted by: Maltese Falcon Aug 28 2021, 07:12 PM
Nice snug fit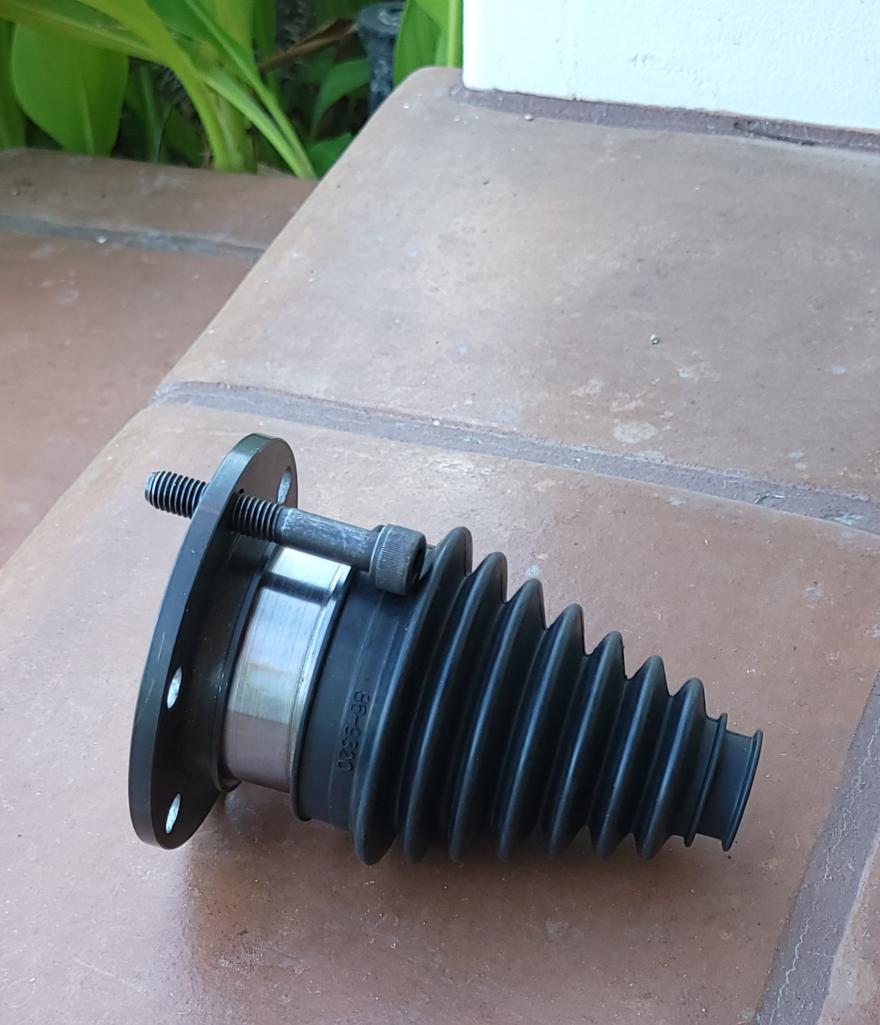
Posted by: Maltese Falcon Aug 28 2021, 07:15 PM
Inside view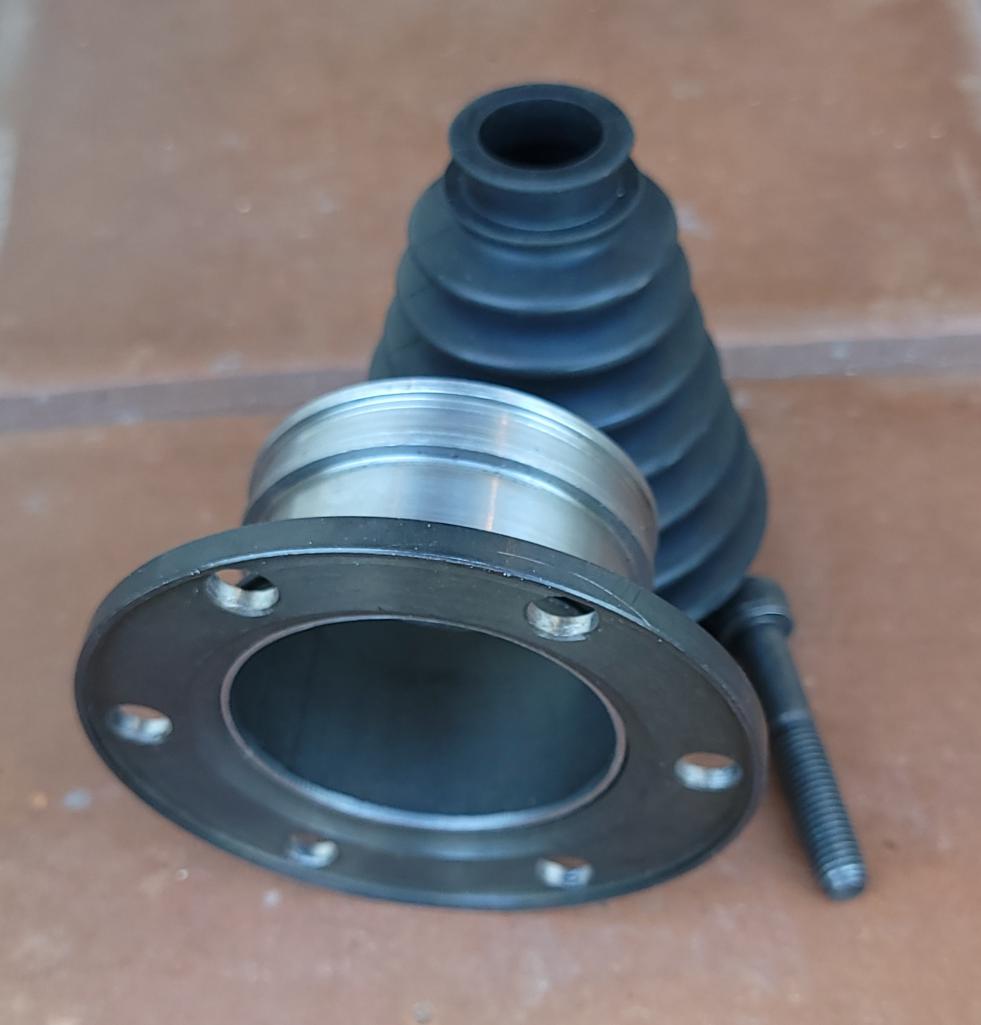
Posted by: Maltese Falcon Sep 3 2021, 09:51 PM
Setting up for MIG welding in the "Rotator" 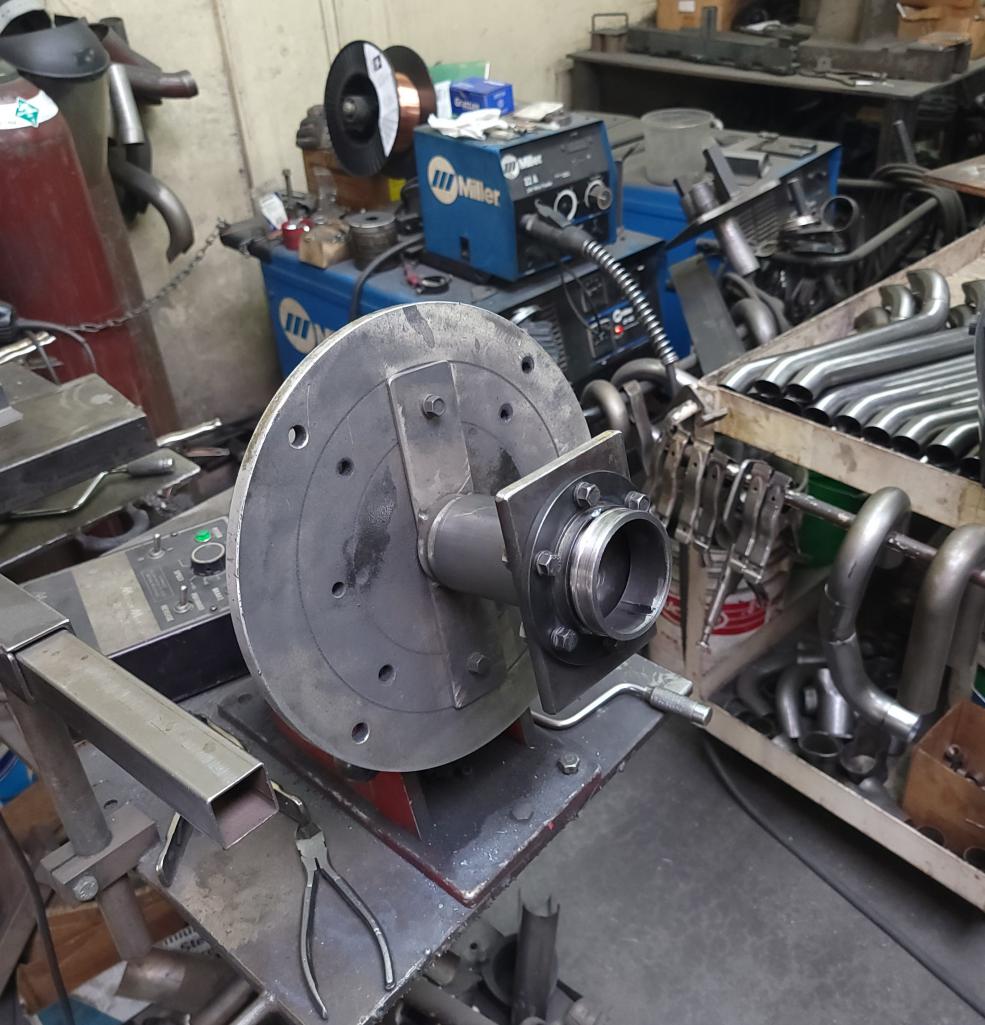
Posted by: Maltese Falcon Sep 3 2021, 10:05 PM
Burn 'em in !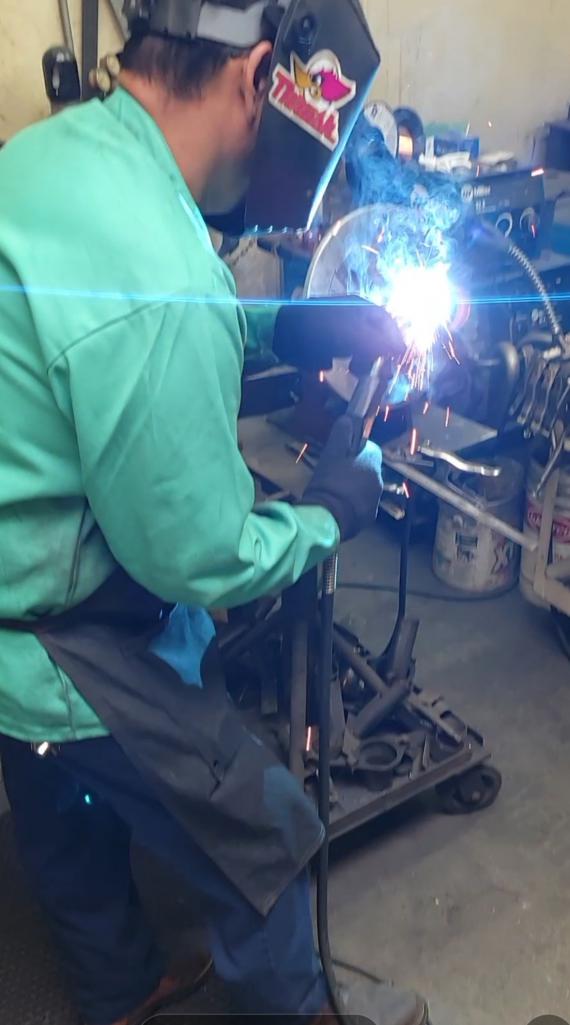
Posted by: Maltese Falcon Sep 3 2021, 10:08 PM
1 down , 3 to go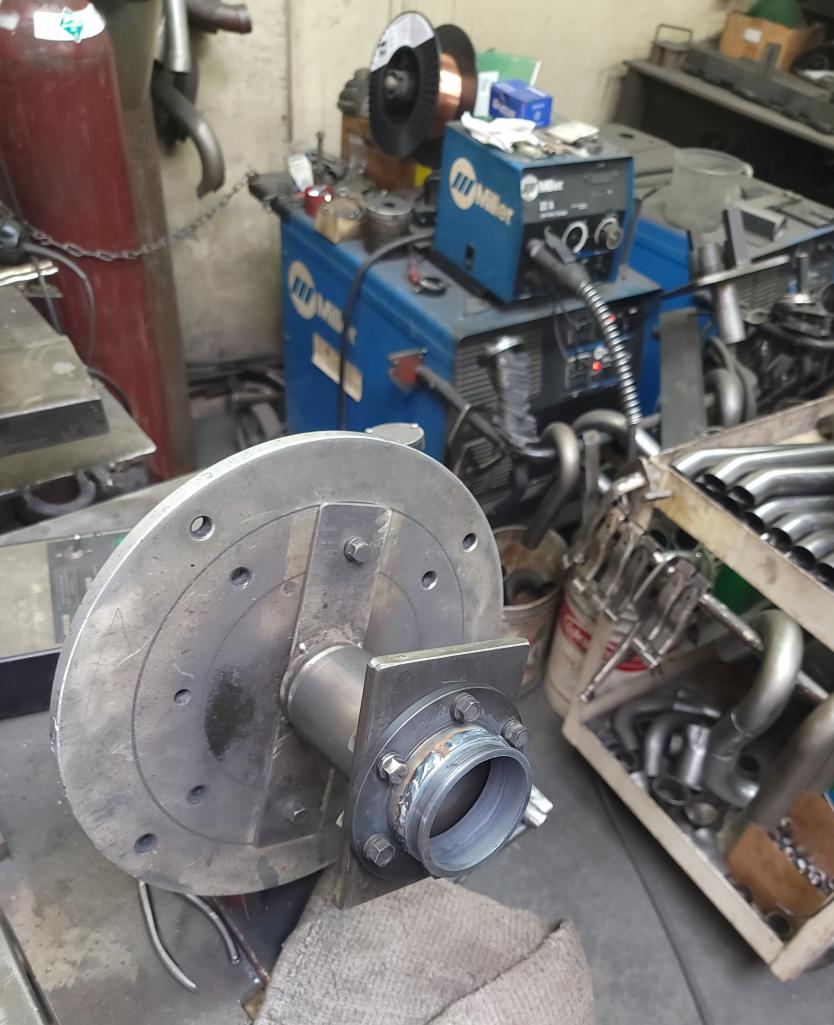
Posted by: Maltese Falcon Sep 3 2021, 10:14 PM
A little throw back to my days spent down at Lions Dragstrip. This fender cover has been on all of my proj's, since Nov. '71. It was the "Doorprize " for my run that Sunday morning !
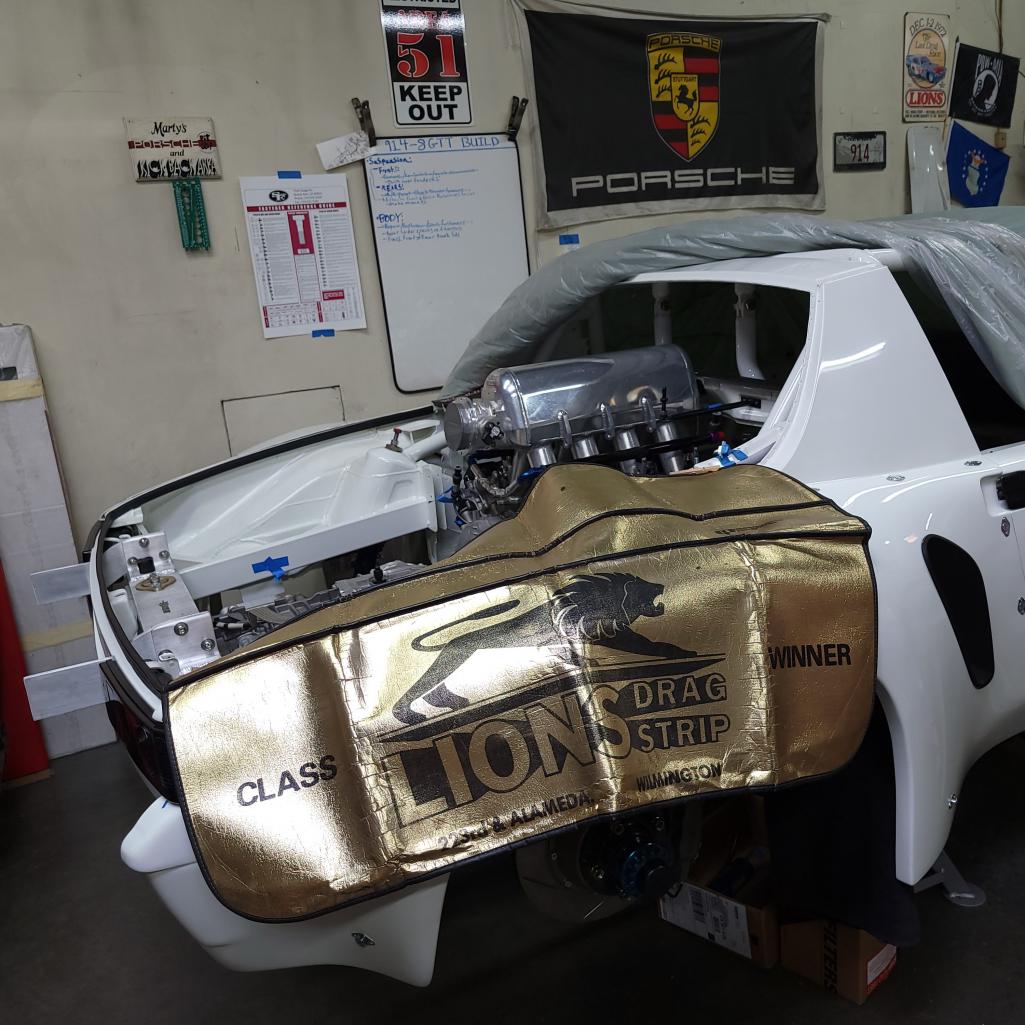
Posted by: Maltese Falcon Sep 3 2021, 10:17 PM
'69 SS 350 with some "Work"
Attached thumbnail(s)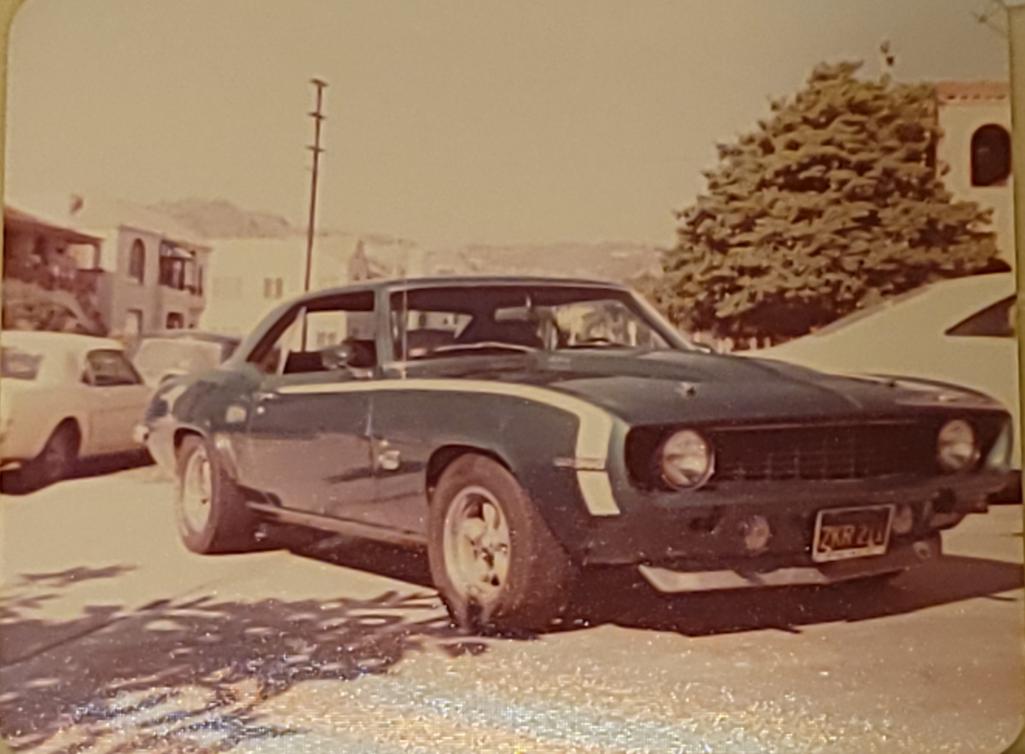
Posted by: rgalla9146 Sep 4 2021, 09:41 AM
'69 SS 350 with some "Work"
American Racing 'Daiseys'....... mmmm
And of course your work is outstanding ....as always.
Posted by: Maltese Falcon Sep 4 2021, 12:11 PM
'69 SS 350 with some "Work"
American Racing 'Daiseys'....... mmmm
And of course your work is outstanding ....as always.
Thank you Sir ! it only took me 2 years to make this E/T improvement (over showroom stock).
The Traco valve train components, head gaskets and some keen advice from Travis & Coons !¡
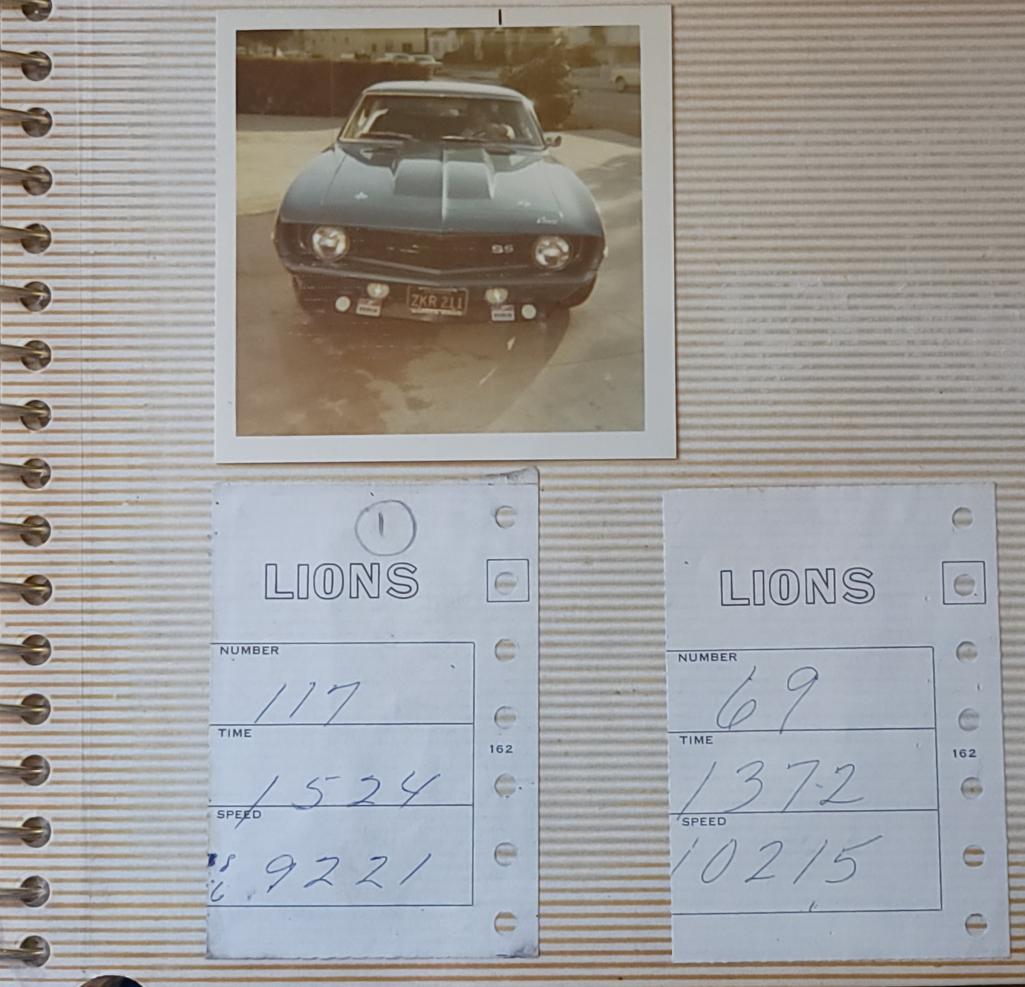
Posted by: Maltese Falcon Sep 5 2021, 03:46 PM
Finished products !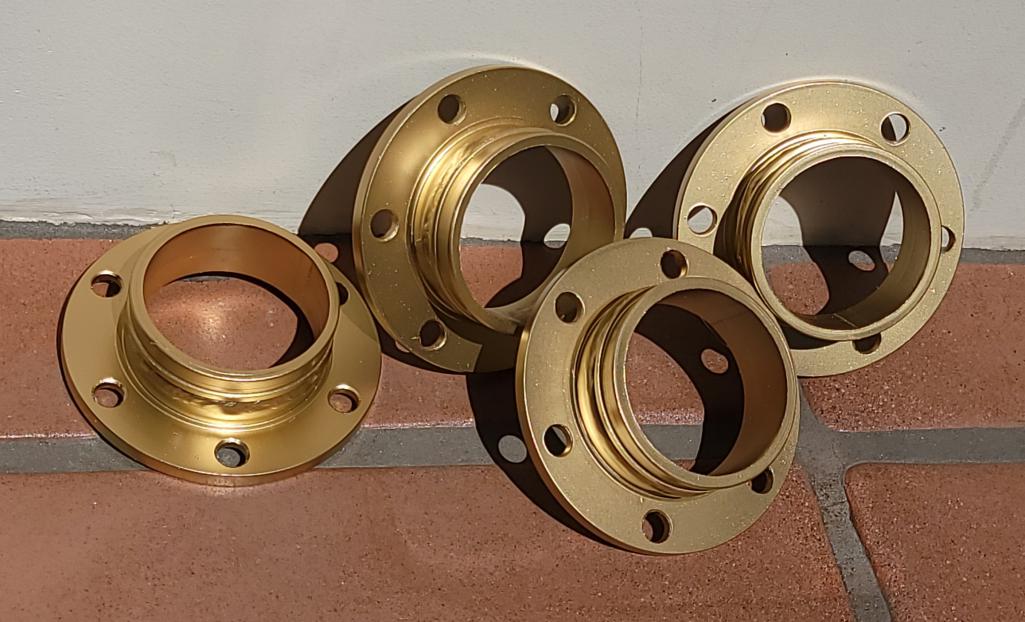
Posted by: mgp4591 Sep 5 2021, 11:35 PM
'69 SS 350 with some "Work"
American Racing 'Daiseys'....... mmmm
And of course your work is outstanding ....as always.
Thank you Sir ! it only took me 2 years to make this E/T improvement (over showroom stock).
The Traco valve train components, head gaskets and some keen advice from Travis & Coons !¡
That's quite the bump! The Traco complete engines were absolutely amazing in their power output and those parts and their advice are proof.
Posted by: Maltese Falcon Sep 6 2021, 06:21 PM
Was totally worth the learning curve on that SBC 350 @http://www.914world.com/bbs2/index.php?showuser=14748 , the Traco guys welcomed local gearheads to share knowledge with; at the rear roll up door on Jefferson Bl. usually with an engine on the dyno at full song. Their immense back parking lot shared parking with the "Suits" from Hughes Aerospace (just up the hill)...and Travis + Coons were friends with all of those "Pocket Protector" dudes as well.
At my 1971 pay scale of $1.85/ hr., here I am with my prized Craftsman torque wrench !!
After the heads went back on, the following Sunday at Lions in eliminations, I took out a 12 car group of Z28's from San Diego
Fenton mags on the car at this period @http://www.914world.com/bbs2/index.php?showuser=5176 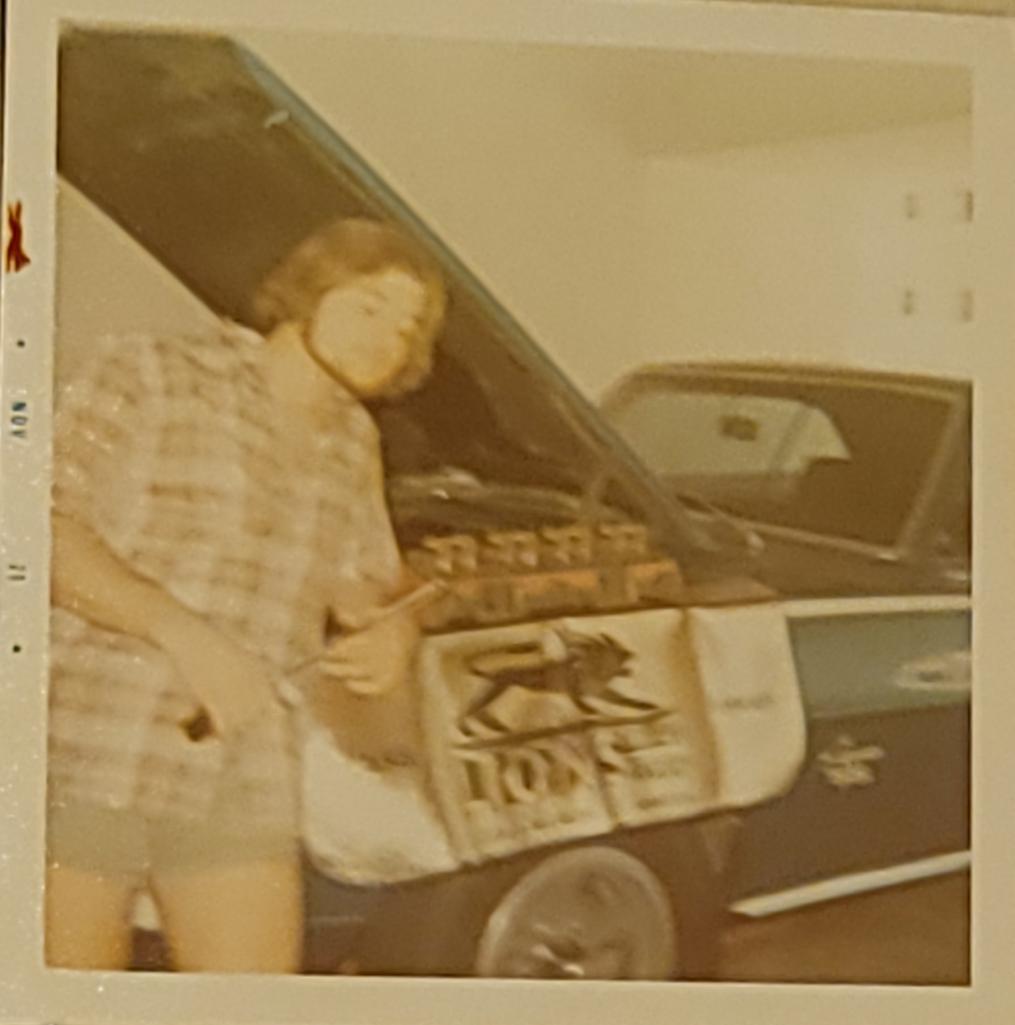
Posted by: Maltese Falcon Sep 6 2021, 06:33 PM
Last of my Camaro thread hi-jack...
Traco built the TransAm engines for Roger Penske (Javelins + Camaros) so I embarked on building a Street tribute to Sunoco Camaro chassis #9908H046
(Sold for approx $1M in 2016).
I sketched out this thumbnail sheet in late '73, but the project never got rolling. Around New Years Eve '74, I lost the Camaro in an understeer slide in Laurel Canyon and she never tracked the same since the impact. My neighbor loved the car and off it went; I took delivery on a new 914/ 2.0 in February '74.
Posted by: flat4guy Sep 7 2021, 08:34 PM
Great build thread - I recall seeing this car at Monterey Historic races several years ago
Posted by: Maltese Falcon Sep 8 2021, 09:59 AM
Great build thread - I recall seeing this car at Monterey Historic races several years ago
Complete with acid-dipped body, wherein Penske added the weight back into other Strategic suspension-to-roll cage points...in order to stay within legal weight limits. GM had their engineering Hands in Penske's TransAm Camaros as well.
Win on Sunday / sell cars on Monday !
Marty
Posted by: Maltese Falcon Dec 31 2021, 10:49 PM
New Year's Eve, time for one more sketch; rear trunk area. Several things going on, hope y'all can read my chicken scratches ! Most of these components have already been sourced...the intercooler dimensions will be determined (then custom built) once the final placement of the turbos are sitting in place.
In the last few months we've been making + routing the custom wiring harness throughout the car.
Have a great and Happy New Year everyone !
Marty & Matthew 
Posted by: NorCalScott Jan 1 2022, 10:25 AM
Thanks for the update! Been awhile. I've been checking a couple times a week. Either you need to update more often or I need to get a life. lol. Can't wait to see some new pics.
Posted by: Maltese Falcon Jan 2 2022, 12:22 AM
Wiring a car def not boring, but Yes lots of time on target !
Attached thumbnail(s)
Posted by: Maltese Falcon Jan 2 2022, 12:28 AM
Easy but not painless...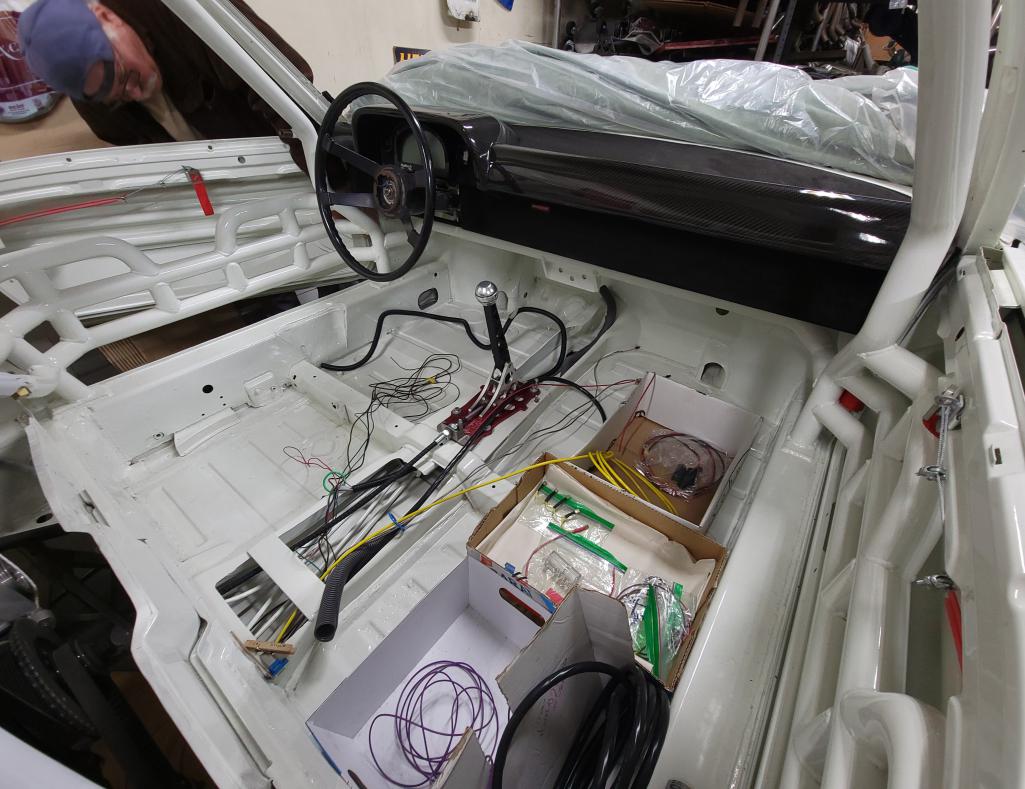
Posted by: Maltese Falcon Jan 2 2022, 12:31 AM
Junk in the trunk...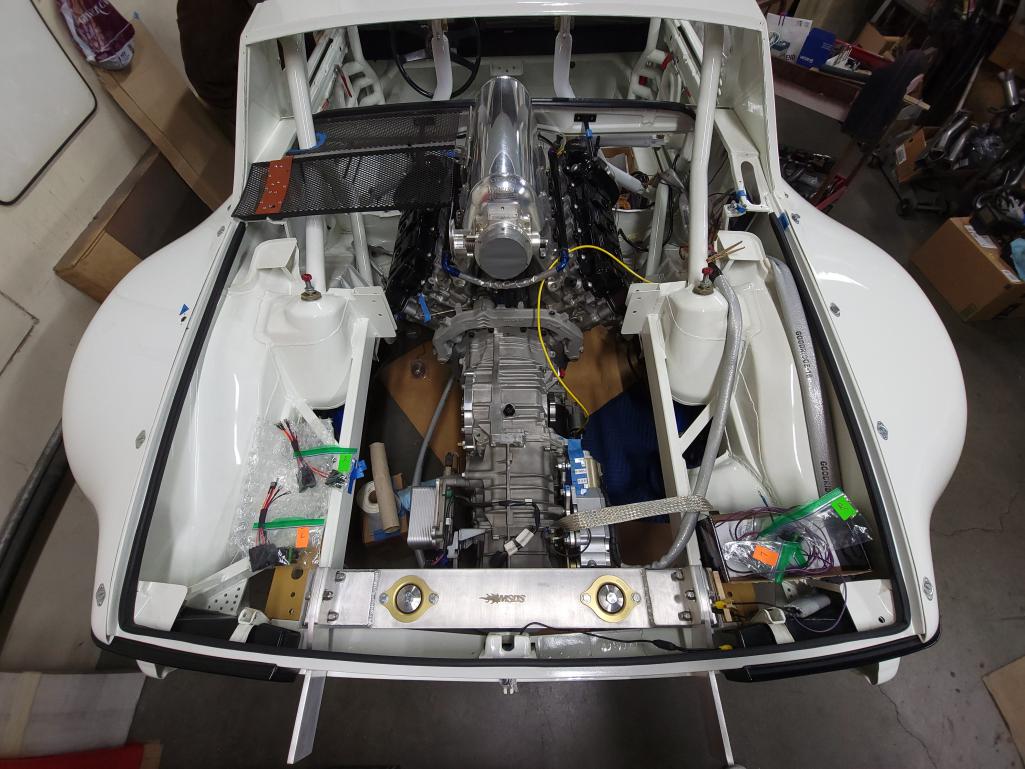
Posted by: Maltese Falcon Jan 2 2022, 12:45 AM
...more pics as we make more progress 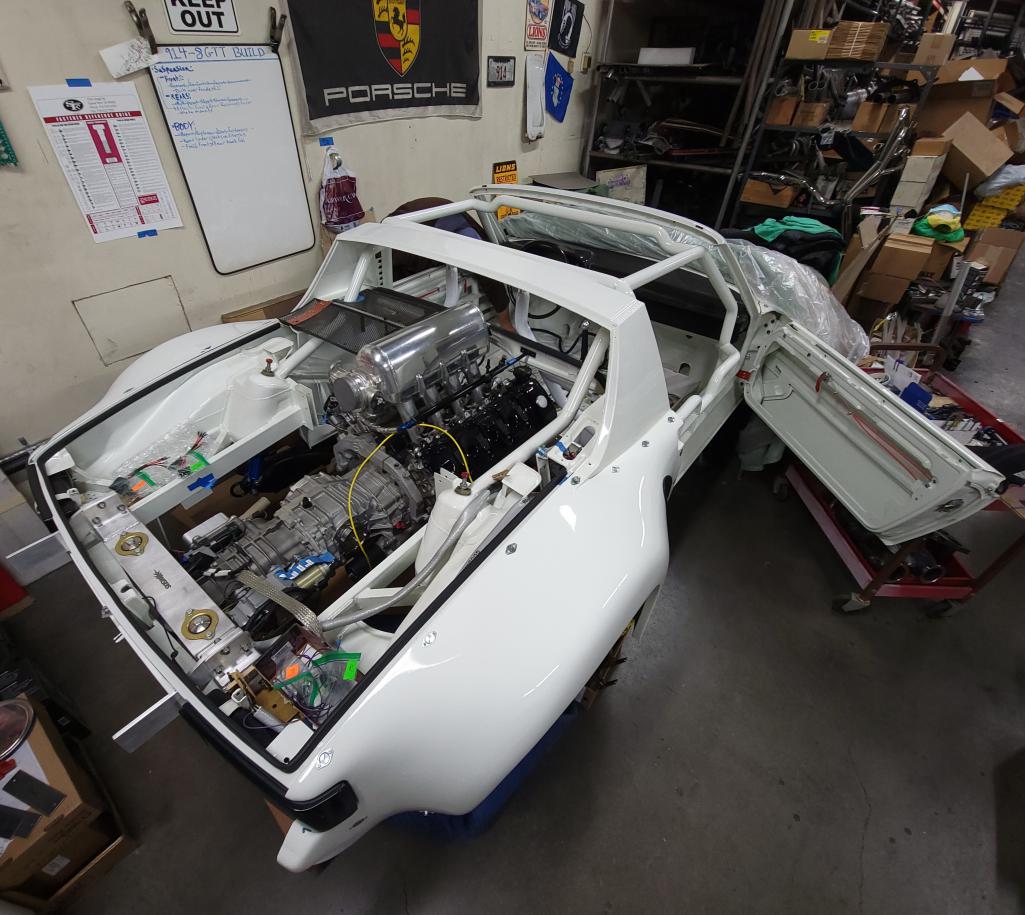
Posted by: NorCalScott Jan 2 2022, 10:31 AM
The car is looking great! It looks like it's getting sooooo close to being done. I can't wait. Thanks for the pics.
Posted by: krazykonrad Jan 2 2022, 03:57 PM
I love watching this build. All the best for 2022!
Konrad
Posted by: Maltese Falcon Jan 2 2022, 08:48 PM
That's it for Sunday !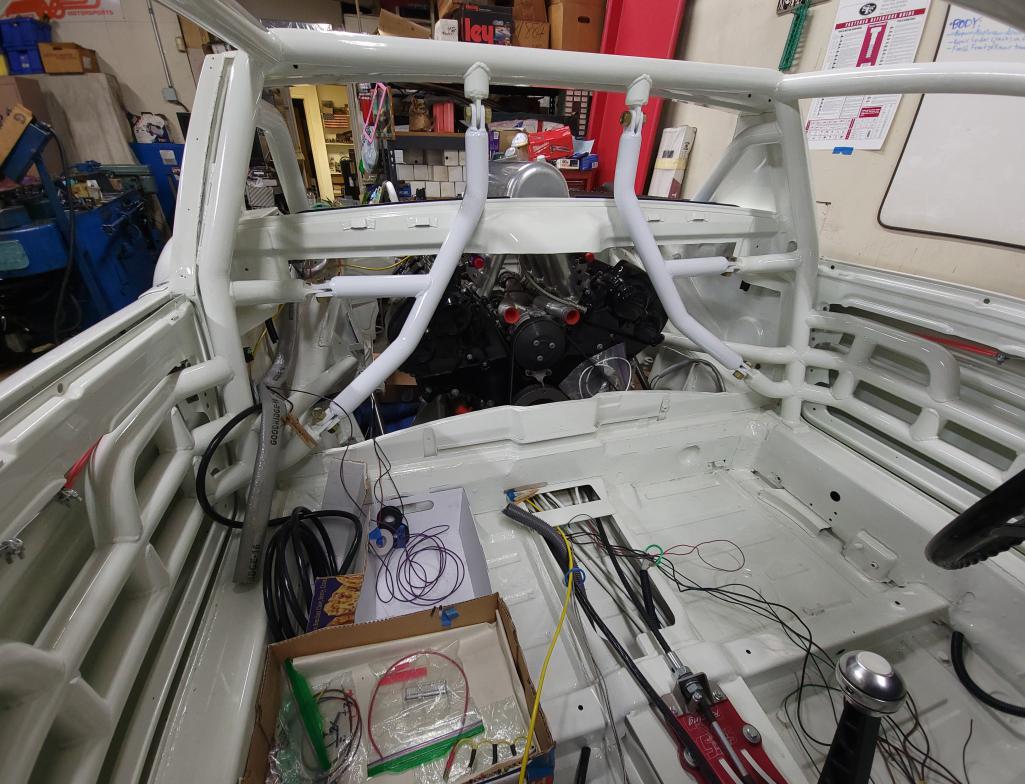
Posted by: NorCalScott Jan 3 2022, 08:36 AM
It's still a little surprising to see the V8 essentially fit in the same space as the flat 4. It doesn't even look like the motor is crammed up against the firewall or the transaxle is moved back to make more room for the motor.
Posted by: Maltese Falcon Jan 3 2022, 11:27 AM
@http://www.914world.com/bbs2/index.php?showuser=25173 Yes it is a tight fit in there, we worked with our friends Aasco in OC, Calif for the mating of Transaxle + engine. They came up with the billet 19mm thick adapter plate, which didn't cause much loss of space (towards rear of trunk). They also engineered the clutch pack and hydraulic T/O/B. There will still be some angle to the cv's, but we have sourced spec built joints + axles to deal with that.
Posted by: Curbandgutter Jan 3 2022, 07:11 PM
WOW Marty looking amazing!!! That thing is going to be brutal. Twin Turbo V8 damn!!!
Posted by: NorCalScott Jan 3 2022, 07:18 PM
@http://www.914world.com/bbs2/index.php?showuser=25173 Yes it is a tight fit in there, we worked with our friends Aasco in OC, Calif for the mating of Transaxle + engine. They came up with the billet 19mm thick adapter plate, which didn't cause much loss of space (towards rear of trunk). They also engineered the clutch pack and hydraulic T/O/B. There will still be some angle to the cv's, but we have sourced spec built joints + axles to deal with that.
Since we're on the subject. What's your opinion on axle angle? I've read places that these CV joints work perfectly well with angles of 15 degrees and maybe even more. If you look at sand rails, that appears to be true. Some say the angle encourages lubrication. If you could, would you run zero angle? Seems like the natural movement of the suspension would be enough to move the grease around in the CV joint. Also, I've read that it's not a good idea to run plunge CV joints on both the inner and outer locations. That it's better to have either the inner or outer CV a fixed/non-plunging CV to prevent the axle from floating inward and outward as it rotates.
Posted by: Maltese Falcon Jan 3 2022, 09:56 PM
@http://www.914world.com/bbs2/index.php?showuser=25173 the c/v joint lube that we are using is Dupont Krytox...and operates between -34° to 288°c., also resistant to "Caking up". Our 300m alloy axles are mfg without the inner-bump (as o.e.) which allow the axles the ability to free float. Also at the end (clip area) we are not use standard Circlip.
Instead we use the (SwayAway) provided Spiral clip.
Given the operating angles we will encounter, plunging c/v's at both ends. Full suspension drop has the rear axle "Droop" at minimum...no where near a standard (long travel) 914 suspension. The drop is just enough to remove tires when up on the airjacks. JRZ makes these Limit adjustments internally in their (nitrogen) shocks.
Posted by: jd74914 Jan 3 2022, 10:23 PM
Have you used Krytox before as CV lube? Just wondering. I’m a huge fan of the stuff (I used to have a free supply of ‘expired’ Krytox courtesy of NASA regulations) and have used it everywhere from skateboard bearings to pipe threads to bike bottom brackets, but never thought above CVs.
Posted by: Maltese Falcon Jan 3 2022, 11:14 PM
@http://www.914world.com/bbs2/index.php?showuser=1659 Jim, yes I was informed of this lubricant by 2 of the race shops I've been associated with. They found out about it through their Indy car friends, and use it for their Porsche IMSA clients c/v joints. Yes it is Mil-Spec and pricey...good that you can get it (out of date) cheap ! For us car guys >>just keep it capped up tight, it lasts a long time.
Marty
Posted by: jd74914 Jan 4 2022, 03:25 PM
That's pretty cool!
A tube does go a long way.
Posted by: NorCalScott Jan 4 2022, 05:17 PM
@http://www.914world.com/bbs2/index.php?showuser=1659 Jim, yes I was informed of this lubricant by 2 of the race shops I've been associated with. They found out about it through their Indy car friends, and use it for their Porsche IMSA clients c/v joints. Yes it is Mil-Spec and pricey...good that you can get it (out of date) cheap ! For us car guys >>just keep it capped up tight, it lasts a long time.
Marty
After going down the Krytox internet rabbit hole, I'm curious which formula you use if you don't mind sharing. My guess is the GPL 227.
Posted by: Maltese Falcon Jan 4 2022, 06:07 PM
#K-24115
Attached thumbnail(s)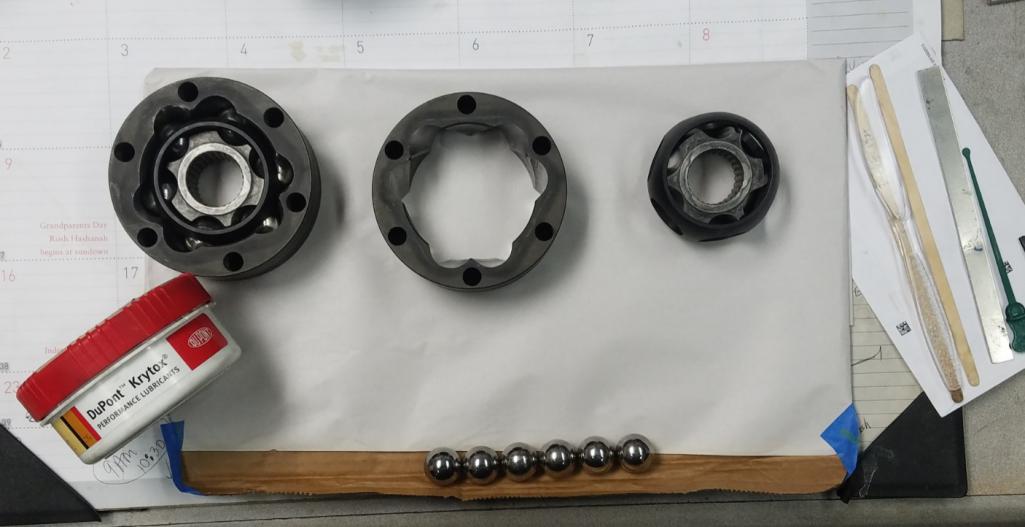
Posted by: NorCalScott Jan 6 2022, 01:23 PM
Thanks. I didn't even see that one in my research. There are too many. But judging by prices, that little tub must be $$$$$.
Posted by: Maltese Falcon Jan 6 2022, 06:16 PM
Thanks. I didn't even see that one in my research. There are too many. But judging by prices, that little tub must be $$$$$.
You can lube 8 joints with that 1) tub...@ $210.00 (2019 price)
So...not that expensive for the right stuff
Posted by: NorCalScott Jan 6 2022, 06:49 PM
Thanks. I didn't even see that one in my research. There are too many. But judging by prices, that little tub must be $$$$$.
You can lube 8 joints with that 1) tub...@ $210.00 (2019 price)
So...not that expensive for the right stuff
I can definitely see why people pay the extra for it after reading some of the testimonials on various forums. Expensive grease, but cheap insurance in the racing world.
Posted by: ClayPerrine Jan 7 2022, 02:39 PM
Thanks. I didn't even see that one in my research. There are too many. But judging by prices, that little tub must be $$$$$.
You can lube 8 joints with that 1) tub...@ $210.00 (2019 price)
So...not that expensive for the right stuff
I can definitely see why people pay the extra for it after reading some of the testimonials on various forums. Expensive grease, but cheap insurance in the racing world.
Everything goes smoother with good lube.
Can we buy some of the expired stuff from you?
Clay
Posted by: Maltese Falcon Jan 7 2022, 10:39 PM
@http://www.914world.com/bbs2/index.php?showuser=1143 I'll shoot you a PM this weekend !
Posted by: Maltese Falcon Feb 13 2022, 06:06 PM
While I've been pulling wires + cables, these are the 2 pressure switches (lower) for Low o/p Big Red light; the other (upper) for Fasten seat belt light...which starts illuminating at 7 psi boost.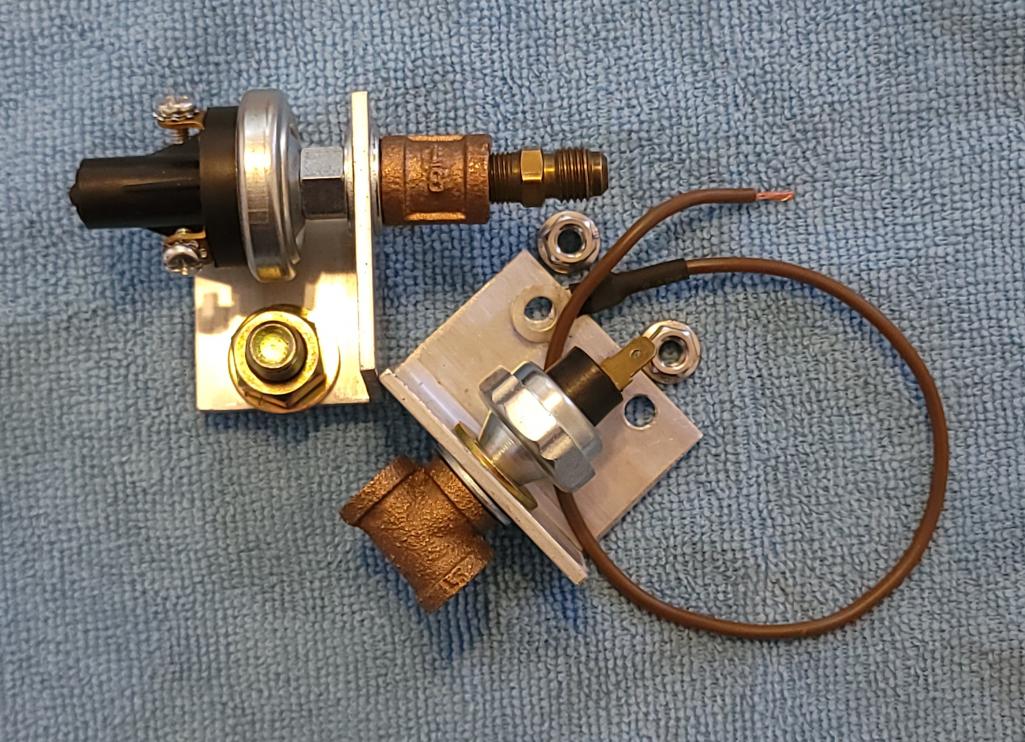
Posted by: Maltese Falcon Feb 13 2022, 06:11 PM
Low o/p Red light (gear selection indicator just opposite), and Fasten seat belt light in the stock location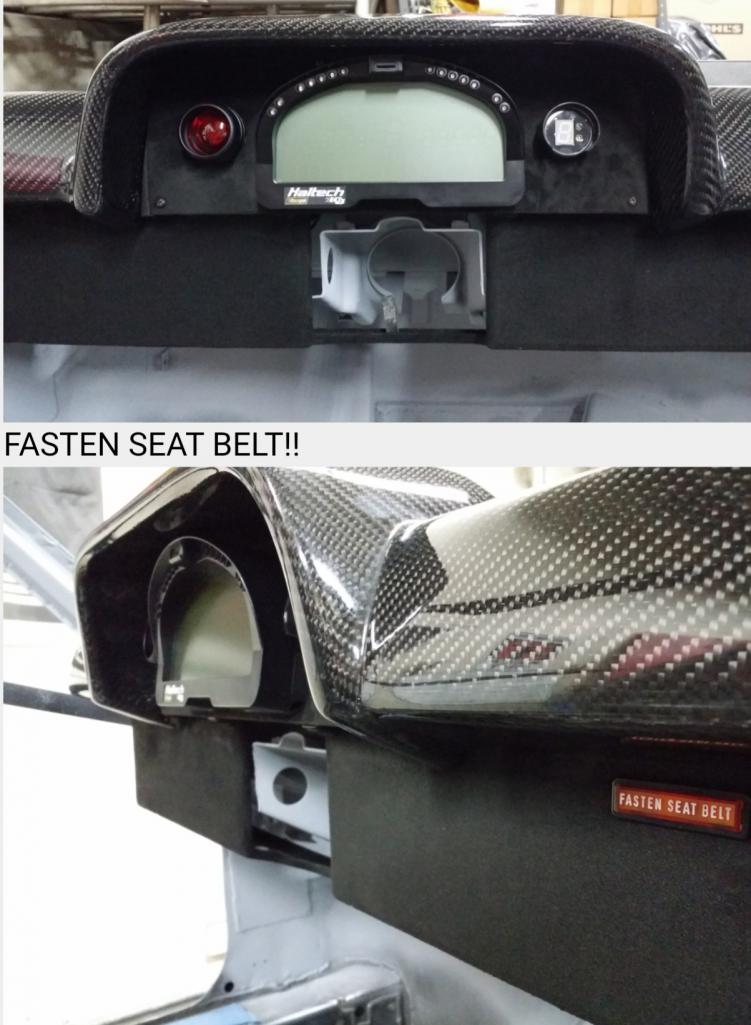
Posted by: sixnotfour Feb 13 2022, 08:02 PM
Cllasshttps://www.aircraftspruce.com/catalog/hapages/teefitting2.php build.. those ??
https://www.aircraftspruce.com/catalog/hapages/teefitting2.php
Posted by: Maltese Falcon Feb 13 2022, 09:45 PM
@http://www.914world.com/bbs2/index.php?showuser=2744 I keep a good assortment of weatherhead brass 1/8", 1/4", 1/2", 3/4" npt fittings (and flare end) here at the shop for all sorts of air, hydraulic, repairs and projects.
Also have several mfg shops within 4 miles of the shop for all sorts of custom made lines: fluids, hydraulics, or air pressure.
Thx for the linky link !
Posted by: AZBanks Feb 14 2022, 11:33 PM
I like the Cayenne engine but I think this engine would be even better.
https://collectingcars.com/for-sale/1984-mclaren-mp4-2-porsche-tag-f1-engine
Posted by: Maltese Falcon Feb 15 2022, 07:04 AM
@http://www.914world.com/bbs2/index.php?showuser=5245 these folks "Lanzante Limited" already have the McLaren engines stuffed into their small production of the Niki Lauda tribute 930's...but you're correct Very Cool !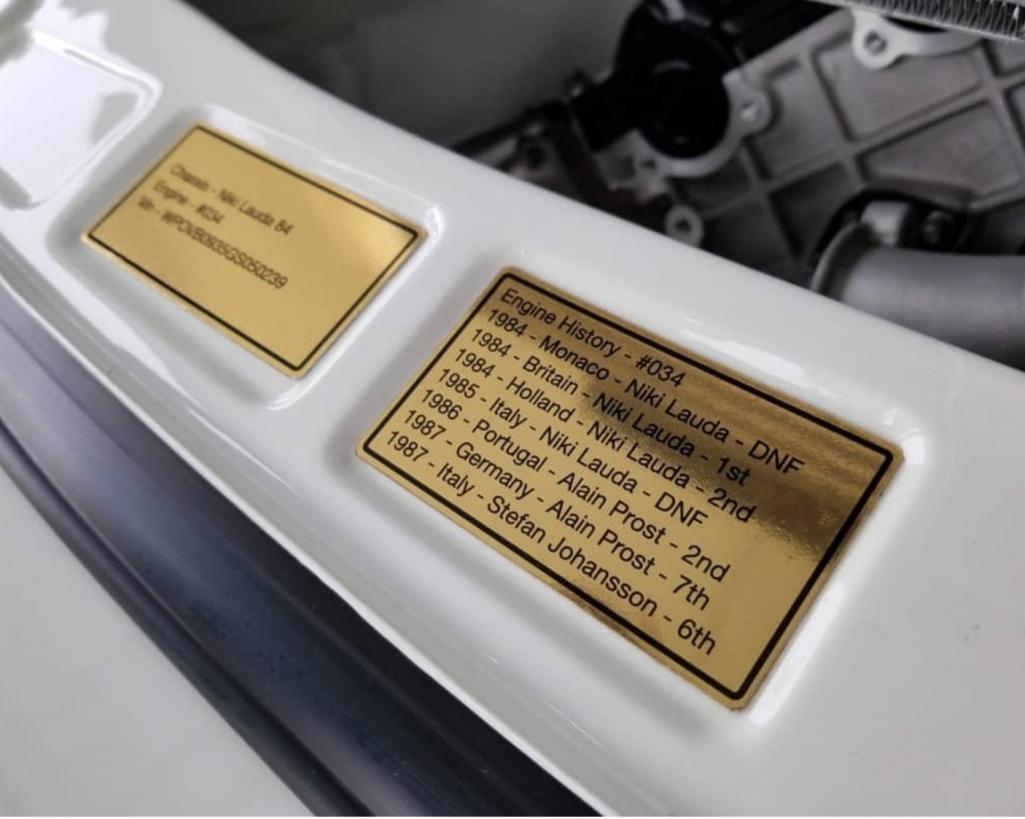
Posted by: Maltese Falcon Feb 15 2022, 07:10 AM
Lanzante Limited exhibit parked directly across from the MSDS / 9148gtt tent at the last Rennsport Reunion 2018.
Did you check these out @http://www.914world.com/bbs2/index.php?showuser=5245 while you were there ¿ 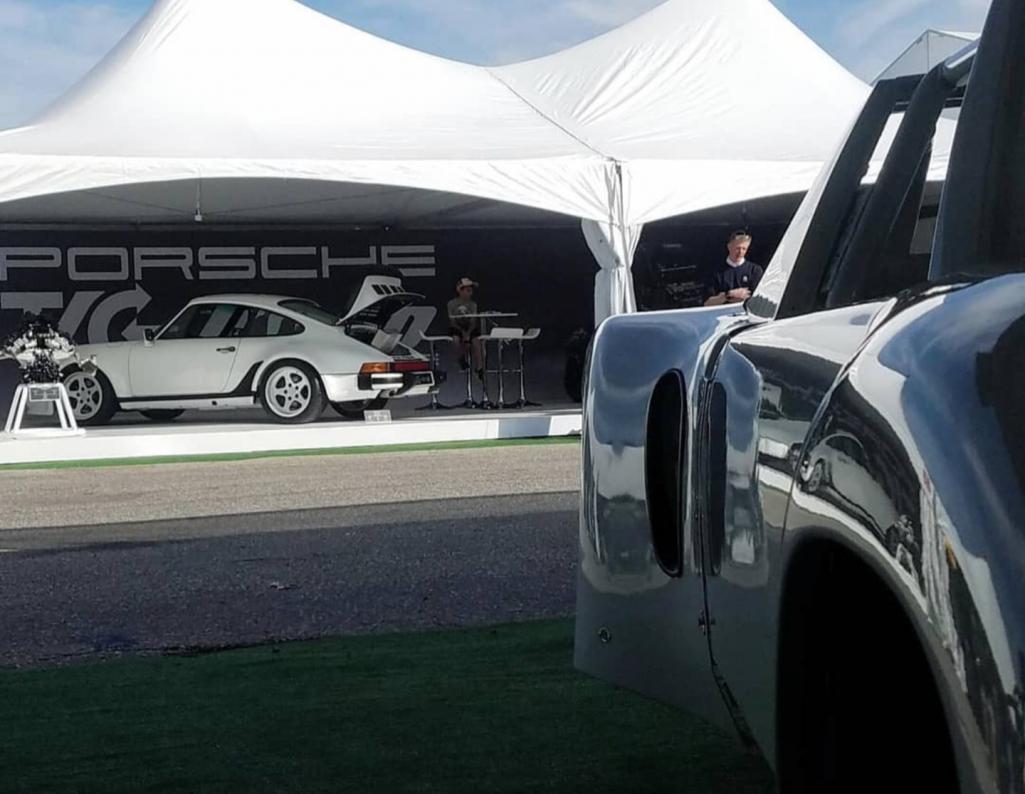
Posted by: JmuRiz Feb 16 2022, 08:27 AM
Looks like there's another engine available for them:
https://www.thedrive.com/news/44237/buy-this-1060-hp-porsche-f1-engine-for-your-holy-grail-swap-project
Posted by: AZBanks Feb 16 2022, 10:26 AM
Lanzante Limited exhibit parked directly across from the MSDS / 9148gtt tent at the last Rennsport Reunion 2018.
Did you check these out @http://www.914world.com/bbs2/index.php?showuser=5245 while you were there ¿
Oh, Yeah, I saw them and fell in love.
Posted by: NorCalScott Feb 16 2022, 07:40 PM
the other (upper) for Fasten seat belt light...which starts illuminating at 7 psi boost.
Posted by: NorCalScott Feb 16 2022, 07:49 PM
@http://www.914world.com/bbs2/index.php?showuser=5245 these folks "Lanzante Limited" already have the McLaren engines stuffed into their small production of the Niki Lauda tribute 930's...but you're correct Very Cool !
That's pretty insane.
Posted by: Maltese Falcon Feb 23 2022, 07:30 PM
Low o/p Light sending unit fits snug, right under the left corner of engine compartment 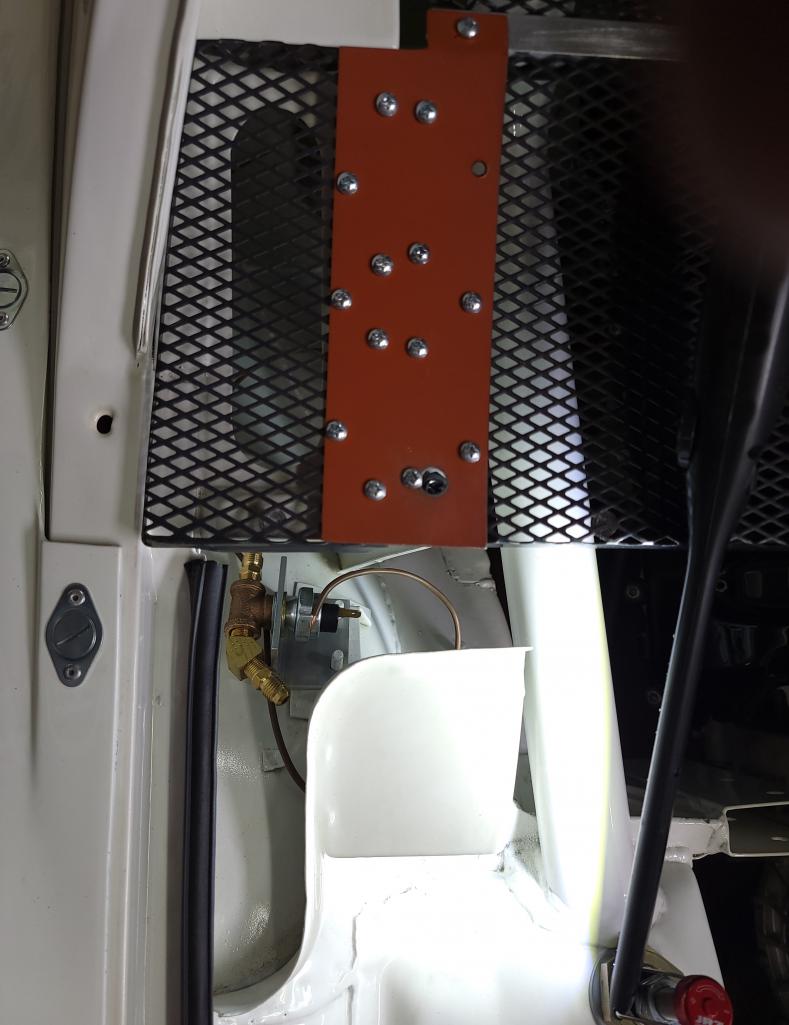
Posted by: NS914 Feb 24 2022, 08:13 PM
Me too...the work is on another level of course but I am truly thankful for all of the posting...your development work and just a ton of ideas are so cool!
Regards, Grant
I just love this build!
Posted by: Maltese Falcon Feb 25 2022, 12:07 AM
Thank you guys @http://www.914world.com/bbs2/index.php?showuser=10455 @http://www.914world.com/bbs2/index.php?showuser=9712 for the good words, this is a fun proj !!
Marty
Posted by: Maltese Falcon Mar 6 2022, 01:03 AM
added another port for 1 more o/p sending unit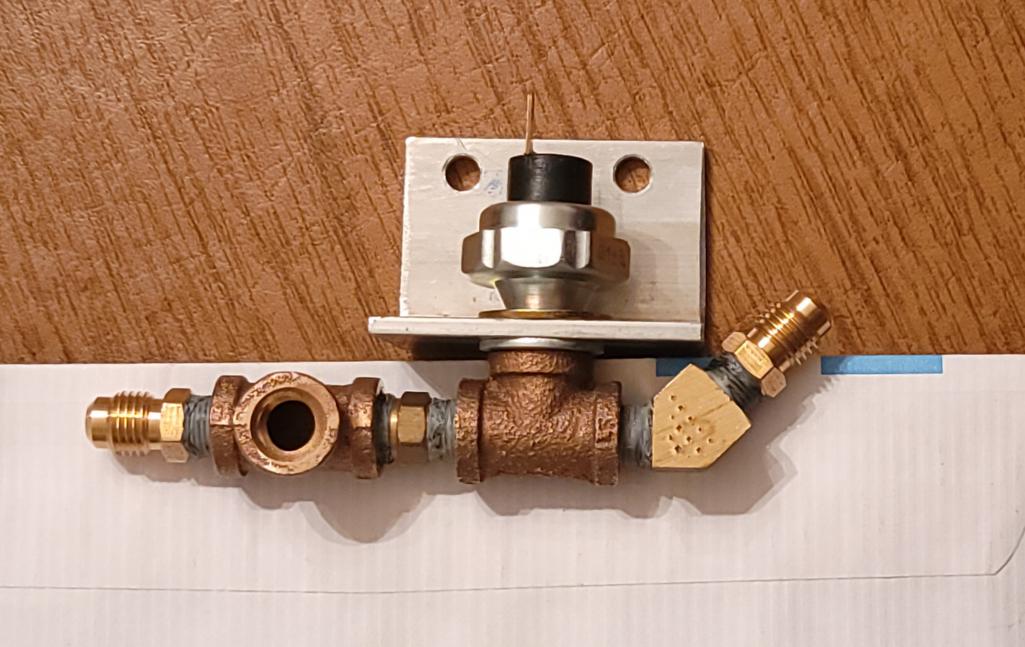
Posted by: Maltese Falcon Mar 6 2022, 01:16 AM
Left and right side oil cooler support brackets in the making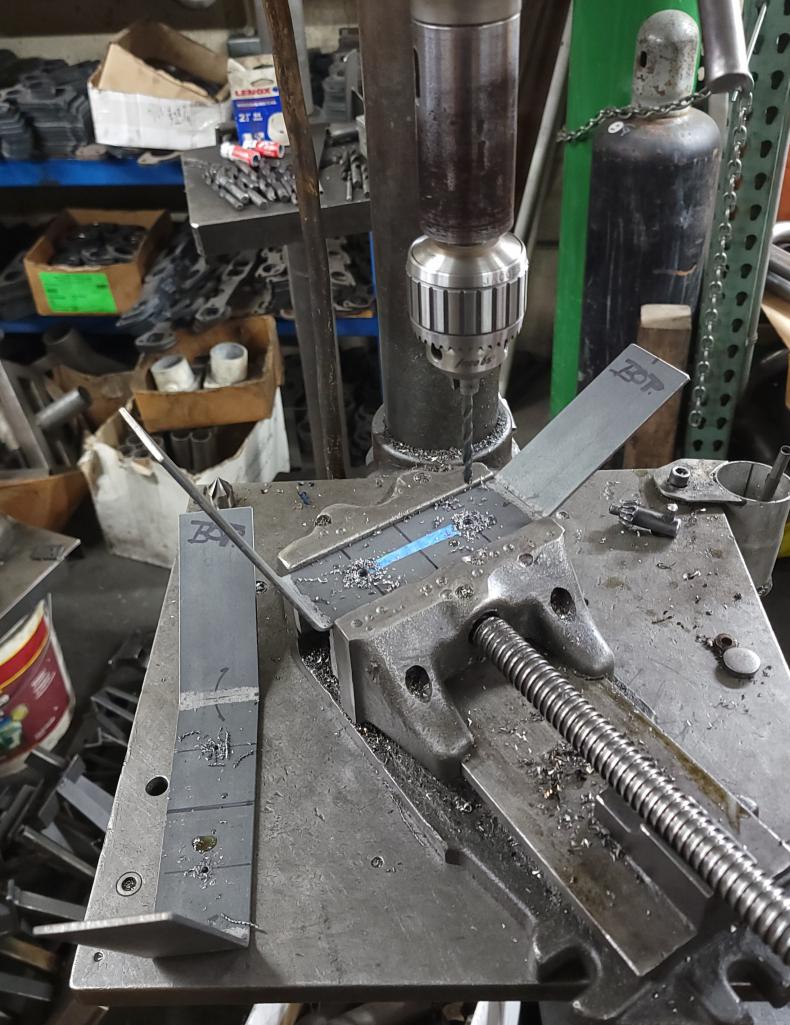
Posted by: Maltese Falcon Mar 13 2022, 06:25 PM
Slipping on the CV boots on to the sway-away axles are a bit of a grunt, so I implemented a few tricks;
a bit of contractors tape covering the sharp splines, well greased 
Posted by: Maltese Falcon Mar 13 2022, 06:35 PM
For the "Push + Twist" a small piece of 10 ga. Insulsted stranded wire (used in construction wiring) coiled around and inserted over the last 2 bellows on the boot. Good point of persuasion & no collapsing (or damage) of the rubber. Note discoloration on the bellows are not cracks...just the mfg "Wax" coming off.
Posted by: Maltese Falcon Mar 13 2022, 07:09 PM
One axle ready for c/v's 
Posted by: rhodyguy Mar 13 2022, 07:13 PM
Cool tricks.
Posted by: Maltese Falcon Mar 28 2022, 05:38 PM
The bigger sending unit will serve the analogue VDO o/p gauge. The Haltech Elite mgmt does have an o/p readout that is on the Racetech IQ3 dash...however I do like a quick glance at an old school gauge
Attached thumbnail(s)
Posted by: Maltese Falcon Mar 28 2022, 05:47 PM
Adding components in and around the engine bay...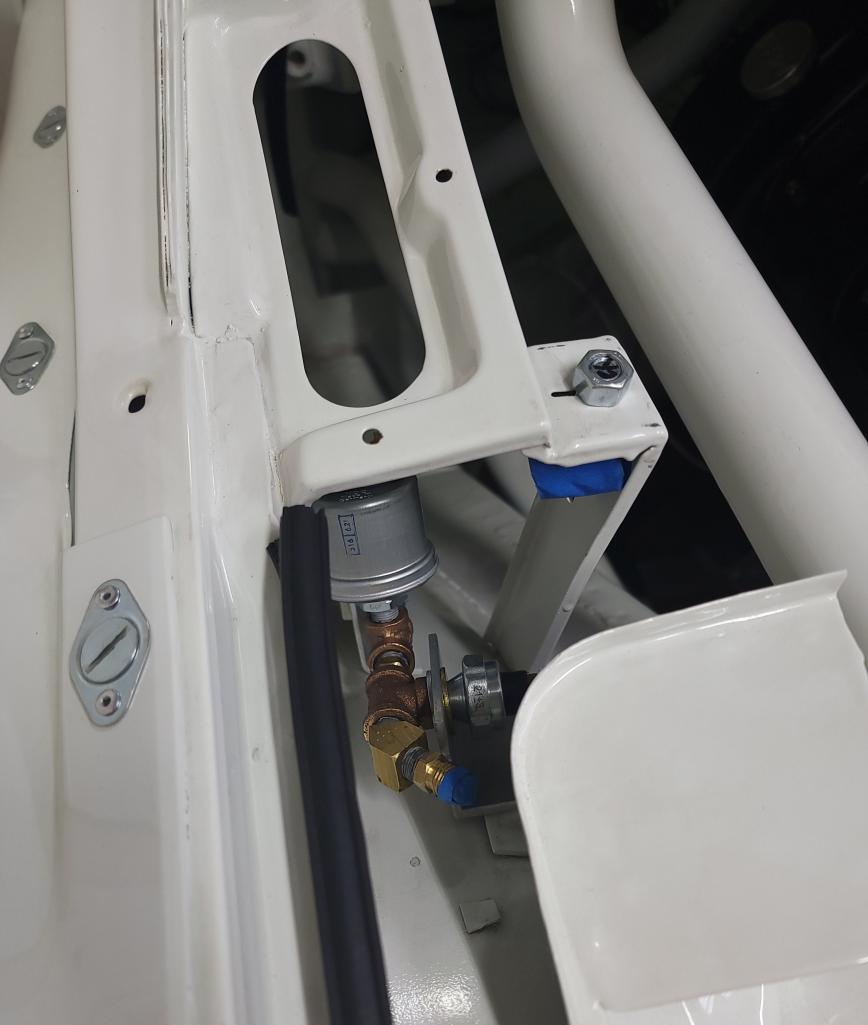
Posted by: krazykonrad Mar 29 2022, 09:50 AM
What are these bolts for? I've never seen a set up like that.
Thanks! 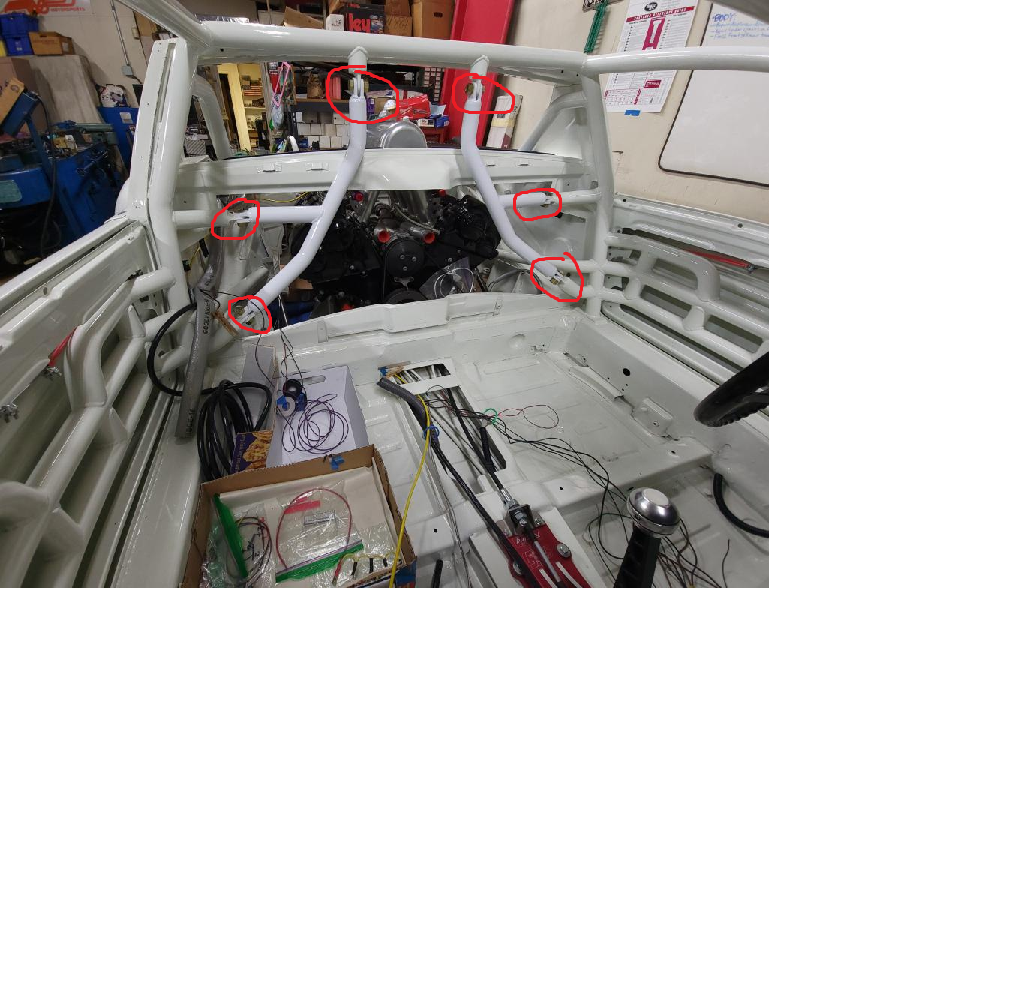
Posted by: BillJ Mar 29 2022, 10:00 AM
Guessing for ease of access to the drivetrain? Removal and reinstall?
Posted by: Maltese Falcon Mar 29 2022, 06:21 PM
@http://www.914world.com/bbs2/index.php?showuser=5610 @http://www.914world.com/bbs2/index.php?showuser=15610 when we took our LBP engine measurements directly off of their built Cayenne v8 engines in their shop, the specs were based on their (flush) c/f cam housing covers [see yellow dots]. The absence of variable cam timing in their Daytona-spec engines was dictated by GCR's of 2010, so they didn't use the OE alum housings (with a bump-out contour). Our engine also features non-vario cam, but they just deactivate and lock them down during the engine build. When our engine shipment arrived we then found out that we didn't get the (very cool) c/f cam covers...but already built the interior cage to the specs of the flush c/f covers = interference once we tried to land the engine in there.
So we re-engineered, newly mandrel formed, then tiG'd the new bolt-in portion of the cage (at the firewall)...which will allow us more access to service the engine.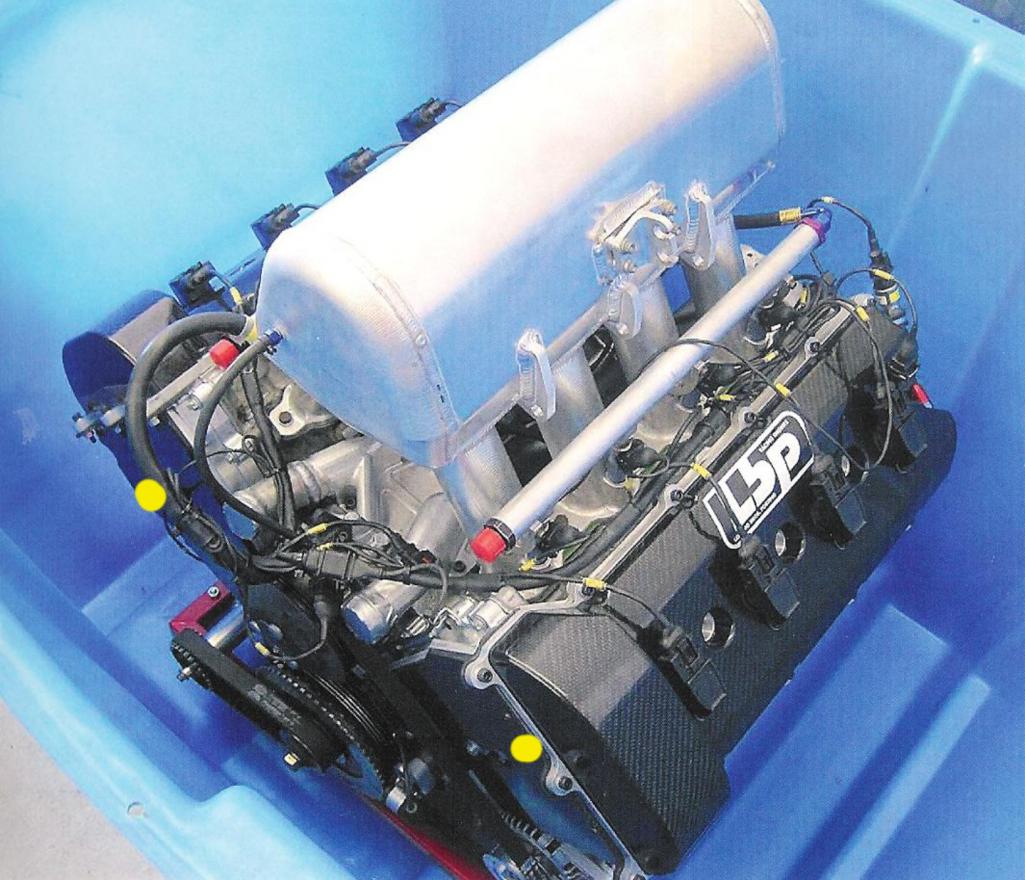
Posted by: Maltese Falcon Mar 29 2022, 06:30 PM
LBP v8 engine that was built for us arrived with these OE style cam cover housings. Yellow dots show the difference (from prev post) now with extra protrusions (vario cam style), that we had to deal with...redesigning a portion of the cage. 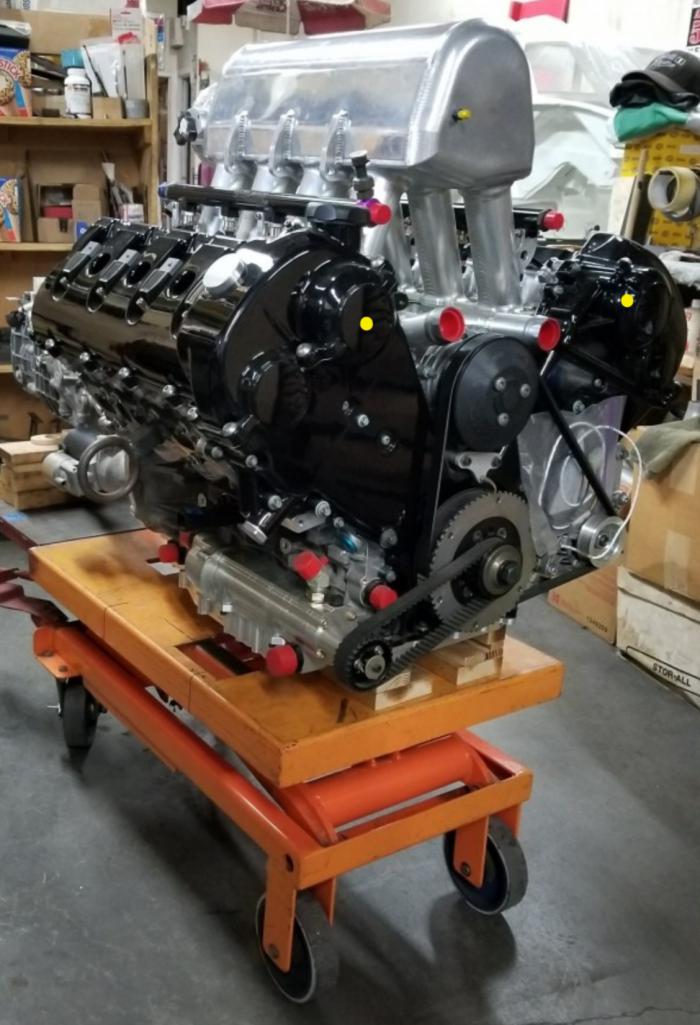
Posted by: BillJ Mar 29 2022, 10:04 PM
That engine is one slick looking piece of hardware. Love the engineering in this build been watching since inception.
Posted by: Maltese Falcon Mar 30 2022, 09:49 AM
thank you @http://www.914world.com/bbs2/index.php?showuser=15610 !
Posted by: Maltese Falcon Apr 3 2022, 04:08 PM
The "7psi boost" Fasten seat belt pressure switch bolted into the engine bay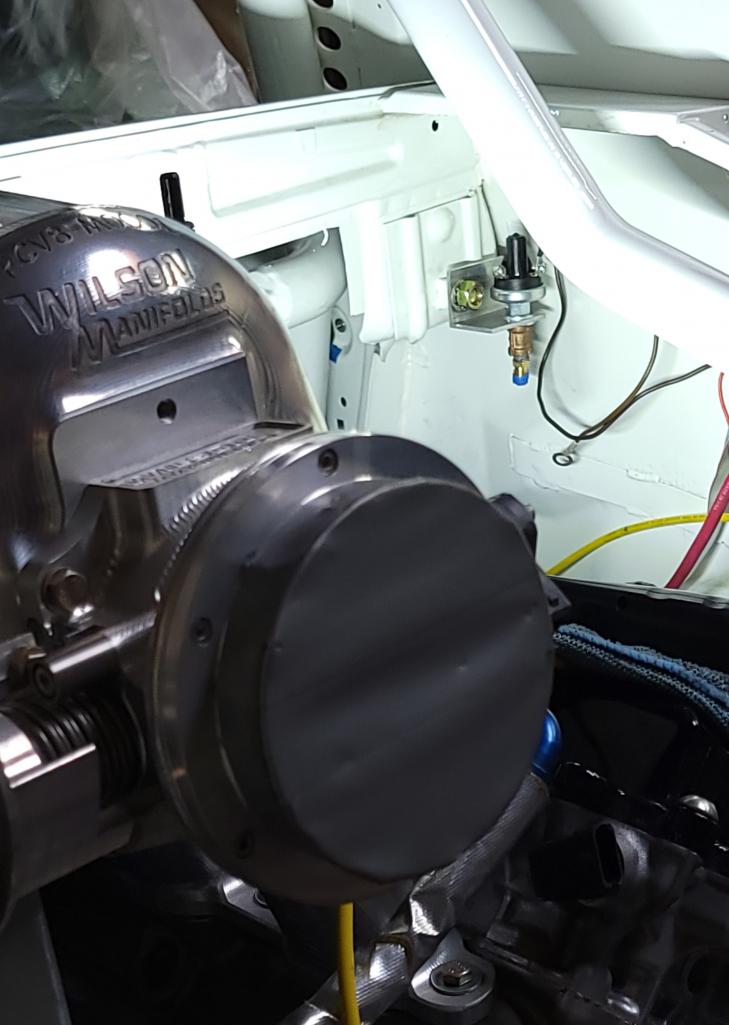
Posted by: Maltese Falcon Apr 13 2022, 06:26 PM
Setting up the "Phasing" of the 930 cv joints + Swayaway axles prior to installing them. A piece of .125 × 1" flatbar alum is the donor straight edge for the job. I use 1 gold dot= to indicate narrow area of the (inner) joint / 2 gold dots= wider area.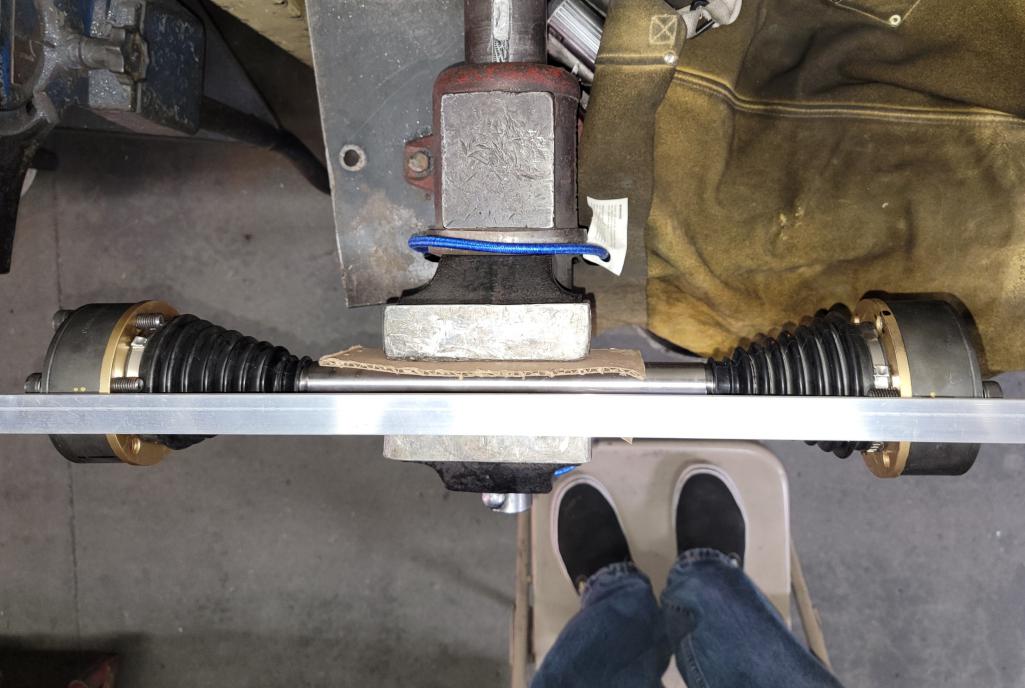
Posted by: NorCalScott Apr 14 2022, 10:23 AM
Setting up the "Phasing" of the 930 cv joints + Swayaway axles prior to installing them. A piece of .125 × 1" flatbar alum is the donor straight edge for the job. I use 1 gold dot= to indicate narrow area of the (inner) joint / 2 gold dots= wider area.
I didn't know that was a thing. Can you please explain a little more? Why it's done? How it's done? Thanks!
Posted by: Dave_Darling Apr 14 2022, 01:27 PM
The "how" is pretty obvious. When you assemble the CV joints, you mark the outside where the wider and narrower gaps in the inner race. Then when you slide the joint onto the splines on the shaft, you make sure they are lined up so that the one side wide gap lines up with the other side's narrow gap.
As to "why", that I don't know. I speculate that it's a vibration-elimination kind of thing, like phasing the U-joints on a driveshaft. But CV joints aren't supposed to need that--it's one of the reasons for using CV joints, after all.
What's the real reason, Marty?
--DD
Posted by: NorCalScott Apr 14 2022, 05:47 PM
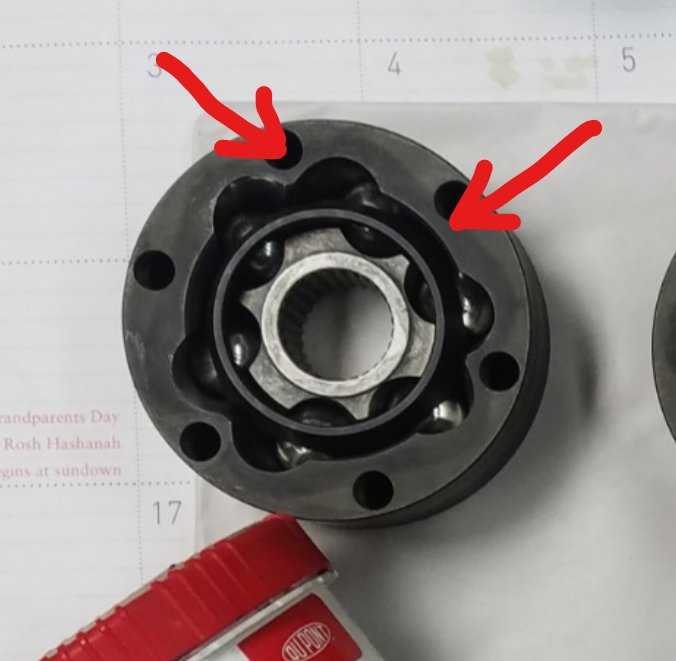 Are these the narrow and wide gaps you're referring to?
Posted by: NorCalScott Apr 14 2022, 05:55 PM
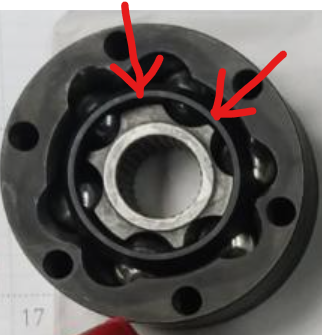 or these? which essentially is the same thing as long they're opposite each other I guess.
Posted by: Maltese Falcon Apr 14 2022, 06:37 PM
Are these the narrow and wide gaps you're referring to?@http://www.914world.com/bbs2/index.php?showuser=121 Correct on the Wide and Narrow areas towards the outer portion of cv housing, for this "Phase" procedure. Most cv joint (stock operational angles) do not require this set up, but can't hurt to set up this way. The 930 joints (housing, cage + ball bearings) that I'm using are referred to as Deep-plunging and will operate at higher than stock angles. With the Phasing, I will gain another +3° to 4° of range, over the operational range of 15+°. The more-than-desired axle angles are created by the drive-flange locations of the "Flipped" 996gt2 transaxle, and me not wanting to lower it closer to the ground.
Same type of cv's are in use on 1,000+hp LS v8 sand rails...these are sourced from McKenzies Offroad in OC, California. Several Youtubes are online with DIY's for 930/ 934 cv joint phasing.
Posted by: NorCalScott Apr 15 2022, 10:39 AM
Are these the narrow and wide gaps you're referring to?@http://www.914world.com/bbs2/index.php?showuser=121 Correct on the Wide and Narrow areas towards the outer portion of cv housing, for this "Phase" procedure. Most cv joint (stock operational angles) do not require this set up, but can't hurt to set up this way. The 930 joints (housing, cage + ball bearings) that I'm using are referred to as Deep-plunging and will operate at higher than stock angles. With the Phasing, I will gain another +3° to 4° of range, over the operational range of 15+°. The more-than-desired axle angles are created by the drive-flange locations of the "Flipped" 996gt2 transaxle, and me not wanting to lower it closer to the ground.
Same type of cv's are in use on 1,000+hp LS v8 sand rails...these are sourced from McKenzies Offroad in OC, California. Several Youtubes are online with DIY's for 930/ 934 cv joint phasing.
Thanks Dave! Makes sense and I'll check it out on YT. I had never heard of this before. One other thing I've heard is that plunging CV joints shouldn't be used on both the inner AND outer locations because the axle can tend to move inward and outward constantly, which is implied to be a bad thing, but it sounds like Marty and yourself aren't using a fixed CV joint at all and it's perfectly fine.
Posted by: NorCalScott May 26 2022, 01:17 PM
I went back through this build thread again looking for pics of the pedals you're using, but couldn't find anything. Did I miss it or have you not posted anything on that yet? Just curious what pedal setup and master cylinders you're using. Not boosted I assume?
Posted by: Maltese Falcon May 26 2022, 07:04 PM
I went back through this build thread again looking for pics of the pedals you're using, but couldn't find anything. Did I miss it or have you not posted anything on that yet? Just curious what pedal setup and master cylinders you're using. Not boosted I assume?
Here's the inventory* on the Tilton foot-pedal equip. It's all floor mount and I've made a few changes to the uneven 914 floorboard= will make for a better install/ operation. Not a vac boosted brake system.
The 3 different size (bores) master cylinders are matched for the requirements of the brakes; Front (6 piston), Rear (4 piston), and clutch.
*Pegasus Racing is my go to place*
So it's on the To-Do list...but all sourced !
Posted by: NorCalScott May 27 2022, 01:48 PM
Cool. Nice setup. This has been my favorite build since discovering it a few years ago. It's looking awesome, can't wait to see it with wheels and tires at ride height. It's going to look freakin amazing! Thanks for sharing!
Posted by: Maltese Falcon Jul 9 2022, 03:09 PM
The new (custom hand made) main vehicle electrical harness is about ½ way wired. Haltech Elite 2500 ecu/mgmt harness is done and its installation will follow up after this is done.
Posted by: Maltese Falcon Aug 14 2022, 06:41 PM
Non stop wiring...so this is small bracket that I came up with; keeps the crank trigger (small white) coax cable from running up into the alternator pulley/or belt. The #16 Goodridge firesleeve contains: the trigger cable, a couple grounds, the B+ charging cable* from alt to battery.
*B+ using a HD silicon insulated cable combined with another anti chaffe insulater inside the Goodridge...gotta be safe !
Posted by: tazz9924 Aug 14 2022, 11:36 PM
When you say trigger wire, is that for the alternator or crank?
Posted by: Maltese Falcon Aug 15 2022, 08:19 AM
@http://www.914world.com/bbs2/index.php?showuser=18779 crank trigger, follow the white cable 
Posted by: tazz9924 Aug 16 2022, 07:18 AM
Some times high current wires like the main alternator wire can mess with the crank signal. Im not an expert, but i think a lot of times the cam and crank sort of get their own harness to prevent interference.
Posted by: tygaboy Aug 16 2022, 08:16 AM
So long as the sensors run shielded cable, properly grounded, they should be good in terms of draining any noise. I can't read the product lableing on that white wire (other than "Made in USA") but it certainly looks like the proper stuff. I'm betting Marty has this covered...
Posted by: Maltese Falcon Aug 16 2022, 09:48 AM
@http://www.914world.com/bbs2/index.php?showuser=19241 @http://www.914world.com/bbs2/index.php?showuser=18779 thanks for looking out for me...good to have the "World's eyes" here for constructive critique !
Yes the coax shielding on the Haltech Elite (white trigger cable) is grounded at both ends of its run + I'll also check in with their tech nearby in Lake Forest.
If needed this small 18" run can be pulled out of the firesleeve in a minute + run independent
Posted by: jd74914 Aug 16 2022, 11:23 AM
@http://www.914world.com/bbs2/index.php?showuser=19241 @http://www.914world.com/bbs2/index.php?showuser=18779 thanks for looking out for me...good to have the "World's eyes" here for constructive critique !
Yes the coax shielding on the Haltech Elite (white trigger cable) is grounded at both ends of its run + I'll also check in with their tech nearby in Lake Forest.
If needed this small 18" run can be pulled out of the firesleeve in a minute + run independent
Grounded at both ends is usually not a good idea due to potential for ground loops. I typically lift at the sensor end.
Posted by: tygaboy Aug 16 2022, 12:18 PM
You only want it grounded at one end. In my application, there's a pin in the ECU for all sensor grounds. Good move to verify with your ECU mfg it's set up correctly.
Posted by: Maltese Falcon Aug 16 2022, 11:14 PM
You only want it grounded at one end. In my application, there's a pin in the ECU for all sensor grounds. Good move to verify with your ECU mfg it's set up correctly.
Def need to chat with Haltech techs; Elite 2500 schematic says [A] ground all coax shields to chassis (-) at both ends. Further in the instructions it only mentions [B] grounding as close as possible near the ecu. Can I get a break
from redundant instructions ¿¿ I'll go with [B] ...sounds like what you're saying @http://www.914world.com/bbs2/index.php?showuser=19241 ?Marty
Posted by: tygaboy Aug 17 2022, 08:10 AM
You only want it grounded at one end. In my application, there's a pin in the ECU for all sensor grounds. Good move to verify with your ECU mfg it's set up correctly.
Def need to chat with Haltech techs; Elite 2500 schematic says [A] ground all coax shields to chassis (-) at both ends. Further in the instructions it only mentions grounding as close as possible near the ecu. Can I get a break
from redundant instructions ¿¿ I'll go with [B] ...sounds like what you're saying [b]@http://www.914world.com/bbs2/index.php?showuser=19241 ?Marty
Marty - Yep, I would chat w/Haltech and verify. I don't have any experience w/them but they make good stuff, so... I'd simply mention that you've heard folks mention ground loops, grounded only at the ECU, etc. and see what they say. Not to challenge them, just to ask that they verify how you've built your harness.
As you well know, this is all part of the fun of custom built stuff! Rock ON!
We need to see this crazy contraption fired up!!!
Posted by: erwan914 Aug 31 2022, 05:55 AM
A little too much "Droop" in the rear JRZ shock assemblies, so a bit of time spent down at ERP suspension. We took 1.75" out of the equation, so this allows the air-jacks to operate at max, and the rear tires now clear the tarmac. Fronts were spot on--no changes needed.
hello
how many LBS are the springs ?
erwan
Posted by: erwan914 Aug 31 2022, 05:56 AM
A little too much "Droop" in the rear JRZ shock assemblies, so a bit of time spent down at ERP suspension. We took 1.75" out of the equation, so this allows the air-jacks to operate at max, and the rear tires now clear the tarmac. Fronts were spot on--no changes needed.
hello
how many LBS are the springs ? shocks rear
erwan
Posted by: Maltese Falcon Aug 31 2022, 11:52 AM
@http://www.914world.com/bbs2/index.php?showuser=14834 I'll be back under 8gtt and check the ID stamps on the springs, then decode with H+R = the spring rates. There is a main, and a smaller spring (stacked together) on each JRZ rear shock.
Posted by: horizontally-opposed Sep 1 2022, 08:27 AM
That engine is one slick looking piece of hardware. Love the engineering in this build been watching since inception.
I remember the first glimpse of this V8's plenum in a DP, and the thought that followed: "Yep, allll business."
Still loving this thread.
Posted by: Maltese Falcon Sep 6 2022, 12:07 PM
@http://www.914world.com/bbs2/index.php?showuser=14834
Springs are Eibach / supplied by Tarett Engineering
Rear rate: 450 lbs each
Front rate: 350 lbs each
Small black assist Springs = no spring rating value
Posted by: Maltese Falcon Sep 6 2022, 12:11 PM
That engine is one slick looking piece of hardware. Love the engineering in this build been watching since inception.
I remember the first glimpse of this V8's plenum in a DP, and the thought that followed: "Yep, allll business."
Still loving this thread.
The plenums were mfg by Wilson manifolds on a limited run. There were a couple of Riley DP's up for sale over Monterey car week; however these were both GM LS/series v8 powered. Action Express Riley's are tucked away in someone's collection

Posted by: NorCalScott Oct 9 2022, 03:48 PM
[quote name='Maltese Falcon' date='May 26 2022, 07:04 PM' post='3004396']
[/quote]
Here's the inventory* on the Tilton foot-pedal equip. It's all floor mount and I've made a few changes to the uneven 914 floorboard= will make for a better install/ operation. Not a vac boosted brake system.
The 3 different size (bores) master cylinders are matched for the requirements of the brakes; Front (6 piston), Rear (4 piston), and clutch.
*Pegasus Racing is my go to place*
So it's on the To-Do list...but all sourced !
[/quote]
Will you be using a throttle cable or DBW? If DBW, what APP sensor are you using?
Posted by: Maltese Falcon Oct 10 2022, 06:59 AM
@http://www.914world.com/bbs2/index.php?showuser=25173 the accelerator assembly to the throttle bellcrank is mechanical; using a custom mfg cable by "Cable Control Co.", Santa Fe Springs, CA.
They also made my custom length SQS shifter cable.
Posted by: NorCalScott Oct 10 2022, 11:25 AM
@http://www.914world.com/bbs2/index.php?showuser=25173 the accelerator assembly to the throttle bellcrank is mechanical; using a custom mfg cable by "Cable Control Co.", Santa Fe Springs, CA.
They also made my custom length SQS shifter cable.
Ok, thanks, is there a particular reason why you didn't go with DBW? I'm just curious why some people prefer one over the other.
Posted by: Maltese Falcon Oct 10 2022, 05:46 PM
@http://www.914world.com/bbs2/index.php?showuser=25173 the accelerator assembly to the throttle bellcrank is mechanical; using a custom mfg cable by "Cable Control Co.", Santa Fe Springs, CA.
They also made my custom length SQS shifter cable.
Ok, thanks, is there a particular reason why you didn't go with DBW? I'm just curious why some people prefer one over the other.
From my experience owning a daily driver (Ford 5.4L Triton v8) with e-throttle; I would not use the system on a high powered track car. When I've had an e-throttle malfunction (3 already on the Ford) , the engine shuts down momentarily into idle /then dead. I can put up with 70 mph on a freeway to coasting into limp mode > making my way to the right shoulder ( honking from dumb motorists and all), then waiting for a flatbed tow for 3 hours; but hauling the mail around a racetrack and having this occur would (dangerously) ruin my day.
The QC and stranded cables that I source from "Cable Control" are less than $100.00...the average that I pay for an e-throttle is $725.00 installed.
Posted by: NorCalScott Oct 11 2022, 11:24 AM
@http://www.914world.com/bbs2/index.php?showuser=25173 the accelerator assembly to the throttle bellcrank is mechanical; using a custom mfg cable by "Cable Control Co.", Santa Fe Springs, CA.
They also made my custom length SQS shifter cable.
Ok, thanks, is there a particular reason why you didn't go with DBW? I'm just curious why some people prefer one over the other.
From my experience owning a daily driver (Ford 5.4L Triton v8) with e-throttle; I would not use the system on a high powered track car. When I've had an e-throttle malfunction (3 already on the Ford) , the engine shuts down momentarily into idle /then dead. I can put up with 70 mph on a freeway to coasting into limp mode > making my way to the right shoulder ( honking from dumb motorists and all), then waiting for a flatbed tow for 3 hours; but hauling the mail around a racetrack and having this occur would (dangerously) ruin my day.
The QC and stranded cables that I source from "Cable Control" are less than $100.00...the average that I pay for an e-throttle is $725.00 installed.
I see. Thanks Marty.
Posted by: Maltese Falcon Oct 20 2022, 11:51 PM
Moving into the forced induction segment of this build, just received the shorty headers back from Ceramic shop; we are using hi-temp satin black coatings on the entire exhaust system.
Both left and right sides header collectors have an O2 and egt port.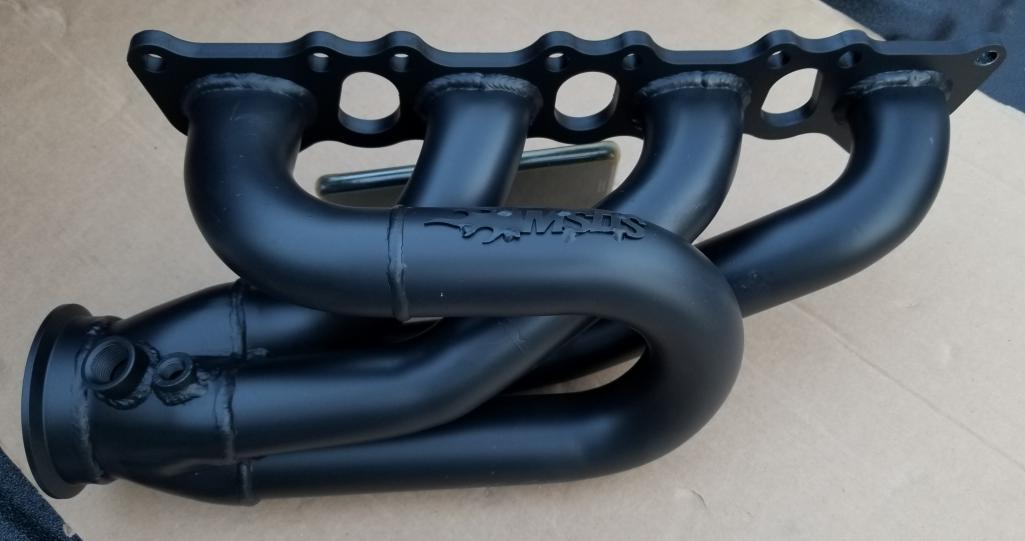
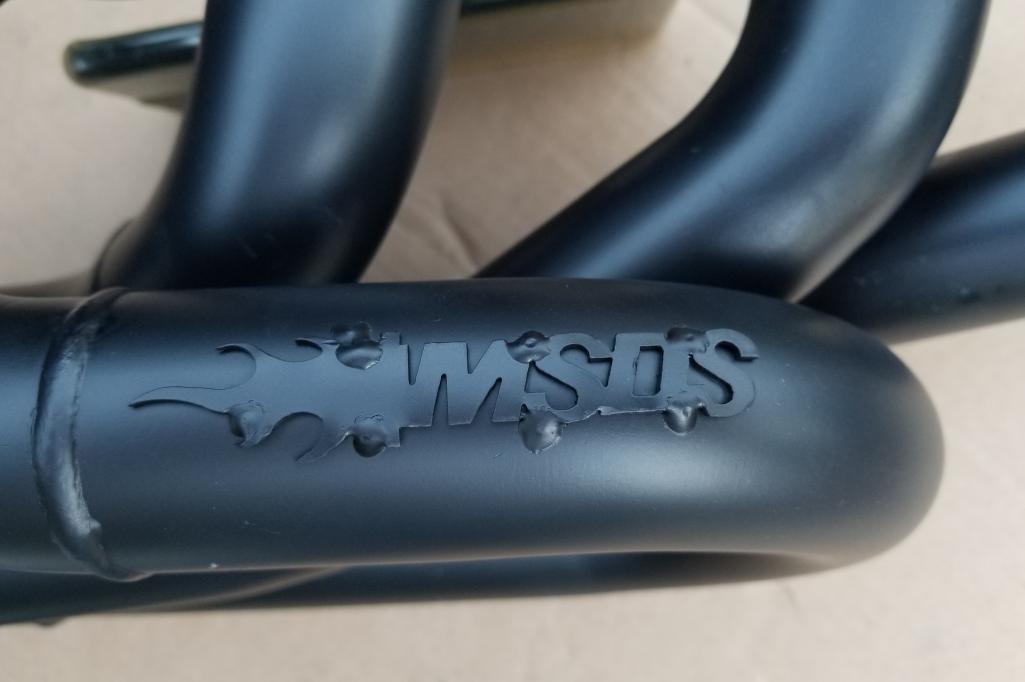
Posted by: Maltese Falcon Oct 20 2022, 11:56 PM
Gathering several misc items needed for prototype locations of the Garrett turbos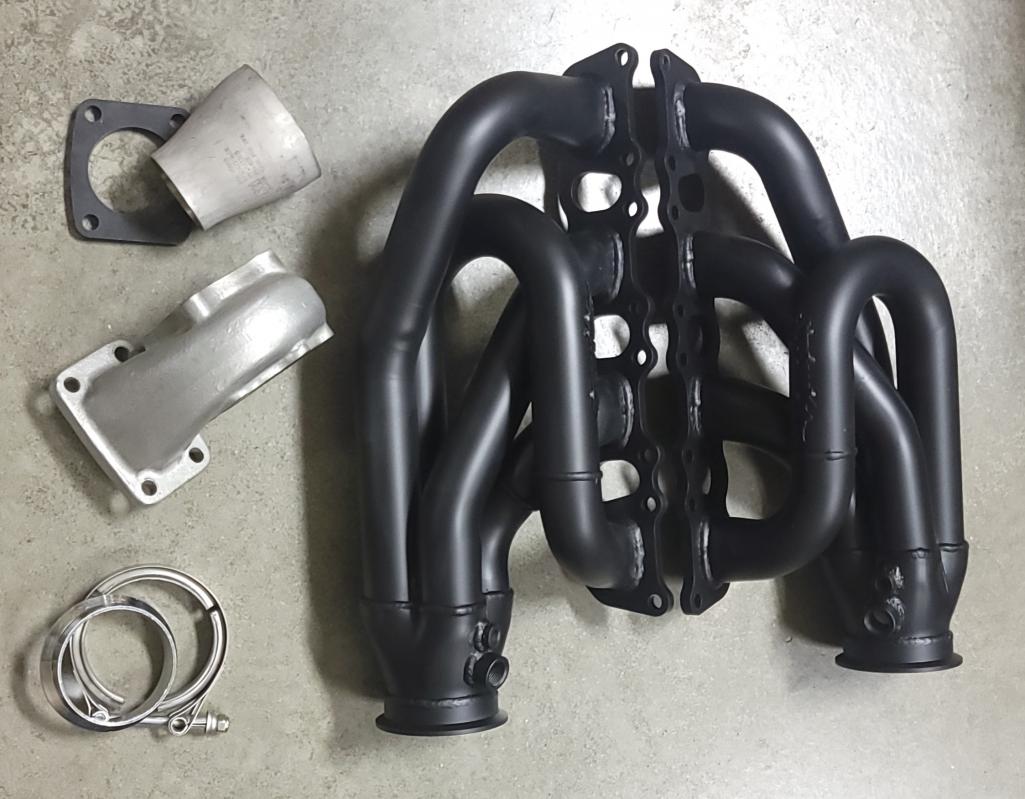
Posted by: Maltese Falcon Oct 24 2022, 03:13 PM
914 firewall wiring Snorkel is a great fit into the Goodridge fire-sleeve, and something else we're fitting into this build "Old Skool style" 914 parts.
It's very accommodating and we can fit lots of wires + one 8- piece (14ga.) insulated cable in there ! This particular electrical run spans from the dashboard, pedals (floor area), and center console to the rear of the trunk area.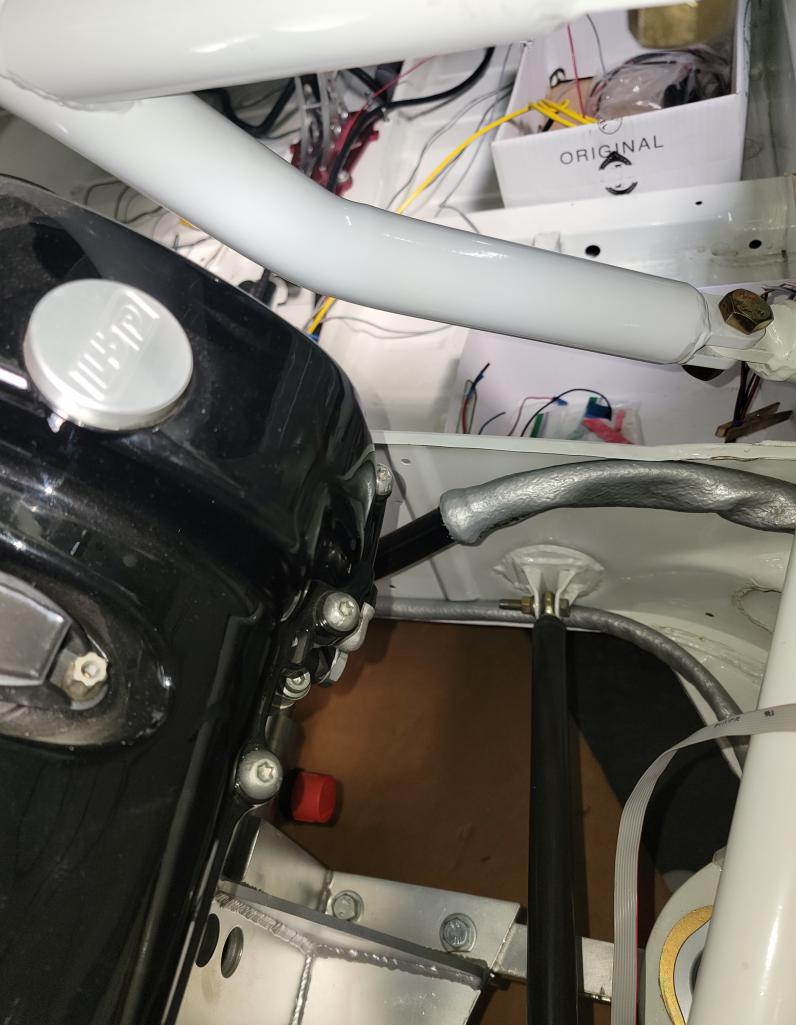
Posted by: Maltese Falcon Oct 31 2022, 04:36 PM
Onward to the transaxle nosecone, wiring for the Reverse light sending-switch in the (narrow dia) Goodridge fire sleeve now complete. 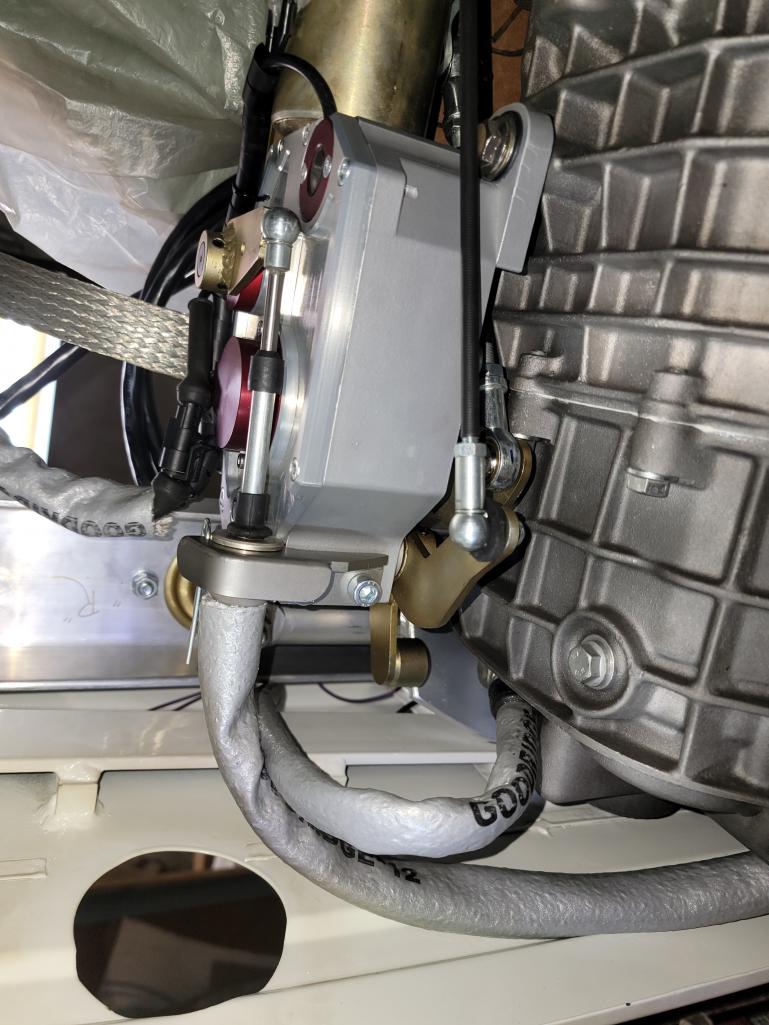
Posted by: NorCalScott Nov 3 2022, 04:32 PM
That super clean transaxle reminds me of a problem I'm having restoring a transaxle to presentable condition. The corrosion/oxidation is really tough to get rid of. Any suggestions? I don't want it to be polished or smooth, i just want it to be clean. Maybe painting is the best way to go.
Posted by: kerensky Nov 3 2022, 04:42 PM
I find these long-term build threads (just today new posts in 3 different threads that are over a decade old!) to be equal parts inspiring and disheartening.
Posted by: Maltese Falcon Nov 3 2022, 09:10 PM
That super clean transaxle reminds me of a problem I'm having restoring a transaxle to presentable condition. The corrosion/oxidation is really tough to get rid of. Any suggestions? I don't want it to be polished or smooth, i just want it to be clean. Maybe painting is the best way to go.
Maybe worth a call to my bud Shawn over at California Motor Sports in Lake Havasu...they might have a procedure/or tip on getting your case lookin' tight !
Posted by: NorCalScott Nov 4 2022, 08:07 AM
Thanks, I'll contact them. You're right, they probably know every trick there is.
Posted by: Maltese Falcon Nov 4 2022, 06:55 PM
It's Friday>>getting Wired up !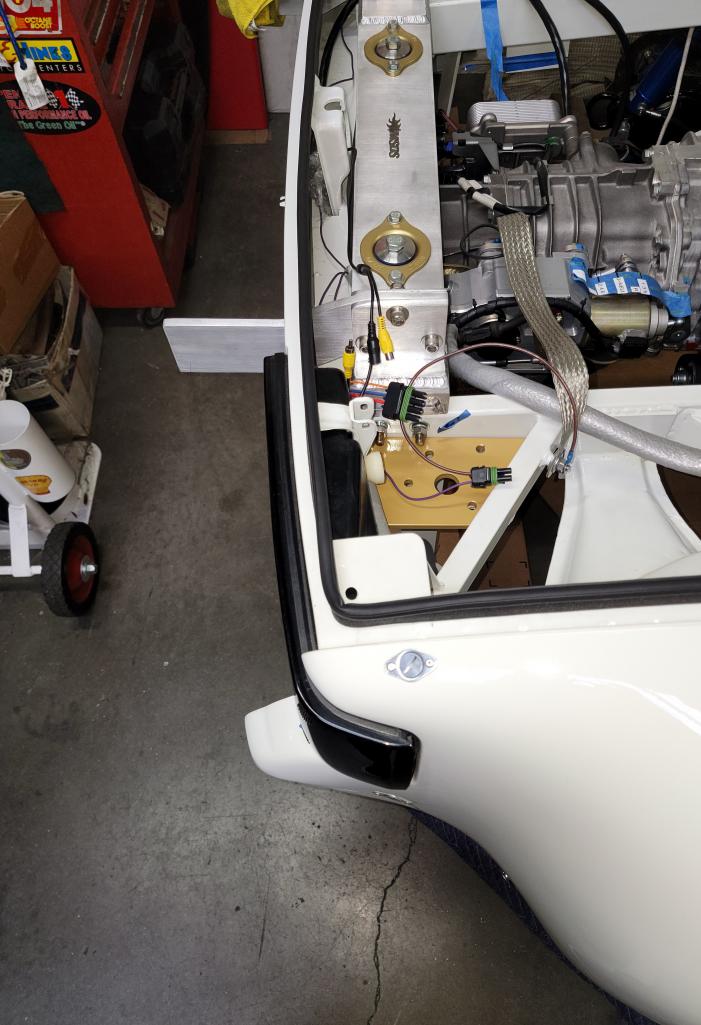
Posted by: Cairo94507 Nov 5 2022, 06:28 AM
Not going to be long now...excited to see video of this absolute beauty running and driving.
Posted by: Maltese Falcon Nov 8 2022, 08:10 PM
Left-side rear wiring ; black (8 wire) cable will finish up making a U turn heading back to the engine bay.
The last available wires will run to Coolant temp/ engine oil temp/ trans oil temp.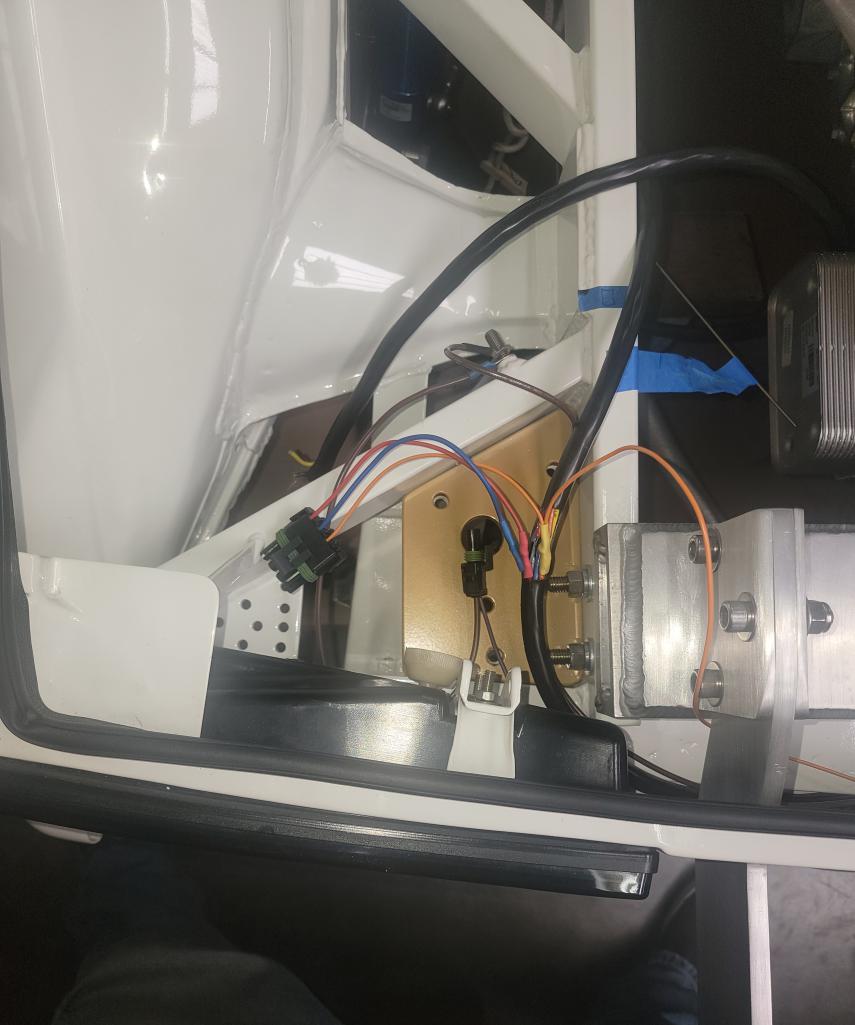
Posted by: Maltese Falcon Dec 4 2022, 07:09 PM
Interior multi-wire cable now totally supplying circuits to left, center, and right sides of the engine bay. 12v Coolant pump for the transaxle cooler will be on a manual switched circuit, not triggered by the oe temp switch.
OE temp switch is being replaced by a VDO oil temp sender + gauge for monitoring trans temp. 
Posted by: Maltese Falcon Dec 7 2022, 04:10 PM
Longtime POC friend Art Zaph stopping in to see what's up, he daily drives a Cayman R these days.
Art recently sold off his 9146 electrical-schematic biz, and is enjoying retirement !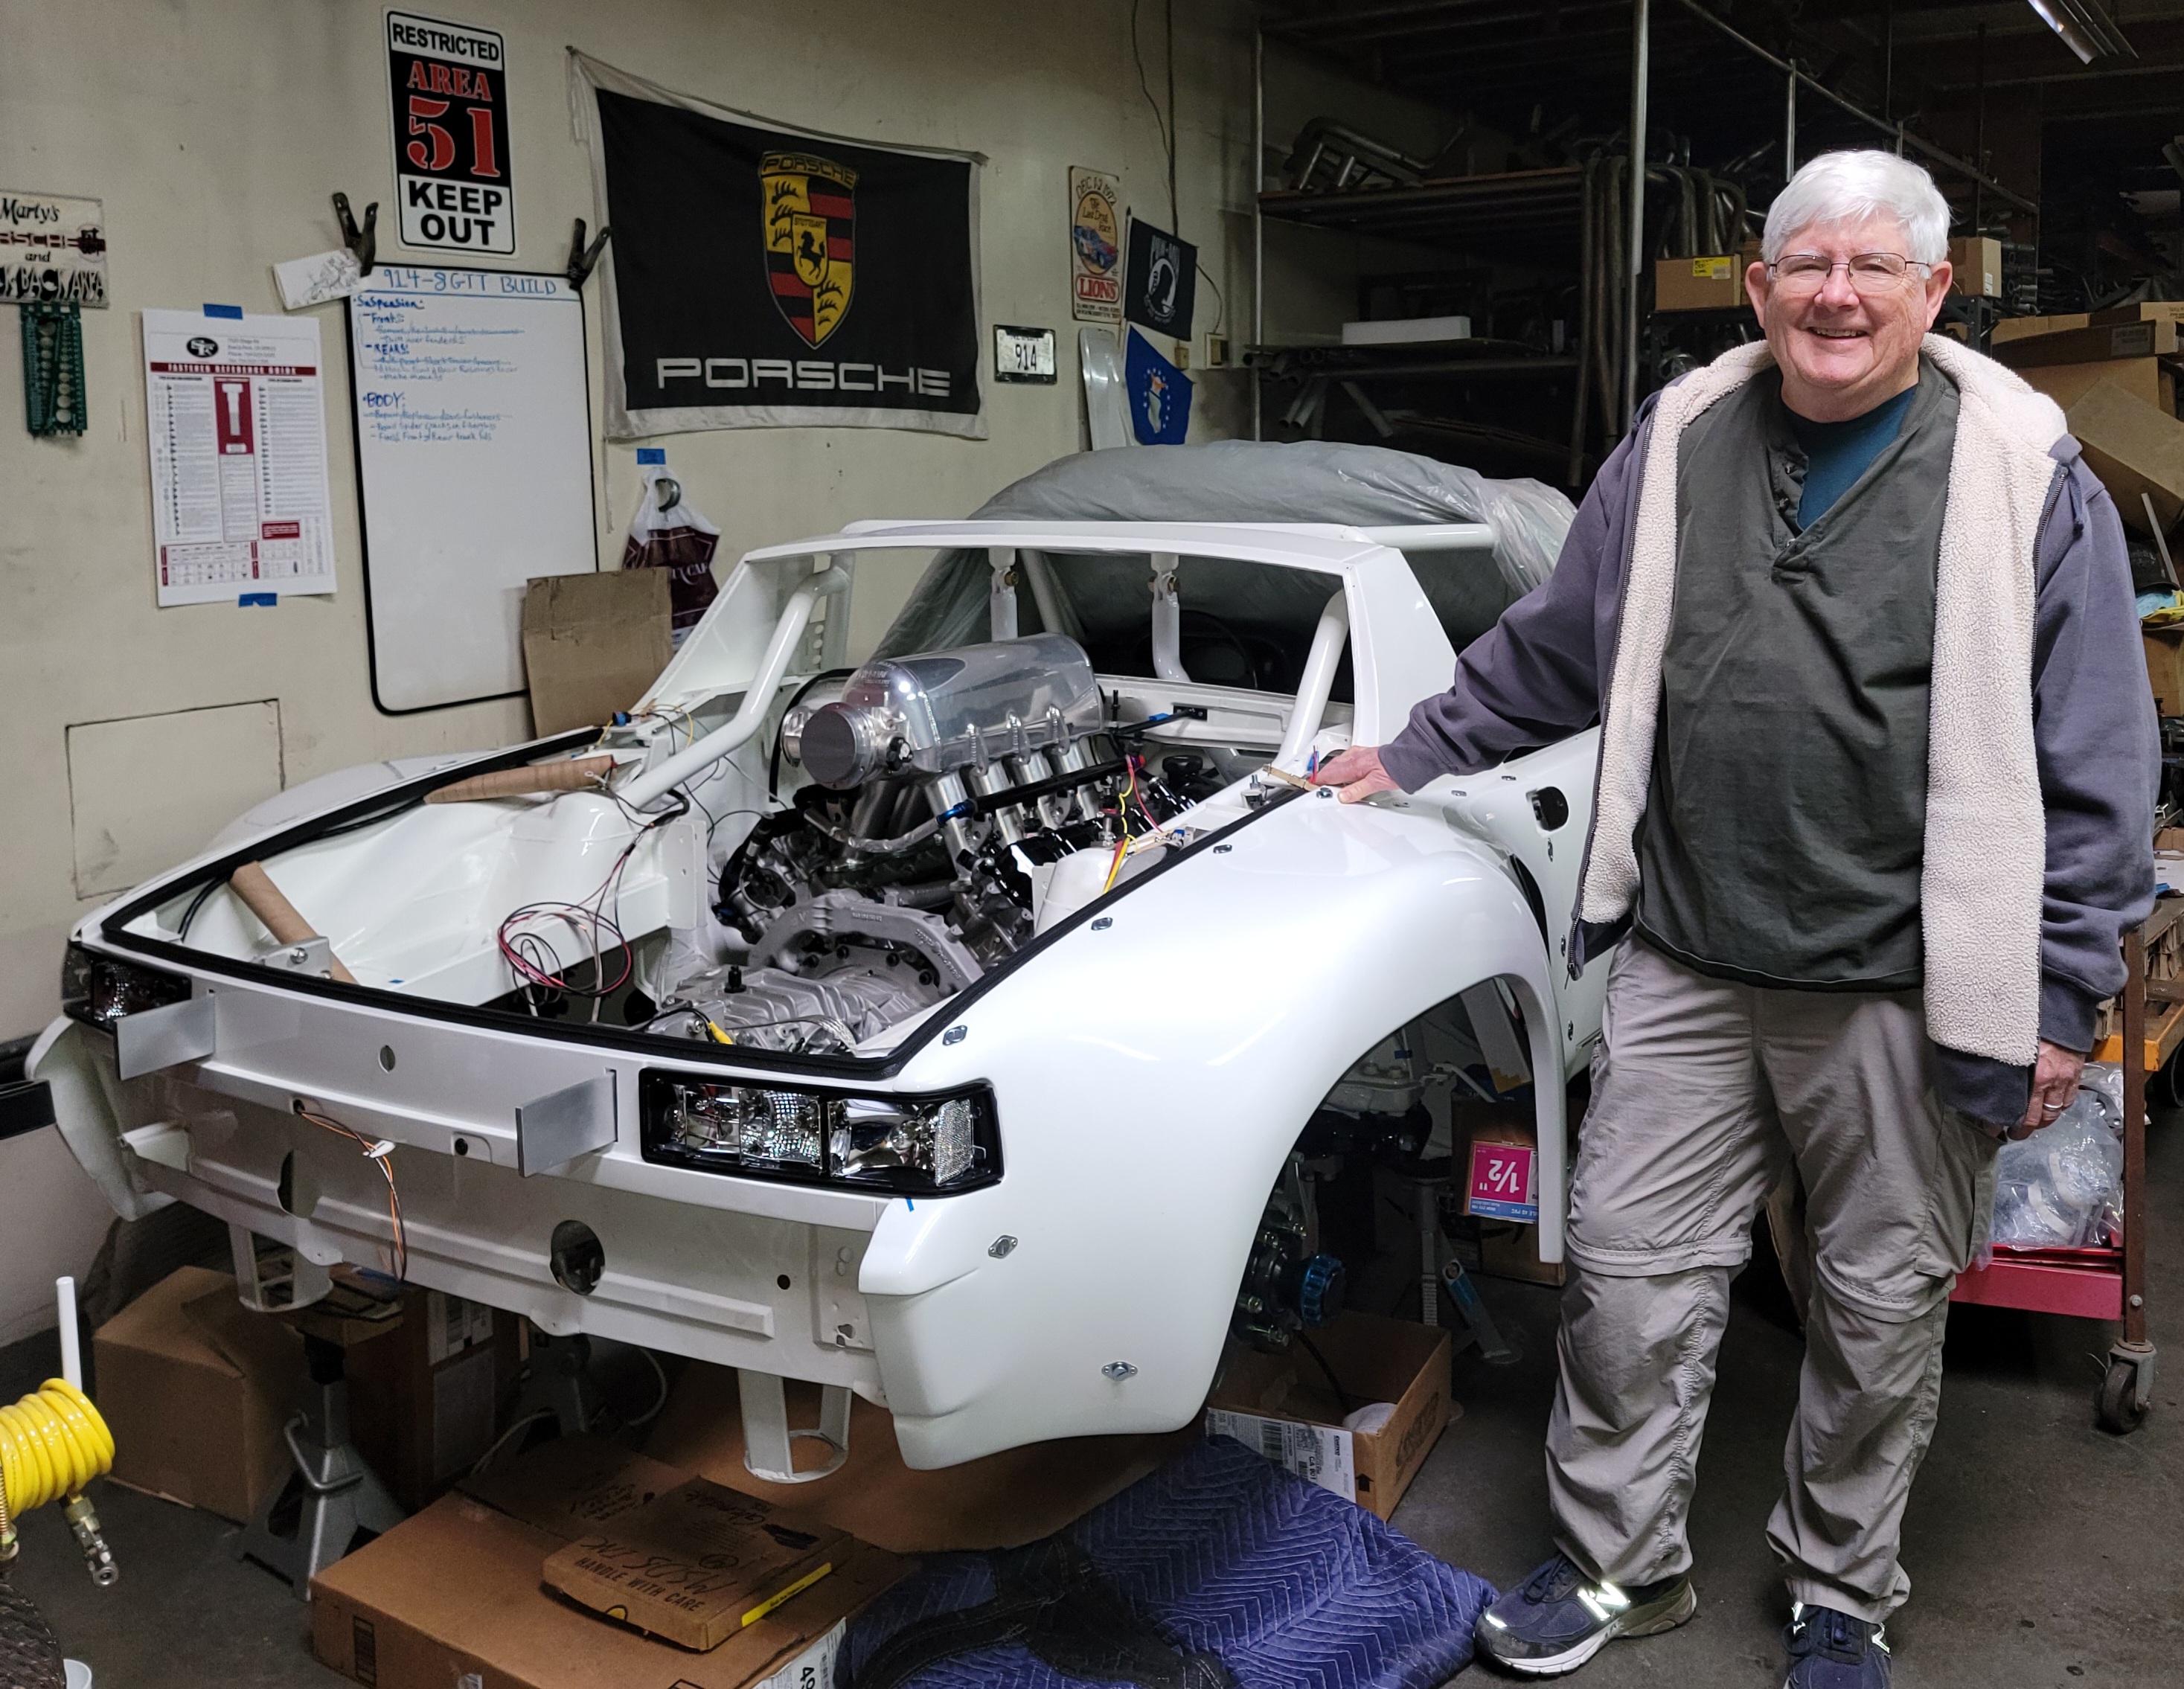
Posted by: NorCalScott Dec 13 2022, 09:55 AM
Damn, that's a great angle of the car. Reminds me of Kim Kardashian for some reason. Can't wait to see it on the ground with wheels and tires.
Posted by: Maltese Falcon Jan 19 2023, 11:43 PM
Still having lots of fun pulling wires through Goodridge fire-sleeve. Customized end on one side mates to a curved split-wire sleeve. I found a very special roll of "Aero grade" aluminum tape in the toolbox to join the 2 together.
Attached thumbnail(s)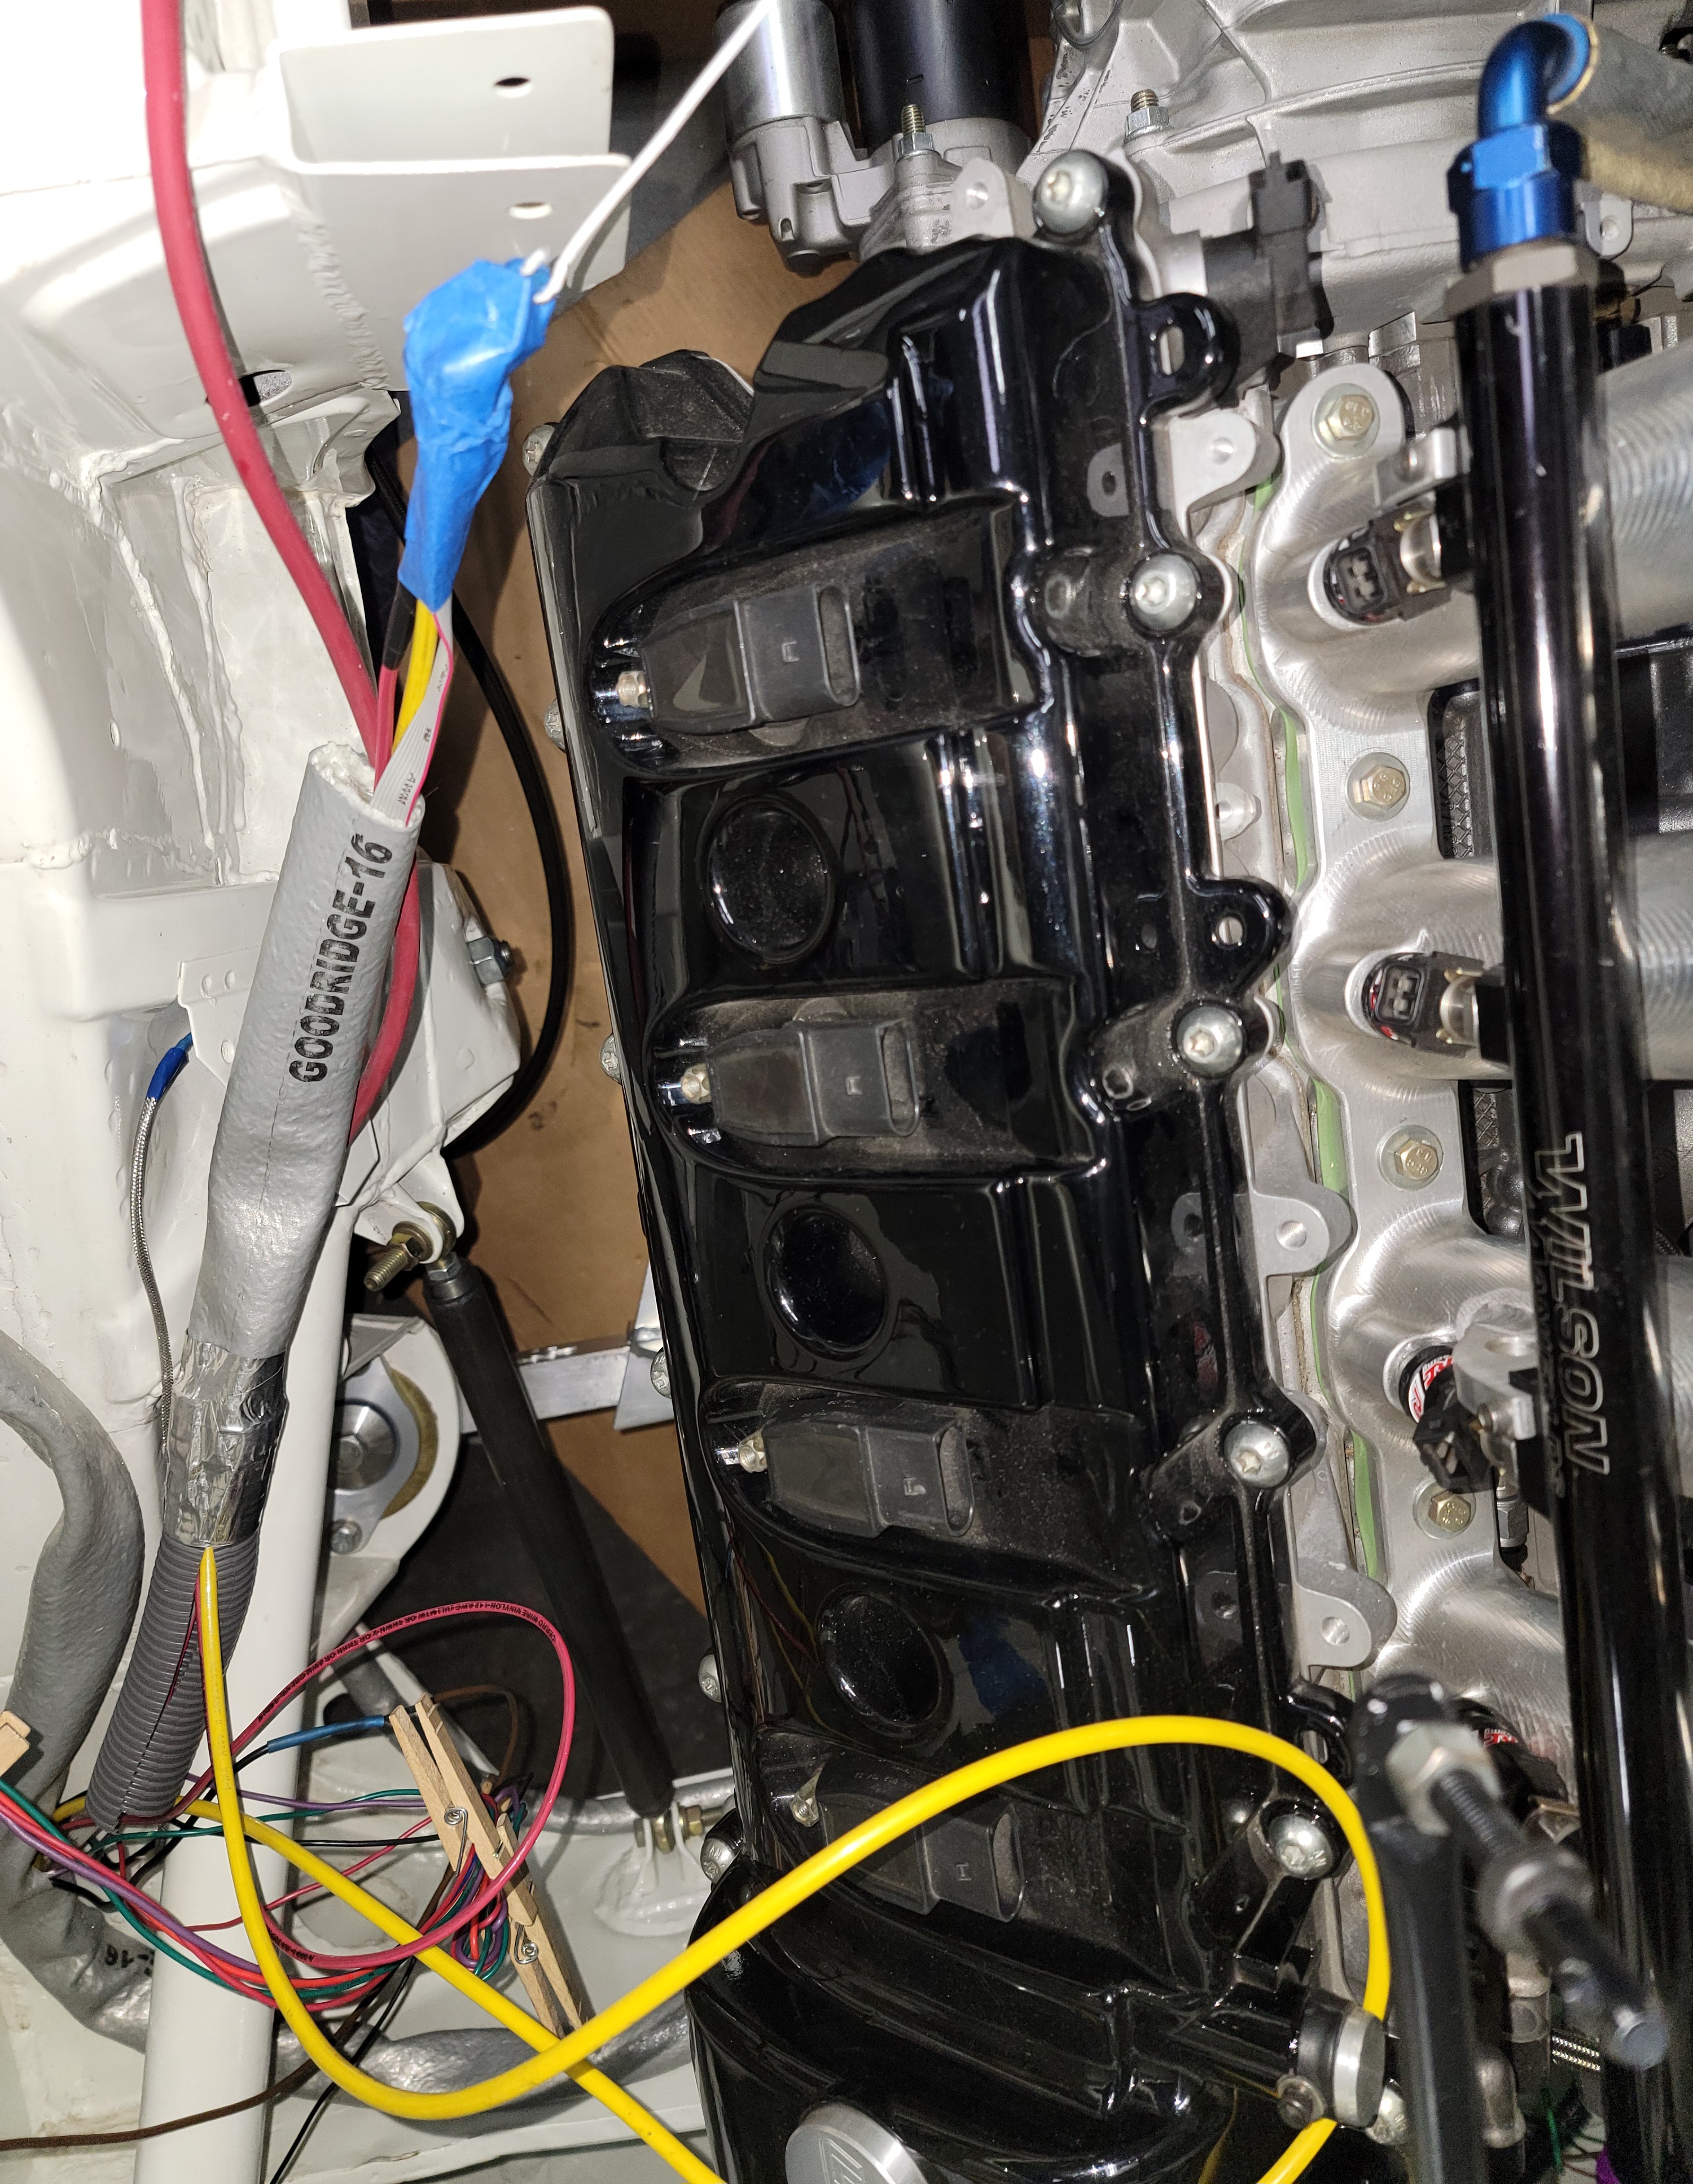
Posted by: Maltese Falcon Jan 20 2023, 12:29 AM
A Naval Air friend gave me this surplus roll of Lamart 3-mil aluminum Aero tape. He used it during temporary repairs on the birds, just to keep out debris. 
Posted by: NorCalScott Jan 20 2023, 11:39 AM
Looking good! Keep working and keep the updates coming. Please. lol
Posted by: 914-300Hemi Jan 20 2023, 09:51 PM
Very excited to hear it run
Posted by: Maltese Falcon Mar 18 2023, 03:54 PM
I never walk by this proj in the shop and Don't tinker with this or that. This connection is for the Cartek l-e-d rain-light...also wired with a couple of quick-disconnects. 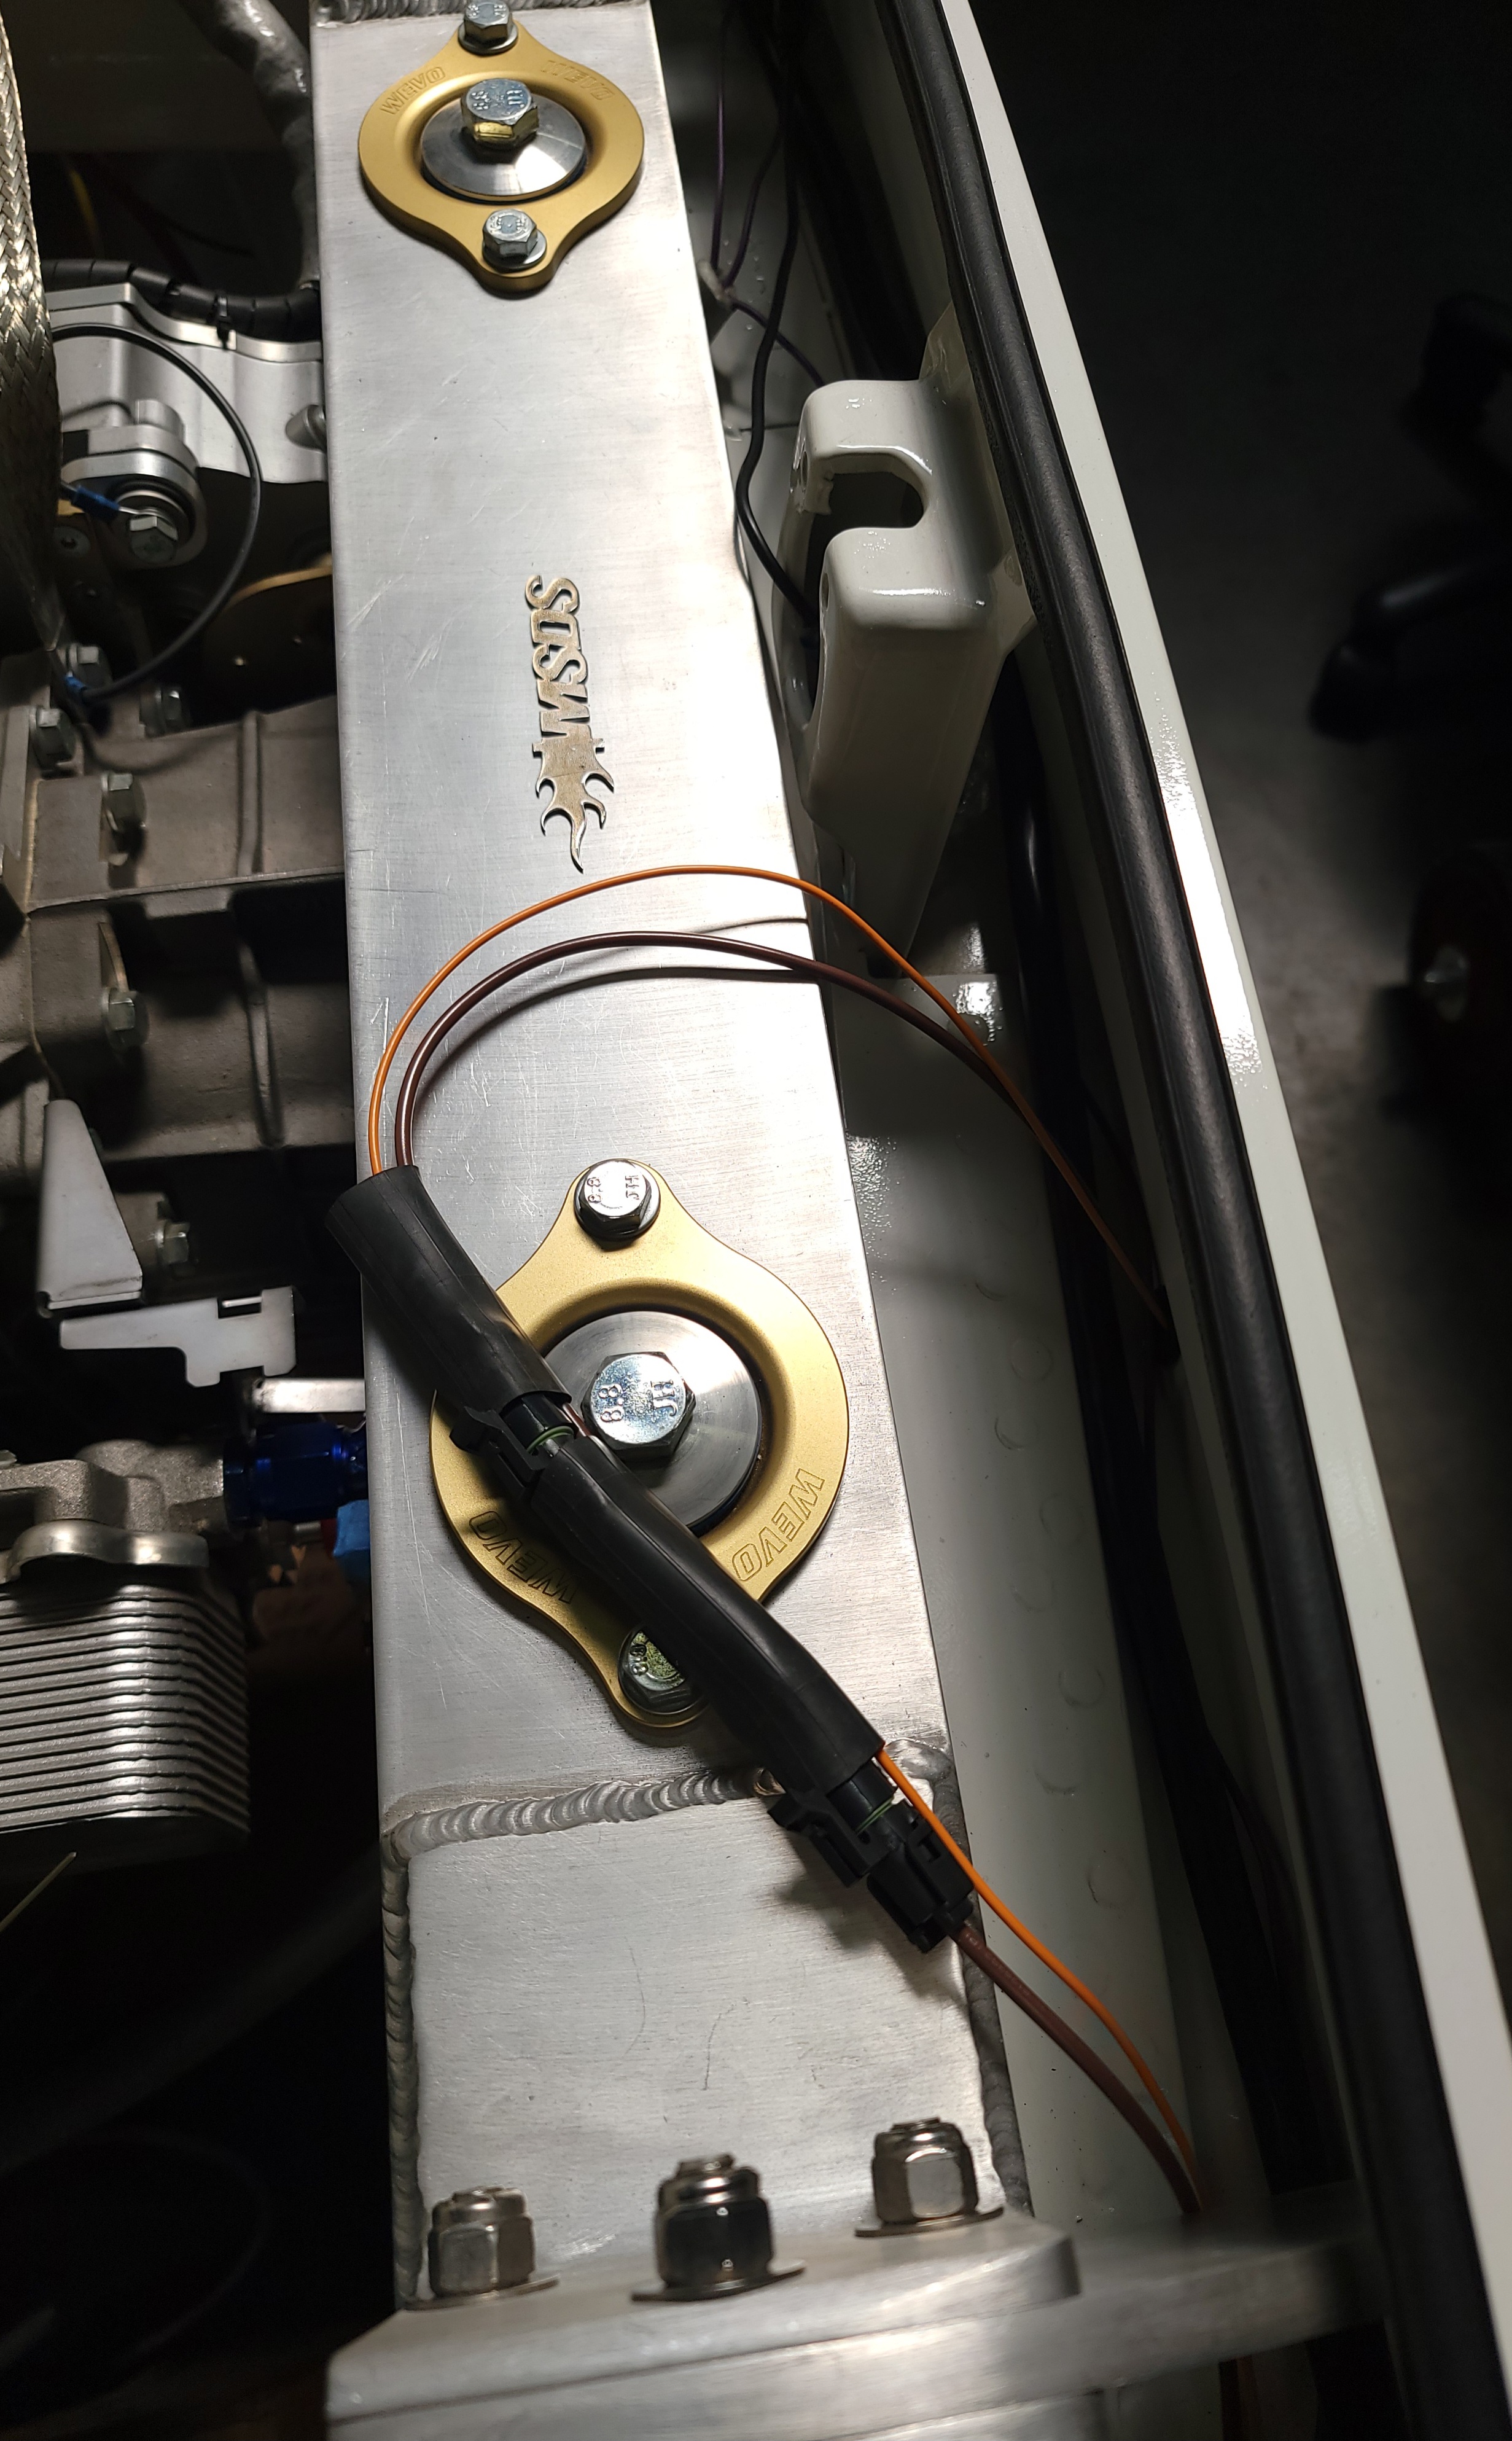
Posted by: Maltese Falcon Mar 18 2023, 04:00 PM
Cartek brand L-E-D rain light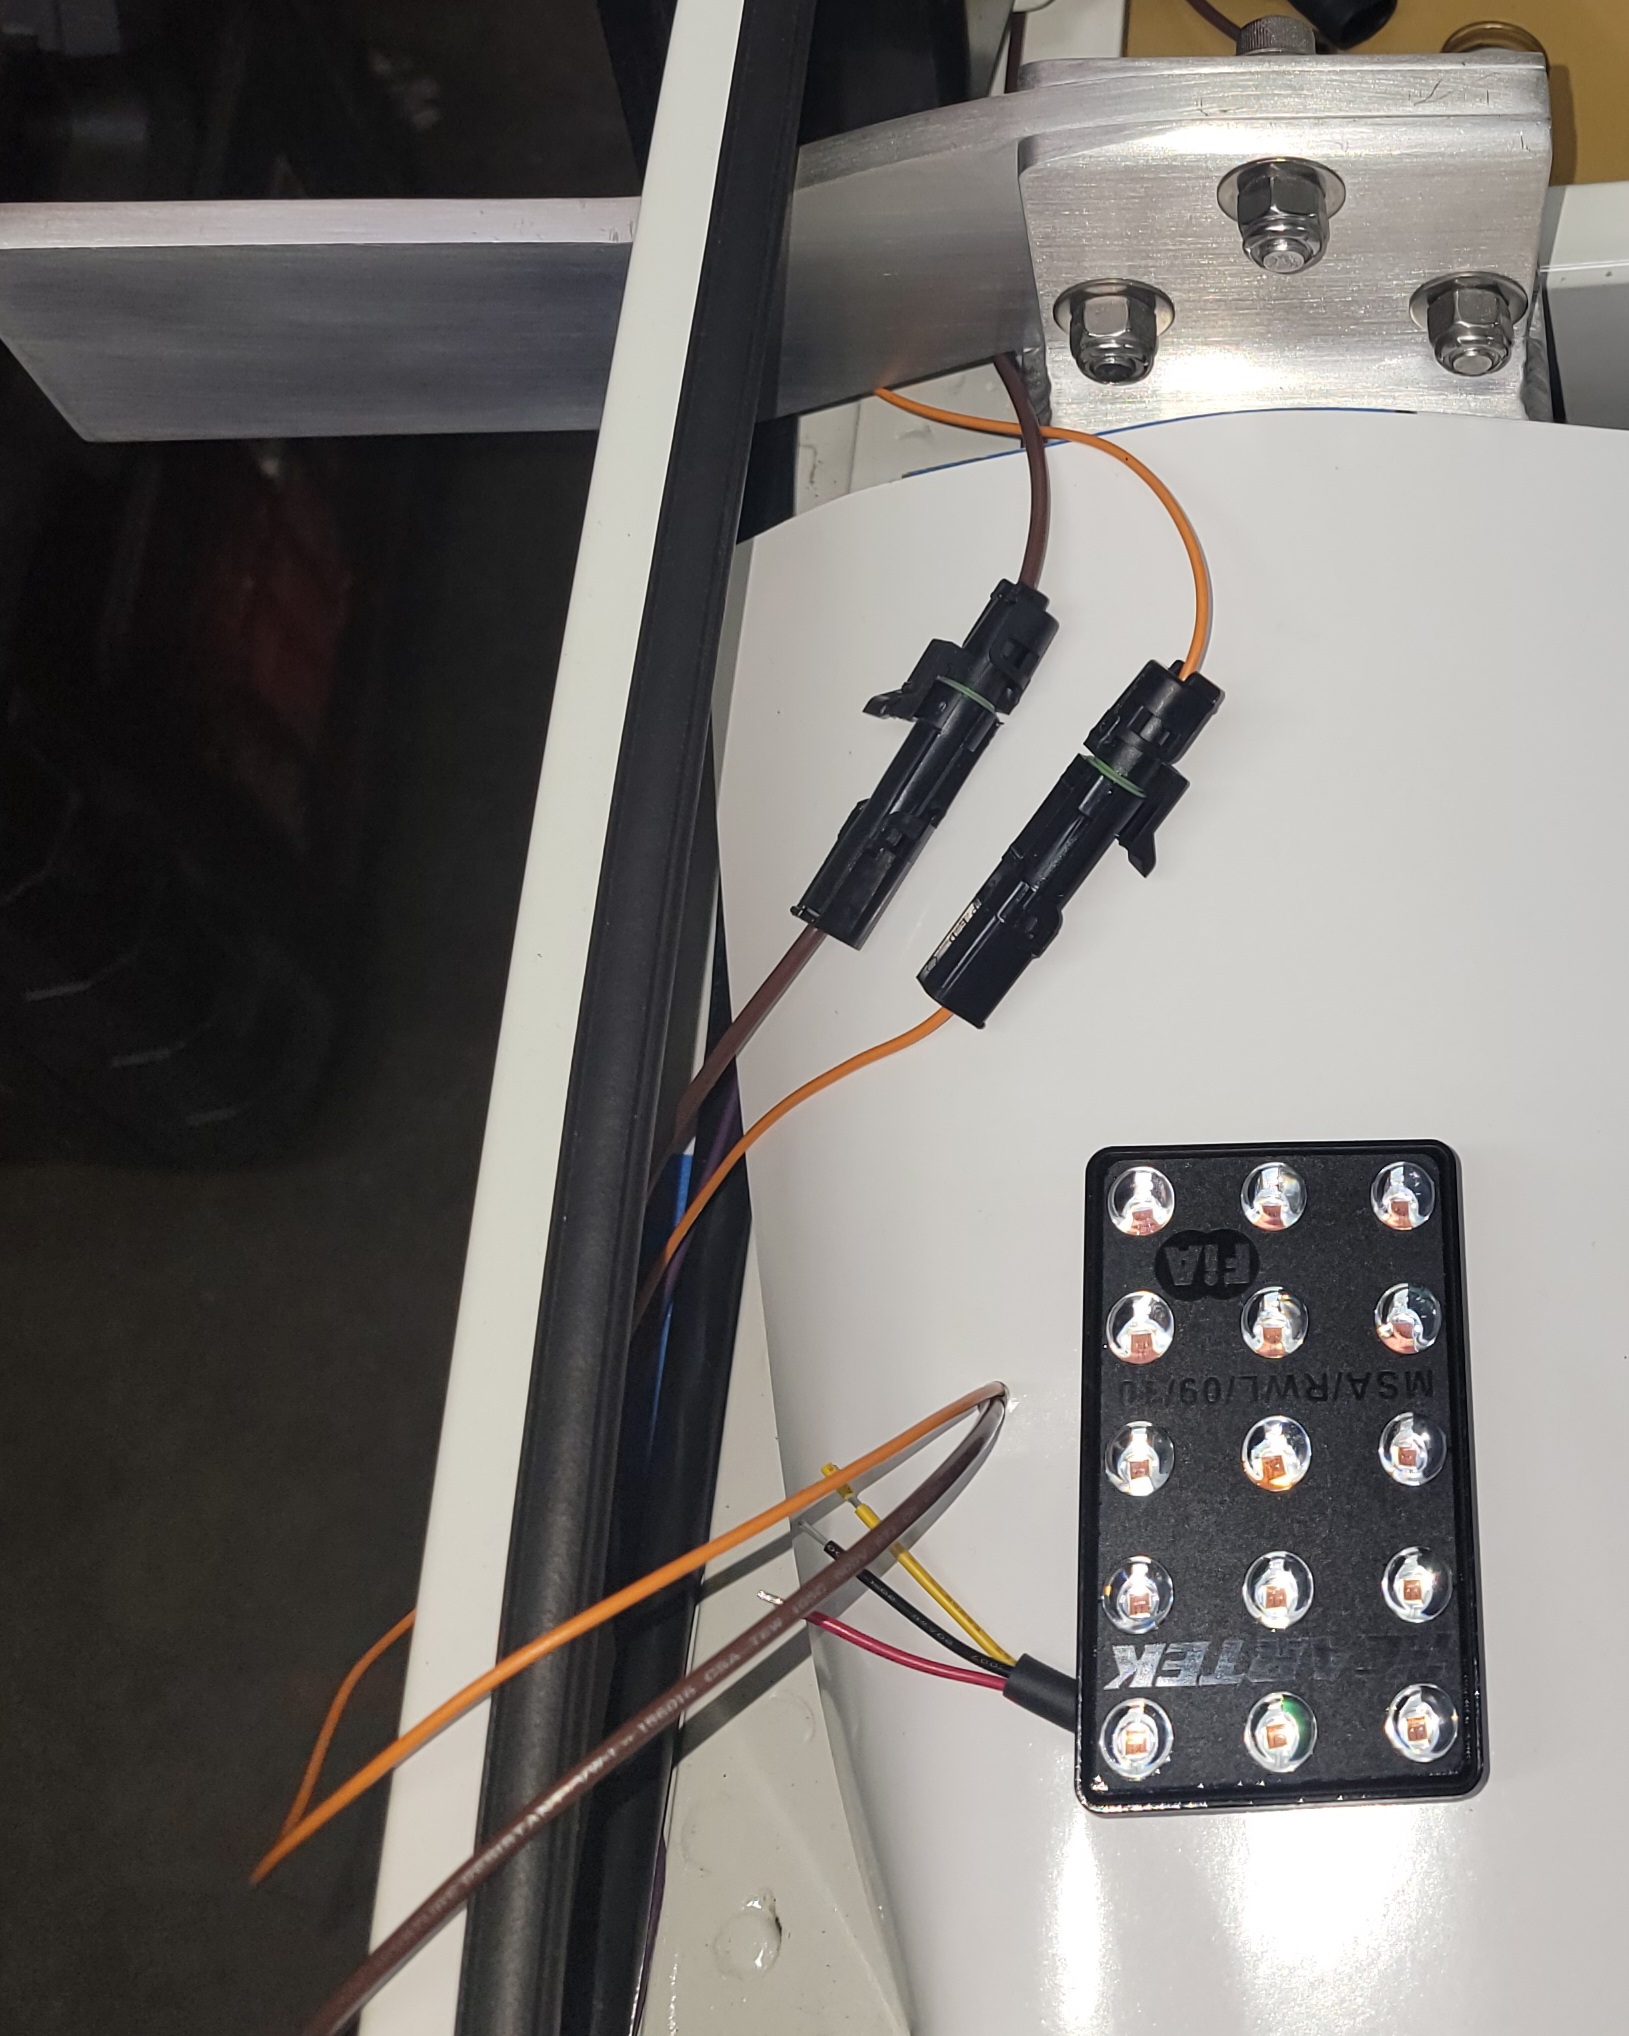
Posted by: Maltese Falcon Mar 18 2023, 04:13 PM
The livery for 8gtt has been voted on by us 3; @http://www.914world.com/bbs2/index.php?showuser=14843 and Mrs. Falcon say "Go with a 21st Century rendition of Sonauto #40".
Me...I'd like to keep sketching, but majority rules
In any event, we're also collaborating with various Wrap guys for their ideas.
Posted by: Maltese Falcon Apr 22 2023, 08:08 PM
Laying out some real estate in the rear "Trunk" area; which will have a big intercooler , two wastegate exhaust pipes, 2 heat-bonnets (over the Garretts), 4 hood pins...so before I start sawing out the Sheridan trunk lid for all of these contour-cuts, it's good to have a quick look see at the basic layout.
Note: these are not the pipes I'll be using as they're much too tall, just some 2"od slash-cut exhaust tips for another product laying around.
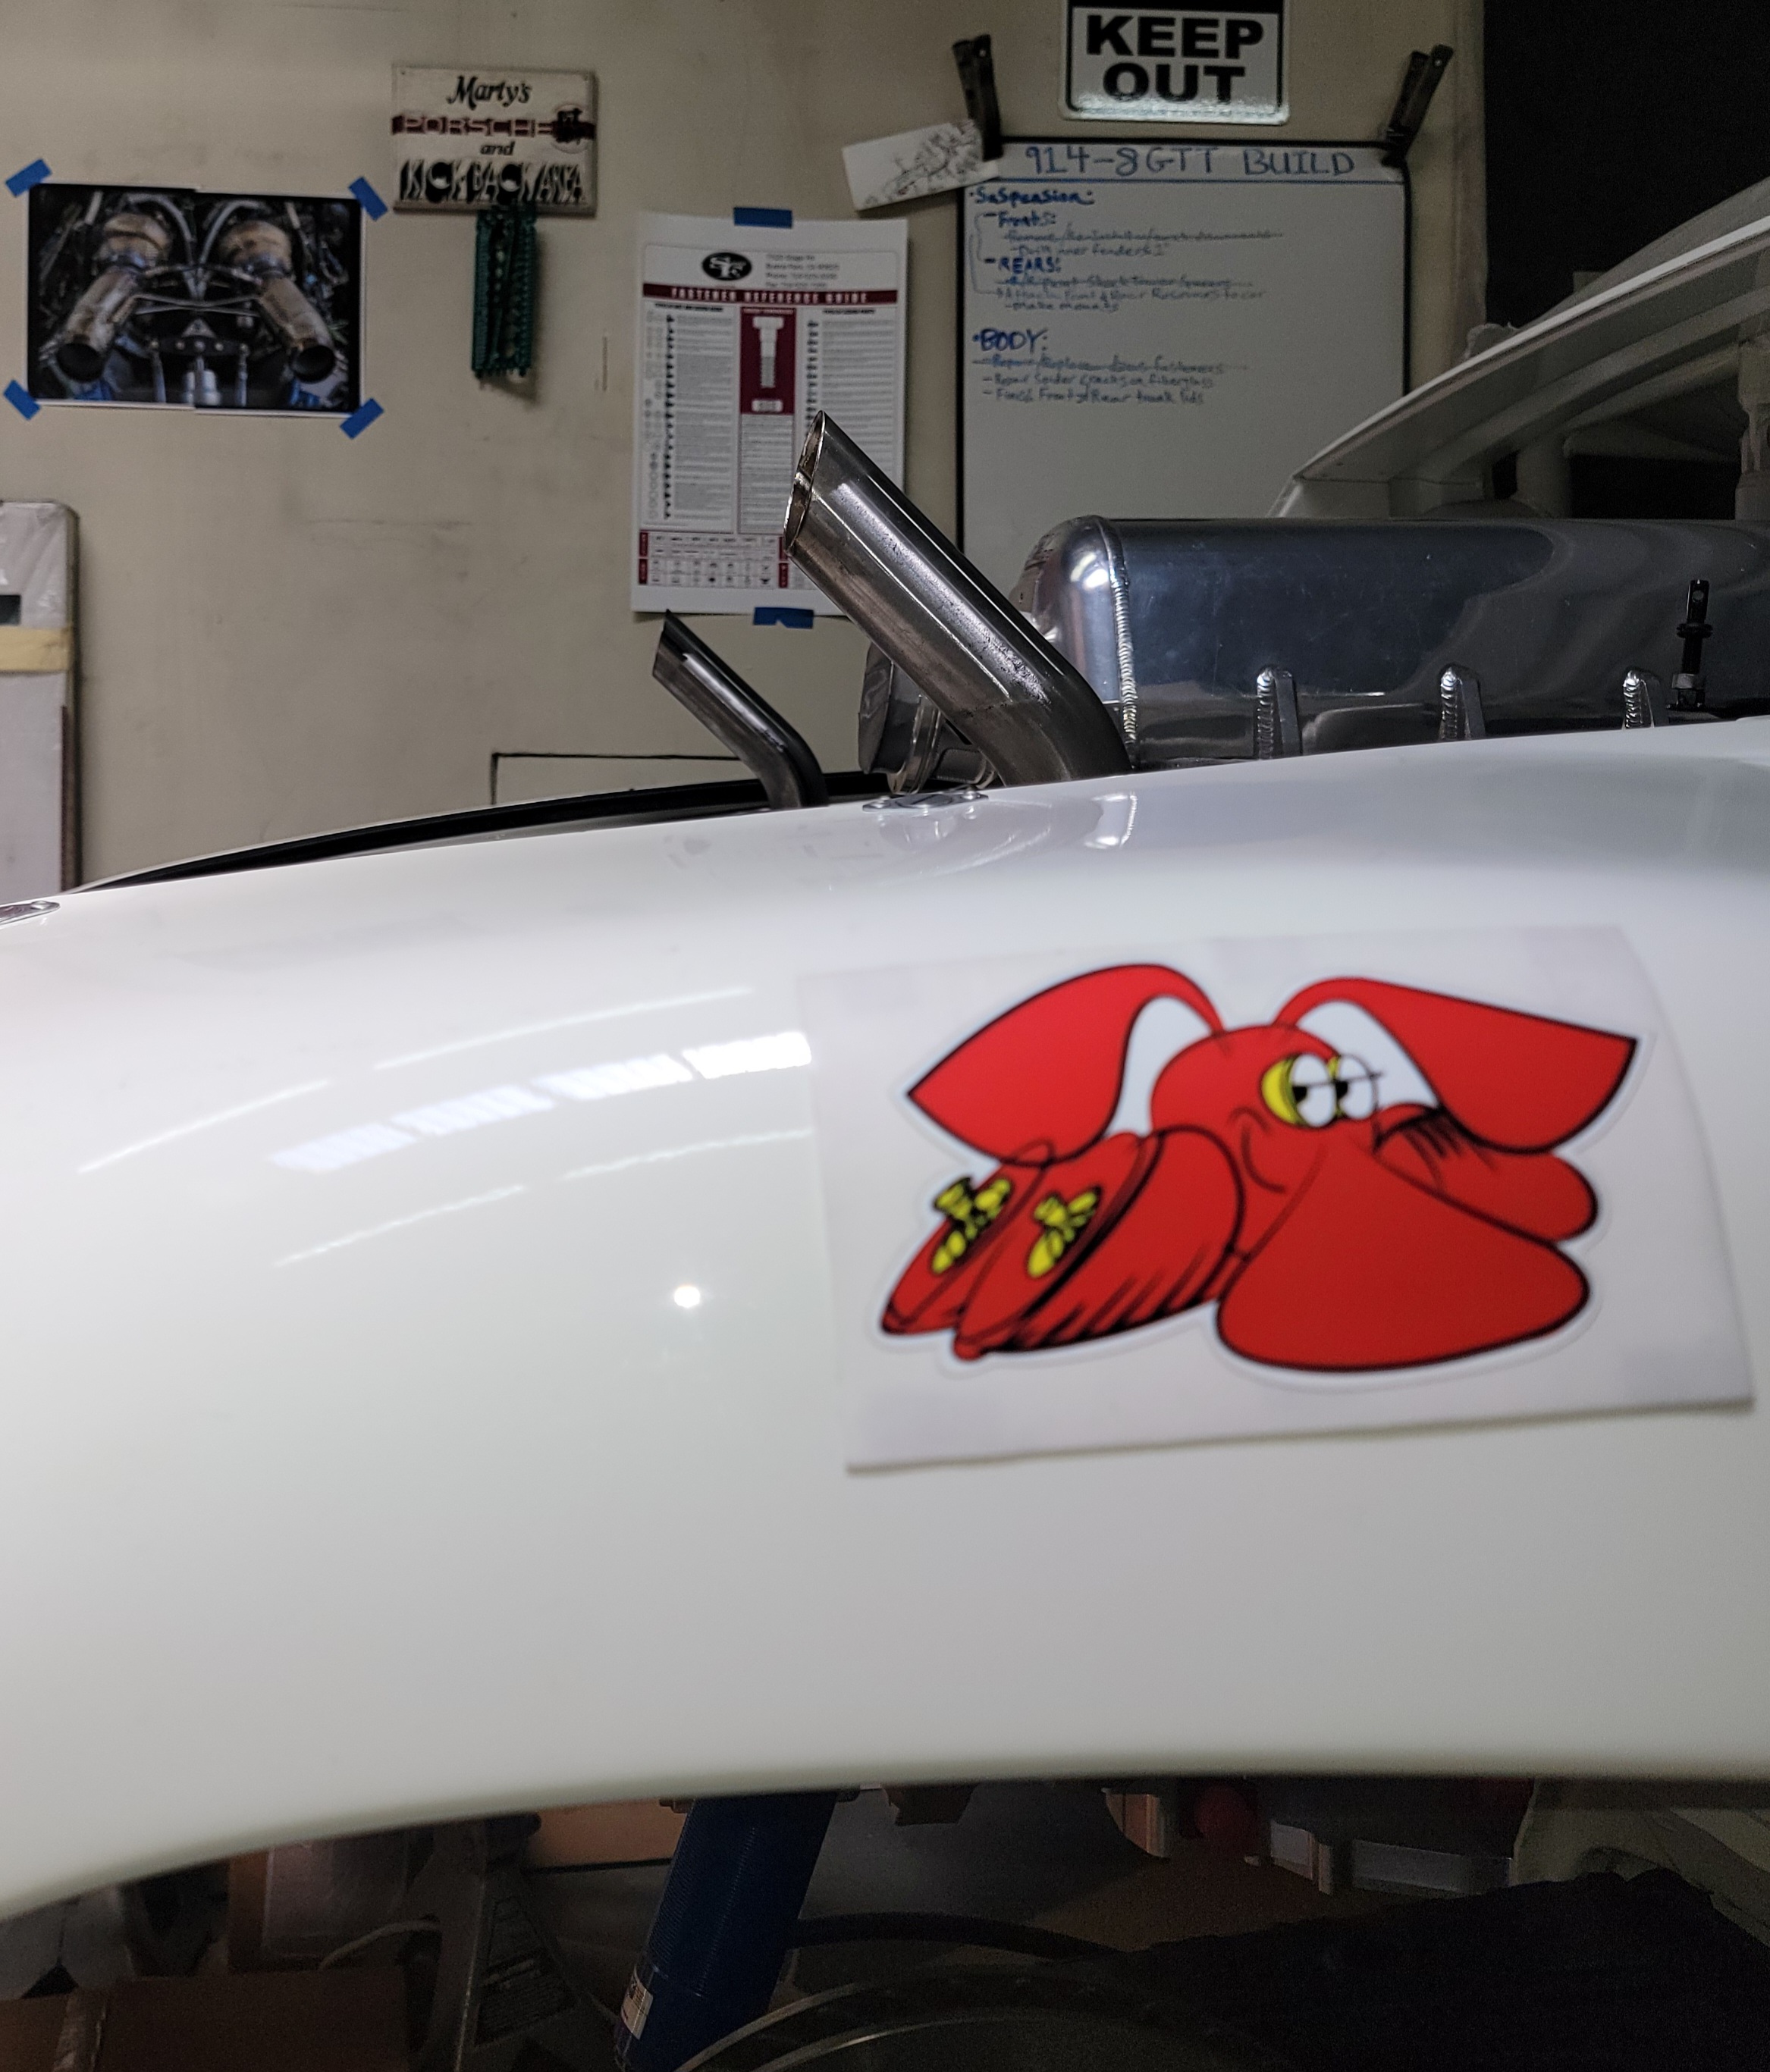
Posted by: Maltese Falcon Apr 22 2023, 09:54 PM
Should be a pretty good pyrotechnic show under boost 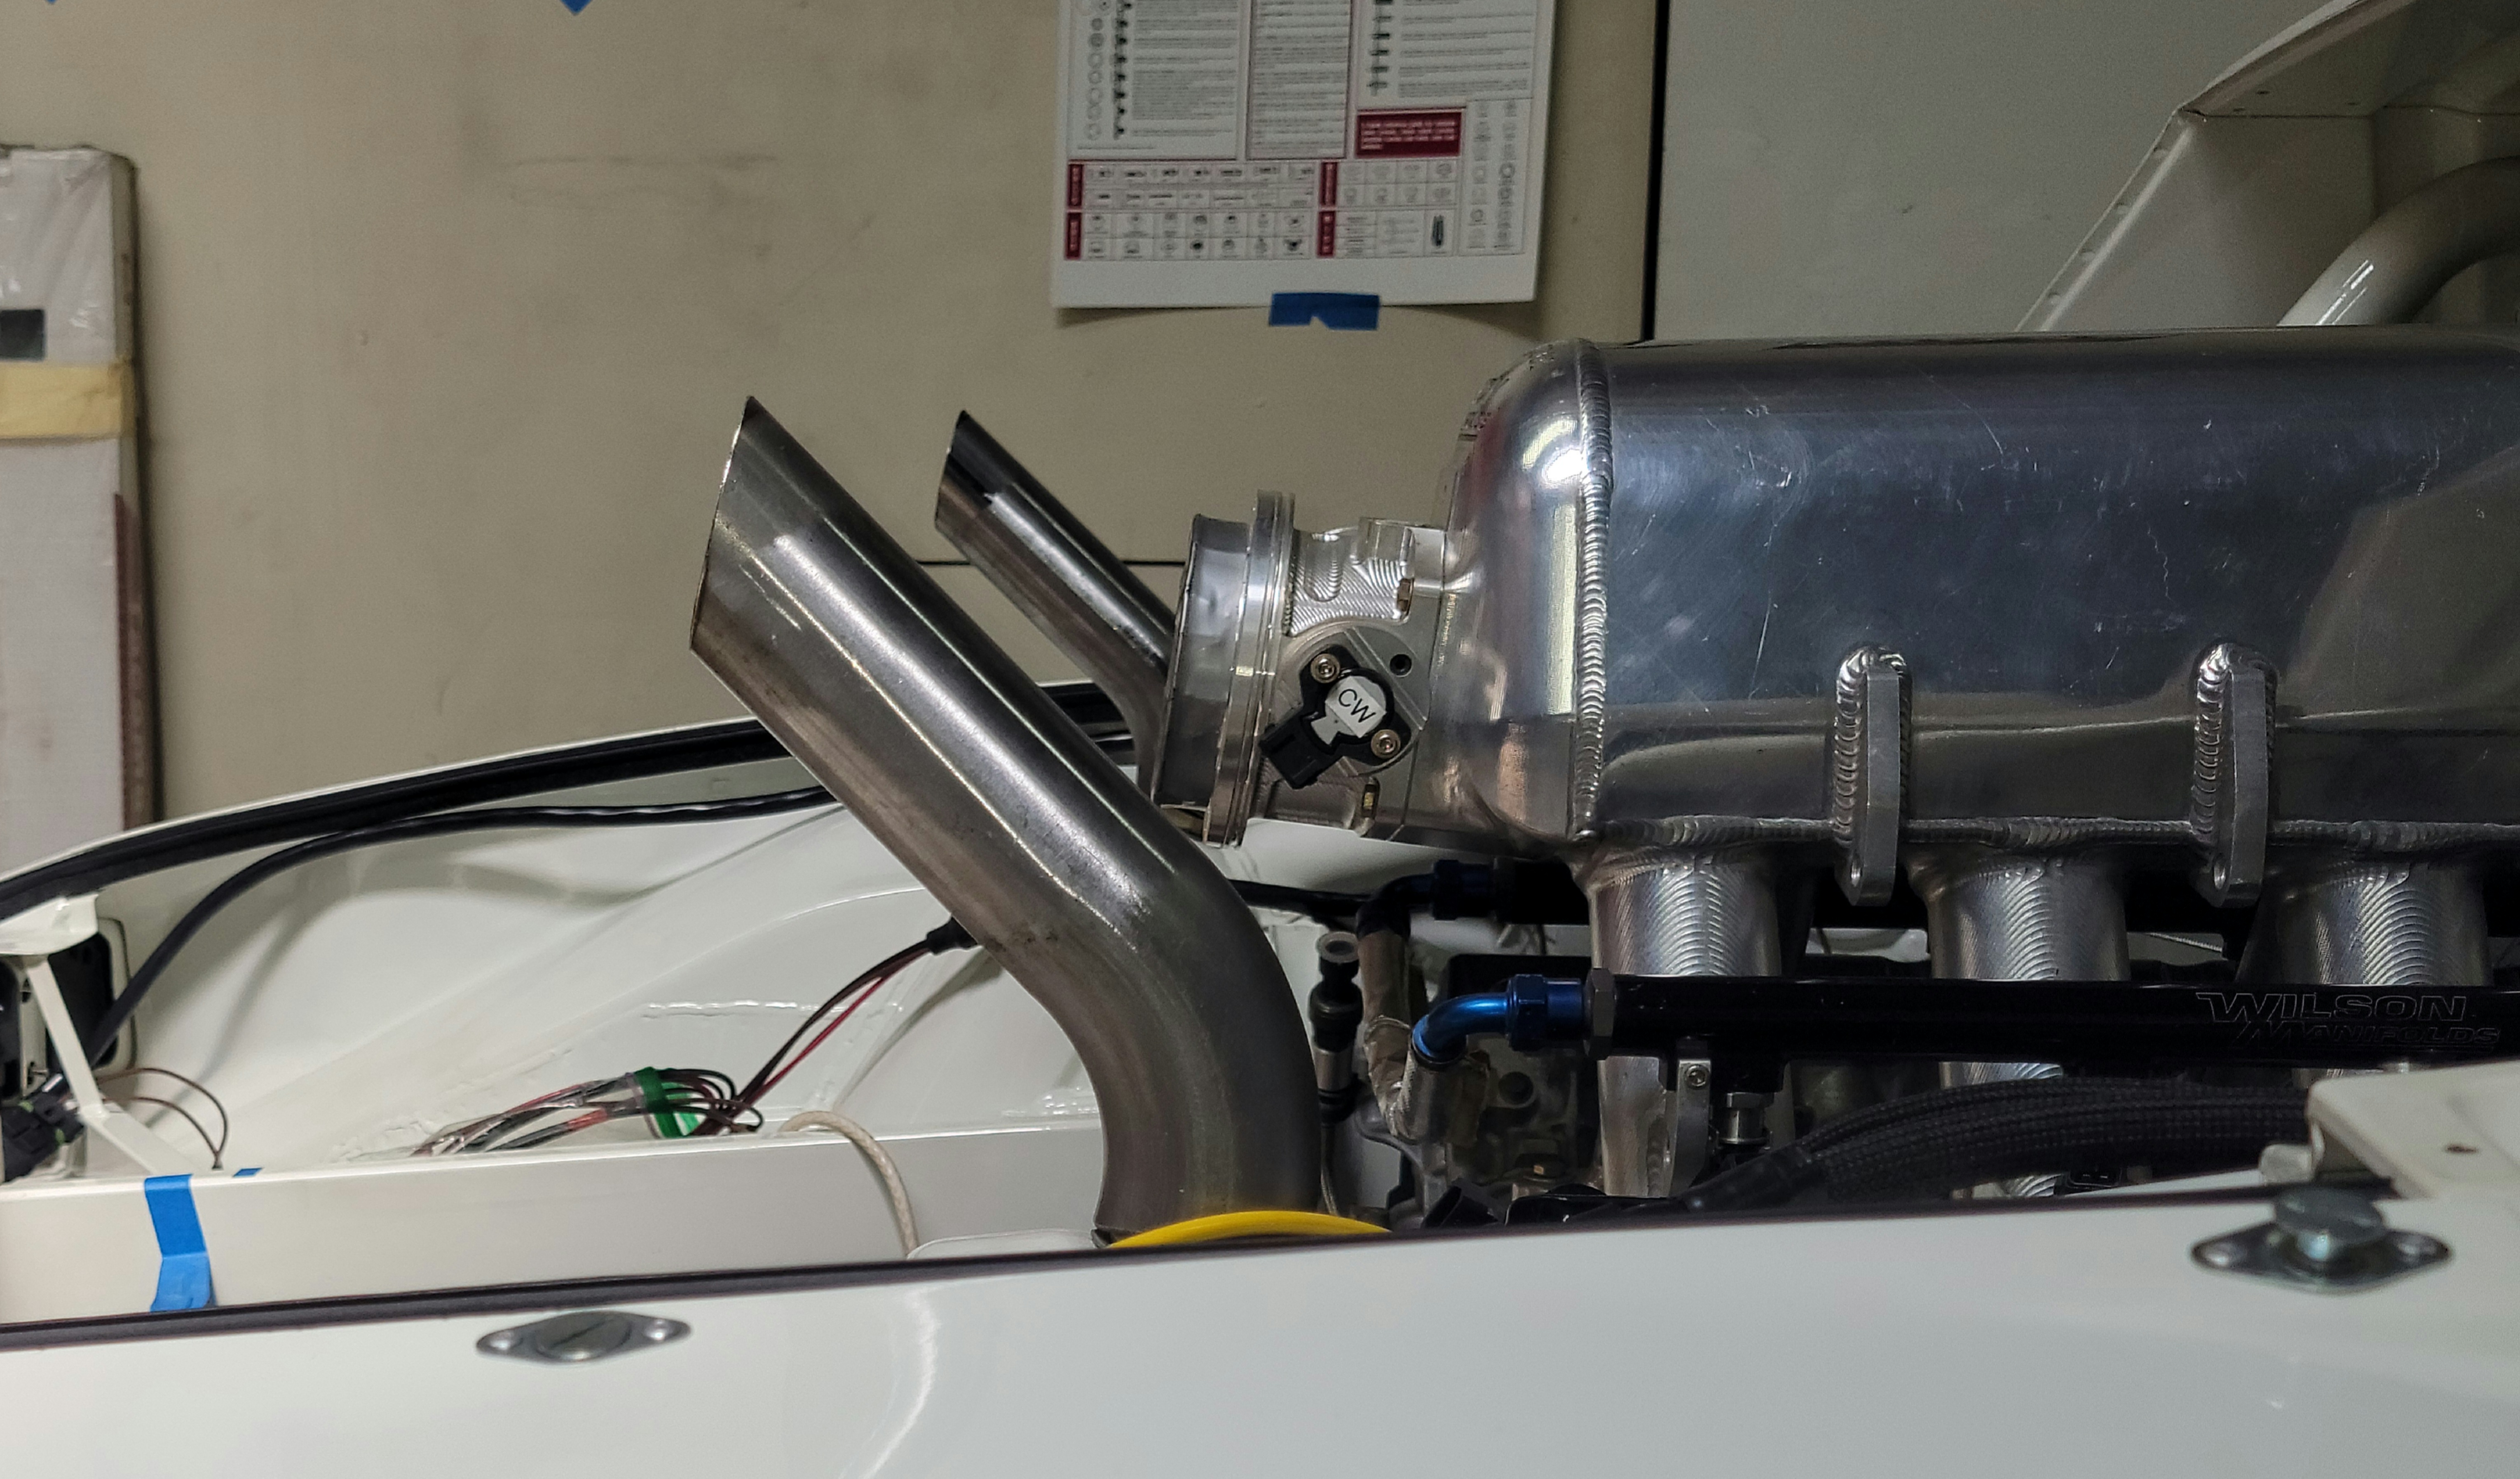
Posted by: sb914 Apr 23 2023, 05:45 AM
10 years since you started this thread. Man how time fly’s.
Posted by: Maltese Falcon Apr 23 2023, 12:34 PM
10 years since you started this thread. Man how time fly’s.
Yessir + 10 dedicated years on these bones...happy to still be holding a wrench and torch. As the Fridge in the garage says LG , as this project moves to completion> Lifes Good !
Posted by: sb914 Apr 23 2023, 09:33 PM
My all time favorite build …
Posted by: Maltese Falcon Apr 24 2023, 07:29 PM
My all time favorite build …
Fun stuff ahead...you will need to visit the beast next trip down to LA La Land !

Posted by: Maltese Falcon Apr 27 2023, 08:15 PM
Our good friend Harry Wong (center) known here as 914six, came by to visit the build-in-progress a couple of weeks ago. Last week Harry suddenly took ill, had a stroke and passed the next day*
I've known Harry since 1983, where we met at the (night time) monumental Last Drag Race at OCIR...which was demo'd the following week. In the foreground of this pic is our mutual friend Alex Wong, owner of Pre-Tech independent Porsche service in Marina del Rey.
*If you are a local in SoCal, and would like to attend his services on 05.09.23, pm me for details ; Forest Lawn, Glendale.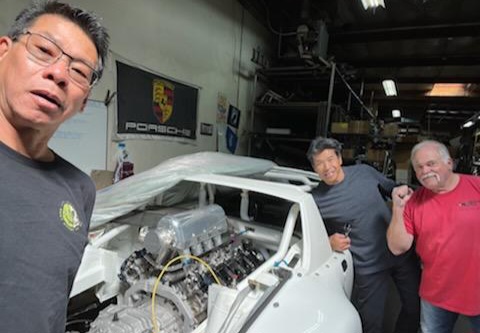
Posted by: Montreal914 Apr 27 2023, 09:17 PM
RIP
Another young one... 
Those who have driving 914s, enjoy them everyday!
Posted by: BillJ Apr 28 2023, 08:26 AM
Sorry to hear this. Thanks for sharing and celebrating a member.
Posted by: 914-300Hemi Apr 28 2023, 07:36 PM
Very sad to hear the news. Condolences to the family
Posted by: Maltese Falcon Apr 28 2023, 09:09 PM
Plugging in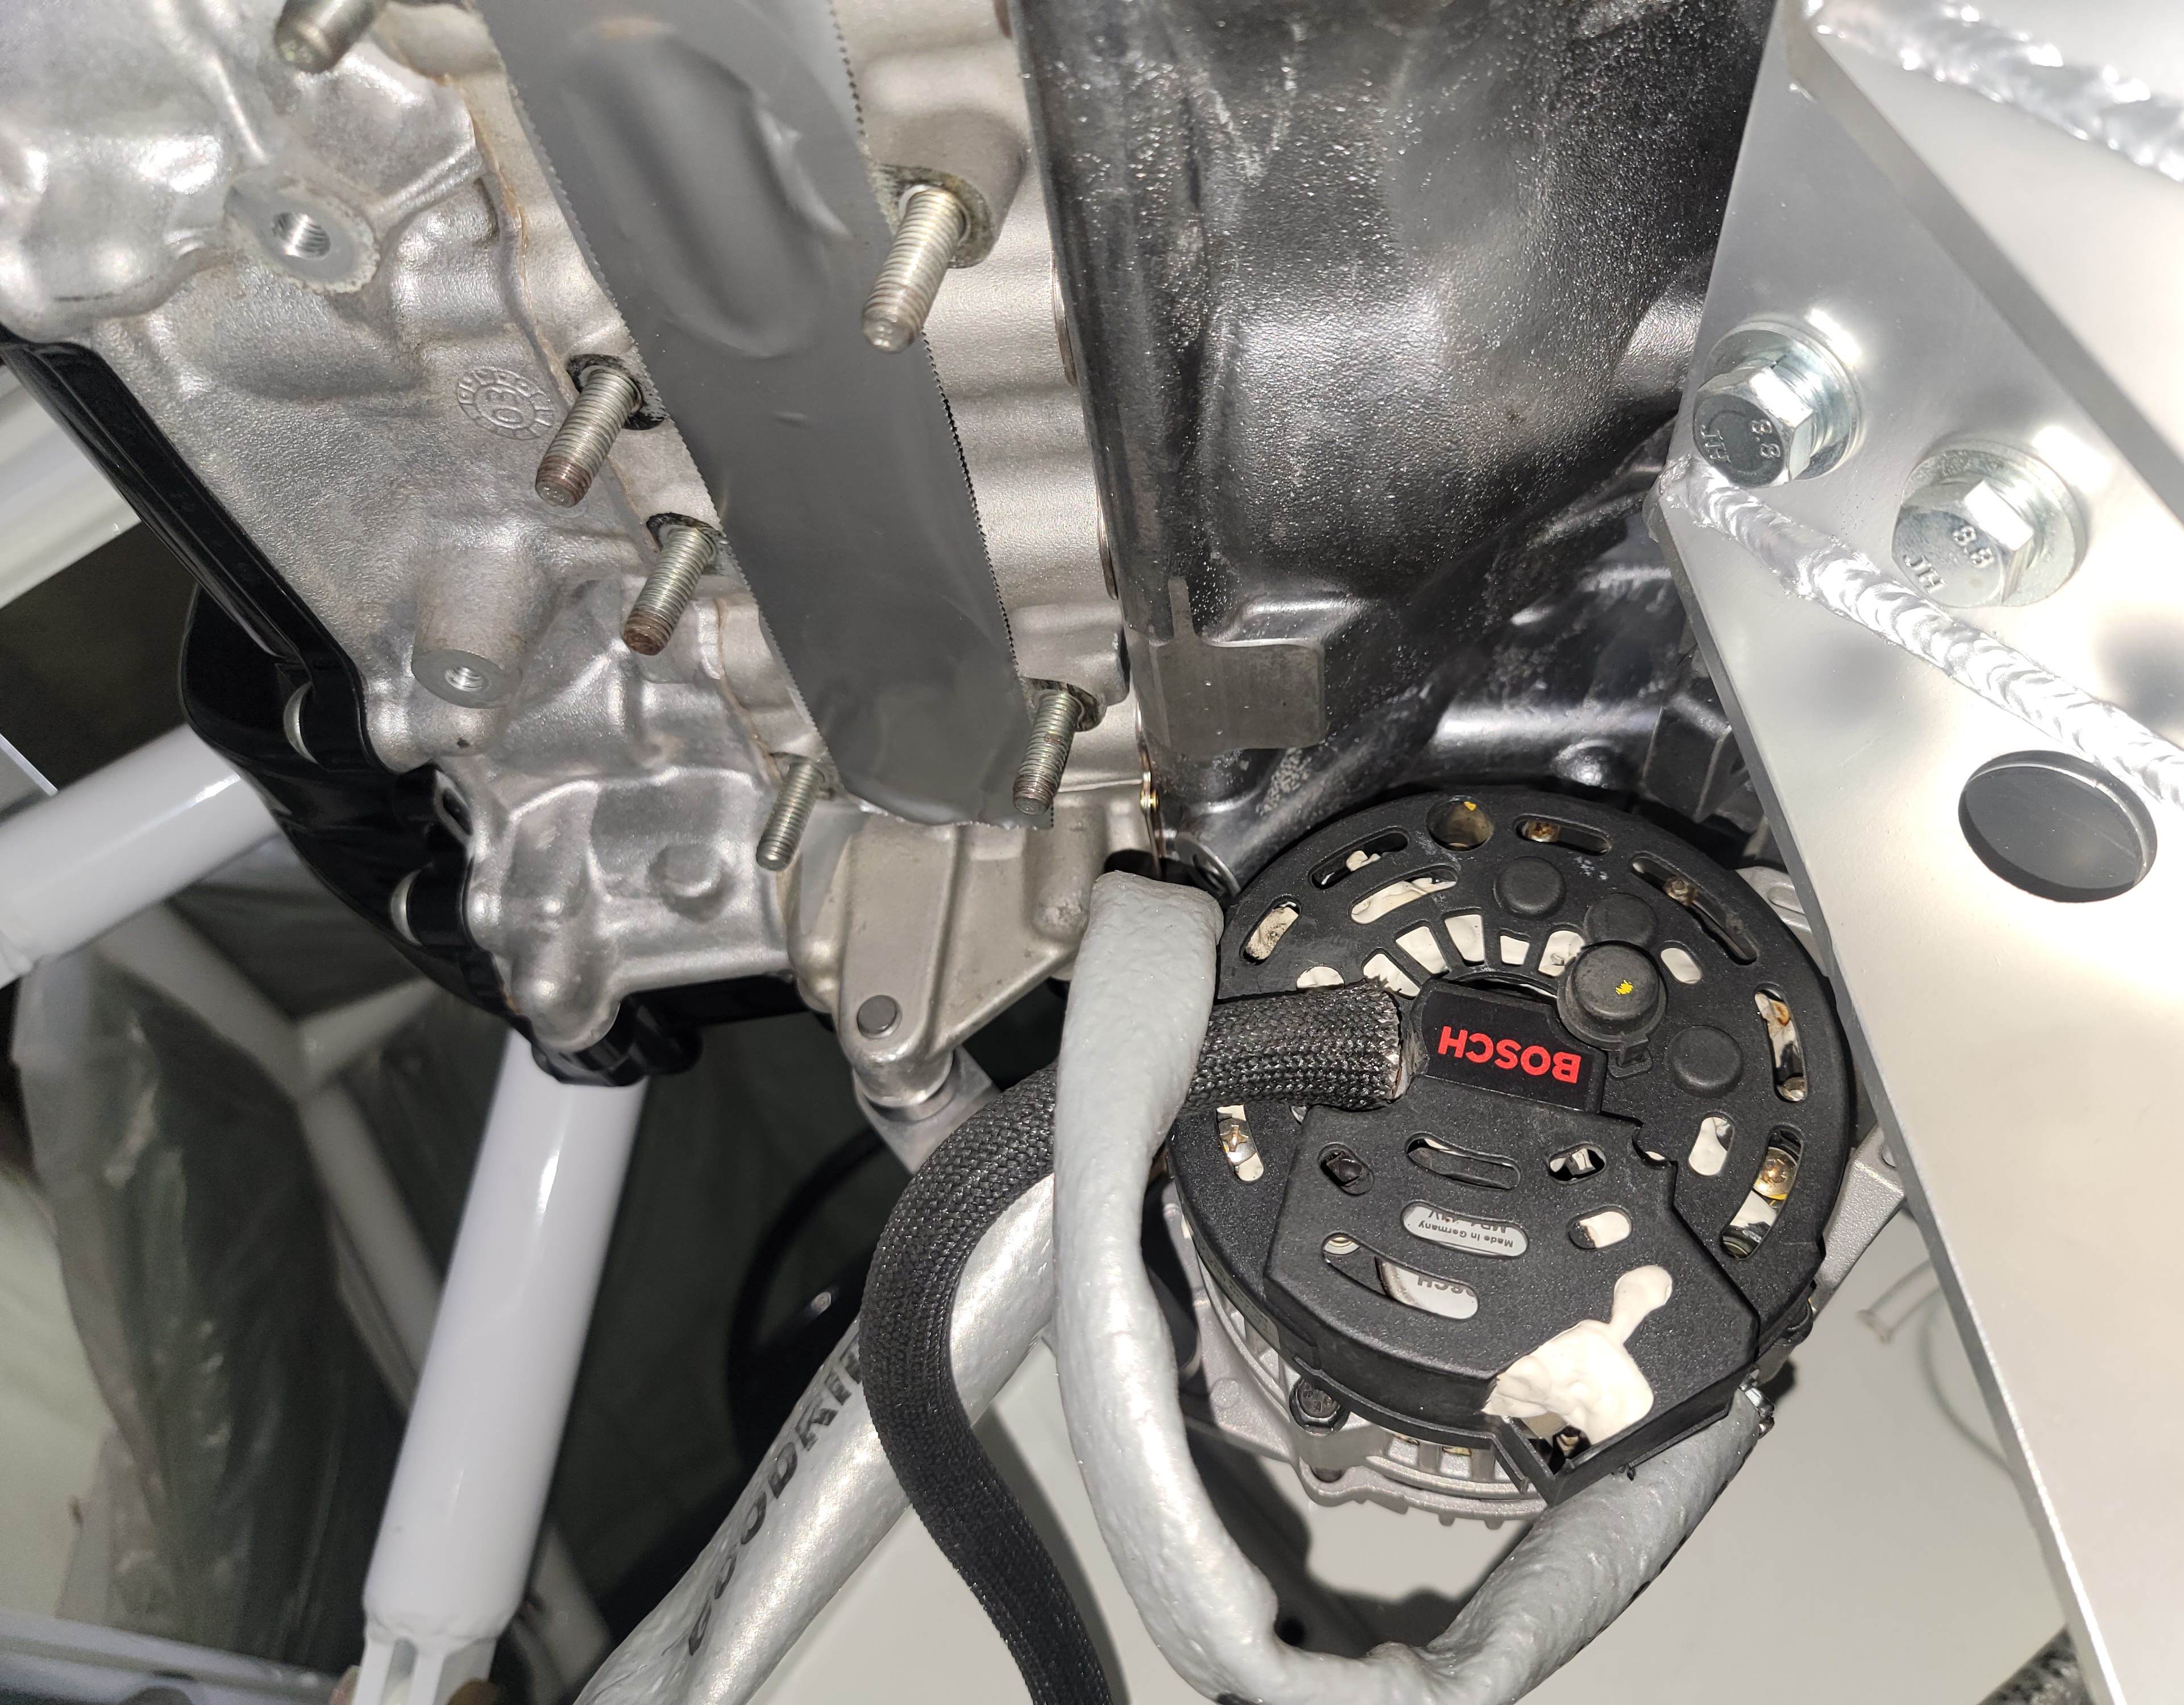
Posted by: Maltese Falcon Apr 28 2023, 09:16 PM
Small 6-gang fuse & SQS shifter-module sub-panel in engine ; this was the prev 12v battery area.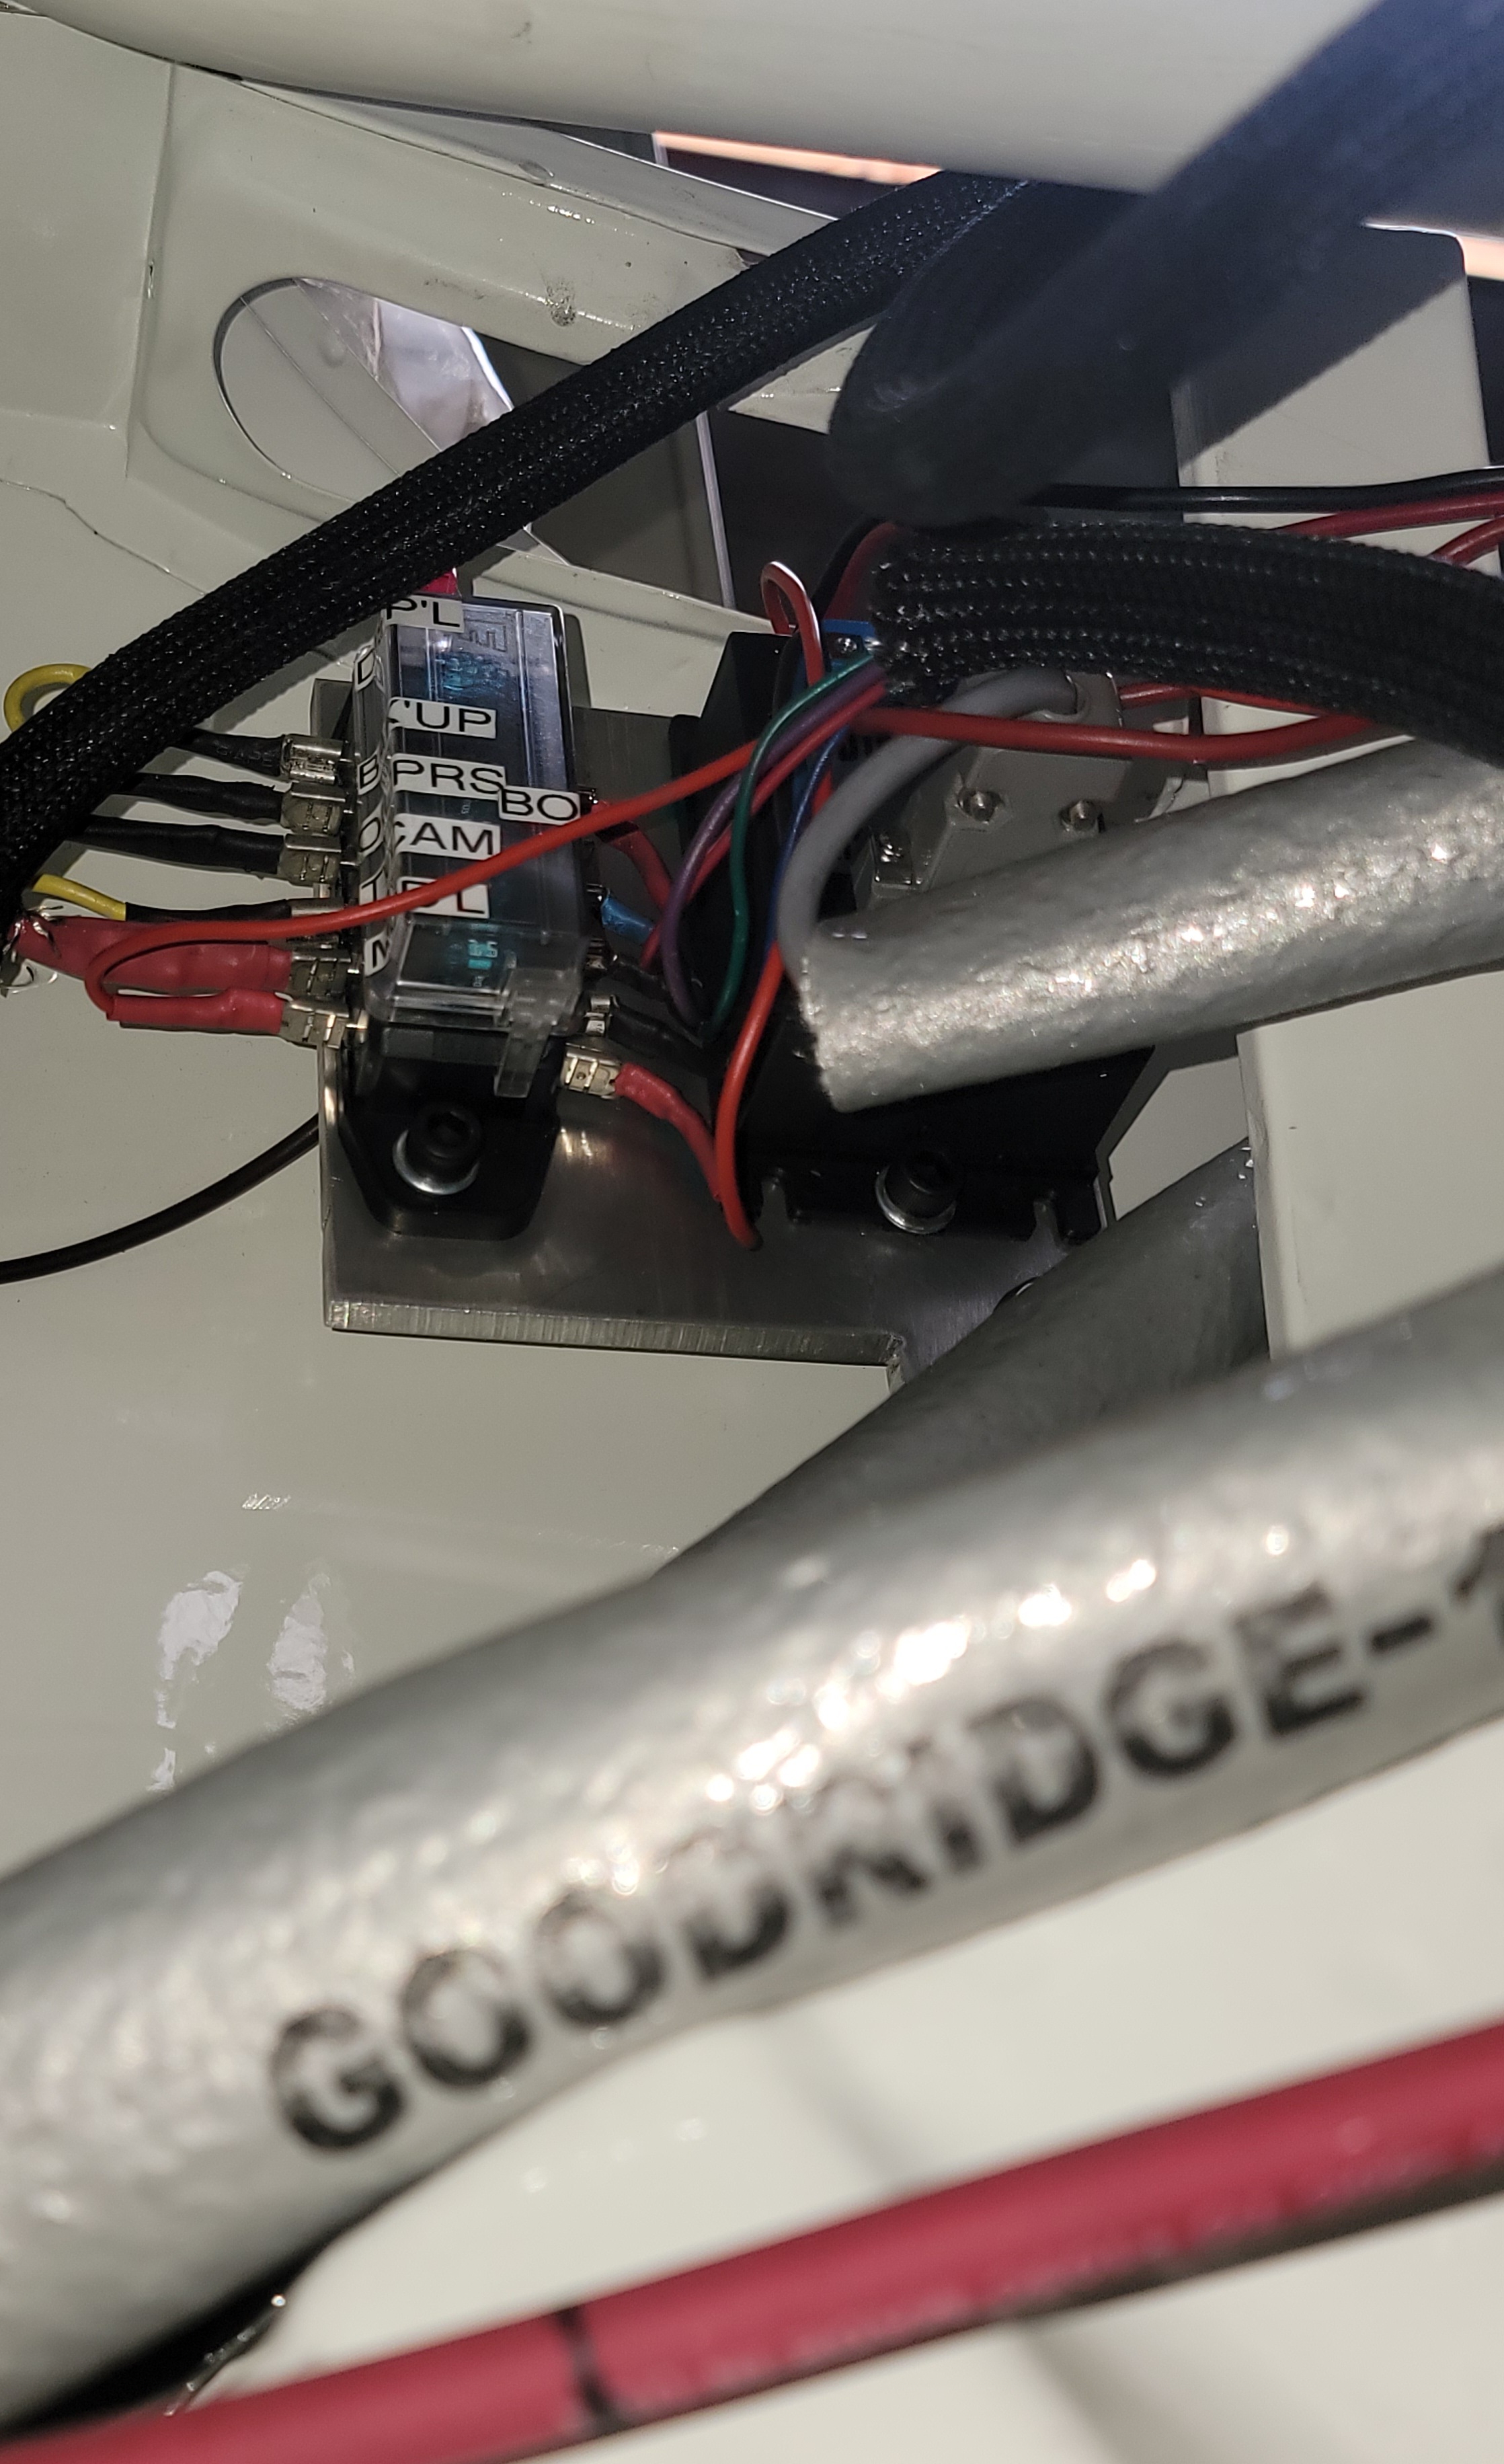
Posted by: Maltese Falcon Apr 28 2023, 10:01 PM
Top view, quick-disconnect is to isolate the SQS shift-module from B+ during jump starting (if needed).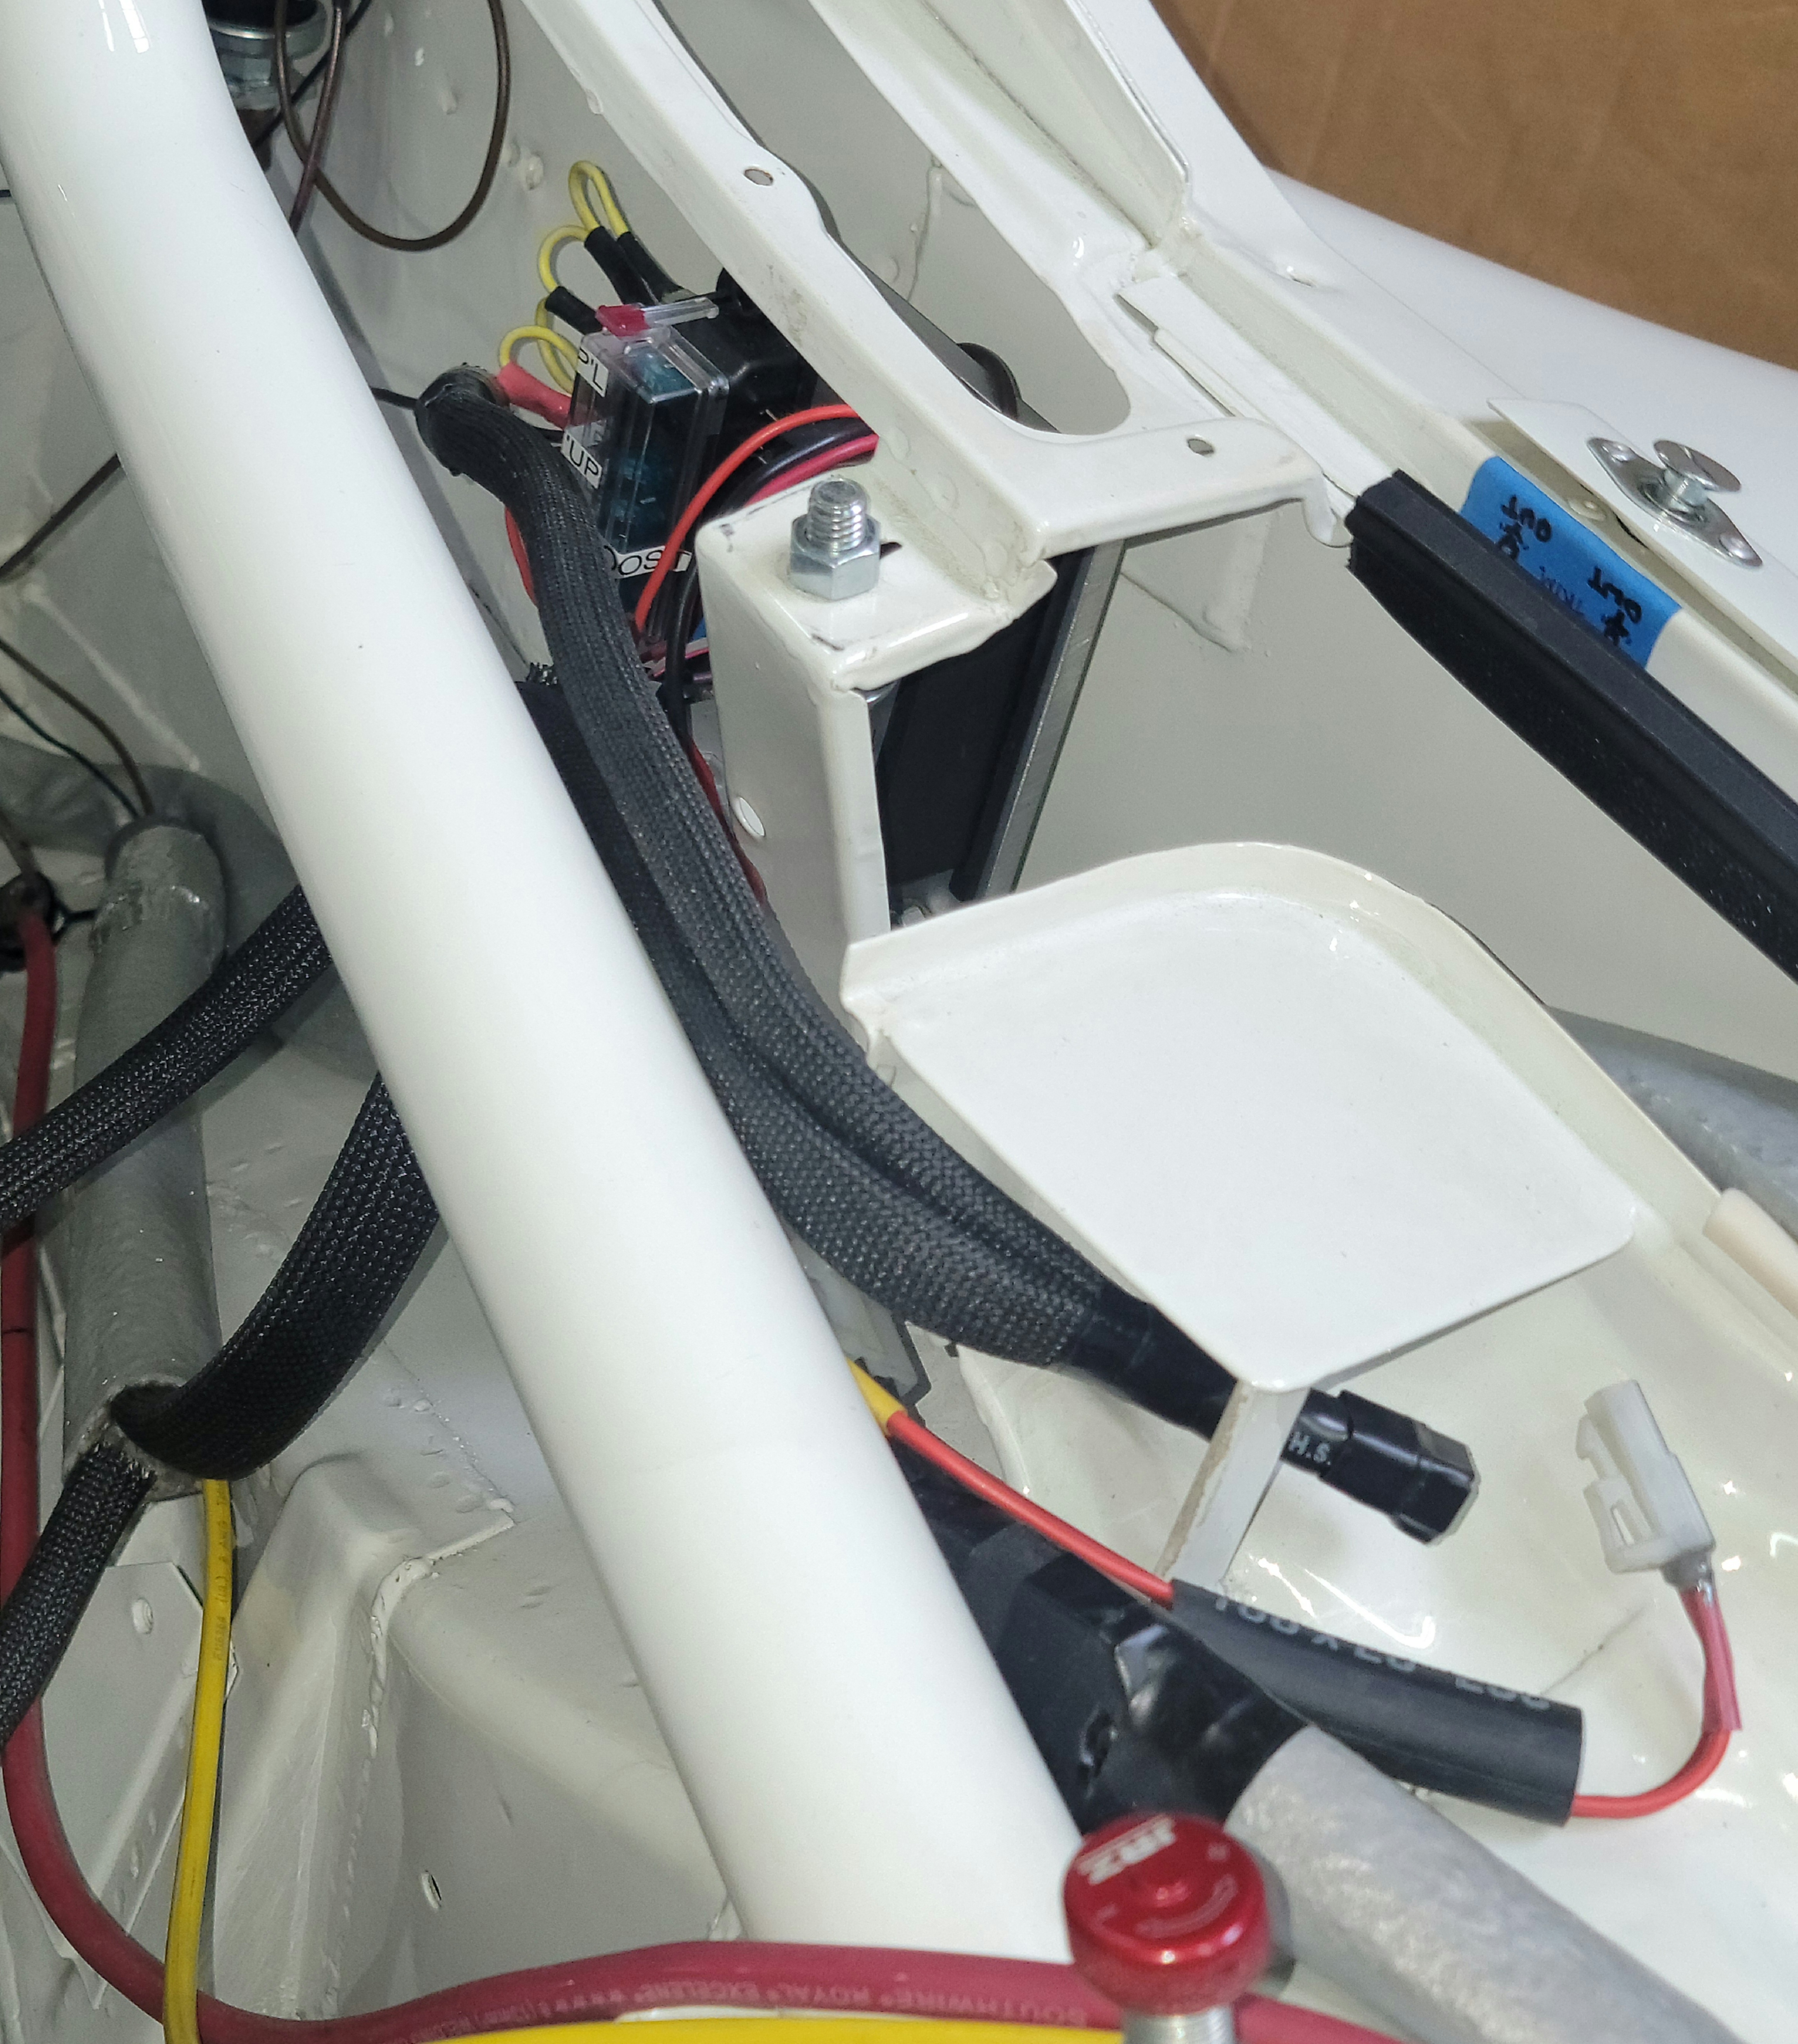
Posted by: Cairo94507 Apr 29 2023, 04:30 AM
RIP Mr. Harry Wong.
Posted by: Shivers Apr 29 2023, 06:49 AM
I'm sorry Marty, that is a bummer...RIP The car looks great.
Just buried my Dad in December from the freakin same thing. But he was 95. It's insidious, talk to your doctors, my Dad had his first stroke at 75 and spent the next 20 years all stroked out.
Posted by: Maltese Falcon Apr 30 2023, 06:50 PM
I'm sorry Marty, that is a bummer...RIP The car looks great.
Just buried my Dad in December from the freakin same thing. But he was 95. It's insidious, talk to your doctors, my Dad had his first stroke at 75 and spent the next 20 years all stroked out.
Our condolences to you & Family on your loss.
Marty
Posted by: Maltese Falcon Jun 16 2023, 06:43 PM
Oil control "Junction" located just below left end of engine grill, now hooked up to the custom chassis wire harness. These senders go to the oil-pressure + oil-temp gauges/ low oil-pressure warning light.
The Haltech Elite engine management also displays this info, but I do like several analog gauges to quickly glance while under way at speed.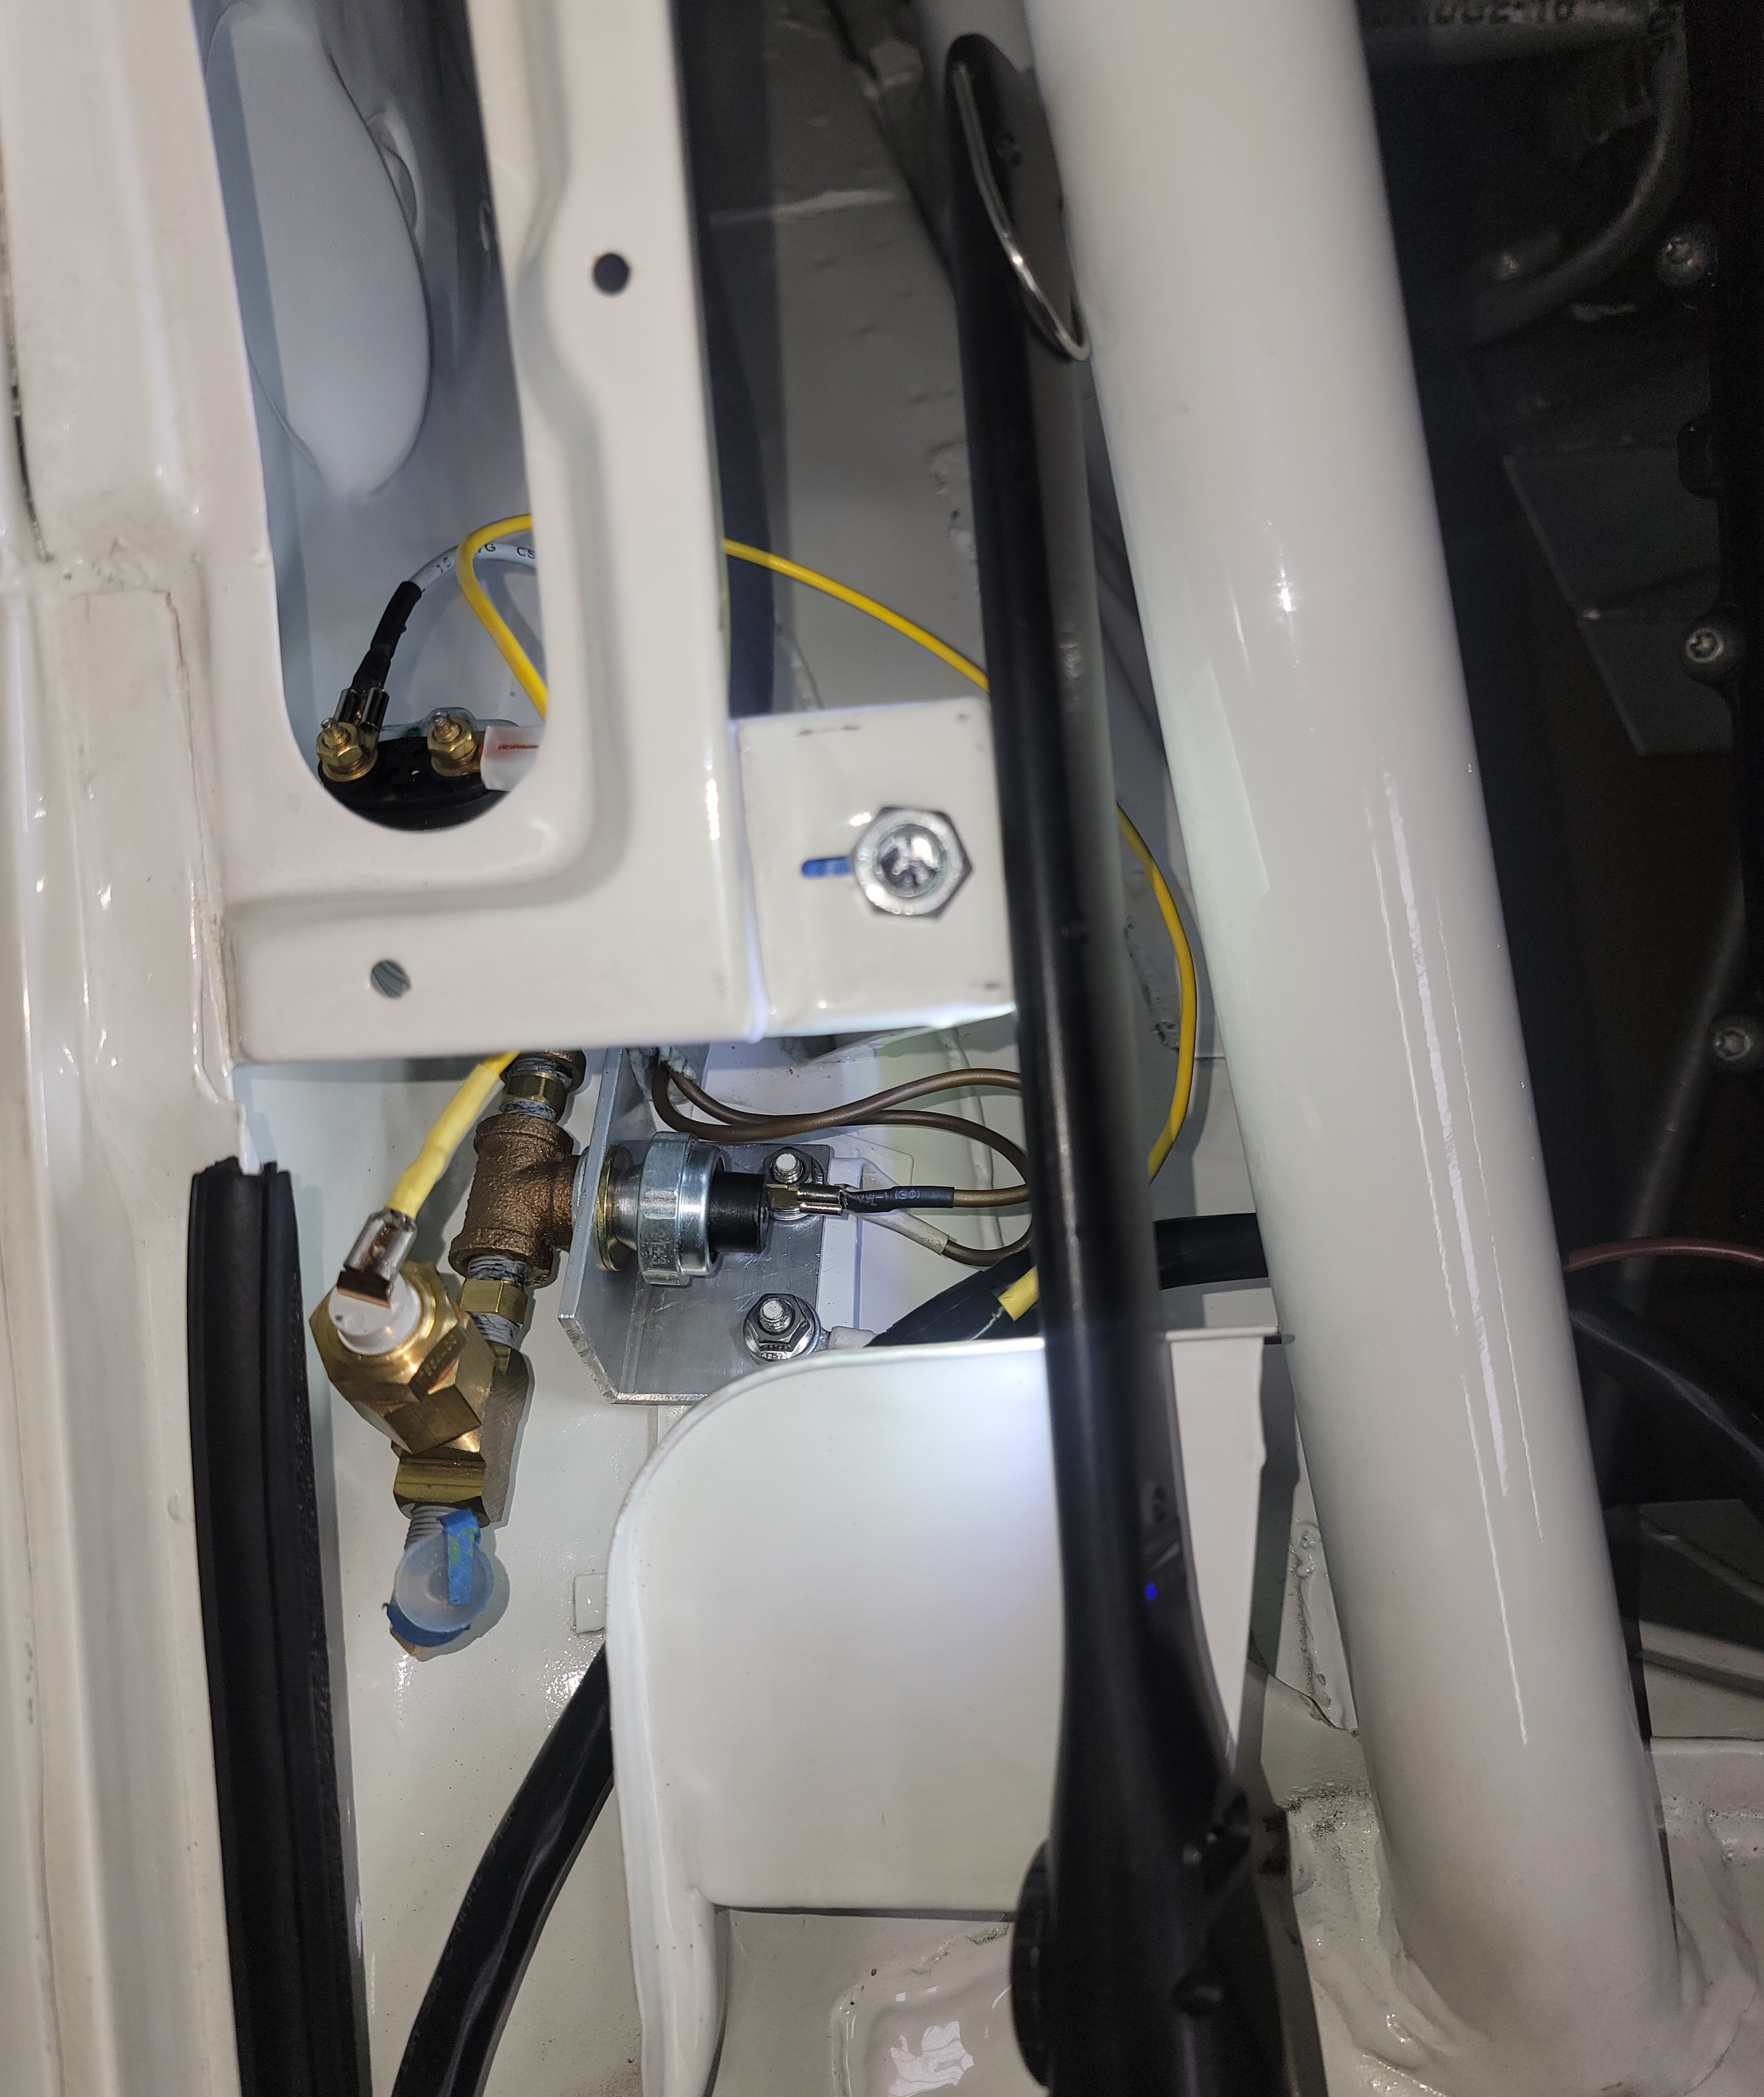 t
t
Posted by: Maltese Falcon Jun 16 2023, 06:48 PM
Body shop forgot to mask-up a few chassis studs, including these two where I was installing a bracket for these oil pressure/ temp senders. Tight quarters...but got the 6x1mm thread die in there for a proper clean up !
Posted by: Maltese Falcon Jun 16 2023, 06:51 PM
Body shop def did not skimp on the paint thickness, lots of debris packed on those studs
Posted by: Maltese Falcon Oct 14 2023, 09:42 PM
Tidying up electric cables running into cabin
Posted by: Maltese Falcon Oct 14 2023, 09:51 PM
Checking operation of low Oil Press warning light
Posted by: Maltese Falcon Oct 14 2023, 09:57 PM
Testing the 49 year old Fasten Seat Belt light...this will illuminate with onset of 7 psi of turbo boost 
Posted by: Maltese Falcon Oct 14 2023, 10:06 PM
I have this "Mechanical" 962 style boost adjustment unit (dampf-rad) but not going to integrate with our Haltec management ecu; as the ecu monitors + adjusts wastegate boost limits via electronic potentiometer + solenoid activation. So I've found a machinist who makes extra Top adjustment knobs> so I won't need to steal one off of my complete 962 valve which is going on the flat-fan biturbo.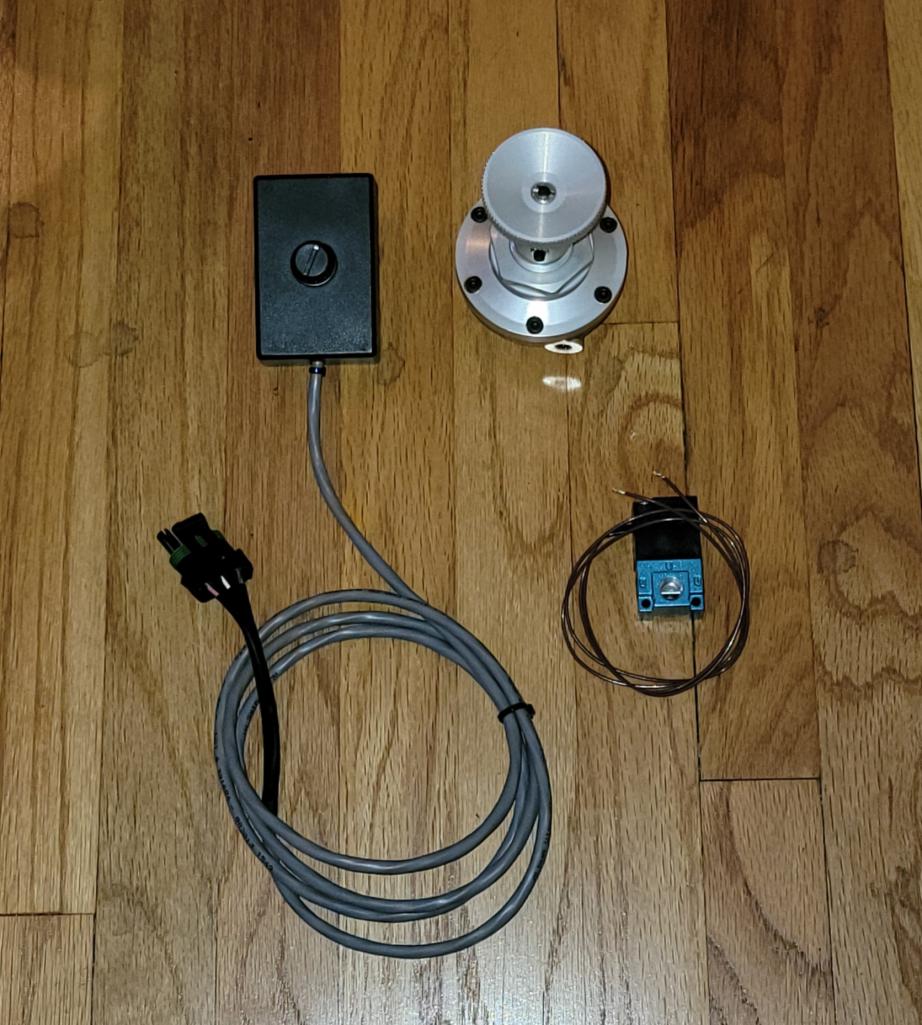
Posted by: Maltese Falcon Oct 14 2023, 10:11 PM
962 style adjustment knob, now grafted to the variable pot'. This will operate 2 solenoids wired to operate 2 Tial wastegates, as this is a twin turbo build.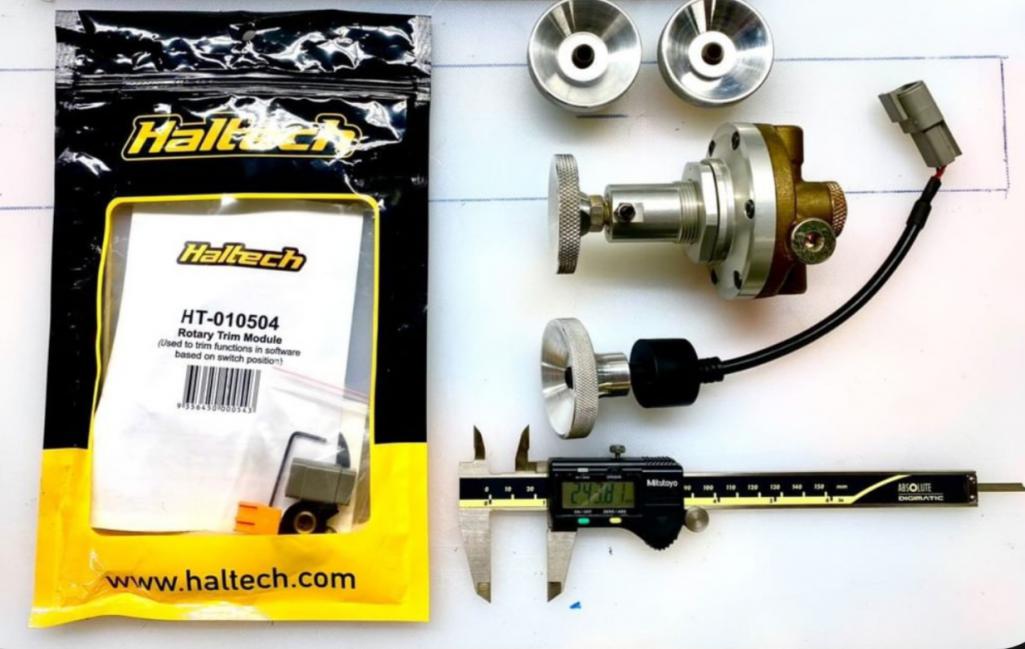
Posted by: Maltese Falcon Oct 14 2023, 10:19 PM
8gtt keys only operate the door locks...car is using a push-button starter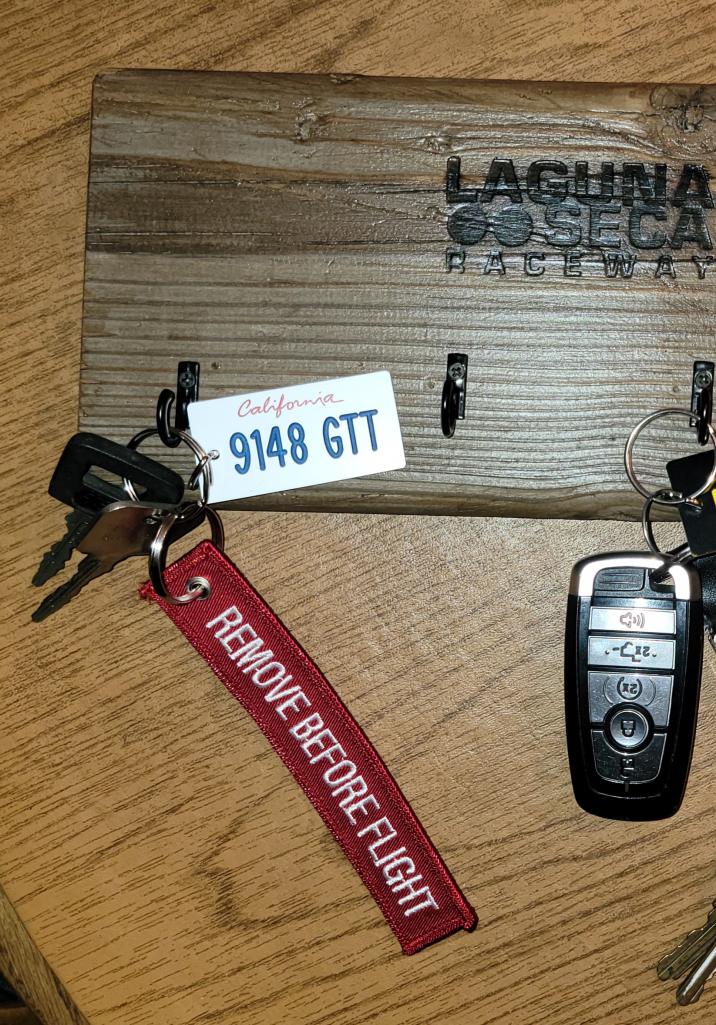
Posted by: Maltese Falcon Oct 14 2023, 10:24 PM
Left side shorty turbo header in place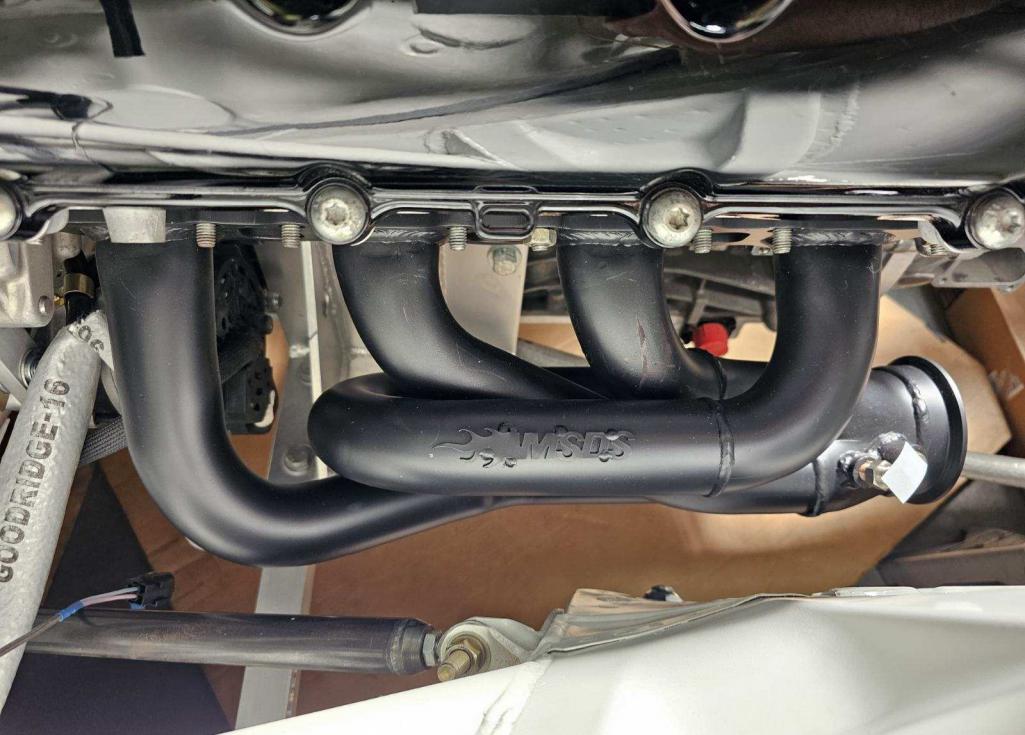
Posted by: Maltese Falcon Oct 14 2023, 10:26 PM
Header finished in high temp Satin Black ceramic coat.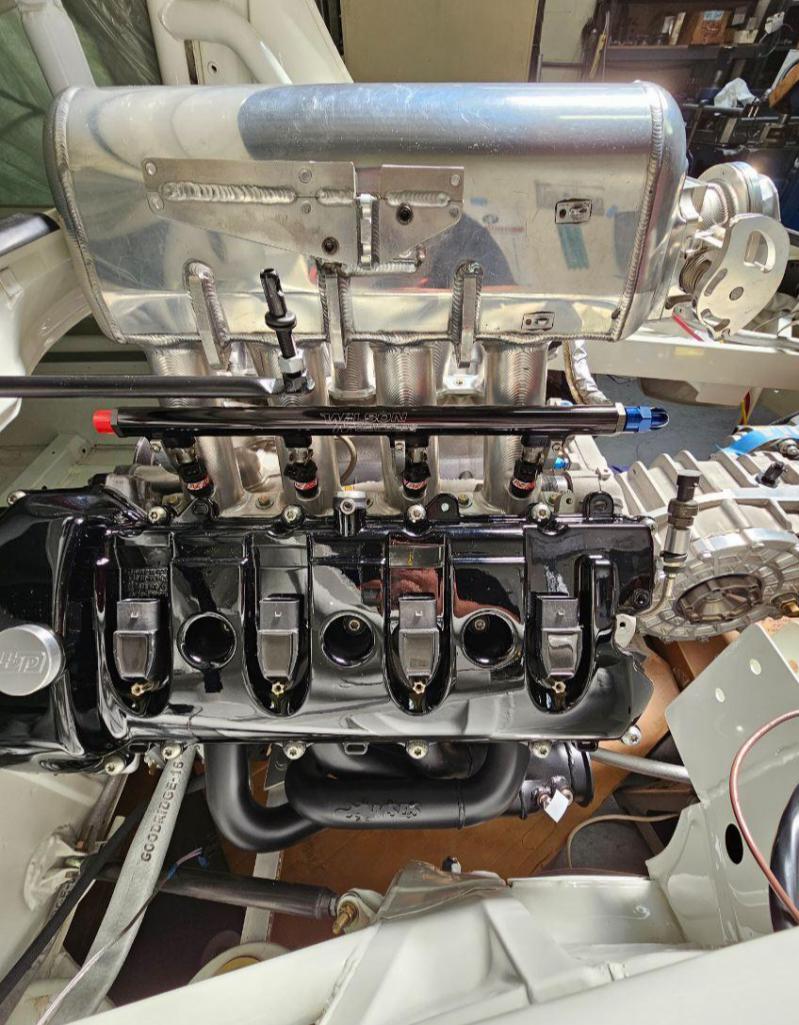
Posted by: Maltese Falcon Oct 14 2023, 10:28 PM
Under shot pic 
Posted by: Maltese Falcon Oct 14 2023, 10:32 PM
EGT probe, o2 port/ pre-exhaust turbine sampling location. Secondary o2 ports go on the turbine outlet exhaust pipes.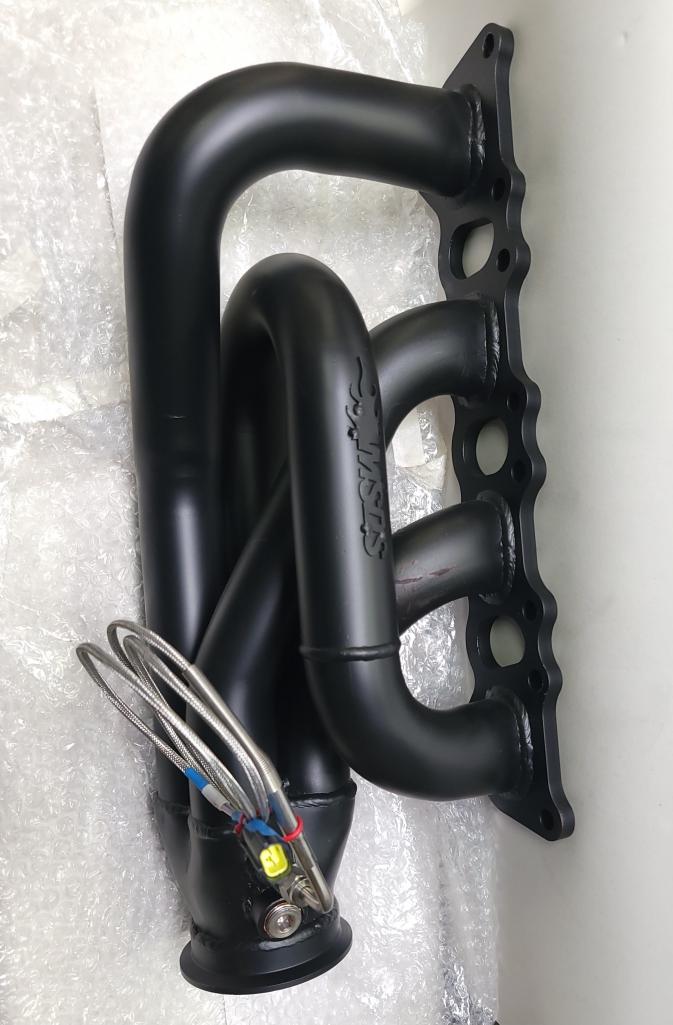
Posted by: Maltese Falcon Oct 14 2023, 10:39 PM
Dunkin and my style of coffee break...
Posted by: Maltese Falcon Oct 14 2023, 10:43 PM
Something came up towards the end of September, and there were plenty of these flat 12 cylinder air cooled racers all gathered there>>took a break from the 8gtt
Posted by: Maltese Falcon Oct 14 2023, 10:45 PM
We were honored to bring the #40 to the gig
Posted by: Maltese Falcon Oct 14 2023, 10:48 PM
One week off of work on 9148-gtt, this Rennsport gig only comes around every 5 years or so.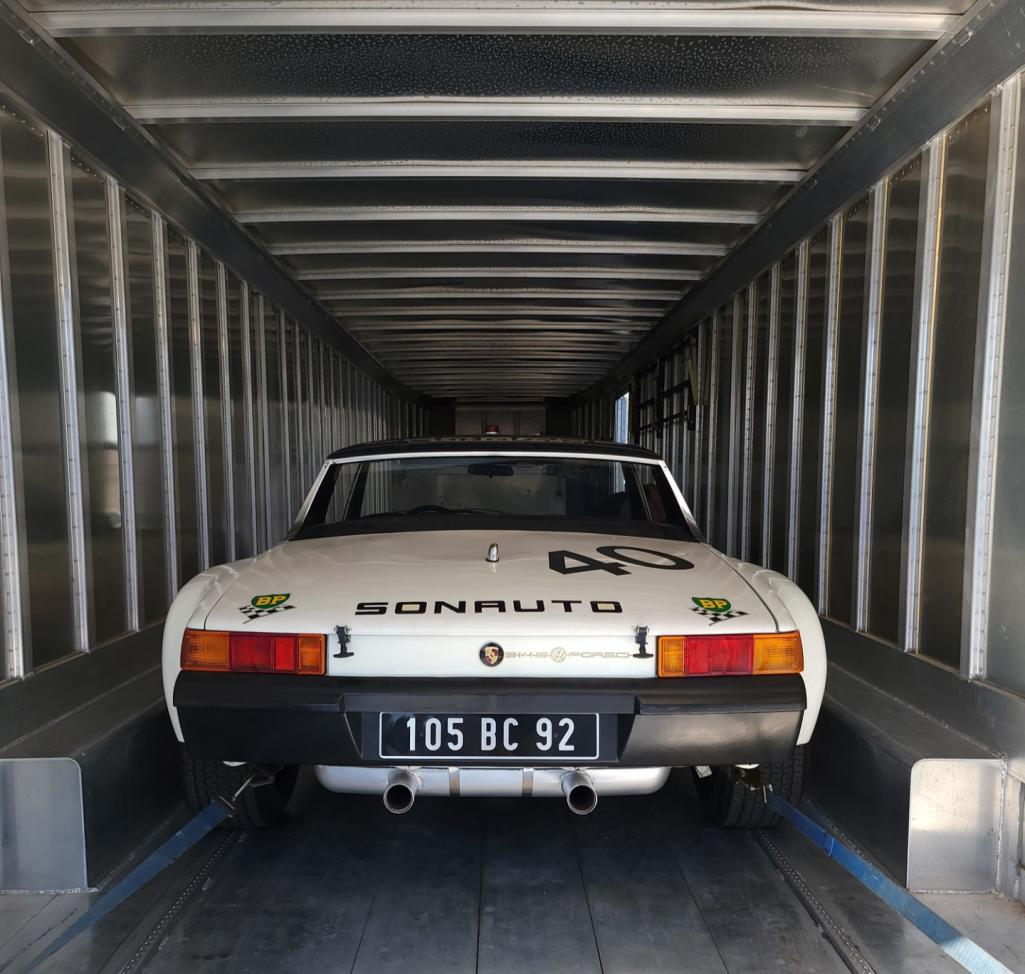
Posted by: Maltese Falcon Oct 14 2023, 10:57 PM
Pairing up with the Gulf 917 for exhibition laps 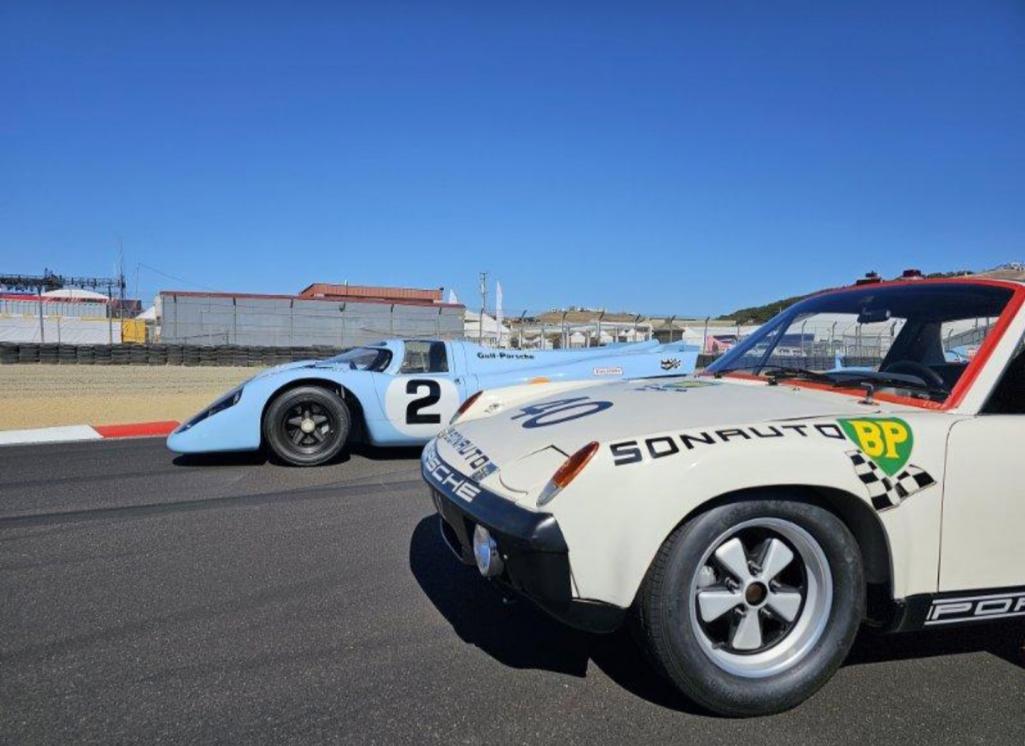
Posted by: Maltese Falcon Oct 14 2023, 11:12 PM
And just as the trip (3 in the 914) to Victory lane in 1970, we followed suit and @http://www.914world.com/bbs2/index.php?showuser=14843 riding shotgun...we finished off Rennsport7 and now back to the 8gtt build
Photo credit @saramdietrich
Posted by: KELTY360 Oct 15 2023, 10:59 AM
And just as the trip (3 in the 914) to Victory lane in 1970, we followed suit and @http://www.914world.com/bbs2/index.php?showuser=14843 riding shotgun...we finished off Rennsport7 and now back to the 8gtt build
Photo credit @saramdietrich
Living the life and carrying the word. Good on ya Marty!!
Posted by: Shivers Oct 15 2023, 11:14 AM
Pairing up with the Gulf 917 for exhibition laps
Oh my Dog Marty. Priceless
Congratulations
Posted by: KELTY360 Oct 15 2023, 03:06 PM
Maybe I missed it Marty, but I don't think you've told us what it's like driving #40 on the track.
Posted by: Maltese Falcon Oct 15 2023, 07:57 PM
Maybe I missed it Marty, but I don't think you've told us what it's like driving #40 on the track.
Marc she runs like on rails, pulls hard from about 3,700 rpm and we were shifting at approx 7,300 rpm.
Not on slicks and exhibit laps only, so I'd say we only ran our daily 4 laps at 70% of potential. Oil temps were normal throughout the course. Gear ratios that we chose in the 901 overhaul were perfect for this track, and the tail shifter performed flawlessly. First time under power since leaving Aase Motors and extremely pleased with the engine, trans, suspension overhaul.
Posted by: Maltese Falcon Oct 15 2023, 09:15 PM
@http://www.914world.com/bbs2/index.php?showuser=14843 and me bumped into Ravi today @http://www.914world.com/bbs2/index.php?showuser=6794 at the annual Galpin Motors car show in Van Nuys !
Posted by: krazykonrad Oct 17 2023, 06:41 AM
You are living the dream!
Posted by: Maltese Falcon Oct 28 2023, 06:31 PM
Addressing the Haltech Elite2500 ecu & some of the accessory and C-A-N cables /from and to the IQ3 Racepak dashboard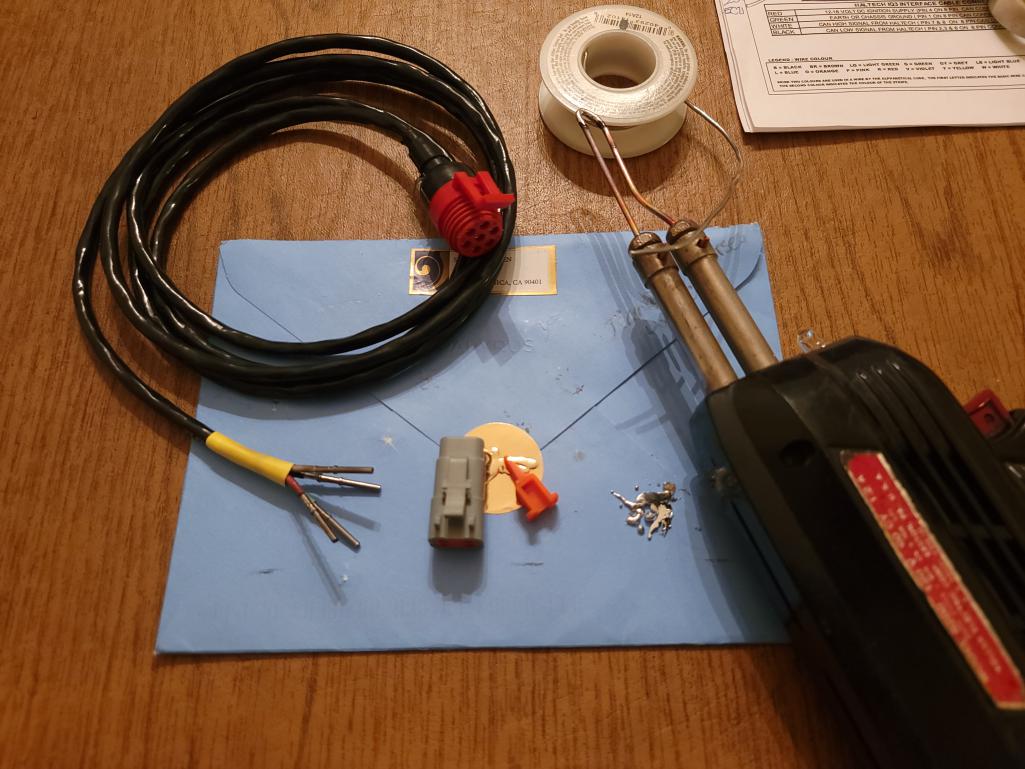
Posted by: Maltese Falcon Oct 28 2023, 06:33 PM
Complete and ready to plug in and move to the next component
Attached thumbnail(s)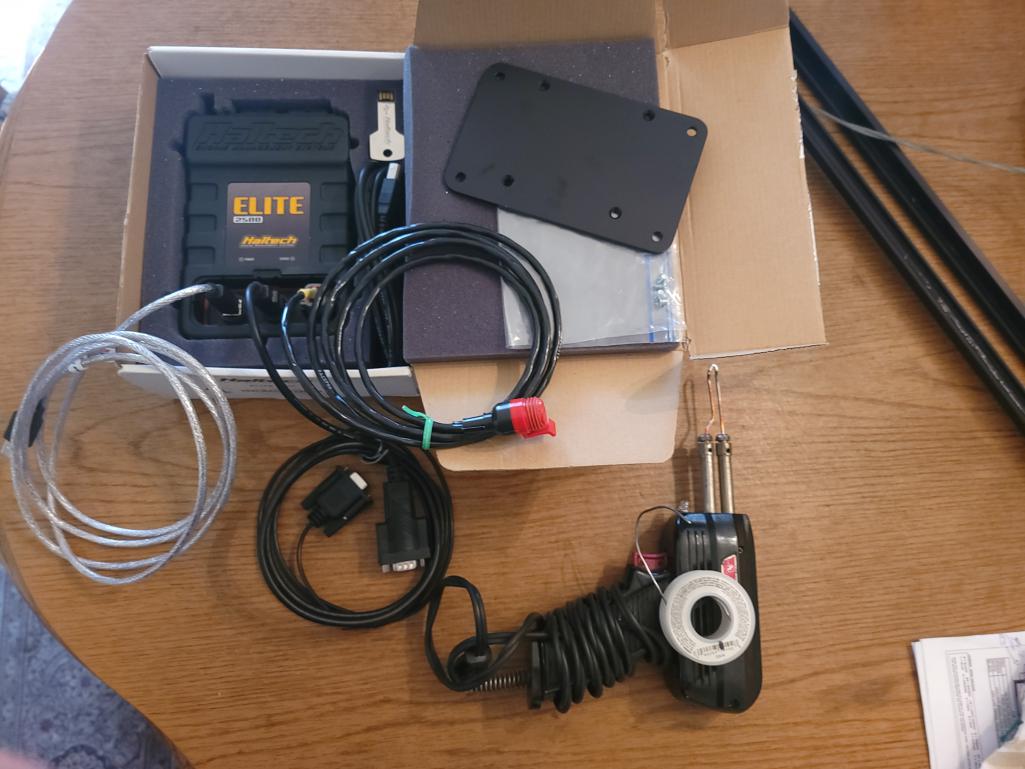
Posted by: rick 918-S Oct 29 2023, 02:05 AM
I like the sticker can I get one? Love the headers.
Posted by: Maltese Falcon Oct 29 2023, 05:48 PM
Cables snapped into the IQ3 Racepak dash, with slack wires for easier component maintenance.
Next up GPS antenna routing for heads up speedo display. 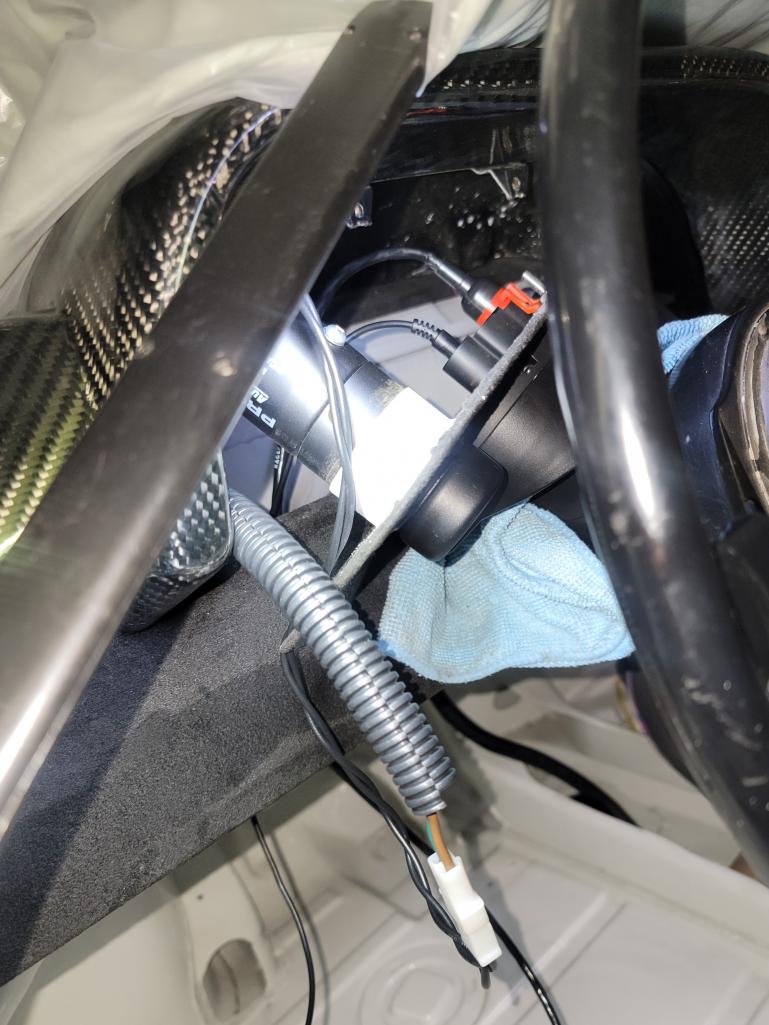
Posted by: Maltese Falcon Nov 4 2023, 09:09 PM
Not a final placement of the GPS /speedometer antenna, but it will be on the dash, facing upwards towards windshield.
Posted by: Maltese Falcon Nov 4 2023, 09:24 PM
and another small component which works with the antenna signals, then interfaces into the ecu. MPH (or KPH) Speeds are determined by how fast the 914 travels between 2 satellites 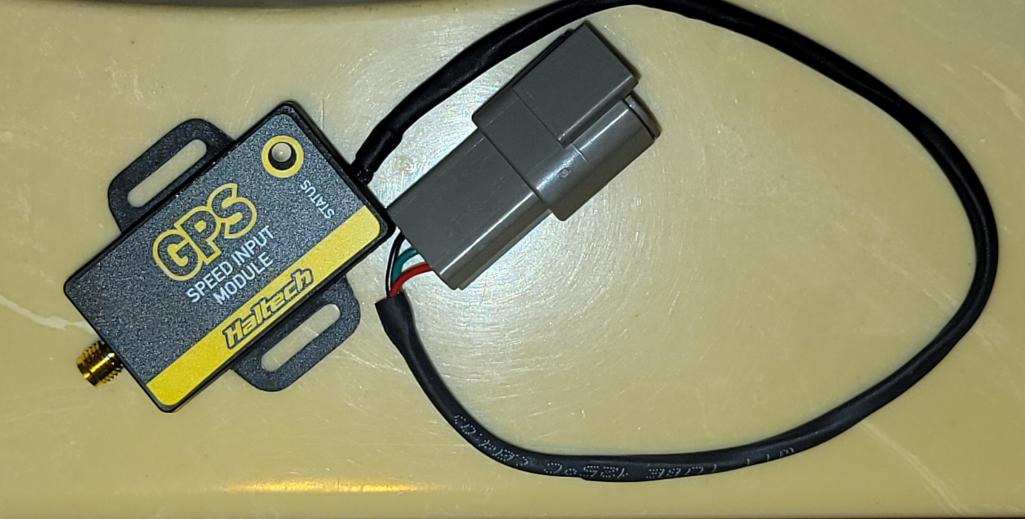
Posted by: Maltese Falcon Nov 4 2023, 09:29 PM
My "Good night" book for reading this evening...probably the 4th or 5th time I've read it.. Always find something new and interesting from Mark!
Posted by: Maltese Falcon Nov 12 2023, 12:24 PM
What's behind us is Important so: rear facing camera feed. Just looking at placement options 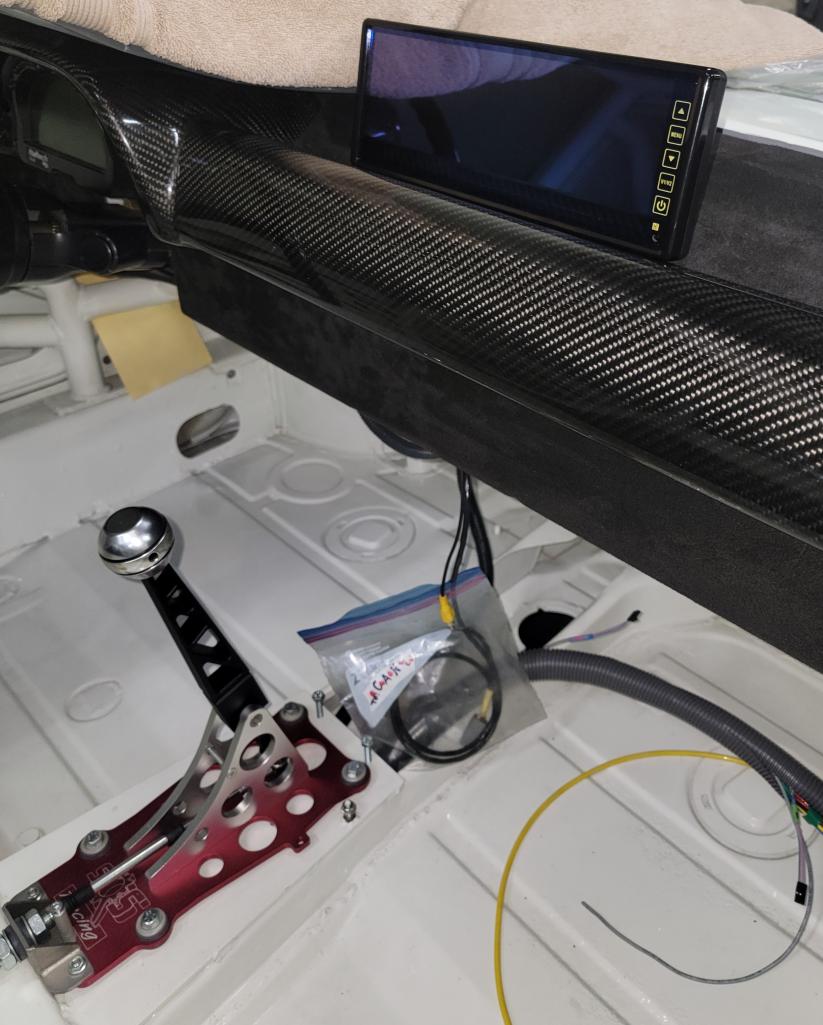
Posted by: Maltese Falcon Nov 12 2023, 12:27 PM
A few improvements to the camera circuit, easier now to mount + access the small enclosed fuse.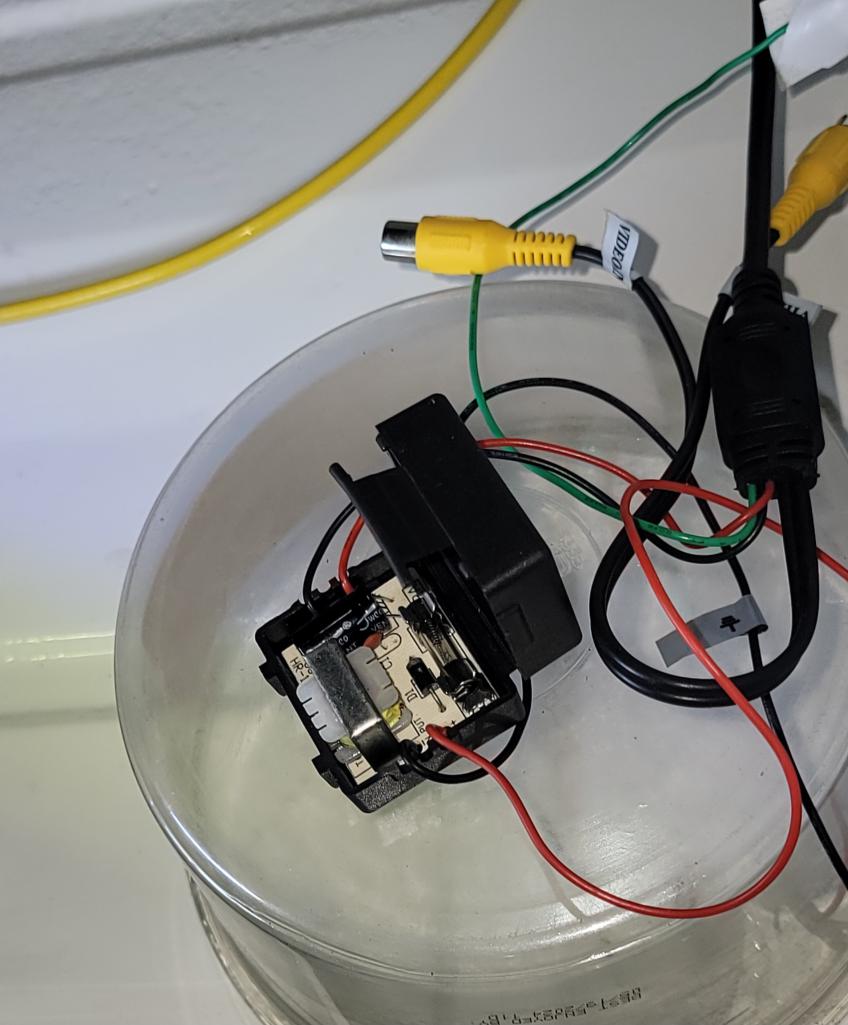
Posted by: Maltese Falcon Nov 12 2023, 12:32 PM
Routing the camera coax line through small passages...less drilling is always good ! Black cable sits in a small groove inbetween the cowl + dash top.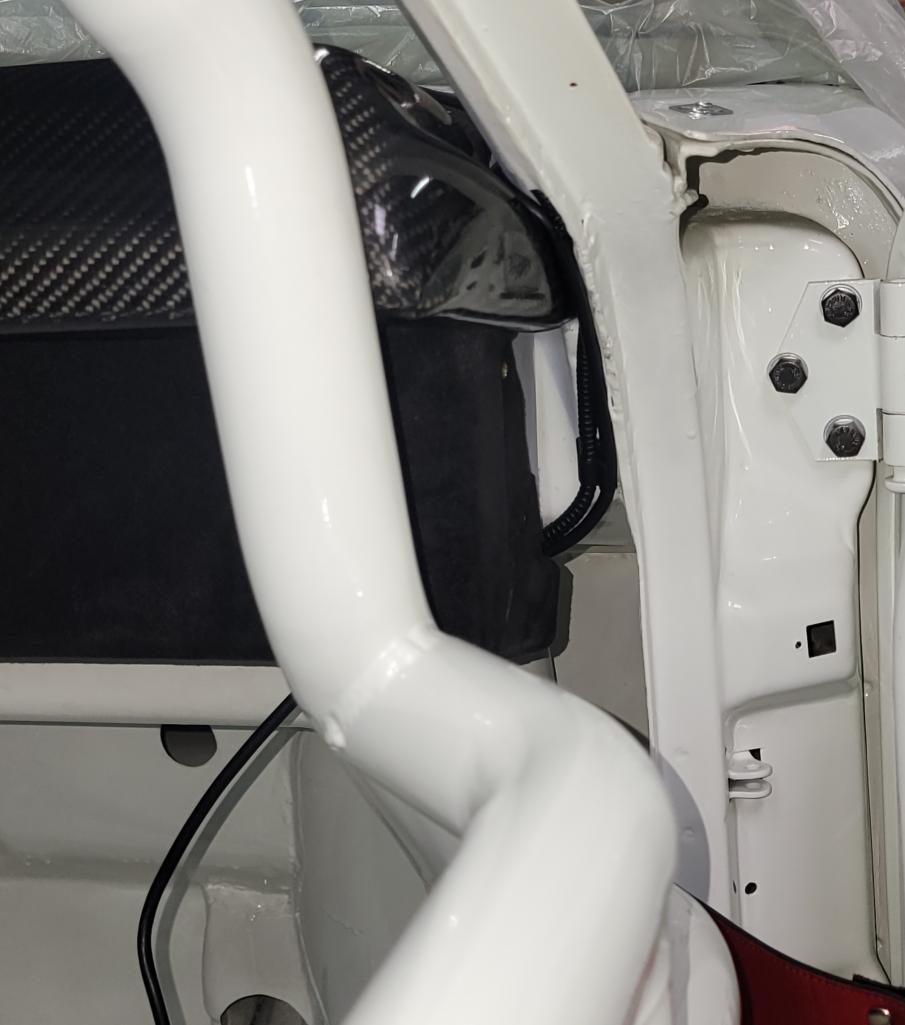
Posted by: Maltese Falcon Nov 12 2023, 08:34 PM
Routing the ¼" camera wire cable in the dashboard gap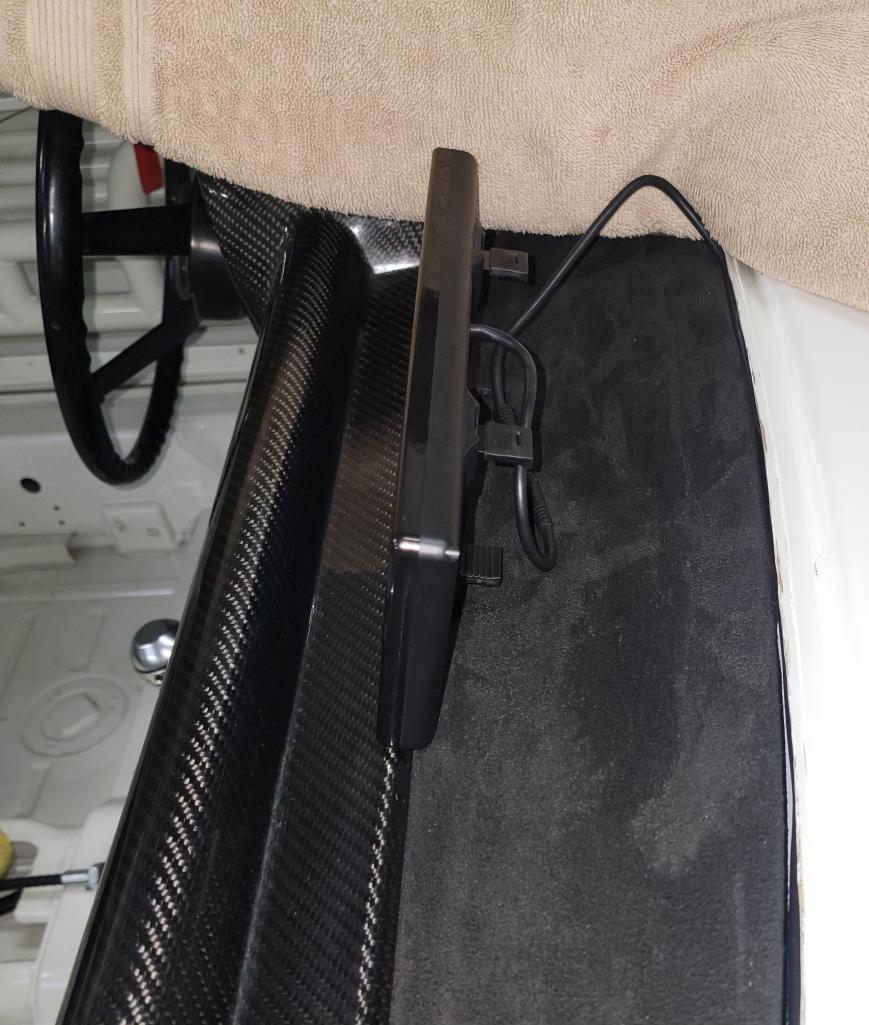
Posted by: Maltese Falcon Nov 25 2023, 11:08 PM
This is the custom right side coolant line cover-plate that Ben @http://www.914world.com/bbs2/index.php?showuser=9892 mfg for us. It's perfect for our use, and since I've elongated the oe opening.. only a small 2×3" piece of sheet is needed to seal it up.
Thank you Ben for the pair of cover-plates 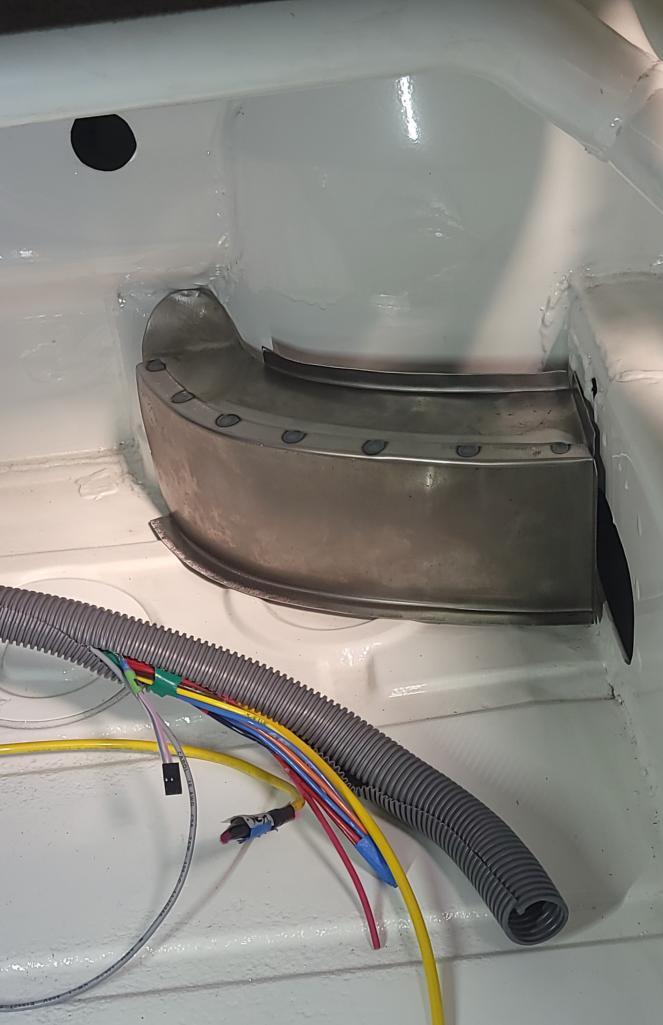
Posted by: Maltese Falcon Nov 25 2023, 11:14 PM
Let's make a boost-solenoid bracket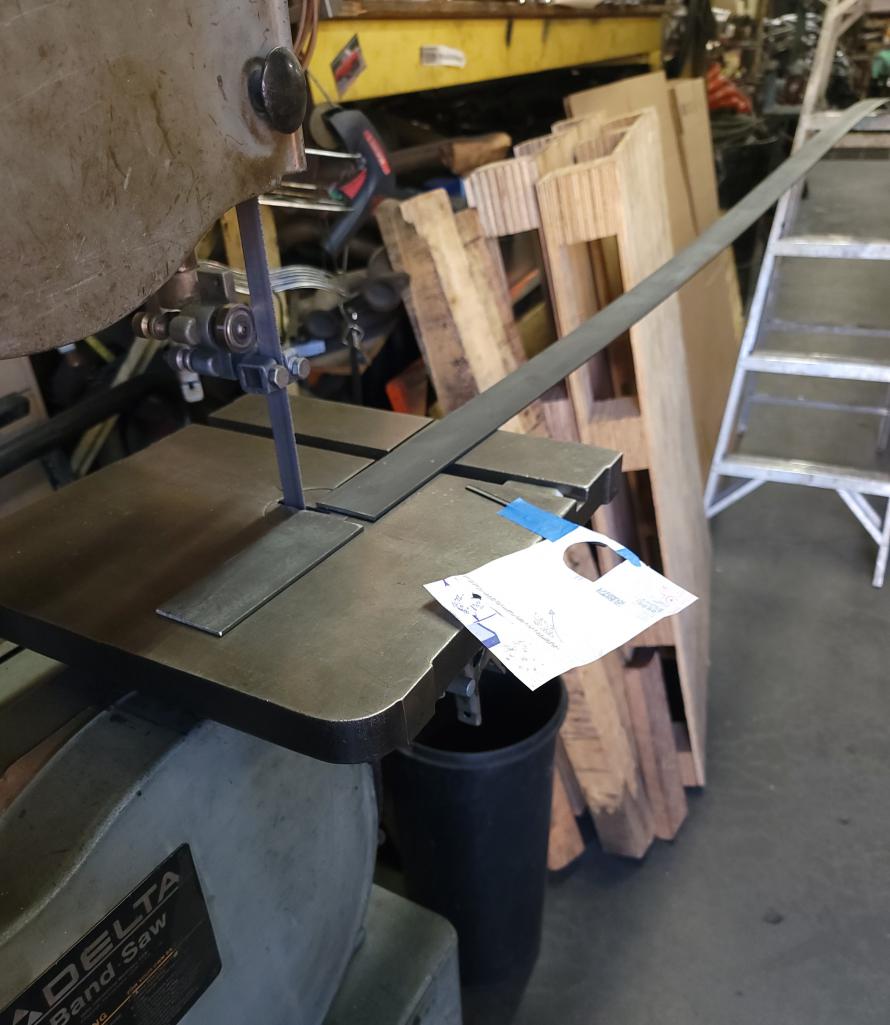
Posted by: Maltese Falcon Nov 25 2023, 11:16 PM
Basic layout.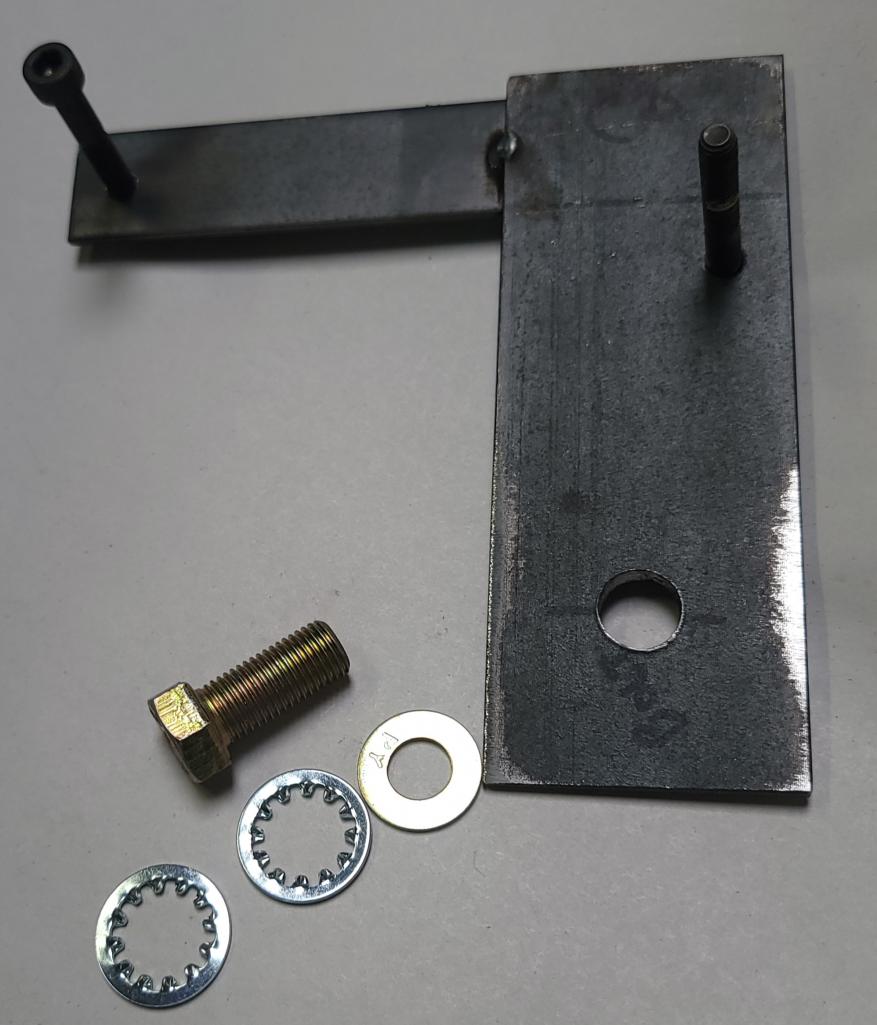
Posted by: Maltese Falcon Nov 25 2023, 11:22 PM
Ready for engine bay mounting, then finish hooking into the ecu wire harness.
The upper 6mm bolt at the top of bracket will be a fastening point for 1 of the fire suppression nozzles. 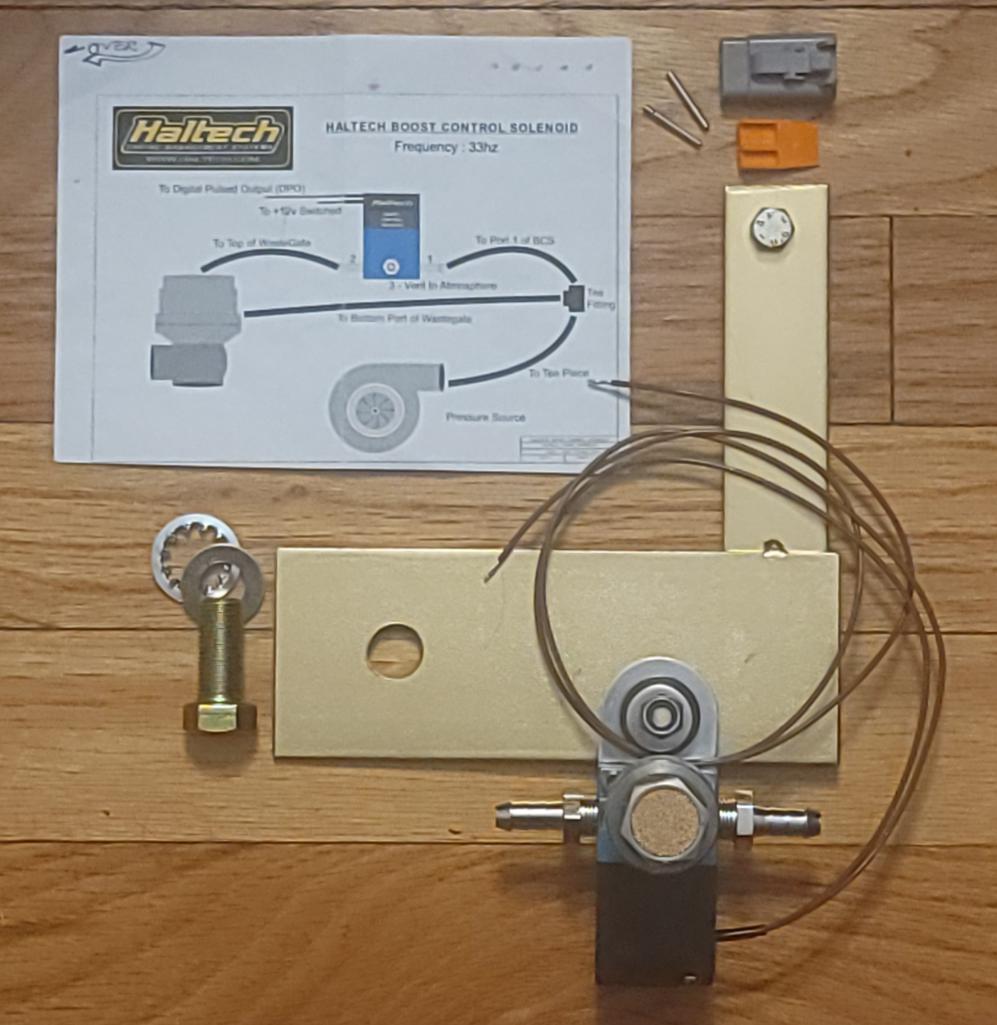
Posted by: Maltese Falcon Nov 29 2023, 04:09 PM
easy job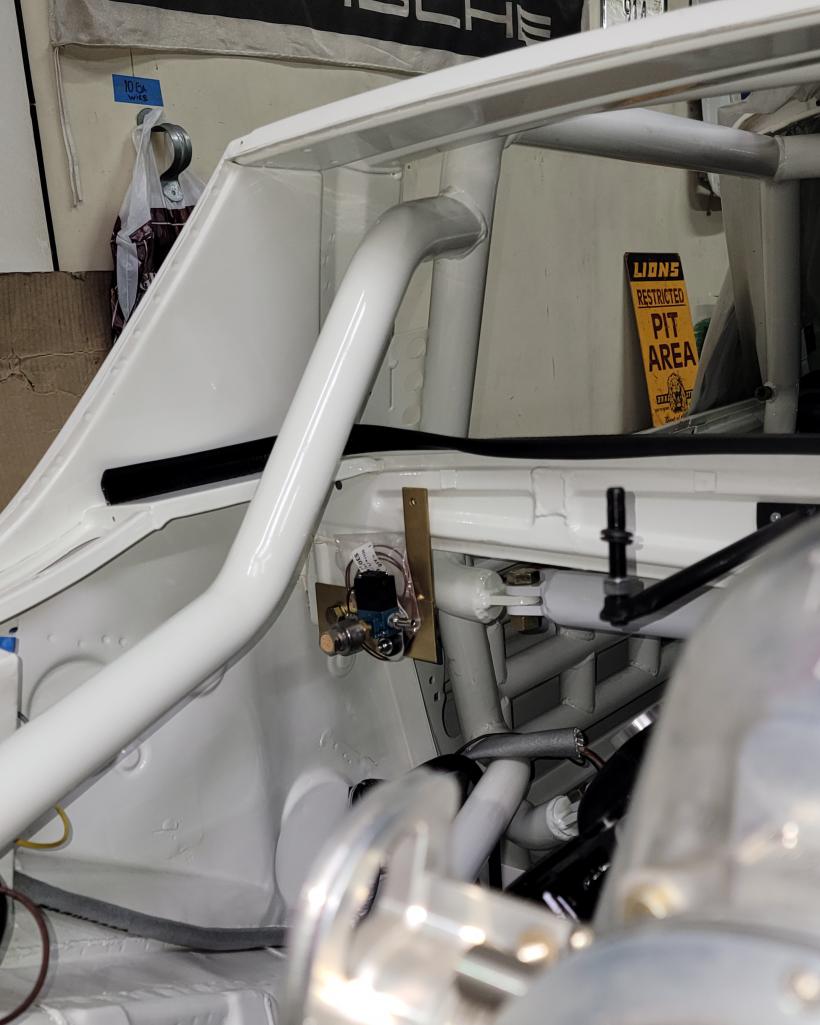
Posted by: Maltese Falcon Dec 2 2023, 05:18 PM
CSF radiator (trans cooler) just in, and working out the rear placement mounting alternatives 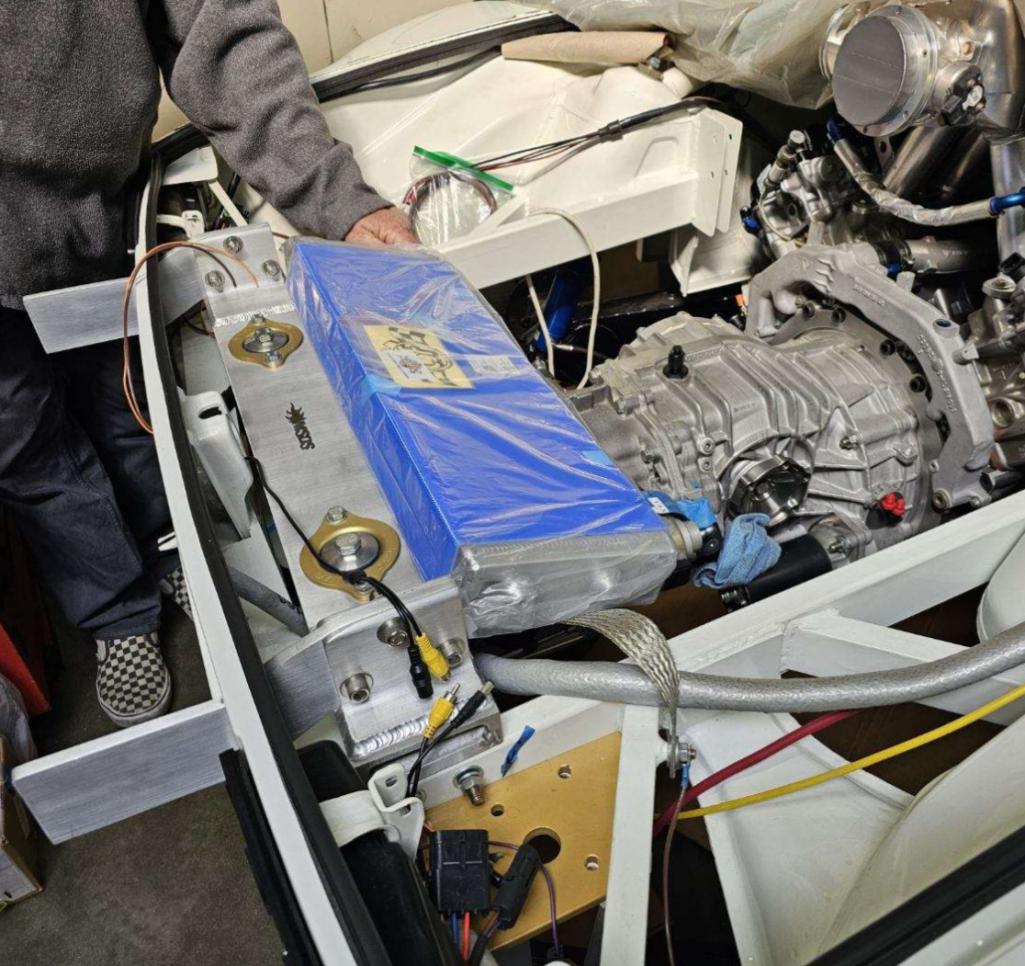
Posted by: Maltese Falcon Dec 2 2023, 06:14 PM
My graphic arts buddy Sam creatively at work with the 8gtt livery; a spicey twist on the #40 style.
He's also making us a couple extra rooftop "Sonauto" banners, as the sticker on #40 took
to the wind while under speed at RR7 Laguna Seca. We did get lucky tho as it stuck itself down to the rear plexi window !
Posted by: Maltese Falcon Dec 2 2023, 06:41 PM
Check out the roof banner / transplanted to the rear targa window...stuck just long enough to finish several exhibit laps; one more lap it would have been into the weeds 
Posted by: Maltese Falcon Dec 9 2023, 07:09 PM
More brackets this week, I'll tack these in place with the .035 Miller mig then finish up in the welding dept.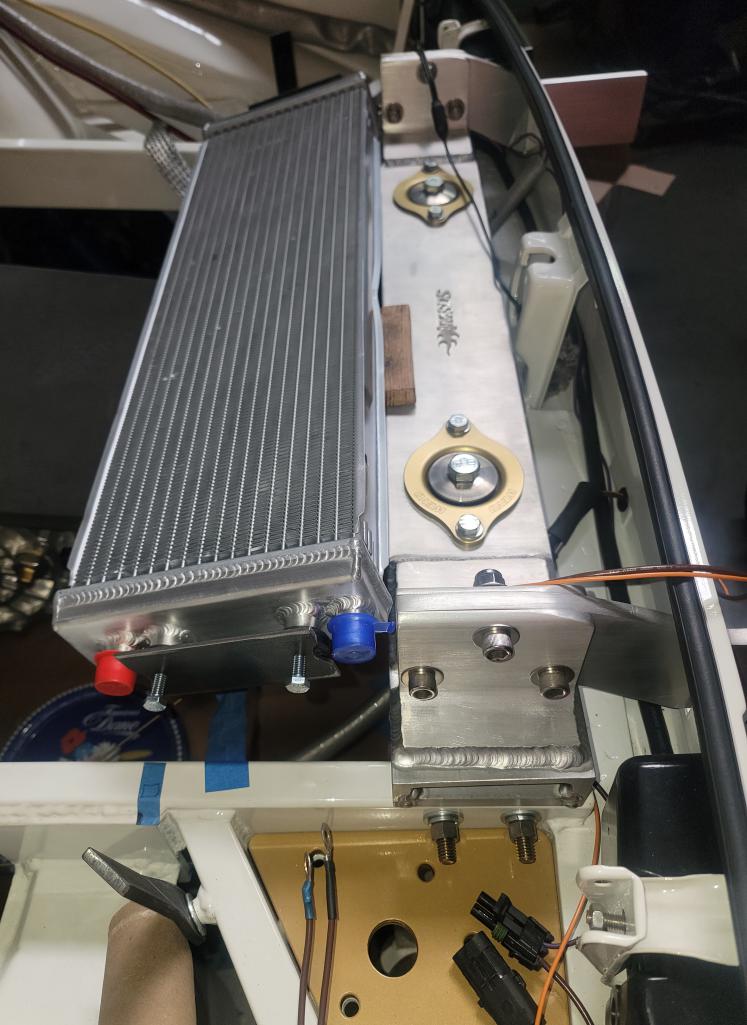
Posted by: Maltese Falcon Dec 9 2023, 07:11 PM
Another view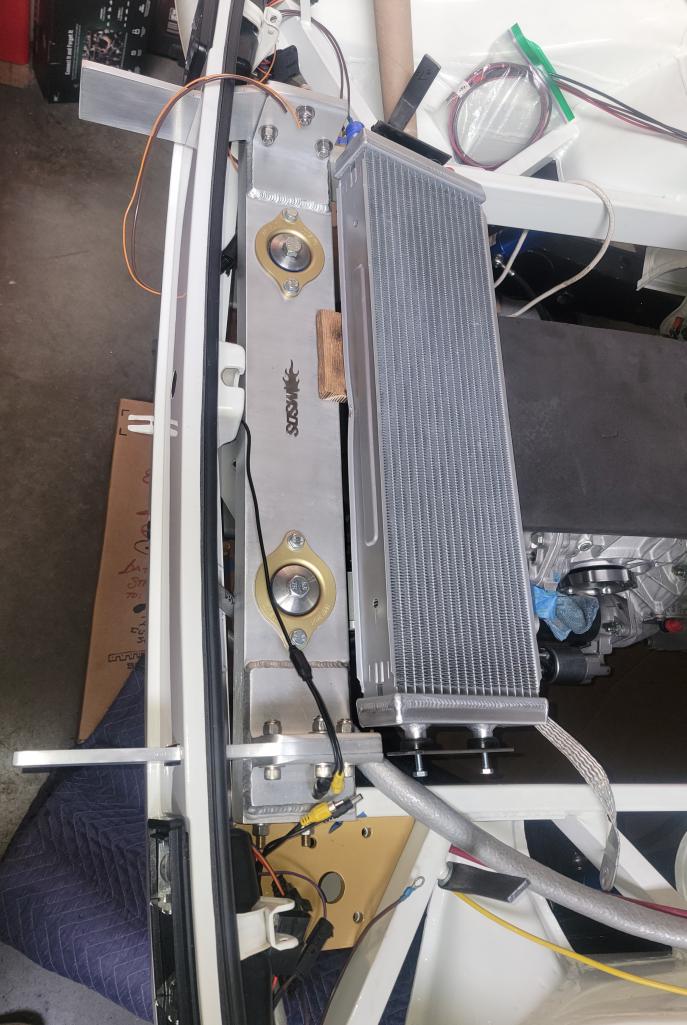
Posted by: Maltese Falcon Dec 9 2023, 07:20 PM
This is the Bosch 12v coolant pump which will be utilized for the trans cooler radiator. Its main use is for the heater system in Mercedes; but also used by Magnacharger (kits) in their supercharger intercooling just under the blower /integrated in the intake manifold. These are built stout and I've only changed 1 pump in 200k miles of use in my supercharged '05 F150 
Posted by: Shivers Dec 10 2023, 10:32 AM
What's behind us is Important so: rear facing camera feed. Just looking at placement options
That is neat. In the 70’s my brother and I would make cannonball runs from LA to San Diego. I was driving and he was in the back seat watching our six with binoculars. Not as clean as your setup but it worked.
Posted by: Maltese Falcon Dec 14 2023, 04:47 PM
Trans cooler resevoir; basic location and bracket designing. The small expansion tank is sourced from the Ford parts bin; 2004 4.6 supercharged Mustang.
Posted by: Maltese Falcon Dec 14 2023, 04:50 PM
Parts warehouse supplied all sorts of pre-shaped ¾" coolant line for me to trim down to spec !
Posted by: Maltese Falcon Dec 22 2023, 09:39 PM
Coolant pump bracket layout and 12v relay base-bracket
Posted by: Maltese Falcon Dec 22 2023, 09:41 PM
Make sure it fits: tack weld & re-check installation 
Posted by: Maltese Falcon Dec 22 2023, 09:49 PM
Coolant pump relay-base finished
Attached thumbnail(s)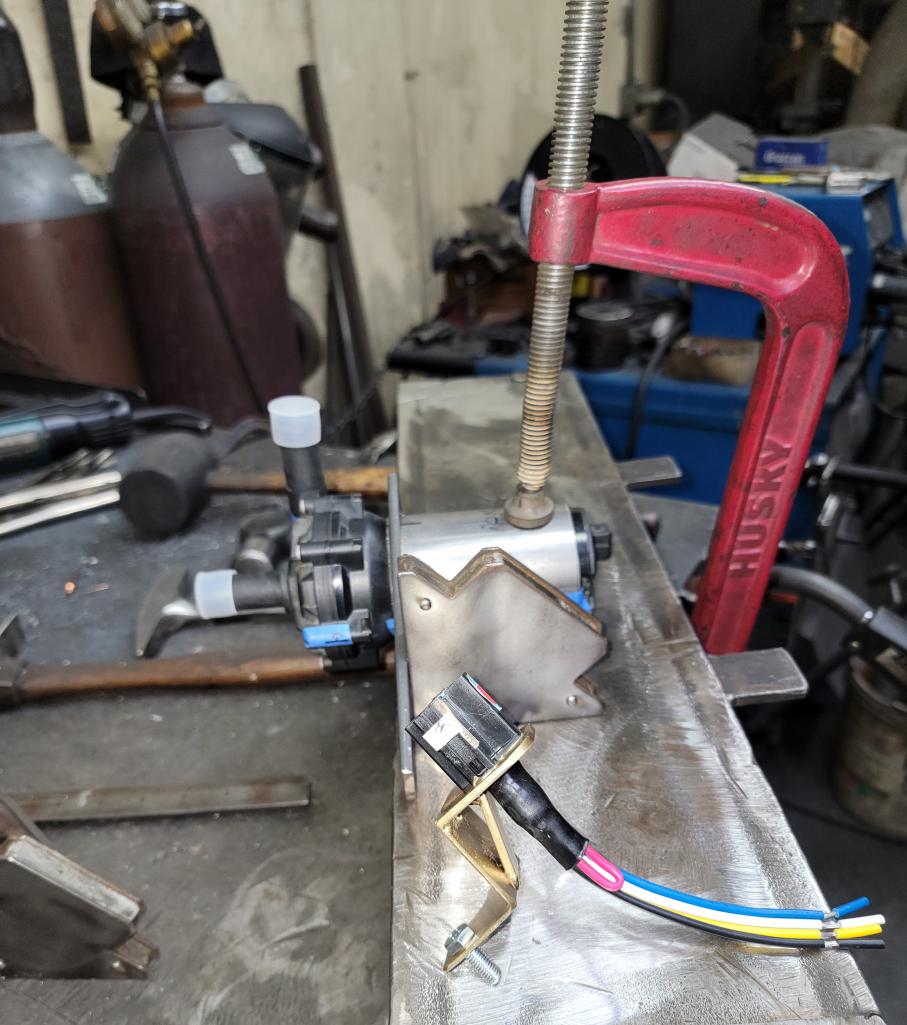
Posted by: Maltese Falcon Dec 22 2023, 09:52 PM
Good location for the pump 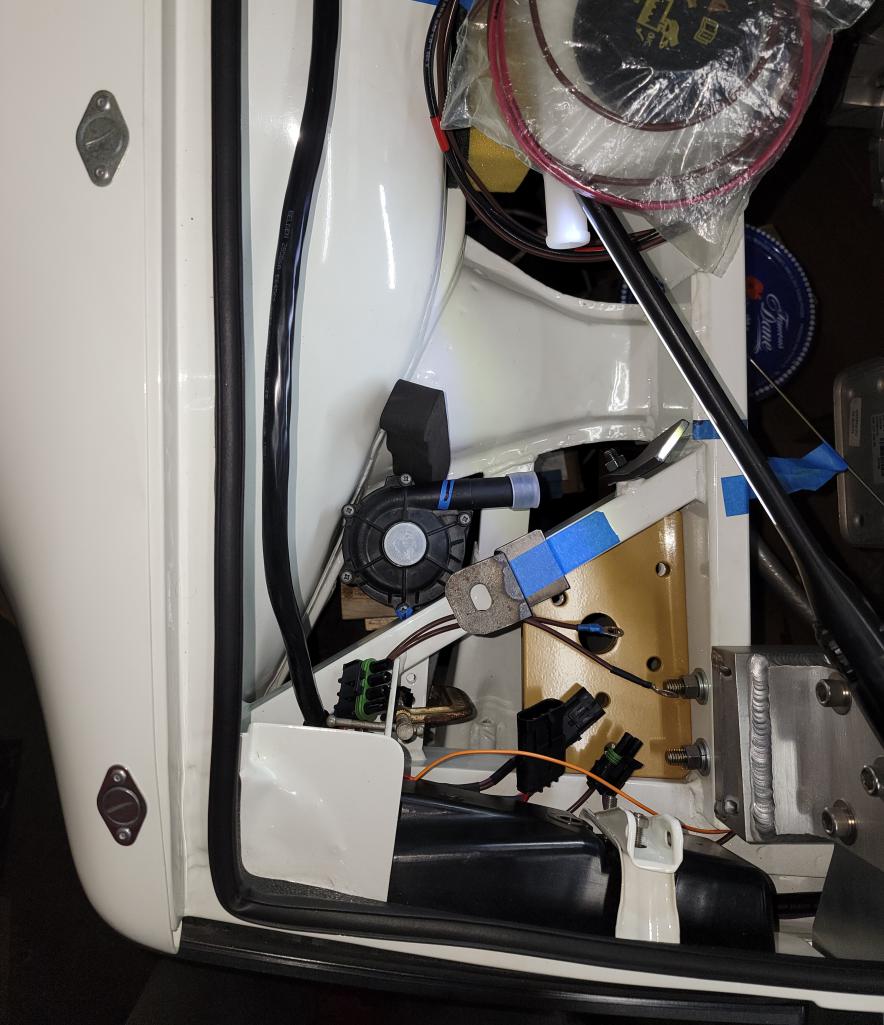
Posted by: Maltese Falcon Jan 12 2024, 08:17 PM
Just a few wires to connect, bolt some brackets into place; the finished components shown here. 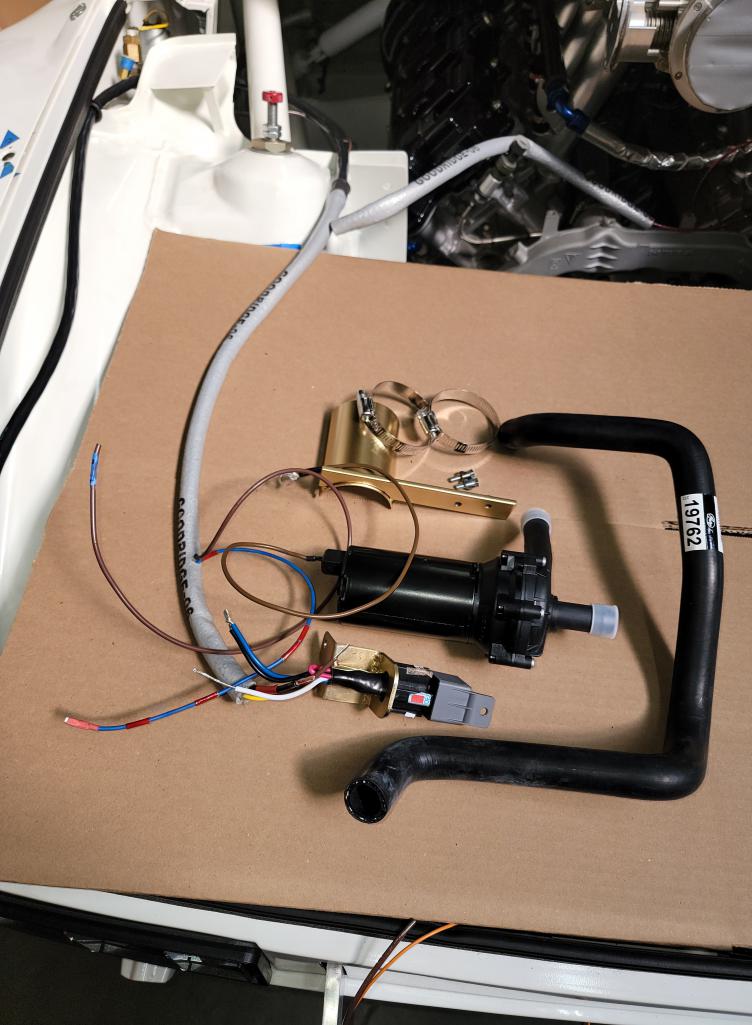
Posted by: Maltese Falcon Jan 27 2024, 11:14 AM
Bottom view of the transaxle cooler pump ; next secure the resevoir bracket, and weld up the rear mounted radiator support brackets 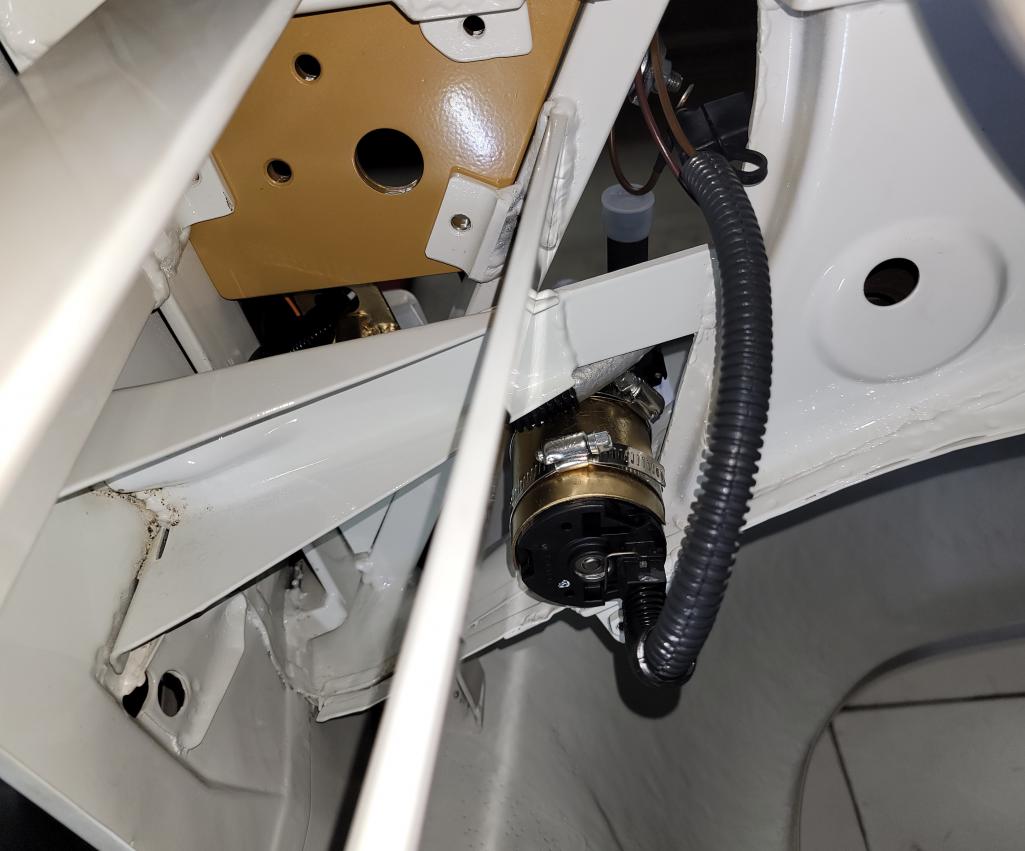
Posted by: Maltese Falcon Jan 27 2024, 11:26 AM
The 2) resevoir bracket mounting points wind up in here. The shock towers are reinforced, and oe spotweld areas have all been fully mig welded.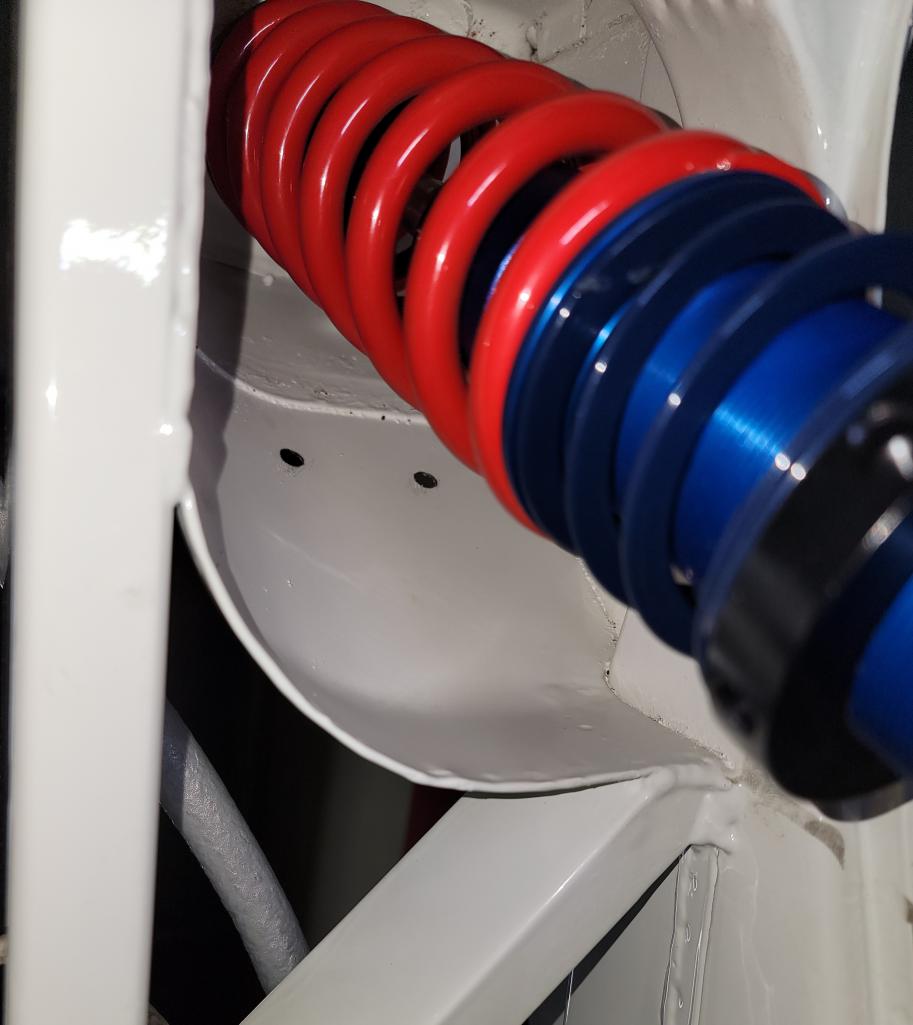
Posted by: krazykonrad Jan 27 2024, 12:00 PM
Looking good! That thing is going to be a rocket.
Posted by: Maltese Falcon Jan 27 2024, 01:52 PM
@http://www.914world.com/bbs2/index.php?showuser=5610 if not a rocket...we will be OK with a slow jet
Posted by: KELTY360 Jan 27 2024, 02:11 PM
Looking good! That thing is going to be a rocket.
@Maltese Falcon Any idea when it will be ready for the launch pad?
Posted by: Maltese Falcon Jan 27 2024, 02:48 PM
@http://www.914world.com/bbs2/index.php?showuser=5344 not anytime soon...but best to view this page as an archive in the making
Couple of Slow jets spotted over Lancaster CA recently !
Posted by: Maltese Falcon Feb 1 2024, 09:27 PM
Trans cooler resevoir 'nailed in place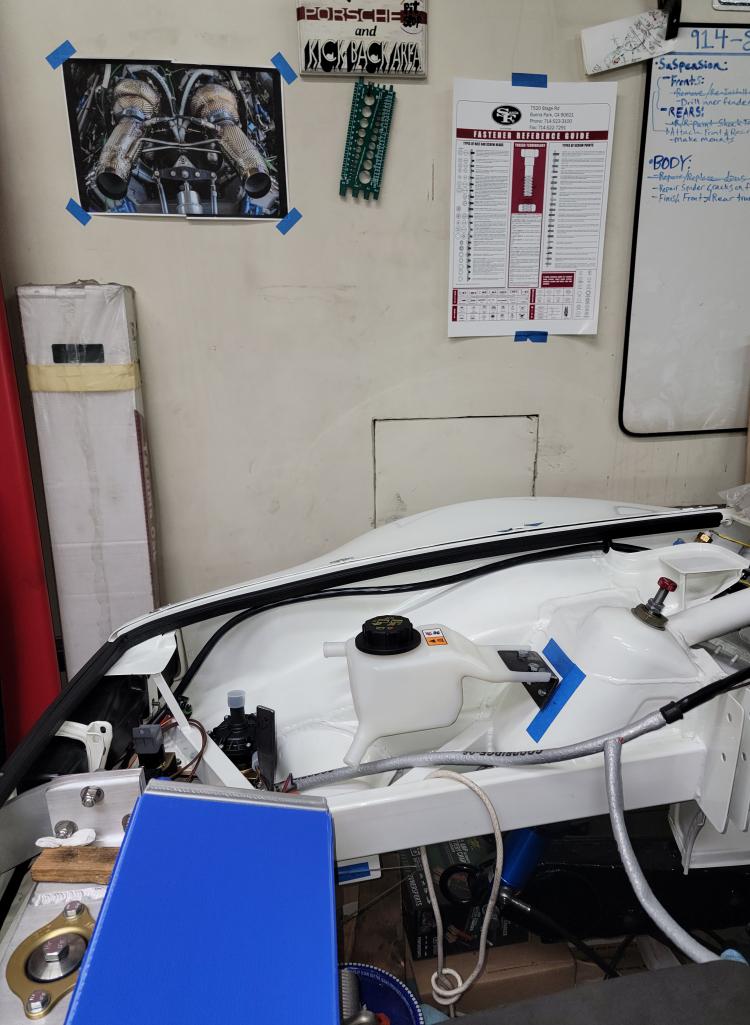
Posted by: Maltese Falcon Feb 6 2024, 11:18 PM
coolant hose routing, starting at the pump inlet 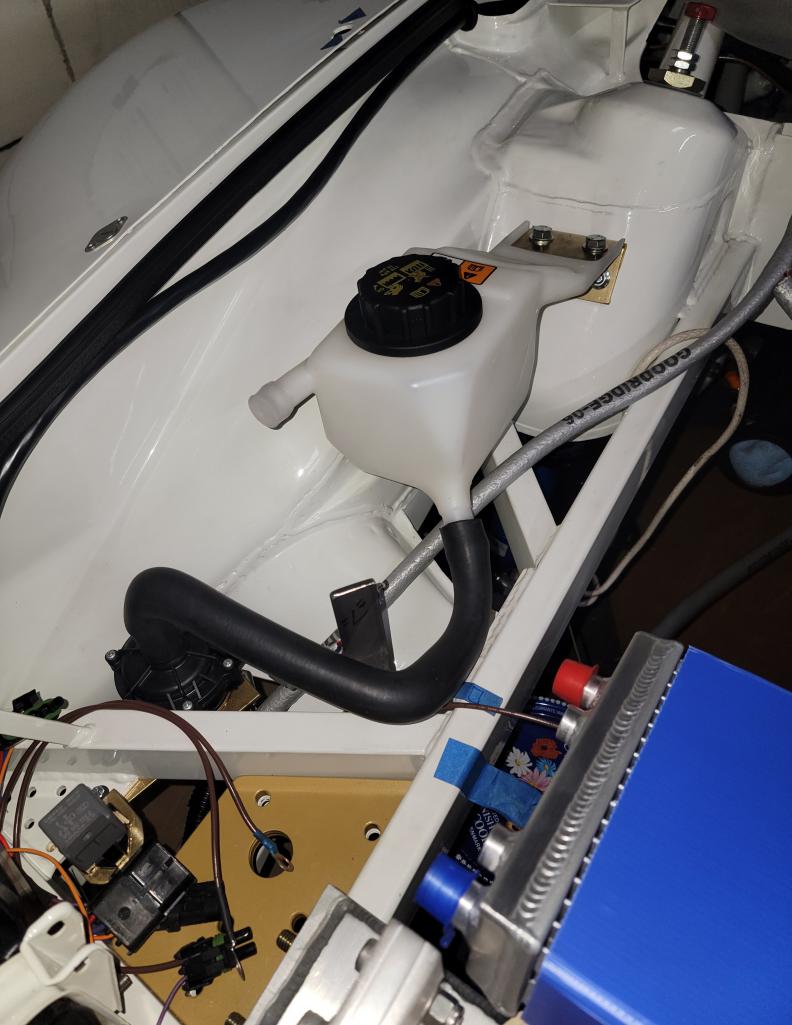
Posted by: Maltese Falcon Feb 6 2024, 11:24 PM
Before trimming out the new plexi windows for side impact bar clearance, making sure to check the fit with a sturdy cardboard template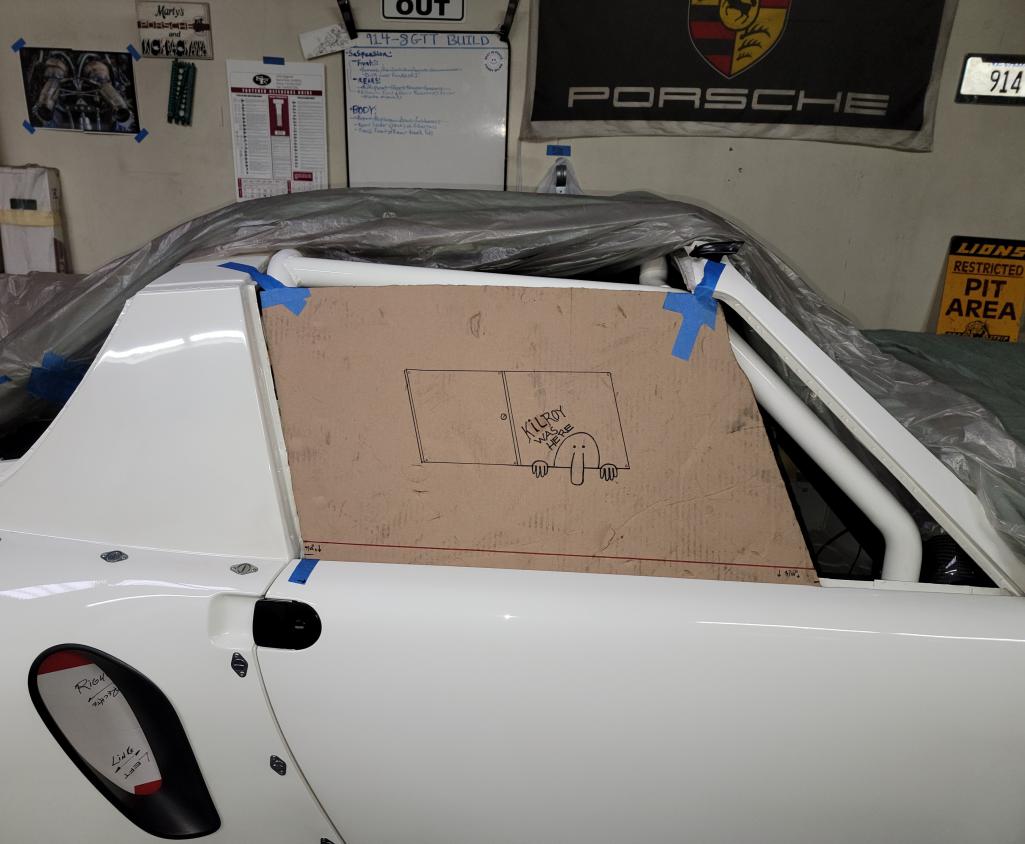
Posted by: Maltese Falcon Feb 6 2024, 11:30 PM
Throwing it back to the 2010 Daytona 24hr, Action Express engine change during Thursday practice; that Wilson intake plenum (#001) is on our Cayenne v8 !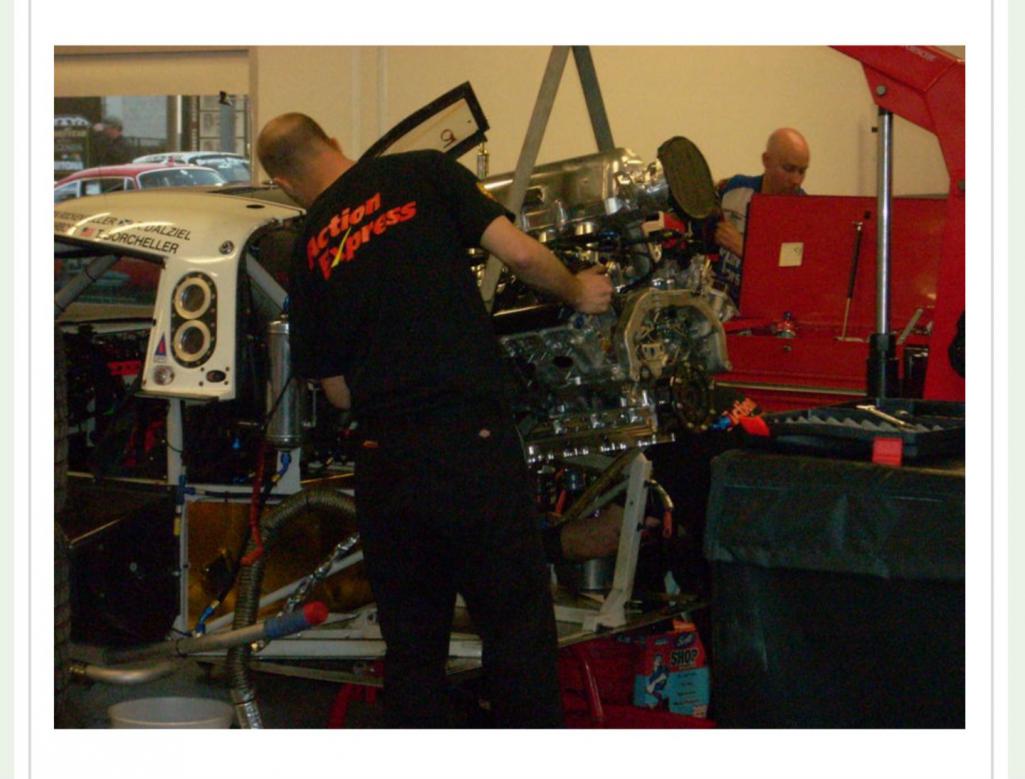
Posted by: Maltese Falcon Feb 6 2024, 11:34 PM
2010 Daytona 24hr list of drivers for the #9 Action Express/ Riley Porsche.
Engine rated at approx 570 hp n/a
Posted by: Maltese Falcon Mar 3 2024, 07:38 PM
Transaxle cooler (heat exchanger) support brackets in the paint dept: hanging from the safety cage of the shop forklift 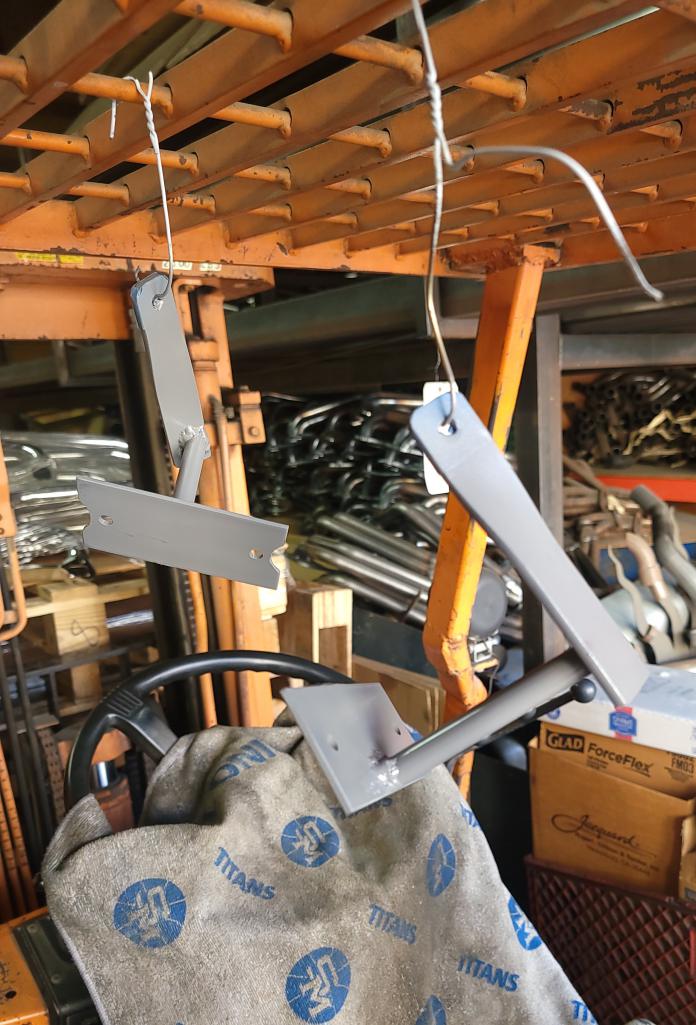
Posted by: Maltese Falcon Mar 3 2024, 07:52 PM
During the L.A. Porsche Lit week, I had a couple of surprise visitors over to MSDS shop; Glenn @http://www.914world.com/bbs2/index.php?showuser=1785 and Andrew @http://www.914world.com/bbs2/index.php?showuser=8778 .They had a good look see around the 8gtt project, then presented us with a passing grade
I also walked them through the exhaust fabrication process and they are both now Top Tier header specialists !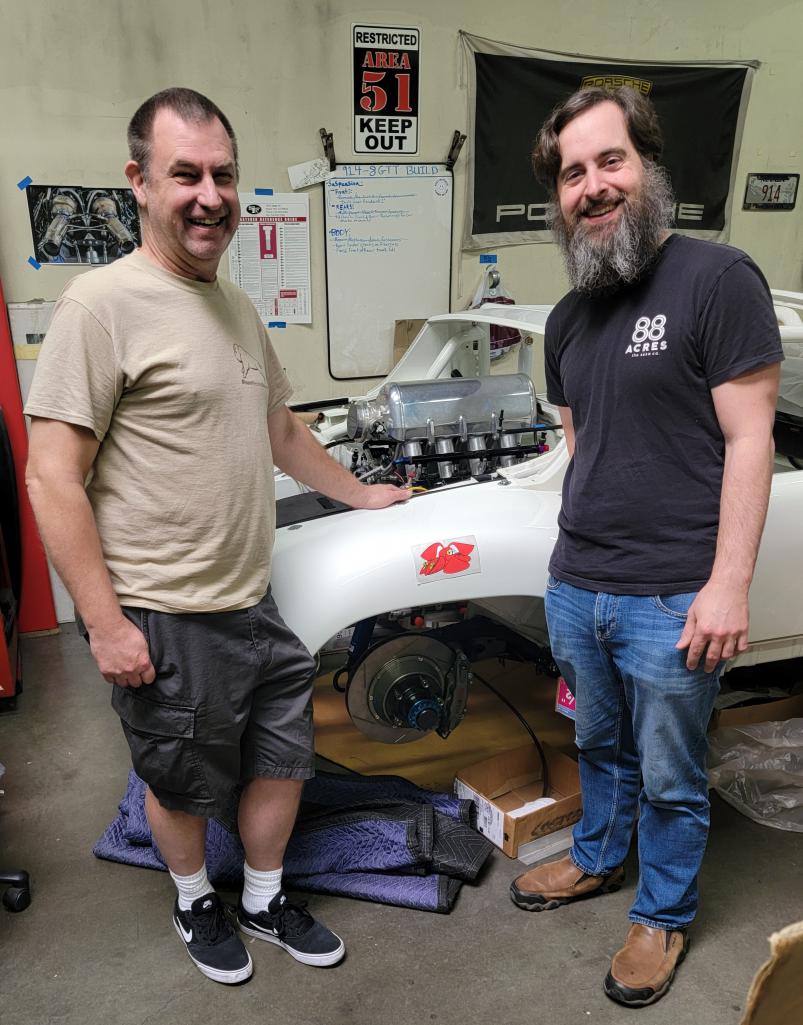
Posted by: Maltese Falcon Mar 3 2024, 07:56 PM
Andrew checking out the inverted 996 gt2 transaxle and its support system.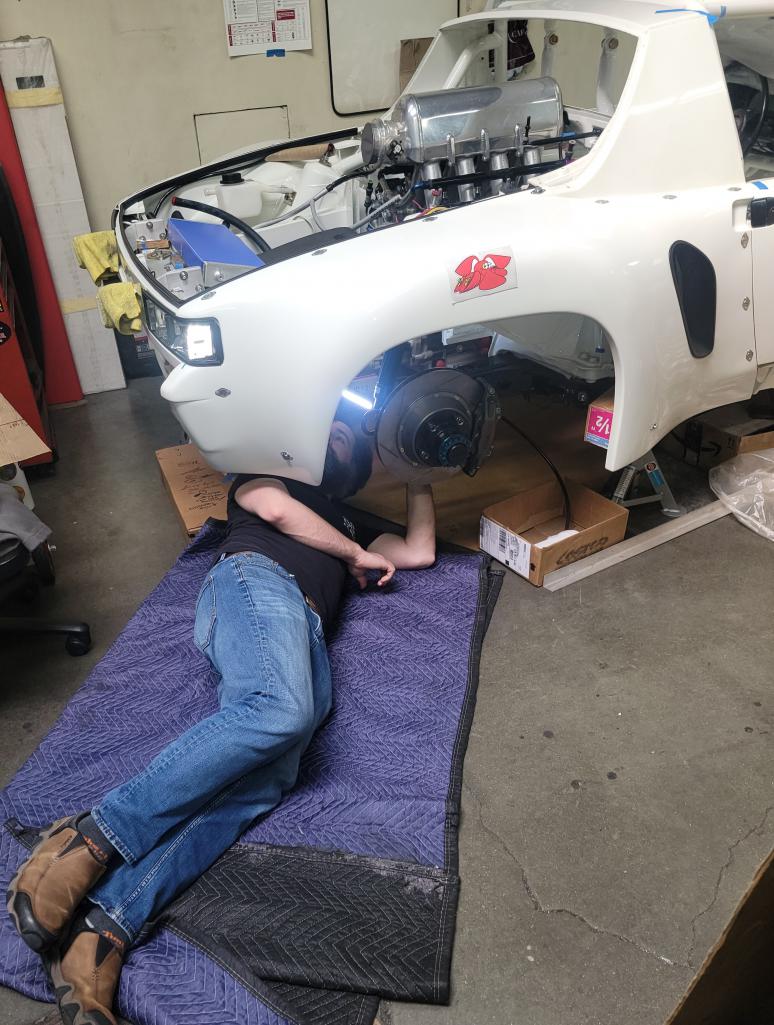
Posted by: Maltese Falcon Mar 3 2024, 08:05 PM
Wrapping up, then a ride towards LAX and time for a quick coffee break 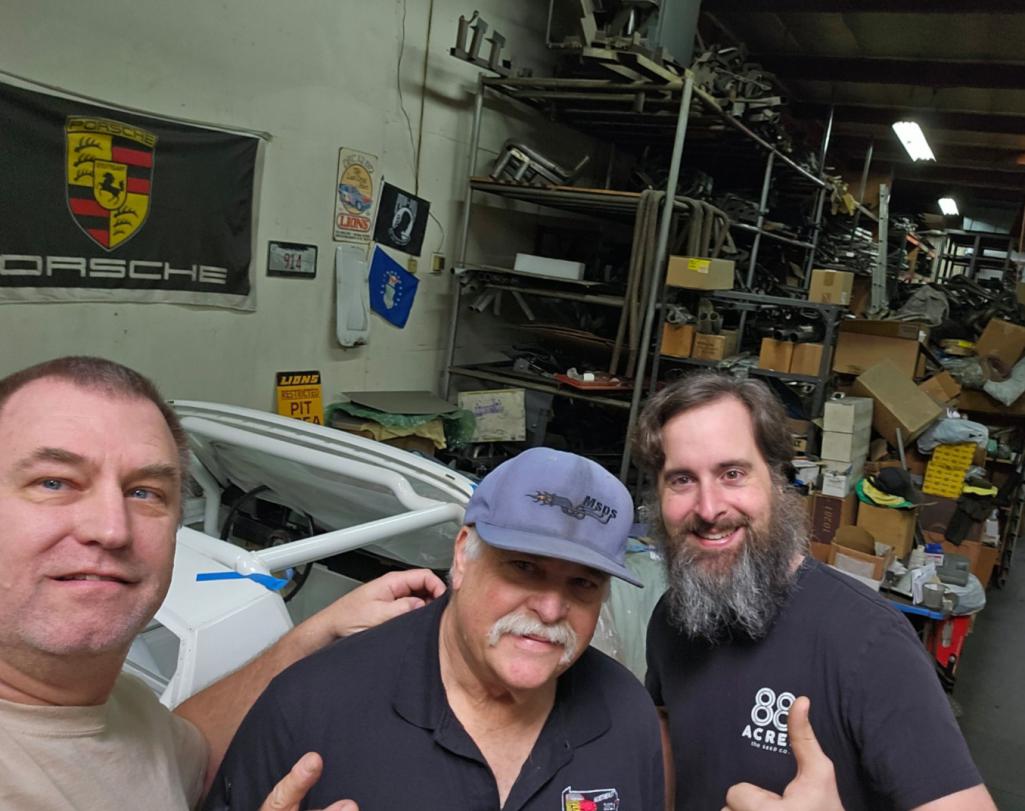
Posted by: Maltese Falcon Mar 3 2024, 08:19 PM
My truck / so my music choice; they had to put up with my Country station The Bakersfield Beat...as Dwight Yoakam says " Music from the Dust bowl to the Hollywood bowl"
Posted by: Moparboy72 Mar 8 2024, 02:45 PM
Marty,
Thanks for showing us around your shop and the wicked 914 - 8 GTT! It was great spending time with you and I even enjoyed the country music too
Thanks again!
Posted by: Maltese Falcon Mar 16 2024, 12:42 PM
Transaxle heat exchanger (CSF) in place with rubber isolation pads; more ¾" coolant hose to run, but going to place the Aviaid dry sump oil tank first.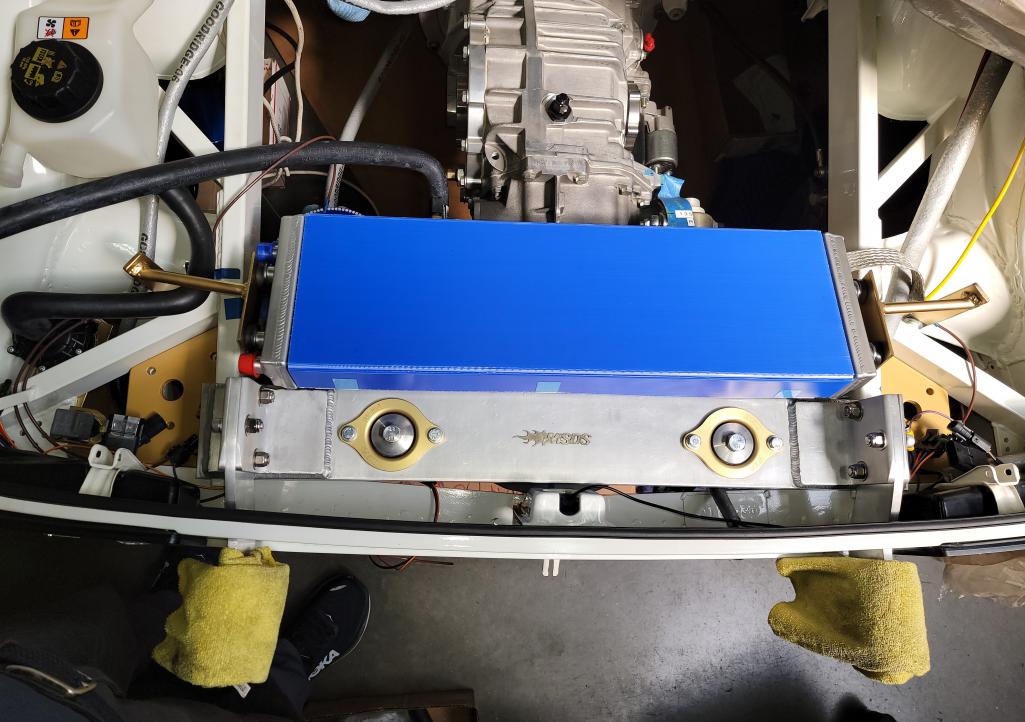
Posted by: Maltese Falcon Mar 16 2024, 12:46 PM
Engine oil cool brackets formed to angles needed in the Right and Left quarter panels, using two Setrab oil coolers with AN#12 fittings.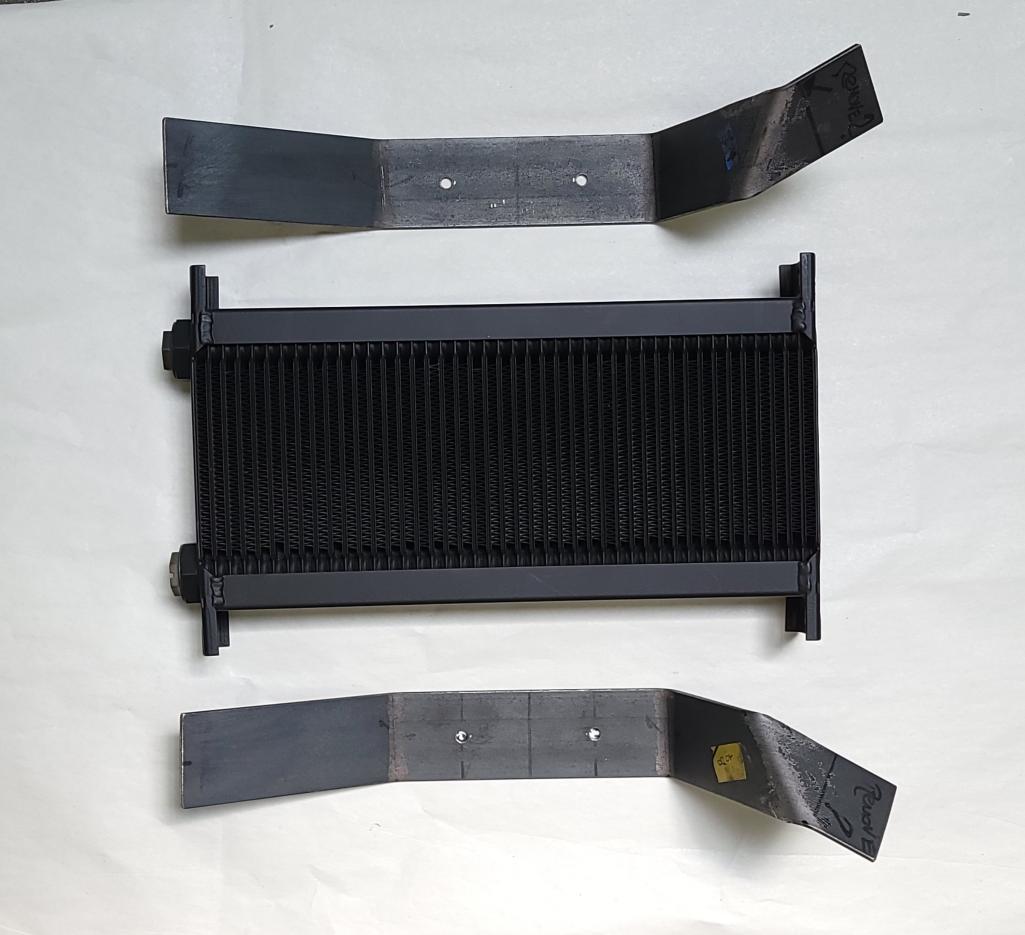
Posted by: Maltese Falcon Mar 16 2024, 12:50 PM
The mock-up for Setrab oil cooler and how it fits into the R quarter panel, which is the Sheridan wide body with a GT3rs inlet.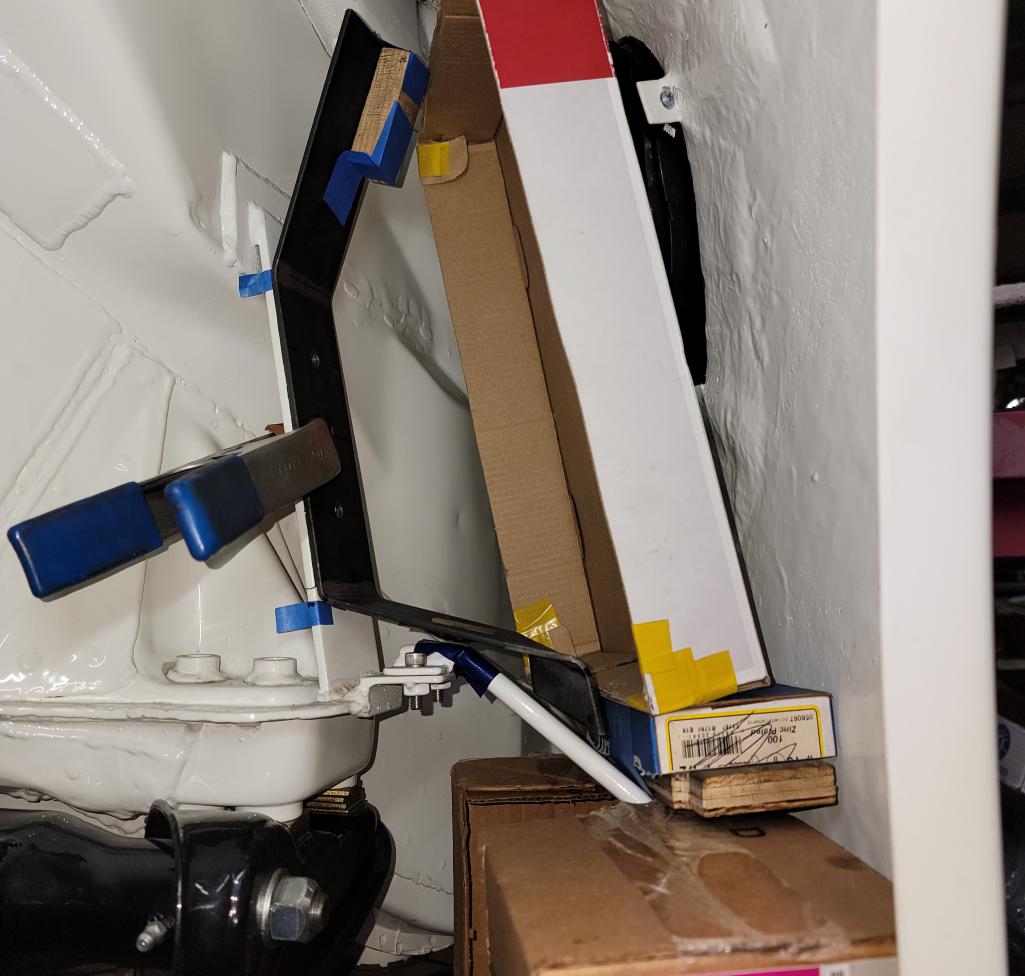
Posted by: NorCalScott Mar 16 2024, 11:46 PM
I like that idea for the oil cooler brackets. The bracket stays out of the way. Nice execution with the correct angles! Keep working on the car and giving us updates. I check almost daily. lol
Posted by: Maltese Falcon Mar 17 2024, 09:45 AM
@http://www.914world.com/bbs2/index.php?showuser=25173 your comments + enthusiasm are much appreciated! I do cheat a little on our bracket set-ups; CAD...cardboard assisted design 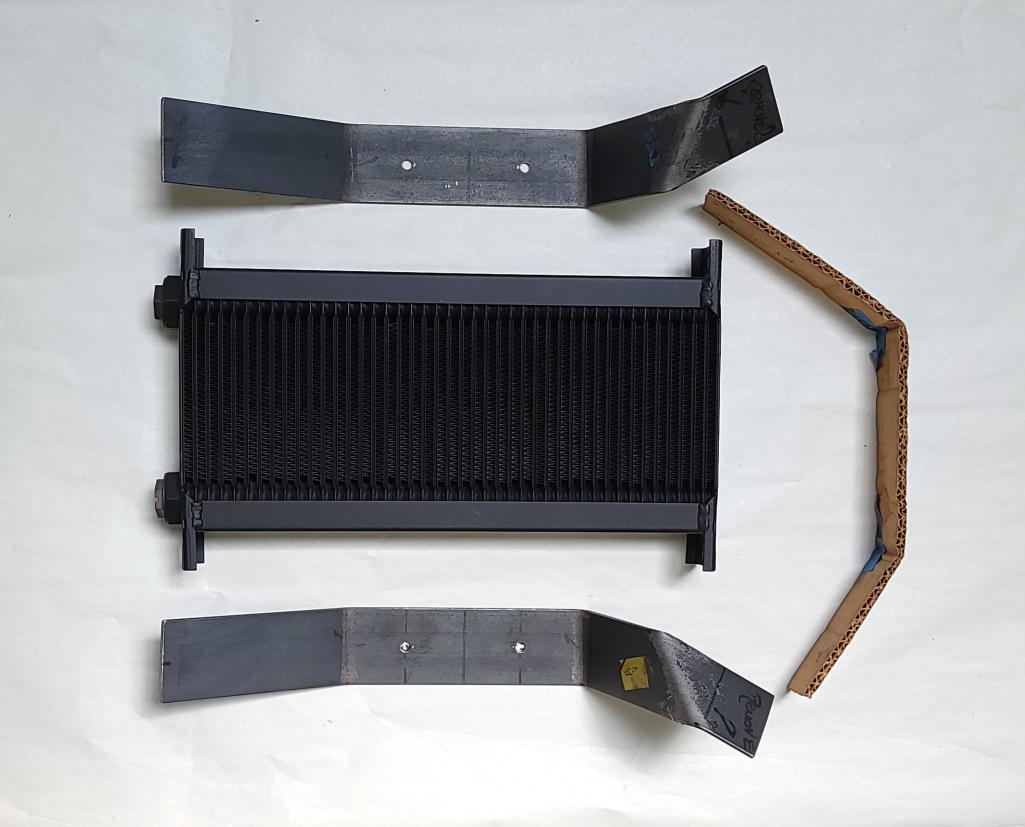
Posted by: Maltese Falcon Mar 17 2024, 09:54 AM
Pre fitting all of the targa area aluminum trim, before
the pieces head into the body shop for detailing + black coating. I'm big on all of the small 914 items that we can integrate back into this custom build. Shoutout to @http://www.914world.com/bbs2/index.php?showuser=12023 for sourcing the rear targa trim pieces for us ! 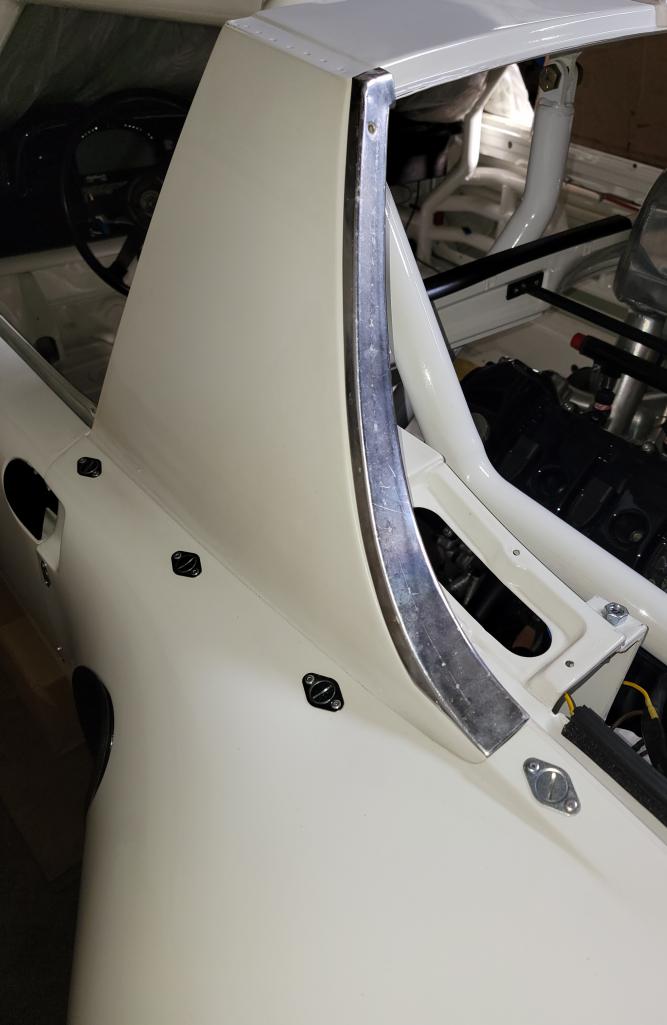
Posted by: Montreal914 Mar 17 2024, 10:55 AM
Glad I was able to somewhat contribute to this build .
BTW, you picked up that trim at our previous house (rental). We bought our house and moved to Claremont 8 years ago… So…time flies… Then, I had started rebuilding a 74 914 (white repainted red) while enjoying my 73 DD bought when I moved to CA late 2009., I later decided to pass along the 74 project and focus only on my 73, restoration that is still ongoing… The white 74 car project is in good hands with Glenn @http://www.914world.com/bbs2/index.php?showuser=5872 .
Posted by: Maltese Falcon Mar 17 2024, 03:16 PM
@http://www.914world.com/bbs2/index.php?showuser=12023 mais oui !¡ time flys when you're having fun with these little cars
à bientôt
Posted by: NorCalScott Mar 17 2024, 11:45 PM
I assume you're probably using the same rubber isolators to mount the oil coolers as you did to mount the trans cooler. Although they're probably very generic, I'm still curious which ones you're using.
Posted by: Maltese Falcon Mar 18 2024, 06:59 PM
I assume you're probably using the same rubber isolators to mount the oil coolers as you did to mount the trans cooler. Although they're probably very generic, I'm still curious which ones you're using.
For the smaller isolater-rubber buffers, like the 4 mounting points (sae ¼x20 threads) on this trans radiator: I just use neoprene or silicon muffler-bracket inserts. I just lightly disc sand these to remove any bumps, and install with small fender style washers, then a wavy washer and a little torque.
For bigger accessories like a large intercooler (8mm or 5/16 threads) same technique but I use a larger silicon- buffer...also a donor from a muffler- bracket.
Posted by: Maltese Falcon Mar 18 2024, 07:53 PM
The next size up that I use as isolator-pads (intercooler mounts), are these inserts taken off the"Aeroflow" billet style muffler-clamps (not shown); for 8mm, 5/16 sae fasteners.
Posted by: NorCalScott Mar 20 2024, 12:55 PM
Thanks for the info! I appreciate it.
Posted by: rgalla9146 Mar 21 2024, 06:21 AM
@http://www.914world.com/bbs2/index.php?showuser=12023 mais oui !¡ time flys when you're having fun with these little cars
à bientôt
Mon Dieu !
Posted by: Maltese Falcon Apr 20 2024, 09:25 PM
Fabrication of the lower support bracket for Aviad oil tank.
Posted by: Maltese Falcon Apr 20 2024, 09:28 PM
Couple of 8mm bolts fastened into 5/16" solid plate frame bracing.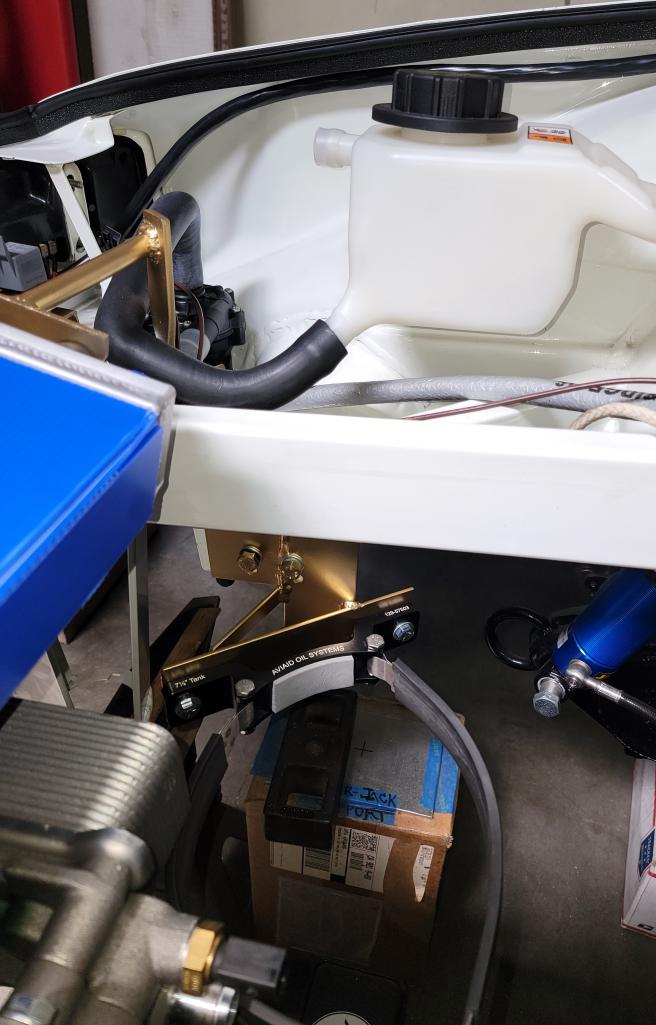
Posted by: Maltese Falcon Apr 20 2024, 09:36 PM
Basic location of tank, going to bring its height up another 3.375" and fabricate the upper tank-support bracket. Tight fit but I borrowed this placement idea after looking at various mid engine racecars, and the slim diameter of this tank just makes it in this spot.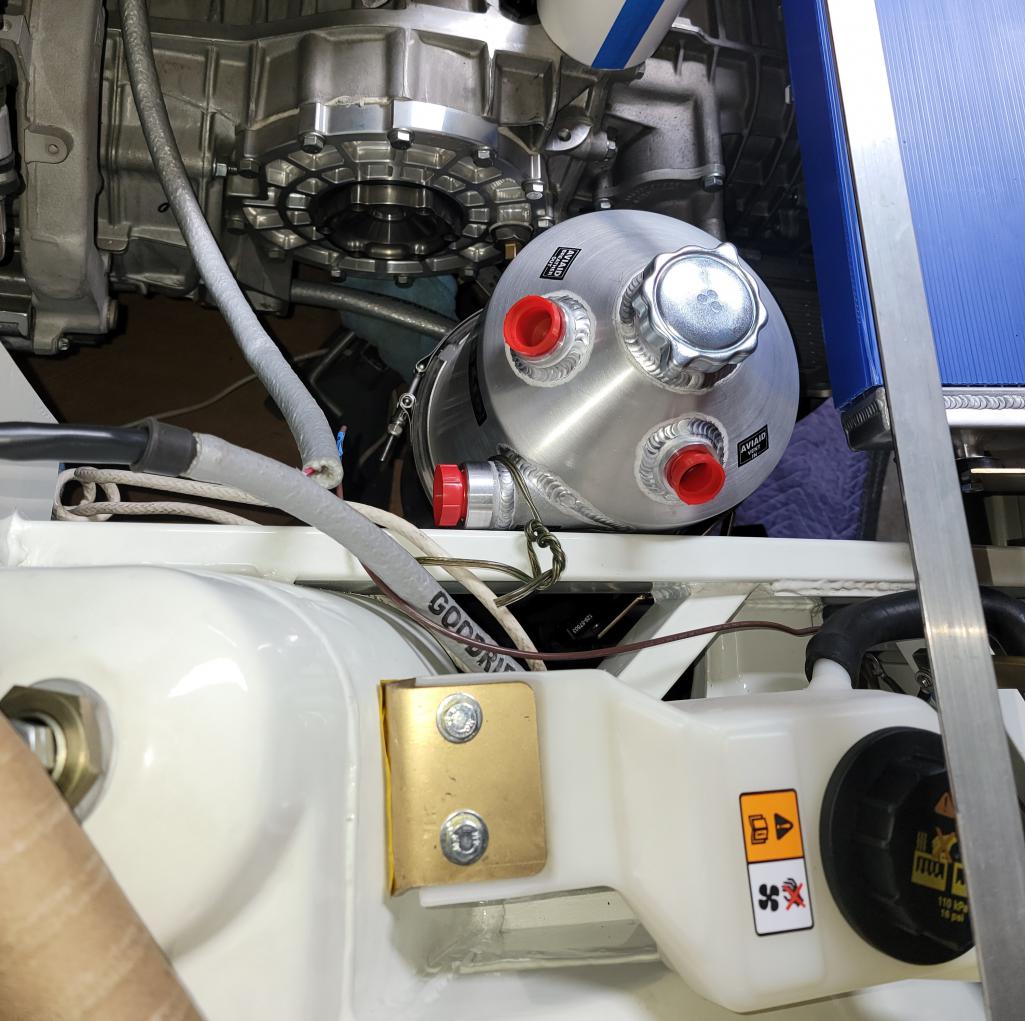
Posted by: ClayPerrine Apr 21 2024, 06:38 AM
When you get this finished, you should duplicate the paint job on the Sounato GT, but with number 41.
Posted by: Maltese Falcon Apr 21 2024, 01:29 PM
When you get this finished, you should duplicate the paint job on the Sounato GT, but with number 41.
Clay, definitely a spin off on the LeMans 914...but a little hot Cayenne spice added !

Posted by: Maltese Falcon May 6 2024, 09:49 PM
Dusted off the roof and started in on the livery layout
Posted by: Maltese Falcon May 6 2024, 10:01 PM
The 8gtt is spicing up the workshop ! More livery on the way from a cool shop in UK, referred to us by forum member Keith @KSCarrera; isaydingdong.co.uk
They have some really cool (ready made) period correct decals.
Posted by: Maltese Falcon May 20 2024, 09:13 PM
Today while putting the oil tank into a proper alignment for the oil line paths, I needed to remove the v-band clamp which holds the top + bottom together. Found a small bit of unfinished aluminum slag hanging from the fill-tube strainer 
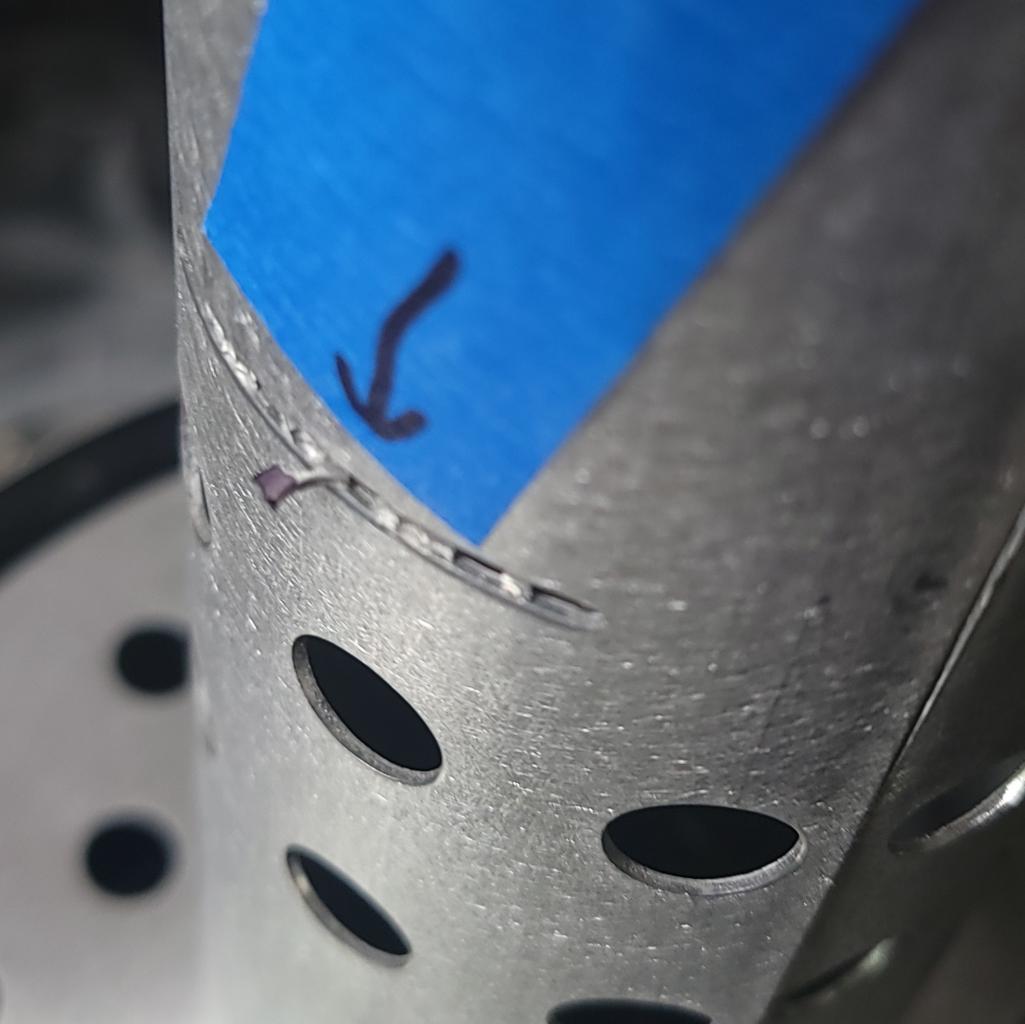
Posted by: Cairo94507 May 21 2024, 05:48 AM
Wow! Bullet dodged.
Posted by: NorCalScott May 21 2024, 01:09 PM
Today while putting the oil tank into a proper alignment for the oil line paths, I needed to remove the v-band clamp which holds the top + bottom together. Found a small bit of unfinished aluminum slag hanging from the fill-tube strainer
wow, you might expect that from some cheap overseas product, but not from an upscale company based in SoCal. That's not cool. You shouldn't have to disassemble everything, but good thing you took this apart. Did you plan to have a filter between the tank and the pump, or did your pump just get very lucky?
Posted by: Maltese Falcon May 21 2024, 02:19 PM
@http://www.914world.com/bbs2/index.php?showuser=25173 I'll be revising my oil flow schematic this week; comparing the LBP (engine builders) to the Aviad (tank mfg.) drawings...but I do have a cnc aluminum oil filter stand for this purpose
Posted by: Maltese Falcon May 21 2024, 06:26 PM
@http://www.914world.com/bbs2/index.php?showuser=25173 For the oil filter placement, I'm going with the LBP engine builder's tech handbook !
Just need to be careful during tank filling + topping up; keep small bits of debris from getting in.
Posted by: NorCalScott May 22 2024, 06:31 PM
I have seen some people place a small billet inline filter between the tank's outlet and the pump to protect the pump's pressure stage. Seems like cheap insurance.
Posted by: Maltese Falcon May 24 2024, 03:59 PM
Meanwhile> while inspection of the lower ½ of the oil tank...more alum slag, rough drilling and deburring required at the baffle plate / all 8) ½" dia holes. I used a short section of band-saw blade for lancing off the slag; and then hand sanded with emery cloth.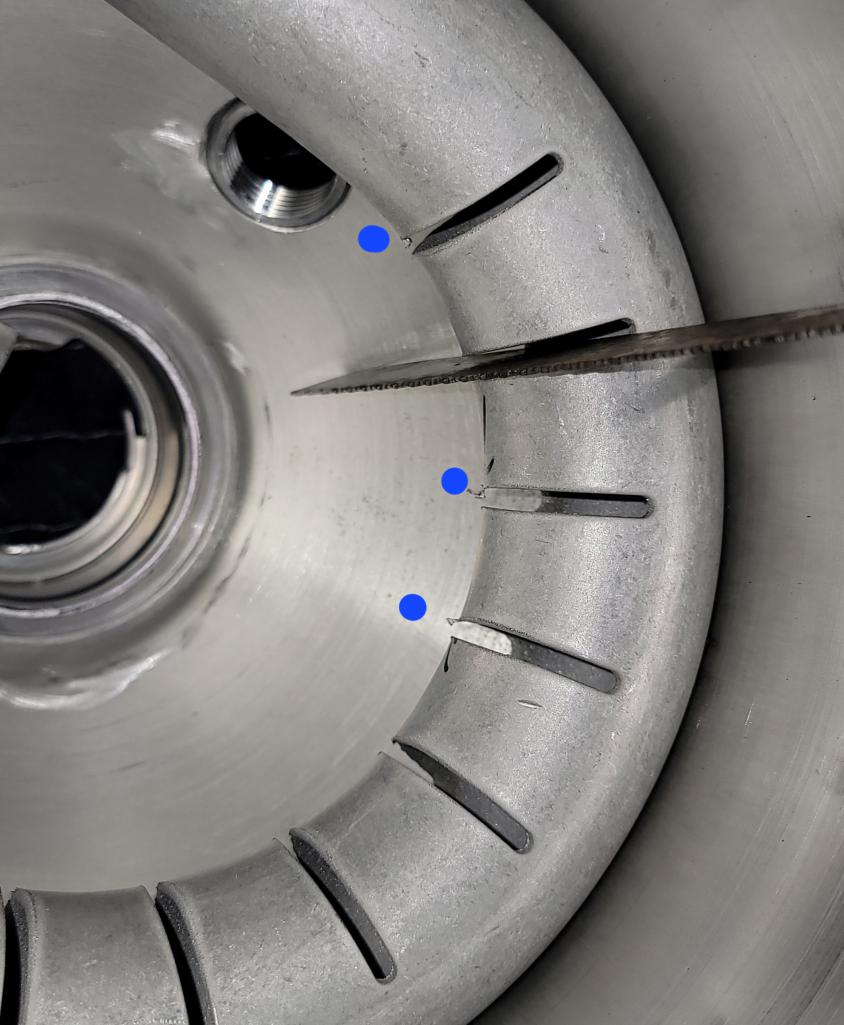
Posted by: Maltese Falcon May 24 2024, 04:02 PM
'Catch of the day 3) nice size pieces of alum slag
Posted by: Maltese Falcon May 24 2024, 04:04 PM
Baffle plate>>all 8) holes needed deburring 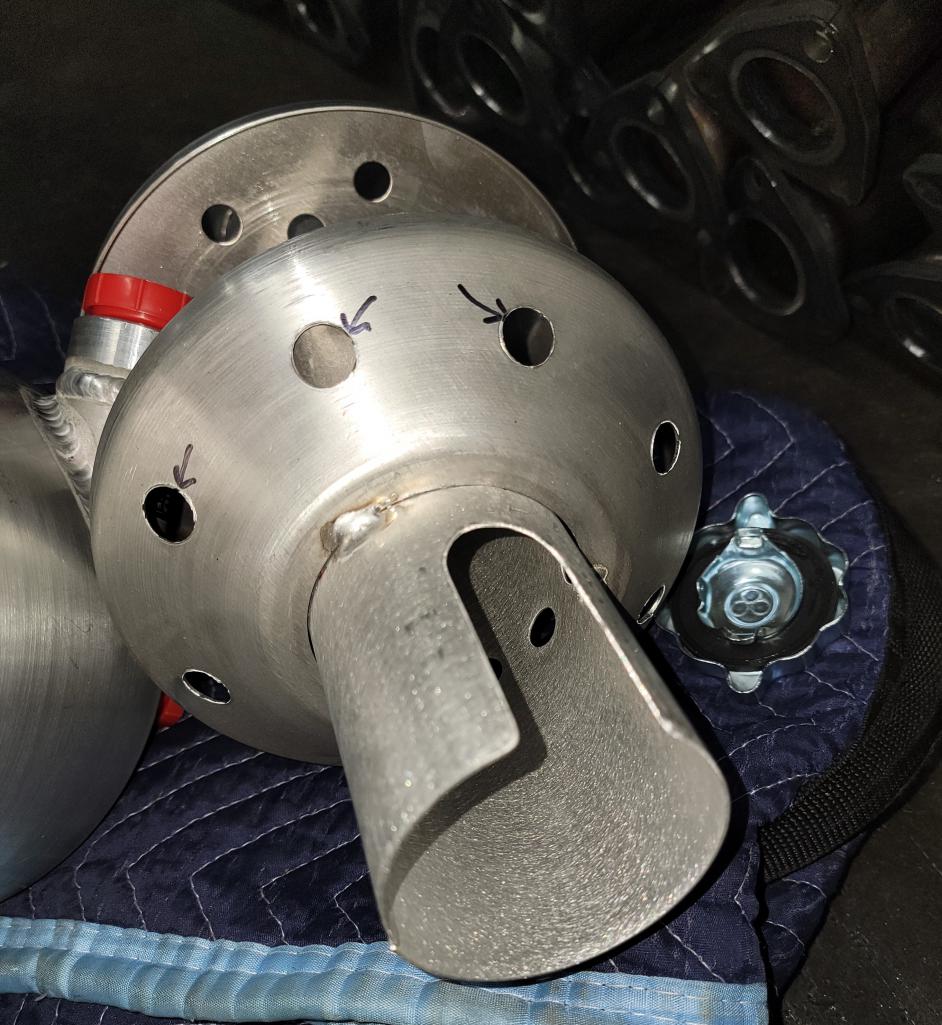
Posted by: Maltese Falcon May 24 2024, 04:10 PM
Baffle plate a BIG 3 minutes to clean up with a #220 fine sanding belt; you think Aviaid Oil Tank Co. could come up with QC checklist for their Made in USA product ¿¿
Cool Okteenerfest Tee shirt too 
Posted by: 930cabman May 24 2024, 05:03 PM
Either made on a Monday or a Friday. Deburr is a straightforward operation, somebody dropped the ball. Maybe bead blast?
Posted by: SirAndy May 24 2024, 05:34 PM
'Catch of the day 3) nice size pieces of alum slag


Posted by: Maltese Falcon May 28 2024, 05:55 PM
17) pieces of trim headed off for satin-black coatings. Not powder painting, but using a durable 2-step 3M automotive product.
Attached thumbnail(s)
Posted by: Maltese Falcon Jun 1 2024, 02:47 AM
I've added the transaxle oil temp sender here, using the same 10mm x 1.5 port* which normally has a thermo switch that operates the valving for engine coolant to flow through a small heat exchanger on the trans. Our trans cooling system uses a seperate tank & radiator and not shared with engine coolant...and a manual on-off switch for the pump.
www.fittings.space in Sparks, NV, makes all sorts of 'Metric to SAE, AN, NPT adapters, which we used their *stainless steel part here/ in conjuction with a VDO ⅛" NPT sending unit.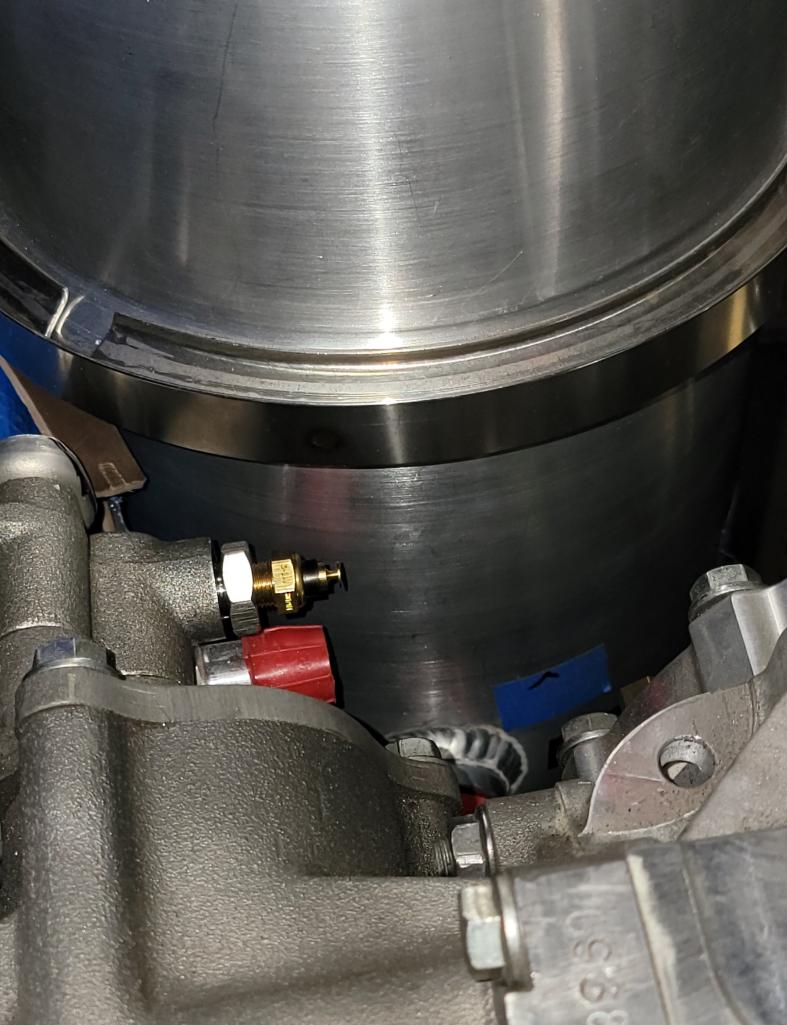
Posted by: Maltese Falcon Jun 1 2024, 02:52 AM
GT2 trans thermo switch sending unit (on left) and 10mm Metric to ⅛" NPT SS adapter/ VDO oil temp sending unit on right.
Posted by: Maltese Falcon Jun 2 2024, 08:29 PM
Roof livery is done; thank you George @http://www.914world.com/bbs2/index.php?showuser=4947 @autoatlanta.com for the quick delivery !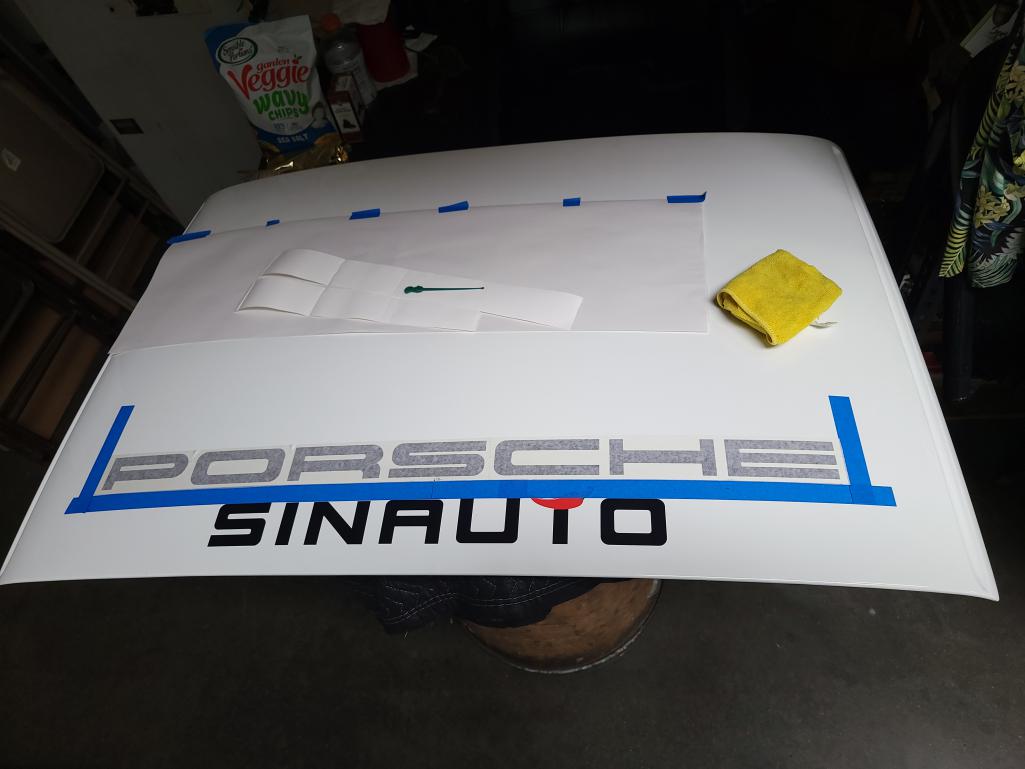
Posted by: Maltese Falcon Jun 2 2024, 08:36 PM
These were originally made for the rocker panels, cut down on length to replicate the Sonauto roof livery...this v8 just a bit spicy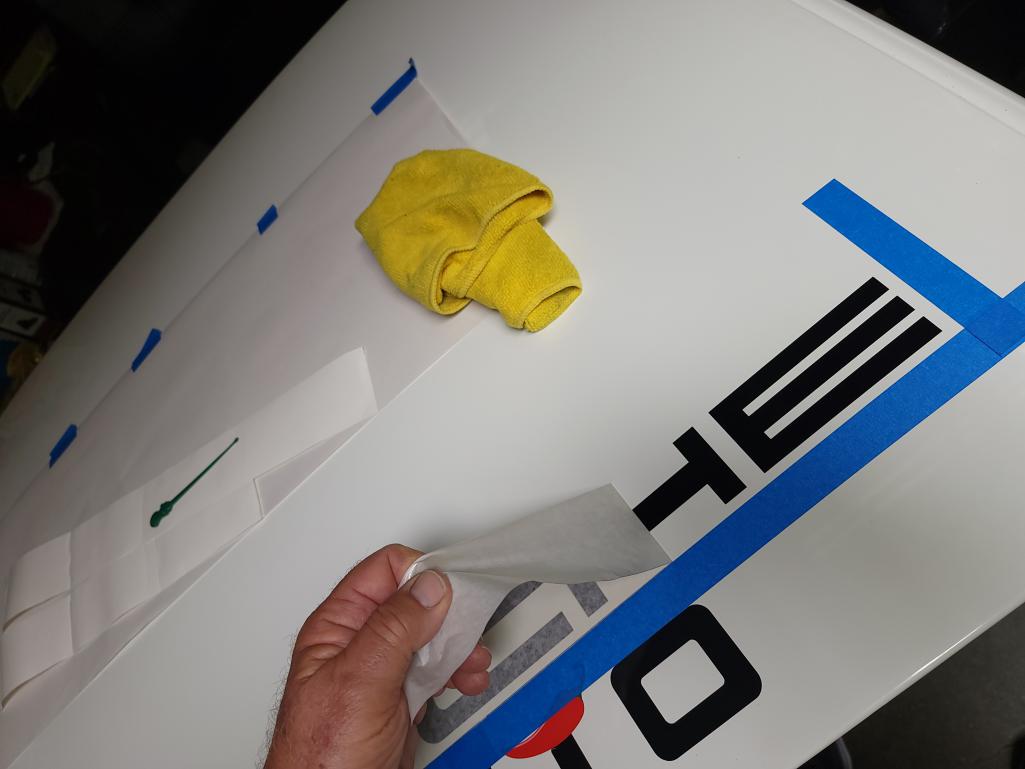
Posted by: Maltese Falcon Jun 2 2024, 08:40 PM
Topside done, now for some hardware on the flip side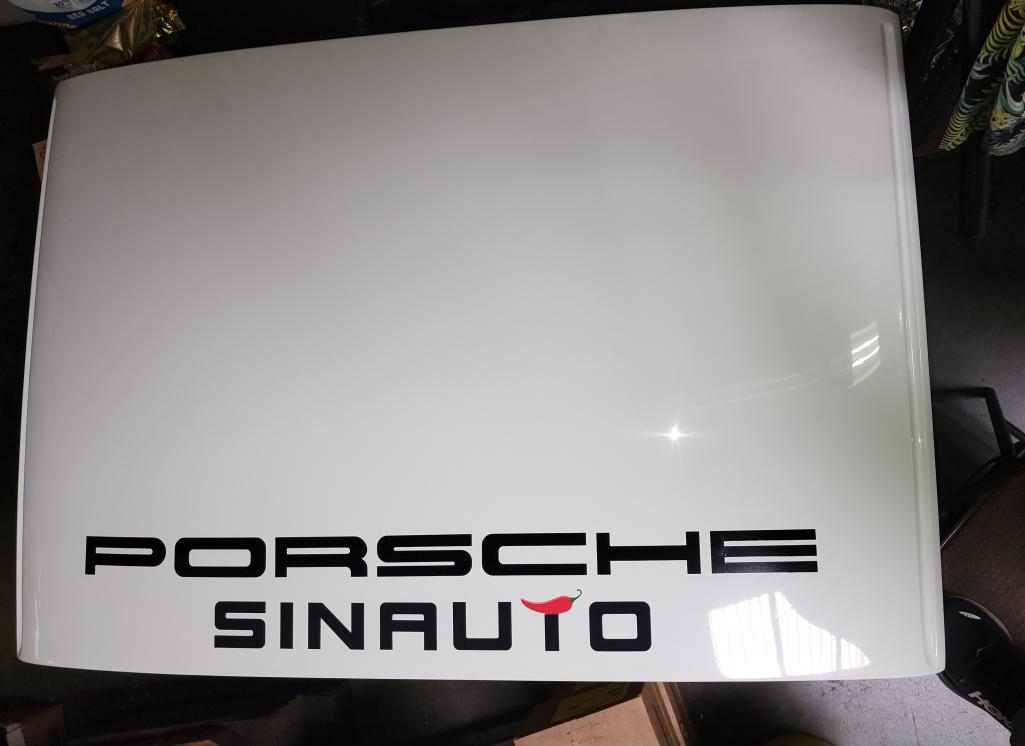
Posted by: Maltese Falcon Jun 2 2024, 08:47 PM
Last time this targa top had hardware installed on it, it was in a freind's backyard under a persimmon tree !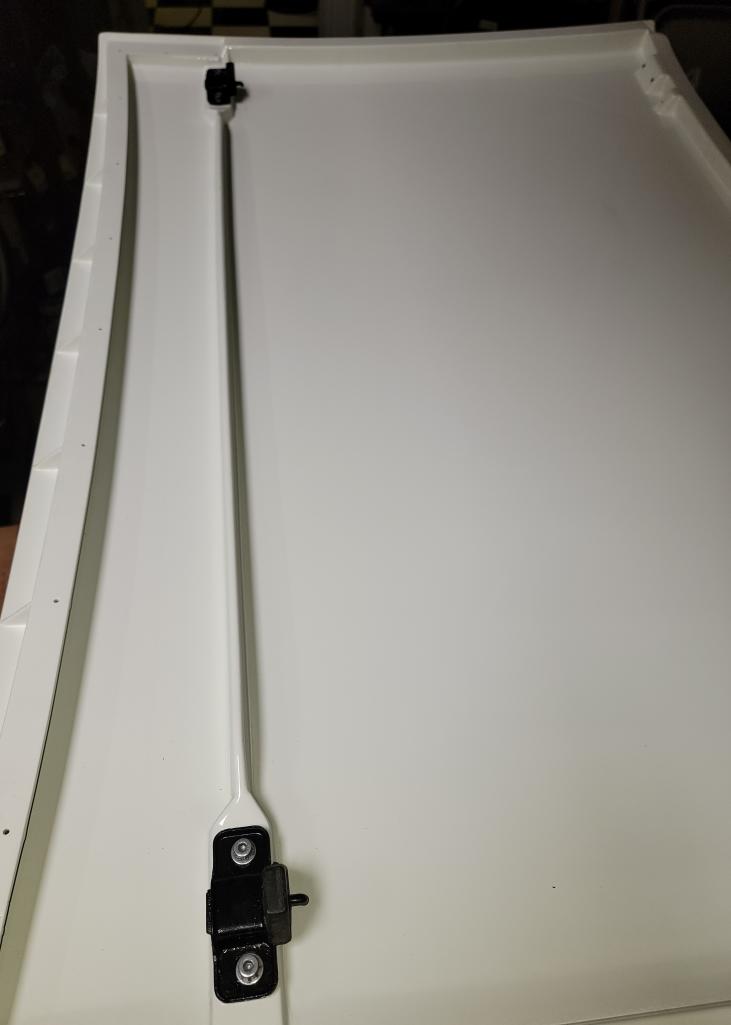
Posted by: Maltese Falcon Jun 2 2024, 08:52 PM
Next up will be setting the Porsche script on the Sheridan rocker panels 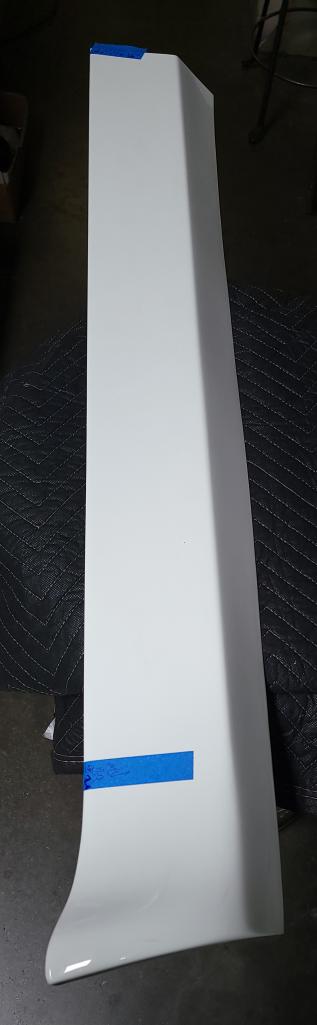
Posted by: Maltese Falcon Jun 4 2024, 02:50 PM
Getting back to engine accessories; setting up the coolant temp sender, coolant bleeder line (to fill tank); set up on a #4AN flexible line/ bracket (fab'ing up now).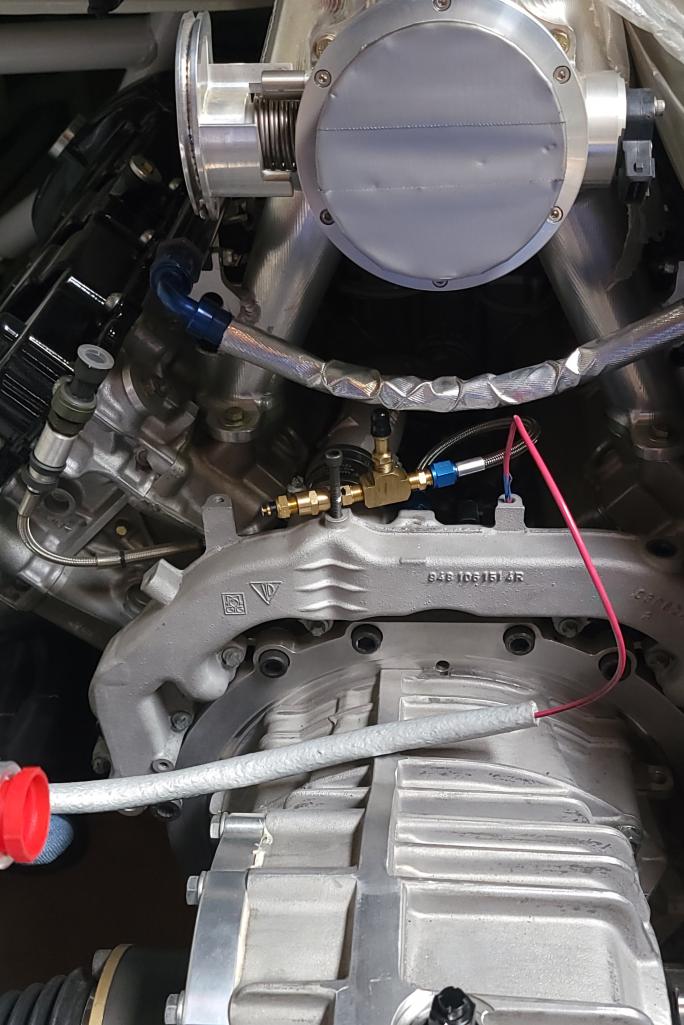
Posted by: NorCalScott Jun 7 2024, 07:22 AM
www.fittings.space in Sparks, NV, makes all sorts of 'Metric to SAE, AN, NPT adapters, which we used their *stainless steel part here/ in conjuction with a VDO ⅛" NPT sending unit.
Saving this resource. Little things like this can be so frustrating when you can't find the right adapter.
Posted by: Maltese Falcon Jun 13 2024, 06:57 PM
Throwback to the iconic Porsche showroom Sonauto in Paris: It's all Stock trust me !
Posted by: Maltese Falcon Jun 13 2024, 08:52 PM
Bracketed and ready to install on to the Cayenne engine coolant-crossover manifold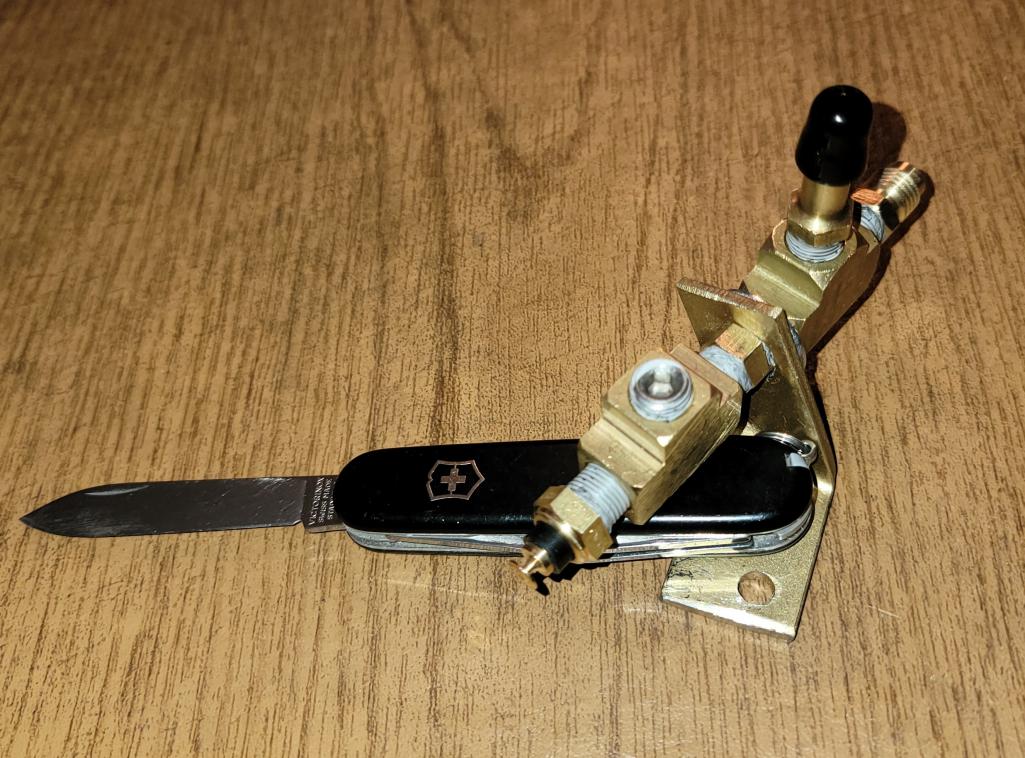
Posted by: Maltese Falcon Jun 18 2024, 09:51 AM
Oil Tank supports / upper & lower brackets. Top bracket mounts to spec frame rail>>drill and tap
Posted by: Maltese Falcon Jun 18 2024, 09:55 AM
Using .125" c/r steel for the fabricated brackets (gold color)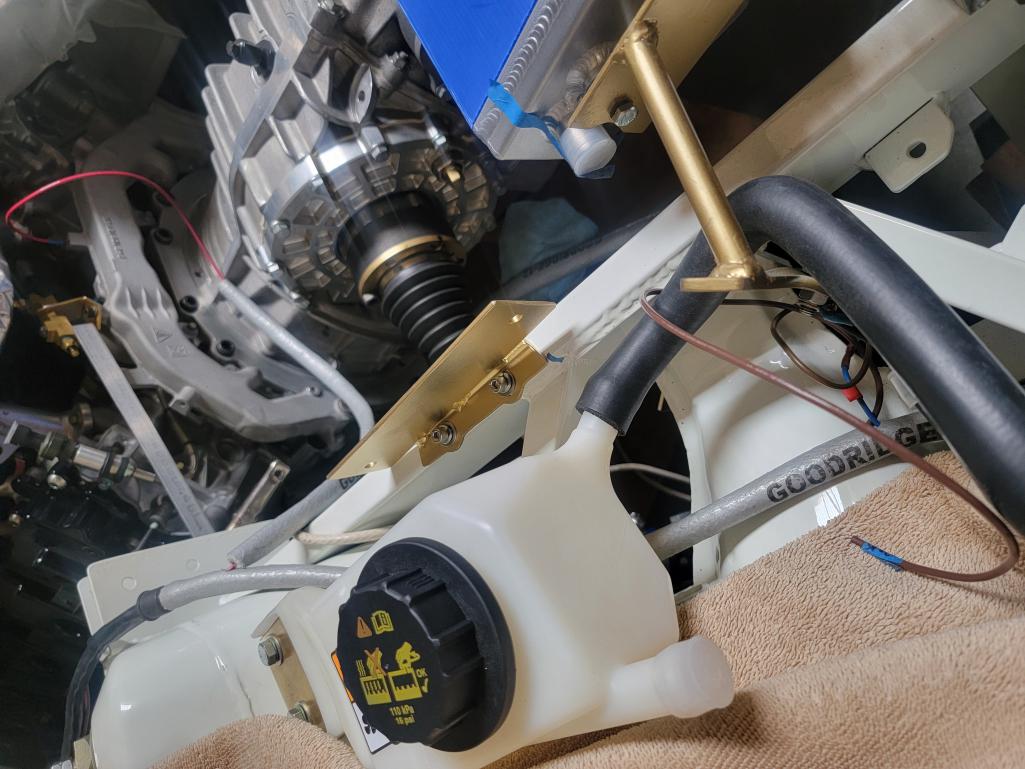
Posted by: Maltese Falcon Jun 18 2024, 10:00 AM
These black-anodized (Aviaid Co.) tank brackets are supplied from mfg. for use on this 7½" dia. oil tank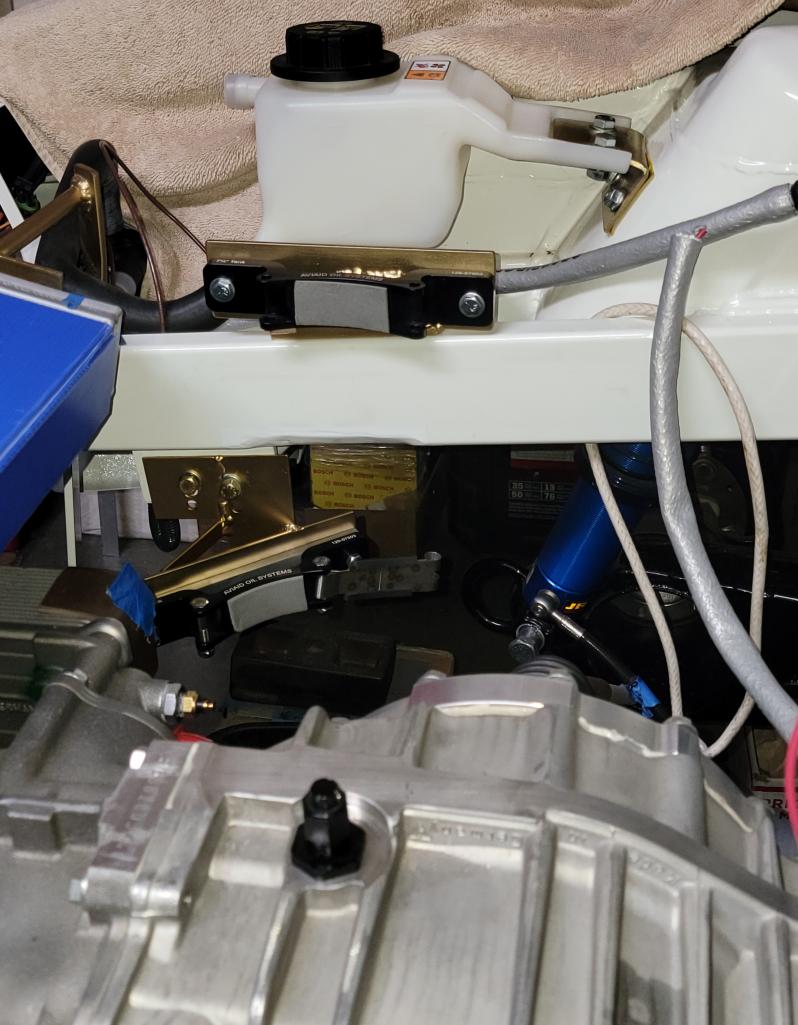
Posted by: Maltese Falcon Jun 18 2024, 10:15 AM
I think that with the adding of 2) Garretts, wastegates, intercooler and b/o/v are all packed into the 'Trunk area, No more luggage room avail. Maybe just strap these to the cold side of intercooler 
Posted by: Maltese Falcon Jun 20 2024, 04:30 PM
Good day today & tidied up runs of wire that have been pulled through into the trunk area. I use 'Goodridge fire sleeve which I've been sourcing at www.pegasusautoracing.com
Also purchased all sorts of racing hardware, Tilton pedal assembly, brake bias control, etc. from them; excellent product knowledge/ customer service 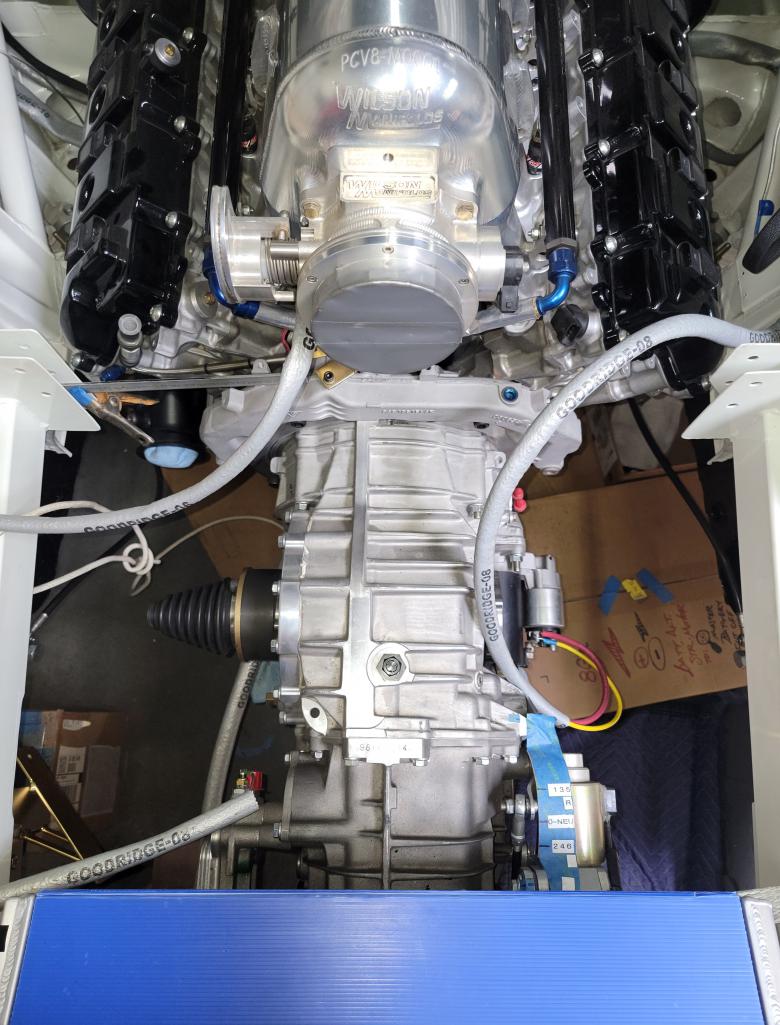
Posted by: Maltese Falcon Jun 20 2024, 04:39 PM
Nice to see Goodridge product on the Porsche 963
Looks like they are fire-sleeving the turbo oil supply (#4AN) lines, and #12AN (oil drain scavenge) lines which seem to be in a super hot zone !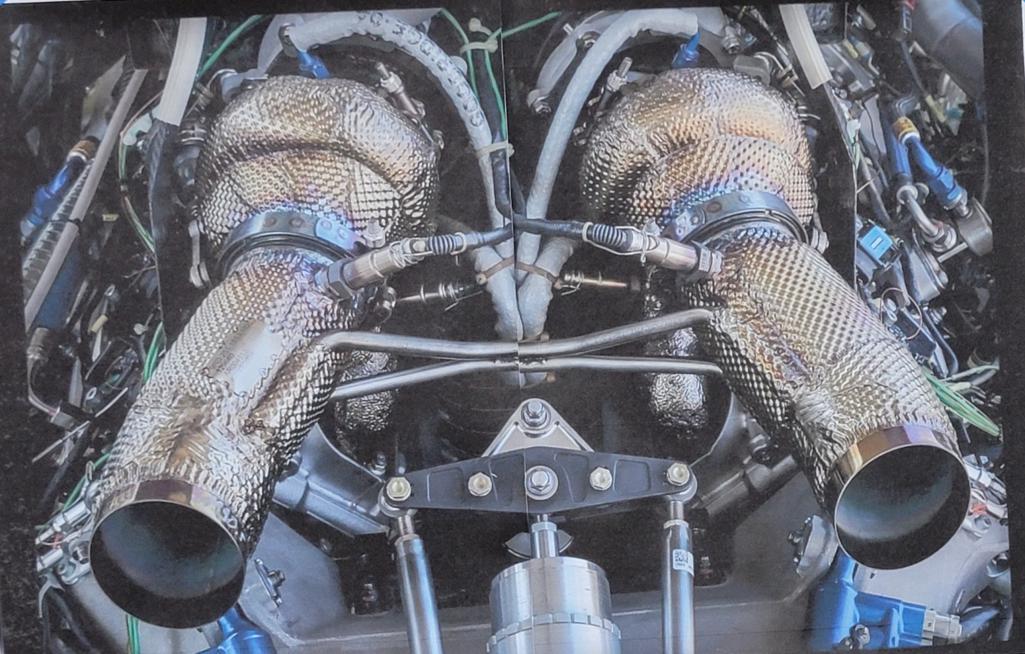
Posted by: Maltese Falcon Jun 21 2024, 06:20 PM
Driver side shorty header securly snuggled down.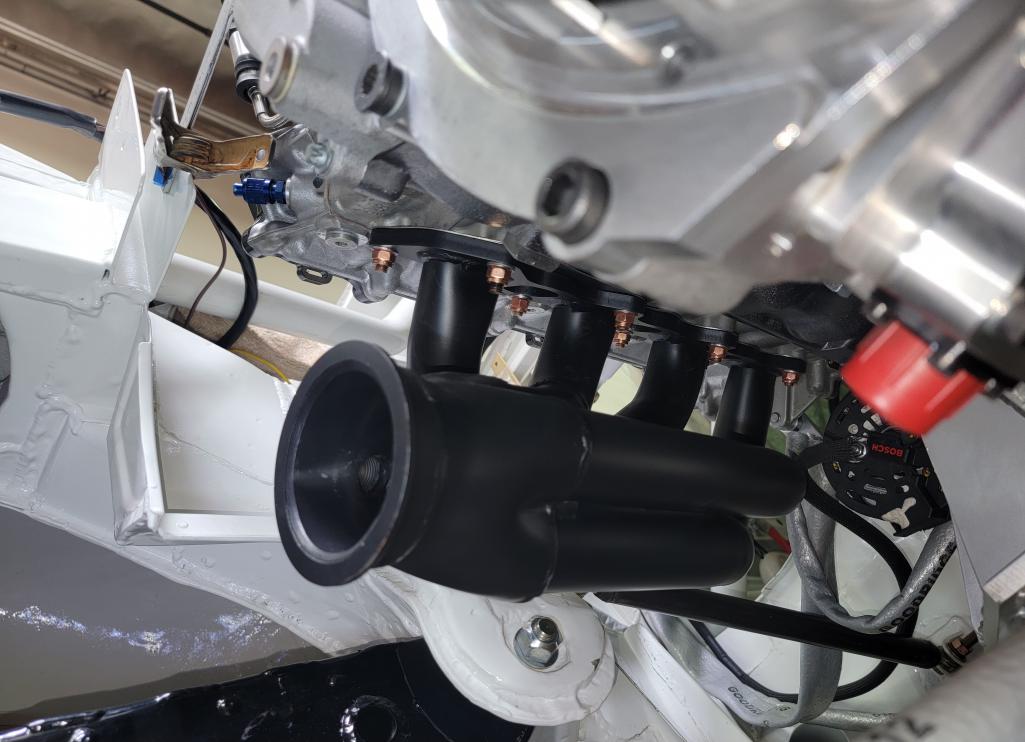
Posted by: KELTY360 Jun 21 2024, 07:11 PM
Driver side shorty header securly snuggled down.
That’ll make some sweet noise.
Posted by: Maltese Falcon Jun 23 2024, 08:51 AM
@http://www.914world.com/bbs2/index.php?showuser=5344 Marc, the 8gtt sounds should be an earful...even for a non-flat plane crank Cayenne v8 ! The basic tech in my shorty shorty header design, is how the placement of the tubes enter into the collector; left and right side headers respectively.
Following the Cayenne v8 firing order: 1-3-7-2-6-5-4-8
I place the tubes in a (rotational) position, so during the normal scavenging taking place = the exhaust pulses fire into the collector in a rotational fashion.
This gives an extra performance benefit during evacuation of the exhaust pulses. Can't hurt getting the pulses to scaveng even quicker, right? 
Posted by: Cairo94507 Jun 23 2024, 09:18 AM
Next level greatness for sure.
Posted by: Maltese Falcon Jun 25 2024, 05:19 PM
Passenger side exhaust header with EGT, and o2 port ready for install.
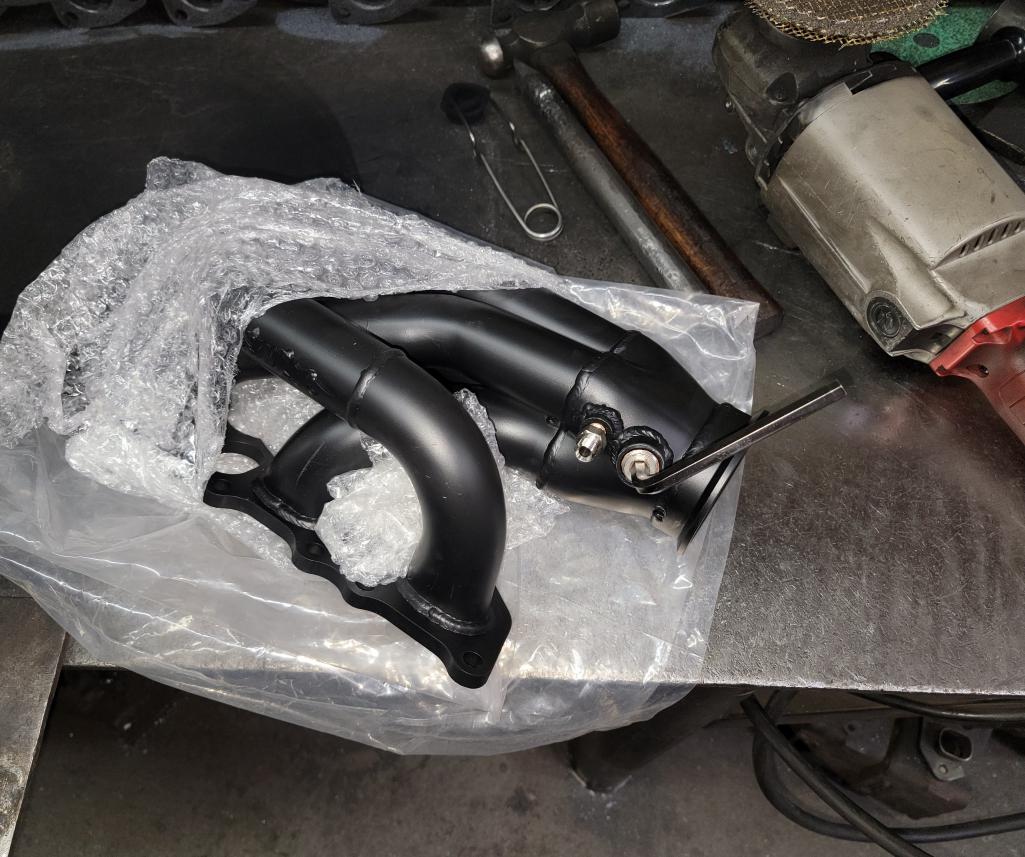
Posted by: Maltese Falcon Jun 25 2024, 05:35 PM
I'm having a few sets of these 18ga. SS plates laser cut for use with these cool 914 headlights, which install into the previous front turn signal locations.
Since we are using Sheridan fiberglass body panels, when you slice the (faux) turn signal 'Pods from the top of the fenders you are left with a ¹/16" perimeter edge...which is not real sturdy to attach these light fixtures on.
The thin plates will be epoxied into place, then these new light assemblies* will have a sturdy foundation to sit on. Then I will add another support bracket inside the fender, in order to catch the stud/nut on the assembly.
Mfg. by* www.3DGAUTO.com
Posted by: Maltese Falcon Jun 25 2024, 05:43 PM
Back side of the new headlight assembly, high and low beam are in this set up. Fully adjustable, simple instructions, and looks like the wire cables are plug + play for converting a stock 914 .
Posted by: NorCalScott Jun 26 2024, 06:50 AM
very cool headlights
Posted by: Shivers Jun 26 2024, 11:16 AM
A bit of of my range but these combo blinker/ headlight housing would be great as an auxiliary driving light.
https://3dgauto.com/products/custom-classic-signal-headlight-combo-for-porsche-914
Posted by: technicalninja Jun 26 2024, 11:46 AM
I'm having a few sets of these 18ga. SS plates laser cut for use with these cool 914 headlights, which install into the previous front turn signal locations.
Since we are using Sheridan fiberglass body panels, when you slice the (faux) turn signal 'Pods from the top of the fenders you are left with a ¹/16" perimeter edge...which is not real sturdy to attach these light fixtures on.
The thin plates will be epoxied into place, then these new light assemblies* will have a sturdy foundation to sit on. Then I will add another support bracket inside the fender, in order to catch the stud/nut on the assembly.
Mfg. by* www.3DGAUTO.com
@http://www.914world.com/bbs2/index.php?showuser=24781
He already has them...
Posted by: Shivers Jun 26 2024, 01:20 PM
I'm having a few sets of these 18ga. SS plates laser cut for use with these cool 914 headlights, which install into the previous front turn signal locations.
Since we are using Sheridan fiberglass body panels, when you slice the (faux) turn signal 'Pods from the top of the fenders you are left with a ¹/16" perimeter edge...which is not real sturdy to attach these light fixtures on.
The thin plates will be epoxied into place, then these new light assemblies* will have a sturdy foundation to sit on. Then I will add another support bracket inside the fender, in order to catch the stud/nut on the assembly.
Mfg. by* www.3DGAUTO.com
@http://www.914world.com/bbs2/index.php?showuser=24781
He already has them...
Yeah thanks I saw that, that's where I got the address. When he mentioned "these cool 914 headlights" I thought that would be neat but what would I do for a blinker? Then I saw the website. I'd love to have these
Posted by: Maltese Falcon Jun 26 2024, 02:07 PM
May or may not use the front blinker, don't need 'em on the track; but very handy for short romps around the block, or short drive to the Petersen Museum for C+C
Posted by: technicalninja Jun 26 2024, 06:10 PM
May or may not use the front blinker, don't need 'em on the track; but very handy for short romps around the block, or short drive to the Petersen Museum for C+C
A 2/1 P/W ratio car on the street...
A "short romp around the block" will make all the animals in a 1/4-mile radius crazy!
What I WANT to know is how you are creating the 7k lbs. of down force that you're gonna need to hook up!

Posted by: Maltese Falcon Jun 26 2024, 11:46 PM
@http://www.914world.com/bbs2/index.php?showuser=27135 >> this is the APR Performance rear c/f wing that we chose for the job. Our own water-jet formed t6 .375" aluminum supports will capture the 1600 psi downforce (rated at 160mph) and send it downwards directly through the transaxle mounting frame. Front canards, and a totally sealed undercar tray with diffuser out back. The wing alone will never reach 7k psi of downforce, and I may never experience w/o/t in 6th gear on a long track; might let Patrick Long enjoy some seat time 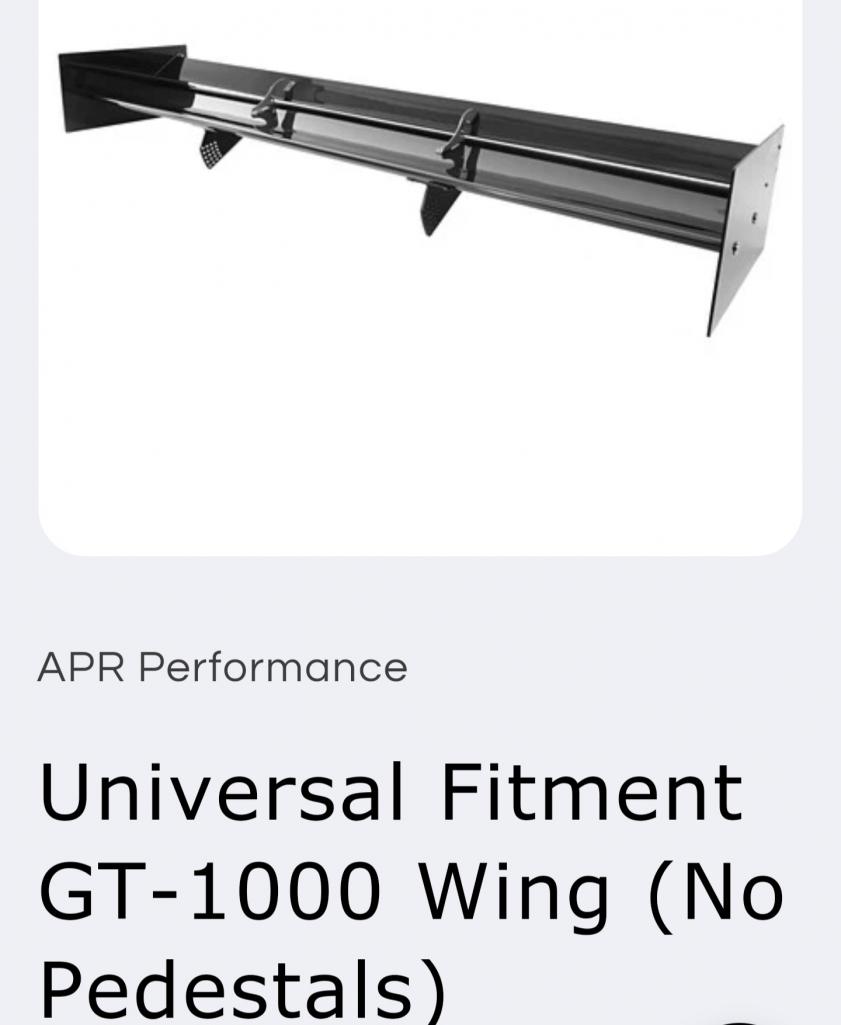
Posted by: Maltese Falcon Jun 26 2024, 11:48 PM
Some APR specs...
Posted by: Maltese Falcon Jun 26 2024, 11:50 PM
Few more pics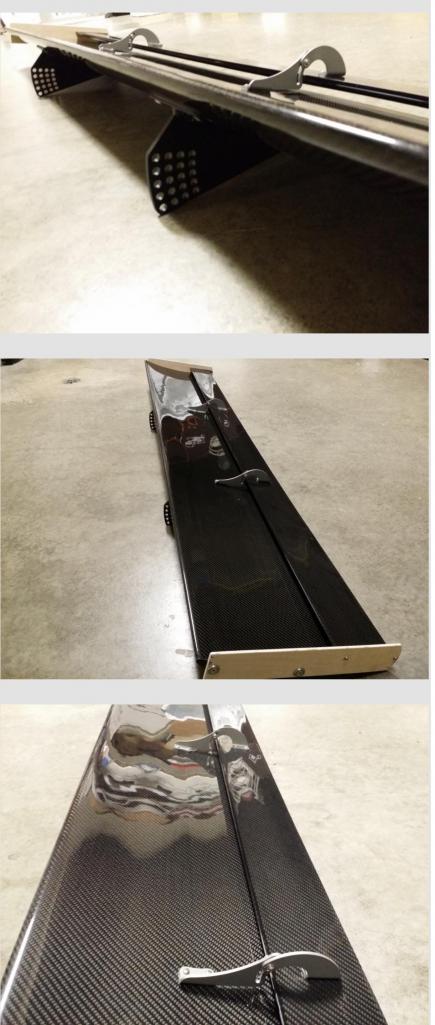
Posted by: technicalninja Jun 27 2024, 12:19 AM
"No stall at 52 degrees" is HARD to believe!
BAD ASSED if it can do that...
I was joking, playing with you!
I DON"T believe you will EVER be able to apply WOT at ANY speed.
Unless,
You've created artificial gravity!
And, if you've accomplished that you're setting your sights too low...
Corky once built a twin turbo Cobra with a 351 as the base. The yellow car (my dad painted it).
He couldn't ever get it up to full boost.
By the time he had enough traction to hold WOT he was 160 MPH and running out of runway down at Kestral...
He was nearing 800 hp.
You're hunting 1100 in a lighter car!
I haven't had time to run through your whole thread, life has been busy/crappy.
What I've seen so far is the Ultimate 914 with master level workmanship. Everything is just exquisite!
COMPLETELY BAD ASSED!
Posted by: Maltese Falcon Jun 27 2024, 09:47 AM
@http://www.914world.com/bbs2/index.php?showuser=27135 Yessir Corky Bell ran a tight shop, and you were definitely in good Mentorship working for him. In the late '70s I think that we both had our business contacts printed in the back pages of Hugh MacInnes 'Turbochargers book Corky supplied us with various components when we were in the turbo kit era
Posted by: Maltese Falcon Jul 7 2024, 06:40 PM
Another body part finished up; rear bumper now set up with the CGT exhaust tip 'Surrounds.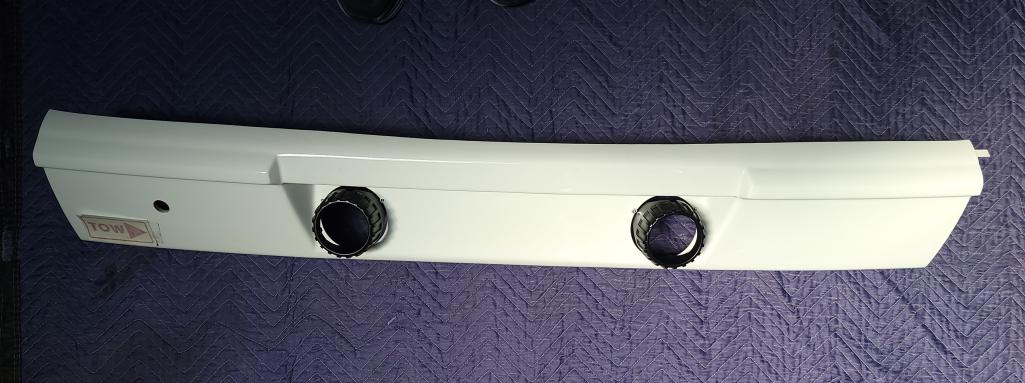
Posted by: Maltese Falcon Jul 7 2024, 06:49 PM
The final 3" o/d exhaust system will exit through these housings; and coated in black Ceramic...same color is used throughout the entire exhaust system.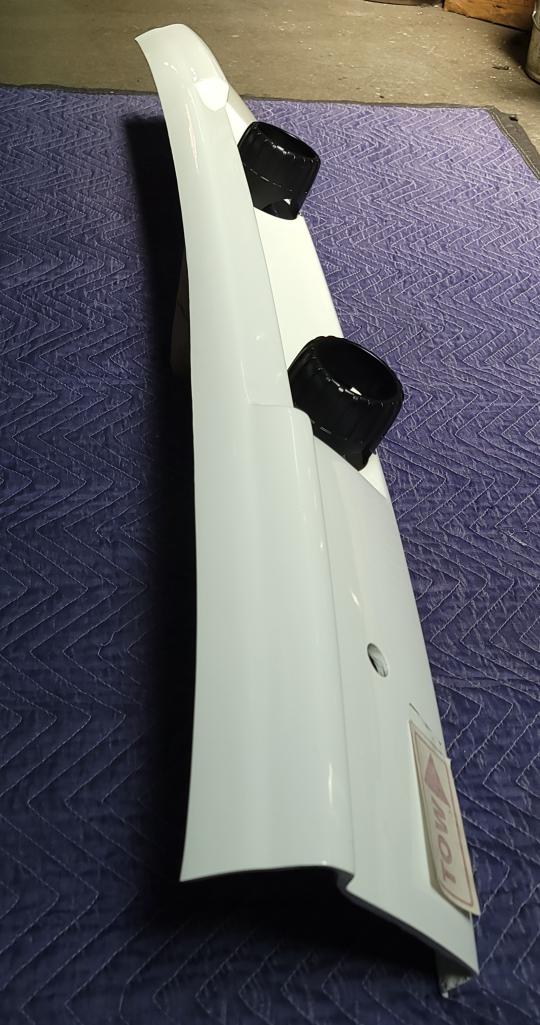
Posted by: Maltese Falcon Jul 7 2024, 07:14 PM
Backside of the rear fiberglass bumper: it's A.I.R. brand very sturdy build>> but Lots of time and labor getting their left and right steel brackets Tweeked to fit the unibody 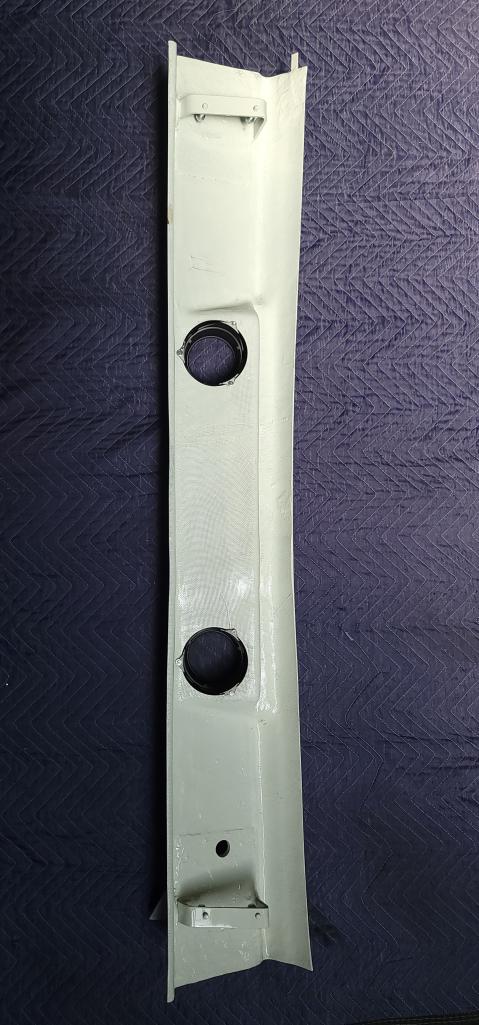
Posted by: technicalninja Jul 7 2024, 07:55 PM
Those look interesting.
What sort of magic will you use to keep the fiberglass from degrading?
Exhaust tubes slip through them without touching?
I'd guess at full tilt that might see 6-800 degrees, maybe more.
How do you make it live?
Posted by: Maltese Falcon Jul 7 2024, 08:25 PM
@http://www.914world.com/bbs2/index.php?showuser=27135 it's not a big problem with temp, the exhaust exits the turbos at approx 1200°f and cool down somewhat heading towards the back bumper.
Coatings bring down the egt's too. Main design challenge is shoving twin 3" od compound/ mandrel formed tubes through a left and right maze of components AND a bunch of SS heatshields, all in
tight 914 rear confines !
This is a quick thumbnail I sketched up which shows a bit of goods I'm hauling around back there !
I have a crazy idea brewing up regarding better 'Packaging of the exhaust...and has been planted in my brain ever since RennSport7, viewing the 963 in the workshop with its rear bodywork removed.
Keep watching our progress here for my easy way around dealing with this heat.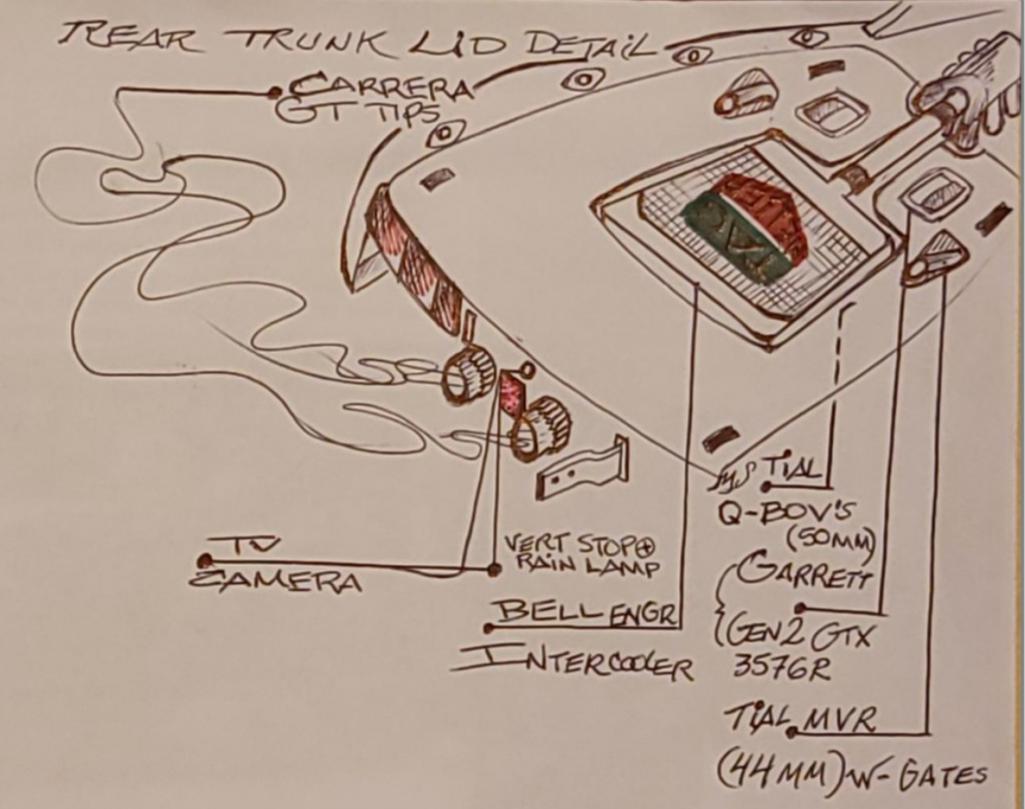
Posted by: Maltese Falcon Jul 8 2024, 06:12 PM
These SS base plates just received for the 3DGAuto.com headlight assemblies.
Now to start laying out the outline for cutting the Sheridan "Turn signal" bucket area.
I have 4) extra pair if anyone is planning on running these headlights on their fiberglass bodywork (Sheridan, 914Rubber, GT Racing) style. 
Posted by: BillJ Jul 8 2024, 06:23 PM
I would buy a pair from you. Seriously considering these lights for the gt for.the same reason (lightness and ease of use)
Posted by: Maltese Falcon Jul 8 2024, 06:35 PM
I would buy a pair from you. Seriously considering these lights for the gt for.the same reason (lightness and ease of use)
Bill, I don't think that you will need these>> if you're using the oe steel fenders which already have a good flat base (perimeter edge) at the top of fender (light bucket area).
These new style headlight housings should drop right into place and sit correctly on the OE edges, even bolt into the oe metal bracket in there.
Marty
Posted by: BillJ Jul 8 2024, 07:25 PM
I have fiberglass flares and thought maybe the fronts are fiber too. Pick up the car tomorrow or Wednesday from dry ice blasting and coating for the underside so will check then!
Posted by: Maltese Falcon Jul 8 2024, 08:24 PM
I have fiberglass flares and thought maybe the fronts are fiber too. Pick up the car tomorrow or Wednesday from dry ice blasting and coating for the underside so will check then!
LMK Bill...if the remaining fender structure is metal, you should have a 'Proper base already
Posted by: Maltese Falcon Jul 11 2024, 08:21 PM
Some 3" exhaust tips to pop through the CGT surrounds; made these with the assistance from our hydraulic press + the Dome-die tooling.
The small 1⅞" od tubes (when finish welded) will be where the 1¾" od tubes with exhaust gasses will enter the tips. Why so small? See following ...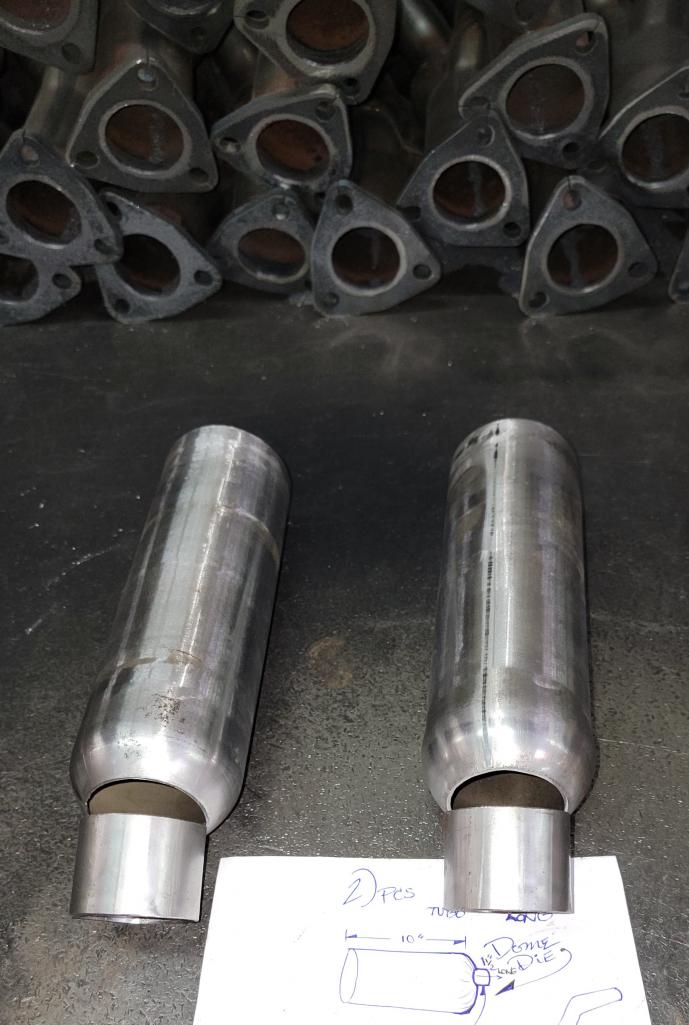
Posted by: Maltese Falcon Jul 11 2024, 08:33 PM
Our Hydraulic press makes all MSDS header collectors, cones, reducers, specialty dimples and domed caps on tubing ends. The end caps on these 3" od tube sections are 1⅞" id.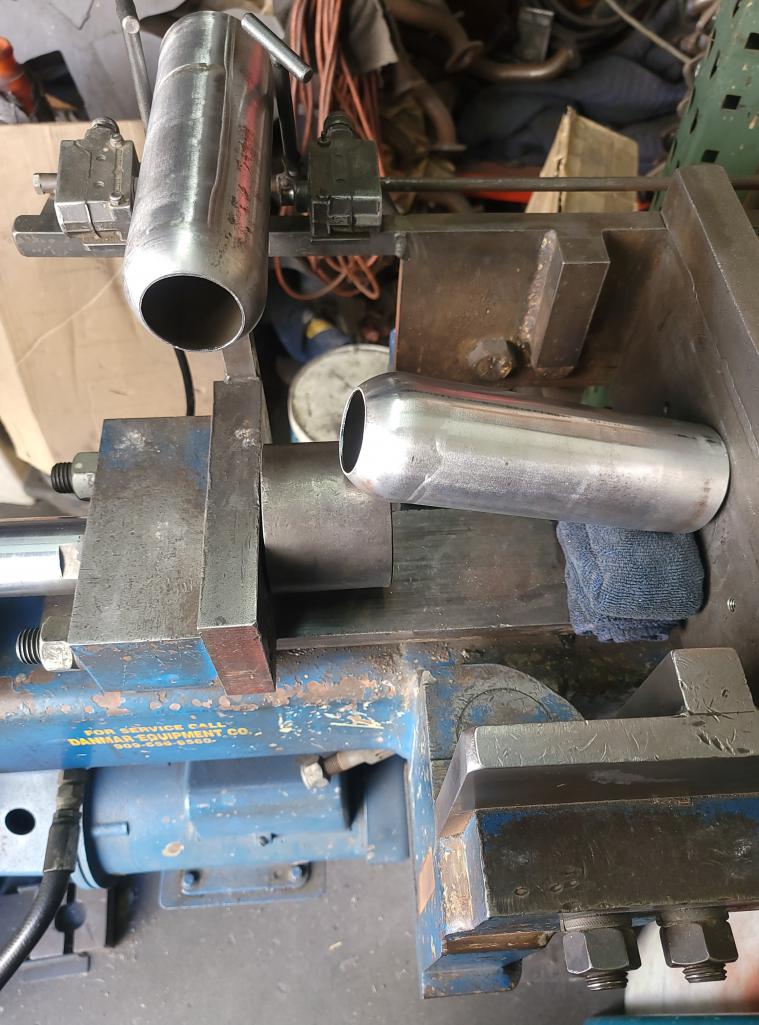
Posted by: Maltese Falcon Jul 11 2024, 08:55 PM
The goal was to move exhaust gas from left and right side Garrett turbos, but we have decided to vent the Left + Right wastegate exhaust down to the rear of the 914 instead; and the turbo exhaust out the top of the rear trunk lid...race car (or even 918) style. Routing 1¾" header tube around the drivetrain 'Maze is so much more compact compared to dual 3" dia tubing. Cooler engine bay temps as well, the wastegates oscillate the dispersing of exhaust gas, wherein the turbo exhaust is a constant flow.
Turbo exhaust will be simple 3" dia 45° angle cut, short and compact. Pic shows basic 1¾" mandrel bends which will be prototyped into place once the wastegates are situated.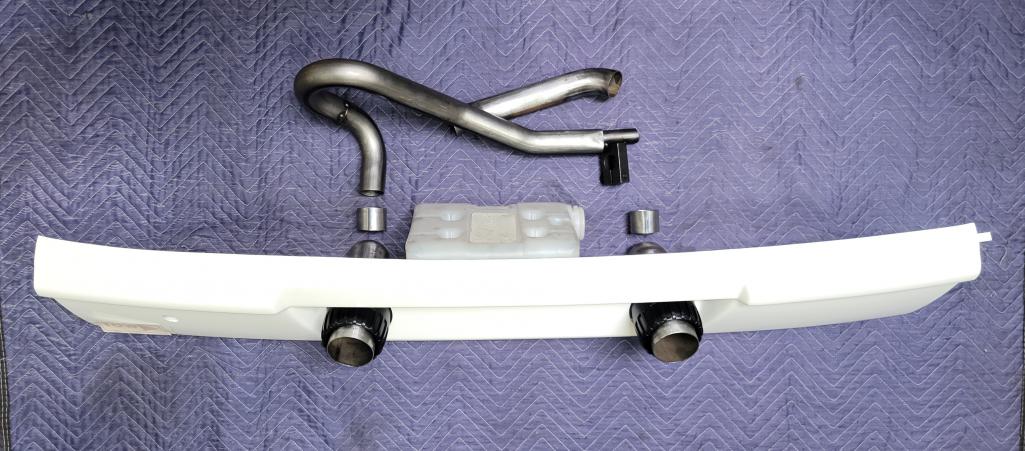
Posted by: Maltese Falcon Jul 11 2024, 08:57 PM
Closeup...the final length of the tip protruding past the CGT surrounds TBD.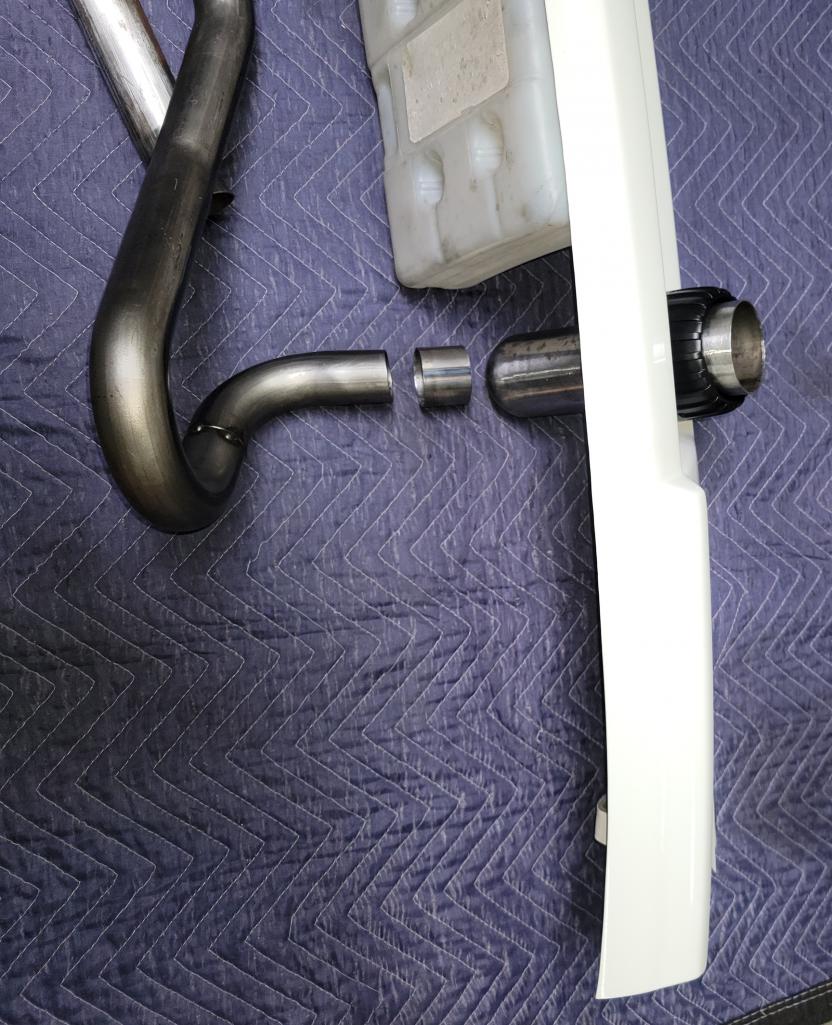
Posted by: Maltese Falcon Jul 11 2024, 09:01 PM
Turbo exhaust on this v8 Indy engine, short and right out of the turbine, and built into the slipstream of the body, very cool design 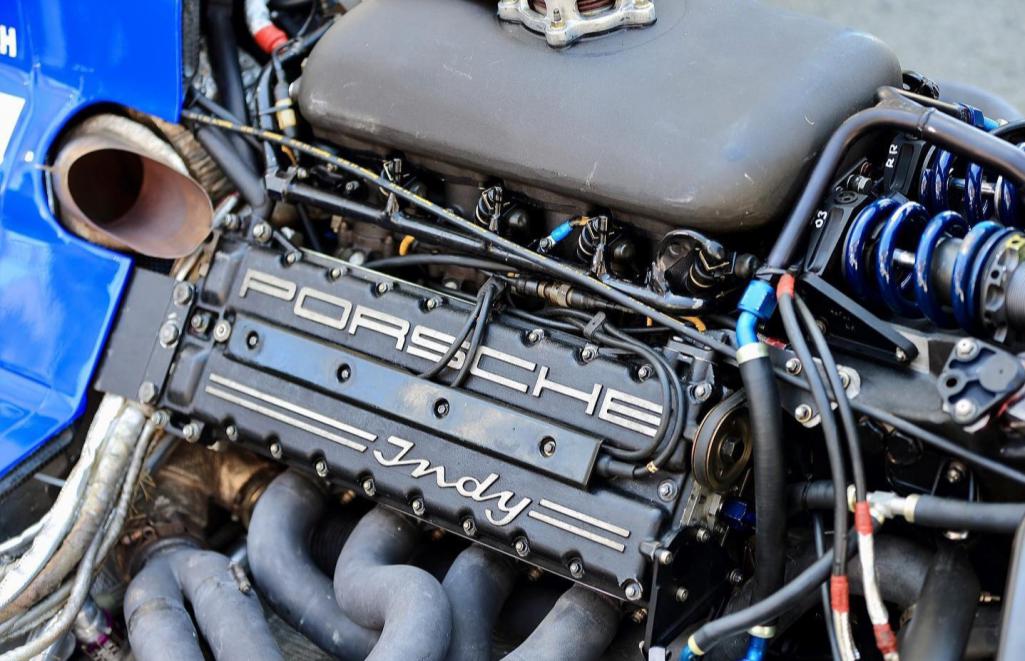
Posted by: NorCalScott Jul 17 2024, 07:02 AM
Very interesting stuff. Thanks for sharing.
Posted by: Maltese Falcon Jul 17 2024, 07:46 AM
In house mfg. od/id swedge tubing (exhaust joints); one side welded in place, and one side snugged down with these SS clamps...available at most hydraulic supply stores.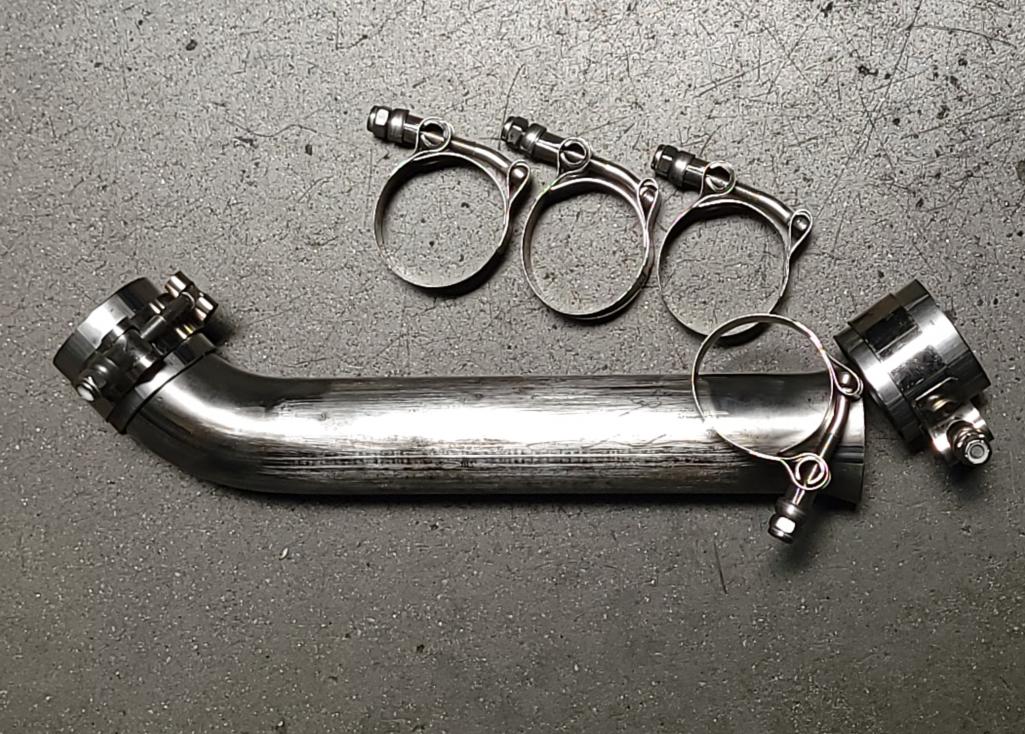
Posted by: Maltese Falcon Jul 29 2024, 06:45 PM
Rear A.I.R. fiberglass bumper and Cali Plate for (occasional) street use.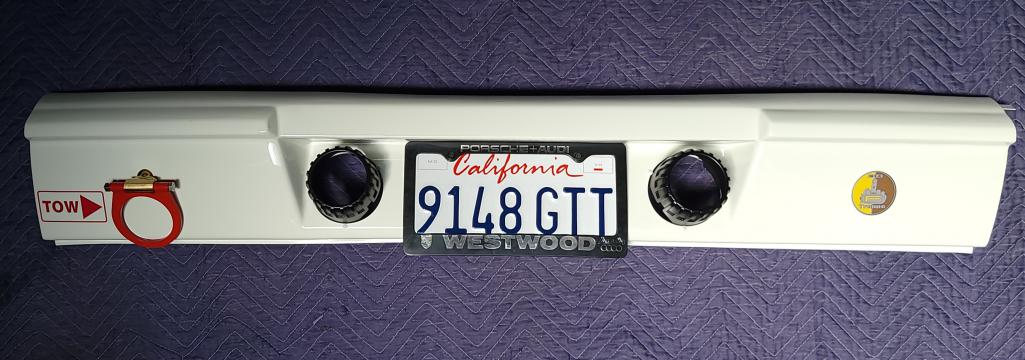
Posted by: Maltese Falcon Jul 29 2024, 06:50 PM
Combination Rain / or Stop l-e-d FIA spec lamp for Club trackwork days. Has quick disconnect 12v cable just behind the bumper.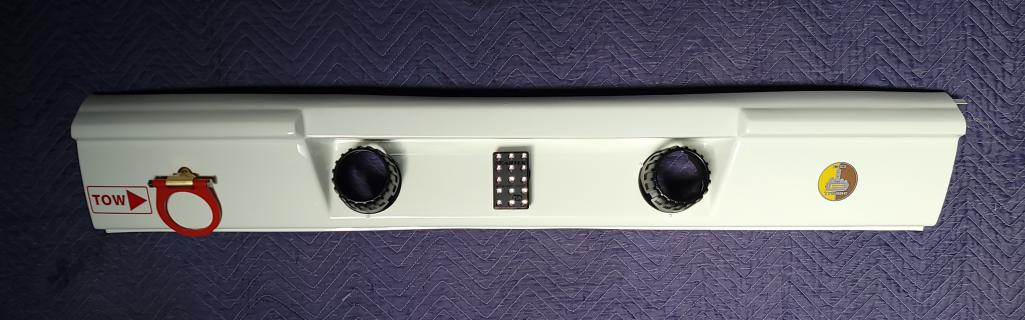
Posted by: Maltese Falcon Jul 29 2024, 06:55 PM
...and some time spent on tapping into the Daley oil pump for AN#4 oil lines (turbo o/p), and figuring out the large AN#18 route to dry sump tank. Large firewall access makes it a lot easier.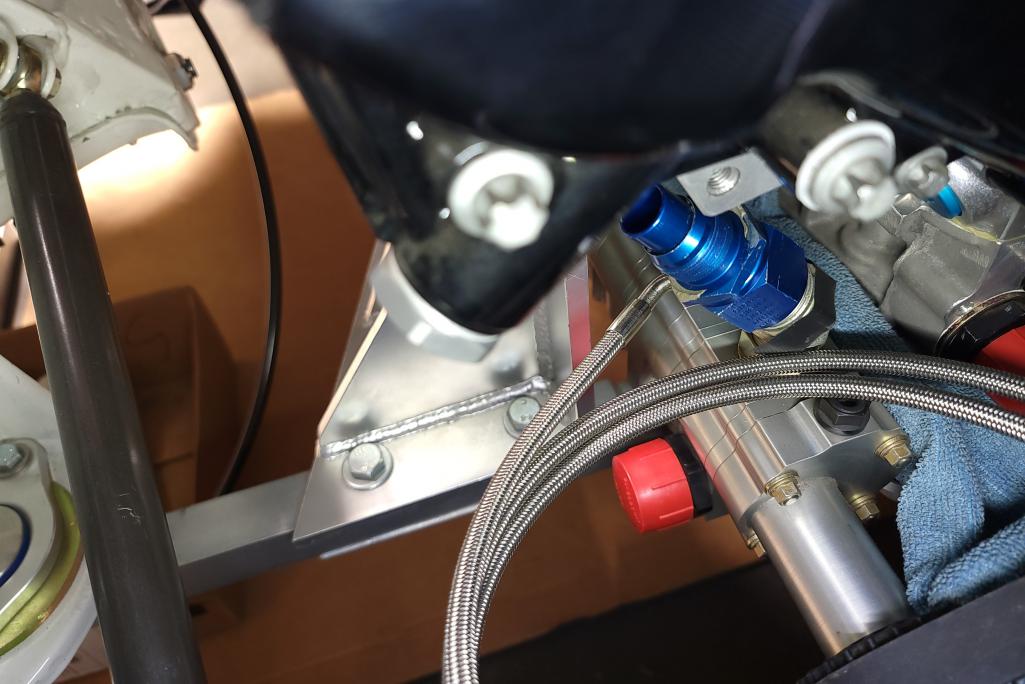
Posted by: Maltese Falcon Jul 31 2024, 07:18 PM
AN#4 oil line (Left side turbo) supply is a snug fit and clears the belts & pulleys.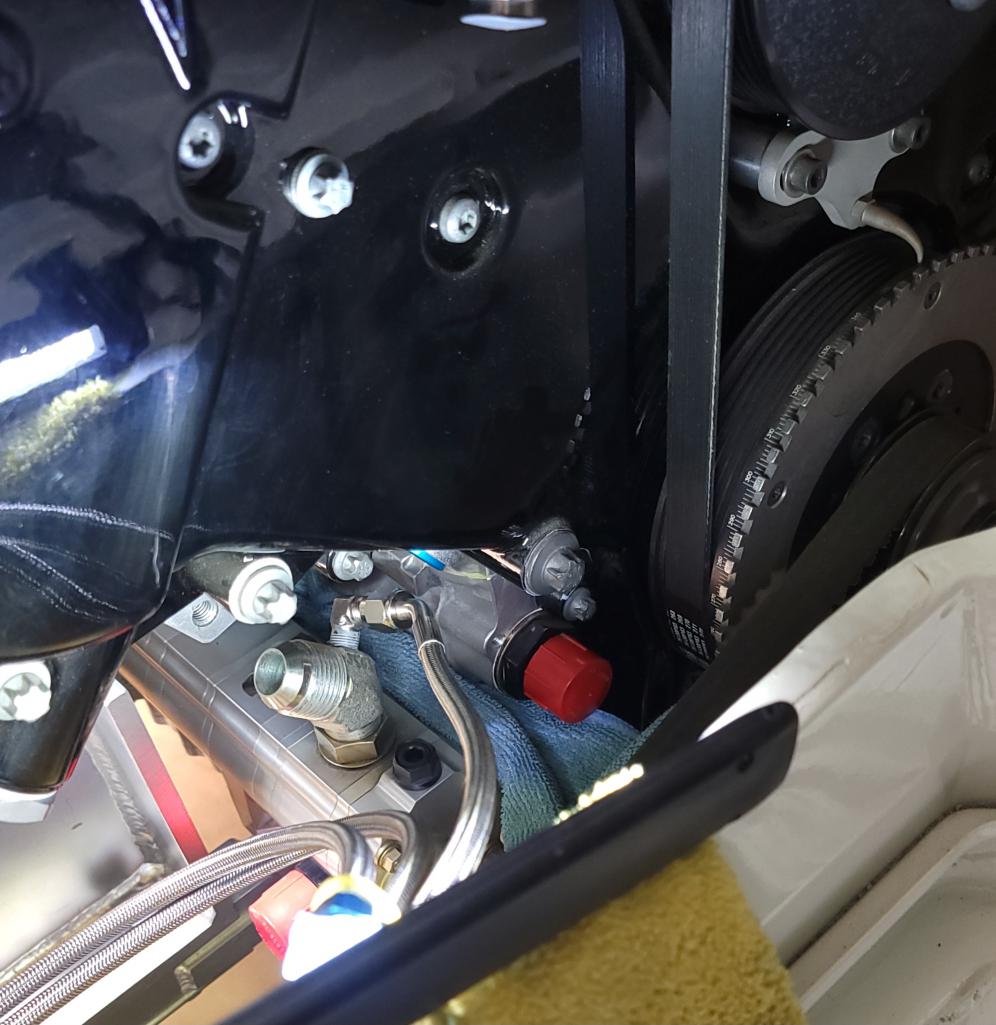
Posted by: Lucky9146 Aug 1 2024, 09:46 PM
Sanitary work Marty! Thanks for the update.
Posted by: Maltese Falcon Aug 2 2024, 10:40 AM
Sanitary work Marty! Thanks for the update.
Thx Jim @http://www.914world.com/bbs2/index.php?showuser=17942 ! are you entering anything for Lüft Universal City this October ¿¿
Posted by: Lucky9146 Aug 3 2024, 10:18 AM
Sanitary work Marty! Thanks for the update.
Thx Jim @http://www.914world.com/bbs2/index.php?showuser=17942 ! are you entering anything for Lüft Universal City this October ¿¿
Yes, entered my '85 M491. BTW 40th anniversary of the "Turbo Look" option. Hope it's accepted! See you there?
Posted by: Maltese Falcon Aug 3 2024, 10:59 AM
@http://www.914world.com/bbs2/index.php?showuser=17942 she's looking Sweet !! We threw the Sonauto car in the application...don't think they want a repeat car to show again as it was at San Pedro couple years ago
Our '79 VERBOTN was shown at Lüft 2 'Bandito Brothers years ago...but no application put in for #342 at Universal City.
LMK if you need your 'RSVP 'Local' spot this year
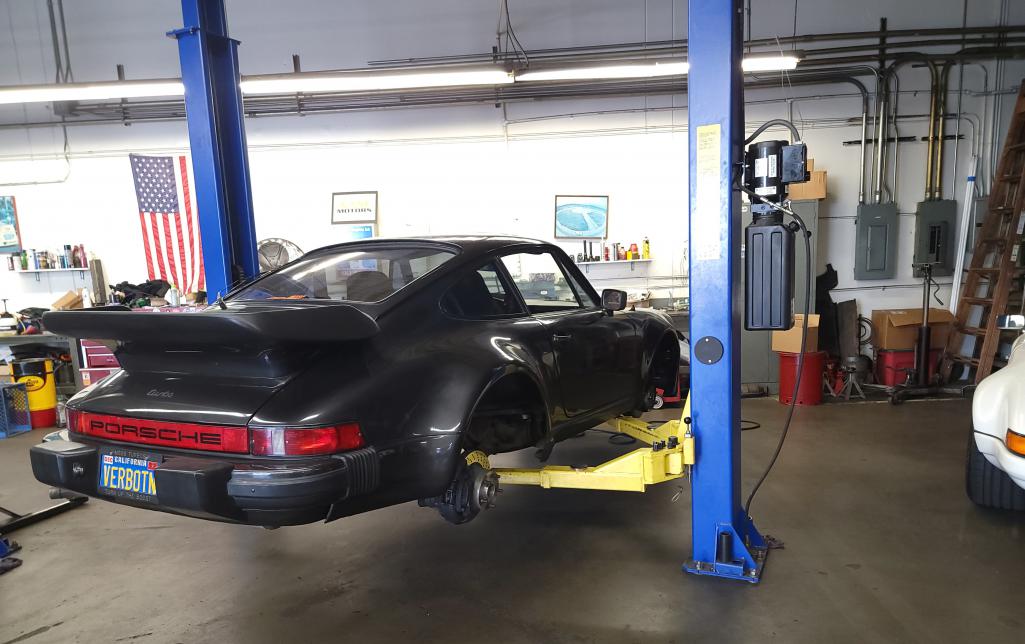
Posted by: MATTYLITE Aug 3 2024, 11:25 PM
Here are 2 quick videos we just posted to YouTube showing the onboard air jack system.
https://www.youtube.com/watch?v=lLjY0i8pH3o
https://www.youtube.com/watch?v=Zn9pa-0_Xyk
Posted by: Maltese Falcon Aug 11 2024, 06:53 PM
Simple fabrication today; just tack welding the dual exhaust support bracket that will come off of the trans nose-cone & guide the 2 pipes into the rear bumper. I'll finish weld (presentable!) after test fitment .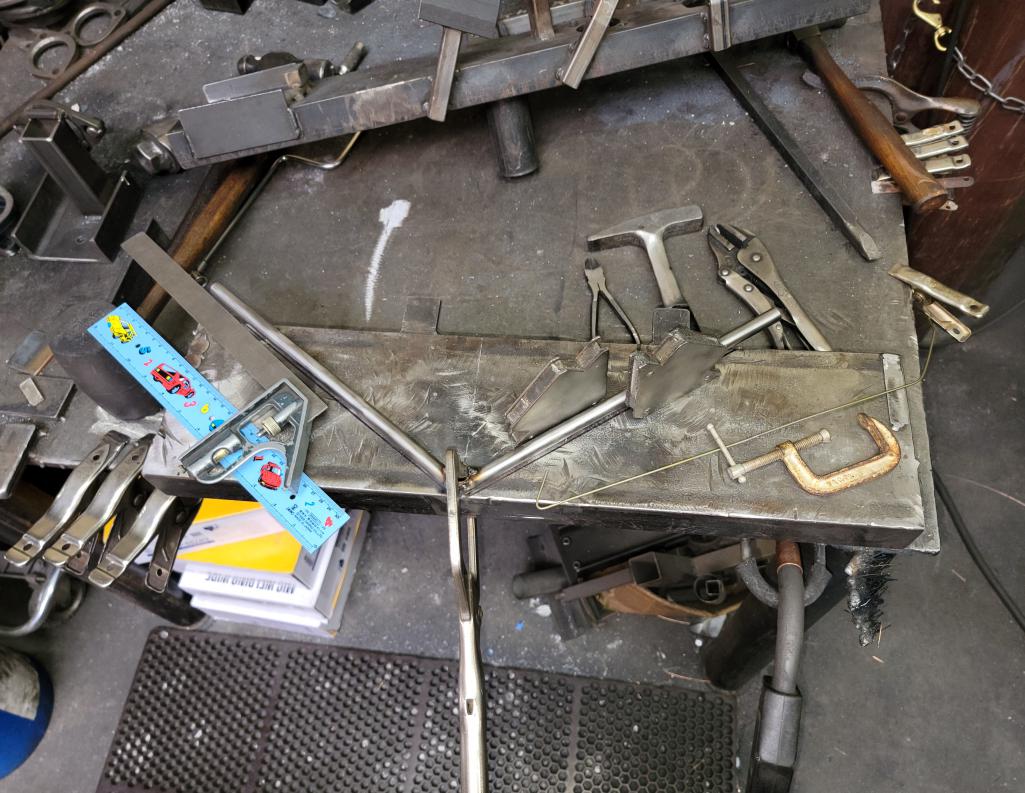
Posted by: Maltese Falcon Aug 11 2024, 06:55 PM
Support bracket >work in progress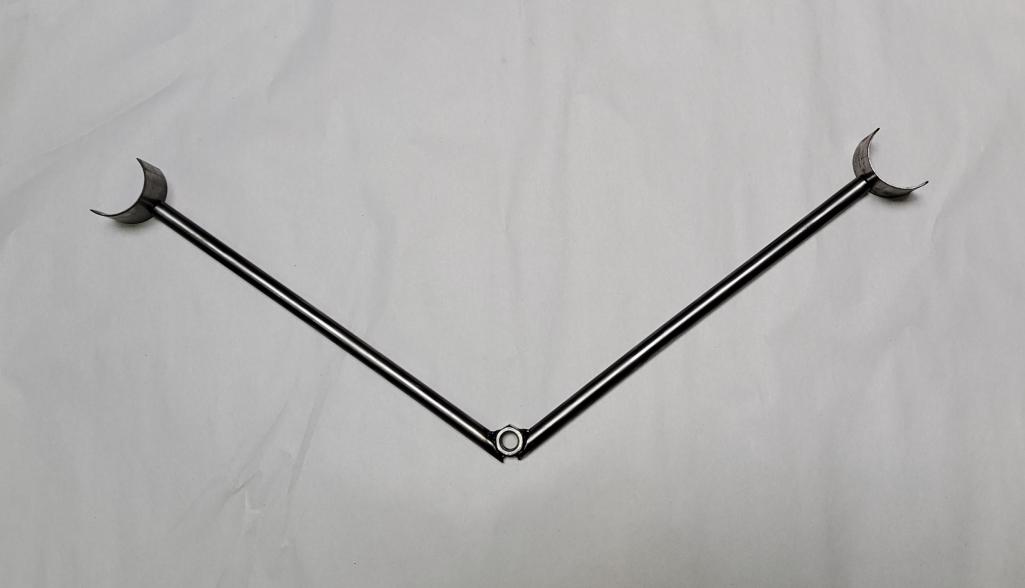
Posted by: Maltese Falcon Aug 19 2024, 07:26 PM
Rear exhaust tips support bracket now bolted on to the 996 gt2 transaxle. Lucked out and found an unused boss (for attachment) at the bottom rear of the nosecone !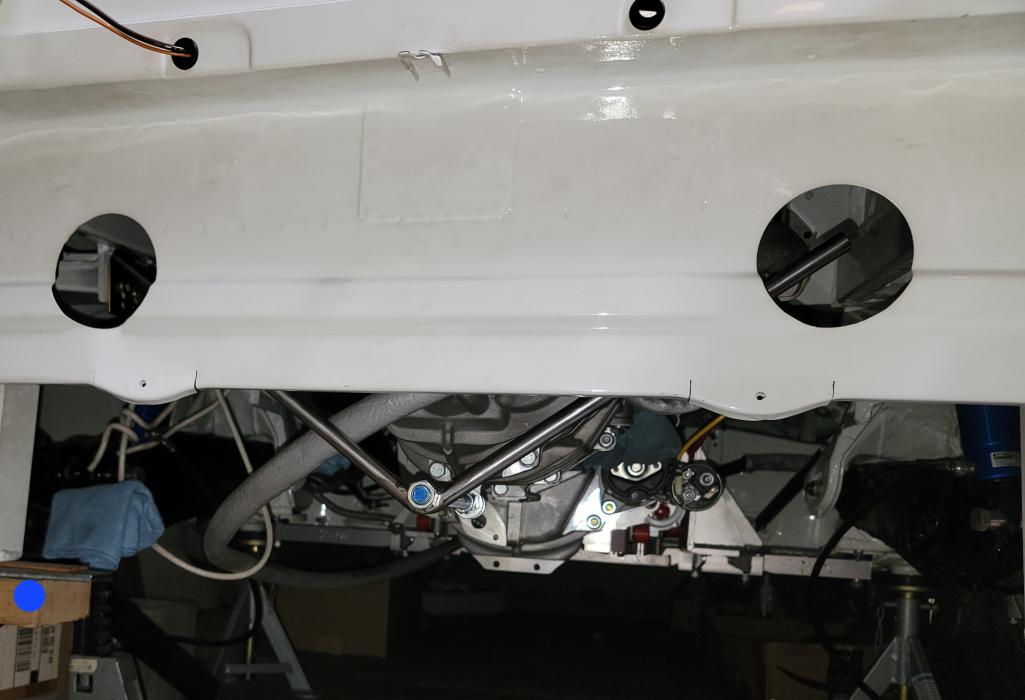
Posted by: Maltese Falcon Aug 21 2024, 05:47 PM
Did some innovative 1D mandrel bending in 2.75" od this week and came up with an end that gives a slight kidney bean + slash tip look: close enough for that Porsche Indy exhaust style.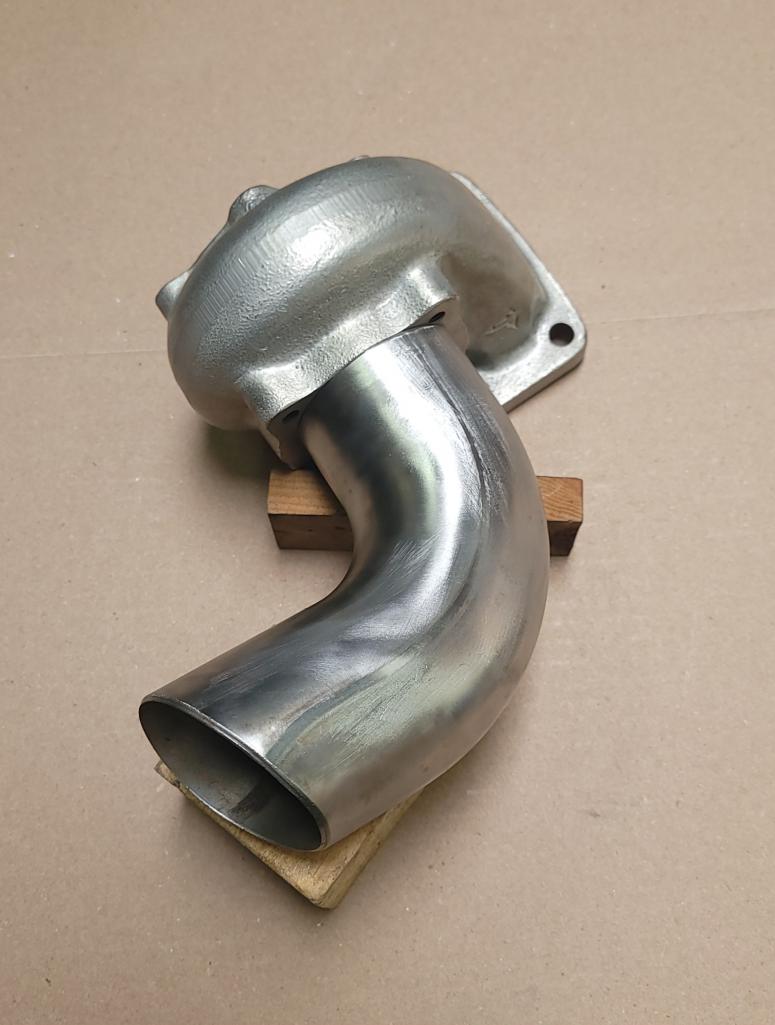
Posted by: Maltese Falcon Aug 21 2024, 05:49 PM
...closer look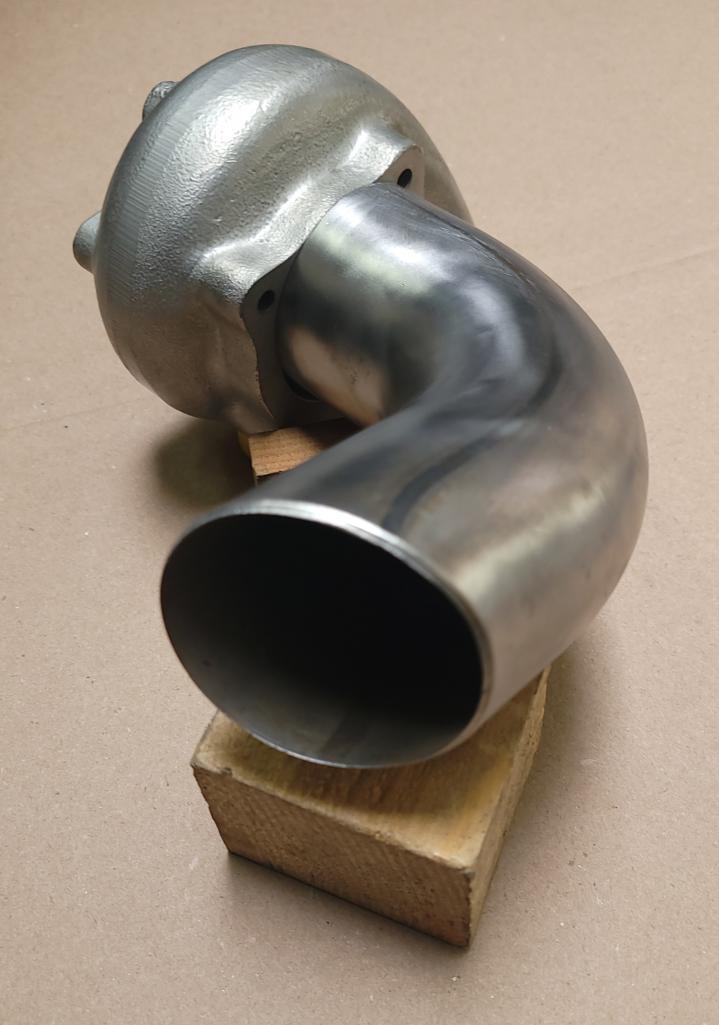
Posted by: Lucky9146 Aug 22 2024, 10:00 AM
Did some innovative 1D mandrel bending in 2.75" od this week and came up with an end that gives a slight kidney bean + slash tip look: close enough for that Porsche Indy exhaust style.
Exhaust art! Love it!
Posted by: Maltese Falcon Sep 11 2024, 08:43 PM
Checking out the placement for the Aero Latches (rear deck) to the corresponding rear trunk mounting plates. Will be using 4) latches on front and rear Sheridan trunk lids.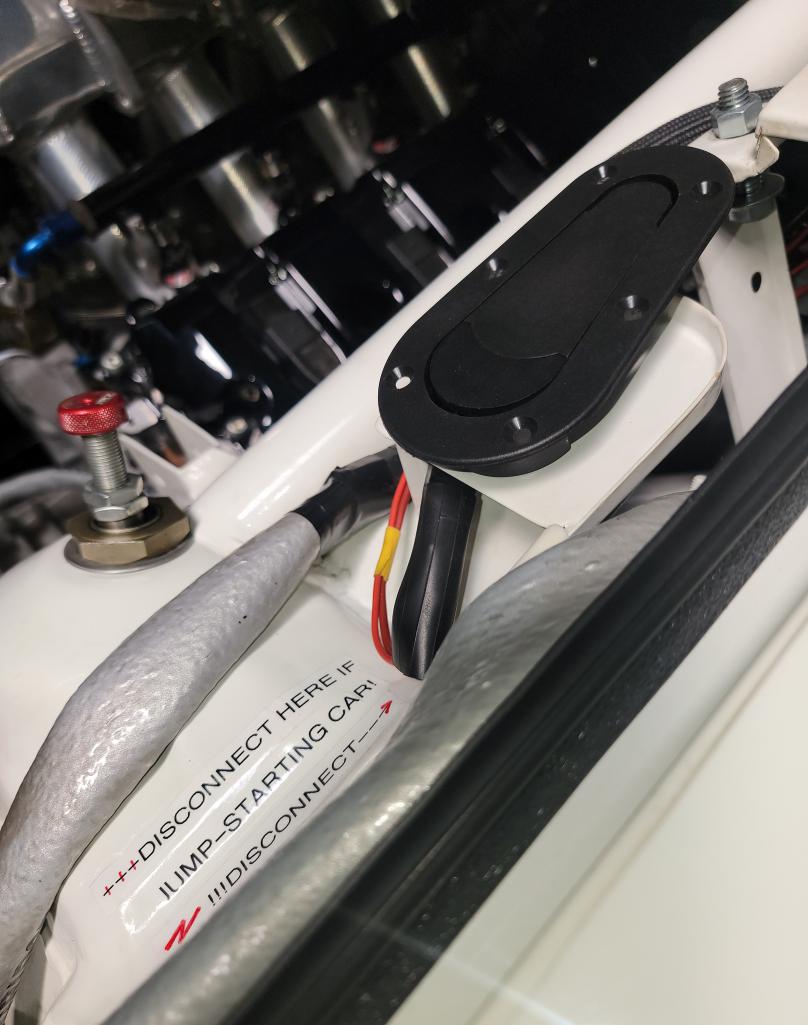
Posted by: Maltese Falcon Sep 11 2024, 08:45 PM
In the open/unlock position. These are sourced through Pegasus Racing Products.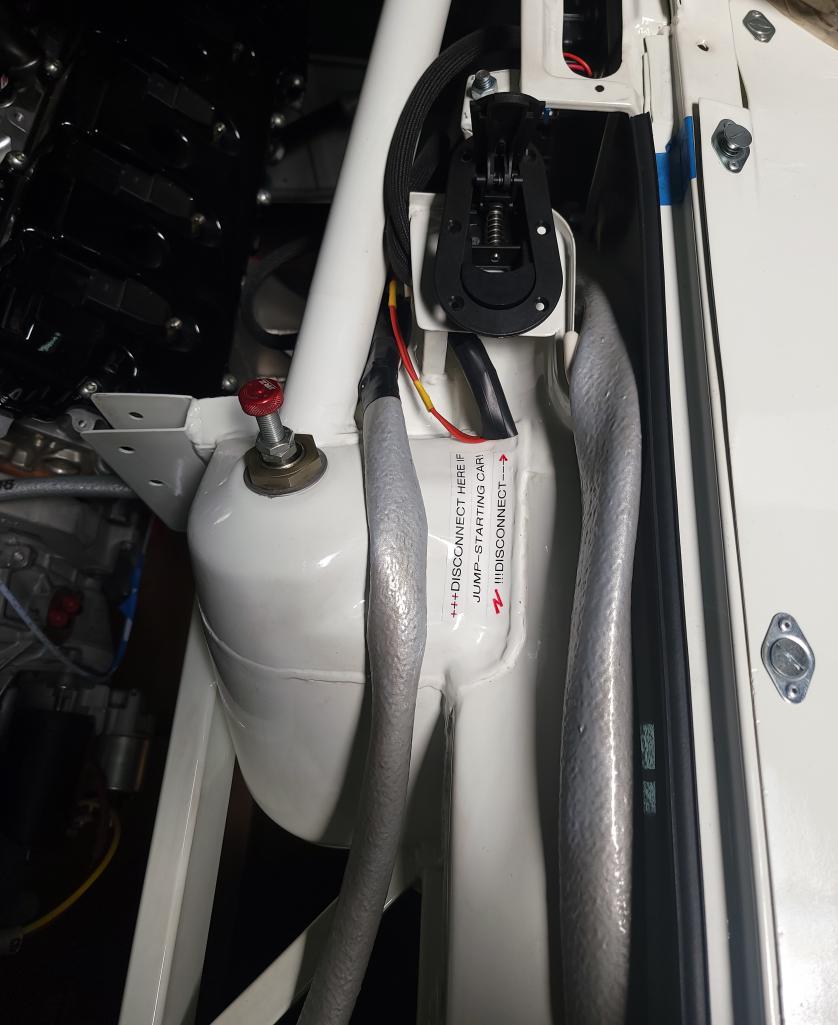
Posted by: Maltese Falcon Oct 29 2024, 06:06 PM
Monthly trip over to Hawthorne, Calif. for some SS braided 'Pro-plus hose; #12 and #16 lines. Orig store there aporox 50 years known as Earl's Supply>> today aka ANPlumbing.com
Every Porsche hot rod I've built since 1976 has their SS braided lines + A/N fittings.. this is like having an automotive/marine plumbing supermarket right down the road from MSDS shop.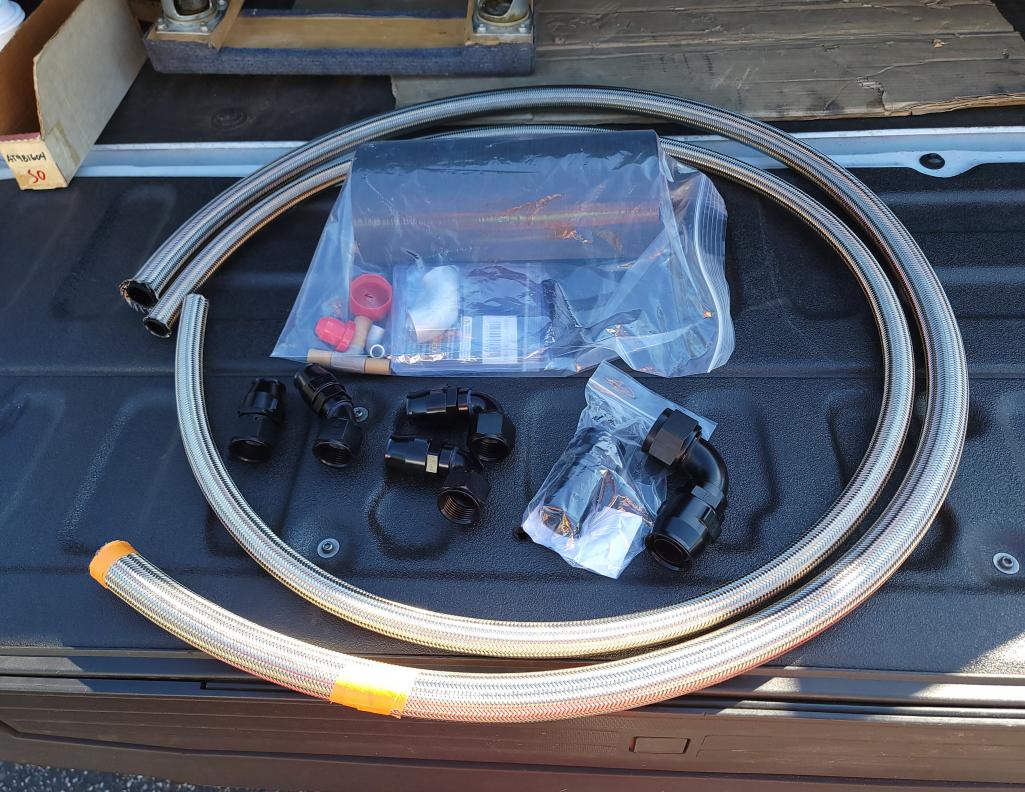
Posted by: Maltese Falcon Oct 29 2024, 06:11 PM
Earl's Supply for the win !¡
ANPlumbing.com will be moving a few miles south to the city of Torrance in Jan. 2025.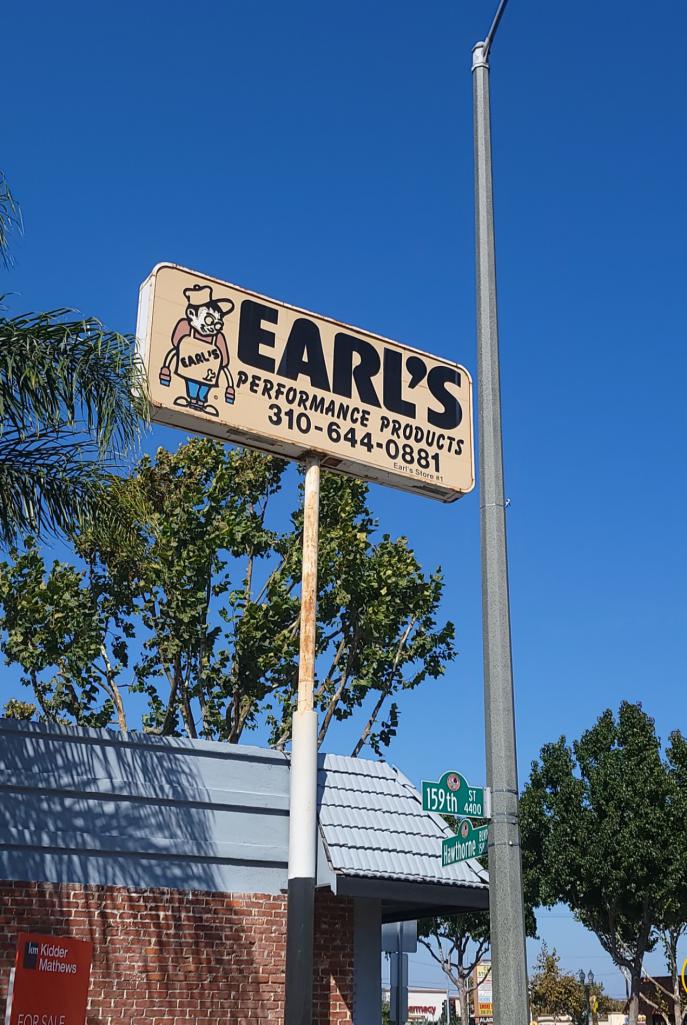
Posted by: campbellcj Oct 29 2024, 06:54 PM
^ Cool, I never realized Earls was (relatively) local! My car has some of their bits.
Posted by: Maltese Falcon Oct 29 2024, 08:18 PM
^ Cool, I never realized Earls was (relatively) local! My car has some of their bits.
Chris,
Original store actually had A/N bits salvaged off of mothballed aircraft + super inexpensive. Where I used to buy the Parker-Hannifin variable boost valves: "Cycle the Parker Valve" !!
Posted by: jd74914 Oct 31 2024, 11:41 AM
I had no idea Earl's was an actual store.
Posted by: Maltese Falcon Oct 31 2024, 06:04 PM
I had no idea Earl's was an actual store.
I think I heard them say that when they make their move to Torrance; the store will be mostly mail order and Customer pick-up only.
Posted by: Maltese Falcon Nov 4 2024, 07:33 PM
Since the Earl's ANplumbing store no longer builds any customer lines, I brought out my old school A/N line soft-aluminun jaw tools for my custom in-house assembly. 
Posted by: Maltese Falcon Nov 4 2024, 07:35 PM
Usually get these A/N ends completed with little or no scuffing...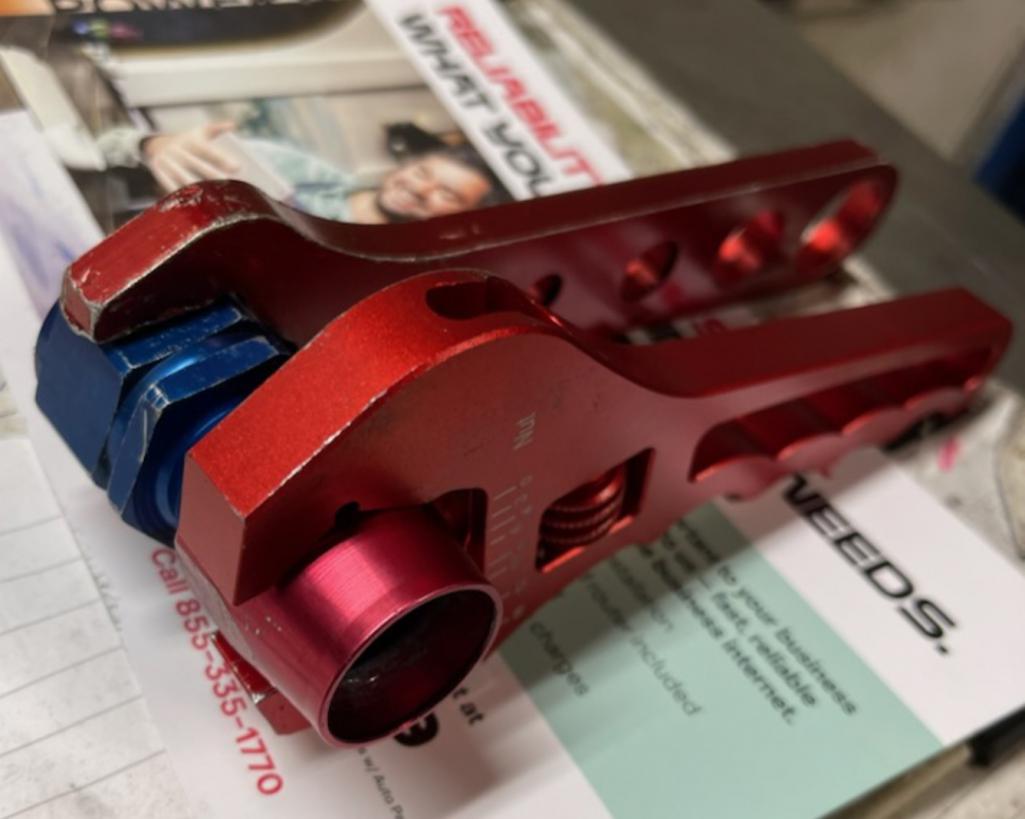
Posted by: Maltese Falcon Nov 4 2024, 07:48 PM
...on the way out of the store...the technician says "Make sure to grab some free stuff out of the cardboard box near the door"
Since they are already packing up for move to new Torrance store>they are giving stuff away !
OK...here's some mil-spec surplus:
⅛" npt alum plugs/ with safety wire holes, and
⁵/16" ss fine thread-to-coarse thread studs.
Last week I scored #6 A/N ss fittings...good for the fuel return line on the 8gtt 
Posted by: Maltese Falcon Nov 6 2024, 04:44 PM
Plexi slider windows trimming day; these are clearance cuts for getting around the Left and Right door roll bars. Pizza box having a good 2nd (shop) life 
Posted by: Maltese Falcon Dec 1 2024, 06:22 PM
Needed to make a simple pattern for neatly cutting the front turn-signal pods off of the Sheridan front end.
I'm using the '74 2L car for set up>> then I'll transfer the angle-jig to the fiberglass front end.
Def do not want to overcut, will be installing the 3dgAuto products.
I'm looking for a perfect finished installation, like some of you @http://www.914world.com/bbs2/index.php?showuser=14076 Sheridan bodied 914s have here on World !
Posted by: Maltese Falcon Dec 1 2024, 06:28 PM
Simple coat hanger wire and a yardstick 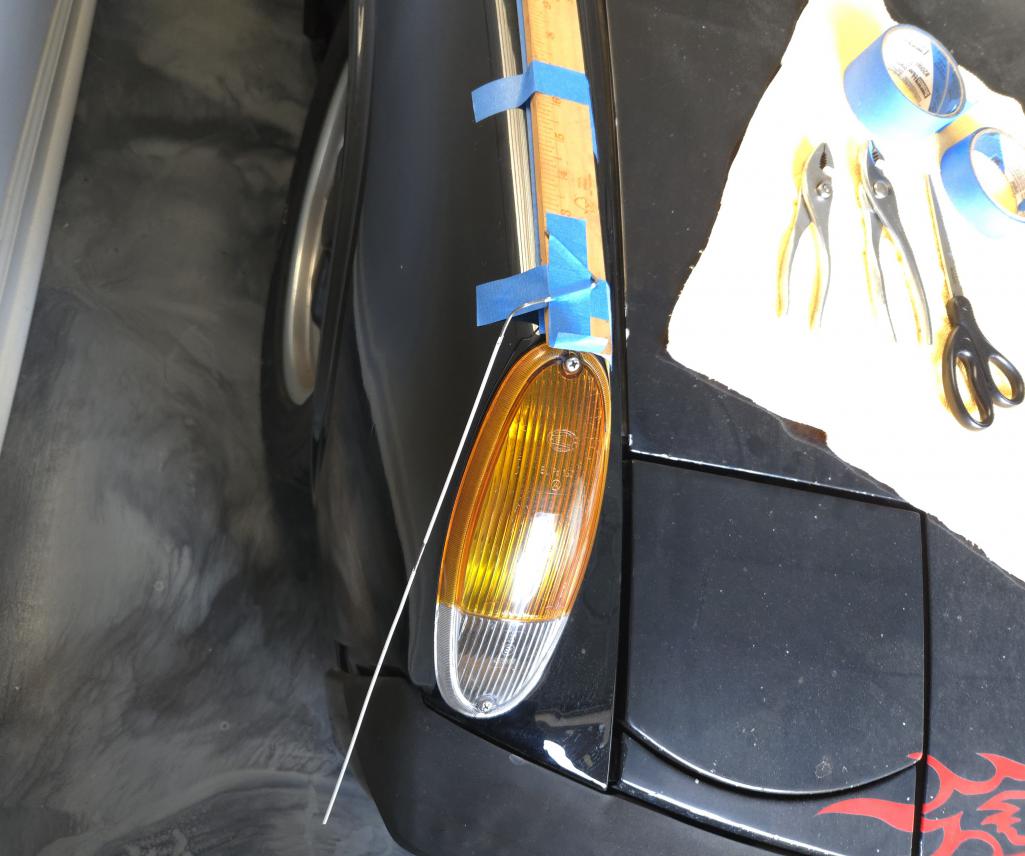
Posted by: Maltese Falcon Dec 1 2024, 06:40 PM
Sheridan front end is molded with left + right turn signal pods, that have a different contour from the oe dimensions>> so having a better set-up for the cutting will def help me out.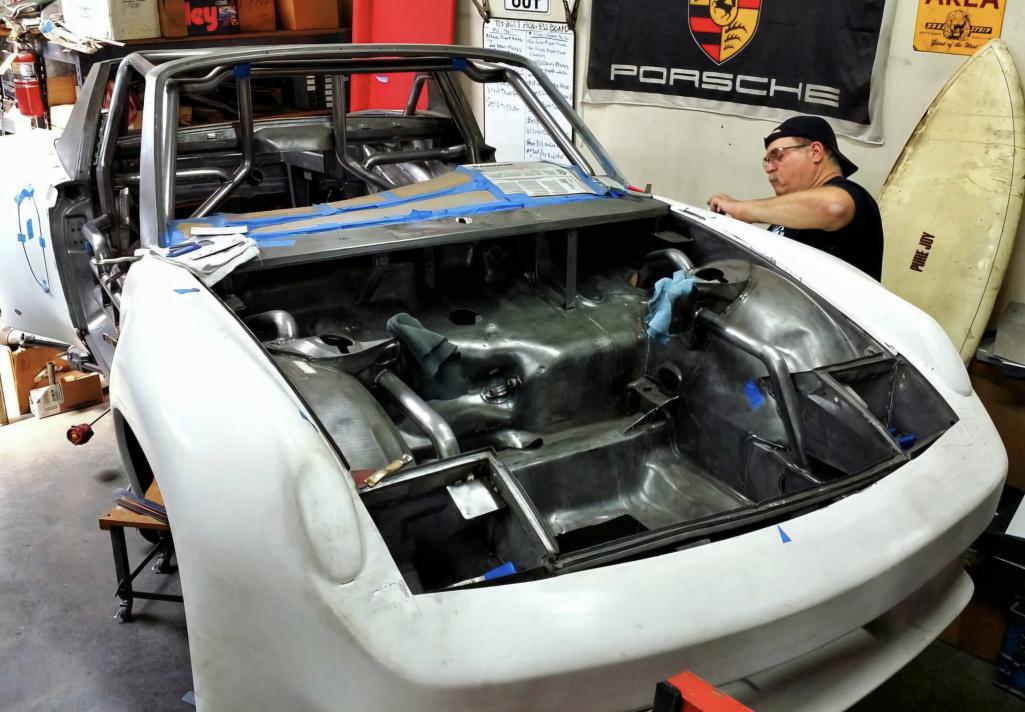
Posted by: FL000 Dec 3 2024, 10:35 PM
Needed to make a simple pattern for neatly cutting the front turn-signal pods off of the Sheridan front end.
I'm using the '74 2L car for set up>> then I'll transfer the angle-jig to the fiberglass front end.
Def do not want to overcut, will be installing the 3dgAuto products.
I'm looking for a perfect finished installation, like some of you @http://www.914world.com/bbs2/index.php?showuser=14076 Sheridan bodied 914s have here on World !
I don’t remember exactly how I marked and cut mine, but I do remember stressing over it quite a bit before the first cut
IIRC I went low tech and cut the outer shape in a piece of cardboard and used that overlaid on the fiberglass to help mark it.
Posted by: Maltese Falcon Dec 4 2024, 04:21 PM
Needed to make a simple pattern for neatly cutting the front turn-signal pods off of the Sheridan front end.
I'm using the '74 2L car for set up>> then I'll transfer the angle-jig to the fiberglass front end.
Def do not want to overcut, will be installing the 3dgAuto products.
I'm looking for a perfect finished installation, like some of you @http://www.914world.com/bbs2/index.php?showuser=14076 Sheridan bodied 914s have here on World !
I don’t remember exactly how I marked and cut mine, but I do remember stressing over it quite a bit before the first cut
IIRC I went low tech and cut the outer shape in a piece of cardboard and used that overlaid on the fiberglass to help mark it.Thank you @http://www.914world.com/bbs2/index.php?showuser=14076 ...I'm on it
 Say hi to T.S. if you bump into him !
Posted by: 930cabman Dec 4 2024, 05:01 PM
Plexi slider windows trimming day; these are clearance cuts for getting around the Left and Right door roll bars. Pizza box having a good 2nd (shop) life
Using Polycarb or acrylic?
Posted by: Maltese Falcon Dec 4 2024, 07:10 PM
@http://www.914world.com/bbs2/index.php?showuser=24877 www.plastics4performance.com is where the 3/16" L + R poly slider /vent windows were sourced (UK). Windshield + rear targa windows mfg. in USA .
Posted by: Maltese Falcon Dec 12 2024, 09:30 PM
On the advise of @http://www.914world.com/bbs2/index.php?showuser=14076 , I've fabb'd up a 'Mold of the lens using paper + spray starch. Several coats of starch, heat gun to dry and finished product came out good.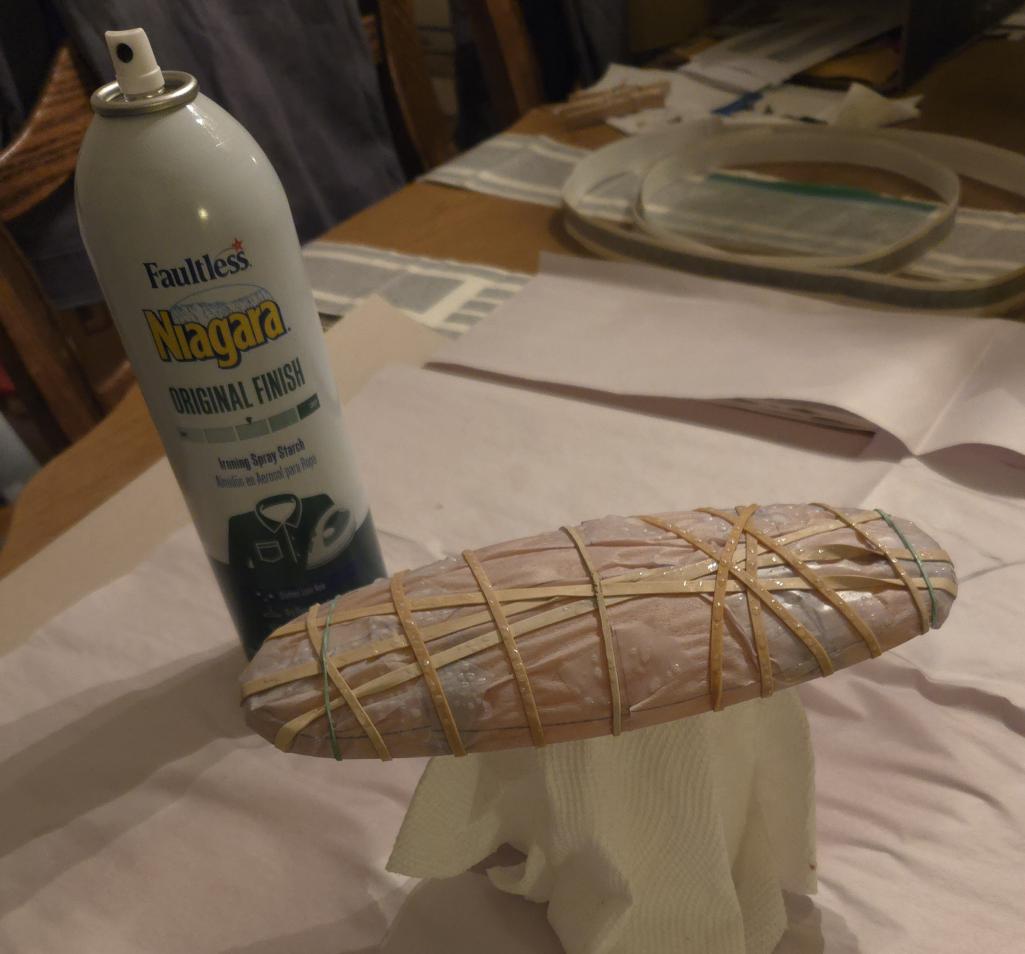
Posted by: Maltese Falcon Dec 12 2024, 09:41 PM
The finished shell is a 99% copy of the lens and stays in shape while placing on top of the Sheridan 'bump at the top of fender.
Posted by: Maltese Falcon Dec 12 2024, 09:46 PM
Another view, masking tape will keep it in shape for the cutting outlines.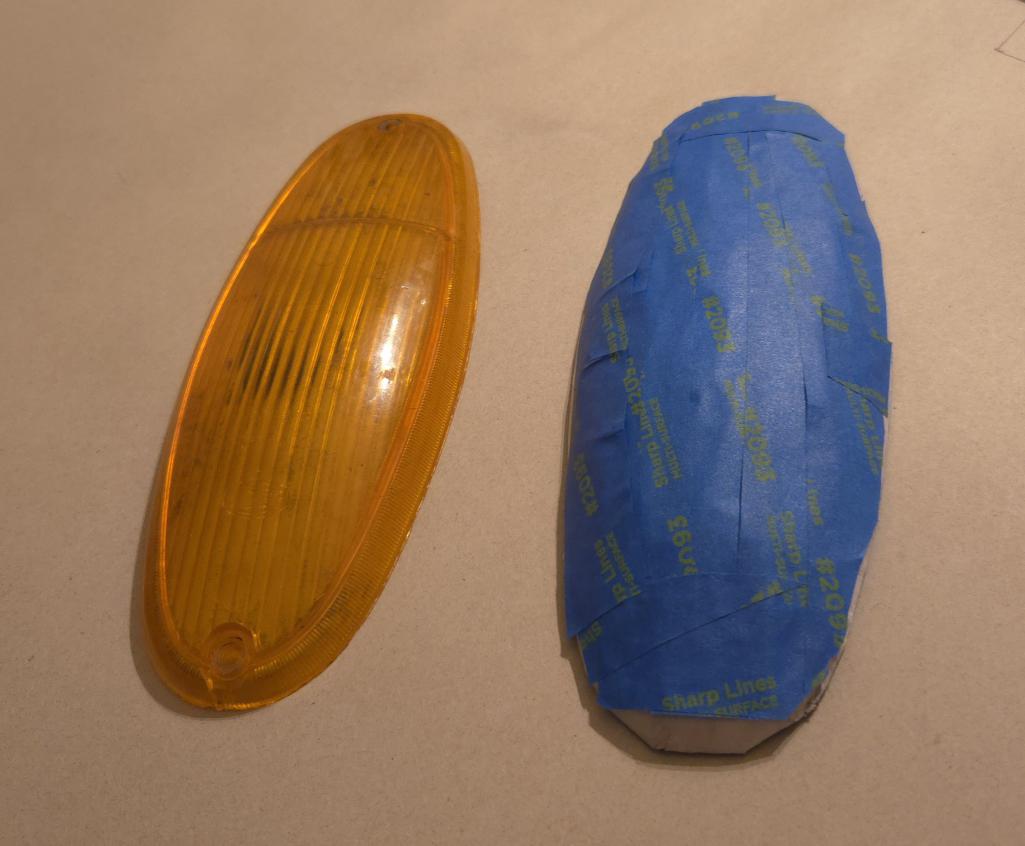
Posted by: pdlightning Dec 13 2024, 02:53 PM
I have really enjoyed and learned a lot from this build, THANKS!
Posted by: Maltese Falcon Dec 13 2024, 05:01 PM
Like the tailor once told me 'Fits like a glove !
@http://www.914world.com/bbs2/index.php?showuser=12660 914World is like a high caliber Trade School...I'm still learning a lot here as well
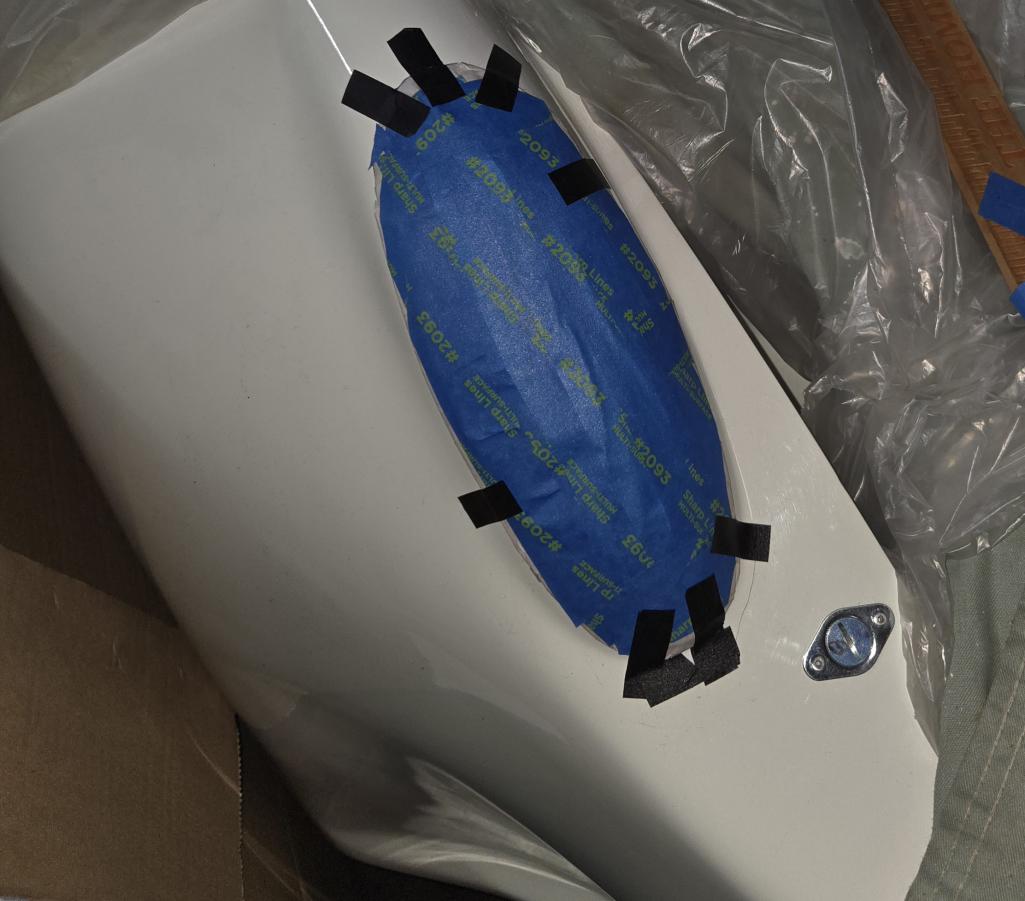
Posted by: Maltese Falcon Dec 13 2024, 05:05 PM
Final torque on the shorty turbo headers exhaust nuts, while I was in that area today 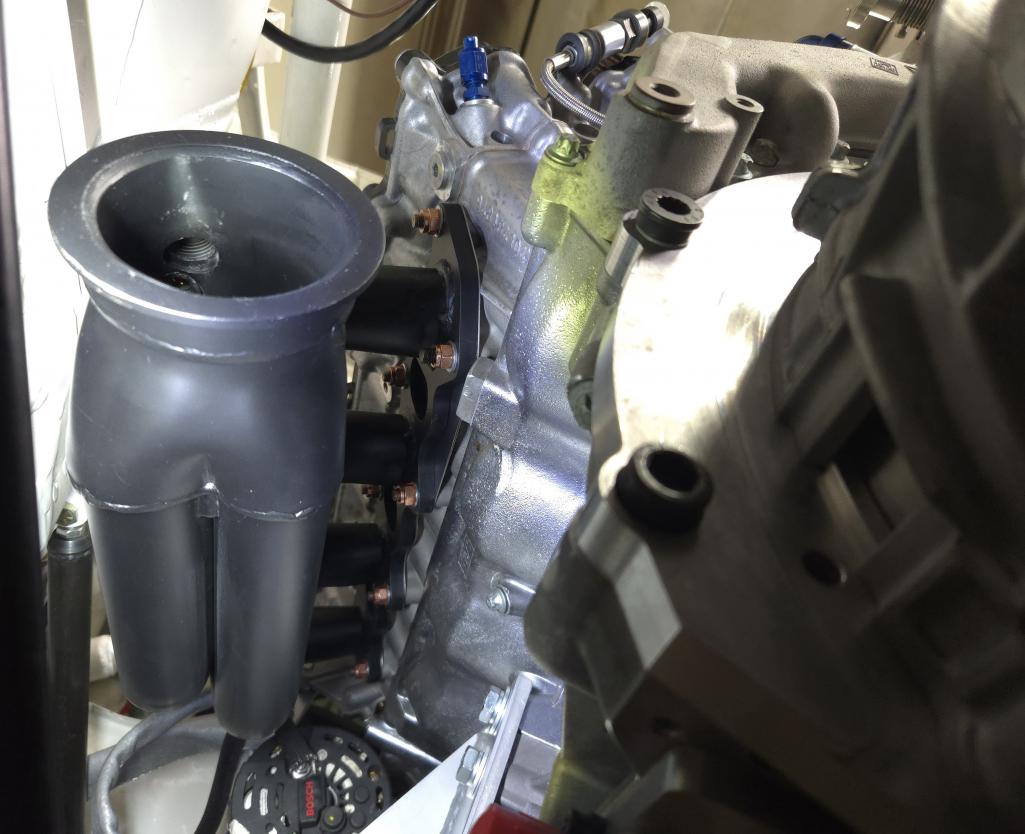
Posted by: Maltese Falcon Dec 20 2024, 09:40 PM
One last view of the polished + ported exhaust chambers, and the R-side header was fastened down today. LBP Lozano Bros. Porting in New Braunfels TX does nice work !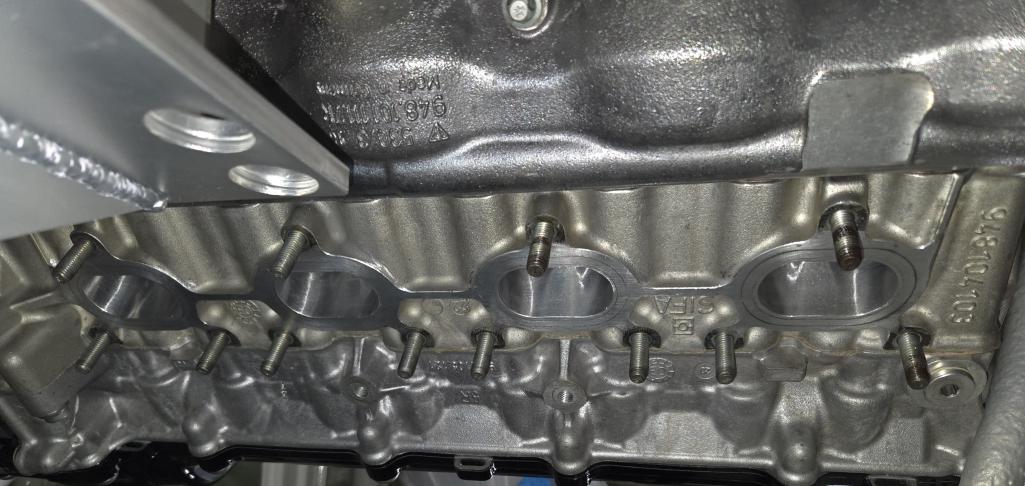
Posted by: Maltese Falcon Dec 23 2024, 06:28 PM
Just a sharpie tracing remaining + let the cutting begin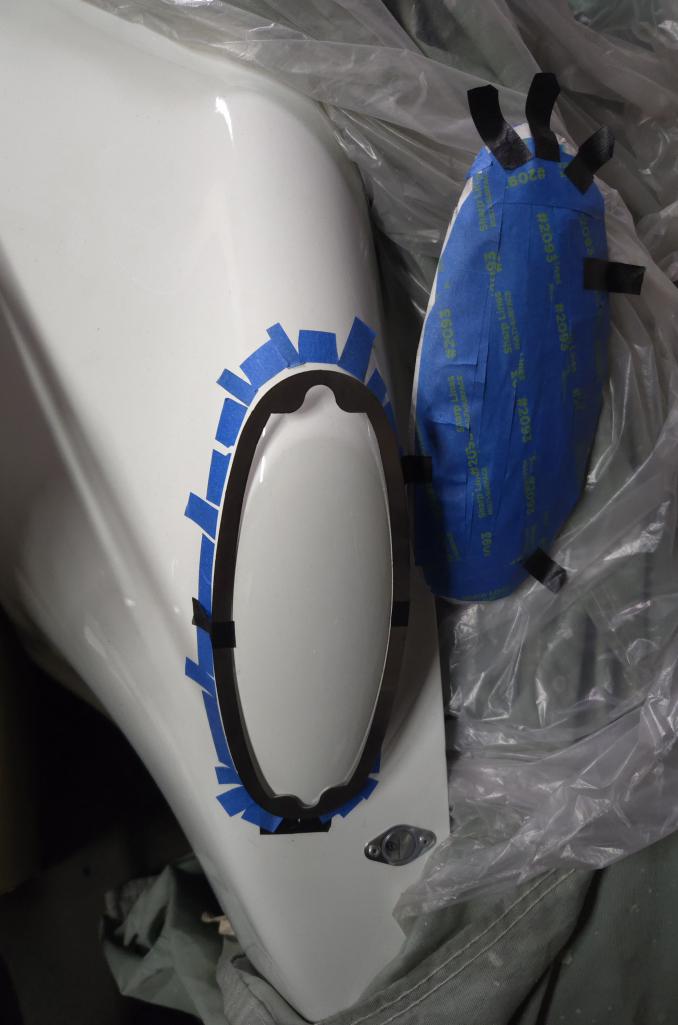
Posted by: Maltese Falcon Dec 31 2024, 06:48 PM
Layout for ⅜" pilot holes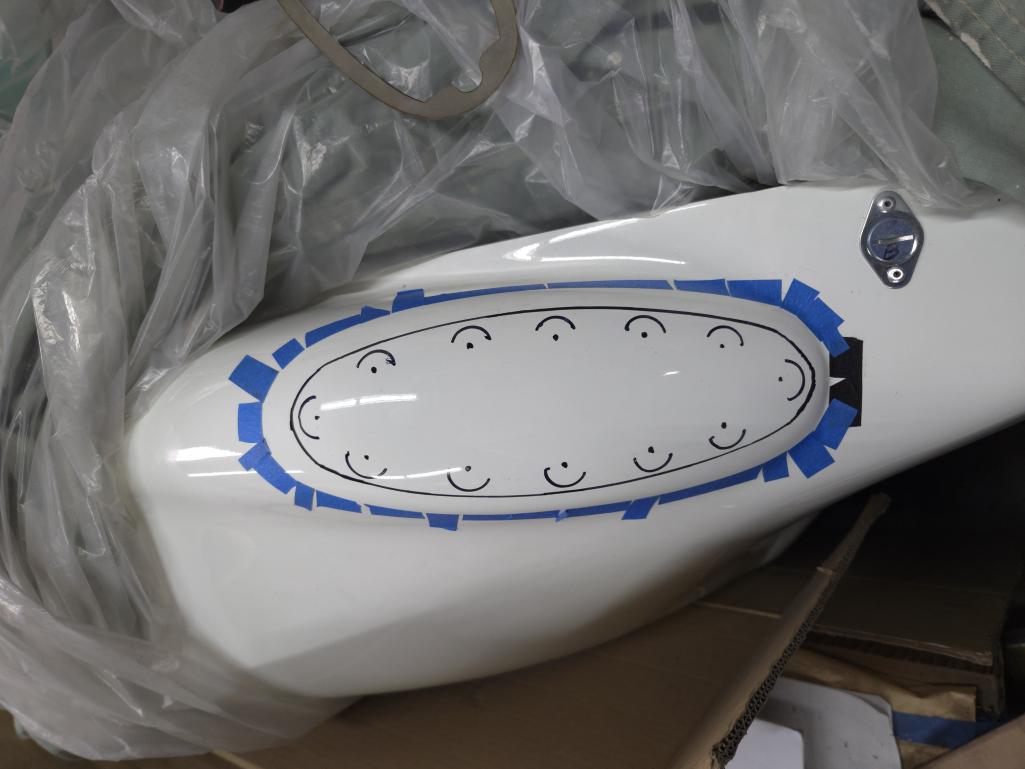
Posted by: Maltese Falcon Dec 31 2024, 06:50 PM
Pilot holes...ready for (fine blade) jig-saw cutting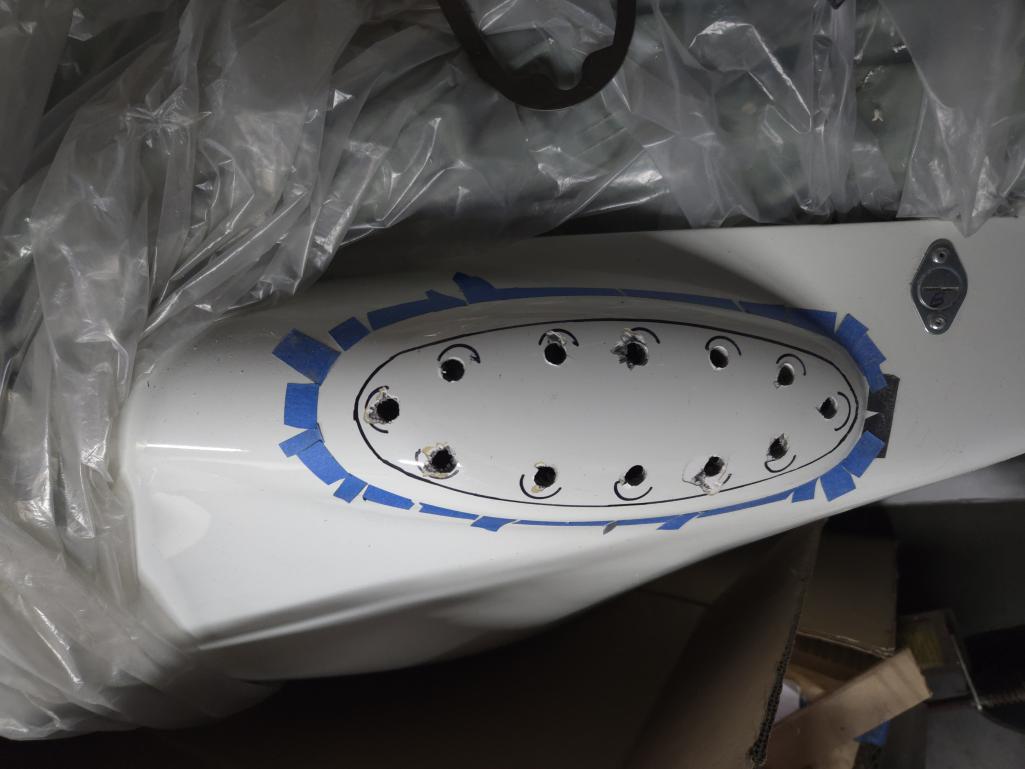
Posted by: Maltese Falcon Dec 31 2024, 06:52 PM
Cut and contour finished up with dremel + hand sanding to spec
Posted by: Maltese Falcon Dec 31 2024, 06:56 PM
3DGauto headlight pod fits like a glove; thank you Josh @http://www.914world.com/bbs2/index.php?showuser=14076 for the cardboard template idea !¡
Marty
Posted by: FL000 Jan 1 2025, 12:05 PM
Looks great! Those lights are pretty slick and “fitting” for your project.
~Josh
Posted by: burton73 Jan 1 2025, 01:12 PM
Marty,
Thanks for showing your process as you go, the work is always exceptional,
and Happy New Year
Best Bob B
Posted by: Maltese Falcon Jan 1 2025, 04:45 PM
Looks great! Those lights are pretty slick and “fitting” for your project.
~Josh
Thanks guys @http://www.914world.com/bbs2/index.php?showuser=14076 @http://www.914world.com/bbs2/index.php?showuser=7414 for the kind words + Happy New Year 2025 !
The Paper maché proj was EZ to grasp , as my Wife (40+ year) educator taught me well
Hard part was finding the Starch product on a market shelf > CVS came thru !
Bob, these projects are a bit more demanding on us nowadays...NOT as easy on our bones like the '70/80's when you + I had our shops in Culver City 90230
Posted by: Shivers Jan 1 2025, 04:55 PM
That came out clean
Posted by: Maltese Falcon Jan 1 2025, 05:02 PM
That came out clean
Thx !
it gets NutZ going back to the body shop to fix 'Over cutting
Marty
Posted by: Maltese Falcon Jan 1 2025, 05:04 PM
Left and Right side header EGT sender cables...now wrapped in heat protection sleeves 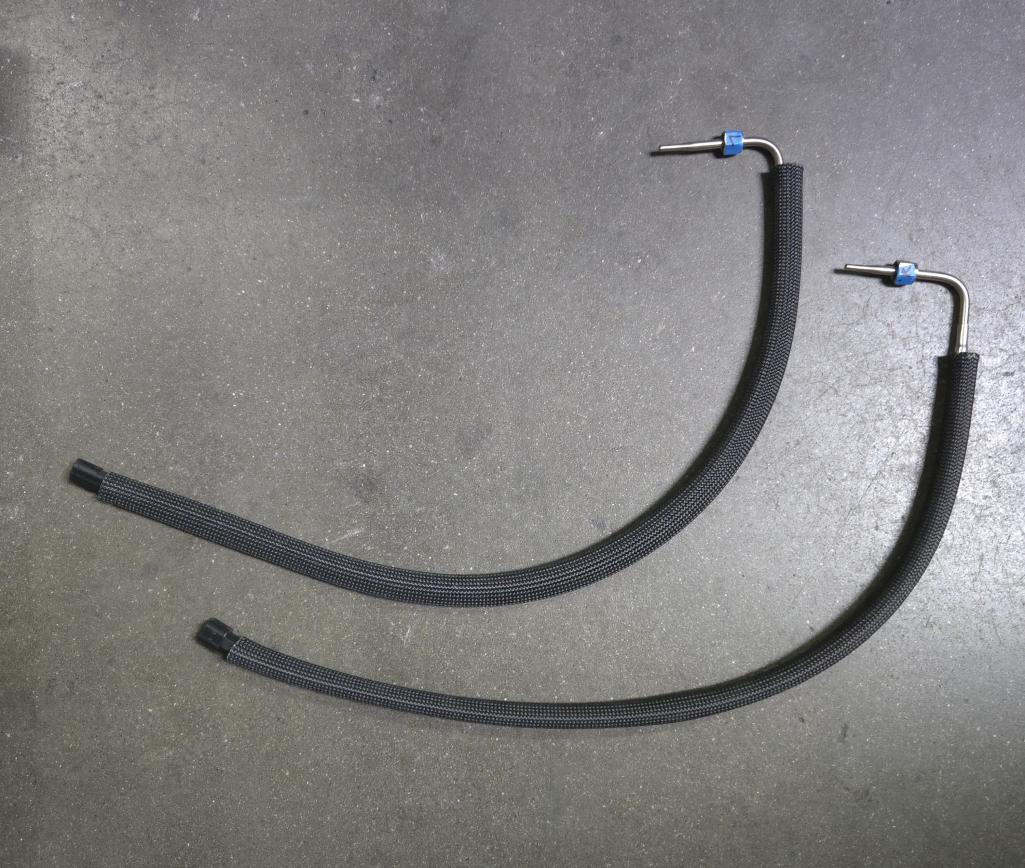
Posted by: Maltese Falcon Jan 21 2025, 01:16 PM
View of the lower bracket attacment for Aviaid dry sump oil tank; tight fit and but clears everything. Thin black thing stuck in there is an LED shop light...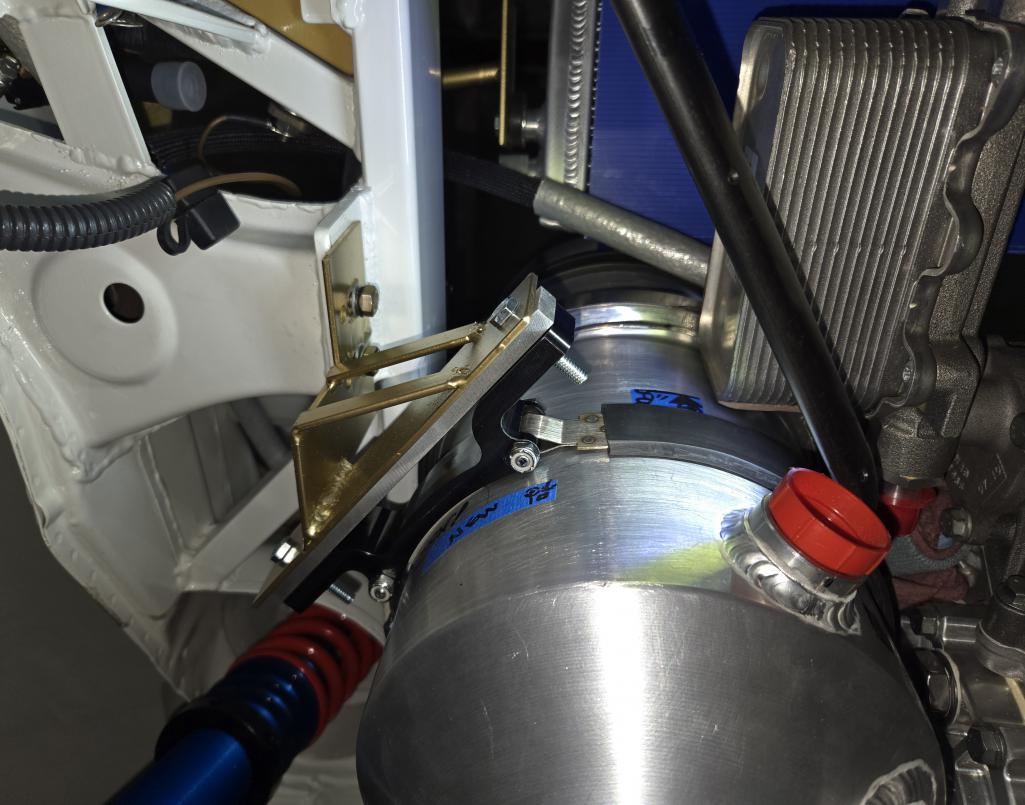
Posted by: BillJ Jan 21 2025, 02:00 PM
Can we get some long shots of where you are with this? Love the details but want to see the forest
Posted by: Maltese Falcon Jan 21 2025, 03:13 PM
Can we get some long shots of where you are with this? Love the details but want to see the forest
Hi Bill , as you can see I only hit an area of work/ skip around a lot and hit the areas that appeal to me on any given day. Forest is still a way out there...
Feel free to come by + visit if you're on the Left coast ¡
Posted by: Maltese Falcon Jan 21 2025, 03:25 PM
No work on the 8gtt today, Boss gave me the afternoon off !¡
Posted by: BillJ Jan 21 2025, 03:26 PM
Mariachi day huh? Let's see the outfit. Now that would be funny seeing a couple mariachi players get out of #40
Posted by: Maltese Falcon Jan 21 2025, 03:28 PM
Good SoCal weather for me + the boys take a long lunch break Taco Tuesday ¡
Back on the 8gtt on Mercoles !
Posted by: Maltese Falcon Jan 21 2025, 03:32 PM
The guys threw me a Mariachi 60th HBD...it was stunning (deafening) SO fun.
Thinking about my 75th now, round 2 
Posted by: technicalninja Jan 21 2025, 04:25 PM
View of the lower bracket attacment for Aviaid dry sump oil tank; tight fit and but clears everything. Thin black thing stuck in there is an LED shop light...
Tank to engine mounted heat exchanger clearance is pretty freaking close!
I'd bet 1000hp will cause deflection...
Even if the engine mounts are SOLID Titanium, I'd be worried about only an 1/8" of clearance.
Still "Bad to the Bone"!
Posted by: Maltese Falcon Jan 21 2025, 06:50 PM
@tecnicalninja just a factory hard-mounted transaxle-to gear oil heat exchanger /probably will run pretty hot gear oil with sustained speeds + heavy throttle; then a higher mounted CSF air-to-coolant (independent of engine coolant + seperate pump) exchanger mounted in rear using the forced air stream...that's where most of the cooling takes place for the cooling of gear oil.
Two engine oil coolers (in L+R ¼ panels) will keep the oil (in tank as well) approx 170-180°.
Undershot pic makes some things look stacked >> but not the case.
Posted by: technicalninja Jan 21 2025, 07:18 PM
I apologize!
It looked engine mounted in the pics.
I believe your engine is going to MOVE!
The car, the frame, the motor mounts, EVERYTHING is going to move.
Some more than others...
In fact, at your power to weight ratio FLIGHT is a possibility!
Posted by: Maltese Falcon Jan 21 2025, 08:39 PM
I apologize!
It looked engine mounted in the pics.
I believe your engine is going to MOVE!
The car, the frame, the motor mounts, EVERYTHING is going to move.
Some more than others...
In fact, at your power to weight ratio FLIGHT is a possibility!
Besides a print form 3 ring binder I've been entering for the mechanical aspects of this build; I will print one page on start up+ driving ethics >> just in case I forget. The Aviaid oil tank also carries an oil pre-heater/ good because I don't think 1 lap of tire warming and green flag griding will warm the engine.
Posted by: BillJ Jan 21 2025, 08:41 PM
So what will use this beast for exactly? Racing, lapping days, low orbit launch?
Posted by: technicalninja Jan 21 2025, 09:03 PM
Power to weight ratio LESS than 2 lbs. per HP.
They don't make roads for this...
One of my mentors Corky Bell built an uber Cobra.
Nicely twin turboed small block Ford.
Similar to the GTT but not NEARLY as technical with less power.
Corky had HELL reaching full boost in the car!
1st, 2nd, and 3rd would just wheel spin and by the time he saw serious boost in 4th he was running out of runway at Kestrel airport and exceeding 150mph!
You CAN build TOO much horsepower...
The Falcon's ride is that same level of car, probably 500lbs lighter and 300 MORE horsepower.
They just don't make roads...
Posted by: Maltese Falcon Jan 21 2025, 10:16 PM
So what will use this beast for exactly? Racing, lapping days, low orbit launch?
Bill, just a fun piece of home built mega hp/Tq mid engine \v/-Porsche. Main goal was to keep the components 99% Porsche. Local SoCal POC probably has a class for the car But I'm not into a trackside dyno, throwing lead weights into the floorpan, in order to qualify for entering any definitive race class. Only interested in this class: Exhibit only.
Did I mention that the 8gtt has current DMV registration, Titled for road use, carries auto insurance, and is an emissions legal candidate for a 1974 914
Not that it will be driven on public roads much...but you never know when/where she shows up. Might start our Hollywood Taco cruise-ins again ¿!
Posted by: technicalninja Jan 21 2025, 11:53 PM
Road "Legal" in California...
With documentation and insurance!
There it is...
I always tell my customers trying to have the fastest car around is fruitless.
There will ALWAYS be someone faster!
THAT might show up!
OK now it's soooo much cooler...
There's too much cage to make it street-car friendly but
WOW!!!!
That car will not log 300 seconds of WOT in its life!
Hot Rod magazine has/had a "Fastest Street Car in America" contest.
Street legal, had to drive between tracks (distant at times), tow your own trailer, totally self-contained, and post the fastest 1/4 mile times.
Went sub 7 pretty fast...
I dreamed up a way to DOMINATE that contest in a very unusual way.
Back half a Chrysler Minivan.
Install a no-longer competitive top fuel drive train. Will be mid-engine config.
Leave FWD engine stock for on road use.
Fancy floating axles in rear and disconnect able front hubs.
3500 lb. van with 8-9000 HP...

1/4s deep in the 4s with 250+ trap speeds.
You can even put the words "Chrysler Hemi" on it.
It would drive like an overloaded minivan on the road.
But I wouldn't want to drive that or put anyone I knew in it. The aerodynamics of a minivan above 120mph is not something I have a burning desire to test...
Your 914 is a bit like the above!
Still the most radical build on the board and probably always will be!
Posted by: Maltese Falcon Jan 22 2025, 01:53 PM
@http://www.914world.com/bbs2/index.php?showuser=27135 Rick, Corky Bell and his BEGI group was one of my old school suppliers of the 'Good turbo components for our '70-80's kit business; rev in peace Corky ! For kicks...look up the F1 powered Renault 'Espace mommy van that was running around Euro tracks (and used for P/R) during the Alain Prost days of F1; you and I would rock that
Marty
Posted by: Maltese Falcon Jan 24 2025, 07:12 PM
Today's work on the Drivers side front turn signal pod; make it resemble the Passenger side for the 3DG Auto headlights. My 'Marty San RWB saw -cutting 15 minutes of fame...hope that Rodger Sheridan isn't dropping tears over the shredding of his body kit 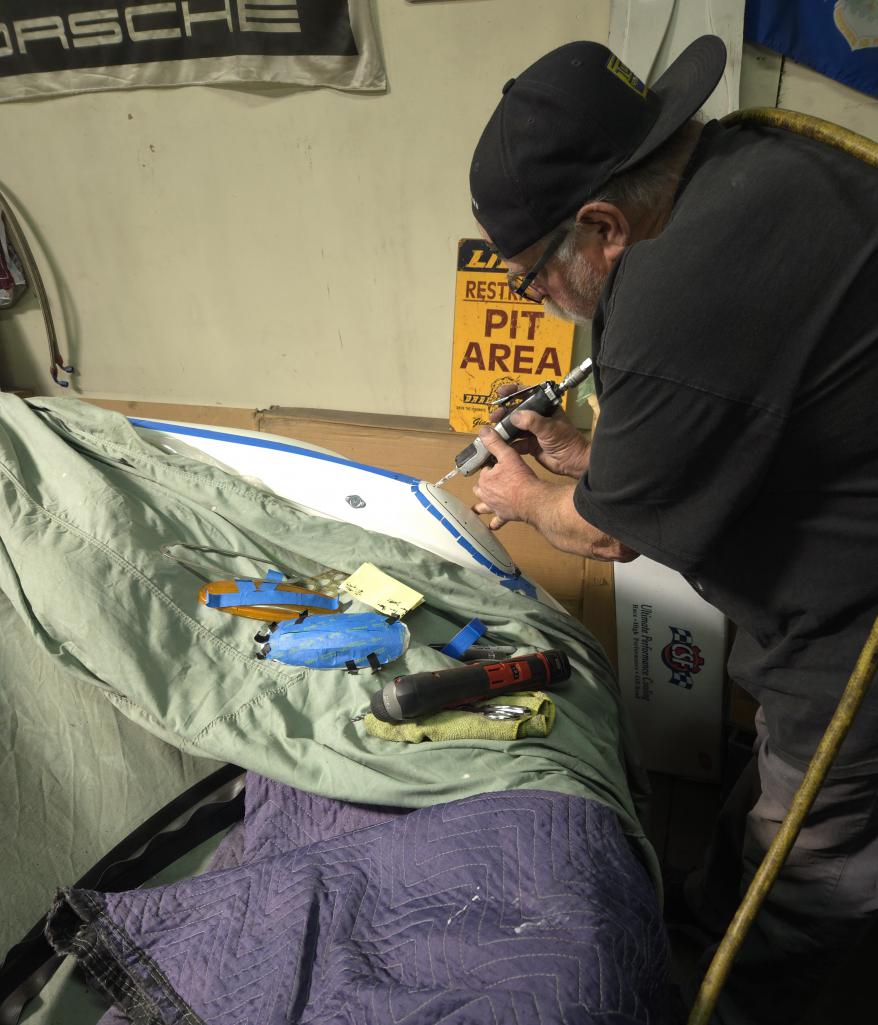
Posted by: Maltese Falcon Jan 24 2025, 07:19 PM
EGT probes set in place, with heat sheathing protection.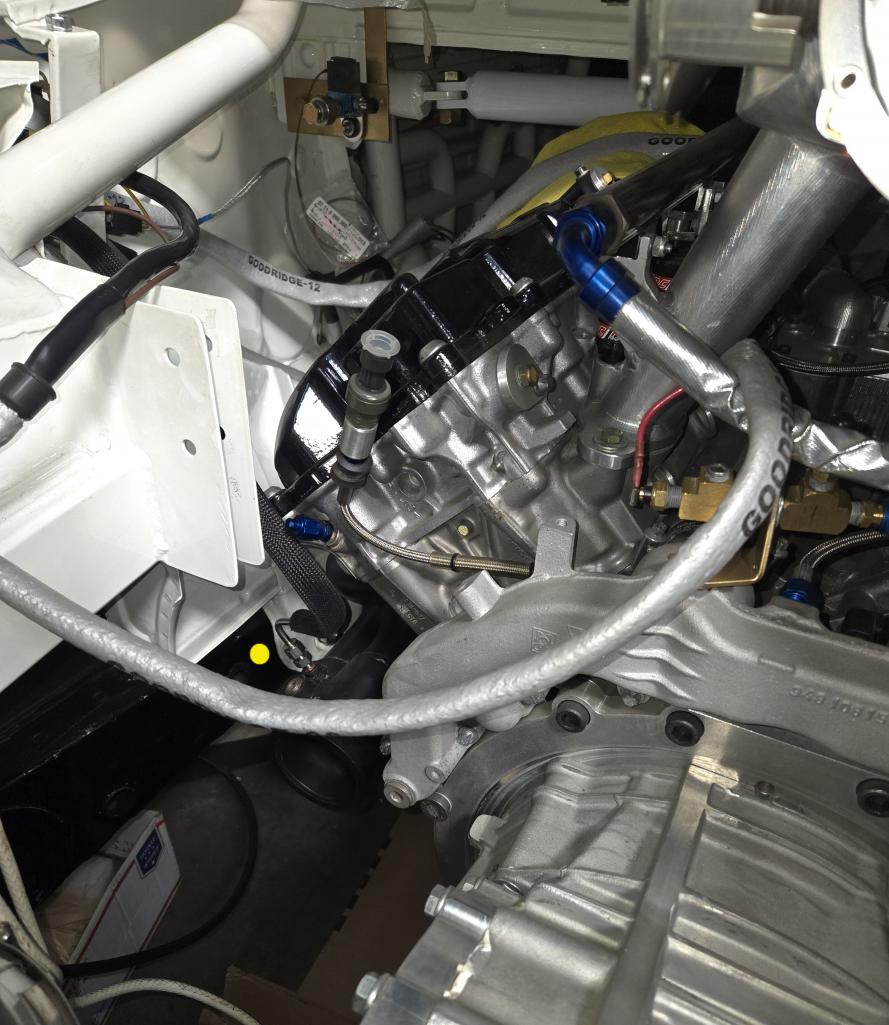
Posted by: Maltese Falcon Jan 24 2025, 07:22 PM
Right exhaust bank EGT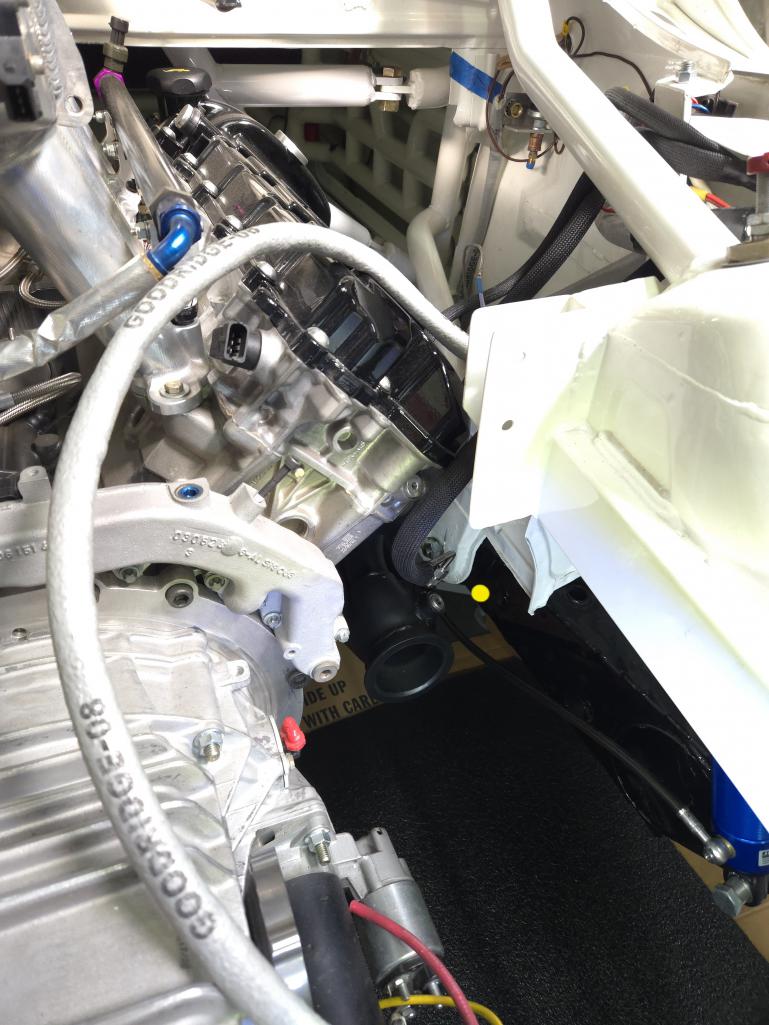
Posted by: Maltese Falcon Jan 26 2025, 05:05 PM
Basic jig-fixture for marking the proper raked angle at the top of the Sheridan fender/ 3dg-auto headlight area.
I've set the angle with a thin strip of black masking tape, and will follow while hand- block sanding with #200.
The new headlights are more pronounced than the oe turn lenses...so I want to keep these sitting into the cut-outs at a nice swept back angle.
Otherwise this mod could come out looking like a '59 Bug eye Sprite 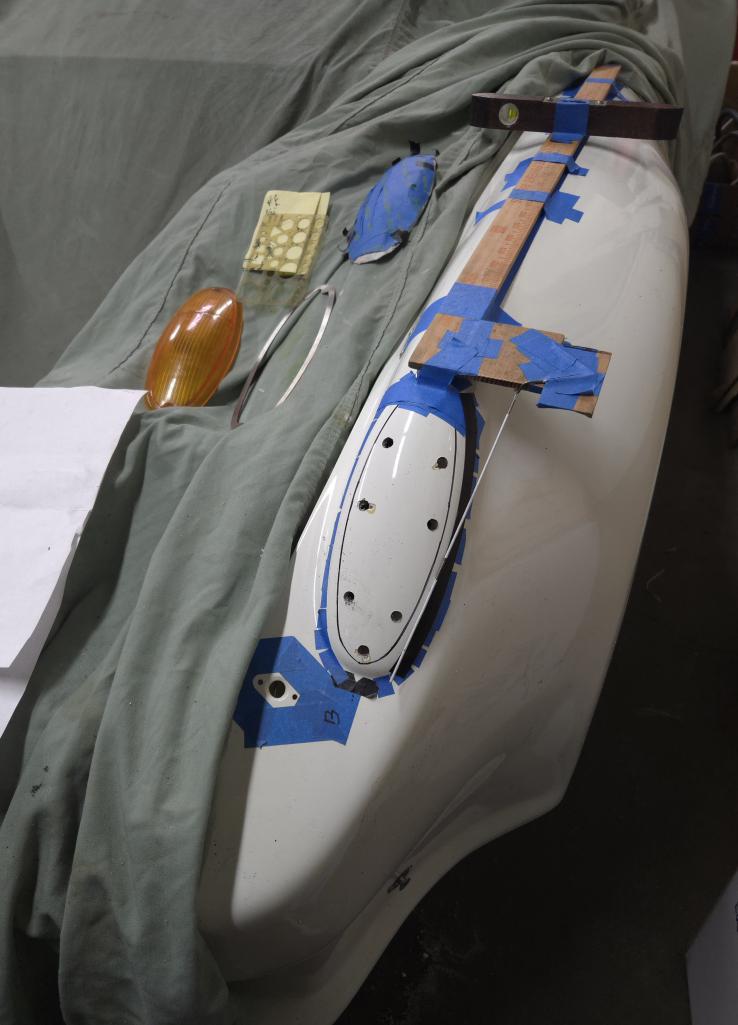
Posted by: Maltese Falcon Jan 27 2025, 04:41 PM
...good set-up, now on to block sanding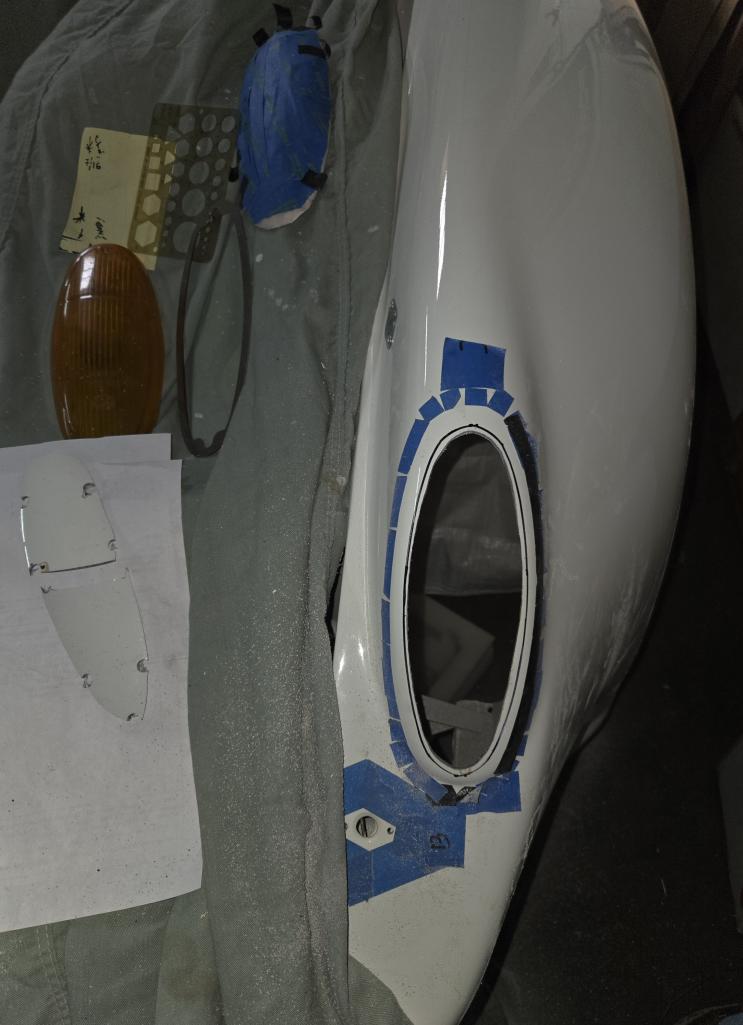
Posted by: Maltese Falcon Jan 27 2025, 04:51 PM
Shop compressor maintenance over the weekend; several years ago I fabricated this small intake manifold and upgrade to a K+N cotton-gauze cleanable /reuseable air filter. This gets serviced every 6 months, using the K+N service kit. The dirt from 6 months use fills up the 5 gallon bucket in solid
black water. Not a trace of dust can be found inside the 3" dia tube 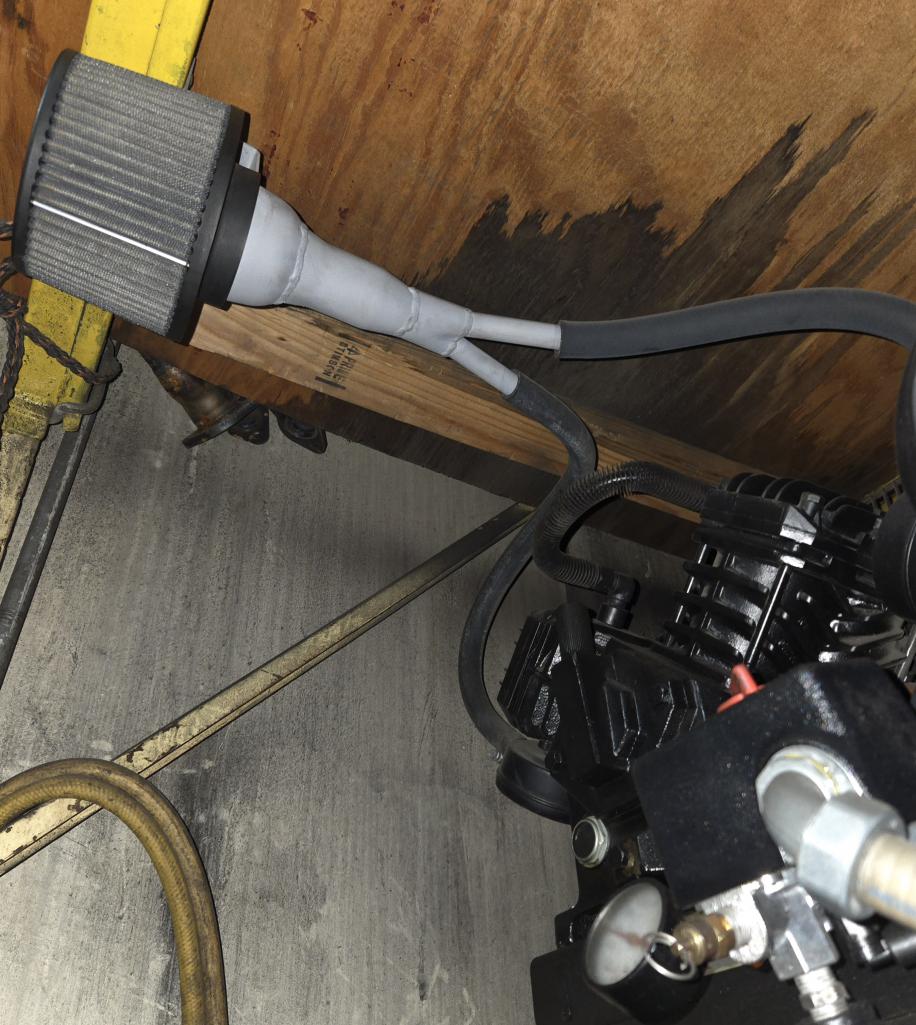
Posted by: Maltese Falcon Jan 30 2025, 05:45 PM
Happy Lunar New Year !¡
...recycled material= Year of the Snake greeting card 
Posted by: _stickykitty79_ Feb 1 2025, 02:28 PM
killer!
Posted by: Maltese Falcon Feb 7 2025, 10:32 PM
Making brackets: this one is mounted off of the bottom of trans. Left side holds the SQS shift cable, Right side holds a #16 oil supply line from dry sump tank.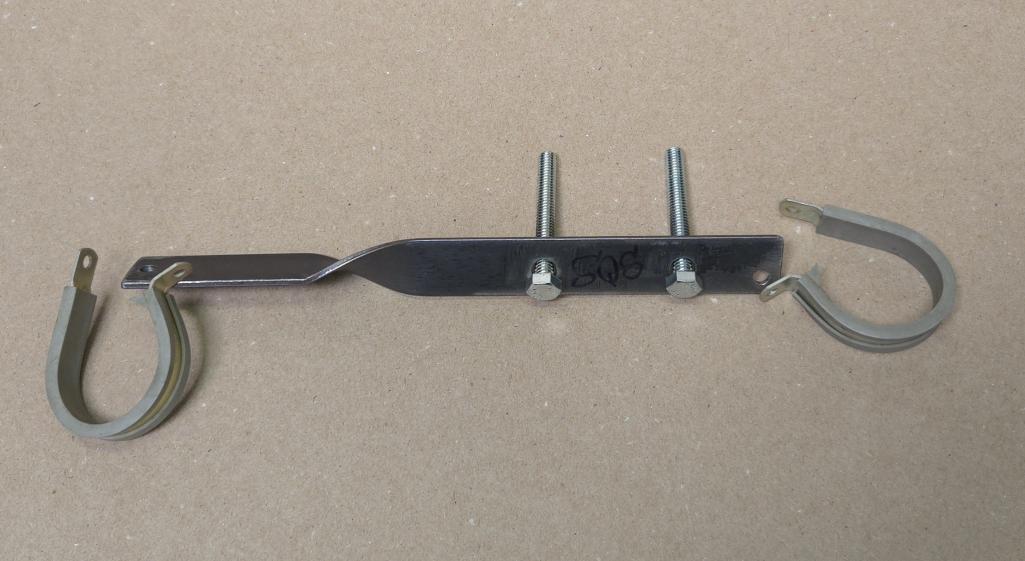
Posted by: Maltese Falcon Feb 7 2025, 10:37 PM
Bottom of GT2 trans & bracket area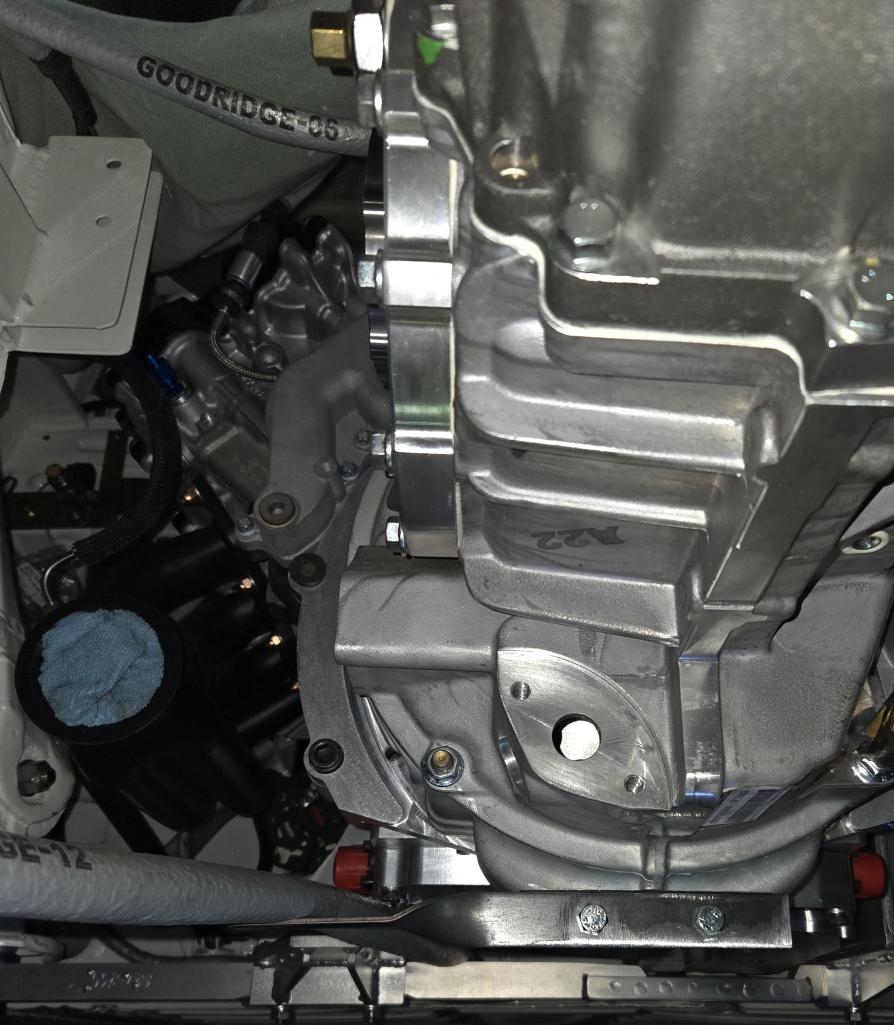
Posted by: Maltese Falcon Feb 7 2025, 10:49 PM
also made the Left + Right 3dgauto headlight mount brackets. I'm using the rear tail lamp 6mm thumbscrews as well/ quick disconnect from the Sheridan front body 'Clip when removal is needed.
The allen bolt sits in an existing 10mm size hole in the oe headlight bucket; easy job ! I made a sample of the brackets if anyone with a (Sheridan) body kit needs to replicate them.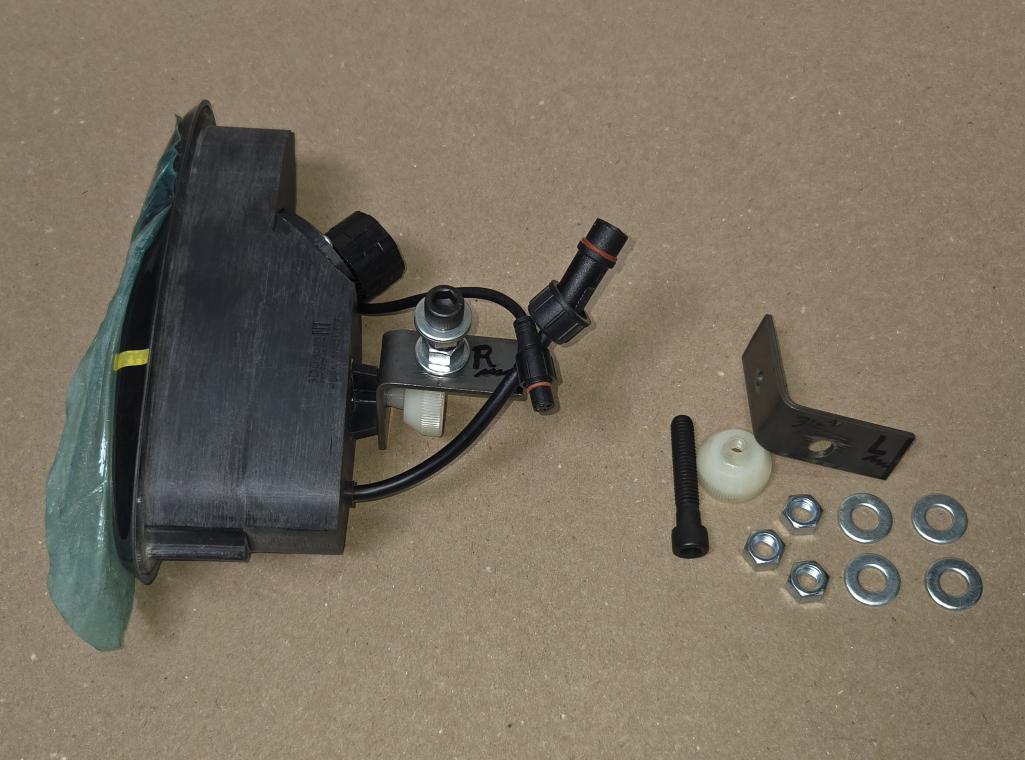
Posted by: Maltese Falcon Feb 7 2025, 10:54 PM
Aviaid dry sump tank: all ready with brackets, various size A/N fittings snugged down in place. Just need to fit the in tank oil- heater element and done !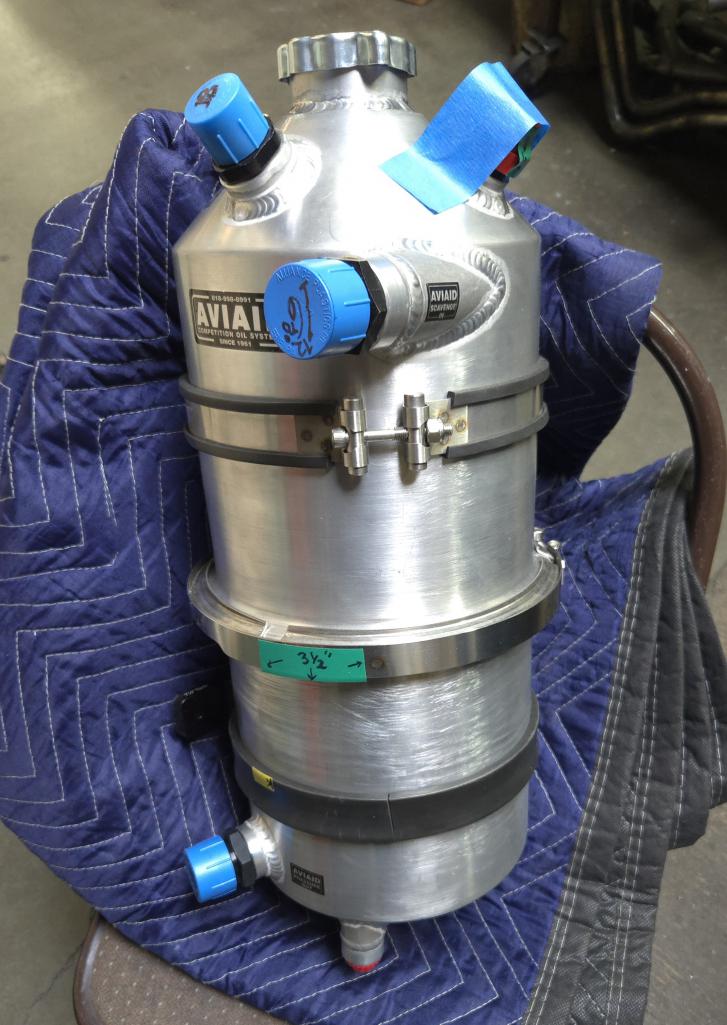
Posted by: ClayPerrine Feb 7 2025, 11:09 PM
Shop compressor maintenance over the weekend; several years ago I fabricated this small intake manifold and upgrade to a K+N cotton-gauze cleanable /reuseable air filter. This gets serviced every 6 months, using the K+N service kit. The dirt from 6 months use fills up the 5 gallon bucket in solid
black water. Not a trace of dust can be found inside the 3" dia tube
My GOD!! Even the compressor at MSDS has a header on it!!!!!
Posted by: Maltese Falcon Feb 8 2025, 01:23 PM
Shop compressor maintenance over the weekend; several years ago I fabricated this small intake manifold and upgrade to a K+N cotton-gauze cleanable /reuseable air filter. This gets serviced every 6 months, using the K+N service kit. The dirt from 6 months use fills up the 5 gallon bucket in solid
black water. Not a trace of dust can be found inside the 3" dia tube
My GOD!! Even the compressor at MSDS has a header on it!!!!!
Smoother than the V-Twins down the street at the Harley Dealer
Posted by: ClayPerrine Feb 10 2025, 12:29 PM
Smoother than the V-Twins down the street at the Harley Dealer
That is setting the bar kinda low...
Posted by: Dave_Darling Feb 10 2025, 08:01 PM
Smoother than the V-Twins down the street at the Harley Dealer
So are my guts after Taco Bell....
--DD
Posted by: Maltese Falcon Feb 10 2025, 08:44 PM
Smoother than the V-Twins down the street at the Harley Dealer
So are my guts after Taco Bell....
--DD
Glen Bell, must have mastered the probiotic aspects of the Taco !

Posted by: Maltese Falcon Feb 21 2025, 09:04 PM
Small variety of custom bracketing for: #16 oil supply line, snorkel tube, 3DGauto headlights, SQS shift control cable. Most of these rubber edge clamps came from Earl's Supply; when they actually had a self-serve store on Hawthorne Bl. stocked full of actual 'Take off equipment from boneyard aircraft.
Bullet Point 1) snorkel hold down.
2) Left and Right headlight brackets.
3) Under transaxle bracket for SQS shift cable/combo with #16 oil line.
4) #16 oil line, running in the location of right side motor-mount bucket/ unibody area.
Oil lines + shifter cable will both be encased in Goodridge fire-sleeve.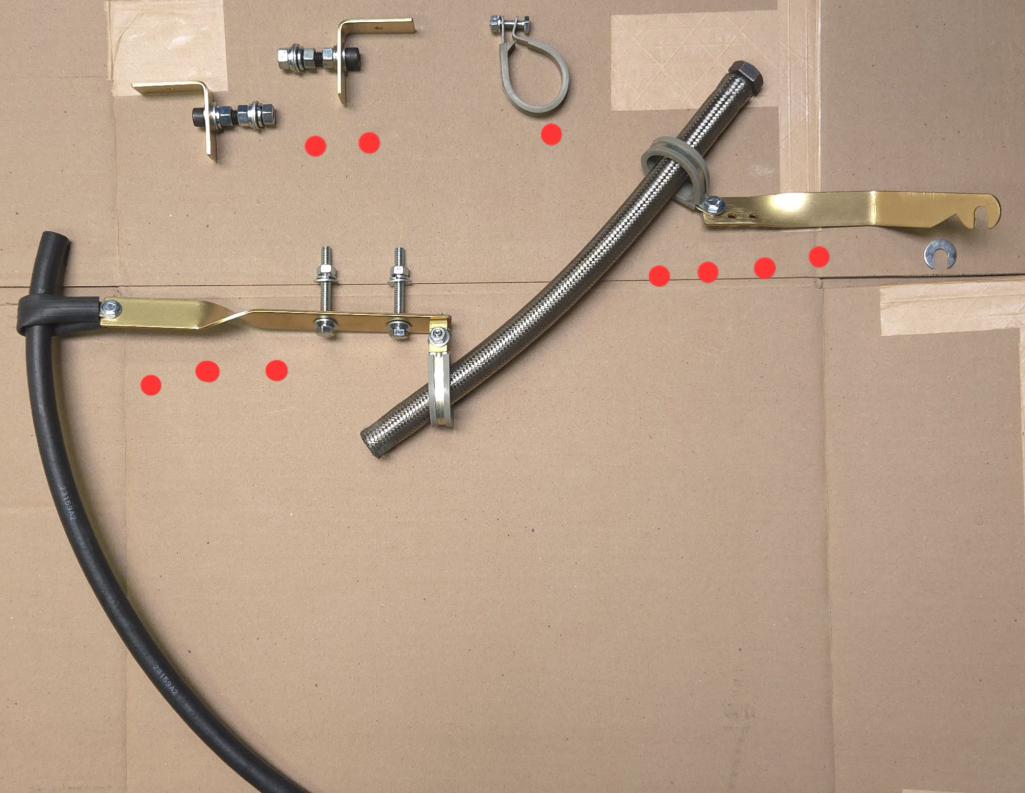
Posted by: Dave_Darling Feb 21 2025, 09:23 PM
Usually aircraft in the bone-yard don't take off...

--DD
Posted by: Maltese Falcon Feb 23 2025, 09:06 AM
Some support bracket pics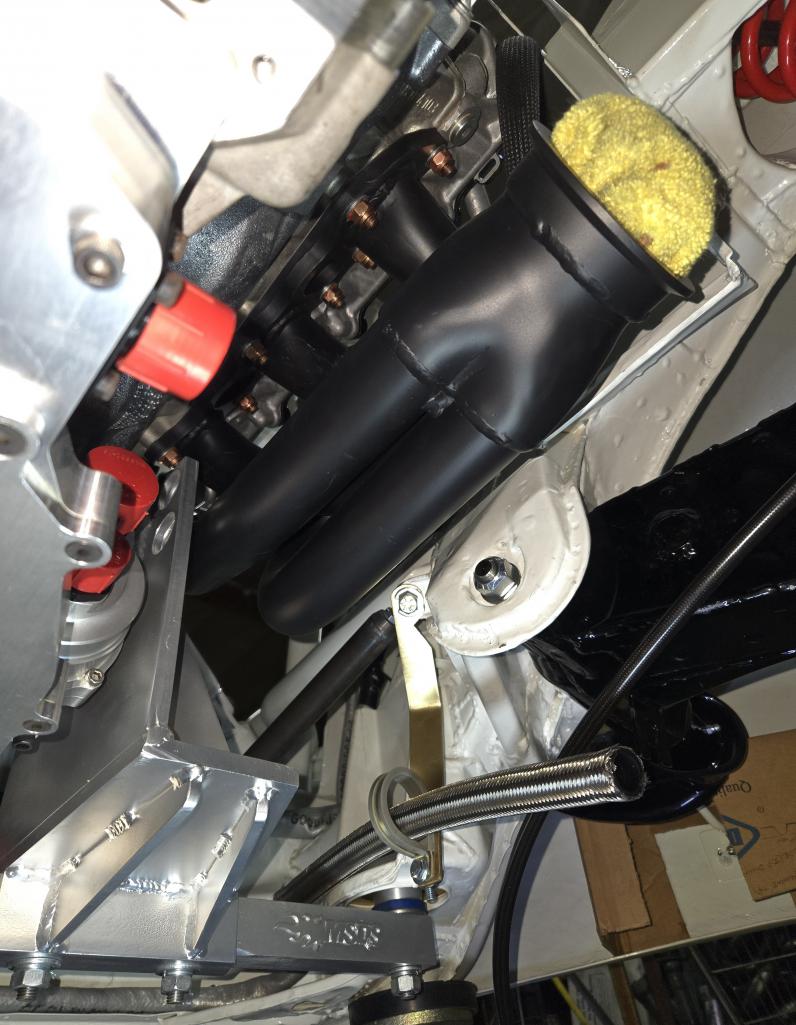
Posted by: Maltese Falcon Feb 23 2025, 09:08 AM
View from engine bay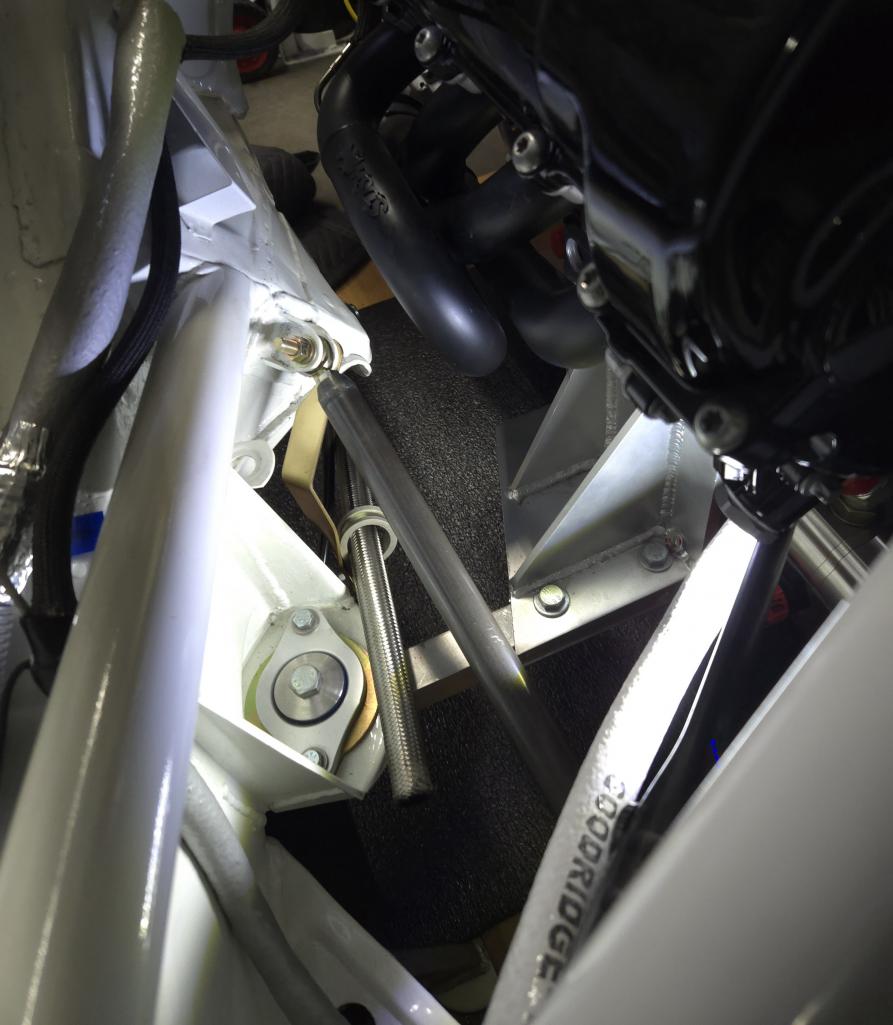
Posted by: Maltese Falcon Feb 23 2025, 09:10 AM
Headlight support 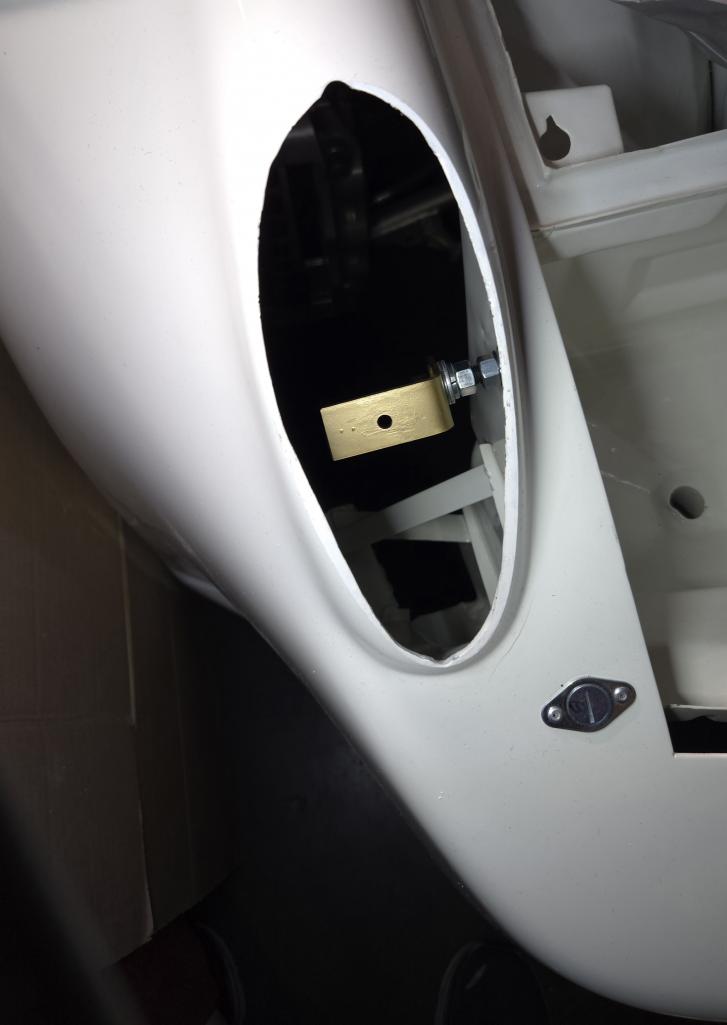
Posted by: Maltese Falcon Mar 7 2025, 07:50 PM
...well that didn't take long to hit a niche market !¡
Posted by: Maltese Falcon Mar 8 2025, 05:12 PM
View from inside the wheel well. I ordered a couple of the black rubber 5-pin relay pads, as 3DGauto headlight wiring inter connects with those.
The 914 rear tail lamp housing Thumb screws work well, no tools required in that tight spot.
Posted by: Maltese Falcon Mar 26 2025, 05:07 PM
Working our wiring cable towards front trunk area, made some custom quick-disconnects for the 3DGauto headlights/ turn signals. The oe Bosch relay bases add a 'Stockish look to the area !
Posted by: Maltese Falcon Apr 5 2025, 10:22 PM
Pre-wiring for headlights/ running/ turn lights in place.
Posted by: Maltese Falcon Apr 5 2025, 10:25 PM
Inside fender view
Powered by Invision Power Board (http://www.invisionboard.com)
© Invision Power Services (http://www.invisionpower.com)