Printable Version of Topic
Click here to view this topic in its original format
914World.com _ 914World Garage _ How to install the glovebox
Posted by: PanelBilly Jun 8 2013, 05:19 PM
I searched the subject and read several threads that said it a difficult job, but nothing that explains the procedure. i don't even remember what holds the box in place. Too many years since I pulled it apart. I kind of remember a strap.
Posted by: Dave_Darling Jun 8 2013, 05:45 PM
Metal strap around the back of the box. Holes near the ends of the strap go over studs sticking out the back of the dash frame; nuts screw onto the studs.
--DD
Posted by: PanelBilly Jun 8 2013, 05:52 PM
Do I put the face in first and then the box? Where are the springs?
Posted by: 76-914 Jun 8 2013, 06:13 PM
Wait for it, wait for it. 
Posted by: mepstein Jun 8 2013, 06:36 PM
Fix it to the metal dash before you install the dash into the car
Posted by: bandjoey Jun 8 2013, 06:47 PM
Yes. . put the face in the box and go burrrrrrrrrrr really fast. 
Couldn't wait any longer 
Lay upside down with feet over the targa bar. Push fiber box in place. Hold strap in place with one hand. Use a 10" extension to reach the screw stud. Drop flashlight from mouth. Nuts fall out of socket while searching for the light. Do this procedure 3 times.
Slide door in place. If memory is right spring is attached with long needle nose pliers to inside of box.
Enjoy!
Posted by: Rob-O Jun 8 2013, 08:45 PM
Put the glove box door on first. Then attach the springs to the door and the dash. There are springs on both sides. Then put the strap halfway on. By halfway I mean that on the side closest to the passenger door there is a slot that the strap fits through. The other side of the strap is the part that gets attached with a nut. Once the strap is halfway on, slide the box itself in place and then attach the strap with the nut.
Posted by: drifter914 Jun 8 2013, 08:58 PM

Put the glove box door on first. Then attach the springs to the door and the dash. There are springs on both sides. Then put the strap halfway on. By halfway I mean that on the side closest to the passenger door there is a slot that the strap fits through. The other side of the strap is the part that gets attached with a nut. Once the strap is halfway on, slide the box itself in place and then attach the strap with the nut.
Excellent directions Rob-O
Posted by: Elliot Cannon Jun 8 2013, 10:06 PM
I don't even use the springs. They are a PITA to install and are not really needed.
Posted by: Rob-O Jun 9 2013, 11:49 AM
Put the glove box door on first. Then attach the springs to the door and the dash. There are springs on both sides. Then put the strap halfway on. By halfway I mean that on the side closest to the passenger door there is a slot that the strap fits through. The other side of the strap is the part that gets attached with a nut. Once the strap is halfway on, slide the box itself in place and then attach the strap with the nut.
Excellent directions Rob-O
Thanks!
What Elliot said is true. You don't have to have the springs in place. I usually have the whole dash frame off the car while doing this, so putting the springs in place when everything is easy to get to is no problem. If the dash is on the car, it can be really easy to get to the springs (depending on how far apart you have everything). For the left spring (closest to driver) you can reach through where the radio hole (assuming that is out of the dash). For the right spring, you can reach through the hole that the right side vent is located (assuming that the bottom dash pad is off AND you have the later style dash with side vents). Good Luck!
Posted by: RobW Oct 5 2014, 05:56 PM
Not much info on changing a glove box door so here goes...
The old one had the basket weave missing, and what color is that anyway? Not Alaska blue metallic...
I basically pried it out and figured I could find a good article on putting it back in on the website here....
So the challenge was getting it back in without pulling the dashboard.
Attached thumbnail(s)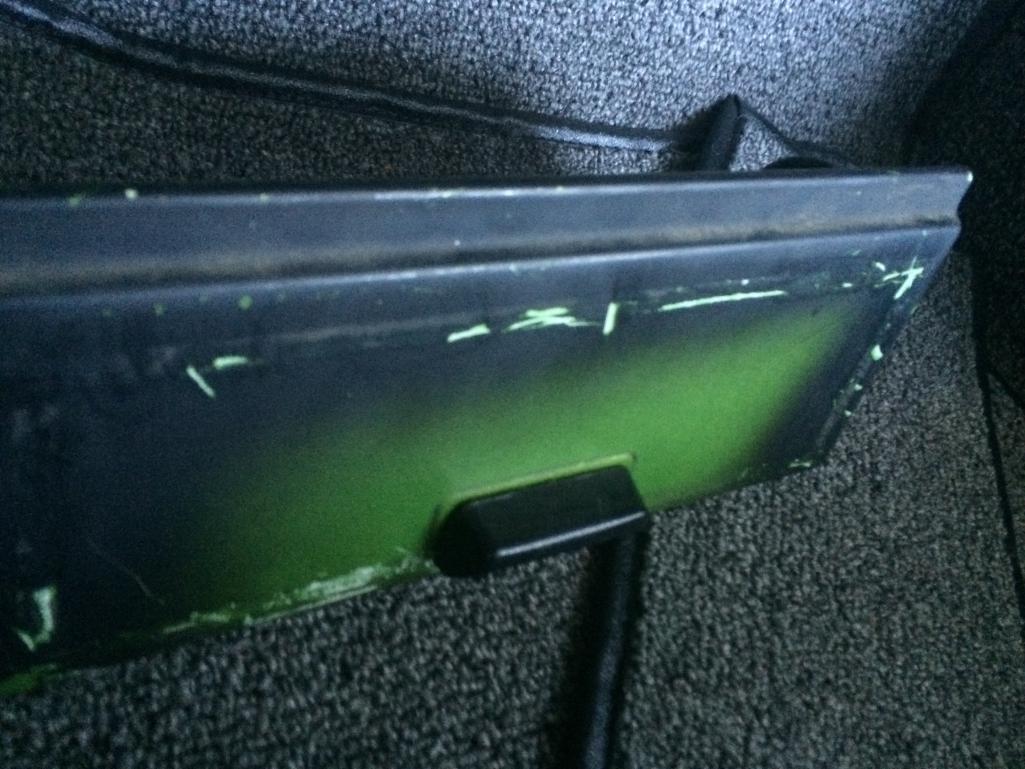
Posted by: RobW Oct 5 2014, 06:00 PM
Next, you have to pull the radio out to get to the left side glove box retainer strap. The 8MM nut is straight up. Take it off pull the metal strap off. Gently push the card / press board glove box down and to the left creating an opening.
Attached thumbnail(s)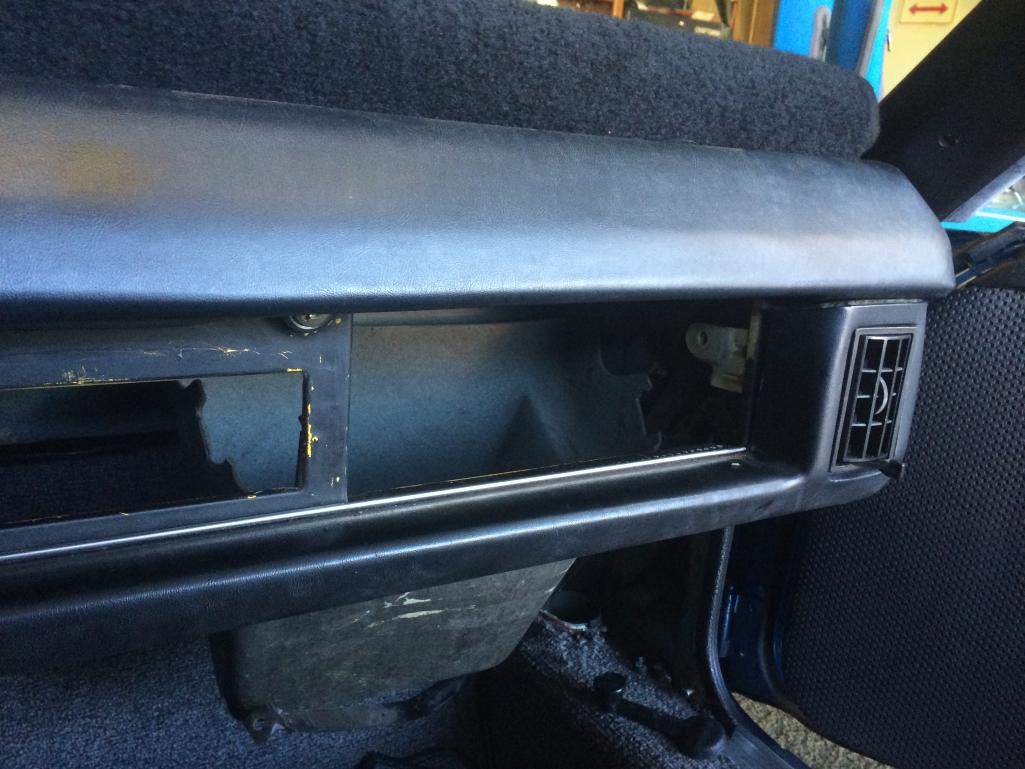
Posted by: RobW Oct 5 2014, 06:02 PM
more
Attached thumbnail(s)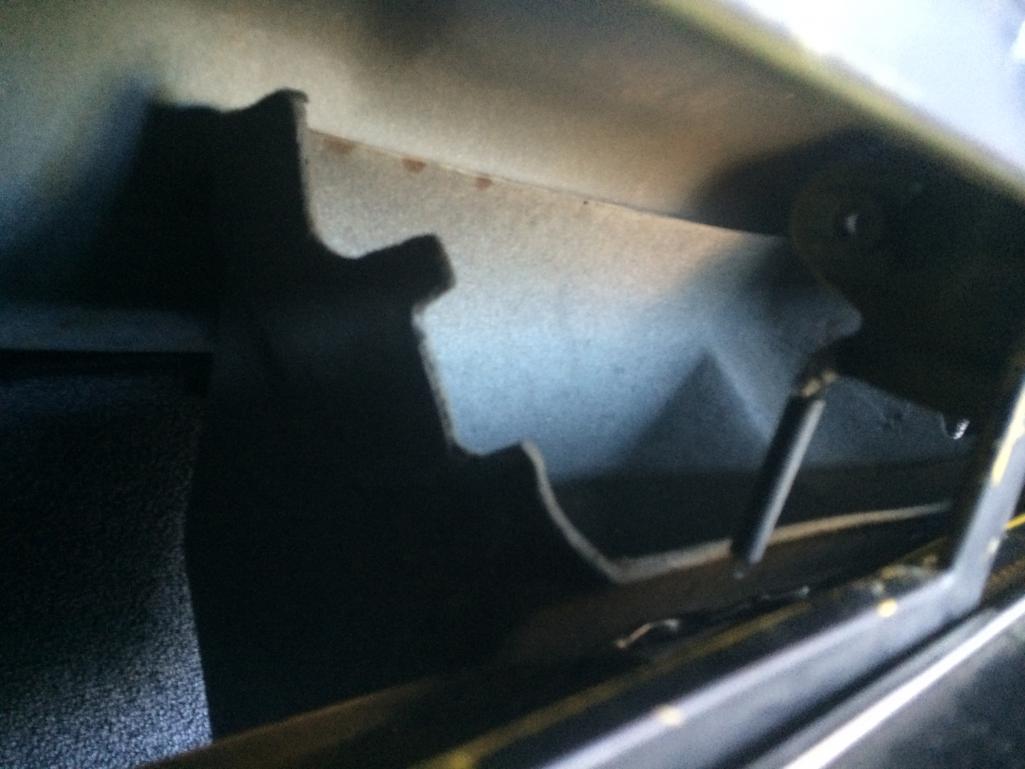
Posted by: RobW Oct 5 2014, 06:04 PM
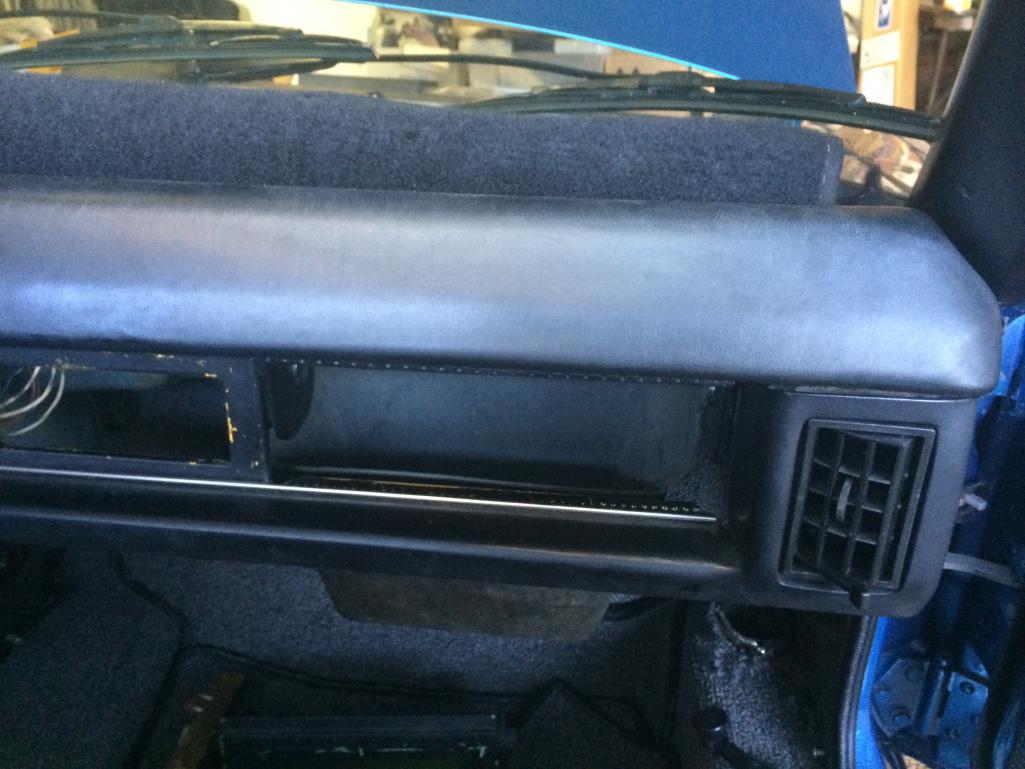
Next the new glovebox door (with the basket weave) goes in fairly easily....
Attached thumbnail(s)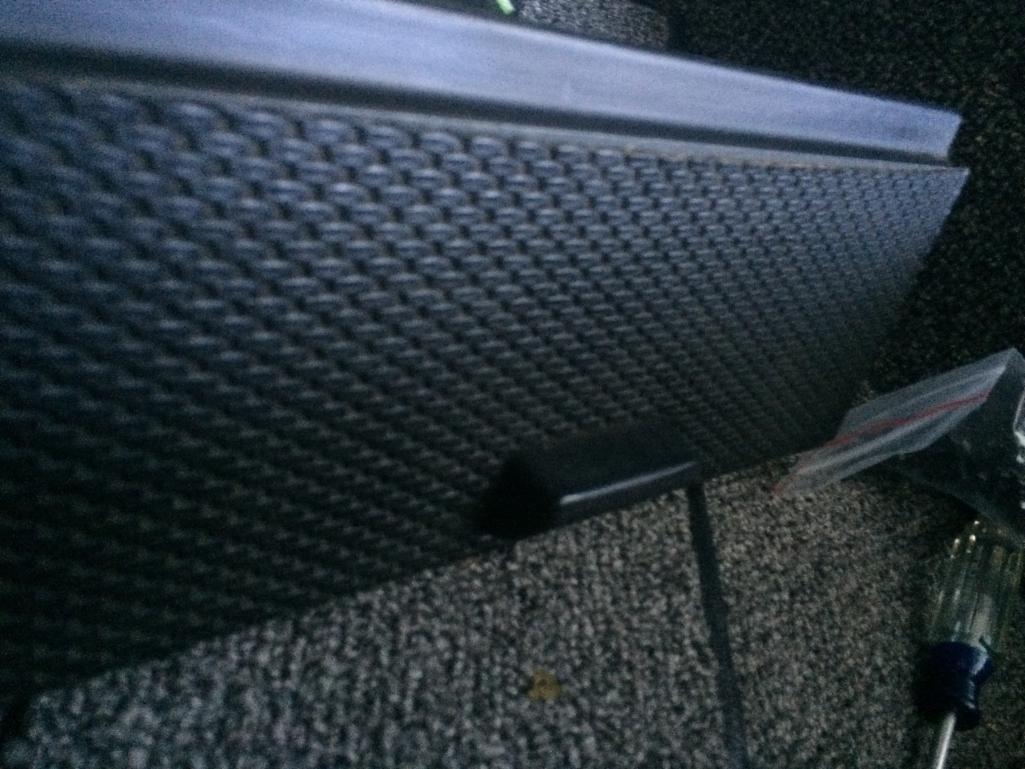
Posted by: RobW Oct 5 2014, 06:05 PM
More
Attached thumbnail(s)
Posted by: 76-914 Oct 5 2014, 06:10 PM
Where are the "Money Shots"? The ones showing the springs being attached.
Posted by: RobW Oct 5 2014, 06:10 PM
Next comes the springs on each side. The ABM isn't a car you leave the springs off.
The left spring is pretty easy because you can see it through the radio slot. I put it on with my fingers just pulling, placing and adjusting it.
I also put the left side inner bolt on, but left the right side off.
The right side spring is blind. I was lucky enough on both sides for the spring to stay on the dash side of the equation and then having to install the springs on the glove box door tabs.
I kept the right side mounting bolt off, move the door into place with the door open, and pulled the spring by hand and pushed it on the tab on the door. All blind. Luckily I got it in the hole first try.
Attached thumbnail(s)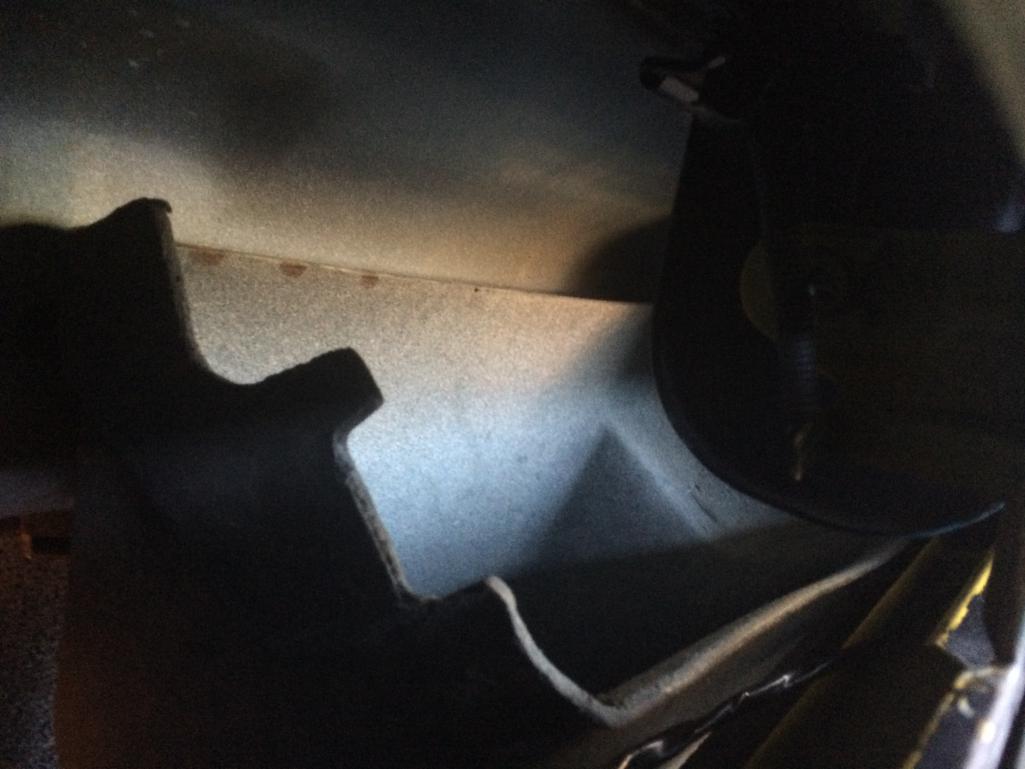
Posted by: RobW Oct 5 2014, 06:14 PM
Install the other bolt on the right side. Now its time to reinstall the glove box strap.
Push the glove box back up and to the right to get it back into position. A few gentle taps and its back in place.
Lay down on the floor mat looking up at the bottom of the dash for this 8MM. Again going in through the radio hole. You can crank on a long 8MM socket to get it in.
Attached thumbnail(s)
Posted by: RobW Oct 5 2014, 06:15 PM
Enjoy your new glove box door...
Attached thumbnail(s)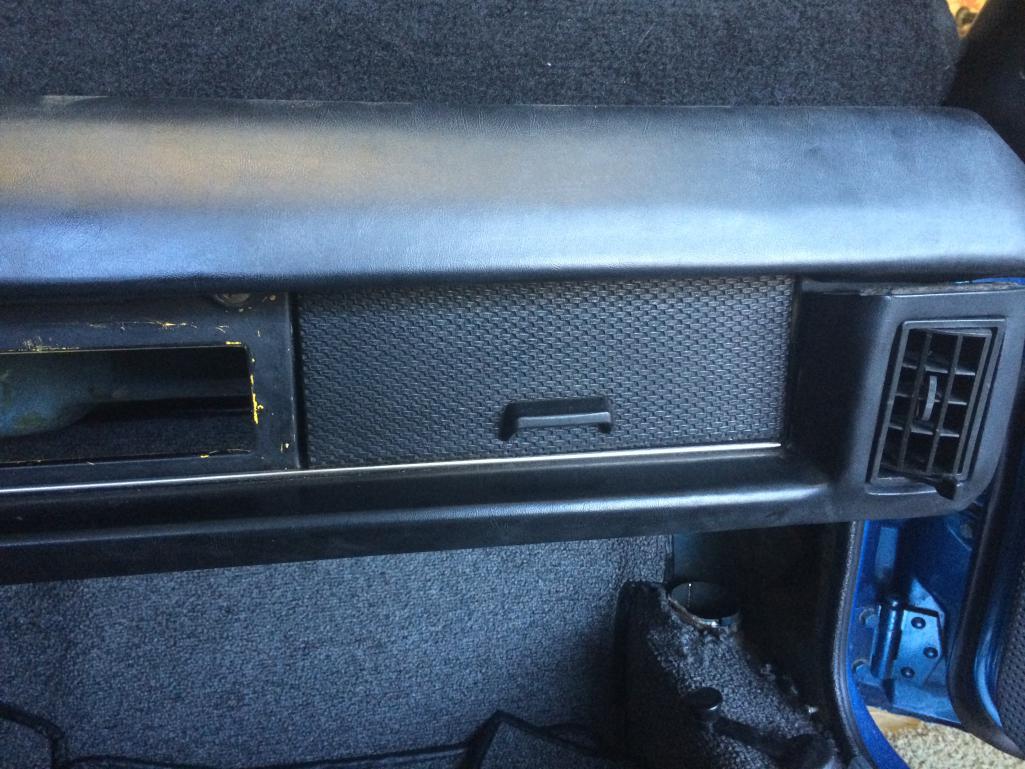
Posted by: RobW Oct 5 2014, 06:18 PM
Where are the "Money Shots"? The ones showing the springs being attached.
Like I said... I got lucky..

Posted by: partwerks Oct 5 2014, 07:14 PM
What if you want to remove the lock? How's that come out?
Posted by: tumamilhem Oct 5 2014, 07:41 PM
Where are the "Money Shots"? The ones showing the springs being attached.
I tried for weeks last year. Again this year. I can't get the damn springs in to save my life. I prefer them in because I like how the door closes with them. But I can't do it. Lord knows I've tried.
Over...
And over...
And over...

Posted by: RobW Oct 6 2014, 12:21 AM
Pull the radio get in there. If you need extra space take the side bolt off. You can do it!
Posted by: mzapisek Oct 6 2014, 09:07 AM
Just did this yesterday. The springs are a real pain. Left side is much easier to get at through the radio opening. If you loosen the lower dash and let it hang down you can then remove the vent box and get better access to the spring on the outside.
I had a hard time getting the 8mm nut started as it was sitting too far down in my socket. I took some two sided foam tape and suck it to the end of my socket extension to get is started. Once threaded on just pull the tape off and finish tightening with socket.
Not fun but not hard.
Posted by: Chris Pincetich Oct 6 2014, 10:03 AM
I NEED TO DO THIS. I actually damaged one side of the box trying to pry it out. Can't decide if I need to replace it first before re-install.....
THANKS for all the pics and tips 
Posted by: clapeza Oct 6 2014, 10:11 AM
Has someone ever made a replacement fiberglass or plastic glovebox? Seems like a perfect project for 914Rubber or 914ap...
Chester
Posted by: Drums66 Oct 6 2014, 10:27 AM
.....Fun!!.....in the sun

![popcorn[1].gif](style_emoticons/default/popcorn[1].gif)
Posted by: RobW Oct 8 2014, 05:21 PM
I NEED TO DO THIS. I actually damaged one side of the box trying to pry it out. Can't decide if I need to replace it first before re-install.....
THANKS for all the pics and tips
duct tape should work.

Powered by Invision Power Board (http://www.invisionboard.com)
© Invision Power Services (http://www.invisionpower.com)