Printable Version of Topic
Click here to view this topic in its original format
914World.com _ 914World Garage _ Taillights
Posted by: green914 Aug 13 2013, 09:45 AM
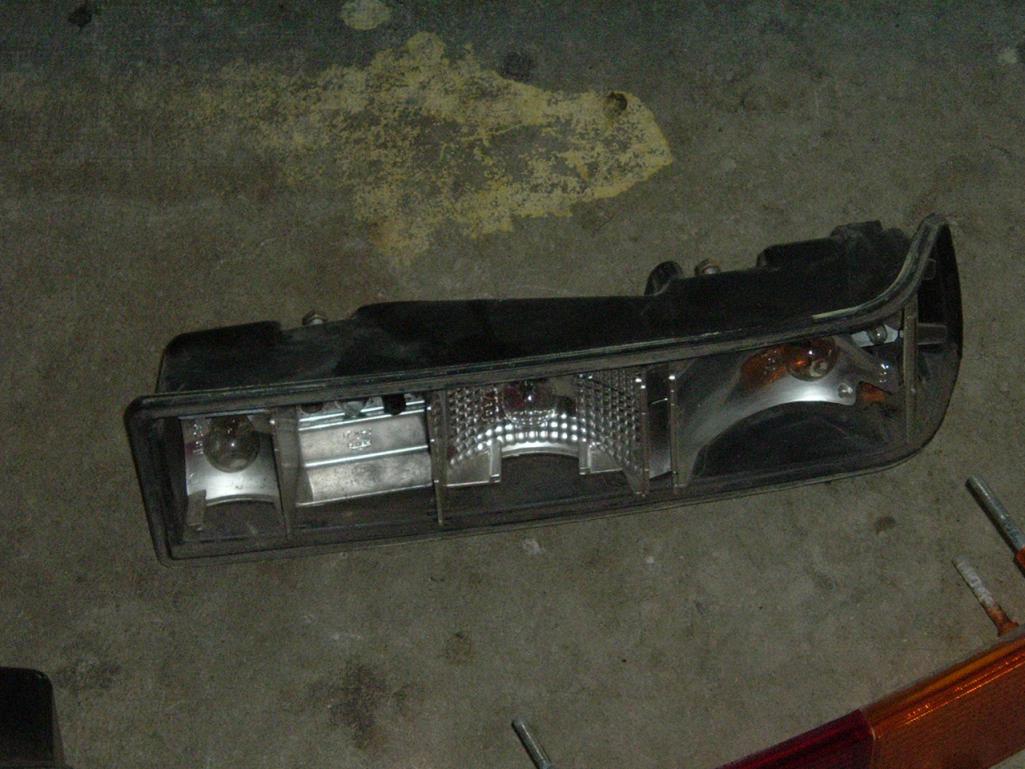
 Wow! The insides of the taillight assembly are covered with a fine dust that needs more than just compressed air to clean it away. I'm thinking of soap and water, but do not want to cause any damage. What's a batter way to do the job?
Attached thumbnail(s)
Posted by: bulitt Aug 13 2013, 09:47 AM
Think I read where someone had good results in the dishwasher, removed prior to dry cycle. ?
Posted by: Harpo Aug 13 2013, 10:50 AM
![popcorn[1].gif](style_emoticons/default/popcorn[1].gif) very good question
very good question
Posted by: green914 Aug 13 2013, 02:43 PM

Think I read where someone had good results in the dishwasher, removed prior to dry cycle. ?
Has anyone out there tried the dishwasher, and had good results?

Posted by: bulitt Aug 13 2013, 03:12 PM
I think it was Saigon71 but cant find the pic in his thread
Posted by: green914 Aug 13 2013, 08:50 PM
I think it was Saigon71 but cant find the pic in his thread
I think running them through the dishwasher should clean them up good without causing any harm to them as long as I take them out before the heat cycle. I will let you know how they come out.

Posted by: saigon71 Aug 14 2013, 07:48 AM
Dishwasher works well!
I ran mine through on the top shelf, using Cascade extra action. I let them go through the heat cycle too, only because I forgot about them:
Posted by: bulitt Aug 14 2013, 09:16 AM
Your car looks great Bob! You are almost there!
Posted by: green914 Aug 14 2013, 11:50 AM
Wow! those do look great  Thanks for the feedback.
Posted by: ChrisNPDrider Aug 14 2013, 01:57 PM
Any scrubbing and that reflective paint is in trouble. On mine the paint was already coming off in some spots, I cleaned w a sponge, and more came off. The plastic was red underneath the paint.
I ended up using rattle-can "chrome" paint to restore them. Be sure to remember not to paint inside the holes for the lights, it ruins the electrical connection (but easy to undo w a dremel and wire brush).
I cleaned the lenses w warm soapy water, installed all new bulbs, and it's a lot brighter 
Posted by: 7TPorsh Aug 14 2013, 02:08 PM
So do I understand this correctly? You put the housings and lenses in?
This should work for the front? too...
Posted by: Drums66 Aug 14 2013, 03:24 PM
....Yeah,as long as no tumbling is involved? should work great! 
(proceed with care!)
Posted by: bulitt Aug 14 2013, 03:25 PM
During my searches I read where you should not put the fog lights or headlights in. Something about the silver being ruined. Not sure the diff between front and back. Probably fronts need a highly reflective surface.
Posted by: Drums66 Aug 14 2013, 03:41 PM
During my searches I read where you should not put the fog lights or headlights in. Something about the silver being ruined. Not sure the diff between front and back. Probably fronts need a highly reflective surface.
......May have to do with metal contac's & filament ruination?
(not good!)carry on folk's
Posted by: green914 Aug 14 2013, 05:27 PM
Any scrubbing and that reflective paint is in trouble. On mine the paint was already coming off in some spots, I cleaned w a sponge, and more came off. The plastic was red underneath the paint.
I ended up using rattle-can "chrome" paint to restore them. Be sure to remember not to paint inside the holes for the lights, it ruins the electrical connection (but easy to undo w a dremel and wire brush).
I cleaned the lenses w warm soapy water, installed all new bulbs, and it's a lot brighter
I just took them out of the dishwasher - they are clean, but the reflective paint took a pounding. I'll be looking for some chrome paint too.
Powered by Invision Power Board (http://www.invisionboard.com)
© Invision Power Services (http://www.invisionpower.com)