Printable Version of Topic
Click here to view this topic in its original format
914World.com _ 914World Garage _ CptTripps' Restoration 2 - The Grey Matter Build
Posted by: CptTripps Aug 19 2013, 03:00 PM
Hey gang!
I'm back in the mix, and getting ready for another 914 restoration. Not sure this will play out as well as it did http://www.914world.com/bbs2/index.php?showtopic=27647, but we'll give her a go and see what I can come up with!
After I find the right starting-point, here's what I've been dreaming of doing to it.
Subaru EJ20 Turbo 4 engine & Trans. (250-275hp target)
Steel flares
5-bolt hubs
Boxster brakes
Stiffen up the body. (MAYBE a roll-bar.)
Satin silver paint, blacked-out chrome, black satin rims...with colorful calipers.
I think I've found the right starting-point car (70-1.7 with carbs) so I'll drive it a bit while I'm stock-piling parts. That way I can start the project in earnest this winter while the snow falls.
I'm going to use the 901 side-shift trans I have in my basement to mount up to the EJ20 after I can locate a decent one. That way, I should be able to get everything right and then mount it up a lot easier after I drop the 1.7 out. (Best intentions...always lead to disappointment, but I'll try anyway.)
Things I learned the last time:
* Do the body work all the way up to the primer, then let a pro take it from there.
* It's much easier to work when you have a lot of light.
* Garage heaters are your friend.
* When in doubt...STOP and look for an answer. (Doubling your bad efforts never works.)
* Wearing those blue latex gloves alleviates embarrassing situations in meetings
* The search button is your friend. (Spelling is also...thanks Andy.)
Here we go!
UPDATE: I ended up with a 1975 with a V8 conversion as a starting point.
UPDATE 2: The engine I found had a good Trans on it, so I'm going to have a Subaru 5MT not a 901.
UPDATE 3: 350 is my new HP goal
UPDATE 4: I'm naming the project "Grey Matter" because the car is going to be a lot more than just a restoration. That...and project names are cool. 
UPDATE 5: April 17th is the "due date" to have it complete. Not as fast as my last build, but there is a LOT more to this one.
Posted by: CptTripps Aug 19 2013, 03:07 PM
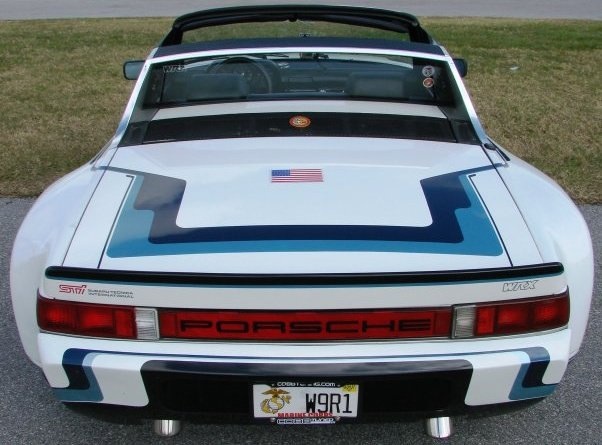
Here's what I'm shooting for as a color combo...but on a Carrera GT.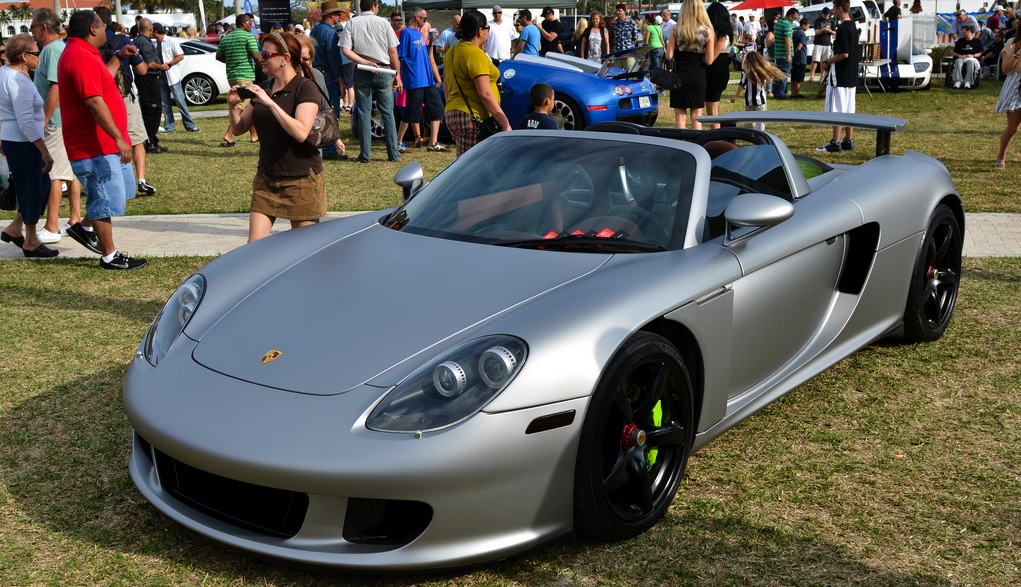
Posted by: jimkelly Aug 19 2013, 03:25 PM
talk to dbcooper - seems he would have gone suby 6 if he were to do it over - unless I recall a post incorrectly.
though how cool is it to be running a closed deck suby with boost : )
Posted by: CptTripps Aug 19 2013, 05:33 PM
I'm digging through a LOT of threads this week. Looks like I need to decide pretty quickly if I want the 901 transmission, or if keeping it will be more work than it's worth. The idea of buying a complete engine/trans combo that could bolt on a lot easier is appealing. The cable-shift transmission conversion is what has me puzzled right now. I need to plot/plan and talk to a few people first.
I guess Ian is on/returning from his honeymoon, so I'll hold off a few weeks before I make that decision.
Just ordered my steel flares and the rear floorboard. I KNOW I'll need that for either of the cars I'm looking at right now, so it was a safe bet to get them in sooner rather than later. Wish I could remember who I got the door panels from last time. I need to dig into that old email account and see if I can find it. Going to get the chassis stiffening kit too. Sad about Engman...he was a 1-stop-shop for a lot of the things I need this time around.
Posted by: Chris H. Aug 19 2013, 05:50 PM
For that much power you should do a 5MT Subie trans...much better fit for your application. Bolts right up with no problem, no adapter required. We're all muddling through the cable shifter thing but many people have done it successfully. I'll be attempting it in a few weeks myself.
Posted by: CptTripps Aug 19 2013, 06:08 PM
So what engine/trans combo should I be hunting for? I was looking at EJ20G, EJ20H, and EJ208 engines on eBay. There seem to be a lot of variances in what people here are using.
I'm also confused as to if I should be buying with/without the ECU.
Posted by: CptTripps Aug 19 2013, 06:13 PM
Nevermind...figured out that the 5MT is about the ONLY trans that came with the EJ20.
Posted by: Chris H. Aug 19 2013, 06:21 PM
Any 5MT will bolt up but you should look for one that was mated to a "turbo" car. The newer the better is the rule. Mine is from a stock 2006 WRX that had a 2.5T in it. I bolted it to a 3.3L SVX engine. Haven't driven it yet but it LOOKS REALLY GOOD!
Someone else will chime in on the engine piece I'm sure. EDIT: Get the ECU and engine wiring harness for sure.
Here's a thread you might want to check out. ON A PRIVATE ROAD some guy was embarassing kids in their Mustangs and GTOs with his lowly 914 2.0T. I'm sure it wasn't DBCooper though...he was just taping it. Note how quickly the 914 pulls away...
http://www.914world.com/bbs2/index.php?showtopic=210228&hl=roush
Posted by: CptTripps Aug 19 2013, 09:49 PM

Any 5MT will bolt up but you should look for one that was mated to a "turbo" car. The newer the better is the rule. Mine is from a stock 2006 WRX that had a 2.5T in it. I bolted it to a 3.3L SVX engine. Haven't driven it yet but it LOOKS REALLY GOOD!
The idea of a bigger power plant is fun and all, but I've always been a fan of a 4-cyl turbo. I'm not going to be tracking the car at all, so the gain in HP for tooling around with one of my boys is what I'm aiming for. 3.3 would be a bit of overkill for...me anyway.
Just purchased the Boxster calipers and the adapters from Rich. Ordered the rear 1/2 of the floor pan, and Flares from AA. Looks like I'll be picking the car up Wed night to drive home. Should be fun!
Posted by: Travis Neff Aug 20 2013, 11:44 AM
Good to see you back!
Posted by: CptTripps Aug 20 2013, 12:49 PM
Good to see you back!
Thanks Travis!
Picking up my car tomorrow...assuming it makes the 120mi trip home!
Posted by: CptTripps Aug 29 2013, 11:12 AM
So I'm stocking up parts already. Trying to use 914World members wherever possible.
1975 914 w/V8 (xsJerry)
3.5" 911 Struts (sebring66)
Boxster Brake Conversion (a914guy)
986 Brake Calipers (eBay)
Pontiac Solstice Rear-View Mirrors (eBay)
17" Boxster Rims (Cleveland Craigslist)
Steel Flares (dr914)
Fiberglass Rockers (dr914)
10-Piece Chassis Stiffening Kit (dr914)
Still waiting on a set of rotors to materialize that will work.
My assistant's boyfriend wrecked his 03 WRX, so I'm going to grab that motor/tranny and some other assorted parts in a few weeks. I'm not going to tackle the engine swap until the snow flies. At that point, I'll sell off the Renegade V8/901 combo or perhaps just sell the engine locally. (I may be able to just trade it to her BF for the Subaru engine.)
Here we go!
Posted by: CptTripps Aug 30 2013, 06:47 AM
Parts are showing up every day...the car is still stuck in California. 
Picked up rear-view mirrors for a Pontiac Solstice.
$85 Shipped...brand-new. 
I'll need to modify them a little bit, but this should be a great starting point for a modern looking mirror.
Make sure you get the "Manual" version and not the electronic. They're the same price (imagine that) but these move a lot easier. (Guy down the street has one, and I tried moving the mirrors manually and they "clicked" across the servos.)
Attached image(s)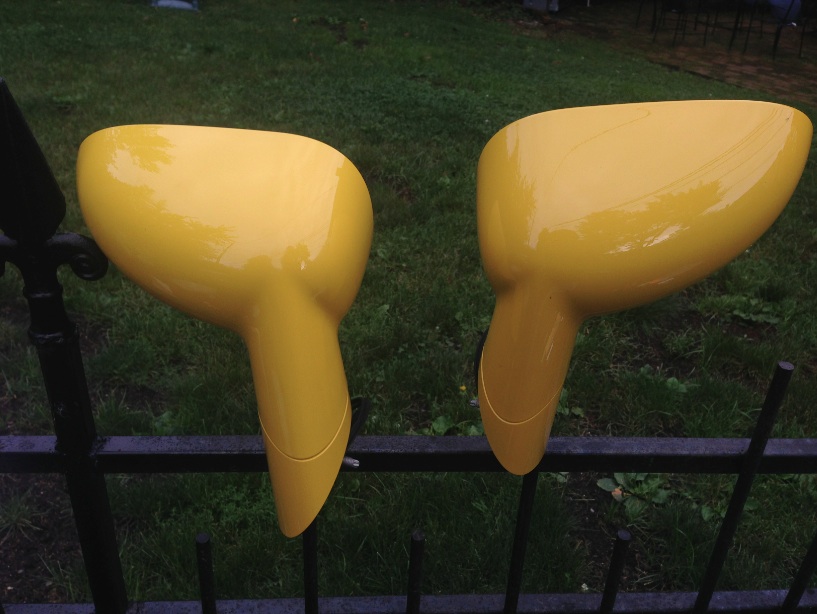
Posted by: CptTripps Aug 30 2013, 06:49 AM
Brakes arrived!
...and they're wrong. 
I open box: Sweet!
I read the part numbers: Shit!
Here's what they sent me.
996.352.422 (RR)
996.352.422 (RR)
986.351.422 (RF)
996.352.421 (LR)
So I got 3 rears and a front. Doh!
Quick email to the seller, and they're going to send me the correct calipers, and take these back. Once I get them, I'll send the calipers and a few other pieces-parts off for powder coating.
Attached image(s)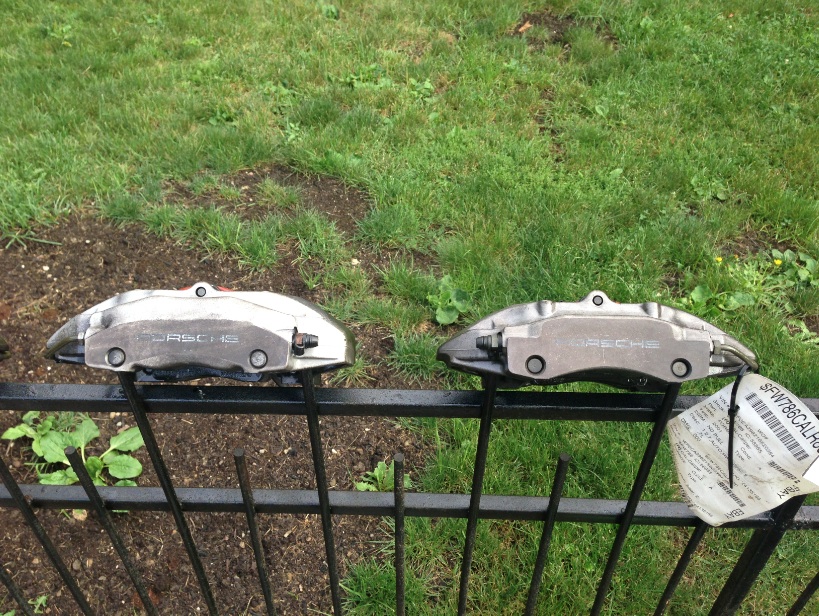
Posted by: CptTripps Aug 30 2013, 06:53 AM
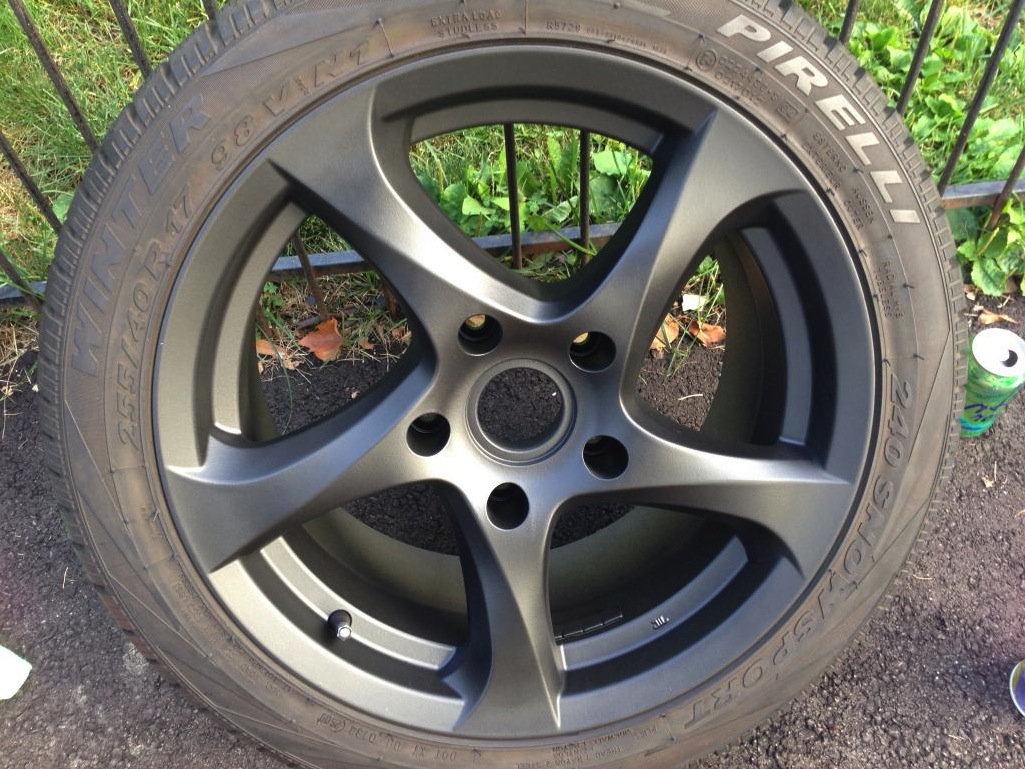
Rims I picked up locally off of Craigslist.
$500 for all 4, but they have winter rubber right now, so that'll be fine for placement and the rest of this summer.
Front: 17x7.5 - 205/50-17
Rear: 17x9 - 255/40-17
Thinking about powder-coating them, but another member (jbyron) suggested I'd give PlasitDip a shot. They came out VERY cool...so I'm going to run them this year to see what it holds up like. Not bad for $5.
Attached image(s)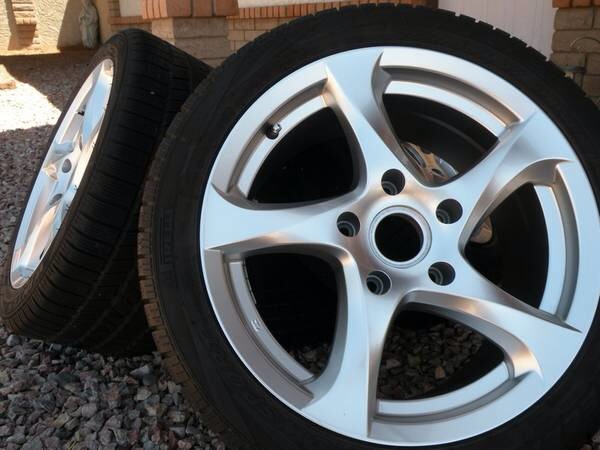
Posted by: uncle smokey Aug 30 2013, 09:38 AM
The wheels look great. I am curious to see how they hold up. Is it just the regular rubber coating or is there a different one?
Posted by: CptTripps Aug 30 2013, 07:10 PM
Just the regular PlastiDip Spray you buy from Home Depoti have the Glossifier spray too, and I'll put a coat of that on tomorrow.
My caps came in today...so I sprayed one to see what it looks like.
Attached thumbnail(s)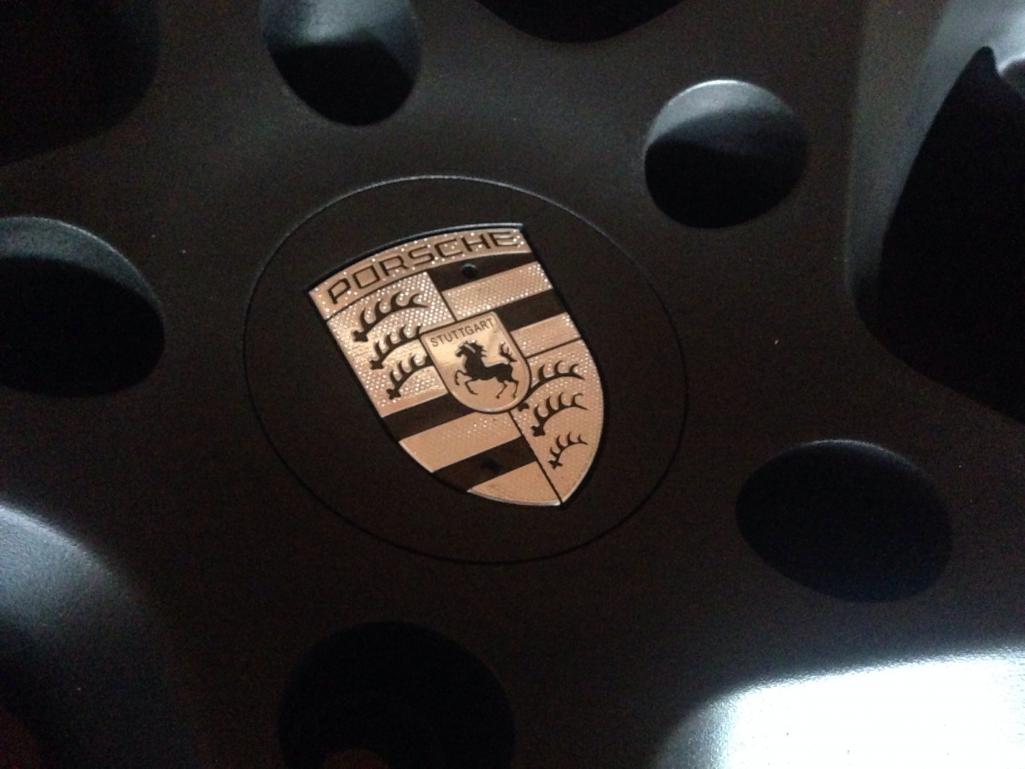
Posted by: cwpeden Aug 30 2013, 07:12 PM
Have you considered a vinyl wrap? Uniform colour and sheen. Plus some cool colours. That GT looks like vinyl.
Posted by: CptTripps Aug 30 2013, 07:15 PM
Have you considered a vinyl wrap? Uniform colour and sheen. Plus some cool colours. That GT looks like vinyl.
Funny...I asked that very question a few days ago...and that led me to the dip!
http://www.914world.com/bbs2/index.php?showtopic=218045
I've got 5-6 different colors of Vinyl on the way. I should have them soon so I can start testing both.
Posted by: CptTripps Aug 31 2013, 12:44 PM
Parts fairy showed up today...with a great delivery from the ATL.
Steel Flairs
Rear Chassis Stiffening Kit
GT Rockers
...still don't have the car.
Attached thumbnail(s)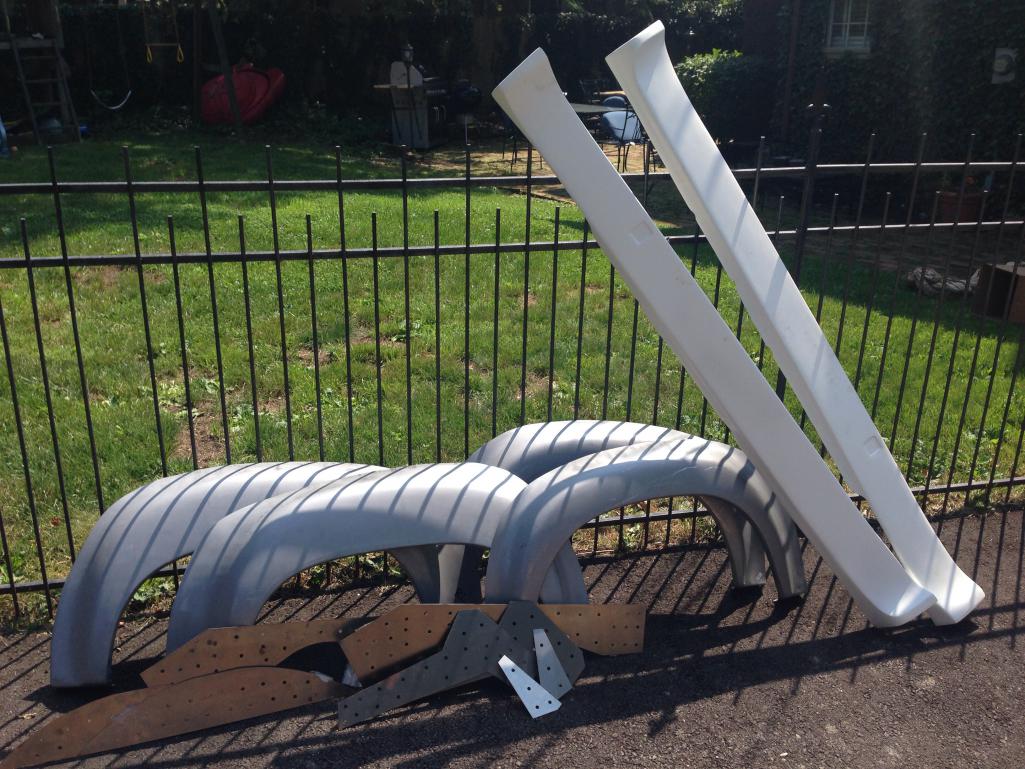
Posted by: CptTripps Sep 5 2013, 06:57 AM
Got the RIGHT calipers in today. They're quite dirty, so I'll get them soda-blasted and headed off to get powder-coated this weekend. I have a set of trailing-arms that I'm going to stiffen, and send off as well. Need to work out the e-brake from a 911 first though. That'll take some fabrication first. I'll wait to powder-coat those until after I have all of that done.
Car should be headed to Cleveland later today, and I'm TOLD I'll have it by the 13th. :woot:
Attached thumbnail(s)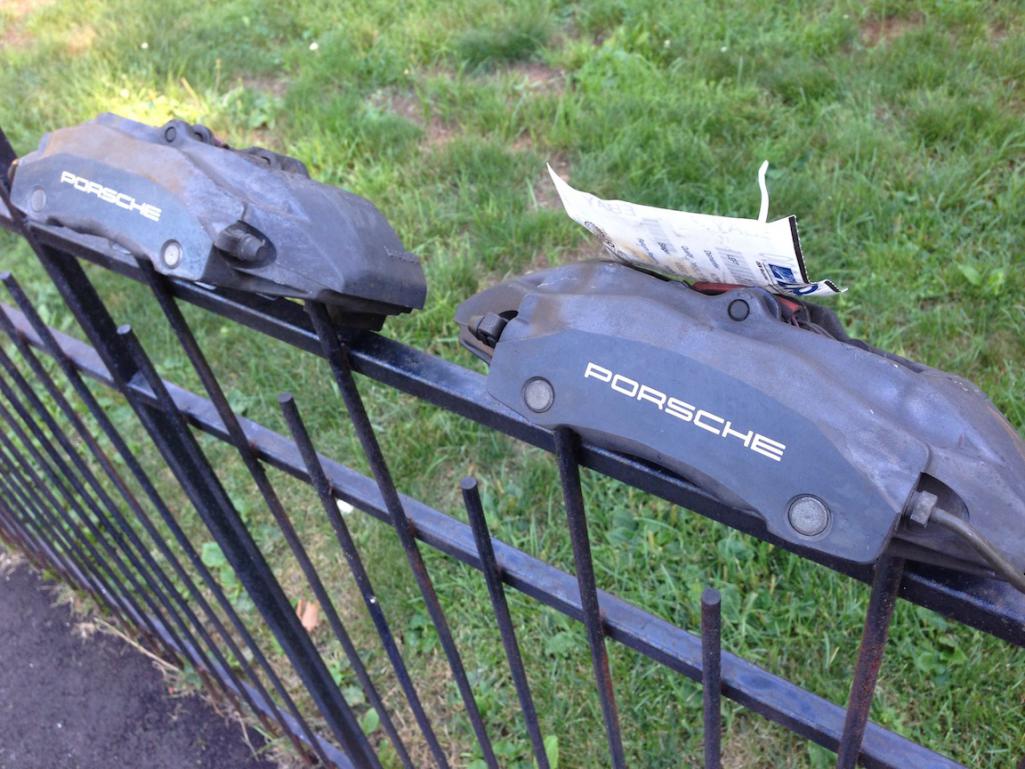
Posted by: 914forme Sep 5 2013, 09:42 PM
Parts fairy showed up today...with a great delivery from the ATL.
Steel Flairs
Rear Chassis Stiffening Kit
GT Rockers
...still don't have the car.
Rear stiffening kit does not do a lot for you. I hate to say. Order a Log kit for 914ltd. It adds some weight to the car, but is makes it super stiff. runs the entire log. Then add a brace to the rear suspension arms. Thats about as good as it gets unless you also run up the inner log.
I still added a roll bar and a petty bar, but the car is super stiff with out the bars. I have the GT stiffening kit in also, so don't feel to bad about it.
BTW, thanks for the tip on the Solstice mirrors, I saw them on the Anklebitter and always thought cool. Never knew they where so cheap.
And where did you get the caps from? I have a set of 18' Cayman S wheels I need caps for.
Posted by: CptTripps Sep 6 2013, 06:40 AM
I have the long kit coming as well. Ordered that from Pelican along with a host of other goodies. The GT kit is a "just in case" and didn't add all that much weight, so I figured I'd go for it. The suspension brace isn't a bad idea though. Maybe I'm making it TOO stiff for a road car...
The center caps were on eBay. I think $30 shipped. These fit perfectly, and the Porsche crest is surprisingly nice. (And removable, so if you ever think you need some chrome creasts, those are cheap!
Wait till you all see what I have planned for side-marker lights!
Posted by: green914 Sep 7 2013, 12:21 PM
The 75 V-8 conversion is on its way. 
Attached thumbnail(s)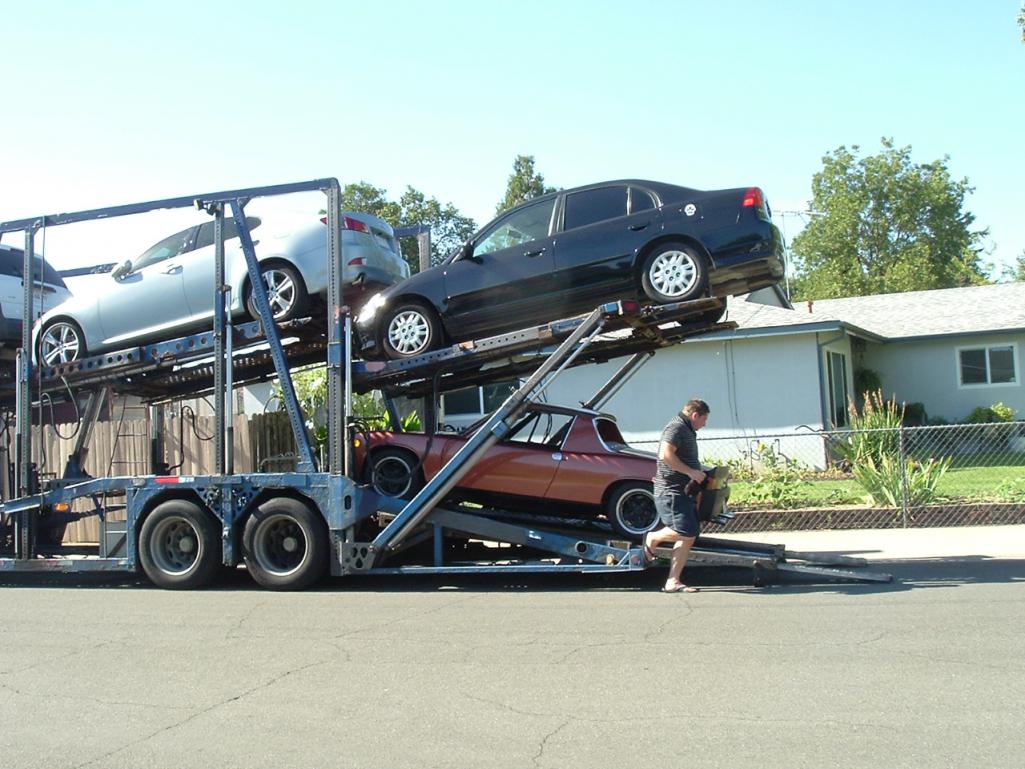
Posted by: CptTripps Sep 7 2013, 05:49 PM
Thanks Jerry!!!
Posted by: CptTripps Sep 8 2013, 07:39 AM
I spent the morning with my son Oliver, cleaning the calipers to send off to Powder-Coat tomorrow. Not entirely sure about the seals and how I should handle them. I'm not all that adept at seal/piston removal, and don't think this is the time to learn. They bake at 400-deg, and the calipers should be able to handle WAY more than that, so as long as they're not getting coated, I should be ok. If they come back cracked, I'll replace them then.
Attached thumbnail(s)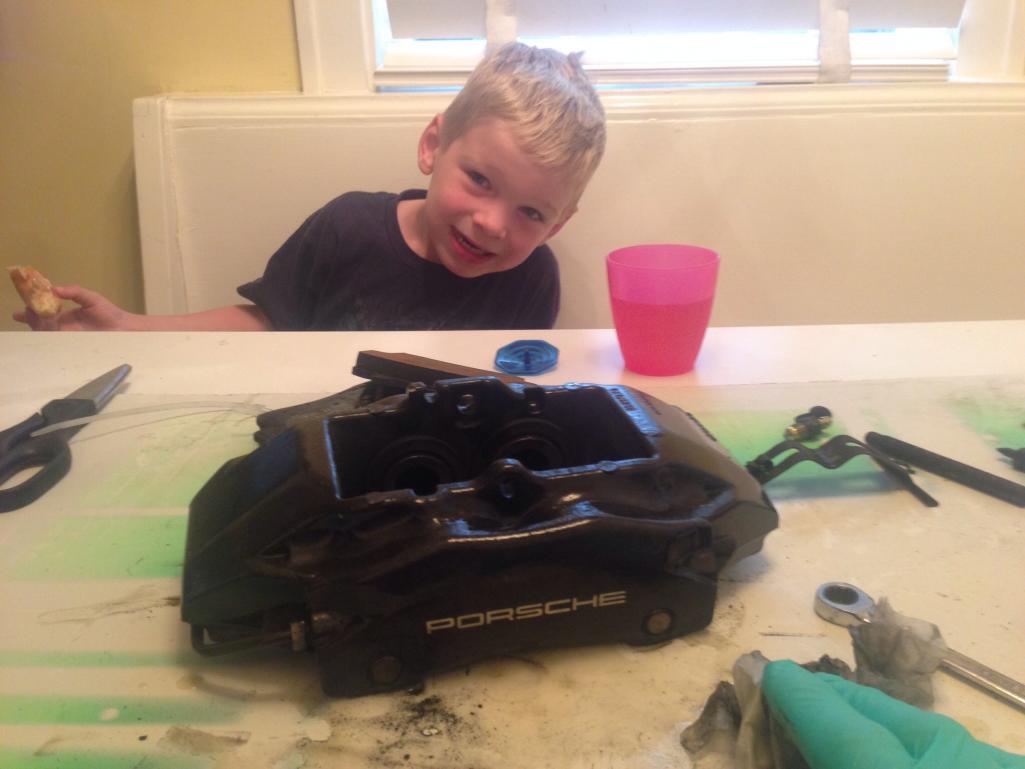
Posted by: rhodyguy Sep 8 2013, 08:33 AM
working on the kitchen table ...you have an understanding wife.
Posted by: CptTripps Sep 8 2013, 10:10 AM
Ha!
She was at the gym working out, and I had it all cleaned up before she got home. 
Posted by: CptTripps Sep 9 2013, 06:22 PM
Dropped the Calipers off today for Power-Coat. They took the remaining pieces, and pistons/seals out for me. Media blasted, and are Powder-Coating tomorrow morning.
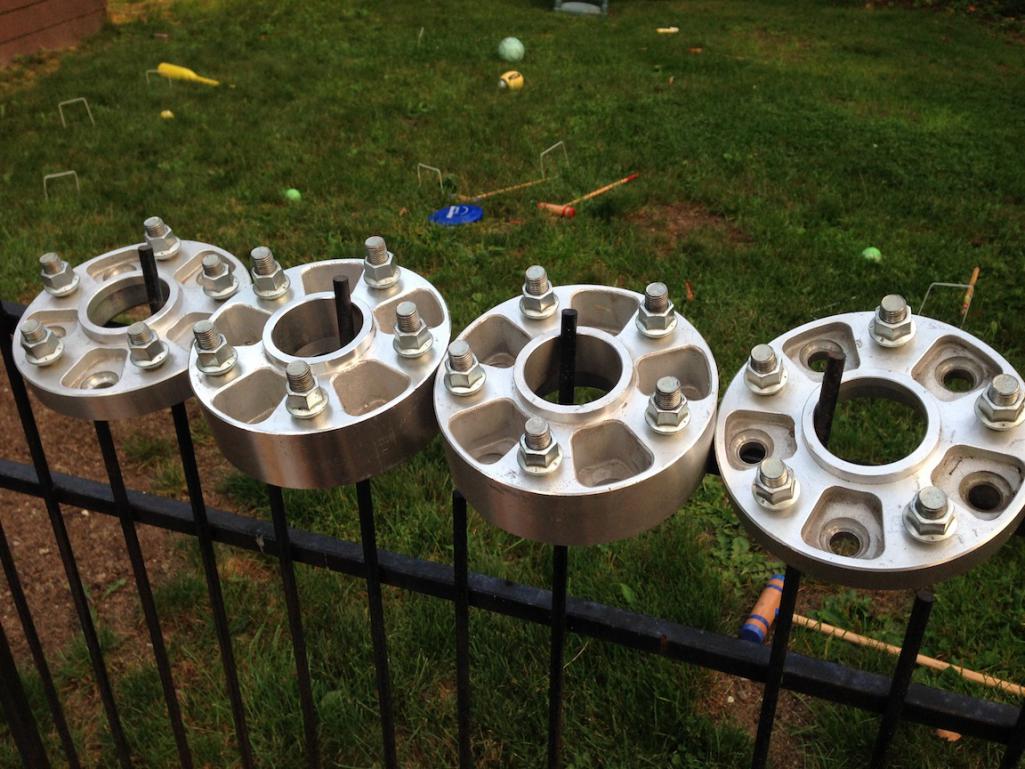
...and then the spacers I ordered showed up.
2X2" and 2X1"...$100 for all 4 shipped!
Attached thumbnail(s)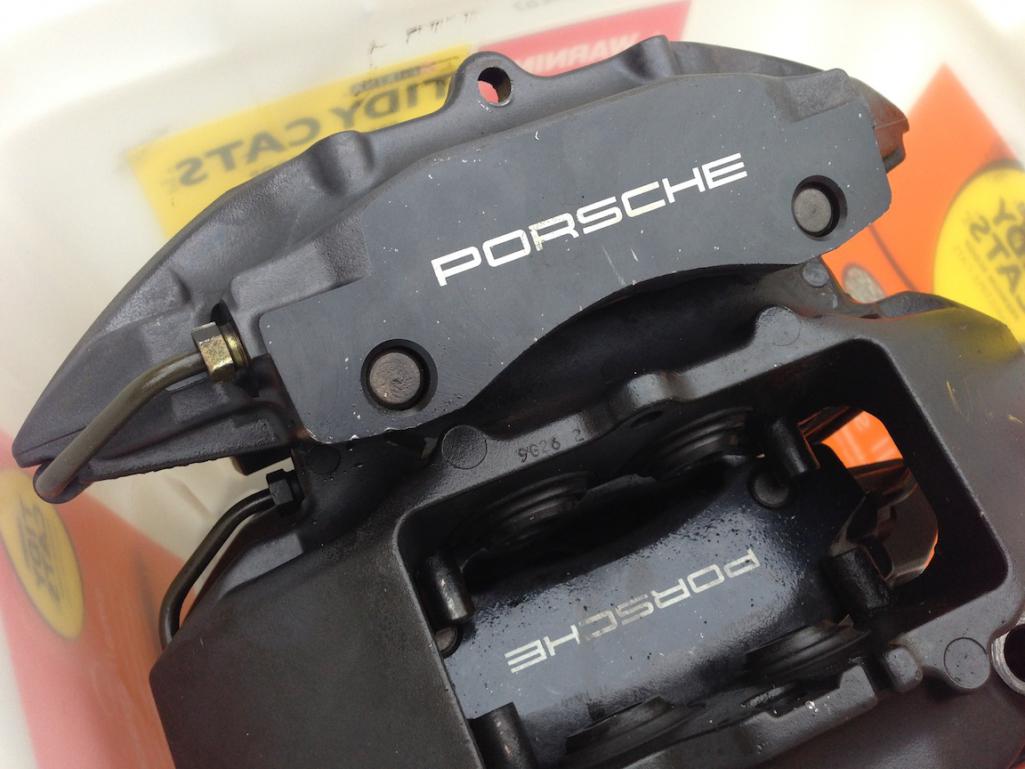
Posted by: McMark Sep 9 2013, 07:39 PM
Flush them when you get them back.
Then flush them again.
Then flush them again.
Media gets everywhere and likes to hang around in passages.
Posted by: CptTripps Sep 10 2013, 07:42 AM
Flush them when you get them back.
Then flush them again.
Then flush them again.
Media gets everywhere and likes to hang around in passages.
Flush like a stubborn turd...got it!
In better news...I just got a call from the driver doing my transport. Looks like I'll have a car tonight!
Posted by: Chris H. Sep 10 2013, 09:29 AM
Sheeesh that's fast. Mine took a month but that was back in 2002.
Posted by: green914 Sep 10 2013, 11:56 AM
Wow!  that is fast.
Posted by: CptTripps Sep 10 2013, 12:09 PM
When he called this morning, I was expecting the purpose to schedule a time for Thu or Fri to meet. I was floored when he said "tonight, around 9:00pm"
Now, I just need to find a ride out to the drop-off point about that time so I can drive it back!
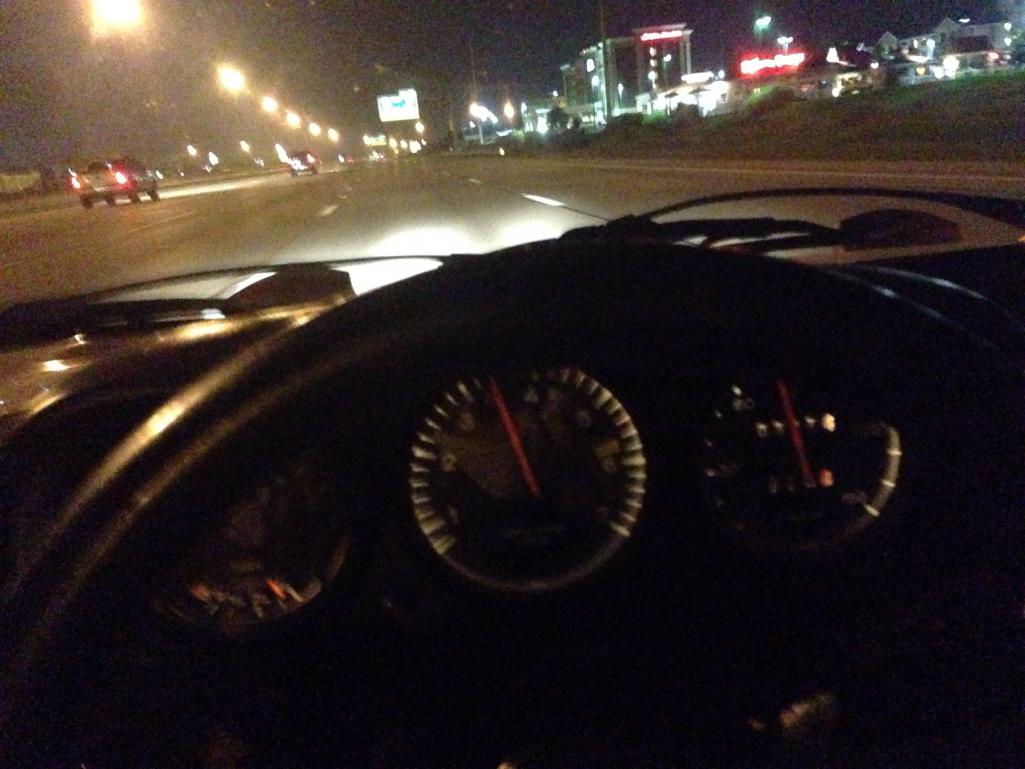
I'm getting excited...been a while since I've been behind the wheel!
Posted by: CptTripps Sep 10 2013, 10:32 PM
And...I'm back in the game!
Car arrived 2 days ahead of plan. That (for once) sucks, because I didn't have the garage cleaned out yet!
I'll dig in tomorrow and see what I'm dealing with. Overall, I'm pretty pleased. I know I'm getting a lot of flack for this, but the V8 isn't for me. I think the subie is where it's at. 20min of searching for gears and having the cabin heat up like a sweat-tent is enough reason for me.
Rotors came in today too. I hope I can have the breaks swapped out this weekend.
Attached thumbnail(s)
Posted by: McMark Sep 10 2013, 11:06 PM
Woohoo! 
Posted by: CptTripps Sep 11 2013, 10:59 AM
Got the calipers back from powder-coating. They look SICK!
Going to see if I can get the suspension and breaks swapped out tomorrow night. I think I should have everything I need.
Attached thumbnail(s)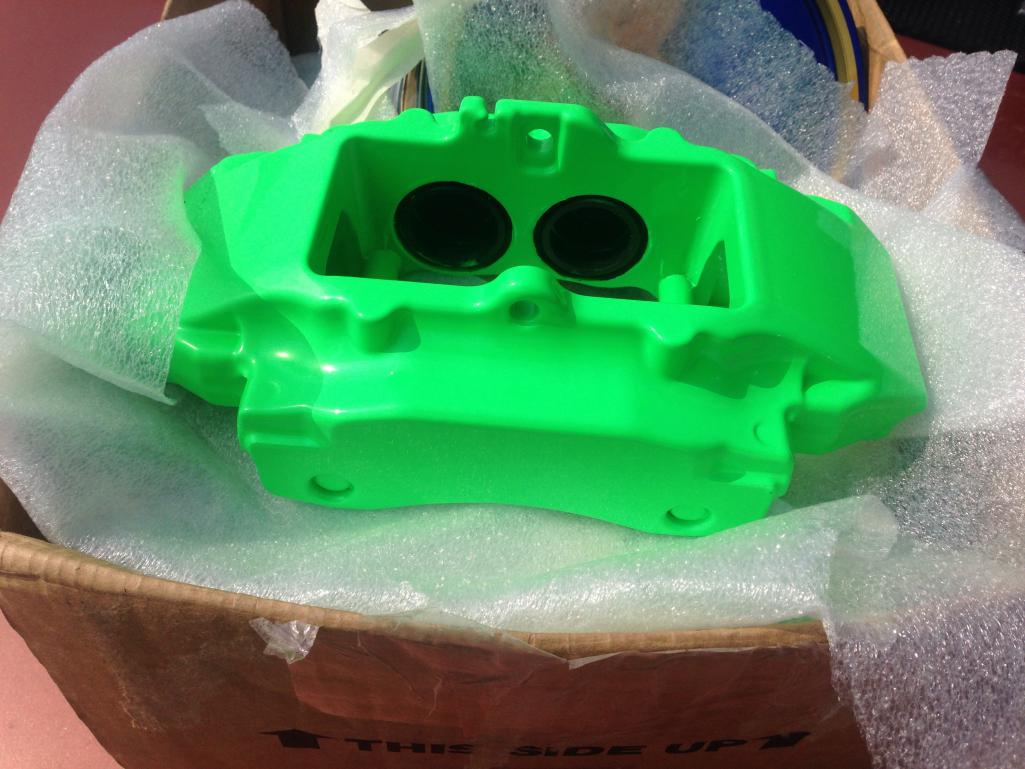
Posted by: rick 918-S Sep 11 2013, 12:03 PM

Posted by: green914 Sep 11 2013, 12:26 PM
Glad to see the car made it there safely Looks like you are having fun driving it  I thought it was a nice ride
  like the V8.
Posted by: CptTripps Sep 12 2013, 01:46 PM
Got the calipers sorted last night. Started rebuilding them, and realized I was missing one seal. Doh! Called the PC place and they have it. :whew:
Also realized I put the wrong adapters on the wrong calipers too. So that'll get fixed tonight.
Stencils just came in too! Got a guy on eBay to sell me 8 for $6.00.
Attached thumbnail(s)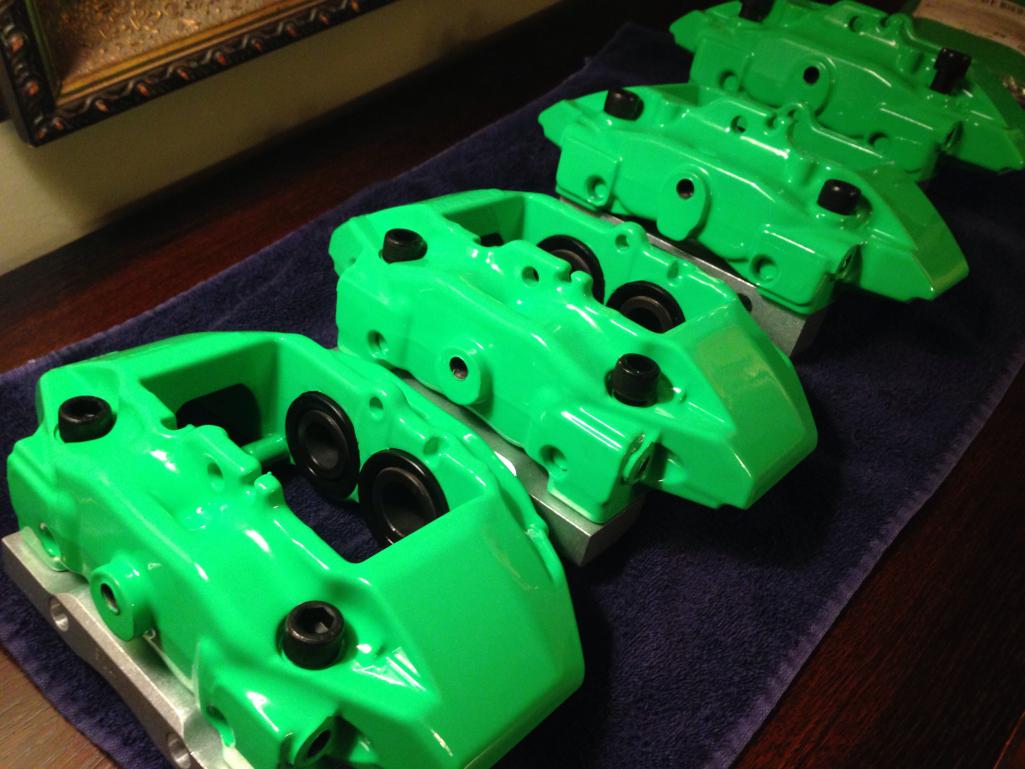
Posted by: CptTripps Sep 12 2013, 04:06 PM
A bunch of perforated metal showed up today.
Getting closer to build time!
Attached thumbnail(s)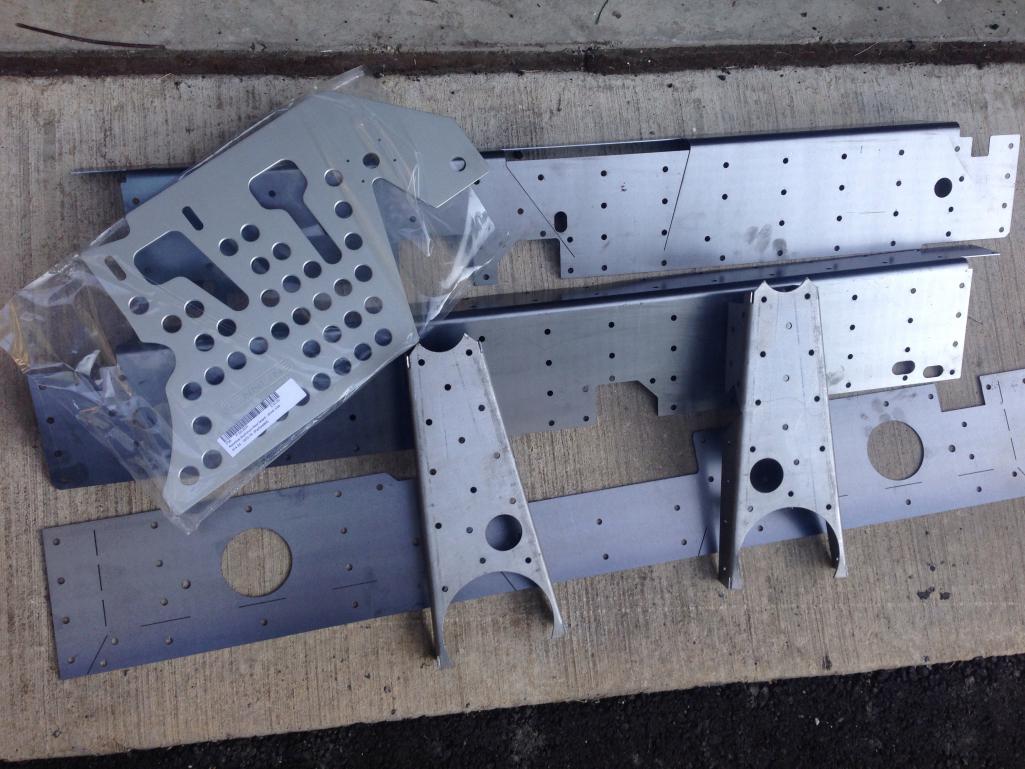
Posted by: Chris H. Sep 12 2013, 04:18 PM
Dude those calipers look like candy. Wow.
Posted by: CptTripps Sep 12 2013, 09:10 PM
Dude those calipers look like candy. Wow.
They look MORE like candy in person. I've got some cleanup to do around the edges though.
I've got to give props to Jason at Cleveland Powder Coating. I called today about the missing seal. He told me that he had it, but that someone threw it away by accident. Offered to discount my next order by $40 to cover the cost of a new seal. That's pretty awesome.
Posted by: CptTripps Sep 14 2013, 04:26 PM
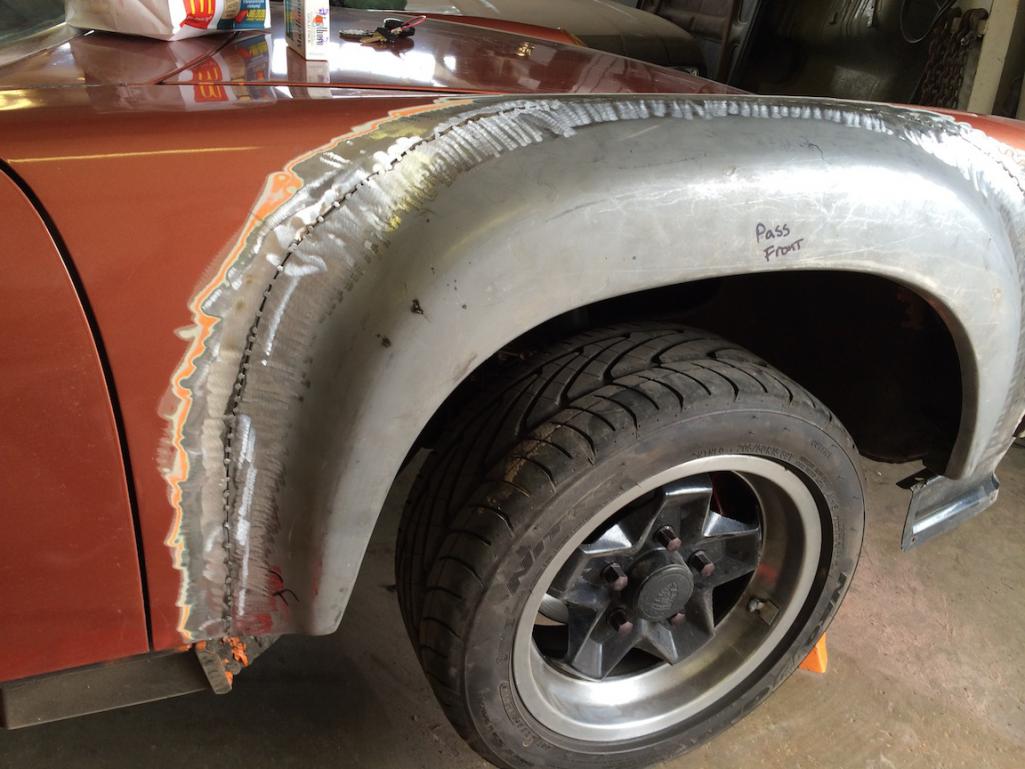
Started working on the flares today. Marked everything out before I take it to a friend's to weld them up.
Took the rockers off and the car lost about 11lb. Holy crap.
Oh...and I added a horn. Discovered I didn't have one and about bit it earlier!
Attached image(s)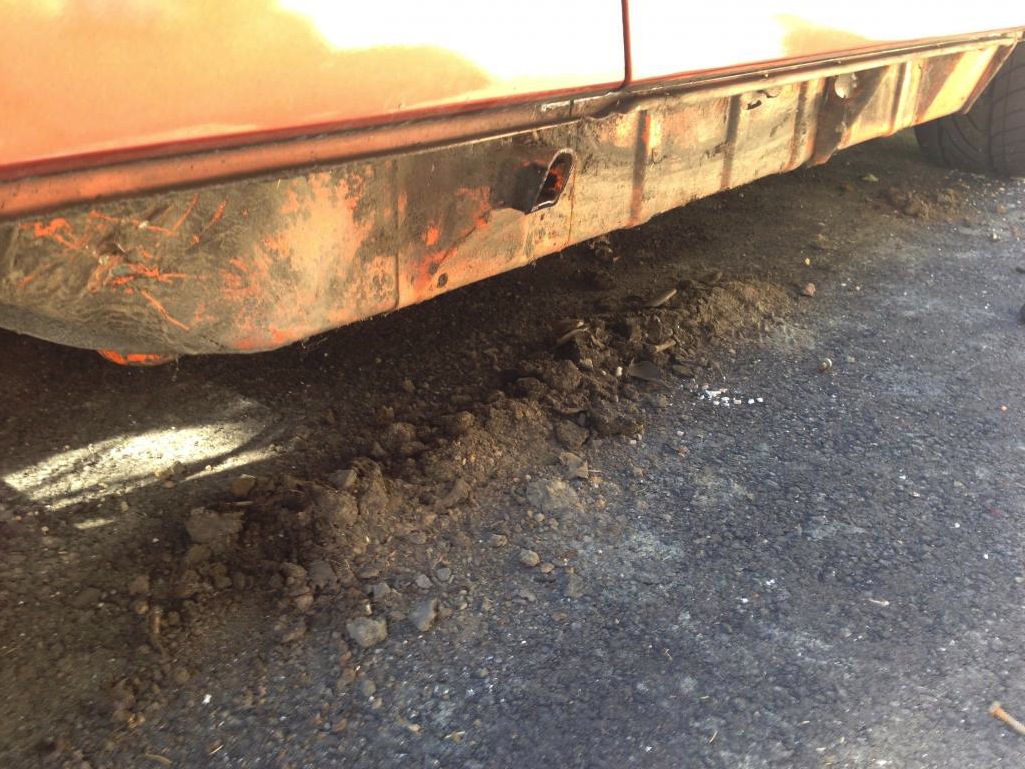
Posted by: CptTripps Sep 19 2013, 08:15 AM
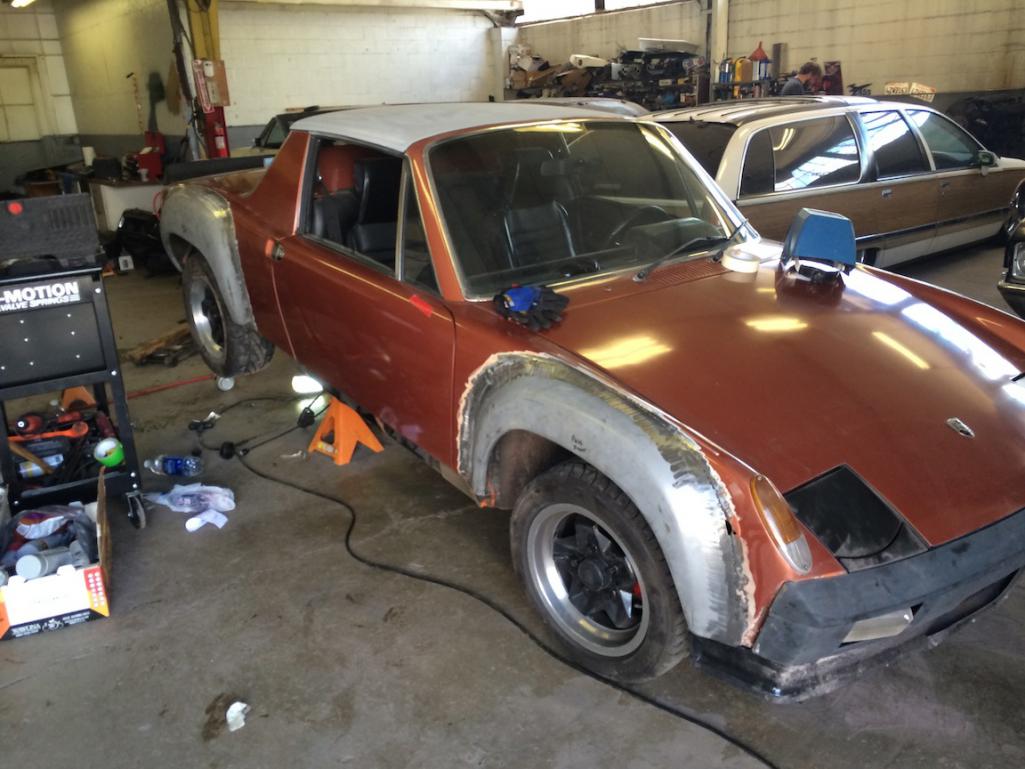
Flares are on...time for some banging and bondo this weekend!
Attached image(s)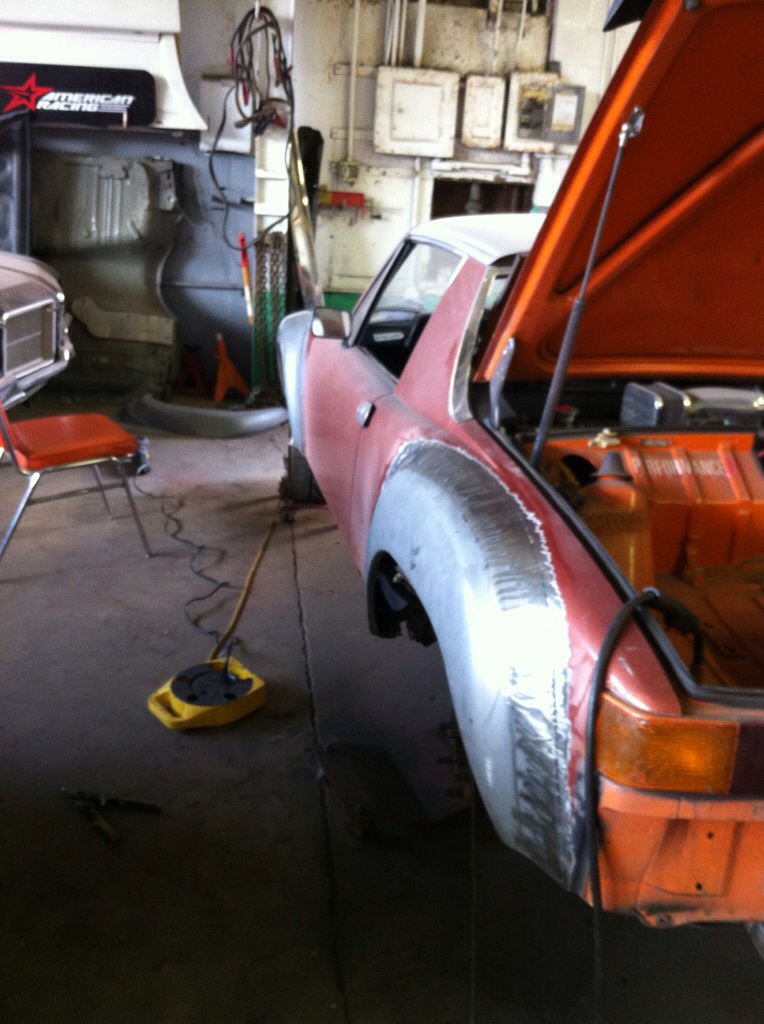
Posted by: Chris H. Sep 19 2013, 10:16 AM
Wow that looks great. Did you do those yourself?
Posted by: bulitt Sep 19 2013, 10:47 AM
Flares on 8 days after taking possession. You guys must be drinking water from the cuyahoga. 
Posted by: BIGKAT_83 Sep 19 2013, 10:59 AM
Great job....At this rate you should be able to make it to Okteenerfest next month.

Bob
Posted by: CptTripps Sep 20 2013, 03:34 AM
If I hadn't JUST driven from ATL to Cleveland 2 weeks ago...I'd happily drive down for Okteenerfest. The car will certainly be on the road.
I was planning on doing the brakes this weekend, but I got screwed by someone that sold me a set of struts...that never arrived. (Nor has the refund.)
I'll be concentrating on bodywork for a bit. Just wanting to get it to primer. I'll have all winter to make the bodywork perfect.
Posted by: CptTripps Sep 20 2013, 06:59 AM
Flares on 8 days after taking possession. You guys must be drinking water from the cuyahoga.
That's how we roll here in the 216!
I tend to get into a build quickly, and push through a lot of the stuff until I find the right answer. Helps me clear my head. I like progress...and don't like leaving something half-done for very long.
Going over to the shop where we did the flares in a little bit so I can replace the U-Joint bushings in the shift linkage so I can drive it home. I replaced them last week with rubber grommits from a skateboard truck...just to get my by.
Posted by: strawman Sep 21 2013, 10:44 PM
As someone who has done the trailing arm reinforcements you have pictured above, I'd like to suggest you scrap that idea -- it makes 'em uber-heavy. Eric Shea's notion of welding in tubes laterally makes a lot more sense (I shamelessly copied his idea!). Not sure he's still providing that service, but it is much lighter; I ended up practically giving away the "clam-shelled" trailing arms.
Good luck with your project; you're making way better progress than I. I am almost five years into my turbo'd Suby project and keep getting sidetracked with other projects...
Posted by: r_towle Sep 21 2013, 11:03 PM
If you can break a pinion gear clean off the shaft, you may want to think hard about going to a Subaru and look for a transmission that can handle that motor...
I like pinion gear breaking off.....cool power
Posted by: CptTripps Sep 22 2013, 06:31 AM
Interesting call on the trailing arms. Hadn't thought of it like that...but I guess it would make sense.
I'll be doing the Subie Trans as well. Already bought the EJ20 and MT5 out of a wrecked 07 WRX.
Today's delima: Should I weld all these gaps, or use AllMetal to fill them?
Attached thumbnail(s)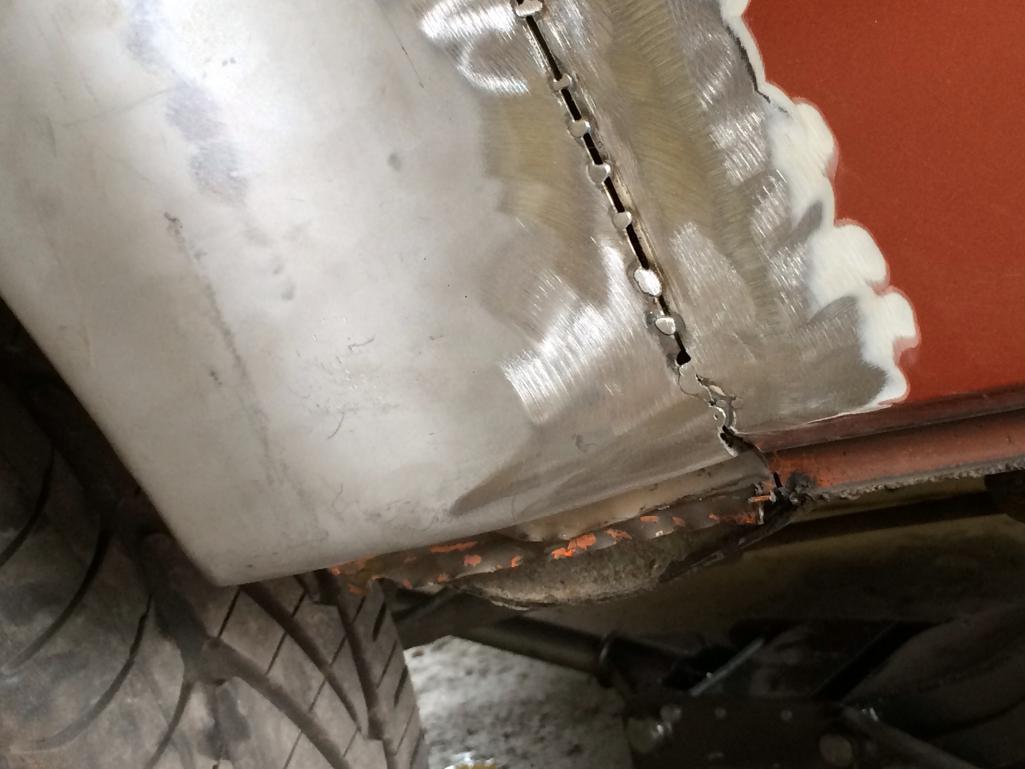
Posted by: jimkelly Sep 22 2013, 06:48 AM
I think the consensus will be to fully spot the entire perimeter.
is this the width gap most have to deal with when installing steel flares???
are you backing this gap with copper plate when you MIG it?
nice work 
grey black is nice, not sure I am fully sold on it, not sure I am sold on satin finish in general, this grey red combo is somewhat appealing too?
Posted by: McMark Sep 22 2013, 07:12 AM
 Weld it all.
Posted by: CptTripps Sep 22 2013, 07:13 AM
Most of the gaps between welds are under 1/2", so it would just be another pass to get it solid. I need to hit it with primer pretty quick before it starts to rain. (I really need to get the garage cleaned out!)
I'm moving towards snow-white, or dark grey. I can wrap a satin vinyl later if I want. The look if this 918 is pretty cool. I could do a white/green GT3 type theme like you have pictured.
Either way, I already have the calipers for it.
Attached image(s)
Posted by: CptTripps Sep 22 2013, 04:25 PM
Worked on welding up the gaps today. My welder took a shit after about an hour, so I'll need to get it fixed before I can weld anything else.
Also discovered that I can't use the 1" wheel spacers, because the bolts hit the inside of the rim. Someone suggested 110mm builds from the hub, and I may just do that. Seems easier.
Making progress though.
Attached thumbnail(s)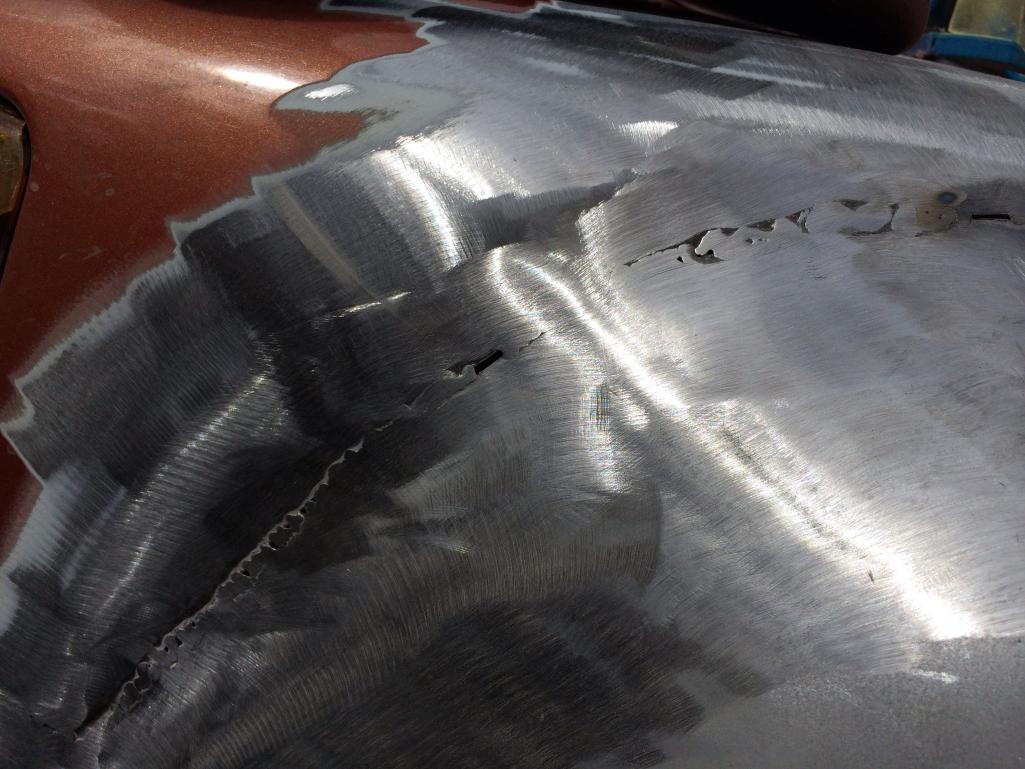
Posted by: jimkelly Sep 22 2013, 04:34 PM
what wire are you using?
.025 easy grind?
gloss silver/grey and black, can't go wrong with that.
jim
Posted by: CptTripps Sep 22 2013, 07:20 PM
I was using .23-eg, but honestly, I found .30 easier to weld with. (It's all about the settings.)
I'm really not that pleased with the job I'm doing. I think it has something to do with the motor going kaput on me. It was skipping which really messed me up a few times. I'm going to go over the whole thing and grind it all down to smooth. I won't sleep well until I know it's right.
The more I look at it, the more I like "Sport Classic Gray" as a paint choice...kinda like this.
Attached thumbnail(s)
Posted by: Cairo94507 Sep 22 2013, 09:01 PM
Terrific work and I love that sport classic grey.
Posted by: jimkelly Sep 23 2013, 05:35 AM
here is what 2 panels of grey gloss rustoleum look like on my car.
I am using it to protect from flash rust temporarily and I wanted to see what grey looked like on my car and it is somewhat close to sport classic grey.
Attached image(s)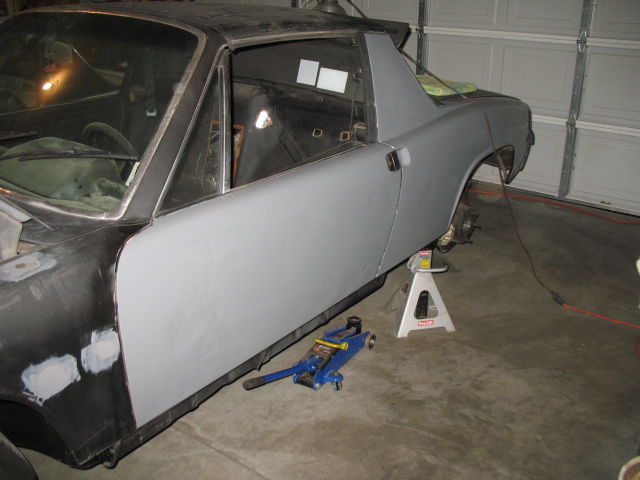
Posted by: bulitt Sep 23 2013, 06:08 AM
I'm really not that pleased with the job I'm doing. I think it has something to do with the motor going kaput on me. It was skipping which really messed me up a few times. I'm going to go over the whole thing and grind it all down to smooth. I won't sleep well until I know it's right.
If you are using an extension cord make sure it is sufficient for the welder. An undersize cord will cause the intermittent wire feed you mentioned. Did you also check your wire feed roller tension?
Posted by: CptTripps Sep 23 2013, 06:35 AM
If you are using an extension cord make sure it is sufficient for the welder. An undersize cord will cause the intermittent wire feed you mentioned. Did you also check your wire feed roller tension?
Yup...checked both. The feed motor isn't spinning at all. I'm plugged directly into the wall. (Same plug it's been connected to for almost 10 years.) I think it's just time to get the welder serviced. I bought it used from a welding repair shop, so it's entirely possible it just needs something else. Like...a fuse? (Just found the manual...need to check this when I get home!)
The weather is getting colder...and my driving days are numbered, so I think it's time to concentrate on getting the garage cleaned out so I can get this project started in earnest. I've had my fun driving it this year, and am really starting to get the bug to get busy!
The Subaru motor is getting pulled this week, and I should have everything at the house soon enough. I'm reading like a madman right now to get all the info I need so I can start building without having to stop too much.
Something else I did this time around that should make things easier: I put an old laptop in the garage so I can look up info without having to go back in the house. All I need is a web-browser, so an old MacBook ought to do the trick. I'm sure it'll look like hell in a few months...like a proper "shop computer" should.
Attached image(s)
Posted by: CptTripps Sep 23 2013, 06:37 AM
As someone who has done the trailing arm reinforcements you have pictured above, I'd like to suggest you scrap that idea -- it makes 'em uber-heavy.
Quick question on this: The reinforcements only weigh about 2-lb each. Does it really add that much weight? IIRC, those are about 15-18lb to begin with. Does another 2-ish change things that much?
Posted by: badmiata Sep 23 2013, 07:27 AM
Really love your progress!!!
Posted by: rick 918-S Sep 23 2013, 08:29 AM
As someone who has done the trailing arm reinforcements you have pictured above, I'd like to suggest you scrap that idea -- it makes 'em uber-heavy.
Quick question on this: The reinforcements only weigh about 2-lb each. Does it really add that much weight? IIRC, those are about 15-18lb to begin with. Does another 2-ish change things that much?
It's all un-sprung weight. The worst kind to add.
Posted by: CptTripps Sep 23 2013, 08:39 AM
It's all un-sprung weight. The worst kind to add.
Gotcha. I guess that makes sense.
Thanks...although it doesn't seem like I'm getting anywhere just yet. Gotta get him on jack-stands so I can really start cranking.
I feel like if I took a week off work and just powered through, I could get a lot further. But then I think "If I finish too early, I'll just be pissed that the car is done, and I can't drive it in the snow."
Posted by: jaxdream Sep 23 2013, 08:46 AM
This is what I done to my trailing arms , real easy to do with 1 inch tube, a little fat on the welds , but sound.
Jack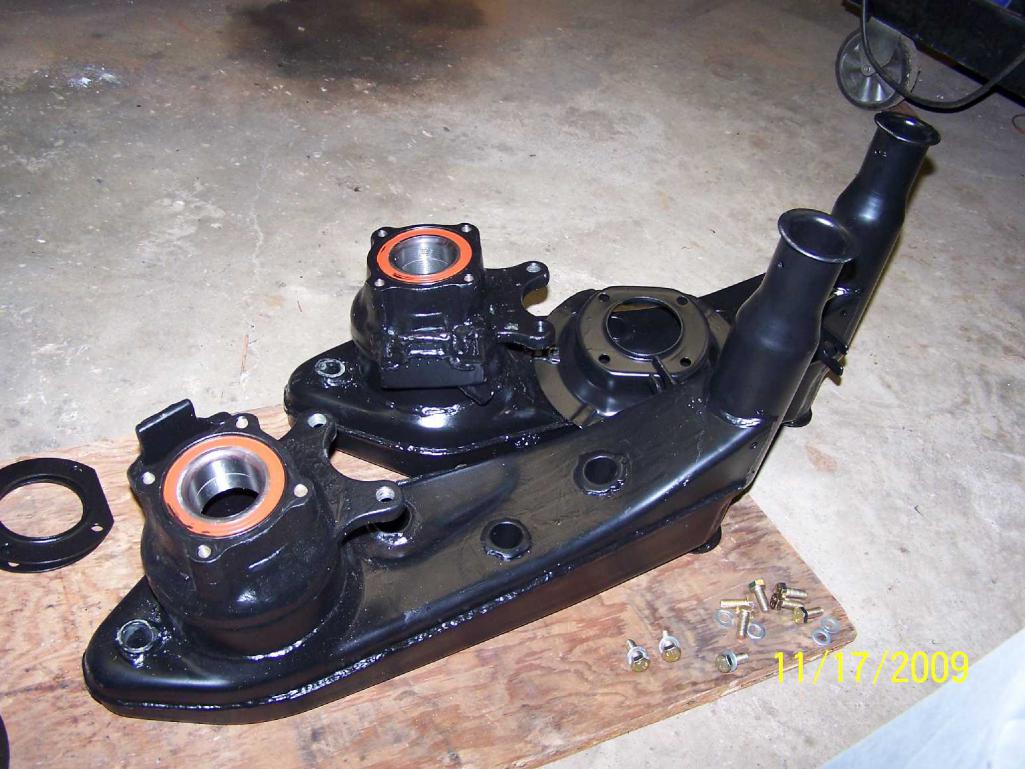
Posted by: CptTripps Sep 23 2013, 08:53 AM
This is what I done to my trailing arms , real easy to do with 1 inch tube, a little fat on the welds , but sound.
So the idea is to cut 4-5 holes...put 1" pipe through them...then weld, and cut off the extra length? I could see adding 3 to each one, at 10-deg angles (for drainage and increased stability) but I'm not sure the weight would be that much different than the boxes. Perhaps I'm wrong.
Luckily: Trailing arms aren't all that expensive and I'll bet I could play with this concept and see how it works out.
Great idea...Thanks!
Update: Here's the thread I found. http://www.914world.com/bbs2/index.php?showtopic=205604
Posted by: jaxdream Sep 23 2013, 09:07 AM
No . set them up under a small drill press , used a 1 inch hole saw , cut in two spots towards the pivot mount. The hole close to the bearing area is the factory hole for the caliper adjustment. two new holes only , tube goes from outside to inside all the way through. Look at the pic a little closer , you'll see what I have done . Racer Chris did a study of reenforcing trailing arms a while back skipping the clamshell setup . His were a lot more refined than mine , but mine are functional as is , and like I said easy to do.
Jack
Posted by: CptTripps Sep 23 2013, 09:38 AM
Got it...only need two.
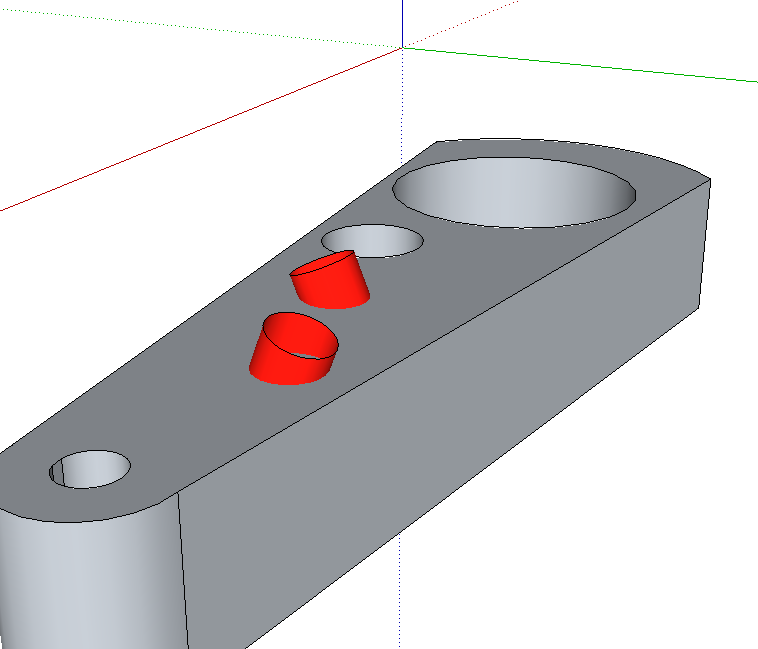
Here' what I came up with real quick. Do you think this would provide anything additional, or is it a waste of engineering effort?
If I take each of the two and put them at opposing angles, this may be a way to add some additional stability. (Maybe...I'm no engineer.)
I put this illustration together real quick to try and show what I 'm talking about. The red tubes are new. (and it's not exactly to scale, but you get the idea.)
Attached thumbnail(s)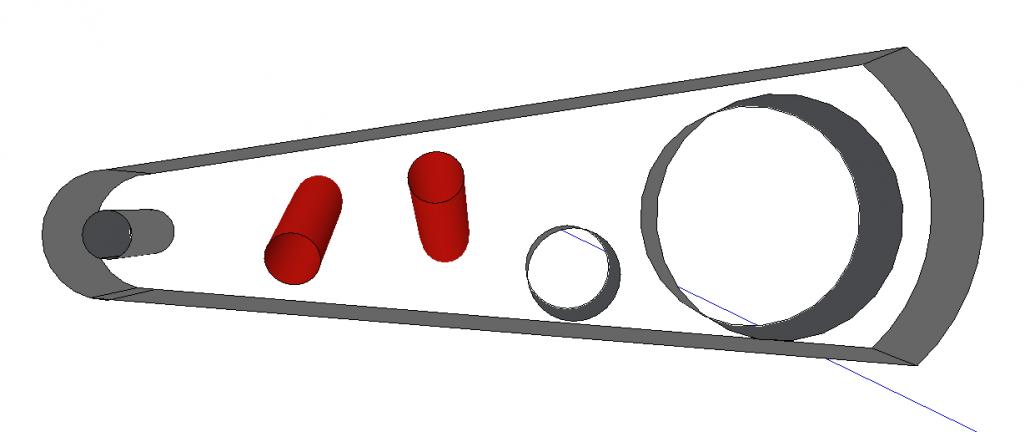
Attached image(s)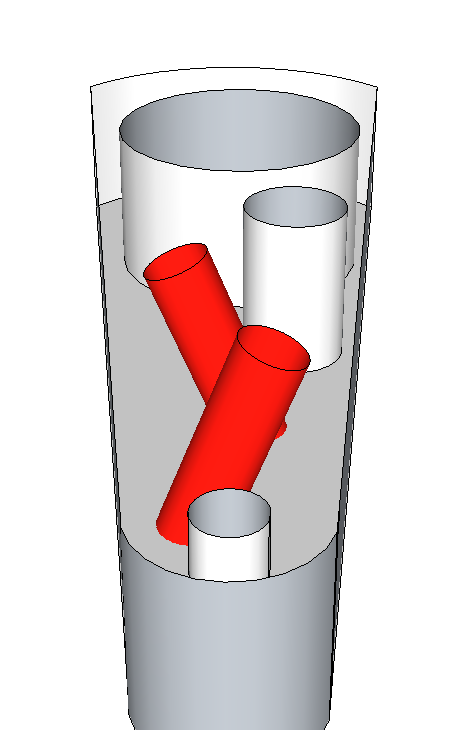
Posted by: jaxdream Sep 23 2013, 09:56 AM
That looks great , if you have the ability to get the different angles , they should be a good way to address the flexing forces . I see that you are upping the horsepower , this should help in getting it to the ground. Racer Chris used some great ideas about strengthening the arms , search for his threads. If I recall ( yeah right ) he cut the arms in half , installed some plates inside at differing angles , welded them back together. It was a way of strengthening with out showing on the outside , something to do with the rules of a racing class. I'd say go for it , won't add as much weight as the clamshells.
Jack
Posted by: CptTripps Sep 23 2013, 10:00 AM
I was thinking about making 2 holes at each side, at different points, than putting the pipe through at the angles. Welding up the outside, then grinding them down smooth.
I'm definitely NOT racing this car, so it's just for the street.
Posted by: jaxdream Sep 23 2013, 10:11 AM
No racing for me either . I just had in mind ( where ever it went ) to do some mods that I thought would be more bang for the buck , this was just so easy while I had the arms off to do a 5 lug with 928 / 944 ebrake conversion . Heck when I do get it back together , I'll be inserting a 1.7 that I salvaged from another 914, talk about wheel spinners!!!!
Jack
Posted by: CptTripps Sep 23 2013, 10:55 AM
I've got a shit-ton of 1" and 1.5" gas pipe. I wonder if I can/should use that?
Posted by: CptTripps Sep 23 2013, 11:28 AM
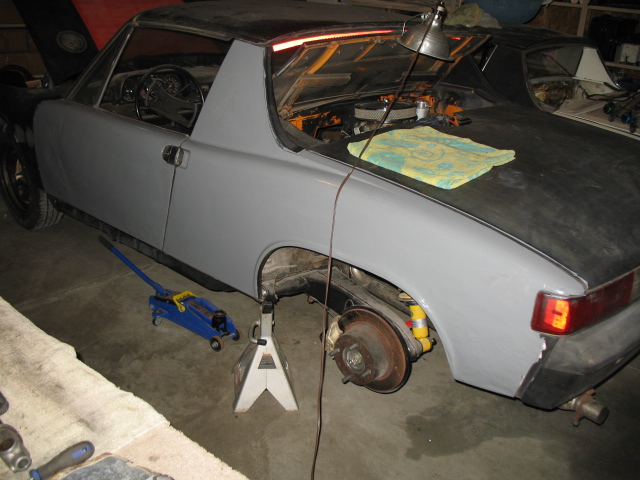
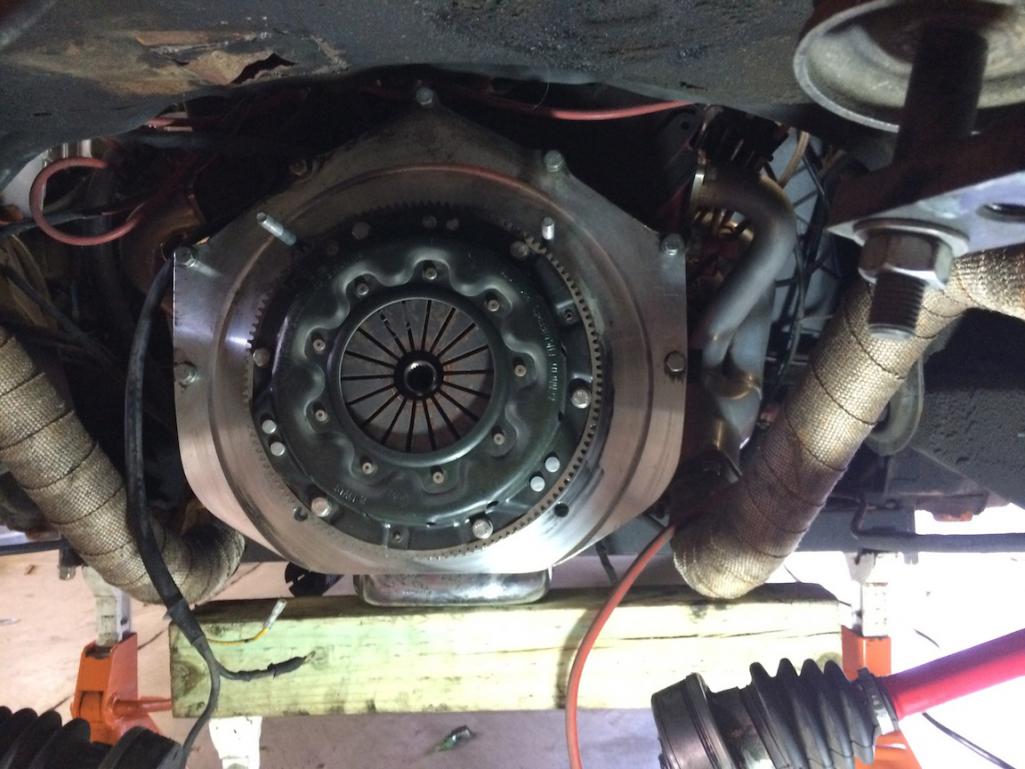
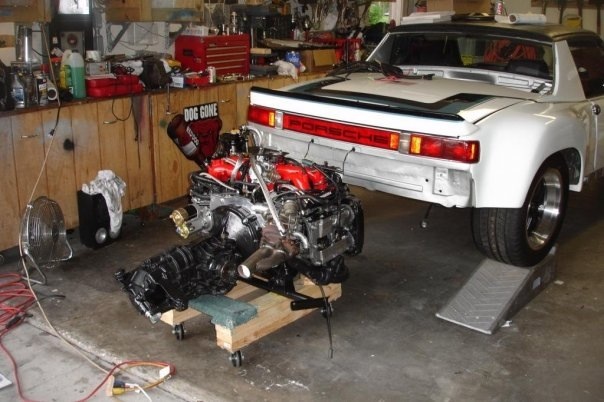
Couple more pics of the flares, and this weekend's trans swap.
Attached thumbnail(s)
Posted by: pete Sep 23 2013, 02:34 PM
Just the regular PlastiDip Spray you buy from Home Depoti have the Glossifier spray too, and I'll put a coat of that on tomorrow.
My caps came in today...so I sprayed one to see what it looks like.
Do these Plastidiped wheels look as good in person as they do in the pic? Did you do them with a rattle can? What color is that?
Posted by: pete Sep 23 2013, 02:36 PM
Couple more pics of the flares, and this weekend's trans swap.
What are you going to be doing with the pipes and the rear trans mounts? I'm working on a SBC350 conversion and will be needing soon.
Posted by: CptTripps Sep 23 2013, 05:38 PM
What are you going to be doing with the pipes and the rear trans mounts? I'm working on a SBC350 conversion and will be needing soon.
I'll have the adapter plate and headers for sale shortly. Actually, I'm driving to NJ in 2 weeks, and may be able to bring them out there if we can put a deal together.
Posted by: CptTripps Sep 24 2013, 07:19 AM
Funny...I make one post, and get 10 PMs about selling off my old parts. Looks like I have myself a cradle and trans hangers, so I may be breaking everything down sooner than I originally expected!
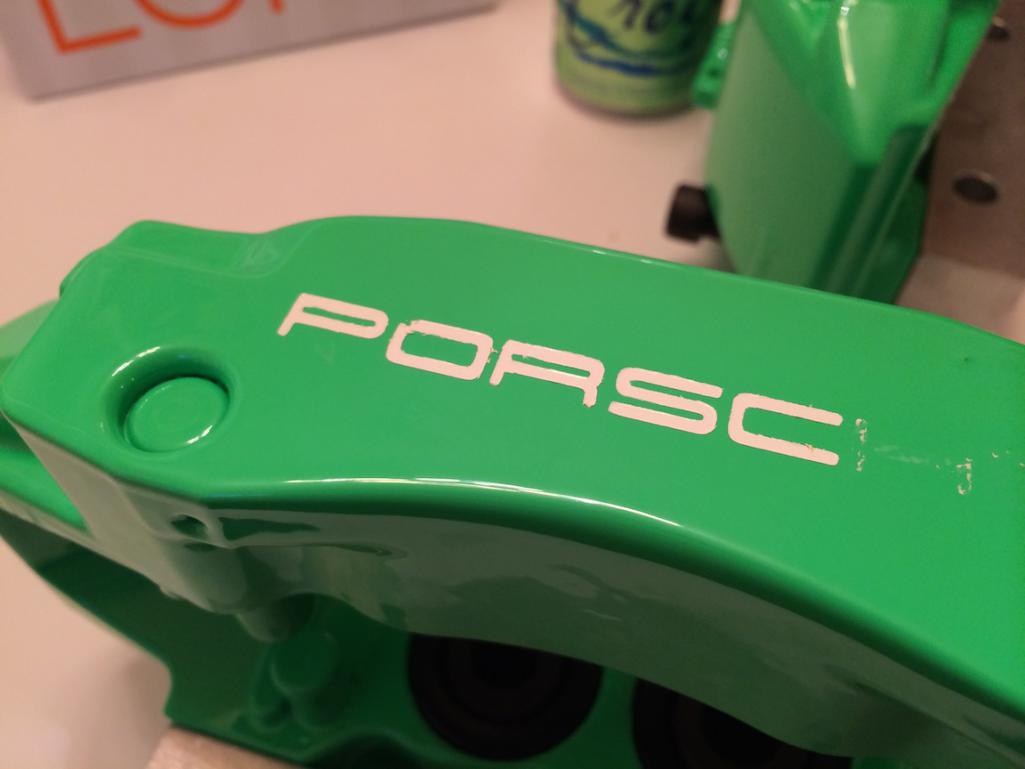
Started working on the brakes last night. LOTS of powder to clean up. Tried adding the "Porsche" to the calipers, but I think I need to rough up the surface first. After it dried, I pulled the vinyl off and half the paint came with it. I think I put it on too thick.
O-Well...glad I have more templates!
Attached thumbnail(s)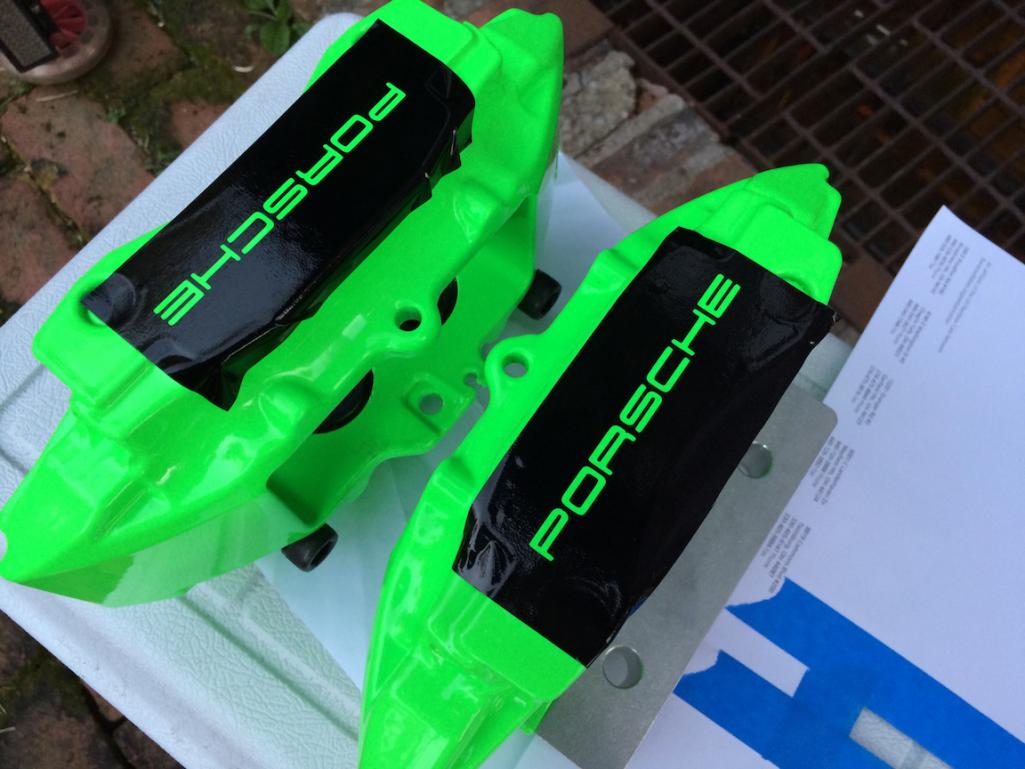
Posted by: CptTripps Sep 25 2013, 07:34 AM
Looks like I've got just about everything I need to start breaking him down and getting this started.
Got Boxster seats, and I don't think I like them very much. I got a great deal on them, so I'm just going to flip them on Craigslist.
Found a Subaru cradle and Trans hangers...
Ordered the spline couplers from Australia...
Bought a set of adapter flanges...
Driving to Summit Racing to pick up my pedal cluster and master/ slave cylinders...
Got an MR2 shifter and ordered new cables...
...and the engine/ECU should be all ready for mech pick up later this week.
What am I missing?
Posted by: 76-914 Sep 25 2013, 08:13 AM
Funny...I make one post, and get 10 PMs about selling off my old parts. Looks like I have myself a cradle and trans hangers, so I may be breaking everything down sooner than I originally expected!
Started working on the brakes last night. LOTS of powder to clean up. Tried adding the "Porsche" to the calipers, but I think I need to rough up the surface first. After it dried, I pulled the vinyl off and half the paint came with it. I think I put it on too thick.
O-Well...glad I have more templates!
Those look really nice Doug. You might get flamed by Erc for painting them, though.

Posted by: CptTripps Sep 25 2013, 09:01 AM
The calipers were powder-coated...the "PORSCHE" is the only thing I'm painting.
...unless he has an aversion to colored calipers in general. At that point, I'll just call him a racist!
Posted by: 914forme Sep 25 2013, 06:24 PM
Keep it up, Subaru Gears is pretty fast at shipping their stuff over seas. My little mail fairy dropped these off today. Ordered them Friday or Saturday, I can't remember. Man thats smaller than I thought it would be.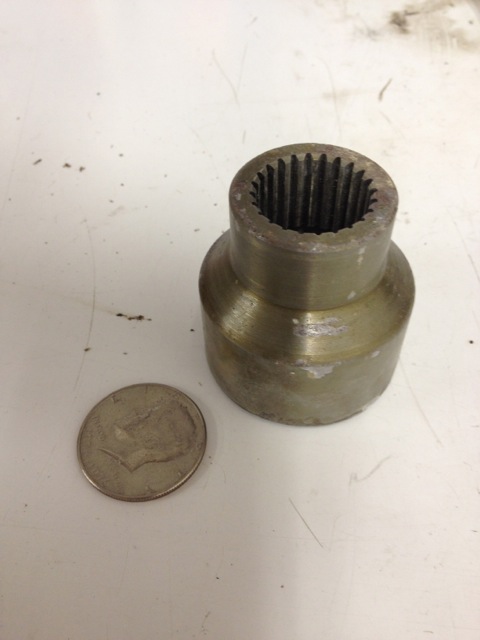
And this.
Way to keep plugging away what are you using from Summit for the pedal cluster?
Posted by: CptTripps Sep 25 2013, 07:55 PM
Holy Shit! I thought that thing would be the size of my fist! I guess size doesn't matter after all. :::rushing to tell wife the good news:::
Seriously though. That's awesome that it got te the US so fast.
Posted by: CptTripps Sep 27 2013, 08:54 PM
Now we're talkin'
Got my flanges tonight. I should be able to use the Renegade axels I have now.
One step closer!
Attached thumbnail(s)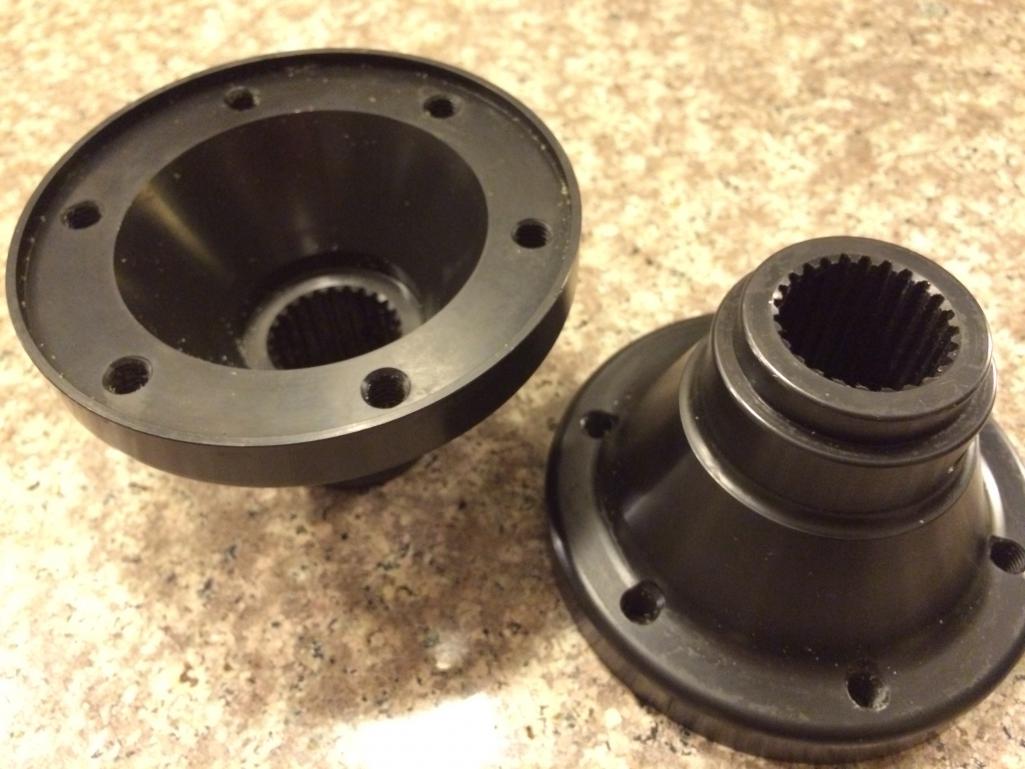
Posted by: CptTripps Sep 30 2013, 09:13 AM
Not exactly progress on the car, but I spent 10hrs yesterday getting the garage ready.
Lots of stuff in Craigslist right now...hopefully the stuff on the right-side sells so I have more room to work.
Attached thumbnail(s)
Posted by: jimkelly Oct 7 2013, 07:51 PM
hard to tell exactly what color this car is, but seems a version of grey.
Posted by: CptTripps Oct 11 2013, 12:01 PM
I've been out of town for the last week or so in NYC and Las Vegas. Got home today, and plan on spending this weekend working on clearing the rest of the garage out so I can get her up on jack stands and start stripping the tub.
I settled on my paint color last week. I was originally going to do the Porsche Sport Classic Gray but ended up going a little darker than that. I didn't want it to be confused with Primer at all...and think this look will be right in line with what I'm going for.
So...I went to Sherwin Williams and bought the whole shooting match. Etching primer, 2K primer, and the basecoat (94937). The shop that I'll have the last coat, along with the clear done at is a SW shop, and SW is a client of my company, so I got a pretty good deal on everything.
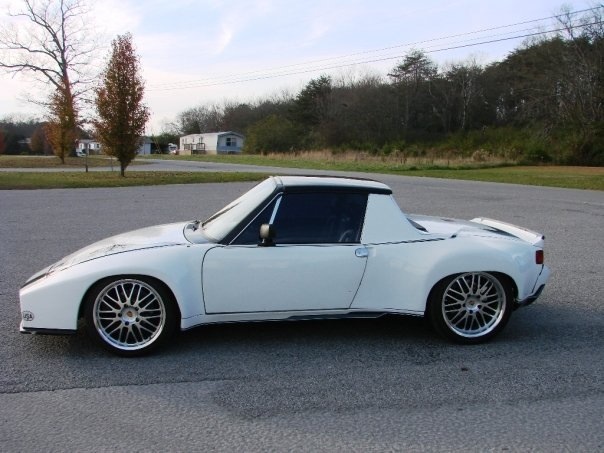
Here's what the car SHOULD look like when I'm done. At least that's what I'm shooting for.
Attached thumbnail(s)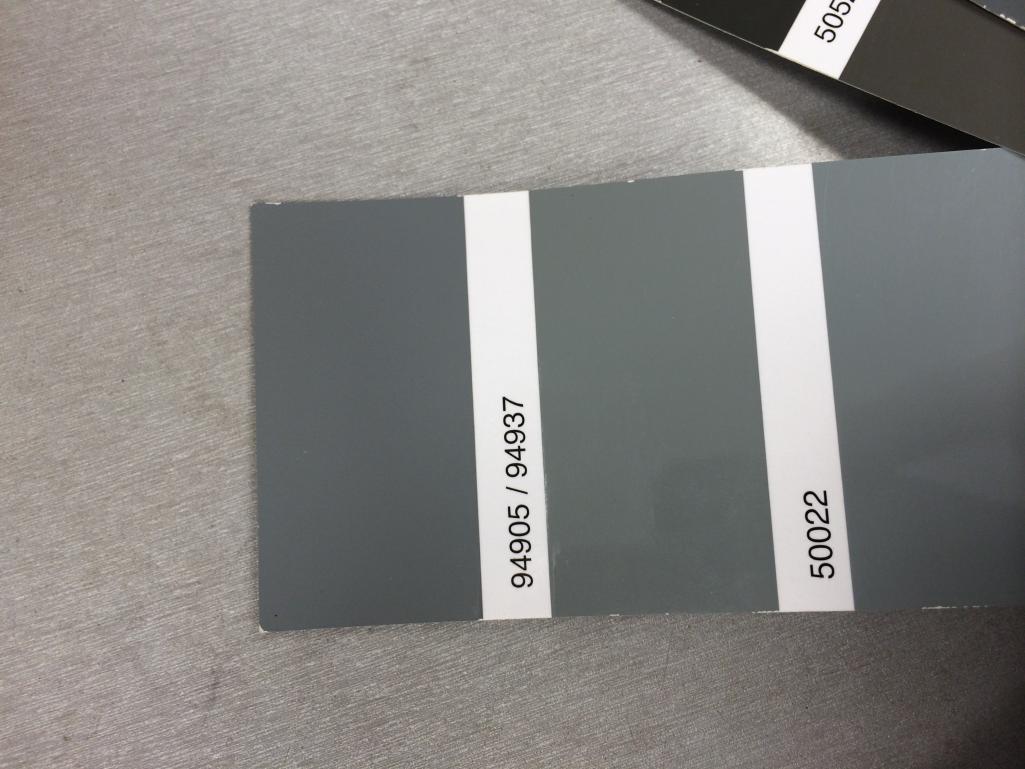
Attached image(s)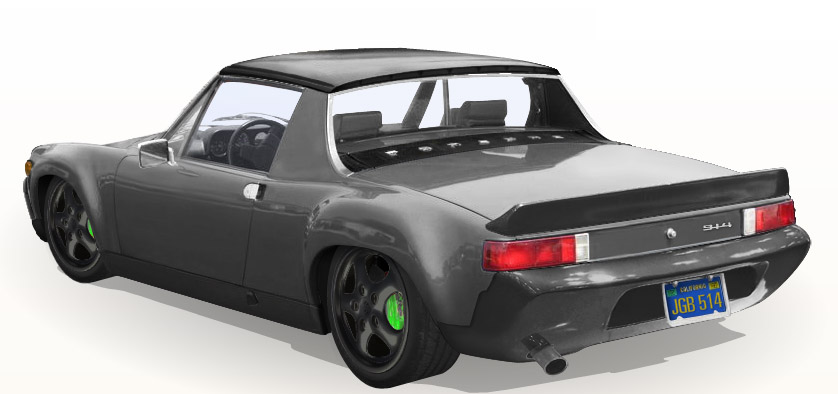
Posted by: green914 Oct 11 2013, 12:31 PM
Looks like you are making great progress, it's going to look great.
Posted by: McMark Oct 12 2013, 11:49 PM
Digital progress. Get out the the garage slacker. 
Posted by: CptTripps Oct 14 2013, 12:53 PM
Alright Mark...I'm in the garage!
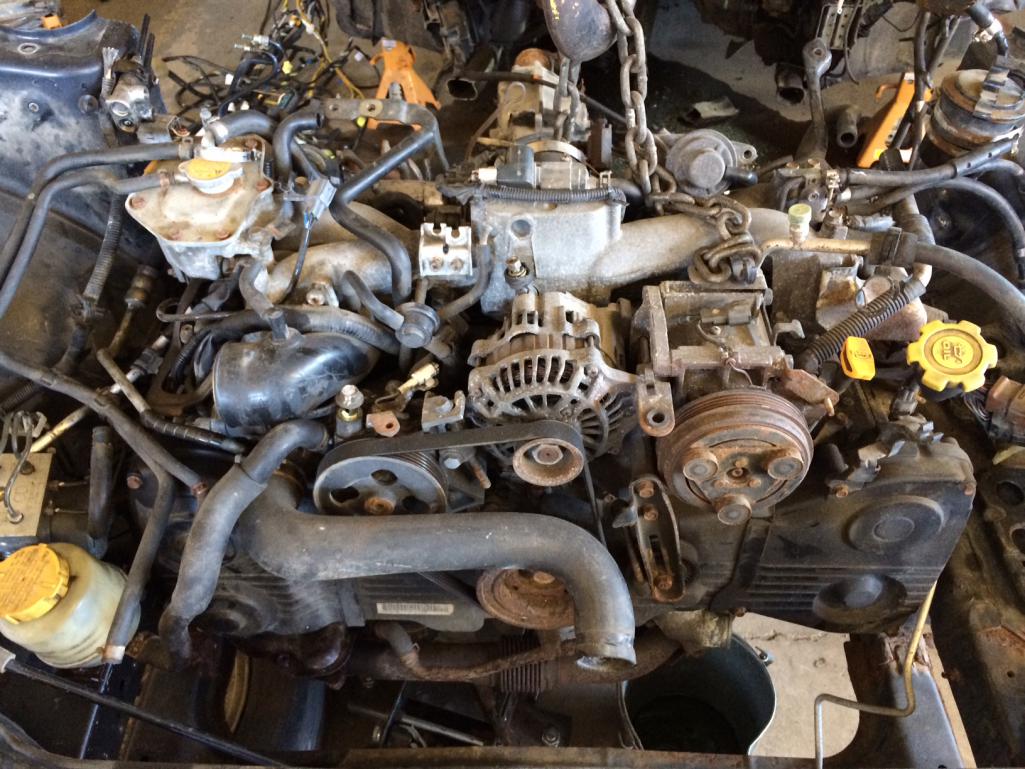
Got to the "Donor WRX" today to start pulling stuff. I have NO idea how much of the wiring harness I'll need, so I just grabbed all of it. Every inch of wire from the entire car. I'm sure it's overkill, but I'd rather have more than not enough.
Ian told me last week "do yourself a favor and just send the wiring harness off to Small Car Performance" and I think I'm A-OK with that, after seeing the magnitude of what is needed for the wiring. There's 60LB of stuff here, and I'll bet I get 10lb back.
Also have most of the engine out of it. We just sawzalled the front clip so we could get a little deeper into it without restriction. I should have everything off in a week or so as I get closer to pulling the V8 out of my 914.
I'm toying with the idea of having someone else re-build the motor. Just to be on the safe side. I'd rather KNOW I'm starting with something that's solid. Besides, now is the time...right? I can also put some upgrades inside and add a few HPs in the meantime.
So...that's a little progress. Right?
Attached thumbnail(s)
Posted by: jimkelly Oct 14 2013, 01:49 PM
i'm liking your final color choice - glossy dark grey.
I read that small car performance has a DYI wiring kit for around $200 but not sure what it includes.
this guy may be a good source for a wiring redo too?
I reached out to this guy - jeff - and here is his reply.
Yep I do harnesses for people. No website just an ad on thesamba.com
http://www.thesamba.com/vw/classifieds/detail.php?id=1434254
I charge $550 to modify and run on the test stand. I do have a few harnesses and ecm's. I charge $800 for it if I supply.
Thanks. Jeff
https://www.youtube.com/watch?v=F2TMiC6UVsY
https://www.youtube.com/watch?v=3WLY387meks
Posted by: CptTripps Oct 14 2013, 04:17 PM
Decided to skip the Boxster seats, and took the seats I had in my basement to an upholstery shop today.
Going with a dark gray leather outer, and suede centers. Should take them 6-8 weeks so that's fine by me.
Attached thumbnail(s)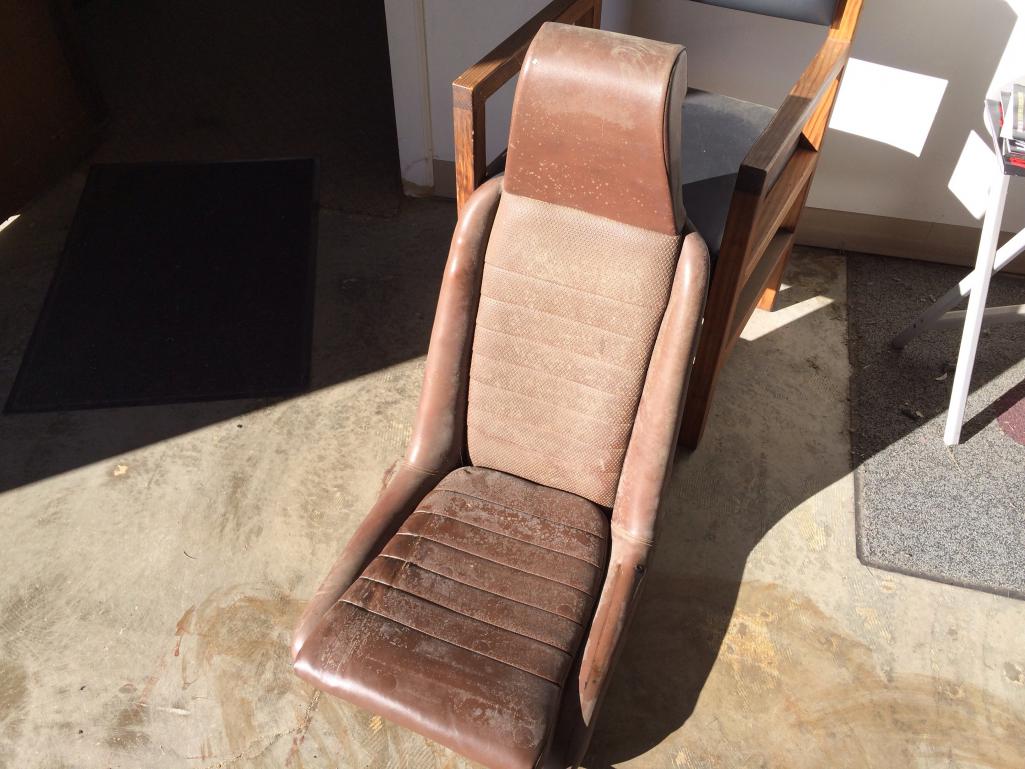
Posted by: CptTripps Oct 14 2013, 04:18 PM
I knew I was in the right place when I walked in and they we're doing the interior on a Morgan. :-)
Attached thumbnail(s)
Posted by: bulitt Oct 14 2013, 07:35 PM
What are they charging you for the seats????
Posted by: CptTripps Oct 14 2013, 07:52 PM
What are they charging you for the seats????
They're quoting them for me first...no clue! (Yet.)
Posted by: JRust Oct 14 2013, 08:18 PM
I've got a nice complete grey leather interior 
Been holding off selling it but times are changing 
Posted by: jimkelly Oct 14 2013, 08:29 PM
since I now know that they have not started yet reupholstering your seats, I will comment.
I am not sure how easy it will be getting in and out of car with suede on seats??
I think I would stick with all leather, though I understand the keep-butt-planted benefit of suede 
looking forward to your review.
jim
Posted by: Chris H. Oct 14 2013, 09:30 PM
Yeah you got into the "hard labor" stuff this weekend didn't you? I was sore for days. Good job!
You did the right thing by nabbing the whole wiring harness. Read the fine print and you'll see Small Car will not take one if it's been cut. Found that out a week too late . Its cool that the engine and trans are from the same car. Total compatibility. Don't want to deter you from modding that engine but it's highly unlikely that it needs a rebuild. How many miles again? It'll look much cleaner and less cluttered when you take the power steering pump and pulley off and some of those hoses and whatnot. I think you can remove the EGR stuff as well (I did). You kept the ignition key and switch right? The key is chipped I think and the car won't start with the stock ECU without it.
The center diff is worth $250-$300 on NASIOC. It'll be gone in a day or two once you post it. Sold mine immediately for $250. Apparently they are the weak spot for 4WD.
Posted by: CptTripps Oct 15 2013, 03:30 AM
I've got a nice complete grey leather interior
Been holding off selling it but times are changing
PM me...I'm interested!
I am not sure how easy it will be getting in and out of car with suede on seats??
I think I would stick with all leather, though I understand the keep-butt-planted benefit of suede
I think just having the centers as suede would be the best of both worlds. Keeping me planted, and letting me get in/out.
Yeah you got into the "hard labor" stuff this weekend didn't you? I was sore for days. Good job!
You did the right thing by nabbing the whole wiring harness. Read the fine print and you'll see Small Car will not take one if it's been cut. Found that out a week too late
. Its cool that the engine and trans are from the same car. Total compatibility. Don't want to deter you from modding that engine but it's highly unlikely that it needs a rebuild. How many miles again? It'll look much cleaner and less cluttered when you take the power steering pump and pulley off and some of those hoses and whatnot. I think you can remove the EGR stuff as well (I did). You kept the ignition key and switch right? The key is chipped I think and the car won't start with the stock ECU without it. The center diff is worth $250-$300 on NASIOC. It'll be gone in a day or two once you post it. Sold mine immediately for $250. Apparently they are the weak spot for 4WD.
Good tip on the diff! I'll do that for sure!
The engine has about 60K on it. Small Car can't do the harness because it's out of an 06 and is "drive by wire". He said they don't work on anything newer than 05. I think I may be on my own with this...
Interesting that I need to get the key to make it work. This may be getting more complicated than I was expecting!
I plan on taking all that stuff off the motor and having it soda-blasted so it's cleaned up before I even bring it back to the garage.
Posted by: Chris H. Oct 15 2013, 07:10 AM
Yeah I would grab the key and ignition switch (grab the whole steering column actually if you still have it). Pretty sure you need it. Kent mentioned it and his is an 01. Many folks are integrating the donor steering column into the 914. Mike Bellis' (kg6dxn) monster Audi turbo conversion is drive-by-wire and it turned out great. Don't let it scare you too much (said the guy with the 95 OBD1 car ). Take a look at his thread. There's also the option to use an aftermarket ECU, which gets you out of the harness cutting/have to use the Subie key game and allows you to tune the car with a laptop on the fly. Someone with more knowledge will post a link to the place (outfront motorsports maybe?) where you can find Link, Stinger, and other aftermarket ECUs. They are like $1500 but Smallcar would have charged you $800 to cut your harness. Then you can sell the stock stuff also, even though I know cost isn't really your concern as much this round.
I'm out running around today but good luck man!
Posted by: CptTripps Oct 15 2013, 11:02 AM
Hmmm....maybe I need to get over there and grab a few more things before I go too far.
Posted by: jimkelly Oct 15 2013, 11:06 AM
I think sometimes with cars with chips in their keys, ecu's need to be flashed/reset somehow?
Posted by: CptTripps Oct 15 2013, 12:41 PM
Ha. Forgot that I left the ECU at the shop too. Guess I'll need to run over and grab that too.
It'd be cool to have the ignition on the dash like the 911 and 914/6 if there was a way to do it. Hmm....
Posted by: CptTripps Oct 16 2013, 08:52 AM
70lbs of wiring harness has been in the corner...staring at me...mocking me. I say "Screw you wiring harness!"
http://www.outfrontmotorsports.com/ems_computers.htm + $1,400 = EMS Stinger and the wiring harness to 'plug and play' my way to less headache.
Anyone else been this route?
Now I'm off to put 70lb of copper on eBay with the ECU.
Posted by: badmiata Oct 16 2013, 09:28 AM
AEM’s Series 2 Programmable Engine Management System is another one. It looks to be a little bit more but is newer. Have you looked at what Cobb's acessport can do with the stock ecu? The whole idea of the key and transponder with the stock ecu really sucks. I was also tryng to imagain the key alla 914/6 in the dash. I guess you eliminate 914 key and wire it to subaru key?
Posted by: effutuo101 Oct 16 2013, 09:51 AM
70lbs of wiring harness has been in the corner...staring at me...mocking me. I say "Screw you wiring harness!"
http://www.outfrontmotorsports.com/ems_computers.htm + $1,400 = EMS Stinger and the wiring harness to 'plug and play' my way to less headache.
Anyone else been this route?
Now I'm off to put 70lb of copper on eBay with the ECU.
seriously considering this option.
I have a megasquirt with harness that I will probably sell. I need faster compute time and resources to tune. My squirt does come preloaded with a 2.0 turbo profile if anybody is interested. about 90% of the wires are complete and ready to plug and play.
Posted by: CptTripps Oct 16 2013, 10:32 AM
seriously considering this option.
I have a megasquirt with harness that I will probably sell. I need faster compute time and resources to tune. My squirt does come preloaded with a 2.0 turbo profile if anybody is interested. about 90% of the wires are complete and ready to plug and play.
Funny...I have 2 PMS from people telling me to look at the MegaSquirt kits instead of EMS.
PM me if you're interested in selling it. I'm just looking for something I can plug in and drive the car. I really don't know what I would need a faster computer for...
Posted by: CptTripps Oct 18 2013, 04:47 PM
Got me some parts today! Getting closer!
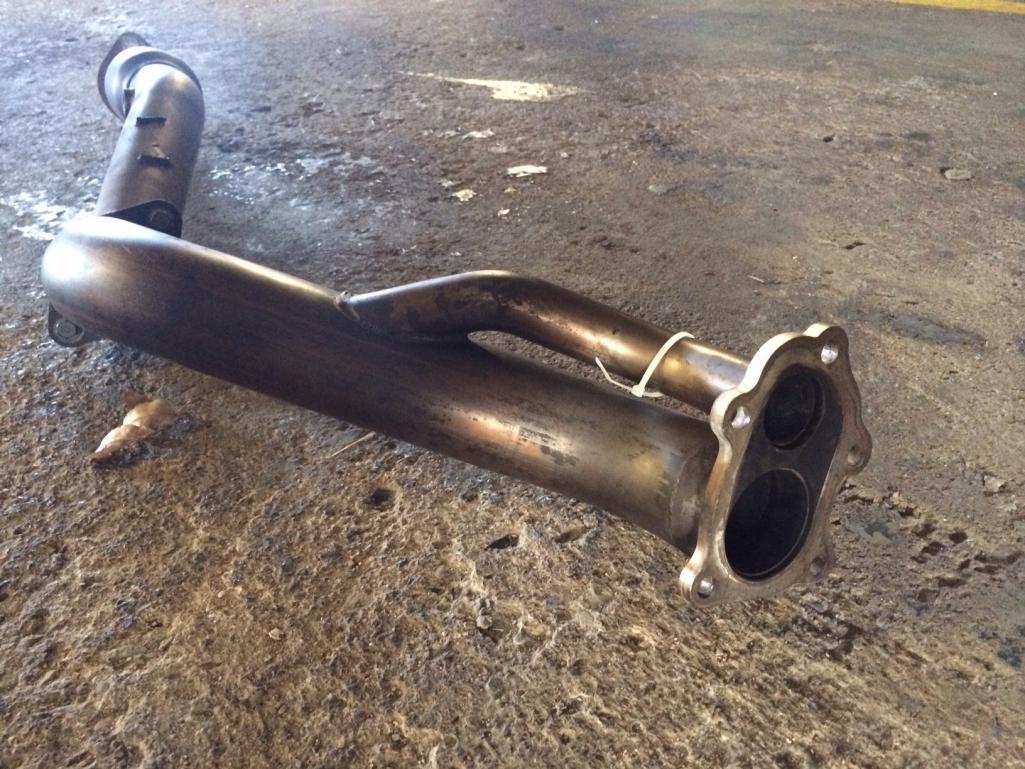
Perrin Equal-Length headers
STI Oil Pan (so the headers fit)
Perrin Up-Pipe
Crucial Racing 3" Divorced Down-Pipe (After researching, this pipe is worth what I paid for everything.)
914Rubber.com "every damn seal" kit.
1Q of Por15
Attached thumbnail(s)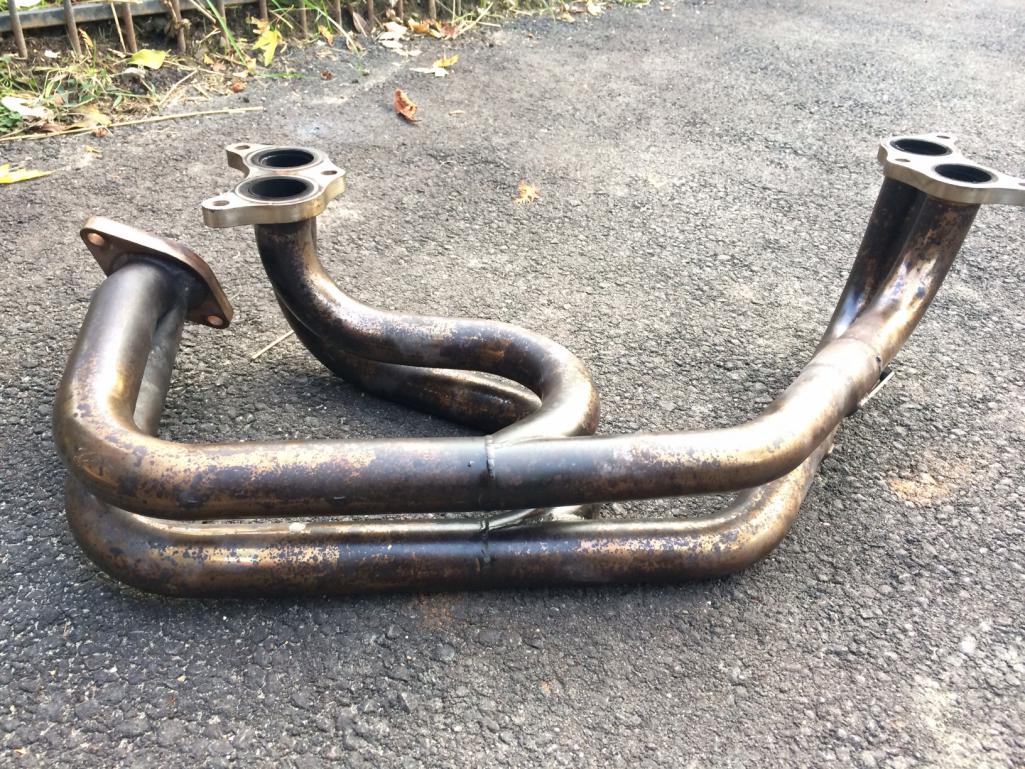
Posted by: CptTripps Oct 18 2013, 04:48 PM
The quality of the Perrin stuff is really pretty awesome.
Very thick metal. Expertly welded.
Attached thumbnail(s)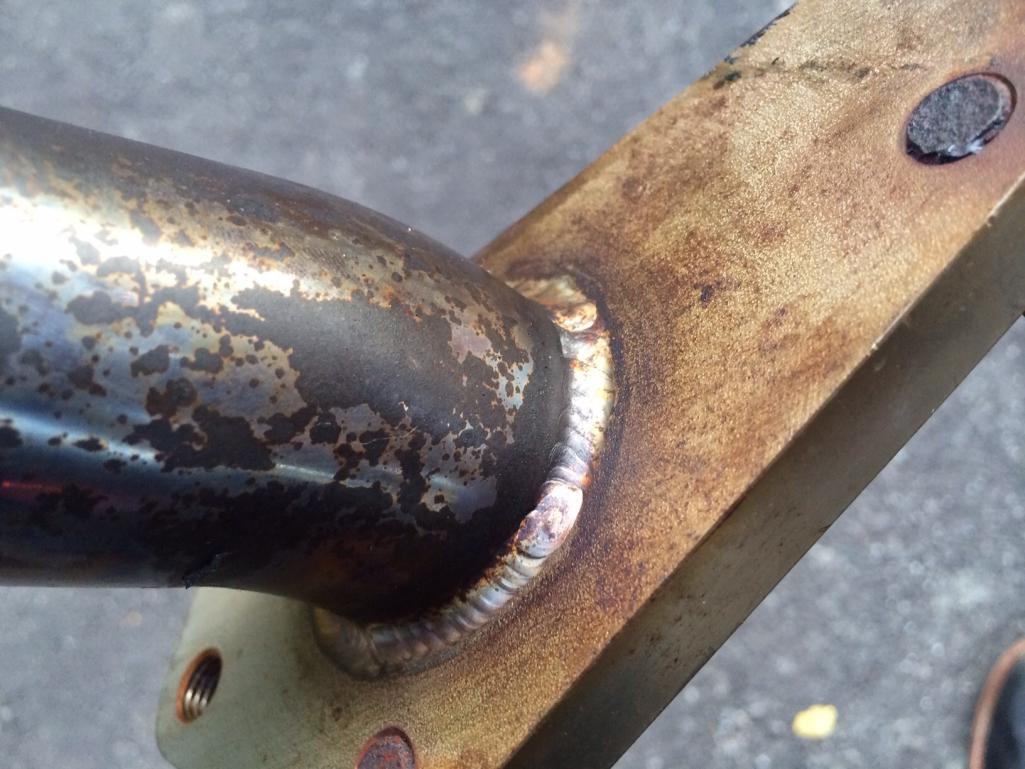
Posted by: DBCooper Oct 18 2013, 05:05 PM
Yeah, now THOSE are man-sized flanges.
Posted by: 914forme Oct 18 2013, 07:00 PM
Mine is a EG33 but Outfront wants a little more than the website would lead you to think. "All we need is the core wire harness for the plug ends and your cam gears
for modification. The price is $180 for the gear modification and $1700 for
the computer, wire harness, programming, and igniters."
Yep $1880, SDS wants $1800. MegaSquirt 3 Pro, and all the items needed to get it going. $1674 with lots of Ebay scrounging. Not sure its really a savings.
Nice score on the header, up pipe, and down pipe.
Oh and wear gloves for the POR-15,that crap is nasty stuff.
Posted by: Chris H. Oct 18 2013, 08:28 PM
Those pipes might look good powder coated. Just sayin'.
Posted by: DBCooper Oct 18 2013, 09:34 PM
Mine is a EG33 but Outfront wants a little more than the website would lead you to think. "All we need is the core wire harness for the plug ends and your cam gears
for modification. The price is $180 for the gear modification and $1700 for
the computer, wire harness, programming, and igniters."
Yep $1880, SDS wants $1800. MegaSquirt 3 Pro, and all the items needed to get it going. $1674 with lots of Ebay scrounging. Not sure its really a savings.
Nice score on the header, up pipe, and down pipe.
Oh and wear gloves for the POR-15,that crap is nasty stuff.
I did the harness and EMS Stinger from Outfront. Makes it easier, but you pay for the convenience. Have you checked Megasquirt from DIY Autotune, or better from Mario at the Dub Shop? I think they may be more palatable.
And those stainless header pipes are an easy polish. It's free, and you can change your mind later, get them coated.
Posted by: CptTripps Oct 18 2013, 11:08 PM
I'll polish them soon...but I think I'm going to heat-wrap them, so I may not bother. I've heard that ceramic-coating is better though...and won't catch fire if oil gets on it.
I keep going back/forth on the Megasquirt. The Stinger is already dialed-in and works...that's worth something to me. Plus, I see a lot of guys with subie-914s that are using a Stinger...that counts for something too! True it's 2X as much...but I'd rather not feel like I have to mess with it. I've spent the last few days on the MS forums, and these people never seem happy...or to be running right.
Posted by: kg6dxn Oct 19 2013, 06:44 AM
Be careful with heat wrap. While it will keep the heat in and help with scavenging, it will also heat cycle the metal making it brittle.
Just about every header manufacturer's warranty is voided by using this stuff.
I had a set of 14ga headers on a V8 grenade on me. Both sides of the engine within a few minutes of each other while driving from SF to LA. I had them wrapped for about 12 months... 
Posted by: jimkelly Oct 19 2013, 06:51 AM
(wrap) it is amazing, how daily, we learn about more things we never knew : )
Posted by: CptTripps Oct 19 2013, 08:22 AM
I didn't even think about that. Maybe I'll just wrap by the area that's closest to the oil pan.
Headed out today to get Bigger injectors (650cc), fuel rails, and a turbo off of an STI. (Vf39) I want the fastest spool possible. If I go too big on te turbo, I'll spend more time in "lagville" than I want.
Then all I need is the engine mounts and I think I've got about 90% of what I'll need for the build.
I wanted "one last drive" today, but it's pouring rain and my flanges are still bare metal. Bummer...
Posted by: DBCooper Oct 19 2013, 08:46 AM
I had a set of 14ga headers on a V8 grenade on me. Both sides of the engine within a few minutes of each other while driving from SF to LA. I had them wrapped for about 12 months...
Ditto here, though on a motorcycle. Ceramic coating (on the inside) is supposed to be the real deal.
Posted by: CptTripps Oct 19 2013, 02:00 PM
I don't think I'm going to worry about it. If I leave it alone, that'll be one less thing to go wrong. It's not like this is my DD, so I'll tinker with that later.
Another shipment of stuff showed up today. Got all my lug nuts and bolts so I can put the spacers and 17" rims on. Woot!
Posted by: CptTripps Oct 21 2013, 06:50 PM
Got me a cradle today!
Attached thumbnail(s)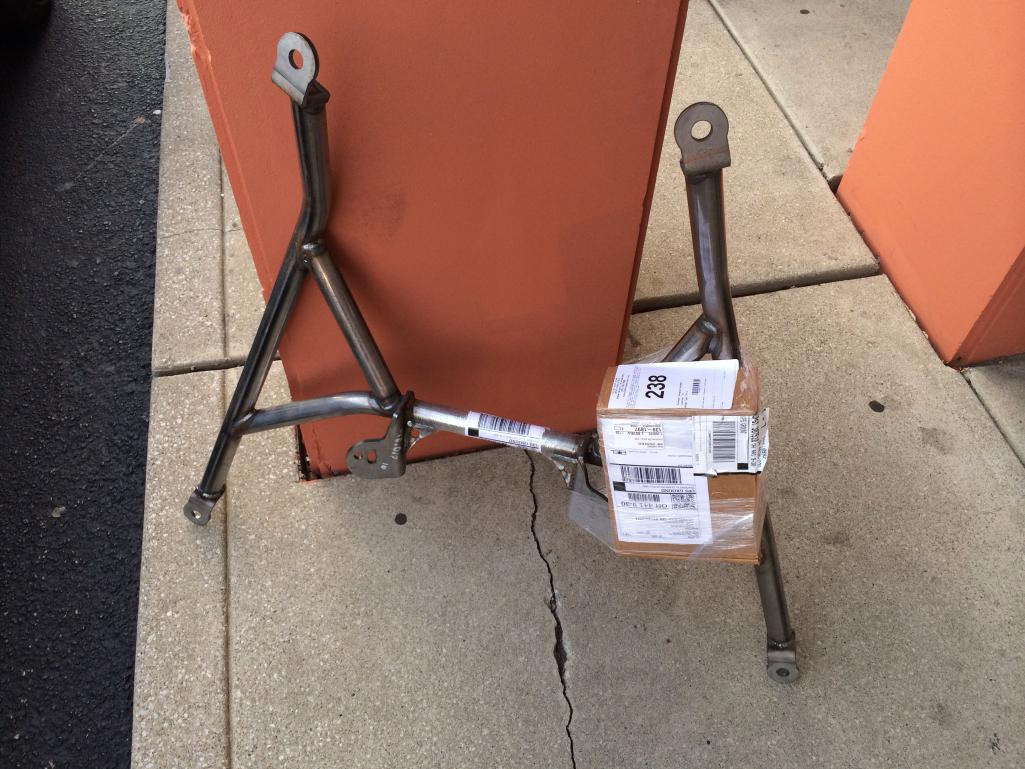
Posted by: tdgray Oct 22 2013, 01:47 PM
Hey Doug... just happened to check the Garage out and saw your name... long time man. I can't believe that's your son... he was just born the last time I saw you.. time flies.
Great thread.... nice build for sure. That will be fun. I don't spend much time in the Garage now-a-days but I will make a point of ducking out of the sandbox from time to time to see how things are going. I'm still teener-less with one more project to go before I can even think about acquiring another one but will enjoy watching this for sure.
Posted by: CptTripps Oct 23 2013, 08:55 AM
Hey Doug... just happened to check the Garage out and saw your name... long time man. I can't believe that's your son... he was just born the last time I saw you.. time flies.
Garrett is 7 now....and the pic you're referencing is his younger (5-yo) brother Oliver. Time flies! Funny that the only part I saved from that sawzall party was the transmission that saved my ass a few weeks ago. Ha!
You'll have to pop in this winter after I get everything in full-swing. It'd be great to see you.
Posted by: tdgray Oct 23 2013, 05:37 PM
OMG... that is funny... that makes sense as Spencer was like 5 or 6 when we "disposed" of that car
He is now 14!
That is funny about that car... the only redeeming value was the wheels I got from you and apparently that tranny
I just finished my TR6 (see thread in sandbox) and have the MCG left to go... love to come up and shoot the stuff with you or you come down and see the MG's and Triumph.
Let me know if you need help... Congrats on the second little one... hows the Doc?
Posted by: CptTripps Oct 24 2013, 08:54 AM
Garage progress time! (See Mark...I was listening.)
Got over to the shop last night and worked to pull the EJ20 and get it to where I can put it in MY garage and start working on it. I'm actually thinking of leaving it at the office where I have a little more space to work. I won't have all my tools, but there's a lot more space here and the lighting is a ton better. Plus, I can hide it from SWMBO for a bit. ;-)
So....
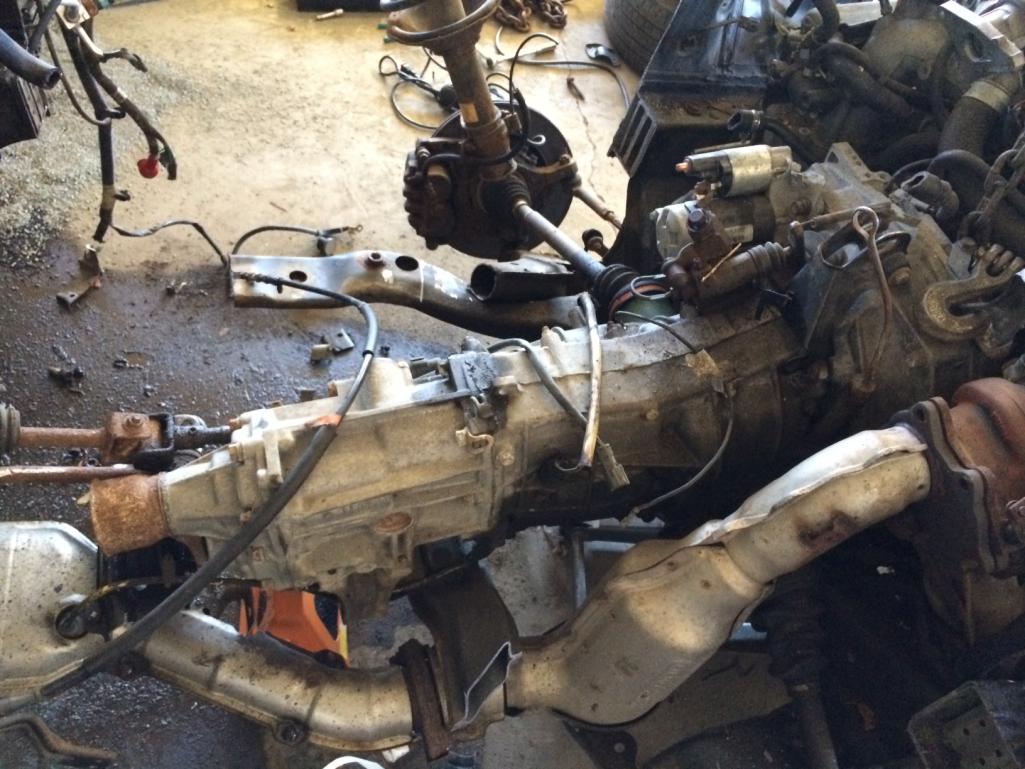
Got the engine pulled, and safely in the back of my land rover. We used a crane to get it in there, and I have NO clue how I'm going to get it out of there on my own. I was thinking about letting the air out of the tires in the back enough to get it hooked to the engine stand I bought.
Attached thumbnail(s)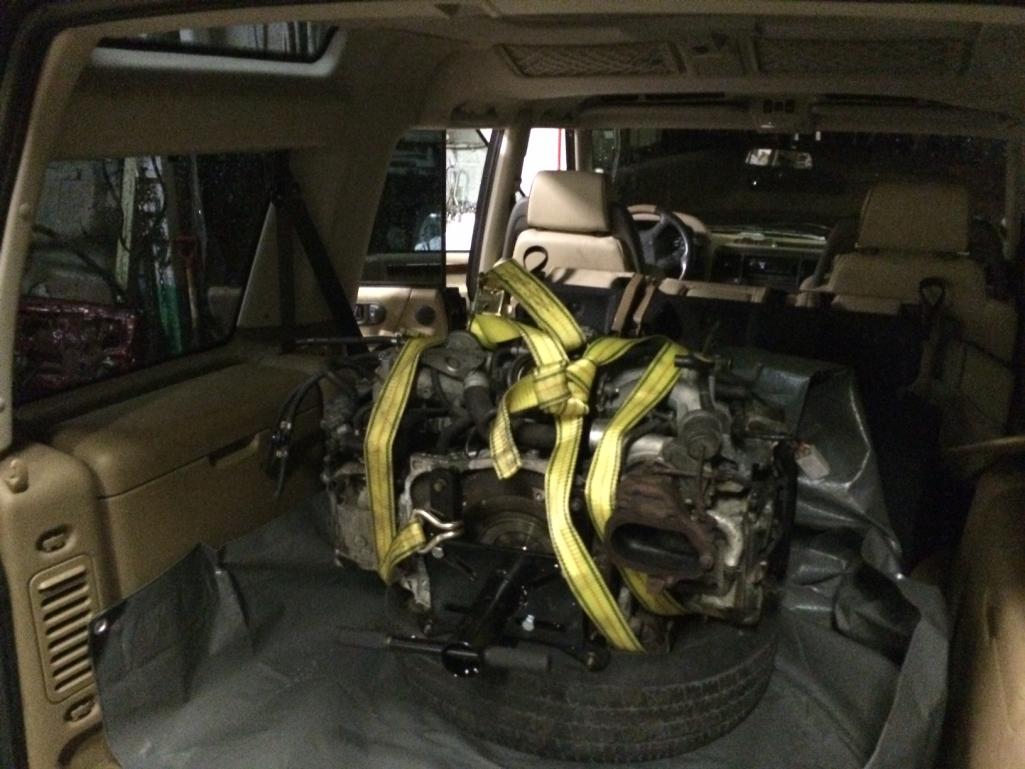

Posted by: CptTripps Oct 24 2013, 05:08 PM
Parts fairy came...
Valve cover gaskets
Water pump
Tensioner
New bearings for timing belt
Timing belt.
Lightweight pully
Water to air intercooler, fan, pump, radiator
Turbo gaskets
Header gaskets
Uppie and downie gaskets
And some green vacuum hose for good measure.
Attached thumbnail(s)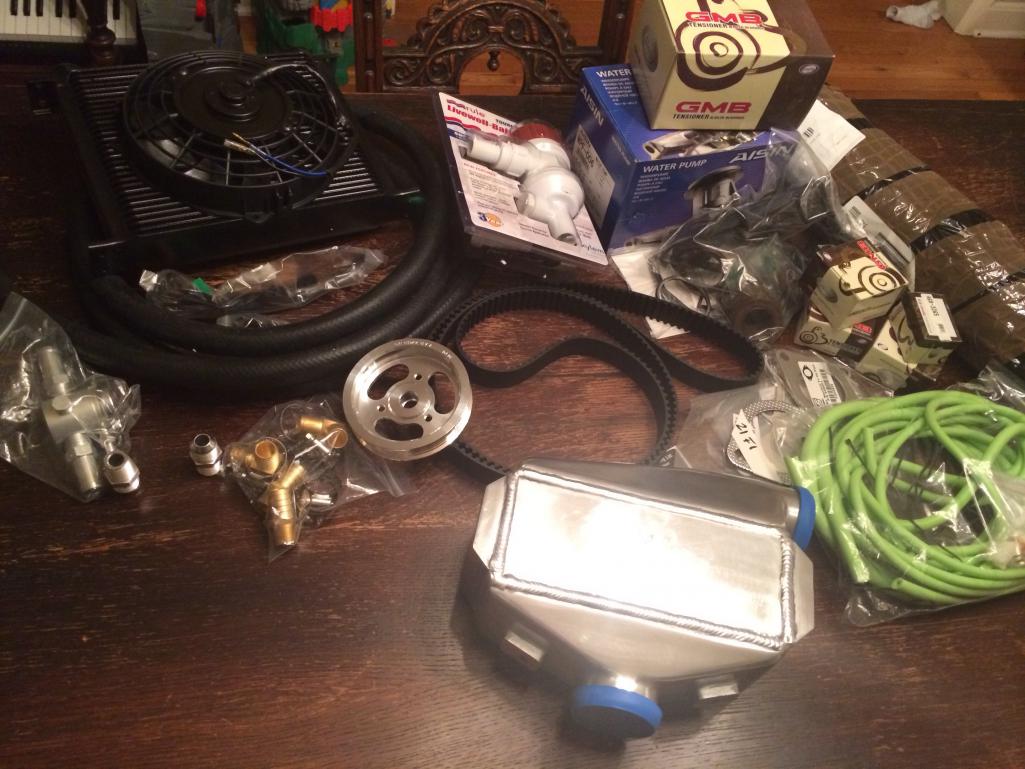
Posted by: jimkelly Oct 24 2013, 05:31 PM
did you take your LAST drive yet : )
you may need a second car
Posted by: CptTripps Oct 24 2013, 07:09 PM
Ha! Well...I woke up this morning to 3" of snow. So if say we're done for the year.
I'm going to take everything to the office in the morning so I can start building the motor there. I have plenty of space...and it's heated. :-)
Posted by: fat73 Oct 24 2013, 07:12 PM
Alright Mark...I'm in the garage!
Got to the "Donor WRX" today to start pulling stuff. I have NO idea how much of the wiring harness I'll need, so I just grabbed all of it. Every inch of wire from the entire car. I'm sure it's overkill, but I'd rather have more than not enough.
Ian told me last week "do yourself a favor and just send the wiring harness off to Small Car Performance" and I think I'm A-OK with that, after seeing the magnitude of what is needed for the wiring. There's 60LB of stuff here, and I'll bet I get 10lb back.
Also have most of the engine out of it. We just sawzalled the front clip so we could get a little deeper into it without restriction. I should have everything off in a week or so as I get closer to pulling the V8 out of my 914.
I'm toying with the idea of having someone else re-build the motor. Just to be on the safe side. I'd rather KNOW I'm starting with something that's solid. Besides, now is the time...right? I can also put some upgrades inside and add a few HPs in the meantime.
So...that's a little progress. Right?
Yep... Using Smallcar perf is a good idea. That's who did my 2003 WRX harness. Sent them a whole car harness and they sent me back a harness that fit in a hatbox. Stock ecu. I used renegade for about everything else.
Ed
Posted by: CptTripps Oct 25 2013, 10:23 AM
That looks like a bad-ass build.
Who's gauges are those? They look awesome.
Posted by: Chris H. Oct 25 2013, 11:05 AM
Ummmmm.....Ed? 
Posted by: DBCooper Oct 25 2013, 11:08 AM
Ummmmm.....Ed?
Yeah? What? It's out of focus?
Posted by: Chris H. Oct 25 2013, 11:16 AM
Well that and it's not centered.
Posted by: CptTripps Oct 25 2013, 11:18 AM
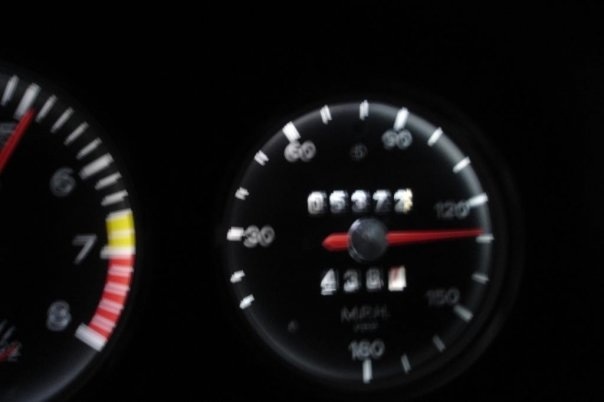
That's a pretty respectable top-speed for a 914. LOL...
Posted by: DBCooper Oct 25 2013, 11:58 AM
What? Ah... yours isn't running yet... I forgot. At about 120 mine was nowhere near done but I realized I wasn't young and crazy any more.
Posted by: CptTripps Oct 25 2013, 12:49 PM
Oh, my V8 will get there...but I'm not confident in the car's ability to stay together. Once I have this project done, I'm quite certain I can get there!
Posted by: DBCooper Oct 25 2013, 01:24 PM
Aw, I forgot to add the little poker guy: I had no concern about the car, my problem was all me.
Posted by: CptTripps Oct 25 2013, 02:54 PM
Found a warm place to work on the motor...at the office!
We have a lot more space than were using, and there's a room in thr back that was full of junk anyway. Heated. Concrete floor. Next to the freight elevator. Perfect!
Attached thumbnail(s)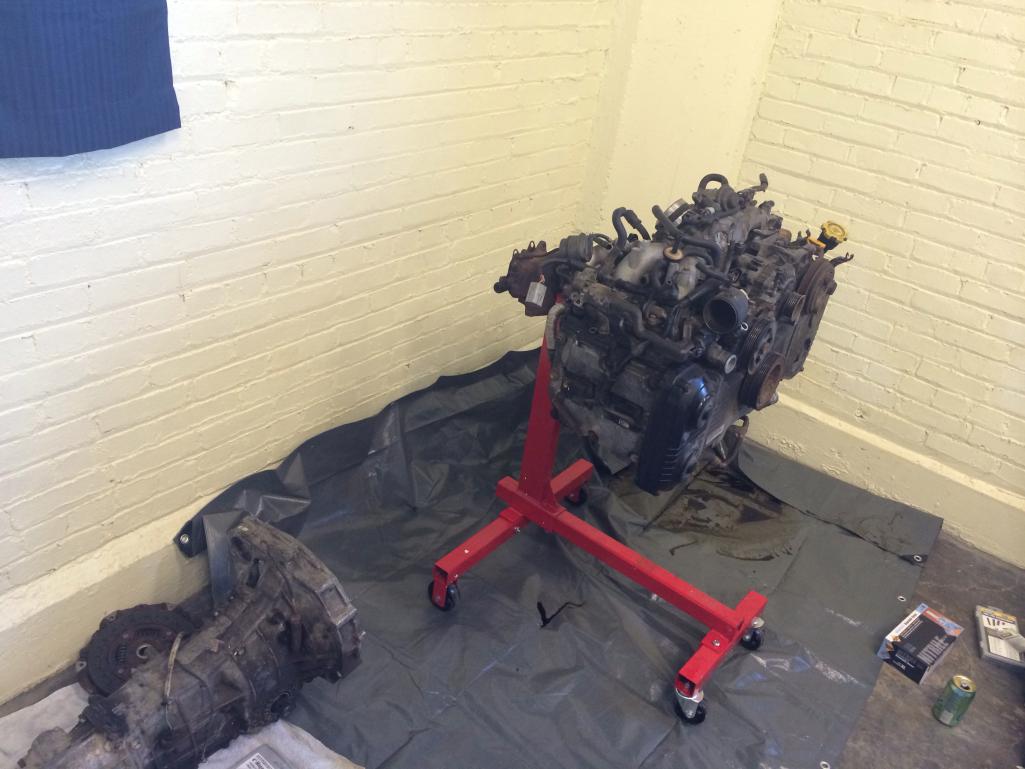
Posted by: rhodyguy Oct 26 2013, 07:44 AM
is that a can of vernors on the floor?
Posted by: rhodyguy Oct 26 2013, 08:23 AM
you joined today and your location is bhopal!!?? i'm not going to open that link for any reason.
Posted by: mgp4591 Oct 26 2013, 09:37 AM
you joined today and your location is bhopal!!?? i'm not going to open that link for any reason.
I dunno... maybe that Office of Disbursment in Calcutta really needs your info- you could be a millionaire!!

Posted by: CptTripps Oct 26 2013, 01:55 PM
That's a spam bot.
I got a lot done this morning. Broke down the engine to all but the timing belt and pulleys. I broke a 1/2" breaker bar, trying to get the crankshaft pully off. Going back tomorrow and bringing a torch!
Also had fun with my new Soda Blaster today. That's going to be a useful addition!
Attached thumbnail(s)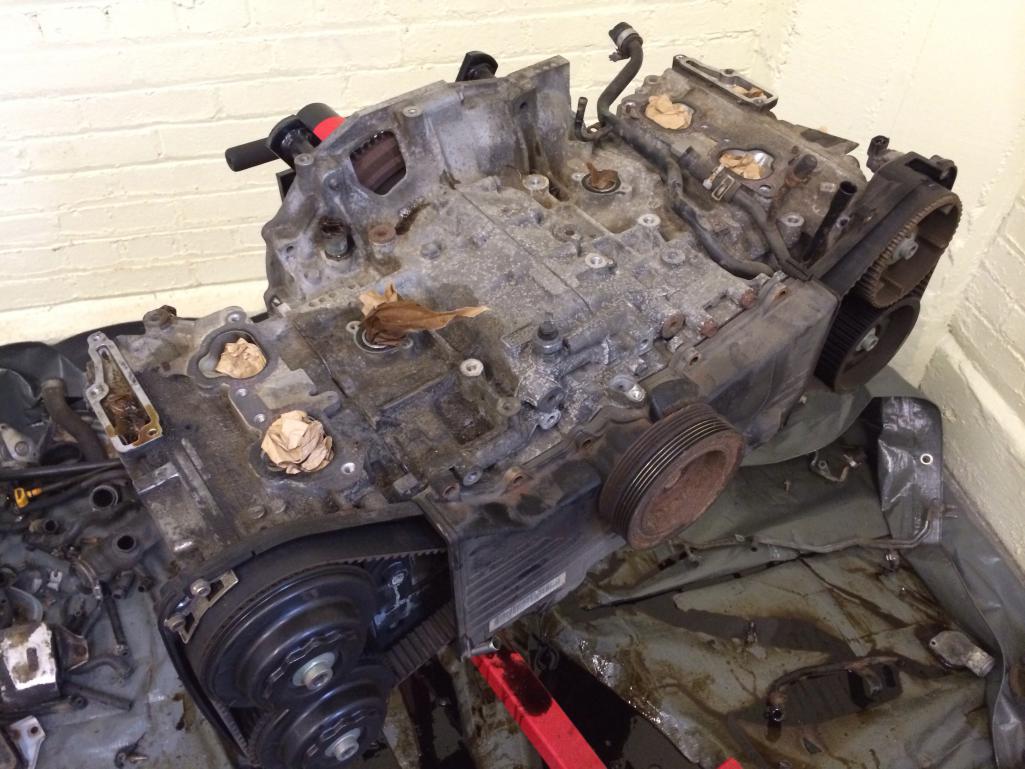
Posted by: mgp4591 Oct 26 2013, 03:46 PM
That's a spam bot.
I got a lot done this morning. Broke down the engine to all but the timing belt and pulleys. I broke a 1/2" breaker bar, trying to get the crankshaft pully off. Going back tomorrow and bringing a torch!
Also had fun with my new Soda Blaster today. That's going to be a useful addition!
Some of those crank bolts I thought were lefty/tighty righty/loosey... Mebbe not...
Posted by: DBCooper Oct 26 2013, 05:14 PM
It was you asking about a custom harness for Megasquirt, wasn't it? Here's one from Mario at The Dub Shop, still on the fab board. I think it's for an EJ22, but not that much different: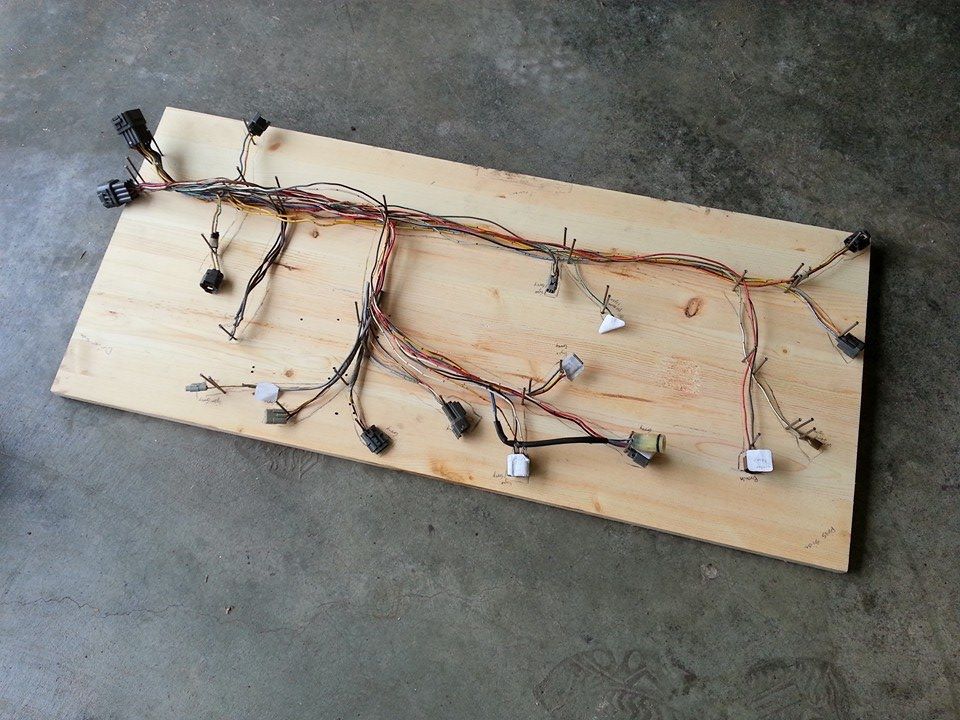
Makes things pretty close to plug and play. I did the EMS Stinger in my car, but if this had been around back I probably would have done this.
Posted by: jimkelly Oct 26 2013, 07:16 PM
tripps
I got this tool, you can borrow if you want.
i think it should have a rod welded on for a handle though for stability.
i believe it is for suby crank pulley removal.
jim
Attached image(s)
Posted by: bulitt Oct 26 2013, 07:58 PM
you joined today and your location is bhopal!!?? i'm not going to open that link for any reason.
The location of a terrible chemical accident in the 80's
Sorry, carry-on

Posted by: CptTripps Oct 27 2013, 02:39 AM
DB: I got a deal on a Hydra EMS 2.7 over at NASIOC, so I'm going to give that a whirl first. I can always buy the stinger later.
Jim: Thanks for the offer. I am going to give it another crack tomorrow with some heat...and a new breaker bar. :-)
mgp: I had the same thought...double checked at a couple different places.
Posted by: 914forme Oct 27 2013, 04:20 PM
Counter clock wise, just popped mine off the EG33. Of course I have this nice 36" long breaker bar, and a flex plat lock I made out of a bolt and a piece of flat steel. Took nothing. I will say this sometimes it seems Japanese motors are not assembled by torque specs. I had a crank bolt on a Honda that took a 6' long cheater, thank you DOM, and another one that long to hold the crank still, finely with an extra 260 pounds of force it busted loose. Luckily it was in the car. But come on does it really take 1560 Ft. Lbs. to bust a crank bolt, yes it does.
Posted by: DBCooper Oct 27 2013, 08:49 PM
Half inch impact wrench, which is how they're put on. Those wrenches usually rated at 300 ft/lbs, but the impact is the key in breaking those loose.
Posted by: CptTripps Oct 28 2013, 05:53 AM
Well, crap. No clue how I'm going to get my impact wrench to the office.
I bought another 1/2" breaker bar. 26" this time...and found a 6' gas pipe I'll use too. If that doesn't do it, I'm taking this thing to a subaru dealer and asking them if they have any bright ideas.
Posted by: Chris H. Oct 28 2013, 07:58 AM
Did you blast it with some penetrating oil? Might want to do that for a day or two. Then the breaker bar/pipe should work. Just take it easy so you don't snap the bolt head off. It'll most likely break loose with that combo...I had to use a cheater pipe.
Posted by: CptTripps Oct 28 2013, 08:34 AM
Good plan Chris. I'll grab some PB blaster today and start spraying it. I'll be out of town for a few days this week, so I'll hit it good before I leave tomorrow too.
I'm thinking about replacing the pistons/rods/valves while I have it all broken down. I've come this far...think it's worth the effort? Seems like another $800-$1k at this point would make sure that I'm not going to have an issue down the line.
Posted by: CptTripps Oct 28 2013, 09:30 AM
Just met with the shop that's going to do all the body work and paint after I get everything welded in. They think 3-4 weeks and about 40-80hrs of work to do the car right. I think if it takes $5K for the body to be perfect...I can live with that. I want a car that I won't ever sell...and won't feel like I compromised on anything. Something I'll have for a very long time.
I'm also making plans to build a rotisserie for it. I think I'm going to use 2 1,000lb engine stands and weld up a more substantial base so I can rotate everything and raise it up. If I could find a cheap one locally, that'd be the way to go, but I'm thinking for about $300 in metal and parts I can get it done.
Posted by: Chris H. Oct 28 2013, 11:10 AM
Good plan Chris. I'll grab some PB blaster today and start spraying it. I'll be out of town for a few days this week, so I'll hit it good before I leave tomorrow too.
I'm thinking about replacing the pistons/rods/valves while I have it all broken down. I've come this far...think it's worth the effort? Seems like another $800-$1k at this point would make sure that I'm not going to have an issue down the line.
I don't really have any experience with the turbo 4's so not the best one to ask on that. Maybe someone with more experience will chime in. With 60k it seems like it's not necessary...really just getting broken in at this point...how did it run before the wreck?
I was going to recommend re-sealing the engine but I'm sure you'll do that. Think you can get a kit that has every seal. Subaruparts.com had one for my EG33. Might have to call them. How did the valve covers look? Any oil leakage? It's not a sign of anything bad, just curious. Mine was a nasty mess, but much older.
Posted by: CptTripps Oct 28 2013, 11:43 AM
The only thing I don't have is the head gaskets. I was thinking of picking those up for good measure, but there aren't any leaks right now so I'm not sure it'd be worth the effort unless I was doing everything.
Motor ran great before the wreck. It even started up afterwards and sounded real smooth. Perhaps I just won't bother.
In other news: My 911 3.5" Boge struts FINALLY arrived from Carrera Parts. Actually in decent shape. They also gave me a set of trailing arms for the trouble. Hmmm.
Posted by: Chris H. Oct 28 2013, 11:54 AM
Wow...buy a lottery ticket!
Yeah same here on the head gaskets...I do have 'em (only because they came with the kit and the engine has 140k), but since you have to take the engine pretty far apart to change them I'll wait until they are needed. It's highly unlikely you will need them for a while.
Posted by: CptTripps Oct 28 2013, 12:03 PM
So would you suggest doing it as a "while I'm in there"?
I'd rather not pull it down this far again.
Posted by: Chris H. Oct 28 2013, 01:57 PM
For me when I looked at the procedure and the exploded view diagram of the EG33 I decided no, I'll wait, and it might be above my level of competence anyway. Might be a bad call on my part, we'll see.
On yours my thinking is with 60k miles it really SHOULD be fine for a long time yet, and you'd be loosening and re-tightening stuff that was done by the factory, etc. Hopefully we'll get more opinions. There's a guy on my thread who did an EG33 swap into an Impreza. He's a well known member on rs25.com. Might want to ping him as he seems to be a general Subie expert (BRZCory). That forum is a lot kinder to questions than NASIOC BTW.
Posted by: CptTripps Oct 29 2013, 06:35 AM
Couple of updates:
Got the rest of my Subaru engine stuff yesterday. Head gaskets, TGV gaskets, and an aluminum alternator pulley. I also talked to a guy that is local, and builds the engines for race applications. He's going to do the TGV delete for me, and we're going to discuss rods/pistons/valves and what I'm going for. I also picked up a VF39 Turbo, so with the calculations that he put together for me, without anything else, and a bit of tuning, I should be north of 325hp to the wheels. He's pumped because says ~325hp is screaming fast in an STI...which is about 1,000lb heavier than what I'm putting it in. Fun times!
Oh...and I bought a rotisserie. ;-)
Posted by: effutuo101 Oct 29 2013, 09:59 AM
Very nice!
I have a G20 turbo. I expect around 300 at the wheels. A 300 Hp subie is a blast to drive, so, like you, having 800-1100 lbs less as well as a lower center of gravity should make our cars an absolute blast.
If memory serves, I remember a story about stoplight racing a Maserati in Vegas with a 2.0 turbo 914. the Maserati could not out accelerate or out brake him. With this kind of HP, we are looking at serious performance.
I removed of all 4 fenders and replaced with FG as well as FG hood and trunk, I think I lost another 100-150 lbs in the process. I did add weight back in with a GT kit and long kit. I also removed all of the tar (replaced with lizard skin) and replaced the steel gas tank with an Aluminum cell, lost the headlight motors and all of the smog stuff.
At this point, I am both looking forward to getting the car weighed and worried about enough weight to keep my 9 and 11's planted. I will probably be adding weight to specific locations to corner balance the car.
Posted by: rhodyguy Oct 29 2013, 10:37 AM
when i bought the leg wagon it came with a binder of receipts. one bill for a failed radiator and all that went with it and "while you're in there", the shop installed new cyl/head studs. is that a 'standard' procedure when you tear these engines down? sorry for the hijack
Posted by: Chris H. Oct 29 2013, 01:11 PM
when i bought the leg wagon it came with a binder of receipts. one bill for a failed radiator and all that went with it and "while you're in there", the shop installed new cyl/head studs. is that a 'standard' procedure when you tear these engines down? sorry for the hijack
I'm the one hijacking! Man I need to shut up. But I do know the answer to this one....
Anyway Kev I saw that your car is a 97 from Kent's "manual" thread...and with those 2.5L DOHC engines there was an issue with the head gaskets (design flaw).
Here's some good info:
http://en.wikipedia.org/wiki/Subaru_EJ25#EJ25
So to answer your question, yes, for those engines it was standard that any time there was a coolant related failure of any kind it was recommended that the head gaskets be changed/upgraded. That's probably what they did. Why else would they remove and replace the head studs, right
 ? Anyway that's a good thing. Should be fine for a lot of miles now. My mom has a Forrester and she had the exact same thing done.
 Posted by: DBCooper Oct 29 2013, 01:38 PM
Same thing, 97 Legacy GT wagon back in the day, DOHC 2.5. New gaskets and the Subaru recommended coolant at 60K, kids used it to commute between school in California and home in Texas. Went another 120K miles with reckless dumb-ass teenage boys, racing and offroading, pretending to be rally drivers, never a problem again.
Posted by: effutuo101 Oct 29 2013, 01:46 PM
rule of thumb from the subaru guys here. if the motor is pre 05 just change the head gasket. Unless you have a receipt that it was done, you will not be happy.
Posted by: RonW Oct 29 2013, 02:38 PM
subscribed
Posted by: 914forme Oct 29 2013, 07:03 PM
I would install ARP head studs while i'm in there, and get the torque lube. They are supposed to be torqued, lubed.
Hate paying for them, love the quality of the hardware though. Keep the deck down on my TDI, 40 psi of boast, never a problem.
Posted by: CptTripps Oct 31 2013, 01:07 PM
ARP Studs/Lube: Already ordered.
Gaskets: Already in-hand. For $200, it's not worth worrying about it. I've come this far, and can clean a few things up while I'm there and see if I have other issues. Now is the time...right?
Posted by: CptTripps Nov 1 2013, 11:57 AM
Not a lot of progress...but a lot of parts showed up today.
New rear trunk floor, head gaskets, ARP head studs, TGV gaskets, Fuel Rails, Blaupunkt Stereo, Targa seal...stuff like that.
Oh...and spraying that drive-shaft bolt 2X daily with PB Blaster for a three days did the trick. Well, I still needed a 4' breaker bar...but I got it off!
Posted by: Chris H. Nov 1 2013, 01:17 PM
Not a lot of progress...but a lot of parts showed up today.
New rear trunk floor, head gaskets, ARP head studs, TGV gaskets, Fuel Rails, Blaupunkt Stereo, Targa seal...stuff like that.
Oh...and spraying that drive-shaft bolt 2X daily with PB Blaster for a three days did the trick. Well, I still needed a 4' breaker bar...but I got it off!
Awesome. Did it make that loud "screeeeeeee---eeeee-eee-eee---eee--cccchhhh" sound ? That's when you know you're getting somewhere.
Posted by: CptTripps Nov 1 2013, 09:21 PM
Awesome. Did it make that loud "screeeeeeee---eeeee-eee-eee---eee--cccchhhh" sound ? That's when you know you're getting somewhere.
Ha! That's exactly right.
Posted by: CptTripps Nov 4 2013, 10:10 AM
Picked up my Rotisserie from Garland on Saturday. I was up in Detroit to help my brother look at a couple Aeromates up there. We didn't buy either of them, but sure had a great time meeting with John and looking at all his awesome 914s. Wow.
So I've got a rotisserie in pieces, and a car that's still too much "together" to do anything with it yet. Maybe I'll see if I can set a record for the fastest 914 disassembly.
Posted by: mr914 Nov 4 2013, 08:07 PM
Sorry I missed you while you were up here. Had Harpo and BS Chairman over putting the back light and interior in the 6. Got the engine put in on Sunday.
Enjoy the rotieserie, it made the rust-or-ation much easier.
Let me/us know what modifications you did to it. I made a print of it for reproduction in the future.
Just in case, there is a Part Duex.... 
Posted by: CptTripps Nov 5 2013, 11:21 AM
Ha! Yeah, I was going to stop by, but we were in Detroit 3h longer than we'd planned already, and were running out of time.
Glad to hear that it's finally coming together for you.
Posted by: CptTripps Nov 9 2013, 01:08 AM
Today's progress involved loading my motor up and sending it to a proper ship to get checked out. Matt from Slick Motorsports knows a thing or two about building 800HP Subie motors. I'm not looking for anything that crazy, but he's going to have everything cleaned, machined, and checked out for me before I start rebuilding it.
So it looks like it's about time to start breaking down the rest if the car to get it ready for some time on this rotisserie I've got now.
Attached image(s)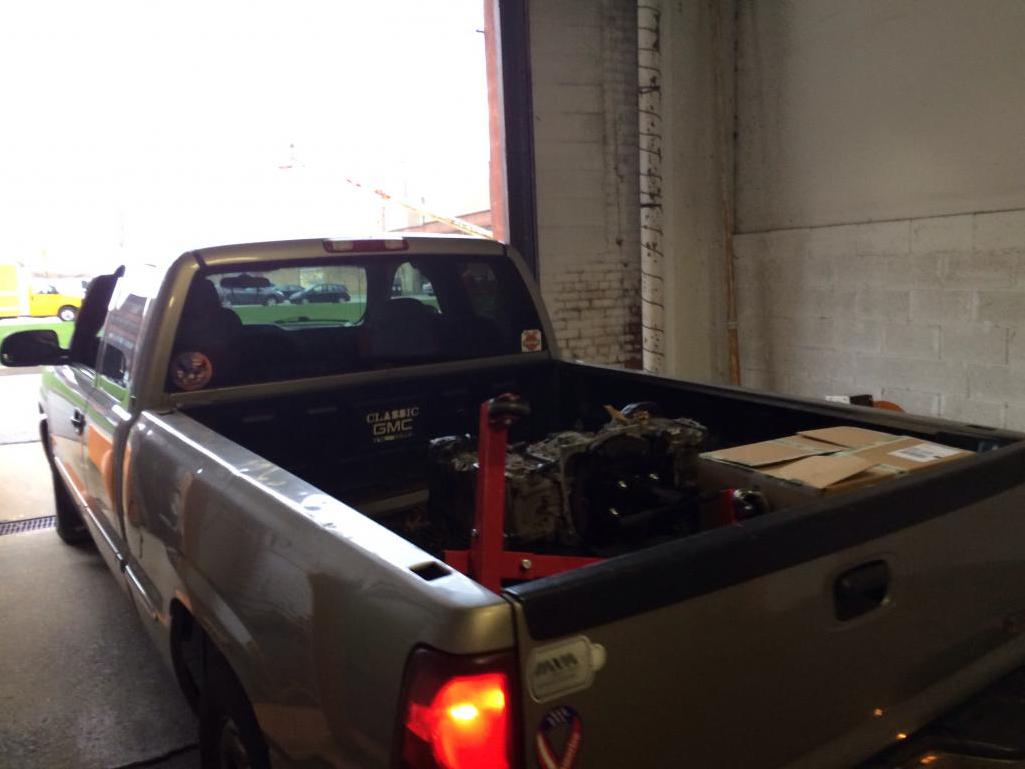
Posted by: CptTripps Nov 10 2013, 10:54 AM
Soda blasting my struts and trailing arms. Ran out of baking soda after an hour. They look awesome though.
Attached thumbnail(s)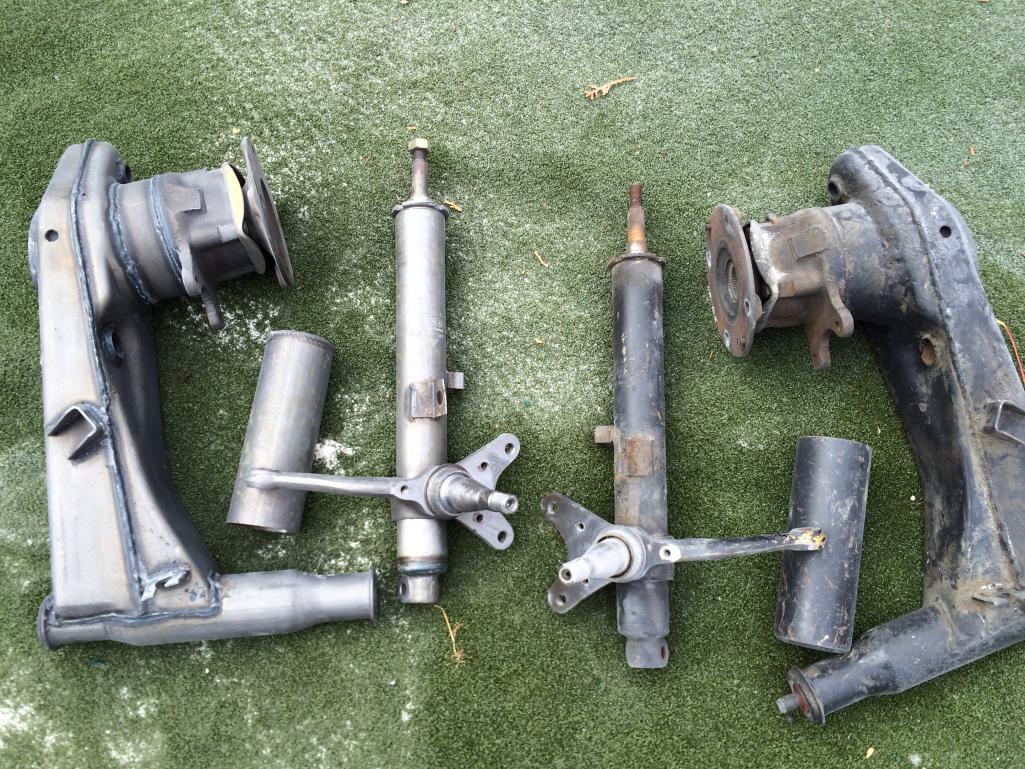
Posted by: jimkelly Nov 10 2013, 12:21 PM
wow - blasted looks great - gonna paint or powder?
I think cadmium-like plate would be nice?
jim
Posted by: CptTripps Nov 10 2013, 04:34 PM
Going to just paint. I'm not going to go crazy with the powder back there. Gloss black epoxy paint will be great and be easy to clean. I've thought about the hammered looking paint too. Going to try a few things to see what I like before I paint them.
I also need to weld a bit to the trailing arms. I'm going to tube them first before I paint.
Posted by: CptTripps Nov 14 2013, 08:55 AM
Got the computer (Hydra EMS 2.7) and a "flying lead" harness.
TurboXS Exhaust showed up.
Heads and Valve covers dropped off at the machine shop for cleaning and a check-up.
Block is being broken down and the pistons are going to get coated and re-ringed.
...and I'm off to Austin to watch cars go vroom!
Posted by: rick 918-S Nov 14 2013, 09:47 AM
Got the computer (Hydra EMS 2.7) and a "flying lead" harness.
TurboXS Exhaust showed up.
Heads and Valve covers dropped off at the machine shop for cleaning and a check-up.
Block is being broken down and the pistons are going to get coated and re-ringed.
...and I'm off to Austin to watch cars go vroom!
What is going on in Austin? Your the second guy I have seen mention a trip to Austin.
Posted by: CptTripps Nov 14 2013, 10:48 AM
USGP Formula 1 race.
http://circuitoftheamericas.com
Posted by: effutuo101 Nov 14 2013, 05:14 PM
Cool! Have fun!
Looking forward to more of your build!
Posted by: CptTripps Nov 15 2013, 06:11 PM
So...we've got the motor torn apart and starting to get it back in shape.
Heads looked great. They're off being cleaned and bead blasted. New guides and seals is a they need.
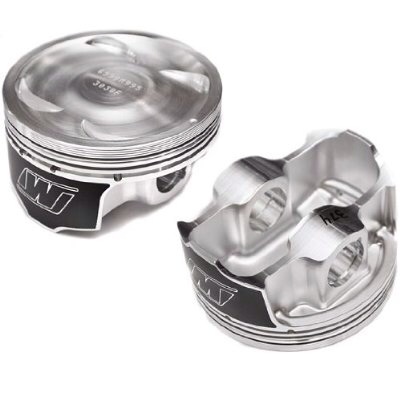
The pistons look a little crusty, and there's a little gauging by the skirts. Perfect opportunity to have it boated out .5mm and replace the pistons. I'm going to leave the rods alone. They're just fine. I'm not sure a set of forged rods are going to do a lot for me.
Picked up Wiseco K588M925 Pistons
Attached thumbnail(s)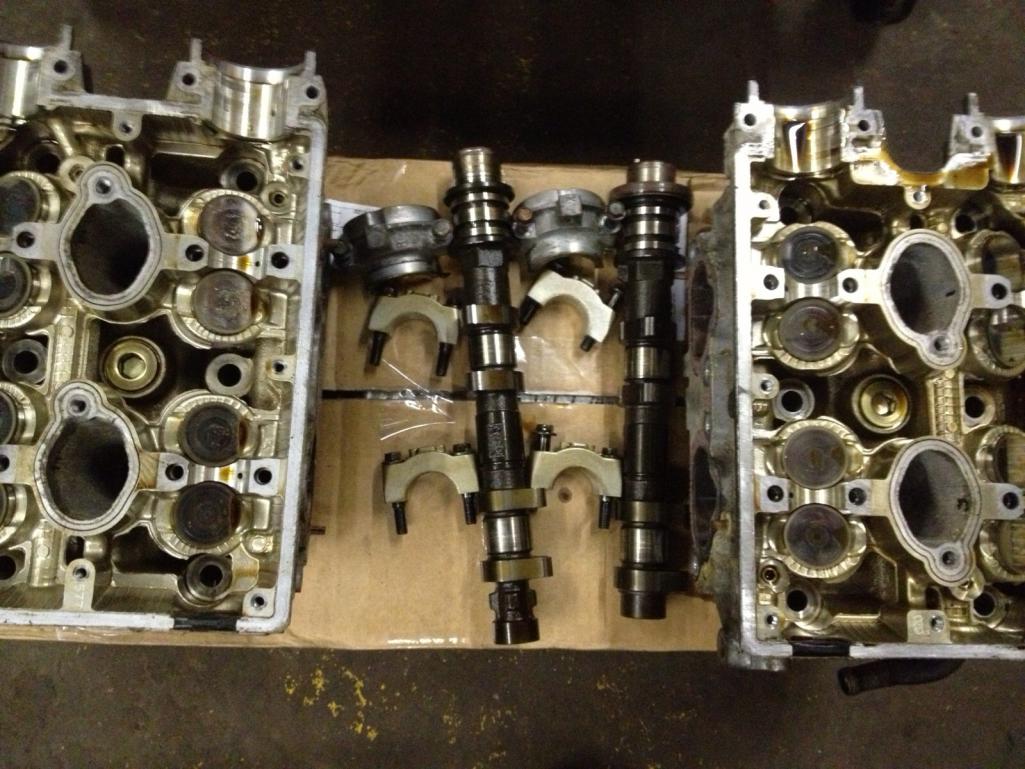
Attached image(s)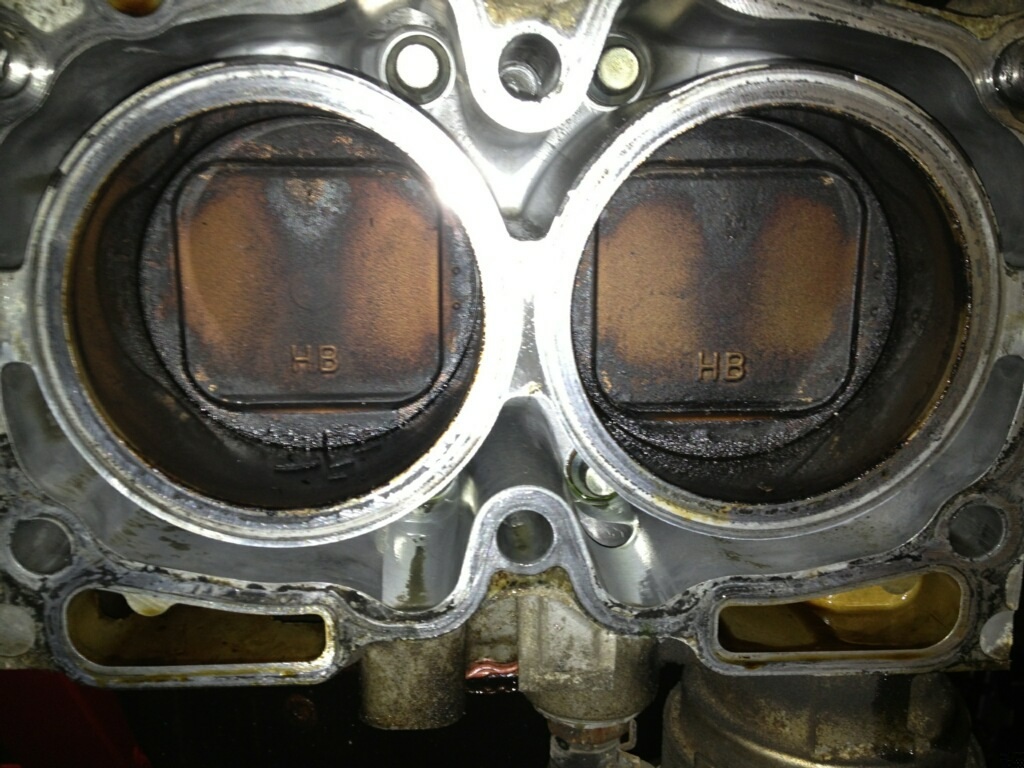
Posted by: rick 918-S Nov 15 2013, 07:10 PM
Your like a mad scientist.
Posted by: CptTripps Nov 16 2013, 12:45 AM
Turns out I needed new bearings too. So...we're just going to do it all. Why not. I'm going to have a "built" motor, and the end result (according to my builder) should be north of 380fpt at the wheels. I got a set of PPG 1-3rd gear and a cryo'd Trans center shaft for a song, so I'll be able to push north of 600hp if I so desire down the road.
This is a never ending hole at this point, but I'm quickly running out of things to replace, and he's going to start building it all back up next week, and I'll have the whole motor/Trans completed in about 3 weeks.
At that point, I'll fit it in the car. Since I'll need to cut out some of the trunk for the Turbo and Starter, I want t do that before I have the car soda blasted and the body work started.
Posted by: Blue6 Nov 16 2013, 11:56 PM
Turns out I needed new bearings too. So...we're just going to do it all. Why not. I'm going to have a "built" motor, and the end result (according to my builder) should be north of 380fpt at the wheels. I got a set of PPG 1-3rd gear and a cryo'd Trans center shaft for a song, so I'll be able to push north of 600hp if I so desire down the road.
This is a never ending hole at this point, but I'm quickly running out of things to replace, and he's going to start building it all back up next week, and I'll have the whole motor/Trans completed in about 3 weeks.
At that point, I'll fit it in the car. Since I'll need to cut out some of the trunk for the Turbo and Starter, I want t do that before I have the car soda blasted and the body work started.
Hi, new here and saw your earlier post regarding the pontiac mirrors. Are they close to fitting the body lines? And do you use a gasket between the mirror and body? Thank you Dave
Posted by: CptTripps Nov 17 2013, 09:26 AM
Not sure yet. It's going to take some modification...that's for sure. I'll end up making a gasket of some kind once I know what the end contour looks like.
Placement of the Pontiac Solstace mirrors is also going to be different. They're a lot taller, so the stock position is hard to see. I may end up 6" forward from the stock holes.
Posted by: CptTripps Nov 28 2013, 05:13 PM
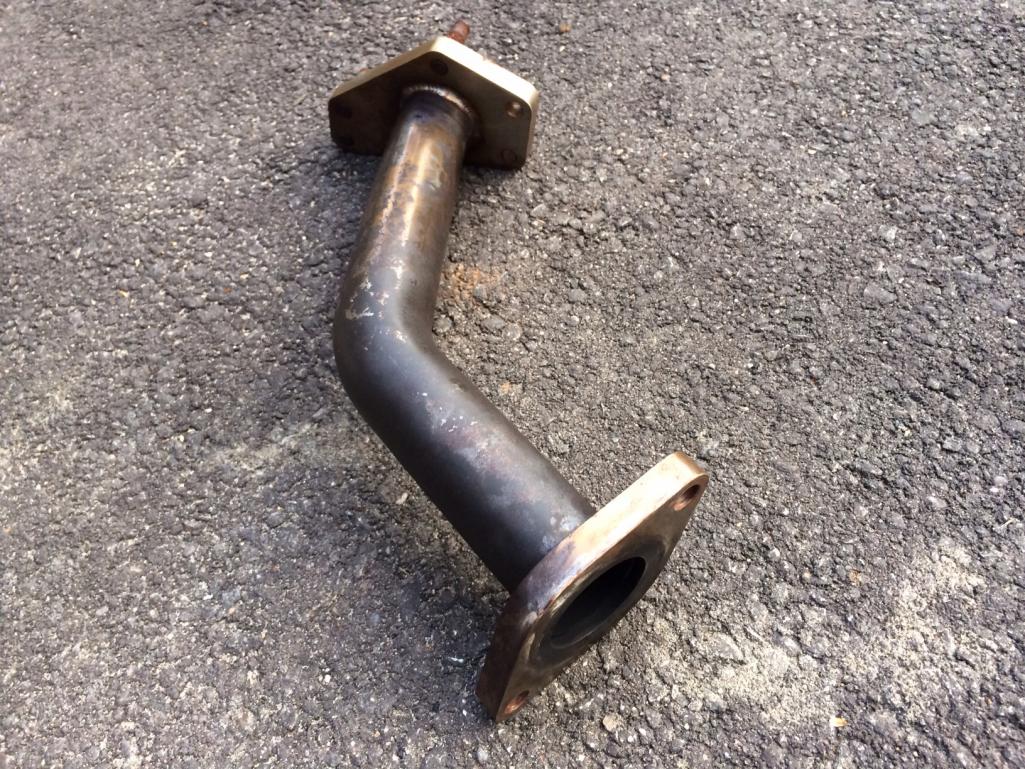
Not a ton of progress. Waiting on the motor to come back from the machine ship before we start rebuilding it. Also having the headers and up-pipe ceramic coated while the frame I bought from Ian is being powder-coated.
Getting close to build time. Just need to get the engine here and fitted so I can cut everything out that needs to be cut, and get the body off to the shop for the work to be done.
In the meantime, I also got all new gauges that I'm going to try and put into the VDO housings, with some new white (or silver?) dials in having made.
Posted by: CptTripps Nov 29 2013, 09:23 AM
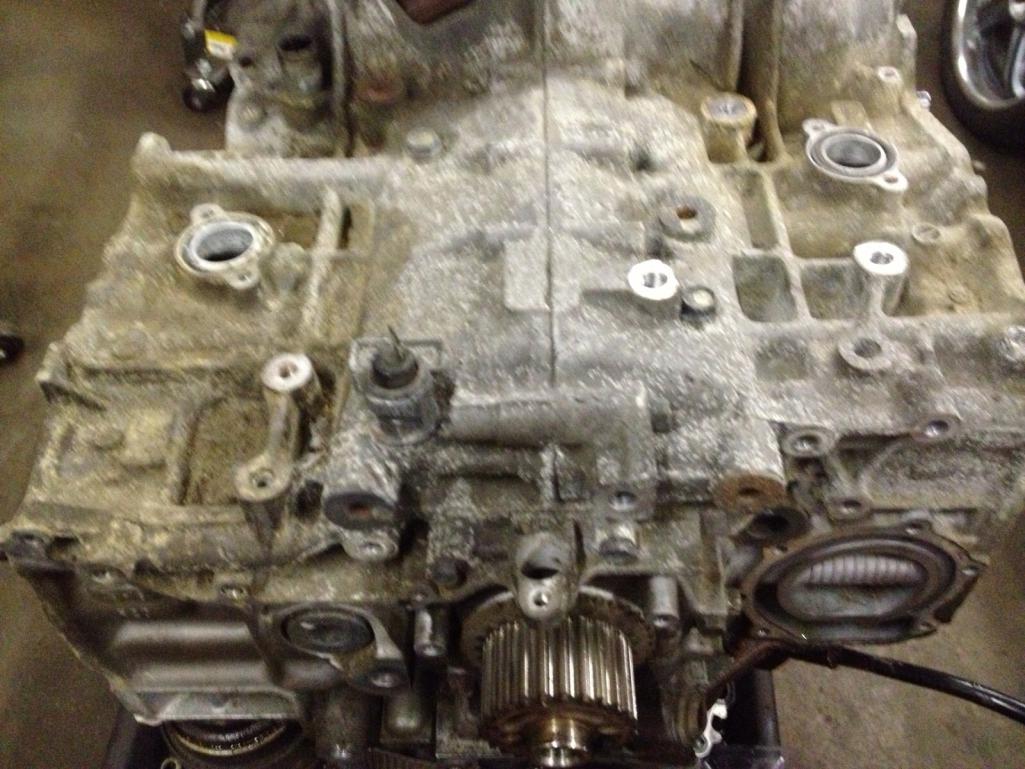
Got the block back from the machine shop...and all the purdy new parts layed out. Time to start putting the motor back together!
Attached thumbnail(s)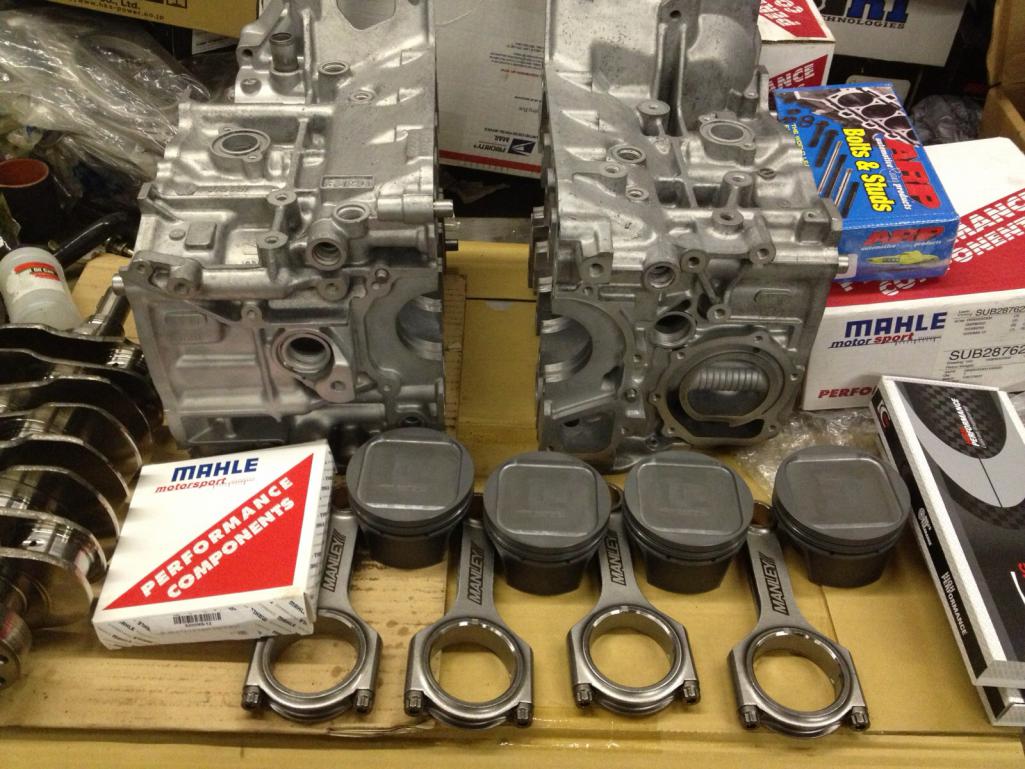
Posted by: CptTripps Dec 6 2013, 01:16 PM
Got the equal-length headers ceramic coated, and had the awesome engine/Trans mount from Ian at ColdWater914.com powder coated to match the Boxster brake calipers. I'm also going to have them do a few more pieces for me in green and polish the aluminum on the air intake. This is starting to come together quickly. I should have the engine built in the next week or so.
Attached thumbnail(s)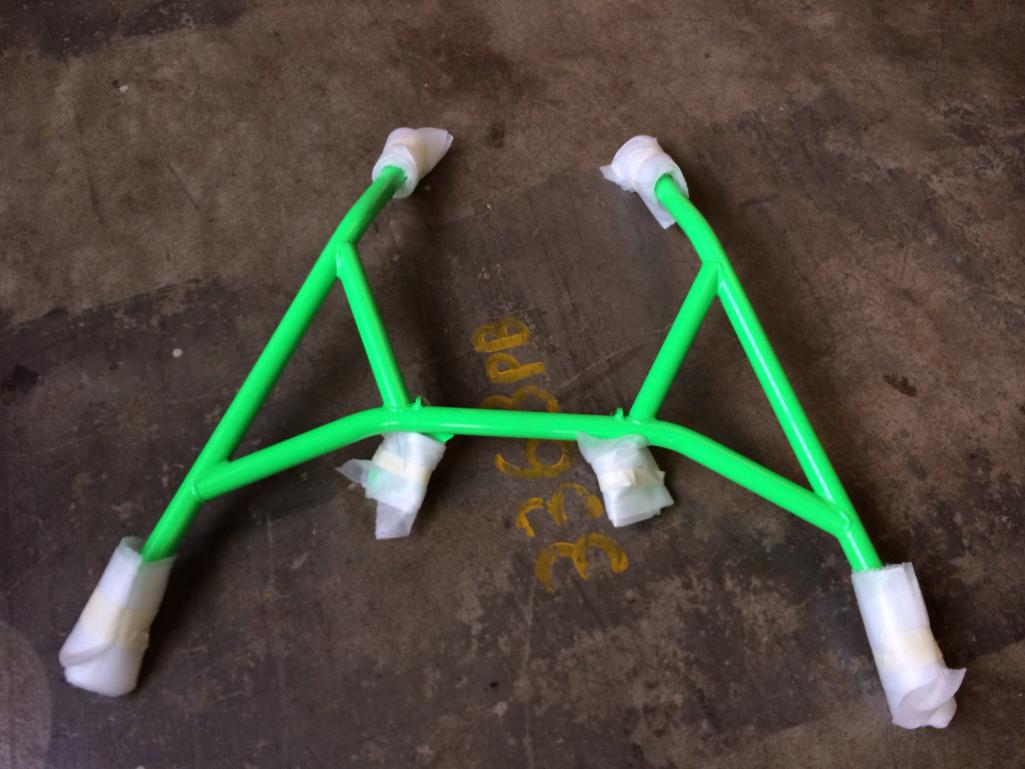
Posted by: badmiata Dec 6 2013, 01:38 PM
Love the "awesome engine/Trans mount from Ian at ColdWater914.com" can't wait until the day comes that I can order one! LOL.
Posted by: CptTripps Dec 9 2013, 06:34 AM
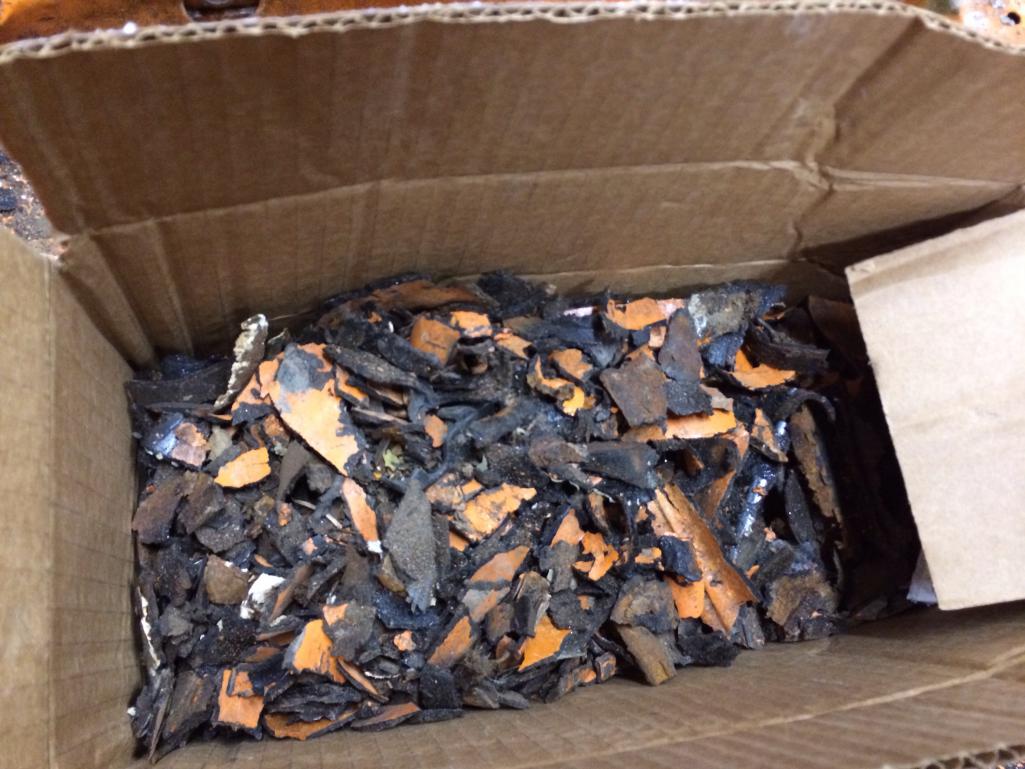
Got to work in the garage yesterday. After the seats came out, I started poking around under the tar. There a bit of rust, but nothing that's perforated and at this point, it's not worth replacing the entire floor.
So...I started scraping. Heat-Gun + Paint scraper = blisters & cheap therapy.
Attached thumbnail(s)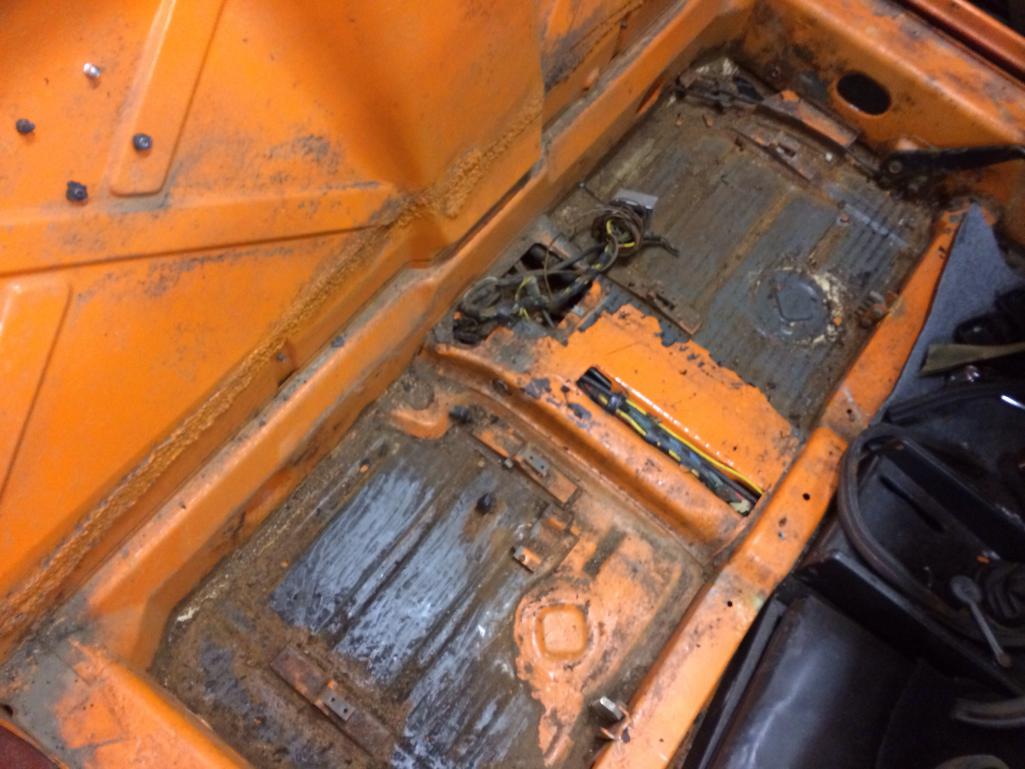
Posted by: CptTripps Dec 9 2013, 06:37 AM
I'm going to finish up after work today and scrub it all out to see what I'm working with.
Also soda-blasted the throttle-body. Cleaned up real nice.
Attached thumbnail(s)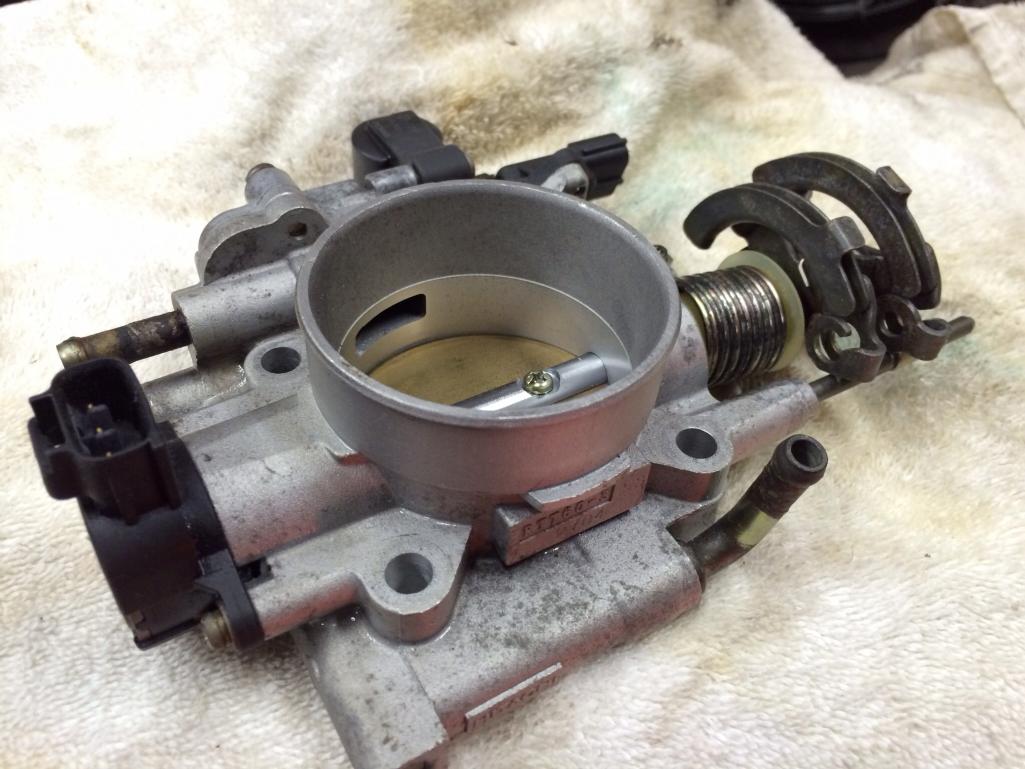
Posted by: mepstein Dec 9 2013, 07:02 AM
Funny, it took me a while to get rid of the green.
Attached image(s)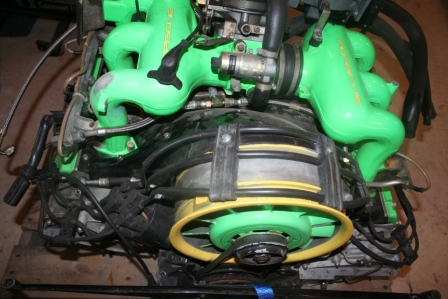
Posted by: CptTripps Dec 9 2013, 08:45 AM
Damn. That's hot...and pretty much exactly what my Subie engine will look like when it's done.
Posted by: effutuo101 Dec 10 2013, 10:16 PM
Love the color you put on your cradle.
Got most of my silicon tubing, blow off valve and new radiator today. More fun this weekend.
Met a great guy down here who does really nice fab work.
Posted by: CptTripps Dec 13 2013, 10:00 AM
Bailed on the idea of re-making my own gauge faces, and ordered a custom set from New Vintage USA. One of them is custom, and the tach needs to be made from a different casting so it'll be larger, but I think this is going to look bad-ass.
Now I need to find some switches from an airplane so I can complete the look for lights, hazards, and the heater and defrost. It'll be cool as hell to have this look more like a cockpit.
Attached thumbnail(s)
Posted by: mikesmith Dec 13 2013, 11:23 AM
http://www.space1.com/Artifacts/Artifacts_FOR_SALE/FS__Switch_Guard/fs__switch_guard.html
http://www.delcity.net/store/Toggle-Switch-Safety-Panel/p_795774
http://www.amazon.com/93331-Formance-Blue-Cooper-Switch/dp/B0050V12DS
Posted by: CptTripps Dec 15 2013, 04:09 PM
Got the whole front end torn out today. I have a fairly funny group of "DAPO" pics. This is the one that pisses me off though. No way I could have known until the radiator and '75 bumper brackets were removed.
Looks like it got hit on the pass-front enough to knock it in about 1/2". Not sure how I'm going to fix this, but I'll tackle it after I get everything else yanked. Any suggestions on how to push this back out? BAH?
Attached thumbnail(s)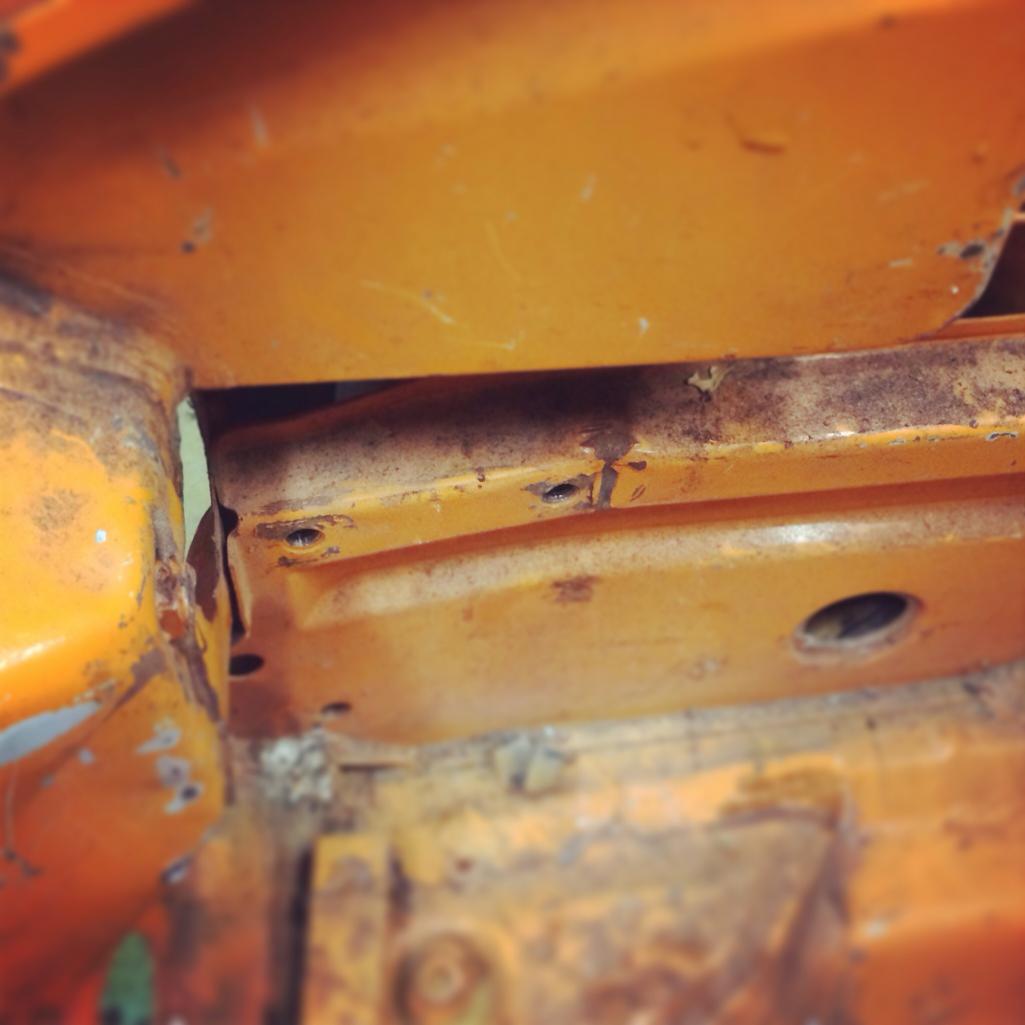
Posted by: effutuo101 Dec 15 2013, 10:03 PM
Did it get wacked to fit the radiator in? It almost looks like you could use a puller and straighten that out.
Looking good!
Posted by: ONTHEGRIND Dec 15 2013, 11:42 PM
I used to do all the coatings for crucial,cobb crawford and many other subaru companies I surprised to see and uncoated crucial down pipe..Let me know if you need any help with the heads or turbo
http://smg.photobucket.com/user/xr8ted/media/100_2050.jpg.htmlhttp://smg.photobucket.com/user/xr8ted/media/100_1922.jpg.html
Posted by: CptTripps Dec 16 2013, 07:36 AM
Did it get wacked to fit the radiator in? It almost looks like you could use a puller and straighten that out.
I'm hoping it's that easy...
There's a bit of bondo on the pass-front quarter. I'll dig into it a little deeper when I get all the paint off. No sense in doing it now until I know ALL of what I need to do.
I used to do all the coatings for crucial,cobb crawford and many other subaru companies I surprised to see and uncoated crucial down pipe..Let me know if you need any help with the heads or turbo
I've got a great Subie guy doing the heads now. Just picked up a rebuilt VF39 turbo, so that'll cover me there. I don't think I'm going to bother with power-coating the snail. It'll be pretty hidden anyway. The downpipe is going to be shortened a LOT so I'm going to wait until I have it all welded up with the muffler flange before I have it ceramic coated.
Posted by: Chris H. Dec 16 2013, 07:58 AM
From what you can see in that pic most likely it got hit with the fat black bumpers on it so the bumper and shock absorbed most of the impact. That's a good thing. That brace (slightly bent piece) is VERY strong. Doubt the flare would have lined up if you had a serious problem. No idea how to fix it though but someone will.
Posted by: CptTripps Dec 16 2013, 09:14 AM
That's really good to hear Chris...and makes total sense. I'll just whack it with the BFH and keep working then.
In other news:
Ordered enough wire to re-make the entire harness.
Working on finding a radiator that'll let me add a space-saver spare.
Picking up the heads tomorrow so I can get the engine back together.
Sold the engine and all the related pieces/parts, so I need to get that crated up and ready to move.
Posted by: rick 918-S Dec 16 2013, 11:15 AM
Got the whole front end torn out today. I have a fairly funny group of "DAPO" pics. This is the one that pisses me off though. No way I could have known until the radiator and '75 bumper brackets were removed.
Looks like it got hit on the pass-front enough to knock it in about 1/2". Not sure how I'm going to fix this, but I'll tackle it after I get everything else yanked. Any suggestions on how to push this back out? BAH?
Get a 1/2" piece of plate, drill a hole though it, Add a small shim to each end of the plate, Insert the bolt through the hole and into the rear bumper mount hole. Slowly tighten the bolt. The spacer shims will allow for the bolt to pull the bumper mount past straight. The bracket will have spring back when you loosen the bolt.
Or if you have a slide hammer with a wide flat bar hook you could bump it out with that.
I may be in Cleveland the end of the week if things go as planned. Your still near my friend Pat's place right? Maybe I could bring my slide hammer.....
Posted by: CptTripps Dec 16 2013, 12:05 PM
I may be in Cleveland the end of the week if things go as planned. Your still near my friend Pat's place right? Maybe I could bring my slide hammer.....
I am! That'd be great. (Also, if you're coming over, that'd give me motivation to clean the garage a little bit!)
I'll PM you my mobile number...give me a call and we'll coordinate.
Posted by: CptTripps Dec 16 2013, 04:56 PM
This is more of what McMark would call "digital progress" but it needs done at some point.
These are the plates I'm fabricating for the dash and gauges. 1/8" aluminum that'll be anodized to match the Momo steering wheel. The backing material will be a perforated black vinyl, and these will bolt over that. I'm removing the heater controls, and hopefully having two discrete fans that will either be on rheostats or 2-stage switches for Defrost and Cabin.
C-Loop guards between the switches, and the toggles have green LEDs at the tip when "On". I'm also thinking about re-locating the key to left of the wheel. Still up in the air on that one though.
Nav is a TomTom unit that I have gutted out to have it mounted in the center console with an external antenna.
I'm going to end up with a 100% custom dash to accommodate the gauge cluster. Guess I'll fab that up soon too.
Attached thumbnail(s)
Attached image(s)
Posted by: effutuo101 Dec 20 2013, 09:51 AM
West marine makes some really nice switch plates.
Posted by: CptTripps Dec 20 2013, 01:42 PM
West marine makes some really nice switch plates.
I know...but for what I was looking for, custom is the way to go. Most of the parts have come in already, and I'm VERY excited to see what they look like when everything is together. I'm already starting to spec out the build for the dash. I've added a few plates too, and should have a very cool setup after all is said and done. I'm going to space the controls out a little more so I can fit the 1-2 knobs I'll need into the plates. The gauges should arrive on the 26th or 27th, so I'll be able to drop them into the test plates I'm cutting and get a good feel for what the rest will look like.
In other news...
I should have the motor back next week, and the trans married to that shortly thereafter. The V8 won't be out for another week, so I won't be able to test-fit until after that's out of the way.
I'm cleaning out the garage to make room for the tool-chest and workbench my Dad got me for Christmas. That'll give me plenty of space to finish off a few of the things that I've been struggling with.
I've got the body-shop all set to take the tub on Jan 15th, and they say I'll have it back by Feb 15th. In that time, I hope to have the wiring harness and all the other stuff ready to start bolting on after it returns. I've decided I'm going to re-make the entire harness. Since I'm going to have a lot of other custom crap stuffed in there, it may be easier to start from scratch.
All-in-all, I'm on schedule to drive the car by April.
Posted by: CptTripps Dec 21 2013, 12:09 PM
Makin' a motor.
Attached image(s)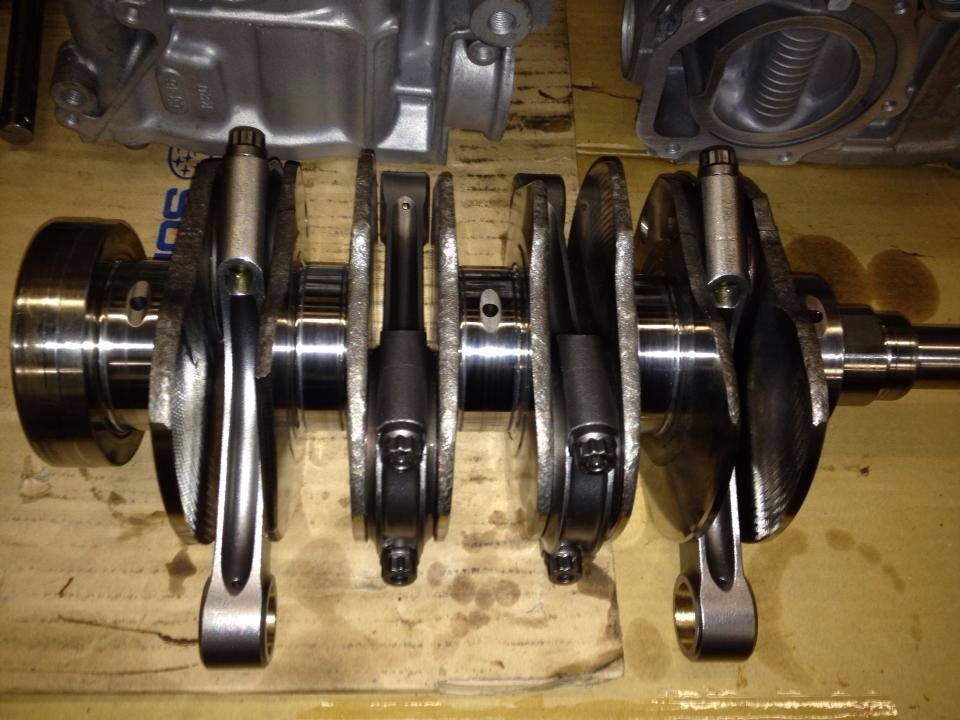
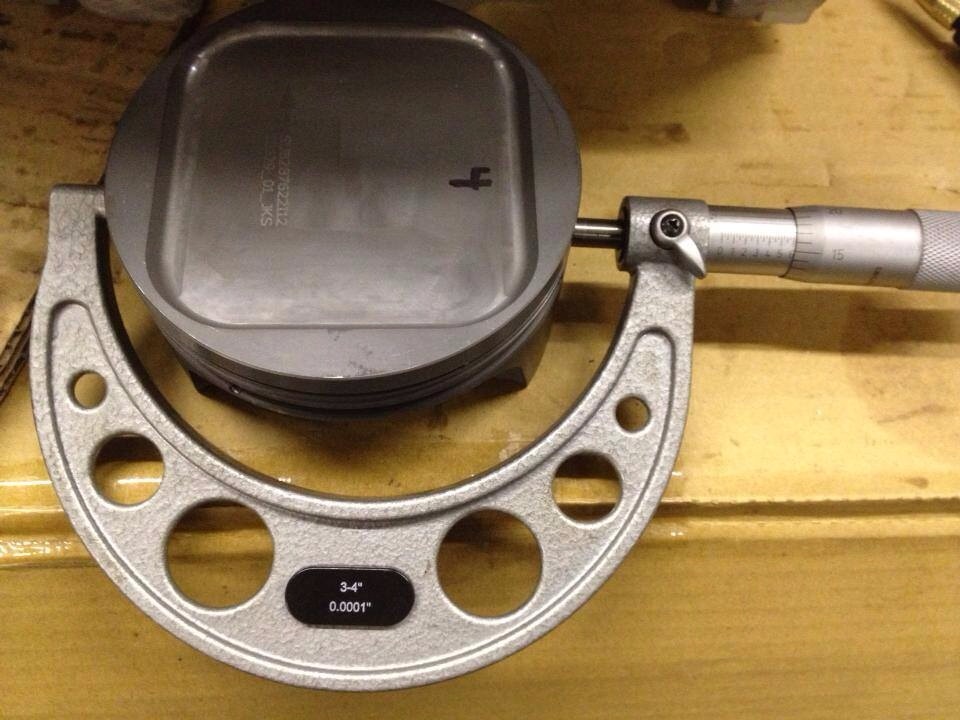
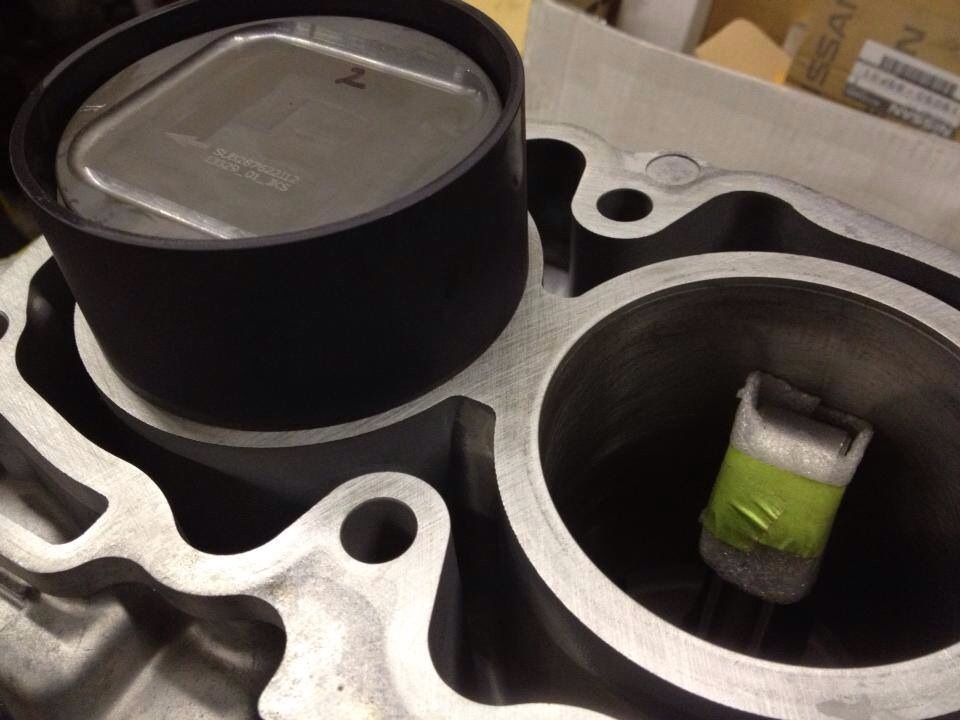
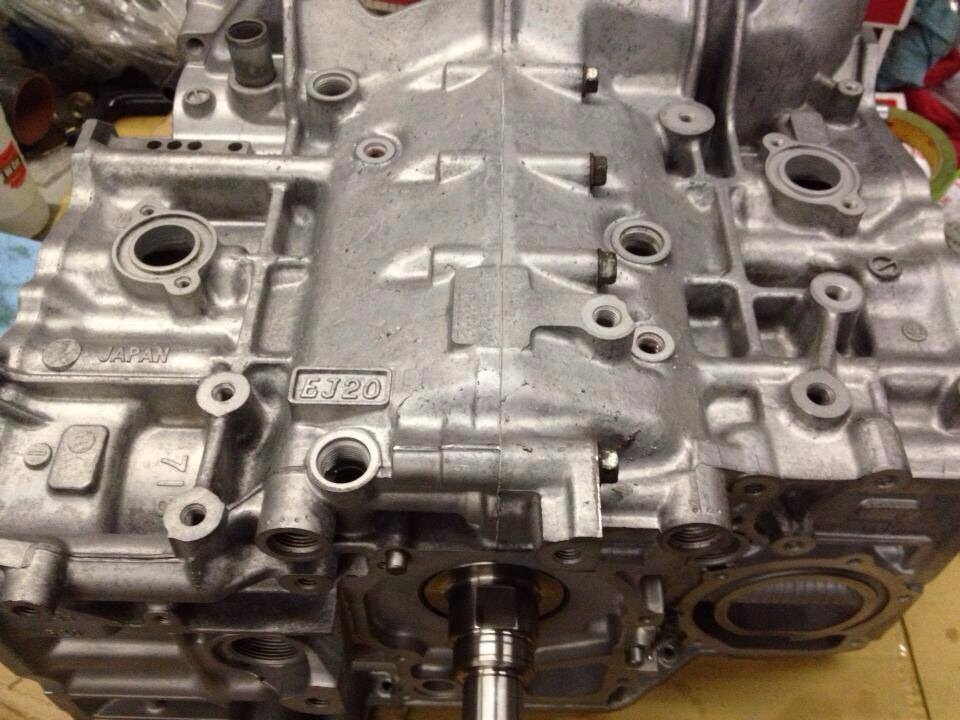
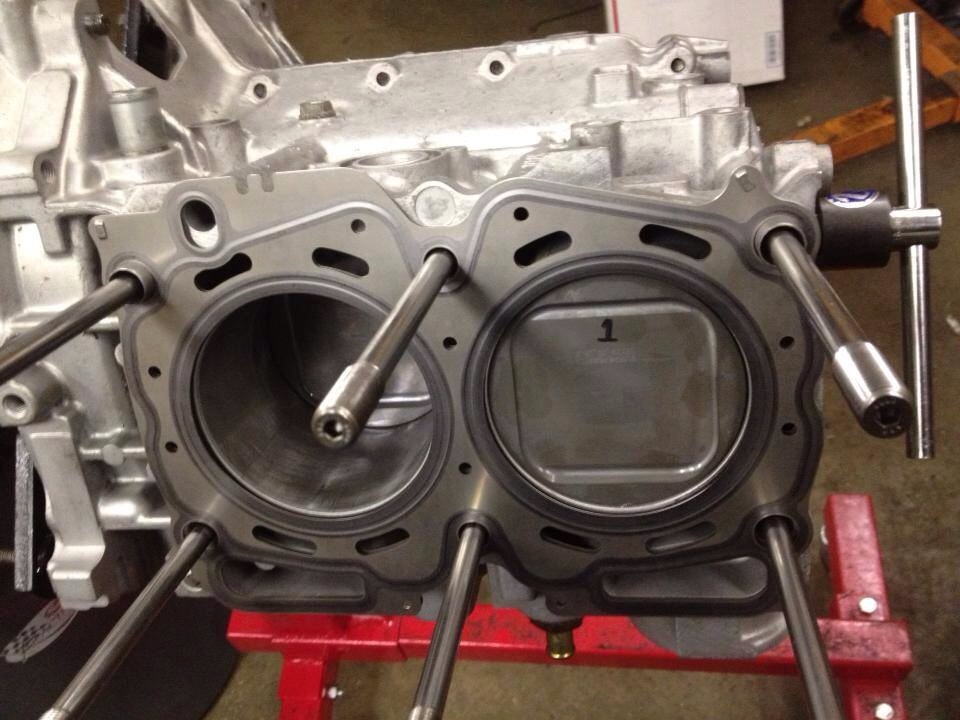
Posted by: CptTripps Dec 21 2013, 12:17 PM
Wiseco forged pistons
Manley forged rods
ARP studs
King XPG bearings
...lots of good stuff.
Posted by: CptTripps Dec 21 2013, 12:18 PM
And here are the heads. Freshly rebuilt/honed/floated.
Attached image(s)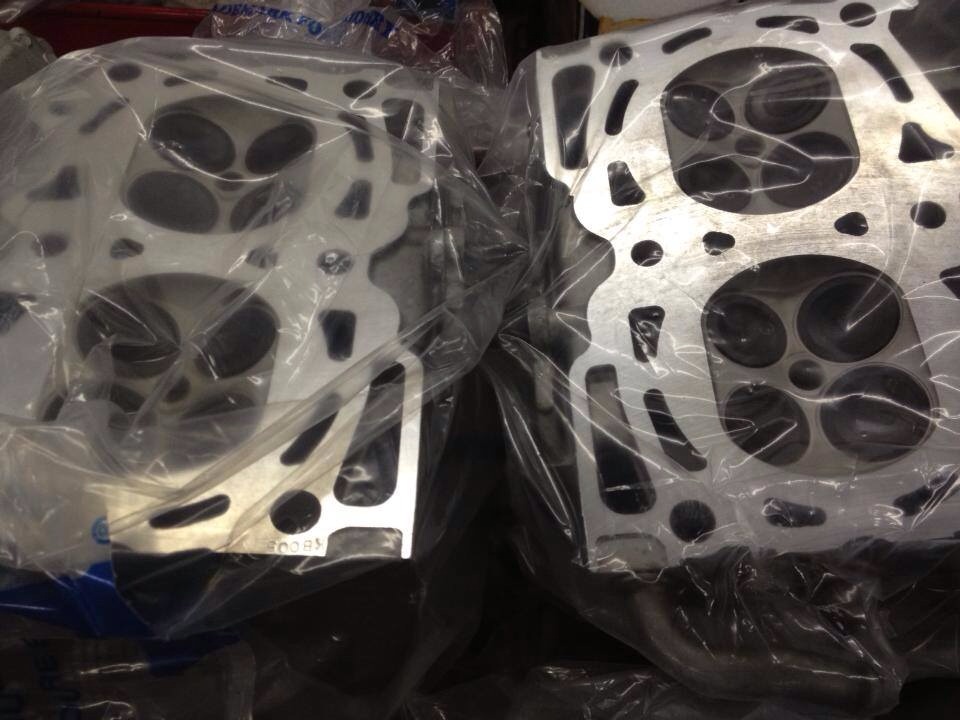
Posted by: 904svo Dec 21 2013, 01:00 PM
Ops wrong form.
Posted by: CptTripps Dec 29 2013, 08:13 PM
Gauges from New Vintage are all done. (Looks like he borrowed Andy's camera.)
Engine is almost ready to come home and meet up with the transmission!
Killer-B oil pickup and a new STi Oil Pan. (so I can use equal length headers)
Attached thumbnail(s)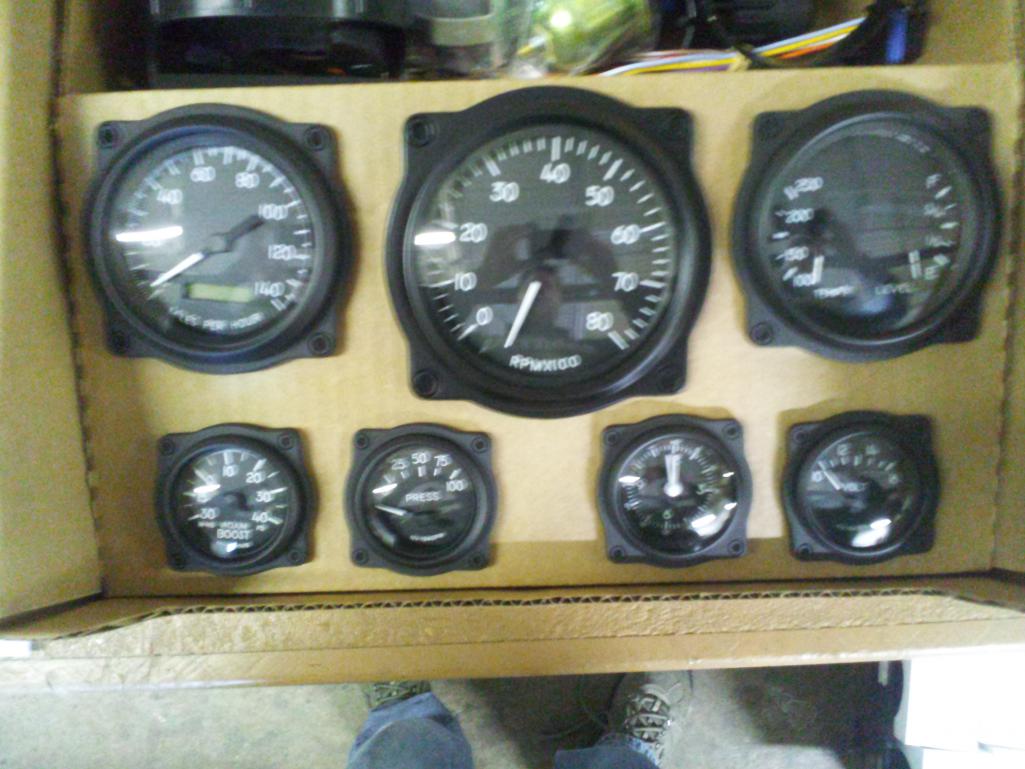
Attached image(s)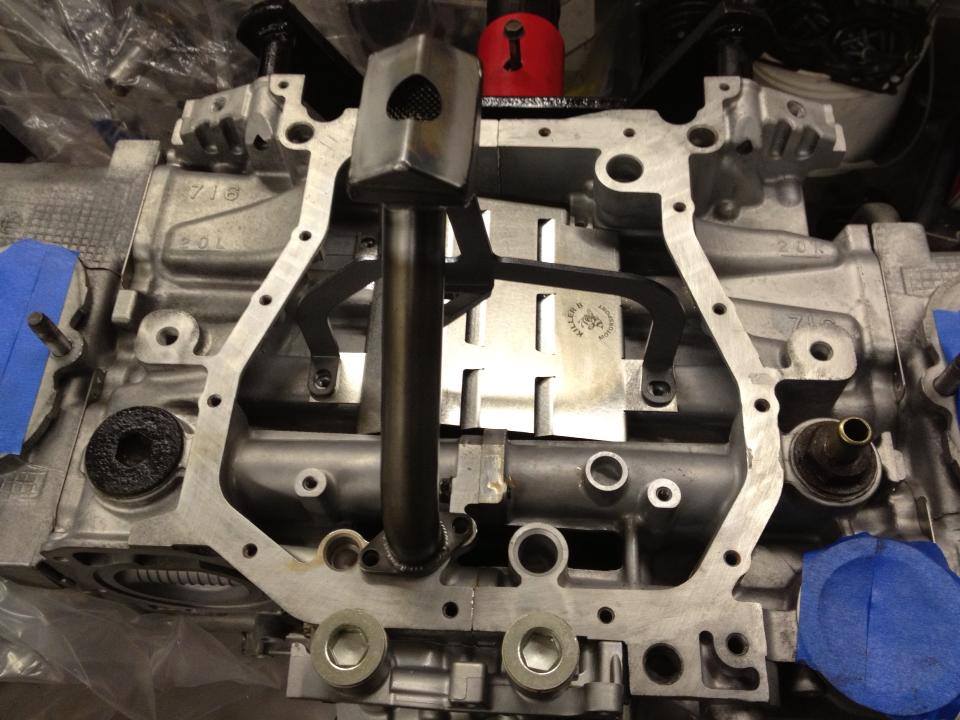
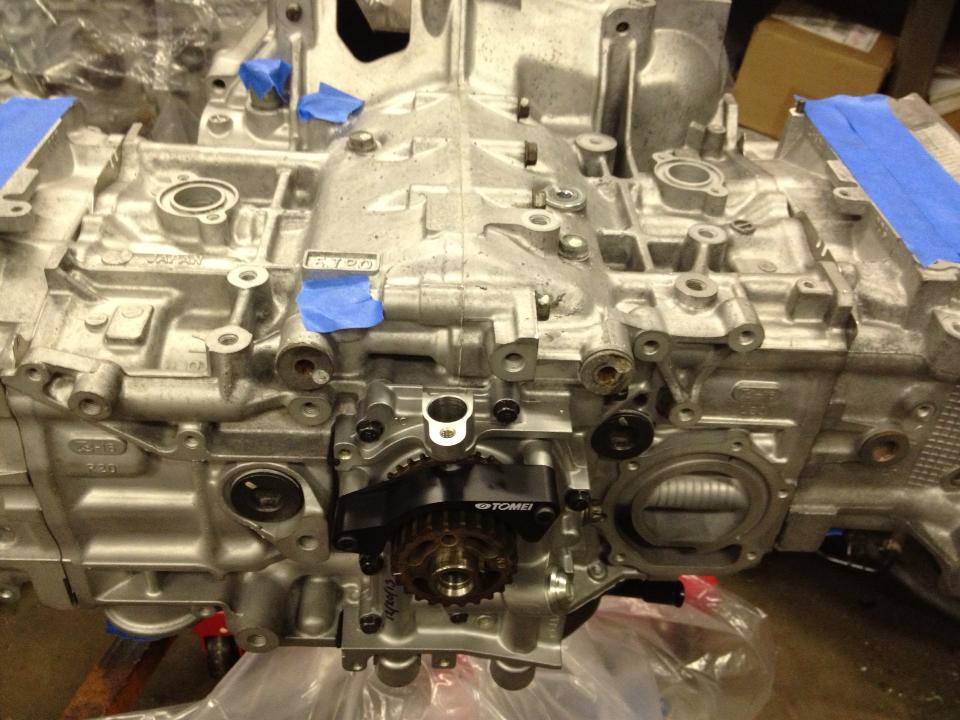
Posted by: rick 918-S Dec 29 2013, 10:18 PM
Looking good Doug. Hope your in town next time I'm passing through.
Posted by: effutuo101 Dec 29 2013, 10:50 PM
Keep it up!
Posted by: mikesmith Dec 30 2013, 03:52 PM
Hopefully we'll get a better shot of those gauges. I want to know if you can actually read the speedo past about 40mph. I've prototyped three digital dashboards now just trying to get legible speed information...
[edit: meaning, not obscured by the steering wheel at freeway speeds]
Posted by: CptTripps Dec 30 2013, 04:43 PM
Well, I'll have them tomorrow or Thursday. I'll take pics immediately and let you all know. I had him do a custom Green LED light inside all of them, so it should look pretty good.
Posted by: CptTripps Jan 4 2014, 11:48 PM
Got the gauges today. Lots of other goodies too, but I needed to be in the garage working...not looking at all the boxes.
So here's a quick shot of them. They look SPECTACULAR in person. This is going to be a great build!
Attached thumbnail(s)
Posted by: effutuo101 Jan 5 2014, 12:24 AM
Oh! Those are sweet!
Posted by: ruby914 Jan 5 2014, 12:41 AM
They do look great. What's up with the 4 mph?
![popcorn[1].gif](style_emoticons/default/popcorn[1].gif)
Posted by: CptTripps Jan 5 2014, 07:35 AM
Good catch Mike. I hadn't noticed that.
I'm waiting for the Alcantara to show up so I can mock up a panel and see if this is going to work.
This weekend, I'm concentrating on getting this puppy stripped out and ready for the body shop.
Posted by: CptTripps Jan 6 2014, 02:32 AM
Spent a few days this weekend hitting the garage. The more time I spend, the more rewarding he effort.
Interior is stripped out, and I gutter the doors. Took advantage of a break in the weather yesterday and soda-blasted the door parts. Take a look at the before/after. I blasted them for about 60sec, and then dunked in warm soapy water afterwards. Quick spritz with some WD-40 to protect the metal and we're jamming.
I need to take another pic or two of the interior. I've since removed the dash.
Attached image(s)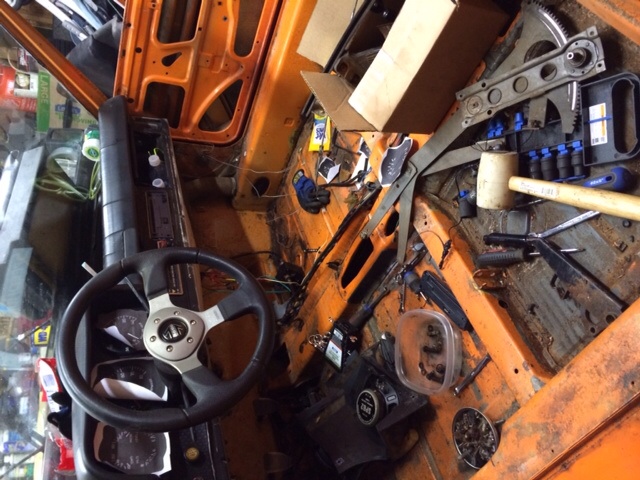


Posted by: OU8AVW Jan 6 2014, 09:36 AM
Sweet! Keep it going!
Posted by: CptTripps Jan 6 2014, 05:02 PM
Got my wiring harness in today!
I wanted to re-make everything, and since all my gauges are custom...this was an easy $175 to spend!
Attached thumbnail(s)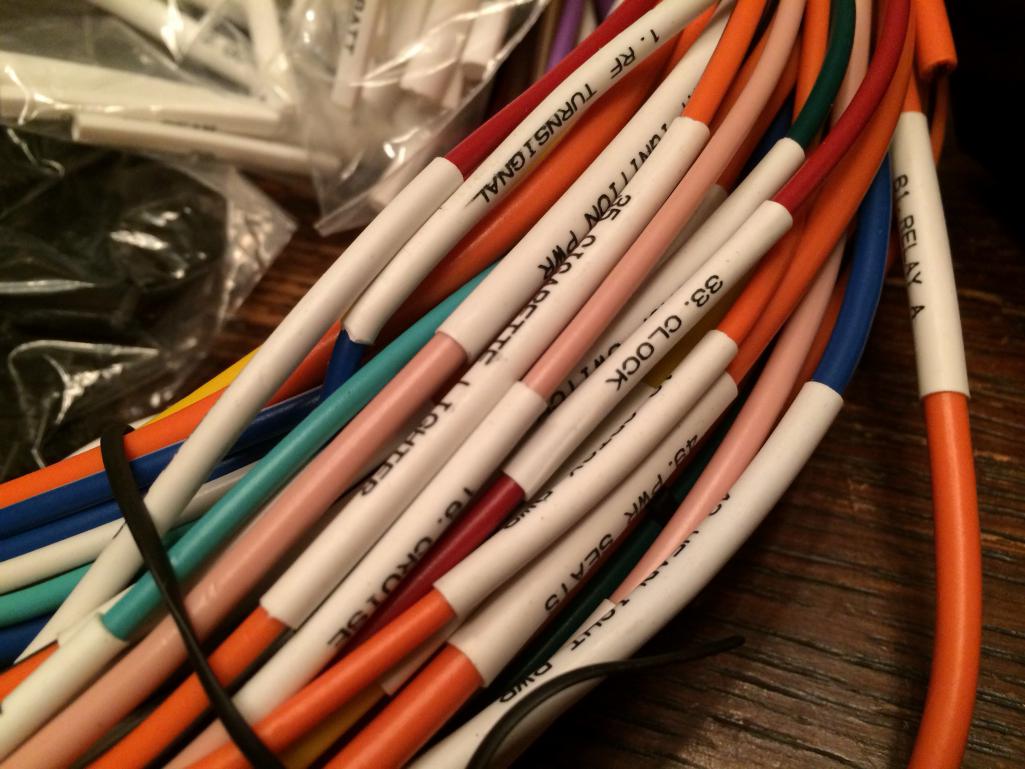

Posted by: palmer_md Jan 6 2014, 10:48 PM
Got my wiring harness in today!
I wanted to re-make everything, and since all my gauges are custom...this was an easy $175 to spend!
Very nice...where was this sourced?
Posted by: CptTripps Jan 7 2014, 08:06 AM
I found it on eBay. Actually, it was less than I said. $160 shipped.
http://r.ebay.com/bi3URr
The quality is seriously outstanding, and there are a lot of things that I didn't expect to have leads for. It also came with the relays for Hazards, blinkers, horn, and starter.
I was all set to order all the wire separately, but this was so much cheaper. I figured at the least, I'd have 30' of 20 different wire colors, which I couldn't buy for less than $200. This came with a modern fuse panel and everything else needed. The bag in the picture has pieces of 3" shrink wrap with all the circuits and the fuse number pre-printed so you can re-mark the wires after you cut them to length. What a time saver!
Posted by: CptTripps Jan 10 2014, 09:00 PM
Almost don't with the motor.
Replaced every bearing on the timing belt. Replaced the water pump, upgraded to a bigger oil pump, new belt and guides, and I even got the shield painted "Grabber Green" before reassembly.
Attached thumbnail(s)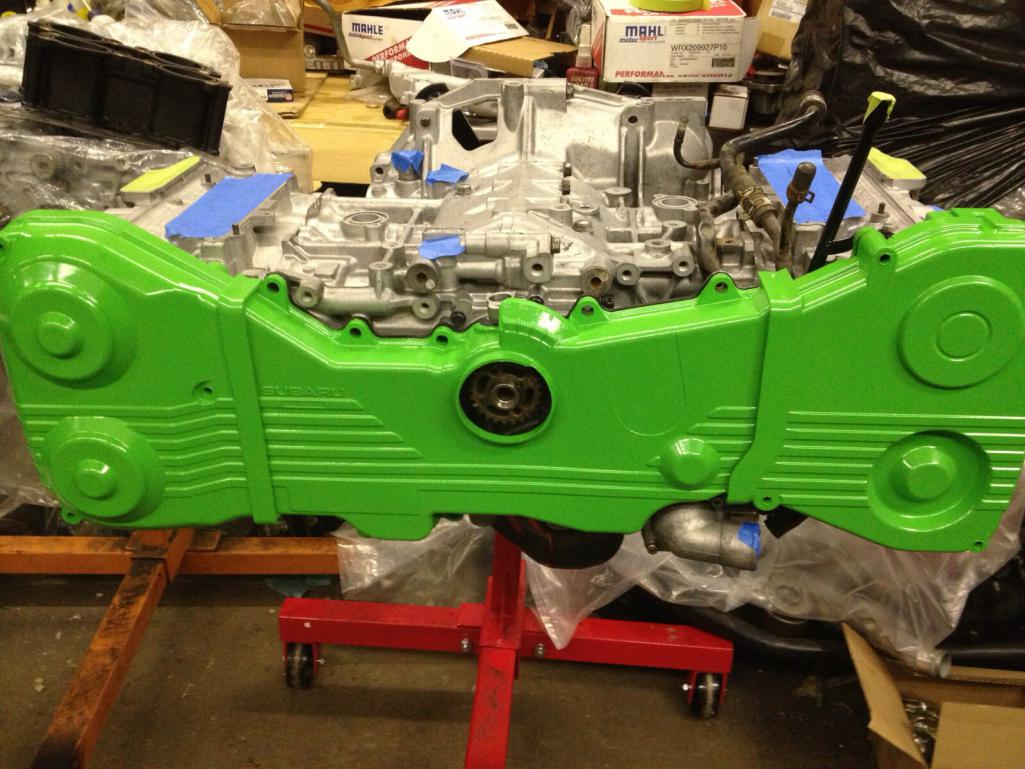
Attached image(s)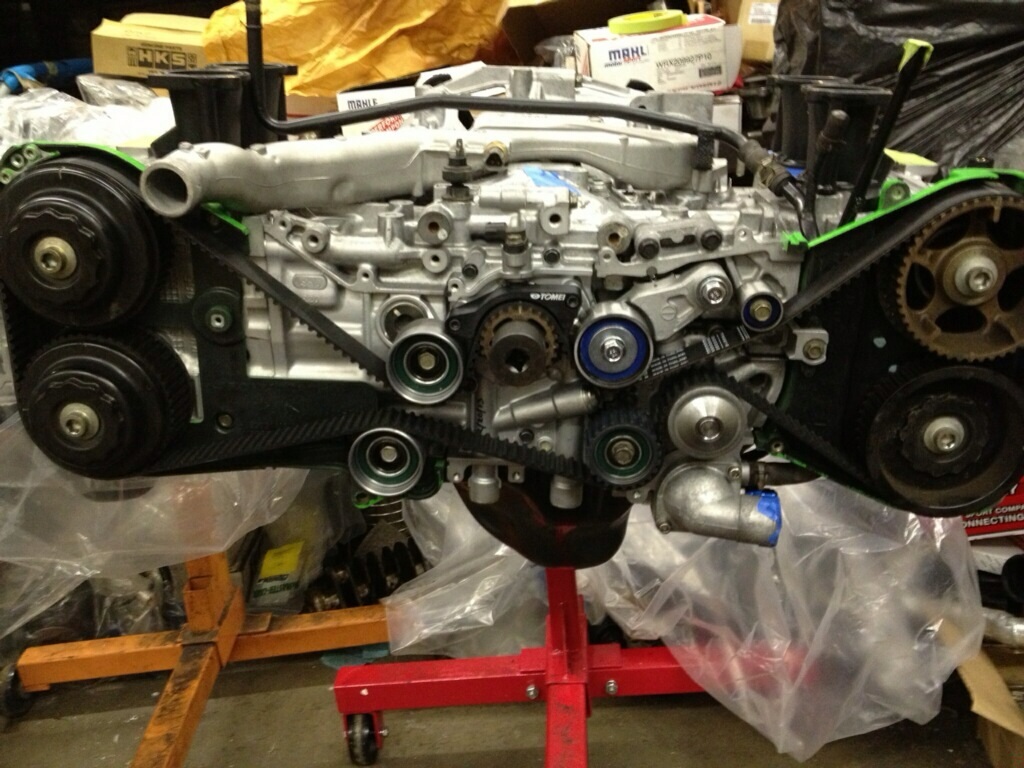
Posted by: effutuo101 Jan 10 2014, 11:48 PM
Nice! I love that green.
Modern engines have so much more flexibility for colors.
Posted by: bulitt Jan 11 2014, 04:33 AM
I found it on eBay. Actually, it was less than I said. $160 shipped.
http://r.ebay.com/bi3URr
The quality is seriously outstanding, and there are a lot of things that I didn't expect to have leads for. It also came with the relays for Hazards, blinkers, horn, and starter.
I was all set to order all the wire separately, but this was so much cheaper. I figured at the least, I'd have 30' of 20 different wire colors, which I couldn't buy for less than $200. This came with a modern fuse panel and everything else needed. The bag in the picture has pieces of 3" shrink wrap with all the circuits and the fuse number pre-printed so you can re-mark the wires after you cut them to length. What a time saver!
If I have so much as a blown fuse I'm going this route.
Posted by: CptTripps Jan 11 2014, 09:42 PM
I'll take pics of the manual it came with. That has everything listed so you get an idea of what's there.
Spent the day getting everything out of the front trunk. I'll finish up tomorrow and then start working on the suspension. We're getting there.
Posted by: CptTripps Jan 12 2014, 07:27 PM
I hit the garage today...and hit it hard. Spent 10hrs, and got a lot accomplished.
Got the trunk and good off. Removed the rear trailing arms, suspension, CVs, and then started on the trans and engine. I'm doing all of this myself, so I'm making use of the rotisserie I bought. I'll get the car down low, remove the bolts on the engine and trans, and then raise the car up 3' and scoot it out safely. Great plan I think.
Anyways. I'm going to put these arms and hubs up for sale in the classifieds. I have another set, and there's no sense in wasting these.
Attached thumbnail(s)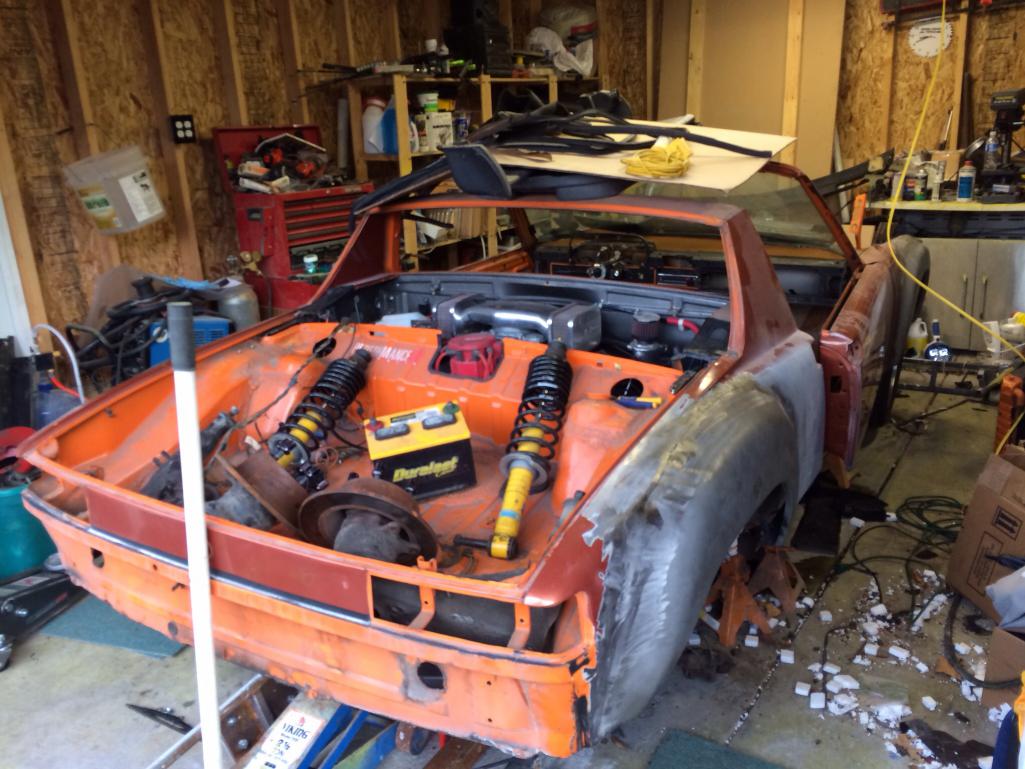
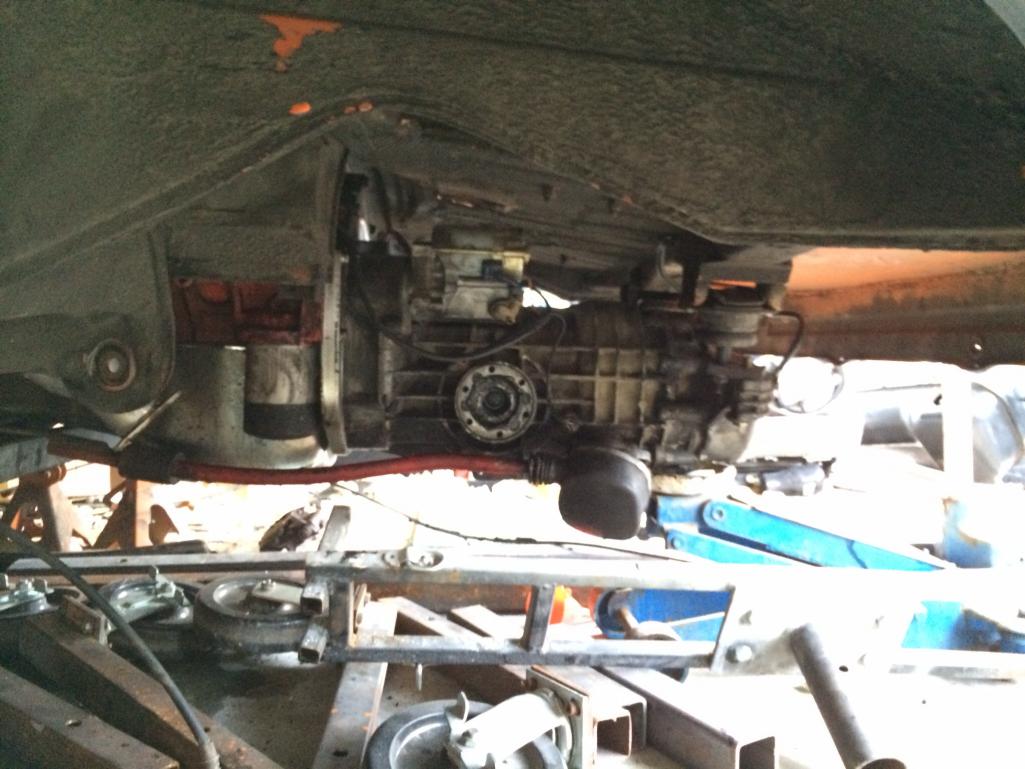
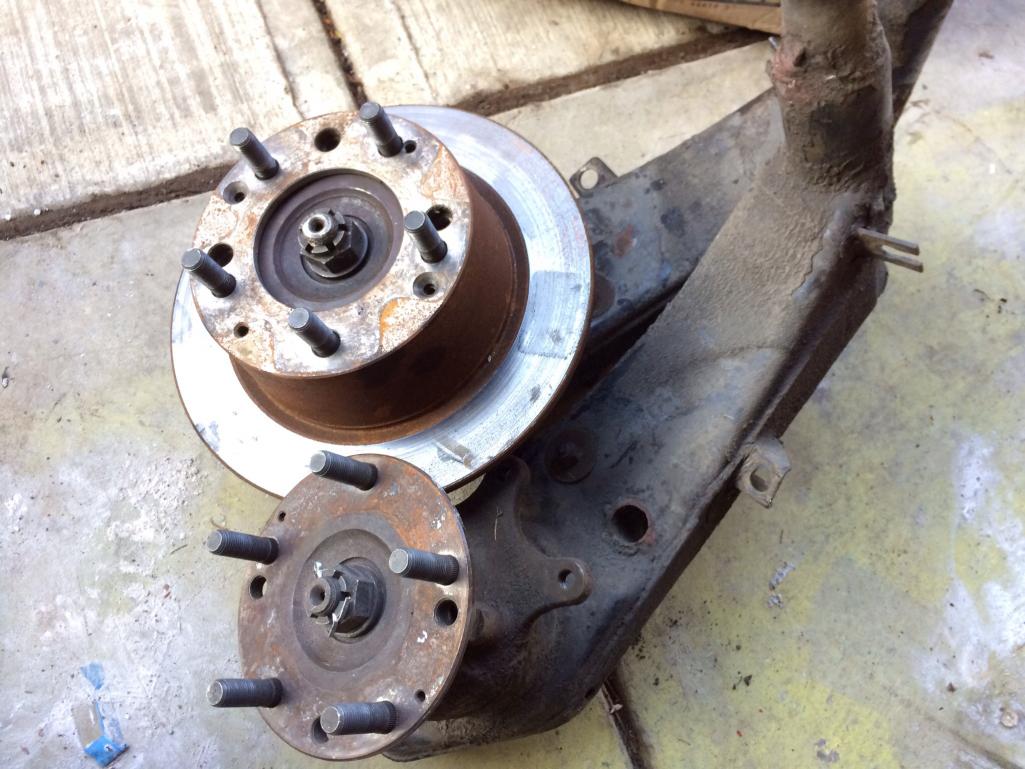
Posted by: CptTripps Jan 16 2014, 10:49 AM
Ok...we're starting to get organized here.
Now that I have the gauges, wiring harness, and all the switches acquired, I thought I'd go through everything JUST to make sure I wasn't forgetting anything.
Put all the LED switches, knobs, spacers, and bolts into baggies.
Got the power window motors, door lock actuators, alarm, loom, and heated seat pads in a box, and ready to go. Seat covers ordered from World Upholstery.
Oh...and I have a new pic for the DAPO Pictures thread. No clue WTF the thought was behind the silicone.
I also started laying out the rear trailing arms and had a question about the L bracket on the Tangerine 911 P-Brake conversion. Should I weld this to the arm or this bracket?
Attached thumbnail(s)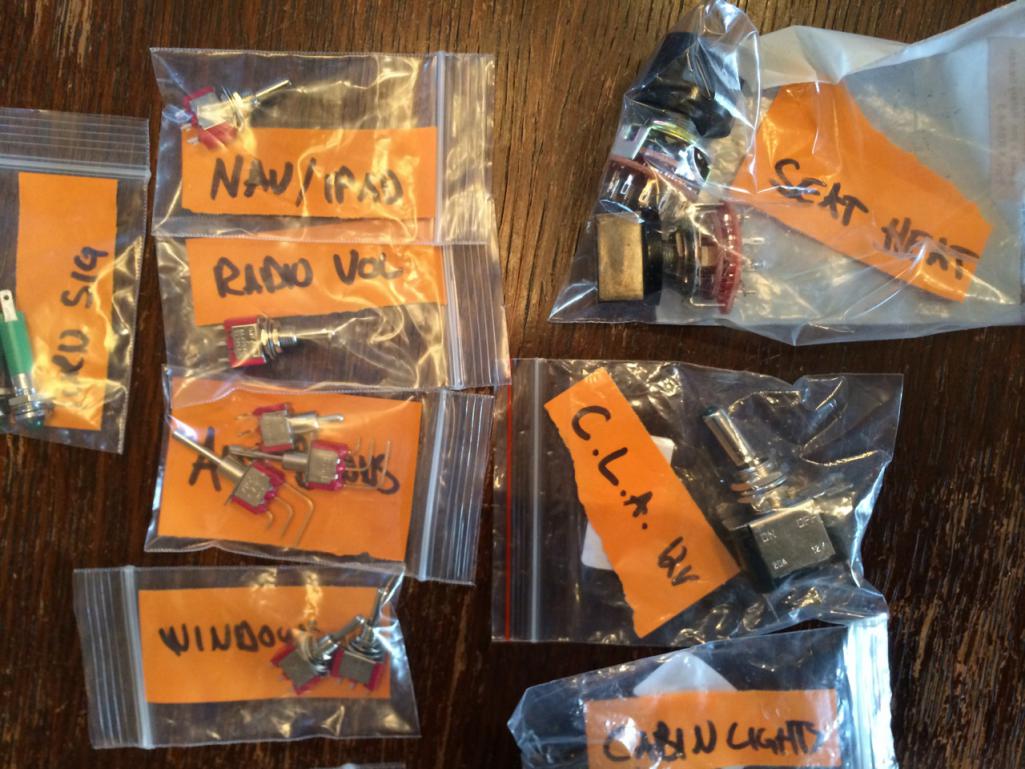
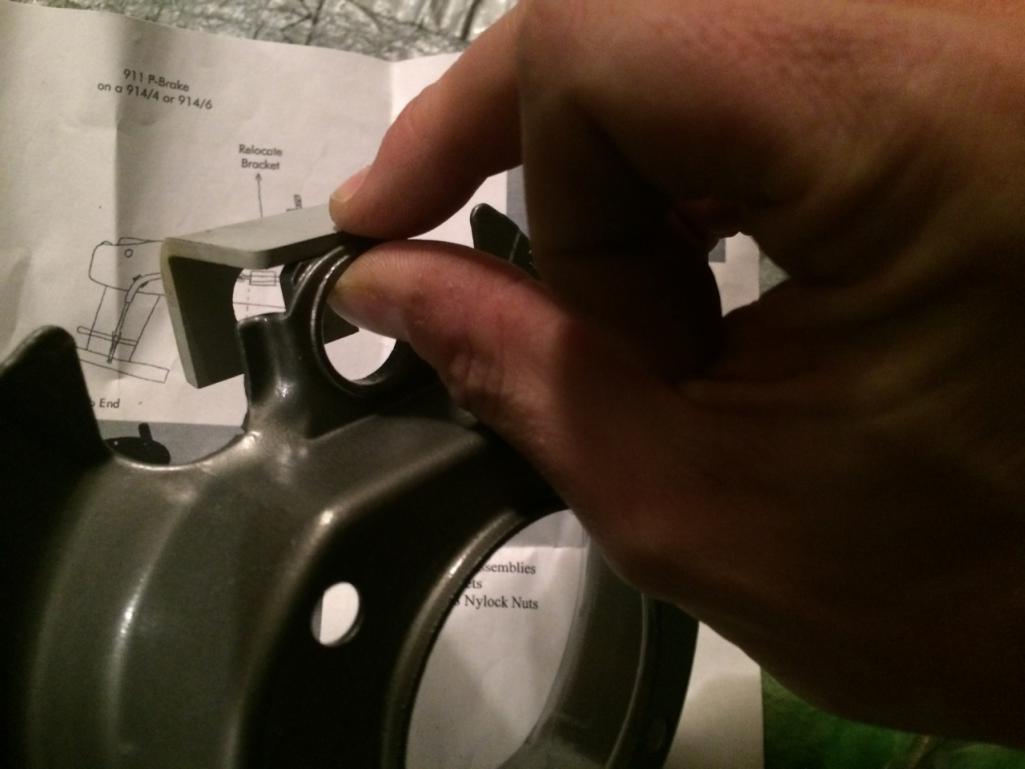
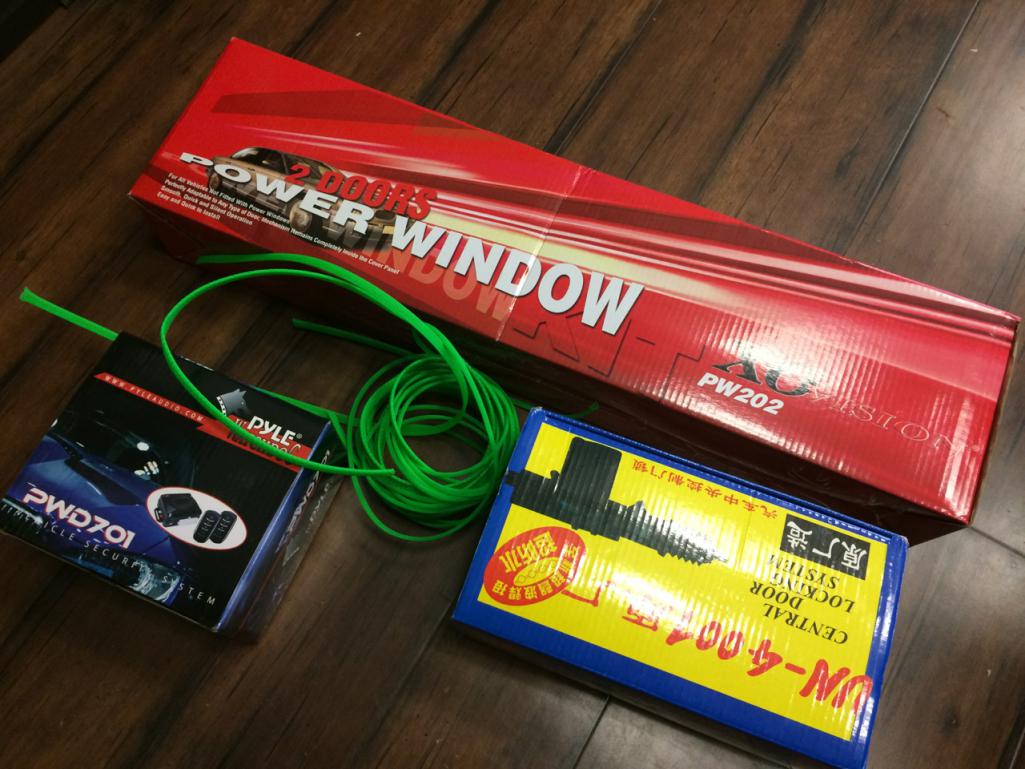
Posted by: CptTripps Jan 16 2014, 02:34 PM
To give everyone an idea of where I'm headed, I mocked up the shifter and started to mock the ret of the dash.
Yes Mark...I know..."Digital Progress" doesn't count.
I have already made a few changes, so this is proving to be invaluable.
Anyways...enjoy!
Attached thumbnail(s)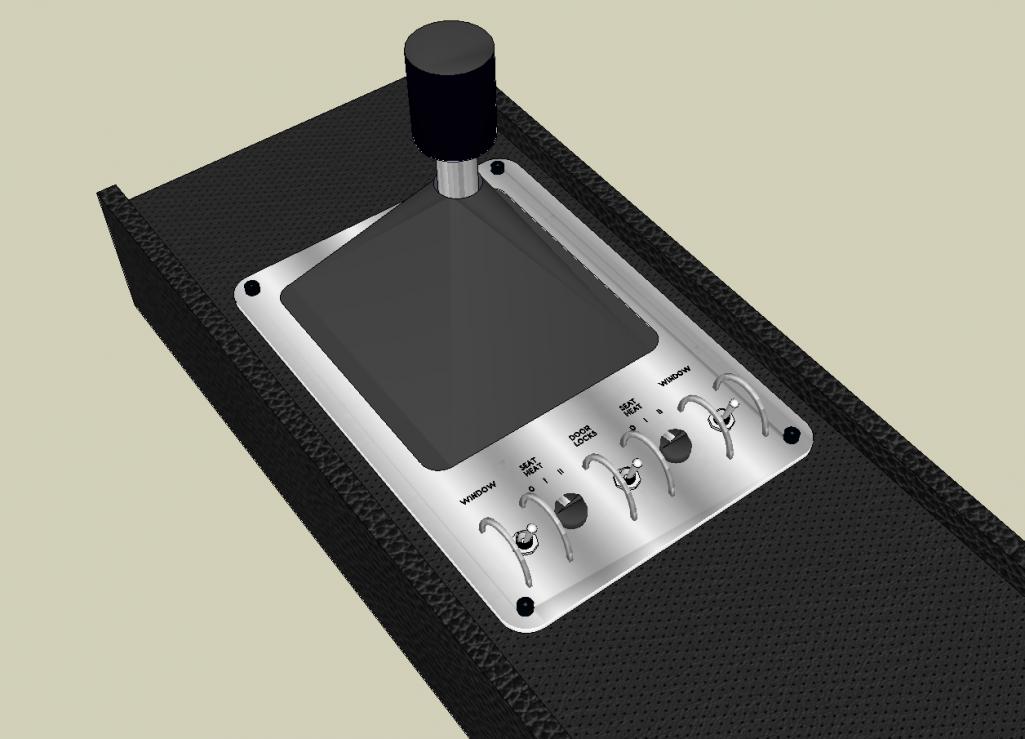
Posted by: effutuo101 Jan 16 2014, 02:53 PM
looking good!
Posted by: Chris H. Jan 16 2014, 03:12 PM
That's gonna be really nice!
Posted by: ruby914 Jan 17 2014, 02:50 PM
That is going to look good.
Give a lot of thought to the shift boot as you go.
I was thinking of starting a thread on "show us you're cable shift, shift boots".
The problem I have is my shift knob and the top of the center console are very close.
I wanted the opening on the console as small as possible and I wanted it covering the linkage but that high up on the shift shaft you are getting full swing of the shaft. That is putting a lot of demand on a short boot with a lot of movement. I have still not come up with a boot design that I like. I may have to make my opening bigger and lower.
Attached image(s)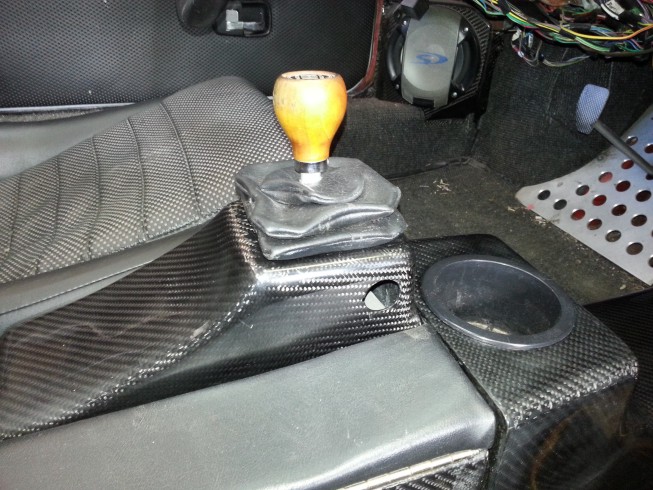
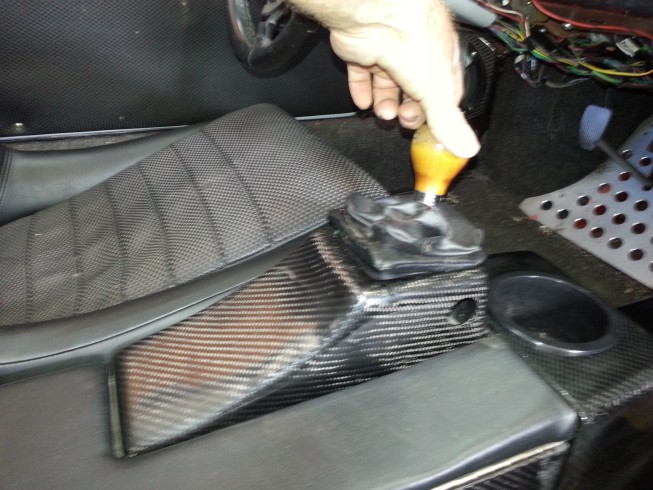
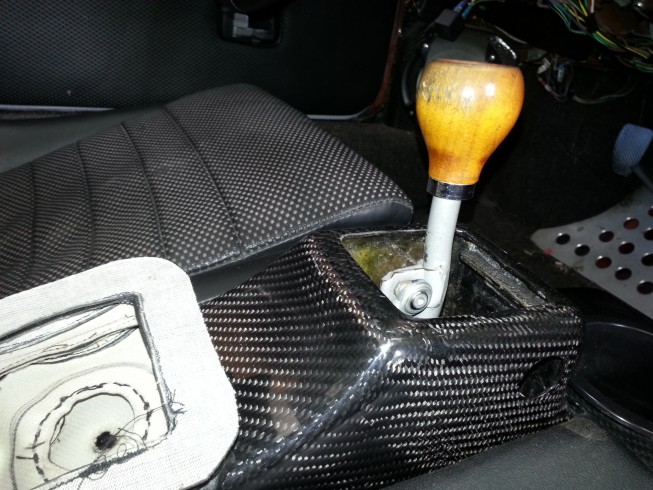
Posted by: 76-914 Jan 17 2014, 03:16 PM
Kevlar Sexy.
Posted by: effutuo101 Jan 17 2014, 05:15 PM
I playing with Adding some height up front and drop the shifter down in the back. That will change how my center console will play out.
Posted by: CptTripps Jan 18 2014, 07:25 PM
Tigre81 stopped by today to buy my rear trailing arms, and gave me a hand getting the SB350 out if the car. I COULD NOT have done that on my own. Holy crap is that thing heavy!
Tomorrow I'm going to weld some braces into the door jams so I can get it on the rotisserie and start making her do backflips!
Attached thumbnail(s)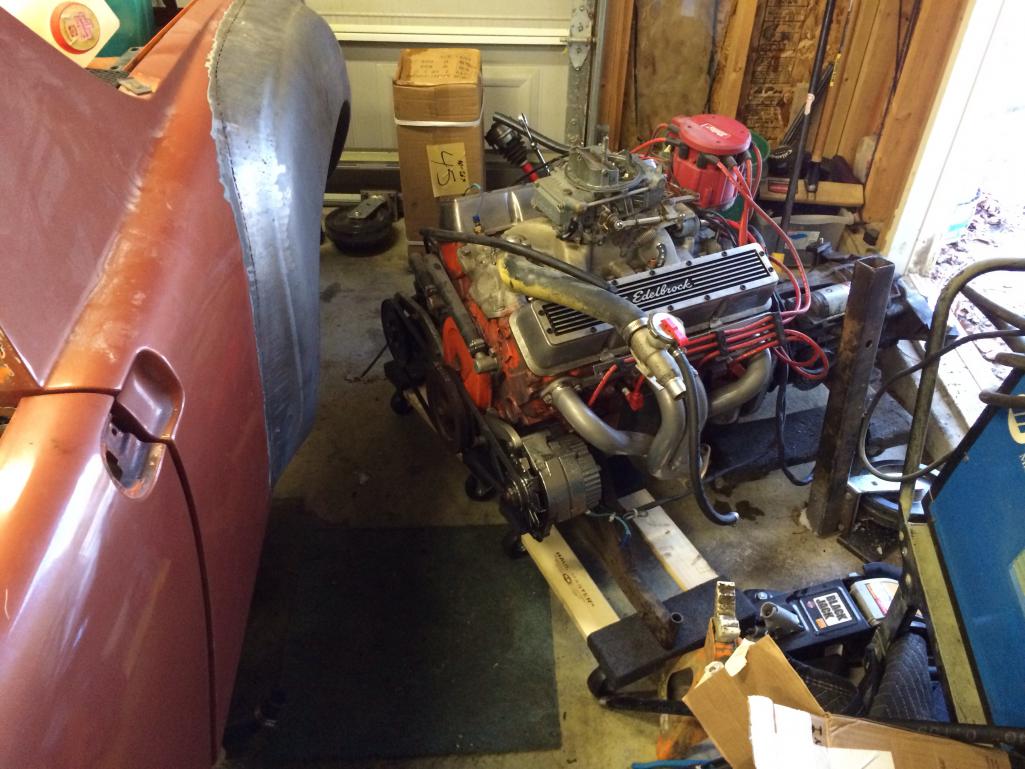
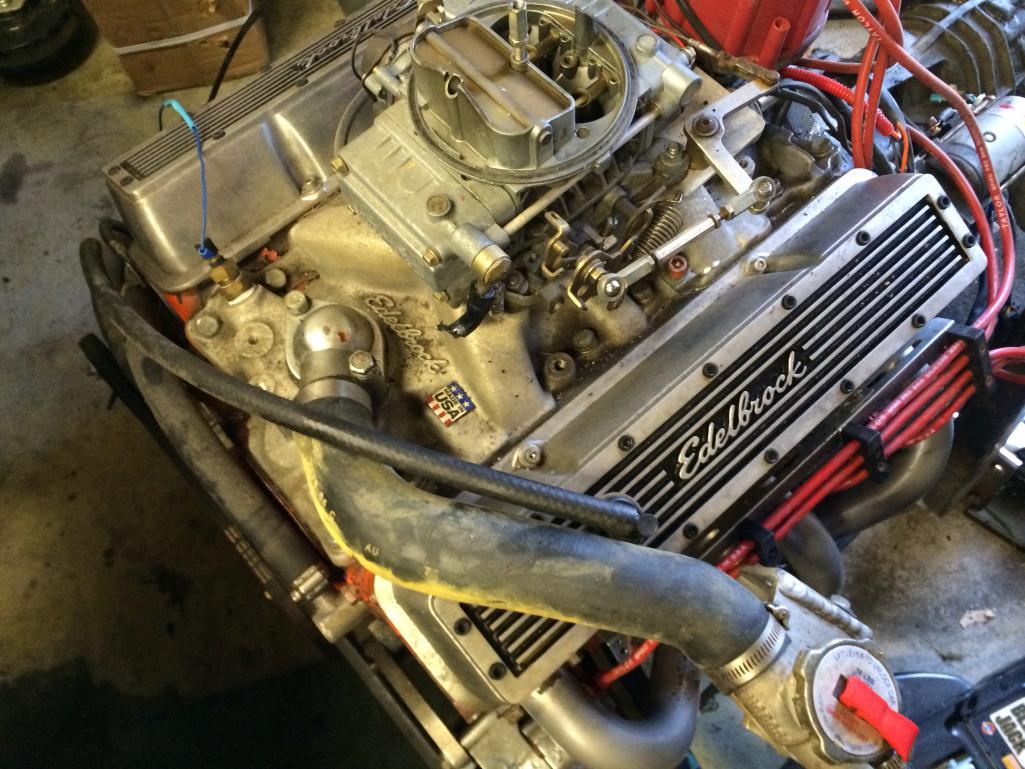
Posted by: CptTripps Jan 18 2014, 07:27 PM
Then I stopped by my motor builder to talk about the wiring harness and what I need to keep before I start rebuilding the harness. She's looking purdy!
Composite TGV deletes and the intake manafold look great. He should have everything ready to come home in another week.
Attached thumbnail(s)
Posted by: Chris H. Jan 18 2014, 07:51 PM
Wasn't quite 100% on that green timing belt cover but it looks really good fully installed. Way better than leaving it black. That engine is gonna scream. Hope you got some good scratch for that V8 motor...Edelbrock INTAKE MANIFOLD...sweet.
Posted by: CptTripps Jan 18 2014, 08:50 PM
That engine is gonna scream. Hope you got some good scratch for that V8 motor...Edelbrock INTAKE MANIFOLD...sweet.
Yeah, he got a hell of a deal on it. I didn't realize at the time I sold it...but it's all good in the end. No worries here. The hard part is going to be crating it up to ship to CA. THAT is going to take some effort!
It's all going to start getting easier now that the engine is out of the car. I should have it over to the sand-blaster by Friday. If not, It'll have to wait until Tues, but that gets me freed up to work on everything else.
Party time!
Posted by: Van914 Jan 19 2014, 07:38 AM
CptTripps,
Call Summit Racing and see if they have any left over crates from their engine program. You live close so you could pick up.
Van914
Posted by: CptTripps Jan 19 2014, 05:16 PM
Worked a bit in the garage trying to make a brace for the doors and got frustrated. So I ended up working on some ideas for the upholstery today.
I'll get back in the garage tomorrow and see if I can get her upside down. :-)
Attached thumbnail(s)
Posted by: CptTripps Jan 20 2014, 02:00 PM
Playing with LED Blinkers today. I'll do a different thread on them later.
https://www.youtube.com/watch?v=FYbiDTxSqK0
Posted by: CptTripps Jan 20 2014, 04:47 PM
Got into the garage and welded the tubes in the rear triling arms.
Made a template that came in 3.5" in the center, and then at 6.5", I came in an inch. Did that on both sides, and it worked real well.
My welds are getting better.
Attached thumbnail(s)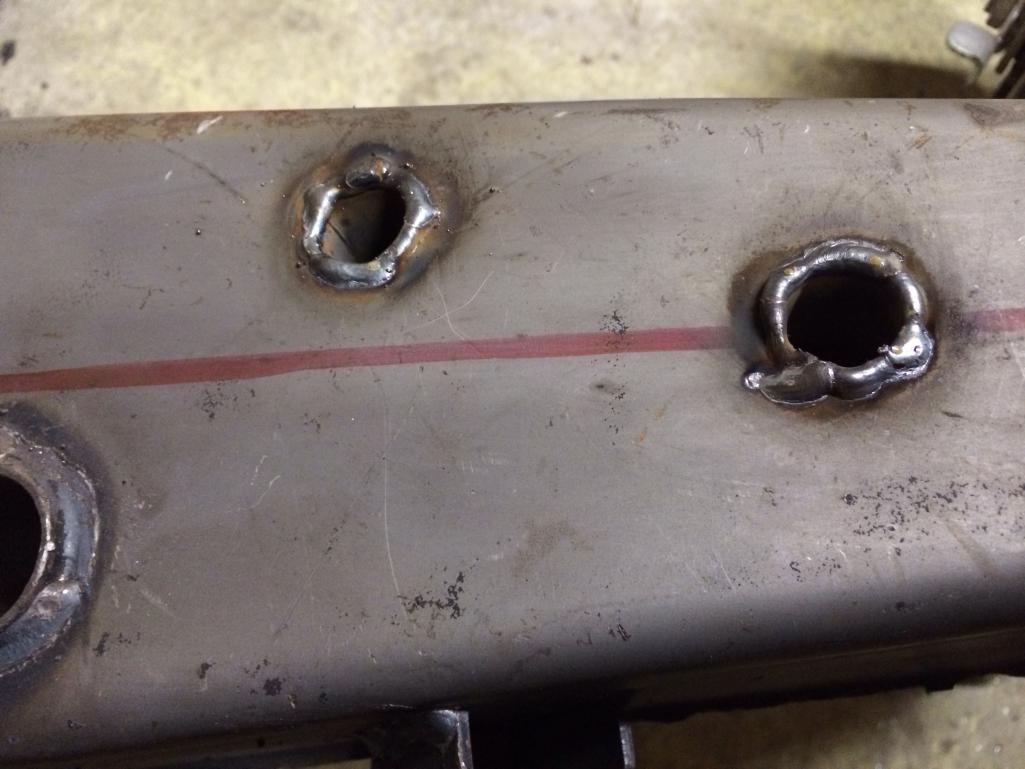
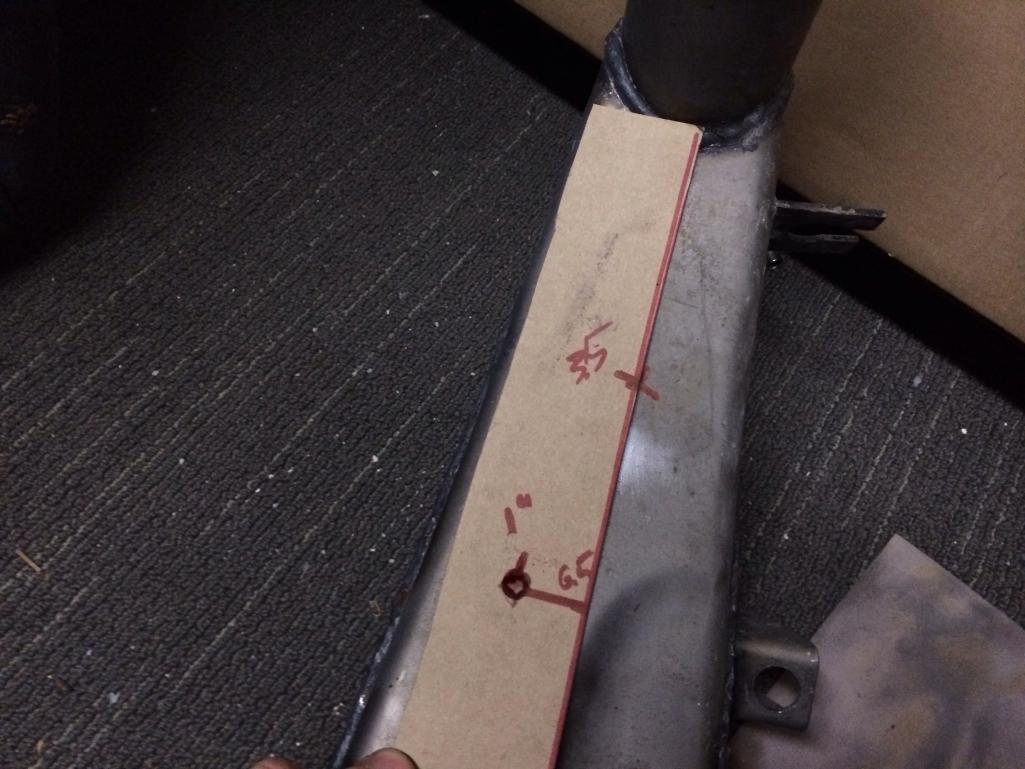
Posted by: Chris H. Jan 21 2014, 08:11 AM
Those blinkers are bright. I'm liking that.
Posted by: CptTripps Jan 21 2014, 09:42 AM
I'm using 1/4" smoked plexiglass to make custom lenses all around. Making my own baskets behind the plexi will let me use just about anything I want.
I loved that the Grote lights were rectangles, mimicking more closely the original tail lights.
Here's what I'm using for the front lights. These are almost the perfect size for the front markers, and with the right baskets, will work real well. I'm going to float these inside the existing baskets, and put some white LEDs behind it to use like Halo DRLs.
I'm gutting the plexi this week, and will get this mocked up so I can see if it'll fly. Who knows.
Attached thumbnail(s)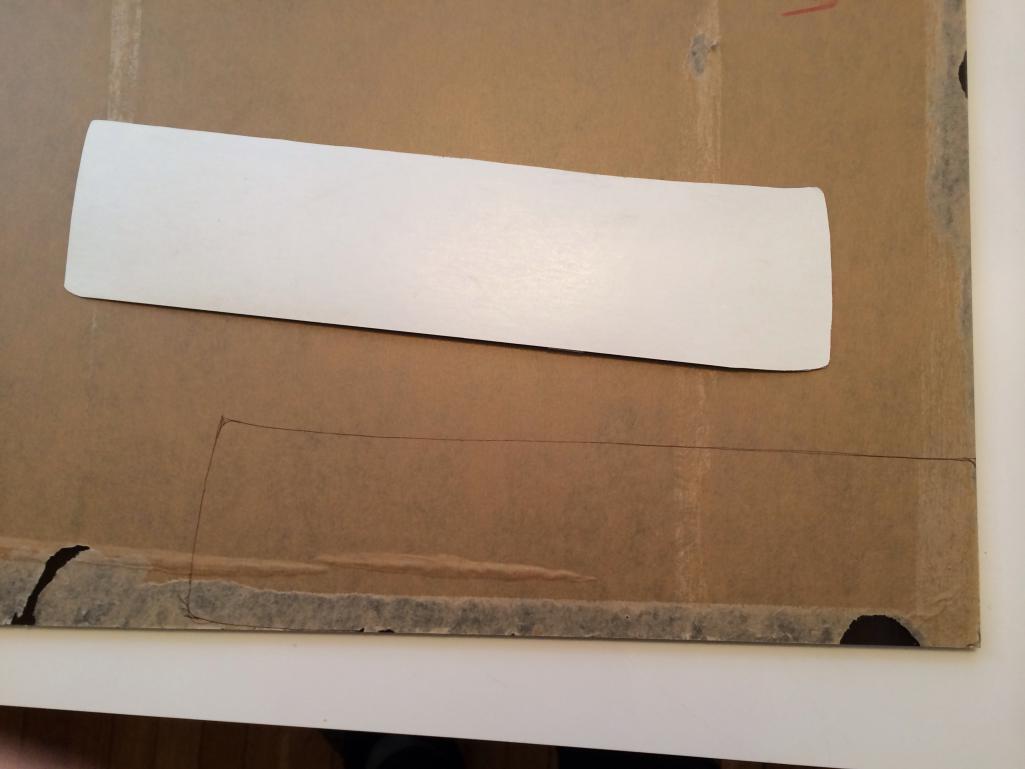
Attached image(s)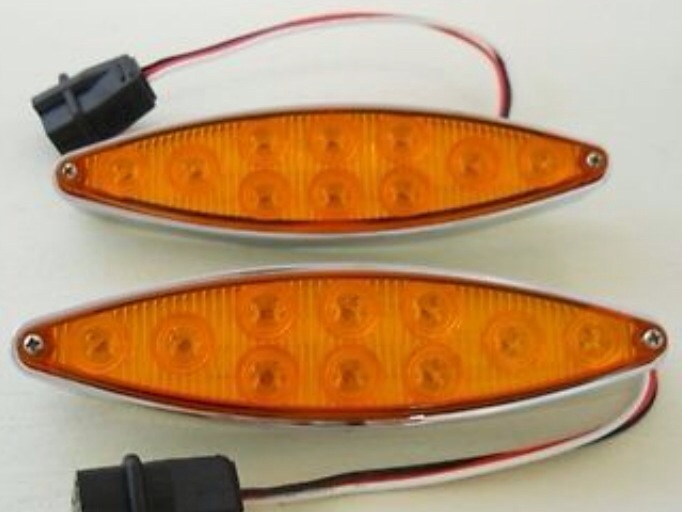
Posted by: CptTripps Jan 21 2014, 09:54 AM
Here are the tail lights I used. Available at Summit for about $20ea
http://www.grote.com/product.php?product_number=G4502
http://www.grote.com/product.php?product_number=G4503
Posted by: CptTripps Jan 21 2014, 11:25 AM
Oliver (5) wanted me to post this pic, because he thought it was about the coolest thing in the world. He and Garrett (7) were trying to convince me to put the engine in the FRONT so they could put seats in the back and ride back there.
Attached thumbnail(s)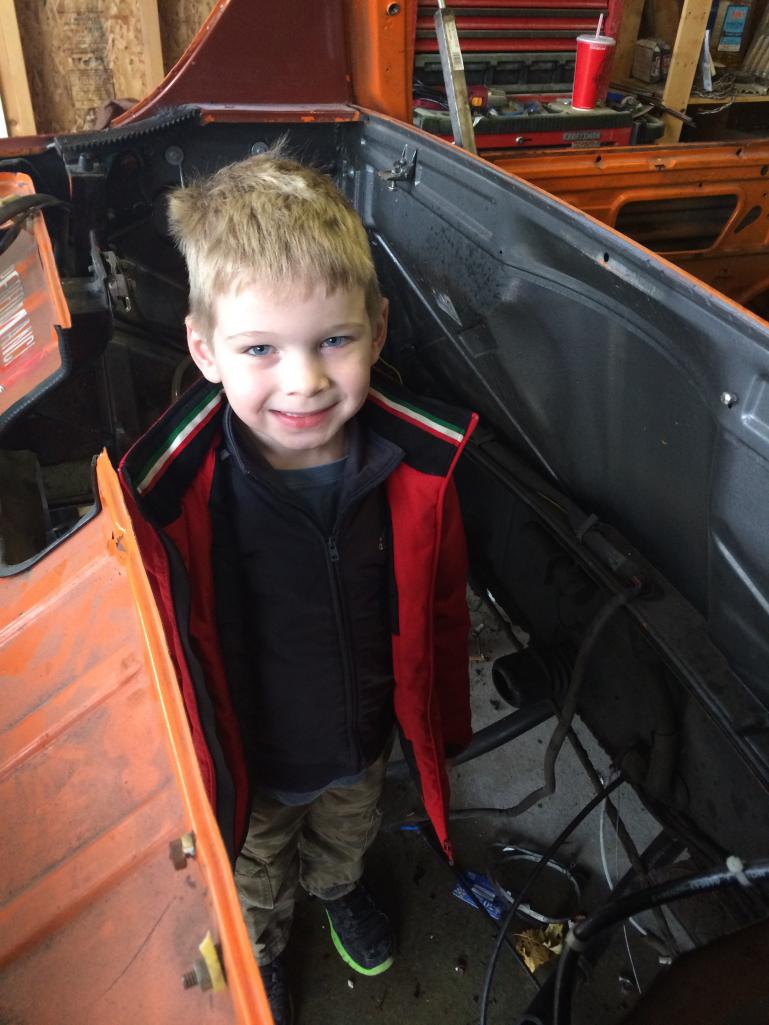
Posted by: 76-914 Jan 21 2014, 11:36 AM
Cute kid. Don't you wish you were his height when working on your teener?
Posted by: Spoke Jan 21 2014, 01:05 PM
Nice LED modules. Grote does a lot of vehicle lighting, especially trucks.
For the front markers, what angle of dispersion do those lights have? This is an issue with LEDs as most of their light is perpendicular to the board which they are mounted on.
Posted by: CptTripps Jan 21 2014, 01:55 PM
For the front markers, what angle of dispersion do those lights have? This is an issue with LEDs as most of their light is perpendicular to the board which they are mounted on.
I'll know when I get them this week. If they are too "narrow" I was going to remove the LEDs that were in there and solder some with a better dispersion pattern in place.
I was also thinking about splitting the pattern in half to have the bottom half act as marker, the top half act as turn signal flasher.
Something like this...
(Edit: I did that upside-down. The marker lights should be on the top, and the blinker on the bottom. Same size split though. 4 LEDs for the marker, 6 for the Flash.)
Attached image(s)
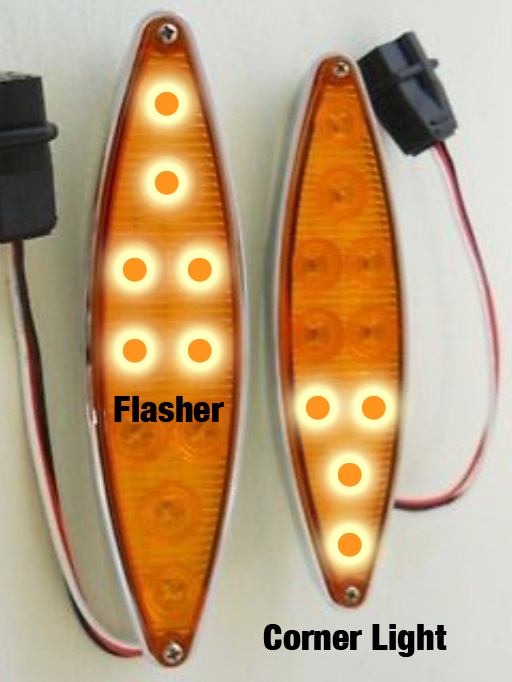
Posted by: CptTripps Jan 21 2014, 01:59 PM
Cute kid. Don't you wish you were his height when working on your teener?
That's what the rotisserie is for! I figure the money I spent on it will pay off in spades as far as my BACK is concerned!
Posted by: Spoke Jan 21 2014, 02:48 PM
If those LEDs are like others, the maximum intensity is 90 degrees from the board. Thus if you mount them with the slant of the front marker lens, the maximum light will point upwards in that direction. Some light will project parallel to the road but most will be aimed upwards.
Can you do different intensities with the front markers? If so, just blink the whole thing at a higher intensity for better visibility.
Posted by: CptTripps Jan 21 2014, 03:34 PM
If those LEDs are like others, the maximum intensity is 90 degrees from the board. Thus if you mount them with the slant of the front marker lens, the maximum light will point upwards in that direction. Some light will project parallel to the road but most will be aimed upwards.
I was planning on angling it in the bucket a bit so it'd be more parallel to the road. I'll know how much room I have in a few days.
Can you do different intensities with the front markers? If so, just blink the whole thing at a higher intensity for better visibility.
I can...and will see how it looks first. I was going to go for something like the Italian light setup with 2 bulbs.
Posted by: CptTripps Jan 21 2014, 09:46 PM
Ok...last post today. More "digital progress" but I figured out all the dimensions for the new center console tonight. Mocked it all up in Sketchup, and I'm getting closer.
I'll to the top of the dash tomorrow and try to get the backpad done as well. This is really pretty helpful, as I can take measurements and then input everything so I don't waste a bunch of material.
I'm going to cover the piece with the Alcantara I scored today. Found 96" X 60" piece for $175. This will give me enough to do the seat centers and all the oter bits and pieces I'm hoping to cover. I'd LOVE to make it out of fiberglass, as the weight may get pretty significant if I'm using wood, but we'll see what kind of time I have in the end.
Anyways...here's a pic of the center console.
Attached thumbnail(s)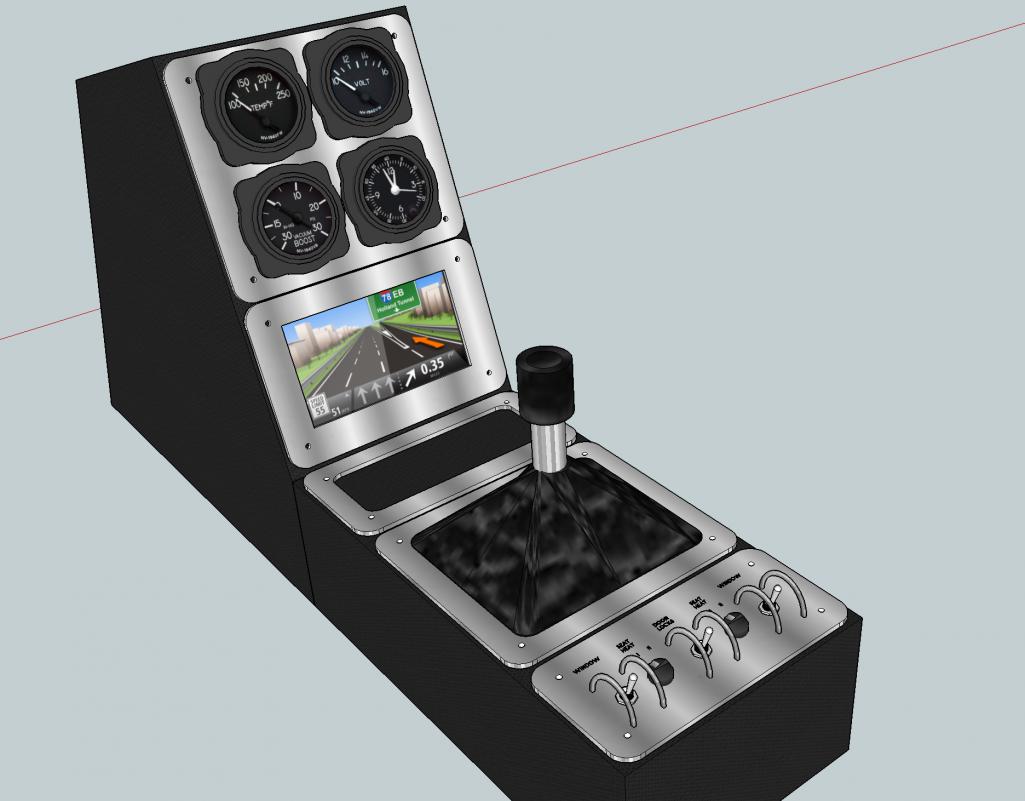
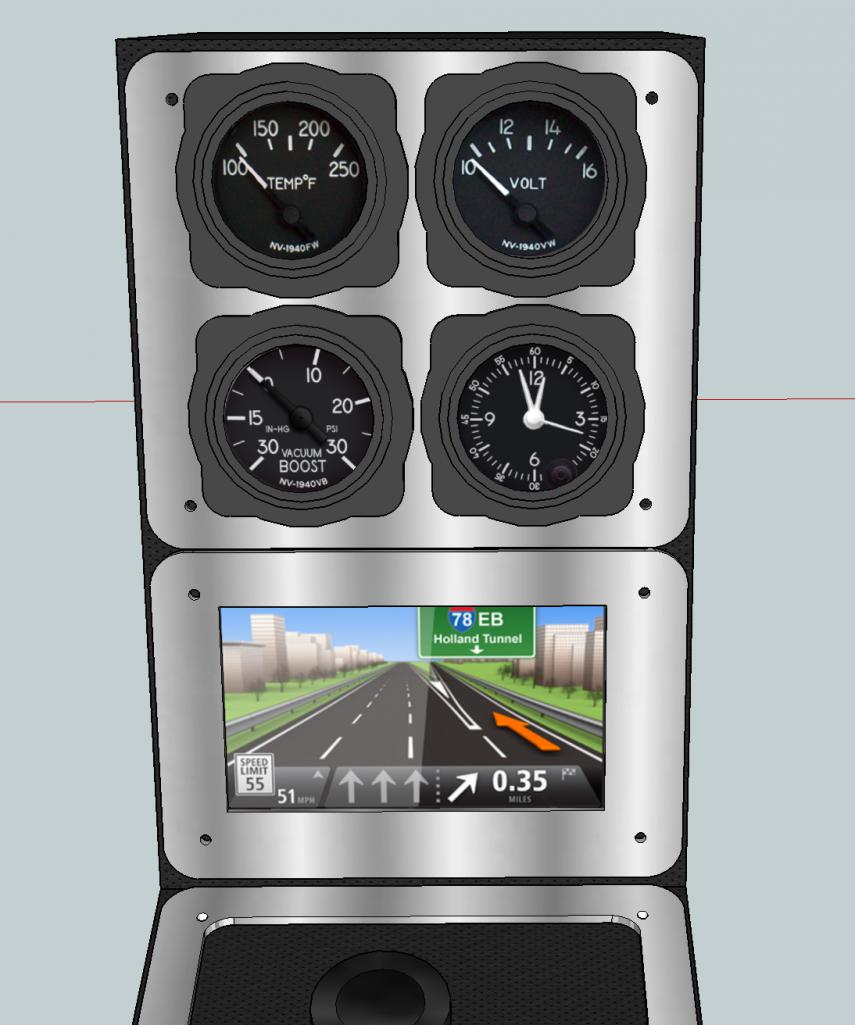
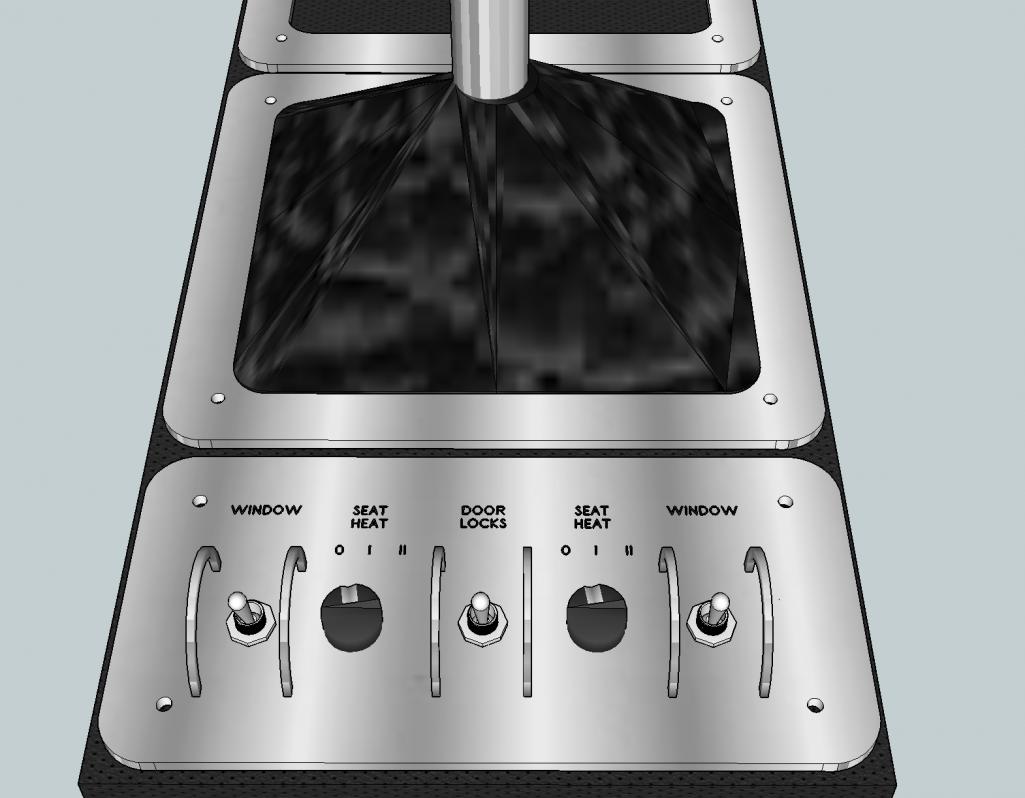
Posted by: McMark Jan 22 2014, 07:09 PM
Doh! You missed your turn. You were supposed to take the Holland Tunnel exit!
Posted by: effutuo101 Jan 22 2014, 07:34 PM
I had something similar in mind. However I flipped the led to the top. Easier to read and glance at.
I am rethinking that as well. Maybe a mount that I can actually reach while locked int my seat..
Posted by: CptTripps Jan 23 2014, 07:21 AM
Worked on my door brace last night. I need to stretch out 1/8" on the top of the pass door. Came up with a good brace for now. Just need to replace it with one that presses against the door plates now so I can weld everything else up.
Attached thumbnail(s)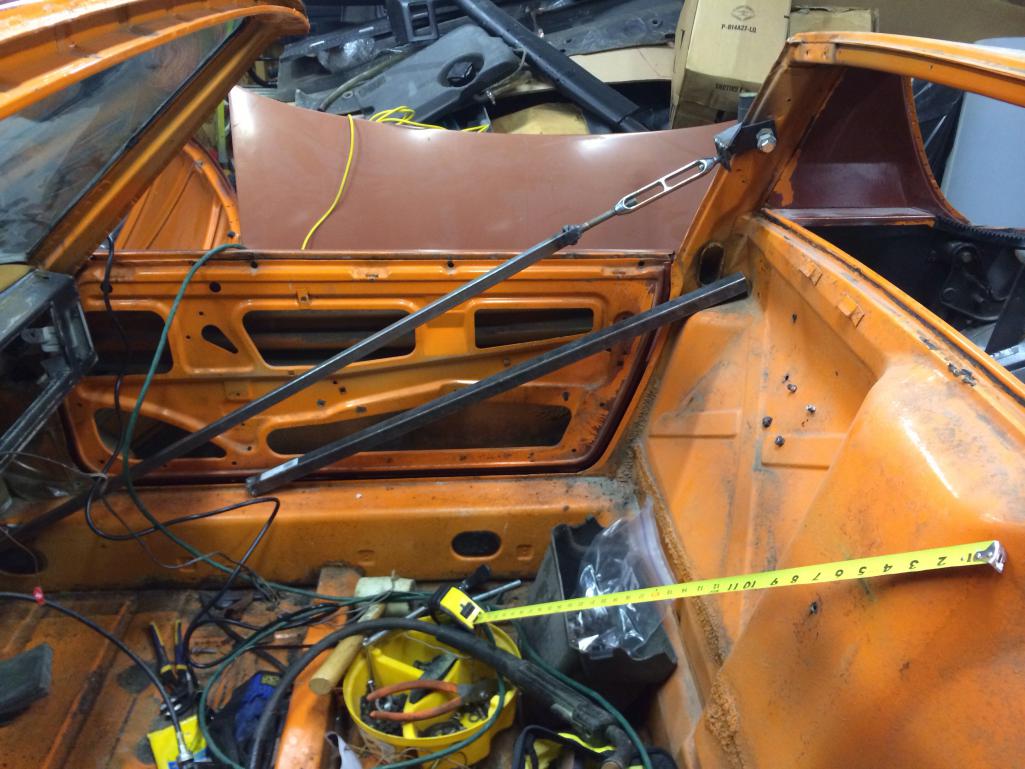
Posted by: CptTripps Jan 25 2014, 01:21 PM
Since it's sub-zero and snowing sideways, I decided to work on stuff in the house today. I did a thread on it ( http://www.914world.com/bbs2/index.php?showtopic=229257 ) but here's what my front marker lights will look like.
https://www.youtube.com/watch?v=K80jWrQ03p0
Posted by: CptTripps Jan 26 2014, 04:39 PM
Garrett (7) was my helper today. He mostly just sat by the heater and kept me company. That was A-OK by me.
We built door braces and welded them up so we can get the rotisserie going. This is going to help a LOT as I finish up the welding on the flares, and contemplate a roll-bar idea I have.
Attached thumbnail(s)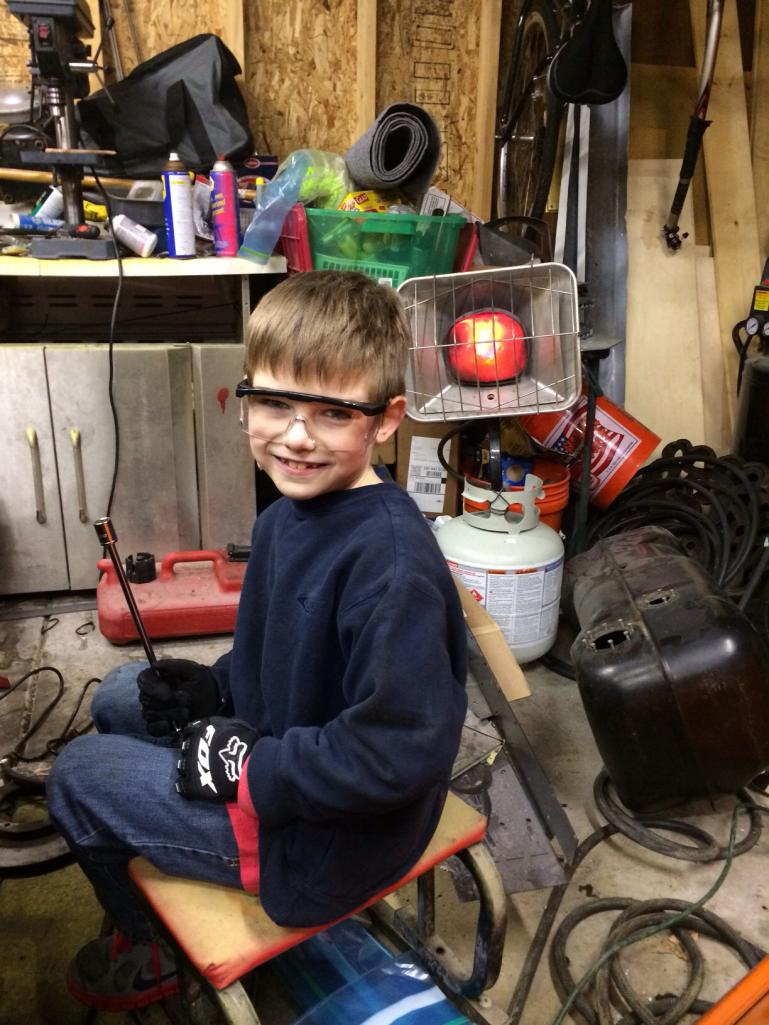
Posted by: ruby914 Jan 26 2014, 11:16 PM
"sub-zero and snowing sideways" Yeah right!
Have you come up with plan on how you will add nomenclature to your cockpit panel.
After I got back from my 2 day camping / surf trip, up north, I found this:
http://www.pulsarprofx.com/DecalPRO/Vertical/2_EXAMPLES/2c_Customer_Photos/Vehicle_Restoration/Porche_911.html
911? No respect.
Posted by: CptTripps Jan 27 2014, 12:46 AM
That was yesterday! Today I had cabin-fever and wanted to get some work done!
That decal system looks interesting. I was going to do vinyl and then clear-coat over, but that looks a lot nicer. I actually least have that laminator at the office, so all I really need is the kit. Hmmmmm.
Posted by: CptTripps Jan 27 2014, 10:13 AM
Have you come up with plan on how you will add nomenclature to your cockpit panel.
After I got back from my 2 day camping / surf trip, up north, I found this:
http://www.pulsarprofx.com/DecalPRO/Vertical/2_EXAMPLES/2c_Customer_Photos/Vehicle_Restoration/Porche_911.html
I just ordered the "starter kit".
Looking at this, it's pretty much exactly what I was looking to do, so we'll see how it works out!
Watch the installation video though. The installation process is more complicated than I was hoping, but in the end, should look pretty outstanding.
Attached image(s)
Posted by: CptTripps Jan 27 2014, 10:24 AM
Got the braces welded in to place (on plates) last night, so I'm ready for "full-rotisserie-action" tonight. I've GOT to get this things stripped the rest of the way down so Mr. Sandblast Guy can get started with his part.
The "expander" I made up (still attached at one end in the photo) worked well enough for me to stretch out the gap by 1/8" before I braced it. I plan on re-welding the hell hole repair the PPO did, and I believe that'll ease it up enough to the point I won't have to worry about it springing back.
I also worked on my "Rendering" a little bit. Used a pic of my actual rims and calipers.
Attached thumbnail(s)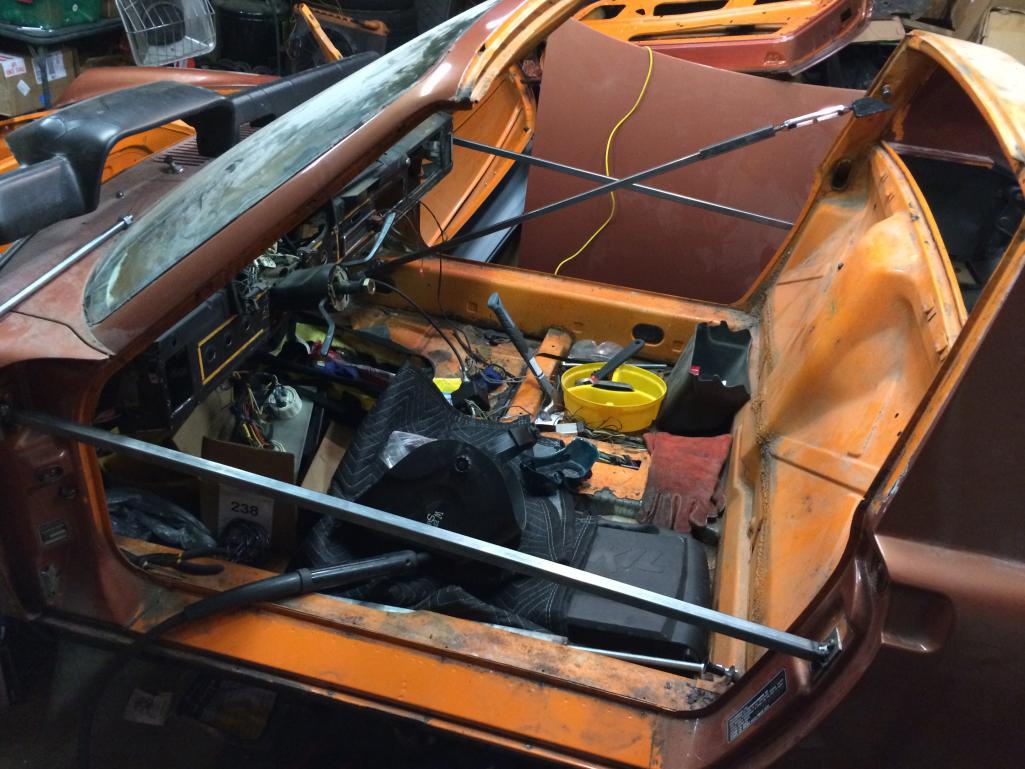
Attached image(s)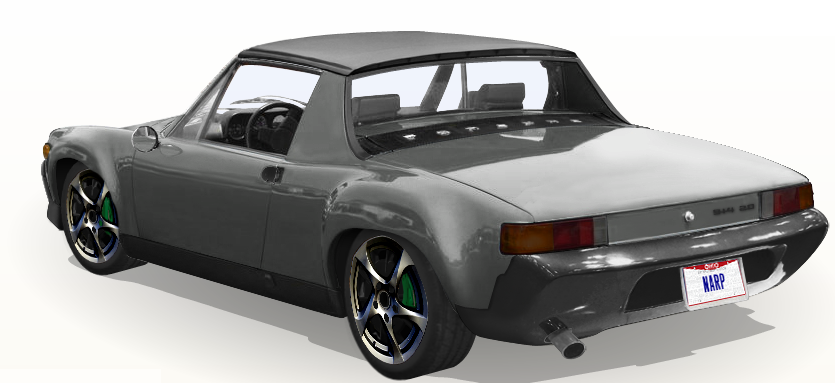
Posted by: CptTripps Jan 30 2014, 08:29 AM
Spent time last night stripping the tub and getting her ready to head over to the sand-blaster this weekend. The pile of things for the powder-coater is getting bigger and bigger too.
Picked up the windshield today. So I've got that taken care of now too. If I can get the tub back from sand and primer by next weekend...I'll be ahead of schedule for being on the road by April 15th.
Attached thumbnail(s)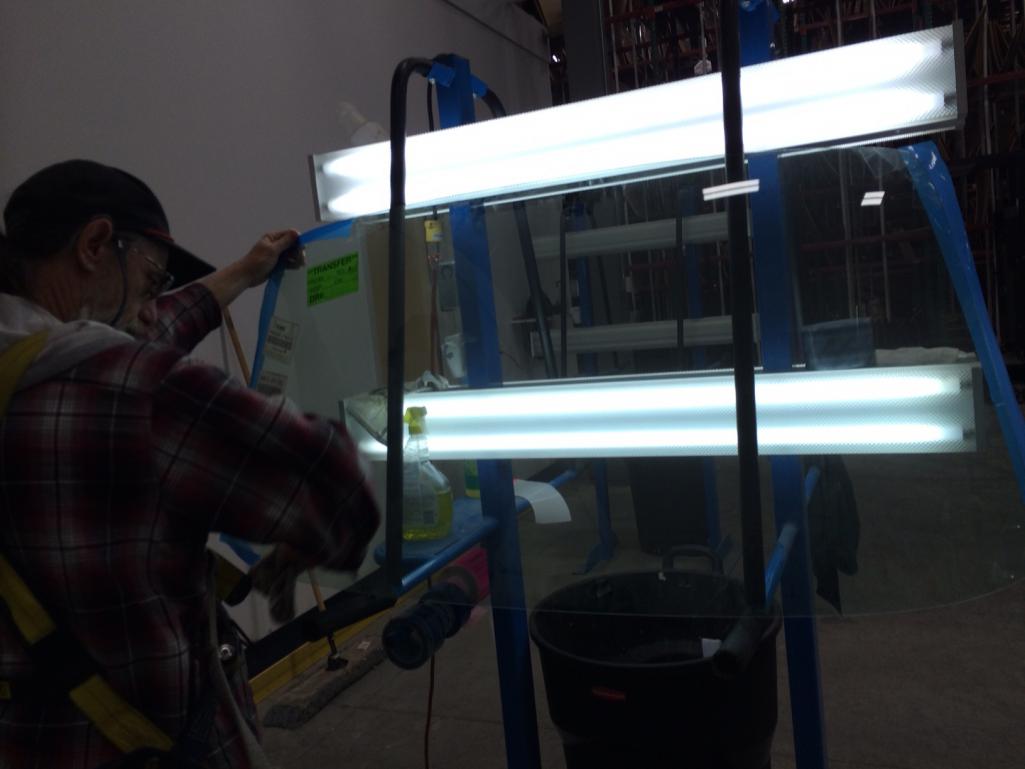
Posted by: Jeff Hail Jan 30 2014, 06:59 PM
Worked on my door brace last night. I need to stretch out 1/8" on the top of the pass door. Came up with a good brace for now. Just need to replace it with one that presses against the door plates now so I can weld everything else up.
Cool project!
Watch out for those turn buckles for tensioning the door opening! They hurt when they explode.
Posted by: CptTripps Feb 2 2014, 06:36 PM
Shit ton of work done today in the garage. Went in at 9a...left at 6:30 to watch the game. Got the tub cmpletely stripped...except for the steering rack. I'll get that off tomorrow and I should be able to get the tub to the sand blaster on Tuesday!
I'm a little discouraged at the Hell Hole repair. Looks a little suspect, and there's a lot of bondo up top. Also, the battery tray is BOLTED into place. That's just strange.
I also have a pile of crap to take to the powder coater tomorrow. A-Arms, Dust Covers, Struts, and a bunch of random stuff.
Attached thumbnail(s)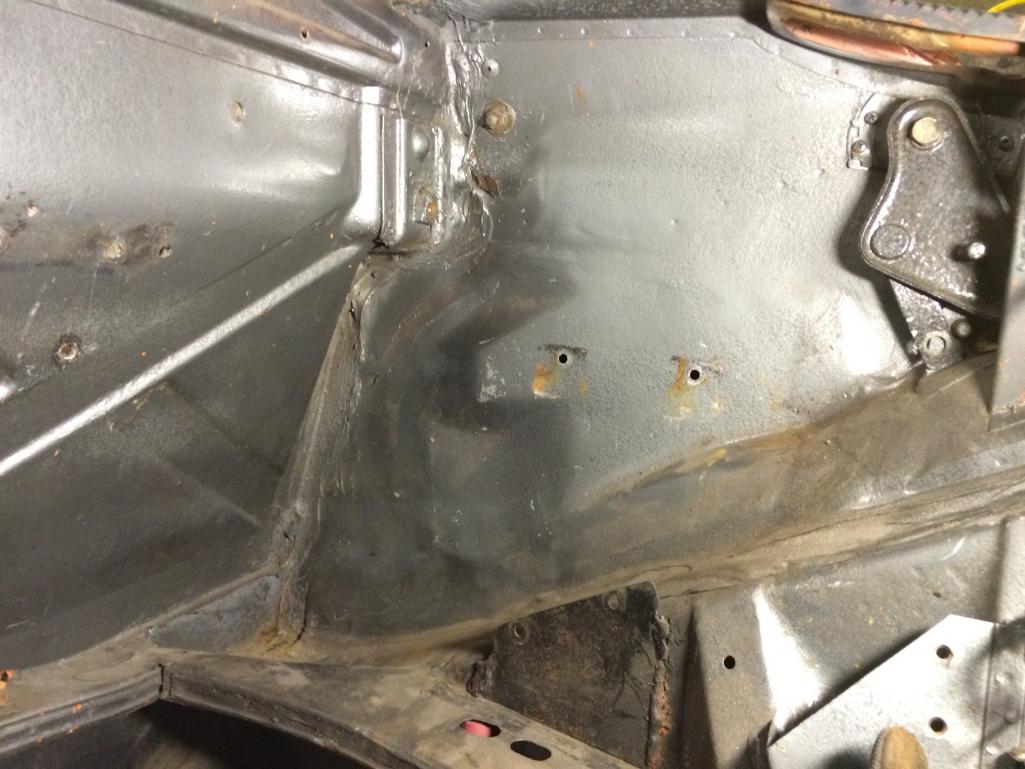
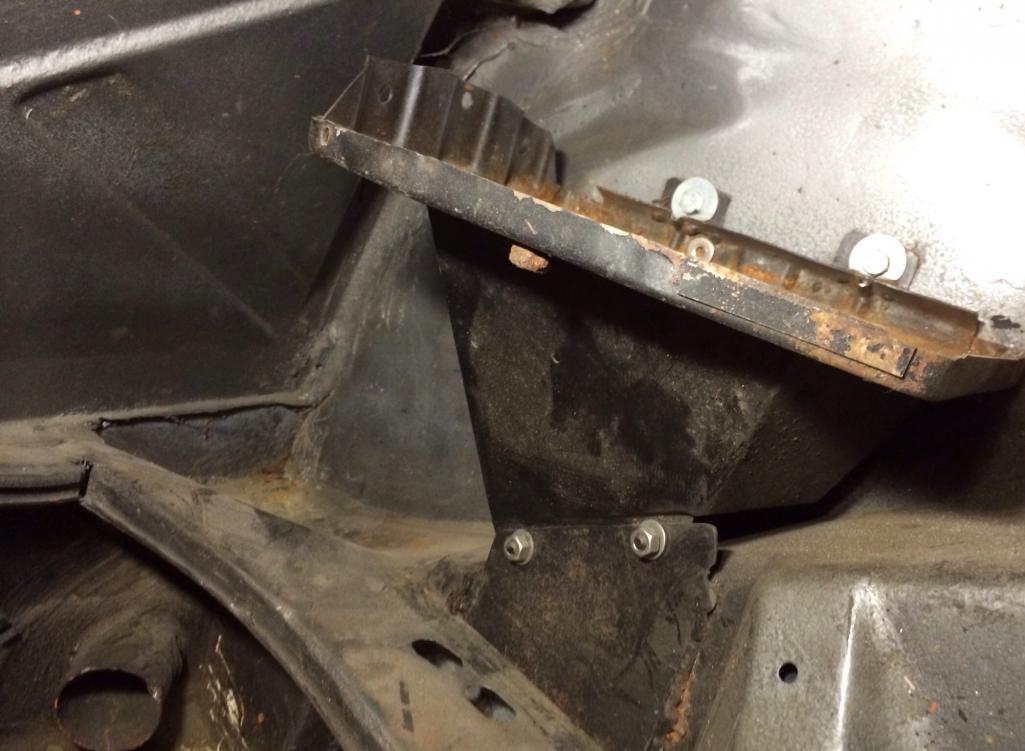

Posted by: 914forme Feb 2 2014, 07:33 PM
I bolted my tray in also. I figured it would rust, so when it did, I would just u-bolt and bolt in a new one. Jon Lowe suggested it when I did the hell hole on my 914.
Come to think of it, theres no rust on that tray, and I use AGM batteries.
Also glad to see the decal system, I was heading towards vinyl myself, but this system will let me do other things also, so yeah. Nice to see its what Mark used for his quad gauge, now if I can just figure out the proper font. 
Posted by: CptTripps Feb 3 2014, 02:08 PM
After watching the "http://www.914world.com/bbs2/index.php?showtopic=78501" for several months, I'm starting to think about the rear trunk, and how I can maintain access to the motor, while keeping my trunk intact as well.
I'm not sure on ALL the dimensions yet, but this is the general idea. Put a hinge up there to let me mount the computer and wiring, then be able to lift it up if needed. The green box is my hYdra-EMS computer, and the blocks are the screw-down terminals for marrying the stock harness to the aftermarket ECU.
Attached thumbnail(s)
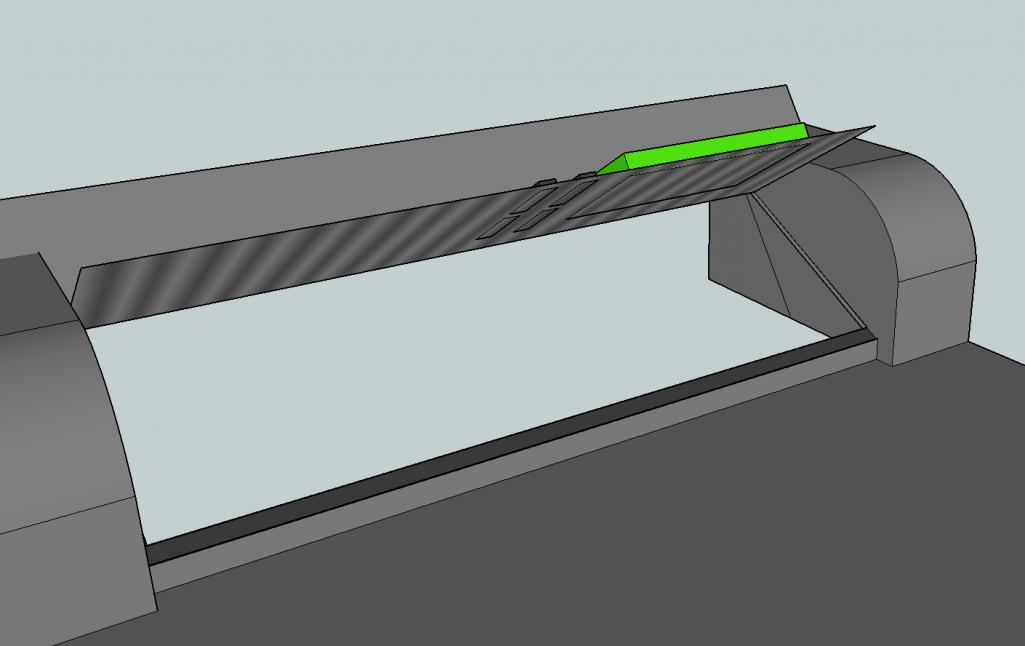
Posted by: CptTripps Feb 3 2014, 02:13 PM
Dropped off a ton of stuff to the Powder Coater today.
Front suspension, brake dust guards, and a mess of other little knick-knacks. This is the box that's being powdered a "Muted Chrome" while the other pieces (not pictured) will be the green.
I snapped a pic of what the combo should look like together.
Attached thumbnail(s)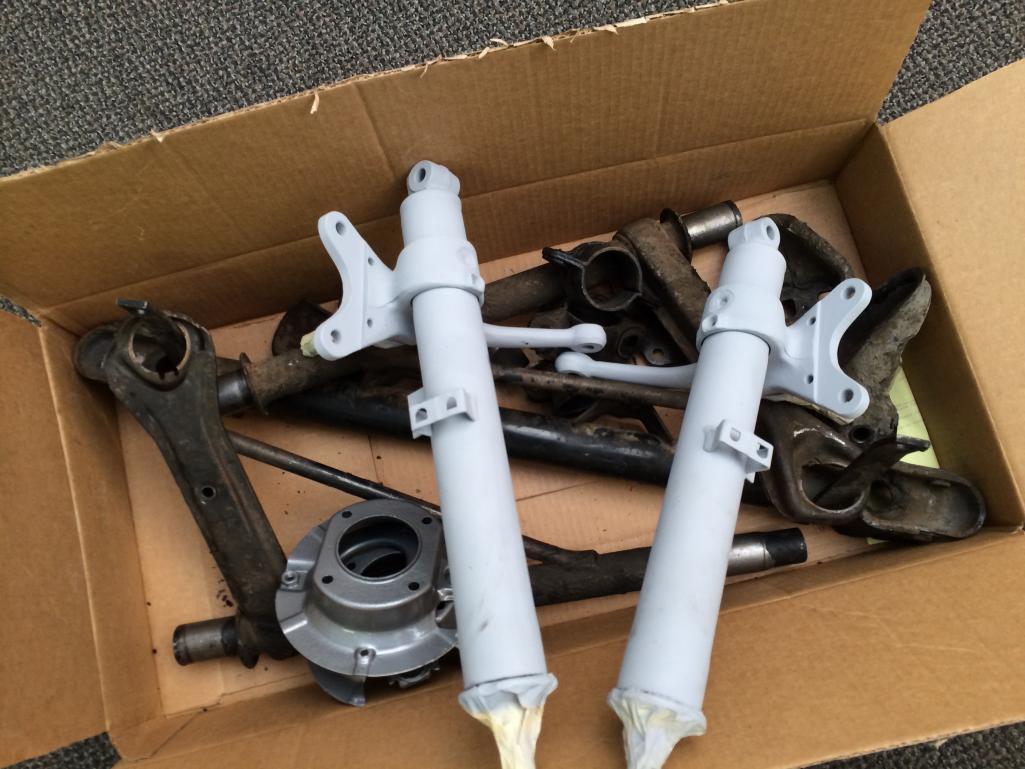
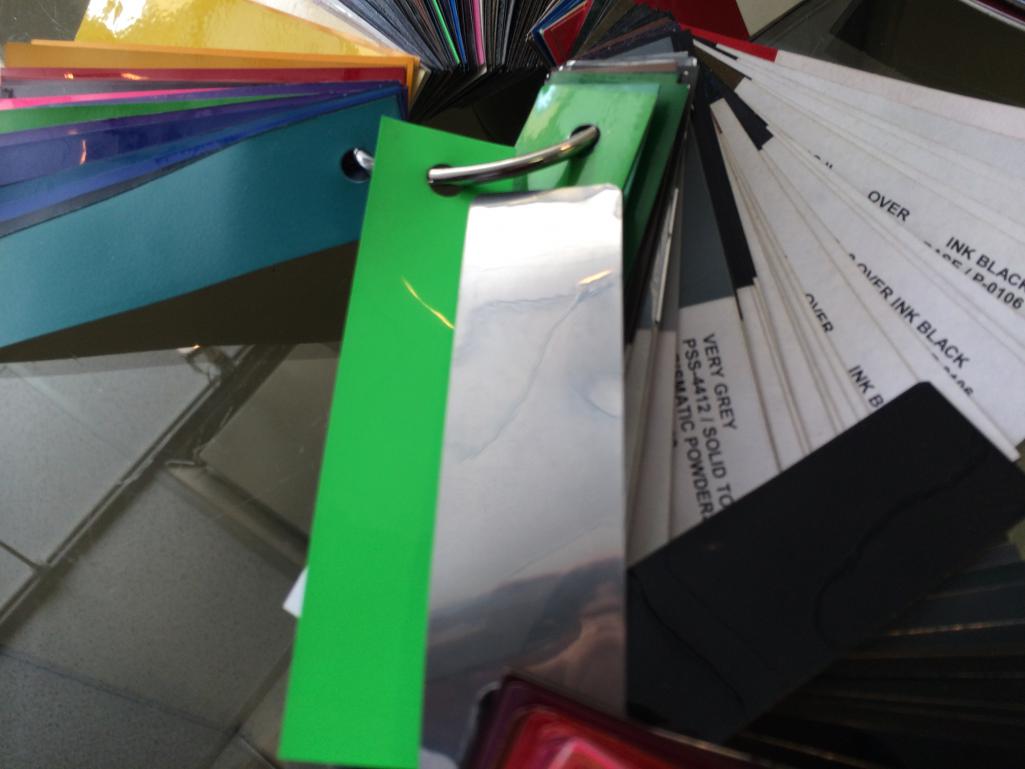
Posted by: effutuo101 Feb 3 2014, 06:31 PM
sweet!
Those will be pretty when completed.
Posted by: CptTripps Feb 3 2014, 09:53 PM
So, I had an idea on the way home about the steering wheel. Since the top of the wheel is normally in the way...why do I need a top to my wheel?
I had an extra Momo wheel in the garage, so I thought I'd play a little bit.
Here's the wheel I had. I played with some tape to see what part I'd want to take off.
Then...I got to cuttin!
I used parts of the "discarded" foam to make caps for the cut part.
Then to the University of Google for a "Baseball Stitching 101" class. Played with some old vinyl I had that I was considering using for something else.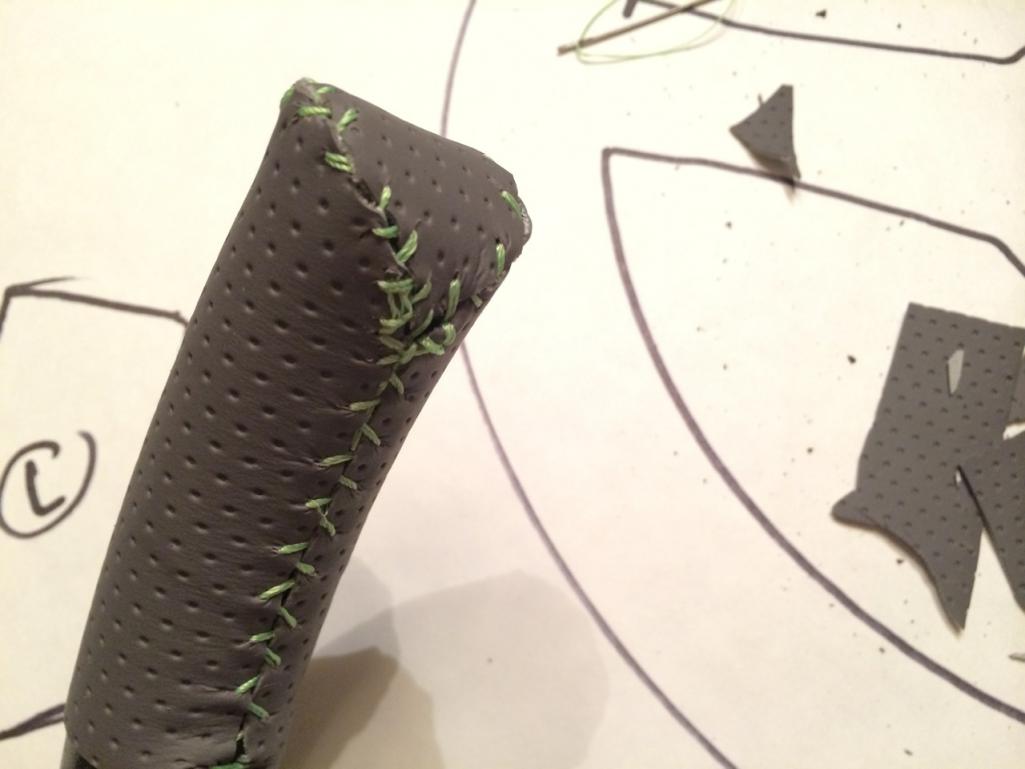
Boy...do I ever suck at baseball stitching! Let's try again with a piece of scrap leather.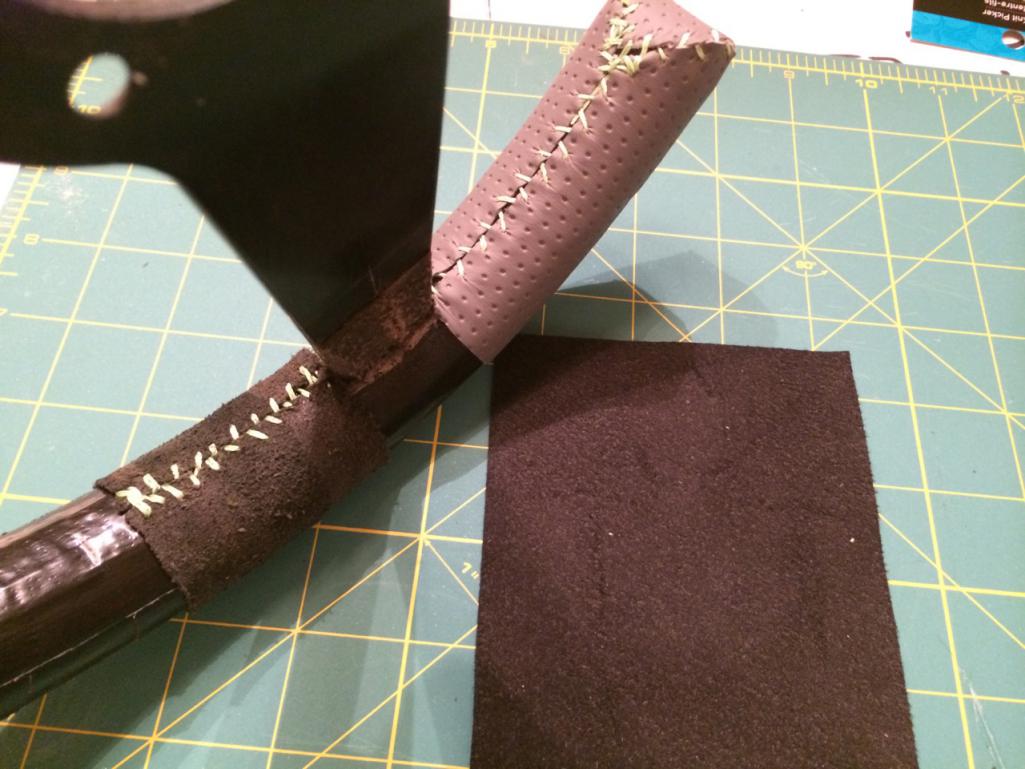
Better...so I cracked out the Alcantara I'm gong to use for another part of the build. Let's see how that goes?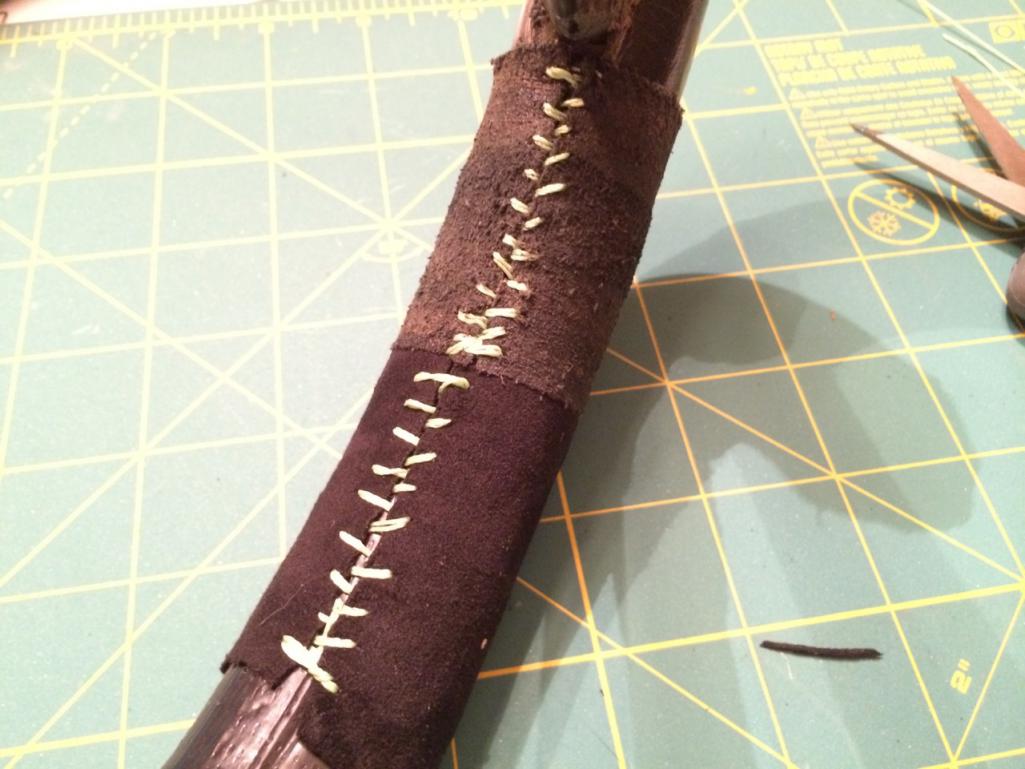
What I learned, was that if I can pre-cut the holes and keep them uniform, this isn't going to be too hard. Time consuming...yes. Hard? Not really.
Here's where I landed for the evening. Not too bad for about 1h worth of work.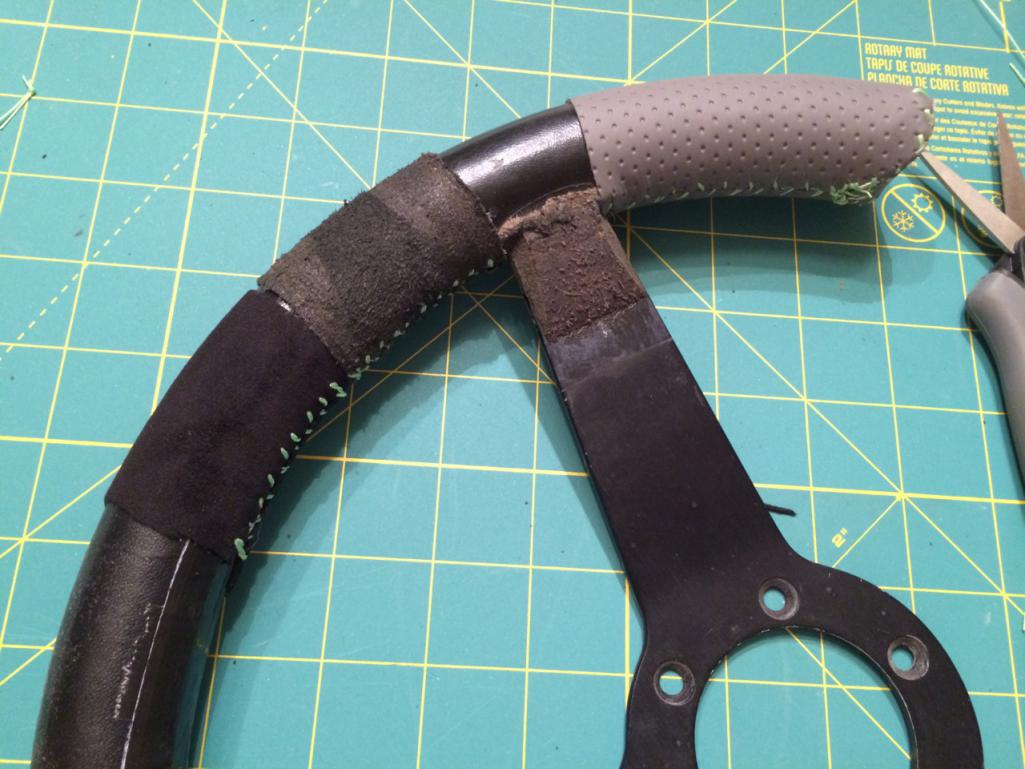
I'm going to cover the rest of the wheel later this week when I get some other stuff in. A template would be the next step. I REALLY don't want to waste any of the Alcantara. It's about $120 per yard. 
Posted by: mgp4591 Feb 3 2014, 10:06 PM
So, I had an idea on the way home about the steering wheel. Since the top of the wheel is normally in the way...why do I need a top to my wheel?
I had an extra Momo wheel in the garage, so I thought I'd play a little bit.
Here's the wheel I had. I played with some tape to see what part I'd want to take off.
Then...I got to cuttin!
I used parts of the "discarded" foam to make caps for the cut part.
Then to the University of Google for a "Baseball Stitching 101" class. Played with some old vinyl I had that I was considering using for something else.
Boy...do I ever suck at baseball stitching! Let's try again with a piece of scrap leather.
Better...so I cracked out the Alcantara I'm gong to use for another part of the build. Let's see how that goes?
What I learned, was that if I can pre-cut the holes and keep them uniform, this isn't going to be too hard. Time consuming...yes. Hard? Not really.
Here's where I landed for the evening. Not too bad for about 1h worth of work.
I'm going to cover the rest of the wheel later this week when I get some other stuff in. A template would be the next step. I REALLY don't want to waste any of the Alcantara. It's about $120 per yard.
Interesting solution! Ever thought of going to a bike shop and picking up some handlebar plugs and tape? They've got some options for covering!
Posted by: CptTripps Feb 4 2014, 08:48 PM
Naaa. I'm going full custom.
Covered the center tonight and I'll have the Alcantara seen up for the rest of the wheel tomorrow.
I'm really starting to see the theme come together. What an awesomely gratifying process. Now if I can just get the body don't likety-split, I'd be a happy dude!
Attached thumbnail(s)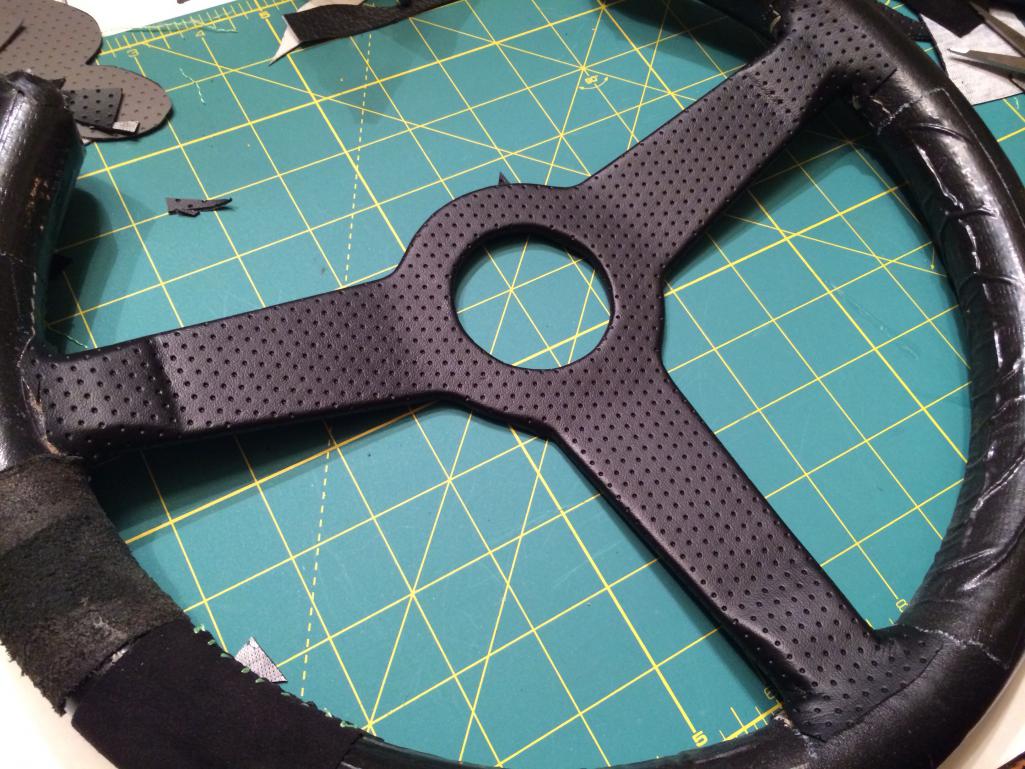
Posted by: McMark Feb 5 2014, 12:33 AM
Like! 
That tub better not come back with big surprises.
Posted by: CptTripps Feb 5 2014, 03:07 AM
That tub better not come back with big surprises.
My biggest fear! I'm already aware of a mess on the pass-front quarter, but past that it'll be the worlds worst game of "Hide & Seek"
She's ready to go. Just waiting on my trailer.
Attached thumbnail(s)
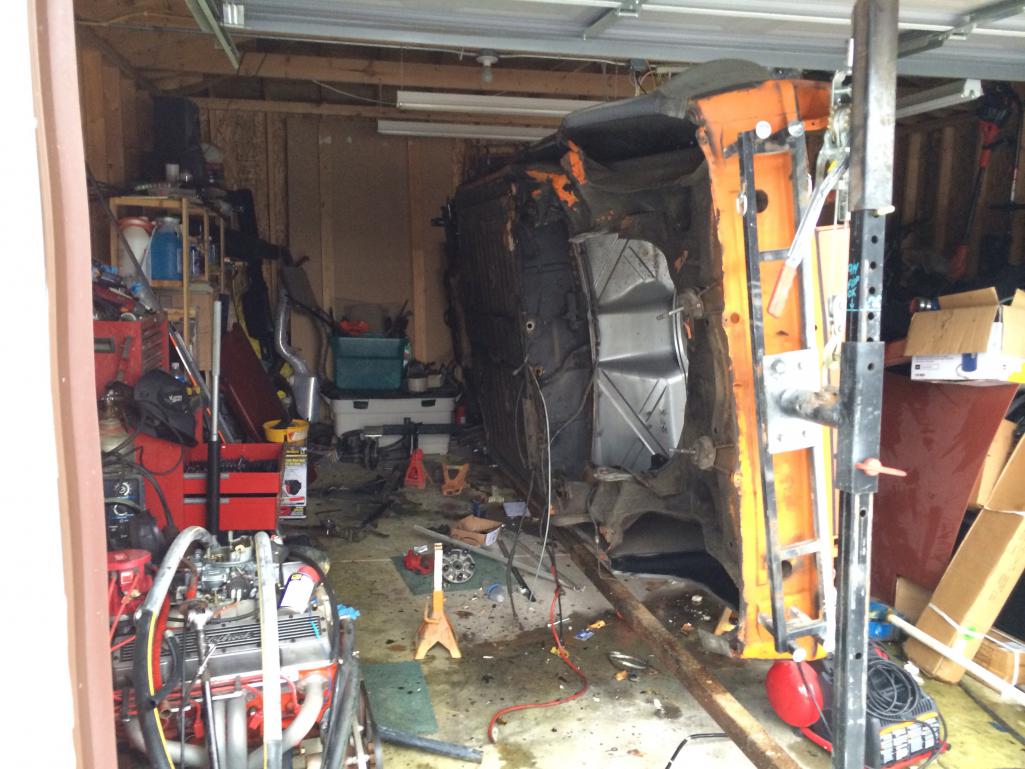
Posted by: mepstein Feb 5 2014, 07:51 AM
Cut out the bottom and it will look like the steering yoke on a plane.
Hopefully your face will not come in contact with the modified wheel
Posted by: r_towle Feb 5 2014, 08:15 AM
Powder coating a strut with the insert in place???
Does that concern you. Excessive heat??
Posted by: CptTripps Feb 5 2014, 10:36 AM
Cut out the bottom and it will look like the steering yoke on a plane.
Hopefully your face will not come in contact with the modified wheel
Just like Knight-Rider! That's exactly where I got the idea. If I cut the bottom of this wheel, I'd likely jab myself in the wedding-tackle if I got in an accident. I do worry about my forehead on the center though.
Powder coating a strut with the insert in place???
Does that concern you. Excessive heat??
No...I lost the only wrench I had to remove them.
They're shot and have new ones at the house already. The guys there are going to pull/pitch them for me. I only taped them off so I could prime to prevent rust since I media blasted them a while ago. They'll be sand-blasted again before powder, so I'm not worried.
Posted by: CptTripps Feb 7 2014, 01:49 PM
I'm "back in the garage" this weekend, and hopefully, can take the car to the sandblaster (finally) tomorrow.
In the meantime, I'm re-working the center console. I picked up a JVC In-Dash nav system, and that frees up the dash area for the rest of the gauges. So I moved the switches down below. I'm also incorporating an 8" sub into the area where the back-pad normally resides. It'll throw against the firewall. Should be cool.
Here's what it looks like in my "digital garage"
Attached thumbnail(s)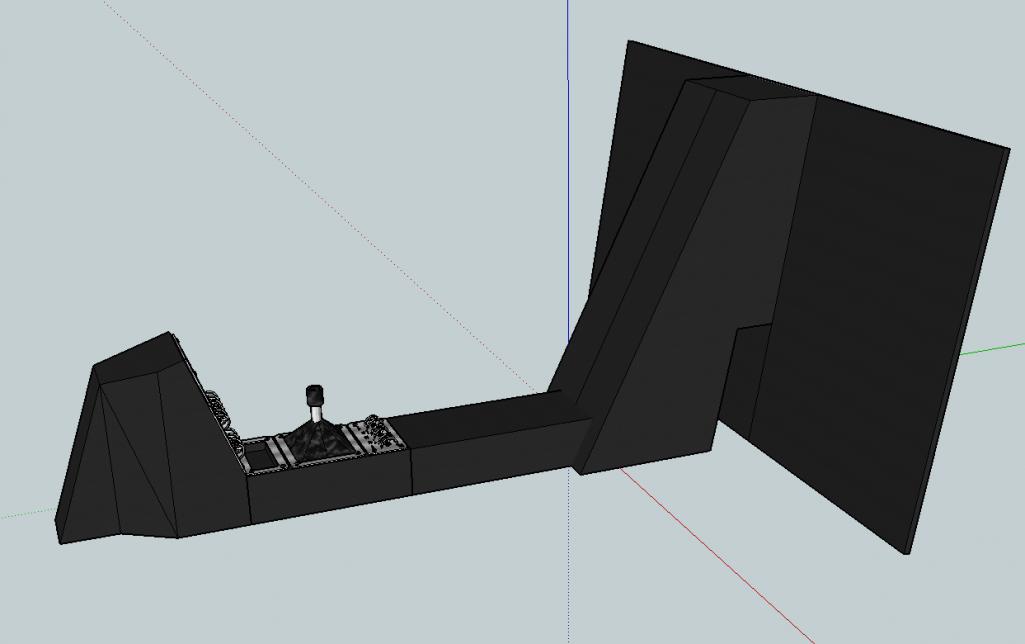
Attached image(s)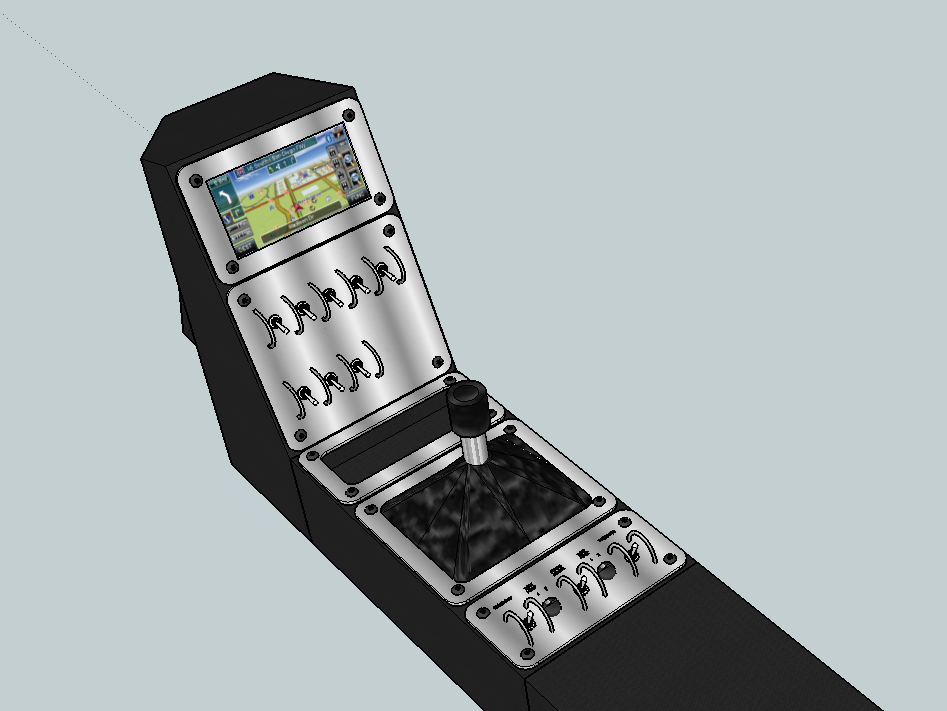
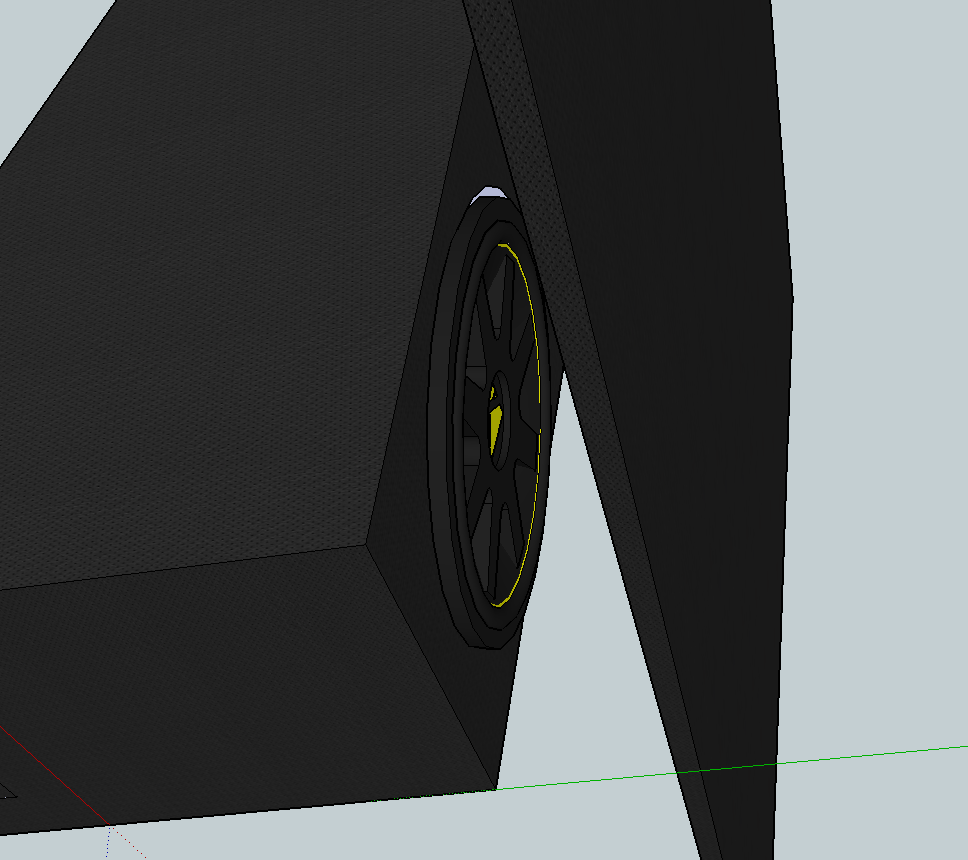
Posted by: CptTripps Feb 7 2014, 07:42 PM
Sent the steering wheel off to Alan Gun of Alan Gun Leather in Plantation, FL. http://www.aglausa.com/
I sent some pics and a description of what I was looking for. I got a very detailed reply that told me he was not only paying attention, but that he'd care about it too. So I sent it off yesterday, and he called me this morning to go over everything. I'm REAL excited to see what it looks like when I get it back. Should be perfect.
Posted by: CptTripps Feb 9 2014, 07:27 AM
Just realized I have 65 days till I need to be on the road. So that gives me just over 9 weekends to bang out a VERY long list of custom stuff. I better get cracking!
::: heads to the garage :::
Posted by: mepstein Feb 9 2014, 08:37 AM
Sent the steering wheel off to Alan Gun of Alan Gun Leather in Plantation, FL. http://www.aglausa.com/
I sent some pics and a description of what I was looking for. I got a very detailed reply that told me he was not only paying attention, but that he'd care about it too. So I sent it off yesterday, and he called me this morning to go over everything. I'm REAL excited to see what it looks like when I get it back. Should be perfect.
Will be interesting. He has a mix of good reviews and bad.
Posted by: CptTripps Feb 9 2014, 04:04 PM
Well, it was a wheel that came with the car and I don't have a lot into it. So, for the $200 it'll cost me, it was worth the risk.
Got busy in the garage today. Garrett helped me put tools away and scrape the tar off of the interior.
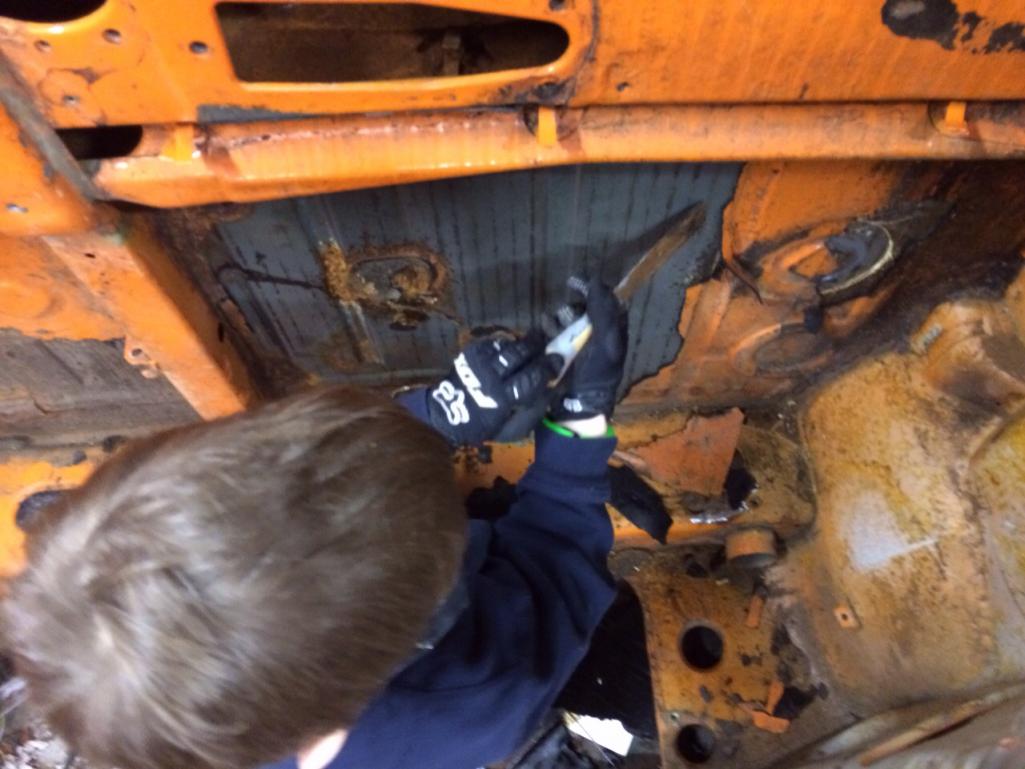
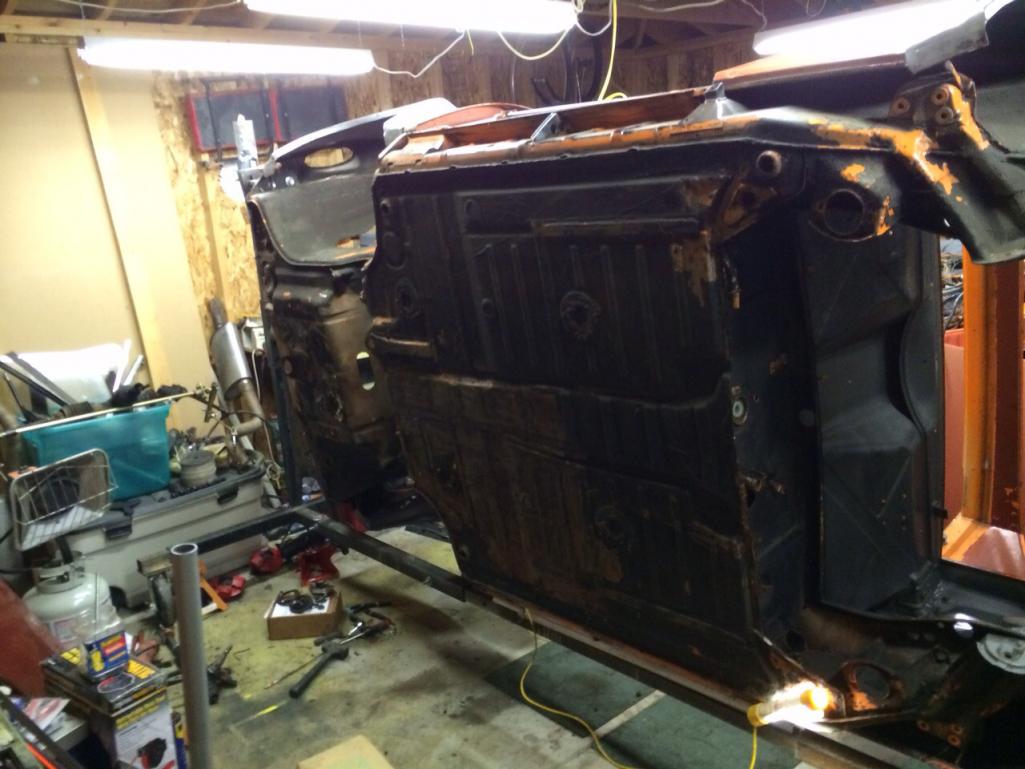
Then I started mocking up the dashboard and center console.
This looks a little wide, so I need to measure with the seats in and see how much space I have to work with.
This is what I'm going for though. I'm not going to have dash pads at all, and plan on covering the metal with vinyl and Alcantara.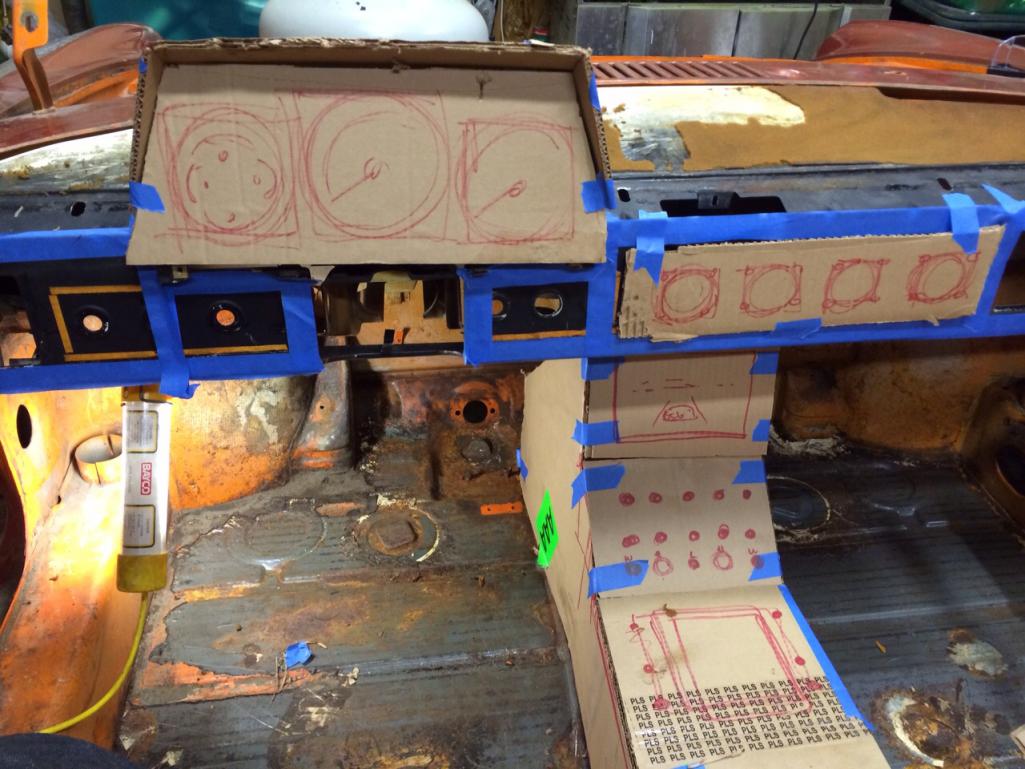
[attachmentid=436381]
Attached thumbnail(s)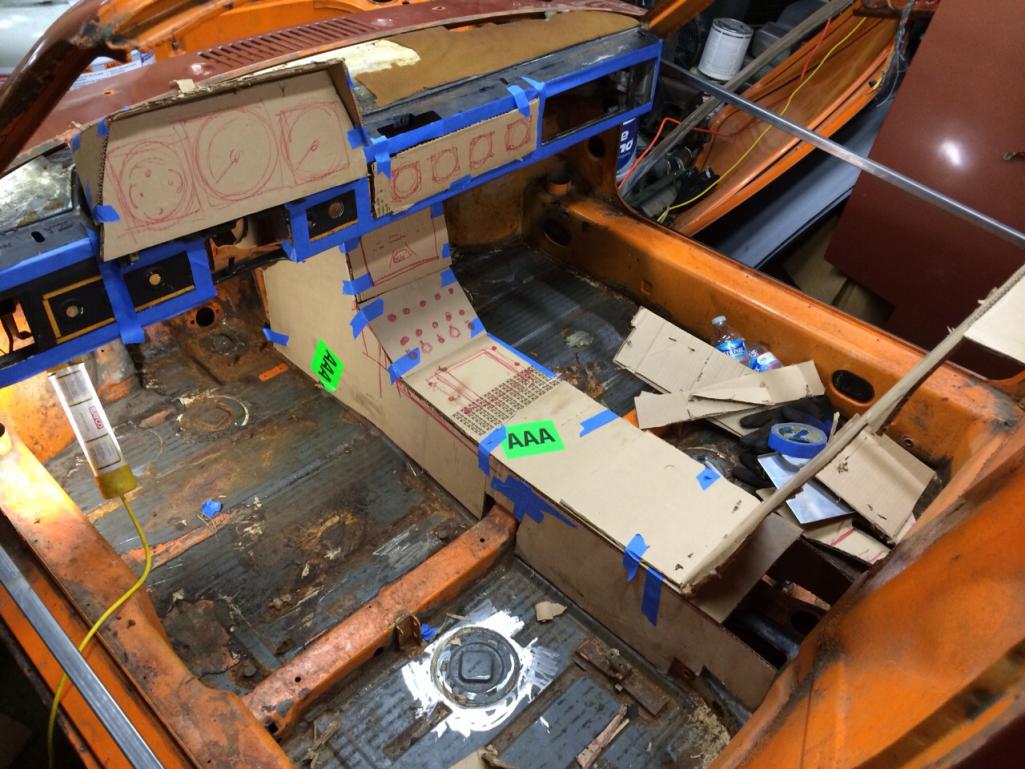
Posted by: 914forme Feb 9 2014, 08:37 PM
I would drop a drivers seat in there and see how the console works with your arm and the shifter. For Me I would be bumping into that stuff all day long.
Posted by: McMark Feb 9 2014, 09:38 PM
Posted by: Mike Bellis Feb 9 2014, 09:44 PM
Don't forget to install the throttle pedal before your final console design. This is one area I still need to refine to a more comfortable position.
Posted by: mgp4591 Feb 9 2014, 10:39 PM
Well, it was a wheel that came with the car and I don't have a lot into it. So, for the $200 it'll cost me, it was worth the risk.
Got busy in the garage today. Garrett helped me put tools away and scrape the tar off of the interior.
Then I started mocking up the dashboard and center console.
This looks a little wide, so I need to measure with the seats in and see how much space I have to work with.
This is what I'm going for though. I'm not going to have dash pads at all, and plan on covering the metal with vinyl and Alcantara.
Now you gotta keep the roof on- when it rains your dash and console are gonna get soggy...

Posted by: CptTripps Feb 10 2014, 05:46 AM
Yeah, I've been thinking about pedal placement a lot. I started pondering that area, and I'm going to try cutting out an area like this. I can take most of that area out. That'll give me plenty of foot room.
Attached image(s)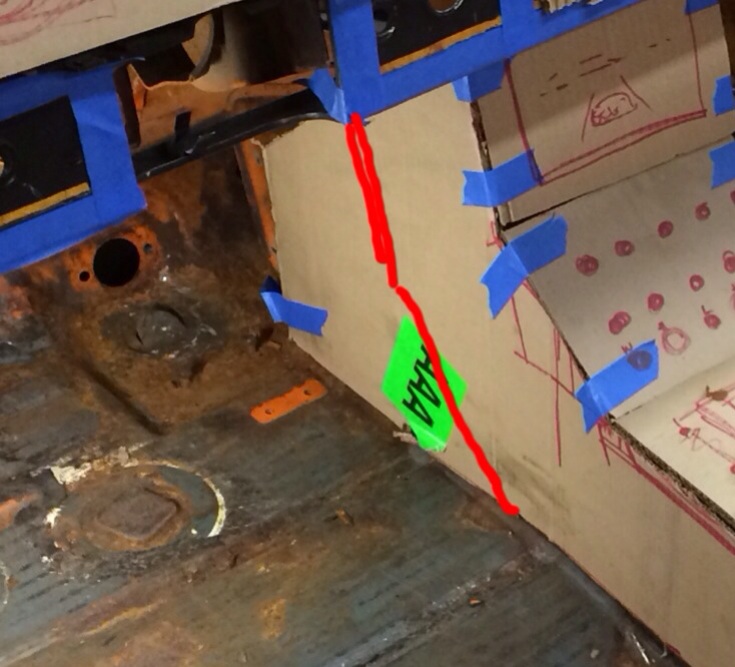
Posted by: CptTripps Feb 10 2014, 10:05 AM
Mocking up what I scribbled earlier...this should give my feet all the room they need, and still hide all the wiring. All I need is enough for the back of the Nav box, the rest is relatively small wiring to the switch panel.
Attached thumbnail(s)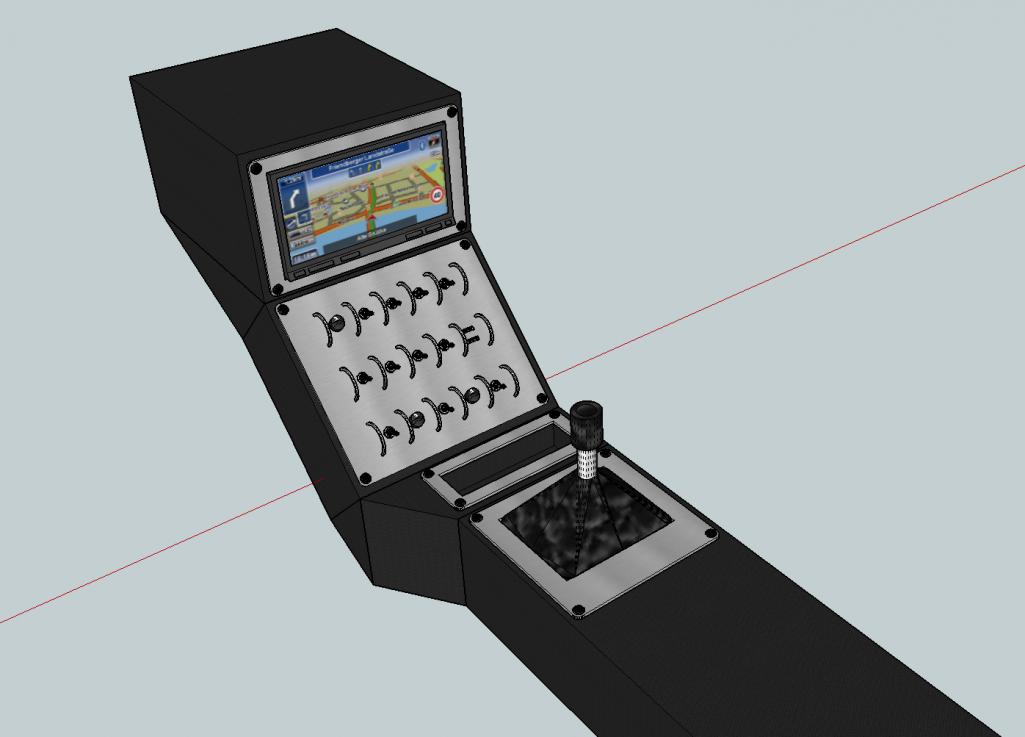
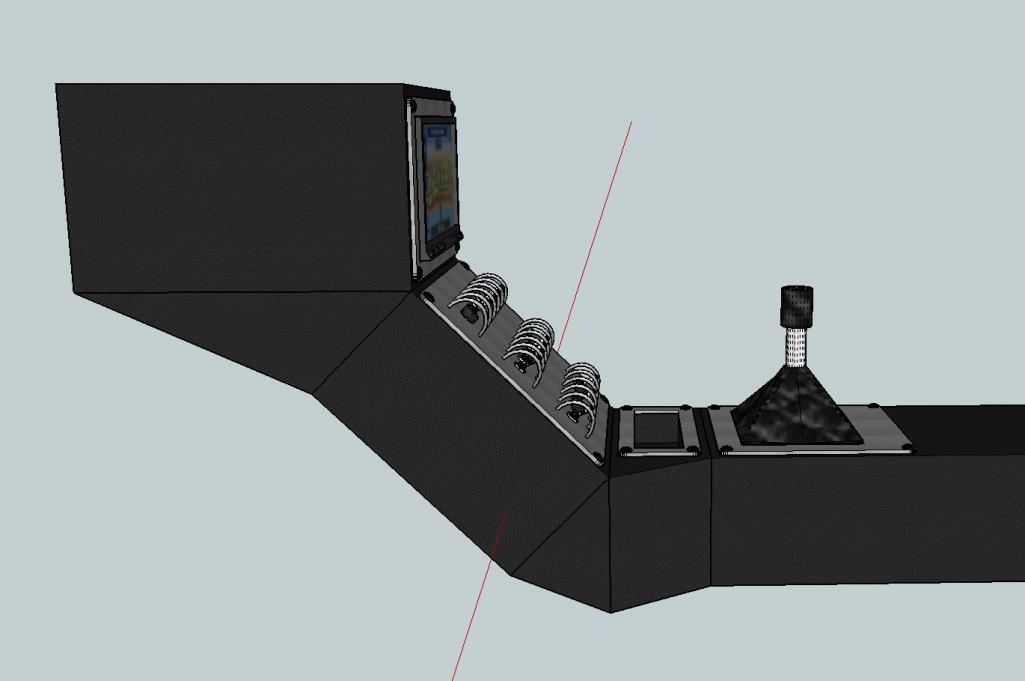
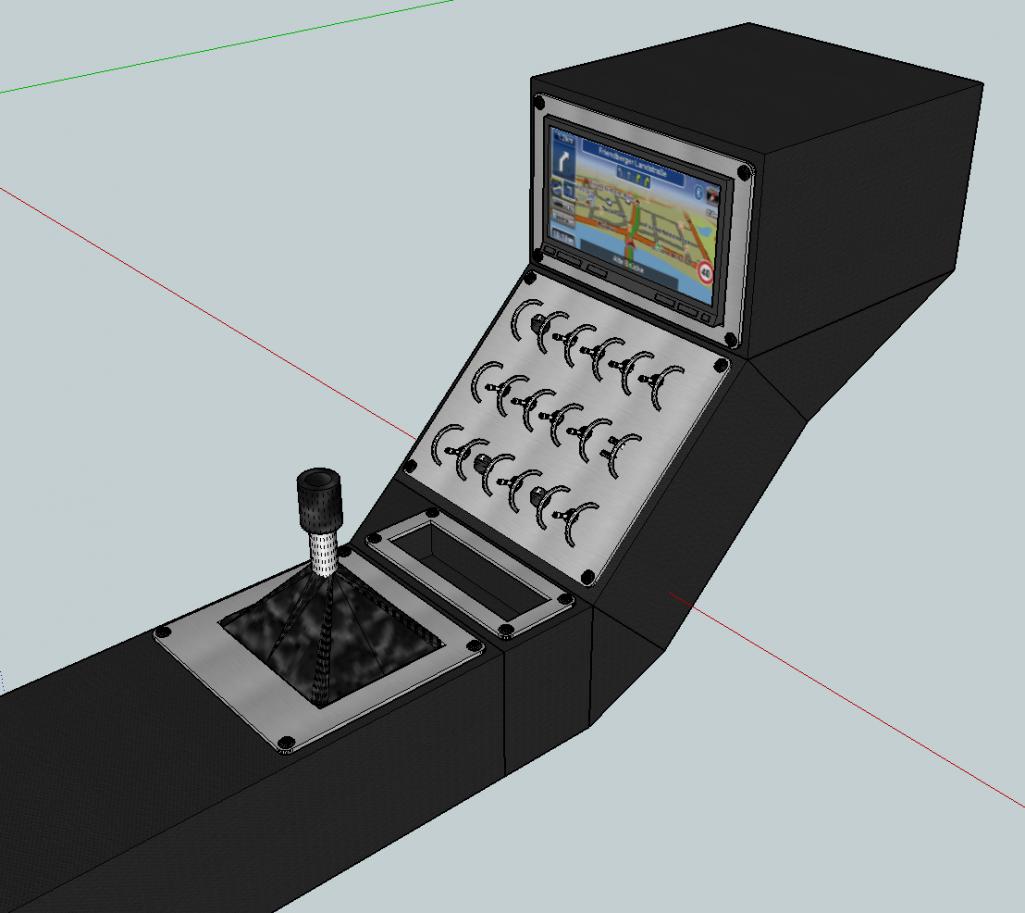
Posted by: CptTripps Feb 11 2014, 08:19 PM
I decided to do a lot of the welding before I send it to the sand-blaster. Reason being, the areas with rust aren't where I'm welding, and I'd rather have them etch-prime the whole tub so the primer gets in all the cracks.
Started the evening welding up the rear trailing arms. I'm not sure I have the tubes in the right spot. Their instructions said one thing, the pictures told a different story. I'm going to wait till my brake parts come back from powder before I finish this part up. I'll put the press together and get the hubs out later this week.
Attached thumbnail(s)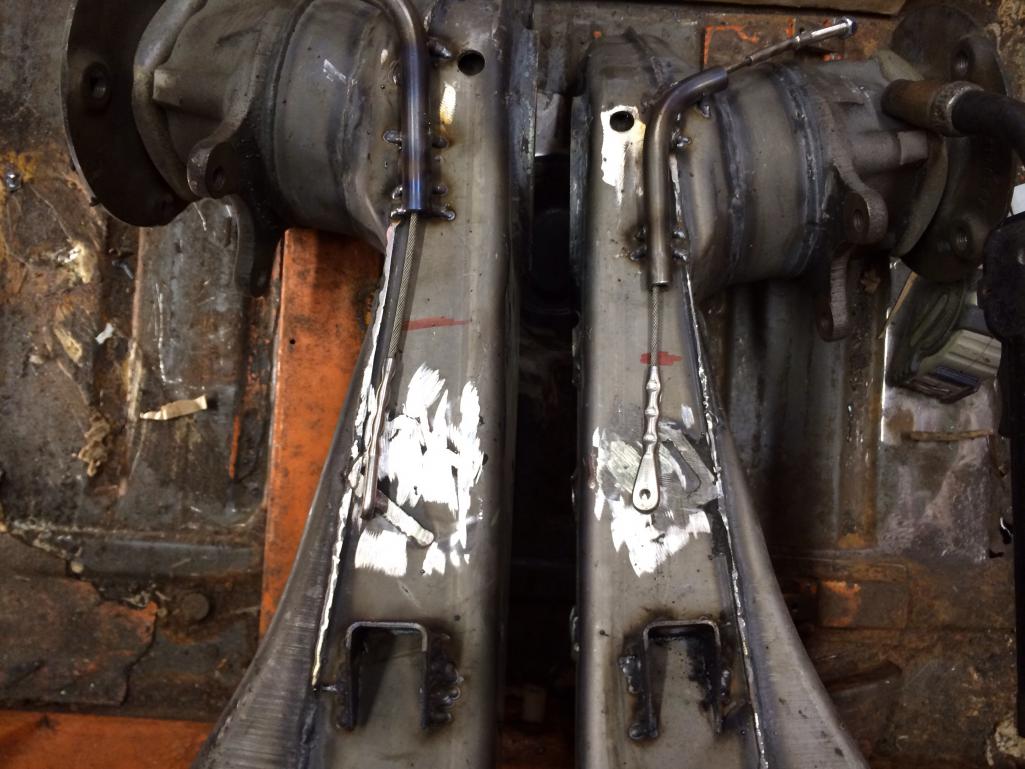
Posted by: CptTripps Feb 11 2014, 08:20 PM
Then I started buttoning up the flares. I'd thought about AllMetal at one point, but McMark talked me out of that route. So I started the long process of filling about 200 gaps on two fenders tonight. I don't have any grind wheels, so that part will have to wait till I can run to HF tomorrow. Got the whole Passenger side welded up. I'll do the other side, and my Engman kit next.
I also fixed the only hole in the floor. There was just 2-3 places it perforated, so I cut a new piece and put the bends in. Welded up nicely. Again...I need grind wheels!
Attached thumbnail(s)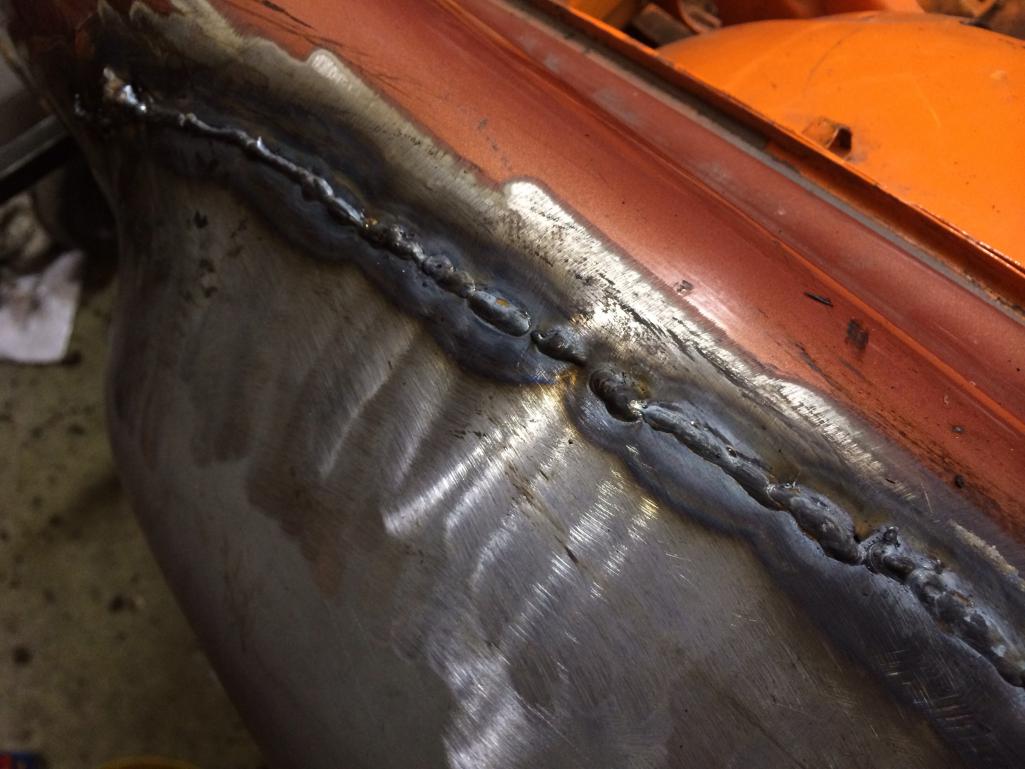
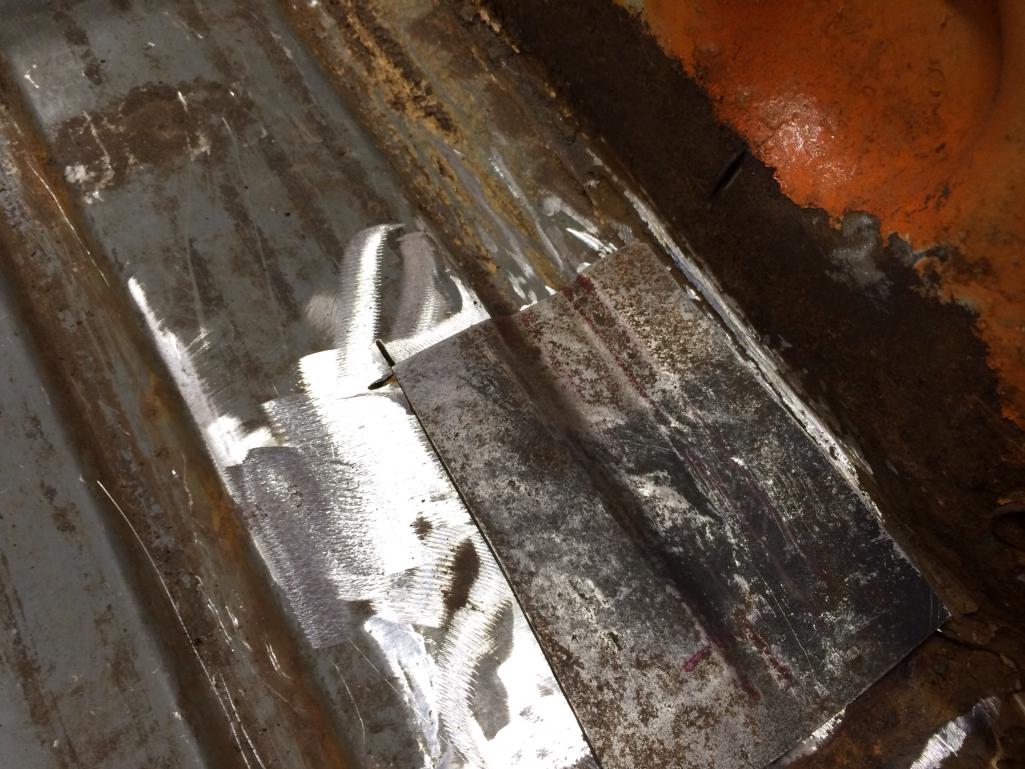
Posted by: CptTripps Feb 11 2014, 08:24 PM
Last thing I did tonight was start pondering where the radiator will go and be routed. I think I'm making a case for running both down the pass long. I can get the other tube out of there, and fashion a steel "case" to put it in at the passenger's feet. Don't know...still thinking.
The Sciricco radiator I got is dual-pass all aluminum, but both hoses are on the same side. That's what got me started.
Attached thumbnail(s)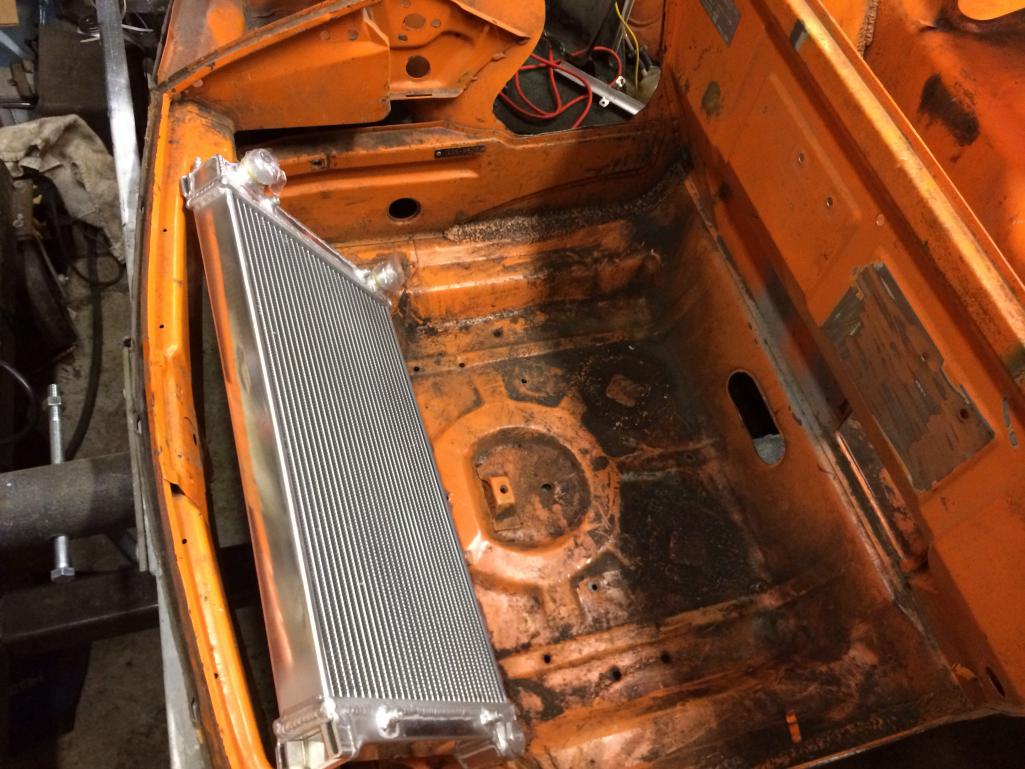
Posted by: CptTripps Feb 11 2014, 08:29 PM
Something like this.
Is use a heat shield of some kind to keep the heat to a minimum. Both hoses would fit in the long.
Alternatively, I could run one through the long and the other through the center channel.
Attached thumbnail(s)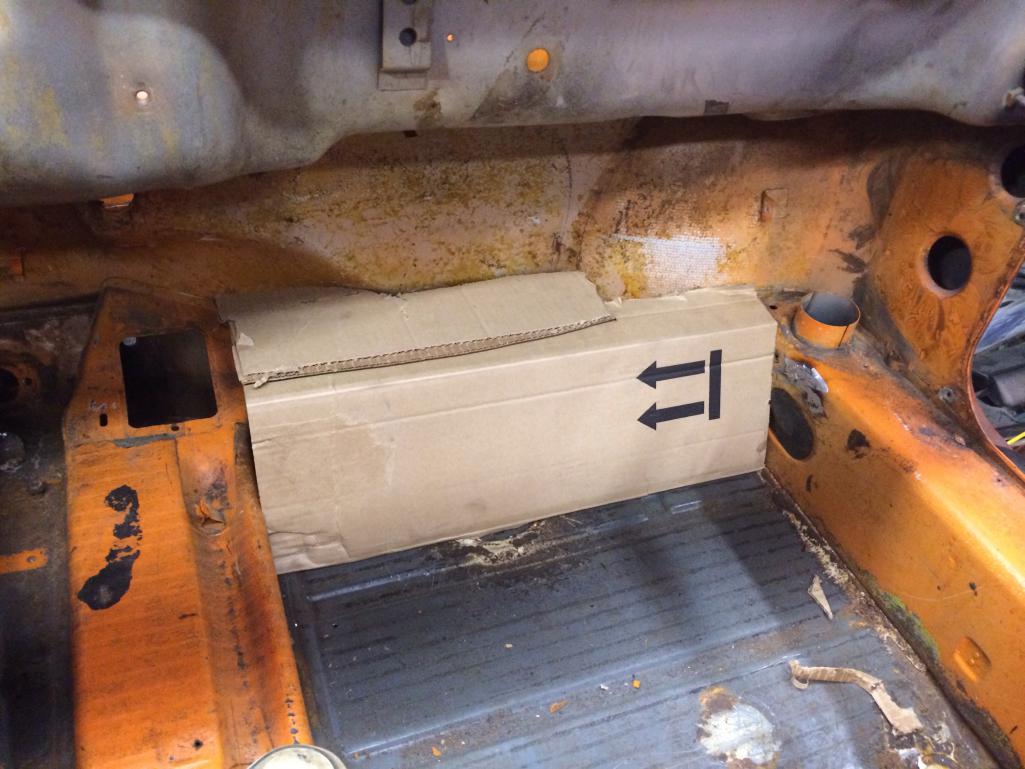
Posted by: CptTripps Feb 12 2014, 07:21 PM
Spent 2-hours in the garage and got all the paint off. MUCH easier with a grinder and 3-4 3M disks!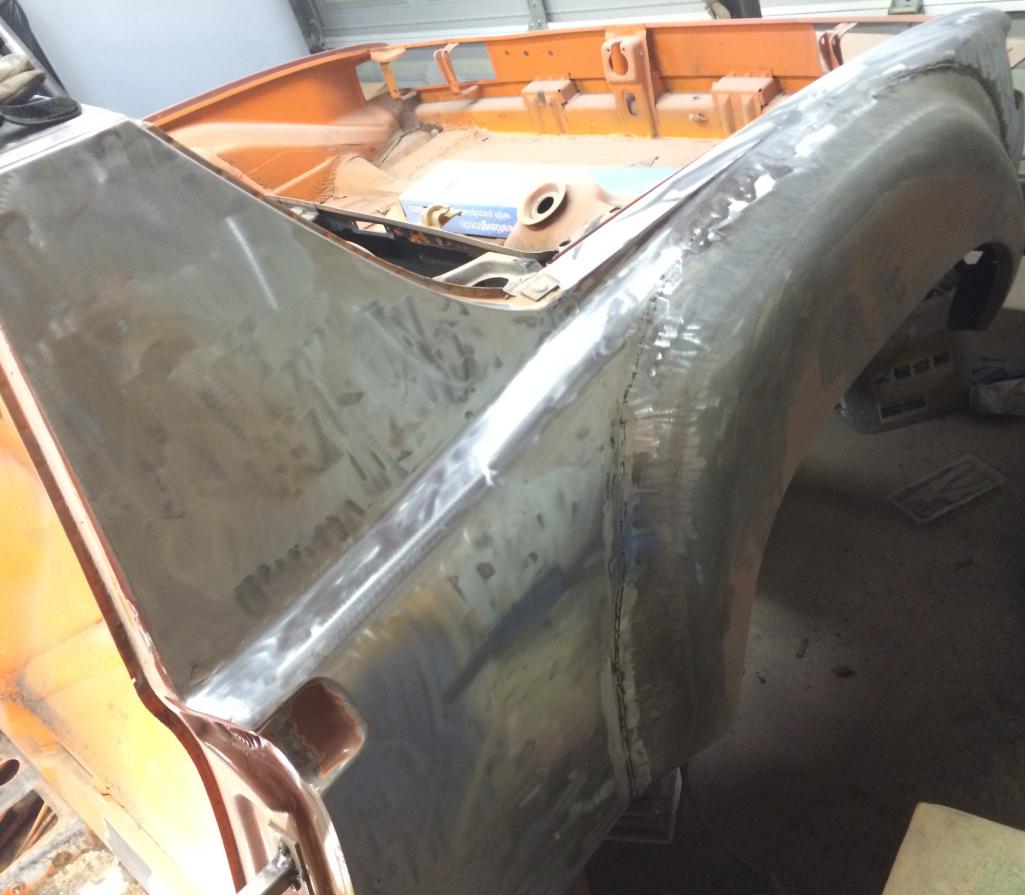
BUT...it looks like I have a bit of a mess in the passenger front quarter. Thinking I may need someone to cut one off of a body for me. This thing is chewed. Going to take a lot of work...or a panel. Thoughts?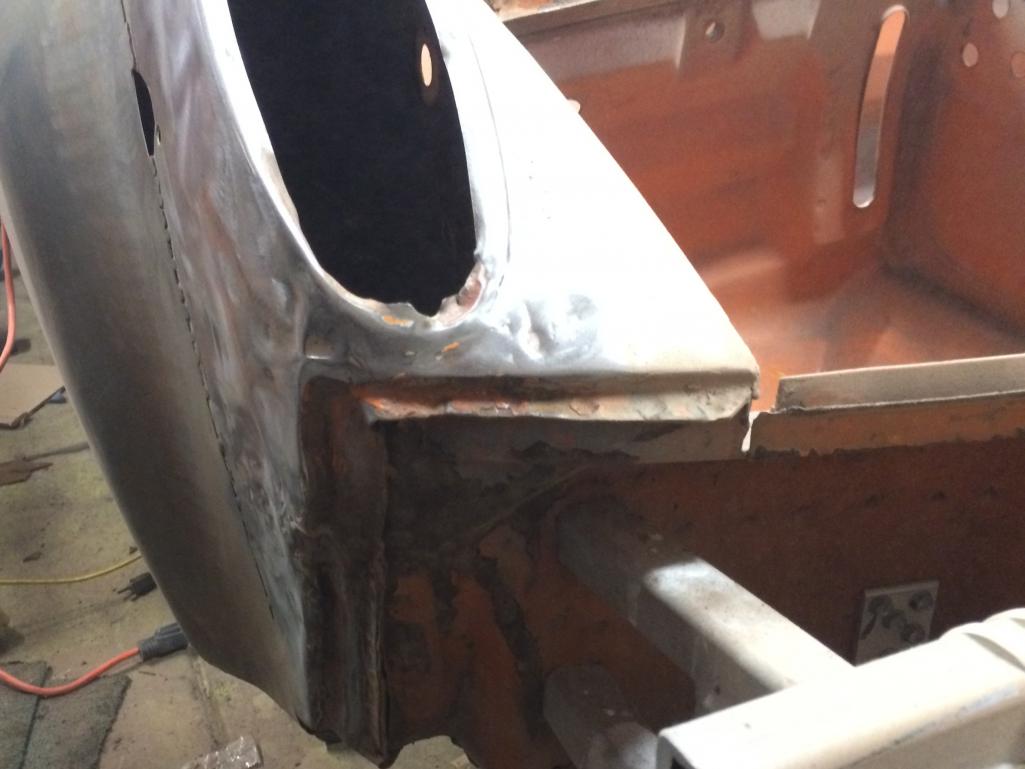
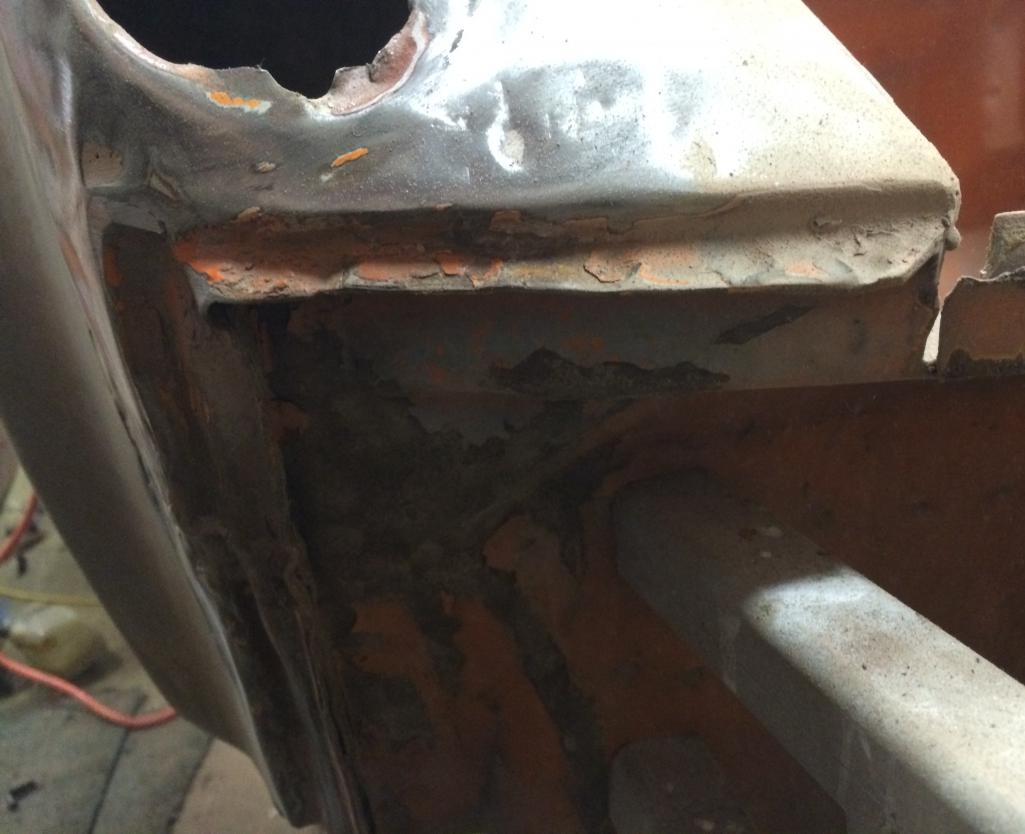
Posted by: r3dplanet Feb 12 2014, 07:36 PM
Quick tax tip: if you hire Garrett as an employee you don't have to pay taxes on him. Not until he turns 18 anyway. Kids are an excellent source of cheap, tax-free labor.
Just saying.
Posted by: Chris H. Feb 12 2014, 08:08 PM
Well dang...must be wrinkled just ahead of the flare weld line then? I'm sure someone has a fender in their stash with that section intact...
Posted by: Spoke Feb 12 2014, 08:42 PM
BUT...it looks like I have a bit of a mess in the passenger front quarter. Thinking I may need someone to cut one off of a body for me. This thing is chewed. Going to take a lot of work...or a panel. Thoughts?
What say the MetalSurgeon? It doesn't look rusted.
Posted by: barefoot Feb 12 2014, 10:36 PM
Just thinking out loud, what do you water cooled guys due for cabin heat since some of you live north of Mason-Dixon?
Show off your solutions !!
Posted by: CptTripps Feb 12 2014, 11:56 PM
Not rusted. Looks like it was used as a teething toy by this guy.
Cabin heat: No clue. I'm not adding anything yet. Next winter!
Attached image(s)
Posted by: 914forme Feb 13 2014, 09:11 PM
I was flipping thru the Summit Racing catalog and found this, if its heat only solution it might be interesting.
Summit Racing Part Number:SUM-991102-1
Heater Type:Dual front vent
Heater Material:Nylon
Heater Finish:Black
Heater Depth (in):8.625 in.
Heater Height (in):6.500 in.
Heater Width (in):9.500 in.
Heater Flow (cfm):260
Heater Output (btus):28,000
Fan Speed:3-speed
Uses Engine Coolant for Heat:Yes
They also have slight larger one. My car usually goes in at the end of October, and back out late March early April. I am putting in Seat heaters. But I am thinking about adding something like this, or a mustang heater core to the fresh air blower. I have auto-xed in the rain and snow, some times its nice to take a little fog off a window, and kep your hands warm.
Though for me it adds to the weight, weight is bad. But seeing is good, rain-x anti-fog, is also good, just like rain-x is good for cars with out windshield wipers.
Heres my rant, its hard to find weights of any products out there. Summit doesn't even list shipping weights, so if your picking between three items, all with in a few dollars of each other, I will pick the lightest one every time. Yet a racing catalog doesn't list weights.
http://www.914world.com/bbs2/index.php?showtopic=226998 and a few others linked in this thread will give you an idea what has been done. Bob BIGKAT_83 of course gets my pick for best street solution.
Doug you started that thread.
Posted by: CptTripps Feb 14 2014, 12:29 AM
That's a very cool heater. I am at Summit about once a week, so I'll grab one next time. Great call! (I'll weigh it for you too.)
I have seat heat, but defrost is a safety issue now that I think of it.
Posted by: 914forme Feb 14 2014, 08:29 AM
Cool, that would be great.
Since it will be the highest point in the system if it is under the cowl, I would add an air bleed to help purge the system.
Posted by: rick 918-S Feb 14 2014, 10:12 AM
I would repair that. Take a propane torch and heat up the sealant that is wadded up in that pocket and scrap it out clean. The you can start to bump it back into shape. Wish I had the time to come help Doug but I won't be in Cleveland again until April.
Posted by: CptTripps Feb 14 2014, 10:40 AM
I was thinking of adding the fill/resivour up there. To make it easier.
I know you would Rick. I think I can get it on my own. Just going to take some time and patience. I don't have much of either.
Posted by: effutuo101 Feb 14 2014, 12:07 PM
a couple of well placed ceramic heaters is the route I am going. light, electric and no hoses to plumb.
Posted by: CptTripps Feb 16 2014, 08:26 AM
a couple of well placed ceramic heaters is the route I am going. light, electric and no hoses to plumb.
I was thinking about that too.
Edit: On second thought, there don't seem to be any that are appropriate for an in-dash installation. The reviews are all pretty terrible too.
Posted by: CptTripps Feb 19 2014, 12:32 PM
I'm bringing in some "backup" to help me out.
I met a guy this morning that's a recent graduate from the Ohio Technical College's Classic Car Restoration program. ( http://www.ohiotech.edu/programs/restoration/ ) He's looking for work...I'm looking to get this project done at some point...seems like a great deal!
I gave him the info for here, so if you see a new guy named Bill show up, be nice.
Posted by: billbeck429 Feb 19 2014, 09:16 PM
Hey guys, I am the aforementioned Bill. Been reading for about 5 hrs trying to get up to speed on the 914's and its pretty sweet stuff your cranking out. Hot rodding at its finest.
Just wanted to say "hey" and I may have some questions
Later on if I cant find them myself but right now im full!
Posted by: 76-914 Feb 19 2014, 09:58 PM
Hey Bill, welcome aboard. Doug can use some help since his weekend release program was cancelled.
Posted by: CptTripps Feb 20 2014, 10:11 PM
MUCH better. Bill's doing a great job.
Attached thumbnail(s)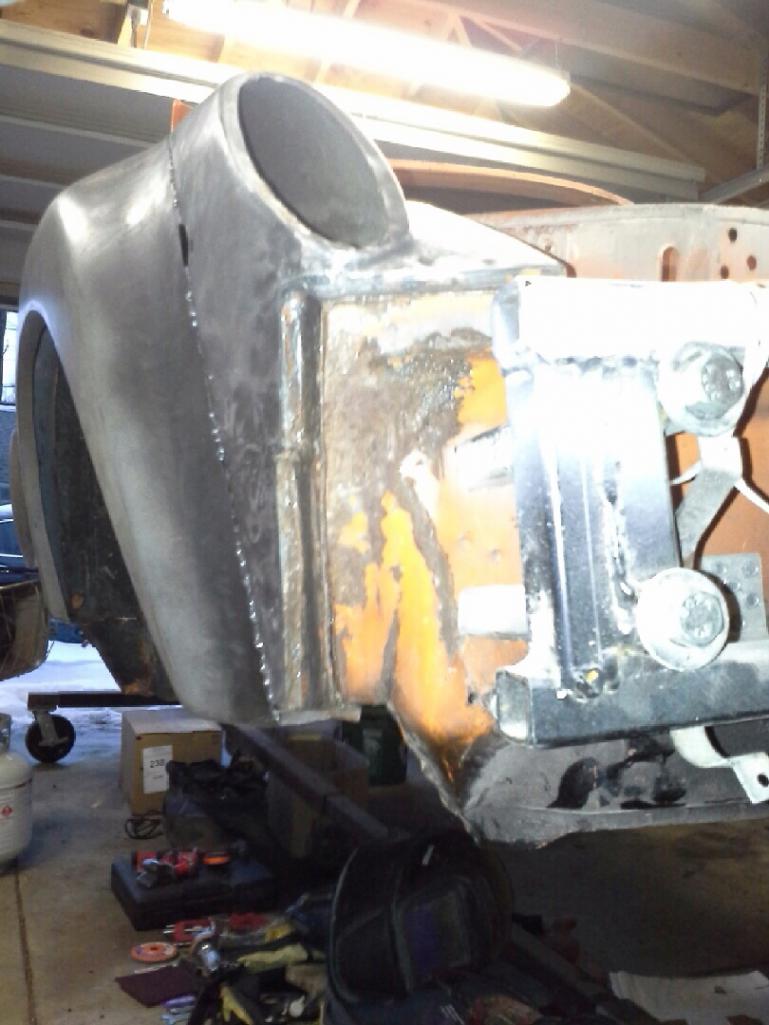
Posted by: Philip W. Feb 21 2014, 07:38 AM
I'm bringing in some "backup" to help me out.
I met a guy this morning that's a recent graduate from the Ohio Technical College's Classic Car Restoration program. ( http://www.ohiotech.edu/programs/restoration/ ) He's looking for work...I'm looking to get this project done at some point...seems like a great deal!
I gave him the info for here, so if you see a new guy named Bill show up, be nice.
 oh, no! you are contributing to the deliquency of a minor! actually, thats a great idea, a "win-win" he can help you with the
 and more , maybe you could be reponsible for converting him over to the 914world of rust
 -let me know if he needs another project to learn on- wait, thats yours-
once he learns more i'll send mine up there - make sure he knows how to fix the longs and jackpoints though, ok? 
and keep up the documentation- more pictures!!
Posted by: Chris H. Feb 21 2014, 08:07 AM
Wow! That's really hard to do. Nice work Bill!
Posted by: CptTripps Feb 21 2014, 12:00 PM
BTW: I think Bill is in his early 40s. Just decided he wanted to work on cars, so he moved to Cleveland from St. Louis to go to OTC.
He should be at the house working when I get home. (I'm on an airplane right now.) I'll take some more pics.
Posted by: CptTripps Feb 21 2014, 06:49 PM
Bill got a bit done today. The front where the metal was all chewed up looks to be formed nicely now. Not perfect, but it is miles better and should clean up very nicely.
Next up is the flares. The welds were tightened up and ground a bit. I can see this coming together nicely too.
He thinks I'll be done and painted in about 3-4 weeks. He'll be on it 8h a day, so I'd expect we may be able to get through it a bit quicker.
Attached thumbnail(s)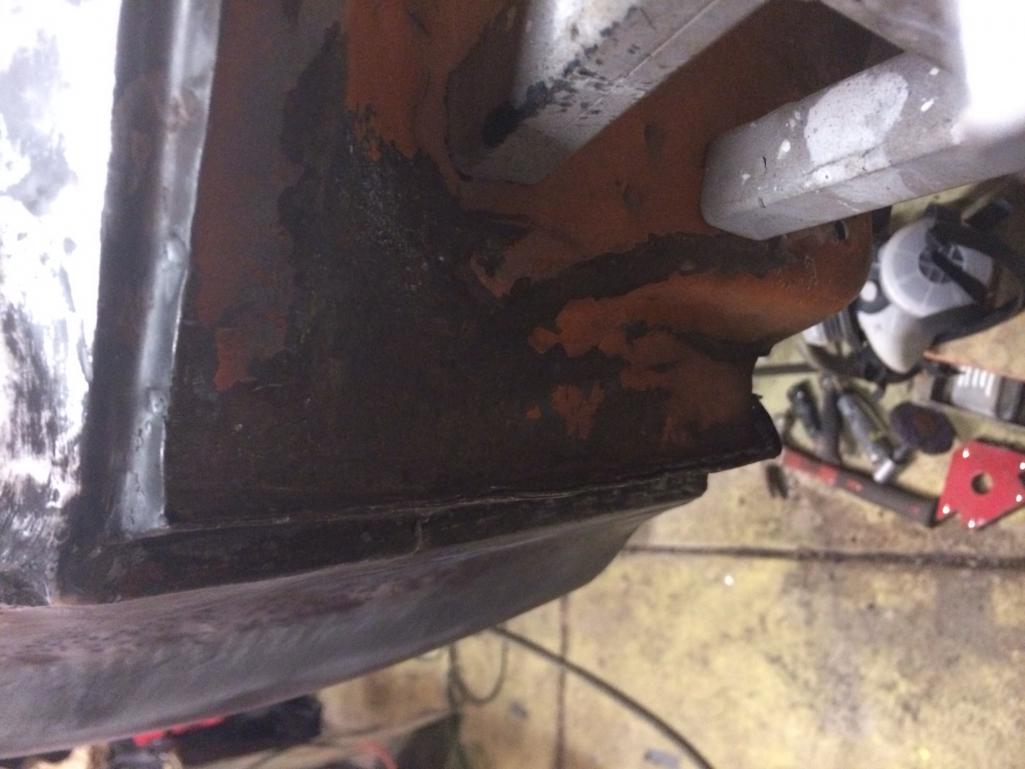
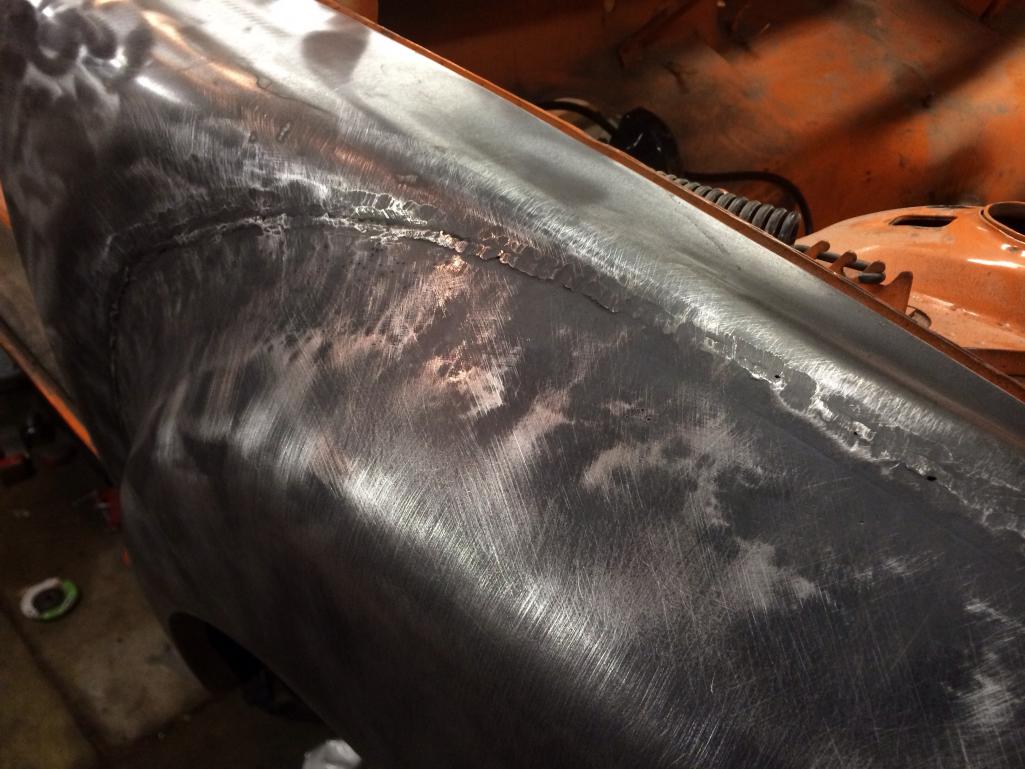
Posted by: CptTripps Feb 23 2014, 09:04 PM
With Bill working on the body over the next few weeks, I can concentrate on all the other stuff that needs done. Part of that, is to get a lot of little things cleaned up.
So....Garrett and I went out and bought a blasting cabinet today. It was on sale from $299 to $209...and I had a 25% off, so for $150 I took it home.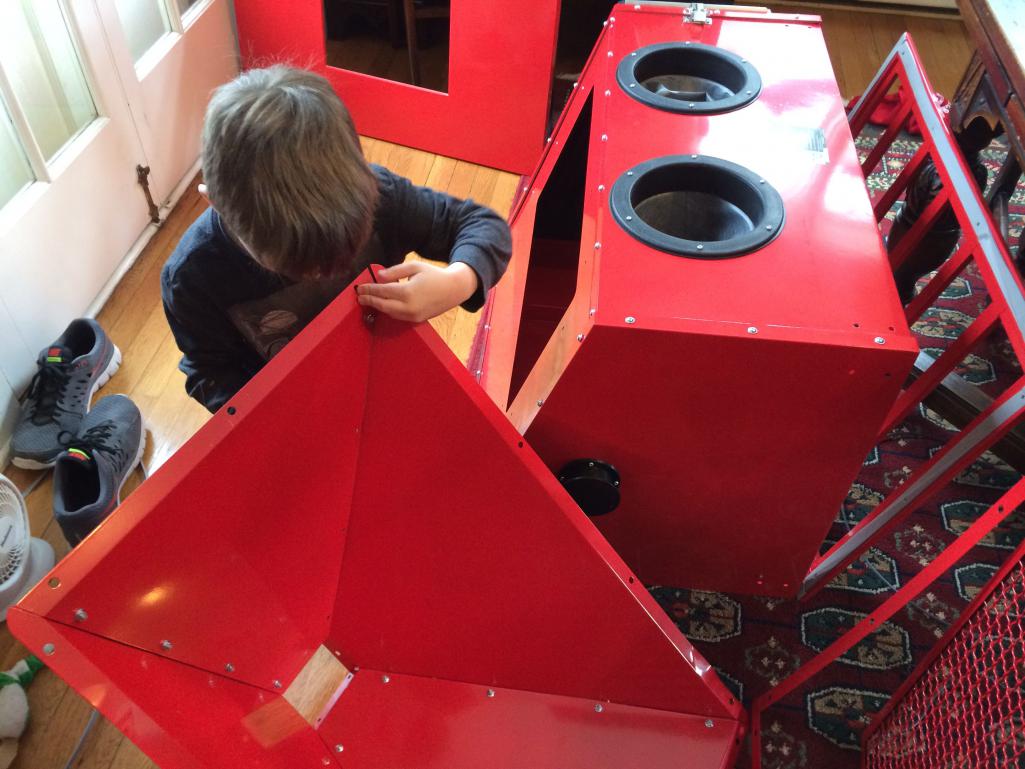
I'd rebuild this cluster, but thought it would be a good idea to break it all down, glass-bead it, and get it out to powder coat after Kent is done with the hydraulic clutch build.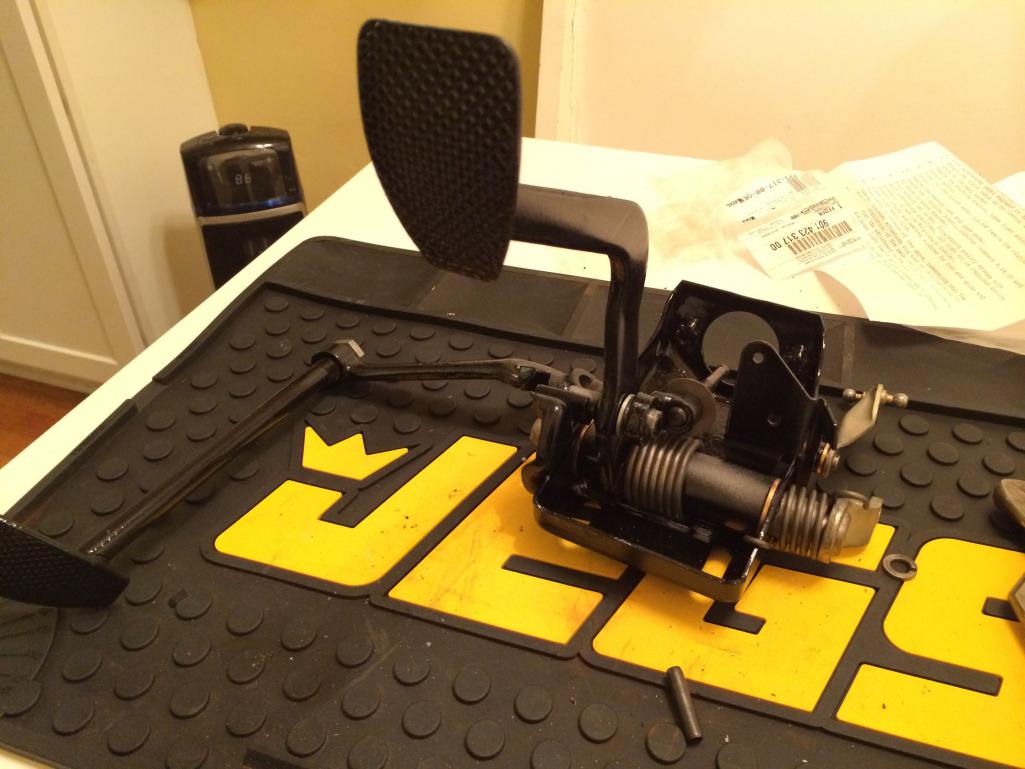
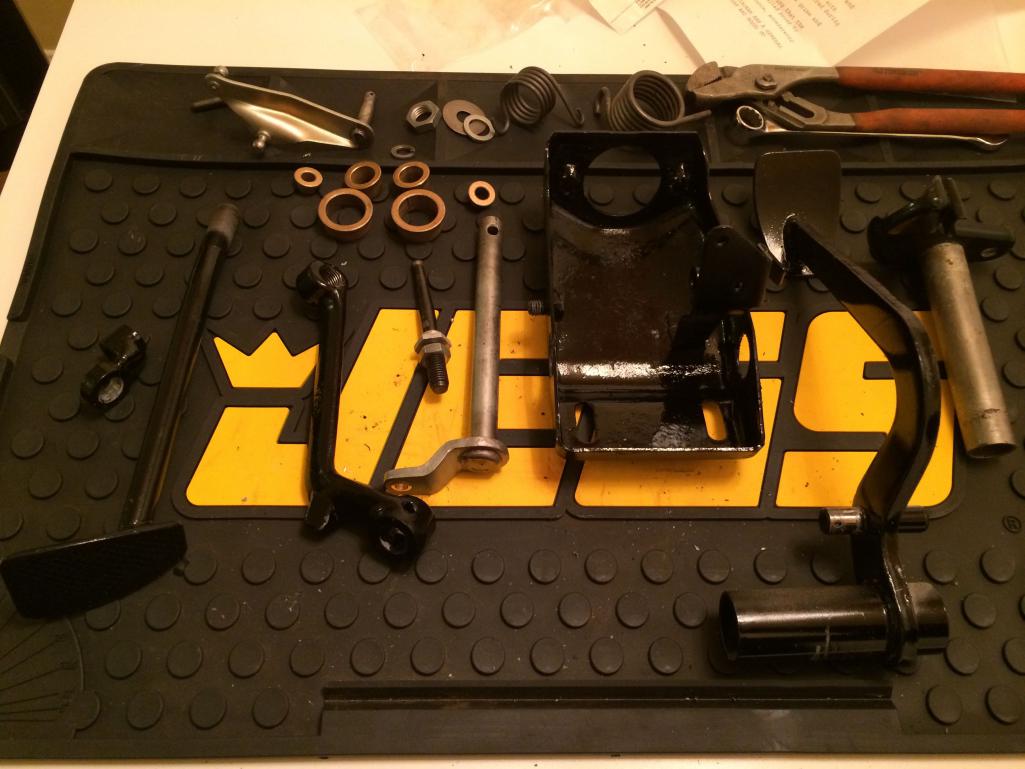
Posted by: CptTripps Feb 24 2014, 05:01 AM
On another note...
Switched to different interior materials. Originally, it was going to be Black vinyl with black Alcantara. Now I'm thinking Gray/Gray. I think the Gray looks better with the brushed Aluminum. Thoughts?
Attached thumbnail(s)
Posted by: bulitt Feb 24 2014, 07:16 AM
Hey guys, I am the aforementioned Bill. Been reading for about 5 hrs trying to get up to speed on the 914's and its pretty sweet stuff your cranking out. Hot rodding at its finest.
Just wanted to say "hey" and I may have some questions
Later on if I cant find them myself but right now im full!

take a look at SocalAndy and plymouth37 build threads!
Posted by: Chris H. Feb 24 2014, 08:15 AM
Blast cabinet is one of my next purchases. Harbor Freight?
Posted by: 76-914 Feb 24 2014, 09:11 AM
On another note...
Switched to different interior materials. Originally, it was going to be Black vinyl with black Alcantara. Now I'm thinking Gray/Gray. I think the Gray looks better with the brushed Aluminum. Thoughts?
+ 1 on the Gray.
Blast cabinet is one of my next purchases. Harbor Freight?
Hey Chris, I found that my HF blast cab fits my HF lift table perfectly. Nice to pick a good working height + the mobility the table offers.
Posted by: CptTripps Feb 24 2014, 09:12 AM
Blast cabinet is one of my next purchases. Harbor Freight?
Yup! I got the "big one" this time. http://www.harborfreight.com/40-lb-capacity-floor-blast-cabinet-68893.html
There are a LOT of things in the HF catalog that can be considered "disposable" but the stuff with NO moving parts is normally a safe bet. This was a steal for $150. One thing I want to do is "Plastidip" all of the interior corners. Just to seal everything up so media isn't leaking out here and there. Wouldn't be hard and would help.
Here's a good coupon for you all. I always do a Google Images search in the checkout line for a coupon. They'll honor just about anything. This one is good until April 12th.
Attached image(s)

Posted by: Chris H. Feb 24 2014, 09:16 AM
Nice, thanks for the info guys. Good idea on the plasti dip. I did hear you have to seal it up good if you're using soda. Saw a few complaints about it not sealing well with that but...it's SODA. Pretty small particles. It's gonna be messy.
Posted by: CptTripps Feb 24 2014, 09:47 AM
Actually, the glass beads are small...and SLIPPERY!!!! Like 1,000,000 tiny ball bearings on the ground. They shimmer too.
Posted by: 76-914 Feb 24 2014, 02:28 PM
Actually, the glass beads are small...and SLIPPERY!!!! Like 1,000,000 tiny ball bearings on the ground. They shimmer too.
Those things as slippery as greased Owl shit. Be careful walking.
Posted by: CptTripps Feb 24 2014, 07:34 PM
While Bill makes progress out in the garage, I'm working nights on the interior pieces.
Stripped the seats to bare glass tonight. Hoping I can get them cleaned up enough to paint soon before the padding gets added back on.
After stripping everything, I found a SHIT TON of mold. Yuck!
Quick trip out to the garage for a meeting with "Mr. Soda Blaster" and I got the mold off. I need more soda, and will strip the rest of the glue and stuff off tomorrow.
Before: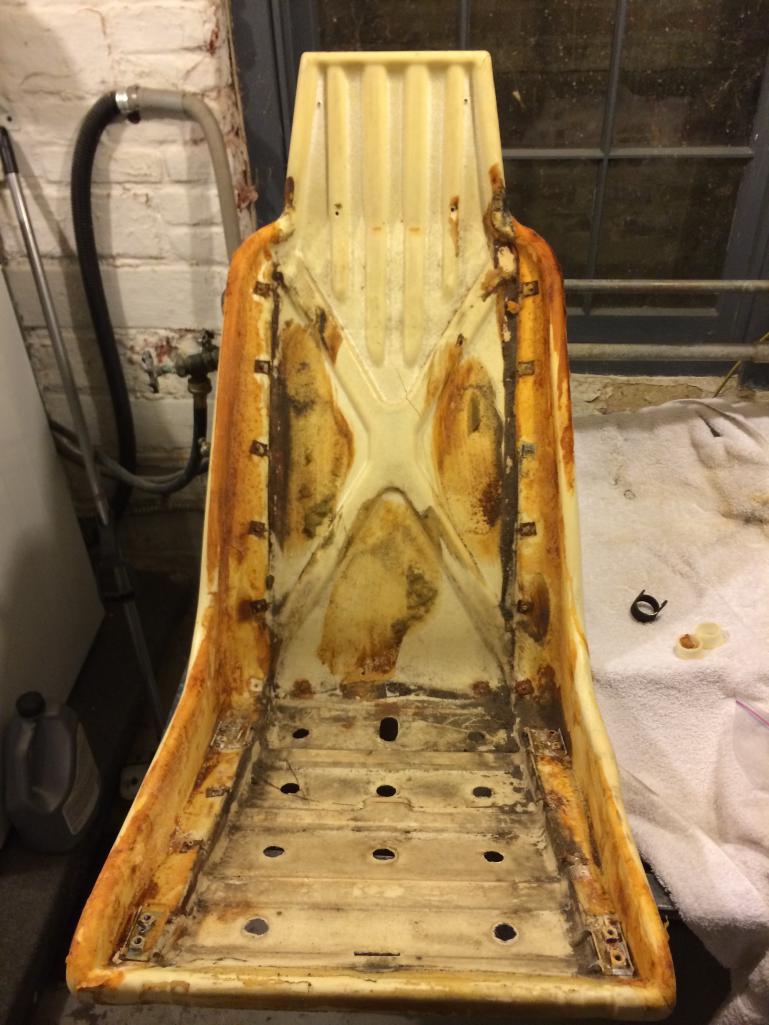
After: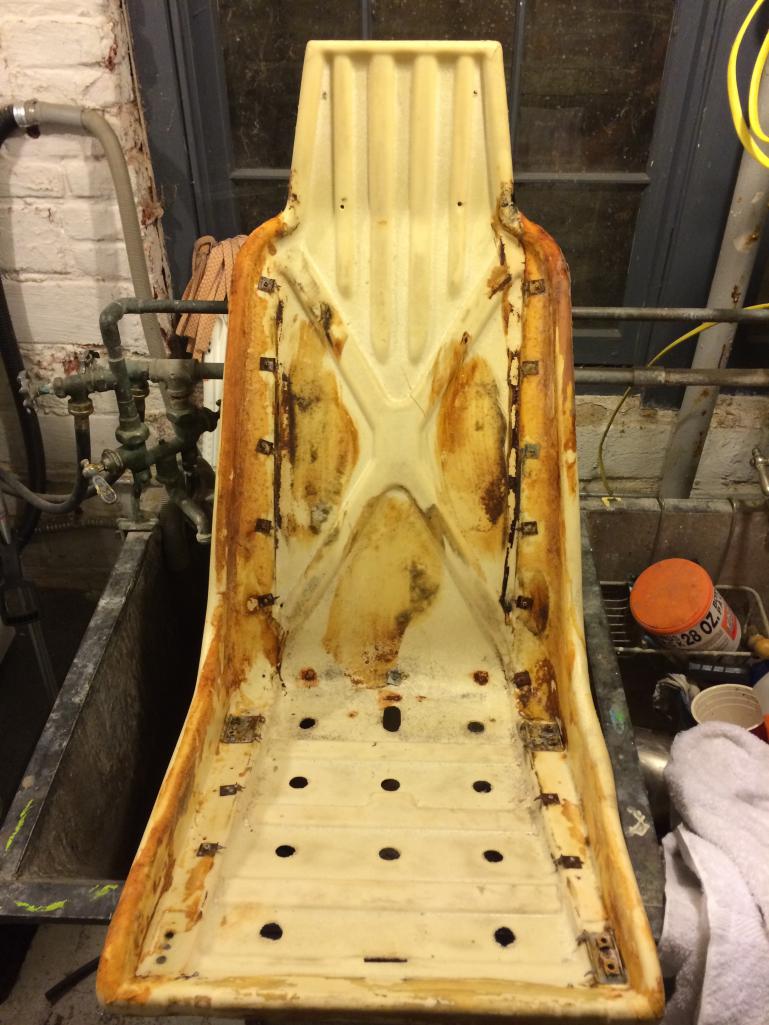
Posted by: rnellums Feb 24 2014, 08:19 PM
Now is a great time to add to the bolsters if you want a slightly grippier seat. A bit of fiberglass, some sewing and voila!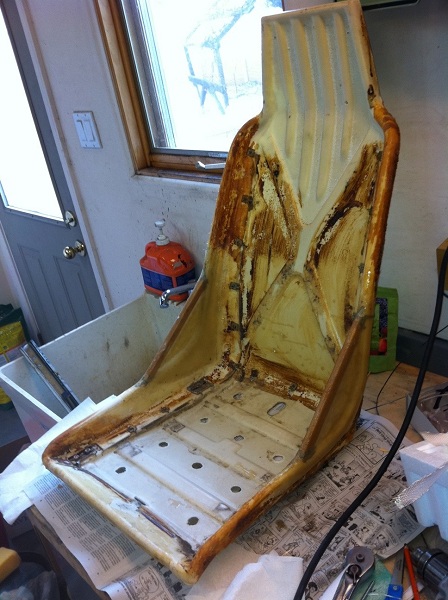
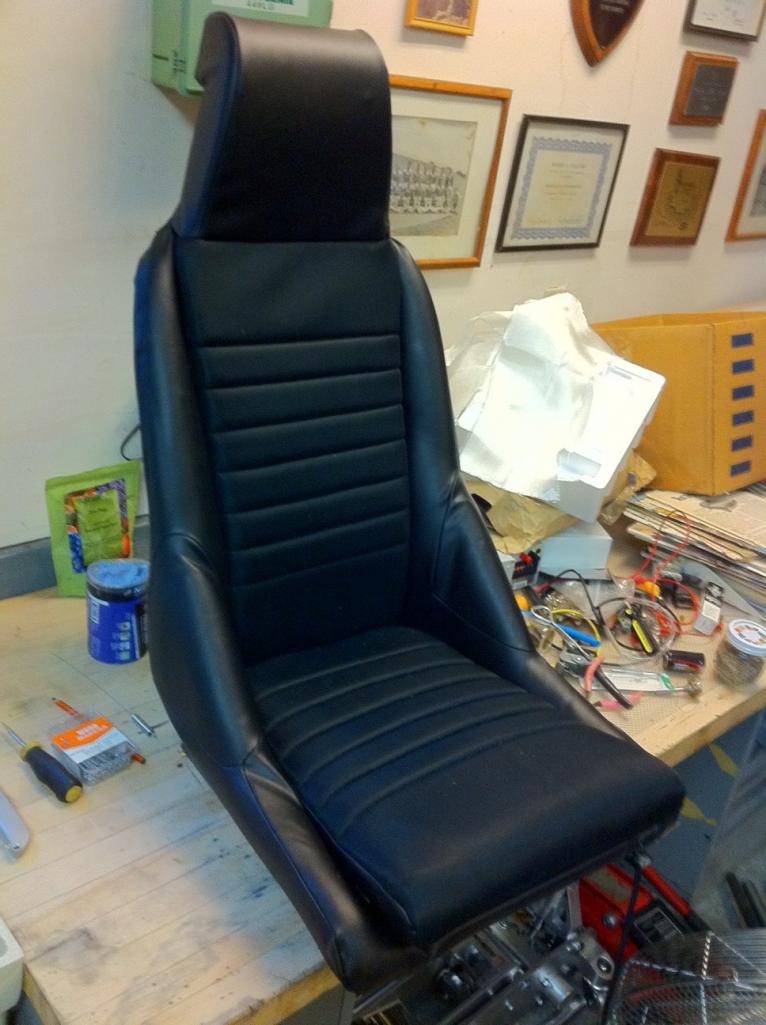
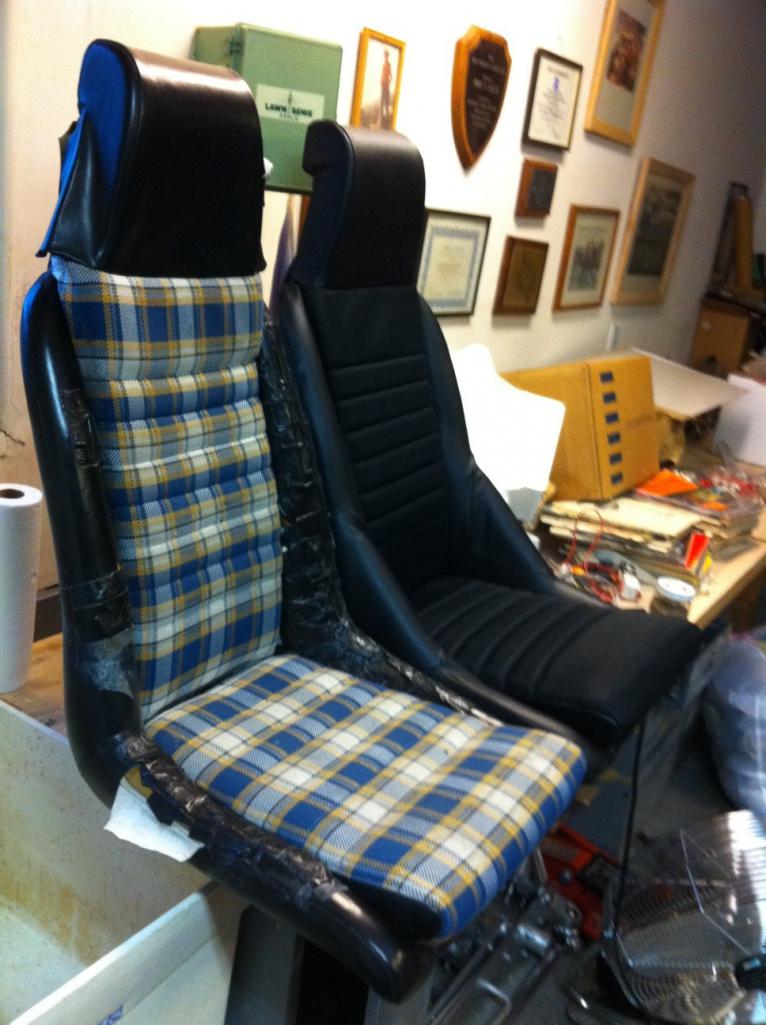
Posted by: tdgray Feb 25 2014, 07:36 AM
Then I started buttoning up the flares. I'd thought about AllMetal at one point, but McMark talked me out of that route. So I started the long process of filling about 200 gaps on two fenders tonight.
Use the AllMetal as pinhole or small gap filler... it can span fairly large gaps but I would not use it as a primary source.
Great product... its all I use.
Posted by: CptTripps Feb 25 2014, 09:32 AM
So, Bill bailed on me. That's a bummer, because he was a real nice guy and I was looking to do a lot more with him. Better I learn now than later I guess.
So...I'm looking for another shop that can crank through the car for me over the next few weeks. HUGE set-back, but I'll make it work. My goal is still April 15th. 50 days isn't' a lot of time from this stage, but I gotta push on and make it work.
Posted by: CptTripps Feb 26 2014, 07:20 PM
The trailer I bought was a piece of shit. So, I put it in Craigslist and a few hours later it was on its way to be the next guy's problem. Cost me $80 to own a trailer for 3 weeks. O-well.
FINALLY found someone that can take the car out to the sandblaster. $80 and he'll be here at 9:00am.
So I spent the evening getting the tub ready for the 18mi trip.
They're going to etch prime it too, so I should get a nice fresh looking tub back.
Attached thumbnail(s)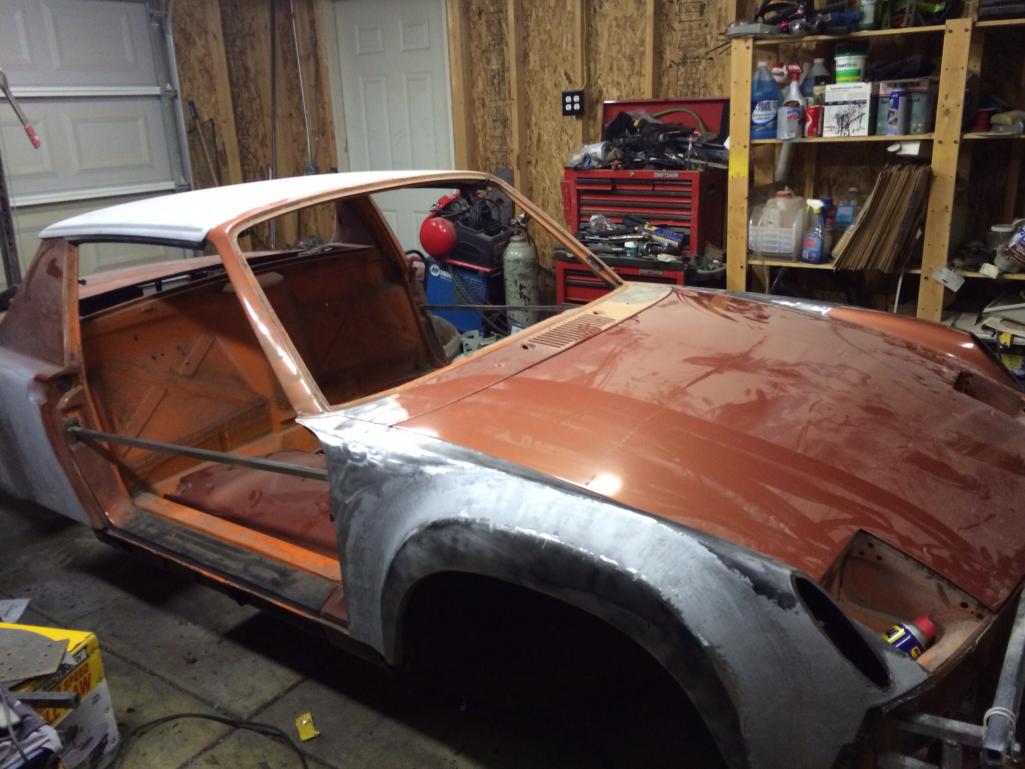

Posted by: CptTripps Feb 27 2014, 08:07 AM
Do I get an award for "Coldest 914" today?
I was concerned for 1min about the snow and then I realized it's going to be sand-blasted in a few hours and then etch primed.
Let it snow! 
Attached thumbnail(s)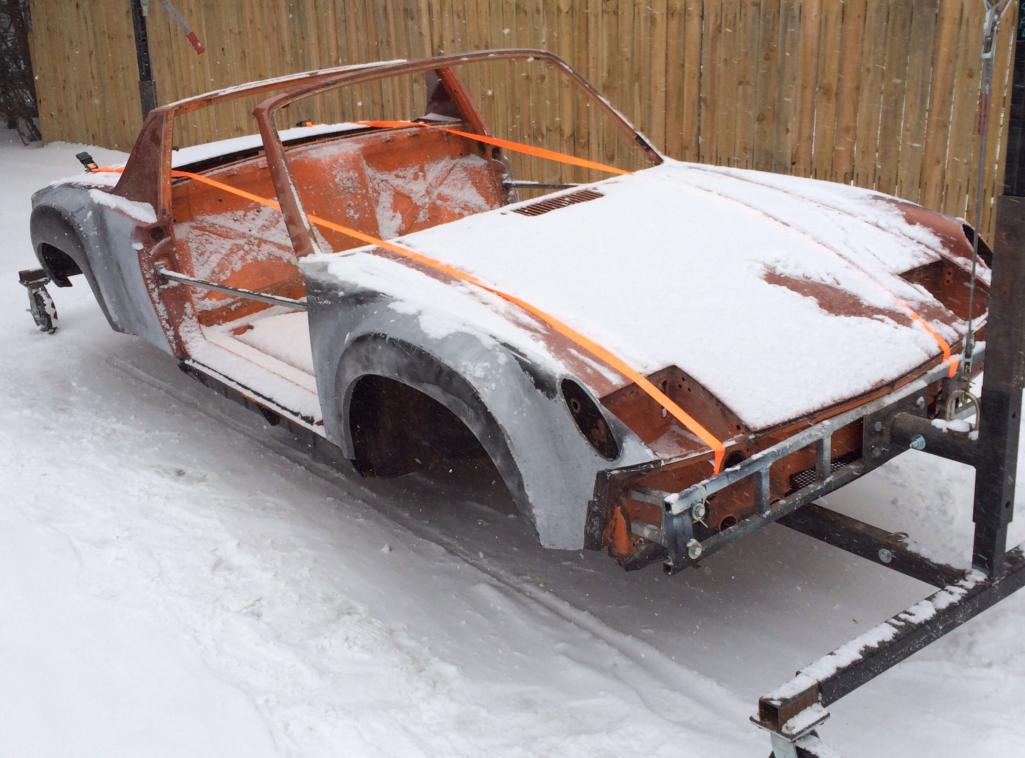
Posted by: rick 918-S Feb 27 2014, 08:32 AM
Don't All-Metal over gaps or pin holes. Although it is resin based it is not metal and will absorb moisture and bubble when it gets wet. Rust will form under it if moisture is allowed to get to it from the back side.
Posted by: CptTripps Feb 27 2014, 01:47 PM
And she's off! Newbury Sandblasting is going to have it blasted inside/out, primed, cleaned and back to my house by Tuesday. They had a real cool Monte Carlo that they just finished yesterday. They spent a LOT of time going over everything with me to make sure it's as expected. I'm feeling good about this. Especially for $600.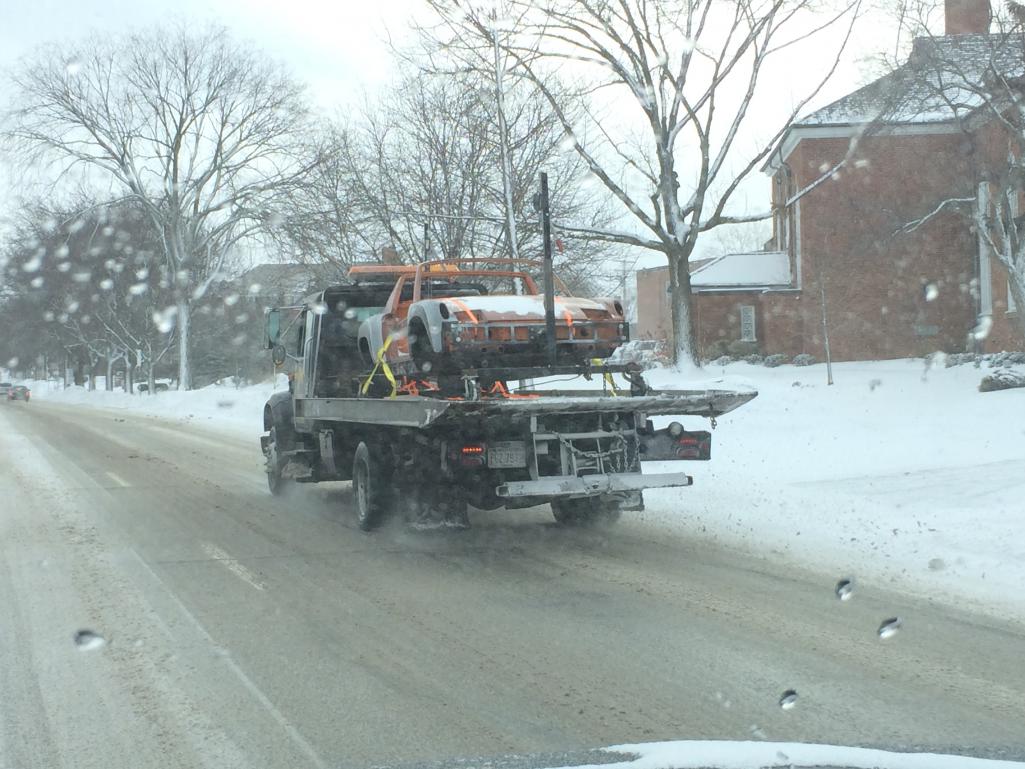
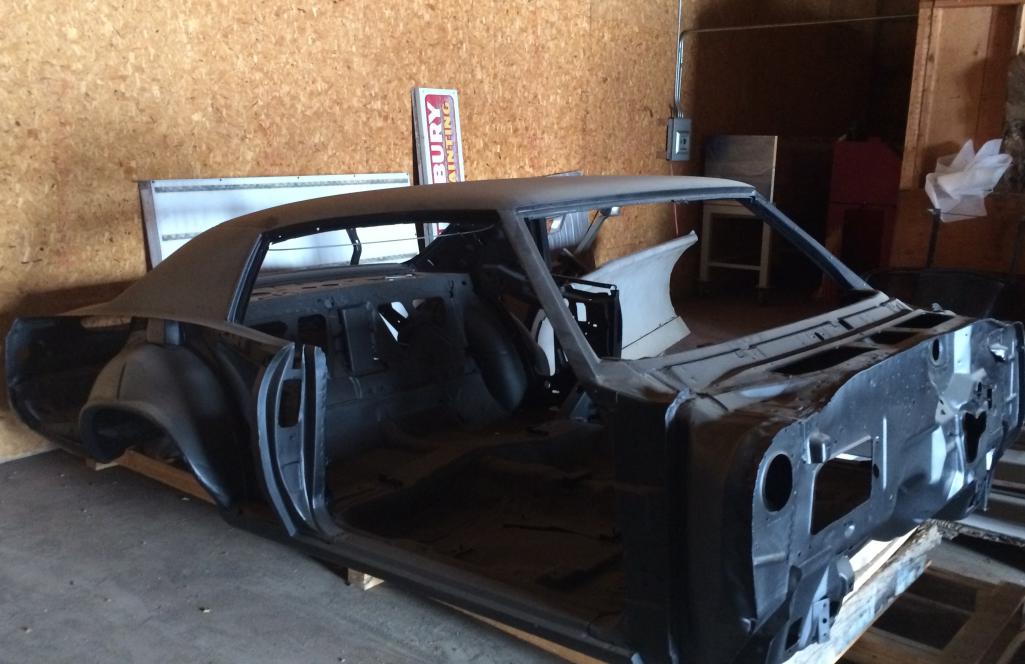
The body shop that I was going to use had a death or something, so now they can't take me until June. Grrrr! I need to find a new one close by so I can check-in from time to time.
Posted by: CptTripps Feb 27 2014, 07:45 PM
Spent the evening working on the engine wiring harness. Since there is a lot of it that is no longer needed, I can re-make the entire thing to the exact right lengths. Ordered a pin puller kit from Amazon and it should be here tomorrow. So I dismantled the entire thing, and washed all the connections. I'll have a LOT of crimping and soldering tomorrow, but having a perfect harness will be worth it.
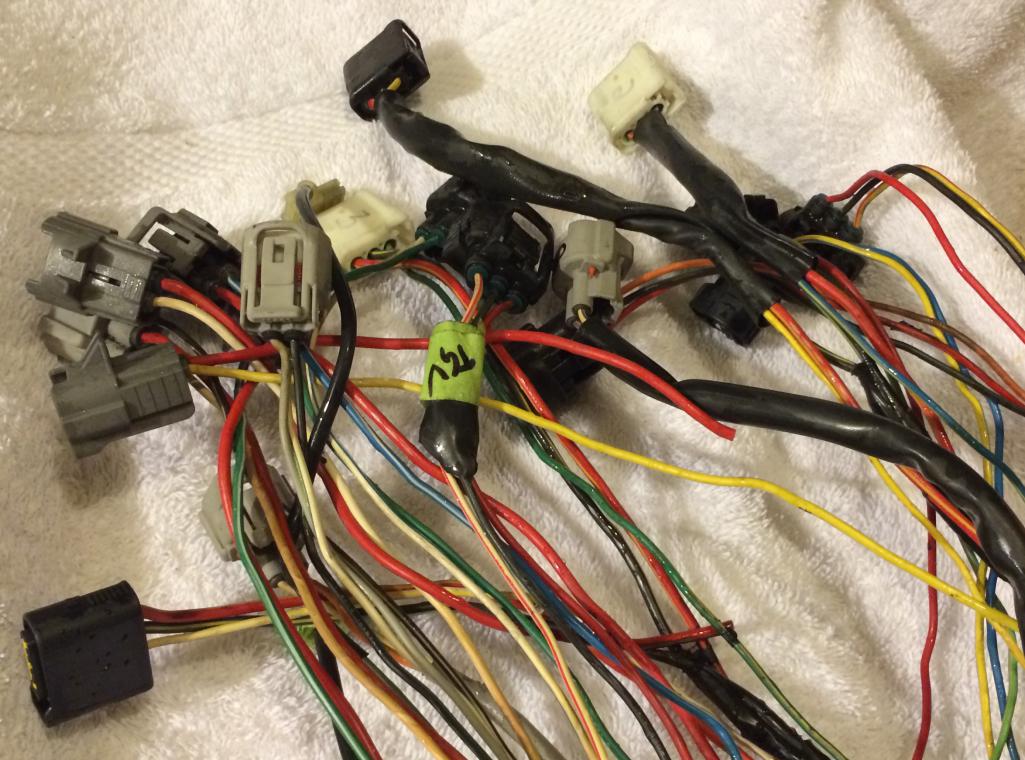
Also worked on finishing up the seatbelt clips. I'm replacing the Orange with Green to match the rest of the theme. Stay tuned for the other cool part. 
Posted by: CptTripps Feb 28 2014, 07:09 PM
Got one project completed today. Completely restored my seatbels...and changed "Press" to "Eject"
Attached thumbnail(s)
Posted by: CptTripps Mar 1 2014, 06:49 PM
Spent the morning working on the ECU.
The Hydra EMS that I'll be using needed some extra wiring, so after getting the pin-map from the manufacturer, I started building out all the pins and organizing.
Figured the easiest way would be to build an Excel sheet to keep everything organized.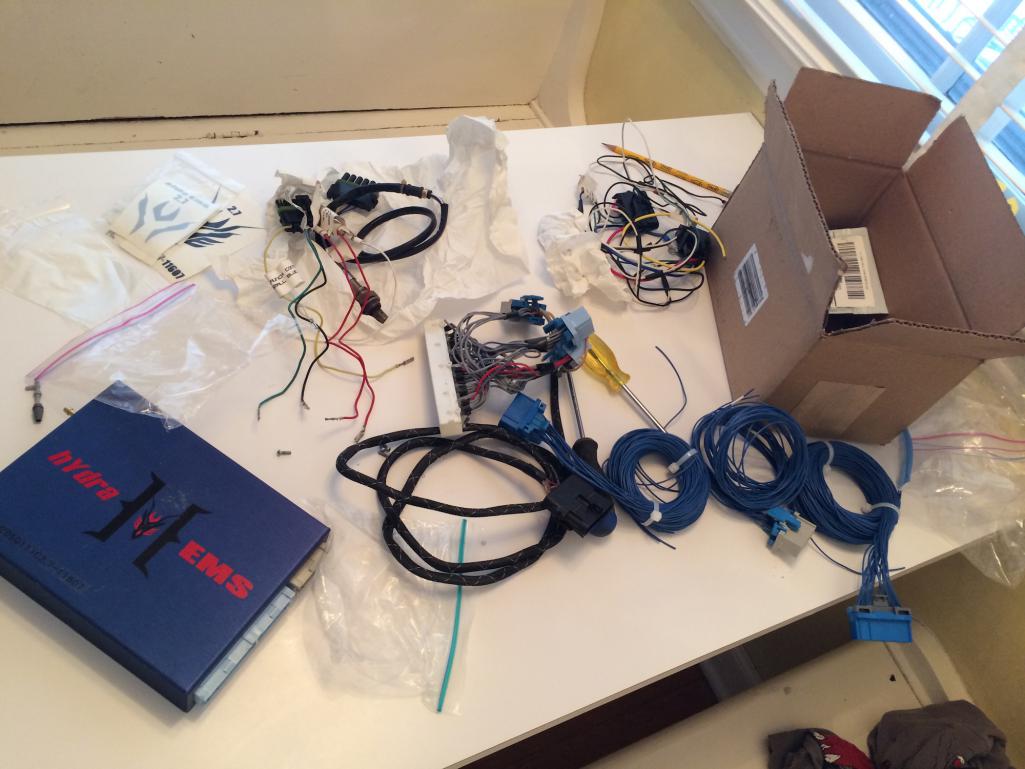
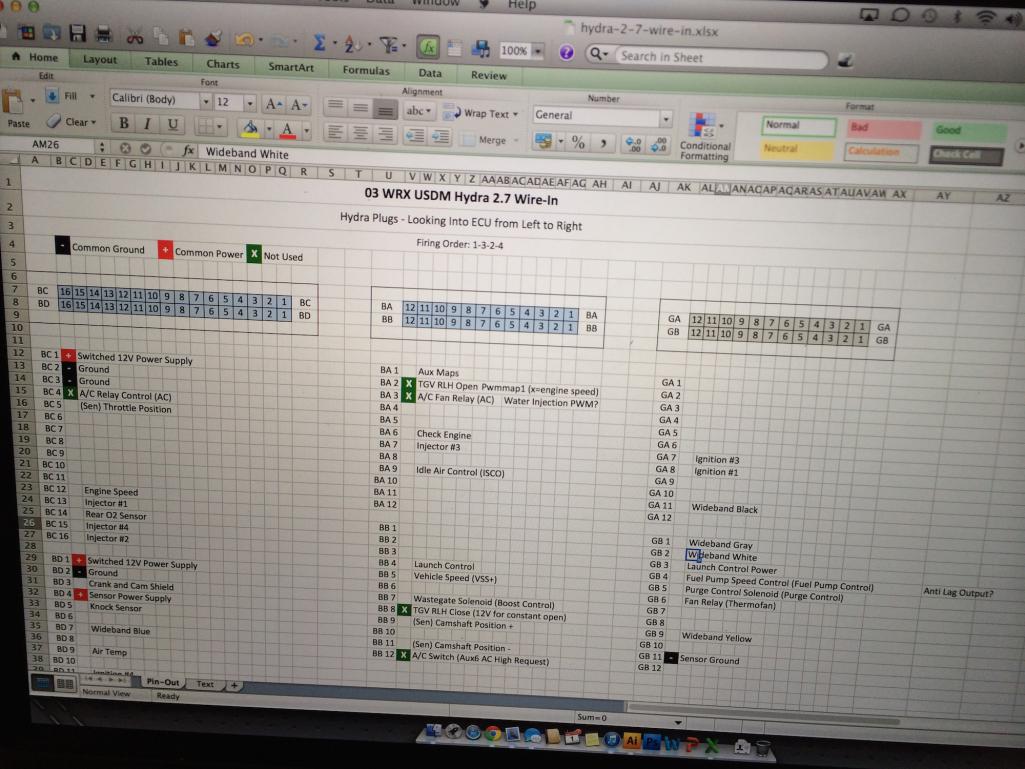
The last part of the day was getting the transmission ready. I finally had all the parts to convert it to 2WD.
After opening it up, I was confused on how to get the 27mm nut off. A quick call to Ian and I was set straight.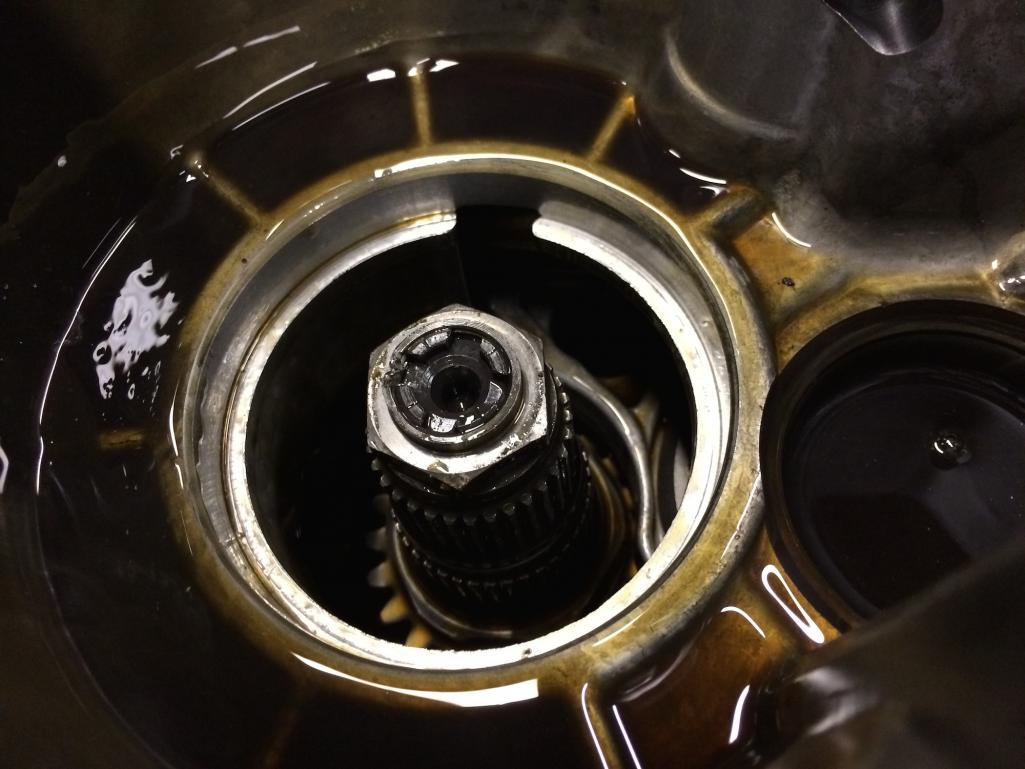
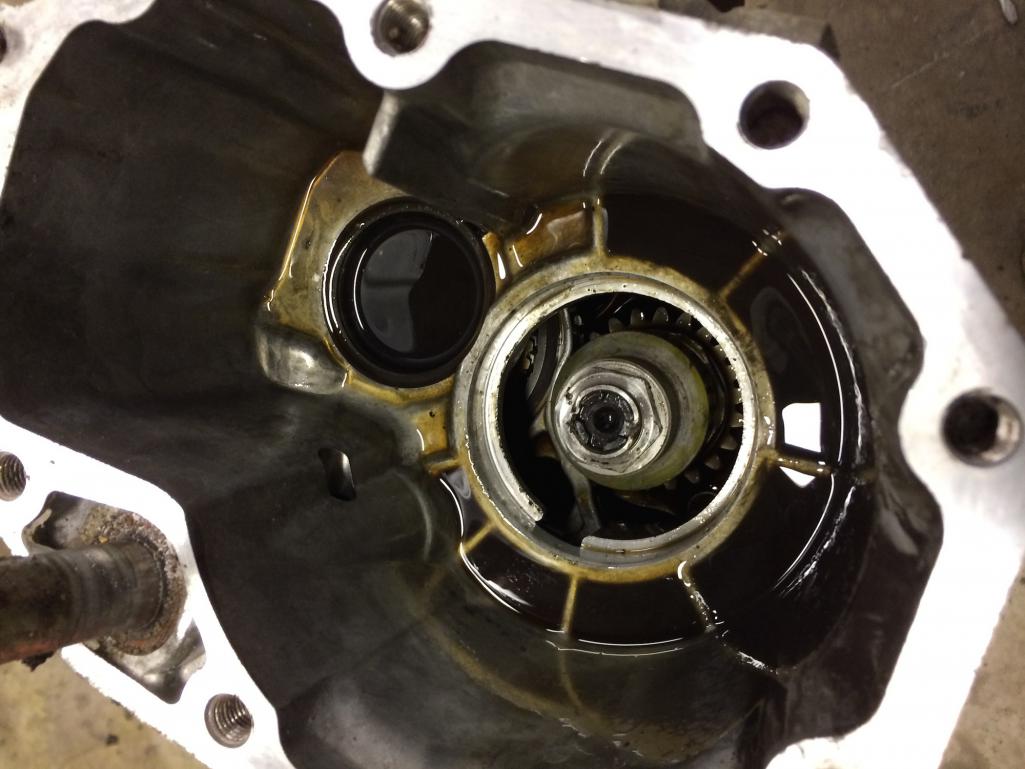
Posted by: CptTripps Mar 1 2014, 06:50 PM
I needed to notch Ian's plate a little to get it aligned properly.
After that...it was all aces!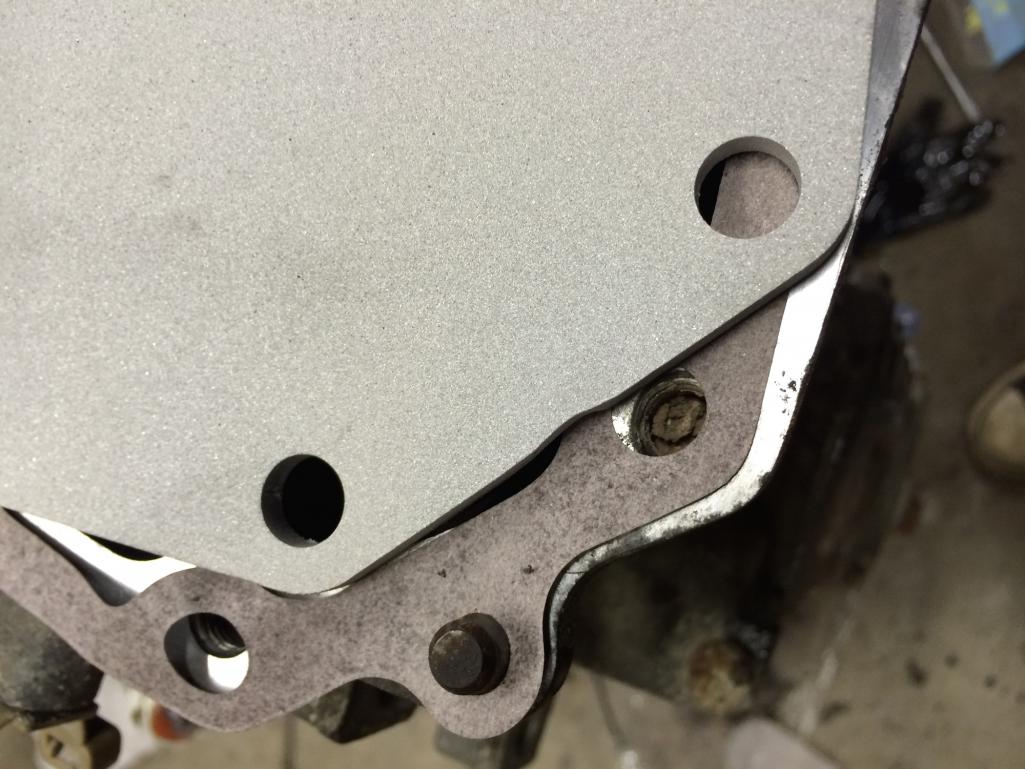
Posted by: CptTripps Mar 1 2014, 09:02 PM
ECU Success!
I had to run out and buy a Windows computer to run the Hydra software. Ultimately it was cheaper and easier to buy an IBM Thinkpad with Windows 7 than it would have been to buy a copy and get it set up. So now I have a dedicated ECU machine. (For $150, I'm not complaining!)
Hydra sent me a base map for the 2003 WRX, so I have a good starting point. The guy that had the ECU before me had a custom map. Maybe I'll load that up and see how it goes at some point.
So now I can see where all the different aux ports are and map them to things like "Launch Control" and other coolness. It'll be cool to have a dial like the Ferraris do for "Street / Race" modes.
Posted by: 914forme Mar 2 2014, 05:20 PM
Doug, don't solder your joints, get high quality crimpers and crimps, crimp them, then adhesive heat shrink over the joint. They are less likely to break and also are repairable if need be, with out cutting out a section. The heat shrink also acts a strain relief. But you can do it how ever you want.
I come from the computer world where when I started we soldered everything. I now crimp everything using crimpers and adhesive heat shrink as my strain reliefs.
But thats just me. You still should use an adhesive heat shrink for strain relief.
Posted by: CptTripps Mar 2 2014, 06:59 PM
I hear you loud and clear. I meant to type "de-soldering". Some of the Subaru connectors were soldered inside the connectors. I just ordered about 200 new female ends for all the different Delphi connectors. I'm also re-doing all the connections to the Hydra. In between, it'll be a using a termination block so I can move to other pins if I need to re-map something.
Posted by: 914forme Mar 2 2014, 07:53 PM
Carry on then good sir carry on.
I hear you loud and clear. I meant to type "de-soldering". Some of the Subaru connectors were soldered inside the connectors. I just ordered about 200 new female ends for all the different Delphi connectors. I'm also re-doing all the connections to the Hydra. In between, it'll be a using a termination block so I can move to other pins if I need to re-map something.
BTW, you could have looked at my post, I showed how to convert to 2WD and well specifically that nut, it is a pain. Yet once you figure it out, its easy as pie.
Posted by: CptTripps Mar 3 2014, 06:46 AM
BTW, you could have looked at my post, I showed how to convert to 2WD and well specifically that nut, it is a pain. Yet once you figure it out, its easy as pie.
I'd looked at a lot of posts, I just didn't remember any of them.
At that moment, I was in the garage...covered in grease...and had Ian's number.
Most of yesterday was spent cleaning...and cleaning...and cleaning. Things just got "out of hand" in the garage, and with the car out of there, it was now or never.
My Dad came over to help me build the Christmas present he and my Grandfather bought me. Took us 2 hours, but having drawers for ALL my tools is going to be awesome.
Attached thumbnail(s)
Posted by: CptTripps Mar 3 2014, 07:53 PM
I spent the night tearing down all the connections for the engine harness. All new high-temp wiring has been ordered in about 20 different colors.
I expect I'll have the entire harness done by the weekend. I've got it all mapped out in an excel sheet, and printed shrink tubing for both ends of each wire. So the plan is to get everything terminated to the connector, and leave 10' at the end so I can take a lot of time to wire it through properly to the termination block.
Attached thumbnail(s)
Posted by: 76-914 Mar 3 2014, 11:24 PM
Your pedal assembly is ready for shipping tomorrow. I'll pm you tomorrow. I made some rubber stop pads. Ugly but effective. Note the washer orientation, don't mix washers. The one on the accelerator shaft is unique in size. Do not omit any washers or interference is possible.
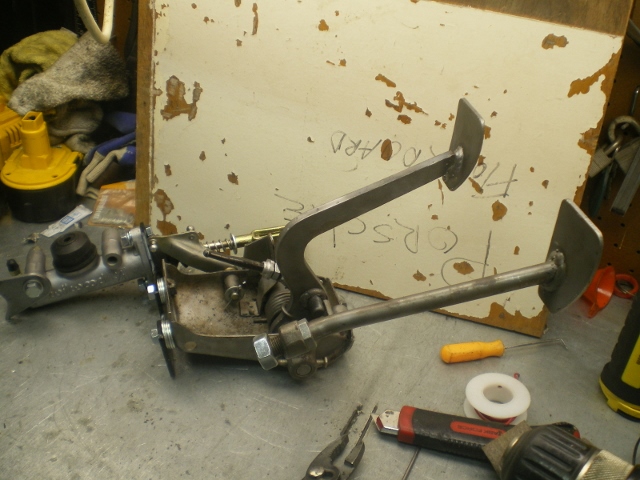
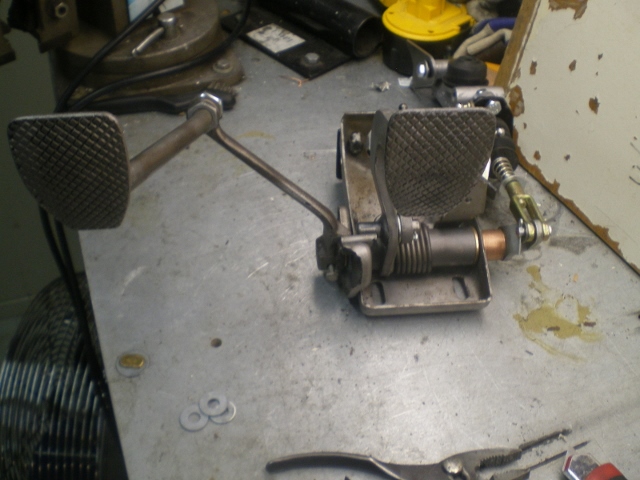
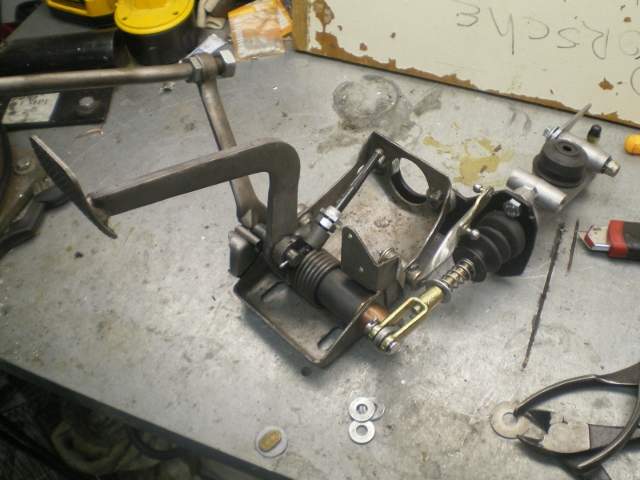
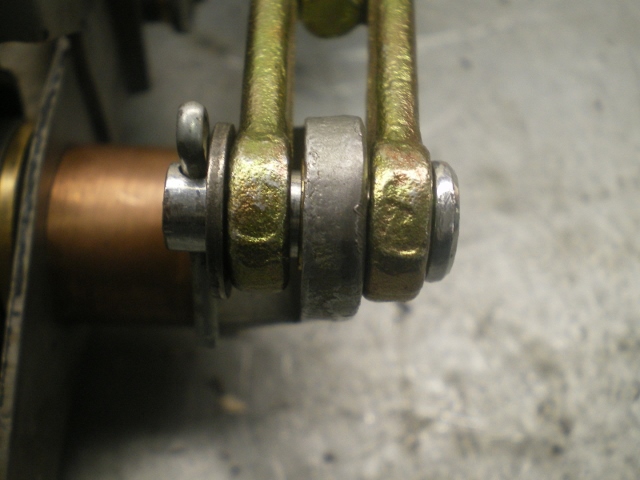
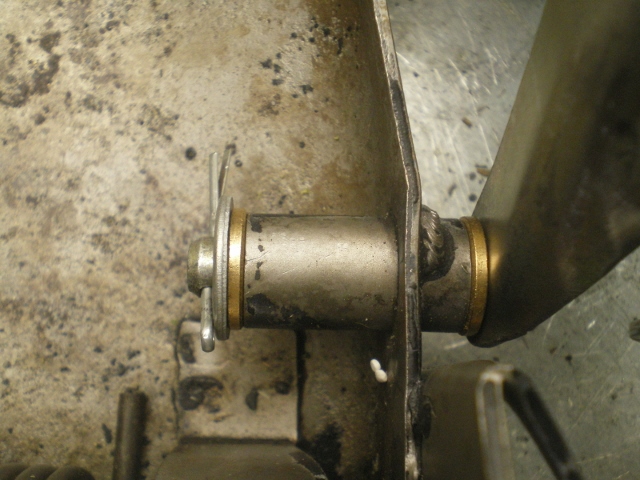
Posted by: CptTripps Mar 4 2014, 08:40 AM
Looks AWESOME!
A couple points of clarification:
1: Is the gap expected? I'd assume YES so there is play for the clevis.
2: Are these washers needed? I'd expect 1-2, and the rest you're showing are to simulate the thickness of the body.
Thanks for the awesome work. Can't wait to get it back and stripped before I send it off to powder.
Attached image(s)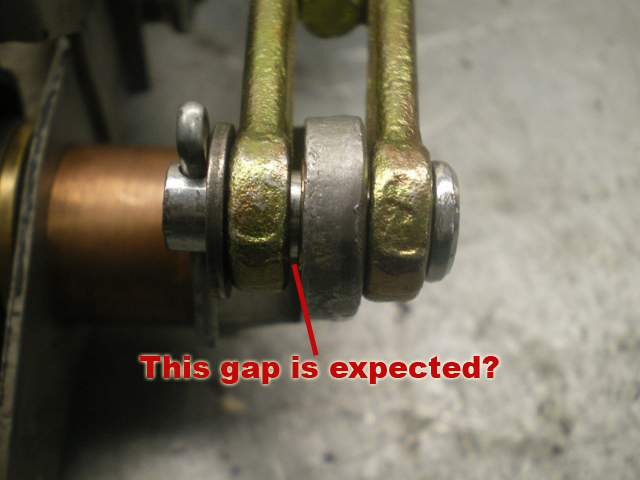
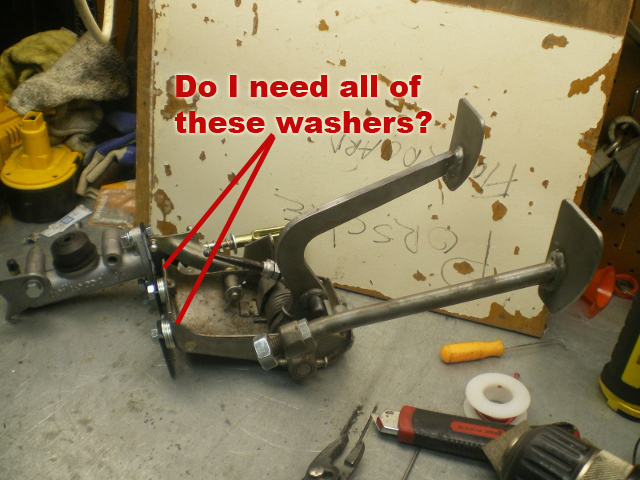
Posted by: 76-914 Mar 4 2014, 10:20 AM
#1- correctamundo.
#2- no, they are used just to set it up and simulate the floor area.
Your assumptions are correct.
Posted by: CptTripps Mar 4 2014, 12:14 PM
Your assumptions are correct.
This marks the first time in history this has happened!
Great work Kent. Thanks!
In other build news:
I sand-blasted and dropped off more pieces/parts to powder-coating. I'm having the PORSCHE and 914 lettering done in the neon green.
Attached thumbnail(s)
Posted by: 76-914 Mar 4 2014, 02:58 PM
Nice, what colour is the car?
Posted by: CptTripps Mar 5 2014, 02:32 AM
Spent the night in the garage working on little things.
Ground and re-welded the tubes for the trailing arms. My welding skills aren't great, but WAY better than they used to be. These go off to powder in the AM.
Attached thumbnail(s)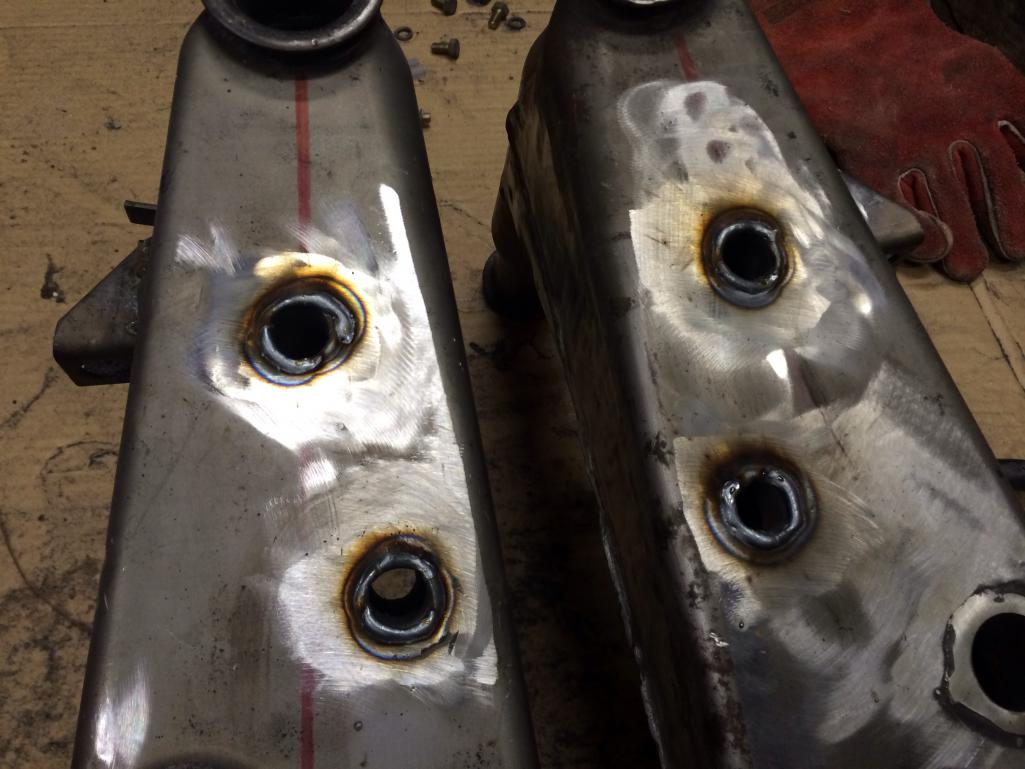
Posted by: CptTripps Mar 5 2014, 06:23 PM
Stopped by the sandblaster today. JUST in time!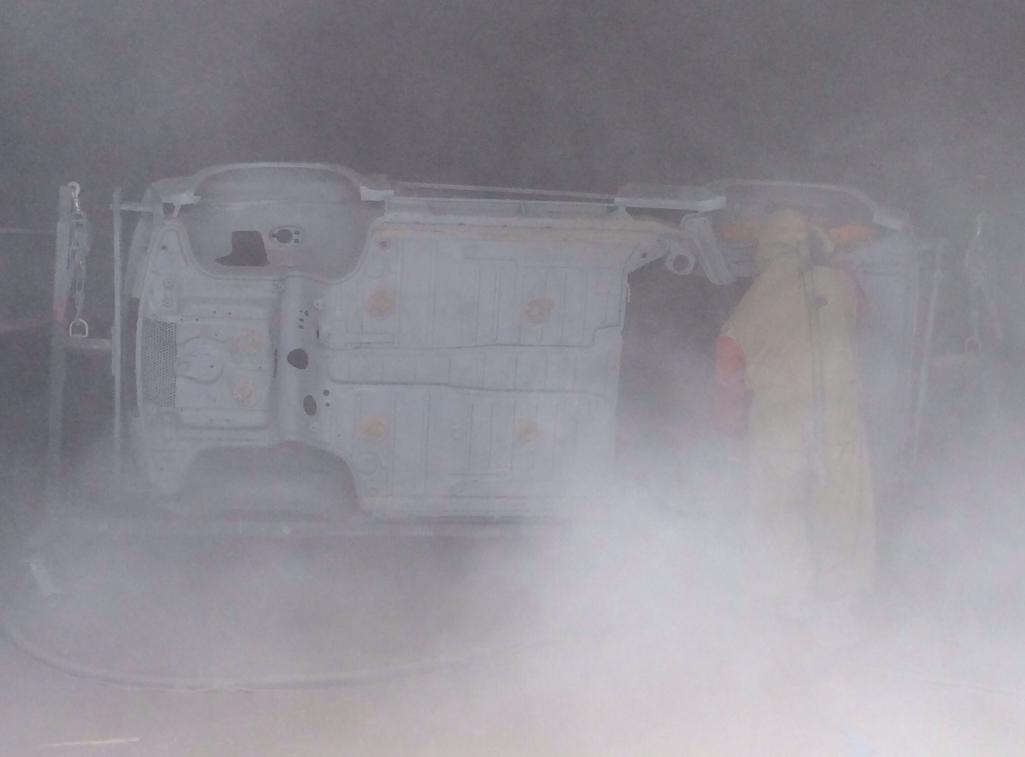
When the dust cleared (pun intended) I got quite a sight.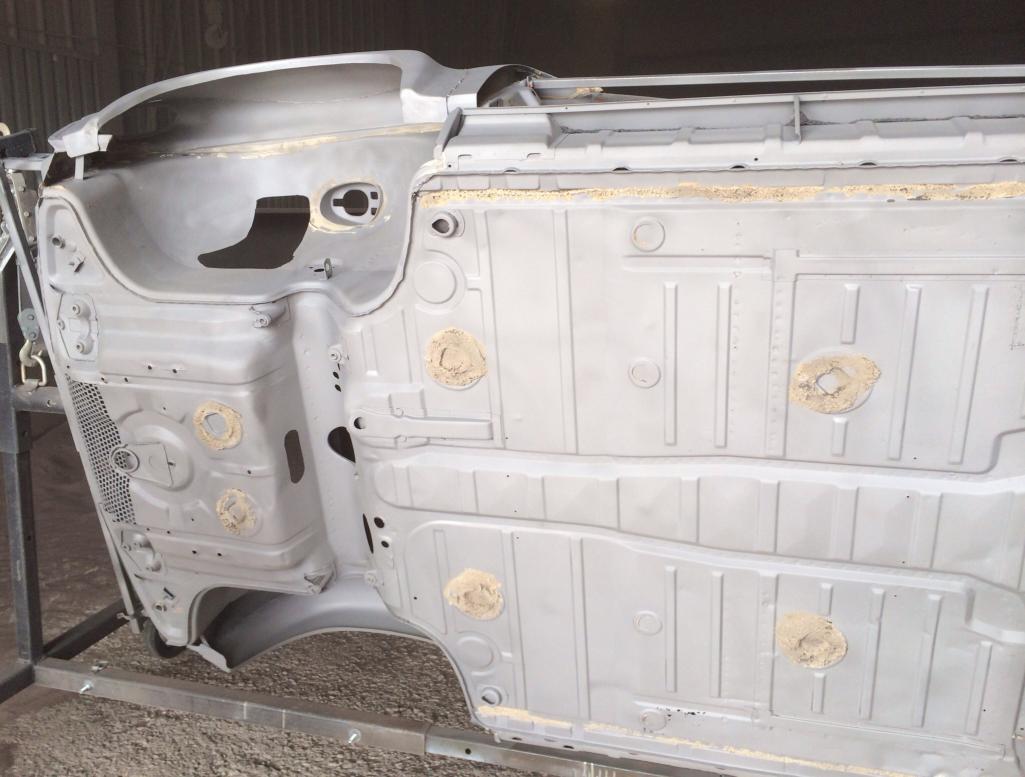
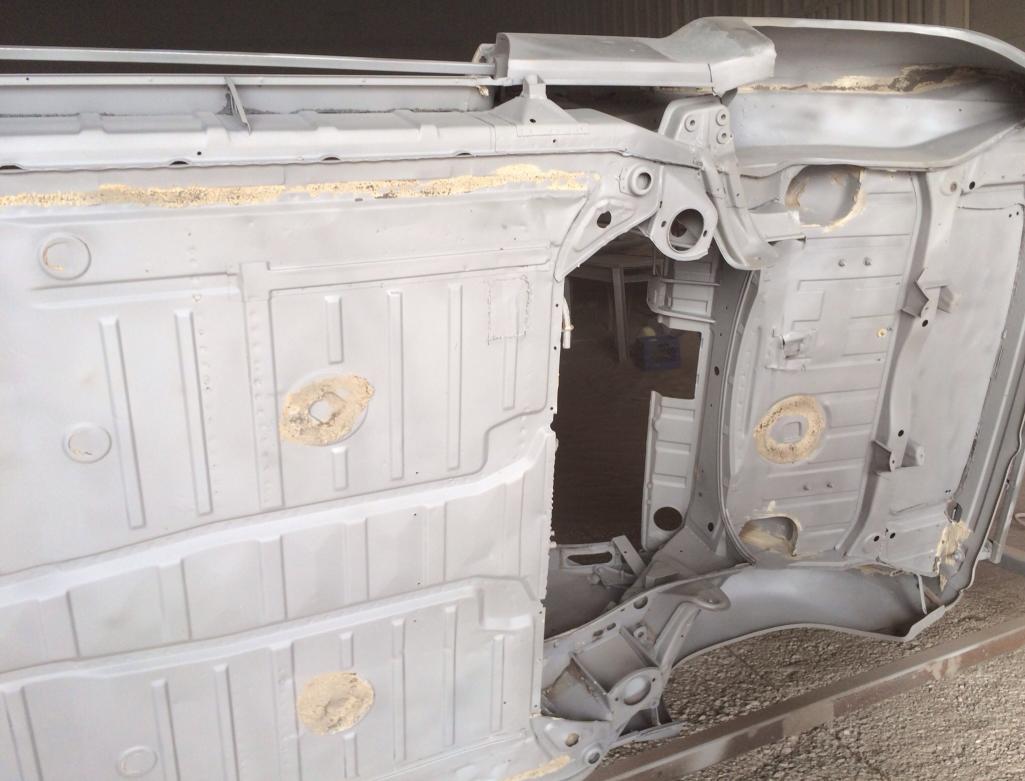
So...my tub is in a LOT better shape than I was expecting.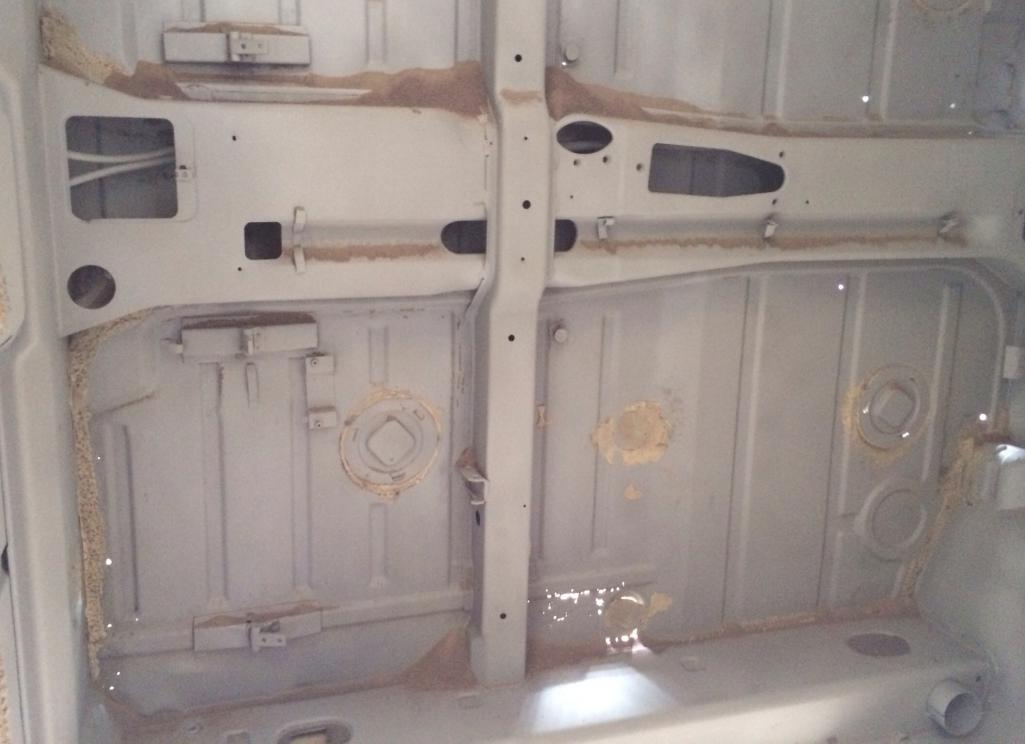

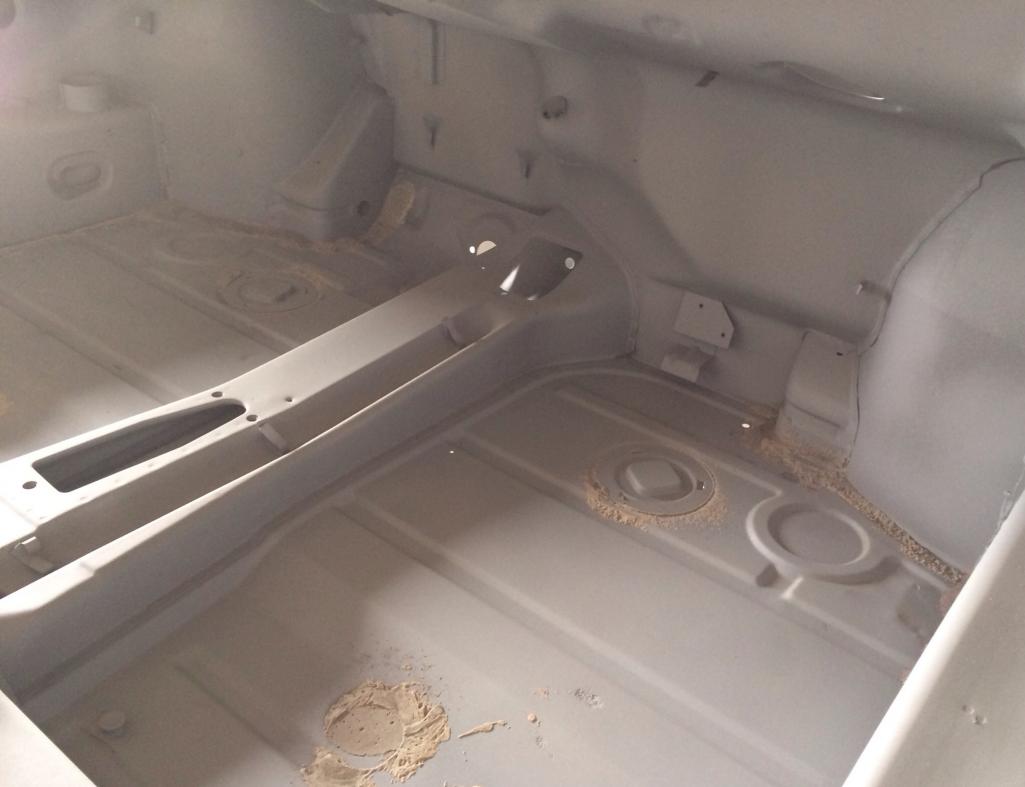
Just a tiny bit of Swiss cheese on the passenger floor,
But everything else appears to be real solid.
They're etch-priming in the AM. I'll have it back in the garage on Saturday!
Posted by: Chris H. Mar 5 2014, 07:05 PM
Awesome. That's a great tub! Tiny little patch and a few plug welds for the extra holes drilled over the years and you're all good.
Posted by: Cairo94507 Mar 5 2014, 07:07 PM
That is so freaking exciting. You are lucky to be able to stop and see it in progress. I can't wait to go visit my car at Scotty's.
Posted by: CptTripps Mar 5 2014, 09:56 PM
Yeh, I was prepared for a nightmare scenario where there was a ton of hiding Bondo and dents. Lucked out this time I guess!
The actually helps quite a bit. I was expecting 3-4 weeks worth of bodywork, but I may be able to have the interior, bottom, and trunks painted by the 15th.
Posted by: KELTY360 Mar 5 2014, 10:54 PM
What did the hell hole look like?
Posted by: CptTripps Mar 5 2014, 11:27 PM
HH is good. It's been repaired in the past, and I'll likely clean it up a little more. (My welds aren't great...these are horrid!)
This is getting exciting.
Posted by: rnellums Mar 6 2014, 08:47 AM
It looks great! Its gonna be sweet painted!
Posted by: CptTripps Mar 6 2014, 11:16 AM
Spent last night working on the ECU.
File this under "OCD" but it was driving me nuts that the wiring on the ECU cable was A: Thin and B: Blue. It took me a while digging through Delphi catalogs, but I found the right connector and ordered a few hundred female pins. While watching TV last night, I was able to re-build all three of my ECU cables. I used a larger gauge teflon coated wire that will also terminate easily into a distribution block. I plan on making that half of the panel real soon.
I also snagged the Rhino label maker from the server room, and bought 1/4" shrink tube so I can print out labels for everything. I'm planning on doing this for every cable in the car. I know it seems like a lot of work, but I have a chart and can easily print everything out ahead of time, and then as I clip wires shorter, or build harnesses, I'm not having to look at a chart. I can easily identify every wire and know where it terminates and what it's for. One of those jobs that's easy to set up and stay on top of if I start it now.
Attached thumbnail(s)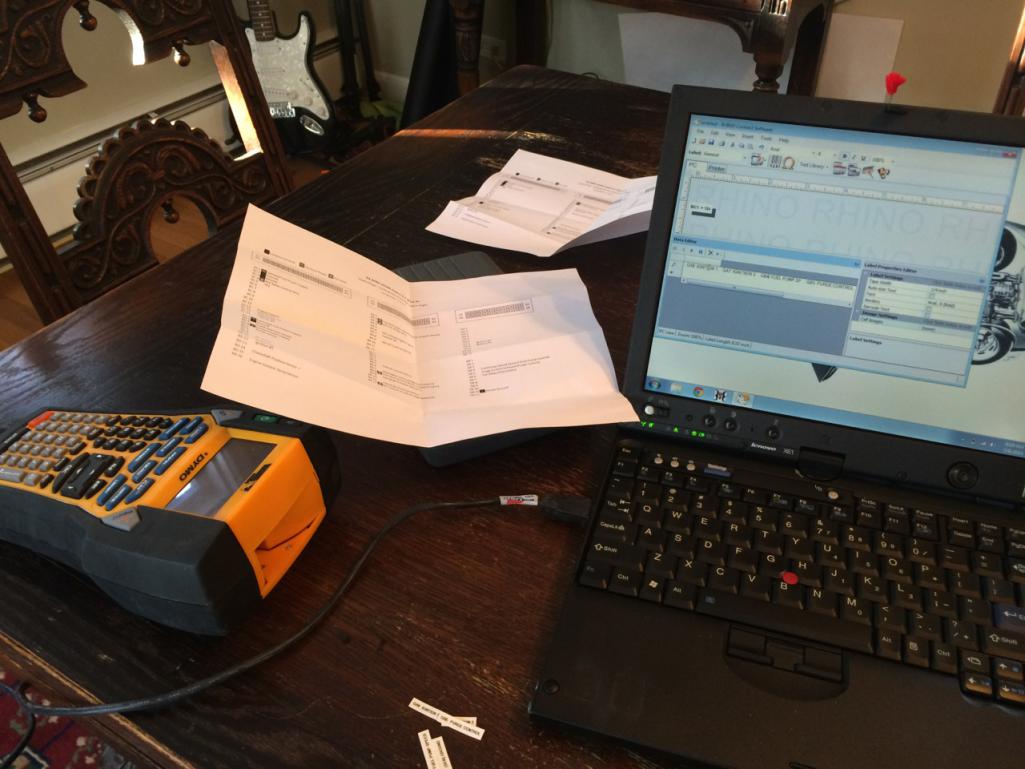
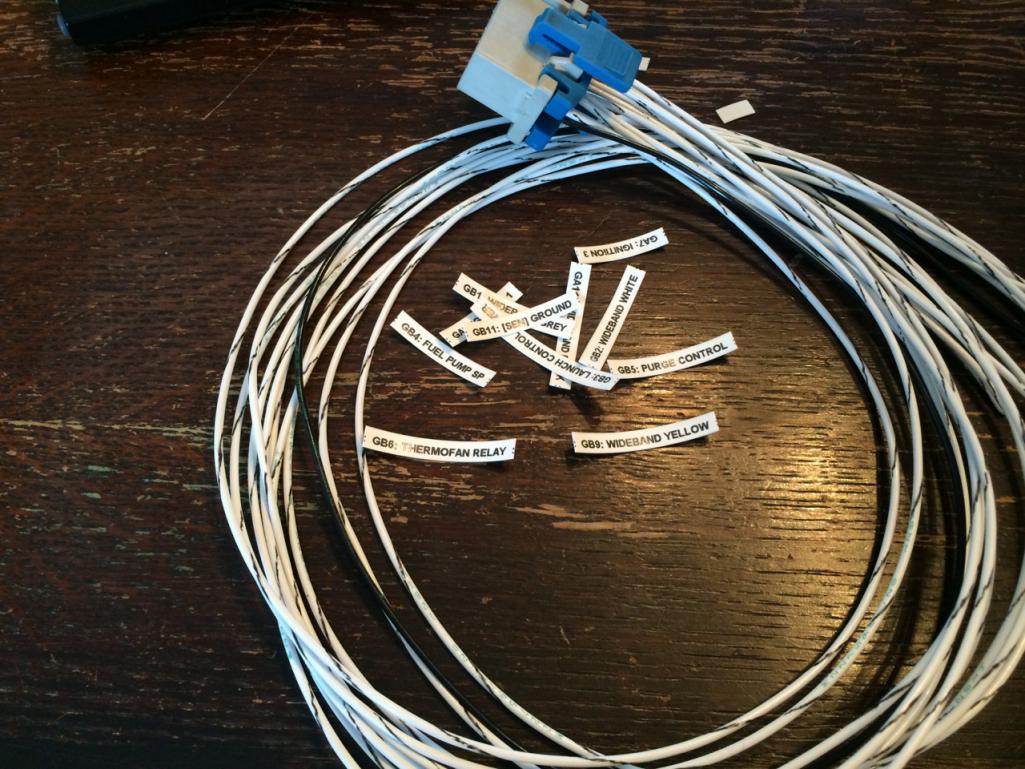
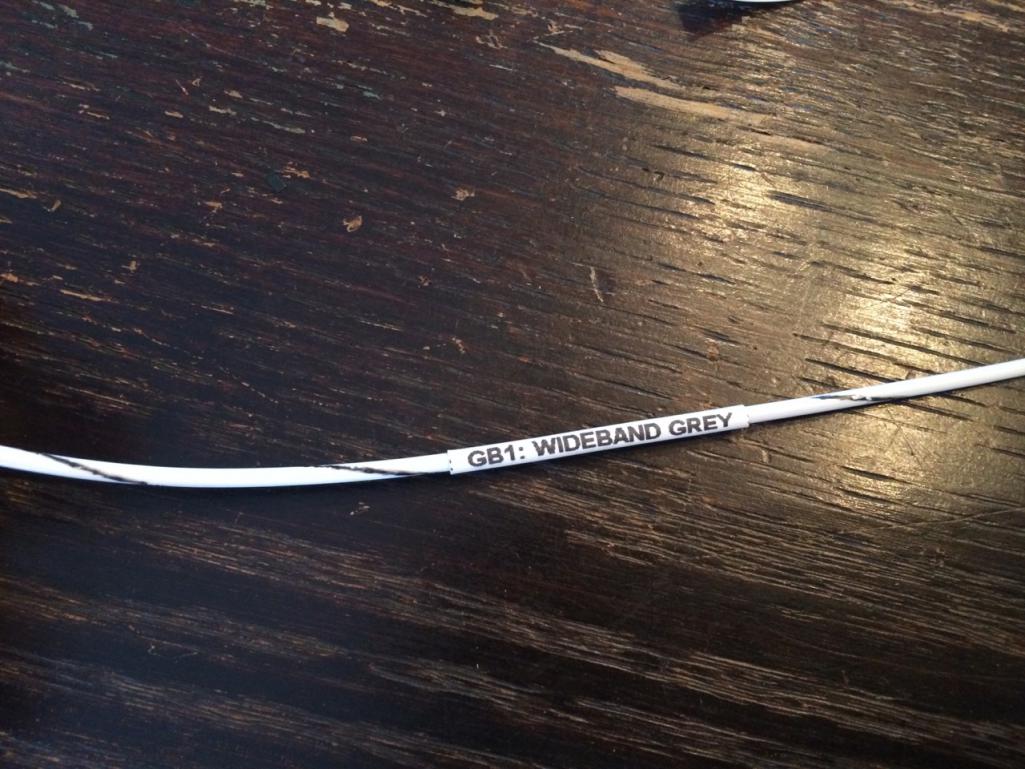
Posted by: 914forme Mar 6 2014, 06:29 PM
Your doing a great job, I have the labeler, the heat shrink tubing, and the harnesses lying around. Now I just need to get off my butt and get something done.
Your making great progress, keep it up.
Posted by: CptTripps Mar 7 2014, 03:13 AM
Worked for 2hrs on the engine wiring harness tonight. Ugh...this is a lot of work!
I've got it all mapped out now though. Only 2-3 that I need clarity on. I'll be spending lots of time searching for replacement plugs too. Other than thT and a few bits/pieces, the motor is pretty much built.
In other news, I talked to the sandblaster late in the day. There was a problem with the etching primer I'd given him, so they had to use a different brand. I'm not too worried about it. What they had was just a different version of the SW paint id given them. I'll have it back Sat morn now instead of Fri night.
Attached thumbnail(s)
Posted by: tdgray Mar 7 2014, 09:07 AM
Doug... just make sure you tell the body shop that is painting it that you used etch primer otherwise they may put the wrong top coat on it and well.... bad things happen.
Ask me how I know 
Posted by: CptTripps Mar 7 2014, 09:52 AM
Todd: I'll be doing the bodywork. PLEASE tell me what you mean? I was planning on doing all the filler on top of the etch primer, and then 2K primer over that before I apply the color. I may have someone else do the final top-coat and clear again, but if things go well, I may do it myself this time. (I feel more confident about painting this time around.)
Posted by: tdgray Mar 7 2014, 02:15 PM
2K (Urethane) primer should not go over etch primer. It has the ability to stick to bare metal and should not be used over etch primer.
I etched the TR6 and the body shop put urethane over it and it all melted together... when they went to block it down it just wiped away. They had to strip and re-primer. Nice big bill for me
I should have used what I usually use which is "z-chrome" from Claussen but I was doing it in batches and did not want to hassle with it... serves me right I guess.
Rick can chime in with a more specific reason why the etch and urethane do not mix... I only know what my buddy told me.
Posted by: CptTripps Mar 7 2014, 02:19 PM
We used a 2k etch primer that was specifically compatible with the 2k high build primer that I bought too. I SHOULD be ok in that department. I'll absolutely check though. Great tip.
Posted by: tdgray Mar 7 2014, 02:48 PM
We used a 2k etch primer that was specifically compatible with the 2k high build primer that I bought too. I SHOULD be ok in that department. I'll absolutely check though. Great tip.
You should be good then... I did not (apparently). I think I used acid etch... dumb ass move I know.
Posted by: 76-914 Mar 7 2014, 03:28 PM
Doug, just run it by your paint supplier. Those guys usually sell just 1 or 2 brands so you may have to check a few places.
Posted by: CptTripps Mar 7 2014, 04:20 PM
Picking up the car tonight. Looks good...but I've got some work to do for sure!
Tomorrow morning I'll get to grinding and welding. Gotta map out all the spots of interest first.
Attached thumbnail(s)

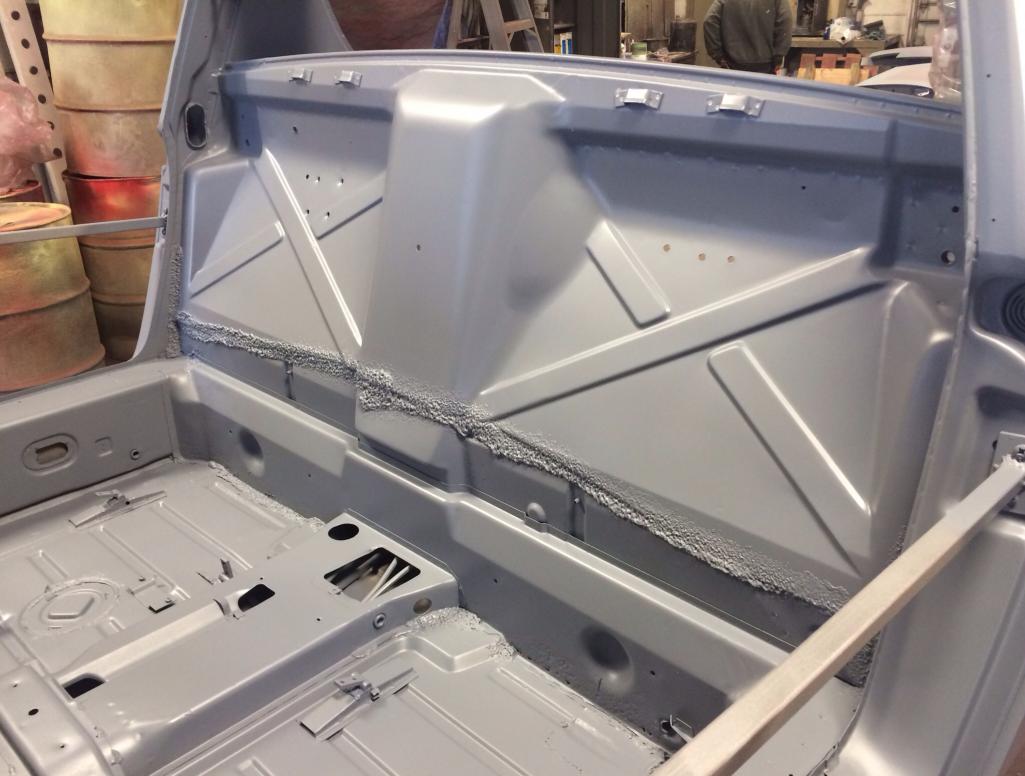
Posted by: CptTripps Mar 8 2014, 10:58 AM
Spent all morning in the garage, getting ready to fix the areas of the floor pan that needed attention. Nothing bad at all. After I got everything fitted, I took them out and sandblasted the replacement metal and primed them.
I also grabbed Garrett to give me a hand with marking all the holes on the Engman kit. He's only 7 but turning out to be a BIG help with tasks like that.
Going to work on the engine shelf and look inside the long after I get back from taking the boys to the dentist. I'm determined to lick this before sundown tomorrow so I can get back on track.
Attached thumbnail(s)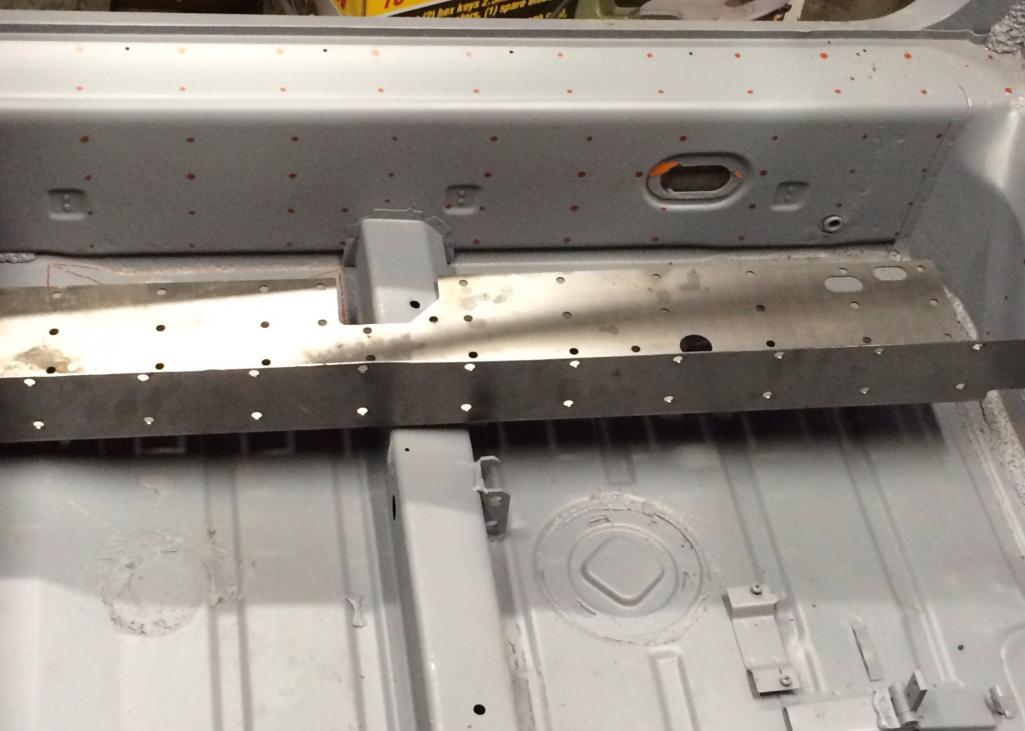
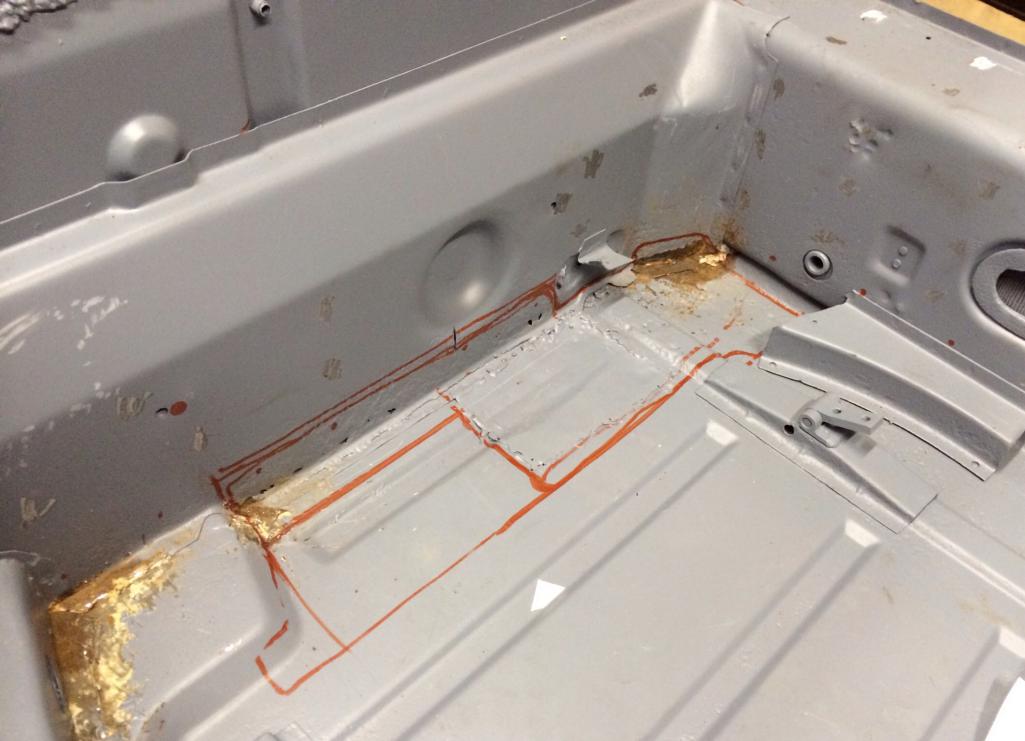
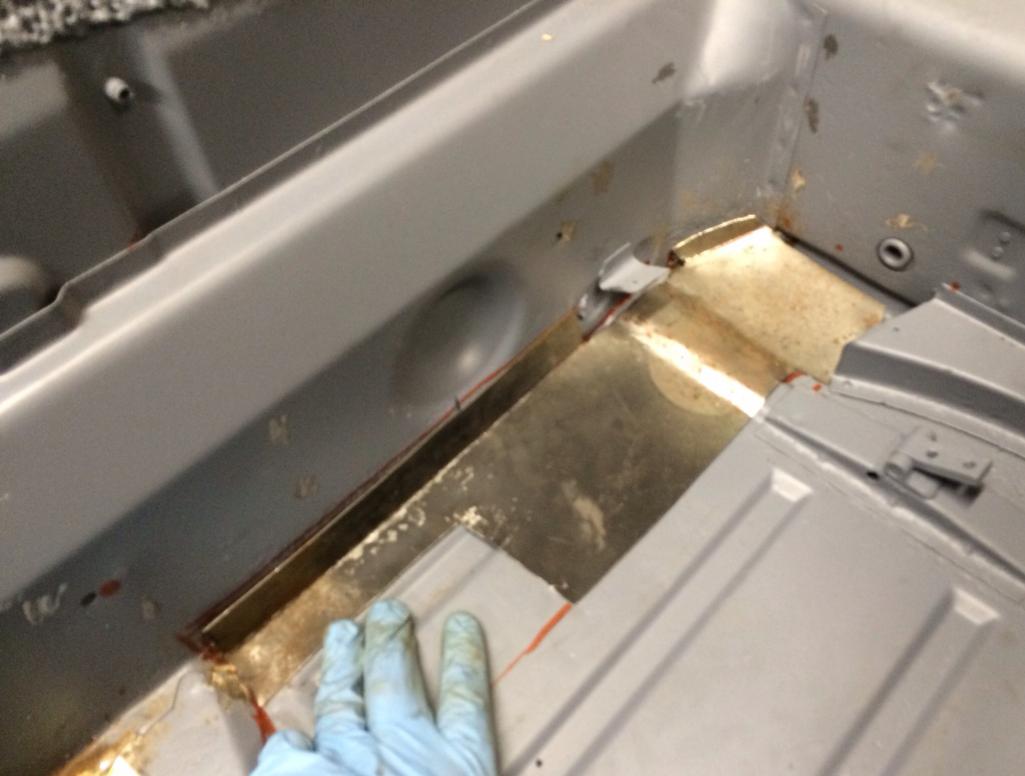
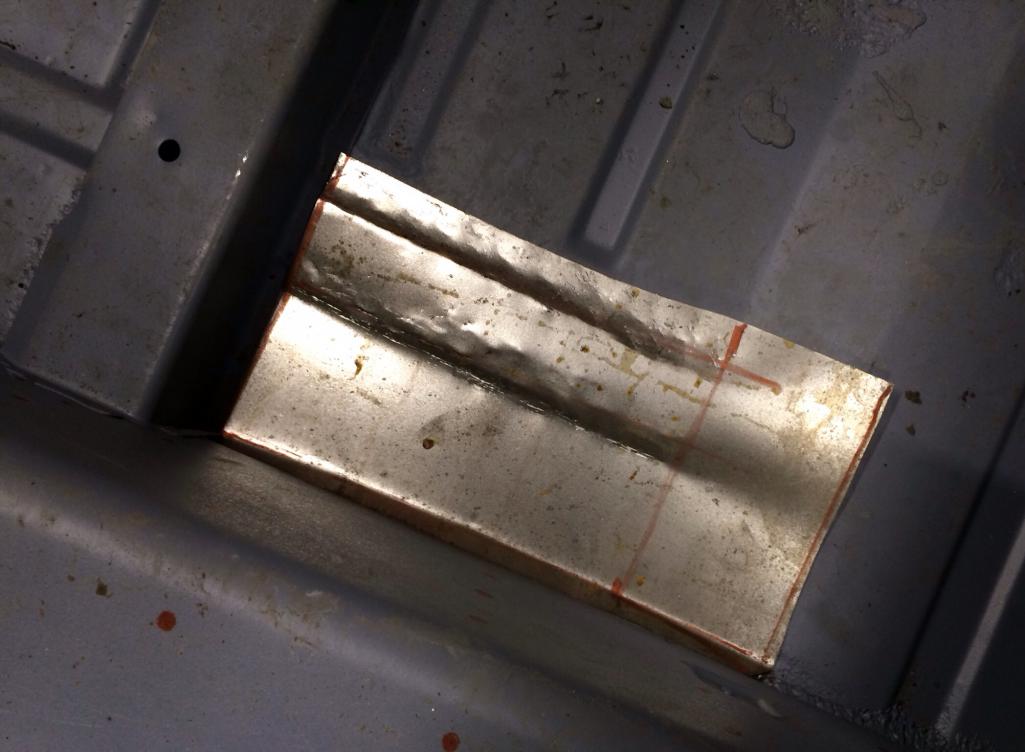
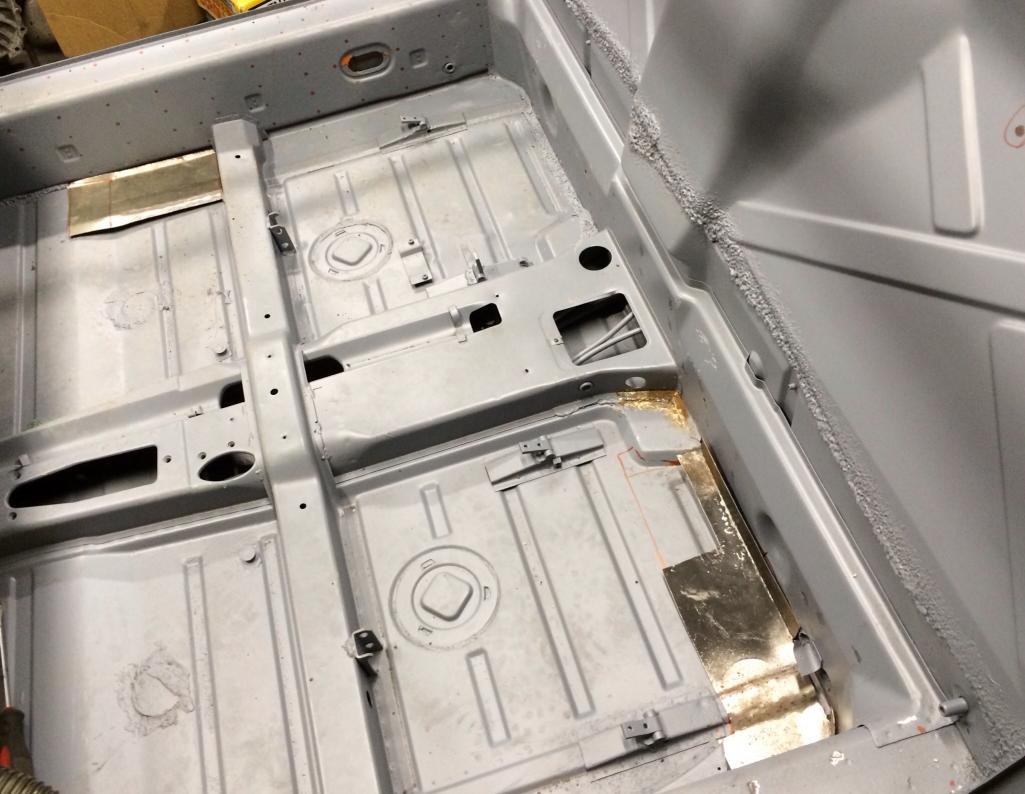
Posted by: 76-914 Mar 8 2014, 11:56 AM
It won't be a biggie but that flange on the L rear patch will hold off that Engman piece a tad. It welds up flush but I don't think .030" offset will matter squat.
Posted by: CptTripps Mar 9 2014, 05:50 PM
Spent the weekend:
patching the floors...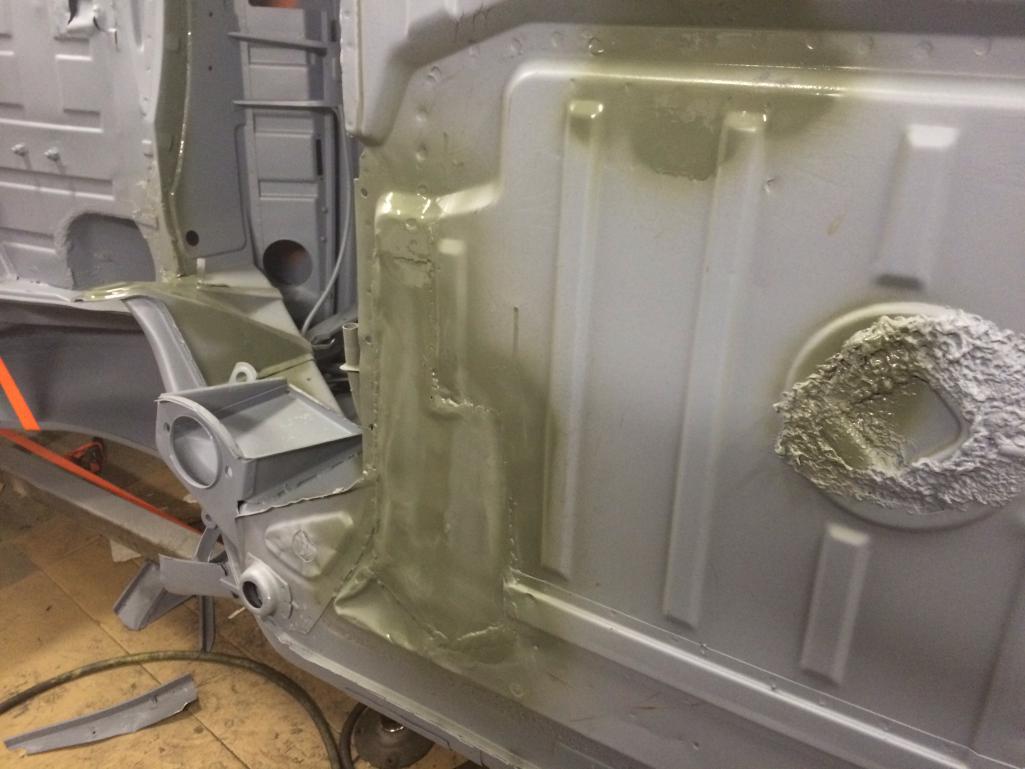
removing the shelf...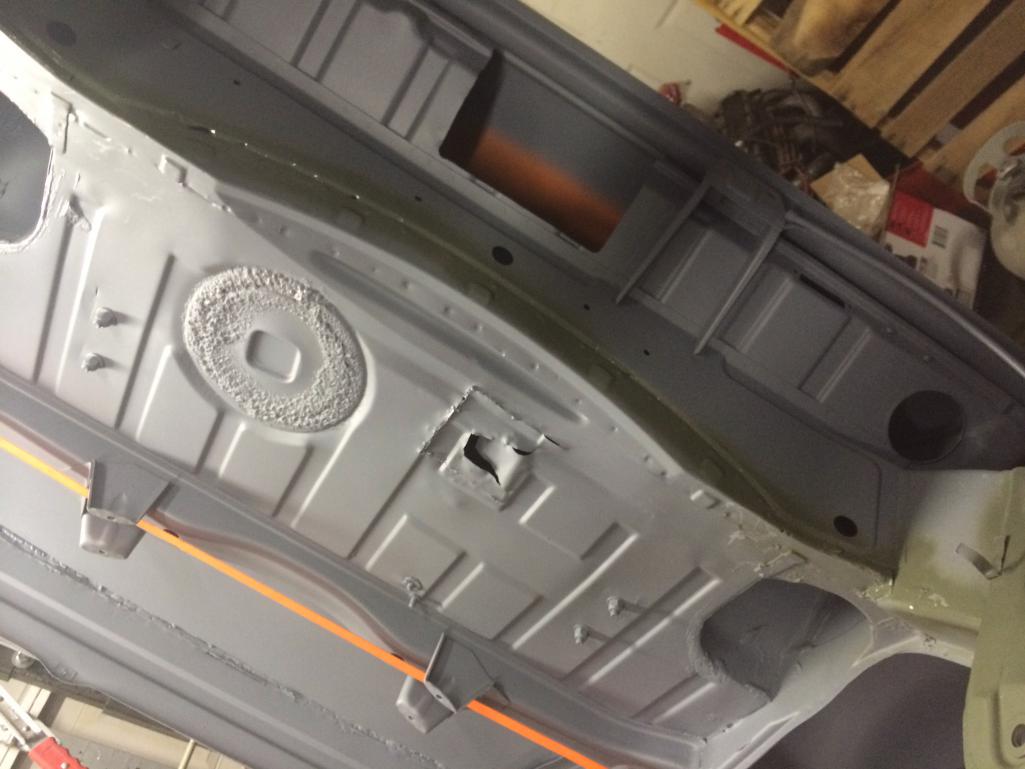
...and fixing the hell-hole. (There's another thread on it, but here's the end-result.)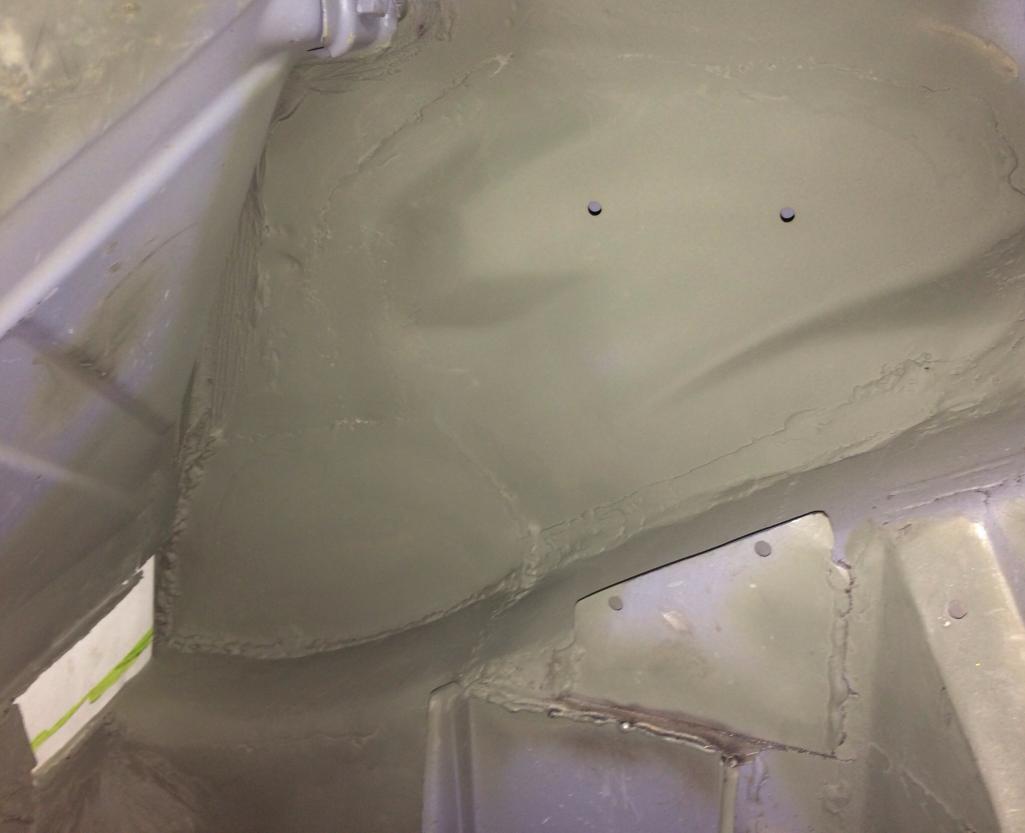
Posted by: CptTripps Mar 9 2014, 06:01 PM
This is the section that I was planning on cutting out next week to box in preparation for the Subie trans. I've got a piece of 2" steel tube that I would put between the two shock towers. Any other ideas? Is this enough room?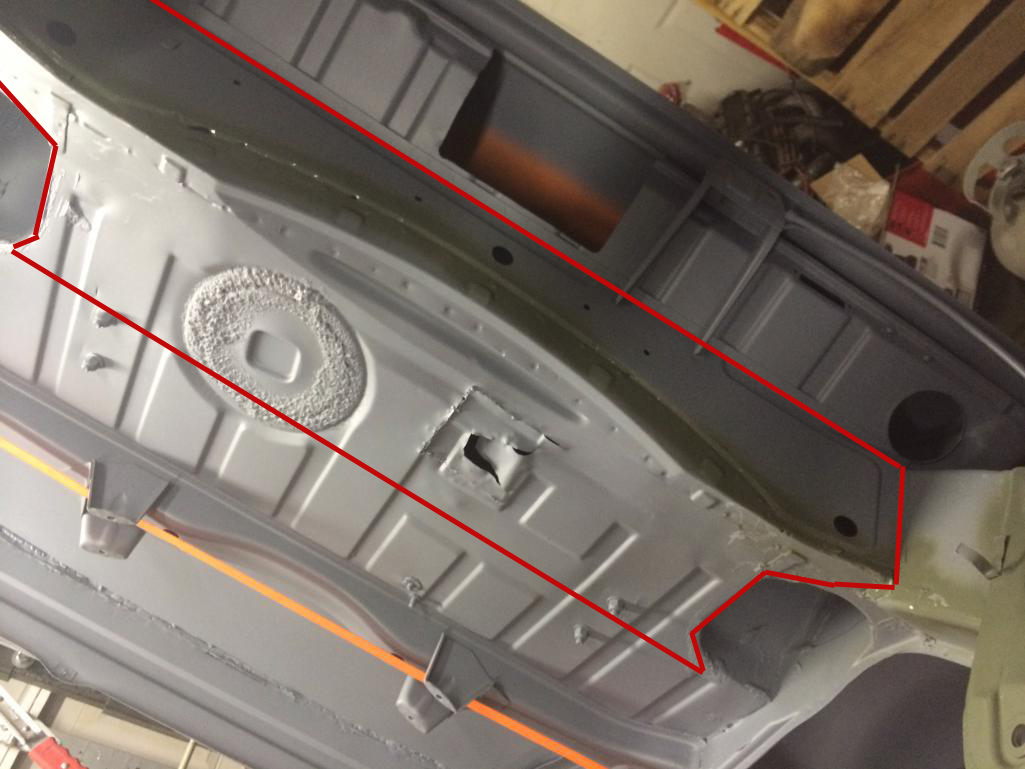
Posted by: Chris H. Mar 9 2014, 08:26 PM
Does your engine setup require you to cut all that out? All I had to do was cut a small hole for the starter in the trunk floor and another 3x3 square in the back for the intake manifold.
Posted by: JRust Mar 9 2014, 09:12 PM
Here are a couple pics of mine
Attached thumbnail(s)
Posted by: JRust Mar 9 2014, 09:13 PM
One more. Sorry I can't resize on my mac worth a 
You really don't need to cut out that whole area. The starter only comes through little bit. So just an access hole should be fine
Attached thumbnail(s)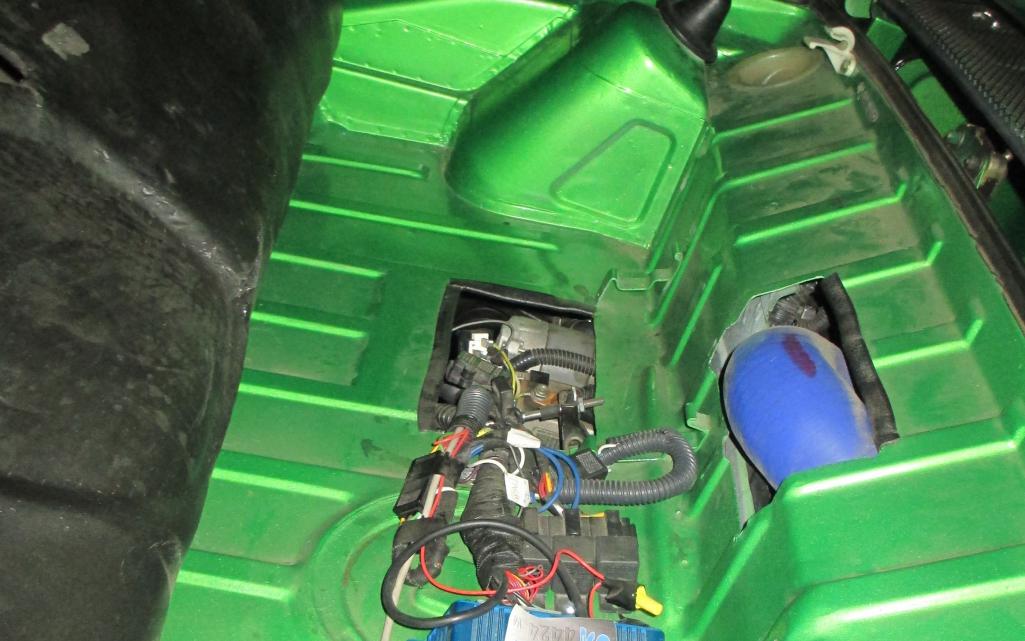
Posted by: CptTripps Mar 10 2014, 05:38 AM
I've got an intercooler that needs some additional piping, and was planning on mounting the ECU on it.
I don't see a cutout for the turbo. Did you move it?
Posted by: CptTripps Mar 10 2014, 05:57 AM
I love what McMark did with this one. Wish I had the spare parts to make it work.
Attached image(s)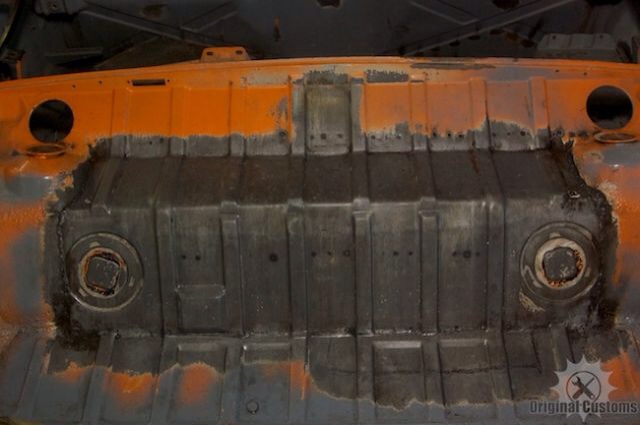
Posted by: Chris H. Mar 10 2014, 06:24 AM
OK I figured it was something if you were cutting a hole that big. I don't think Jamie's is turbo'd (yet).
That extended piece does look nice and stockish with the matching ribbed panels. I'm sure someone has a piece of trunk floor they could cut out for you...
Posted by: DBCooper Mar 10 2014, 07:16 AM
Excellent, that's what I've been trying to describe to people but I didn't know someone had already done it, that there was a photo. That's perfect, and if I were doing it again is the way I'd do it.
I think you'll find that how much you need to cut out, and where, depends on where the cradle, or whatever other engine mount you're using, locates the engine. That's the most important factor, then the engine's plumbing, tubing, whether the manifold was flipped, etc, etc. For my first cradle with the 901 transmission we kept the engine pretty much at the same position as the T4 engine, then when we did the Subaru transaxle we we moved the transmission forward an inch or inch and a half, because we could and because that gave the engine more space for the flipped manifold and the intercooler tubing. So I think how much you're going to need to do depends on what configuration you're putting in. But that big cutout that McMark did (damn, he's a smart guy) should cover pretty much any combination.
Posted by: CptTripps Mar 10 2014, 07:32 AM
But that big cutout that McMark did (damn, he's a smart guy) should cover pretty much any combination.
That's kinda what I needed to hear. My engine and trans won't 'meet' the car until after the bodywork is done, so I need to guess at the maximum space and hope that it works out.
I have a complete rear trunk panel, but I need to use it because what I have in there now is a piece of flat sheet metal from the PO.
Posted by: 76-914 Mar 10 2014, 08:37 AM
Kiss the imposed April deadline good bye! You have a lot of work and it just keeps piling up.
Posted by: CptTripps Mar 10 2014, 08:46 AM
Kiss the imposed April deadline good bye! You have a lot of work and it just keeps piling up.
Ye of little faith! I'm determined to drive it to Hershey.
Honestly, it's all going to start coming together from here. I have just about all the major fabrication done. If I can get the trunk floorpan and cut-out done tonight, I'll be ready to start the rest of the bodywork.
Posted by: CptTripps Mar 10 2014, 09:54 AM
Stopped by Cleveland Ohio Powder Coating to see what everything looks like this morning. They were just getting ready to put everything in the oven to pre-bake. I dropped off:
Front Struts
Front A-Arms
Front Mounting Pieces
Front Support Beam
Rear Trailing Arms
Brake Shields
911 E-Brake Shields and Mounts
Other pieces/parts
A bunch of it will be "Powder Chrome" and the other parts will be neon green.
I'll have everything back later today!
Attached thumbnail(s)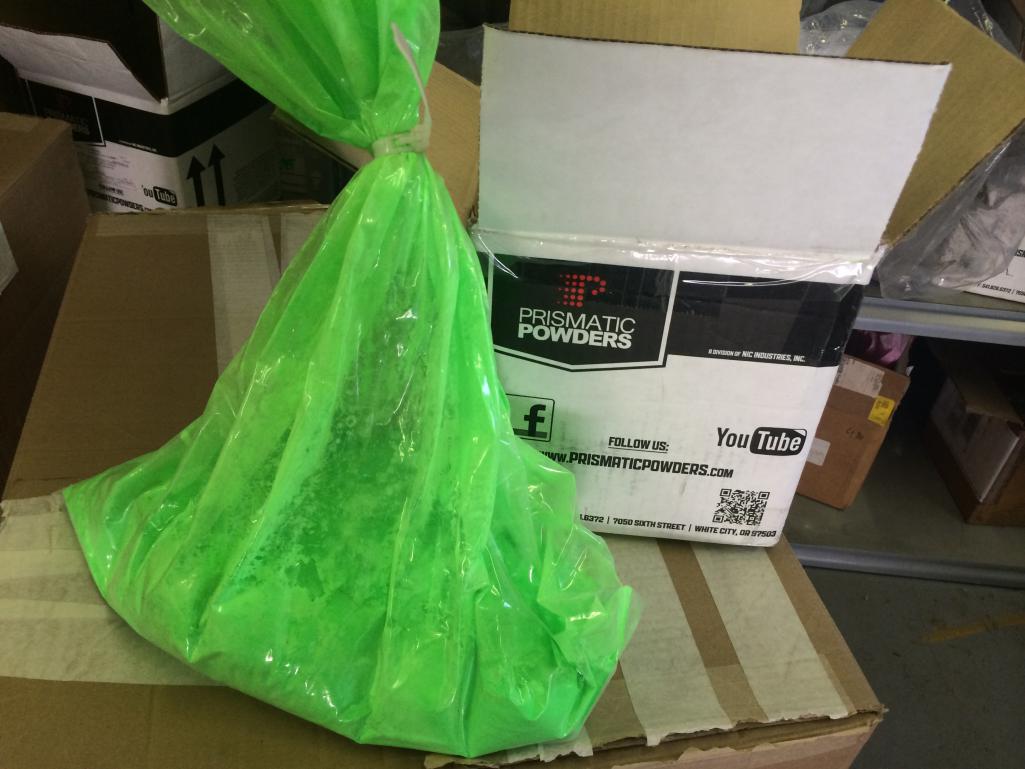
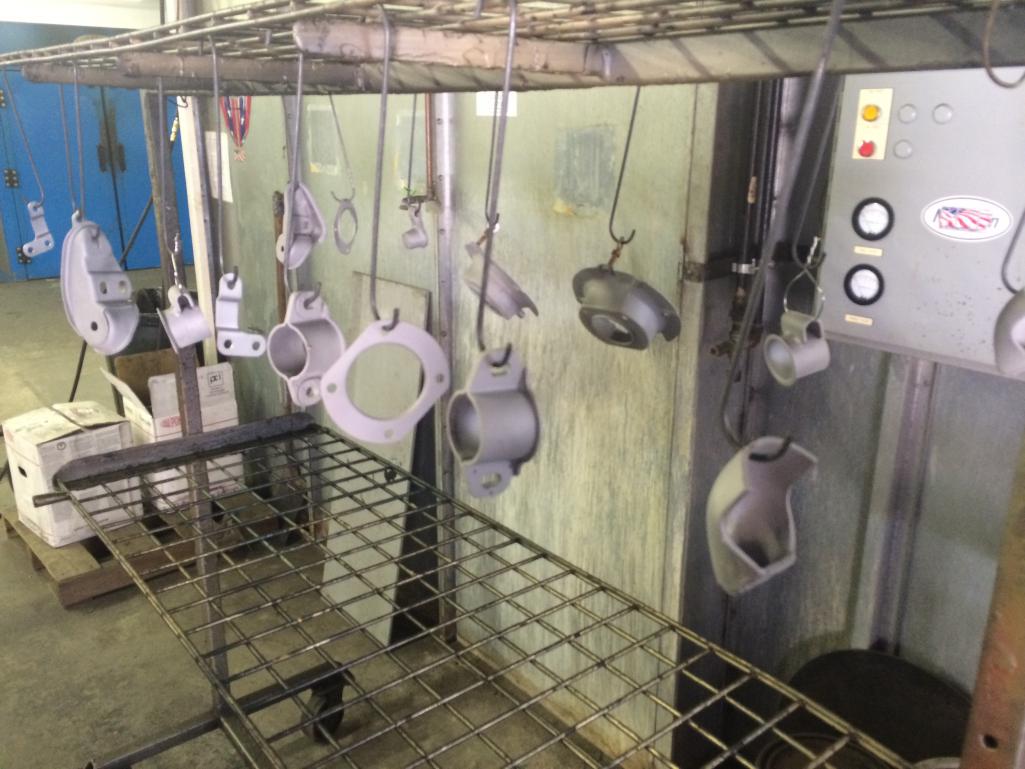
Posted by: JRust Mar 10 2014, 10:08 AM
OK I figured it was something if you were cutting a hole that big. I don't think Jamie's is turbo'd (yet).
That extended piece does look nice and stockish with the matching ribbed panels. I'm sure someone has a piece of trunk floor they could cut out for you...
Yeah mine is just a normally aspirated 2.5. Although the motor was built a little & dyno'd at 160 to the rear wheels. It pulls great & runs awesome. Not sure I will ever go for the turbo setup. An suby 6 would be more likely. For now I am just trying to keep from screwing anything up. I want to enjoy a driving 914 for once

Posted by: effutuo101 Mar 10 2014, 12:18 PM
Stopped by Cleveland Ohio Powder Coating to see what everything looks like this morning. They were just getting ready to put everything in the oven to pre-bake. I dropped off:
Front Struts
Front A-Arms
Front Mounting Pieces
Front Support Beam
Rear Trailing Arms
Brake Shields
911 E-Brake Shields and Mounts
Other pieces/parts
A bunch of it will be "Powder Chrome" and the other parts will be neon green.
I'll have everything back later today!
Cool!
get er done!
Posted by: CptTripps Mar 10 2014, 04:41 PM
My powder-coater rules.
Attached thumbnail(s)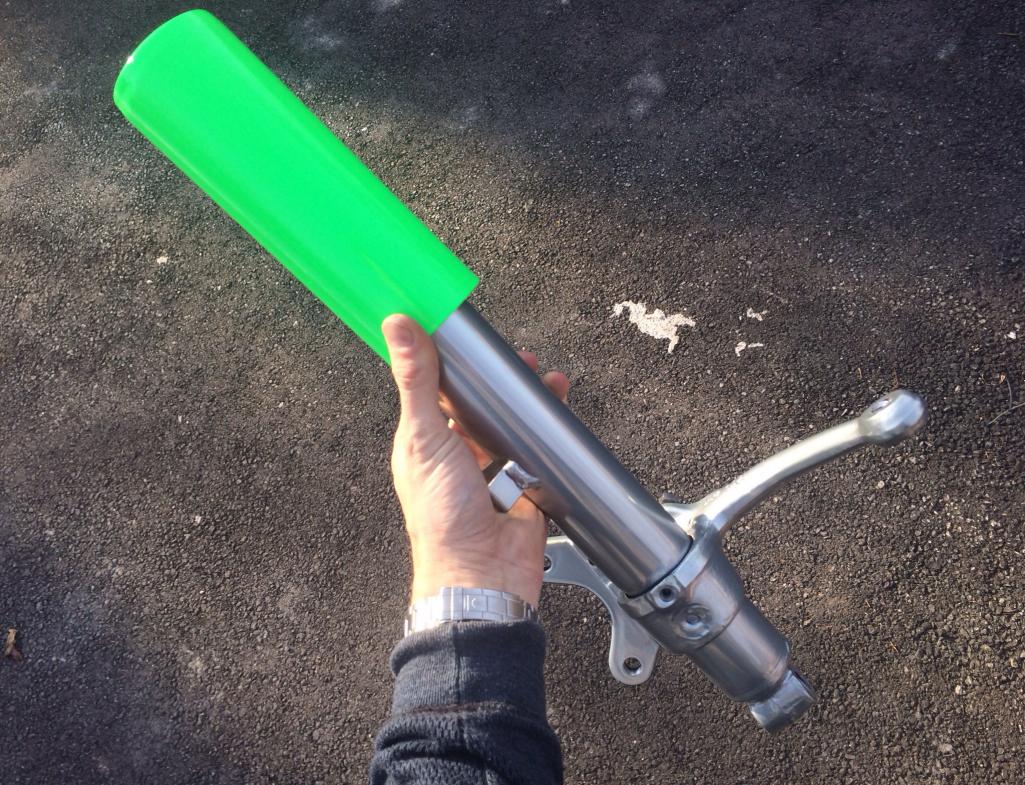
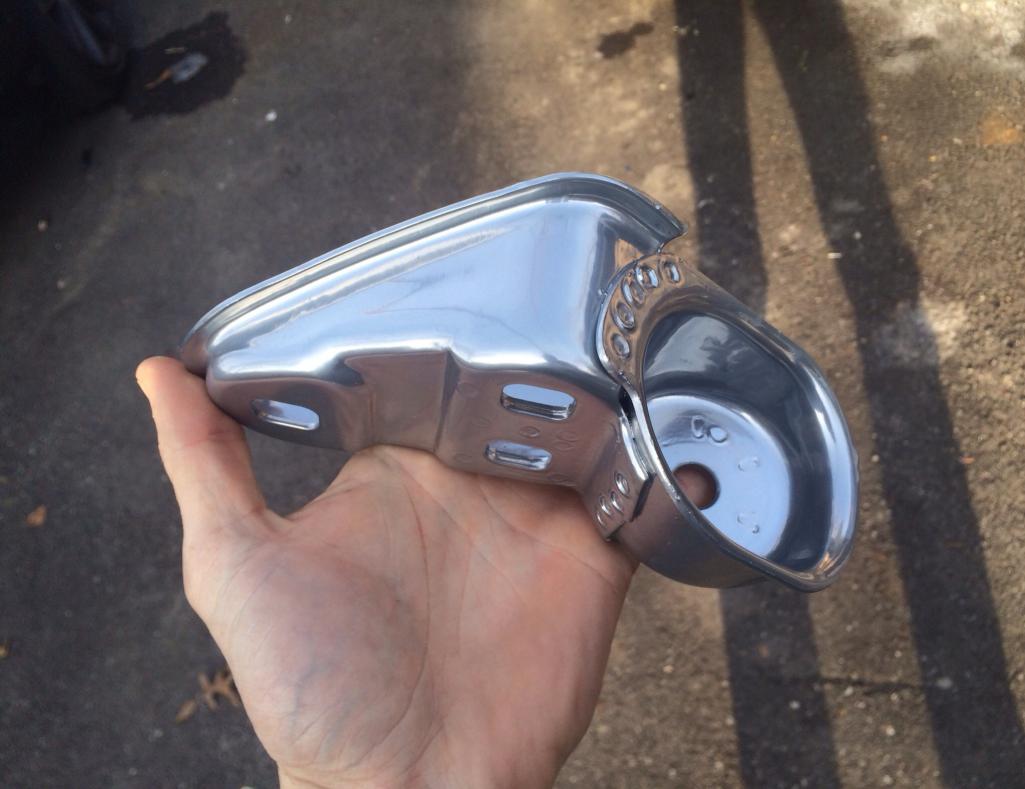

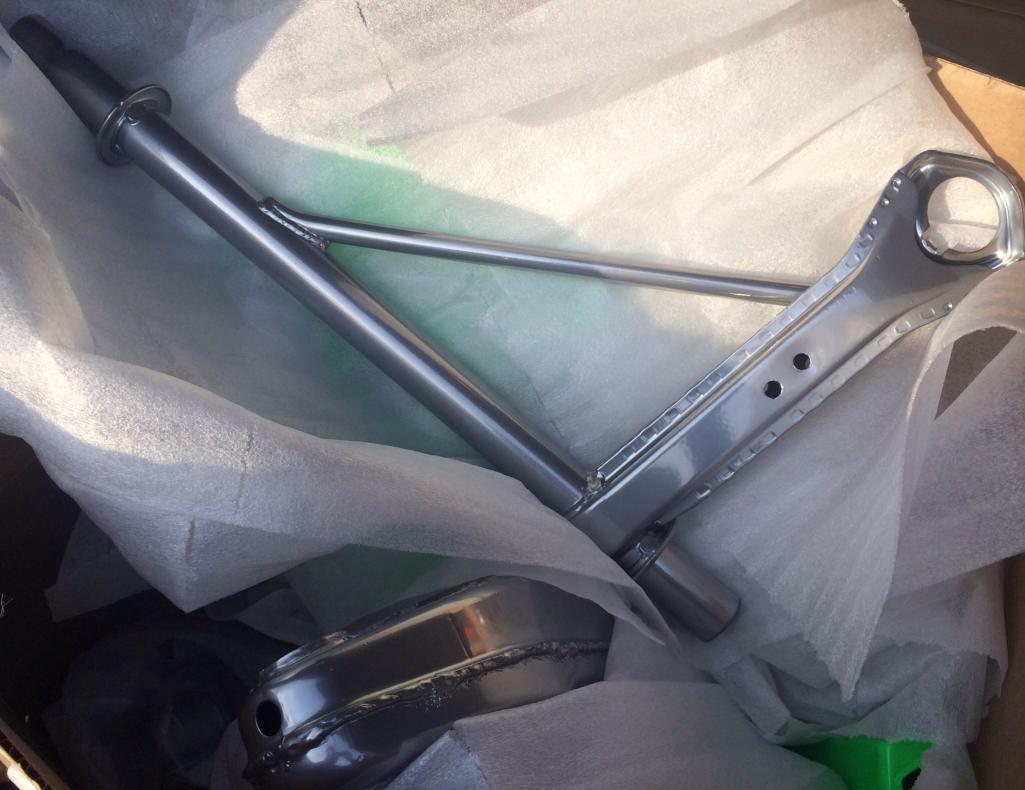
Posted by: ruby914 Mar 10 2014, 05:12 PM
WOW, Nice
Looks Photoshopped.
Posted by: CptTripps Mar 10 2014, 08:33 PM
It's bright. That's for sure!
Posted by: mgp4591 Mar 10 2014, 09:09 PM
Bright AND protected for awhile! Great job at any price!
Posted by: effutuo101 Mar 10 2014, 09:11 PM
I love the colors!
also, when I did my /4 suspension, I did it the same "chrome" it came out really nice!
Posted by: CptTripps Mar 11 2014, 07:22 AM
Got busy with a few projects last night.
First, I finished up the hell-hole repair. I ran out of 18awg steel, so I picked up a few more sheets yesterday. The piece went in easy and after some fitment, I feel confident that I have it all buttoned up well. My welds aint as pretty as I'd like just yet, but they are getting a lot better!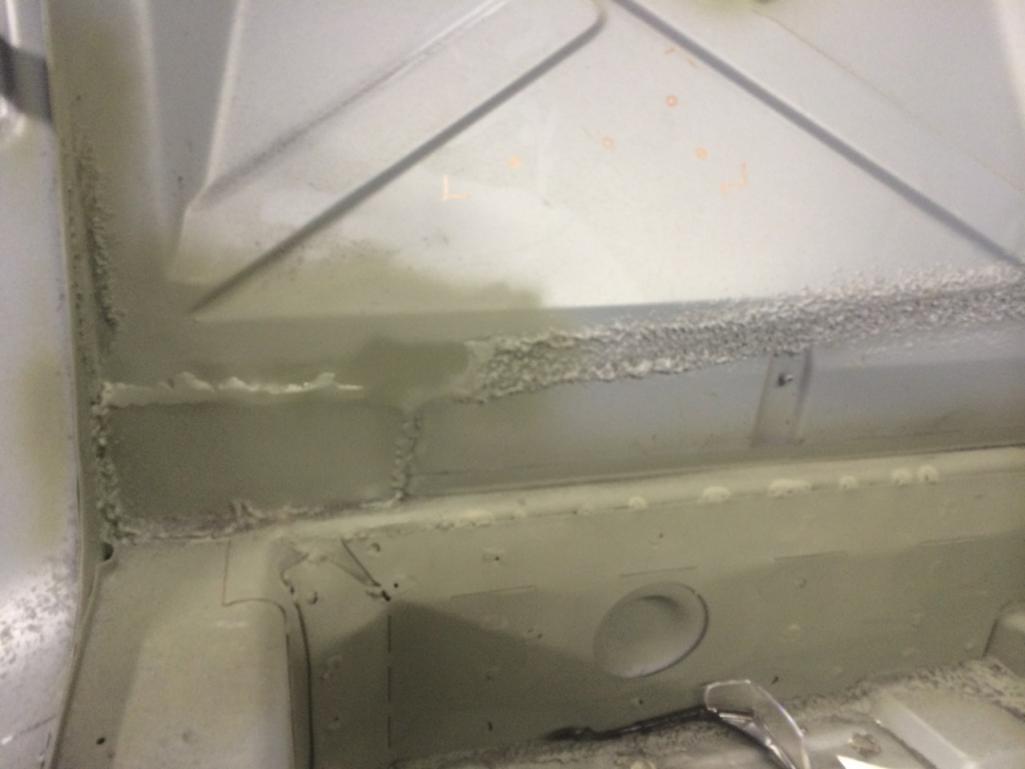
Next, I played with the seats a little bit. For whatever reason, this part of the build still has me flustered. I just don't know what I want to do. On one hand, I have these bad-ass Carbon-Fiber seats I picked up for a song. They need recovered so if I want them in the car, I need to decide pretty quickly what I want to do. BUT...if I use them, I'm going to need to move the e-brake handle and use the Boxster handle I bought. That'll take some fabrication, and I'm not sure I'd ever really trust it if I needed to.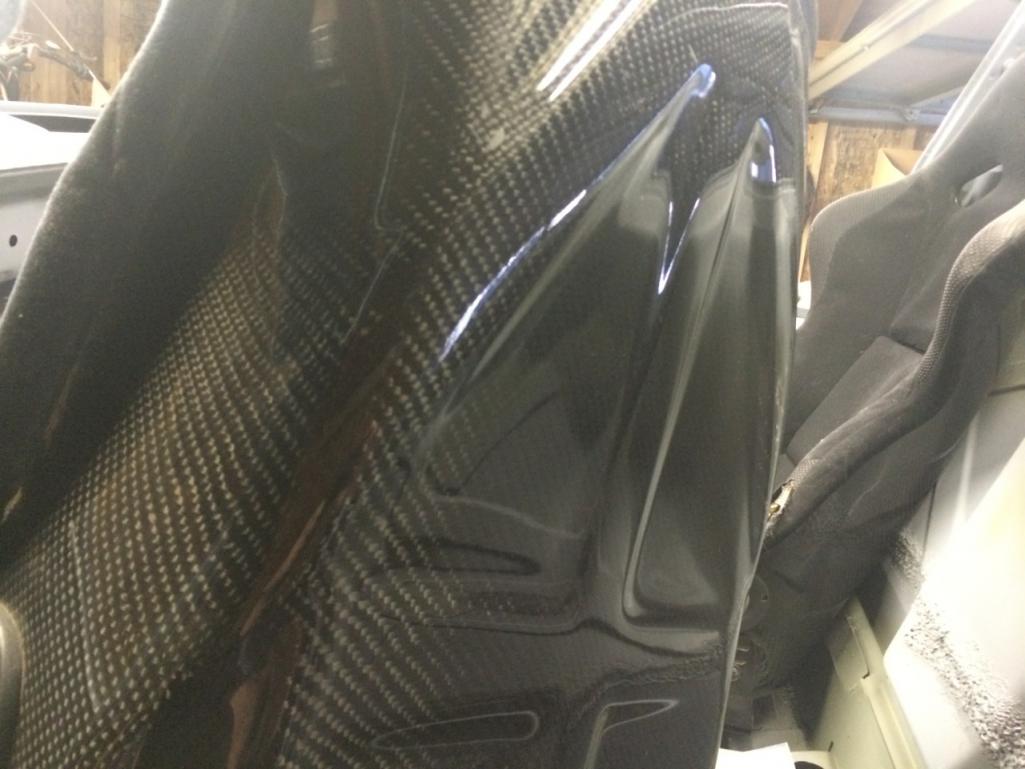
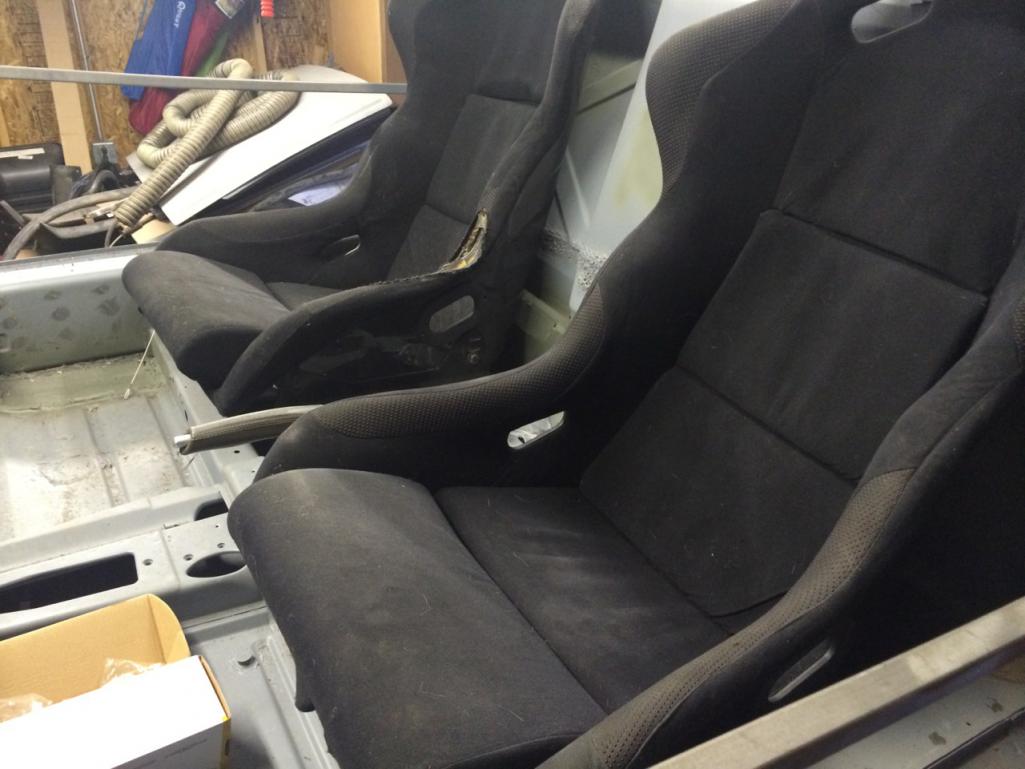
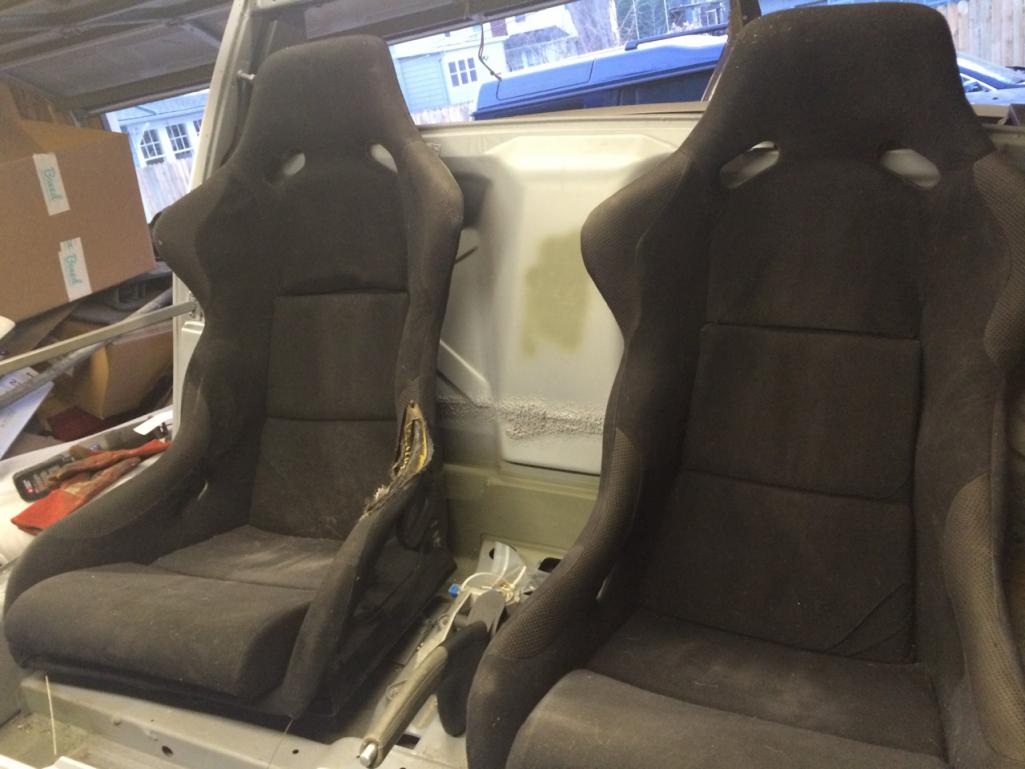
I'll ponder that later...time to get started on more welding before I move on to the trunk project.
I have this GT kit, and after I got this piece in place, I realized that I didn't have the instructions, and couldn't figure out where 2 of the other pieces went. So...I got these installed and left it at that until I can research placement, and if some of the other pieces are really necessary.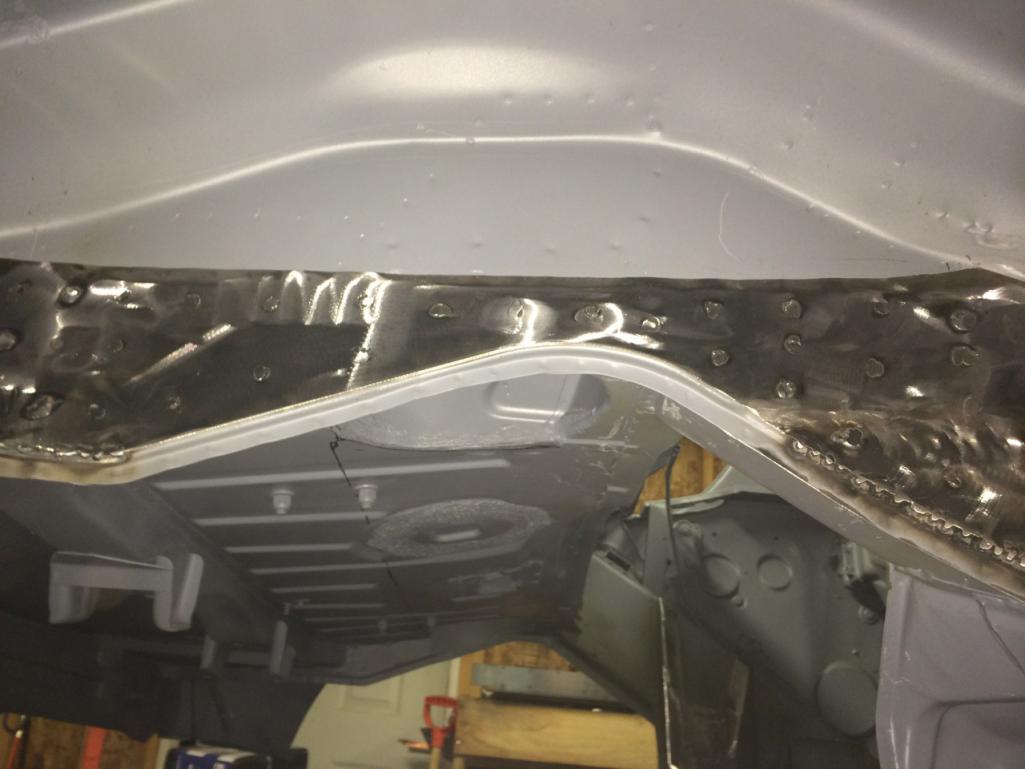
Posted by: 914forme Mar 13 2014, 05:42 AM
GT kits where made for the -6 cars, so the two pieces you have most like run up the inner logs towards the inner suspension console. They are covered by that much needed -4 engine mount on each side. You could cut them out, weld in the plates, and then put them back in as you need them for the Coldwater cradle.
Posted by: CptTripps Mar 13 2014, 06:41 AM
GT kits where made for the -6 cars, so the two pieces you have most like run up the inner logs towards the inner suspension console. They are covered by that much needed -4 engine mount on each side. You could cut them out, weld in the plates, and then put them back in as you need them for the Coldwater cradle.
That's exactly what I figured out. I'm wondering if that particular part is really needed though. Also, I don't want to take something off, and then realize after it's too late, that I put them back incorrectly.
In the end, I may just add the pieces I know I need, and then seam weld the parts that are normally just tacked up. That should give me the added strength that I need, without adding additional weight.
In other news...
I mocked up the dashboard yesterday so I know what the pieces of aluminum I need to have water-jetted for the dash. I had to make a few things smaller...others a bit bigger, and some of the holes that I made are just downright WAY too small.
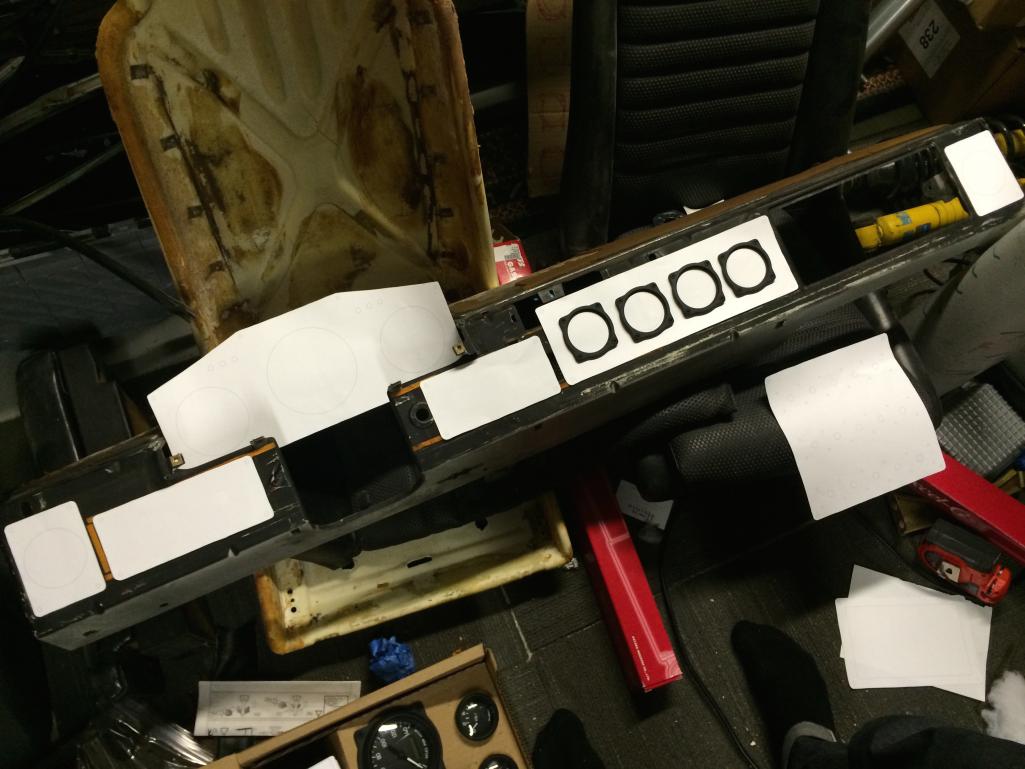
Also found a place local to me that had a bunch of Porsche rims and assorted other goodies. These Corbeau seats look to be a much better fit than the Carbon Fiber seats I bought last week. I can trade him mine for these, and have something closer to what I'm looking for without having to move the e-brake handle.
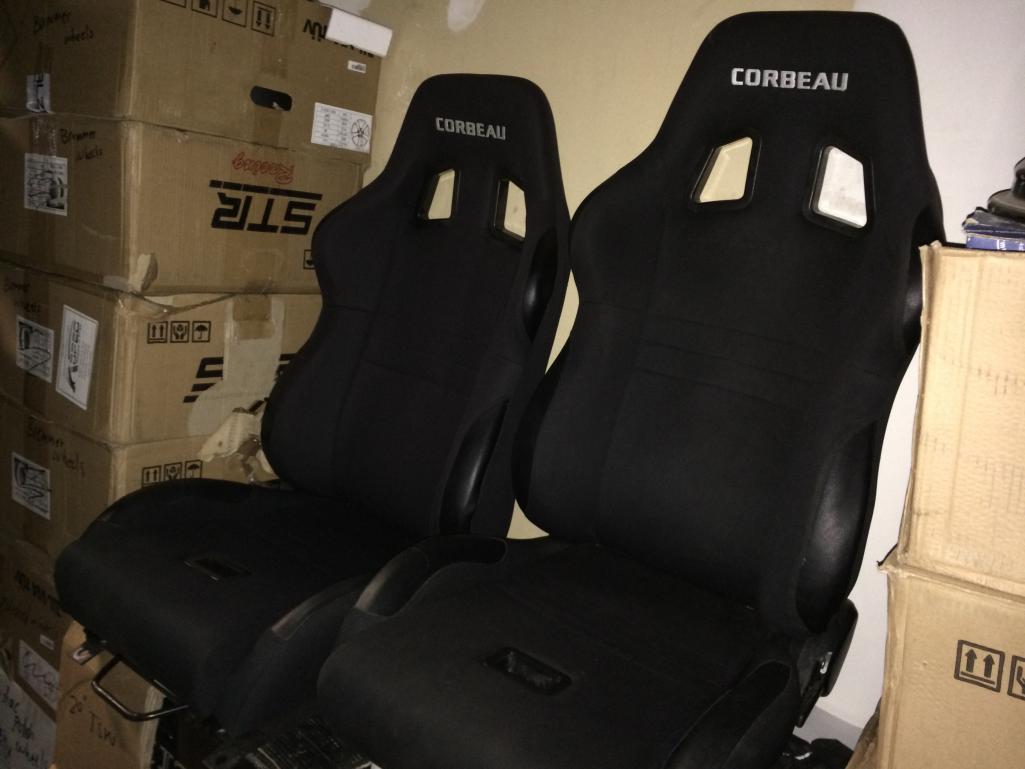
Still hunting for a body guy that can take this from me on Saturday and work on it next week while I'm out of town. My hope is to have it back in a week and be ready for final blocking and paint.
Posted by: CptTripps Mar 14 2014, 10:03 PM
This is Dan. My new body guy.
I have to get on a plane to LIT tomorrow, then ATL on Monday, the. SFO on Tues. So I needed some backup.
He tells me he can get the body filled/blocked/everything by next Sunday. If he makes the FOLLOWING Sunday, I'll be happy.
Already sent me some progress pics. I'll post those in the AM.
Attached thumbnail(s)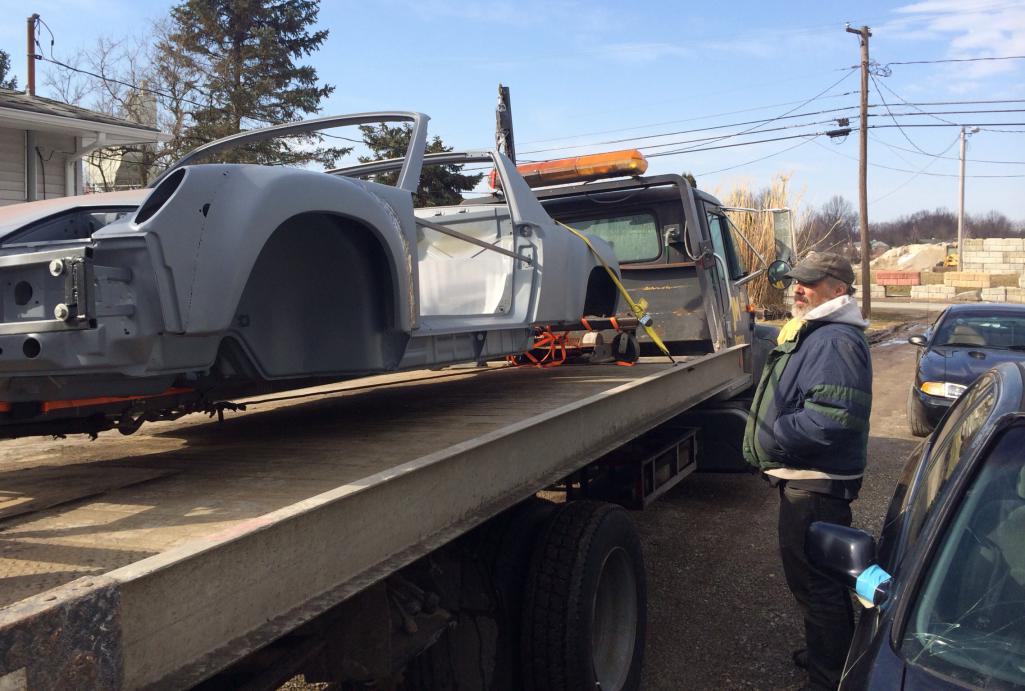
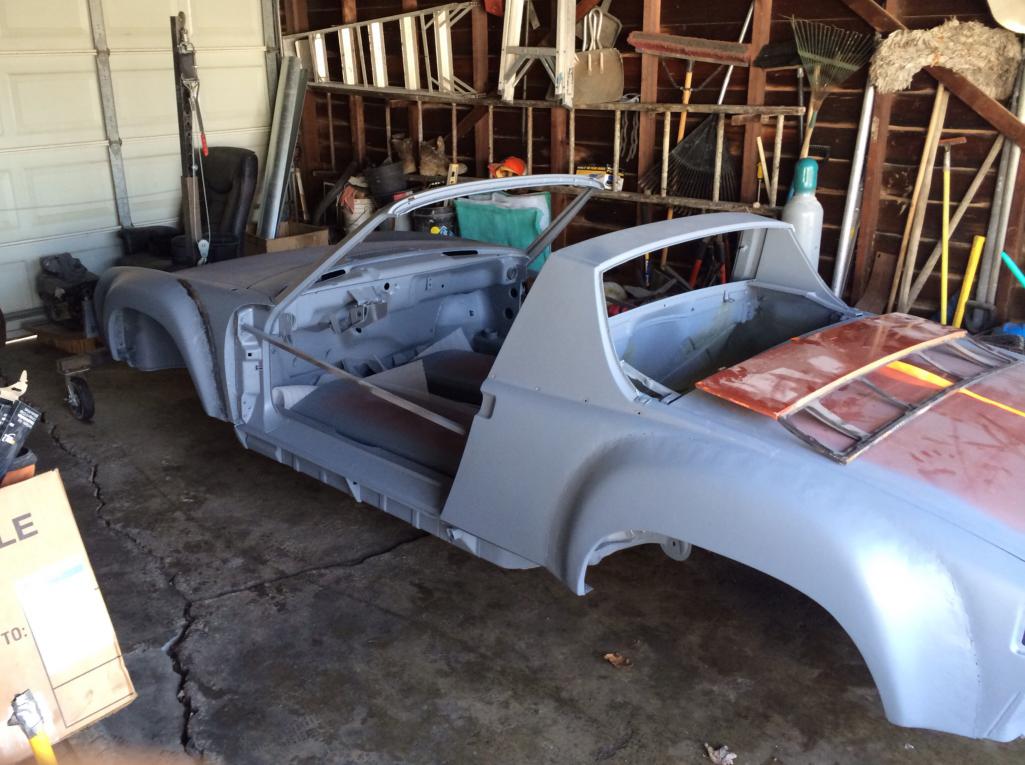
Posted by: 914forme Mar 15 2014, 11:11 AM
What was the decision on the rear trunk. I have McMarks rear trunk Evernoted for my Project as it is the cleanest factory looking one I have seen.
I got my cradle from Ian, have the mockup motor almost ready to go in and see what and where I need to clearance.
Your making great progress keep it up.
Posted by: CptTripps Mar 15 2014, 12:39 PM
Thanks Stephen. I "punted" until next week when I get the body back. I think I'm going to end up dong something similar, but without the "ribs" that McMark has. Honestly, I'm going so far off the reservation with the rest of the build, it doesn't make sense to put a ton of work into making it look stock.
Dan has been doing a great job on the flares. He got all the "waves" out of one of them about an hour after I dropped it off. He also fixed the welds that the other guy ground too much off of. He sent me a question last night about how to match the flares with the existing sheet metal down by the rockers. I know I've seen a few threads on it, so I'll keep digging. I dropped the fiberglass rockers off at his garage this AM on my way to the airport. I'll let him have fun with that!
Here's one of the pics he sent me last night. Already I can see a big improvement. I'm not sure what the other guy was doing with the pick-end of the metal hammer. Trying to shrink it up? Who knows. This guy is much better.
Attached thumbnail(s)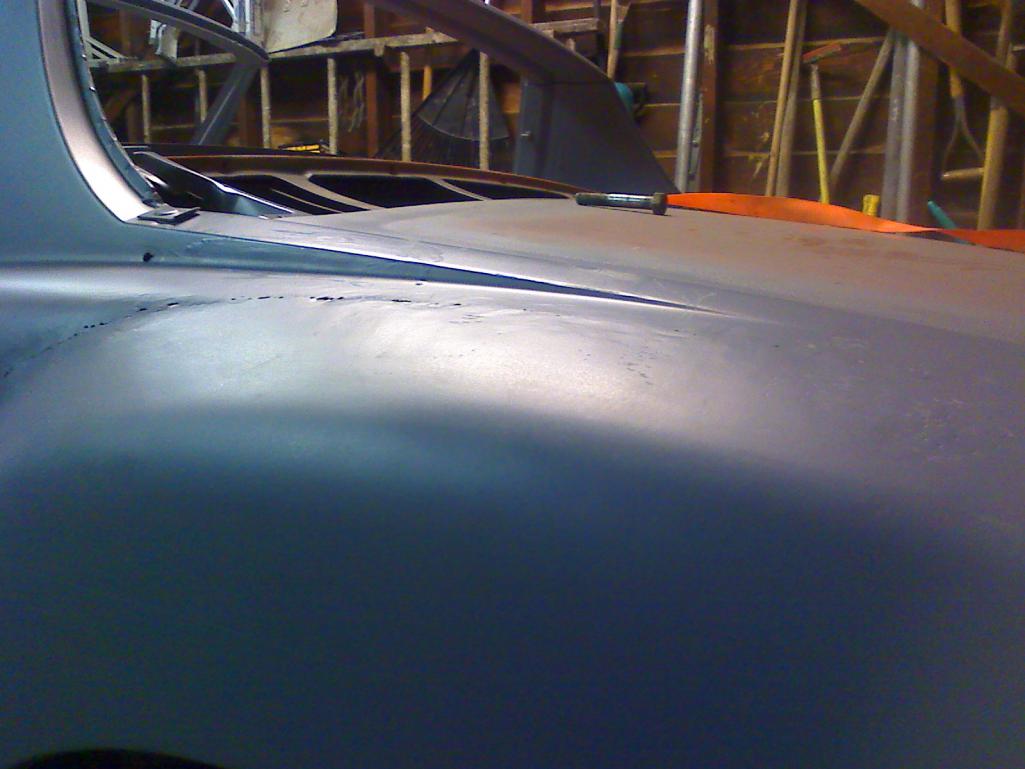
Posted by: CptTripps Mar 16 2014, 08:10 AM
So I got an update late last night from my new body gut Dan.
He isn't happy with how far he got yesterday, but I sure am! He ground out and braised any of the thin spots that were over ground. Then modified the bottom of the flares so they match up with the body panels now.
Also welded all the little holes I wanted buttoned up. So far, I like what I see.
Here are a few of the 20 pics he sent me last night.
Attached thumbnail(s)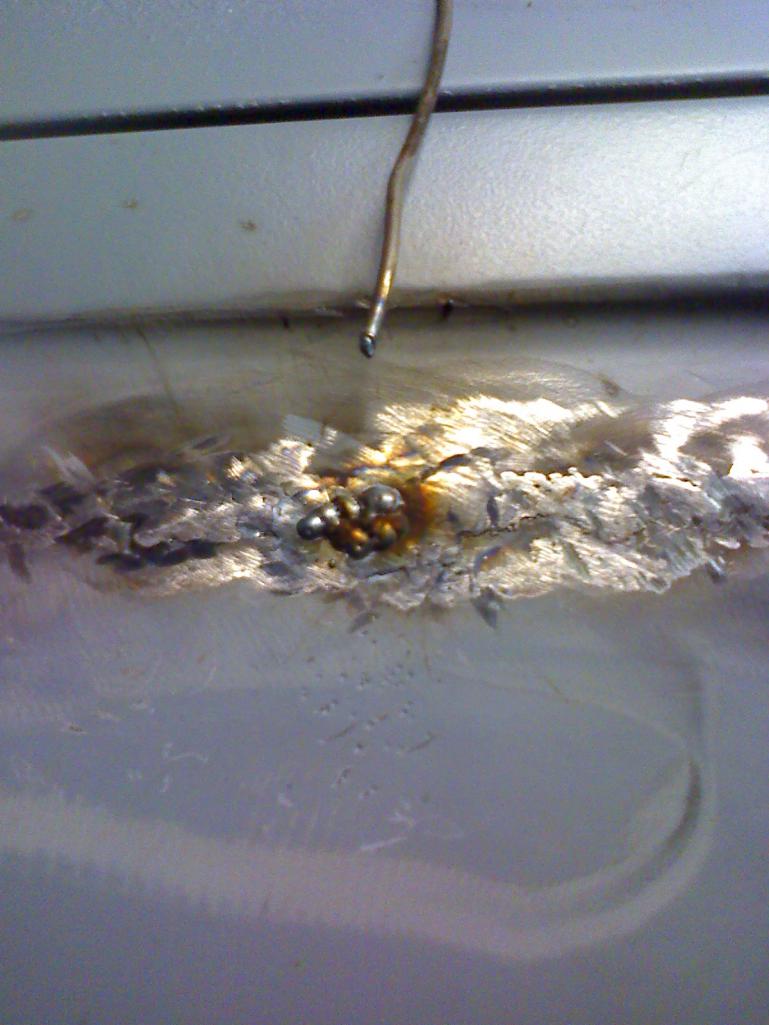
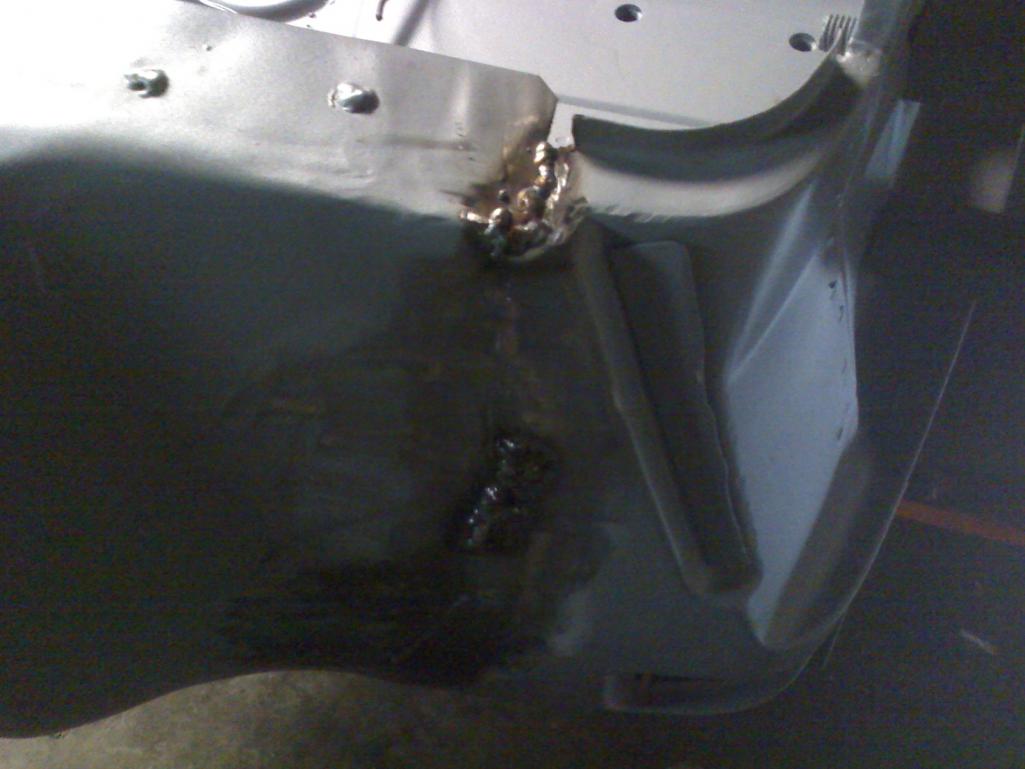
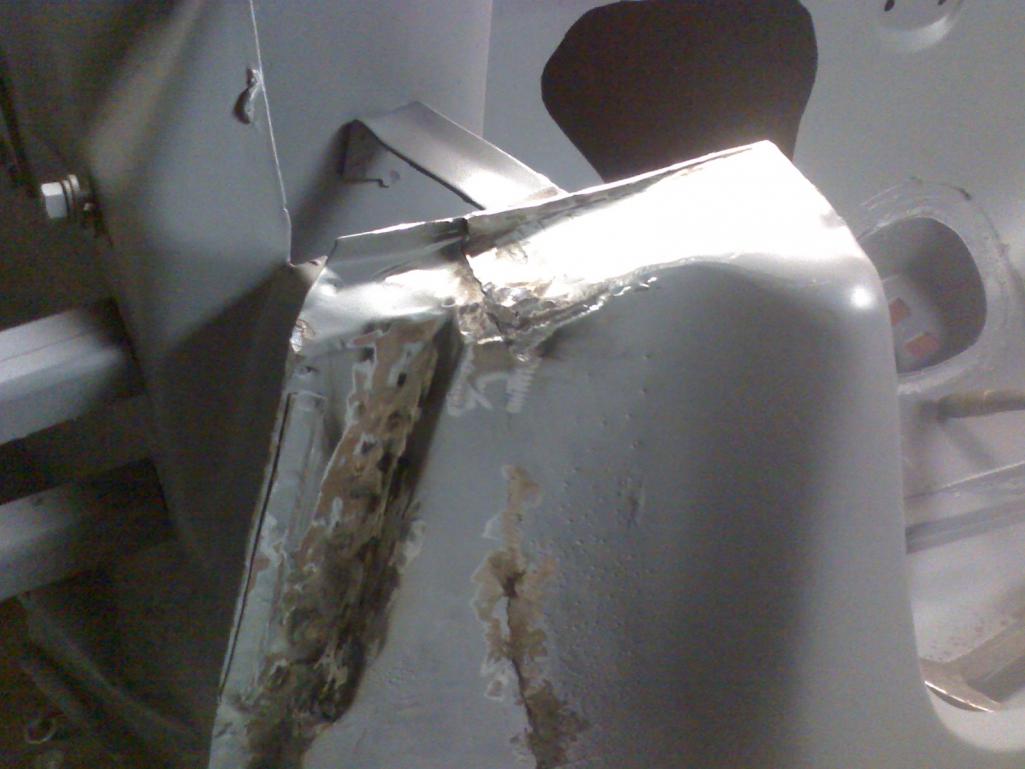
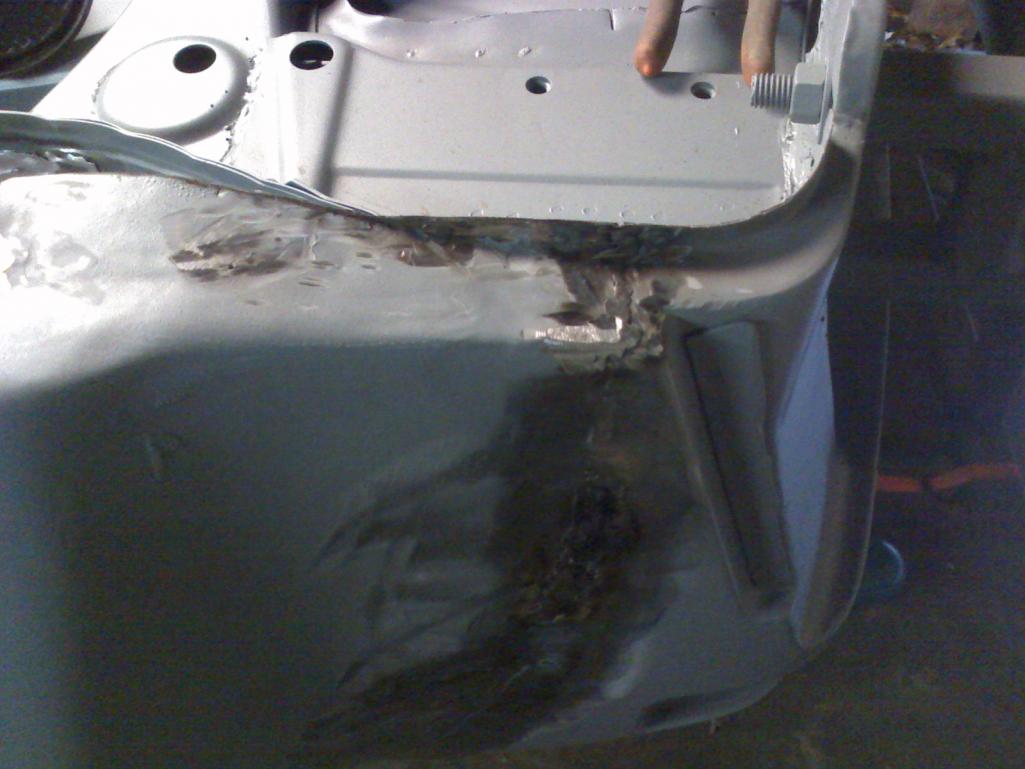
Posted by: CptTripps Mar 17 2014, 09:02 AM
More pics from my body guy, while I'm out of town.
VERY glad I didn't try to tackle this on my own. He welded everything up, blocked it out, then re-sprayed it with more epoxy primer.
He's starting on the bondo (Using Rage Gold) work today. He'll have it blocked out and in 2K high-build by the time I get home on Thursday. He'll do a few more coat before it lands in my garage next Sunday.
From there, I've got to do the trunk work, then I'll paint the bottom and interior so I can get started on re-assembly of all of that before it hits the paint-booth for the exterior work on April 3rd.
in no time...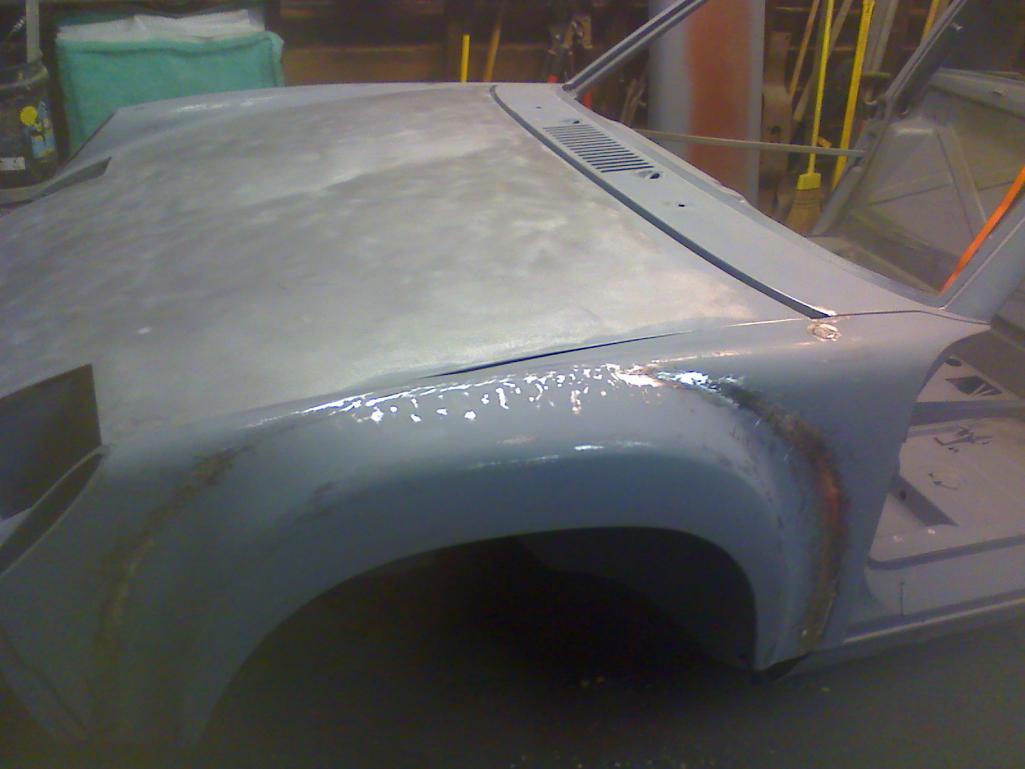
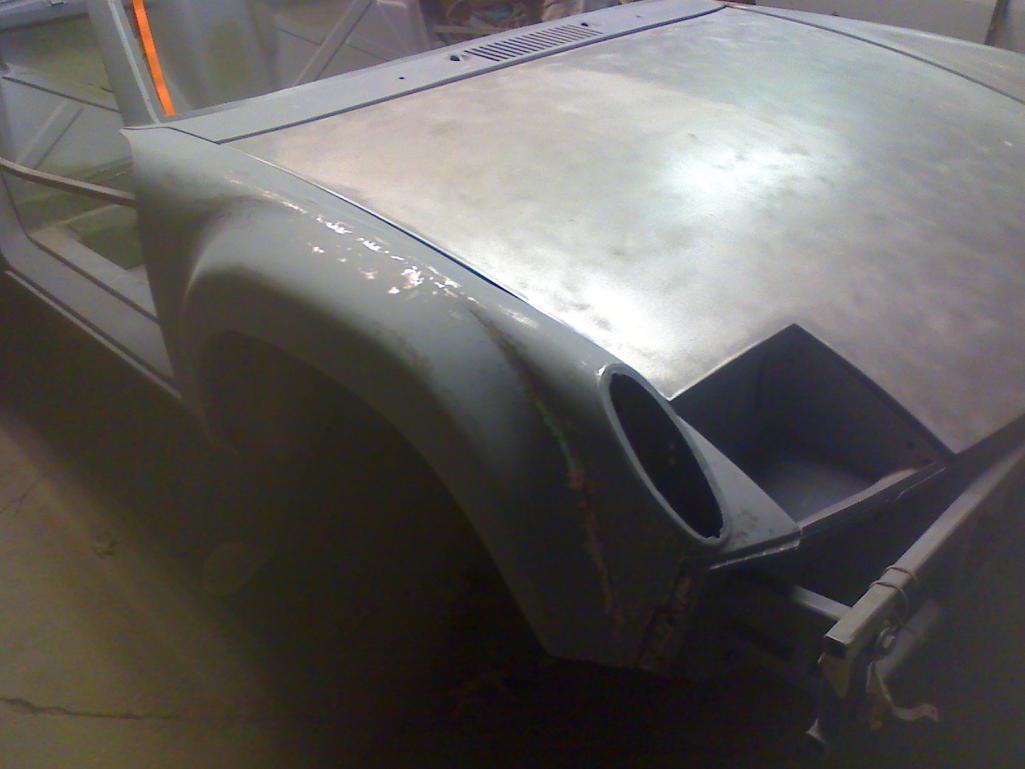
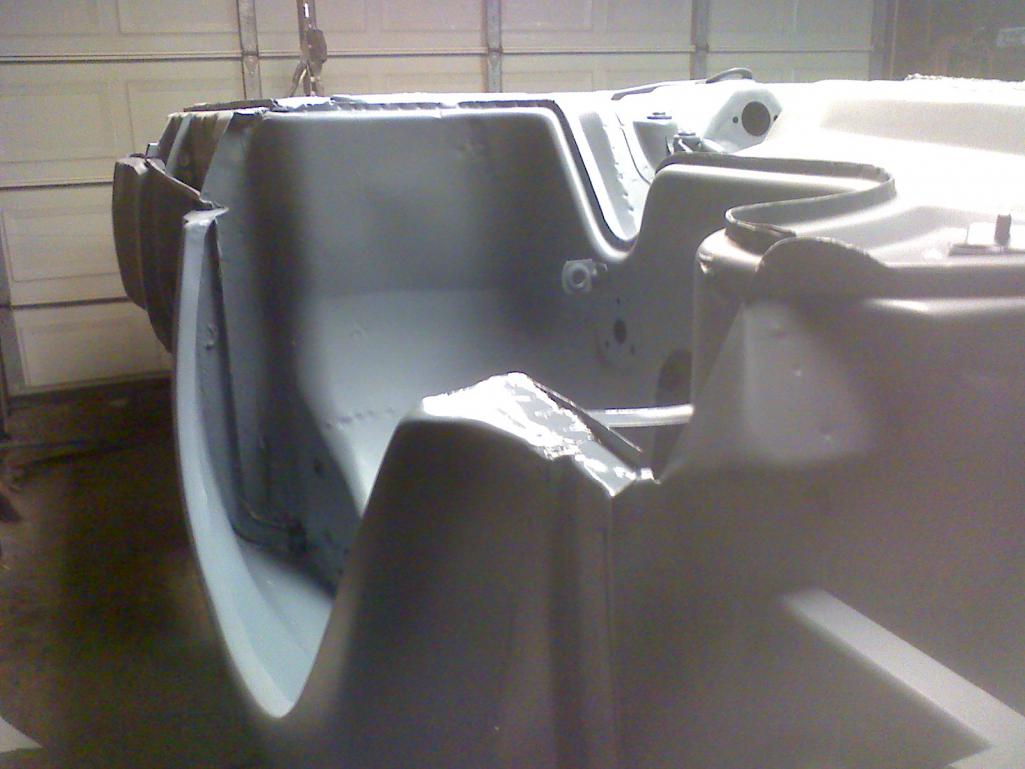
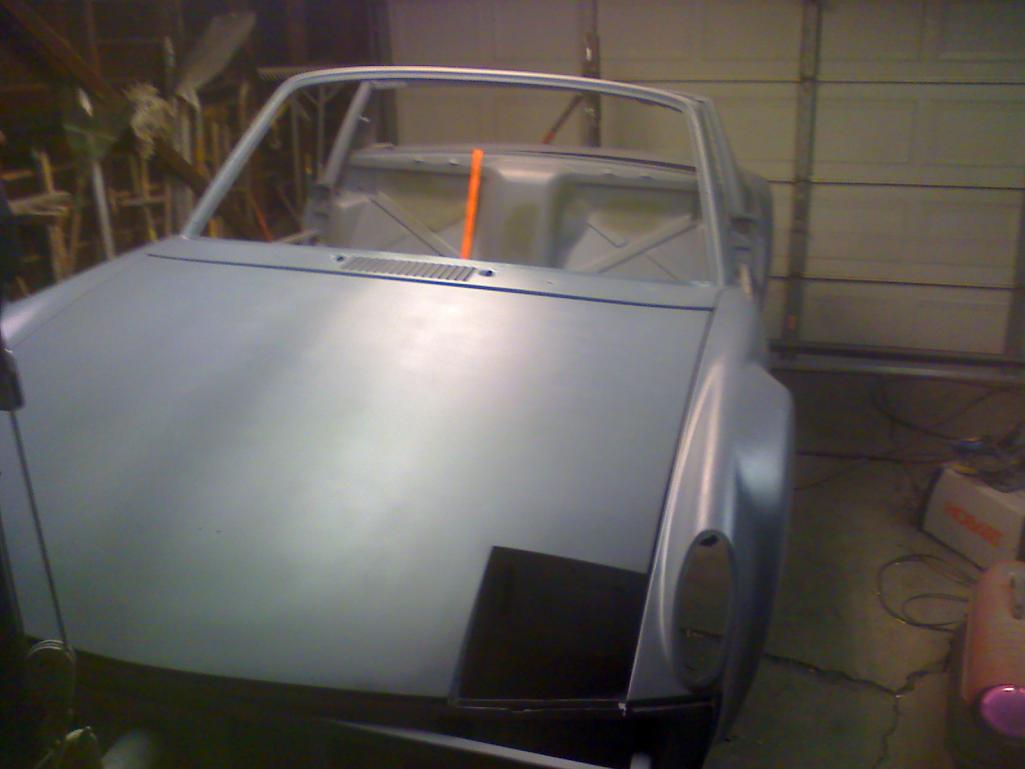
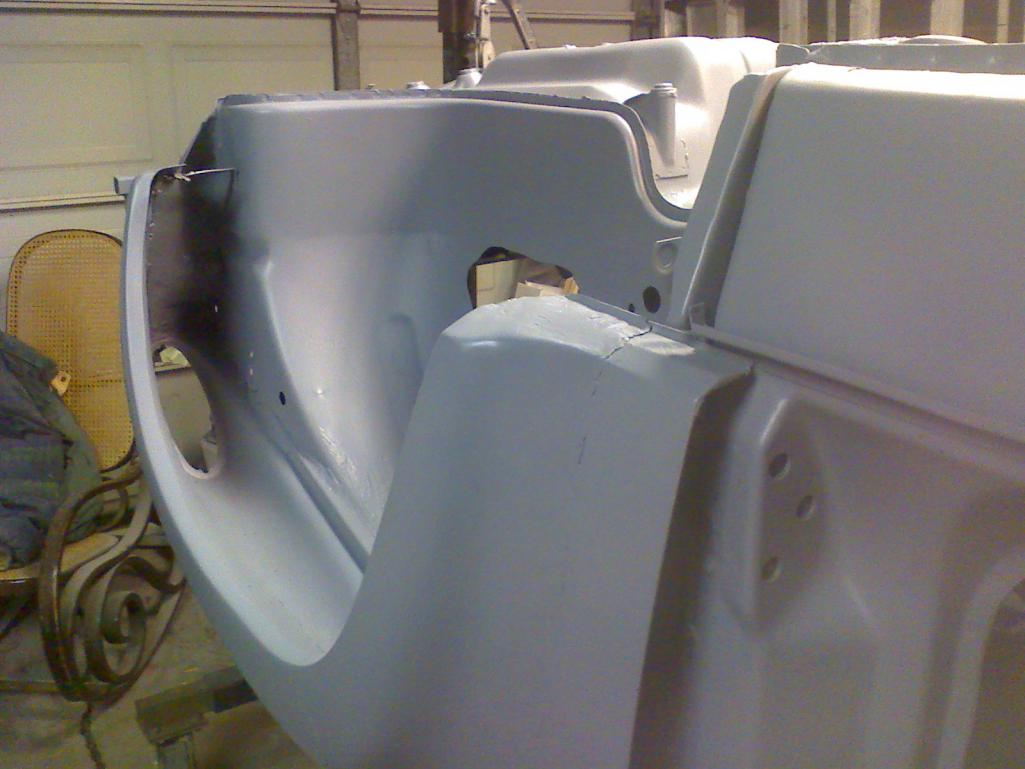
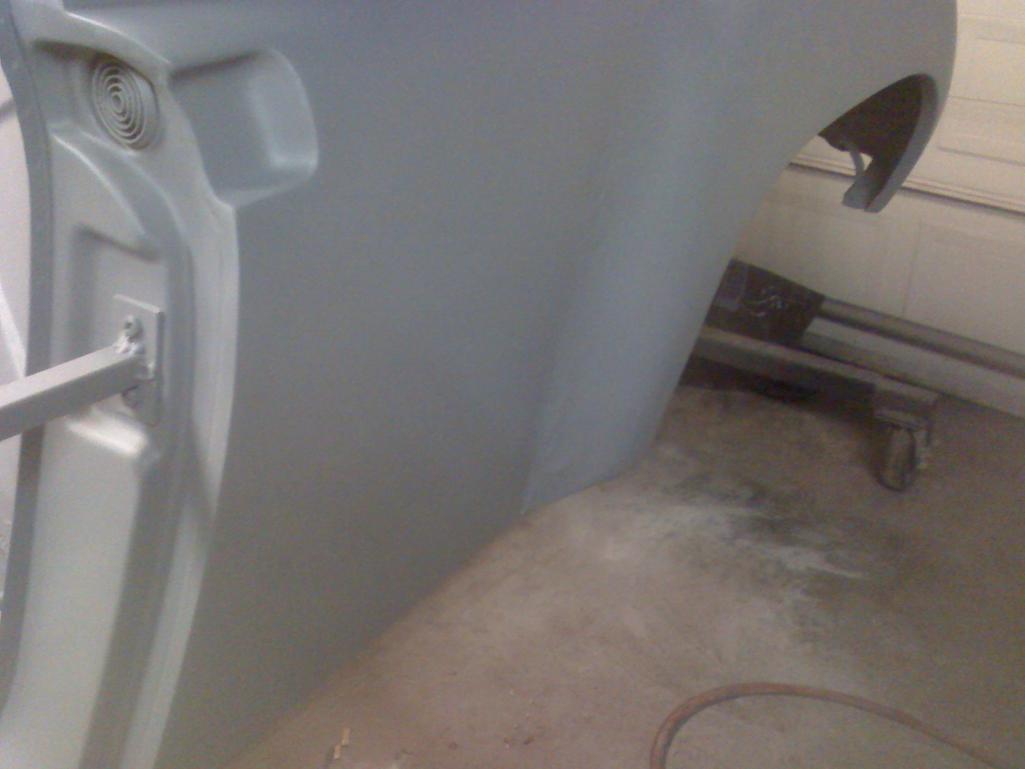
Posted by: McMark Mar 17 2014, 05:36 PM
Whoops! Shoulda had them mask off this section depending on what bearing/bushing replacements you're using. The PC thickness will come into play on most setups. Also, you'll likely have the grind the PC off the ID to fit the ball joint into the arm.
But I really like the chrome and green. 
Glad you like the trunk restructuring we did. The top of the new section is the vertical wall from the trunk, cut and flipped. This kept the ribbing and gave us the smooth rounded transition. The other piece is a section of rear trunk pan from a donor car. I opted to leave the 'portholes' for a little more authenticity. 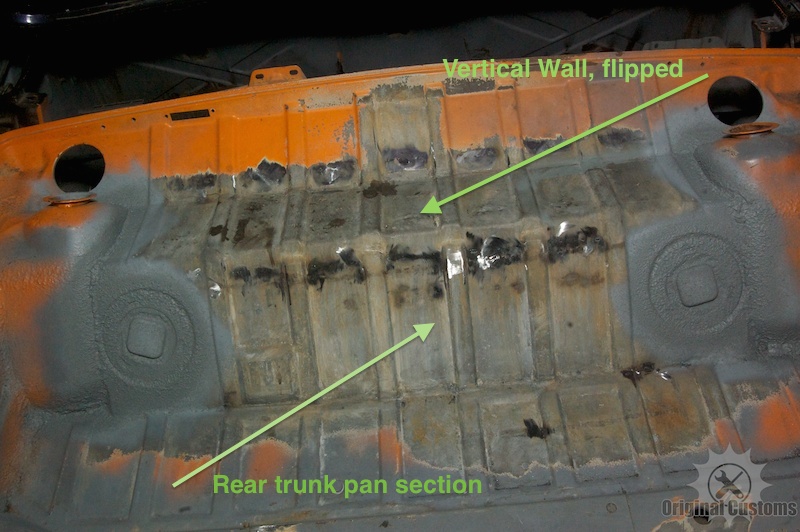
There is also a very important reinforcement section on the bottom of the new piece. The stock cars have a double wall, boxed section between the shock towers. Without replicating that box section or otherwise reinforcing the shock towers, you may experience flex or worse, tearing metal.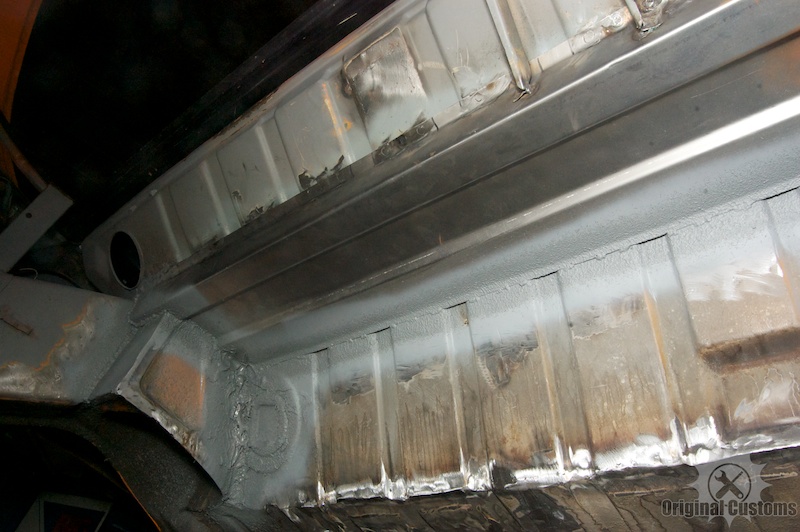
Posted by: CptTripps Mar 17 2014, 06:17 PM
Wow Mark...I completely forgot to have them mask the arms. They did it on the trailing arms and the struts.
The trunk work is going to be interesting. There are 2-3 different ways that I can go about it, but I'm going to have to wait and see what I come up with when I have the sawzall in my hand. Maybe I can get some advice on Wednesday when I drop by Mark?
Posted by: CptTripps Mar 18 2014, 07:56 AM
More progress from my body guy. He sends me about 20 pics every night at about 2:00am. The body of the message from these pics said he felt good about the drivers side now, and was going to work on the pass today. He'll have the whole thing in 2K primer by tomorrow and can start working on sanding/blocking everything again and again. "Looks like a lot in some pics, but after sanding it'll be nothing much thicker than a dime."
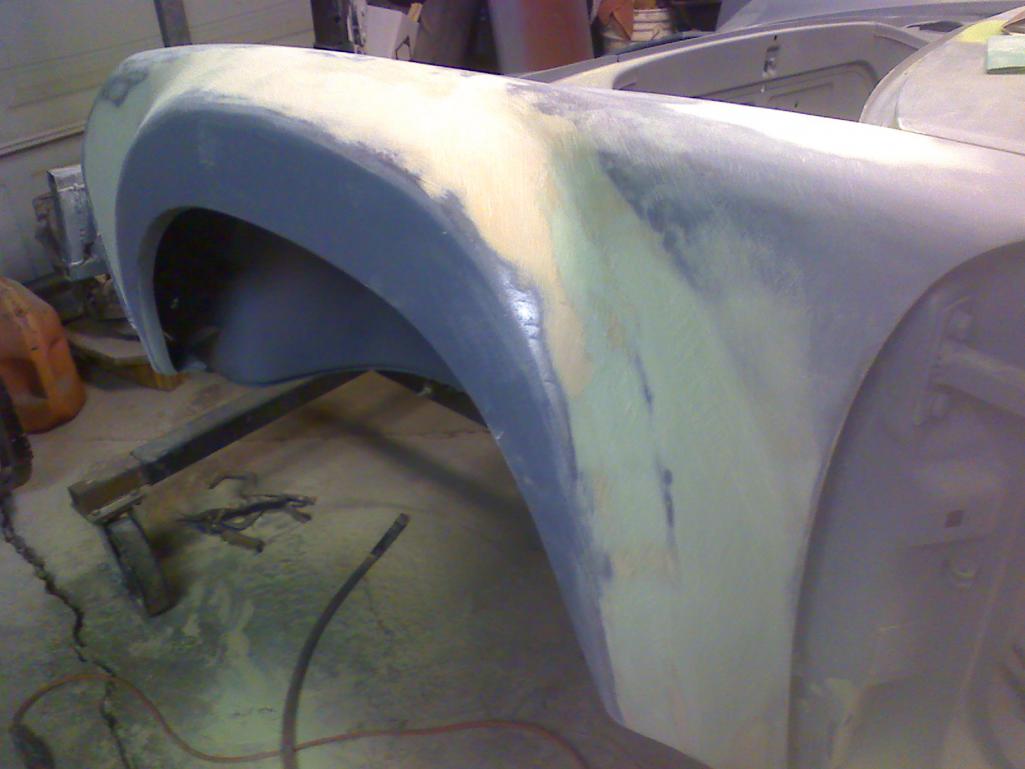
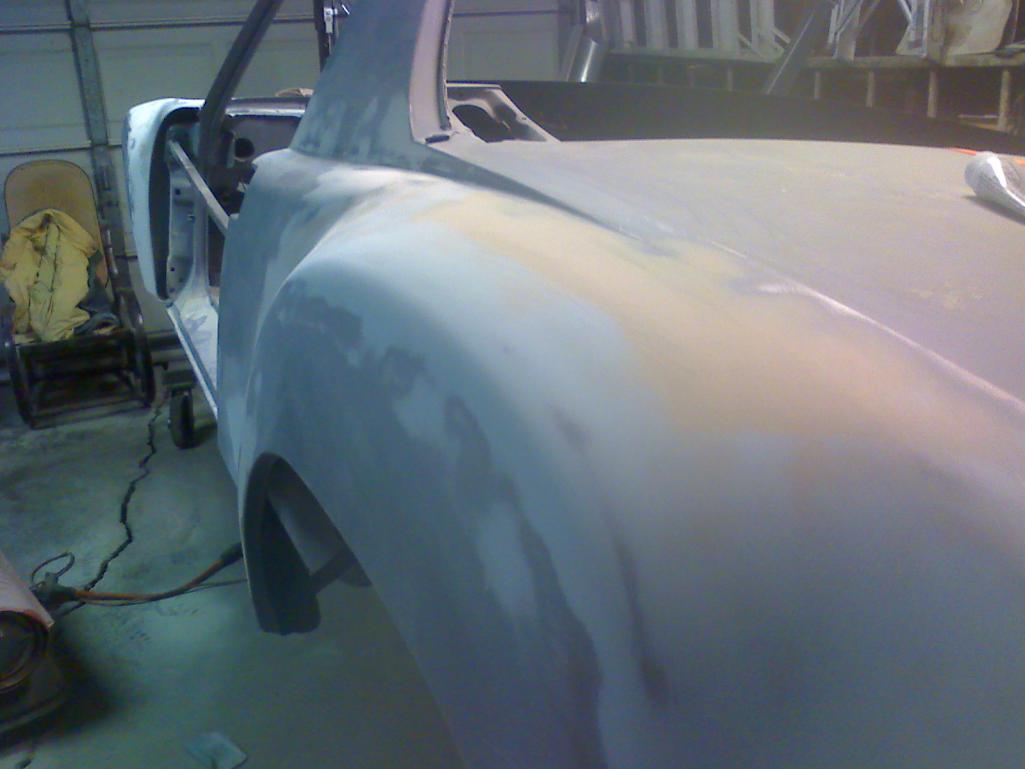

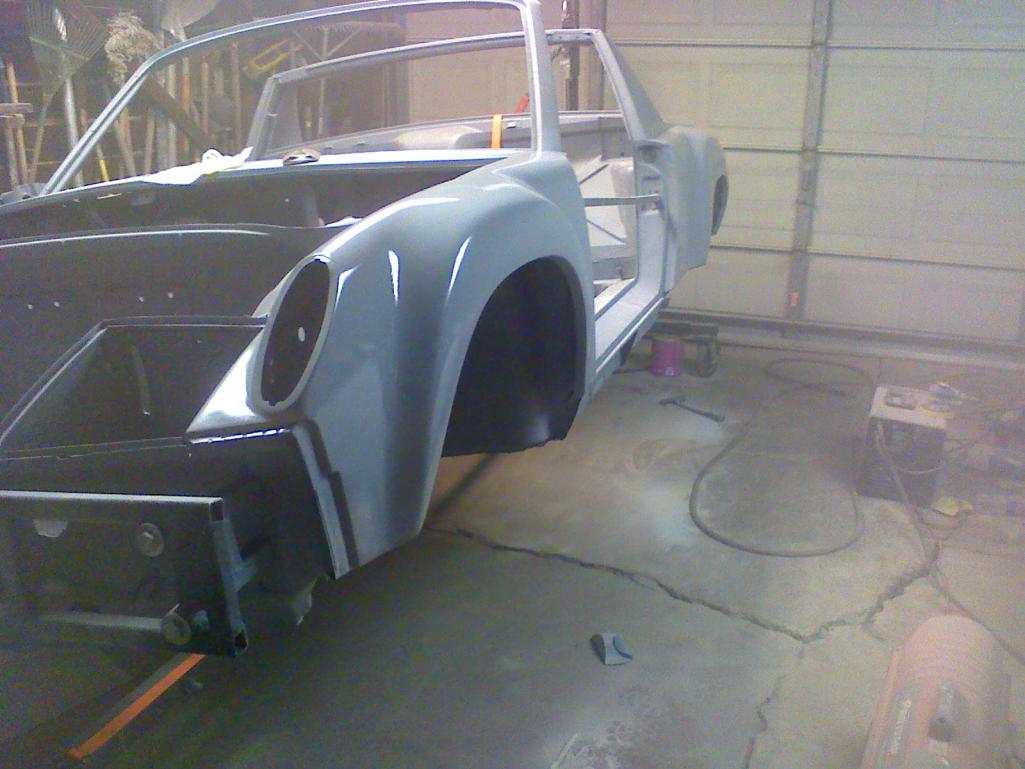
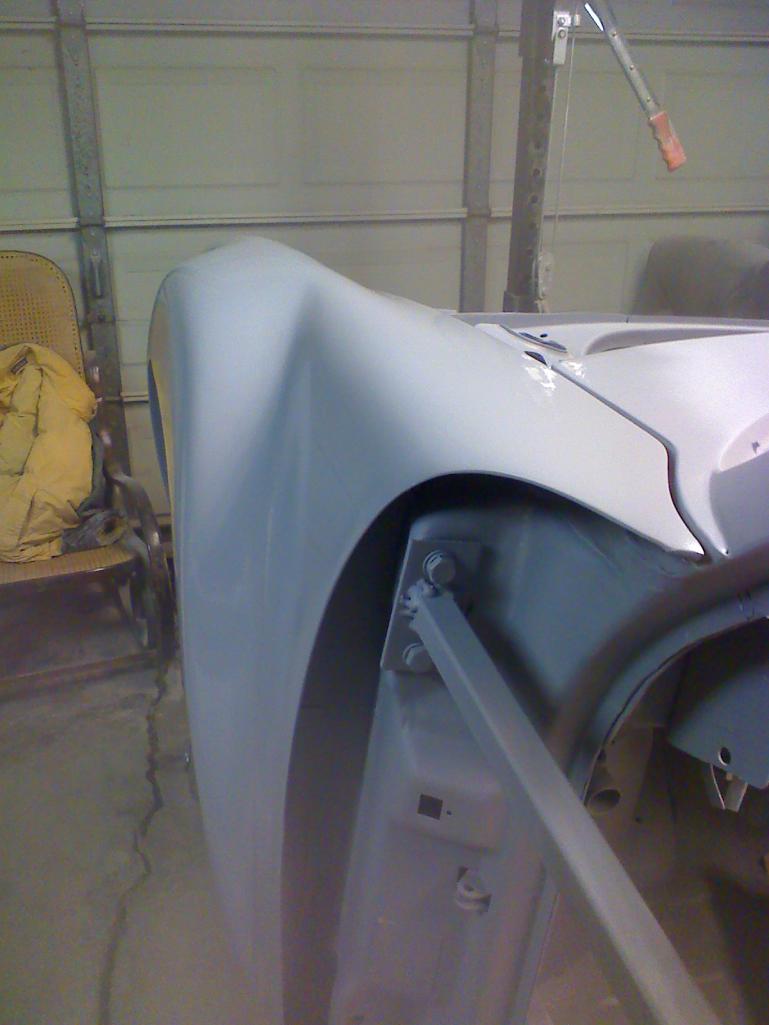
Posted by: effutuo101 Mar 18 2014, 08:18 AM
That looks great! Almost time to guide coat and block it out!
Posted by: Chris H. Mar 18 2014, 12:57 PM
Dude you're gonna hug it out with that guy when you get back.  He's really diving in. Looks really good.
Posted by: 914forme Mar 18 2014, 06:55 PM
McMak thanks for the detailed shots. Doug that is looking super nice, how did you find your body guy? Looks like he's doing the work on the side.
Posted by: McMark Mar 18 2014, 09:32 PM
Maybe I can get some advice on Wednesday when I drop by Mark?
Sounds good. I have a secret project to show you that I know you're gonna like.

Posted by: CptTripps Mar 18 2014, 11:03 PM
No doubt!
He JUST called me as I was pulling in my drive in Palo Alto. He thought he needed to have it done by Thursday when I got home! I told him I wouldn't be able to take it until Monday or Tuesday. I've got to get the V8 I pulled out shipped first. It's taking up too much room in my garage! (...and, it'll be needed shortly.) He already has the whole car in primer, and will start blocking it out tomorrow afternoon and Thursday. Said he'd like to do 2-3 coats of primer to make sure it's tight before I get it back.
Funny enough...Craigslist!
He works as a pipe fitter or something like that, and does body work on the side. When I tell you all what he's charging me, you'll flip out. I want to make sure that's really the price before I get too excited.
Can't wait! I'm headed up there after my breakfast meeting in PA.
It's really coming together...
Posted by: CptTripps Mar 18 2014, 11:07 PM
Here's his email from today. (He sends me about 20 pics every night.)
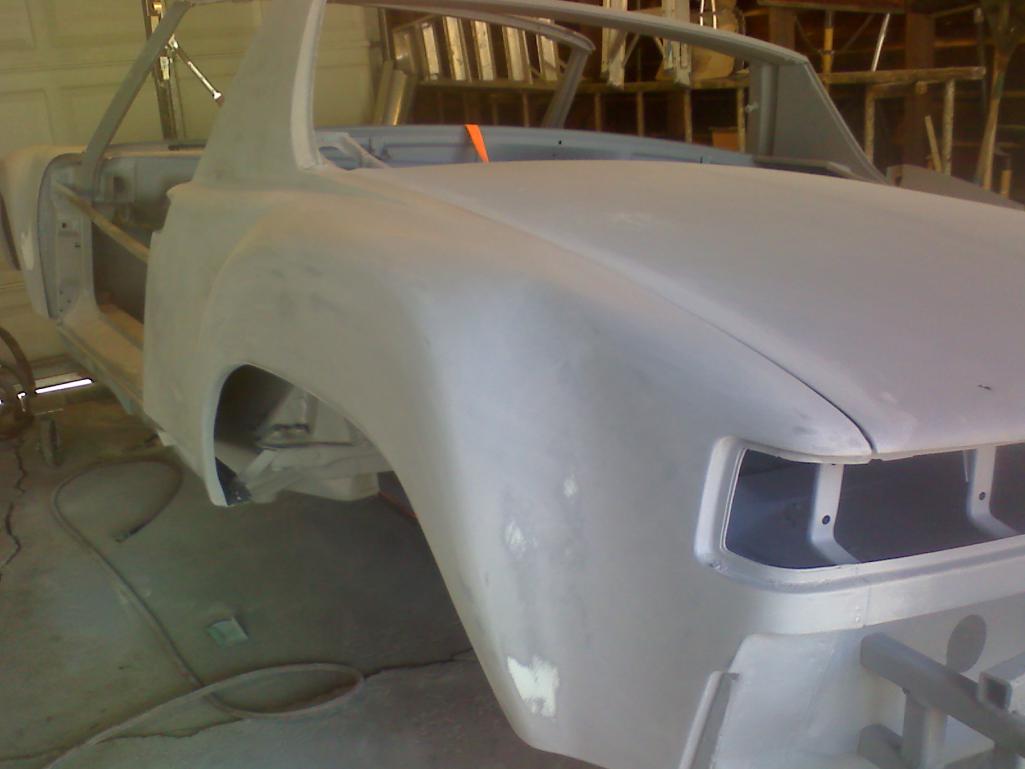
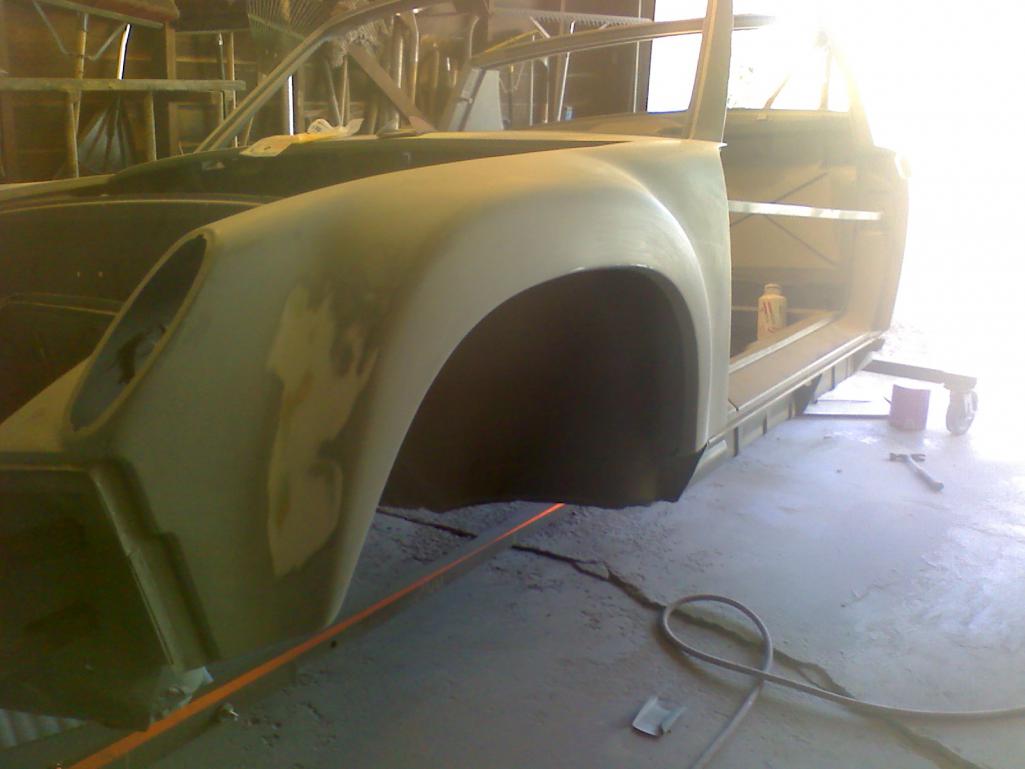
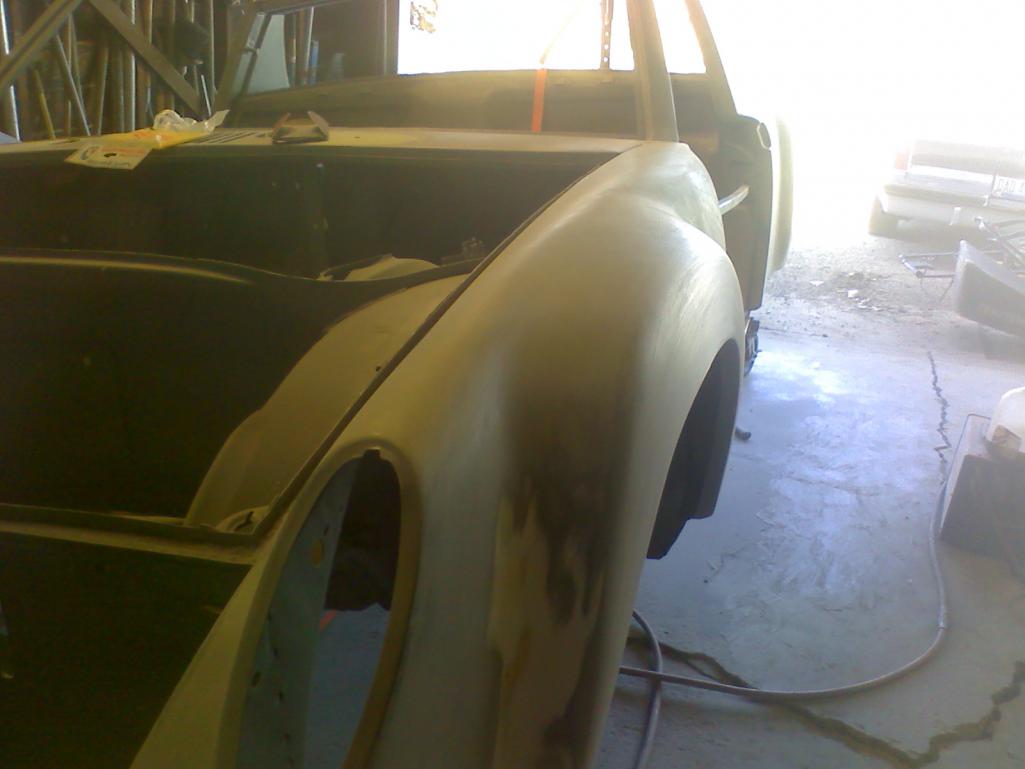
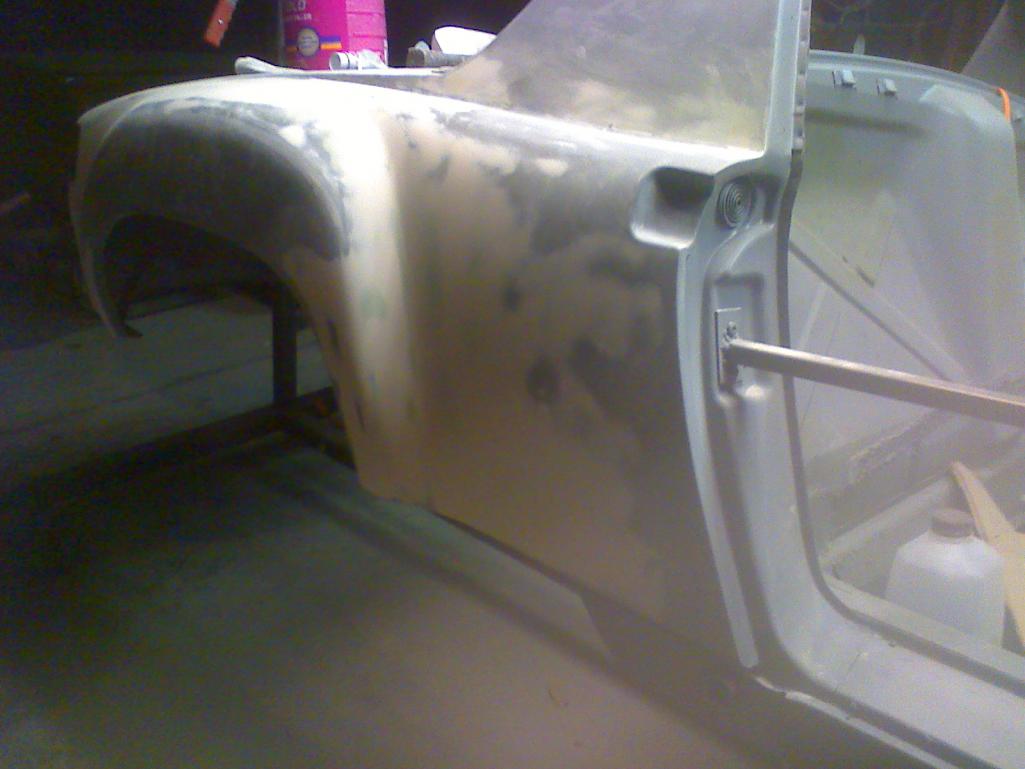
Posted by: CptTripps Mar 19 2014, 11:50 PM
Stopped by to check out McMark's setup over at Original Customs for an hour or so today. I didn't feel too trigger happy with the camera, but I really enjoyed looking at everything. I got to see some cool stuff...and we talked about my NEXT build a little bit.
Gotta get this one done first though!
I'll post pics of my car in the morning when I get a chance to check it out. Right now: It's "redeye" time.
Posted by: CptTripps Mar 20 2014, 10:58 AM
Stopped by this morning on my way home from the airport to check in and see how it was going. Man...I'm a happy camper.
The driver's side will be blocked out after he's finished with the passenger side later today. He's going to shoot the whole car with 2K one more time before I get it back.
He's really doing great work. I can't imagine how I'd have done this good of a job on my own. All the welds on the inside of the flares were ground down and feel nice. Every little hole is patched and now smooth. It's exactly what I was looking for.
Here are a few pics I took with my phone. Hope to have it back in my garage Monday after someone comes to grab the engine I'm shipping. (I need the room...badly!)
Attached thumbnail(s)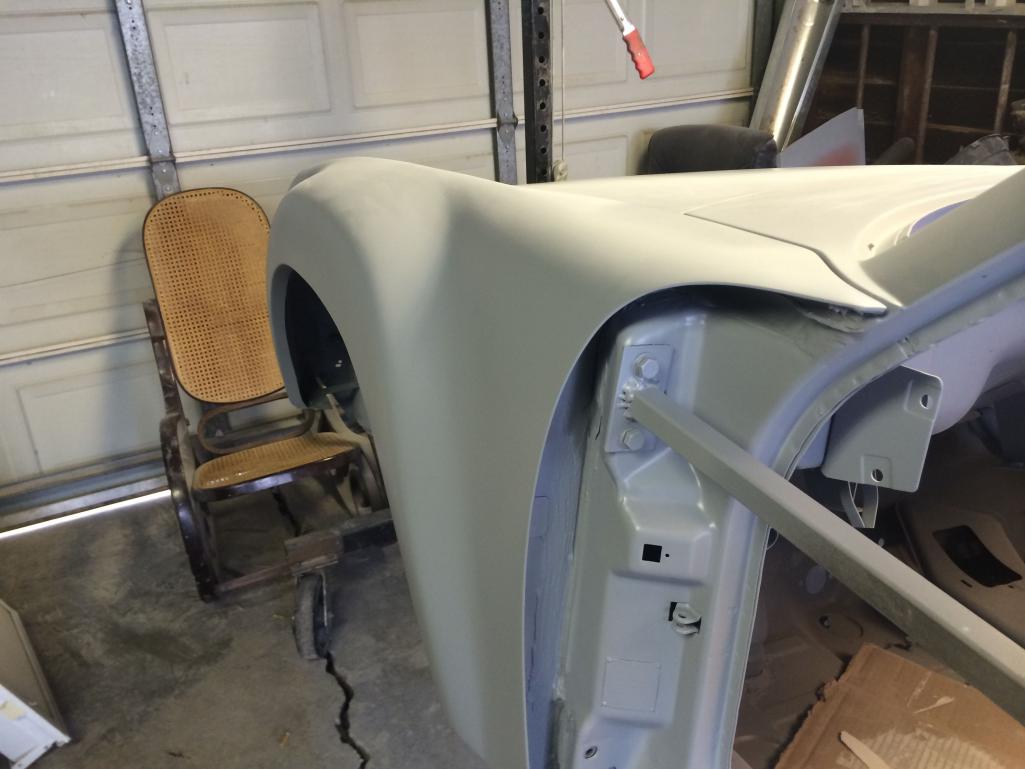
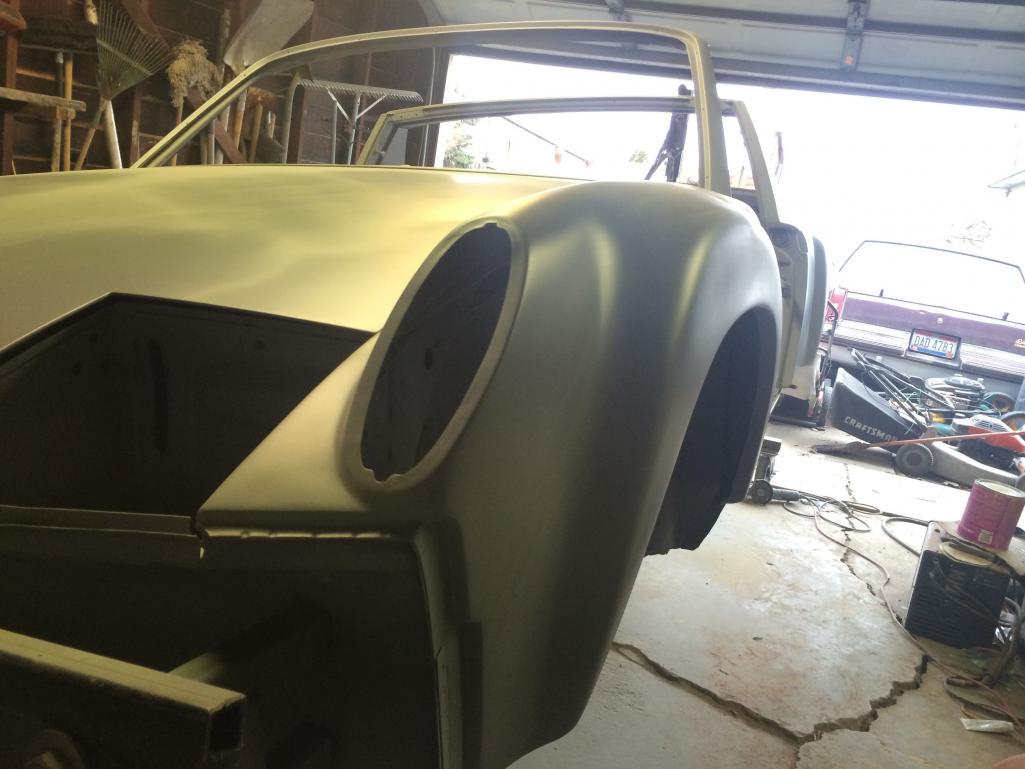

Posted by: jimkelly Mar 20 2014, 11:06 AM
love love love all that chrome look powder coated suspension parts
my compass, similar to your gauges.
Attached thumbnail(s)
Posted by: CptTripps Mar 20 2014, 11:52 AM
I DID look at using real airplane gauges at one point, but bailed on it pretty quickly. Too much work!
Posted by: CptTripps Mar 21 2014, 07:35 AM
It's really starting to come together on the body front.
He knocked out the lids and put a few more coats of 2K on the car yesterday with some additional blocking to knock it all down. I'm quite pleased. He's going to start on the doors today and I should be in good shape to bring it home on Monday so I can get the bottom, interior, and trunks sprayed with the base coat. I can start putting the wiring harness and interior in from there.
Attached thumbnail(s)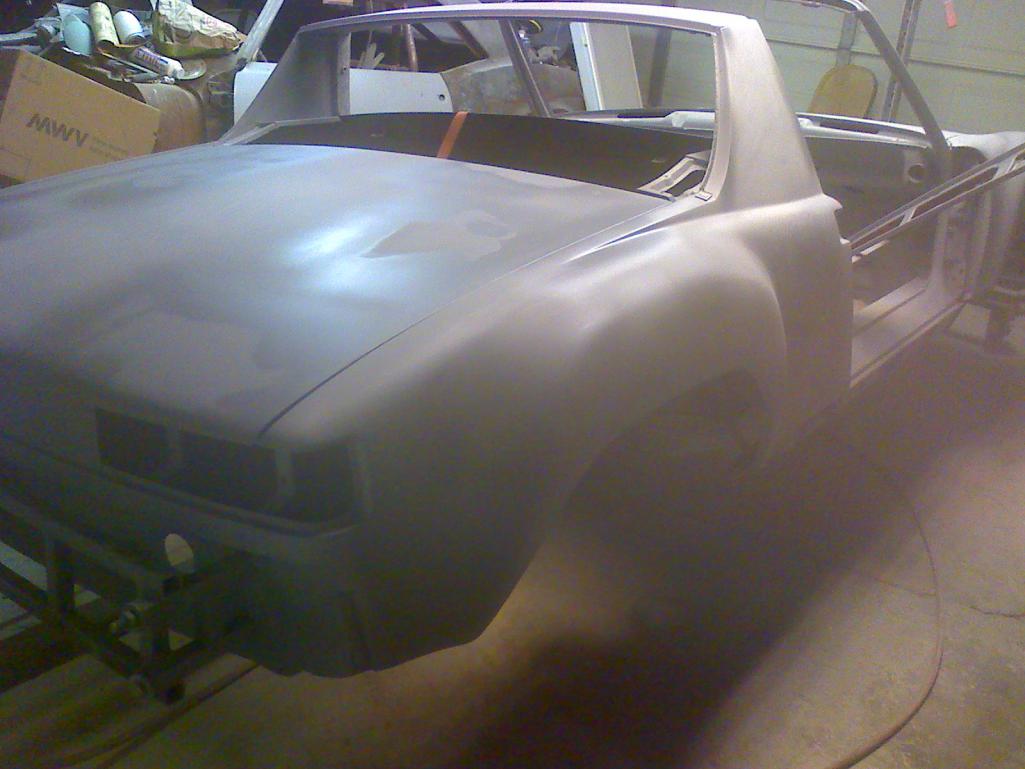
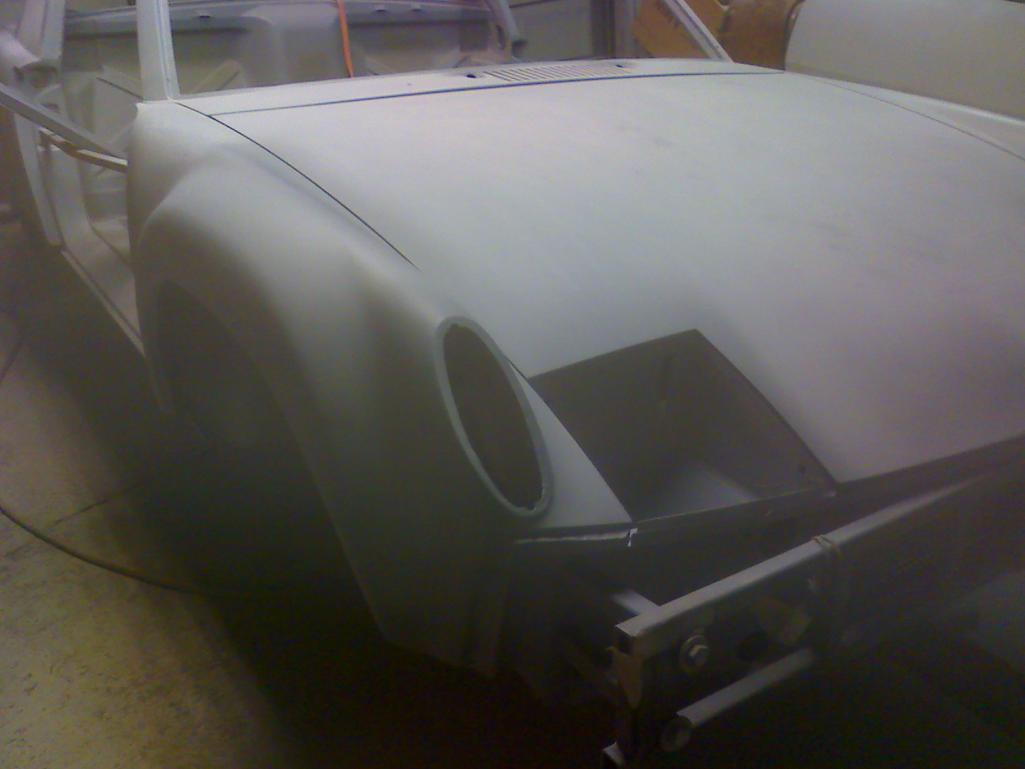
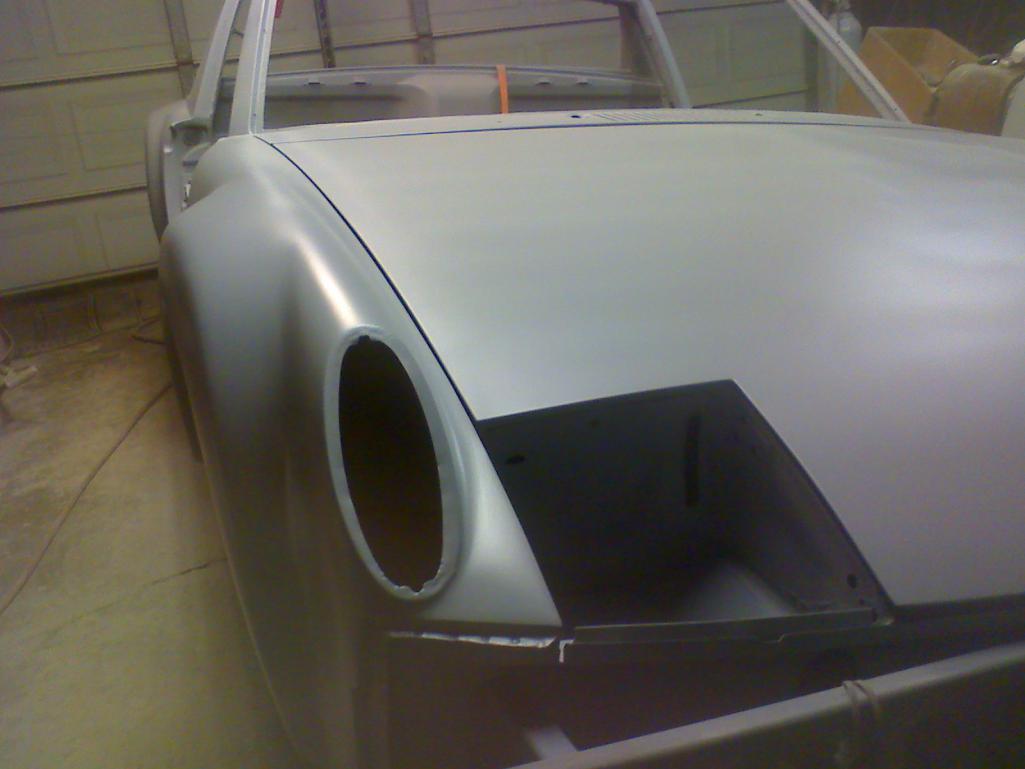
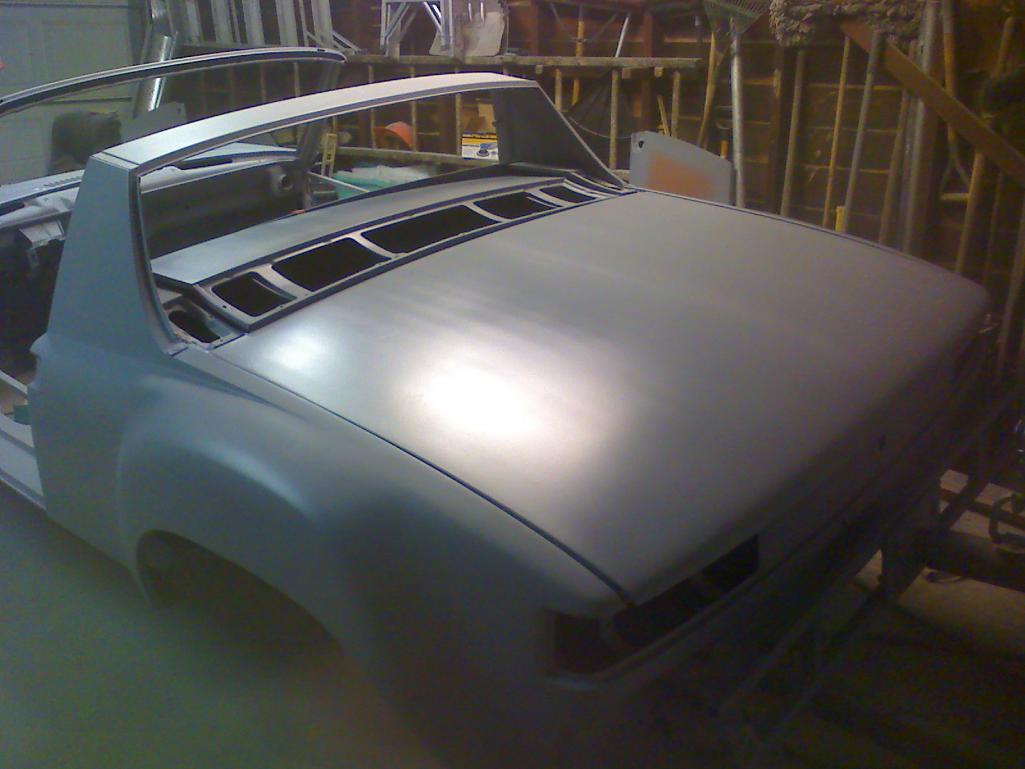
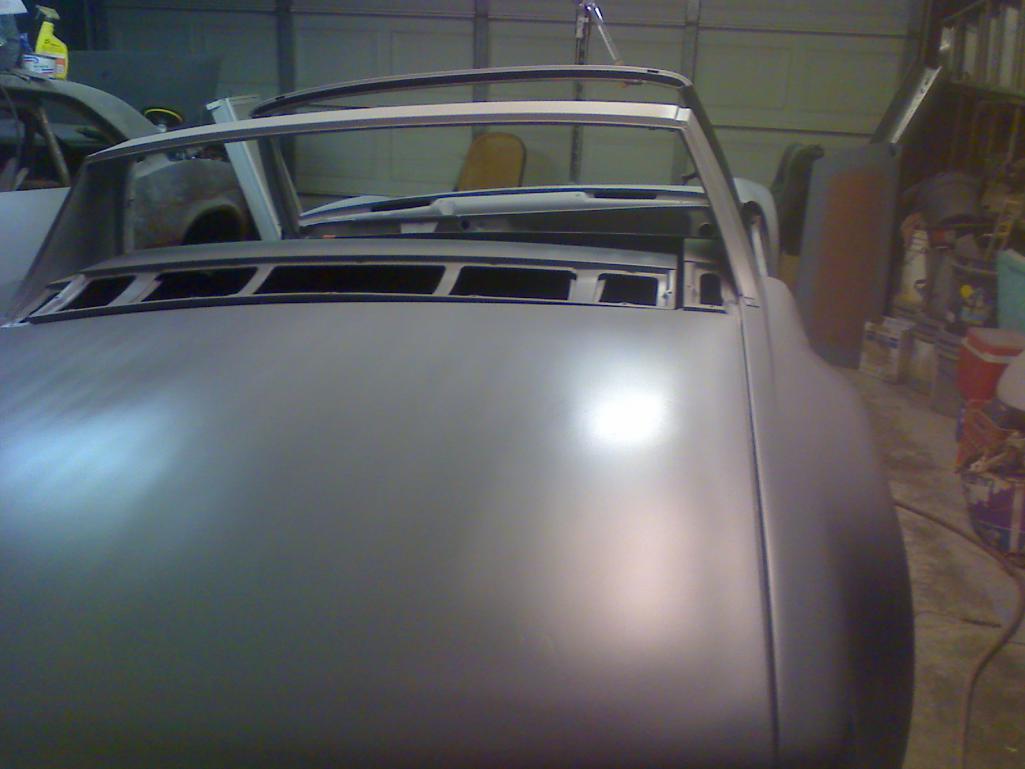
Posted by: CptTripps Mar 21 2014, 07:37 AM
Just realized that I keep forgetting to take the clips for the rear sail trim off the car. I'll bet there is visible orange paint under them. lol...
Posted by: Philip W. Mar 21 2014, 07:58 AM
I love it when a build goes FAST!. How did you find the new body guy? looks like he is working out of his garage? looks good, though! what color did you say you are going to? and you are trying to put it on the road for Hershey? insane! are you sure you want to drive it on all the salt riddled roads from ohio to hershey?
Posted by: CptTripps Mar 21 2014, 07:21 PM
Working on the interior this weekend.
I printed all the plates I was going to have water-jetted out of 1/8" Aluminium. After I laminated them, I can mock everything up from here. Then I just need to make adjustments once and I should be in good shape.
Attached thumbnail(s)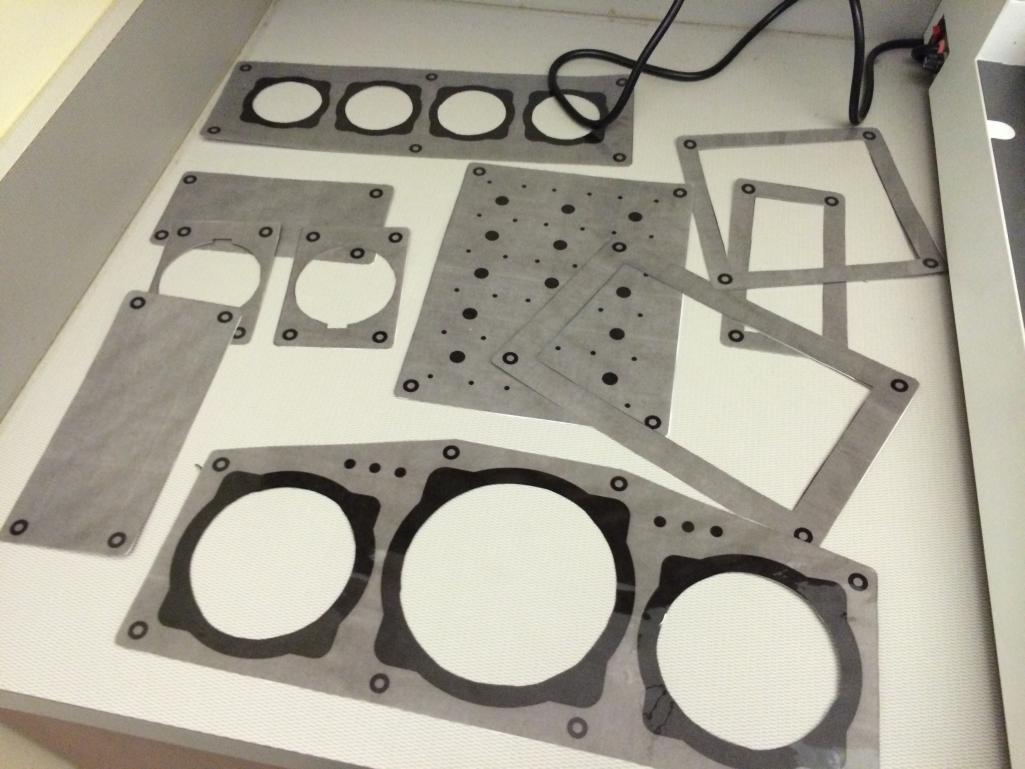
Posted by: CptTripps Mar 21 2014, 10:08 PM
Spent the night building the engine's wiring harness. I still have 3 sensors left to do, but I want to double-check the names and connections BEFORE I crimp them down. I started working on the dash plates like I mentioned in the previous post. There are a few changes I need to make to those before I have them water-jetted. Glad I played with paper first!
Attached thumbnail(s)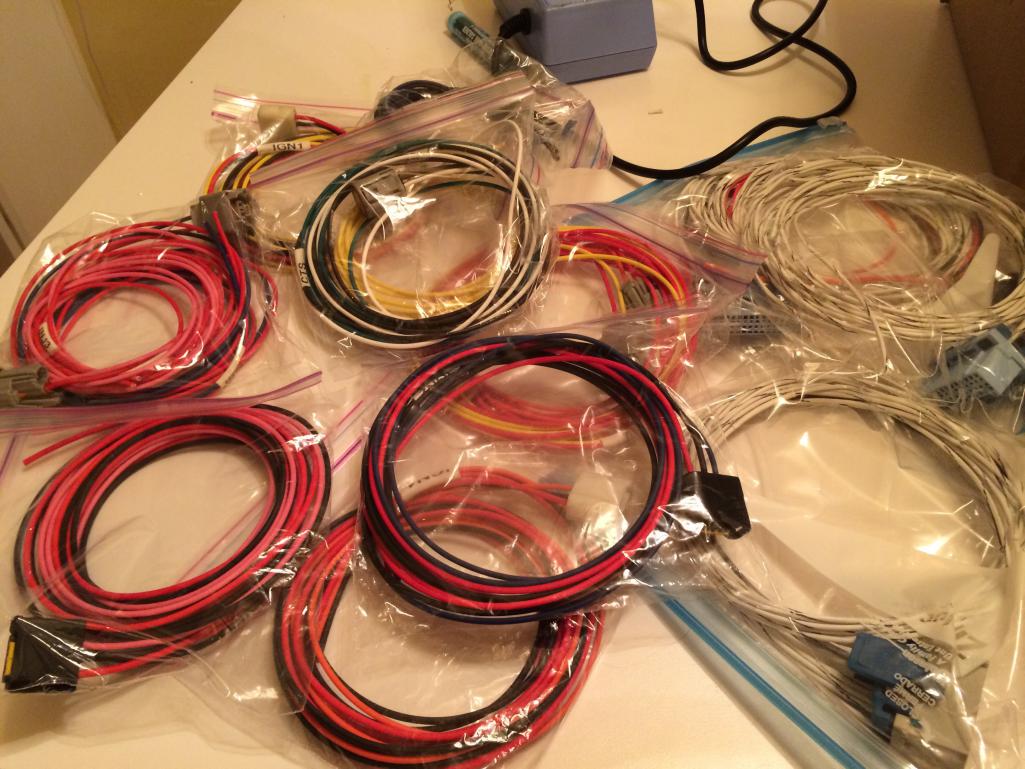
Posted by: CptTripps Mar 22 2014, 07:28 PM
Stopped by to check on the progress today, and I'm loving what I found.
The body is primed, blocked, and ready to go! I was going to paint it at home, but he's doing such a great job, I have him some more work. He'll be replacing the rear trunk pan for me, and building the cutout for the Subaru stuff. I'll have the car back and painted by next Friday, just in time for my wife and kids to leave for the weekend.
I plan on cranking through the weekend and HOPEFULLY I can start the car at some point on Sunday.
We'll see...
Attached thumbnail(s)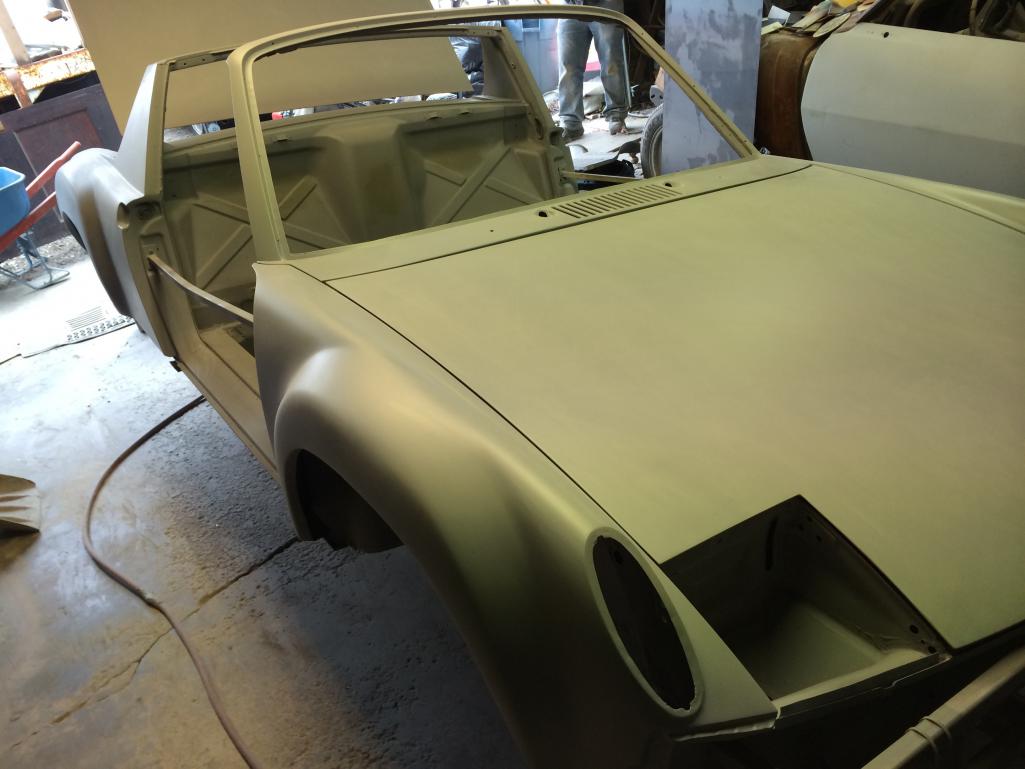
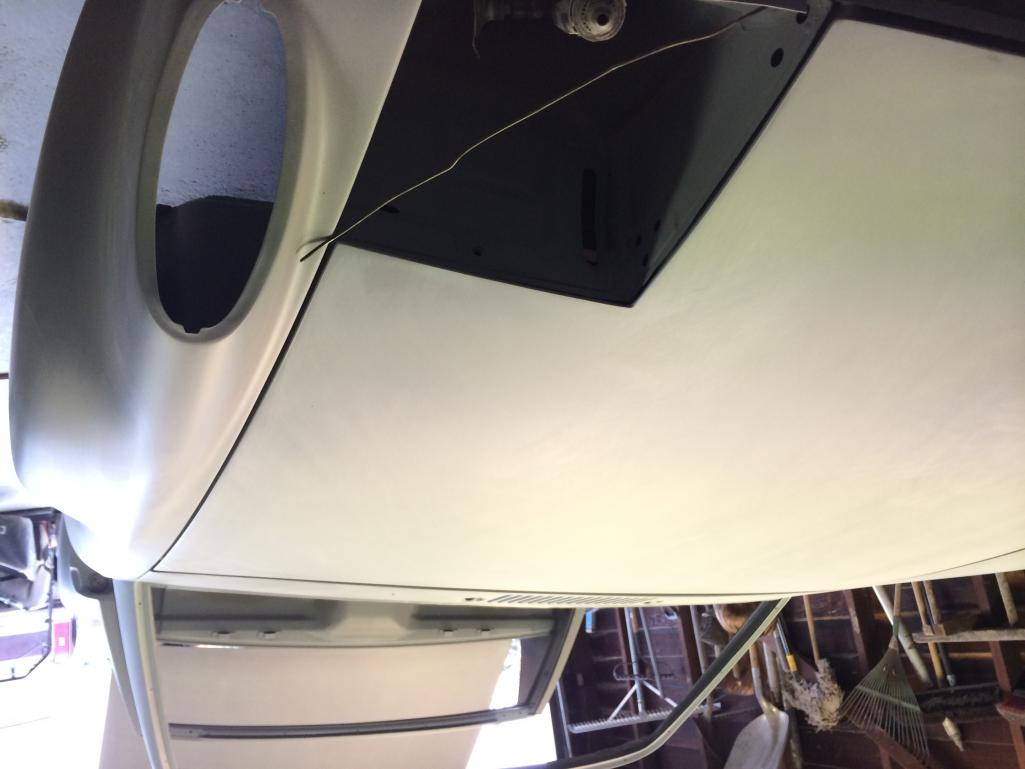
Posted by: CptTripps Mar 22 2014, 07:29 PM
Garrett also helped me swing by Slick Motorsports to work on the wiring harness. That's all done now too!
Attached thumbnail(s)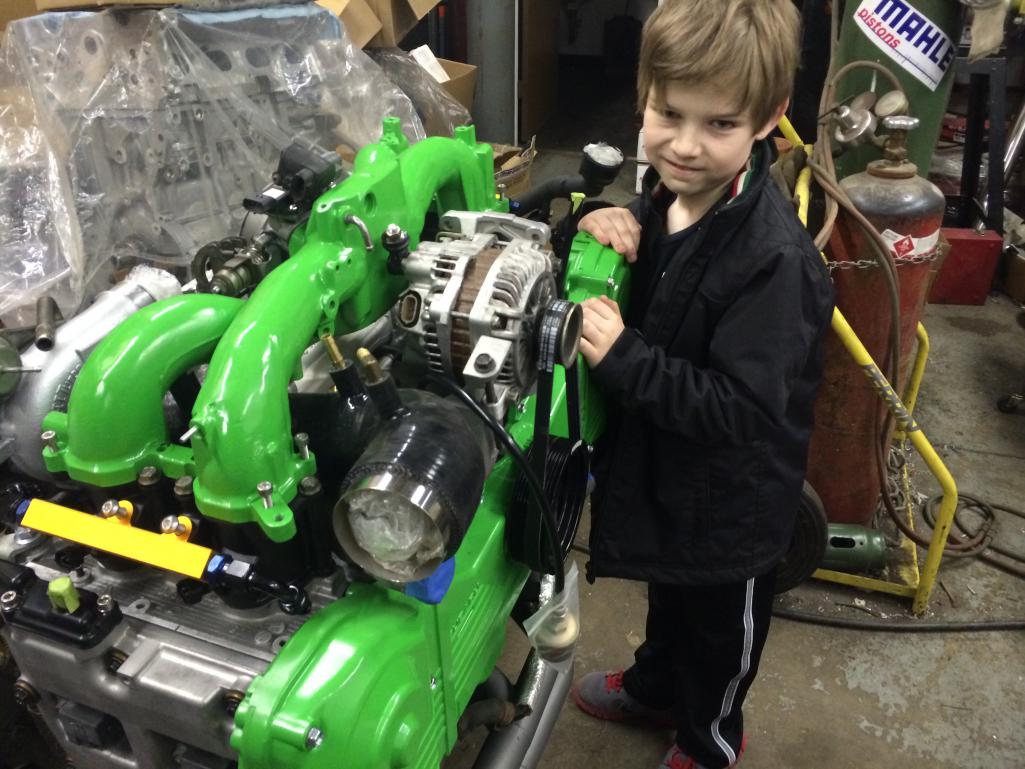
Posted by: ruby914 Mar 22 2014, 10:06 PM
I plan on cranking through the weekend and HOPEFULLY I can start the car at some point on Sunday.
Burnout on Monday
Posted by: CptTripps Mar 22 2014, 10:22 PM
Burnout on Monday
Not a chance! I have a lot to do, and only 2 days "kid/wife" free to work without guilt. There is a lot to do, but I think I have everything. I'm spending this week getting everything mapped out and pre-assembled if I can. The hope is to get the brakes and suspension ready to bolt on so I can get it on the ground, and then put the engine/Trans in place so I can at least sit in it and make vroom-vroom sounds.
I couldn't sleep so I went to the garage to clean and get a few little things going.
Yanked the bearing pieces out of the rear arms and blasted the front signal buckets. I'm painting the insides white so they reflect the DRL lamps better. I'm going to add those in the morning and get that piece of the puzzle solved. One thing at a time.
I also noticed that the hub clamp nuts are different sizes. Gotta figure out the right one to order another of. (If I need to.)
Attached thumbnail(s)
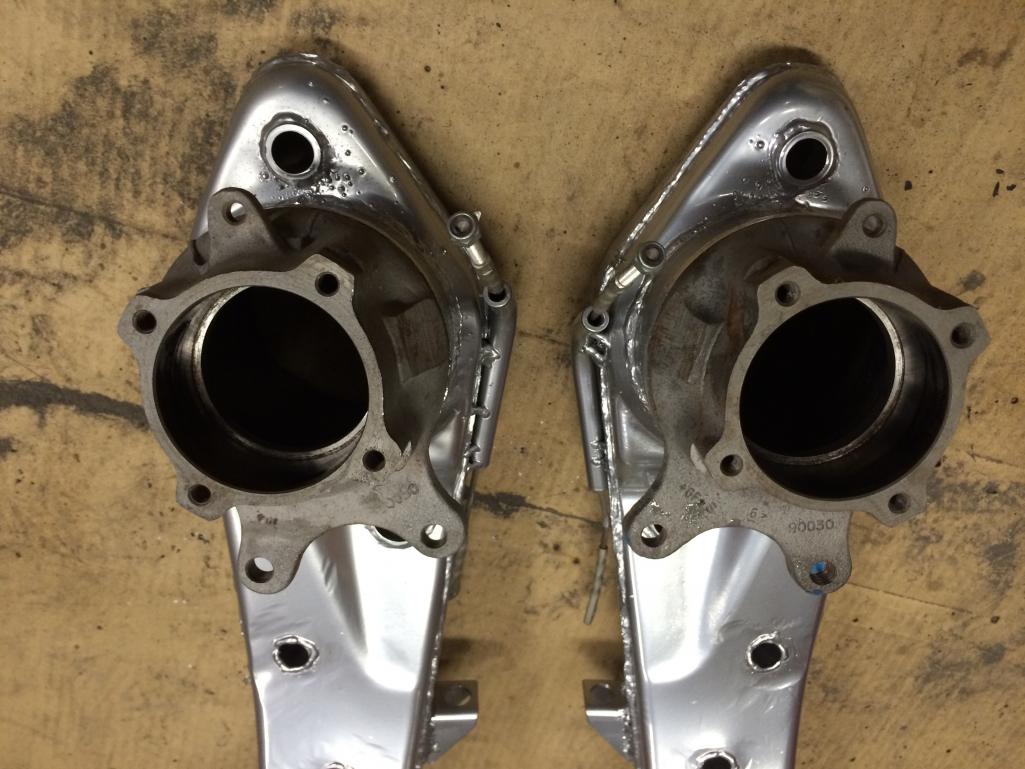
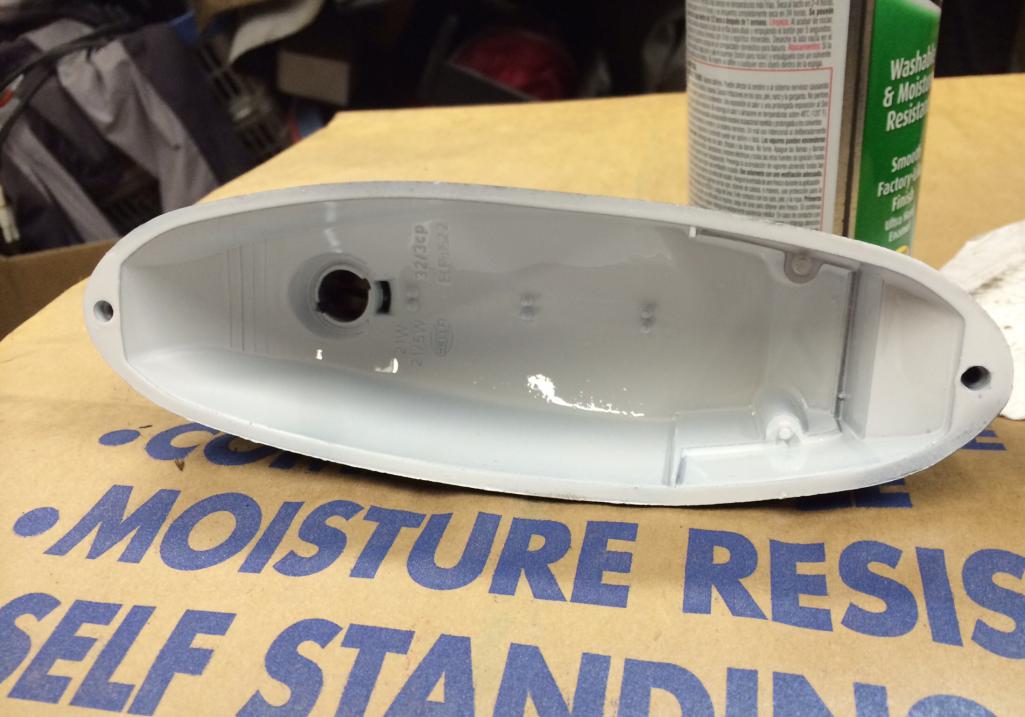
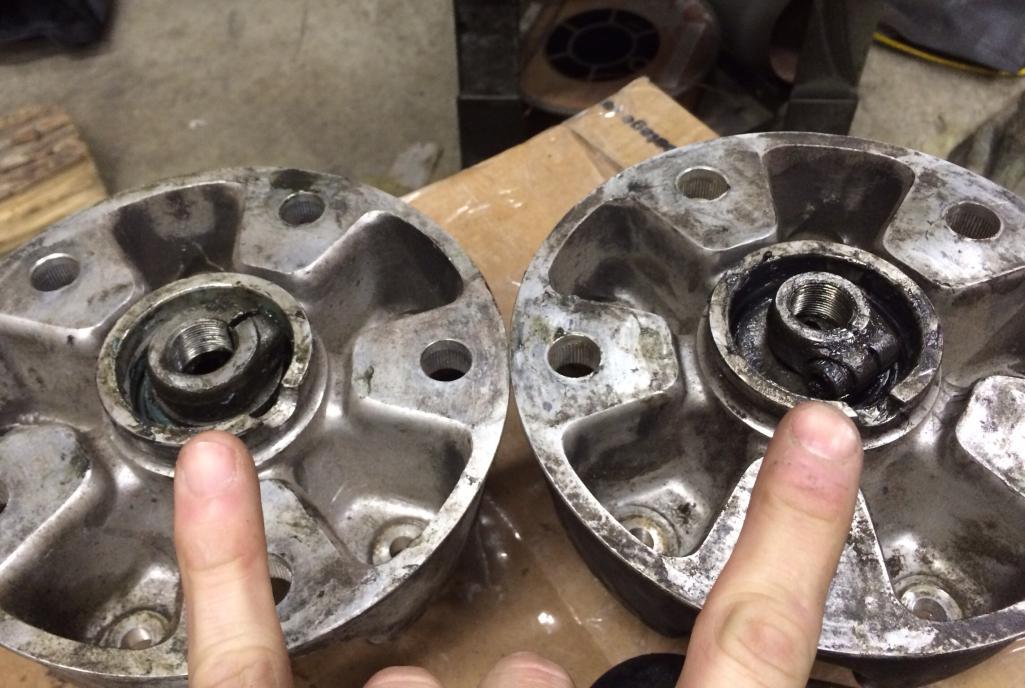
Posted by: CptTripps Mar 23 2014, 06:11 PM
Spent the day doing all the little things I won't have time to, or want to do later.
Yanked the bearings and blasted the front hubs, blasted and painted the targa latches, blasted and re-sprayed about 20 little nick-knacks and cleaned the windshield wiper assembly.
Also bought a parts vibrator today after seeing McMarks's last week. Holy shit is this thing useful.
Attached thumbnail(s)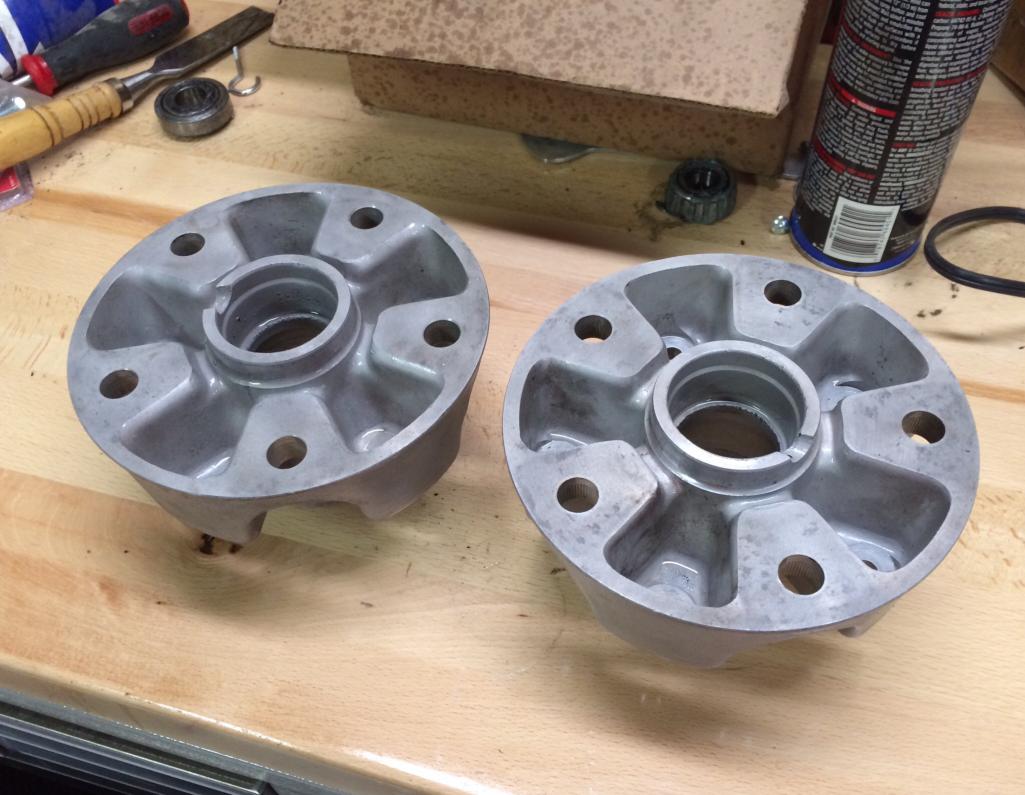
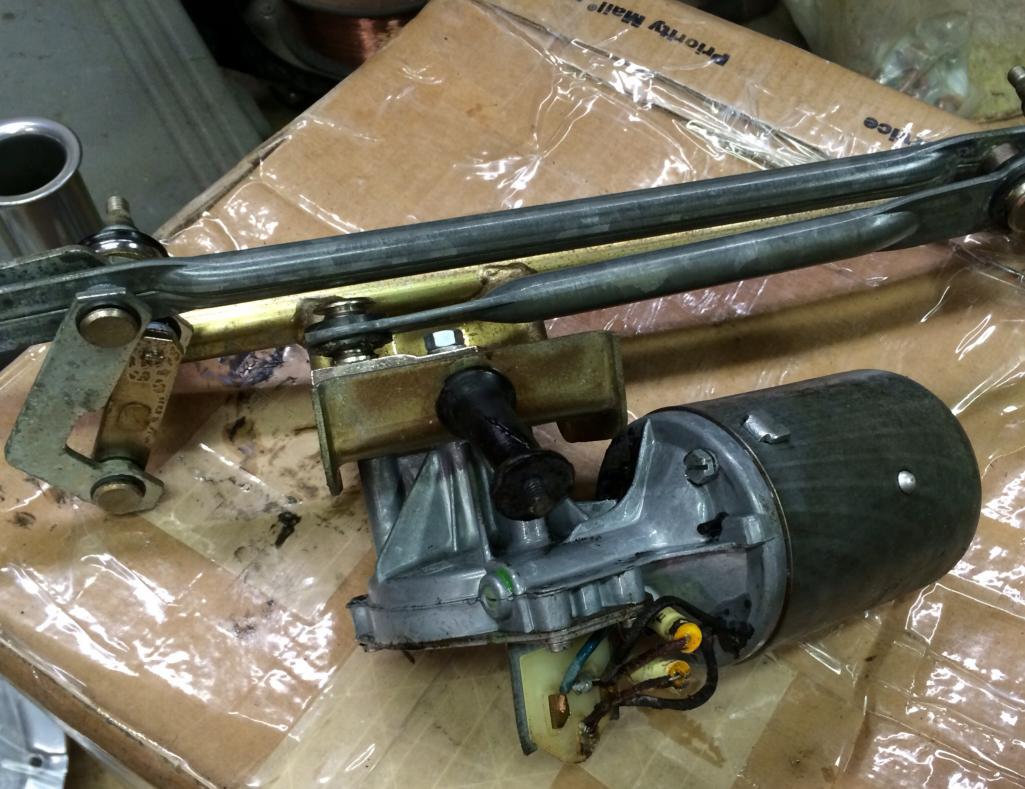
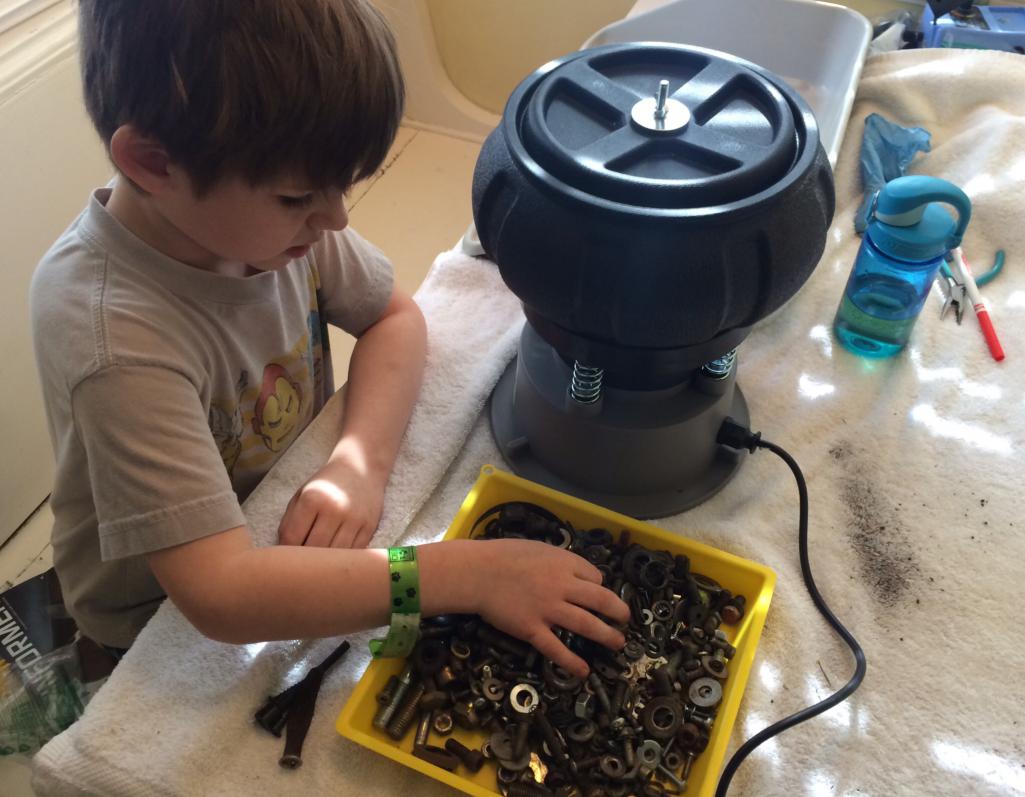
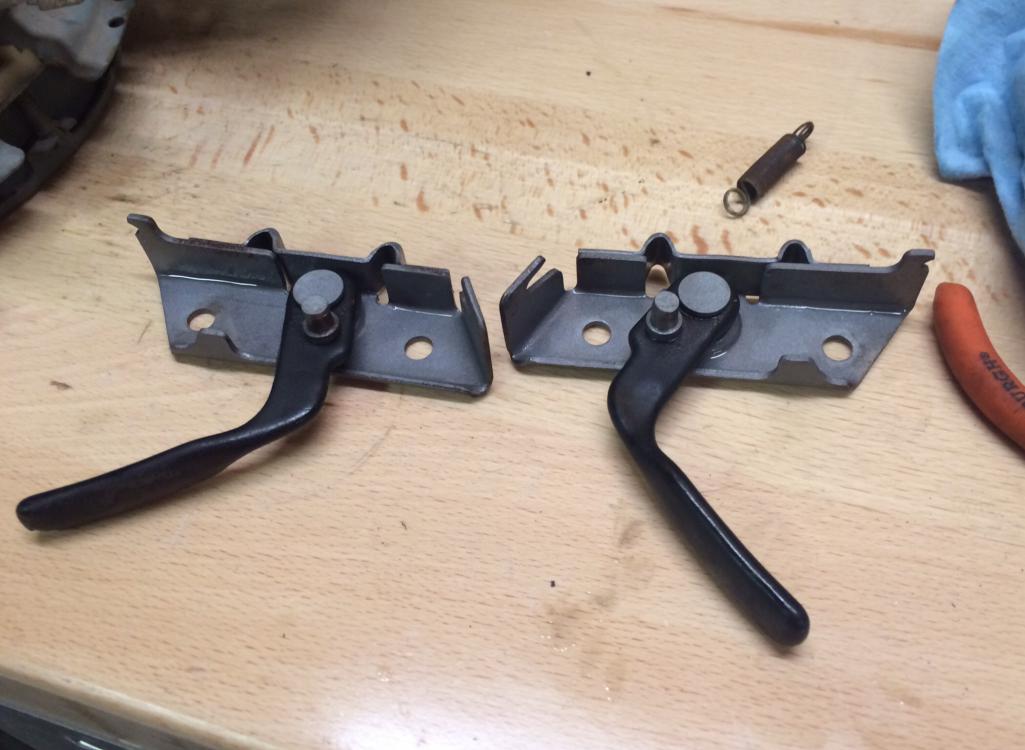
Posted by: CptTripps Mar 23 2014, 06:35 PM
Here's what an hour in the vibrating parts cleaner thingy can do to a tired greasy box of bolts.
Attached thumbnail(s)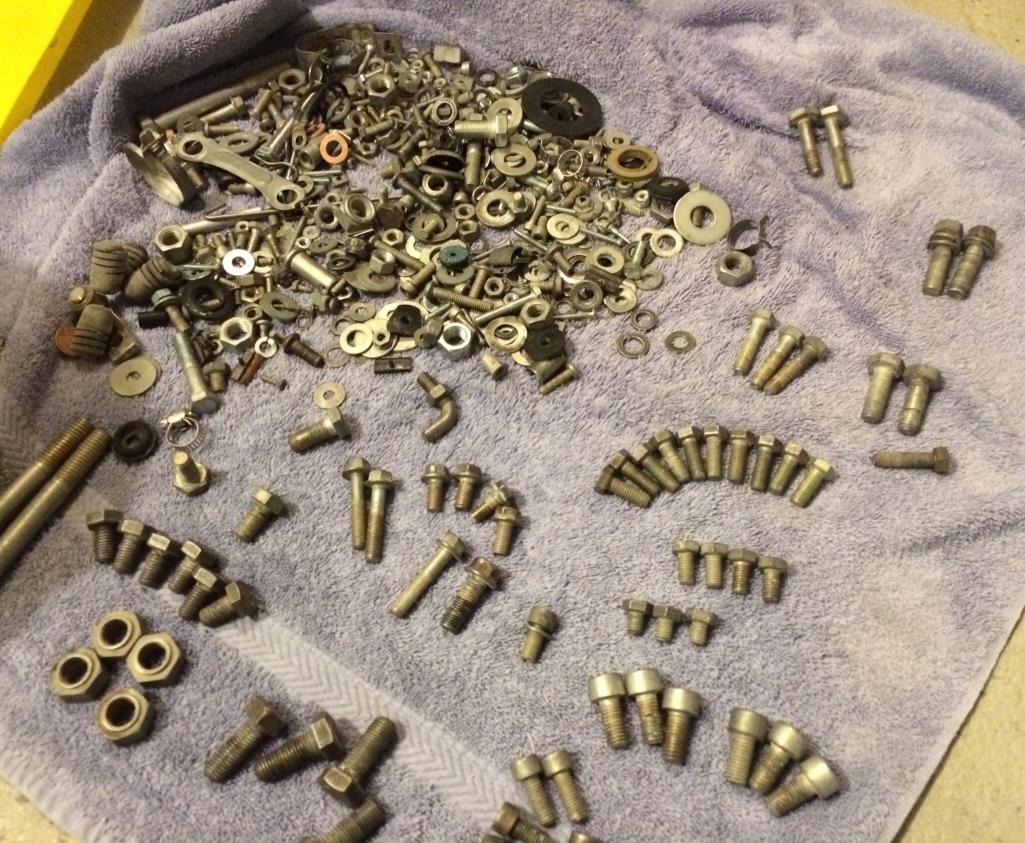
Posted by: McMark Mar 23 2014, 07:26 PM
Posted by: bulitt Mar 23 2014, 07:47 PM
Here's what an hour in the vibrating parts cleaner thingy can do to a tired greasy box of bolts.
What medium are you using in the vibrator? Liquid dish soap also? I have one just haven't used it yet.
Posted by: CptTripps Mar 23 2014, 08:46 PM
The green glass pyramids, with some SuperClean and water.
I did a run with just water, and a dry run too. The mix I mentioned above worked the best. I ran it for about an hour each time.
And boy...if you thought stepping on a Lego in there feet was rough...this is WAY worse. You have no idea.
Posted by: CptTripps Mar 24 2014, 05:49 AM
Engine bay mod is done. Used 1.5" tube across the shock towers, then boxed it in place. I'm going to use the flat panel to mount a plate for the ECU and the wiring block. (I REALLY hope I gave myself enough room for the turbo and starter to clear.
Attached thumbnail(s)

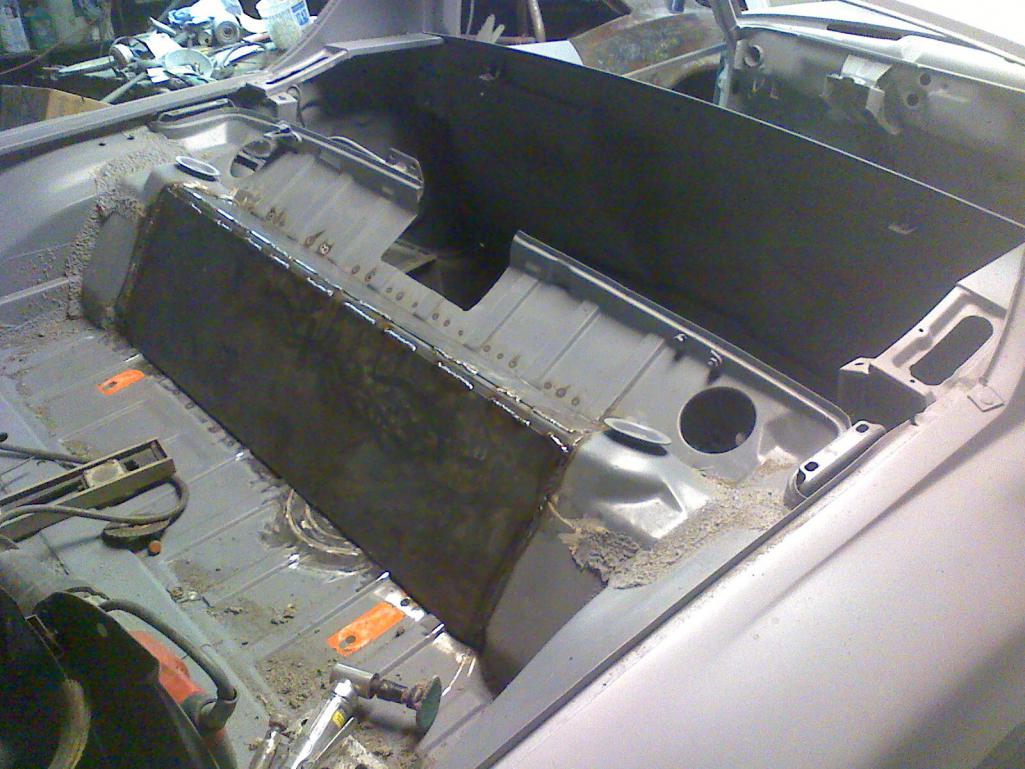
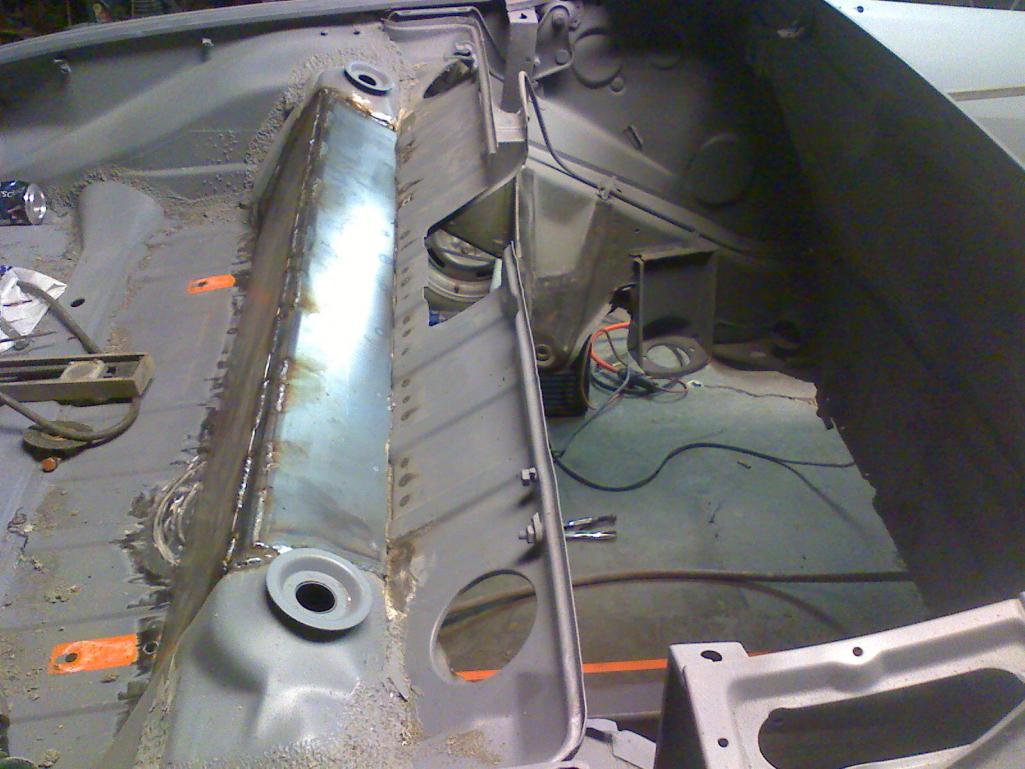
Posted by: OU8AVW Mar 24 2014, 01:21 PM
That's a cool way to box your trunk. The tube gives good strength and a nice round edge. Let's hope the motor fits
Posted by: CptTripps Mar 24 2014, 01:47 PM
Thanks.
Yeah, I THINK I'll be OK. I used dbcooper's pic as a template for how far out I needed to go...then added a few inches. I'm going to use the flat panel for the ECU and Wiring. I left myself about 6' extra from every lead so I'd be OK in the "worst-case-scenerio" of ECU wiring. I should also have quite a bit more support between the rear towers.
The inside and bottom edges are also 1" square tubing between the points. The inside triangle was also braced and welded up.
I'm going over to measure tonight and will set up the board so I can just screw it on and add the wiring as needed. I'm going for a very clean install. Like I used to do with car stereo installs back in the 90s.
Attached thumbnail(s)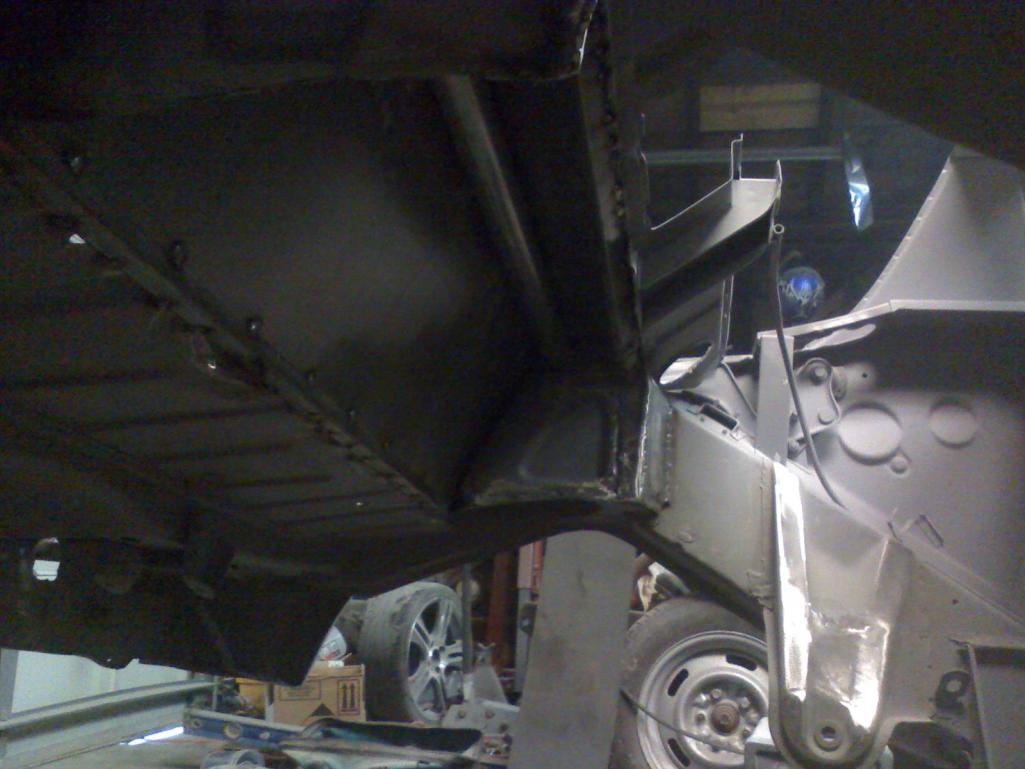

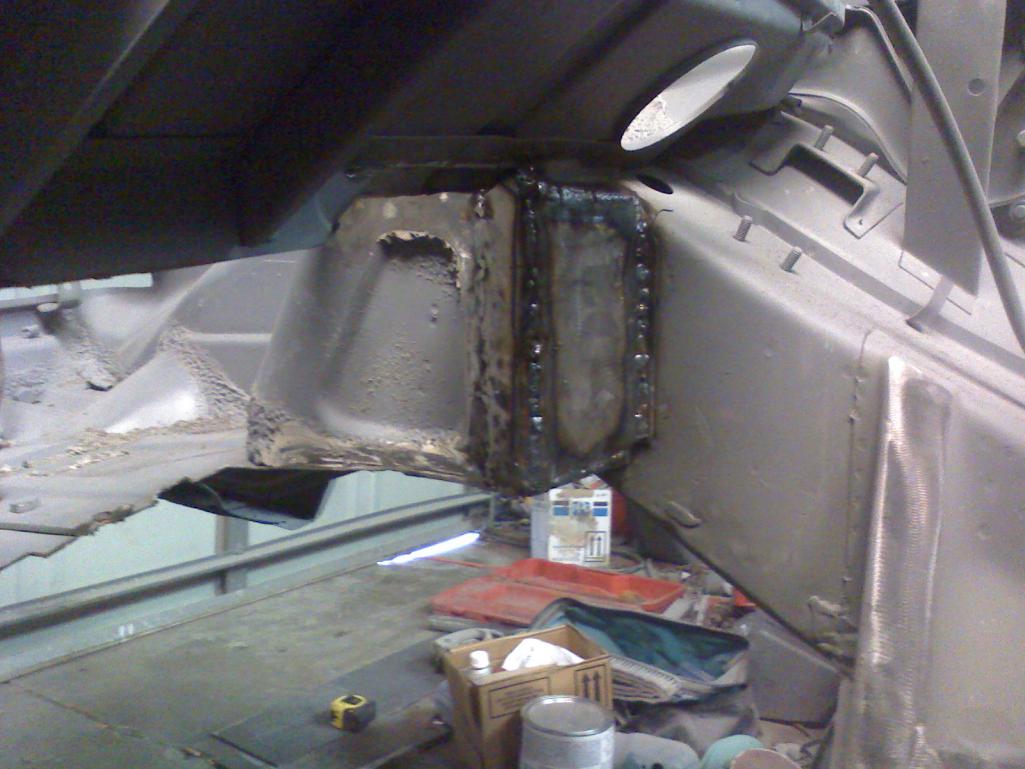
Attached image(s)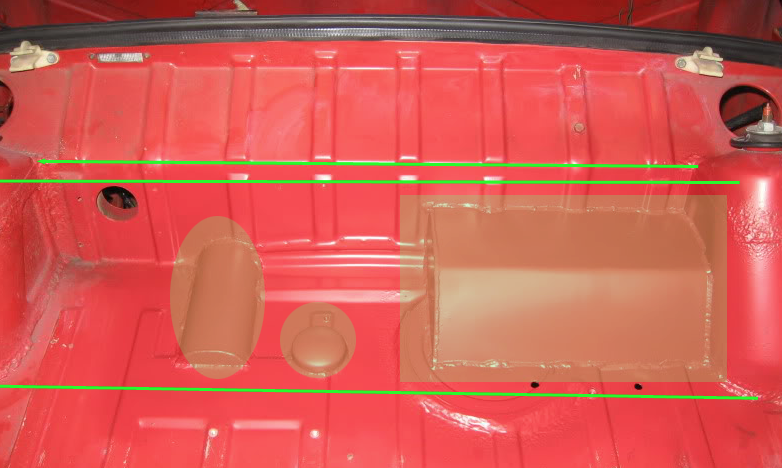
Posted by: CptTripps Mar 25 2014, 07:51 AM
Stopped by the car last night to check the progress in the trunk.
He'd ground down all the welds in the "box" and removed the rear section of the pan. This is going to be covered by interior vinly later, so I just need it to be ground down "enough" so I can do my thing there later.
Since this is a 1975 car, and had the bumpers converted, the piece I bought needed modified to make way for the bumper bolts. Not a big deal, but put a kink in the progress. I'm going to take some stuff over later for painting, but wanted to post these so people could see.
Also finished the install of the Engman kit. The car was pushed out by an extra 1/8", and by the time the kit was complete, the measurements between the windshield and targa bar are perfect.
The inside of the box will get packed with seam sealer after epoxy and before primer and paint, so don't fret too much about that. This also shows a better look at the inside braces. He's also going to replace that section of metal where the distributor for the SB350 was.
Attached thumbnail(s)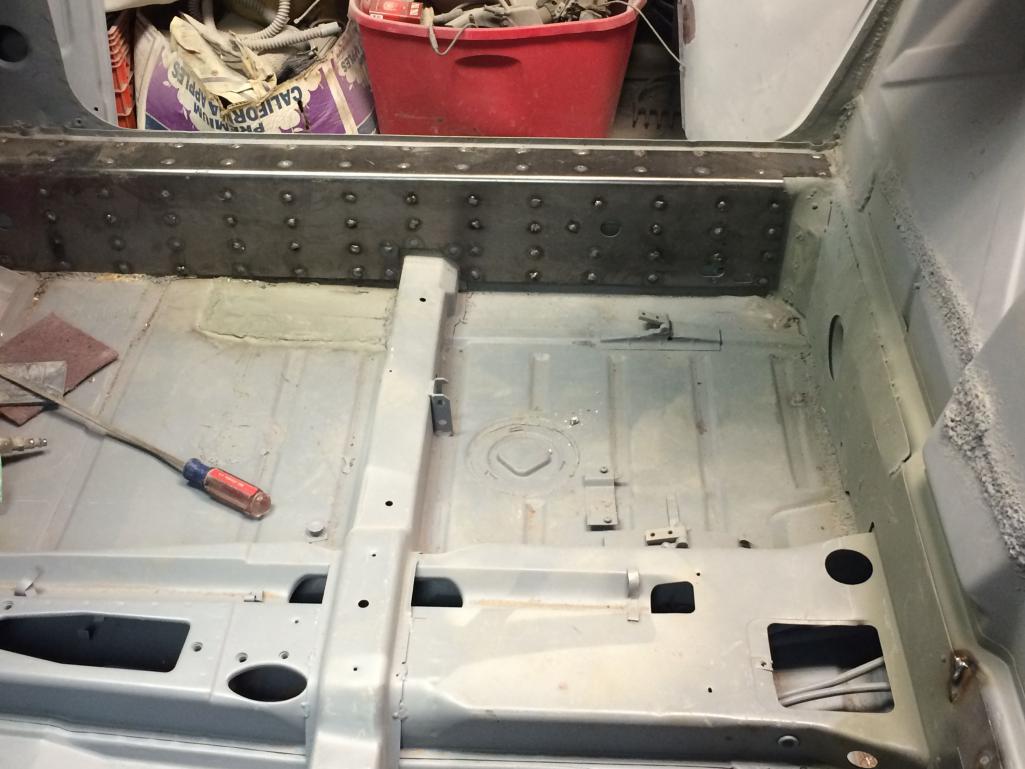
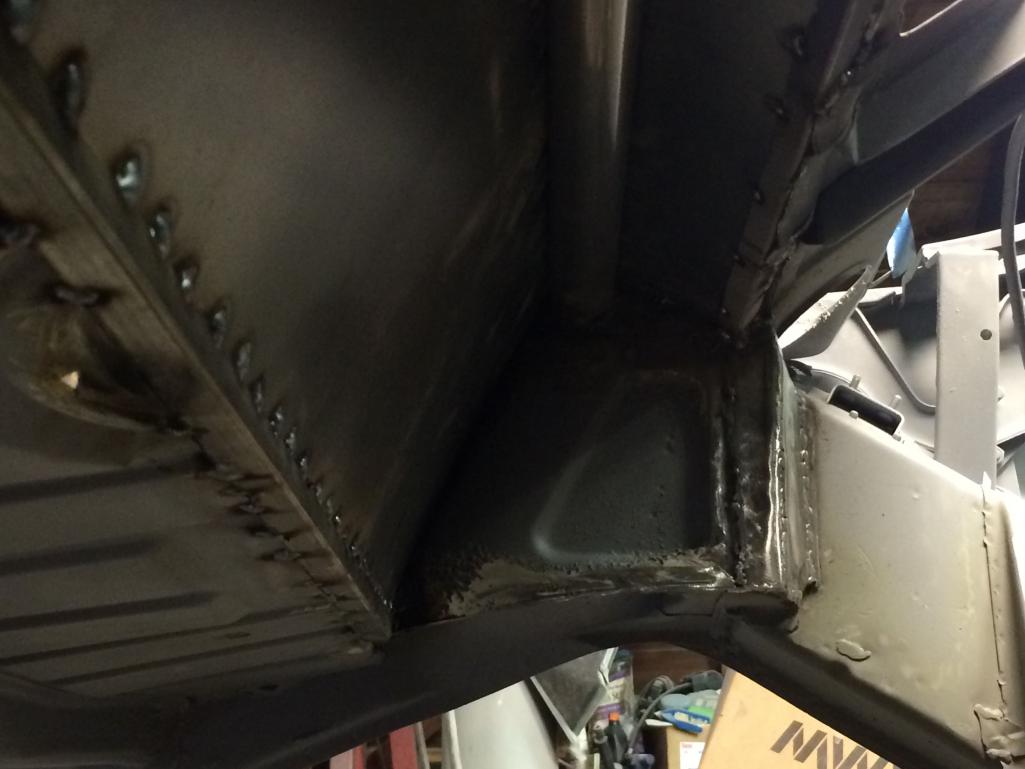
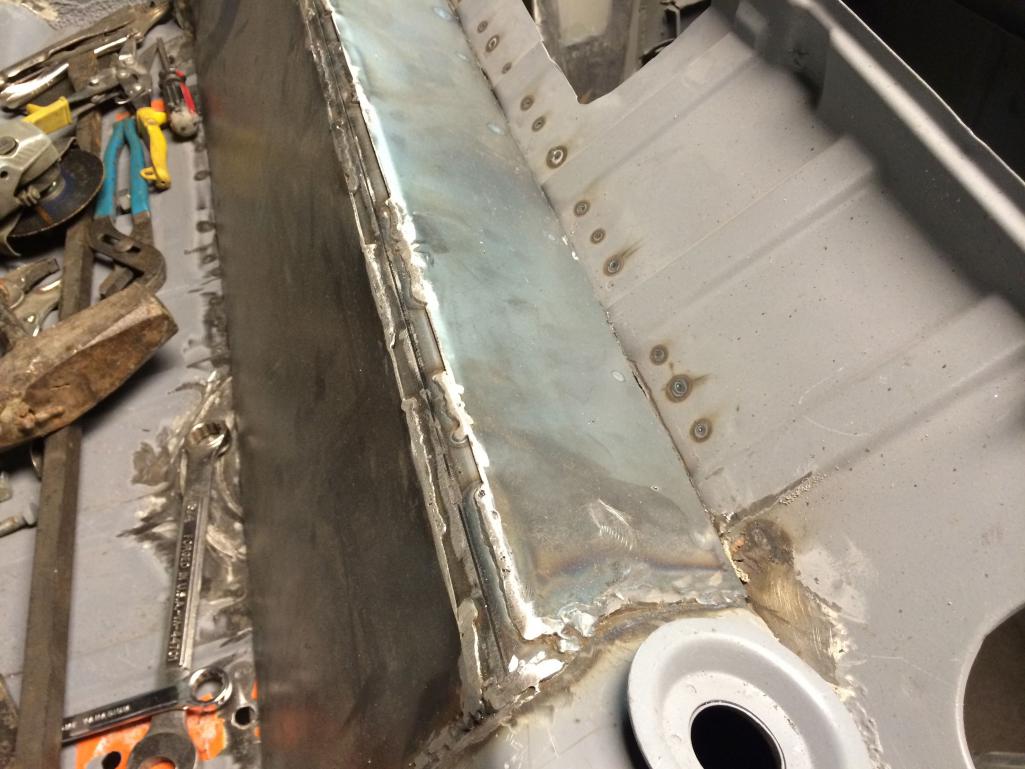
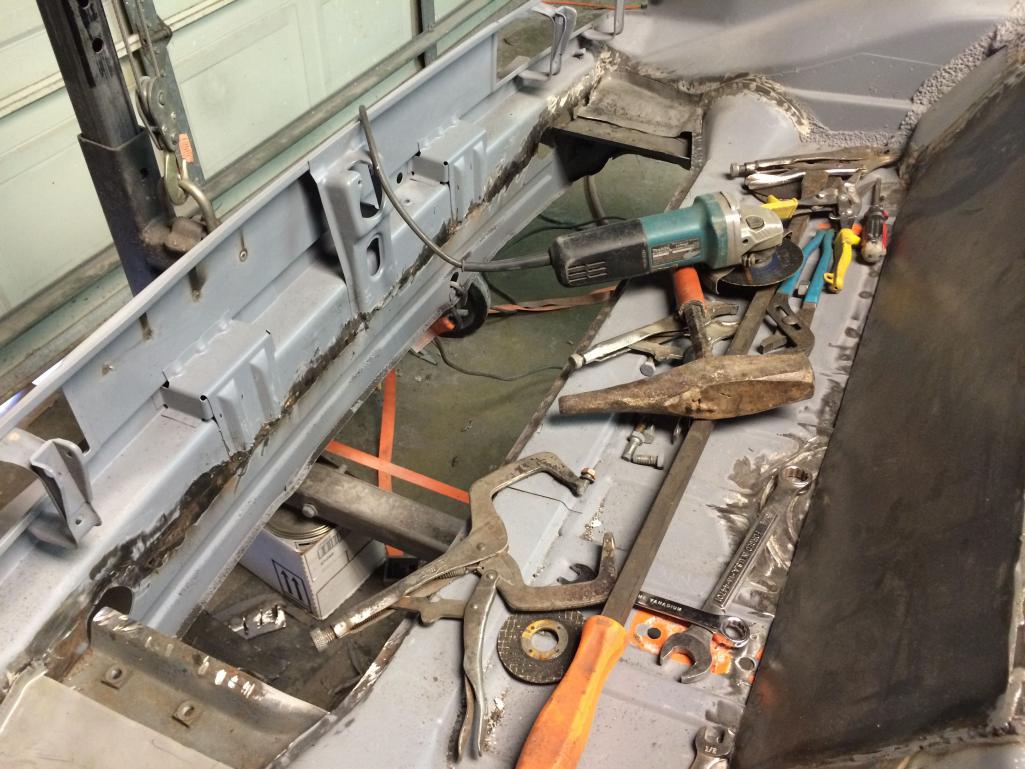
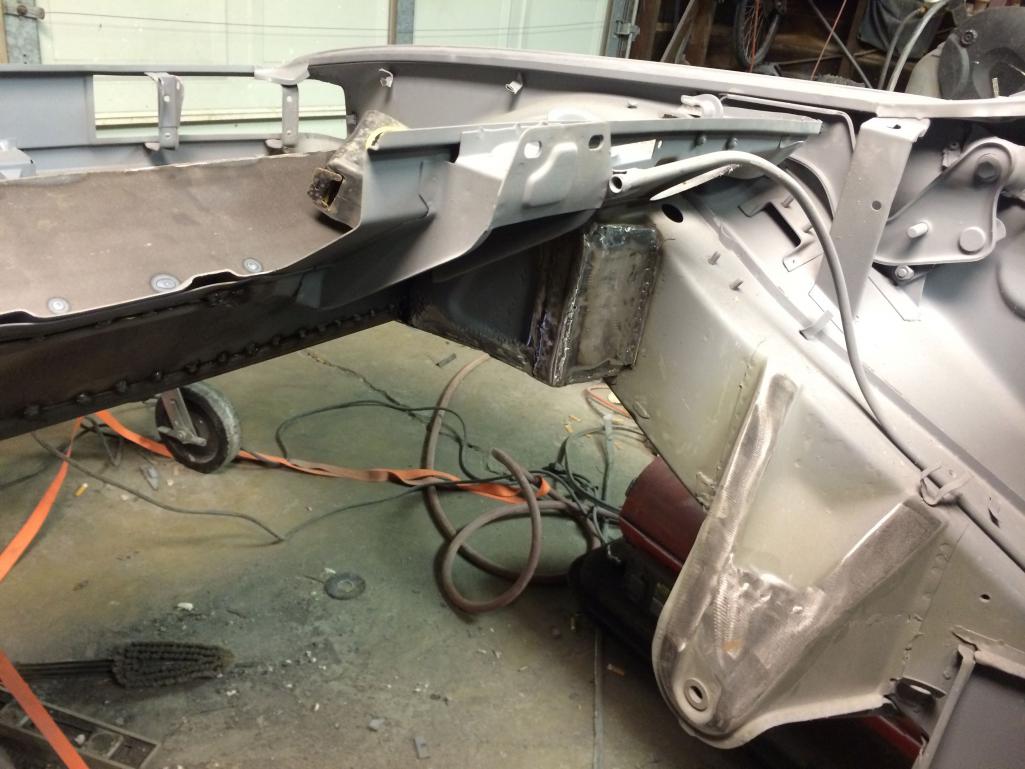
Posted by: CptTripps Mar 25 2014, 02:00 PM
Because I'm going to need to go pretty fast on my wiring harness once the car gets here, I figured I'd do some advanced work on what will be needed. Holy shit are the instructions bad. The only thing worse, was the PDF that the company sent me. I'm not even joking...this is an example of what they looked like.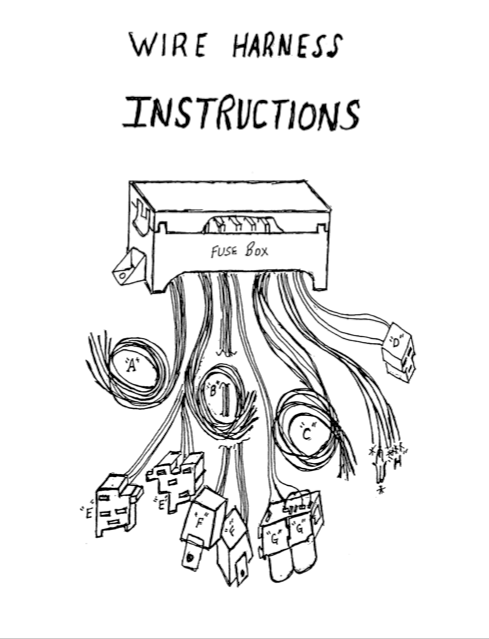
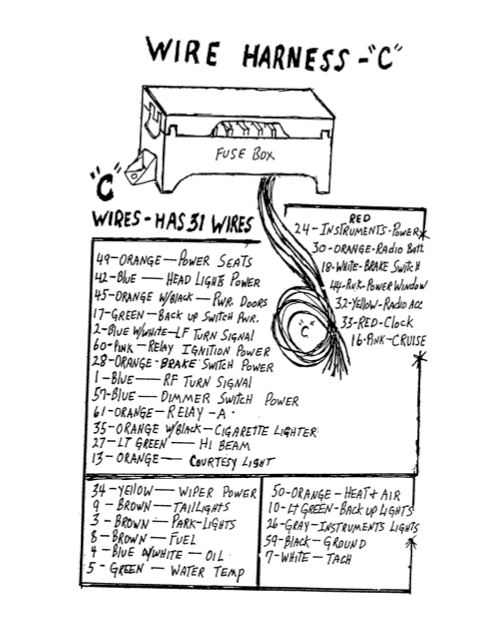
SO....I started hunting a little more. Lucky for me, someone else had the same issue and came up with a set of REAL instructions.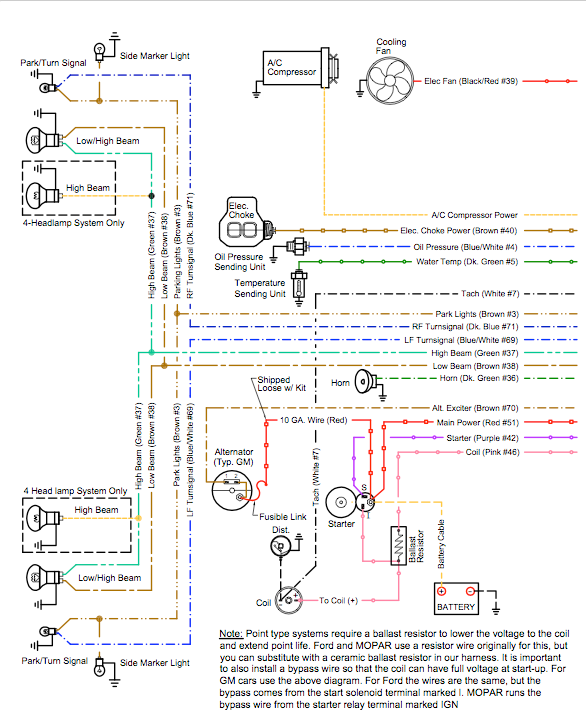
In case anyone else is looking...here's a link to the good ones.
http://www.goindesign.com/w4r/EZ2Wire-Manual.pdf
I guess EZ2Wire buys them from the same place and spent a few hours putting together proper instructions. Boy, am I ever grateful!
Tonight is going to be a lot of pre-assembly. I have the brake calipers to get ready, so I'll be putting all the pistons together and trying to locate the banjo fittings so I can get the lines made up when I have them in the car. I ordered about $100 worth of $2 pieces/parts from Pelican today. That'll all be here on Friday.
The car lands in my garage on Saturday morning...ready or not! (Oh, I'll be ready...)
Posted by: CptTripps Mar 25 2014, 02:18 PM
::: guess I forgot to add the pics :::
Posted by: 914forme Mar 25 2014, 06:25 PM
Thanks for the link, as I have the same harness. The drawings are just like the How to Keep Your Volkswagen Alive
Posted by: CptTripps Mar 25 2014, 09:53 PM
Spent the evening working on more little things.
Replaced the bearings in the front hubs.
Re-built the pedal cluster...again.
Painted a bunch of random pieces.
Re-stenciled the "Porsche" on the calipers.
Dan is CRUSHING the body work. I'll be stopping by tomorrow to check it out, but he was prepping for paint when I stopped by earlier in the day. It's really starting to feel like everything is coming together.
Attached thumbnail(s)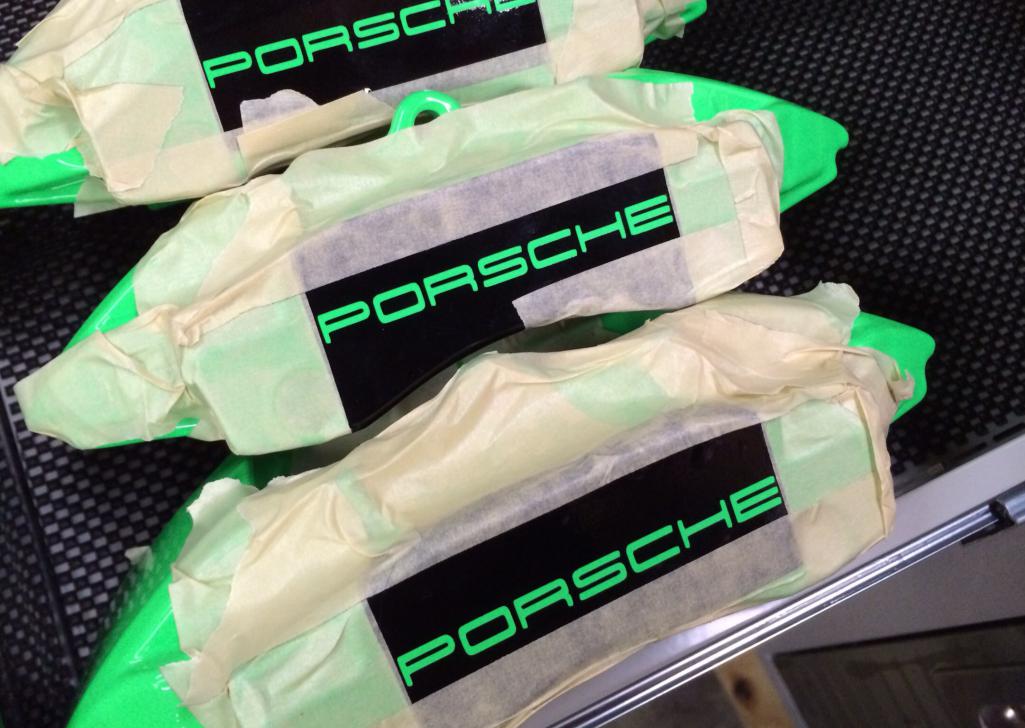
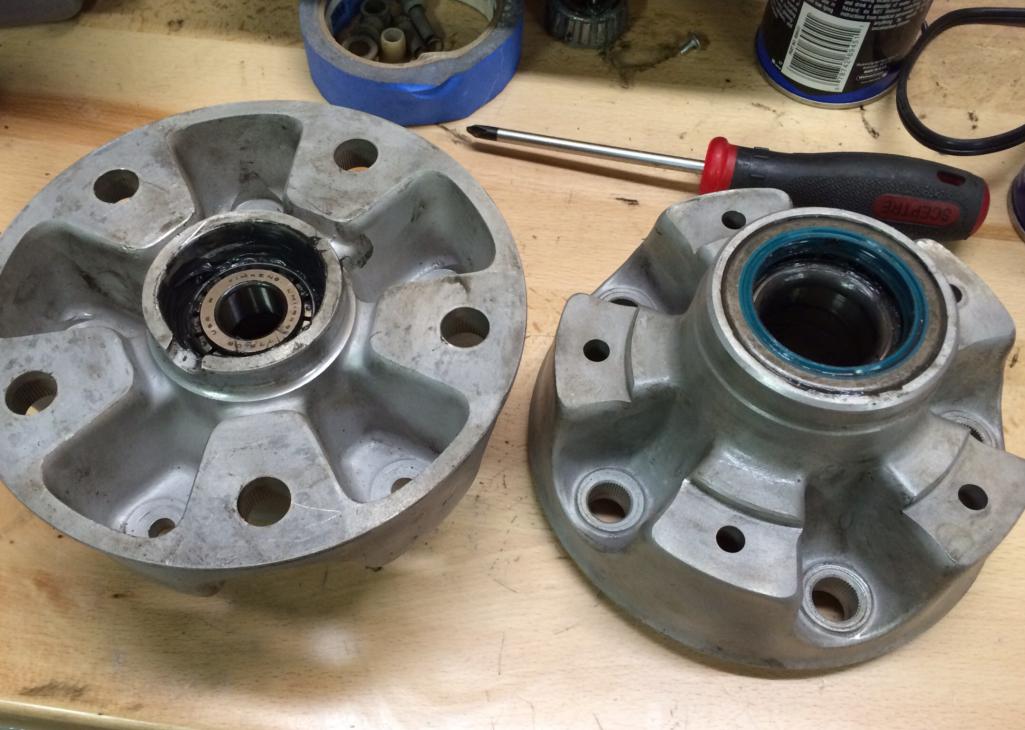
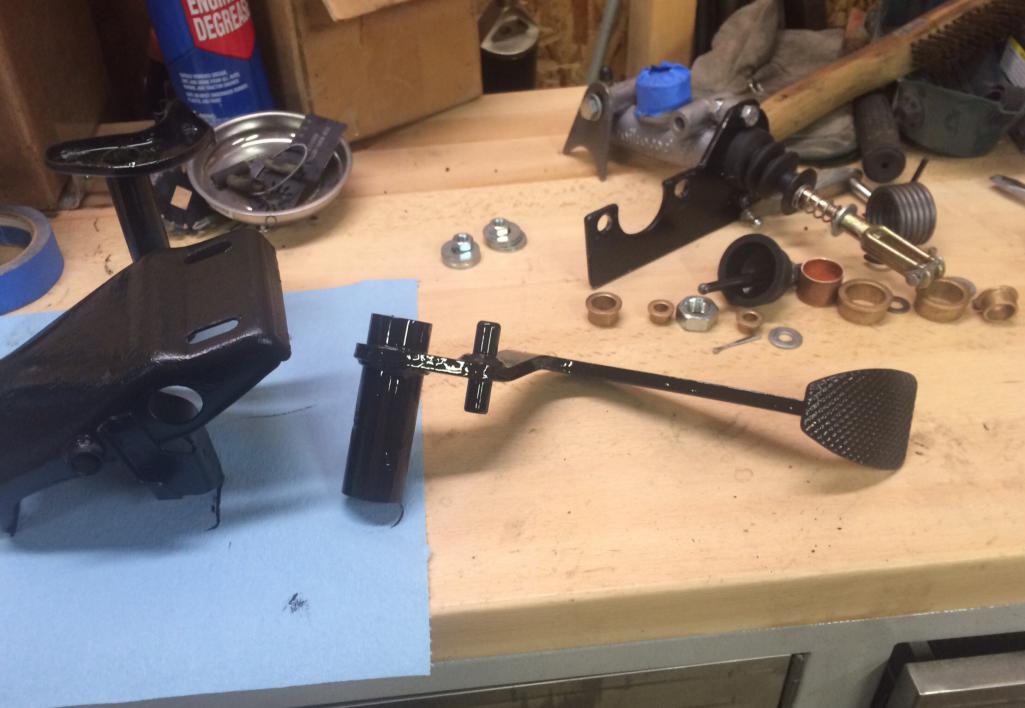
Posted by: Zaney Mar 25 2014, 09:53 PM
Thanks for the link, as I have the same harness. The drawings are just like the How to Keep Your Volkswagen Alive
Love that book!
Kept me from going crazy many times! Can't say the same about Suby wiring harnesses though.
 Took mine apart maaaaaaany times to get it right!
Car looks great!! You have learned from all the other Suby conversions to do it right the first time!
Cheers!

Z
Posted by: CptTripps Mar 26 2014, 05:54 AM
Here are the pics I got last night from Dan. Yesterday he got the rear trunk-pan welded in, fabricated a piece for the dizzy, epoxy primed all the trunks and engine bay again, seam-sealed the areas that needed it, and ten put a coat of paint on the trunks/interior/engine bay/underside.
Today hell get a coat on the car and then start blocking and sanding for another coat and then do it again until the body is ready to come home on Sat.
He's working faster than I am!
Attached thumbnail(s)
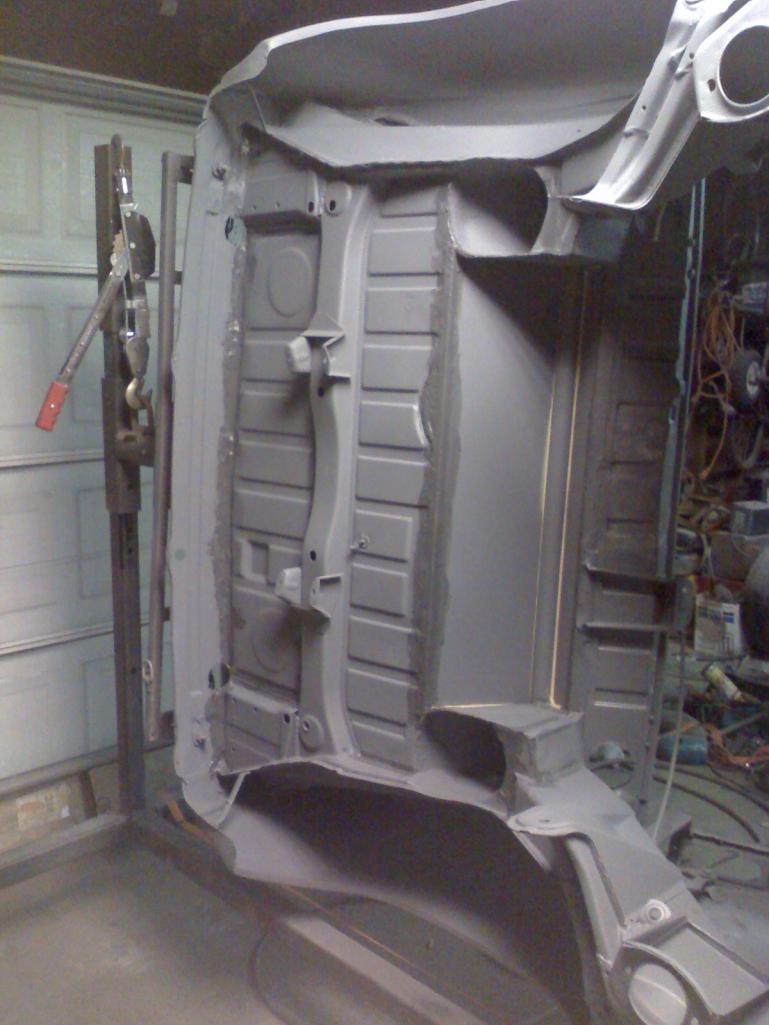

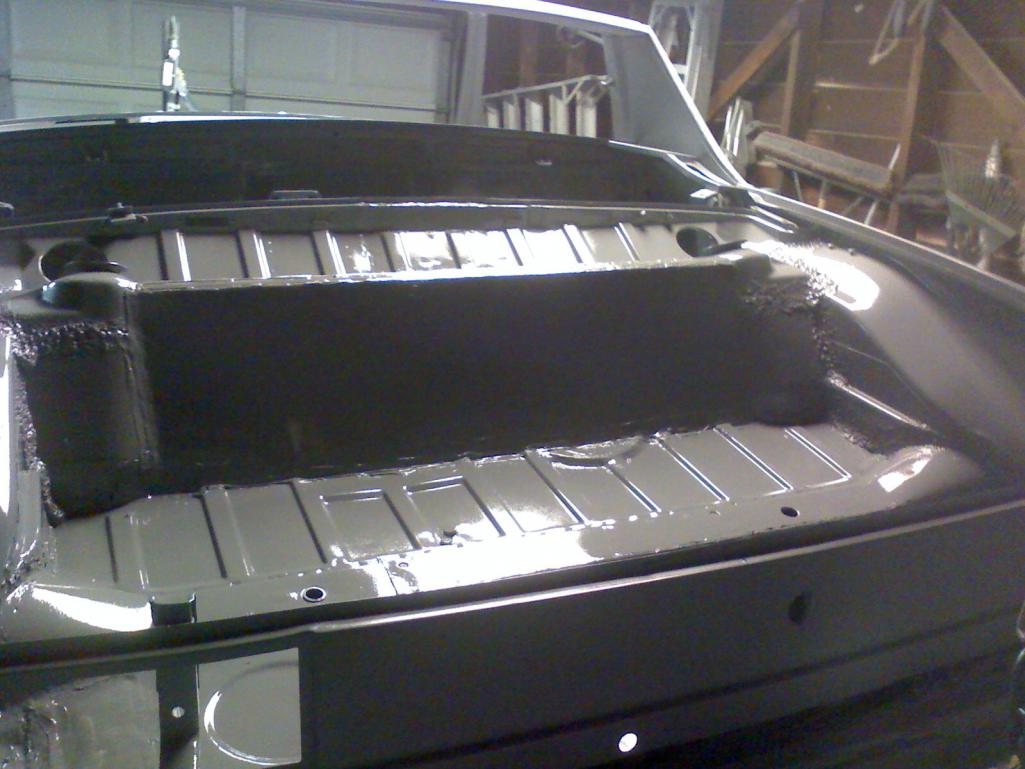

Posted by: RazorbackFan78 Mar 26 2014, 08:58 AM
Posted by: tdgray Mar 26 2014, 12:10 PM
Good progress.... keep his number... I need to get it from you at some point.
Posted by: CptTripps Mar 26 2014, 01:08 PM
Just sent all my aluminium pieces off to be water-jetted this week. There's a local guy that's doing it for me. $160 for a 4X4 sheet of 1/8" 6061 Aluminium...and the jetting is included. :woot: I should have them on Monday!
It'll be a lot easier to build my console out and have all the switches in-line of I can do it this way. The ONLY thing I'm thinking about is a gated shifter. I may go back later for that one. I can have it cut out of plexi for $25 so I'm not wasting metal to do it.
Attached image(s)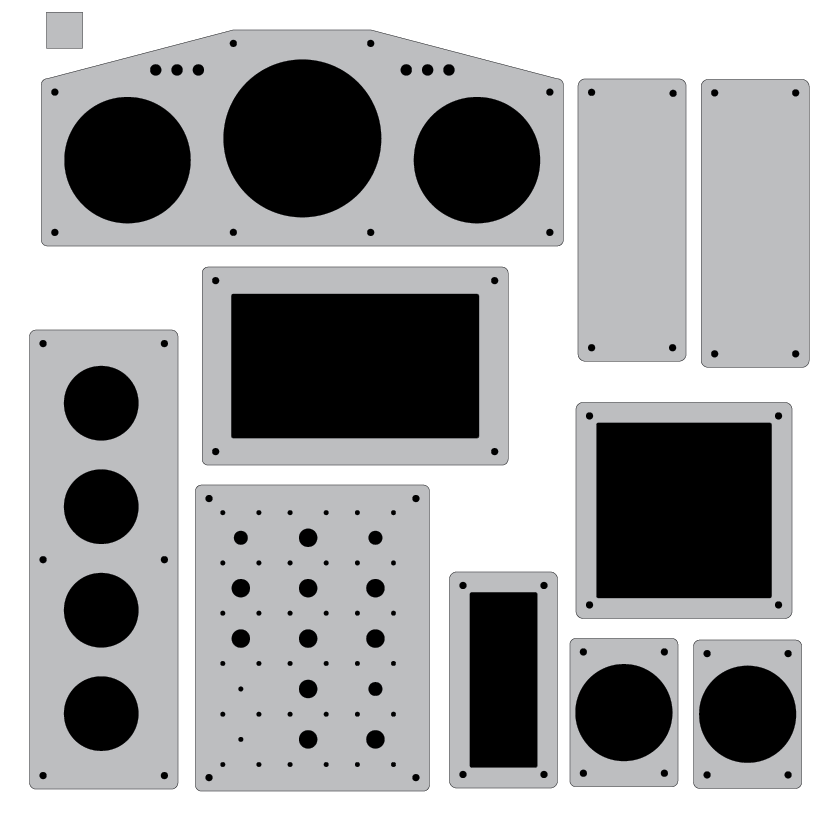
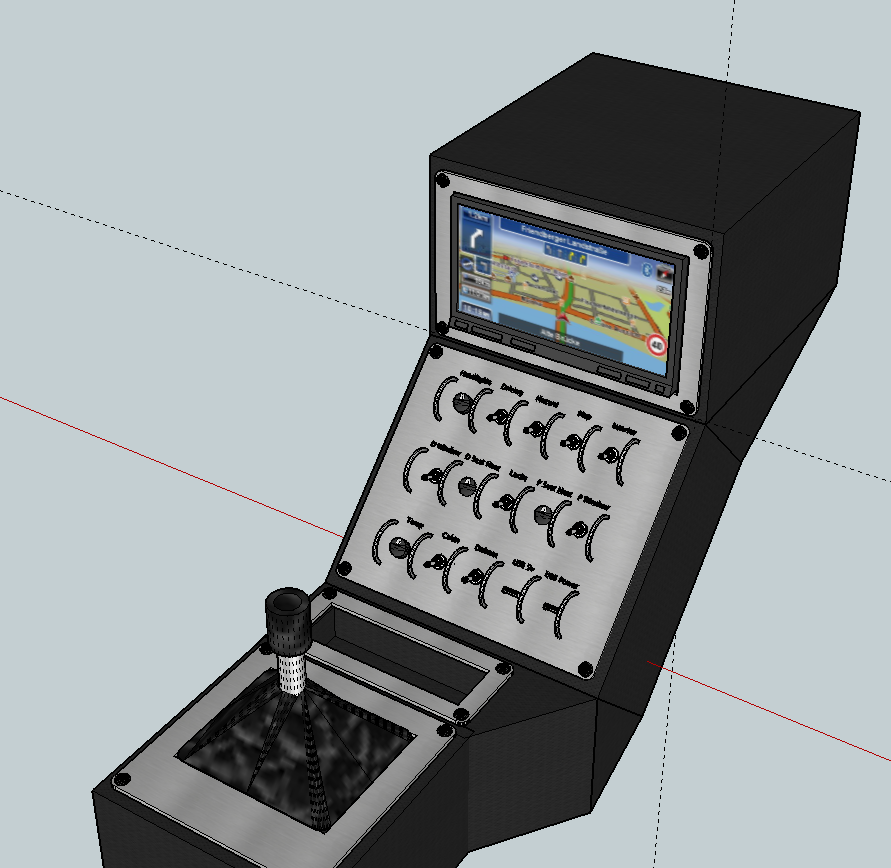
Posted by: CptTripps Mar 26 2014, 09:49 PM
Your pedal assembly is ready for shipping tomorrow. I'll pm you tomorrow. I made some rubber stop pads. Ugly but effective. Note the washer orientation, don't mix washers. The one on the accelerator shaft is unique in size. Do not omit any washers or interference is possible.
I can't thank you enough for this post!
I took it all apart and forgot to take a pic first. Looking much better now!
Attached thumbnail(s)
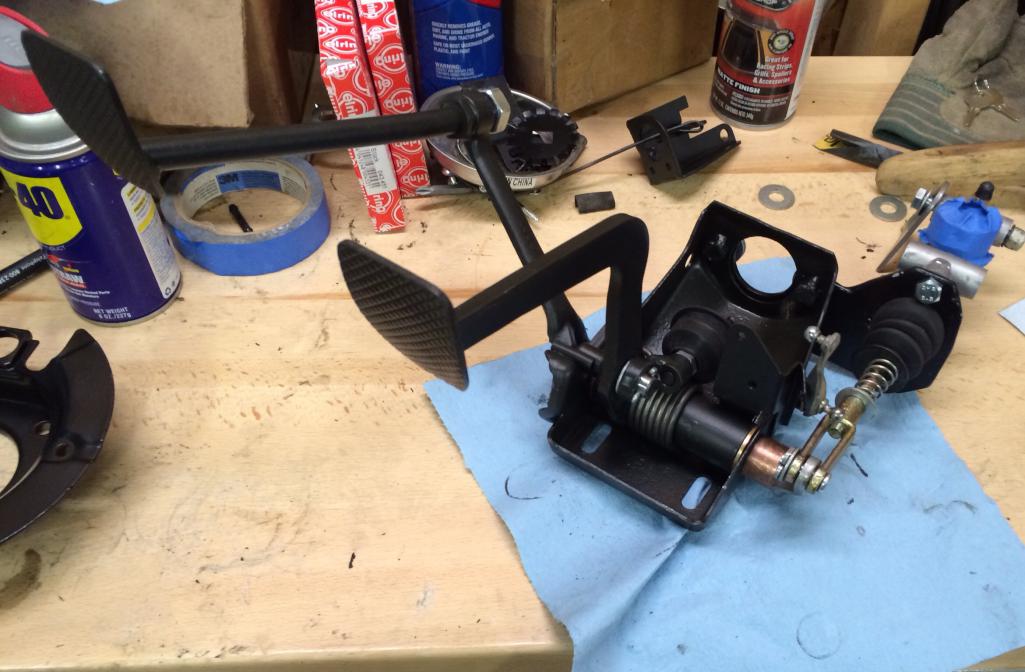
Posted by: CptTripps Mar 27 2014, 12:00 AM
I got a lot accomplished tonight.
Assembled one of the front struts tonight, just to see how it would all go together. I have some grinding to do! The powder on the area the caliper mounts is thick, so I don't have the right clearance. It sure looks good though!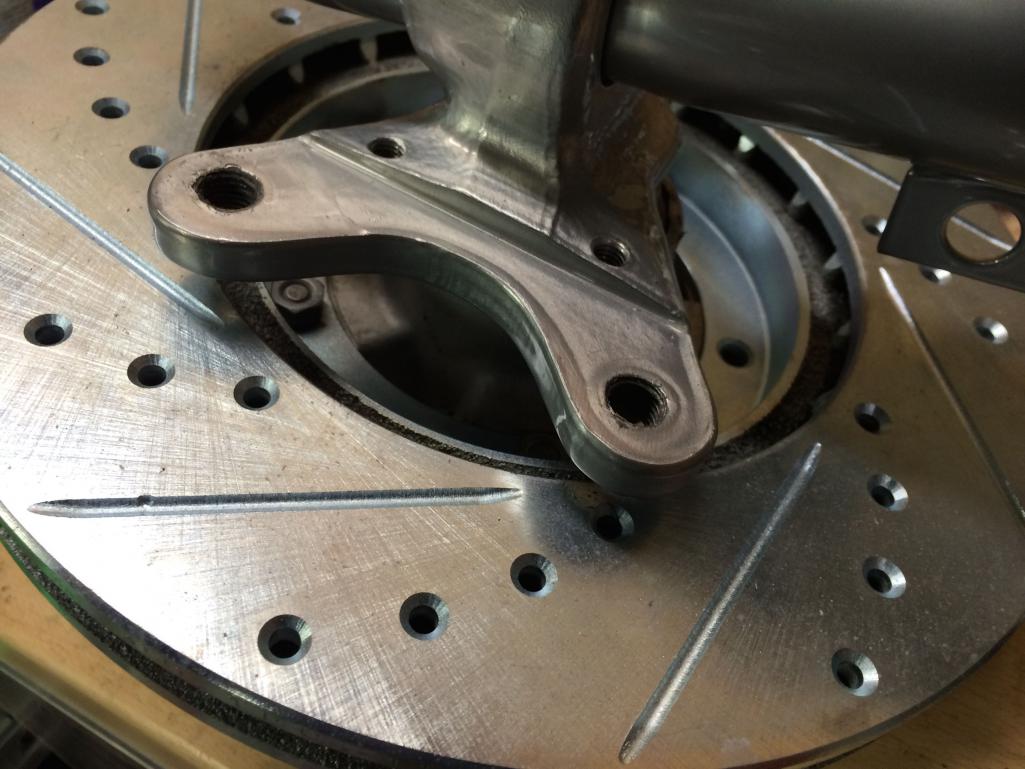
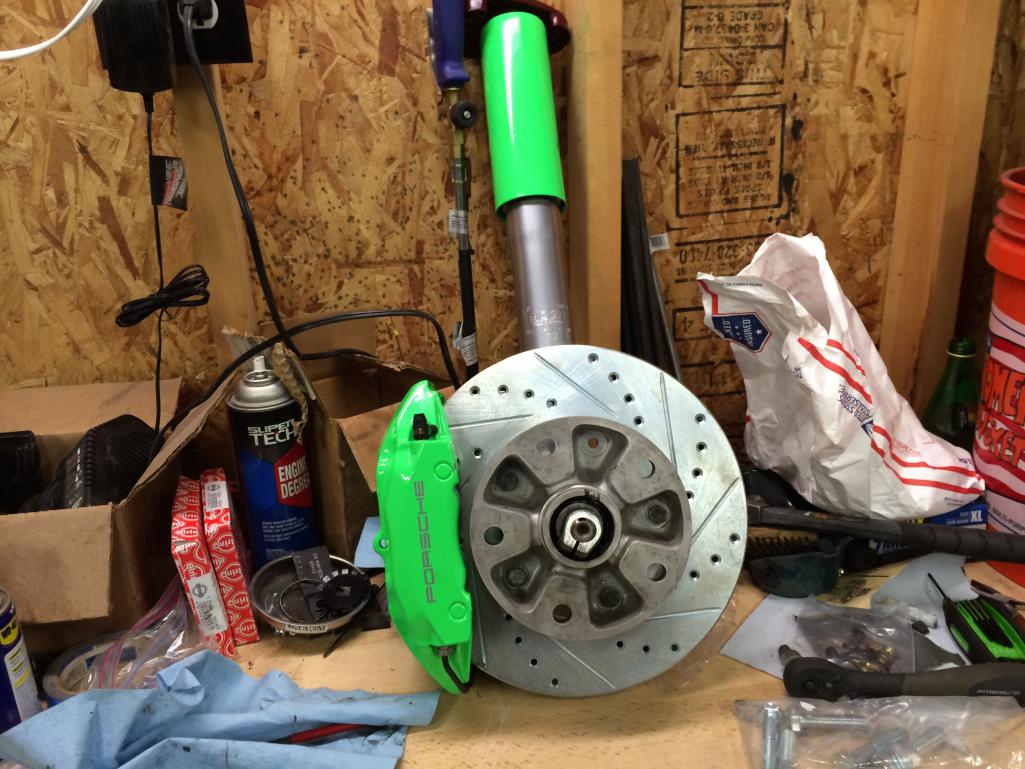
Then I got to work on the trailing arms. Ground down all the extra metal with a grinding flap-wheel thingy, then welded the tabs on. From there, it was pretty easy.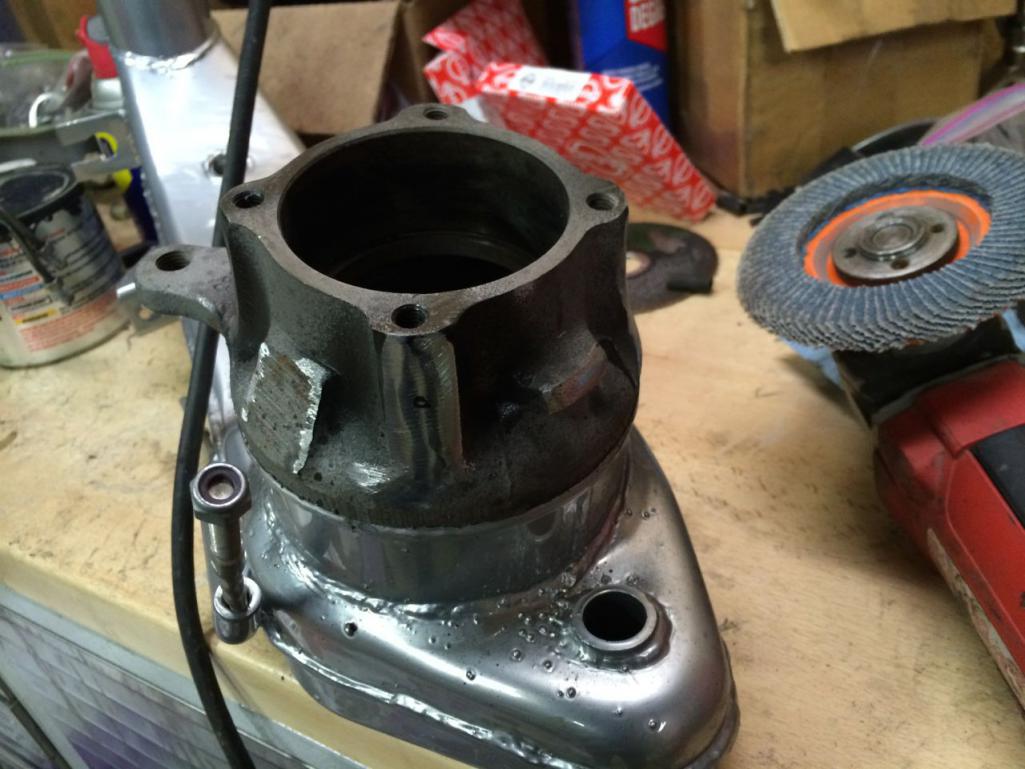
Then I pressed the old bolts out of the spacers, so they're ready to be milled down (if needed) or just put over the other bolts I have now. (100mm)
All the while, Dan is hard at work on the body. I'll head over in the morning and take a look. He had the insides/bottom painted yesterday. He was going to get a few coats on the body this evening so I should be able to see it coming together when I get there.
Ok...I'm pooped. Time for bed!
Posted by: CptTripps Mar 27 2014, 06:45 AM
Just got a few pics from Dan. I'm real happy with the color. Very unique, and there certainly isn't another 914 out there in this color.
I'll take more when I go over later today.
Excited!!!
Attached thumbnail(s)
Posted by: tdgray Mar 27 2014, 07:58 AM
Almost like a Jag Dove grey... little lighter... like it
Posted by: Philip W. Mar 27 2014, 08:00 AM
i do like it, i thought that was just a grey primer a first, is it a non-porsche color?
Posted by: Chris H. Mar 27 2014, 08:08 AM
Looks pretty much just like you wanted it. You're gonna make it to the meet too aren't ya? That's crazy.
Posted by: CptTripps Mar 27 2014, 08:13 AM
Chris: Unless it's snowing...or raining like hell, I'll be driving it there.
Todd: Yeah, that's exactly right. I wanted a deep grey that wasn't metallic at all.
Philip: It's not a Porsche color. There's a "Porsche Sport Grey" that I was going to go for, but it was a little too "brown" for me. I have this color matched up perfectly with a perforated vinyl and an Alcantara that should really make it look special.
I forgot to mention. Thanks to bdstone914 for getting me a set of hats in a hurry so I could get the rear arms together quickly. That made all the difference!
Posted by: CptTripps Mar 27 2014, 08:16 AM
Almost like a Jag Dove grey... little lighter... like it
Upon further inspection, it looks like it's exactly Jaguar Dove Grey. JA004/JAG-25449 is SW 94905.
Posted by: green914 Mar 27 2014, 10:30 AM
Looks great!
Posted by: bulitt Mar 27 2014, 10:47 AM
Love it! Thought it was going to be lime-green to match your parts...
Little darker than this 
Posted by: CptTripps Mar 27 2014, 11:23 AM
Love it! Thought it was going to be lime-green to match your parts...
Little darker than this
That's the color I originally wanted, but bailed on it when I saw one in person. Looks amazing on a 911...would look like ass on a 914. (IMHO) There's a 'brown' hue to it that makes it look a little too old-fashioned for my taste.
Posted by: Johny Blackstain Mar 27 2014, 11:32 AM
Even though there is no such color, it looks like "gloss battleship grey". 
Posted by: CptTripps Mar 27 2014, 12:32 PM
I'm going for a whole "fighter jet" theme with the car, so I could have left it in primer and been just fine. (I DID think about that at one point...)
I've got to run to the house, and then over there to drop some things off to him. (spray bed-liner for the bottom and wheel wells.) I'll take more pics then and see what we're dealing with.
Posted by: Larmo63 Mar 27 2014, 03:33 PM
I LOVE the color!!! I like the 911 color too, but I can't wait to see this thing together. Killer.
Posted by: CptTripps Mar 27 2014, 05:28 PM
I stopped by to drop some things off tonight. Overall, the body looks awesome. There dust in the paint, but it should buff out without issue.
I live the color. It's exactly what I was looking for.
Attached thumbnail(s)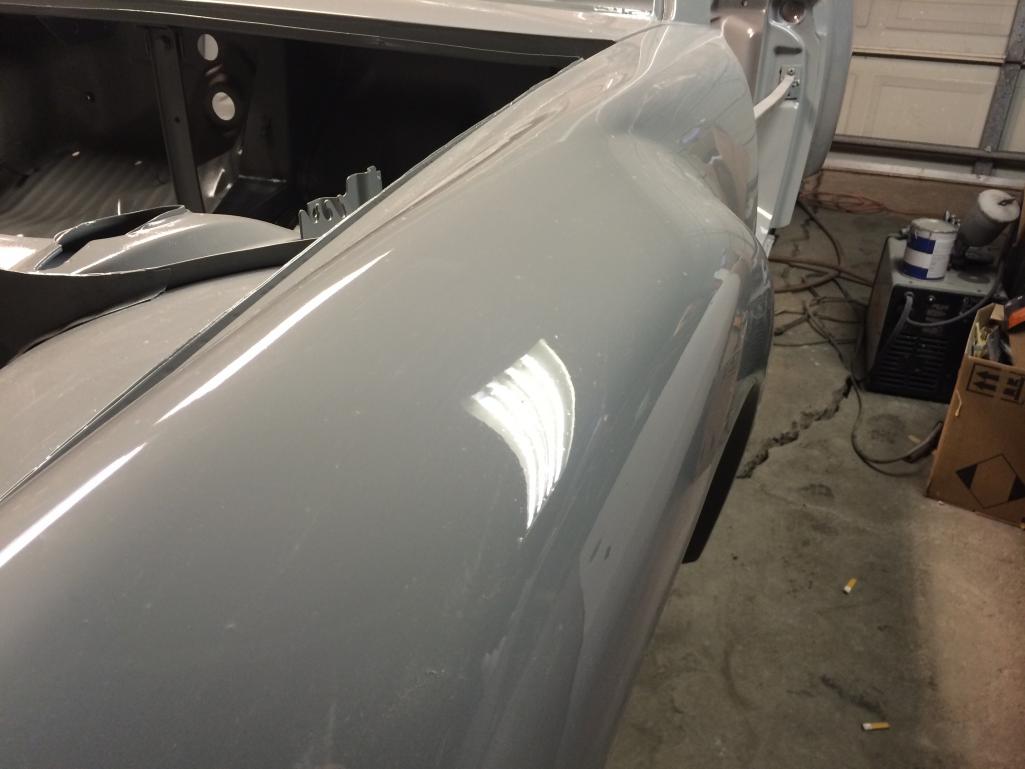
Posted by: 914forme Mar 27 2014, 05:35 PM
So when are you adding one of these?
There are herehttp://www.aircraftspruce.com/catalog/elpages/infinitygrips.php
Or us an old computer joy stick. http://www.ebay.com/itm/Thrustmaster-F-16-FLCS-Flight-Control-System-Vintage-PC-Joystick-/111307375940
I would go for the real thing from Aircraft Spruce.
Posted by: mgp4591 Mar 28 2014, 12:24 AM
With the right wheels and tires that combo is gonna look killer, and if you're as attentive to that choice as you've been to everything else in your post it's gonna knock it outta the park! Great color and great job so far!
Posted by: CptTripps Mar 28 2014, 06:57 AM
Thanks guys.
I actually thought about a joystick like that for the shifter. I may still do it at some point, but that actually may add "labor" to driving the car...which I'm trying to avoid. It'd be cool to wire up the buttons for "Launch Control" and a few other goodies that I'm thinking about.
I spent all night on the wiring harness and getting everything mapped out and ready. I ran out of heat-shrink tubing for my Rhino label maker, so I ordered more from Amazon. I'll have it on Saturday and can work on finishing that in the morning before I run off to get the tub from Dan. I'm half-tempted to have him hold off on buffing it out too much. I may need to anyway after I have it in my garage for a week and walking past it. I'm going to look into a plastic sheeting of some kind to protect the paint until I get it ready for the final buff-out. Like that stuff that they have on the car from the factory before it gets to the dealer?
Posted by: CptTripps Mar 28 2014, 05:08 PM
My weekend is starting off right!
Stopped by to see the body before I pick it up tomorrow. Dan buffed out one quarter for me, and it looks like a mirror.
He sprayed the Raptor Liner on the bottom, and in all the wheel wells. Tinted to match the body color. Looks great too! Should offer great protection from rocks and such.
Tub comes home tomorrow, sans hoods and doors. He'll deliver those on Monday. I wouldn't be able to use them yet anyway. I'd rather be able to get stuff in/out of the car easily.
Here is a sneak peak of the car in (gloomy) daylight.
Attached thumbnail(s)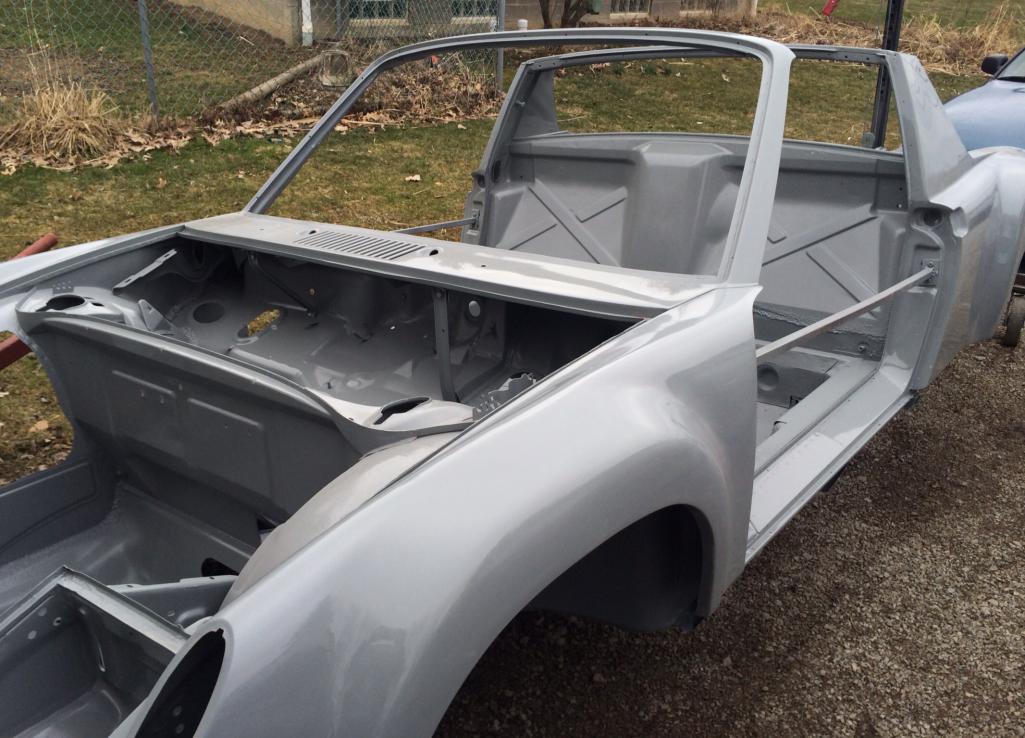
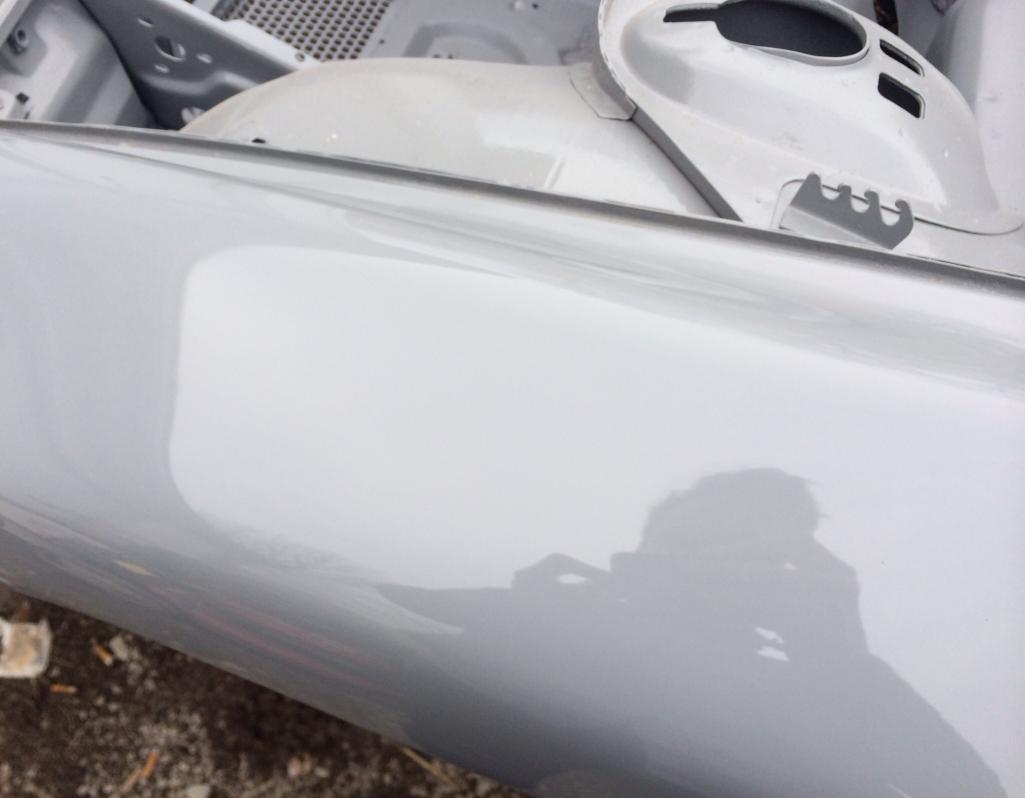
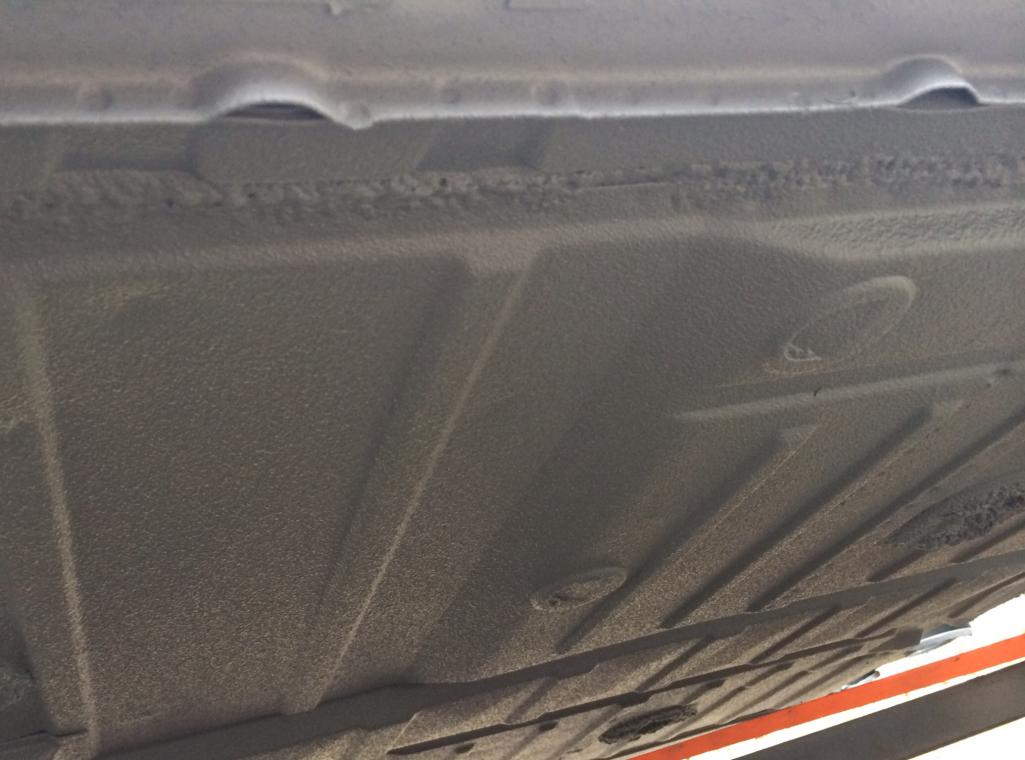
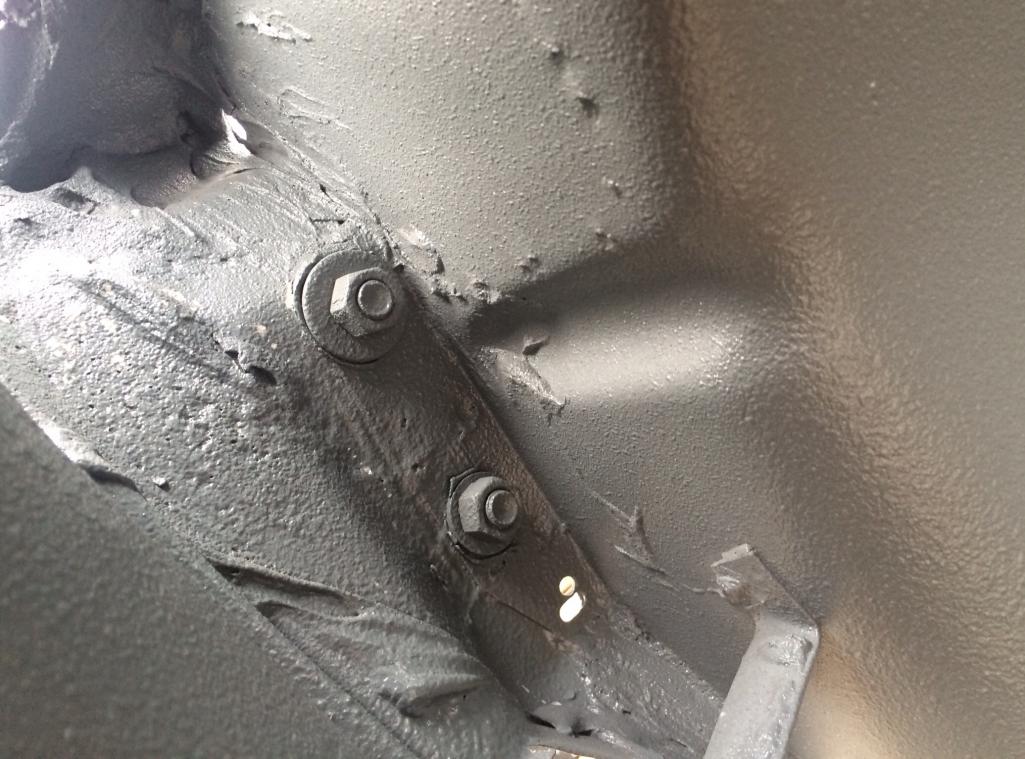
Posted by: rick 918-S Mar 28 2014, 07:16 PM
Nice
Posted by: 914forme Mar 28 2014, 07:19 PM
That Raptor liner has a nice textured finish to it.
Posted by: CptTripps Mar 28 2014, 10:05 PM
Spent the night working on cleaning out the garage. After that, I started on the hubs.
Got the studs pulled on everything and then blasted the rear hubs and painted them. Nothing is going back on this car that hasn't been cleaned and/or replaced.
I used 2 of my 2" spacers to seat all the studs. I pressed them in, then used an impact wrench to get them seated and straight.
So...I've got that going for me...which is nice.
Attached thumbnail(s)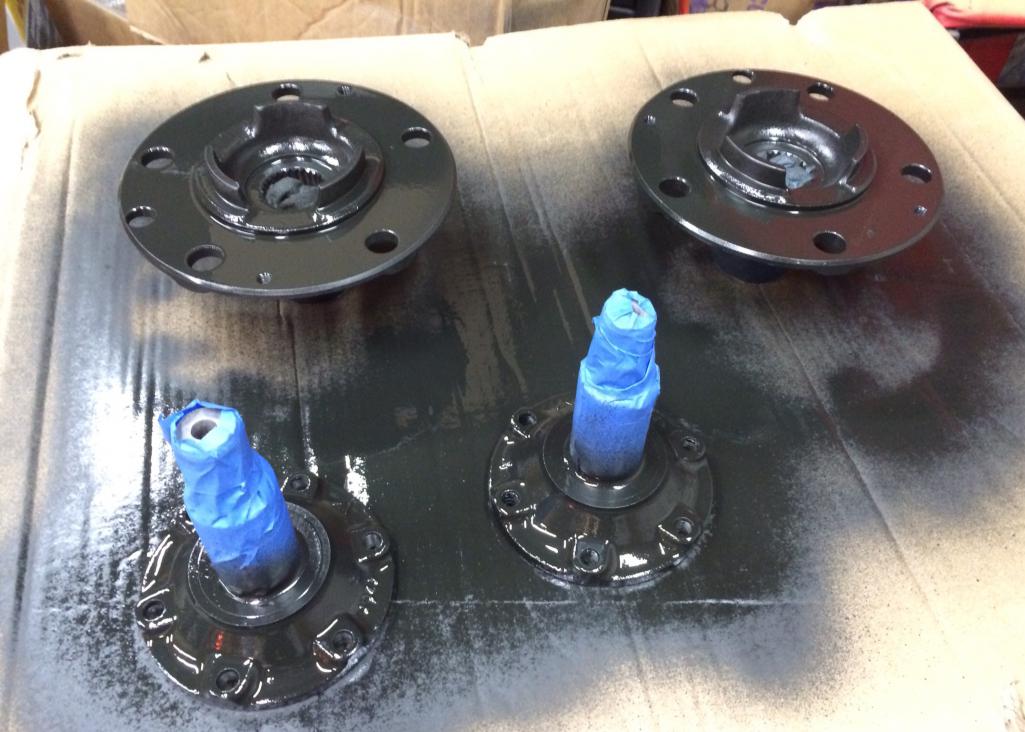
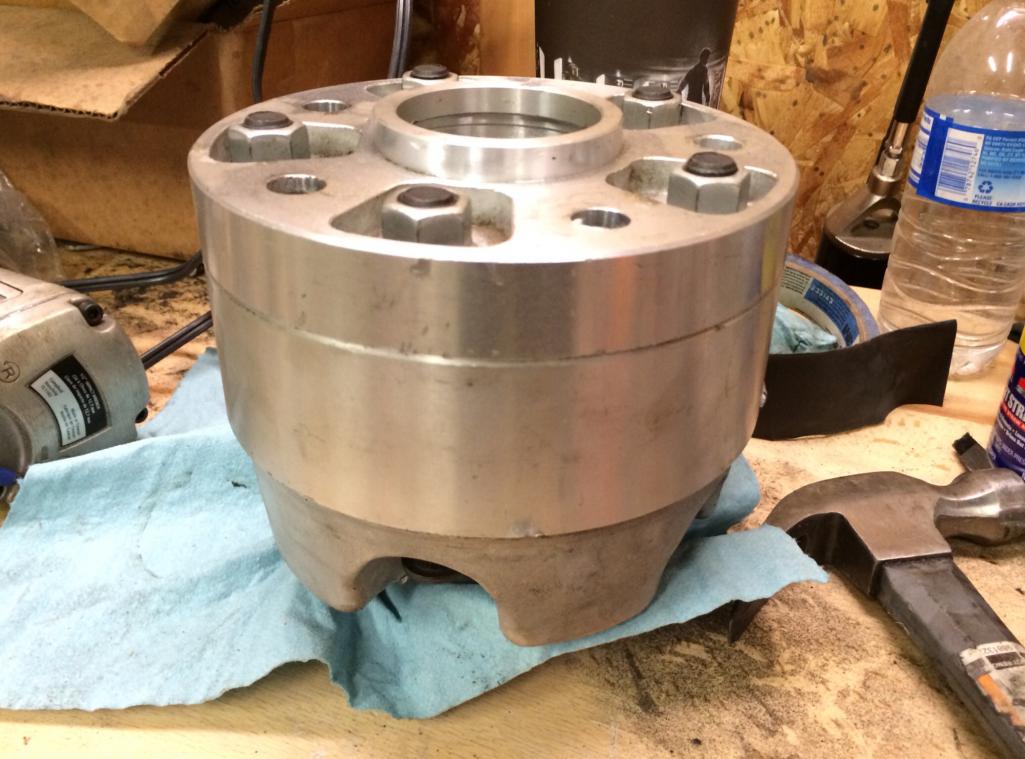
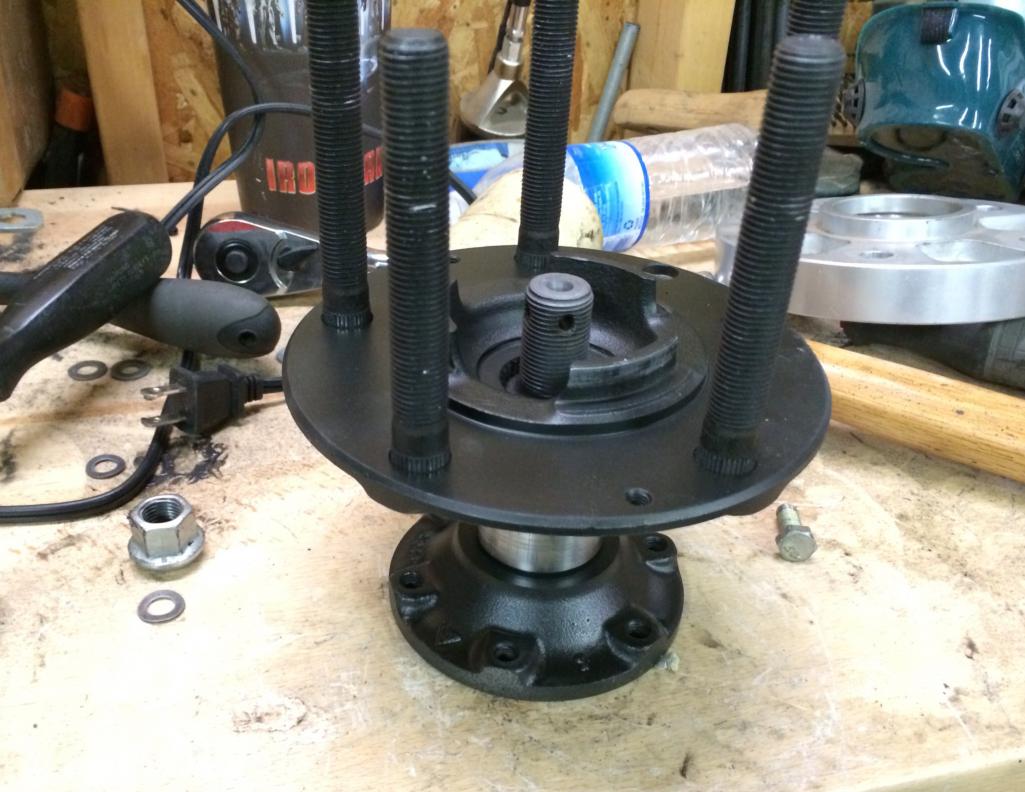
Posted by: CptTripps Mar 29 2014, 12:49 PM
Got the car back in the garage as planned. I bought some "crash wrap" to keep the fenders from getting scuffed up while I'm walking past it, until all the crap leaves the garage this week.
I marked out the area of the center support that I want to cut out so it's easier to get to the wiring harness, and so I have room for the cables to the transmission.
Got her up on her side, and got to work...
...then about cut my finger off with a cut-wheel on my grinder. So now I'm sitting in the ER waiting to get this stitches up so I can get back to my garage!
Attached thumbnail(s)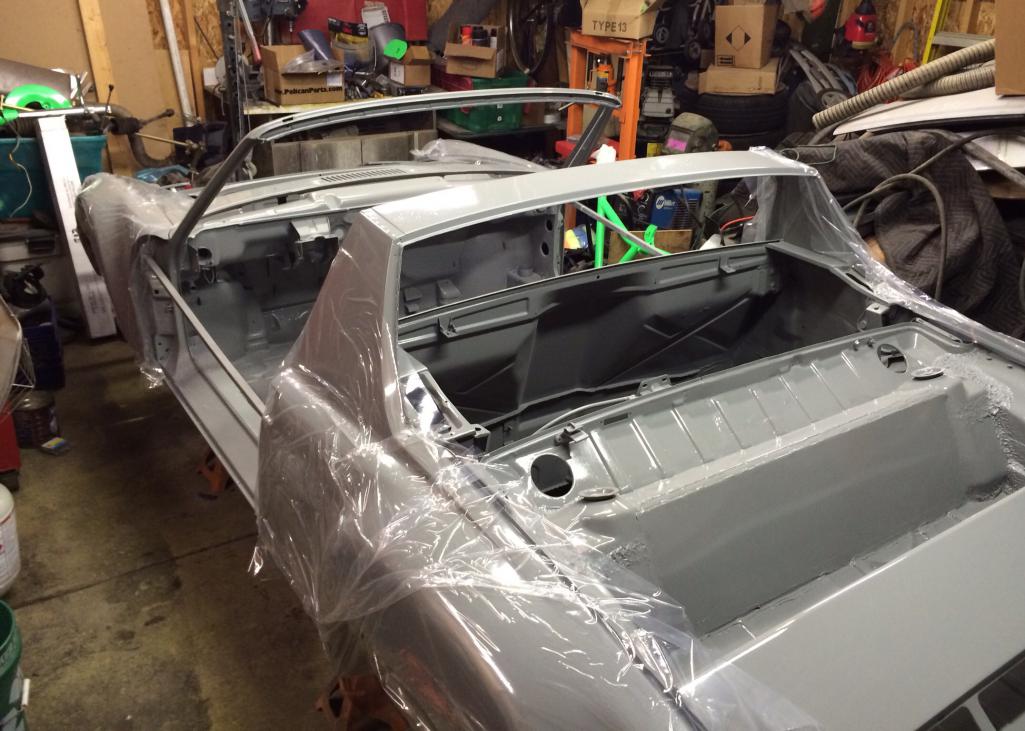
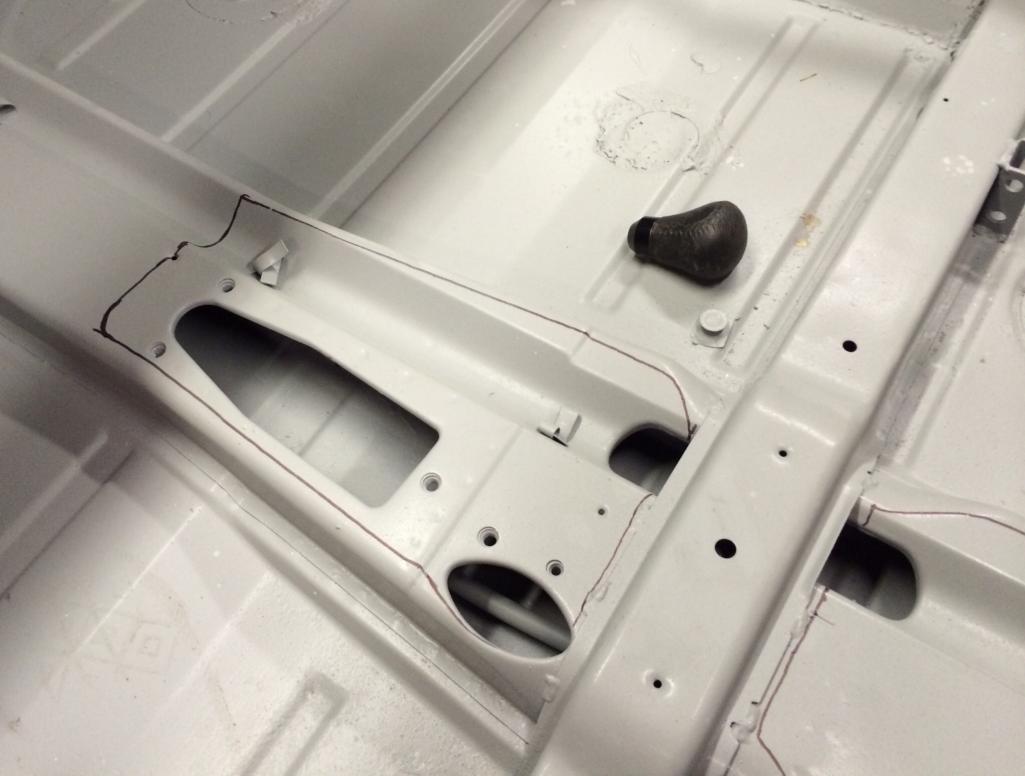
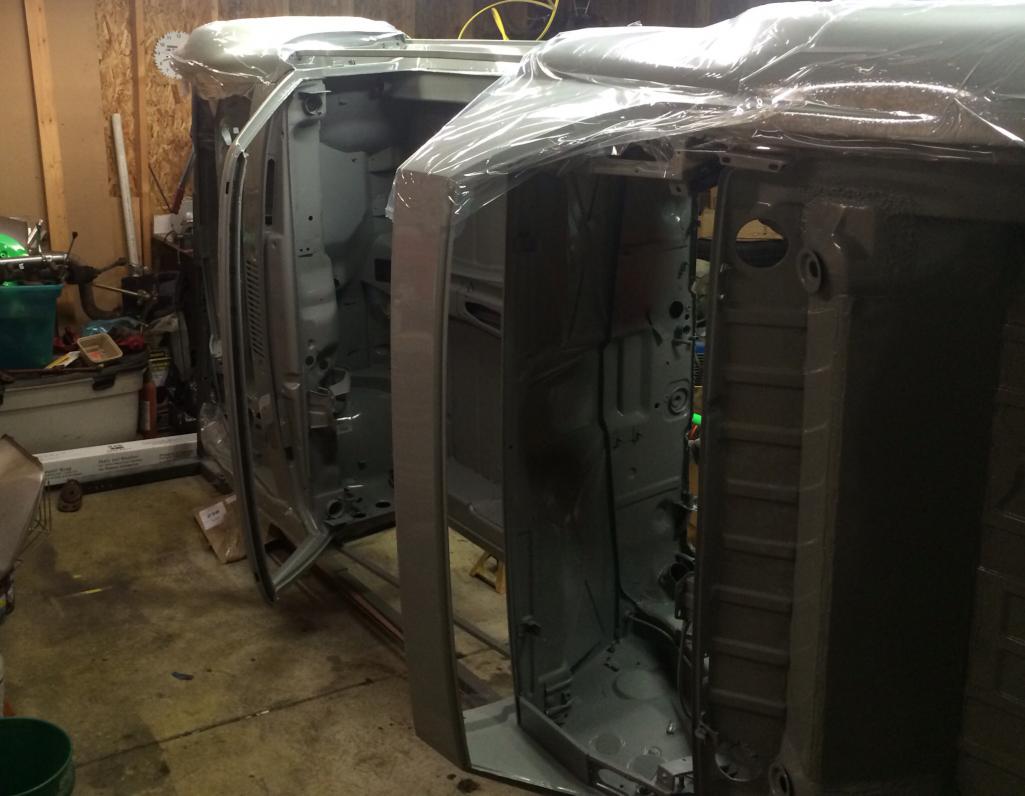
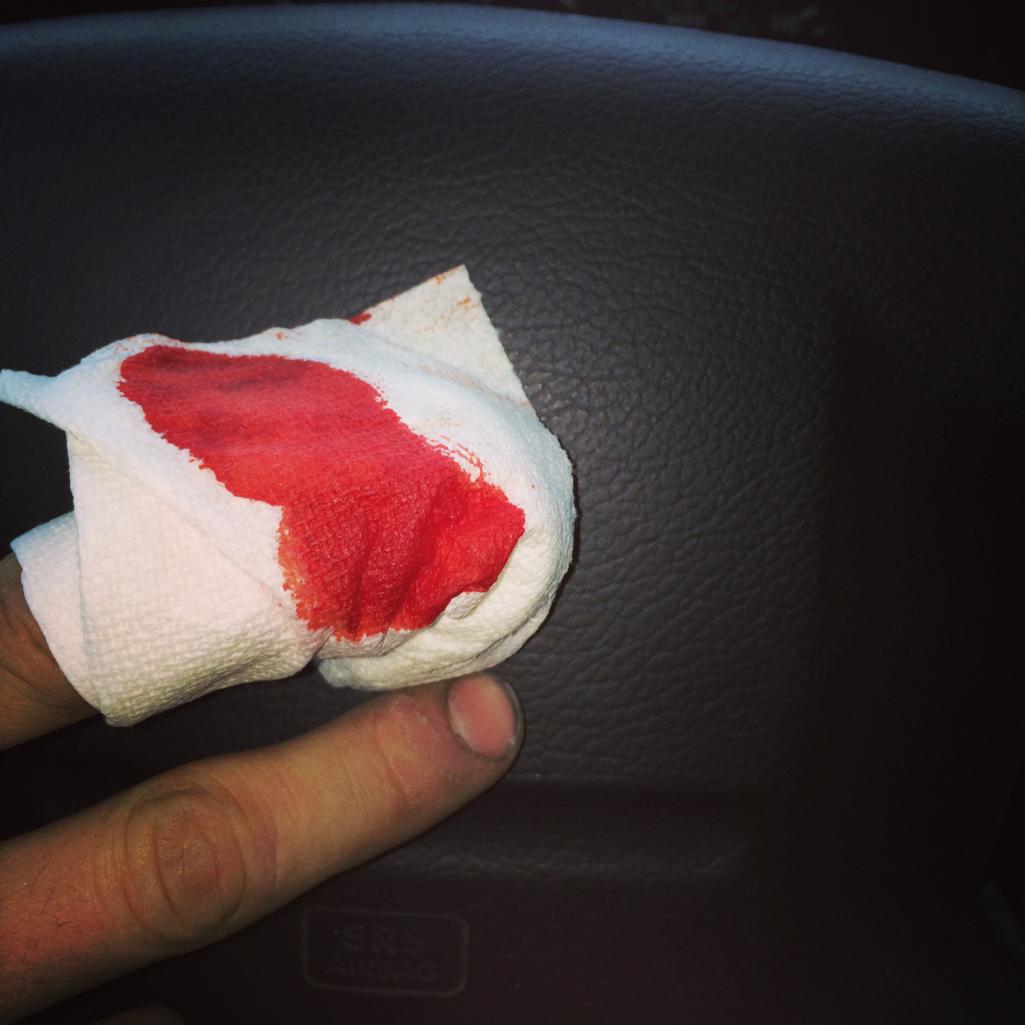
Posted by: CptTripps Mar 29 2014, 12:54 PM
On another subject...I'm loving the Raptor Liner.
Attached thumbnail(s)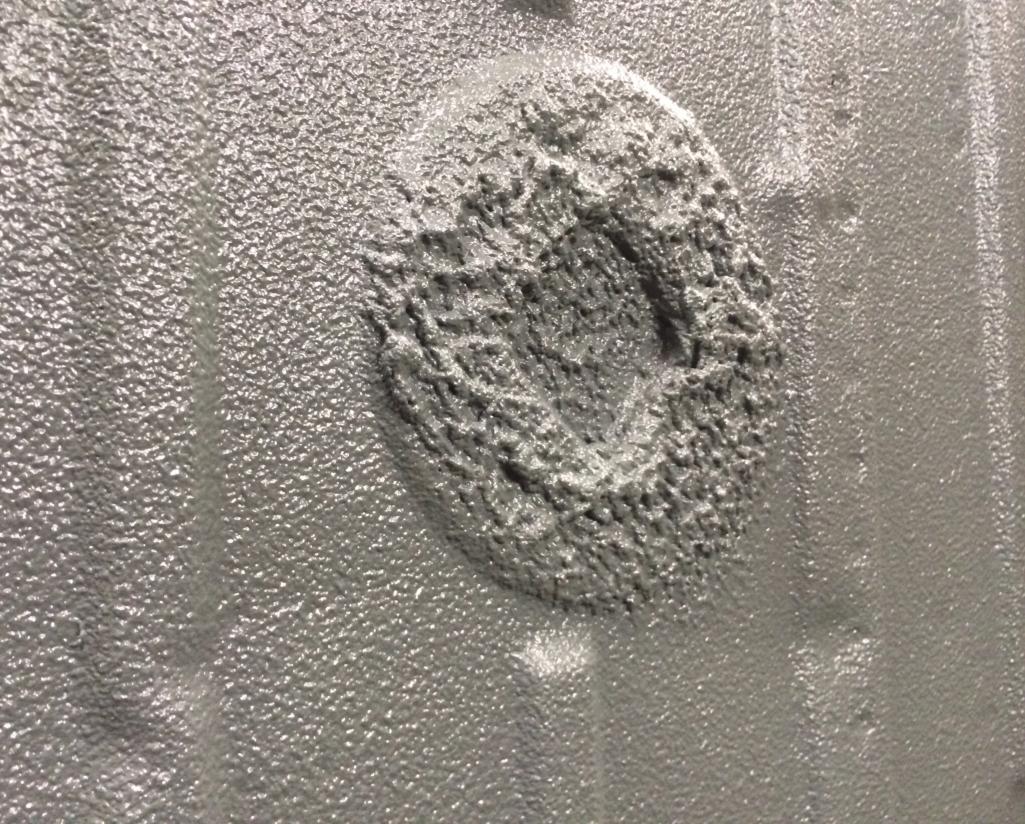
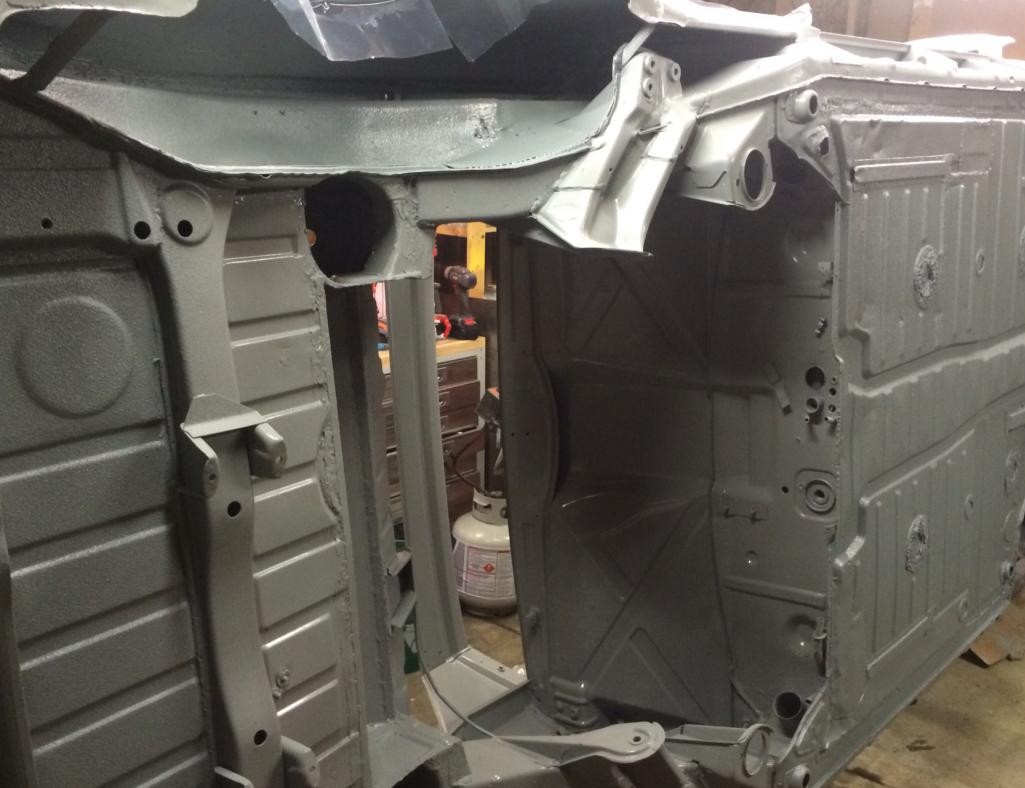
Posted by: Larmo63 Mar 29 2014, 02:00 PM
Dude, sorry about the finger. Heal fast, we like this thread!
Posted by: CptTripps Mar 29 2014, 02:55 PM
Oh, I'm not letting 6 stitches stop me. Headed home now to get back to work!
Posted by: PanelBilly Mar 29 2014, 03:35 PM
I got an owwie on my hand today too, but no visit to the hospital, just two band aids...
Posted by: 76-914 Mar 29 2014, 07:03 PM
. with Billie. If I can avoid an ER, hospital (read petri dish) I do.Duct tape and toilet paper makes for one Hell of a bandage. But it will heal faster if stitched. Doug, to what and how will you mount your shifter once you've removed that area detailed?
Posted by: Travis Neff Mar 29 2014, 07:43 PM
what color is that?
Posted by: CptTripps Mar 29 2014, 08:52 PM
Color: Dove Grey. NOT a Porsche color. I wanted something different.
ER: the cut wheel went through my leather glove, and the nitrate glove. I could see bone before I even took the glove off! Check it out!
http://instagram.com/p/mI2xhCn9Cc/
Shifter: I'm adding cross-braces so it'll be lower and give me room for cables.
I've been busy trying to get the damn front bushings on. The powder is WAY thick inside. Now I realized I have the tortion bars in wrong, so I'm trying to figure out how to remove them.
I rebuilt the steering rack while frustrated. Bead-blasted the case then re-greased everything. Looks awesome now.
I also put Ian's cradle and mounts in. They're awesome.
Attached thumbnail(s)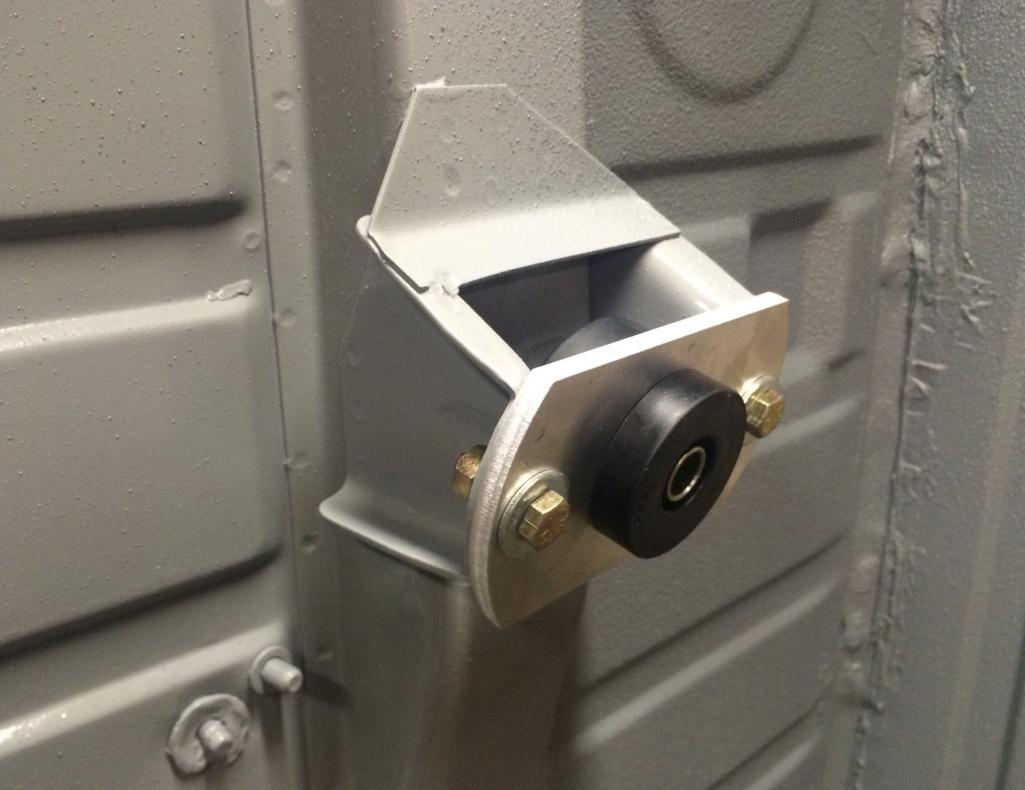
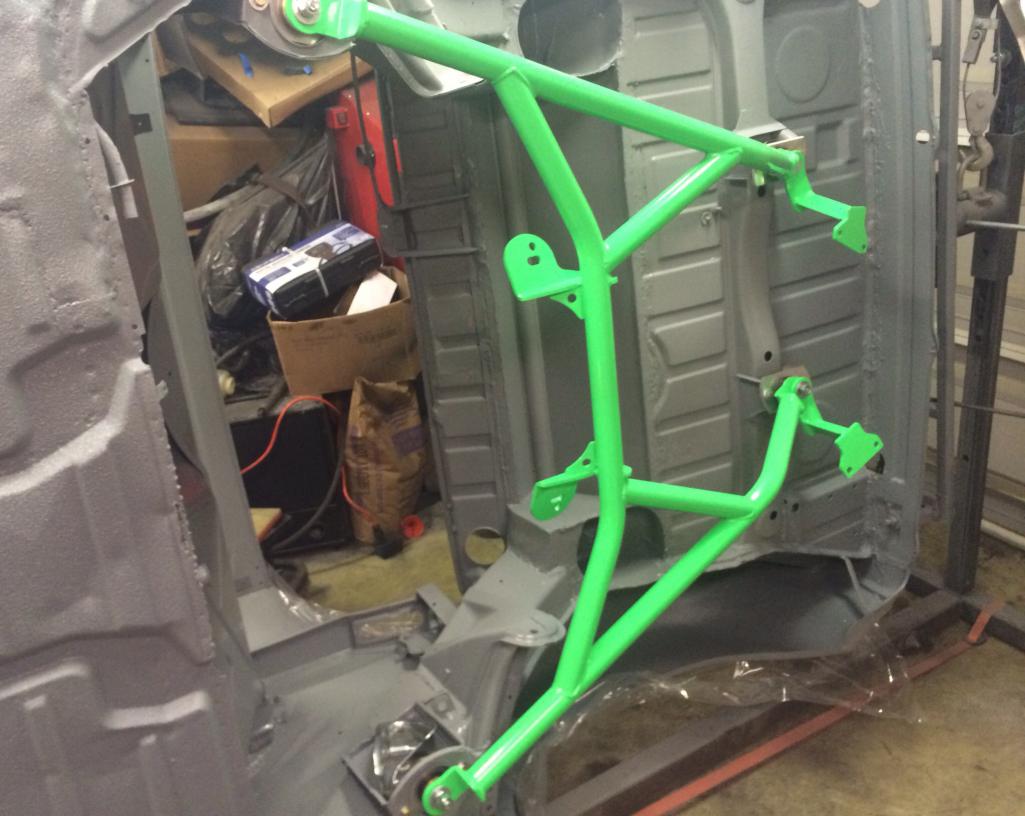
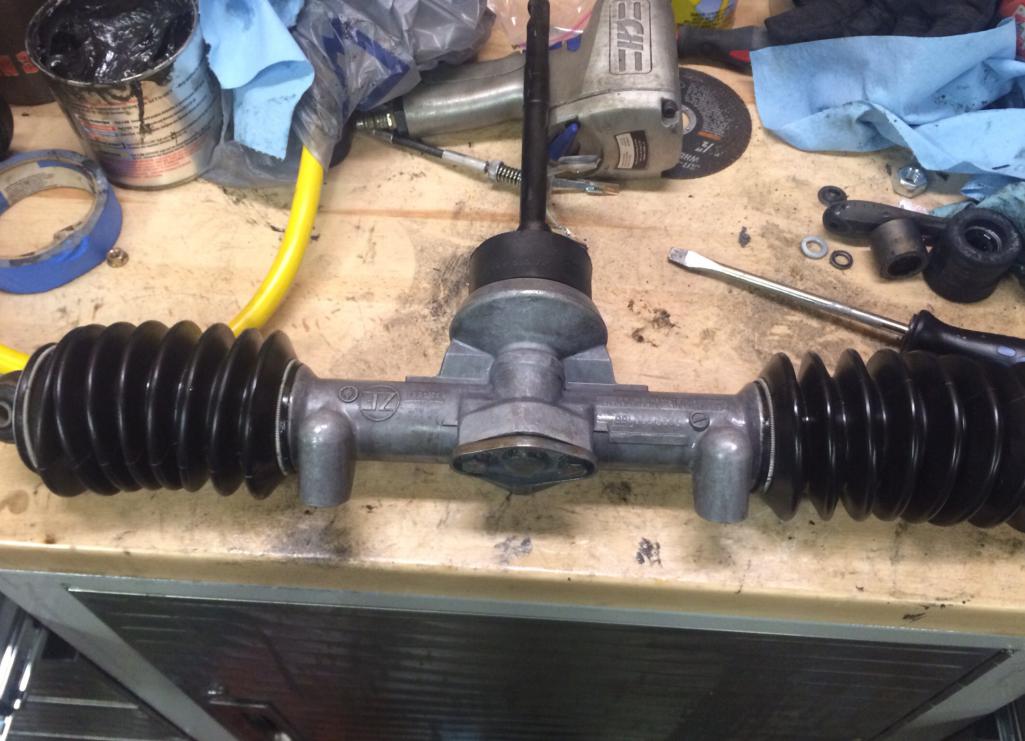
Posted by: mgp4591 Mar 29 2014, 10:50 PM
Damn fingers, always getting in the way... glad you're not letting a little blood and bone get in yer way!
Posted by: ruby914 Mar 30 2014, 09:36 AM
That is a PITA place to be cutting your finger. Try not to bend it for the next 3 weeks.
Color looks great. Like a green monster hidden in the fog.
Posted by: IM101 Mar 30 2014, 10:20 AM
Wow, nice color on the cradle man! awesome progress!
Posted by: CptTripps Mar 30 2014, 07:42 PM
Busy day!
Got the entire suspension installed and ready. I still need to hook up the e-brake before I put the rear hubs on. Just want to make sure it's 100% before I press them.
Had the front suspension on/off 4 times. The bushings were too tight, and then when I finally had it right, I realized I hadn't put the 930 tie rods on. Then I did that and after I got it all back on, realized I forgot the steering rack bearing and boot. So...that was the 5th time. Ugh. I burnt 4h on stupidity.
Installed the master cyl and the hydronic clutch stuff. I'm not sure I have it right yet, so I'll re-visit that soon.
My engine never made it today. I'm bummed about that, but I got a lot of other stuff done, so I'm not too upset about it. Tomorrow night, I'll do some of the stuff in the engine bay and get the fuel system plummed and ready.
But...I feel great about all I got done. Especially with only 1 1/2 hands.
Attached thumbnail(s)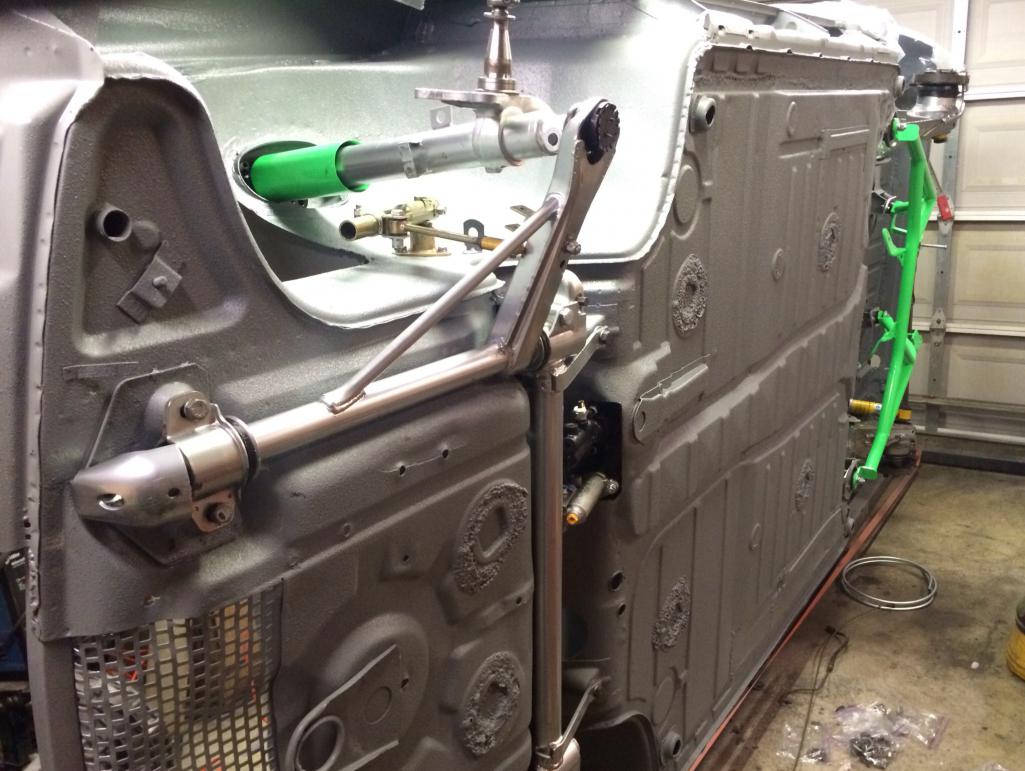

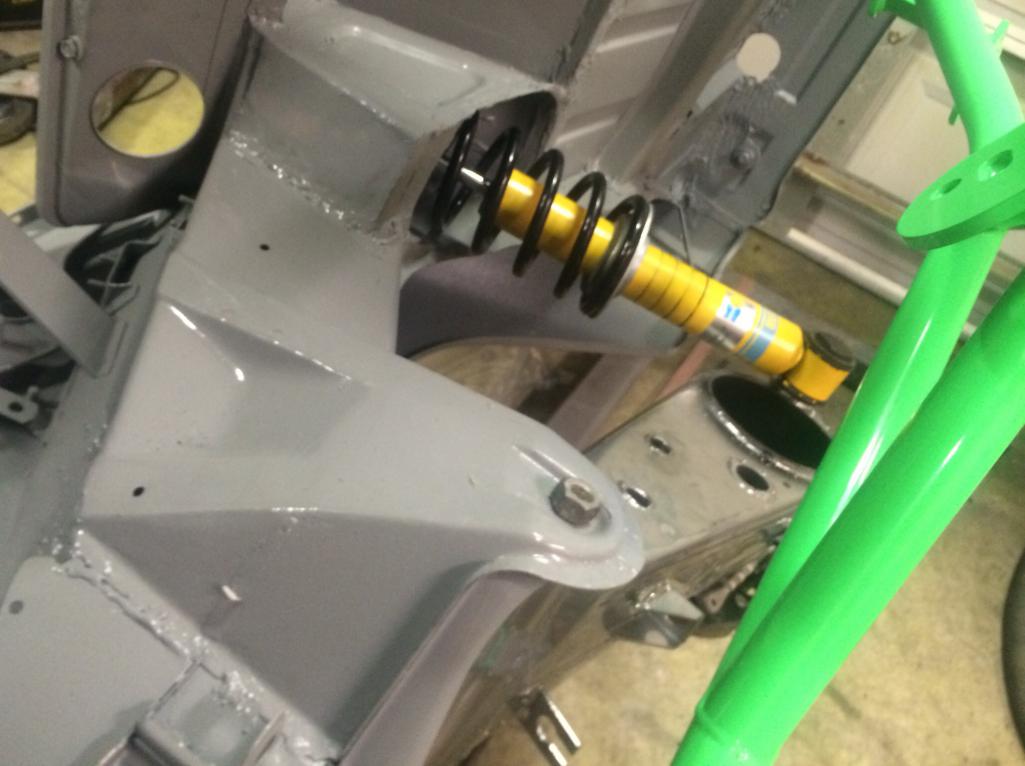
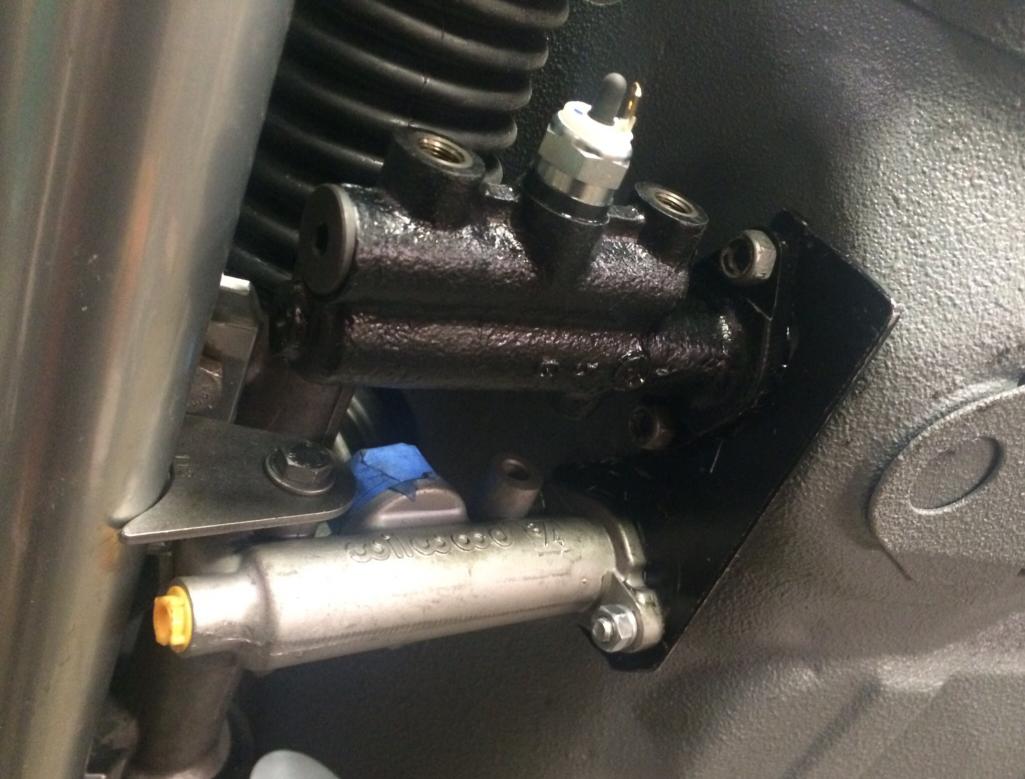
Posted by: Larmo63 Mar 30 2014, 11:19 PM
Not bad for a guy with nine fingers......
Posted by: 914forme Mar 31 2014, 07:59 PM
Keep it up. BTW, what happened to the solstice mirrors?
Posted by: CptTripps Mar 31 2014, 08:45 PM
Solstace mirrors may or may not make it. They need a of work to make them fit right.
Dan and his brother Doug stopped by with the doors and hoods tonight. They're hard at work sanding and buffing while I'm putting DynaMat in the interior. It's starting to look amazing. I'm real happy with the body.
The rear proportioning valve is a huge pita to put back together. I took it all apart and cleaned the gunk out. Made up a gasket out of an old pack of cigarettes, and left a note for the next guy. Now I need to get it in a vice to put it back together.
Attached thumbnail(s)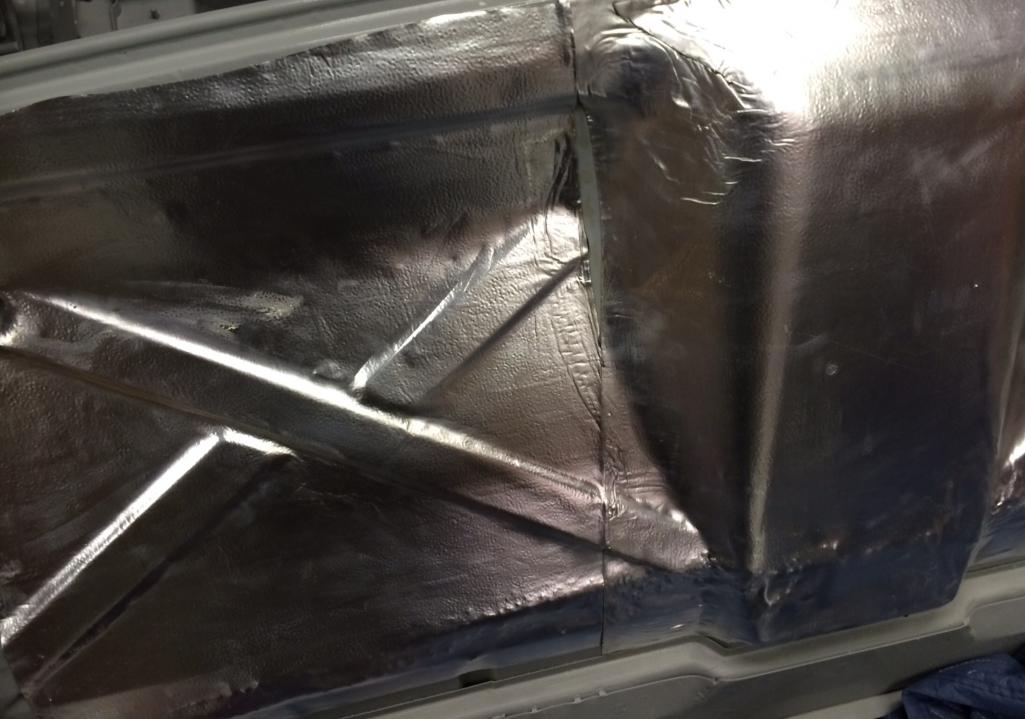

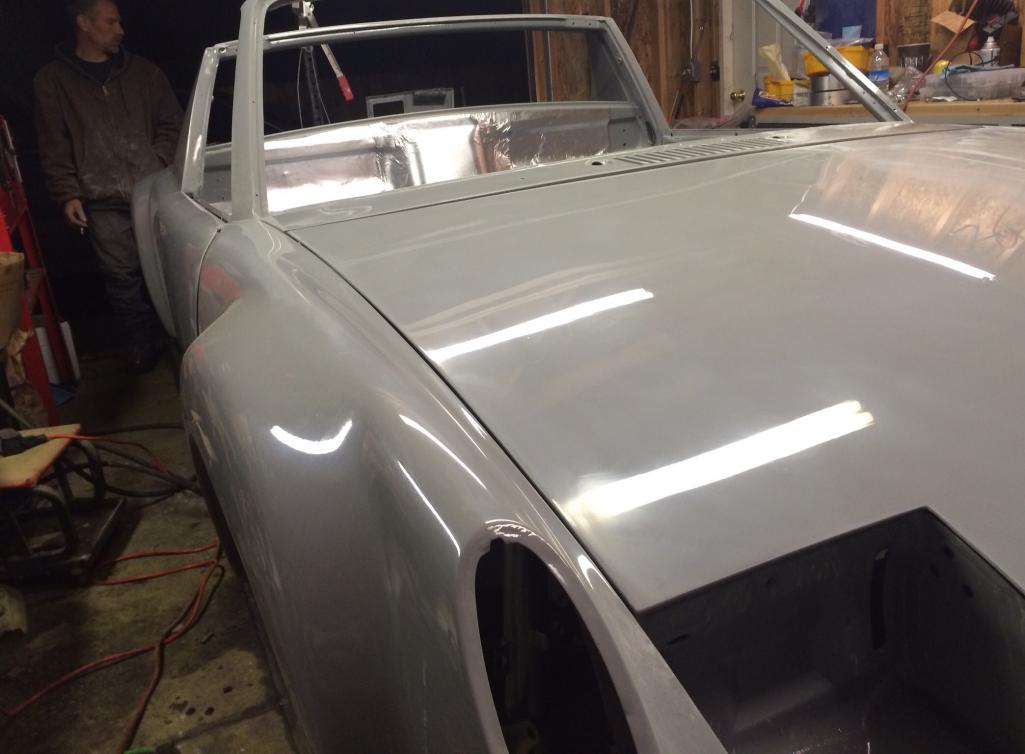
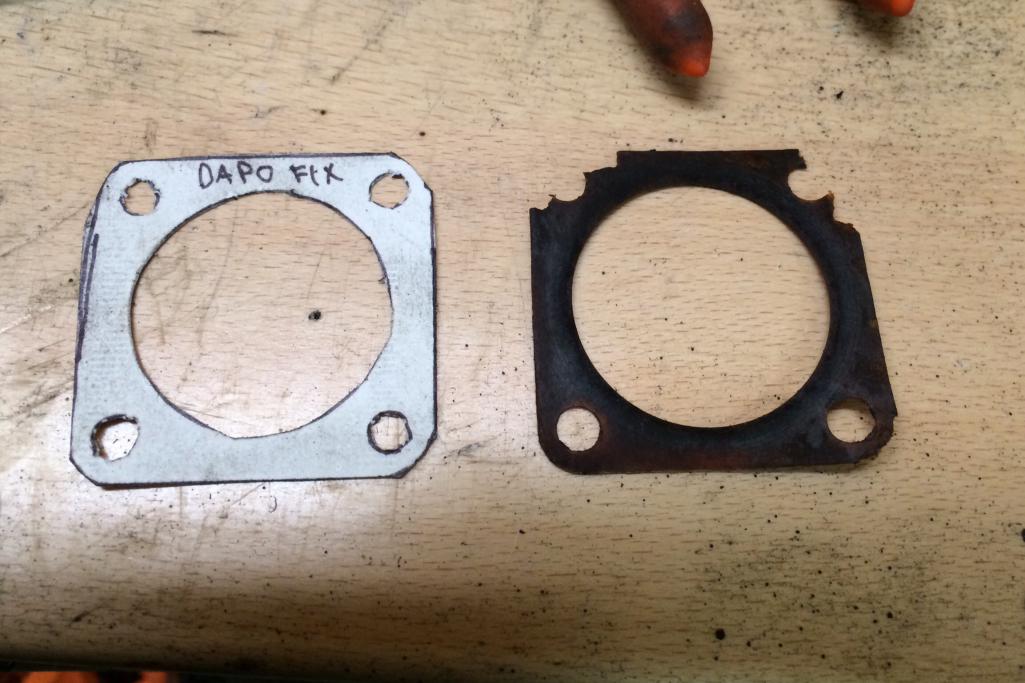
Posted by: CptTripps Apr 2 2014, 06:07 AM
Dan and Doug (Dan's brother) came over last night to finish wet-sanding and buffing everything. They're doing a great job. I MAY have the car sprayed one more time, and then clear-coated, but I'll make that determination after they are done, and before I put all the rubber seals in everything. It's single-stage paint that can be cleared, so I can go either way. I really don't want to do it after the seals are in place though. That never works out well.
I spent last night on the wiring harness, and getting ready for the engine to arrive. (Still..) I also got the metal plate ready for the ECU to be mounted. I was planning on doing that later today as well.
The harness I have was meant for a hot-rod that had the engine up front, and the fuel tank in the back...so I 've had to take everything apart, and move a bunch of wires forward, and even more back. I'll re-wrap everything this afternoon and see if I can get it in the car before I leave for DC Friday morning. I have a pretty big list of things to do between now and then.
Posted by: CptTripps Apr 3 2014, 07:27 AM
Cranked quite a bit last night while Dan and Doug were over finishing up the body work (for now.)
I installed Lava Mat on the back of the firewall to a: help with heat and b: look bad-ass. I still need to do the lower section, but the temperature in the garage was dropping and this stuff gets harder to work with when it's cold. Getting it worked into all the contours is important.
Here's a link to the stuff I got. The 4' X 5' piece may be a little big, but I'm planning on using it in the cabin if I can to help with heat from the radiator tubes
http://www.amazon.com/gp/product/B0055BY2CQ/ref=as_li_ss_tl?ie=UTF8&camp=1789&creative=390957&creativeASIN=B0055BY2CQ&linkCode=as2&tag=putte-20
Attached thumbnail(s)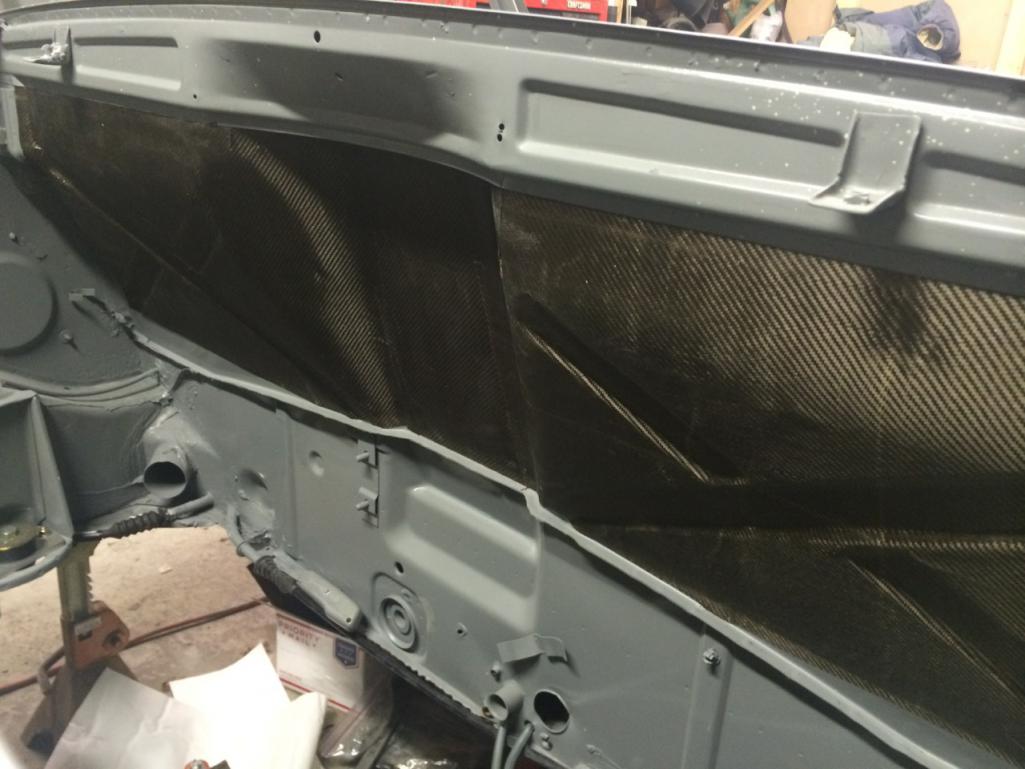
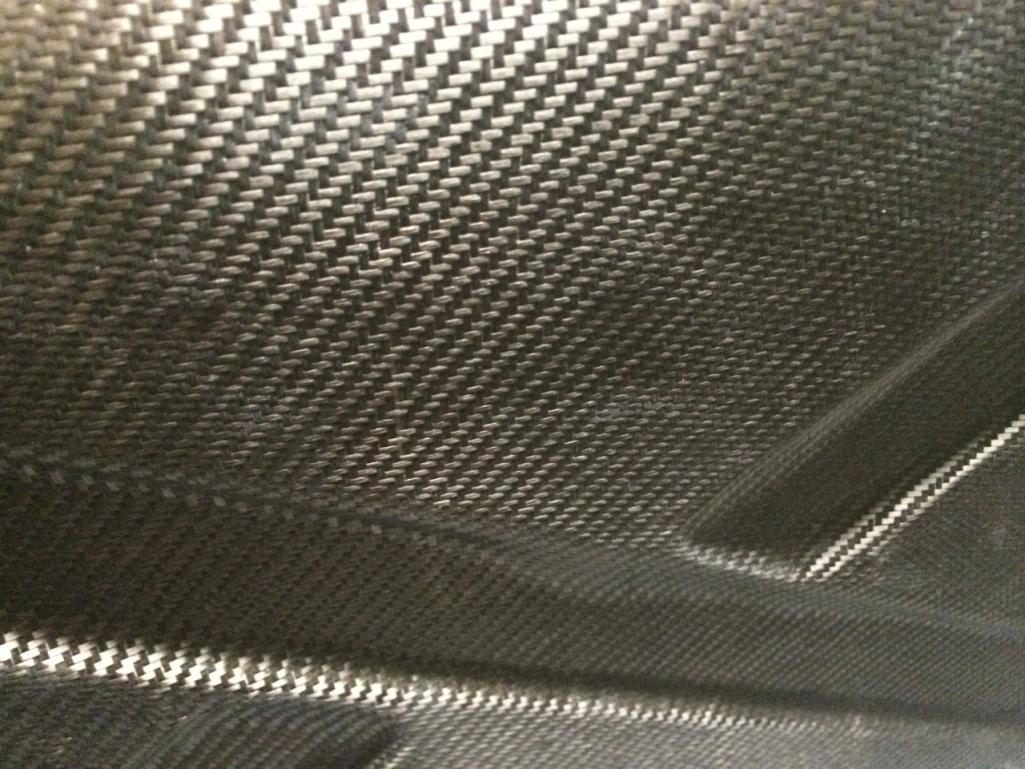
Posted by: CptTripps Apr 3 2014, 07:28 AM
I also did the FG work on the speaker pods for the pillars. The holes were a bit too big for the separates I have, so I closed up the holes, and I'll re-drill and then cover in Alcantara.
Attached thumbnail(s)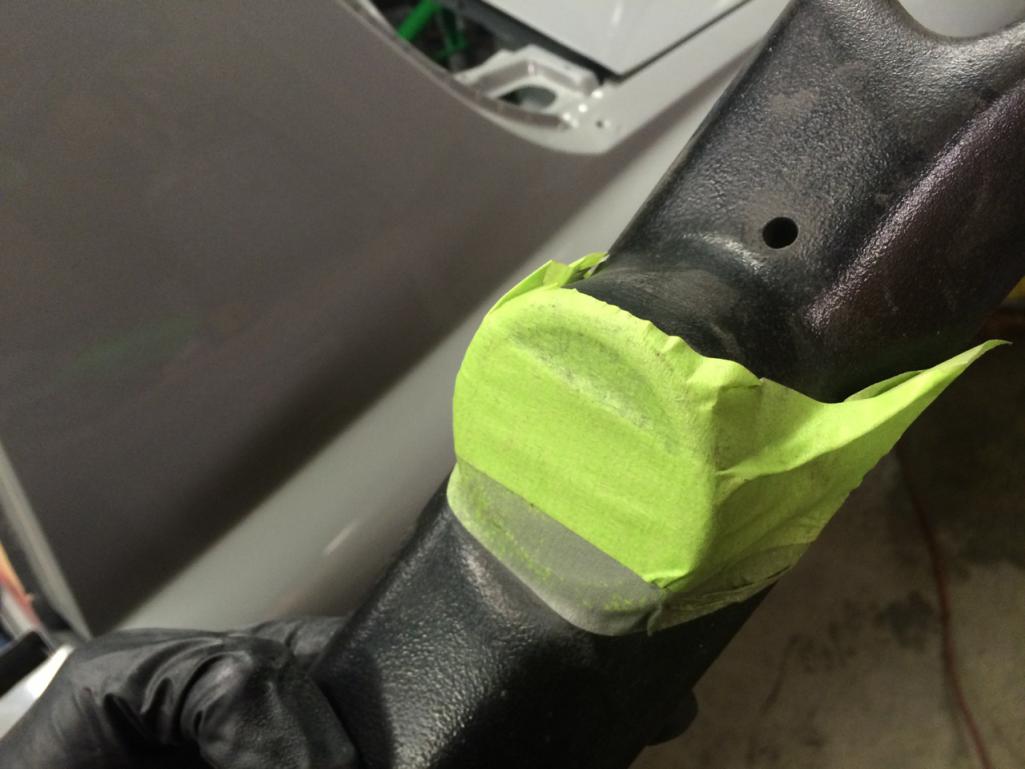
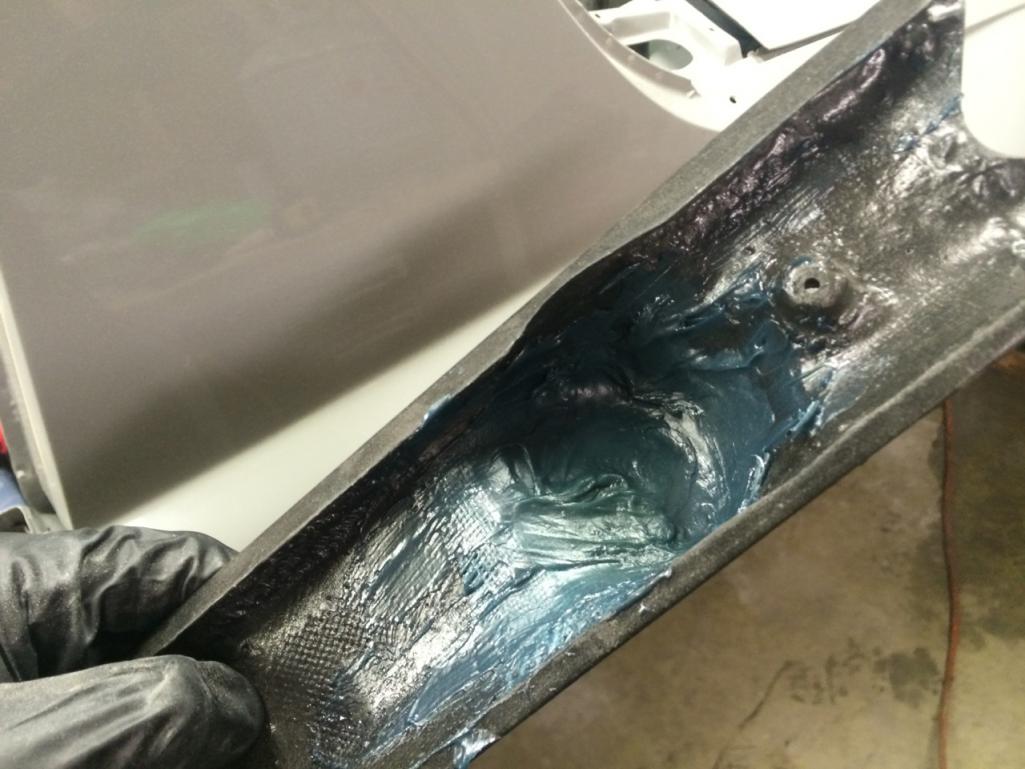
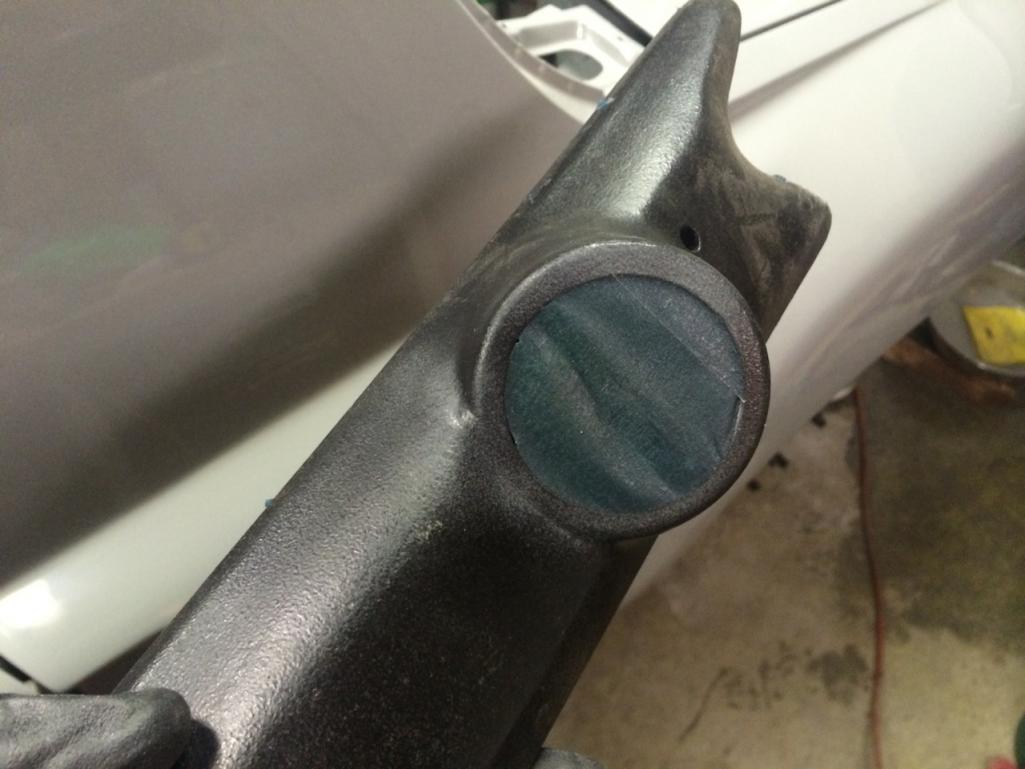
Posted by: CptTripps Apr 3 2014, 07:32 AM
I did a bunch of other stuff like blasting the slave cyl for the clutch, found all the locks and installed them in the trunks and deck-lid, installed the e-brake cables and checked all of that out, then I put the hubs on the front and back. I think I'm a little too long on the front studs. I'll deal with that later I guess.
Last thing I did was get the brakes started. Picked up a BUNCH of brakeline, and I'm mapping it all out. I put the hubs on, and placed one of the calipers...just to see what it looked like.
One last pic to show what she looks like all shined up!
Tonight I MAY have a motor to put in it. Still working out logistics. I've had more issues with moving motors this week. What a PITA.
Attached thumbnail(s)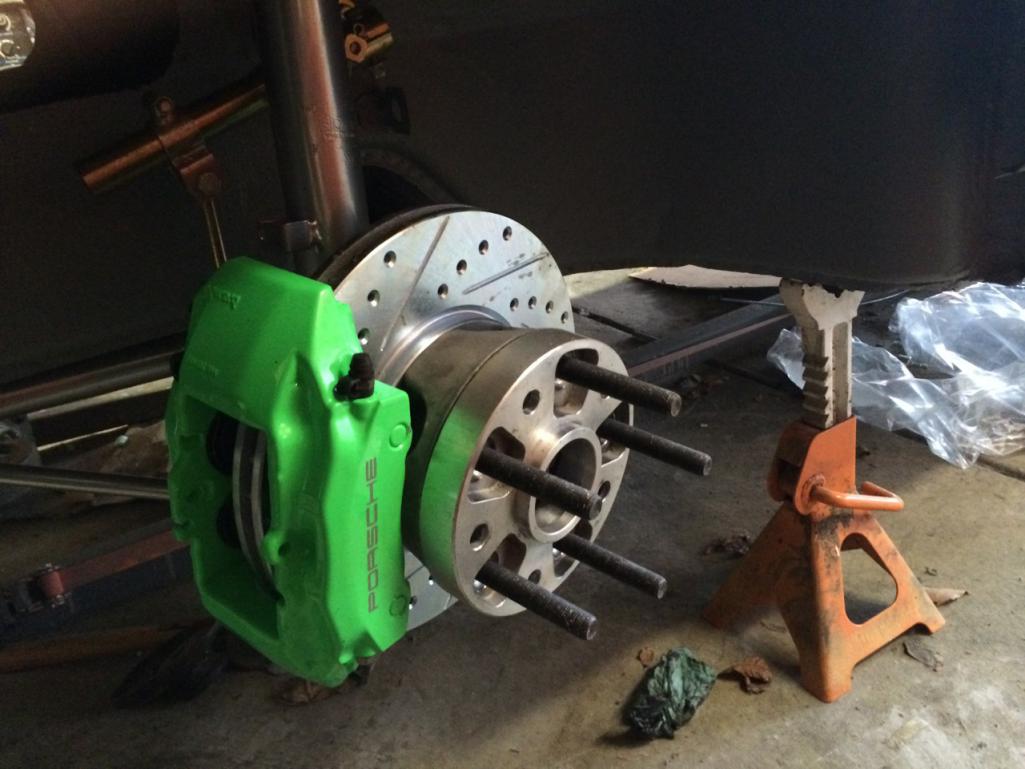
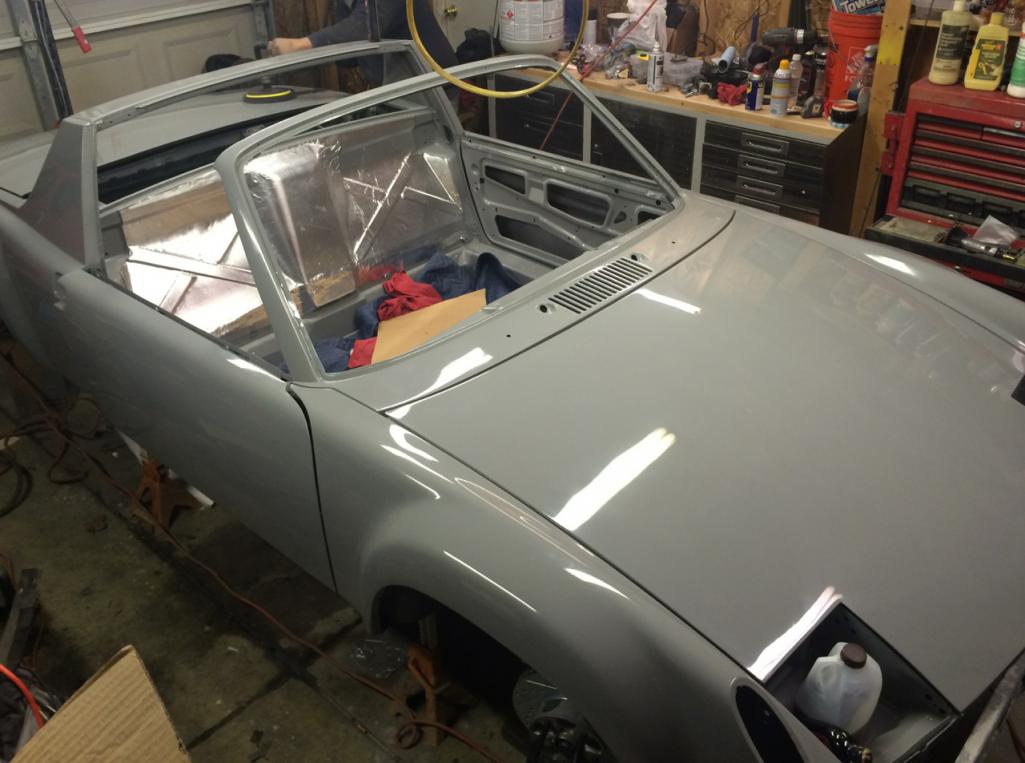
Posted by: cwpeden Apr 3 2014, 07:40 AM
Keep both hands on the tool, and dont remove the guard. Same thing with a zip wheel. Just lucky it didnt go further in the nail.
Posted by: jfort Apr 3 2014, 07:51 AM
I enjoy this thread and am amazed at your work. Keep it up. Hope to make if over there in a Porsche if the weather would ever break
Posted by: CptTripps Apr 3 2014, 10:38 AM
Thanks guys.
Yeah...I had both hands on it, it caught and swung around. the guard WAS on, but in the back position so I could cut the metal.
I'm meeting with my upholstery guy in a few hours to drop off the seats to be re-covered. They should look awesome.
Posted by: 2mAn Apr 3 2014, 12:19 PM
You're a madman!!! You're making great progress
Posted by: Java2570 Apr 3 2014, 12:47 PM
Wow, Cpt Tripps....this is one cool build! And I've found that I cut myself at least once every time I
do any work on my car....or it seems like it anyway! Can't wait to see this car up and driving!! Jon
Posted by: ruby914 Apr 3 2014, 01:53 PM
I also did the FG work on the speaker pods for the pillars. The holes were a bit too big for the separates I have, so I closed up the holes, and I'll re-drill and then cover in Alcantara.
"If you need a set with a different size, let me know."
Shoulda gone with no holes. So, what tweeters and hole size did you come up with?
BTW, are there more than 24 hrs in a day in Shaker Heights, OH?
I may have to move there.
"Cranked quite a bit last night while Dan and Doug were over finishing up the body work (for now.)"
Should this read: Did crank quite a bit last night...?
Posted by: CptTripps Apr 3 2014, 05:25 PM
Yeah...I know...I know. I miss-read that so I just took what you had handy. No biggie. Went with the kicker 6.5" separates. So the hole is about 3/4" too big. O-well.
Just dropped the seats off to be re-done. They're going to be pretty awesome. I'll wait to show you all what I came up with. :-)
Headed home to crank on the brakes tonight. I also had an issue with the rear hubs feeling like they're loose. I think they just aren't right enough. We'll see!
Posted by: Spoke Apr 3 2014, 06:41 PM
I also had an issue with the rear hubs feeling like they're loose. I think they just aren't right enough. We'll see!
Do you have the spline installed and castellated nut on? Or is this a different issue?
This car is going to be too nice to drive.
Posted by: CptTripps Apr 3 2014, 09:18 PM
Do you have the spline installed and castellated nut on? Or is this a different issue?
This car is going to be too nice to drive.
I plan on driving the SHIT out of this car.
I'm using 911 hubs all around and the rears just feel like they aren't tight enough. I don't have the leverage to crank on them right now (no motor) so I'll investigate further when I get that going.
Tonight I spent the evening rebuilding all 4 brakes. I took everything down to a powder-coated frame and replaced every seal and dust cover. Then put the lines on them and bolted up the conversion parts and pads. The fronts are installed...rears are waiting for the brake rotors.
Attached thumbnail(s)
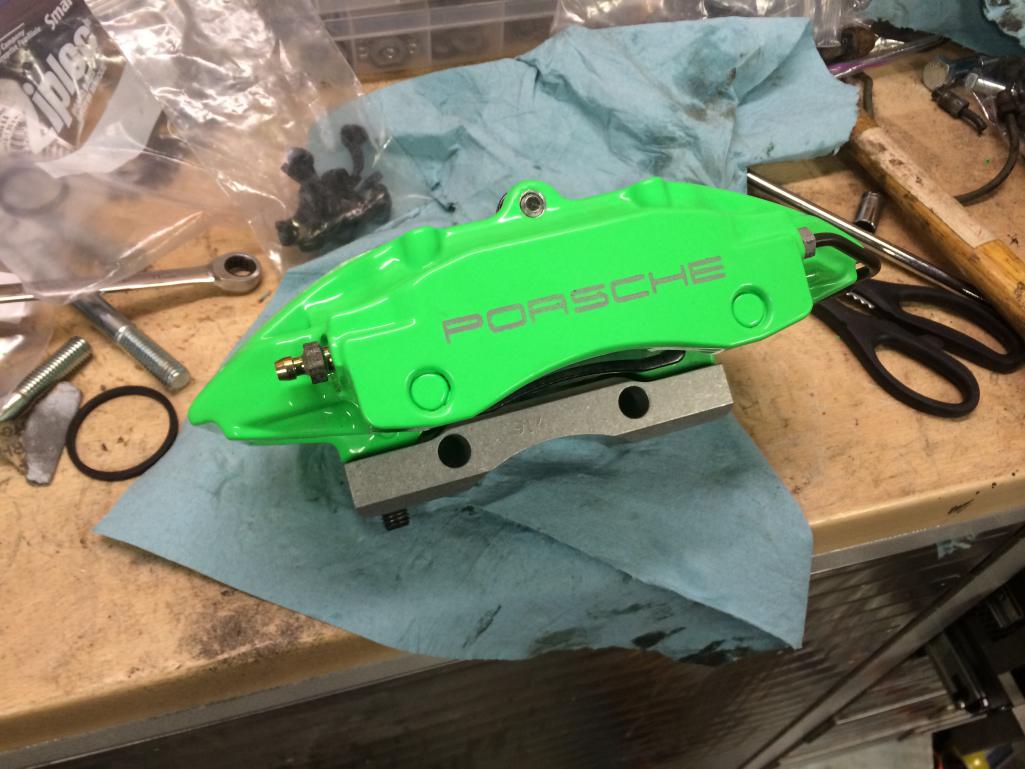
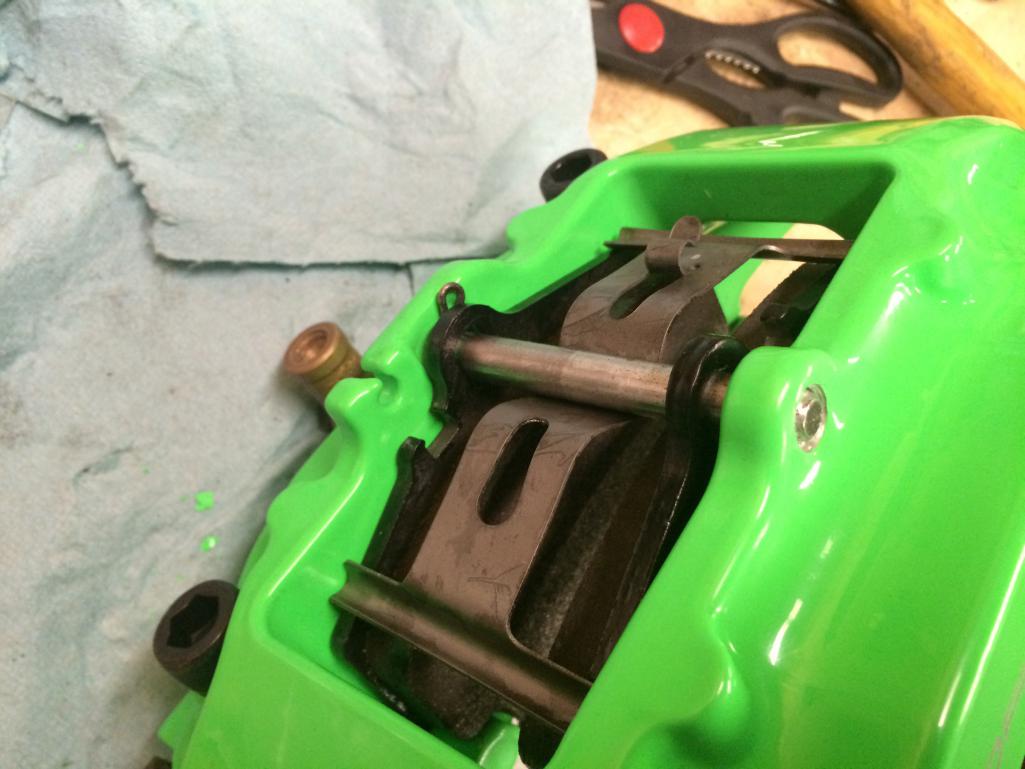
Posted by: dan_the _body_guy Apr 4 2014, 02:15 PM
you better get cracking on it the 18th is coming fast. after all the 12-14 hour days i had on it that car better make it to hershey even if it has to be pushed there lol
Posted by: Chris H. Apr 4 2014, 02:34 PM
Weeeellllll look who it is....Dan the body guy! A lot of people want your number Dan. You did some great work on that car. Really nice job!
And
Posted by: dan_the _body_guy Apr 4 2014, 02:53 PM
Weeeellllll look who it is....Dan the body guy! A lot of people want your number Dan. You did some great work on that car. Really nice job!
And
thanks chris, believe it or not the car was a real pleasure to work on and doug is a great guy to deal with. as for my number if anybody in the area wants to reach me my email is dfoulkrod1970@yahoo
Posted by: 914forme Apr 4 2014, 06:23 PM
In the area, heck, I'll bring mine up on a trailer and rotisserie. You did some great work on that car. 
And yes I agree with Chris
Posted by: CptTripps Apr 5 2014, 12:03 PM
Yup. Dan's my body guy from now on.
I'm in DC with my family this weekend, and in Vegas all next week, so I've got next Fri-Sun and the nights the following week to get it wrapped up. I didn't take pics but the electrical is about laid out and the ECU is back from being re-worked, so I'm closer than I appear.
I really need to work out the hoses and routing for the radiator. That's going to take some imagination and work.
Posted by: dan_the _body_guy Apr 5 2014, 07:47 PM
In the area, heck, I'll bring mine up on a trailer and rotisserie. You did some great work on that car.
And yes I agree with Chris
thanks stephen, dont forget your wallet if you make the trip. my friends at the paint supplier will appreciate the business, will i have more than 2 weeks to complete it? lol as ive said before i enjoyed working on grey matter it was nice to be able to help get it to hershey on the 18th. its a hell of a nice build, im looking forward to seeing dougs vision completed it should bring him many years of enjoyment
Posted by: CptTripps Apr 7 2014, 03:23 AM
Drove home from DC this morning and just about met my motor guy in my driveway upon arrival. Good timing!
We got the motor unpacked and ready to attach to the trans. So that's what I did next!
After installing a new lightweight flywheel and organic racing clutch, I got everything put together and ready to go! Trans mated with no issues and the throw-out bearing snapped into place. Added the "magic flanges" because the time seemed right.
Attached thumbnail(s)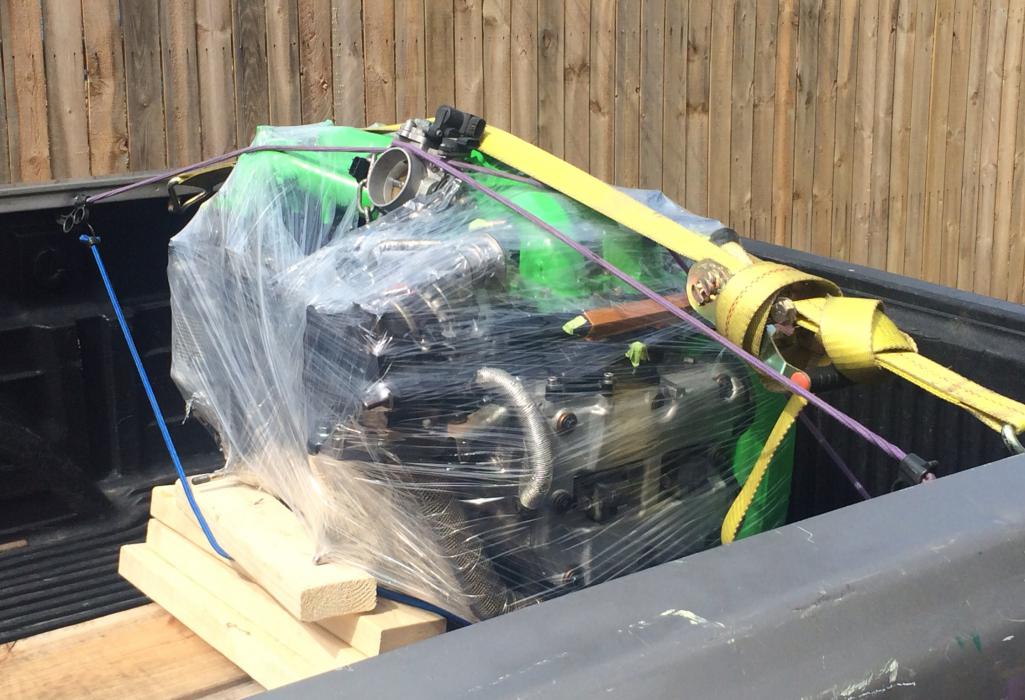
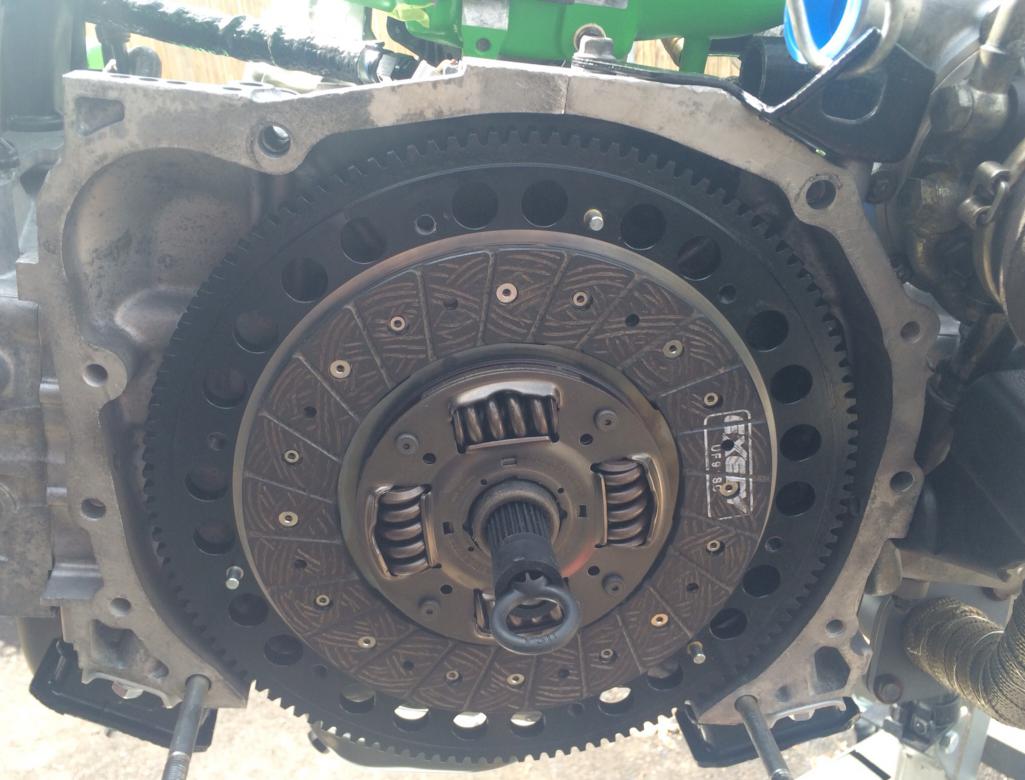
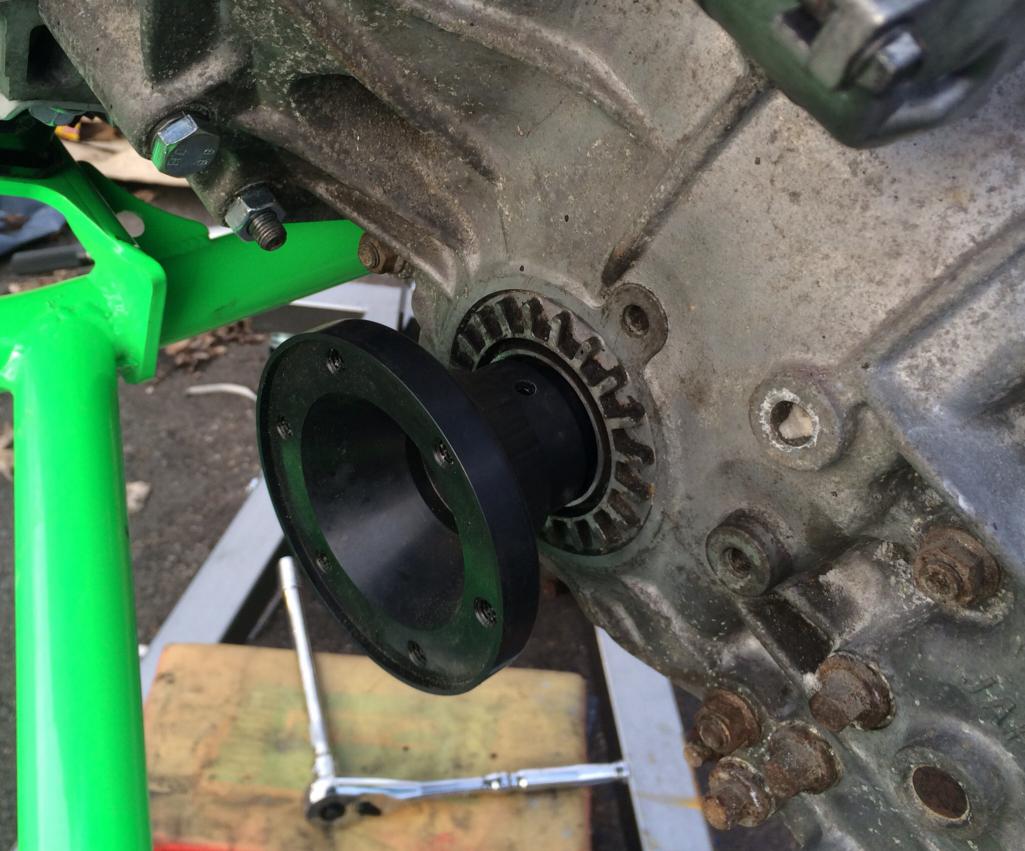
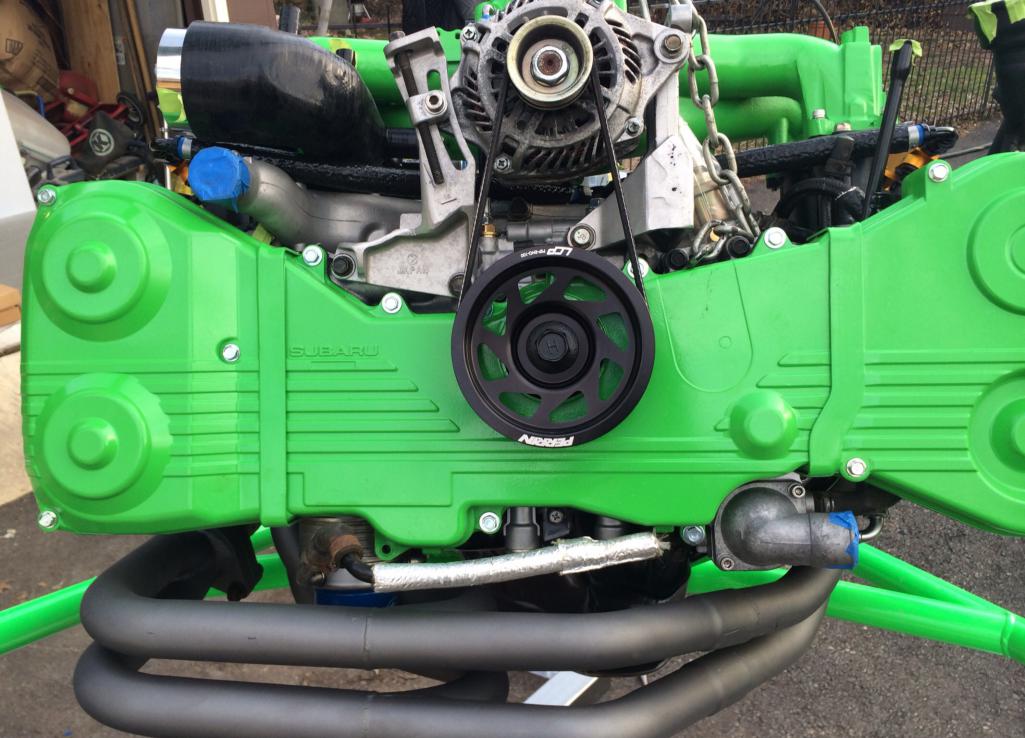
Posted by: CptTripps Apr 7 2014, 03:28 AM
I lowered everything and had my neighbor and his son lift the car while I rolled the motor in place.
I'll get it jacked up and mounted this morning before I leave for Vegas. I'll be there a few days and then I'm back at this build until she starts.
My hope is, I'll be able to have it out to Matt's shop next Saturday morn to get the motor started and drive it home Sunday to install the interior. It'll be close. But I think I can do it.
Attached thumbnail(s)
Posted by: CptTripps Apr 10 2014, 11:10 AM
No updates for a few days, as I've been in Vegas at a conference. I'm hitting it hard this week so I can drive it this weekend. Gotta make it happen!
Anybody want to come to Cleveland this weekend to help?
Posted by: rick 918-S Apr 10 2014, 11:16 PM
No updates for a few days, as I've been in Vegas at a conference. I'm hitting it hard this week so I can drive it this weekend. Gotta make it happen!
Anybody want to come to Cleveland this weekend to help?
I was actually supposed to be in Cleveland delivering the 911 but I got a stay of execution until June 1st.
Nice progress!
Posted by: CptTripps Apr 11 2014, 05:53 AM
I was actually supposed to be in Cleveland delivering the 911 but I got a stay of execution until June 1st.
Nice progress!
Damn. That would have been great! Hope I'll see you then.
Honestly, I just want someone else to give everything a once-over so I'm not about to go down the road in a death-trap!
Posted by: Philip W. Apr 11 2014, 06:09 AM
Doug, i'm not sure how you are going to get that on the road in a week! BUT you have some serious mad ninja build skills  !
!
i hope all the electrical sorts out. it seems like that could be the only thing holding you back in the end. do you have the harness installed yet? wish i was going to Hershey this year, but seems i always have a conflict with C.E. conferences every april. - heck, its been a month since i started trying to get my brakes fully bled after replacing all the lines, calipers etc. so i hope that goes smoother for you than it has for me! - this might be the fastest build from tub to finish ive seen in being around the 914world the past 5 years! looking forward to more pics!!!!!!!
Posted by: CptTripps Apr 11 2014, 07:30 AM
I plan on having the brakes done by midnight, and if I can get the wiring and ECU mounted that'd be a great day.
Posted by: tdgray Apr 11 2014, 08:05 AM
No updates for a few days, as I've been in Vegas at a conference. I'm hitting it hard this week so I can drive it this weekend. Gotta make it happen!
Anybody want to come to Cleveland this weekend to help?
I was actually supposed to be in Cleveland delivering the 911 but I got a stay of execution until June 1st.
Nice progress!
Yeah let us know Rick... would be great to grab a beer and BS... If I can ever free myself from work
Posted by: CptTripps Apr 11 2014, 08:23 AM
Seats are done. :-)
Attached thumbnail(s)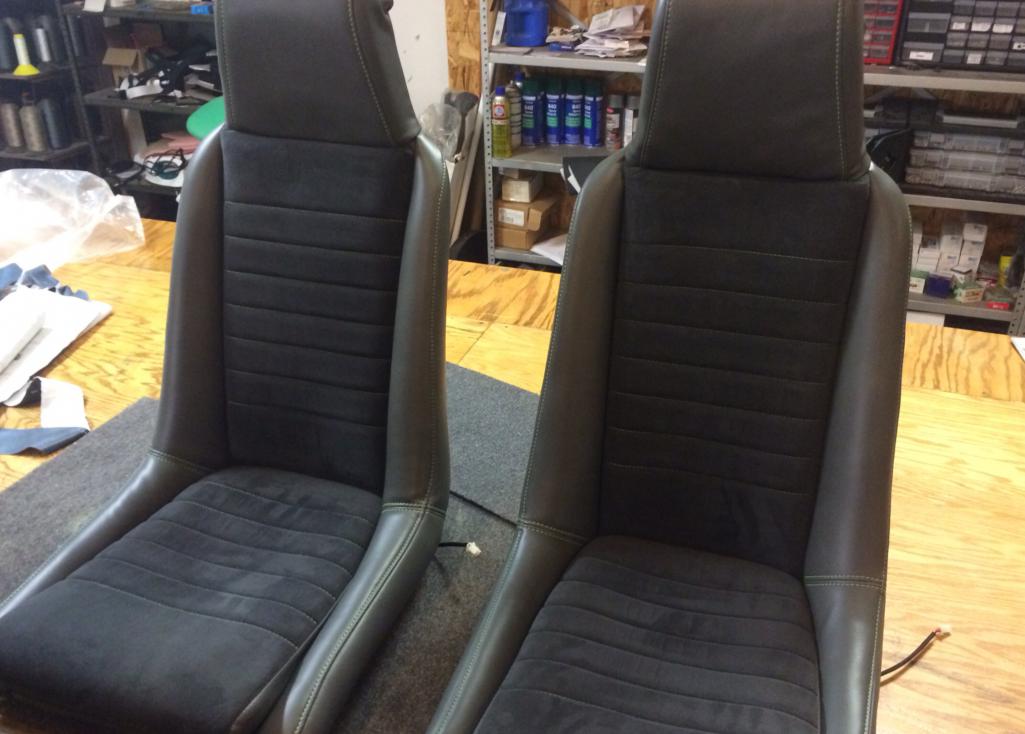
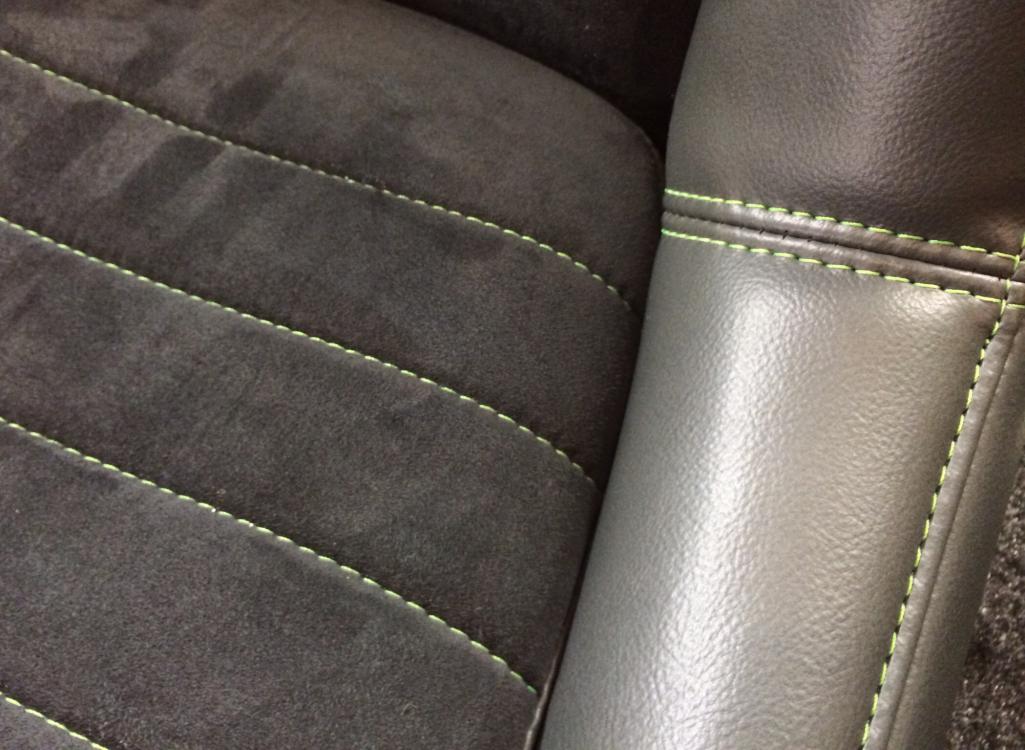
Posted by: rhodyguy Apr 11 2014, 10:14 AM
awesome, fast build.
Posted by: Qarl Apr 11 2014, 01:10 PM
Love the green stitching. Nice touch!
Posted by: dan_the _body_guy Apr 11 2014, 08:45 PM
get back to work! when youre finished putting the scratches and greasy paw prints on it from assembly let me know so i can give it a final buff and glaze before anybody sees it
Posted by: CptTripps Apr 12 2014, 08:19 AM
I went in to the office yesterday to grab something and ended up smack-dab in the middle of an emergency that the team was working on, so I didn't get back home until about 9p. No worrys...I've been in Vegas all week, and still working on "west cost time"
Worked till 2:30am on wiring....and I 'm up to go finish the job. This harness is SO easy to use. I'm going to go back through and mark all the wires I used, and where to use them so others can do this too. Even the good instructions are a little tough to understand.
Garrett is helping with wiring today, and I HOPE to get the cooling system plumbed at some point too. Gotta figure out the size hose I need, then I'm headed to McMaster Carr to pick up that and a few other do-dads.
Attached thumbnail(s)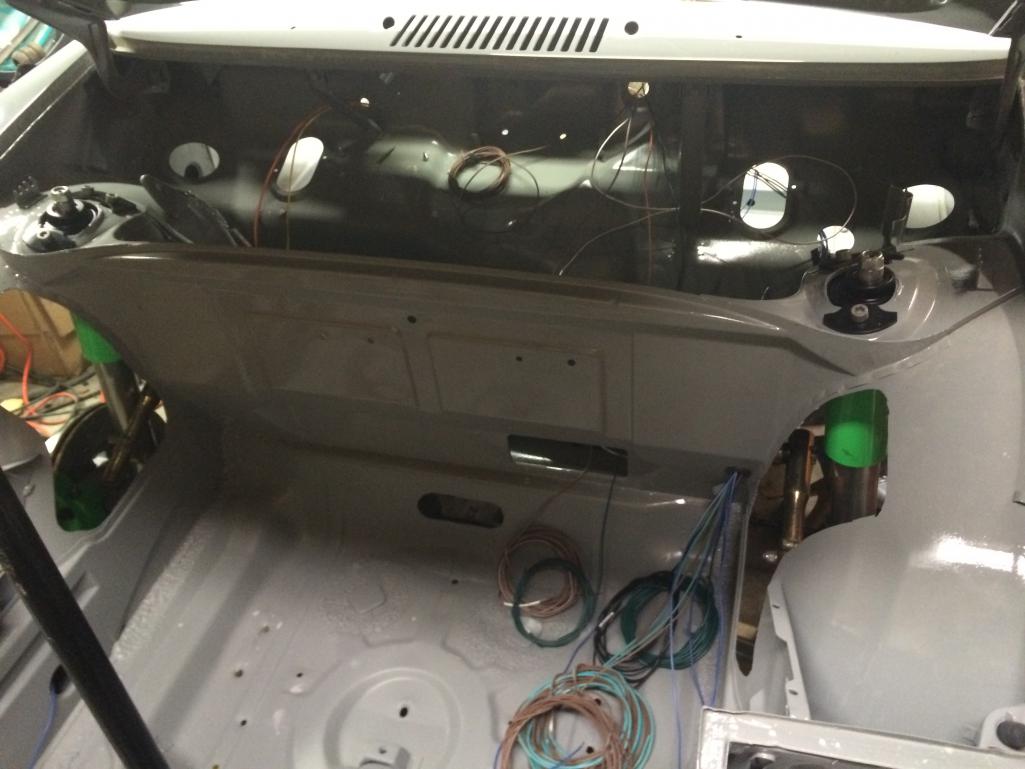

Posted by: PanelBilly Apr 12 2014, 08:27 AM
Go speed racer, go!
Posted by: 76-914 Apr 12 2014, 09:10 AM
I might have missed this part, but did you reinforce those wheel well cut outs? Looking good. I can't wait to see the total $$ build cost
Posted by: Spoke Apr 12 2014, 09:13 AM
Amazing progress!
The only way I could do this much work this fast is to have started 5 years ago, stored all the pics, and release them in sequential days. Awesome!
BTW, how will you cover the openings in the center channel?
This is the way the manufacturer should have made it so things are accessible.
Attached image(s)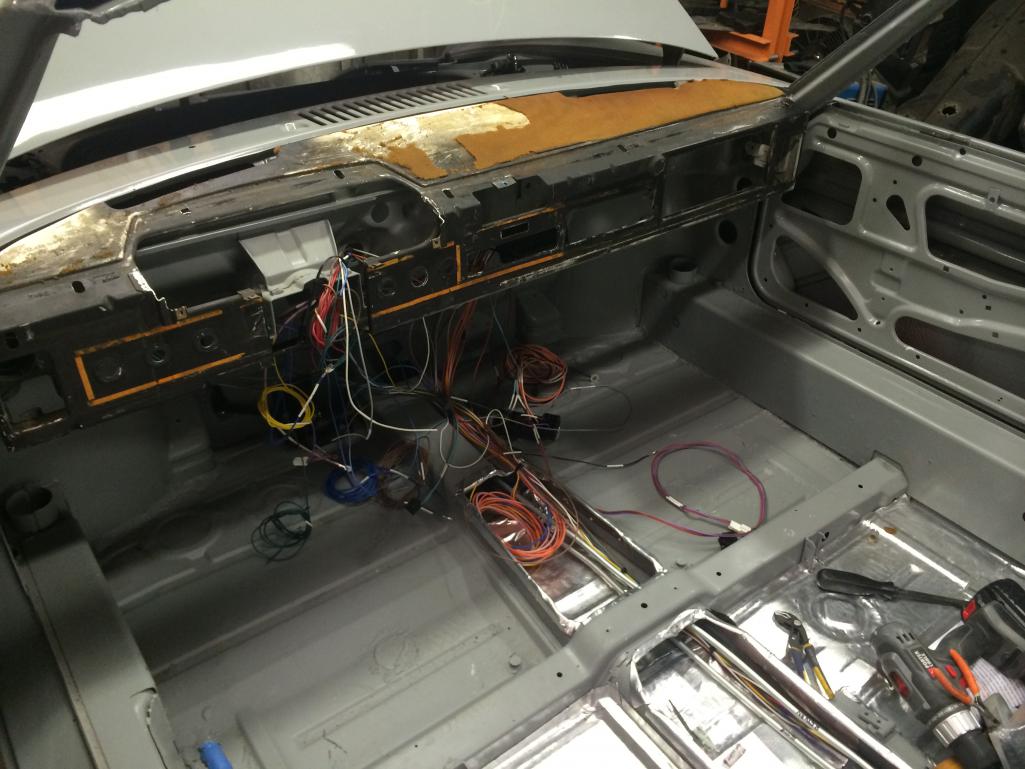
Posted by: CptTripps Apr 12 2014, 04:27 PM
Spent all morning working on the radiator and finishing up the wiring. Also stripped the paint off the rear tail lights and got them re-painted too. I'm going with black on them because the LEDs are bright enough.
Oh...I also got the motor/trans in the car. Clearances are perfect. Plenty of room. I'll be able to get the CVs in shortly and then will work on how in the hell I'm going to get water back there. Hmmmmmm....
Attached thumbnail(s)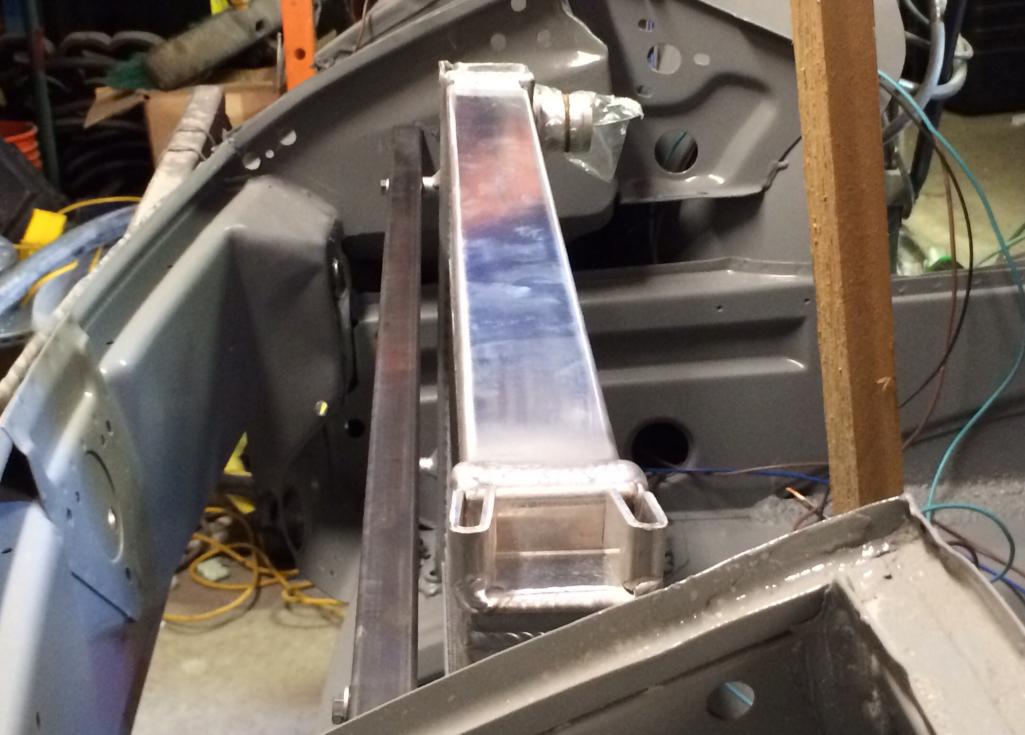
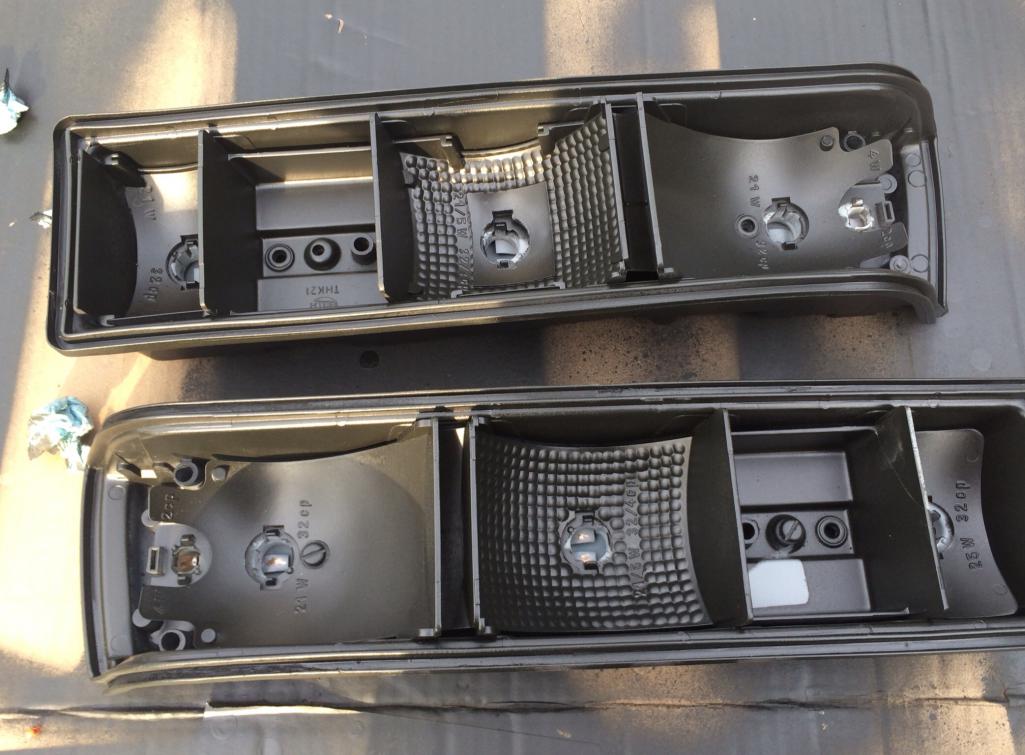
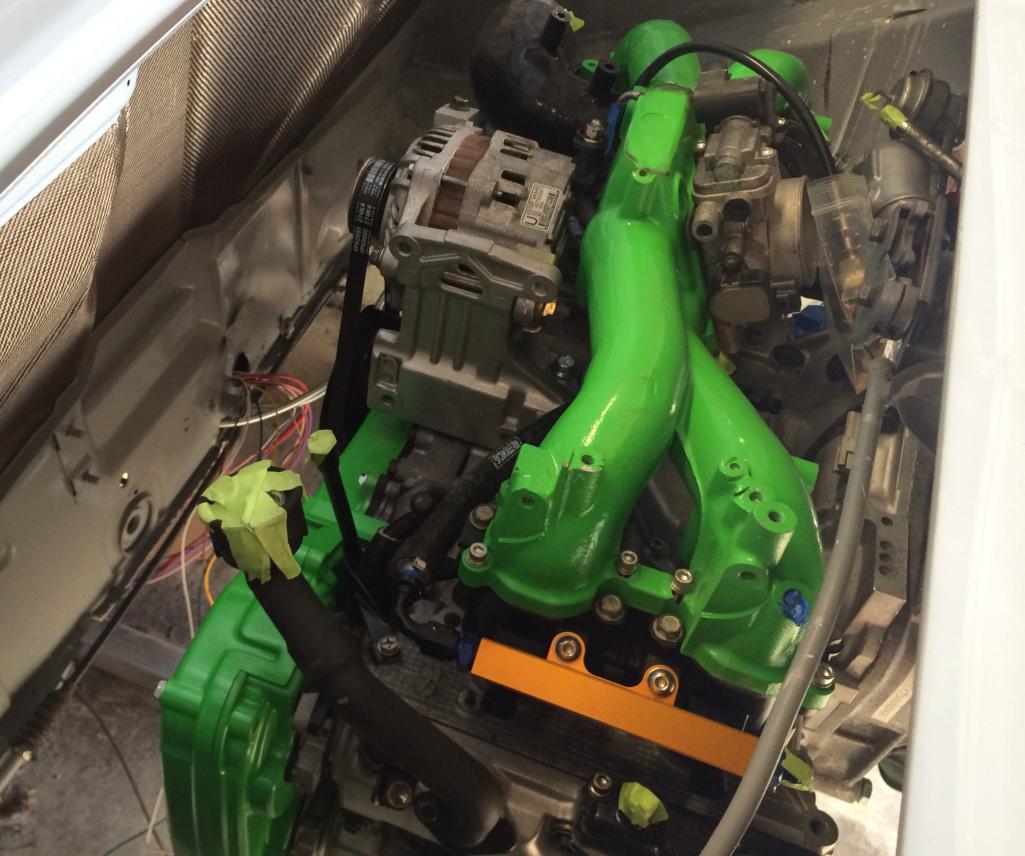
Posted by: 914forme Apr 12 2014, 05:37 PM
Doug, I have some concerns about your radiator mount. Most of the time they are mounted into a channel at the bottom, padded, and a set of brackets at the top that clamp them in place. The bungs you used are normally for the fan assemblies to be mounted to. At least thats what my rock crawler friends. They say that using the bungs will cause the vibrations from the car to rapidly flex at that point causing them to crack, and leak. Thats what I have been told. Now rock crawlers might see more forces being applied to their rads than we would. But I noticed that my stock rads all use isolated pin mounts at the bottom, and isolated pin mounts at the top.
Posted by: CptTripps Apr 12 2014, 07:13 PM
Doug, I have some concerns about your radiator mount. Most of the time they are mounted into a channel at the bottom, padded, and a set of brackets at the top that clamp them in place. The bungs you used are normally for the fan assemblies to be mounted to. At least thats what my rock crawler friends. They say that using the bungs will cause the vibrations from the car to rapidly flex at that point causing them to crack, and leak. Thats what I have been told. Now rock crawlers might see more forces being applied to their rads than we would. But I noticed that my stock rads all use isolated pin mounts at the bottom, and isolated pin mounts at the top.
Good tip! Nothing is concrete yet, as I haven't welded the top piece in. The bottom bar IS for the isolation posts, and that's how I have them in place. I'll re-work that later or tomorrow when I go to Summit Racing to pick up some more (smaller) hose.
I've been working on lights for the last few hours. Got the backs done, and all purdy. Need to order the plastic nuts so the lenses attach right.
I'm really stuck on my rear hubs. They're (I think) wider than the 914 bearings, so I may need to re-do them before I can drive. Tightened all the way, there seems to be play on the hub. I'm at a loss.
Attached thumbnail(s)
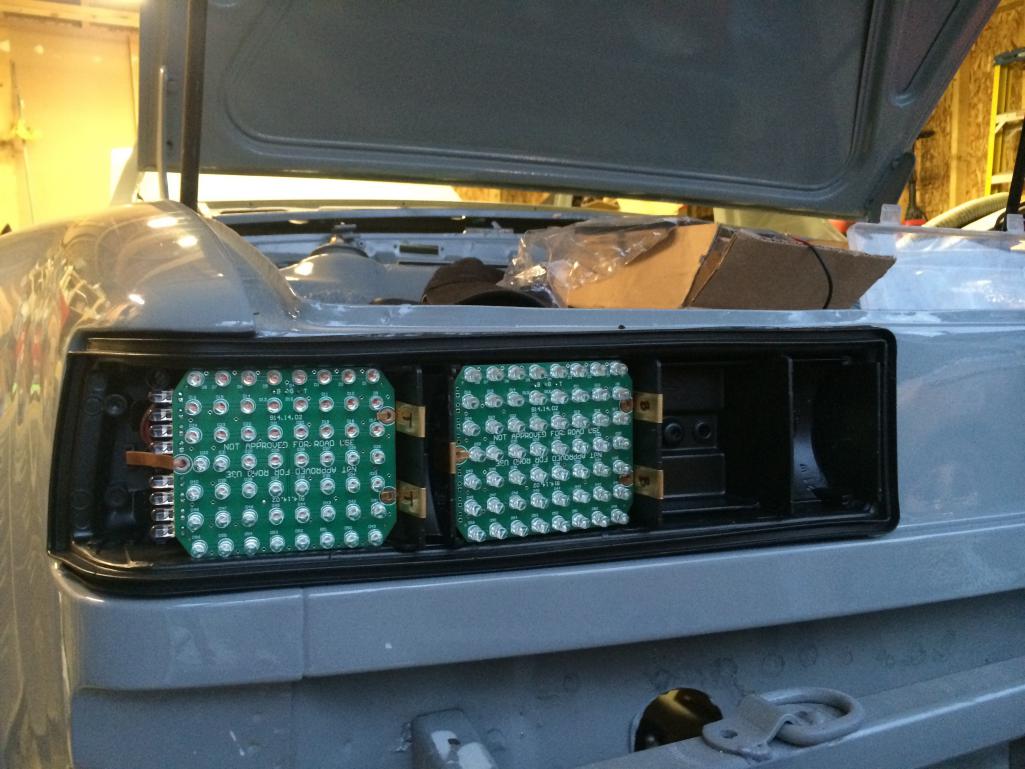
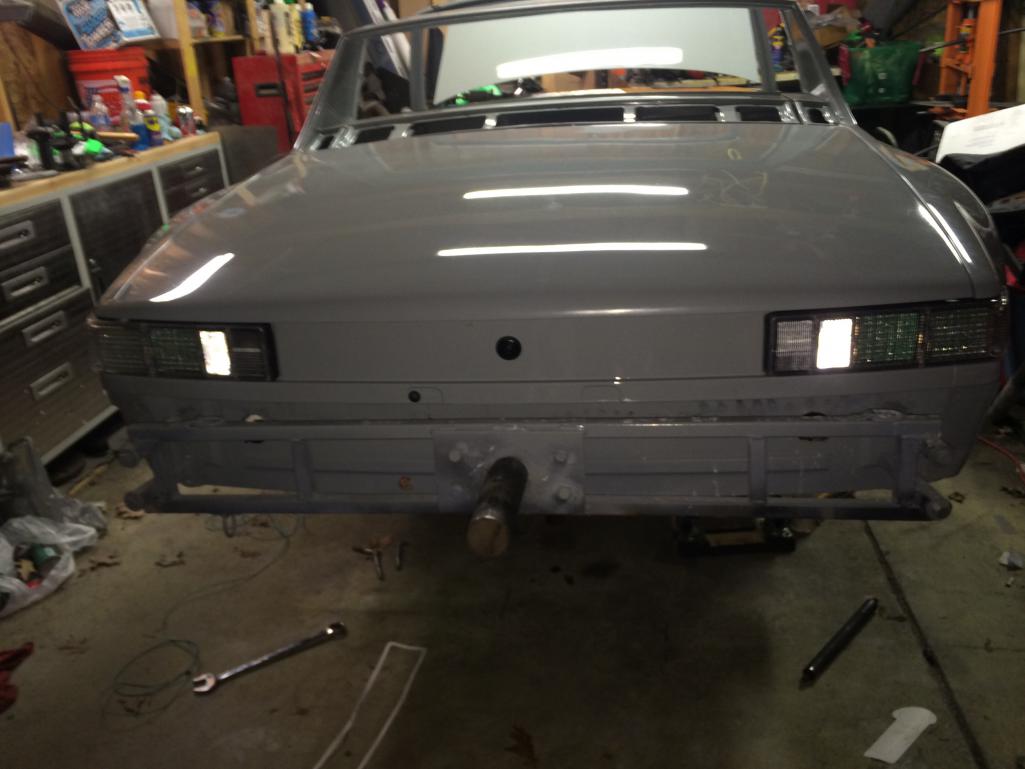
Posted by: CptTripps Apr 12 2014, 10:38 PM
Ok. I'm calling it a night.
Got the dash mocked up. Plates show up Monday.
Got the engine all wired up, and the wires routed to the trunk wall for mounting. I'll hook up the ECU tomorrow and get that tidied up. The distribution block layout might change a few times...actually, I know it needs to.
Engine bay is starting to really come together. A few more doodads to add before I take it to the engine builder so I can get the inter cooler plumbed and ready to roll.
It's getting there...
Attached thumbnail(s)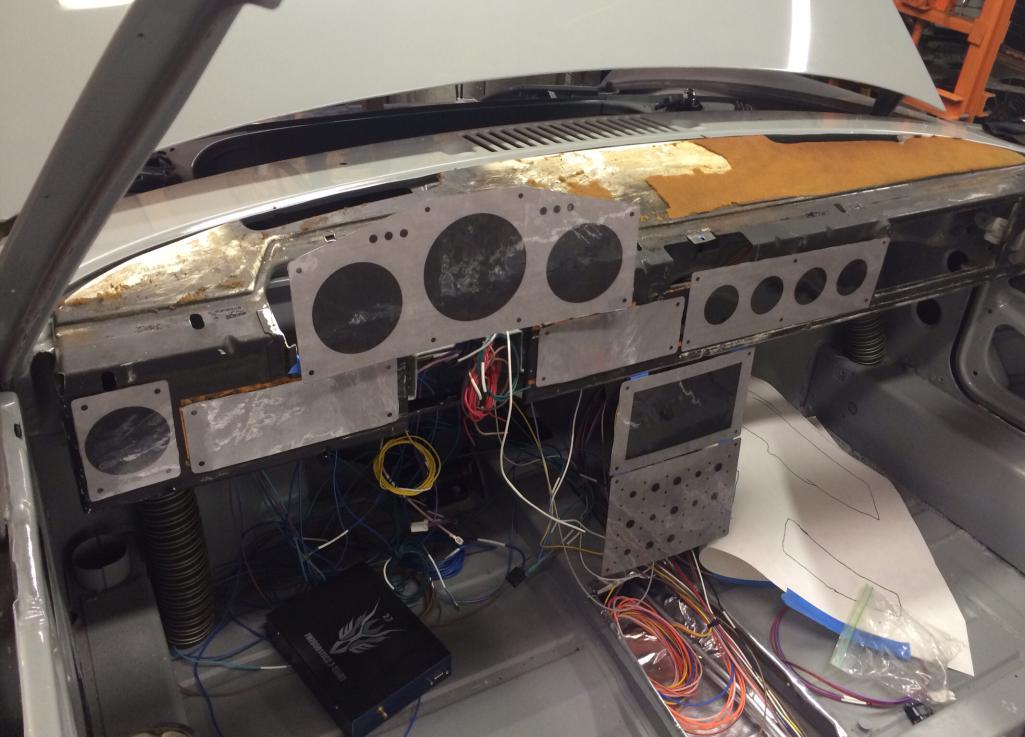
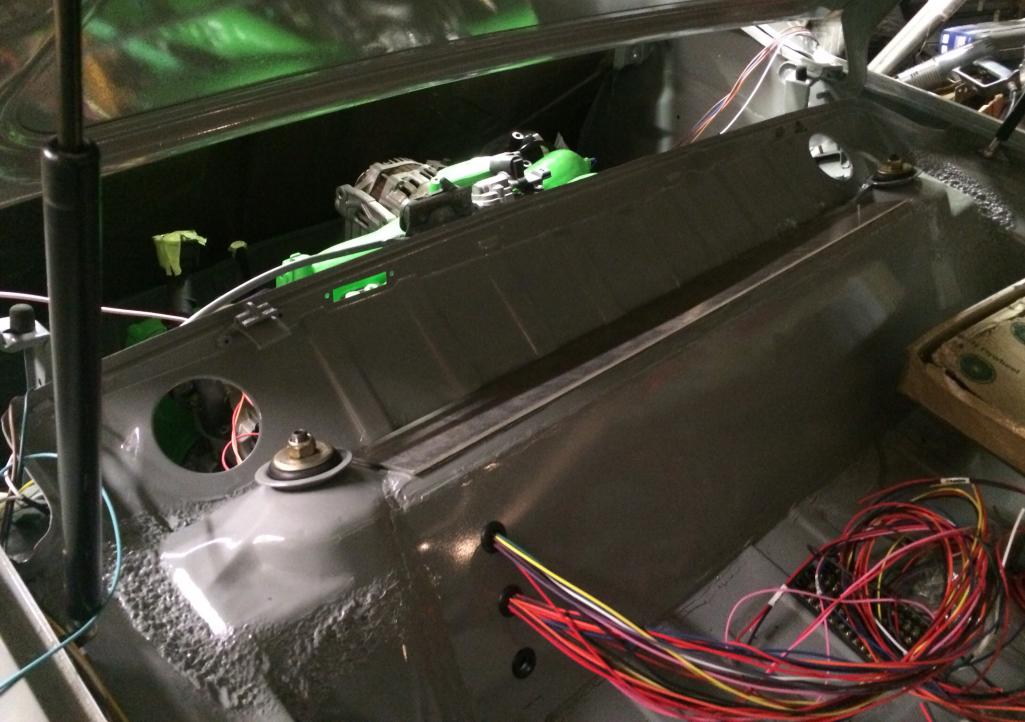
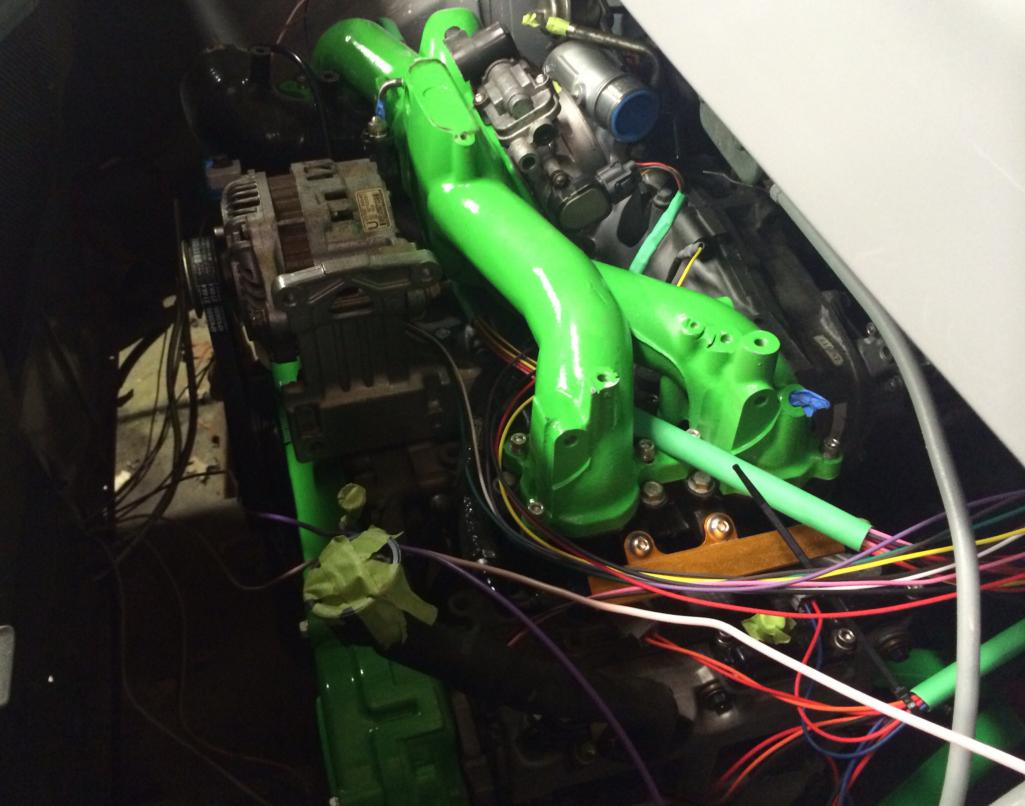
Posted by: dan_the _body_guy Apr 12 2014, 10:49 PM
very nice! its starting to look like a car again, get with me after you get it running ill finish buffing before hershey trip
Posted by: 914forme Apr 13 2014, 07:55 AM
Doug, let me know what other odds and end 914 pieces you need, I am sure I have them hoarded just for your build.
I PM'd you about the lens nuts.
Posted by: CptTripps Apr 13 2014, 12:47 PM
Thanks Stephen!
Spent all morning getting the cable shifter installed and hooked up. Now I'm on the the radiator hose.
I welded a 3/4" square tube brace to the tunnel. Not that it needs more bracing, but the height was perfect for what I'm building as a center console.
I also added a little shrink-wrap to the nut that connects to the shifter linkage. This fattened it up perfectly. The only modification I made to Ian's piece was to make the hole in the Aluminium arm a little bigger so it matches the hole on the clevis fitting. We're in business now. VERY tight shifting pattern!
Attached thumbnail(s)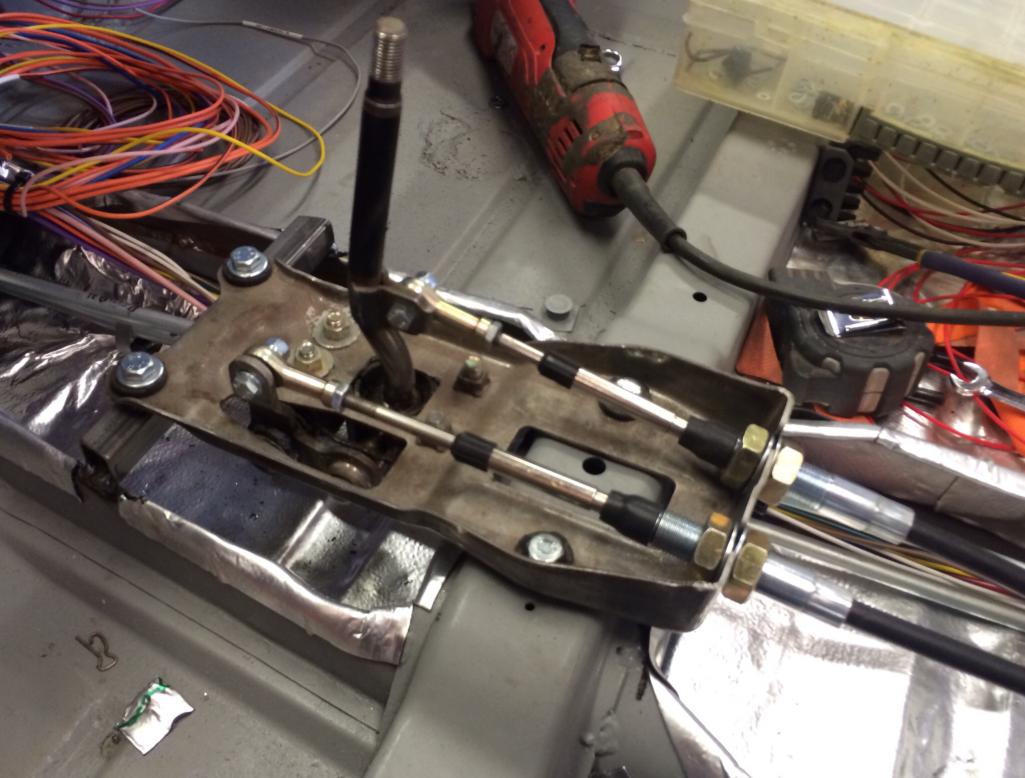
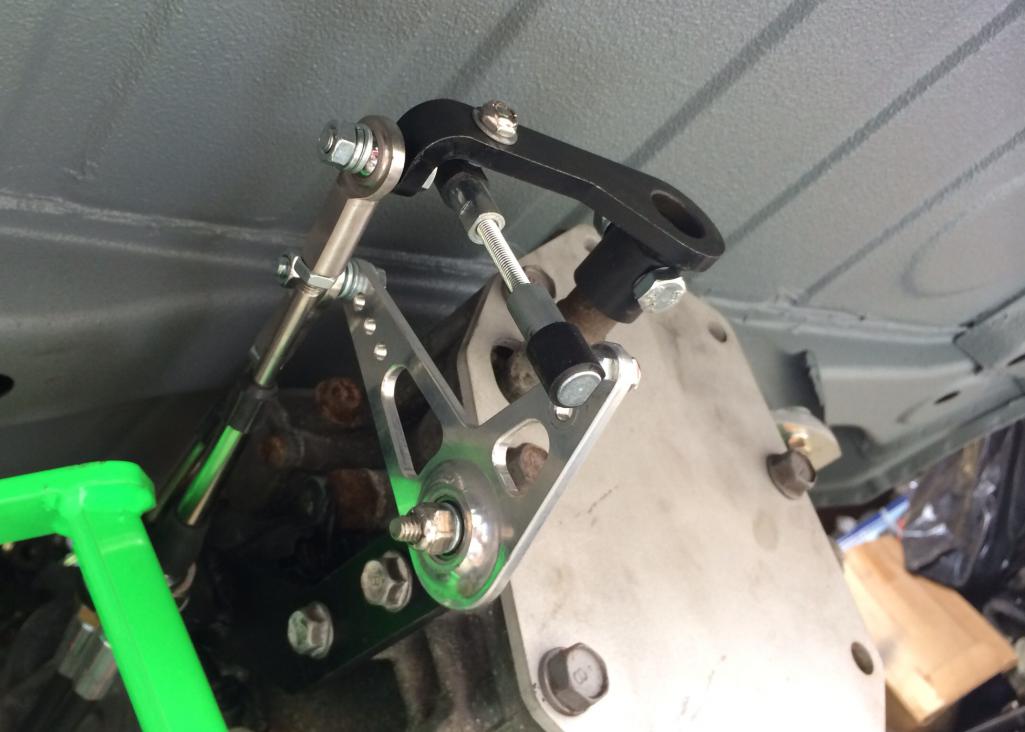
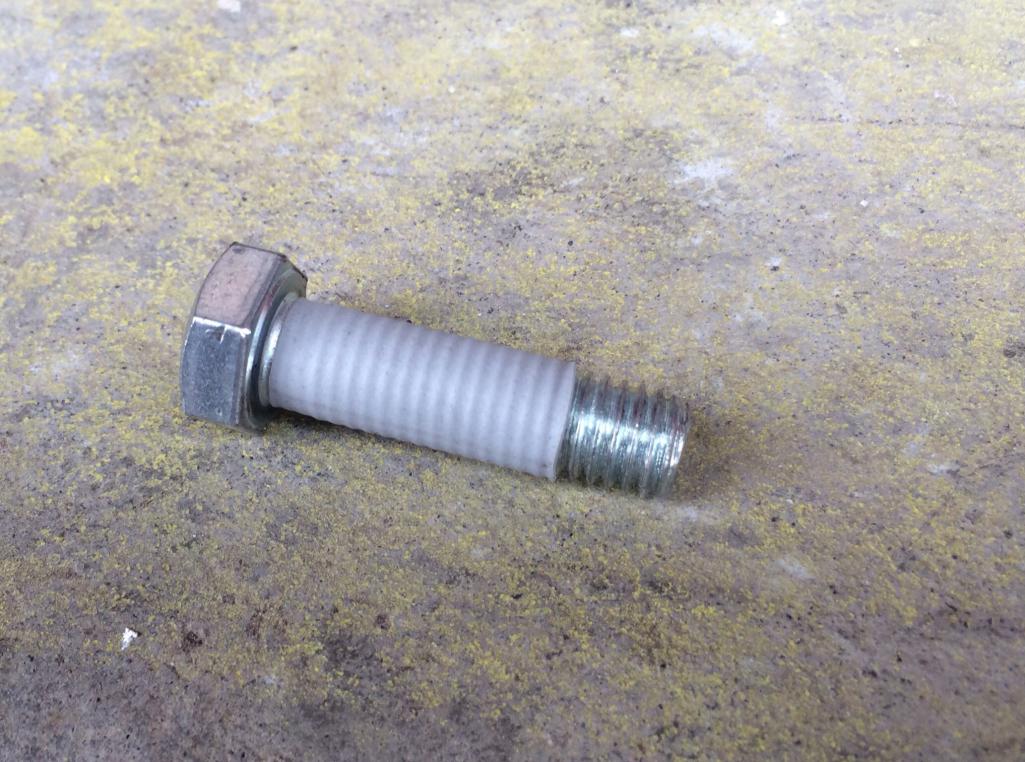
Posted by: CptTripps Apr 13 2014, 01:46 PM
Just decided that I'm going to take the radiator hoses up the tunnel. I have a lot of Lava Mat left for the entire tunnel, and it'll be a lot cleaner than going through the longs or under the car.
I can take a 4" square piece of Lava Mat, stick it to my finger, and hold it 3" over the top of an open flame with almost no heat on my finger. I think it'll work real well.
Posted by: McMark Apr 13 2014, 04:57 PM
Paint your PCBs black. 
Posted by: CptTripps Apr 13 2014, 07:06 PM
Paint your PCBs black.
Not a bad idea! I'll add that to the "after I get driving" list of weekend projects.
I got the clutch master re-mounted tonight and started on the radiator hose. I have a lot of little things to do with the electrical so I'll do those inside tonight. Just finished tagging all the wires out of the ECU to make that easier to identify while hooking up.
Attached thumbnail(s)
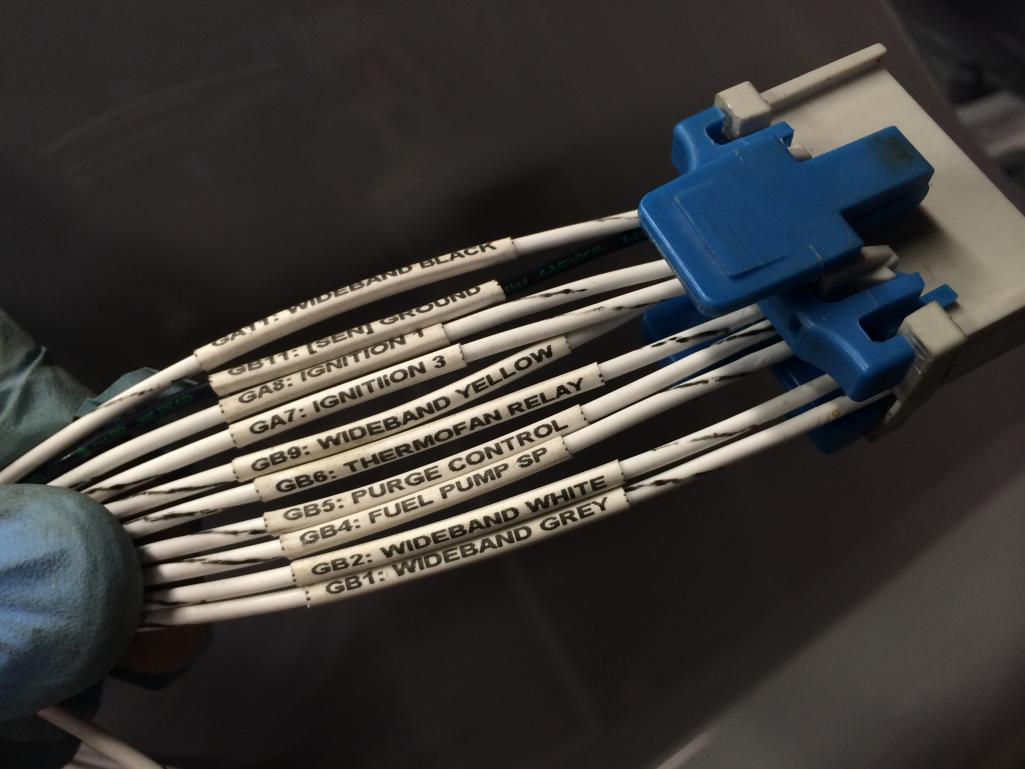
Posted by: Chris H. Apr 13 2014, 08:30 PM
Just decided that I'm going to take the radiator hoses up the tunnel. I have a lot of Lava Mat left for the entire tunnel, and it'll be a lot cleaner than going through the longs or under the car.
I can take a 4" square piece of Lava Mat, stick it to my finger, and hold it 3" over the top of an open flame with almost no heat on my finger. I think it'll work real well.
Great idea. I thought about the tunnel too since it'll be so empty without the shift rod and clutch cable, etc. but thought for sure it would get too hot in there. Can't wait to hear how it works. How crazy would it be to wrap the section of the hoses inside the tunnel in something like that as well? Not necessarily that stuff but some sort of heat barrier? Or at least the "hot" side? Just to get double protection in there....
Keep up the pace, you're really getting there! Hope you'll have a day or two for quality control/tweaking.
Posted by: CptTripps Apr 13 2014, 08:57 PM
I'm planning on taking a spin Wednesday night. That'll give me Thursday night to check everything over before I drive off to Hershey on Friday.
I may not have rocker panels or even much of an interior, but I'll be driving it.
Posted by: Qarl Apr 13 2014, 08:58 PM
You are a mad, mad, man!
Posted by: dakotaewing Apr 13 2014, 11:34 PM
How about a few more details on the front trunk...?
Show/give some more details on the radiator...!
Posted by: 914forme Apr 14 2014, 07:46 AM
My only issues with down the tunnel would be the possibility of heating brake fluid, or the fuel. Warm fuel sucks, but pre heated brake fluid could become a safety issue.
Warm fuel = less power.
Warm Brake fluid, means your closer to boiling it. I hope it works, because that makes for a nice well protected easy to run location. Might want to add some shielding for the lines. I know you said Lava Rock, with out testing Im not sure how well that stuff truly works.
Are they going to be tubing of the steel or Al. kind, or hose like green stripe?
Posted by: Jacob Apr 14 2014, 08:31 AM
Great work on you build! Thanks for sharing the pictures!
Posted by: CptTripps Apr 14 2014, 09:18 AM
My only issues with down the tunnel would be the possibility of heating brake fluid, or the fuel. Warm fuel sucks, but pre heated brake fluid could become a safety issue.
Warm fuel = less power.
Warm Brake fluid, means your closer to boiling it. I hope it works, because that makes for a nice well protected easy to run location. Might want to add some shielding for the lines. I know you said Lava Rock, with out testing Im not sure how well that stuff truly works.
Are they going to be tubing of the steel or Al. kind, or hose like green stripe?
The lava mat works real well, but that's not to say that I wouldn't rather over-do the insulation there.
I was going to use the green stripe hose. I have plenty of 1" hose that fits well in the tunnel. An idea is to put something up the middle to separate it into two sides. I could use an insulating board that would give me an extra barrier between the radiator hose and the brake/fuel lines. Using a heat-shield sleeve on the radiator hose would also help a bit.
The goal is to have everything through that tunnel, so I've got to do whatever it takes to get it there. Right now, I have 1" ID hose, and then make it 1.25" on the radiator side and 1.4" at the motor. I don't know if that's going to be an issue or not, but from what I've heard, I should be just fine.
Either way, I'll find out this week if it works or not.
Back to progress:
I printed out all the shrink-wrap for the wires, and mounted the ECU in the trunk last night. I'll wire that all up later today and then get back to the tunnel and running lines. I have a feeling that's the last "great hurdle" I have to get over before the other pieces start falling into place. I'll also mount up the intercooler and fan tonight. I figured out where I'm mounting all of that. (under the driver side of the trunk, opposite the exhaust.)
Posted by: CptTripps Apr 14 2014, 09:58 AM
very nice! its starting to look like a car again, get with me after you get it running ill finish buffing before hershey trip
Doubt I'll have time, but if you want to come by Thursday afternoon, you're welcome to! I should have most of the exterior work and trim back on by then. I still don't think the paint we touched-up with is dry yet. Something tells me the hardener was needed afterall. ;-)
Posted by: CptTripps Apr 14 2014, 04:41 PM
For those wondering about LavaMat...
https://www.youtube.com/watch?v=uNc_WyJ_7KA
Posted by: Qarl Apr 14 2014, 04:50 PM
That's like 4-5 inches away. Tiny little flame.
HOW LAME!
Posted by: CptTripps Apr 14 2014, 05:11 PM
I'll try with a torch...just for you Qarl.
https://www.youtube.com/watch?v=lXQUnWSKS8A
Posted by: bulitt Apr 14 2014, 05:22 PM
At least you didn't stick it on your middle finger for the torch test!
Posted by: dudzy's914 Apr 14 2014, 06:39 PM
How did you do those LED lights? What lens, and what LED pagage did I you use?
Posted by: CptTripps Apr 14 2014, 09:20 PM
Getting closer...
I spent an hour on re-building the proportioning valve tonight. I put it together wrong last time. Doh!
Then I ran the rear brake lines and played around in the front trunk a bit. Got the front marker lights wired up and installed. Then I moved to the ECU and got everything wired and ready to connect. Marking everything was important.
I also installed the wiper motor and squirters, only to realize I'm missing one of the rubber gaskets. Sent an email to Mark about that.
I'll have the spacers for the rear hubs tomorrow so I can get them installed along with the CV joints and then I should have a chance at making my deadline.
Tomorrow I'll finish the brakes and MAYBE get the radiator hoses set up. Past that it's going to be figuring out where the inter cooler stuff can go and finishing wiring. This is going to be close!
Attached thumbnail(s)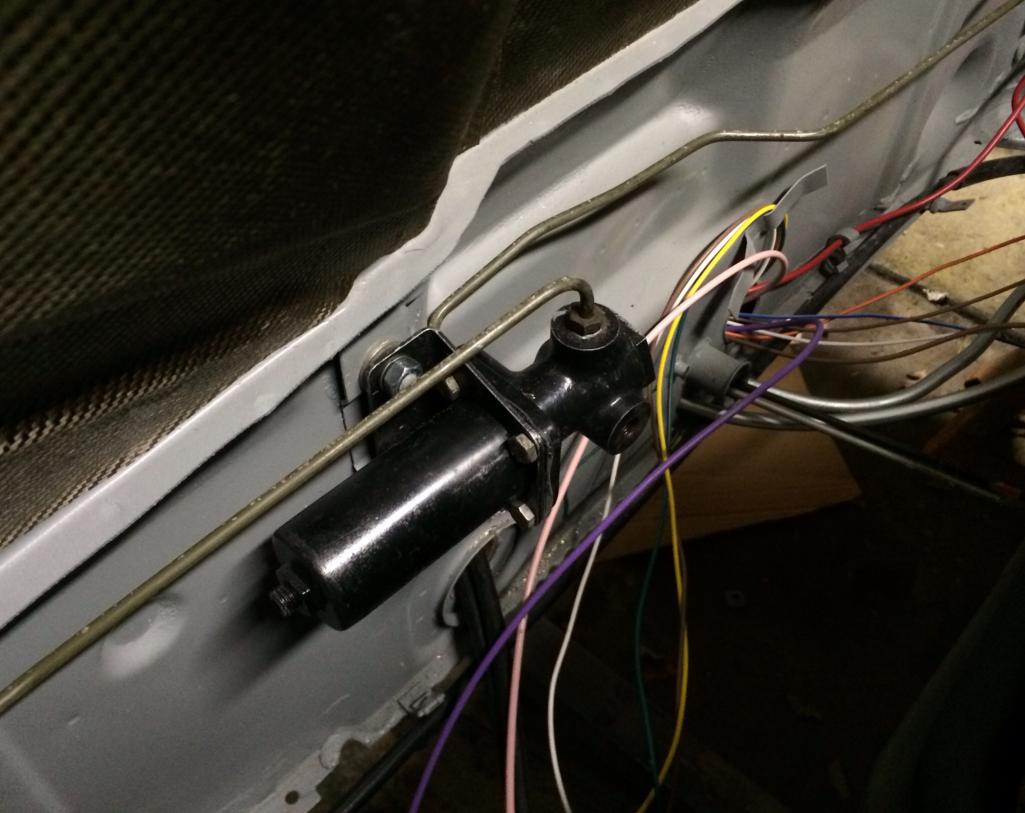
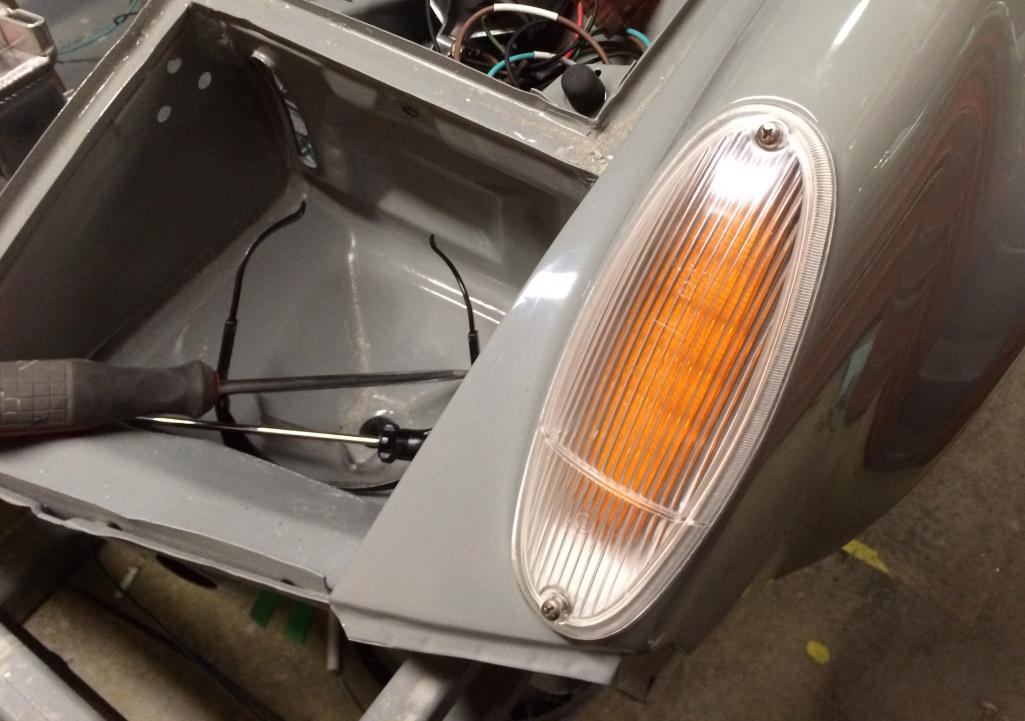
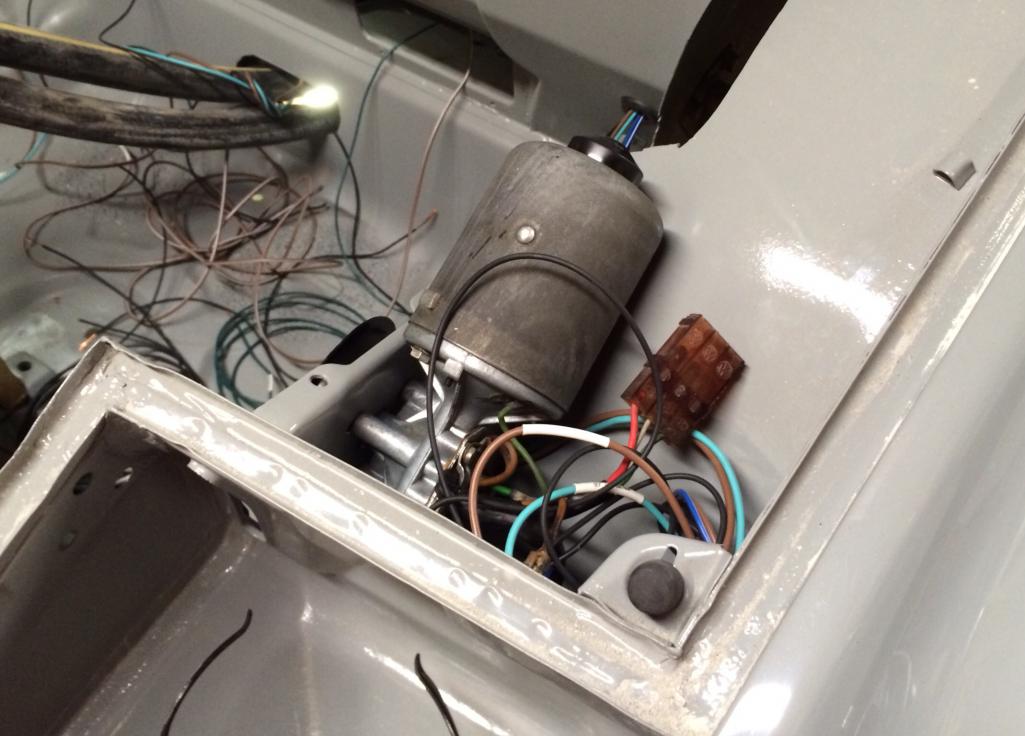
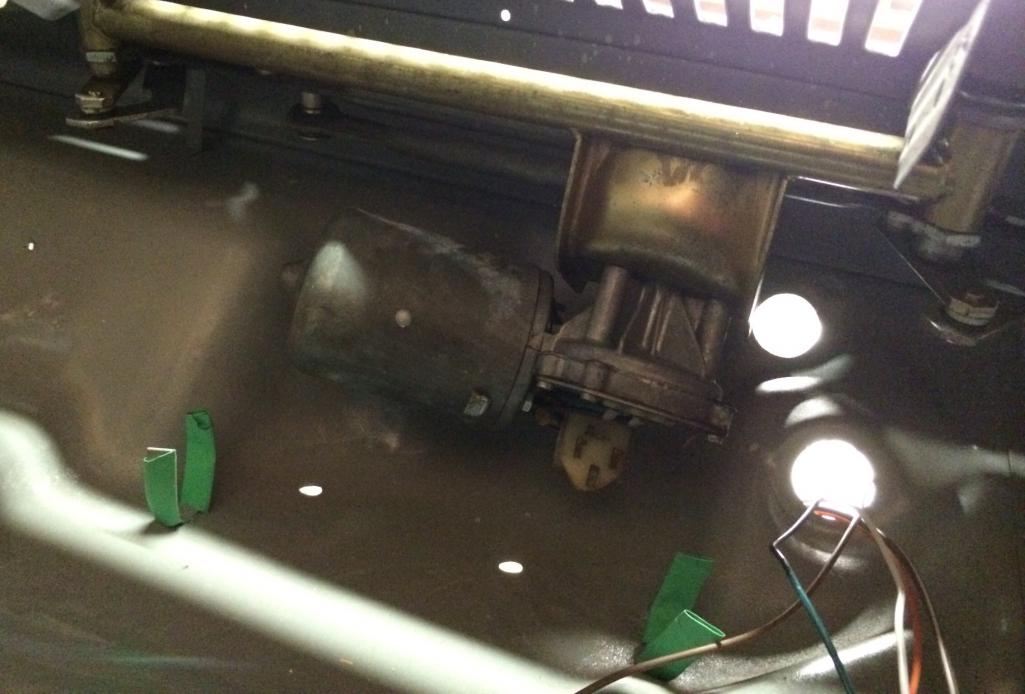
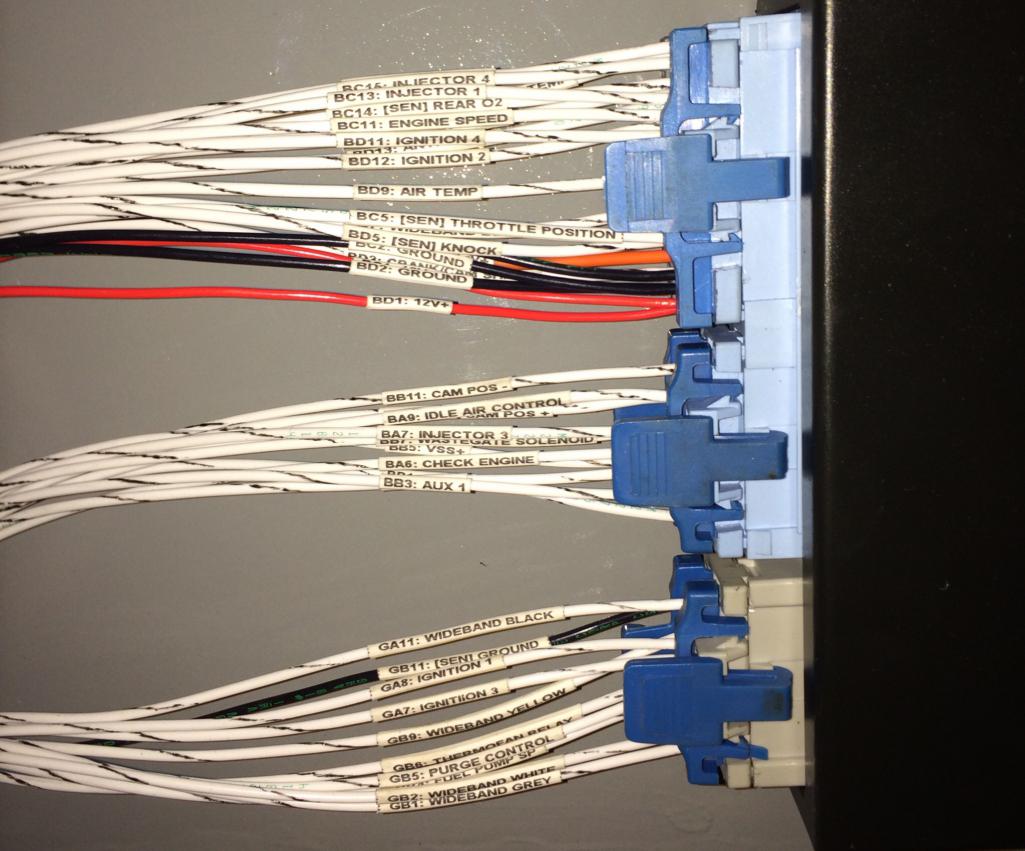
Posted by: bigkensteele Apr 14 2014, 09:36 PM
Doug, I am addicted to this thread. Can't believe how much work you are getting done so quickly, yet so well. You must be one hell of a project manager to keep yourself so focused and on task.
Posted by: CptTripps Apr 14 2014, 09:44 PM
Ha! I'm the worst PM in the world. Even my PMs at the office would say the same thing. My ADD keeps me bouncing around different parts of the car. I think that's why it seems like I'm getting so much done.
Honestly, I wish I was further along. I have a lot to do in 3 days to get it on the road. With all of this, we had a client spring a surprise on us so I may have to run out if town tomorrow for the day. That'll put a big kink in my plans.
We shall see...
Posted by: Dr Evil Apr 14 2014, 10:37 PM
When are you cruising through to Hershey? I plan to leave Fri AM sometime. I am on the way and can help call you a two truck if you get a problem This is impressive
Posted by: CptTripps Apr 15 2014, 07:09 AM
When are you cruising through to Hershey? I plan to leave Fri AM sometime. I am on the way and can help call you a two truck if you get a problem
This is impressive I was planning on leave Cleveland about noon, so I'd land in Hershey about 5:30. If I can get this built up enough that I trust it, I'll be there with my 914. If not, I'll either trailer it there on my truck, or just drive my DD and enjoy the ride.
Either way, I'll be there. Just not sure if I'll be driving a 914, Discovery, or 535. Two of the three may need a tow truck, so I'll keep your number.
There was a point last night that I thought this may be a hopeless cause, but now I'm looking at the punch list and thinking I may be able to get it done enough to drive. I won't have a lot of the interior done, but all I need is a seat and a steering wheel...right?
Posted by: CptTripps Apr 15 2014, 07:31 AM
How did you do those LED lights? What lens, and what LED package did you use?
Spoke is making them.
Thread: http://www.914world.com/bbs2/index.php?showtopic=202793
Buy: http://www.914world.com/bbs2/index.php?showtopic=233408
Posted by: JmuRiz Apr 15 2014, 07:41 AM
Love the green stitching. Nice touch!
Totally beat me to my idea.
Hey CptTripps:
Who did your seats? Would they do a stitched dash?
Posted by: bulitt Apr 15 2014, 07:49 AM
Doug, I am addicted to this thread. Can't believe how much work you are getting done so quickly, yet so well. You must be one hell of a project manager to keep yourself so focused and on task.
He hasn't hit Men-O-Pause yet. The energy of youth.
Posted by: CptTripps Apr 15 2014, 07:58 AM
Who did your seats? Would they do a stitched dash?
I'll bet if this guy ever sees another 914 seat, he throws something at it! He's out of town for the next 2 weeks, so I'll ask when I pick up my door panels. I had to order the thread from http://thethreadexchange.com That reminds me...I need to get that back from them.
I'm going to have him do a "booster" seat for my kids too. Basically, something that just goes over the existing bottom seat to raise it up 4-5". So it'll look stock, and give the kiddos the added support they need.
He hasn't hit Men-O-Pause yet. The energy of youth.
People said that It'd happen to me at 30...then 35...now 40. I'll turn 40 in January, so we'll see!
Posted by: 76-914 Apr 15 2014, 08:08 AM
Don't sweat it. It won't happen till you hit 60. And at that point your ready for a little breather.
Posted by: CptTripps Apr 15 2014, 12:07 PM
I just hope it doesn't happen before Friday. I need to keep the momentum up.
Posted by: Qarl Apr 15 2014, 12:48 PM
Less posting and more...
You need to...
Posted by: CptTripps Apr 15 2014, 02:18 PM
Less posting and more...
This IS how I work on the car throughout the day while I'm at work.
Posted by: 76-914 Apr 15 2014, 02:21 PM
And when it's finished you need to do a "class photo" of your subs. Just don't post any cost figures. Some of our wives read these things.
Posted by: CptTripps Apr 15 2014, 05:47 PM
Ok. Back in the garage for the last hour or so. Here's what I got done.
The 5mm spacers came in from PM so I was able to get the back hubs, disks, calipers, and CVs installed. Tried the wheels on for size and realized the following:
A: 2" spacers in the rear are too much.
B: 1" spacers may be just right
C: I have a lot of negative camber in the front.
So now I'm 2" up front, 1" in the rear, and looking to replace these 100mm studs I bought! (Or at least put spikes on the end.)
...back to work on making brake lines.
Attached thumbnail(s)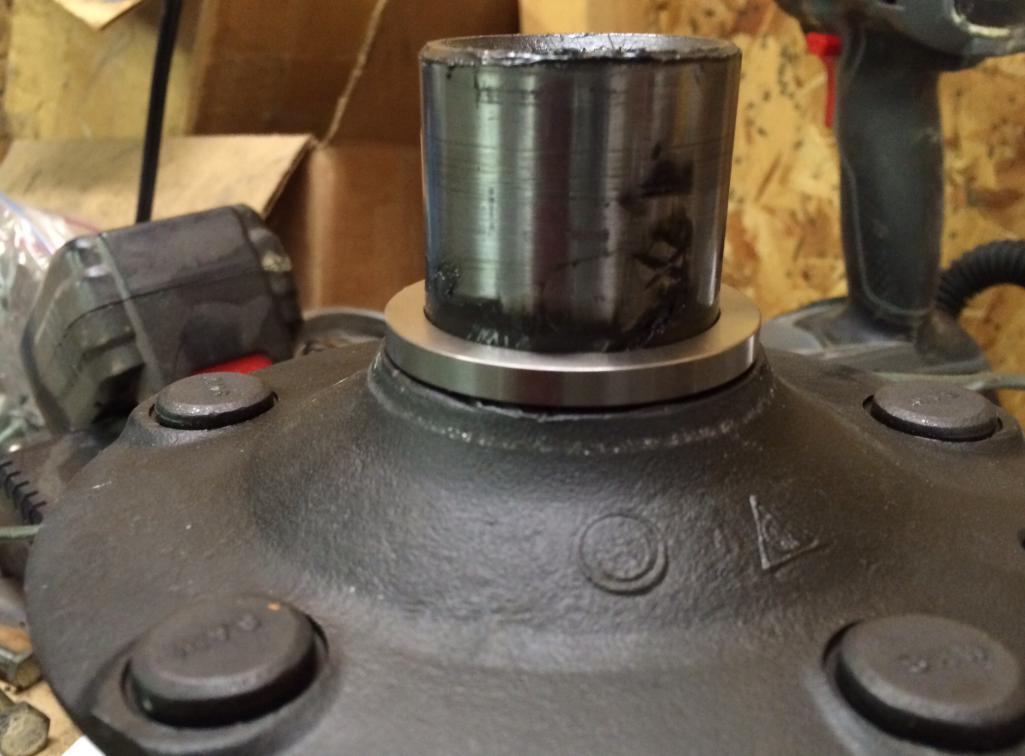
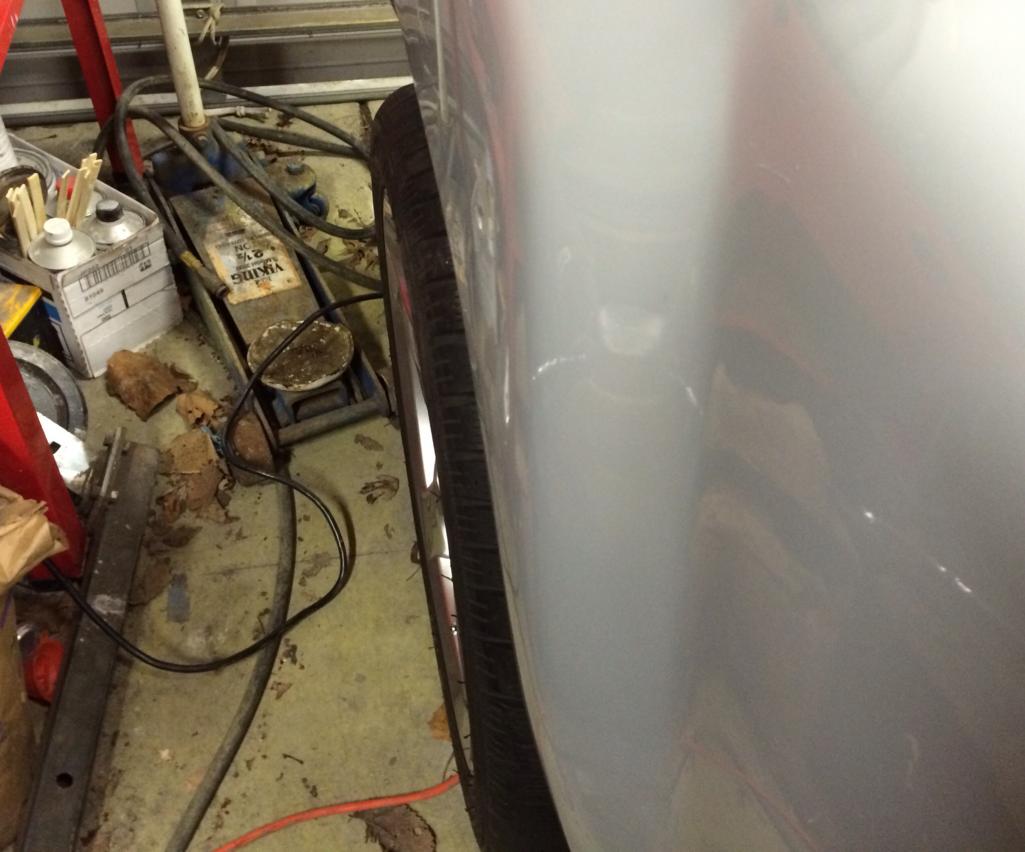
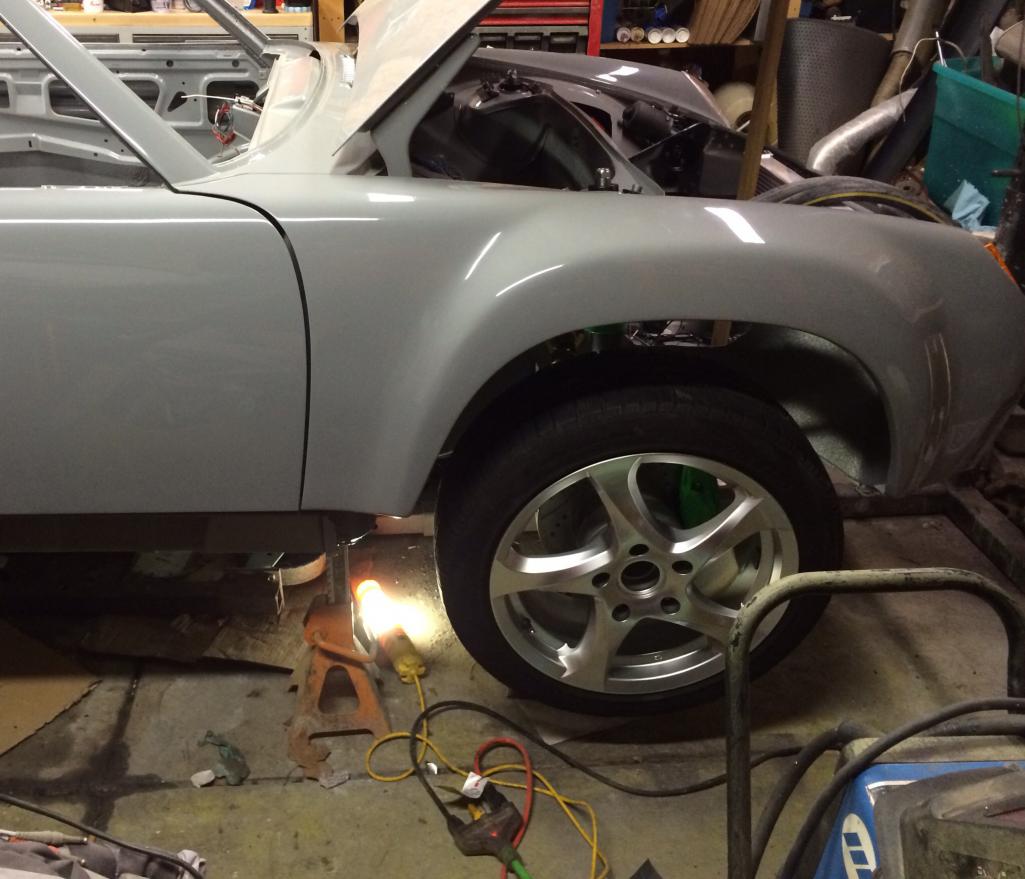

Posted by: CptTripps Apr 16 2014, 08:02 AM
Ok...more updates.
Spent the remainder of the evening working on the brakes, exhaust, and axels.
The pedal cluster bolts weren't really long enough for me to get a good grip on everything after the Raptor Liner was sprayed on, and the plate for the clutch slave plate was installed, so I needed to make a few adjustments. I tool a cut-wheel and got rid of the captive bolts that were in place. Then welded up the cuts, ground them down, and re-painted it. I just left the 2 holes. I'll use bolts that are about 1cm longer so I can get the threads on and feel comfortable with the safety of it all.
I also forgot to add the CV joint gaskets, so I had to pull everything off and re-do those too. After buttoning everything up...again...I realized that I may need spacers between the trans and the magic flanges. HOPEFULLY I can just pull the flanges, but I may not have enough travel available for that, so I'll need to pull the drive-half of the CVs off again before I get on the road. It's starting to look like a proper car from behind though!
The exhaust is going to be trickier. The divorced down-pipe I have drops just a LITTLE too low for me to weld the can directly to. There's also the question of how I'm going to orient it. The thinking right now is that I'll cut a 2" section out where the bung for an O2 sensor was, and use that for my wideband, and then weld the exhaust to that. I'll have to curve around the engine cradle and leave myself enough room to still get to the cradle bolts if needed. In reality though, I shouldn't need to pull the engine without taking the exhaust off. It's only 3 bolts and it'll come out in one piece.
Attached thumbnail(s)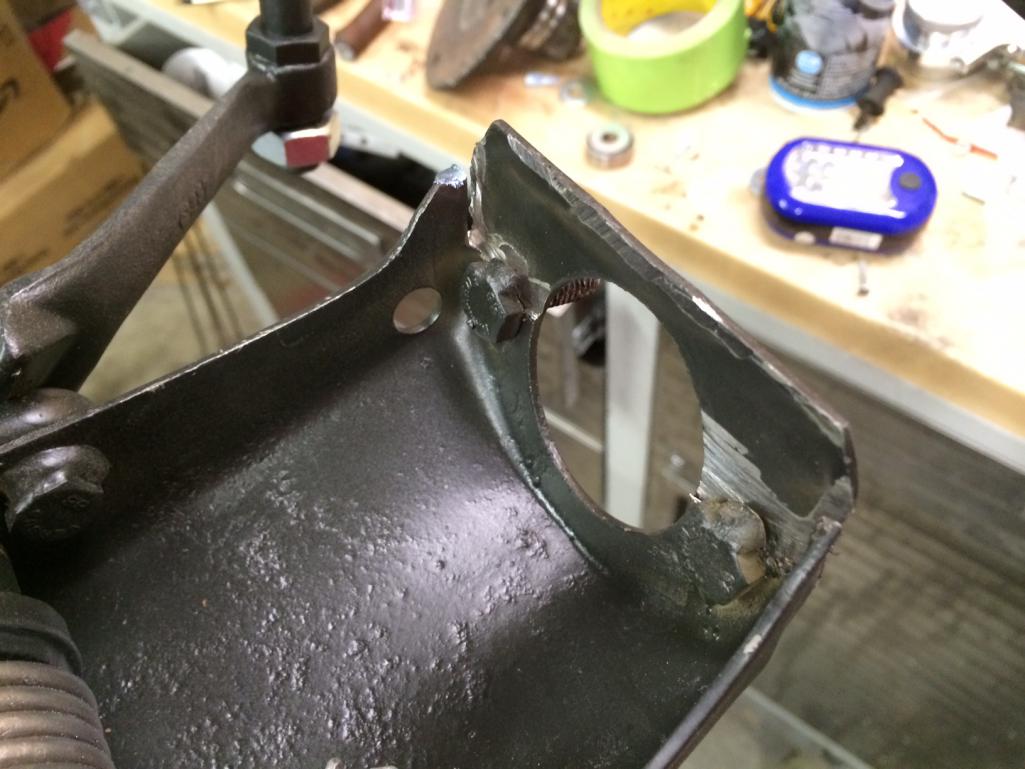
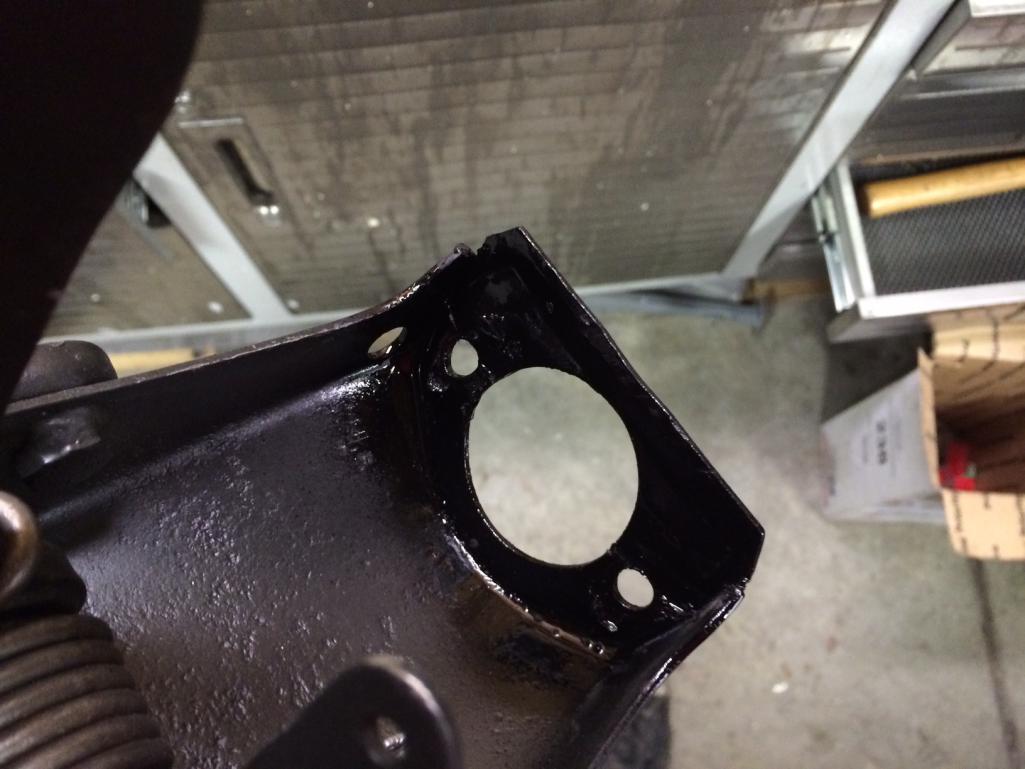
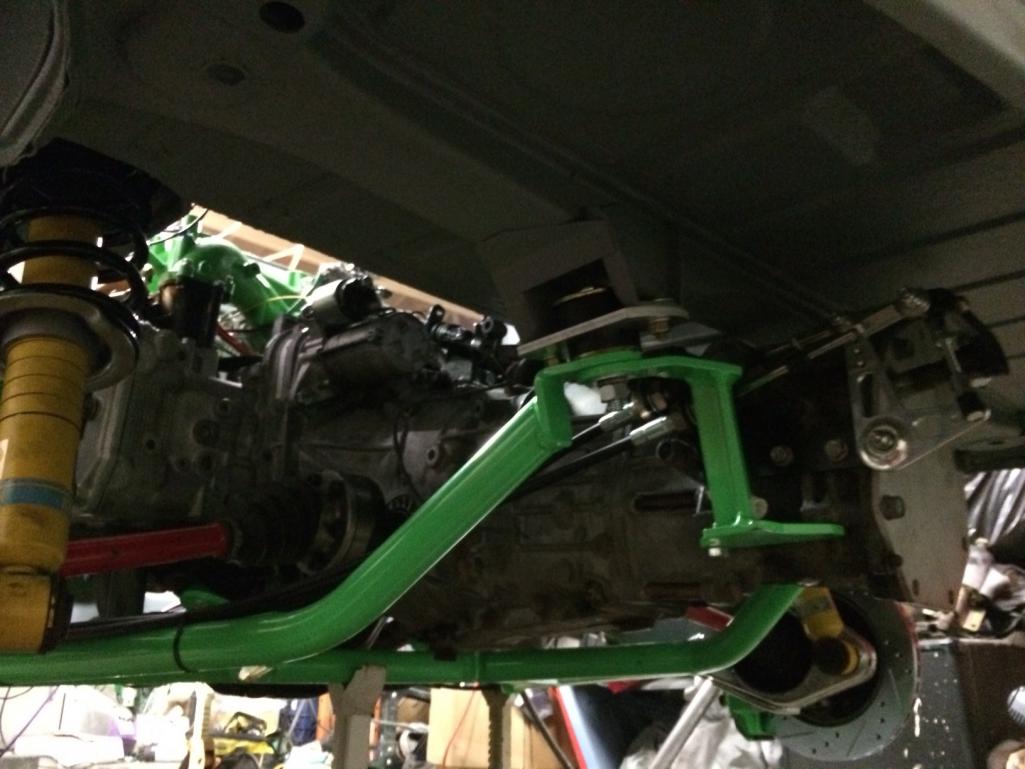
Posted by: green914 Apr 16 2014, 11:39 AM
Wow! You are making great progress - looking good.
Posted by: Qarl Apr 16 2014, 11:46 AM
Be safe!
Posted by: CptTripps Apr 16 2014, 12:57 PM
Be safe!
...which is exactly why I'm not going to try to make Hershey with the car.
If I rush it, I'll overlook something important...and may end up killing myself, or someone else. It's just not worth it.
So, I've decided to take the night off of wrenching and spend it with my kids. I've been in the garage every day for 3 weeks whenever I'm in town, and I miss hanging out with them.
Plus, it'll be a LOT less stressful driving 5.5hrs to Hershey in my DD.
(And faster!)
Posted by: Qarl Apr 16 2014, 01:03 PM
Wise man! Enjoy your kids!

Posted by: 76-914 Apr 16 2014, 04:04 PM
Doug, great idea on the longer bolts (and spending time w/family). I have a unit here that I was about to ship but will modify it before releasing it.
Posted by: CptTripps Apr 17 2014, 07:31 AM
Last night's progress: Watched MIB-2 with the family and consumed a pizza.
Tonight: Get a box of stuff ready to sell in Hershey. Maybe clean the car too?
Posted by: Chris H. Apr 17 2014, 07:43 AM
Good call. Safe travels.
Posted by: effutuo101 Apr 17 2014, 03:53 PM
Ok...more updates.
Spent the remainder of the evening working on the brakes, exhaust, and axels.
The pedal cluster bolts weren't really long enough for me to get a good grip on everything after the Raptor Liner was sprayed on, and the plate for the clutch slave plate was installed, so I needed to make a few adjustments. I tool a cut-wheel and got rid of the captive bolts that were in place. Then welded up the cuts, ground them down, and re-painted it. I just left the 2 holes. I'll use bolts that are about 1cm longer so I can get the threads on and feel comfortable with the safety of it all.
I also forgot to add the CV joint gaskets, so I had to pull everything off and re-do those too. After buttoning everything up...again...I realized that I may need spacers between the trans and the magic flanges. HOPEFULLY I can just pull the flanges, but I may not have enough travel available for that, so I'll need to pull the drive-half of the CVs off again before I get on the road. It's starting to look like a proper car from behind though!
The exhaust is going to be trickier. The divorced down-pipe I have drops just a LITTLE too low for me to weld the can directly to. There's also the question of how I'm going to orient it. The thinking right now is that I'll cut a 2" section out where the bung for an O2 sensor was, and use that for my wideband, and then weld the exhaust to that. I'll have to curve around the engine cradle and leave myself enough room to still get to the cradle bolts if needed. In reality though, I shouldn't need to pull the engine without taking the exhaust off. It's only 3 bolts and it'll come out in one piece.
can you send me some measurements on how far the shifting stuff sticks out behind the transmission? I need to get some data to start fab work.
Posted by: 76-914 Apr 17 2014, 04:15 PM
You need to fab something? I thought you bought Ian's kit? I can't imagine anyone's set-up extending further than the end of the shift rod, though!
Posted by: CptTripps Apr 17 2014, 04:32 PM
I believe he's thinking for exhaust work.
I'll look at it tonight. I agree that it's not much past the Trans rod.
Pics in a bit. Stay tuned.
Posted by: CptTripps Apr 20 2014, 04:56 PM
So after seeing people DRIVING their 914s, I'm motivated to get mine on the road!
Picked up a few goodies this weekend in Hershey. Headed out to the garage to put them to good use!
I'm out if town until Thurs morn, but plan on working hard Thurs afternoon, and then all day Fri and Sat. Hopefully I really can drive it on Sunday. Even just around the block would be nice.
Posted by: RonW Apr 20 2014, 05:55 PM
Looking forward to the drive report!
Posted by: 914forme Apr 20 2014, 06:14 PM
Oh you tease, no pictures of the swap meet loot?
Posted by: CptTripps Apr 21 2014, 11:16 AM
Swap meet loot for the 914 consisted of a 5-lug space-saver spare (that only ended up costing me $15), some 1" spacers, and stainless kick-panel plates. I'll take pics as they're installed. :-)
I'm on a plane to ATL right now and them head to SFO tomorrow. I'll be back in the garage Thursday to start on the home stretch.
I DID get the brake lines made up for the Boxster conversion last night...so that was cool. Now all I need is the set I ordered from Eric to show up, and I'll be stopping like a boss!
Posted by: CptTripps Apr 24 2014, 04:49 PM
I did a ton of work this afternoon...but only took a few pics.
Made and bent the clutch line from the master to the slave. Needed to use 3 different thread ends and 2 flare types, but it's all good.
Made the double flares on the brake lines I made for the Boxster brakes to the soft lines. Those are good to go now.
Blasted and painted the seat rails, battery tray, and the gas tank. Those will all go in tomorrow.
The radiator tube was more flexible than I was expecting, spin was able to go through the longs there. I'll close up the hole I made to get them into the tunnel tomorrow.
I also filled in the exhaust cut-outs that the PO made in the bumpers. My exhaust will be very different. I'll work on that tomorrow too.
Attached thumbnail(s)
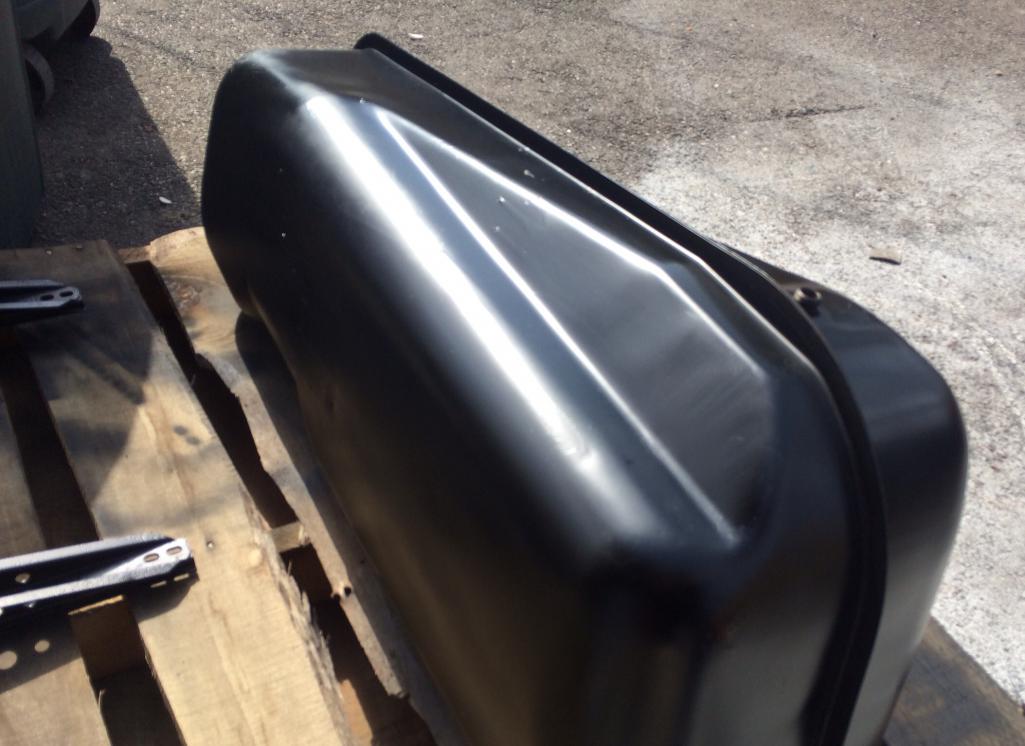
Posted by: CptTripps Apr 25 2014, 08:16 AM
Picked up the dash plates today from the "The Metal Shop" in Maple Heights.
1/16" brushed stainless. I MAY paint these, or cover them in suede or vinyl. Haven't decided just yet. (photo of a quick test below.)
I made a couple of the holes just a smidge too small, so I need to open a few of them up, but that's not a bog deal at all. Especially considering that the other 100" holes are perfect.
I emailed a CAD file and picked this up a few days later. A+ in my book!
Attached thumbnail(s)


Posted by: CptTripps Apr 25 2014, 08:23 AM
Here's a refresher of what I mocked up for the center console. The only difference is that I'll have an 8" sub in the back of it. I need to get in there to see where it'll fit and how I'm gong to seal it up. Other than that, the plates are the same.
Attached thumbnail(s)
Posted by: 914forme Apr 25 2014, 08:40 AM
Since you where going for the aircraft theme I would paint them car color. Most fighters are painted the same base color inside and out. Or a matte black. But that is just me,
Posted by: Moneypit Apr 25 2014, 08:44 AM
Here's a refresher of what I mocked up for the center console. The only difference is that I'll have an 8" sub in the back of it. I need to get in there to see where it'll fit and how I'm gong to seal it up. Other than that, the plates are the same.
Really digging the aircraft theme, especially the gauges! You literally beat me to what was rattling around in my brain about 10 years ago before I went in. I wish you could find an old radar or Radar Warning Receiver (RWR) screen to mod, if you could rig a radar or MFD surround with your GPS it would really complete the look!
Here's an example based off someone's home flight sim cockpit:
Posted by: Dr Evil Apr 25 2014, 10:13 AM
Doug, what gauges are those? I like them a lot.
I am also considering suede for my /6 (someday).
Posted by: Qarl Apr 25 2014, 10:15 AM
If you go suede, make sure it's an automotive grade that can handle the heat/sunlight.
I've seen too many guys on my Lotus forums spend $$$$ on custom suede interiors only to have them deteriorate within a year.
Posted by: CptTripps Apr 25 2014, 10:53 AM
Doug, what gauges are those? I like them a lot.
http://www.newvintageusa.com/1940.html
He did a custom tach for me that's 1/3 larger than the normal gauges. I also had green LED lighting done, so it matches the bulbs I have in the other parts of the car.
If you go suede, make sure it's an automotive grade that can handle the heat/sunlight.
I bought 4-yards of charcoal Alcantara. I'm using it in a lot of other parts of the car. (Check out the pics of my seats.) It wasn't cheap AT ALL but I think it'll be worth it in the long run.
Posted by: Dr Evil Apr 25 2014, 12:01 PM
How did you contact the gauge folks? All of there "contact us" links are dead. I need to find a place to make a custom gauge for my bike projects. I found a few places I liked, but they were not interested in motorcycle gauges due to weather proofing.
Posted by: Dr Evil Apr 25 2014, 12:03 PM
Never mind....one of their links on home page worked
Posted by: CptTripps Apr 26 2014, 06:47 PM
I flat out cranked today.
Spent some time cleaning the garage and getting organized, then started on the painting that needs to get done. Also did quite a bit of sandblasting of parts.
Painted almost all the trim a darker version of my dove grey. Painted all the plates that color too, and built a few of them up.
I'll start on reassembling the doors and windows tomorrow.
Attached thumbnail(s)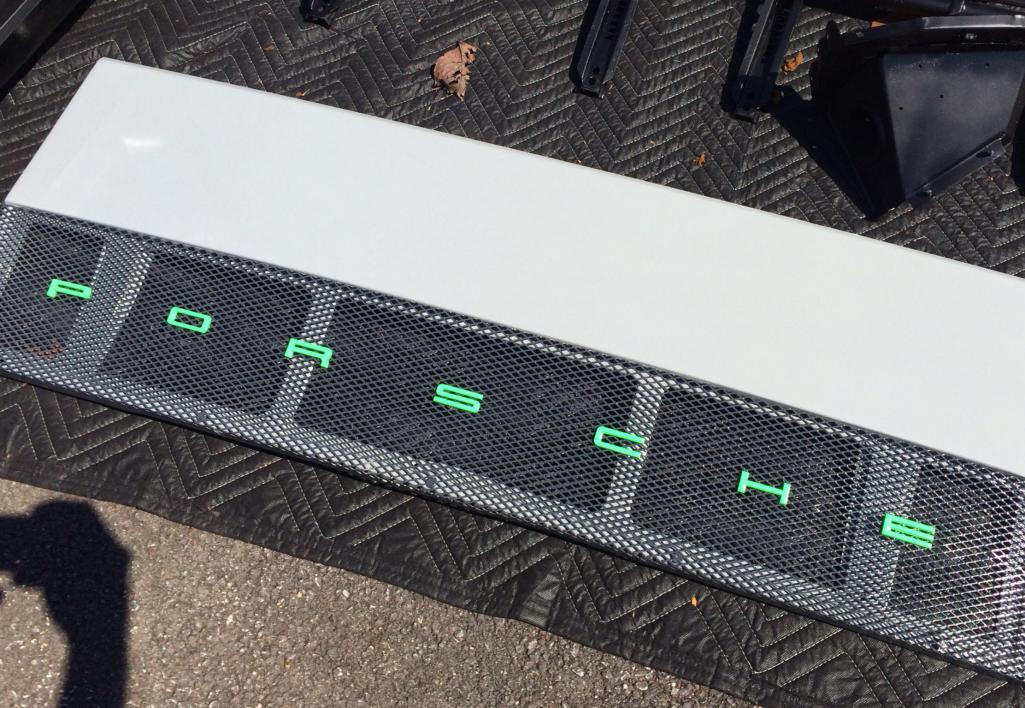


Posted by: CptTripps Apr 30 2014, 10:19 AM
Not much visible progress to report. Just a lot of wiring work and getting the interior measured out to install starting tonight.
The dash has been cut up and glassed in so I can cover it in vinyl. I still need to work out how I'm going to cover the tup of the gauges...that part can wait though. I'll clean up the tack welds soon. I'm planning on using some Bondo to make those transitions a lot nicer before I cover it in vinyl or Alcantara.
I (finally) got the steering wheel back from Alan Gun in Plantation Florida. I think he did an "OK" job on it. Not worth the money I paid to have it done, it looks decent, and is a better job than I'd have done.
Attached thumbnail(s)


Posted by: Moneypit Apr 30 2014, 10:52 AM
I'll just leave this F4 Phantom ejection seat handle here, because you could totally mod this into an e-brake lever...
http://www.flighthelmet.com/mm5/merchant.mvc?Screen=PROD&Store_Code=FHL&Product_Code=EJSP-3086&Category_Code=EJSP
Or you could get a pair of full Ejection Seats for like $2200 a pop. Really complete the look! 
Posted by: 76-914 Apr 30 2014, 05:34 PM
Doug, it looks like you are 90% done with 90% to go. Looking nice!
Posted by: CptTripps Apr 30 2014, 07:49 PM
90%: totally agree! That's what it feels like too.
I've had a lot of personal stuff to deal with this week, but I'm going to start hitting it hard tomorrow.
That ejector handle is awesome. That's how I already have my e-brake and seat movers painted up.
Posted by: Moneypit Apr 30 2014, 09:08 PM
90%: totally agree! That's what it feels like too.
I've had a lot of personal stuff to deal with this week, but I'm going to start hitting it hard tomorrow.
That ejector handle is awesome. That's how I already have my e-brake and seat movers painted up.
Like I said, the same site apparently sells legit Ejector Seats from F4's, F16s, and other stuff. Way more than a Recaro, but damn if that wouldn't look HOT!
Really dig your aircraft theme man, I used to dream of a layout like this in High School. Later I shifted gears towards a more 917/904/90x series racer interior.
Posted by: CptTripps May 1 2014, 07:29 AM
I actually looked at aircraft seats. Everything I could find was way too wide, or way too tall. They'd be awesome for racing though. Real high bolsters.
The interior is important, but right now I need to concentrate on all the little crap that needs to get done. Wiring. Radiators. Intercooler. Those are the top priorities.
Posted by: 914forme May 1 2014, 07:49 AM
I'll just leave this F4 Phantom ejection seat handle here, because you could totally mod this into an e-brake lever...
http://www.flighthelmet.com/mm5/merchant.mvc?Screen=PROD&Store_Code=FHL&Product_Code=EJSP-3086&Category_Code=EJSP
Or you could get a pair of full Ejection Seats for like $2200 a pop. Really complete the look!
Oh yeah this brings up a old topic on this thread. http://www.flighthelmet.com/mm5/merchant.mvc?Screen=PROD&Store_Code=FHL&Product_Code=ACPT-1062&Category_Code=ACPT
Thats really a decent deal for a metal control stick grip with buttons.
They have a few others also.
Posted by: Moneypit May 1 2014, 07:58 AM
I actually looked at aircraft seats. Everything I could find was way too wide, or way too tall. They'd be awesome for racing though. Real high bolsters.
The interior is important, but right now I need to concentrate on all the little crap that needs to get done. Wiring. Radiators. Intercooler. Those are the top priorities.
Pffff.... Look at you trying to be all practical. "It'd be too tall!" - Sounds like you need a Carrera GT style double bubble targa roof
Have you already done your seats? If not there might be a way to re-cover them, build up side bolsters, maybe using some exposed strip aluminum to give that ejector seat look. You could probably score some fabrics that mimic the colors with more OD green and black, but in suede or something more comfortable. You could also paint your seat adjuster handle either red or black/yellow. I think you should fly me up there so I can consult on the interior while you deal with trivial things like wiring and intercoolers.
Posted by: CptTripps May 1 2014, 02:46 PM
Ha. Yeah, look back a few pages. The seats are re-covered...and awesome. I'm hoping the Alcantara keeps me stuck in the middle.
Posted by: Moneypit May 1 2014, 02:55 PM
Ha. Yeah, look back a few pages. The seats are re-covered...and awesome. I'm hoping the Alcantara keeps me stuck in the middle.
Forgot about that! So many pages, I got lost at one point. They look great, before the 2.0 died my mom had started to redo our seats, using some faux-alcantara style stuff and some kind of heavy duty blak "sport" fabric, can't figure out how to describe it. At the time the idea was an inexpensive way to fix them up, since she's been sewing for a long time. Did some home contract work once sewing sound deadening material for helicopters or something!
I'm still trying to convince my mom to let go of the reins of the 914, all this time it's been in her name, and hers alone. She keeps bringing that point up every time I start talking about nefarious plans...
Posted by: CptTripps May 3 2014, 12:34 PM
Ok. Lots to talk about.
I need to add more pics later...
I got the pedal clister and masters installed. Them moved to wiring.
Since I didn't have the connection to the wheel any more, I soldered leads on the I can connect up to the harness I have. Should be all set, as I've toned everything out.
Finished adding dynamat to the entire interior and doors. Dead as dirt now. Going to be great.
Painted a the trim, and drilled out the holes for the LED holders I have. There will be 5 lights in the targa bar trim that should keep people off my ass.
Attached thumbnail(s)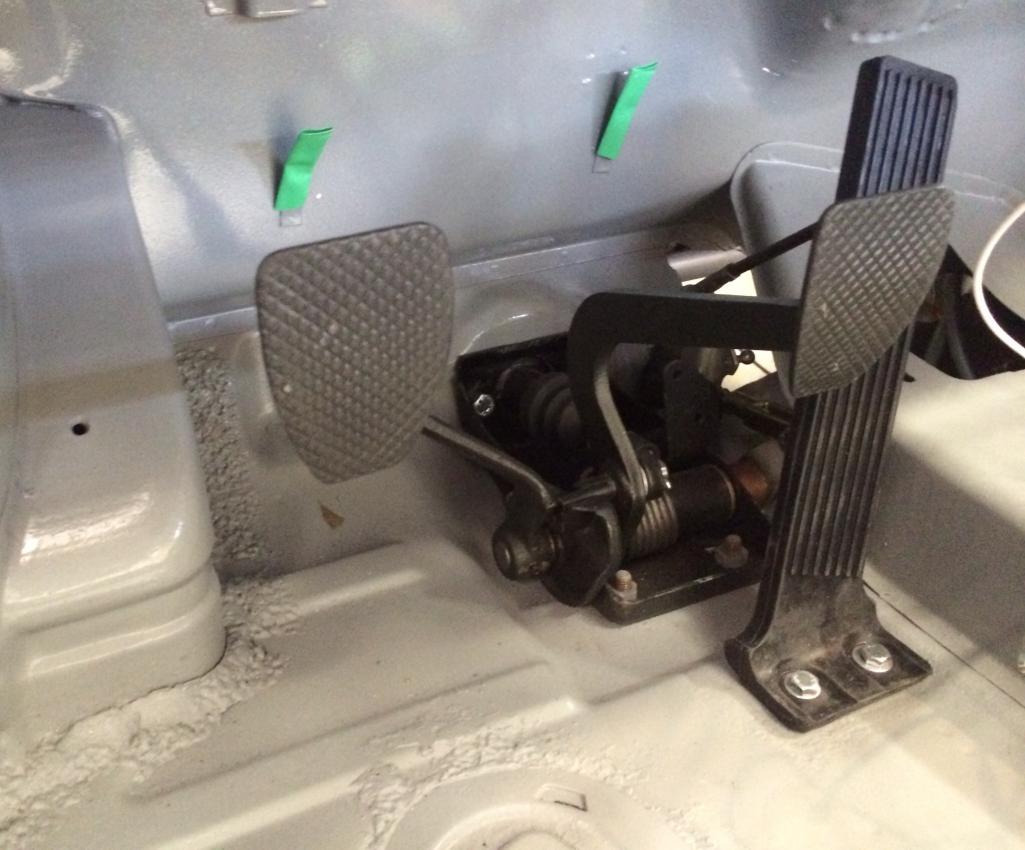
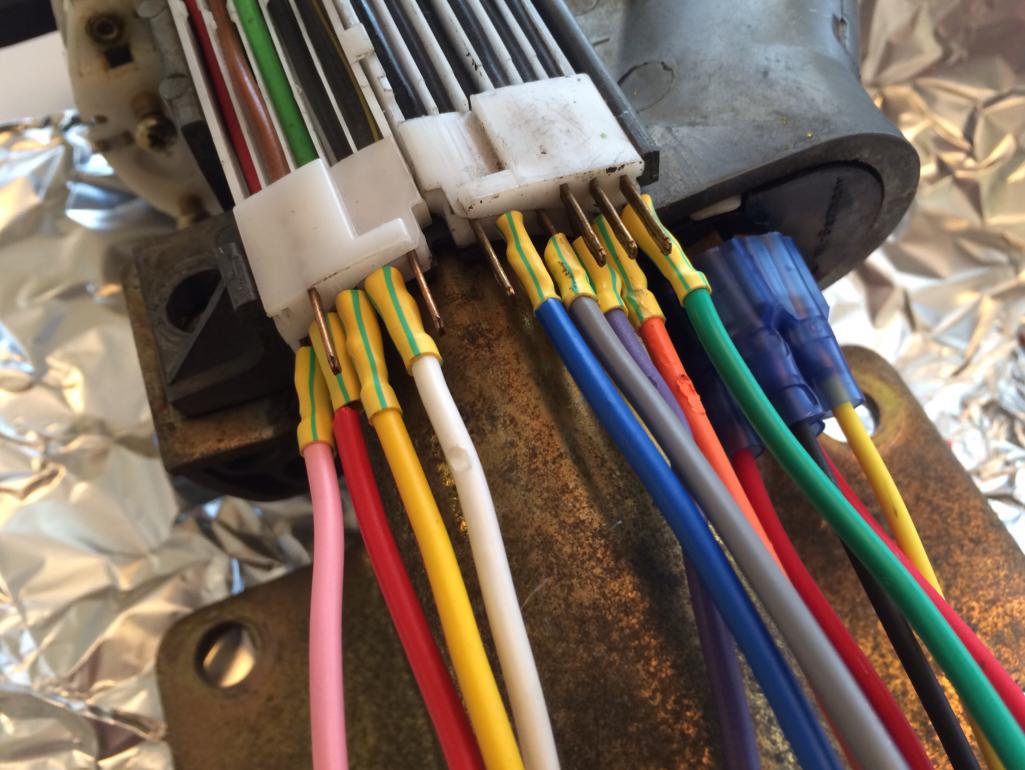
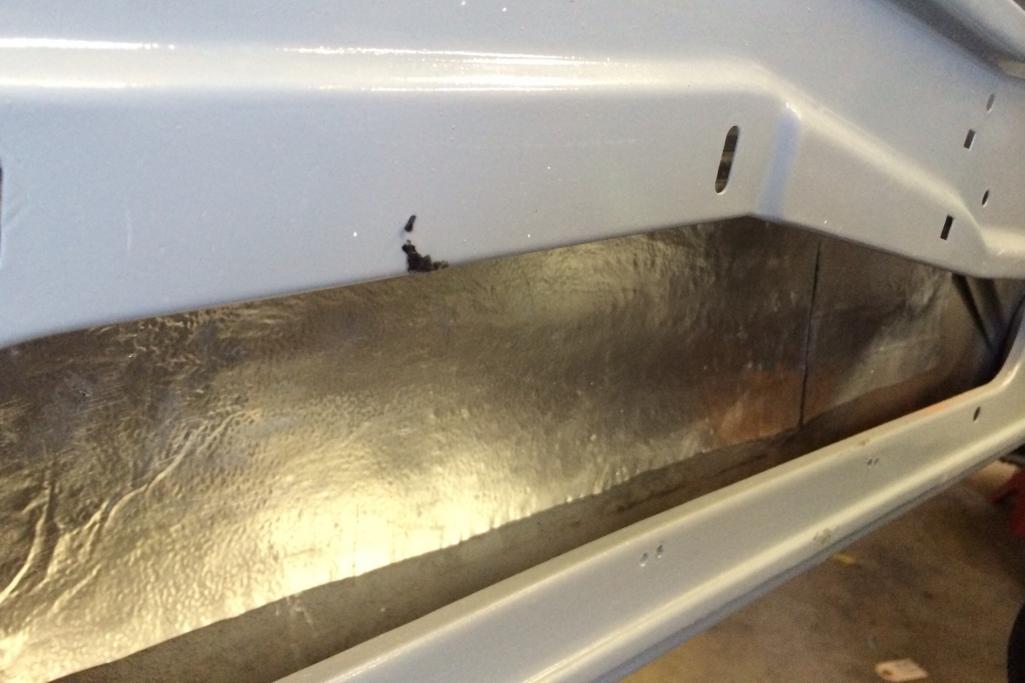
Posted by: CptTripps May 3 2014, 03:05 PM
Got goodies from Eric today. :-)
Attached thumbnail(s)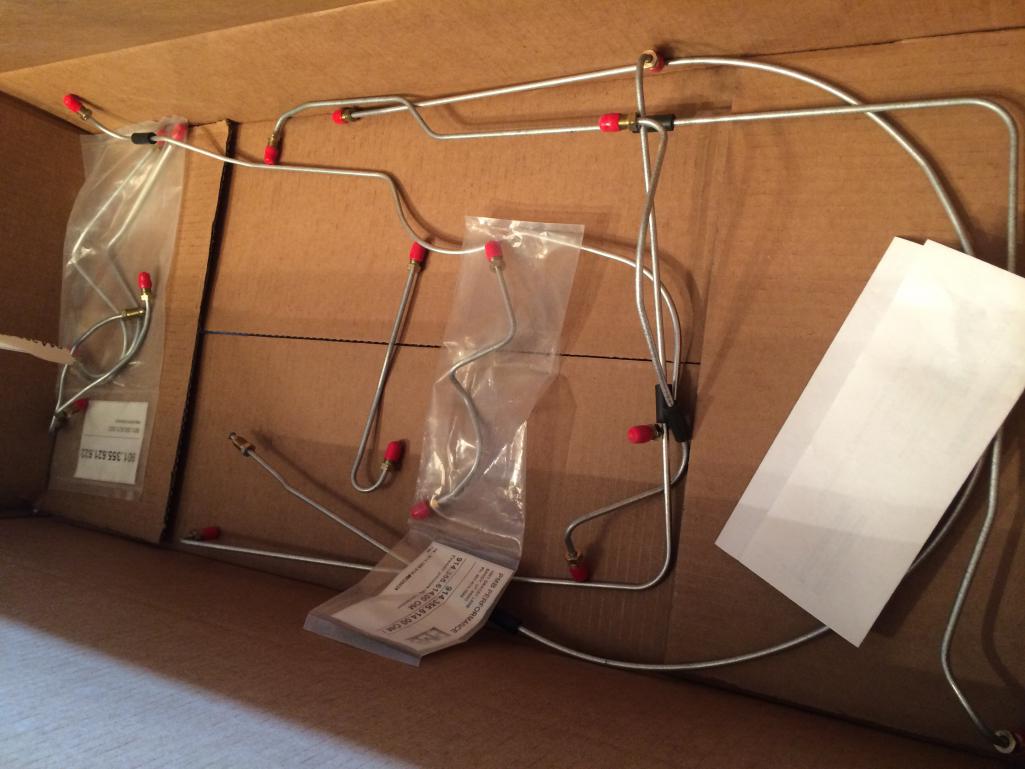
Posted by: Maltese Falcon May 4 2014, 01:33 AM
90%: totally agree! That's what it feels like too.
I've had a lot of personal stuff to deal with this week, but I'm going to start hitting it hard tomorrow.
That ejector handle is awesome. That's how I already have my e-brake and seat movers painted up.
Love the green theme running with your build. I have taken a liking to the Porsche acid green for details in the livery on our current v8 build. Your aircraft theme is well executed + unique.
I have an airframe id plate that I salvaged from one of these F4s that was downed in combat. I might stick this in the race car somewhere
Awsome build on your 914 !
Marty
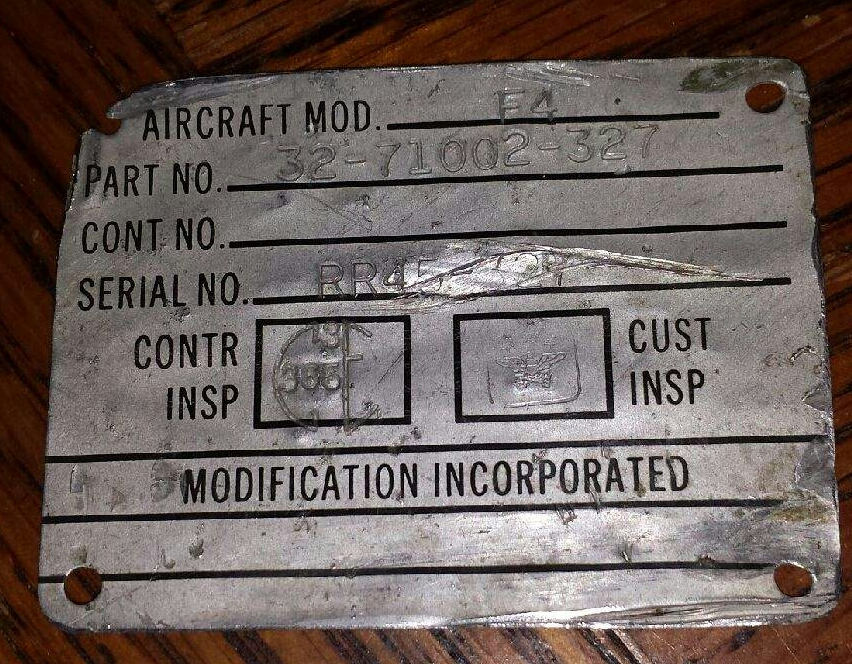
Posted by: CptTripps May 5 2014, 04:14 AM
Took a day off to be with my family, and then hit the garage yesterday.
Realized that for the 2nd time, I'd built the proportioning valve wrong. So...back apart again. I'm getting good at this! The trick is to replace 2 bolts first with real long ones, then back it out that way. Installation is the reverse. No muss no fuss. 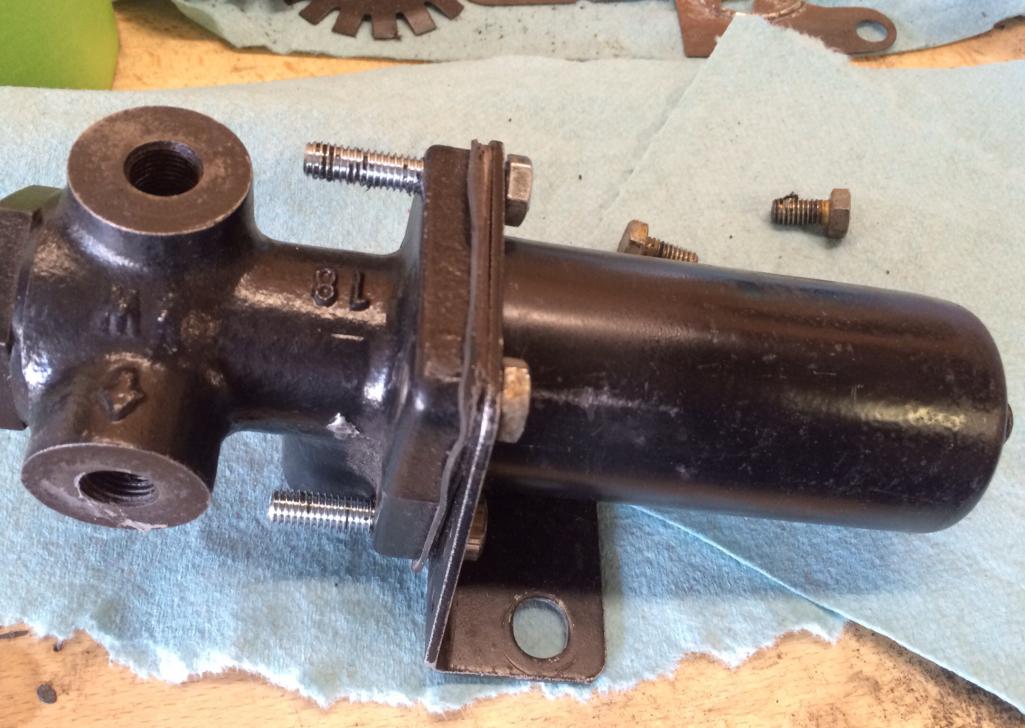
Then I started on door seals and working towards getting the windows back in. The new triangle seals from 914rubber.com are really pretty awesome. Took lots of stretching and prodding but I'm locked in place now.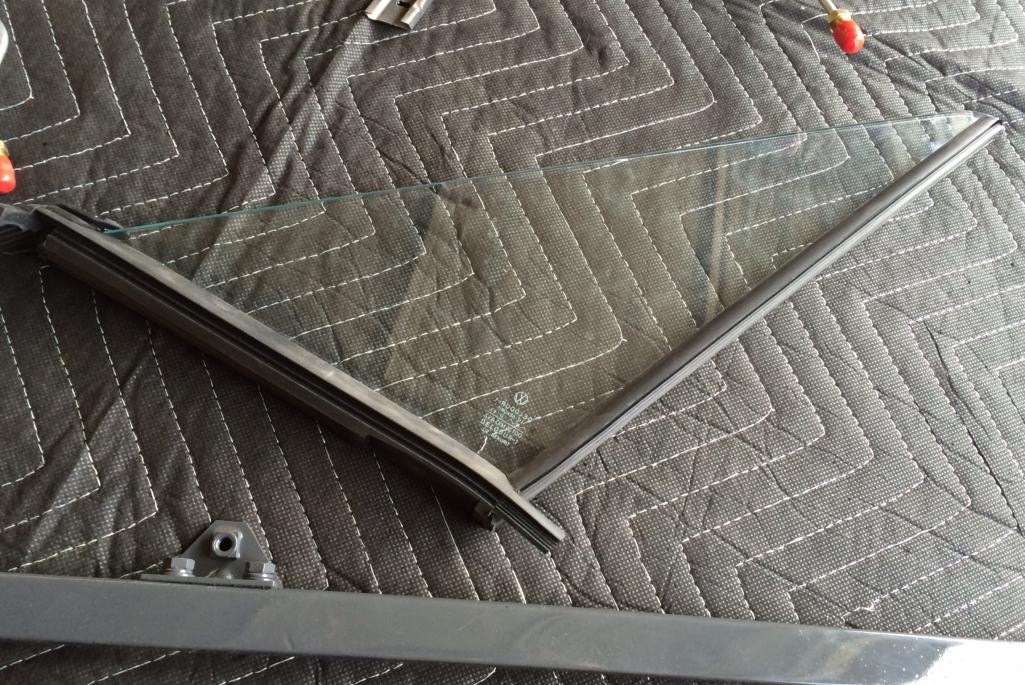
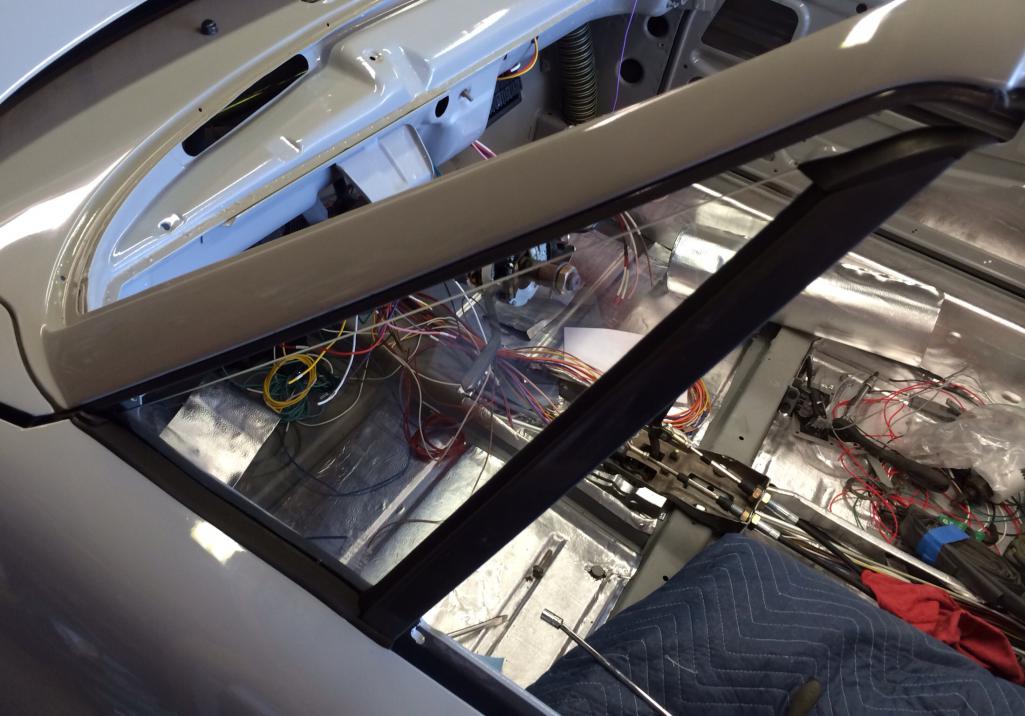
One thing I'm stuck on is the vertical targa seal. 1: Is this installed correctly. 2: should I cut the rest off?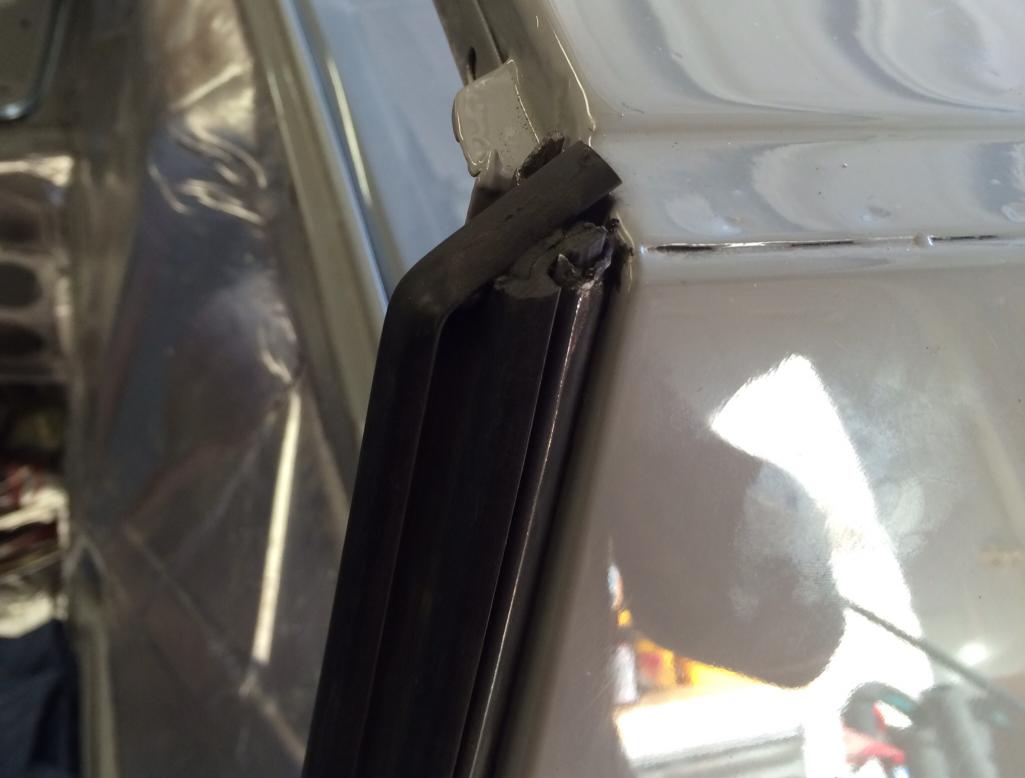
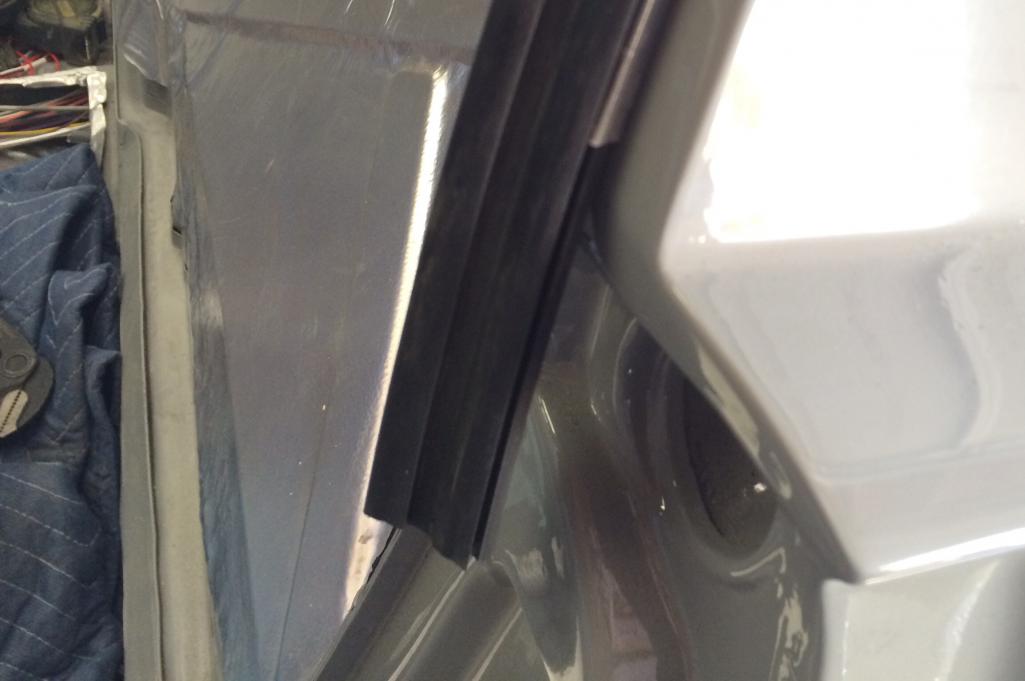
I got the rear brakes all set, and am missing a fitting that'll let me complete the front. Need to call Eric on that today.
Today I'm going to finish the radiator and get that started. I can start the thing without an intercooler...but not without water.
Posted by: Maltese Falcon May 5 2014, 10:18 AM
The end of the vertical seal at the top (your picture) is incorrect.
Porsche Panorama had an article on this , and I do remember that the instructions were to carefully trim an angle to match the angle where there Targa top window seal meets it. In essence: both edges may require a careful trim ( at their meeting point) and would look like a 45° joint. Since the top clamps down with pressure, allow enough extra material to ensure air+water tight sealing and should help eliminate Targa top rattles as well.
Marty
Posted by: CptTripps May 5 2014, 10:33 AM
So I need to push it down further than I have it now? If there's a "finished" end like that, I'm assuming that it would go on top so water wouldn't leak down inside of it and become trapped.
Posted by: McMark May 5 2014, 10:51 AM
Get the top on and inspect how the two seal interact before you cut anything.
Posted by: Maltese Falcon May 5 2014, 11:50 AM
So I need to push it down further than I have it now? If there's a "finished" end like that, I'm assuming that it would go on top so water wouldn't leak down inside of it and become trapped.
Some of the rubber Targa seals I've installed come with a slight squared off edge. This is a candidate for trimming. I like a snug fit. With age the fit gets loose, causing top rattling. This also starts to chaffe the soft aluminum Targa top edge trim.
YES always premount + check before cutting !
Marty
Posted by: CptTripps May 5 2014, 08:22 PM
Yeah...I need to get the top on sooner or later. Now I just need to find it. :-)
Posted by: scotty b May 5 2014, 08:31 PM
Get the top on and inspect how the two seal interact before you cut anything.
This
Posted by: CptTripps May 6 2014, 07:45 AM
I'll be back in the garage later today and the first thing I'll be doing is checking the top out. I want to get the seals done so I'll have one less thing to worry about at the end of the build. The body work is all done now, so the seals are just one more thing I can do now to feel like I'm making progress.
My hope is to have the seals in, and the doors full of windows and electronics by the end of the day.
Posted by: CptTripps May 6 2014, 03:39 PM
So I didn't touch the doors today. I focused on the exhaust and radiator. Can't start the car without either of those!
The exhaust wasn't all that hard after I started in on it. I needed to cut the Crucial down-pipe to make it a little shorter, and bent out to move away from the engine cradle. After welding those up, I ground it all down and welded it to the exhaust.
But I didn't end up doing that great of a job. I'm askew just a little bit. No biggie, I'll just rotate it later and re-weld the pipe.
Attached thumbnail(s)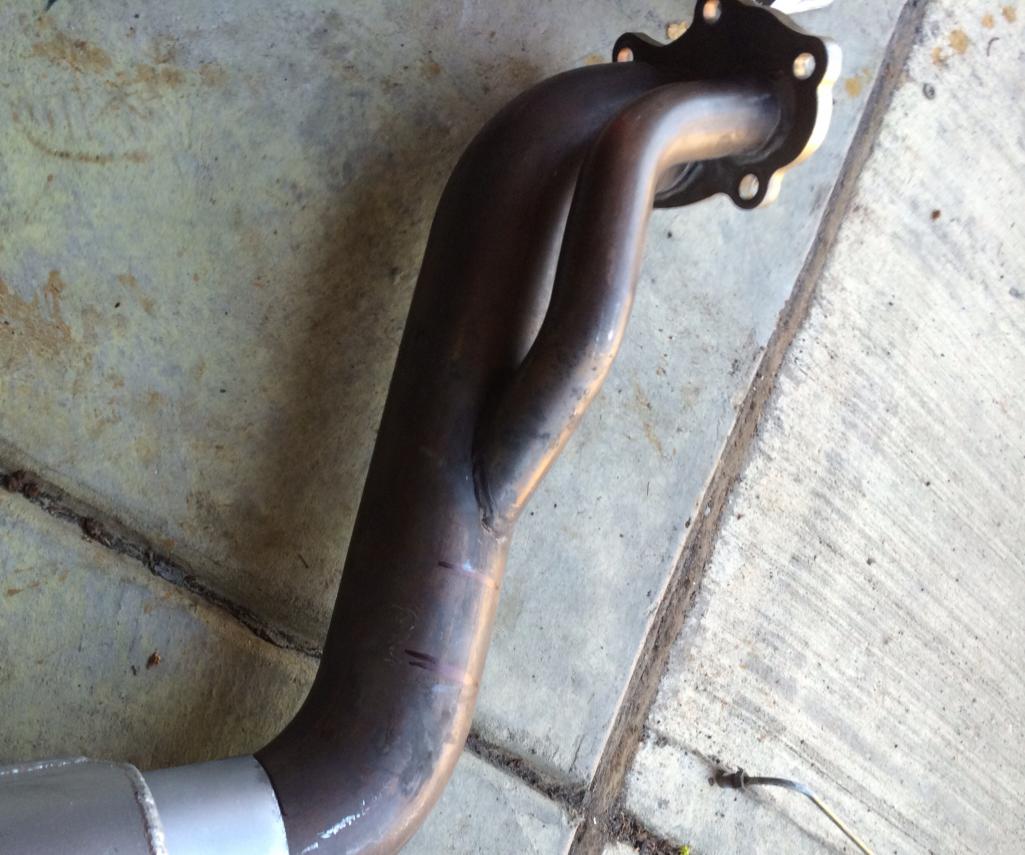
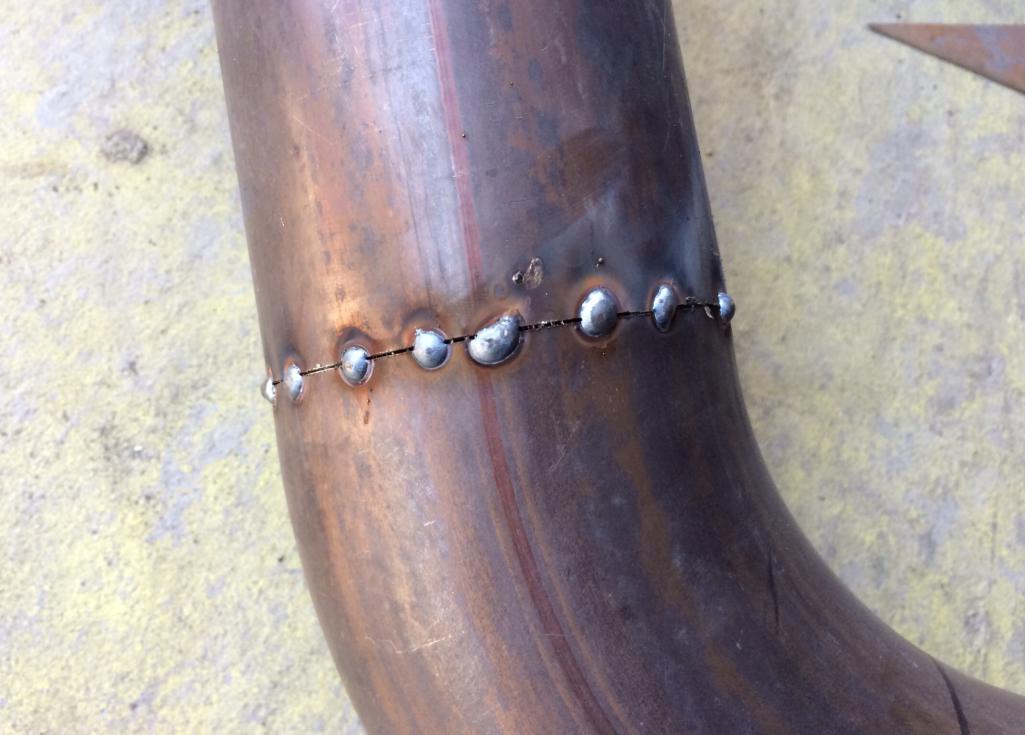
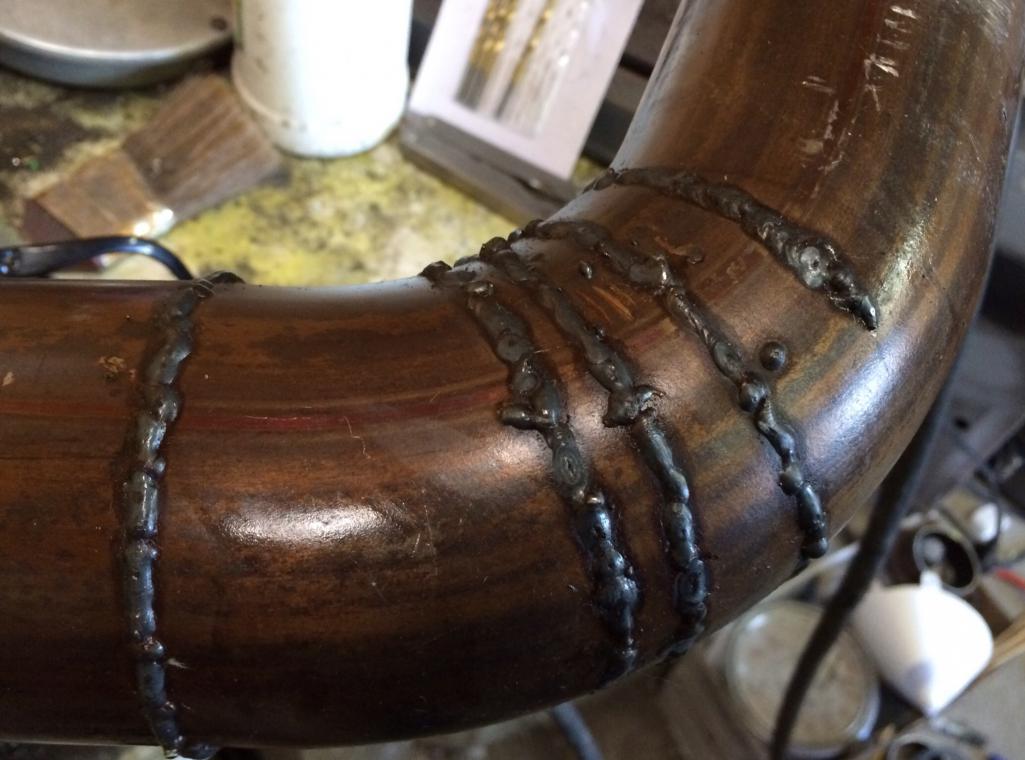
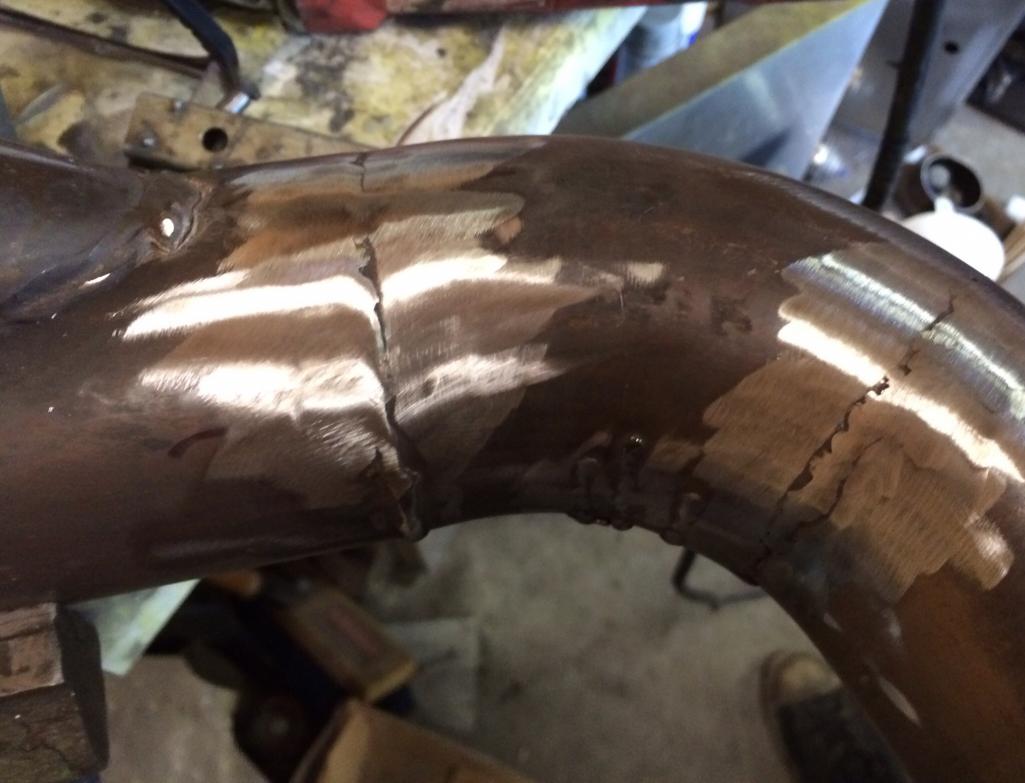
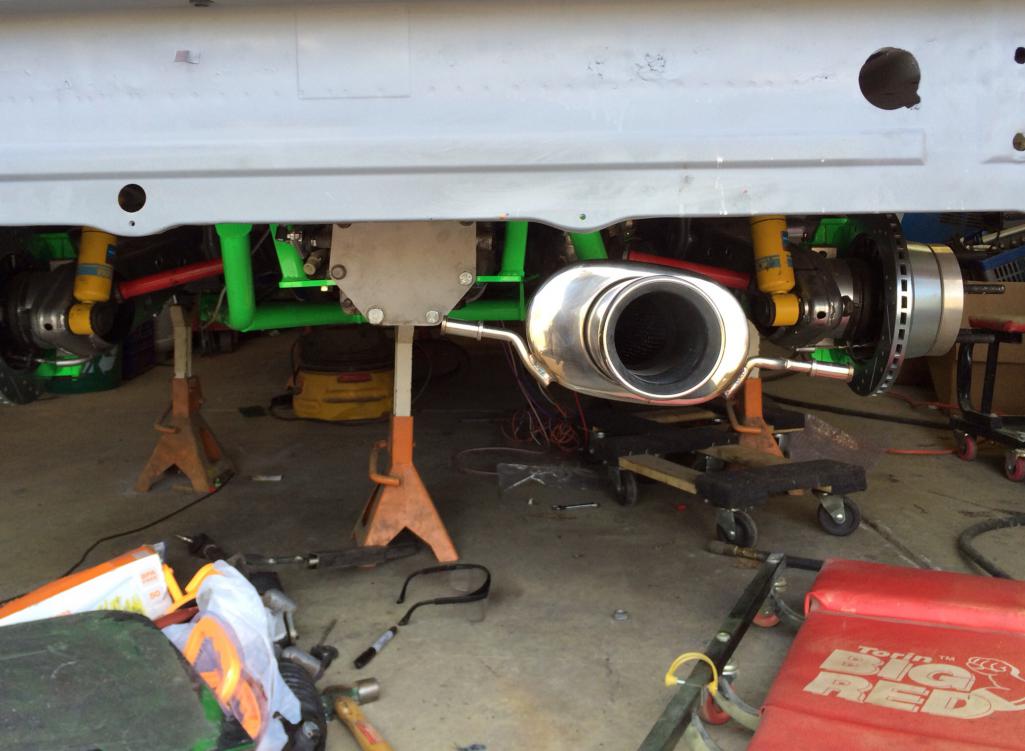
Posted by: CptTripps May 6 2014, 03:42 PM
With the radiator, I changed the size of the holes, and made way for rubber grommets. After welding it into place, I feel good about the fit. The grommets give me enough "wiggle" so it's not solid on the chassis. I'll make up a shroud later after I get the tubing run.
Attached thumbnail(s)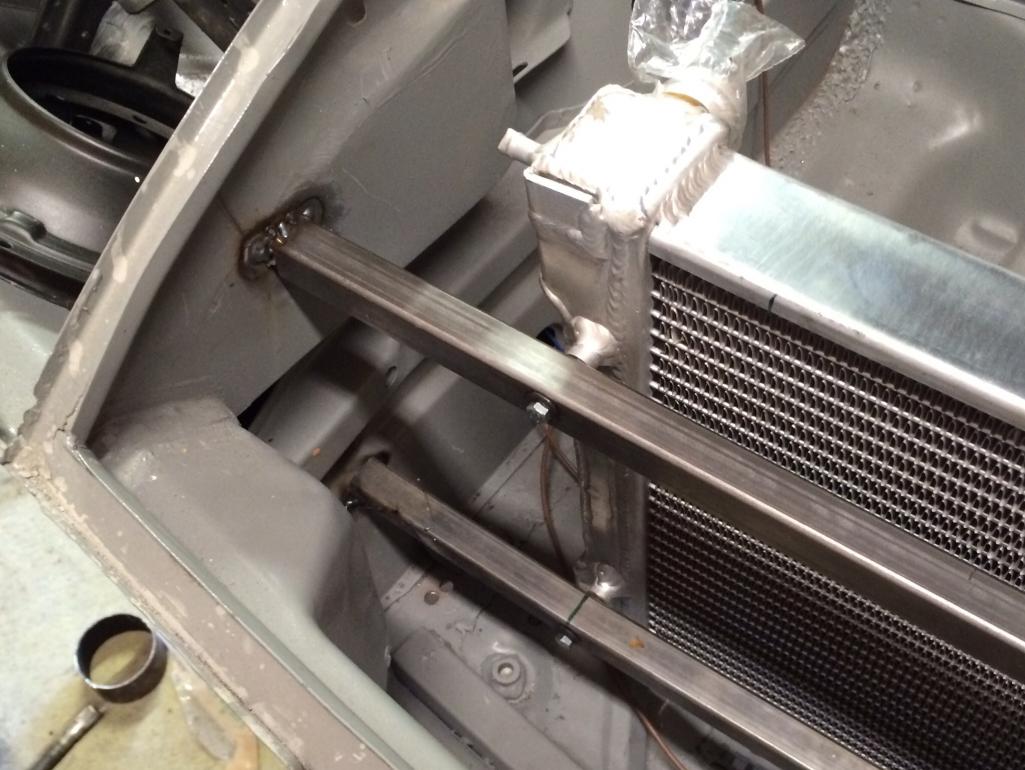
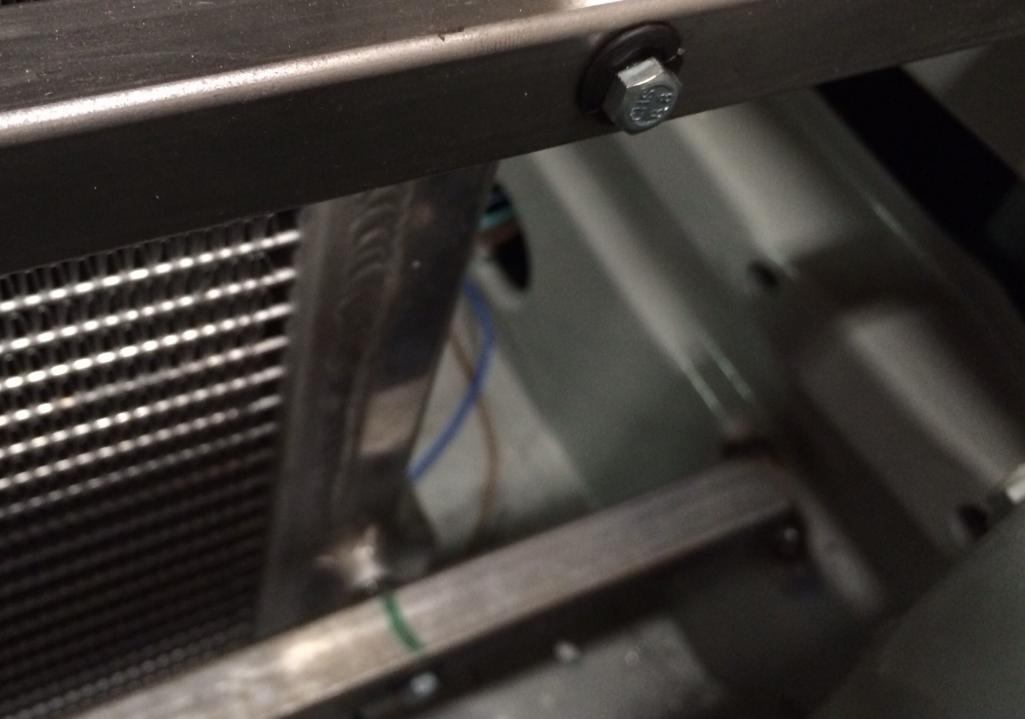
Posted by: 76-914 May 6 2014, 08:12 PM
Those grommets might come back to bite ya, Doug.
Posted by: CptTripps May 7 2014, 04:55 AM
What would be a better idea?
Posted by: bulitt May 7 2014, 05:25 AM
Here is a very clean Install, and the frame makes attaching the shroud easy.
From a post by joefri187
The radiator is floating, not bolted directly to the frame as I've heard that bolting directly to the frame can cause the radiator to crack as there is a lot of expansion when hot...
It sits on rubber mounts on the bottom and bolted on through rubber grommets along the top edge.
And yes, it works great and everything stays cool!!!

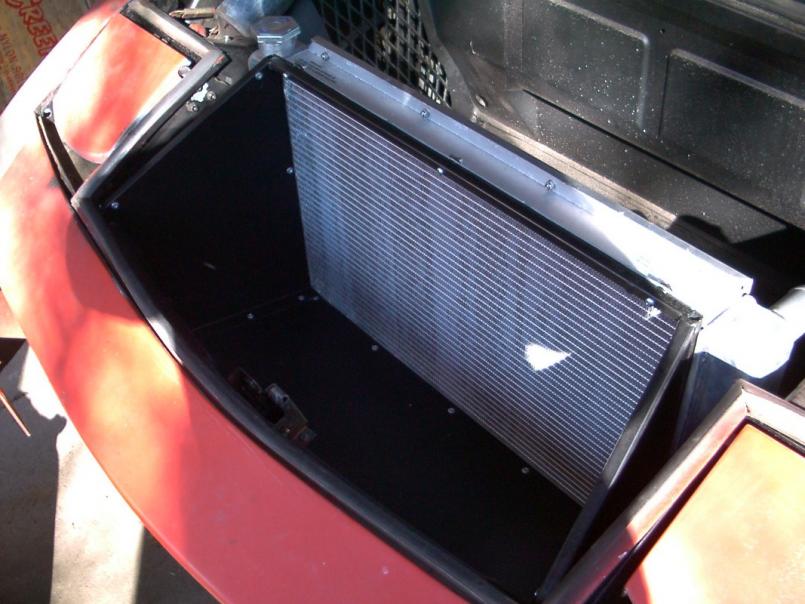
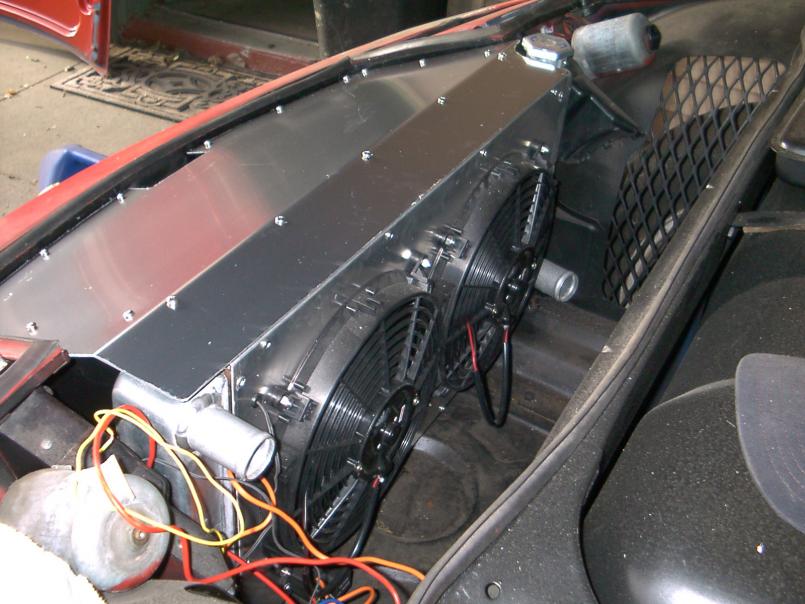
Posted by: 76-914 May 7 2014, 08:13 AM
What would be a better idea?
Something a lot thicker with some "give" or sponge-nous to it. How much is that set up going to weigh once it is filled w/ water? Depending upon the wall thickness and type/hardness (T rating) of aluminum that the radiator has would dictate my next step. Vertical loading/support would be better but that's not what you have. Could you post up several of pic's of your radiator set up and that area in general. It might be possible to leave what you have but to intro some vertical support as well.
Posted by: ruby914 May 7 2014, 09:49 AM
I think Kent has a good point. It is nice to have your radiator floating.
Check Summit, http://www.summitracing.com/search/part-type/radiator-mounting-brackets
or just Google; Radiator mounts images for ideas.
Posted by: CptTripps May 7 2014, 04:03 PM
Alright. I think I see how I can modify what I have already welded in place, to accommodate a truly floating radiator setup.
Started wiring the motor to the Hydra today. After that it's the rest of the wiring. Hope to finish wiring tomorrow at some point!
Posted by: MMW May 7 2014, 04:20 PM
I would fab a U shaped bracket lined with rubber that rad would sit in. This would support the weight & then the top brackets would only be holding it from moving front to back. Top brackets can also be U shaped/rubber lined over the top of the rad & then bolted into your top bar.
Posted by: CptTripps May 8 2014, 08:47 AM
Yeah. On further investigation, I'm going to re-work that setup after I get it running. Today I'm concentrating on wiring and the intercooler. Those two pieces need to get done, and I'll order some parts for the radiator doin can tackle that later.
I've got the entire interior dynamat-ed and just picked up the banjo bolt I needed to finish the brakes. I forgot (somehow) that Stoddard is about 10min from my house, so I can pick up parts from them for the "Porsche" pieces of the car a lot faster than I realized.
Posted by: mgp4591 May 8 2014, 09:32 AM
Besides the rubber U cradles (most cars have at least those) you can pick up radiator bolts that are really just rubber pieces with threaded shanks coming out either end. One bolts into the radiator, the other into your support bracket. That way it really does float and absorb all that nasty vibration and the U cradle simply is a soft place for it to sit. Check at Honda, Toyota and Nissan dealers- not really sure if yer local Auto Zone would have those... I just think so many of us are in awe of your progress that we'd cry if you had a coolant meltdown!
Posted by: CptTripps May 8 2014, 09:18 PM
Finished all the brake lines today, but haven't bleed anything yet. Still have the gas tank in/out so much to work out the radiator hoses. Which I finally did today.
Bent down one of the ribs in the gas tank, and cut a few openings. Now I'm in business. I need to put a valve in to relieve air, but I'll make it work.
Took this just before I finished it. Radiator: Plumbed!
Attached thumbnail(s)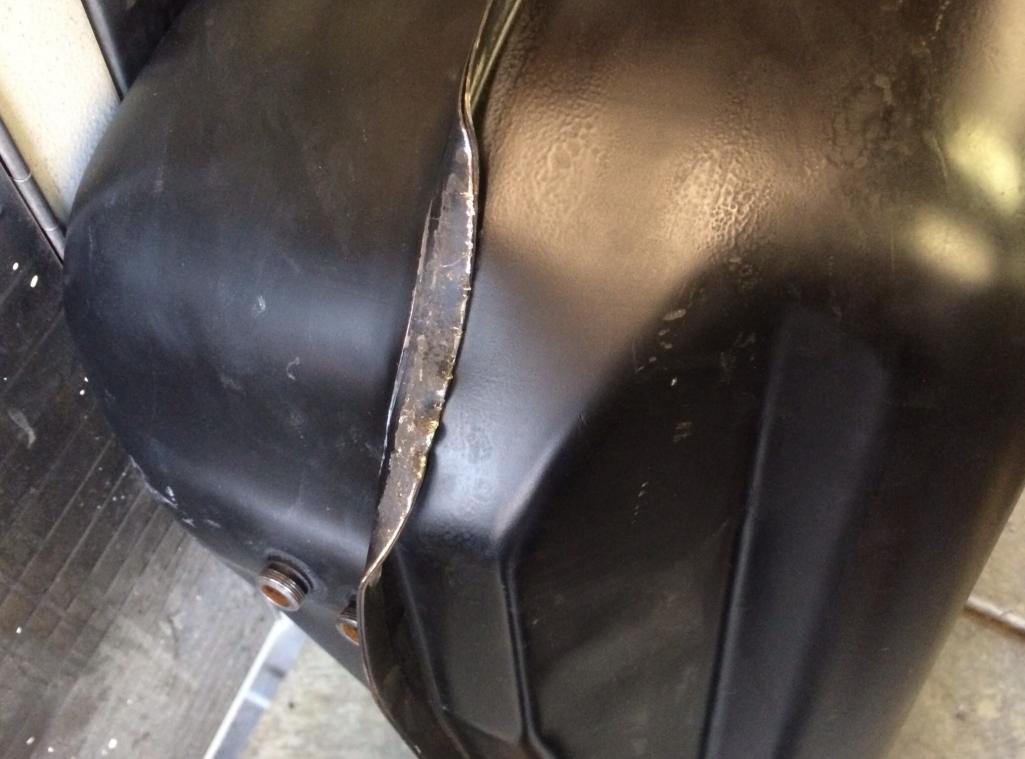
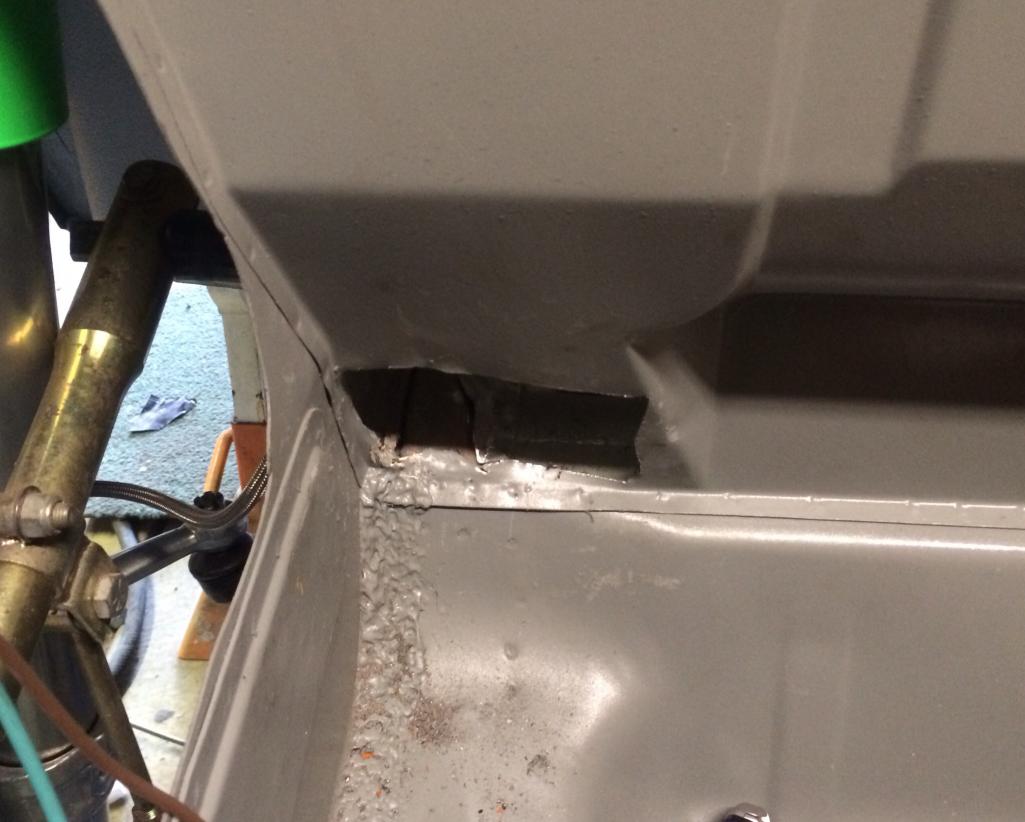
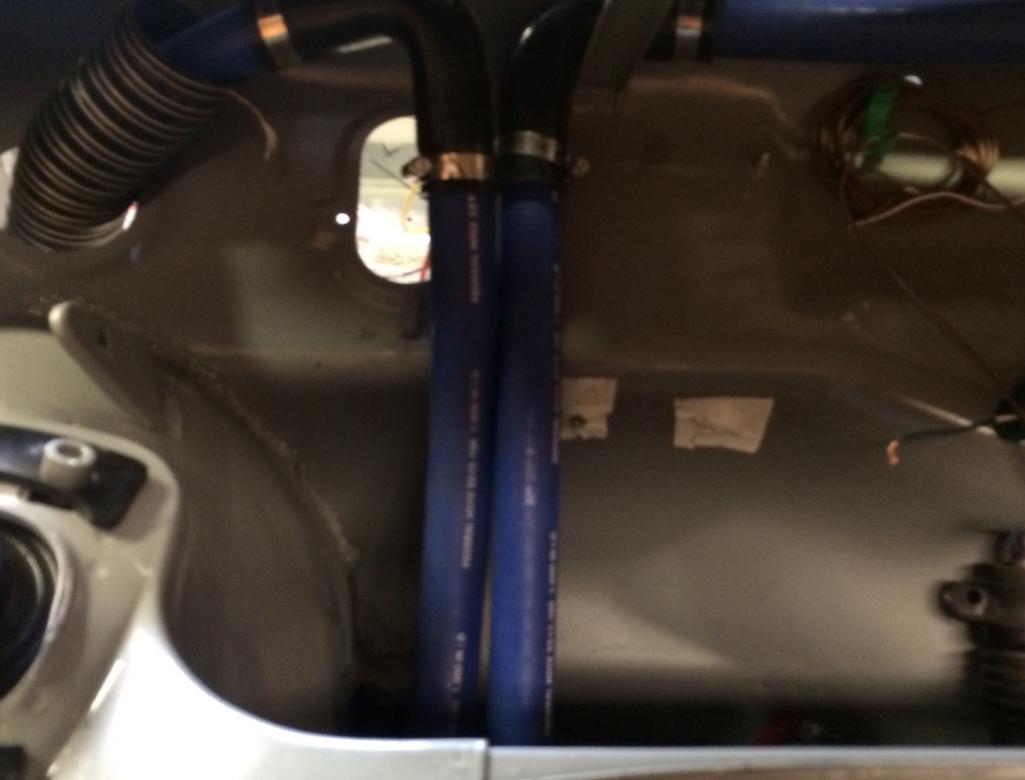
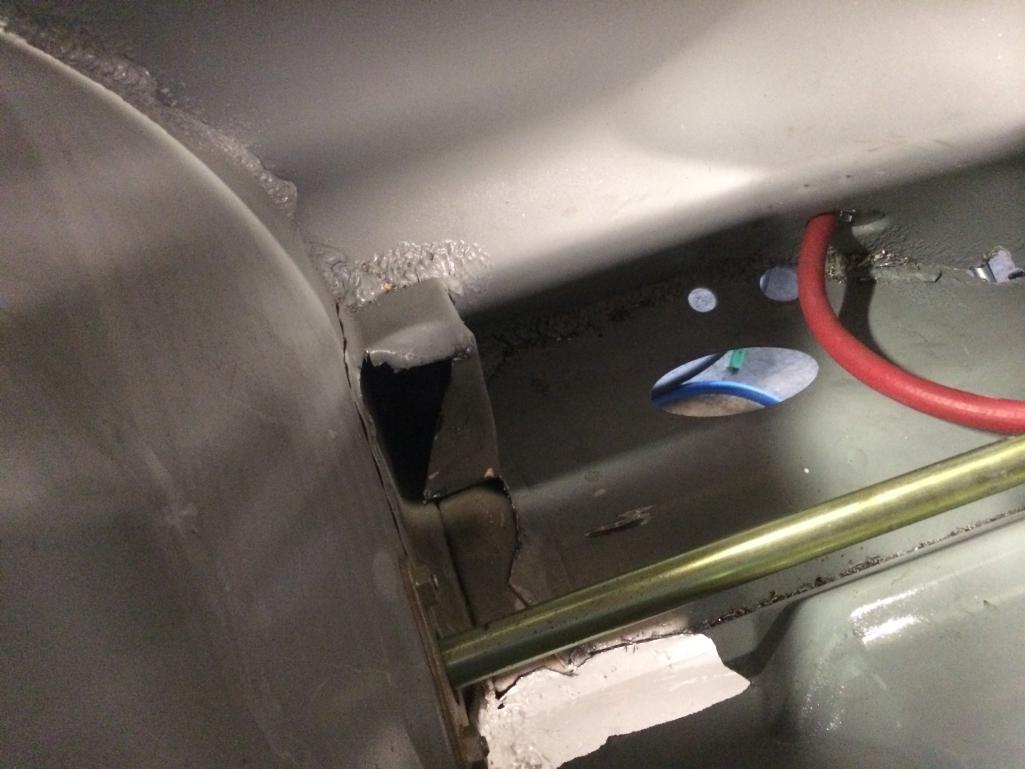
Posted by: CptTripps May 8 2014, 09:20 PM
Forgot one...
Attached thumbnail(s)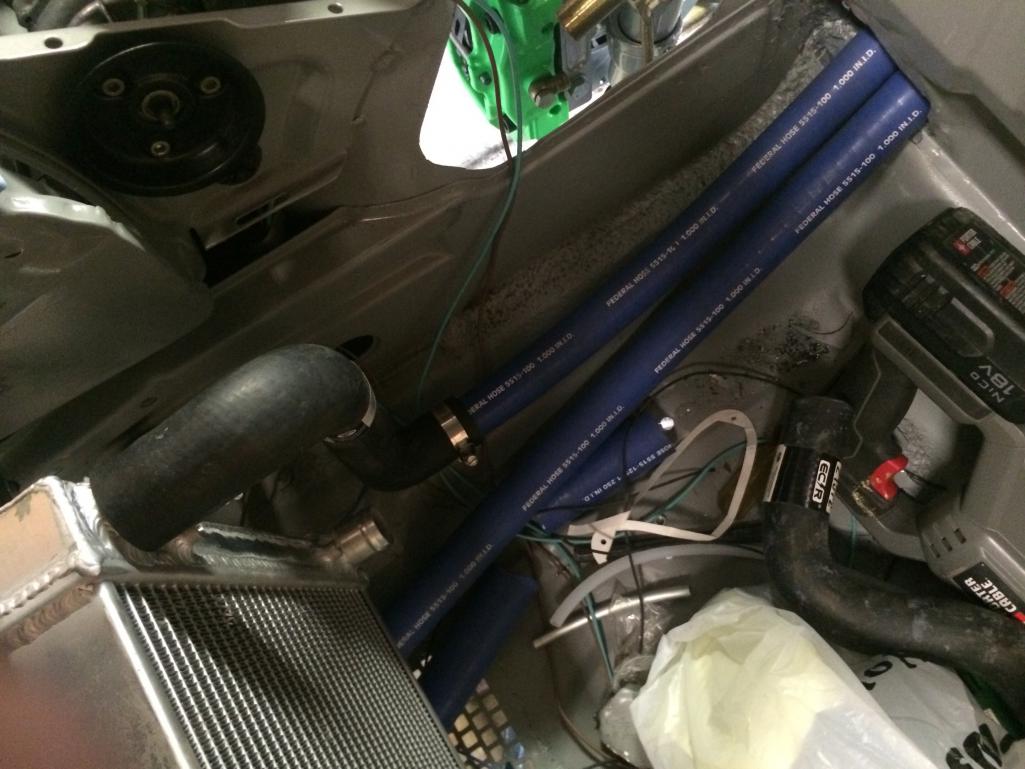
Posted by: 914forme May 9 2014, 08:48 AM
I hope your hose mating holds up. I would not trust it in my car. You can find transitions and put some humps on them, or get the from places like http://www.jagsthatrun.com/Pages/Parts_Cooling_TransHoseSplicers.html Then use a quality clamp and not the worm gear clamps. They will cut into the hose and cause failures down the road.
You can bead transitions if you find them locally using a beading tool, or build one out a vice grip and muffler clamps. You can slap solder, braze, Mig or Tig a bead onto material if need be. I have used all the above methods with success. In a bind depending on the tubing size you can also cut threads into the OD. And you can use epoxy to build your hump. Though I don't like the last one nearly as well.
Also, please put some protection around your hoses where ever they go through bulkheads, they will wear really fast in those areas. I am sure you have thought about that and the picture just don't show it.
Just trying to get you to and keep you
Keep up the great work Doug
Posted by: CptTripps May 9 2014, 09:48 AM
I have better threaded transitions on order already. That's why I left all the hose a little long. It'll be easy to add them, and I need to keep moving.
I put a bunch of seam sealer in the opening so I'm not rubbing against metal. Again, I'll add more later after everything is together and I know where the "run spots" are. Mocking everything into its final position right now is key.
I'm kinda stuck on the fuel pump. Originally I was going to use the stock in/out of the tank and mount the fuel pump externally. Now I'm looking at cutting the tank and using the Subaru one. One of the outputs on my Walbro pump is too shallow to mount anything to. Back to the drawing board there I guess.
Posted by: rhodyguy May 9 2014, 02:33 PM
the beading that runs along the sides of a engine lid might dress out the hole and protect the coolant hoses.
Posted by: CptTripps May 10 2014, 10:31 PM
For a new in-line fuel pump and re-did the lines to the tank. I also finally got the last piece to my master cylendar for the clutch.
The issue I have now is the clutch slave isn't moving. I've blead the line...but it won't budge. Just still feels like there is no resistance. Fluid squirts out when I'm bleeding it. But it doesn't move at all. I'm stumped.
Posted by: Mike Bellis May 10 2014, 10:42 PM
Did you bench bleed your new master? Could still have a bubble inside.
Posted by: mgp4591 May 10 2014, 11:34 PM
The slaves I've dealt with will bleed fluid all day long but they need actual pumping to get them to activate. You've probably done that- I'm just throwing in my 2 cents...
Posted by: Mike Bellis May 10 2014, 11:44 PM
If you push the master, the slave should move the same relative amount. If not, there is air in the system. Hydraulic fluid does not compress easy like air.
Posted by: 76-914 May 11 2014, 07:13 AM
If you push the master, the slave should move the same relative amount. If not, there is air in the system. Hydraulic fluid does not compress easy like air.
Mikes right. Damned few liquids will compress. You have to bench bleed it firstus, Festus!
Posted by: CptTripps May 11 2014, 12:25 PM
Gawd. Ok. I'll dig into it tonight. Such a pita.
I've put 8oz through the slave and still not engaging. I'm starting to think it may be the master.
Posted by: Mike Bellis May 11 2014, 12:33 PM
The bubble is in the master. That's why you bench bleed. Then you take the drippy messy thing to the car and try to install it without spilling brake fluid everywhere.
BTW, I'm running a Howe 5/8" master with my stock VW slave. Not sure what size the VW slave is but it bolts right onto the Cayman 6 speed. Works great!
Posted by: 76-914 May 11 2014, 01:19 PM
Search "bench bleeding clutch master cylinder". There are several videos that are quicker than explaining with my limited vocabulary. It takes some force to push in the plunger but it will go. Or, bench bleed it in place and have someone pump the pedal for you.
Posted by: CptTripps May 12 2014, 04:03 AM
Bench Bleeding: Got it! That seems like the issue I'm having. I imagine it has something to do with the master being at an angle down there. I'd tried to do it with my "Power Bleeder" but the result was the cap blowing off the master and a puddle of fluid on the garage floor.
Ugh...
Posted by: CptTripps May 15 2014, 07:23 PM
Anybody want to come help me finish this thing? I could use a 'friend' in the garage.
For the last several weeks, I've been having trouble staying focused. I'm about to go through a very sad separation/divorce and have almost no motivation to work on this car right now. I'm just emotionally exhausted.
So...if someone wants to come up for a weekend to play in my garage and help me knock through the list of "to-do's" I'm happy to get you a ticket if I can.
Just throwing it out there...
Posted by: bigkensteele May 15 2014, 07:39 PM
Anybody want to come help me finish this thing? I could use a 'friend' in the garage.
For the last several weeks, I've been having trouble staying focused. I'm about to go through a very sad separation/divorce and have almost no motivation to work on this car right now. I'm just emotionally exhausted.
So...if someone wants to come up for a weekend to play in my garage and help me knock through the list of "to-do's" I'm happy to get you a ticket if I can.
Just throwing it out there...
Doug, sorry to hear this. I will look at my schedule. I am just down in Cincinnati, so only a 4 hour drive. This weekend is out, but I may be able to free one up in the near future.
Ken
Posted by: 76-914 May 15 2014, 08:19 PM
Aw man I'm so sorry to hear this. I'm too far away to be of any real help to you. I'm sure the OH 914 Mafia will be here to help you shortly, Doug.
Posted by: Qarl May 15 2014, 09:52 PM
Sorry dude. I'm about to fly off for vacation for a few weeks, or I'd head out.
Take care of YOURSELF first. The car is just a material possession.
Be happy for the future. Have a beer (or something stiffer) and look out for your own interests first. Divorces can be messy and stressful. Listen to you attorney.
Take it a day at a time, and go hammer on the car if you need to get away.
Posted by: Dr Evil May 15 2014, 10:12 PM
Lemme check my schedule and see if I am able to get free.
PM or txt me and I bet we can work something out.
Posted by: rick 918-S May 16 2014, 05:25 AM
Sorry Doug, I have my own fish to fry. I'm supposed to finish two cars by next weekend. Heat is on here.
Posted by: CptTripps May 16 2014, 06:44 PM
Got a second wind today.
Bench blead the masters, then the clutch and brakes. Not a fun "one man" job, but I got it close and was able to chase leaks. I should be good for now. I can feel the clutch engaging and the brakes pushing.
Now I'm wresteling with the wiring diagram. This is going to be a lot of work, but I think I have a good bit of it sorted. Need a few relays I wasn't planning on. No worries there.
I think I'm going to tackle the tail lights and then start in on the headlight buckets while I ponder the wiring.
Posted by: 76-914 May 16 2014, 07:15 PM
That's the trick. If something stumps me I move on to something else and return to it later. Just keep moving forward, always forward.
Posted by: CptTripps May 18 2014, 05:49 AM
Looks like the good Dr (or the Evil one anyway) is coming out this week for a few days to assist me with the wiring. That's really the last major piece before I can get it to the engine guy to finish the inter cooler and turbo lines.
I may be driving it in a week after all!
Posted by: edwin May 18 2014, 07:30 AM
Just make sure the Dr doesn't touch a welder while he's there.
Keep up the good work, I'm looking forward to seeing the result when it's done.
Posted by: 914forme May 18 2014, 09:53 AM
Doug as I have said else where I would love to come up, yet I am booked solid for several weeks. I get you got torpedoed, I would be devastated also. As I am sure you have figured out life moves on..... Control what you can control, the only people who really win in this situation is the Lawyers.
It will be july before I get a free day, if your still struggling then I'll gladly lend a hand where I can. BTW, I make a pretty mean brisket, and pork butt. So if you need to feed some guys for the final push an its in July, I can offer my smoker and skills to feed a much more mechanically skilled group, than I am.
Posted by: CptTripps May 18 2014, 07:51 PM
Thanks guys. I'm actually feeling better.
Spent 2-3hrs in the garage cleaning and organizing today. Then I got busy on some of the wiring. Started wiring the hydra to distribution blocks. This will make wiring easier.
Attached thumbnail(s)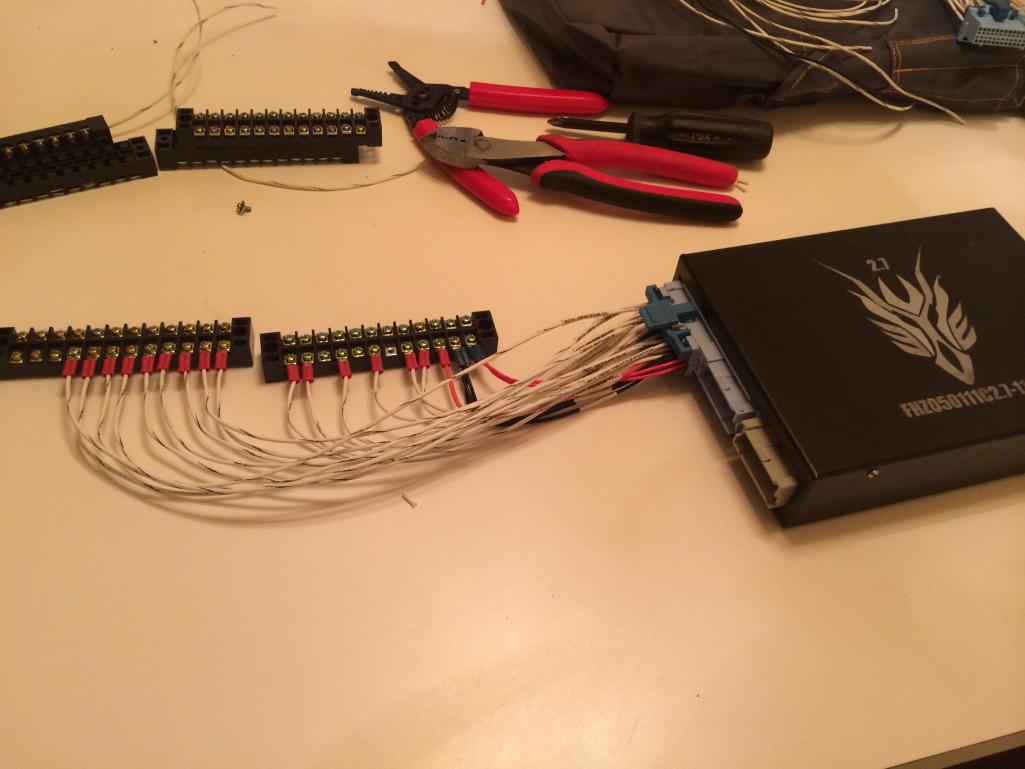
Posted by: Krieger May 18 2014, 07:59 PM
Posted by: CptTripps May 18 2014, 09:01 PM
18 down, 40 to go!
Now that I have a plan for the wiring, it should go a lot quicker. I need to get some more terminal ends though.
Posted by: Dr Evil May 18 2014, 09:11 PM
Shit, what the hell will be left for me?
Edwin....that was a low blow you fucker  Just kidding I have recently purchased a TIG, though. It has yet to arrive. I have been practicing my MIG skills and they aint bad. Spool gun MIG with AL is not great...I hope to do better with TIG. See me when I get down there in Aug for my transmission clinic that may be moved again. Gonna be in Canberra.
Posted by: tdgray May 19 2014, 08:08 AM
Let me know guys... busy as shit right now but I can free some time up if we have a plan.
Posted by: CptTripps May 19 2014, 08:13 AM
Shit, what the hell will be left for me?
All the internal stuff, and the other side of what I'm doing now. I'm just connecting to the ECU. We still have to figure out WHERE the engine connects, and to what. Plus, the internal gauges/starter wires/relays/etc. Plenty of work. Don't worry.
Let me know guys... busy as shit right now but I can free some time up if we have a plan.
DrEvil will be at my house this Wed/Thurs. Come up after work and play with us. Should be a good time.
Posted by: MMW May 19 2014, 09:14 AM
CptTripps wrote - "DrEvil will be at my house this Wed/Thurs. Come up after work and play with us. Should be a good time."
That sounds sooooo wrong.
Posted by: CptTripps May 19 2014, 01:22 PM
That sounds sooooo wrong.
Yeah...I'm just realizing that.
Posted by: Chris H. May 19 2014, 01:44 PM
Noooooo...let's right the ship on this one boys...
I'm picturing something more like this:
https://www.youtube.com/watch?v=_g0mUyH6dI8
Who gets to be Will Ferrell?
Posted by: Dr Evil May 19 2014, 01:58 PM
Posted by: CptTripps May 19 2014, 02:06 PM
Dude. We're TOTALLY doing Karate in the garage. We just need to move a car out first.
I'll buy a watermelon and bring my samurai sword home for the office. It's no signed by Randy Jackson or anything though.
Posted by: Moneypit May 19 2014, 02:11 PM
I don't see why a couple dudes can't spoon and have it not be gay
Posted by: dan_the _body_guy May 19 2014, 02:17 PM
just try to refrain from sword fighting and above all else DO NOT tea bag the drums or the car!
Posted by: tdgray May 20 2014, 07:03 AM
Let you know Doug... have union negotiations Thursday so who knows how that will go... considering I did such a good job last one
Posted by: CptTripps May 20 2014, 07:25 AM
It'd be great if you could come up tomorrow OR Thursday Todd. Seriously, it'd be a big help.
Here's the list of things I need to do on the car.
Lots-O-Wiring (DrEvil actually WANTS to do this one.)
ECU Mounting after I finish the pre-wiring. (I'll have that done tonight though.)
Headlight buckets. (I need the plastic grommets to finish this, I can't find them anywhere.)
Intercooler air tubing installation.
Intercooler radiator and canister installation.
Brake and clutch re-bleeding.
Throttle cable installation. (This is a bitch to try to get through that tube, I'm just going to re-drill a hole for it.)
Radiator fill-valve installation.
Window and windshield installation.
There's an oil line for the turbo that I need to install and route. I think it connects to the AOS that I have. Need to double-check that part.
The seats and carpet can wait until I have something wired up properly TO install them in. I'm going to work on making the center console tonight. I also need to cover the dash in the vinyl I have so that can be ready for DrEvil to wire things into.
Posted by: 914forme May 20 2014, 06:41 PM
Headlight buckets. (I need the plastic grommets to finish this, I can't find them anywhere.)
I just cut up a front clip, I should have these,your taking the pivot arms bushings, right?
Posted by: CptTripps May 20 2014, 10:16 PM
I actually need the drop-link arm, bushings, and rotator thingy for both. I have 1 sides arm, but am missing the other bushing. I need the part that attaches to the motor, another drop-link like this, and all the bushings. If you have the stuff, can I buy them and pay for you to overnight them? I need to get this stuff tightened up on Thurs when Mike is still here. (He's doing the wiring with me.)
If not, that's fine too. I just need the parts.
Attached thumbnail(s)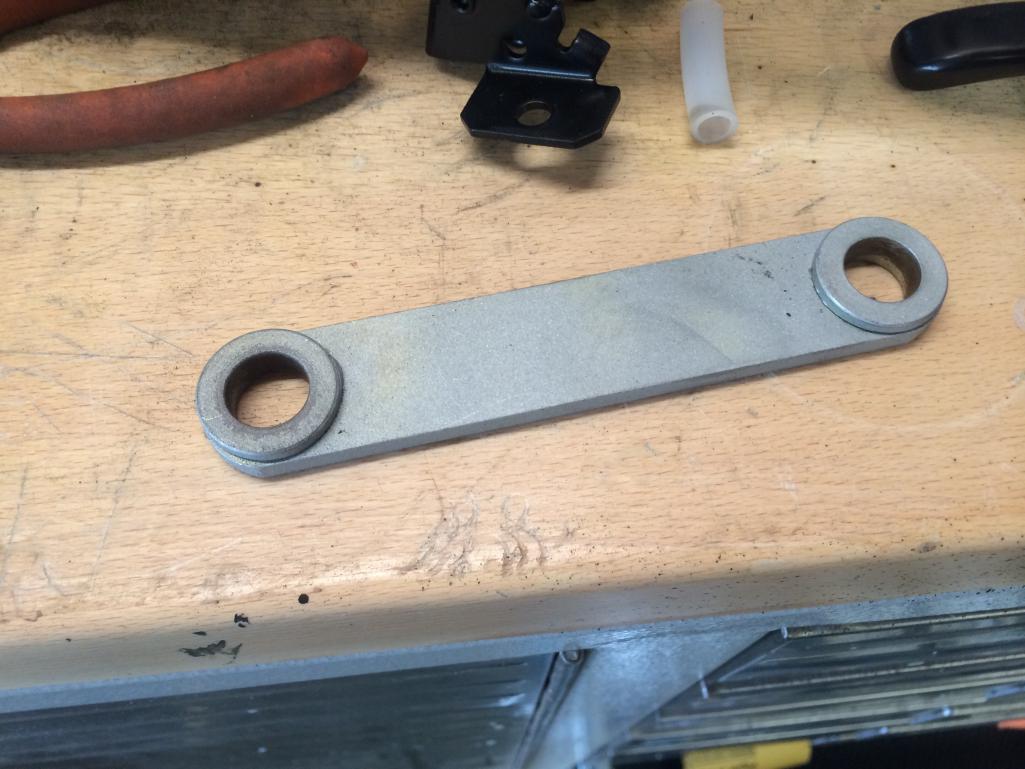
Posted by: CptTripps May 21 2014, 06:04 AM
Got the HID headlights installed. They don't work yet, and I'm still missing the link, but it's one less part on the shelf.
Attached thumbnail(s)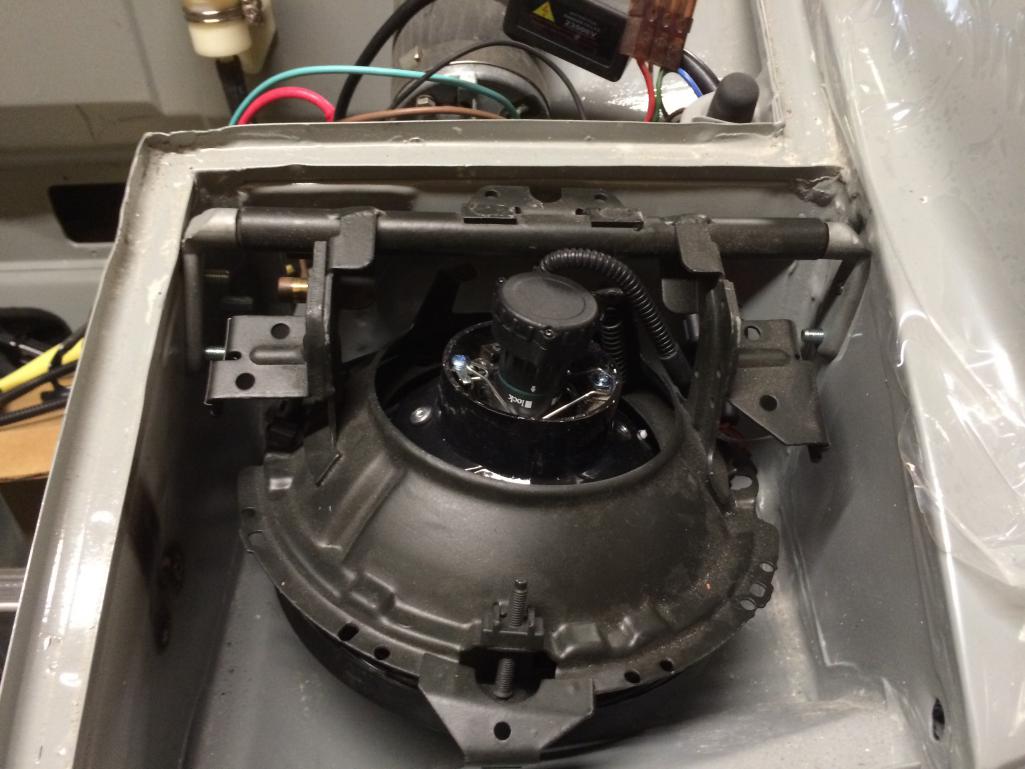
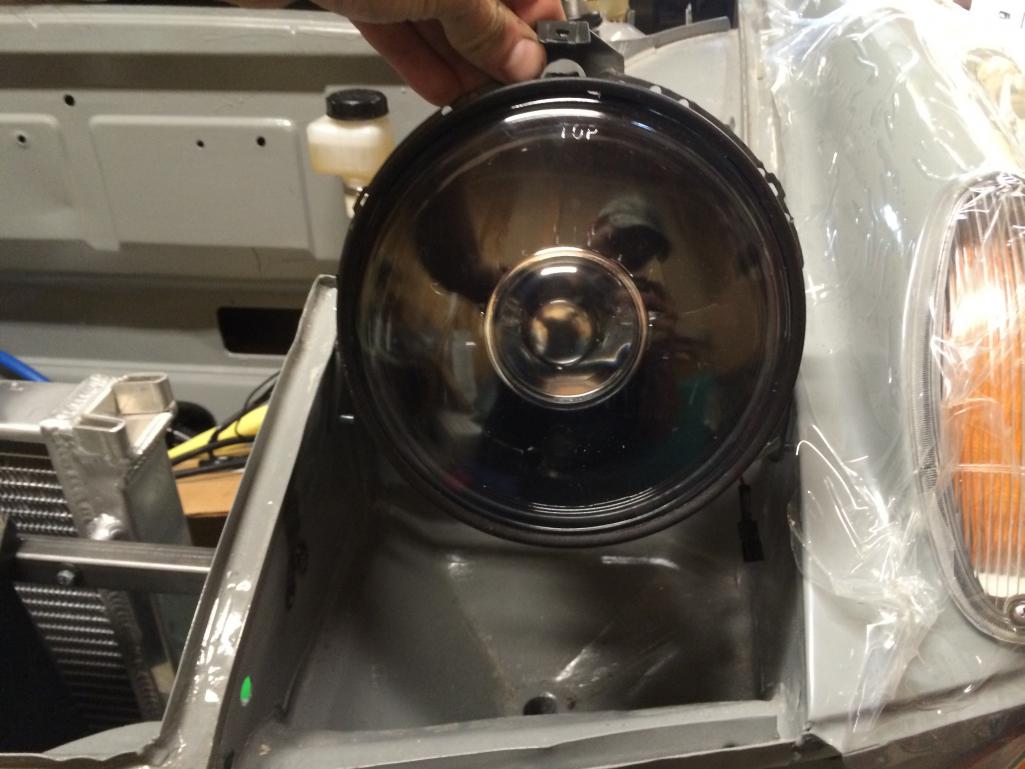
Posted by: tdgray May 21 2014, 05:08 PM
Can't make it dudes...sorry duty calls
Well is not how it is going 
Posted by: 914forme May 21 2014, 05:24 PM
Yes, I have all the stuff, don't worry about it, you can cover shipping, I'm not worried about making money, I was going to scrap them anyway.
PM me if you still need them.
Posted by: CptTripps May 21 2014, 08:25 PM
DrEvil arrived and got right to work after lunch. We're still in the garage wresteling wiring.
Attached thumbnail(s)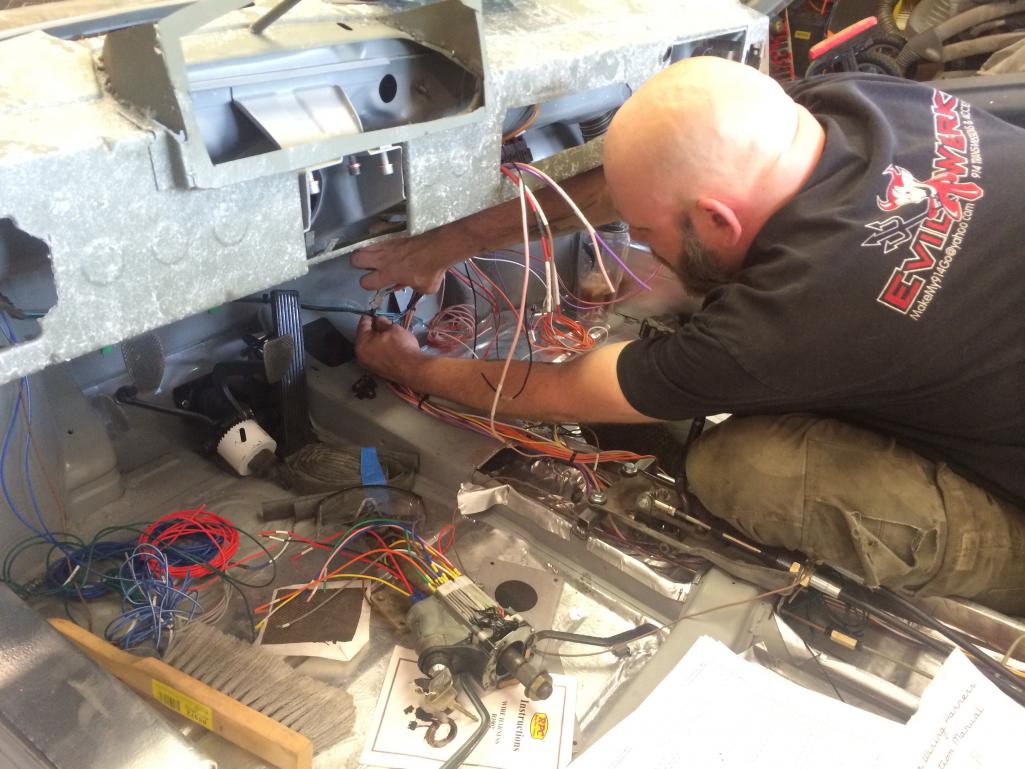
Posted by: bigkensteele May 21 2014, 08:35 PM
DrEvil arrived and got right to work after lunch. We're still in the garage wresteling wiring.
Be careful what you feed him. You might not be garage buddies for long, depending on the size and ventilation qualities of your garage. However, he is a great guy and funny as hell, so you might just have to breath out of your mouth for most of his stay.
Hope you guys knock it out!
Posted by: CptTripps May 22 2014, 06:15 AM
Oh I'm WELL aware of what he's...er...capable of. Why do you think I left the garage open all day?
Posted by: Moneypit May 22 2014, 10:56 AM
DrEvil arrived and got right to work after lunch. We're still in the garage spooning.
Fixed it for ya

Posted by: AfricanHijinx May 22 2014, 10:58 AM
what is the brand of the headlights?
Posted by: Chris H. May 22 2014, 11:03 AM
No they're probably working on the bunk beds.
https://www.youtube.com/watch?v=ffAszD0d618
Posted by: CptTripps May 22 2014, 12:06 PM
what is the brand of the headlights?
I forget. Got them off eBay. The trick for me was re-figuring out the way to wire them up. (Well, Mike did anyway.) They have a different relay setup, and you need to run constant power to them. There is constant power up there anyway for the headlight motors normally, but my wiring harness is completely custom, so that went out the door.
They LOOK cool. Don't work yet, but still look cool. Cant wait to fire them up.
Posted by: CptTripps May 22 2014, 12:07 PM
Yes, I have all the stuff, don't worry about it, you can cover shipping, I'm not worried about making money, I was going to scrap them anyway.
PM me if you still need them.
Absolutely. You still have my address, right? Just let me know what the $ is.
Posted by: 914forme May 23 2014, 05:09 AM
Yes, I have all the stuff, don't worry about it, you can cover shipping, I'm not worried about making money, I was going to scrap them anyway.
PM me if you still need them.
Absolutely. You still have my address, right? Just let me know what the $ is.
Yes I do, I'll get them boxed and out. I have a few other items to ship out for a secret project someone on the East Coast is working on for me.
 So I'll just add it to the box stack and get it up to yah.
Posted by: CptTripps May 26 2014, 01:08 PM
Haven't had a lot of time to work on much. DrEvil CRUSHED the wiring. It'll be easy to finish up from here. I'll take pics later.
Did my 3rd brake light this am, by drilling holes in the back bar, taping off the holes, adding a clear epoxy and inserting LED lights. It's pretty bright, and doesn't detract at all from the lines of the car.
Attached thumbnail(s)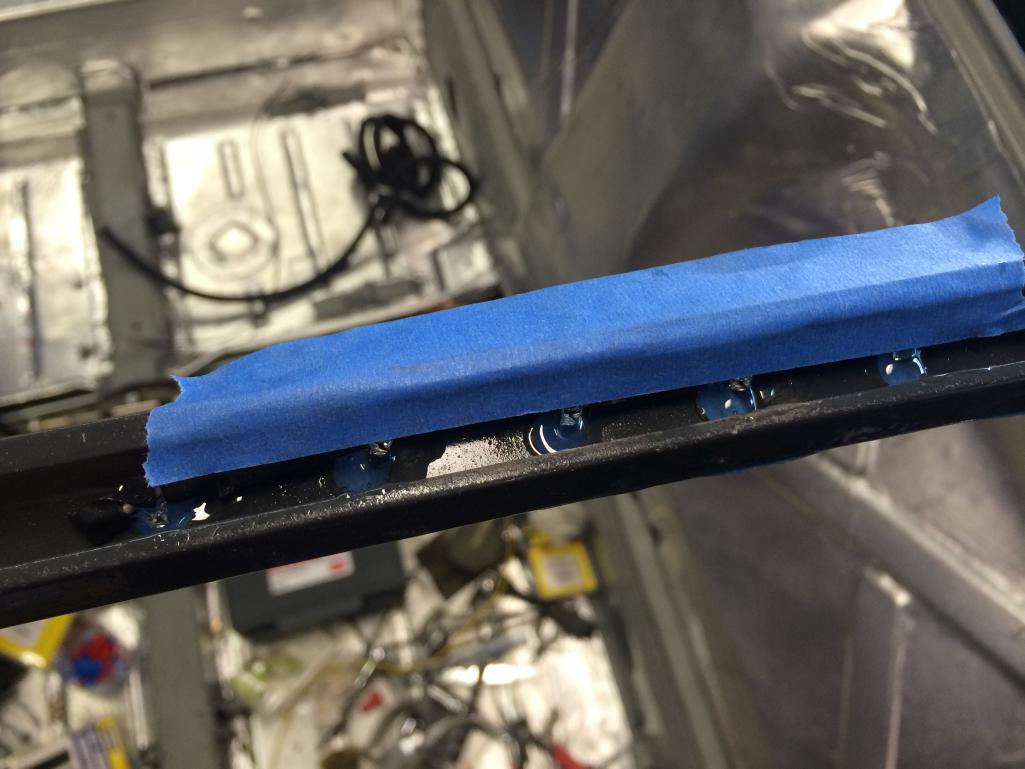
Posted by: CptTripps May 26 2014, 01:24 PM
Later today: Starter and Coil relays. Wire up the Hydra. Start working on the interior so I can ship it to my motor builder to make all my air flow work. We're getting close!
My new/realistic deadline is to have it driving for the Stoddard meet in 2 weeks. I'm pretty sure I can make that one!
Posted by: Dr Evil May 26 2014, 01:27 PM
Posted by: CptTripps May 27 2014, 06:55 AM
Ok...lots of progress....that doesn't look like much, so I didn't take pics.
Put a plate together for the Hydra to mount in the trunk. I wasn't going to, but with the amount of things I needed to mount on that panel, and the thickness of the steel I was going to have to drill through, this was a better option than velcro. (Cleaner too.) So I got the panel all drilled out and ready to mount.
I also ran the starter relay and finished wiring the coil and injectors up to relays. I don't like the relays I bought, so I'm going to buy some 40A later today and use those instead of the 10A I had.
Wiring for the engine should be done tonight. Then I get to tackle the intercooler and figuring where in the hell I'm going to mount the radiator for that...and the tank...and how to tube the whole thing. That's the last major piece before the interior.
I already have the carpet all cut. I need to have a few pieces bound at the edges and then cover the dash and fire-wall with....something. I'm still not sure how I want to do that part. If I have enough carpet left, perhaps that's my best option. I'll figure that out later though.
Just waiting on the parts for the headlight motors and I can get that piece worked out.
So...that's my punch-list right now. It's a few more days of hard work, but I hope I can get it done in time for the Stoddard meet.
Posted by: 76-914 May 27 2014, 08:56 AM
Ok...lots of progress....that doesn't look like much, so I didn't take pics.
Oh Boy, how many of those days are there? A full day and nothing to show for it.
I also ran the starter relay...............
Good call. You wont regret that and your starter switch thanks you.
Wiring for the engine should be done tonight.
 Yea, right!
Just waiting on the parts for the headlight motors and I can get that piece worked out.
What's with those? I missed that part.
So...that's my punch-list right now. It's a few more days of hard work, but I hope I can get it done in time for the Stoddard meet.
I want 3 of whatever your taking, Doug. Don't take this wrong Doug, but I think your a "long" month out. Maybe 2 month's but soon enough to make RRC this year.
Posted by: CptTripps May 27 2014, 09:26 AM
We shall see. I know I'm on the home-stretch at this point. No longer 90% with 90% to go for sure.
The engine wiring is all in the trunk, and the Hydra is completely wired to the terminal blocks. Everything is shrink-labled at both sides, so I can't imagine that it'll take long at all. I just ran out of crimp ring connectors or I'd have kept going last night. I ordered more, and bought enough this AM at Radio Shack to finish off the major pieces. The starter relay seems a little TOO heavy-duty for what I'm going for so I was going to replace that with a smaller one I ordered.
After that, it's a matter of wiring up the interior, which DrEvil did an outstanding job of pre-wiring with Molex connectors for me.
If I can get the car to at least turn, I think I'm close enough that I can get somewhere in pretty short order. The dash gauges may be an issue, as I don't thin I gave myself enough clearance in the back. Gotta ponder that one today in between meetings.
Posted by: Justinp71 May 27 2014, 10:20 AM
Posted by: CptTripps May 27 2014, 10:37 AM
Here's the punch-list.
Looks long, but some of these are 10-min jobs. Stuff with and "*" are being done by my engine builder. He's going to work on it while I'm in Atlanta this weekend. Said everything is already mocked-up so it'll just be putting everything together.
Engine:Complete Engine WiringComplete Hydra Wiring*Mount Fuel Pressure Regulator*Mount Boost Solenoid
*Mount Radiator For Intercooler
*Mount Intercooler
*Plumb Intercooler
*Plumb Water Lines To Intercooler
*Exhaust Hangers*Vacuum Lines
*Plumb Air-Oil Separator
Finish Radiator At The Engine
Add Radiator Relay
Finish Headlight BucketsInstall Accel Cable
Interior:
Re-Cover Dash
Re-Cover Firewall
Build Center Console
Mount/Wire Speakers In A-Pilars
Mount/Wire Door Speakers
Mount/Wire Switches
Carpet Installation
Mount/Wire Subwoofer
Mount/Wire Sub Amp
Mount/Wire Sat-Nav
Mount/Wire Power Windows
Mount/Wire Power Locks
Install Thresholds
Exterior:
Mount Windshield (Recover Dash First)
Mount Back Glass (Recover Firewall First)
3Rd Brake Light Wiring
Windshield Wiper Motor
Windshield Washer Motor
Mount Door Handles
Install Seals
Drivetrain/Steering:
Adjust Camber
Adjust Allignment
Check Bolts/Pins
Posted by: BIGKAT_83 May 27 2014, 10:56 AM
If your in Atlanta on Sunday you need to go to caffine and octane (7am til 11am) car show.
Let me know and I'll meet you there.
Bob
Posted by: CptTripps May 27 2014, 01:13 PM
Actually, that may be cool. Where's it at? I'll have my kids with me and they're really into cars now that mine LOOKS like a car.
We leave for CLE at 4:30 so if it's close to Buckhead where we're staying, I'll be there.
Posted by: CptTripps May 27 2014, 02:22 PM
More of what McMark would call "Digital Progress" but I got the decal sheet done today. Still not sure if I actually want to sue them or not, but I have the vinyl cutter...and I have the vinyl. Easy enough to cut and I can change my mind later.
Attached image(s)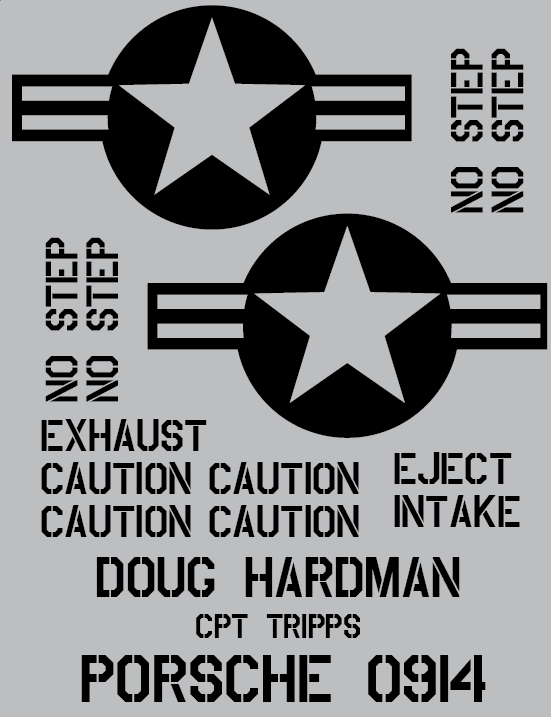
Posted by: BIGKAT_83 May 27 2014, 04:07 PM
Actually, that may be cool. Where's it at? I'll have my kids with me and they're really into cars now that mine LOOKS like a car.
We leave for CLE at 4:30 so if it's close to Buckhead where we're staying, I'll be there.
Its about 15miles north on GA 400 no traffic that time of the day. I usually get there around 8:30 or so.
Bob
Posted by: BIGKAT_83 May 27 2014, 05:07 PM
Actually, that may be cool. Where's it at? I'll have my kids with me and they're really into cars now that mine LOOKS like a car.
We leave for CLE at 4:30 so if it's close to Buckhead where we're staying, I'll be there.
Its about 15miles north on GA 400 no traffic that time of the day. I usually get there around 8:30 or so.
Bob
Posted by: green914 May 27 2014, 05:43 PM
Great progress
Posted by: r_towle May 27 2014, 07:20 PM
More of what McMark would call "Digital Progress" but I got the decal sheet done today. Still not sure if I actually want to sue them or not,
Why would you want to sue them?
Posted by: CptTripps May 27 2014, 07:59 PM
Doh! Autocorrect fail.
USE them.
Posted by: saigon71 May 27 2014, 08:50 PM
Keep on rolling Doug...you are on the home stretch.
Posted by: effutuo101 May 28 2014, 02:54 AM
solidarity!
looking good Doug!
send pictures of the turbo oil and water cooling systems please.
need to finalize mine.
Posted by: CptTripps May 28 2014, 10:10 AM
Spent all night on wiring. Then I ran out of crimp ends. I have all the wires installed on the engine and marked off where they go on the Hydra blocks, so I'll have that wrapped up later today.
My water cooler still eludes me. I keep going back/forth as to where I want it mounted.
Attached thumbnail(s)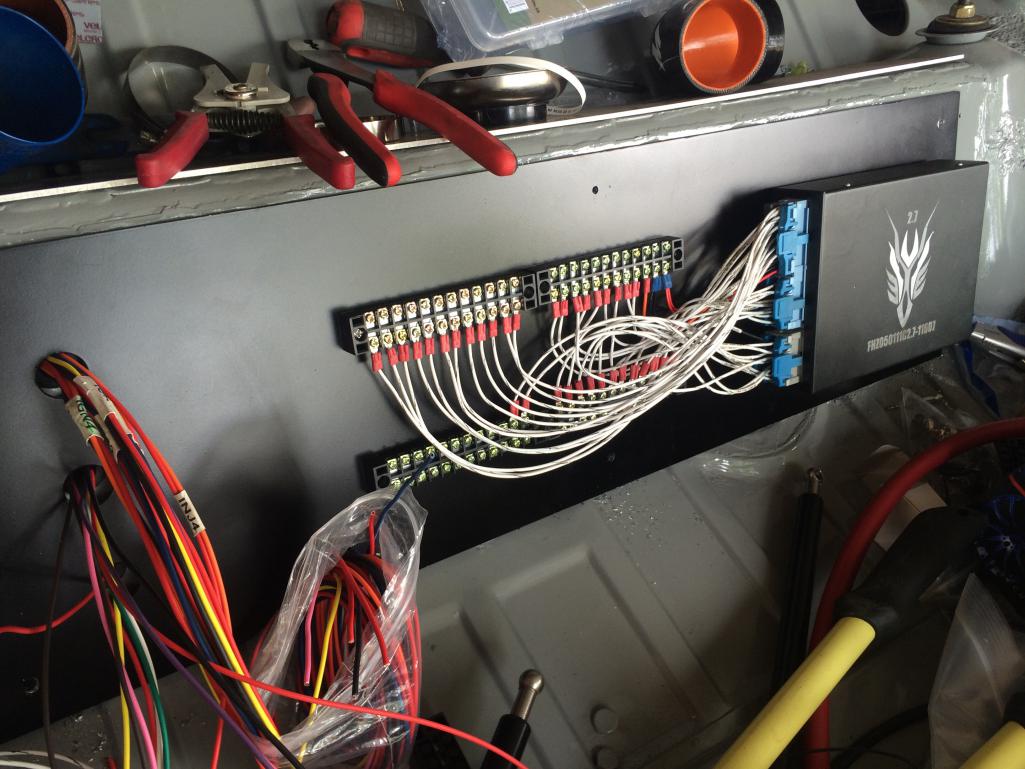
Posted by: CptTripps May 28 2014, 10:46 AM
Looking at that pic, I should clean those up a bit to make things easier down the line. An extra hour on this side will make for a more refined look down the line.
I just picked up 6 3/4" spacers to raise the panel off of the wall a little bit. That'll give the wire more room too. I was hoping to get a 8-10" service loop behind it to make moving the panel a little easier too.
So I *should* be all the way wired later tonight. Still pondering the intercooler stuff here and there. I think I have a plan now. Need to dry-fit it first though.
Posted by: rhodyguy May 28 2014, 11:28 AM
are you planning on some sort of heating system to tie in to the cabin? the wiring job is as clean as they come. top shelve. hard to believe its the same car that came from the far north cal coast.
Posted by: CptTripps May 28 2014, 05:09 PM
Wiring for the engine is complete. Except for the ignition coil pack relays for power. Working on the boost solenoid and fuel system tonight after the kids go to bed.
Here's what it looks like now.
Attached thumbnail(s)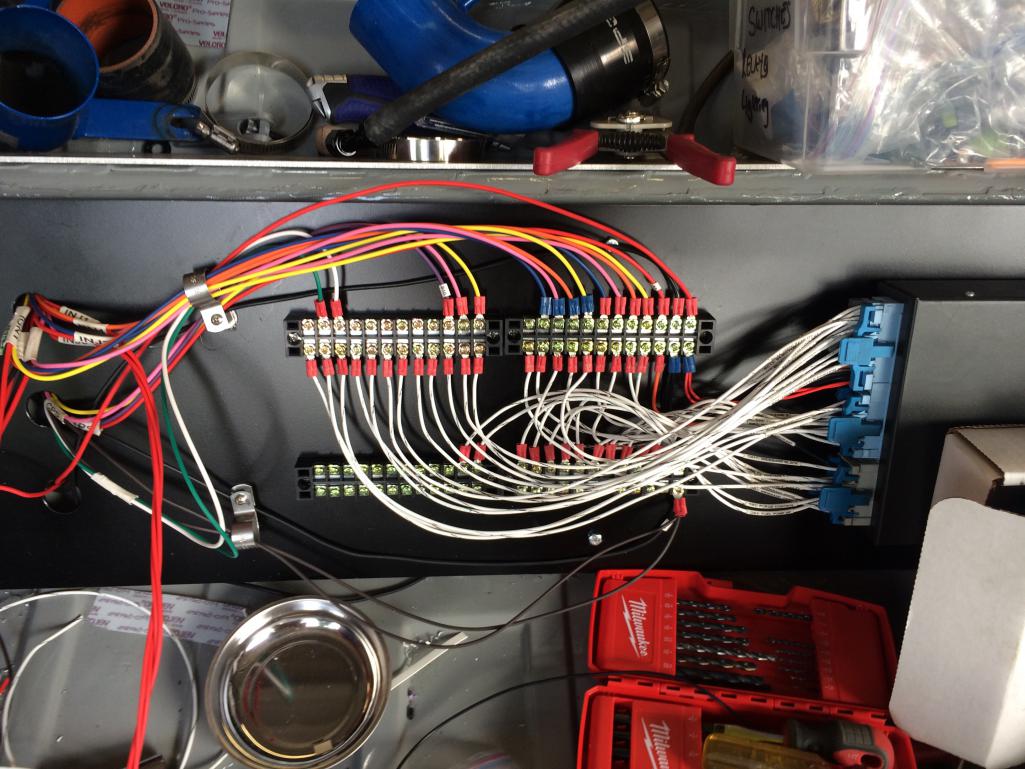
Posted by: Mblizzard May 28 2014, 06:41 PM
You better finish this and bring it to Ockteenerfest because I really want to see this car!
Posted by: 76-914 May 28 2014, 06:49 PM
Getting closer and looking good, Doug. Is that Tefzel wire? You just reminded me I need to get busy cleaning up my electrical Rat's Nest.
Posted by: CptTripps May 28 2014, 08:30 PM
Got a shit ton done tonight.
Fuel system: Complete (tank to rails to pressure reg...good to go!)
Hydra Wiring: Complete (just need to connect the wide-band at the exhaust)
Boost Solenoid: Complete (wired and vac lines run)
Throttle Cable: Complete (had to build a custom cable mount)
Starter Relay: Complete (it turns over and everything!)
Attached thumbnail(s)
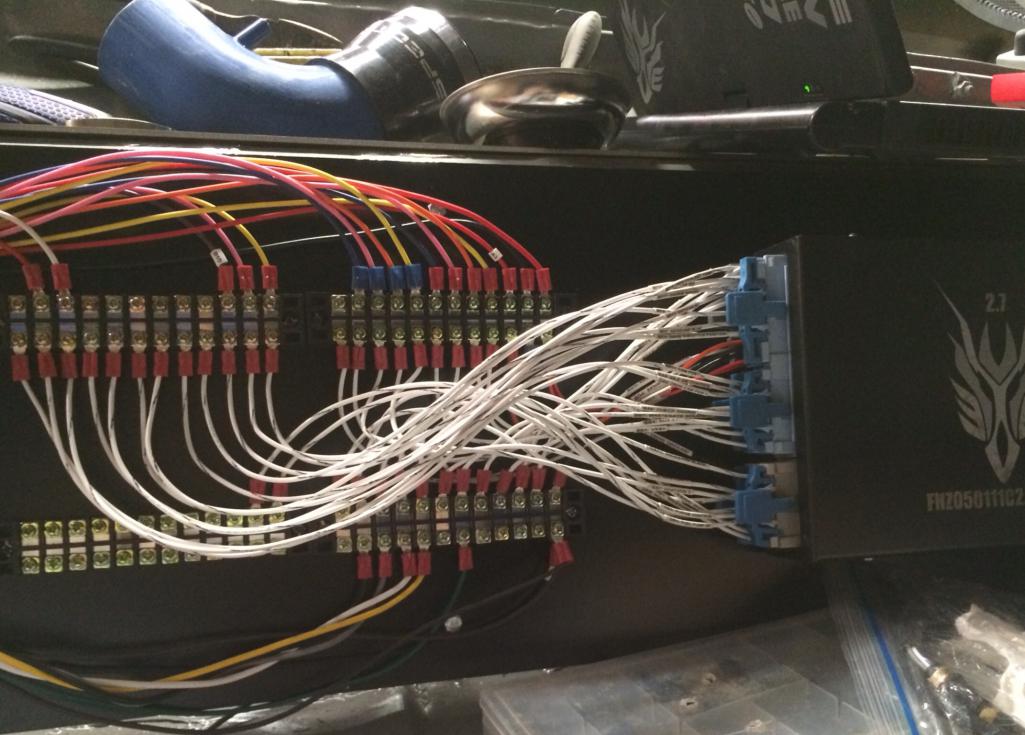
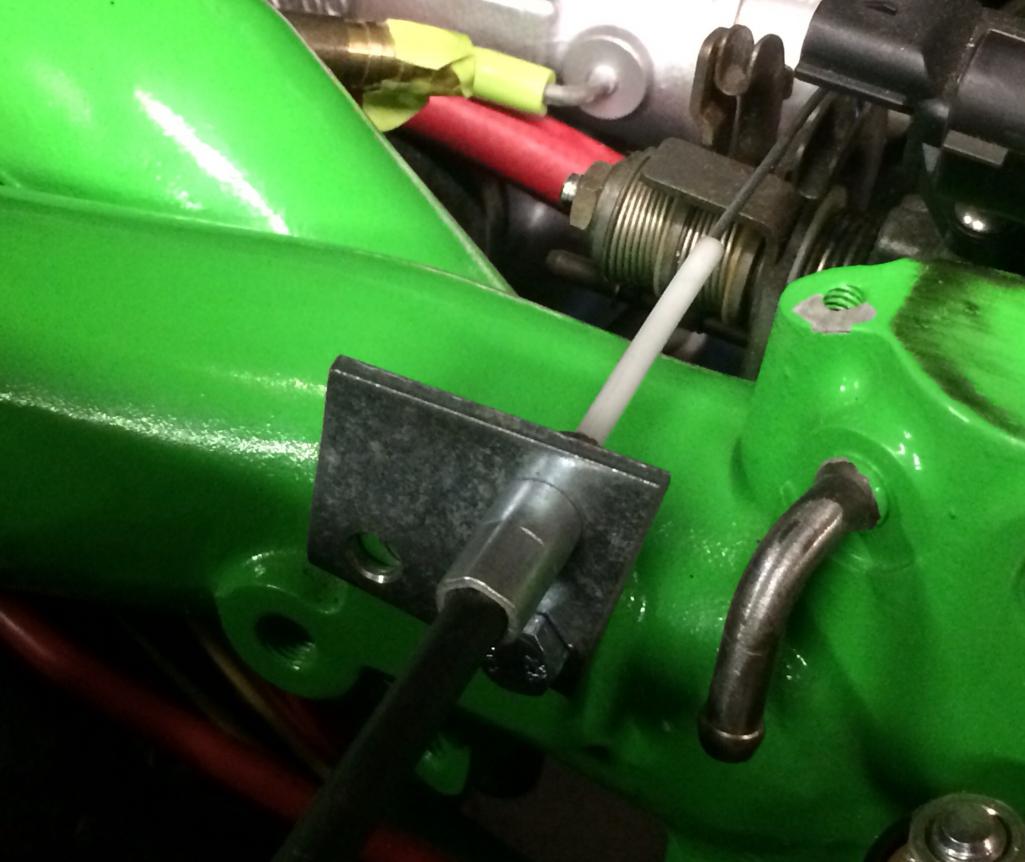
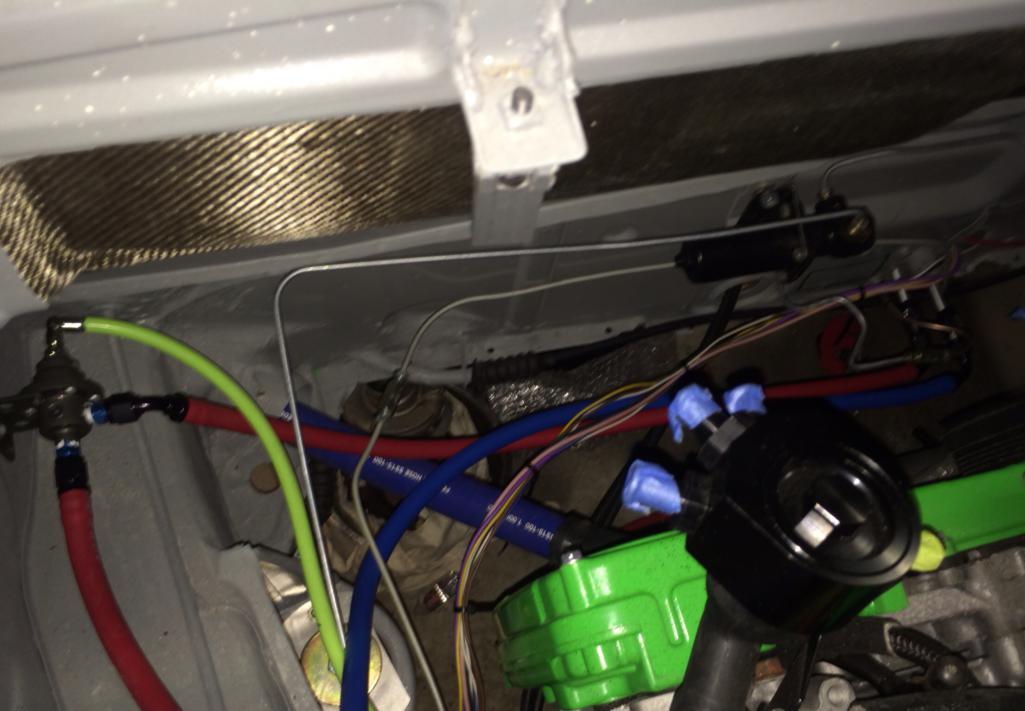
Posted by: CptTripps May 28 2014, 08:31 PM
I still need to clean everything up with zip-ties and such, but everything is where it should be and it's easy to make it look nice from there.
Feeling good about this guys...really starting to see the light at the end of the tunnel.
Posted by: Amenson May 28 2014, 08:43 PM
Getting close to tire smoke!
Posted by: CptTripps May 28 2014, 09:15 PM
I'm still a little stuck on the throttle and how to connect it to the stock (new) 914 cable. The subaru uses a lug at the end, and the 914 has the pressure-pole-thingy. Right now, just putting it in there holds just fine. I just want to make sure it's solid.
Any ideas?
Posted by: Spoke May 28 2014, 09:27 PM
I'm still a little stuck on the throttle and how to connect it to the stock (new) 914 cable. The subaru uses a lug at the end, and the 914 has the pressure-pole-thingy. Right now, just putting it in there holds just fine. I just want to make sure it's solid.
Any ideas?
Not sure what each end looks like. Got some pics?
BTW, great progress! Lookin' pretty sweet.
Posted by: CptTripps May 29 2014, 06:58 AM
The other issue I saw was that the starter only moves one wheel when I'm in gear and turn it over. I'm hoping (praying) that it's because both the wheels aren't on the ground. I would have expected one wheel to go one way, and the other to spin the opposite direction. I need to check that when I get home. ;(
Posted by: Chris H. May 29 2014, 07:24 AM
I think that is actually normal. Ask Ian. Your trans has an open diff like mine. That's why it was such a pain in the arse to tighten the nut on the diff locker because you don't get any opposing tension like you do with the older ones. You get no tension at all.
Posted by: CptTripps May 29 2014, 07:32 AM
I think that is actually normal. Ask Ian. Your trans has an open diff like mine. That's why it was such a pain in the arse to tighten the nut on the diff locker because you don't get any opposing tension like you do with the older ones. You get no tension at all.
That's what I thought too. When I had the trans out, I know they spun opposite in my hands.
I'm also worried that the roll-pins I have aren't substantial enough, and that I need a washer or spacer of some kind behind the Magic Flanges I have. I remember someone saying I needed something there, but I can't find the email/pm/thread that talked about it.
Update: Found it -> http://www.914world.com/bbs2/index.php?showtopic=115804
Anyone know where I can get a set of the rings/washer things I need?
Just going through my list of "last-min" stuff before I fill the trans with fluid in preparation for "go time" next week.
Posted by: Dr Evil May 29 2014, 08:56 AM
Attached image(s)
Posted by: Chris H. May 29 2014, 09:37 AM
Doug,
Take a read of this when you have a little free time...
http://forums.nasioc.com/forums/showthread.php?t=920674
As you may know the Subie trans is known as the weak spot, but primarily that's due to the fact that they are AWD so when the clutch is dumped at 7000 rpm after a surge of adrenaline the wheels cannot spin easily and the CV joints are extremely sturdy. For this reason "Scotty" has come up with a mixture of trans fluids that he believes helps lengthen the life of the 5MT trans. This is really just FYI...don't feel like you have to do this. Just Subie trans education for you. It's fine to use the OEM stuff but in case you're concerned about it or maybe after you thrash it a bit you'll at least have this top of mind. I might use it just because I have NO IDEA what my trans has been through up to now. You've just got a LITTLE more hp than stock so that's why I threw it out there.
Posted by: 76-914 May 29 2014, 10:02 AM
Here you go Doug. This is from the horses (Steve aka Porcharu) mouth.
I used all my pipe up on another project. It's 1" pipe schedule 10, fits perfect. I actually think this spacer is not needed as the aftermarket axles have long splines and just let the CV slide around, but if you can get the pipe and cut 4mm slices I would do it.
Steve
Posted by: CptTripps May 29 2014, 10:14 AM
That's what I was looking for. Thanks!
I went over to NASIOC and copied the recipe. I've ordered everything and it should be here by Monday.
Here's the cocktail: (With links to buy the stuff on Amazon)
2qt 80w90 Castrol HypoyC(NOW labeled Axle Limited Slip 80W-90 by Castrol in North America) -> http://amzn.com/B00HFL36V2
1qt Redline HEAVYWEIGHT SHOCKPROOF -> http://amzn.com/B000CPI5XW
1qt Penzoil 'SYNCHROMESH' transmission fluid....the GM synchromesh fluid PN 12345349 is available at any GM dealer and can be used if the Penzoil product is not available....the Penzoil one IS better. -> http://amzn.com/B0002KL098
----------
1) FOR BEST RESULTS DRAIN THE TRANSMISSION FOR AT LEAST 30 MINUTES...REMOVE the trans dipstick and use a funnel(see below) with a long spout....
Pour the WHOLE BOTTLE of the HEAVYWEIGHT SHOCKPROOF(NOT THE LIGHTWEIGHT) into the trans....
2) Pour EXACTLY 1/2 of ONE of the bottles of CASTROL into the now empty shockproof bottle and shake it gently.....and pour THAT into the trans
3) Pour ALL REMAINING CASTROL PRODUCT into the trans.
4) Pour EXACTLY 1/3 of the 'synchromesh' into the trans and replace the dipstick
5) Drive car in a NORMAL AND RATIONAL AND REASONAL MANNER using ALL the gears INCLUDING REVERSE.....
6) Park car on LEVEL surface....wait at least 20 minutes and check trans fluid level.....top up with the synchromesh product.
THE 5MT TRANSMISSION DOES NOT LIKE TO BE AT ALL UNDER FILLED....A BIT OVER FILLED IS BETTER THAN ANY UNDER-FILL AMOUNT.
OVERFILLING THE TRANSMISSION S L I G H T L Y IS NO BIG DEAL.....DO NOT WORRY ABOUT IT.
Figure it's not going to be a bad idea for me to start with this. I need to fill it with fluid anyway. Right?
Posted by: CptTripps May 30 2014, 07:28 AM
I'm digging my hotel room number in ATL.
Attached thumbnail(s)
Posted by: Philip W. May 30 2014, 08:56 AM
I'm digging my hotel room number in ATL.
what are the chances--you asked for that room number, right?
Posted by: CptTripps May 30 2014, 03:29 PM
I've stayed here a dozen times but normally on the 14th or 15th floor. I needed 2 connecting rooms this time. They have me 912 and 914. Not too shabby.
Posted by: CptTripps Jun 2 2014, 05:48 AM
Spent about 2h in the garage last night running the accelerator cable to the pedal, and contemplating the air/water intercooler setup. The others I've seen have flopped the intake and moved the radiator. I don't think this is an option for me, as I've got a lot of other custom stuff up there that'll prohibit the move. So I need some tight radiuses and maybe a different can for the intercooler.
Off to the interwebs to find a better can for my application.
Posted by: mgp4591 Jun 2 2014, 06:05 AM
I've stayed here a dozen times but normally on the 14th or 15th floor. I needed 2 connecting rooms this time. They have me 912 and 914. Not too shabby.
918 and 919 would've been nice too!
Posted by: CptTripps Jun 2 2014, 11:50 AM
919 wouldn't happen. There are no "odd" numbers in a lot of asian hotels. (Mandarin Oriental is where we were.)
Posted by: CptTripps Jun 2 2014, 01:10 PM
I THINK I just figured out my intercooler issue. If I mount the radiator on the decklid, and convert it to a "GT" style lid, I can mount the rest of it underneath. The tubing is still going to be plentiful, but with some 3" and 2.25" silicone tubing and elbows, I'll be able to get it done without any welding.
Progress....
Posted by: bulitt Jun 2 2014, 02:57 PM
I THINK I just figured out my intercooler issue. If I mount the radiator on the decklid, and convert it to a "GT" style lid, I can mount the rest of it underneath. The tubing is still going to be plentiful, but with some 3" and 2.25" silicone tubing and elbows, I'll be able to get it done without any welding.
Progress....
Doesn't it have to be in the air flow to provide cooling?
Posted by: CptTripps Jun 2 2014, 03:56 PM
I have a fan for it so I was thinking I just needed to pull air into it. Do I need to run more lines from the radiator for it? That's going to be a giant pain in the ass, but better I learn now, than after I finish building the center console.
Posted by: CptTripps Jun 3 2014, 06:17 AM
Would this be an appropriate place to mount the intercooler radiator? Is having an "air gap" going to mess anything up? (the distance between the two radiators.)
I'm going to hate having SOMETHING ELSE up the center tunnel, but this seems like the only option. The tubes won't be all that hot anyway, just the water from the intercooler. The extra length may give it more time to cool down anyway.
I'd remove the fan from it, and maybe use that as a secondary fan for the radiator. It's smaller, but could work well as a secondary.
Attached thumbnail(s)
Posted by: Dr Evil Jun 3 2014, 07:32 AM
That would make for a lot of air mass to move a long distance before getting to your engine. I think that would be problematic, but I do not know for sure.
Posted by: bigkensteele Jun 3 2014, 08:00 AM
That would make for a lot of air mass to move a long distance before getting to your engine. I think that would be problematic, but I do not know for sure.
It is not the intercooler itself, but the radiator for the liquiid cooled intercooler which I assume will still live back with the engine.
Posted by: CptTripps Jun 3 2014, 08:13 AM
That would make for a lot of air mass to move a long distance before getting to your engine. I think that would be problematic, but I do not know for sure.
It is not the intercooler itself, but the radiator for the liquiid cooled intercooler which I assume will still live back with the engine.
Correct. I'd be mounting the water cooler up front, and the intercooler in the back by the turbo.
I also think I bought the wrong intercooler. The builds I was modeling mine after at the time all had the intake manifold flipped to the other side, and the alternator relocated. I didn't do this, so I'm fighting a losing battle with the setup I have. I'm thinking I go with one of the "canister" intercoolers instead. Or at least one of the ones with both ports on the same side like one of these.
Routing is still a royal PITA, but I think I can get it done with the "Type 23" where the "in/out" are on the same side.
If there was an easier way to do this, I'd be all over it. I think I'm pretty screwed in the "easy to do" department. My builder struggled with the setup he was thinking, so when he came to look it over with me last week, we had lot of combined head-scratching.
He's coming over later today to look at a few options with me. There HAS to be a way to do it...there just has to.
Attached image(s)


Posted by: CptTripps Jun 3 2014, 08:15 AM
I forgot to post a pic of what I have right now to play with.
It's called a "Type 13" on the frozenboost websiite.
http://www.frozenboost.com/index.php?cPath=218&osCsid=f354a522c5dca60beffdc35d367cf31f
Attached image(s)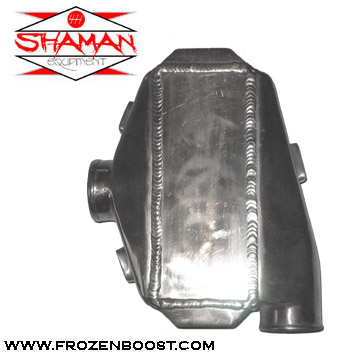
Posted by: effutuo101 Jun 3 2014, 08:26 AM
From the first set of pictures, I have the first on. You don't need to have that much space as it is cold water being cooled. You can mount the radiator and fan in the engine compartment and call it done. I will post a pic of my set up later.
Posted by: CptTripps Jun 3 2014, 10:40 AM
From the first set of pictures, I have the first on. You don't need to have that much space as it is cold water being cooled. You can mount the radiator and fan in the engine compartment and call it done. I will post a pic of my set up later.
I WISH your setup would work for me. I have a rear trunk though.
I think routing it all behind the driver would be best for the intercooler. I was trying to get the radiator under the rear trunk, opposite the exhaust. (On the "cool" side of the trunk.)
Other than the firewall, there really isn't a great spot. Thought about the deck-lid, but that may be a PITA too.
Ugh!
Posted by: Dr Evil Jun 3 2014, 11:26 AM
Ah, yes. The water cooler. My bad :duh:
Might have to notch the rear trunk for the intercooler.
Posted by: effutuo101 Jun 3 2014, 11:47 AM
you can hang it off the trunk floor out of the way. doesn't mater where the cooler is, just that it is cool.
I almost put it where the muffler would normally go.
Attached thumbnail(s)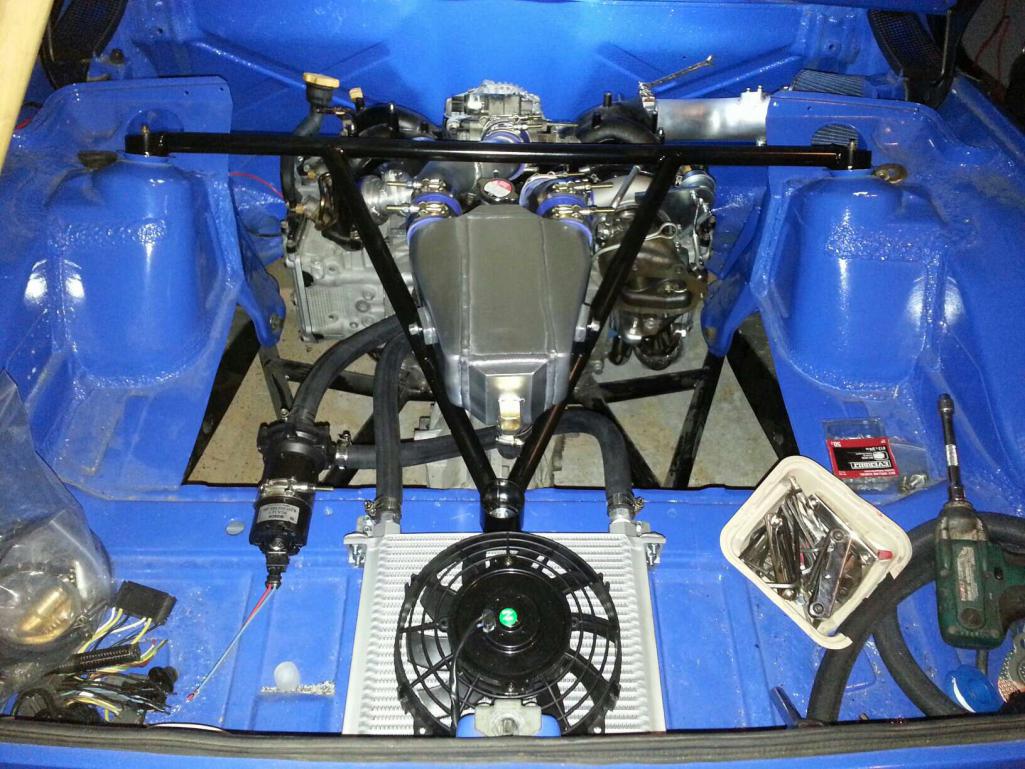
Posted by: mikesmith Jun 3 2014, 04:49 PM
Would this be an appropriate place to mount the intercooler radiator? Is having an "air gap" going to mess anything up? (the distance between the two radiators.)
The air gap will mean that air will tend to go around, rather than through, your intercooler. You might be better off looking for a different cooler (looks like maybe a long skinny oil cooler would fit between your mounting bars there?)
Alternatively, it looks like you have room to move the radiator sideways; you could stack an oil cooler vertically alongside it and then play with ducting to balance airflow between it and the main radiator...
Posted by: CptTripps Jun 3 2014, 08:03 PM
I wish I could use the trunk. All my wiring goes there and it'd be a serious project to move it.
I'm working on the interior now. Need to have some noticeable progress or I'm going to drive myself insane. I'll take the car to my engine builder and we can figure out the intercooler over a weekend or something. It's just too much for me to think about right now.
Working on the center console and I'm realizing the plates I had made up are TOO big for a reasonably sized center. I'm going to re-design that tomorrow when I'm at the office. Not too bad actually. Just a few adjustments and I'll make the new board out of a piece of perforated Aluminum I have. Could look cooler ultimately too.
Posted by: CptTripps Jun 4 2014, 07:27 AM
So....my center console idea didn't pan out how I'd wanted. The plates I had made were just a little (lot) too wide. So, it looks like I'm starting over on the center console idea. I think I have a plan though.
I can make it shorter, giving me ample room in the back for my feet, and POSSIBLY add the sub too.
Here's the new plate I'm working out. I'll incorporate the nav system and switchboard into the same plate, giving me more room for things. It'll also be wide enough at the front to JUST snug over the center support and leave me plenty of travel for the shifter.
Attached image(s)
Posted by: CptTripps Jun 4 2014, 10:29 AM
FML...
I had to do a running total for Hagerty.
Adding up receipts isn't EVER a good idea.
Good news: I can justify $40K in coverage pretty easily.
Bad news: I could have bought a 2001 996 Turbo and been driving it right now.
Posted by: CptTripps Jun 6 2014, 06:56 AM
Spent the evening with my turbo. I THINK the plan I put together is solid. A few mods but nothing crazy. I also found the part I've been looking for to join the turbo's oil intake to the motor. Whew. That one was going to be a PITA if I had to re-build my own. Minor victories add up over time.
In other news, the donor for my next build showed up last night. 2005 Saab 92x with some motor issues.
Posted by: CptTripps Jun 6 2014, 09:36 PM
Still limping along...but I think I figured out the Intercooler stuff...finally. But I don't like the answer.
I'm going to move and re-wire the ECU so I can cut through the area I have it mounted and get it into the trunk. I'll mount the radiator for it under the car as planned, and be in business. Re-wiring isn't going to be all that hard, and I think I can leave everything I have pretty much in place. Thank god I have a separate set of wiring that I bought for the Hydra. I'll just use those.
Getting there...
Posted by: CptTripps Jun 7 2014, 12:27 PM
Hitting it HARD today. Getting somewhere too!
Moved the ECU and all that pretty wiring I did. Need room for the intercooler! I bought a bunch of 2.5" pipe and bends. Then started cutting.
I also figured out where to mount the radiator. Should be perfect, but the water pump may be tough. Gotta play with that a but yet.
Attached thumbnail(s)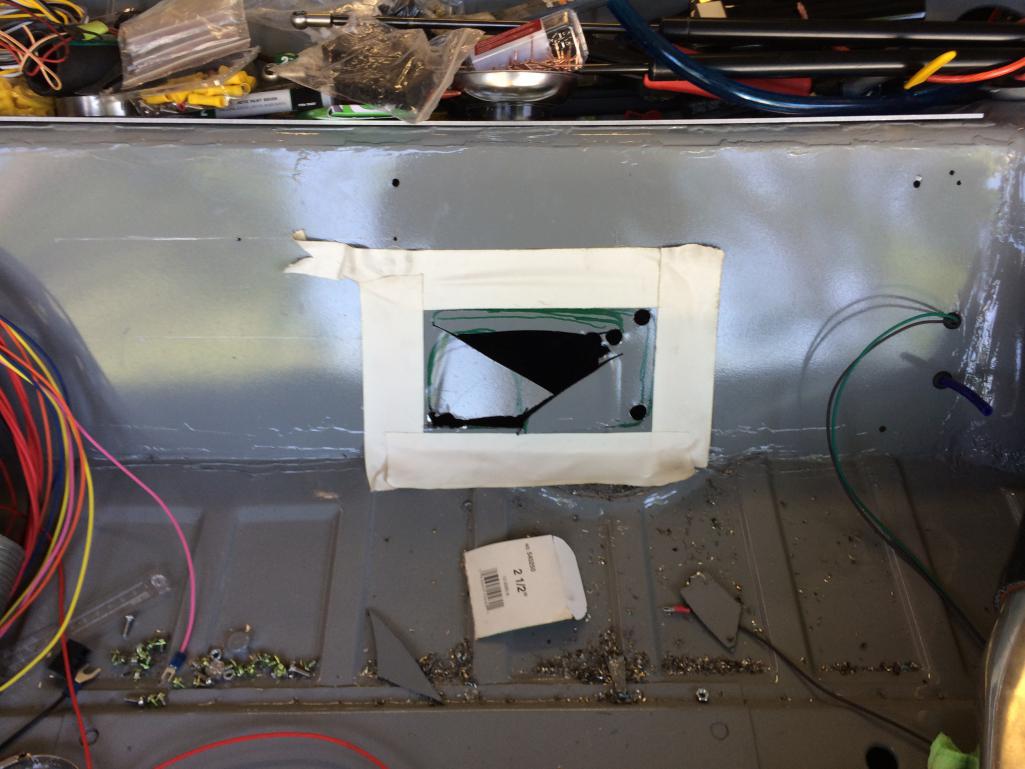
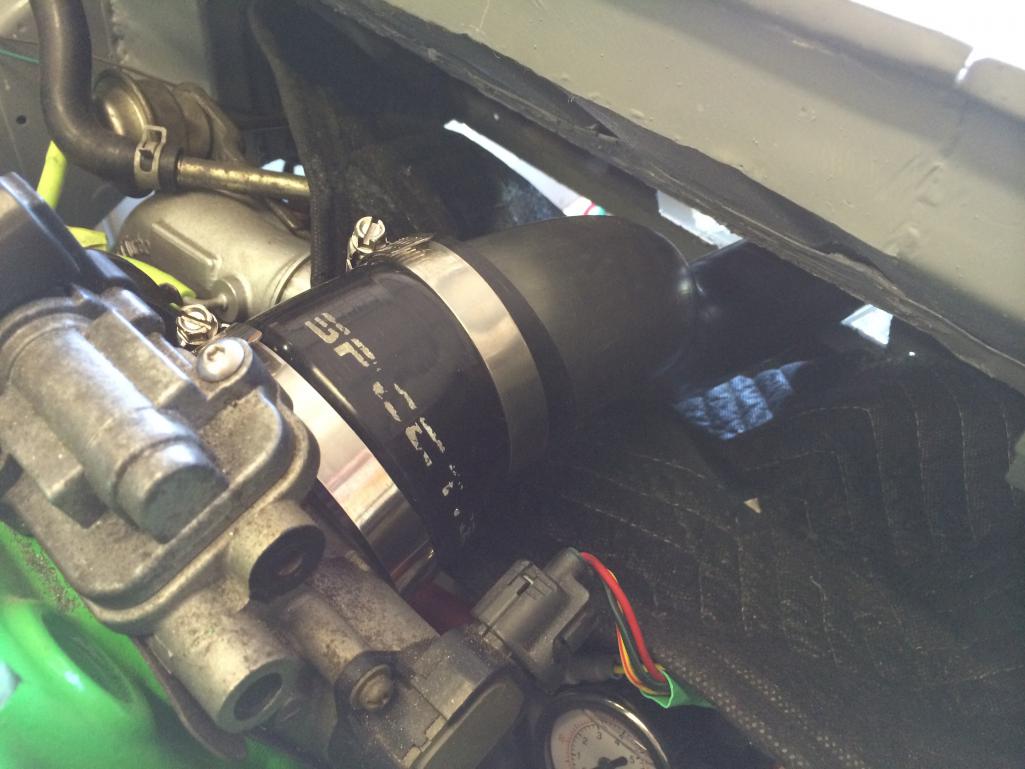
Posted by: CptTripps Jun 7 2014, 12:28 PM
Here's the pipe I fabricated. So I have the intake covered. Now for the turbo output. Hmmm.
Attached thumbnail(s)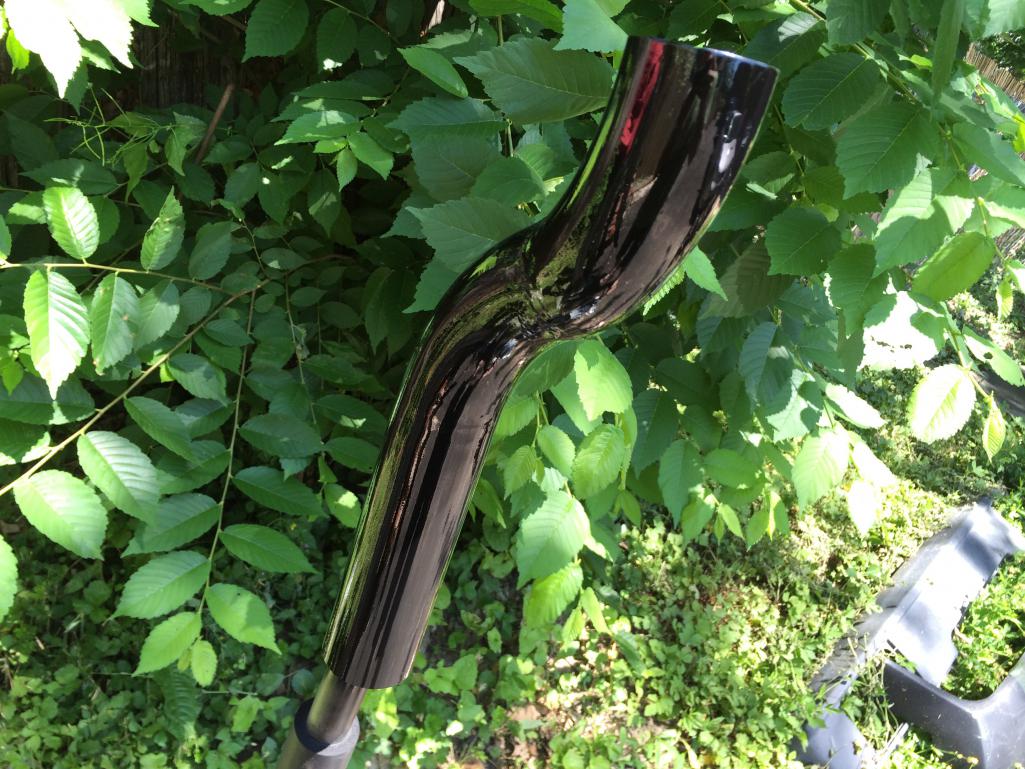
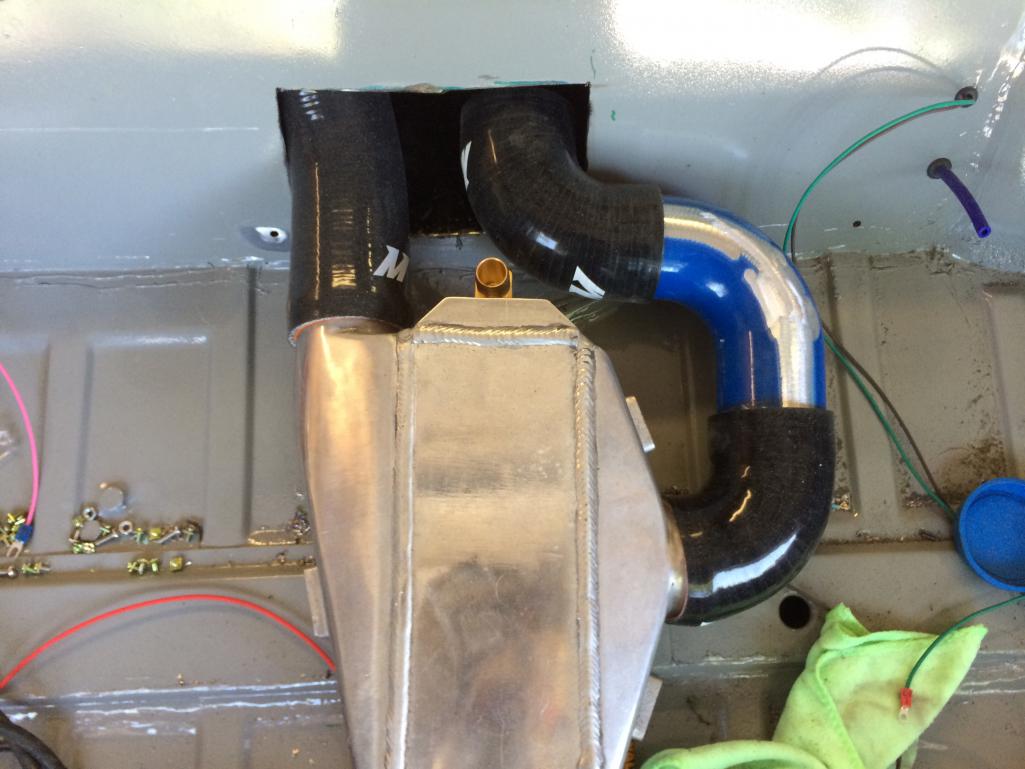
Posted by: CptTripps Jun 8 2014, 05:16 PM
Got it!
Attached thumbnail(s)
Posted by: Chris H. Jun 8 2014, 06:09 PM
Bitchin'. Definitely worth moving the wiring for.
Posted by: BIGKAT_83 Jun 8 2014, 07:02 PM
Been helping D914 with his car. I remounted the inter cooler for him. He's using a outfront turbo pipe that mounts the turbo to the front of the engine. Hope to have this going for him SOON. 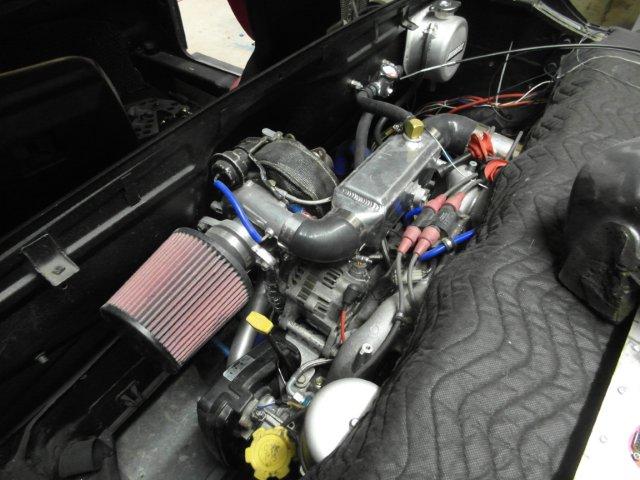
Posted by: CptTripps Jun 9 2014, 05:00 AM
Been helping D914 with his car. I remounted the inter cooler for him. He's using a outfront turbo pipe that mounts the turbo to the front of the engine. Hope to have this going for him SOON.
I wish that would have been an option for me. At one point I thought about trying to find a rotated turbo, but that just isn't in the cards. Moving the ECU and wiring was a painful decision but in the end, the best way to get this project back on track.
I also hooked up the Air-Oil separator and will work more on the burp tanks tonight. I can't find the filler attachment for the radiator ANYWHERE so that may be a stopper temporarily.
I was looking at everything last night and thinking "I'm really very close here" so if I play my cards right, I could be on the road in a few weeks. Once I can get the engine running, the interior should come together quickly. There's a lot less "engineering" necessary in tat department.
Posted by: bulitt Jun 9 2014, 06:25 AM
Remote liquid intercooler is awesome! Guess I missed that. Carry on!
Posted by: CptTripps Jun 9 2014, 06:37 AM
Here's how I'm thinking I route the filler for the intercooler. Since I need to fill at the highest point, I'm thinking here is a good place to start. This will let me mount the pump under the car and not have to worry about it getting choked up with air. (In theory anyway.)
I'll be routing the tubing inside the trunk compartment so the lines don't get too hot by being next to the exhaust. Really the only way I CAN do it. So I guess my thoughts of a waterless trunk are kinda out the window. I'm going to have to make up a plate on risers for the ECU and wiring too then. Maybe a double-stack kinda configuration. That'll limit my ability to monkey with the wiring if I ever need to, but I could likely do it where with 4 wingnuts, I'm in good shape. Who knows...I'll have to get in there and see what's possible after I get the radiator mounted and plumbed.
This is a royal PITA, and I hope I only have to do it once. I'm really looking forward to my FactoryFive 818 build this winter. Having a mid-engined car with INSTRUCTIONS will take a lot of the "How in the f%@k am I going to engineer this?" out of the equation.
Attached image(s)
Posted by: Mike Bellis Jun 9 2014, 08:22 PM
Don't forget there will be a big bubble of air inside the intercooler. This will be above the level of the pipe fitting. Leave it loose so you can lift one end after filling with water. The pump alone will not be able to get the bubble out.
Posted by: rick 918-S Jun 9 2014, 08:27 PM
Just stopped at Doug's place. Nice project! Lots done! September is the month Doug!
Posted by: bigkensteele Jun 9 2014, 09:00 PM
Just stopped at Doug's place. Nice project! Lots done! September is the month Doug!
Rick traveling outside MN = car acquisition

Doug, great work! I may have to move up there. Apparently there are more hours in the day in northern OH.
Posted by: Dr Evil Jun 9 2014, 09:17 PM
Looking like I will be moving closer, soon WCH area.
Posted by: tdgray Jun 10 2014, 06:57 AM
Looking like I will be moving closer, soon
WCH area.
Posted by: CptTripps Jun 10 2014, 08:34 AM
Looking like I will be moving closer, soon
WCH area.WCH? Were the hell is that?
Don't forget there will be a big bubble of air inside the intercooler. This will be above the level of the pipe fitting. Leave it loose so you can lift one end after filling with water. The pump alone will not be able to get the bubble out.
Already planning on it. I think I have a plan for that.
Just stopped at Doug's place. Nice project! Lots done! September is the month Doug!
GREAT to see you last night Rick. I'm glad you like the build. I get nervous doing everything myself in a relative vacuum.
You need to get your ass over here and take a look Todd.
Posted by: Dr Evil Jun 10 2014, 09:19 AM
WCH = Washington Court House, OH 43160
Posted by: tdgray Jun 11 2014, 07:17 AM
I know... I know... will do soon. Work has just been a bitch recently
Posted by: Philip W. Jun 11 2014, 07:55 AM
WCH = Washington Court House, OH 43160
been there, once nice little town- friend of mine's home town. He practices down in Kentucky.
are you joining a family practice down there?, Good luck in the new position! seems like there are a lot of teeners in the mid-west. Saw a few in cincinatti last time i was up there to visit my nephew. Good central location, should be close enough to make it down to the Octeenerfest!
Posted by: 76-914 Jun 19 2014, 06:07 PM
OK Doug,  . No updates in 9 days. You don't even want to know what page I found this on. Is it at the mechanic's, yet?
Posted by: CptTripps Jun 23 2014, 07:46 AM
I wish it was at the mechanic's. I ran into an issue a few weeks ago and then "life got in the way" as it does for so many.
I discovered I hand' even thought about having a blow-off valve which means I need to tear things back apart and start over on my Air-Water intercooler. What a PITA.
I'll get back to it soon. Need to concentrate on family and work for a few more weeks. After that, I AM close. Just don't have time for the garage right now. Sorry guys.
If I can't get to it in a few weeks, I've honestly been considering just selling it off. I wan't have time to finish it in the next few months and it may be a necessity if things go south at work. I'm just sick over the whole situation. If I could even just find someone to hand it off to to finish for me, that'd be awesome too. Again...there is a lot up in the air.
Posted by: 76-914 Jun 23 2014, 08:13 AM
Sorry to hear that, Doug. Let me know if I can help. Life can be an utter fugging bitch with moments of happiness intertwined. Take what it gives you and leave the rest. Here is to hoping everything works out for you, soon! Kent
Posted by: Chris H. Jun 23 2014, 10:24 AM
Everyone gets to "that point" Doug....hang in there man. You'll get more satisfaction (and money) out of it finished. I was so determined not to have mine off the road for long but have stopped working on it a couple times and stepped away. It's good to give a project a rest sometimes.
Plus.... IT'S A FRIGGIN' JET FIGHTER PLANE 914 WITH HUNDREDS OF HORSEPOWER!!!!!! YOU ARE THE PILOT!!!!! IT SAYS SO RIGHT ON THE STICKER!!!!!
Posted by: CptTripps Jun 24 2014, 06:26 AM
Thanks guys. I appreciate the support. I just got REAL stuck on a few things that I need to work through on it. REALLY helps to have someone else in the garage with you. Unfortunately, there aren't a lot of people in this area that could come out and help for a few days.
I'm still forever grateful to Dr. Evil for getting my wiring sorted for me. I'm sure I had a lot less into the wiring than a lot of people would have, and that made all the difference for me. I just wish I understood more about it so I could finish off what he started. Having to re-locate the ECU was a pretty major blow too.
The major things left on the list are the plumbing for the last bits of the intercooler, including the blow-off valve. I'll get out there tonight and finish the radiator for that. I also need to re-work my engine radiator tubing so it is more trustworthy. I need to get some fillers int there so I have a way to get the water INTO the hose. Past that, it's all the little bits-and-pieces that are starting to mount up.
Posted by: CptTripps Jun 25 2014, 07:15 AM
I'm getting back in the groove. Made a list of stuff I need last night. Located a bunch of them, need to go out to you all for the rest.
The two most pressing things I need:
Window-track fuzzys for the rear part of the door.
Headlight dog-bones and the rotators for the motors. Bushings too.
Posted by: bulitt Jun 25 2014, 07:57 AM
914 rubber has the fuzzy's
http://shop.914rubber.com/914-Rear-window-fuzzies-set-of-2-914LDWF.htm
Posted by: CptTripps Jun 25 2014, 08:32 AM
Great find.
Ordered!
Posted by: 76-914 Jun 25 2014, 09:16 AM
IIRC, I bought my headlight bushing kit from Carrie @ 914central
Posted by: CptTripps Jun 25 2014, 11:13 AM
The metal pieces are more important. I can't finish the headlights without them, and cant finish up the front without finishing the headlights.
Got a local guy to make me 10 1"-OD stainless pieces to use on my radiator hose joints. Found 2 filler valves I can use, and with an hour of work tonight, I should have that all ready to go. After that, I need to re-wire things up and get a blow-off valve involved somehow. That should let me start the motor, which would motivate the hell out of me to finish this thing.
Posted by: 76-914 Jun 26 2014, 12:20 PM
The metal pieces are more important. I can't finish the headlights without them, and cant finish up the front without finishing the headlights.
Got a local guy to make me 10 1"-OD stainless pieces to use on my radiator hose joints. Found 2 filler valves I can use, and with an hour of work tonight, I should have that all ready to go. After that, I need to re-wire things up and get a blow-off valve involved somehow. That should let me start the motor, which would motivate the hell out of me to finish this thing.
We'll be expecting a video, soon.
Posted by: 914forme Jun 26 2014, 06:57 PM
I dropped you a PM about the head light parts.
Posted by: scotty b Jun 26 2014, 07:01 PM
I dropped you a PM about the head light parts.
I'm dropping you a PM about letting Drevil work on your wiring

Posted by: CptTripps Jun 27 2014, 11:47 AM
I'm dropping you a PM about letting Drevil work on your wiring
Mike came out a month ago to help...and did a LOT of great work. I fear I need a little more help in that department to get it all done though. Perhaps I can get him out "one more time" when I get closer to having it done. I'd love to get the rest of the interior put together first though. That way, there's just 'buttoning up' to do and he can be there for the first start.
Posted by: Dr Evil Jun 27 2014, 02:34 PM
Scotty is just being an ass hat.
I have some time I might be able to come out. Main thing is I have a back log of transmissions to build that need to be cleared out first.
Posted by: CptTripps Jun 28 2014, 07:26 AM
No worries. I'm a way out from needing more help in that department.
I'm going to concentrate on the interior and seals over the next week or so. The engine stuff can be worked out by people smarter than me after a spell. IF I can get the interior done, I'll feel like I'm making progress so that'll help mentally.
Posted by: rick 918-S Jun 29 2014, 06:30 AM
I was in Cleveland again Friday but only long enough to pick up the Mercedes. I wanted to come check the progress but the phasers in my truck went south. I was lucky to make it home. Remember 9-14-14
Posted by: CptTripps Jun 30 2014, 06:34 AM
I was in Cleveland again Friday but only long enough to pick up the Mercedes. I wanted to come check the progress but the phasers in my truck went south. I was lucky to make it home. Remember 9-14-14
Honestly, it's not visably further along than the last time you saw it. I've done a few things here and there, but I need to start hitting it hard this week. Like I said: Interior is next. I'm not going to feel good about it until I tackle that the way I'd intended.
Posted by: Dr Evil Jun 30 2014, 08:36 AM
Just make sure the seats are easily removed and the dash is not blocking up the wiring as it will make finishing up that part a crap load more difficult. Send me a list of things you still need done as far as wiring and I can get a plan together.
Posted by: CptTripps Jun 30 2014, 11:02 AM
Just make sure the seats are easily removed and the dash is not blocking up the wiring as it will make finishing up that part a crap load more difficult. Send me a list of things you still need done as far as wiring and I can get a plan together.
Understood!
I'll put a plan together, but it'll be a bit before I have my head around what is needed. Now that you 'know' the car, we'll be able to make quick work of everything.
Posted by: 76-914 Jun 30 2014, 01:04 PM
The Rotten Dr has a point. The interior should be the last thing to go in for several reasons. Besides, you can throw it in quickly once you've got things as you want them. Just saying..........
Posted by: CptTripps Jul 1 2014, 06:25 AM
The Rotten Dr has a point. The interior should be the last thing to go in for several reasons. Besides, you can throw it in quickly once you've got things as you want them. Just saying..........
It's more about building the pieces needed. My center console needs to be constructed, the dash is completely custom work, and there's a lot of padding and covering that needs to happen. The seats will be the last thing to go in, well after the rest is done. The wiring for the tach, speedo, lighting and all that is already in place, so there's no reason to not get started on the instrument clusters.
I got to the garage yesterday afternoon to get started and it was just too damn hot to do anything. I need a fan in there or something. At the very least, I should only work on it at night after the sun goes down. It's just brutal right now.
I am waiting on a few more parts that should arrive in the next few days. That'll let me at least get the headlights in there so I can check that off my list. Small victories is the key for me right now. not looking at the big picture all the time. One thing at a time...
Posted by: CptTripps Jul 15 2014, 07:47 AM
I've literally lost almost all motivation with this right now. Sorry for not having any updates. "Life" threw me a bunch of curve-balls recently and it may be a while. I'm super pissed that I can't get it on the road, because I think it would help my mental state to be able to drive it. I'm just 'stuck' on too many things right now and would need someone experienced to come in and fix things so I can keep moving.
Ugh.
Posted by: effutuo101 Jul 21 2014, 10:35 PM
Keep at it Doug. Life will sort itself out.
Posted by: CptTripps Jul 22 2014, 12:12 PM
My wife moved out with the kids last week, so the car has been the last thing on my mind lately. Really sucks, as this would be perfect to drive right now as a "pick me up" that I sure could use.
I've put a few feelers out to people that may be able to help me get the mechanical stuff sorted, but everyone is too busy right now. The things holding me from getting it running are:
Radiator Hose burps and fill valves
Proper routing of the oil lines
Blow-Off valve fabrication. (I can't believe I forgot about this one.)
Intercooler plumbing
Re-wire the ECU (This is the easiest piece once everything else is done.)
After that, it should fire right up. Getting that list hammered out has proven to be the death of me though.
Posted by: Mblizzard Jul 22 2014, 02:58 PM
I might be able to make a trip up and help you out
Posted by: tdgray Jul 22 2014, 06:58 PM
Dude... I have no experience with any of that but I have some skills.
My schedule is always a train wreck but you say when and I am there.
Stay strong man... Life is a series of speed bumps.
Posted by: CptTripps Jul 23 2014, 06:33 AM
Thanks for the support guys.
If I knew where to start, or even knew where to start, I'd invite you all up in a heartbeat.
I think the air-flow piping for the intercooler and such is the biggest issue for me. Welding has never been my strong-suit, and certainly the number of bends and breaks isn't helping. To weld in the BOV in the limited space I have isn't making things any easier.
Ugh...I wish there was someone I could cart the car off to for a week to finish this stuff for me so I can get to the interior, which I'm actually looking forward to.
Posted by: Mblizzard Jul 23 2014, 07:00 AM
Thanks for the support guys.
If I knew where to start, or even knew where to start, I'd invite you all up in a heartbeat.
I think the air-flow piping for the intercooler and such is the biggest issue for me. Welding has never been my strong-suit, and certainly the number of bends and breaks isn't helping. To weld in the BOV in the limited space I have isn't making things any easier.
Ugh...I wish there was someone I could cart the car off to for a week to finish this stuff for me so I can get to the interior, which I'm actually looking forward to.
Just remember we are here if you need to call all hands on deck!
Posted by: saigon71 Jul 23 2014, 07:04 AM
Sorry to hear about the life events unfolding for you.
I got frustrated, stuck and demotivated more than a few times during my restoration. In my experience, I was better off stepping away from the project for a bit when it happened, rather than working pissed off. Most times, I gained some clarity and perspective during the break.
Good luck with everything Doug.
Posted by: CptTripps Jul 23 2014, 09:03 AM
My biggest frustration is that I could really use the "pick me up" of driving it to work every day, but at this rate, I won't finish until the snow flies...
Posted by: 76-914 Jul 24 2014, 09:30 AM
My biggest frustration is that I could really use the "pick me up" of driving it to work every day, but at this rate, I won't finish until the snow flies...
Hell Doug, the time issue is a PITA for all of us. I think you will "enjoy" your build now that you have removed the time constraints you had imposed upon yourself. You ain't no Chip Foose and Overhauling Inc. And given our skill sets I think 1-2 years is totally reasonable. Onward thru the Fog my good man, onward. Just my 2 cents.
Posted by: rick 918-S Jul 24 2014, 10:32 PM
It's a hobby Doug. You'll spoil the fun and enjoyment if you push it. How do you eat an elephant?...
Posted by: CrashDown Jul 24 2014, 11:16 PM
this is an amazing build.......
Posted by: Chris H. Jul 25 2014, 07:17 AM
It's a hobby Doug. You'll spoil the fun and enjoyment if you push it. How do you eat an elephant?...
+1
Yeah I think I FINALLY learned that myself. Hey I was thinking since you travel a bit Doug....might be nice to see a couple of turbo conversions in person so you can physically see how the turbos are plumbed up. DBCooper's is proven. Even though it's an Audi, I'd look at Mike Bellis's. Plus he can tell you a lot about turbo'ing and such. There's another blue one out there that's real nice. Done by Renegade Hybrids. Maybe stop at RH if you are ever in Vegas...BTW if you had cash and wanted it done...RH does that all the time. I'm sure it's pricey...
Posted by: DBCooper Jul 25 2014, 07:58 AM
+2
Don't worry about leaving the car in the garage until you're ready to get back to it. It won't go anywhere, it'll actually marinate, get better, and will be ready for you when you're ready for it. I've been through the divorce thing too, and it's a process, really is those steps of grieving. May not believe it now, but things will get better. For real. To the point where you can't even imagine any more how you got through the last few crappy years you were married.
A little later I'm on my way over to see my granddaughter and chase my son through the Santa Cruz hills in his 914/WRX. Sourdough, Crab Louis and good wine in the redwoods, a perfect weekend, and you know what? I won't think of the ex even once, but if I do it will be in amazement at how good things have been since she's been gone. And believe me, the kids will understand too.
And if/when you're ever in California, any part, north or south, you're more than welcome to take my car out, thrash it. That should recharge things on the car front. Whenever you're ready.
Posted by: effutuo101 Jul 25 2014, 08:40 AM
Hey Doug! The stuff to plumb my turbo should be done next week. I will send you pictures here as soon as I have them. Oil and collant.
Your build has kept me inspired. Now I can return the favor!
Posted by: PanelBilly Jul 25 2014, 09:15 AM
Put the interior together. Hell, I put mine together and. Know I need to pull it apart again to do the throttle cable and shift rod. Let's face it, it will be a fun project. As you're assembling it, keep in mind that you need to make it easy to pull back apart. Get some black vinyl for gluing in where the body isn't covered by carpet. Takes time to cut out all strips
Posted by: CptTripps Jul 29 2014, 07:53 AM
Thanks again for all the support. I'm starting to get a bug up my butt to finish this thing. I still want to drop it off to have someone else work on the motor. I've come too far to have it screwed up by my "below average" mechanic skills.
I have a few people lined up right now. If I'm not under the gun, this should go a lot smoother.
Posted by: Chris H. Jul 29 2014, 09:23 AM
I'm with you Doug...there were a couple of things that most people think are pretty do-able in the conversion process but I DON'T so I paid someone to do it right (or someone did it for me just to be nice, like Kent). Nothing wrong with that.
Posted by: TeckniX Jul 29 2014, 12:14 PM
Doug,
Sorry to hear about the current curve ball, the great thing about these forums is you have supporters, passionate people and gurus always willing to help.
I'm about 3hrs from you, but willing to come up to knock out a couple of things.
For the BOV, you could snatch a simple bov pipe for cheap and simply put it in-line with the rest of the piping.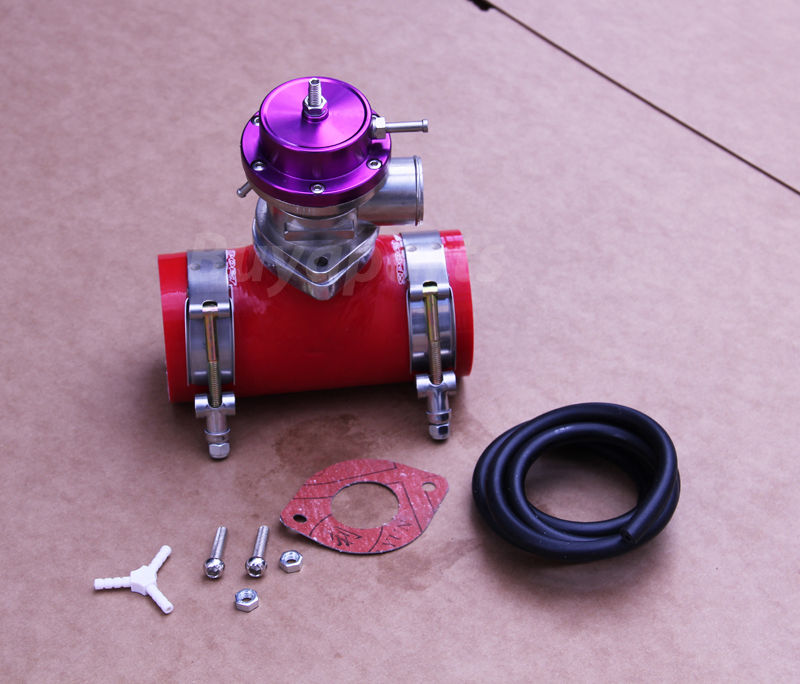
You should have enough room between the turbo and the water-cooler to get it mounted.
I'm sure there's a lot of discussion around placement, and this made sense to me:
http://www.dragsource.com/index.php?navselect=articles&articletoview=7
Posted by: 76-914 Jul 29 2014, 05:30 PM
There ya go Doug; the answer to your prayers. Looks like you'll finish before Chris an I, now. Call this man and handcuff him to your engine bay.
Posted by: effutuo101 Jul 29 2014, 05:36 PM
Doug,
Sorry to hear about the current curve ball, the great thing about these forums is you have supporters, passionate people and gurus always willing to help.
I'm about 3hrs from you, but willing to come up to knock out a couple of things.
For the BOV, you could snatch a simple bov pipe for cheap and simply put it in-line with the rest of the piping.
You should have enough room between the turbo and the water-cooler to get it mounted.
I'm sure there's a lot of discussion around placement, and this made sense to me:
http://www.dragsource.com/index.php?navselect=articles&articletoview=7
Nice!
Ok Doug, i need my ordered parts to arrive and about another 2k to get my car back on the road. Do we have a race?
Posted by: CptTripps Jul 30 2014, 07:11 AM
Actually, I do have a very similar valve. I thought I had to have something more elaborate but it appears I can just get a "T" silicone fitting. That could be a good way to do it.
Hmmmm....
Posted by: CptTripps Aug 5 2014, 11:40 AM
Not a LOT of progress, but I did get the headlight motors hooked up and raising/lowering the buckets last night.
One foot in front of the other...and I'll be there in no time. Right?
Posted by: effutuo101 Aug 5 2014, 11:59 AM
yep. I am almost at a point to dedicate 1 hour a day to my project. That makes time fly!
Posted by: Chris H. Aug 5 2014, 12:25 PM
I just try to do SOMETHING every day, even if it's 10 minutes.
Posted by: CptTripps Aug 5 2014, 12:26 PM
yep. I am almost at a point to dedicate 1 hour a day to my project. That makes time fly!
That's exactly what I need to do. Take an egg timer out to the garage with me or something.
I think if I just get the wheels on and put the car on the ground, it'll help my mental state. Even if I just put it there for a few hours to get it off jack stands and out of the garage.
Posted by: JRust Aug 5 2014, 01:41 PM
A little bit a day does help. After a while the incentive get's a little cloudy. Something that I'll try to do is get a buddy over for a couple hours. Amazing how much you can get done in a day with a helper. Doesn't even need to be much of a mechanic. Definitely helps if they have a teener too. Just makes it a little smoother work day. Just have a plan to tackle a particular thing. I don't accomplish much when I go out with no plan. I'll jump from one thing to another & really not accomplish much of anything. So even if you just have 15min. Have a plan of what your going to do.
I am the king of letting things sit. I am a feast or famine guy. Mine will sit for 8 months. I'll work on it hot & heavy for a month. Then it sits again (my v8 conversion is a great example). Although it's been sitting close to 2 years now . I'm a walking contradictin
Posted by: CptTripps Aug 5 2014, 01:47 PM
A question about the BOV: Can I put it in my trunk? Is there an issue with me blasting extra pressure into there? I'm not recirculating at that point, and the cool "wishhh" sound would be in my trunk, but that'd be the easiest/quickest way for me to do it.
Posted by: effutuo101 Aug 5 2014, 01:53 PM
you can. You can plumb it out the bottom of the car if you want. it is just wasted air.
Posted by: CptTripps Aug 5 2014, 02:31 PM
you can. You can plumb it out the bottom of the car if you want. it is just wasted air.
That's what I'm thinking. Just blow it out the bottom of the trunk.
Posted by: effutuo101 Aug 5 2014, 02:37 PM
Sorted!
Posted by: CptTripps Aug 7 2014, 01:54 PM
Ordered this today for $25 from Amazon. I can shorten it a bit and put it wherever I want. This should be perfect.
Attached image(s)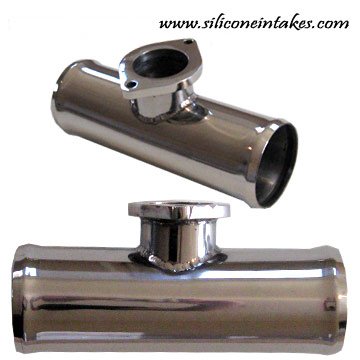
Posted by: 914forme Aug 8 2014, 06:13 AM
Ordered this today for $25 from Amazon. I can shorten it a bit and put it wherever I want. This should be perfect.
You might want to leave it as is. The humps will help you from hoses blowing off. Make sure you get quality T clamps and hoses. My old TDI ran 45 PSI boast levels, I had to change all my intercooler piping from the turbo on out. All joints had 12" of slip and double T clamps on each side and that finally solved my constant issue of tubes blowing out of the silicone connector hoses.
You shouldn't see that kind of boast range with your little gas engine, but it is the point that these things do leak, and air will find or create a least restrictive pass to atmosphere. It really does not like being compressed, shoved down a series of pipes, chilled, and then burnt. If air molecules have feelings this would be like their own personal trip to hell. I would try to form a revolt, and find the weakness in my prisons defenses and escape also.
Posted by: CptTripps Aug 8 2014, 07:42 AM
Stephen-
I forgot to properly thank you for the headlight motor pieces. You gave me the EXACT 3 parts I was missing. It was actually quite amazing. That's the one thing I've done to the car in a month and a half. One more thing to check off the list!
Posted by: d914 Aug 8 2014, 09:01 AM
votion is good for all those turbo plumbing needs also..
Posted by: 914forme Aug 8 2014, 05:14 PM
Not a problem, glad they where of use, life gets in the way, sometimes the little things can start you rolling in the correct direction and like a small ball in the snow, as it rolls you pickup more snow. Pretty soon your ball will pickup speed and rolling faster and faster down hill.
Wish I could come up and help you, but my schedule is booked out through October. We have been told not to ask for leave until Mid October. As of right now, I am in the middle of a huge network upgrade, and have ~58 hours and 51 minutes to get it done. Sometimes I wonder why I am still in this game! Because I love doing what people say is impossible, and Im a little Okay maybe more than a little bit
Posted by: Van914 Aug 9 2014, 07:01 AM
Stephen - you said it!

Posted by: CptTripps Aug 13 2014, 10:59 AM
The part I ordered isn't going to cut it, so I'm dropping the hot-side piping off tonight to have a BOV mount welded to it. I'm also having him make me 1" inserts for the radiator tubing and weld the Wide-Band bung in the exhaust so that'll be nice and tidy.
From there I should be able to sort the rest of the tubing and get this project off dead center and moving in the right direction.
Distractions suck.
Posted by: Dr Evil Aug 13 2014, 11:02 AM
Borrowed this one
Attached image(s)
Posted by: CptTripps Aug 18 2014, 06:51 AM
Theoretically, if I wanted to put a "build party" together for a few days...who would be in? I'm thinking the first or second weekend in September? I'd love to have it running by "09/14"
I'd cover hotel rooms and food for everyone over a weekend. I think I'm close enough that if 2-3 people helped me, I could be driving the thing around, sans interior, after a day of wrenching.
Anyone???
Posted by: tdgray Aug 18 2014, 08:07 AM
Theoretically, if I wanted to put a "build party" together for a few days...who would be in? I'm thinking the first or second weekend in September? I'd love to have it running by "09/14"
I'd cover hotel rooms and food for everyone over a weekend. I think I'm close enough that if 2-3 people helped me, I could be driving the thing around, sans interior, after a day of wrenching.
Anyone???
Let me know when... will pack tools and head north
Posted by: CptTripps Aug 18 2014, 02:02 PM
Thanks Todd. That's 1!
Looking for 2-3 more to make the trip. I'd want to make sure we had enough people to finish the task at hand.
Posted by: Dr Evil Aug 18 2014, 02:29 PM
I would love to, but the timing could not be worse with selling/buying a new house, moving, changing jobs, etc. If after mid Oct, I can probably swing it.
Posted by: CptTripps Aug 28 2014, 07:28 AM
It was great having Bob (BIGKAT_83) stop by last night. Gave me an excuse to clean the garage a little bit and assess the list of remaining things. I'm a lot closer than I realized.
Posted by: Chris H. Aug 28 2014, 10:50 AM
Cool! Bob is good at refocusing you isn't he? Just do a little every day.
Posted by: CptTripps Aug 28 2014, 11:12 AM
It's just a matter of me attacking one thing at a time. I'll get 1-2 things knocked off the list this weekend. That'll get me a step or two closer.
Posted by: mgp4591 Aug 28 2014, 04:11 PM
It was great having Bob (BIGKAT_83) stop by last night. Gave me an excuse to clean the garage a little bit and assess the list of remaining things. I'm a lot closer than I realized.
That guy is everywhere! I was lucky to catch him at home in Ga- well, at the body shop where one of his projects is and had a good talk. We were gonna go down to Auto Atlanta to meet some folks but family commitments for me came up so I had to split. Good to meet him and great to see 3 of my girls again! More money shelling out for weddings tho... 2 of 'em at once... maybe we could combine-- na, probably not...
Posted by: 76-914 Aug 28 2014, 06:44 PM
It's just a matter of me attacking one thing at a time. I'll get 1-2 things knocked off the list this weekend. That'll get me a step or two closer.
Once I realized that I had once again gotten in over my head and I knew that this "project" was bigger than me, I decided to compartmentalize and to do what I "could" do and not worry about the rest. If you followed my build you saw that I was in and out of the electrical for quite some time. When I hit "the wall" I would drop back and work on another part that I felt comfortable with. I dove in and out of that for month's but to my point, if you do what you "can" do, most of the rest will work itself out and you will surprise yourself. Now get off the comp get back on your teener.
Posted by: CptTripps Sep 11 2014, 10:05 AM
Here's an update for ya...I'm getting back into this.
I just ordered a new intercooler like this one. I'm going to remove the wall in the back of my trunk and put something like this together. I had an epiphany last night that I can remove a large section of that wall, maintain the ability to put the roof in the trunk, and it'll make routing the pipes a lot easier. At that point, I can add the BOV and water cooling.
Posted by: 76-914 Sep 11 2014, 10:38 AM
About time! Good for you, Doug. Nothing a luggage rack can't over come.
Posted by: CptTripps Sep 11 2014, 10:56 AM
Hopefully I can get Chris (effutuo101) to give me more pics of how he did his intercooler. I'll work on mocking it up this weekend. I don't think I'll have the intercooler by then, but I have a pretty good idea of where it's going and how I'll route the lines to it.
Posted by: mepstein Sep 11 2014, 12:15 PM
Posted by: effutuo101 Sep 11 2014, 01:07 PM
Shoot me an email Doug. I will take some pictures and send them!
Posted by: effutuo101 Sep 11 2014, 03:12 PM
Let's see if mobile works!
Attached thumbnail(s)
Posted by: effutuo101 Sep 11 2014, 03:13 PM
Hehe up side down...
Attached thumbnail(s)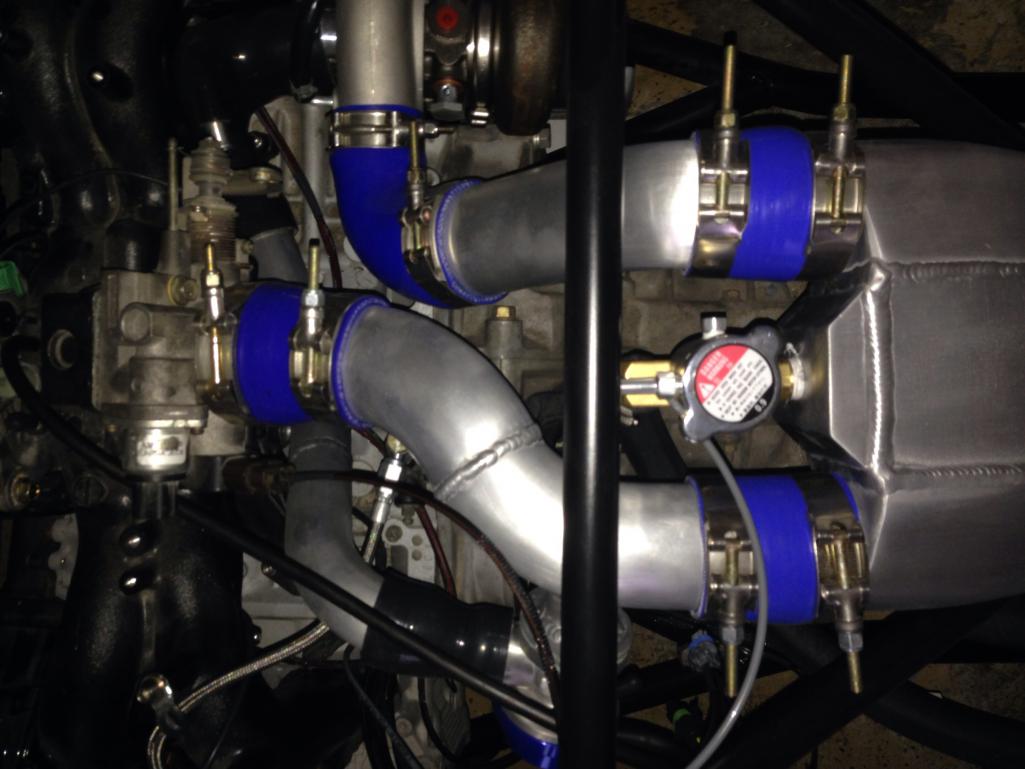
Posted by: effutuo101 Sep 11 2014, 03:15 PM
Rotated
Attached thumbnail(s)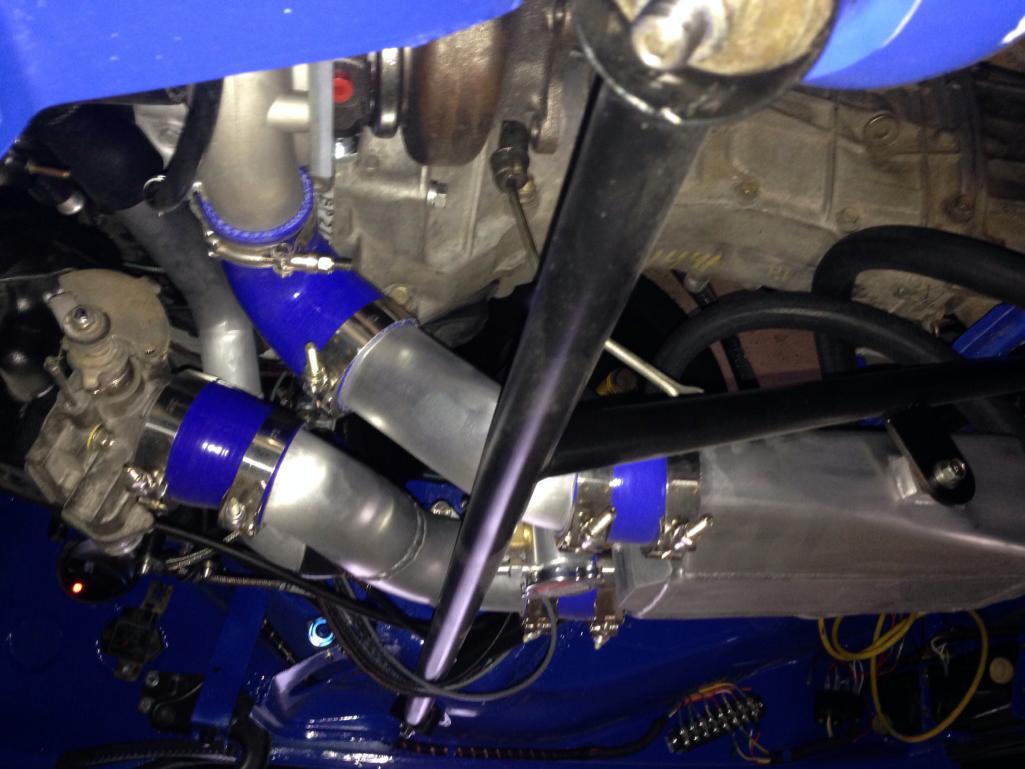
Posted by: effutuo101 Sep 11 2014, 03:16 PM
Bagh!
Last try to rotate pic
Attached thumbnail(s)
Posted by: CptTripps Sep 12 2014, 03:32 PM
Can you take one of the BOV side?
Posted by: effutuo101 Sep 12 2014, 06:10 PM
I will try
Attached thumbnail(s)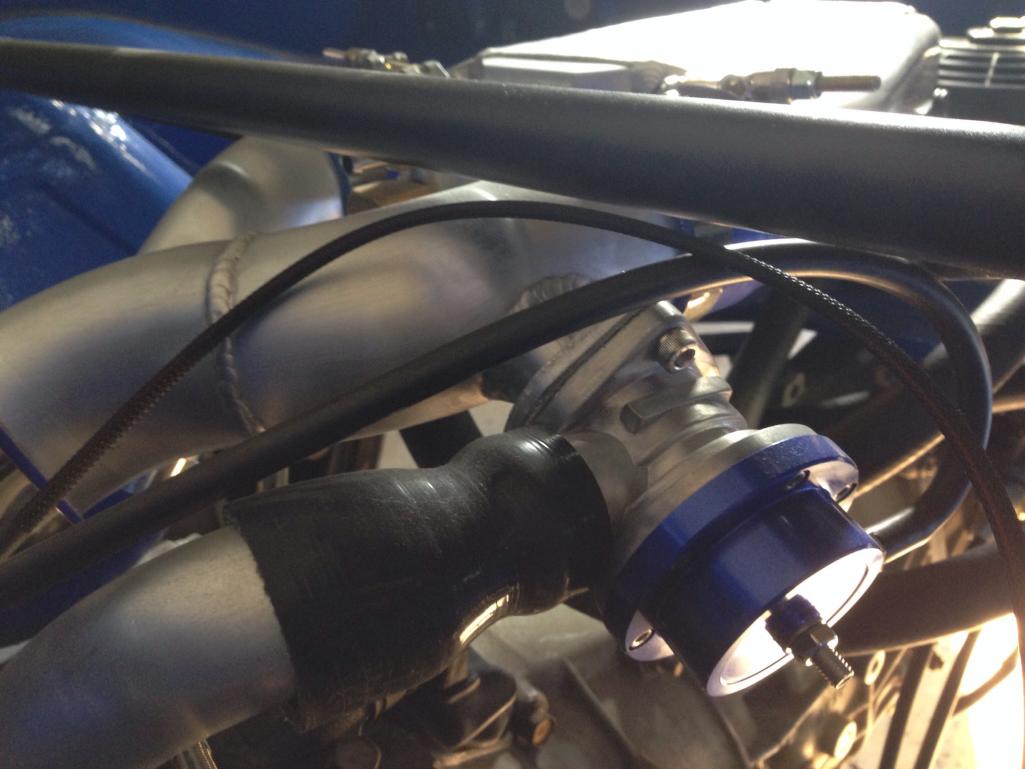
Posted by: effutuo101 Sep 12 2014, 06:10 PM
Nuther
Attached thumbnail(s)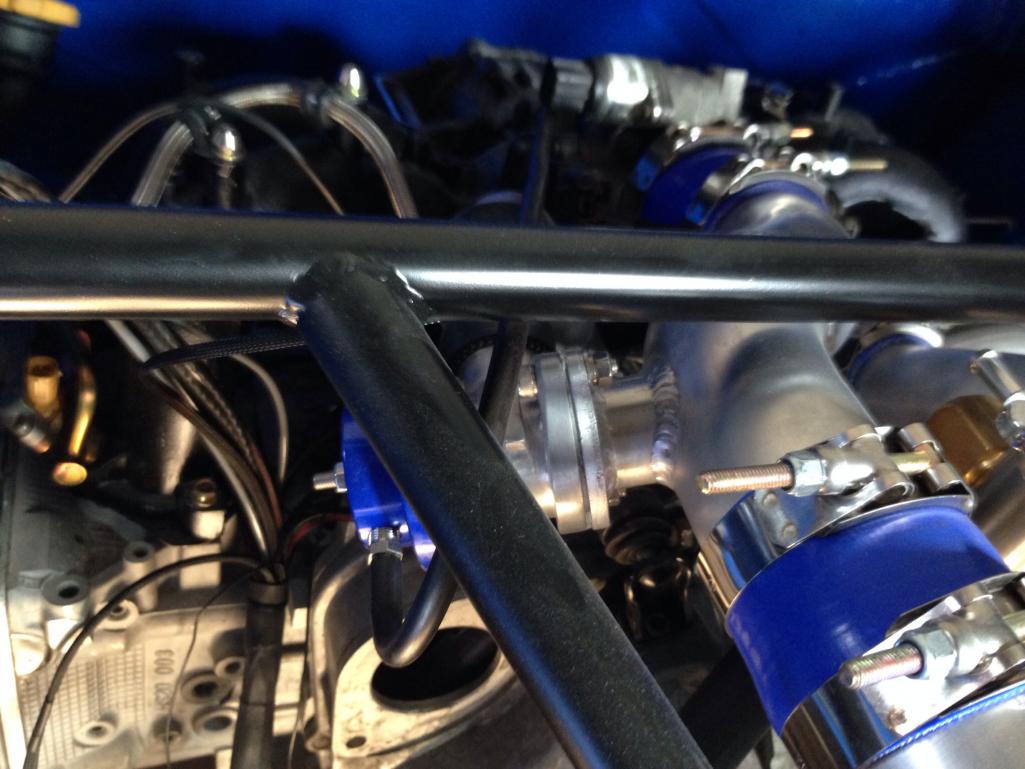
Posted by: effutuo101 Sep 12 2014, 06:11 PM
1 more
Attached thumbnail(s)
Posted by: effutuo101 Sep 12 2014, 06:12 PM
K 1 more
Attached thumbnail(s)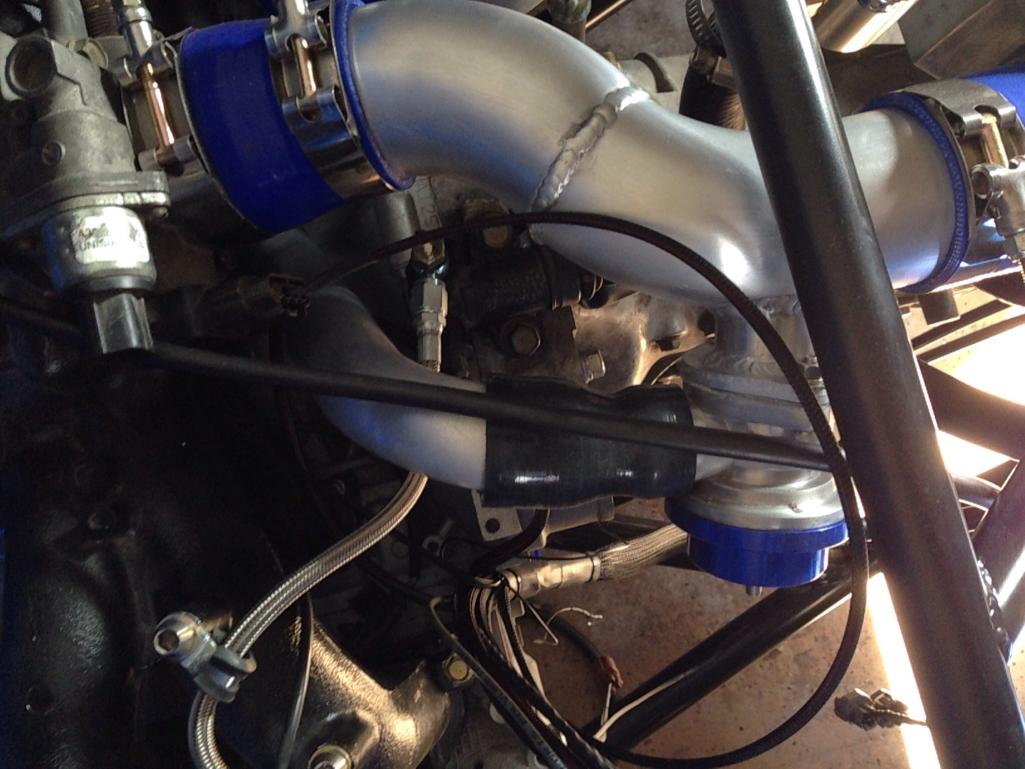
Posted by: effutuo101 Sep 12 2014, 06:13 PM
Last after errors
Attached thumbnail(s)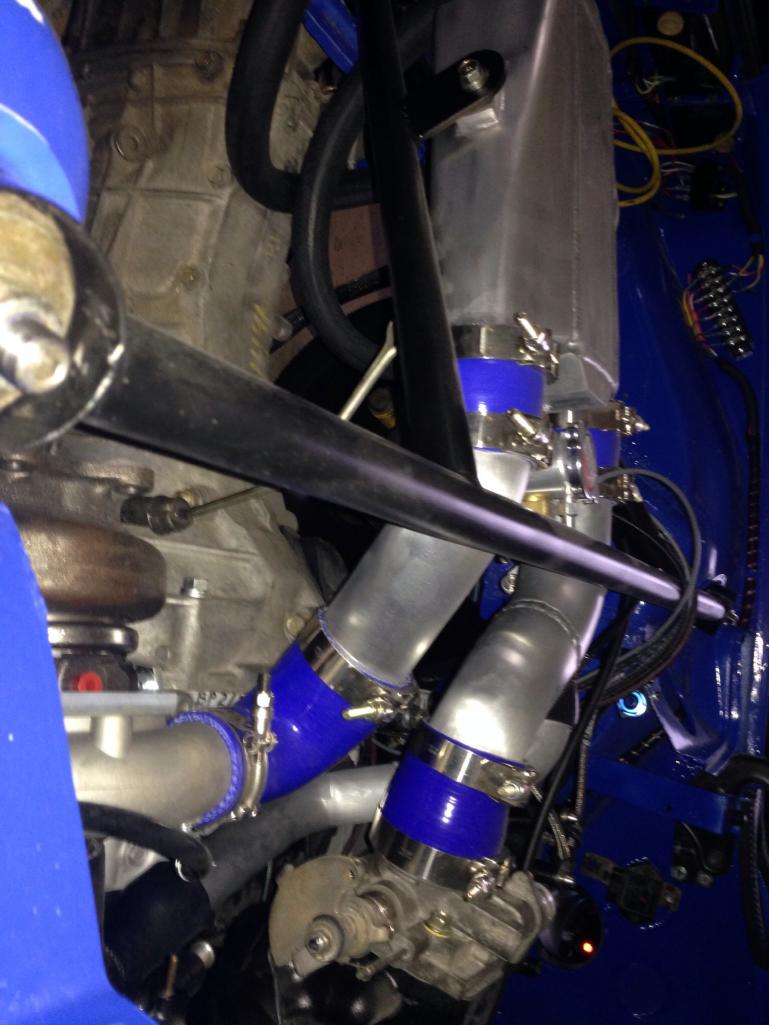
Posted by: effutuo101 Sep 13 2014, 08:51 AM
My BOV is a plumbed to be recirculating.
Posted by: CptTripps Sep 15 2014, 07:37 AM
Got it. Thanks a bunch Chris!
Ok...looks like I have my work cut out for me, but I'll do the best I can and see what I can come up with.
Posted by: 76-914 Sep 15 2014, 08:14 AM
Posted by: effutuo101 Sep 15 2014, 08:18 AM
No worries. You have my email if you need more. Difficult to photograph.
Posted by: CptTripps Sep 15 2014, 10:24 AM
I'd be MORE than happy to pay your guy to make me up a set of the same pipes he did for you! (If that's even possible)
Posted by: effutuo101 Sep 15 2014, 04:08 PM
I will ask!
Posted by: 76-914 Sep 15 2014, 06:17 PM
Alright then. Let's get this show on the road again. We await your arrival, d'Artagnan.
Posted by: CptTripps Sep 16 2014, 07:56 AM
I will ask!
That'd be a life saver! Please let me know. I'll email you.
So here's the punch-list that is keeping me from starting this thing and taking it around the block.
Engine:
Re-work the cooling hoses so they're more secure.
Add fill-tank.
Re-connect all the wiring
Fill it with oil.
Intercooler:
Remove the wall in the trunk.
Plumb the intake/output piping
Add BOV to the air plumbing
Mount the radiator
Plumb the water lines
Wiring:
Finish the gauge cluster so I have a tach/speedo
Re-run the alternator and battery lines.
That's the short-list anyway. I'm going to start trying to put an hour in 2-3 days a week until I cram this list out. You'd think this would be easy now that I don't have the kids most of the time! I just have a lot going on.
...it's not going to finish its self though!
Posted by: effutuo101 Sep 17 2014, 07:17 PM
Checking still. He is at Sema, so pretty busy!
Posted by: CptTripps Sep 18 2014, 08:28 AM
I had a thought last night.
I am checking to see if my local guy can weld an output for the BOV to my intercooler. That'd kill 2 birds with one stone.
Something like this.
Attached image(s)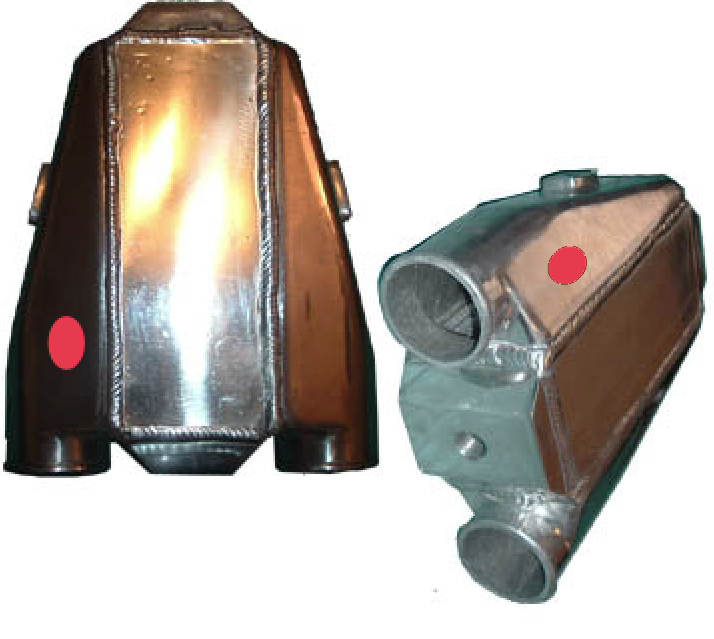
Posted by: effutuo101 Sep 18 2014, 10:55 AM
Or have him weld up some pipe and put a junction so you have some flex and be able to replace it if it goes south. You can vent straight from there into the exhaust or open air.
That works!
Posted by: CptTripps Sep 18 2014, 11:25 AM
On second thought, I can just drill out a hole and taps so I can mount it directly. All I'd have to do is make a gasket at that point. If it goes south, I can just mount another one up later.
Posted by: effutuo101 Sep 18 2014, 04:56 PM
good call. maintenance/upgrades happen.
Posted by: CptTripps Oct 22 2014, 11:02 AM
I'm not dead...just taking my time getting everything organized to finish this over the winter.
Baby steps.
Posted by: Dr Evil Oct 22 2014, 12:53 PM
Moved in, demolished goat pens in pole barn, got $$ for new concrete floor, you can move it in there over winter if you want
Posted by: CptTripps Dec 15 2014, 11:05 AM
OK....we have some progress to report.
I talked to the guy that built my motor and I'm shipping the car off to him next week to do the intercooler, radiator, and fuel system for me. Those are the three pieces that have been keeping me from finishing this off, and my skill-set isn't going to get any better on its own. If I get him the car now, I should be able to get it back in early February...which is still plenty of time for me to get it ready for spring. I'll be concentrating on the interior and electronics once I get it back. THAT is something I'll be able to handle on my own once the mechanicals are set.
So Hershey is still my goal...just not the 2014 Hershey. ;-)
Posted by: CptTripps Dec 15 2014, 11:21 AM
I've printed Chris' photos and I'm sending them with the car. Hopefully, we'll have the same air-to-water intercooler setup after all is said and done. One of my goals is to make sure the roof still fits in the back though.
While the car is away, I'm going to focus on the dashboard, bumpers, and roof so those are ready to go too.
Posted by: effutuo101 Dec 15 2014, 11:30 AM
Cool! Hope mine goes for Radiator, cv's, and peddle cluster this week.
Posted by: 76-914 Dec 15 2014, 11:41 AM
OK....we have some progress to report.
I talked to the guy that built my motor and I'm shipping the car off to him next week to do the intercooler, radiator, and fuel system for me. Those are the three pieces that have been keeping me from finishing this off, and my skill-set isn't going to get any better on its own. If I get him the car now, I should be able to get it back in early February...which is still plenty of time for me to get it ready for spring. I'll be concentrating on the interior and electronics once I get it back. THAT is something I'll be able to handle on my own once the mechanicals are set.
So Hershey is still my goal...just not the 2014 Hershey. ;-)
Good news
Maybe we'll see ya @WCR2015!
Posted by: CptTripps Dec 15 2014, 12:15 PM
Good news
Maybe we'll see ya @WCR2015!That would be just awesome. I'll shoot for it. If I can get the car ready for a 5,000mi journey, I'd definitely be in!
Posted by: 76-914 Dec 15 2014, 02:45 PM
Good news
Maybe we'll see ya @WCR2015!That would be just awesome. I'll shoot for it. If I can get the car ready for a 5,000mi journey, I'd definitely be in!
Good to see you "back in the saddle" Doug. I'll bet New Years Eve you'll be toasting the end of this year. Glad your back. Us minorities need to stick together.
Kent
Posted by: Scarlet75 Mar 7 2015, 06:55 AM
Looking good Doug. I found the link for the wiring harness, but could not get the link to work. Do you remember the name of the company? Thanks. I am going for Hershey 2016. This year I will bring my truck
Posted by: CptTripps Mar 8 2015, 11:21 AM
Let me look and see. I'll tell you though, the instructions were pretty bad...and incorrect. I needed Dr. Evil's help to make heads or tails of a lot of it.
Just run a search on eBay for "18 wiring harness" and I'll bet you find it there. (Mine was a 21, but I didn't need 5 of them, so 18 would be plenty.)
Posted by: Scarlet75 Mar 8 2015, 01:43 PM
Thanks Doug. I think I am going to remove the wiring harness from the donor car though.
Posted by: CptTripps Mar 9 2015, 08:14 AM
This one looks pretty similar to mine, and is about 1/2 of what I paid. I don't think it'll matter much, as long as the wires are long enough...which they normally are.
http://www.speedwaymotors.com/Speedway-Universal-20-Circuit-Wiring-Harness,42872.html
The trick is to take all the wire wraps off, lay is out in the driveway, and go wire-by-wire laying them out to the front or back of the car. These harnesses are normally set up for the engine in front.
Posted by: 76-914 Mar 9 2015, 10:16 AM
Any plans to pull the 914 out and start working on it again this spring, Doug?
Posted by: CptTripps Mar 9 2015, 10:44 AM
Any plans to pull the 914 out and start working on it again this spring, Doug?
I'm working on putting that plan together now. Scarlet75 and I had a conversation this AM about him coming out to help me for a bit. I'd like to get my ducks in a row a little better first. Once I have a plan of attack, I'll let everyone know what I'm thinking.
Posted by: Dr Evil Mar 9 2015, 11:50 AM
Posted by: 76-914 Mar 9 2015, 04:40 PM
Any plans to pull the 914 out and start working on it again this spring, Doug?
I'm working on putting that plan together now. Scarlet75 and I had a conversation this AM about him coming out to help me for a bit. I'd like to get my ducks in a row a little better first. Once I have a plan of attack, I'll let everyone know what I'm thinking.
Great news, Doug. The Bad News is that I live too far away to help with anything but Moral (and I've lost most of those by now) Support
and worthless advice. The Good News is that I have a huge supply of both. Here's to you, your project and a brighter 2015!
Posted by: AndyB Mar 22 2015, 09:44 AM
Hows it looking Doug? ![]()
Posted by: CptTripps Mar 26 2015, 08:44 AM
OK....I'm back at it.
First order of business: Clean up the elbows up front. I need to replace the rubber elbows with something made of stainless. I'd bought 1" copper pipe to use that, but the copper pipe is actually 1-1/16" OD, which WILL NOT fit inside the silicone tubing I'd purchased.
So I need a few 1"OD stainless elbows and connectors to get the front tidied up.
Right now, I don't like this setup AT ALL....I think it's not nearly as refined and sturdy as I'll ultimately want it. Time to make some changes.
Attached thumbnail(s)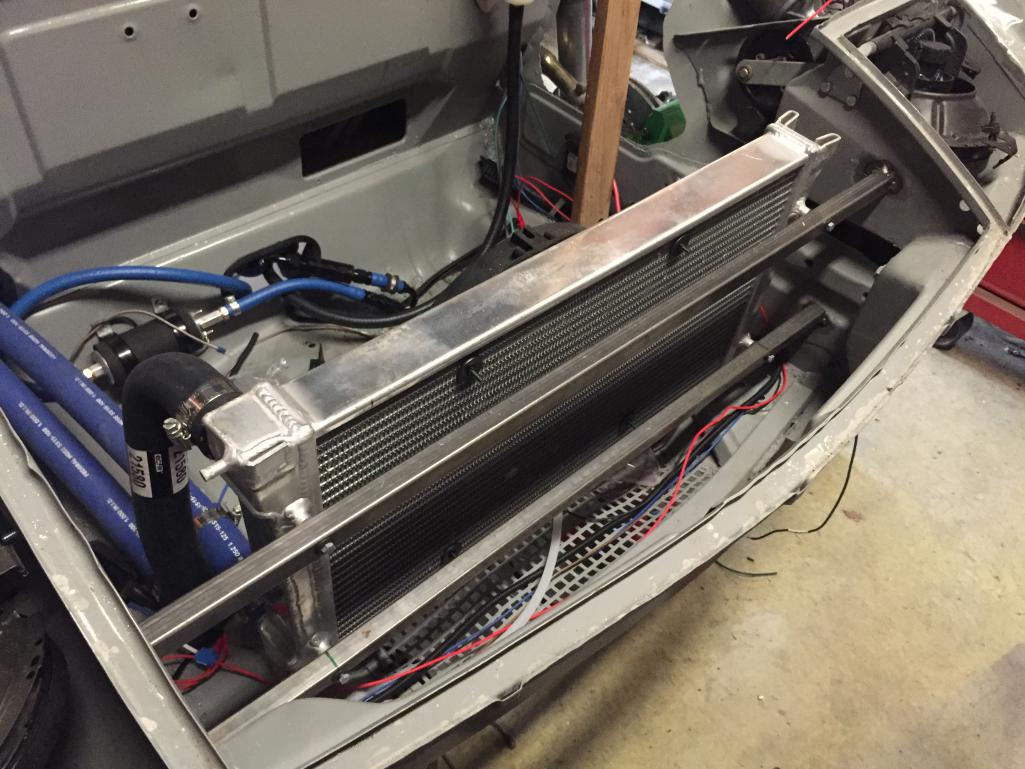
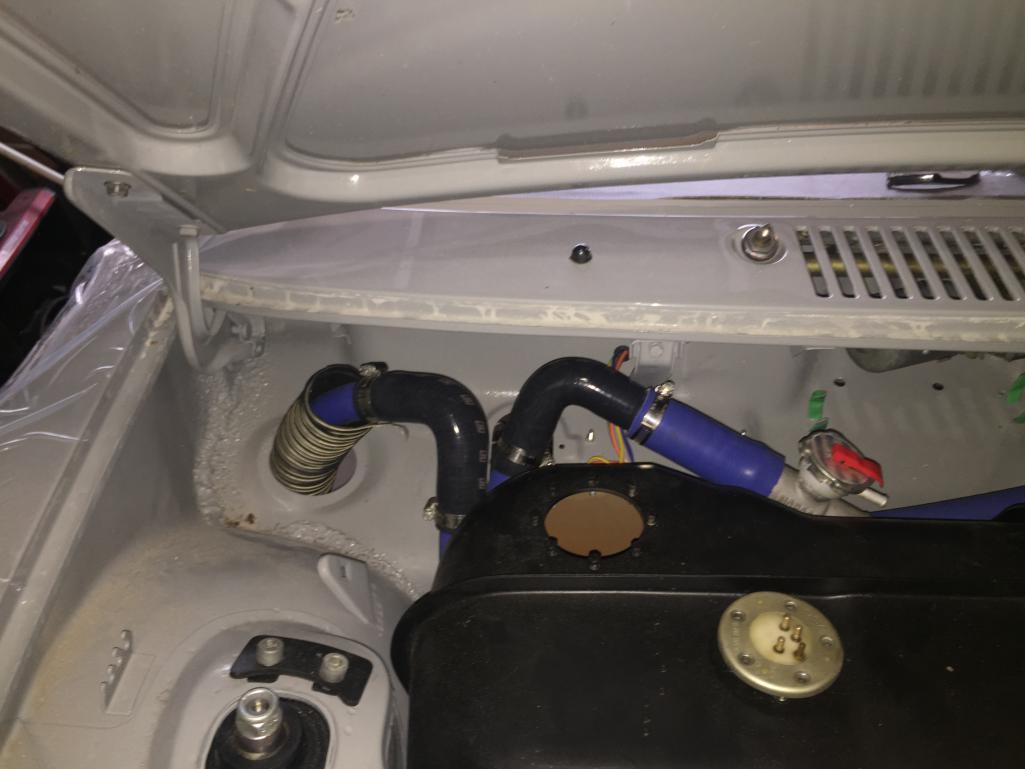
Posted by: mgp4591 Mar 26 2015, 08:49 AM
Doug, I've been following this but didn't see where you got your coolant cap adapter piece from- that's pretty slick!
Posted by: CptTripps Mar 26 2015, 09:23 AM
It's just kinda lying up there right now. That's absolutely the highest point, so I thought it would work best to have the coolant fill/burp valve up there. Just kinda sitting up there right now while I decide the best way to do it. I may end up with a solid metal tube up there to get the water from one side of the car to the other, then elbow down off of that.
Posted by: mgp4591 Mar 26 2015, 09:40 AM
It's just kinda lying up there right now. That's absolutely the highest point, so I thought it would work best to have the coolant fill/burp valve up there. Just kinda sitting up there right now while I decide the best way to do it. I may end up with a solid metal tube up there to get the water from one side of the car to the other, then elbow down off of that.
The highest point is the key, but where did you get that piece? I've been looking around and seems they're difficult to find...
Posted by: Chris H. Mar 26 2015, 11:05 AM
Doug, just FYI I have the same fuel pump as you and it's kinda loud. It's a great pump, so I wouldn't change it, but if you notice the whine you may want to wrap it in some insulation.
Those radiator fillers are on e-bay...
http://www.ebay.com/itm/Howe-Racing-Radiator-inline-filler-neck-1-1-2-dia-/331373439804?hash=item4d27656b3c&vxp=mtr
Summit, Jegs, etc.
Posted by: CptTripps Mar 26 2015, 02:22 PM
Doug, just FYI I have the same fuel pump as you and it's kinda loud. It's a great pump, so I wouldn't change it, but if you notice the whine you may want to wrap it in some insulation.
I'm going to wait and see it it's tolerable first. When I turned the ignition the first time, I noticed that it WAS loud....but I figured that once the motor turns on, I won't notice it as much.
Posted by: Chris H. Mar 26 2015, 02:55 PM
With fuel running through it it's not as bad, and with the car running, even less noticeable. Made me really appreciate the nearly silent L-Jet fuel pump.
Posted by: mgp4591 Mar 26 2015, 06:59 PM
Doug, just FYI I have the same fuel pump as you and it's kinda loud. It's a great pump, so I wouldn't change it, but if you notice the whine you may want to wrap it in some insulation.
Those radiator fillers are on e-bay...
http://www.ebay.com/itm/Howe-Racing-Radiator-inline-filler-neck-1-1-2-dia-/331373439804?hash=item4d27656b3c&vxp=mtr
Summit, Jegs, etc.
Thanks Chris! I must have missed those...
Posted by: okieflyr Mar 26 2015, 07:04 PM
You may want to consider rubber mounts or insulators on the radiator mounting points. Inevitably any flexing going on up there may transfer to the radiator and give problems down the road.
Nice build by the way....
Posted by: Mike Bellis Mar 26 2015, 07:09 PM
Your radiator looks really hard to shroud. As it sits, all the air will go around it and not through it. Thus you will overheat.
I would remount the rad tilted forward and figure out a different way to secure it. Perhaps vertical bracing to the same mounting studs?
The hoses rising behind the fuel tank form an air trap and you will need to have a bleeder on both hoses.
I love the size of the radiator! I need to find one that size if I do not go with a Boxster setup.
Make sure that no air can get around the radiator at all. I'm no expert but I can tell you that my conversion runs way way too cold; 160°F. Not many of us can say that. My radiator is almost twice your size and completely shrouded and sealed.
Posted by: CptTripps Mar 27 2015, 06:56 AM
I have rubber grommets in the radiator setup, so it's "floating" now. But I DO think I need to change it. That's on the list now that the weather has broken.
I used a vw scirocco all aluminium 2-pass radiator. It fits down there nicely, and should be more than enough to cool the EJ20. Shrouding will be important...for sure.
Posted by: AndyB Mar 27 2015, 07:24 AM
I admit it I love you radiator. Its small compact, the question is will it cool a 2.5 L?
Posted by: CptTripps Mar 27 2015, 08:29 AM
I forget the unit of measurement for radiators, but this was the same as the one that cooled the V8 that was in the car previously. It's only a little smaller. An all aluminium, double-pass radiator is the way to go....or so I was told by the guys at Summit Racing where I got it. They said it'd be "more than enough" for what I was using it for. It's also larger than the stock WRX radiator.
Posted by: CptTripps Jun 14 2016, 07:52 AM
I hate to do it, but I think I need to let this project go. It's been 2y and I'm no closer to having time to finish it. Ugh.
Unless there's someone that would be willing to drive to Cleveland, pick it up, and finish the mechanicals for me. (I'd happily pay.)
Posted by: Chris H. Jun 14 2016, 01:09 PM
Hey Doug! Nice to hear from you! I know Brad Mayeur in Peoria could finish it. McMark is in Grand Rapids now. Don't let it go man. Hate to see all that work go unrewarded. What's left to do at a high level?
Posted by: 914forme Jun 15 2016, 11:28 AM
I hate to do it, but I think I need to let this project go. It's been 2y and I'm no closer to having time to finish it. Ugh.
Unless there's someone that would be willing to drive to Cleveland, pick it up, and finish the mechanicals for me. (I'd happily pay.)
I have done exactly that several times, what kind of time frame are we talking? I need to finish my car though. PM me if you want to go over the particulars of what needs completed still.
Posted by: 2mAn Jun 15 2016, 11:59 AM
I hate to do it, but I think I need to let this project go. It's been 2y and I'm no closer to having time to finish it. Ugh.
Unless there's someone that would be willing to drive to Cleveland, pick it up, and finish the mechanicals for me. (I'd happily pay.)
At this point, try to find someone to come in and help, wasnt the engine builder going to finish it for you? Its a soul crushing moment to sell a project off thats 90% completed, but I think every one of us has been in that position or have had that feeling. I know it all too well myself
Posted by: Chris H. Jun 15 2016, 12:24 PM
Stephen could finish it if he has the time. The body work is all done and it's painted. It's mainly dealing with the wiring harness, plumbing the turbo and getting the engine fired, finishing the interior. I just can't remember where he left off.
Posted by: CptTripps Jun 15 2016, 02:08 PM
Thanks guys. I've reached out to a few people, and we'll see what I can find. MY hope is that I can send this off on a few-month vacation to someone that can help me get the mechanicals across the finish line.
Posted by: 76-914 Jun 15 2016, 05:01 PM
You might want to hide your welder from Stephen.
Posted by: 914forme Jun 15 2016, 06:43 PM
You might want to hide your welder from Stephen.
Hey
I guess I deserve that one
Posted by: matthepcat Jun 15 2016, 08:07 PM
This is my first time reading through your thread. This is an amazing build! Now is not the time to get rid of it!
Unless you want to sell it to me
j/k .... sort of.
Posted by: mgp4591 Jun 16 2016, 12:30 AM
I think about when you started this project and all that you've bared your soul about with personal matters and such. You've put so much work, imagination, and raw emotion of your own into this build that getting rid of it now may just further the funk you've been through. Finishing this would lift your spirits and give you the reward of driving that would only help you feel more accomplished (not that you're not accomplished already). To state a partial line from one of my favorite 80s movies; "You can't give up now... it's a moral imperative!"
Yoo can doo eet!!
Posted by: CptTripps Aug 26 2016, 09:02 AM
So, Scott came to Cleveland last weekend to take a look at helping me finish this thing off. Holy mother of shit is his car cool! I had no clue what kind of power these Subie engines are capable of. Wow.
So I'm putting together a punch-list of things that need done, and we're going to see what it'd take to get this thing in the works again.
Just giving you all an update. My goal, once again, is to drive it to Hershey next year. Let's see if I can make this one a reality!
Posted by: mepstein Aug 26 2016, 09:21 AM
Go Doug Go!
Posted by: Chris H. Aug 26 2016, 11:35 AM
Awesome Doug! Glad to hear it. Hershey next year is a good goal. Take your time. Everything I rushed I have re-done.
Posted by: Philip W. Aug 26 2016, 11:45 AM
That's great to hear! I know it's discouraging to table a project like that when you were so close to actually being able to enjoy the fruits of your labor! Look forward to seeing you get this on the ground ! If you can get to Hershey next year maybe you can make something like Okteenerfest in the fall too!
Keep us updated on progress-
Posted by: Amenson Aug 26 2016, 12:53 PM
So, Scott came to Cleveland last weekend to take a look at helping me finish this thing off. Holy mother of shit is his car cool! I had no clue what kind of power these Subie engines are capable of. Wow.
So I'm putting together a punch-list of things that need done, and we're going to see what it'd take to get this thing in the works again.
Just giving you all an update. My goal, once again, is to drive it to Hershey next year. Let's see if I can make this one a reality!
Narrow rear tires really amplify the insanity. With the meats you have, you will be upgrading your turbo next winter.
Look forward to working on it!
Cheers,
Scott
Posted by: 914forme Aug 26 2016, 01:25 PM
Punch list item not on the current build
Limited Slip
Posted by: CptTripps Aug 26 2016, 04:19 PM
Punch list item not on the current build
Limited Slip Ha! That's the first thing Scott told me I needed!
Posted by: 76-914 Aug 26 2016, 04:21 PM
"Bout  time. JK ya, Doug. I know you been drug thru the these past 2 years. I believe that all of us Suby converts wanted to help you. Some of us just live too far away. The experienced eye can see that there is still an awful lot of work to be done but your with an experienced person now so things will move right along. Keep in mind what Chris said. Everything he rushed he's had to redo. Good to see you back at it. Kent
Posted by: CptTripps Aug 26 2016, 04:48 PM
Thanks for the encouraging words guys. Going over the car with Scott, I realized how far I've really come with this thing. And also how far I have to go. Like he said though: "all the right parts are here." So I guess I did something right after all!
Having a proper engineer finish off the important bits is going to be key. The last thing I want is a shoddily built 350hp go-kart!
Posted by: effutuo101 Aug 26 2016, 05:40 PM
Good to see you back! We are both in the same place. Need experts to finish/tidy up bits. Keep the faith and you will have a rocket soon!
Posted by: 914forme Aug 26 2016, 06:33 PM
Punch list item not on the current build
Limited Slip Ha! That's the first thing Scott told me I needed!
One wheel burn outs = not cool
Scott has an LSD in the Porsti, and he roasts his tires on a regular basis. One of your tires is almost equal to two if his.Of course this now goes the other way.
Scott you need flares or slicks Ill bring up my DVD on 914 flare shaping, my palm nailer, a buffed carriage bolt and we can make our ears ring worse than a Spinal Tap Concert
my palm nailer goes to 12
Posted by: Dr Evil Aug 26 2016, 07:45 PM
Hmmmm, Sept 29-30 and maybe that weekend since I will be there anyway.
Posted by: rick 918-S Aug 26 2016, 07:46 PM
Posted by: Amenson Aug 27 2016, 06:09 AM
One wheel burn outs = not cool
Scott has an LSD in the Porsti, and he roasts his tires on a regular basis. One of your tires is almost equal to two if his.Of course this now goes the other way.
Scott you need flares or slicks Ill bring up my DVD on 914 flare shaping, my palm nailer, a buffed carriage bolt and we can make our ears ring worse than a Spinal Tap Concert
my palm nailer goes to 12 Stephen...the day I can't blow up the rear tires from a 40mph roll is also the day I start yearning for a really spendy engine/turbo upgrade. I'll get to see how Doug's car is with proper rear tires and then do flares on the Porsti this winter.
Leave your palm nailer at home, we'll just need the epoxy gun!
Cheers,
Scott
Posted by: CptTripps Oct 8 2016, 02:42 PM
Getting ready for a big move tomorrow, so I put tires on her and dropped her to the ground for the first time in 3 years!
More pics and info tomorrow after I get her in the sunlight and on a trailer.
Attached thumbnail(s)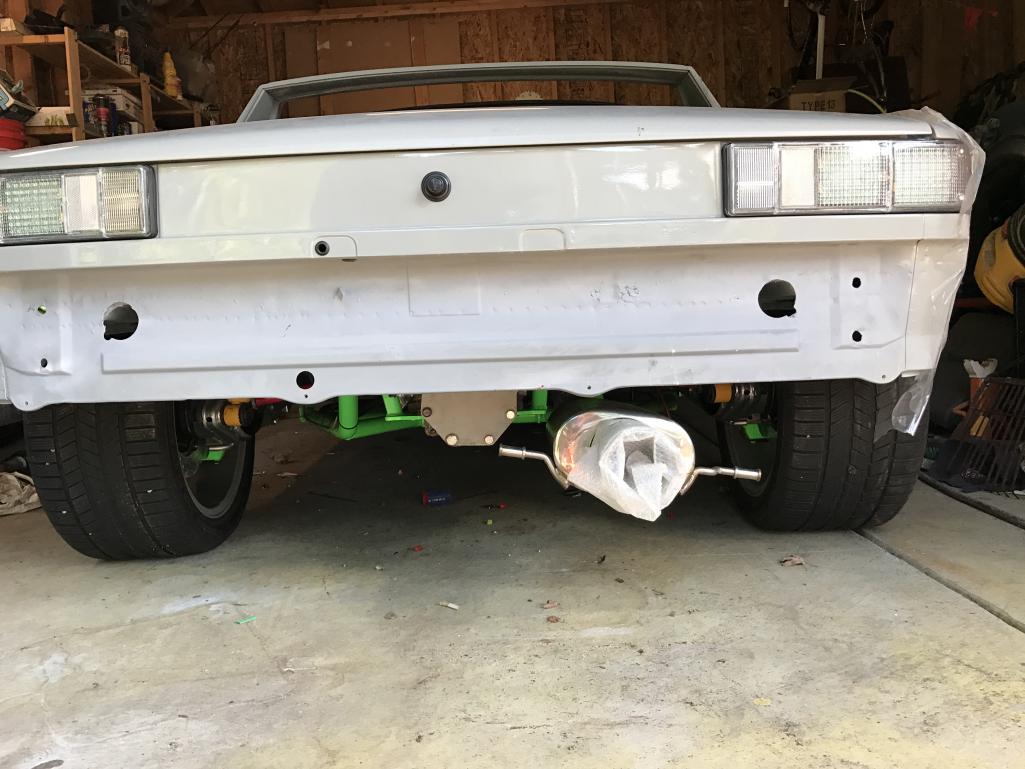
Posted by: Amenson Oct 8 2016, 03:47 PM
I wonder where it is going? 
Posted by: CptTripps Oct 8 2016, 04:03 PM
I wonder where it is going?
Evidently, to a much cleaner garage!
Posted by: rhodyguy Oct 8 2016, 07:20 PM
What is behiNd the chevy's cab?
Posted by: Amenson Oct 8 2016, 07:26 PM
I wonder where it is going?
Evidently, to a much cleaner garage!
I had just finish its weekly vacuuming before the picture.
Posted by: Amenson Oct 8 2016, 07:33 PM
What is behiNd the chevy's cab?
The A-pillar/firewall of the old rusty cab. I left all of the parts on the old cab while I was shortening the frame and installing the new cab. Now I need to swap everything over.
Posted by: 914forme Oct 8 2016, 07:54 PM
No idea where it is going But can't wait to see it tomorrow. Unfortunately it involves work.
Posted by: CptTripps Oct 9 2016, 11:40 AM
All loaded up and heading to southern Ohio for some engineering!
Attached thumbnail(s)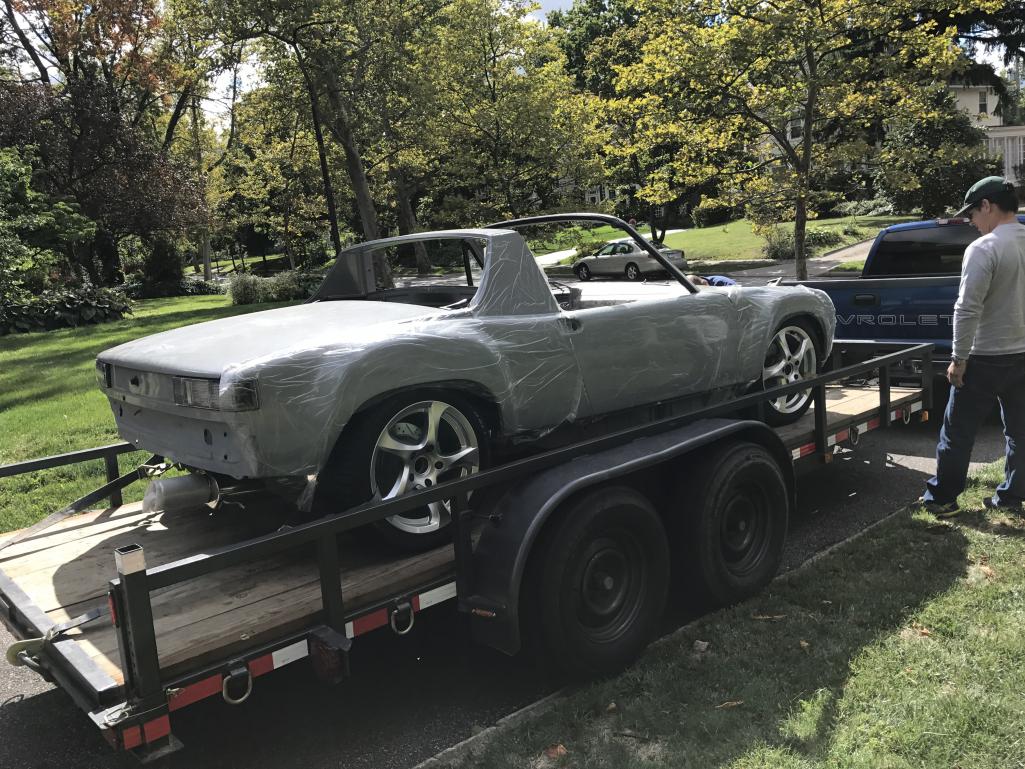
Posted by: Amenson Oct 11 2016, 08:17 PM
Grey Matter made it safe and sound to its new home for the next few months.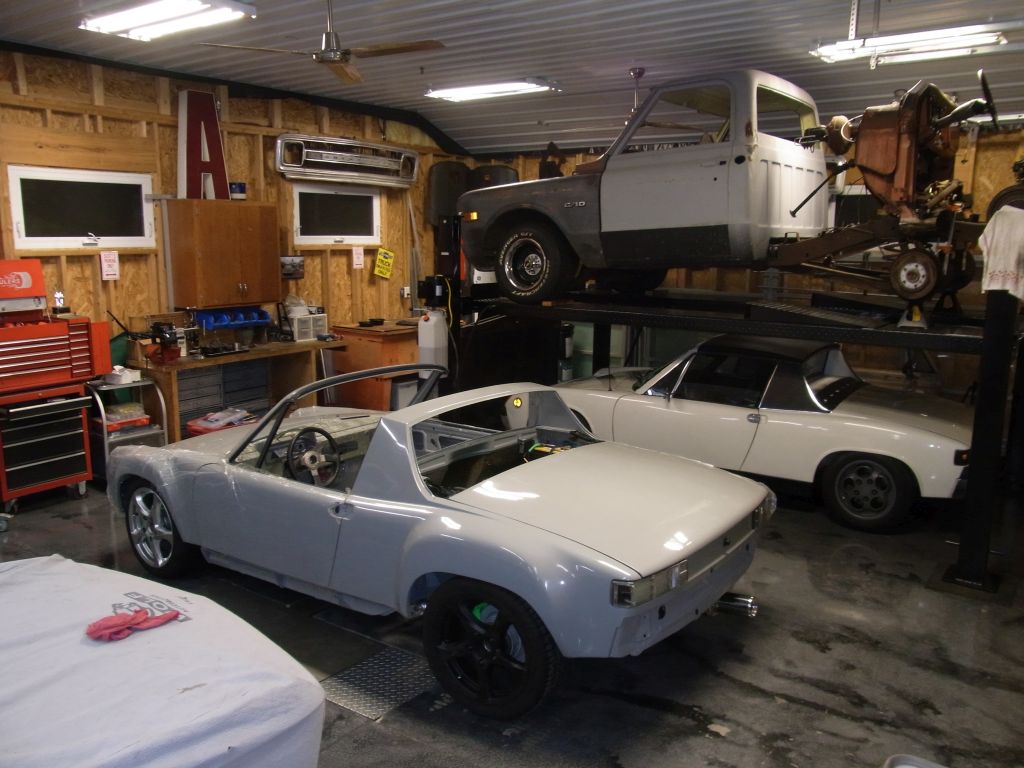
Spent a couple of hours clearing out he loose parts and random other stuff while putting a plan together. 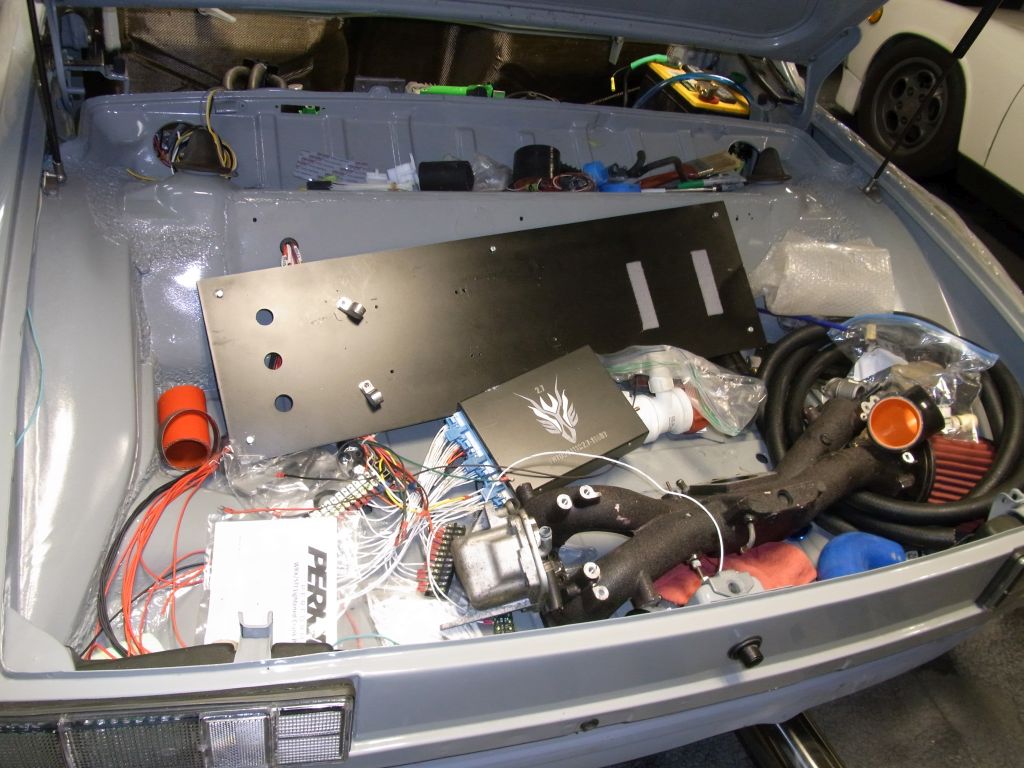
So much better!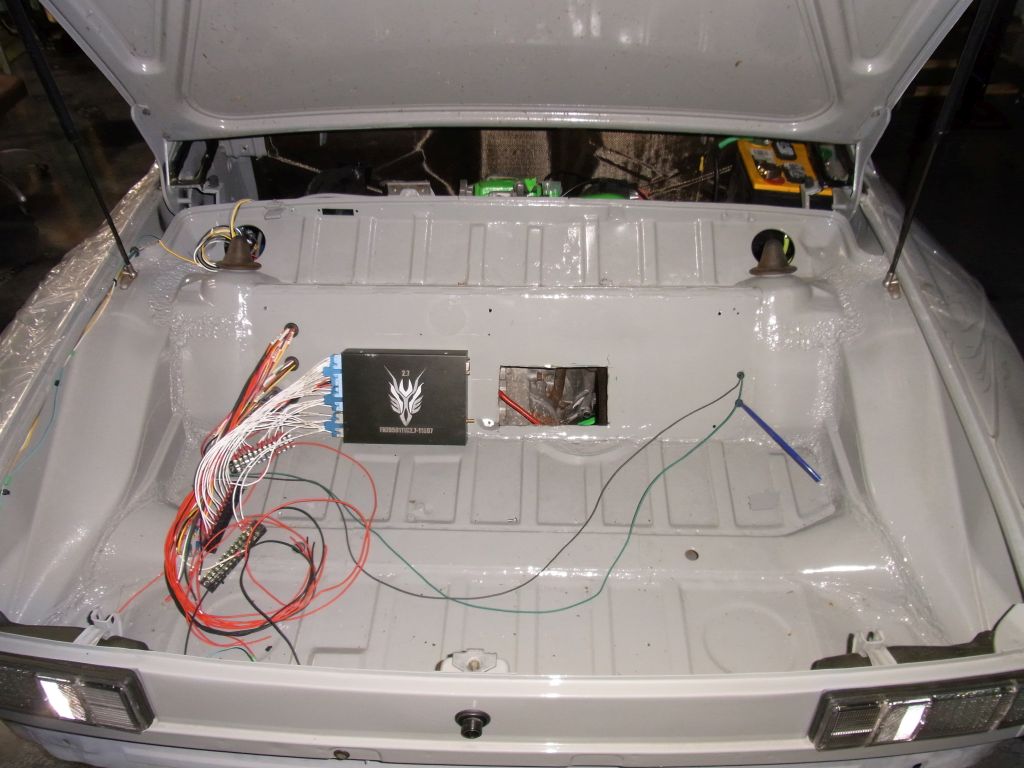
Also ,sorting out some of the parts I am likely to use.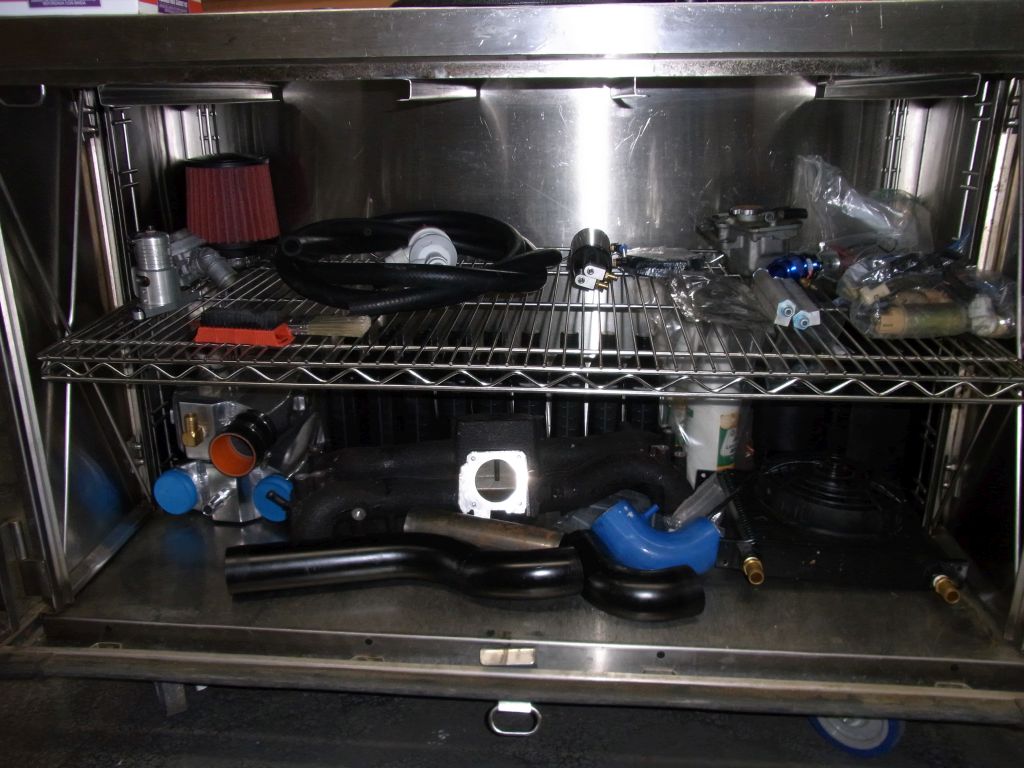
Lots of good parts to work with, so much cutting and welding to get them to work together.
Posted by: Dr Evil Oct 11 2016, 10:31 PM
Posted by: matthepcat Oct 12 2016, 01:15 AM
Excited to see this come together. Love this car.
Posted by: Chris H. Oct 12 2016, 07:49 AM
Pass that over...
Doug you got a long way with this one. Totally understand where you got stuck. Makes sense to have someone help you wrap it up who has done it before. Check out Andrew's thread for interior ideas. His has a similar general shape/layout.
Posted by: Spoke Oct 12 2016, 12:32 PM
All loaded up and heading to southern Ohio for some engineering!
Can't wait to see the car with the finishing touches done. Looks great so far. So did you sell the car or just getting some help finishing it?
Posted by: 914forme Oct 12 2016, 05:48 PM
Help finishing it. It is a very nice car in person, and just needs a little bit of fabrication and systems cleanup to make it drivable for Doug. He has gone from thinking it will always be on jack stands forever. To it will be out on the road running and driving. Scott has set a pretty lofty goal for getting it running and back to Doug.
It is running snow tires so I am not sure what the rush is
Posted by: db9146 Oct 12 2016, 09:45 PM
Scott Amenson is VERY talented when it comes to fabrication. I saw some of his work at Okteenerfest when he was walking me through some of the build of his Subie-powered 914. Very nice work....so if anyone can get the plumbing and wiring whipped into shape, Scott can.
Posted by: CptTripps Oct 13 2016, 07:21 AM
I can't thank Stephen and Scott enough for coming out last weekend and picking her up from me. Being back in the garage for a day getting everything ready for transport was like walking into a time machine. I hadn't been out there in about 2 years, and I forgot where everything was. What started out with the best intentions of getting everything ready for him, turned into a "shove stuff in a box" competition.
After we loaded it up on the truck, I just told Scott "Do whatever you want. You're not going to offend me at all by re-doing anything I did." to which he replied "Oh, I've got a list alright."
It'll be awesome to watch from here to see how things progress. I plan on heading down there when he's ready for me to work on wiring. Perhaps I can get Dr. Evil to drive out an assist with that again? ;-)
Posted by: Amenson Oct 13 2016, 08:32 PM
Thanks for the kind comments...pressure it building, better get to work.
First order of business was to install the service cover that arrived today. This thing is really nice. Should have purchased one a long time ago, my car might still have decent pain.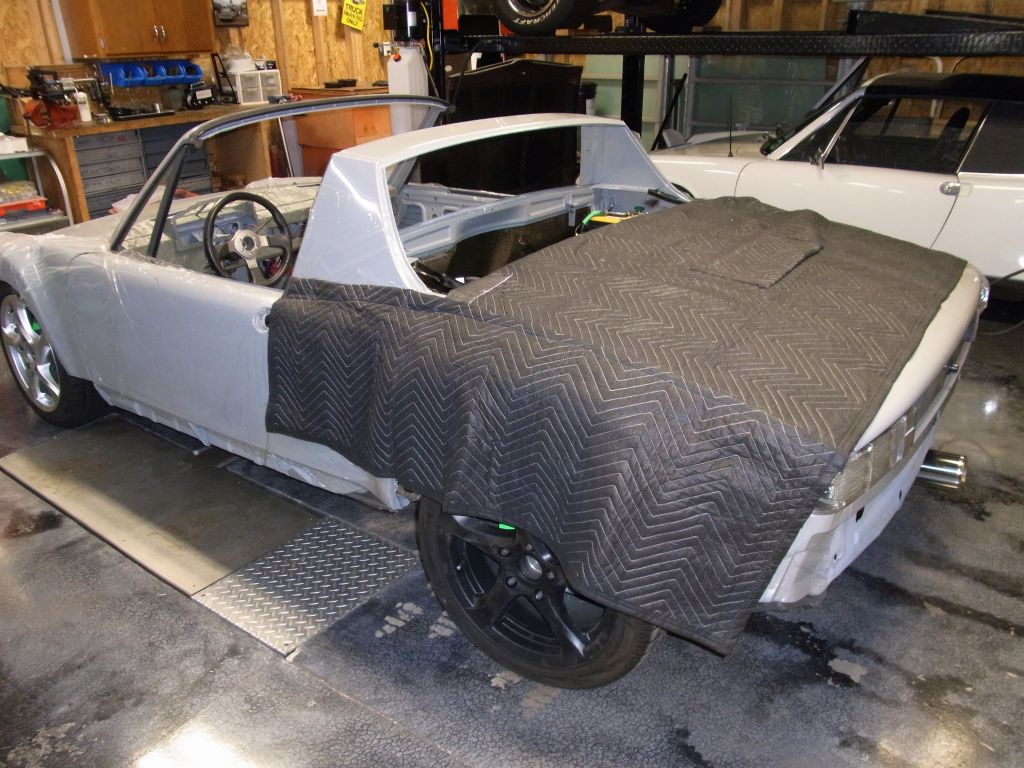
Storage bag is even signed 
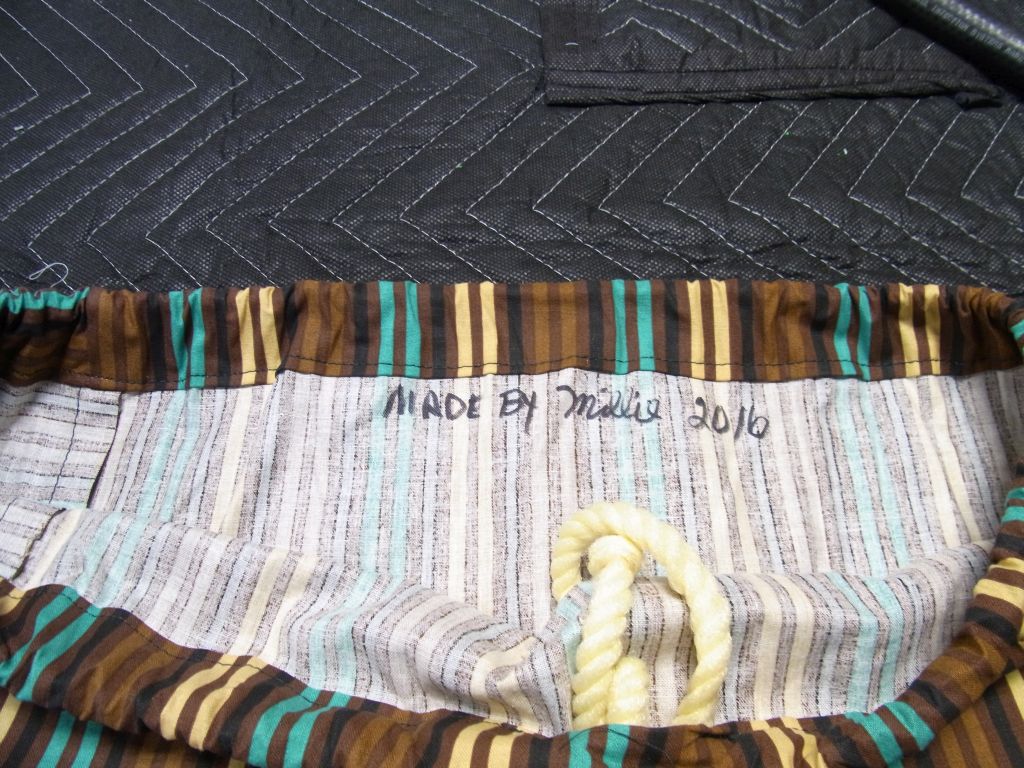
Now I can get to work. First task is to flip the intake so I can get a feel where things will end up. Snaked all of the wiring out of the way and went to remove the throttle cable. WTF is this Doug Add that to the list.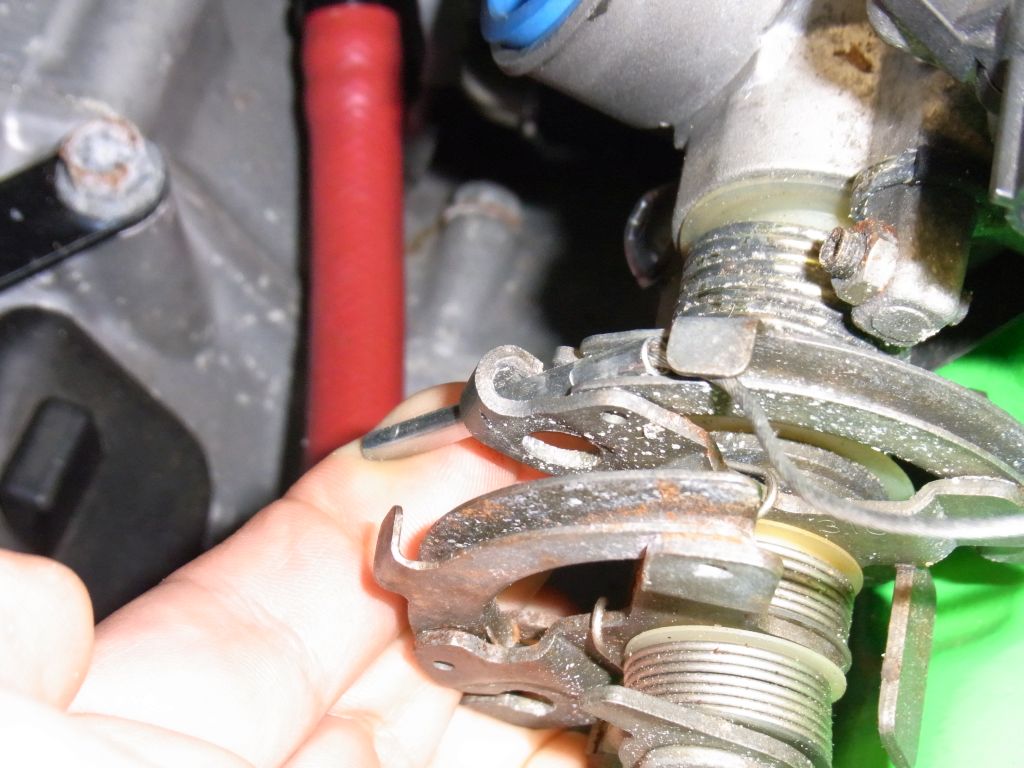
Some cool stuff under here. What is the coolant line with the AN fittings?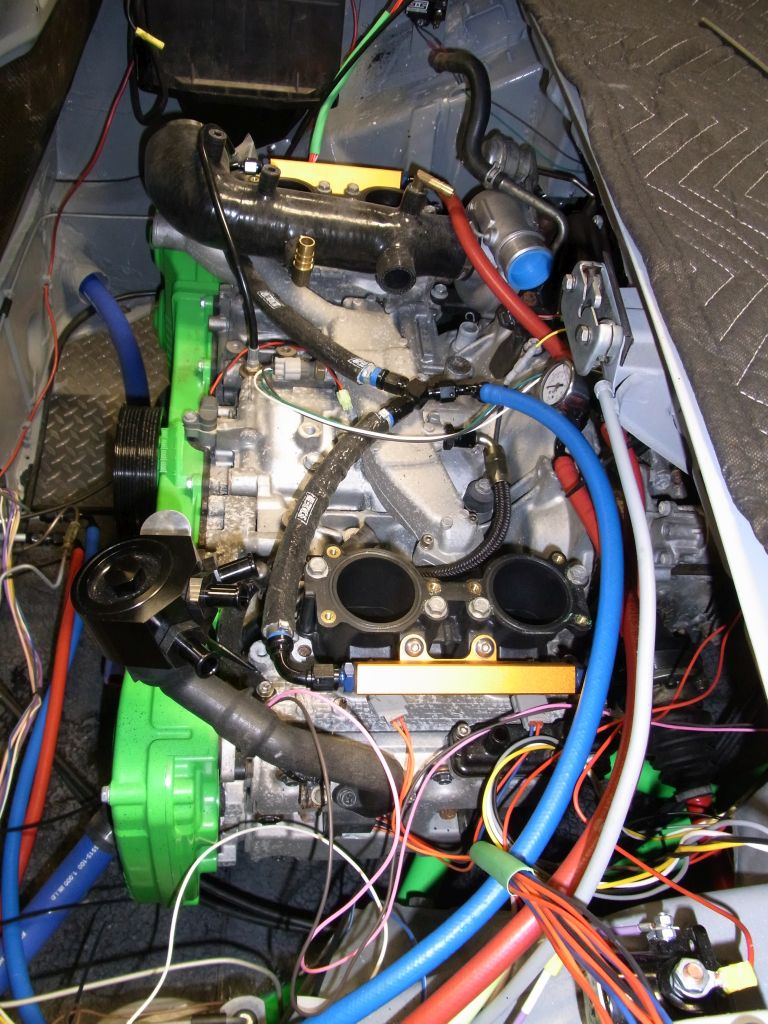
Apparently the manifold is not quite symmetrical on the bottom side and the additional lugs interfere with the turbo inlet. D Didn't take long to have to start cutting.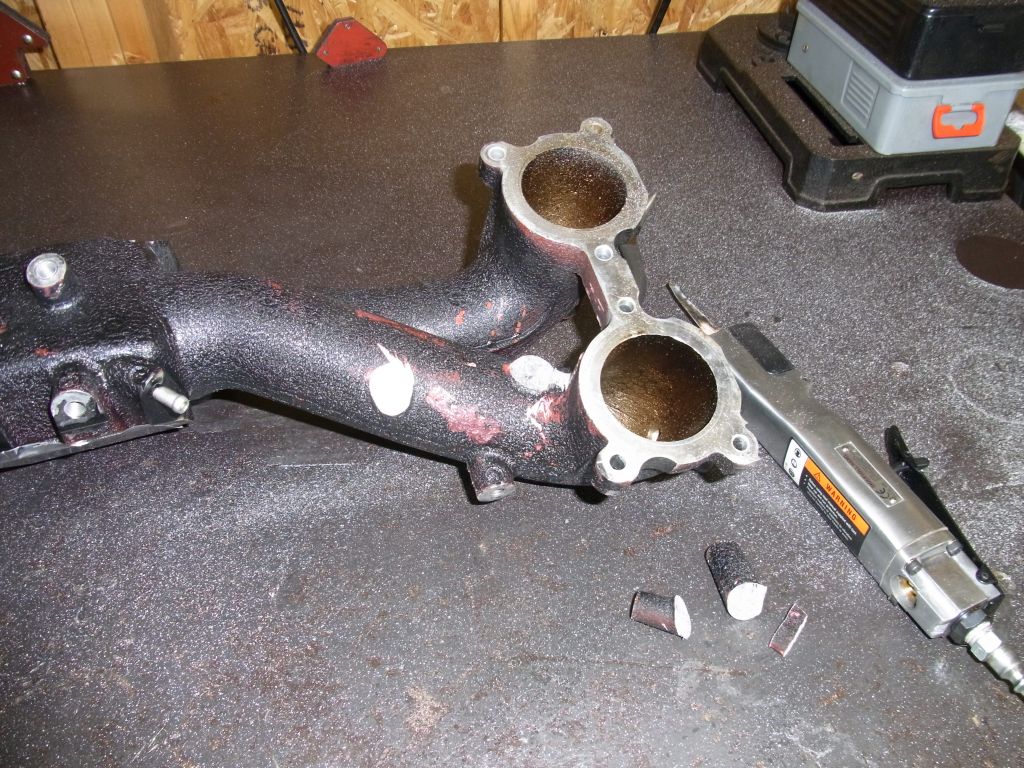
This looks promising, if only the throttle body fasteners were the same size as the other manifold. Bolts are too big.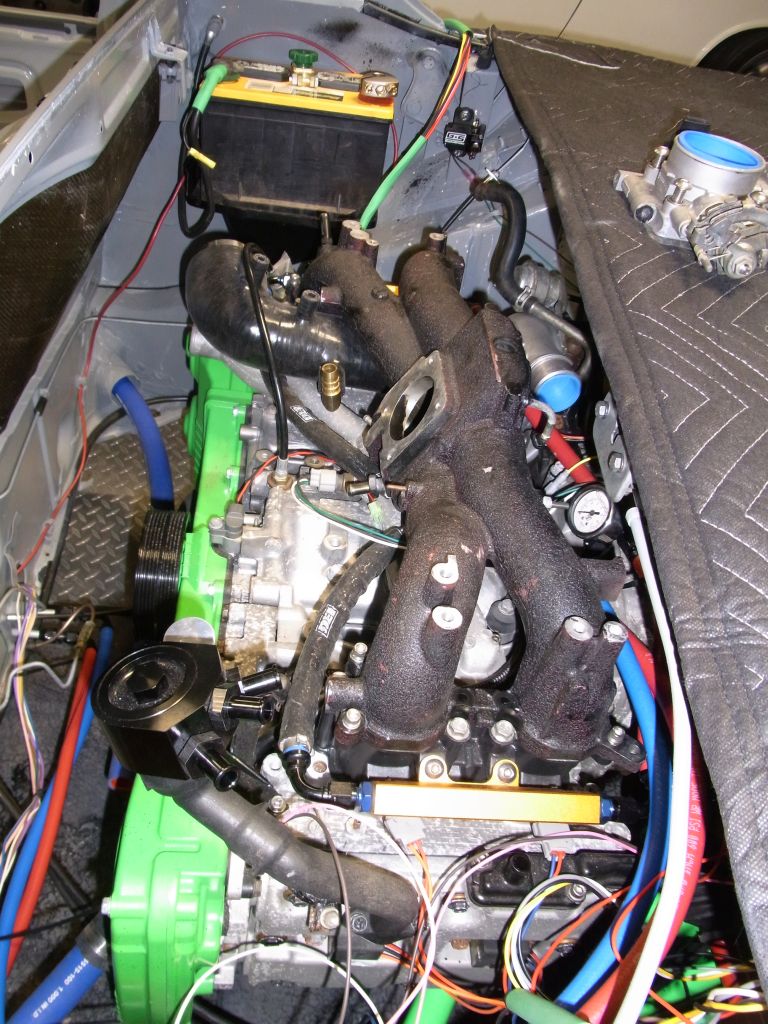
Rinse and repeat.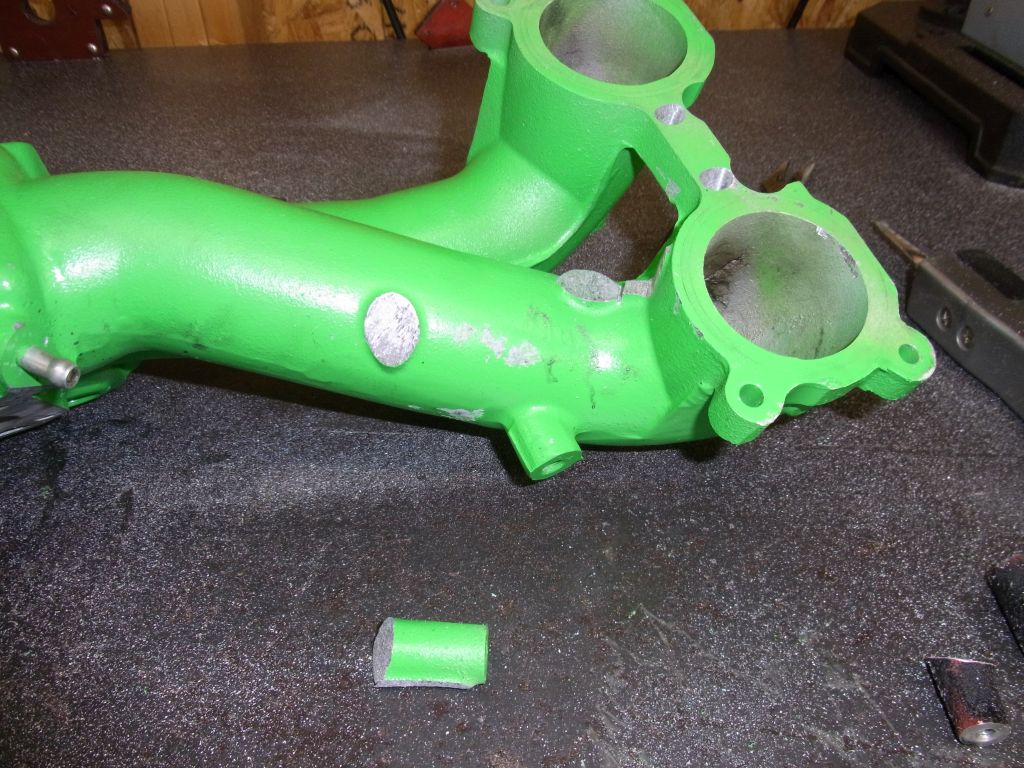
There we go. IC will fit perfectly.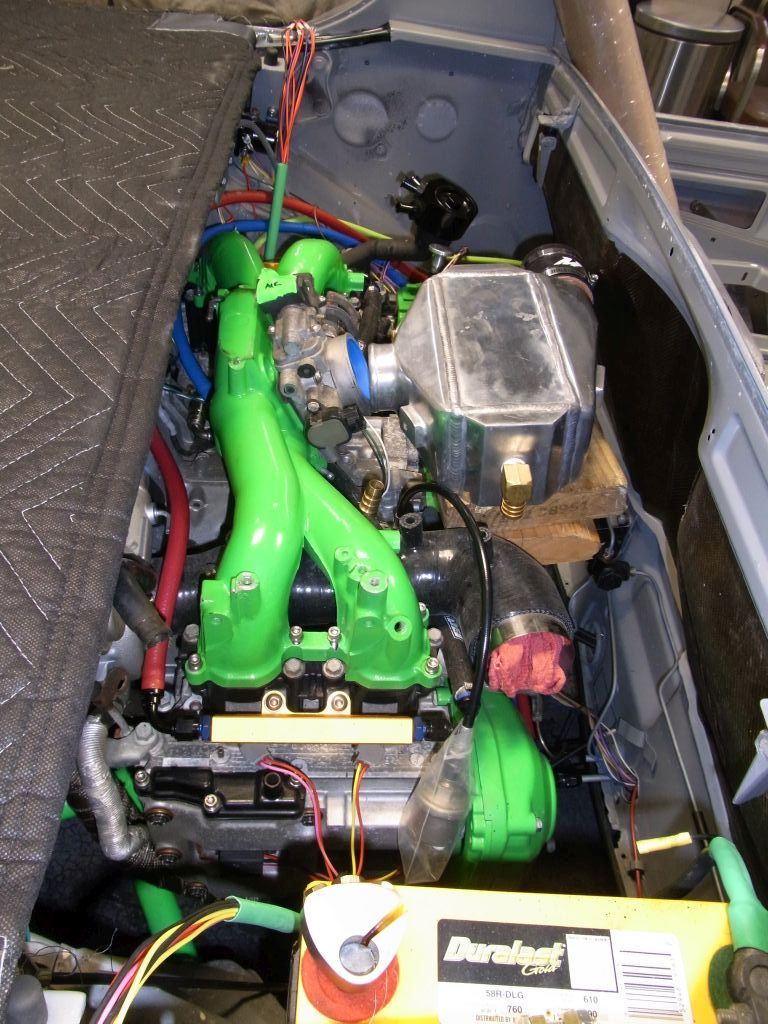
Doug, did you order the alternator relocation parts yet?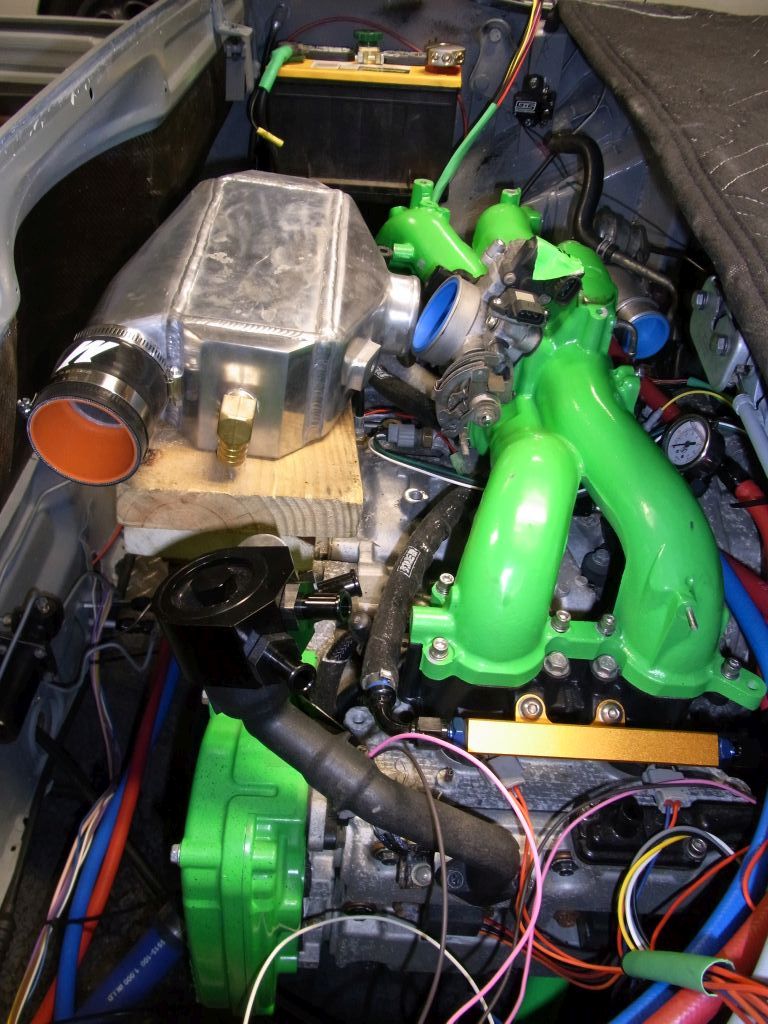
I can almost smell burning snow tires.
Cheers,
Scott
Posted by: Spoke Oct 13 2016, 10:21 PM
Great to see this project moving forward. It was a real bummer to see your project get stalled by life but it's best to get the important things taken care of first.
I'd like to help out but I'm a bit too far away with way too little free time it seems anymore. I really appreciated your consultation and help getting going with the prototype 914 brake LED boards and figuring out how to secure the turnsignal boards. I'd like to return the favor.
How about we trade your prototype brake and turnsignal boards for current brake, turnsignal, reverse, front sidemarker (if your car still has them) and front turnsignal boards? This way all the boards will be up to date when your car gets on the road.
Posted by: CptTripps Oct 14 2016, 04:36 AM
Scott: alternator relocation stuff should be on the way. I'll call today. Also, let me know what you need me to order for the throttle. I have no clue what part you were referring to that you were holding.
Spoke: More than happy to swap. Let's let Scott get it running and when I bring it back to Cleveland to finish up, we'all chat about it. Thanks for the offer!
Posted by: 914forme Oct 14 2016, 10:40 AM
The part in hand is your throttle cable, and it needs replaced.
Posted by: Dr Evil Oct 15 2016, 09:25 AM
Glad to see this getting some love. Ill help as able, when able, with whatever.
Posted by: Amenson Oct 18 2016, 07:27 PM
I am stalled in the engine compartment until the alternator relocation parts arrive so I moved to the front. Had to put it up on the lift to get to the bottom of the tank.
Don't worry Grey...you will be back on your tires in no time.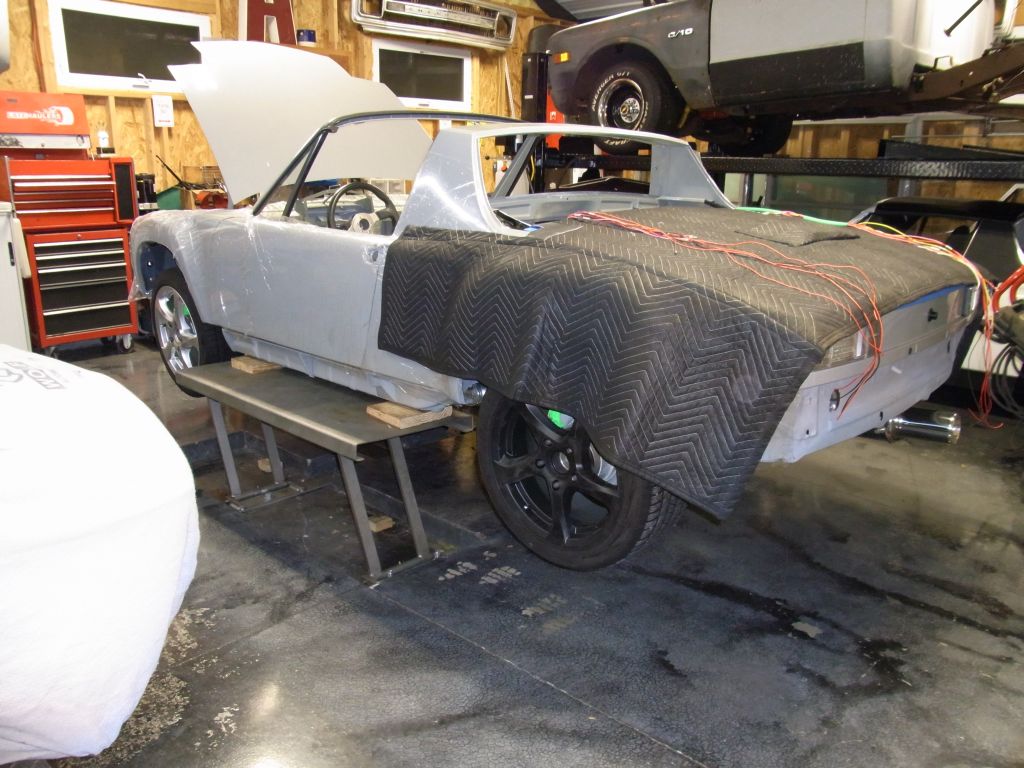
Almost a clean slate.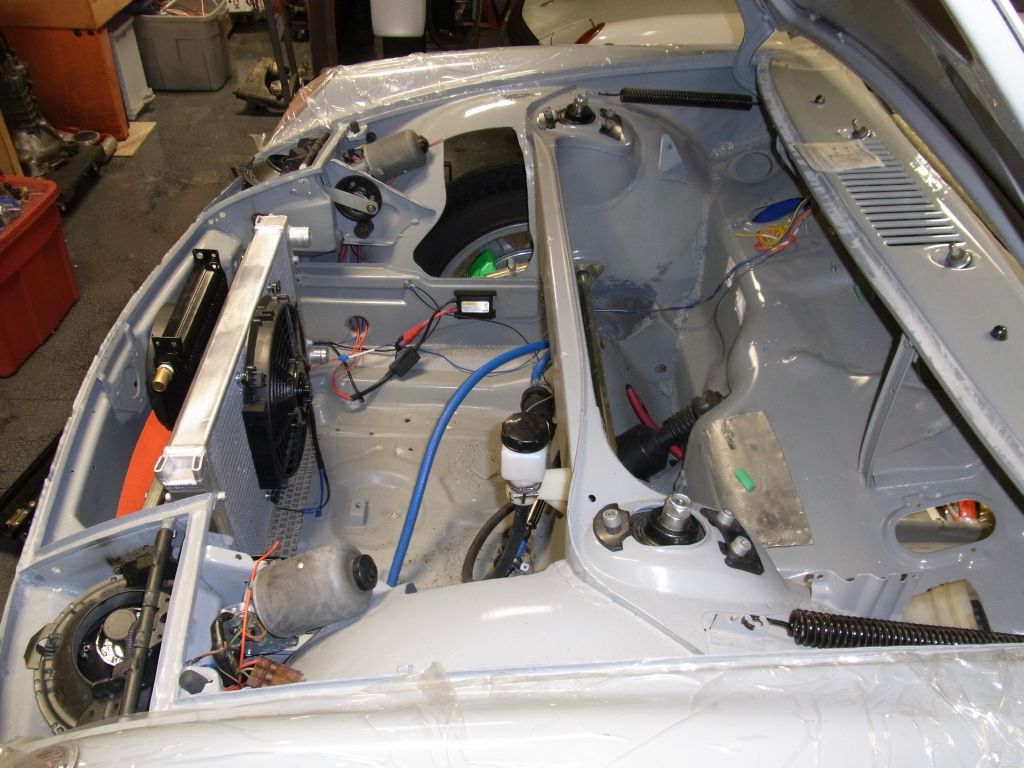
Almost cut out the radiator mounts but wanted to sleep on it to make sure my plan makes sense. ![yellowsleep[1].gif](style_emoticons/default/yellowsleep[1].gif)
Doug, what are the dimensions of the spare you want to put up front?
Cheers,
Scott
Posted by: effutuo101 Oct 18 2016, 08:29 PM
Looking good Doug!
Posted by: 914forme Oct 19 2016, 04:03 AM
Hoping it is a space saver as all others will be to big.
How about a small air compressor, tire plug kit, and a AAA card
Did not realize the fender well vests where so huge, I'm surprised we did not bring a cat or two back with us from Doug's
Posted by: CptTripps Oct 19 2016, 06:44 AM
I'll measure the spare when I'm in Cleveland this weekend. It's honestly the least of my worries though. I like Stephen's idea better anyway.
Got your email about the parts-list to order...as always, I'm on it.
Posted by: Amenson Oct 19 2016, 09:09 PM
The Outfront alternator relocation parts arrived today. Couldn't wait to see how things would work together so I took a few minutes before my soccer game to install it. Unfortunately one of the stock hard cooling line connections was in the way so I am going to have to wait. 
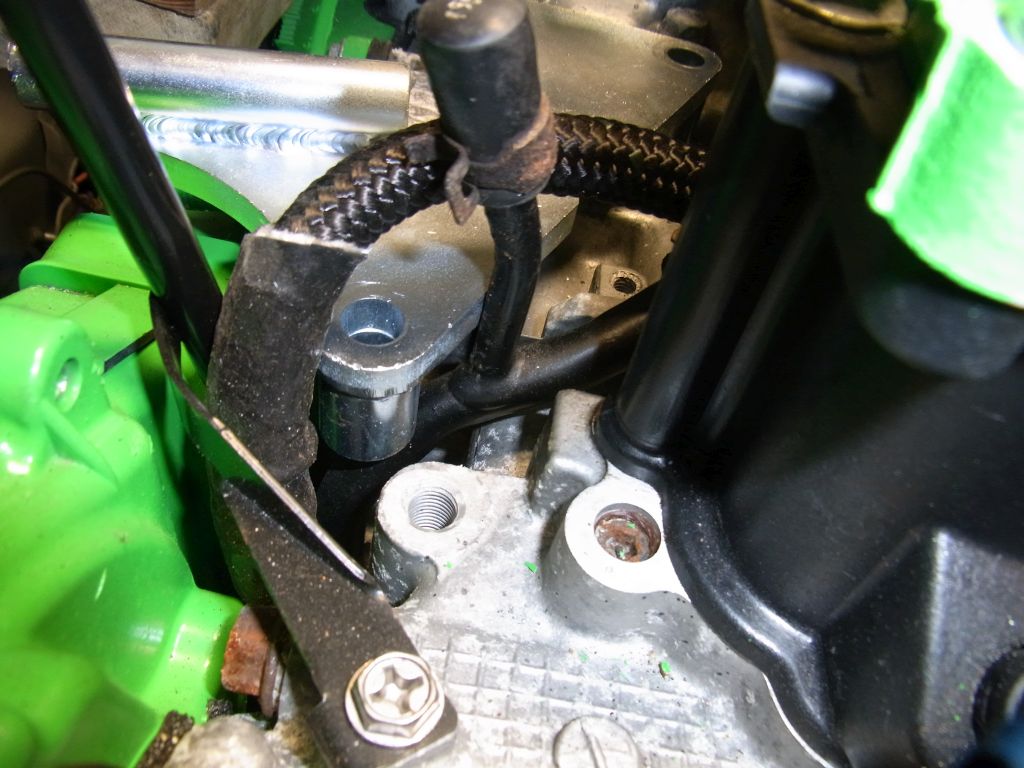
Not a big deal, just a little and we will be good to go.
Cheers,
Scott
Posted by: 914forme Oct 20 2016, 03:15 AM
That Alt relocation brakes looks like a very simple clean design. Lets see a picture off the engine. I would like to get the design etched into my head, for future reference.
Posted by: Amenson Oct 20 2016, 07:05 AM
That Alt relocation brakes looks like a very simple clean design.
Lets see a picture off the engine. I would like to get the design etched into my head, for future reference.If it works half as well as it looks, this is just one of the parts to purchase and not spend the time to recreate it.
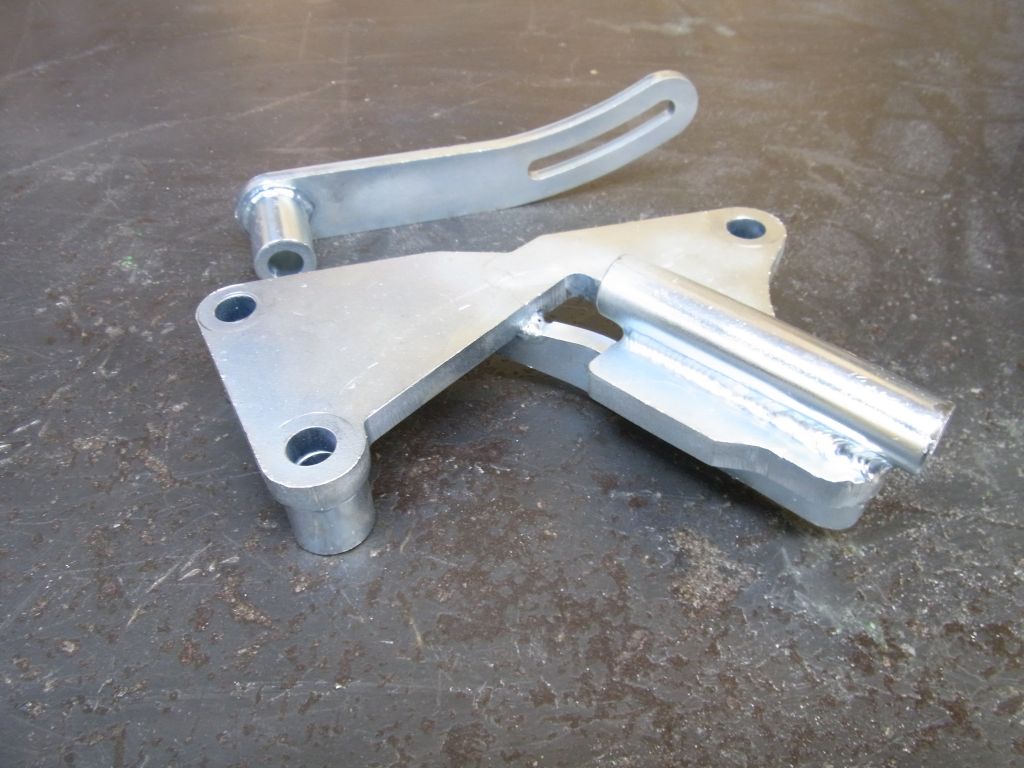
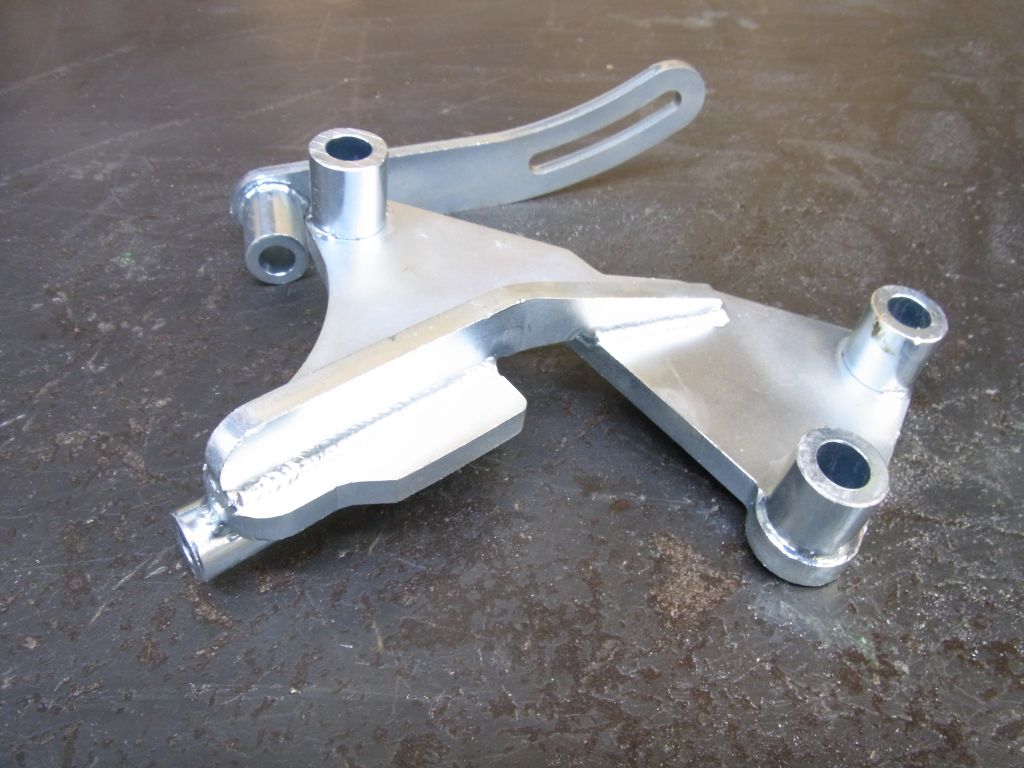
Cheers,
Scott
Posted by: 914forme Oct 20 2016, 07:56 AM
Posted by: CptTripps Oct 20 2016, 08:13 AM
Looking good...That got there a lot faster than he told me it would. I was expecting a call before he shipped, and he said it might be another week before that. Wow. Parts look fantastic.
Posted by: Amenson Oct 20 2016, 08:47 AM
Looking good...That got there a lot faster than he told me it would. I was expecting a call before he shipped, and he said it might be another week before that. Wow. Parts look fantastic.
This might be the third part that I use unmodified on a Suby swap. The only suby swap parts on my car that I used unmodified were the dash and the double splined locking thingy for the transmission.
Everything else is
Cheers,
Scott
Posted by: effutuo101 Oct 20 2016, 11:52 AM
I was at outfront last week. I picked up a new oil filler set up that is a little cleaner.
Posted by: CptTripps Oct 20 2016, 12:27 PM
I was at outfront last week. I picked up a new oil filler set up that is a little cleaner.
We looked at using that one, but I couldn't use it with my air/oil separator. So we went a different direction. I'll let Scott post pics of what he's going to do when he gets to it. Going to be very cool! (of course.)
Posted by: CptTripps Oct 20 2016, 03:36 PM
I've got some fancy new parts headed your way Scott.
Attached image(s)
Posted by: Amenson Oct 20 2016, 08:06 PM
I've got some fancy new parts headed your way Scott.
I need to do more projects for other people. I really enjoy getting parts in the mail and now I can get them and don't even have to pay for them!
I pulled the offending coolant line tonight and installed the alternator. It is really close but I will be able to snake the tube under the manifold and past the alternator.
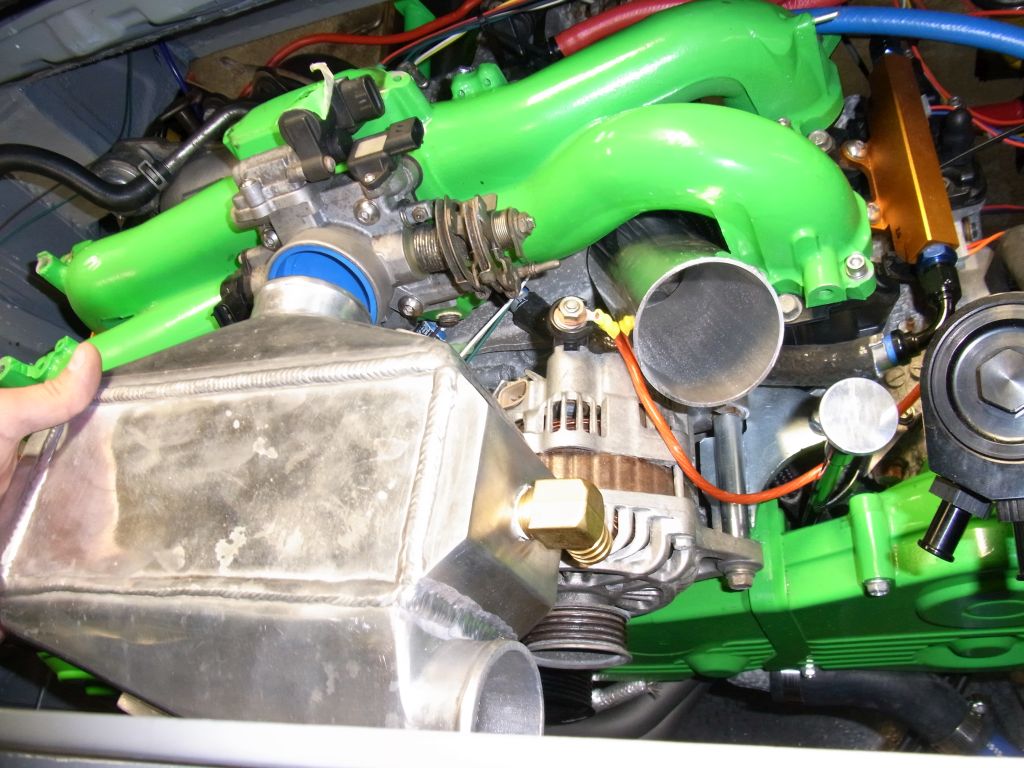
This install is going to be super clean and functional. Loads of
in the coming weeks.Cheers,
Scott
Posted by: Amenson Oct 24 2016, 08:35 PM
No actual progress this weekend. Had to winterize the yard and take care of a few honey-do's. Lot's of parts showing up so I took some time to organize the garage. Nothing more frustrating than searching for parts or tools.
Speaking of parts, Doug....if you wanted to go big, now is the time.
I was "helping" Stephen find a snail for his project and found this.
2.0L Subaru Borg Warner EFR 6758 and E85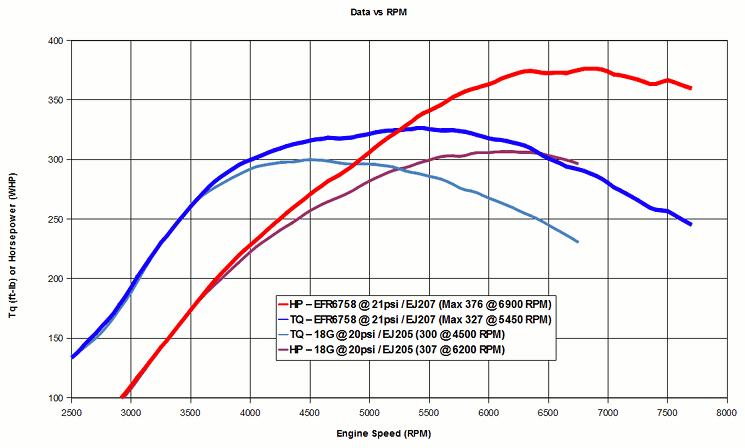
Now wouldn't that be exciting!
Cheers,
Scott
Posted by: 914forme Oct 25 2016, 11:24 AM
And that is a great snail Very nice broad map 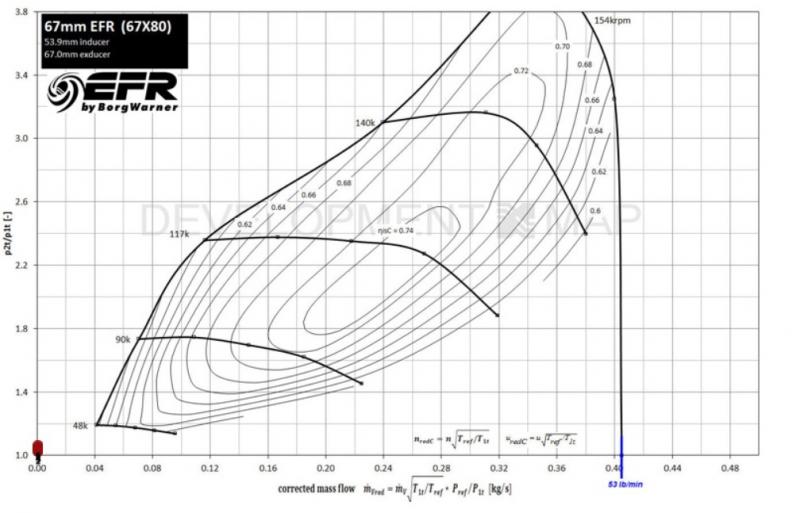
DO IT in my most evil Star wars voice
Posted by: CptTripps Oct 26 2016, 05:10 AM
Great suggestion, but the vf39 should be plenty for me. I know everyone is saying I'll want more HP later, but my target was 250hp and it's looking like I'll be way over that now. Hell, I had a blast in my 2.0 and that was only 100hp.
Besides Scott, your car scared the shit out of me.
Posted by: Amenson Nov 6 2016, 07:43 PM
I havn't been slacking...promise
Just about done with the radiator mount. All made from flat.
Bottom will be held in place by the pins in rubber grommets. IC heat exchange will be mounted with 4 tabs to the radiator frame.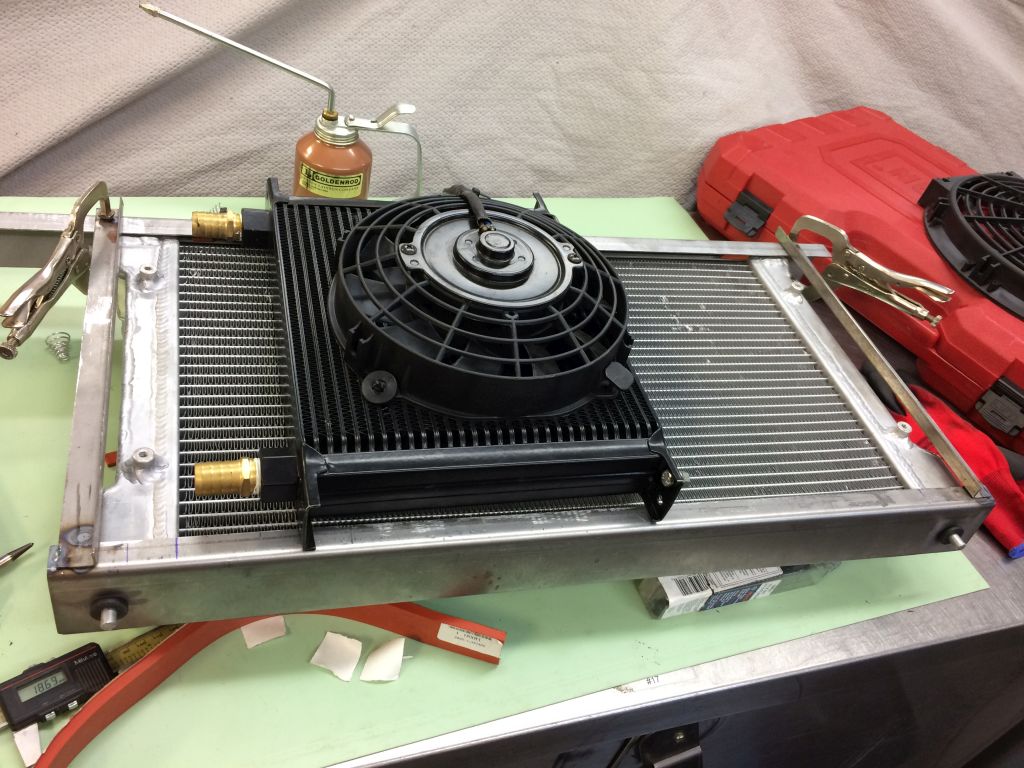
Fits like a glove. Still need to make end pieces for the bottom to weld to the chassis and stiffen everything up.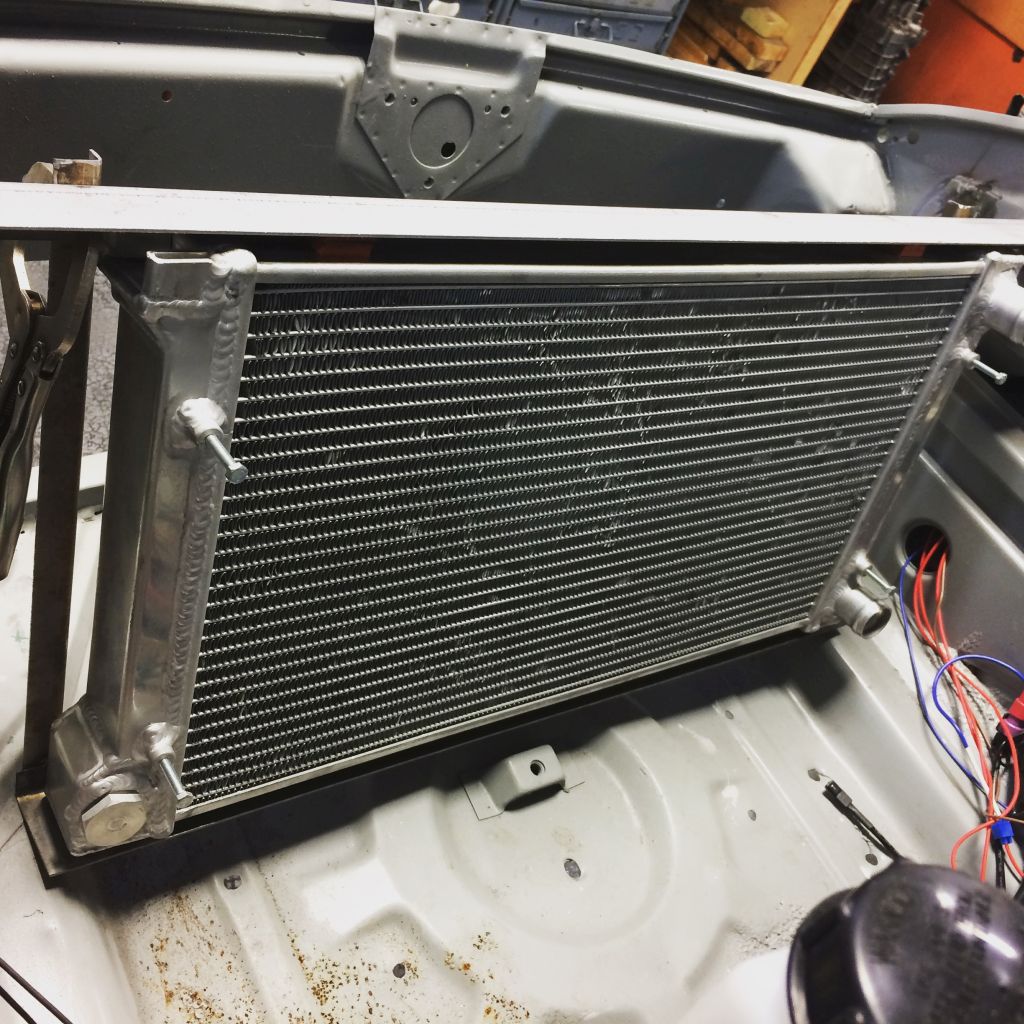
The vertical angle pieces are there temporarily to hold the top and bottom pieces in place as I take it in and out for fitment.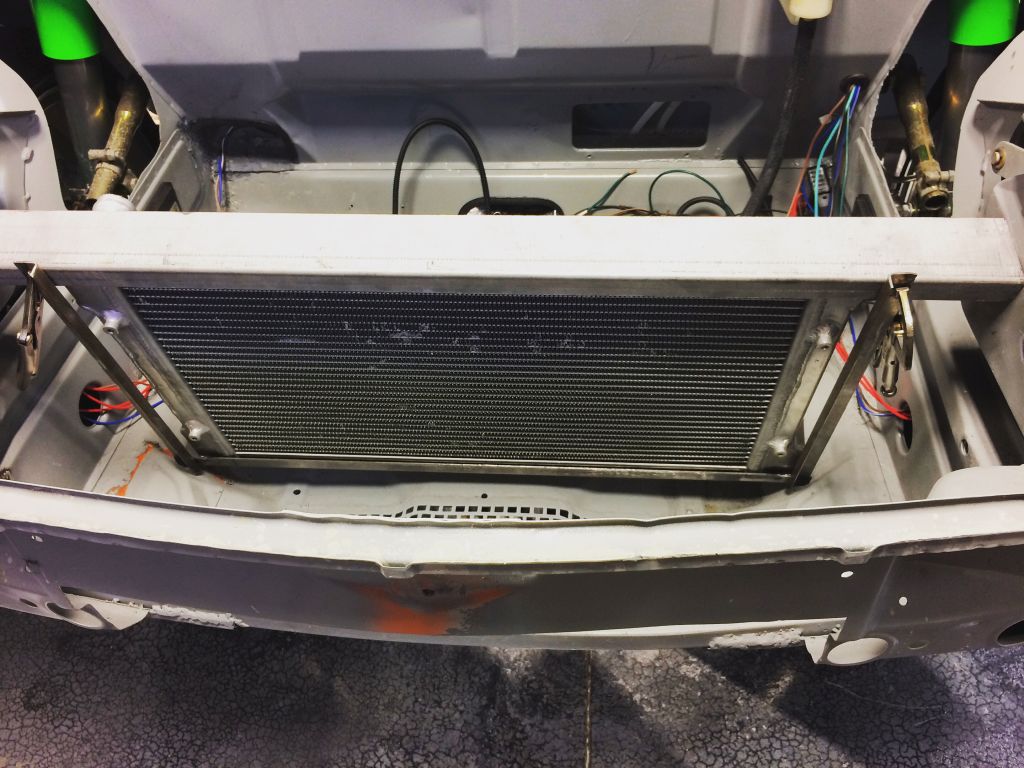
Tight gaps will make it easy to put down pretty welds.
Cheers,
Scott
Posted by: CptTripps Nov 8 2016, 07:23 AM
Looking good Scott. I knew you'd have a better way to do the radiator.
Posted by: 76-914 Nov 8 2016, 08:06 AM
It's a good idea to tape some protective cardboard to cover the fins during construction.
Posted by: Amenson Nov 13 2016, 08:49 PM
Why do things the easy way when I can spend countless hours on details no one will ever notice.
Made the feet for the lower part of the rad mount.
In place.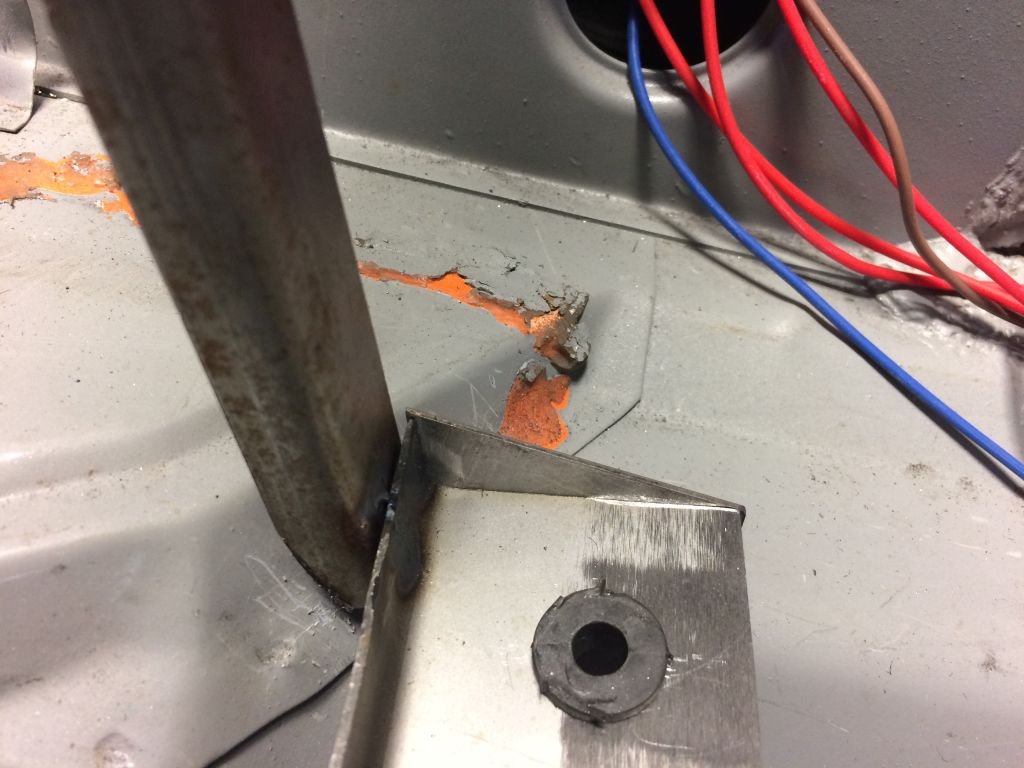
Also made the mounts for the IC heat exchange.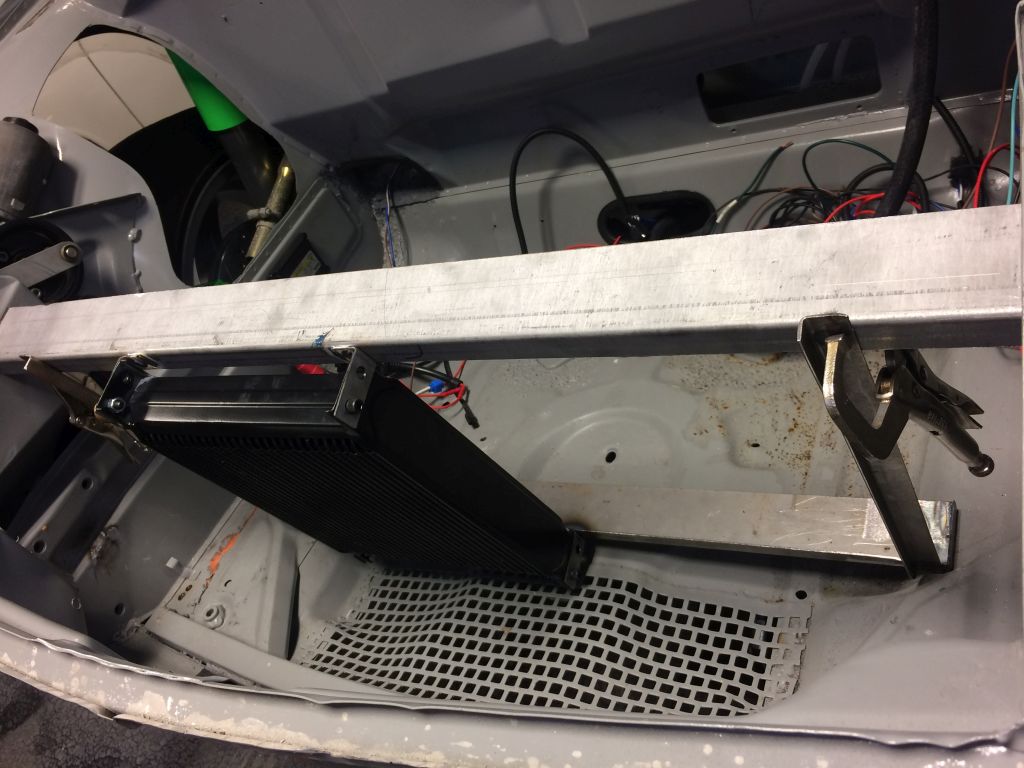
I probably could have welded it all in place today but I did not remove the lower grommets while welding and ruined them. I though that I had two more but only had one.
Cheers,
Scott
Posted by: CptTripps Nov 14 2016, 08:01 AM
Looking good Scott!
I'm a little pissed that I see orange paint. I'd paid to have the entire tub sand-blasted, but I guess they forgot part of the front trunk. Guess I missed that when I went to inspect it before they put the primer on.
Posted by: Amenson Nov 14 2016, 08:23 AM
Looking good Scott!
I'm a little pissed that I see orange paint. I'd paid to have the entire tub sand-blasted, but I guess they forgot part of the front trunk. Guess I missed that when I went to inspect it before they put the primer on.
The orange paint was under some sort of rubbery calk stuff. I assume that it was from the previous radiator setup. It took some serious scraping to get up, sand blasting definitely would not have removed it.
Posted by: CptTripps Nov 14 2016, 09:23 AM
Ah! Gotcha. That makes perfect sense. Yeah, the rubbery stuff never comes off with media blasting of any kind.
Posted by: Amenson Nov 20 2016, 09:29 AM
Phase 1, mount the radiators is complete!
While doing the final fitting I did not like the way the holes lined up for the IC heat exchanger so I removed the bottom tabs and started over. 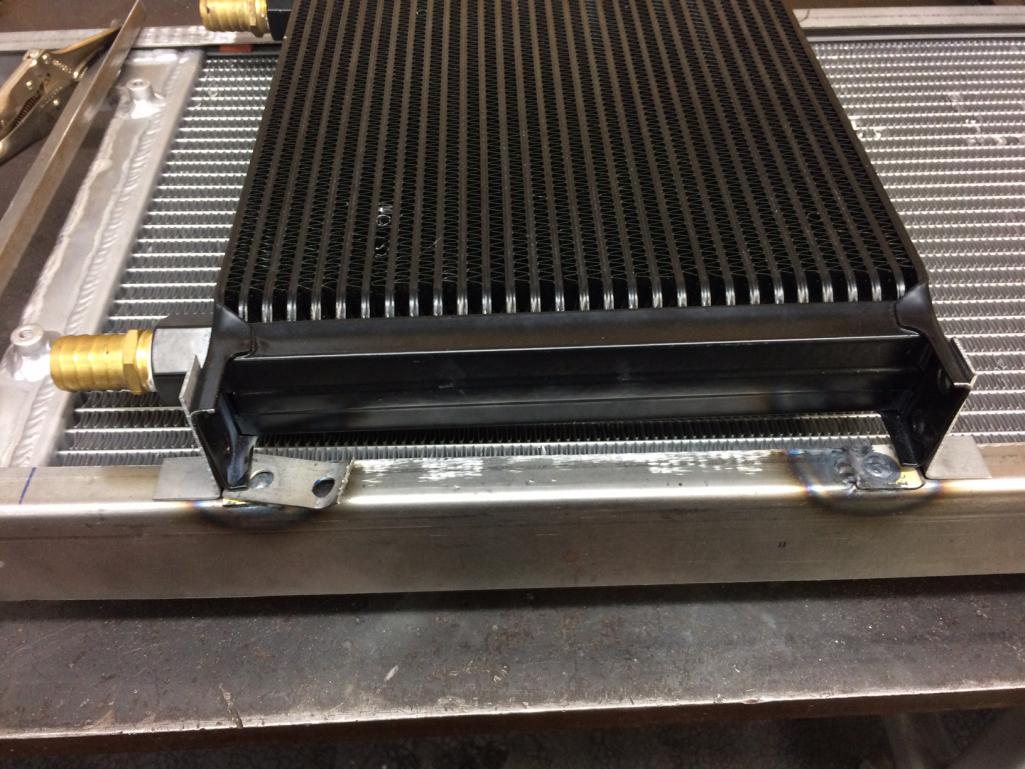
Much better now. No slotted holes allowed.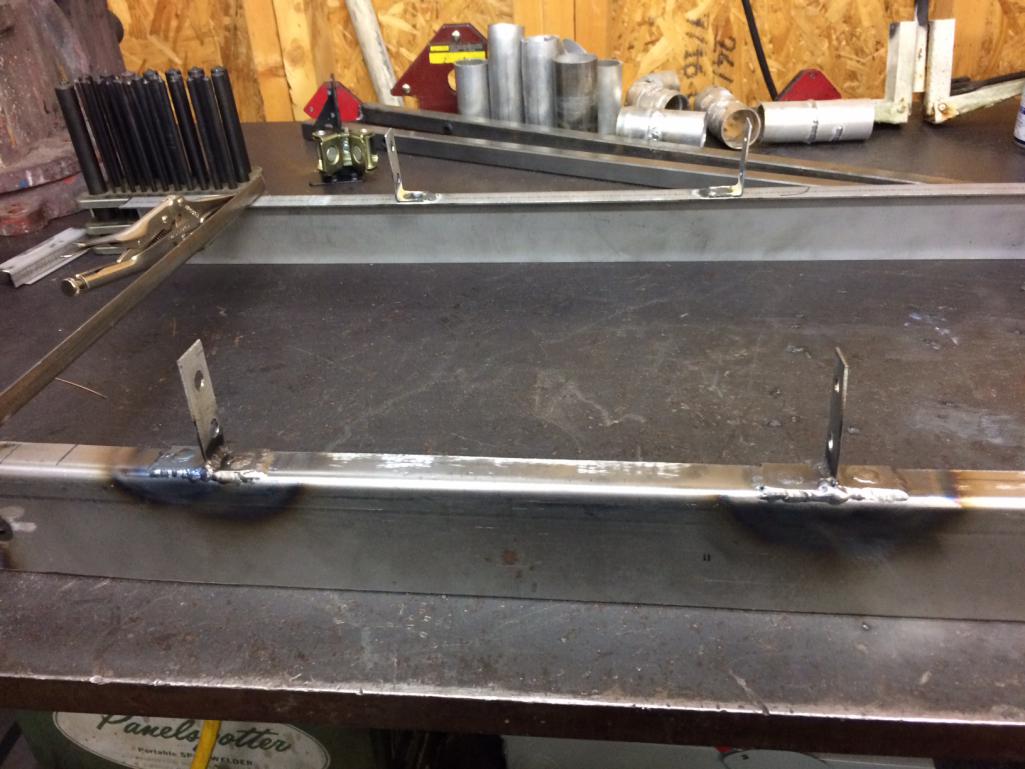
Welded in place. Getting to the bottom piece was the toughest TIG welding I have had to do. Good practice for when I put a cage in my car. Definitely going to need another tig torch with current control.
IC heat exchanger in place.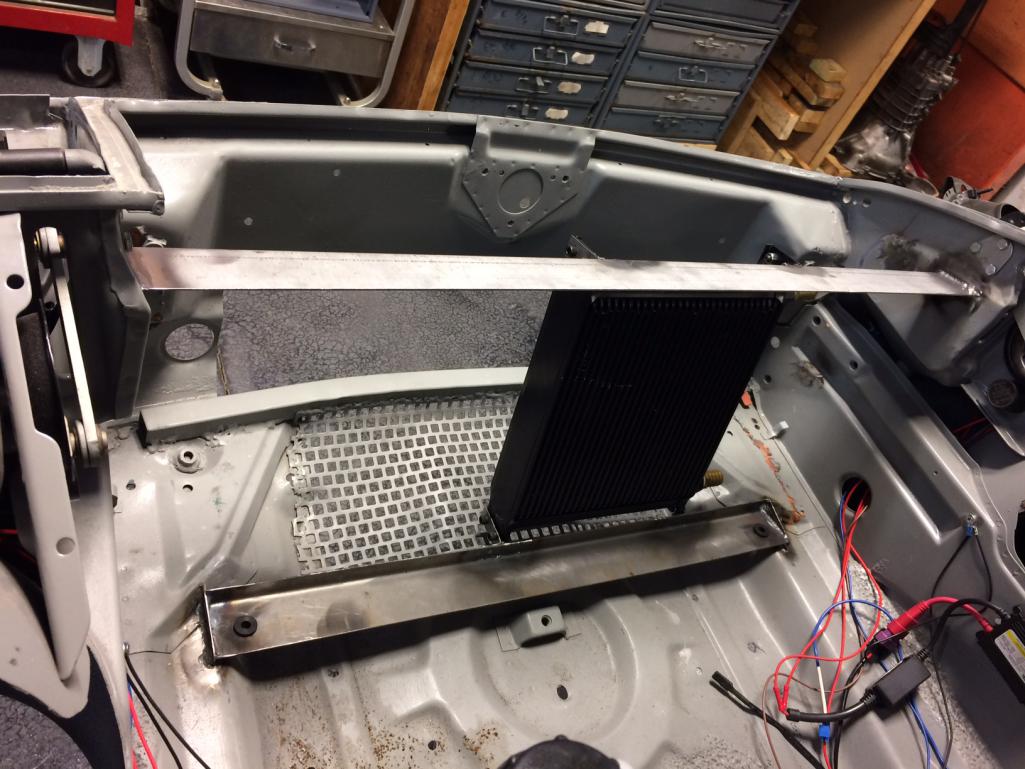
And the radiator just drops in.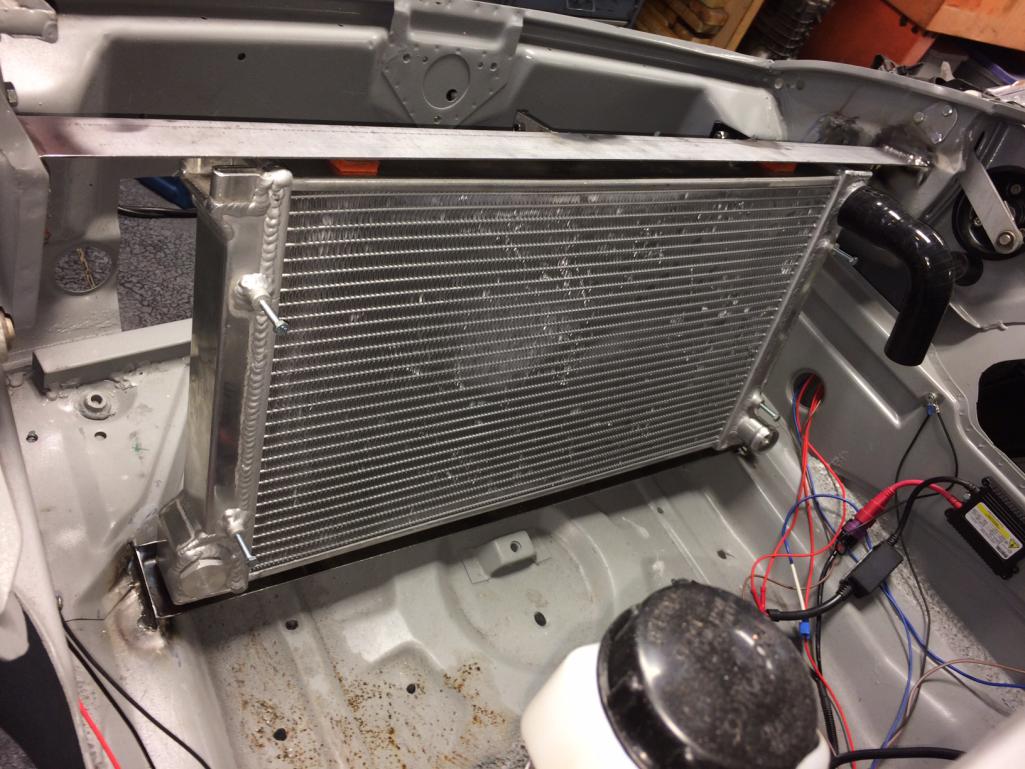
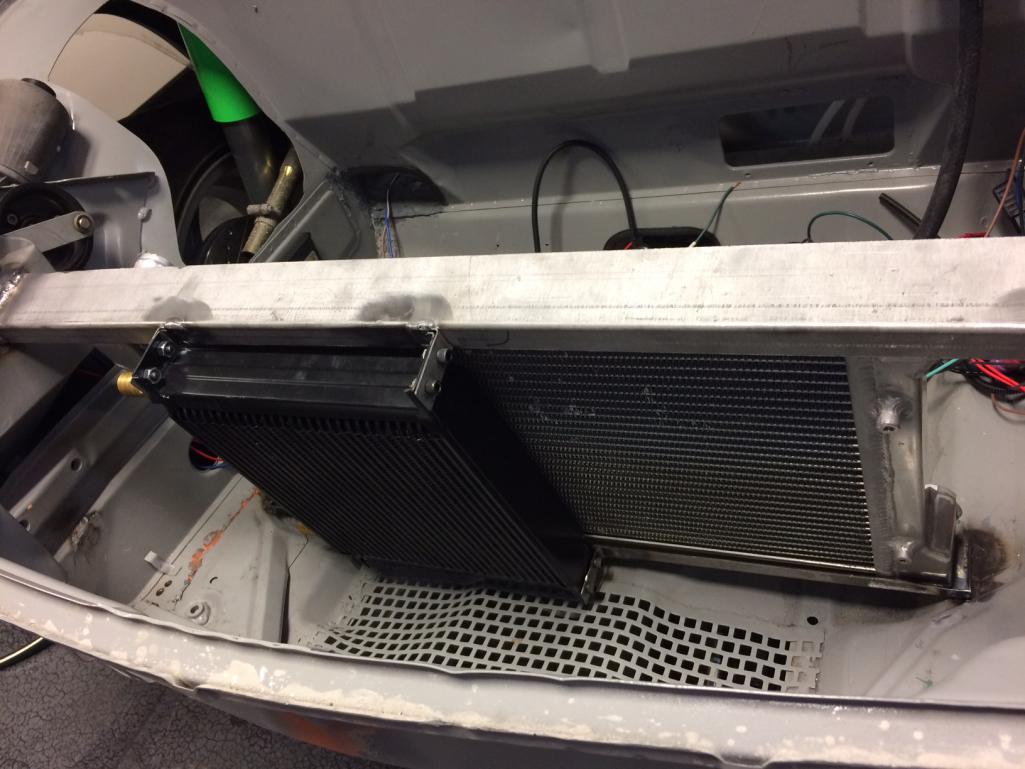
Now on to running the hose to the radiator.
Cheers,
Scott
Posted by: 914forme Nov 20 2016, 09:37 AM
I like, now to redo my mounts
Posted by: Amenson Nov 20 2016, 09:54 AM
I like, now to redo my mounts
What should I work on next so that you can avoid additional rework
I really do not want to hear you bellyaching about how I made you miss your birthday goal.
Posted by: 914forme Nov 20 2016, 02:06 PM
I like, now to redo my mounts
What should I work on next so that you can avoid additional rework
I really do not want to hear you bellyaching about how I made you miss your birthday goal.
LOL, I won't belly ache, I'll keep it to my self. Plan still is to be done for my birthday, and at least take it down the road. It might okay will be ugly, but I need to get to
Posted by: CptTripps Nov 21 2016, 09:33 AM
Looking awesome. That sure beats the hell out of the janky-ass mount I made up...consisting of one piece of 1" square tube.
Party on!
Posted by: CptTripps Nov 23 2016, 09:33 AM
Quick question/comment for Scott:
Are you going to move where the radiator hose goes through the longs, or at least how they get routed there? I'm certain I had about 10' too much hose in that operation, and what I'd originally set up would have been a bitch to get bubbles out of the line.
Just curious if you found a better way.
Posted by: Amenson Nov 26 2016, 07:41 PM
Quick question/comment for Scott:
Are you going to move where the radiator hose goes through the longs, or at least how they get routed there? I'm certain I had about 10' too much hose in that operation, and what I'd originally set up would have been a bitch to get bubbles out of the line.
Just curious if you found a better way.
Hose routing will definitely be different. Similar to mine with some tweaks. Should have it routed this week now that I am back from holiday travel. Stay tuned.
Cheers,
Scott
Posted by: Amenson Dec 4 2016, 07:33 PM
Hose routing through the passenger compartment proof of concept. Still need to clean up the holes and install edge treatment...and weld the access hole closed.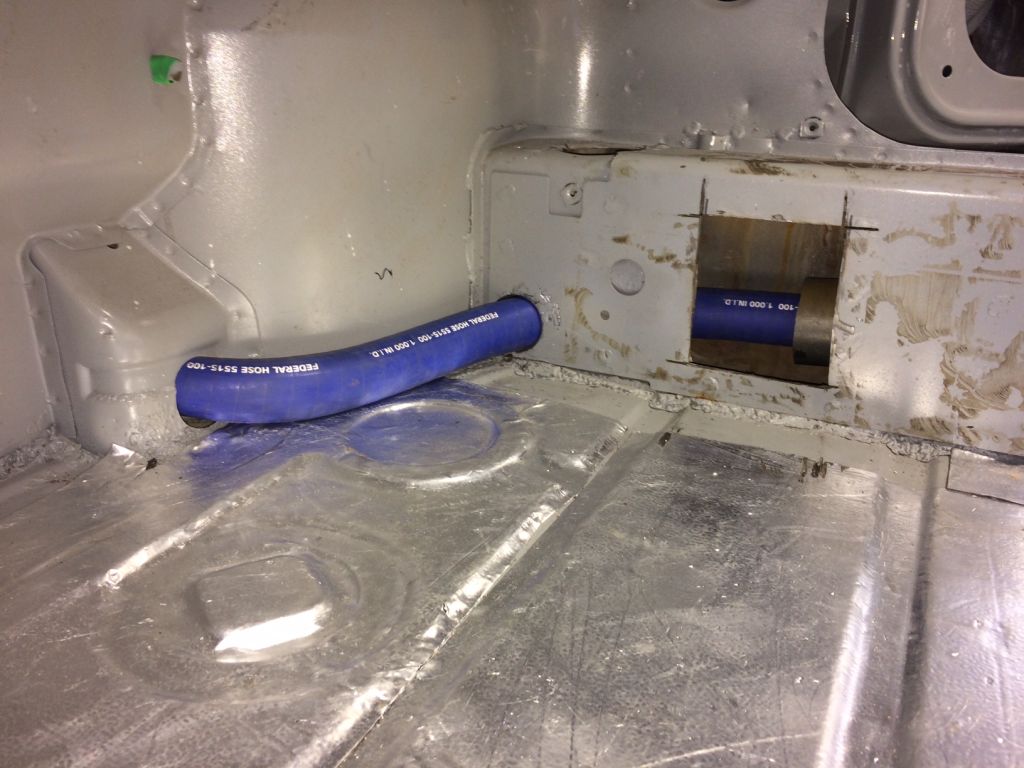
No hint of kinking like I had initially with my setup. The silicone hose is really nice to work with.
Cheers,
Scott
Posted by: Perry Kiehl Dec 4 2016, 08:27 PM
Wouldn't it be better to make a bolt on cover? How would you replace that line?
Posted by: Spoke Dec 4 2016, 08:28 PM
Wouldn't it be better to make a bolt on cover? How would you replace that line?
I was thinking the same thing. Does the hole need welded up to add rigidity to the long?
Posted by: Amenson Dec 4 2016, 08:41 PM
Wouldn't it be better to make a bolt on cover? How would you replace that line?
The hose is installed from the engine compartment and can be manipulated out of the long through the existing heater hole in the top of the long. I will leave that open for just this purpose.
Cheers,
Scott
Posted by: Amenson Dec 4 2016, 08:51 PM
Wouldn't it be better to make a bolt on cover? How would you replace that line?
The hose is installed from the engine compartment and can be manipulated out of the long through the existing heater hole in the top of the long. I will leave that open for just this purpose.
Cheers,
Scott
This is the other side. I cut the hole in the long so that I could remove the elbow in the heater duct.
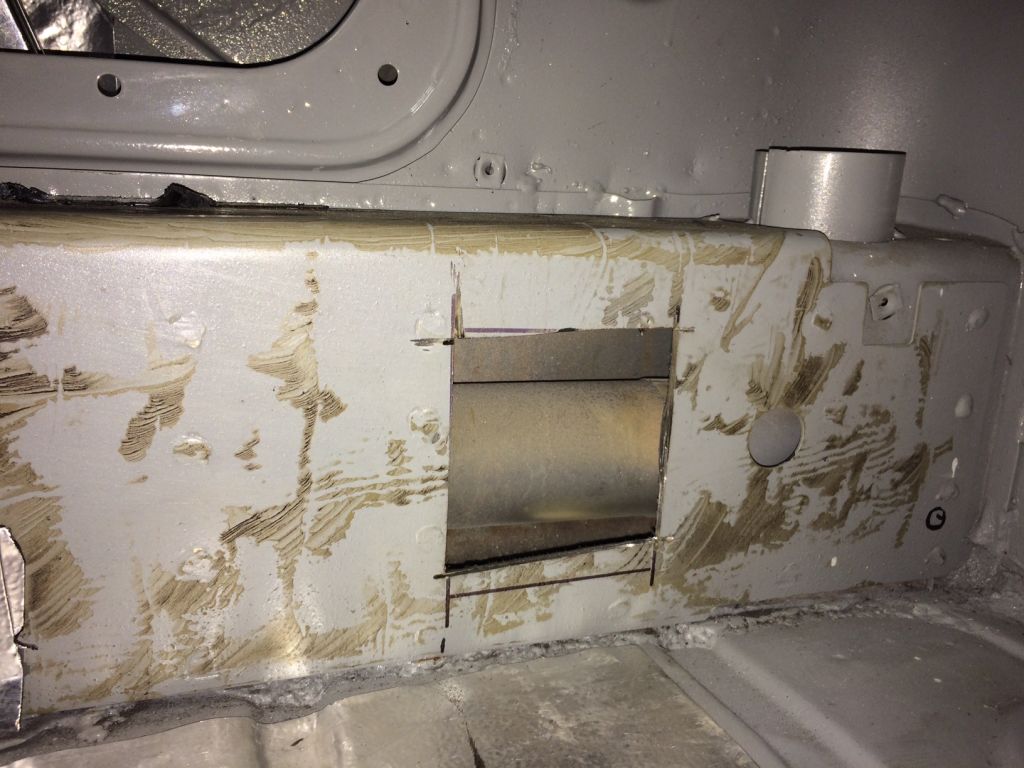
It was much more challenging than anticipated because the tube is almost touching the reinforcing plate in the center of the long.
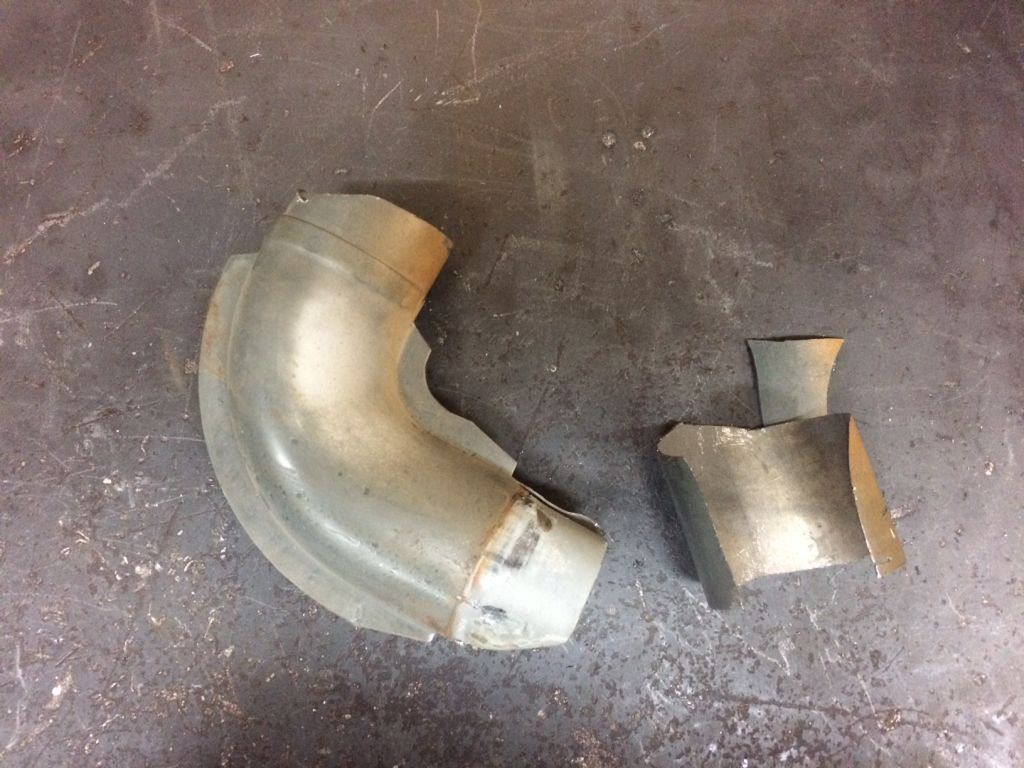
Cheers,
Scott
Posted by: CptTripps Dec 5 2016, 04:01 PM
Feel free to pull any/all of the Dynamat out of there. I'm actually thinking of taking it all out and just spraying the interior with Rhinoliner.
Looking good Scott. I'll reply to your email tonight when I have some time to sit down and go through everything.
Posted by: CptTripps Dec 6 2016, 10:16 AM
I was thinking the same thing. Does the hole need welded up to add rigidity to the long?
Longs have the chassis stiffening kit installed already, so they're already much beefier than stock.
Posted by: Amenson Dec 8 2016, 08:28 PM
I had a chance to pop into the garage tonight. I reshaped the holes a bit and installed the edge treatment. I ran the full length hose from the rear to make sure I can fish it through without using the access hole.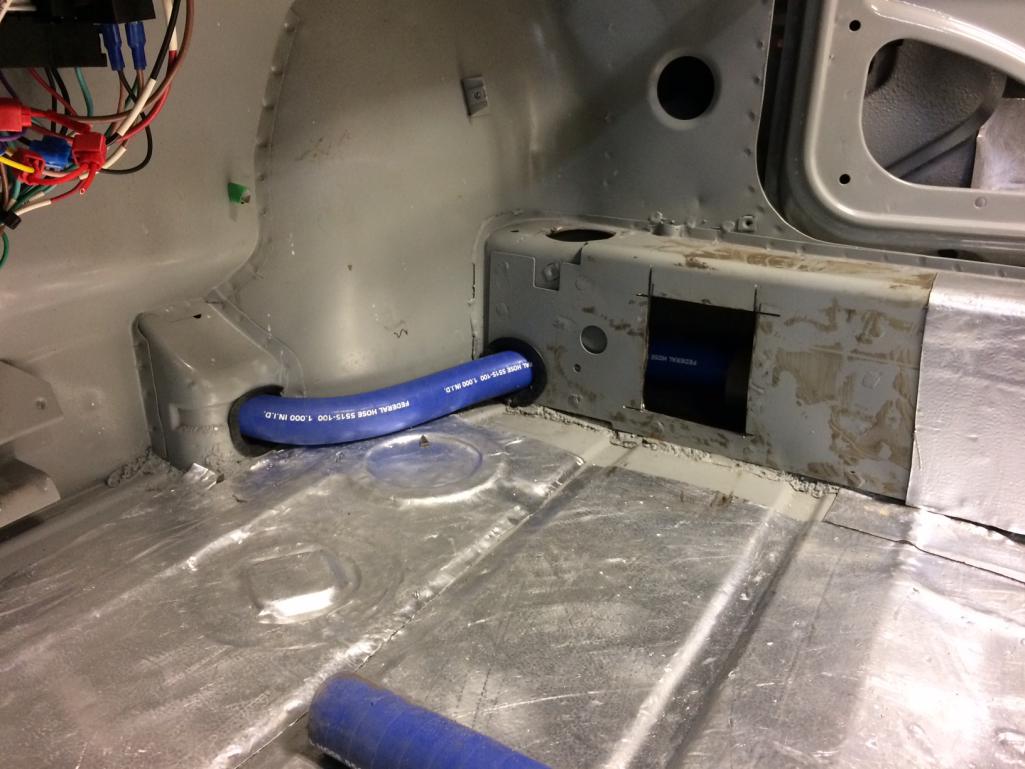
Couldn't stop there so I ran it to the radiator.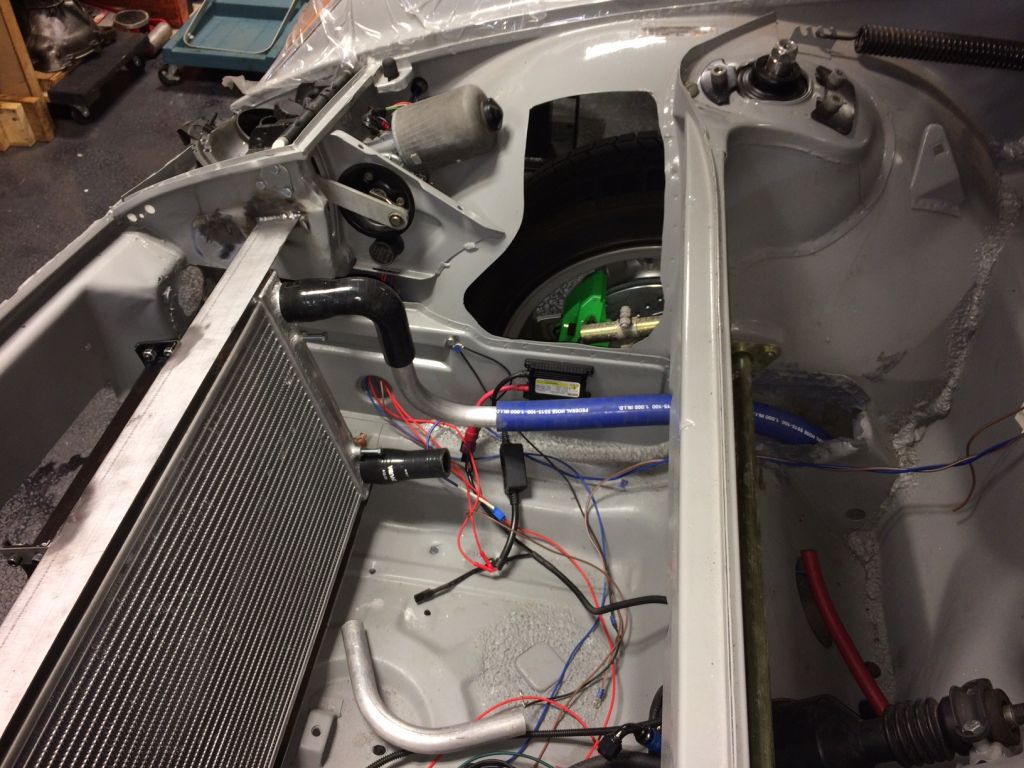
Just to be clear, I had nothing do do with the angry beaver removal of the channel over the steering rack hump and have not decided what to do with it yet
Cheers,
Scott
Posted by: 914forme Dec 8 2016, 09:01 PM
Someone needs to use a nice set of beading tools that someone else left behind
Posted by: jd74914 Dec 9 2016, 10:53 AM
Awesome progress!
Please don't take offense at this, but I have used silicon coolant hoses on a car with a racecar with a sealed and pressurized coolant system and noticed that the water level decreased over time (no evidence of head gasket failure when running or after disassembly). I looked it up then and found that silicon hoses allow some diffusion of water so you might want to be careful of exactly where you put them in case they need to be removed. I just worry that over time you'll leak water into the cabin, etc. Probably not much and I'm just a little over-conservative, but I just wanted to say something.
Posted by: Amenson Dec 9 2016, 02:41 PM
Awesome progress!
Please don't take offense at this, but I have used silicon coolant hoses on a car with a racecar with a sealed and pressurized coolant system and noticed that the water level decreased over time (no evidence of head gasket failure when running or after disassembly). I looked it up then and found that silicon hoses allow some diffusion of water so you might want to be careful of exactly where you put them in case they need to be removed. I just worry that over time you'll leak water into the cabin, etc. Probably not much and I'm just a little over-conservative, but I just wanted to say something.
Jim, feedback based on direct personal experience with the topic at hand is always appreciated.
There are many questions about the size and material of the cooling lines. If it does not work out we can easily pull them and install lines similar to my car.
And yes Stephen...I will be beading all of the AL tubes. Have to keep the beaders fresh for you!
Cheers,
Scott
Posted by: Amenson Dec 11 2016, 02:52 PM
Duplicated the cabin routing to the driver's side and then added the twist for the passenger side. To clean up the front trunk area I am running the cooling line across the car under the fuel tank. Have plans tonight so no time to pull the test hose and add install edge treatments. Will hold it in place with a couple p-clamps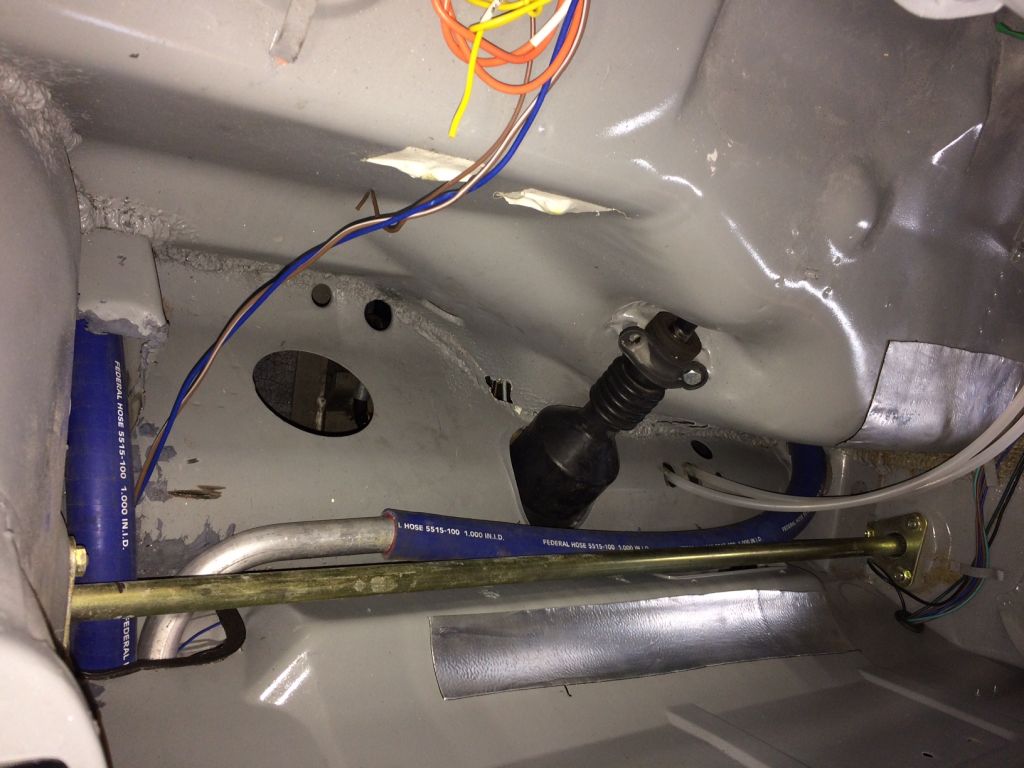
One thing I noticed while I was sitting in the fuel tank area, one of the posts for the steering rack clamp is missing!?
Doug, do you have the piece that broke off so that I can weld it back in?
Cheers,
Scott
Posted by: CptTripps Dec 12 2016, 08:02 AM
You can thank Renegade for that one. They did the V8 install I took out. There were a lot of things that had me scratching me head like that.
Doug, do you have the piece that broke off so that I can weld it back in?
I believe it was like that when I stripped everything off of the tub. No clue how I'd even be able to come across one of those. Would welding a nut in place work?
Posted by: 914forme Dec 12 2016, 08:33 AM
Doug, do you have the piece that broke off so that I can weld it back in?
I believe it was like that when I stripped everything off of the tub. No clue how I'd even be able to come across one of those. Would welding a nut in place work?
Pretty simple operation , just machining the part out of some stock and get to welding it in there.
Or place a WTB add in the classifieds and see if someone comes to your rescue, with the real part.
Posted by: Amenson Dec 30 2016, 07:08 PM
I have quite a bit of time off during this time of year so I managed to get the cooling system pretty much finished. Still need to make the mount for the fans and ducting for the radiator but the plumbing is solid.
I hate MIG welding for many reasons but the fumes are the primary one so I picked up a Lincoln fume extractor. It turns on automatically and does a great job controlling the weld fumes.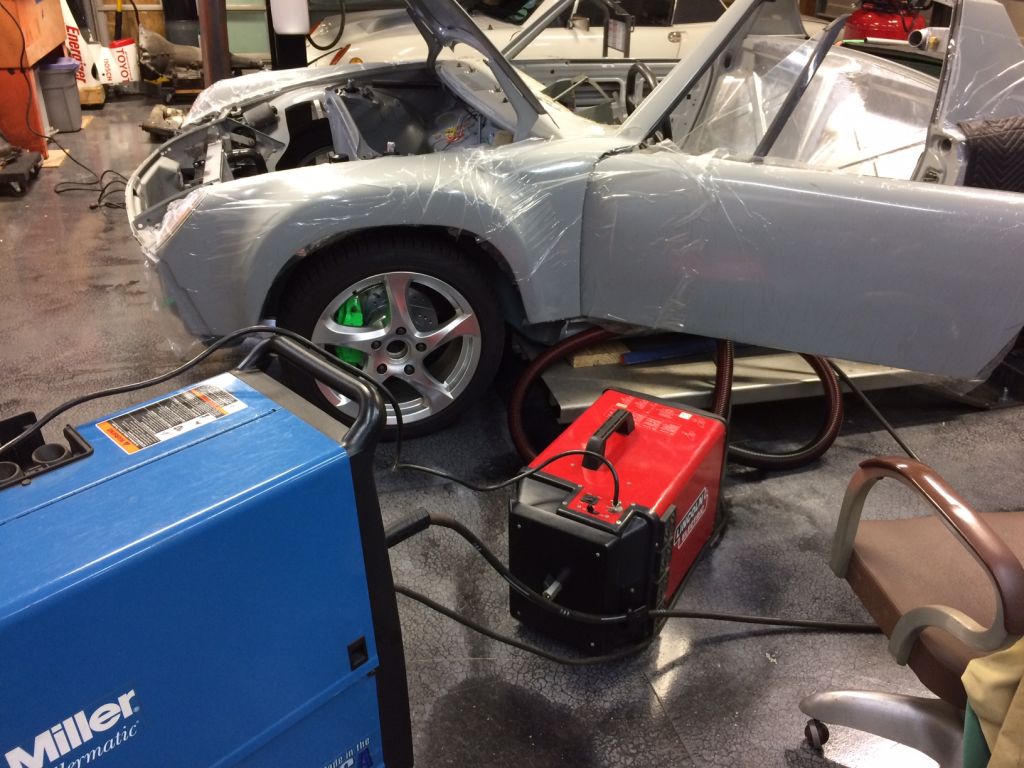
After removing the elbow from the heater system the remaining tube was not supported very well so I welded it to the inner long and applied edge treatment. 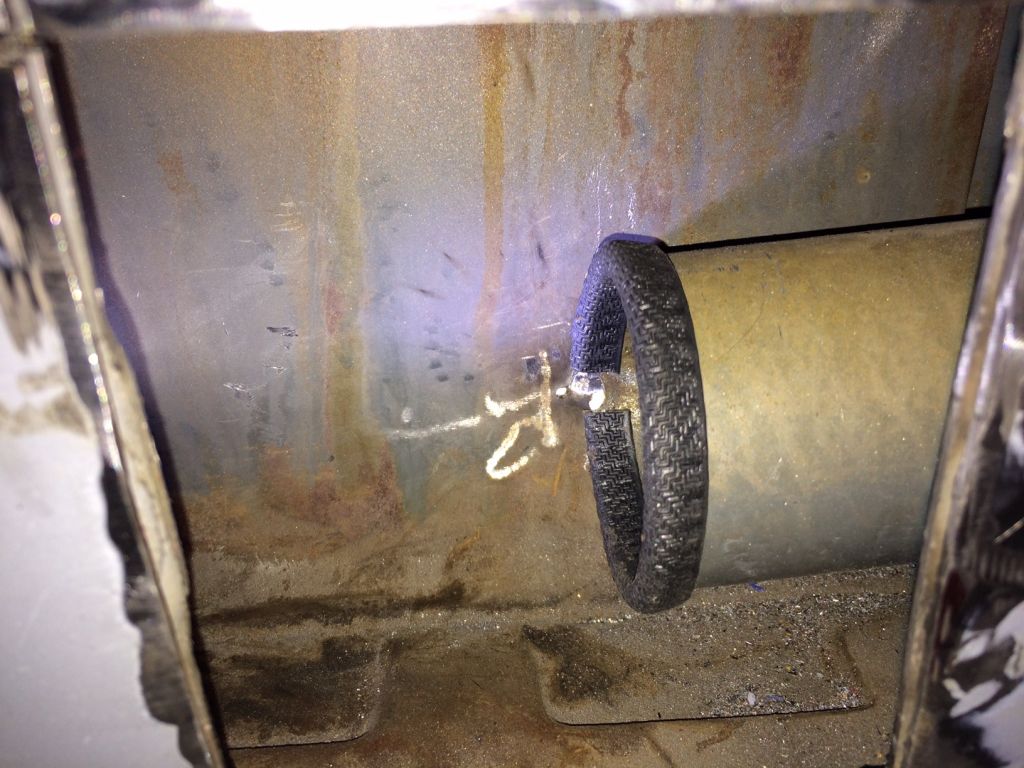
I have a moving blanket in the car to lay on while I am working and the dogs decided that it would be a great place to hang out on while I was at the welding bench.
These two pieces take the place of a dozen random connectors that Doug had in the car when it arrived. Stephen's tube beader applied the finishing touches.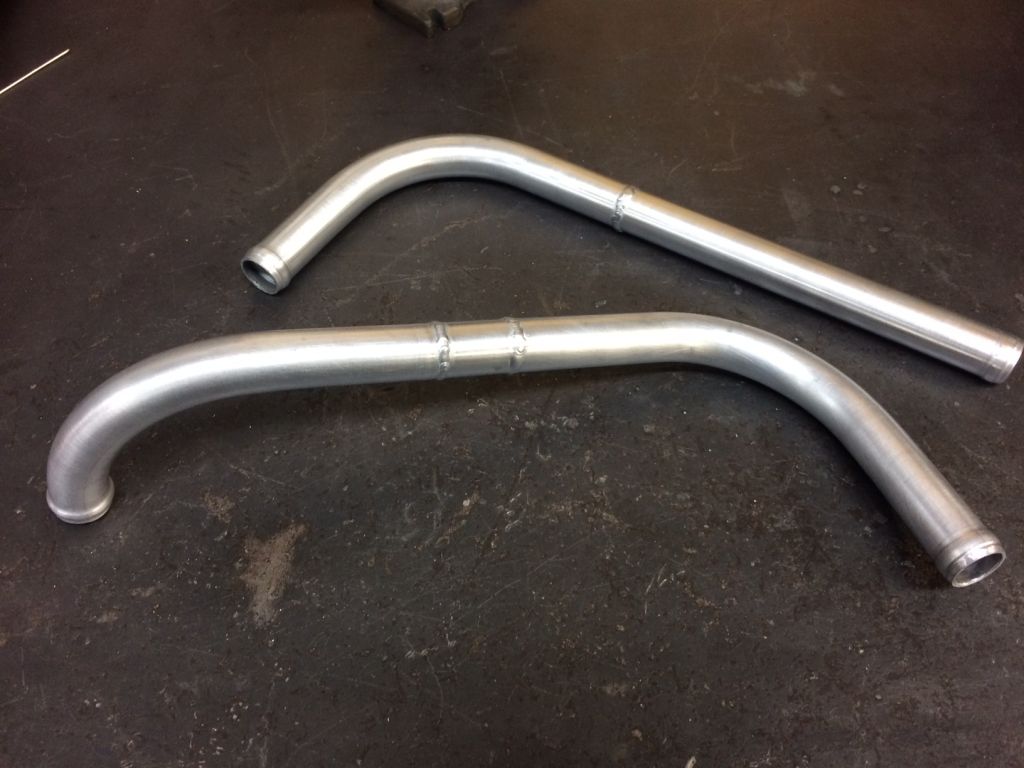
Simple but elegant solution.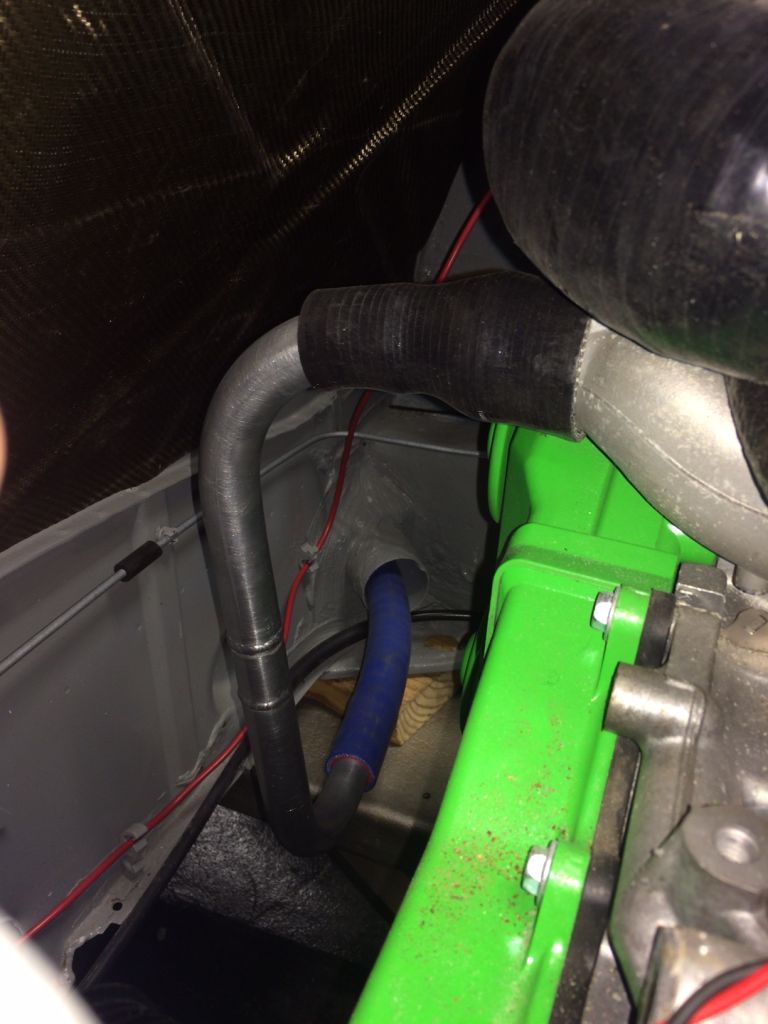
I really enjoy making parts that will only work in one place on any car.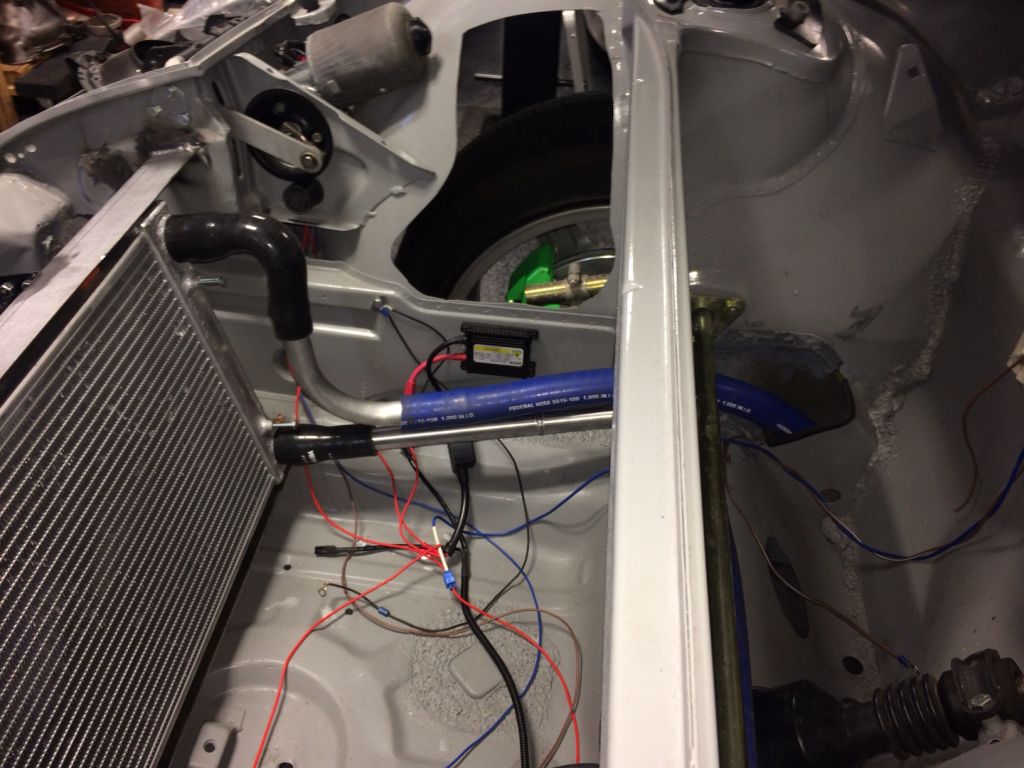
I welded up the access ports in the longs.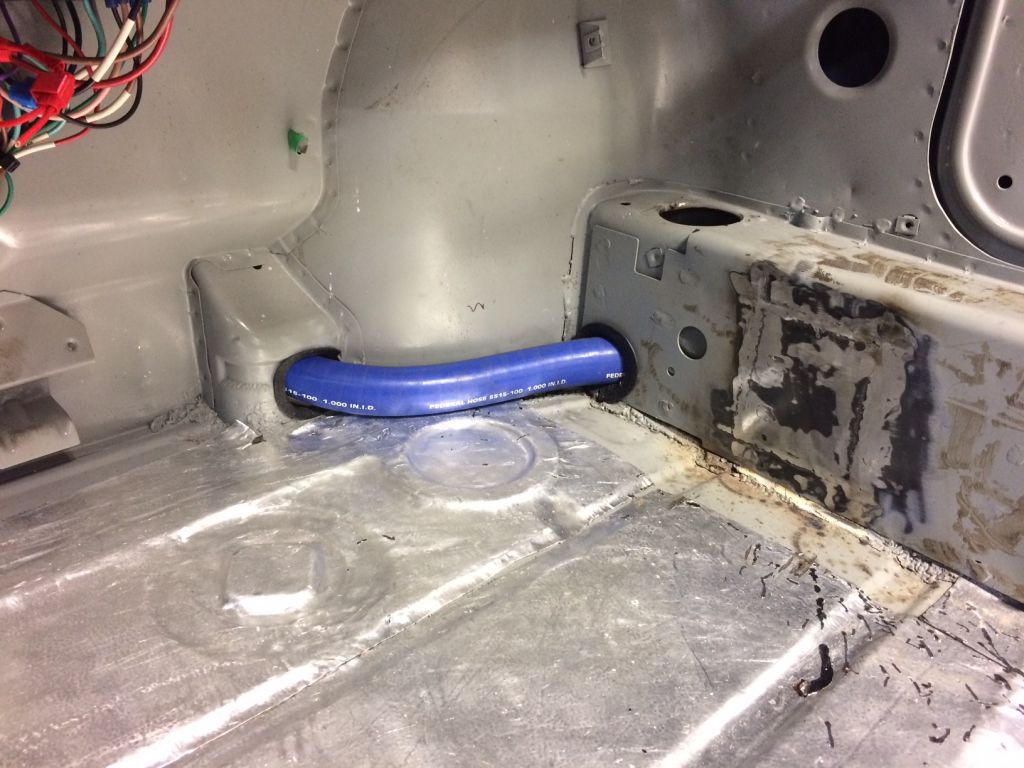
Unfortunately I welded this one twice. I got a bit ahead of myself and welded it the first time before securing the inner tube and applying the edge treatment so I had to cut it back open and then weld back closed.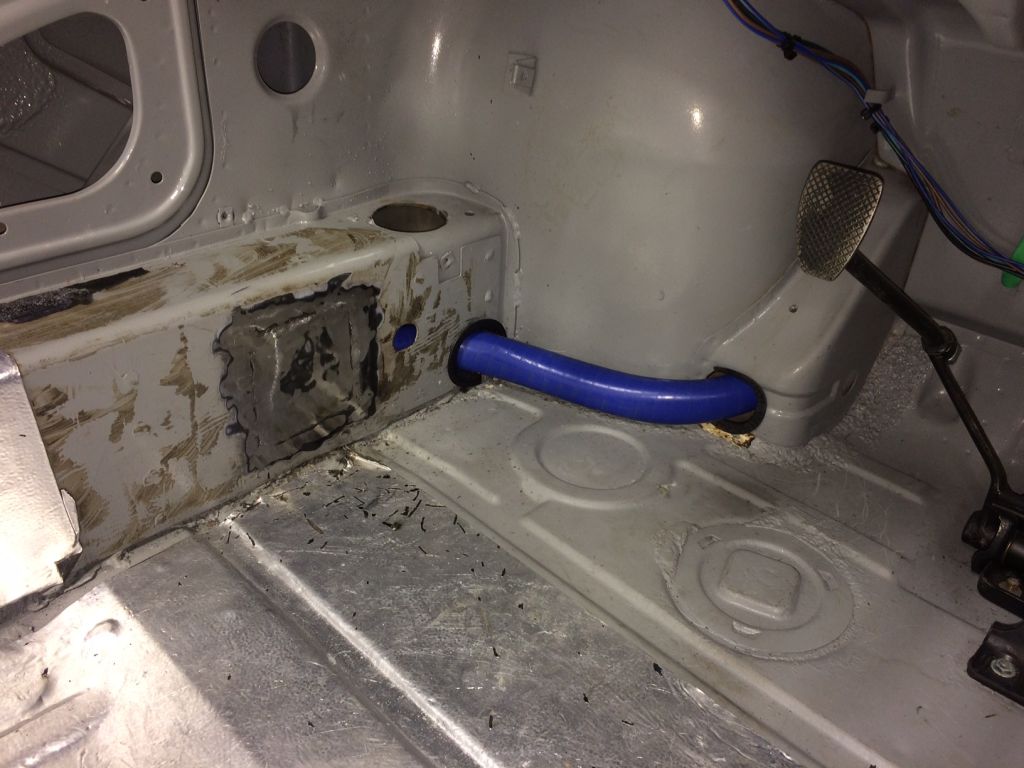
I am off until Tuesday so i should get to make some good progress on the IC install.
Cheers,
Scott
Posted by: Amenson Dec 31 2016, 08:03 PM
I had a super productive day today. The plan was rock solid in my head, I had all of the material and I didn't mess up any parts!
Step one of using an off the shelf part...cut it up.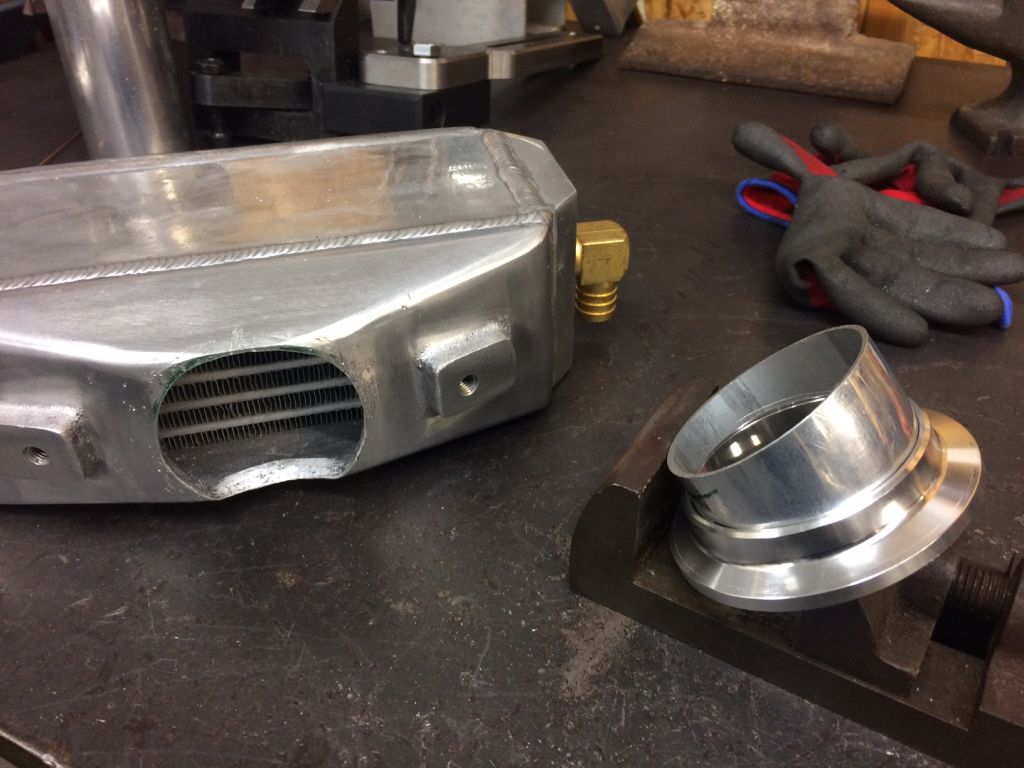
I didn't take any pictures but I disassembled and sandblasted the throttle body. I then modified it so that the v-band half would fit on the inlet and TIG welded it on. Hours of fussing to get everything straight and level and...vuala.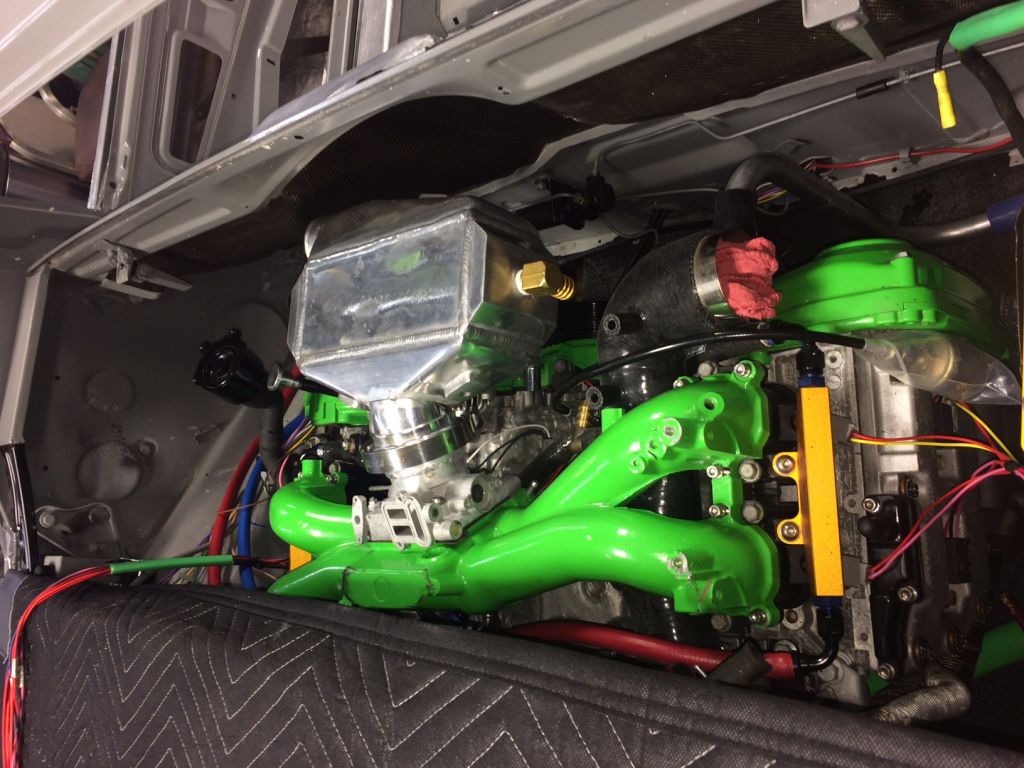
Perfect.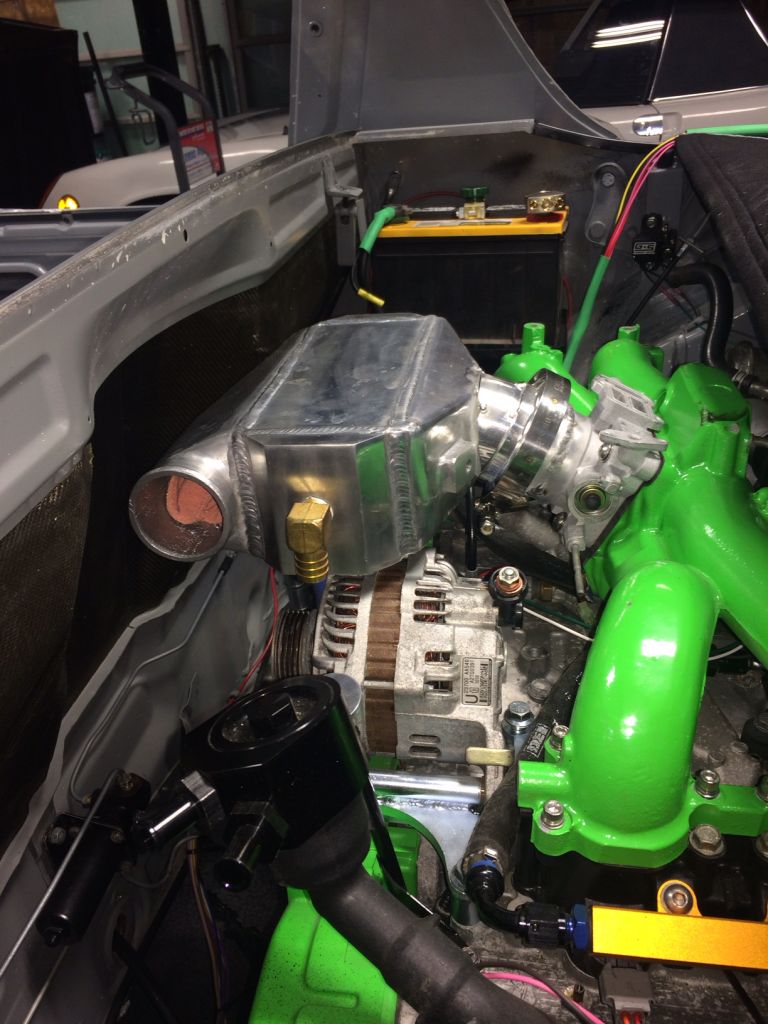
Had some extra time before dinner so I started on the IC to turbo plumbing. Tubes are exactly where I want them to be. Unfortunately it is resting on the dipstick tube, alternator and intake manifold. 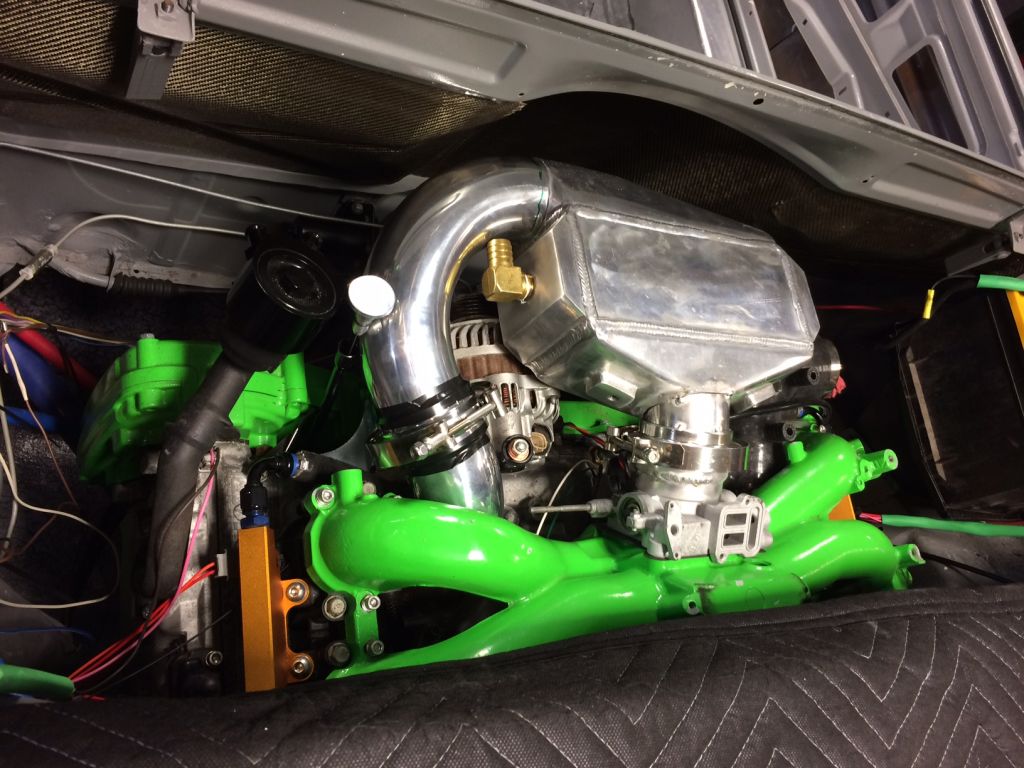
The engine is going to need to come out to get this sorted. It will also make the IC mount easier to mock up. I am going to take some time to make a roller kart that I can mount on the engine cradle because I may have another project lined up that I can use it on.
Happy New Year,
Scott
Posted by: CptTripps Jan 3 2017, 04:14 PM
Holy. Shit.
That's looking bad-ass Scott. You're a true master.
Posted by: 76-914 Jan 3 2017, 06:38 PM
Maybe a rubber isolation coupling between the IC & TB
Posted by: Amenson Jan 3 2017, 07:33 PM
Maybe a rubber isolation coupling between the IC & TB
Ya, sure...why not.
I would only take about 7 minutes to run the intercooler and throttle body through the the bandsaw to hack off the v-band clamp that I spent all day installing and replace it with leak prone rubber/silicone coupling.

Sarcasm aside, this is an upgrade that I added to the project on my own time because I did not want Doug to have to deal with the frustration of blowing IC piping apart in the middle of an awesome high boost maneuver. Nobody should have to ever experience that.
Cheers,
Scott
Posted by: mgp4591 Jan 4 2017, 03:05 AM
How much boost are you planning to run?
Posted by: Amenson Jan 4 2017, 06:45 AM
How much boost are you planning to run?
Doug's turbo is good to about 17psi, same as what I am running on the Porsti. Not a huge amount but enough to cause problems. Once he gets a proper turbo that is up to what his engine is cable of...much more.
Cheers,
Scott
Posted by: mgp4591 Jan 4 2017, 07:34 AM
How much boost are you planning to run?
Doug's turbo is good to about 17psi, same as what I am running on the Porsti. Not a huge amount but enough to cause problems. Once he gets a proper turbo that is up to what his engine is cable of...much more.
Cheers,
Scott
Saw your car move along quite well at Octeenerfest... looked like fun. Your passenger seat was occupied so I got to ride with Wes - 450hp smallblock was a great ride both days!
I'm looking at all the n/a options for extra power on my EG33 build. This build and your posts have been incorporated into my project as well - Thanks!
Posted by: 76-914 Jan 4 2017, 09:52 AM
Maybe a rubber isolation coupling between the IC & TB
Ya, sure...why not.
I would only take about 7 minutes to run the intercooler and throttle body through the the bandsaw to hack off the v-band clamp that I spent all day installing and replace it with leak prone rubber/silicone coupling.
Sarcasm aside, this is an upgrade that I added to the project on my own time because I did not want Doug to have to deal with the frustration of blowing IC piping apart in the middle of an awesome high boost maneuver. Nobody should have to ever experience that.
Cheers,
Scott
I can understand that and it looks very nice. My concern would be cracks in the aluminum induced by the 4 cylinder's vibration. Maybe the Suby's 4 produces very little vibration. Just speaking from A/C experience.
Posted by: Amenson Jan 4 2017, 11:29 AM
I can understand that and it looks very nice. My concern would be cracks in the aluminum induced by the 4 cylinder's vibration. Maybe the Suby's 4 produces very little vibration. Just speaking from A/C experience.
From my experience with persistent failure of the IC mount on the Porsti, the engine vibrates more than enough to break stuff! You can find the details and the solution in my build thread.
If you have some relevant experiences and want to share the details and how you solved the problems, it would be great to learn from them.
Cheers,
Scott
Posted by: CptTripps Jan 4 2017, 12:27 PM
Once he gets a proper turbo that is up to what his engine is cable of...much more.
That sounds like a bit of foresight! I imagine I'll upgrade the turbo down the line, but it won't be for a while.
Posted by: 914forme Jan 4 2017, 06:50 PM
Saw your car move along quite well at Octeenerfest... looked like fun. Your passenger seat was occupied so I got to ride with Wes - 450hp smallblock was a great ride both days!
I'm looking at all the n/a options for extra power on my EG33 build. This build and your posts have been incorporated into my project as well - Thanks!
EG33 NA
CAMS
HEADERS
EFI
275HP maybe a bit more.
No replacement for adding positive pressure, very nice turbo will easily get you to 450HP on an EG33, and if you want to to go higher than that, well it can be done, how many $$$$$$ do you want to bring to the fight.
As usual Scott doing a great job on the build, the V-bands are the way to go. Keep on
Doug, yes you will get used to the power
Posted by: Amenson Jan 8 2017, 06:27 PM
As promised...new engine cart. In total it took 14 component not including casters and fasteners.
Square tubing recycled from my nieghbors fence and castors from the cart that my C10 came on.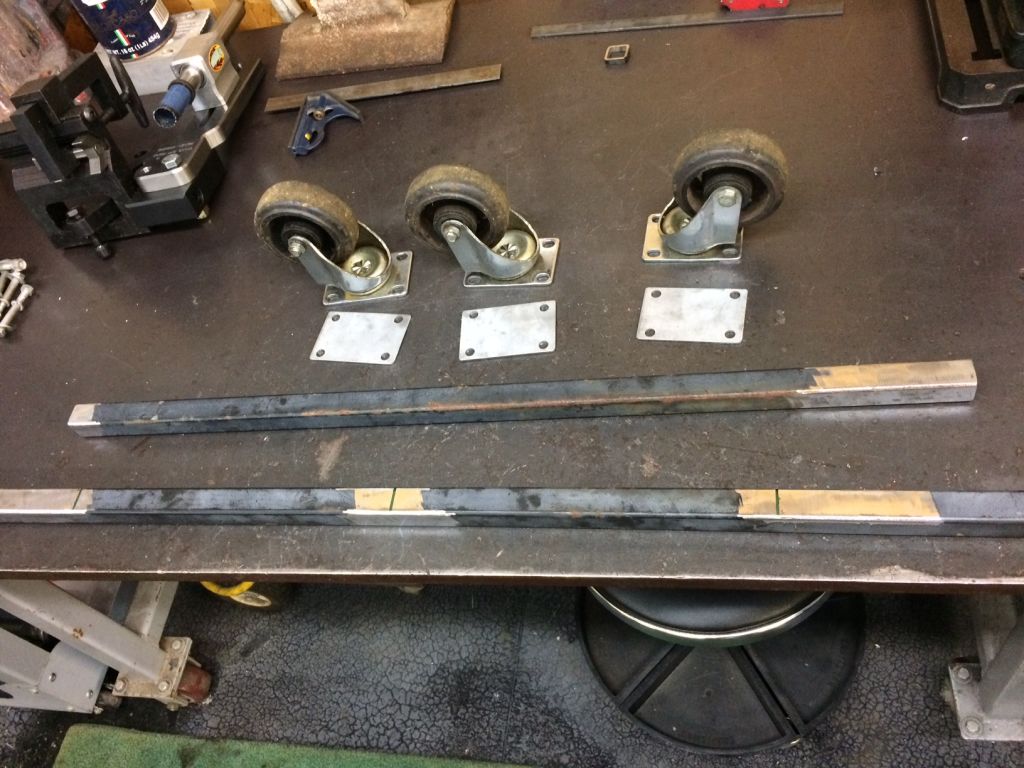
Threaded rod, bar stock and my bender. I coated the pads in liquid rubber to minimize scratching.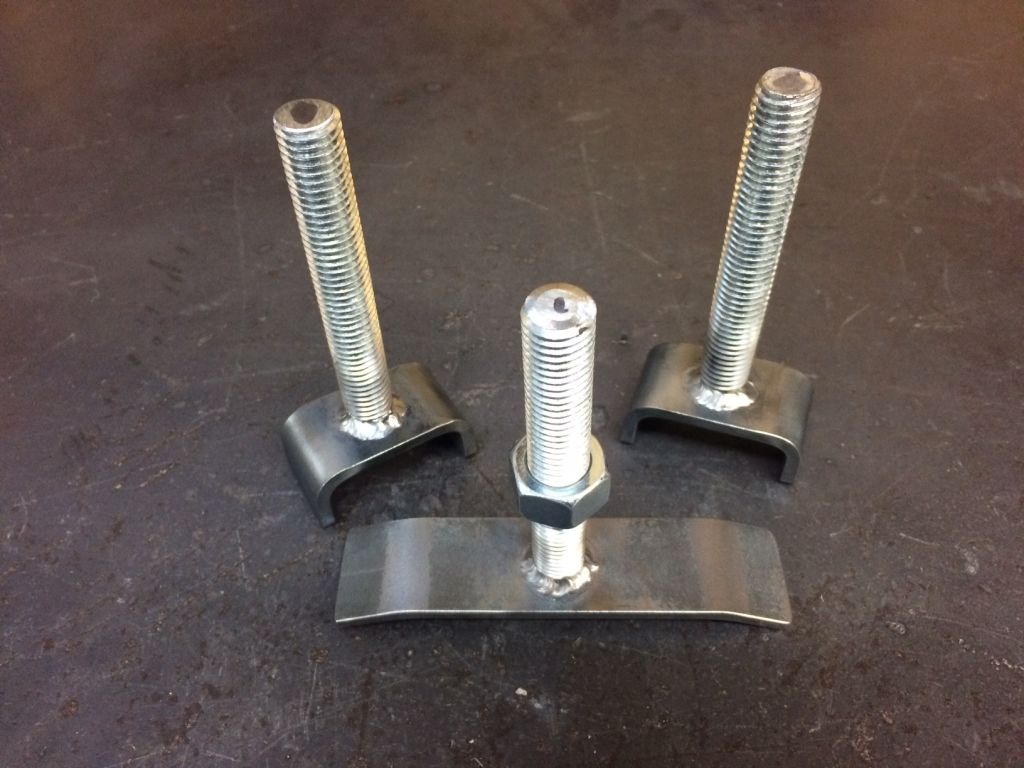
I welded bushings into the square tube for each of the adjustable pads.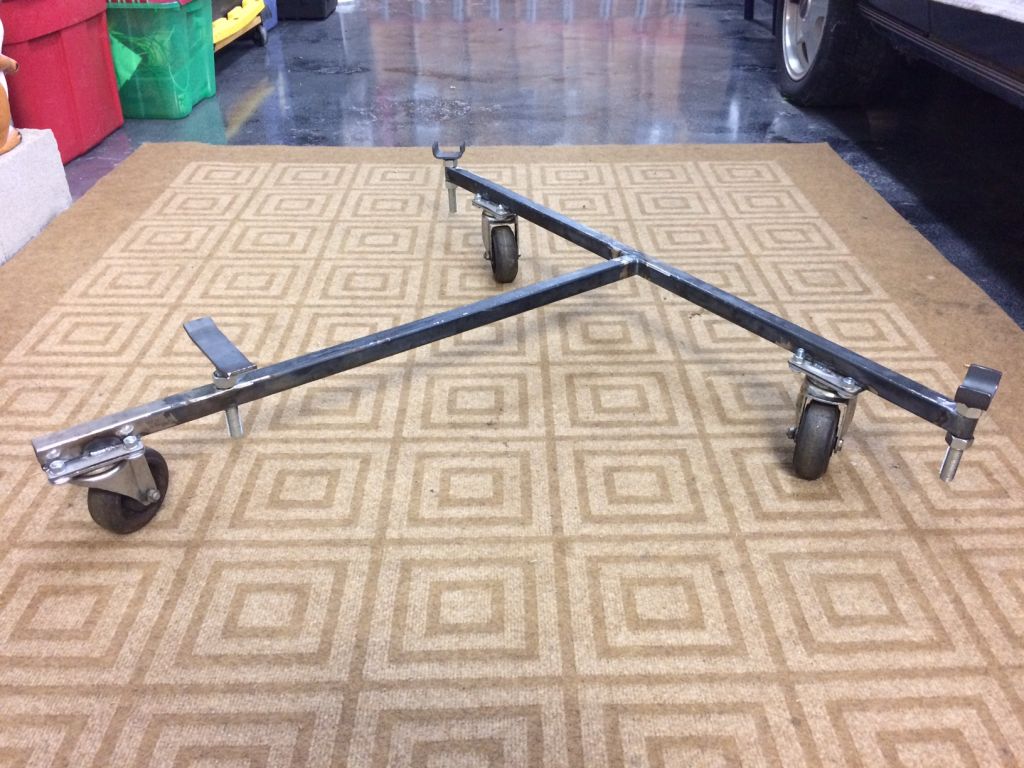
Engine came out so easily that I forgot to take pictures! I removed the wheels and lowered the car until the drivetrain was on the cart, adjusted the pads and then removed the four mounts and lifted the body above the engine.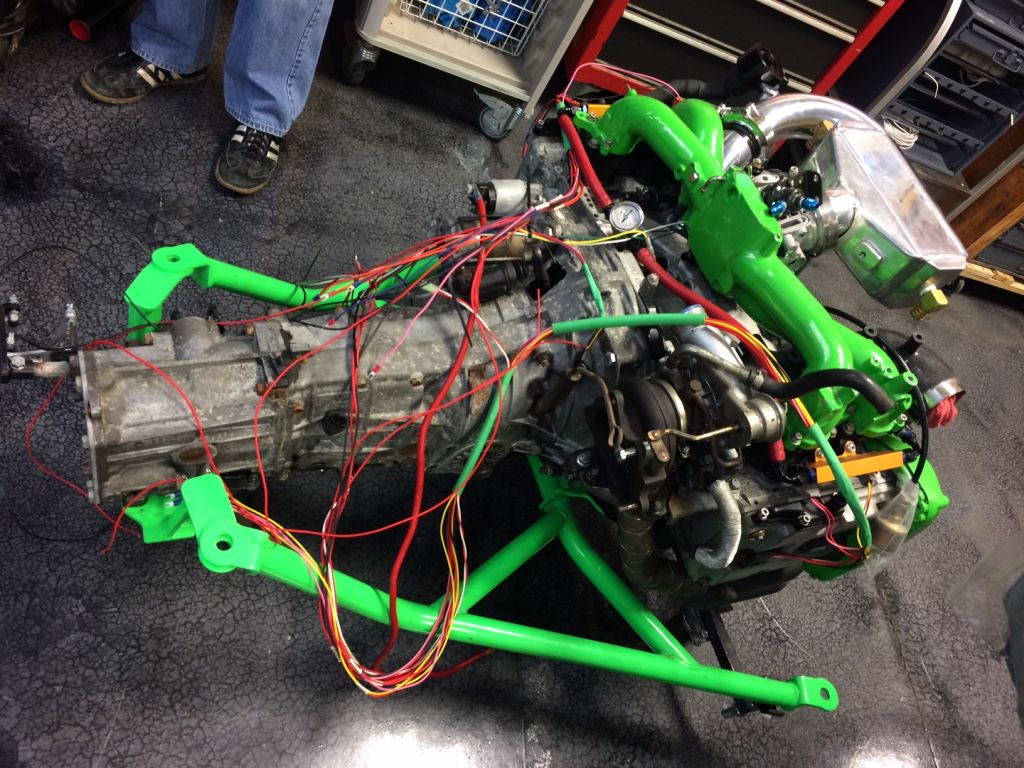
Perfect fit.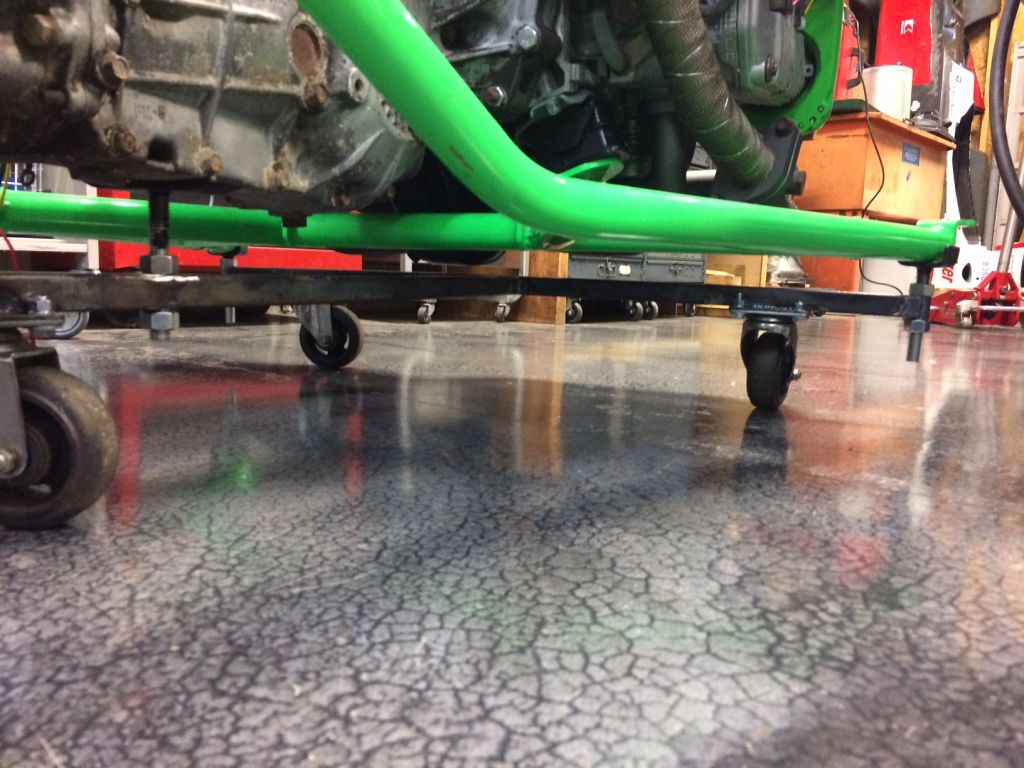
Now I can finish the IC install.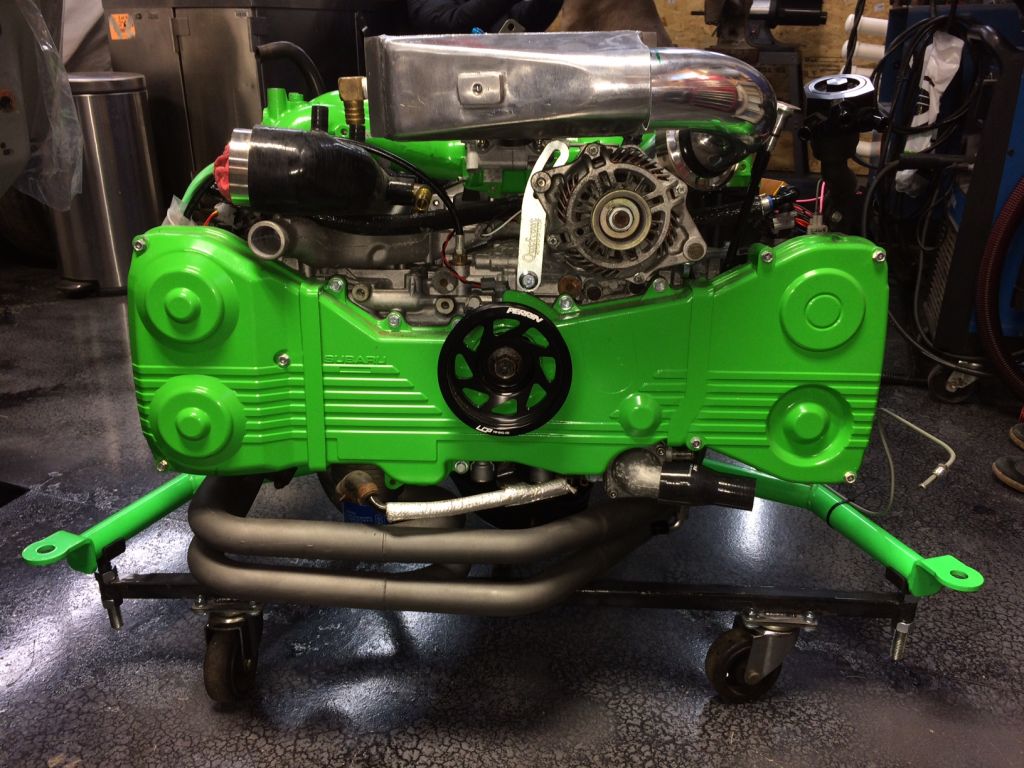
Also made a new mount for the air tools.
Cheers,
Scott
Posted by: CptTripps Jan 9 2017, 08:15 AM
That's a bad-ass cart you've got there sir!
The IC install looks perfect. There's a lot going on in that little space, but you've made the most of it for sure. Definitely way better than anything I would have hobbled together.
I need to make some time to get down there to help out soon. Let's connect and see what we can come up with.
Posted by: Amenson Jan 15 2017, 08:44 AM
So much easier to work on the engine on the cart. Lead to a super productive day yesterday.
I made more room of the IC tube to the turbo by modifying the dip stick, removing some unneeded material from the intake manifold and remade the first tube out of the IC. It now clears the coolant elbow for removal and does not touch anything on the way under the manifold!!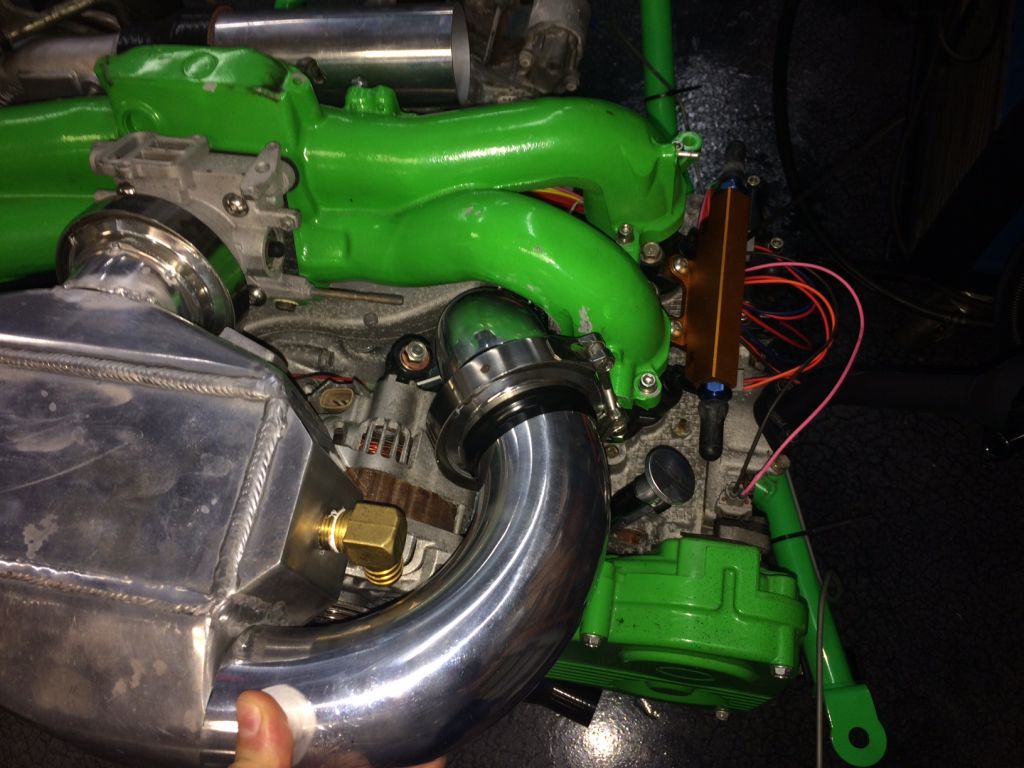
I used CAD (cardboard aided design) to figure out the parts for the IC mount.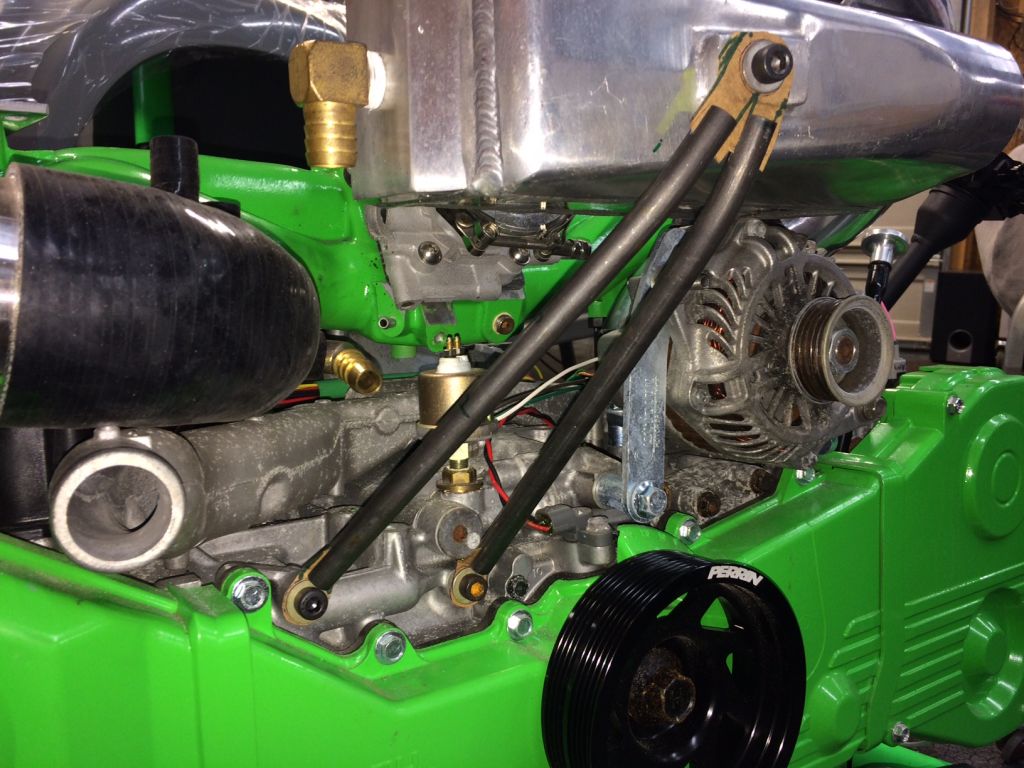
Many hours later.
It fits!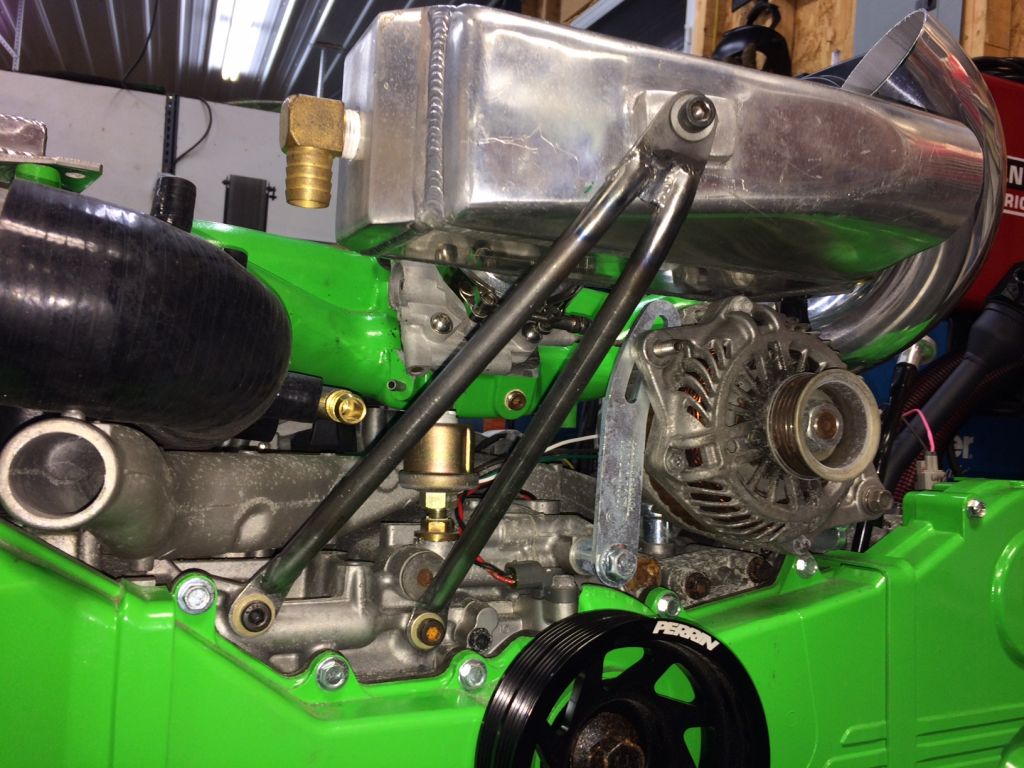
Nobody will ever see this when the engine is in the car so I have to show off some details.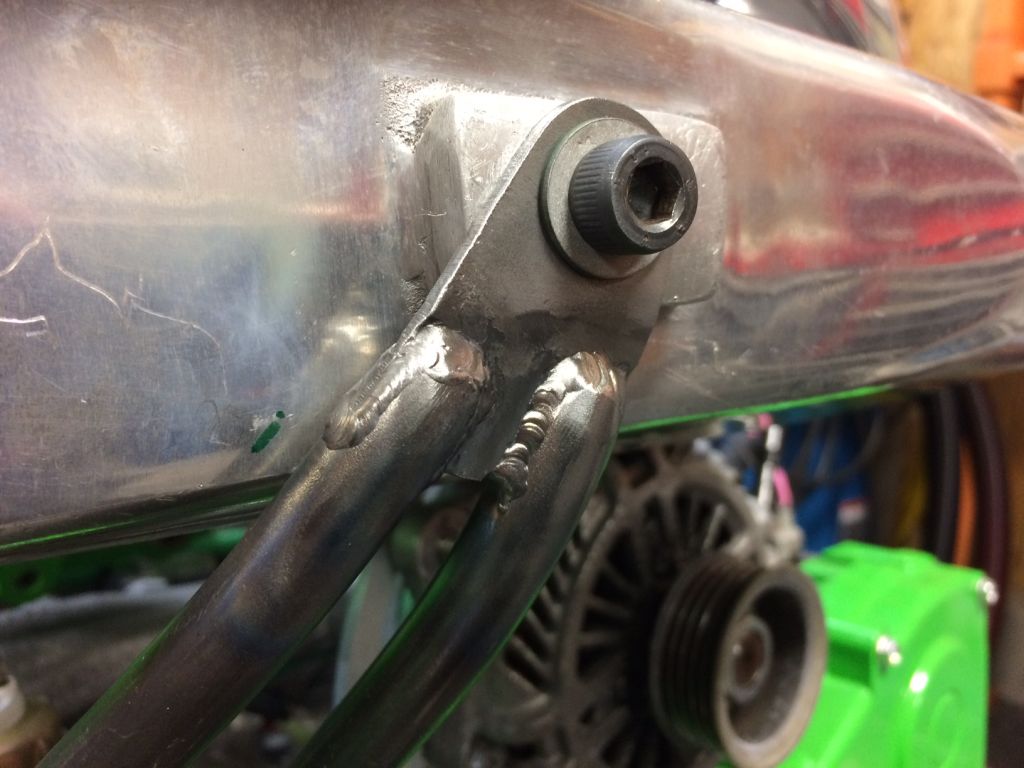
So many angles.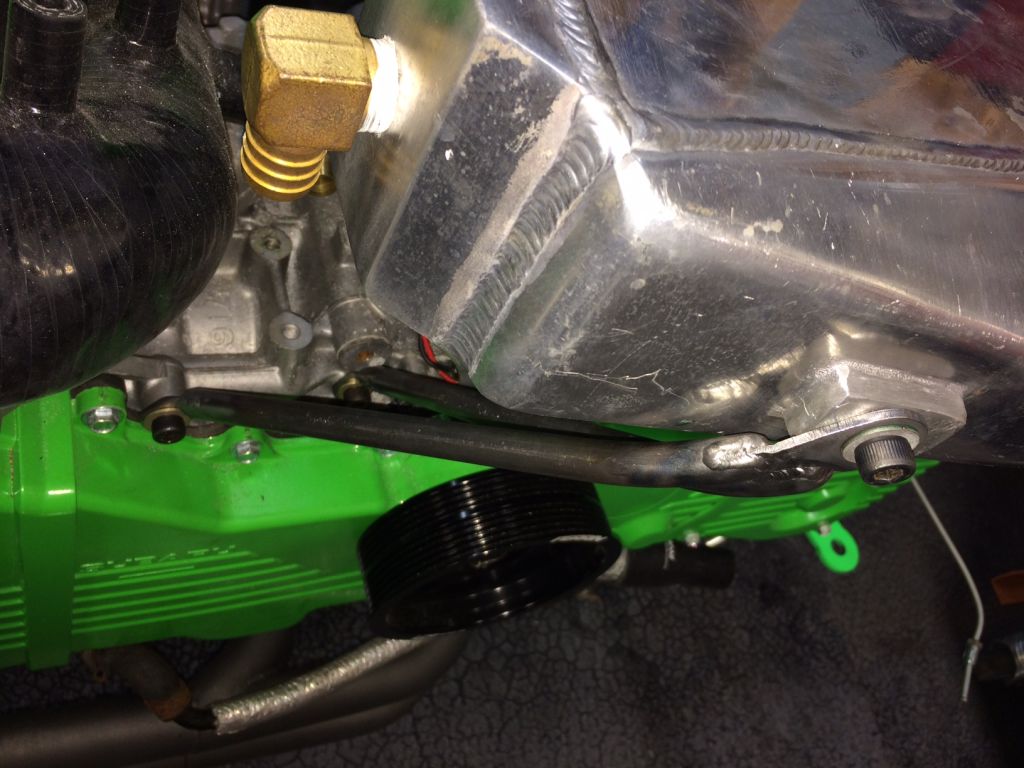
Enough internets, time to get back in the garage and work on the IC plumbing.
Posted by: Amenson Jan 16 2017, 12:57 PM
No real progress to show from Sunday. Wife wanted to try out the Sunday brunch special, Chicken and Waffles, at one of the local microbrewerys killing half of the day. The afternoon was spent cleaning up the shop from Saturday and considering how to run the IC plumbing under the manifold with the absolute minimum bends.
I did take my normal tour of some of the great build threads on the forum to see if there were any new ideas I could steal and ran into Bob's old blue SVX powered car. He used a really nice coolant expansion tank but I can not figure out what it came from. Any ideas?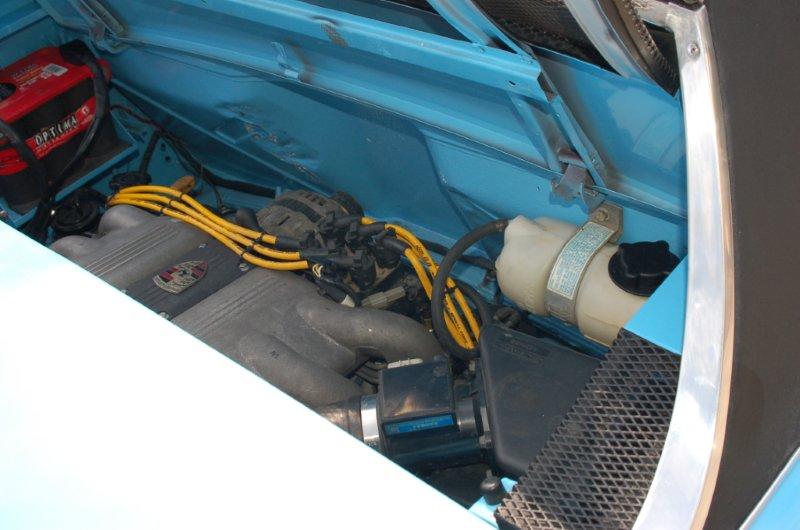
Cheers,
Scott
Posted by: Chris H. Jan 17 2017, 09:12 AM
It's from a Volvo. 700/900 series.
http://www.ebay.com/itm/Coolant-Expansion-Overflow-Tank-Volvo-740-760-780-940-Turbo-/361610858719?hash=item5431afd0df:g:w~IAAOSwmtJXarHp&vxp=mtr
That's a good one if you have the room horizontally. No weird mounting tabs, etc.
Posted by: effutuo101 Jan 17 2017, 01:23 PM
Looking good!
Posted by: Amenson Jan 17 2017, 01:36 PM
It's from a Volvo. 700/900 series.
http://www.ebay.com/itm/Coolant-Expansion-Overflow-Tank-Volvo-740-760-780-940-Turbo-/361610858719?hash=item5431afd0df:g:w~IAAOSwmtJXarHp&vxp=mtr
That's a good one if you have the room horizontally. No weird mounting tabs, etc.
Thanks for the info.
I was not expecting to see the outlet on the bottom, looks like it is intended to run pressurized. Not exactly what I was looking for but, I also reached out to Bob for the info and he has one that he is willing to part with so maybe I will play with it a bit on another project.
Cheers,
Scott
Posted by: Amenson Feb 19 2017, 07:03 PM
Today was the day to finally route the IC feed under the intake manifold.
After a few hours fitting and tweaking it was time to tack! The green tape is some heat resistant tape that does not leave a residue even after it gets a bit melty. It will eventually char but so much better than anything I have used previously.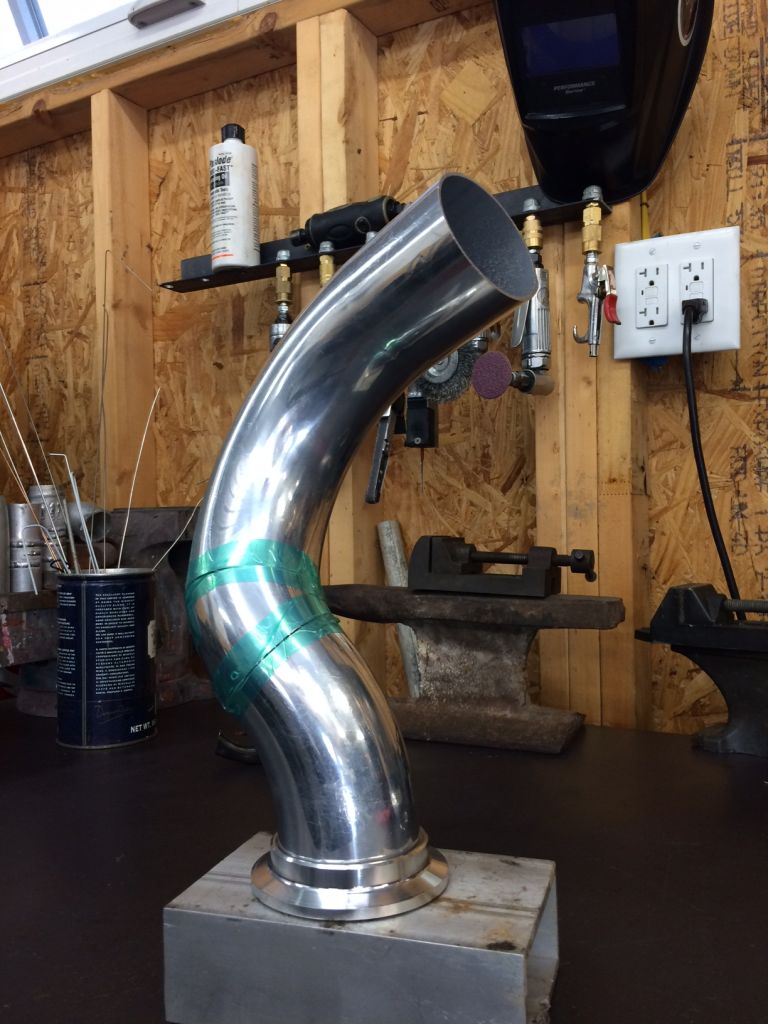
The shape does not make sense until...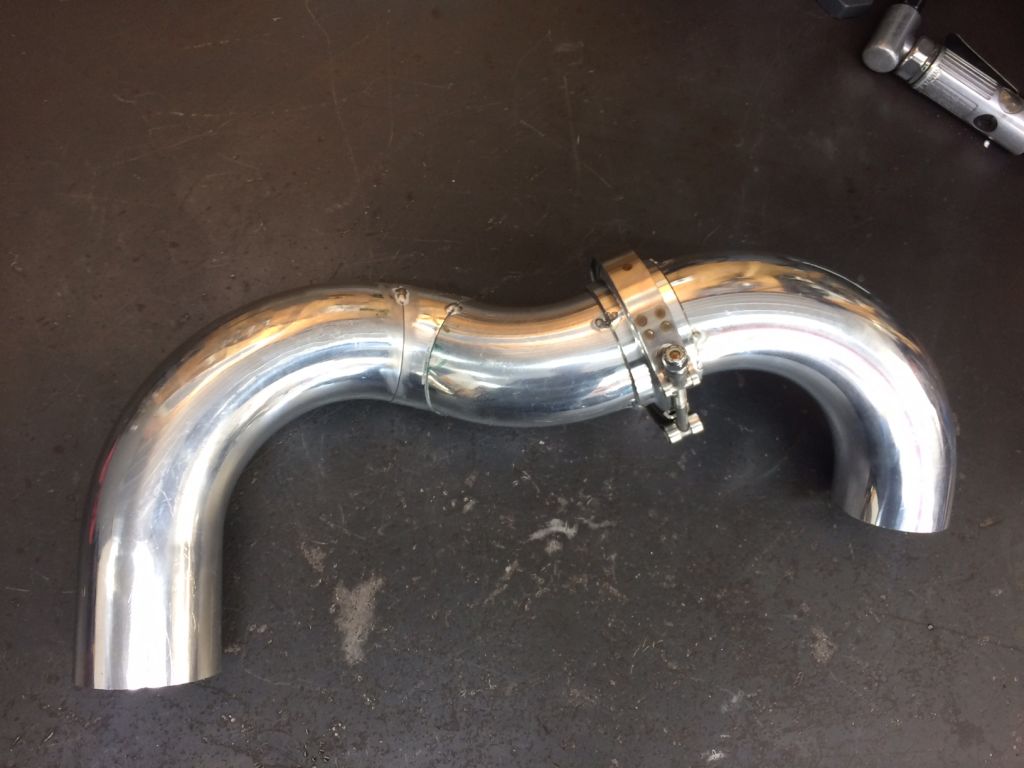
...it is in place where it fits perfectly.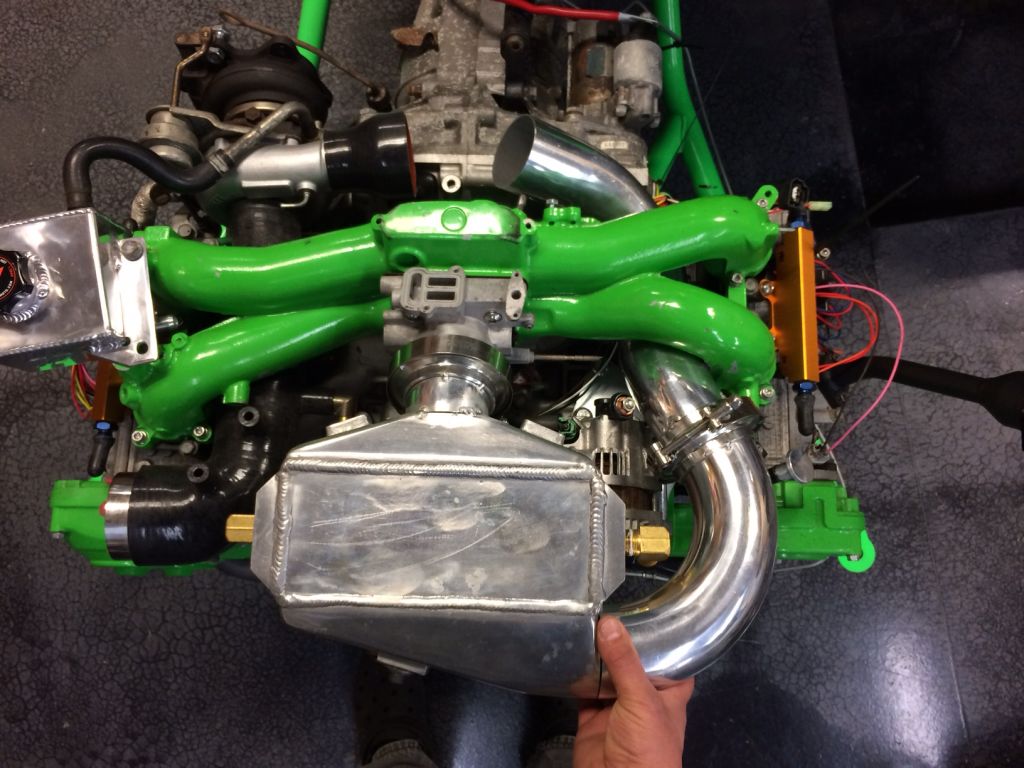
I did not have a chance to finish the last section to the turbo or shape the IC entry so that will have to wait until next time.
Cheers,
Scott
Posted by: jd74914 Feb 20 2017, 07:47 AM
...it is in place where it fits perfectly.
That looks great Scott! What kind of tape is that? It almost looks [and you describe it] like Kapton, except in the wrong color.
Posted by: CptTripps Feb 22 2017, 08:26 AM
Gang-
I've had a drastic change in my personal circumstances that is forcing me to sell this car. I've tried 10 different ways to hang on to it, but it's not going to happen.
I'm completely gutted right now.
The car is listed here: http://www.914world.com/bbs2/index.php?showtopic=305265
Please email me directly with any questions.
Posted by: Amenson Mar 5 2017, 08:25 AM
...it is in place where it fits perfectly.
That looks great Scott! What kind of tape is that? It almost looks [and you describe it] like Kapton, except in the wrong color.
This is the https://www.amazon.com/gp/product/B00CKGIBYE/ref=oh_aui_detailpage_o07_s00?ie=UTF8&psc=1. Really a life changer for making this kind of stuff.
Cheers,
Scott
Posted by: CptTripps Apr 9 2017, 05:53 PM
Well, the car officially has a new home. Sad to see it go, but happy that the project will get finished.
I'll change the name of the thread once the new owner tells me how he wants it named. Scott is still going to be working on the car for a few more months, so you'll see him chiming in here too.
I can't wait to watch the progress as it unfolds.
Posted by: mgp4591 Apr 9 2017, 08:26 PM
Life goes on... you probably feel the weight gone already. Knowing it went to a good home has got to be satisfying on some level - hell, you'll probably even get to drive it once!
Posted by: theer Apr 10 2017, 07:48 AM
Hey 914World,
we'll keep this thread going right here. Just spent the weekend driving to Ohio and back (from the Boston area) to close the deal. The car is staying at Scott's to finish up over the next 4-5 months.
The project is in pieces right now, but everything looks amazing. 90% done and 90% left to go. Stay tuned.
There will be a few changes in direction from Doug's vision, but really nothing major.
Specifically, I'm going back to stock for the dash. So, now I need the whole dash assembly, including the metal frame, top pad, knee pad, vents, etc. Let me know what you've got.
Tom
Posted by: Amenson Apr 17 2017, 09:01 PM
I am on the cusp of finally putting some proper rubber under the PorSTI so I took the opportunity to work on the suspension on Grey for a bit to get a feel of how much space is available under the flares.
First step was to get the car down to ride height.
I pulled the springs in the rear and found that they did not sit in the spring cups very well. The OD is ~5mm larger than what the upper cups want to hold.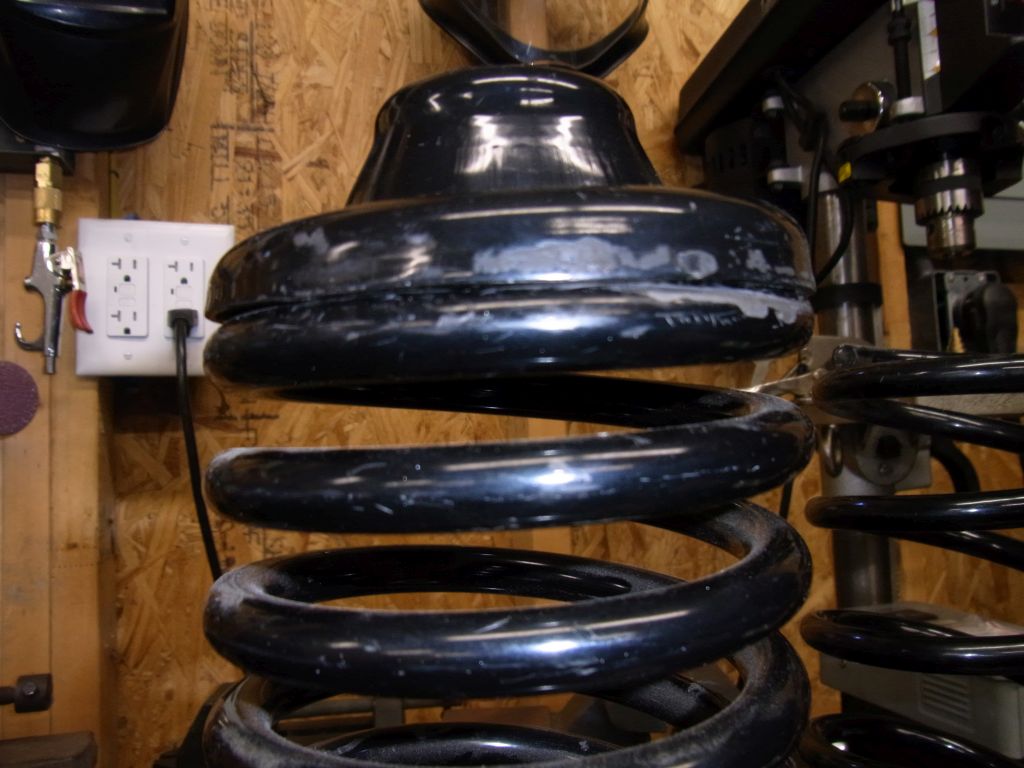
The lower spring perch works but the spring is pretty loose. Also, there was an odd spacer under it sitting on the clip that locks in the groove on the shock body.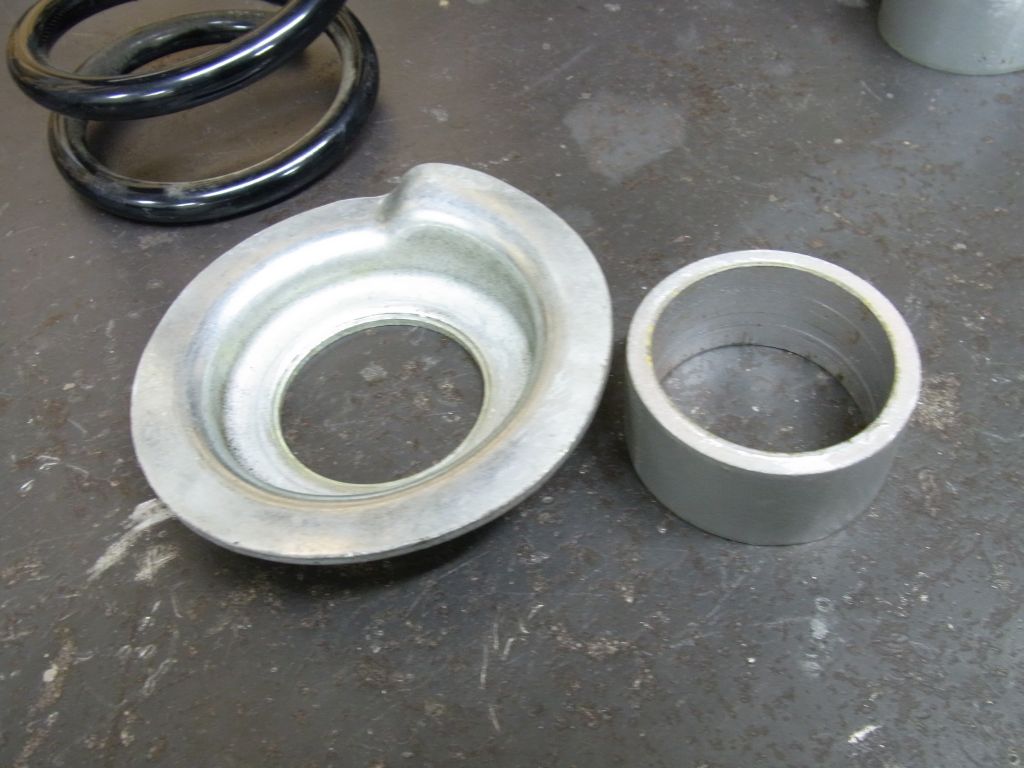
Anyone have any thoughts?
In the front I needed to clock the torsion bars by one spline. The Driver side did not want to come out of the control arm. I got it out and found why it was being difficult. The front of the control arm was open. Looks like the end cap was pushed out at some point. 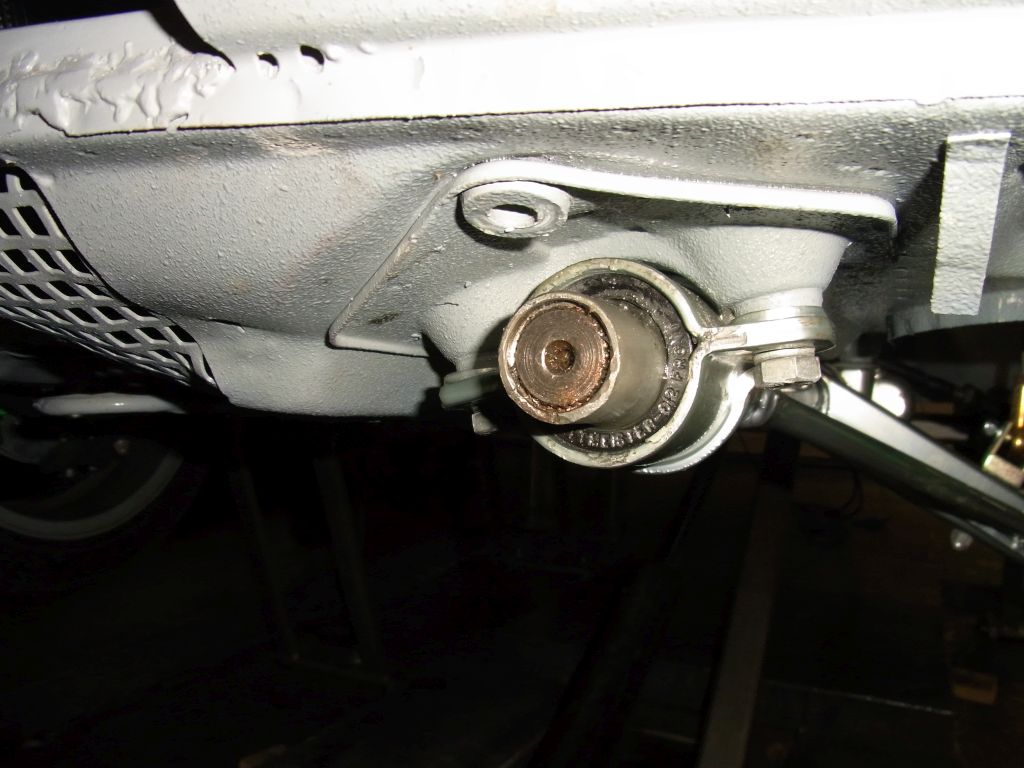
Looks like it could just be a welch plug. Is this part available?
Working off the lift with no rear springs makes it very easy to play with ride height. I think it looks pretty good right there.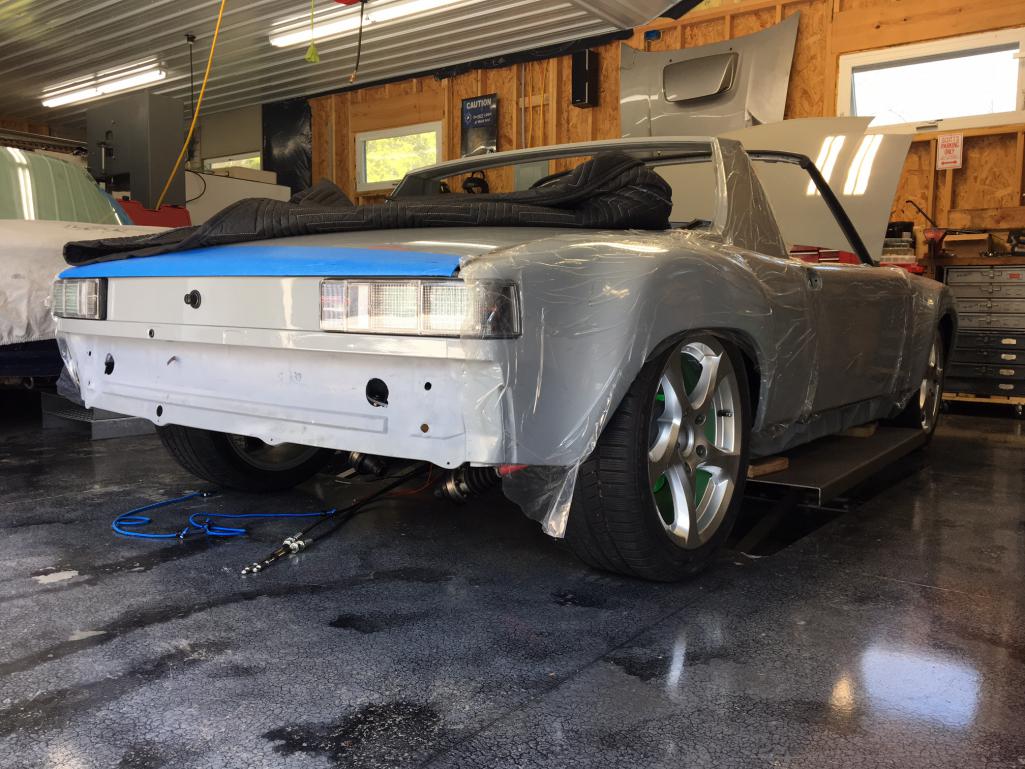
Driver side is rubbing on the inside and the passenger is rubbing on the fender lip but they will fit. Will trim the fender lip to give some additional room and will probably need to adjust the spacer's once it is aligned.
Cheers,
Scott
Posted by: 914forme Apr 18 2017, 02:38 PM
Yes the front plug is available.
http://www.sierramadrecollection.com/911-912-65-73-/Suspension-Steering/Front-Suspension/Dust-Cover-Steel-Plug-65-89-p27259.html
Stoddard has them
Part number 900.040.008.01
Did you string Gray to see if the tow is out of wack, I think it is. But I would open up the lip like the factory did.
That spring is not right for the hat, the spring sits inside of the stock hat. Heck, I would convert it over to a set of 2.25 or 2.5 inch springs, with different hats and if it was me different collars though if you don't need to corner balance, then the stock system does work just fine. Makes me wonder if someone did not cut a stock spring, as they do wind tighter at the top to fit the stock hat. They where not installed upside down?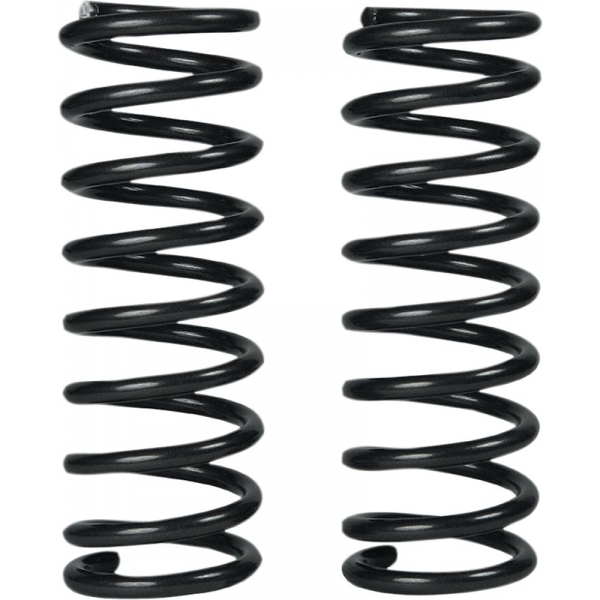
Posted by: Amenson Apr 25 2017, 06:01 AM
That spring is not right for the hat, the spring sits inside of the stock hat. Heck, I would convert it over to a set of 2.25 or 2.5 inch springs, with different hats and if it was me different collars though if you don't need to corner balance, then the stock system does work just fine. Makes me wonder if someone did not cut a stock spring, as they do wind tighter at the top to fit the stock hat. They where not installed upside down?
The springs are Weltmeister SP180's.

According to the internets they are for the 914 but I can't find any mention of special upper hats? I called the number on the Weltmeister website and was routed to Eckler's!? Nobody picked up.
Anybody install these springs and remember if the stock hats worked?
Cheers,
Scott
Posted by: mepstein Apr 25 2017, 06:17 AM
Mine are also Weltmeister SP180's and they seem to fit fine with the stock 914-4 top hat. But mine are not yet compressed, just loosely assembled.
Attached thumbnail(s)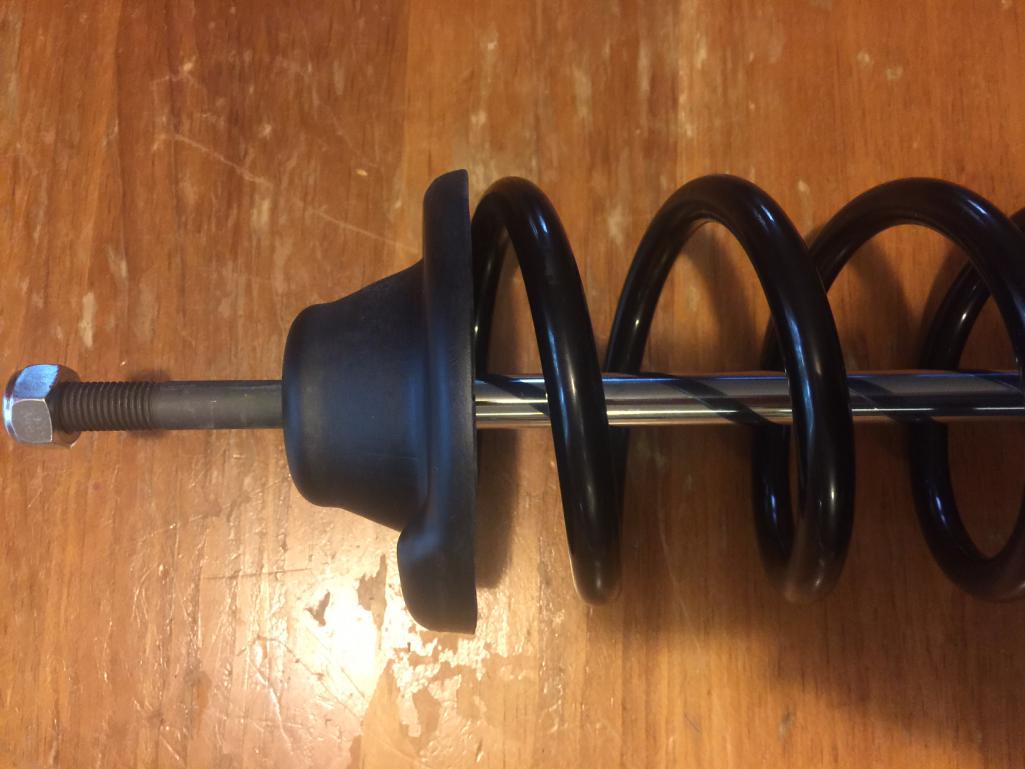
Posted by: Amenson Apr 25 2017, 06:22 AM
Mine are also Weltmeister SP180's and they seem to fit fine with the stock 914-4 top hat. But mine are not yet compressed, just loosely assembled.
Thanks for the feedback. Maybe the top hat is odd on Gray. Will you measure the OD of your top hat?
Posted by: mepstein Apr 25 2017, 06:50 AM
Mine are also Weltmeister SP180's and they seem to fit fine with the stock 914-4 top hat. But mine are not yet compressed, just loosely assembled.
Thanks for the feedback. Maybe the top hat is odd on Gray. Will you measure the OD of your top hat?
11.2 mm OD
10.6 mm ID
Posted by: 914forme Apr 25 2017, 07:18 AM
i'll bring another set of hats with me so you can compare them to the ones on gray, and an extra set of old eyes, maybe we can figure these out.
Posted by: Amenson Apr 25 2017, 08:00 AM
Thanks for the feedback. Maybe the top hat is odd on Gray. Will you measure the OD of your top hat?
11.2 mm OD
10.6 mm ID
That matches Gray's top hat...must be the springs.
Spring ID 87.5mm OD 111.2mm
Can you compare against your spring.
Posted by: mepstein Apr 25 2017, 10:02 AM
Thanks for the feedback. Maybe the top hat is odd on Gray. Will you measure the OD of your top hat?
112 OD
106 mm ID
That matches Gray's top hat...must be the springs.
Spring ID 87.5mm OD 111.2mm
Can you compare against your spring.
Spring 106mm OD, 80mm ID.
Posted by: Amenson Apr 27 2017, 08:16 AM
With Mark's measurement and an on site consultation  with Stephen, the conclusion is that the spring OD is too large...very strange.
Cheers,
Scott
Posted by: mepstein Apr 27 2017, 08:50 AM
I just got mine from a member here. There was at least one more world member that offered me a set for $80. Paragon also sells the springs.
Posted by: Amenson Apr 27 2017, 09:34 AM
I just got mine from a member here. There was at least one more world member that offered me a set for $80. Paragon also sells the springs.
I may have just ordered a Rebel rear coil over setup for the PorSTI this morning so there will be a nice set of springs kicking around the garage soon.
Posted by: theer Apr 27 2017, 11:27 AM
I claim first dibs on Scott's soon-to-be extra springs.
Posted by: 914forme Apr 27 2017, 03:36 PM
I just got mine from a member here. There was at least one more world member that offered me a set for $80. Paragon also sells the springs.
I may have just ordered a Rebel rear coil over setup for the PorSTI this morning so there will be a nice set of springs kicking around the garage soon.
Good Choice
BTW, Jegs carries QA1 Powder Coated Springs, great quality , very low prices, and local to you. I can tell you to pick your length wisely. And if Rebel does not get them to you soon enough to make your goal for PORSTI and a trip, then let me know, I have a set sitting on the bench never used that we can trade, as I am sure you will need them before I need them on my EG swap.Back to normal "Grey" conversations now.
I still love the color of this car overtime I see it.
Posted by: mgp4591 Apr 28 2017, 08:50 PM
That spring is not right for the hat, the spring sits inside of the stock hat. Heck, I would convert it over to a set of 2.25 or 2.5 inch springs, with different hats and if it was me different collars though if you don't need to corner balance, then the stock system does work just fine. Makes me wonder if someone did not cut a stock spring, as they do wind tighter at the top to fit the stock hat. They where not installed upside down?
The springs are Weltmeister SP180's.
According to the internets they are for the 914 but I can't find any mention of special upper hats? I called the number on the Weltmeister website and was routed to Eckler's!? Nobody picked up.
Anybody install these springs and remember if the stock hats worked?
Cheers,
Scott
I've got the same issue with mine - Weltmeister 180s and the stock tops don't work. I've been looking a bit and haven't found an answer or any mention of it til now.
Posted by: Amenson Apr 29 2017, 09:23 PM
I've got the same issue with mine - Weltmeister 180s and the stock tops don't work. I've been looking a bit and haven't found an answer or any mention of it til now.
Yard art?
Sad but there is not much else that can be done with them.
Posted by: mgp4591 Apr 30 2017, 12:38 AM
I've got the same issue with mine - Weltmeister 180s and the stock tops don't work. I've been looking a bit and haven't found an answer or any mention of it til now.
Yard art?
Sad but there is not much else that can be done with them.
A little heat and flare out the lip, weld on a couple of retaining tabs and problem solved?
Posted by: matthepcat Jul 31 2017, 03:37 PM
Anything new going on here?
Posted by: theer Jul 31 2017, 05:07 PM
As a matter of fact.. yes, there is.
Scott will be re-starting the build in the near future. Stay tuned.
Posted by: Amenson Jul 31 2017, 07:08 PM
I picked up a little something for the project 2 weeks ago 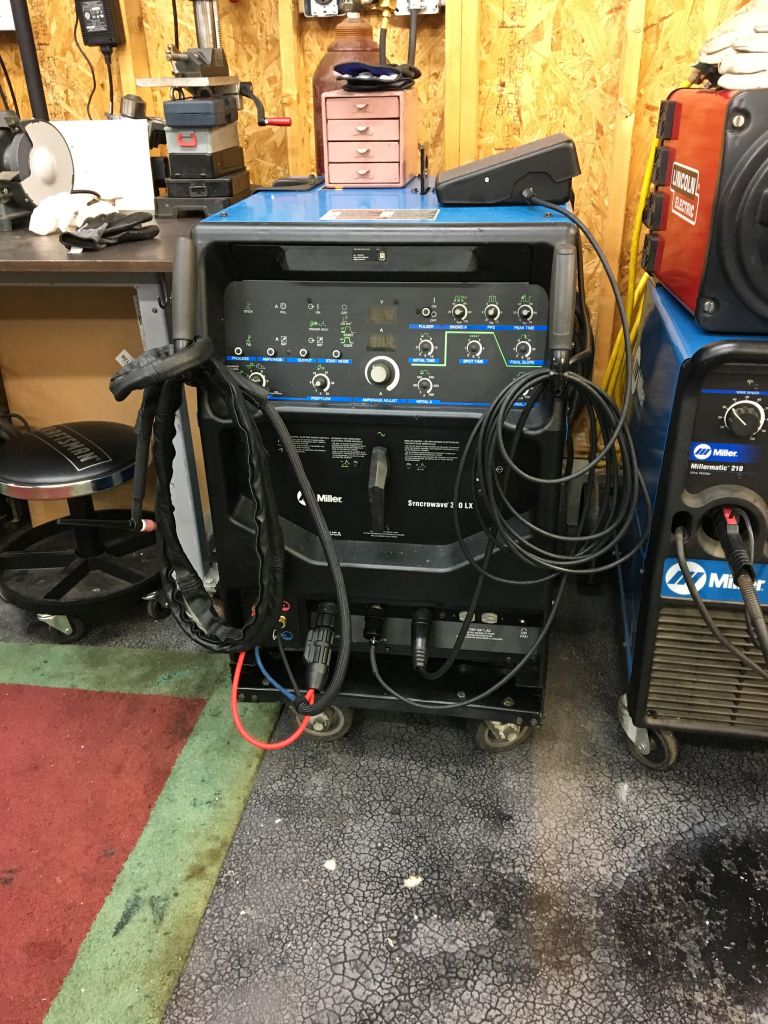
Posted by: Amenson Sep 5 2017, 08:30 PM
TIAL BOV arrived. I put it together to check fitment...will be perfect.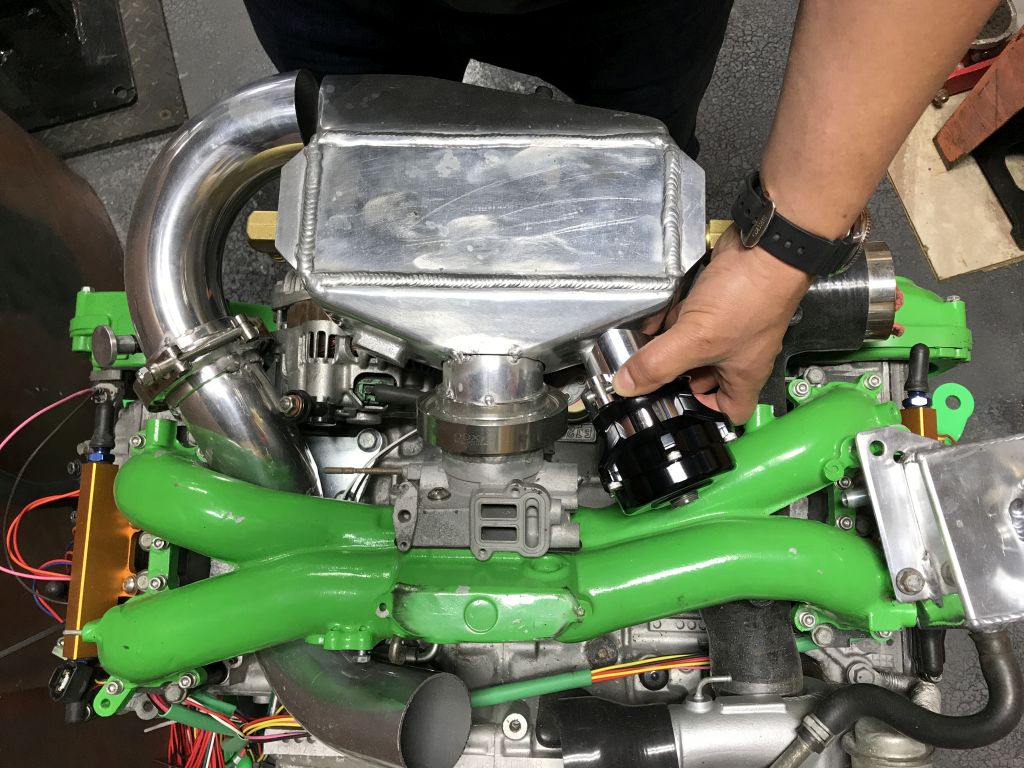
Just a bit of massaging on the weld flange to match the profile on the IC.
Cheers,
Scott
Posted by: matthepcat Sep 6 2017, 06:53 PM
This car is not driving yet ?
Posted by: Amenson Sep 6 2017, 08:56 PM
This car is not driving yet ?
No, I planned some projects on the PorSTI while Grey was transferring owners that got out of hand chasing rust and poorly done rust repair. Back at it now.
Cheers,
Scott
Posted by: Amenson Sep 7 2017, 09:09 PM
The AFCO Scirocco radiator fan shroud showed up. Really nice piece but something is not right?! 
After much measuring and internet searching it turns out that it is not the standard Scirocco rad but some universal radiator for Volkswagen Golf, GTI, Rabbit, Scirocco.
https://www.amazon.com/81-92-MK1-GOLF-RABBIT-SCIROCCO/dp/B00QMXUF72
Unfortunately there is not a nice fan shroud for this rad...I guess that I will have to widen this one:welder:
Cheers,
Scott
Posted by: theer Sep 7 2017, 11:23 PM
That's a bummer Scott.
On the bright side, you get to play with your new toy (post #1001).
Posted by: Amenson Oct 8 2017, 07:53 PM
Business travel is over for a while so it it time to get serious about Grey.
Got the new Tig welder dialed in so it was time to finish the IC plumbing.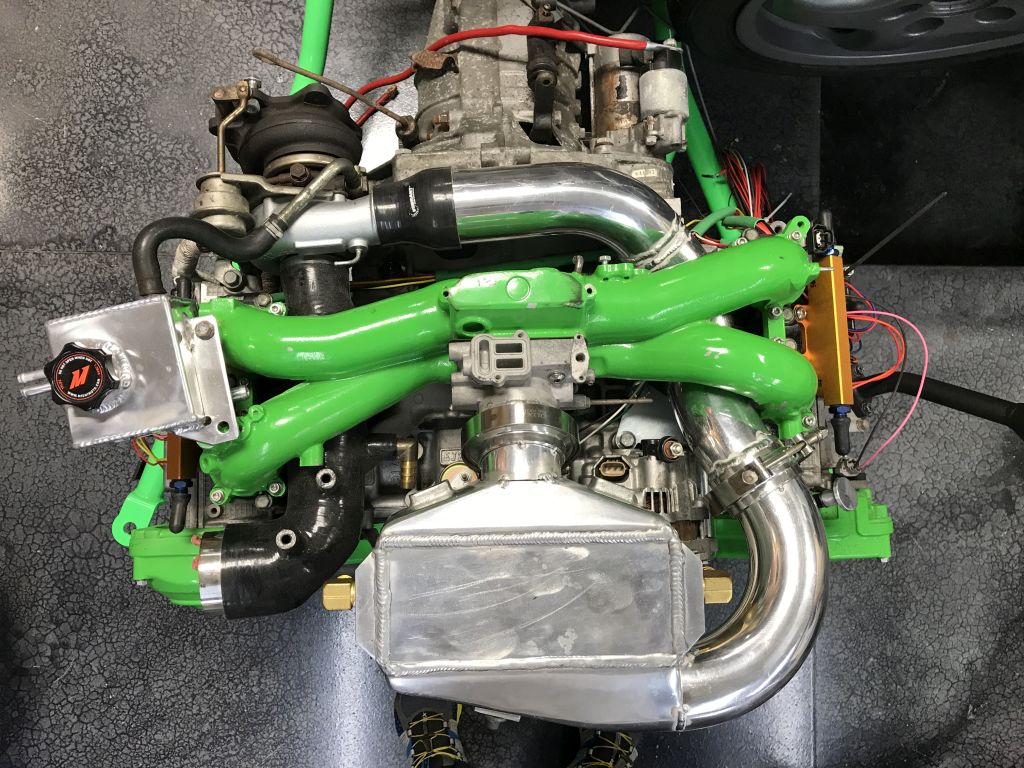
The best execution looks simple...it wasn't. Many fine adjustments to get the gaps tight enough to Tig weld. Final fitting was done on the belt sander.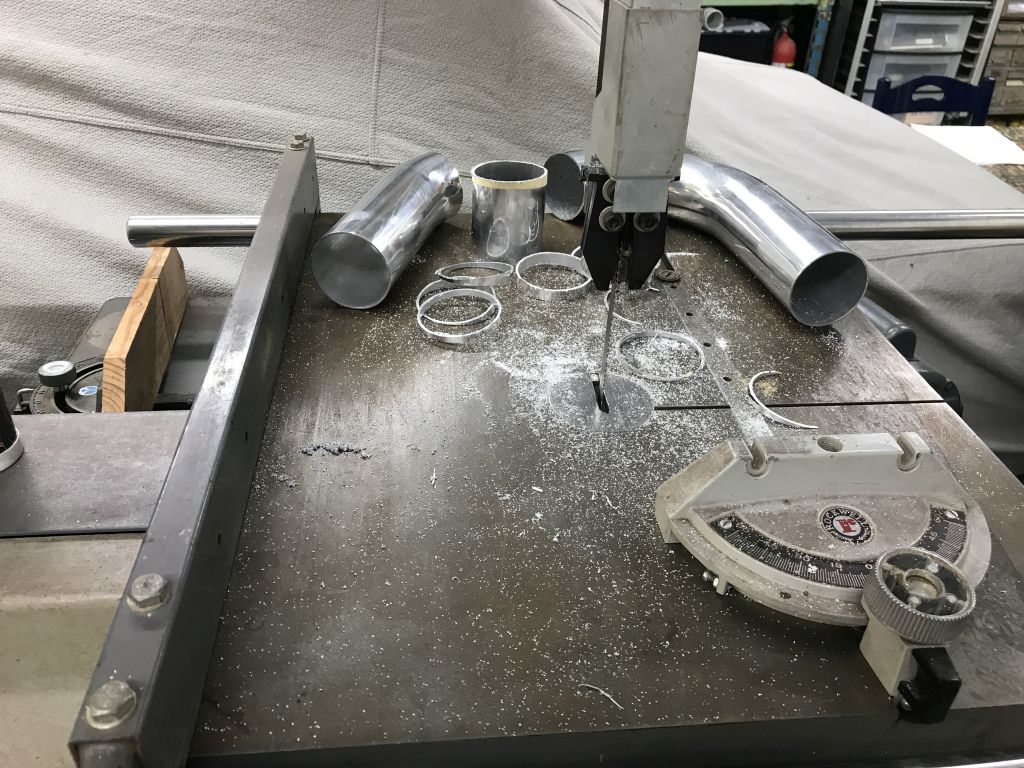
Lots of work to open up the outlet of the IC, should flow cleanly.
Still need to weld the seams on the IC and then fit the Tial BOV.
Also started modifying the radiator fan. Could have made more progress but the new brake didn't show up on Friday.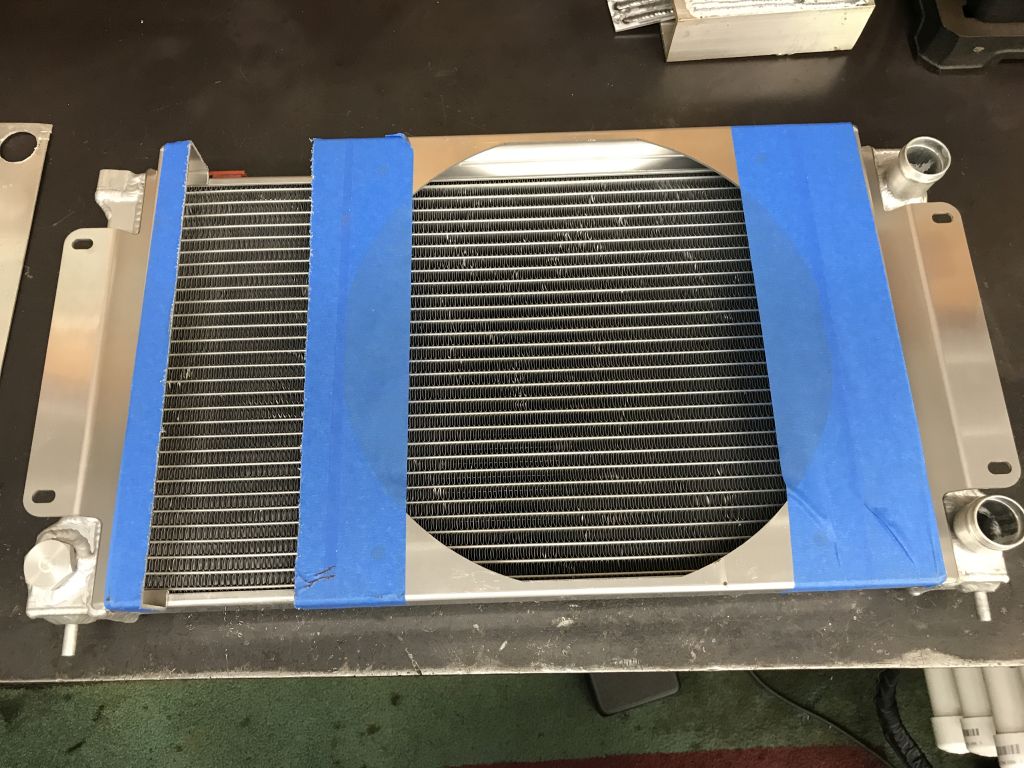
So much more rewarding than rust repair on the PorSti!
Cheers,
Scott
Posted by: Amenson Oct 9 2017, 05:57 PM
What day is it...new tool day!!!
No more to bend sheet metal.
Cheers,
Scott
Posted by: effutuo101 Oct 9 2017, 10:10 PM
Sweet!
Posted by: 914forme Oct 10 2017, 07:39 AM
What day is it...new tool day!!!
No more
to bend sheet metal.Cheers,
Scott
I'll be over once I mock all my stuff up. Nice finger brake.
Posted by: theer Oct 10 2017, 07:58 AM
I love new tool day!
Posted by: Amenson Oct 10 2017, 02:35 PM
What day is it...new tool day!!!
No more
to bend sheet metal.Cheers,
Scott
I'll be over once I mock all my stuff up. Nice finger brake.
You can use it any time. Just keep in mind that it is only 24" wide. I could not justify the cost or footprint of the 48".
Posted by: Amenson Oct 15 2017, 07:36 PM
Finished welding the IC joints and installed the BOV. 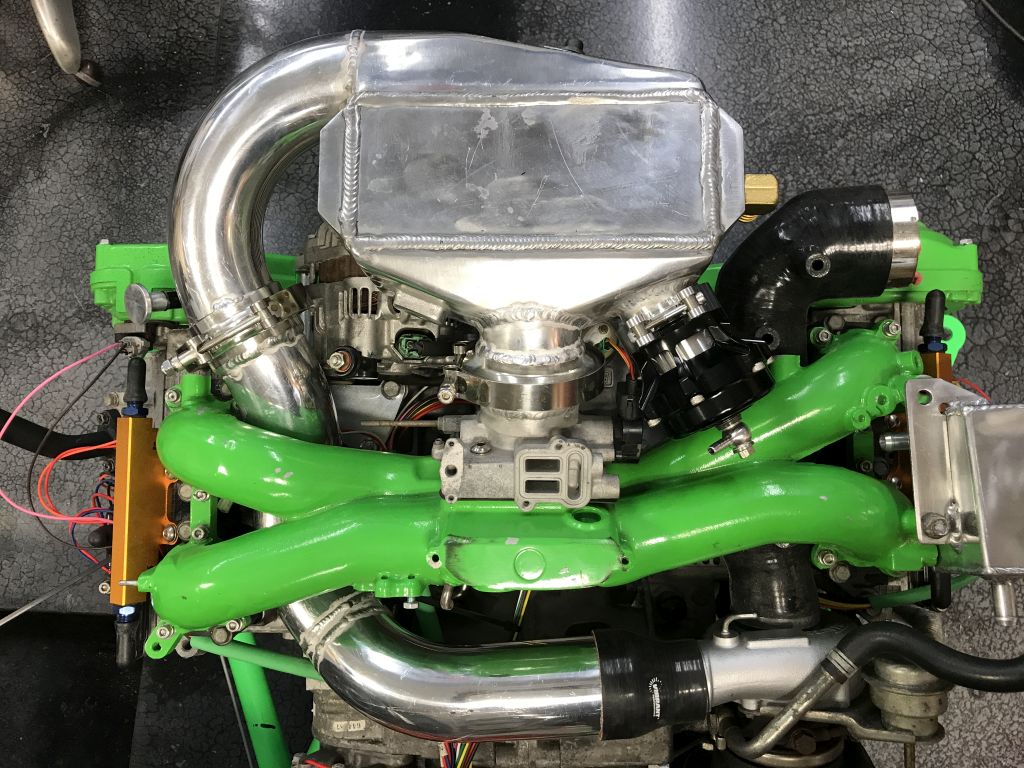
Not quite #weldporn quality beads but nice and tidy. I did get myself in a bit of trouble on the inside of the sweeper coming out of the IC. My torch would not fit for proper arc position but I tried to make it work and left a blob that took a ton of work to smooth out. Lesson learned....always take the time to configure the torch to fit.
Cheers,
Scott
Posted by: Amenson Oct 19 2017, 08:36 PM
Time to fix the radiator shroud.
A little measuring, remeasuring and then again. I also had had to reshape the mounting flanges and move the mounting holes because the bosses on the radiator were shorter and in a different location.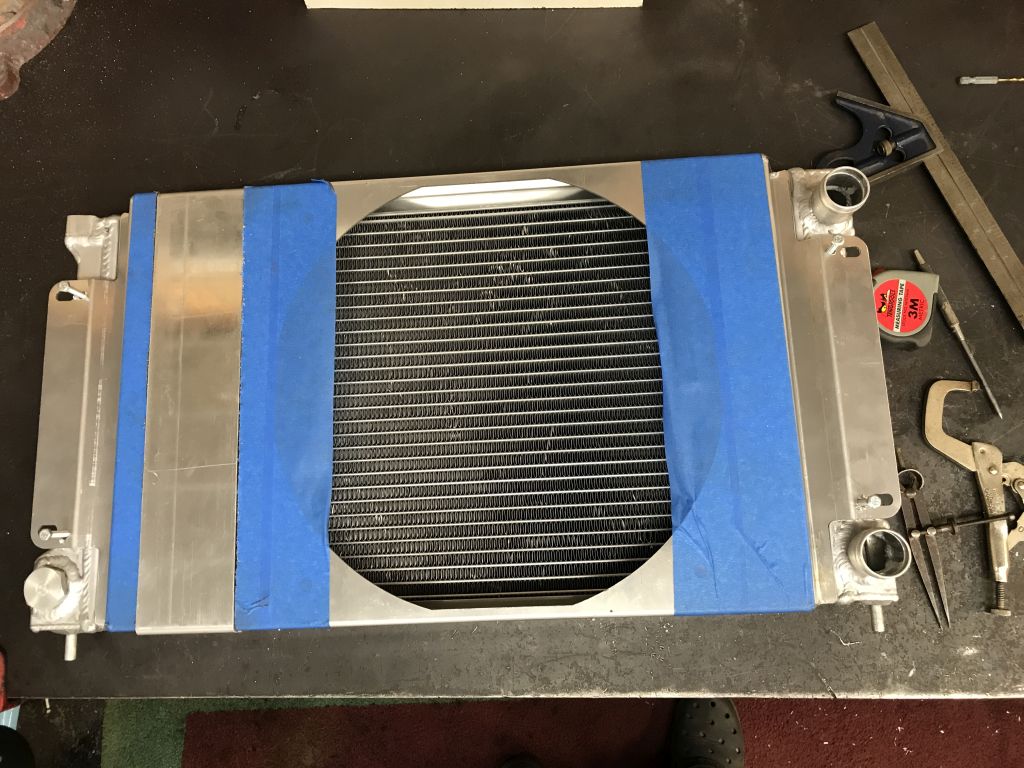
I do have more clamps, this was all that was necessary to keep everything aligned.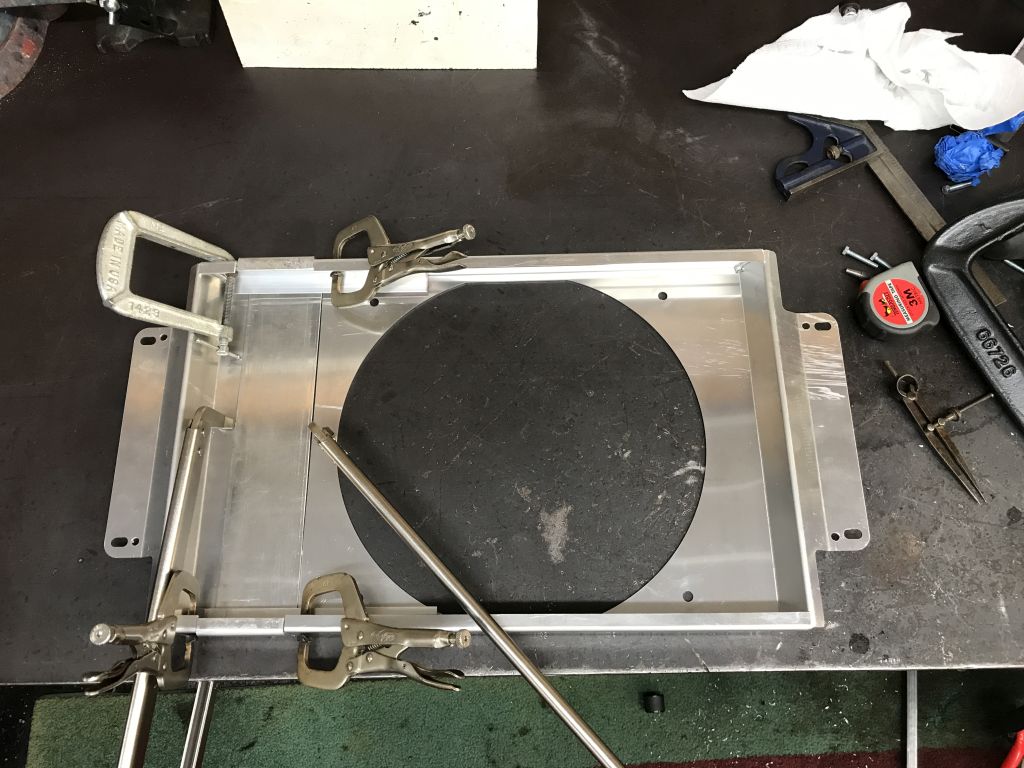
Dialed in. That was some really, really satisfying torch time.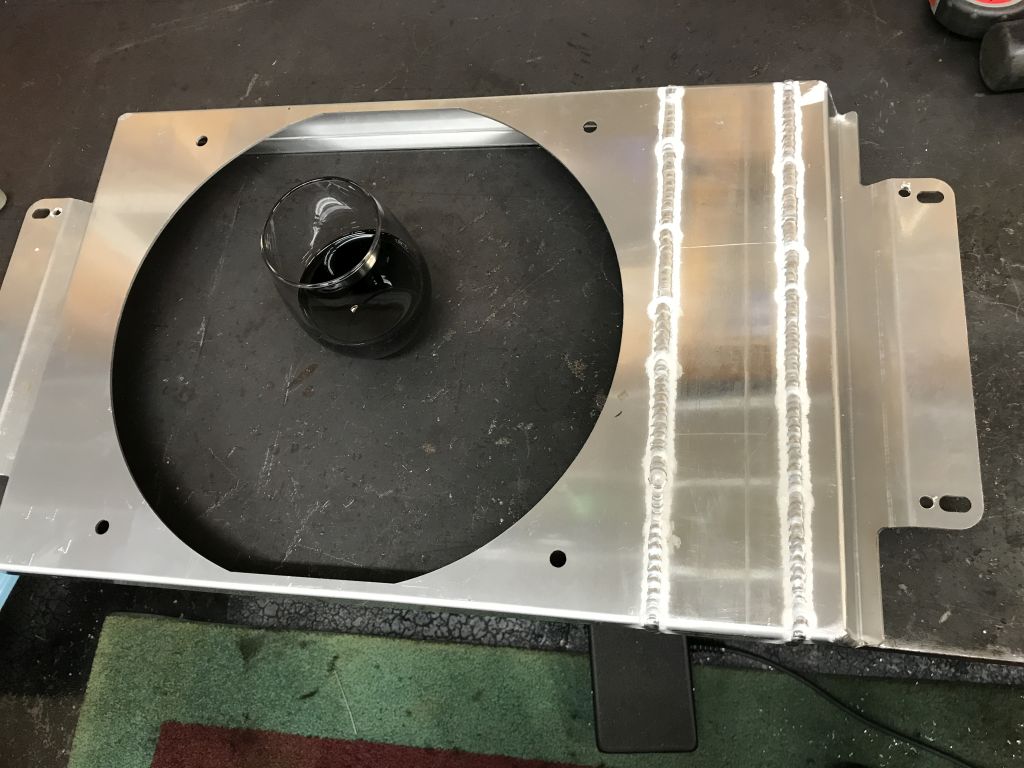
The holes still line up!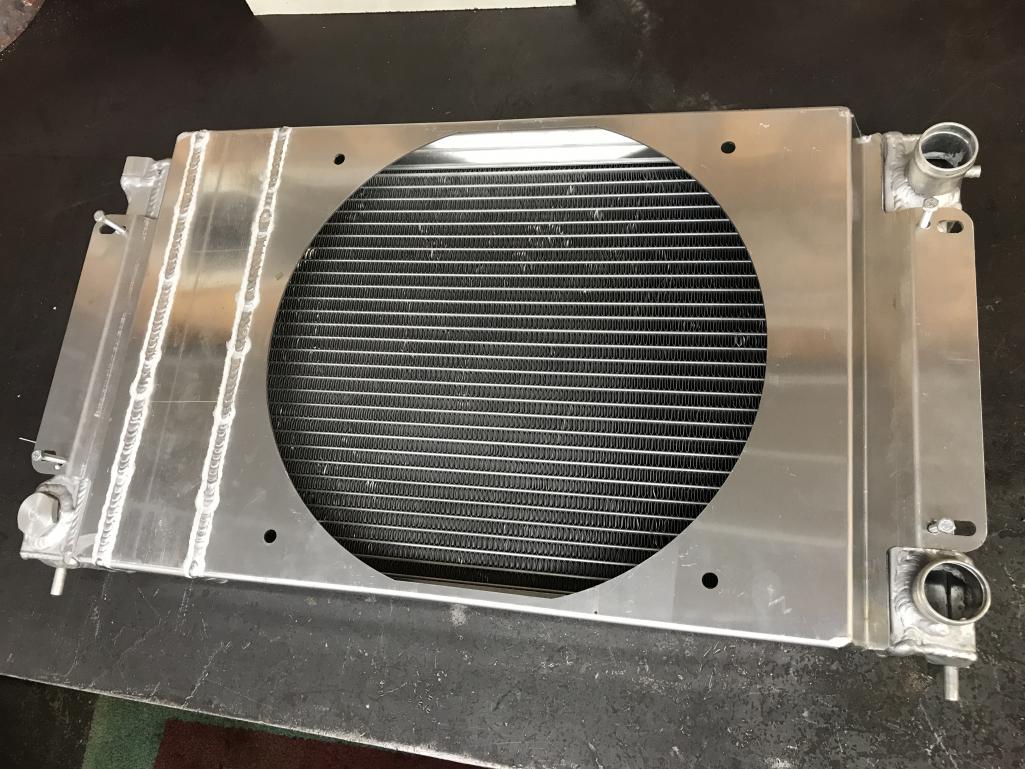
Still need to trim the mounting flanges and then back in the car.
Cheers,
Scott
Posted by: ablesnead Oct 19 2017, 10:05 PM
Be careful , that shroud is going to murder your high speed airflow....fan is blocking airflow over about 25 , and not needed , your shroud is reducing the remaining cooling area , rendering your radiator less efficent ...
Posted by: Amenson Oct 20 2017, 09:12 AM
Be careful , that shroud is going to murder your high speed airflow....fan is blocking airflow over about 25 , and not needed , your shroud is reducing the remaining cooling area , rendering your radiator less efficent ...
Purpose of the shroud is to increasing radiator utilization while stationary or at low speeds by allowing the fan to draw air through the entire radiator instead of just the area covered by the fan. Certainly, at speeds higher than what the fan can create, the shroud will limit the flow to what is capable of passing through the fan.
That said, I have yet to experience a shrouded radiator that cools while stationary, not cooling at high speeds. I have experienced an un-shrouded radiator not cooling effectively while stationary, that does cool at speed.
Cheers,
Scott
Posted by: 914forme Oct 20 2017, 05:45 PM
If your up for the challenge, you could build flaps on the other side of the rad shroud. In the above picture it would be the left side, for the flaps. So when air pressure became to great they will open up, and then close once stoped or air pressure is not great enough to over come either gravity or cavity pressure in the trunk or exhaust duct area.
This presumes that the air pressure will be greater outside the rad than inside the trunk due to speed.
More than likely over kill
Posted by: Amenson Oct 29 2017, 06:38 PM
Flaps are likely overkill. Easy to add later if necessary.
Finished the modifications to the shroud by removing the extra mounting ear material.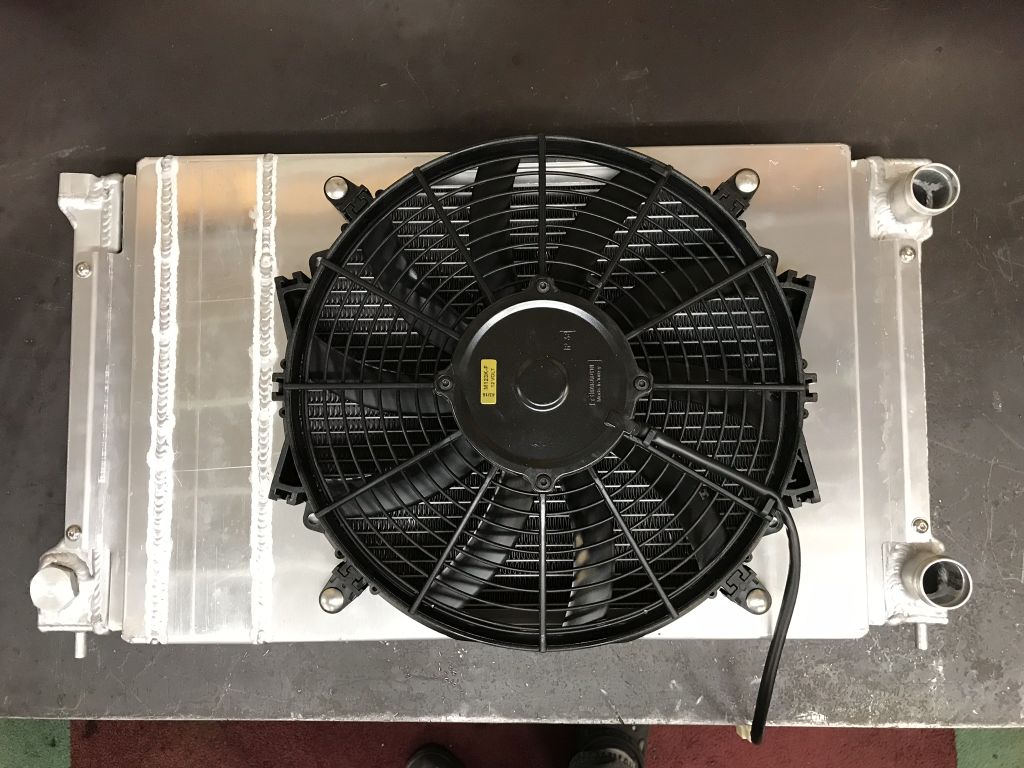
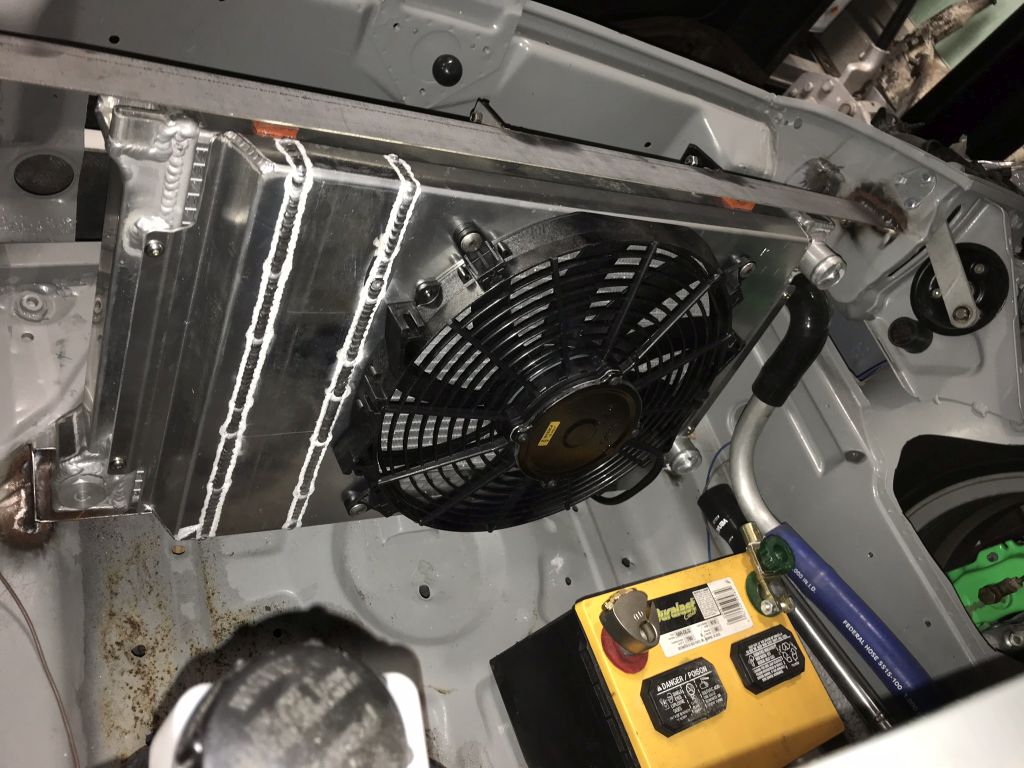
A few things came in the mail this week.
The dash looks really good. A few scuffs here and there but really nice shape.
Unfortunalty it is missing all of the bulb holders. Hopefully the ones from my old cluster fit.
We will need an electronic speedo from a 911 to work with the suby trans. speed sensor.
Stainless fuel lines with AN fittings arrived from CFR. He even custom bent the engine side!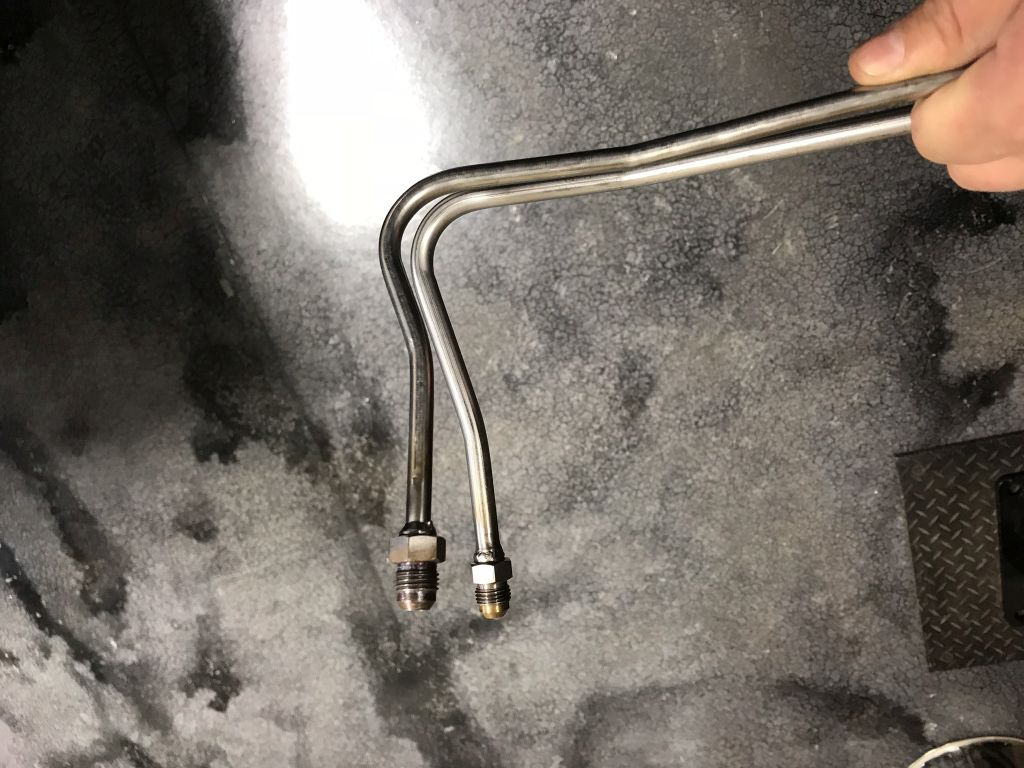
I went through the IC pluming to make sure that it was good to go and didn't like the transition to the outlet V-band flange so I got out the die grinder and ported it a bit. The carbide burr always gets clogged when cutting aluminum so in desperation I tried AL tap magic and it made a world of difference. A few drops every once in a while and the burr stays clean!!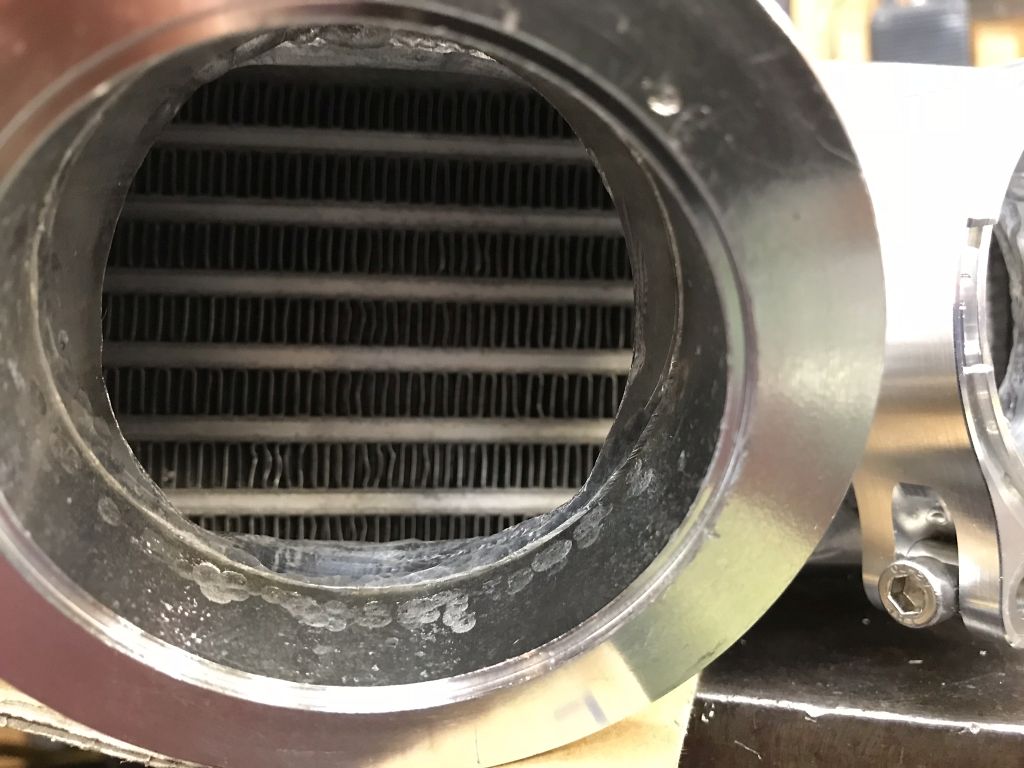
Had some time left so I modified the IC water header tank. I didn't want to run a water exchange type radiator cap so I found weld fittings for a mustang radiator cap. Sliced off the old cap on the band saw and then made a sketchy fixture to cut the hole for the new fitting.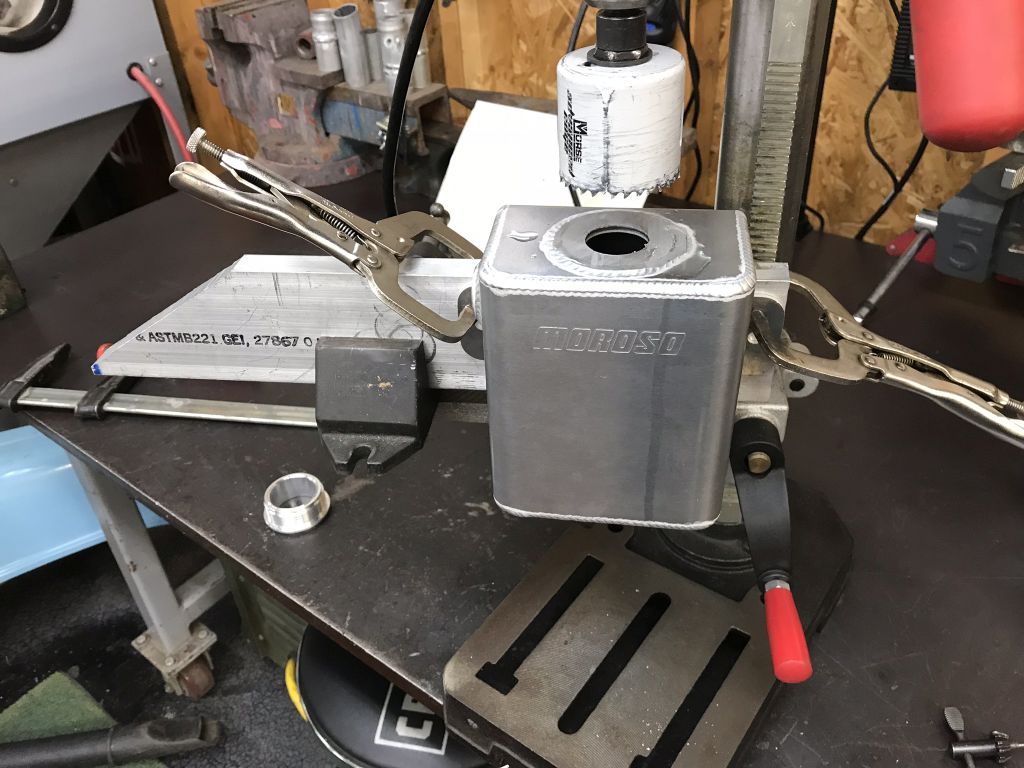
My best AL welds to date. Really getting dialed in with the new welder. Also helped that I changed my tungsten type and got a proper tungsten grinder.
The mustang cap had a huge flange stuck out over the sides of the tank so I cut it off. Much better.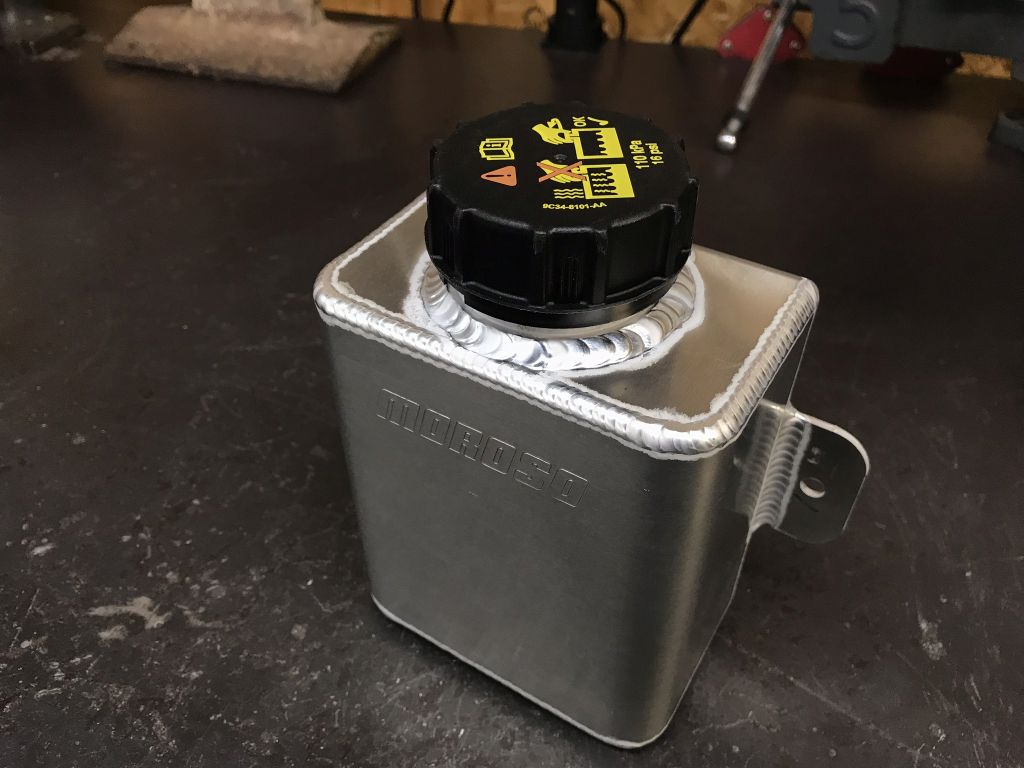
Cheers,
Scott
Posted by: 914forme Oct 29 2017, 06:59 PM
Looks very nice, but really you had to add a Mustang part onto this car , better include instructions on how to do a burn out
Posted by: Amenson Oct 30 2017, 07:07 AM
Looks very nice, but really you had to add a Mustang part onto this car
, better include instructions on how to do a burn out Don't worry, I exorcised the crowd seeking mustang demons when i modified the cap.
Posted by: jd74914 Oct 30 2017, 07:33 AM
Purpose of the shroud is to increasing radiator utilization while stationary or at low speeds by allowing the fan to draw air through the entire radiator instead of just the area covered by the fan. Certainly, at speeds higher than what the fan can create, the shroud will limit the flow to what is capable of passing through the fan.
That said, I have yet to experience a shrouded radiator that cools while stationary, not cooling at high speeds. I have experienced an un-shrouded radiator not cooling.
I've actually had they very problem before with a shroud that sealed too well and excessive pressure drop through the fan limited air flow. It was pretty neat, we put yarn on the inlet duct and actually saw reversion as vehicle speeds increased (didn't happen at the magical 25 mph number though
). Like you said, not well enough shrouded it usually the issue and flaps are easy. Just though I'd put this anecdote here since it actually does happen. OTOH, that was on a racecar, street cars just don't have the high-speed, high engine load duty cycles so they're likely a bit more forgiving. In any case, it looks great! The mustang cap looks nice too-definitely going to steal that one!
Posted by: Amenson Oct 30 2017, 08:48 AM
In any case, it looks great! The mustang cap looks nice too-definitely going to steal that one!
The cap idea was inspired by Bob when I found a picture of his conversion using a Volvo
The weld fitting for a non
P/N: CR-SM-CPF-001A
Price: $20
Cheers,
Scott
Posted by: jd74914 Oct 30 2017, 11:43 AM
Thanks! That's really not a bad price either all considering.
Posted by: Amenson Nov 5 2017, 09:43 PM
Mounted the fuel pressure regulator and Boost controller and as always, it got a bit out of hand finding an ideal location.
I really wanted to put it behind the the intake manifold so that I could connect directly to the "T" between the fuel rails. Problem is there is not a while lot of room between the intake manifold and the charge pipe to the turbo. After a whole lot of measuring and pondering I decided that might just work...step 1, modify the fuel pressure regulator mounting bracket. Can't get 0.5mm shorter without a whole bunch of stuff interfering with each other.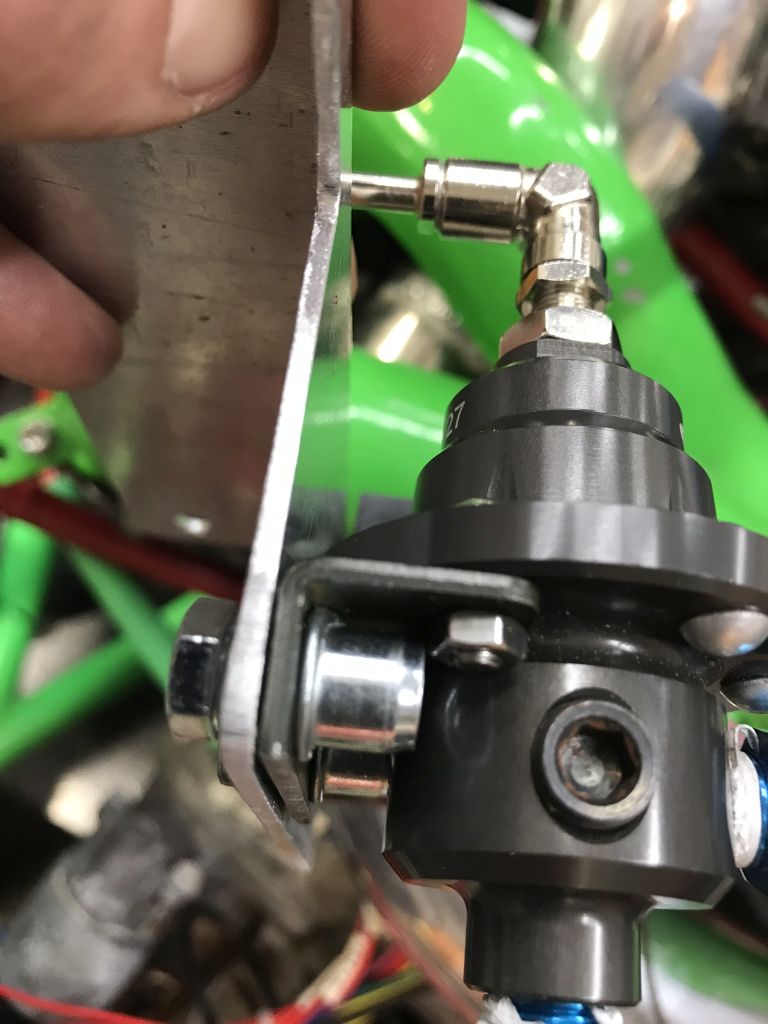
I always wanted to use press in threaded inserts so I tried to reuse the ones from the boost controller. Worked perfectly. Now I just need to figure out how to buy a bunch. Who knows what they are called?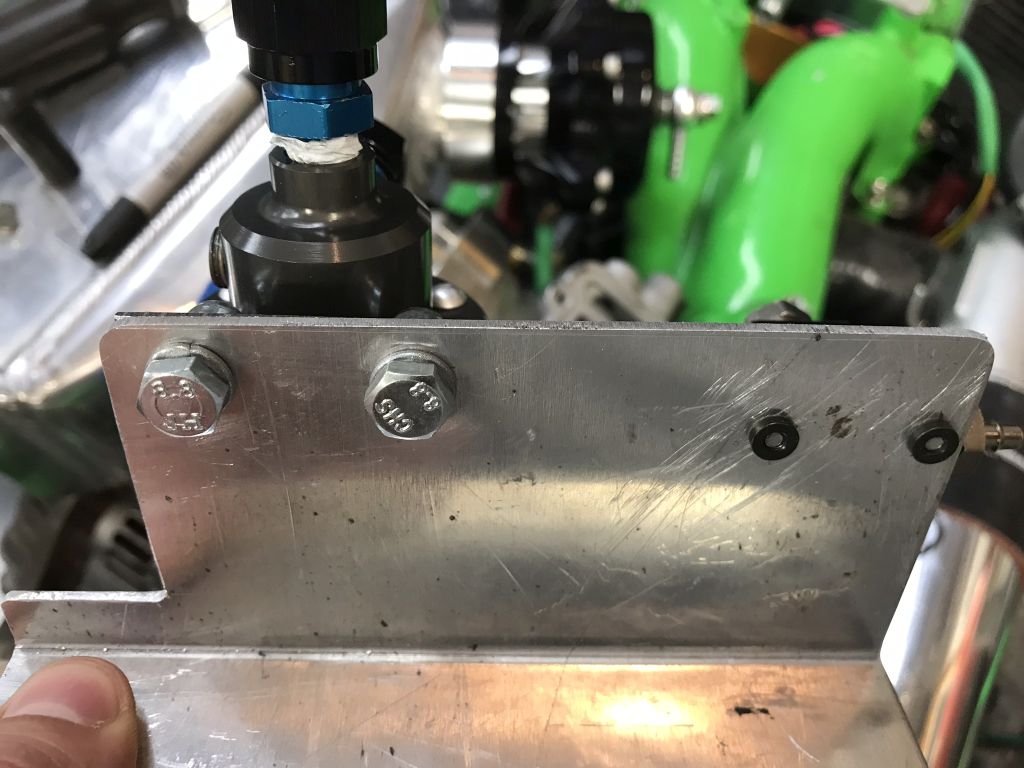
Clearance everywhere!
Packaging.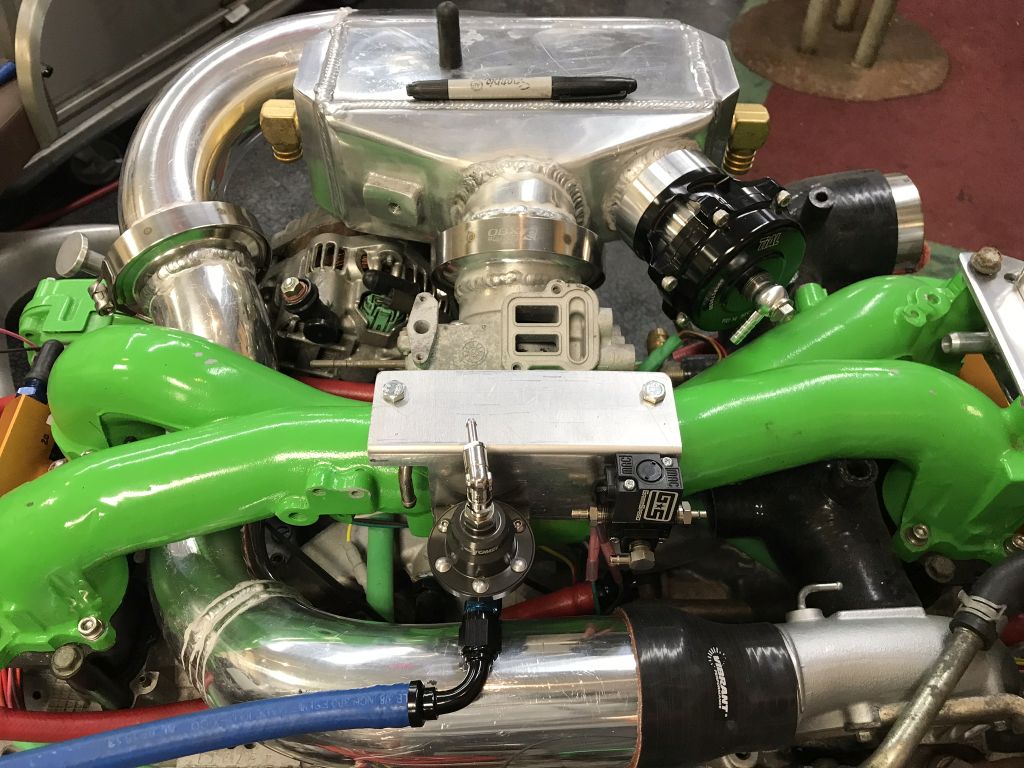
One issue is that the top of the manifold was ground down so there is not a flat surface to bolt to. 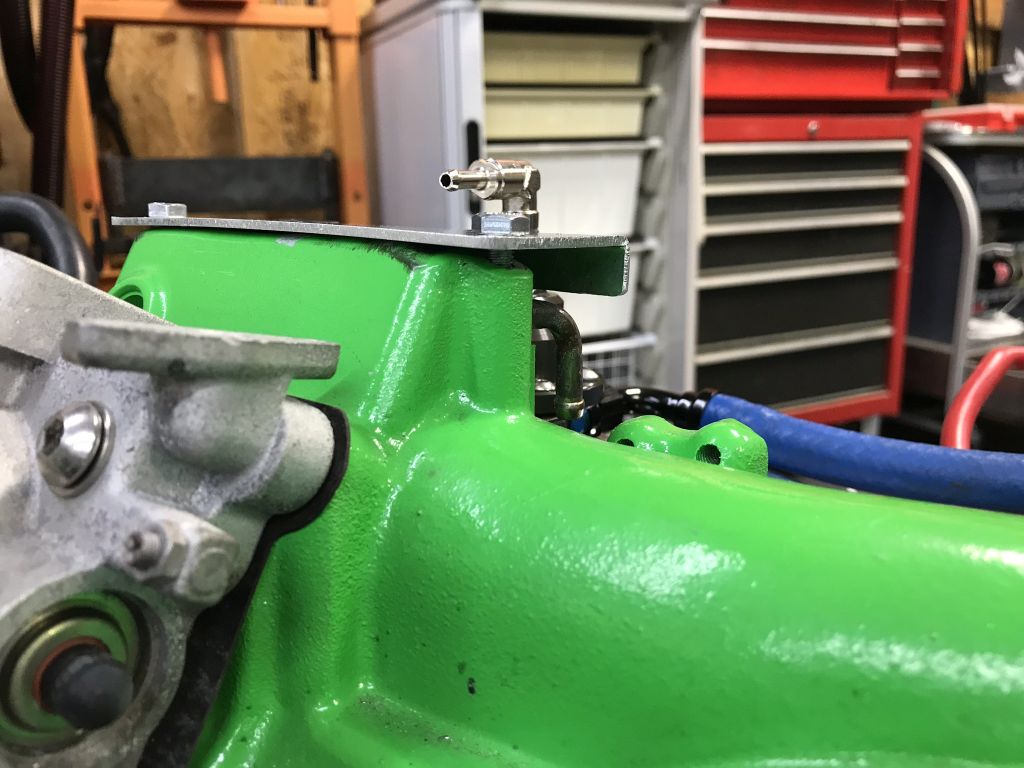
This was really bothering me so $40 on ebay later and a new manifold is on the way. The one I found even has the throttle body and throttle cable bracket! The throttle cable brake alone made it worth it so that I don't have to design/make one!
Cheers,
Scott
Posted by: mepstein Nov 6 2017, 05:29 AM
"I always wanted to use press in threaded inserts so I tried to reuse the ones from the boost controller. Worked perfectly. Now I just need to figure out how to buy a bunch. Who knows what they are called?"
Riv nuts?
Posted by: GS Guy Nov 6 2017, 05:49 AM
"I always wanted to use press in threaded inserts so I tried to reuse the ones from the boost controller. Worked perfectly. Now I just need to figure out how to buy a bunch. Who knows what they are called?"
Riv nuts?
Pem nuts. Nice looking work!
Posted by: Amenson Nov 6 2017, 06:27 AM
"I always wanted to use press in threaded inserts so I tried to reuse the ones from the boost controller. Worked perfectly. Now I just need to figure out how to buy a bunch. Who knows what they are called?"
Riv nuts?
Pem nuts. Nice looking work!
Oh yes!! Thanks.
What is up with your suby build...lost track of the build thread?
Posted by: Amenson Nov 6 2017, 01:59 PM
Ever since plumbing the 3 port boost controller for the first time on the PorSTI it has always bothered me why a connection was necessary back to the intake between the air filter (MAF) and turbo. Having to now add the connection for Grey I decided to find out. It is not, definitely not for a setup w/o MAF. The port is just a vent to release the pressure from the waste-gate actuator.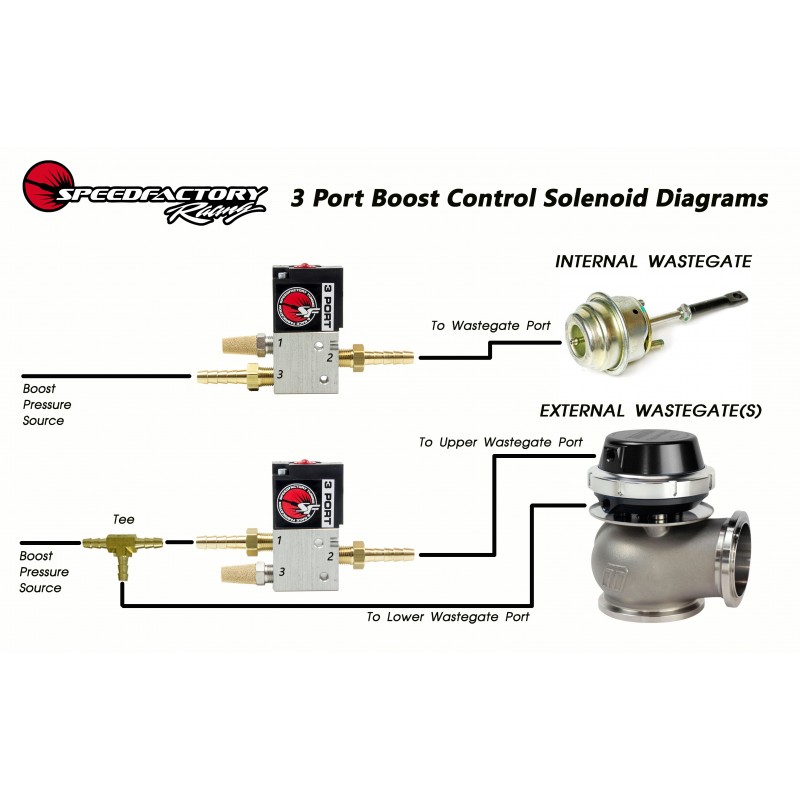
I guess theoretically in a MAF system venting the volume of air already accounted for by the MAF back into the system post MAF increases accuracy but it seems like a remarkably insignificant volume of air.
The best type of plumbing is the type that is not necessary. Sintered bronze mufflers on order!
Speaking of MAF-less...I am confirming that we need to add a temp sensor into the Intake manifold.
https://www.bmotorsports.com/shop/product_info.php/products_id/4172?osCsid=54uk3d8mnt1n5hefvu3mkl4g75
Cheers,
Scott
Posted by: jd74914 Nov 6 2017, 02:09 PM
You do need an IAT for speed density. Maybe need is a little strong since technical the IAT is most strongly governed by your IC efficiency curve and compressor map, so you could kind of build the correction into the load table, but it's certainly nice to have for tuning simplicity since you can just make an ideal gas correction.
Why not use the combined Bosch MAP/MAT sensor?It's a pretty slick package and requires only 1 hole in the manifold?
https://www.bmotorsports.com/shop/product_info.php/cPath/129_143/products_id/1721
Posted by: jd74914 Nov 6 2017, 02:11 PM
I guess theoretically in a MAF system venting the volume of air already accounted for by the MAF back into the system post MAF increases accuracy but it seems like a remarkably insignificant volume of air.
It may not be so insignificant for improving IMEP COV and emissions characteristics.
Posted by: Amenson Nov 6 2017, 02:18 PM
You do need an IAT for speed density. Maybe need is a little strong since technical the IAT is most strongly governed by your IC efficiency curve and compressor map, so you could kind of build the correction into the load table, but it's certainly nice to have for tuning simplicity since you can just make an ideal gas correction.
Why not use the combined Bosch MAP/MAT sensor?It's a pretty slick package and requires only 1 hole in the manifold?
https://www.bmotorsports.com/shop/product_info.php/cPath/129_143/products_id/1721
Bosch...who would use their crap
(I realized after writing this, probably not everyone knows that I work for Bosch)I would but Grey's ecu has an onboard MAP sensor.
Cheers,
Scott
Posted by: 914forme Nov 7 2017, 06:46 AM
Bosch...who would use their crap
(I realized after writing this, probably not everyone knows that I work for Bosch)I would but Grey's ecu has an onboard MAP sensor.
Cheers,
Scott
Nice to see progress. I can bring up my PEM setting tool on Friday, if you need one. Street Term for Mark is Riv Nuts, or Rivet Nuts, or Blind Rivet Nuts as that is what they are most akin to in most peoples knowledge of fasteners and tools. The good old Pop Rivet, or blind Rivet. Both use a mandrel to draw the pieces together and lock them in place. One advantage to the PEMs is you can also use a bolt, and backer to place them. On larger units that is exactly how you get them in there. Very handy for places you can no weld a nut or threaded sleeve in place. I figured you would have made a threaded sleeve and then welded it onto the bracket you made just to get a bit more TIG time in.
Some times it is nice just to get stuff done.
Though your places seems to be the place where my cool tools go and stay. I think your hoping I forget about my Parker's
Posted by: Amenson Nov 7 2017, 09:47 PM
Nice to see progress. I can bring up my PEM setting tool on Friday, if you need one. Street Term for Mark is Riv Nuts, or Rivet Nuts, or Blind Rivet Nuts as that is what they are most akin to in most peoples knowledge of fasteners and tools. The good old Pop Rivet, or blind Rivet. Both use a mandrel to draw the pieces together and lock them in place. One advantage to the PEMs is you can also use a bolt, and backer to place them. On larger units that is exactly how you get them in there. Very handy for places you can no weld a nut or threaded sleeve in place. I figured you would have made a threaded sleeve and then welded it onto the bracket you made just to get a bit more TIG time in.
Some times it is nice just to get stuff done.
Though your places seems to be the place where my cool tools go and stay. I think your hoping I forget about my Parker's
I like the PEM in this application because I didn't have room for a riv nut. No need to bring yet another tool over. I can buy my own PEM set.
The Parker beaders on the other hand....those are worth their weigh in gold and is about what a new set costs. Don't worry, I will bring them back the moment that you need them. Which is hopefully soon, you really need to get back to your suby build one of these days.
Speaking of tools...new tool day!
DSO Nano next to the trusty Fluke Scopemeter.
Not an instrument grade oscilloscope but a compact way to confirm sensor behavior.
Cheers,
Scott
Posted by: Amenson Nov 12 2017, 10:33 PM
Stephen stopped by on Friday and delivered the new dash pieces so I pulled the existing one, installed the stock one and fit the 911 style dash top.
I fit them together off the car to check for issues. Good thing that I did because the center mounting hole is shifted to use another hole that needed to be enlarged.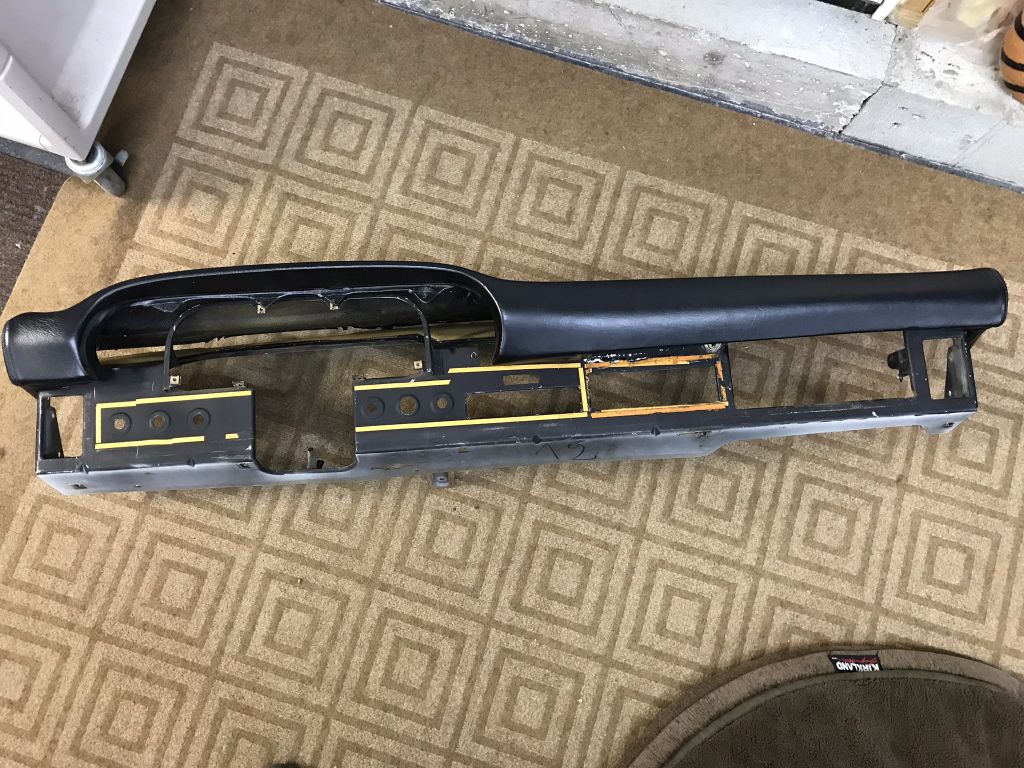
Back to stock.
OK not really.
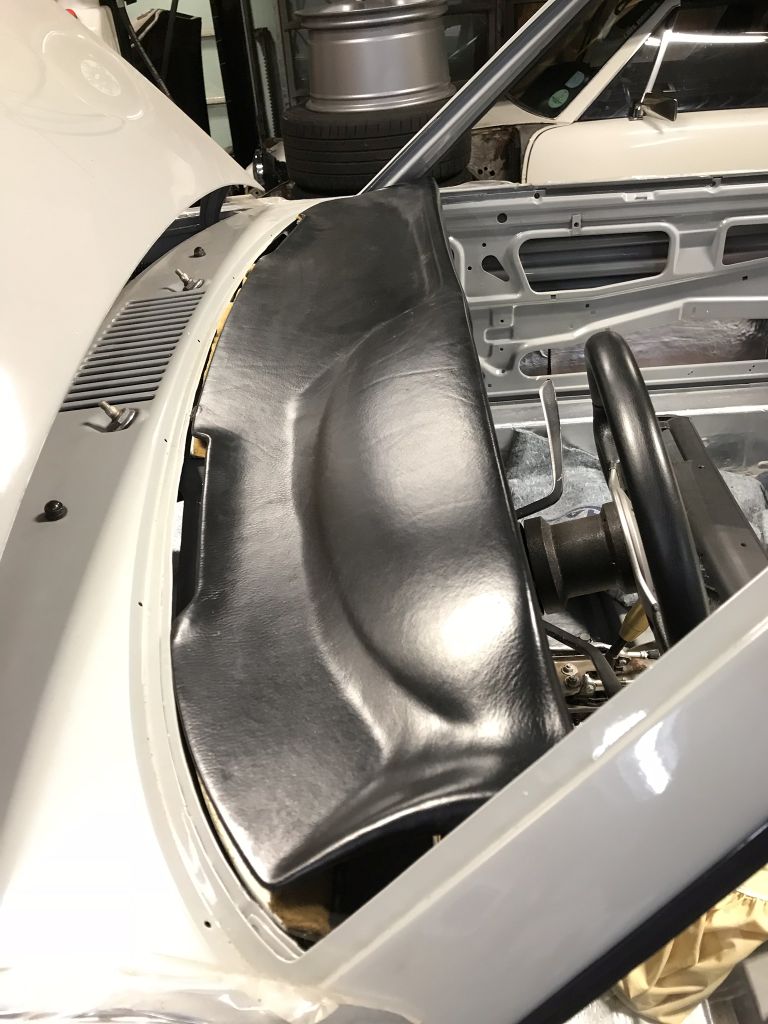
Then I did this....check the PorSTI build for the background.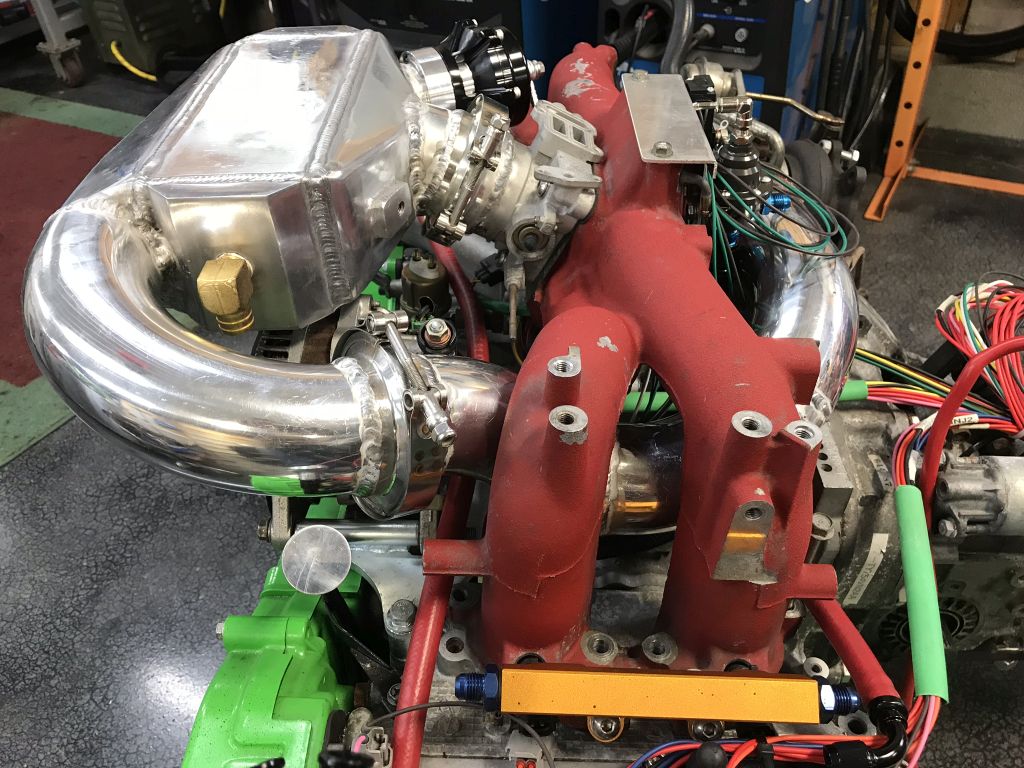
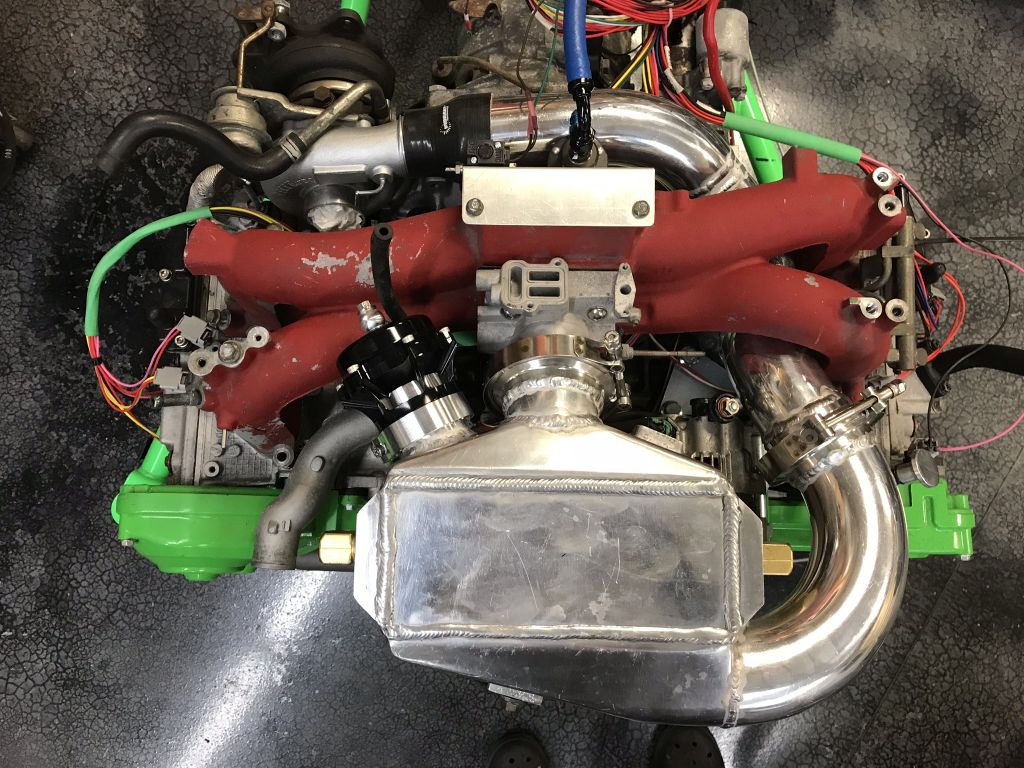
Not only does it look better, it eliminates the need to slot the middle mounting holes when rotating the upper part of the intake.
Tom, I am thinking about a proposal. I'll send an email...
Cheers,
Scott
Posted by: theer Nov 12 2017, 11:00 PM
Whatcha got in mind, Scott?
Posted by: 914forme Nov 13 2017, 12:04 PM
Nice progress I like it.
Posted by: Amenson Nov 30 2017, 09:18 PM
Time for a much overdue update. Have been getting a ton of time in the garage but quite busy ouside as well so have not made time to organze pictures.
Here we go....
I talked Tom into going with the JDM manifold and man am I happy I did. The hours to smooth and intigrate it were not planned but well worth it.
First off was to add a second lug for the coolant tank.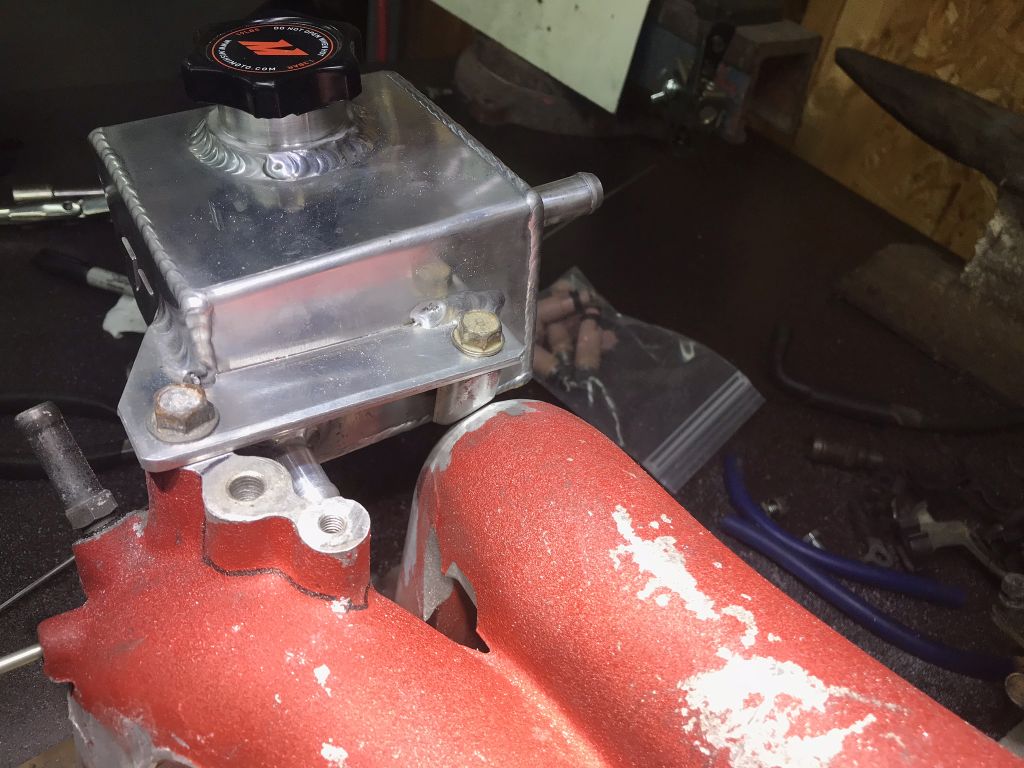
After many hours of cutting/grinding/welding...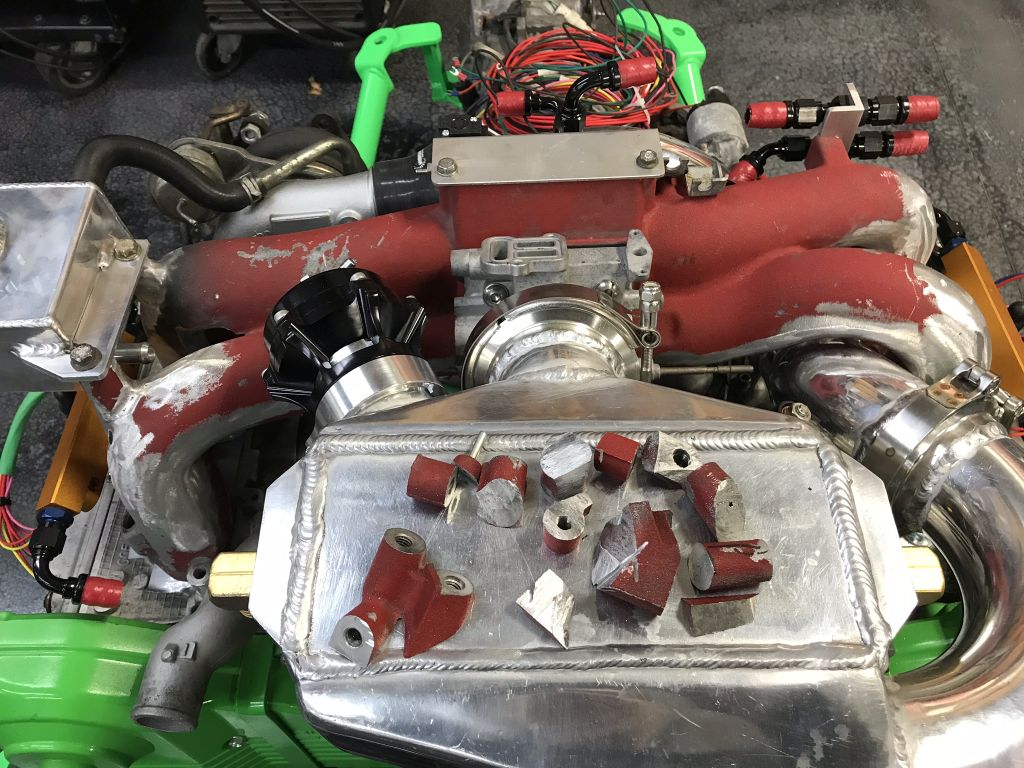
This lug stayed and made a perfect place to mount for the fuel line connections to the chassis lines.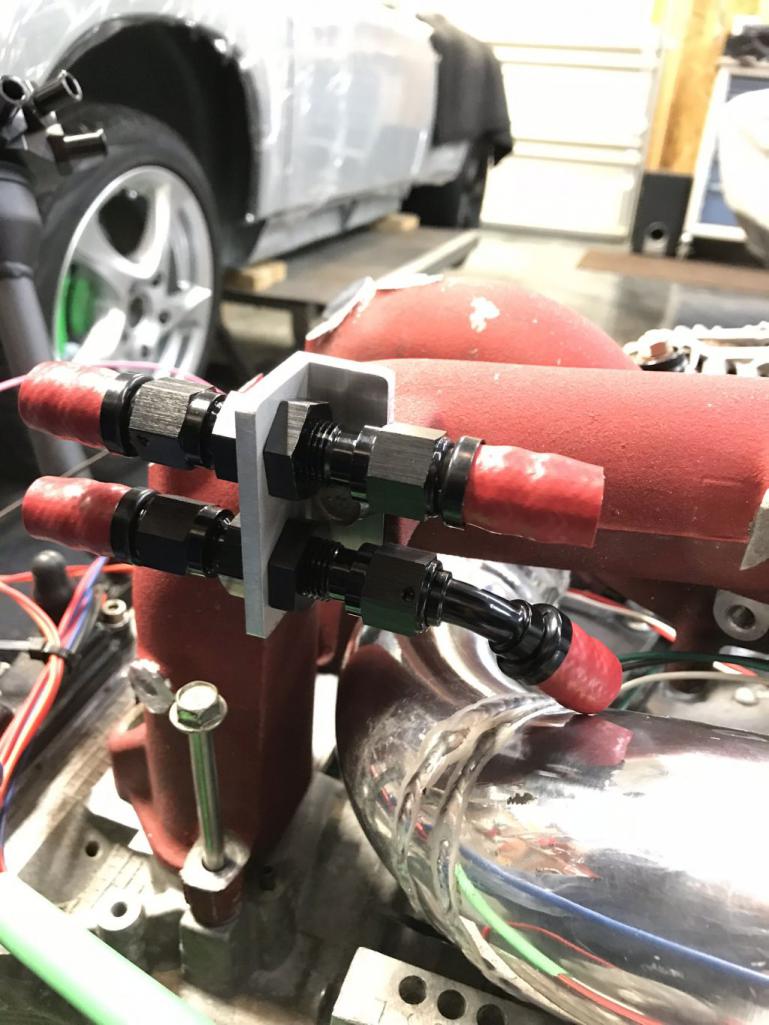
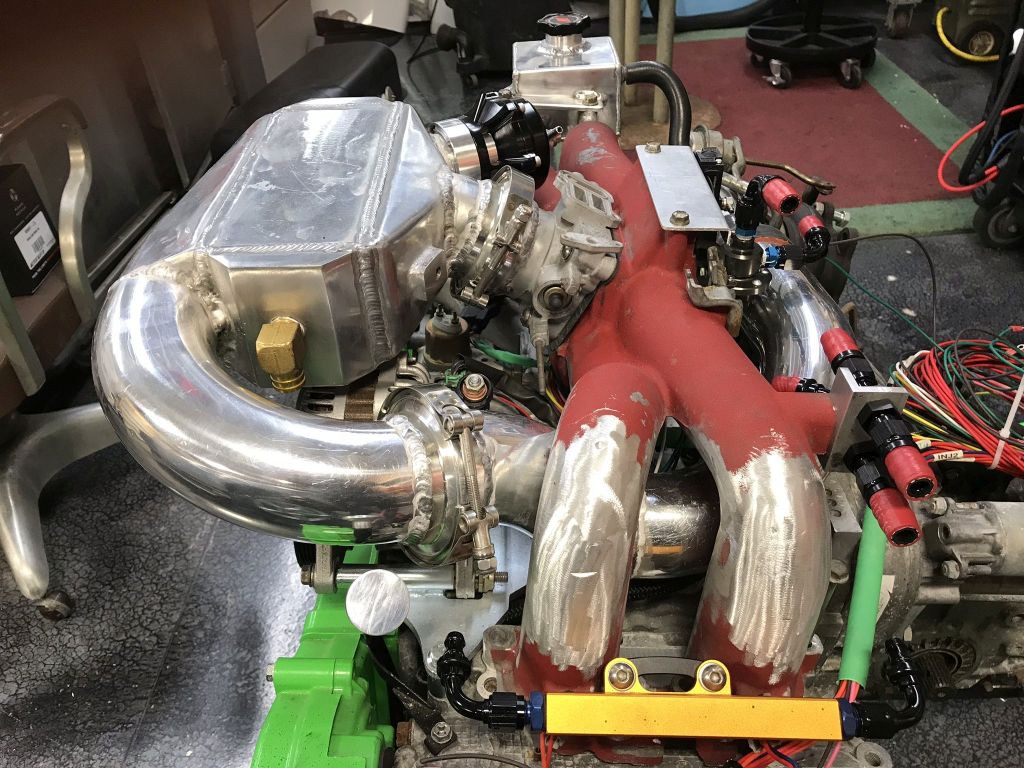
The aftermarket silicon turbo intake had way too many extra connections so I decided to make my own. Unfortunately it was not quite a straight shot to the turbo.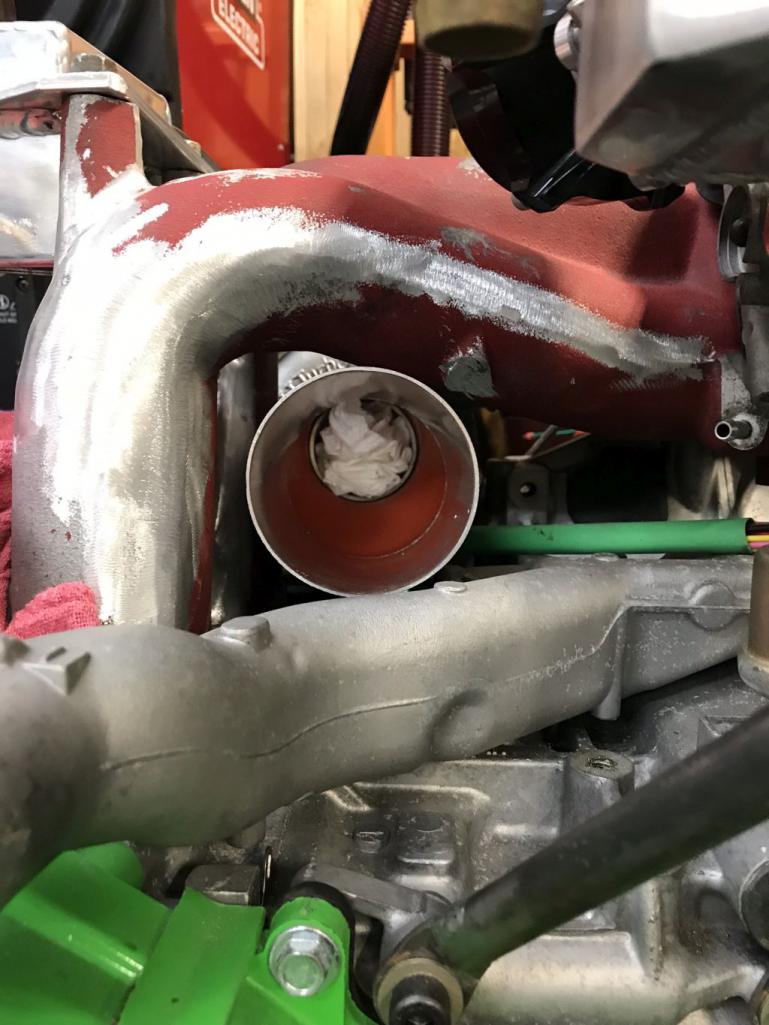
No problem.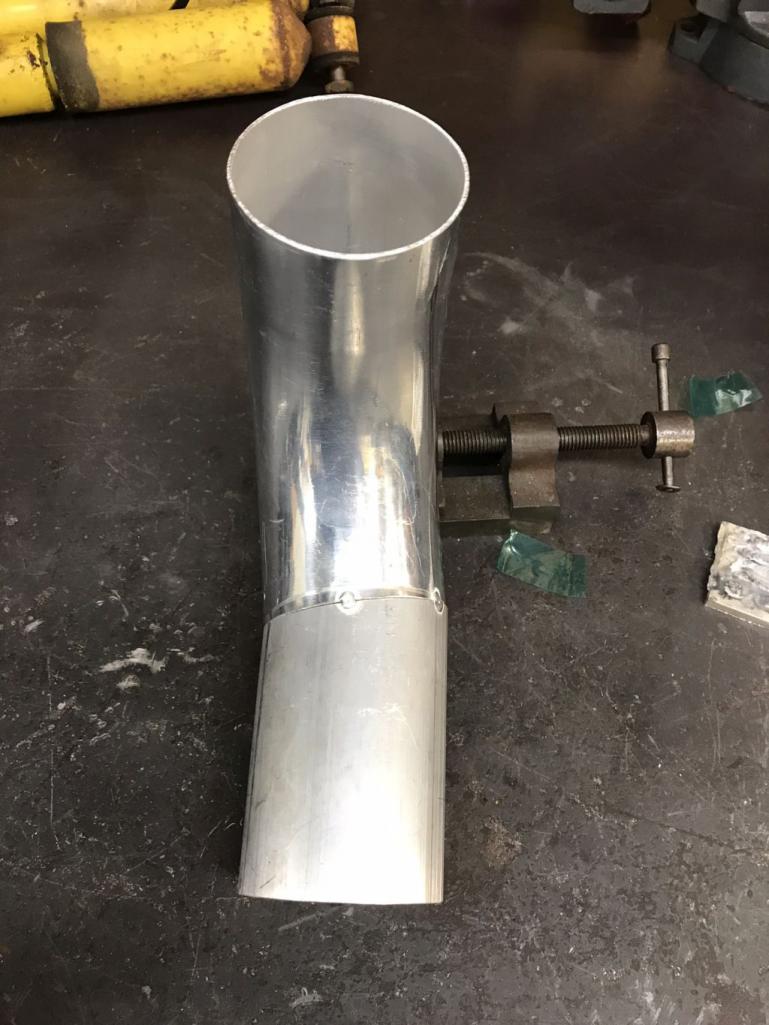
Much better.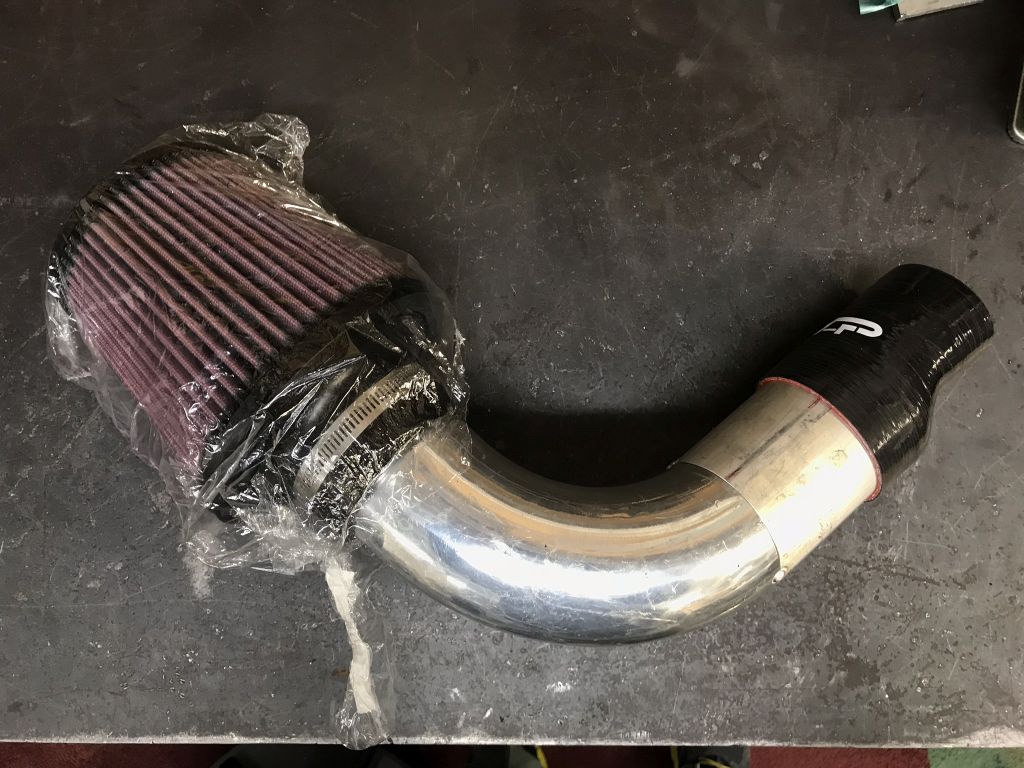
Ooooh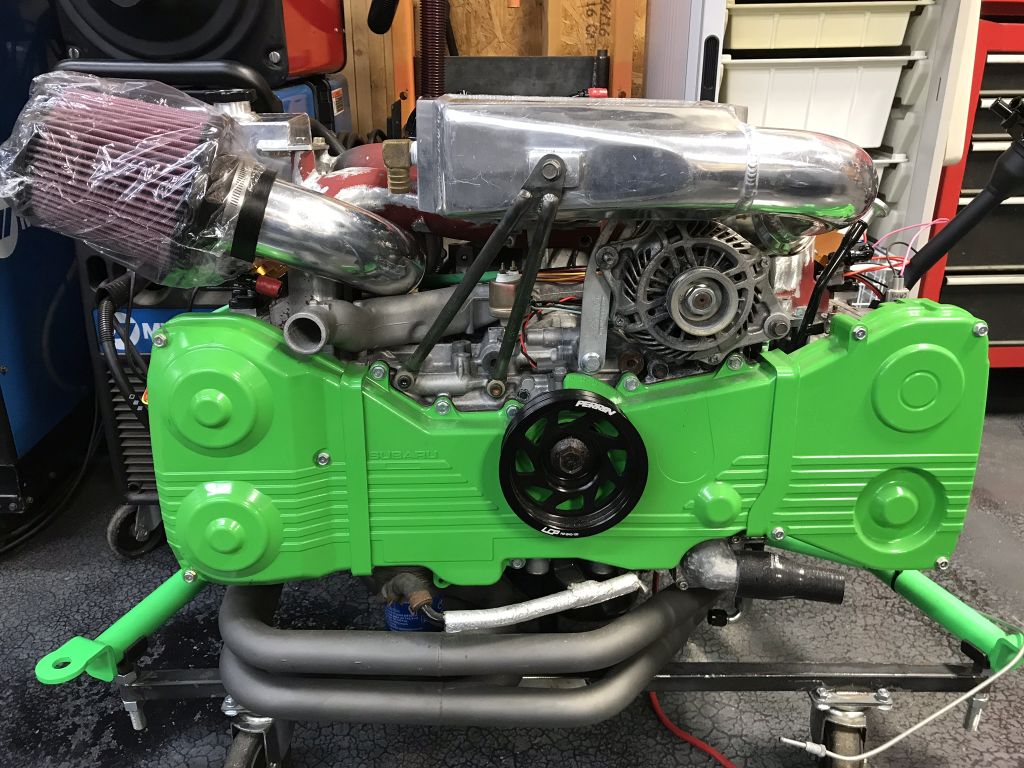
Aaaah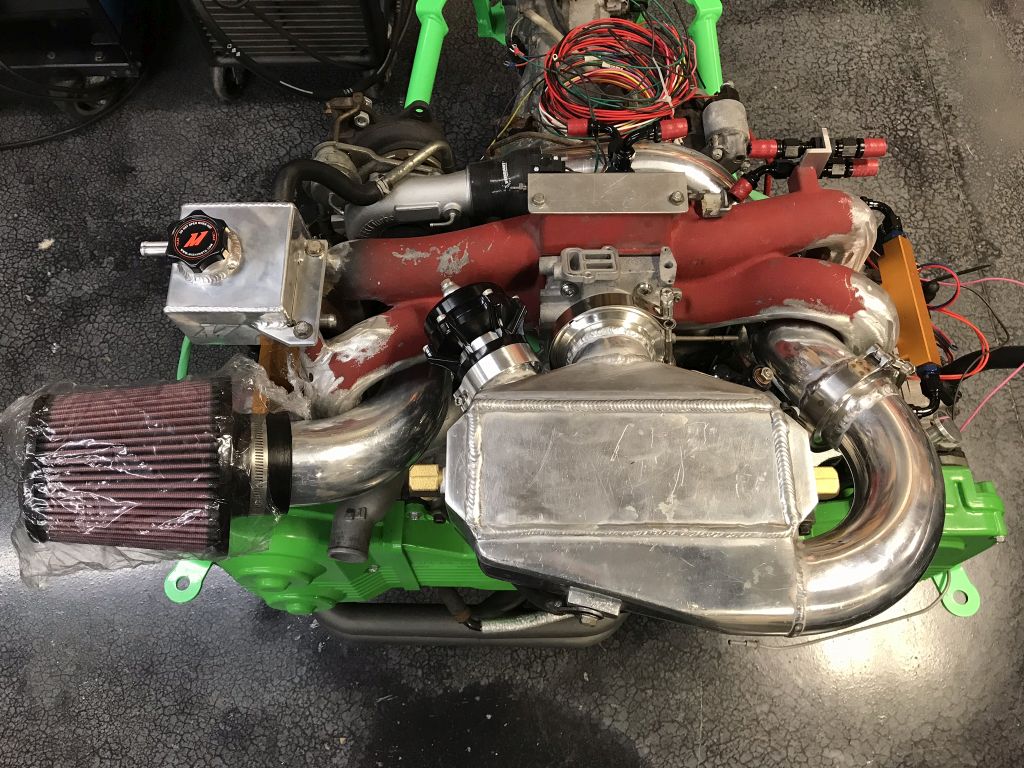
Still need to make a tab and add a lug to the intake to support it.
Cheers,
Scott
Posted by: Amenson Nov 30 2017, 09:30 PM
Also worked on the chassis.
Swapped out the oversized spings for the springs I pulled from Porsti when I installed the coil overs. Also threw on the tie downs.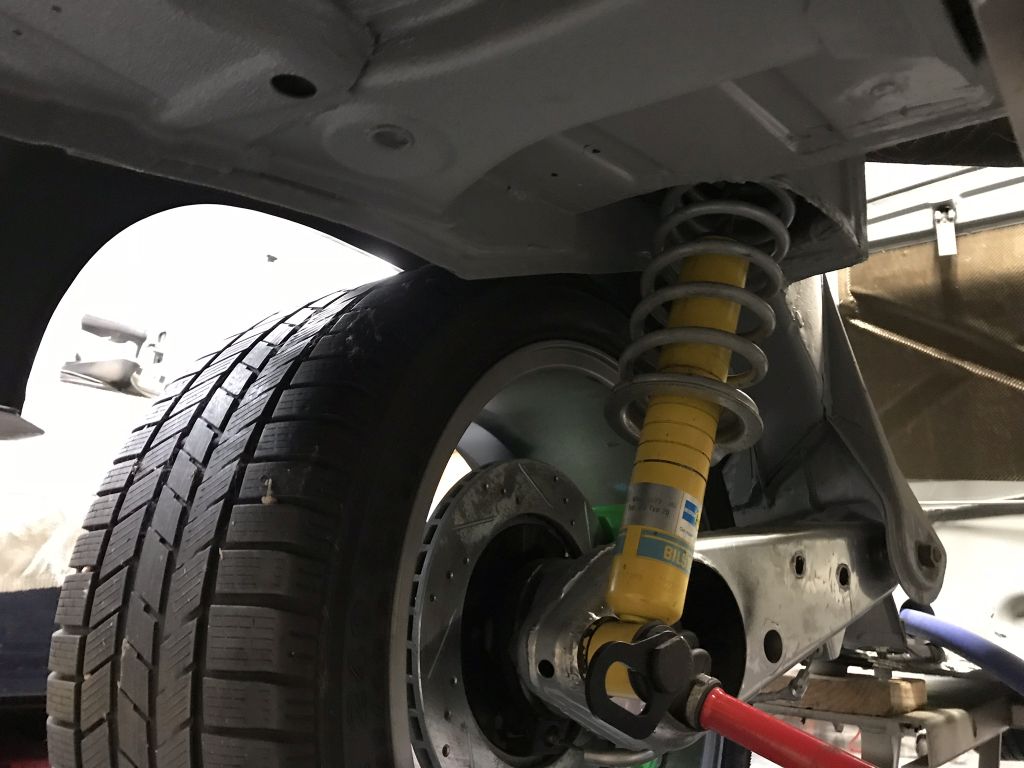
Was going to install the windshield while I had extra hands around the garage but managed to break 2 of the trim clips. Those things are a bugger to install.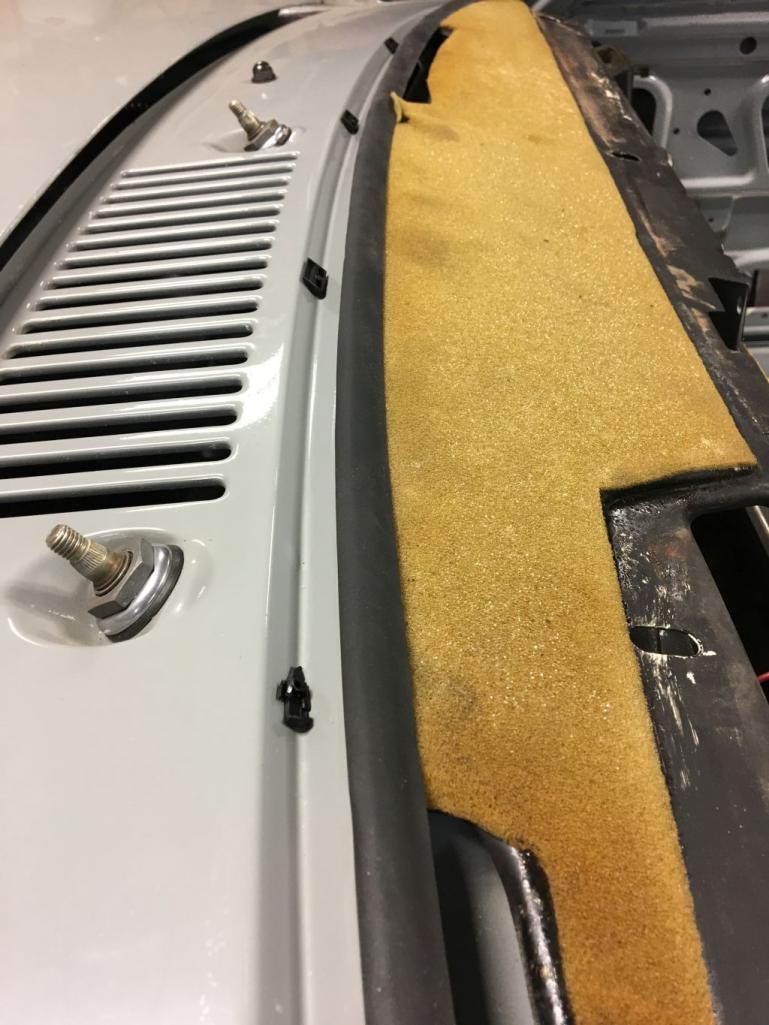
Removed the extra stuff coming trough the firewall. Will cut out the shift rod support also. Then everything will be filled and properly placed holes added. Removed the wiley brake and clutch lines. New brake line made.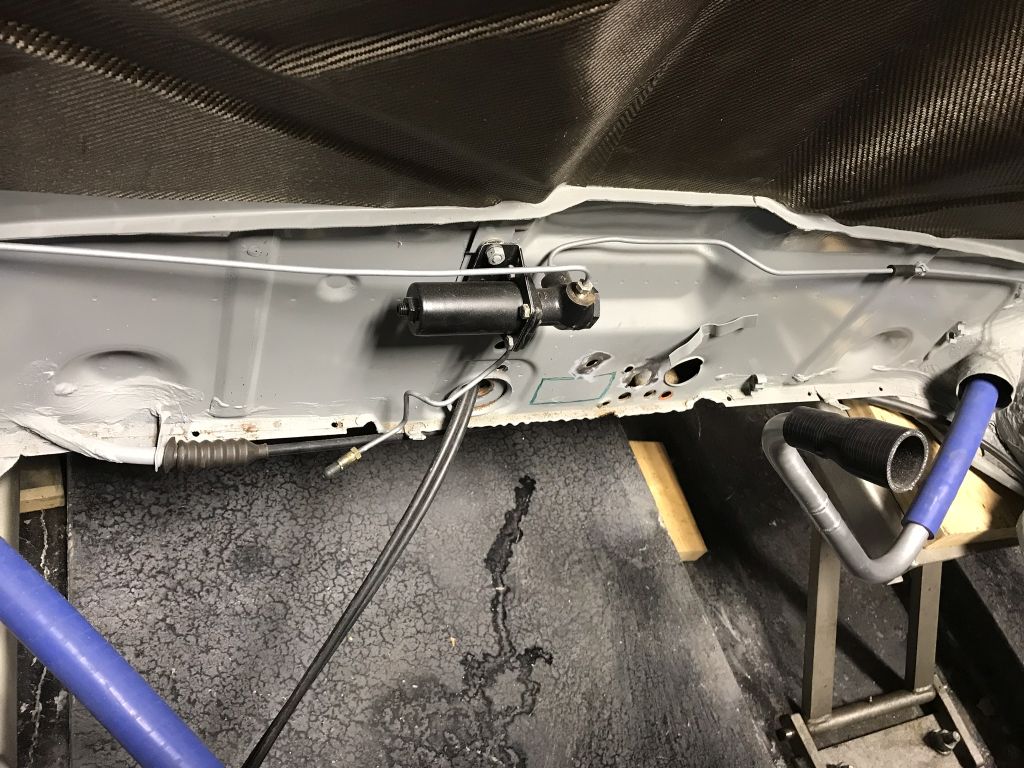
Started mounting the coolant tanks. Battery tray removed and tiny battery mounted in the trunk.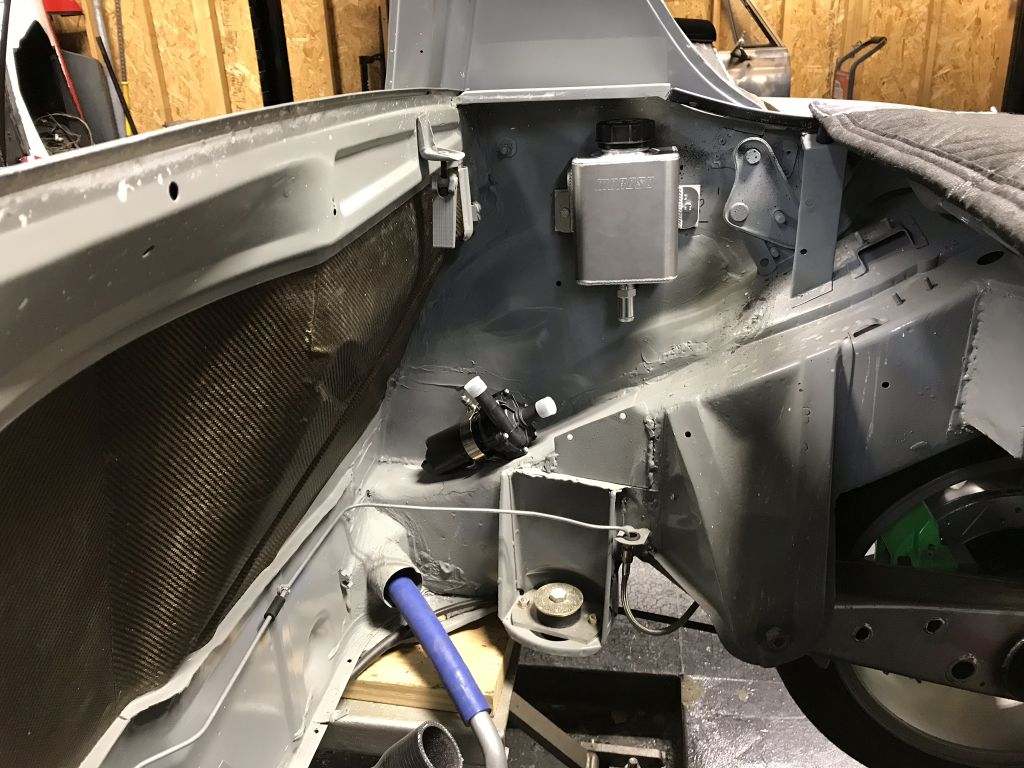
My parents were in down last week and my Father knocked out a ton of work on my much neglected C10. Starting to look like a truck again.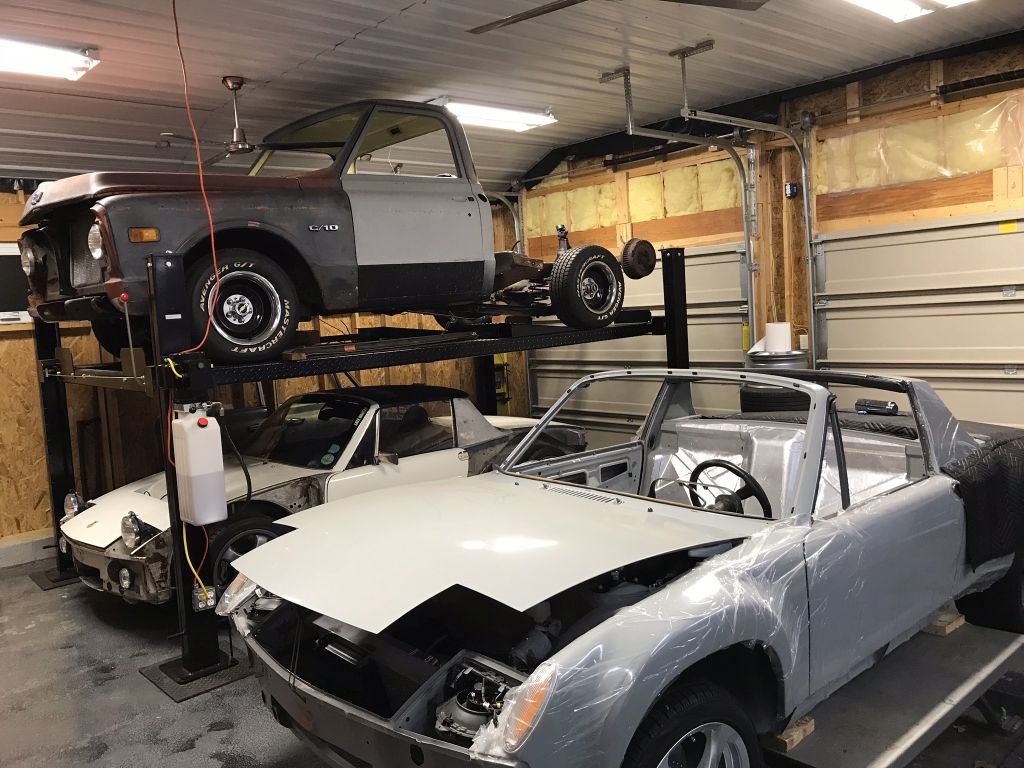
Cheers,
Scott
Posted by: effutuo101 Dec 1 2017, 09:16 AM
Sweet! Looking good!
Posted by: theer Dec 1 2017, 09:26 AM
Scott, you are a true artist when it comes to getting all that plumbing to fit. Looks awesome.
Tom
Posted by: Amenson Dec 3 2017, 08:46 AM
Scott, you are a true artist when it comes to getting all that plumbing to fit. Looks awesome.
Tom
Thanks for the kind words Tom, glad you like it. I am just a hack compared to the world class guys that I study. Each part gets closer but I have a long way to go.
Cheers,
Scott
Posted by: Amenson Dec 10 2017, 10:15 PM
Few "minor" tasks checked off the list.
Step one of mounting the air intake...add a threaded lug.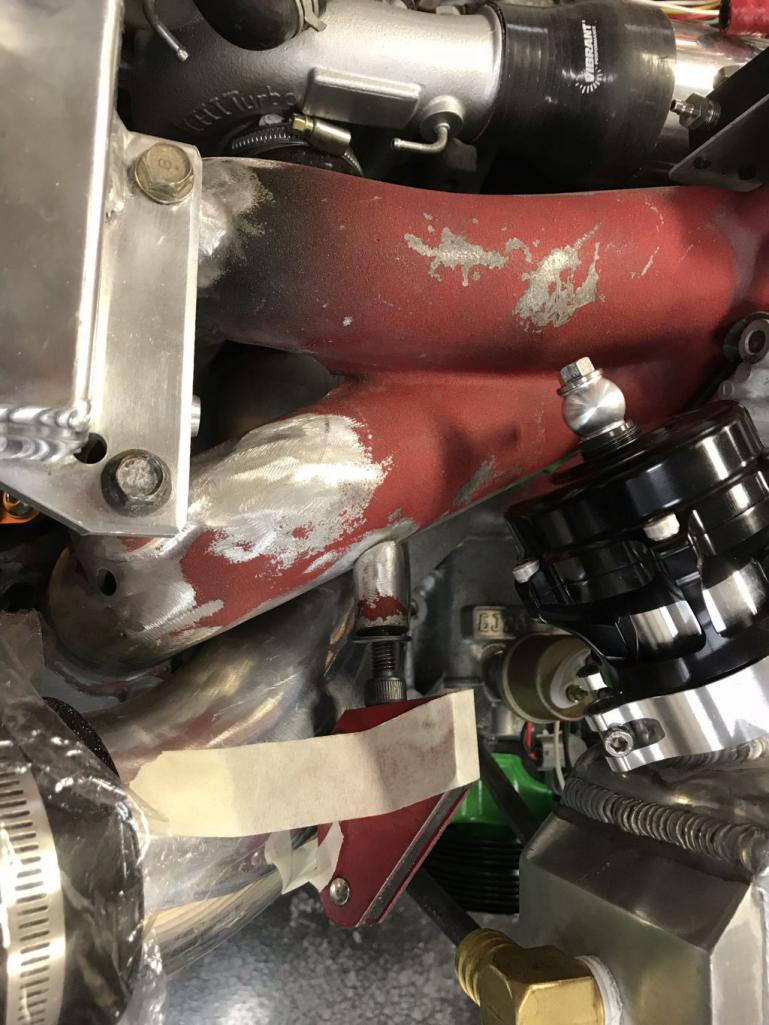
Step 2, make a tab paying careful attention to leave 1 thickness of cardboard around the tube.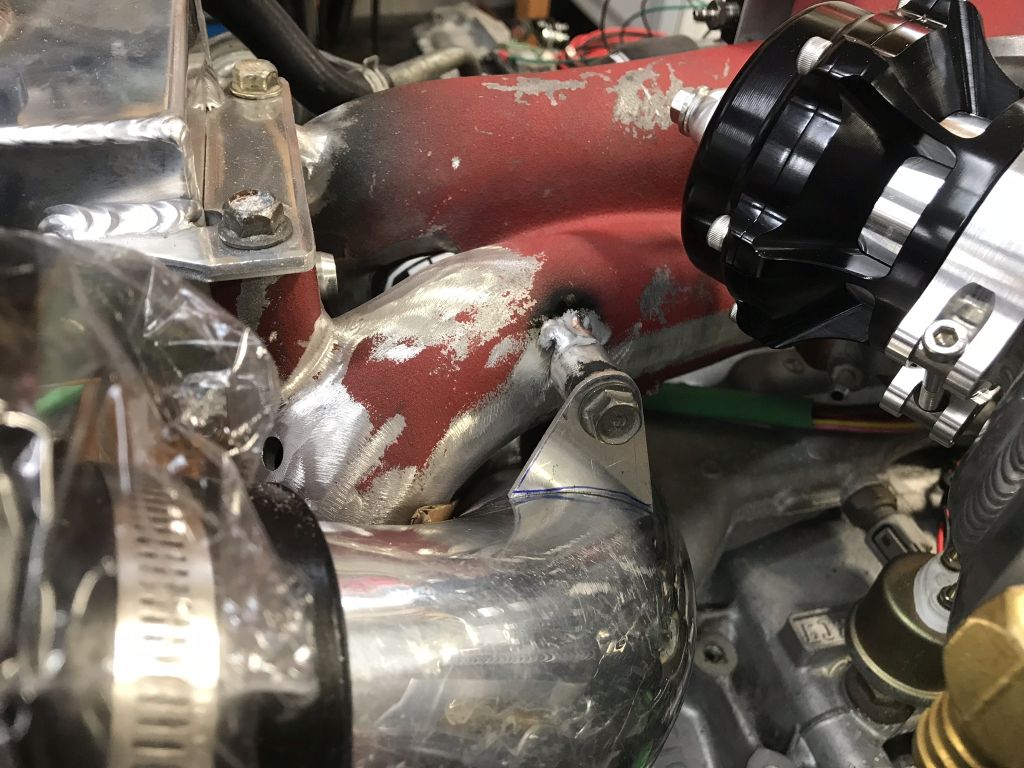
Weld, no touching except the tab and turbo coupler!! 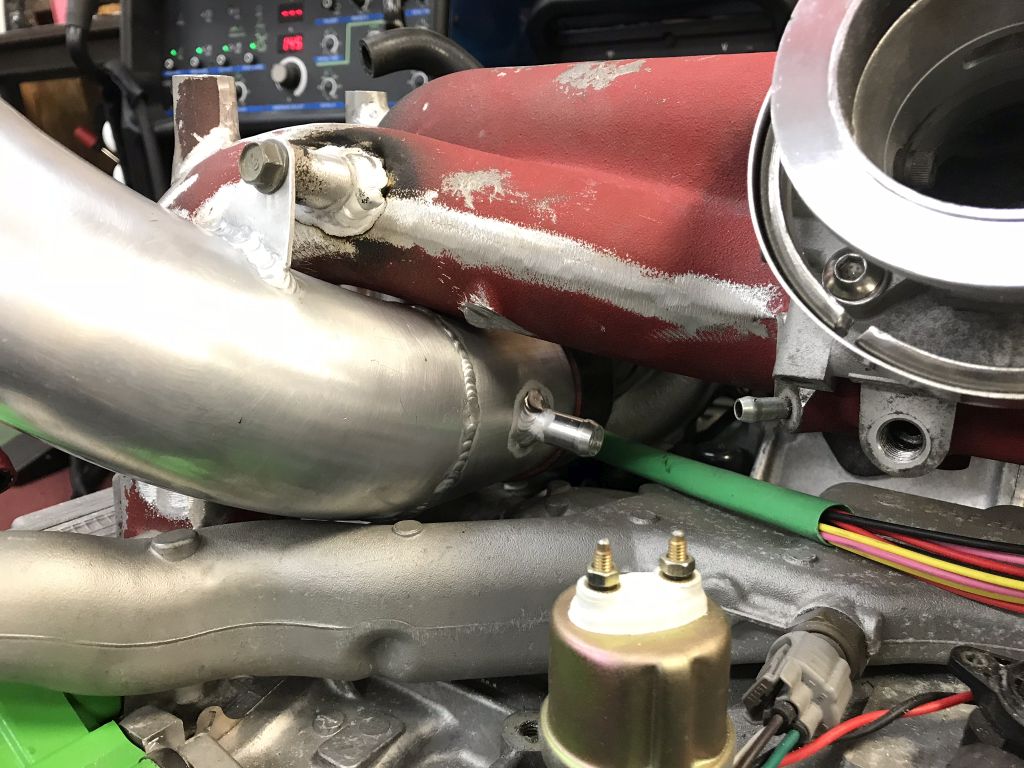
Oh, ya...along the way I added a connection for the crank air oil separator.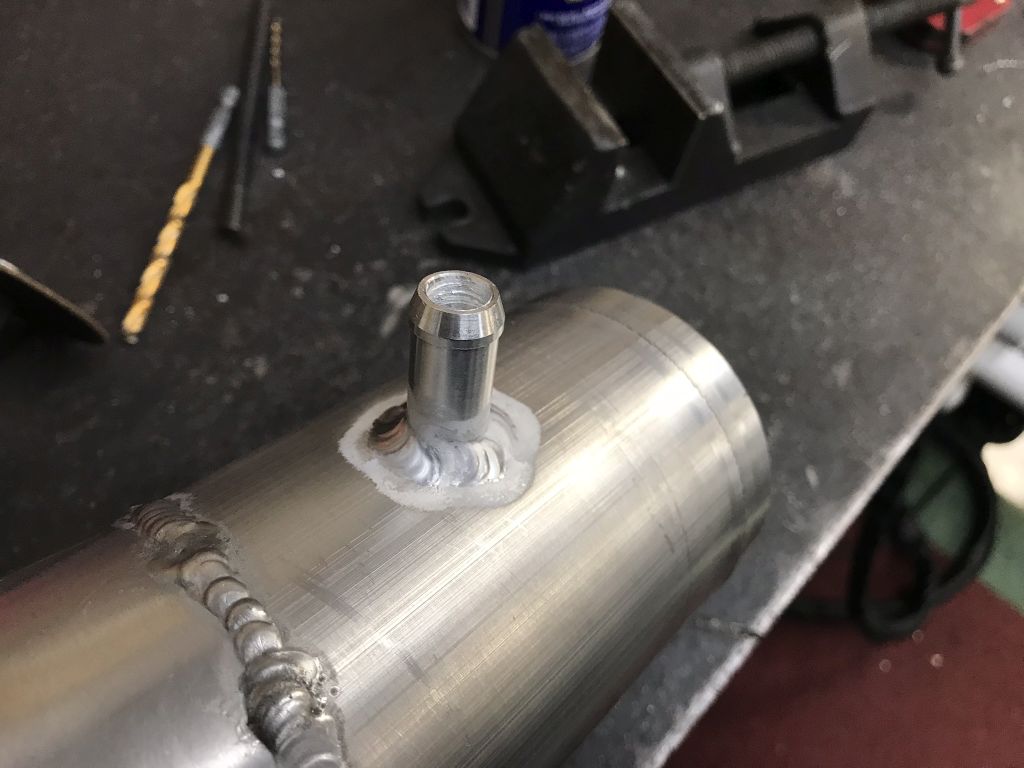
The position of the lower bung on the coolant tank was not in the best place so I moved it (re-purposed on the air intake). AN all the things!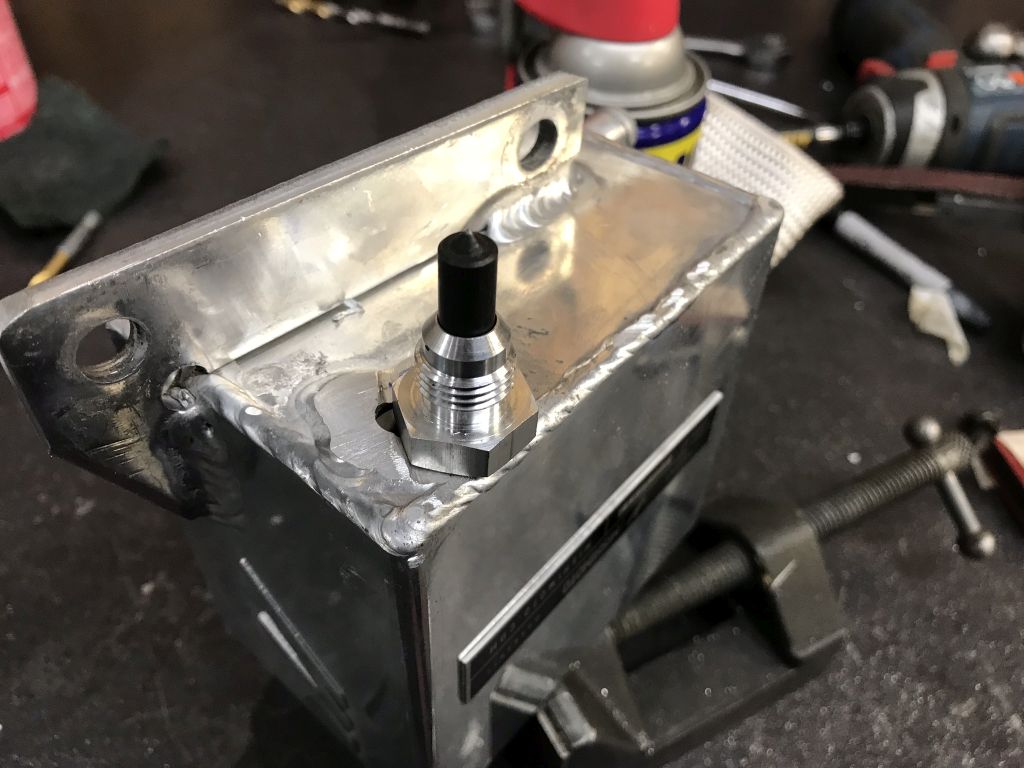
Welded.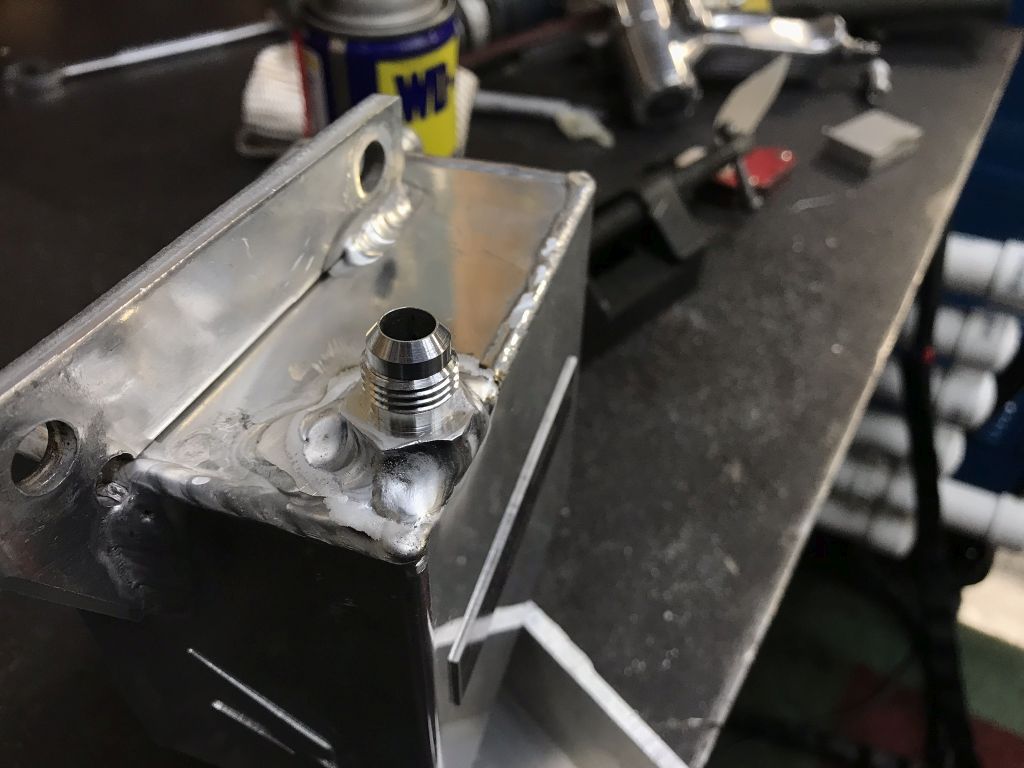
Much better.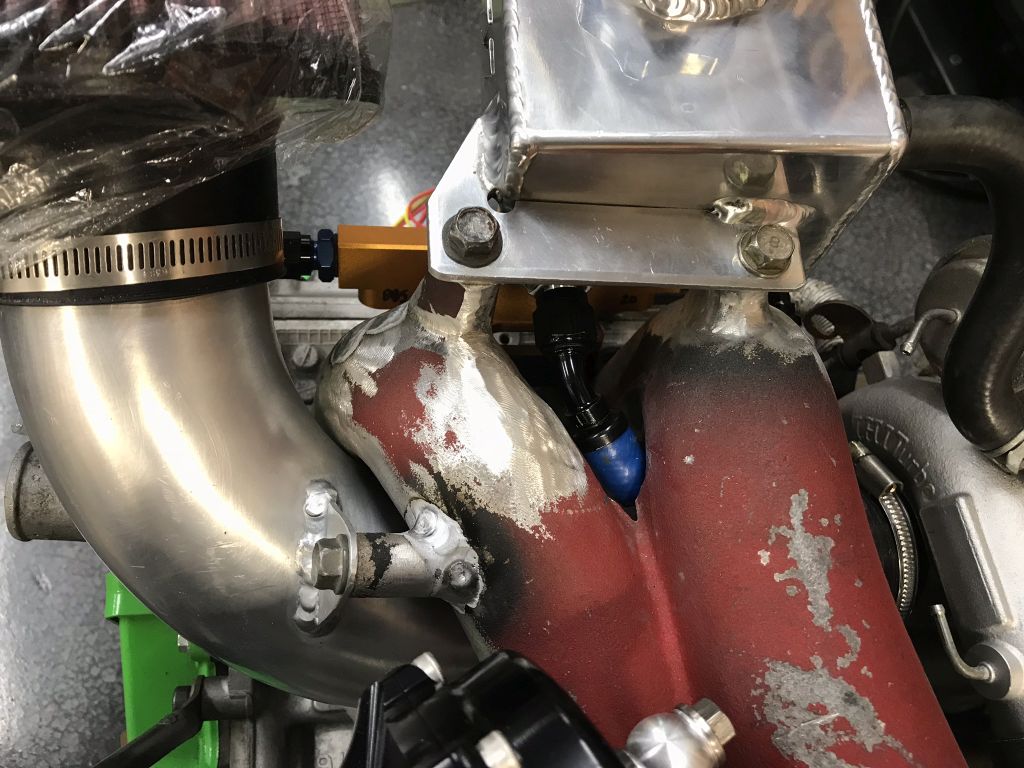
Almost done with the engine fab, just need to at the IAT threaded bung just in front of the throttle body.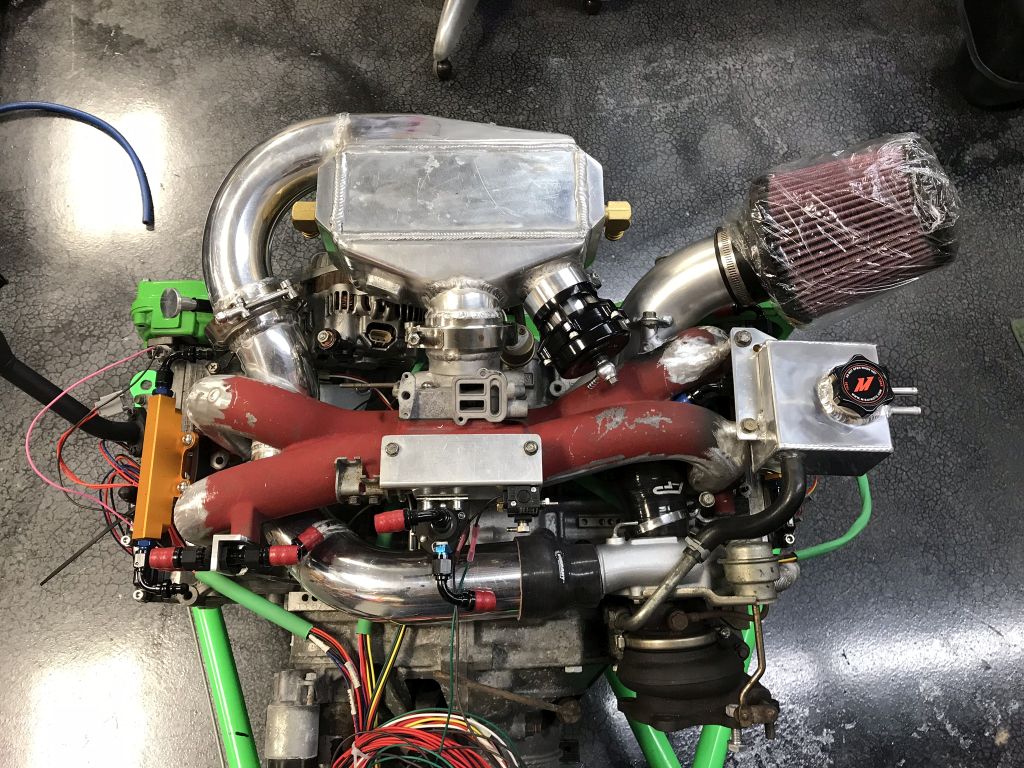
I had anxiety every time I looked at the mess of holes in the firewall, so I got rid of them.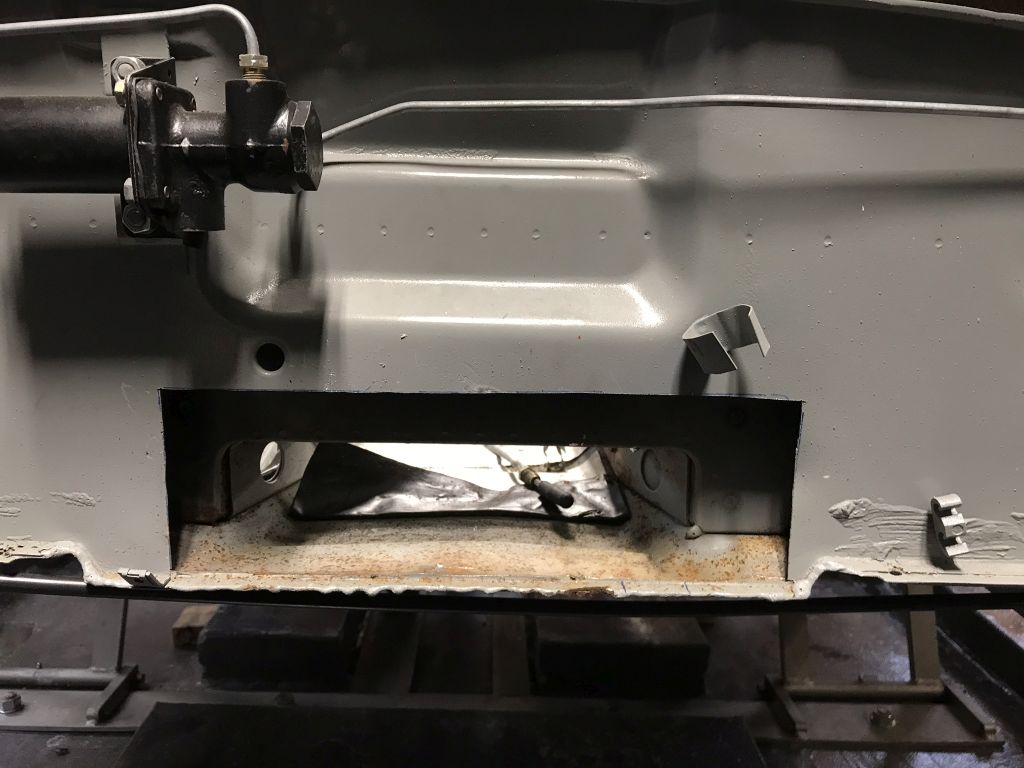
Ugly.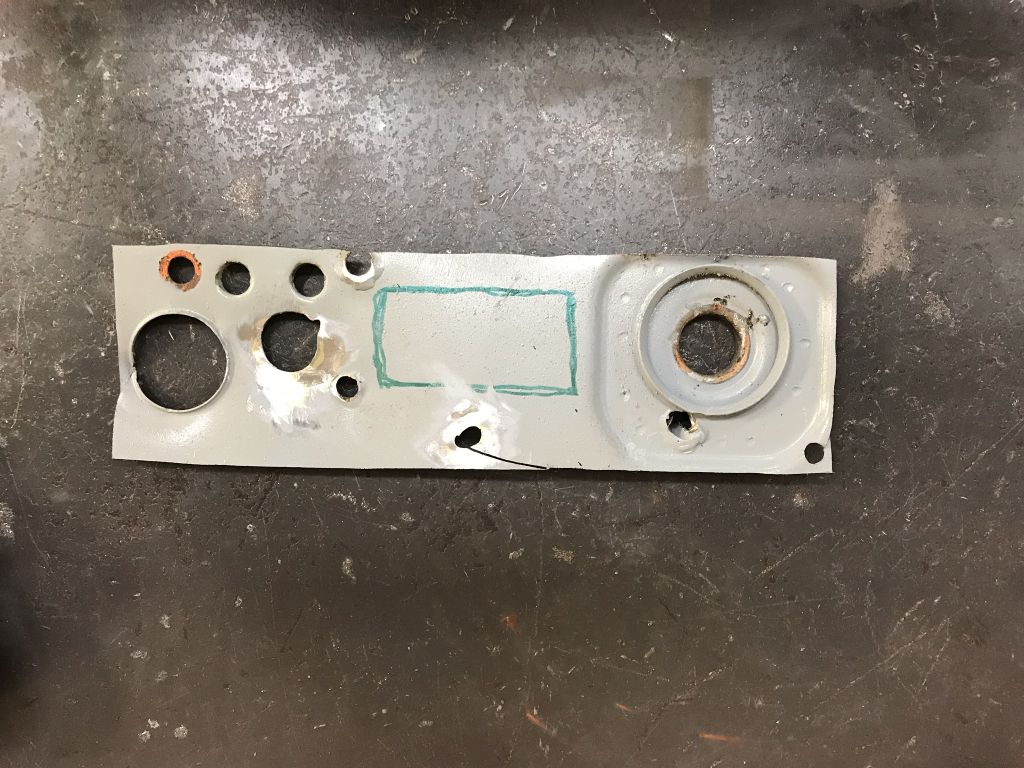
Now I can sleep at night. I can't wait to put fresh holes in the proper place.
Cheers,
Scott
Posted by: 914forme Dec 12 2017, 01:12 PM
I had anxiety every time I looked at the mess of holes in the firewall, so I got rid of them.
Cheers,
Scott
Liking the engine fabrication a lot, nice and tidy. Lots of work and time spent here.
I like the firewall section also. You have electrical, fuel, shifter cables, clutch hydraulic cable going back there. Forgot the go pedal cable. I have been pondering running the shifter cables up and over the engine, like they do on the Cayman / Boxsters, nice gradual bend, away from the exhaust. Can look like crap
Its thoughts like that, that keep me up at night.
Posted by: matthepcat Dec 12 2017, 03:45 PM
Looking good. Can't wait to hear this thing run finally.
Posted by: Amenson Dec 13 2017, 01:32 PM
Liking the engine fabrication a lot, nice and tidy. Lots of work and time spent here.
I like the firewall section also. You have electrical, fuel, shifter cables, clutch hydraulic cable going back there. Forgot the go pedal cable. I have been pondering running the shifter cables up and over the engine, like they do on the Cayman / Boxsters, nice gradual bend, away from the exhaust. Can look like crap
Its thoughts like that, that keep me up at night.
Thanks! You also forgot the IC coolant lines.
As for the shifter cables...running them over the engine seems like a very inefficient way to get to the transmission. There is enough extra length in the Kit cables to easily pass the header on the side.
When I get back to the PorSTI I plan to run them straight back to the linkage, basically following the path of the sideshift shaft that the header was built around. Then I can get shorter cables and hopefully crisper shifting.
Cheers,
Scott
Posted by: effutuo101 Dec 14 2017, 07:23 PM
Looking good!
Posted by: Amenson Dec 16 2017, 11:05 AM
Yesterday was the last day in the office until after the new year so I thought that I would start the long vacation with some inspiration by test fitting the drive-train.
Fits great! Only had to remove the air filter and oil filler neck. The oil filler neck will be modified to avoid this...and because it is ugly in the stock position.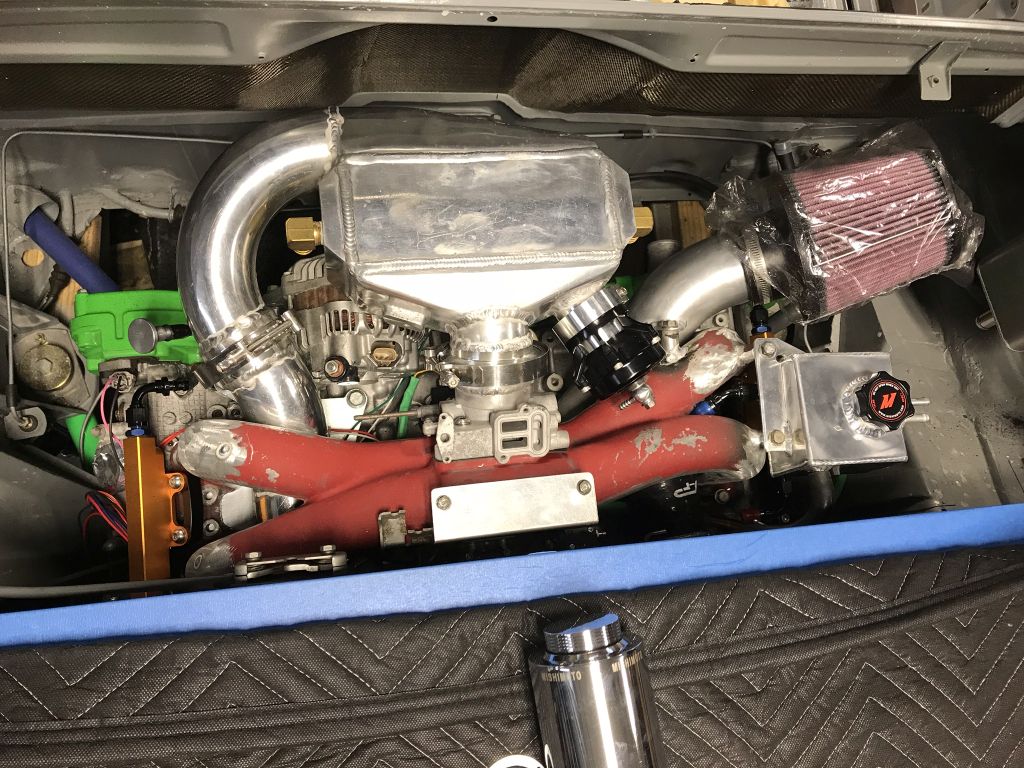
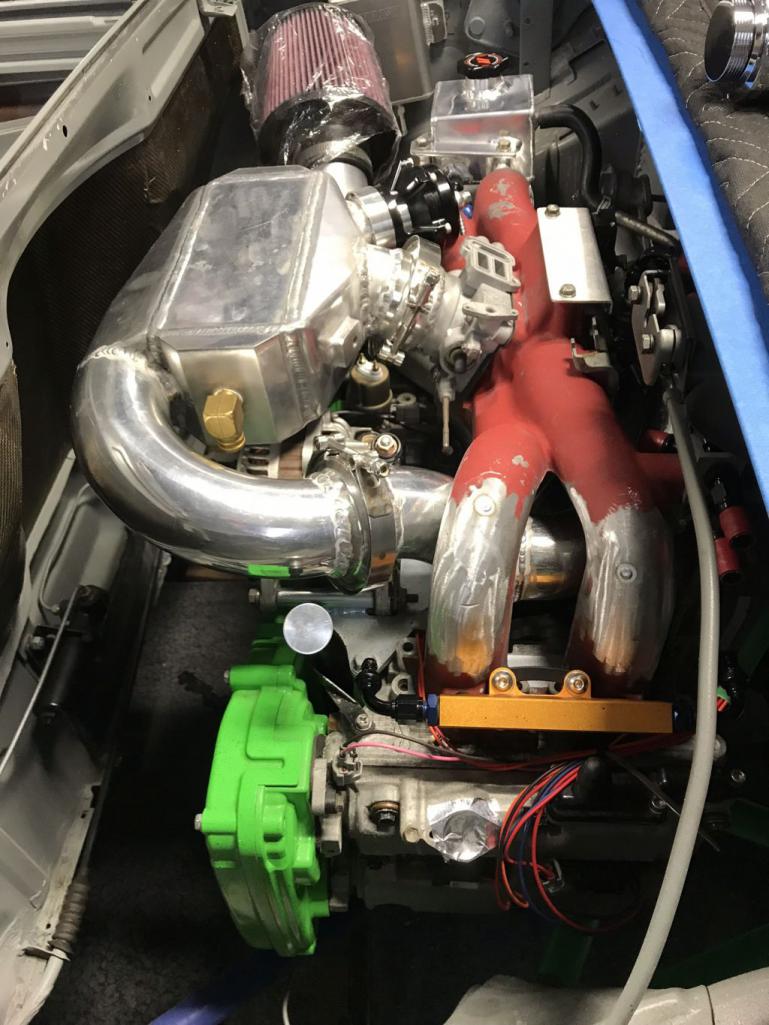
Time to pull it back out.
Cheers,
Scott
Posted by: effutuo101 Dec 16 2017, 04:54 PM
So excited for you! Looks great!
Posted by: Spoke Dec 16 2017, 08:58 PM
Looking good. Great fabrication work. This is going to be one hot car.
Great to see Doug's excellent work continued in similar fashion.
Doug's a great guy and helped me engineer the mounting of the first LEDs I built. I'd like to reciprocate by donating whatever LED boards are desired. Brakes; front and rear turnsignals, reverse boards, flasher. Whatever. Let me know when the time comes to install the boards and I'll send them to you.
Posted by: Amenson Dec 18 2017, 08:22 AM
So excited for you! Looks great!
Thanks, looks like your car is coming together quickly also!
Looking good. Great fabrication work. This is going to be one hot car.
Great to see Doug's excellent work continued in similar fashion.
Doug's a great guy and helped me engineer the mounting of the first LEDs I built. I'd like to reciprocate by donating whatever LED boards are desired. Brakes; front and rear turnsignals, reverse boards, flasher. Whatever. Let me know when the time comes to install the boards and I'll send them to you.
That is a very generous offer. As discussed via PM, Tom can let you know what he wants do do. Recommendation to Tom, get the euro boards with the driving lights that turn off when the blinker is activated, super cool.
I decided to leave the engine in for a few days so that I can work out a few routing/mounting details.
First up was the oil filler/AOS cap.
Gangly thing isn't it.
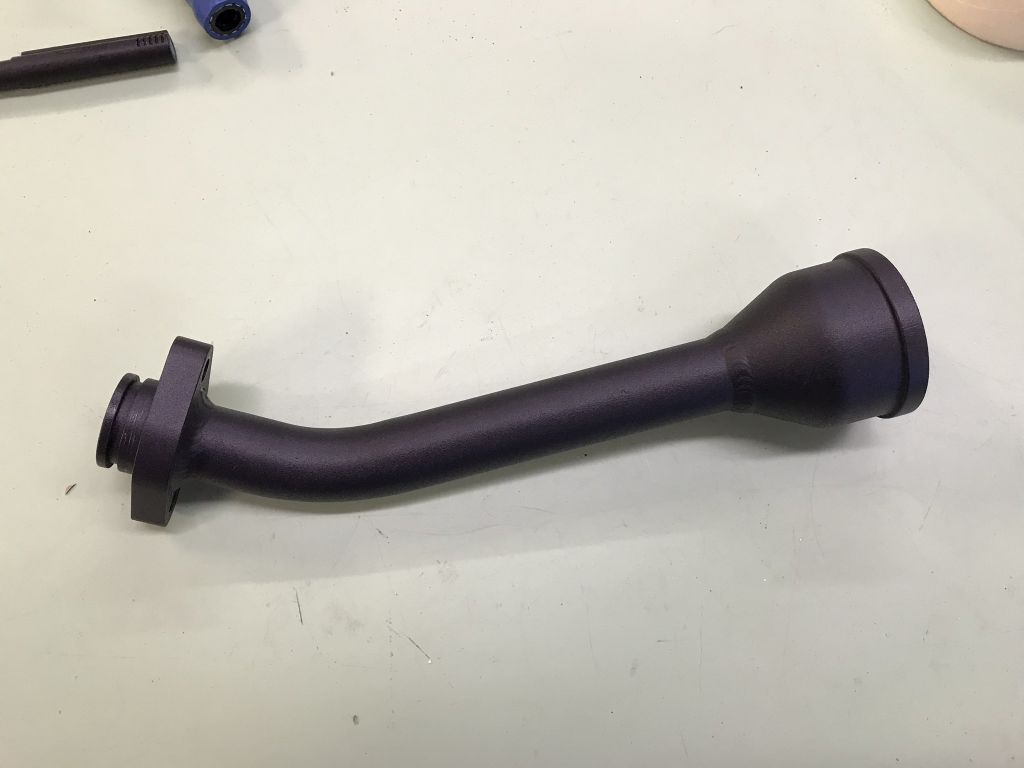
Looks about right.
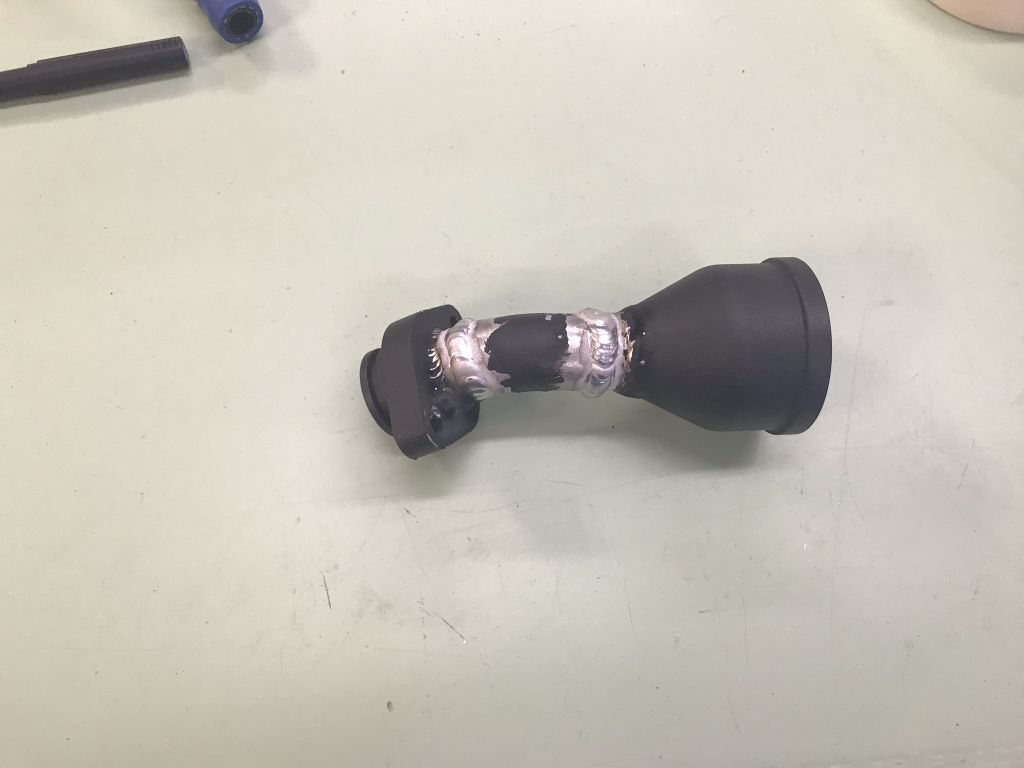
Right where it needs to be. Took quite a bit of tweaking so that I can discretely run the octopus of OAS hoses. I set up the driver side vent to use a hose section from a stock vent hose from my bin of parts.
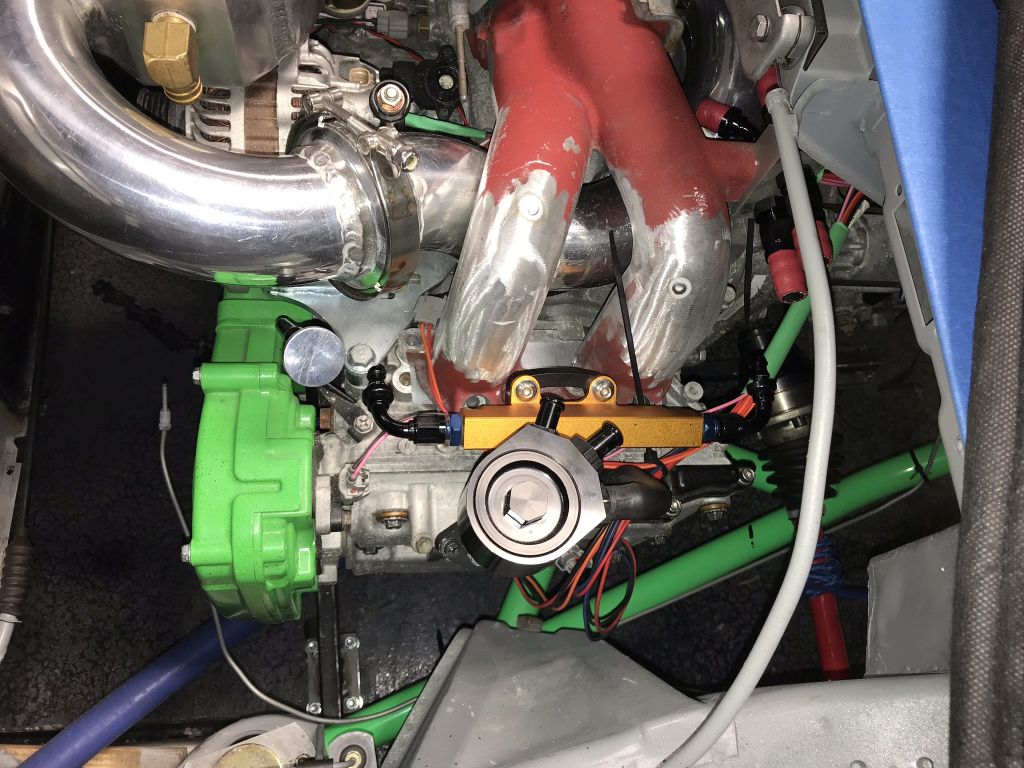
Cheers,
Scott
Posted by: Amenson Dec 18 2017, 06:49 PM
Wire was on sale so I bought some...and by some I mean 100ft of every color in 3 different sizes (TXL/GXL for the nerds) 
That should cover any additions/corrections that I need to do.
Posted by: jd74914 Dec 18 2017, 09:27 PM
TXL/GXL for the nerds
I thought the nerds were into M22759/32?
In all seriousness, the motor looks great in there! And that is a boatload of wire, wow. Have you used that style AOS before? It's a lot more compact than some of the others on the market.
Posted by: Amenson Dec 19 2017, 07:43 AM
TXL/GXL for the nerds
I thought the nerds were into M22759/32?
In all seriousness, the motor looks great in there! And that is a boatload of wire, wow. Have you used that style AOS before? It's a lot more compact than some of the others on the market.
Only the rich nerds are into Mil spec stuff.
 I look into it every once in a while but just can't justify the cost of crimpers and components for a street car. Properly spec'd and installed automotive grade components are perfect for...automobiles.
 I have not used that AOS before. Doug picked it out and I couldn't convince him to use something that I was familiar with because it was relatively expensive. We will find out!
Posted by: jd74914 Dec 19 2017, 08:31 AM
Only the rich nerds are into Mil spec stuff.
I look into it every once in a while but just can't justify the cost of crimpers and components for a street car. Properly spec'd and installed automotive grade components are perfect for...automobiles. I have not used that AOS before. Doug picked it out and I couldn't convince him to use something that I was familiar with because it was relatively expensive. We will find out!
Just wanted to give you a hard time. That box would be a fortune in Mil Spec, especially if you added a few circular connectors.
Pretty interested to see-it's certainly a nice and compact option if it works well.
Posted by: 914forme Dec 19 2017, 09:21 AM
Wire was on sale so I bought some...and by some I mean 100ft of every color in 3 different sizes (TXL/GXL for the nerds)
That should cover any additions/corrections that I need to do.
Who has it on sale
Posted by: Amenson Dec 19 2017, 10:59 AM
Who has it on sale
https://www.delcity.net/ has periodic 20% off everything sales. The most recent one was last week!
Posted by: Amenson Jan 4 2018, 06:58 PM
With the stock dash going back in, using stock switches, relays, fuses box for basic function with a dedicated fuse/relay box for the drivetrain makes a lot of sense. Unfortunately we do not have a stock harness for the car. Anyone part out a car want to sell a harness. Does not have to be 100% perfect (90% would be nice) just looking for a solid base to work back to a mostly stock harness.
Posted by: mgp4591 Jan 5 2018, 02:48 AM
With the stock dash going back in, using stock switches, relays, fuses box for basic function with a dedicated fuse/relay box for the drivetrain makes a lot of sense. Unfortunately we do not have a stock harness for the car. Anyone part out a car want to sell a harness. Does not have to be 100% perfect (90% would be nice) just looking for a solid base to work back to a mostly stock harness.
I've got a complete harness from my 71 1.7 less the wires I snipped for the fog lights and the heater motor. Pulled it all through the grommets and all including the fuse box. I really have no idea what it's worth but you're welcome to it and I could send it out Saturday...
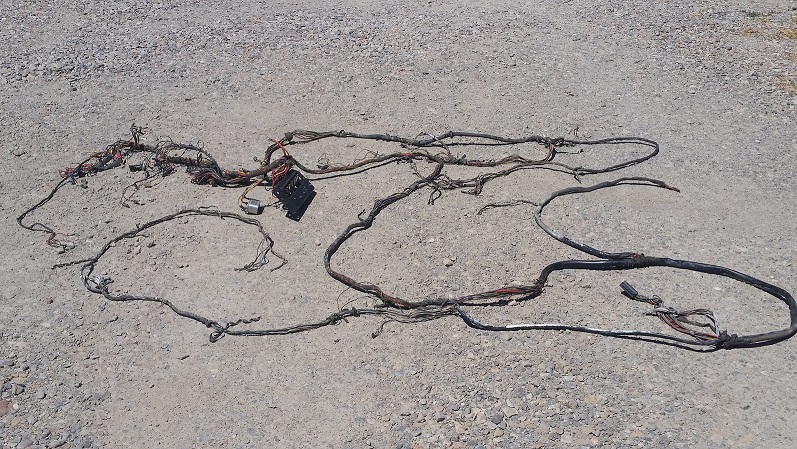
Posted by: Amenson Jan 7 2018, 09:47 PM
New tool day! 
Well, not exactly. It has spent more time on "jack stand" than most 914's I picked it up from a neighbor and tore it completely down and then converted the CVT speed adjustment to 3 phase VFD control.
It was 20 deg in the garage and even if I turned on the heater the tools would be freezen so I finished the lathe in the nice warm basement. Still getting it set up but it is making chips and the first part is in the chuck...replacement for the missing steering shaft lug.
Posted by: Amenson Jan 14 2018, 10:33 PM
Had a very unproductive weekend in the garage. I intended to get the steering shaft clamp fixed but when I went to finish the new part, the belt on the lathe started slipping. I had a replacement drive belt on hand but still slipped. Apparently my custom mount did not allow the motor to move enough to tighten the belt properly.
Fix.
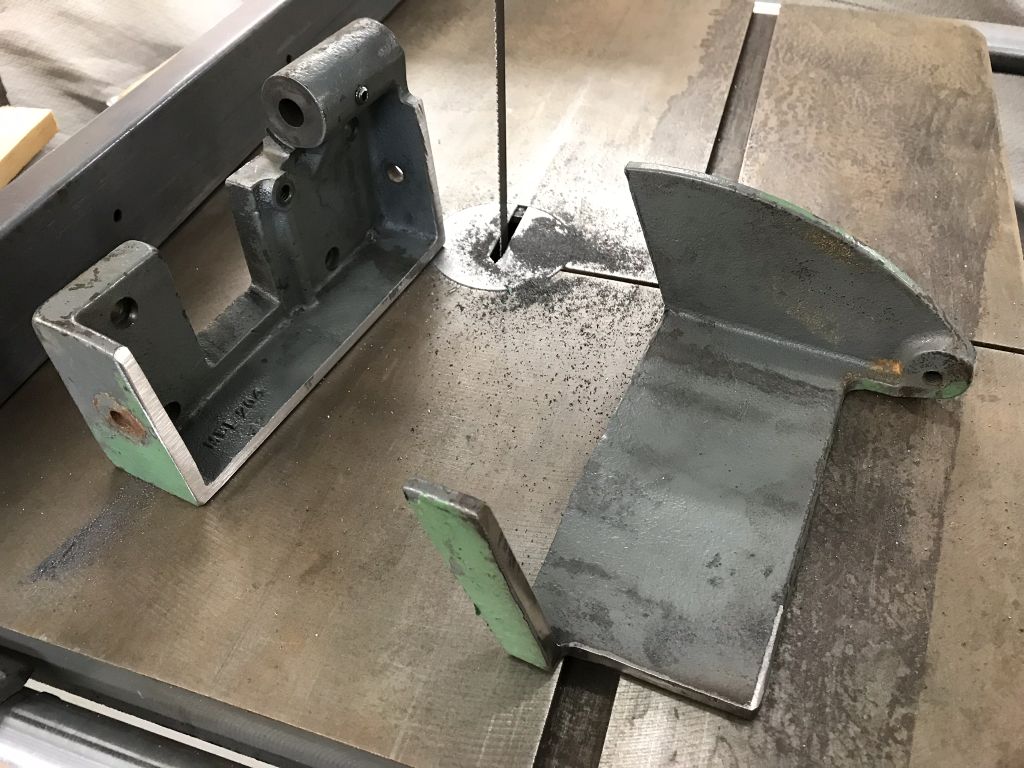
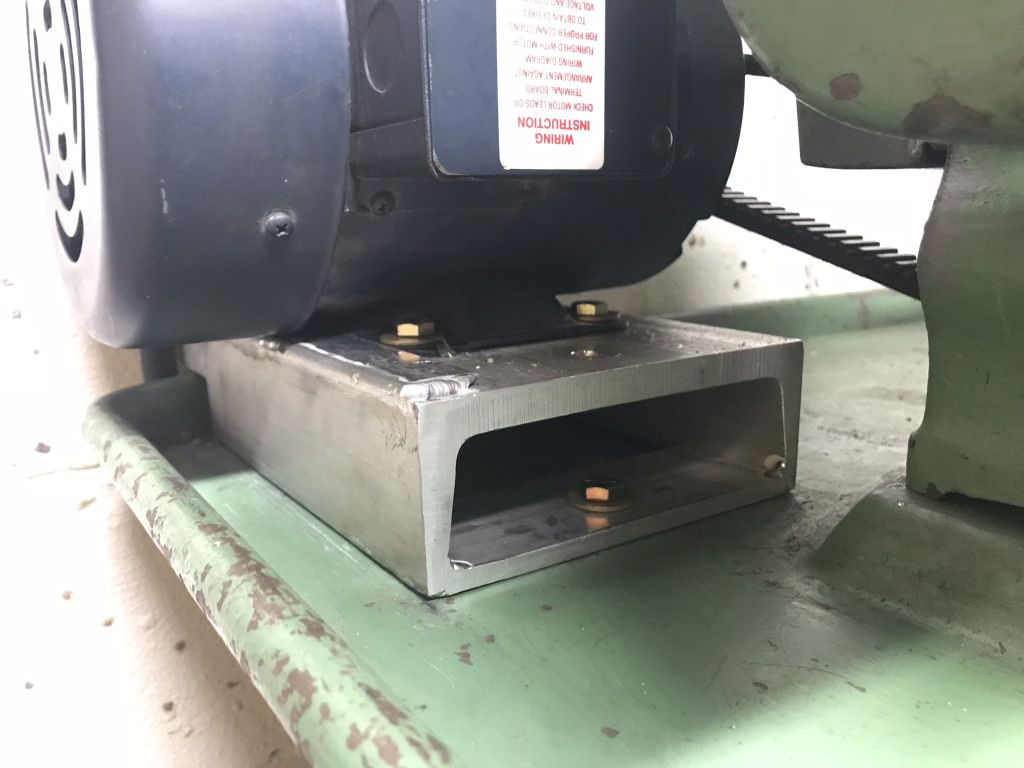
Got it working again and then ruined the carbide insert for my cutting tool
I needed to accomplish something so I continued the stockification.
Pulled the custom wiring harness and steering column.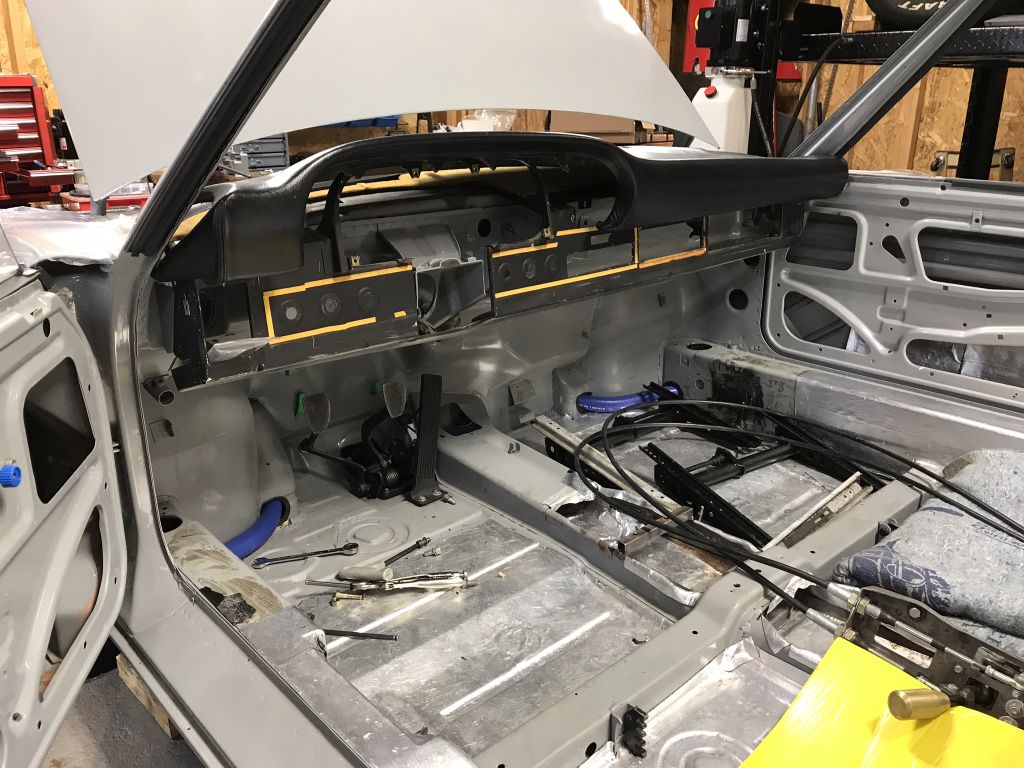
Installed the replacement steering column. 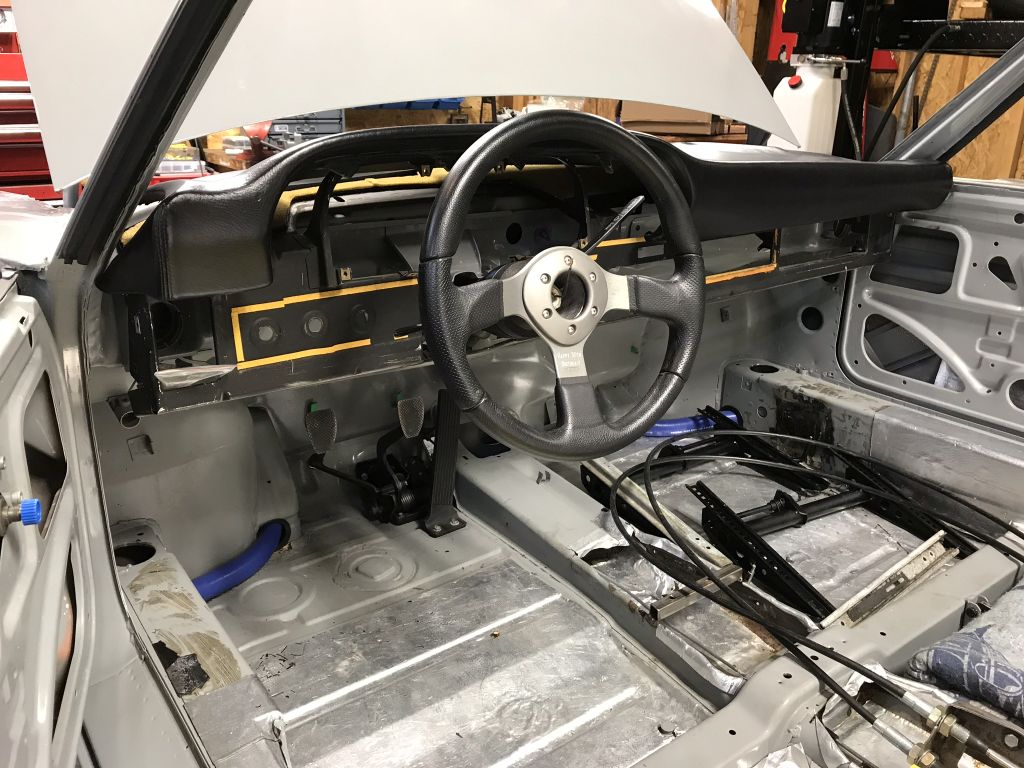
Stock harness should be here this week.
Posted by: 914forme Jan 21 2018, 04:39 PM
Tom asked me to add updates as I did work on his gauges for him. We have a few items up our sleeve and this car will have a full array of needles to keep your eyes off of so you can
First item was a new speedo for the car. Subaru uses an electric speed sensor in their MT5's so this car needed a speedo that was electric drive. So here you go, proper VDO 930.641.508.00 And well like most older VDO speedo's Anton thought it was a great idea to lube the gear shaft with a bit of grease. The grease happens to break down the material the gear was built out of. This is the worse one I have seen in my years of doing these.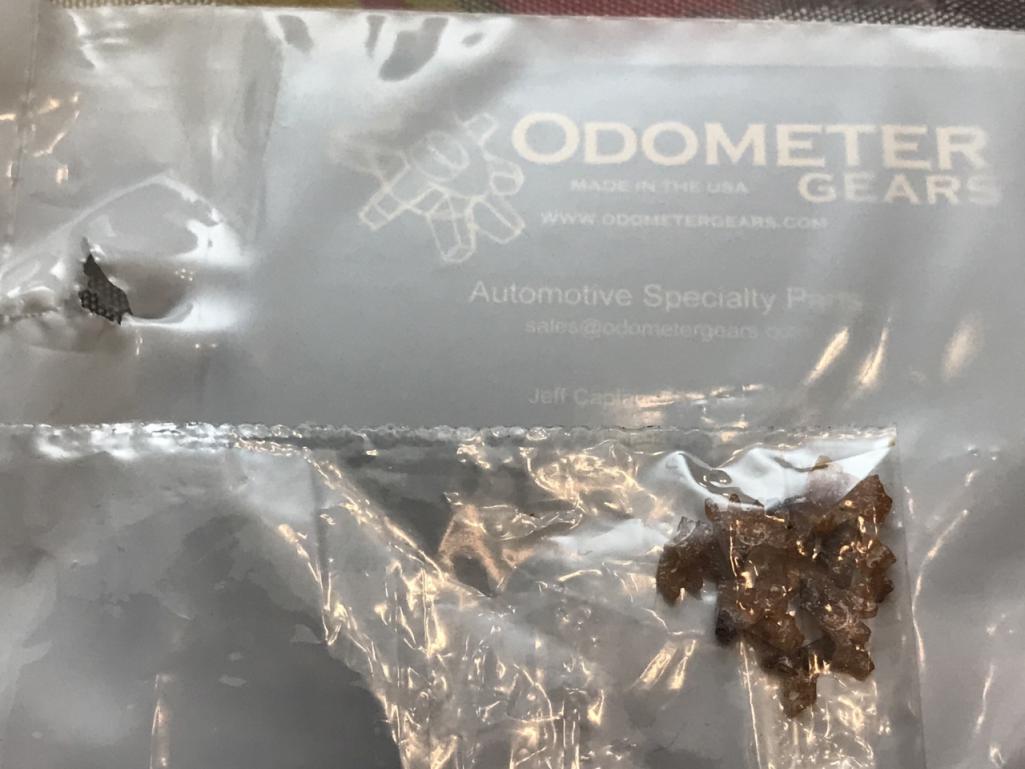
http://www.odometergears.com to the rescue, meet these guys at Hersey, great group of guys, and I knew at some point I would need at least one of their gears.
Since I did not know the miles on Grey, I asked Tom how he wanted to handle the conversion. He said zero it out, it is a for the most part a brand new car. 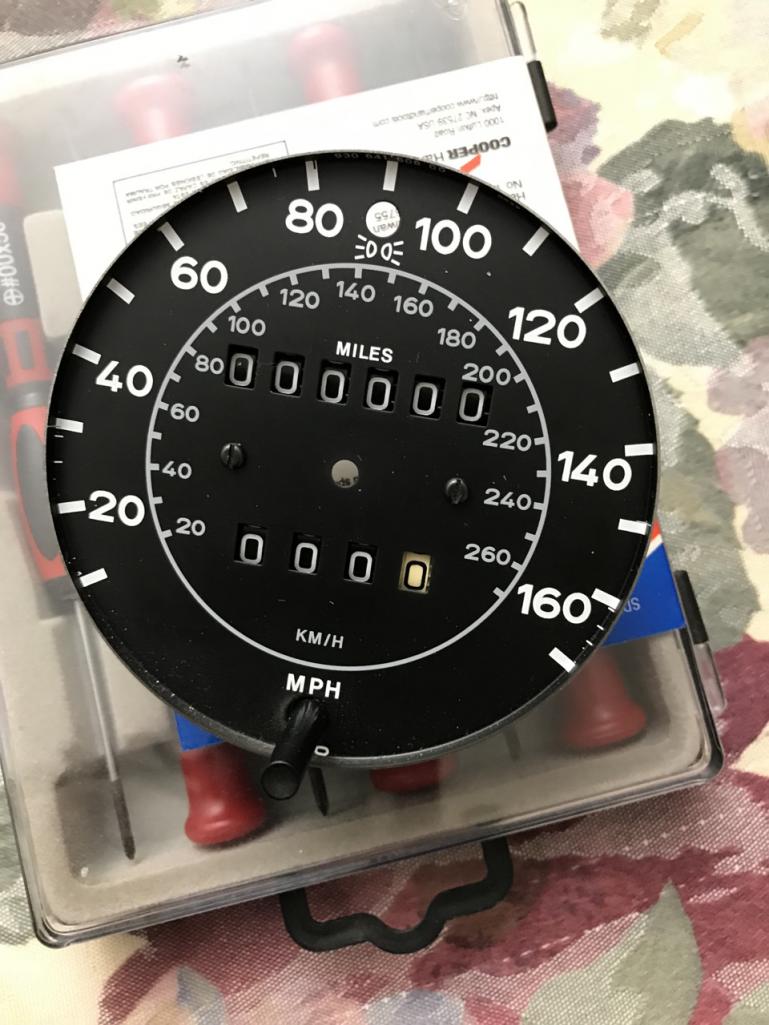
Next up get the new gear back in and get this thing assembled.
First up, I polished up the shafts, then added a touch of dry graphite bearing treatment to the shaft. Then repolished the shaft to remove excess per directions. Spins smooth now.
Overkill Oh heck yeah it is.
Next up add all the gears and e-clips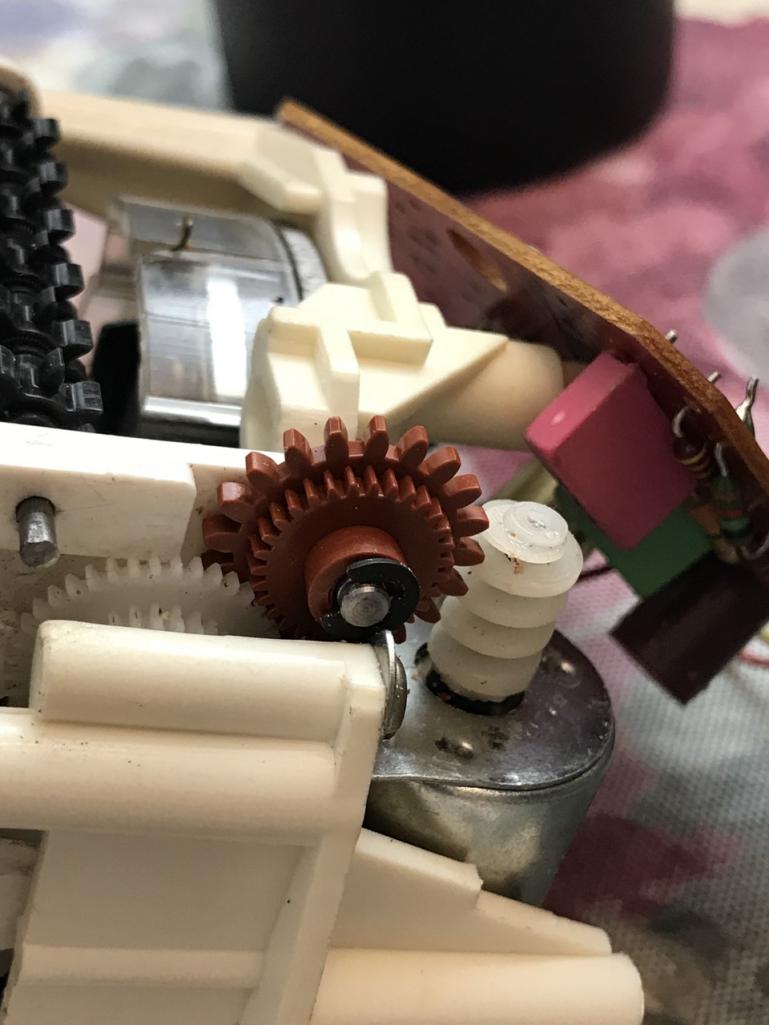
Test everything and it works And because of the high definition pictures I see a piece of the old gear in the worm drive on motor, that has been removed.
And it is now together again.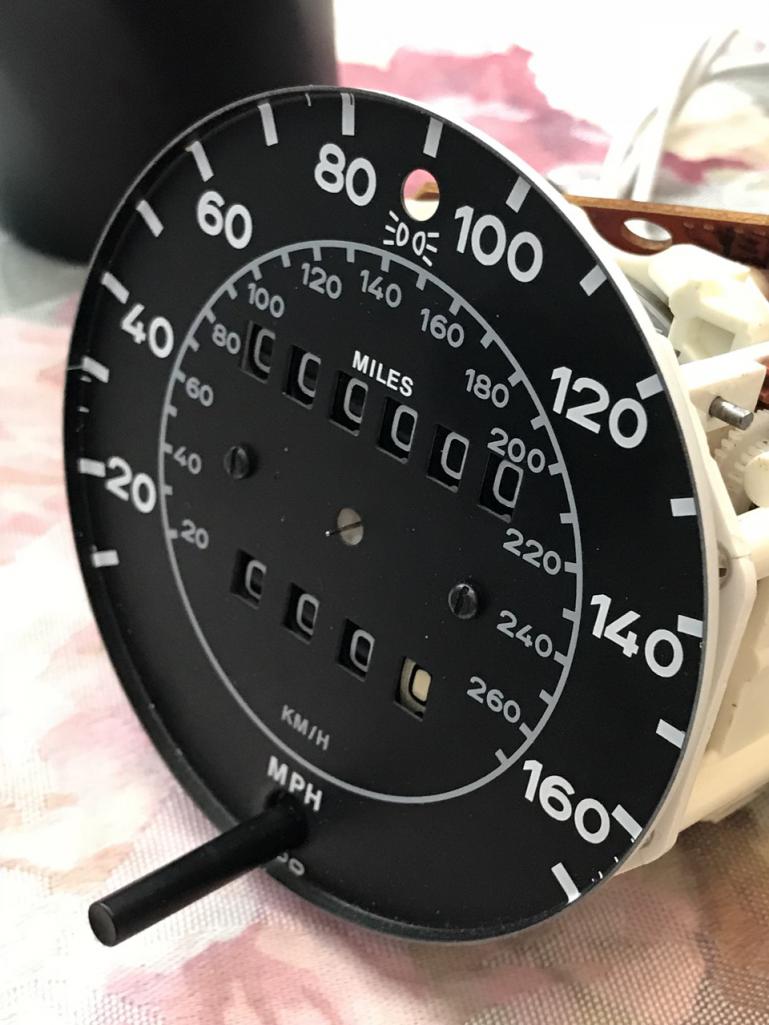
That is all I can do for now. All the needles will be painted at the same time, so they will all match. So I'll bag this one up and move onto the next one.
When I reassemble I will re-dust all the surfaces to get all the last bits out and off the assembly and the faces.
Posted by: theer Jan 22 2018, 08:05 AM
Looks good, Steve.
Posted by: Amenson Feb 7 2018, 04:14 PM
Fun with wires!
The harness from Mike looks decent. I have all of the tape off of the harness so that I can inspect and repair any issues. There are a few spliced wires here and there and one that had a few too many electrons moving through it at some point that will need to be replaced. Still need to cut off the protective tubing to check the rest of the wires. Then everything will get wrapped again prior to installation.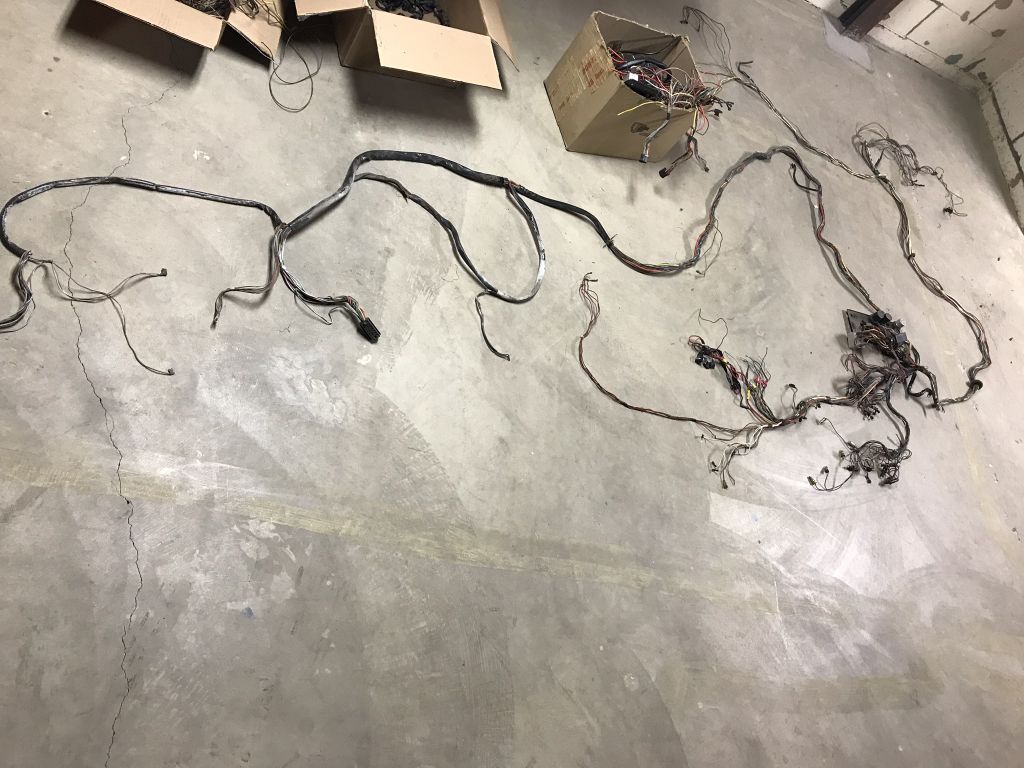
The harness is missing the steering column connectors. 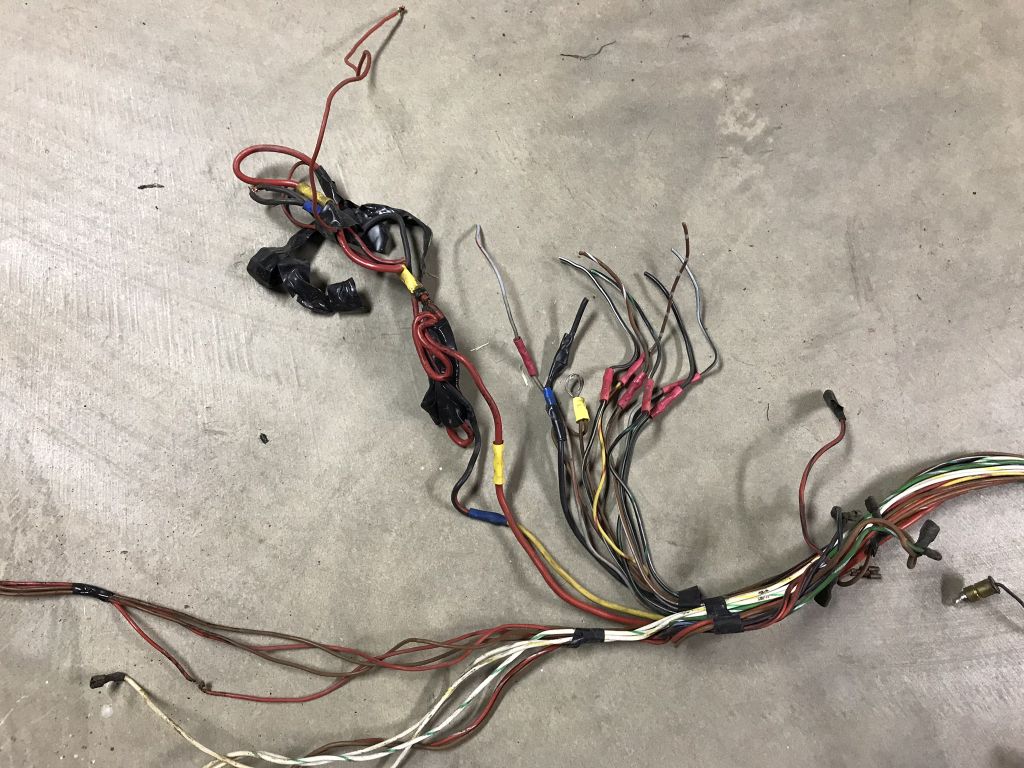
I have the harness section from Porsti that I can work into the harness but I need to make sure that the connector pin definition is the same between the '71 and '73 columns. Are the columns interchangeable between the years? The schematics look a bit different and not all of the wires in the '73 harness are present in the '71.
Posted by: mepstein Feb 7 2018, 04:29 PM
Fun with wires!
The harness from Mike looks decent. I have all of the tape off of the harness so that I can inspect and repair any issues. There are a few spliced wires here and there and one that had a few too many electrons moving through it at some point that will need to be replaced. Still need to cut off the protective tubing to check the rest of the wires. Then everything will get wrapped again prior to installation.
The harness is missing the steering column connectors.
I have the harness section from Porsti that I can work into the harness but I need to make sure that the connector pin definition is the same between the '71 and '73 columns. Are the columns interchangeable between the years? The schematics look a bit different and not all of the wires in the '73 harness are present in the '71.
I thought the 71 was a 14 pin connector and later was 12. Jeff B would know for sure.
Posted by: theer Feb 7 2018, 04:59 PM
Grey started life as a '75.
Posted by: Amenson Feb 11 2018, 09:41 PM
I continued plugging away on the harness in the evenings and hit it hard on Saturday. Got it completely unwrapped and cleaned and started fixing some minor nicks/cuts. Noticed some odd terminations of the main power supply wires from the outset but figured that I could swap them out when I reinstalled the steering column connectors.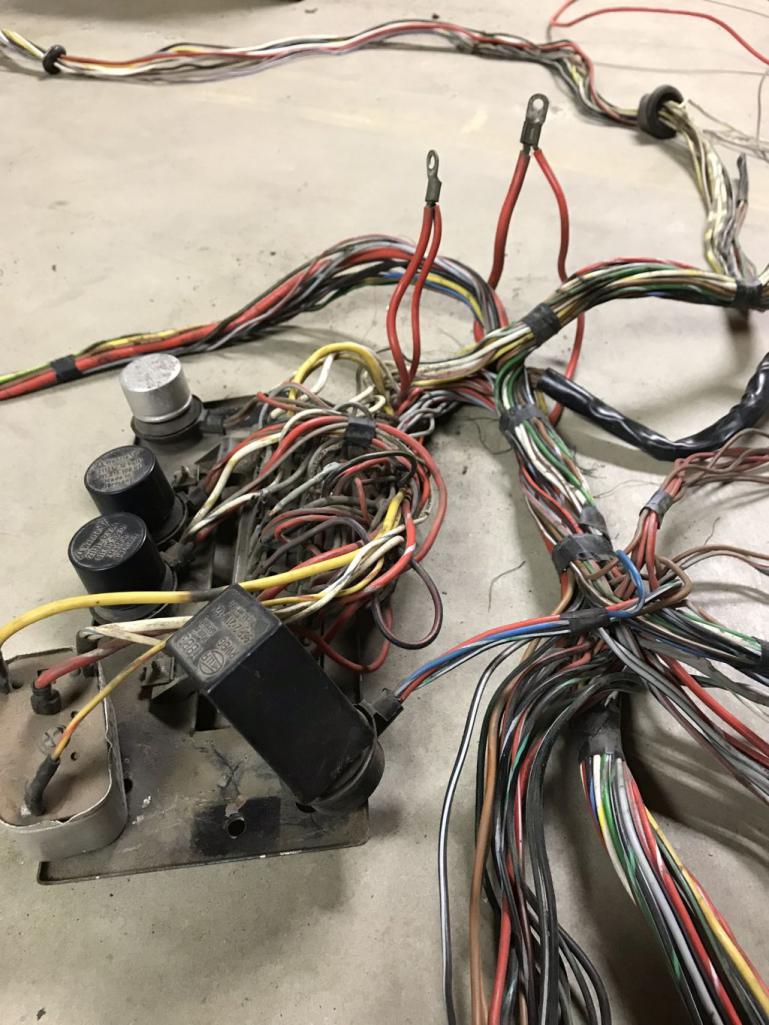
I pulled apart the old porsti harness to harvest the steering column connectors. I planned to take the wires as complete as possible to minimize splices. After much studying the wire diagrams between the '71(actually probably a 70) and '73...there are just too many differences to cleanly/efficiently adapt it to work with the '73 column. Add in the two burned circuits and odly spliced power circuits (which probably resulted in the meltage) and I pulled the plug on this harness. Time of death Saturday, February 10th, 4:45pm.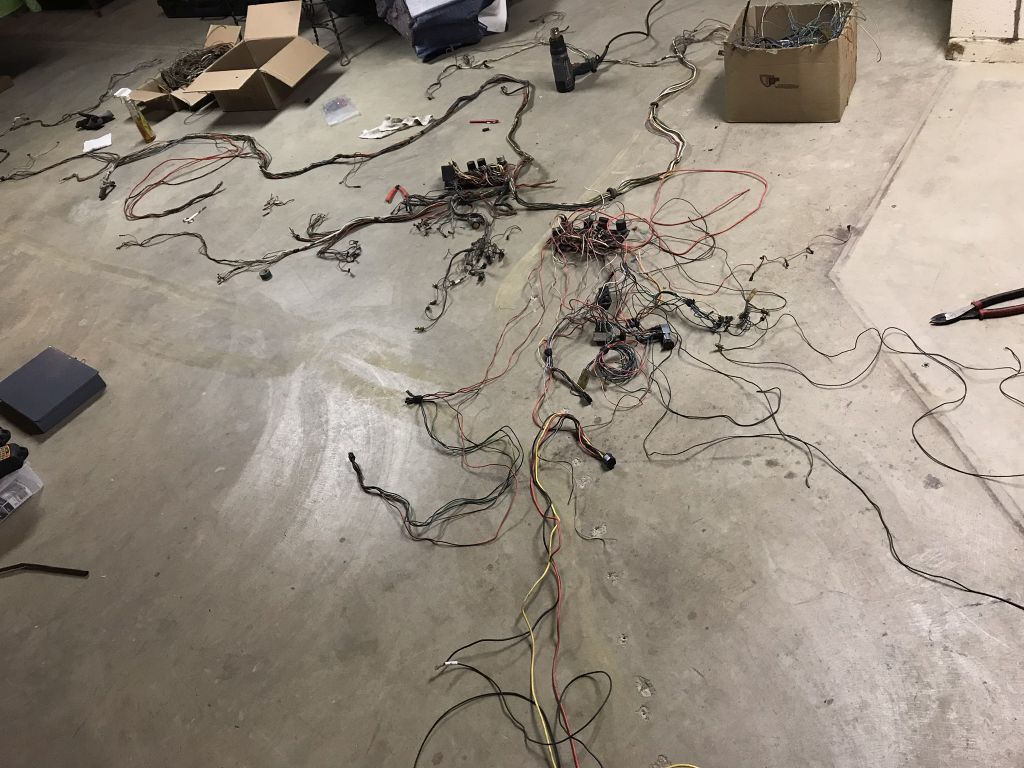
A quick email to Bruce and what should be a really clean, complete harness from a '74 will be arriving soon. Bruce to the rescue again.
Time to make some progress. I convinced Tom to let me fix the clutch MC install and nearby angry beaver access port.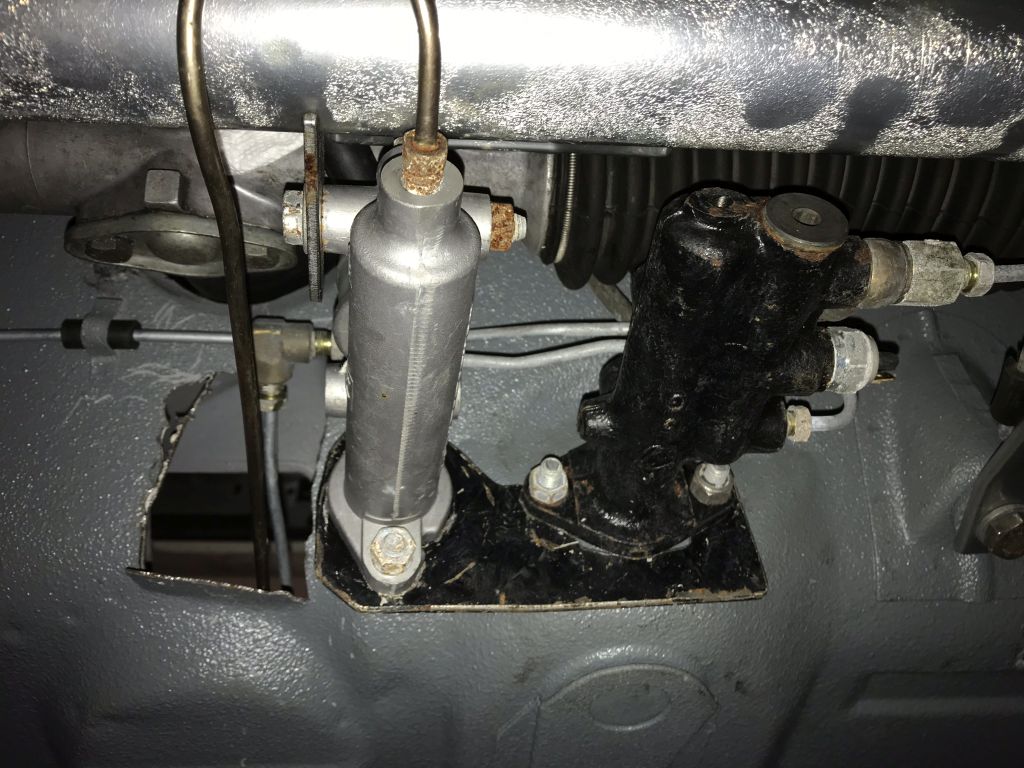
MC mount will be replaced with rnellums part.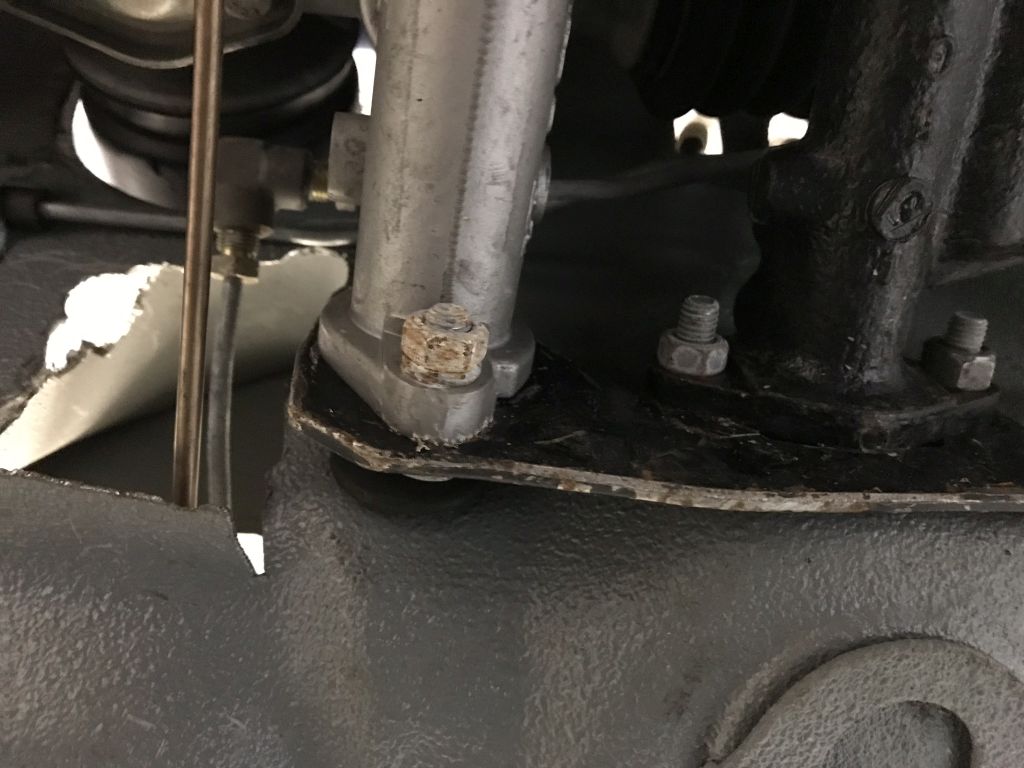
Not quite sure what this hole was for but the beaver managed to cut through to the area below the fuel tank making it a multi dimensional fix. First step, cut back to clean margins. Actually second step, first step was to disassemble everything.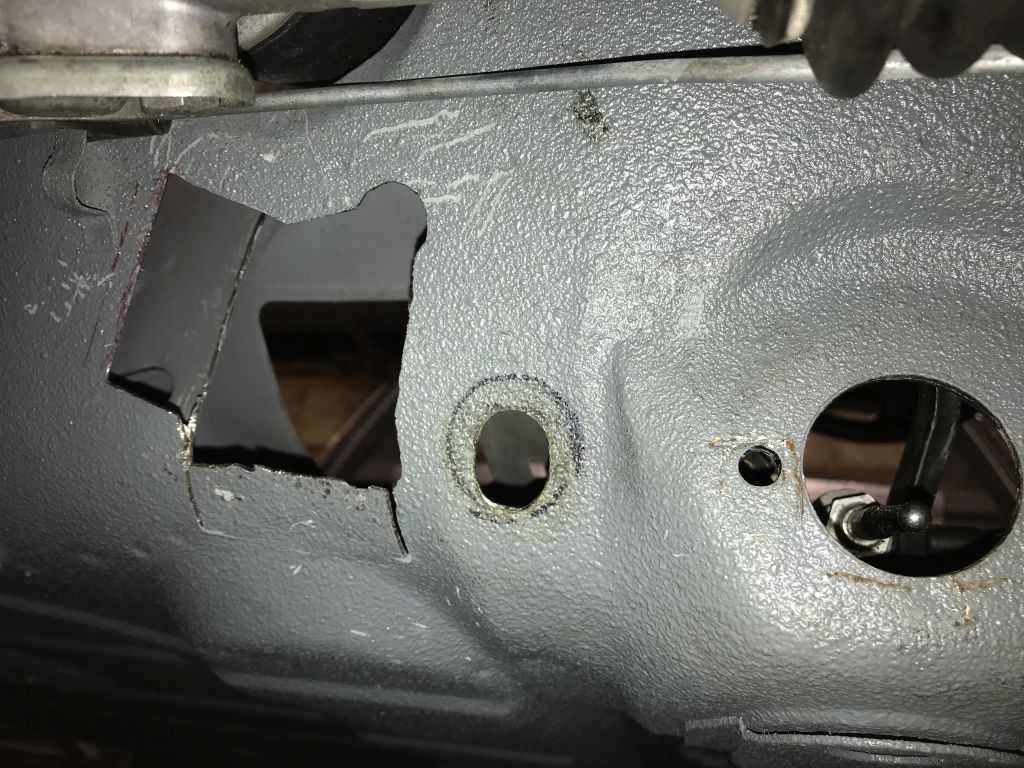
First patch made...only took 3 attempts to get it right.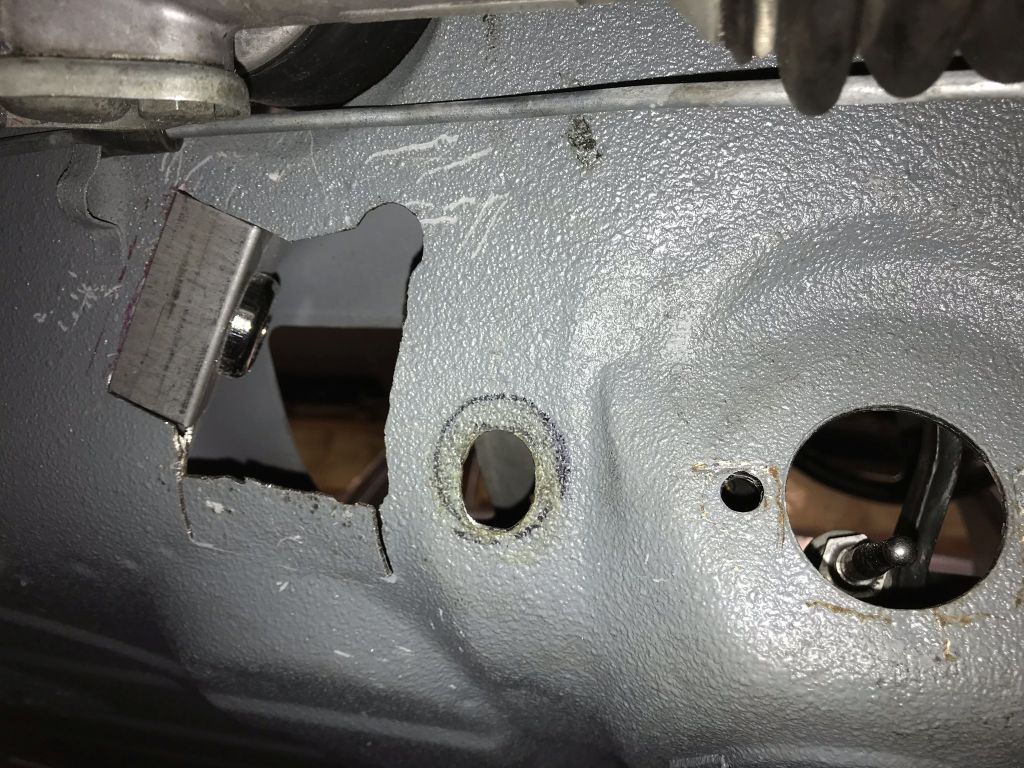
View from below the fuel tank.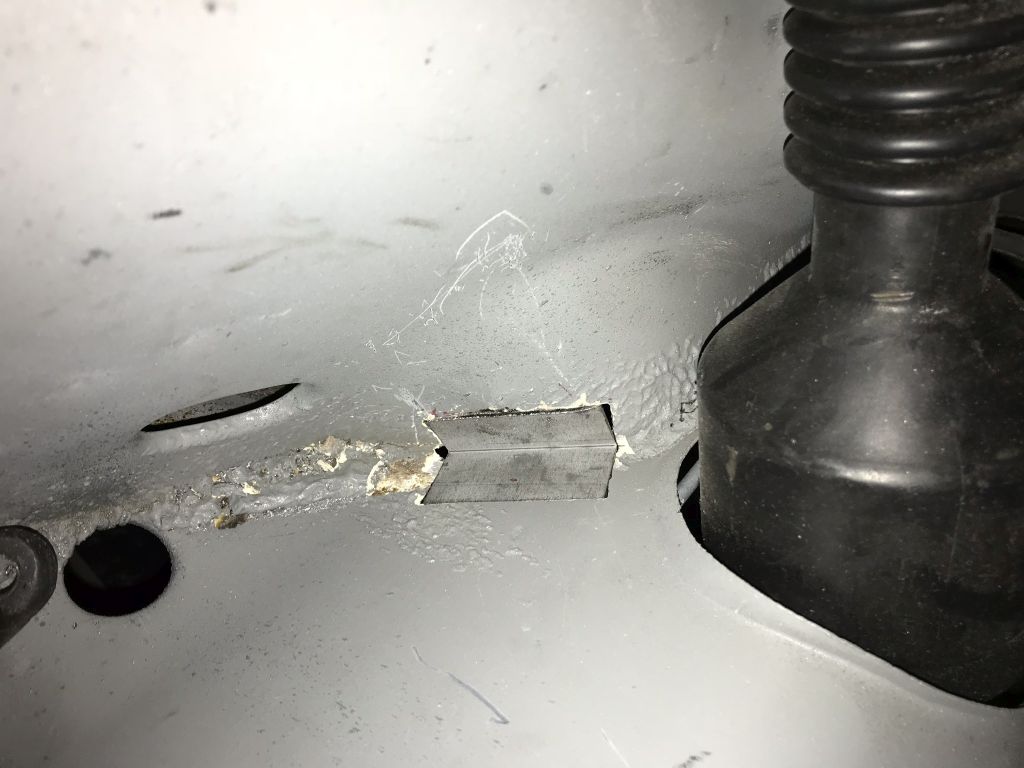
The other piece will be much easier to make, then It has been too long since I picked up the torch.
Posted by: Amenson Feb 18 2018, 09:11 PM
Just about finished up the clutch area.
Started with a little TAD to make the patch panel.
With gaps like this it will be a pitty to waste them on the MIG...unfortunately it is a bit tight in there to tig overhead, so mig it is.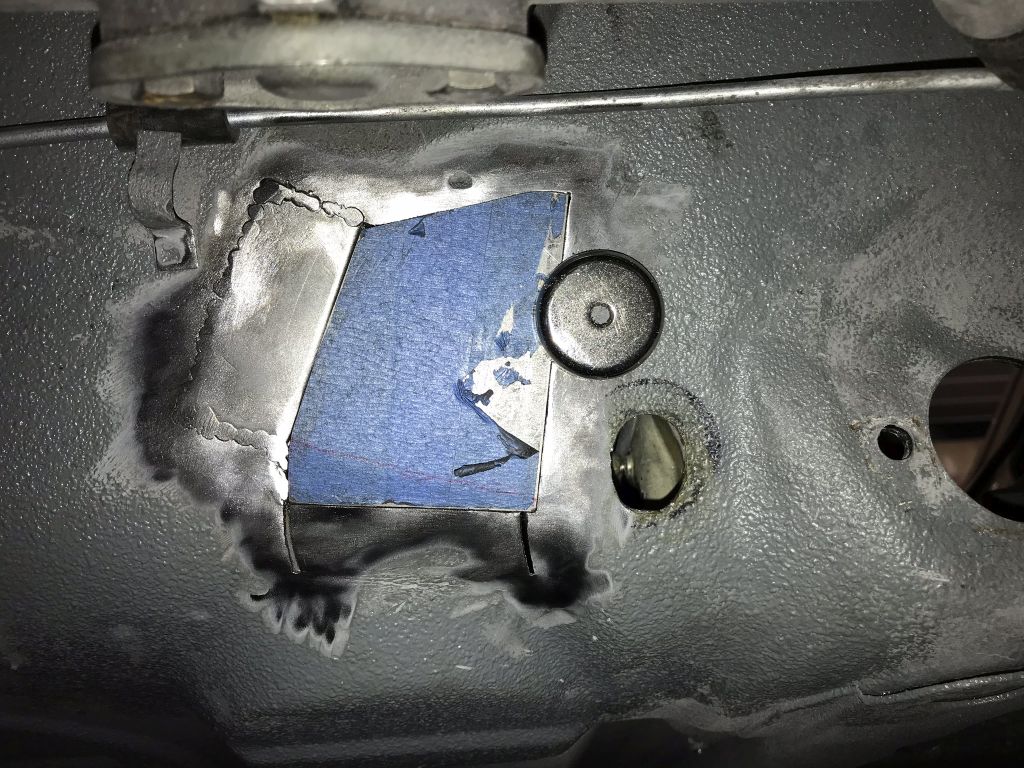
After a few adjustments to the body to get the plate to sit flat and a whole bunch of fitting, marking and cutting to get the proper size holes in the proper place.
The flash really highlighted the welds, going to have to get back in there for a bit more grinding to get them flush.
Posted by: Amenson Feb 23 2018, 09:32 PM
Third time's a charm!
'74 harness is pretty much unwrapped and looks pretty good. Few things to fix, remove all traces of the seat belt logic relay and then add in the wires for the new stuff and we will be substantially closer to the first start.
Posted by: Amenson Feb 25 2018, 09:34 PM
Feels so good to have it done right.
A little bummed that the paint dried so light. I found another rattle can color that will hopefully be closer.
Finally pulled the trigger on a battery location.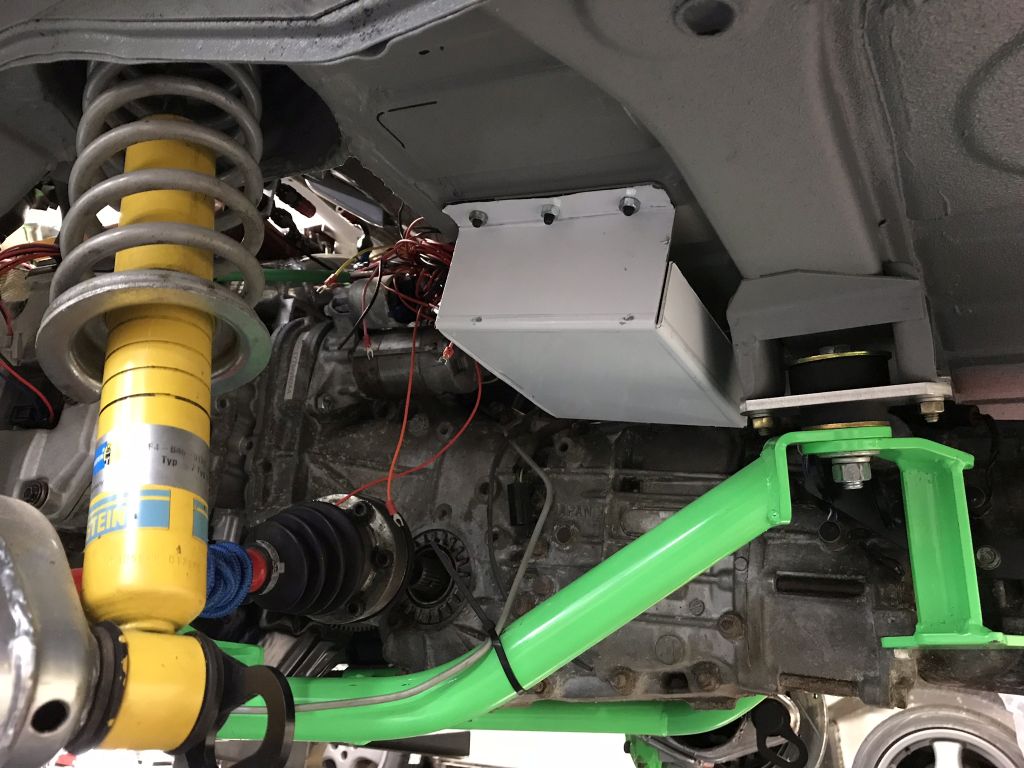
Knocked out some more CAD work.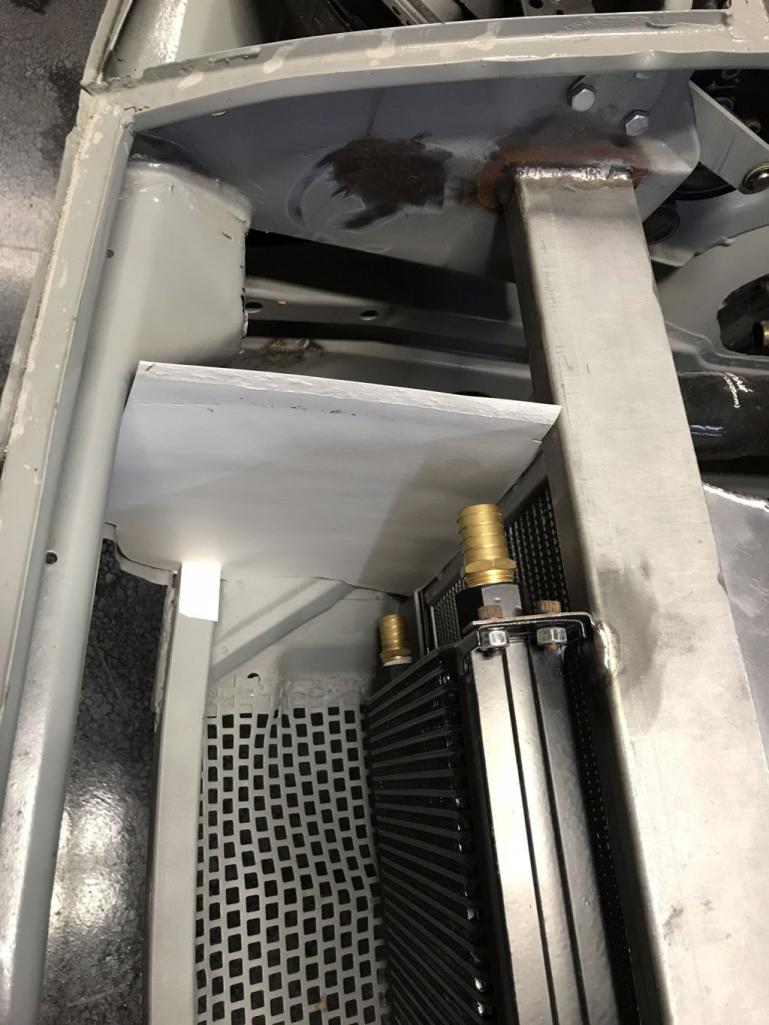
And some more hours on the harness. It is amazing how much dirt can get stuck in a bundle of wires. Sucks to clean it but gives me an opportunity to find any hiding nicks/cracks.
Posted by: Amenson Mar 11 2018, 08:32 PM
I always thought that the hose running to the radiator looked a bit sloppy. Needing to tuck the spare tire as far to the passenger side as possible to make room for the brake/clutch fluid reservoir gave me an excuse to tidy it up a bit.
Replaced the hose with some more AL tube. This is the return, forgot to take a picture of the top tube.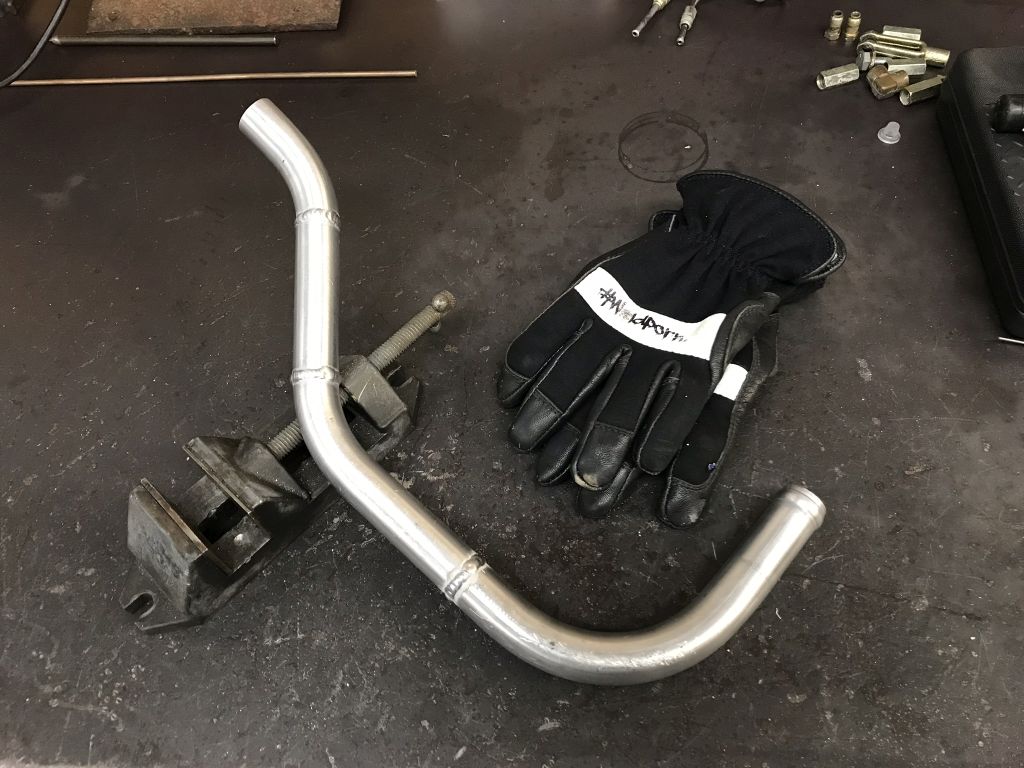
Tight.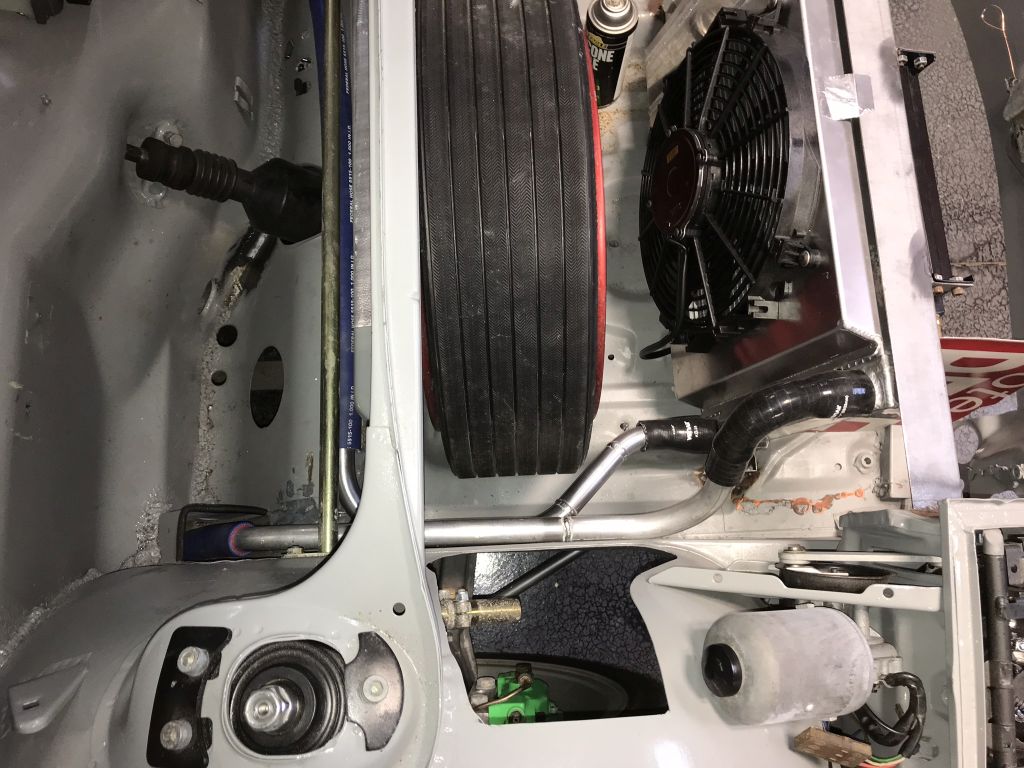
Posted by: Amenson Mar 17 2018, 05:59 PM
While running the final bit of plumbing through the center tunnel I was disgusted enough of the previous removal of the top to convince Tom to source a new center tunnel.
He found a really nice donor. First step of prep was to remove the unnecessary tubes.
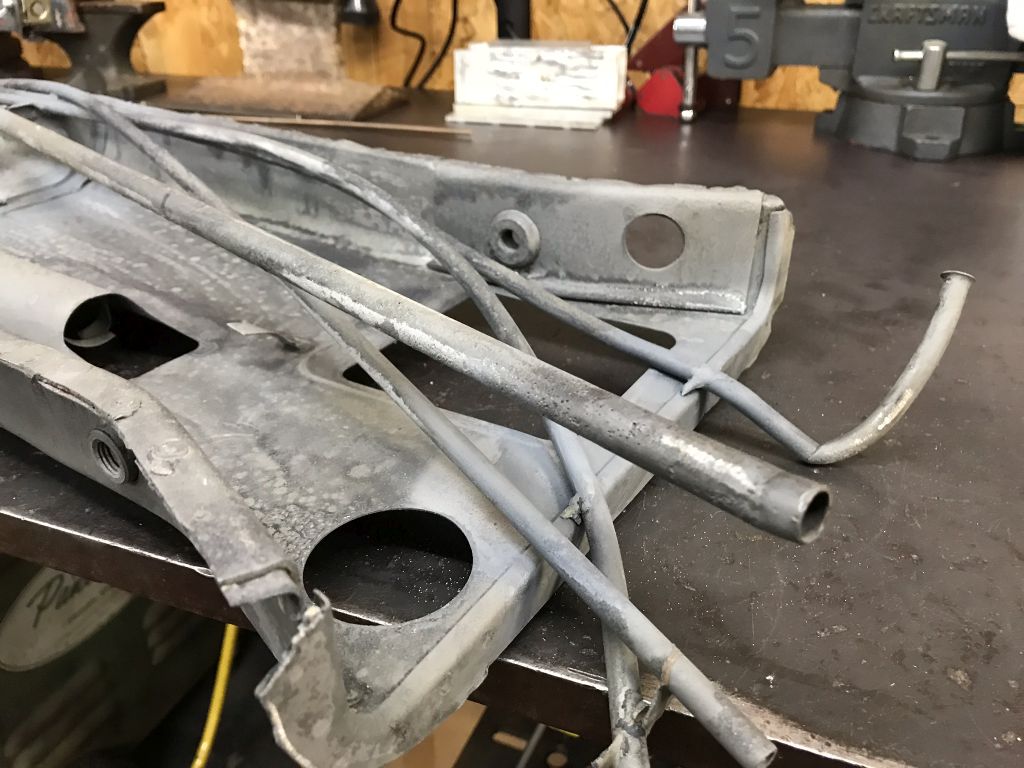
Much better. The throttle tube will be moved to the driver side for cleaner routing of the throttle cable to the reveres intake. It also leaves the center of the tunnel open in case the 1" coolant tubes are not large enough. I will be modifying porsti to run the coolant tubes down the center tunnel and if it works, Marks EG will be run this way also. Plenty of room now!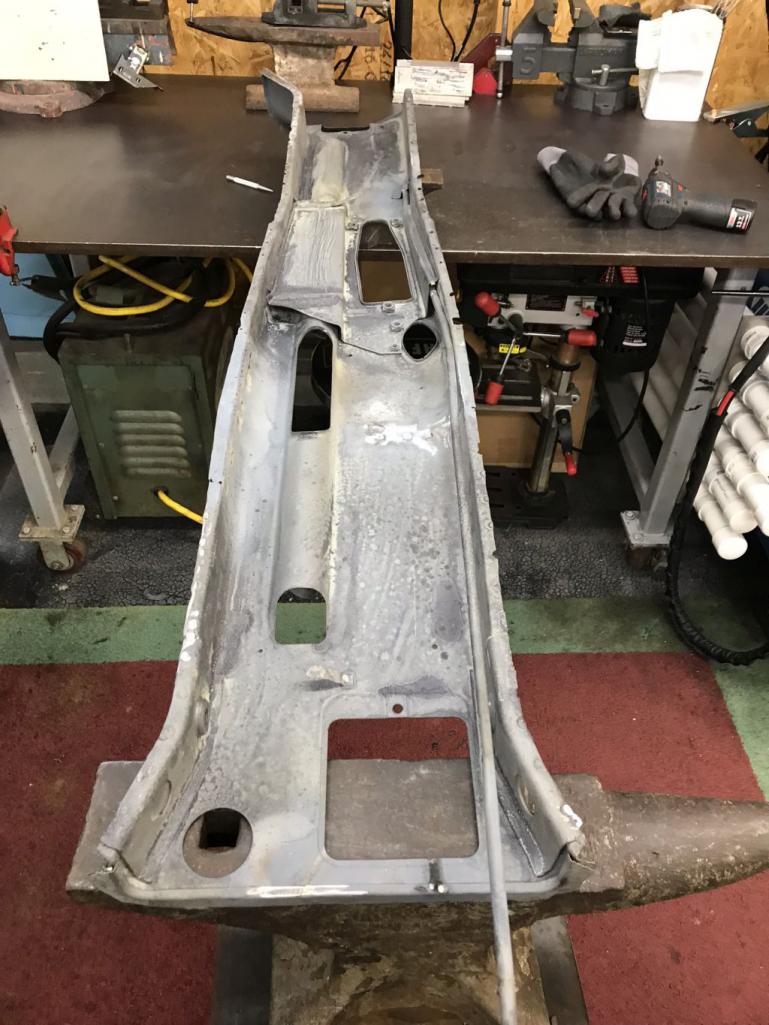
Center tunnel was prepped really well, only had to remove the firewall flange.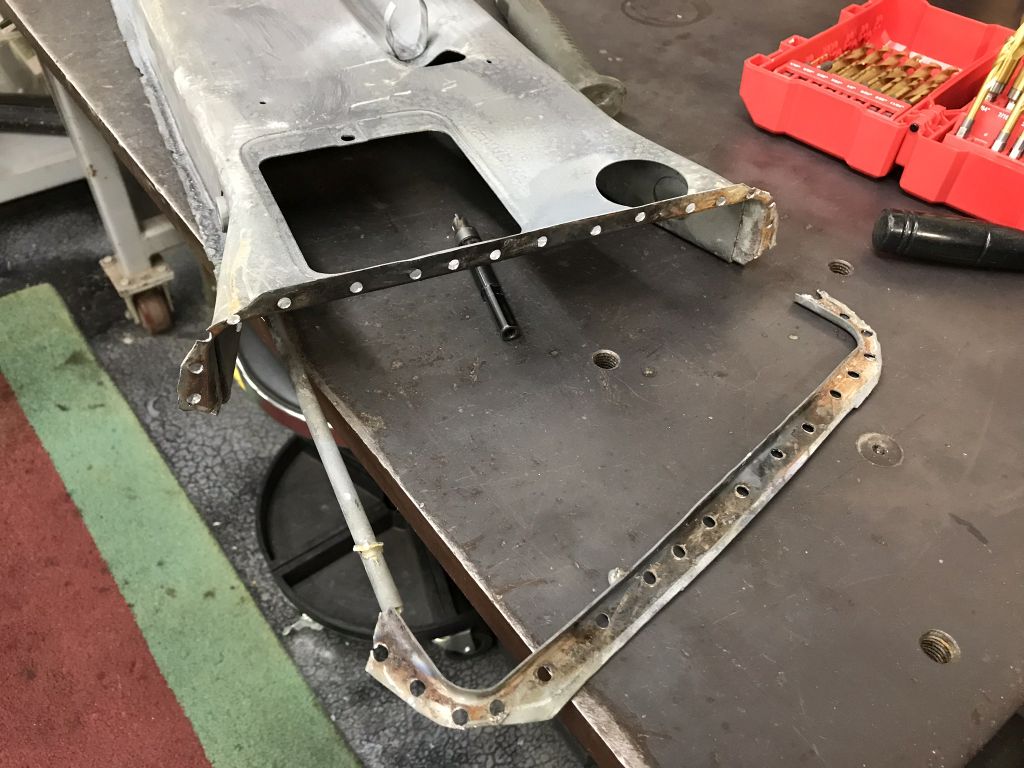
Old tunnel almost removed. 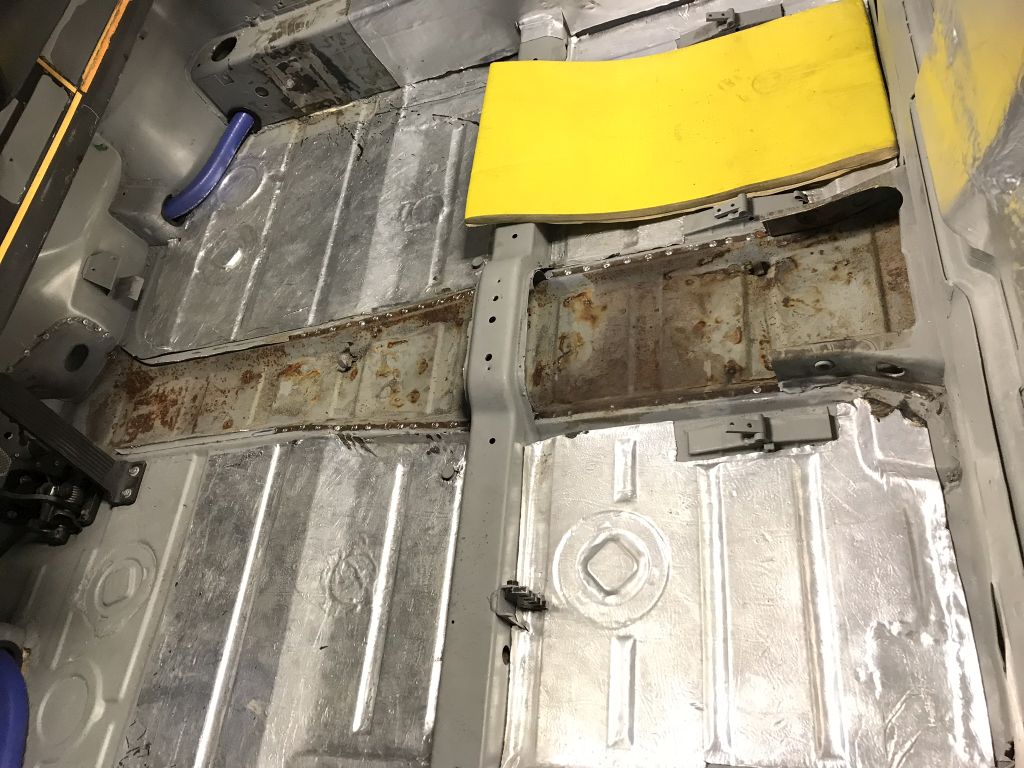
Had to stop to get to the bar for once a year amazing corned beef.
Posted by: mepstein Mar 17 2018, 06:09 PM
Center tunnel lines sound good. Is there any issue having the coolent lines share space with the fuel lines.
Posted by: Amenson Mar 17 2018, 06:14 PM
Center tunnel lines sound good. Is there any issue having the coolent lines share space with the fuel lines.
Nope.
Posted by: 914forme Mar 17 2018, 07:34 PM
I always thought that the hose running to the radiator looked a bit sloppy. Needing to tuck the spare tire as far to the passenger side as possible to make room for the brake/clutch fluid reservoir gave me an excuse to tidy it up a bit.
Replaced the hose with some more AL tube. This is the return, forgot to take a picture of the top tube.
Tight.
I recognize those beads on the end of these tubes. Keep going, keep going.
Posted by: mgp4591 Mar 17 2018, 07:54 PM
My center tunnel was trashed and eaten up on the sides almost to the top. I sourced some 2x4" 14 ga tubing that fit right in and welded up fine to the new floor pans. I'll run the coolant lines down the center and top that tube with another one for my brake, fuel lines, and cables. Probably some wiring too plus my shifter. I'm working on a different type of heater setup to eliminate more water running through the middle plus if I bet a leak, the center tunnel is isolated from the rest of the car and won't flood anything - it'll just run out and it eliminates the possibility of hitting coolant lines run under the car. I've never really liked that solution...
Posted by: Amenson Mar 18 2018, 09:01 PM
I would like to take this time to make a public service announcement.
If you are thinking about making random holes in your car; for the sake of your future self, kids, future owner or humanity in general....please don't. Take the time and/or spend the money to do it right. The owner of this car before Doug is officially on my shit list.
And say off my grass
I was a bit optimistic that yesterday's progress was closer to the finish than the start, it was not. The rear part of the tunnel where it is reinforced for the seat belt anchor is spot welded and seam welded to the floor and had to be ground out. Getting the rear flange out from under the strengthening panel was also quite a joy. I shortened the flange on the replacement part so that it can slide under.
On a happy note, the replacement center tunnel is almost ready to weld in!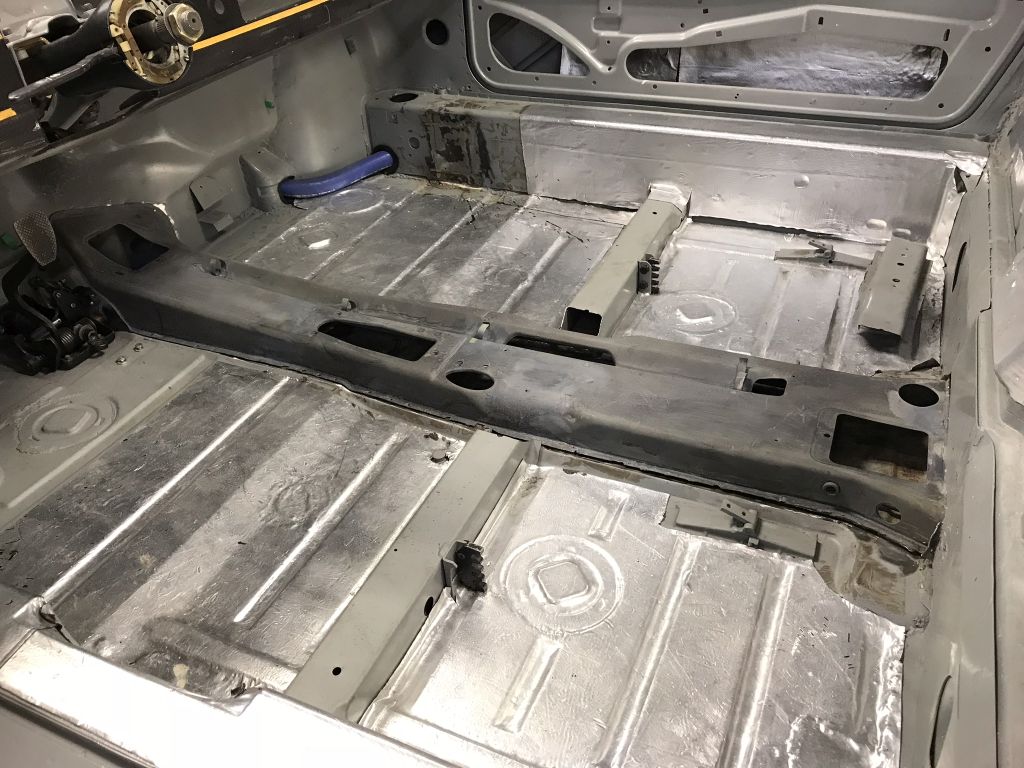
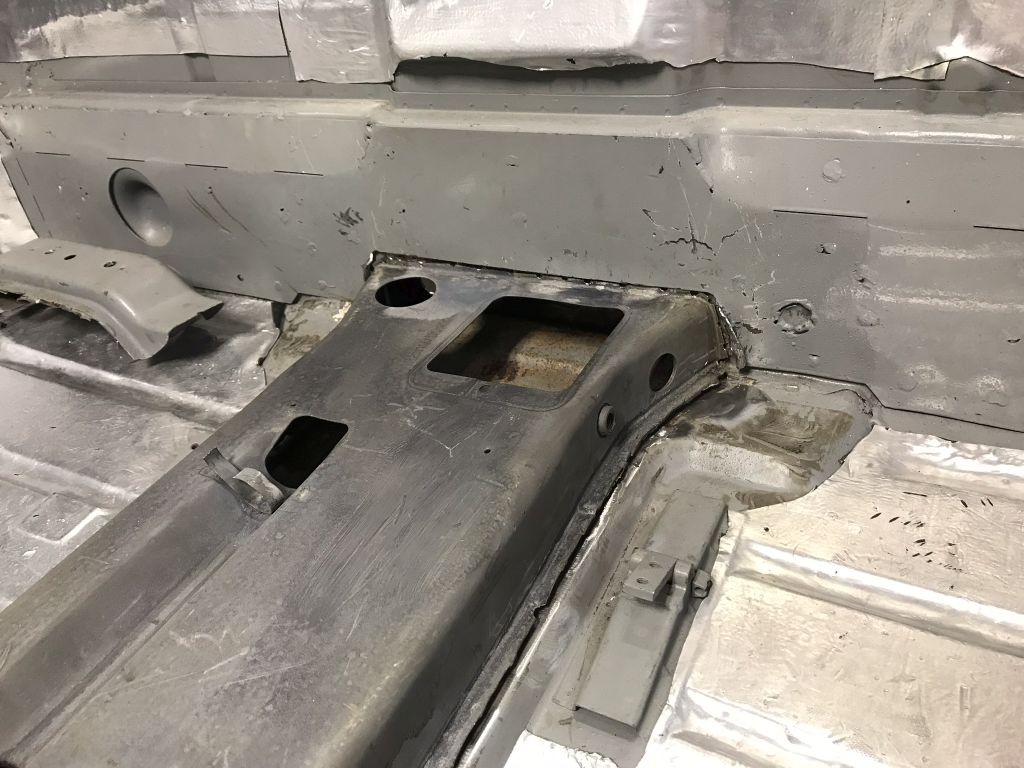
There was a repair at the passenger front of the replacement panel is a bit proud to the bottom of rest of the weld flange and keeping that side from sitting flat. A bit of cutting and it sits flat, now I just need to weld it back together.
Posted by: Amenson Mar 25 2018, 08:33 PM
Several days of fun compressed into one post.
This is the repaired area that needed adjustment. Didn't get a post repair picture.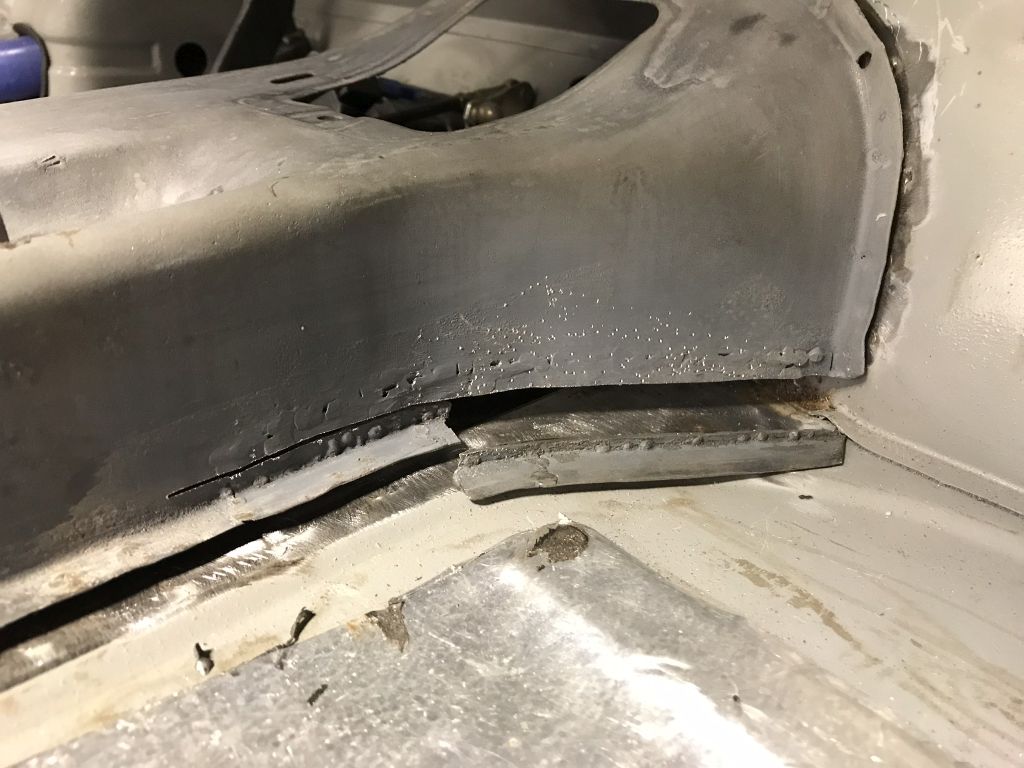
I couldn't help myself, had to wire brush and paint the floor under the center tunnel. Just used weld through primer.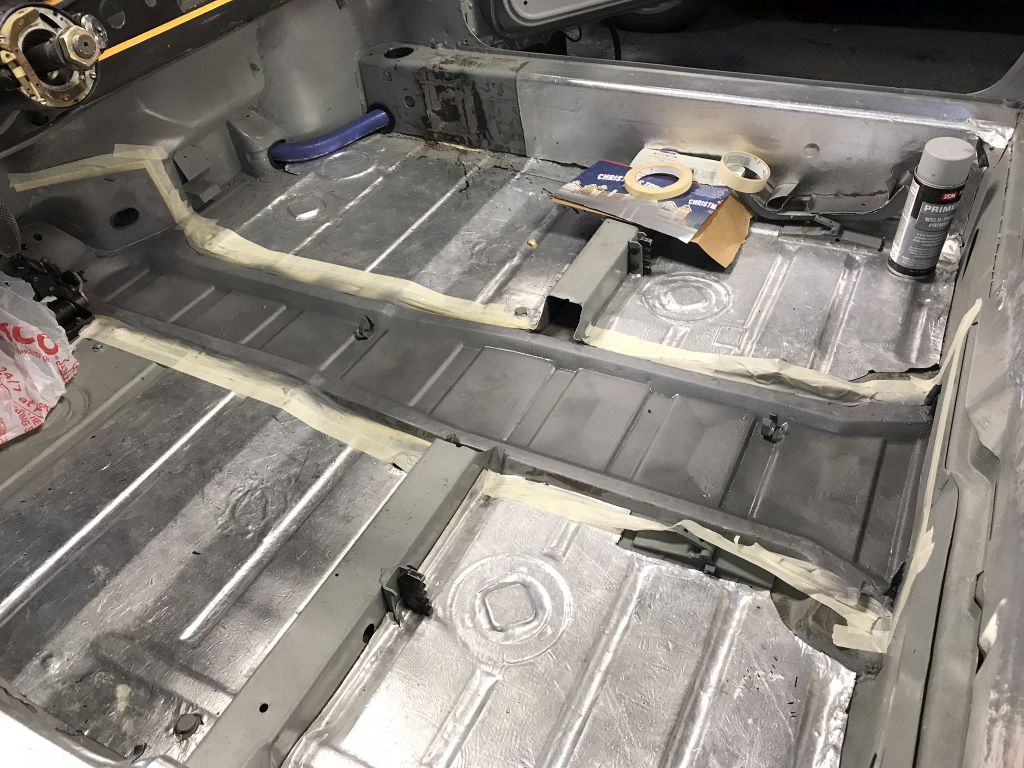
Holes for the IC heat exchanger. I am pretty sure I would not have been able to drill these holes with the center tunnel in place.
Center tunnel is painted with weld through primer on the underside and another poor attempt at matching the grey body color on the outside. Was warm enough to bake it in the sun today!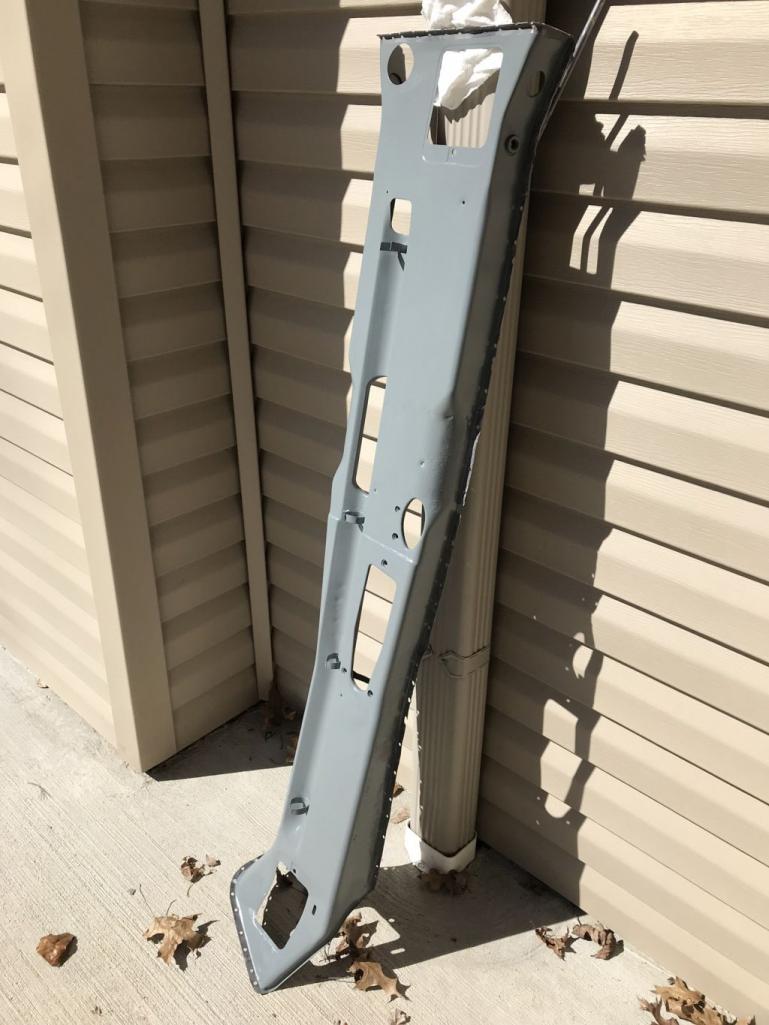
The calm before the storm.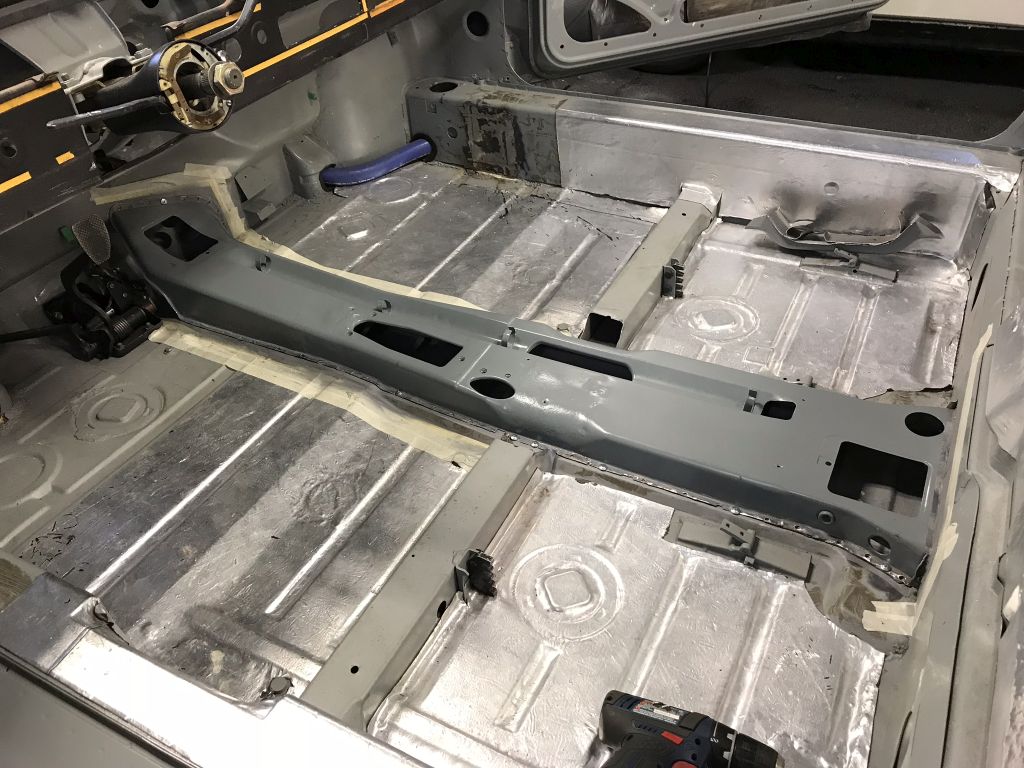
After much mig welding. It is amazing how much smoke a little bit of burning bed liner gives off.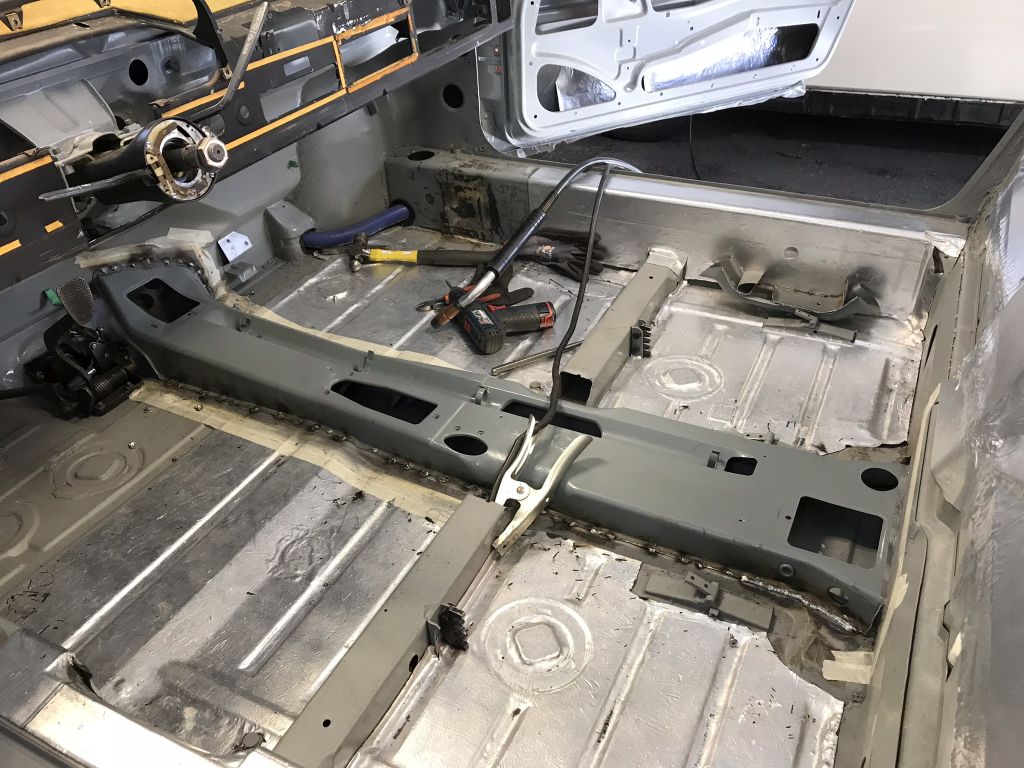
Center rib drops perfectly back in place.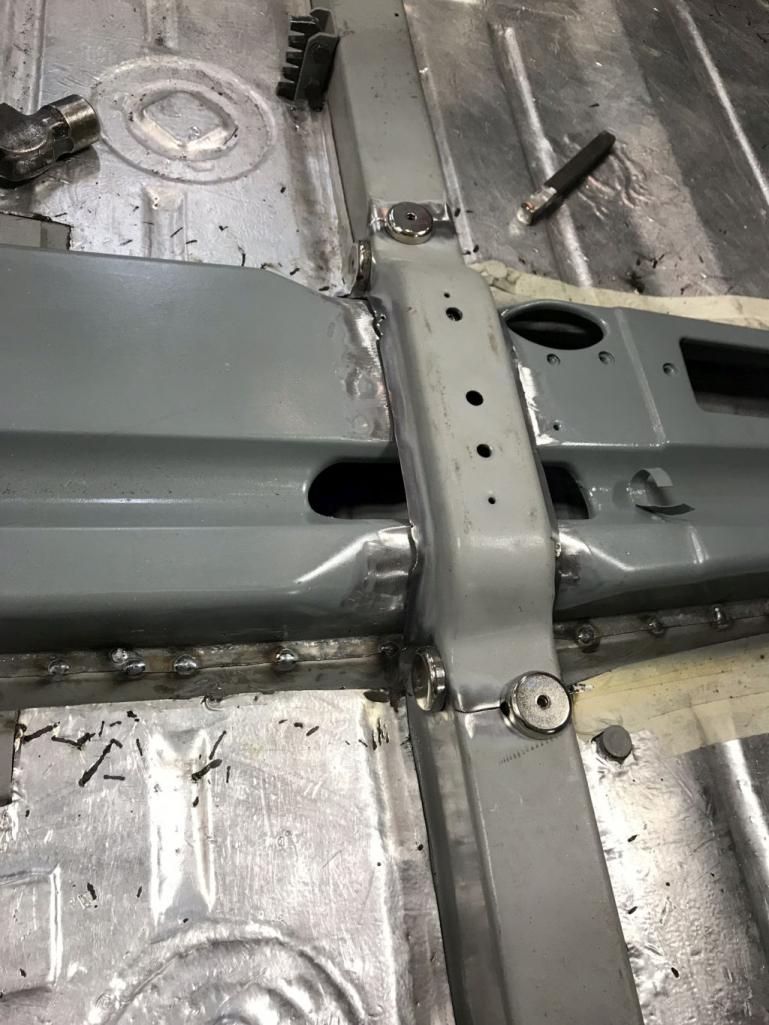
Gap's were so good that I decided to use the TIG.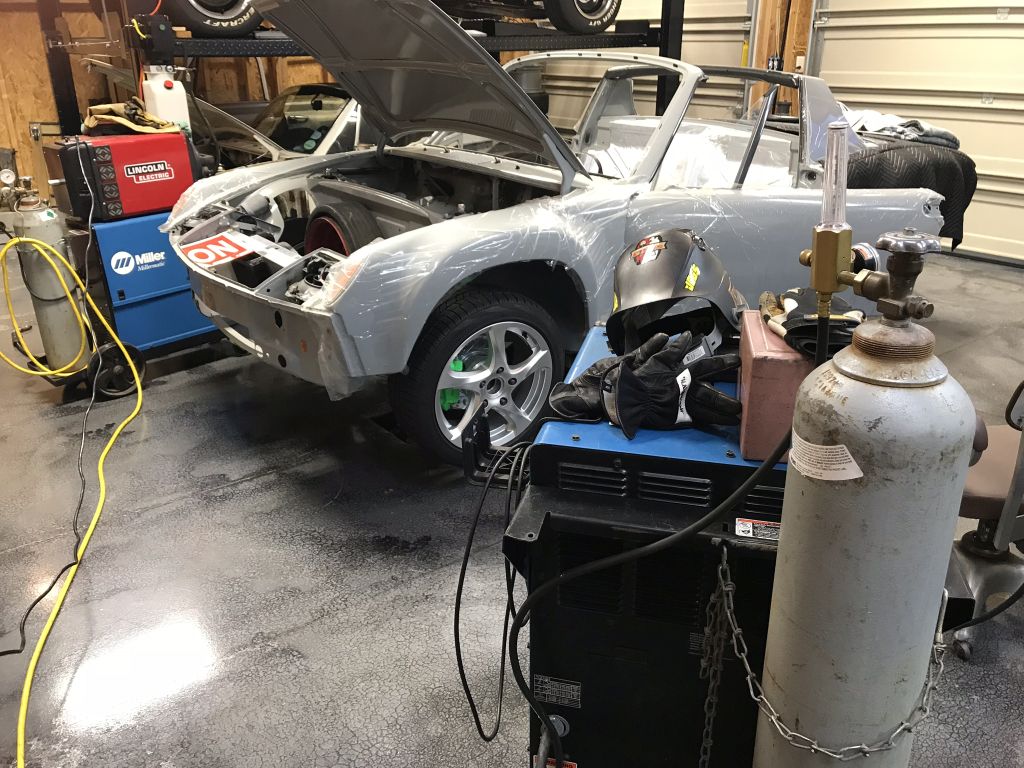
Partially TIG'd. Decided to call it Beer'thirty after sticking the tungsten for the third time. What an awkward welding position. 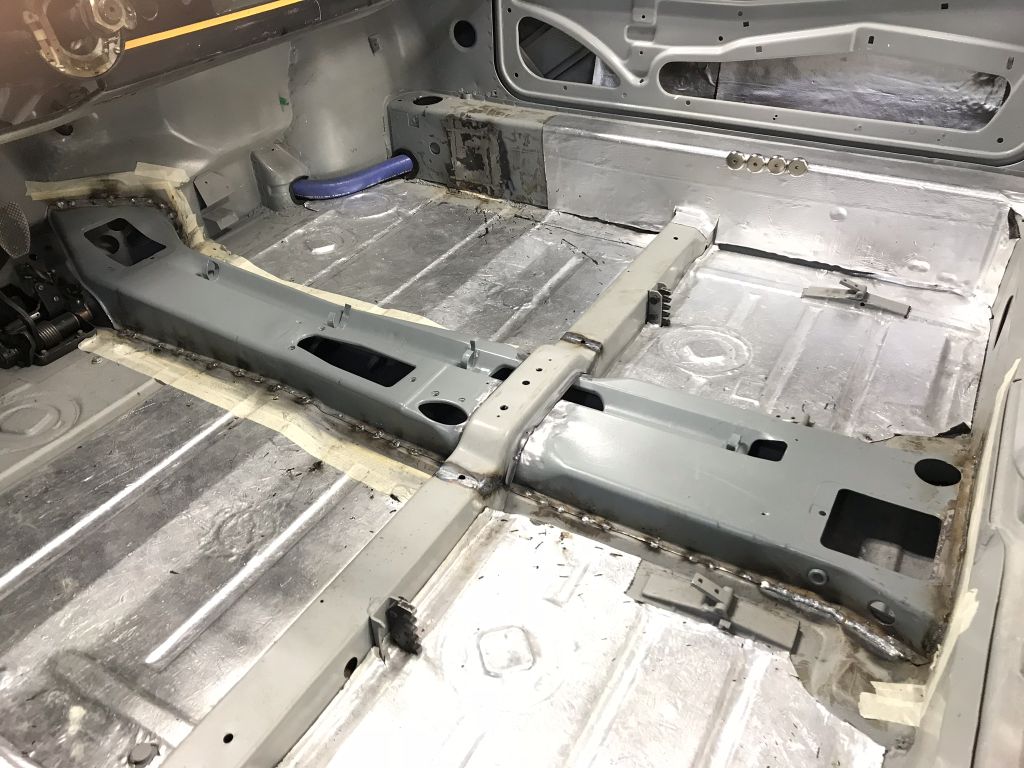
Looks so much better. Much welding and a bit of painting and this task will be complete.
Posted by: theer Mar 25 2018, 09:00 PM
Looks amazing Scott.
Happy Beer-thirty.
Posted by: bbrock Mar 25 2018, 09:16 PM
That is one wicked repair!
Posted by: Amenson Mar 26 2018, 07:24 AM
That is one wicked repair!
Small potatoes compared to what you are tackling!
Posted by: 914forme Mar 26 2018, 07:26 PM
Nice progress Scott.
Posted by: mepstein Mar 26 2018, 08:37 PM
Sorry I couldn't help you with the replacement piece. Mine was toast. Car looks much healthier with the metal back in place.
Posted by: Amenson Mar 27 2018, 07:38 PM
With the center console in place and the throttle cable tube relocated to the driver side I was able to mock up the throttle cable.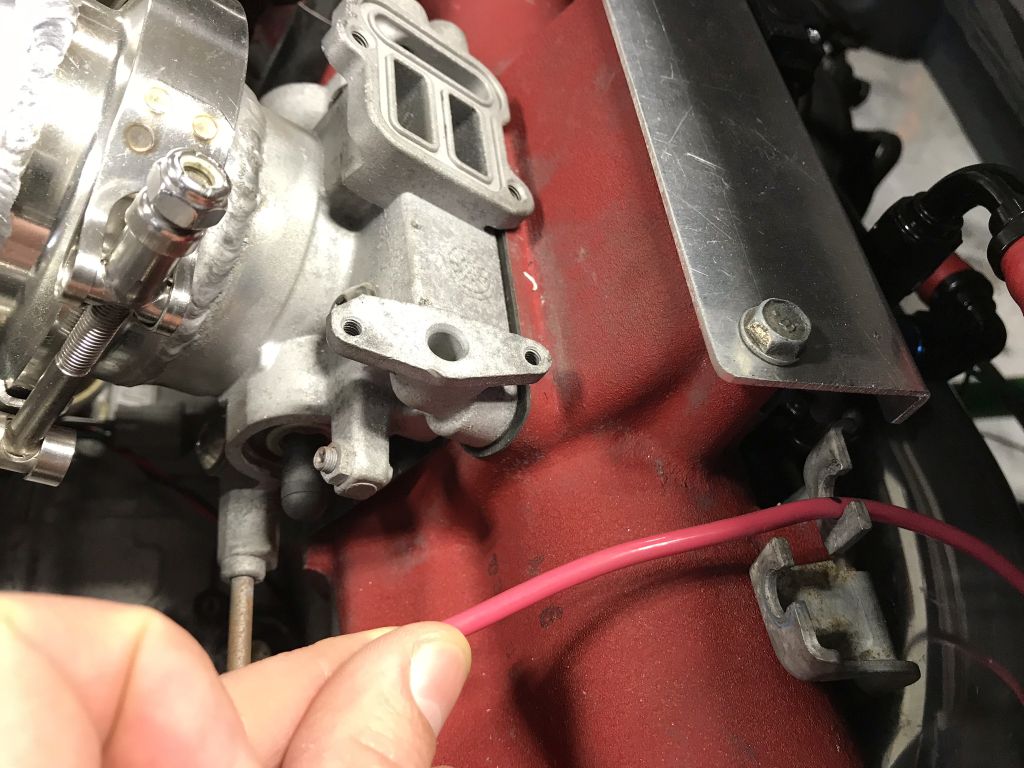
Bad picture, you can sort of see the red wire in place of the throttle cable.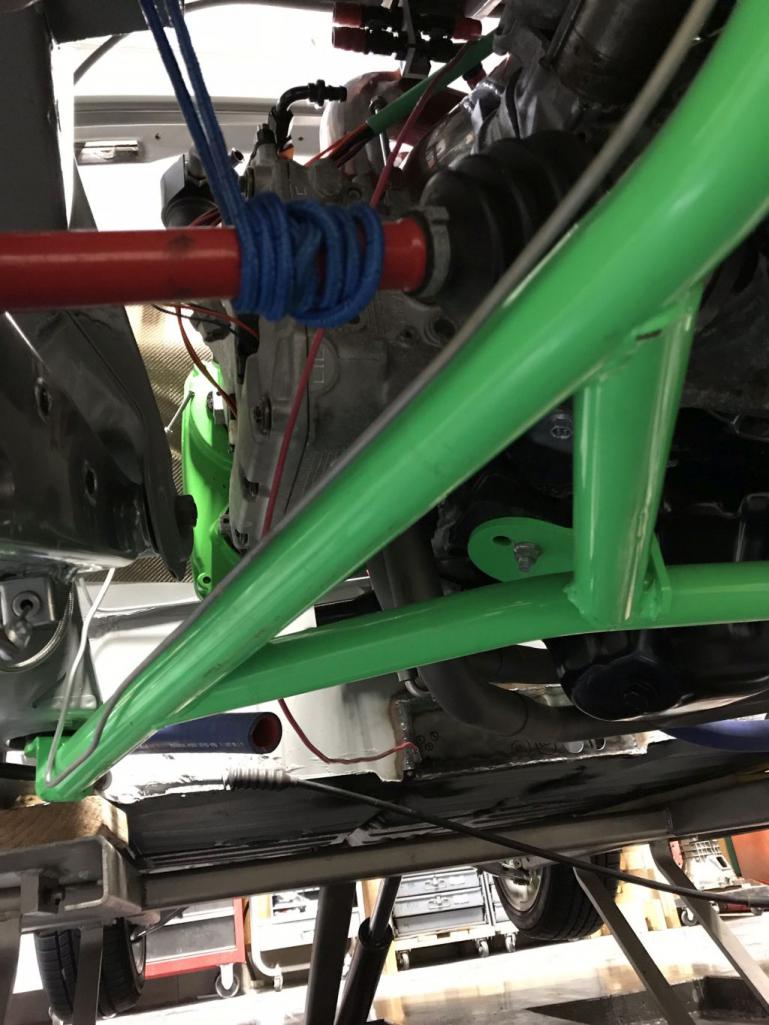
The length from the tip of the throttle tube to the stock Suby cable mount is 140cm.
Throttle tube is stock length.
Manifold side is all stock Suby.
Tom, is this enough info to specify the cable to 914 Rubber?
Posted by: theer Mar 28 2018, 06:56 AM
Thanks, Scott. That should do it.
Tom
Posted by: Amenson Mar 29 2018, 06:01 PM
How do you eat an elephant?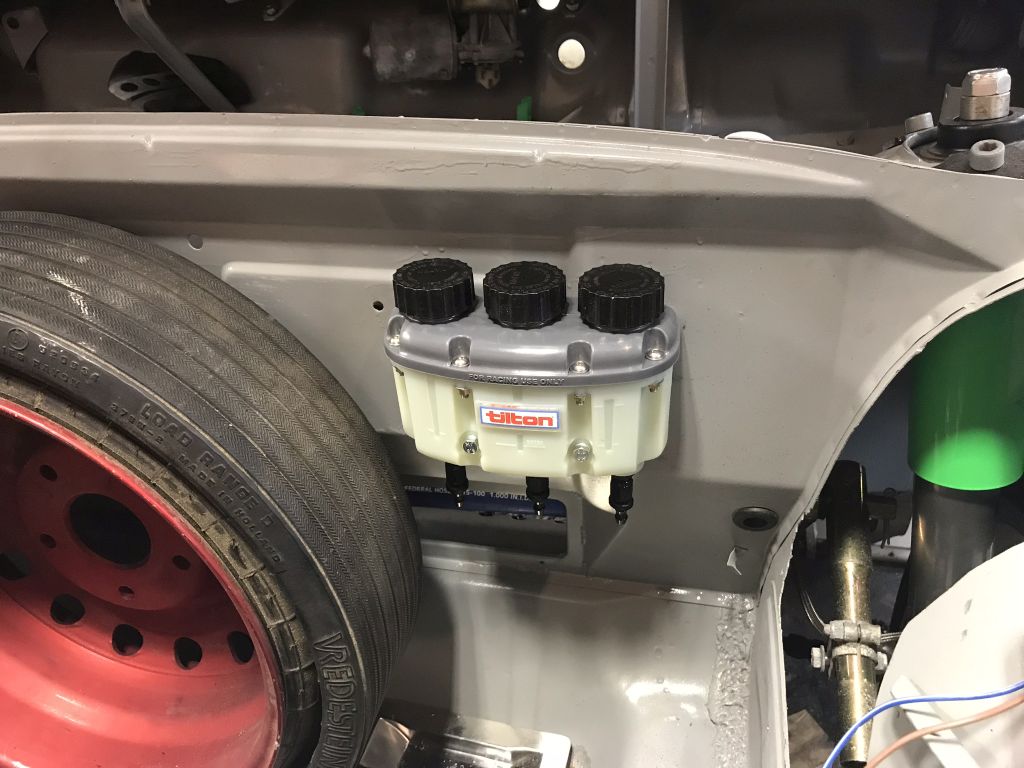
Posted by: 914forme Mar 29 2018, 06:39 PM
With a proper three chamber Tilton fluid reservoir. But you are correct one piece at a time.
I was busy cleaning hubs tonight, one piece at a time 
Posted by: Amenson Mar 30 2018, 09:12 PM
Had they day off and took the opportunity to finish the welding on the tunnel replacement.
Bad things happen when you try to push through dirty tungsten. It is amazing how a little contamination pop can ruin the arc. Proper thing to do is to stop and resharpen. this is what happens when you don't. Arc gets wide, takes more amps to melt the filler, more contamination on the tungsten, then blop... 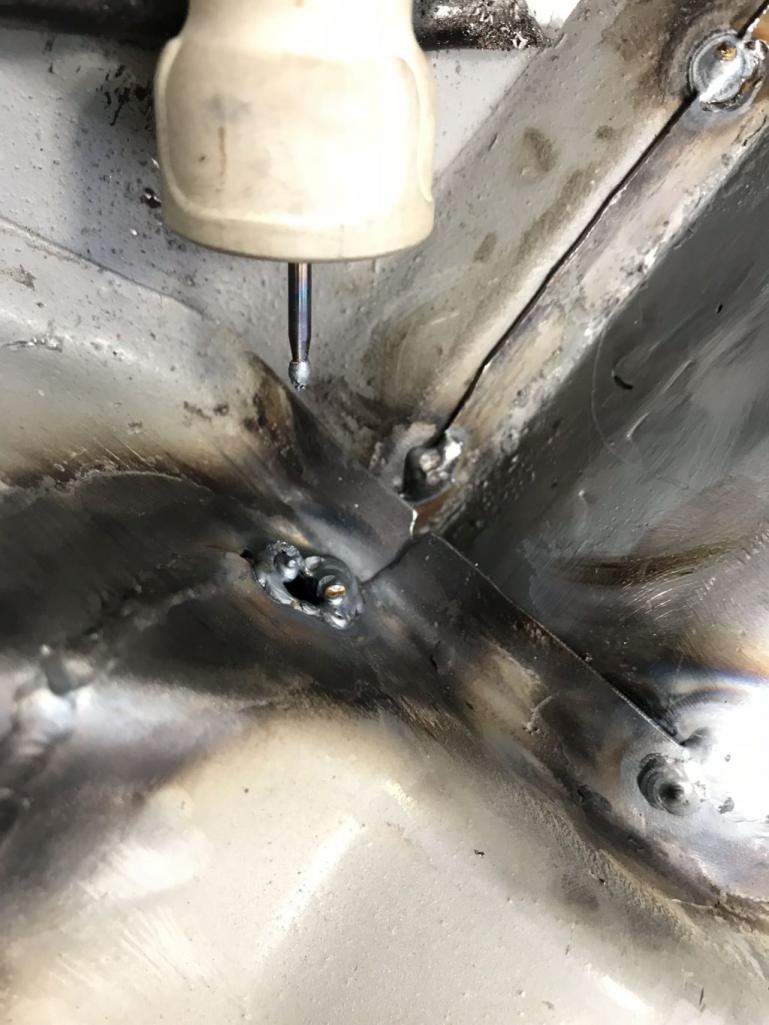
Took a bid of grinding but pretty happy with the recovery.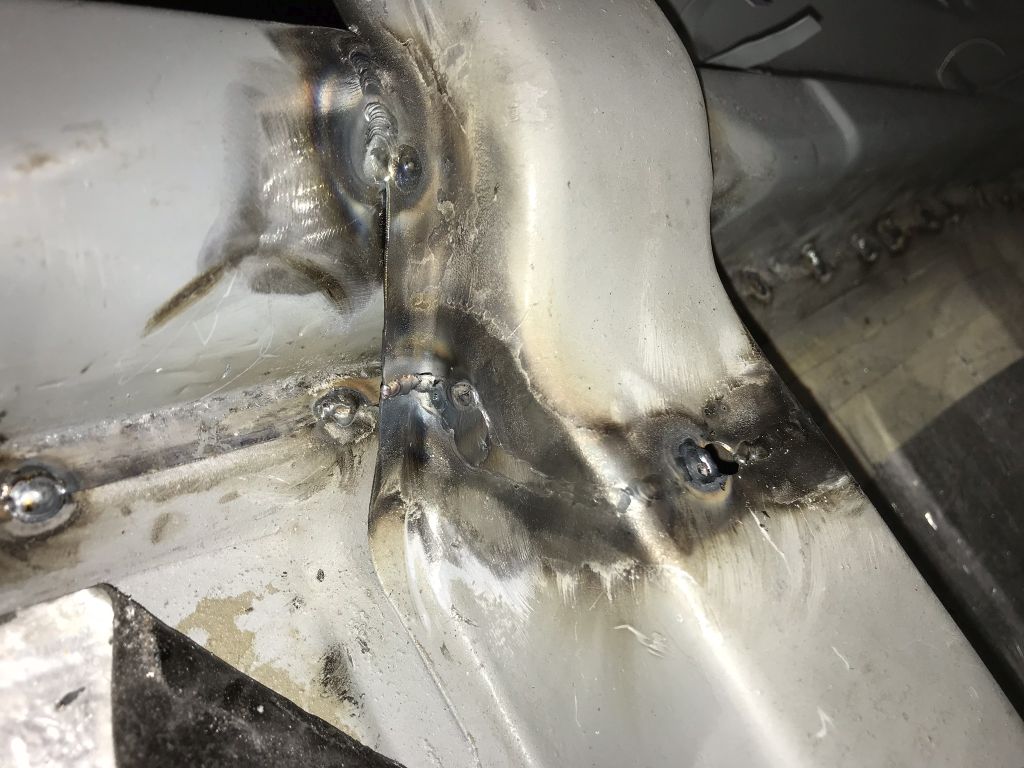
Welding finished. This thing is stiff.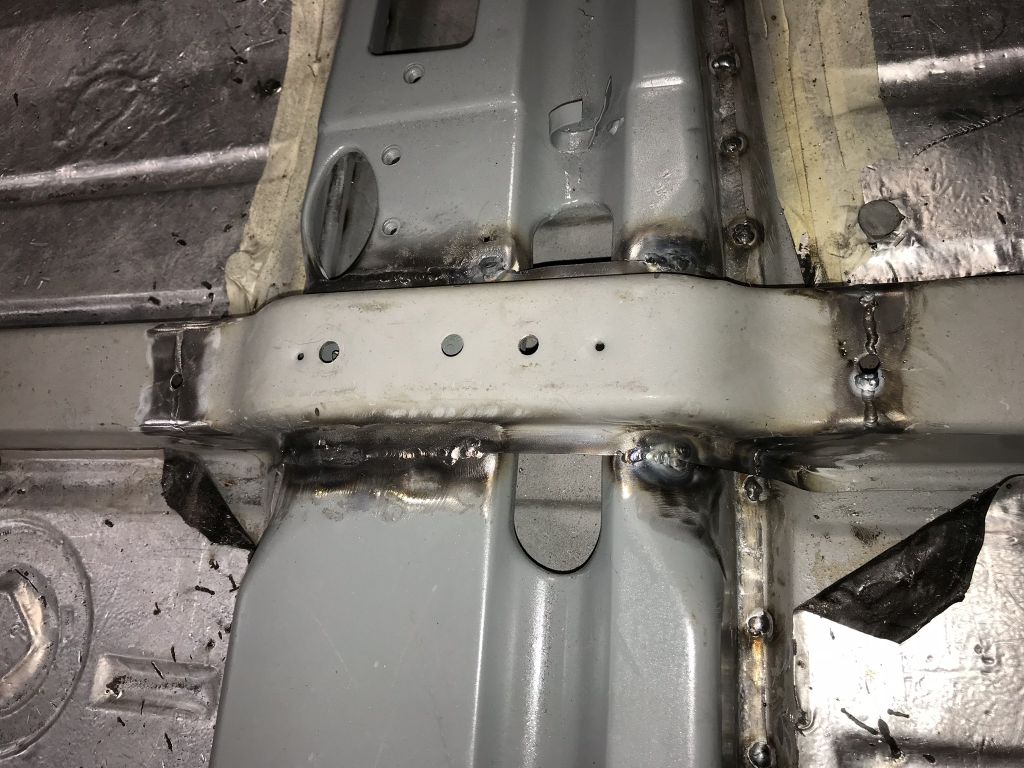
Tomorrow the squirt gun welds get ground.
Posted by: Amenson Apr 1 2018, 06:16 PM
And Done. Now you can cover it with carpet.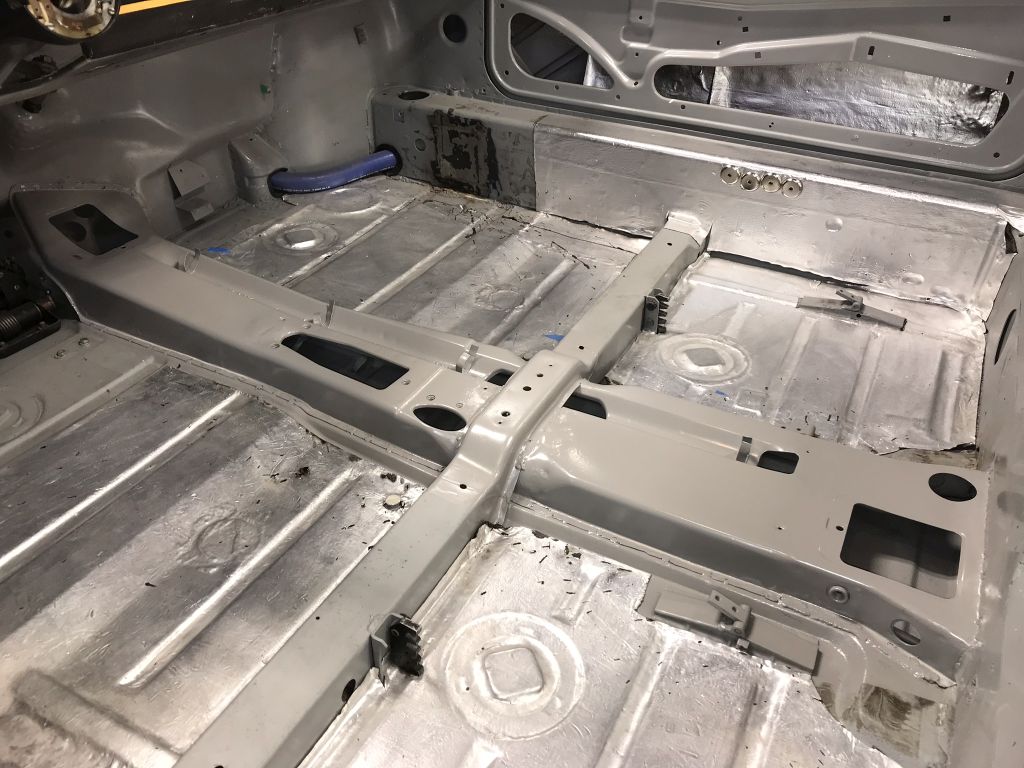
Also fixed the missing steering rack clamp stud.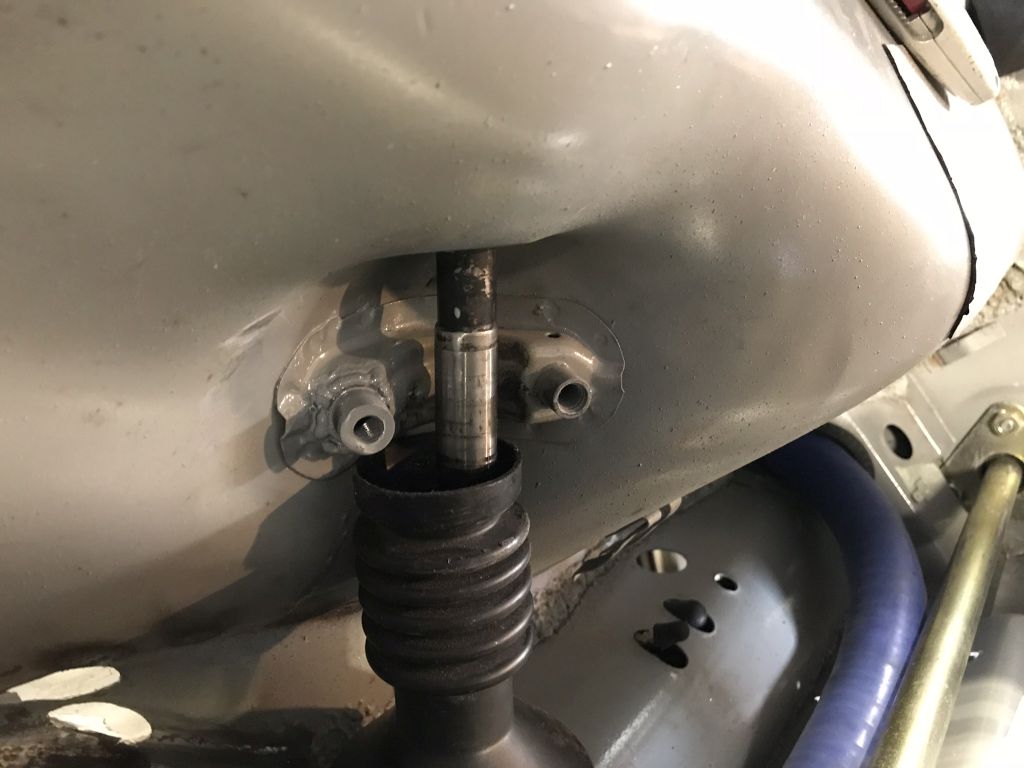
Yet another repair that will never be noticed.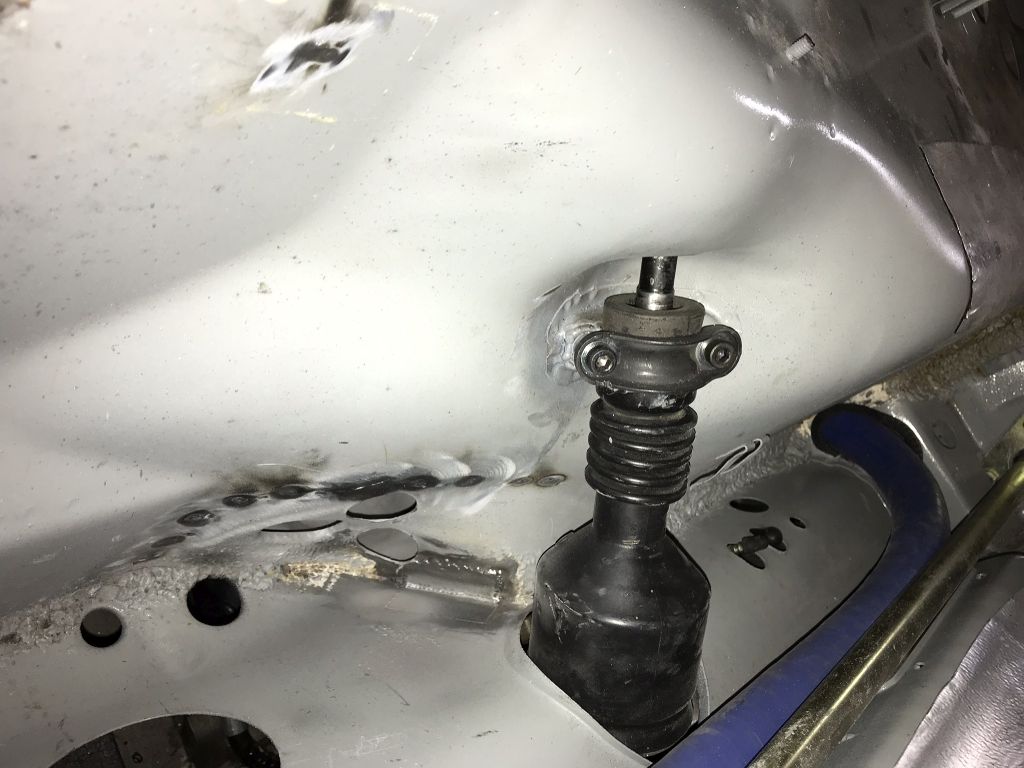
Time to get back to some fun stuff.
Posted by: Amenson Apr 3 2018, 07:59 PM
Moving on to final assembly.
Good place to start is the hydraulic clutch master cylinder. After pressing out the studs I realized that the flat for the stud head is too small for the bolt.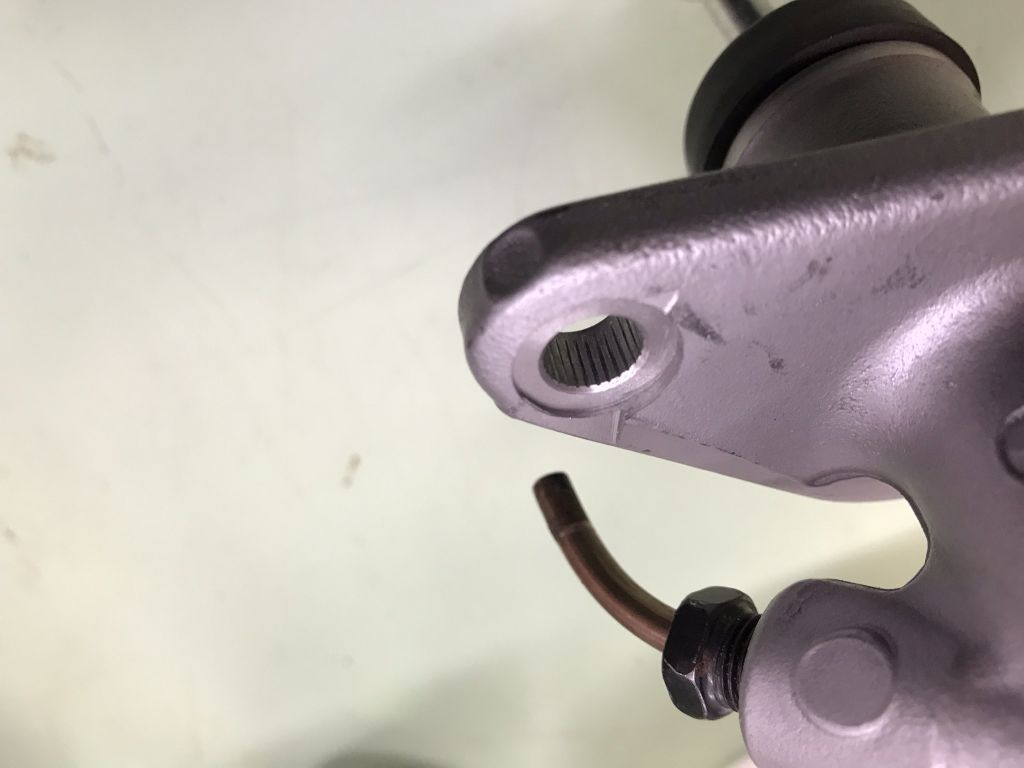
I thought about trying to grind it flat but it would never be really flat and if someday down the line it needed to be replaced it could not be replaced w/o modification. So I machined some step washers.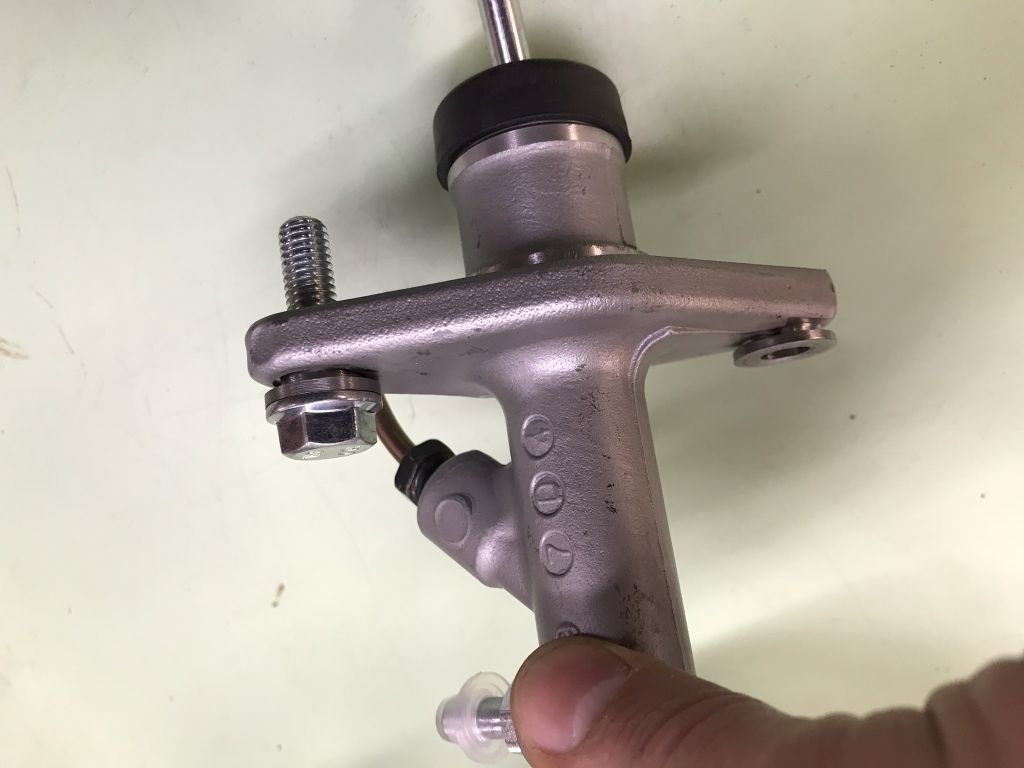
Check that off the list.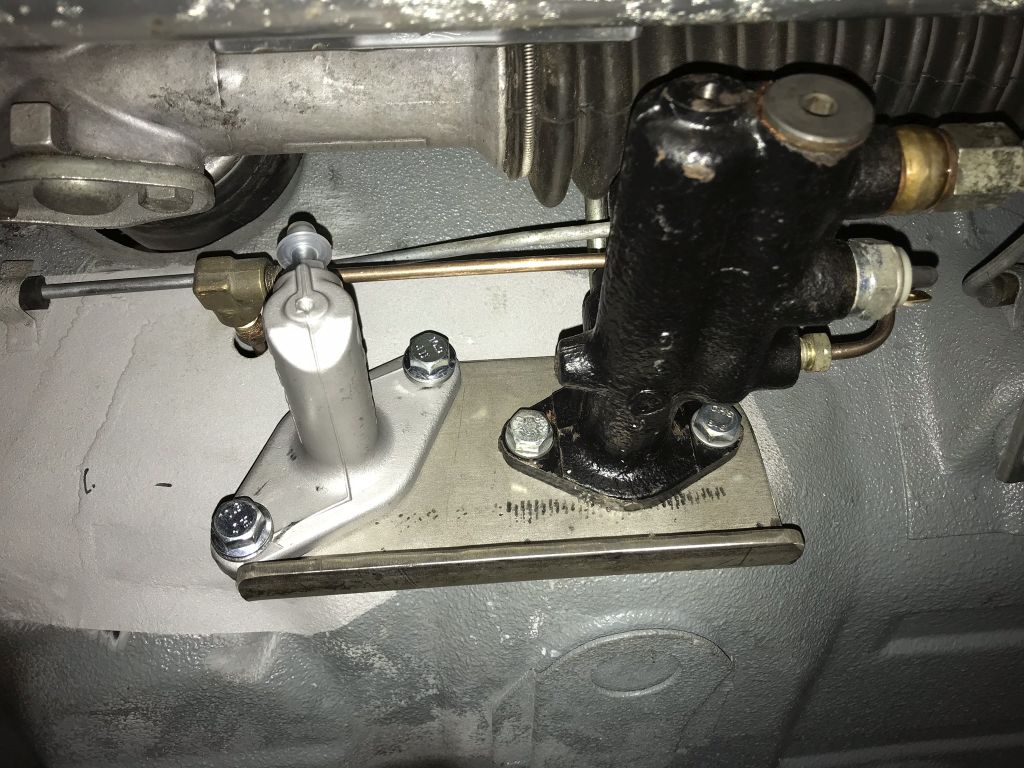
Posted by: CptTripps Apr 11 2018, 11:26 AM
I've been watching from the sidelines for several months now, shedding the occasional tear for how awesome this build is, and that it's in such good hands. This is truly going to be the baddest-ass 914 on the road.
I talked to Tom last night, and got him some of the info on the map in the ECU.
Scott: If you download the Hydra software, you'll be able to pull the map off of it. I uploaded the custom map to the ECU already. Here are some specifics about it.
I told the guy that wrote the map for me the engine specs, turbo specs, and that I was using an air-to-water intercooler. The also knew that it was only driving two wheels. As he told me, the map that he wrote was "close" but would need refinement to operate at peak performance. Once I got it running, he was going to VPN into the computer attached to it, and then make the final adjustments. I forget the guy I talked to, that wrote the map, but the company was Element Tuning. (I don't have access to the email account that I'd conversed with him through, or I'd let you know.)
The laptop that Tom has, has the installation file for the software on it. He should be able to get that to you. I have no clue where to download it anymore. (a quick Google search wasn't much help either.) I DO believe I'd emailed you the pin-out for the ECU a long time ago. I can dig that up again if you need it.
Hope that helps guys. I can't wait to see this thing on the road!
Posted by: CptTripps Apr 11 2018, 11:34 AM
Update: Found the link to download the software: http://nemesisems.com/software/
Posted by: Amenson Apr 11 2018, 01:47 PM
I've been watching from the sidelines for several months now, shedding the occasional tear for how awesome this build is, and that it's in such good hands. This is truly going to be the baddest-ass 914 on the road.
I talked to Tom last night, and got him some of the info on the map in the ECU.
Scott: If you download the Hydra software, you'll be able to pull the map off of it. I uploaded the custom map to the ECU already. Here are some specifics about it.
I told the guy that wrote the map for me the engine specs, turbo specs, and that I was using an air-to-water intercooler. The also knew that it was only driving two wheels. As he told me, the map that he wrote was "close" but would need refinement to operate at peak performance. Once I got it running, he was going to VPN into the computer attached to it, and then make the final adjustments. I forget the guy I talked to, that wrote the map, but the company was Element Tuning. (I don't have access to the email account that I'd conversed with him through, or I'd let you know.)
The laptop that Tom has, has the installation file for the software on it. He should be able to get that to you. I have no clue where to download it anymore. (a quick Google search wasn't much help either.) I DO believe I'd emailed you the pin-out for the ECU a long time ago. I can dig that up again if you need it.
Hope that helps guys. I can't wait to see this thing on the road!
Update: Found the link to download the software: http://nemesisems.com/software/
Hi Doug, great to hear from you. I wasn't sure how you were handling someone else taking over the project. Glad that it is only occasional tears. I am not sure I would be so composed given similar circumstances.
I have been playing with the SW for quite a while. It has very good info on the wiring interface that I have been using to confirm your pin out sheet. I also wanted to get comfortable with sensor checking/scaling/debugging.
Regarding the MAP, I have not powered up the ECU so I can not download the data from it. I assumed that the MAP was on the laptop that went with the car so I had Tom send it. The MAP he sent had notes describing a completely different setup with a boost target of 41psi! He is going to send the other MAPs. I am sure we can find the one that matches with what is in the ecu, otherwise I will just start it with what is in there.
Posted by: mepstein Apr 11 2018, 01:57 PM
I have to think that Scott helped to save this build. While Doug did a lot of heavy lifting, there are still a ton of details that could have been a make it or break it result. I hate it when projects get pushed in a corner.
Posted by: theer Apr 11 2018, 02:23 PM
You are right about that, Mark.
If Scott hadn't agreed to help, I wouldn't have been able to do the deal.
Posted by: Amenson Apr 22 2018, 09:02 PM
Fun with sheetmetal. The last major bit of fabrication on the project is to make the shroud for the radiator intake. I had mentally budgeted a day in the garage to get it done...ya, that didn't quite work out. When I made the Radiator mount I had a general idea of what I wanted to do. When it came down to actually doing it I didn't like my first idea. After several cardboard templates and much pondering I ended up reworking the radiator mount a bit to add mounting flanges. More CAD and then 2 tries per side in aluminum I think that it is almost something I am happy with.
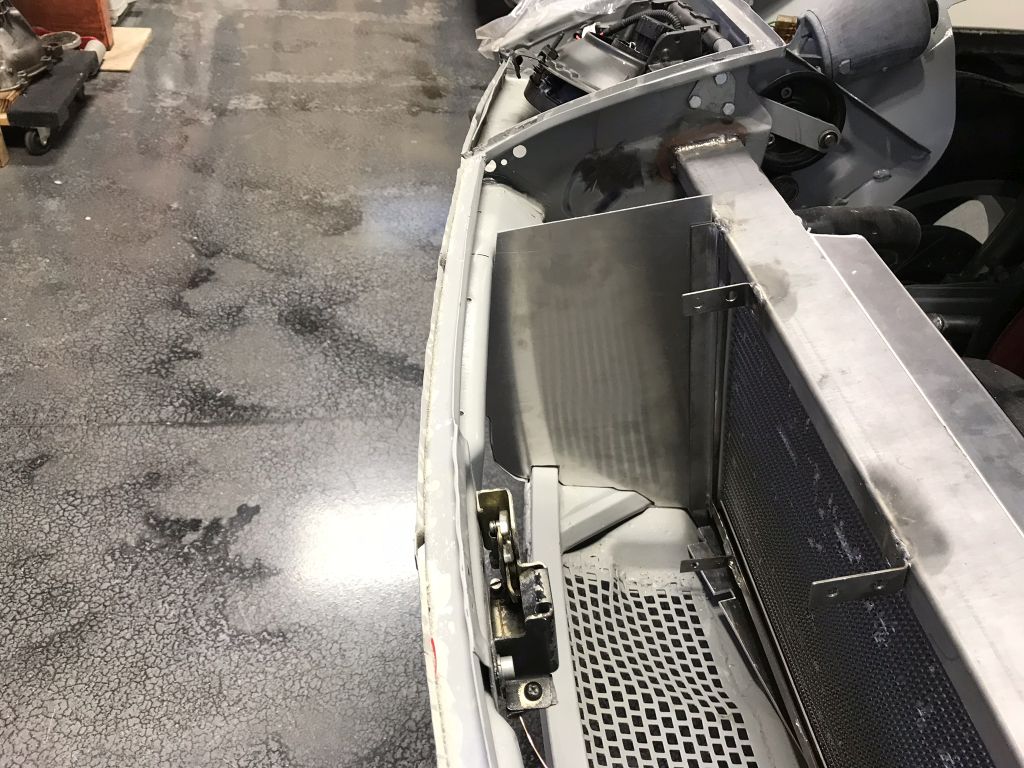
The tops of the side pieces will be bent in to make a flange to mount the top piece to. The top piece will need to be bent to sit flat on the front lip. May have to get out the bead roller and try out the tipping dies. I am sure this will only take a few ruined pieces to get right! The shape over the radiator is not final.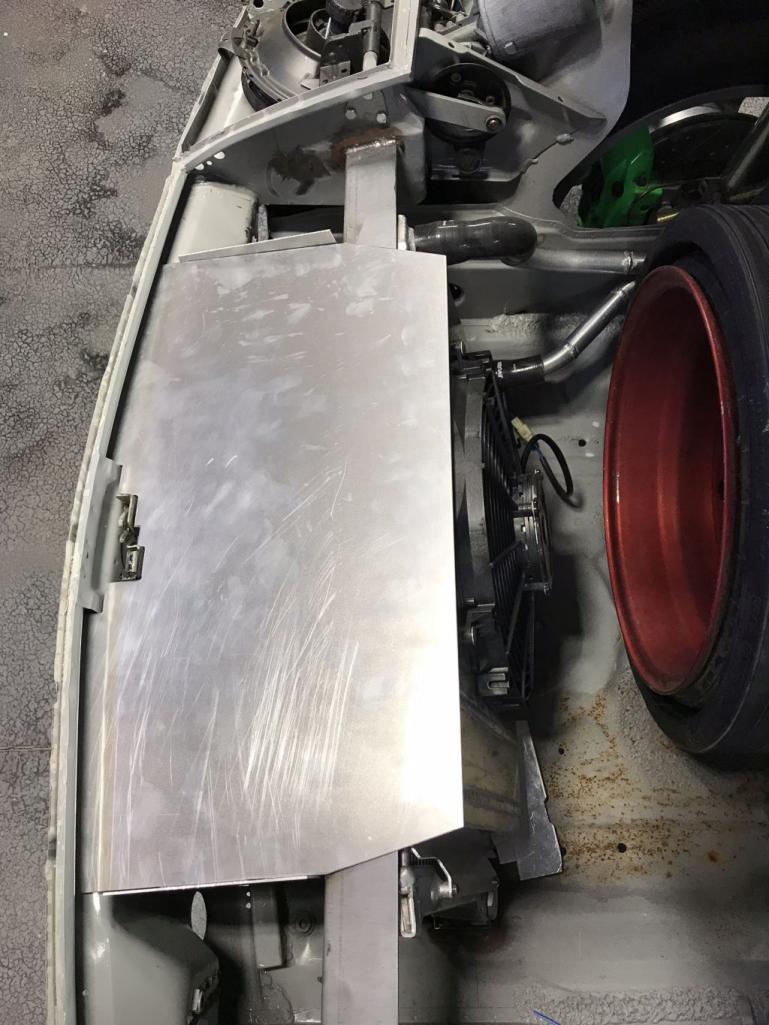
CAD 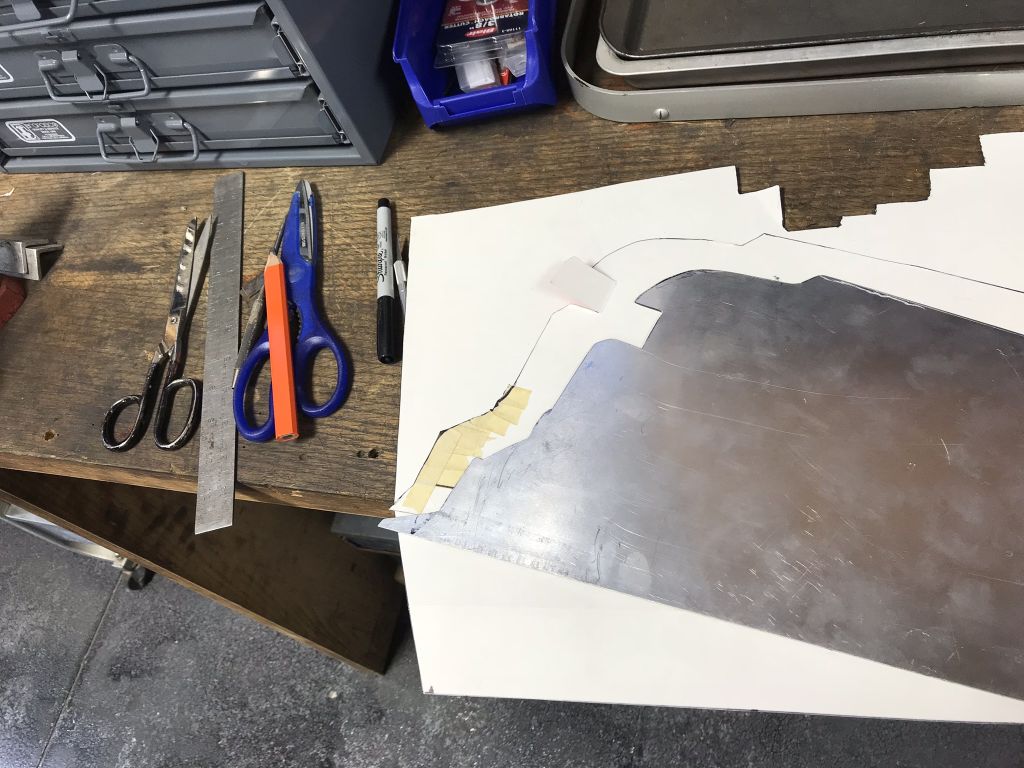
The clevis for the clutch MC arrived and is a really nice piece. Unfortunately the pin is larger than the bushings in the pivot. The slot is also quite a bit wider than the pivot. I am guessing that most people just pop out the bushing and run it. Effective but not something that I could do and sleep at night. I'll enlarge the hole and make a pair of step bushings.
Posted by: Amenson Apr 24 2018, 08:59 PM
I dug into the clutch linkage tonight. I was pleasantly surprised that the shaft came out without removing the entire pedal assembly
I was a bit harsh on the bushing in my last post. When installed it is just undersized. Once out is is right at 8mm. Pin in the clevis is 7.90mm. A shave with a 8mm reamer when installed and it would be perfect. The side to side gap is definitely excessive so I will still make a pair of step bushings.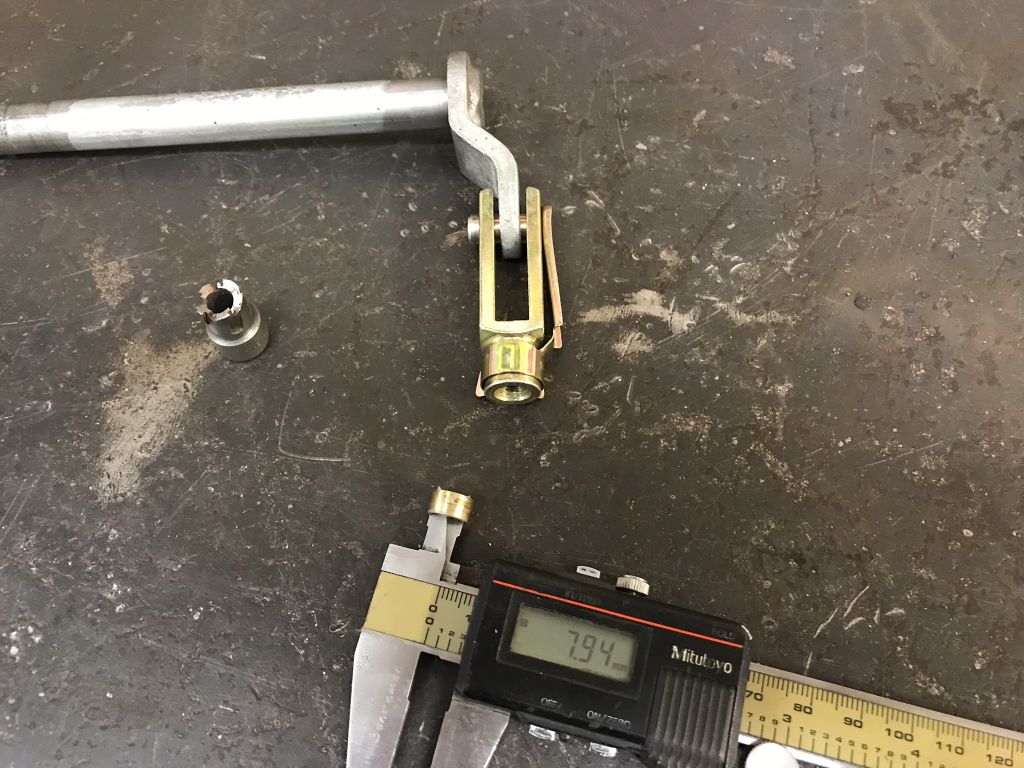
Posted by: dakotaewing Apr 25 2018, 01:46 PM
Those cuts for the radiator sheet metal look really clean and smooth..
What are you using to make the cuts, and what guage is the metal?
I'm asking because I have to to the same thing for my project -
I'm assuming that's aluminum?
Posted by: Amenson Apr 30 2018, 08:39 PM
Those cuts for the radiator sheet metal look really clean and smooth..
What are you using to make the cuts, and what guage is the metal?
I'm asking because I have to to the same thing for my project -
I'm assuming that's aluminum?
It is aluminum. Thickness: 1.5mm
As for the cuts, I start with the longest straight edge on the shear cut edge of the sheet metal. Instant straight! Other edges are cut on the band saw, tidied up on the belt sander and final tweaking with a file.
Just take your time....lots of it!
And don't be afraid to start over.
Good luck.
Posted by: Amenson Jul 6 2018, 08:48 PM
The Porsti Power Tour thrash is over, time to get back to Grey. I spent a good part of the weekend and the 4th cleaning and organizing the garage back to a workable state. Now Grey is back on the operating table.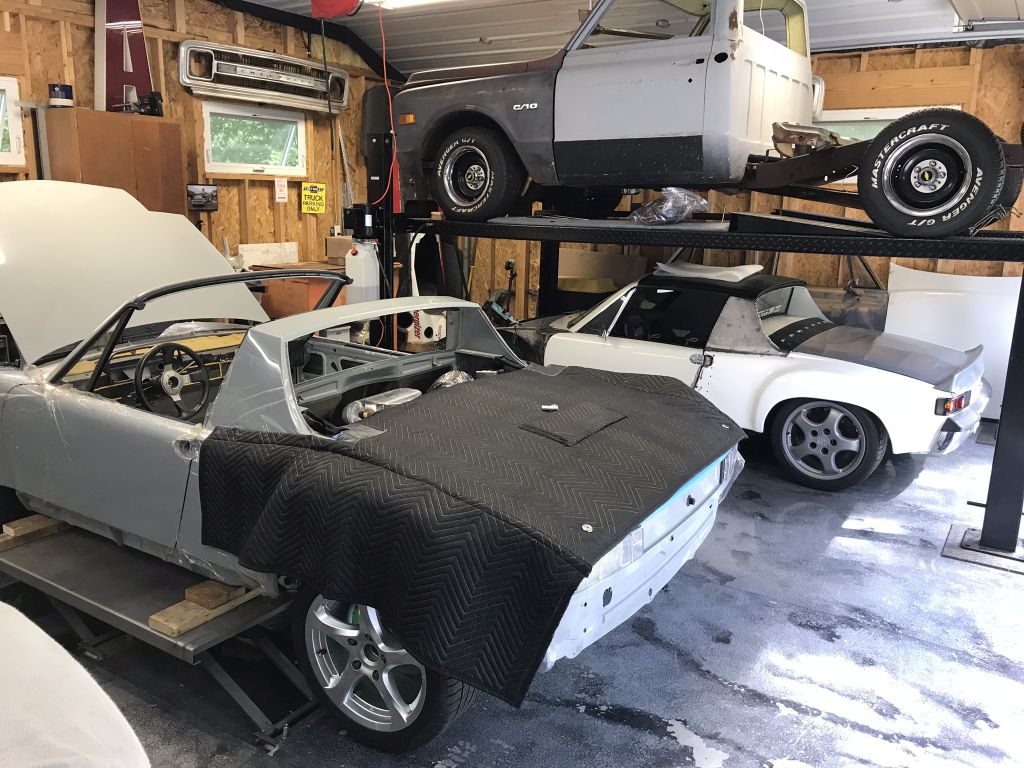
Pushing it around reminded me how much rubbing is happening. Driver side is rubbing on the inside, passenger on the outside. Need to get a base alignment done to see if they will fit perfectly in the limited space or if some trimming and precision spacing will be necessary.
Posted by: effutuo101 Jul 7 2018, 12:27 AM
Just wow! Keep up the good work!
I am still waiting on Dyno. Went a different way, so now I have to source some mirrors.
Then seat belts and touch up on paint.
Posted by: Amenson Jul 16 2018, 08:31 PM
Great weekend of progress on Grey. Finished shaping the radiator shroud and got the placement set.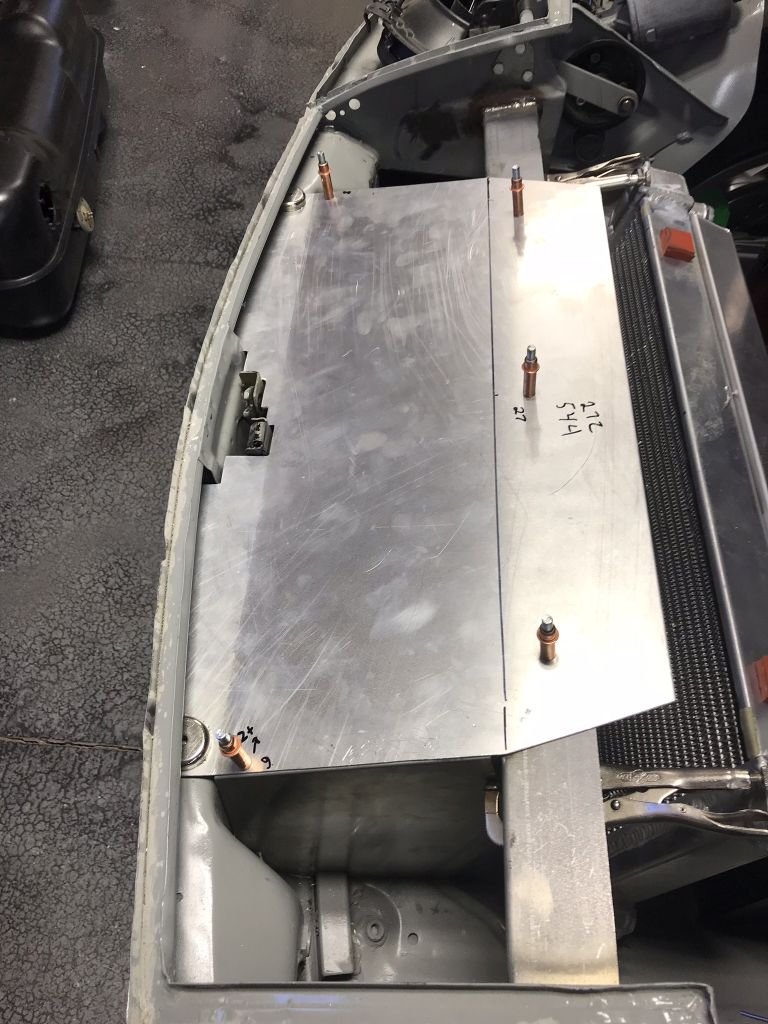
Also finished the front radiator tubes. Added the fittings for a heater core, finalized the length and finished the beads.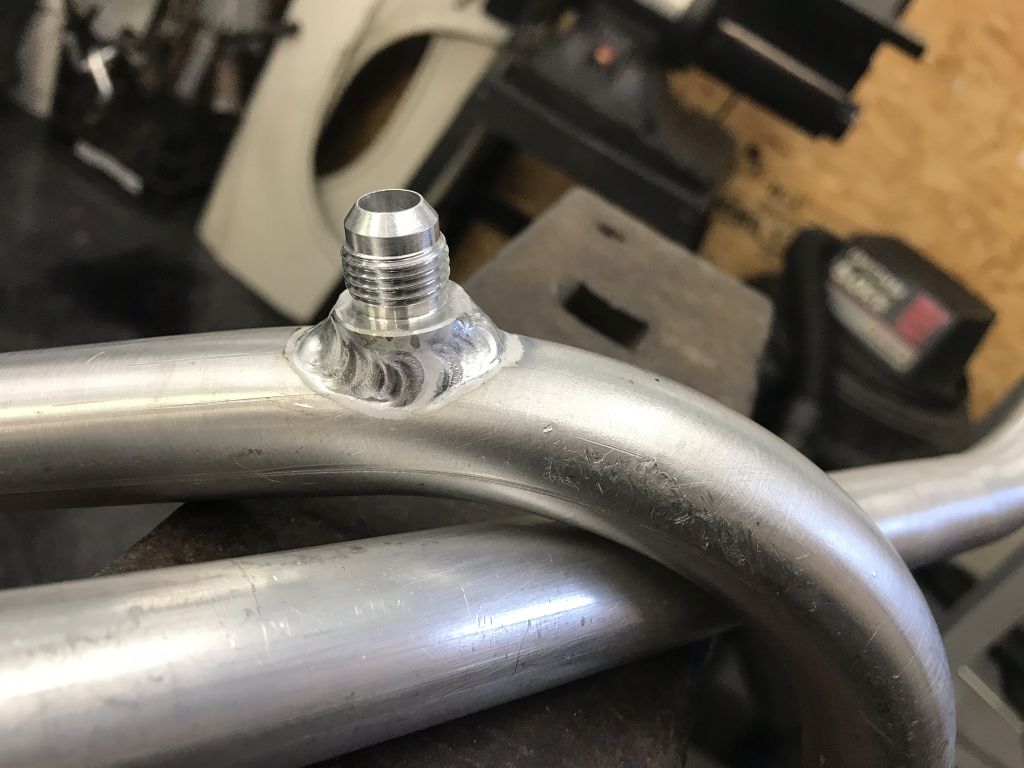
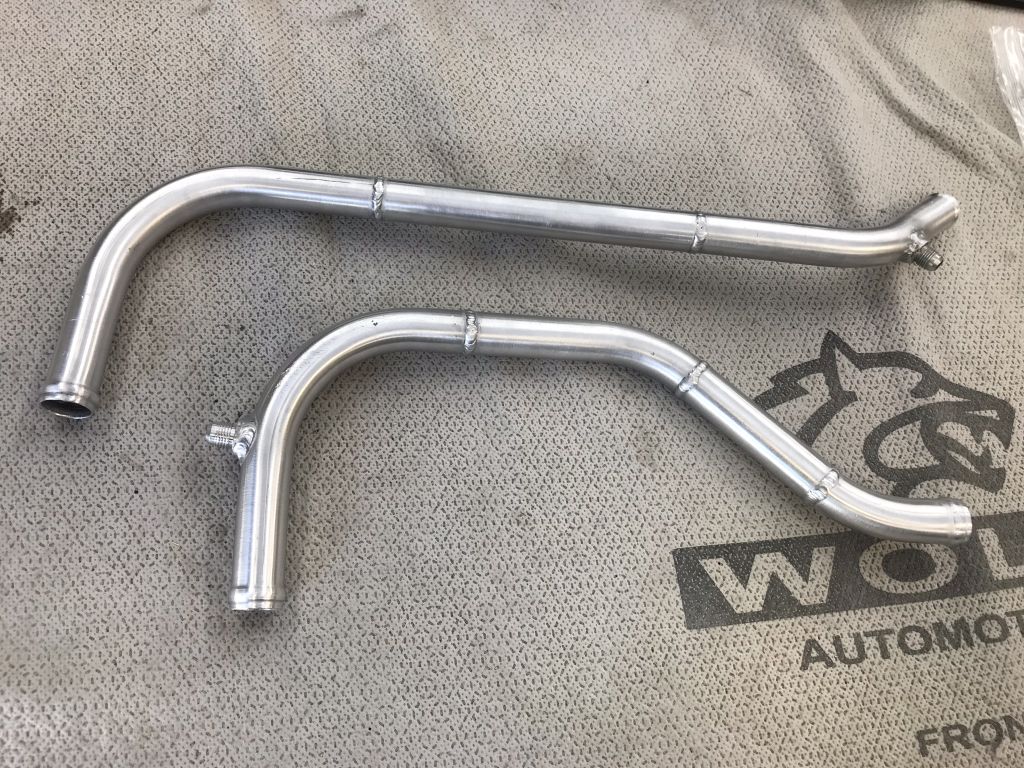
It has been hot as balls here lately so I have been working on the harness in the basement when I need a cooling cycle.
Posted by: Amenson Jul 29 2018, 06:10 PM
Many thanks to Kent for the design. Not quite as nice as his but definitely more than adequate.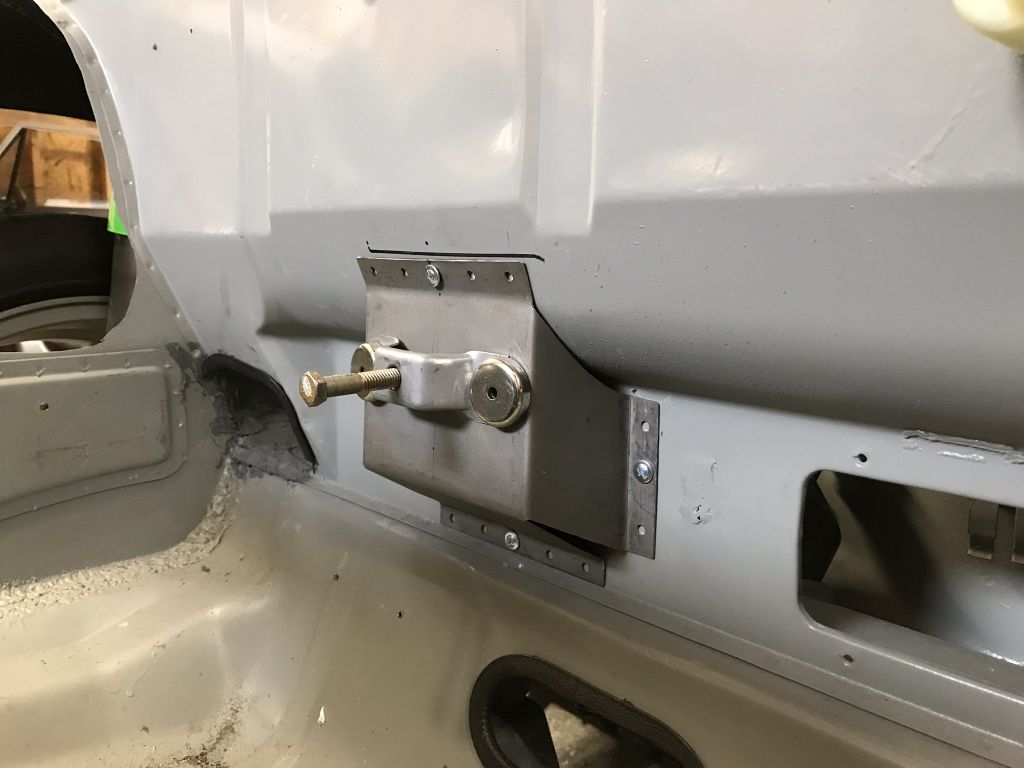
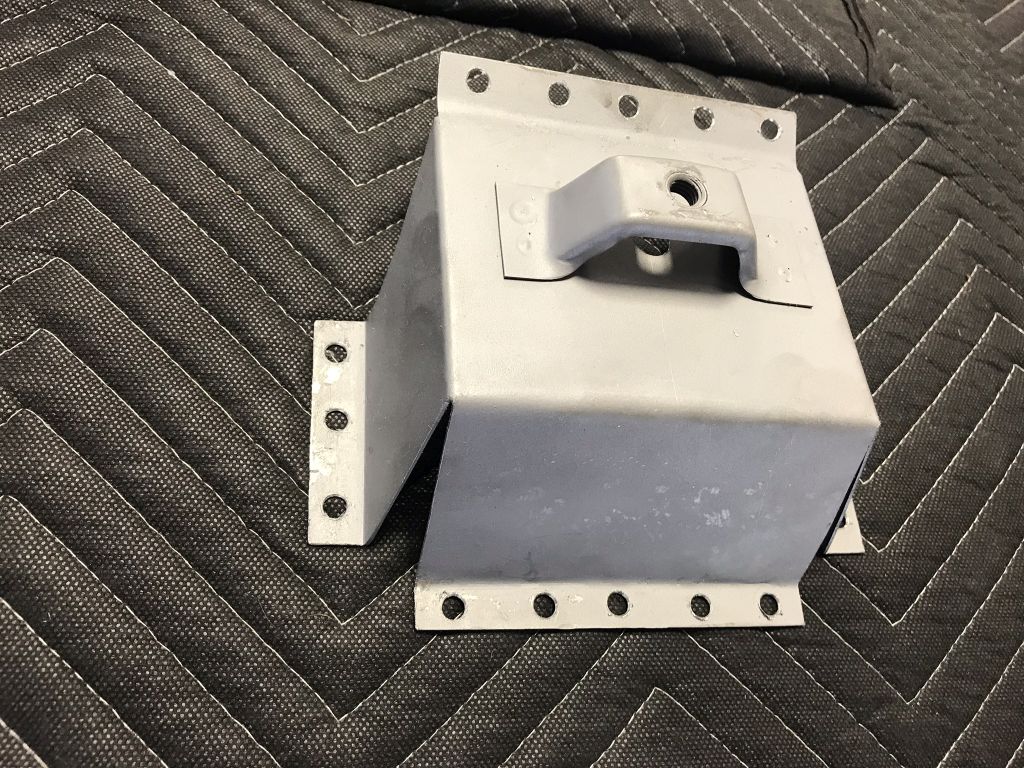
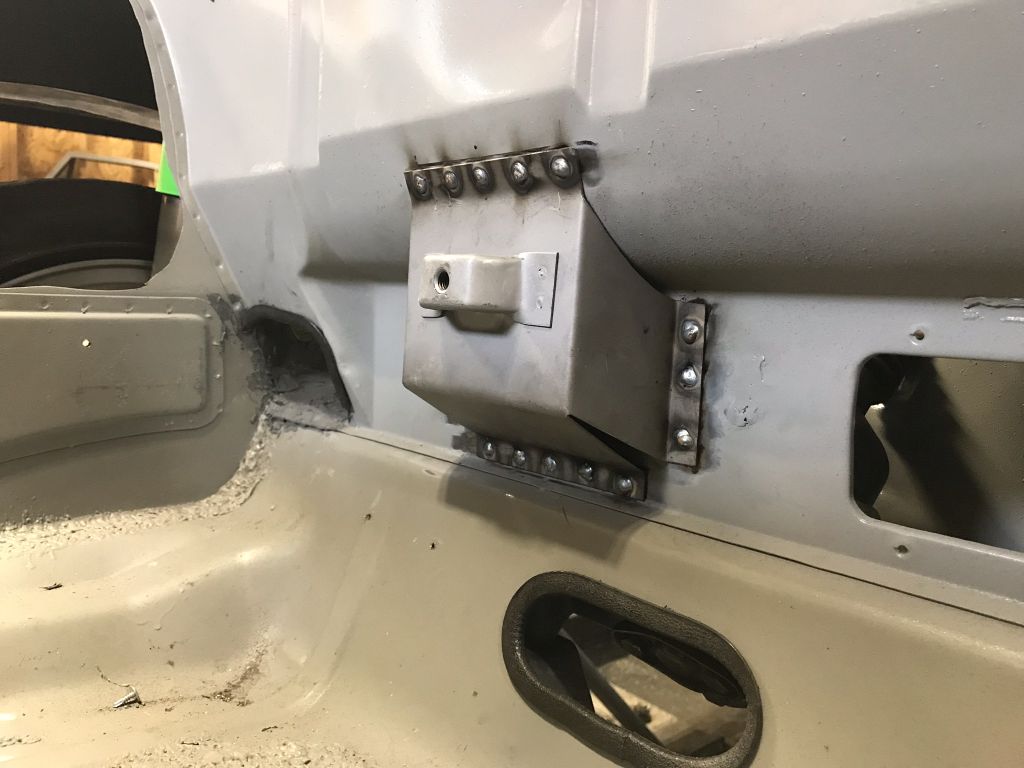
Still need to grind the welds.
Posted by: Amenson Aug 5 2018, 08:50 PM
More pieces in for the final time. After much deliberation I decided to run the brake fluid reservoir hoses through the original holes in the steering rack hump and through the fuel pump opening. Only took two tries to get the block off plate the way I wanted it.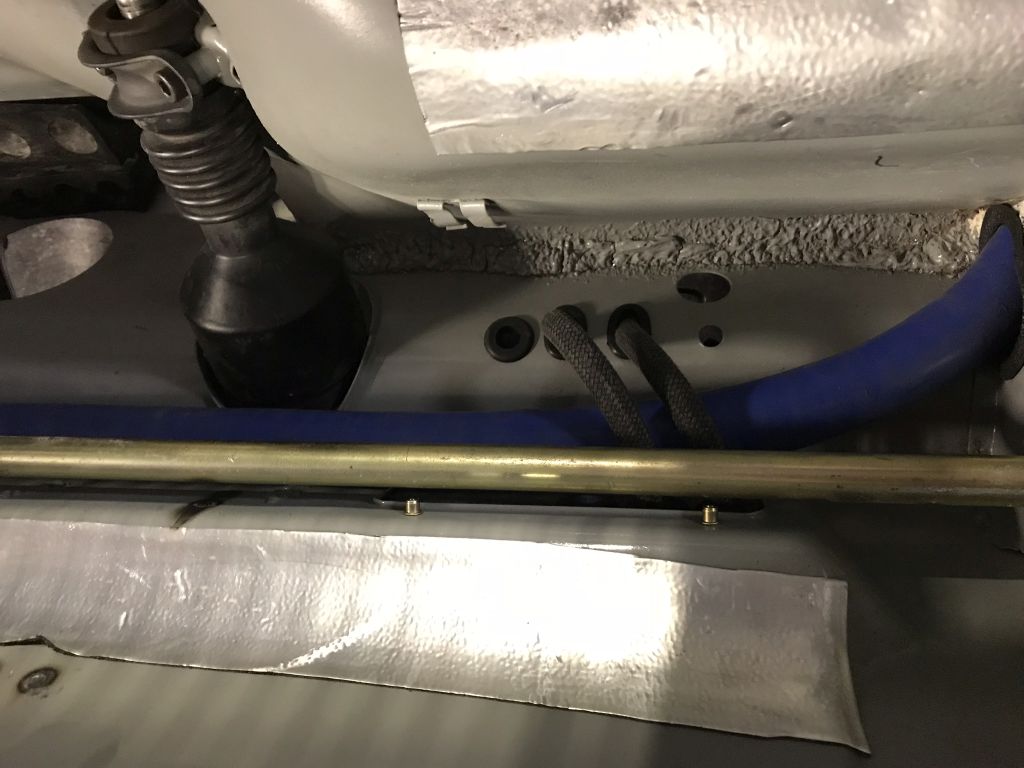
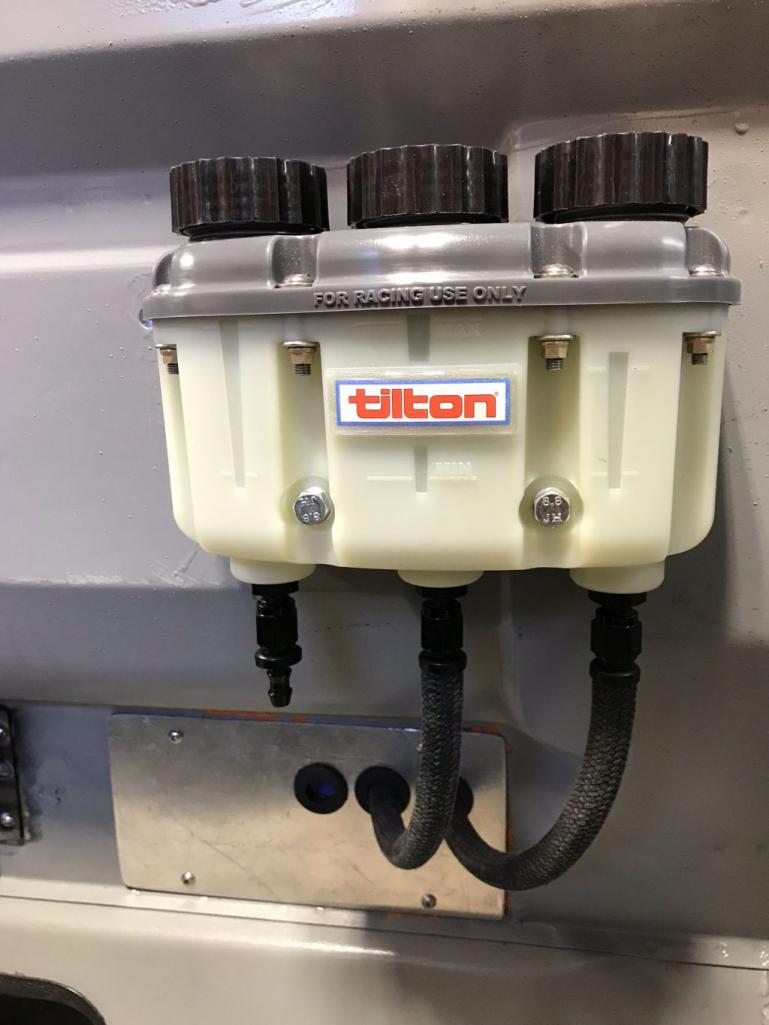
Posted by: 914forme Aug 7 2018, 08:32 AM
Scott What hose are you using for the brake lines? looks to be a push lock product of some sorts.
Posted by: Amenson Aug 13 2018, 08:19 PM
Scott What hose are you using for the brake lines? looks to be a push lock product of some sorts.
Sorry for the delaaayyd reply...I was in Maine with my wife celebrating our 10 anniversary most of last week.
The hose is some "Porsche" remote reservoir hose, I believe from Pelican.
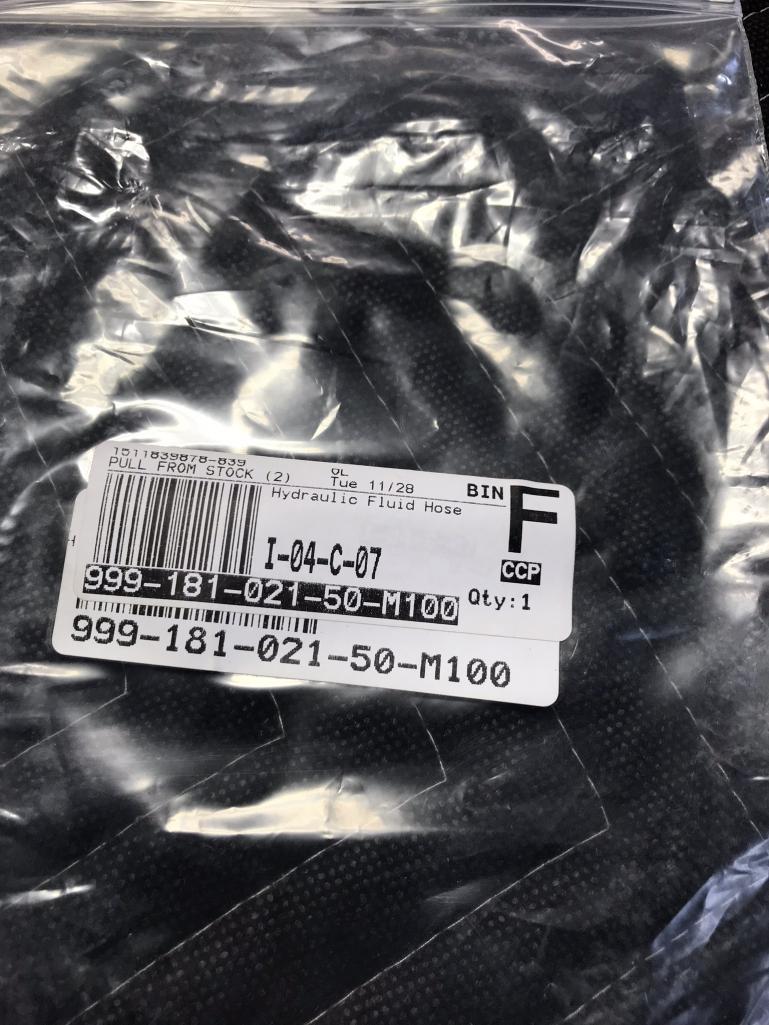
Works great with AN4 pushlock fittings and much better looking than the red Wilwood stuff that comes with the MC's.
In town for 26 hours and then off to Mexico for a day of meetings, no progress updates from this weekend.
Posted by: matthepcat Aug 14 2018, 11:47 AM
The new owner can now only race this car.
V V V
More pieces in for the final time. After much deliberation I decided to run the brake fluid reservoir hoses through the original holes in the steering rack hump and through the fuel pump opening. Only took two tries to get the block off plate the way I wanted it.
Posted by: Amenson Sep 3 2018, 08:29 PM
I had a quick trip to Mexico for work after returning from Maine and brought back a 9 day case of Mantazuma's revenge. What a shitty situation and not very conducive to progress in the garage.
I did have a nice productive long weekend around in the garage. Not a lot of photogenic progress but I did get one fun thing finished. I decided to modify the clutch pivot to better work with the hydraulic MC. The old hole was slightly oblong and was pretty close to the size of the new pin so making a bushing was going to be challanging. I also wanted to gain a few more threads of engagement on the input rod. To accomplish this I welded some more material around the hole and then used a rotabroach cutter to open it up to 1/2".
Stock
Extra material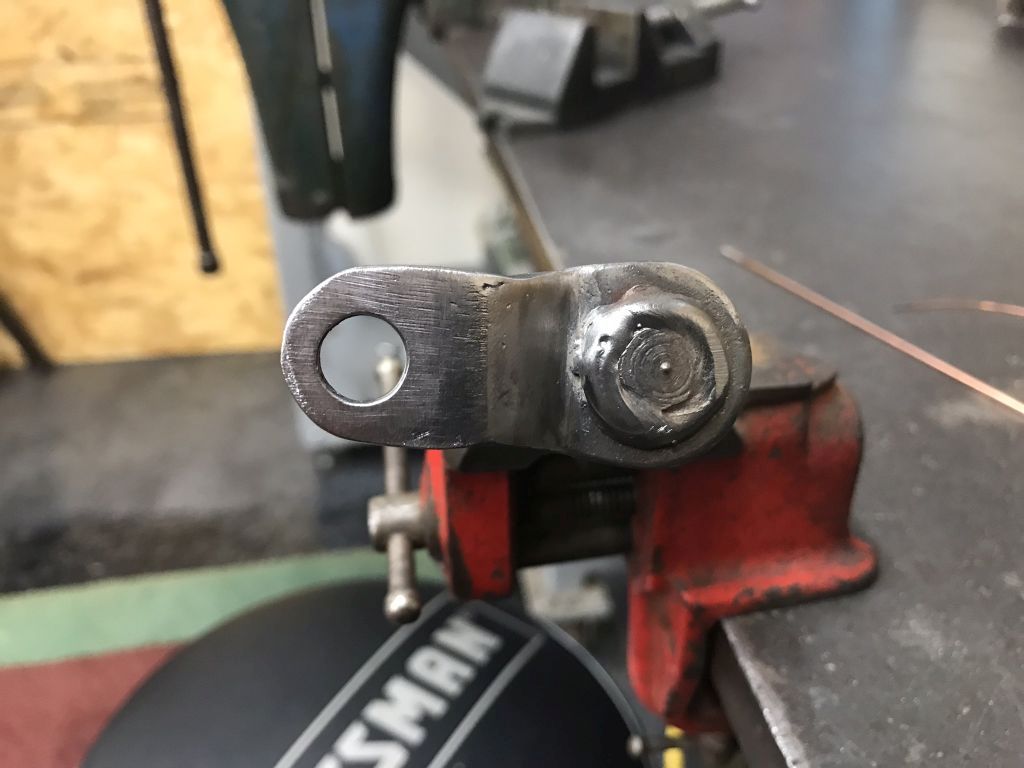
Bigger hole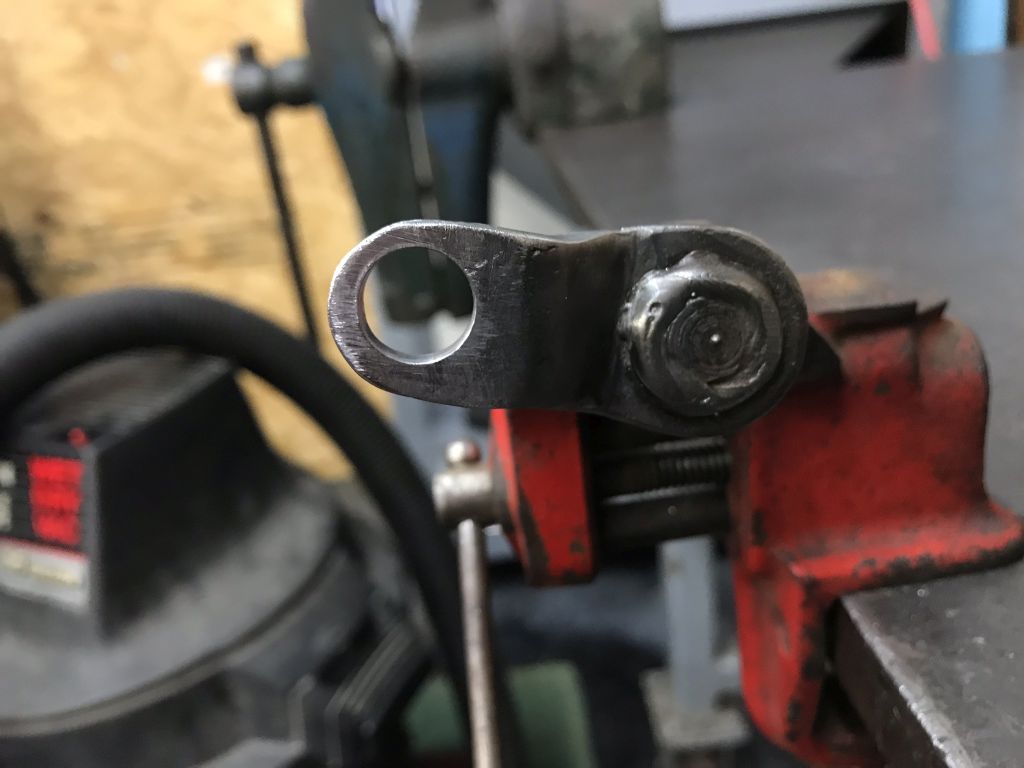
Bushing material arrives tomorrow. More fun with the lathe.
Posted by: Amenson Sep 16 2018, 08:24 PM
No progress last weekend because my wife and I had our annual trip to NY Finger Lakes wine region to restock the racks. 4.5 cases this trip should get us by until the snow starts flying. If you have not visited the area, definitely check it out. The reds do not hold up to California/European wines but some of the Dry whites are exceptional. Watkins Glen is also in the area. There was an SVRA event going on while we were there.
Good progress this weekend. Stephen stopped by and it was great to catch up.
Finished the front end of the center tunnel. I missed putting in the radiator bleed return line hole while I had the center tunnel out. Tool a while to figure out how to get a drill in to make the hole. Could not get to it from the pedal area but a step bit in the pneumatic 90 deg drill did the trick. Cleaned up all of the exposed metal, a bit of paint and the proper sized grommets and we are ready to install the hoses. Still need a fuel line grommet. Could not find one in any of the bins.
On to the auxiliary fuse/relay box. This is a very convenient place to put it but I underestimated how not flat this area was. After much reshaping is almost fits. I lost my dolly holder so there is still some shaping to go.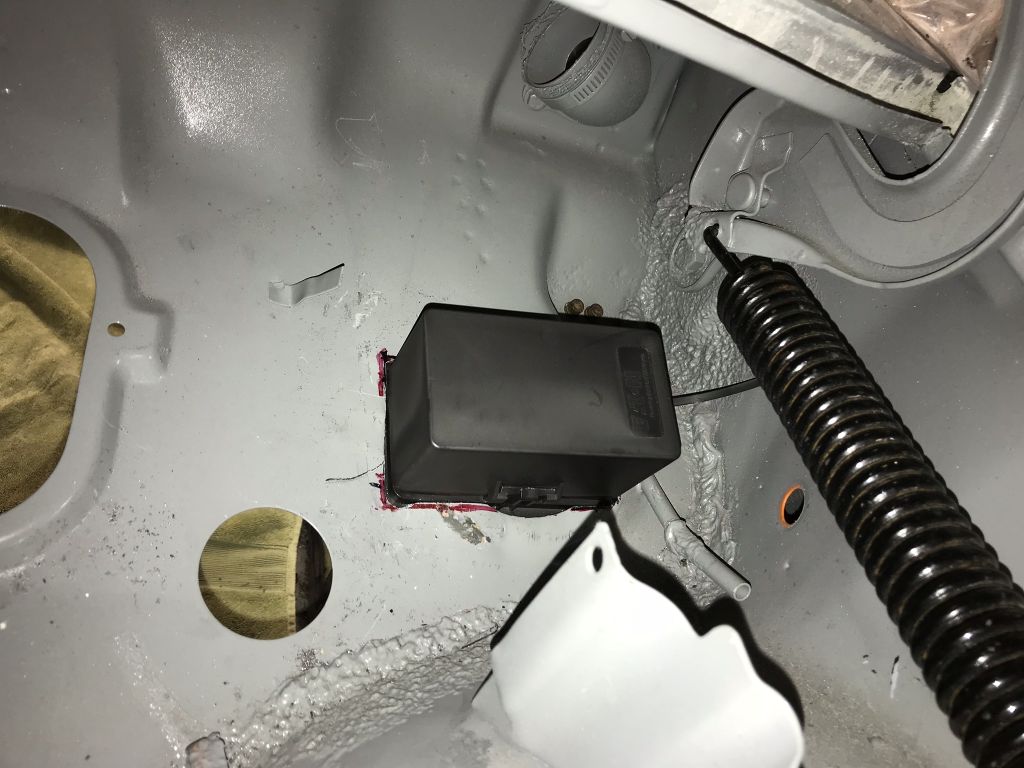
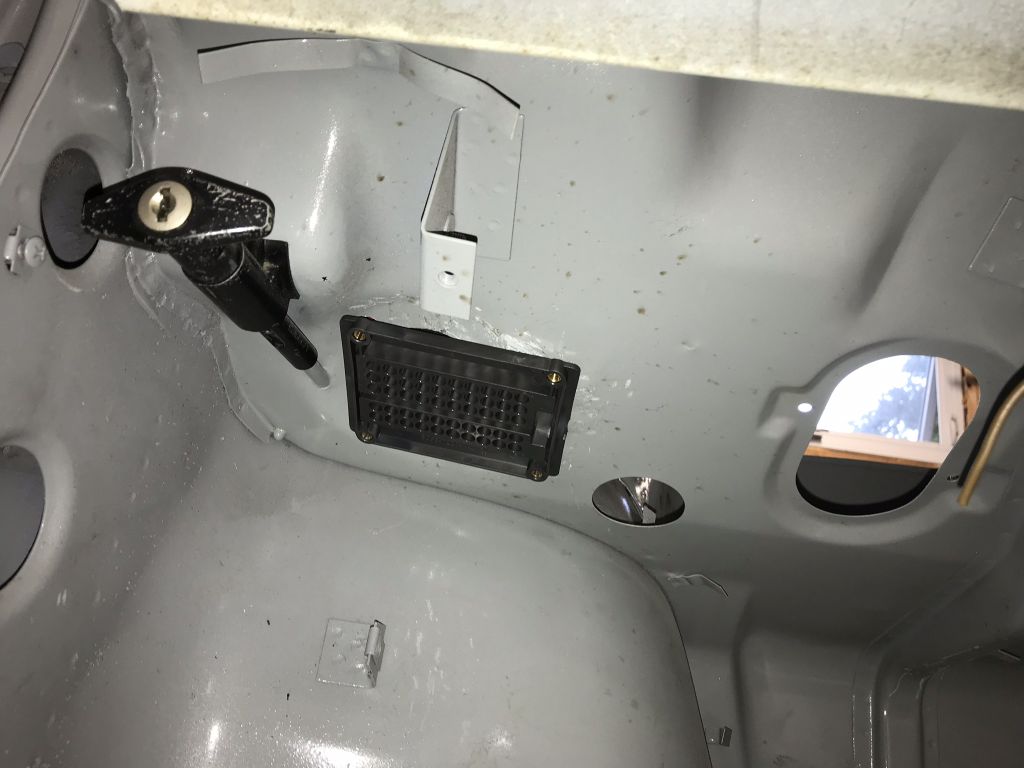
On with the clutch pivot. Turning wheels on the lathe is like a time warp. It is amazing how time flies while making chips. Unfortunately I am not the greatest machinist so I make a lot of chips. Eventually got one bushing pretty much the way it needed to be...although it will be remade.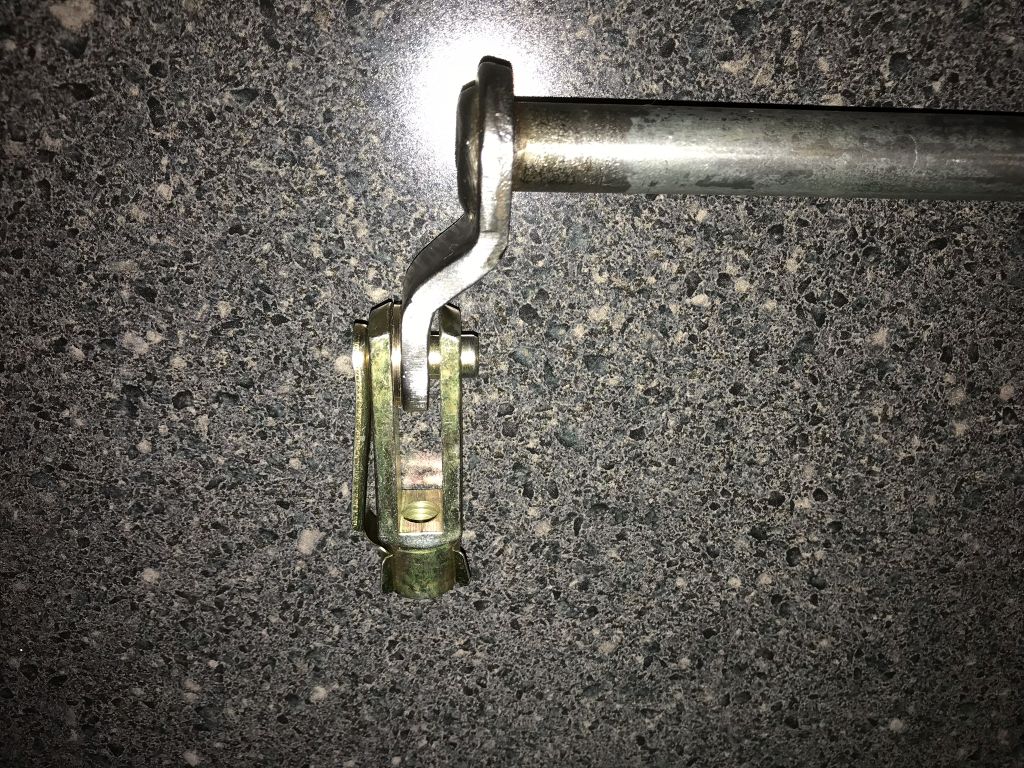
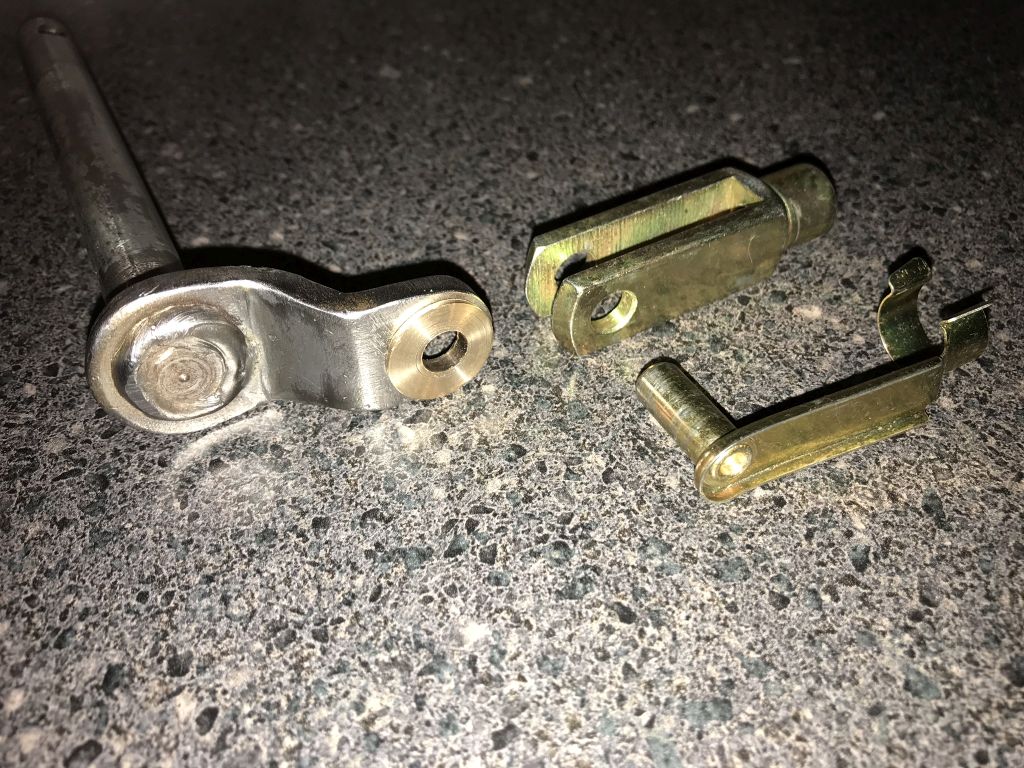
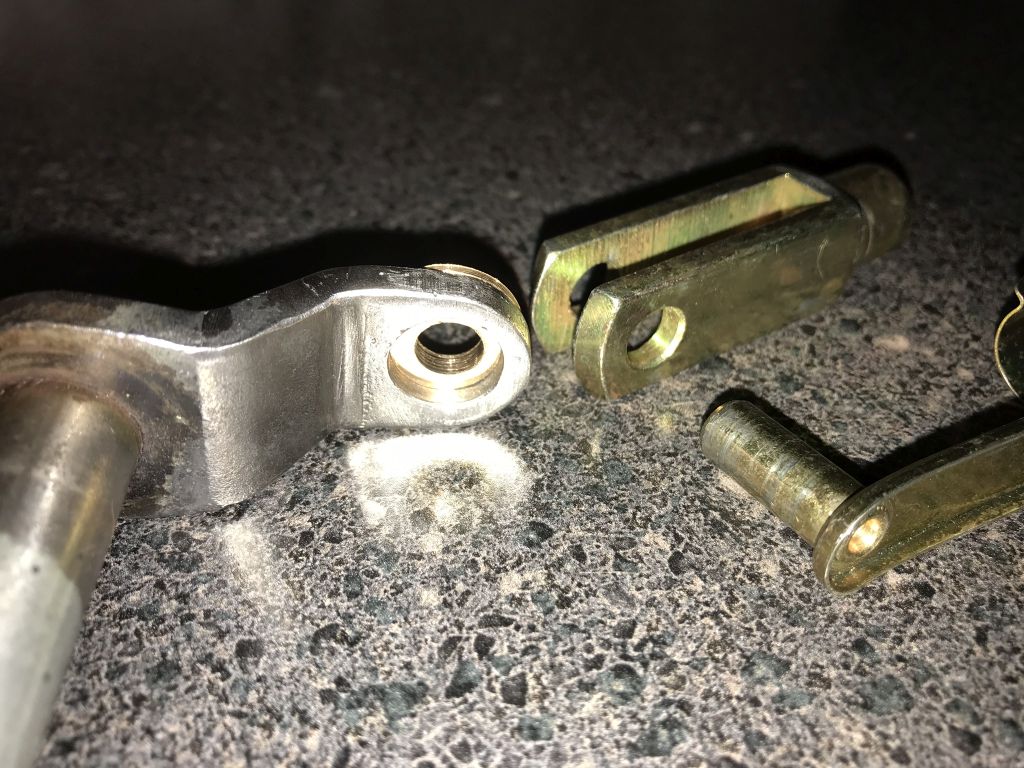
Posted by: effutuo101 Sep 16 2018, 09:26 PM
Very nice!
Posted by: Amenson Sep 23 2018, 08:28 PM
Hydraulic clutch master cylinder achieved. 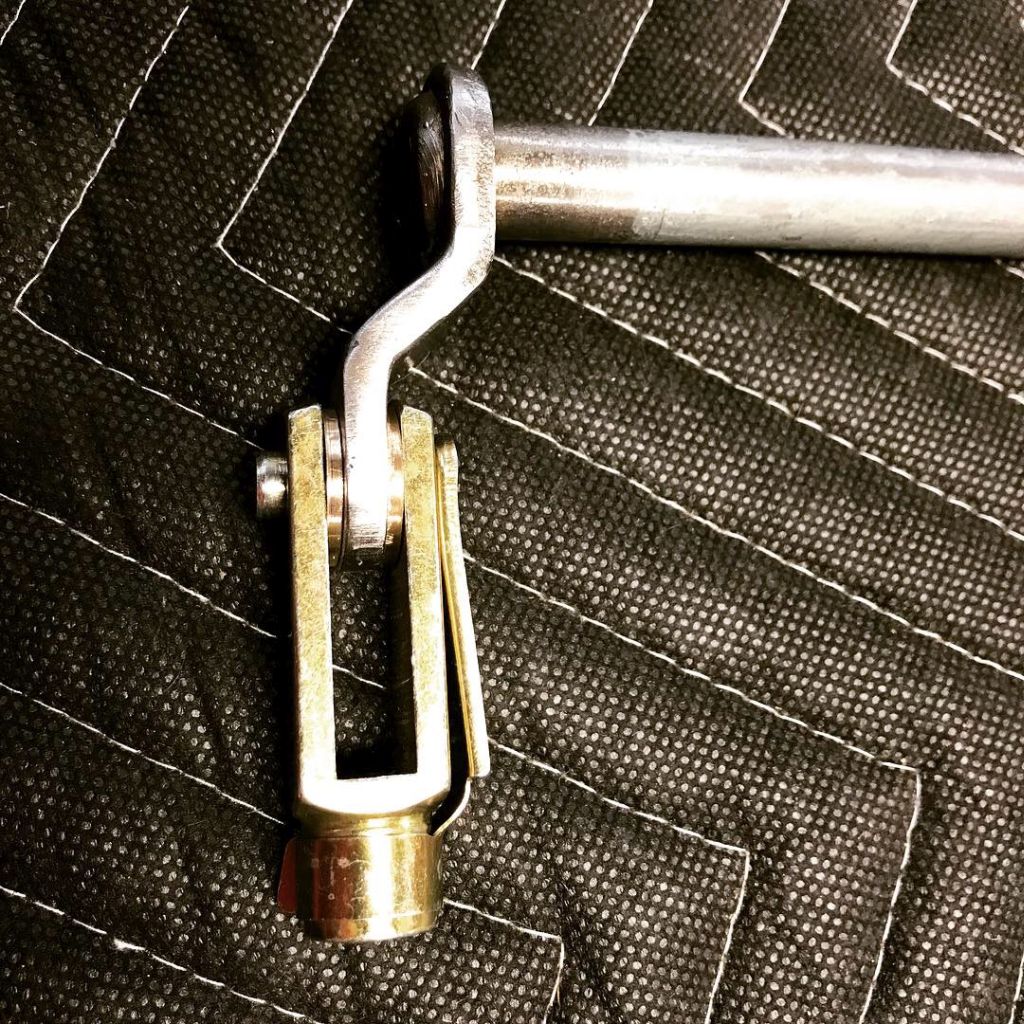
It is so smooth I had to take a video. Posted it on instagram
https://www.instagram.com/p/BoC8PesnaCi/?taken-by=seec_motorsport
Set up the brake pedal also just to make sure that nothing was messedd up from the clutch bracket.
My new tool finally arrive!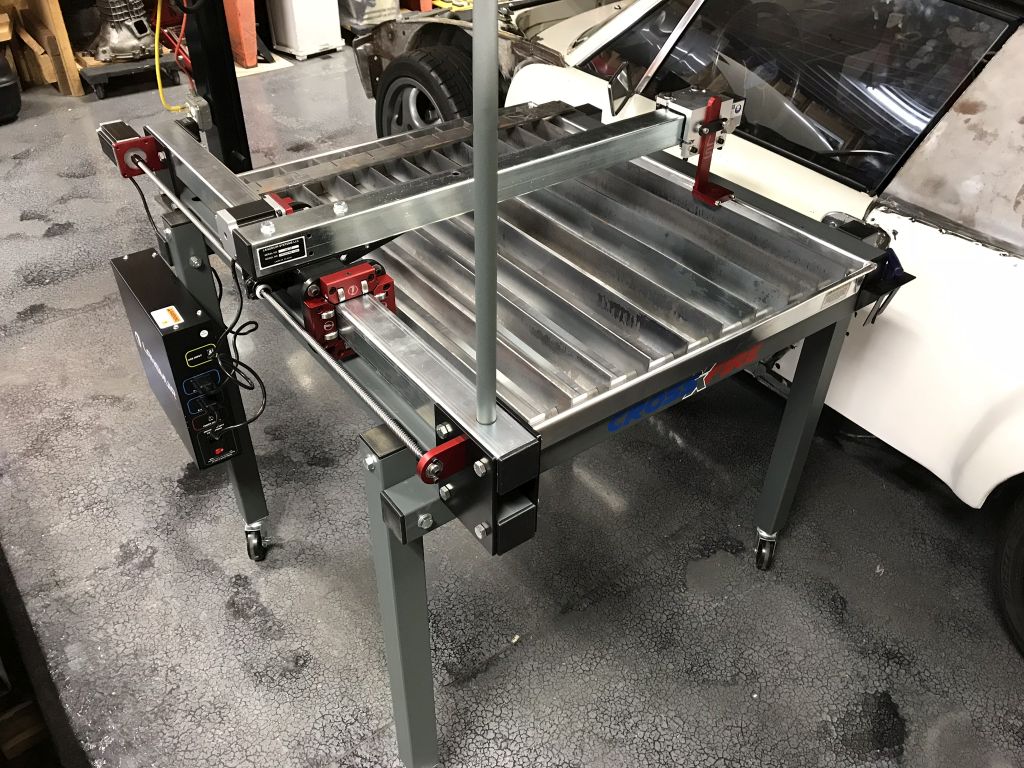
Only took about 2 hours to assemble. Have not powered it up and made it to anything useful yet because that will likely be a rabbit hole of tinkering. Will wait unit I have something useful to make.
Posted by: mepstein Sep 23 2018, 08:53 PM
For the less tool educated - me - what is it?
Posted by: Amenson Sep 24 2018, 07:37 AM
For the less tool educated - me - what is it?
CNC plasma cutter table.
Posted by: tygaboy Sep 24 2018, 07:49 AM
I know you already know this but...
You are going to LOVE your plasma table!
Posted by: mepstein Sep 24 2018, 07:54 AM
For the less tool educated - me - what is it?
CNC plasma cutter table.
Oh, that’s going to be fun.
Posted by: Amenson Sep 24 2018, 10:55 AM
I know you already know this but...
You are going to LOVE your plasma table!
You are partially responsible for this purchase...I have been in awe of your build and am feeling the pressure to up my game
Posted by: tygaboy Sep 24 2018, 12:59 PM
I know you already know this but...
You are going to LOVE your plasma table!
You are partially responsible for this purchase...I have been in awe of your build and am feeling the pressure to up my game
Well, credit where credit is due: I totally swipped your reservoir mount location and cover plate design, so thanks for leading the way there...!
If I can help you with anything plasma table, send any of the .dxf files I have, etc., please just let me know!
Chris
Posted by: Amenson Oct 9 2018, 08:49 PM
No turning back now. After much checking, rechecking, measuring, drilling I finally bit the bullet and painted the front trunk. I couldn't stand the huge stain from a brake fluid leak prior to me getting the car so I got rid of it and painted the entire floor too. Amazing how much etching occurred from the brake fluid. Had to use Metal Ready to make sure all of the corrosion was out of the pits.
Nutserts-4-life 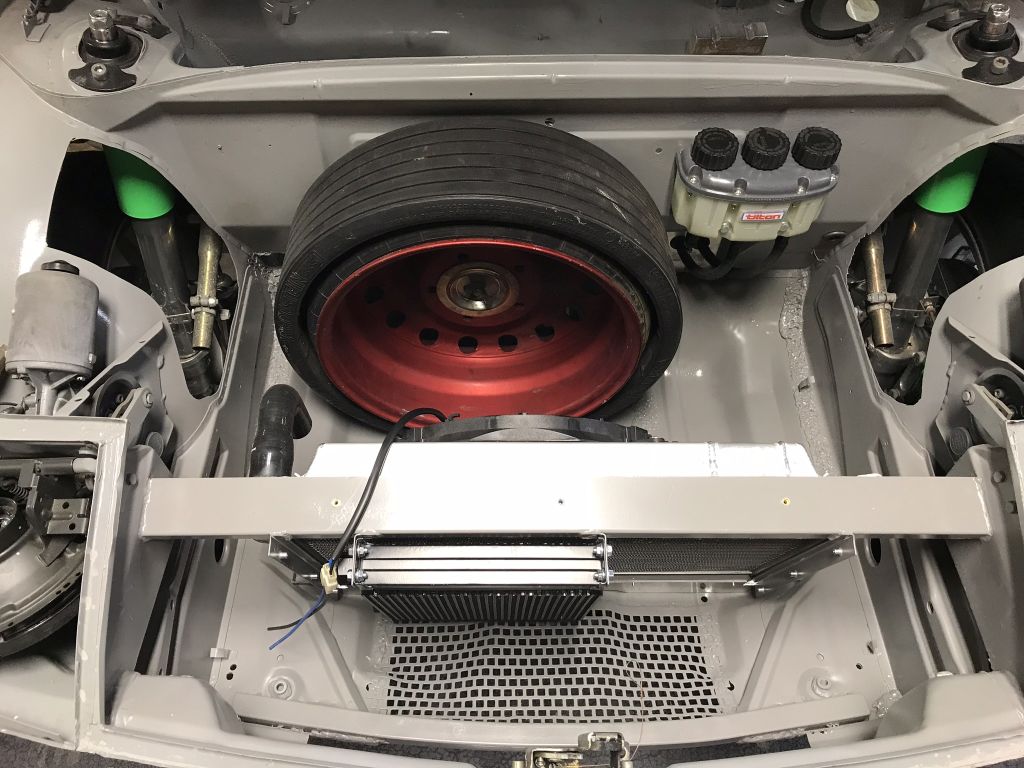
Starting to look like something! I also added a few tabs in the intake to keep the front of the ducting from moving.
There were a few holes that I decided to shift a bit...no problem just weld them shut.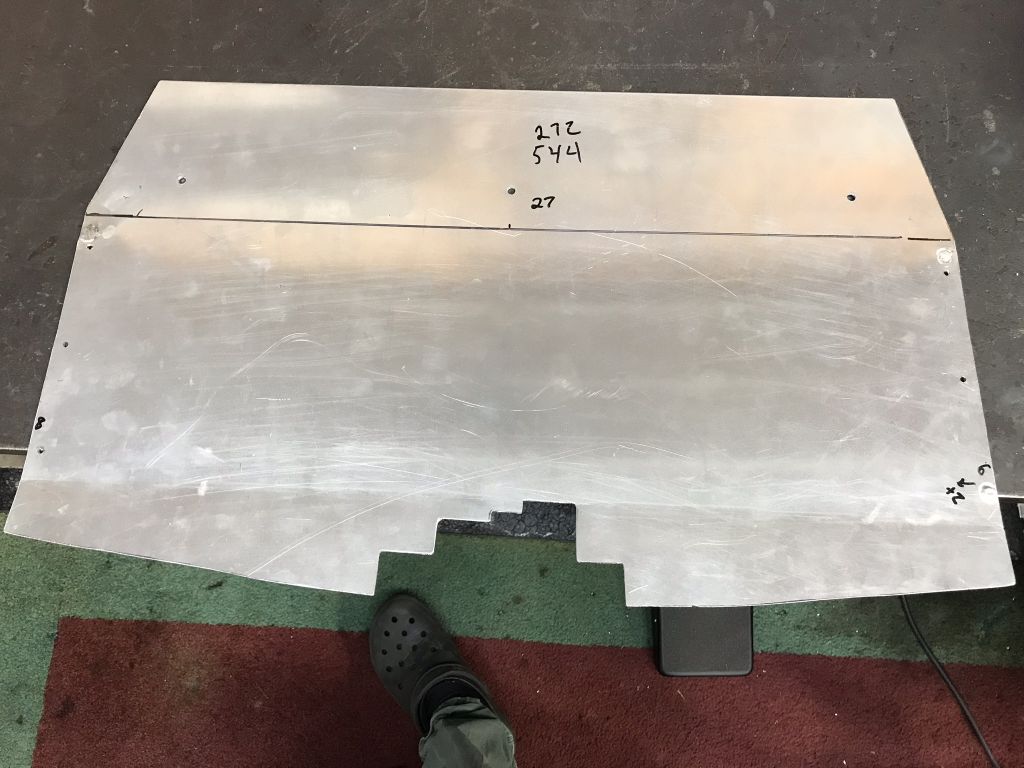
More parts installed for good is a good feeling.
Posted by: Amenson Oct 10 2018, 08:56 PM
Tom...the front fuel line grommet arrived.
It is frick'n NOS. 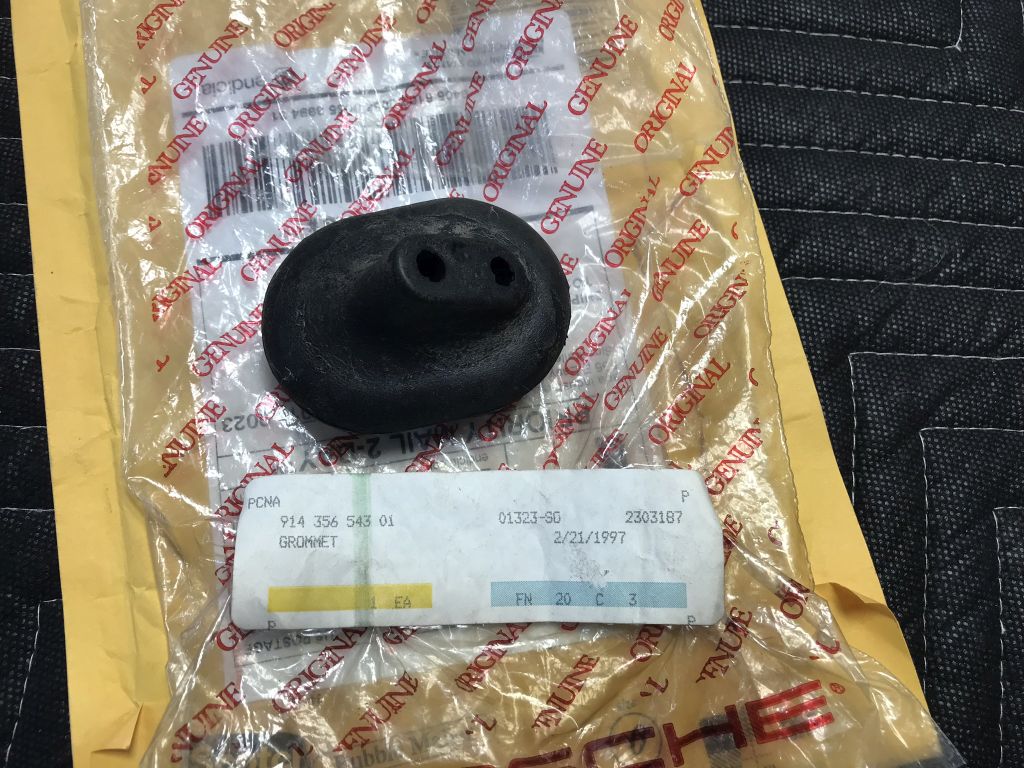
I am going to feel bad slicing this up to work with the AN fuel lines.
Where did you find it? I may order one to have it hand if I ever pull the lines from my car.
Posted by: theer Oct 11 2018, 08:58 AM
I know!
I got it from aturboman (Robert) in response to my WTB ad. He was able to get it out immediately and at a very decent price. Thanks, Robert!
I did consider the NOS fact for about 30 seconds, then figured it's not something a concourse judge will ever see, so no real value from that perspective.
Spare tire mount & repaint looks fantastic.
Posted by: Amenson Oct 14 2018, 07:49 PM
Pulled the engine so that I could finish running everything down the center tunnel.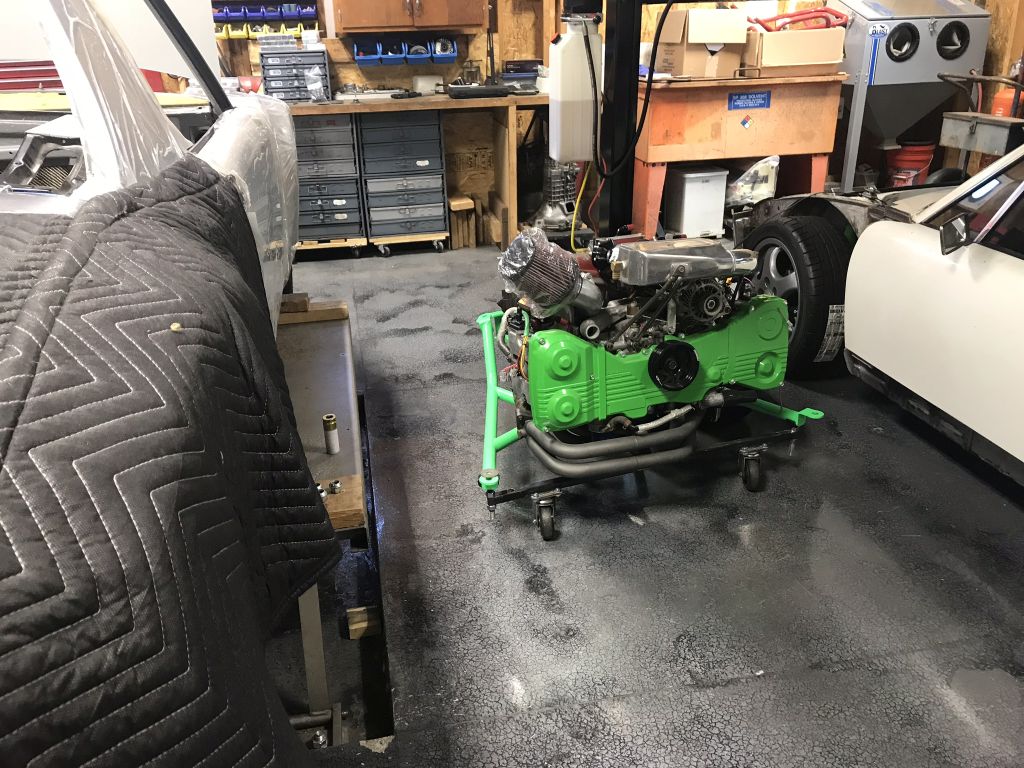
Just a few grommets.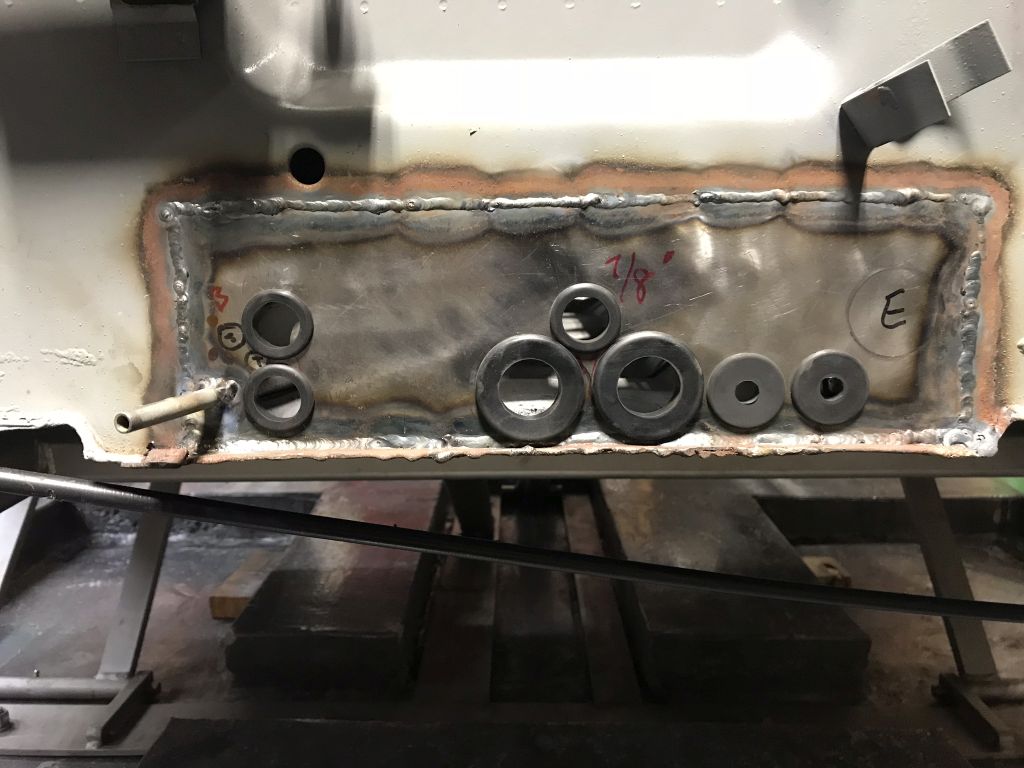
Still need to place the clutch and brake lines. I thought that I knew where I wanted them but decided to move things around a bit.
Posted by: effutuo101 Oct 15 2018, 01:27 PM
Posted by: Amenson Oct 21 2018, 07:38 PM
More plumbing installed.
I had to modify the fuel lines. I set the dimensions for CRF to match what I had on my car which does not use the factory brake proportioning valve. My lines rung right through that area so I had to shorten them and weld on new fittings. Fortunately I had some left over from my lines. A little time on the lathe and welding table and they are correct.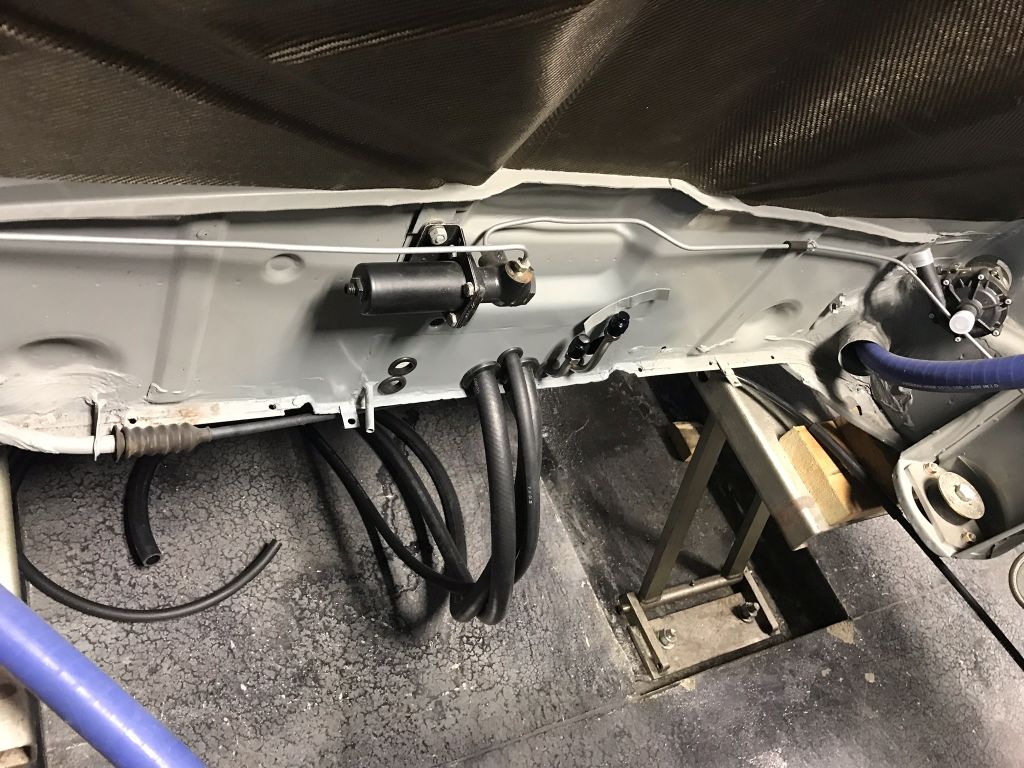
Crappy thing about using the proper sized grommets is that the tube is tight to pull through. So nice though...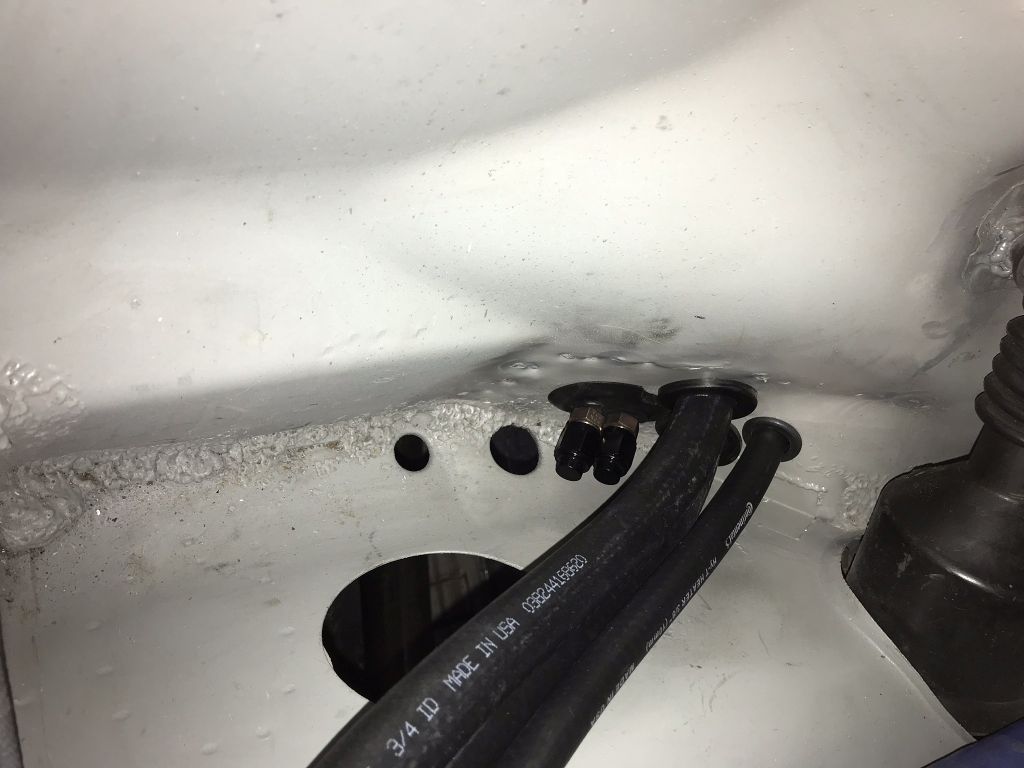
I also cleaned up the rear of the floor pan where the edge was goop welded. It was a bit too close to my work and could have been thought to have been something that I did...now it is and is done properly.
Posted by: CptTripps Oct 22 2018, 11:36 AM
I'm absolutely loving the progress. You're crushing it, Scott. So many little things that were bothering me, are bothering you too...except you have the ability to actually fix them.
Can't wait to see this thing on the road.
Posted by: Amenson Jan 1 2019, 10:09 PM
Been a while since an update...havn't fallen off the earth, just not very active online.
I did take a couple of weeks of garage time to make the wife happy and insulate the shop and put up wall covering. I posted a picture on the Porsti build thread.
As for progress on Grey, knocking stuff off the list toward road worthyness.
A few photogenic updates:
Finally got the auxilary fuse/relay box to fit properly. Required quite a bit of reshaping, probably would have been quicker to cut the area out and weld in a flat section pre-cutout for the box. Still needs to be painted.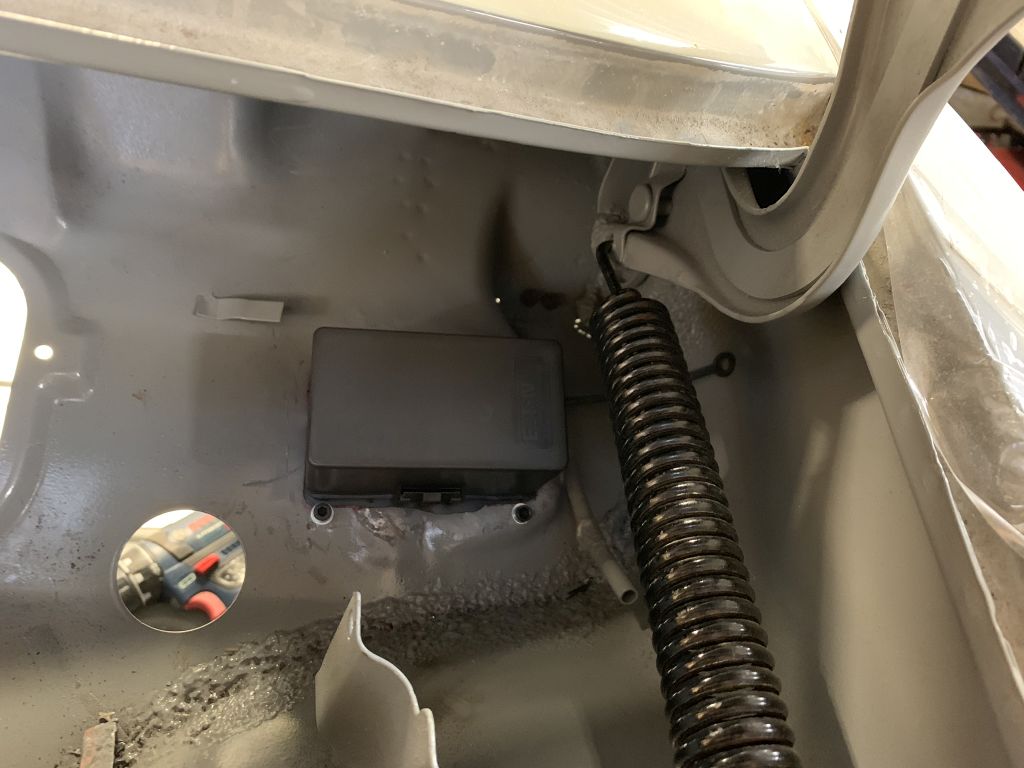
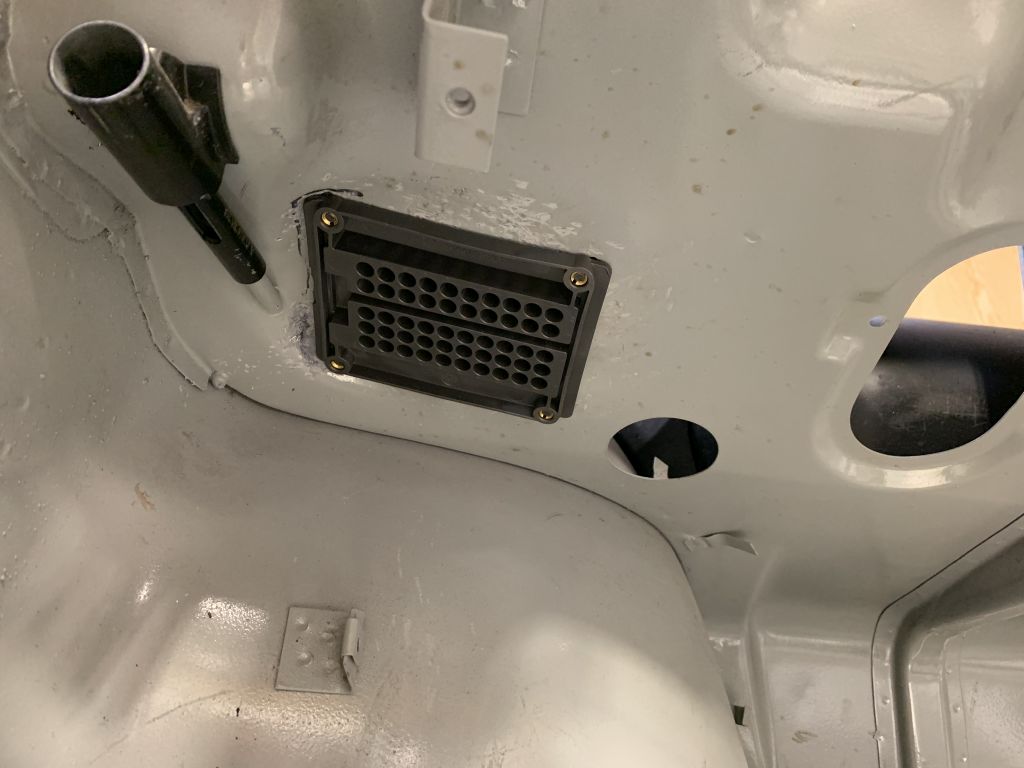
Also got the IC pump mounted and the overflow and IC reservoir modified/mounted.
The pump sort of interfered with the bottom battery tray mount that was unnecessary and quite ugly...so I removed it. This opened a huge can of worms due to the less than stellar hell hole repair. For a couple of hours I was seriously contemplating redoing the entire hell hole repair. More than a little cutting/welding/grinding later and the area is presentable.
I decided to attach the expansion tank to the IC reservoir which made it impossible to use the inlet I cut it out and plugged the opening (pic pre welding). I also added spacers to the back of the reservoir because during one of Tom's visits he pointed out that it is a bit tight to get to the cap. Still not super convenient but better.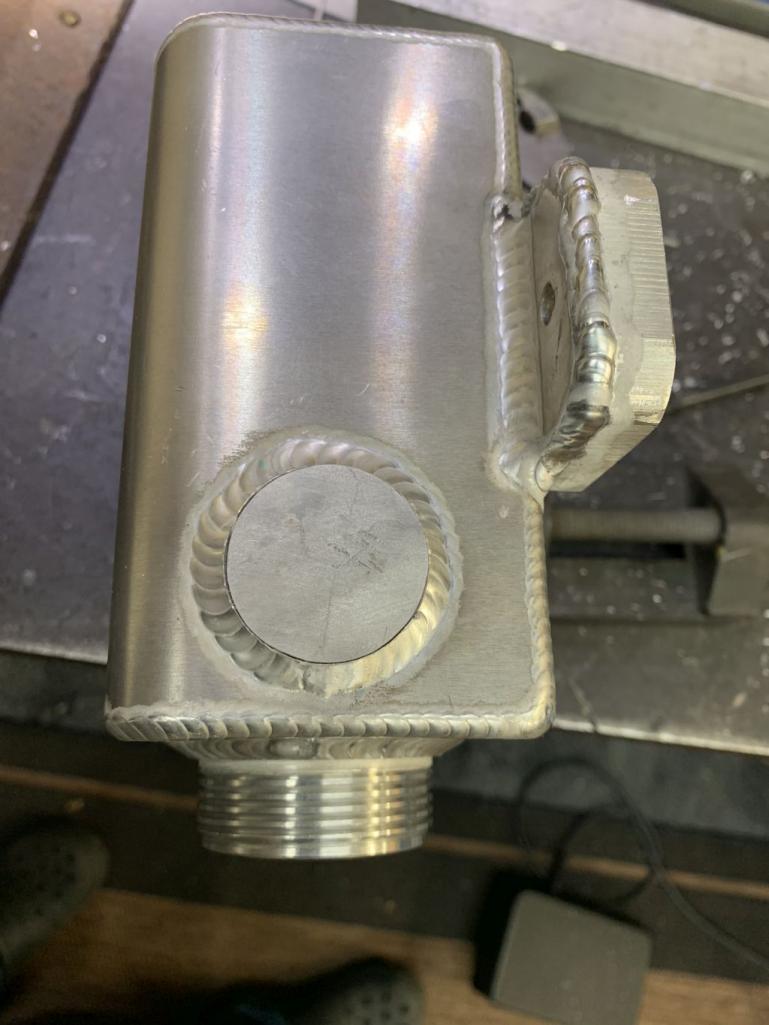
Made some plates to attach the two reservoirs. The expansion tank was chromed so I sandblasted it to remove the bulk of it. Turned up the cleaning a bit on the TIG and it welded pretty well.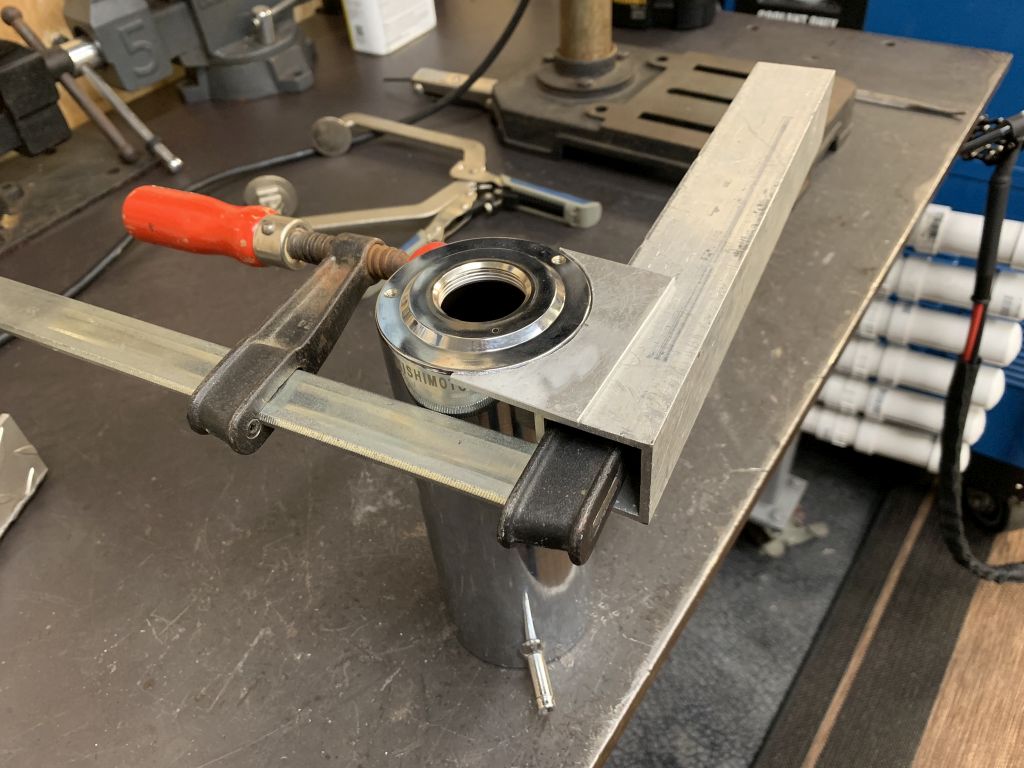
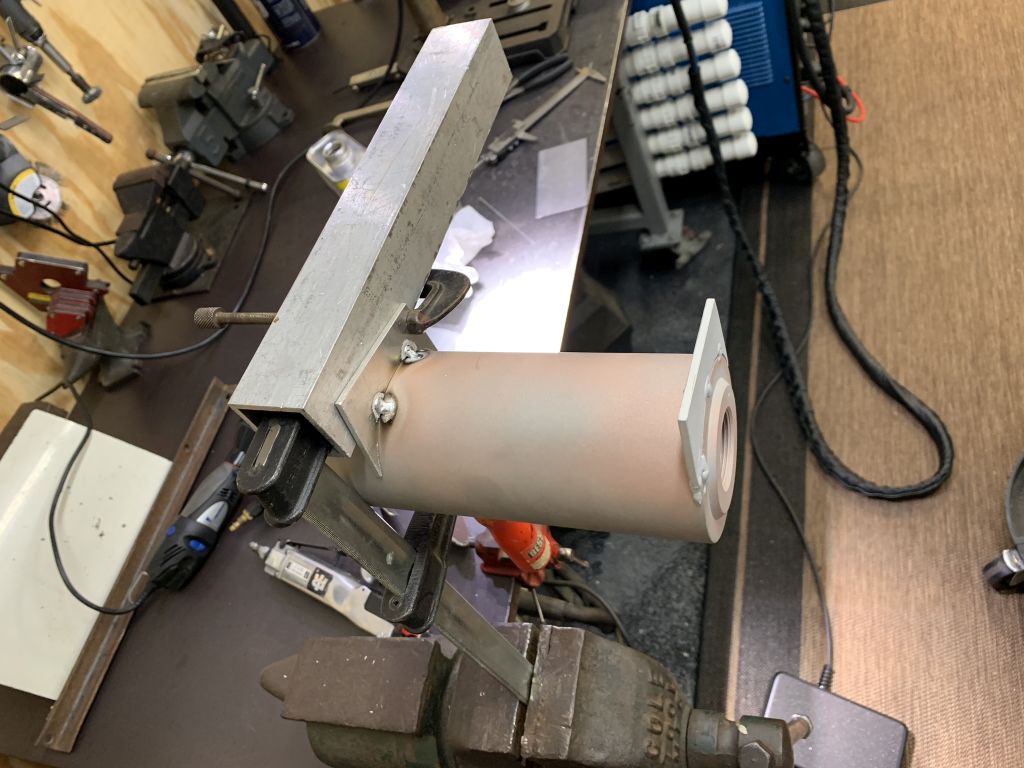
I still need to add the inlet bung and will probably put a braket at the bottom of the expansion tank.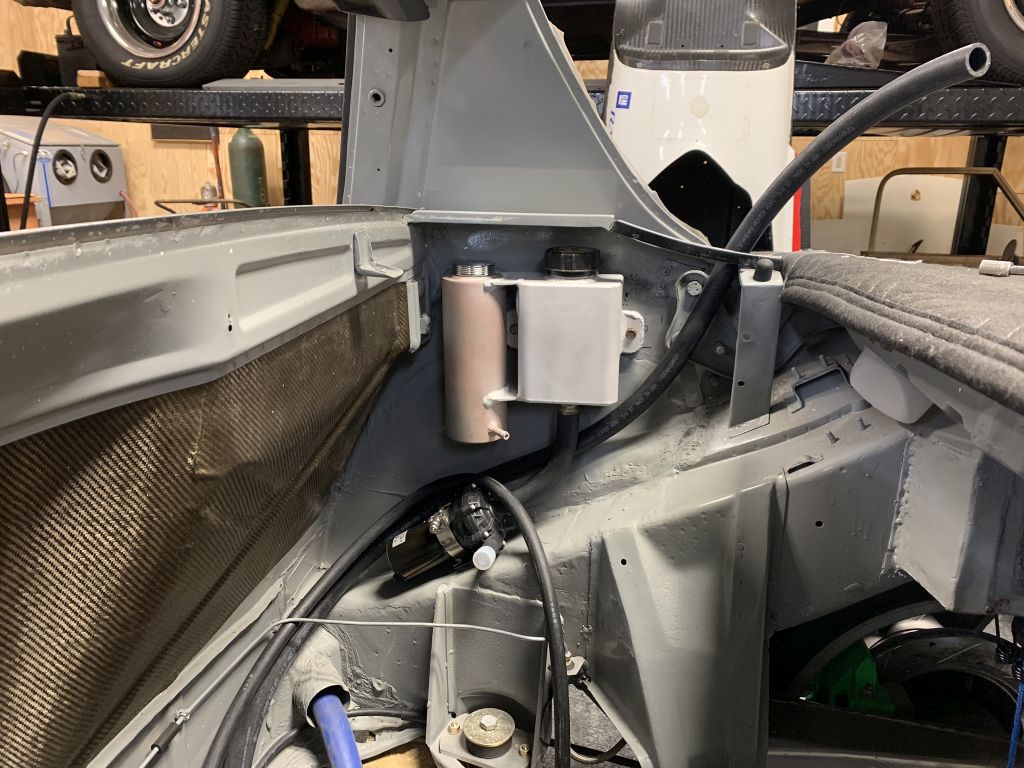
Happy New Year
Scott
Posted by: theer Jan 2 2019, 10:28 AM
Happy New Year, Scott!
Garage looks great.. Grey is coming together nicely... looks as if 2019 is going to be an excellent year.
Tom
Posted by: Amenson Jan 13 2019, 10:06 PM
Another big task check off the thist and one that I was avoiding.
Filled all of the unnecessary holes in the trunk (and one that I buggered up installing the batter box).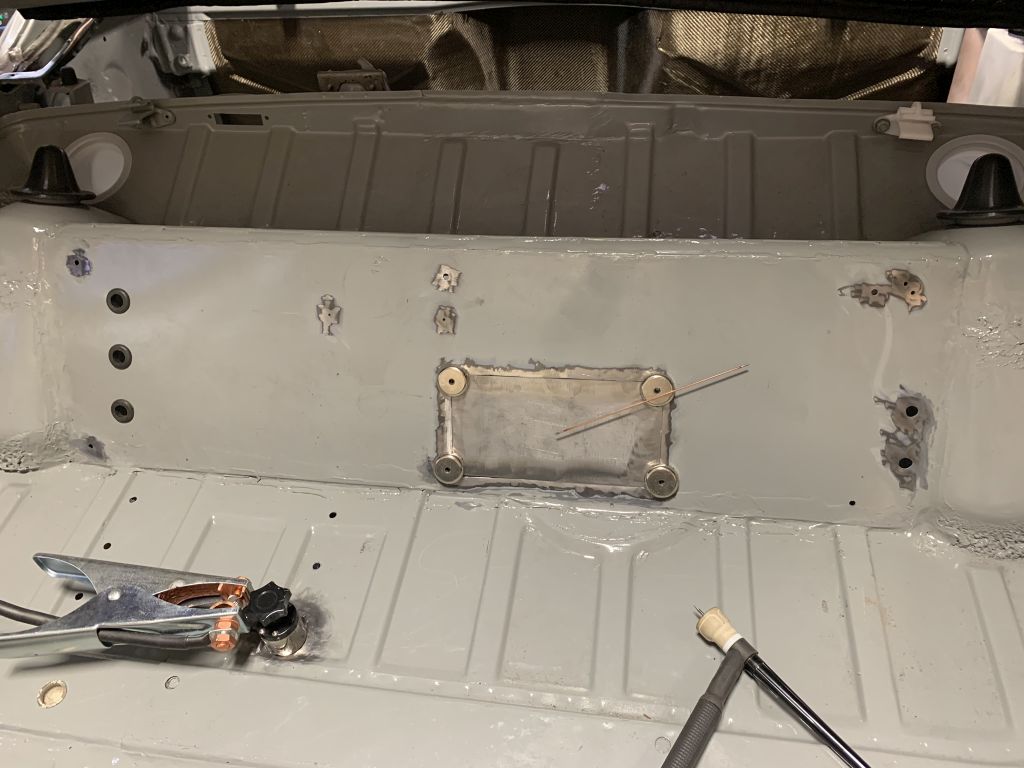
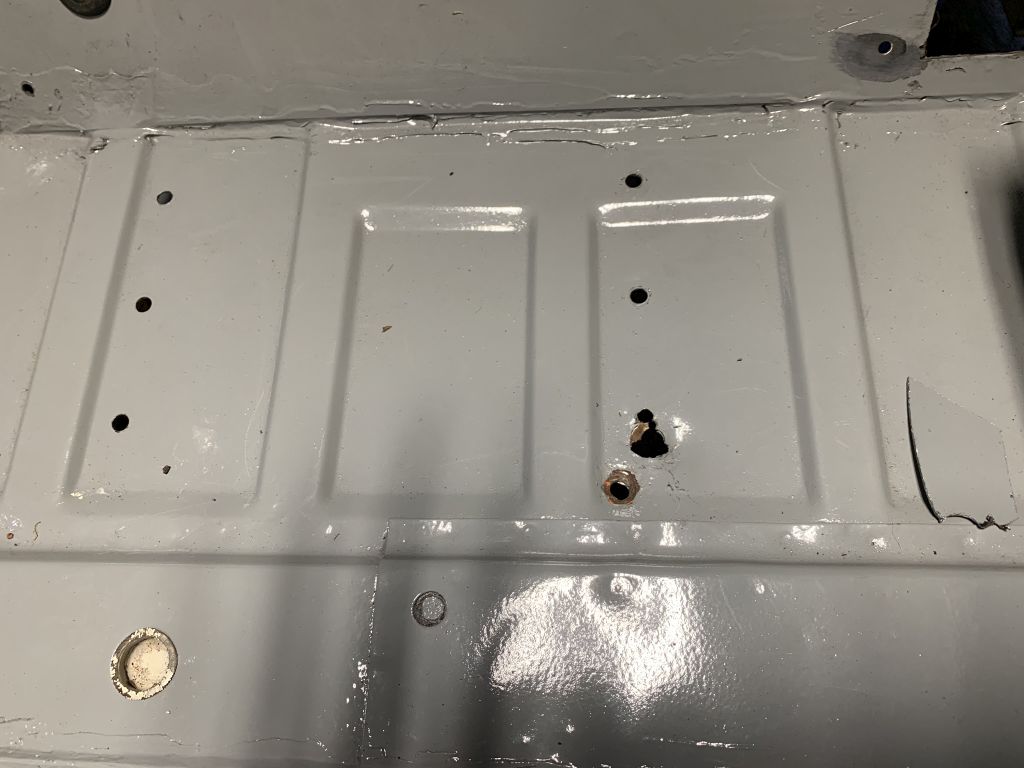
So much better, and got the the bulkhead connectors installed. 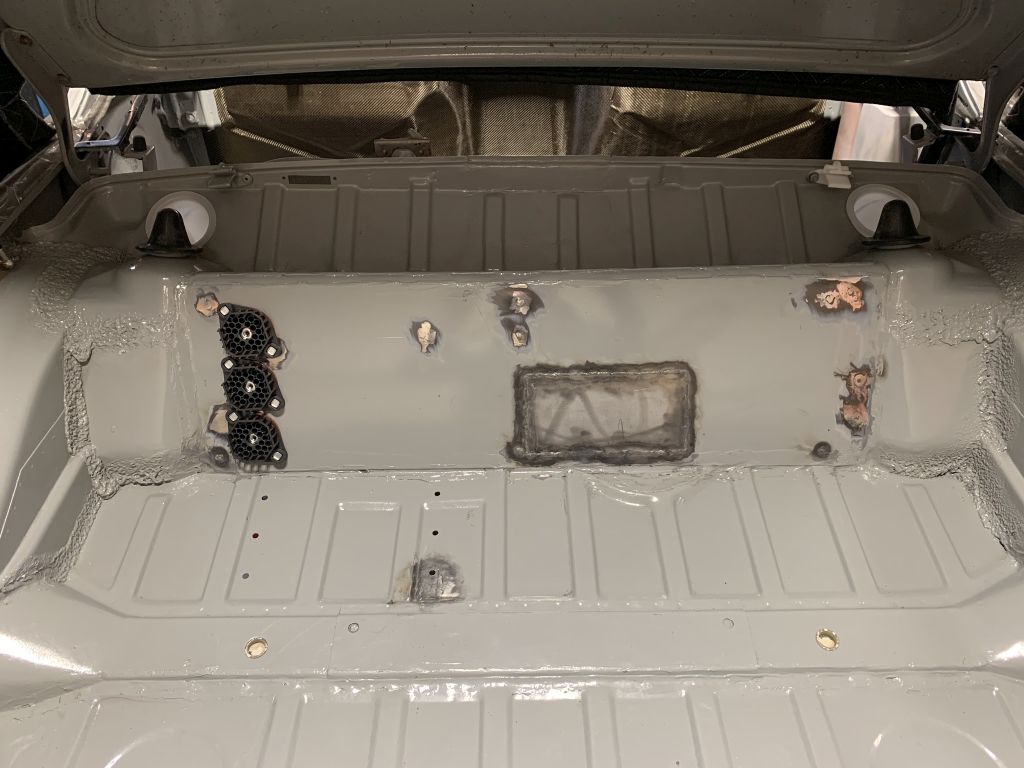
I knew it was going to be close fitting three but it was really close.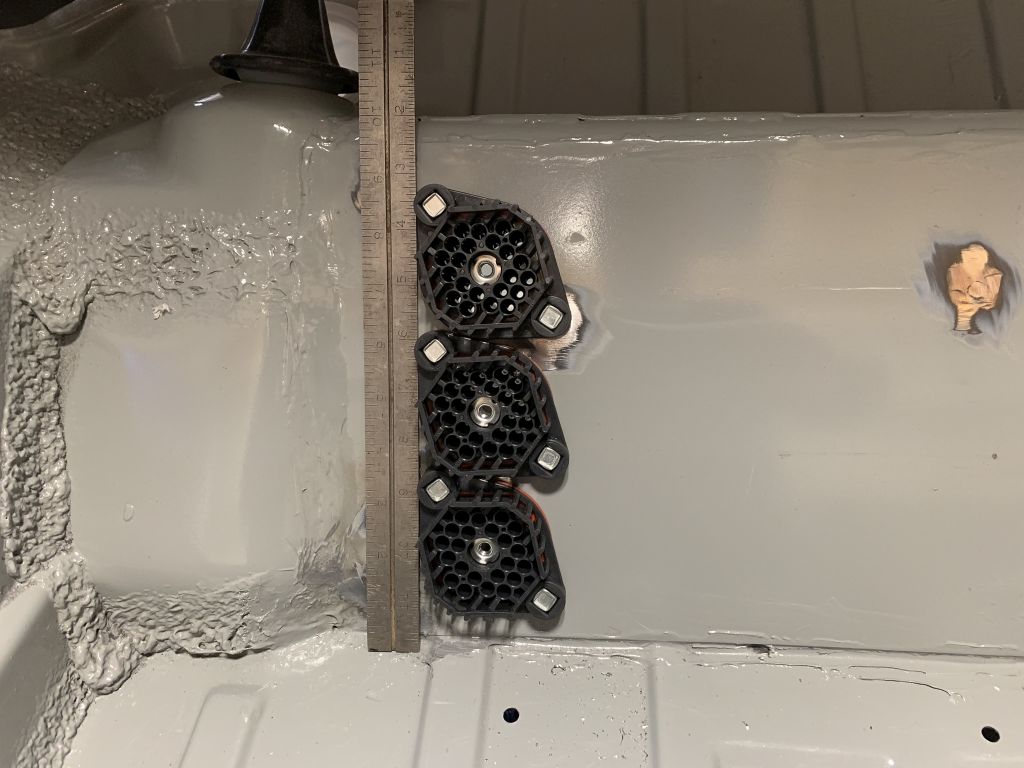
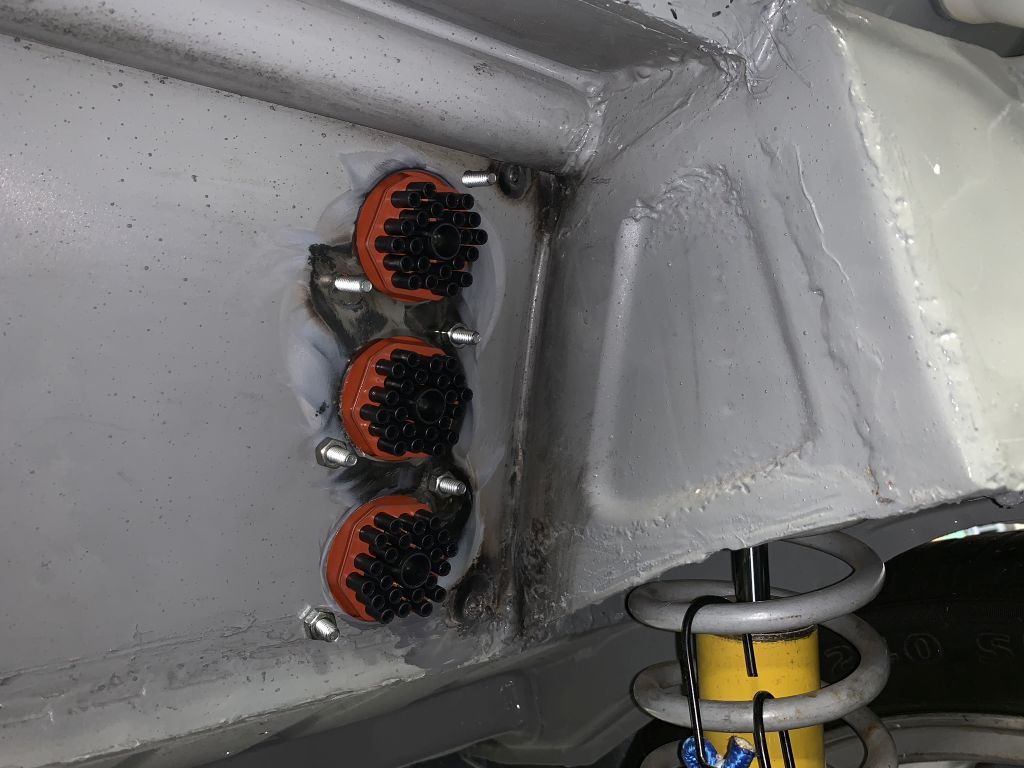
I bit more smoothing and then paint.
Posted by: CptTripps Jan 15 2019, 09:07 AM
I'm assuming that you're still putting the computer back there. Those connectors will be brilliant for that.
Sorry about the big hole. I later had the idea to put the ATW intercooler back there for some dumb reason. That one is on me!
Posted by: Amenson Jan 17 2019, 09:56 AM
I'm assuming that you're still putting the computer back there. Those connectors will be brilliant for that.
Sorry about the big hole. I later had the idea to put the ATW intercooler back there for some dumb reason. That one is on me!
ECU will go pretty much where you had it.
As for the big hole...decisions like that are forced when trying to do complex plumbing using only silicon elbows and chunks of tube. It is like it never happened now!
Posted by: Amenson Jan 20 2019, 09:50 PM
Bit of a mixed bag of success this weekend. Was planning to do final assembly of the cooling lines but the step clamps that I ordered arrived as 31.6mm instead of 36.1mm.
Jumped to install the clutch reservoir line. Went in pretty well but tube was a bit loose on the MC fitting so I installed a step clamp for good measure. While I was at it I decided the brake reservoir hose needed them also. Got the clamps slid over from the reservoir side but could not get the tool in to make the crimp. Out comes the MC...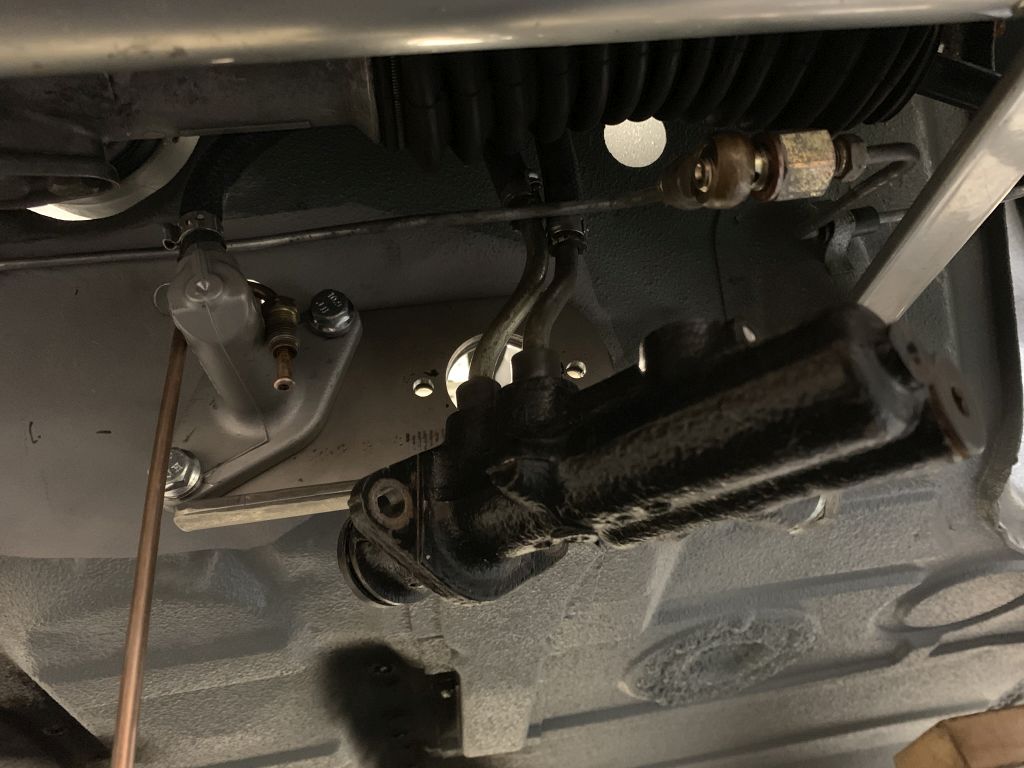
No chance of them leaking or blowing off during pressure bleeding now!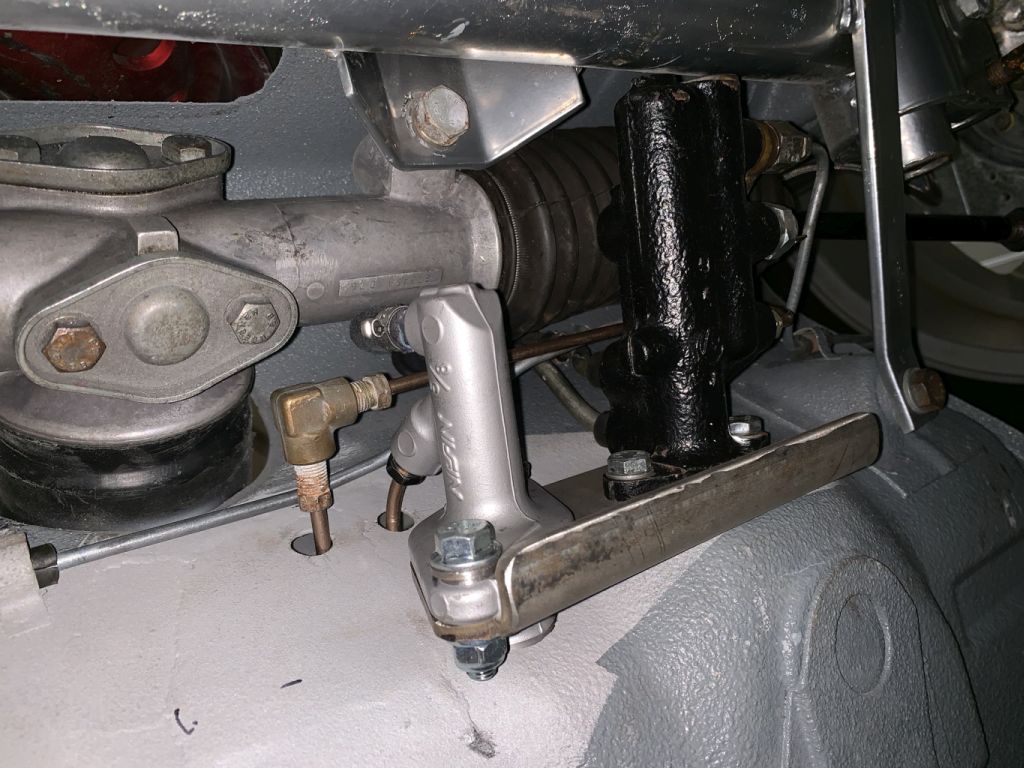
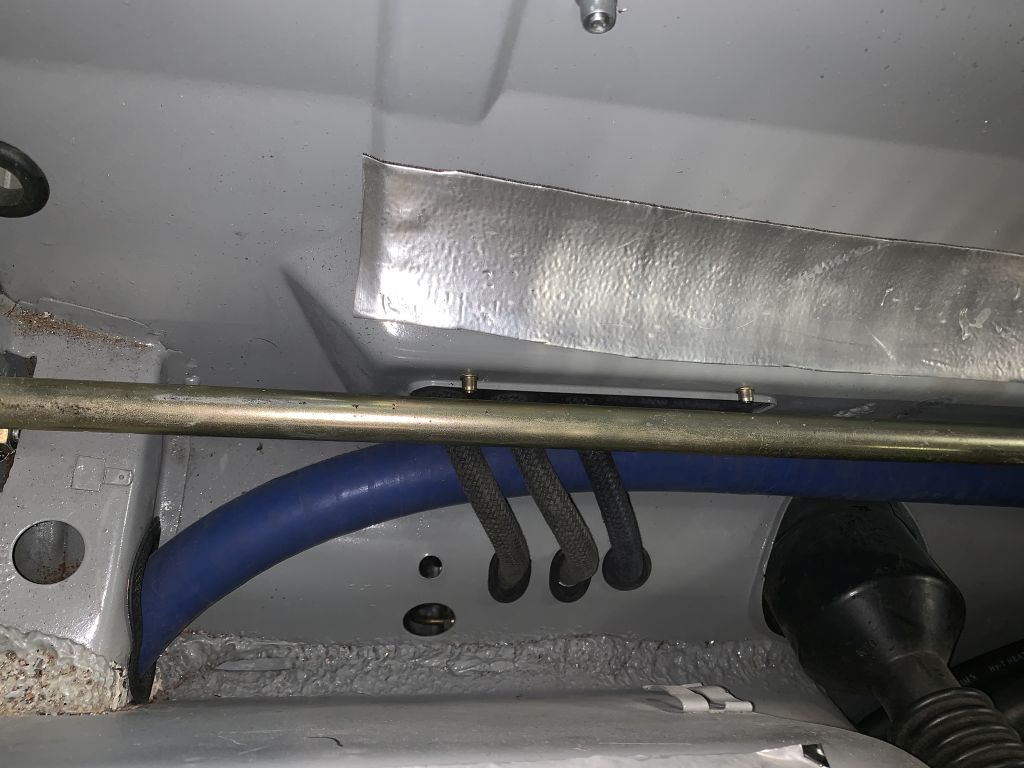
While fussing with the rear springs a while ago I managed to lose one of the big washers. Finally found a replacement and pulled the rear apart to install it.
Posted by: CptTripps Jan 22 2019, 12:02 PM
It's funny, I'm looking at that second picture, and remembering the weekend that my son and I spent cleaning re-building that steering rack. That was the first time I used my soda blaster.
Posted by: Amenson Feb 7 2019, 09:56 PM
Update from the last two weeks. Two weekends ago I was in Vail so no progress but had a great time. This past weekend was quite productive.
I finished up the trunk. Good amount of grinding and hammering to get it reasonably flat. I am not a huge fan of cut trunks but this doesn't look so bad.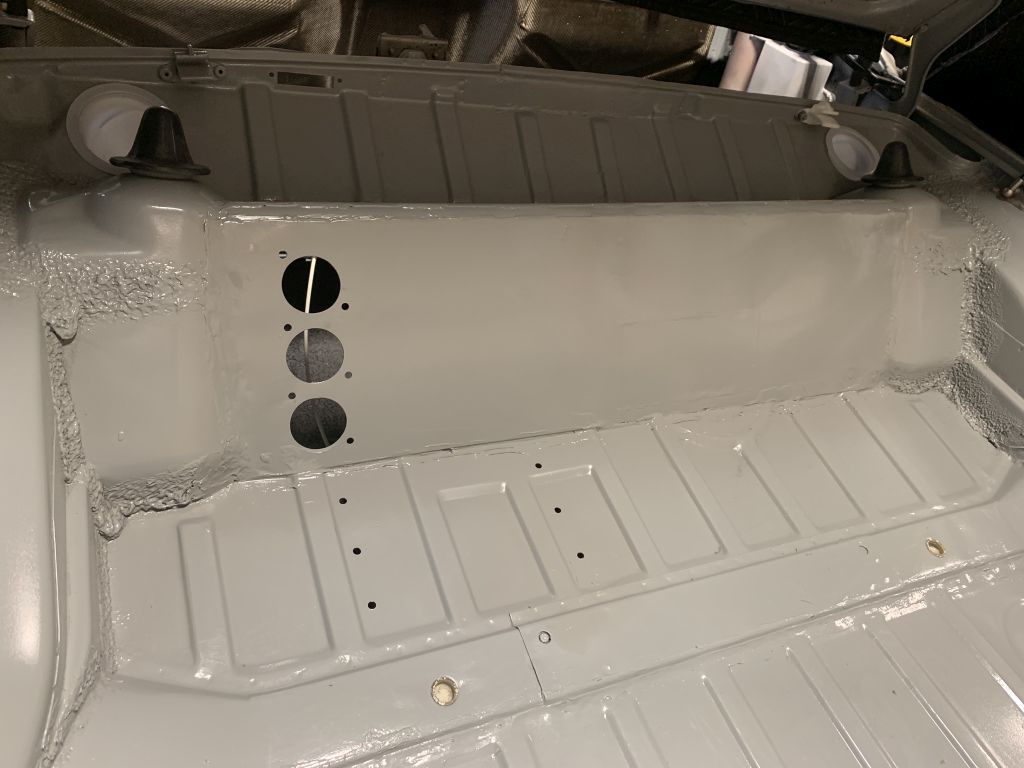
Didn't take a picture but I got sick of dropping nuts and washers when installing/removing the battery box so I put in nutserts.
Back to the front. Pulled all of the ducting and installed the nutserts. Reinstalled the hard lines for the coolant with the Oetiker stepless ear clamps in place. I ordered the smaller of the two sizes that would work just to make sure that I got a good clamping force but it made it a huge pain to install. Still not crimped close just in case I need to make some adjustments. 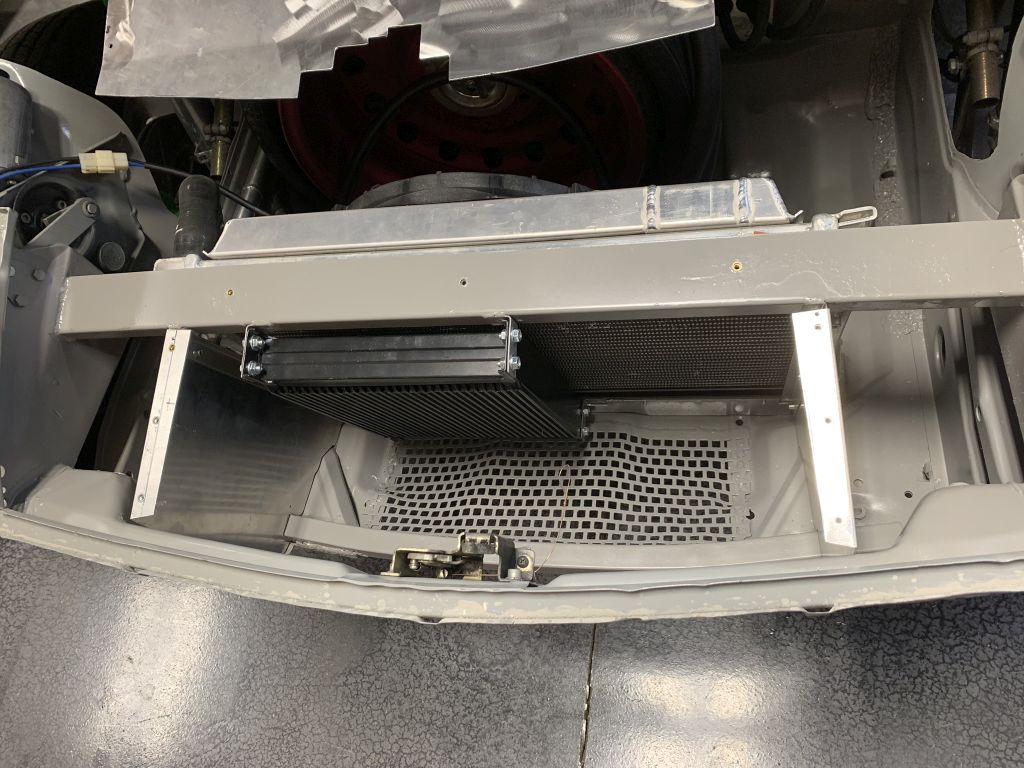
I'll refinish the top piece so that the texture is uniform. Hard to see in the picture but the fasters are stainless steel flanged button head socket cap screws, super clean.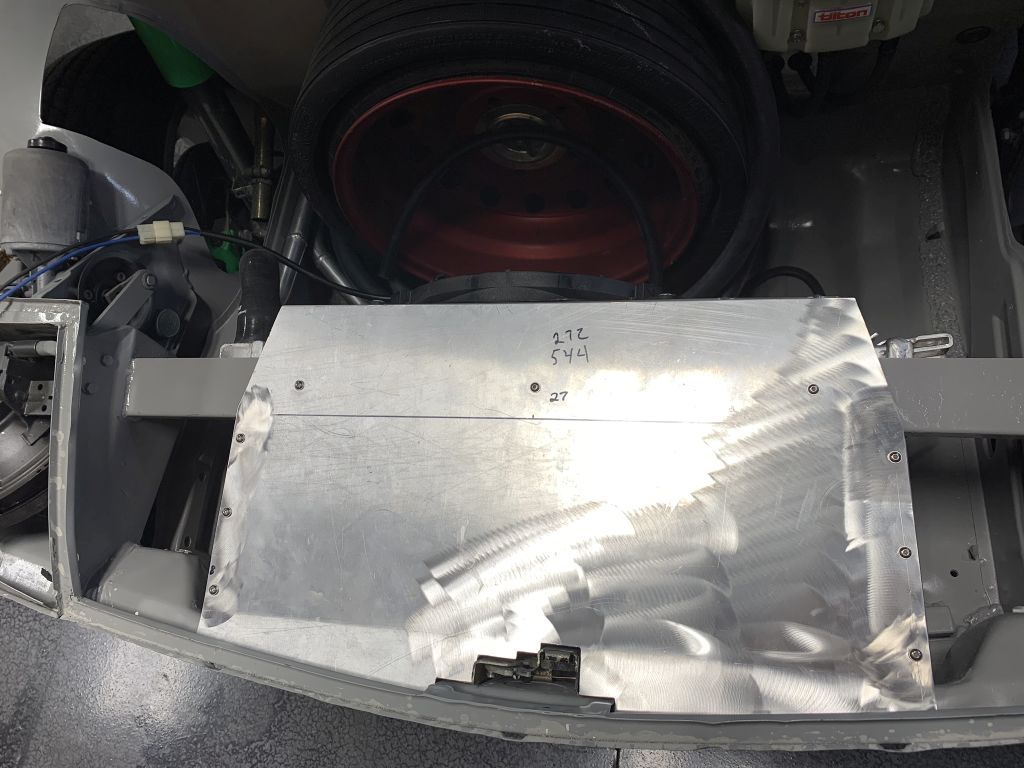
Tom, here are some pictures of the 944 phone dials to confirm fitment of your Fuchs. Looks like there is pleanty of room. ID of these wheels is ~14.5"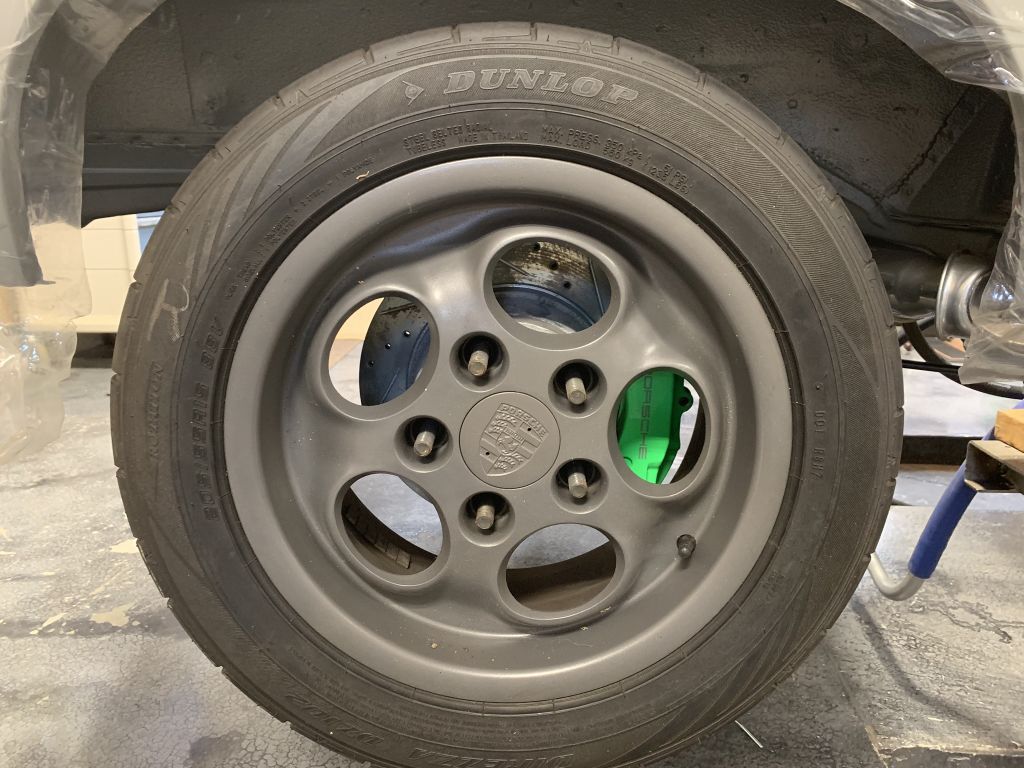
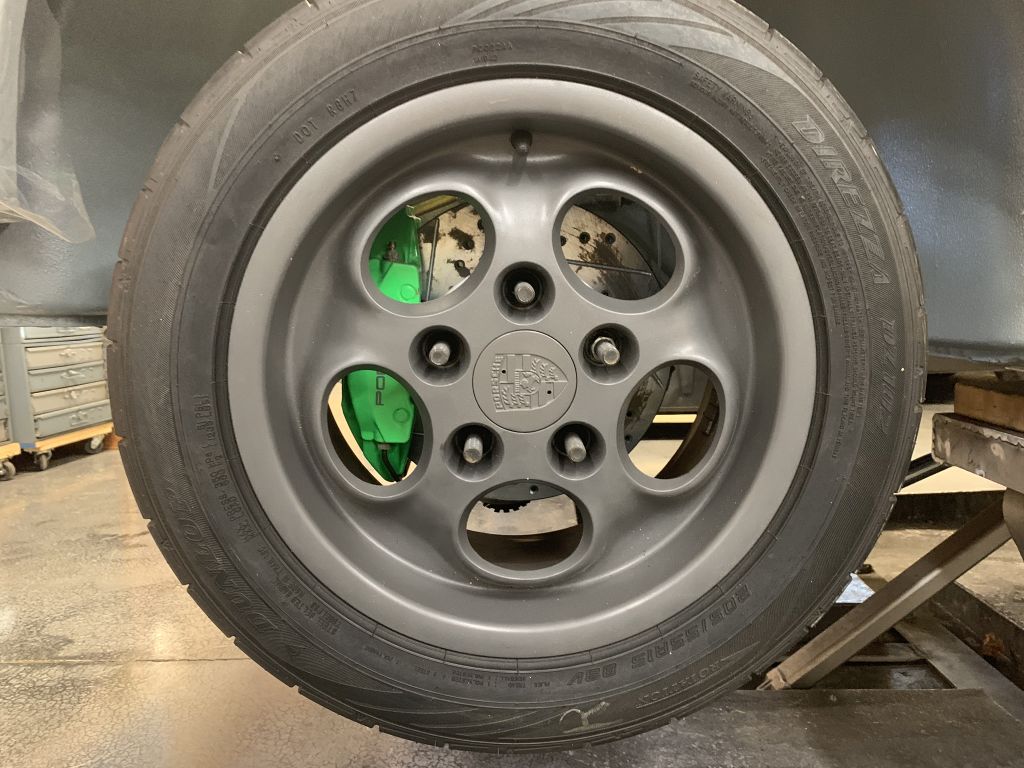
If anyone is looking for a set of phone dials...I am looking to get these out of the garage.
The throttle cable also arrived. Quite a bit shorter than ideal but Looks like I can make it work. I did get a bit panicked when I installed it in the pedal linkage. I had forgotten how close that linkage is to the ex-clutch cable pivot. I was convinced that pressing the clutch pedal would pull the throttle cable. Clearance should be the same as stock...at least that is what I keep telling myself.
Posted by: theer Feb 8 2019, 09:05 AM

Oooohhhhmmmm ...... everything will work out..... ooohhhhhhhmmmmmmm... throttle cable will be fine.... ooohhhmmmmmm.
Posted by: CptTripps Feb 8 2019, 10:04 AM
The happiest day of my life will be the day I Text Tom to ask how much it'll cost me to buy Grey back.
Keep rocking guys! Looking great.
Posted by: theer Feb 8 2019, 10:16 AM
Hmm, that reminds me.. gotta get a new cell phone number.
Posted by: CptTripps Feb 8 2019, 10:32 AM
Hmm, that reminds me.. gotta get a new cell phone number.
LOW BLOW!!!
Posted by: Amenson Mar 17 2019, 08:54 PM
Not really project related other than killing 10 days of progress...I had another business trip to Japan. While there I took the time to finally visit Diakoku Futo PA. Think of Cars and Coffee at a truck stop on a small island in Tokyo Bay. If you don't know what it is, check out some videos. Weather was not great on the Saturday night I visited but a good crown considering. One of my colleagues had just returned to Japan after an assignment in the US and brought back is Grand Sport so he picked me up and we tore around Tokyo after checking out the car scene.

On with the build progress...
Next step to beinging done is to take it all back apart 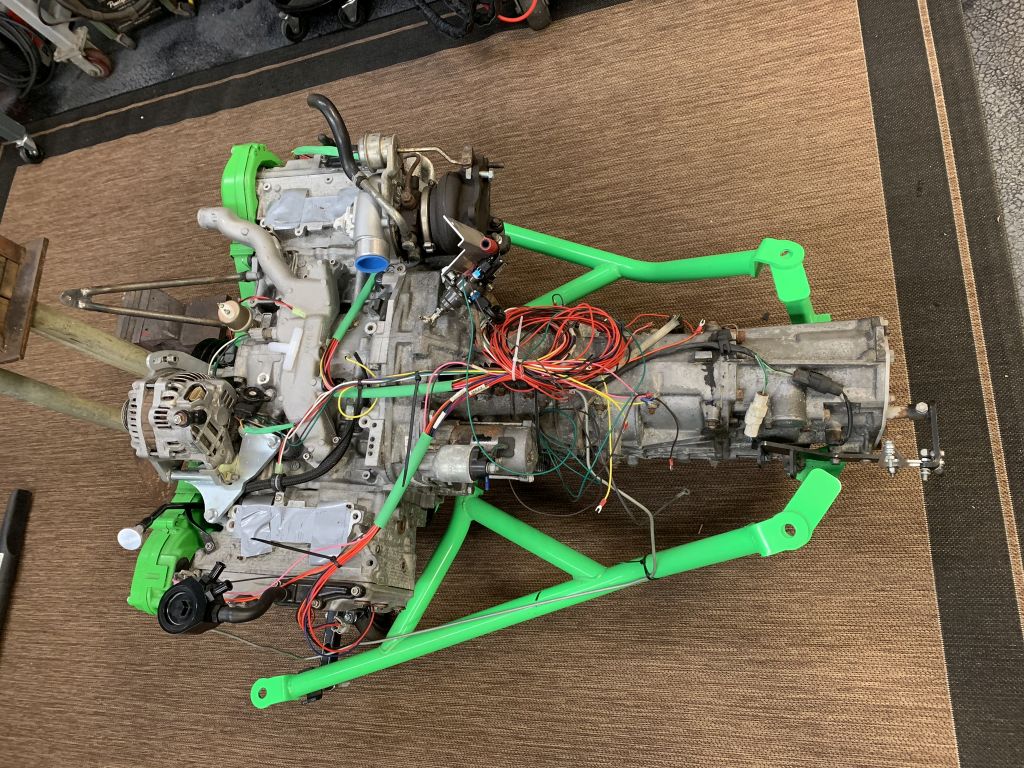
Finished welding unnecessary holes in the manifold and smoothing a few more casting lines.
Also added the IAT sensor bung to the bottom of the IC. And cut off and welded shut an unused mounting lug.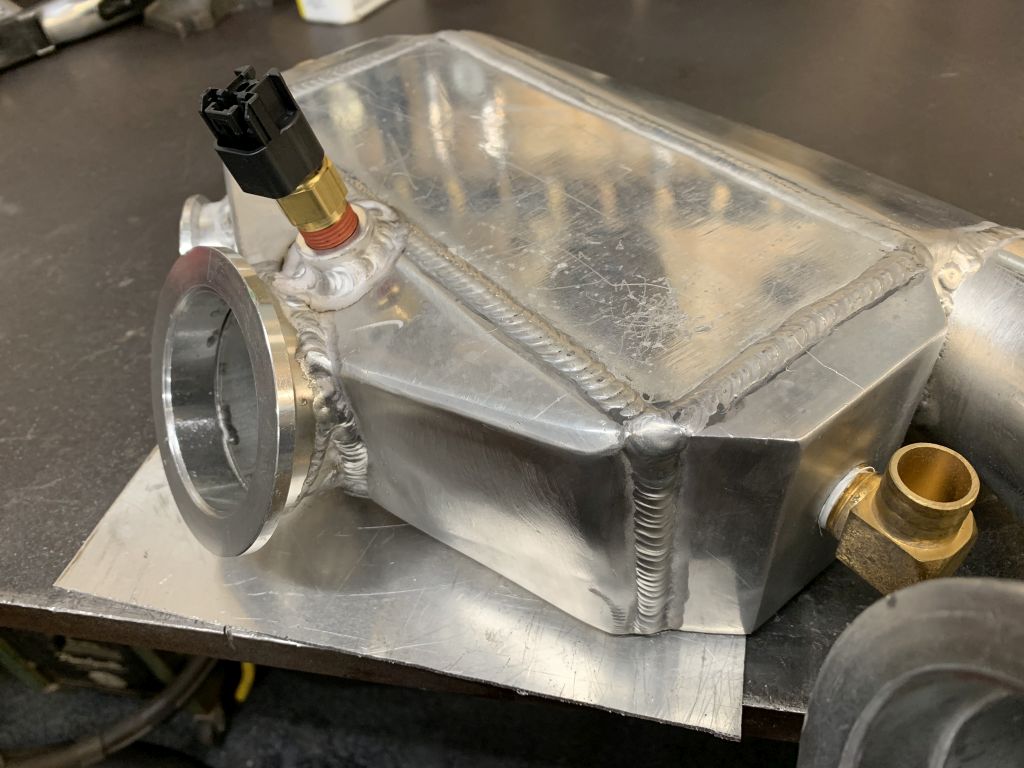
Now I know why powder coating costs so much. Sand blasting and masking take forever.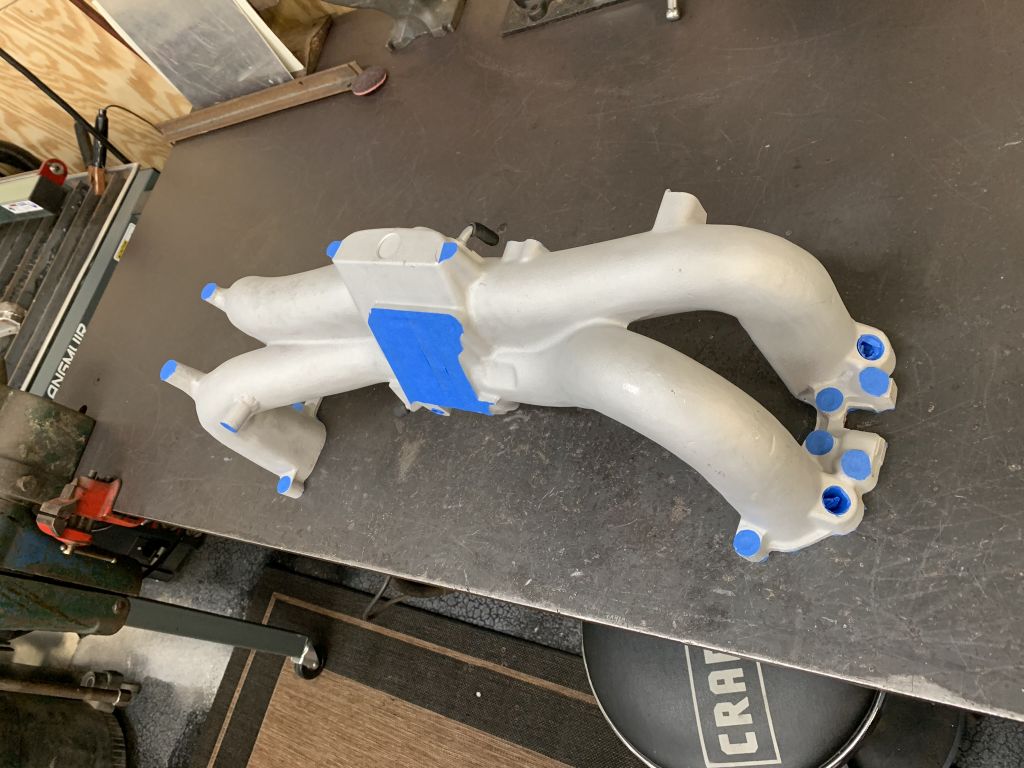
I wanted to match the factory Subaru crinkle paint and found a product that is high temp and somehow crinkles as it dries. Instructions called for 3 "heavy" coats. What a terrible product to spray. It comes out in huge drops and is either not covering completely or on the verge of running. The drops are so big that half do not make it to the target and make a huge mess on the floor. 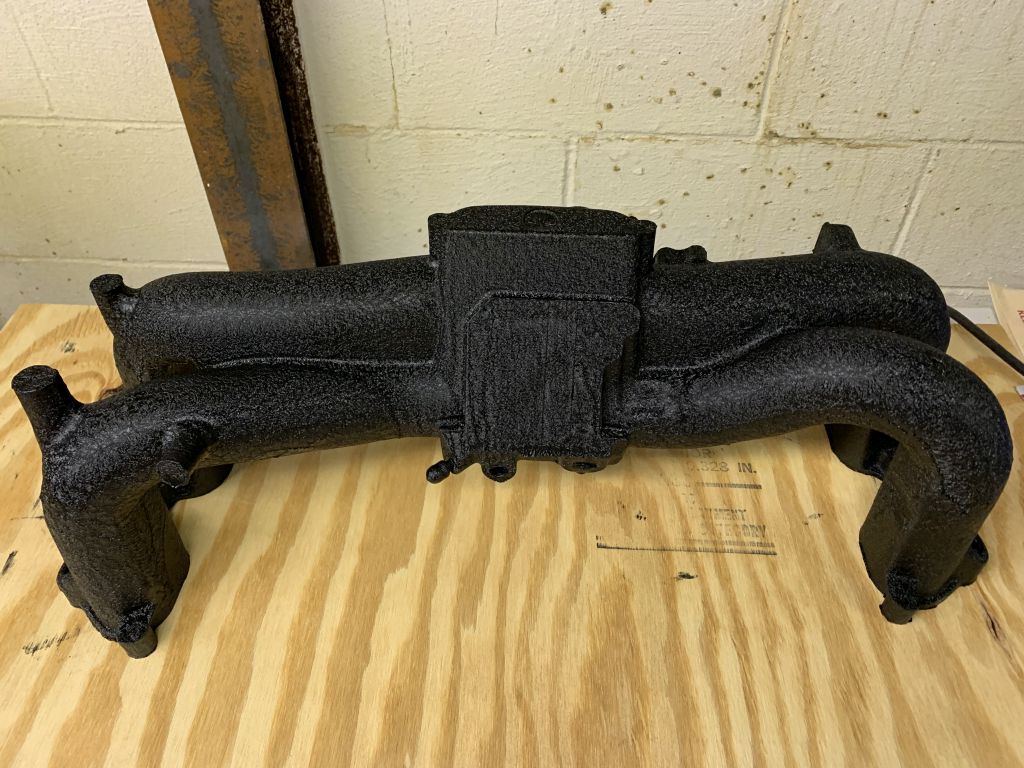
Even after being gone for two days it was still curing (in the basement) when I returned so I had to accelerate it. Instructions called for 200 deg oven but the wife would not have been down with that, so...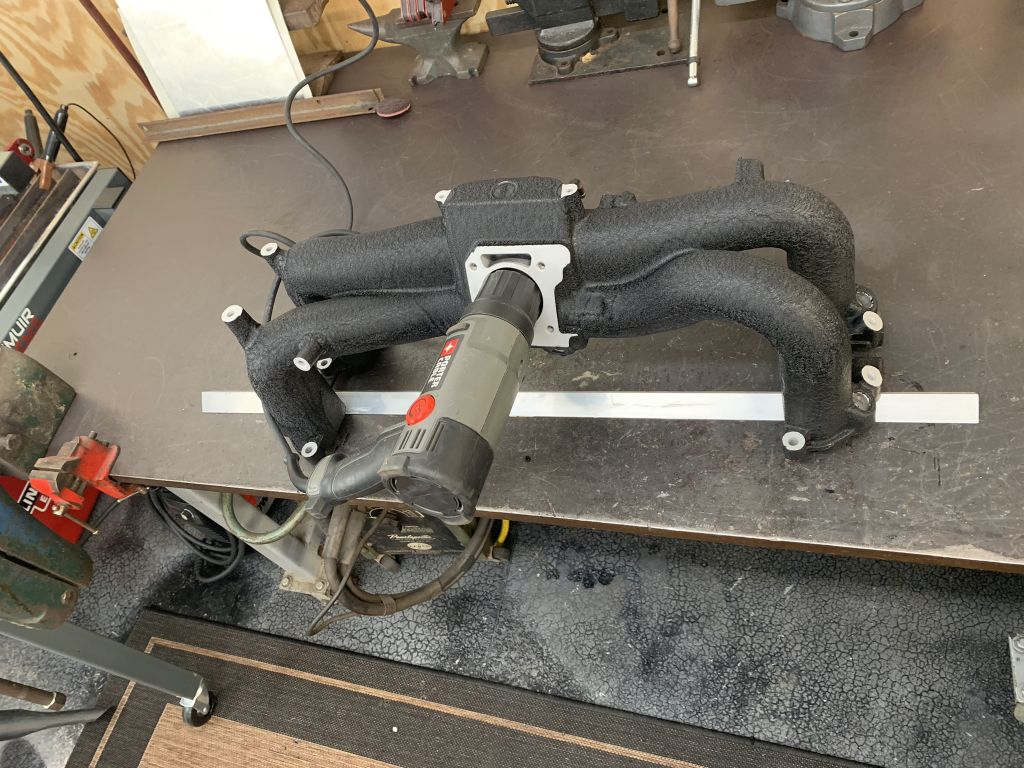
Final assembly!!! Can't just throw it together though, everything needs to be cleaned.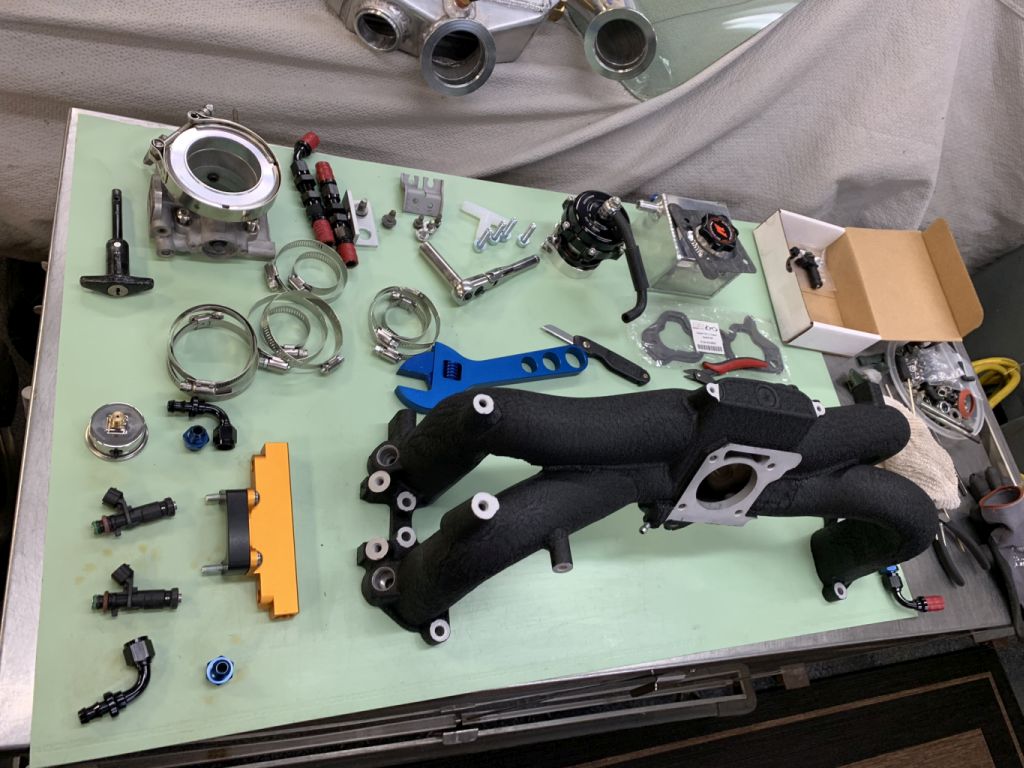
I was a little worried that something might have found its way into the intake ports so I checked all of them...perfectly clean. Will pull the plugs and use a bore scope to check out the combustion chamber prior to firing.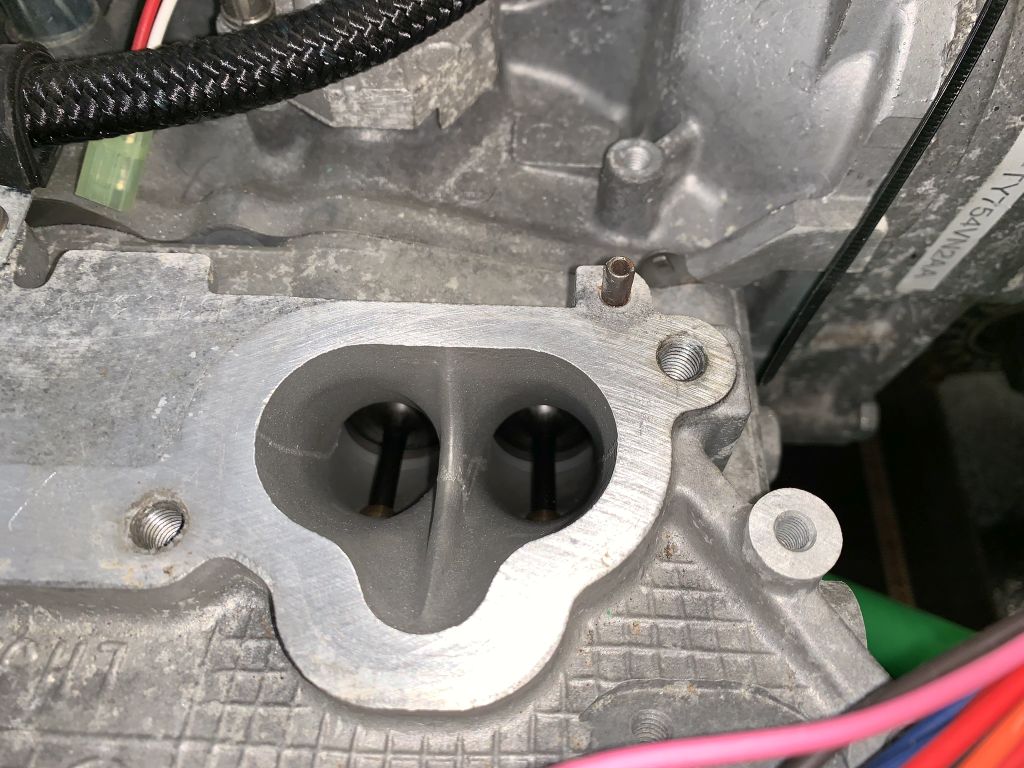
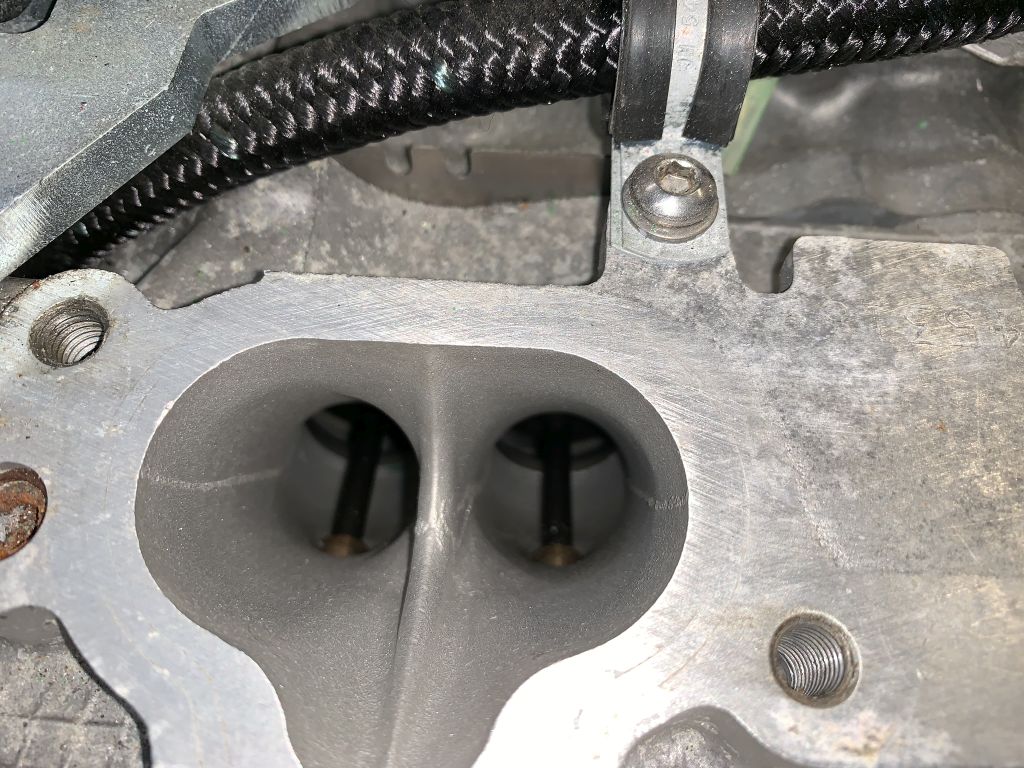
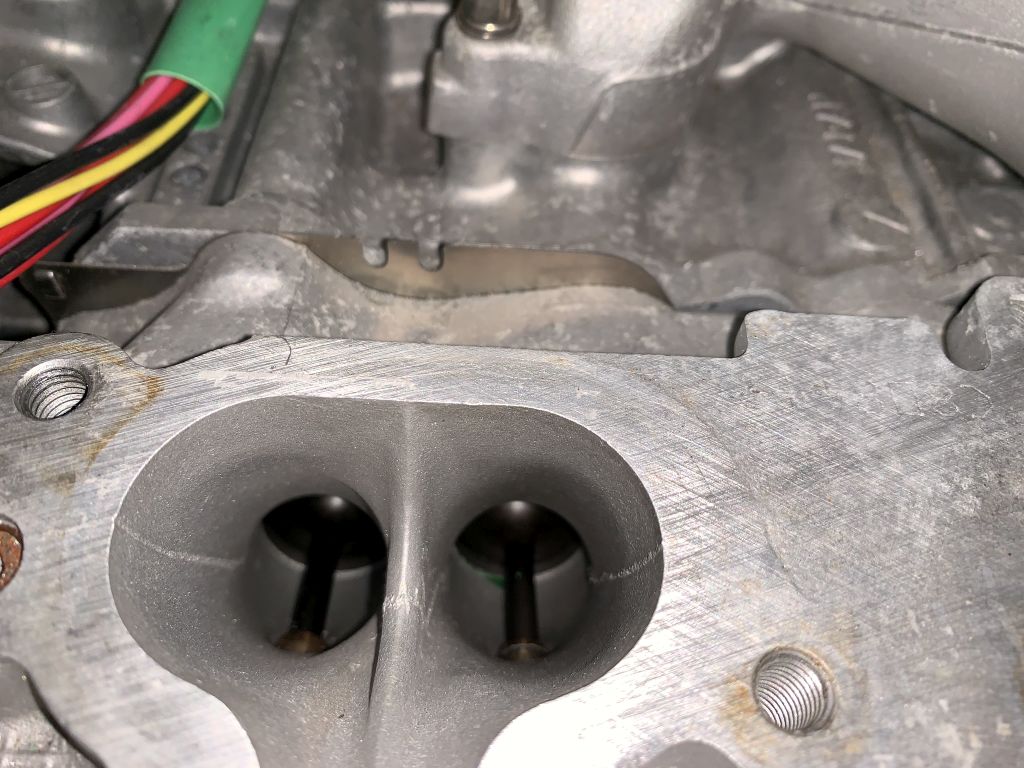
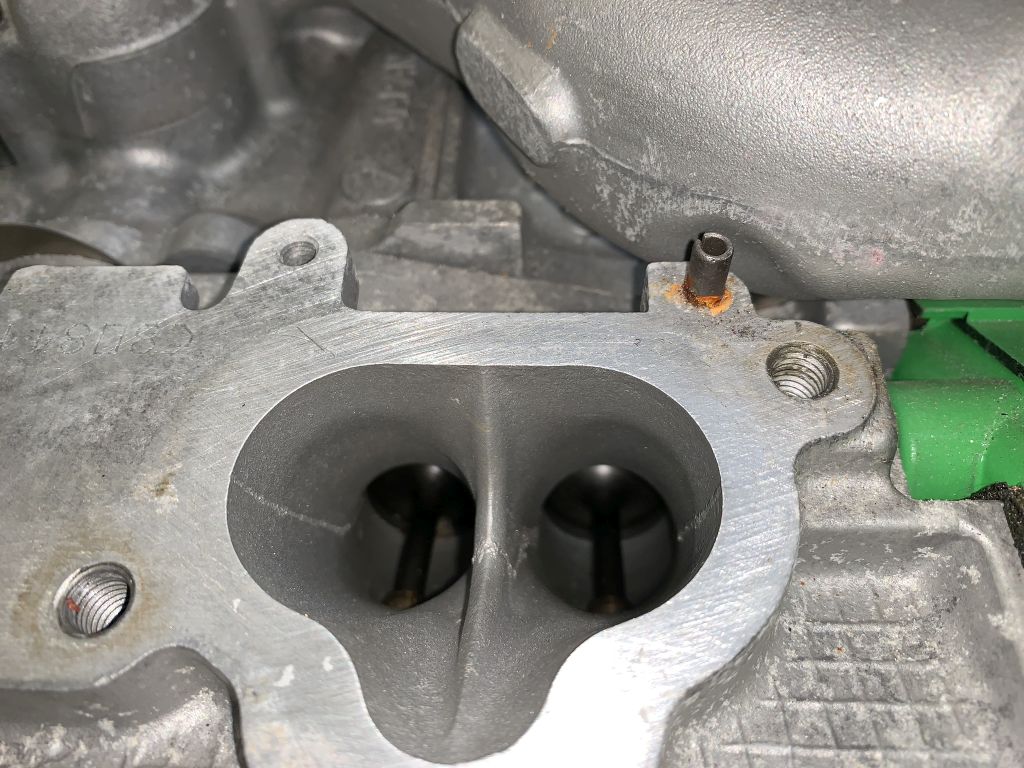
Finally coming together for the final time. All of the raw aluminum is getting a rub down with green and then white scotch bright pads to even out the finish a bit. Fussy but makes a huge difference. Oh, also drilled and tapped the fuel rail for the pressure gauge.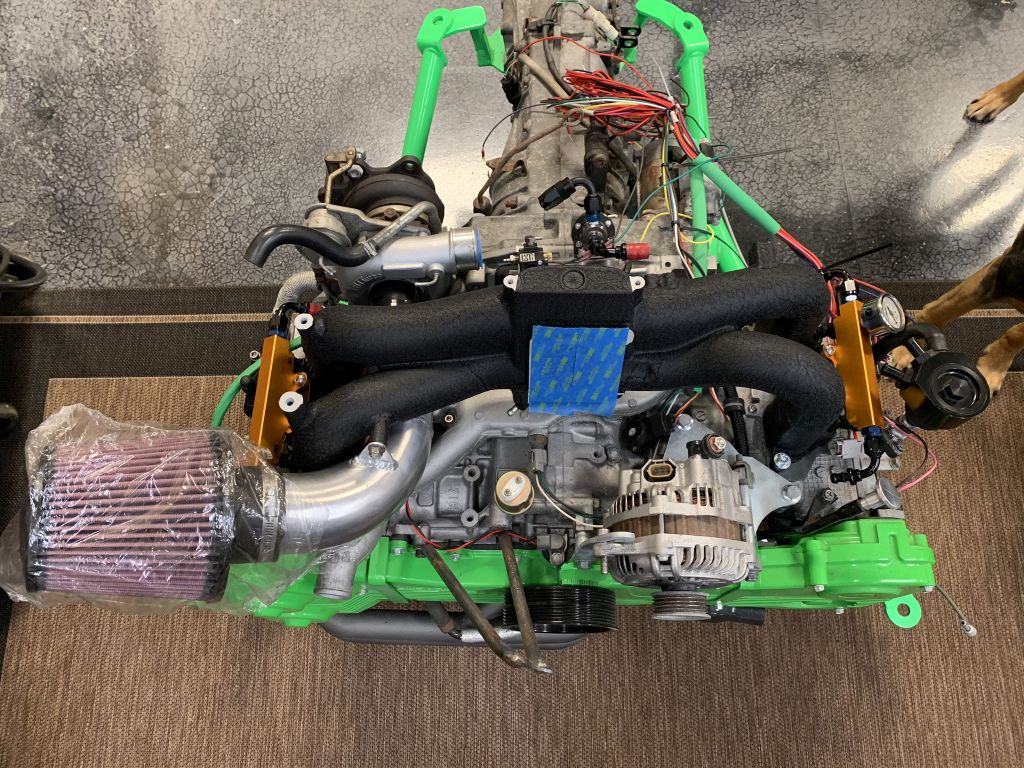
Posted by: CptTripps Mar 18 2019, 07:54 AM
Looks absolutely amazing. Can't wait to see her on the road!
Posted by: mepstein Mar 18 2019, 08:18 AM
“Now I know why powder coating costs so much. Sand blasting and masking take forever”
It’s always the prep that takes 95% of the time.
Removing old powder coat takes forever.
Neat work.
Posted by: 914forme Mar 18 2019, 08:49 AM
Easy way to remove Powdercoat is higher heat, it becomes ash once you get it hot enough, and let it cool back down in a controlled fashion. Bring it up slow, bring it back down slowly. Like diving you don't want to get the bends.
Did not look like that the last time I was there.
Posted by: mepstein Mar 18 2019, 09:47 AM
Easy way to remove Powdercoat is higher heat, it becomes ash once you get it hot enough, and let it cool back down in a controlled fashion. Bring it up slow, bring it back down slowly. Like diving you don't want to get the bends.
Did not look like that the last time I was there.That is true. We just have a powdercoat oven so max heat is 420. The real powdercoat shops have ovens to burn off the oil and old coatings but if I did it in my kitchen oven, my wife would kill me if the fumes didn't.
Posted by: Amenson Mar 20 2019, 06:10 PM
Well, I learned a fun fact today...Subaru does not sell the throttle body shaft seals. I couldn't find them online so I took the part to a local Subaru dealership with a decent parts guy and he confirmed that they are not available.
Fortunately I have another. 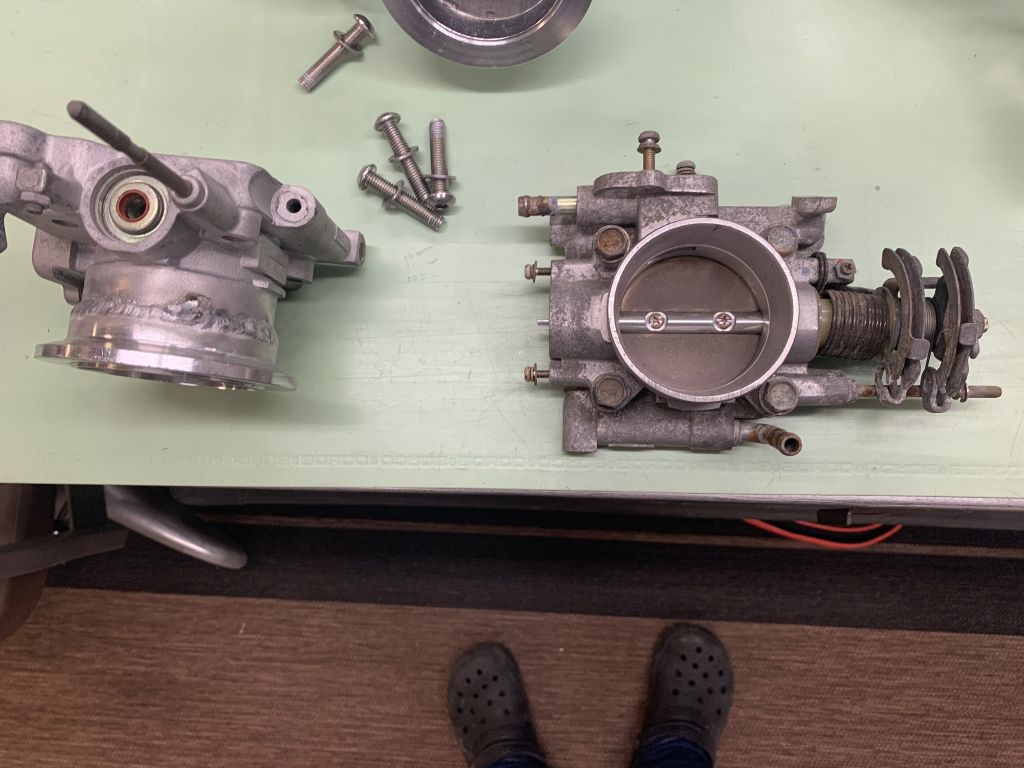
Will not be nice and freshly sandblasted but will do the trick. Just need to weld on another v-band flange which should arrive Friday.
Posted by: CptTripps Mar 26 2019, 02:16 AM
::: debating if I should comment about the crocs or not :::
Posted by: Amenson Mar 26 2019, 09:42 AM
::: debating if I should comment about the crocs or not :::
They are very comfortable...but never leave the house.
Welded the v-band flange to the other throttle body. Was a bit of a pain trying not to overheat the seals but seems to have been successful. Also pained and installed a most of the remaining brackets and started on the engine harness.
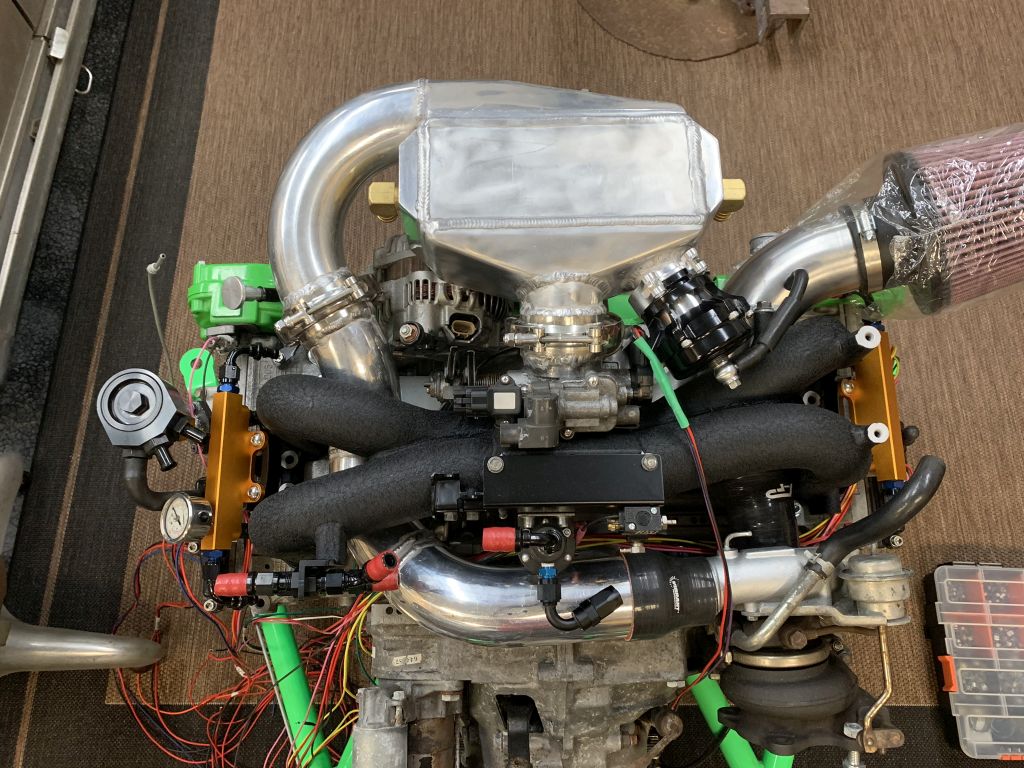
Did run into a small snag. I created a bit of rework for myself by not having the gaskets installed while making parts. Fortunately the plumbing still fits quite nicely but the front IC support needs attention.
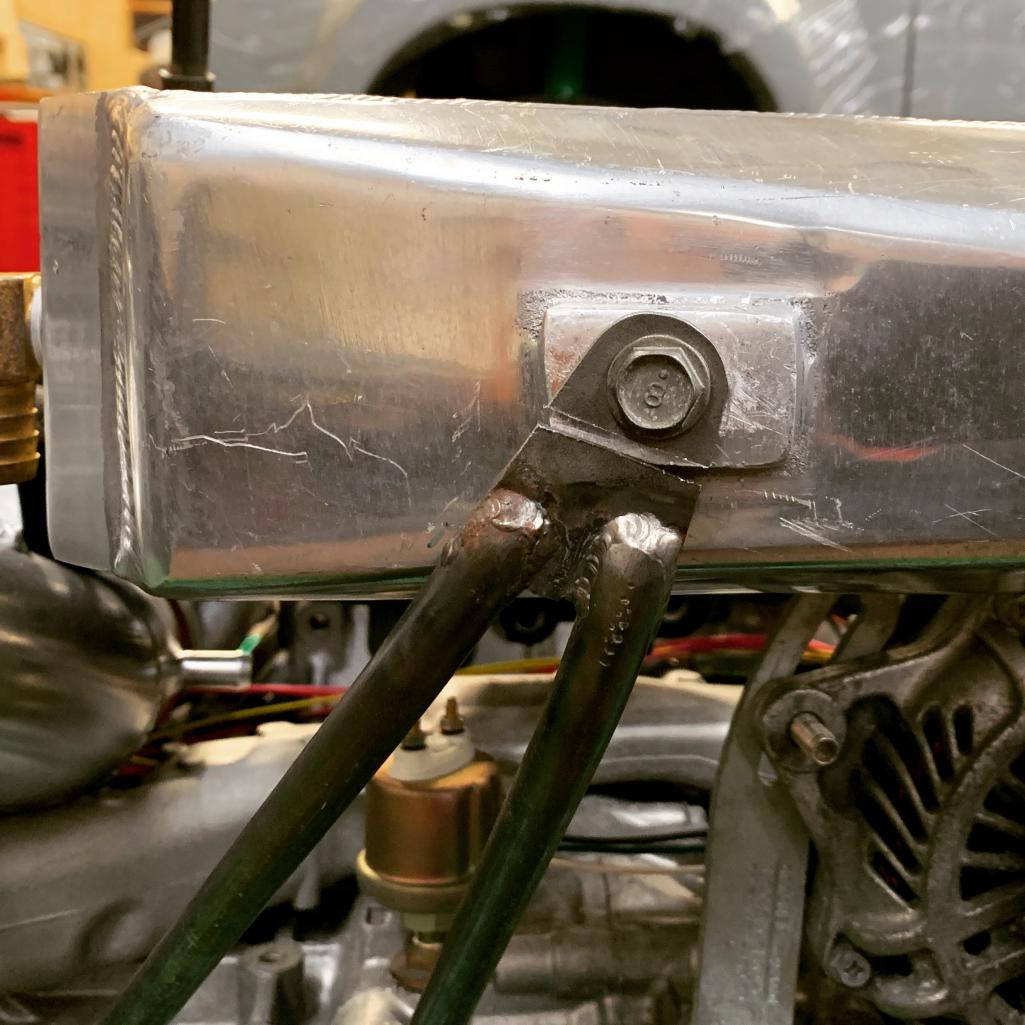
Posted by: mepstein Mar 26 2019, 09:49 AM
::: debating if I should comment about the crocs or not :::
Attached image(s)


Posted by: Amenson Mar 31 2019, 09:01 PM
This was a week of mostly fun with wires.
Raw materials...plus a bunch of crimpers and new connectors. Using Doug's start as a base, every connector is new. I would have started completely from scratch but Doug color coded the injectors and coils the same for each cylinder. That is the kind of detail I appreciate.
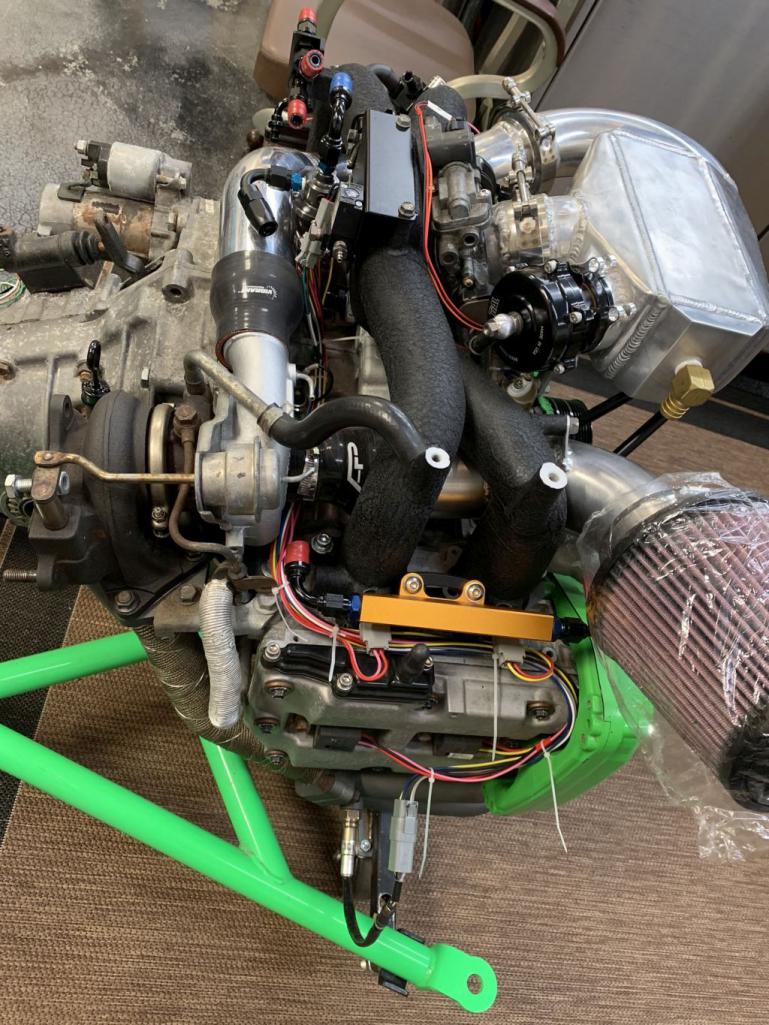
Connectors for the IAC,Knock sensor and Crank position sensors will arrive Tuesday. Crank and cam sensors were already wired with fresh wires and connectors but after much soul searching I was uncomfortable that they were unshielded so I picked up 50ft of 2 conductor shielded Tefzel.
Key to good wiring is good documentation.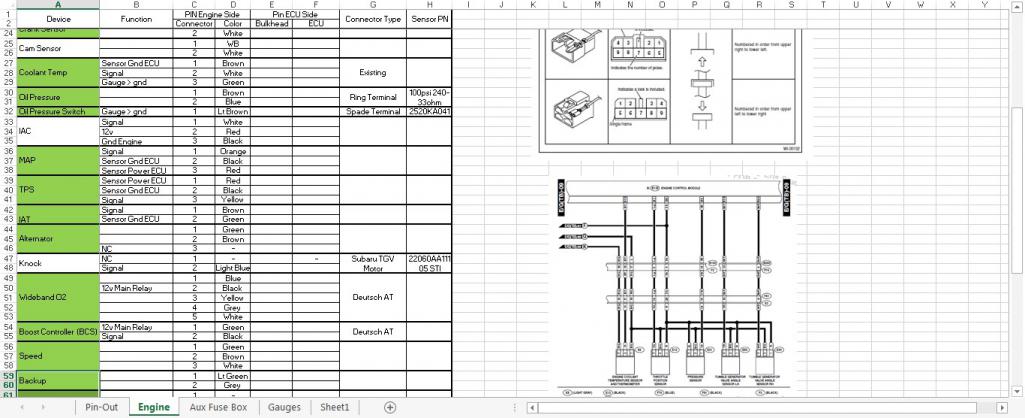
Also fixed and painted the front IC mount. 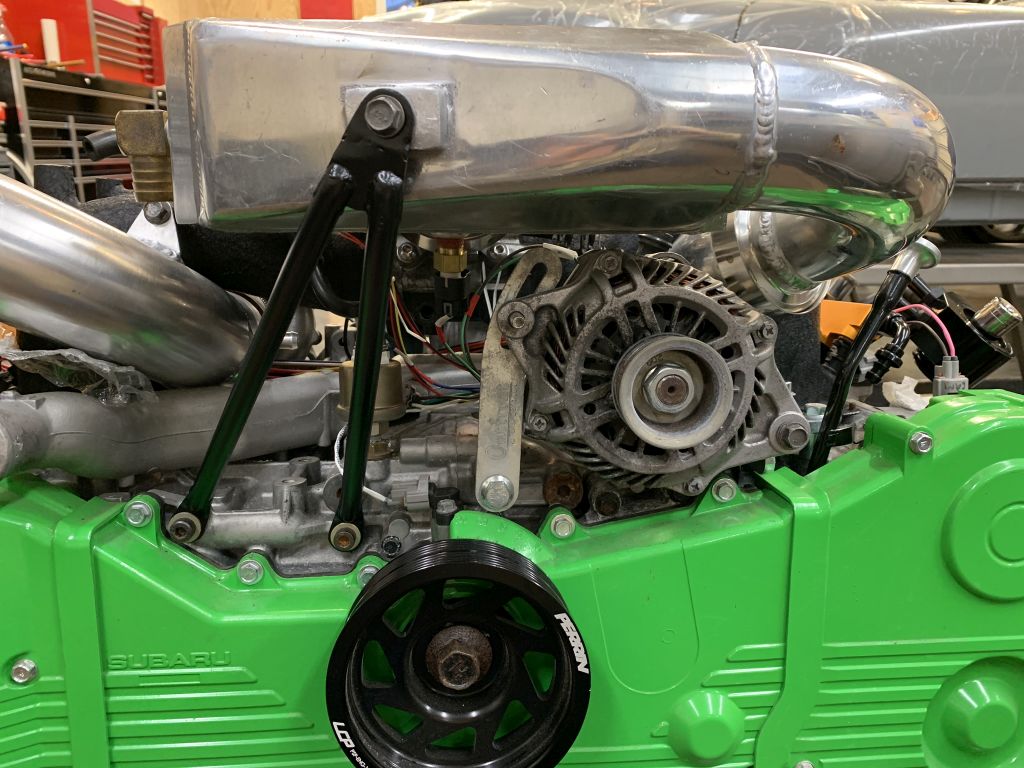
And replaced the other water pump return line with AN. I did this on porsti with Grey's heater return/bypass as inspiration and just happened to have a 1/4NPT/6AN fitting in the garage...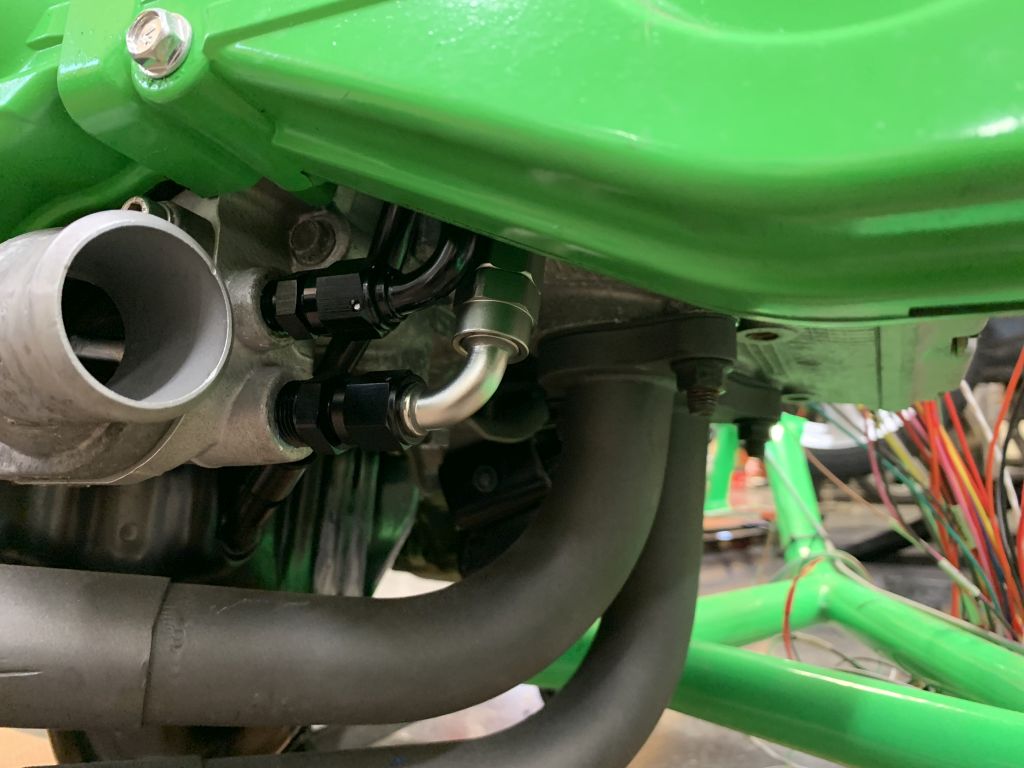
Some may say I have trust issues but push lock fittings make me nervous.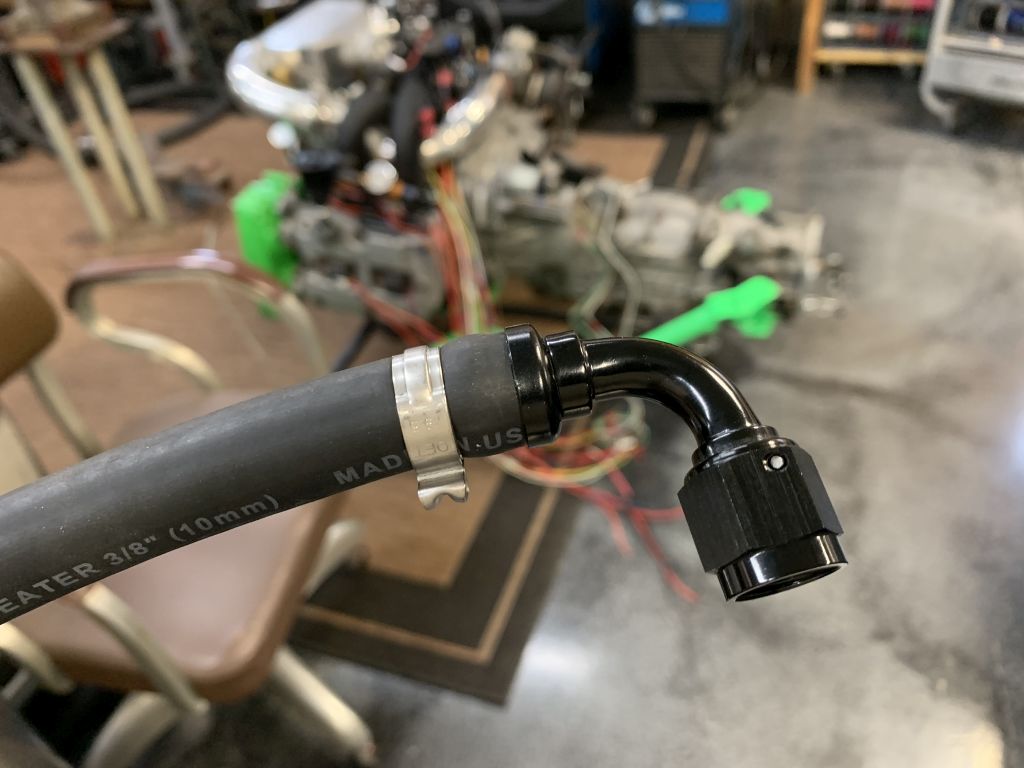
This thing was bothering me so as I was cleaning up for the night I decided to shorten it. Results can be found in the first two engine pics...paint still drying.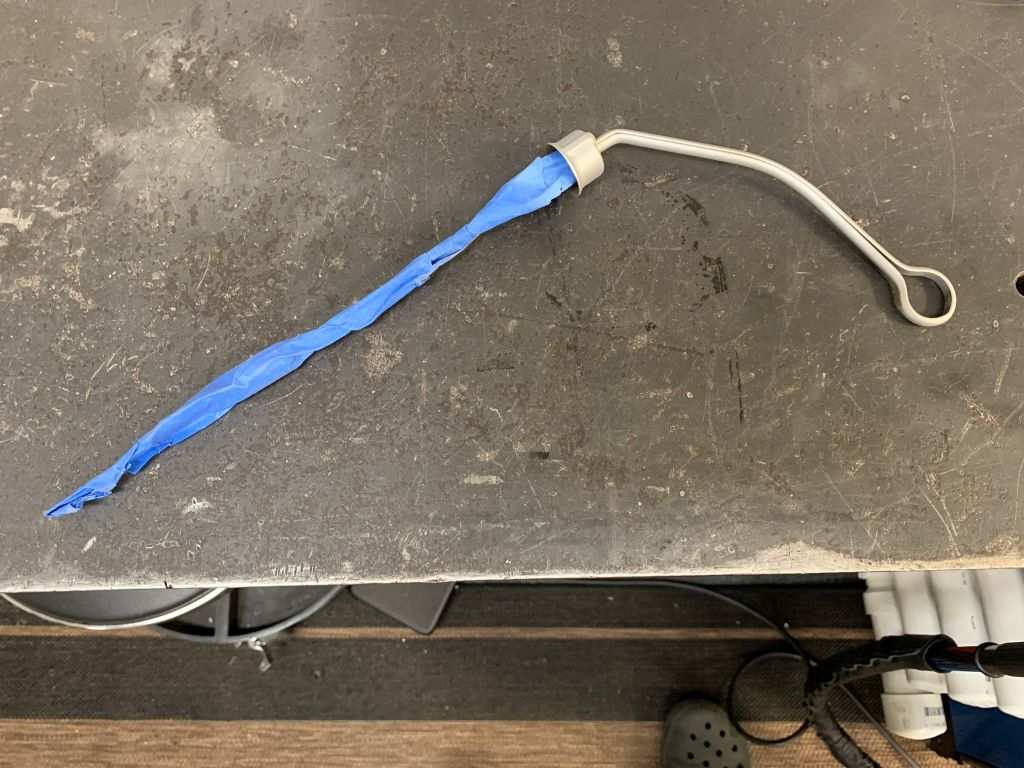
Posted by: CptTripps Apr 1 2019, 06:43 AM
Heads Up: I didn't do a THING to that transmission. I was told that it was in good working order, and had a cryoed main in it from a rebuild 5,000mi ago, but other than draining the oil out of it. I did nothing.
...not that it matters. I'm sure you've been over every bolt I put in the car "just to make sure".
Posted by: DRPHIL914 Apr 1 2019, 07:14 AM
6 years, 58 pages!! how close are we to having it back on the road?
I was going to give you a hard time about that but then I realized that ive had my car 10 years aog had it on the road on and off, but was not until last year that it was really finished. this is really cool and I may be a bit jealous, my thought was that there has to be an easier and faster way to put a suby motor in a 914? kudos to your perseverance it will surely be worth it! I hope next time I am up that way to Cincy to see my nephew that this thing is running and on the road I would love to see it- or better yet bring it to Okteenerfest!
Posted by: mepstein Apr 1 2019, 07:37 AM
It's a good read for anyone contemplating a conversion. The engines don't just plug in all by themselves. There's a lot of work that goes into a successful swap and the devil is in the details. It's not the solution for someone who just doesn't want to spend the money rebuilding the original engine. Scott is taking this to another level in terms of fit and finish. My car will be a basic conversion with good functioning parts but nothing exotic or custom.
Posted by: Amenson Apr 1 2019, 08:08 AM
Heads Up: I didn't do a THING to that transmission. I was told that it was in good working order, and had a cryoed main in it from a rebuild 5,000mi ago, but other than draining the oil out of it. I did nothing.
...not that it matters. I'm sure you've been over every bolt I put in the car "just to make sure".
Does it have the 2wd spline coupler installed?
Posted by: Amenson Apr 1 2019, 08:16 AM
6 years, 58 pages!! how close are we to having it back on the road?
I was going to give you a hard time about that but then I realized that ive had my car 10 years aog had it on the road on and off, but was not until last year that it was really finished. this is really cool and I may be a bit jealous, my thought was that there has to be an easier and faster way to put a suby motor in a 914? kudos to your perseverance it will surely be worth it! I hope next time I am up that way to Cincy to see my nephew that this thing is running and on the road I would love to see it- or better yet bring it to Okteenerfest!
Completion date is set at Mid April and it will be heading to the east cost. You will have to convince Tom to bring it out to Okteenerfest. When you get to Cincy you are still welcome to stop by and check out PorSTI...and probably Marks car.
It's a good read for anyone contemplating a conversion. The engines don't just plug in all by themselves. There's a lot of work that goes into a successful swap and the devil is in the details. It's not the solution for someone who just doesn't want to spend the money rebuilding the original engine. Scott is taking this to another level in terms of fit and finish. My car will be a basic conversion with good functioning parts but nothing exotic or custom.
The turbo and stand alone ECU add a ton of complexity to the swap.
Posted by: DRPHIL914 Apr 1 2019, 09:17 AM
6 years, 58 pages!! how close are we to having it back on the road?
I was going to give you a hard time about that but then I realized that ive had my car 10 years aog had it on the road on and off, but was not until last year that it was really finished. this is really cool and I may be a bit jealous, my thought was that there has to be an easier and faster way to put a suby motor in a 914? kudos to your perseverance it will surely be worth it! I hope next time I am up that way to Cincy to see my nephew that this thing is running and on the road I would love to see it- or better yet bring it to Okteenerfest!
Completion date is set at Mid April and it will be heading to the east cost. You will have to convince Tom to bring it out to Okteenerfest. When you get to Cincy you are still welcome to stop by and check out PorSTI...and probably Marks car.
It's a good read for anyone contemplating a conversion. The engines don't just plug in all by themselves. There's a lot of work that goes into a successful swap and the devil is in the details. It's not the solution for someone who just doesn't want to spend the money rebuilding the original engine. Scott is taking this to another level in terms of fit and finish. My car will be a basic conversion with good functioning parts but nothing exotic or custom.
The turbo and stand alone ECU add a ton of complexity to the swap.
Great to hear! thats really soon. Thanks for invite i will look you up when we come up.
I heard from a local thst the cars and coffee scene is changed due to the coffee joint Fuel Cincinnati closed, did they find a new place to meet? There were a lot of really nice cars last time i was there.
I agree with what mark said the attention is in the details and does not compare to a standard build for sure its awesome to see such attention to details.
should be a very dependable driver once finished.
Posted by: theer Apr 1 2019, 03:56 PM
Heads Up: I didn't do a THING to that transmission. I was told that it was in good working order, and had a cryoed main in it from a rebuild 5,000mi ago, but other than draining the oil out of it. I did nothing.
...not that it matters. I'm sure you've been over every bolt I put in the car "just to make sure".
Does it have the 2wd spline coupler installed?
See page 17 of this thread... unless that's a different transmission, it has been converted to 2wd.
Tom
Posted by: CptTripps Apr 2 2019, 02:59 AM
See page 17 of this thread... unless that's a different transmission, it has been converted to 2wd.
Correct. It's been converted properly to 2WD.
I was only saying that I didn't rebuild any of it, and to make sure that you put trans fluid back in it before you go tearing down the road.
Posted by: 914forme Apr 2 2019, 12:21 PM
Great to hear! thats really soon. Thanks for invite i will look you up when we come up.
I heard from a local thst the cars and coffee scene is changed due to the coffee joint Fuel Cincinnati closed, did they find a new place to meet? There were a lot of really nice cars last time i was there.
The car and the craftsman that is working on it are both located just north of Columbus Ohio, about 2 hours north of Cincinnati, Ohio.
If it is not reliable it will not be do to a lack of craftsmanship. It could be due to Murphy and the Some Times
Happens Rule.Posted by: Amenson Apr 3 2019, 10:12 PM
See page 17 of this thread... unless that's a different transmission, it has been converted to 2wd.
Correct. It's been converted properly to 2WD.
I was only saying that I didn't rebuild any of it, and to make sure that you put trans fluid back in it before you go tearing down the road.
Just needed to confirm after you mentioned that you did not do a thing to the transmission...taking it apart, removing the AWD parts and installing the spline couple definitely falls in the category of doing something!
Great to hear! thats really soon. Thanks for invite i will look you up when we come up.
I heard from a local thst the cars and coffee scene is changed due to the coffee joint Fuel Cincinnati closed, did they find a new place to meet? There were a lot of really nice cars last time i was there.
The car and the craftsman that is working on it are both located just north of Columbus Ohio, about 2 hours north of Cincinnati, Ohio.
If it is not reliable it will not be do to a lack of craftsmanship. It could be due to Murphy and the Some Times
Happens Rule.I will be seriously angry if anything is problematic with this car...details matter.
Posted by: Amenson Apr 4 2019, 07:56 PM
Finished up the engine side. Once it is terminated at the bulkhead connectors I will take it out and wrap it.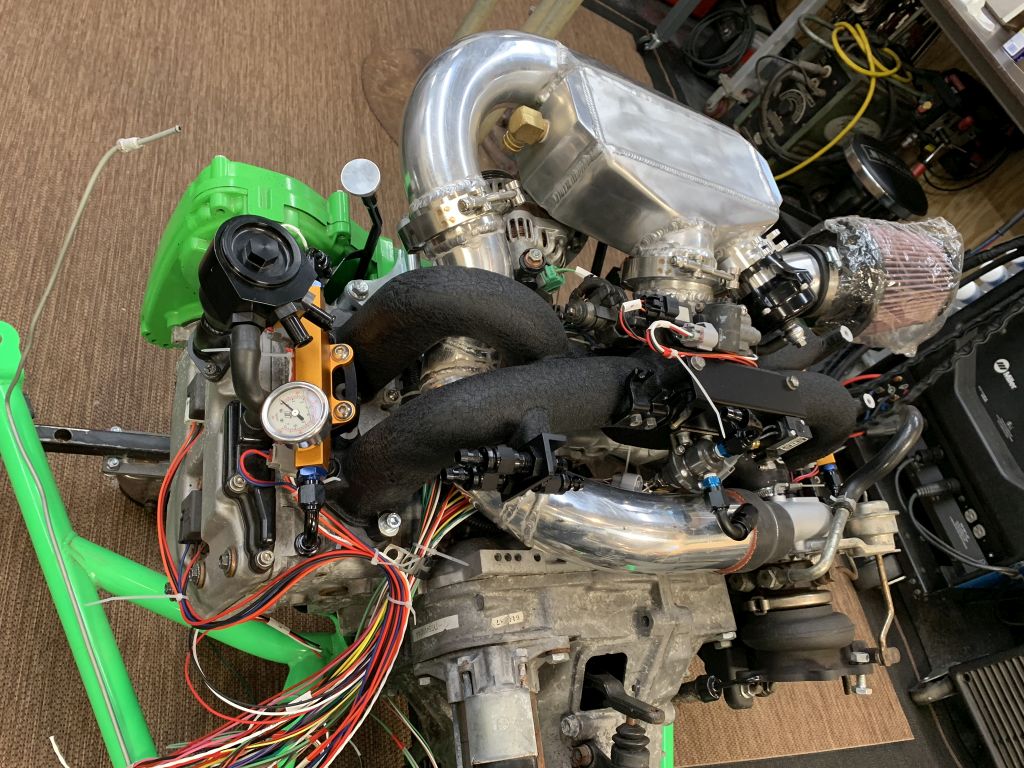
Time for the ecu side...setup and ready to go.
Some hours later. Could have been quicker but weather pack connectors are really fussy to properly crimp on the seal. 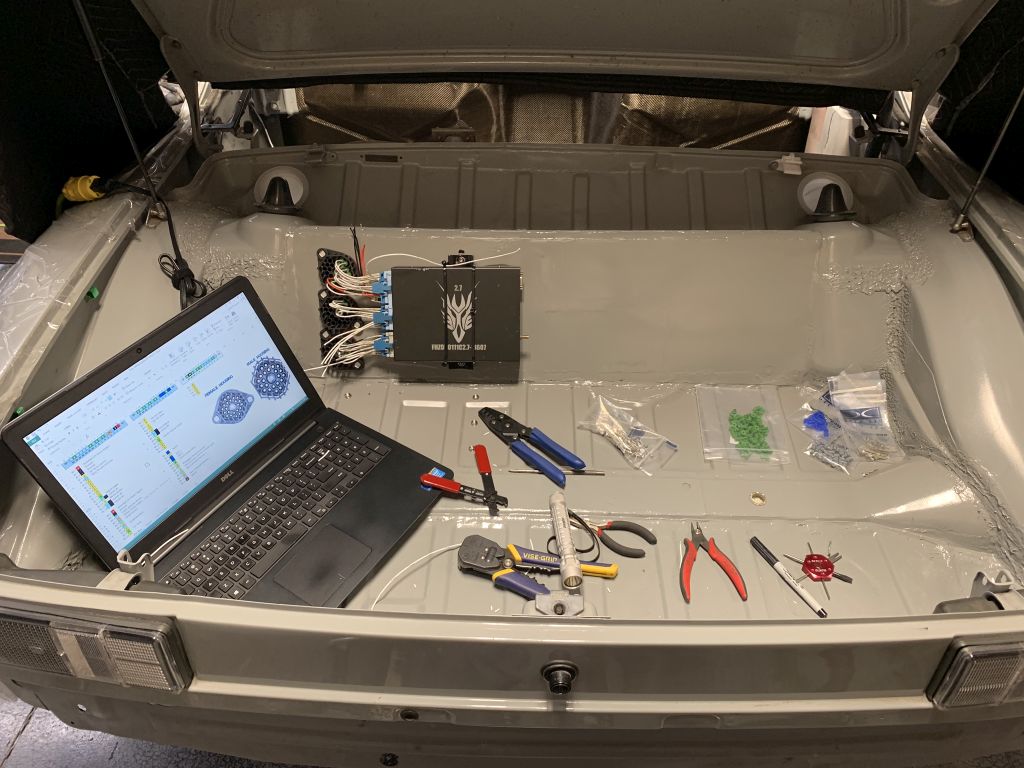
Lets vote...does Grey need a party mode? 
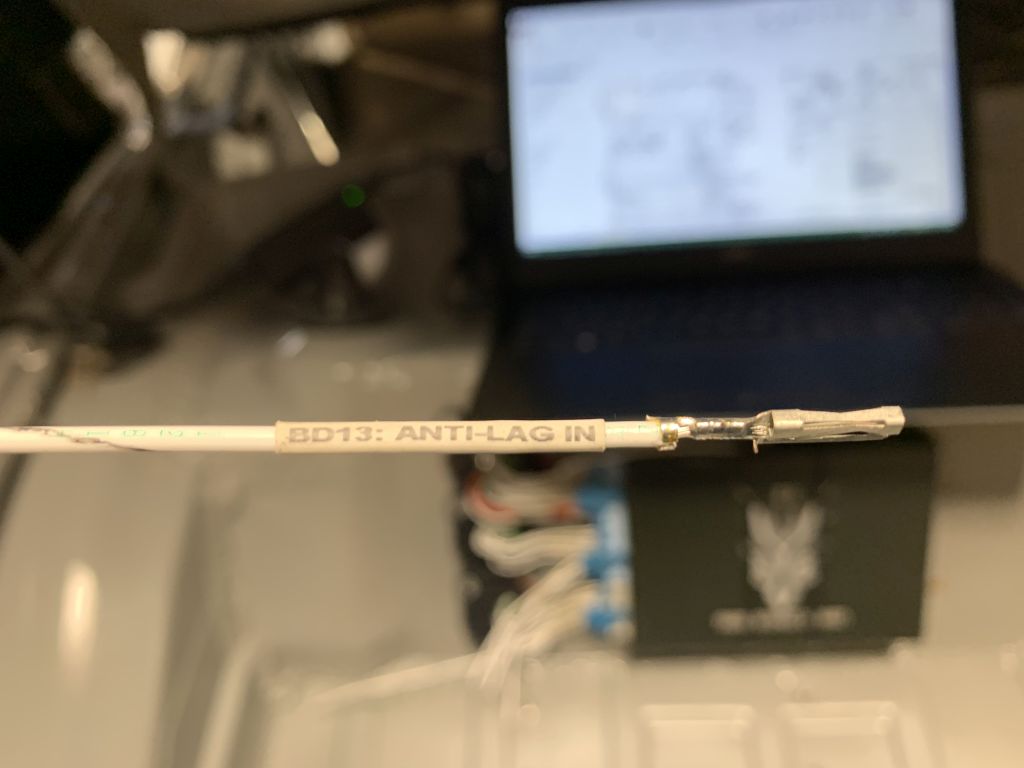
Posted by: theer Apr 4 2019, 08:20 PM
I vote YES for pahty mode!
Posted by: 914forme Apr 5 2019, 11:22 AM
to ANTILAG
Posted by: Amenson Apr 5 2019, 11:37 AM
to ANTILAG
It would at least put a quick end to the turbo so that Tom would be forced to upgrade.
Posted by: mepstein Apr 5 2019, 12:37 PM
Please explain this for the non turbo people like me.
Nevermind - looked it up on Wikipedia
Posted by: CptTripps Apr 5 2019, 04:18 PM
Yes. He should nuke it so the car is worthless and I can buy it back for $1.
Man, I remember programming the heat-shrink printer with all of those wraps. Then making sure I had the right one with the right wire. Then crimping all the wires. What a royal pain in the ass. I hope it made it easier for you, though!
Posted by: Amenson Apr 5 2019, 09:15 PM
Yes. He should nuke it so the car is worthless and I can buy it back for $1.
Man, I remember programming the heat-shrink printer with all of those wraps. Then making sure I had the right one with the right wire. Then crimping all the wires. What a royal pain in the ass. I hope it made it easier for you, though!
Labels make the world go round!
With the ECU wired and the engine completely terminated it was time for the bulkhead connectors. I was really struggling to figure out how to wire the connectors neatly without bring stuck in the engine bay for hours. Now that I did it the solution seems super obvious but it took a lot of mental energy to get here. I made a bracket off of the trans mount to the chassis side of the connectors. Pulled it out and bolted it to the cradle.
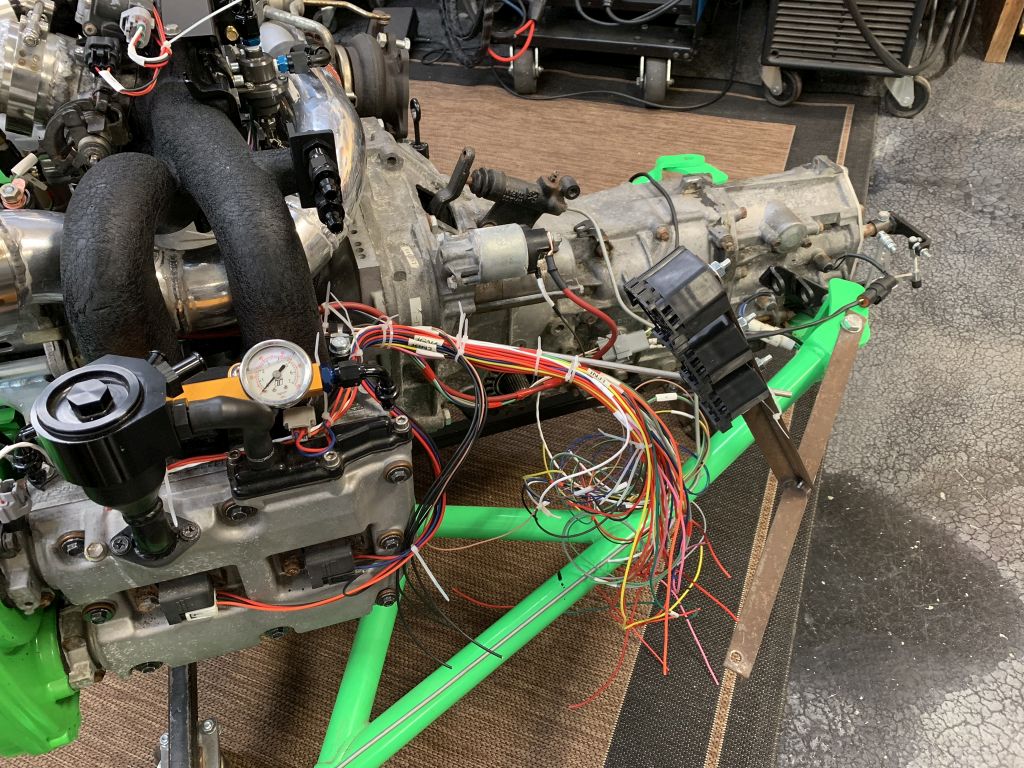
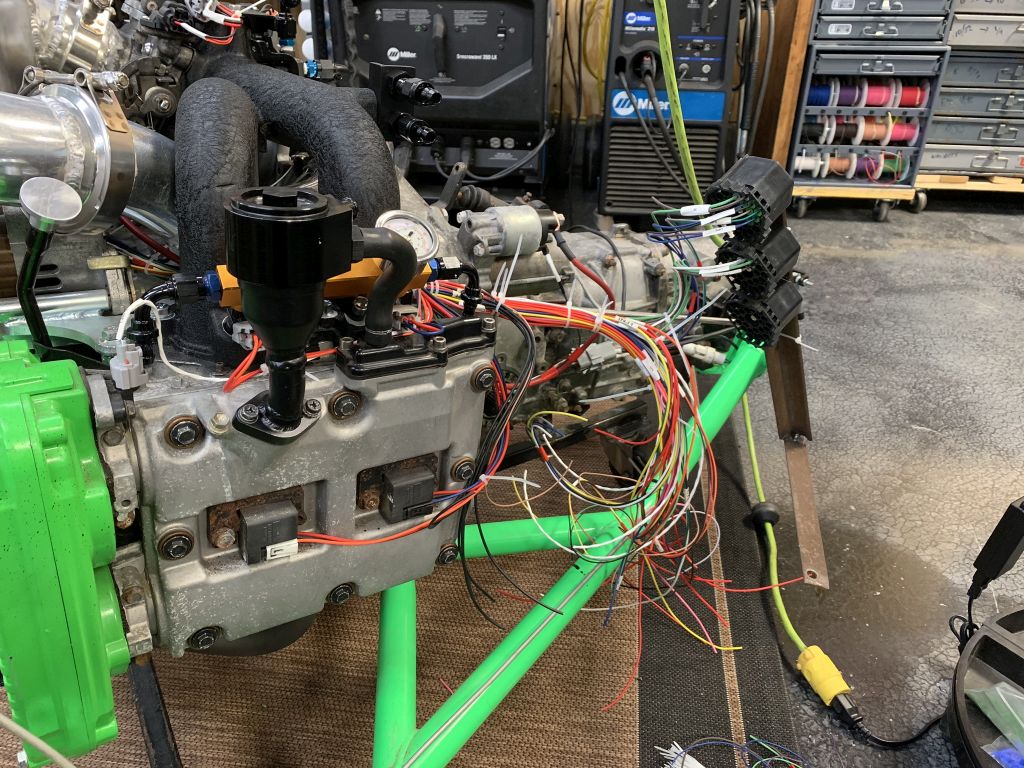
Posted by: Amenson Apr 7 2019, 09:14 PM
Much cutting, stripping, labeling, crimping later and the engine is fully terminated.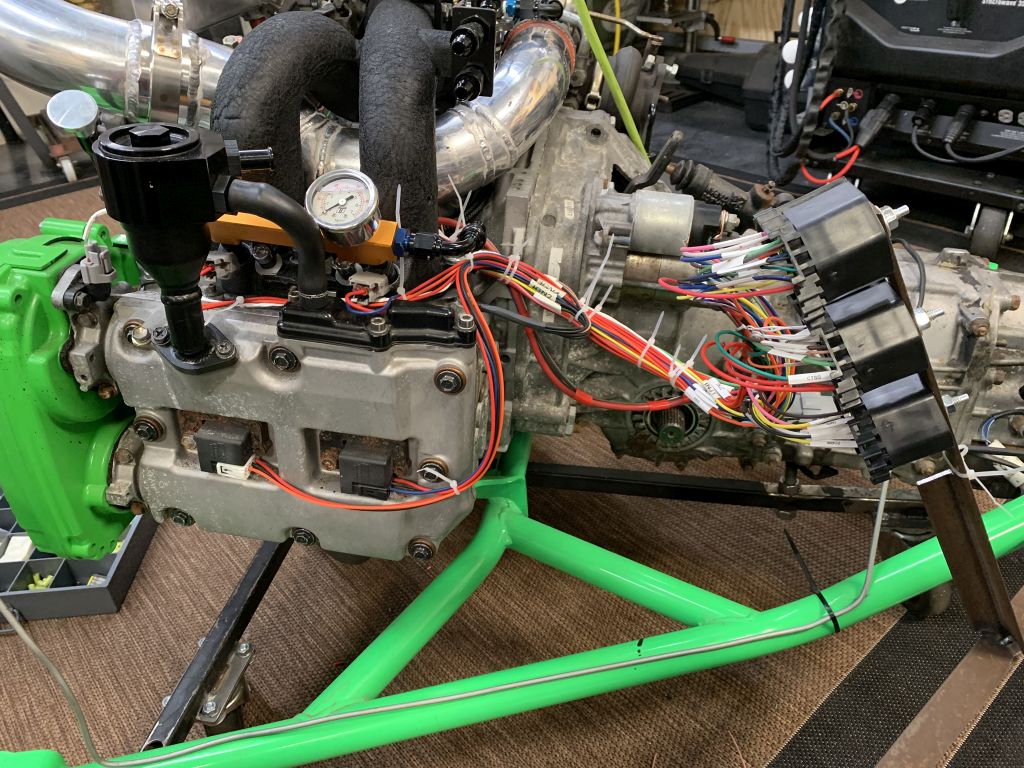
Dime bag of adulthood.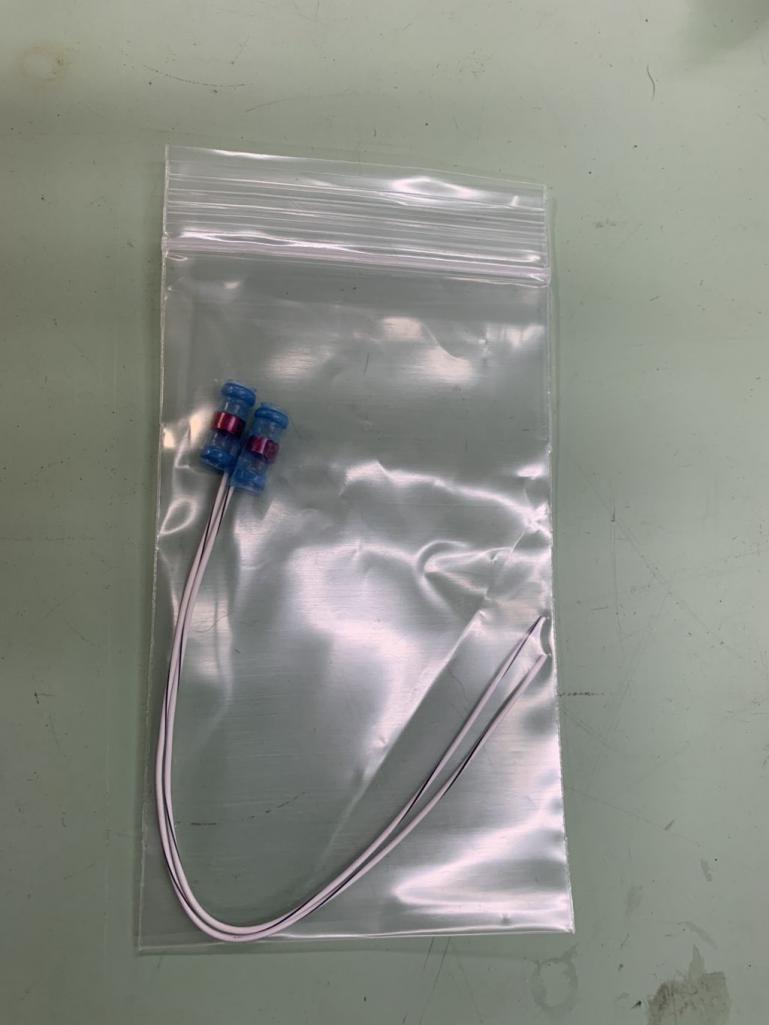
Those go over a small section of the braided shield and are heat shrunk. 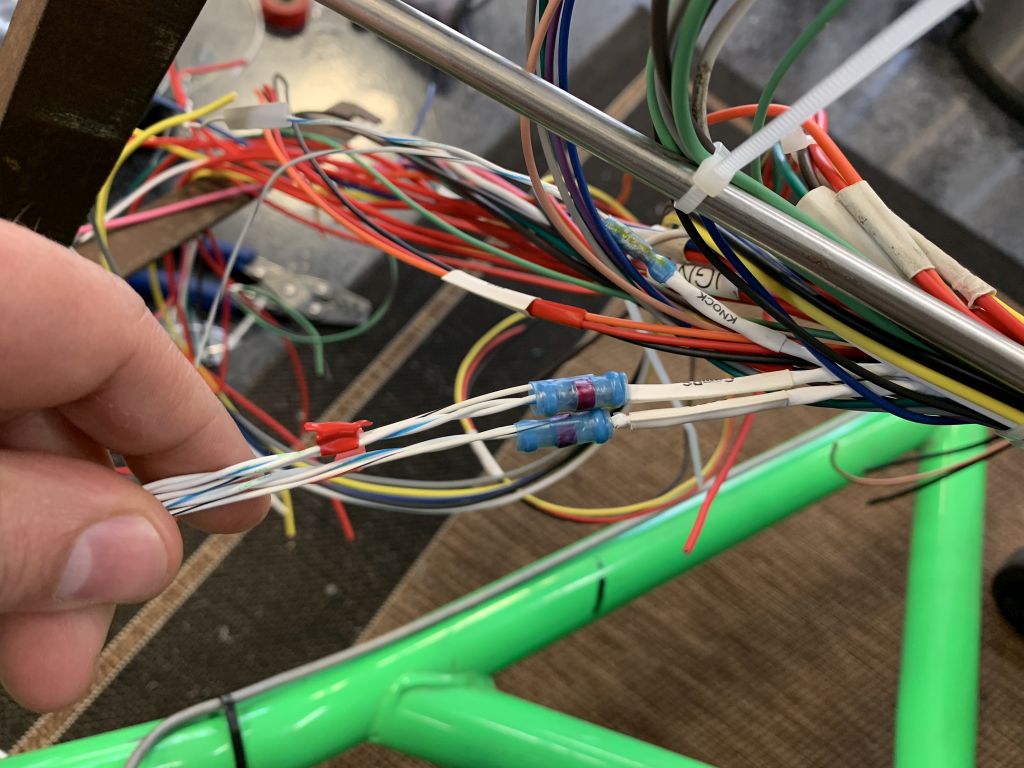
The ring of solder melts connecting the lead to the shield. Life was so much simpler when proper wiring included the use of bullet connectors "crimped" onto the wire with channel lock pliers.
Next the harness comes out and get wrapped.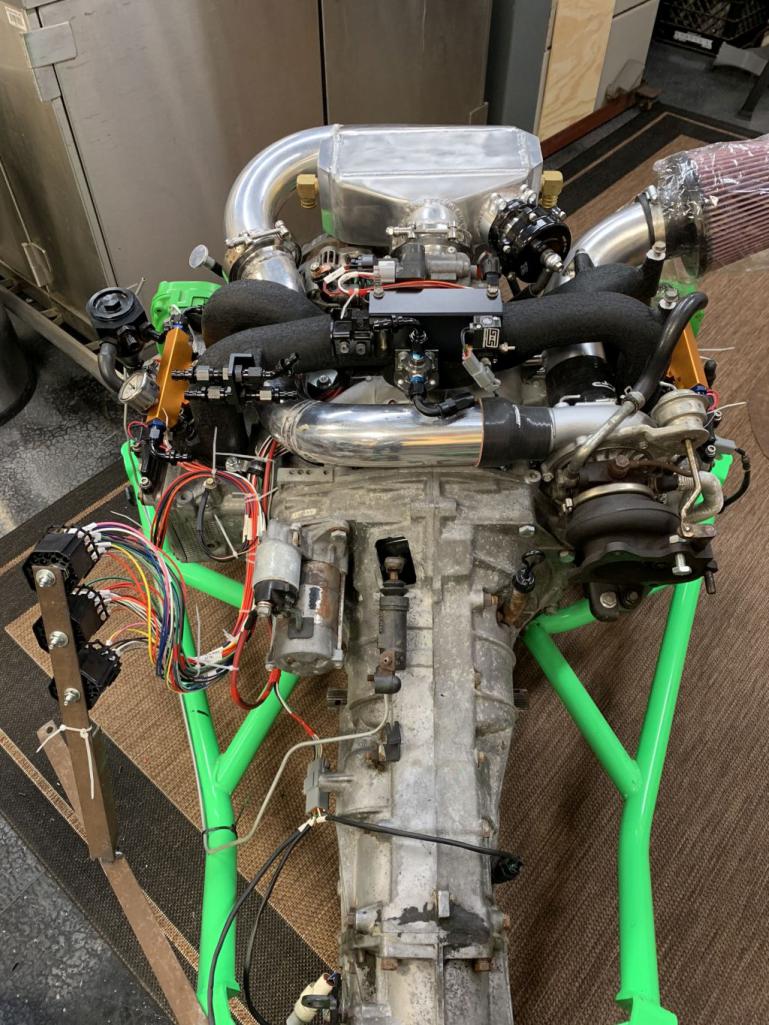
Also painted this guy.
And powered up the ecu. It was a little cranky when I first powered up and freaked me out a bit. Turned out that the firmware on the ECU didn't like the updated version of the tuning SW. All better now.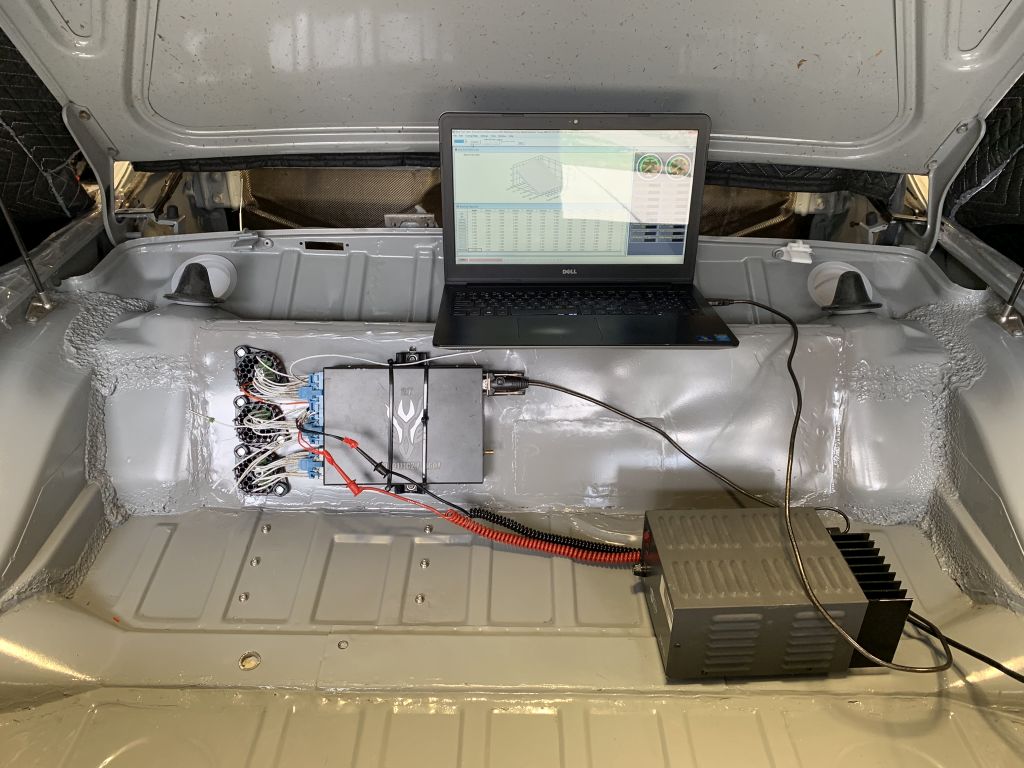
Posted by: CptTripps Apr 8 2019, 07:50 AM
That all looks SO outstanding. Great job, as ALWAYS, Scott.
Posted by: jd74914 Apr 8 2019, 08:27 AM
Dime bag of adulthood.
Those shield terminators are awesome. So much easier than soldering directly to the shield or forcing it into a pin.
Just out or curiosity, why did you decide on the WeatherPack bulkhead vs. say a Deutsch HDP20?
Posted by: Amenson Apr 8 2019, 08:57 AM
Dime bag of adulthood.
Those shield terminators are awesome. So much easier than soldering directly to the shield or forcing it into a pin.
Just out or curiosity, why did you decide on the WeatherPack bulkhead vs. say a Deutsch HDP20?
Why did we go with WeatherPack...back when I was discussing the bulkhead idea with Doug I just didn't know that it existed. I was familiar with WeatherPack and the higher end motorsport stuff. We went with WeatherPack due to cost and general availability. I have since fallen in love with the DT series and use it exclusively whenever I can't use an OEM connector. If I were to start over, HDP20 would be used.
Posted by: jd74914 Apr 8 2019, 12:19 PM
Why did we go with WeatherPack...back when I was discussing the bulkhead idea with Doug I just didn't know that it existed. I was familiar with WeatherPack and the higher end motorsport stuff. We went with WeatherPack due to cost and general availability. I have since fallen in love with the DT series and use it exclusively whenever I can't use an OEM connector. If I were to start over, HDP20 would be used.
Gotcha. That's why was curious-I used to use WeatherPack stuff (vs. the mil spec we use at work) and once discovering the DT series never went back. I'm also a huge fan of the solid pins vs. the open contacts. Somewhat expensive, but assembly is so much faster with the indent crimping tool.
Posted by: Amenson Apr 8 2019, 09:24 PM
Why did we go with WeatherPack...back when I was discussing the bulkhead idea with Doug I just didn't know that it existed. I was familiar with WeatherPack and the higher end motorsport stuff. We went with WeatherPack due to cost and general availability. I have since fallen in love with the DT series and use it exclusively whenever I can't use an OEM connector. If I were to start over, HDP20 would be used.
Gotcha. That's why was curious-I used to use WeatherPack stuff (vs. the mil spec we use at work) and once discovering the DT series never went back. I'm also a huge fan of the solid pins vs. the open contacts. Somewhat expensive, but assembly is so much faster with the indent crimping tool.
The best thing about the solid pins is that you can put the heat shrink label over them when you forget to put it on before crimping.
The wrap ferry showed up tonight!
I left the transition into the bulkhead connectors free just in case I need to swap some locations.
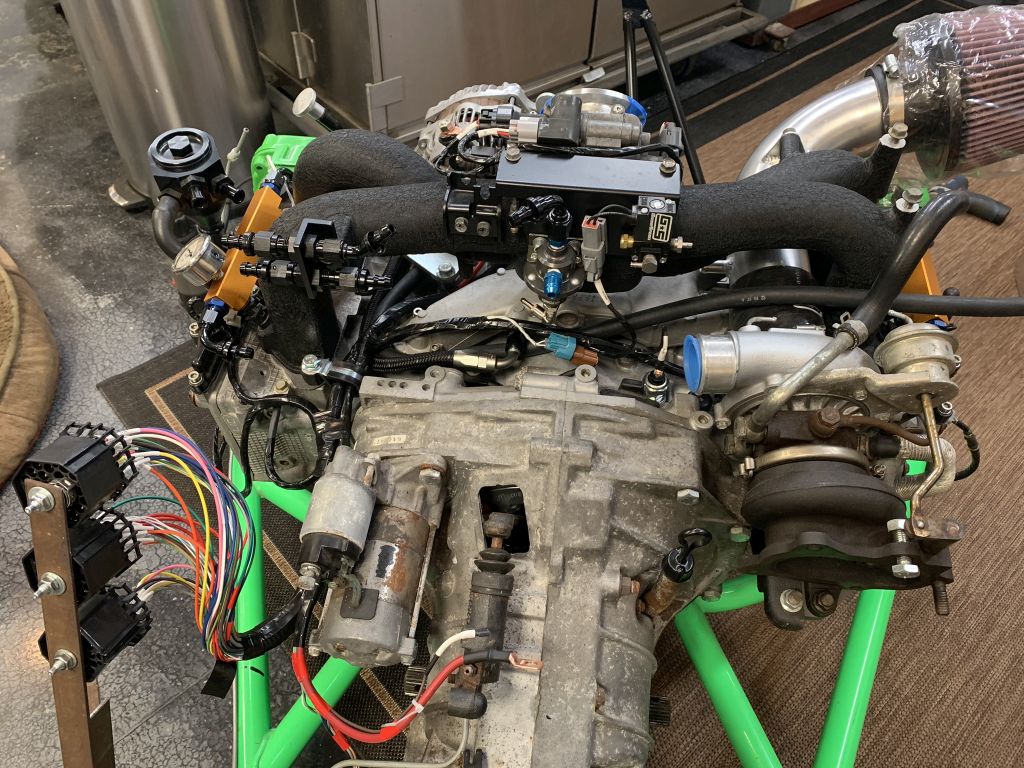
Karmann the garage hound says that it is time to go inside.
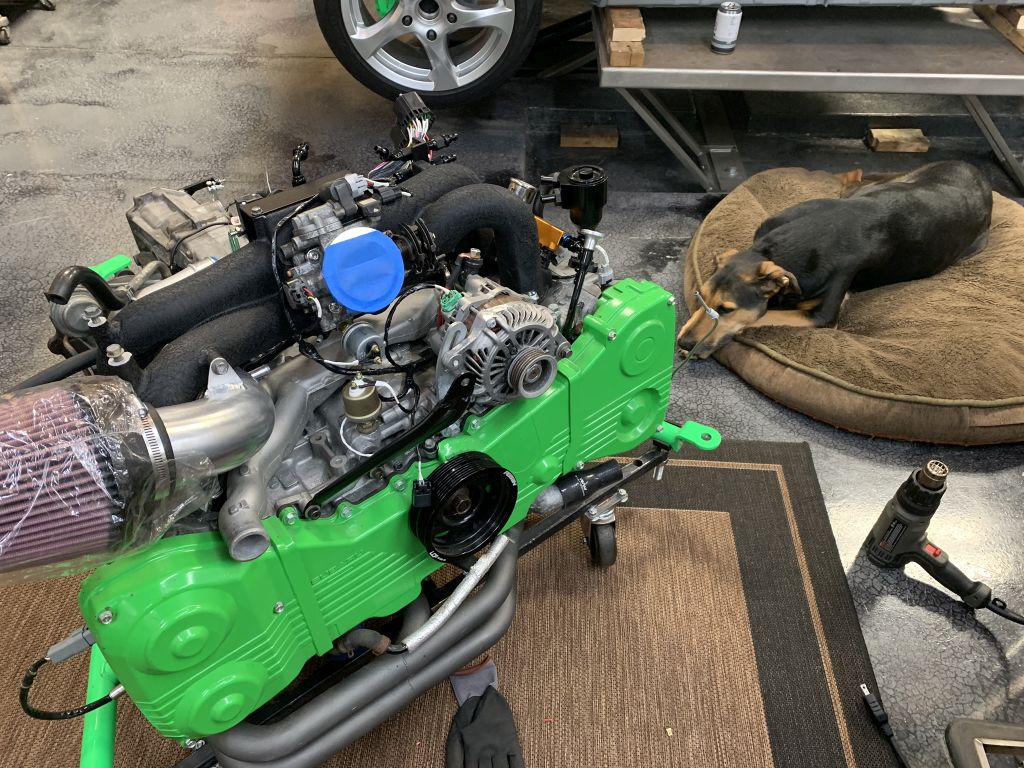
Posted by: 914forme Apr 9 2019, 01:04 PM
Great to hear! thats really soon. Thanks for invite i will look you up when we come up.
I heard from a local thst the cars and coffee scene is changed due to the coffee joint Fuel Cincinnati closed, did they find a new place to meet? There were a lot of really nice cars last time i was there.
@http://www.914world.com/bbs2/index.php?showuser=11106 The Porsche crowd is now hanging out at the Liberty Center Parking lot across from Starbucks for the cars and coffee. I understand the coffee part is subject to taste.
Posted by: DRPHIL914 Apr 9 2019, 08:23 PM
Great to hear! thats really soon. Thanks for invite i will look you up when we come up.
I heard from a local thst the cars and coffee scene is changed due to the coffee joint Fuel Cincinnati closed, did they find a new place to meet? There were a lot of really nice cars last time i was there.
@http://www.914world.com/bbs2/index.php?showuser=11106 The Porsche crowd is now hanging out at the Liberty Center Parking lot across from Starbucks for the cars and coffee. I understand the coffee part is subject to taste.
@http://www.914world.com/bbs2/index.php?showuser=2388 thanks , good to know, might have to check it out when we come up
Posted by: Amenson Apr 9 2019, 08:58 PM
Engine is just about finished. Went through and checked/marked all of the fasteners. Gave the IC/and piping a rub down with green and white pads to even out the finish and installed all everything.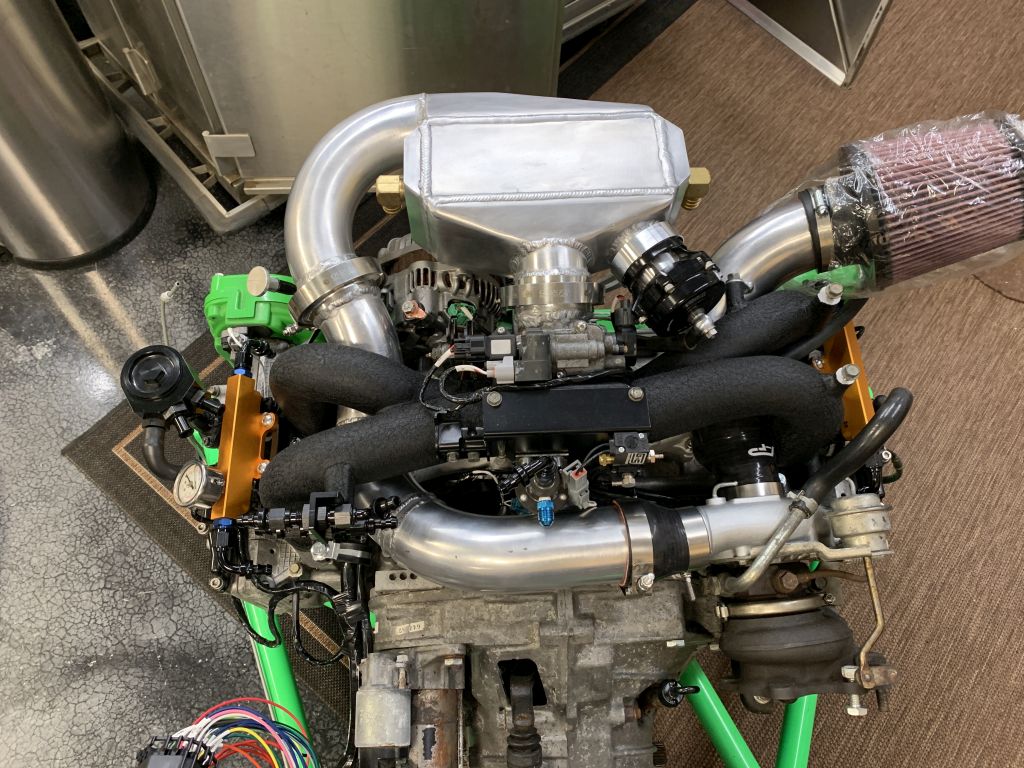
...except the fuel line. I wrestled with push lock fittings for an hour. If anyone is thinking that you are going to save money using push lock over proper AN fittings with fuel lines...don't. You will just end up buying the $300 assembly tool like I just did. Push lock is OK for the lower pressure rated hose but apparently impossible with proper fuel line.
Posted by: Amenson Apr 15 2019, 09:09 PM
The push lock pusher arrived and while substantially easier than without it (as in possible to assemble)...it was still remarkably difficult. I can confidently conclude that this is a really bad application for the product. Anyways, it turned out really well.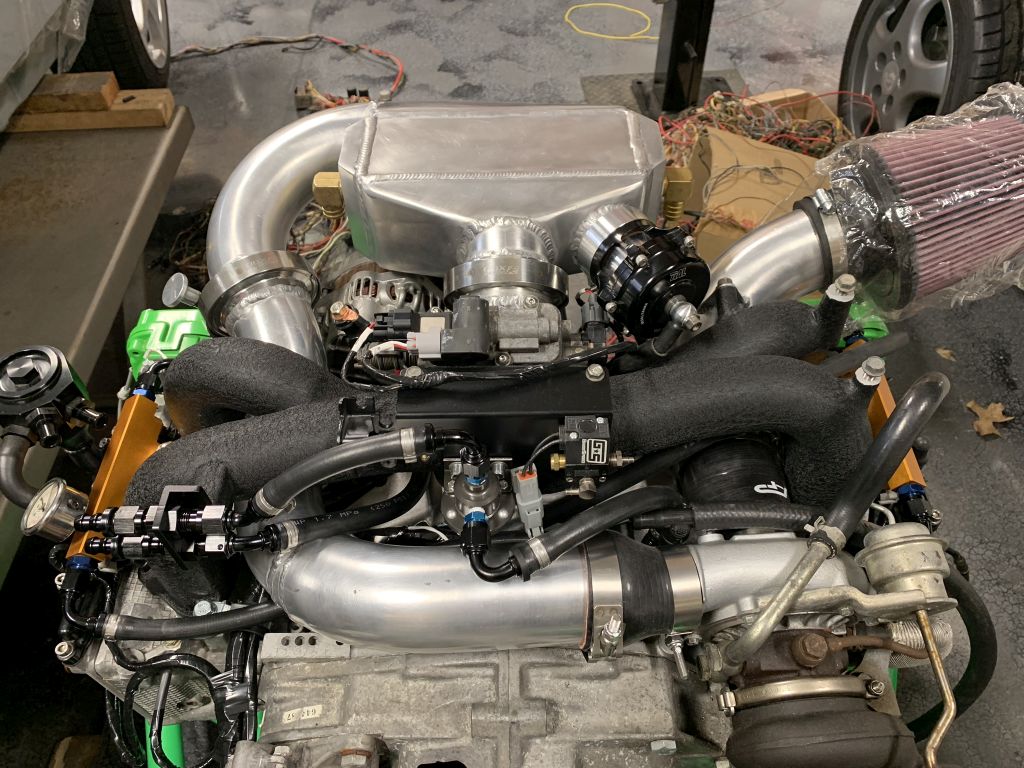
Ohhh, shiny.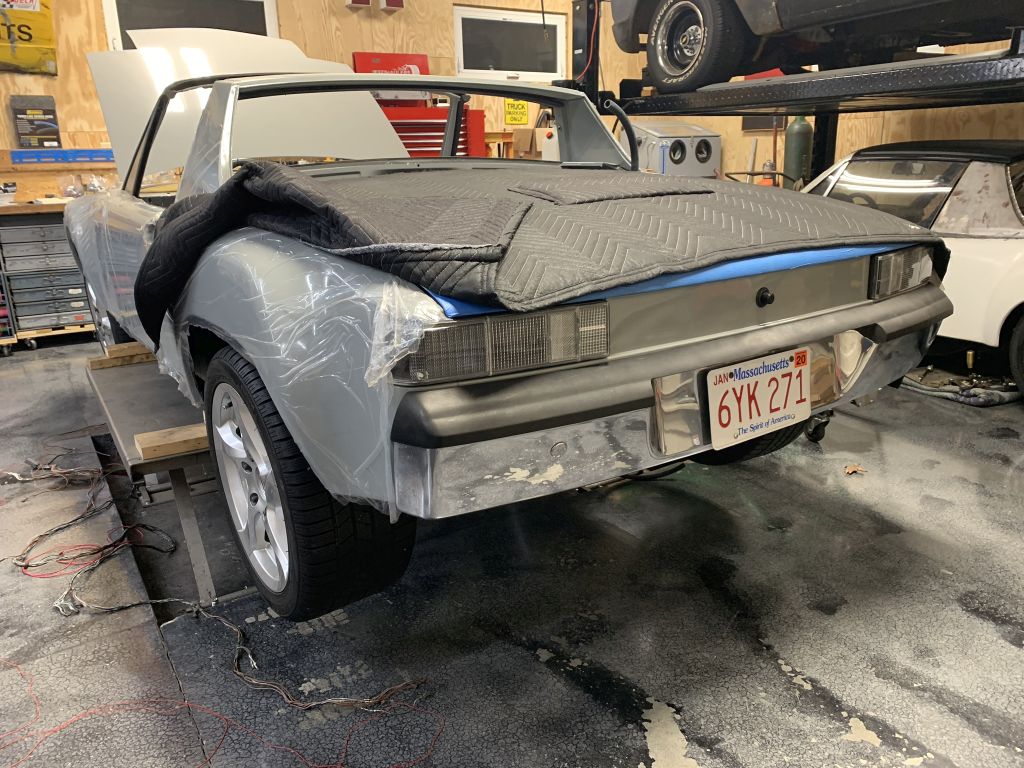
And more wiring. Much, much more wiring. Pretty sure that I doubled the wires in the harness, not counting the connections between the ECU/engine.
It is ready to wrap and go into the car but I want to go through it one last time to make sure that I didn't miss any wires. 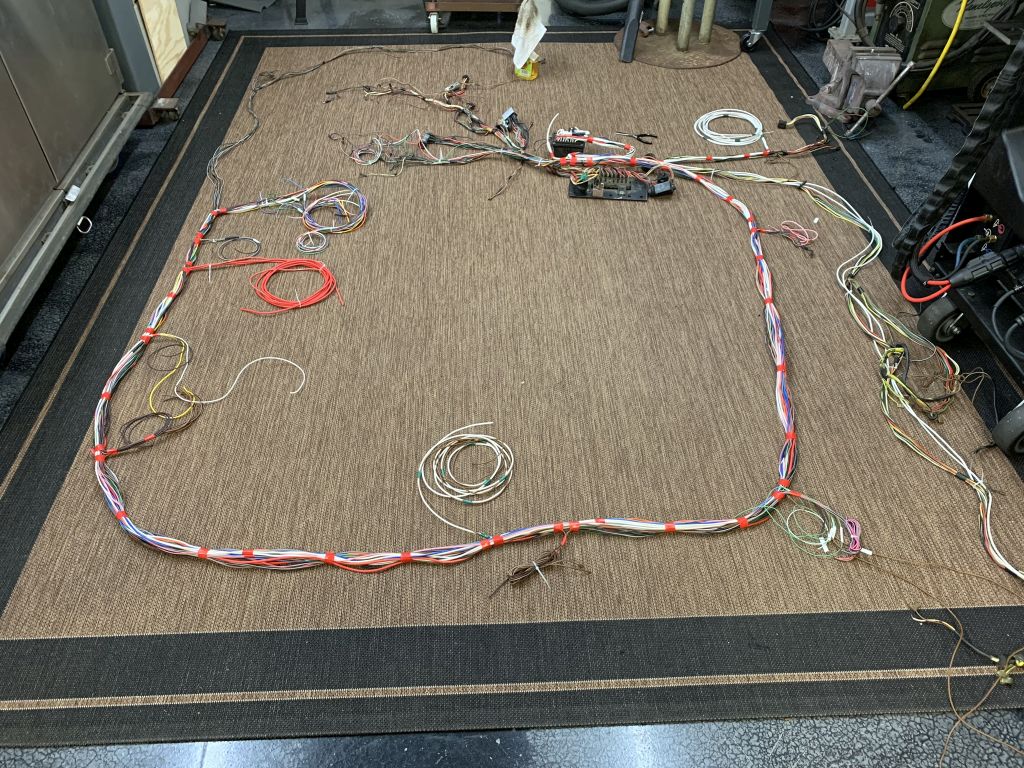
Also almost doubled the fuses and relays. 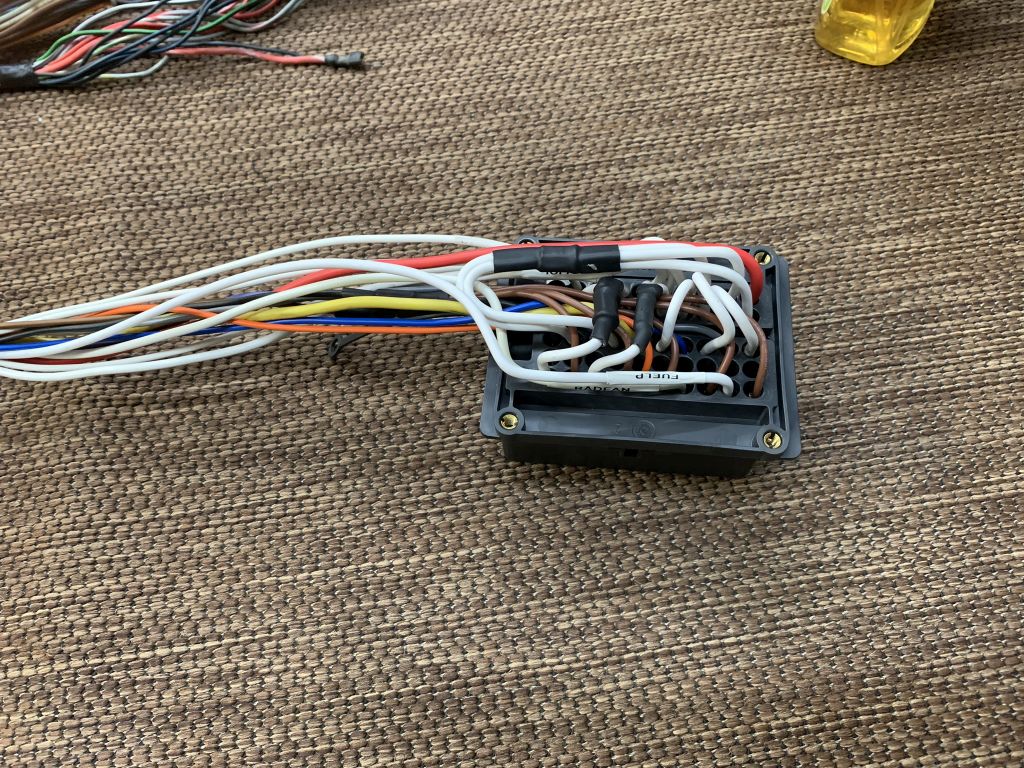
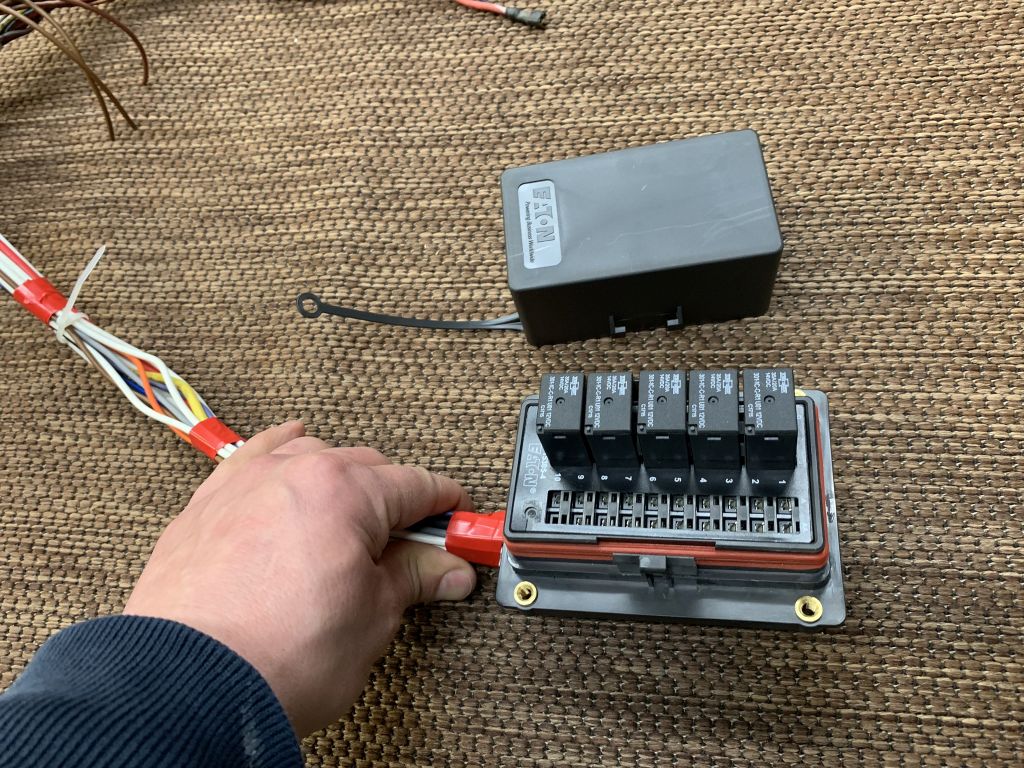
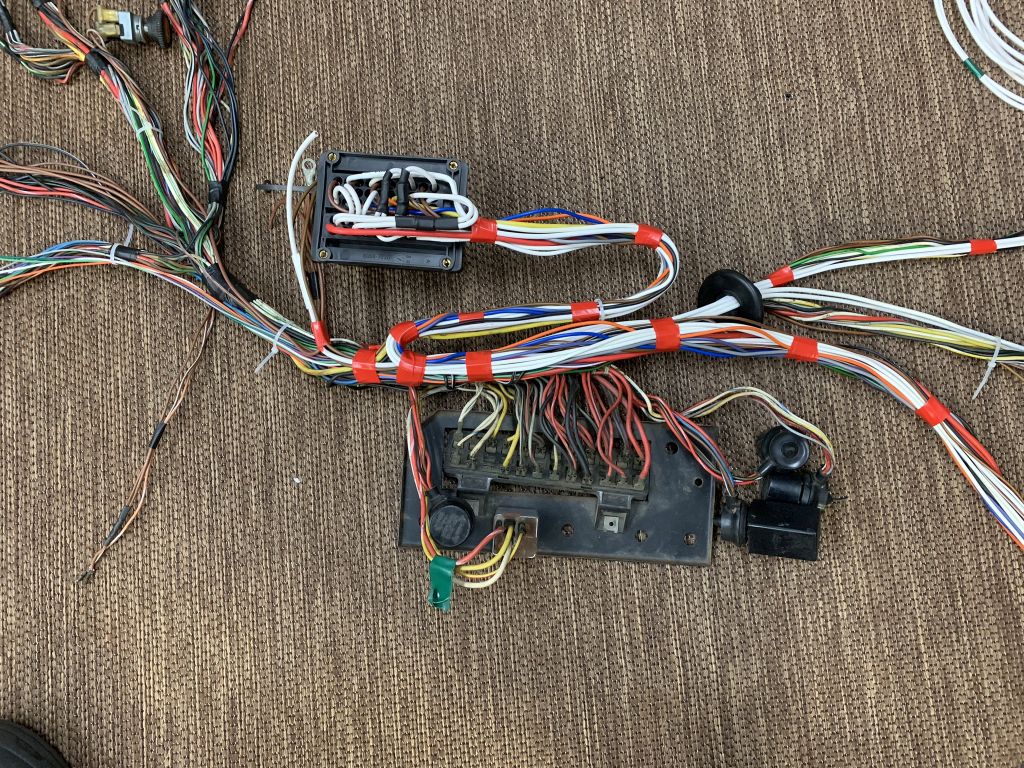
There were a few areas of the harness that I extended to get to the new ECU and I wanted to keep all of the original colors, luckily I have parts of 3 harnesses to pull wires from. Also fixed quite few overly dry and modified/cut/nicked wires.
Posted by: CptTripps Apr 16 2019, 06:00 AM
This car is going to be an absolute masterpiece. I can't even believe it.
Posted by: Amenson Apr 23 2019, 09:04 PM
In the last post I left the harness complete but wanted to take a night to sleep on it before wrapping. Good think I did, I missed a couple of grounds and one power.
Much has happened since then, will share what I took pictures of.
Harness was completely wrapped except for a few areas to make it easier to get through the firewall grommet. Only have a picture of partial wrappage.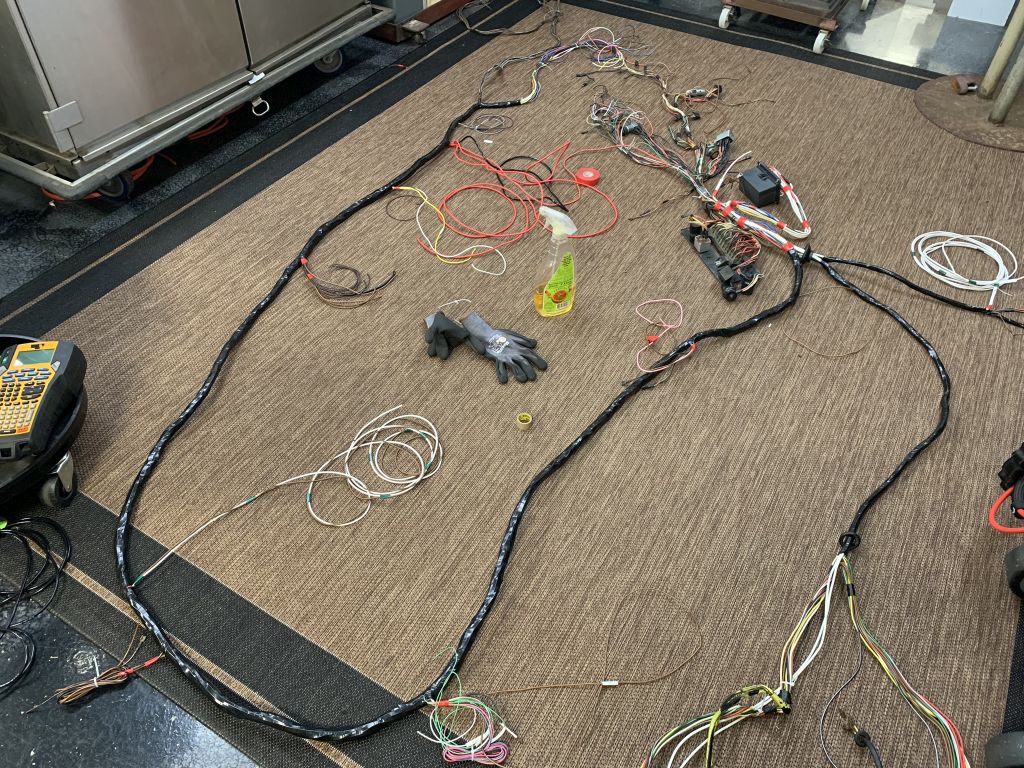
Removed a few random bracket leftovers and a few other unused bits of metal from this area and then repainted. Also cleaned up and painted the front of the longs that I modified.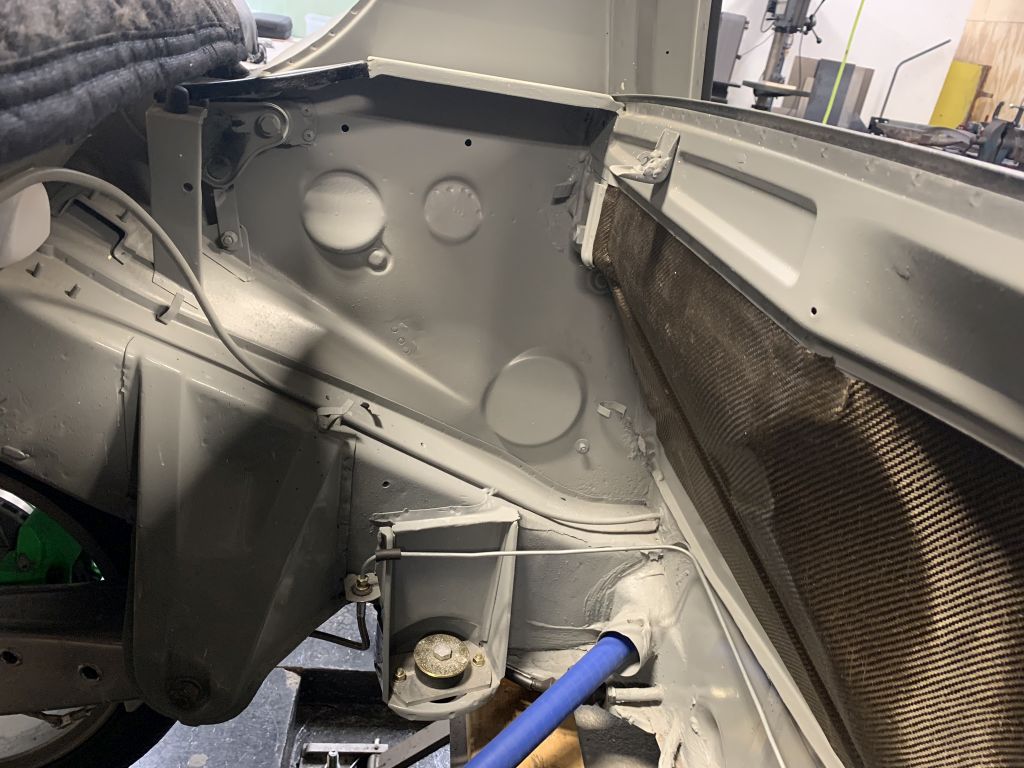
Skip forward a 4 day weekend and the harness is in place, fuel lines made for the engine compartment and other lines/wires organized and mounted.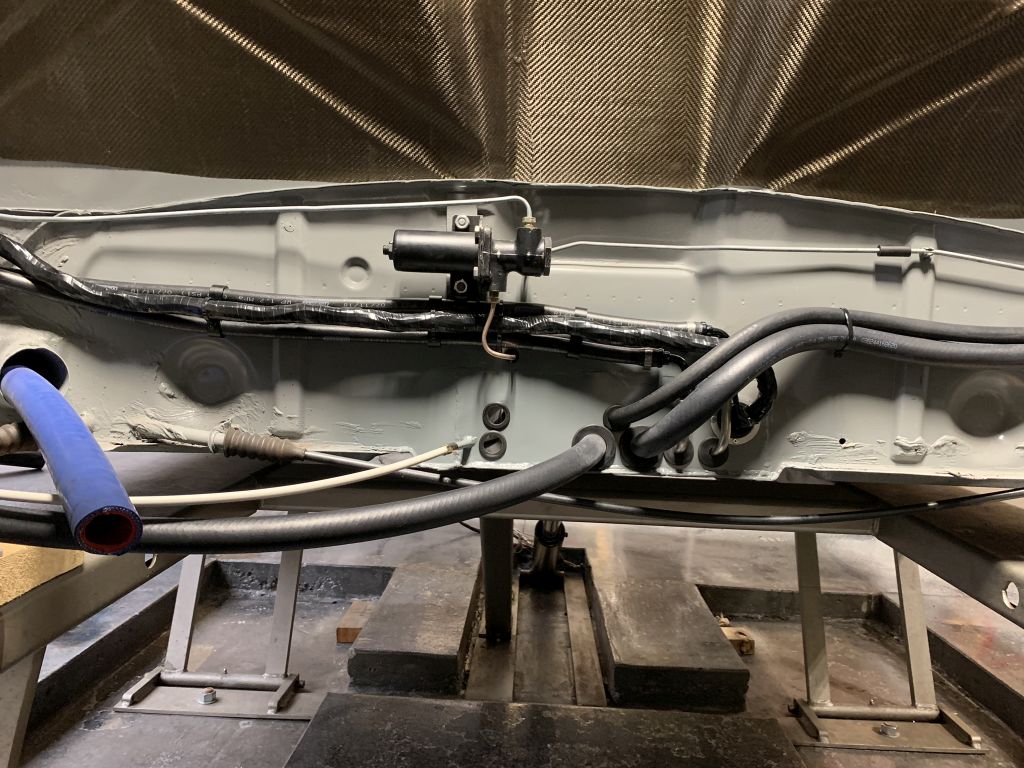
Everything is held in place with these ty-rap tabs rivet in place except the fuel lines which use these double clamps modified for a through bolt into a nutsert.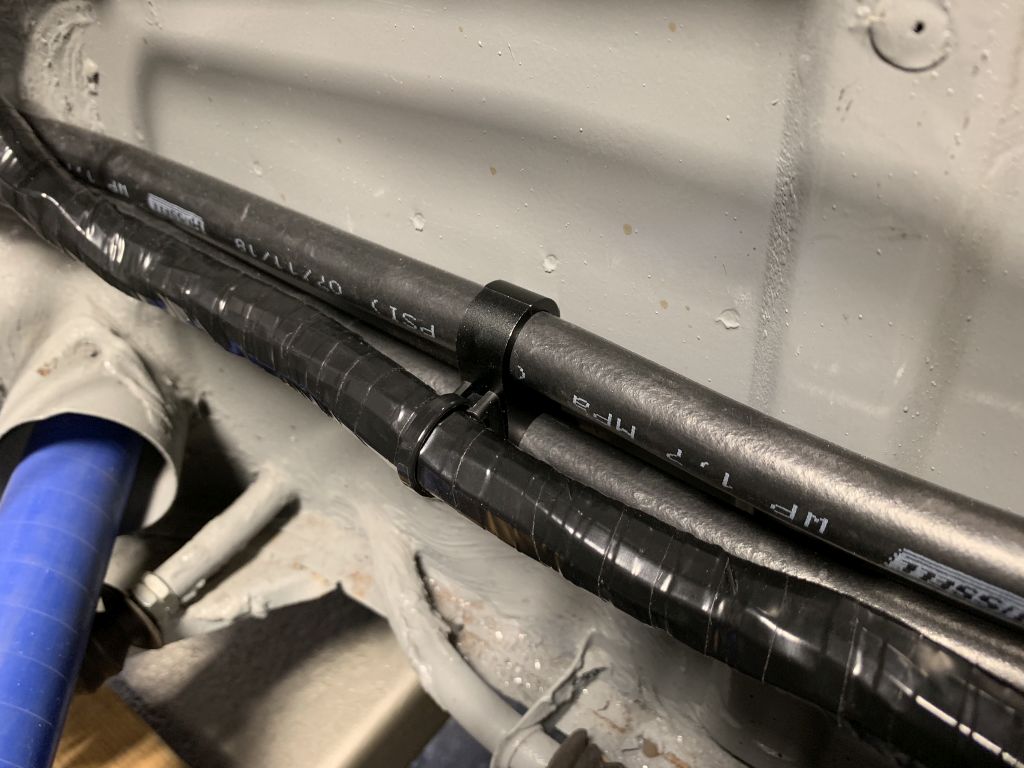
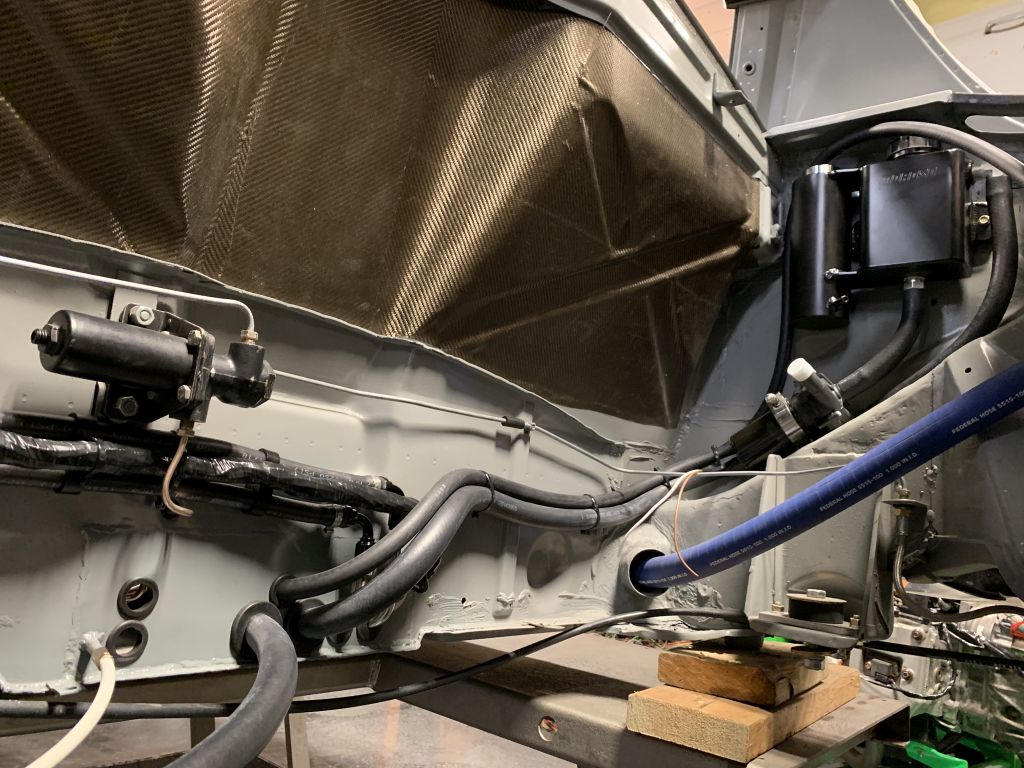
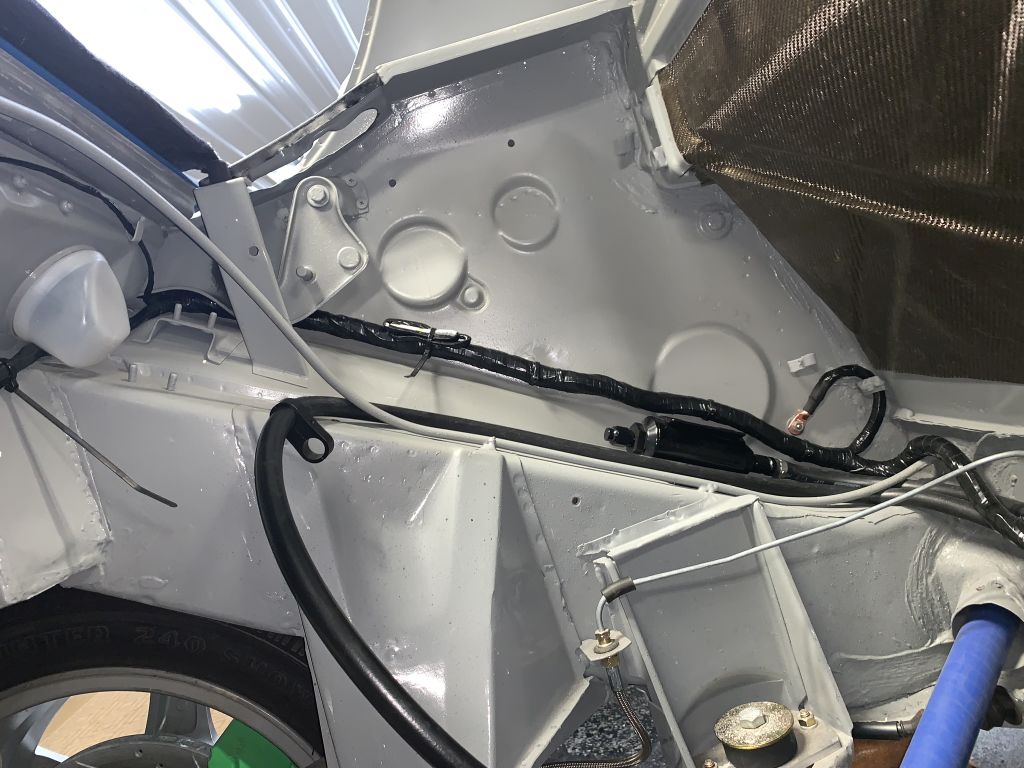
I added a number of things to the harness to make it easy to add features that the ecu supports that are not on the current to do list. Flex fuel connection in the engine compartment, clutch switch by the pedals, and several inputs for switches/dials by the shifter....(ecu has dial a boost capability )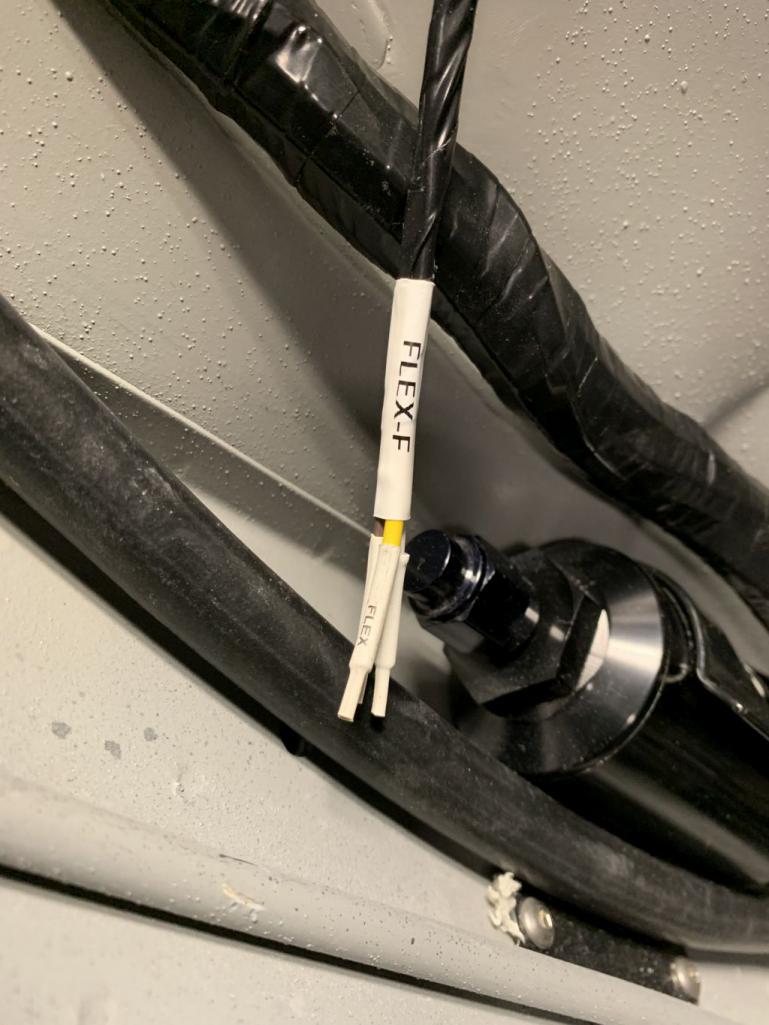
I measured off of a mostly complete original harness to get the positions of where the battery connections and ecu bundle would exit the harness but the area where the harness goes into the back trunk was a bit tighter than I anticipated and required quite a bit of rework to make right. I had to remove the trunk spring bracket and open up the passage into the rear trunk as well as unwrap and rework this area of the harness. Luckily I left enough extra wire.
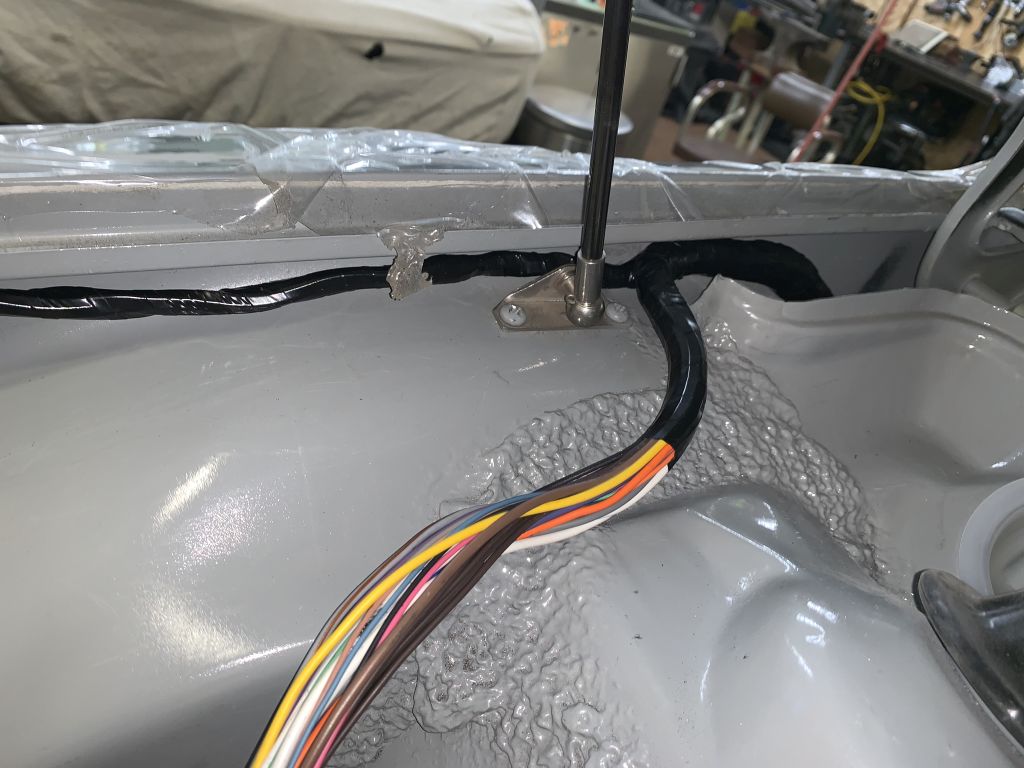
It was surprisingly fussy getting the harness to the stock locations. A few extra wires and a fully wrapped harness limited the flexibility quite a bit. Still not completely happy with it.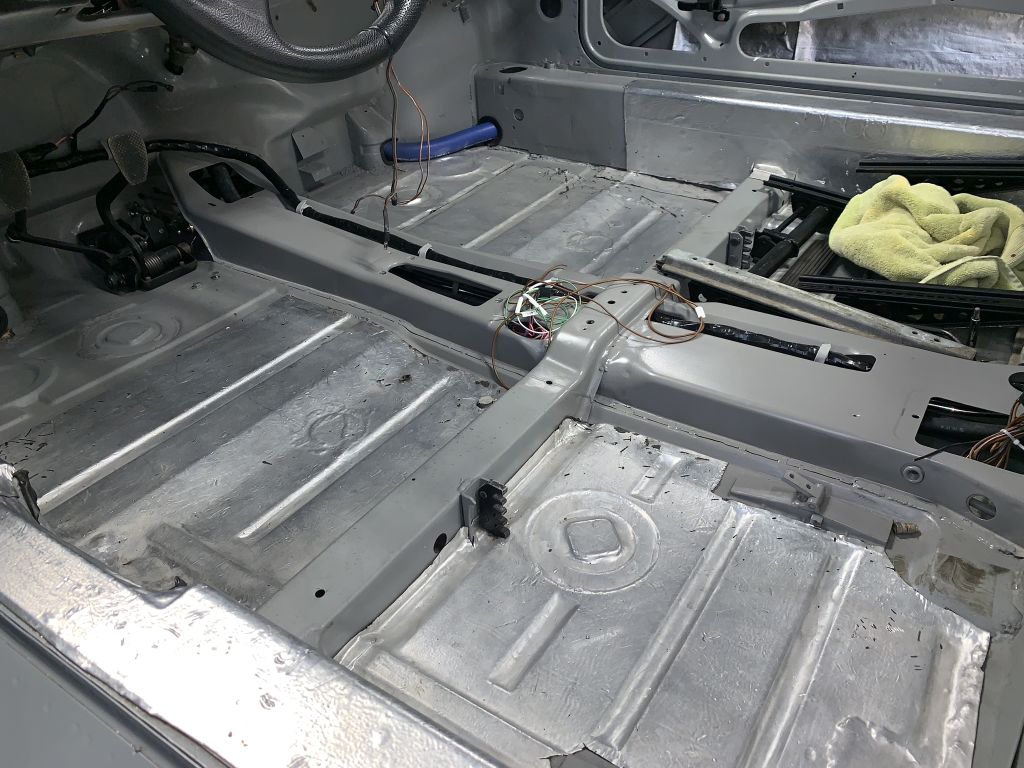
I left a bit too much of a service loop to the aux fuse/relay box.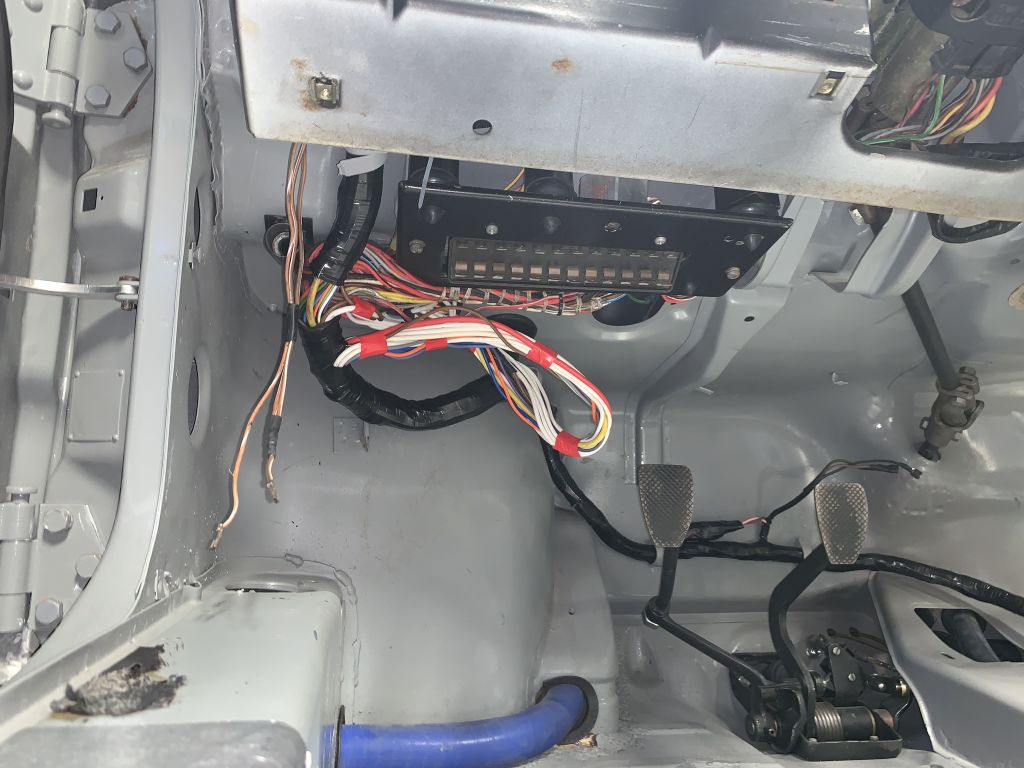
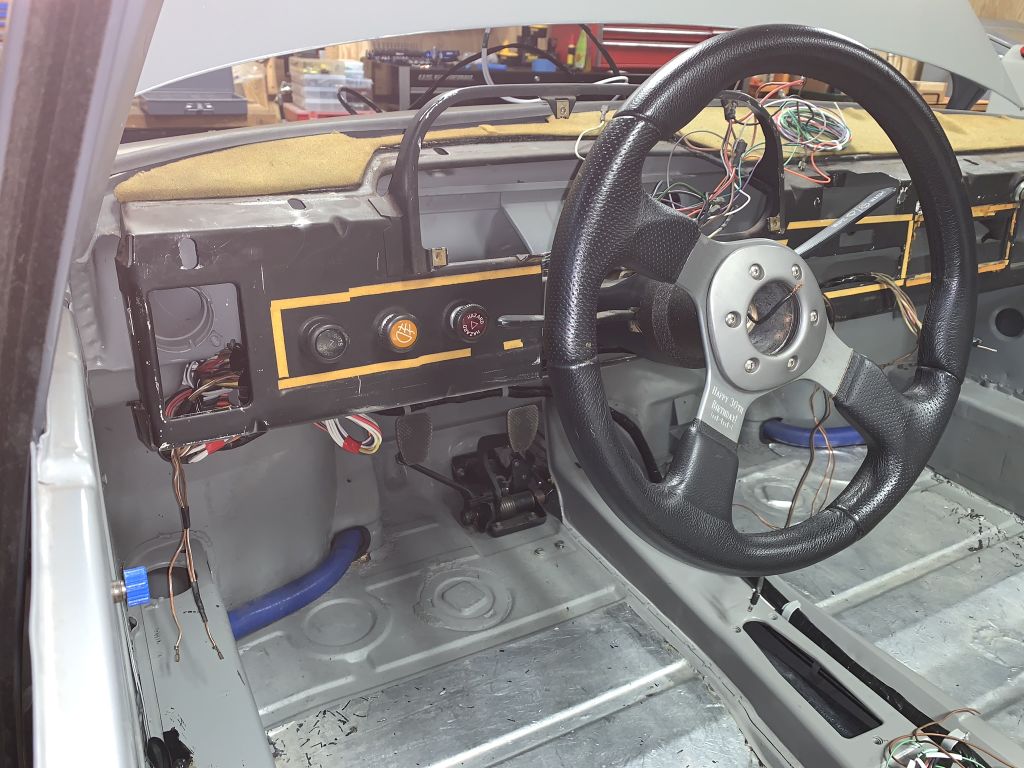
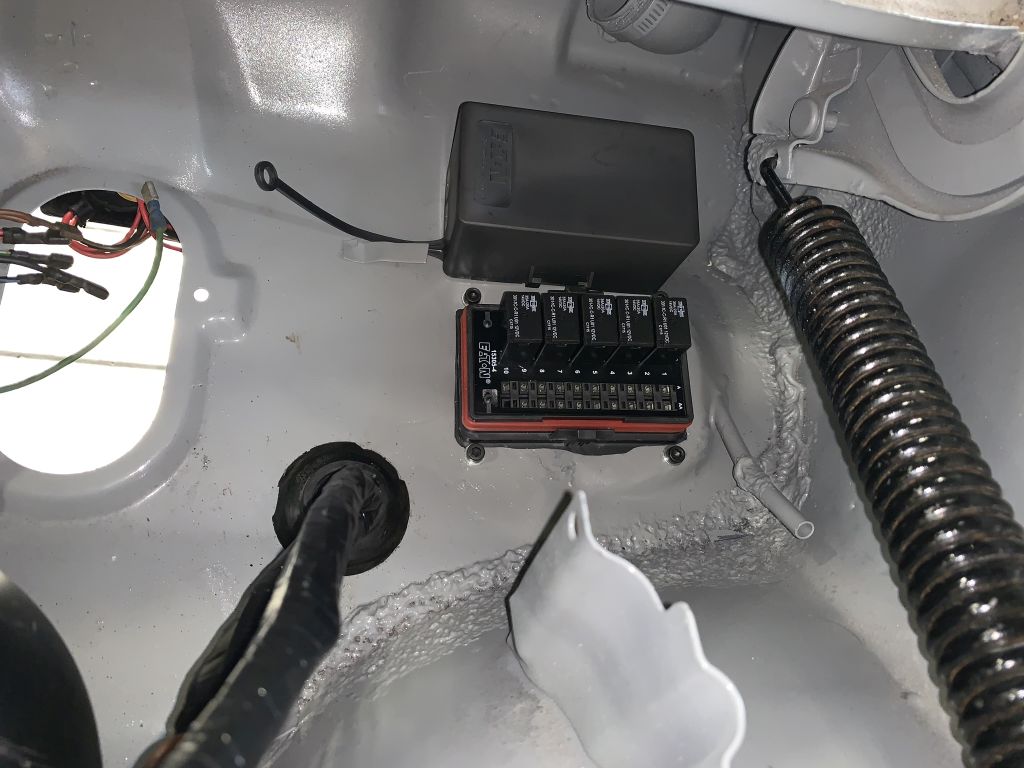
Posted by: CptTripps Apr 24 2019, 09:06 AM
Funny seeing my "Happy 30th Birthday" steering wheel there. lol
As always, great work Scott.
Posted by: 914forme Apr 24 2019, 07:07 PM
I am shocked that it still has the original fuse block. That Jwest engineering one would add a blade fuses to the operation instead of the old round ones.
Looks great, and a lot more progress since I last saw it before the 4 day weekend. Great work.
Posted by: theer Jun 6 2019, 02:36 PM
Well, the car is now in Massachusetts. I drove out to Scott's last week to put some finishing touches on it for final delivery. Doug came down to give his blessing and a proper send-off.
Stephen brought the refurbed gauges and stayed very late on Friday to get them all hooked up. I'll share pictures in a bit. It's going to look awesome.
Still a long list of things to do, but all the BIG stuff is done! the motor starts and runs, but needs a final tune. Interior needs to be installed along with a bunch of little things (door handles, LED lights) I'll call final assembly.
I huge thank you to Scott for his meticulous work on finishing up someone else's project. He takes great pride in his work and it really shows. At every opportunity, he made suggestions of a "better" solution if there as one. I appreciate the extra effort on all the little things, which made more work for him, but were truly the right thing to do and will make working on everything easier down the road.
And a huge Thank You to Stephen for all his work on getting the Porsche gauges to talk to the Subi ECU (including a rare 930 tach with factory boost gauge.. so cool!).
Finally to Doug, who had to let the project go, but has always been available to answer questions and provide the history & context of all the decisions made over the years .
Thanks - I couldn't have done it without you... and I'll be needing more help getting her roadworthy this summer. Stay tuned.
Tom
Posted by: Dan the body guy Jun 6 2019, 03:25 PM
After only 4 years I must say if that car ever makes it back to Cleveland area somebody owes me a ride
Posted by: CptTripps Jun 11 2019, 01:42 PM
When you get it up and running, I'll be on the first plane to come get a ride. It was SO nice to see the engine running. Nearly brought a tear to my eye.
I'll second what Tom said aout Scott: He's quite literally the best there is.
Posted by: CptTripps Jun 19 2019, 03:08 PM
...and while I'm waiting patiently for the Tom to enjoy the car for a few years, I'm going to be spending some time on the "Dark Side" with my new friend.
Attached image(s)
Posted by: theer Jun 19 2019, 03:24 PM
Meh. It's just a NNARP, after all.
Congrats!
Posted by: CptTripps Jun 20 2019, 09:15 AM
Agreed. It’s no 914. Especially yours. It had the right stuff to satisfy my cravings while I wait for you to get bored with Grey though. ;-)
Posted by: CptTripps Jul 10 2019, 01:45 AM
Come on Tom! I KNOW you have updates for us...
Posted by: theer Jul 14 2019, 08:26 PM
Come on Tom! I KNOW you have updates for us...
Yep- I’ve been chasing gremlins.
1) surging idle. I spent hours trying to figure out why the idle would surge up and down, up and down. I was convinced it had to be the EMS since everything on the motor is new, right? Yeah, no. Turns out the idle air control valve was stuck (common problem on WRX motors). Scott had sent a spare in one of the boxes of part. Cleaned it up, replaced it , good to go. Happy little motor.
2) but wait... why is the battery voltage so low (10-11 volts)? Poke around with the voltmeter, sure enough the alternator is only putting out 11 volts at the power stud. Needs a new alternator, right? $83 next day delivery from Amazon. Out with the old, in with the new.... and no change.
Here’s a clue: I’m an idiot. Just like the 914, the WRX needs to have the eejit light circuit complete to excite the field, and make power (voltage). Installed the bulb for the gen light (thanks @http://www.914world.com/bbs2/index.php?showuser=10825 ) and now have a perfectly good spare alternator if my cheapo Amazon unit craps out.
Picture of both culprits:
[attachmentid=704763]

Posted by: theer Jul 14 2019, 08:30 PM
I also added a remote + post so I can jump/charge the battery without electrocuting myself. Probably won’t need this ever again, now that the alternator is working properly (see previous post)... 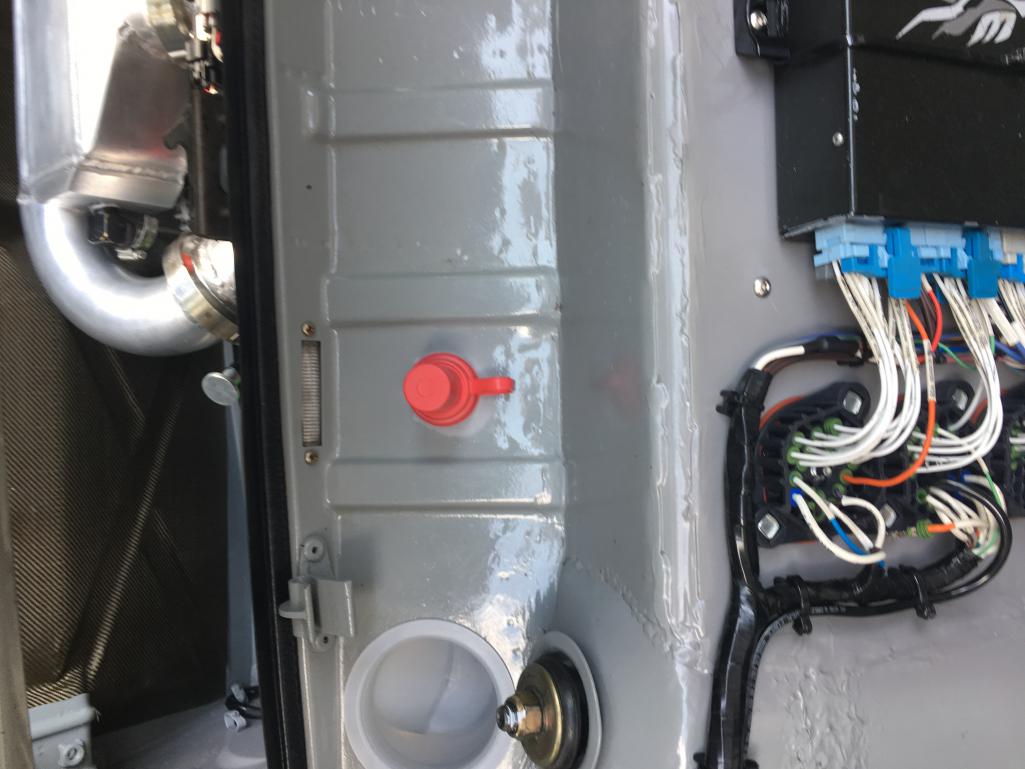
Posted by: theer Jul 14 2019, 08:41 PM
other misc (not picture worthy) tasks:
- installed Doug’s newly recovered seats. Very nice, but getting the tracks mounted to the seat bottoms was way more trouble than it needed to be.
- filled the coolant systems (engine and inter cooler).
- installed door handles (now with matching lock cylinders)
- installed various 914 Rubber seals
- AND thanks to @Spoke- installed a complete set of led lights- front and rear (picture worthy)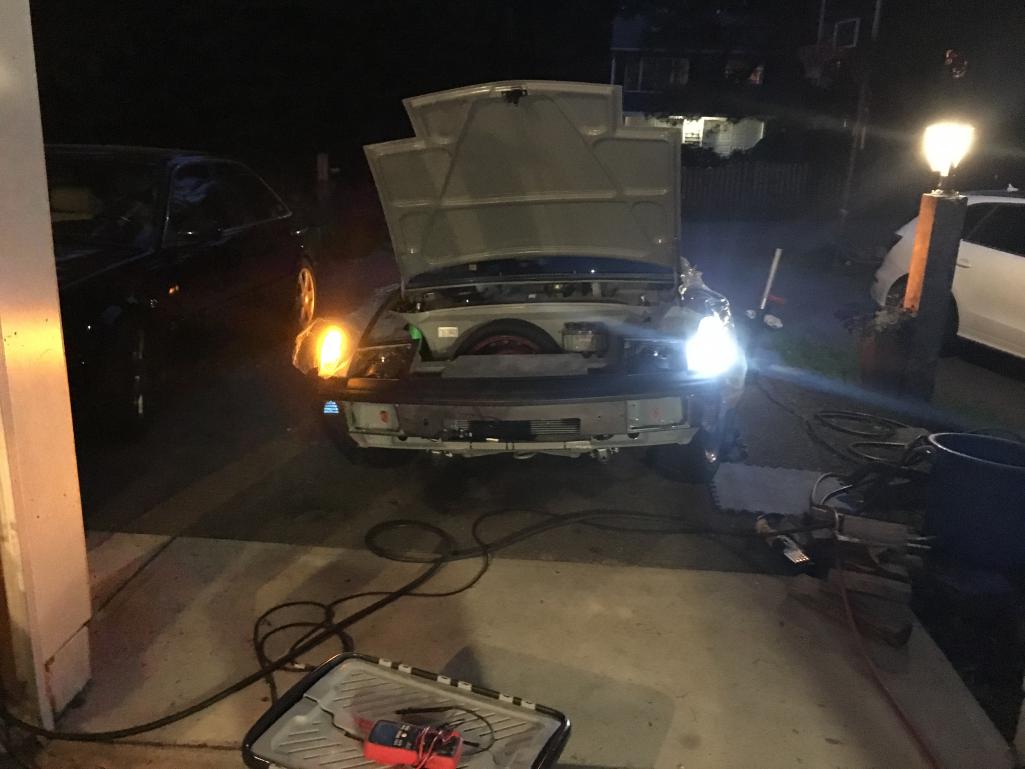
Posted by: theer Jul 14 2019, 08:44 PM
Couple more pics of LEDs:
Posted by: theer Jul 14 2019, 08:45 PM
Posted by: CptTripps Jul 17 2019, 06:22 AM
Looking good man! Can't wait to see videos of it on the road!
Posted by: theer Aug 20 2019, 08:03 AM
Picked up a pair of 3rd gen Miata side mirrors, which should be the last thing needed to get it inspected and road-legal, if not exactly road-worthy (missing door and rear glass and a bunch of other bits & pieces).
Miata mirrors have been done before, but does anyone have pictures & how-to advice? Holes will need to be drilled, and that's making me nervous.
Posted by: 914forme Aug 20 2019, 02:14 PM
I did first Gen Miatas on a build, but not the 3rd gen, should not be a huge issue. It has been so long since I built the car, I have forgot most of that build. I remember getting them out of a Miata, and using the gasket to build a brake, and installing them in the doors. 3 holes to add, non-electric. The rest is a bit blurry.
Posted by: theer Dec 1 2019, 07:56 AM
It’s been a while since I posted an update. Finally got it to pass inspection! They didn’t notice the missing rear and passenger door windows
Posted by: theer Dec 1 2019, 08:15 AM
Now I need help from the Subi-conversion guys...
Something in the engine bay was making a gawd-awful noise- like rocks in the laundry dryer. Turns out the turbo is shot. The shaft connecting the turbine and compressor wheels broke.
Now I need a decent (stock) turbo to get her running again. Any suggestions and recommendations where to buy? Or is this the time to upgrade?
Thanks,
Tom
Posted by: Chris H. Dec 1 2019, 08:56 AM
Bummer on the turbo but you're making progress! Try the classifieds of NASIOC:
https://forums.nasioc.com/forums/forumdisplay.php?f=149
You can post a WTB there also. Probably find a "take-off" stock turbo fairly easily.
Posted by: 914forme Dec 1 2019, 10:47 AM
I would say upgrade your engine was built to take added boast.
You may be able to rebuild what you got. New Shaft Bearings, and seals, inpellers as long as the housing was not harmed, it should be good.
You reach out to Scott @http://www.914world.com/bbs2/index.php?showuser=4154 he might have one sitting on a shelf right now, I am sure he is looking for a reason to upgrade, and off set his costs.
Posted by: theer Dec 1 2019, 11:34 AM
Thanks guys!
Scott is already aware- he’s got his motor out already. Could be a possibility... hmmmm.
Doug (PO) says the turbo was actually rebuilt before installation.
Rebuild is not likely with the shaft broken. I didn’t see a rebuild kit which includes the shaft & turbines. Also, the turbines were banging around in there so the housing is likely damaged.
A dangerous question: what else is needed to upgrade the turbo?
Posted by: Amenson Dec 1 2019, 12:43 PM
Thanks guys!
Scott is already aware- he’s got his motor out already. Could be a possibility... hmmmm.
Doug (PO) says the turbo was actually rebuilt before installation.
Rebuild is not likely with the shaft broken. I didn’t see a rebuild kit which includes the shaft & turbines. Also, the turbines were banging around in there so the housing is likely damaged.
A dangerous question: what else is needed to upgrade the turbo?
Ahhh, I will not be upgrading my turbo at this point. Primarily because the turbo plumbing will need to be modified to fit the new turbo...which is what will be the issue with your car as well. There may be some bolt in options but to make a noticeable improvements something bigger is needed. I think that it has a VF39, already an upgrade for the EJ20 and should get you pretty close to 300whp...especially if you enable flex fuel.
Posted by: 914forme Dec 1 2019, 05:35 PM
Tom, search for VF39 Cartridges, that gives you everything but the housings.
Posted by: CptTripps Dec 4 2019, 02:47 PM
Correct. It was a VF39 out of an STI. Upgrade from the one that came with that motor. I tried finding the place that "rebuilt" it for me but their website is dead, so there's nothing we can do about that.
A new/used VF39 will bolt right on to the plumbing that's already been custom made.
Posted by: theer Mar 16 2020, 10:17 AM
well, it's been quite a while since my last update. Winter in New England.. no snow this year, but it has been too cold to work in my unheated garage.
I found a nice VF39 turbo from a local Subi tuner and finally installed it last weekend. Took a test drive this weekend. Who-weeee! I don't think the original turbo was ever working properly! Broke the tires loose every time in 1st. This this flies!
The rear window is not installed yet, so the spooling and snorting of the turbo and waste gate was... spine tingling to say the least.
Next up is to install all the glass (rear & passenger side) so I can take it out sooner.
I have an annoying clunk in my pass side strut. Driver side is fine. I can induce it by simply pushing down on that corner. Can't tell immediately what it is, but probably a rubber piece missing on that side or the nut needs tightening.
Posted by: Root_Werks Mar 16 2020, 10:27 AM
It's been a while since I caught up on this thread. What great progress! You seem so close to getting back on the road.
Posted by: theer Mar 16 2020, 11:07 AM
I know!
I was shooting to get her finished last Fall (it's running and I even got her to pass State inspection!), but the turbo failure cost me a lot of time and I ended up just putting it away of the winter.
It seems I will be spending more time at home in the near future, so time to get back to it.
Posted by: 914forme Mar 17 2020, 03:18 PM
Nice to see this car coming along
Posted by: CptTripps Mar 20 2020, 04:19 PM
Did you check to make sure the bolts for the sway bar are both tight? That could be the "clunk" you're talking about.
GREAT to hear that she's sorted, and (more importantly) fast!
Also: WE NEED TO SEE PICS!
Posted by: theer Mar 20 2020, 04:28 PM
Yep - they were loose, too, but now tight. I probably need shorter end links, but that's for later.
I'm certain the noise is from the strut - I can make it clunk by lifting and lowering the corner by hand.
Posted by: theer Mar 24 2020, 10:44 PM
Ok- here’s a picture of the top of the strut. I put the impact wrench on it to make sure it was tight, but it still has maybe 1/8” play up & down.... just enough to make noise.
There’s a slot in the shaft, but no slotted washer. Any tricks to get this right?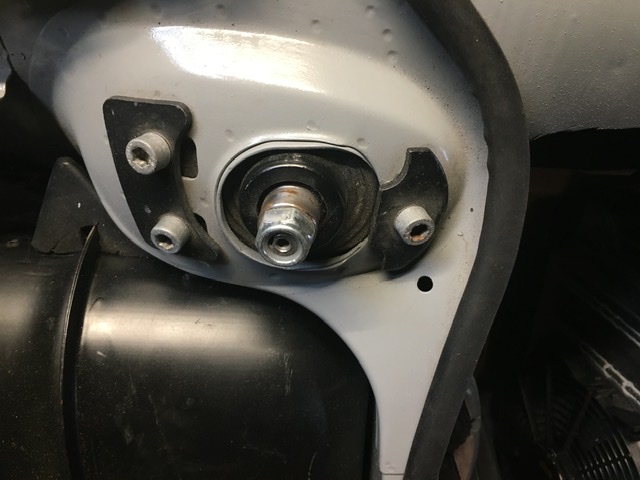
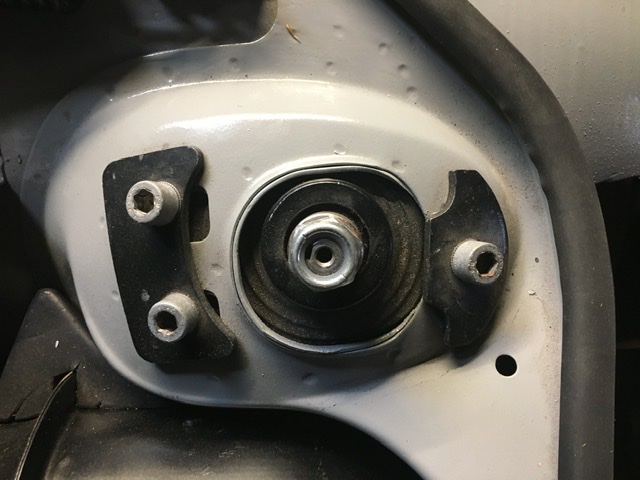
Posted by: mepstein Mar 25 2020, 07:38 AM
Looks like it's missing the large concave slotted washer. #8
Attached image(s)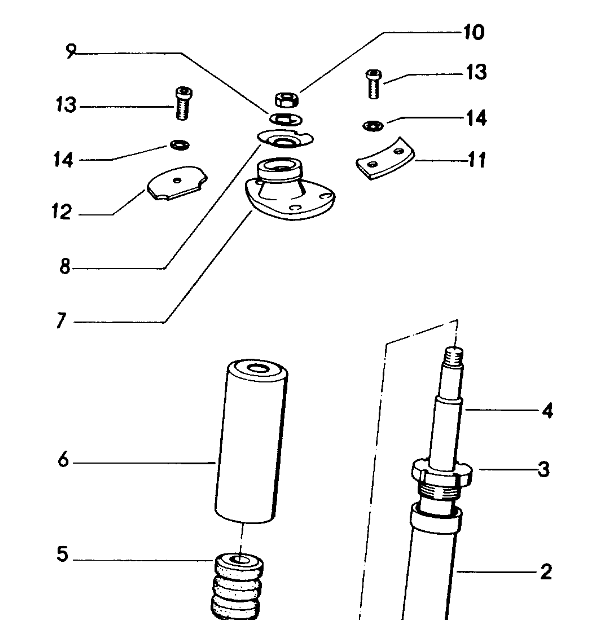
Posted by: 914forme Mar 27 2020, 10:17 AM
I have them, if you need the Tom
If these are a mono ball mount or insert, not sure if it needs one, but if it has play it needs something. The large washer, does one thing well, it keeps the strut if the rubber mount fails, the strut doesn't drop out of the upper mount if that should happen.
You would know if it happens as it would go a bit wonky, but you could survive, and get the car stopped.
Posted by: theer Mar 27 2020, 10:51 AM
Thanks, Stephen. I'd like to at least try them.
They would help to let me torque the nut tight, but I'm not sure the washer will help tighten the gap which is allowing the allowing the strut to move up & down. I'll send a video clip.
Posted by: theer Mar 27 2020, 10:53 AM
Close up of the strut and movement: trim.10382841_FD17_47FE_B49E_7A58CF247F5E.MOV ( 1.59mb )
Number of downloads: 77
trim.10382841_FD17_47FE_B49E_7A58CF247F5E.MOV ( 1.59mb )
Number of downloads: 77
Posted by: theer Mar 27 2020, 11:03 AM
Does the link work?
Posted by: Amenson Mar 27 2020, 11:40 AM
I think that the strut nut is tight, looks like the monoball is moving in the housing. It is probably held in with a snap ring but it might also be held in with a crew in piece like these:
https://www.fvd.net/us-en/FVD34310020L/fvd-camber-plate-911-1969-89-front-left.html
Posted by: Amenson Mar 27 2020, 11:47 AM
I think that the strut nut is tight, looks like the monoball is moving in the housing. It is probably held in with a snap ring but it might also be held in with a crew in piece like these:
https://www.fvd.net/us-en/FVD34310020L/fvd-camber-plate-911-1969-89-front-left.html
Pretty sure these are what they are but cant find a picture of the underside:
https://www.ebay.com/itm/PORSCHE-911-914-930-MONOBALL-STRUT-MOUNTS-SHOCK-CAMBER-PLATES-LEFT-RIGHT-/120668135763
Clunk Discussion:
http://forums.pelicanparts.com/porsche-autocross-track-racing/556074-camber-plates-ebay.html
See if you can get a picture of the bottom so that we can see how the monoball is held in.
Posted by: theer Mar 27 2020, 11:59 AM
Thanks Scott - yes, they look to be them. The reviews are not confidence inspiring.
I'll try to get a look from underneath this weekend.
Posted by: Amenson Mar 27 2020, 12:05 PM
Thanks Scott - yes, they look to be them. The reviews are not confidence inspiring.
I'll try to get a look from underneath this weekend.
Looks like the design was borrowed from Weiltmeister...there should be a snap ring. Must be a spacer missing.
https://www.pelicanparts.com/More_Info/CM1300.htm?pn=CM-1300
This whole working from home thing is making me really productive.
Posted by: 914forme Mar 27 2020, 04:07 PM
To the manufacturer - I know Tooling paths cost money and time, but come on take some pride in your work, and make the last pass overlap, smooth out your tooling paths.
Oh sorry, things like that just irritate me.
I don't think you will get the play out of them. As Scott says they are held in by a snap ring. From what I am seeing the ball is moving in the bearing structure, most likely they used a teflon lined ball socket, and well the teflon failed somewhere along the line.
I have strut tops with stock rubber, or with poly inserts, either set I can toss in a box and send over.
All the washers also.
I'm not a huge fan that the Nut is not seated down so the nylock washer is in the threads, but hey, some loctite would fix that also.
Posted by: theer Mar 29 2020, 02:35 PM
Well, Scott was right- those are the mounts & the ball is only held in by a snap ring. Destined to fail. I put a shim-stock washer in there and it helps a little, but not completely.
Check out the damage to the housing- I left the chipped out chunk on top. Pretty much junk- eventually the snap ring won’t have a groove left to hold on to.
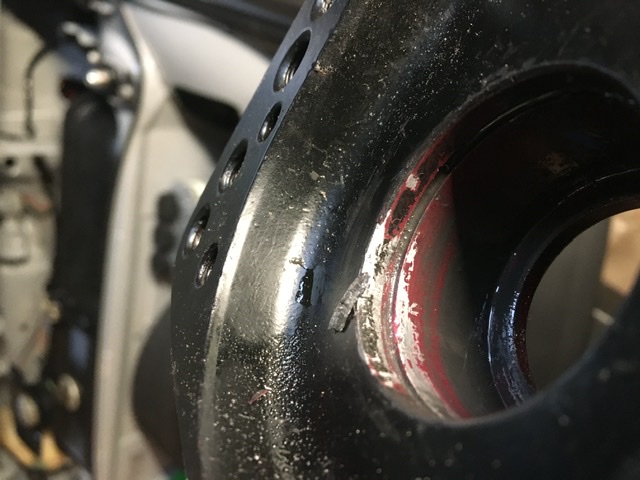
Washers won’t help, and in fact will use up precious threads for the nut (already not engaging the Nylock.)
Stephen -I’d be interested in your top mounts with poly inserts.
Posted by: 2mAn Dec 17 2020, 05:37 PM
Any updates? I was hoping this would end with some burnout pics or something
Posted by: matthepcat Dec 31 2021, 02:58 PM
Came here to find this thread that I was following 7 years ago. Nice to see it was running. Hope it went out and had fun this past summer.
Posted by: Porschef Dec 31 2021, 03:31 PM
It’s running, and its a rocket.
Passenger seat only…
Posted by: ndfrigi Dec 31 2021, 04:15 PM
Looks like it's missing the large concave slotted washer. #8
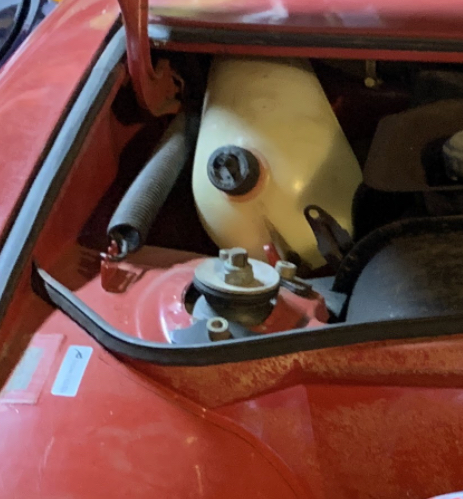
Posted by: theer Jul 15 2023, 08:54 AM
Update: Grey Matter is on its way back to Ohio!
After 5 or so years, Doug came back to reclaim his beloved.
He and his friend Jake flew in this morning and are driving (!) it back to Ohio.
It was a ton of fun while it lasted. I’m looking forward to seeing Doug finish up the interior and other bits to finally say it’s “done”.
Thanks to all for the help over the years!
Good luck & drive safe. Can’t wait to hear the complaints from my neighbors about how Doug tore outta here. I have video, but it’s too big to upload. 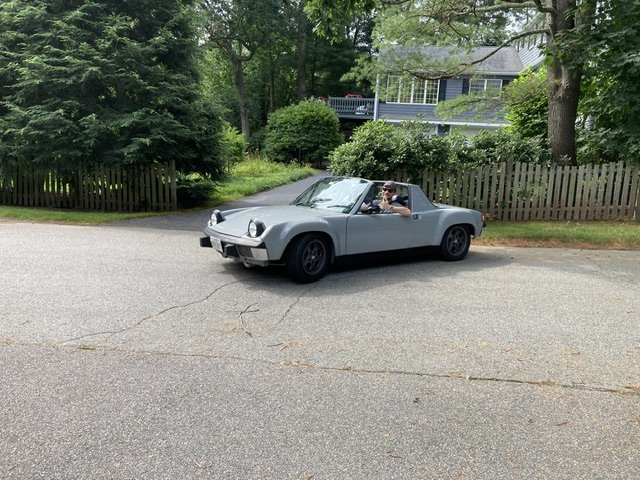
Tom
Posted by: 76-914 Jul 15 2023, 09:11 AM
Good news. Glad he will be able to complete his dream.
Posted by: rick 918-S Jul 15 2023, 05:52 PM
Spoke with Doug a week ago and he told me he was going to get it. Glad you brought it along as far as you did. What's next for you?
Posted by: CptTripps Jul 16 2023, 04:36 PM
Tom: As I said…I can’t thank you enough for calling me last month to tell me you were ready to let her go. Driving it home yesterday, I learned that this car means more to me than I realized. You’re a gentleman and a true “car guy” to make sure that it found its way back to me after all these years.
When I got to Tom’s house he asked if I wanted to test drive it. I declined. I needed my first ride in the car as the owner. Apologies to your neighbors. I couldn’t help myself!
So what’s next, you ask???
I got to the garage at about 6am this morning to tear the interior out to A: dry it out from yesterday’s monsoon on the way home and B: take stock of what I want to do here.
The 911 dash wasn’t something I was ever a fan of, but after an 12h drive in it yesterday, I’m a convert. It just looks right in here. Great call, Tom.
I spent about 4h with a scrub brush and a rag cleaning her up so she can hang with the rest of the crew in my garage. We had a lot of fun all day pointing at things and oohing and ahhing at her. So many things that I remember talking to Scott on the phone about but never got to see in person.
Also: This car is a rocket ship.
Attached thumbnail(s)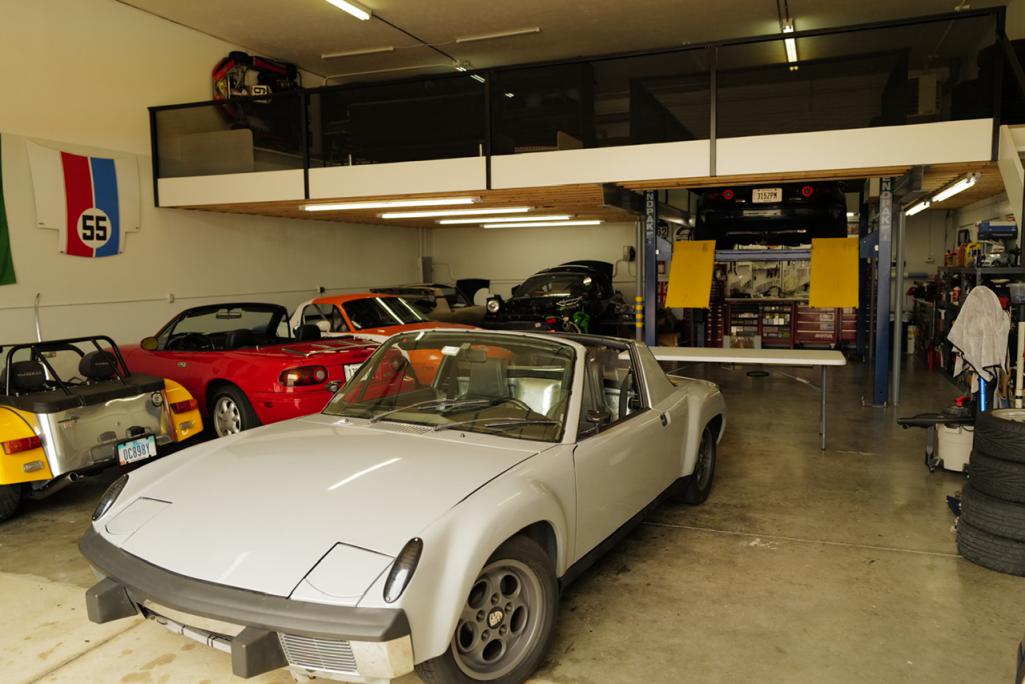
Posted by: theer Jul 17 2023, 08:24 AM
Here's the video of the rocket ship taking off.. turn up the volume!
https://www.youtube.com/watch?v=grjvNvspbuE
Posted by: theer Jul 17 2023, 08:30 AM
Spoke with Doug a week ago and he told me he was going to get it. Glad you brought it along as far as you did. What's next for you?
What's next for me? Well, I still have my stock-ish 1972 914, which I've had for 35 years, or so, which I'll be spending some more time playing around with. Looking at a 5-lug conversion, getting the Webers properly tuned, etc. Just bought a combo gauge from Mark Heard...
It's my first, I'll never sell it!
Posted by: theer Jul 17 2023, 08:44 AM
Tom: As I said…I can’t thank you enough for calling me last month to tell me you were ready to let her go. Driving it home yesterday, I learned that this car means more to me than I realized. You’re a gentleman and a true “car guy” to make sure that it found its way back to me after all these years.
When I got to Tom’s house he asked if I wanted to test drive it. I declined. I needed my first ride in the car as the owner. Apologies to your neighbors. I couldn’t help myself!
So what’s next, you ask???
I got to the garage at about 6am this morning to tear the interior out to A: dry it out from yesterday’s monsoon on the way home and B: take stock of what I want to do here.
The 911 dash wasn’t something I was ever a fan of, but after an 12h drive in it yesterday, I’m a convert. It just looks right in here. Great call, Tom.
I spent about 4h with a scrub brush and a rag cleaning her up so she can hang with the rest of the crew in my garage. We had a lot of fun all day pointing at things and oohing and ahhing at her. So many things that I remember talking to Scott on the phone about but never got to see in person.
Also: This car is a rocket ship.
You're welcome - glad our deal worked out as intended - That doesn't always happen!
For the new guys...Doug gave me the opportunity to step into his unfinished project at a fraction of his sunk costs, which was the only way this was ever going to work for me. Scott and Stephen (and so many others) helped finish the conversion and I took care of the easier things, such as installing the interior, dash, rubber bits, lights, bumpers, etc., etc. I had a ton of fun with it and am so glad I was able to own/drive it, if even for just a little while.
But the plan from the beginning was always to get it back to Doug for him to finish.
Best of luck with whatever direction you take it - the gray phone dials look pretty good actually!
Posted by: Porschef Jul 18 2023, 08:14 AM
Great story, Tom, and good karma...
Glad I was able to experience a ride in that rocket, and while I somewhat regret not taking you up on your offer to drive it, it was probably for the better...
Good luck with your next endeavor
Posted by: MDTerp Jul 19 2023, 03:57 AM
I was fortunate enough to drive this car briefly and it's just awesome! So nice when things work out for everyone like this.
Powered by Invision Power Board (http://www.invisionboard.com)
© Invision Power Services (http://www.invisionpower.com)