Printable Version of Topic
Click here to view this topic in its original format
914World.com _ 914World Garage _ #770 (912E) Project thread *Tangerine Cooling System installed!)
Posted by: Steve Pratel Aug 21 2013, 08:44 PM
I'm restoring a 912E, total gut & rebuild. New to this forum, been on the 912 board and several others for a while. I've never worked on an air cooled car engine before, or VW/Porsche of any type, so this has been a real learning process. Been lurking here for a while, figured it was time to post. I've been on 912BBS since 2011, for those interested, this link goes back to day 1. http://www.912bbs.org/vb/showthread.php?43391-770-Update
Posted by: kg6dxn Aug 21 2013, 08:48 PM

Posted by: 76-914 Aug 21 2013, 09:09 PM
Posted by: PanelBilly Aug 21 2013, 09:10 PM
WElcome.
Posted by: JawjaPorsche Aug 22 2013, 02:09 AM
We need pictures!
Posted by: aharder Aug 22 2013, 06:40 AM
Posted by: Drums66 Aug 22 2013, 10:29 AM
....WELCOME...man!
Posted by: Joe Sharp Aug 22 2013, 10:42 AM

Posted by: gunny Aug 22 2013, 11:12 AM
Posted by: krazykonrad Aug 22 2013, 06:12 PM
Posted by: green914 Aug 22 2013, 06:31 PM
Posted by: Steve Pratel Aug 22 2013, 06:36 PM
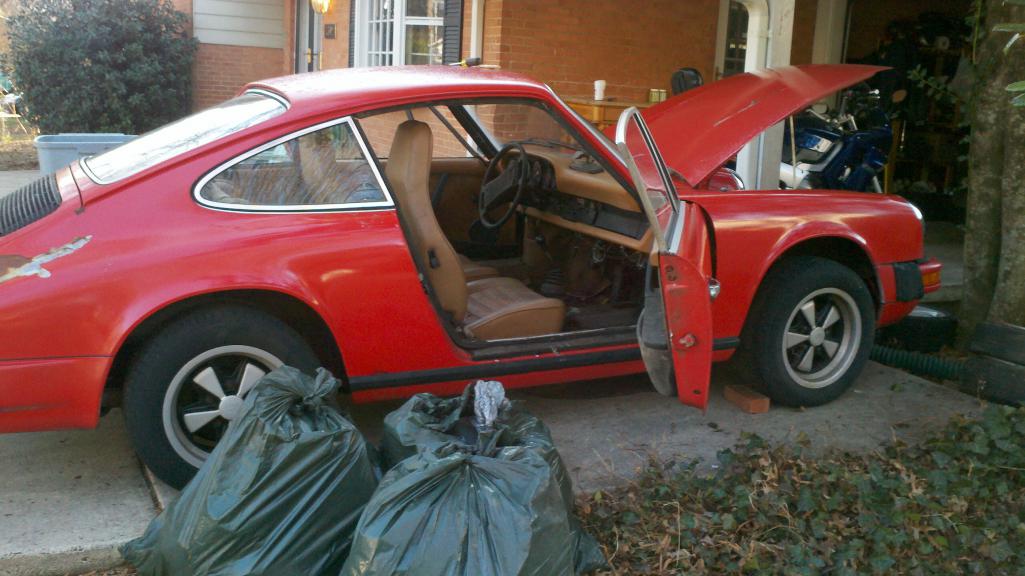
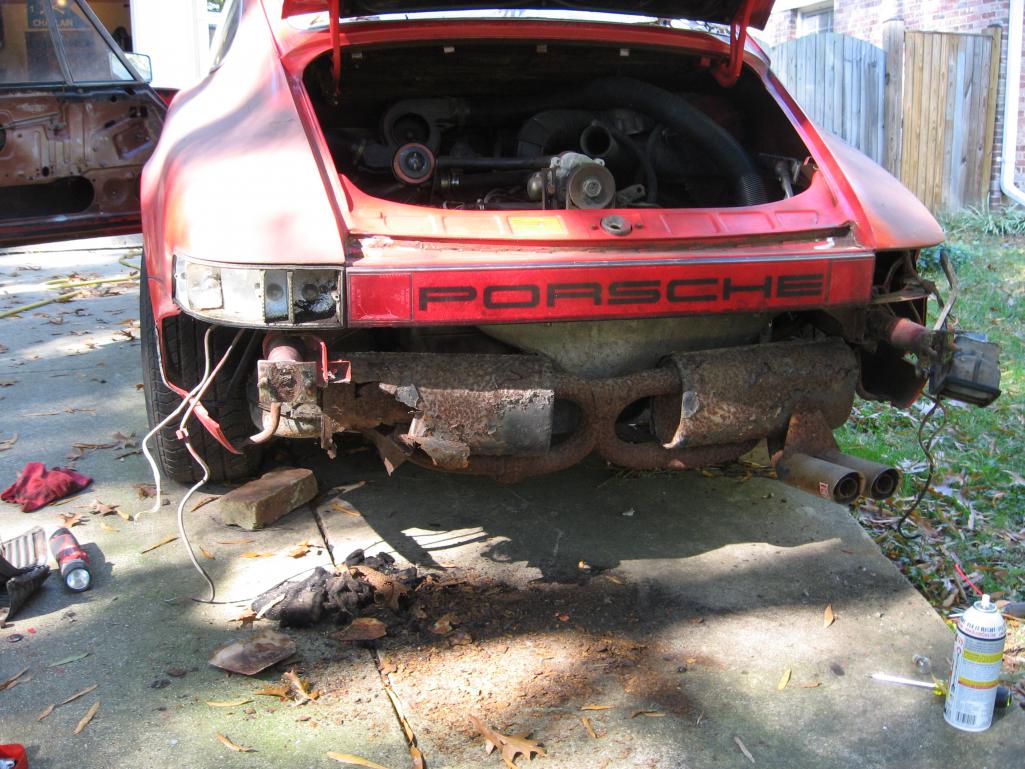
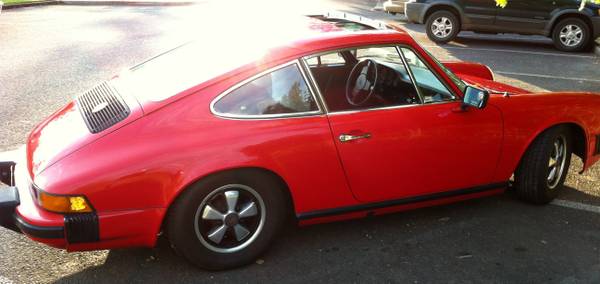
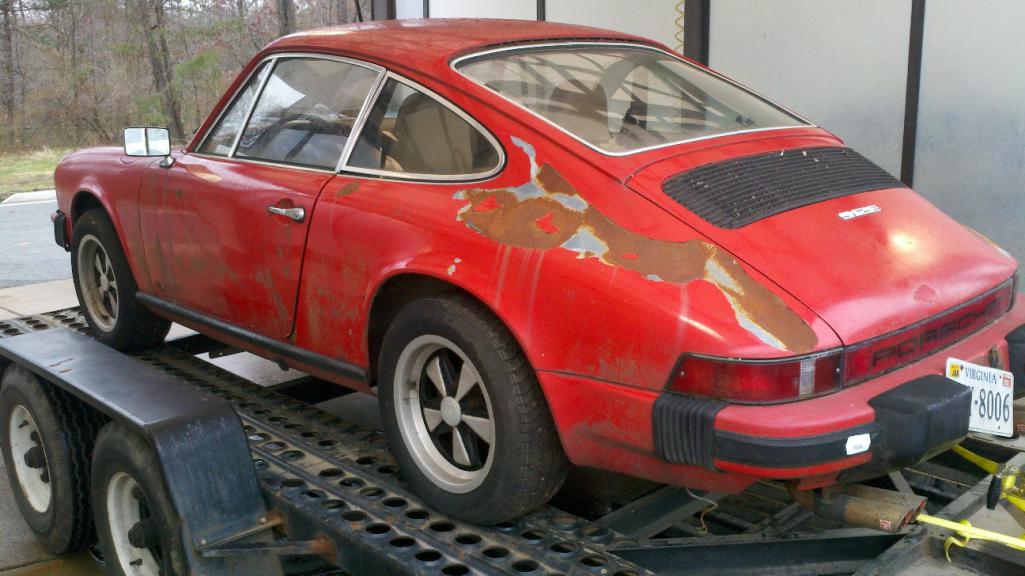
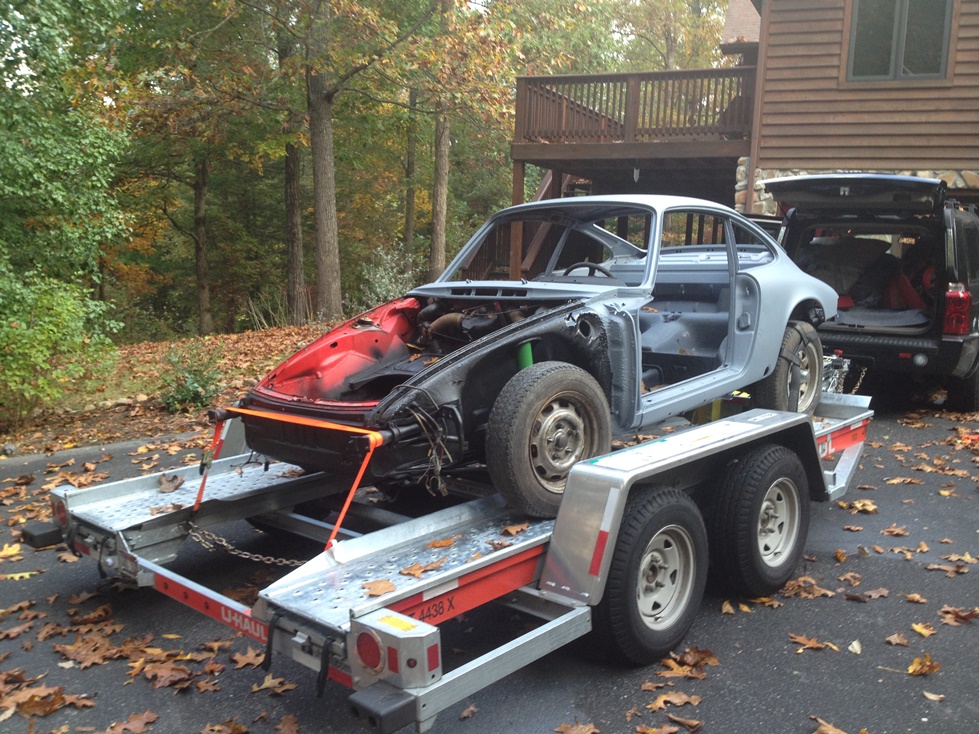
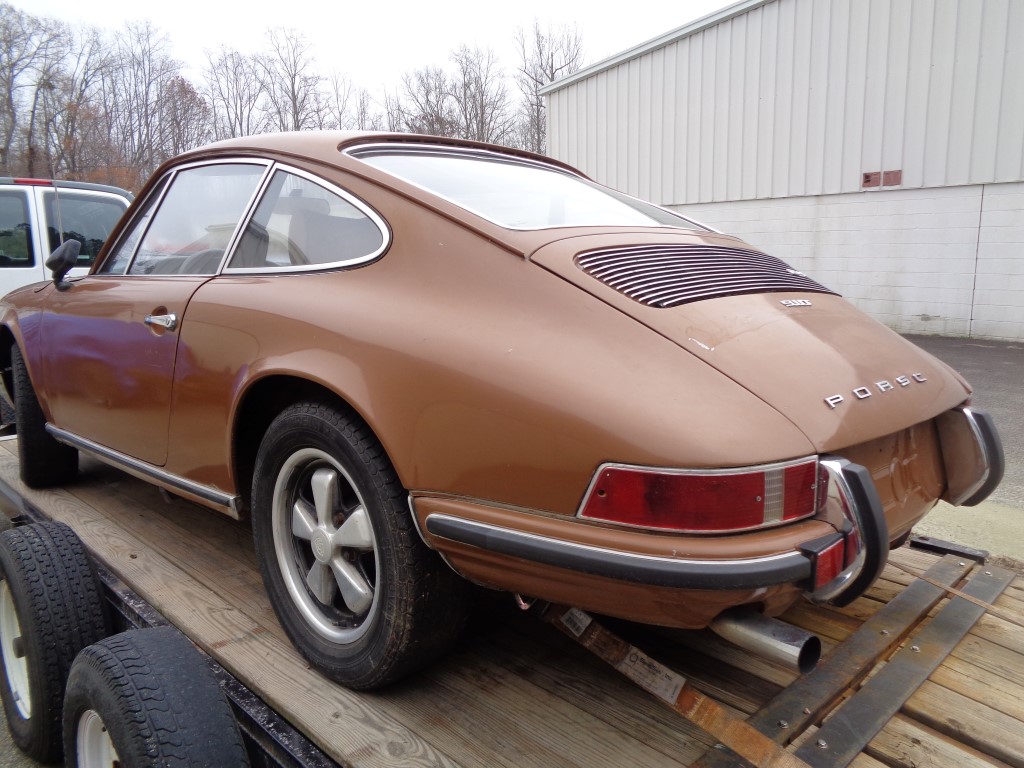
OK, here is a quick journey, focus mainly on the motor. Car was basically abandoned in the woods, generations of mice & bugs & Lord knows what reproducing. Is a total gut and rebuild, but I got the car for nothing and I'm having fun...
First couple are of the car, will follow with motor.
Attached thumbnail(s)
Posted by: Steve Pratel Aug 22 2013, 06:40 PM
more of car overall
Attached thumbnail(s)
Posted by: Steve Pratel Aug 22 2013, 06:46 PM
As is evident the car is basically solid, just filled with junk, and moss and mold and water and such. The bags in last post was the first round of trash I pulled out, next was the carpet, headliner, door panels, etc. Basically is a gut down to the frame. So far the wiring harnesses looks untouched by varmints.
Attached thumbnail(s)

Posted by: Steve Pratel Aug 22 2013, 06:50 PM
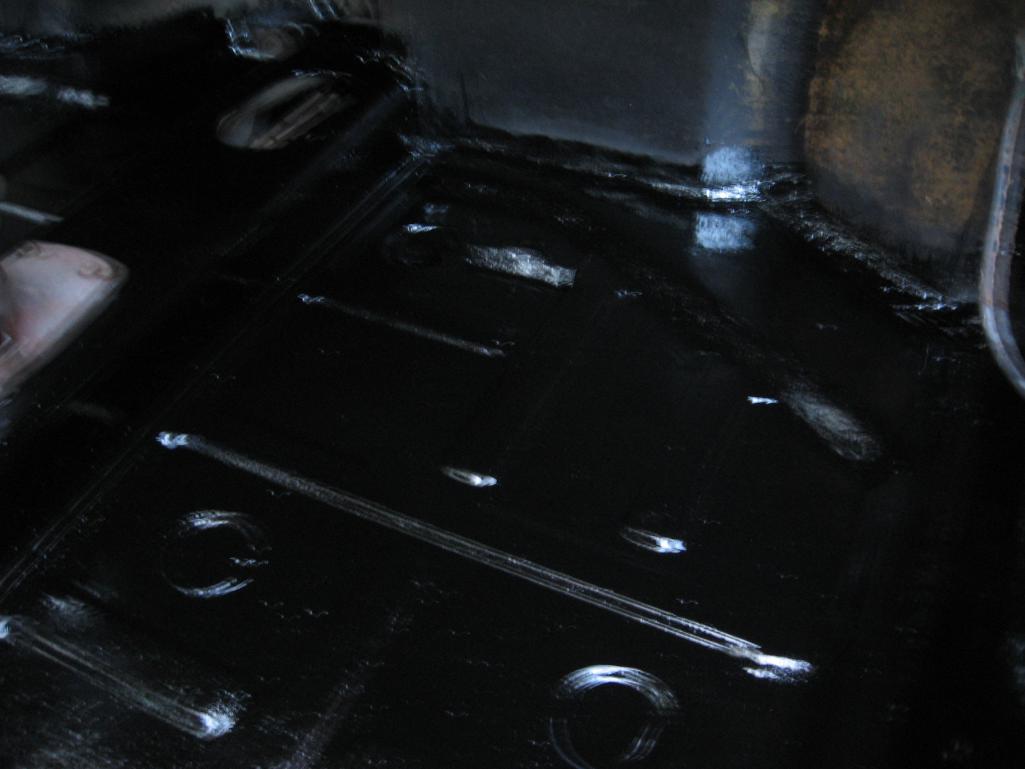
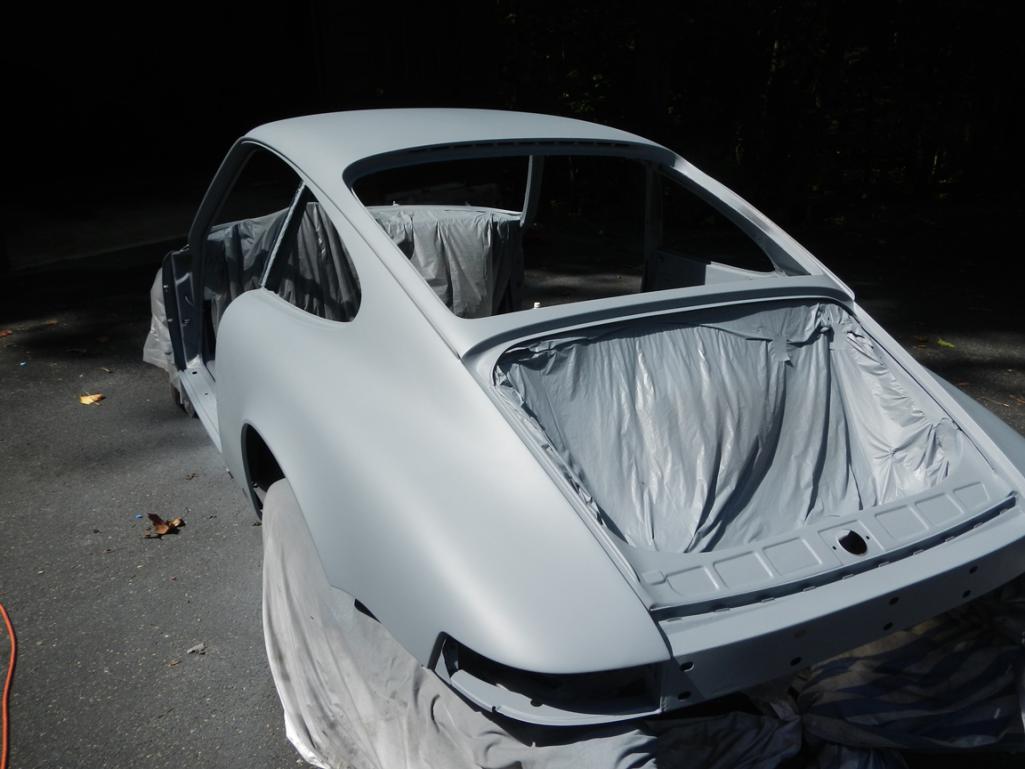
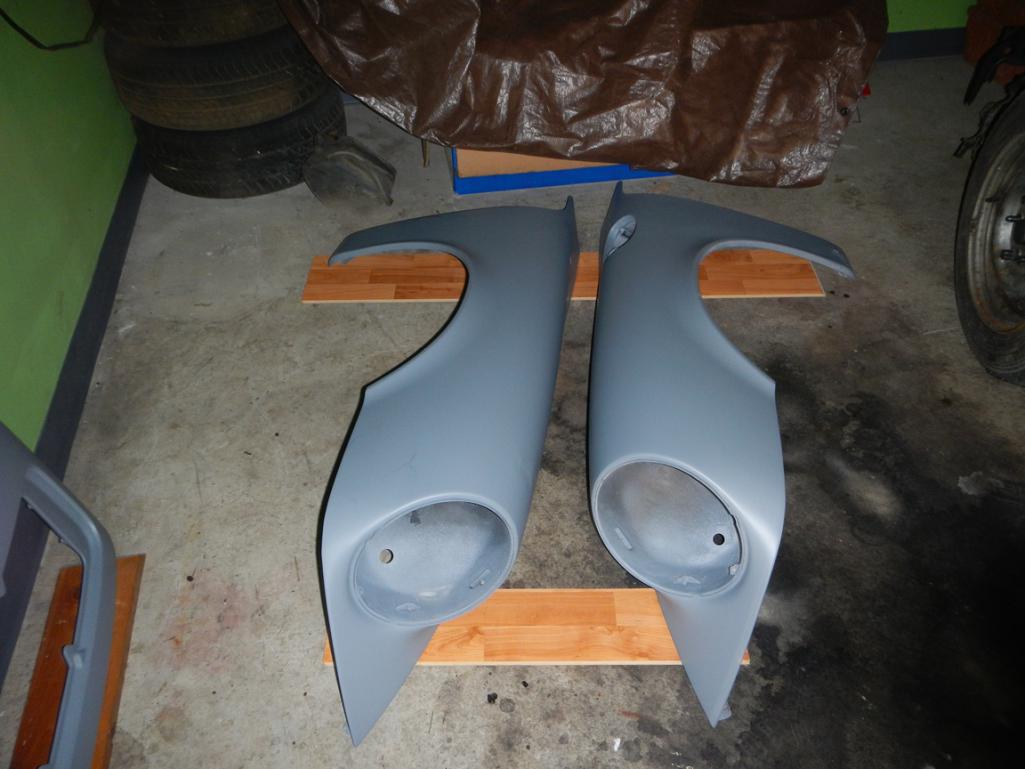
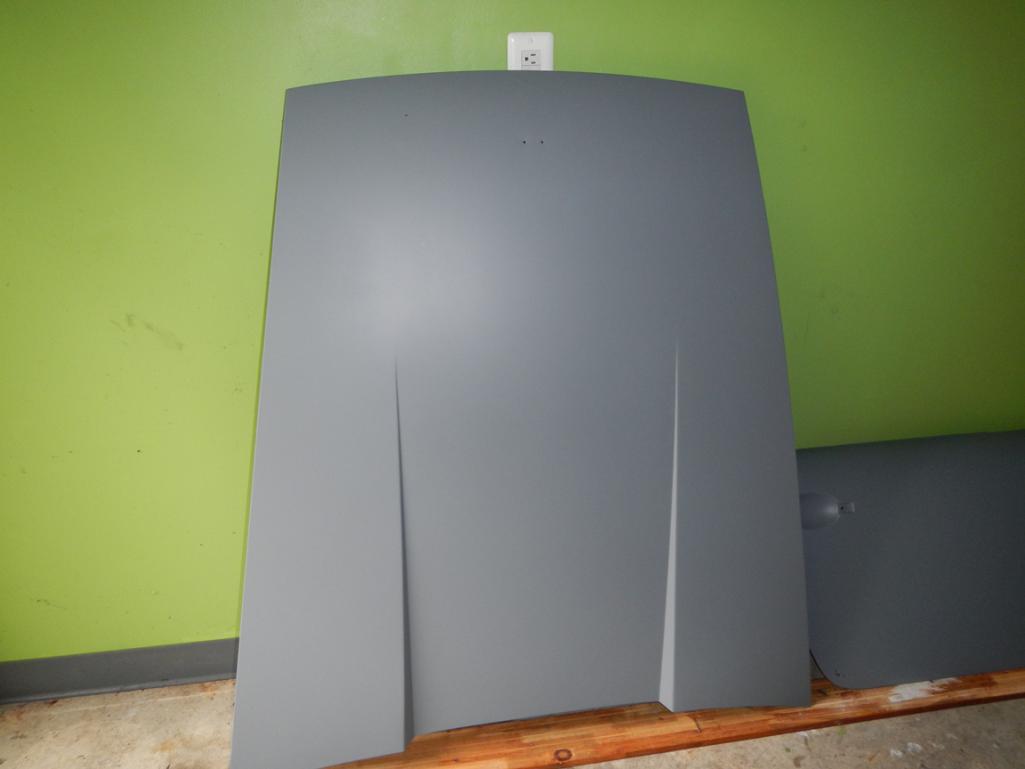
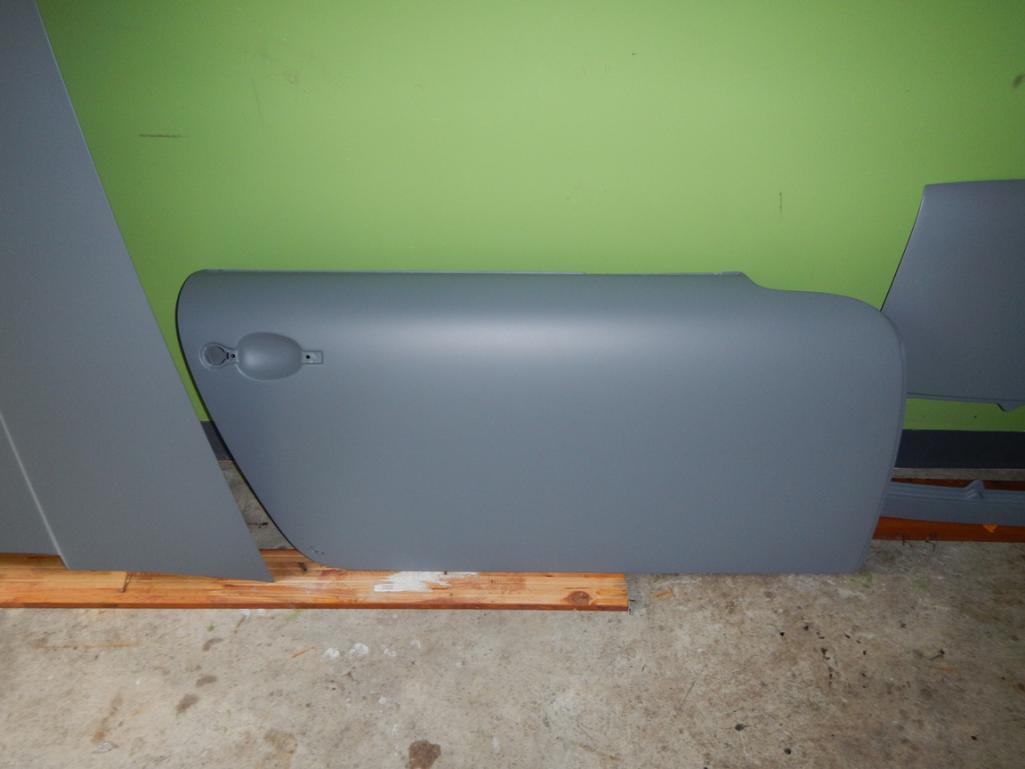
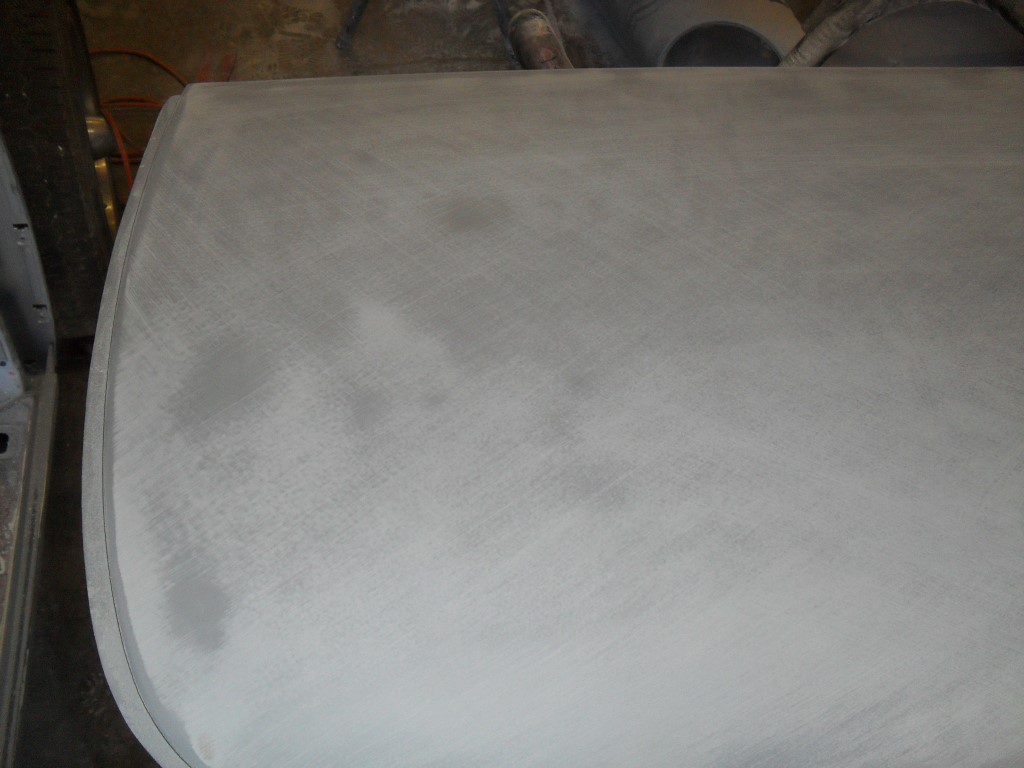
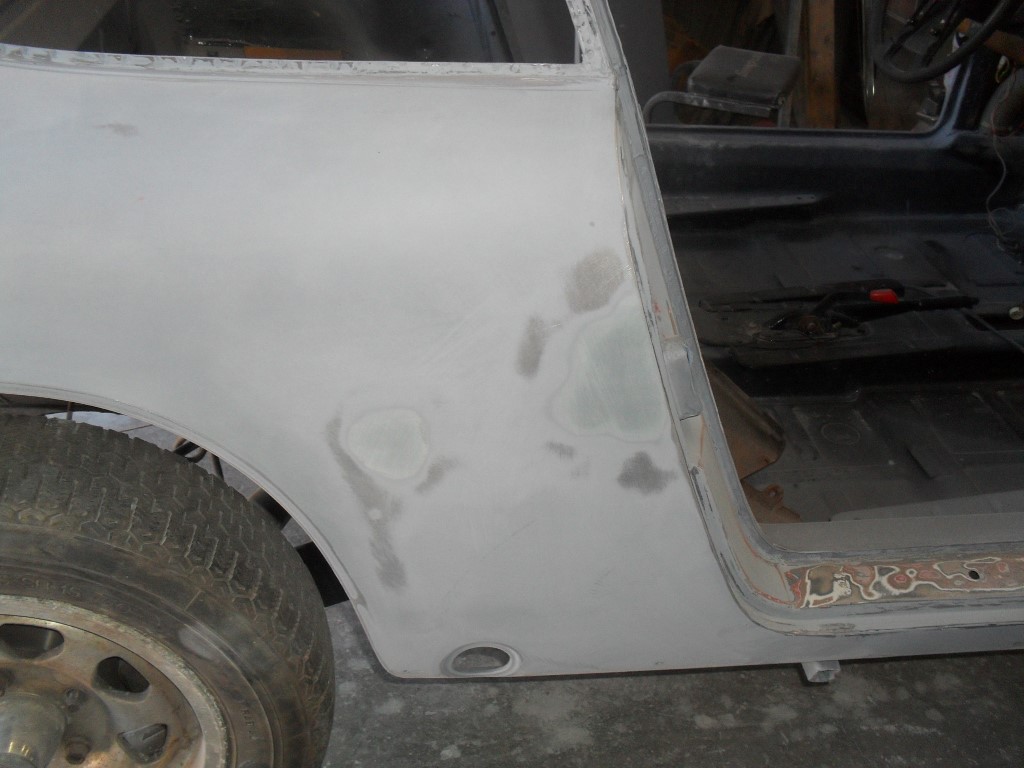
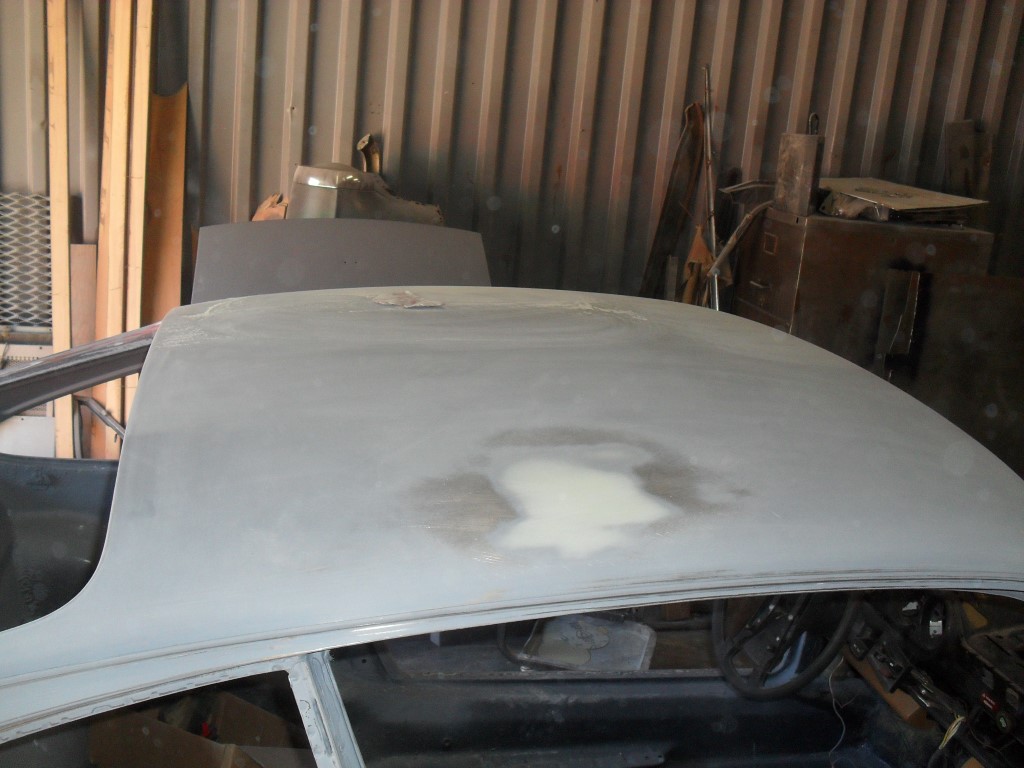
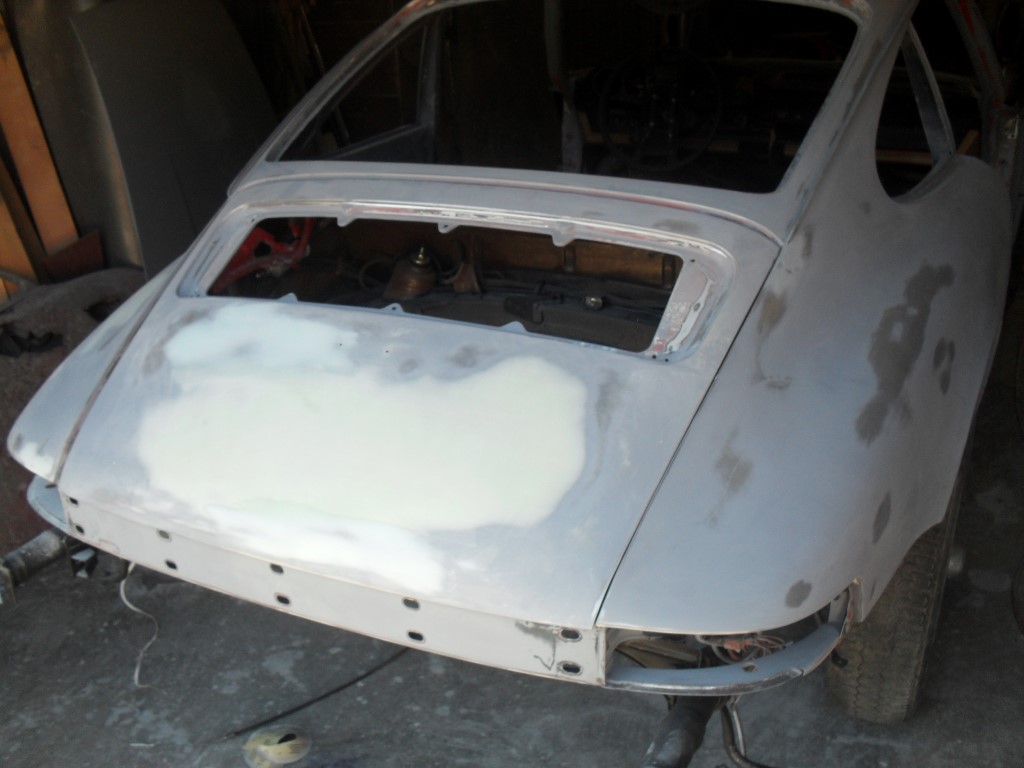
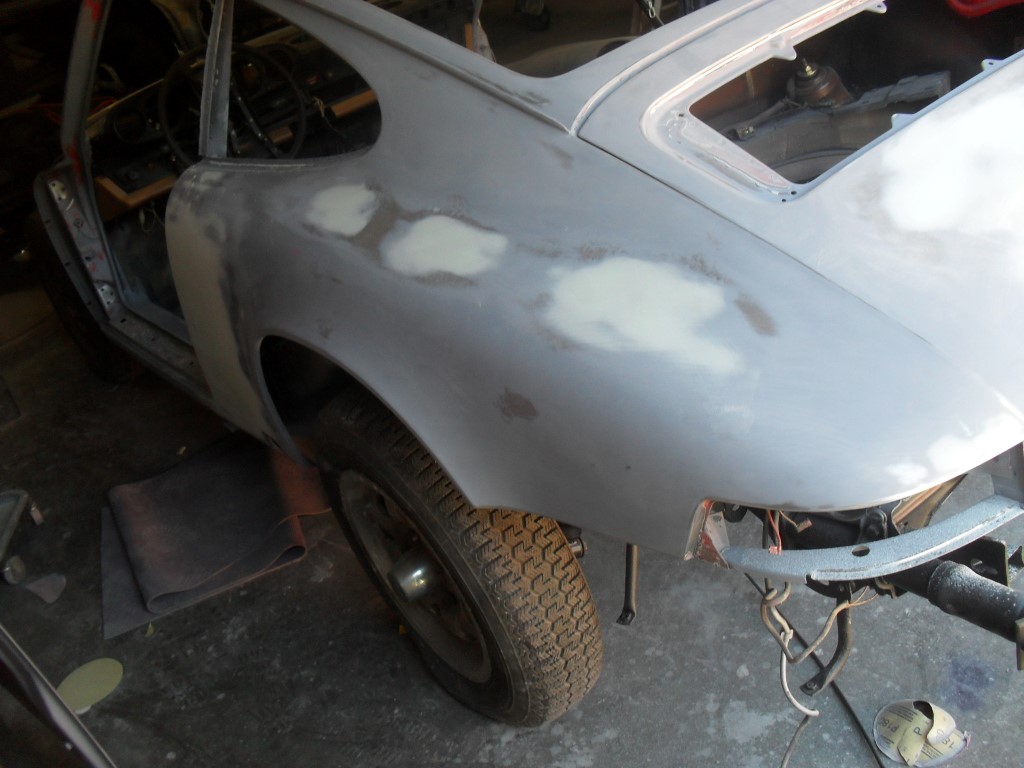
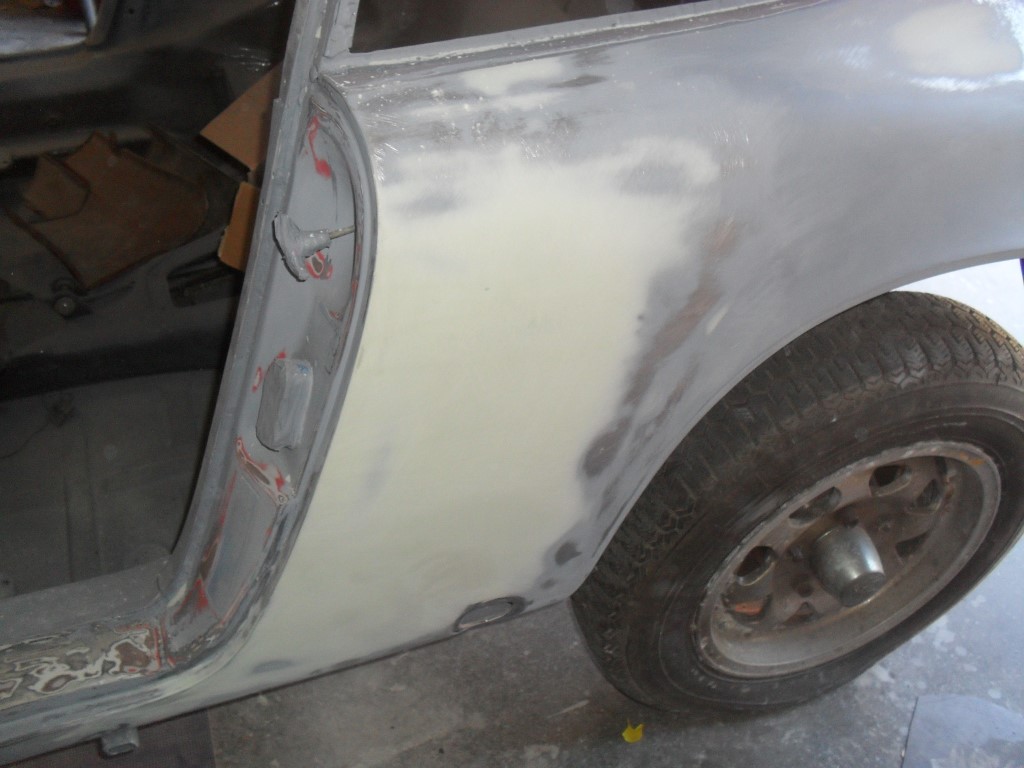
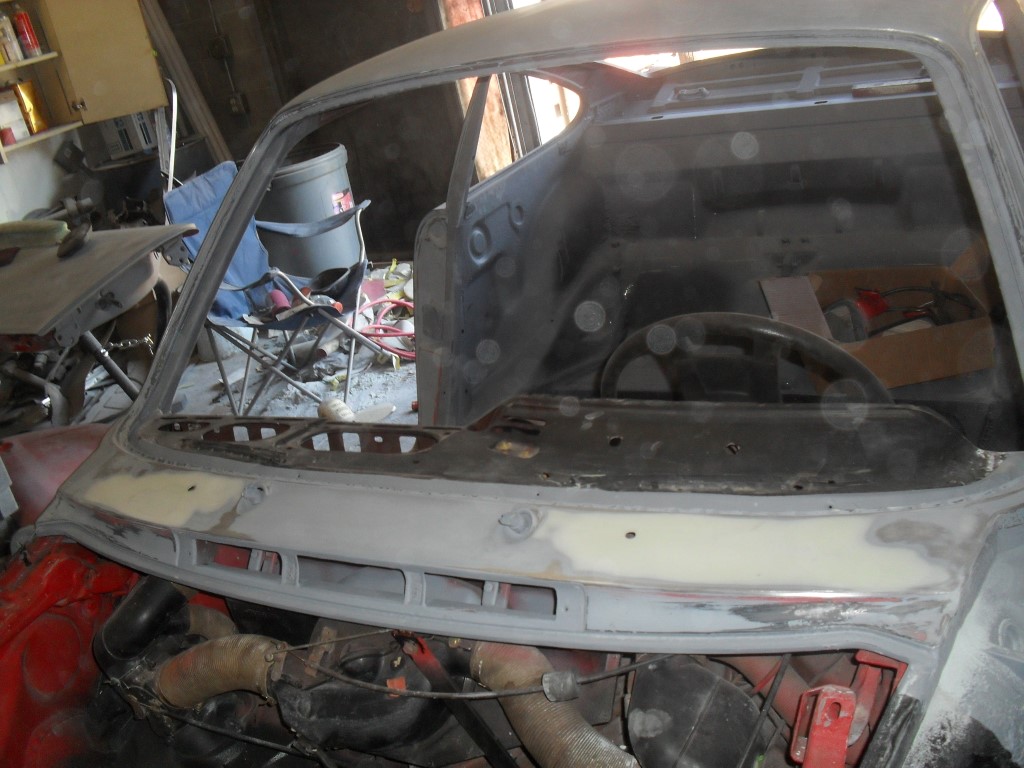
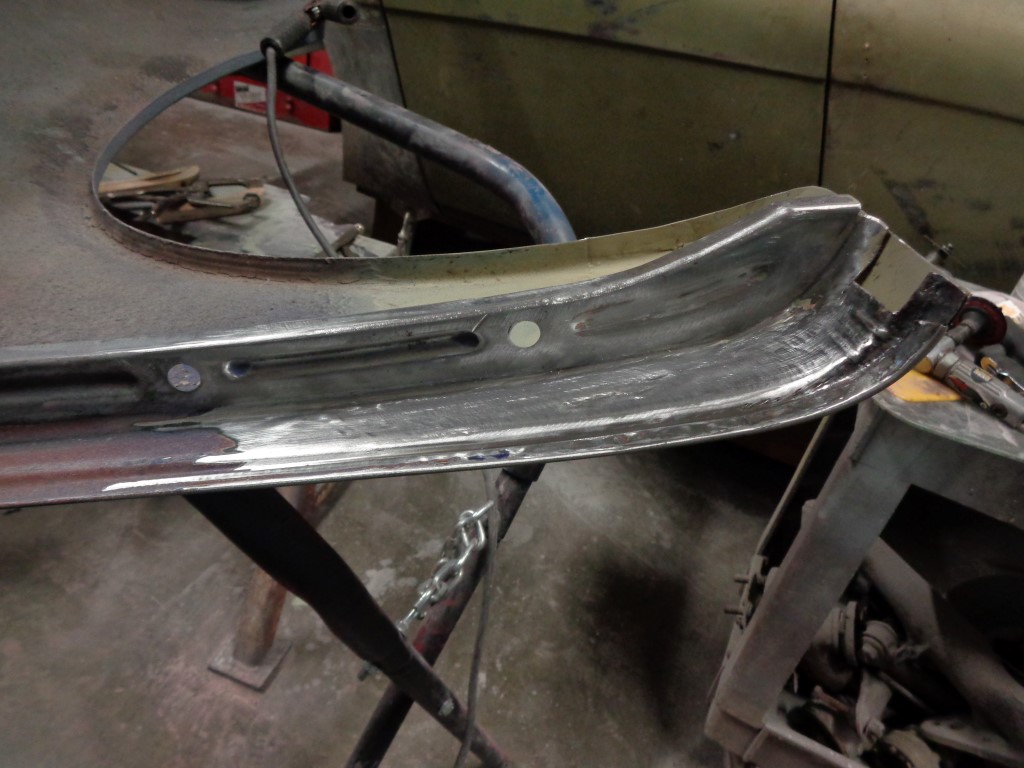
Here is how the floor and interior look today. I stripped down the floor to bare metal, repaired rust, treated with mercedes source miracle paint (like POR15). I am currently stripping the body, sanding down to base coat (had a couple BAD paint jobs) then off to a body shop to take down to metal repair rust & prep for paint.
Attached thumbnail(s)
Posted by: Steve Pratel Aug 22 2013, 07:01 PM
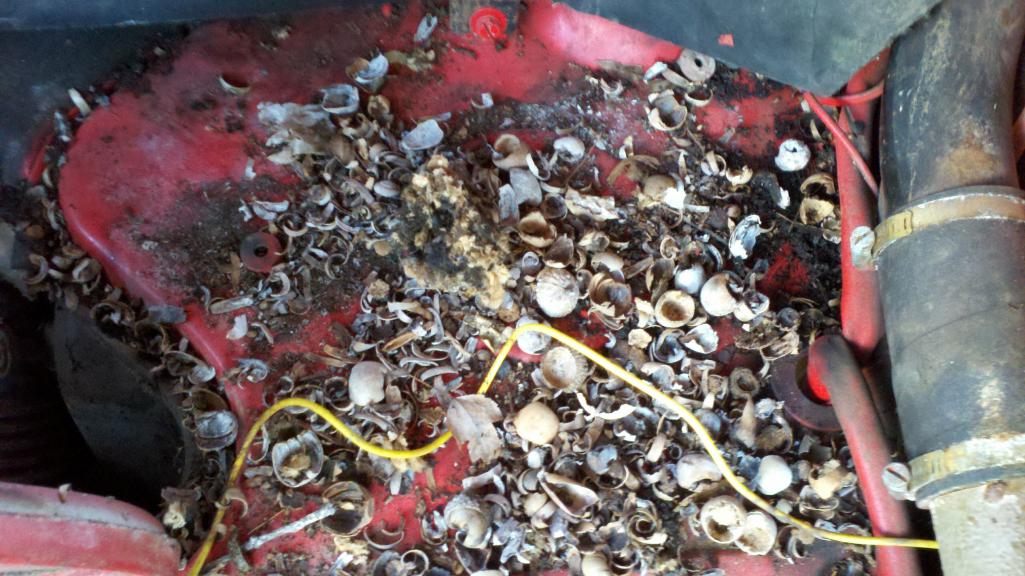
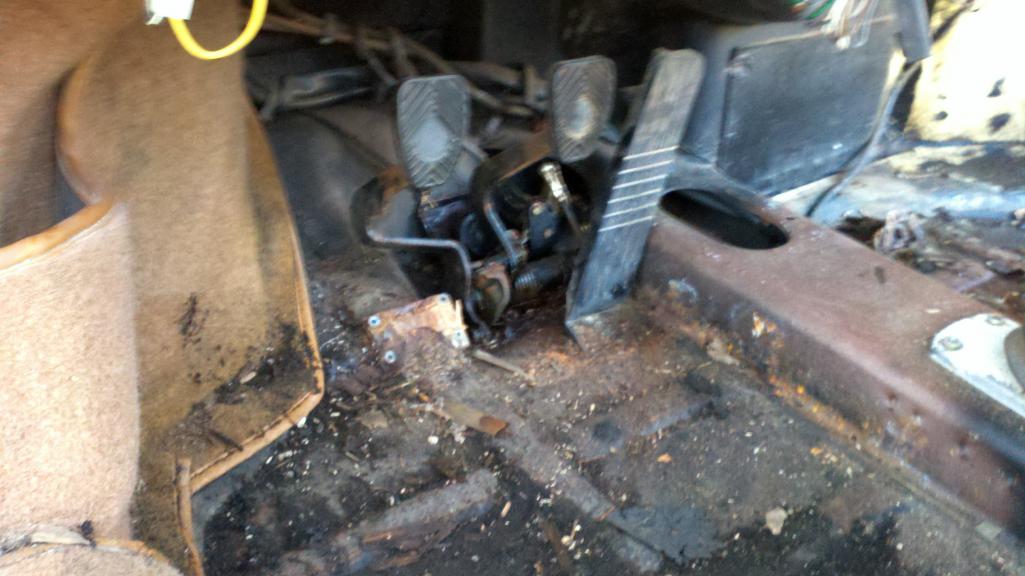
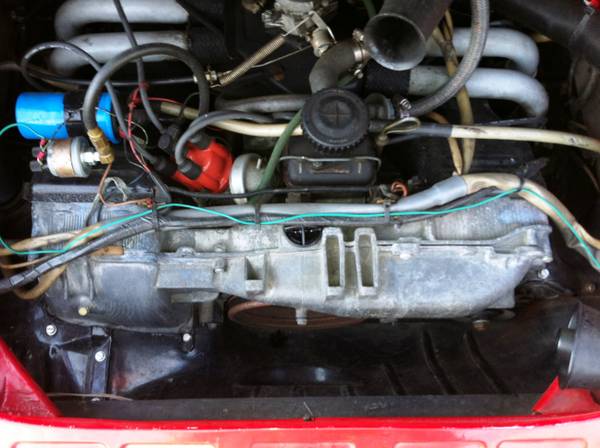
Engine Pics I never took a pic of whta the engine compartment looked like before I emptied the nests, basically when I opened the lid, it was filled completely as a giant nest. Car was basically complete and stock.
Attached thumbnail(s)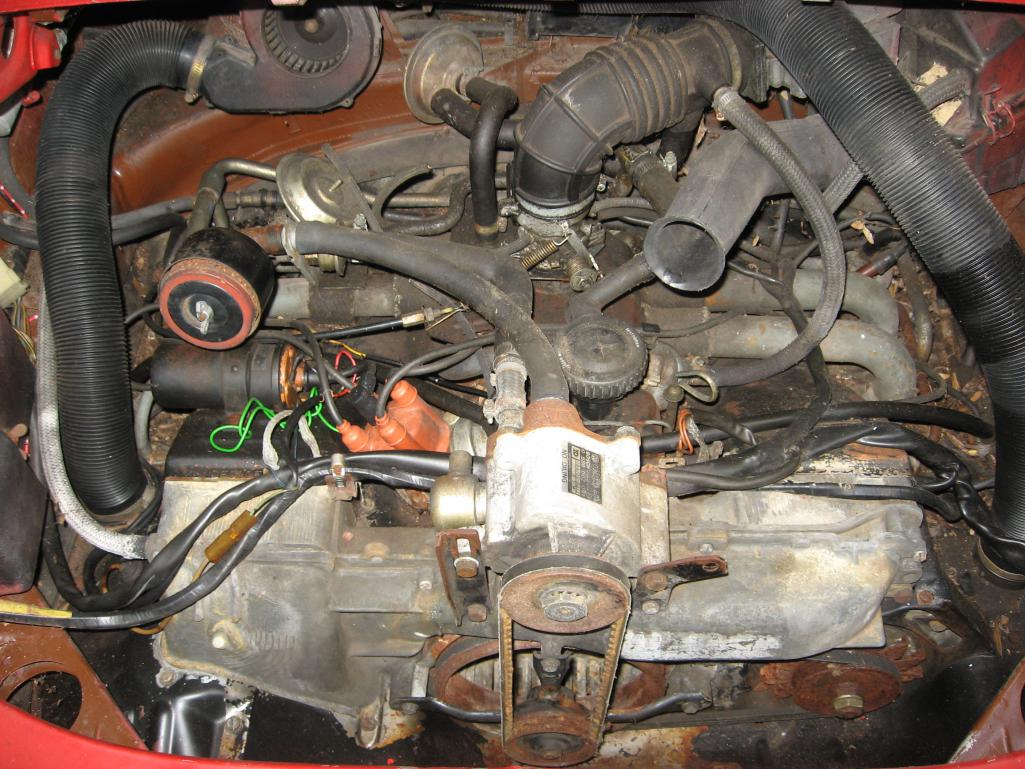
Posted by: Steve Pratel Aug 22 2013, 07:04 PM
drop & dissasemble
Attached thumbnail(s)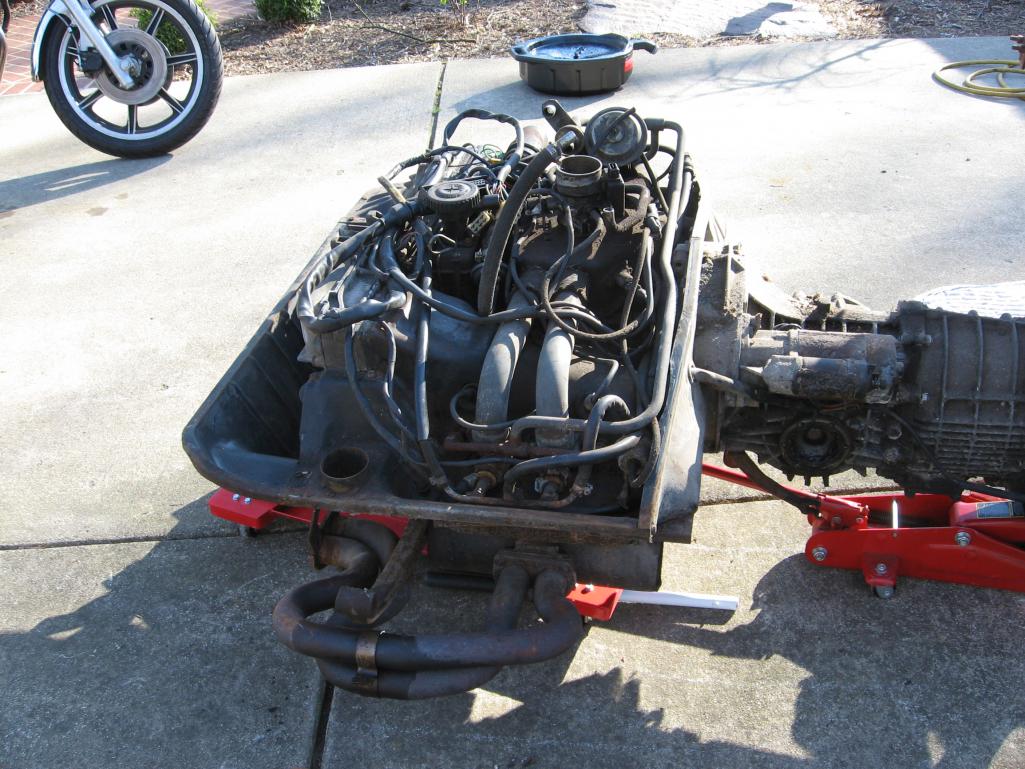
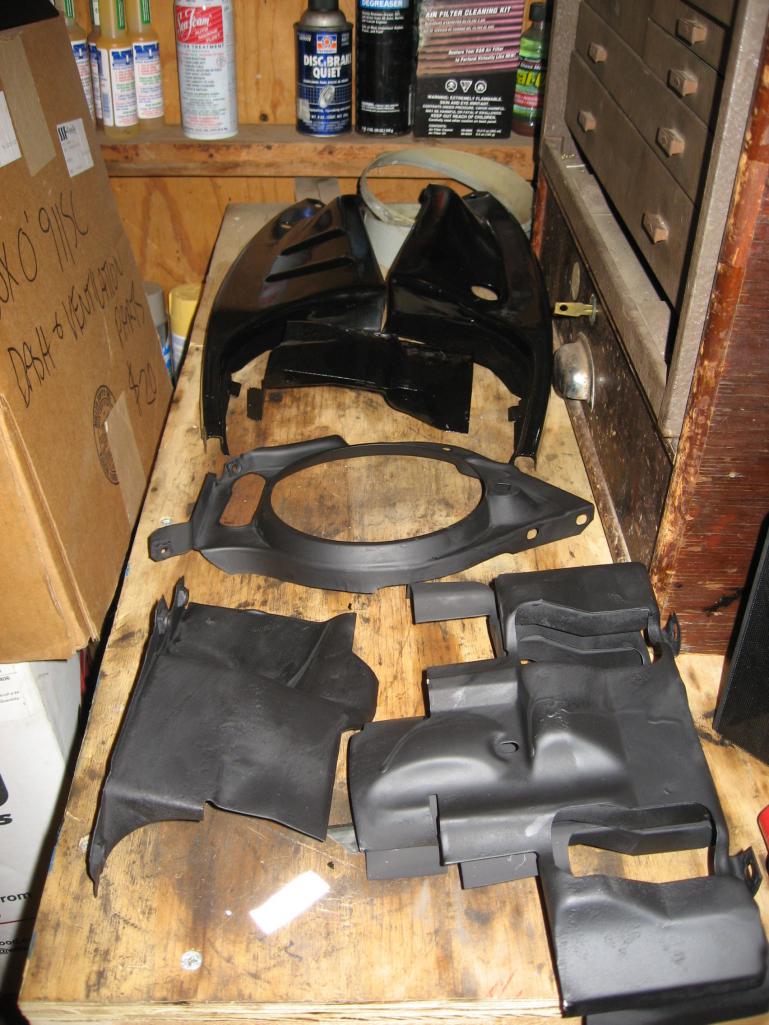
Posted by: Steve Pratel Aug 22 2013, 07:42 PM
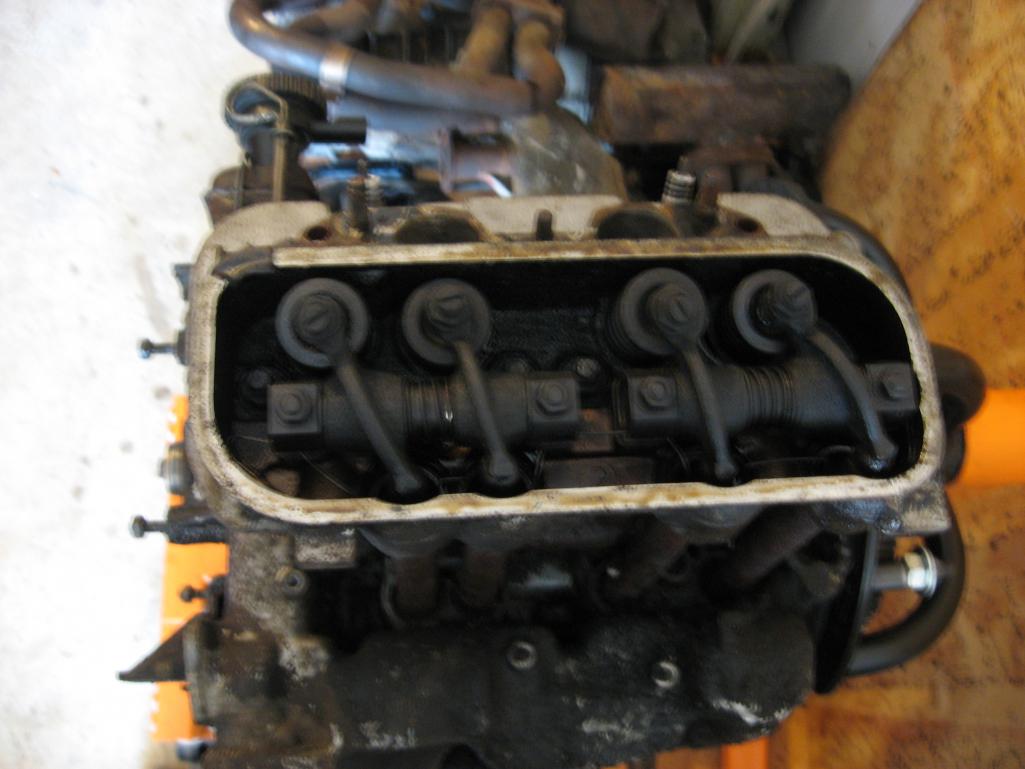
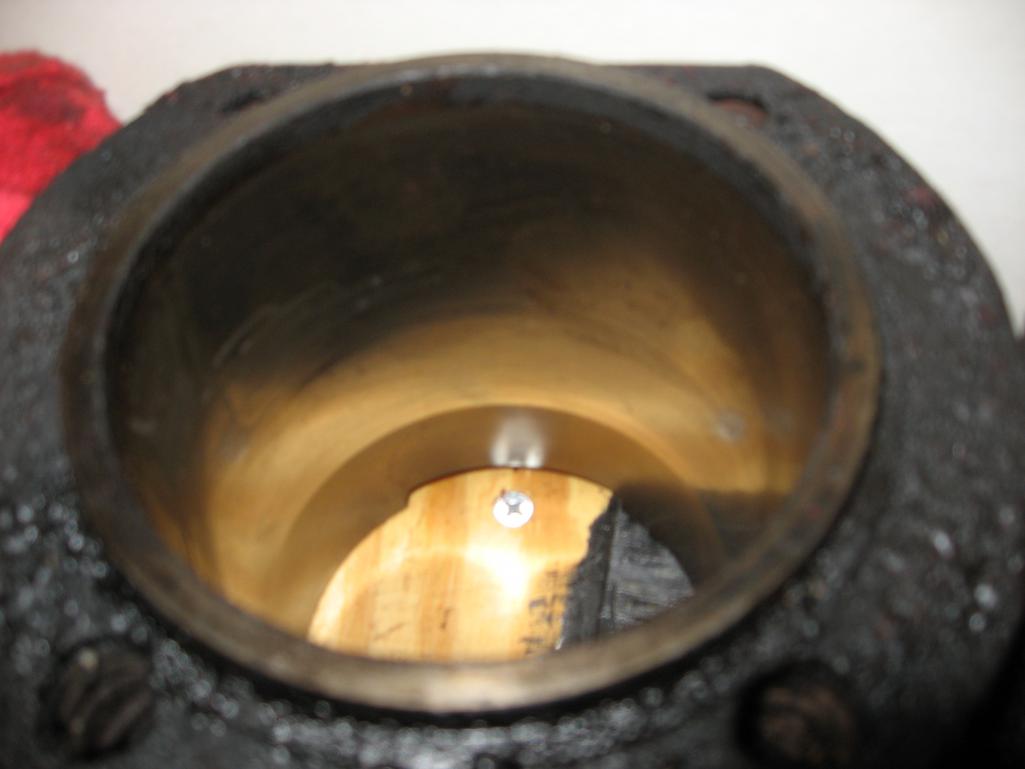
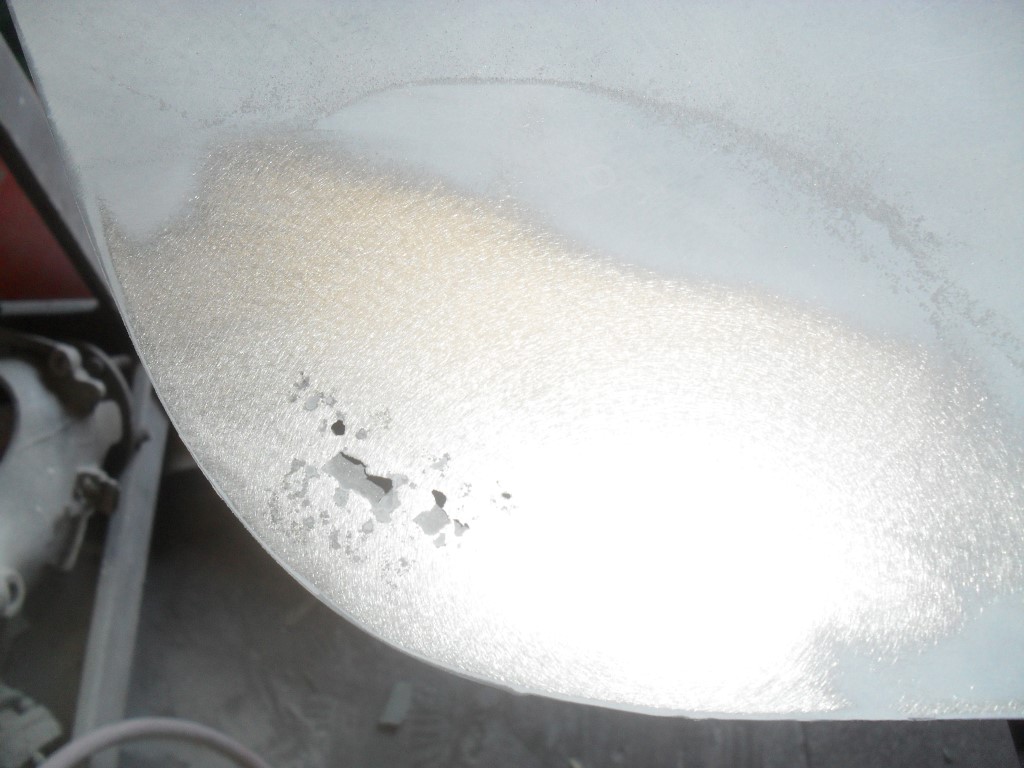
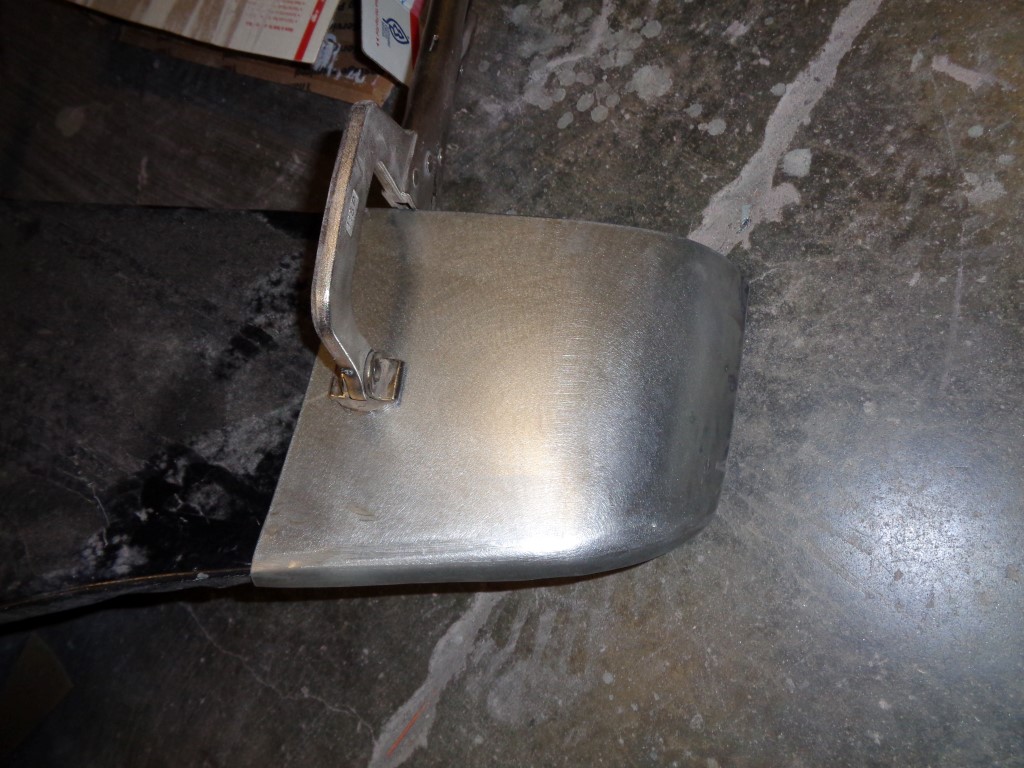
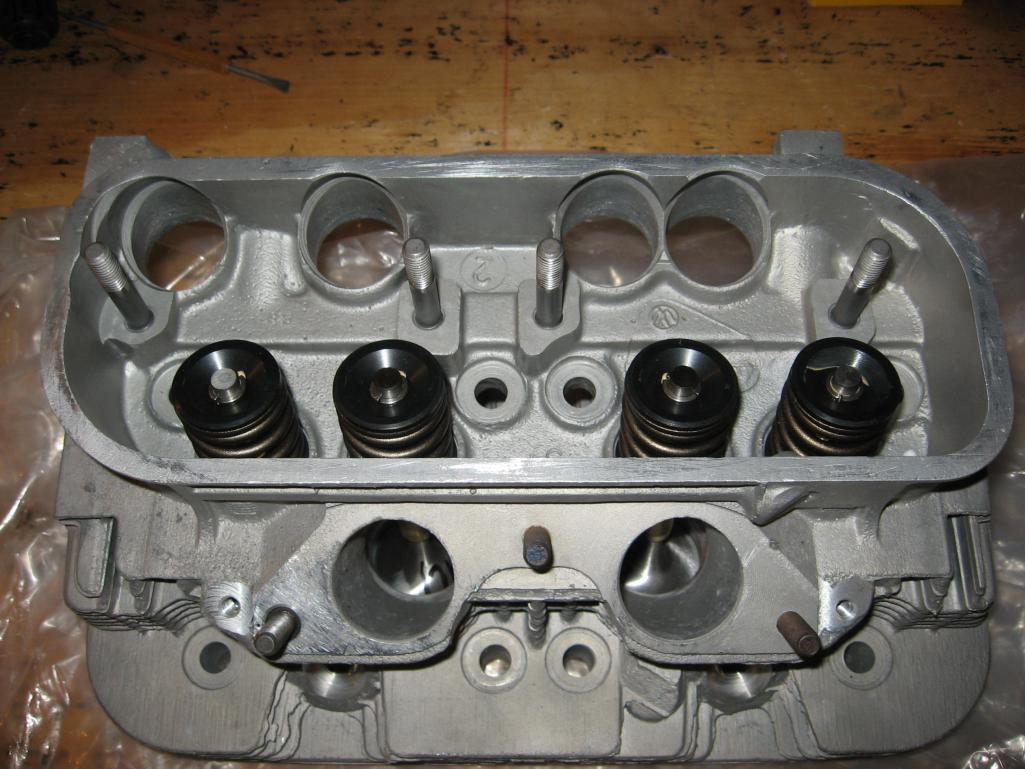
Overall the internals of the engine were in good shape. Nothing outrageous, and teh PO says it was running when he drove it last (95). The P & C's are in excellent shape, will probably clean and keep for posterity, or sell.
Attached thumbnail(s)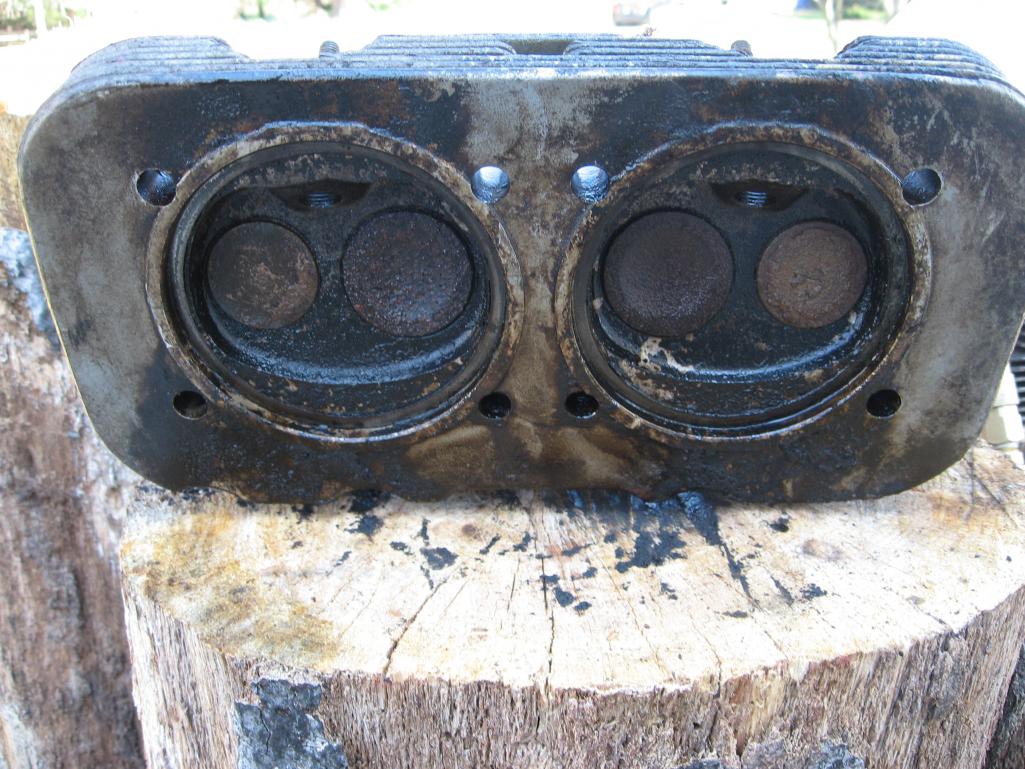
Posted by: Steve Pratel Aug 22 2013, 07:46 PM
very little scuffing shows the car was lightly used, and probably serviced regularly though a few of the upper tangs of the cyl were broken off. This may have happened when the clutch was changed, as it looks like this is the first time the heads came off.
Attached thumbnail(s)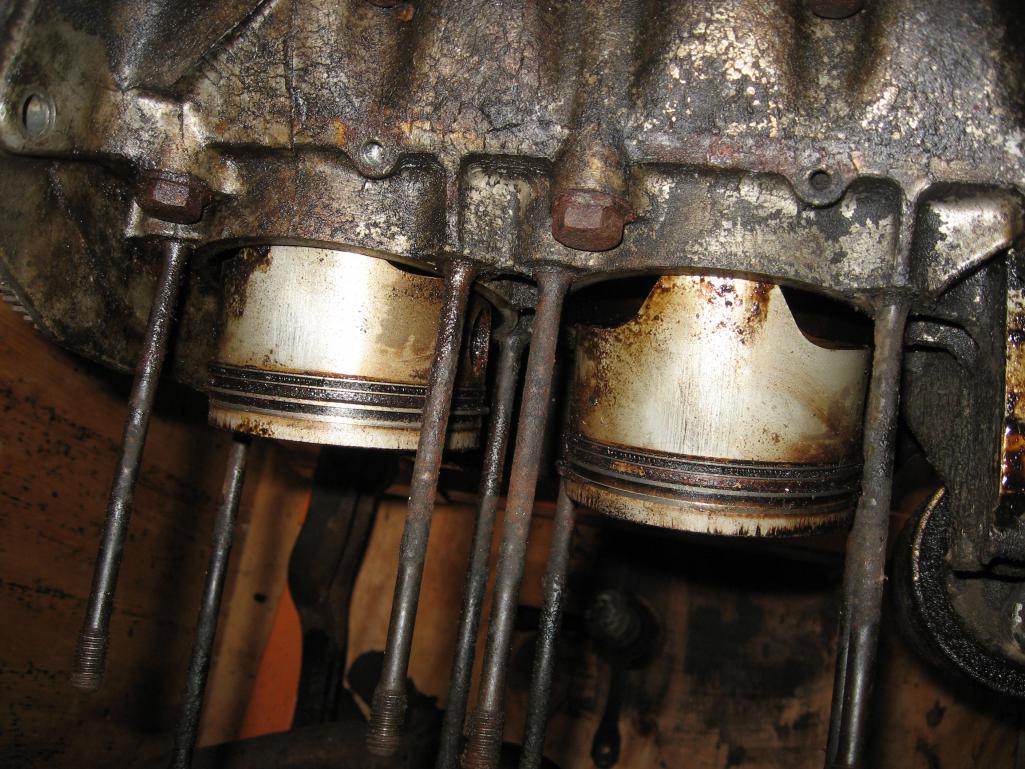
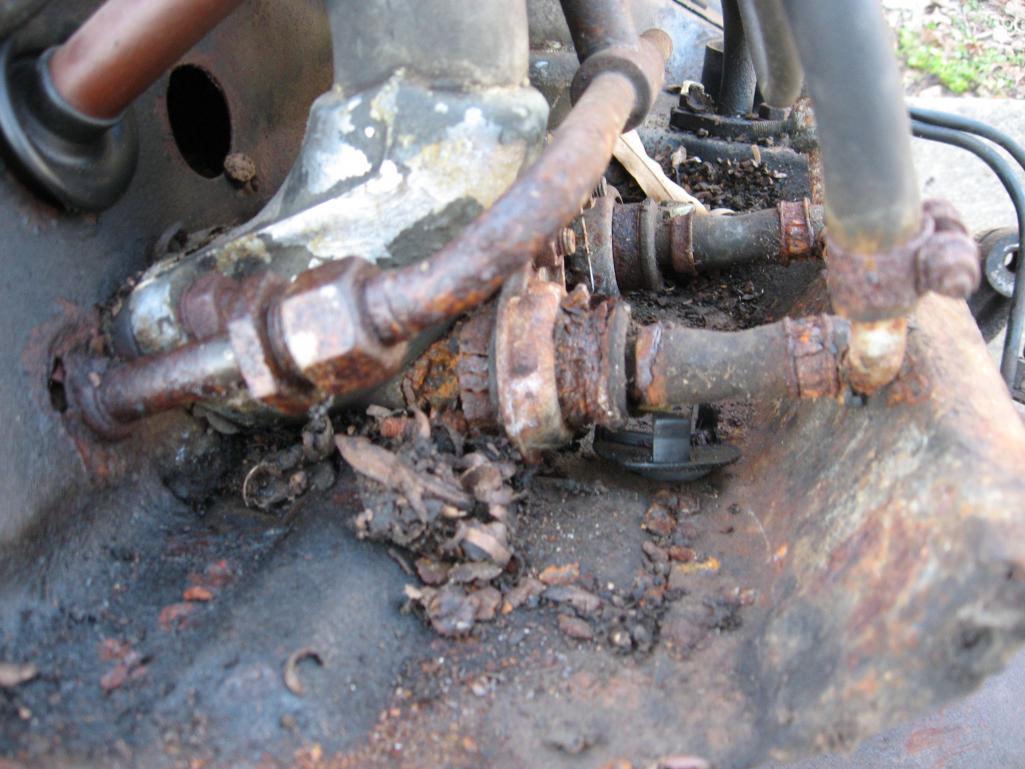
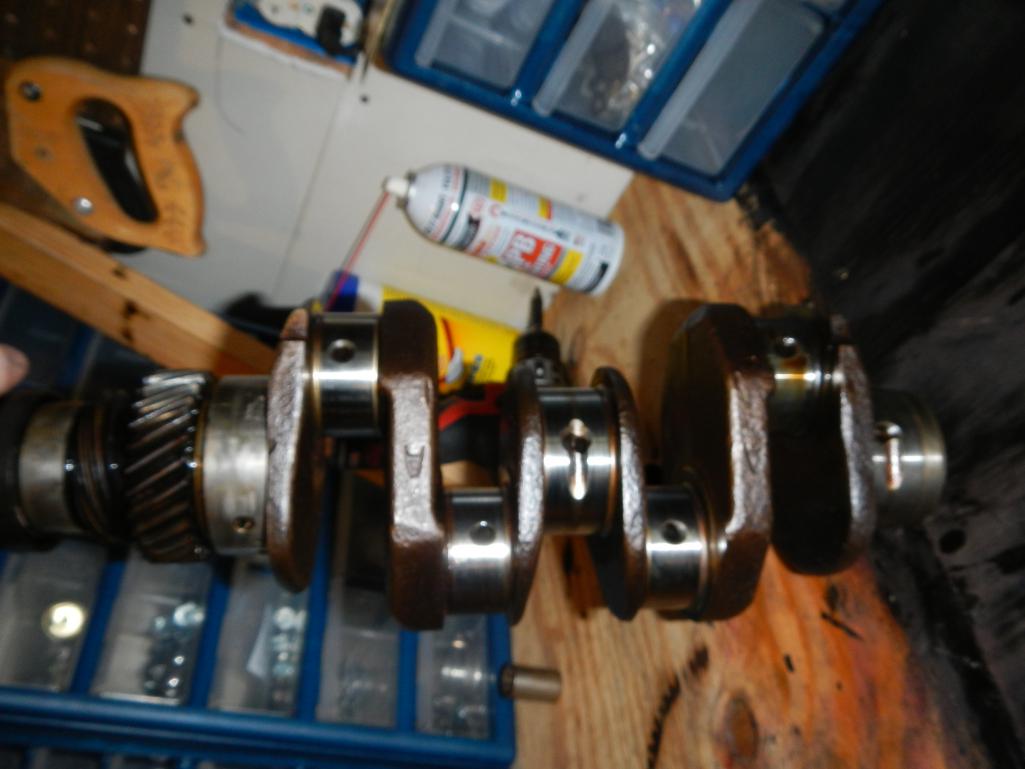
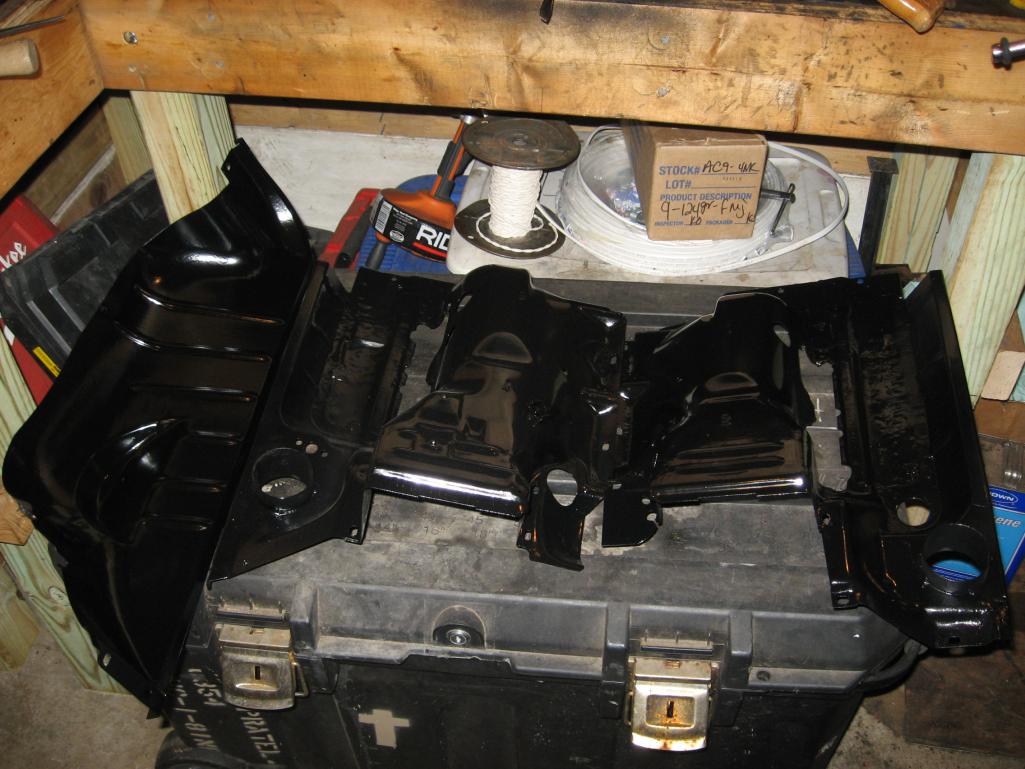
Posted by: Steve Pratel Aug 22 2013, 07:53 PM
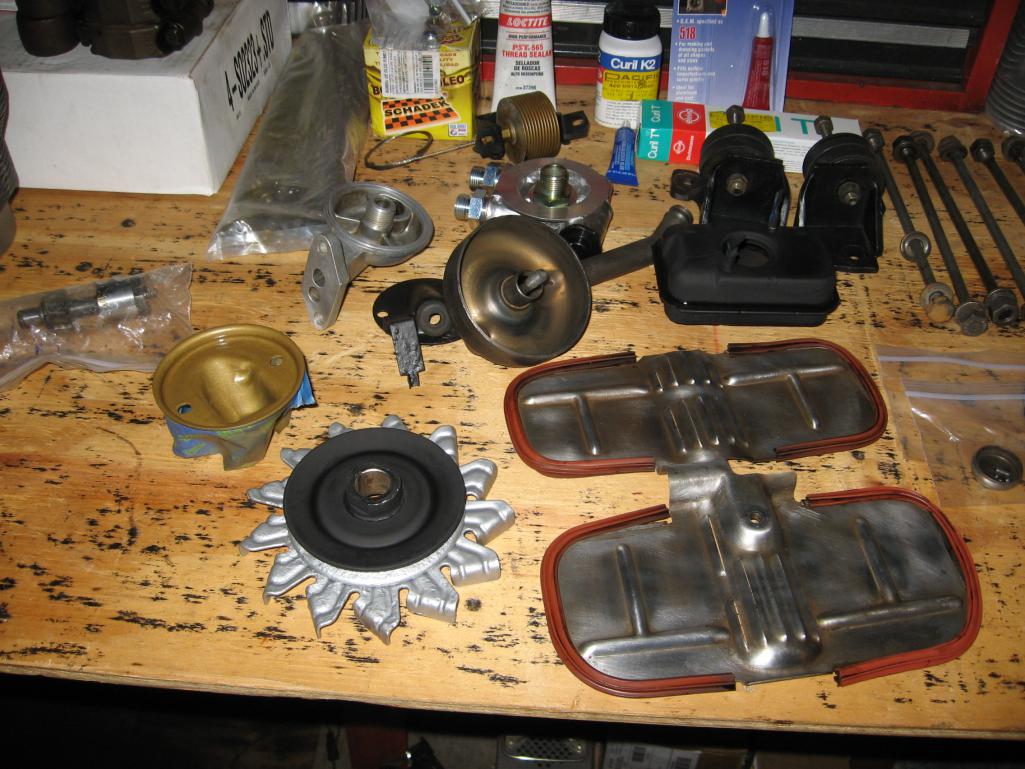
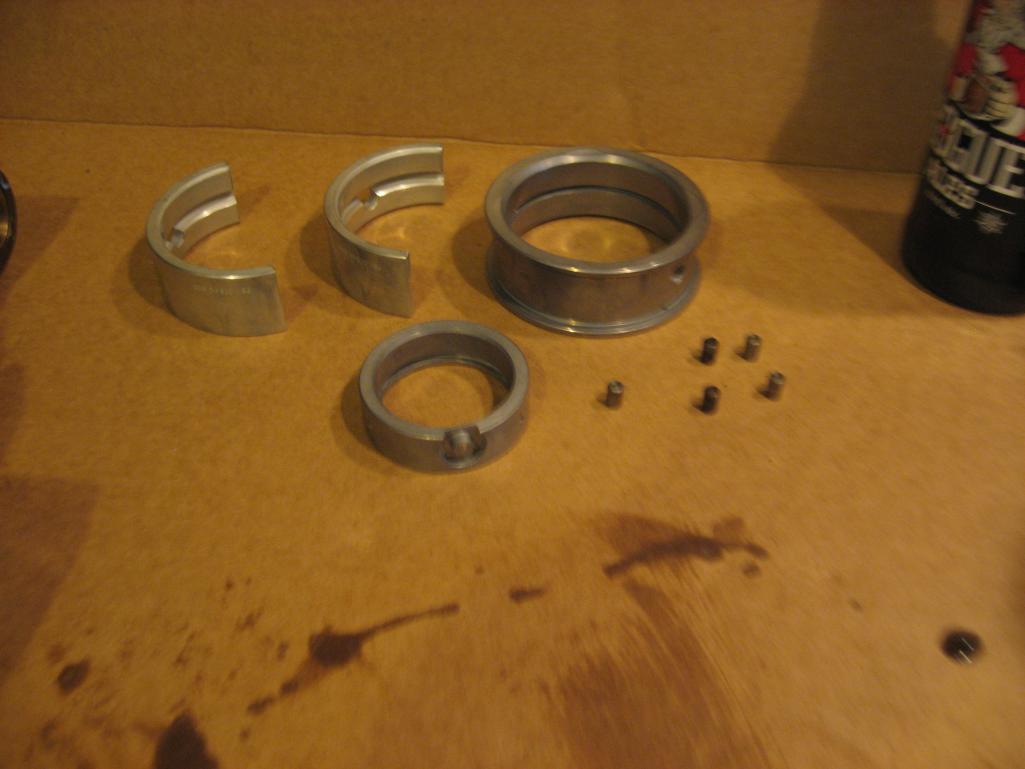
cases split very easily, though I was surprised at how LOOSE the mains were. Bearings had very little wear. Waiting for cases to come back then its time to start the journey take it to the long block.
You guys asked for pics!
Attached thumbnail(s)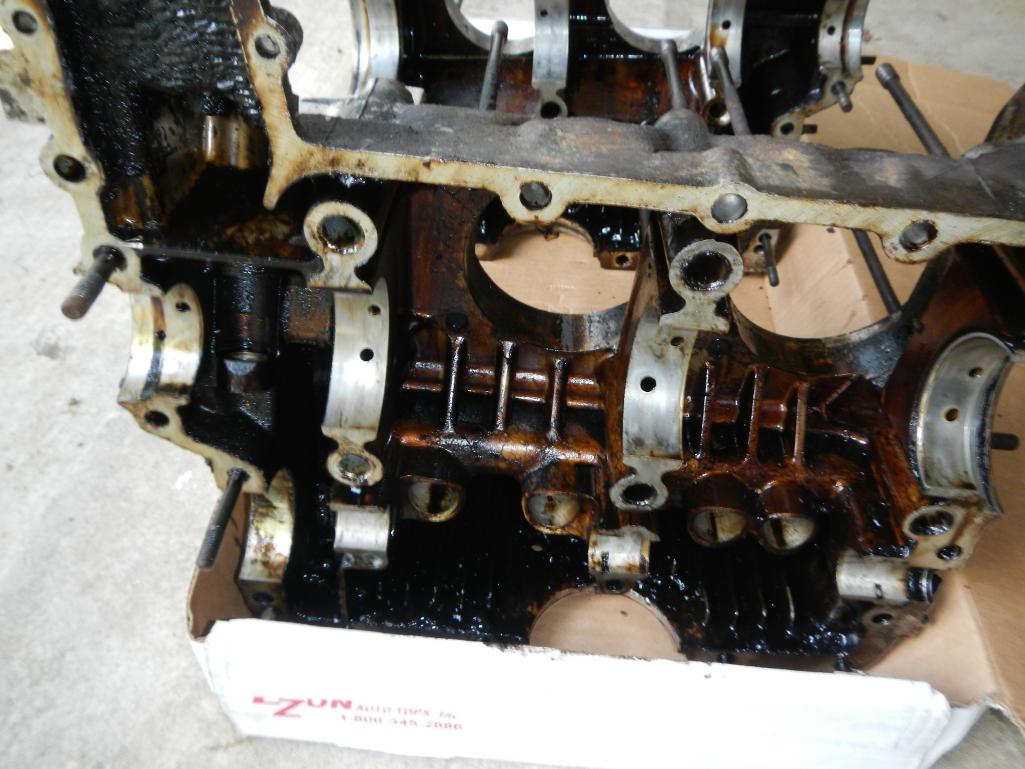
Posted by: Socalandy Aug 22 2013, 07:54 PM
Posted by: dale73914 Aug 22 2013, 10:39 PM
Why someone would leaave this to rot is beyond me......
I would love one of these 
Goodluck with the build
Posted by: SirAndy Aug 23 2013, 10:46 AM

I would love one of these
Goodluck with the build

Posted by: Steve Pratel Aug 23 2013, 12:17 PM
Why someone would leaave this to rot is beyond me......
I would love one of these
Goodluck with the build
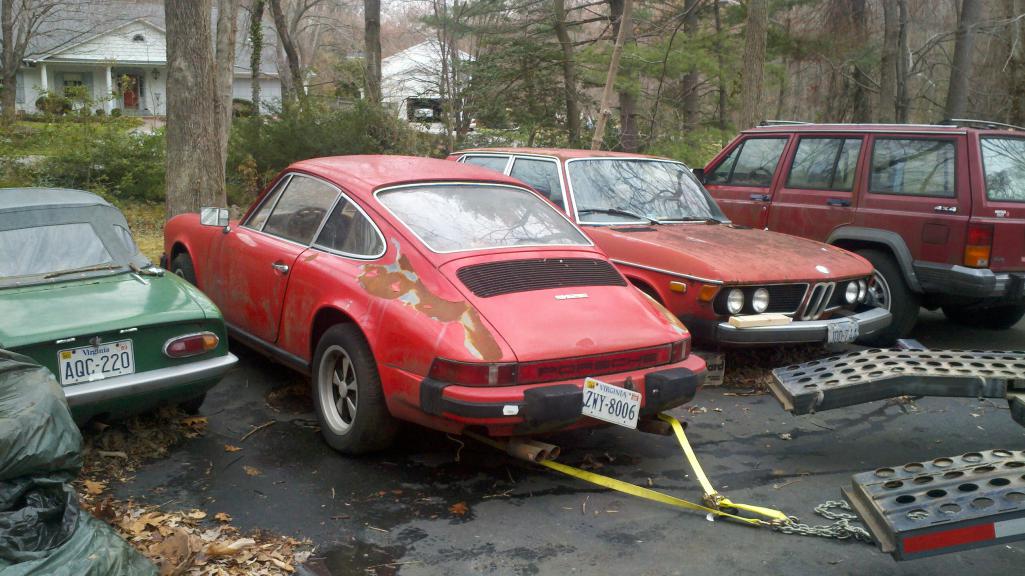
The truth is ugly.............. he parked for the winter, and in the spring instead of putting back on the road, he started driving a.... Miata............ choke....... Really nice guy, older what is worse is what this was sandwiched between.
Attached thumbnail(s)
Posted by: stugray Aug 23 2013, 12:37 PM
I never realized that the 912s had 4 cyls in them.
That looks exactly like our type IV.
Does the engine have VW markings anywhere?
Are those heads technically 2.0L heads?
Be sure to do the galley plugs once you get the case back from cleaning.
Good Luck!
Stu
Posted by: Jgilliam914 Aug 23 2013, 01:08 PM
I never realized that the 912s had 4 cyls in them.
That looks exactly like our type IV.
Does the engine have VW markings anywhere?
Are those heads technically 2.0L heads?
Be sure to do the galley plugs once you get the case back from cleaning.
Good Luck!
Stu
The 912E were the only VW type 4 motored 912's all previous were 356 type motors
Posted by: Jgilliam914 Aug 23 2013, 01:12 PM
To Steve you will have a blast working on it. And in the end you will have a very rare car that you will enjoy for years to come!
Posted by: poorsche914 Aug 23 2013, 01:15 PM
The '76 912E had the same 2.0 as our 914s but with L-jet.
Posted by: stugray Aug 23 2013, 05:31 PM
So do the 912E owners get "looked down upon" like the 914 owners do at the PCA meetings? ;-)
Stu
Posted by: injunmort Aug 23 2013, 08:03 PM
not to be a douche but butdo you guys care about my 1970 911 resto that I haven't started yet?
Posted by: Mikey914 Aug 23 2013, 09:55 PM
This is what it will look like when it's done-
Some pictures for inspiration
Attached image(s)


Posted by: Mikey914 Aug 23 2013, 10:00 PM
not to be a douche but butdo you guys care about my 1970 911 resto that I haven't started yet?
Depends, taking the motor out and dropping it into a 914??

There is a lot of crossover with this car. It replaced the 914 until the 924 came out as the entry vehicle.
Posted by: speed metal army Aug 23 2013, 11:30 PM
not to be a douche but butdo you guys care about my 1970 911 resto that I haven't started yet?
HA!No.....
Posted by: euro911 Aug 23 2013, 11:42 PM
Cool. It would be a 2056 with those P/Cs
What cam does it have?
... and
Posted by: Steve Pratel Aug 26 2013, 10:44 AM
I never realized that the 912s had 4 cyls in them.
That looks exactly like our type IV.
Does the engine have VW markings anywhere?
Are those heads technically 2.0L heads?
Be sure to do the galley plugs once you get the case back from cleaning.
Good Luck!
Stu
The 912E had the same motor as the 914, but with a different FI system. Yes, they are the 3 stud "porsche heads"
Posted by: euro911 Aug 26 2013, 11:27 AM
2.0L T4 with L-jet FI
Posted by: Dr Evil Aug 26 2013, 07:59 PM
Not sure if a lot of people already mentioned this, but the 76 912E had a 2.0 TIV with L-jet 
Cool project! 
Posted by: euro911 Aug 26 2013, 11:50 PM

Posted by: Nine_14 Aug 27 2013, 10:30 AM
Looks like the previous owner was not an Porsche enthusiast.
Hope to see the rebuild of the car here with many pics.
Posted by: Steve Pratel Aug 29 2013, 04:55 PM
Thanks for the welcome guys, I will definitely be checking in here for some help as I build the motor. I took the flywheel to a second shop they said the flywheel was fine, so they are going to clean and do a light resurface.
Here is a question, my cooling fan is pitted and dirty, what is the best way to restore? I'd like to powder coat, but am a bit concerned about the cleaning and effecting the balance of the fan.
SHOULD start the assembly of the long block after laborday weekend.
Posted by: Jonathan Livesay Aug 29 2013, 05:09 PM
not to be a douche but butdo you guys care about my 1970 911 resto that I haven't started yet?
I wouldn't mind if you wanted to give it to me, if that is what you are asking.
Posted by: euro911 Aug 29 2013, 07:13 PM
Here is a question, my cooling fan is pitted and dirty, what is the best way to restore? I'd like to powder coat, but am a bit concerned about the cleaning and effecting the balance of the fan.
SHOULD start the assembly of the long block after labor day weekend.
Blast away and paint or powder-coat the pulley as desired. Some folks paint the fan too.
Repaint your timing marks (red or white) and carry the timing marks all the way to the other side of the fan so it's easier to see from any angle.
Posted by: Steve Pratel Sep 3 2013, 08:58 PM
Here is a question, my cooling fan is pitted and dirty, what is the best way to restore? I'd like to powder coat, but am a bit concerned about the cleaning and effecting the balance of the fan.
SHOULD start the assembly of the long block after labor day weekend.
Blast away and paint or powder-coat the pulley as desired. Some folks paint the fan too.
Repaint your timing marks (red or white) and carry the timing marks all the way to the other side of the fan so it's easier to see from any angle.
Thanks Mark, yes the plan is to paint both sides, and to make fresh/clear timing marks on fan. I will probably soda blast the fan then paint in light coats.
Posted by: euro911 Sep 5 2013, 04:41 PM
Another neat trick is to drill a 1/2" hole in the rear engine tin at the flywheel. Paint the factory TDC gouge with a nice bright color and paint another (wider one) 180 degrees out for BDC.
This comes in handy for ignition timing when topside and the marks on the flywheel also help when down below, adjusting the valves 
Posted by: Steve Pratel Nov 11 2013, 07:05 PM
Am looking at a couple fuel pumps for my build.
Is a 2056 with Weber 40's. Looking at these two pumps as a start, any experience with these? Obviously looking for reliability.
Also, do I need to run a regulator and fuel return back to the tank with this low a pressure? I've come across this http://www.amazon.com/FRAM-G3583-In-Line-Fuel-Filter/dp/B000AMW0F6 as a possible alternative to a pressure regulator, would be an easy fit, plan to keep stock filter and plumbing and put this in beween the stock filter and carbs, then plumb in the return. But is it needed? Good insrurance? Here are the pumps. a CB, Mer Gasket and Carter.
http://www.cbperformance.com/ProductDetails.asp?ProductCode=3193
http://www.summitracing.com/parts/mrg-42s/overview/
http://www.jegs.com/i/Carter/180/P4070/10002/-1
Thanks!
Posted by: SirAndy Nov 11 2013, 08:08 PM
http://www.cbperformance.com/ProductDetails.asp?ProductCode=3193
I used the CB rotary pump on my 2056 and it worked great and was quiet ...

Posted by: Kirmizi Nov 11 2013, 09:39 PM
Rotary pumps, like the one from CB Performance, are also available from your local FLAPS.
Posted by: euro911 Nov 11 2013, 10:20 PM
Is a 2056 with Weber 40's. Looking at these two pumps as a start, any experience with these? Obviously looking for reliability.
Also, do I need to run a regulator and fuel return back to the tank with this low a pressure? ...
Thanks!
Posted by: StratPlayer Nov 12 2013, 10:30 AM
Clean off the fan with some brake cleaner, if your gonna have it powder coated it will need to be balanced. If rebuilding the engine, all parts that need balancing should be balanced as well.
Posted by: Steve Pratel Nov 14 2013, 07:17 AM
Thanks all, I decided on the CB rotary pump.
I just finished media blasting the fan, will be painting then sending crank, fan flywheel, and PP to be balanced. I weighed my piston/ring/rod assemblies and tehy are almost spot on, but will match opposing sides as close as possible.
Quick question, I have been planning on using permatez aviation sealant for my case/assembly sealent, is this still the conventional wisdom?
\
Posted by: Jeffs9146 Nov 14 2013, 11:12 AM
Thanks all, I decided on the CB rotary pump, and will likely use the Fram filter with the built in bypass as a second filter. The Jeep guys use this when running Weber IDF's with great results.
I just finished media blasting the fan, will be painting then sending crank, fan flywheel, and PP to be balanced. I weighed my piston/ring/rod assemblies and tehy are almost spot on, but will match opposing sides as close as possible.
Quick question, I have been planning on using permatez aviation sealant for my case/assembly sealent, is this still the conventional wisdom?
I'm going to try to keep all my questions and posts on the car in this thread, would like to rename it if possible, to #770 Build Project (my 912E is #770 of about 2000). Moderators???
You can change the title yourself by going to your first post while loged in and click on edit, then full edit and go to the top of the new screen and change your title!
Posted by: Joe Sharp Nov 14 2013, 11:35 AM
not to be a douche but butdo you guys care about my 1970 911 resto that I haven't started yet?
Some people will be douche bags and say no but that is not what all of us would say. I like restorations in just about any car. There has even been some pics a Lotus done here.
Posted by: Steve Pratel Nov 14 2013, 12:33 PM
thanks!
Thanks all, I decided on the CB rotary pump, and will likely use the Fram filter with the built in bypass as a second filter. The Jeep guys use this when running Weber IDF's with great results.
I just finished media blasting the fan, will be painting then sending crank, fan flywheel, and PP to be balanced. I weighed my piston/ring/rod assemblies and tehy are almost spot on, but will match opposing sides as close as possible.
Quick question, I have been planning on using permatez aviation sealant for my case/assembly sealent, is this still the conventional wisdom?
I'm going to try to keep all my questions and posts on the car in this thread, would like to rename it if possible, to #770 Build Project (my 912E is #770 of about 2000). Moderators???
You can change the title yourself by going to your first post while loged in and click on edit, then full edit and go to the top of the new screen and change your title!
Posted by: Joe Sharp Nov 14 2013, 12:42 PM
So I'm cooking today to get ready for dinner tonight. MMMM cookies. Going to start the smoker at about 2:30 for the smoked chicken tacos. So if your in the area stop by for dinner at about 6:00 pm. 
Posted by: euro911 Nov 14 2013, 01:15 PM
Thanks all, I decided on the CB rotary pump, and will likely use the Fram filter with the built in bypass as a second filter. The Jeep guys use this when running Weber IDF's with great results. ...
I don't know about Fram's fuel filters, but I don't use their oil filters. Why?
https://www.youtube.com/watch?v=XRRgw4B7R-I
I just finished media blasting the fan, will be painting then sending crank, fan flywheel, and PP to be balanced. I weighed my piston/ring/rod assemblies and tehy are almost spot on, but will match opposing sides as close as possible.
Having the entire rotating assembly balanced with the flywheel, fan and clutch assembly bolted on is essential to longevity, you're doing it right
Quick question, I have been planning on using permatez aviation sealant for my case/assembly sealent, is this still the conventional wisdom?
A light coating is good
I'm going to try to keep all my questions and posts on the car in this thread, would like to rename it if possible, to #770 Build Project (my 912E is #770 of about 2000). Moderators???
Posted by: Steve Pratel Nov 19 2013, 07:20 PM
And the fan is finished being blasted and painted. The pulley metal was very rusty so I removed the rust, and between wirebrush, sandpaper and a grinding stone on my dremel and smoothed it down to metal as good as possible, then used Eastwood Rust encapsulator once that cured for a couple days, I topcoated with PJ1 case paint. After curing for 2 days I then baked it at 200 for an hour to fully cure and complete the ceramic hardening. Then painted fan housing with silver and baked. Tomorrow I hope to pick up my crankshaft remount the front bearings and gears and get back to the mechanic for balancing with all the parts.
Attached thumbnail(s)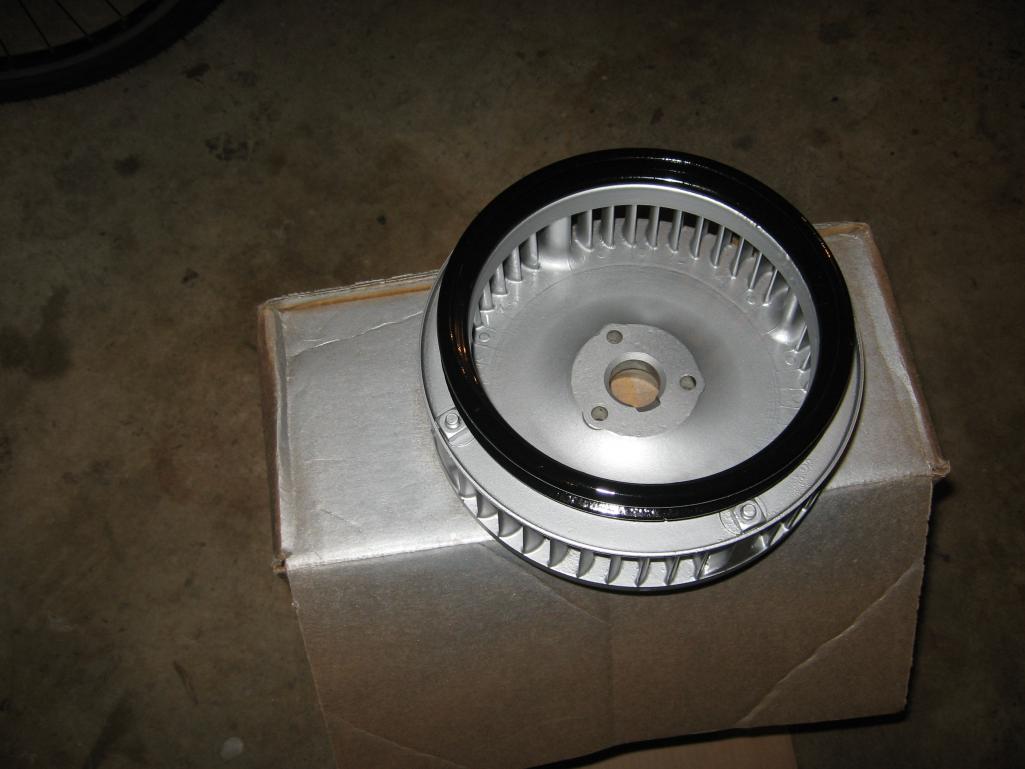
Posted by: euro911 Nov 19 2013, 08:14 PM
Nice. I can already tell how the rest of the motor is gonna look
Posted by: PanelBilly Nov 19 2013, 08:42 PM
Since you changed your title, I guess my "WEcome" comment doesn't work anymore now it's just welcome.
I was looking at a restored 912 this summer at the XXX event in Seattle. Guy wanted $18,000 or something close to that. I thought it was a steal at that price. Watch out how much you spend if you're thinking of selling the car any time soon.
Posted by: Steve Pratel Nov 20 2013, 08:03 AM
Since you changed your title, I guess my "WEcome" comment doesn't work anymore now it's just welcome.
I was looking at a restored 912 this summer at the XXX event in Seattle. Guy wanted $18,000 or something close to that. I thought it was a steal at that price. Watch out how much you spend if you're thinking of selling the car any time soon.
NOt SUre WHat you mean about the welcome ;-)
Yeah, I am very aware of the cost of this have been bargain hunting for parts, buying slowly over the last 2 years. Also watching for sales & great prices, recently scored new zimmerman front vented rotors for $55 a piece and rear vented rotors for $27. Crazy good deal. The downside is I am a parts whore and my wife is getting mad as boxes arrive daily ;-)
The entry price was virtually nothing, and paint will be the real killer, likely more than the full mechanical restore. I don't plan to sell the car, I have a bad habit of keeping things when I like them. After all the BS&T put into the car I'll be driving it for quite a while. My goal is a 3 season driver not a garage queen. I'm also doing 99% of the work myself with the exception of some machine work, balancing and the paint/body work. I did strip the car down to bare metal then acid etch and zinc coat. Will sit over the winter. In the spring I will redo the acid etching and zinc coating and prime with a 2 part epoxy primer, then send to a body shop for bodywork and paint. That is the BIG $$$ still looking for the right shop/person.
I am basically doing a complete gut & rebuild, salvaging what I can (which is a lot) and upgrading where I am replacing. i.e. Most of the work is refreshing, but some is total replacement.
- new 96MM pistons & cyls
- performance cam for carbs with solid lifters & swivel head adjusters
- Thermo reactors replaces with bursch bypass pipes
- Heads rebuilt and improved by Len Hoffman
- 911 style rotors & calipers & M/C
- 911 Turbo tierod and rack spacer kit
- Upgraded gauges - adding 911 dual
- Interior door panels and center console from 86 SC
- heater modifications and addition of fresh air fan circuit in place of clock & fuel gauge.
I'm having fun and have made some great connections, two of them being Jorge from European motorworks, and Len from Hoffman. Both of these guys are masters and very helpful, professional and have been great to work with. HIGHLY recommend either of them.
I've been wrenching on my own stuff since I was in 8th grade, and have rebuilt/restored half a dozen cars and motorcycles, but this is my first Porsche/VW other than a short stint with a GTI back in the early 80's which ended horribly in an Audi...... So I am learning as I go, and appreciate all the insight and help. I've asked a million dumb questions and will ask more.
Bottom line is if I spend $7500 on paint, I will be under $17000 for the total rebuild, that is everything including new tires, stereo, 100% complete. Plus I have a bunch of stuff to sell from this and other projects I have gathered piles of parts. I'm talking to one forum member about a few parts right now once we settle that I will offer the balance to the forums.
Posted by: FourBlades Nov 20 2013, 09:19 AM
Great project!
Seems like you have a good plan.
John
Posted by: anderssj Nov 20 2013, 06:31 PM
Why someone would leave this to rot is beyond me......
I would love one of these
Goodluck with the build
The truth is ugly.............. he parked for the winter, and in the spring instead of putting back on the road, he started driving a.... Miata............ choke....... Really nice guy, older what is worse is what this was sandwiched between.
Hi Steve,
Very nice project! Wow, lots of VA plates in that earlier post . . . where are you? I'm in Yorktown if you need a hand. There are a few of us in the eastern part of the state . . . .
Posted by: Al Meredith Nov 20 2013, 08:21 PM
Steve, I have had 3 912Es , now own #265. I built the2056 myself with all RABY parts. The torque is wonderfull. Check out Jake Raby,s website and you can find out about the one he has . I think it gets 36MPG at 80 MPH on an after market FI. I think it is : www.aircooledtechnology.com Let me know if you have any questions, AL
Posted by: gothspeed Nov 20 2013, 09:28 PM
I would love a 912E .... except they still have to be smogged here ....... lookin good
Posted by: euro911 Nov 20 2013, 11:15 PM
Get a '74 or a '75 911 and drop a T4 in it 
Posted by: Steve Pratel Nov 21 2013, 09:47 AM
SWEET! Just picked these up off ebay. NOS never used DRLA 36's with manifolds, filters and linkages, at about 1/2 a set of Weber 40's.... I'm psyched.
Attached thumbnail(s)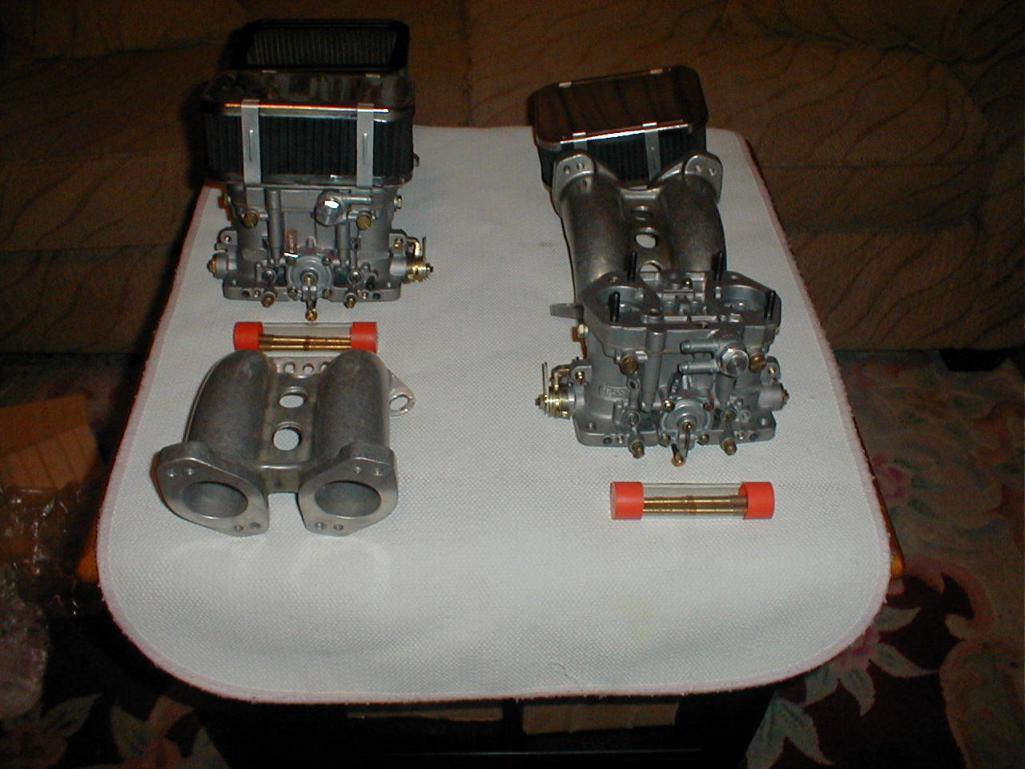
Posted by: Steve Pratel Nov 21 2013, 09:48 AM
[/quote]
Hi Steve,
Very nice project! Wow, lots of VA plates in that earlier post . . . where are you? I'm in Yorktown if you need a hand. There are a few of us in the eastern part of the state . . . .
[/quote]
I'm in Alexandria, just North of MT Vernon. Thanks for the offer!
Posted by: Steve Pratel Nov 21 2013, 09:56 AM
This is what I am hoping for, not looking to bracket race, but good strong midrange performance, torque, etc. I've learned much from the Raby pages, and ended up purchasing much of my engine hardware inadvertantly from the individual he purchases (or used to) them through. So I have many of the Raby improvements, with a few differences. I've corresponded with him a bit, interesting fellow... Will definately have questions as I work towards assembly of the motor. I'm really blessed to have a great local porsche mechanic, all they do is Porsche, and the guy I am dealing with has built hundreds of Type 4's and used to race his 914 which he still has in the shop. I'm doing 99% of it myself, he is balancing, and will tune/dyno the car when it is assembled.
My BIGGEST worry at this point is setting the valvetrain geometry correct, and cutting the pushrods to the right length. I have 3-4 articles on this that dont make much sense, but that is weeks away.
Thanks for the offers of help, this is a great forum.
Steve, I have had 3 912Es , now own #265. I built the2056 myself with all RABY parts. The torque is wonderfull. Check out Jake Raby,s website and you can find out about the one he has . I think it gets 36MPG at 80 MPH on an after market FI. I think it is : www.aircooledtechnology.com Let me know if you have any questions, AL
Posted by: Steve Pratel Nov 21 2013, 10:02 AM
I never even heard of one untill I found this car, almost diddnt go for it at first, but the more I have read and the reality that I will have a motor with almost as much power, with much less weight, better fuel economy, and better handling, plus a rare car (**EDIT missed a 0.... ;-) about 2000 made, with who knows how many still around) and this was a no brainer. PLUS the type 4 will always be less to operate and maintain (in theory) than the more complex 6CYL, and likely more durable.
I HOPE to build this motor right and to never have to open it for at least 50K miles other than valve adjustments, tuneups, etc.... I've been tearing the car down and slowly buying parts for the last 2 years, and am now at teh point where I am reassembling and building! WHOO HOO!
SO CA doesnt have an antique car clause? In VA I can put antique/collector plates on it, and not worry about emissions, etc.
I would love a 912E .... except they still have to be smogged here ....... lookin good
Posted by: Dave_Darling Nov 21 2013, 10:07 AM
There were, I believe, 2100 of the 912E made. Somewhat more than 200, but still a very small number.
I remember when a younger member of the Porschephiles email list found 912E #1 and bought it. He took it to his mechanic for a general going-over or maintenance or something, and the mechanic wrecked it on a test-drive. Still makes me sad to think about....
--DD
Posted by: gothspeed Nov 21 2013, 12:54 PM
I never even heard of one untill I found this car, almost diddnt go for it at first, but the more I have read and the reality that I will have a motor with as much power (if not more) than the 76 911S, with much less weight, better fuel economy, and better handling, plus a rare car (**EDIT missed a 0.... ;-) about 2000 made, with who knows how many still around) and this was a no brainer. PLUS the type 4 will always be less to operate and maintain (in theory) than the more complex 6CYL, and likely more durable.
I HOPE to build this motor right and to never have to open it for at least 50K miles other than valve adjustments, tuneups, etc.... I've been tearing the car down and slowly buying parts for the last 2 years, and am now at teh point where I am reassembling and building! WHOO HOO!
SO CA doesnt have an antique car clause? In VA I can put antique/collector plates on it, and not worry about emissions, etc.
I would love a 912E .... except they still have to be smogged here ....... lookin good

Posted by: euro911 Nov 21 2013, 01:00 PM
There was legislation introduced to increase it to 1981 (IIRC), but it didn't pass 
Posted by: gothspeed Nov 21 2013, 04:39 PM
There was legislation introduced to increase it to 1981 (IIRC), but it didn't pass
+1 oh yeah, I kinda heard about that ..... that really sucks it did not pass ...
Posted by: euro911 Nov 21 2013, 05:34 PM
Yeah, they need to keep up with the times and move it up to at least '85 or so ... then I wouldn't have to smog my '84 Westy 
Posted by: Steve Pratel Nov 30 2013, 07:21 PM
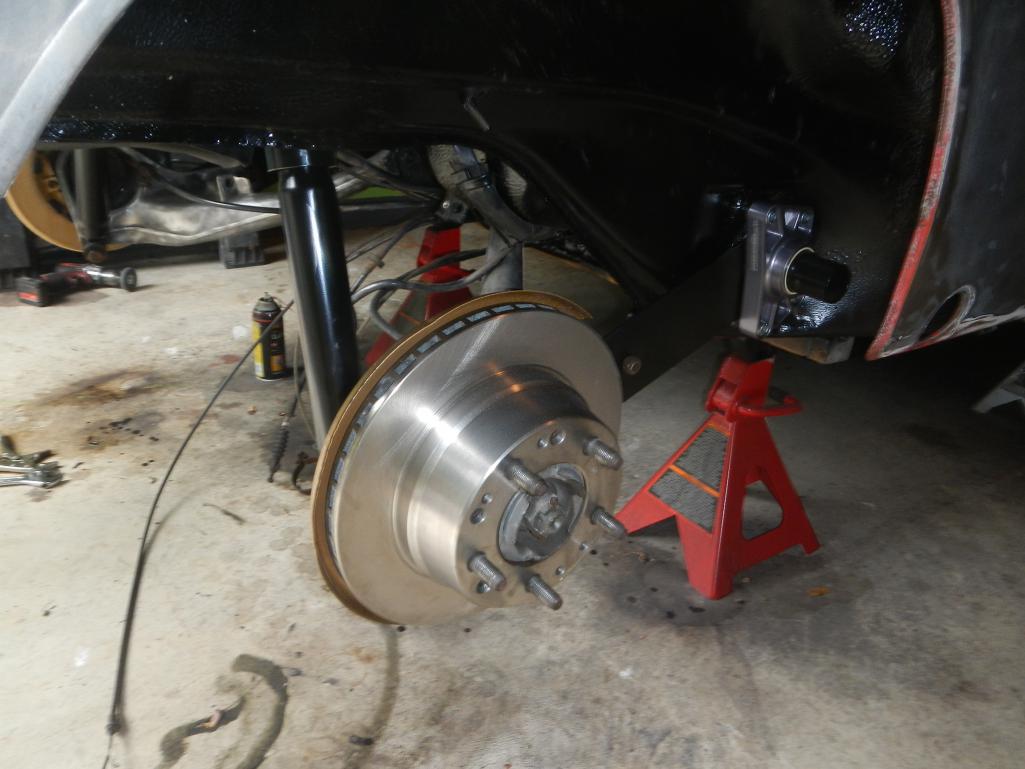
Some progress, I jacked the car up and put on stands today and started disassembling the suspension and brakes.
REAR: pulled the rear brake rotor, caliper, shock, brake shield and a few other things off the rear, was going to pull the rear spring plate and control arm bushings but after pulling the spring plate and looking at the bushing, which looked almost new, no cracks, etc. and some vigorous pushing and pulling of the control arm, I decided to lube and reinstalled. Nasty nasty rotors. I noticed the rear calipers were ATE.
FRONT: Pulled the rotors, calipers, shields, hubs, front sway bar, pulled out the torsion bars, and broke the balljoint pin loose, and ran out of energy (and the wifes patience lol ;-).
Notable moments: steel brake lines are shot, fittings are fubar, need to be replaced. Front torsion bars were in relatively good shape though the rear had no grease and had rusted. The brake pads were about 90% and caliper boots dont look too bad. Havent pulled the control arms off, but looking at the bushings they dont look dried out and cracked. I need to pull the control arms due to some rust on the arms and brackets. Will R&R the whole front suspension,
Next up: Separate the ball joint and strut housing, remove control arms and struts with camber plates, remove master cyl, drop the cross member and steering rack, clean and paint all, and then R&R.
Attached thumbnail(s)
Posted by: Steve Pratel Nov 30 2013, 07:23 PM
and the rear
Attached thumbnail(s)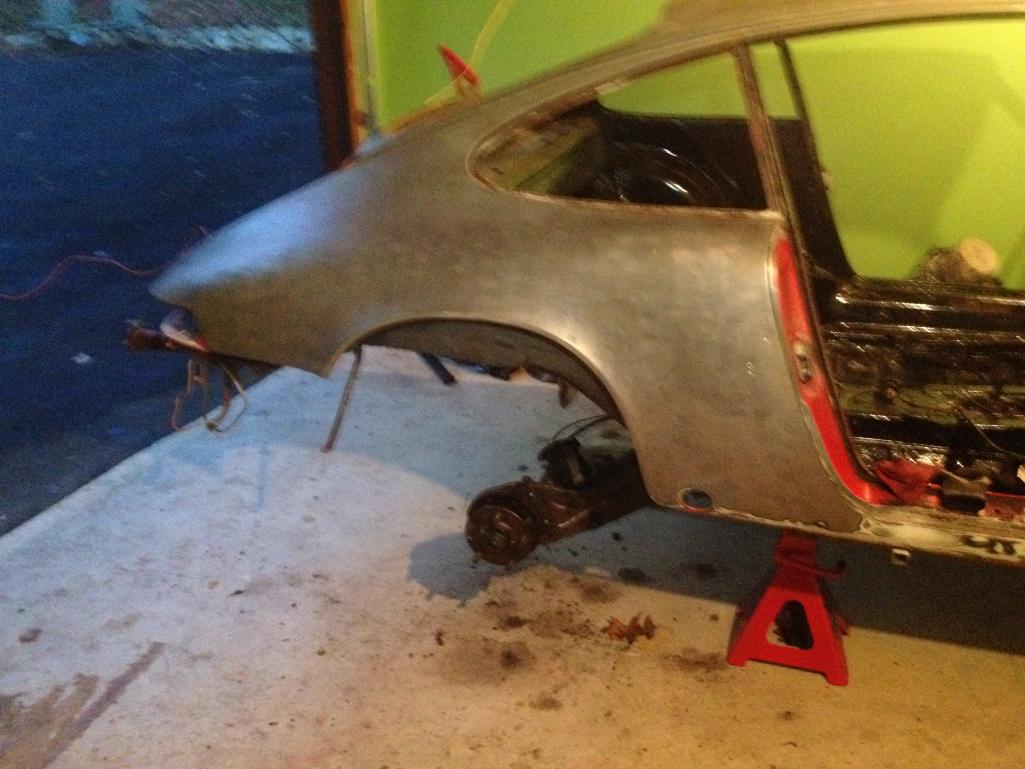
Posted by: Steve Pratel Nov 30 2013, 07:25 PM
..The pile of stuff. Will be dumping the rotors, and sending calipers back for cores, am upgrading to vented rotors front and rear and putting on new calipers as well as new Master cyl as well as new rubber lines, and most of the metal lines it looks like. Most looks good but the dust shields are very rusty and thin, will be interesting to see how it all works out.
Attached thumbnail(s)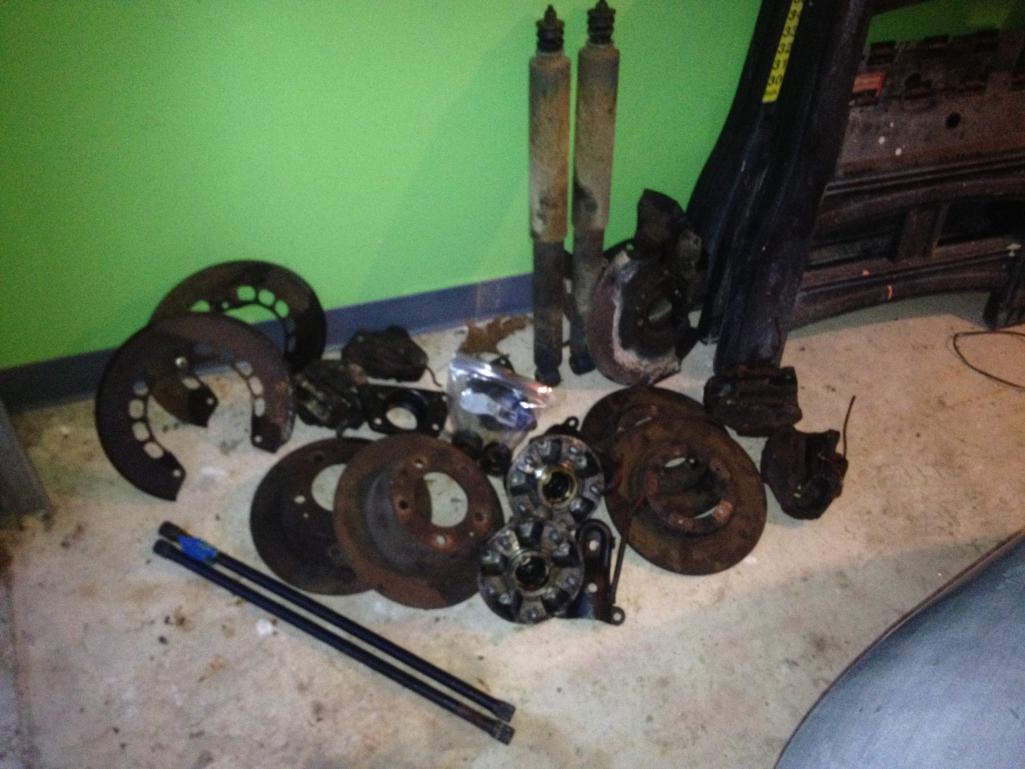
Posted by: Steve Pratel Nov 30 2013, 07:45 PM
passenger front end parts I removed today.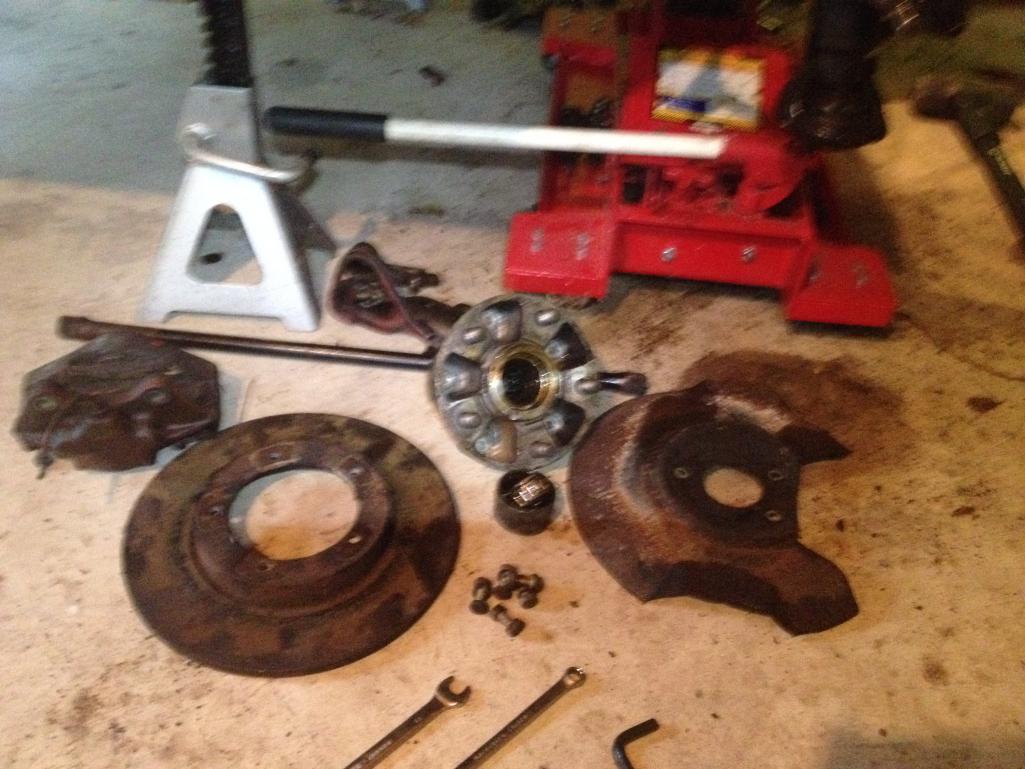
Posted by: Mikey914 Nov 30 2013, 07:45 PM
There was legislation introduced to increase it to 1981 (IIRC), but it didn't pass
Just an fyi my 912E will pass DEQ without the air pump and thermal reactors.
Smart. move to ditch the reactors they build up heat and cook the oil after you park the car.
The pump is a pain that robs power and I can get 36 mpg at 75.
love these cars too. The motor is what the 914 should have evolved to if production was continued.
Posted by: euro911 Nov 30 2013, 07:56 PM
Looks like you've been a busy boy.
If the car has sat for a long time, I recommend rebuilding the calipers and install a new master cylinder, even if they 'look OK'. It's really not that expensive in the realm of things and it'll give you peace of mind
P.S. you can go back and EDIT your posts. Sometimes (because I'm lazy) I'll EDIT my original post(s) to add pix.
Posted by: Cap'n Krusty Nov 30 2013, 08:32 PM
Another neat trick is to drill a 1/2" hole in the rear engine tin at the flywheel. Paint the factory TDC gouge with a nice bright color and paint another (wider one) 180 degrees out for BDC.
This comes in handy for ignition timing when topside and the marks on the flywheel also help when down below, adjusting the valves
Why would you want to look at marks on the flywheel when adjusting the valves?
The Cap'n
Posted by: euro911 Nov 30 2013, 09:02 PM
Topside, TDC for timing with an adjustable timing light. Bottom side, to find TDC & BDC
Posted by: oldschool Dec 1 2013, 09:59 PM
Get a '74 or a '75 911 and drop a T4 in it
LOL thanks what I was thinking....
Posted by: Steve Pratel Dec 4 2013, 08:41 PM
Gents, diddnt want to start a new thread, and trying to keep some discipline
So a few weeks ago I scored a new set of Dellorto 36's. I've heard and read several different opinions on wether these are too small. I've read that Dell's flow as well as one size up Webers, and because the target IDF was 40 as opposed to 44's, I figured that the Dellortos were the 'right size'. I've also been told that the 30mm venturis will be restrictive especially with my larger cam and Hoffman Heads.
So being a 'show me' kind of guy I have been reading and researching and discovered the following:
1. The CFM of Dellorto 36 DRLA is 205.8cfm/venturi for a total of 823CFM (CB Performance)
2. Approx 208 CFM total is Needed for a 126.27952 CID (2056cc) Mildly Built Engine (Carbs Unlimited)
3. Divide 208CMF/4 and you get 52 CFM/cyl.....
4. I measured the internal venturi/housing size of the SINGLE throttle body for the stock EFI and it is 58mm at its widest, and this flows all the air for the motor.
Based on all of this looks, it like the Dell will easily meet any demand for flow........ If the projected CFM for each cyl is 52, and each venturi will flow 205CFM, this is good right? Even if the CFM number posted for the carb is for BOTH Venturi's (barrells) I am still more than double the calculated CFM required...... SO....... other than experience, What am I missing????
Posted by: Jake Raby Dec 4 2013, 08:59 PM
For adequate performance for 5,500 RPM or below the 36s will be fine. The 36 Dell only flows 5CFM less than a 40 Weber with stock venturis.
Posted by: gothspeed Dec 5 2013, 12:00 AM
Get a '74 or a '75 911 and drop a T4 in it
Yeah, that is a good idea. it would have to be a non sunroof model then stripped of all extra weight. However in that price range, a nice early 912 would be kinda nice too.
Posted by: Steve Pratel Dec 11 2013, 07:31 AM
OK, things have been hectic the last week, back to it today I hope. Been getting some unexpected 24hr duty shifts at work, about to head home. I owe a few guys some prices on parts, will get them boxed and est weights today. Sorry for the delays!
Then it is time to do more blasting...... I have 2 small tin sections and the large pieces, that need to be media blasted, then washed (gonna use the dishwasher (without soap) when the wife is not home ;-) Then coat with eastwood rust encapsulator and gloss PJ1 black engine case paint & bake in oven to cure. Then it is on to suspension pieces. Hopefully get the crank assembly back from the mechanic next week (why does it take so long???)
Posted by: Steve Pratel Jan 26 2014, 04:30 PM
I've been busy on #770, here is a link to the thread on the 912E page. A great fellow Porsche source of info, and as you know shares the same basic motor as the 914. Figured I'd paste the link instead of double posting, and if I want to watch the Probowl tonight I need to do those honey do's...... SWMBO is understanding, but I spent all day on the car yesterday, so... well you know how it is. lol Anyhow, her is the link. Not much that is engine related, but I believe some of the suspension and shift mechanism may be applicable or interesting. Man am I having fun.
http://www.912bbs.org/vb/showthread.php?43391-770-Update&p=304404
Posted by: type47 Jan 26 2014, 05:10 PM
... and the reality that I will have a motor with as much power (if not more) than the 76 911S,
really ...?
http://www.thetruthaboutcars.com/2012/11/review-1976-porsche-911s-2-7/
states 170 hp
Posted by: Steve Pratel Jan 26 2014, 05:30 PM
... and the reality that I will have a motor with as much power (if not more) than the 76 911S,
really ...?
http://www.thetruthaboutcars.com/2012/11/review-1976-porsche-911s-2-7/
states 170 hp
LOL, yeah at some point, I thought the 911 motor put our around 130 hp.
Posted by: type47 Jan 26 2014, 06:24 PM
well, I know Jake does magic with typeIV motors but if it was in my car, I would like a 170 hp -6 rather than a 170 hp -4. But then I drive my cars like a  (trying to make a funny, no offensive meant to our female members)
Posted by: Steve Pratel Jan 26 2014, 07:14 PM
well, I know Jake does magic with typeIV motors but if it was in my car, I would like a 170 hp -6 rather than a 170 hp -4. But then I drive my cars like a
(trying to make a funny, no offensive meant to our female members)True, but this car isn't about power, and I've seen the prices of the 6cyl motors and parts...... I'm VERY happy with cost of the type 4. In fact, I could and would not be doing this project if it was in this condition and had the 6cyl. That said, as I have modeled my engine build on some of the best type 4 engines out there (mostly Raby), I think I will be completely satisfied with the power, even when I am old and drive like a girl
When I want speed I'll hop on my 0-60 2.8 sec.
1/4-mile 10.93 sec Motorcycle.

Posted by: Steve Pratel Feb 1 2014, 05:41 PM
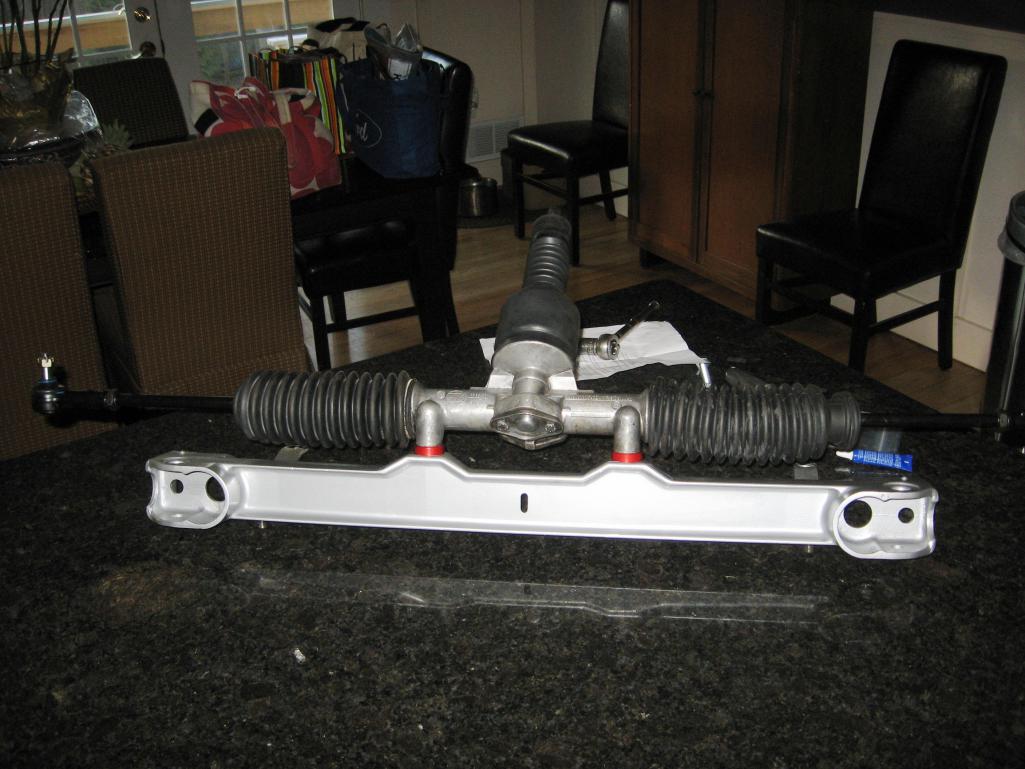
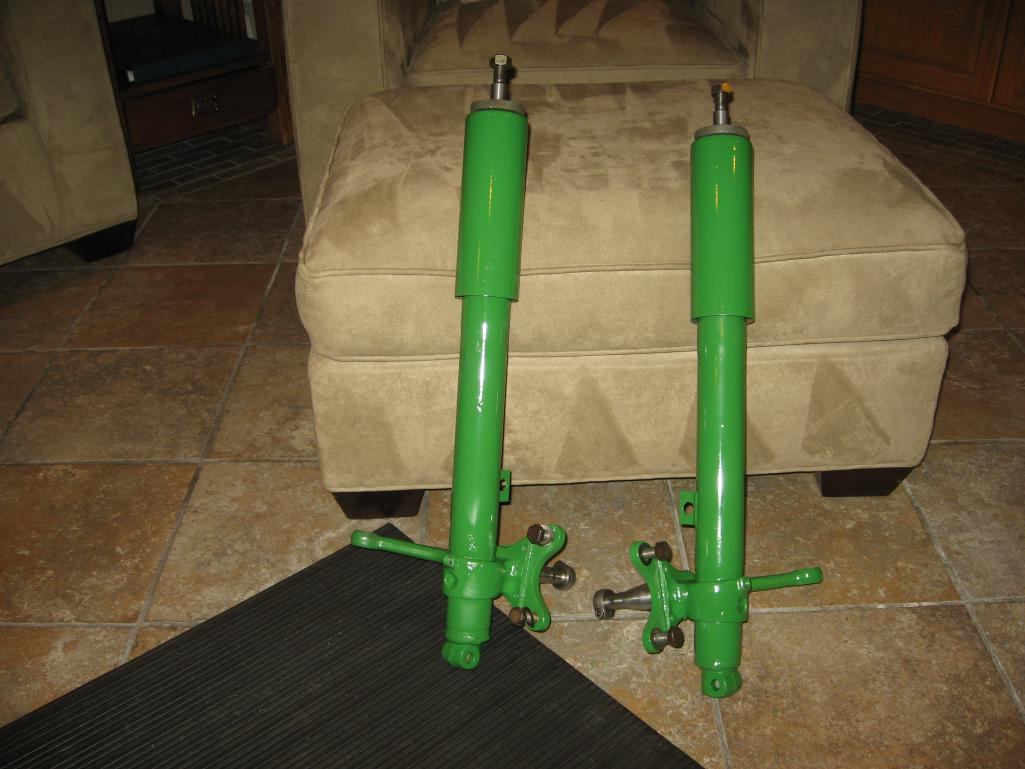
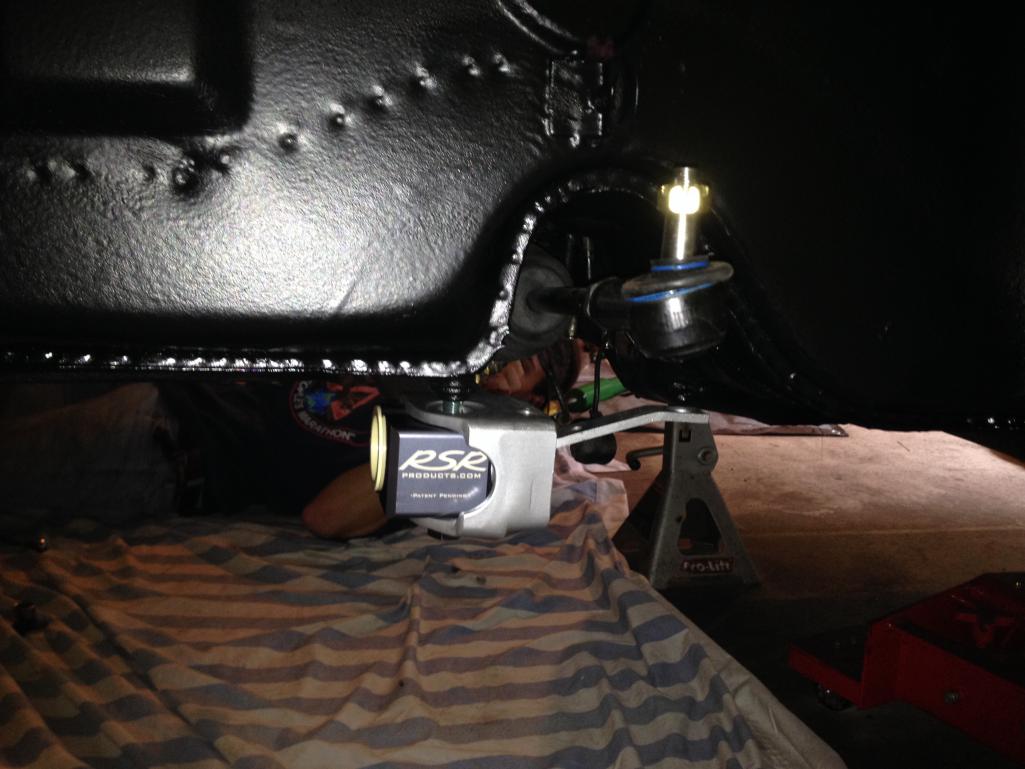
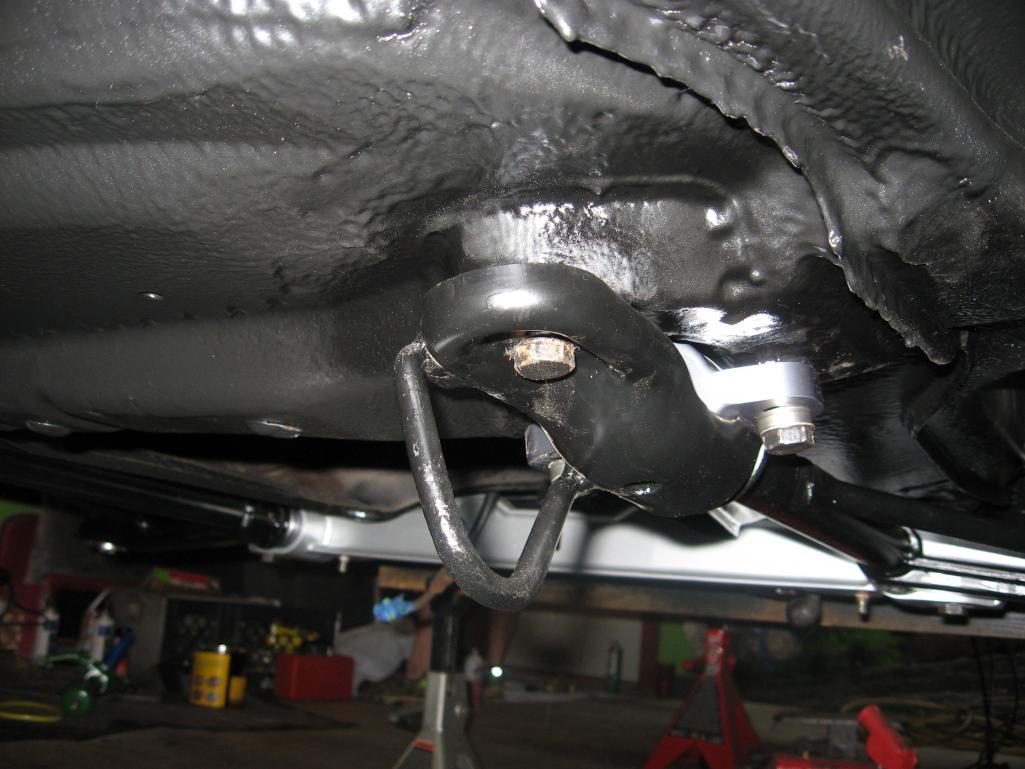
R&R'd the steering rack and front cross member today, things are coming along! Here is a before & after. Details are on the main build thread. Also test fit the sachs/Boge strut inserts, fit perfectly. Will be cleaning them up over the next few days.
http://www.912bbs.org/vb/showthread.php?43391-770-Update/page4
Attached thumbnail(s)
Posted by: Jake Raby Feb 1 2014, 07:23 PM
Consider the sprung weight difference of the two engines behind the rear axle of the same car. Then things change.
170 HP is nothing for us these days with the T4, in fact most every engine we complete is north of that figure today. The exception are those that are outfitted with stock FI and kept at around 130 "safe for stock FI" HP.
Yes, I own multiples of each and can compare them all back to back any day of the week. Both have pros and cons.
Posted by: Steve Pratel Feb 3 2014, 09:29 PM
A few more projects completed. Paint is PJ1/VHT engine paint. Heat treated after it cured. Should stand up well. The brake shields were very rusty, cleaned up with wire wheel, cleaned degreased and POR15 like paint, then topcoated with 3 coats of gold engine case paint & baked in oven. Same with suspension parts.
Attached thumbnail(s)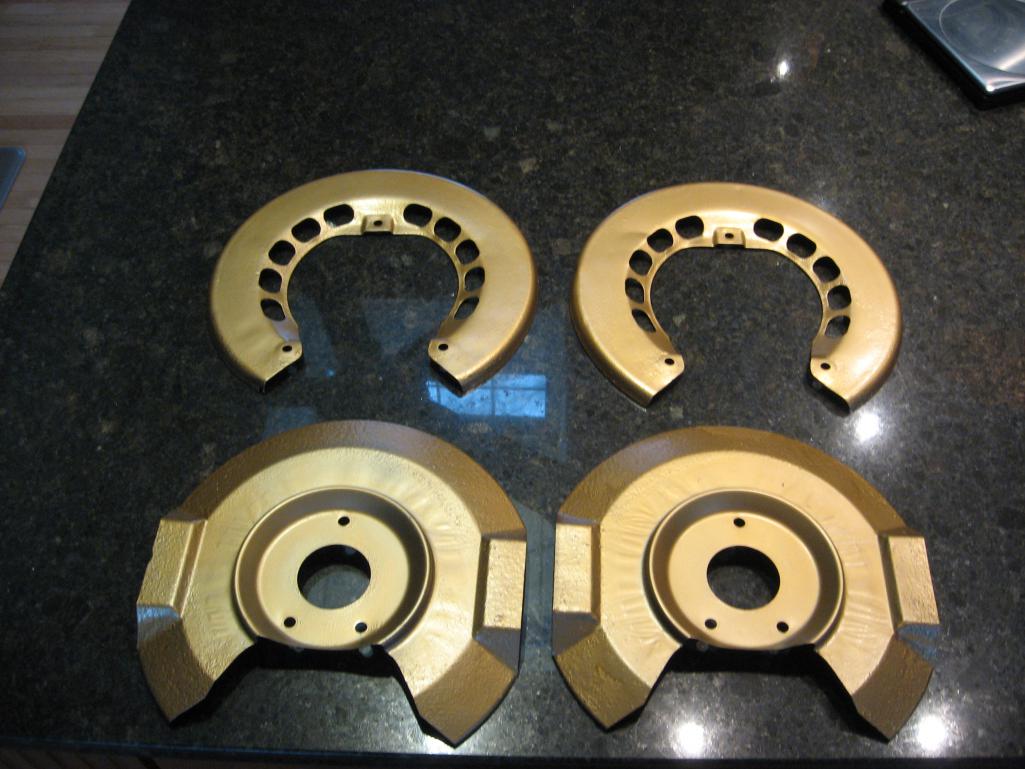
Posted by: Steve Pratel Feb 3 2014, 09:34 PM
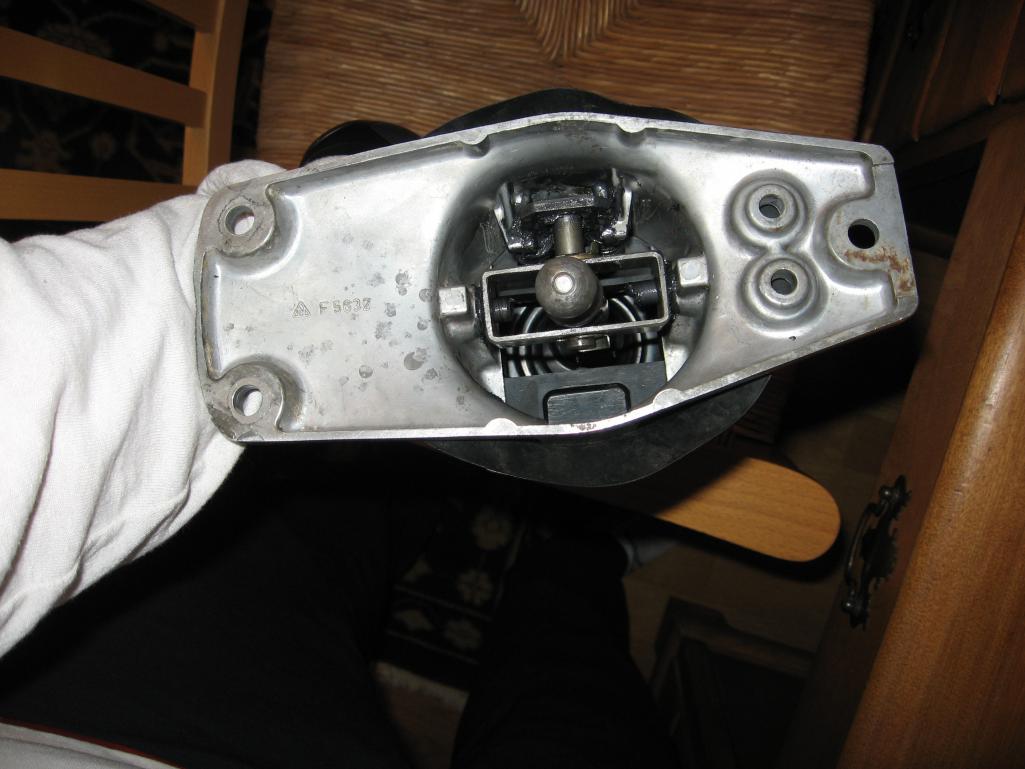
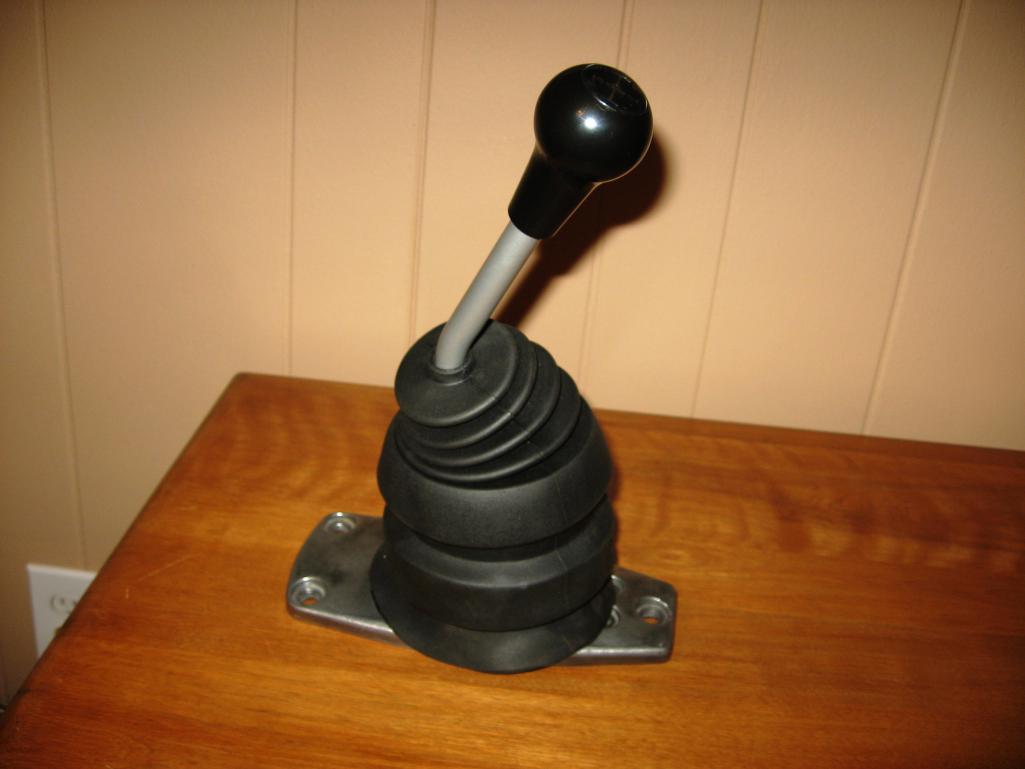
Decided to go silver with the shift lever. Took lever down to metal, then 4 coats of PJ1 engine case paint. Let cure then heat treated. Should stand up well. Waiting on the new shift knob with silver shift pattern, Looks great and matches the Momo Protipo Steering wheel. Dissasembled the unit, cleaned it all up, polished pivot points & reassembled.
Attached thumbnail(s)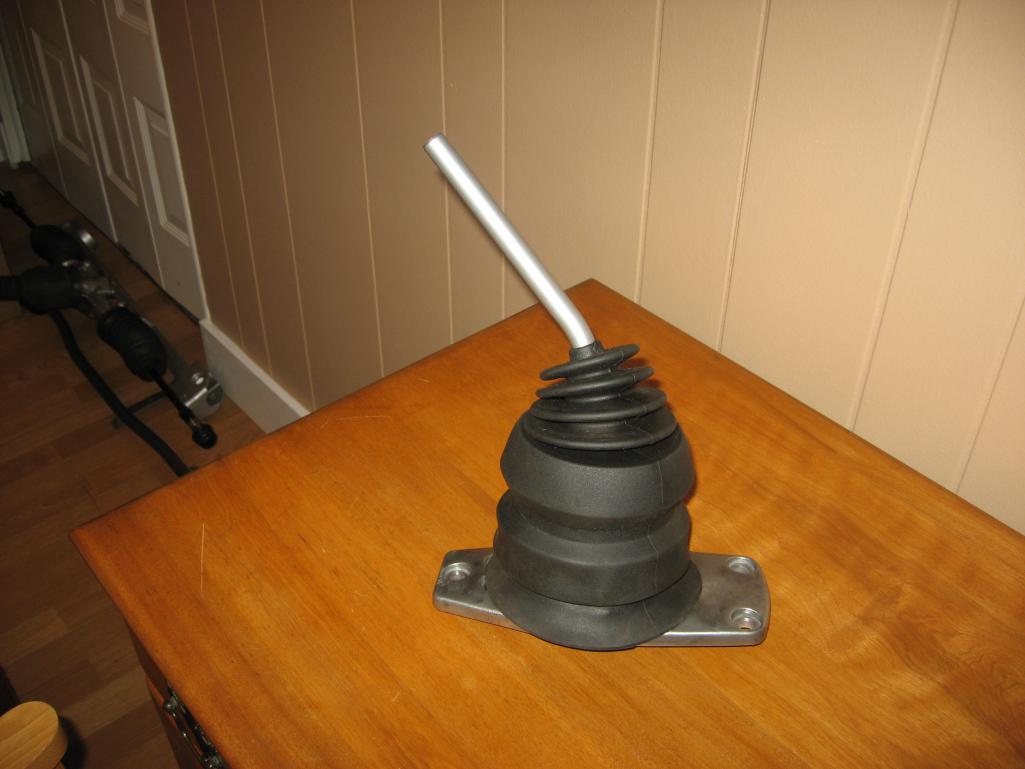
Posted by: euro911 Feb 3 2014, 09:37 PM
Excellent
Posted by: Steve Pratel Feb 5 2014, 04:16 PM
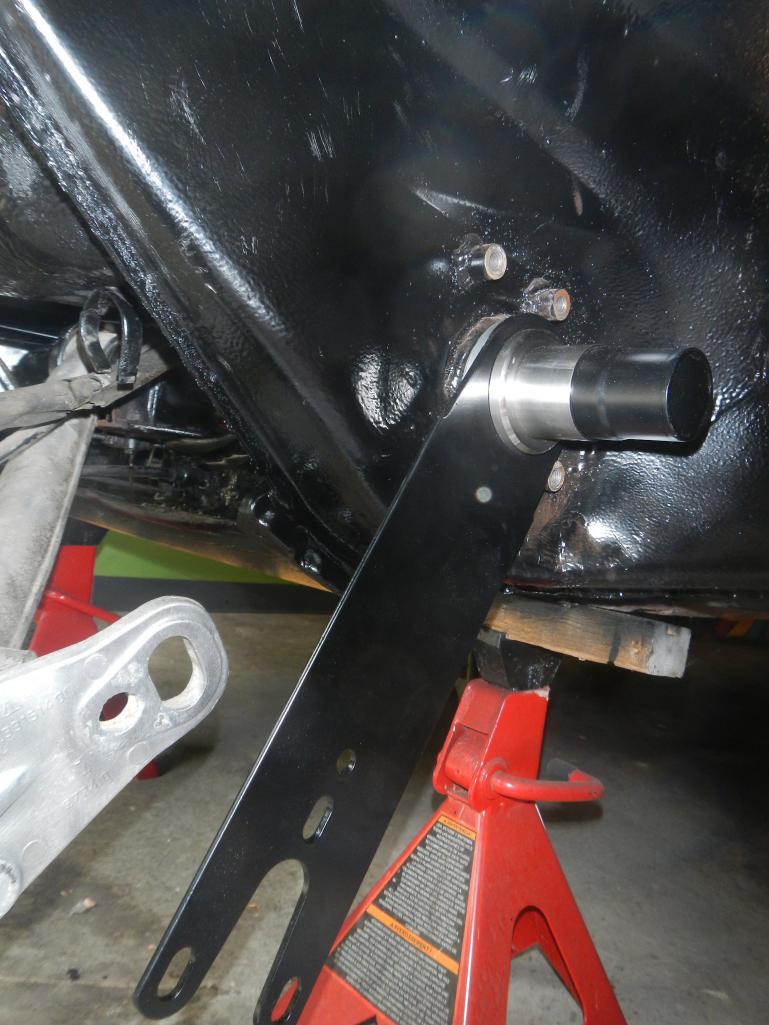
Getting psyched, just ordered the rebel racing bushings..... Hopefully will finish the struts and control arms this weekend!
Of course I realized I still have a ton of stuff to R&R, including the gravel tray 1/2 shafts, front hubs and bearings, but I'm getting close to the suspension being finished! The rear is good to go. Once I get the under chassis cleaned and refreshed, I can start reinstalling it all.
Posted by: Steve Pratel Feb 9 2014, 10:56 AM
OK, I'm not above begging...............
Anyone have the alternator rear plate with cooling duct? I've looked without success, and cant buy one aftermarket. The 912E had the duct built into the alternator casing itself, whee the 914/bus had a separate backplate. I went for the bus alternator for the upgrade to 75Amps over the 55 stock.
If none turn up, hopefully will find one at Hershey. If that fails, I will send mine out to be rebuilt.
Thanks!
Posted by: barefoot Feb 10 2014, 07:53 AM
R&R'd the steering rack and front cross member today, things are coming along! Here is a before & after. Details are on the main build thread. Also test fit the sachs/Boge strut inserts, fit perfectly. Will be cleaning them up over the next few days.
http://www.912bbs.org/vb/showthread.php?43391-770-Update/page4
You don't show torsion bars or rear bushings in front A-arms, beware that worn OEM bushings sag and cause bars to rub the ID of the A-arm and create grooves and corrosion pits that may result in fracture of the bars. Replacement of the bushings is easy and should be done if you haven'r already been there.
If the torsion bars have the coating warn away be sure to polish the bars to remove any grooves or corrosion and re-coat.
Posted by: Steve Pratel Feb 13 2014, 08:42 PM
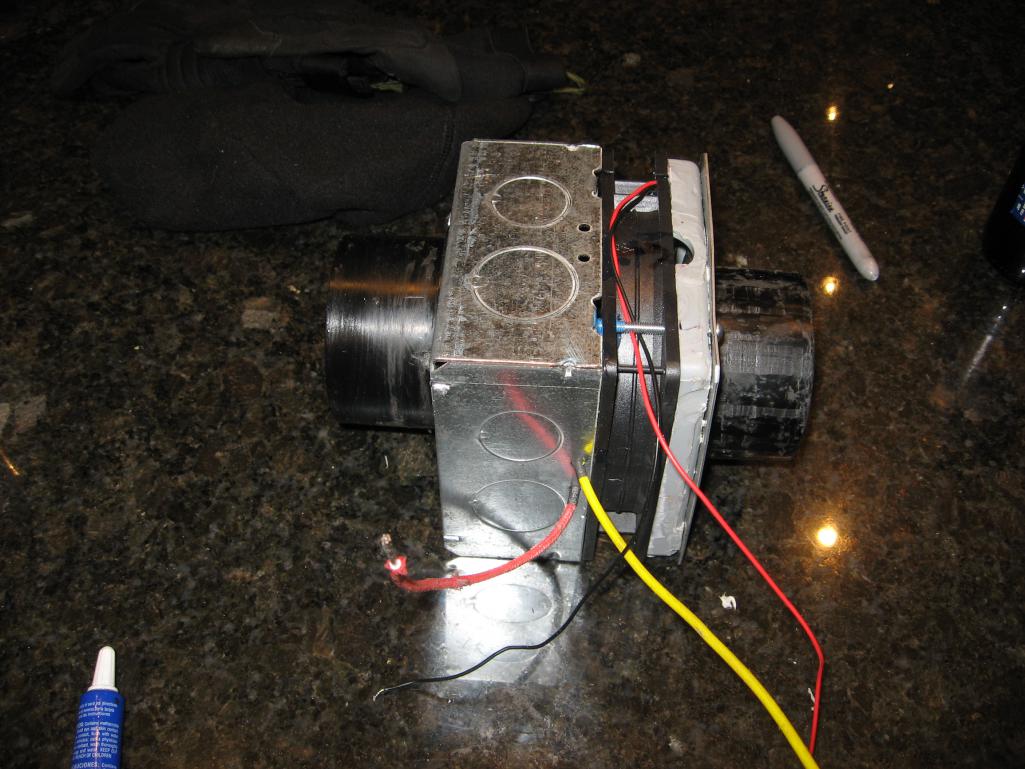
Snow day today, so I figured I'd try my electric heater box part duex.... Round 1 was ineffective as the stock rear blower was unable to push what I thought was enough air. After looking around I decided to try a larger enclosure and go for a 125CFM 4" fan...
Parts:
4" 12V brushless double ball bearing fan
4" metal electrical box & cover
3" PVC drains (x2)
4" PVC plastic box cut down to 3/4 for spacer
125W 12V heat element
I used my dremel to cut holes in the metal box and cover for the inlet and outlet. The Heat element bolts directly inside the box and air is pulled into the inlet, through the heat element through the fan and out the other end. Because the fan is 4" and the outlet is 3" I had to make a spacer to create airspace for air movement. I cut a hole in the metal plate cover for the box, slipped the drain through the hole. I drilled holes in the fan housing that lined up with the standard cover screws and sandwiched the fan and spacer between the box and cover. JB Weld over any large seams/joints, and then wrapped the whole unit in duct/foil tape.
The result? A solid 10-12 degree raise in temps.... lol. I think the issue is too much fan/air volume and thus too little temperature rise. I imagine pulling air through the tubes from the back of the car will slow the volume down, but maybe not enough. This was one of the reasons I went for a higher CFM fan. I will have plenty of time to play around with the system and will probably put in a variable speed control for the fans. Was a fun snow day project though.
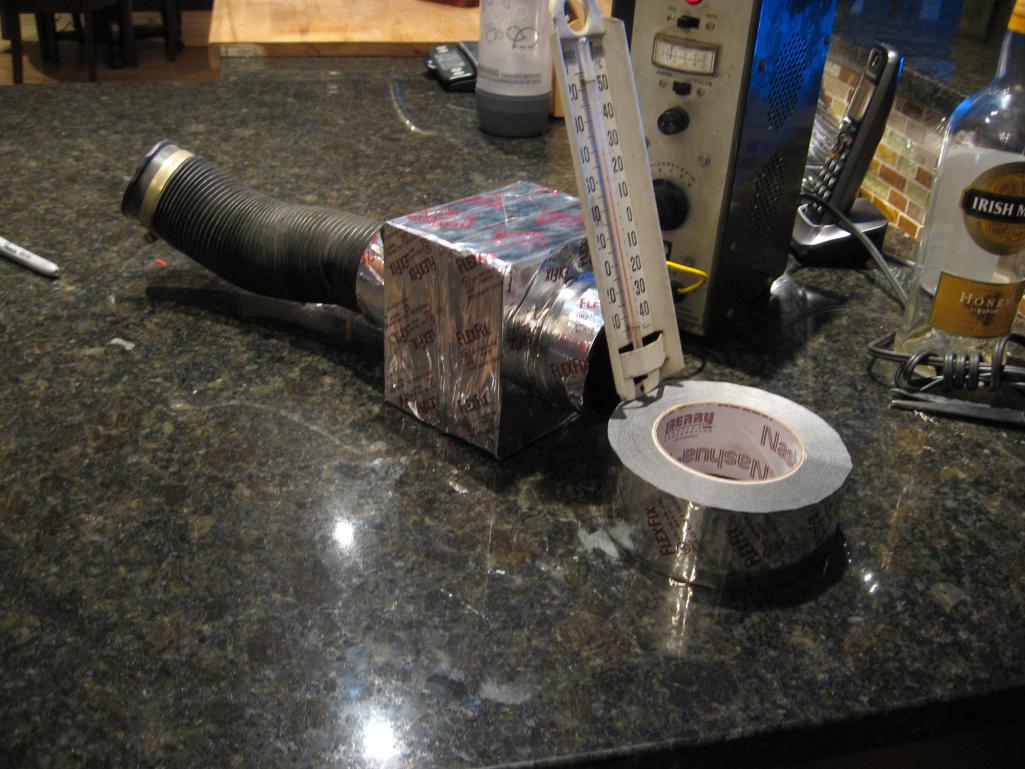
Finished product. Saw a 10 degree rise in the house (70-80). Took the unit out to the garage, let the thermometer settle to 40, ran it for 5 minutes, temp output was 52. clearly not enough. More development to follow.....
Attached thumbnail(s)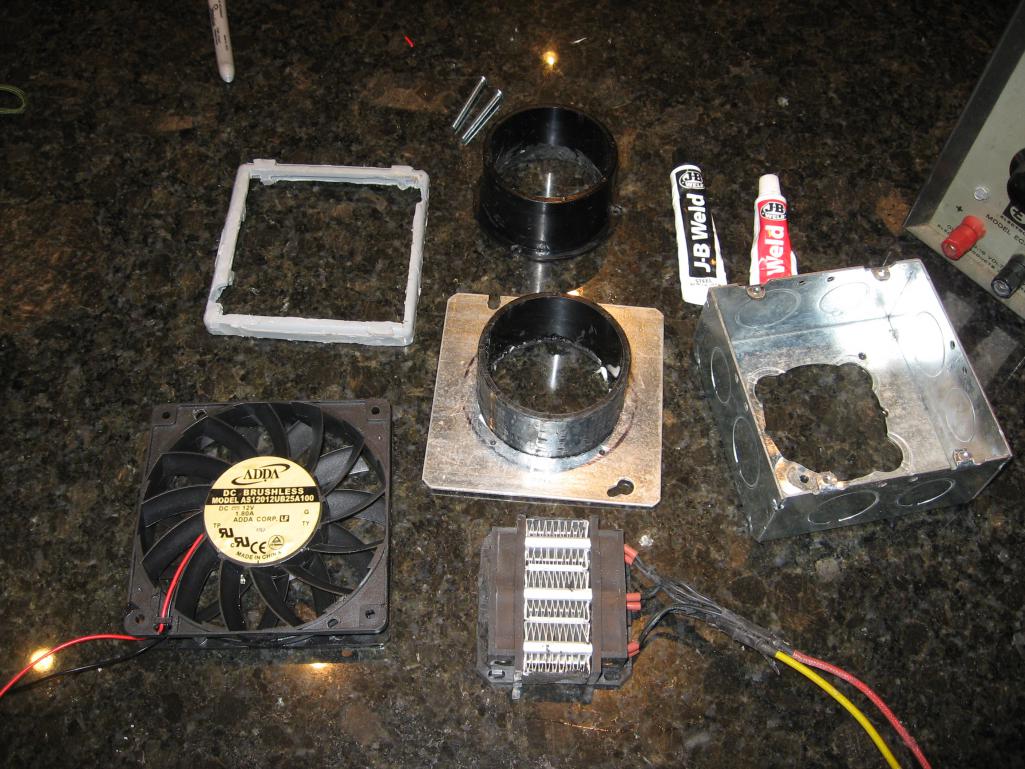
Posted by: Steve Pratel Feb 13 2014, 08:47 PM
finished product
Attached thumbnail(s)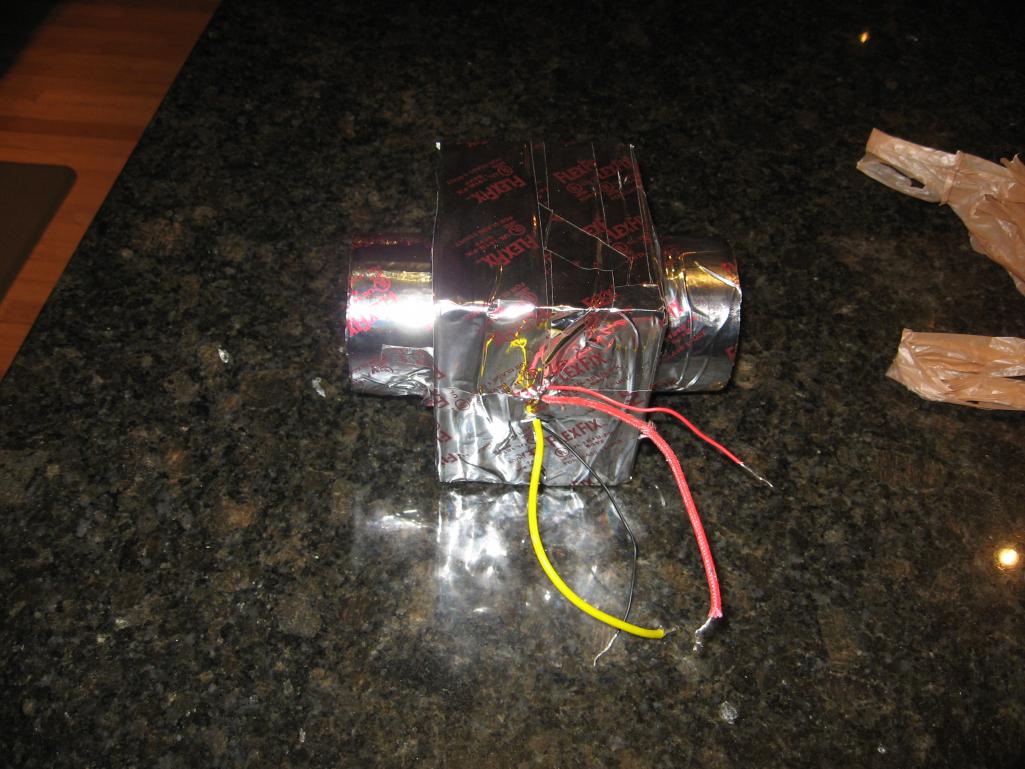
Posted by: euro911 Feb 13 2014, 10:17 PM
I think your testing the garage isn't a true test of your theory due to the ambient temperatures and the volume air space in the garage. By recirculating heated air in the passenger compartment of your car (instead of introducing outside air), I think you'll achieve higher temperatures.
Posted by: Dave_Darling Feb 14 2014, 10:21 AM
... But it's still going to be difficult to get meaningful heat out of any 12V system ... 100 watts (a light bulb!) is about 8 amps, which is a fair bit. To get 1200 watts, which is a decent amount of heat, you need 100 amps. That's a HUGE amount of current... In fact, that's somewhat more than the stock alternator is capable of producing.
--DD
Posted by: Steve Pratel Feb 17 2014, 07:03 PM
Took advantage of an extra day off to finish up some my suspension parts.
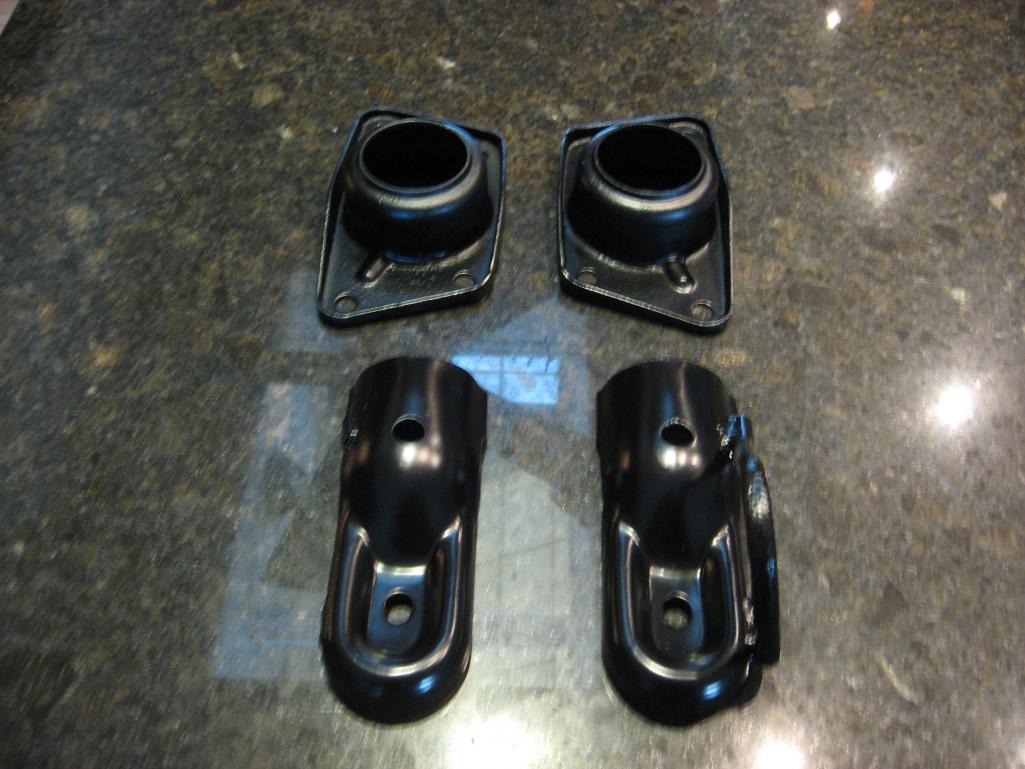
- Camber Adjustment Plates & upper shock washer) (eastwood rust encapsulator topped with VT engine universal gold)
- Camber Plate, Front Bushing mount, Cross member Bolt Heads (eastwood rust encapsulator)
- Front sway bar bushing mounts (eastwood rust encapsulator topped with eastwood chassis black)
- Torsion bar adjusters (eastwood rust encapsulator topped with VT engine universal gold)
- Star lock washers for balljoints (eastwood rust encapsulator topped with VT engine universal silver)
- Caps for torsion bar tube in control arms. (rust encapsulator, will tap into pace after arms are installed and torsion bars inserted.)
After they sit overnight, I will cure in oven at 200 for an hour tomorrow. This is essential to finish the curing of the VHT paint. Of course I have NO idea if this eastwood rust encapsulator stuff will work, but at least I tried.....
Still have more cleaning of: front sway bar, strut housings and control arms then they get painted.
Also cleaned and started prepping for paint:
- Gravel Tray - (rust encapsulator and antichip guard chassis black paint)
- Axle shafts - (eastwood rust encapsulator topped with VT engine universal silver)
- Engine mount cross bar. (eastwood rust encapsulator topped with VT engine universal silver)
- Transmission Mount and weight. (rust encapsulator and antichip guard chassis black paint)
- Gas Tank - (rust encapsulator and antichip guard chassis black paint)
**That ends the terrible terrible task of cleaning the rust and dirt and grime of 30+ years and just sitting and rotting parts..... I may have a few odd and ends, but no more piles of rusty parts and pieces..... at least I think........ lol
I still have a pile of stuff to paint that was stripped and cleaned some time ago, chiefly:
- Engine Tins (rust treated then VHT gloss blach high heat case paint)
- Fan housing (Satin black)
- Engine Case (VHT silver after assembly)
- Cyls (light coat of VHT flat black)
It is amazing how rusted and crappy it all was. Layers and layers, and I'm glad I am doing this, as left unattended, these parts would have failed due to rust. Hopefully, the treatments and top coat of fresh paint will extend life for a few more years, and allow me to replace over time. I dont mind the extra time to R&R these parts, as I would have to buy them otherwise...... no think you.
I also installed the shift knob on the shifter, installed and then uninstalled the blue clutch helper spring (?? how this works makes no sense) finished cleaning the transmission body itself, and reinstalled the clutch throwout bearing arm, shaft and seals. I used the synthetic brake caliper grease for this. Ist great stuff, easy on plastics, repels/resists water, Doesnt ever melt out or run, and is stable in the coldest of temps.
Attached thumbnail(s)
Posted by: Steve Pratel Feb 17 2014, 07:30 PM
I think your testing the garage isn't a true test of your theory due to the ambient temperatures and the volume air space in the garage. By recirculating heated air in the passenger compartment of your car (instead of introducing outside air), I think you'll achieve higher temperatures.
That may help too, but the biggest problem is too much airflow through the element overpowers the element's heat capacity. I went too high on CFM's. I played around with airflow,and when I lowered the airspeed, limited flow, I was able to get the temp rise up to 20. I have some further refinements, and will likely add a potentiometer to the fans to control speed. lower CFM will allow better heat absorbtion. I wsa going to get normal 40CMF fans but was concerned they wouldnt flow enough air. These fans put out over 125CFM's. They are super quiet and powerful. The air comes out of the housing almost blow dryer speed.
I am eliminating the air exchangers (well dr rusto did that) Though I dont expect to get real hot heat, I'm hoping for some warm, and to have strong airflow for defogging etc. These boxes will be mounted in the footwell areas on both sides. I will remove the stock heat tube (from rocker panel to ducting under dash) and insert these with some other tubing. If by chance one day I am able to find heat ex changers, or another viable alternative, I can pull these out, reinstall the factory blower and install exchangers.
Phase 2 of the build will include new upholstery/seats and electric elements in front seats. Will NOT be a winter car anyway, mostly spring-fall.
Posted by: Steve Pratel Feb 27 2014, 02:22 PM
Had some free time so I figured I'd add all my latest purchases to my excel spreadsheet and was shocked at the list..... 3 years of parts hording, is nice to be assembling! Am painting the strut housings and front control arms as I type this. Good Lord, I had no idea.............. But as I look over the list I am happy with my purchases and prices I paid. Still have some things to get, particularly the interior and cosmetic/body, but it looks like the mechanical part is almost finished. Now that the cleaning and stripping is complete, it is time to build.
Posted by: Steve Pratel Feb 28 2014, 11:17 AM
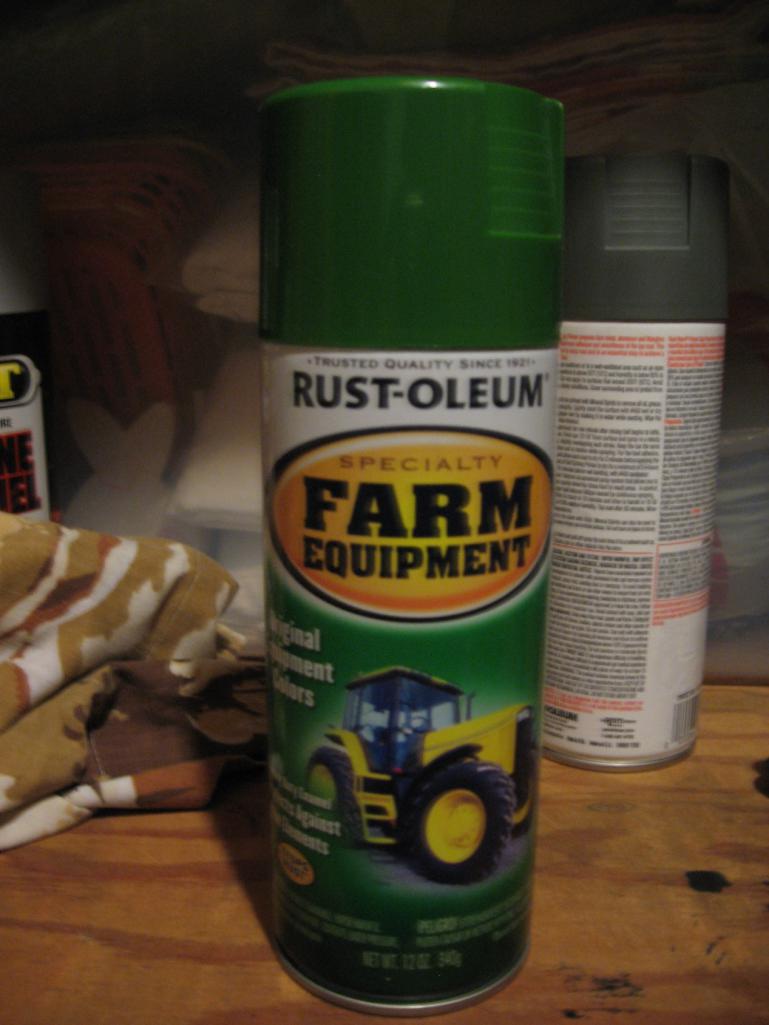
Front struts painted & inserts assembled. The Paint was much harder to work with than the Eastwood and VHT I've been using, took 8 hours to be tack free. Treated the rusty areas, then a self etching primer then the topcoat of the Rustoleum Farm equipment paint. Gets good reviews we will see. I know they aren't Bilstein struts, but I had to paint the housings so why not.
I cleaned out the inside of the housing real well, and dabbed a little bit of grease on the insert to help with removal (if I ever do that) as well as to help with possible rattles. The cap diddnt screw down to the top of the housing (1-2 threads showing) but I diddnt try that hard. Will re-tighten before mounting in car.
Also did a quick fit test with the upper mounts looks like the US Spec big fat washer will not be used.
Attached thumbnail(s)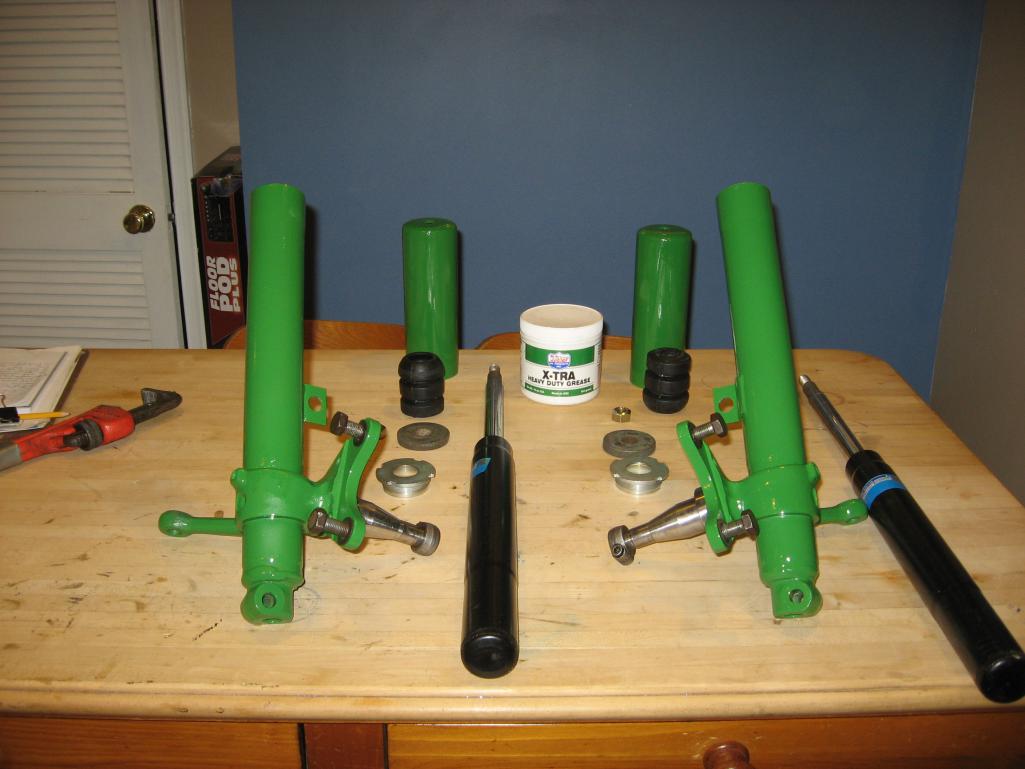
Posted by: Steve Pratel Mar 1 2014, 08:08 PM
Finished the control arms today, hard to believe they once looked like this.
Second Pic is after I wire brushed and cleaned
Third & fourth pic is after I JB Welded the SS sleeves for the Rebel Racing CA bushings. Very tight tolerances, and very smooth movement. Bushings on the control arms. All that is left or the front suspension is to R&R the sway bar & gravel tray.
Attached thumbnail(s)

Posted by: Steve Pratel Mar 1 2014, 08:09 PM
Third & fourth pic is after I JB Welded the SS sleeves for the Rebel Racing CA bushings. Very tight tolerances, and very smooth movement. Bushings on the control arms. All that is left or the front suspension is to R&R the sway bar & gravel tray.
Attached thumbnail(s)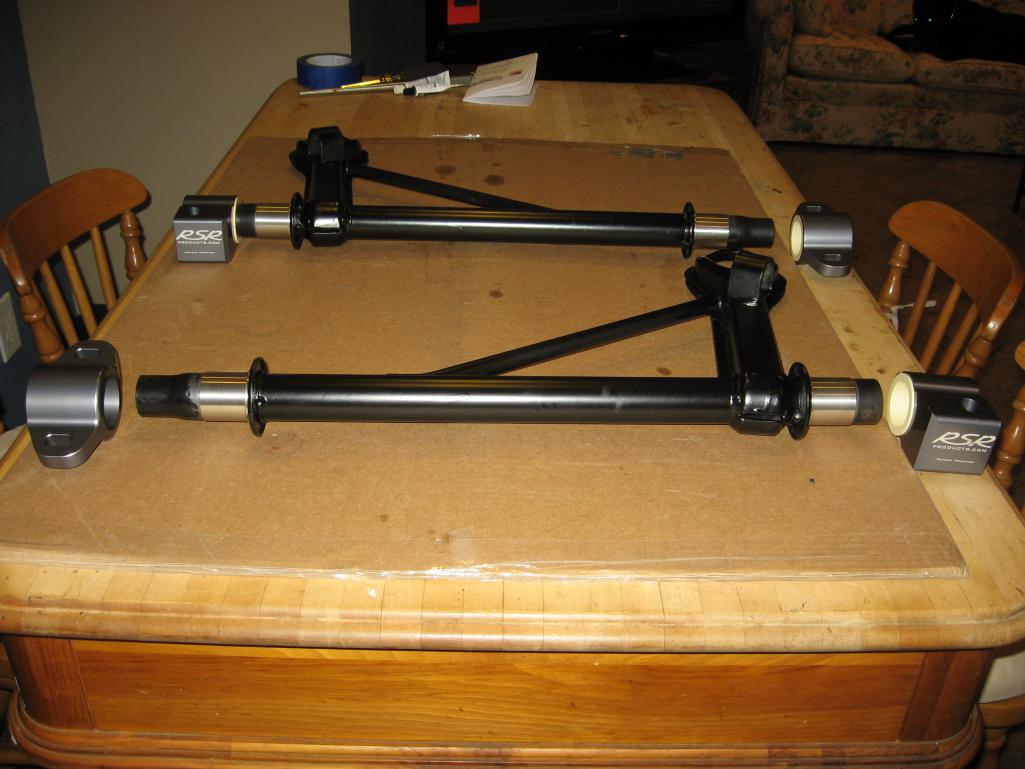

Posted by: type47 Mar 2 2014, 07:04 AM
There's a fellow on dorkiphus.net who just bought a 912E from CA and posted about it. He's from Gaithersburg, MD and his user name is DrBellPepper. You two need to connect ...
Posted by: Maltese Falcon Mar 2 2014, 11:18 AM
OK, I'm not above begging...............
Anyone have the alternator rear plate with cooling duct? I've looked without success, and cant buy one aftermarket. The 912E had the duct built into the alternator casing itself, whee the 914/bus had a separate backplate. I went for the bus alternator for the upgrade to 75Amps over the 55 stock.
If none turn up, hopefully will find one at Hershey. If that fails, I will send mine out to be rebuilt.
Thanks!
Steve, check into the 924 alternator...I think it had an air guide plate attached to the back of the alternator. The 912e will be a sought after Porsche, especially retaining all stock equipment. Low production quantity, only built for the U.S. market , and I've been watching prices creeping up.
We built just about all of the 912e shorty Thermal headers for those cars in the day, sold under the brand names; Automotion, Eurasian Automotive, PB Tweeks, Auto Atlanta, AutoGear . Our headers were
a great upgrade considering the crude oe design of Thermal reactors. Porsche even
put an oil drip channel on top of the reactors...to guide the dripping v/c gasket oil off of
the reactors ! We still keep a few n/o/s reactor headers in stock.
Excellent restoration btw !
Marty
Posted by: Steve Pratel Mar 2 2014, 02:32 PM
Thanks Marty, will check it out.
I eliminated the thermal reactors, replaced with the Bursch pipes don't need them and I cant imagine how the car ran with them the clearances are so small. You wouldn't happen to have any heater boxes would you?
OK, I'm not above begging...............
Anyone have the alternator rear plate with cooling duct? I've looked without success, and cant buy one aftermarket. The 912E had the duct built into the alternator casing itself, whee the 914/bus had a separate backplate. I went for the bus alternator for the upgrade to 75Amps over the 55 stock.
If none turn up, hopefully will find one at Hershey. If that fails, I will send mine out to be rebuilt.
Thanks!
Steve, check into the 924 alternator...I think it had an air guide plate attached to the back of the alternator. The 912e will be a sought after Porsche, especially retaining all stock equipment. Low production quantity, only built for the U.S. market , and I've been watching prices creeping up.
We built just about all of the 912e shorty Thermal headers for those cars in the day, sold under the brand names; Automotion, Eurasian Automotive, PB Tweeks, Auto Atlanta, AutoGear . Our headers were
a great upgrade considering the crude oe design of Thermal reactors. Porsche even
put an oil drip channel on top of the reactors...to guide the dripping v/c gasket oil off of
the reactors ! We still keep a few n/o/s reactor headers in stock.
Excellent restoration btw !
Marty
Posted by: Maltese Falcon Mar 2 2014, 04:37 PM
Sorry Steve, no HBs in my stock. One of my 912e customers is in the process of rebuilding his perforated HBs...then sending to our ceramic contractor.
He had a hard time finding his, even in bad shape.
Marty
Posted by: Jake Raby Mar 3 2014, 12:00 AM
A customer of mine has a very solid set of 912E HX to sell.. I'll see if he still has them.
Posted by: r_towle Mar 3 2014, 07:30 AM
OK, I'm not above begging...............
Anyone have the alternator rear plate with cooling duct? I've looked without success, and cant buy one aftermarket. The 912E had the duct built into the alternator casing itself, whee the 914/bus had a separate backplate. I went for the bus alternator for the upgrade to 75Amps over the 55 stock.
If none turn up, hopefully will find one at Hershey. If that fails, I will send mine out to be rebuilt.
Thanks!
Steve, check into the 924 alternator...I think it had an air guide plate attached to the back of the alternator. The 912e will be a sought after Porsche, especially retaining all stock equipment. Low production quantity, only built for the U.S. market , and I've been watching prices creeping up.
We built just about all of the 912e shorty Thermal headers for those cars in the day, sold under the brand names; Automotion, Eurasian Automotive, PB Tweeks, Auto Atlanta, AutoGear . Our headers were
a great upgrade considering the crude oe design of Thermal reactors. Porsche even
put an oil drip channel on top of the reactors...to guide the dripping v/c gasket oil off of
the reactors ! We still keep a few n/o/s reactor headers in stock.
Excellent restoration btw !
Marty
If you get a chance and it's not a pita, I would love to see some detailed pics of a thermal reactor for a type 4 motor.
Does it loop back the gases somehow to reburn things?
Posted by: Steve Pratel Mar 3 2014, 05:36 PM
If you get a chance and it's not a pita, I would love to see some detailed pics of a thermal reactor for a type 4 motor.
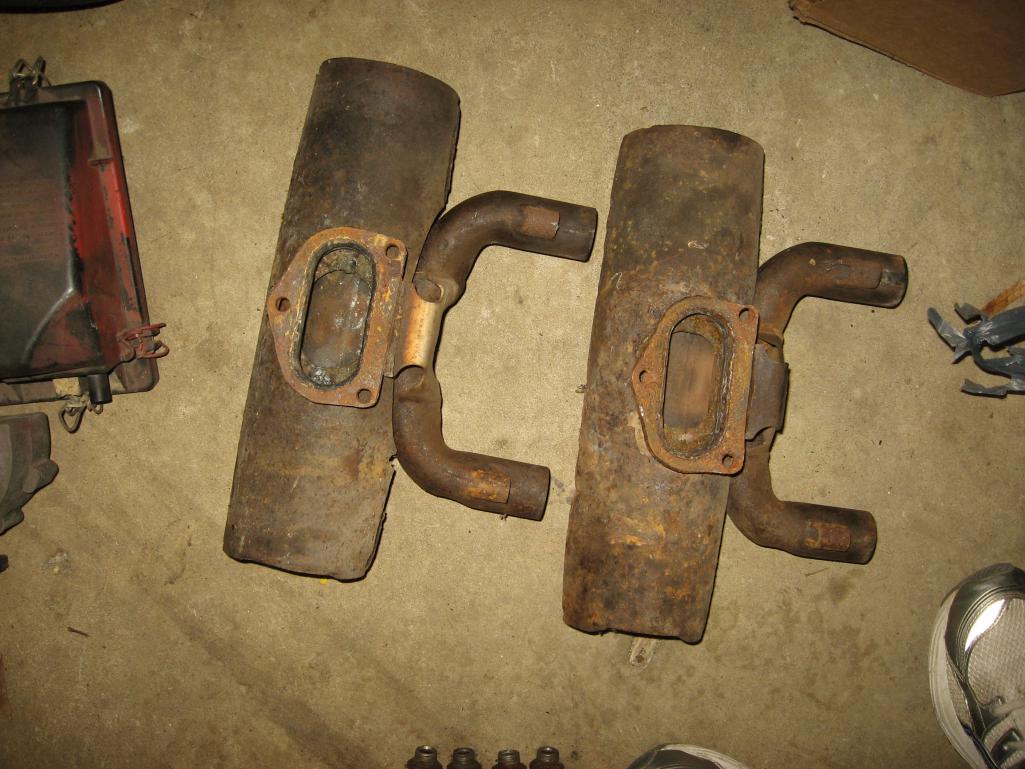
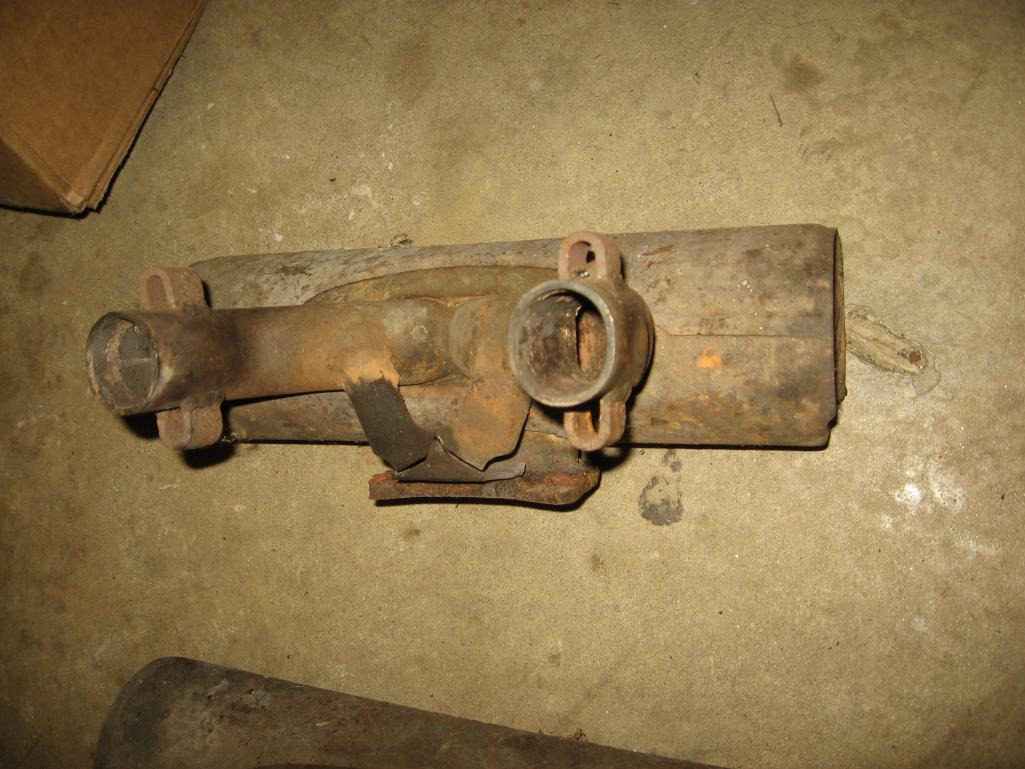
Does it loop back the gases somehow to reburn things?
No, its basically a catalytic converter. Here are a few pics. The Bursch Pipes are a straight pass the same basic size as the exhaust port and header pipes. The T/R's have an inner housing/tube in the center that the cut clearance to about 1/4 inch
Attached thumbnail(s)
Posted by: Mikey914 Mar 4 2014, 03:22 AM
These cars are better off without the thermal reactors. Mine passes DEQ without. They store a lot of heat that bakes the oil after the engine is shut down. The concept works while the car has air flowing, but not so much after shut down.
Save a pair for the CW that may buy it, but if you plan to drive it no need for these.
Posted by: AE354803 Mar 4 2014, 12:30 PM
These cars are better off without the thermal reactors. Mine passes DEQ without. They store a lot of heat that bakes the oil after the engine is shut down. The concept works while the car has air flowing, but not so much after shut down.
Save a pair for the CW that may buy it, but if you plan to drive it no need for these.
I have a type IV in the back of a 67 912, the PO used VW 412 headers that required very little modification to the heat exchangers to have working heat, a bursch exhaust (IIRC) was modified to fit up, sounds very nice
See post #132 in link below
http://www.914world.com/bbs2/index.php?s=&showtopic=204833&view=findpost&p=1896093
Andy
Posted by: Steve Pratel Mar 13 2014, 06:36 PM
Slow but steady progress, just finished the engine mount bar, gravel tray, sway bar, axle shafts. All waiting to be put back on the car. Good news as well, I thought I was missing one CV joint circlip, but when I dug them out, I had all 4. I thought I had destroyed one getting it apart, but in retrospect that was one of the piston circlips. Starting on the engine tins next, and have the fan housing out for a good cleaning.
Hopefully will finish prepping the chassis of the car to recieve all the newly reconditioned parts.
Attached thumbnail(s)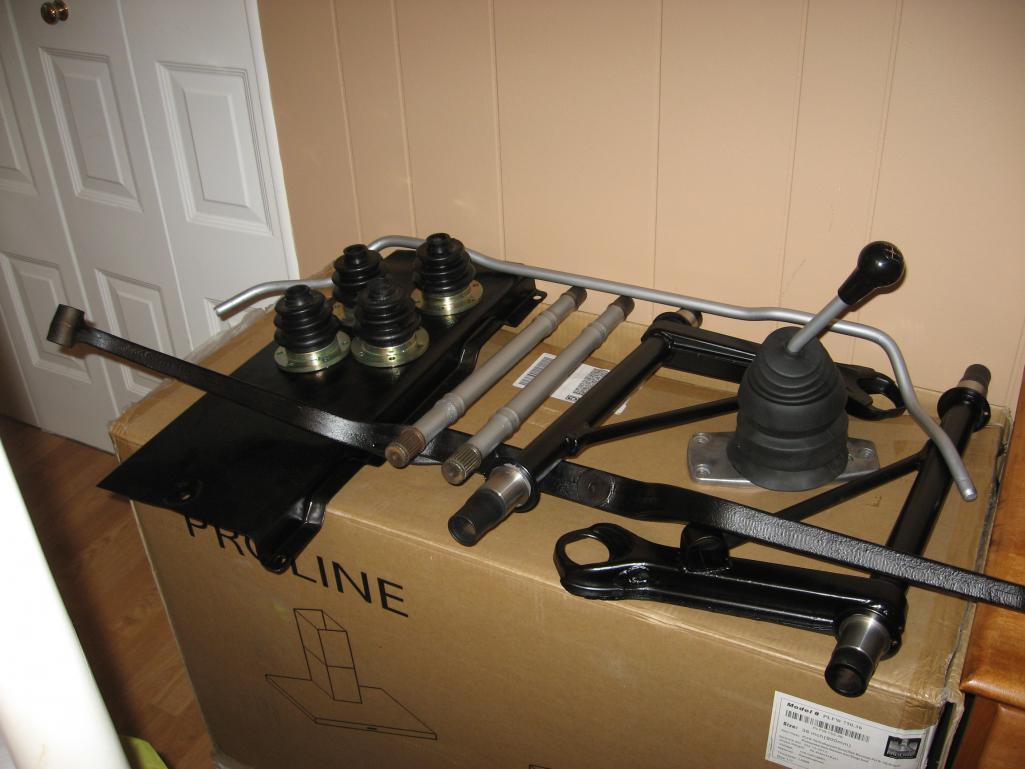
Posted by: Steve Pratel May 16 2014, 12:09 PM
Well, progress slowed for a bit, finally refinished the spring plates and prepped for the Rebel Racing Bushings. I just need to finish cleaning the front hubs, will likely repaint, but not sure, and then it is time to start putting it back on the chassis! Hopefully will get at ti next week. I have a little cleanup to do on the rear chassis/underbody still, but now I have completed the suspension tear off rebuild/restore and reassembly. Spreading the parts purchases and bargain hunted over TWO years!
Bear with me as I make my list of what I have/plan to do.
FRONT SUSPENSION
- Refreshed upper camber plates and Rebel Racing poly strut mounts
- Refreshed/repainted strut housings with SACHS inserts, all new OEM upper and lower small hardware
- New Ball joints on refreshed/repainted front control arms with Rebel Racing Bushings
- Repainted (surface rust) torsion bars, height adjusters, torsion bar seals
- Turbo Tie rods and steering rack spacer, regreased steering rack and refreshed/painted crossmember
- Refreshed/repainted gravel tray and gravel tray seal
- Refreshed/repainted front sway bar and stock rubber bushings
REAR SUSPENSION
- Refreshed/repainted spring plates w/ Rebel Racing Bushings
- New SACHS rear shocks
- Degrease rear control arms
- Treat rust/paint chassis and undercarriage
BRAKES F&R - upgrade to 76 911 running gear
- New HD Master CYL
- New Zimmerman Vented Rotors F&R
- Rebuilt ATE calipers F&R
- New rubber & hard lines
- New OEM Pads & hardware kits
- Repainted/refreshed brake dust shield
MISC
- NOS/OEM Fag wheel bearings seals and races
- Lucas HD wheel bearing grease
- Teflon fitting grease
- Cable luber for Ebrake cables
Attached thumbnail(s)
Posted by: rhodyguy May 16 2014, 02:24 PM
Nice work!
Posted by: Steve Pratel Jun 1 2014, 06:59 PM
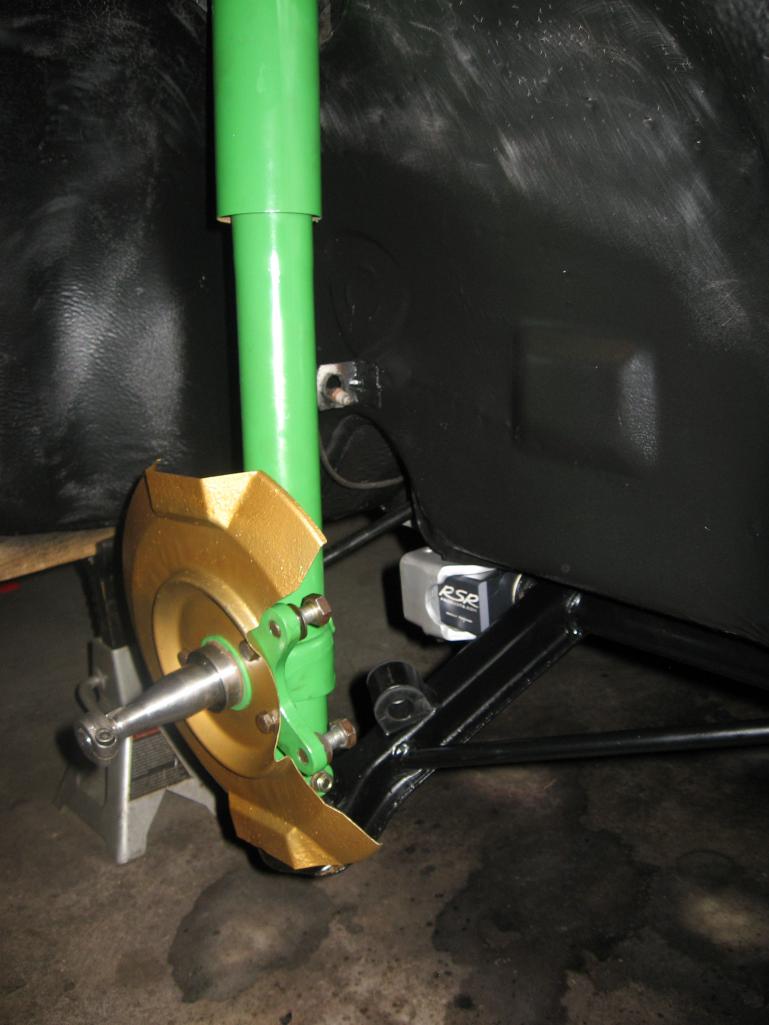
Finally some Progress, bolted on the front suspension! Most went very well, a few snafu's but the Rebel Racing Bushings went in well. I need to redo one of the Ball Joint pin/bolts, as it wouldnt seat all the way and I discovered that the 912E front sway bar is skinnier than the 911, but all is looking great. Regret the gold disk brake dust shield (looks dumb IMO). Had a great day of father son bonding, and progress on the car.
Attached thumbnail(s)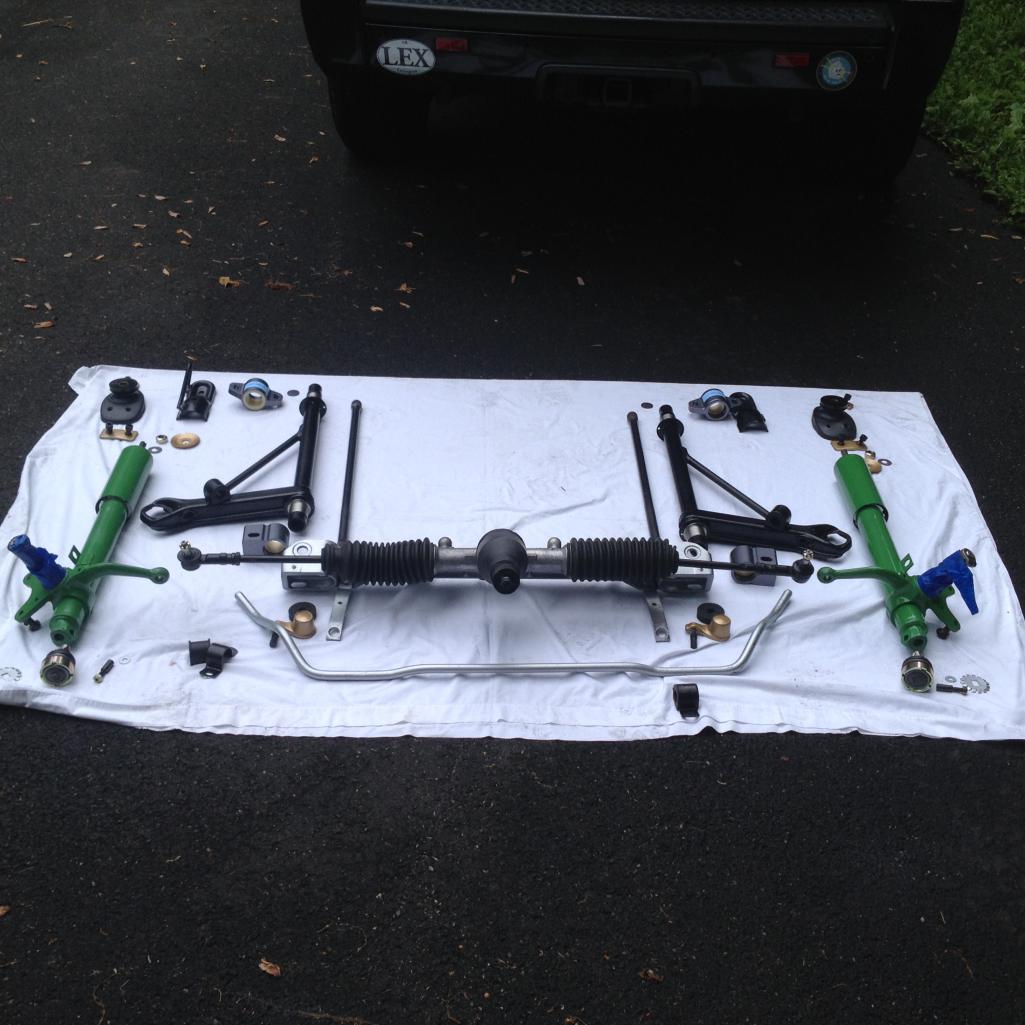
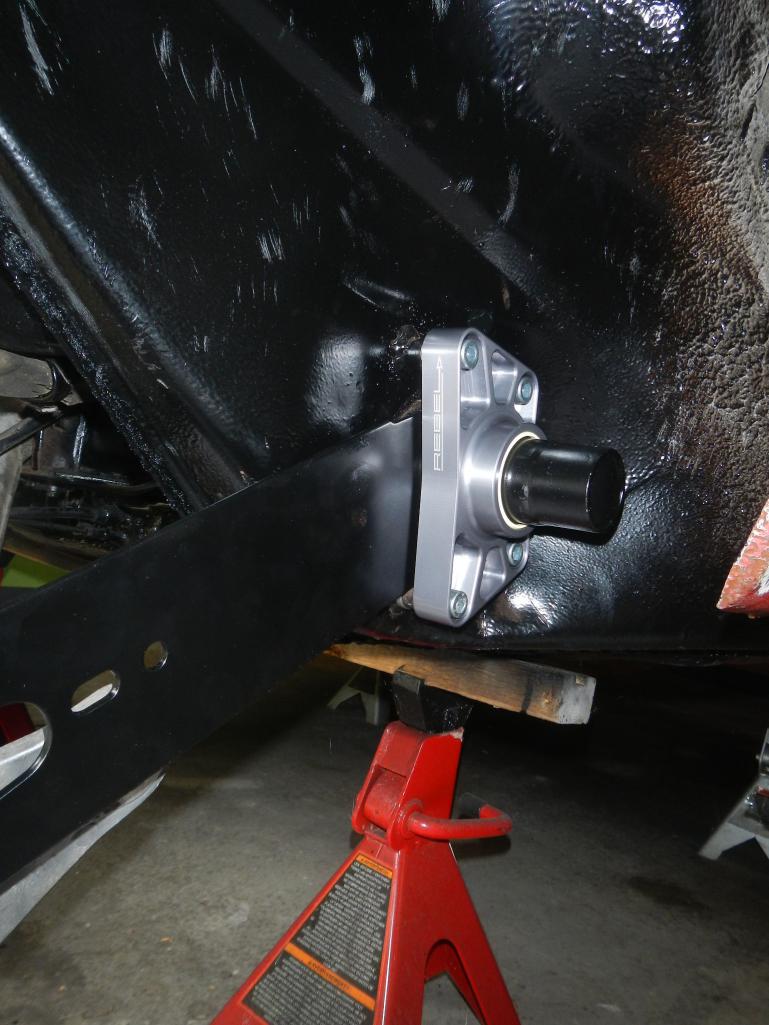
Posted by: Steve Pratel Jun 1 2014, 07:02 PM
Views of the Rebel Racing Bushings. Install was straightforward, very smooth range of motion, just barely enough to hold the position it is left in. Haven't tightened to final torque, will do when back on ground.
Attached thumbnail(s)
Posted by: Steve Pratel Jun 1 2014, 07:04 PM
More views
Attached thumbnail(s)
Posted by: Steve Pratel Jun 1 2014, 07:11 PM
My son is home from college for the summer, was great to work together on this. He did a great job cleaning up the rear trailing arms, and prepping rear wheel wells and lower chassis. Solid worker and skills! Was great. He never really liked changing oil/plugs, etc, but this he is really into and we had a blast.
Attached thumbnail(s)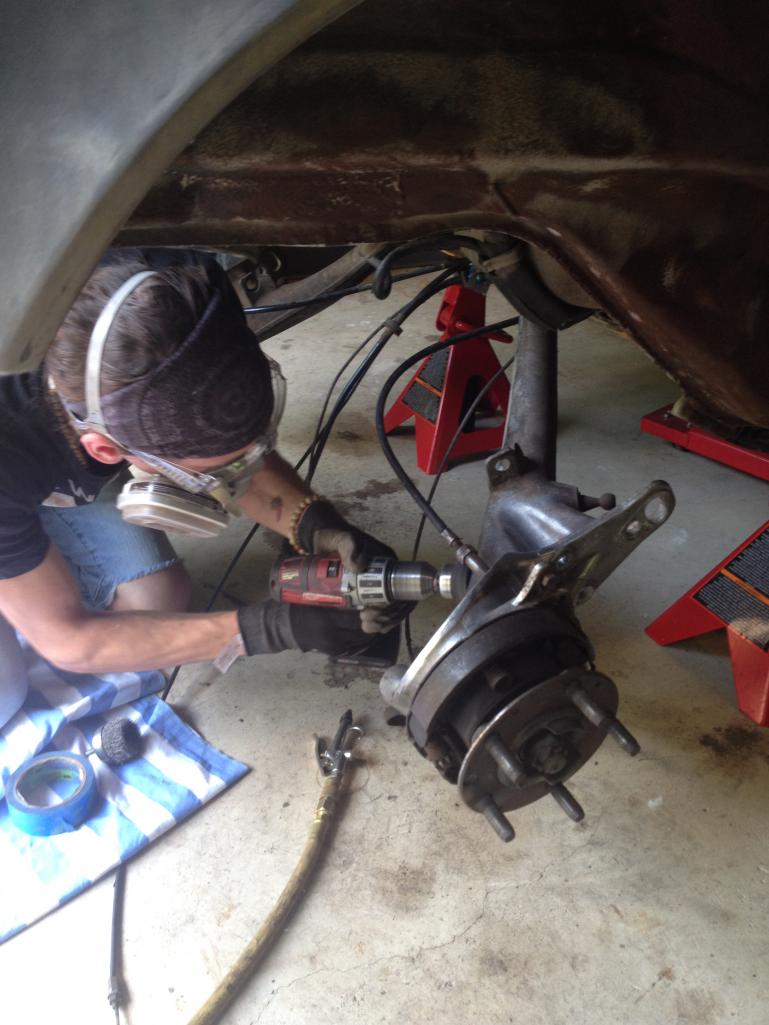
Posted by: Steve Pratel Jun 1 2014, 07:23 PM
A few more random shots. Next up is prepping the openings for the rear radius arm/spring plate Bushing. The holes had some significant rust and piting, will likely need to grind a bit. Surprisingly the torsion bars came out fairly easy. After a minute or two of hard wiggling and circular movements, a very slight wiggle and pressure and POP they came right out. I was ready for an all day fight, but we were very fortunate. Bars looked great.
Attached thumbnail(s)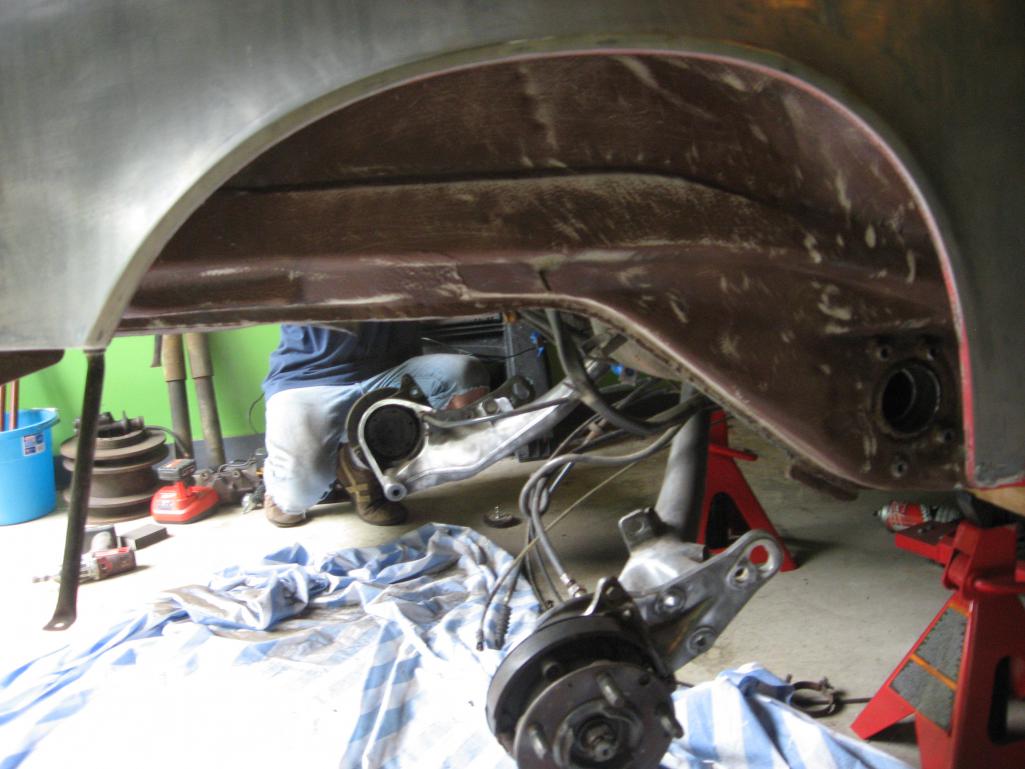
Posted by: euro911 Jun 1 2014, 08:28 PM
A few more random shots. Next up is prepping the openings for the rear radius arm/spring plate Bushing. The holes had some significant rust and piting, will likely need to grind a bit. Surprisingly the torsion bars came out fairly easy. After a minute or two of hard wiggling and circular movements, a very slight wiggle and pressure and POP they came right out. I was ready for an all day fight, but we were very fortunate. Bars looked great.
Sometimes I wished we had some kids. Only sometimes though

Posted by: Steve Pratel Jul 2 2014, 12:53 PM
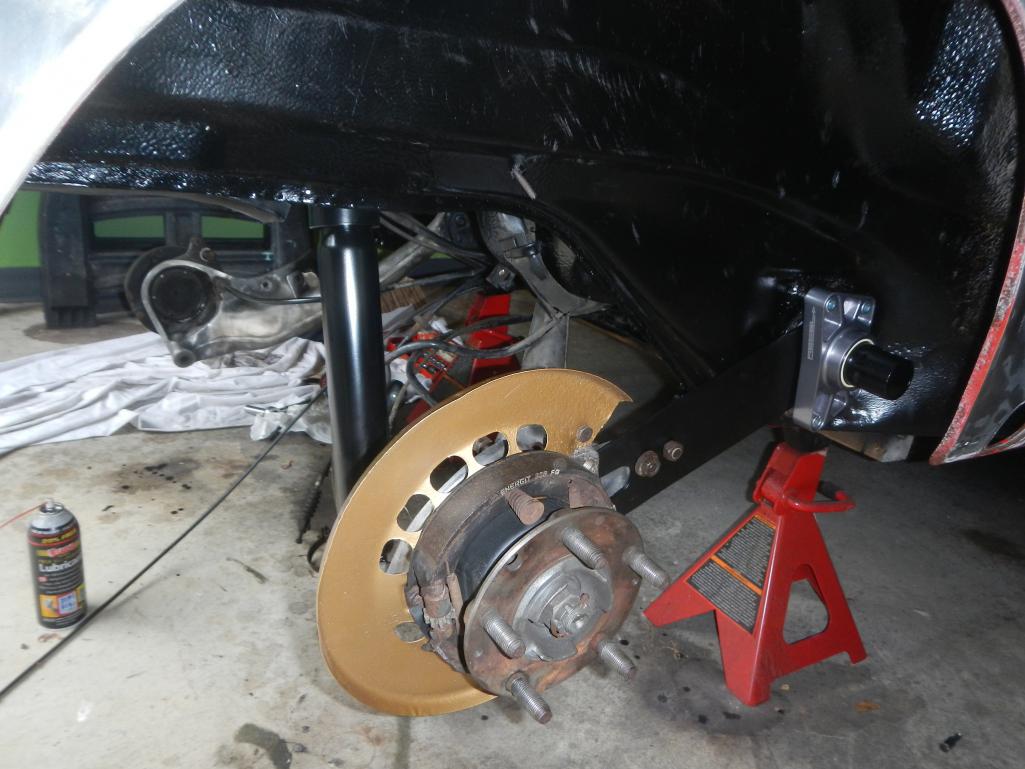
Making progress, was able to finish the rear suspension over the weekend. The rebel racing Bushings are well made and perfectly machined and line up with the mounts. They are a little pricey, but the benefit of smooth suspension movement, ease of install, dis-assembly for setting ride height and the fact they are flat out awesome looking make it worth while. Installation was straight forward, but a little nerve racking. Key is proper prep of torsion bar tube, and I'd recommend to fully test install the bushings and swing-arm with spacers and tightened down before installing the torsion bars. This part is time consuming. Looking forward to seeing how the car rides with the smooth virtually free moving suspension front and rear (as opposed to the tight twisting rubber setup that the car had stock) I'm hoping for a smooth responsive suspension. Also installed the new vented rear rotors, amazing difference in size. Pics follow.
Attached thumbnail(s)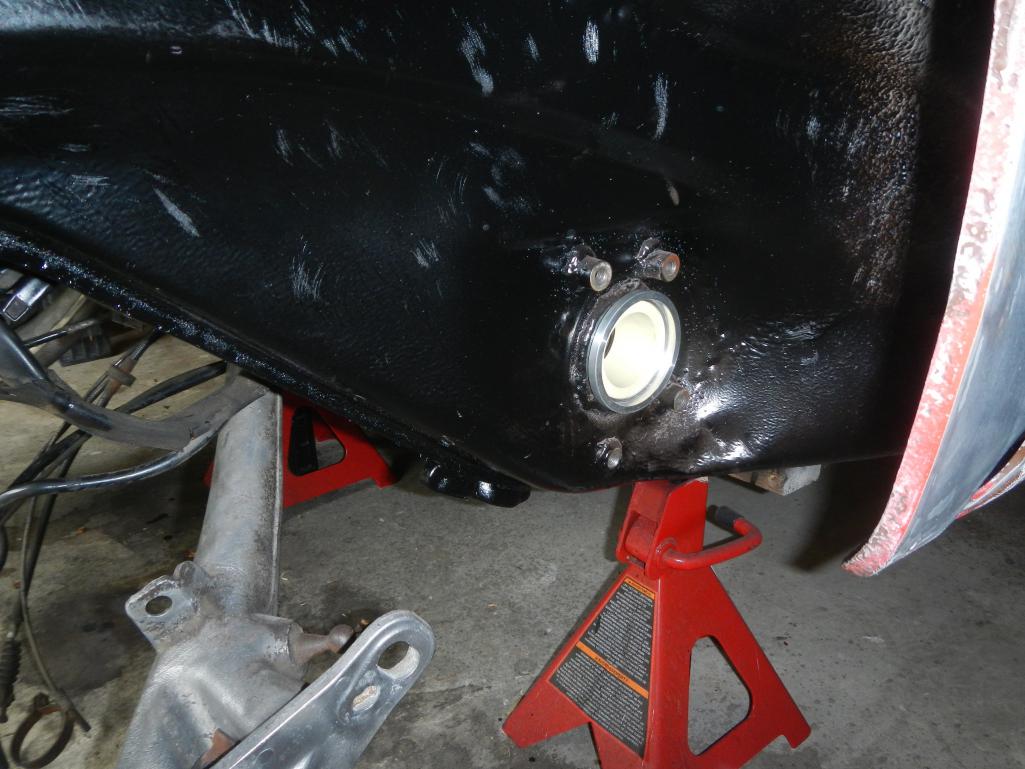
Posted by: Steve Pratel Sep 2 2014, 05:48 PM
Things are progressing, I was able to source the correct Calipers, sourced a set of 'A' calipers for an 83, and they bolted right up to the strut and proper spacing and fitment to the rotor, so GOOD NEWS on that regard. Bolted them up put on the tires and I have a rolling chassis again!
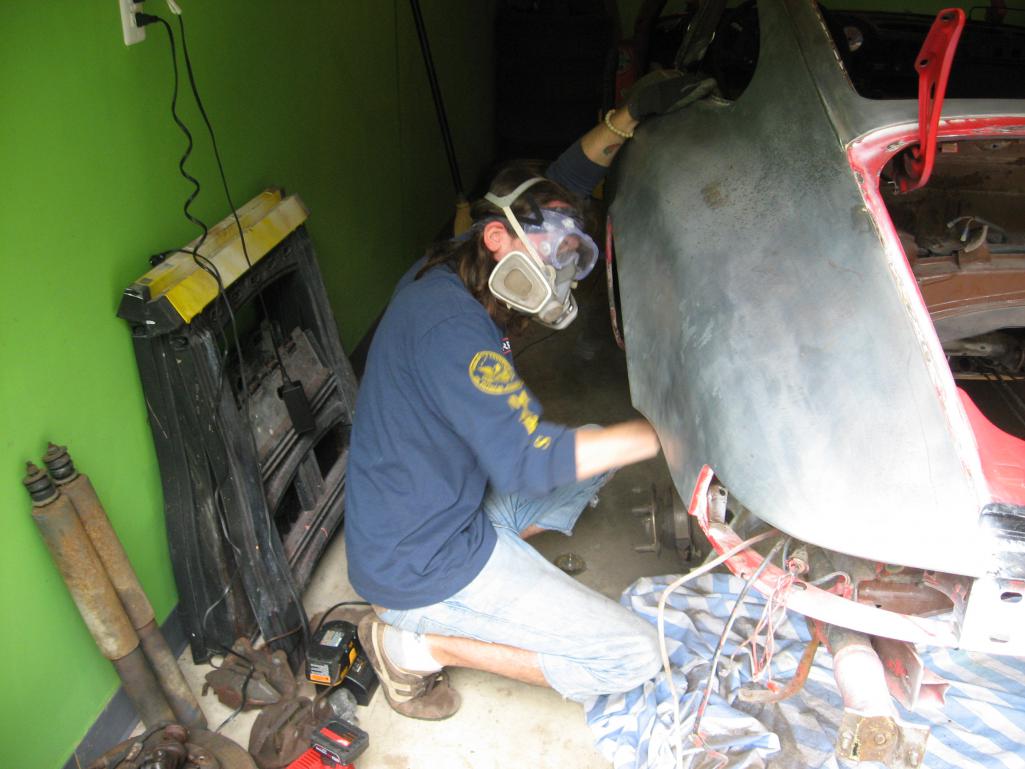
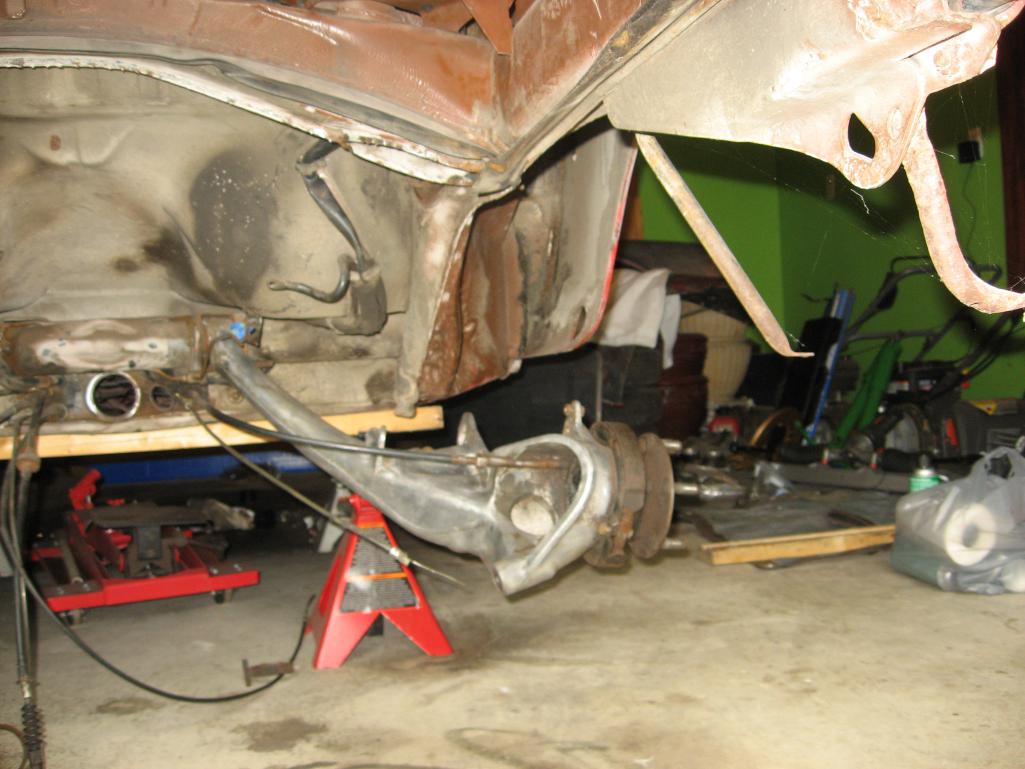
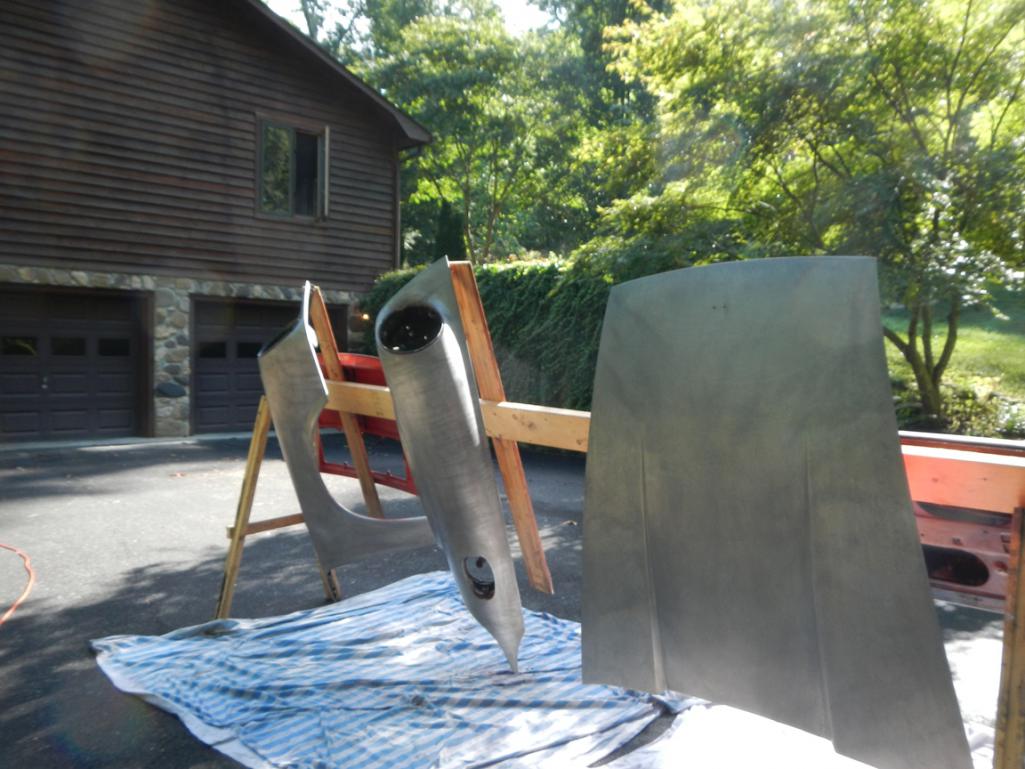
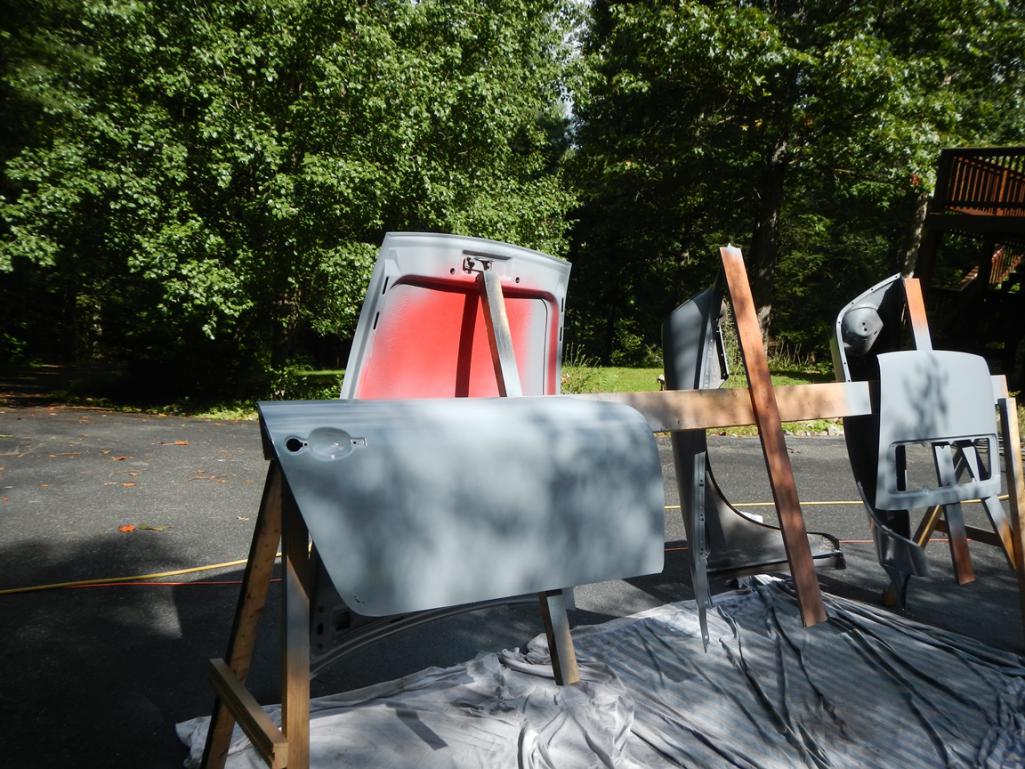
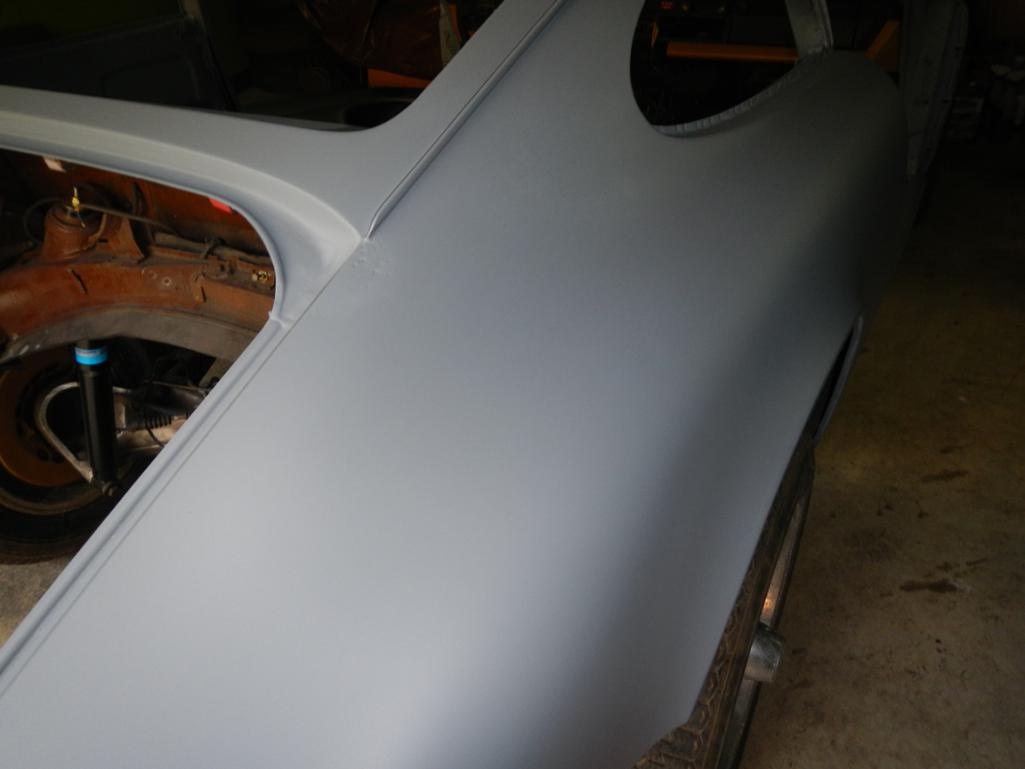
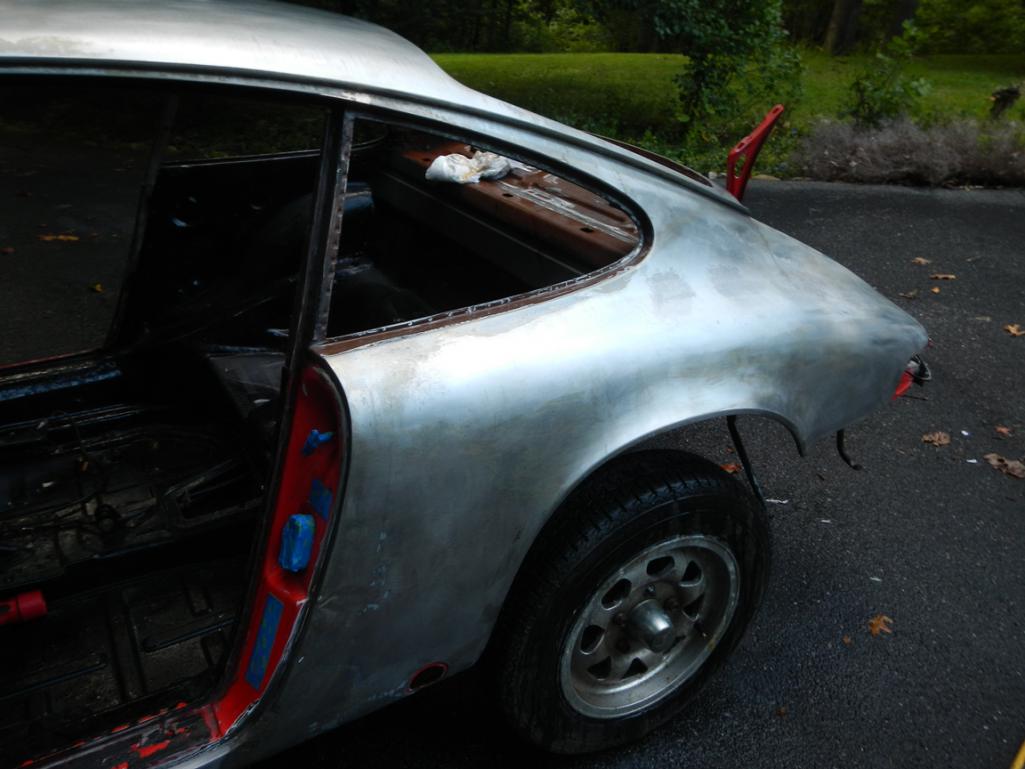
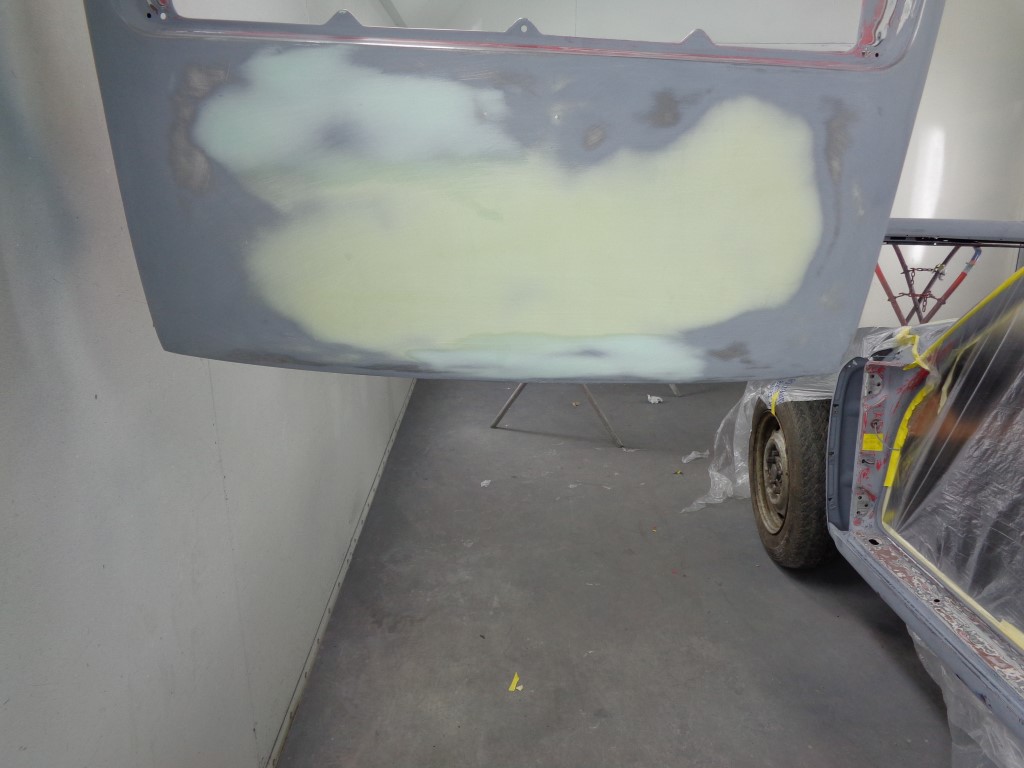
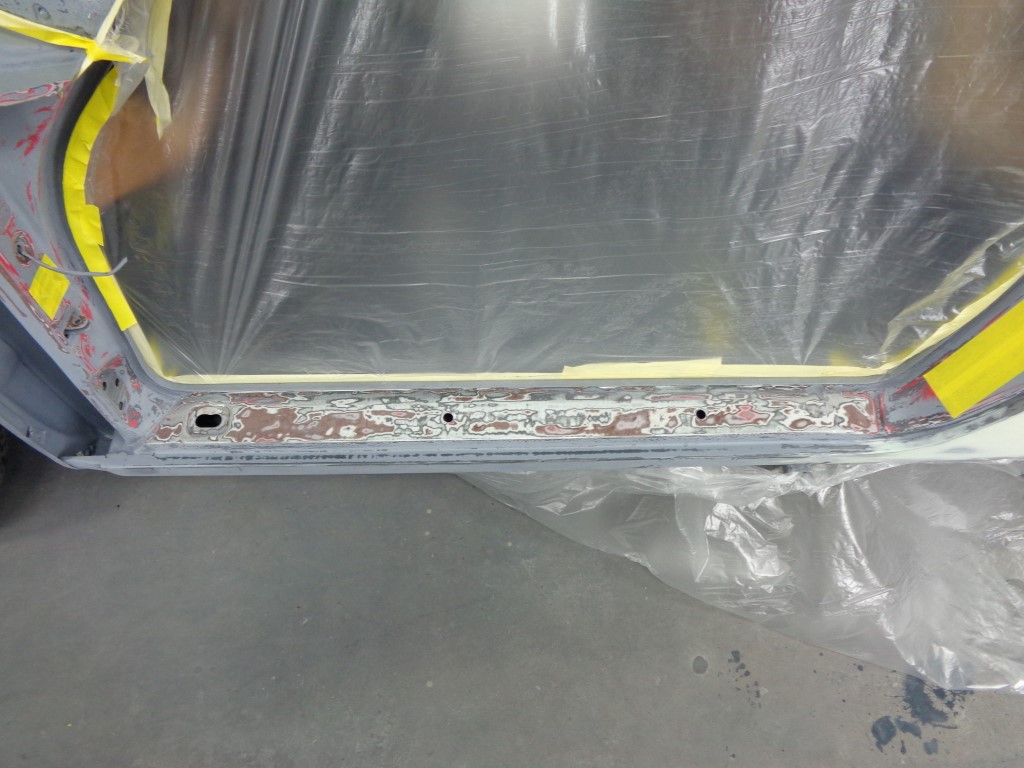
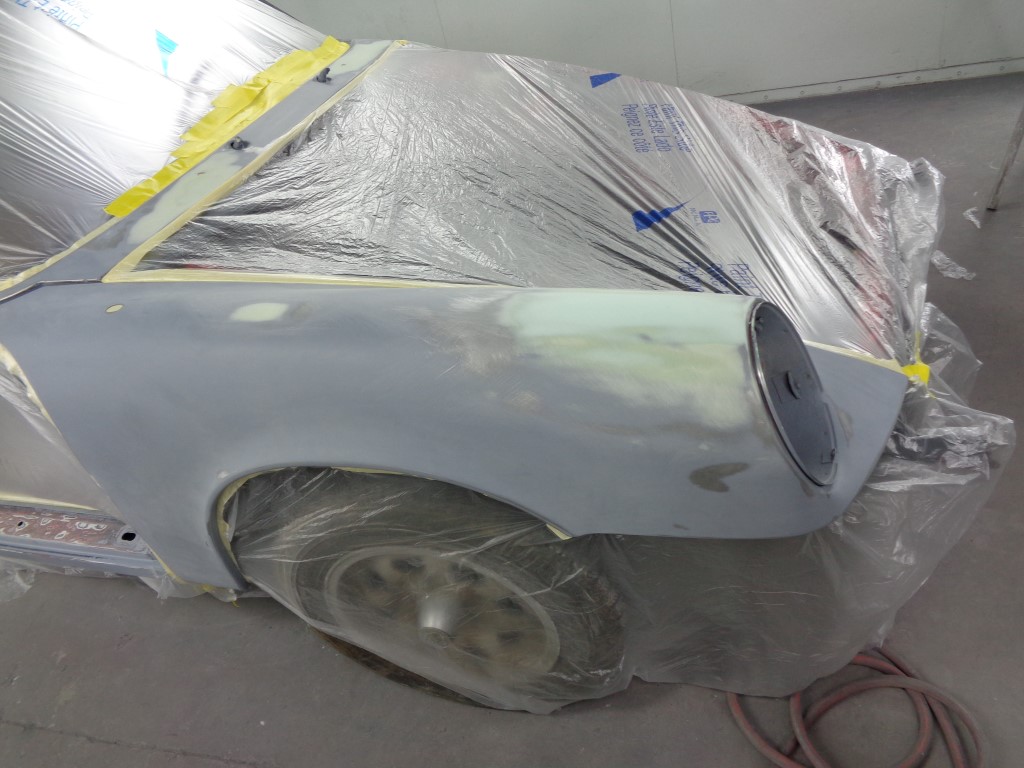
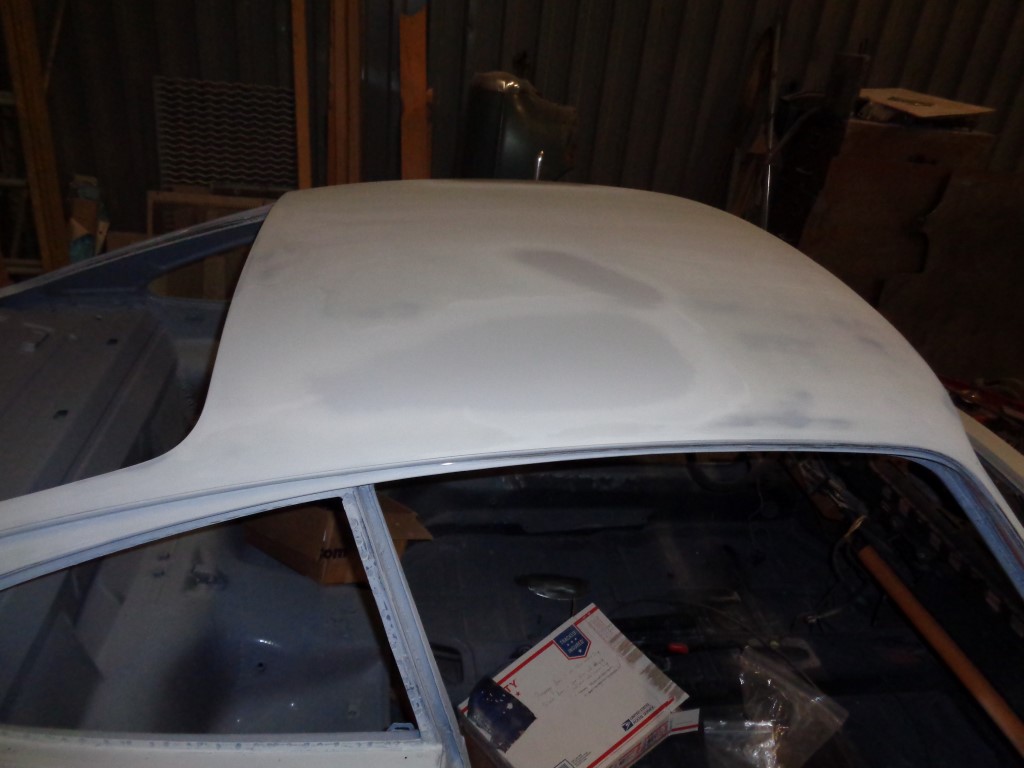
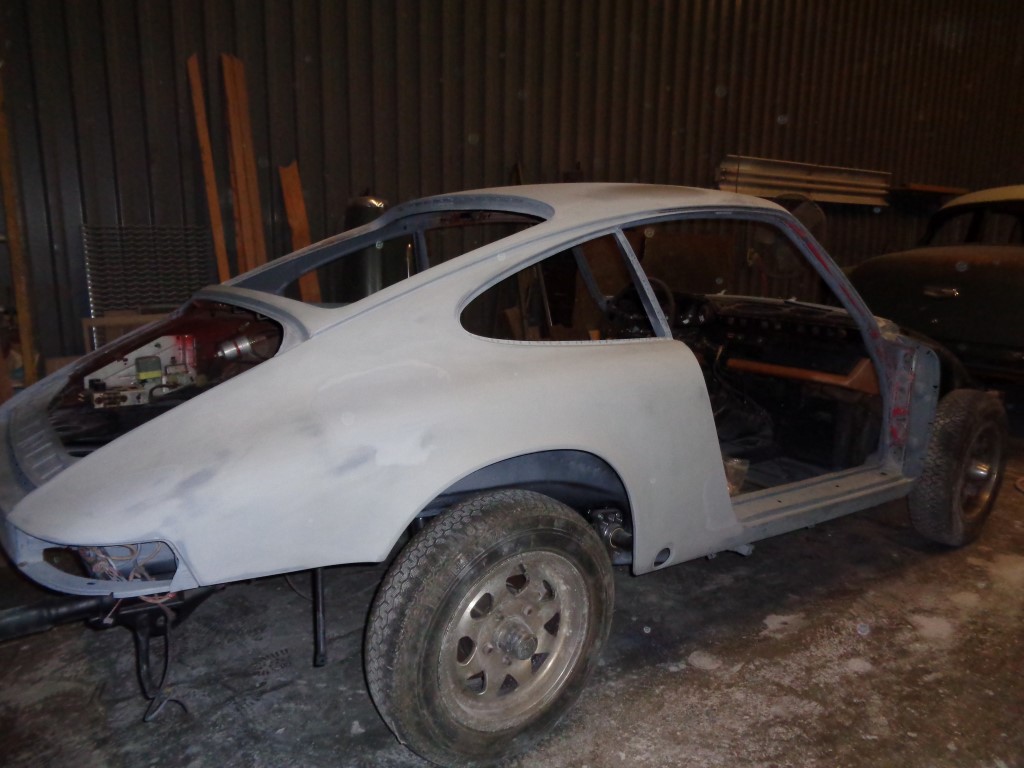
This means I can get back to bodywork. Last summer over ab out 6 days of straight work, I was able to get the body stripped down to bare metal, then the two step PPG 579/520 metal conditioning outlined in pelican under bodywork. MUCH has been said about how long you can leave bare metal left untreated, and my experience is that these panels showed NO evidence of rust for the first 9 months and only began showing some flash or surface rust mid June or July. I ran out of steam, and time and one thing led to the next, and winter came, so I decided to put the car on stands, strip the suspension parts and restore them over the winter. Now that it is all back together it was time to revisit the body work, getting it ready for the body shop.
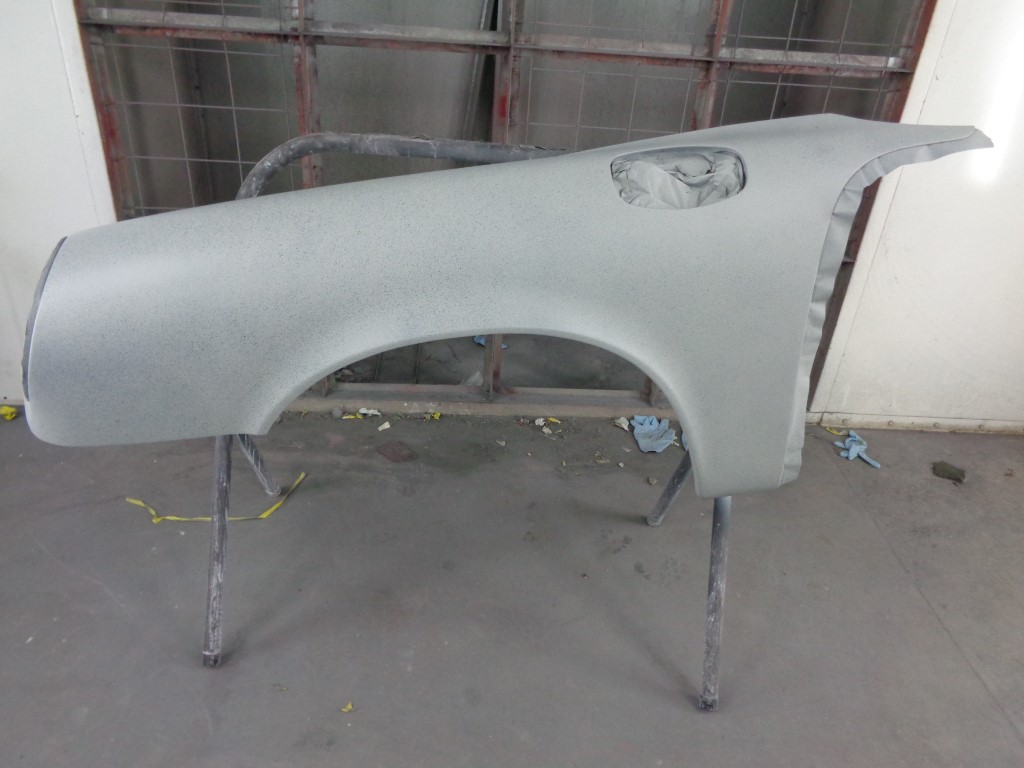
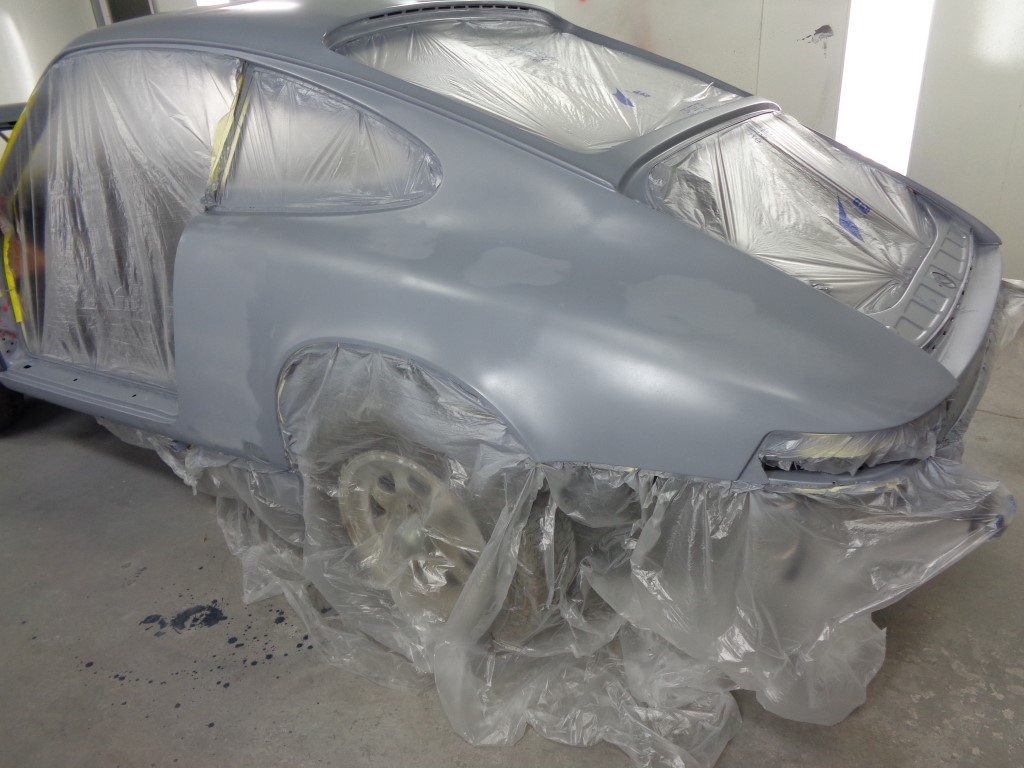
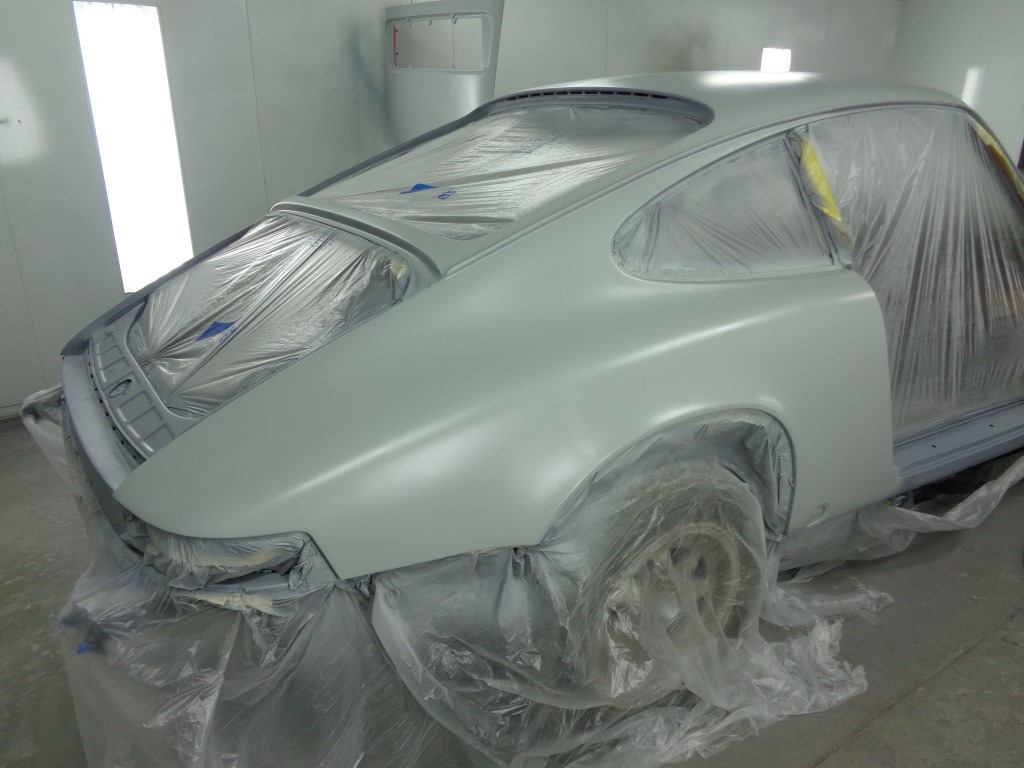
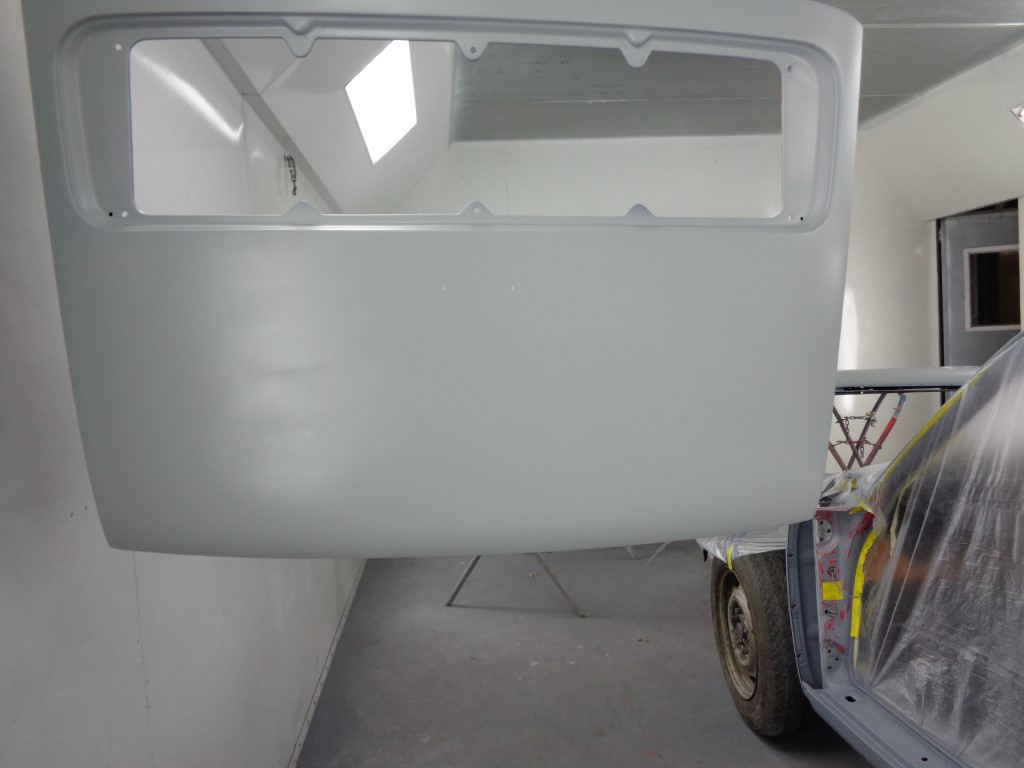
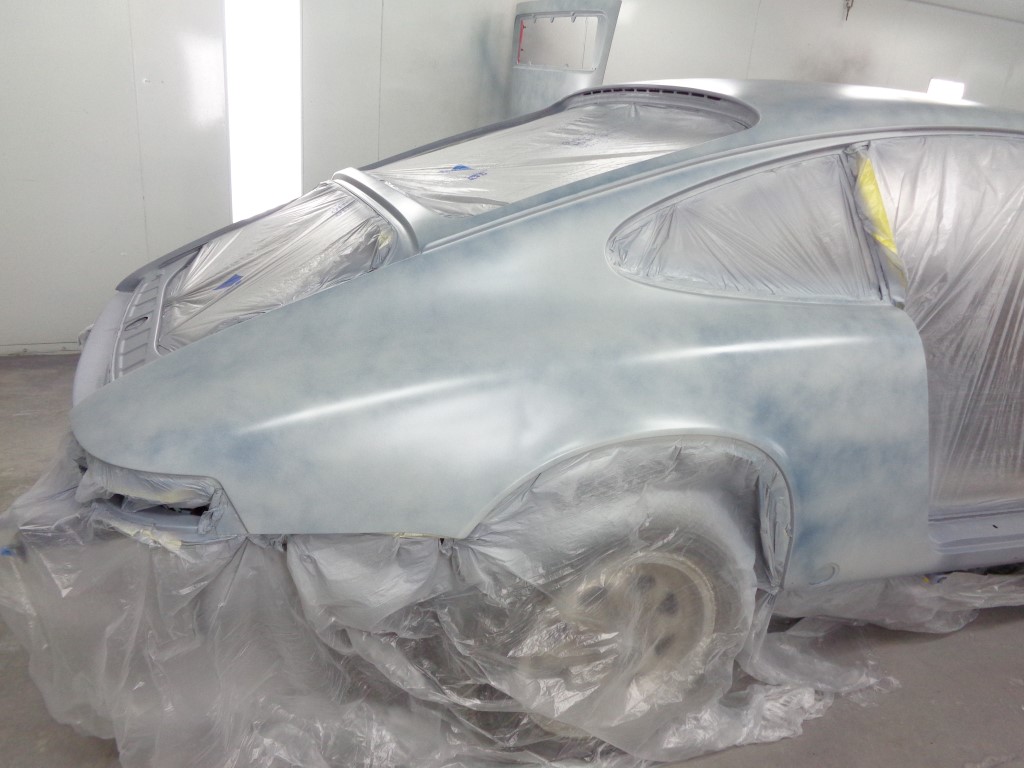
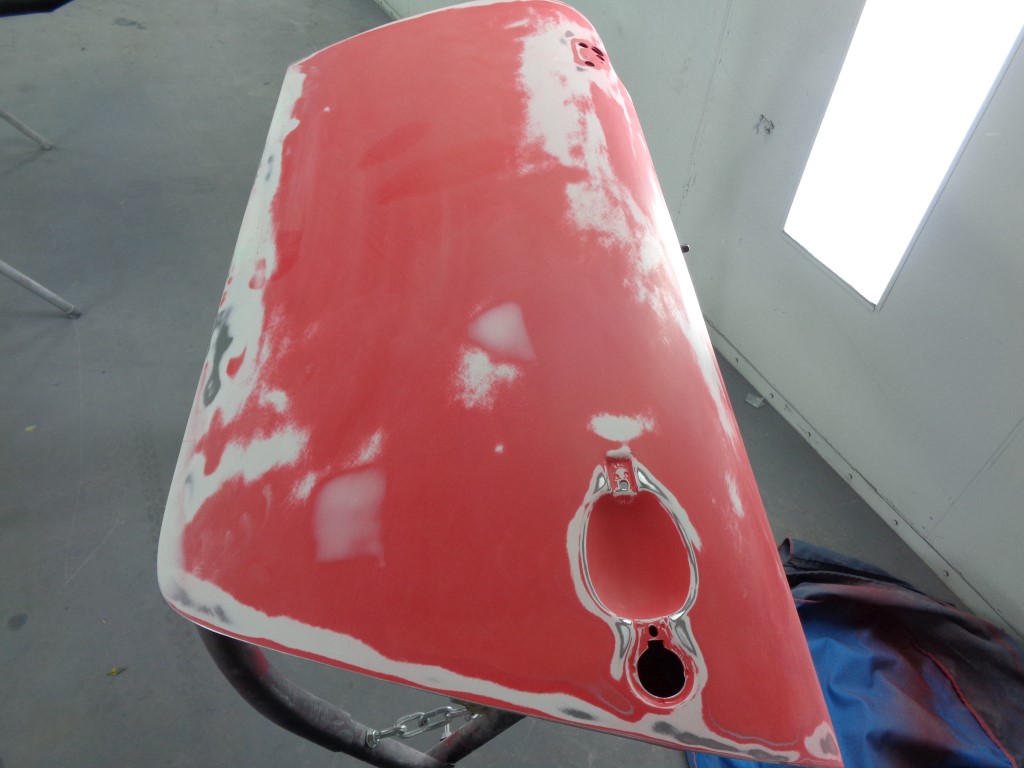
Last year I just focused on the exterior panels not the back or crevices, etc. so in addition to going over the whole body again with 80 grit with a DA sander, I also had to do all the joints and back of the panels. Not to many trouble spots, and will trust Scotty B (autobody shop doing my paint) to sort them out. After I re-conditioned all the parts (man I REALLY don't like spraying water on bare metal) it was time to address all the remaining paint and areas that would be covered with primer, as well as the back side of some of the panels. Talk about a NEVER ending job! I've done small projects before but never something at this level. It took another 3-4 days of sanding, grinding cleaning prepping, sanding cleaning and I was finally done.
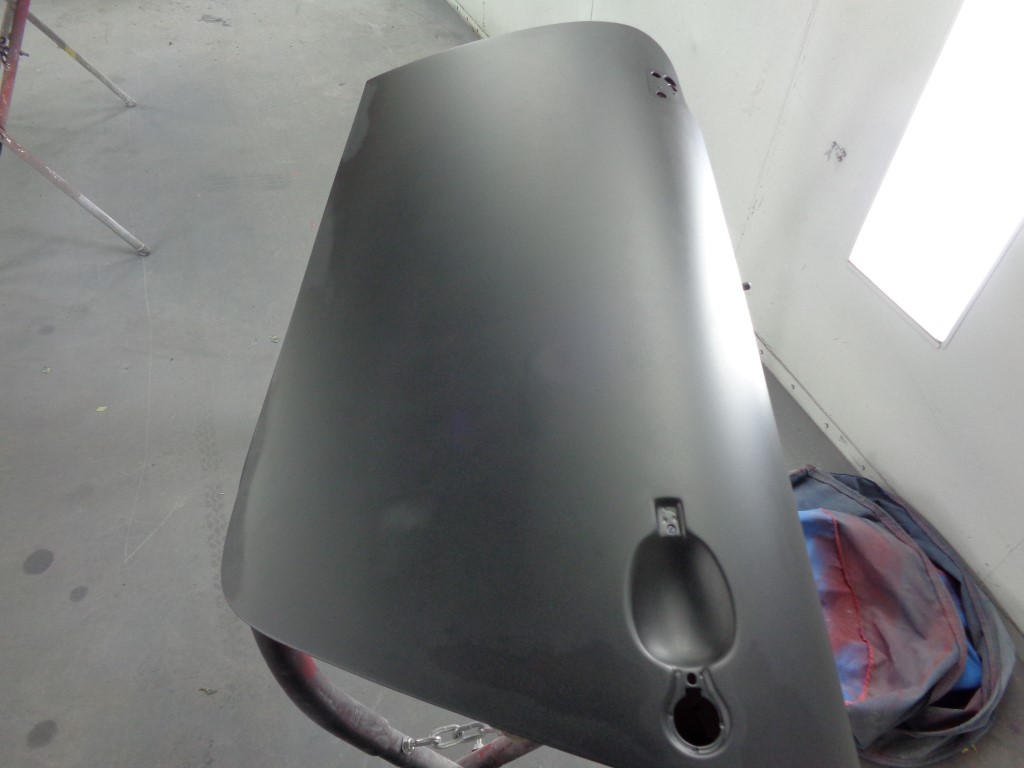
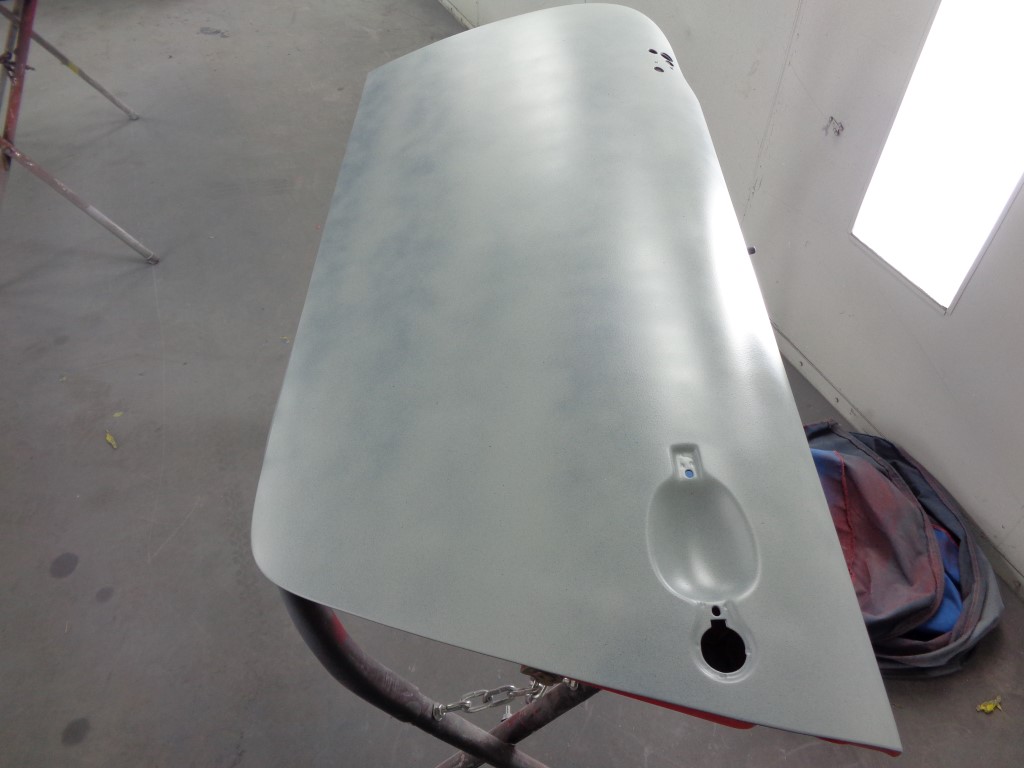
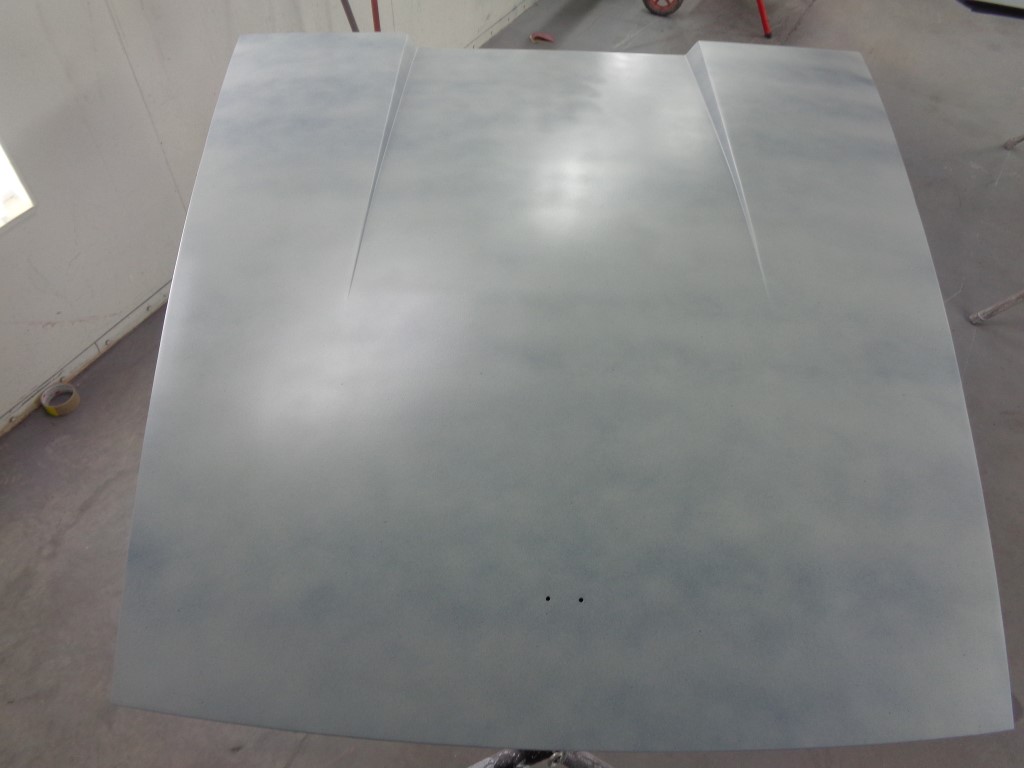
I was super stressed about actually spraying, and though I have pretty good rattle can skills, I had never sprayed paint with an air gun, never mind 2 part epoxy. Would I set the gun right? what ratio paint/hardener/reducer to use, would it stick? LOL The kit I bought came with two guns a 1.4 and 1.8 (not that I know what the heck the difference is) so I hooked up the 1.8 filled it with water and sprayed away teaching myself how the gun worked. Once I was more confident I hooked up the 1.4 gun, cleaned it with some reducer by spraying it, and setting the gun to where I felt it would spray well.
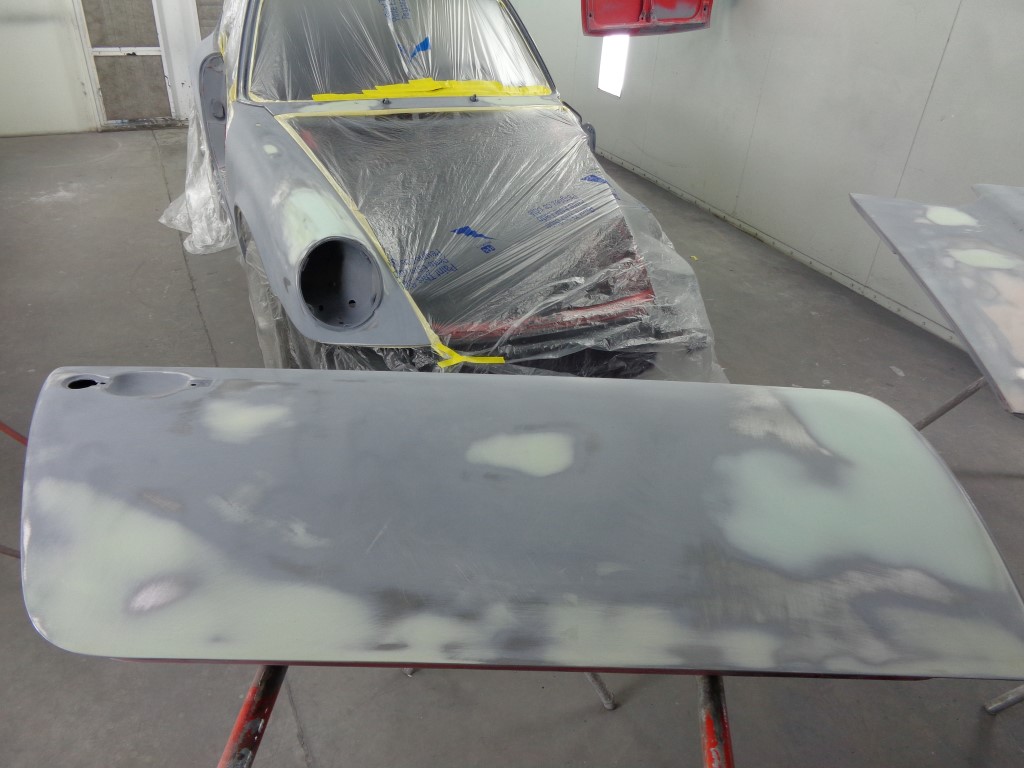
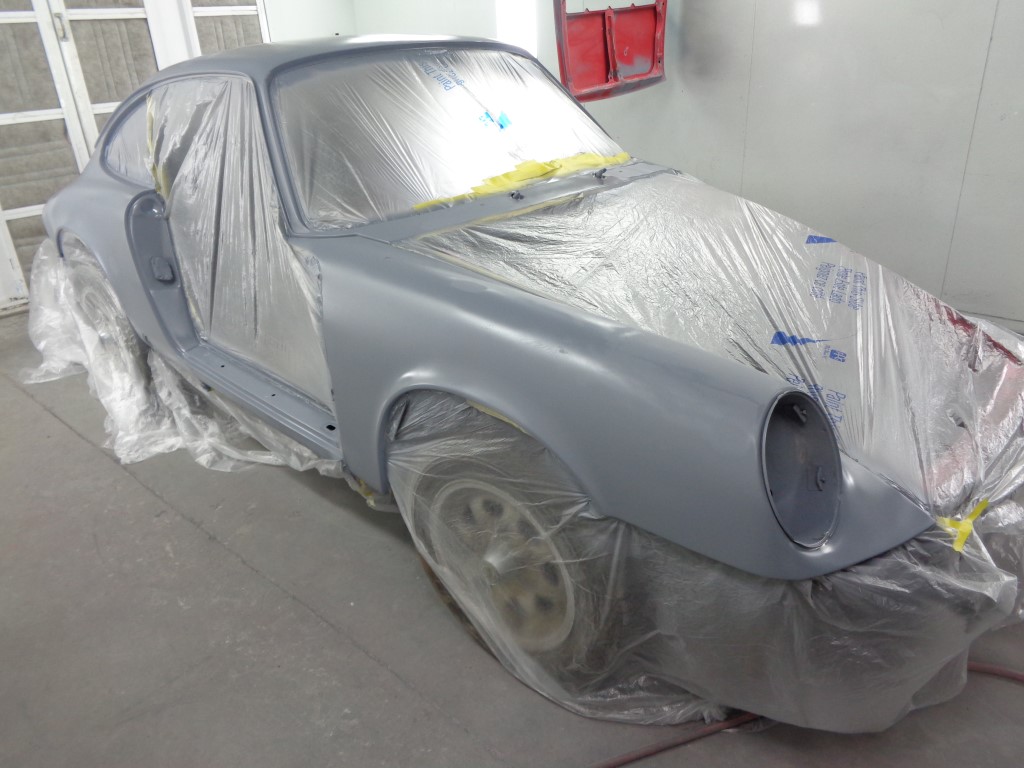
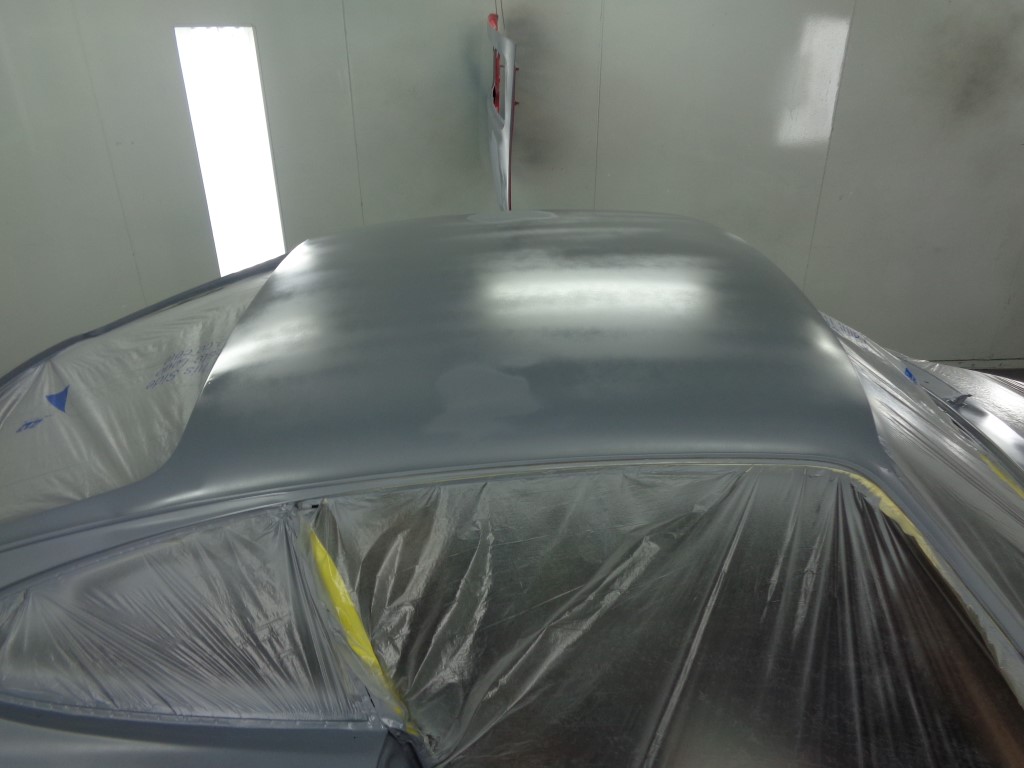
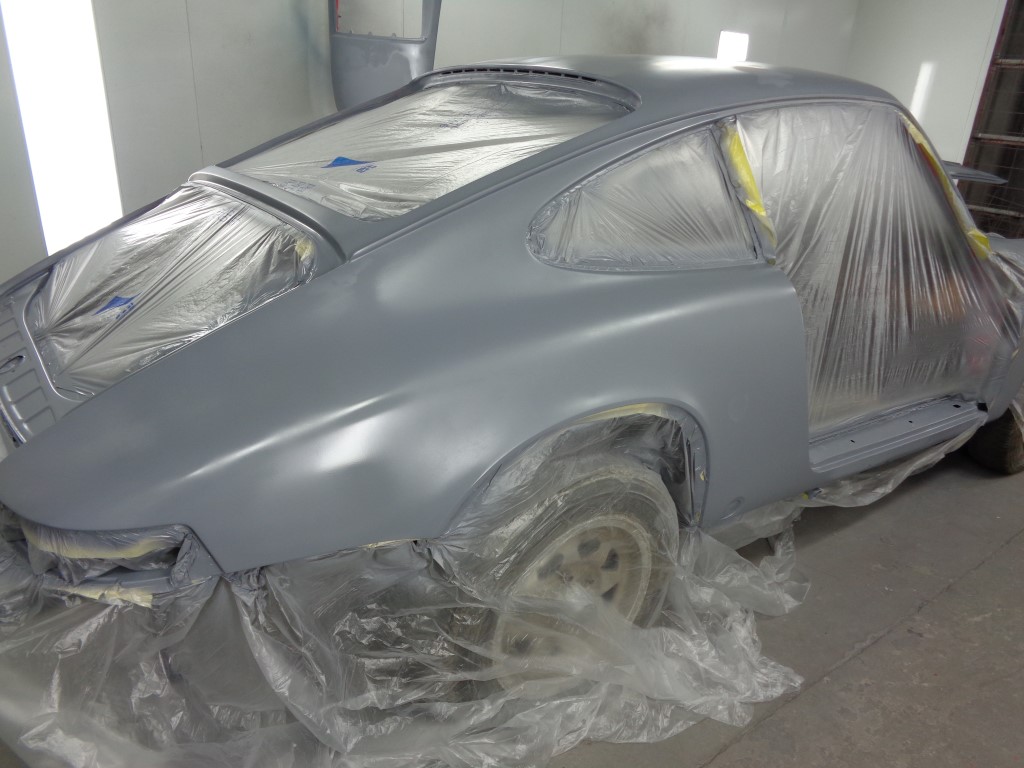
Then I set up my makeshift panel stands hung the fenders hood and door, mixed the paint and wiped the panels down with pre paint cleaner AND IT STARTED TO RAIN...... lol Of course all goes inside. Wait an hour no go, wait till the next day deal with a few flash rust spots from rain, repeat wipe down and tac cloth, start pouring out paint AND RAIN..... At this point I was ready to quit. It was Sunday, and Monday was Labor day. But I got up Monday morning, the sun was out and I figured one last time. Third time was a charm. I set everything up, mixed and sprayed the individual panes first, then as they dried I rolled the chassis out of the Garage, masked and prepped the body and shot the paint.
VERY happy with the results, the primer sprayed beautifully, only one area of runs which was the first piece I painted (fender), and only one area with orange peel which was my second piece (engine lid), The rest went very well, and now I am anxious about prep. Will the primer stick? did the pre-cleaner leave a residue, did I mix correctly, etc etc. Whatever, the body is sealed and I leave it to the Scotty B and his expertise at the paint shop to go from here.
Materials/supplies
PPG 579/520 metal conditioning
TCP Global 2 Part Epoxy Primer
PPG medium reducer
Mercedes source Miracle Paint
El cheapo harbor freight 1.4 nozzle air gun 100 lbs at wall, 45 lbs at gun with two water separators, one before and one after the regulator.
Makita 5600 Air Compressor
Eastwood DA sander & 8million discs... lol
Pics follow
Attached thumbnail(s)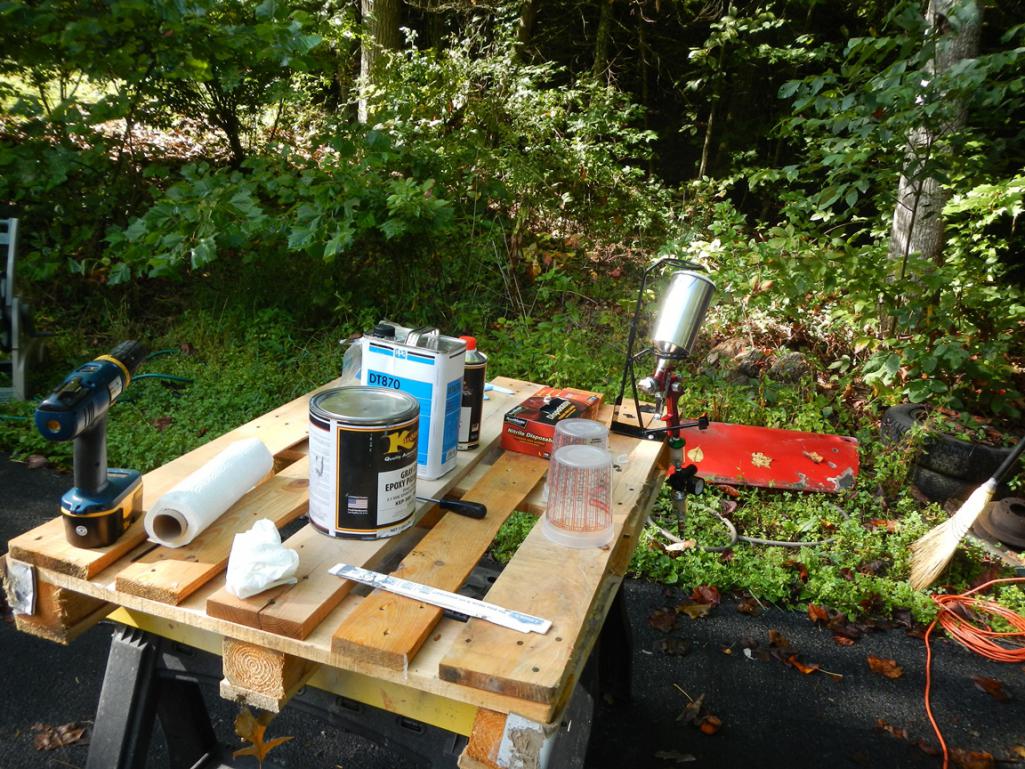

Attached image(s)
Posted by: Steve Pratel Sep 2 2014, 05:52 PM
A few more pics. and the starting point. NEXT for the chassis is Paint and time to start building the motor.
Attached thumbnail(s)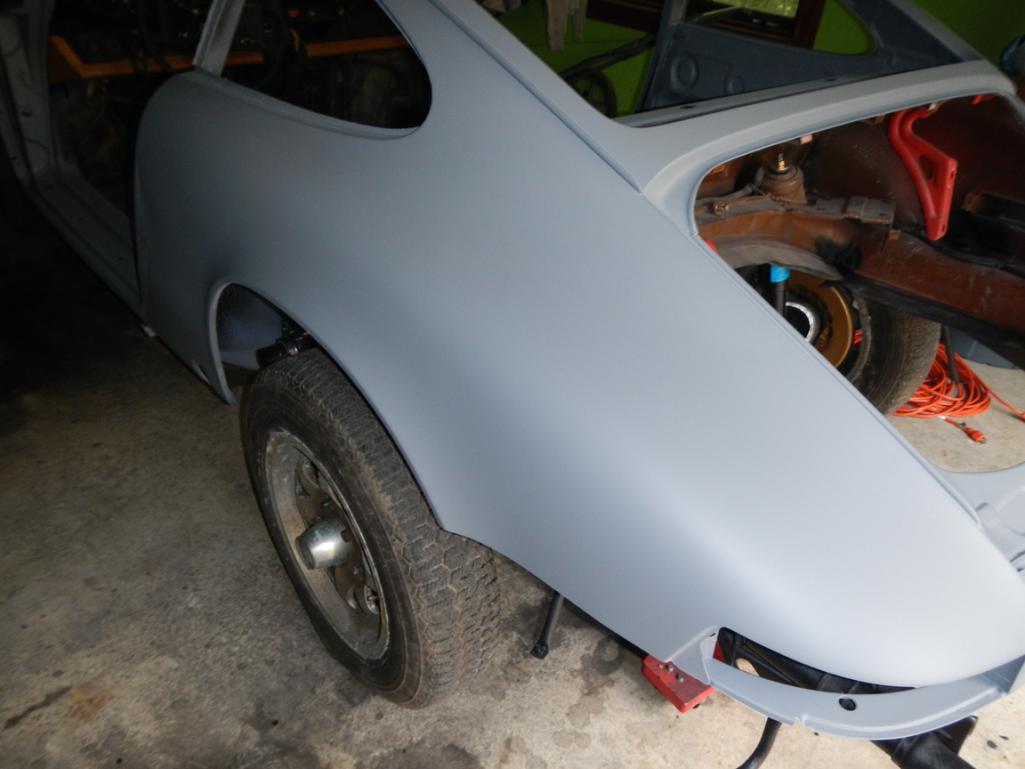

Posted by: scotty b Sep 2 2014, 06:15 PM
Looking good Steve. Once you get that 6 built she'll be pretty sweet 
Posted by: Steve Pratel Sep 3 2014, 05:42 AM
 Yeah, about that, I seem to have lost two of the pistons and cyls, looks like I'll just have to do it with 4. But on the bright side, it will have closer to a 50/50 weight balance now!
Looking good Steve. Once you get that 6 built she'll be pretty sweet
Posted by: Harpo Sep 20 2014, 01:39 PM
Very nice. I would be interested to hear about the RSR bushings after your first ride. I'm concerned about the stiffness. I would really like to get a 912 before they become too expensive
Thanks
David
Posted by: Steve Pratel Sep 23 2014, 05:51 PM
Time to buy the AFM, Anyone using this? I like that it has a voltmeter built in and can expand to other modules (pricey) http://www.plxdevices.com/product_info.php?id=WDBDSMAFR_DM6G3
Posted by: Steve Pratel Sep 24 2014, 10:45 PM
I pulled the switch on the PLX, is a Gen 3, looks to be a good deal from the manufacturers now that their Gen 4 is out. It comes with a 10 foot cable but also a 1 foot pigtail. This is 11 feet to the Module, then there is a 4 foot cable that goes from the module to the gauge so I think I should be OK as far as cable length.
I plan to mount the AFM/Voltmeter in between a fuel gauge and clock (52MM VDO) in a 3 gauge bracket where the ash tray was, will likely need to widen the opening a bit. The nice thing about the PLX is that is it super low profile, and could be mounted elsewhere very easily. I added the dual pressure/temp gauge from a 911 and also plan to delete the fuel gauge and clock, and replace them with dash vents from a Ford F150 connected to a fan with a heater element and filter. I'll be using one of the heater boxes I made when I was trying to create a heat exchanger option.
I picked up a 52mm VDO clock and fuel gauge (VW beetle type). I attached a pic of my proposed layouts, as well as a pic of the ford vent.
Not sure if I will keep or sell the stock clock and fuel gauge. Believe it or not the original clock still works.
Attached thumbnail(s)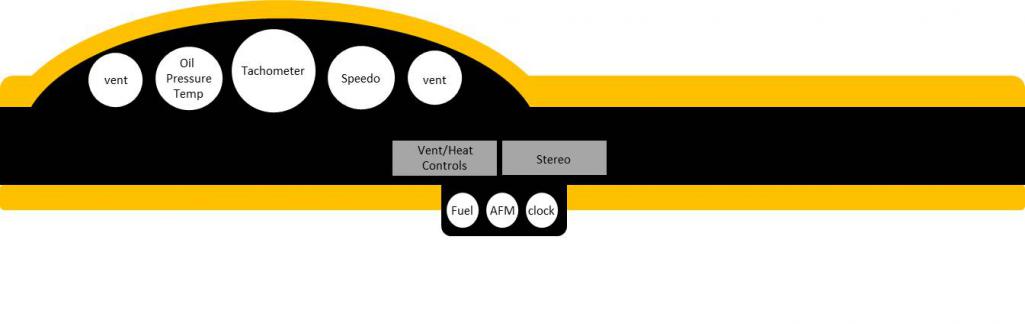

Attached image(s)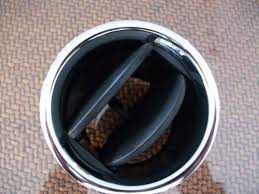
Posted by: Steve Pratel Oct 21 2014, 02:52 PM
Woohoo, dropped of #770 at Scotty B's shop for some TLC & Paint! cant wait to see it back in its original color! I almost cant believe it.... Time to get serious on building the motor! In addition to repairing some of the weak/rusted panels, (spot on door, fender, rear window) he is going to prep, block & paint, as well as set the headliner and front/rear windscreens...
Of course when backing on the trailer the throttle cable got pulled down and pushed forward and under the car so I couldn't see it and is now toast as a result of being dragged for 150 miles, oy 
I have a bit of cleanup to do in the garage and paint the tins/fan case, then it is assembly time. Now I'm getting nervous. Two areas I will need the most help with is valve geometry and setting up the carbs. First is to get a magnifying glass so I can actually read what is stamped on the jets etc, 
Posted by: scotty b Oct 21 2014, 06:41 PM
I put Ben on it today. Will have some pics this weekend in it's first coat of high build. this one should go quickly since the car is in such good shape and Steve did so much of the prep work Doo doo brown here we come 
Posted by: Steve Pratel Oct 22 2014, 08:36 PM
Look forward to the pics! I dropped a package in the mail with the fender/door bolts, hood & trunk latches, as well as some other misc hardware including the small body panel that goes behind the front fender bellows. I will bring the headliner and windshield/seals/molding when it is time.
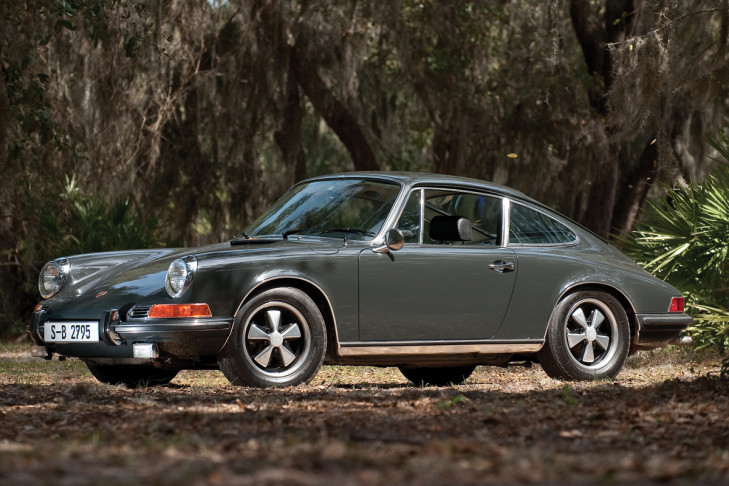
What.......... you dont like "bitta chocolate?"  Its not the 'nicest' color on the planet and I almost went for BRG or Ivory, but this was what it rolled from the factory in. Pic of BC below is my visual 'target' but I do like the Ivory and BRG as well.
I put Ben on it today. Will have some pics this weekend in it's first coat of high build. this one should go quickly since the car is in such good shape and Steve did so much of the prep work
Doo doo brown here we come Posted by: Steve Pratel Oct 22 2014, 08:41 PM
One day, I would love to have a color schemed car that in 1973 caused me to obsess over the 911...... I am psyched over the car I have and looking forward to putting bitter chocolate back on it though. 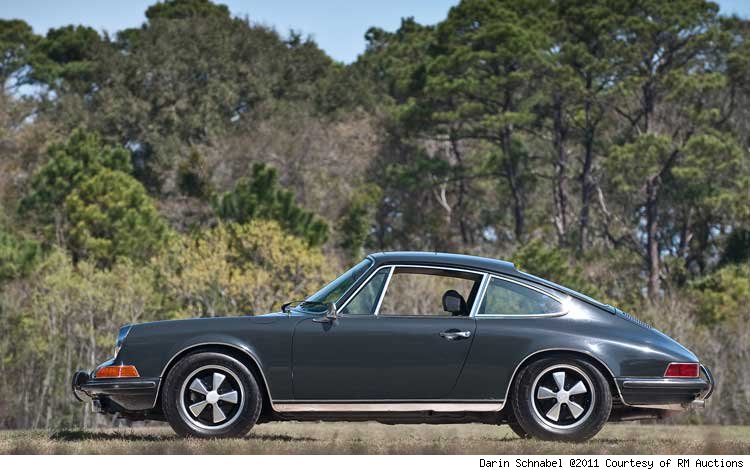
Posted by: scotty b Oct 24 2014, 05:01 PM
I need to talk to my helper about his picture taking There was a crunched spot of the front of the drivers quarter. The ONE pic he took was after he pulled it out. As of yesterday the main body has been blocked down and skim coated where needed, as are the passenger door and both fenders. I'll probably be putting a couple coats of high build on Monday night
Attached image(s)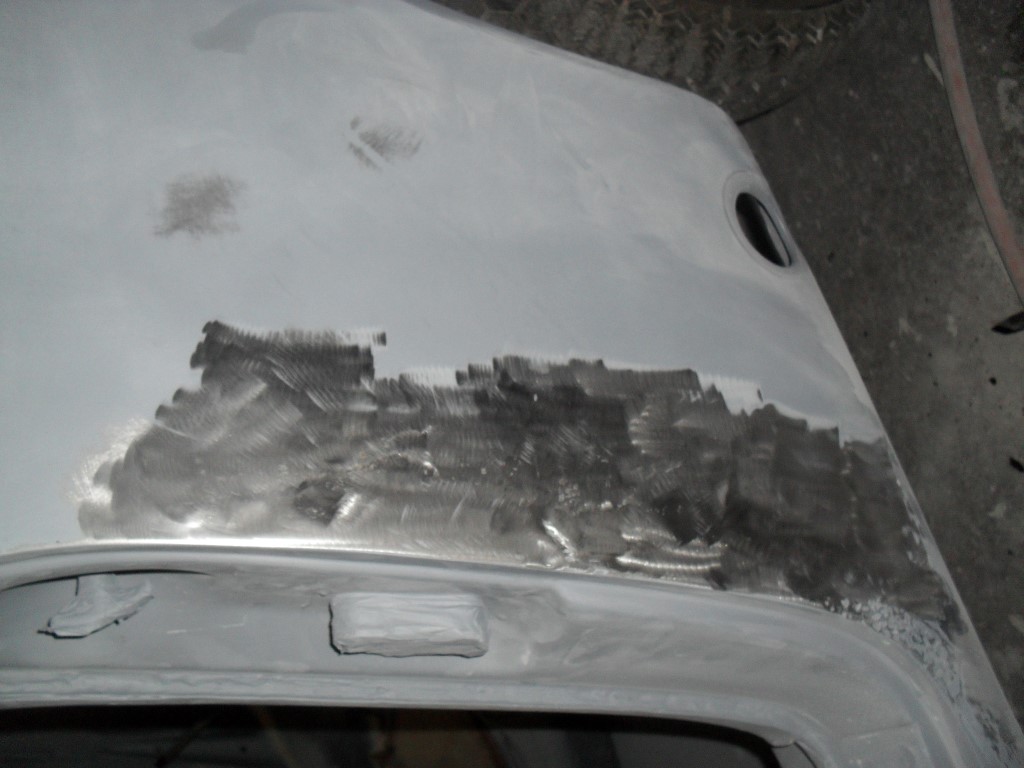
Posted by: Steve Pratel Oct 24 2014, 05:43 PM
Posted by: scotty b Nov 3 2014, 06:18 PM
Everything is in high build and will sit for a week or tw to setup good. I ran out of donor fenders for the dog leg area that always rots out, so it was metal smashing time. Also had a broken bolt to extract


Attached image(s)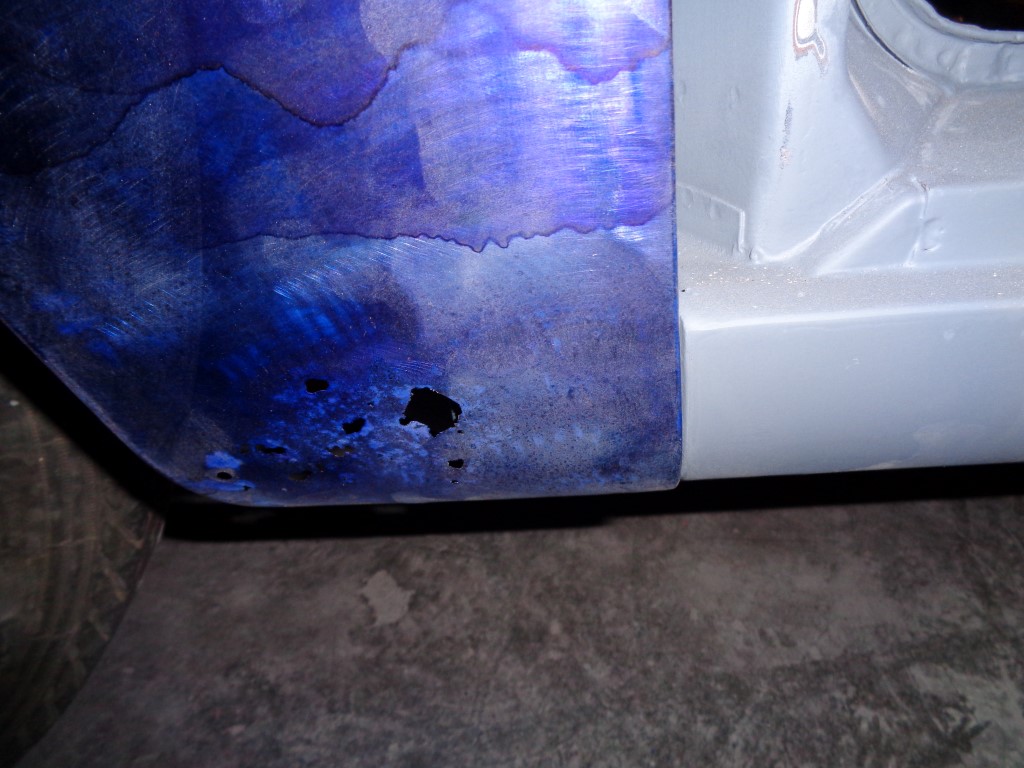

Posted by: scotty b Nov 3 2014, 06:25 PM
Epoxy sealer followed by a couple coats of high build. Where's that spray gun smilie ?
Attached image(s)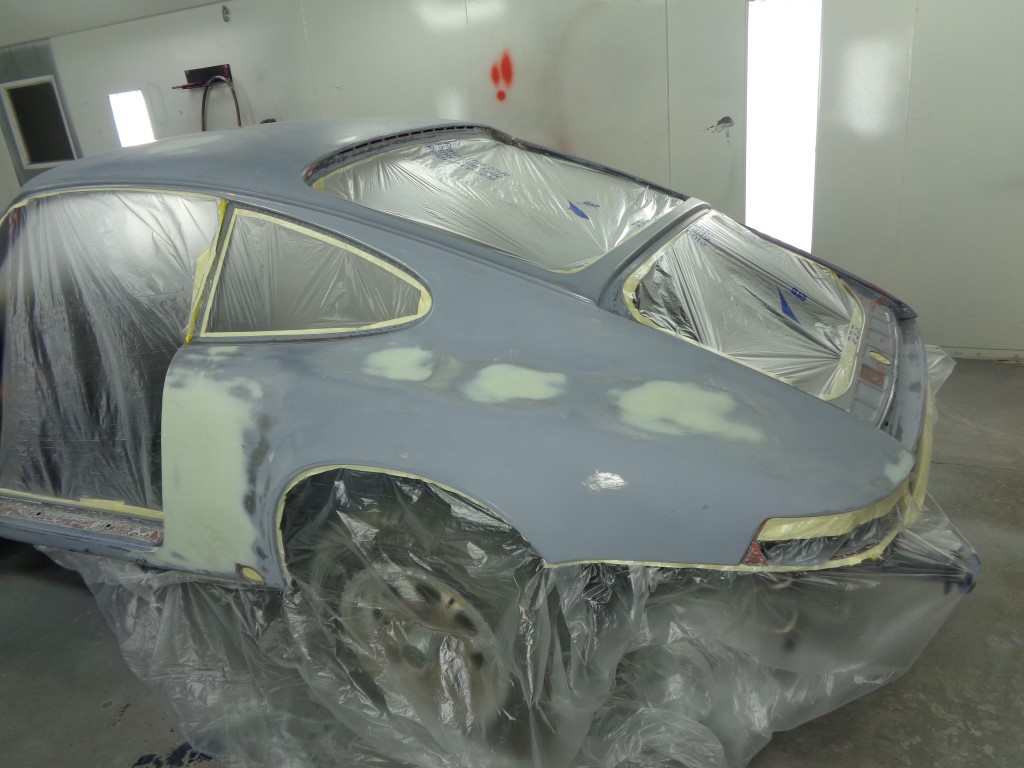

Posted by: Steve Pratel Nov 4 2014, 06:02 PM
Looking great! 
Posted by: Steve Pratel Nov 12 2014, 01:09 PM
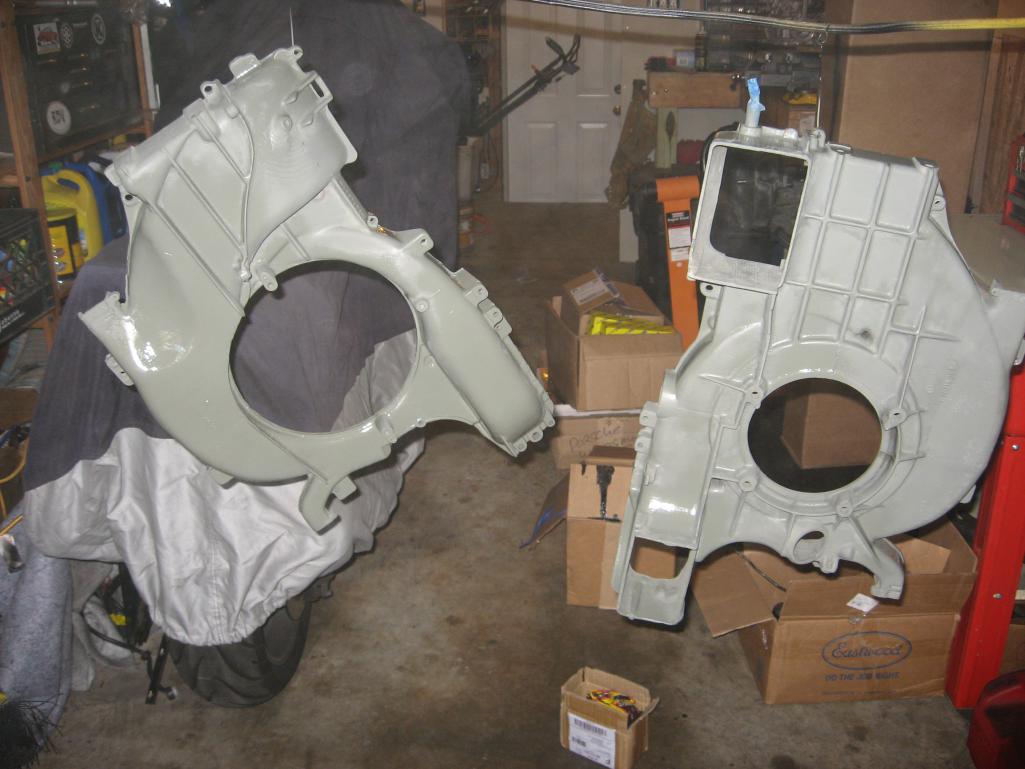
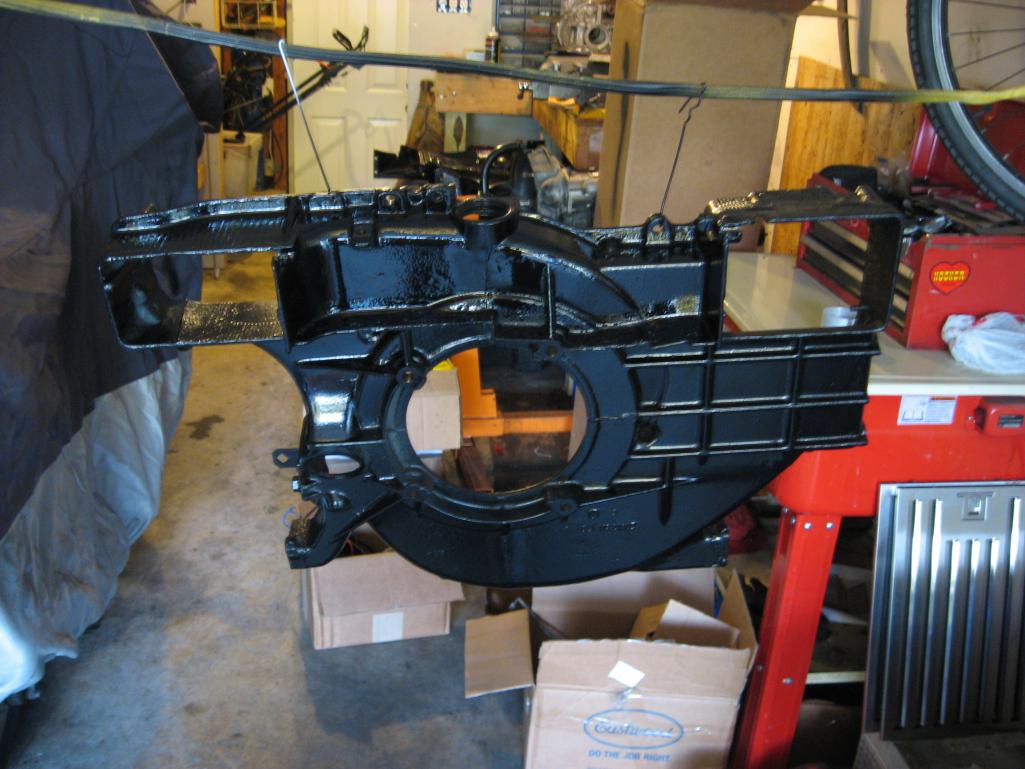
Took the opportunity of a day off to finish up a few stray ends, finished painting the fan housing and tins. Will let cure for a few days then 'bake'
Used VHT Gloss on the tins, Satin on the fan housing, and the super high temp flat on the lower tin in hopes it will stand up to heat better. After cleaning up the fan housing, I treated the severely corroded parts, then a hi temp self etching primer and top coated with VHT
The finishing of these parts brings my strip sand, clean and repaint mode to an end, and NOT TOO SOON..... I must admit motivation was low for these parts. The aluminum on the housing was very distressed and it took 3-4 attempts to get all the loose powdery residue and oxidized stuff off. I was very surprised at the amount of corrosion, but given that there was standing water in and on the engine, and fan (all was corroded and rusted together) and that the entire engine compartment was a nest of many years and layers of nests and varmints, I guess it is to be expected. I was able to save all the hard parts, and most cleaned up well, though with some major pitting.
When Len Hoffman rebuilt the heads, me mentioned that there was some significant pitting he couldnt polish out in the intake tracts but not to be worried because "the increased turbulance will likely be benificial" lol.
Anyhow, Now it is time for assembly! Woohoo! 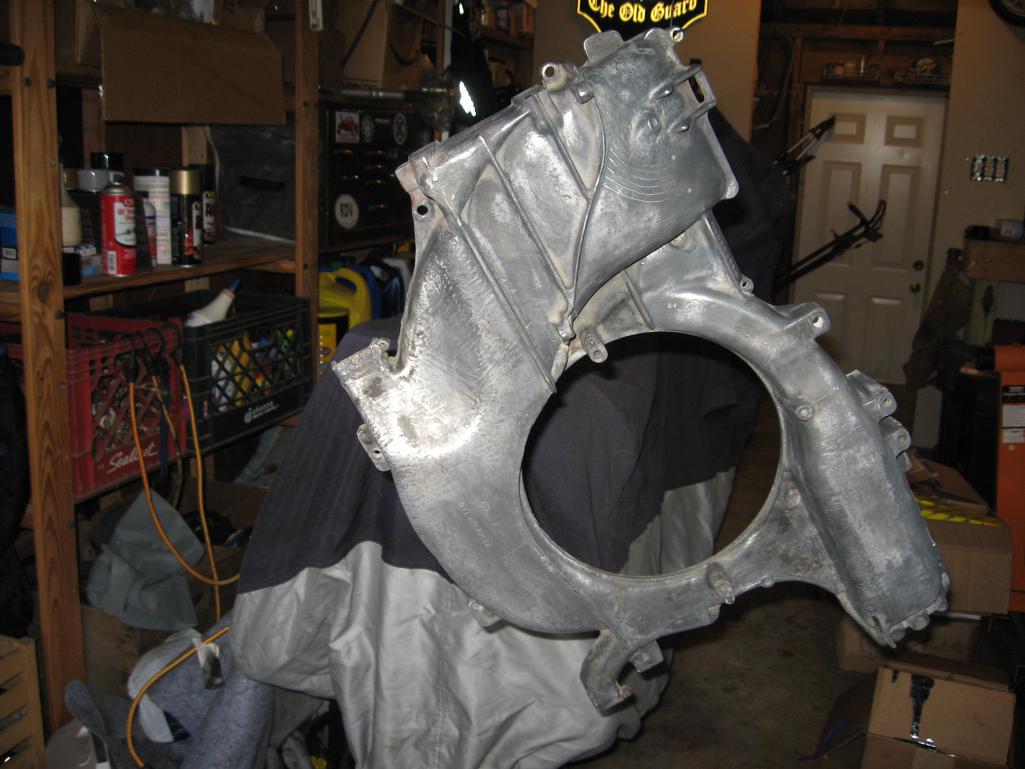
Posted by: Steve Pratel Nov 12 2014, 01:25 PM
more
Attached thumbnail(s)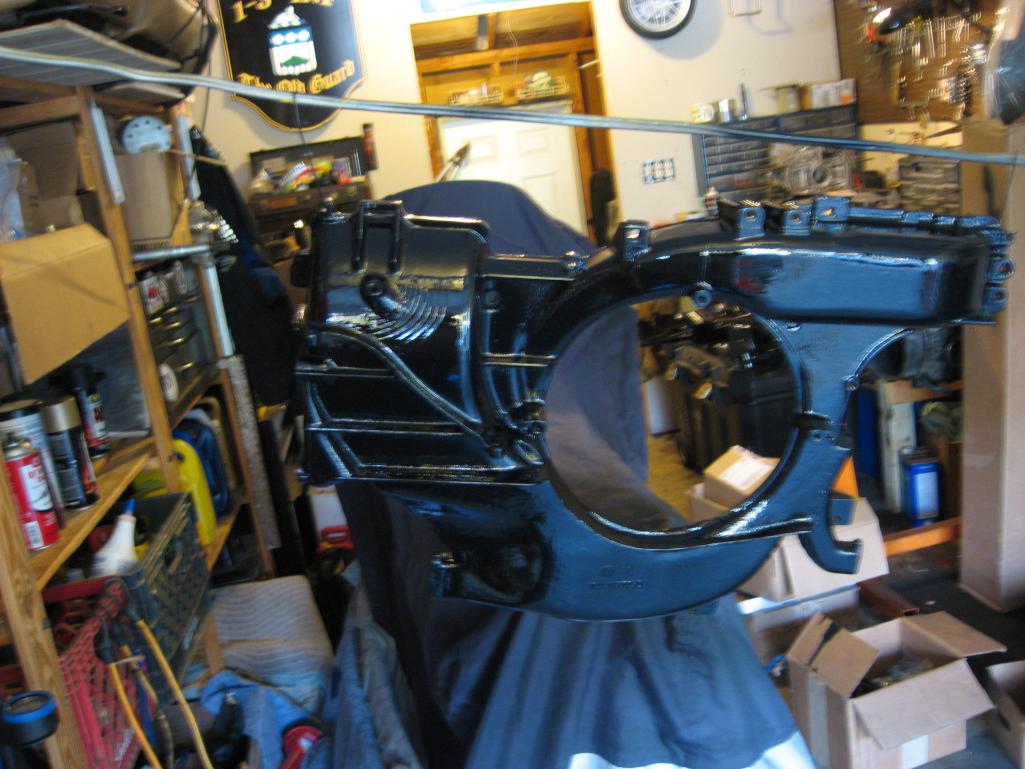
Posted by: Steve Pratel Nov 12 2014, 01:29 PM
small and side pieces. After cleaning I had some significant holes in the tin, used an old method with the mercedes source miracle paint and layers of fiberglass mesh to fill gaps. Not perfect, but good enough.
Attached thumbnail(s)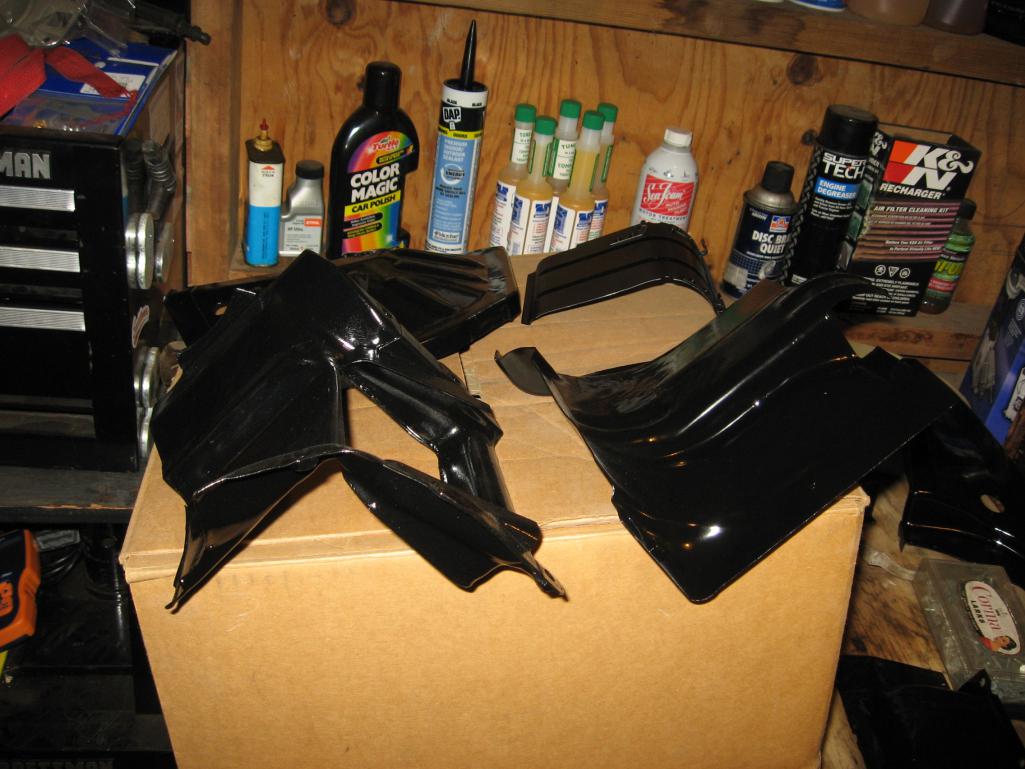
Posted by: Steve Pratel Nov 12 2014, 01:32 PM
Fan Shroud Mockup with "Porsche " plate" I know, a bit cheesy, but I wanted to do something in the engine compartment and found this plate, thought it would look good. Has an adhesive back, but is metal and I will drill and rivet in the corners.
Attached thumbnail(s)
Posted by: euro911 Nov 12 2014, 02:01 PM
Posted by: scotty b Nov 13 2014, 07:23 PM
All blocked down for the last time. A few spots showed up and were addressed and spot primed. And a splash of glossy poo on the insides Depending on how my back is doing next week I may be able to get the rest of the car painted. Then all that will be left is the bumpers and valances
Attached image(s)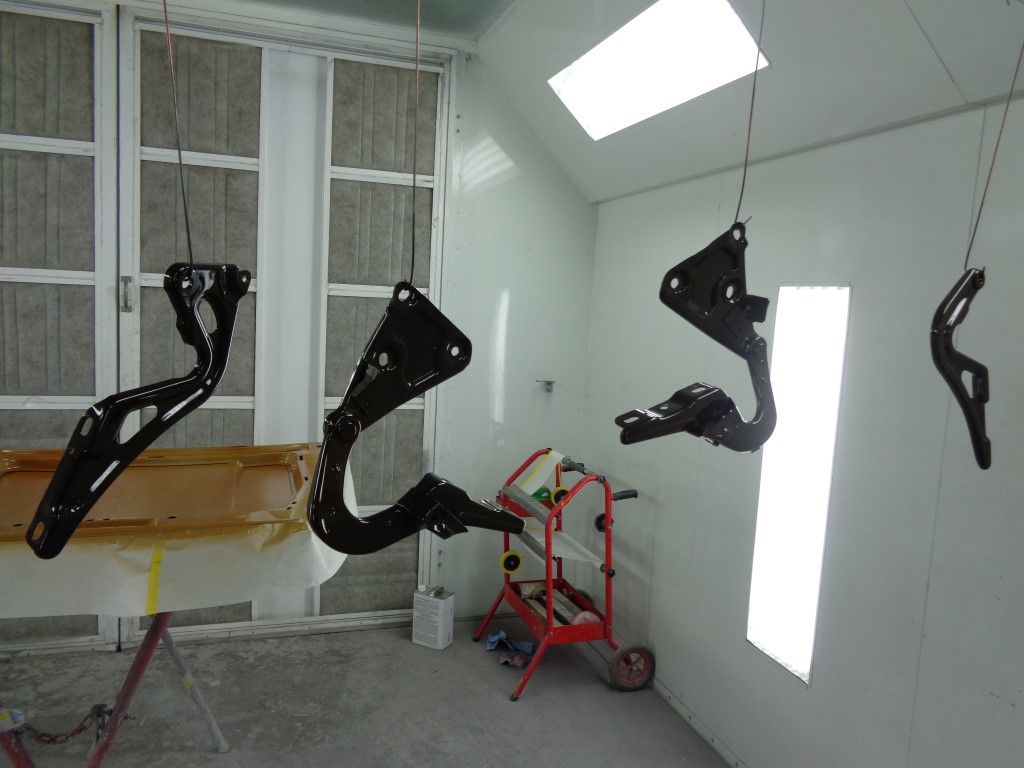
Posted by: Steve Pratel Nov 17 2014, 02:30 PM
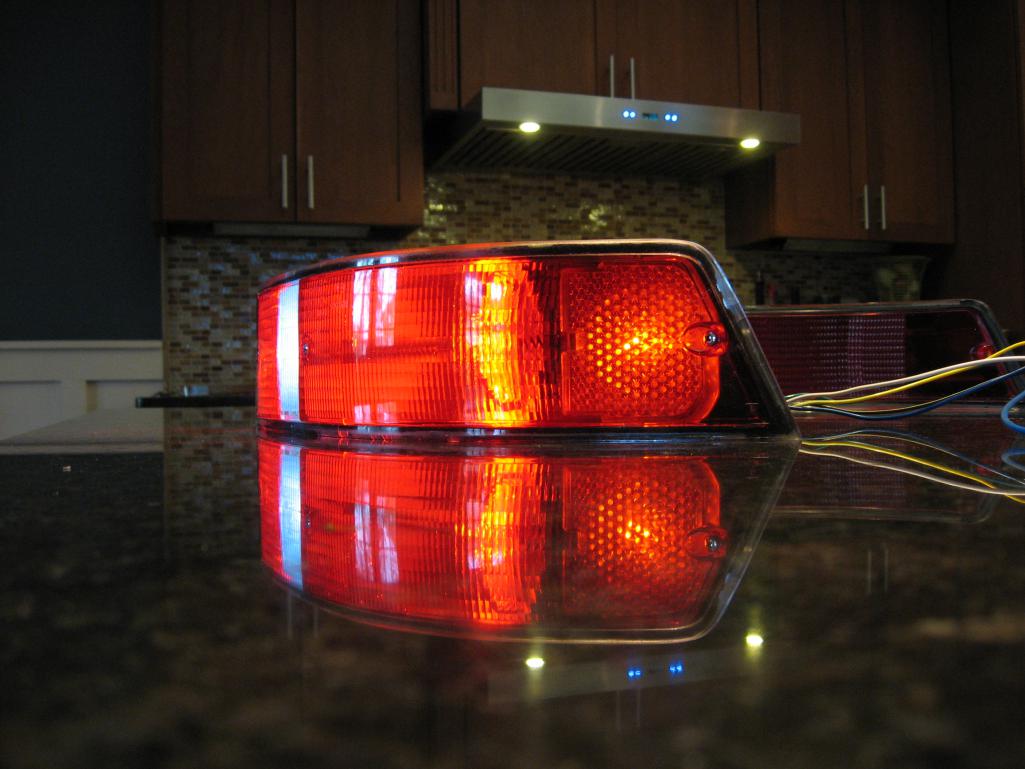
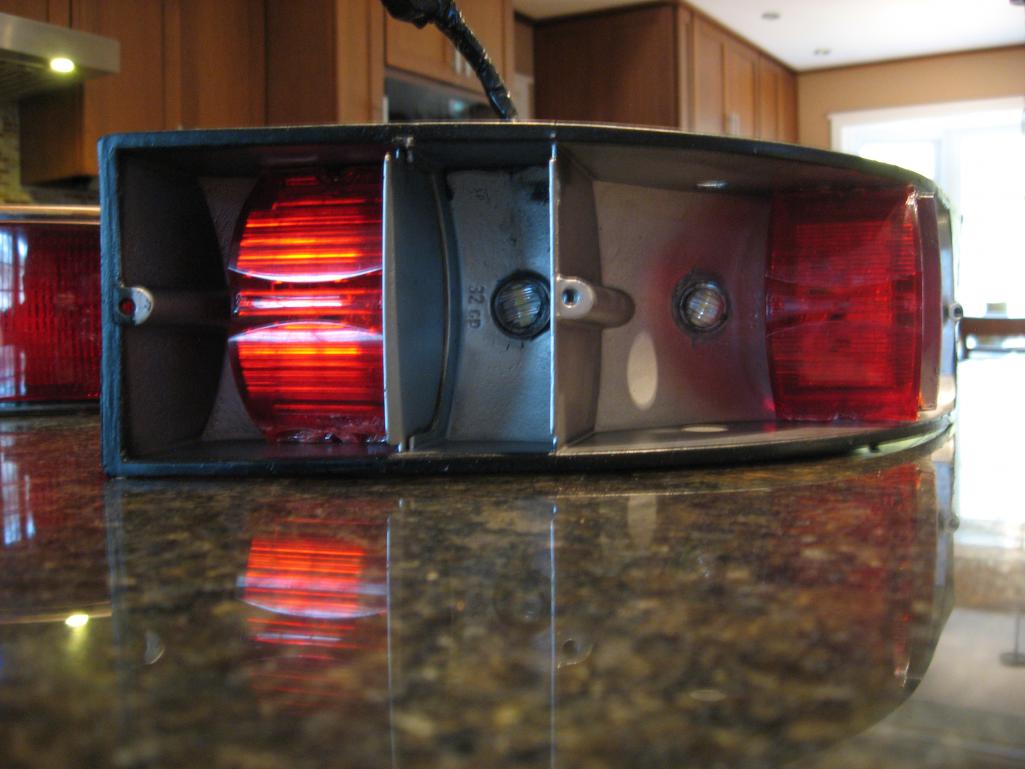
Finished the tail lights over the weekend, the lenses polished up nice, and lights are bright. We will see how the directional relay likes the LED's, may have to solder in a resistor. Not bad for a $45 investment (plus time and paint cost).
Attached thumbnail(s)
Posted by: Steve Pratel Nov 17 2014, 02:38 PM
inner details of taillight LED conversion. All units are sealed weather proof LED's, I had to gut the housings due to corrosion, cracked connectors, circuit boards, etc. I didn't want to spend the $$ ($350+) so I improvised.
The Directional/Tail light was a dual filament bulb, so I added drilled into the housing and added another light. All is held in place with marine silicone. LED's tend to last a very long time, but if one burns out will be simple to change. Was a fun project overall.
Attached thumbnail(s)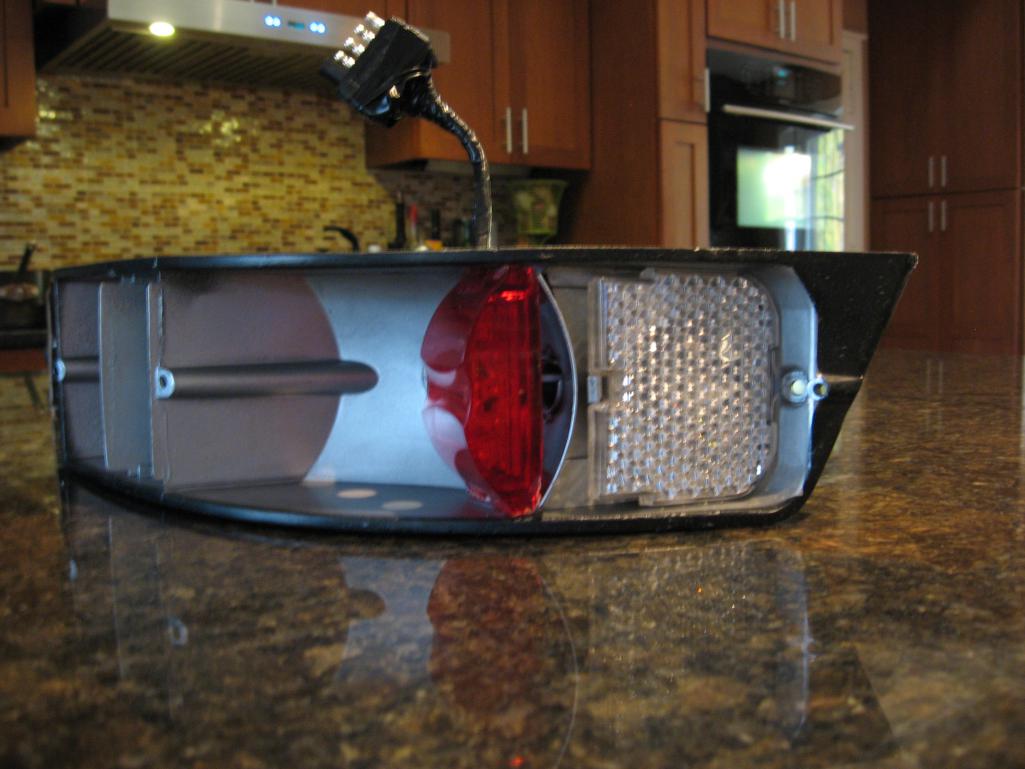
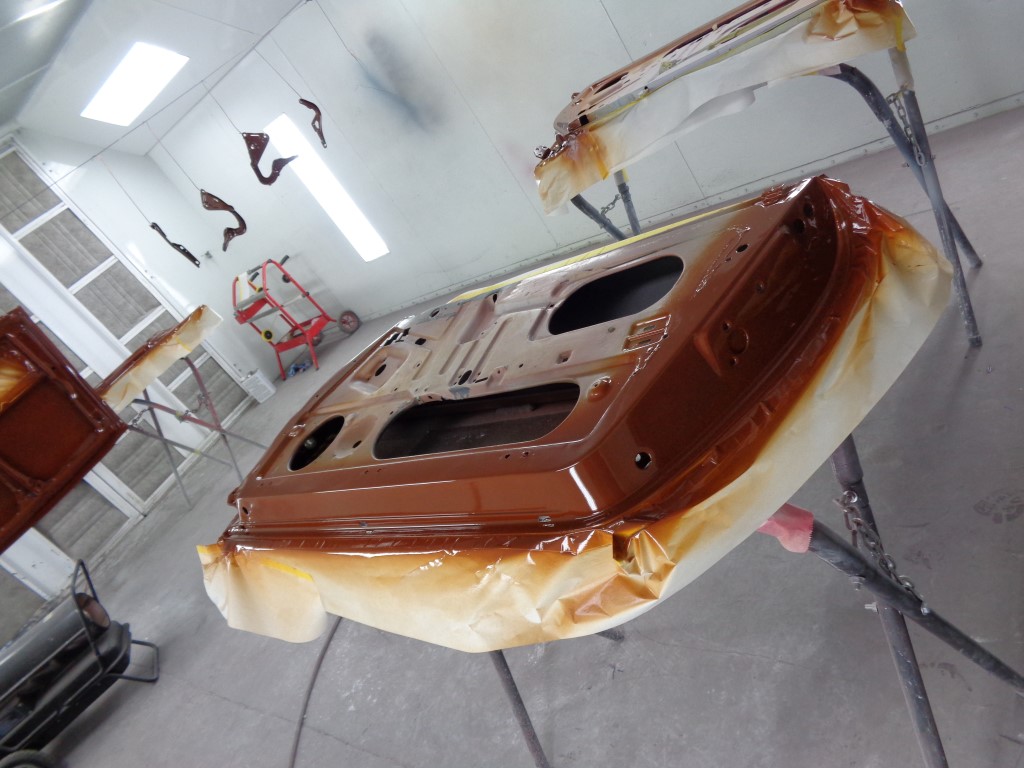
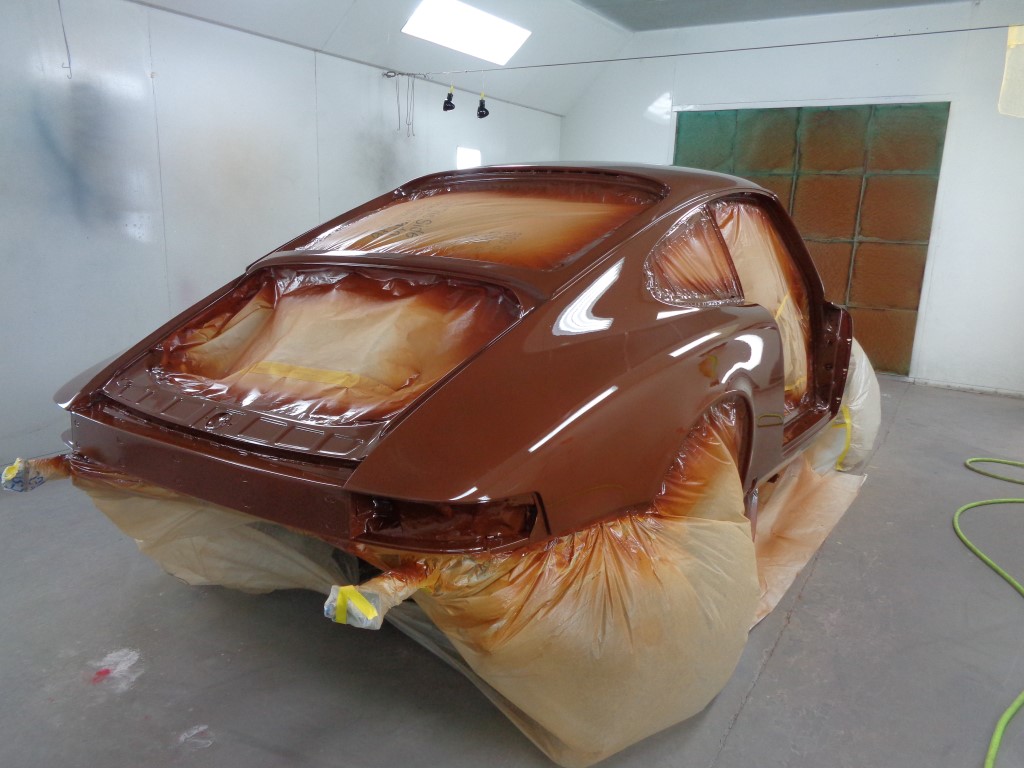
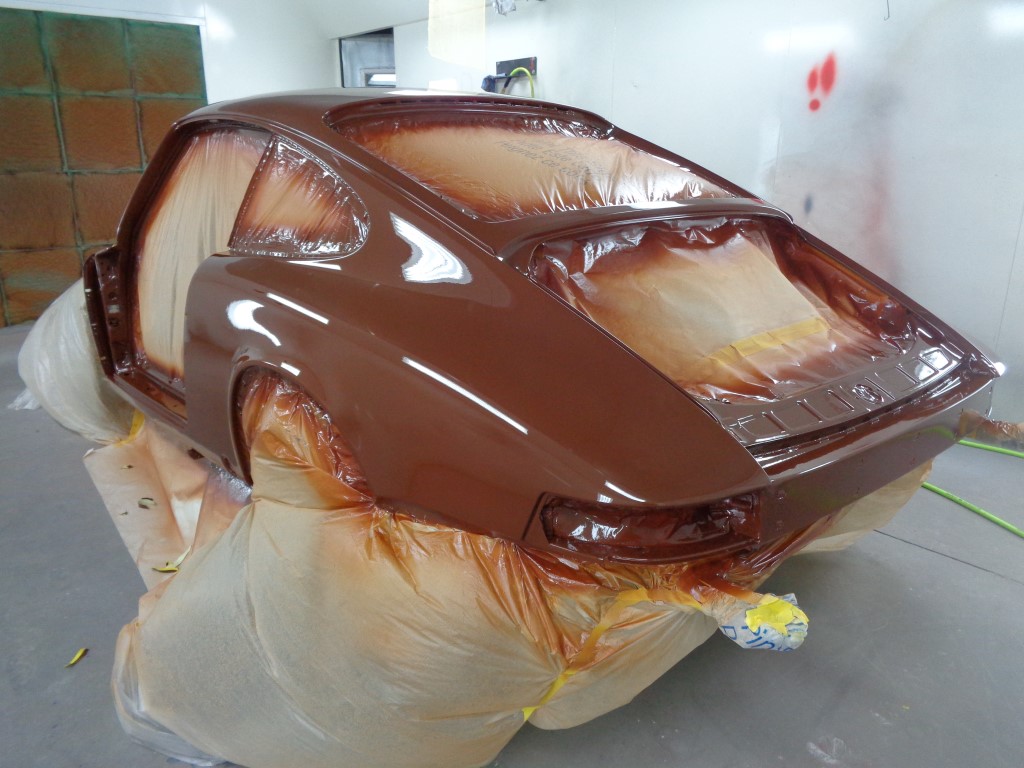
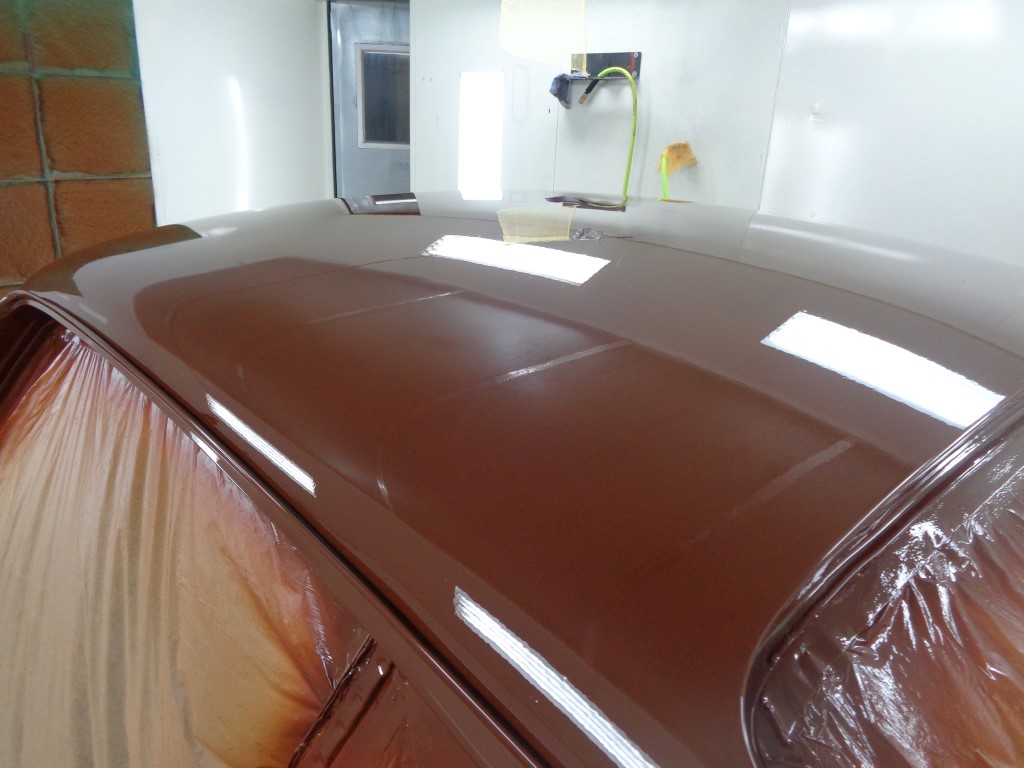
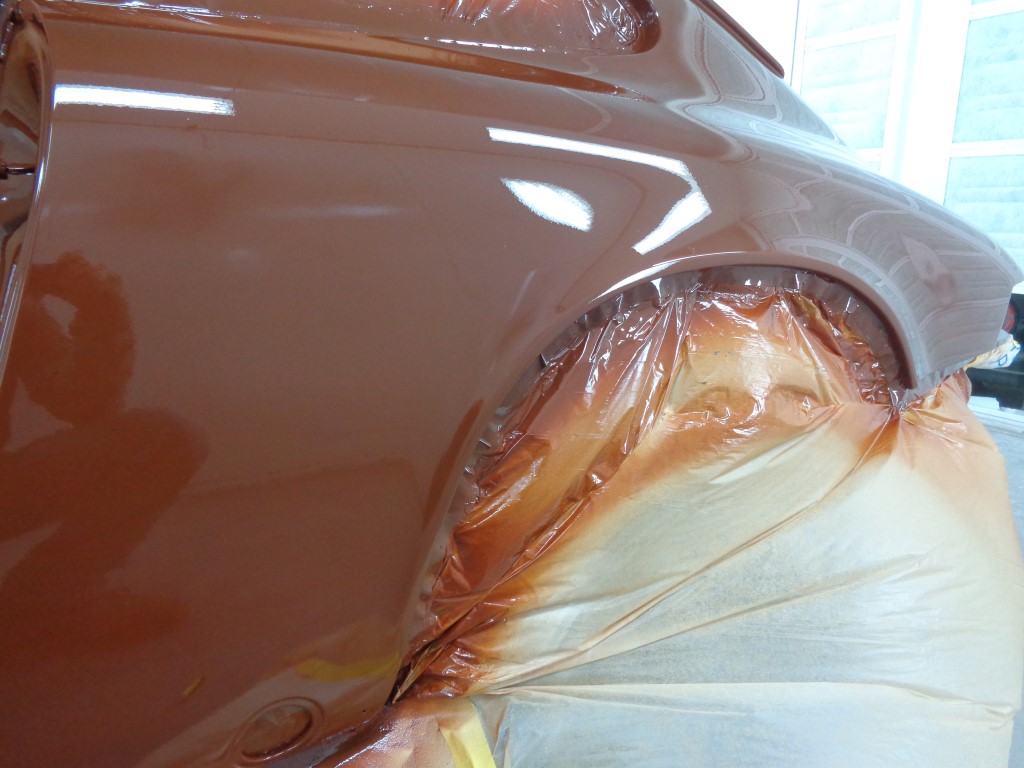
Posted by: scotty b Dec 6 2014, 09:50 PM
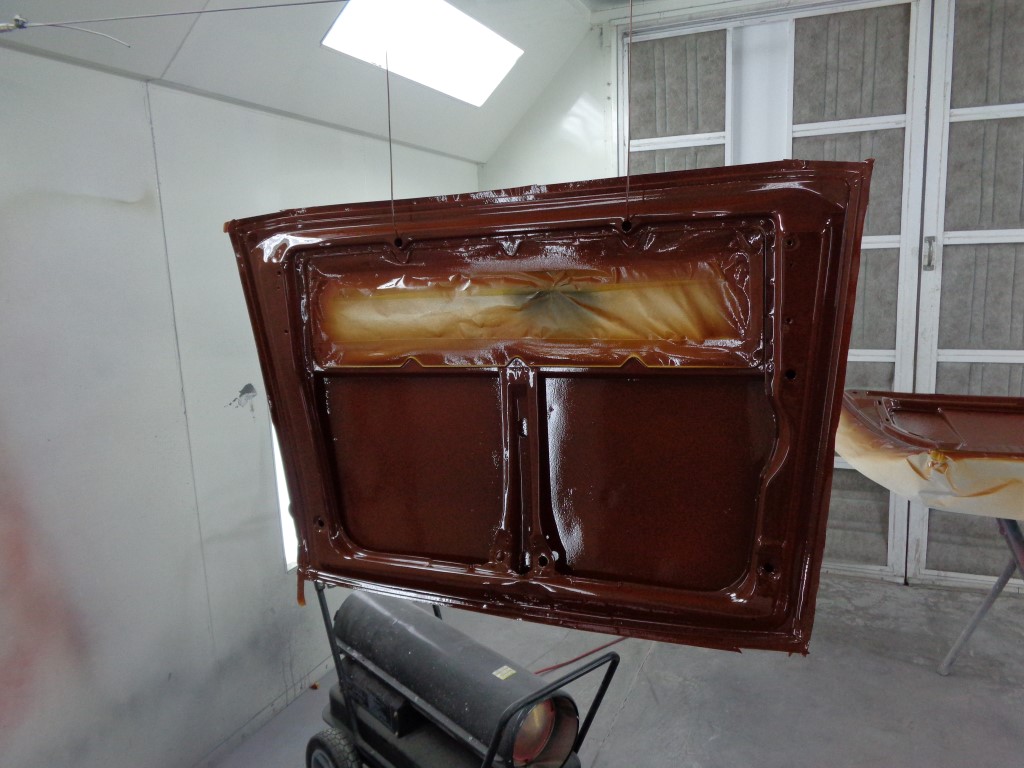
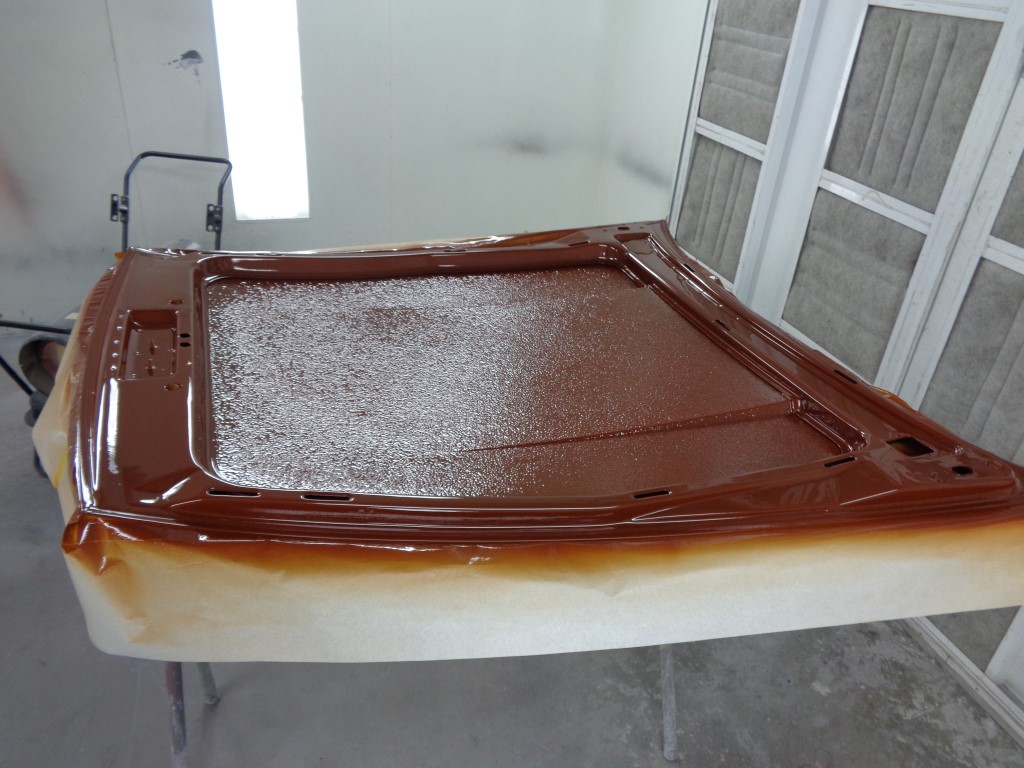
and the chocolate shall flow I never would have thought it, but this is the second worst color I've done for coverage. I initially bought 3 quarts of base, which once reduced gets you 4.5 quarts. This normally is enough for a 911. It has now taken 5 quarts ( gallon and a half reduced ) to get this far. I went and got another 3 quarts friday morning to get the outsides of the doors, hood, engine lid, bumpers and valances done. It is taking 9 coats to get full coverage  Normally 3-4 gets it done in Shopline, 2-3 in Deltron
Attached image(s)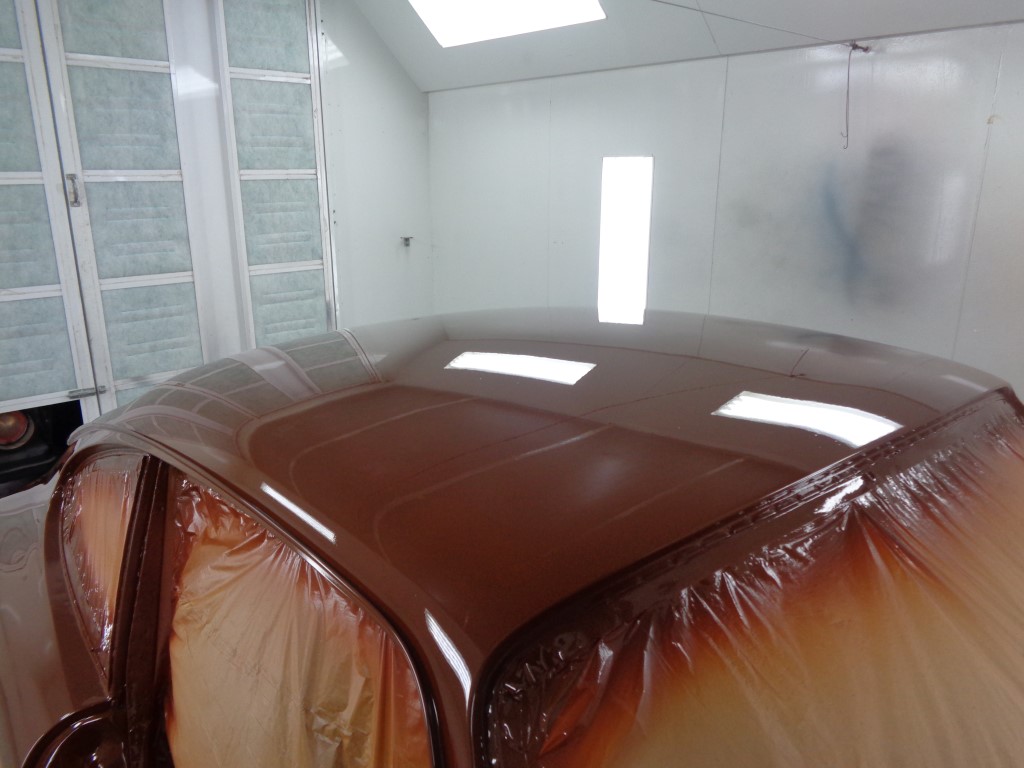
Posted by: bigkensteele Dec 6 2014, 10:13 PM
That is a lot of material, but it looks phenomenal!!! 
Who took these pictures? This obviously isn't your camera.
Posted by: euro911 Dec 7 2014, 12:59 AM
NICE 
Posted by: Steve Pratel Dec 7 2014, 10:22 AM
Scott, looks great, will give you a call later.
Posted by: rick 918-S Dec 7 2014, 12:49 PM
I hate that. I had a ford factory color that did that. But even worse it really didn't show up until we pulled it out of the booth.  At least you were able to keep going.
That chocolate looks delicious! 
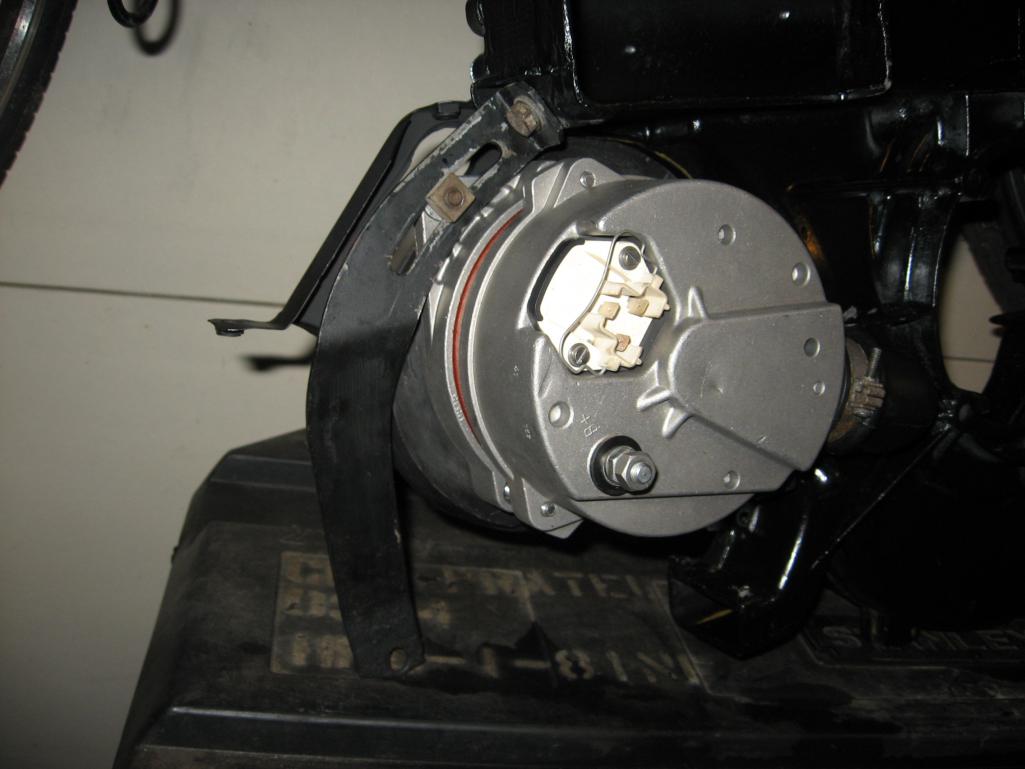
Posted by: Steve Pratel Dec 11 2014, 03:34 PM
More progress, finished assembling the fan housing and alternator tonight. I was able to source a new lower alt bracket as the old one was missing the rear half. Thanks to Bruce Stone. Also pulled out the heads, man they look great. Havent really looked at them since I received last year, looking forward to getting it all together!
Housing went together well, and I sealed the housing with curil K2 before assembly. Interesting stuff. I am waiting for my new connecting rod bolts before I continue on the crankshaft, so doing some prep and test fitting. It took a good bit to figure out how all that goes back together, but I think I have it right. Found all the pieces except the little white plug thing on the left side. Why do parts look much worse rust wise in pics????
Tonight hope to put a light coat of black on the cyls and prep the case.
***EDIT, just realized I already posted this in the engine thread yesterday
Attached thumbnail(s)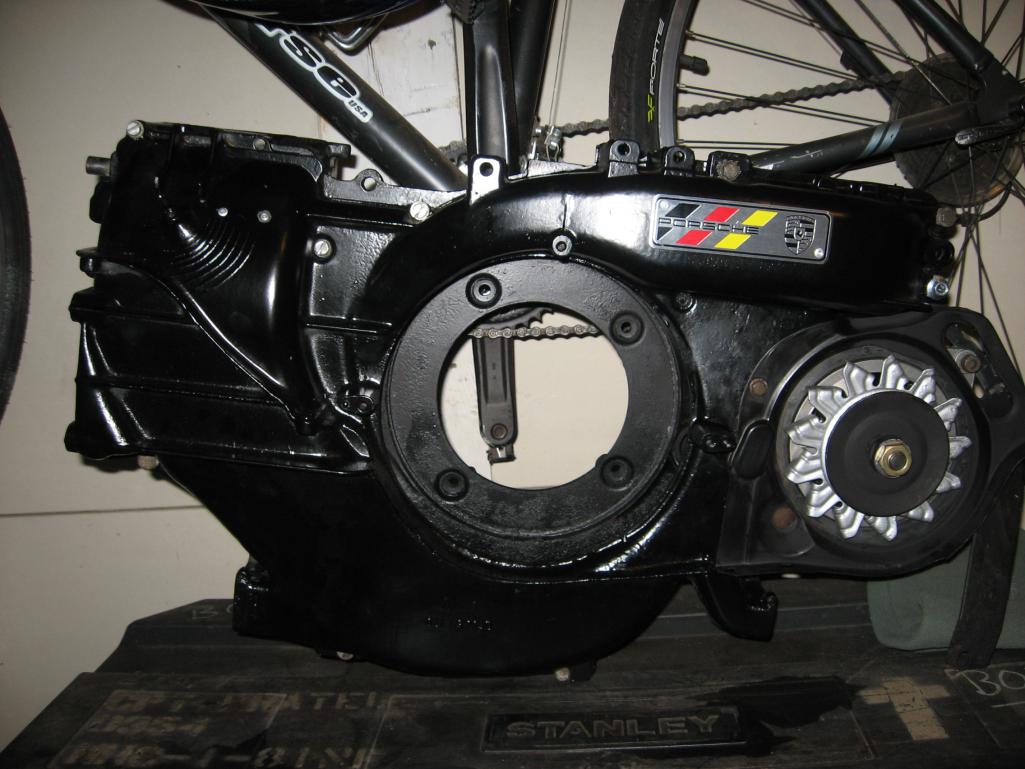
Posted by: euro911 Dec 11 2014, 05:42 PM
Looking good, Steve.
Is that one of Pete Newman's alternator upgrade kits?
Posted by: Steve Pratel Dec 11 2014, 06:12 PM
Looking good, Steve.
Is that one of Pete Newman's alternator upgrade kits?
Thanks, a little frustrating right now with a few hardware issues,
Got the alternator direct from BNR parts, is an ebay seller too.
Posted by: G e o r g e Dec 11 2014, 06:16 PM
what color is your 912? looks to dark to be Sepia
Posted by: scotty b Dec 11 2014, 06:58 PM
what color is your 912? looks to dark to be Sepia
Steve's is Chocolate/Cockney brown. This is Sepia
Attached image(s)
Posted by: Steve Pratel Dec 13 2014, 09:45 PM
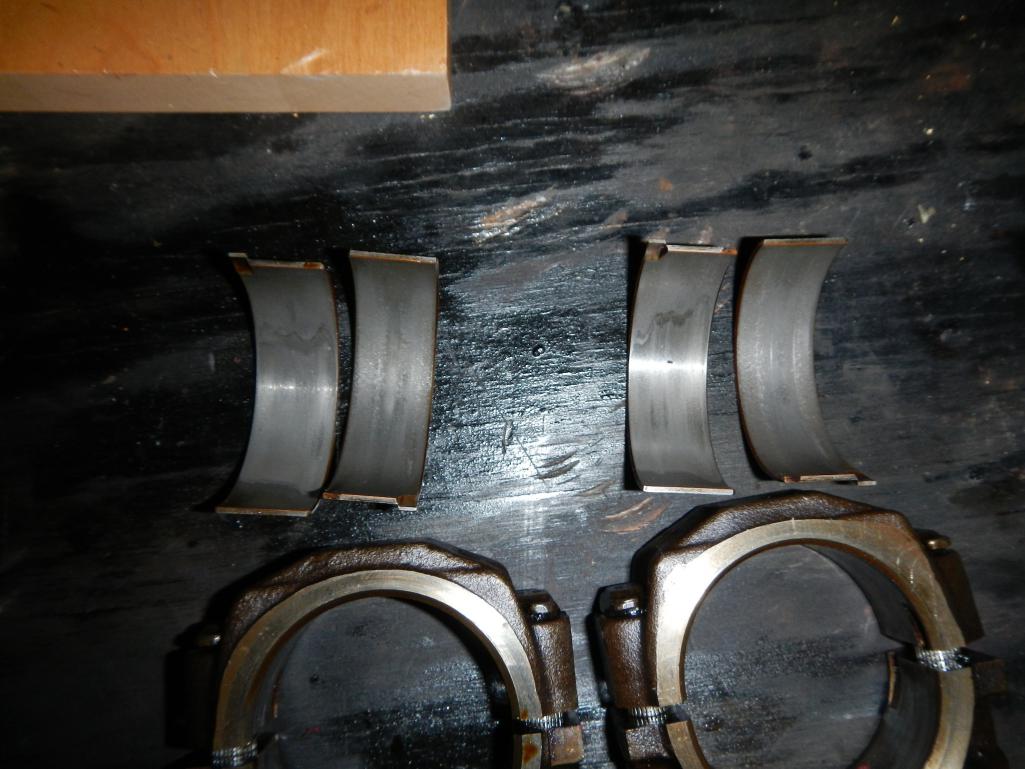
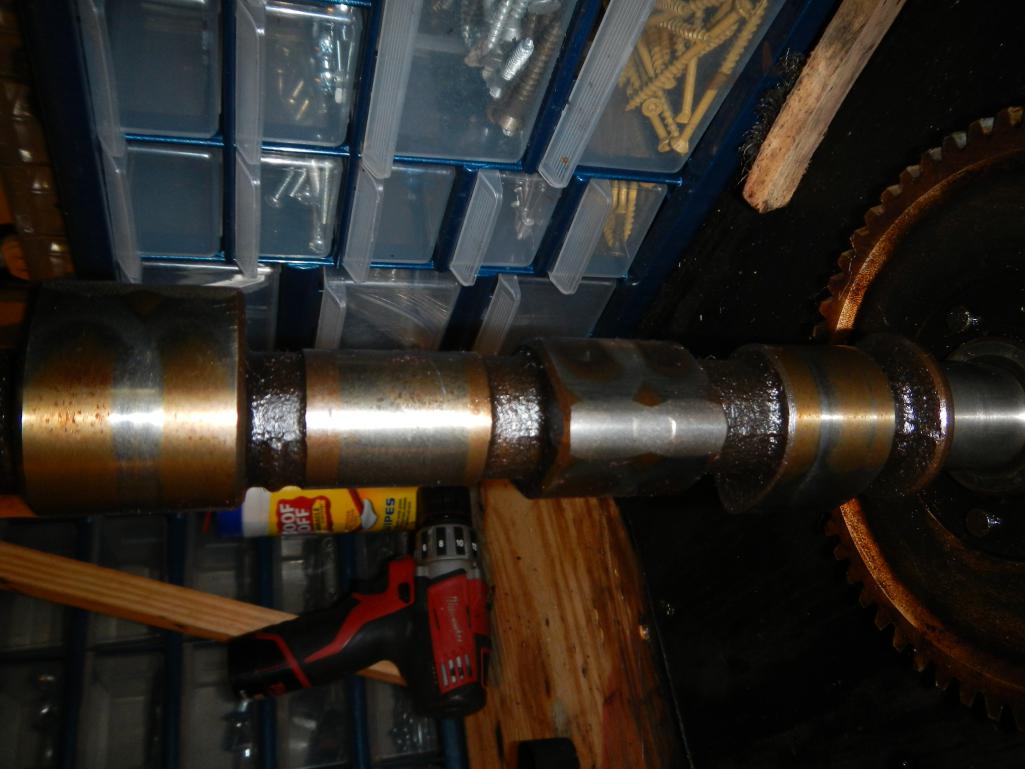
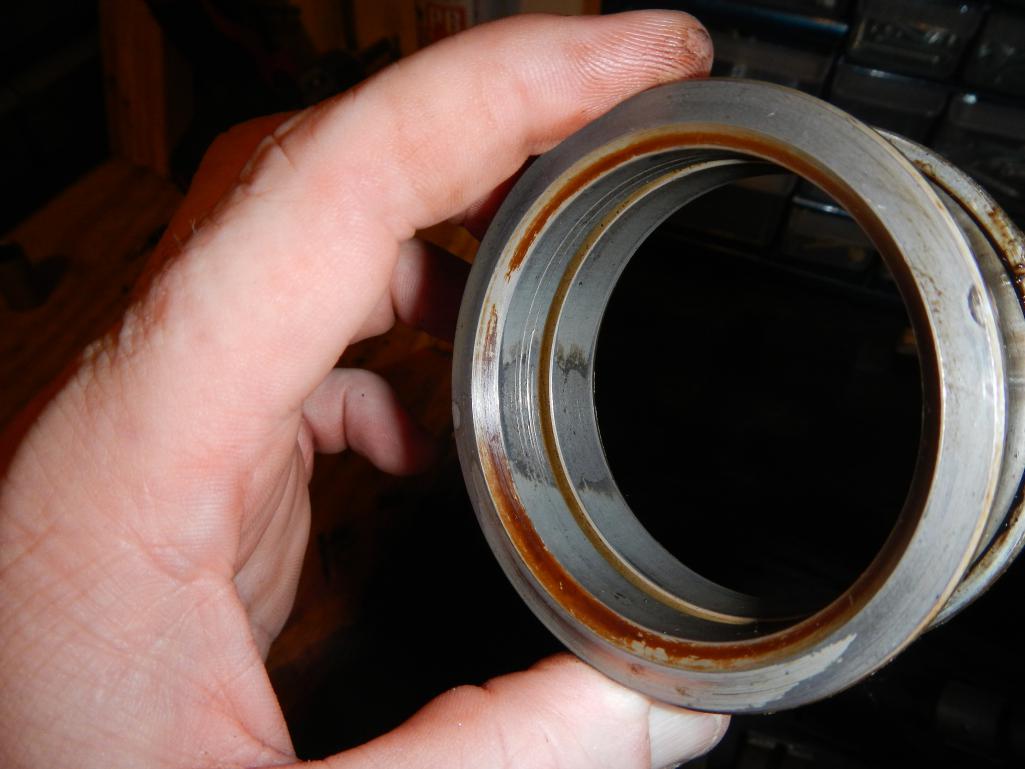
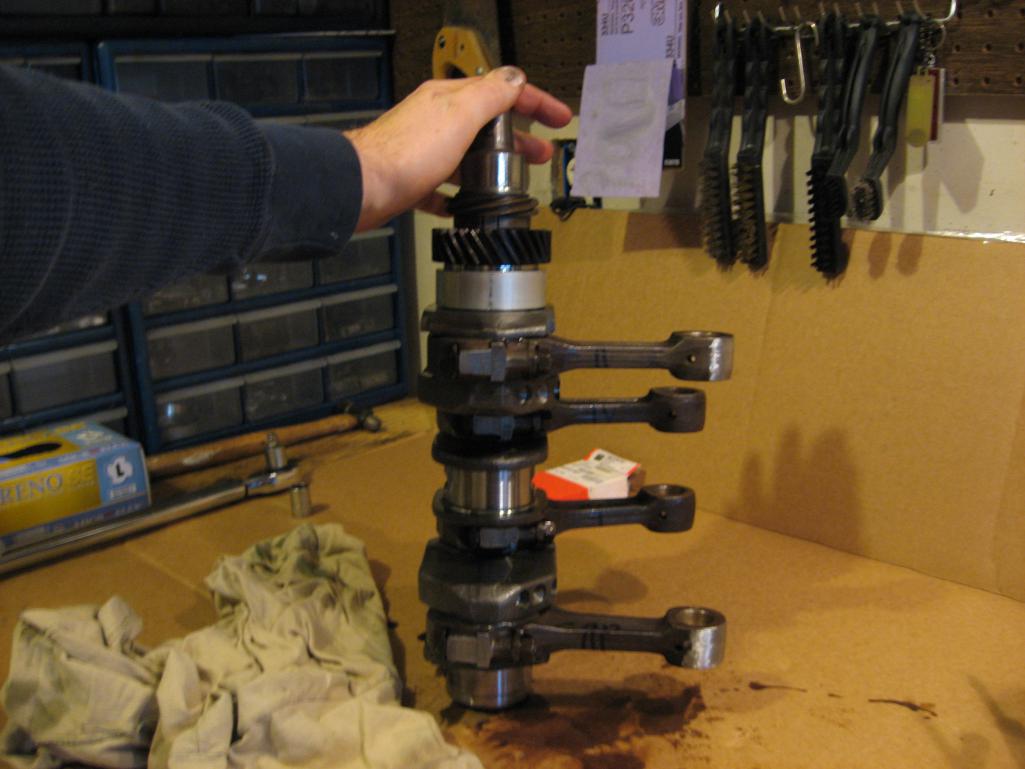
Assembled the short block today, everything went very smooth, no real issues or surprises. I reweighed the connecting rods and re cleaned everything. 3 weigh in at 813g, 1 at 812g, 3 of my piston sets are 503grams, and 1 is 504. Pretty impressed with the bearing fit and quality. Only had to file a bit on one of the cam bearings. the rest fit perfectly. I pretty much followed the 'conventional wisdom' found on the boards, with a few minor adjustments. Motor spins freely with even resistance, no 'hotspots' The silverline bearings fit perfect.
Attached thumbnail(s)
Posted by: Steve Pratel Dec 13 2014, 09:48 PM
Took my time and double checked the cam bolts and oil pump clearance, all was great. Jorge at EMW really set me up for success here. I decided to use the windage tray, used a set of needle nose pliers and opened up the slots a bit but left it alone otherwise.
The most excitement of the day involved the cam. After I lined the cam and crank gear dots, I spun the crank to make sure cam lobes and crank and case played well together. In so doing, I put things 180 degrees out of sync. Was an easy fix, just pulled the dist & gear and rotated 180 back, and all was good. Of course lots of 'is it clean enough' thoughts, but all in all it went well.
Attached thumbnail(s)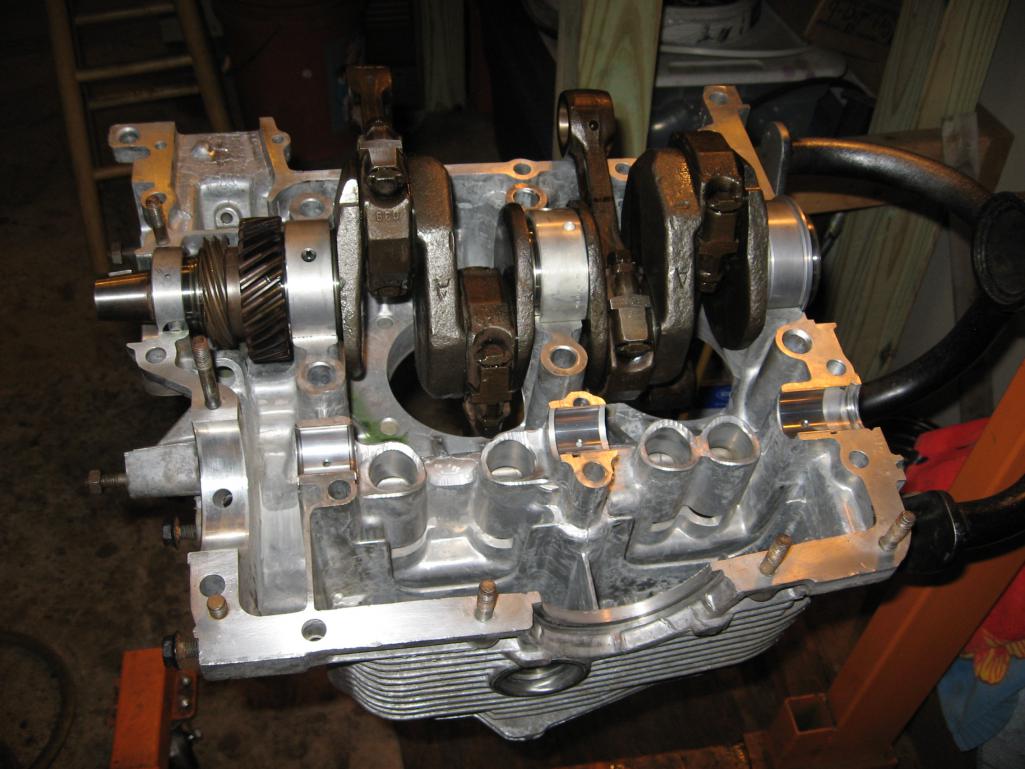
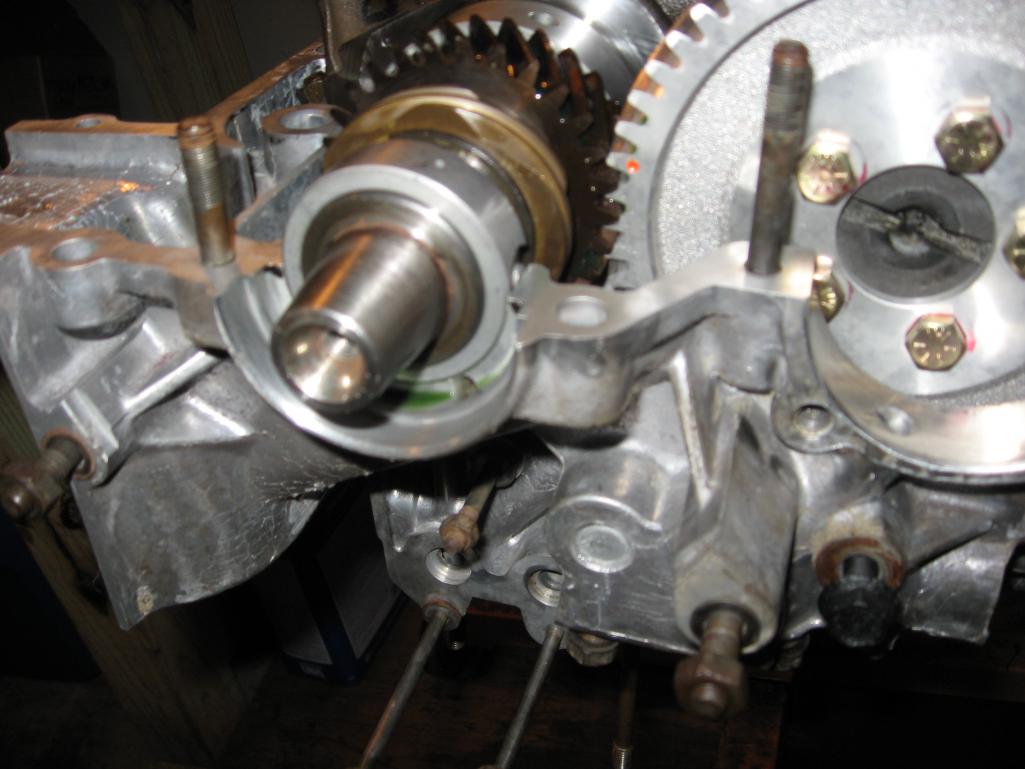
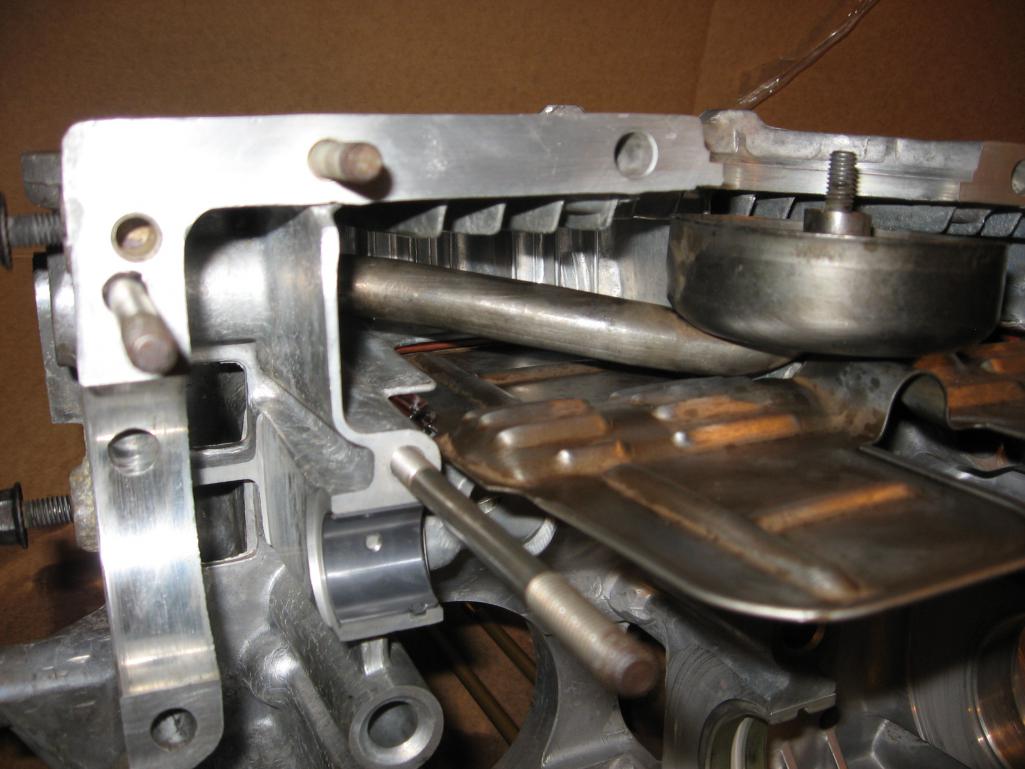
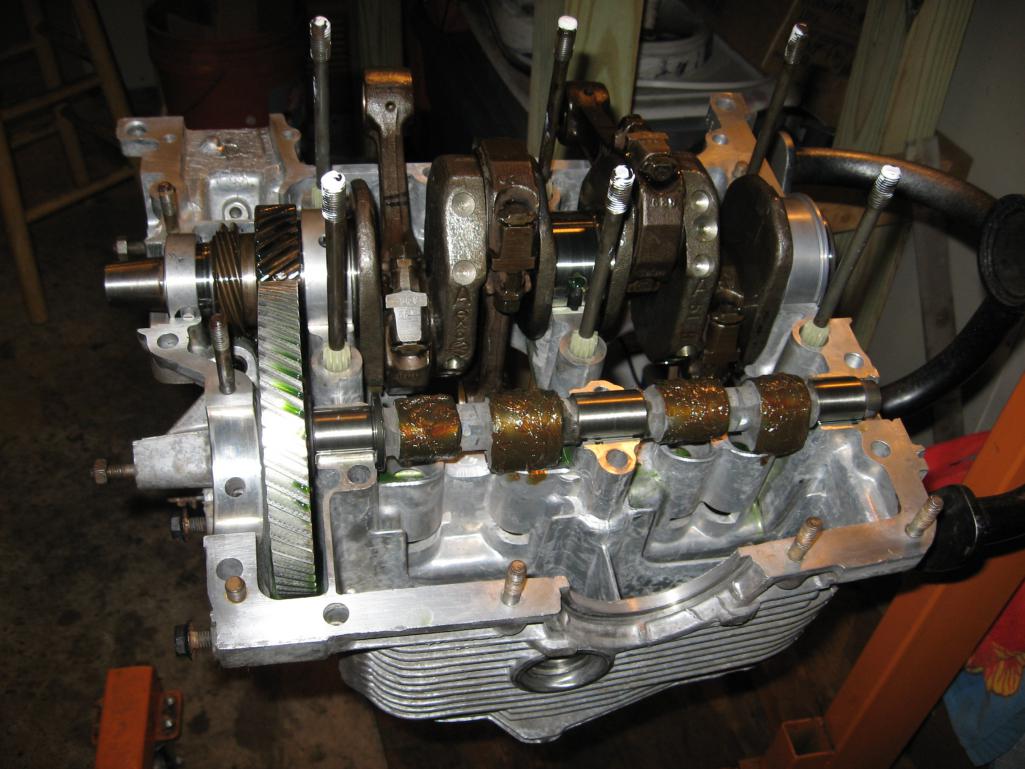
Posted by: Steve Pratel Dec 13 2014, 09:51 PM
Finished product
Attached thumbnail(s)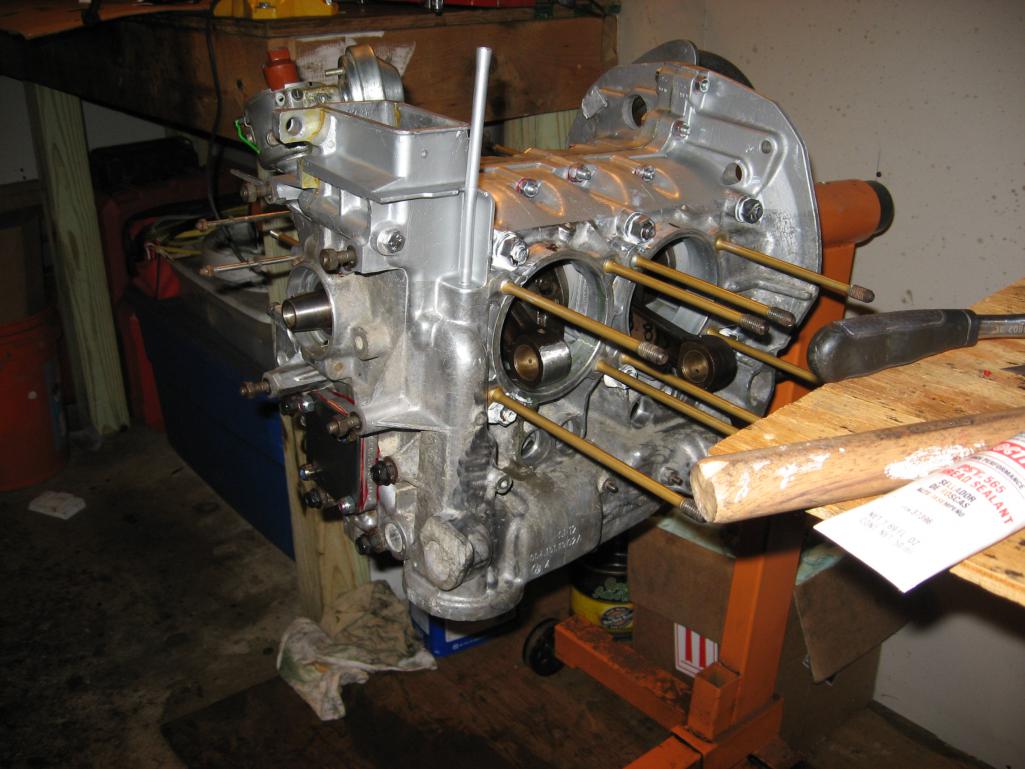
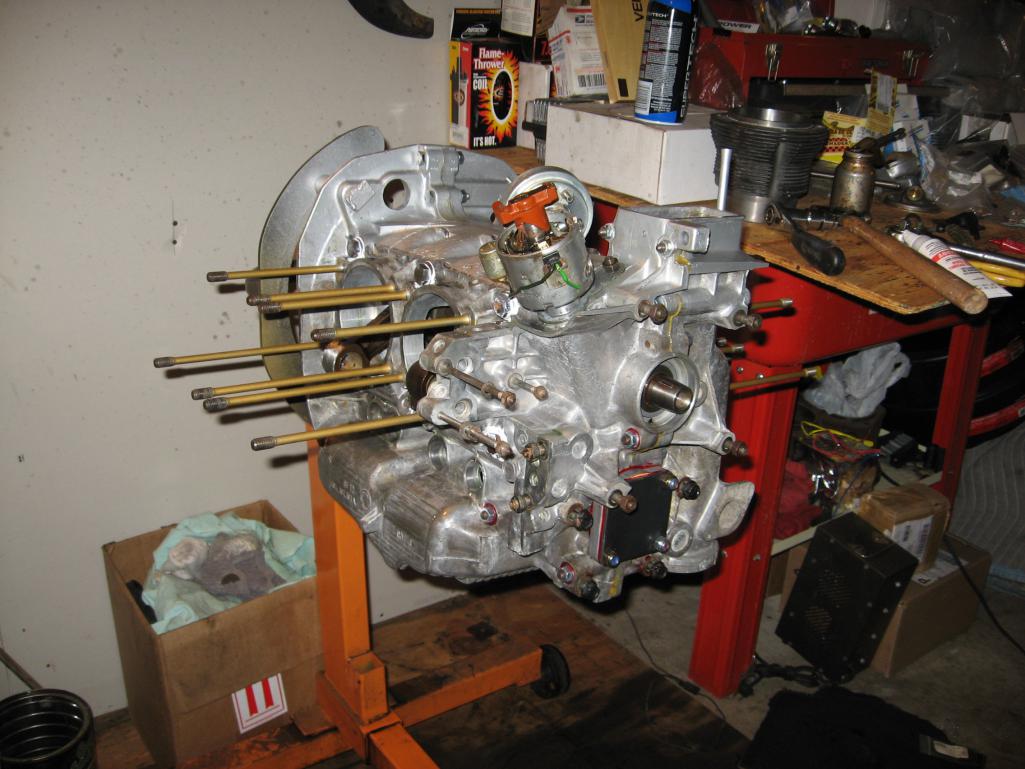
Posted by: scotty b Dec 20 2014, 07:21 PM
SOooooo I ended up repainting the whole car. I didn't notice it initially but I had a lot fo tiny white specks in the paint. I had this happen once before and it turned out that the pigment had been sitting on the shelf long enough it had separated and started to harden. I am assuming it was the same thing this time as well. Anyway, here she is almost ready to go home. This time around I got PPG Deltron, and instead of 9 coats to get coverage it took 3
Attached image(s)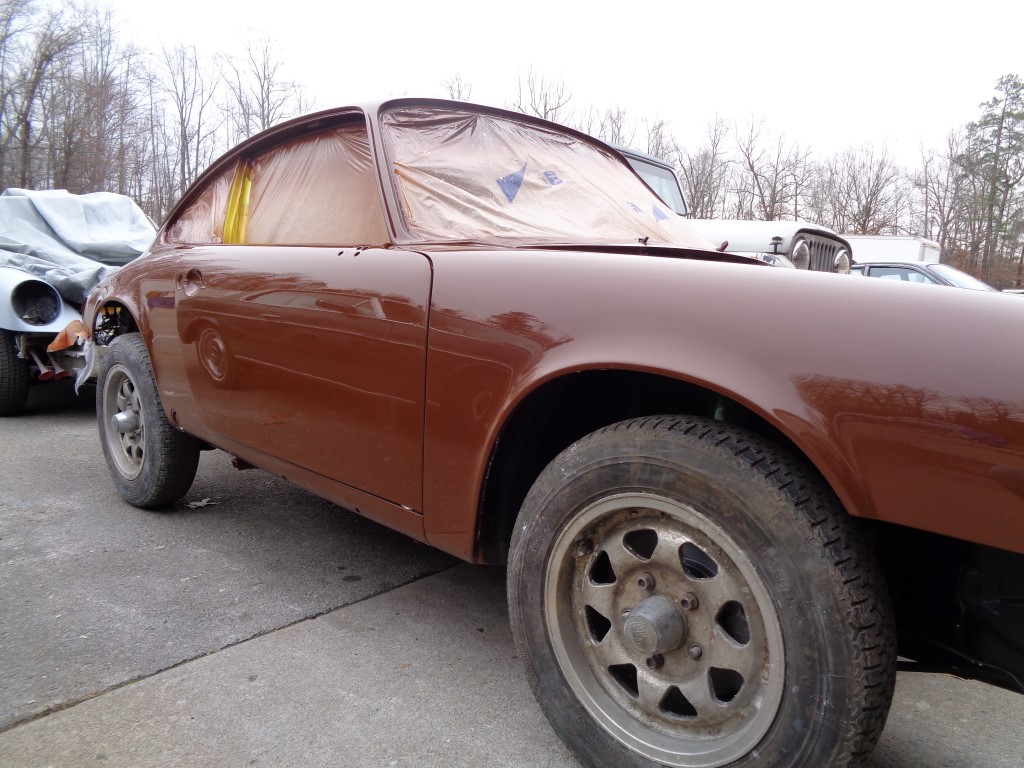
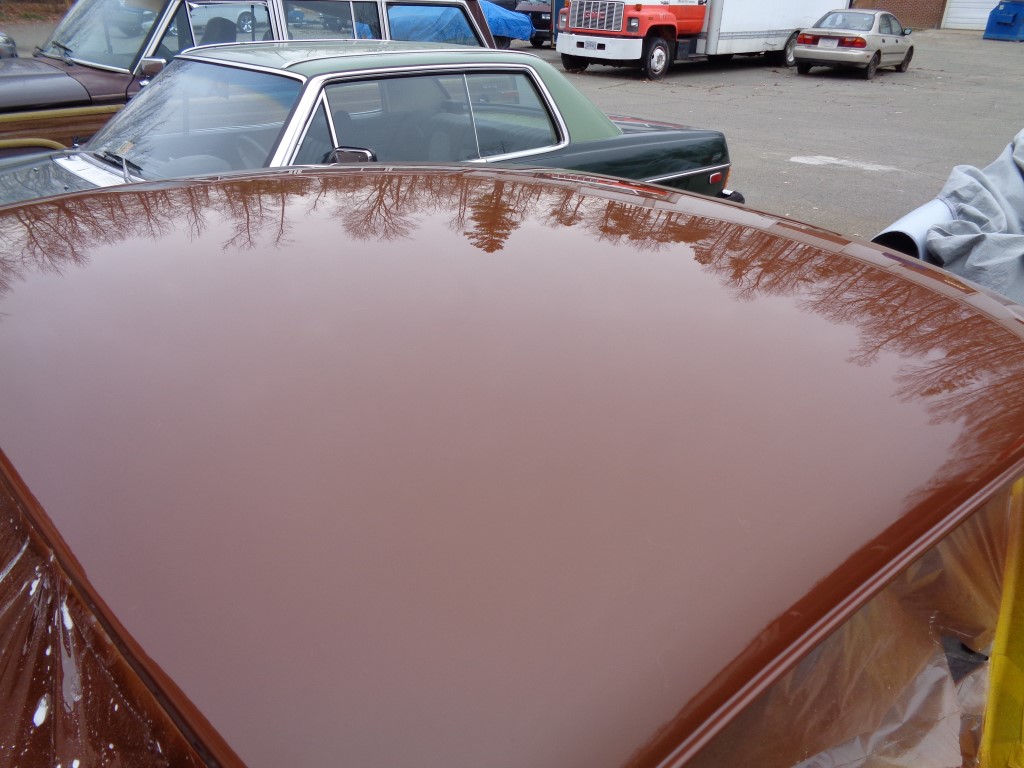
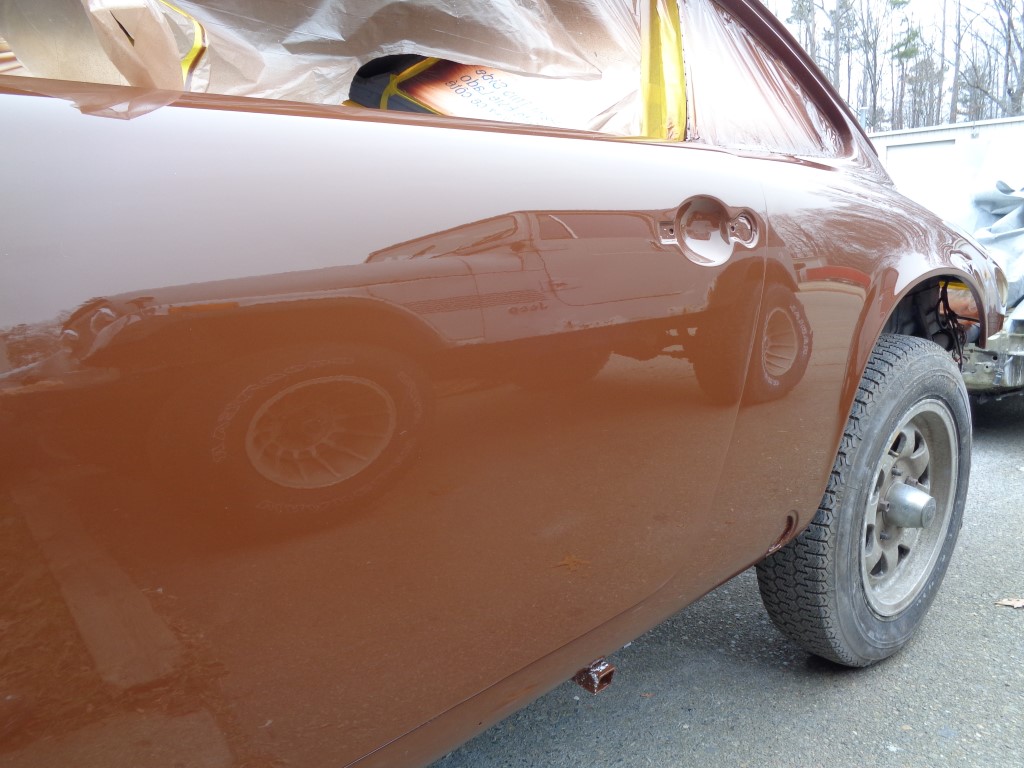
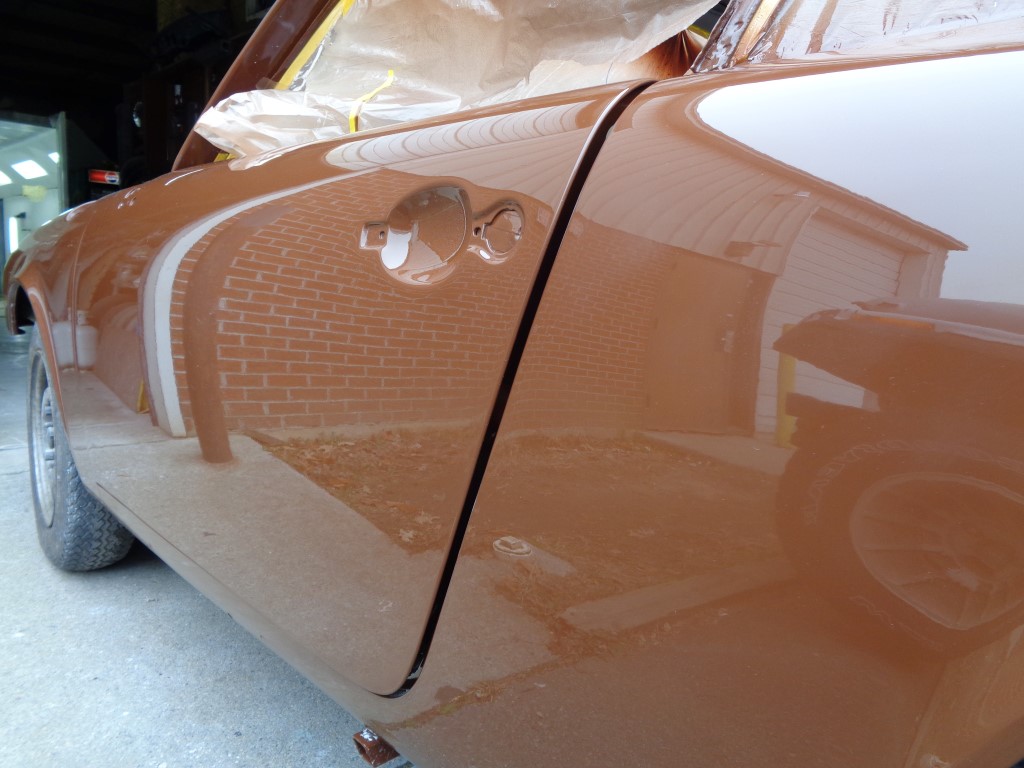
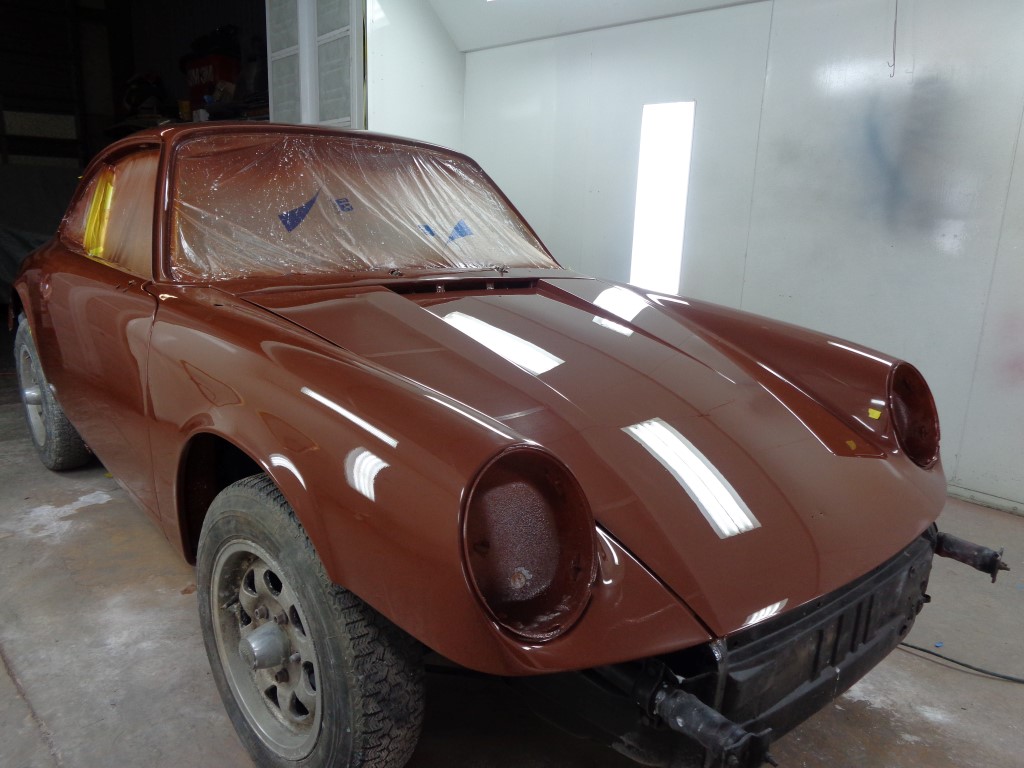
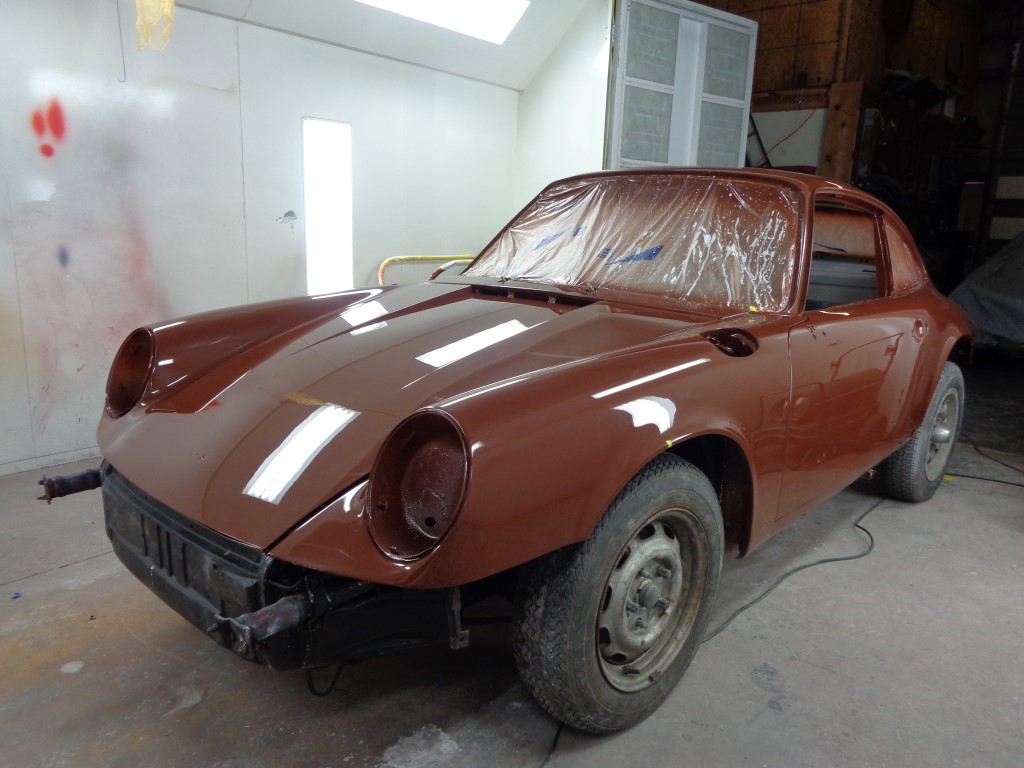
Posted by: euro911 Dec 21 2014, 01:28 AM
Posted by: altitude411 Dec 21 2014, 01:43 AM
bitchin....
Attached image(s)
Posted by: Steve Pratel Dec 21 2014, 03:02 PM
is it real? 
 looks great!
Posted by: scotty b Dec 21 2014, 05:22 PM
is it real? looks great!Nope......Memorex
Posted by: Steve Pratel Dec 21 2014, 05:51 PM
More progress on the motor build, spent 2-3 hours last night and 1 hour rechecking today and came up with 27.09 as my final measurement. Virtually stock......
This will give me a total lift of .437 at the valve on a .430 lift cam, and about perfect alignment of the valve stem and adjuster with some room for adjustment on the swivel head and acceptable spring compression at full lift. Overall I am happy.
A few thoughts...... Its not that big of a deal..... overall lift diddnt change much regardless of pushrod/adjuster, what really changed was the ALIGNMENT of the valve stem and adjuster at half lift.
I had to make significant adjustments for this, and diddnt really change overal llift at valve, maybe .5mm. Once I finished, I re-lubed the cam with the assembly grease, and dissasembled the head and cyls. As I stated before, I just slipped the pistons on teh con rods and ran in cyls without rings. This allowed guaranteed TDC and c rod slap inside the cyls.
I did this on cyls 1 & 2, and came up with slightly different figures (a bit more lift on cyl 1, but within the recommended 5%) Now on to the pistons & cyls.
Am using an EMW G cam (430LIFT), lubealobe LIfters, OEM 911 swivel foot adjusters.
Rocker Zero Lift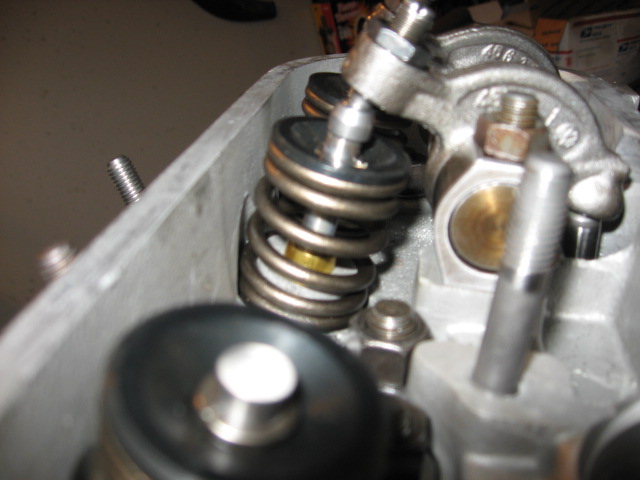
Half Lift
Full Lift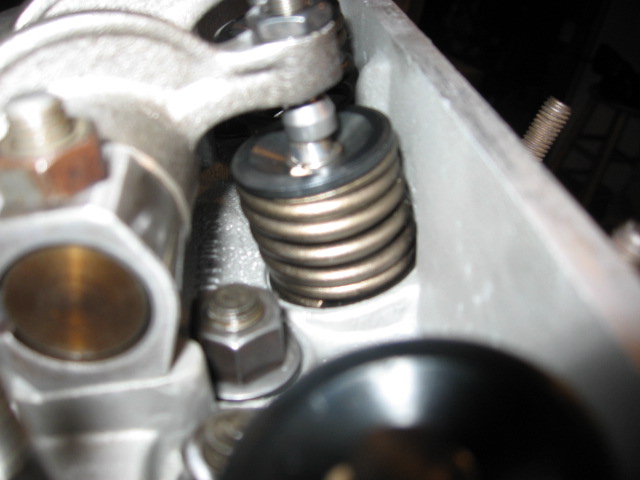
Finished Pushrod 27.09 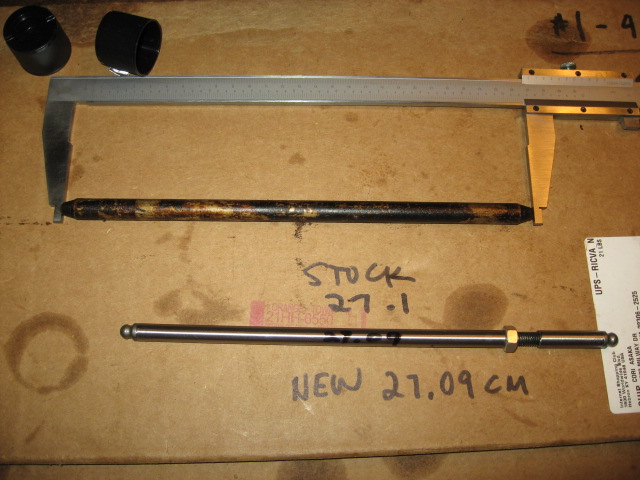
Posted by: Steve Pratel Dec 21 2014, 07:06 PM
Moving on to Pistons & Cyls.
As this is my first time doing any of this, I am in measure 4X mode and double/triple check as I go. I had earlier weighed and matched the pistons and con rods, so now that it is time to assemble, after cleaning everything well, oiling the interior of the cyls, I started laying everything out. I weighed and marked each Con rod as well and matched them to the pistons by weight to be equal within .07 grams. I also had the crank, fan and flywheel balanced, so hopefully this will end in a very balanced motor.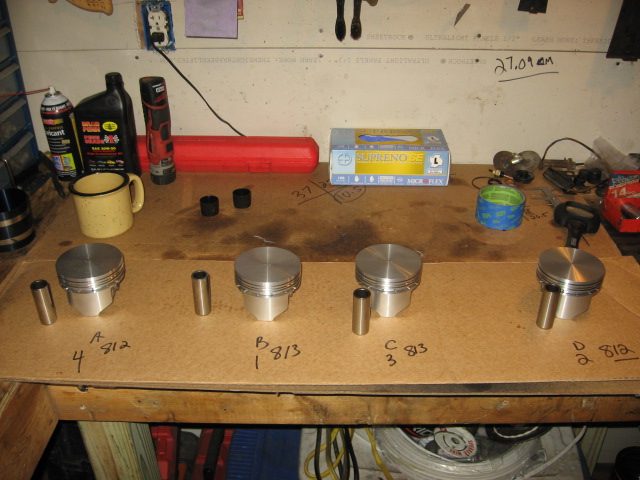
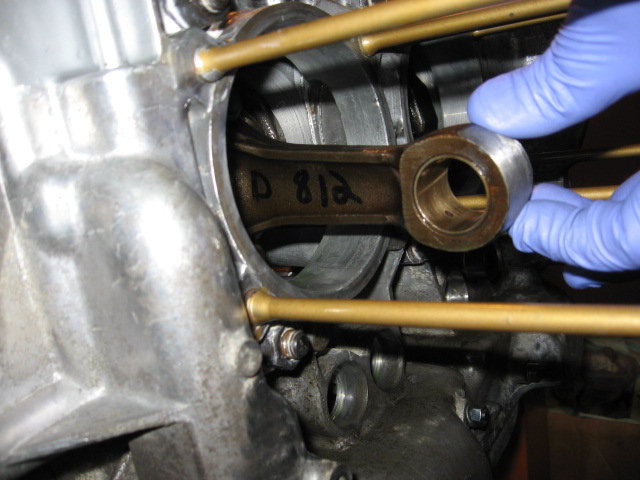
After cleaning I taped and sprayed a light coat of high heat black on the cyls.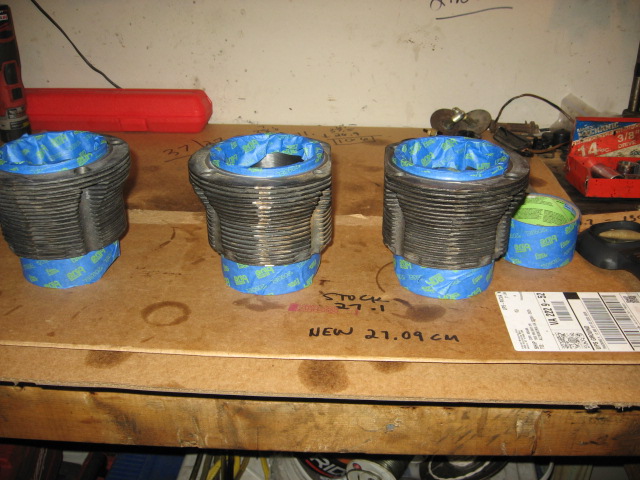
One of the things about the KB pistons is they are not directional, meaning there is no arrow. That said, there is a STD mark on each piston and I decided to orient things so that the STD's will be facing up in the motor.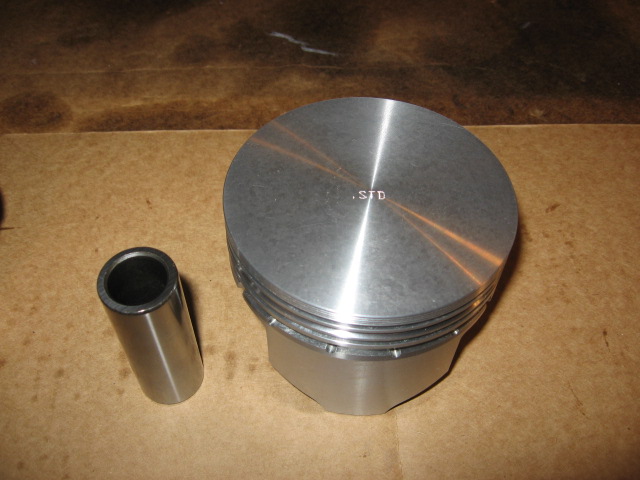
This is my first time using Spirolocks, and while they take some getting used to, they look bulletproof. I found opening them about 1/2 inch and to 'thread' it into the spirolock slot in the piston was a great way to get started, otherwise when you try to press the ring into the slot it kept slipping out.
Because you need to install once side of the spirolocks before attaching to motor, and I determined my pistons would all face the same way, I had to be particular about what side I put them on. I will probably go in order 4, 3, 2, 1.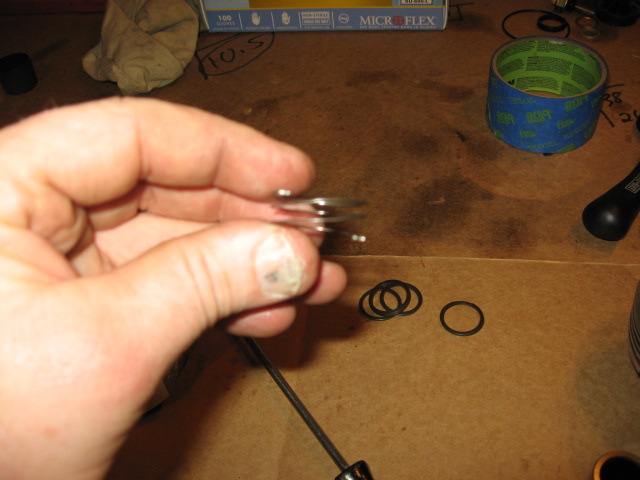
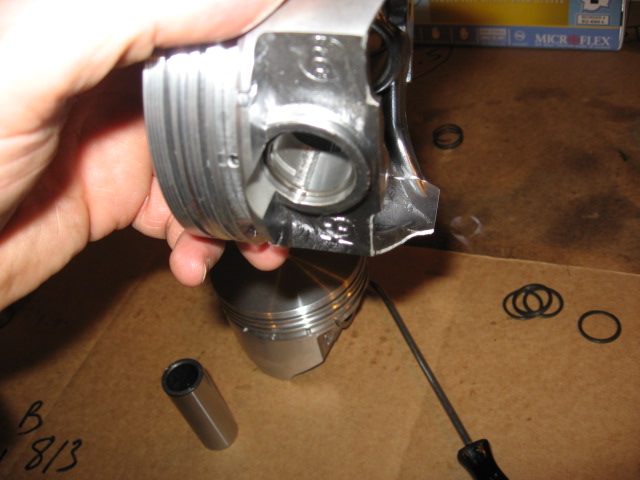
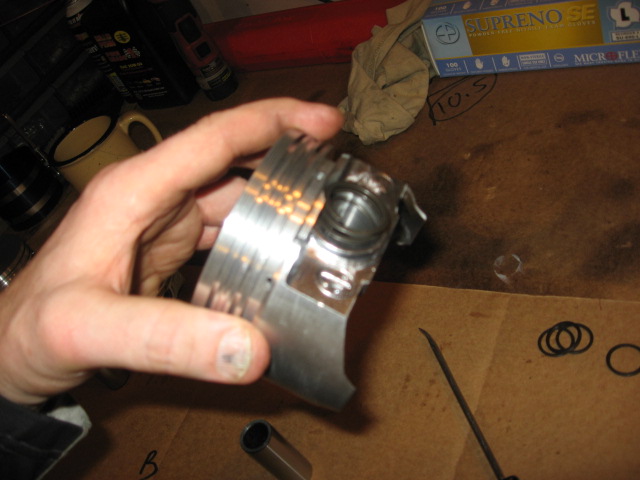
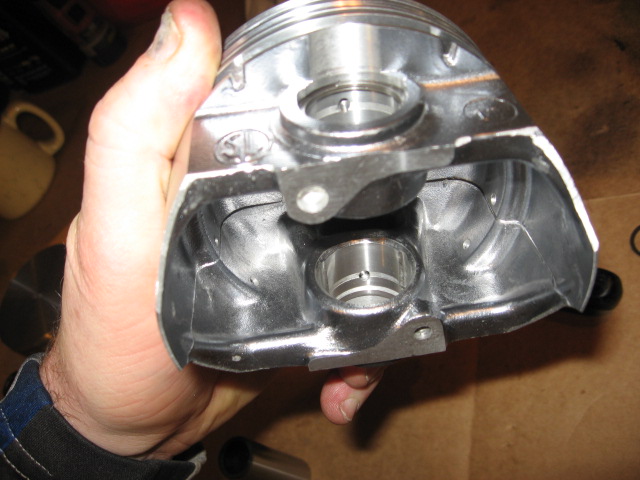
I also thought I would post a picture of a tool that has been INVALUABLE over the last 20 years. I originally accidentally bent this screwdriver back in the late 80's, and it has saved my butt more times than I can count. Happy accidents! 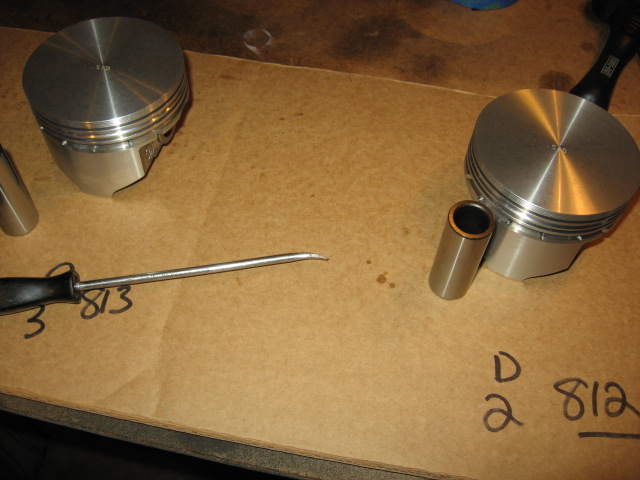
Overall the KB pistons are works of art. Top notch quality, very impressive. Floating writs pins are also a plus.
Attached image(s)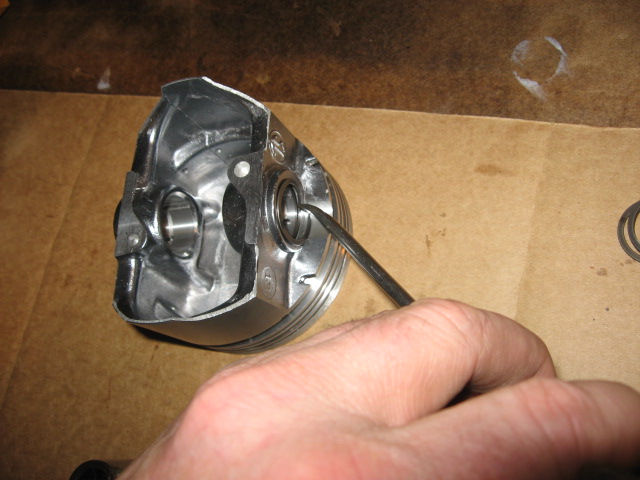
Posted by: Steve Pratel Dec 21 2014, 08:24 PM
Of course all good things come to an end..... After measuring the ring gaps and adjusting so all were the same, I cleaned them up and started installing. The 2nd compression ring has a dot that must face up and of course I made sure it was..... I wish. I realized what I did, and when I tried to pull it out, in an attempt to not mar the side of the piston, I pulled just a little too far and it snapped..........
So I went on, it was for piston #1, so I figured I'd go to #4, and work my way down, get 4, 3 & 2 installed and then #1 when I got the extra ring, but unfortunately, my cheap @$$ ring compressor sucks..... Wouldn't compress the oil scrapers enough to insert into the cyl. grrrr.
It was interesting to see the difference in ring gaps when uncompressed.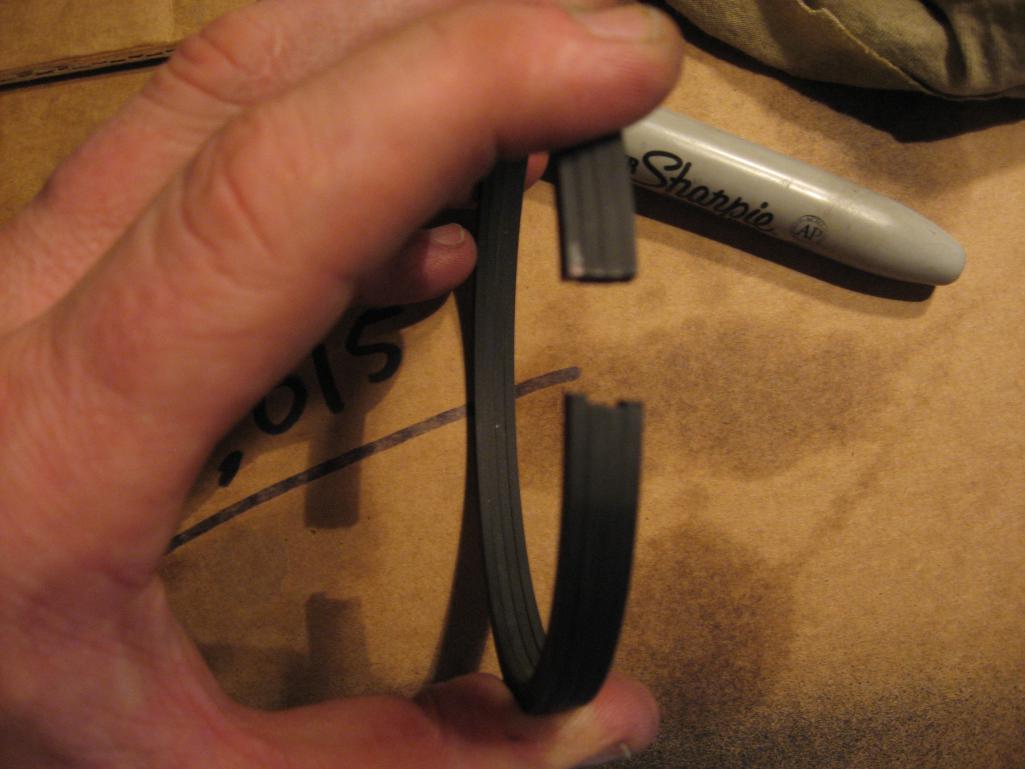
The compressed measurements, ranged from .18 - .20. I initially wrote .22 but it was actually .20 as the gap wasn't even, it was angled .22 in the inside and .20 at the outside. 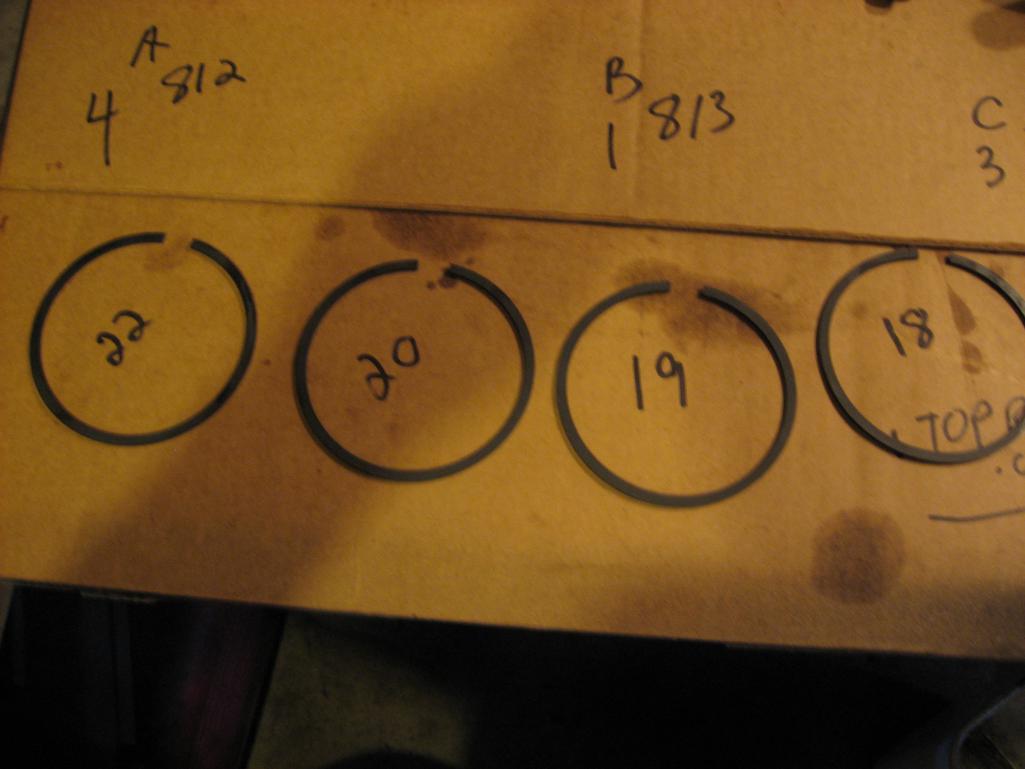
The Top ring gaps are now all at .20, and even, not angled. The Second ring is a uniform .15 and was not angled. It almost seems as though the top ring set was resized/modified? I need to ask EMW about this. If so, was pretty shoddy work. KB recommends opening the top ring gap by .10, Len Hoffman says leave stock, and Raby says leave as is, so I'm guessing going from teh stock .15 to .20 is a met in the middle compromise. Most important to me is that the gap is even.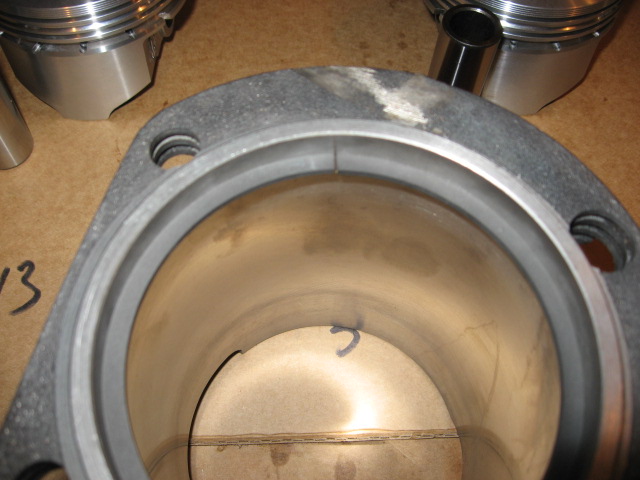
And the broken ring............... Can I just buy ONE? or do I have to buy the whole set? Things are busy before Christmas, but I will run to Napa tomorrow to check on the ring/ringset and to pickup a real ring compressor, and drop the pushrods off at the machine shop to cut and assemble the pushrods.
Hmmm, the Gun range is right next to the Napa...... Yeah I need some trigger time.... Gotta stay fresh on the conceal carry skills. 
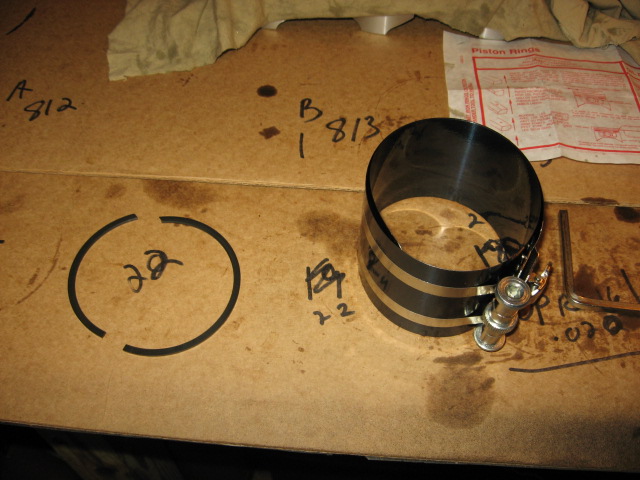
Posted by: Steve Pratel Dec 21 2014, 08:56 PM
Once my plan to set pistons and cyls was kaboshed, I decided to finish altering the cooling tin for use with my 911 pressure gauge and the Pertronix Billet distributor.
The Pertronix Dist is MUCH larger in diameter than the stock Bosch. I used a ball peen hammer and slowly shaped a divot in the cooling tin for the distributor. The result is about a 1/8" gap between the tin and spark plug wire boot. Even with the modification, I have to take the cap off the distributor, mount the distributor and then cap, but it fits well.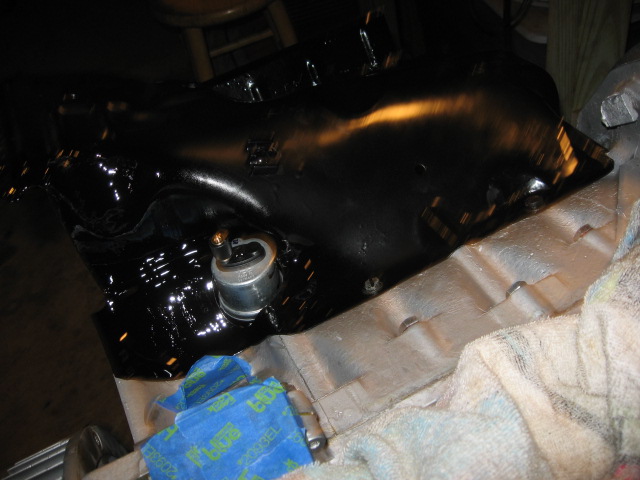
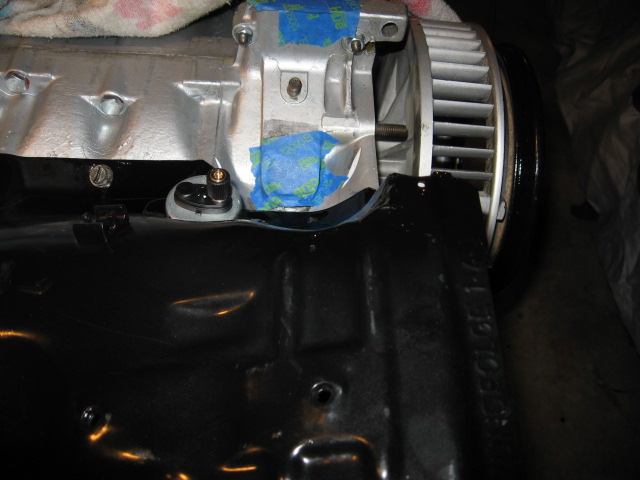
I also had to open up the oil pressure sender.to fit the 911 style oil pressure sender. I'm using a 911 pressure/temp gauge as opposed to an idiot light. I was planning on using a t block to run a pressure switch for the idiot light too, but It doesnt look like it will fit with the oil cooler and cyl in place. Jury is still out on this. At a minimum, I will run the temp & pressure gauges. 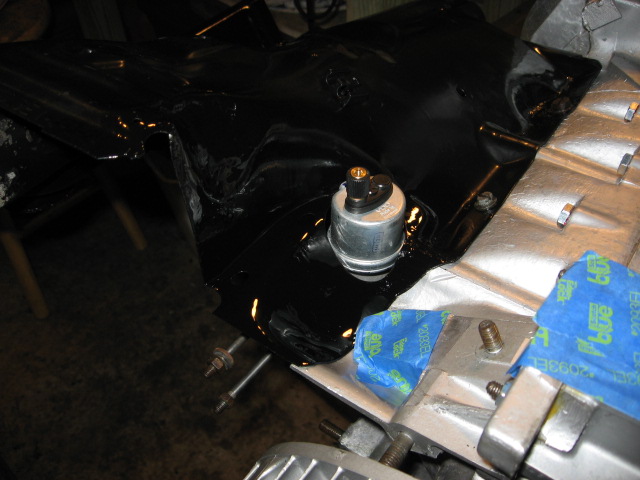
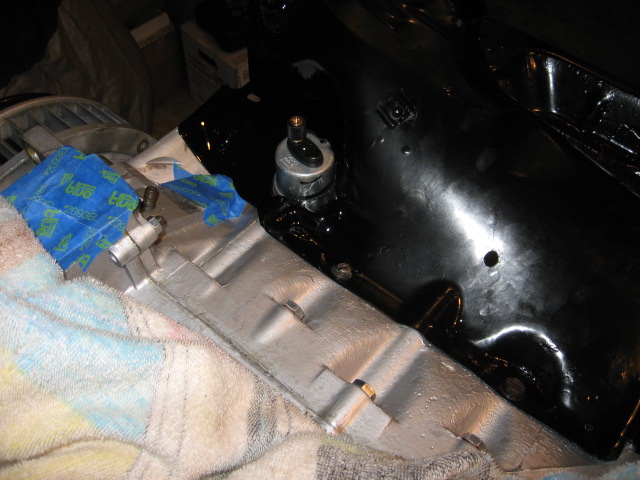
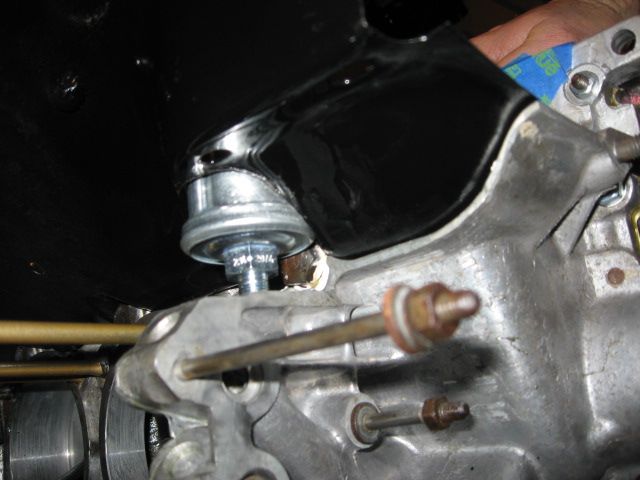
Posted by: Steve Pratel Dec 22 2014, 09:35 PM
3 Steps forward? 2 steps back..... Yesterday I finished sizing the engine tin for the oil pressure sensor and Larger Distributor. Everything fit individually, and looked good. But as I looked at the oil pressure sensor, it looked a bit high so I decided to check and see clearance for the Pertronix, and sure enough it is too tall. I had bought the pressure switch for idiot light and the sender for the gauge, but was having clearance problems so I decided to skip the idiot light sender (I dont need no stinking idiot light ).
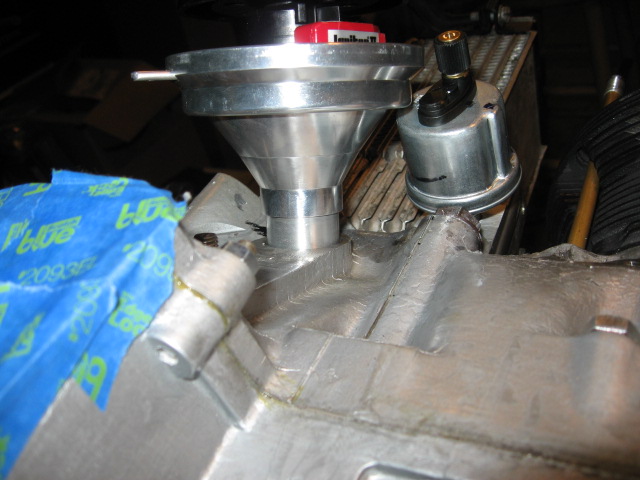
Yeah that wont work...... So this sent me to the local hardware store for some 1/8" brass..... Ended up with this. Is a bit of a goat rope, and hoping that this will work. What do you guys think? I will have to assemble in sections, but this arrangement allows both pressure sender and switch, and allows full rotation of distributor.
Here is the finished product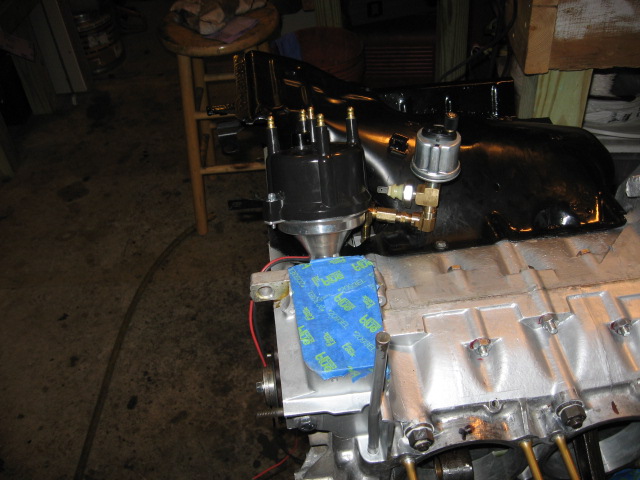
Working backwards without distributor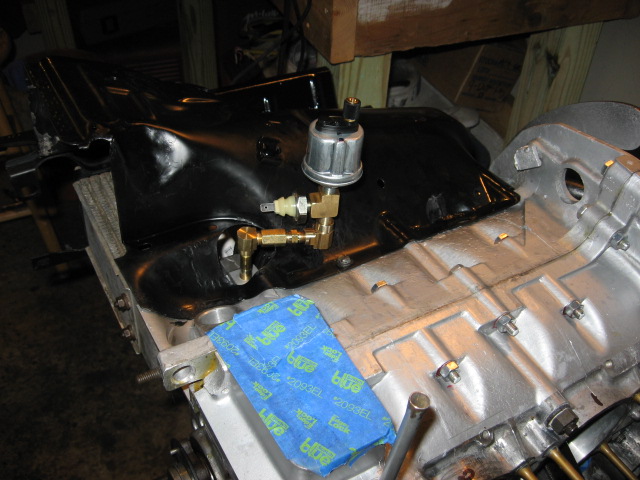
Then without the pressure switch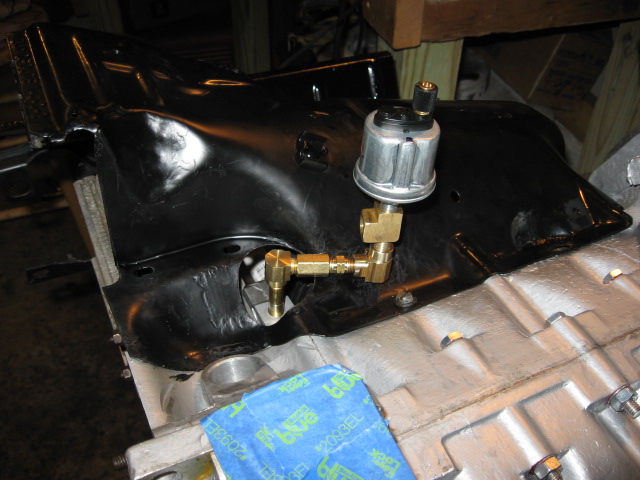
Then the splitter and pressure sensor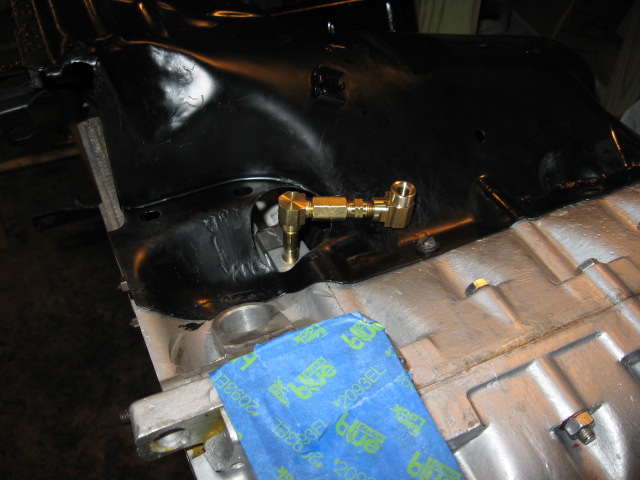
And finally the extension, leaving only the one 1 1/2" stub and elbow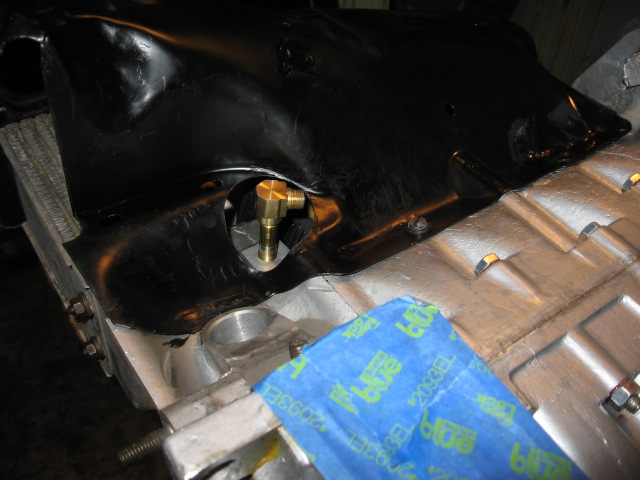
Yes, I am asking myself WHAT DID YOU GET YOURSELF INTO............... OY 
It looks better in real life than in pics.... But hey everybody has to have a little ghetto on their build right? lol I'm hoping that the 2 elbows will not be a problem with oil pressure, will I need to bleed this contraption? And of course I am thinking what fun I will have when I try to do the carb linkage.......... And of course after I ground that big hole for the sender to poke through the tin......... 
Posted by: Racer Chris Dec 23 2014, 07:24 AM
You should switch that brass assembly for a hose Steve.
Posted by: Cairo94507 Dec 23 2014, 07:54 AM
Great story and build thread. The paint looks terrific. My first 914 was a '73 2.0 appearance group in Sepia Brown - definitely lighter in color than the chocolate. The color grows on you for sure.
Posted by: Steve Pratel Dec 23 2014, 10:31 AM
You should switch that brass assembly for a hose Steve.
Yeah, I was thinking about that and the possibility of leaning on the unit and cracking the boss..... Is such a line available? or should I do barbed fittings and clamps on oil line?
Posted by: Dave_Darling Dec 23 2014, 11:45 PM
Check around; there may still be adapter kits available. I have heard of people using a grease gun hose and some adapters as well.
The pipe creation is going to put a lot more stress on the mounting boss. Bad idea IMHO.
--DD
Posted by: Racer Chris Dec 24 2014, 07:08 AM
Check around; there may still be adapter kits available. I have heard of people using a grease gun hose and some adapters as well.
The pipe creation is going to put a lot more stress on the mounting boss. Bad idea IMHO.
--DD
I recommend against grease gun hoses and paintball gun hoses.
The rubber in them isn't designed for the chemical/temperature environment.
We're starting to make our own hoses from Aeroquip parts.
Someone suggested a brake hose but I haven't seen that in usage yet, and I'm not sure about availability of the proper adapter fittings.
Posted by: Harpo Dec 24 2014, 09:42 AM
Aeroquip or Earls the parts are readily available. I believe it was -04 line & fittings
David
Posted by: Steve Pratel Jan 1 2015, 01:27 PM
Look what I took home yesterday  Just in time for the New Year, just waiting on the bumpers and valences. Really looks great, Thanks to Scotty B!
Diddnt have much time to do more than pick up and drop off at my storage garage, had to get back home for the NYE borefest at some snobby wine & cheese place (EHEM, I mean a wonderful NYE celebration  ).
).
Now its time to start sorting out the wiring, interior gauges, etc.
On the trailers at Scotty B's 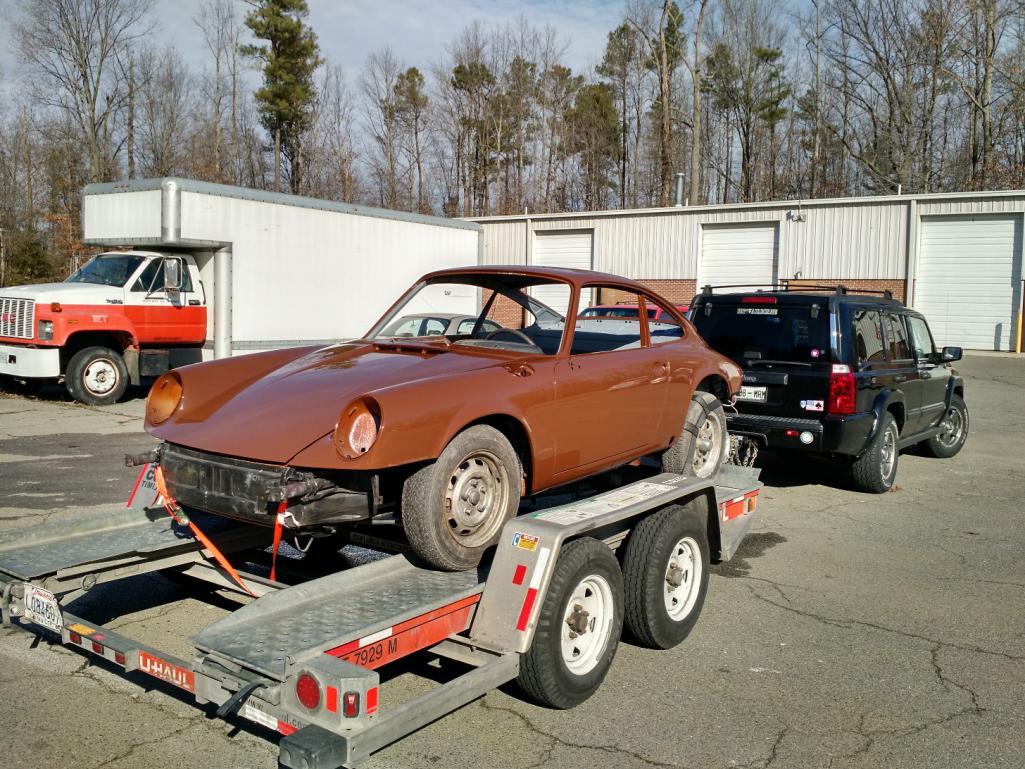
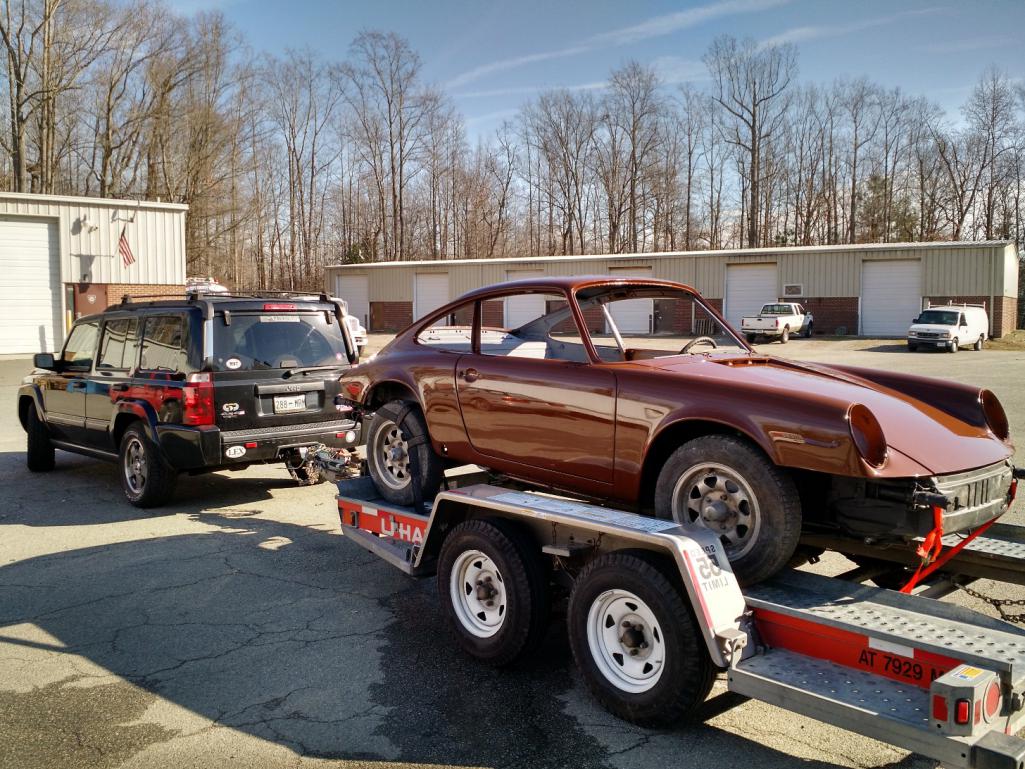
At a gas stop.
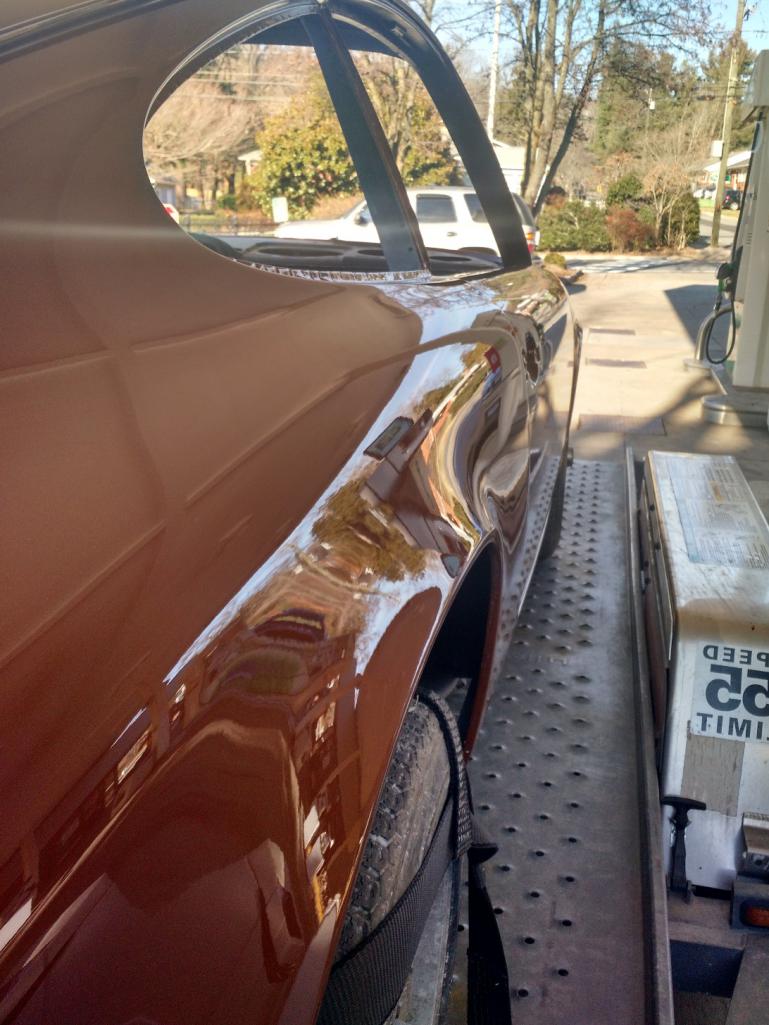
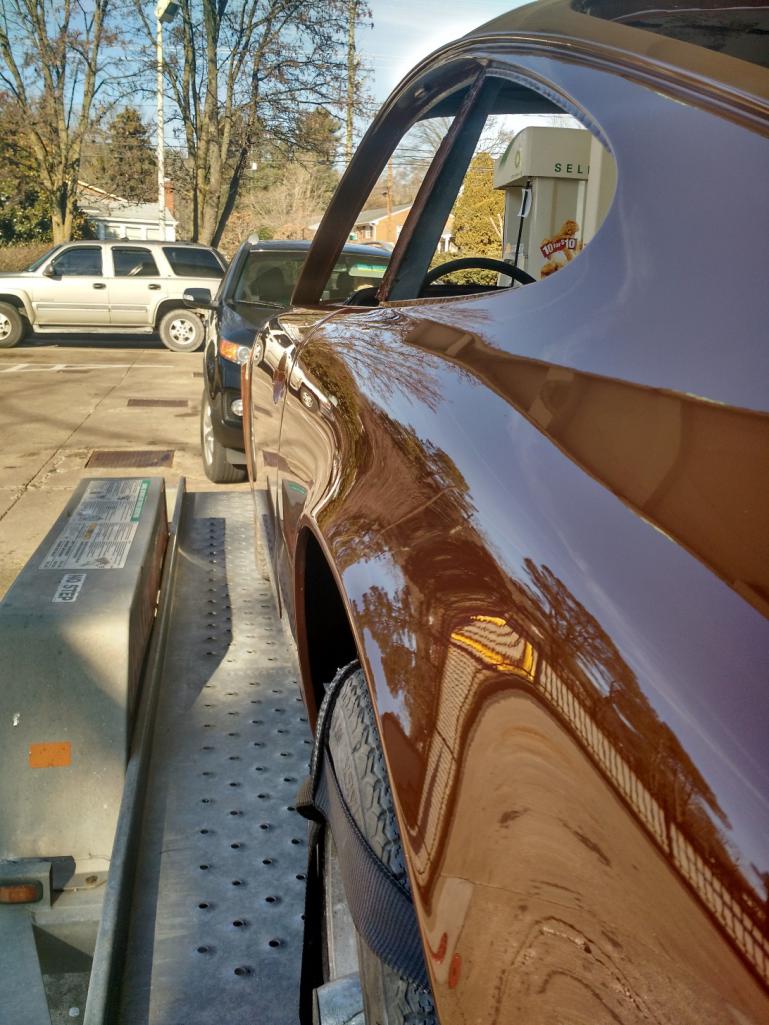
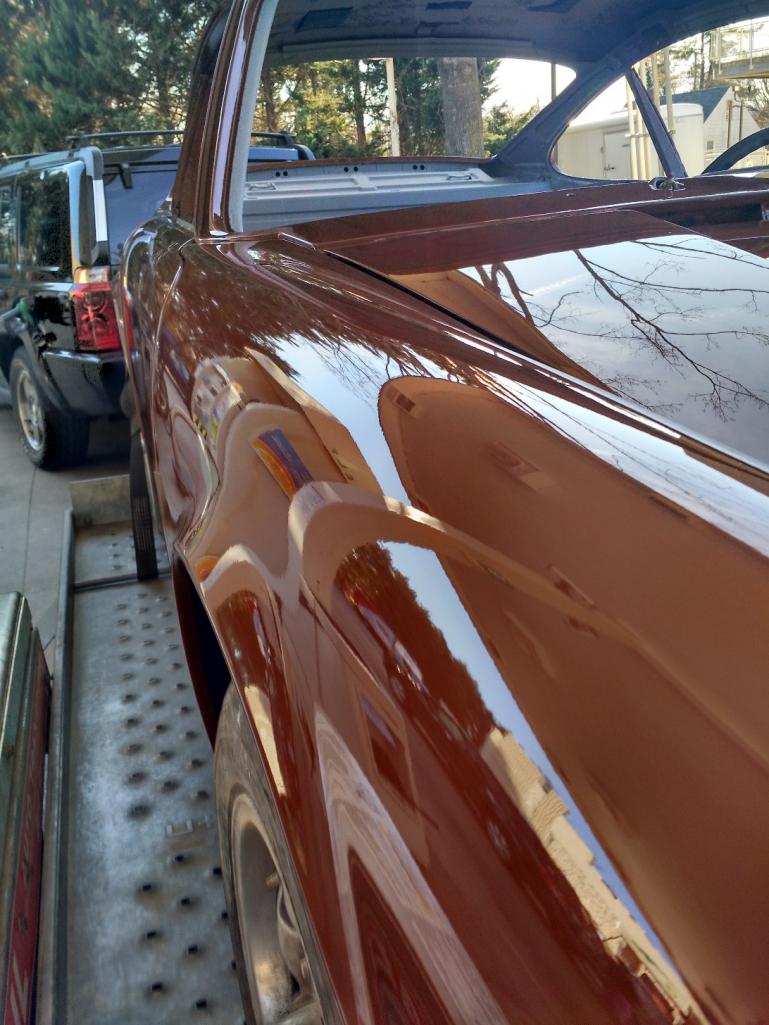
Progress!
Posted by: Steve Pratel Jan 6 2015, 06:12 PM
Finally have the Long Block mostly assembled, things are going well. Next up is pushrod tubes and a few more accessories. Still have to finish the temp sender wire. Hopefully the machine shop will finish my pushrods by the weekend. If so, I will be able to button up the motor. I've already mocked up the intakes, carbs, etc, and all looks good. 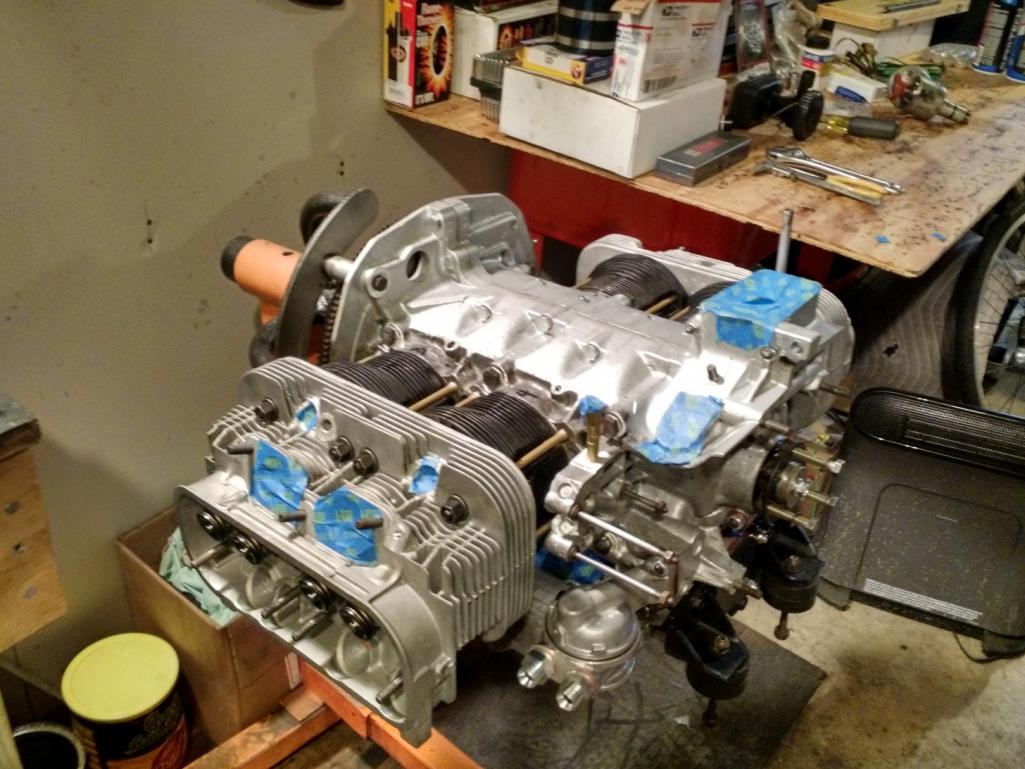
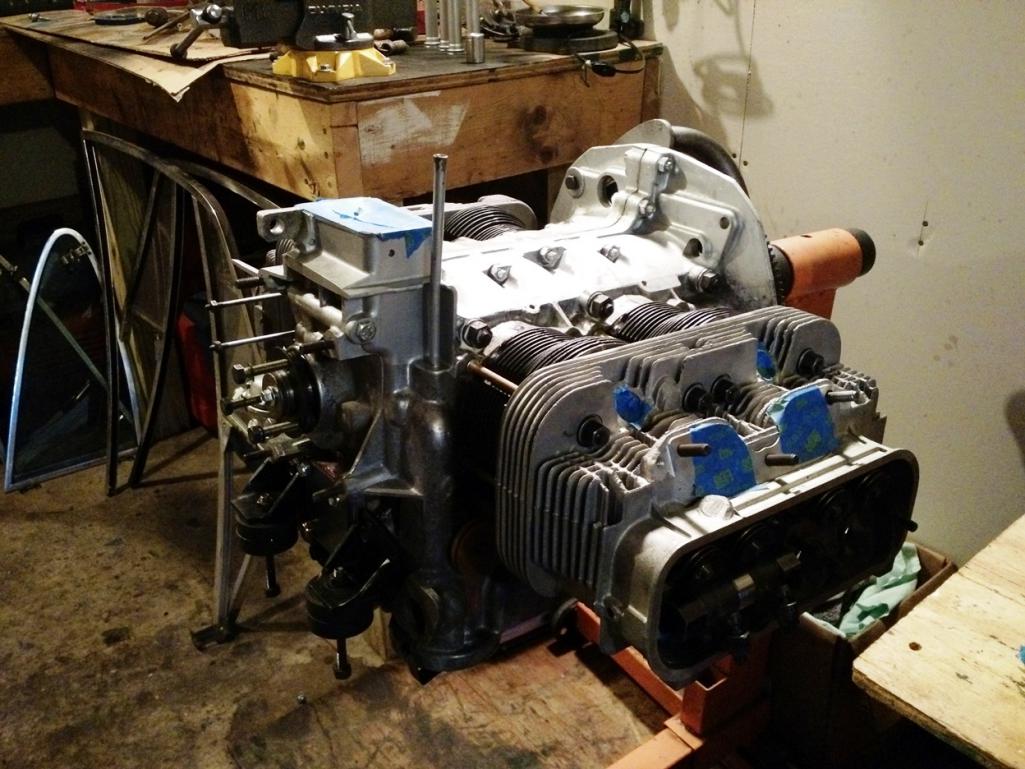
Under cyl tin fit perfectly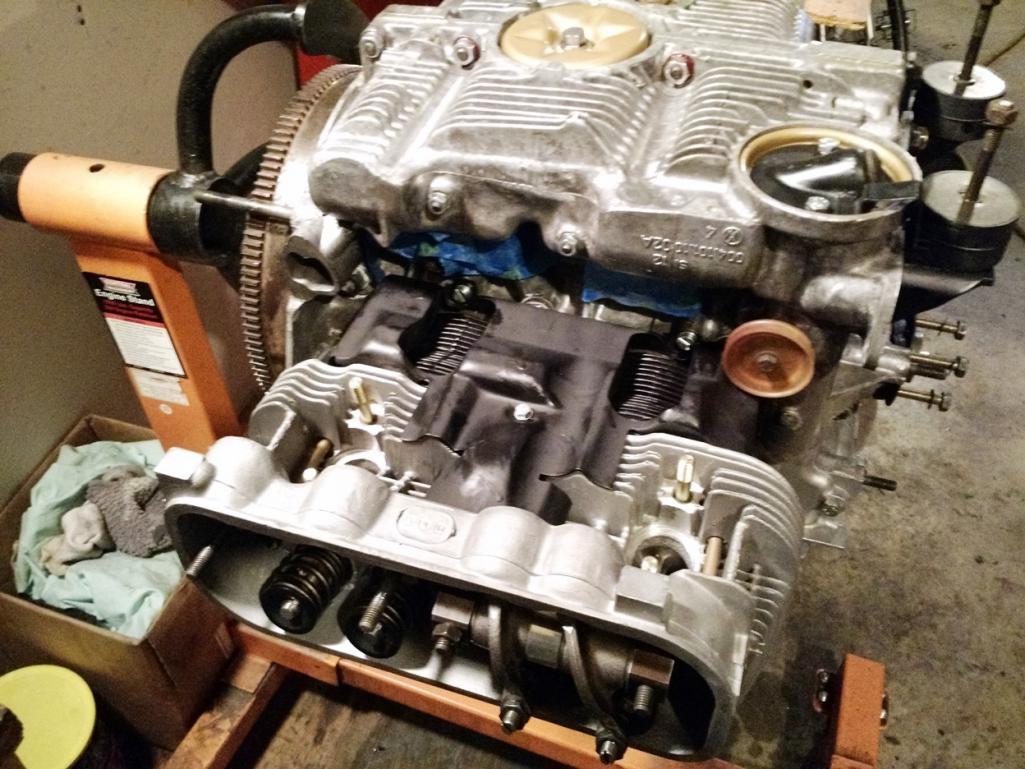
Attached thumbnail(s)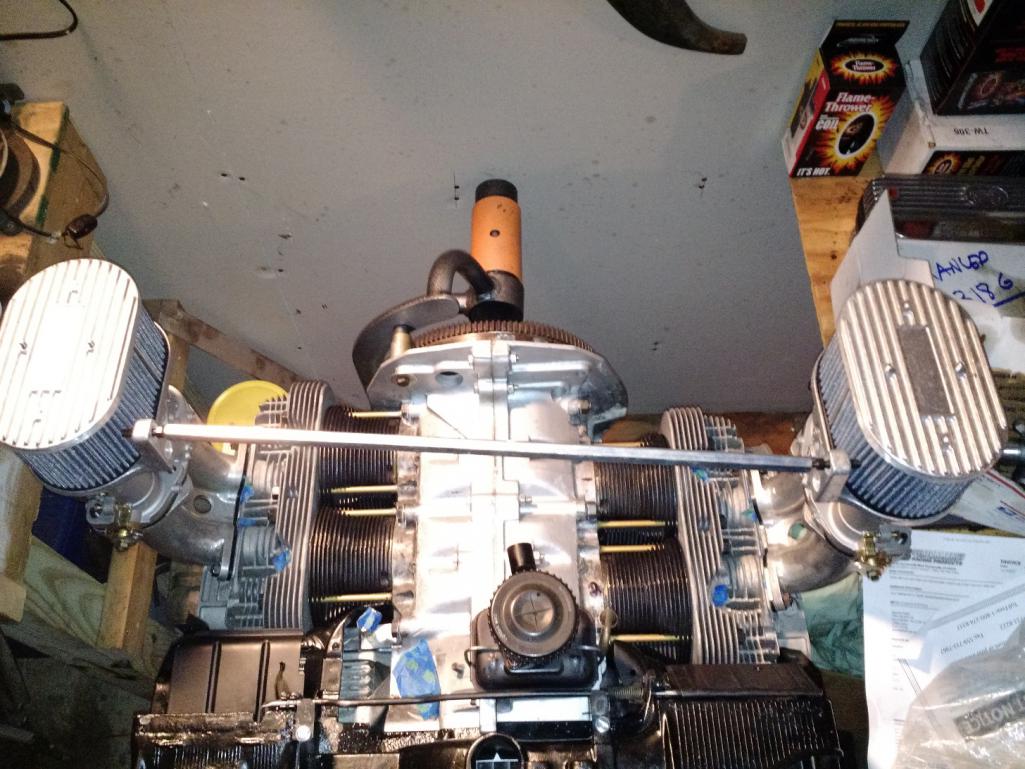
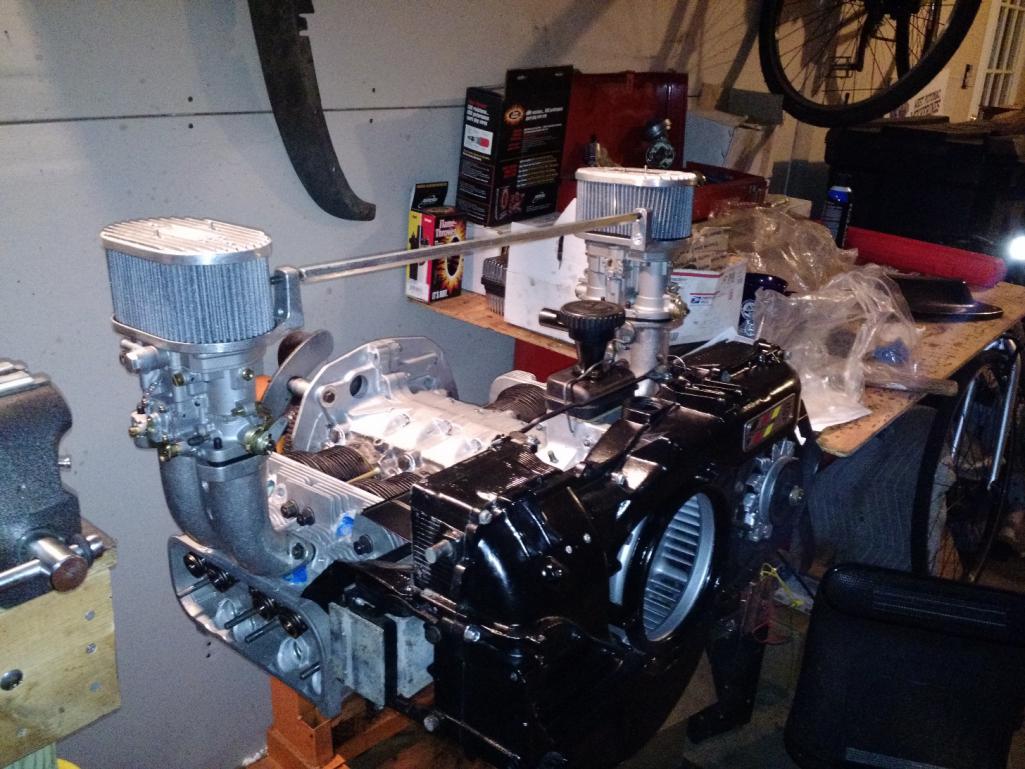
Posted by: saigon71 Jan 6 2015, 09:19 PM
Great progress Steve - should be ready for Hershey right?
That paint job looks sweet ScottyB!
Posted by: Steve Pratel Jan 9 2015, 11:24 AM
Great progress Steve - should be ready for Hershey right?
That paint job looks sweet ScottyB!
If all the stars align.... I should have the body complete and engine in and running, but not sure if I will have the interior finished or all the kinks and and issues sorted out.... I'd love to, as I think this will be my last chance for several years. I will PCS this spring no idea where yet, find out in Feb.... If I get the East Coast, FT Bragg, Benning, Stewart, Drum, will definately be there in 2016, but who knows.
Posted by: Steve Pratel Jan 14 2015, 07:27 PM
As my Italian forbears would say................ SHEET SOMMA A BEECH
I have a local machine shop, two man shop, been in the same location since they built the place 43 years ago. And it looks it.......... Old School everywhere, the kind of place you just want to hang out in..... They do impeccable work.... Meticulous, to the point of obsession, literally had to look up my engine in a book to see and visualize what it was.......... etc, bet they'd get along great with Jake (sorry bud ) The More I tried to say 'look, I just need you to cut it to this length, then press this end on, the more in-depth and demanding he was.......... He called me over the weekend after he did his first one, left a 5 minute voice mail because he couldn't get it to a 50 thousands of an inch.......... I kid you not..... I had to cut him off and ask "Is 50 thousanths .0005 of an inch????" He says yes. I say "I think that's fine. He wants to be precise............ So I muster all my 'respect your elder military discipline' and a chuckle, knowing that they will be exact at least.
So I get a call today, he is done, come pick them up.............. After the 5 minute tail of what he did, how he did it, how much pressure he had to use to press the ends in after the cut............... He says "I spent 8 hours doing them, and $80 an hour, but your military so I'll charge you for 6 hours................ (SILENCE FROM ME) "Hello, sir? hello??
ME KEEPING CALM...... "Yeah, I'm not sure I heard you right, did you say 8 hours??" Yes, but I'll only charge you for 6, and remember, I only take cash........... ME " So one hour per rod?????????" He senses my frustration, and makes no apology, "hey. I'm only charging you for 6, and I wanted to get them right for you, and they are perfect........"
ME "OK, I'll be by, need to warm up the printing press, make sure my plates are precise when they print the bills..... " He doesn't appreciate my humor.... I tell him that my humor is far preferable to the alternative and that I think 6 hours is unreasonable. I'll be by with $200. Take it or keep the parts.......
He tells me to  but takes the $200 and gives me the rods. I dont even want to look at them...........
Am I crazy to assume 2-3 hours MAX for this job?
I figured 30 minutes to set up the lathe/jig to cut, an hour to cut and debur the edges, check measurements/file as needed and MAYBE another hour to press the new fitting on the cut end???
I maintained my cool, but barely...........
 OK, its not the weekend, but I need ............ eh make that a Tullemore Dew neat please....
Posted by: billh1963 Jan 14 2015, 07:55 PM
Looks like Scotty will be shooting a lot of Brown this Spring!
BTW....'76 Chocolate Browns rule! 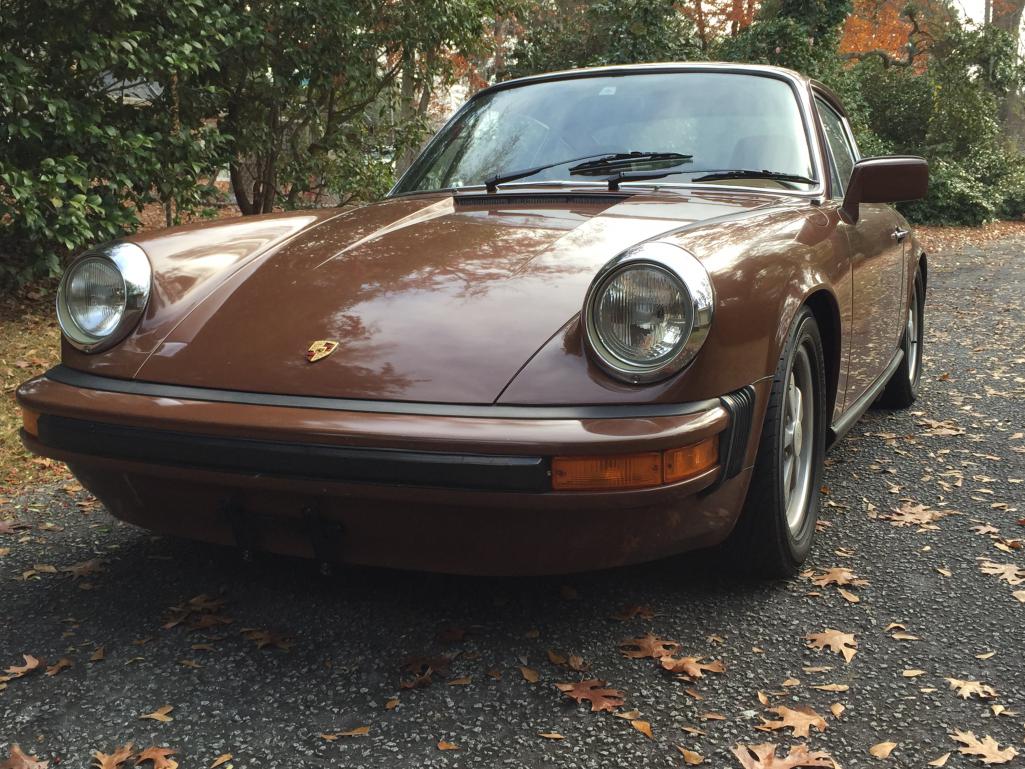
Posted by: '73-914kid Jan 14 2015, 07:59 PM
When I cut mine on a lathe, it took 20 minutes to physically cut all 8 of them.. maybe 10 minutes of setup to make sure things were going to be the correct length.
You need to remind your machinist that there is such thing as the law of diminishing returns... as soon as you start/ break in the motor, the pushrod ends will seat further, shortening the overall length a miniscule amount....
A small pipe cutter for copper house plumbing works just as well
Posted by: rick 918-S Jan 14 2015, 08:15 PM
Sounds like he wants you to pay him to talk to every other customer he BS'd that day. I hate that shit. I had a similar experience. But not only was the bill massively inflated he cut one of my euro spec heads "S" unobtainium heads like a wedge. 
Another machinist, specialized on 15k and up race engines, brought him a 121 head for a BMW 2002, E12 valves, cut the head like a wedge. 23 years ago and the head work was $ 500.00. By the time the head was recut straight it was .111 over the max cut. The head was ruined.  Guy went on and on about how good he was with chevy's. Like it really made a difference what head he was working one.
Another specialty "Heads Only" shop, Brought them a second set of 928 euro heads. Asked about a price. Without even looking at the heads he quotes $ 900.00 each. I ask him if he knows how to measure the heads to determine how much he can cut them or if they are within spec. He says.... you measure them? I say, ya, There is a casting on the head you use to measure them, he say's where? I smiled, picked up the heads and walked out.
Posted by: Steve Pratel Jan 15 2015, 04:51 AM
Looks like Scotty will be shooting a lot of Brown this Spring!
BTW....'76 Chocolate Browns rule!
Yeah, seems this color is coming back. I bounced between several colors, dark forest Green (like the 912 in Spy Games), Ivory, that 80's Mahogany Metallic Brown, but Bitter Chocolate was the factory color, so it seemed the right thing to do.
My all time favorite color is the slate grey on black from the Movie Lemans (with McQueen) Saw it in the movies when I was a kid (maybe 73? was instantly in love with the 911.... That would have meant a complete interior color change too.
Posted by: Racer Chris Jan 15 2015, 07:24 AM
...
Am I crazy to assume 2-3 hours MAX for this job?
...
Even my anal retentive machinist could do that job in less than 2 hours.
An hour should be more than enough for someone who's done it before and has the right tools.
You would have been better off telling him to kiss your ass (sorry chaplain) and buying a fresh set to take somewhere else.
Posted by: Steve Pratel Feb 1 2015, 09:42 PM
I've been super busy at work and progress, but no time to post.
Engine: Not much progress on the engine, but did accomplish:
- Finally got my pushrods back from the machinist, after a huge fight over his fee..... Wanted to charge me for 8 HOURS OF LABOR..... I paid him for 2 hours...... It got very ugly. In the end I told him take it or leave it. He thought he had me over a barrel till I told him to take the $200 or I was going to buy a new set, send them to California to be machined, overnight them to me and STILL take my wife out to dinner with teh $200 I had in hand. He took it without another word, handed me me the pushrods and I went on my merry way....
- Installed flaps and test fit all the tins, but need to change my engine mount to stop sag before I do much more.
- Mocked up the Carbs and intakes, waiting on a Throttle cable bracket.
- Still playing with the pertronix distributor fitment...... will probably have to re-index the drive to keep the lead/lug away from the cooling flap bar. I'm about to call it quits and go with a Bosch style distributor with Pertronix guts. MTF...
Body Reassembly: Lots of progress: Will do some breakout posts on the projects sometime in the future.
As I just got the car back from the bodyshop (Scotty B) and had to install the windshield washer bottle, and fuel filler, etc. I took the drivers fender off, and kept it off. HIGHLY recommend this as there is much work to do at this site when working on the brake, fuel and electrical systems.
- Finished brake system, installed front pads, and hardware, and bled/filled the brake circuits. NO LEAKS! I expected some kind of leak due to the amount of heat I had to put on the old stock lines to get everything apart. I have new rubber lines and the final hard line to caliper at each wheel, but the rest is all stock. Biggest surprise was no leak at the master cyl feed grommets.
- Installed the Gas filler door latch - ** If you are taking off the fender, and cant get the little clamp undone to remove cable, JUST CUT IT, and order a new cable. It is much easier with the fender off, turned upside down and you can see everything. I cant imagine doing it while on car, would have been difficult not being able to see.
- Installed mirror support in passenger door. Blue tape is because I am a clutz///
- Converted the rear defogger switch to a foglight switch - The rear defogger element is toast, so why leave a switch unused and spend $ on a factory style switch or go ghetto. Cost $4. I will use the old power lead for the rear window defogger to power as needed the accessory gauges I am adding (AFM, CHT, Clock, Fuel Gauge)
- Cleaned up and undercoated/painted my donor fuel tank. Fresh eastwood undercoat on bottom and chassis black/enamel on top. Really scored on this the tank is SPOTLESS inside.
Most progress has been made on electrical system
- Installed New/Used Heater controls
- Cleaned up fuse blocks front and rear, cleaned all connections, contacts and relays.
- Installed battery and grounds
- Tested and verified the wiper/washer/cig lighter/horn/rear heater/blower circuit works.
- Installed Relays for:
- Headlights (dual 40 am relays and fused for high and low beams),
- Foglights (Hella system, 15A relay and fuse powered by parking light circuit and switched by the new foglight switch)
- New accessory Fuse block, 40 amp circuit switched with ignition.
- Also stripped front wiring harness, pulled headlight wires out of fuse block, and wired in new leads to switch relays, added foglight power wires and re-ran/re-taped leads to each side, also re-ran horn wiring harness. Still need to wire in the relays, am waiting till I install all the lights before I power everything.
The only problem so far is the front blower seems to be dead. I tested power at the plug, had it on one pin with lever all the way to right,, but nothing from the blower, will do some research and run a test wire to check the fan before I pull the motor. Anyone have a troubleshooting guide for the fresh air fan?
Here are some pics, will update with 'how to/progress' pics posts later.
Attached thumbnail(s)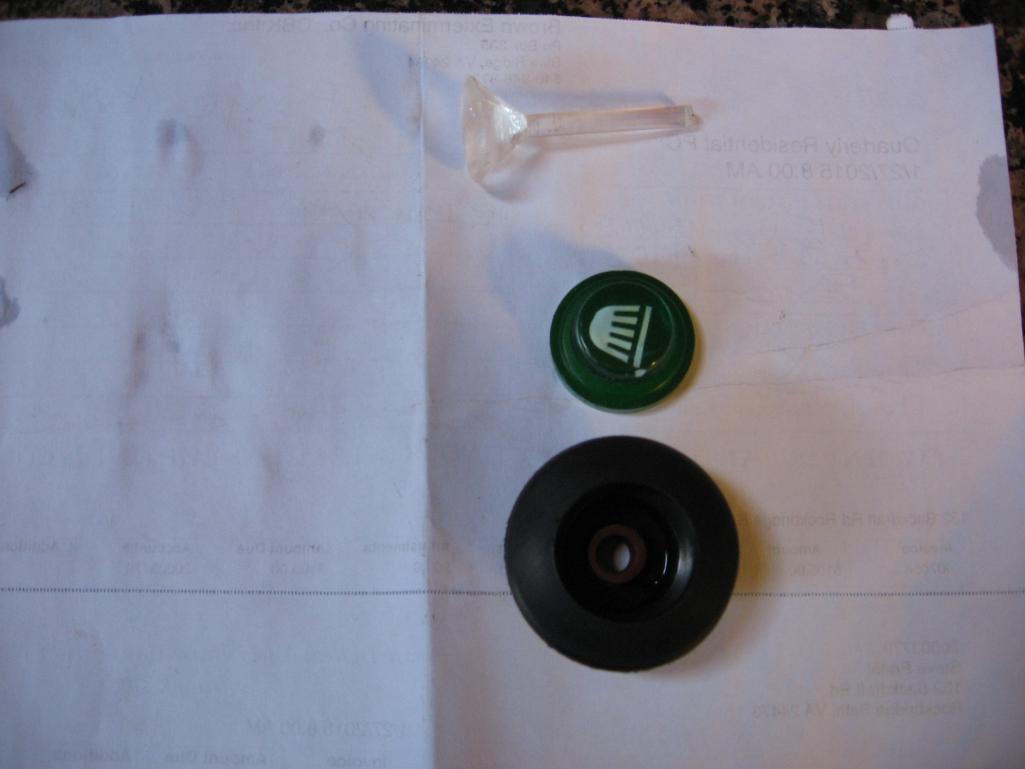
Attached image(s)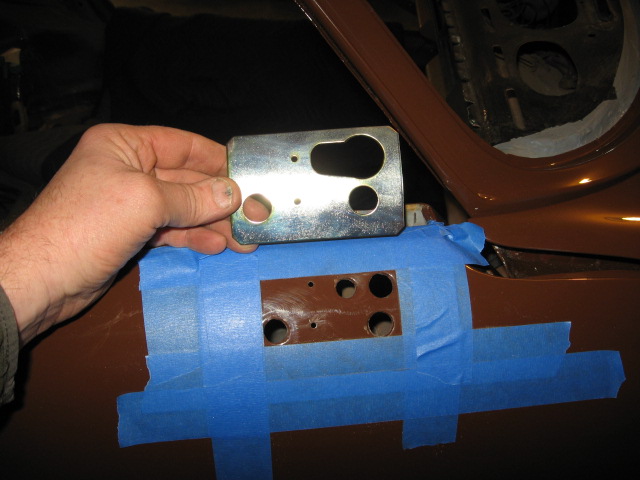
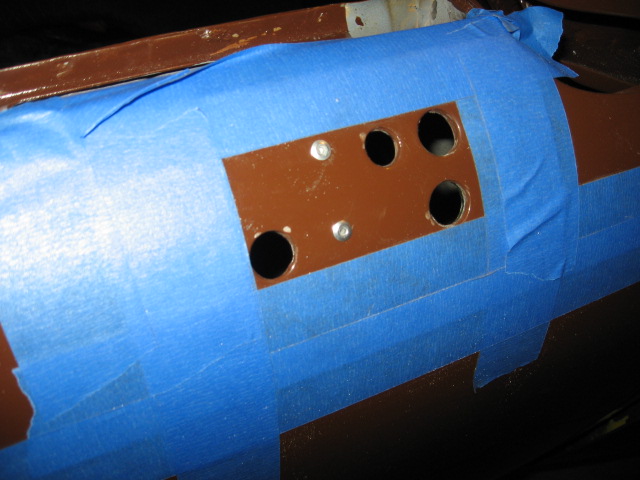
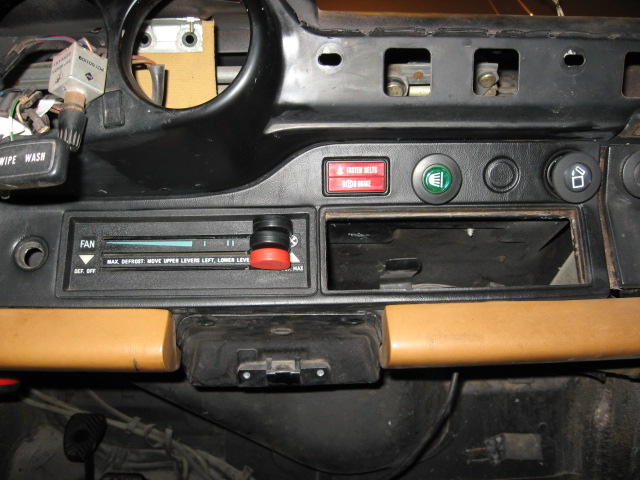
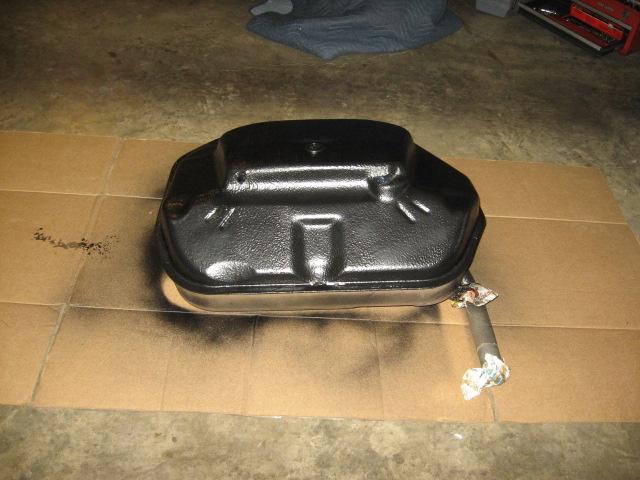
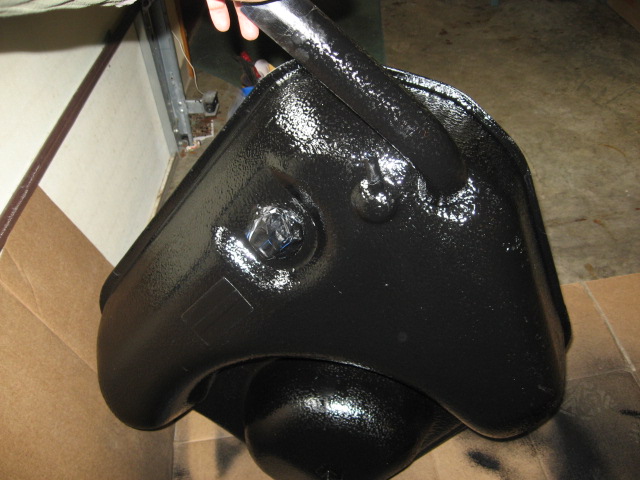
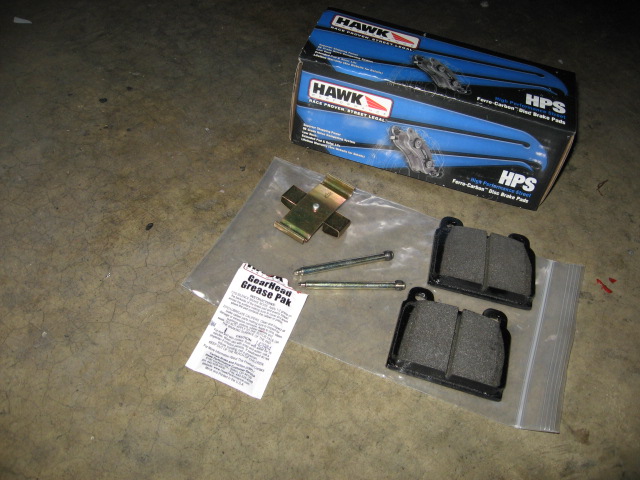
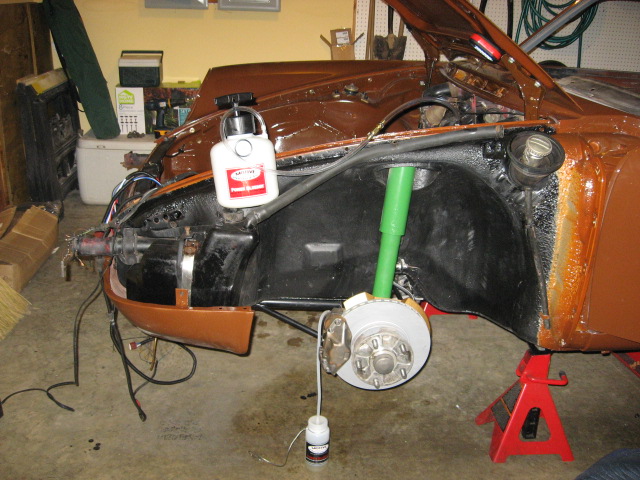
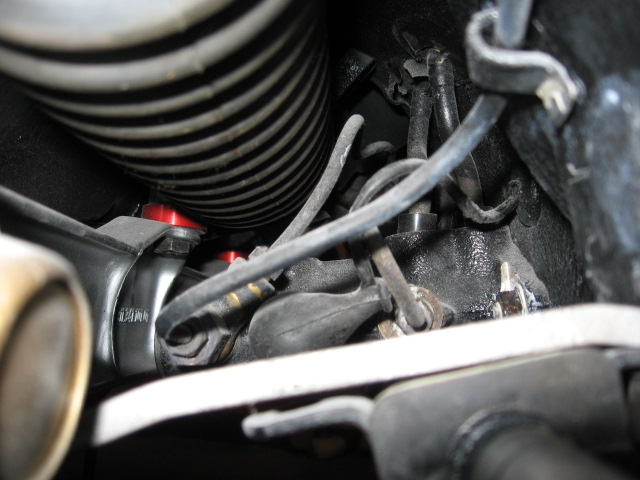
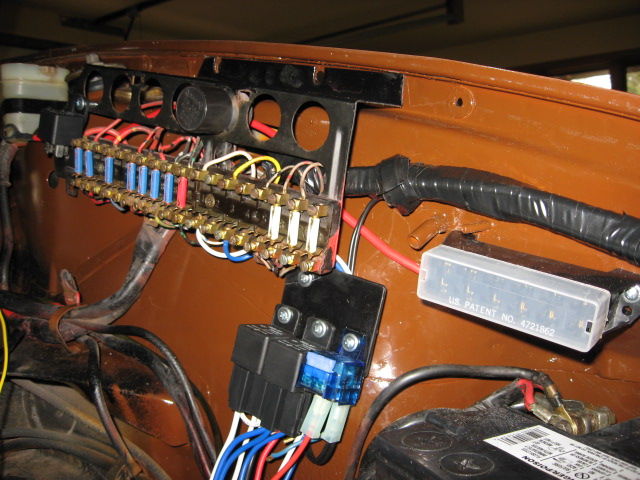
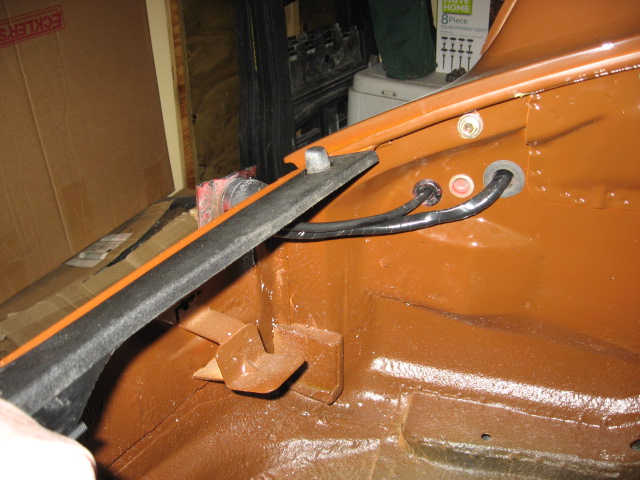
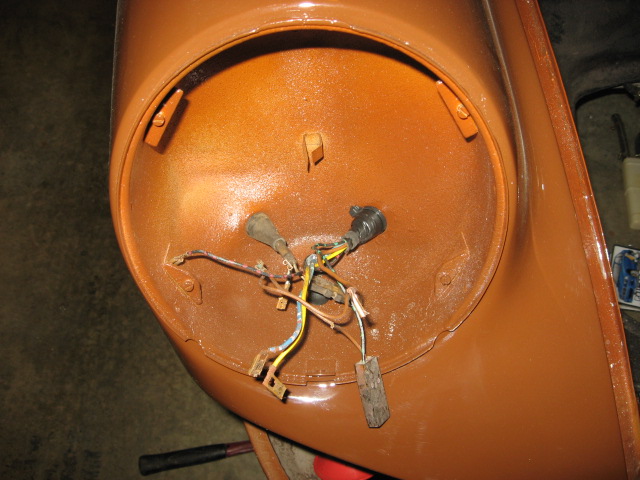
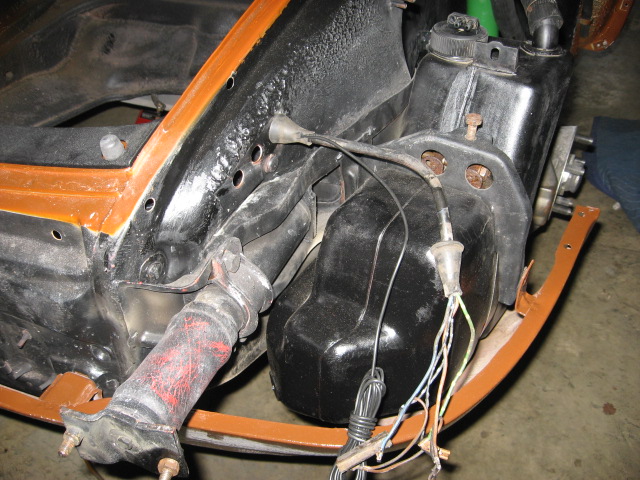
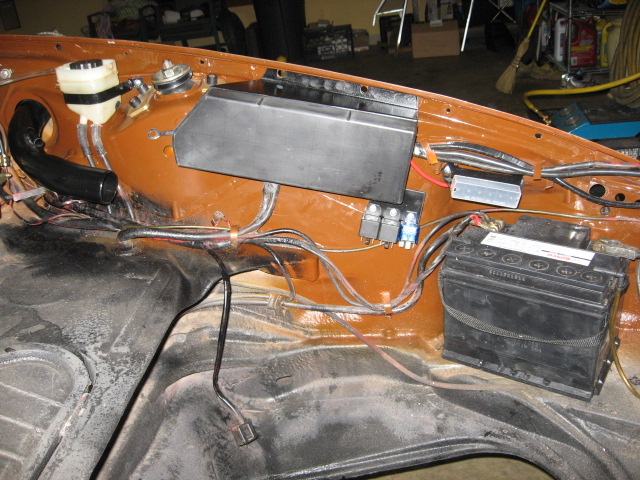
Posted by: Steve Pratel Feb 14 2015, 06:22 AM
Just finished sketching out the head/fog light wiring relays using standard Bosch style Relays. I wanted to use the open round relay spaces in the fuse box, but would be about $75/relay for relay and socket, so went this way. I have the relays mounted to a small steel plate. In a past life, I had an associates degree in industrial electronics, thought I was gonna be an electrical engineer at one point.
The car did not have a Fog light Circuit, so I added one by converting the rear defogger switch to a fog light switch by changing the lens. If at some point I swap out the rear glass for one with intact element I can easily reattach and address a switch for the fog lights.
Because I want them to come on independent of the headlights (not just with low beam), but with the lights, I will take the feed for fog light relay from #7 license plate fuse or one of the parking lights, run a wire to the fog light switch & back to the feed side of the #8 fuse for fog lights. Not necessary as it is only powering a relay, but if the car is going to have foglights and has a dedicated fuse location for fogs, might as well use it. This will allow switched independent control of fog lights with parking lights, not just headlights. I do want to make sure it goes off with the key. After looking at the pics above, for a cleaner look, I decided to rework the relays so they are directly under the fuse panel, not shifted to the right. I know it will be covered by carpet, but if your gonna do it do it clean right?
I was surprised to see that Porsche crimped/soldered little brass caps on the end of the wires in the fuse panel, an easy way to replicate this is to heat and solder the tip of wire. I have a few other schematics to draw up, for the secondary fresh air vents and accessory power strip.
Attached thumbnail(s)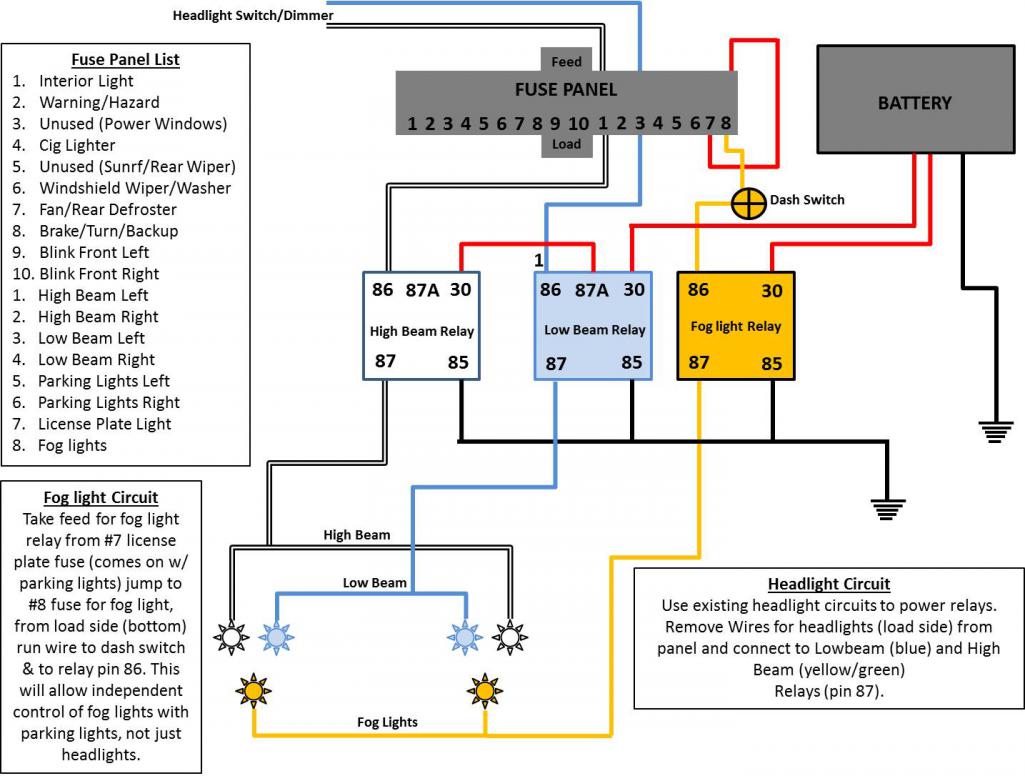
Posted by: Maltese Falcon Feb 14 2015, 10:48 AM
Great restoration +recreation, I like the hot-rodding touch of carbs +cast aluminum intakes on the T4. With a lightweight 912e and a responsive 2.0 this will be a fun car in the twistes!
Hang on to the injection parts, those will be added value if you ever sell the car . Your schematic sketch is going to be helpful with wiring up my current project...thanks for sharing 
Marty
Posted by: 914forme Feb 15 2015, 08:19 AM
You certainly raised the bar on project wiring diagrams, that will be great info to have latter on. What program did you use to pull these off?
Posted by: Steve Pratel Feb 17 2015, 08:43 PM
You certainly raised the bar on project wiring diagrams, that will be great info to have latter on. What program did you use to pull these off?
Microsoft Powerpoint. Being a graduate from Command and General Staff Officers Course has its highpoints/// other than the lobotomy ;-) **Edit-addition. For those wondering about this (got a couple PM's). All field Grade officers have to go to an exciting course called the Command General Staff College. It is referred to affectionately as the 'field grade lobotomy' where once fire breathing go getting push the limits Patton style leaders come out as 'company men' lol.
Posted by: Steve Pratel Mar 6 2015, 12:53 PM
Been super busy at work and honey do lists lately, but have been plugging away, and planning out my electrical accessories and new circuits. Below are several wiring diagrams for headlight relays, fog lights and two layouts for an accessory fuse panel.
I made a bunch of progress on the body & chassis, discovered my front fresh air fan is bad, and once again that $20 boxoparts I picked up at Hershey last year bailed me out. Plugged the new fan unit into the housing and wallah it worked! Will swap i t out and rebuild/repair the original for future use. Also installed the rear taillights and front end of the car sans the drivers fender as I want to keep it off until after I finish in the trunk fuel tank and all. SO MUCH nicer to lean in and not worry about scratching the new paint.
I also put the clutch & pressure plate on and remounted the engine on the stand with spacers and to prevent sag. Hope to get to fitting the rocker arm assemblies today and buttoning up the valve train. Will take the pushrods out for the pre-start crank, but wanted to get it all in and clearances, etc. **Note to self, put lifters in before pushrod tubes.............. Pics to follow.
I Amended Head/Fog Light Diagram above and did 2 more. Adding indicator lights into console for the AUX fan, and fog lights & a few other minor changes.
I am adding a switched accessory fuse panel for future expansion, as the stock fuse block only has two open spots. Diagram 1 has me using the switched relay to feed power to the aux fan and my stereo THROUGH the old stock fuse panel (#3 & 5) 
This diagram shows the same Relay and new accessory fuse block, but it powers the Radio and aux fan circuits. Haven't decided what way to go. Right now I am leaning on diagram 1 above. This leaves the accessory fuse block unused.
Posted by: Ferg Mar 6 2015, 02:59 PM
Just seeing this for the first time. Nice color
Attached image(s)
Posted by: Steve Pratel Mar 7 2015, 05:44 PM
Just seeing this for the first time. Nice color
Indeed sir, indeed
Posted by: Steve Pratel Mar 9 2015, 02:12 PM
Progress on Motor Assembly.
Spent most of Saturday fitting and putting the tins on, as well as mounting the intake runners and carbs so I could test fit the throttle linkage. Took a bit of finagling, and adjustments, but the tins are all in place. I also reindexed the Distributor Gear for optimum lug placement in relation to the tin and air flapper control shaft. The engine is at TDC and when at the #1 firing point, I have about 50 degrees of clear rotation in both directions. I'm assuming that moving to 34-37D before TDC is turning the dist counter clockwise? Ah, that's for later..... lol
Overall I am pretty happy EXCEPT for that CB linkage.... man it looks UGLY.... (no offense to anyone)..... I think I'm just going to close my eyes and order the Tangerine Setup..... It will be worth it..... it will be worth it......  More parts to add to my 'oops dang it pile of re-sales.... I did plan to switch to this in the future when I go to this intake, but this is unnecessary at this point.
Working hard to get the body and wiring and such finished so I can get it back to Scotty B for installation of windscreens and headliner, then back up to my house to install the Motor and try to start.... All before 15 June...... yeah.... 
Attached image(s)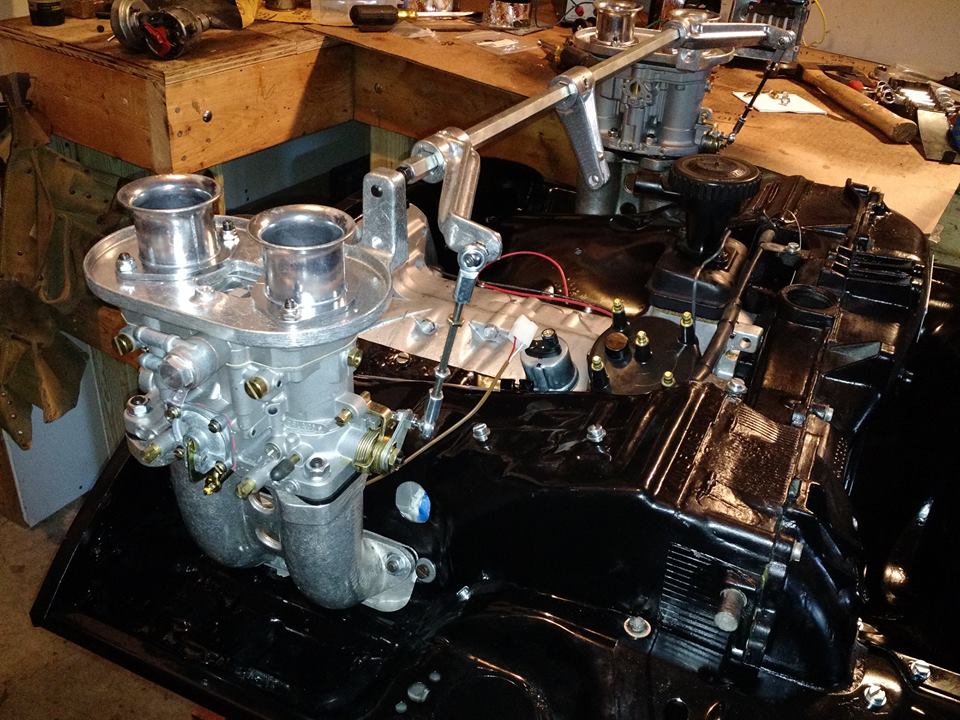
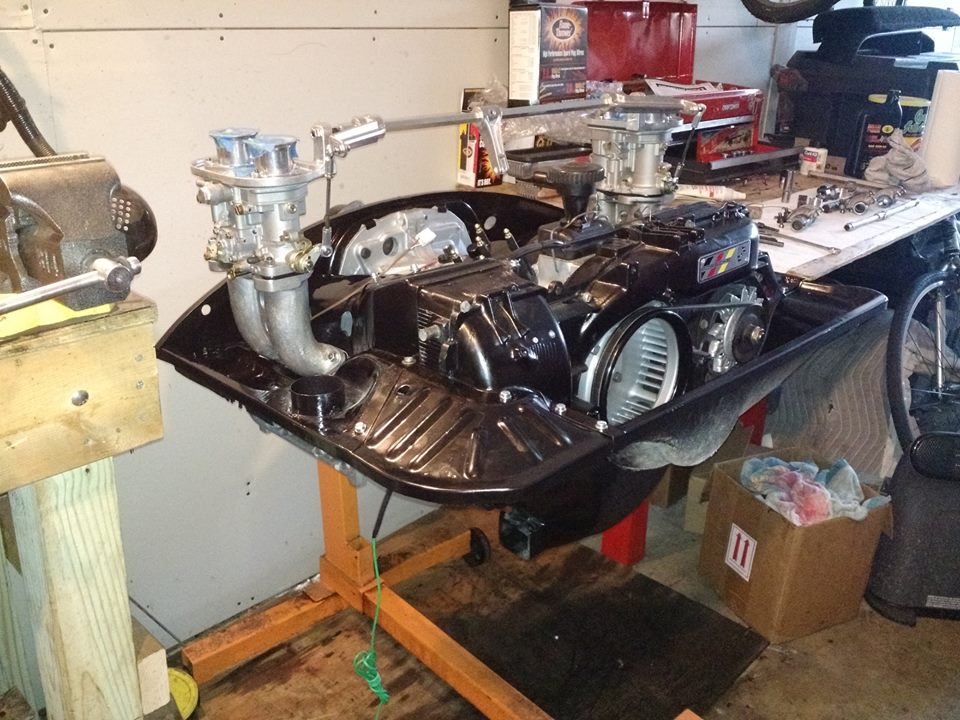
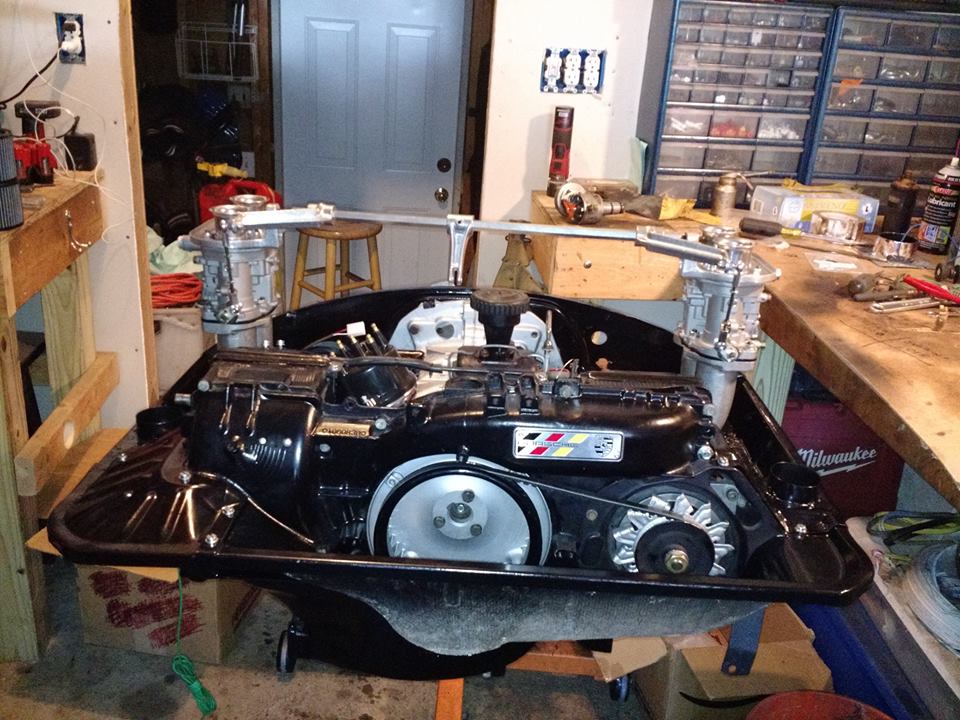
Posted by: euro911 Mar 9 2015, 04:06 PM
I never paid much attention to the 912E set up, but with additional length of the fan housing (as opposed to the type 616 912 motor), looks like the a T4 takes as much room as a '6'.
Posted by: Steve Pratel Mar 16 2015, 06:26 PM
I really like the look of the Metal/aluminum engine grill of the 912, and in this Restomod of #770, and decided to go for that look as opposed to the black plastic of the 911 that was on the 912E. I cleaned up the grill scuffed up the slats with 60 grit paper, primed and painted with 5-6 coats of Rustoleum Professional enamel. The tape lifted a bit in one section between coats and I didn't see it so I have a little touch-up, but I am happy with the look. It will likely peel over time, but for now it looks great. The silver flecks in the pics are not paint over spray but the plastic itself.
Attached thumbnail(s)
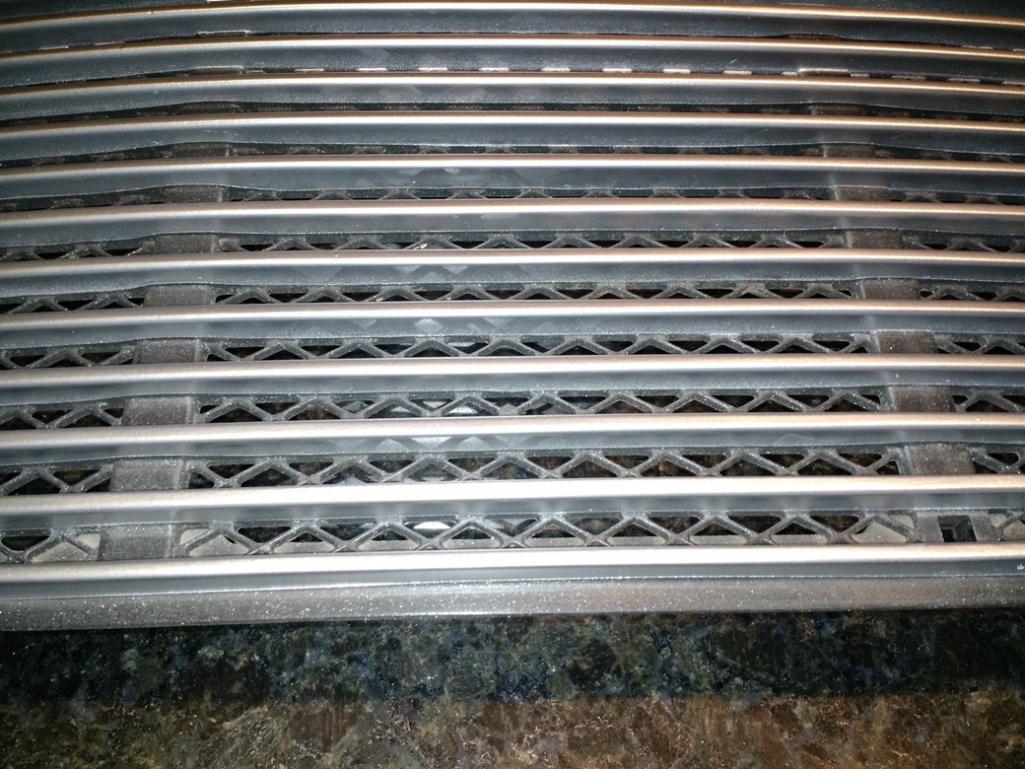
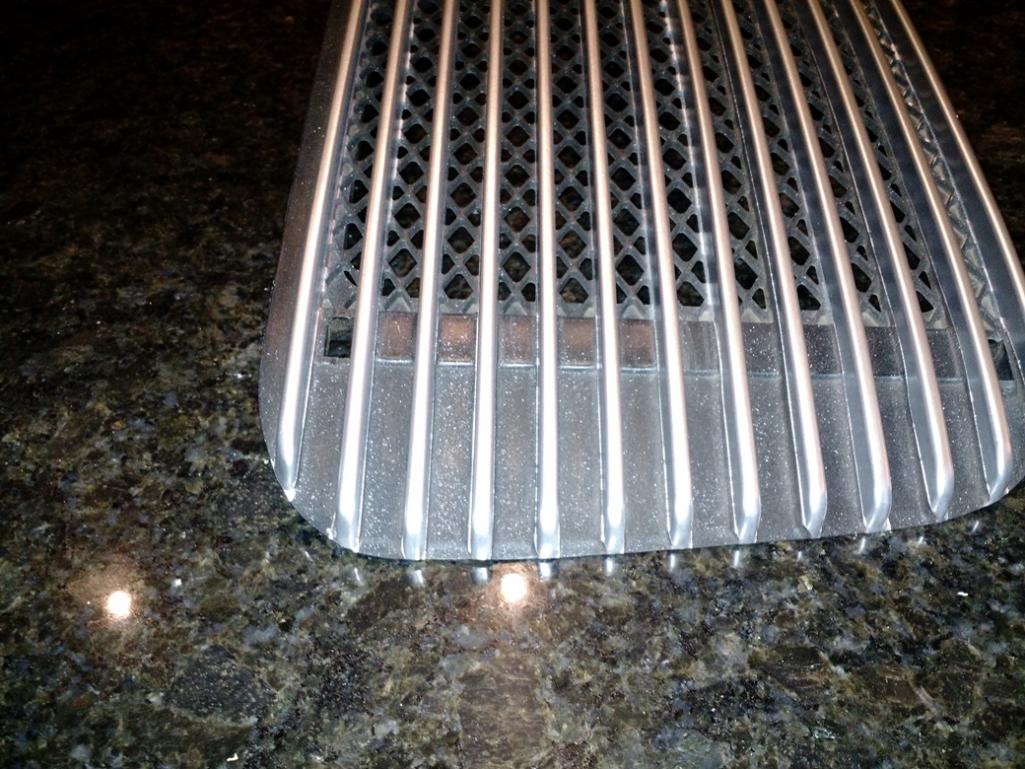
Posted by: Steve Pratel Mar 16 2015, 06:41 PM
Engine Update:
I decided I really diddnt like the look of the Hex bar, so I broke down and ordered the Tangerine Cable Throttle kit and ITG Air Filters..... I'm at the 'hide the receipts' point from the wife ;-) lol......
Posted by: Steve Pratel Mar 30 2015, 04:49 PM
Made a ton of progress this week, my dad came up and we spent 5 days working on the car. Assembled the doors/windows, lights, front fenders, and a ton of electrical wiring. Only one major snafu. Woohoo!
When I disassembled the doors I did a tutorial, will also do one for the reassembly, particularly the drivers fender...... learned a few things along the way that may be helpful for those who work on a 911 chassis.
First up is the Gauge cluster, this is how much of the bolster needed to be cut away to fit the triple gauge. Then all gauges installed and bracket mounted, and a mockup of the center console. Am replacing the stock fuel gauge and clock with dash vents and moved those two to the cluster with a CHT. The PLX AFM will go over the hole just to the left of the climate controls. I took the lighting and power leads from the clock to run the back-lighting of the gauges and to power the clock. 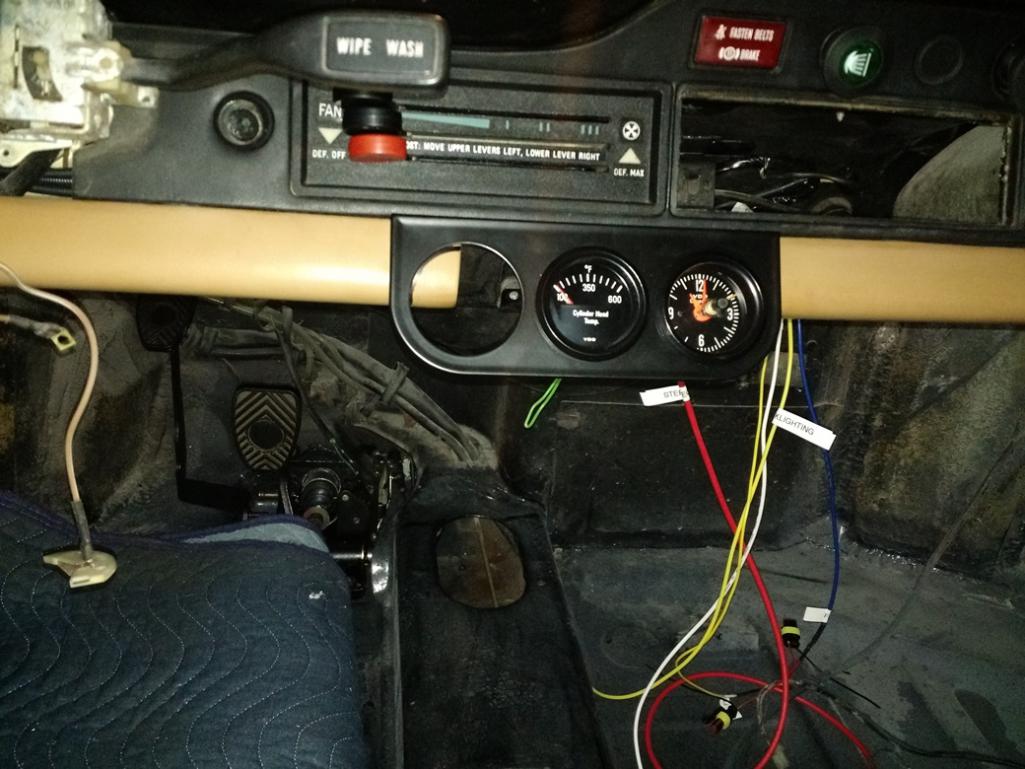
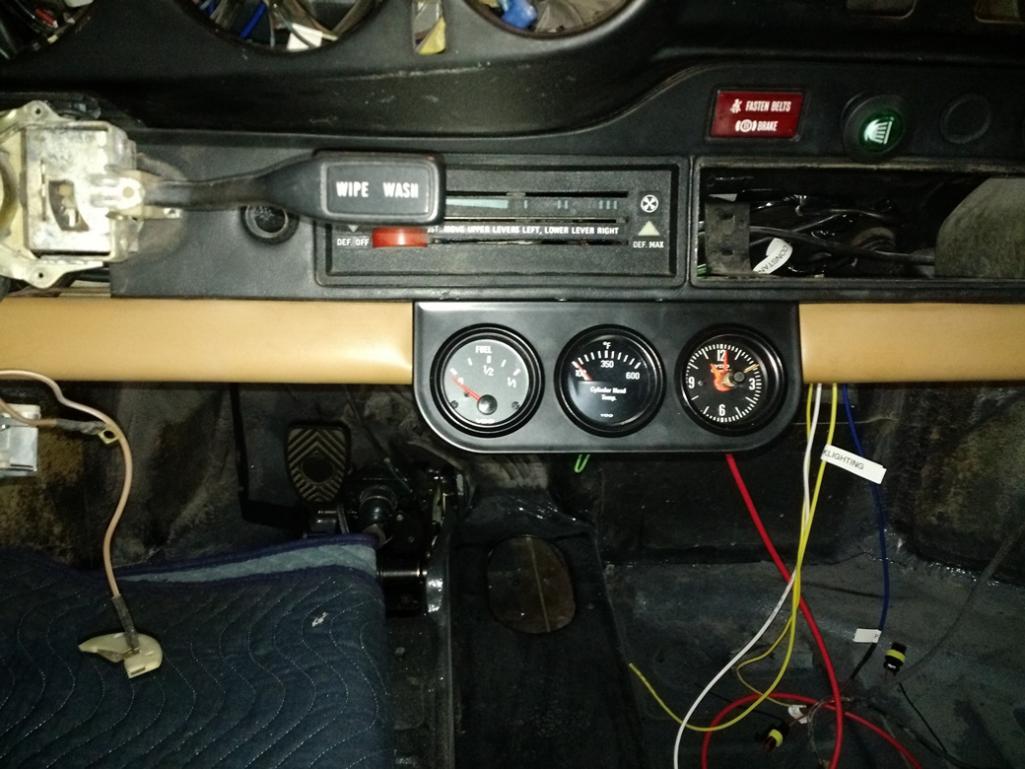
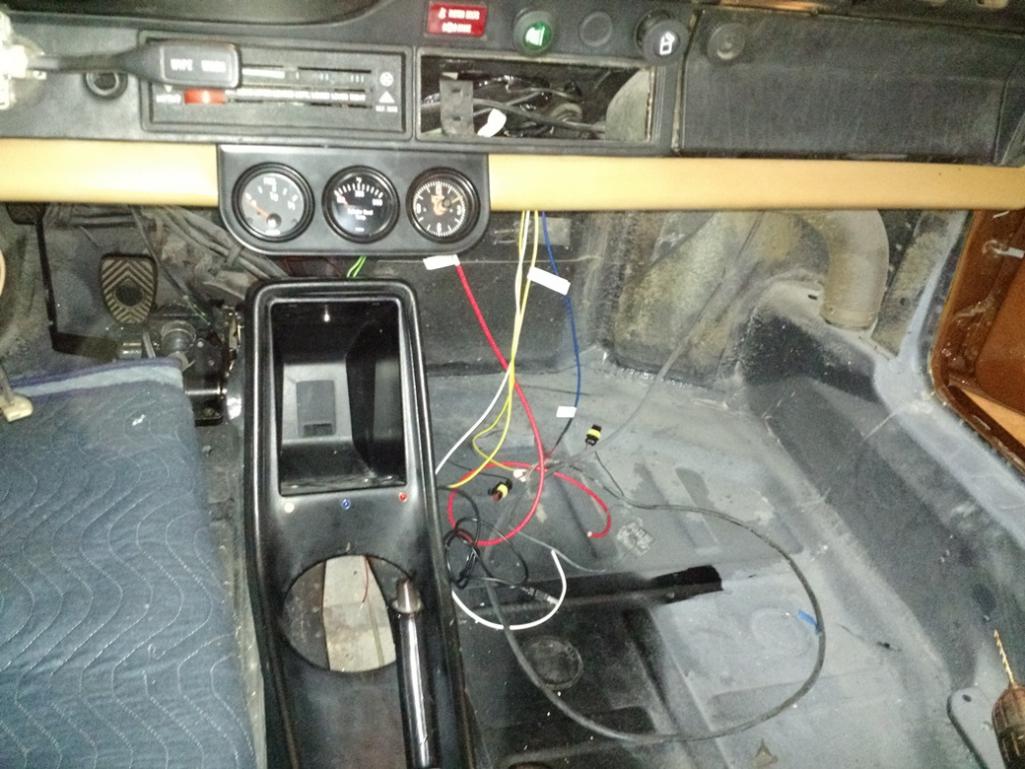
I finished the electrical wiring at least in the trunk and panel, still lots to do under the dash. Headlight relays, fog light relay and a 40 amp accessory fuse block that runs off a relay switched by the ignition. I have the radio and aux fan hooked into this and have spots for 5 more if needed. Due to the changing of the headlight circuits I also have two new free spots on the old stock fuse panel. Everything tucked up nicely with teh fuel tank installed..... far too nicely, lol. I had NO idea how much space the tank took up and it was by the grace of God that it all fit. 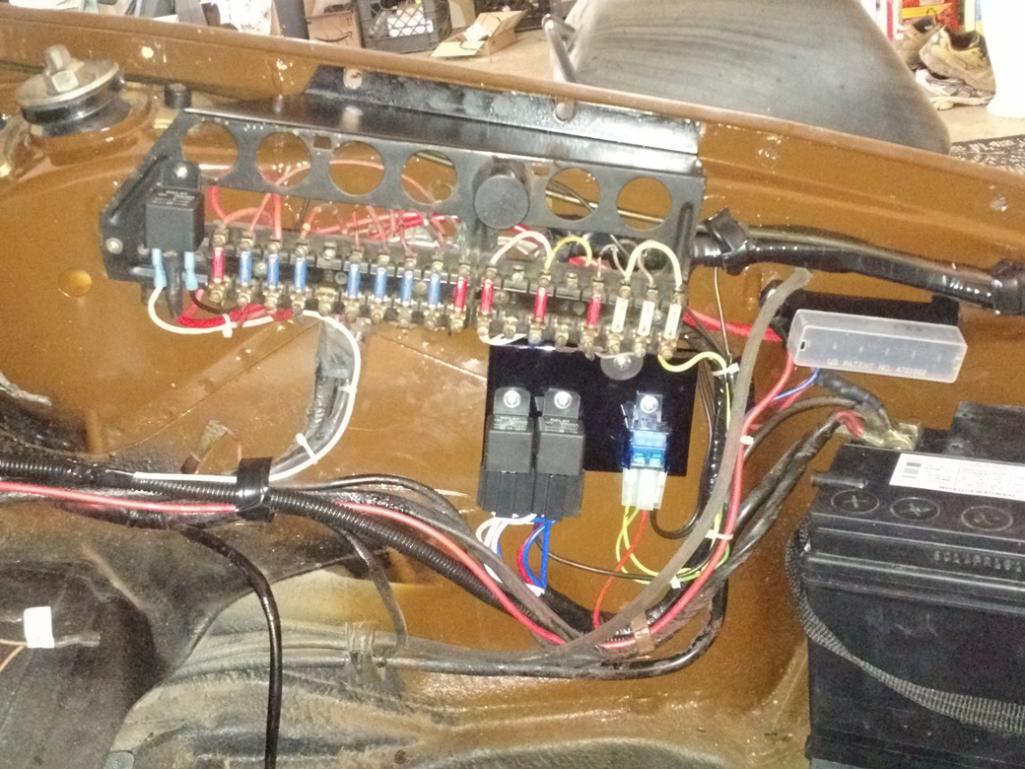
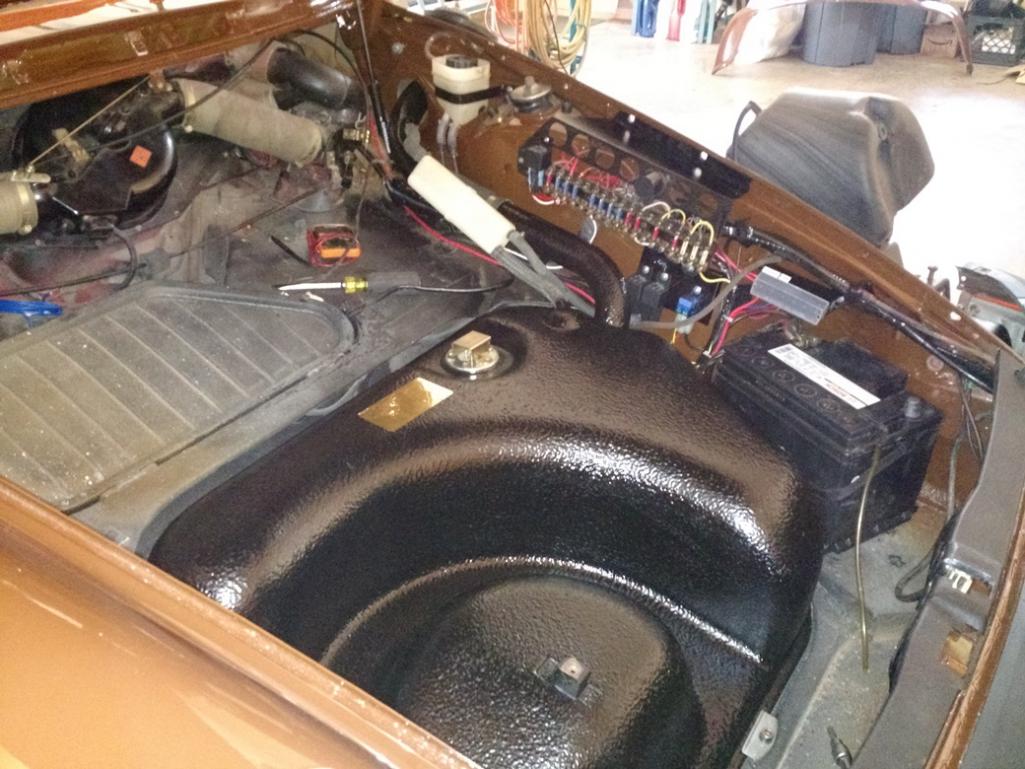
Highbeams and Fogs. Who needs HID?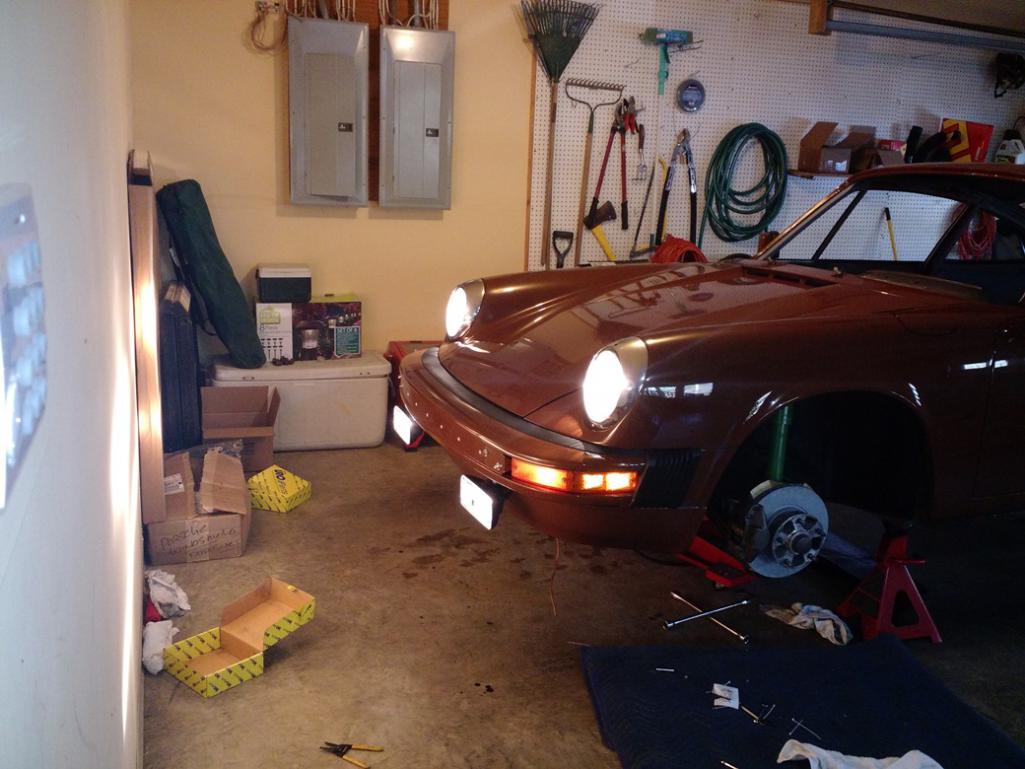
Some looks at the 90% assembled Body. Not thrilled with the taillights or center reflector, but they are OK. I rehabbed both, glued, polished/painted, and replaced the side reflectors. Eventually will go for new, just needed to save $$. They are functional. I will probably repaint the tail light trim satin black as well as the reflector, the gloss black and silver just don't work. I do LOVE the silver accents on the engine grill though.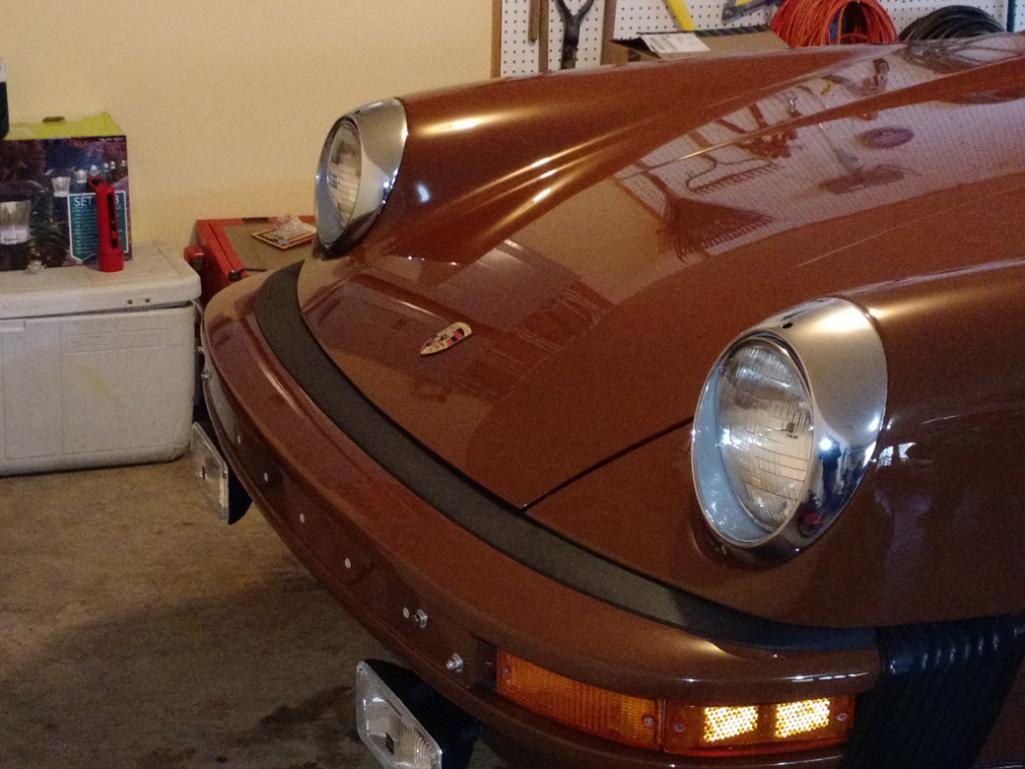
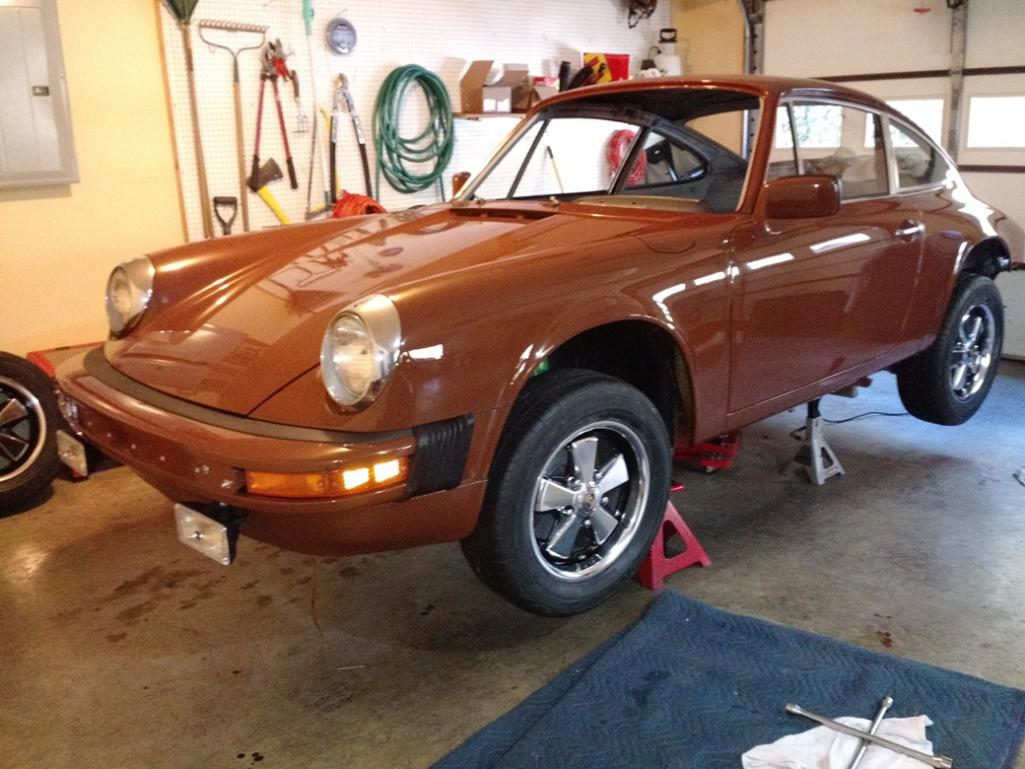
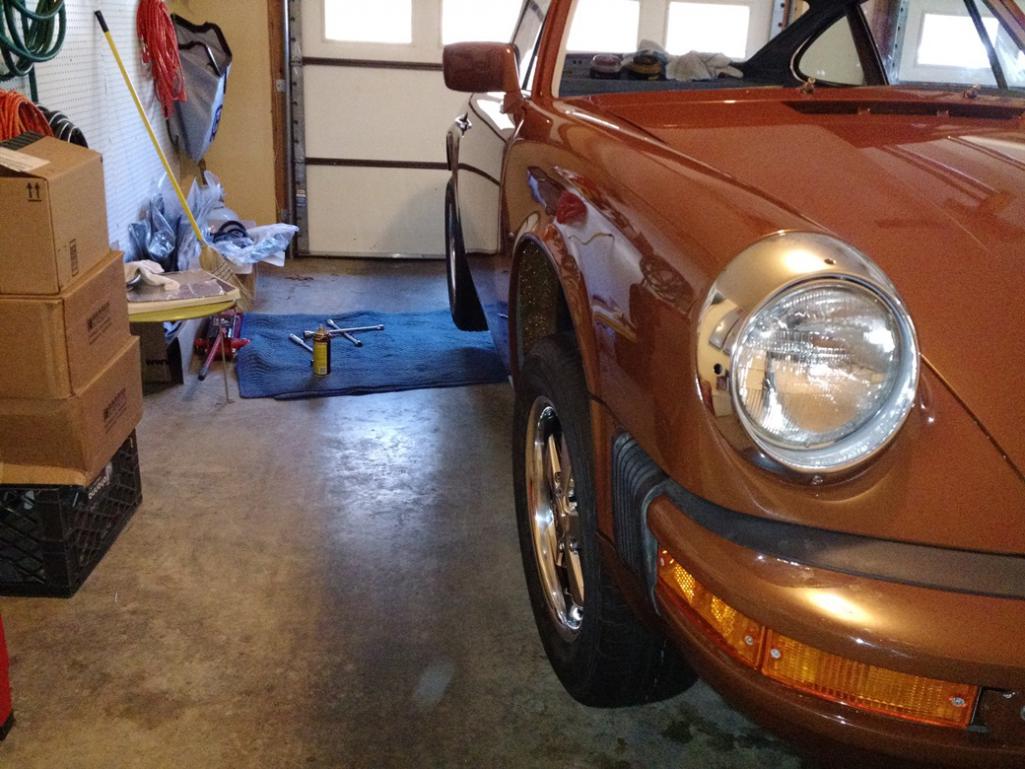
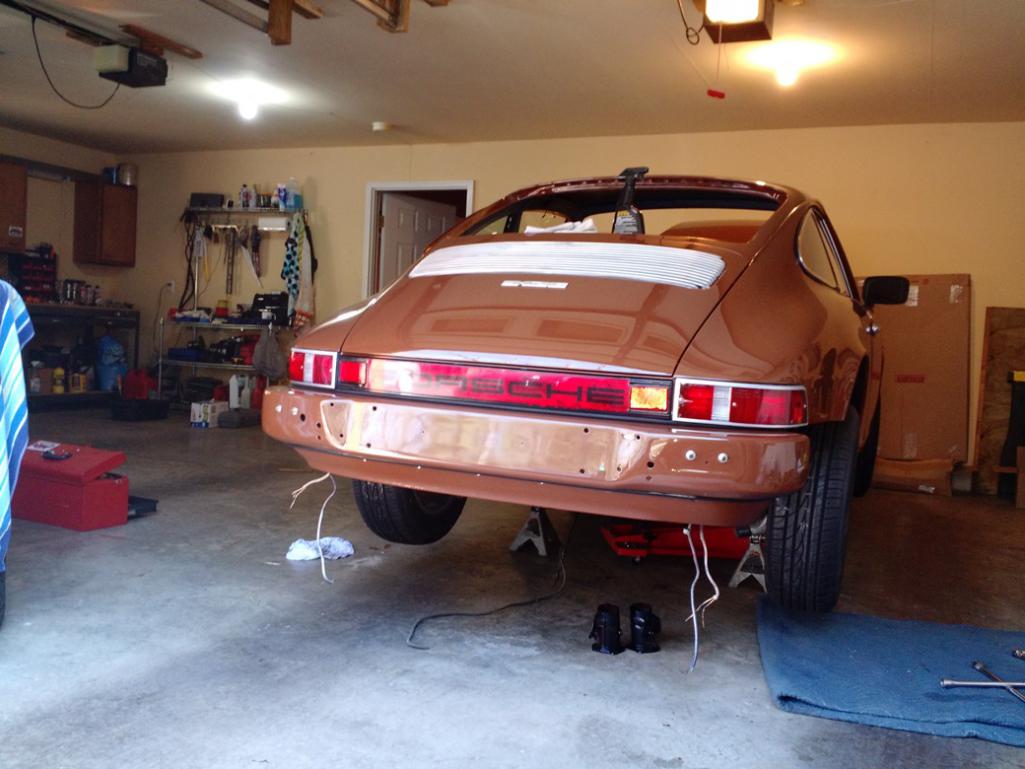
And finally a pic of my dad, who did a great job, detailing, cleaning and keeping me sane ;-) We really had a great week. Built a Porsche, Burnt Meat & Drank Beer......... 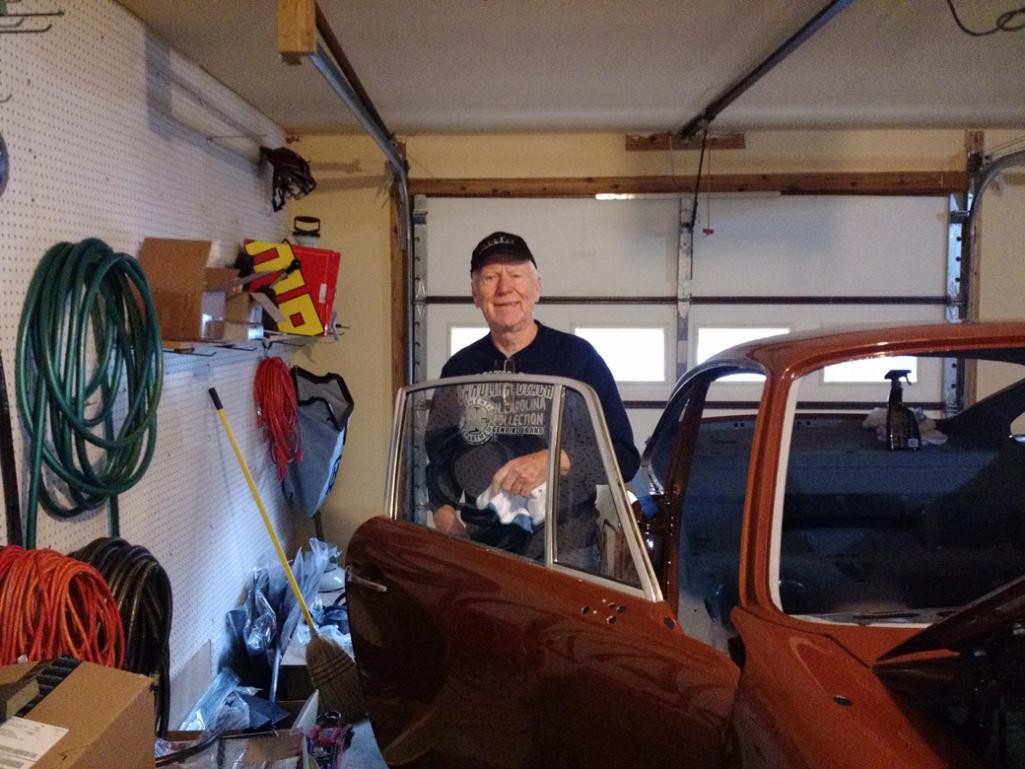
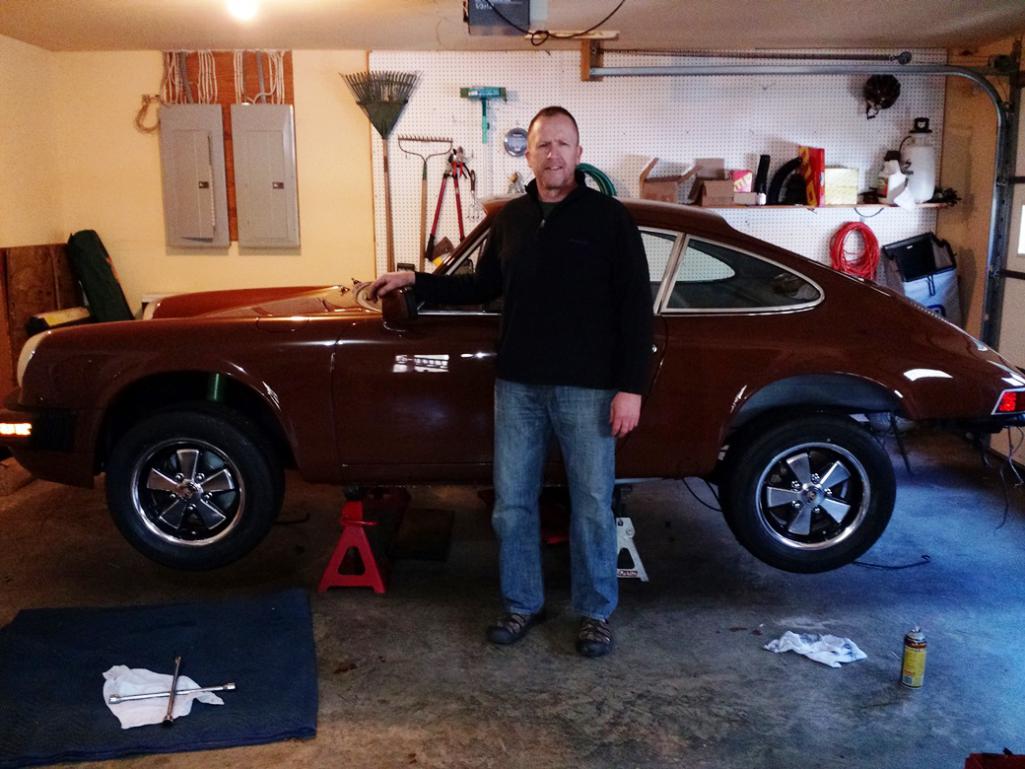
Posted by: Steve Pratel Mar 30 2015, 05:09 PM
Not to neglect the engine, this week I found the wiring harness clips and coil mount, so I painted them up and installed today.....
Attached thumbnail(s)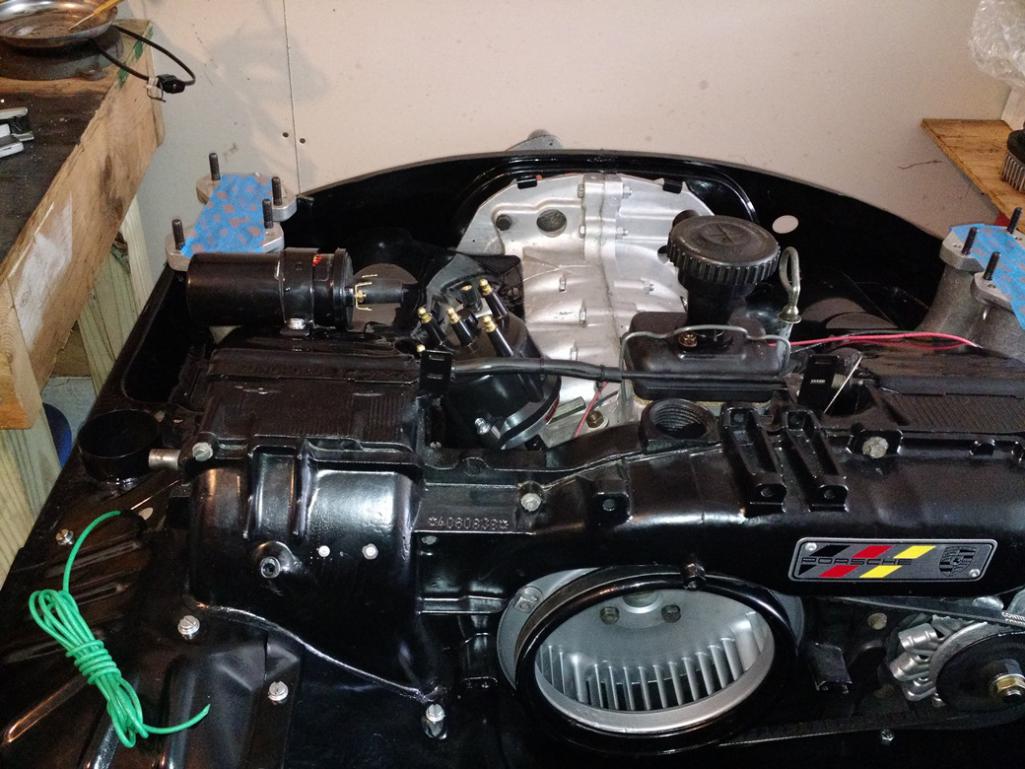
Posted by: euro911 Mar 30 2015, 05:36 PM
It's really cool that your dad is involved in your project
I lost my dad 29 years ago - we had plans to travel the country to find and restore some classic cars.
Posted by: billh1963 Mar 30 2015, 05:44 PM
Nice progress! Who will be installing your windshield and trim?
Posted by: FourBlades Mar 30 2015, 08:35 PM
This is a great thread, keep it going!
Really nice car.
John
Posted by: Dave_Darling Mar 30 2015, 08:48 PM
When I disassembled the doors I did a tutorial ...
I have a thread on the Pelican 911 BBS detailing door panel removal, disassembly, etc. Another one on the electric window mechanism clock-spring as well. I wrote those up after fixing the wife's 82 SC.
--DD
Posted by: rosenfe Mar 30 2015, 10:08 PM
dave where on 911bbs do i find your writeup on door?
Posted by: Steve Pratel Mar 31 2015, 11:06 AM
Nice progress! Who will be installing your windshield and trim?
Scotty B
Posted by: rick 918-S Mar 31 2015, 11:45 AM
What does your engine bar look like?
Posted by: Steve Pratel Mar 31 2015, 07:18 PM
What does your engine bar look like?
This isn't my bar, but this is what it looks like. The 912E uses the same transmission mounts as teh 911 but the engine mounts are different, there is a U bracket on the bottom of the frame rail that the bar mounts to.
Attached image(s)
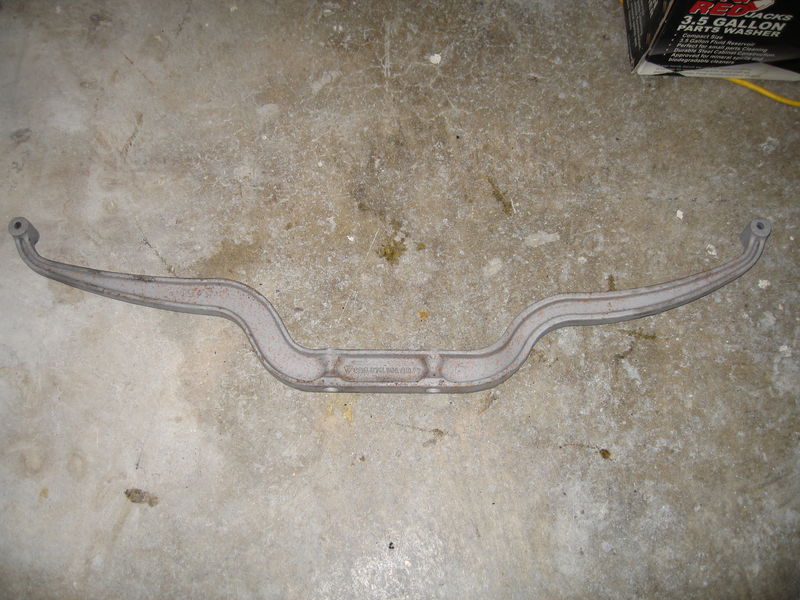
Posted by: rick 918-S Mar 31 2015, 09:13 PM
Thanks for posting that. We picked up a 69 912 and are doing the Type IV. We have 912E tin. That bar looks easy enough. I though about adapting a 911 bar to the Type IV. But that looks easier to fab.
Posted by: euro911 Mar 31 2015, 09:39 PM
Rick, I think Mark DeBernardi still sells body mounts for the 912 T-4 conversion. Might save you some time.
Posted by: rick 918-S Mar 31 2015, 09:42 PM
Rick, I think Mark DeBernardi still sells body mounts for the 912 T-4 conversion. Might save you some time.
I'll see him next month...Car is coming along nice Steve!
Posted by: Dave_Darling Mar 31 2015, 10:05 PM
dave where on 911bbs do i find your writeup on door?
http://forums.pelicanparts.com/porsche-911-technical-forum/640105-daves-adventures-door-panels.html
http://forums.pelicanparts.com/porsche-911-technical-forum/641017-daves-adventures-window-regulators.html
--DD
Posted by: Steve Pratel May 8 2015, 02:39 PM
Finally got the car off jackstands, and ready to head back to Scotty B for front and rear windshields and headliner.
Attached thumbnail(s)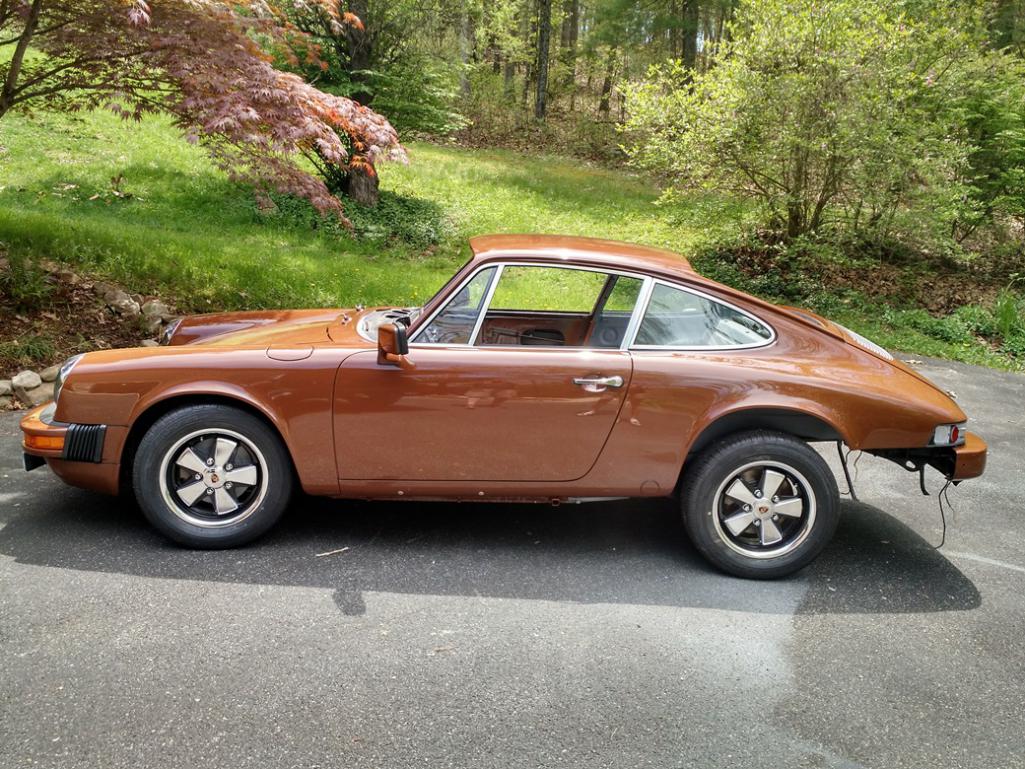
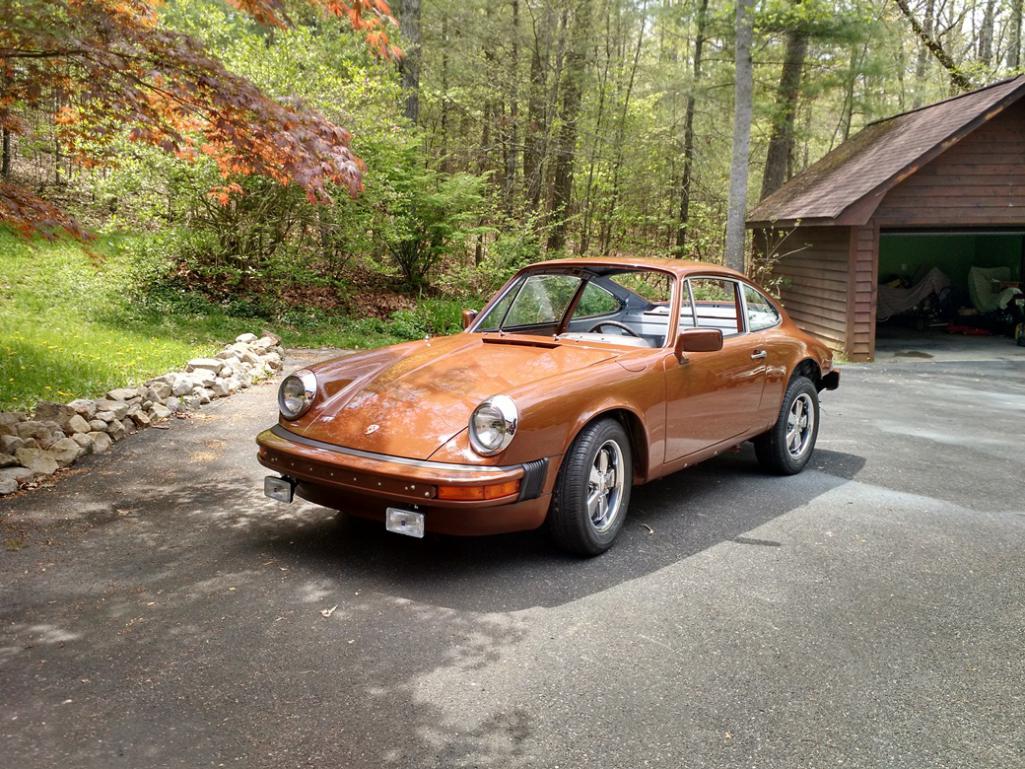
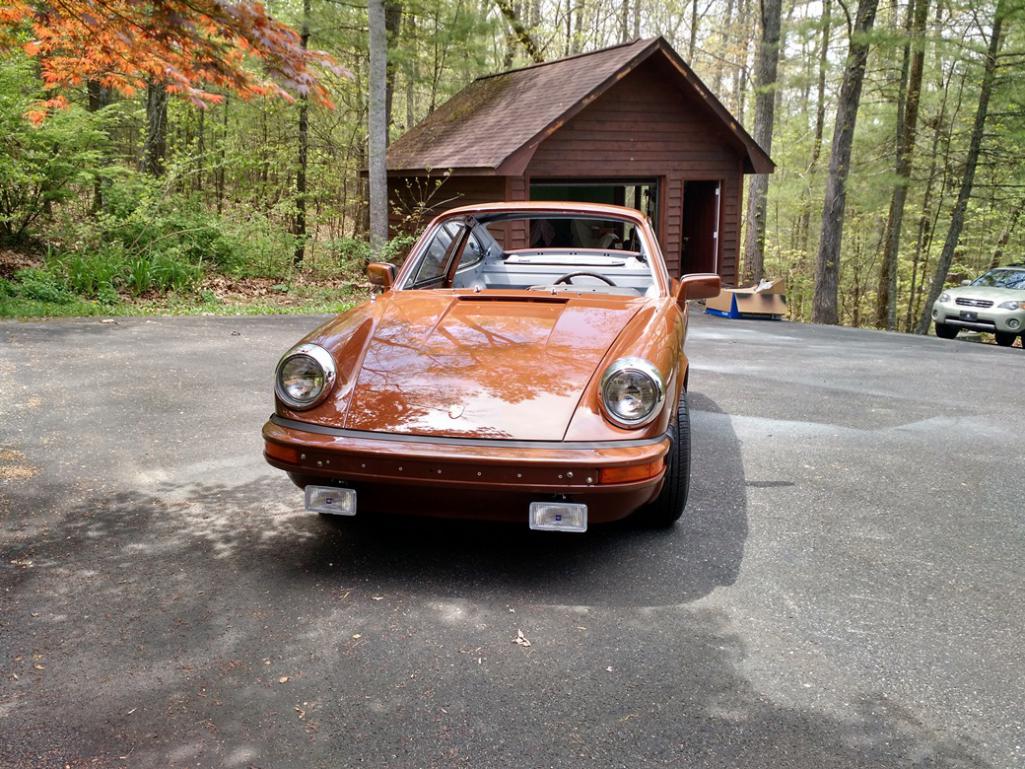
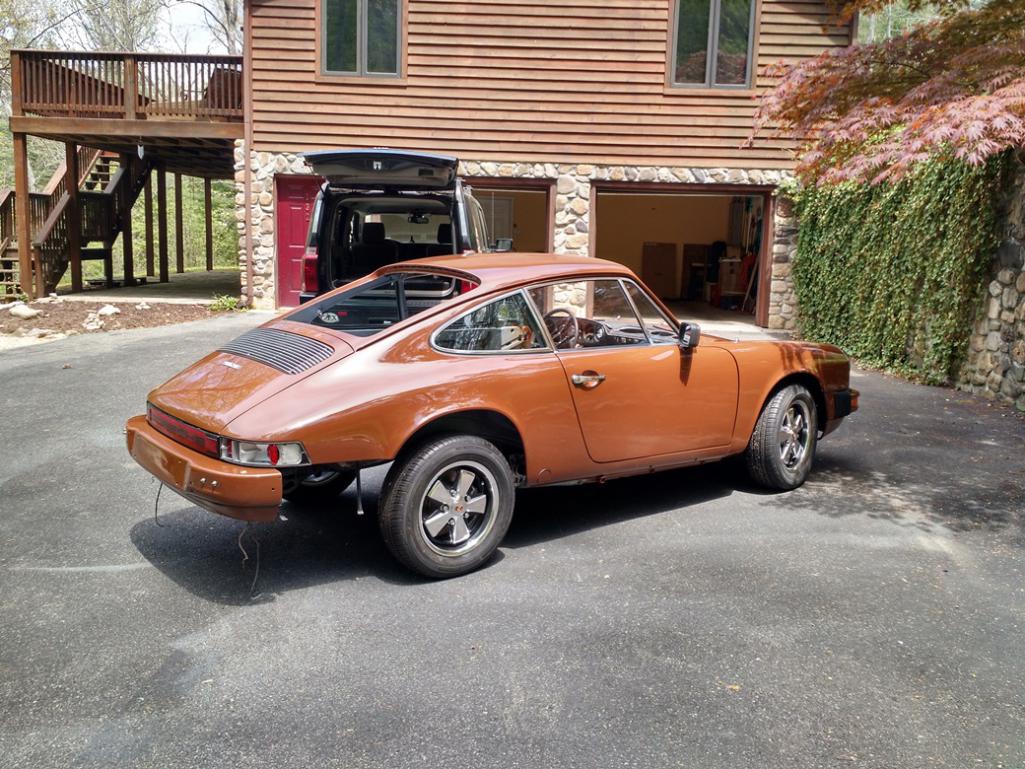
Posted by: Steve Pratel Jun 9 2015, 04:45 PM
Progress has slowed a bit, but moving.
The car is getting some love, painting the gauge surround, installing A & B pillar Vinyl, dash, headliner and front/rear windscreens.
I upgraded the window seals to OEM/Porsche got great deals from FCP Euro and ECS TUning if anyone is looking for them. And alas, I added two more things to my long list of new parts I'm not using..... Ah the folly of the unwashed.
Filled the Tranny with Gear Oil today, and a few other house keeping issues before I connect it to the motor and install it in the car net week. After reading way too much, I decided to go for a standard dead dino 75/90 gear oil. I have NO idea what this trans mission is like or even if it has a problem. Once I drive it a bit and get a feel for how the syncros are, I may change it, but mostly think the $30/bottle snake oil is just snake oil.
The engine as it sits, I'm not going to put the carbs on until after it is in the car. Painters tape over openings and over the studs. 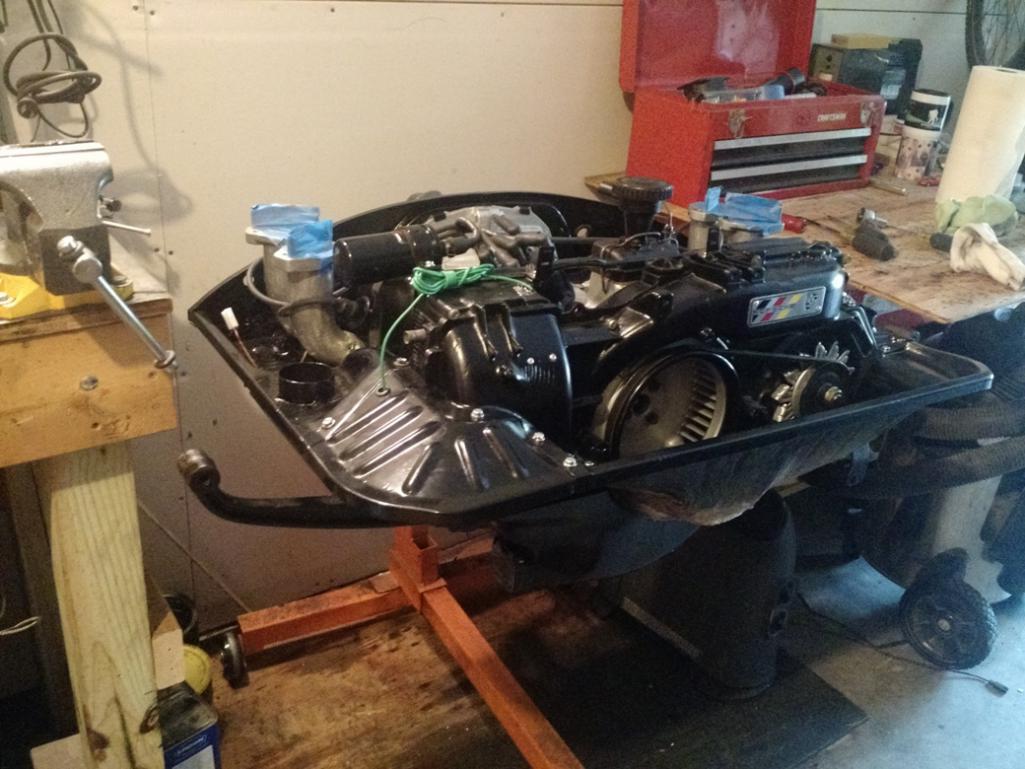
Transmission on the bench for fluid fill. 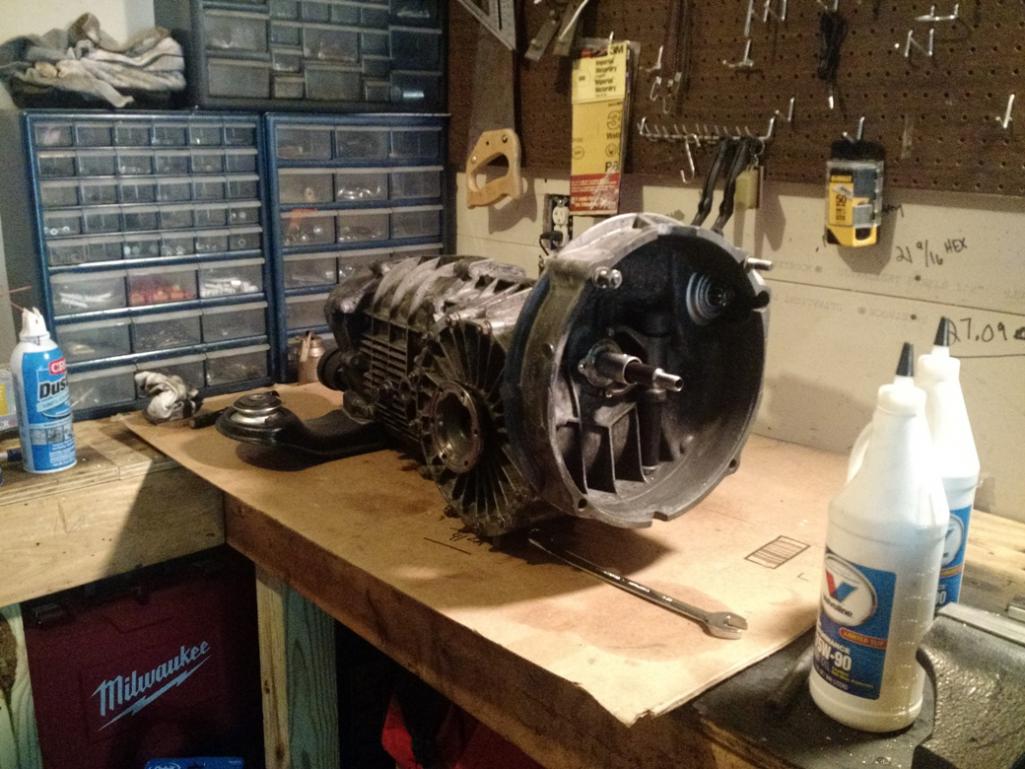
Posted by: Steve Pratel Jul 25 2015, 01:33 PM
Well, after getting the car back from Scotty B who installed a new headliner and front/rear glass, I hung the motor, and towed #770 cross country without issue (other than 3 of 5 days being rain.....) Been doing a few odds and ends, and while test fitting the carbs and air filters I discovered that the old air filter platform had to be removed to fit the carbs, and also that the ITG and Tall CB Performance filters will not clear the trunk lid arms.... Fun times. A few other fitment issues, but working on them.
Anyone have experience with this? I don't remember seeing any issues with either having to cut off the FI air filter platform.
Here are a few pics of the Trailer Ride across country.
The Halfway Point, Sioux falls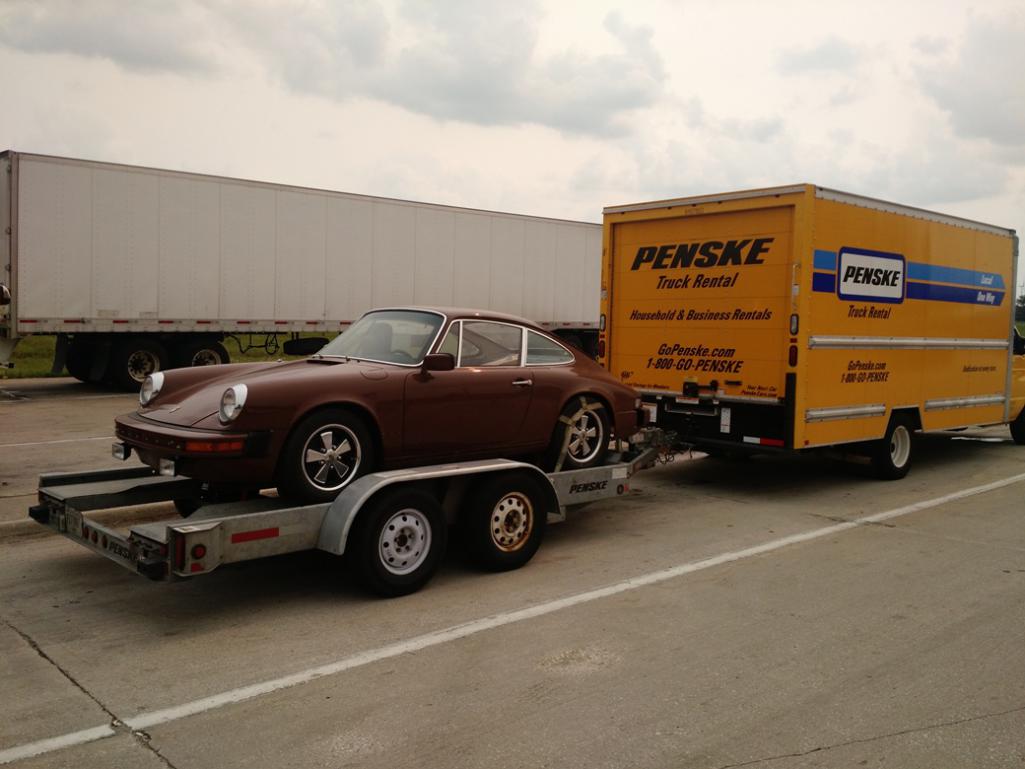
Stopped at the Badlands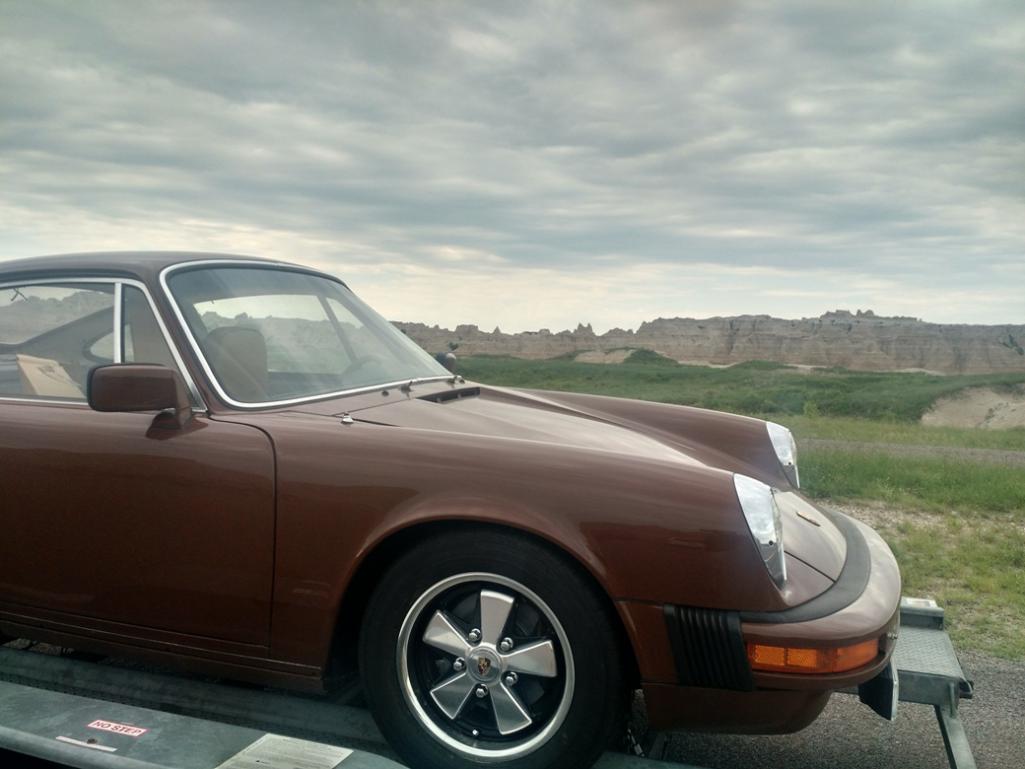
Arrived at Joint Base Lewis McChord
Overall the car traveled well. I wasn't thrilled with all the rain, but it was a good test of weatherproofing. I did tape stuff and cover the intakes, Dizzy and tailpipe with a ziplock bag, so hopefully kept any water out.
Attached image(s)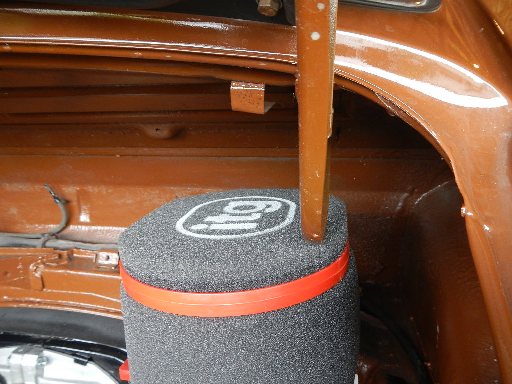

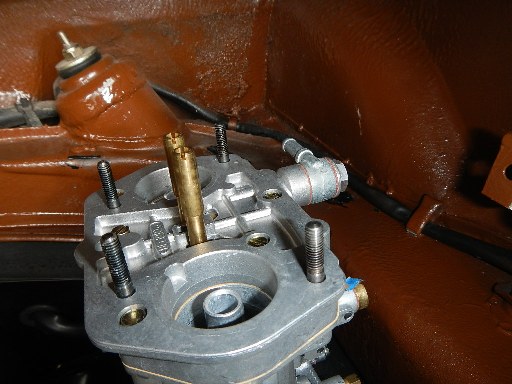
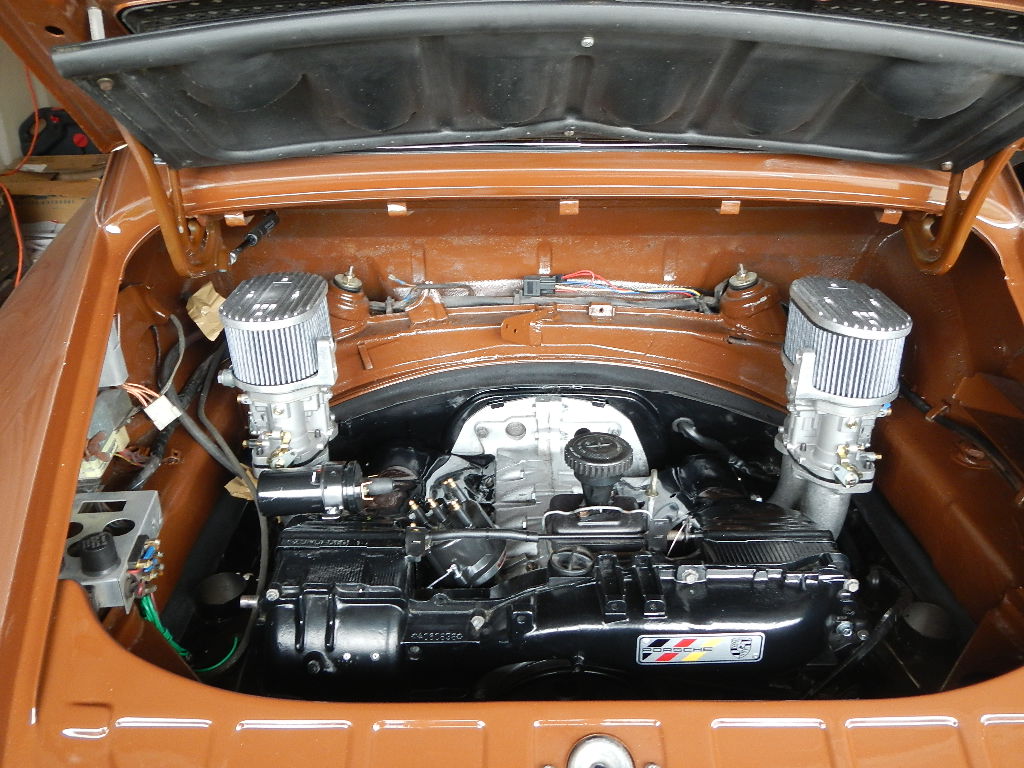
Posted by: Maltese Falcon Jul 25 2015, 02:56 PM
Try
S+B Filters
Ontario, California.
They make/stock many shapes + sizes, all with high flow washable cotton filter material.
Keep your base and tops, just drop your dimension in the filter height.
Marty
Posted by: saigon71 Jul 25 2015, 05:11 PM
It's coming together nicely Steve!
You will be very soon.
Posted by: euro911 Jul 25 2015, 09:33 PM
Intake manifolds come in different widths too. See if you can find a set of them.
It looks like an inch on each side just might do the trick
Posted by: maf914 Jul 26 2015, 06:11 AM
There are some shorter dual throat Webber manifolds out there, but I am not sure who may have them today. The CB style now seem to be the standard for type 4 applications. I bought a pair of short manifolds from PMO many years ago, when they used to advertise 914 Type 4 Webber carb kits in the PCA Panorama magazine. I don't know if PMO still deals with Type 4 carbs, but if you want to try a shorter manifold you might contact them and ask if the short manifolds are still available or who made them.
Posted by: rhodyguy Jul 26 2015, 07:26 AM
what are those 6"+/- tall filters?
Posted by: Steve Pratel Jul 26 2015, 06:04 PM
what are those 6"+/- tall filters?
I got them from Chris at Tangerine Racing.
Posted by: euro911 Jul 27 2015, 02:17 AM
I'll keep my eyes open for any spare manifolds while I'm packing up my shop, but I think I may have already sold off all of them.
A few years ago I bought an engine with intakes and carbs, but no throttle crossbar. I had a spare crossbar but it was too short - by at least 2 inches. I installed a narrower set of manifolds and all was well. I don't know who made either set of manifolds, they didn't have any brand markings
You might give George at European Motor Works (EMW) a call to explain your dilemma and see what's available. A lot of the parts that retail shops sell come from EMW (310 644-8038)
Posted by: Racer Chris Jul 27 2015, 08:13 AM
There are shorter manifolds. I've also seen ones which go up straighter so the filters would be closer to the engine centerline.
The ones I usually work with are what Pierce Manifolds sells.
I can get ITG filters 1 1/2 inches shorter.
The fuel inlet interfering with the air cleaner mounting plate is something I haven't seen. Your inlets are different. A spacer plate would solve that.
Posted by: Racer Chris Jul 27 2015, 08:13 AM
what are those 6"+/- tall filters?
They're 100mm.
Posted by: Steve Pratel Jul 29 2015, 12:06 AM
There are shorter manifolds. I've also seen ones which go up straighter so the filters would be closer to the engine centerline.
The ones I usually work with are what Pierce Manifolds sells.
I can get ITG filters 1 1/2 inches shorter.
The fuel inlet interfering with the air cleaner mounting plate is something I haven't seen. Your inlets are different. A spacer plate would solve that.
Thanks Chris, that should work, but hold off a bit. I will measure tomorrow to make sure that will be enough. I just looked at the Pierce Manifold site, does anyone know the height/spacing of those manifolds? I got these manifolds with the Carbs. Ah the joy of customizing........
Posted by: maf914 Jul 30 2015, 08:20 AM
I was recently browsing Aircooledtechguy's build thread and came across these photos of his shortening a pair of manifolds. This build thread is full of great tech ideas and procedures. Thanks for sharing Nate.
http://www.914world.com/bbs2/index.php?showtopic=160739&st=200
Attached image(s)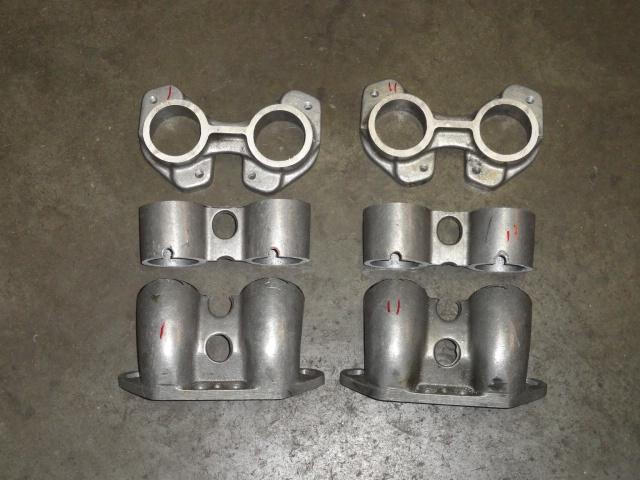
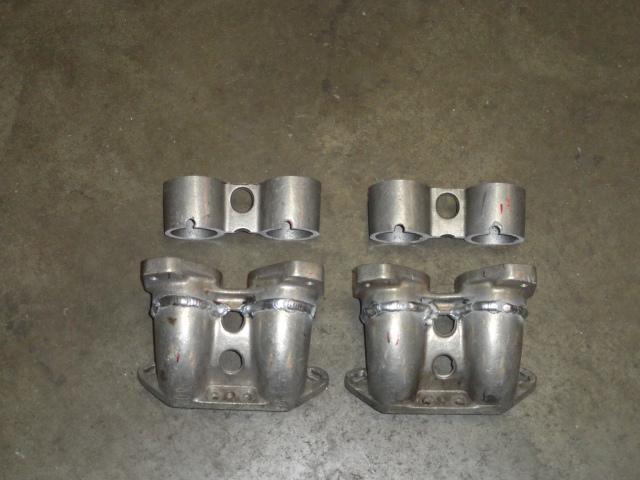
Posted by: Racer Chris Jul 30 2015, 11:17 AM
I shortened a set of PMO manifolds for my race car.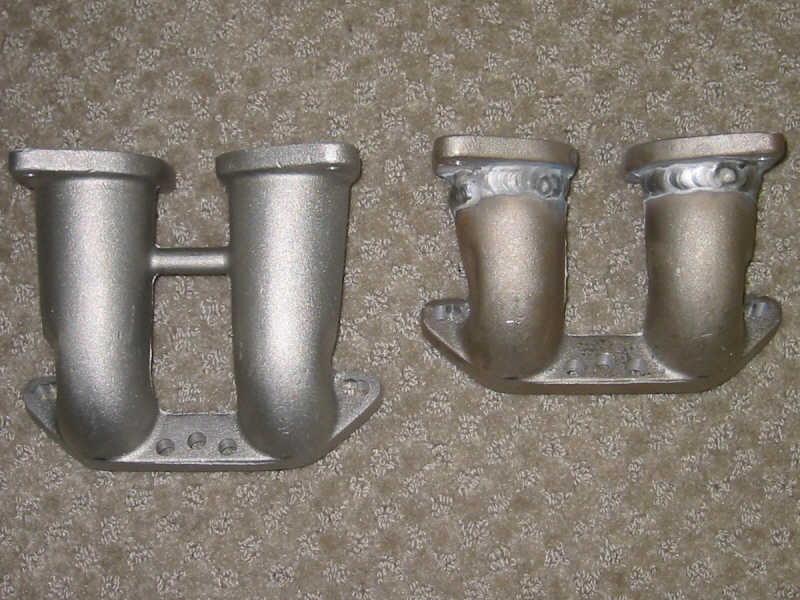
Posted by: Steve Pratel Aug 8 2015, 09:59 PM
sheet summa a beech................... I diddnt know the windshield wipers are reversed on this car.................. yeah, bolted them up today, had them pulled up turned on to test and promptly gouged the paint.............. I think I scared my neighbors with my NY inspired flood of language................ Pissed beyond words.........
I also finalized my aux fan system. Pushes about as much air as the stock system. Began sorting out the rear fuse box and wiring harness as well as did a wiring harness and ran wires for the new sensors (CHT, Oil Pressure, AAFM) and the starter relay.
Turns out the little black relays aren't working, they click, but don't send power out. Is this a common type of failure?
On another note, the Headlight switch also freaked out today, suddenly out of the blue, the dimmer for the dash lights turns the headlights on and off.... lol. The only thing that I did was install the gauges, not sure if that would cause a circuit to loop back and cause this. Will recheck tomorrow. OY
Attached thumbnail(s)

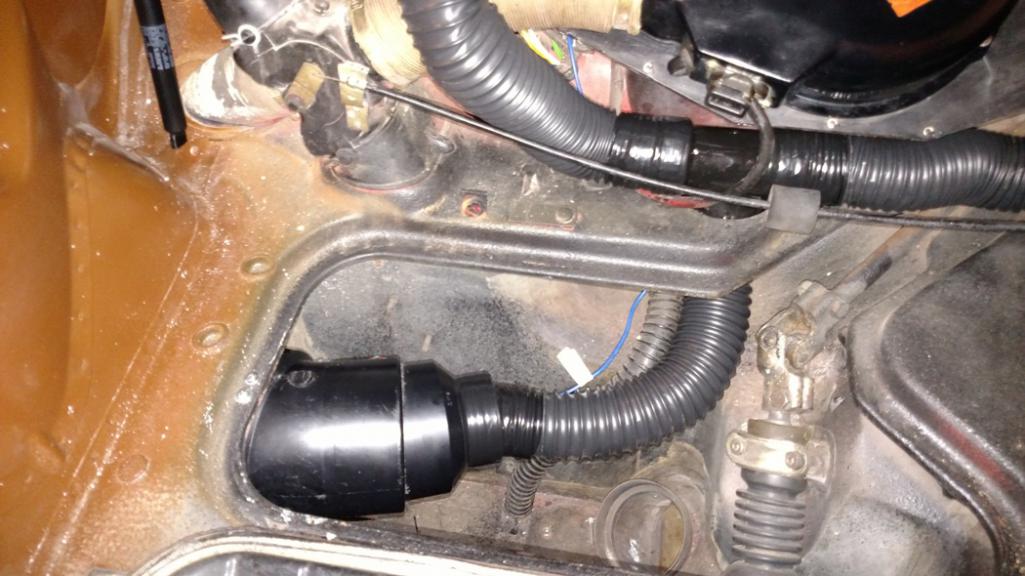

Posted by: Dave_Darling Aug 8 2015, 10:55 PM
Not really.
You can test them with a battery and a multimeter. Check for continuity between pins 30 and 87a when no power is connected to the other pins. You should have it. Then apply +12V to pin 85 and ground to pin 86. There should no longer be continuity between 30 and 87a; instead it should be between 30 and 87. (You can swap power and ground between 85 and 86 and get the same result.)
If either one of those fails, then the relay really is borked. You can often pop the plastic cap off the base to look at the insides--it is just an electromagnet and a switch. When current flows between 85 and 86, the magnet pulls the switch so it bridges from 30 to 87, when the current isn't flowing between 85 and 86, there's a spring that pulls the contact form 30 over to 87a.
--DD
Posted by: zambezi Aug 9 2015, 02:51 PM
Sorry about the paint. This very reason is why I test out the wipers on cars I restore by using a "flag" of tape wrapped around the shaft before mounting the arms and blades. By doing this I can test the speeds and park position without running them dry on the windshield and it also prevents the problem you have.
Posted by: Steve Pratel Aug 15 2015, 05:53 PM
Thanks Dave, I confirmed that the relay is good, as is the power circuit to activate the relay. The issue is no power at 30, so I need to track that down. So far it is the only circuit with no power. There is also no power at the fuse, so I need to pull the panel off and look, but want to check wiring from the front, not sure if this is a direct to the battery of front fuse box.
** Edit, figured it out, the power feed to the rear fan comes from a wire connected to the alternator. I went out, connected all the wires under the car, alternator, starter, starter relay and WALLAH...........
Not really.
You can test them with a battery and a multimeter. Check for continuity between pins 30 and 87a when no power is connected to the other pins. You should have it. Then apply +12V to pin 85 and ground to pin 86. There should no longer be continuity between 30 and 87a; instead it should be between 30 and 87. (You can swap power and ground between 85 and 86 and get the same result.)
If either one of those fails, then the relay really is borked. You can often pop the plastic cap off the base to look at the insides--it is just an electromagnet and a switch. When current flows between 85 and 86, the magnet pulls the switch so it bridges from 30 to 87, when the current isn't flowing between 85 and 86, there's a spring that pulls the contact form 30 over to 87a.
--DD
Posted by: Steve Pratel Aug 19 2015, 10:52 PM
Gents, I hope to wrap up the gauge wiring and tangerine cable throttle linkage this weekend, then prime the oil system and install the upper valve train.
A few pics of engine compartment and throttle cable install.
A few Electrical Q's.
1. Now that I have gone to carbs and eliminated the FI brain, What is the best way to run power to the fuel pump, just a switched power feed?
2. I did up a diagram to illustrate the Pertronix install, but have a question about grounding the coil. Nothing I could find in the pertronix instructions said anything about grounding the negative lead of the coil, but to connect the black wire from the module. My GUESS is that the module and coil are grounded by the distributor and the wire between the two accomplishes this. YES? NO? I'd prefer to do a direct ground for the coil just for power supply, but......
Attached thumbnail(s)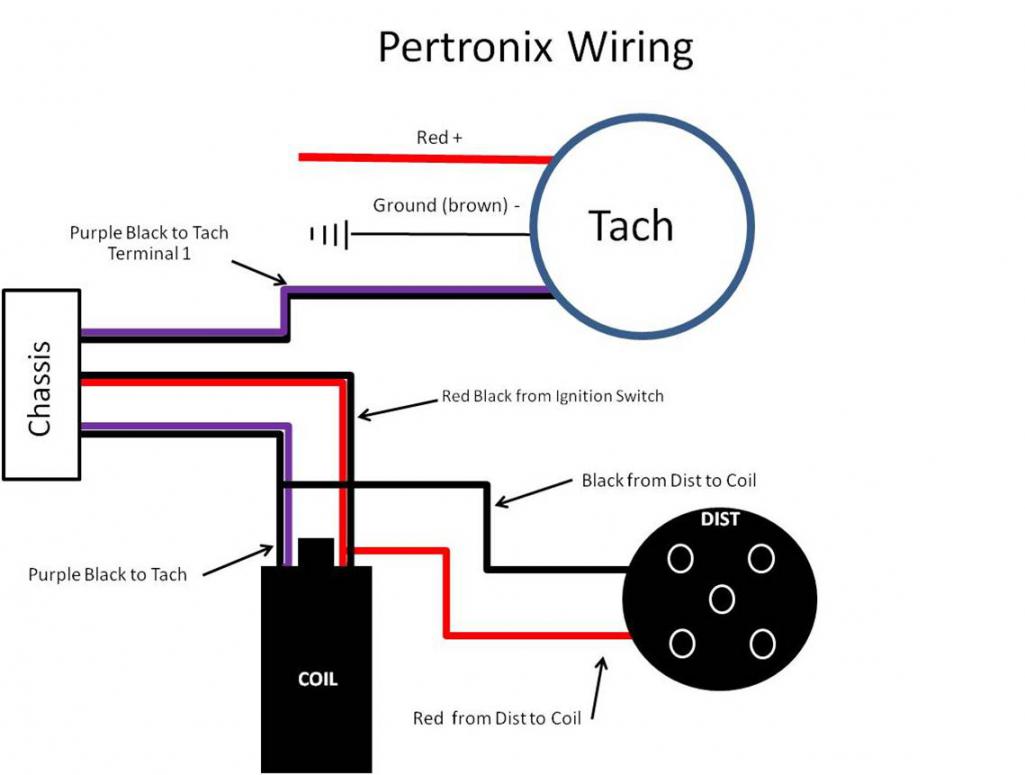
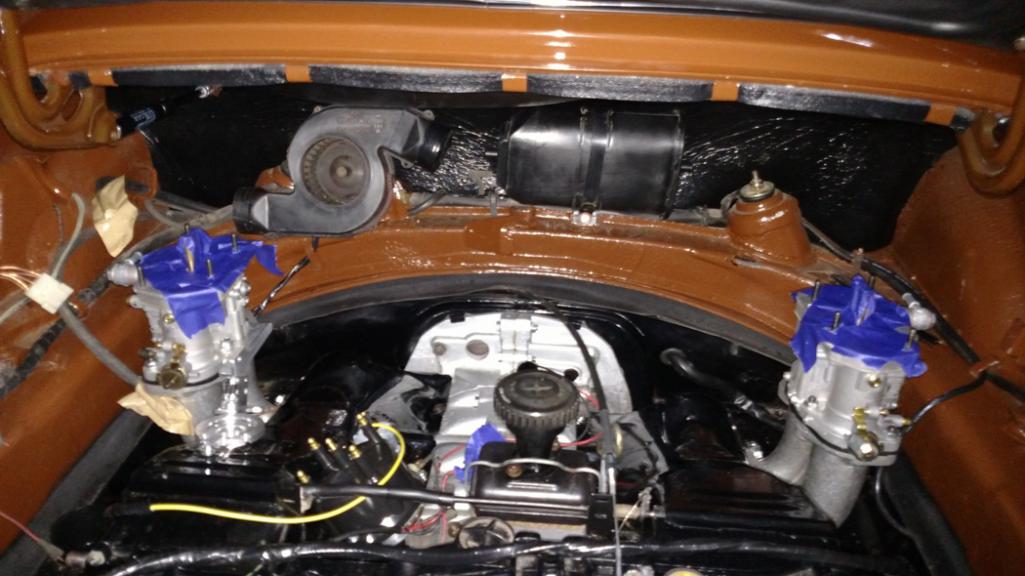
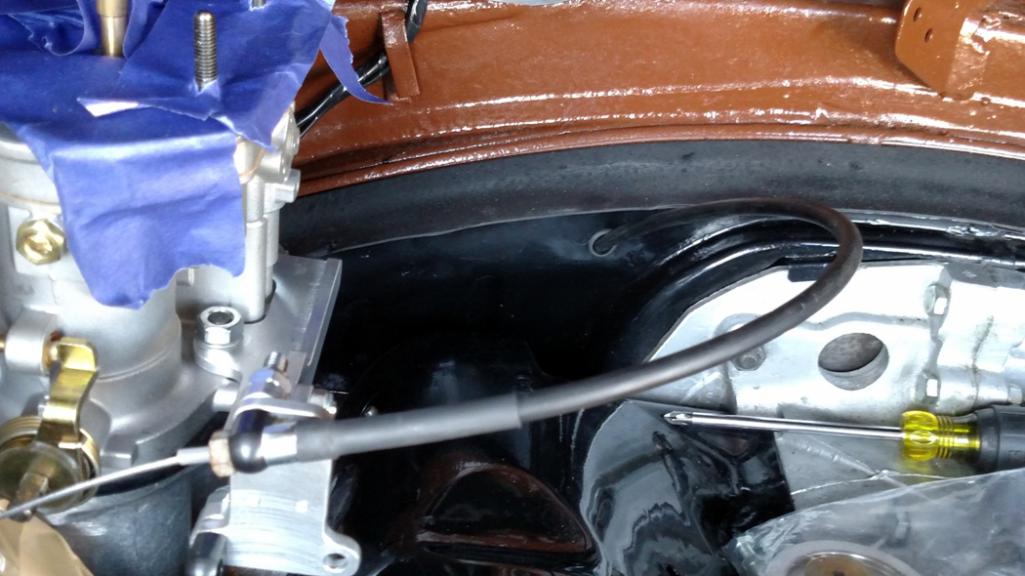

Posted by: Dave_Darling Aug 20 2015, 09:12 AM
Do not ground the coil directly!! It grounds through the points, or in this case through the Pertronix. (The other circuit in the coil grounds through the spark plugs.)
Sir Andy did a write-up on adding a jumper to one of the pins in the four-pin connector on the relay board so that the fuel pump relay would power the pump when you are running carbs. It's an old thread, but a search should turn it up.
AFAIK, there are no power wires that come off the alternator. Just the one large-ish red wire from the starter, which shares a stud with the fat battery (+) cable. There would be several wires attached to the battery end of that cable, on the terminal that fits around the battery post. Sounds like someone has replaced the cable at some point (not the worst idea!) and hooked one of the power wires to the alternator. Which is a bit odd.
--DD
Posted by: Steve Pratel Aug 21 2015, 09:00 AM
Thanks Dave, that's what I thought, but wasn't sure that the lead from the module could carry enough current for the coil.
I'll look up that thread on the jumper. I may just power the fuel pump off the switched acc relay I installed in the front, seems silly to run power from the front to the back to run it all the way to the front again. I'd like to retain the stock wiring as much as possible,
Do not ground the coil directly!! It grounds through the points, or in this case through the Pertronix. (The other circuit in the coil grounds through the spark plugs.)
Sir Andy did a write-up on adding a jumper to one of the pins in the four-pin connector on the relay board so that the fuel pump relay would power the pump when you are running carbs. It's an old thread, but a search should turn it up.
AFAIK, there are no power wires that come off the alternator. Just the one large-ish red wire from the starter, which shares a stud with the fat battery (+) cable. There would be several wires attached to the battery end of that cable, on the terminal that fits around the battery post. Sounds like someone has replaced the cable at some point (not the worst idea!) and hooked one of the power wires to the alternator. Which is a bit odd.
--DD
Posted by: Steve Pratel Aug 24 2015, 01:31 AM
Well, I finally got all the upper gauges wired in properly, new gauge and indicator lights, everything seems to be working including the high beam and parking light indicators. Also installed the Momo.
Ran in to a few snafu's still need to work it out (maybe) for some reason the ground wire (ground) was energized with 12V when the key was on. This of course created all kinds of havoc, primarily activating the headlights when the dimmer was turned on, as well as the gauges acting funny. I traced the wire back into the dash and it looks like it runs down to a plug into a module? I just eliminated it and ran a fresh ground for the gauges and backlight.
So I now have in the upper dash Oil temp & pressure with oil and alt idiot lights from a 911, stock tach and stock speedo. I also removed the EGR light and put a fan switch (from a 911 AC system) for the new dash vents that bank the upper gauges.
Now I need to finish wiring in the lower gauges, to include a gas gauge, CYL head temp, clock (2"VDO) and a PLX Air Fuel/Volt meter. All the lower VDO gauges will be lit off the gauge lighting circuit including dimmer function, and LED indicators for the fog lights, low fuel and new aux fan. The PLX will come on with the ignition. Its not stock, and the purist may hate it, but I kinda like it
Dash almost complete with MOMO steering wheel
Good view of all gauges. I have the PLX mounted with EZpass style velcro, I moved it down a bit to be more center. 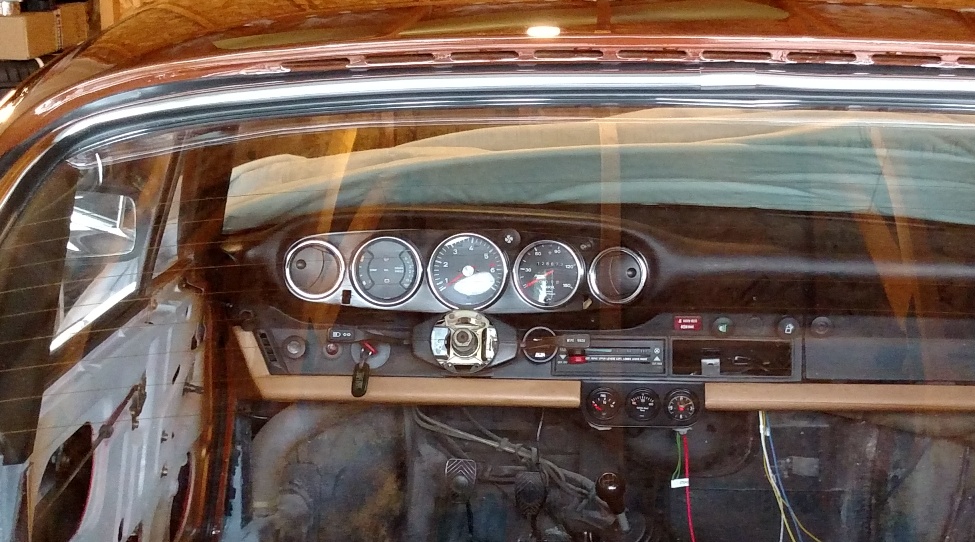
Here is the offending 12V ground wire, and some of the new wires I had to run, the yellow is the Oil Pressure, and green is new ground. I also had to run an eztra 12V switched lead for the double gauge. 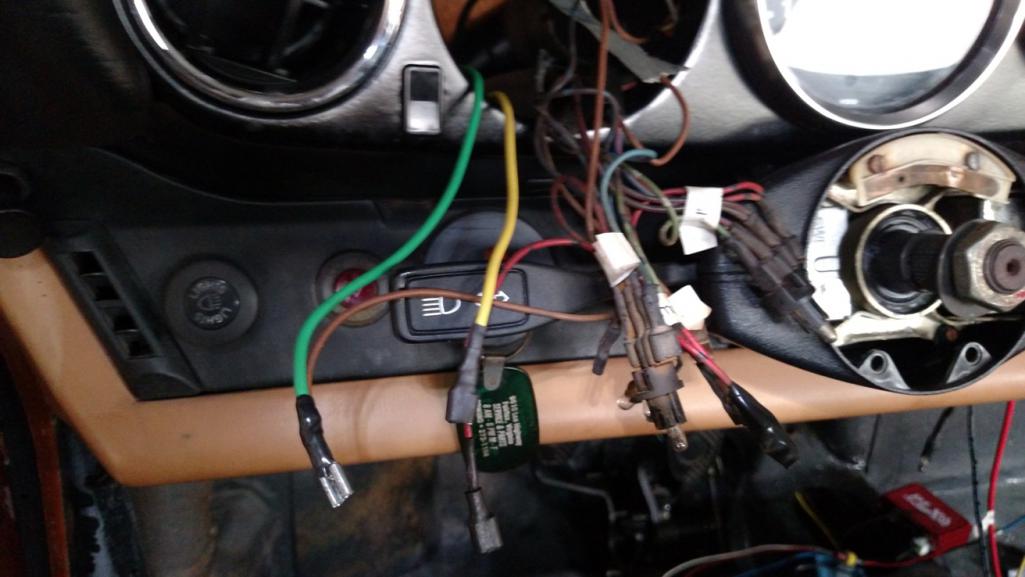
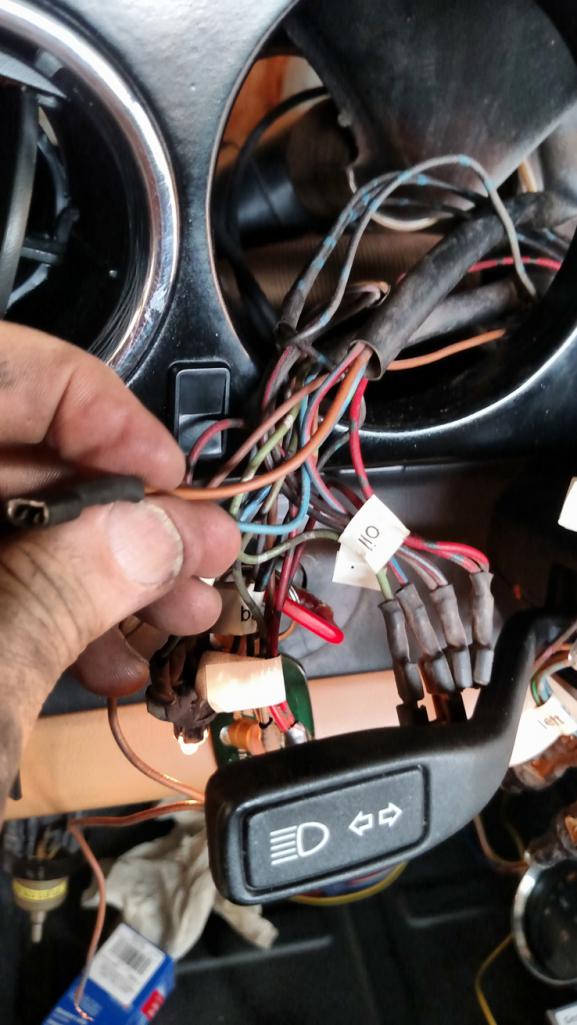
Posted by: Steve Pratel Sep 6 2015, 12:19 AM
Gauges and Dash done!
Attached thumbnail(s)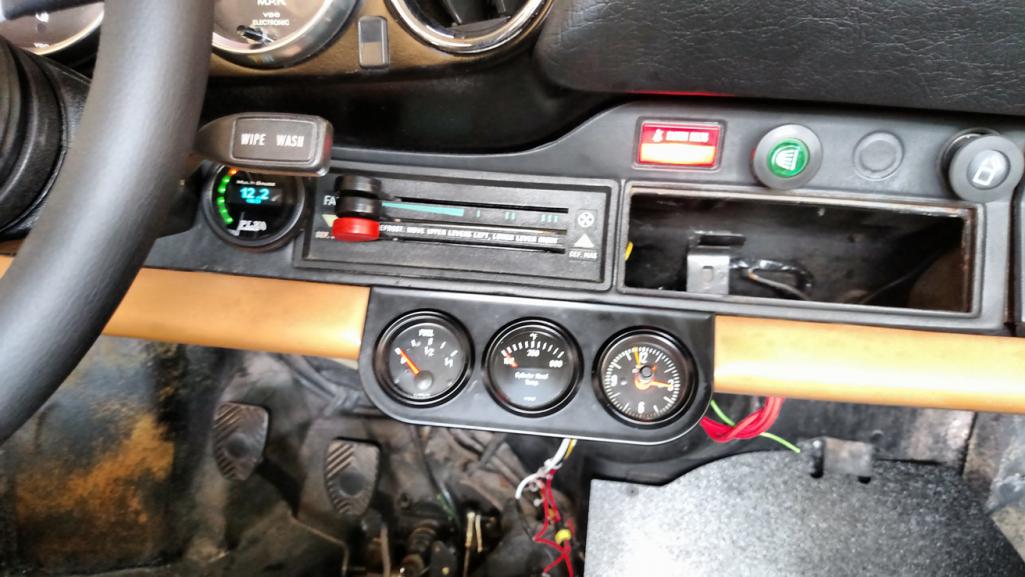
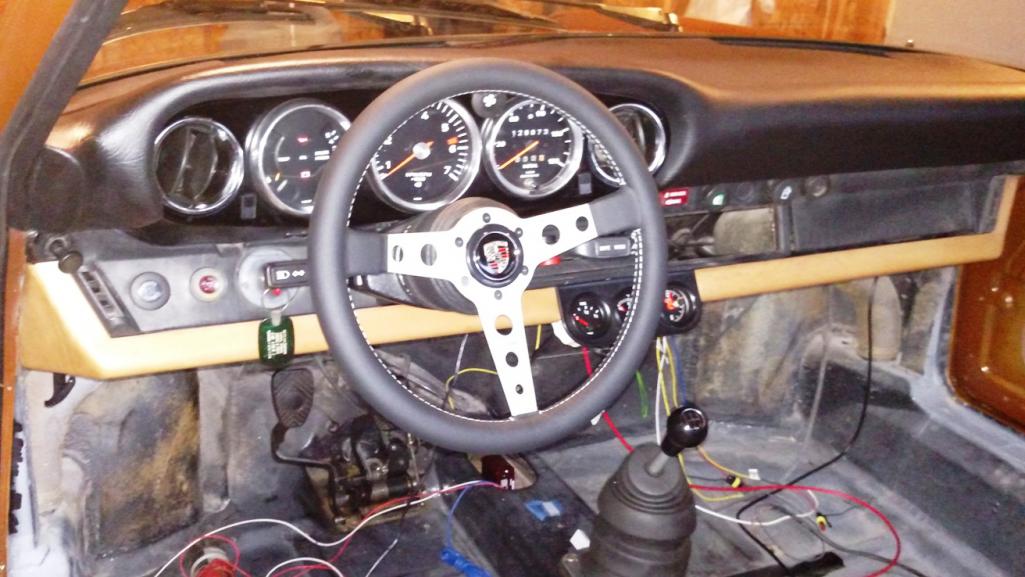
Posted by: Steve Pratel Sep 15 2015, 09:59 PM
Making Progress, finally rebuilt and installed the CV Joints and axle shafts, and wired in the 'hot start' starter relay, removed the spark plugs and test cranked the motor to prime the oil system and build oil pressure. Pays to use OEM parts, the adhesive on the CV basket was very welcome, and fit was perfect.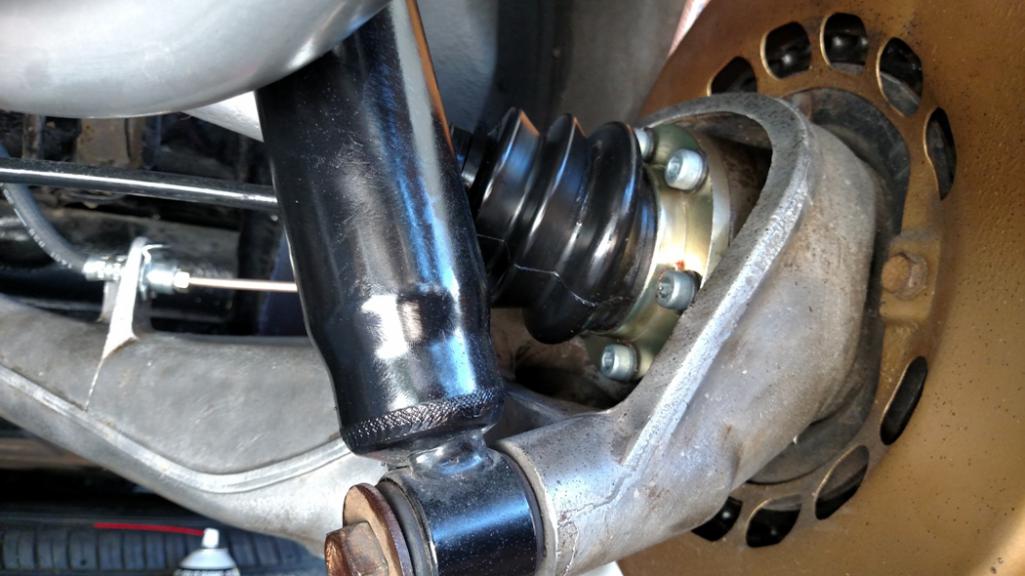
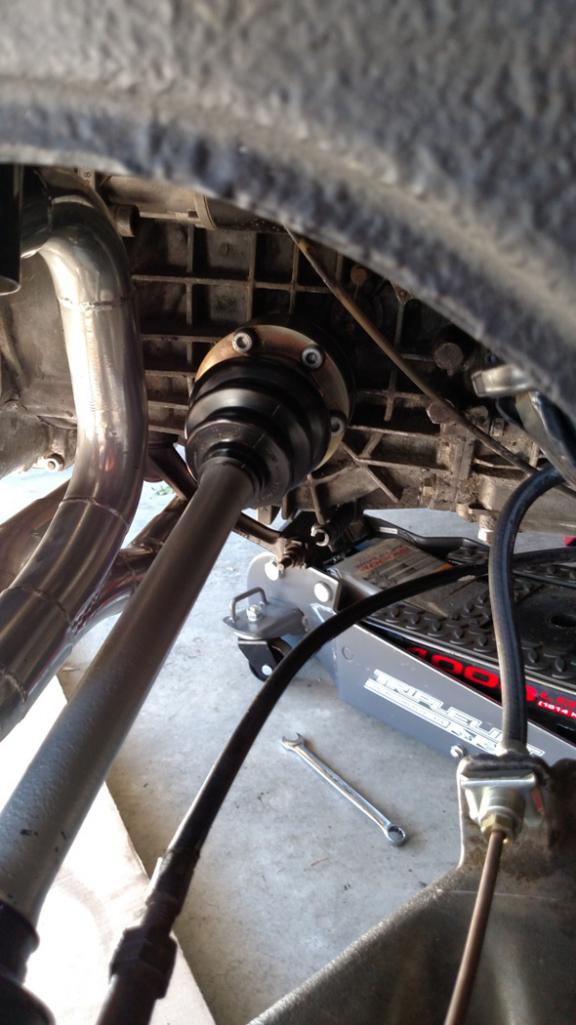
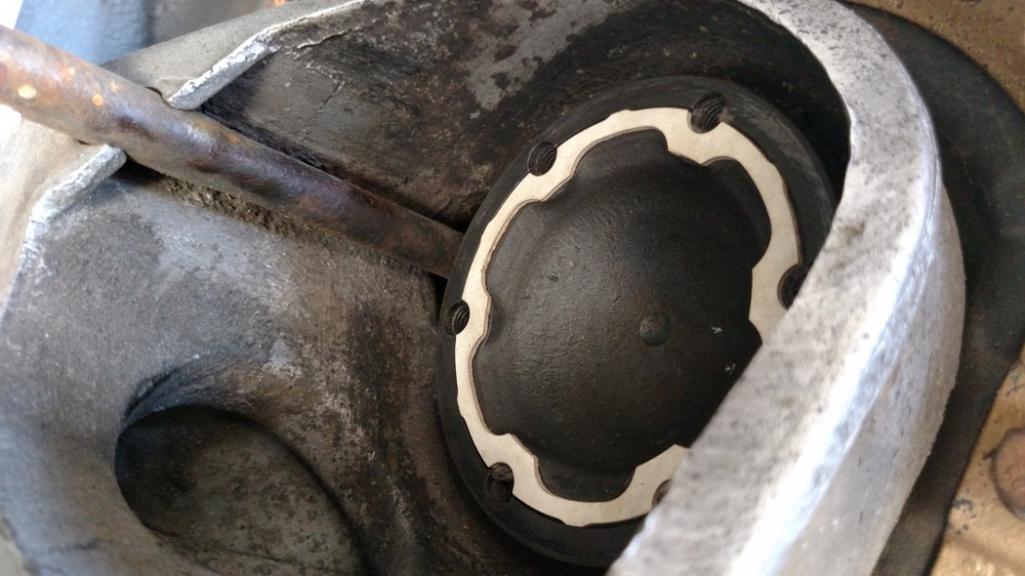

Side rubber strip (NO FUN)
Also installed LED's and a USB port in center Console. I installed a USB port to plug in the back of the Blaupunkt head unit for cel phone charging, IPD, etc. Also a white LED with a mini toggle in the bin, red for the low fuel light circuit, blue for the accessory fan and green for fog lights.
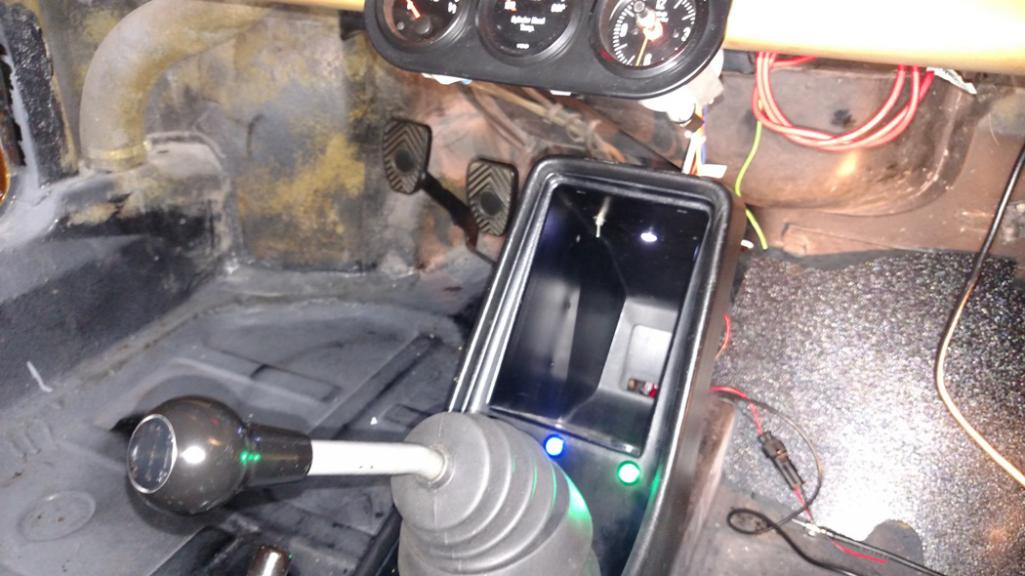
Posted by: Dave_Darling Sep 16 2015, 11:31 AM
Change the needle on the tach, or on the speedo. The tach has the early silver-cone needle, the speedo has the later no-cone one. If you go with cones, add one to the middle of the combo gauge as well. Looks weird with it mixed.
Be very very very careful with those ratchet-type jack stands. If you bump the release lever wrong, they can let go. Gint had to have his face reconstructed after an incident just like that. Pin-lock jack stands are much better. If you keep using these, rig up a way to positively hook the lever in the locked position! We don't need another forum member having to get emergency surgery after his car falls on him....
--DD
Posted by: Steve Pratel Sep 17 2015, 10:24 AM
Thanks Dave,
I haven't swapped out the tach or speedo, they are the ones in the car when I got it. I wondered about the mismatch, but figured it was what it was. Will go on the 'future' to do list.
On the jack stands, whenever I am under the car I use a floor jack as backup and as you can see the tires are under the car as well. Thanks for the lookout!
If I can get the holes drilled in the throttle arms this weekend, I will finish the Tangerine cable throttle system and maybe even install the pushrods and rocker arms.... Has anyone tied to drill through the Dellorto Throttle arm? holy cow, they just laugh at drill bits, even carbon. I ordered some carbide, hopefully those will work, if not I will just take to a machine shop and have drilled.
Change the needle on the tach, or on the speedo. The tach has the early silver-cone needle, the speedo has the later no-cone one. If you go with cones, add one to the middle of the combo gauge as well. Looks weird with it mixed.
Be very very very careful with those ratchet-type jack stands. If you bump the release lever wrong, they can let go. Gint had to have his face reconstructed after an incident just like that. Pin-lock jack stands are much better. If you keep using these, rig up a way to positively hook the lever in the locked position! We don't need another forum member having to get emergency surgery after his car falls on him....
--DD
Posted by: FourBlades Sep 17 2015, 11:02 AM
This is a great build! 
Will be a very cool car.
John
Posted by: Steve Pratel Oct 3 2015, 08:05 PM
Making serious progress. Finished the Tangerine Cable Throttle system, got the correct spacers for the Dell 36's so the Air Filters set properly, Ran fuel lines to carbs, and installed an oil pressure switch to control the fuel pump. I'll break all out in separate posts.
First is the Tangerine Cable Throttle System.
Overall a very nice smooth system, and easy install. Super high quality parts and machining. Really like supporting a small business and custom part maker like Chris. The only hiccup was drilling the dellorto throttle arms. SUPER hard metal required a $20 carbide cutting bit.
The Dellorto Carb return springs are pretty strong, and I don't know if the Tangerine supplied springs were necessary, but as you can see there are springs attached to the pulleys. The instructions are clear, and common sense made for an easy install. Though I must admit I didn't really read them other than the part on drilling the 1/8" hole for the pin to locate the throttle arm to the pulley. I used blue loctite on the nuts, as the standard locking tabs would not fit inside the pulley. The cable to the slave pulley is too long, so before I cut it I heated it up with the soldering iron, impregnated it with solder and cut. FOr extra insurance against fraying I also stuck a piece of shrink tube over the end and shrunk it up. I had to use a couple washers as the pulley arrangement forces the elimination of the spacers on the shaft. The nut bottomed out before tightening the pulley. Still need to fine tune, but to my eyes the system is ready to go.
Attached thumbnail(s)
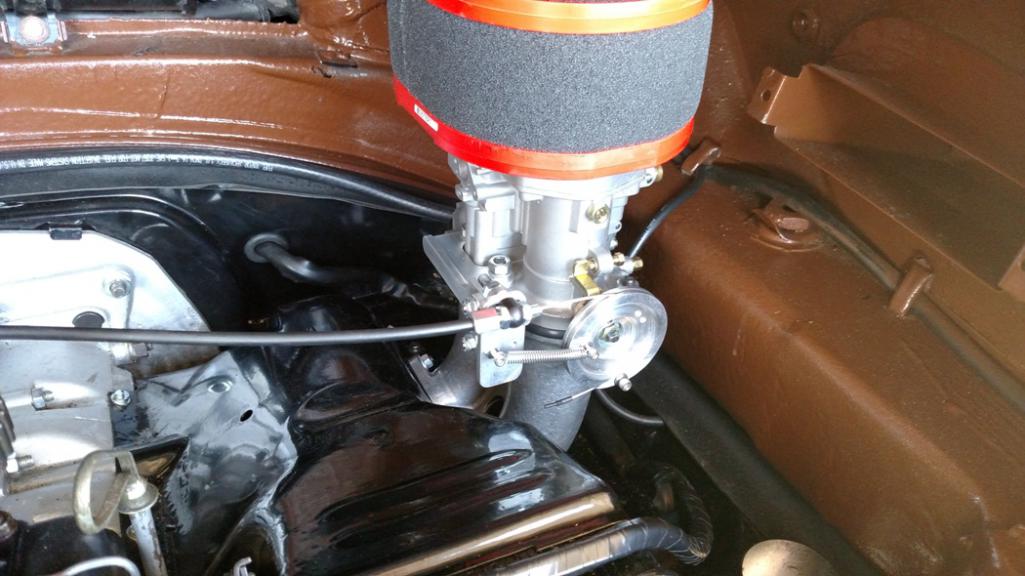
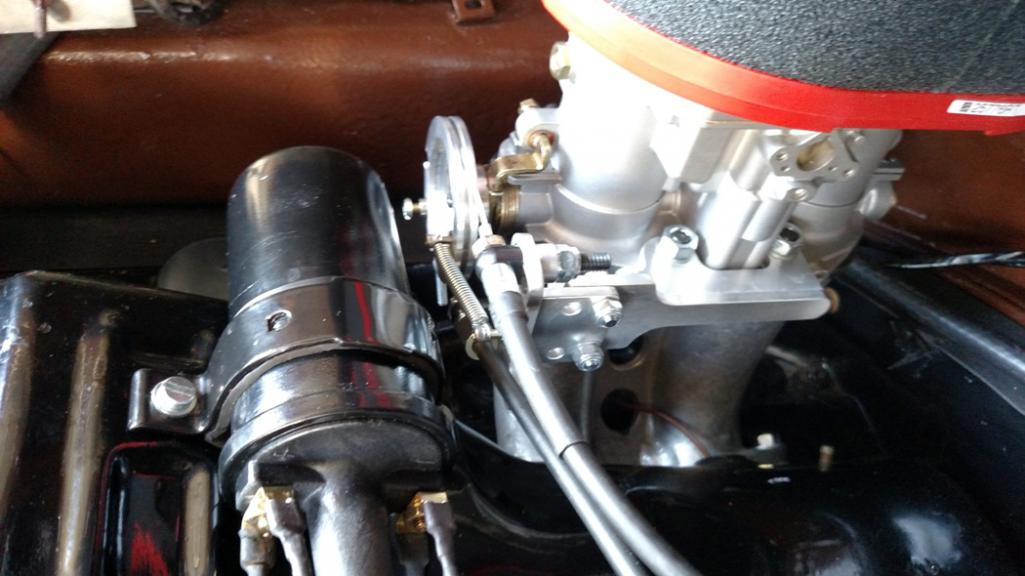
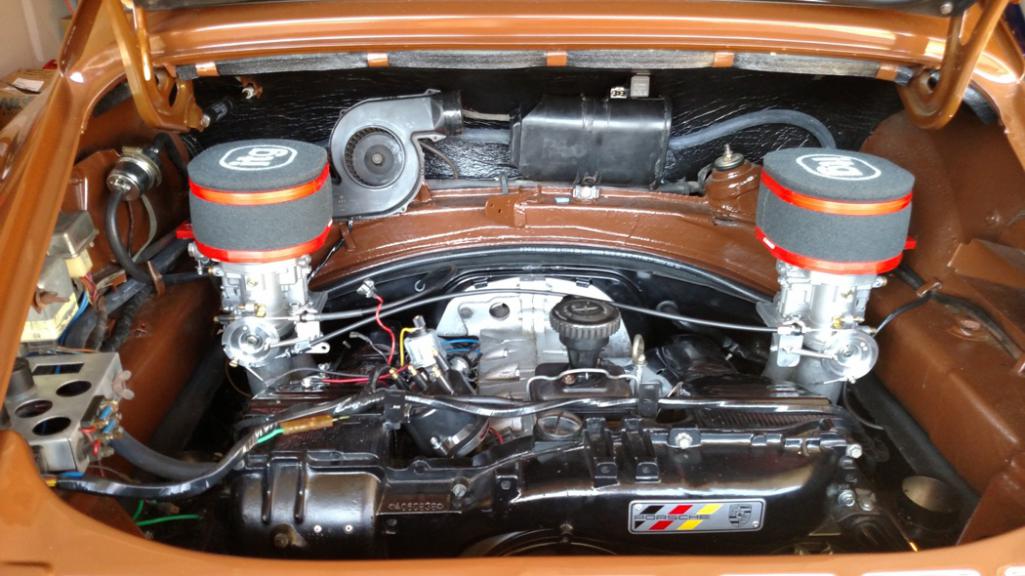
Posted by: Steve Pratel Oct 3 2015, 08:08 PM
Carb Spacer and Air Filter Install
The Dell 36 has a raised fuel banjo and while the CB performance bases work fine, the ITG filters did not. After some research, I found a website called eurocarb that sells a bunch of carb parts and filters and stumbled on these spacers. I bought a set of RAMFLO filters really cheap, and may use in the future, but for now and the setup, balance, tune, etc, I will stick with the ITG filters. The shorter filter still makes a little bit of contact with the trunk lid arm, but not bad. The ITG filters allow the use of the velocity stacks, and seal up nice. No real place or way to run a connection for the Crankcase or fuel vapor vent so I guess I'll just vent them to atmosphere. The fuel vapor is routed to under the car and the crankcase vent will just have a small filter.
Attached thumbnail(s)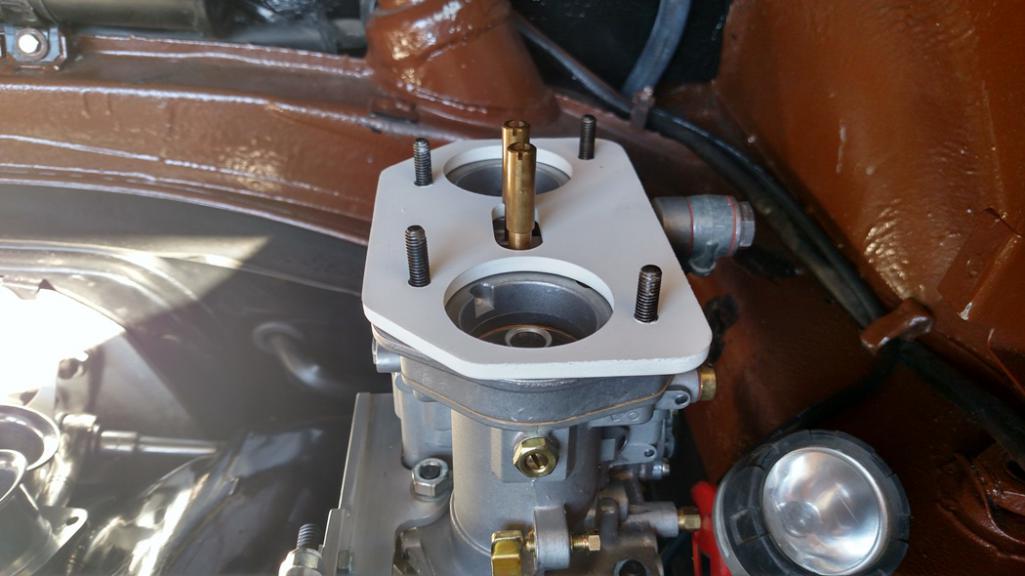
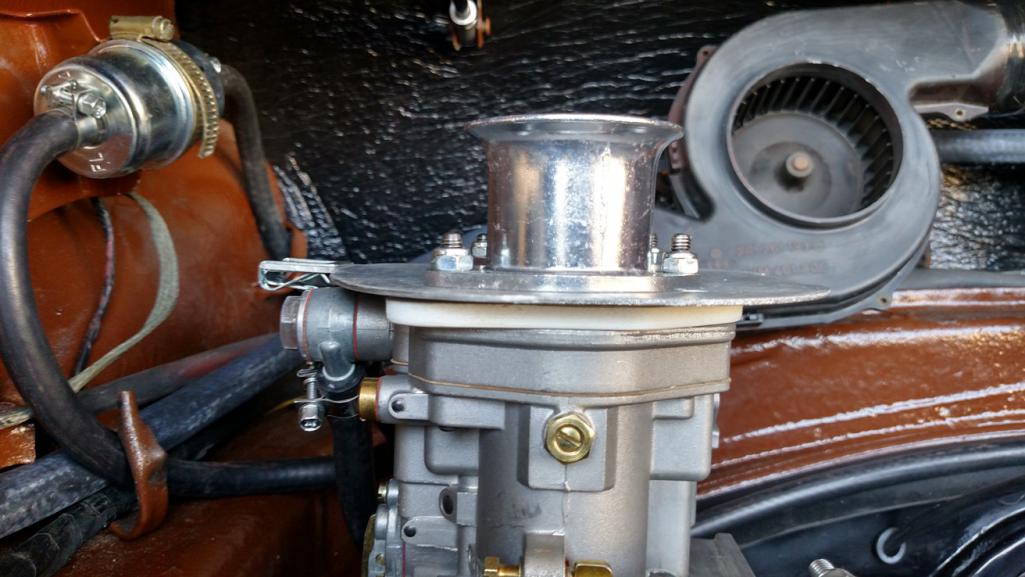
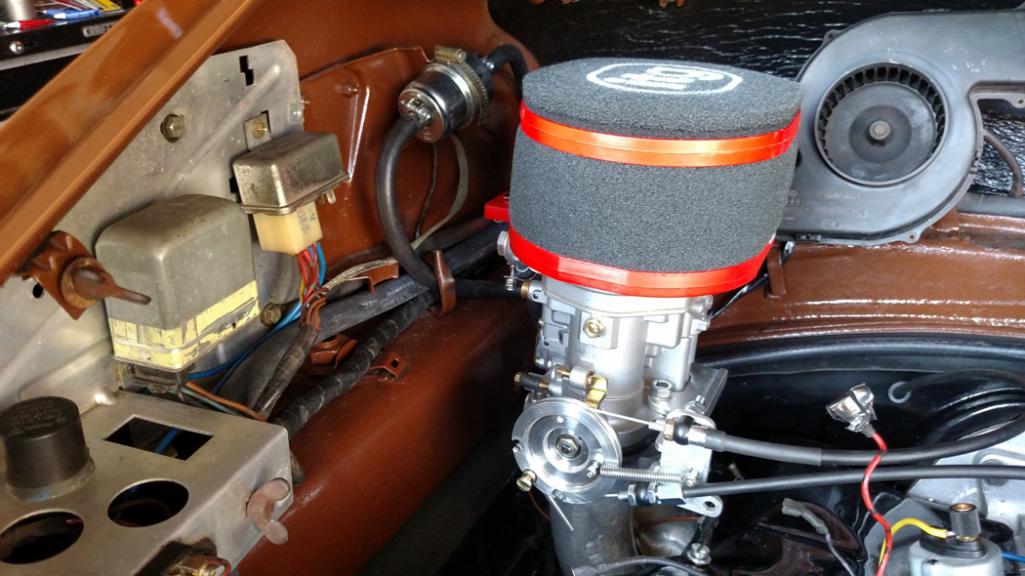
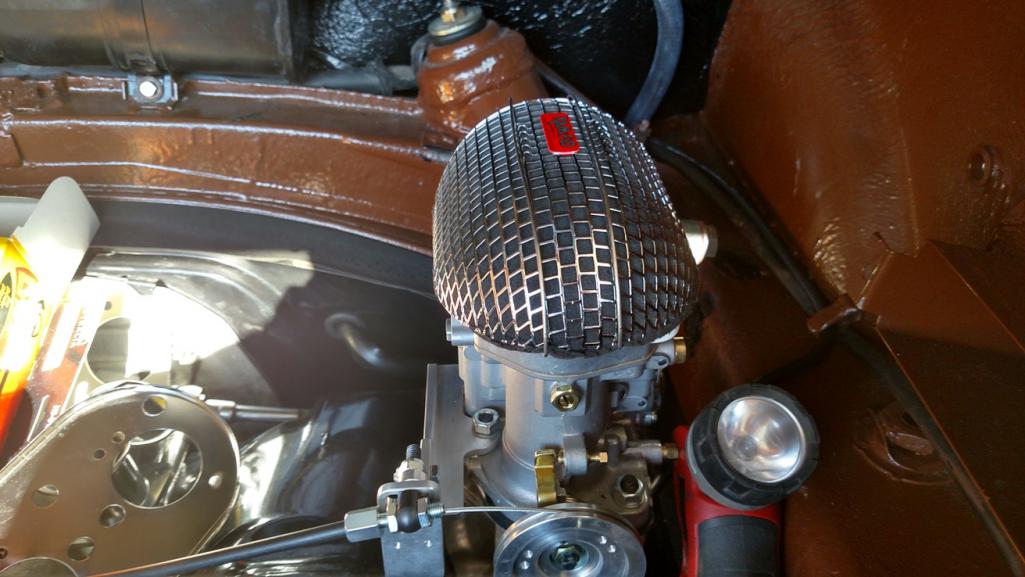
Posted by: Steve Pratel Oct 3 2015, 08:22 PM
Fuel Pump relay
I figured out how the stock double relay worked for the fuel pump, and installed a normally open oil pressure switch, that at 4lbs of pressure and becomes a closed circuit.
With the change to carbs and elimination of the computer, the pump does not run in the 'on' position. Once I figured that out, I also wanted some type of safety that wouldn't overpower the float valves, and eliminated the possibility of accidentally flooding the engine and dumping raw fuel if the ignition switch was left on.
The stock 912E system runs the fuel pump when the starter is engaged, and when running. If the car stalled, the fuel pump would shut off. When air passed the airflow flap arm thing in the airbox, it closed a contact, and triggered the fuel pump relay. I backtracked to the circuit on the relay, and discovered that on the right side of the relay (FI side) terminal 88a was 12V out, and according to the schematic ran to the air flow sensor/meter in the airbox. Tracing that, I saw that it returned and ran through the fuel pump relay on terminal 86b. I tested this theory and it worked perfectly.
Fuel pump runs when start is engaged, and stops when set to run. Jumping terminal 88a & 86b activated the relay and fuel pump. I installed a Normally OPEN oil pressure switch (from an 88 GMC for the same purpose) to act as the safety. So the fuel pump will run when starting and will continue to run as long as there is 4lbs of pressure.
I did another wiring diagram, mostly so I could figure it out and document what I did so when I have to go back years from now, I don't have to try to remember (futile effort)
OK its beer time..............
Attached thumbnail(s)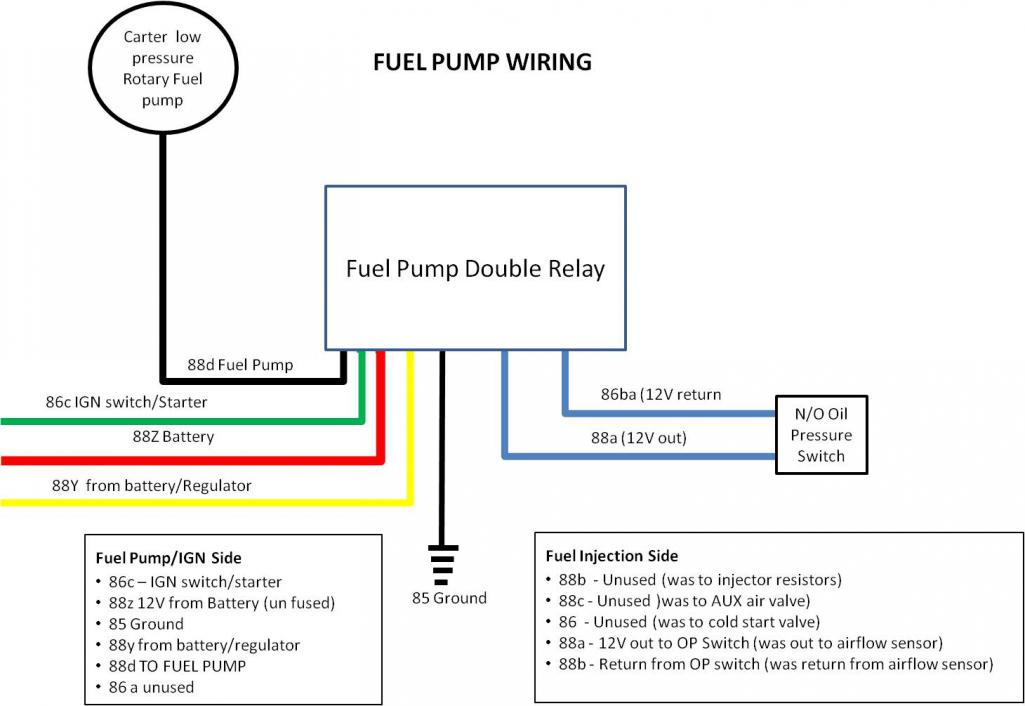
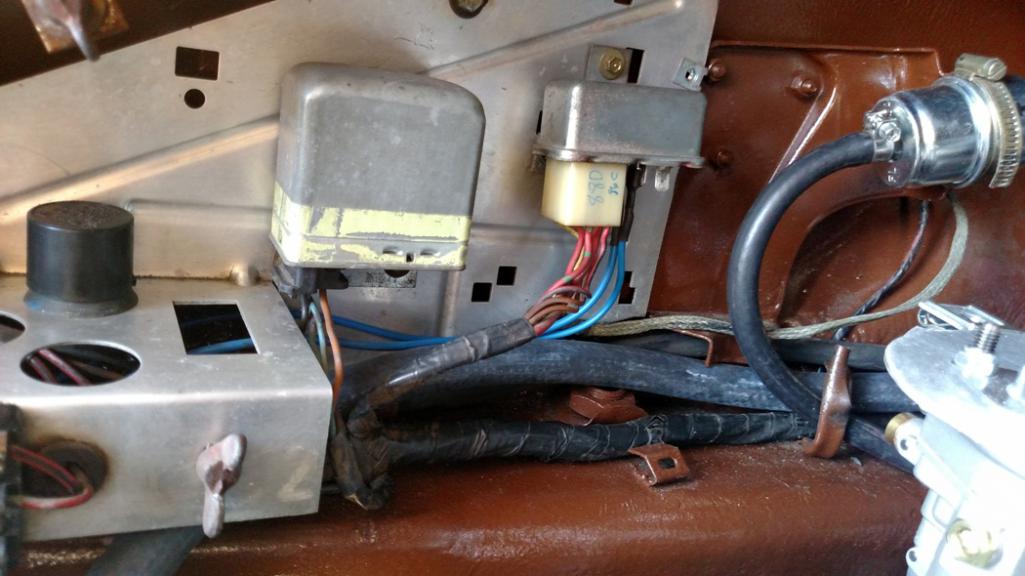
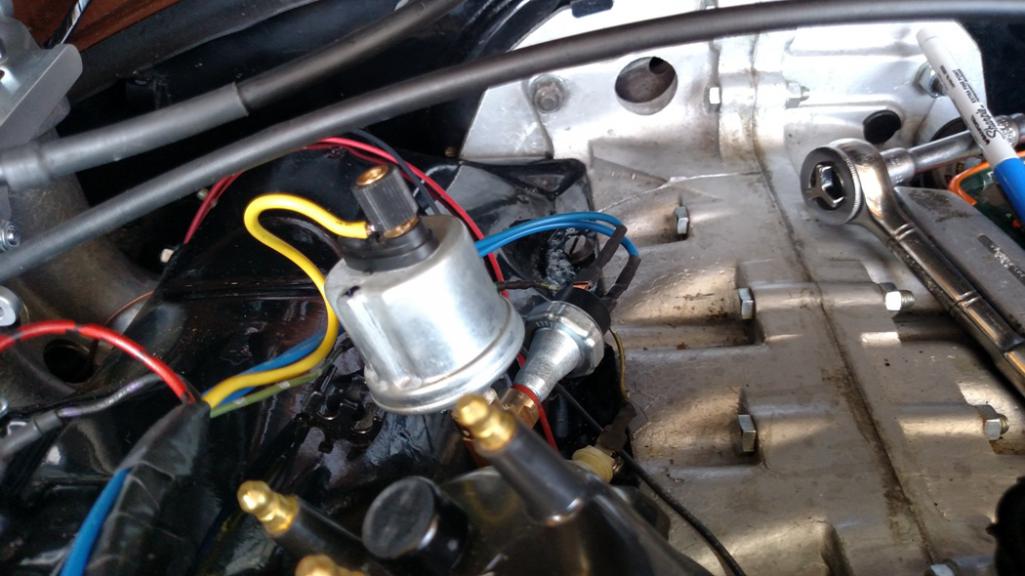
Posted by: Racer Chris Oct 4 2015, 08:10 AM
That looks real good Steve.
Nice that someone makes those spacer plates so the ITG bases will fit on the 36's.
BTW, I expected to see the return springs behind the pulleys...
but maybe you already tried that and prefer them in front with your installation.
Posted by: barefoot Oct 4 2015, 03:51 PM
That looks real good Steve.
Nice that someone makes those spacer plates so the ITG bases will fit on the 36's.
BTW, I expected to see the return springs behind the pulleys...
but maybe you already tried that and prefer them in front with your installation.
For 914's the return springs would be behind the pulleys, Just because the engine is installed the wrong way in 912's
Posted by: barefoot Oct 4 2015, 03:59 PM
Carb Spacer and Air Filter Install
The Dell 36 has a raised fuel banjo and while the CB performance bases work fine, the ITG filters did not. After some research, I found a website called eurocarb that sells a bunch of carb parts and filters and stumbled on these spacers. I bought a set of RAMFLO filters really cheap, and may use in the future, but for now and the setup, balance, tune, etc, I will stick with the ITG filters. The shorter filter still makes a little bit of contact with the trunk lid arm, but not bad. The ITG filters allow the use of the velocity stacks, and seal up nice. No real place or way to run a connection for the Crankcase or fuel vapor vent so I guess I'll just vent them to atmosphere. The fuel vapor is routed to under the car and the crankcase vent will just have a small filter.
Is the ID of the velocity stack the same at the inlet throat of the carb ?
For your 2 filter choices, not quite clear which uses the white spacers. Too bad their ID does not match the carb throat. there will be some inlet loss at WOT as the inlet flow is a sharp edge at the throat. I got past this dilemma by making custom velocity stacks that mount under the top spacer/ filter housing. had to make them 2 piece as the inlet bell mouth would not fit thru the spacer.
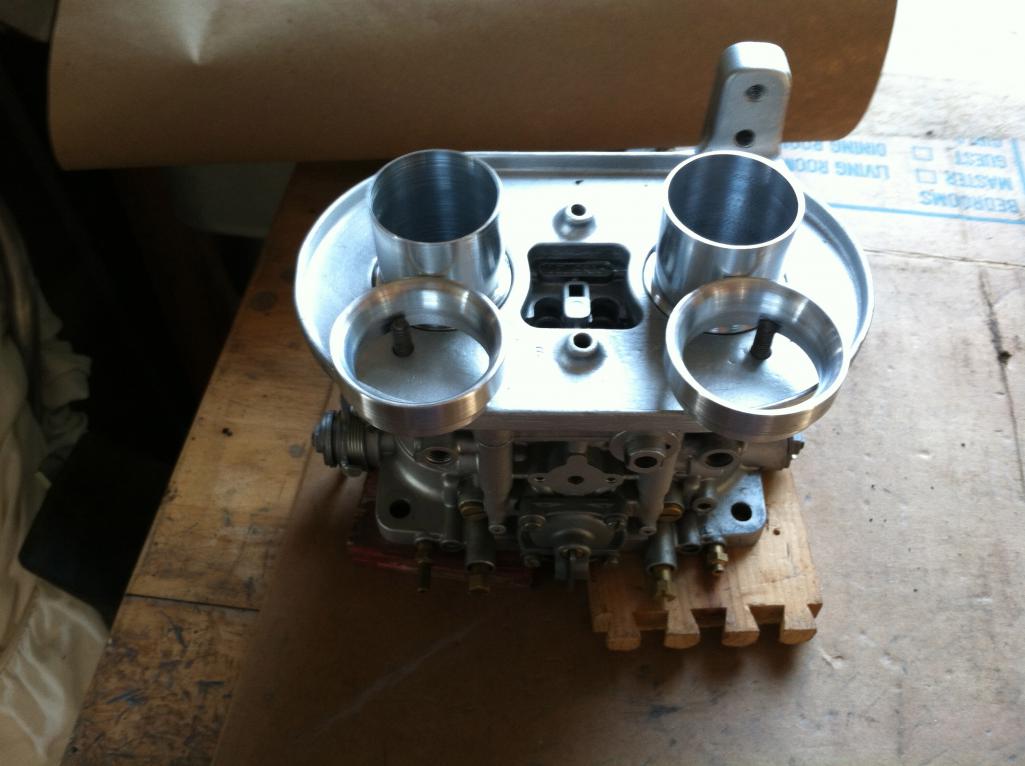
Posted by: Steve Pratel Oct 13 2015, 12:16 AM
Its almost Startin time.....
Installed the valve train and adjusted valves, installed spark plugs and primed oil and fuel systems, all is connected. Before I turn the key, want to check a few things and get some final wisdom/input. I've never done a full rebuild from scratch like this, and never on a VW/Type 4, so bear with me. Want to lessen the snafu's.
Current set.
1. 4 quarts Break in oil - dipstick shows 1 quart low. Is this ok for breakin? Cranked motor just enough to build pressure. Should I bring up to full for first start and break in? I know I will drain the oil after the breakin, so I'm inclined to leave alone.
2. Carbs DEL 36's floats were set and the mixture screws are initially set at 2.5 turns out. Tangerine cables are synced well, bowls are filled and floats tested (don't leak)
3. The Pertronix plug & play billet had springs installed by EMW, and I have one red (20) and one blue (16) for total of 18 advance limiters. **For Breakin, I have dist set AT TDC.
PLAN
1. Start engine quickly without excessive cranking. Run engine at 2000-2500 RPM for 30 minutes.
2. Shut off, drain oil, check oil for metal shavings etc.
3. When engine cools, check/readjust the valve clearances to zero lash.
4. Change Filter Refill with Brad Penn 20W50
5. Restart Set timing to 27-28deg BTDC at 3500 RPM 9-10BTDC at Idle (850-950 RPM).
6. Install O2 sensor to read exhaust gasses and adjust carbs. (NO idea how yet, need to get there, lol)
What am I missing..........
Attached thumbnail(s)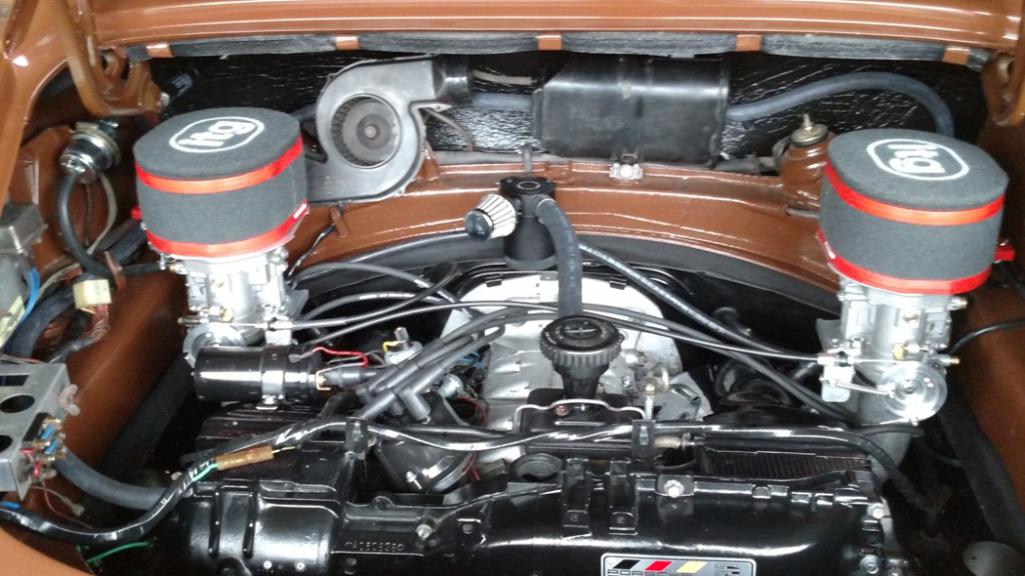
Posted by: Racer Chris Oct 13 2015, 07:38 AM
To hold steady rpm for breakin you should be able to insert a shim between the throttle stop arm and the adjustment screw on the master carb.
Not sure the needed thickness but I'm guessing in the 1/8" range.
We usually set the full advance timing as soon as we have the engine running, then hold 2500 for 20 minutes.
If you have oil leaks or other issues shut it off right away and resolve them before attempting to run continuously.
We generally leave the break-in oil in the engine until after the first or second drive to seat the rings.
Posted by: Steve Pratel Oct 24 2015, 07:18 PM
Just finished starting the engine for the first time. Had a bit of a brain fart and a bit anxious about timing marks, but I decided to go for it, and all is good! Put the drivers seat in, and a buddy come over to help with turning the key while I was out back.
I set the static timing for a bit before TDC (ended up being 14BTDC at 3500) car started on second crank! I had primed fuel bowls and oil system before attempting to start. Motor started right away, one cyl was a bit lean for the first few seconds (popping out carb) , but that cleared up quickly.
Ran the motor up to 3500, set timing to 27BTDC, then let the motor run at 2000-2500 RPM (mostly at 2400-2500), then let it idle down, set idle at 950-1000 RPM, checked base/idle timing at 11, then ran up to 3500 and set to 27BTDC, was back at 11 at idle. All is good.
I also did the 'by ear' the way I did it for years, found the sweet spot, and ended up being dead on at 11 at idle and 27 at 3500.
Valves on passenger side were a bit noisier than on drivers side, but I'm sure that will change when I readjust.
Temps stayed well in range, the 911 oil temp gauge reads a bit higher than 1/2. The CHT shows 330-340 even during break in.
Shut down and let cool, checked for leaks, no leaks so far!
After sitting for an hour I went out, started back up and went for a 15 mile drive. Engine pulls well, haven't gone to redline yet, will do on next drive, BUT motor pulls smoothly, no surging no flat spots, pulls linearly from idle to 5K. Not overly powerful, but got to 70 in no time, and cruised nicely. VERY HAPPY CAMPER.
I had NO idea if the Tach, Speedo or Trans would work, this was the first time the car has run and been driven in almost 20 years. BUt the trans shifts nicely, Tach is rock solid as is speedo. I have a few adjustments to make on the clutch, as well as the shift linkage, but the suspension was SMOOTH, no clunking on bumps, no noises, very comfortable. Still need to get a 4 wheel alignment, is just my 'eye estimate' at this point, but the car drove straight, steering a bit heavy, but proper camber/caster will fix that. Seated the brakes a bit, will take some getting used to.
Overall I am psyched, next up will be to readjust the valves and take for a few more drives to seat the rings, push the motor a bit more, run to redline, connect the AFM, and start playing with the carb adjustments, am currently at 3 turns out on the idle adjustment screws, seems to be good.
But at this point, I am VERY happy with the motor, pulls evenly, no flat spots, feels strong across the rev range, but I haven't really pushed it yet. Looking forward to How it runs after the valve adjust, oil change and timing check. Will take some getting used to the almost rough 'pulse' of a flat 4, and feel of the motor, but I think we are off to a great start!
Attached thumbnail(s)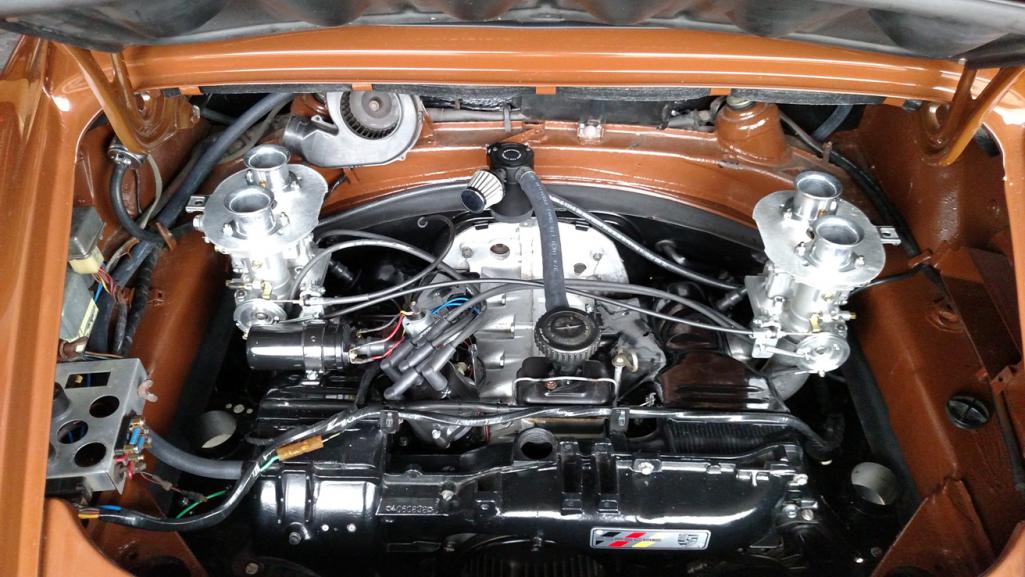
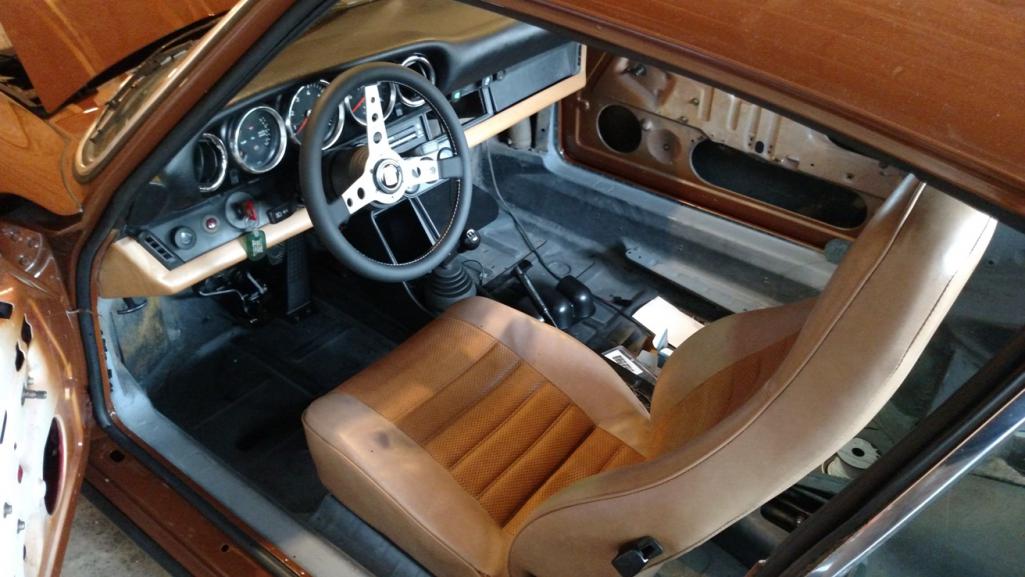
Posted by: mepstein Oct 24 2015, 07:34 PM
Congrats!
Posted by: bigkensteele Oct 24 2015, 09:37 PM
Way to go!!! You have built a great car and you should be proud!
Posted by: Steve Pratel Oct 28 2015, 11:09 PM
Did the valve adjust tonight, exhaust on #1 was a little loose, intake was a little tight. Not sure how that happened, but the rest were pretty close, maybe a little tight overall. After I buttoned everything up, I went for a 30 minute drive.
Engine ran stronger and stayed cool. Easily hit 100 on the highway with little effort, and cruised beautifully in 5th gear at 75. Pulls strong and flat from 1700-5000 RPM, and makes BEAUTIFUL sounds!!! Not comfortable running to redline under hard acceleration yet, but ran up to redline nice and easy as I ran through the gears, and did several full throttle accel and hard decel cycles. Not a hitch, not a stutter, not a ping..... I have to be honest and say that I am very surprised. I really expected to have to take to a pro to get tuned and dialed in. If I have time tomorrow after work, I am going to hook up the PLX and see what my AFR is.
A few observations: Keep in mind I have NEVER driven a 912E, 914 or even a mid year 911.....
1. The clutch is light, smooth and a delight to operate.
2. The Gearbox is SLOW, but I'm driving an E36 M-3 every day so maybe not a fair comparison. BUT, all the gears and syncros work well, only an occasional stubborn gear change. I used dead dino gearbox lube, nothing special.
3. NO power steering and brakes will take some getting use to. Though it is not power assisted, I did expect a bit more bite. Hopefully will get an opportunity to go out this weekend and seat the brakes a bit more as well as put a few more miles on the engine, then will change out the break in oil.
4. Car handles flat and ride is very comfortable. It is hard to make an assessment as there is NO sound insulation so all the senses are engaged thus I may not be able to really 'feel' the road, though the suspension is very supple and the Rebel Racing suspension makes movement smooth and fast, much faster than a twisting rubber bushing I think.
5. The Tangerine exhaust sounds VERY nice. Mellow, and full, and NOT at all like a VW flat 4. Also the Heat exchanger system works very nicely. Not overly Hot, but hot enough. I'd like more airflow and may look into a stronger fan, but overall is working out nicely.
6. Starter cranks too slow for my liking and seems to labor a bit on the compression stroke. My grounds are good, so I think it may be the starter. Time will tell.
7. Looks like my flaps are a little sticky, will play with them a bit and adjust the cable to the thermostat.
8. The 911 Double gauge I bought on E-bay fogs up when the car is started and running, VERY strange as it is all electrical.
**Quick question, what is the best/optimal range for the engine as measured by the CHT gauge? I'm tracking just under 350 once fully warmed up. Plan a longer drive this weekend, want to keep my eyes on everything.
Attached thumbnail(s)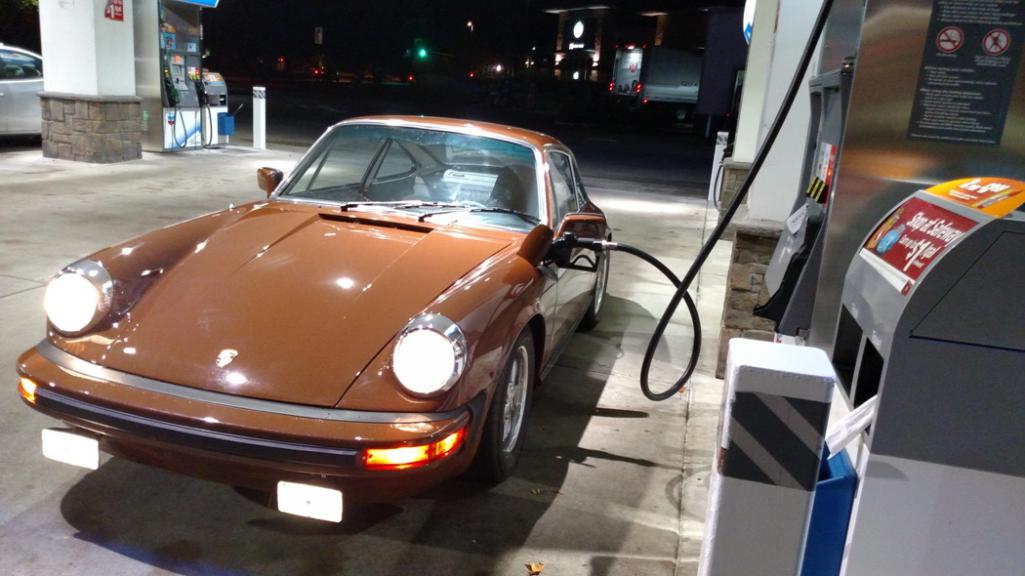
Posted by: mgp4591 Oct 28 2015, 11:24 PM
Nice job, sweet looking car!
Posted by: Steve Pratel Nov 3 2015, 06:14 PM
UPDATE
Well, 500 miles into the engine already, NO major issues. I adjusted the valves and changed out the break in oil at 300 miles, then readjusted timing and idle. Also installed the Oxygen sensor, and ran the AFM for the first time.
AFM - Basically ranges from 12-13:1 for average running and idle and when cruising in top gear light throttle hovers around 14.1-14.5 when at a very light throttle, but mostly is right at 13-13.5. I THINK This is good for an air cooled motor, you want it a little rich. Correct? FULL throttle pedal to metal is 10.5 ish. At least that is from memory. I know the MAGIC # is
I initially set the timing off the 'factory' red line, but on readjust used the mark I made for TRUE TDC, which is one fan blade off. Motor runs as smooth but feels better overall, about a 3-5 degree difference (less) than the red mark.
As the motor has broken in and the 30W oil out, the engine cranks much faster. Still think the starter is a bit slow and weak, but I have nothing to compare it to.
Running Hi Test (94), didn’t want to risk a lower octane at start. When the tank needs refilling, will try 5 gallons of mid then regular. I am also adding a bottle of seafoam or Lucas to every tank given the idiocy of environmental weenies and ethanol. I need to see if there is a PURE gas station near me. I had a great farmers CO-OP in VA....
Motor is running very well, at least seems so, idles strong, pulls well from 2,000, and STRONG from 2500-5000, even feels great the last 500 RPB, but just a little less urgent in power.
Looking forward to meeting up with a few people, letting them drive/listen and maybe drive so I can compare. I know it probably seems retarded to you guys, but I have never driven an Air Cooled Porsche, 911, 912, 914 or 912E, so I guess I have nothing to compare to, but it really sounds and feels good, and except for a VERY small hesitation that comes on when after holding in 3rd or 4th and sustained RPM, the first SLIGHT pressing/feathering of the gas causes a lean (15:1) and slight hesitation. A quick stab at the throttle leaves NO hesitation, just the slight. I wanted to go to cars & coffee this weekend, but will be in Seattle all day at a training conference.
Overall I am happy, look forward to getting sound insulation and carpet and seats in! The singer sewing machine sound (silky) takes some getting used to and the unmistaken VW mechanical sound is present, but I think that is the nature of a flat 4..... I REALLY like the sound the Tangerine Exhaust makes.....
ISSUE 1: My thermostat does not expand............. I bought one of those ones from the guy who makes new ones, forgot the name, will look it up and contact him. Flaps are open 3/4 for now so things don’t get too toasty
ISSUE 2: The Transmission is LOUD........ and once warmed up is very noisy when idling in neutral. Is also balky, making shifting back in to 1st a challenge on occasion. DEFINATELY a Dinosaur....... I initially put cheap dead dino oil in it so I could run the first few hundred miles to clean out any rust, or debris from sitting for 20 years. I DIDDNT do anything to the transaxle but clean the outside and change oil. Will add the slick expensive stuff soon.
PLS feel free to wreigh in with some wisodm, I am all ears.....
Posted by: Steve Pratel Nov 15 2015, 11:08 AM
Well, this AD freaked me out for a second...... Thought someone was running a spoof ad. This is a very nice car, and looks to be all original. Will be interesting to see what it sells for. http://www.ebay.com/itm/Porsche-912-912E-/161882990640?forcerrptr=true&hash=item25b0fa6830:g:m2gAAOSwI-BWQM9W&item=161882990640
Posted by: porschetub Nov 30 2015, 12:04 AM
[quote name='Steve Pratel' date='Nov 4 2015, 01:14 PM' post='2260616']
UPDATE
Well, 500 miles into the engine already, NO major issues. I adjusted the valves and changed out the break in oil at 300 miles, then readjusted timing and idle. Also installed the Oxygen sensor, and ran the AFM for the first time.
AFM - Basically ranges from 12-13:1 for average running and idle and when cruising in top gear light throttle hovers around 14.1-14.5 when at a very light throttle, but mostly is right at 13-13.5. I THINK This is good for an air cooled motor, you want it a little rich. Correct? FULL throttle pedal to metal is 10.5 ish. At least that is from memory. I know the MAGIC # is
I initially set the timing off the 'factory' red line, but on readjust used the mark I made for TRUE TDC, which is one fan blade off. Motor runs as smooth but feels better overall, about a 3-5 degree difference (less) than the red mark.
As the motor has broken in and the 30W oil out, the engine cranks much faster. Still think the starter is a bit slow and weak, but I have nothing to compare it to.
Running Hi Test (94), didn’t want to risk a lower octane at start. When the tank needs refilling, will try 5 gallons of mid then regular. I am also adding a bottle of seafoam or Lucas to every tank given the idiocy of environmental weenies and ethanol. I need to see if there is a PURE gas station near me. I had a great farmers CO-OP in VA....
Motor is running very well, at least seems so, idles strong, pulls well from 2,000, and STRONG from 2500-5000, even feels great the last 500 RPB, but just a little less urgent in power.
Looking forward to meeting up with a few people, letting them drive/listen and maybe drive so I can compare. I know it probably seems retarded to you guys, but I have never driven an Air Cooled Porsche, 911, 912, 914 or 912E, so I guess I have nothing to compare to, but it really sounds and feels good, and except for a VERY small hesitation that comes on when after holding in 3rd or 4th and sustained RPM, the first SLIGHT pressing/feathering of the gas causes a lean (15:1) and slight hesitation. A quick stab at the throttle leaves NO hesitation, just the slight. I wanted to go to cars & coffee this weekend, but will be in Seattle all day at a training conference.
Overall I am happy, look forward to getting sound insulation and carpet and seats in! The singer sewing machine sound (silky) takes some getting used to and the unmistaken VW mechanical sound is present, but I think that is the nature of a flat 4..... I REALLY like the sound the Tangerine Exhaust makes.....
ISSUE 1: My thermostat does not expand............. I bought one of those ones from the guy who makes new ones, forgot the name, will look it up and contact him. Flaps are open 3/4 for now so things don’t get too toasty
ISSUE 2: The Transmission is LOUD........ and once warmed up is very noisy when idling in neutral. Is also balky, making shifting back in to 1st a challenge on occasion. DEFINATELY a Dinosaur....... I initially put cheap dead dino oil in it so I could run the first few hundred miles to clean out any rust, or debris from sitting for 20 years. I DIDDNT do anything to the transaxle but clean the outside and change oil. Will add the slick expensive stuff soon.
PLS feel free to wreigh in with some wisodm, I am all ears.....
The 915 gearbox was never very cultured,Swepco gearoil is proven to smooth out the shifting and is better for the sycromesh,never head of it making them quieter.
The noise of the transmission has been well documented since the cars where new.
Posted by: Steve Pratel Dec 6 2015, 11:30 PM
Re-assembled and installed my door panels and test fit rear deck.
Using the original stock Top Trim pieces (Cork), a set of Door handles, arm rests and pockets I bought at Hershey, new Door Panels, aluminum door handles and window crank. Speakers are Infinity Kappas, 6.5 in doors and 5.25 in rear deck. The Infinity speakers are VERY nice units, the mid/tweeter is directional, and you can point it for better dispersion of mids and highs. Also have a hifreq filter switch built into the tweeter. THe only thing I'm not thrilled about is how big the grills are, could have easily been 1/2 the height, would have looked far more refined. Isnt too bad on the doors, but look a bit wonky on the rear deck.
Installing a Tan Carpet Set from Robert Budd at Classic 9, lined the whole rear engine firewall with hush mat, and then sections of the floor to cut down on vibration, and will cover the whole floor and rear seat/firewall with 3/8 closed cell foam from super sound control foam with a self adhesive back. Don't think I will do the center tunnel or side rockers, just the floor and rear areas. COMING ALONG!
Right Door. THe pull handle, arm rests and pockets are from an 80's model, MUCH better than the original 70's era pockets. Much easier to install and more sturdy.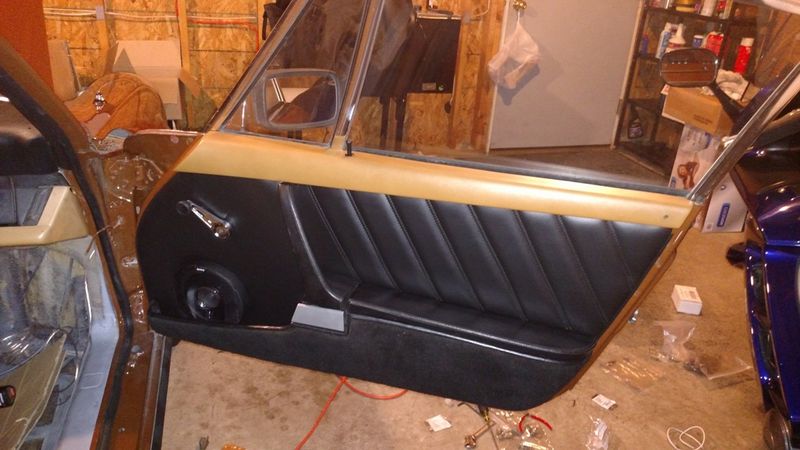
Left door. I need to align the dash pad, was missing the anchor bolt on the left side.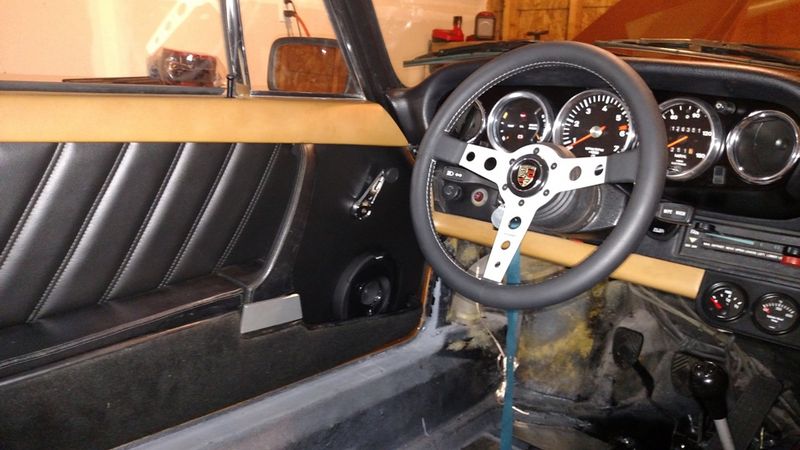
A bit of a panorama, still need to install Head unit (Using Blaupunkt Toronto 420)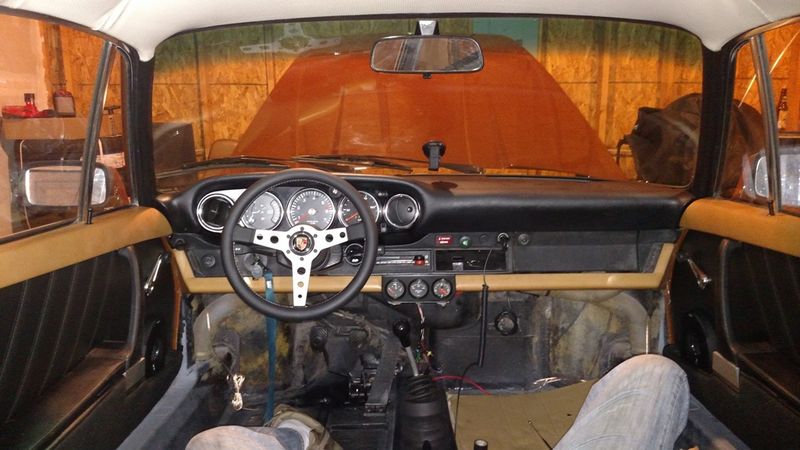
Test fit the rear deck, am considering not using the rear seatbacks, just the seat bottom. I'm lining the whole area with 3/8" closed cell foam, so will be more comfortable.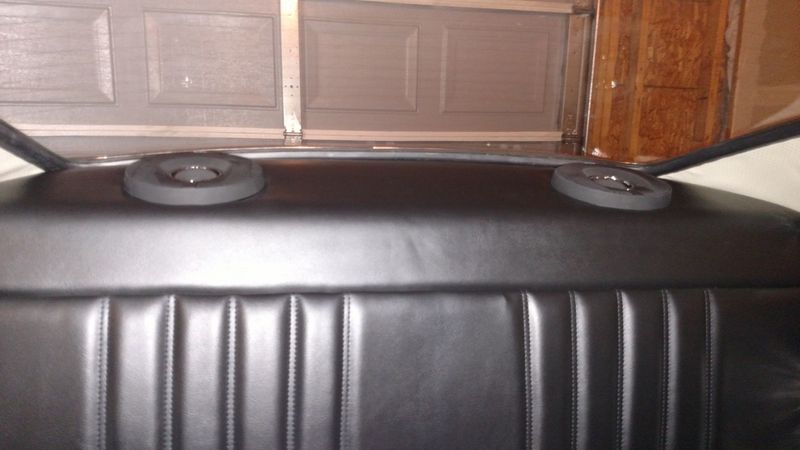
Posted by: Steve Pratel Jan 18 2016, 08:33 AM
Progress continues, including some revisions. I diddnt like the location of the AFM, was blocked by the steering wheel, so I removed the left dash vent, replaced it with the original clock, and moved the AFM to the center gauge cluster where the small VDO clock was. Much happier in this location. 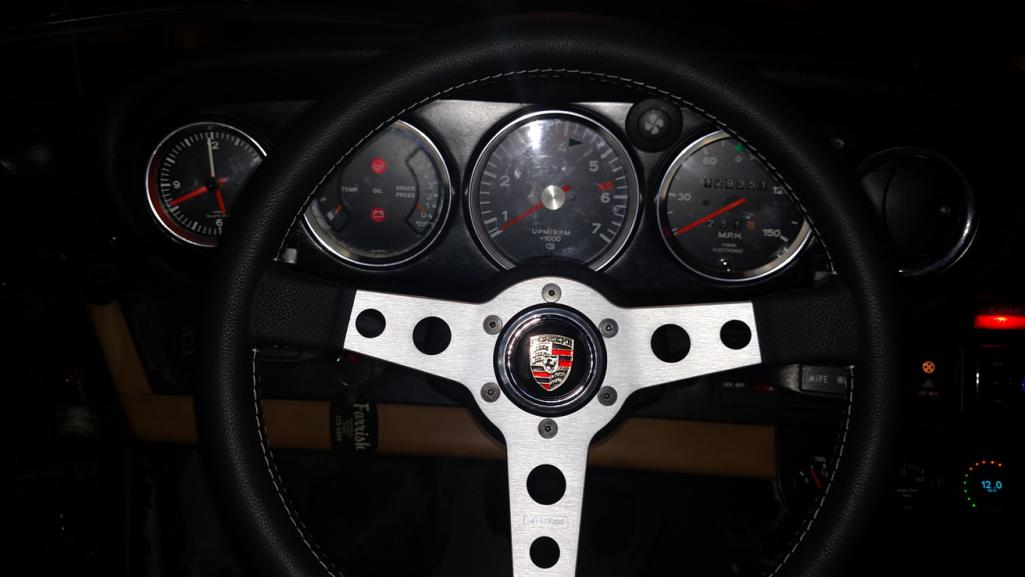
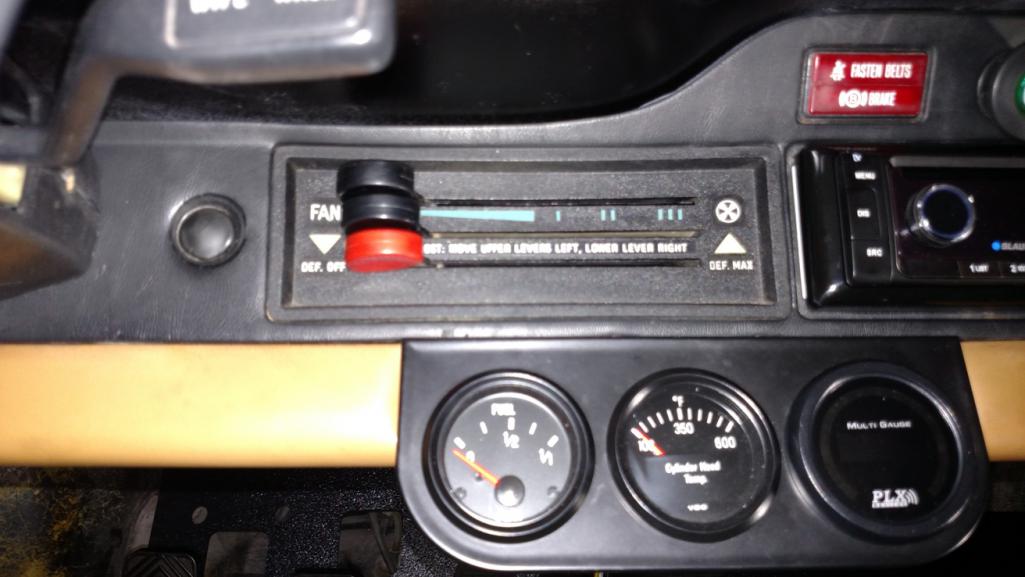
Making progress on the interior, got my carpet set from classic 9 and started installing. Tell ya what.... SOMEONE needs to make a premoulded set for this car.... I covered the rear firewall and most of the floor with hushmat, then a pressure sensitive (self adhesive) 3/8 closed cell foam. Hopefully will mute much of the harshness.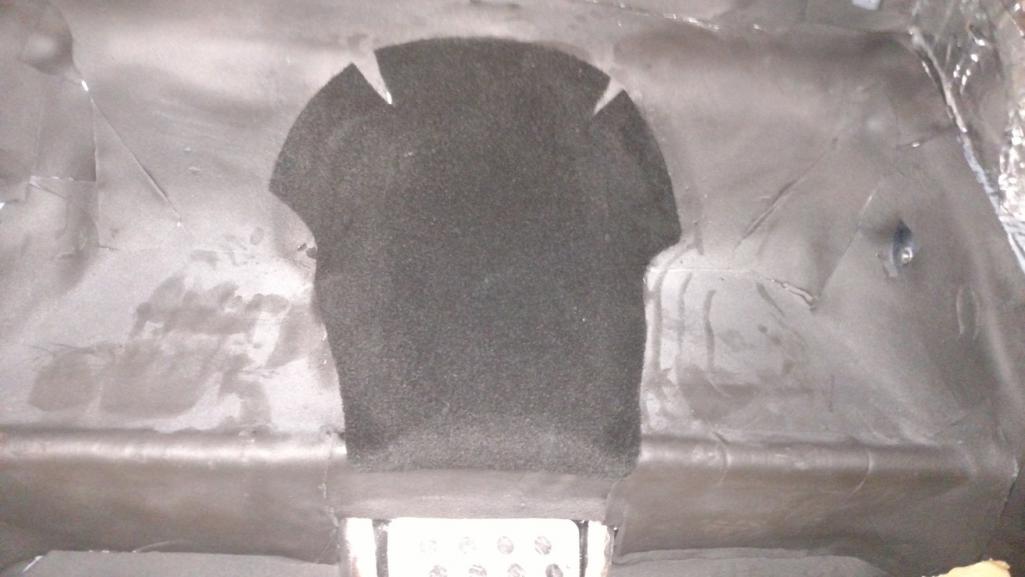
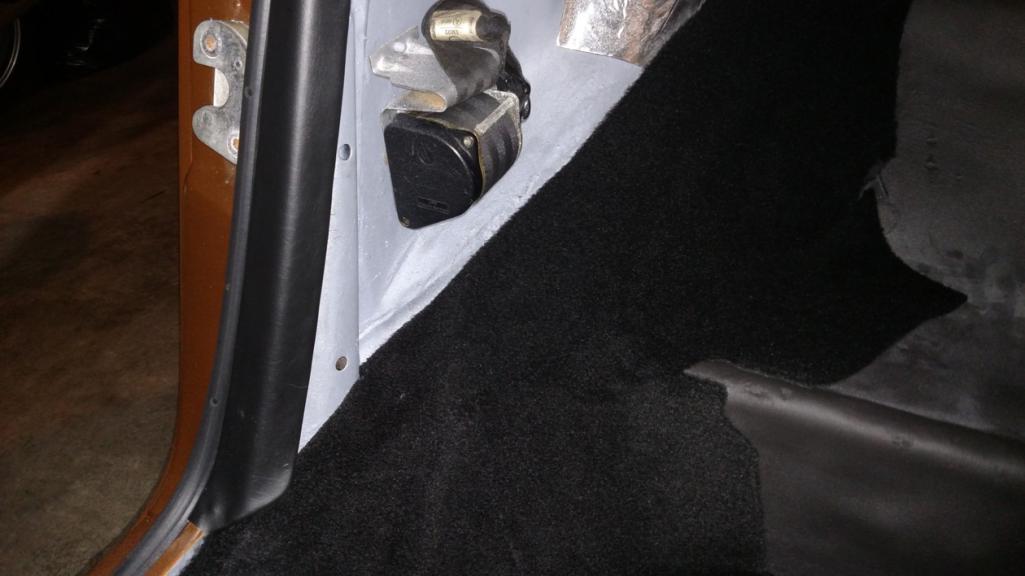
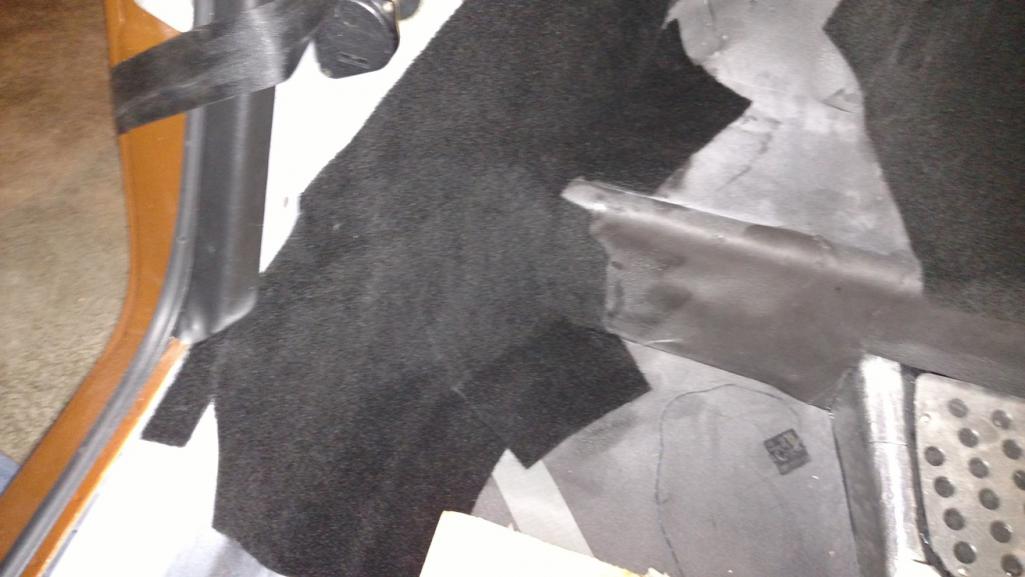
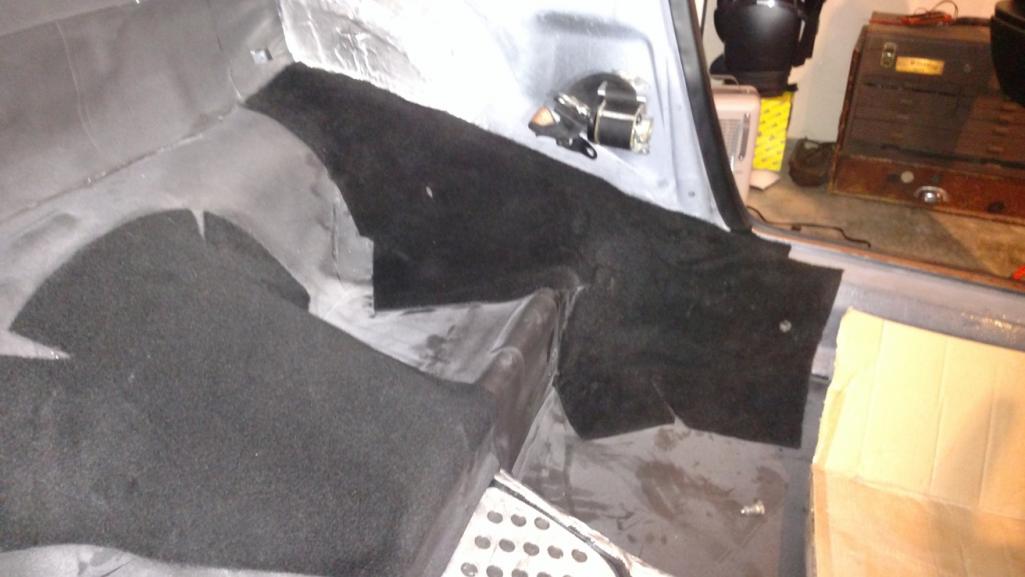
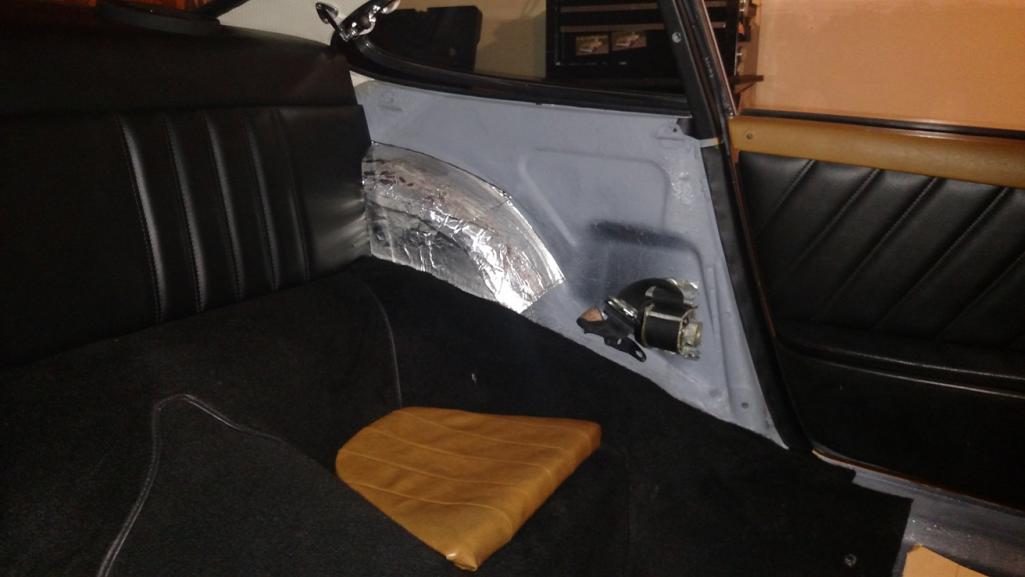
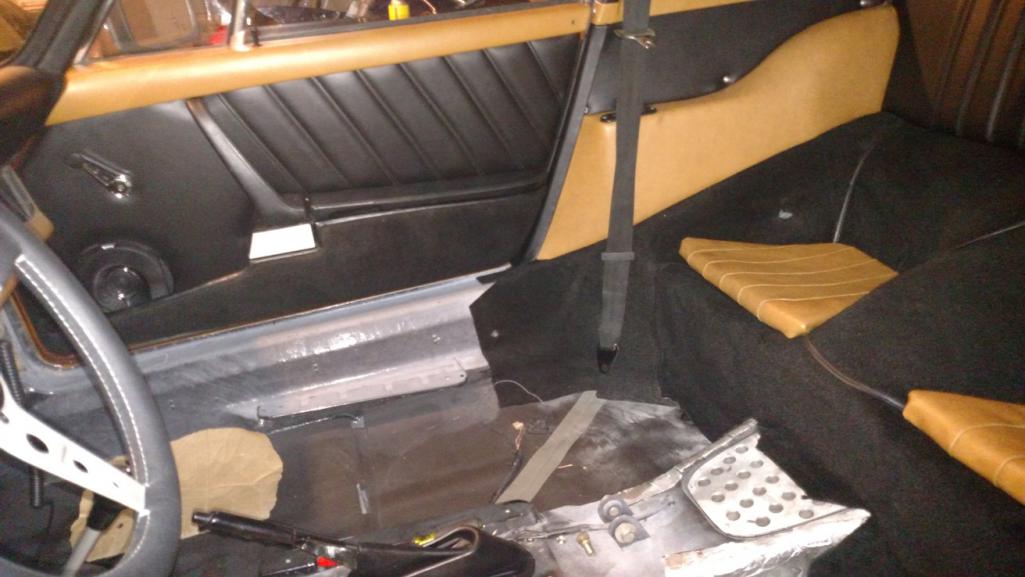
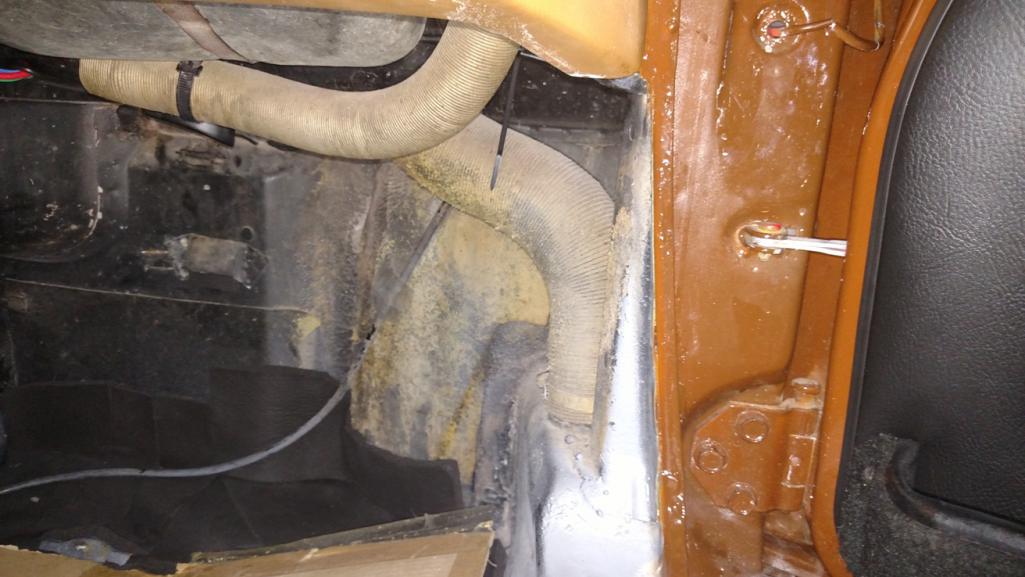
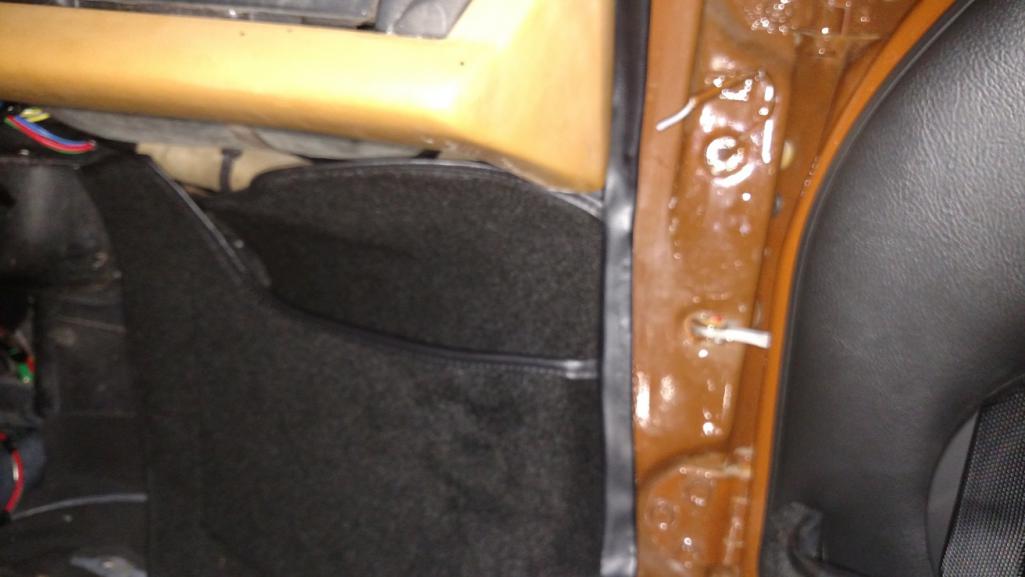
Posted by: Steve Pratel Jan 20 2016, 12:12 AM
deleted double post...... duh
Posted by: Steve Pratel Jan 20 2016, 12:17 AM
I had a Dream............... Well, I had to give credit to Dr. King. Were it not for the day off yesterday, I wouldn't have been able to complete the carpet set and a few other essential pieces. Still need to order visors and rear seat belts, install the door light switches and trouble shoot a few things, but real progress. I am going to try to do a dummys (cause that's what I am lol) guide to carpet install, I made some significant mistakes during the install, most were recoverable, but not all. Here are some pics.
Attached Images
Attached thumbnail(s)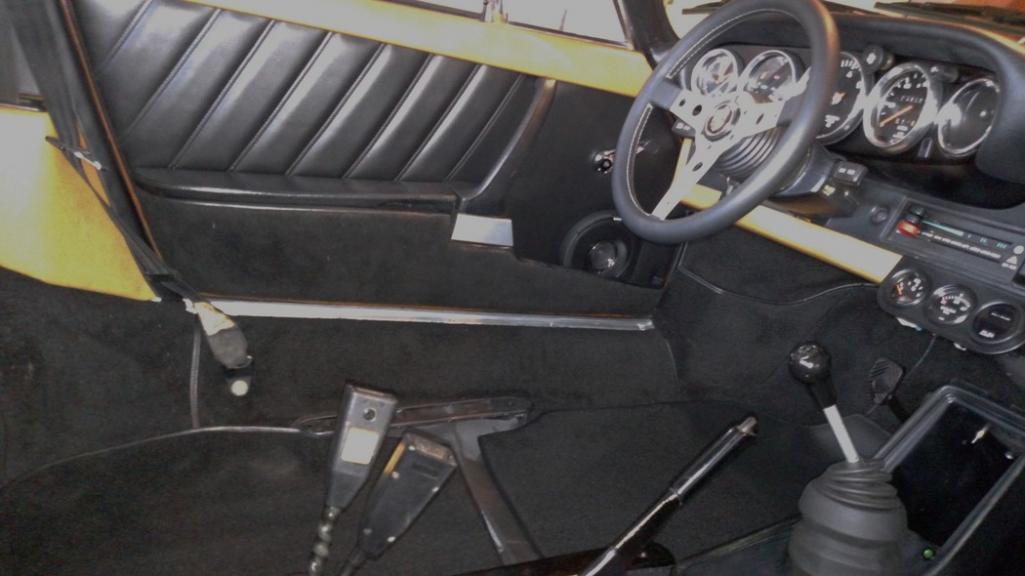
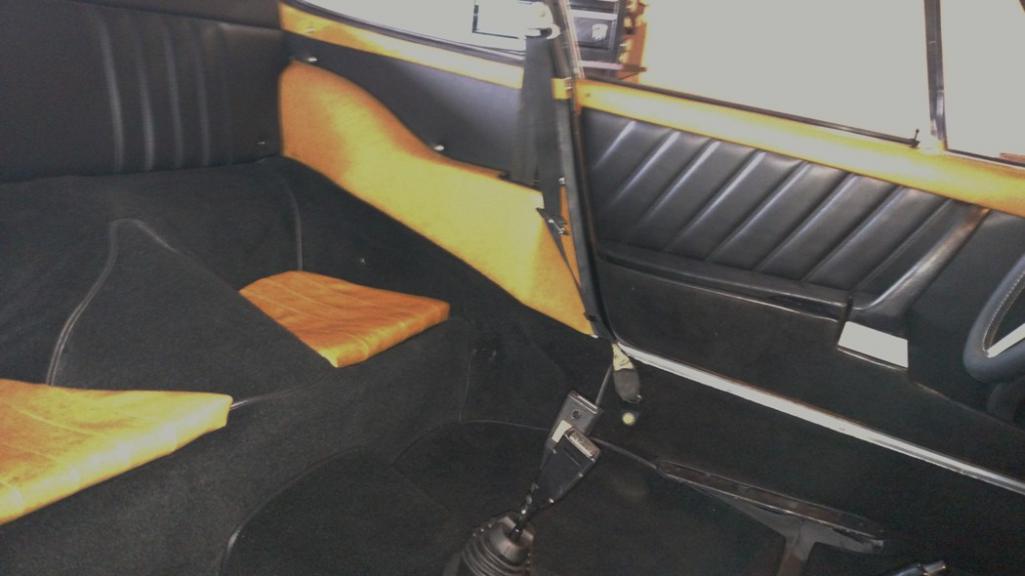
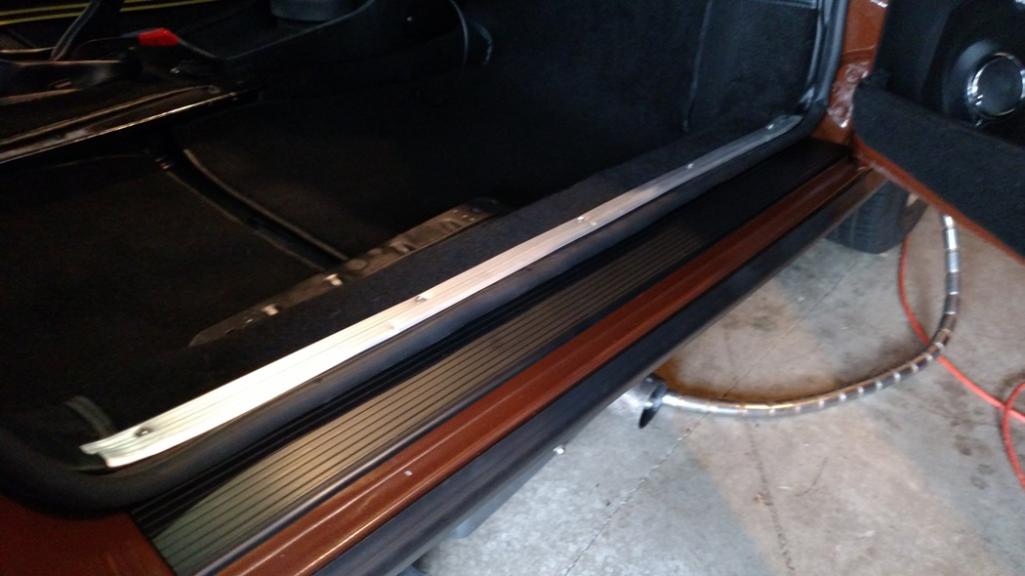
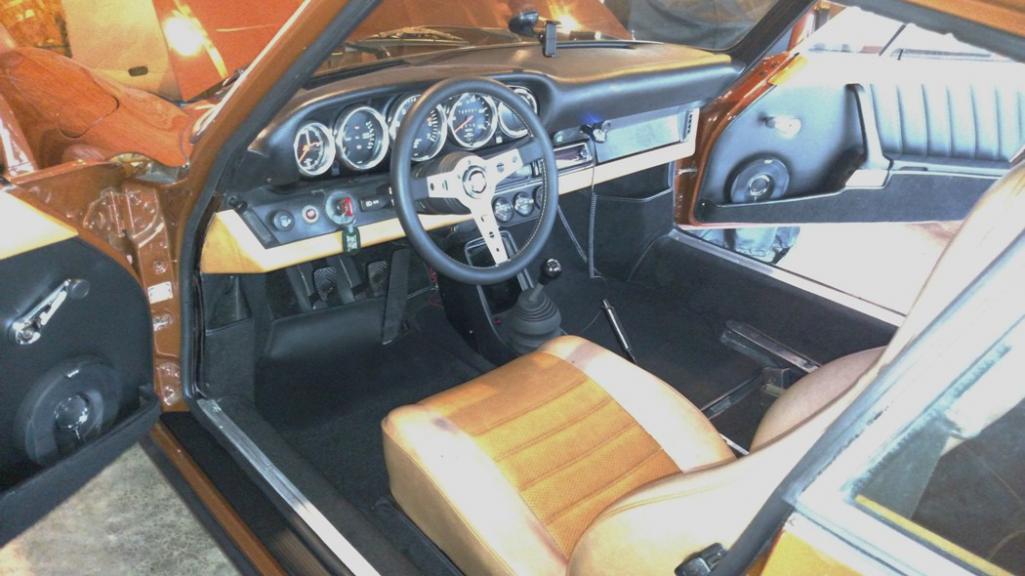
Posted by: Steve Pratel Jan 20 2016, 12:23 AM
Even though I still need to mount the passenger seat, glue in the rear seat cushions, and cut in the seat belt rubber boot, I couldn't resist taking the car for a long drive to see how my sound insulation efforts went.
The Lord was good to me, the rain stopped between about 1pm & 5pm allowing me about a 3 hour drive in and around the Lacy/Olympia/Rainier areas. Prior to this I had driven about 500 miles with no sound insulation and the engine was loud and transmission even louder. I layered the entire firewall and the flat panels of the floorpan with 2 boxes of hushmat and then covered it all with 3/8" closed cell foam. With the carpet set, I am at about 38lbs for carpet and sound insulation.
The results? At start and Idle, the engine and transmission are very well muted, and I hear the engine sound more from the vents above the rear window than through the firewall or tunnel area. VERY happy about this. Road noise is well muted, though at speed I am wishing I had used CSF or hushmat on the roof, as this is where most of the noise comes from except at WOT and holding at 4000-5000 RPM. The engine booms when holding at 4500 RPM and higher, and the noises through the firewall and interior with all the sound insulation is a very nice muted growl and induction, with a little exhaust as well. The clatter of the gearbox is gladly 99% GONE.
I'm thinking the ride height is just right. I was thinking of dropping the rear a bit more, but I think this works well. I am super impressed at the combination of Rebel Racing suspension bushings and the Sachs Shocks. The car is well damped, extremely responsive, smooth and has no harshness, clunks or rattles. It is solid as a bank vault and I would say it is just a tad softer than the M3 in its ability to soak up bumps rumble strips and those awful recessed reflectors.
The motor continues to run flawlessly, there is a very slight fuel starvation issue with light throttle increases when at high RPM's (i.e. when at 4500 rpm in 3rd gear a very slight throttle advance will lean the fuel mixture (shows 16-17 on AFM) and a slight hesitation. If I get deeper in the throttle it is fine, cruising it is fine, full throttle it is fine, routine driving is fine, its just at this point. I want to play with the timing a bit to see if that will help. The engine is very responsive, and top gear acceleration is adequate, though a downshift wakes things up. Power is a relative thing, and this is NOT a muscle car, but no slouch, makes 60 in 8.5 and keeps pulling strong at 100 in 4th. Good enough, and this car in NOT about drag racing it is about the total experience. I can't wait to take it on its first drive up to MT Rainier or the Olympic Peninsula.
I cant wait to see how it drives and handles after a proper alignment, everything is set neutral (to the eye). Even so, the car tracks beautifully, though the steering is a bit slow to respond and there is more body lean than I'd like. Then again, my daily driver is an E36 M3. After I get the car aligned (this weekend) and I drive it a bit, I amy opt for a thicker front roll bar and rear bar, but I dont know. I have to let the car talk to me a bit.
The Stereo and Infinity Speakers ROCK. Though the rear speakers lack the necessary depth for full bass, they balance out enough of the high tones to make the sound feel rich and full and the 6.5 Infiniti Kappas in the doors are incredible and take all the 50W head has to offer with full bass and balanced sound, so no need for an underseat subwoofer...... Besides I'm 51 you know? Dr. Drey has no pull on me....... That said, I wouldn't recommend these speakers unless they were going to be mounted behind a grill. THe Kappa grils stick out about 3//4" and IMO, arent bery aesthicially pleasing. Only one rattle in the interior, the car is very solid.
I'm very happy with the gauge changes, the clock looks great, and I have clear view of the AFM/volt meter. The Mom wheel makes the 50-70 area of the speedo unreadable, but oh well. I may eventually invest in one of those momo offsets, but I'm not too worried about it. The right side controls of the Stereo are just beyond comfortable reach, though the rest of the controls are natural in their feel and response. The single One nice surprise was just opening the windows allowed air to come out of the dash vent and the now single vent outlet on the fan feels much stronger. I'm a bit of a symmetry fanatic, so it is hard to see the dash unbalanced, but I much prefer clear view of the gauges and a stronger airflow from the vent.
All in all I am beyond psyched.... Army Life and 15 years of war has burned much of my ability to truly 'feel' but yesterday I actually had a very nice moment of elation. I just hunted out back roads, and found these horses. I stopped to take a picture to send to my girls and while doing it the horses started dancing and jumping around. I got a bit nervous one was going to jump the fence.
Many people to thank, and I will wait for that until I am finished. Still need sun visors, trunk carpeting, and a few other odds and ends.
Attached image(s)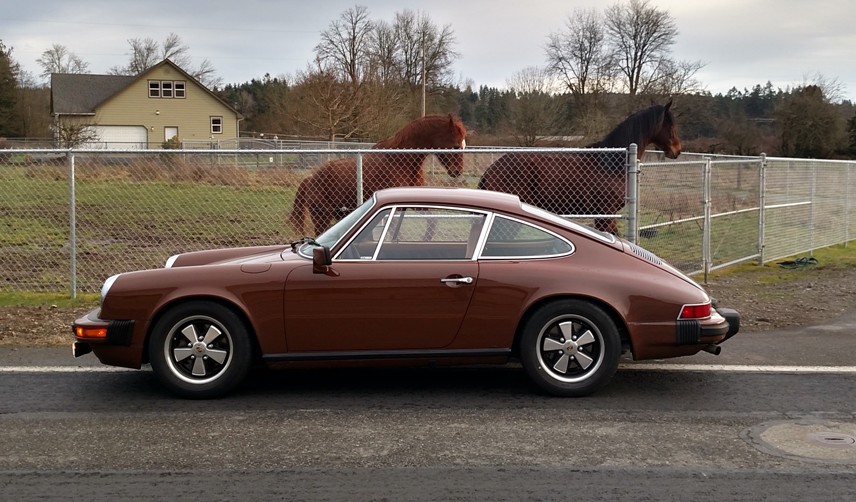
Posted by: euro911 Jan 20 2016, 01:54 AM
Well, where's the LIKE button?
Posted by: maf914 Jan 20 2016, 06:42 AM
Good photo. Your car looks great. The color of the horses goes well with it. Thanks for all of the updates and photos of the build. Congratulations!
Posted by: rhodyguy Jan 20 2016, 07:57 AM
Steve, you live in Washington not the mid Atlantic region? The car looks swell! Ride height is perfect from my perspective. Yes, yesterday was a nice break in the weather. This am looks to be nice too. Go for a drive if you can.
Posted by: Steve Pratel Jan 20 2016, 08:46 AM
Steve, you live in Washington not the mid Atlantic region? The car looks swell! Ride height is perfect from my perspective. Yes, yesterday was a nice break in the weather. This am looks to be nice too. Go for a drive if you can.
I live in Dupont, just about equal distance between Tacoma and Olympia, assigned to JBLM. I was in Alexandria VA
Posted by: rhodyguy Jan 20 2016, 08:50 AM
Next time you drive east on 512 wave. I live about 1 mile south near the canyon road exit.
Posted by: mbseto Jan 20 2016, 08:57 AM
Beautiful. Congratulations on getting her on the road.
Posted by: Steve Pratel Jan 20 2016, 09:17 AM
Next time you drive east on 512 wave. I live about 1 mile south near the canyon road exit.
Roger that, will have to get together some time.
Posted by: Steve Pratel Feb 12 2016, 11:53 AM
Progress continues, trying to put a few miles on the car, fine tune the carbs, and make adjustments for daily driving. REally like how the car is sitting and looking. I'm thinking the foglights may go, they are too big. 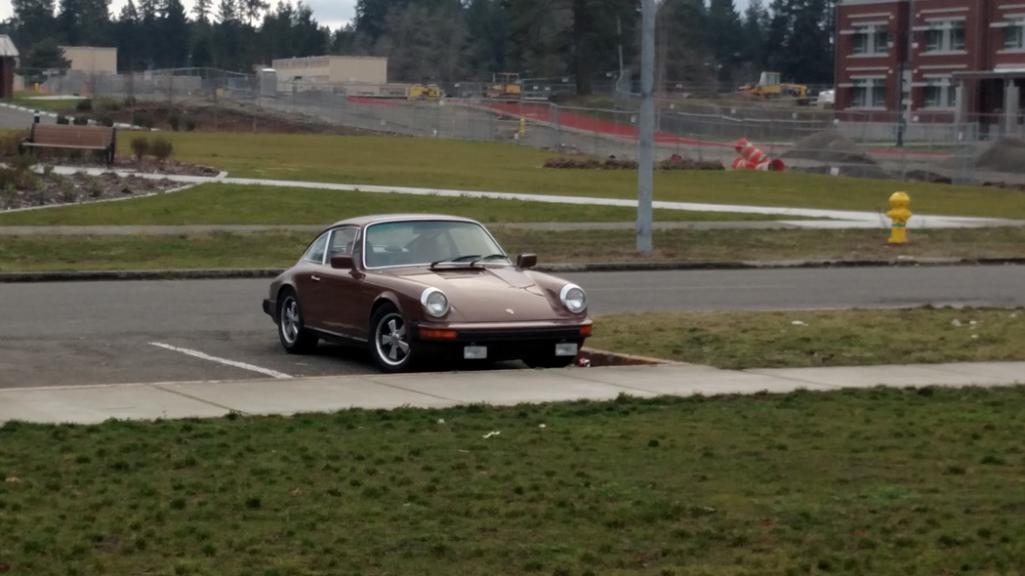
The COCO mats finally came, took 3 weeks, but they look great and are super high quality.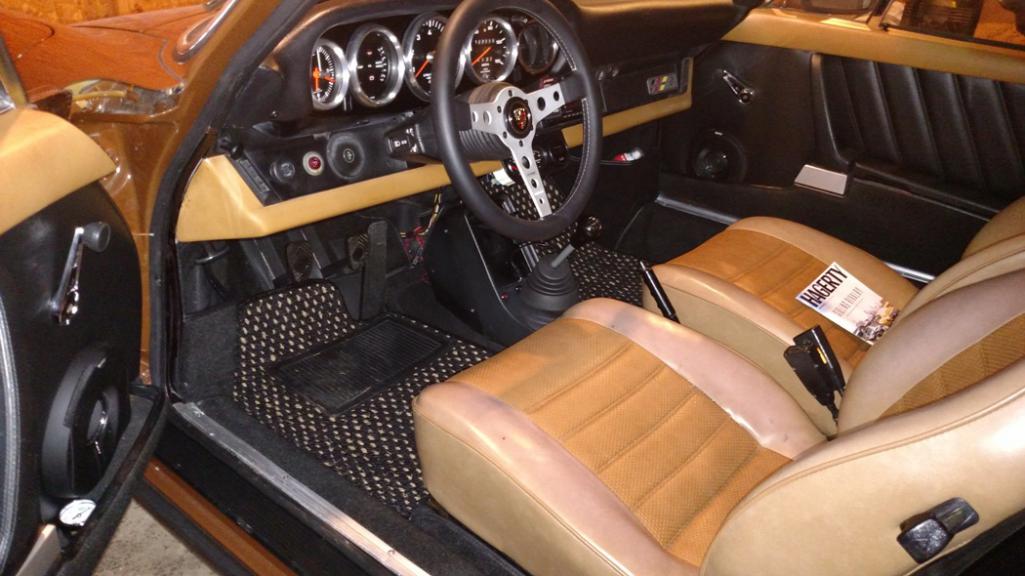
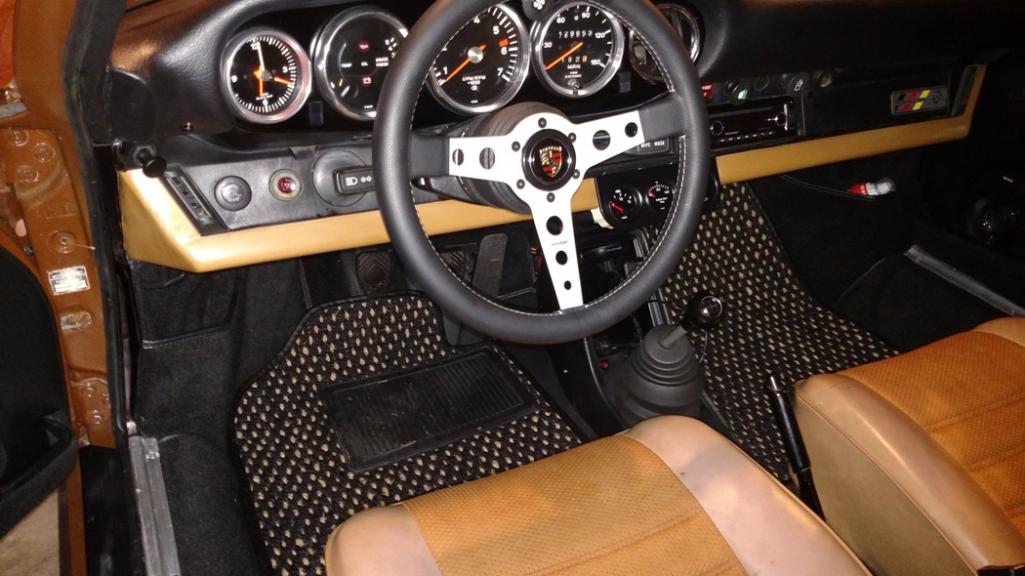
I initially set the motor up with ITG filters and 1.5" Velocity stacks. I also picked up a set of RAMFLO filters at a swap meet for $25. Am trying them out. The main difference seems to be sound, the RAMFLO's without V stacks is much quieter at WOT. Midrange also seems a bit weaker without the V Stacks, but may be related to other tuning issues.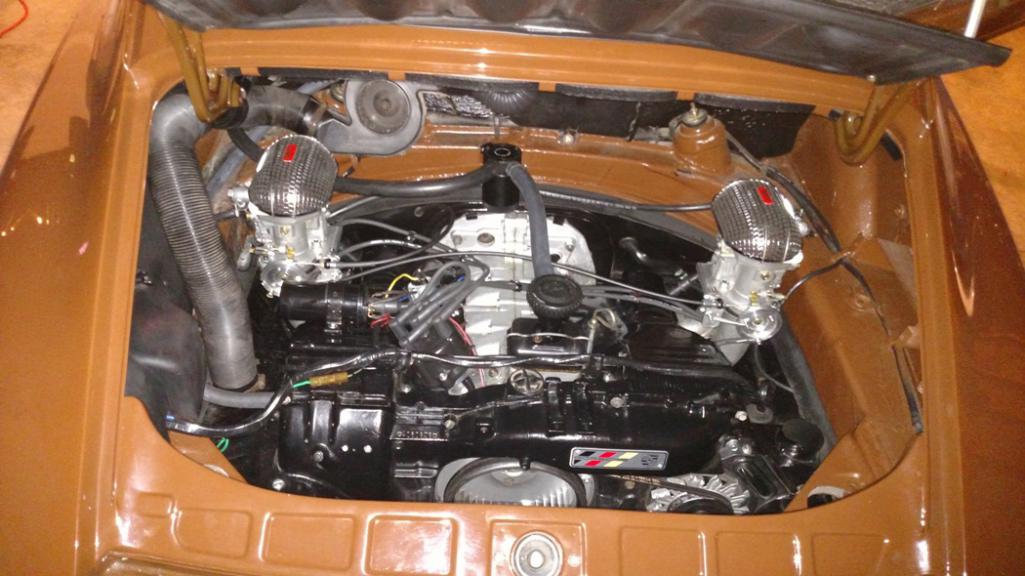
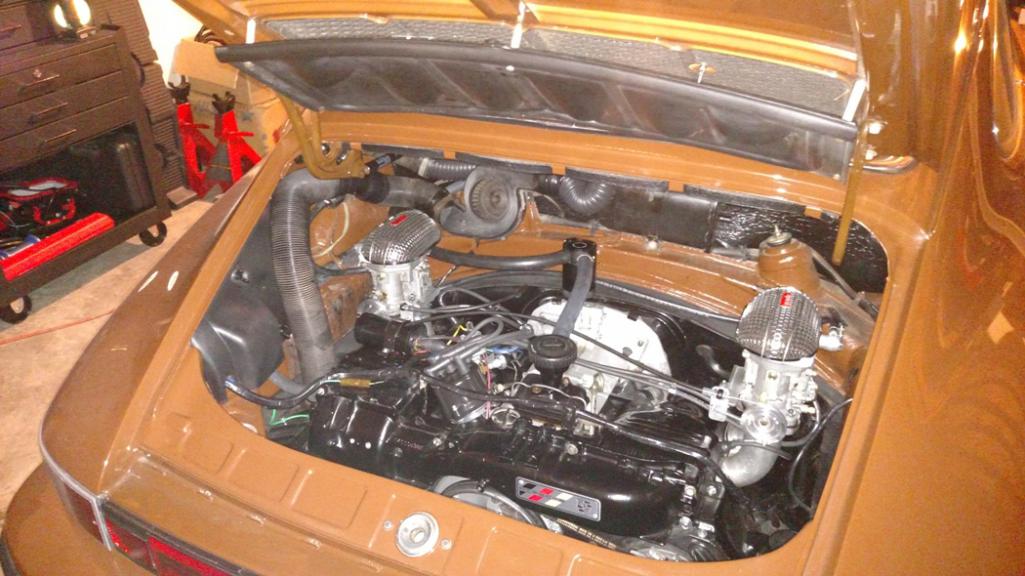
Posted by: Steve Pratel Mar 6 2016, 09:34 PM
Rounding the corner, down to little items and refinements. Installed the trunk carpet and put a rubber mat down, put all my hambone stickers on, even did a grocery run. It was nice on Saturday so after a drive I washed the car, and parked next to the M3. Funny, the 3 never looked stodgy before. I'm definitely going to swap out the Hellas for something smaller, will put them on the Jeep.
And now that I have some more spare time on my hands its time to show the 3 some love. Replaced the cracked and peeling wood center console with a black piece. GOt it from ECS tuning, didn't have the cut out for the power locks, but a few seconds with the dremel fixed that.
Attached thumbnail(s)

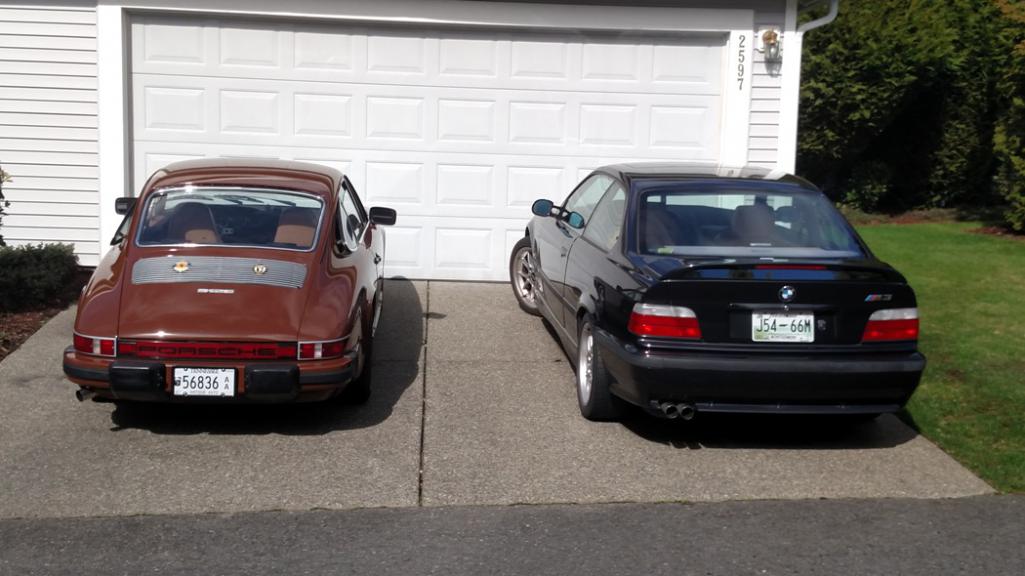
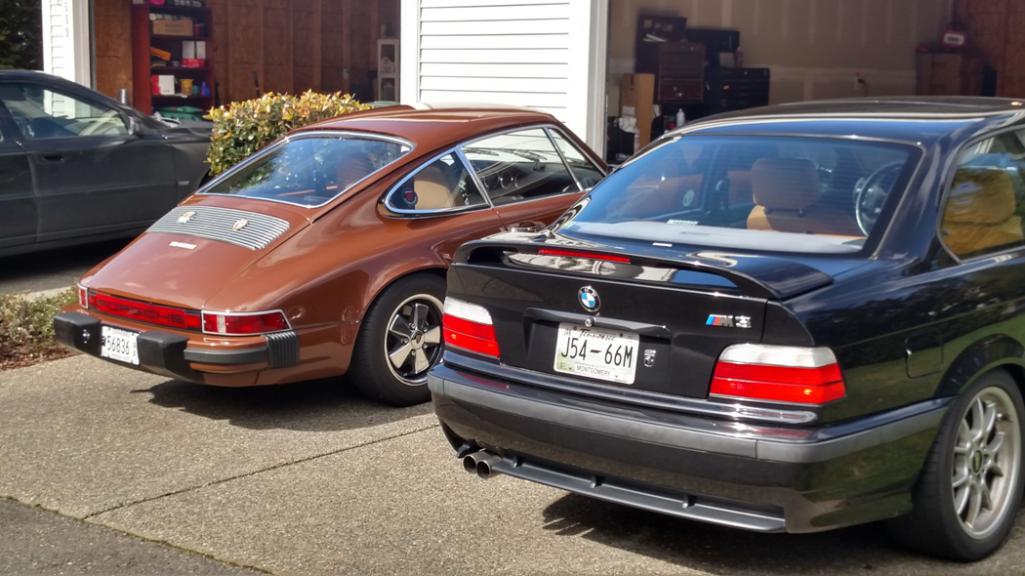
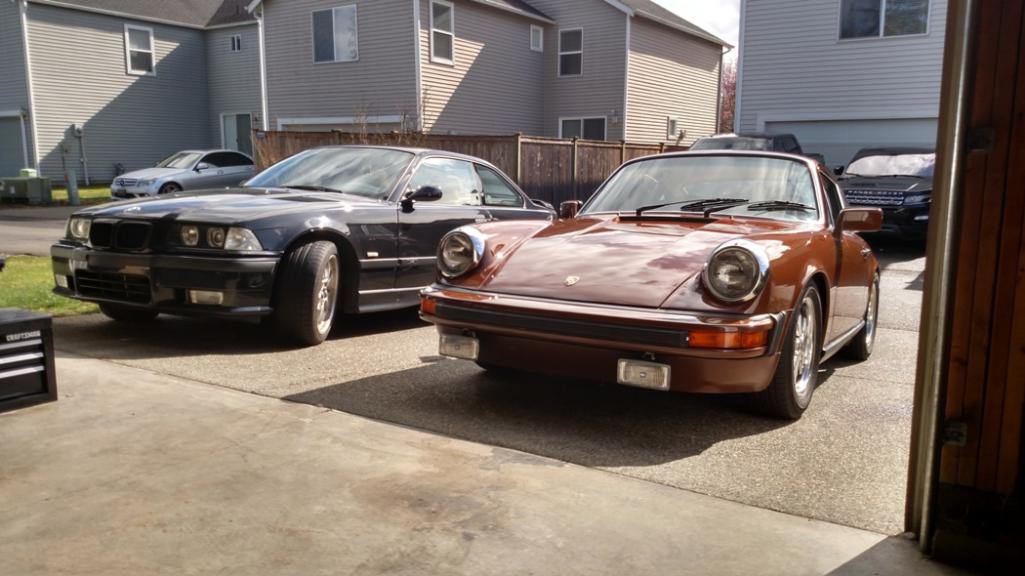

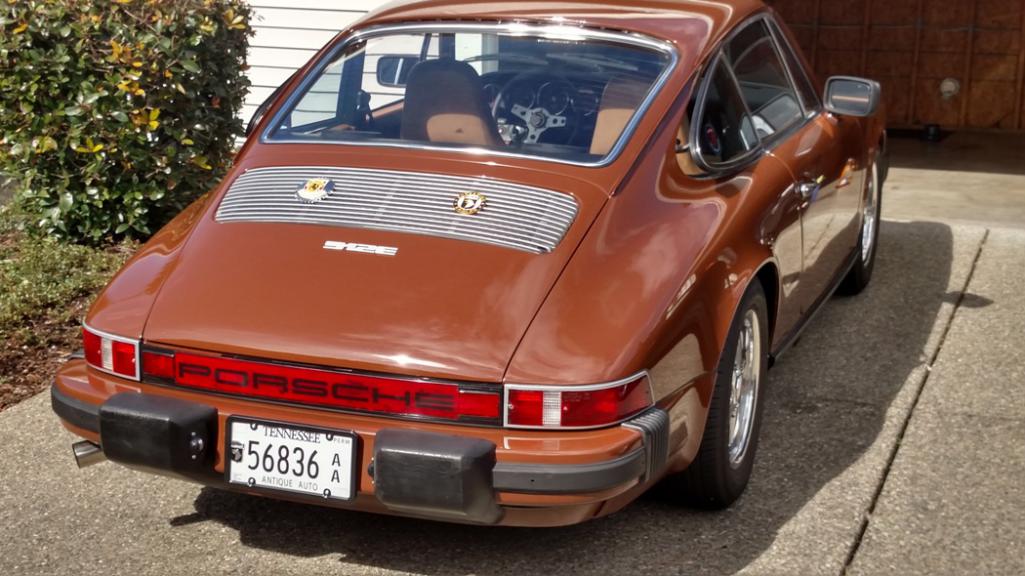
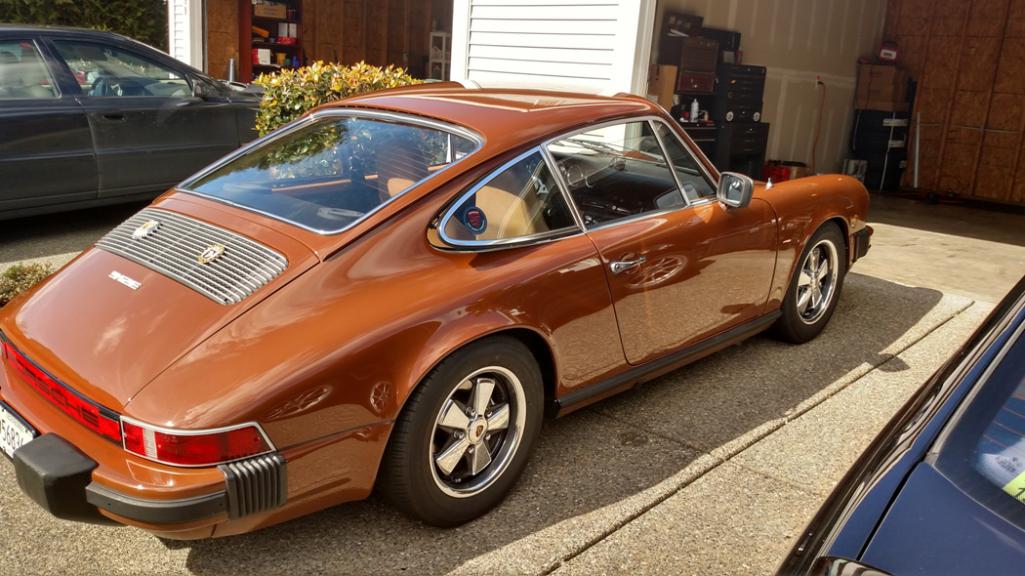
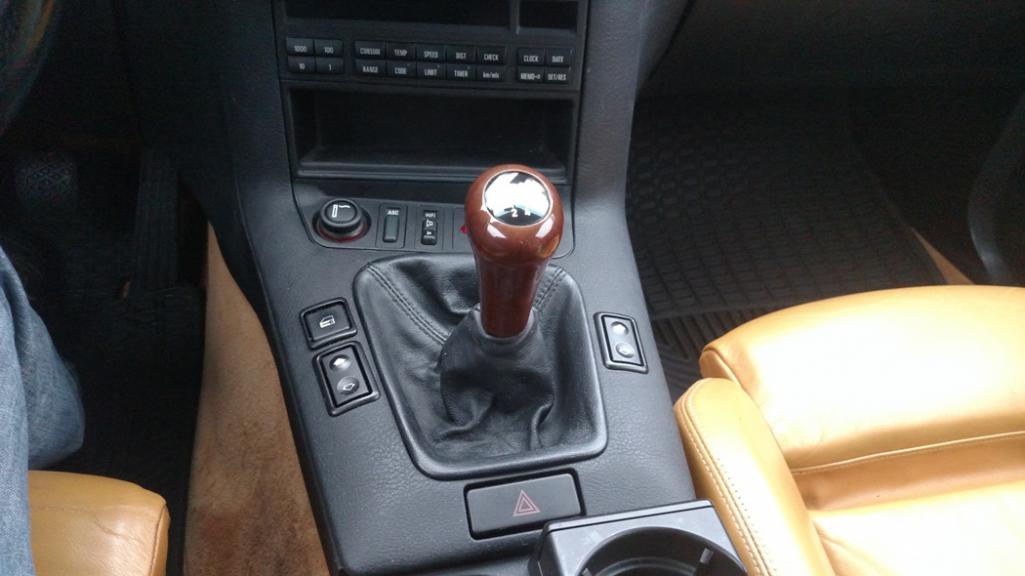
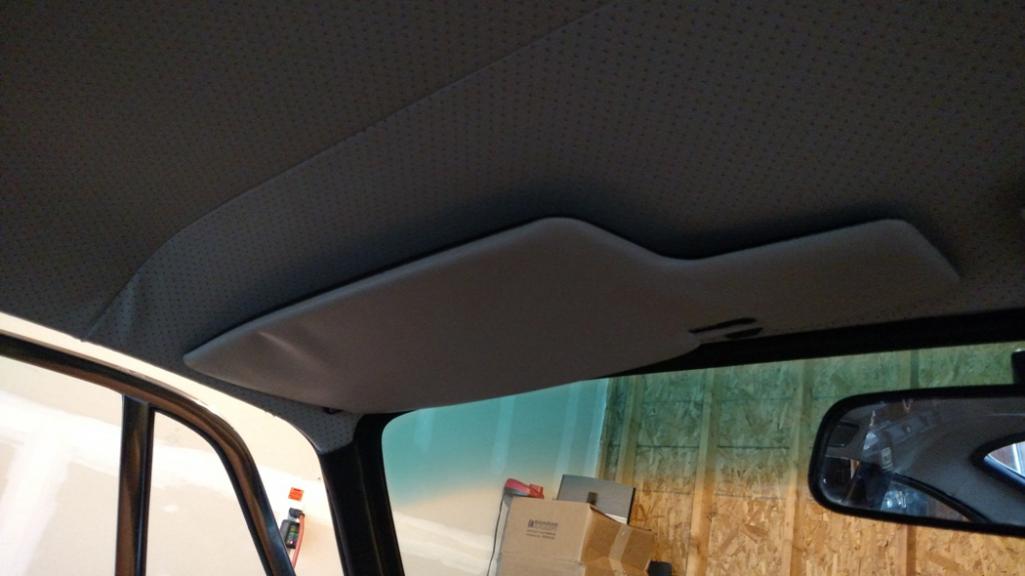
Posted by: RenoRoger Mar 6 2016, 10:31 PM
Rounding the corner, down to little items and refinements. Installed the trunk carpet and put a rubber mat down, put all my hambone stickers on, even did a grocery run. It was nice on Saturday so after a drive I washed the car, and parked next to the M3. Funny, the 3 never looked stodgy before. I'm definitely going to swap out the Hellas for something smaller, will put them on the Jeep.
And now that I have some more spare time on my hands its time to show the 3 some love. Replaced the cracked and peeling wood center console with a black piece. GOt it from ECS tuning, didn't have the cut out for the power locks, but a few seconds with the dremel fixed that.
Congratulations! A beautiful build!
I noticed that your rear windows swing out. Did you do the modification?? I own a 912E. It is bone stock and the rear windows are fixed. How about your front wing windows? Do they swing out? Mine are fixed.
RenoRoger
Posted by: billh1963 Mar 7 2016, 07:29 AM
Rounding the corner, down to little items and refinements. Installed the trunk carpet and put a rubber mat down, put all my hambone stickers on, even did a grocery run. It was nice on Saturday so after a drive I washed the car, and parked next to the M3. Funny, the 3 never looked stodgy before. I'm definitely going to swap out the Hellas for something smaller, will put them on the Jeep.
And now that I have some more spare time on my hands its time to show the 3 some love. Replaced the cracked and peeling wood center console with a black piece. GOt it from ECS tuning, didn't have the cut out for the power locks, but a few seconds with the dremel fixed that.
Congratulations! A beautiful build!
I noticed that your rear windows swing out. Did you do the modification?? I own a 912E. It is bone stock and the rear windows are fixed. How about your front wing windows? Do they swing out? Mine are fixed.
RenoRoger
M7 '76 911 rear windows are popout's like Steve. On the '76 the vent windows are fixed.
Our cars are twins!

Posted by: Steve Pratel Mar 7 2016, 11:06 AM
Thanks guys, has been a ton of fun. This was my first P car. WONT be my last.
I was just about ready to do a hotrod/modern handling restore on an 86 Olds 442 when I found this 5 years ago, its safe in a garage back east. I'm ready for the next project ;-) Been looking at several options, want to go Targa or convertible, but I'm only 6 years from retirement with at least one more deployment to AFG/IRQ and likely a European Assignment, so will likely hold unless I come across a great deal on a long nose targa. I want to retire with a modern Targa or Convertible.
As for the rear windows, The PO added the pop out windows in 1980. Vent windows are fixed.
Dude, I love your light blue Targa!
Congratulations! A beautiful build!
I noticed that your rear windows swing out. Did you do the modification?? I own a 912E. It is bone stock and the rear windows are fixed. How about your front wing windows? Do they swing out? Mine are fixed.
RenoRoger
M7 '76 911 rear windows are popout's like Steve. On the '76 the vent windows are fixed.
Our cars are twins!
Posted by: Steve Pratel Mar 22 2016, 06:35 PM
As part of my rebuild, I initially installed an oil pressure safety switch to run the fuel pump, this way if I leave the key on or the car stalls or am in an accident the pump won't continue to pump fuel into the engine compartment.
I kept the original wiring and fuel pump relays which activated the pump when in start and when there was a signal from the airflow sensor. I initially installed a Normally Open Oil Pressure switch, and when the oil pressure hit 4 lbs the contact would close and keep the pump running.
The only problem with this is that when the car sat for 2-3 days most of the fuel would drain out of the fuel lines and back towards the tank, essure. This meant that the car would often stall immediately on letting off the key because the pressure in the fuel lines wasn't up, and if the motor didn't crank enough to build oil pressure.
To prevent this, what I was doing was jumping the fuel pump, listen to the fuel fill the bows, then go and start the car, all was good. This was kind of a pain. I could have just jumped the relay and called it done, but that left me in the always on if the key was on. So I started doing some research and found this fuel pump controller http://www.revolutionelectronics.com/Fuel_Pump.html among others.
The advertisement says the pump runs 3 seconds at initial key on, but mine runs 10 seconds then shuts off. This allows proper priming of the fuel system, and will shut off if the engine stalls because it gets a signal from the negative tach lead.
Of course I have no idea how long this thing will work, so I also built in a jumper to the wiring, so if this controller decides to crap out I can just plug & be back in business. Not bad for $60, I got mine cheaper on Amazon, and I am sure there are other options.
If you are converting to carbs and dont want to run the fuel pump 'on' all the time with the ignition, this is a great solution. Easy to wire in and go.
Attached thumbnail(s)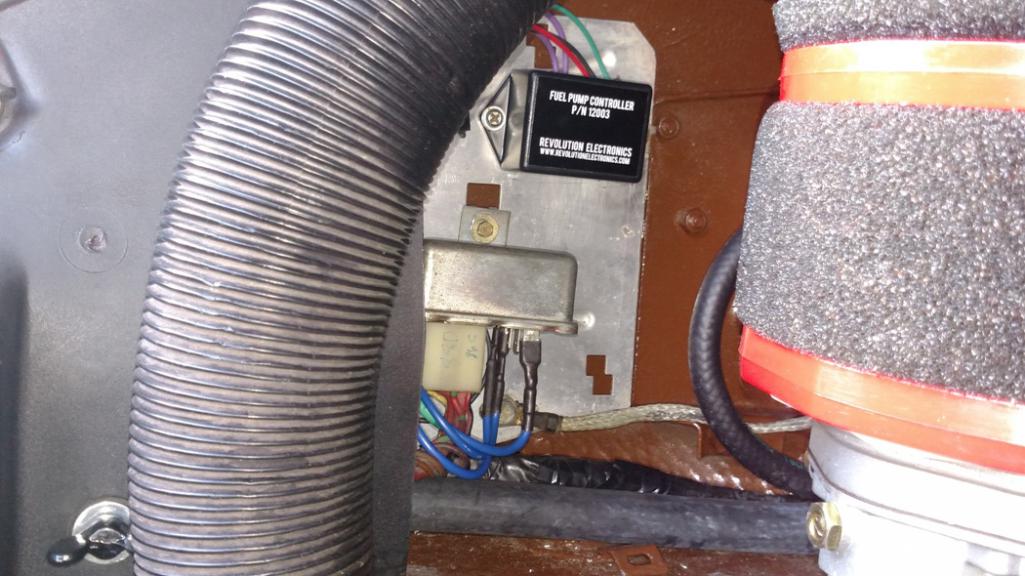
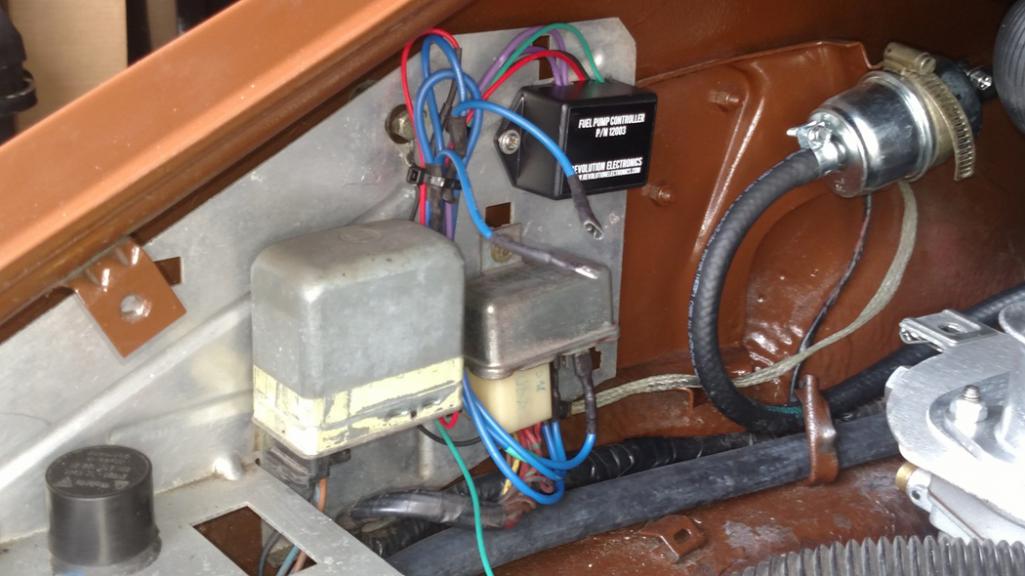
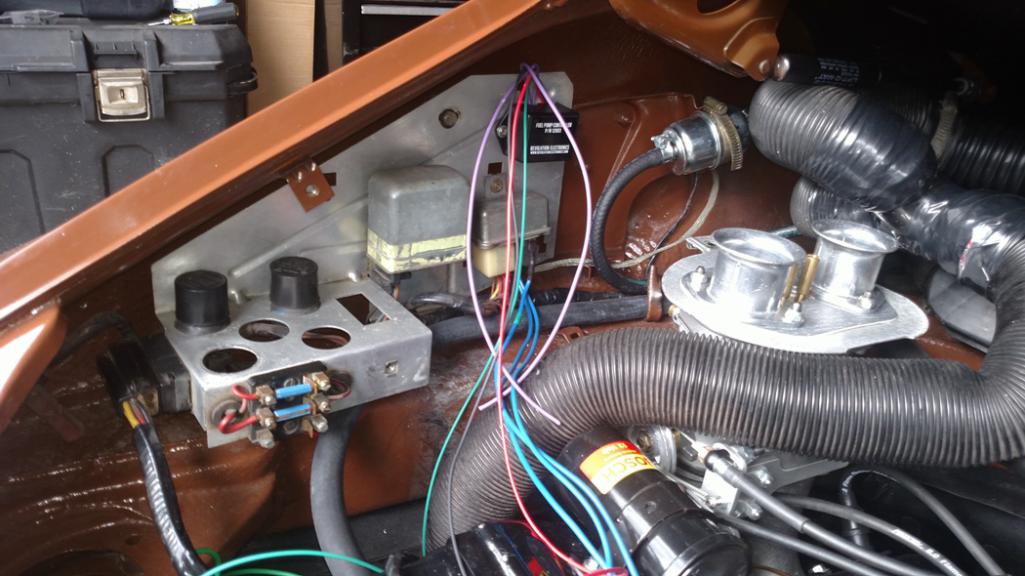
Posted by: saigon71 Mar 22 2016, 07:50 PM
Your car looks awesome Steve! Very well done.
Posted by: Steve Pratel Apr 3 2016, 12:49 AM
Well, I finally got the car for the alignment, went to Tru Line in Bellevue. they did a great job, the Tech was awesome, did a great job, answered all my questions and gave a detailed spec sheet. Great customer service and the car is spot on. If you are in the Seattle area, and need an alignment, I highly recommend Tru Line.
He took the car for a ride before and after the alignment so I also got a a chance to hear my what the Tangerine Header and Exhaust sounds like..... The sound was deep and mellow, and not at all like a 4 CYL or a Type 4/VW motor. I've heard many 914's over the years, as well as Bugs with and without a Type 4, and a couple 912E's. They varied in sound, some sounding like a VW other less so, but standing and listening as he ran through the gears I'd never guess it was a 4CYL VW. Of course I didn't think to video.
The CFR Exhaust and header is a quality piece, sounds, and looks great. Get it, you wont regret it.
Attached image(s)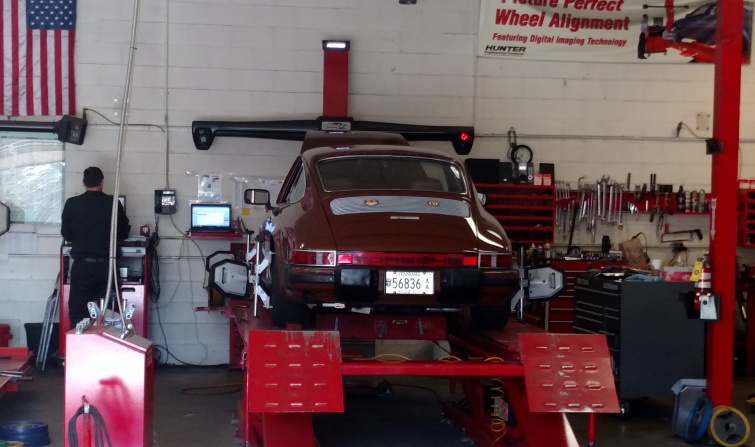
Posted by: Steve Pratel Apr 18 2016, 11:51 PM
I've been slowly building confidence in the car, and when I woke up Saturday, I felt the call of the Ocean, so I decided to drive to the Pacific Coast, ended up a flawless trip of 325 miles. It was a warm sunny day, at mostly highway speeds. Engine performed well, no issues, and even took a pleasant drive on the beach! I'm amazed at how solid and planted the car is at any speed, and had a blast in the twisties. The car is very driveable.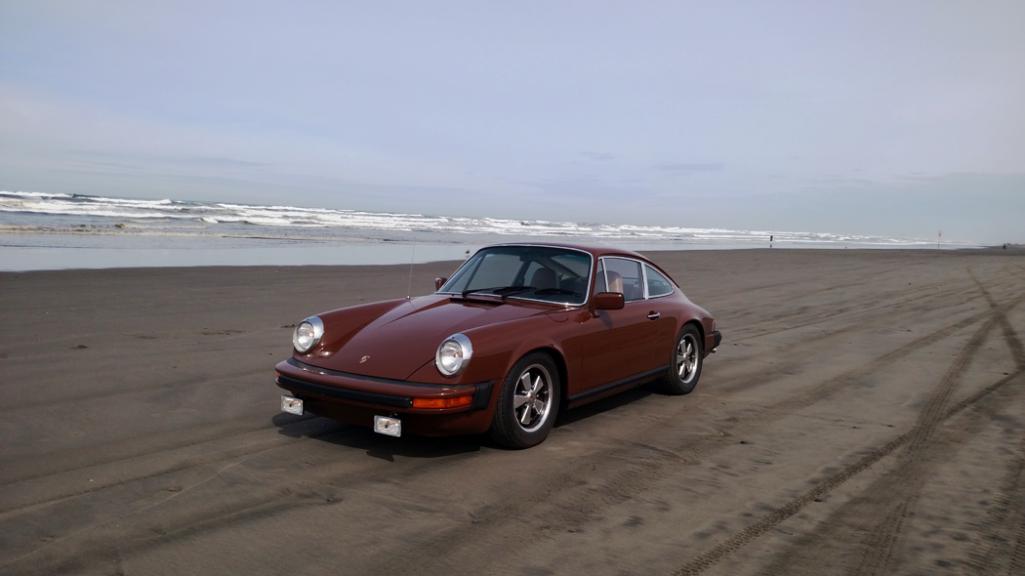
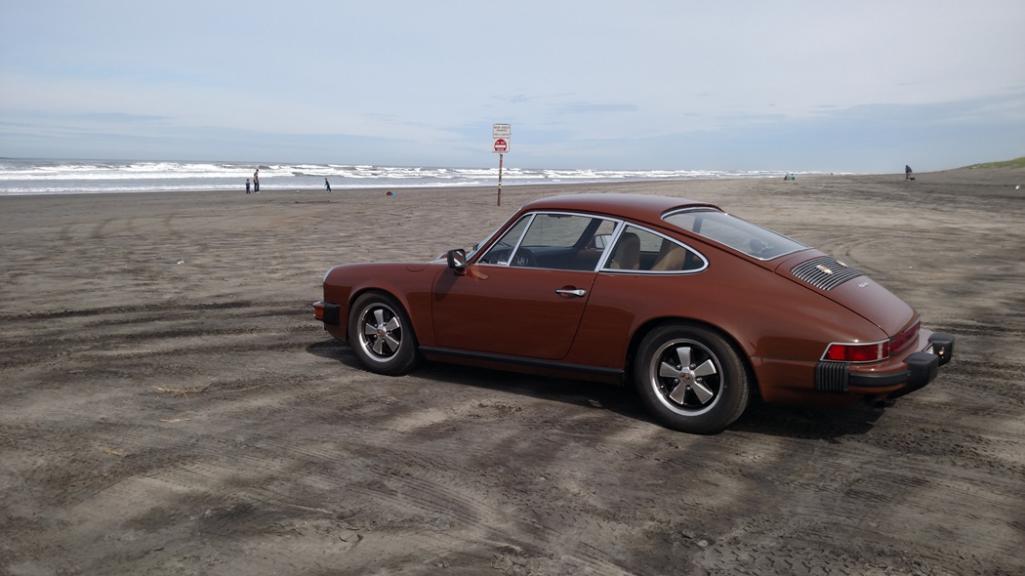
The only enduring issue is a lean condition with very light throttle input when coming off a coast. Hard to describe, but if I hold in gear, reve out a bit, then let off throttle, if I go light on the throttle as if to just maintain speed, I get a 2-3 second lean condition until I get deeper in the pedal. Also have a small leak on two pushrod tubes and the lower case seam. Not enough to drip, but is wet. When I do the 3000 valve adjust, I will probably pull those tubes, clean the o rings and reinstall. Not sure what to do with the other.
Oil Temps varied 180-190 no matter what I did, the external cooler and mocal thermostat adapter are working very well. CYL Head Temps averaged 300-325. Fuel mileage looks to be about 25 MPG, would be better if I could keep my foot out of the throttle but I'm having too much fun. I mounted the Cooler in the passenger wheel well. Not ideal, but there is good air movement when driving, and the angel protects the fins of the cooler. I also mounted in an oil temp sensor on the outlet and run it to the PLX multi gauge. (oil temp, volt and Air Fuel).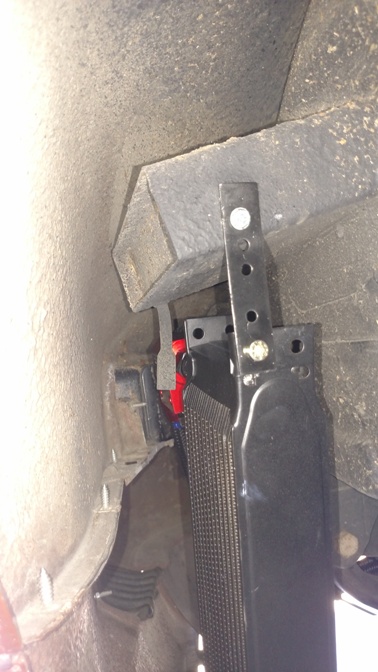 [attachmentid=551472]
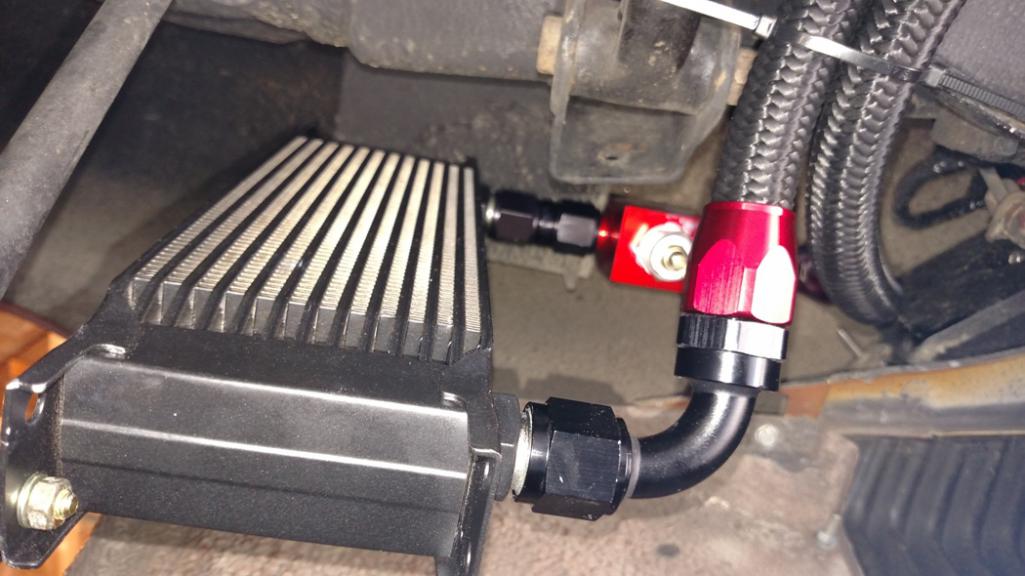
I also did a 2000 mile oil change and also changed the sump for the first time. Found some sealant of some type stuck in the screen and some goo on the sump plate but nothing unexpected.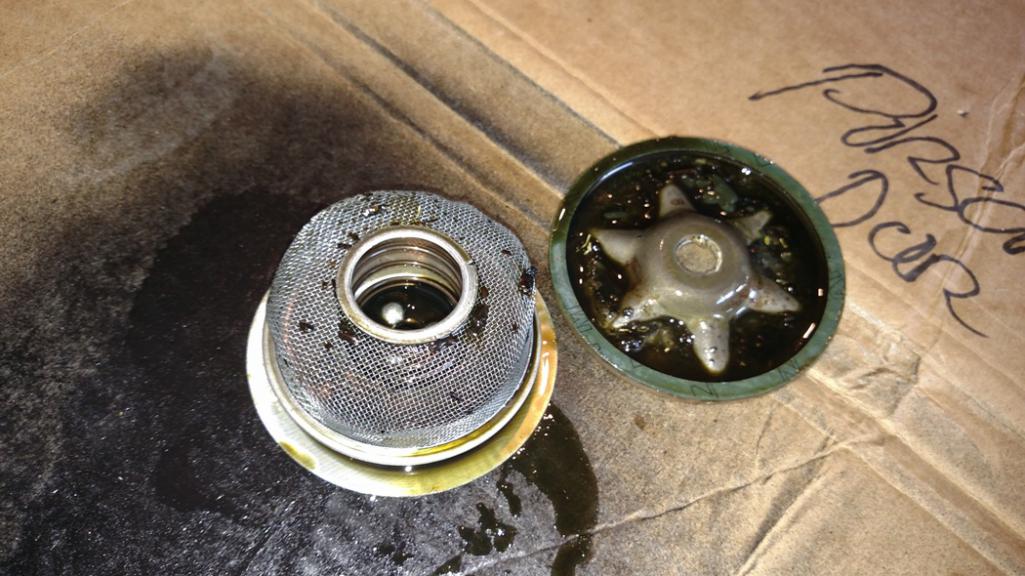
I finally got around to installing and relocating the Oil Pressure and Temp gauges with the Tangerine braided line. Used the Band clamp from the Carter Fuel pump, and connected to the case. Looks great and much safer than the wack brass setup I started with. Like EVERYTHING Chris does, this is well thought out and install is straightforward. Even an old marmaluke like me can do it.
Before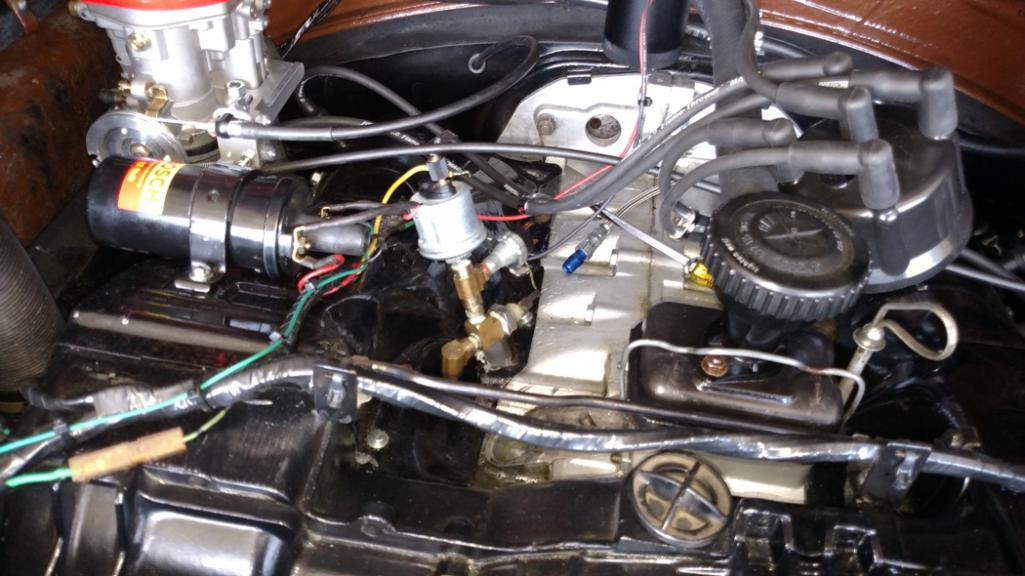
After
[attachmentid=551464]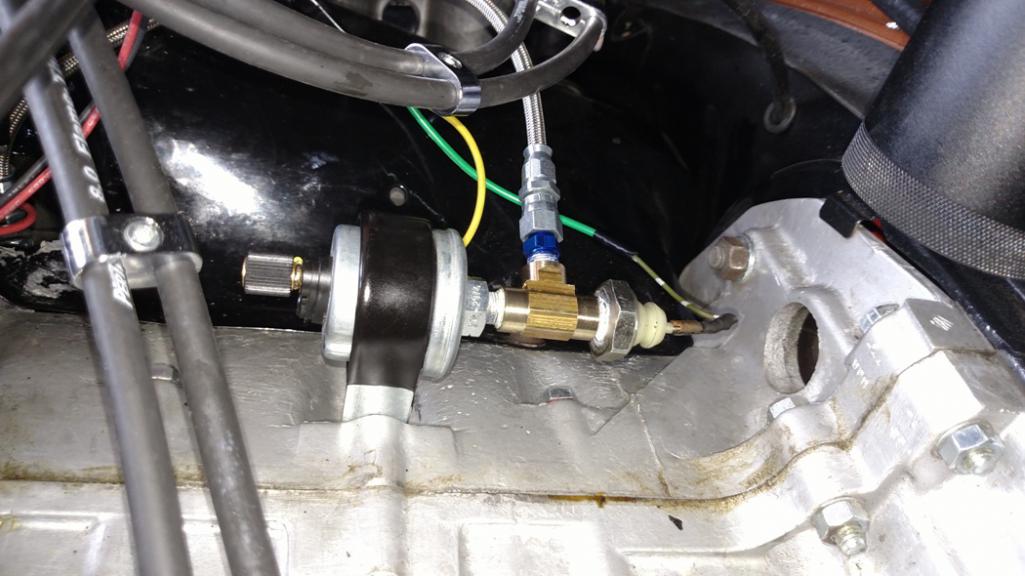
I really am having a blast and loving the car more and more.
Posted by: Mikey914 Apr 19 2016, 02:53 AM
Took ours out this last weekend. It has the injection system and we got about 32 mpg on the highway. Not bad for an old car.
Posted by: Steve Pratel May 17 2016, 05:49 PM
YUP............ more evidence that i am a retard. I've mentioned a few times that the fuel filling is torturously slow on #770, and while I dont mind slowing down to smell the roses appreciate that good things take time, it was getting ridiculous.... So today I decided to pull the filler and vent lines and take a lookie. Shoved down into the filler neck was my home made 'prefilter' Had to hook it with a dental pic and then pull out with needle nose pliers.

Attached thumbnail(s)
Posted by: jd74914 May 17 2016, 06:08 PM
It's funny; we made the exact same mistake with my dad's 911 after coating the tank.
Posted by: rhodyguy May 17 2016, 11:20 PM
WOW! That's the result of coating the fuel tank? What's the point? Now what do you do Steve?
Posted by: Papermaker May 18 2016, 11:57 AM
Beautiful car Steve. I've got to say that I'm partial to brown!
Here's a photo and a thread to a few comments about my 912e Outlaw.
http://forums.pelicanparts.com/porsche-912-technical-forum/912957-porsche-912e-outlaw.html#post9125876
--Papermaker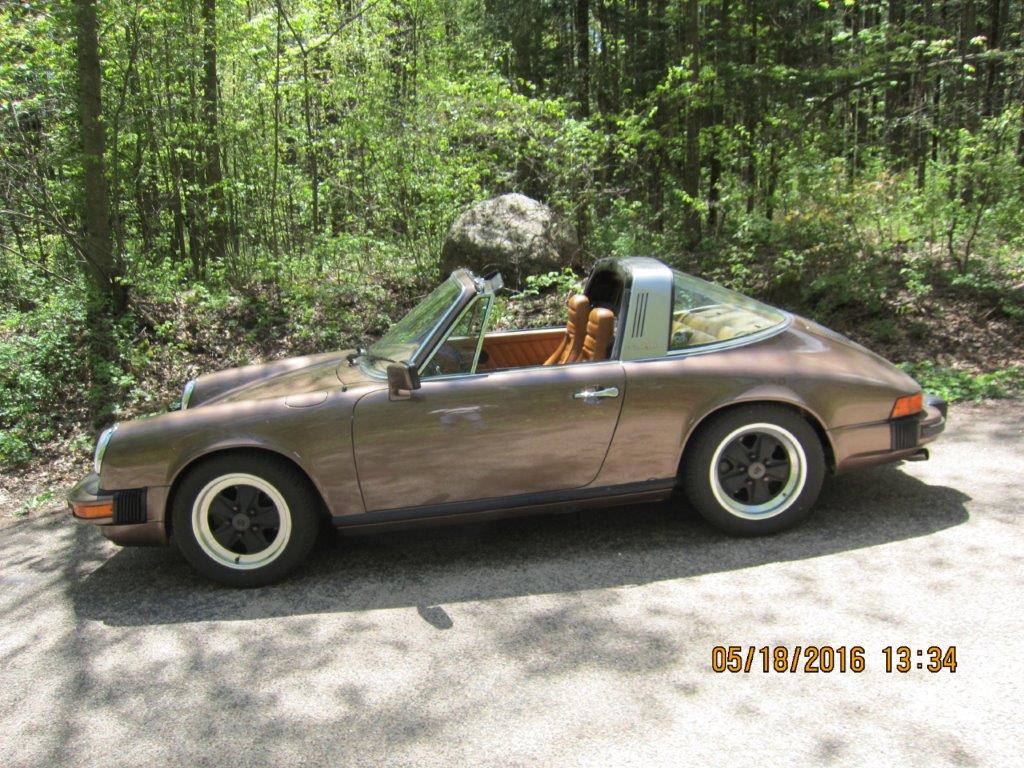
Posted by: Steve Pratel May 19 2016, 05:34 PM
WOW! That's the result of coating the fuel tank? What's the point? Now what do you do Steve?
Its hard to tell by the photo but that is just a tight ball of newspaper. I didn't re-coat the tank, I was fortunate to get a pristine tank out of a wrecked garage queen. I wadded up the paper to keep varmints/dust out of the tank while I stored it. I fished it out with a dental pic and needle nose pliers. All is well. Filled up in normal time.... what a relief.
Posted by: Steve Pratel May 21 2016, 07:56 PM
Beautiful car Steve. I've got to say that I'm partial to brown!
Here's a photo and a thread to a few comments about my 912e Outlaw.
http://forums.pelicanparts.com/porsche-912-technical-forum/912957-porsche-912e-outlaw.html#post9125876
--Papermaker
Thanks Papermaker, Brown Rules! I went with the Bitter Chocolate because it was the factory color of my car. If I had a Targa I would have gone black. I totally dig this look.
Attached image(s)
Posted by: Papermaker May 23 2016, 06:04 PM
Steve--
Mocha and cork are the stock colors.
--Papermaker
Posted by: jmitro May 23 2016, 08:44 PM
very nice looking car. Keep up the good work!
Posted by: Steve Pratel May 23 2016, 11:26 PM
Steve--
Mocha and cork are the stock colors.
--Papermaker
Gotcha. I've never seen a Bitter Chocolate Targa. If my car was Mocha, I would have likely gone with that color as well. I checked out your thread on PP Looks great!
Posted by: Papermaker May 24 2016, 11:07 AM
Steve--
I have a rubber covered oil pressure line but I like your SS line better. Where did you get it and is it temp proof, does it have a temperature rating?
Also, did anyone on World comment about a 912e thread on a 914 site? I'm thinking about adding a thread about my car.
Thanks,
--John
Steve--
Mocha and cork are the stock colors.
--Papermaker
Gotcha. I've never seen a Bitter Chocolate Targa. If my car was Mocha, I would have likely gone with that color as well. I checked out your thread on PP Looks great!
Posted by: Steve Pratel Jun 9 2016, 10:44 PM
Did my 3000 mile Valve Adjust today, first was after breakin, then at 1000 miles.
Overall, I am very happy with the results. I had 3 valves spot on and needed no adjustment, 2 were a bit tight, and 3 were about the same amount loose.
1 - Intake was a little loose, Exhaust was a little tight
2 - Intake was spot on, Exhaust was a little tight
3 - Intake was spot on, exhaust was a little loose
4 - Intake was a little loose, exhaust was spot on
Yeah Yeah I know I should have measured, but hey I'm getting old and lazy. Total Job was less than an hour including jacking up putting on stands, removing tires. I use a short cut method to adjust. Very easy on the 911 body, not sure this would be so easy on the 914.
ADJUST PROCESS:
o Remove distributor cap and timing plug
o Using a big box wrench Rotate engine with alternator nut so CYL 1 is at TDC.
o When #1 is at TDC, the #2 intake and #4 exhaust valves are also fully CLOSED and can be adjusted. Adjust #1 Intake and Exhaust, #2 Intake, and #4 Exhaust.
o Rotate engine one full revolution so rotor turns 180 degrees and is facing #3 and mark is at TDC again. #3 is at TDC. Now set #3 Intake and Exhaust as well as the #4 Intake and the #2 Exhaust. Badaboom, done.
I reset the timing, and used the factory mark as opposed to MY mark when I had the engine apart, the Factory Mark is 5 degrees more advanced than my TDC. I set it to 9 degrees at idle and ends up at 24-24 at 3500. Motor seems a bit Livelier, but I still really have no idea what the 'ideal timing should be with my particular build.
Everything looked great inside the valve covers, have used maybe 1/4 quart of oil, and the motor still screams, pulls straight to redline, no surging, great throttle response and torque. The only lingering issue is a slight lean condition with light roll on throttle input. In other words, say I am in 3rd gear, rev to 5K and let off the gas. If I feather the fuel back up to maintain speed, I get a 1 second lean condition. If I Am more aggressive with the fuel, there is no issue, so I am thinking it is ME that needs to adjust my driving style. I'd still like to take it to John Walkers garage or another shop in the area and have it put on a dyno for real professional tuning and a HP check, but I'm also cheap............. lol
I HATE putting my cars/motorcycles and $$$ into someone else's hands.
I want to say THANK YOU again to this forum and those who helped and gave advice along the way. Now its time to source the parts for a 2270
Posted by: Steve Pratel Jun 9 2016, 11:00 PM
John, just saw this, sorry for the late response. I got mine from Chris Foley, contacted him directly for it, I dont think it is on his webpage.
I've received a warm welcome, nothing said to my 'face' 914 World Rocks. I'm sure there is some keyboard warrior who is offended but he will get over it. I put the 912E in the title as a courtesy so those who arent interested dont waste precious web time in a non 914 thread.
Steve--
I have a rubber covered oil pressure line but I like your SS line better. Where did you get it and is it temp proof, does it have a temperature rating?
Also, did anyone on World comment about a 912e thread on a 914 site? I'm thinking about adding a thread about my car.
Thanks,
--John
Steve--
Mocha and cork are the stock colors.
--Papermaker
Gotcha. I've never seen a Bitter Chocolate Targa. If my car was Mocha, I would have likely gone with that color as well. I checked out your thread on PP Looks great!
Posted by: Dave_Darling Jun 10 2016, 12:06 PM
o When #1 is at TDC, the #2 intake and #4 exhaust valves are also fully CLOSED and can be adjusted.
I (and others) have found that this often leads to valve clearances that are larger when measured at TDC. Not sure why, though. (Tolerance stack on the valve train?)
--DD
Posted by: napasteve Jun 10 2016, 12:46 PM
Steve,
Regarding your 912 thread on the 914 board:
I have really enjoyed watching you restore your beautiful 912e. Like many of the 914 restoration threads here on the World, I am gobsmacked by the quality of your work, attention to detail, and of course the stunning result.
So I'm very happy that you took the time to start and post on your thread. If my reading of history is correct, that engine in your 912 was supposed to go into a 914 but the 914 program got killed so Porsche stamped out a couple thousand 912e's to use up the engines. So the 912e is kinda a rear engine 914???
So thank you for your thread.
Posted by: Papermaker Jun 10 2016, 06:15 PM
Steve--
Thanks for the feedback on the oil pressure line, I'll give Chris a call next week.
--Papermaker
PS. I'll start a 912e Targa thread next week also.
Posted by: Steve Pratel Jun 11 2016, 09:45 AM
AND IT HAS A NAME (long post).
I've named a few of my motorcycles, but never named a car other than my first (a 1964 Buick Special names the Low Rider due to its rust sag). One of my motorcycles was named Bug Slayer due to my finding every bug on the planet to commit suicide on its fairing and windshield...... After my 400+ mile drive yesterday, I think #770 has decided on its name. And it is BRACKET KILLER............
So there I was........... Got an unexpected day off Friday due to Army Ball recovery, and decided to drive to Leavenworth WA to get a christmas ornament for my soon to be born grandson, and decided to take the scenic route. Will post on engine temps and experience in another post, but the first 300 miles were a blast. There must have been some kind of P car meet in the Leavenworth area, passed a ton of watercooled (aka fake ) Porsches of all types heading in to leavenworth.
Anyhow, I drove the snot out of the car, drove it like I stole it most of the day and all was well until....... I stopped for gas in Pomona and heard a strange rattle. YEP lower alternator bracket is broken again....... Upper bracket bolt worked itself loose (diddnt use loctite) allowed excessive vibration and cracked lower bracket. Is my fault. WHen I recently changed out my brackets (upper and lower) when I installed the upper it didn't 'torque' up right, felt like it was going to strip so I backed off. Obviously it worked itself loose, allowed movement and vibration and caused the lower to crack.
This will be Bracket 3.... The first was the original that fell apart when I initially disassembled for restore, the second broke after 2000 miles and this third after 900 miles. So.... I think it is time to pull the back end of the tins and fan housing off and see whats up....... Will likely have to tap a larger hole for the upper bracket. FUN FUN.
So, at 8pm in the rain in the Mountains, I limped home, kept the motor revs low, drove the speed limit and got home about 11pm. Made it home without problem, I was convinced it would throw the belt as the alternator is bouncing around and the belt is VERY loose. AH the joys of driving a 40 year old treasure.... Seriously I LOVE it.....
Here is the route.
Attached image(s)
Posted by: rhodyguy Jun 11 2016, 01:51 PM
Long drive from Pomona. even with a good running car. You were prob very relieved when you got to 512. Weird your car is eating brackets. I don't have any more of them.
Posted by: Steve Pratel Jun 11 2016, 11:23 PM
Long drive from Pomona. even with a good running car. You were prob very relieved when you got to 512. Weird your car is eating brackets. I don't have any more of them.
Not sure either, I think the reason the lower broke this time is because the upper bracket came loose and caused the lower to crack? I found a lower one on ebay, but may explore some other options. I will head over to the Hangers and Machine shops this week and see what the metal shop can work up for me. They can fabricate almost anything, and have all kinds of high strength steel parts. Hmmm, maybe even repurpose a bracket or piece of metal off an AH64 or CH47. That would be cool ;-)
Posted by: Steve Pratel Jun 11 2016, 11:28 PM
Thanks for the kind words. I know that feeling I've spent the last 5-6 years looking over this and PP forums with others and have been blown away at peoples work. I'm a total newbie,and my work is passable for a hobbyist, but not professional. But I've done most all myself except for the pain and heads, and I'm happy!
Not sure what Porsche was thinking with the 912E but it makes sens to use the core 914 engine. They did use a different FI system and I think a few other changes but it is basically a low content 1976 911S with the reworked 914 motor.
Steve,
Regarding your 912 thread on the 914 board:
I have really enjoyed watching you restore your beautiful 912e. Like many of the 914 restoration threads here on the World, I am gobsmacked by the quality of your work, attention to detail, and of course the stunning result.
So I'm very happy that you took the time to start and post on your thread. If my reading of history is correct, that engine in your 912 was supposed to go into a 914 but the 914 program got killed so Porsche stamped out a couple thousand 912e's to use up the engines. So the 912e is kinda a rear engine 914???
So thank you for your thread.
Posted by: Steve Pratel Jun 26 2016, 11:02 PM
Pulled the fan shroud off today to do the R&R of the Upper ALT bracket bolt, looks like the threads stripped out of the aluminum which caused the bracket to come loose. I was able to find another bolt long enough to go all the way through the housing and I put a nut at the top. Sucker isn't coming off ever..... That should take care of the upper bracket which is I think the culprit both times. First time the original bracket bent and broke because it had nothing to bolt to at the lower end. On Stock 912E's the alt bracket runs in an arc from the fan housing down to where the header and muffler attach. Because I am using the Tangerine Exhaust this is eliminated. The bracket I got from Kevin (Rhody Guy) is off a 914 and is much sturdier. 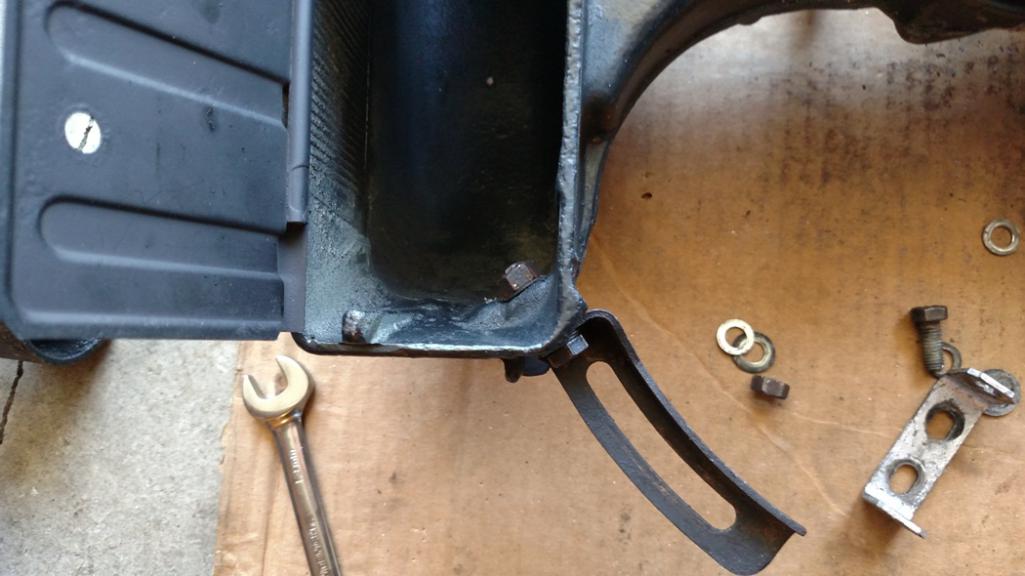
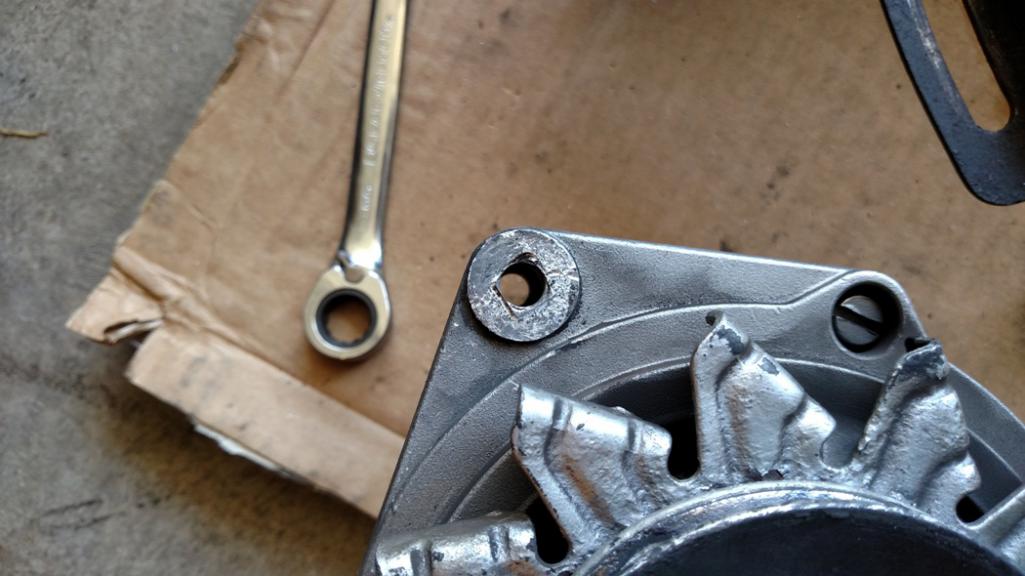
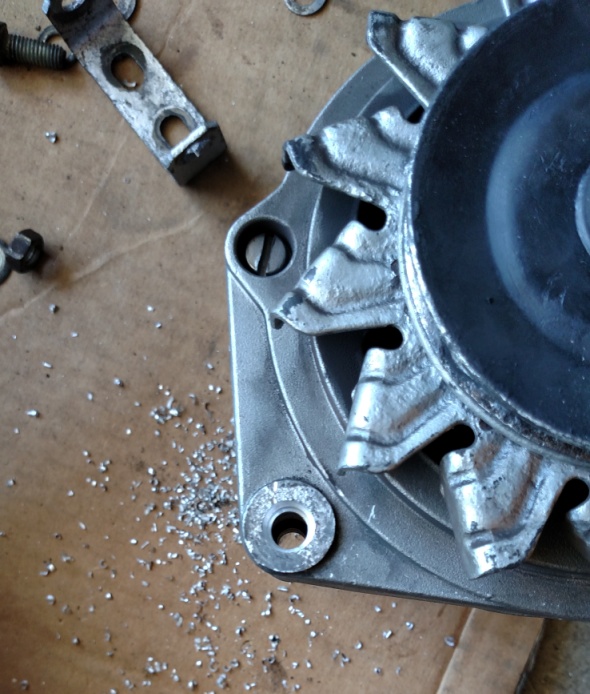
I think I need a new Alternator Pulley, mine is eating the fanbelts super fast because of how pitied it was.
I think I also figured out the problem with the lower bracket. The square end on the carriage bolt is longer than the bracket, and when tightened would bottom out on the alternator and didn't pull the bracket tight to the alternator, just the bolt. This I think created stress on the bracket and movement of the alternator. I used a step drill and widened the hole enough to let the squared section of the bolt slide inside the hole and now the bracket is pulled tight to the alternator front and back. I also used a flat file to smooth the surface of the housing where the bracket bolts up. 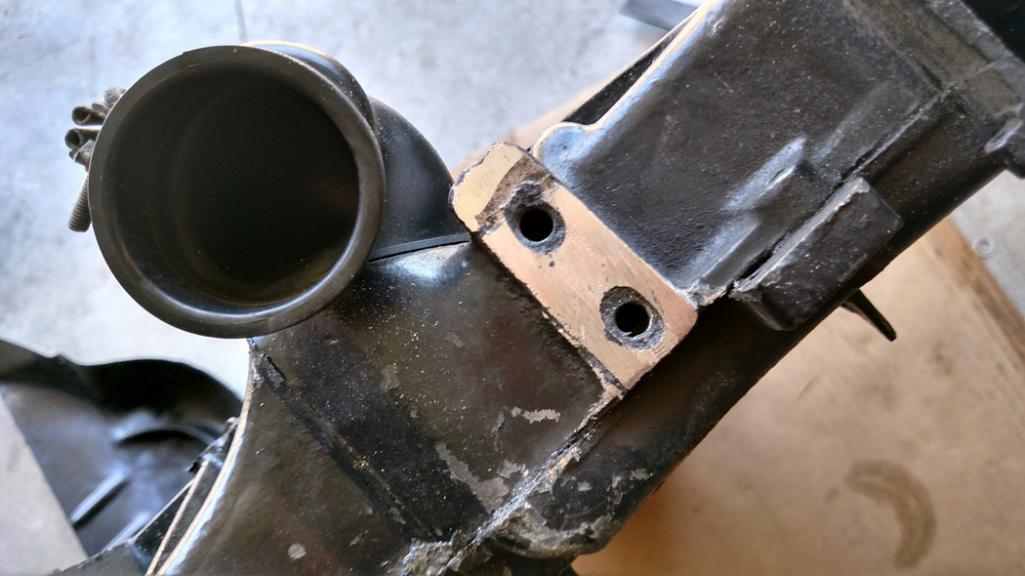
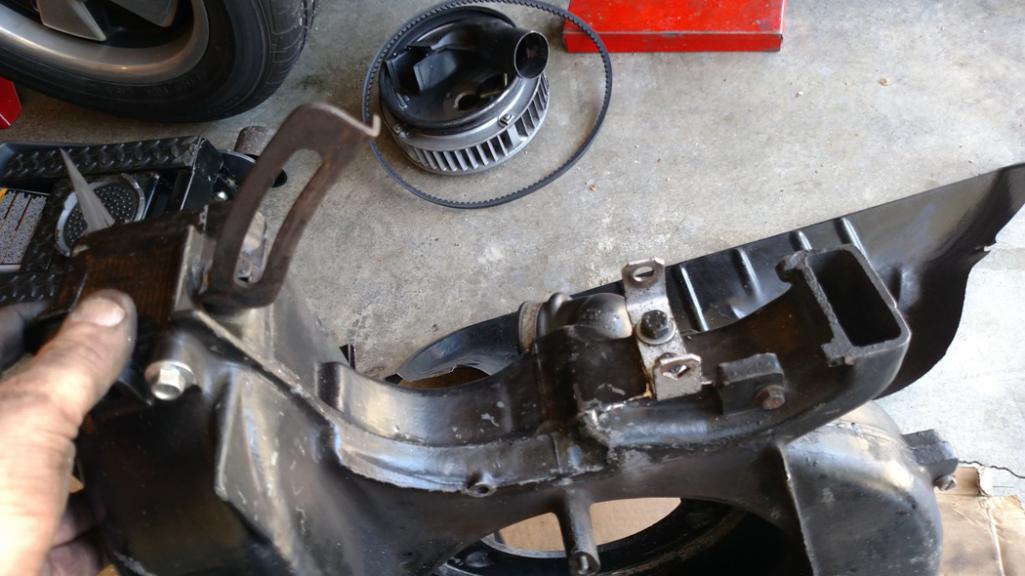
Wasn't too bad only 3 hours to R&R the whole deal & go for a 120 mile drive. Would have gone farther but I forgot my wallet and almost ran out of gas lol. Put 465 miles on the tank of gas, most of it spirited driving. All seems good, but the breaking point has been about 1500 miles. I think I have it this time, with a new solid and bolted tight upper mount, smoothed lower bracket mounting area. Fingers Crossed.
Nice to see no leaks from the crank seal or oil pump, so it looks like my leak is the bottom engine seam.... Oh well, its only a drip here and there.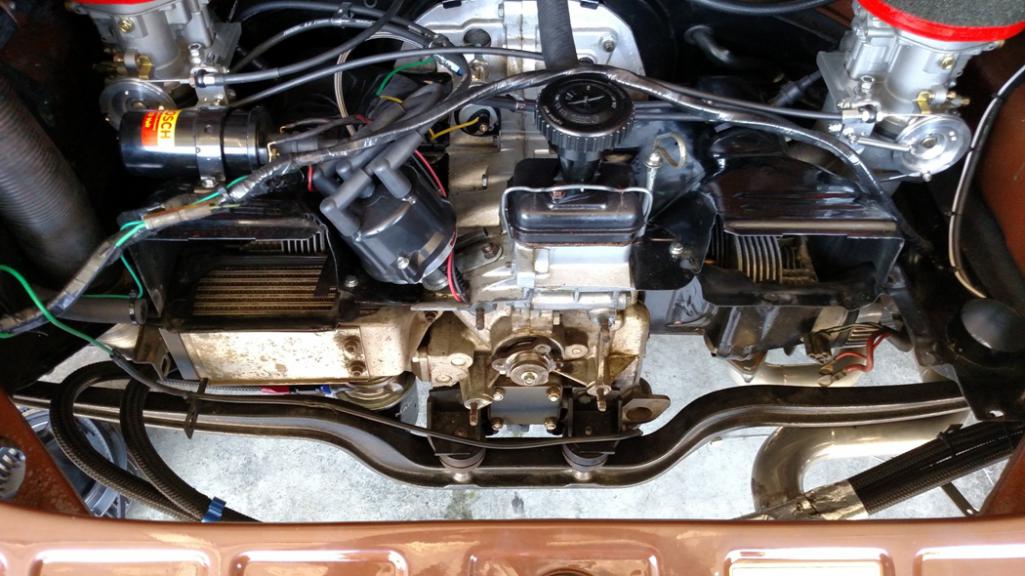
The Second Bracket, both breaking the same way in 3 pieces. Is this a common failure on these engines? The original was broken when I pulled the engine apart. I took extra care to make sure the brackets were lined up so the alternator moves freely across its range of motion so no binding or odd stressing of the brackets. I also have some of my Apache Mechanics making me a bracket out of some kind of steel they say wont break, but hopefully won't need it for a while.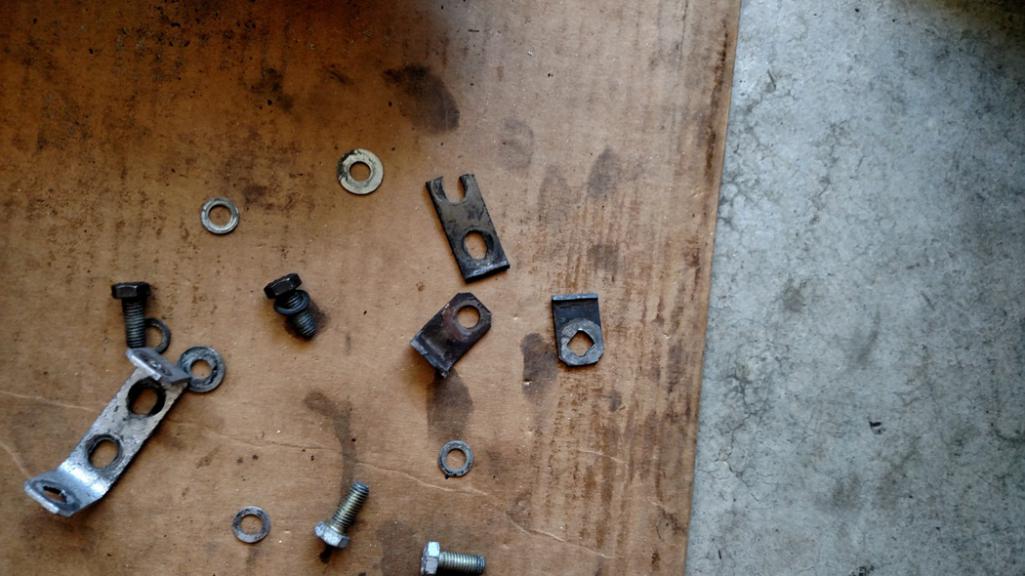
Posted by: rhodyguy Jun 27 2016, 08:15 AM
Nice fix! I have a pulley for you. Give me a call.
Posted by: Mueller Jul 3 2016, 02:20 PM
How is she running?
Why the Dell 36's? How did you pick that size if you don't mind me asking?
Posted by: Steve Pratel Jul 8 2016, 10:17 AM
How is she running?
Why the Dell 36's? How did you pick that size if you don't mind me asking?
Car is running great.
I went with the Dell 36's because I got them for a great deal..... Dell 36's flow like Weber 40's, and are a good option for driveability, solid midrange performance in a 2056. They give up some ultimate HP/Dyno HP #'s to the 40's but not enough to make a difference unless you drive at redline all the time.
Posted by: rhodyguy Jul 8 2016, 10:27 AM
Smooth on the bottom end. When Steve left my house, 0 carb racket and no drama.
Posted by: Mueller Jul 8 2016, 11:32 AM
How is she running?
Why the Dell 36's? How did you pick that size if you don't mind me asking?
Car is running great.
I went with the Dell 36's because I got them for a great deal..... Dell 36's flow like Weber 40's, and are a good option for driveability, solid midrange performance in a 2056. They give up some ultimate HP/Dyno HP #'s to the 40's but not enough to make a difference unless you drive at redline all the time.
Thanks!
Your build has been somewhat inspirational for me.
Mike
Posted by: Steve Pratel Aug 9 2016, 10:34 PM
Smooth on the bottom end. When Steve left my house, 0 carb racket and no drama.
You still need to drive my car, would love to get some feedback.
Posted by: Steve Pratel Aug 9 2016, 10:38 PM
Thanks!
Your build has been somewhat inspirational for me.
Mike
Mike, it's funny. I look at my car and project and while I love how it turned out, I am like 'meh' is good (other than paint which is excellent) for a hobbyist project, could be better and is nothing like some of the projects I see here and in PP resto threads. So I appreciate the kudos. It's been a dumb stumble and shot in the dark through most of it, but God honors fools and fear has been burned out of me so I just went for it. I still want to finish the interior with new/better quality tan leather, just dont want to spend the $$........
Posted by: porschetub Aug 10 2016, 01:01 AM
How is she running?
Why the Dell 36's? How did you pick that size if you don't mind me asking?
Car is running great.
I went with the Dell 36's because I got them for a great deal..... Dell 36's flow like Weber 40's, and are a good option for driveability, solid midrange performance in a 2056. They give up some ultimate HP/Dyno HP #'s to the 40's but not enough to make a difference unless you drive at redline all the time.
too many go big thinking bigger is better ....funny thing is we don't drive a 5000 to 5500 rpm that much ,a good midrange power is very rewarding.Posted by: Steve Pratel Sep 22 2016, 08:51 PM
8000 mile update.
Just turned 8000 miles on #770 rebuild and all is going well. Here are a few observations.
1. The 911 Chassis on the 912E is very comfortable, solid ride, and cruises beautifully and effortly at 75-80 mph. It only has a front roll bar so the real tight twisties give some body lean, but I really like the ride quality so I am leaving it alone. But I must say............... This is the first car (including my E36 M3) I can take through the turns as fast as I can take in my motorcycles, and it does it almost effortlessly. The balance is perfect, with a full tank I am 52/48, with 1/2 tank is 50/50. No idea what it is with a driver, but the car is just AMAZING...... The Rebel Racing suspension and Sachs shocks with stock torsion bars and sway bar is sweet. Supple, responsive, and solid as a rock.
2. The Motor is running perfectly. Starts right up, solid idle, pulls straight to redline, great midrange, and most importantly is docile, smooth and responsive when driven normally. Very little oil burning, maybe a quart every 2000 miles. Fuel mileage is averaging 26mpg, when just on highway/cruising/trip my wife and I got 33mpg, loaded with luggage two people and 70-75 mph highway.
3. When driving aggressively and returning from an off throttle situation, if I feather the gas it will go lean for a second or two, so I need to get deeper in the pedal. I may switch to larger accel jets in the future but this is the only driveability issue fixed by changing my driving style.
4. I didn't do a good job with the top and bottom case seals. The front and back and crank/cam plugs & seals are good, but my top and bottom seams weep a little oil, as do 1-2 of the cyls where they make with the case. It's not bad, and amounts to Very little drip, but the seams are wet with oil. Oh well.............
5. I've eaten 3 alt brackets and 5 belts...... I think I have the brackets straightened out, but need to swap out the alternator pulley, it is pitted and just eats away at the belts.
6. Air/oil temps. This may be a matter of TMI, but I track oil temp in 2 locations, the sump on the stock gauge, and post my external oil cooler with a PLX, and also the Cylinder Head Temps on a VDO. In normal driving, mix of hills and flats, and legal speeds the motor is spot on for oil and cyl head as far as temps. When driving aggressively, or in over 90 degrees outside, it is a tug of war between good head temps or good oil temps. If I drop down a gear, especially in the mountains and long hills, the Head temps are good, but the oil temps spike and get close to max. If I keep the revs down, higher gear, the oil temps stay low, but head temp spikes and gets close to max. Though my external oil cooler is not in a clear path of direct air, it is in an open space. I think a solution will be a cooler mounted fan that I can manually turn on and off. I ran 2 extra wires to the front when I had the car apart so will wire in a micro switch in my accessory gauge cluster to power a fan and see what this does.
7. Oil pressure. I've noticed when entering hard cornering that the oil pressure drops if the oil is not full. Even a 1/2 qt low can trigger this. Hopefully the tuna can thing will fix this. Because of my external oil cooler, I try to stay 1/2 a qt over full as the cooler is higher than the sump and drains back into the sump. If I keep the level full, it rarely happens, but MAN what a scare to get the oil light when you are hard on the throttle in a 75MPH sweeper!
8. I swapped out the dead dino oil with swepco in the gearbox and it made an immediate improvement that seems to be getting better. Smoother shifting, better downshifting and syncro engagement, but still get a little complaint from 1-2 and 2-3 upshifts. Only 2-300 miles so far, but everytime I drive it feels better. Still not perfect, but much better.
I want to again say THANK YOU to those of you in this forum. I dont have time to contribute very often these days, but still poke my head in and will do so.
Attached thumbnail(s)
Posted by: mark04usa Sep 22 2016, 10:19 PM
Thanks to you, Steve. We have enjoyed your thread. I got to drive a new 912E when I worked at a Porsche dealer in the '70's. I don't recall if we had more than one. It was a great car to drive, and it was also quiet, just a subtle roar. You chose such a fine car to restore
Posted by: rhodyguy Sep 23 2016, 08:00 AM
Great picture. Beautiful car. Impressive geography.
Posted by: VGM911 Sep 24 2016, 12:20 AM
Thanks for taking the time, Steve, to meticulously document this project for our education and enjoyment. I read the entire thread from beginning to end.
I, too, owned a Bitter Chocolate 912E (#1746), but I always thought it was under powered with its somewhat "meager" 86HP. However, the massive 21 gallon gas tank was a wonderful feature, providing a cruising range of several hundred miles!
Posted by: Steve Pratel Sep 24 2016, 12:11 PM
Thanks for taking the time, Steve, to meticulously document this project for our education and enjoyment. I read the entire thread from beginning to end.
I, too, owned a Bitter Chocolate 912E (#1746), but I always thought it was under powered with its somewhat "meager" 86HP. However, the massive 21 gallon gas tank was a wonderful feature, providing a cruising range of several hundred miles!
Thanks, its been a blast. I'm happy with the power of the rebuild, but have nothing to compare it to. Have never driven or ridden in a 914, or 912E or 911 of that Era.
One of these days will get together with Kevin and others to see what they think of the power. I'm impressed, and guessing it is at about 115-120 HP.
Posted by: Steve Pratel Dec 11 2016, 02:08 AM
After almost 3 months of being gone training, I decided to go for a drive this morning. It was a bit chilly, but the sun was out. Unfortunately, my new AGM 911 sized Battery was completely dead.... Thankfully, I bought it at OReilly's and they tested it and it came up bad. They had one in stock, replaced at no cost and 60 minutes later I have the new battery in the car and am driving.... Real nice 3 hour drive. WHAT A SWEET car.....
After not running for 3 months the car kicked right off, and just a little spitting from one of the carbs (same one every time) the car ran sweet and strong. The Tangerine Exhaust with heat option does a fair job, puts enough warmish air on the windshield to keep it fog free unless I breath too hard... lol
I THINK however that the car killed the battery, and that I have a very slight draw somewhere in the system that drained the battery completely. I mean totally dead as in 0 volts... lol Last time I drove it was in Sept. I didn't put the trickle charge on before I left so my bad. I do need to try to track down the draw/short though.
Not sure why but a few things work if the key if off, particularly the windshield wipers. I figure if that circuit is still live there must be a couple others. Still need to get it to the body shop to get the door repaired...
Posted by: billh1963 Dec 11 2016, 07:40 AM
I THINK however that the car killed the battery, and that I have a very slight draw somewhere in the system that drained the battery completely. I mean totally dead as in 0 volts... lol Last time I drove it was in Sept. I didn't put the trickle charge on before I left so my bad. I do need to try to track down the draw/short though.
Not sure why but a few things work if the key if off, particularly the windshield wipers. I figure if that circuit is still live there must be a couple others. Still need to get it to the body shop to get the door repaired...
I have a '76 911S same color as yours. In that car (as well as my other 911's and such) I use this...seriously.
It may be old school. But, it saves the battery and also reduces my concern of a fire caused by a short or other electrical issue.
https://www.amazon.com/gp/product/B000CQBND0/ref=oh_aui_detailpage_o01_s00?ie=UTF8&psc=1
Attached thumbnail(s)
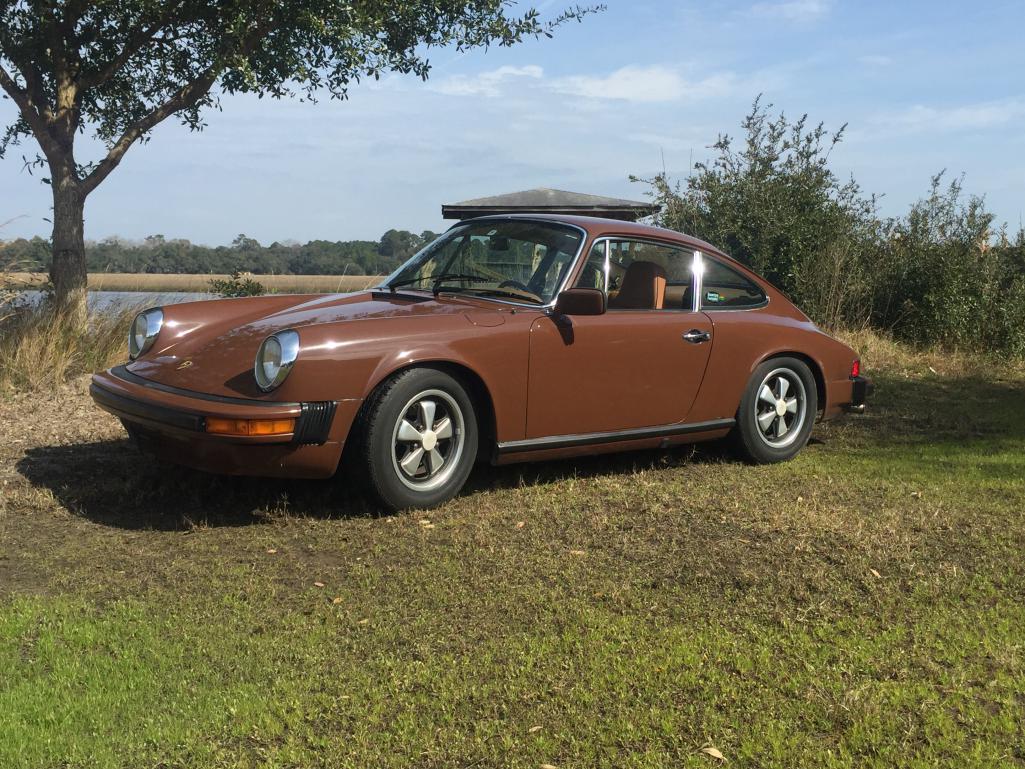
Posted by: napasteve Dec 11 2016, 11:12 AM
Steve, I agree with billh1963. Here is what I did on my 914. 3 benefits: 1) slight thief deterrent, 2) no more battery rundown from electrical leaks, and 3) eliminate the small fire hazard associated with 45 year old electrical systems that are energized and sitting in your garage.
Posted by: Steve Pratel Dec 12 2016, 10:53 PM
Yep, thanks was on the 'to do list' Picked one up today, will install this week. Still would like to track down the slow drain and figure out if the wipers should be 'active' while the key is off.
Initially the delay circuit and park on off function worked fine but after the first drive in the rain (yes.... it is NOT a garage queen) the wipers failed to return to park on off and the delay function ceased to work. I disassembled the motor, re-soldered the connections and no change so I assume it is the switch itself. Is on the 'list' I wanted to drive the car and enjoy it after 6 years of work.
My short list of 'to do's is:
1. New Leather seats - Recover stock units - $$$
2. Track down the short and wiper issue
3. Install fan on external oil cooler
4. Send Thermostat back to the 'awesome powdercoat' thermostat doesn't open, never has. Am running without.
5. Sell all my EXCESS parts.
But I've been so dang busy...... I just barely have time to squeeze in drives.....
Posted by: Steve Pratel Jan 16 2017, 10:41 PM
Nice weather today, took the car for a long drive and swung by Rhody Guys (Kevin) to pick up a good working thermostat. Took the long way home, about 200 miles and came home to discover that Bracket Slayer had struck again....... #4........ SAME exact place as the others. Time to reevaluate. It is notable that this is an ongoing problem for the car, as when I initially tore the engine apart, it only had half a bracket, and I found out by accident that it was broken.
Thanks to Kevin I now have a working Thermostat Bellows which will help keep the motor at optimal operating temps.
Posted by: rhodyguy Jan 17 2017, 10:51 AM
You took the long way home . What route did you take? Up 410? Weird on the bracket. I have another one. I had the pleasure of driving steve's car yesterday. More than adequate power, wonderful road manners, and nice a/f ratios. To me, his carbs are setup perfectly.
Posted by: Steve Pratel Jan 17 2017, 12:35 PM
You took the long way home
. What route did you take? Up 410? Weird on the bracket. I have another one. I had the pleasure of driving steve's car yesterday. More than adequate power, wonderful road manners, and nice a/f ratios. To me, his carbs are setup perfectly.I took the Tacoma Narrows Bridge then up through Purdie and looped down to Olympia on 3 and 101. Thanks for the complements on the setup. Credit goes to this board, I spent 2-3 years reading threads and researching, and getting advice before I turned the key.
I'll prob swing by this weekend for the bracket, but wont put it on till I have a workable fix to ensure no further breakage. I think I am going to create a stiff backing plate to support the bracket. I think the rear (engine side) of the bracket hangs off the fan housing and this causes the bracket to brake at the weak point where it is thinnest due to the bolt hole.
Posted by: Bulldog9 Oct 19 2017, 07:38 AM
Right before I "disappeared" for a few months, I ordered a NOS Alternator Pulley from Sunset Porsche. Unfortunately, their database was in error and there were no parts available. I really need a new Alternator Pulley. It eats fan belts like a fat kid ad McDonalds, and the inconsistent width of the pulley (from rust pitting, etc,) causes a constant 'pulse' of tension for lack of better description on the belt and may have contributed to breaking 3 lower alternator brackets over 5-6K miles.
I was able to get a good 914 pulley from Rhodyguy, but unfortunately the backspacing difference between the 914 & 912E motor causes a misalignment of the belt and it throws immediately. The 912E Pulley has fan blades behind the pulley. I think they are unnecessary as the Alternator is cooled from the cooling fan. Once I get settled, I may relook and consider shimming behind the pulley with a washer, but if I remember, the differences make that questionable.
Right now this is the only weak point in the car and is limiting my confidence to just go drive. When I get back East I want to drive to Hershey, visit Hoffman and Jake the Great, maybe AA, as well as take it on the Dragon's Tail, etc.
Anyone with experience in swapping these out? I do plan to change the cooling system to a DTM or Tangerine eventually, but would much prefer to go the new pulley route.
Posted by: bigkensteele Oct 19 2017, 10:42 AM
Just thinking out loud, would it not be possible to have a machine shop chuck it on a lathe and smooth out the walls? Or better yet, machine a new one from aluminum.
Posted by: Bulldog9 Apr 30 2018, 07:08 PM
It's been a while. Our great Uncle has been keeping me busy, and I am back on the East Coast back to where it all started for #770
I just turned 10K miles on the rebuild and other than a few things here and there (like eating alternator brackets and fan belts), the car is solid. I still havent sourced a good pulley alternate to replace my trashed and pitted pulley, and havent found one that will fit, but I will keep trying. At this point after 5 fan belts the old pulley is almost smooth now ;-) My last fix on the bracket mount seems to have worked, but I picked up a fan housing and bracket for $10 at the swap meet so I may just swap that in.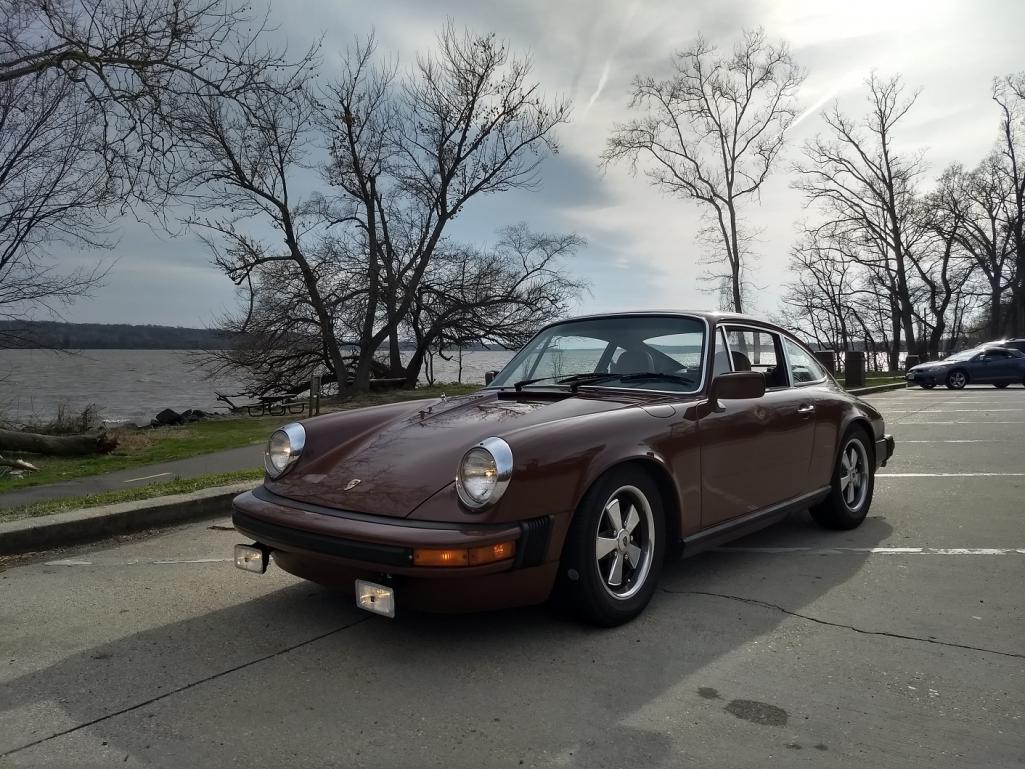
Posted by: bigkensteele Apr 30 2018, 09:25 PM
Love seeing positive updates on this car! Is that a dent on the door or a reflection - hoping a reflection...
Posted by: Bulldog9 May 1 2018, 06:49 PM
Love seeing positive updates on this car! Is that a dent on the door or a reflection - hoping a reflection...
No... Sadly it is a dent and one caused by me. I'm waiting to get back into Scotty B to get it fixed.
Overall the car is running really great I just pulled the plugs today when I changed the oil and added the tuna can mod they all look great that tan color with a very very light tint of green which I'm assuming is due to additives in the fuel.
I think I'm due for a valve adjustment but the motor sounds great. What's the Frequency recommended if you're running swivel foot Adjusters?
Posted by: 73-914 May 1 2018, 10:29 PM
have you tried looking on Ebay.de for bosche alternator parts?
Posted by: Bulldog9 Jul 3 2018, 07:36 PM
It's been a while and I am finally happy to report that I have finished! I found a great deal on a set of perfectly color matched front seats and some marine vinyl for the lower rear pads. As some may remember, I decided to omit the upper folding seat backs and leave them as jumpers. Got a killer deal on the seats and the color scheme matches perfect. I also swapped out the big square halogens for some small PIAA LED's. Not period correct, but better lighting and easier on the electrical system.
I added the Sump extender and since I put the backing plate on the lower alternator bracket, no more broken brackets! 11K miles on the rebuild and only a few minor issues.
Attached thumbnail(s)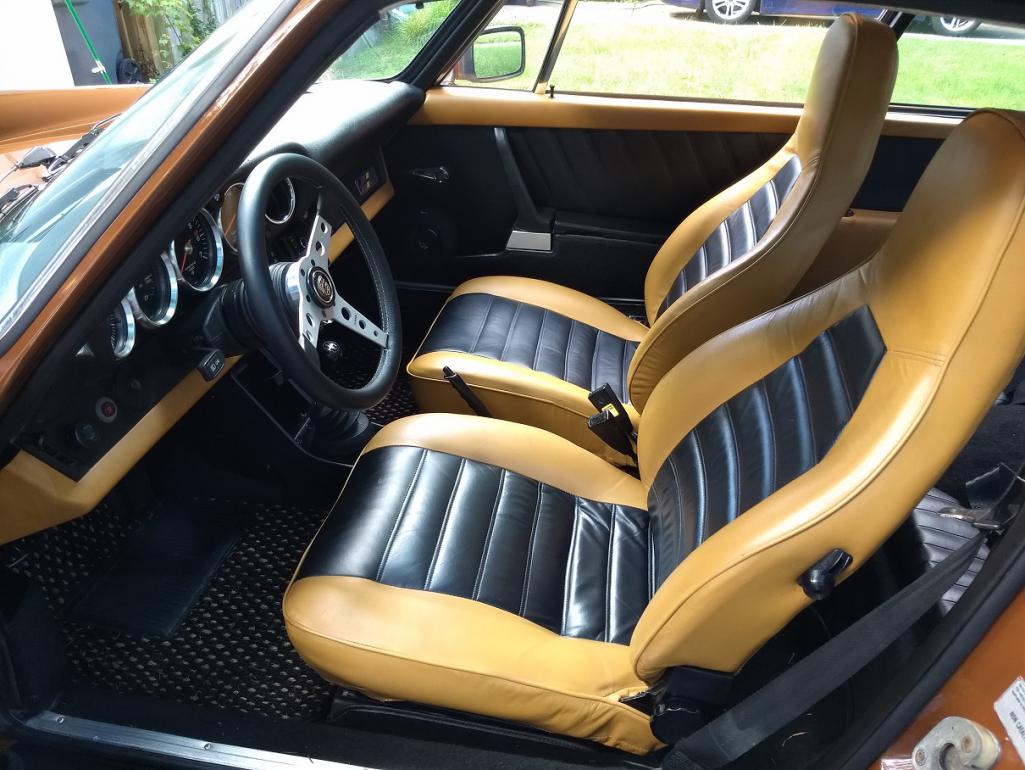
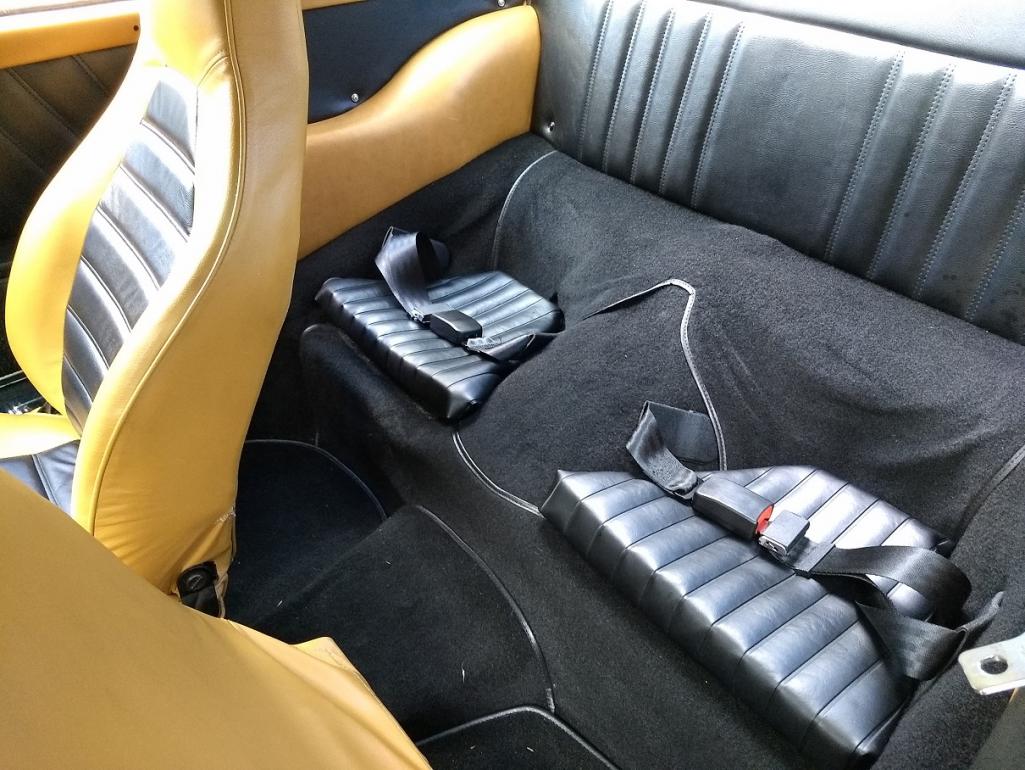
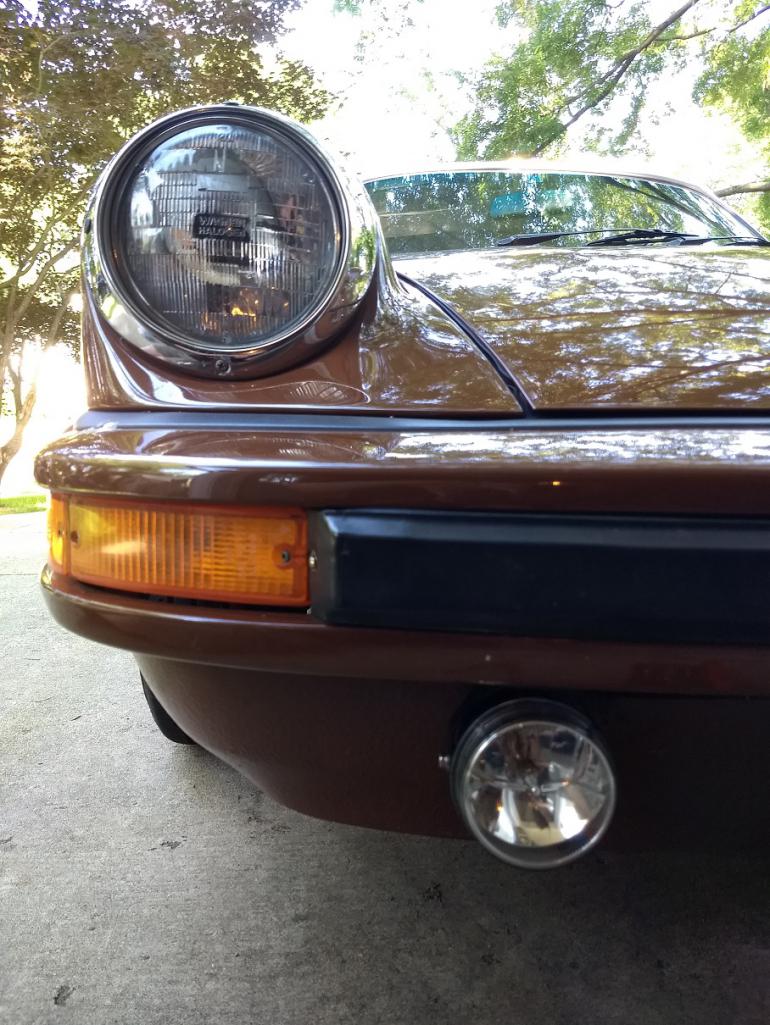
Posted by: Bulldog9 Oct 15 2018, 07:51 PM
Well.............. Bracket slayer strikes again........... Bracket #4 (or maybe 5) is broken. I put a backer plate on and it lasted about 5K miles, but was heaidn out for a drive saturrday and once again it broke. Between this and the terrible belt eating pulleys I'm DONE...........
Time to look at either a DTM or FAT 911 style. There was a guy at Hershey selling a full FAT system, should have grabbed it.
Anything newer or better for the Type4/914 Motor? Insert a few minutes of cursing............. lol
Other than that, everything is running great!
Posted by: Bulldog9 Mar 19 2019, 07:17 AM
5th time a charm?
Finally took the time to address my latest broken bracket. Went through the routine, replaced the lower bracket and noticed the upper was cracked too. Made sense as have been driving the car, mostly short trips no more than 10-15 miles from home figuring I could drive back on battery if it threw the belt. It didn't, but was basically hanging from top bracket, which cracked it..... sigh.....
So this time I took out the entire fan housing again, swapped out both brackets. Probably did it right for the first time Taking both off forced me to have to ensure proper alignment with not only the fan, but also in relation to each bracket and range of motion on the slide bracket.
Til now I have basically swapped out the bracket and called it done. I THINK the alternator was in effect mounted crooked, and put pressure/twisted the lower bracket, causing it to crack and break. It basically broke in the EXACT same place every time.
This time, I took measurements to see where the brackets needed to be so the pulleys lined up, then took the fan housing off the motor, mounted the brackets sightly tight and the alternator to the brackets finger tight and played/adjusted tapping here and there to make sure that the alt slid freely on the slide bracket and while doing so put no torsional stress on the lower bracket, and most importantly, when pressure is put on the alternator on full acceleration. Now it appears to be properly square and aligned. I can see that I had both brackets cocked a bit in the past, and this is hopefully what caused the bracket slaying.... I didn't think it was that much of a big deal.... but... Going on a 300 mile drive today, lets see how it hold up!
Broken Lower Bracket
Cracked upper bracket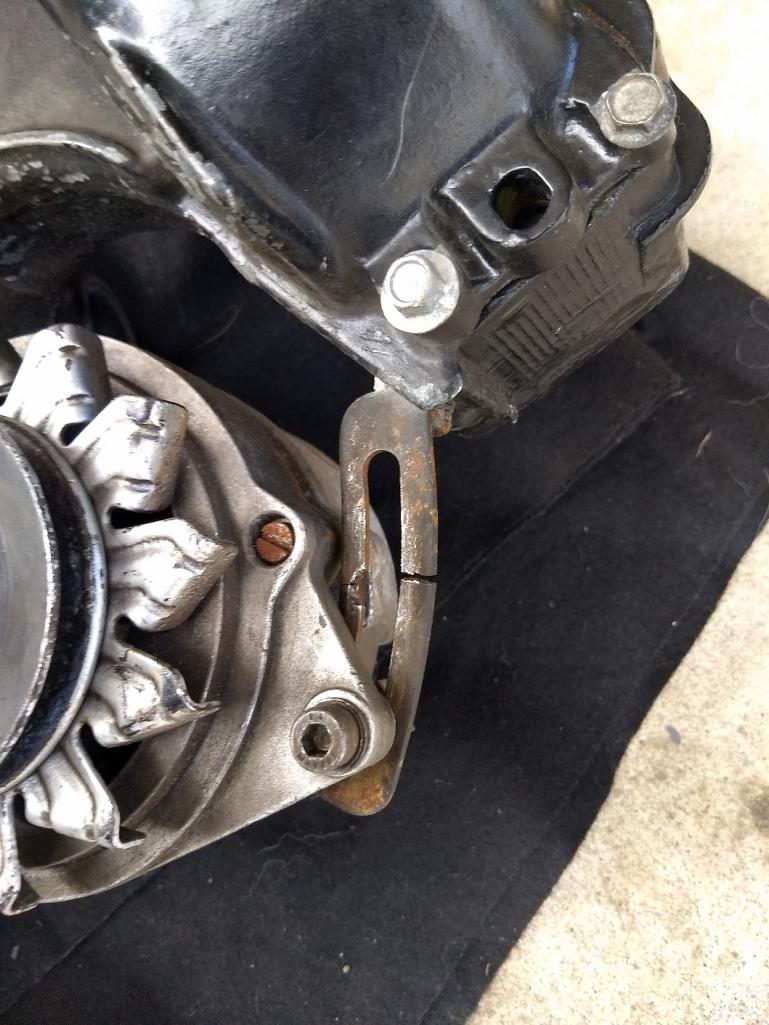
Posted by: Bulldog9 Nov 12 2019, 09:40 PM
Update on #770.
Just did the 10K mile valve adjust and tuneup. All the valves were just a hair tight, swapped out for new plugs, checked timing, carb sync, and fresh oil. MAN what a difference! Motor is much smoother at idle, and running.
I did 3-4 valve adjustments/checks over the first 1000 miles, but have mostly just done oil changes every 3K miles, and filters every 6K. The timing was still spot on, and the Pertronix cap & rotor showed little wear, plugs were that desired tan, even #3.
I swapped out the ITG filters and V stacks for the Ram Flo filters, and will wash and re-oil the ITG's when I have time, but didn't realize how much quieter the intake would be. Lost a little midrange power, but not too bad.
I also FINALLY relocated the vent hose from the oil catch can vent from the chimney. I originally routed it down the front of the engine bay, and was right near the intake for the heat/vents. No more smell on hard acceleration...
I think I finally have the alternator bracket situation sorted. The stock pulley ate belts at a 500 mile rate, and once adjusted to the full extent, the bracket would break. I ended up buying a re-manufactured alternator for a 914, pulled the pulley and put it on the alternator, put on a new belt. Between the total realignment back in March, and pulley, 2K miles later, belt is wearing well, and in a 'healthy' adjustment range, so no broken brackets anymore (crossed fingers). Now I just need to sell the alternator.... lol.
17K total since rebuild, the car is running and driving flawlessly. Even took it to a PCA track event this summer, which was tons of fun.
Not much time to post or visit the forum, but hope all are well!
Posted by: bigkensteele Nov 12 2019, 10:08 PM
Glad to hear you finally tackled the bracket issue. I love that you are driving it the way it was meant to be used. I hope to see 17k on my car one day.
Posted by: Bulldog9 Dec 9 2019, 02:51 PM
Glad to hear you finally tackled the bracket issue.
I love that you are driving it the way it was meant to be used. I hope to see 17k on my car one day.I wish I could drive it more, but since moving back East, and being in the Metro DC area, daily driving is less appealing, though I try to get out most weekends.
I also realized I never posted up the repair of the Door, done by Scotty B for me a few months back.
Pics of the door. As always Scott's work is impeccable.
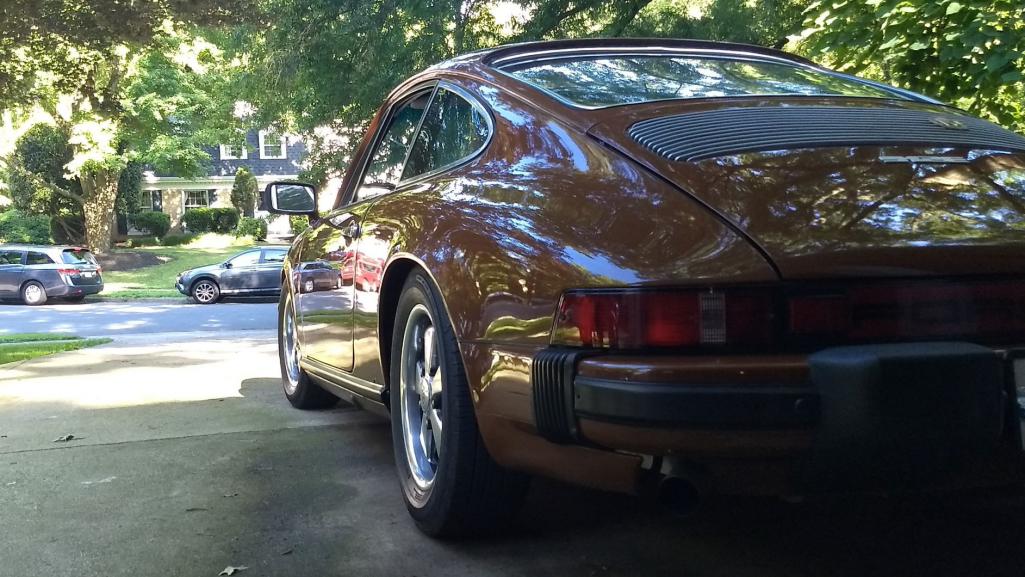

Here is the new pulley. 2K so far. Hoping after a run to Hershey next Spring to take the car on a Tour of the Kentucky Distillery's with the wife.
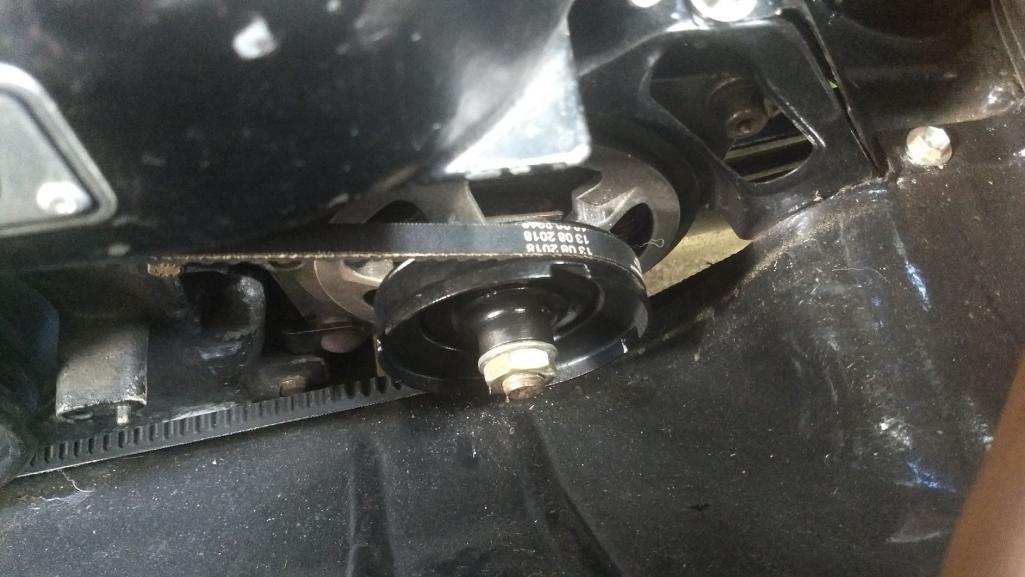
Still have a few things I want/need to do, mainly adding an aux fan to my external cooler, and touch up of some chassis rust, mainly one caliper and the rear brake hubs. Should have taken the time at rebuild, but THOUGHT they were G2G. Also considering a higher torque starter upgrade.
Posted by: sixnotfour Dec 10 2019, 05:34 AM
Lookin Classy.....
How is Scotty doing these days??
Posted by: rhodyguy Dec 10 2019, 12:10 PM
Long road. Sounds like you've solved the bracket issue.
Posted by: Bulldog9 Mar 12 2020, 01:23 PM
Long road. Sounds like you've solved the bracket issue.
Yup, and still holding with minimal belt degradation. Belt still flys off when I rev too high. Fine when shifting at or below normal redline.
Now I need to catalog ALL my unused parts and sell! I have a perfect 914 rebuilt Alternator, bunch a other parts including a NOS Bursch Muffler for the 912E.
Hope to get m y act together this spring, take photos, etc....
Posted by: Bulldog9 Apr 23 2020, 06:18 AM
Current state of affairs as I prep to convert to the Tangerine Cooling system and stainless pushrod tubes. I'll also be swapping out the starter with a hi-torque unit and installing an external cooler with fan in place of the stock unit.
Overall, pretty happy with how it all looks after 5 years and 15K miles.
2 quick questions.
1. As I'm going to be changing out the pushrod tubes, and all the upper valvetrain will be removed, is this a good time to re-torque the heads? If I do this, should I do them one at a time, or back all off slightly and then retorque?
2. Anyone know of a fuel filter with a check valve that works with the low pressure pump? Tired of the fuel being sucked back to the tank after I shut the car down.
Will post pics of updates as they go.
Thanks all.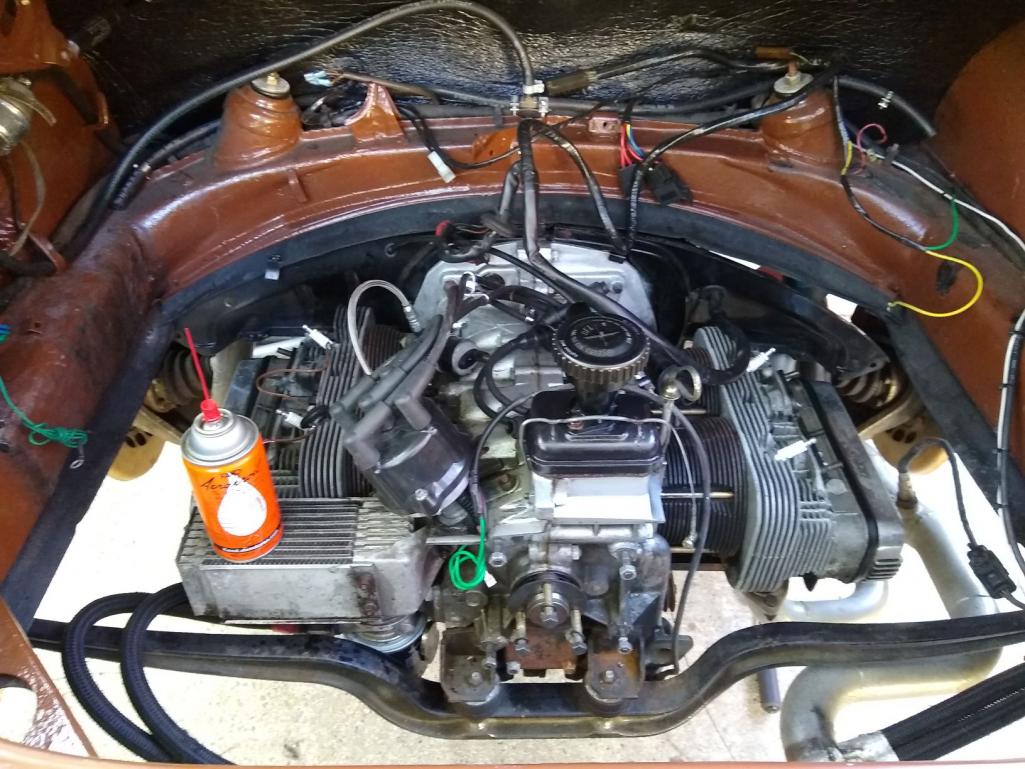
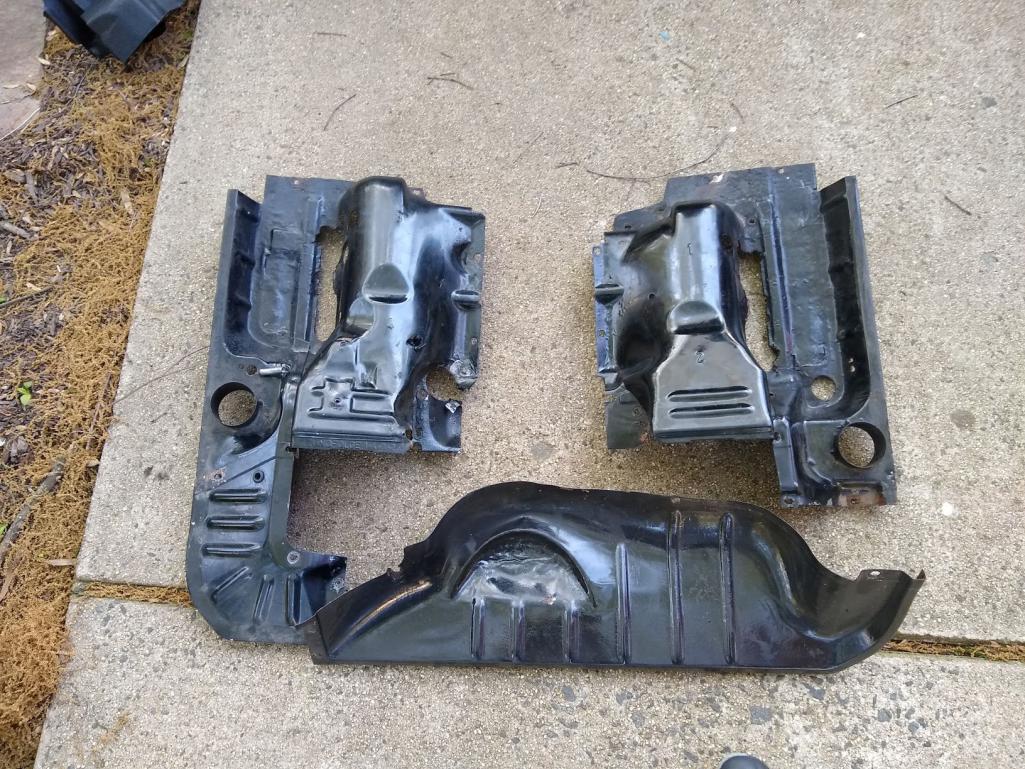
Posted by: Root_Werks Apr 23 2020, 09:44 AM
A proven build with years and miles on the ODO, well done! Such a clean looking 912.
Posted by: Al Meredith Apr 23 2020, 03:36 PM
I haven't been to this page in a long time . I have # 265 (silver / red int. I built the 2056 engine and love the combination . I'm running 44MM Webers with the stock (big FI ) filter and it runs fine at 2.5 PSI . Al
Posted by: Bulldog9 Nov 9 2020, 04:33 PM
Prepping to install the Tangerine Horizontal Cooling system, just waiting on the parts for the remote oil cooler. Am installing a remote cooler with thermostatically controlled fan. Will also use a high flow marine bilge pump to flow air through the heat box for heat.
Mock up of the fan and housing.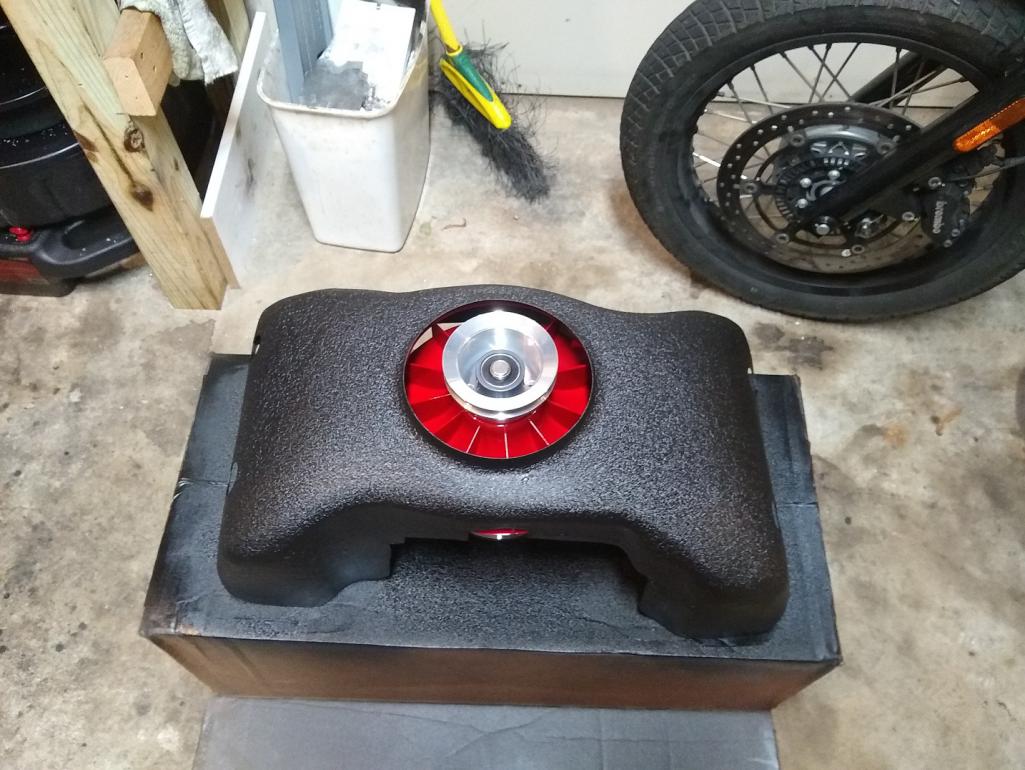
Fitting the pulley bracket and alternator. Couldn't use the stock alternator due to the cooling port and housing.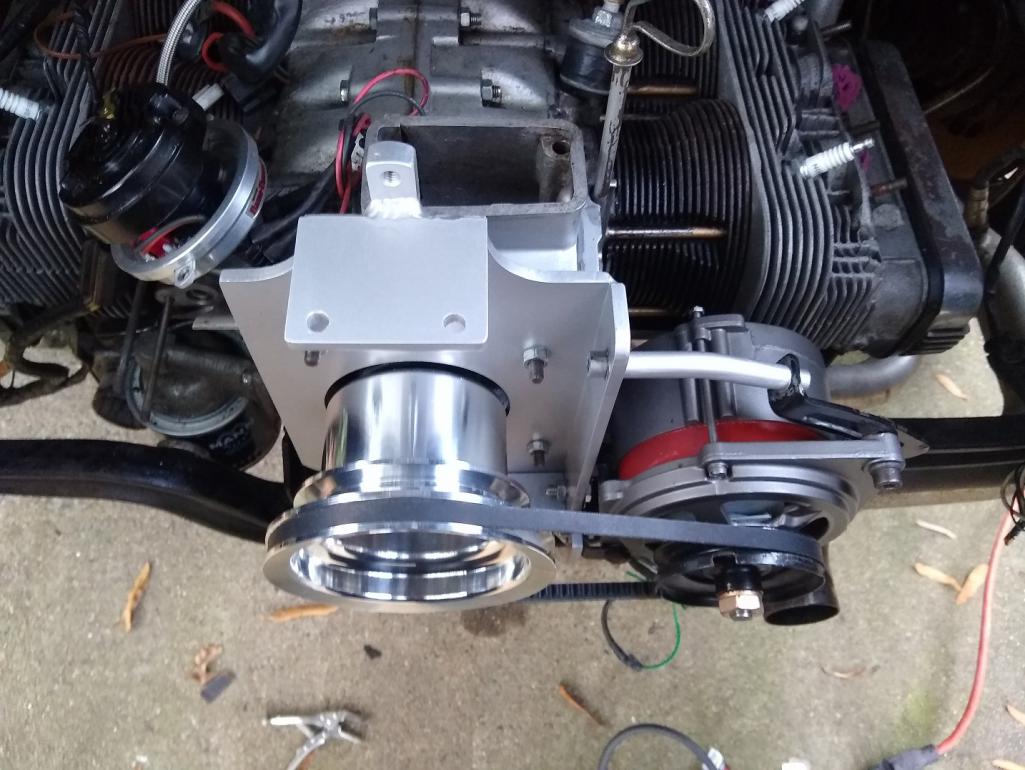
Posted by: BeatNavy Nov 9 2020, 06:21 PM
I think you need a new broom
Seriously, I'm a fan of Tangerine, and that's a good looking setup. Please let us know how it works!
Posted by: rhodyguy Nov 9 2020, 07:55 PM
WOW. Pretty cool. Is the black bracket on the alt a stock piece or a Chris's version?
Posted by: Bulldog9 Nov 9 2020, 08:21 PM
WOW. Pretty cool. Is the black bracket on the alt a stock piece or a Chris's version?
It uses the stock upper and lower brackets.
Posted by: Bulldog9 Nov 10 2020, 10:32 AM
I think you need a new broom
Seriously, I'm a fan of Tangerine, and that's a good looking setup. Please let us know how it works!
Hoping it will all work out well. I've wanted to do this for a while, and this will really clean up the engine compartment and make it more unique. Just want to get it done, I started it in April. Want to get it wrapped up so I can get the car into storage before the bad winter weather starts, the car is in my driveway on jack stands. Id DEFINATELY gonna be sweet when done.
I also have the Tangerine Exhaust, and Cable Throttle, as well as the SS pushrod tubes, but have not done those yet, on the future 'when I feel up to it" list, as I may have to drop the motor. Time will tell.
I just had hip replacement in March, and Knee replacement in August/October so pushing the car around and on/off a trailer is not an option. Cant start it due to everything being disassembled.
And what's wrong with my broom?
Posted by: Bulldog9 Nov 12 2020, 06:24 PM
Woohoo! Got the final parts today from Chris, and tomorrow will do the final fitting of the engine surround with the oil take off, remount the muffler and see where the best place for the oil cooler to mount. Hoping it will fit on the rear drivers side somewhere. Really dont want to put it in the wheel well, am thinking up against the engine surround on the high side.
I used the full rear stock engine tin, and some of the drivers side for strength and stability as Im hanging the oil cooler from the tin, and helps with the transition from side to rear.
Hopefully will not be raining.............
Posted by: Bulldog9 Nov 14 2020, 10:17 AM
Engine Surround almost finished, just finalizing the fitment of the oil cooler and figuring out the best way to suspend the exhaust. With the removal of the stock shroud, there is nothing to attach the drivers side bracket to.

Posted by: Bulldog9 Nov 27 2020, 02:49 PM
Finished! Just came back from an hour drive, cyl head temps were in the 275-300 range, oil temps in the 180-190 range, is about 60 degrees out today.
This is definitely not for the faint of heart, and not exactly plug and play. Probably 40-50 hours of further fabrication for the engine surround tins, making adjustments for the fan mount, pulley mount, drilling holes for spark plugs, placing the vanes, then getting it to all fit and line up nevermind painting and powder coating, and figuring out how to connect the left side tin with the factory rear. But I am happy for how it turned out, and glad it is done. The car was on jack stands in the driveway since April, and I hated the idea of it sitting in the snow and rain all winter. Hoping to get a longer drive in, but 'honey DO' things must be done......
In addition to the Tangerine cooling system, I also installed one of those high torque starters. MAN that thing is money. I also had to buy a 914 specific alternator as the 912E unit wouldn't fit.
I had a bit of drama, as I miss labeled the 1-2 plug wires when I took them off back in April (was on pain meds for hip replacement.... I know excuses, excuses) So once everything was put together, the thing wouldnt start. Of course being that I took them off back in April, and thought the #'s were right, I put #1 where it actually is supposed to go, so now my timing mark on the new pulley is marked for the wrong position. No big deal, will fix soon. The car had a full tuneup and valve adjust recently, and the oil is new, but having the carbs off gave me an opportunity to look at the accel pump adjusters. Were all but impossible to see mounted, and I discovered that the hesitation I have had at applying light throttle at higher revs was due to my adjusting the darn things the WRONG way. While off the car, I readjusted the nuts equally to give fastest and max action, and am happy to report that there is now NO hesitation.
Now I just need to find a place to mount the new water proof 270 cfm bilge pump for the heat box. I blocked off the rear port on the box, and will connect the new one to the other port. I will put some sort of free flowing filter over the end, and then adapters to get it down to the right size. MTF.
The car ran fantastic, and flawlessly, though the horn stopped working
Here is the finished product. The cooler hangs below the engine surround, and is about the same level as the bottom of the heater box and taco can sump. I used my dremel and cut off some of the stock engine surround to make a smoother transition from the side to rear tin, and it worked out very well, with a perfect spot for the coil and the oil pressure/idiot light sensor to mount. 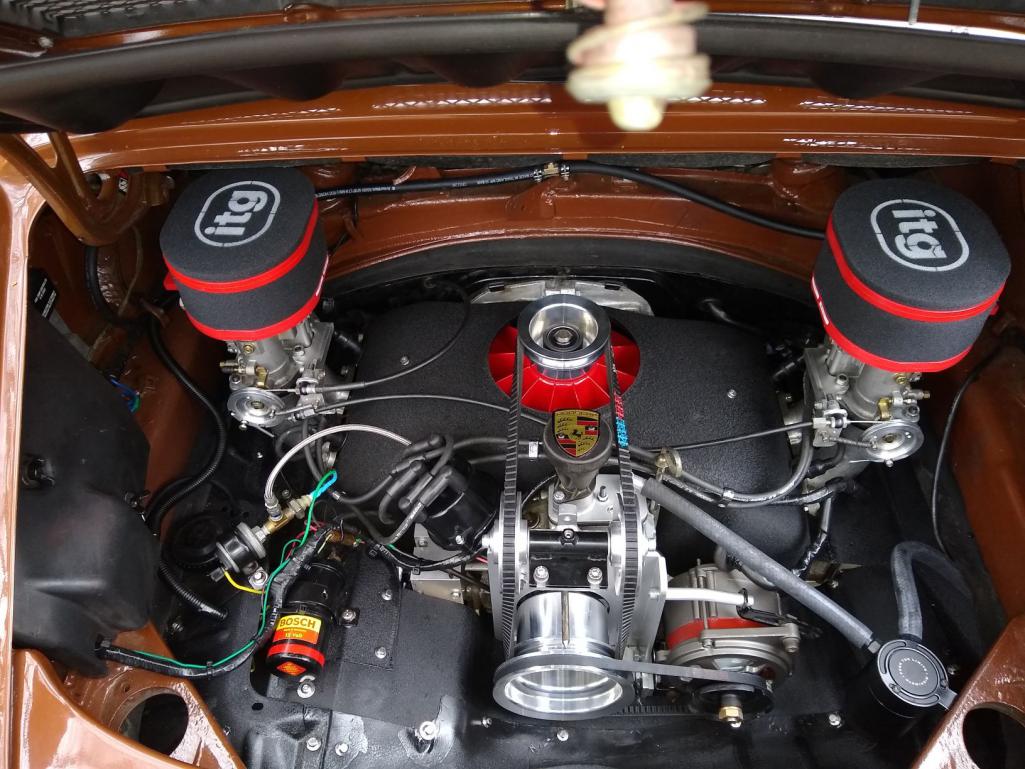
I was able to tuck the wiring and thermostat for the oil cooler fan under the electrical cover and all the wiring and connectors needed some adjustment for the new positioning, but it all works well. 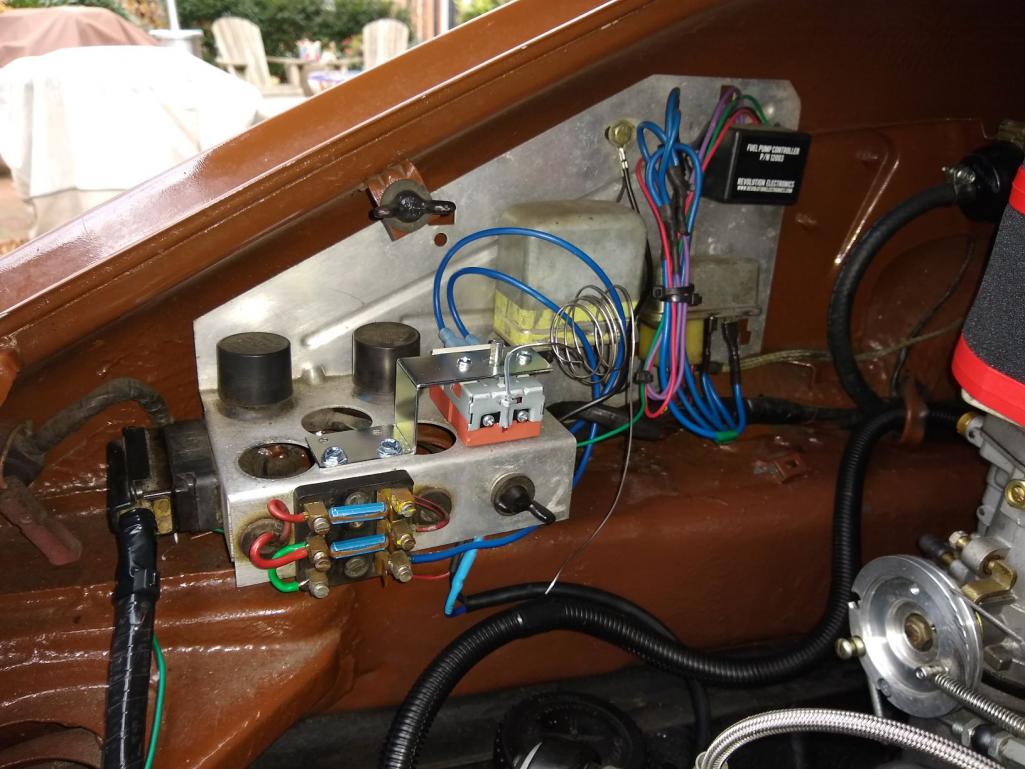
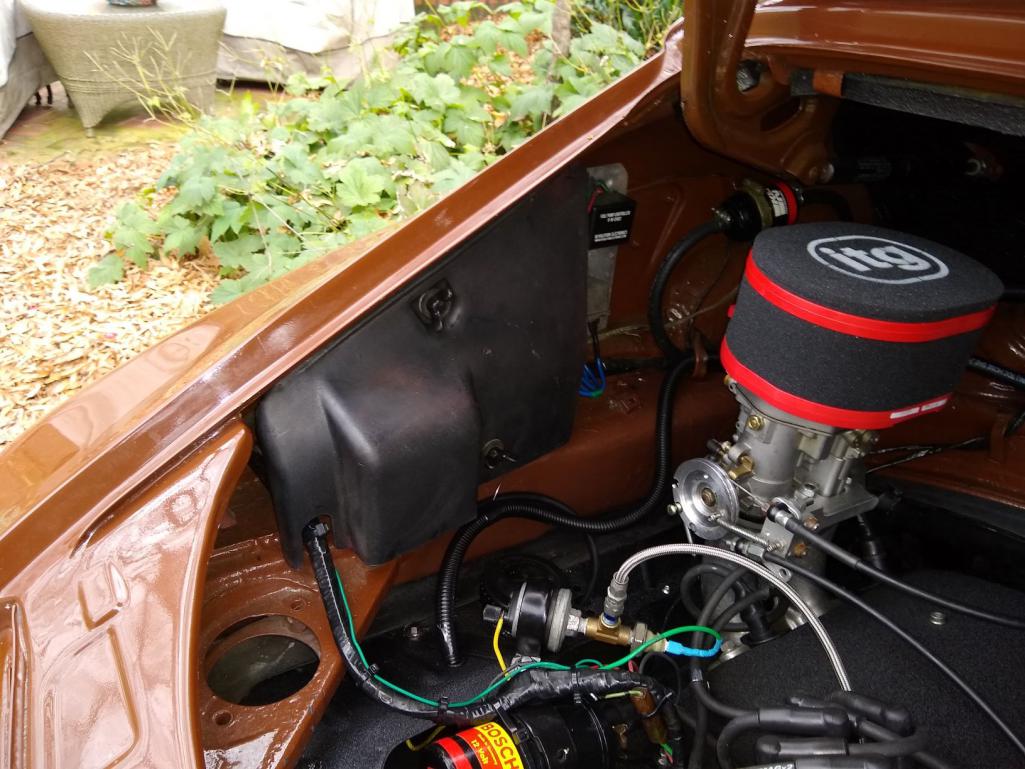
Re pourposed the Mishimoto catch can, vents down to just below the rear bumper.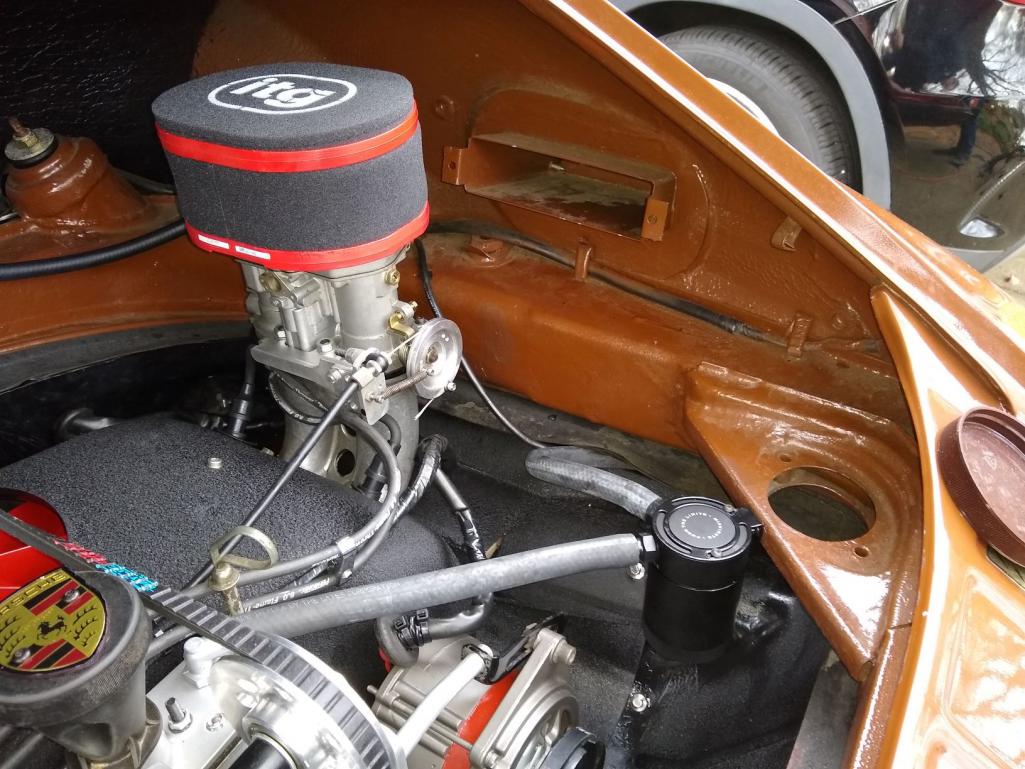
Oil Cooler location with Thermostatically controlled fan, and the adapter for the PLX oil temp sensor. As stated earlier, on the hour drive (drove it like I stole it after warmed up) Temps were about idea.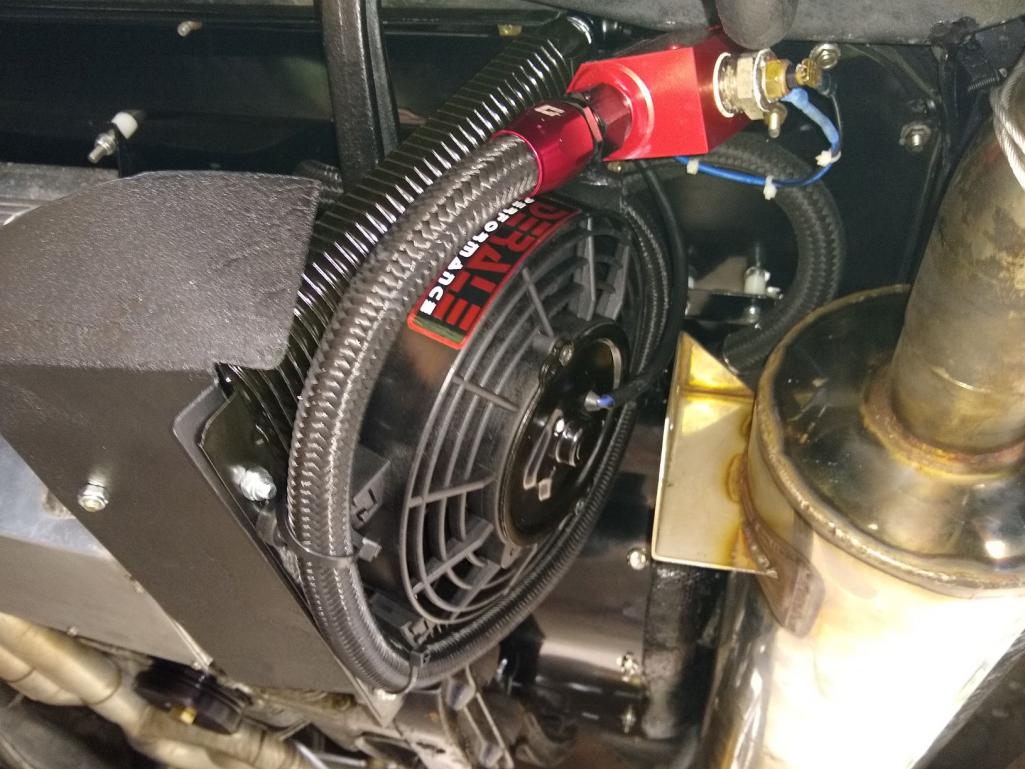
And for some perspective, here is what it looked like before I started this mess...... Hoping to get a nice long drive in tomorrow to work out some kinks, but overall, it looks like all is working well. We will see how heat soak effects things. The old setup would run 325-350 head temp at the hottest, and oil would get to 225 which is as high as I want to go, prefer to stay in the 180-200 range. If necessary, I can easily add the old cooler back in for some extra cooling.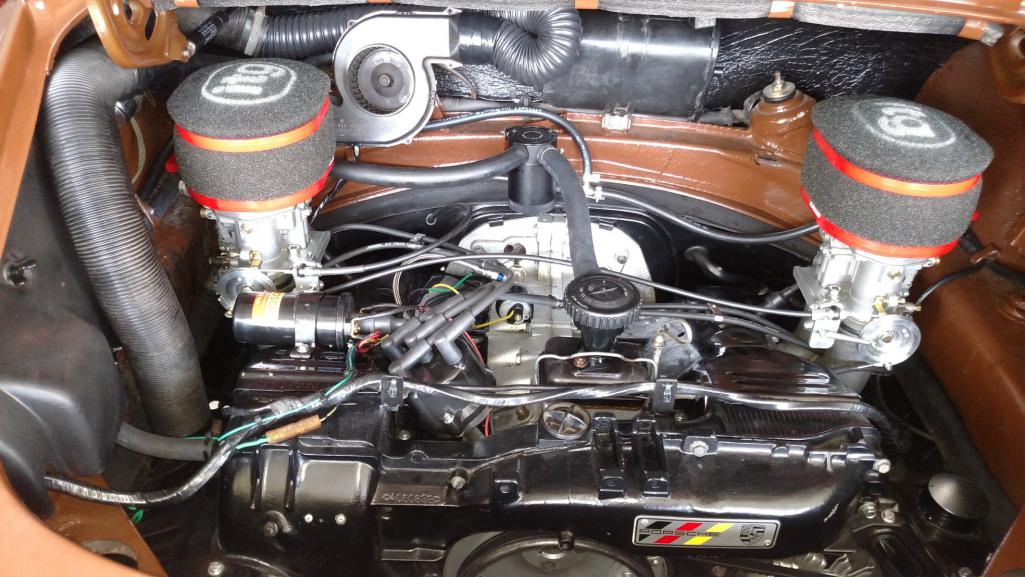
Posted by: Bulldog9 Nov 29 2020, 07:21 AM
Wrapping up a few chads, I finally installed a trickle charger and jumper cable lead. My install and battery make jumping the car a difficult proposition (near impossible) so I installed both a trickle charger lead, and a quick disconnect for jumper cables. I've neve needed a jump, but you never know.....
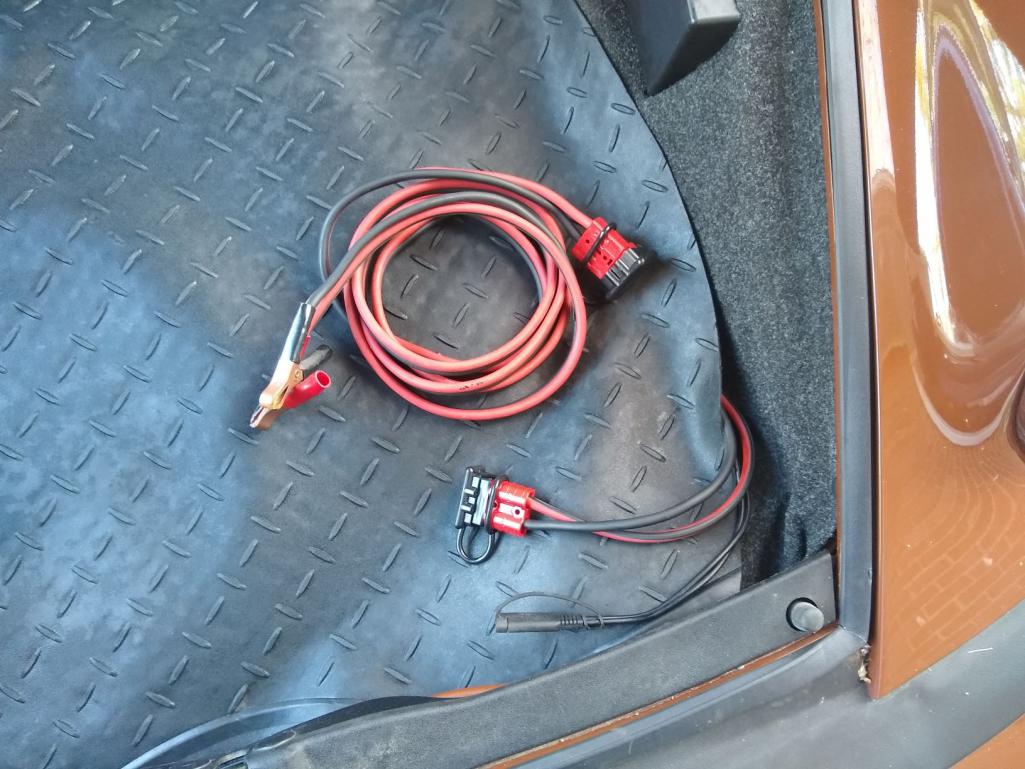
Nice 3 hour drive yesterday, some highway, some around town, some big hills and twisties, and drove it like it was meant to be driven. Temps are very good. Vey happy with the setup.
In a funny twist, though this is by no means a bracket racer and drag strip king, I've always been happy with the poke of the engine and power. However, last year, I bought a Mustang Bullitt Edition, and am used to 480HP..... Hmmmm, time to start a fresh big bore turbo engine? 
OK, I'm out, will try to check in on occasion.
Posted by: Jett Nov 29 2020, 11:32 AM
Wrapping up a few chads, I finally installed a trickle charger and jumper cable lead. My install and battery make jumping the car a difficult proposition (near impossible) so I installed both a trickle charger lead, and a quick disconnect for jumper cables. I've neve needed a jump, but you never know.....
Nice 3 hour drive yesterday, some highway, some around town, some big hills and twisties, and drove it like it was meant to be driven. Temps are very good. Vey happy with the setup.
In a funny twist, though this is by no means a bracket racer and drag strip king, I've always been happy with the poke of the engine and power. However, last year, I bought a Mustang Bullitt Edition, and am used to 480HP..... Hmmmm, time to start a fresh big bore turbo engine?
OK, I'm out, will try to check in on occasion.
Loved the thread and car, well done! Hope your hip and knee feel better!
Btw. If you ever want to go on a cruise, we often door the WA “loop’... cheers
Posted by: Montreal914 Nov 29 2020, 12:07 PM
Thank you for sharing your cooling upgrade! These are very good numbers.
Very nice car!
Posted by: Bulldog9 Dec 3 2020, 07:46 AM
A Couple people asked about how the oil cooler was mounted.
I used the stock cooler and bracket from Tangerine's kit and mounted up to the engine surround tin on the drivers side. It sits basically under the coil area and to the outer edge of the car.
This shows the side view. Hangs lower than I would like, but the bottom of the scoop is level with the heater box that surrounds the exhaust and the taco can sump extender thing. As the gas tank and front suspension axle is a full 3" lower to the ground as is the floor, I think it will be OK, but will watch closely, and will not be taking my 912E off road or Baja Rallies  . As I recommended to Chris, for the 912E I'd suggest a 1-2" shorter cooler for better insurance/clearance.
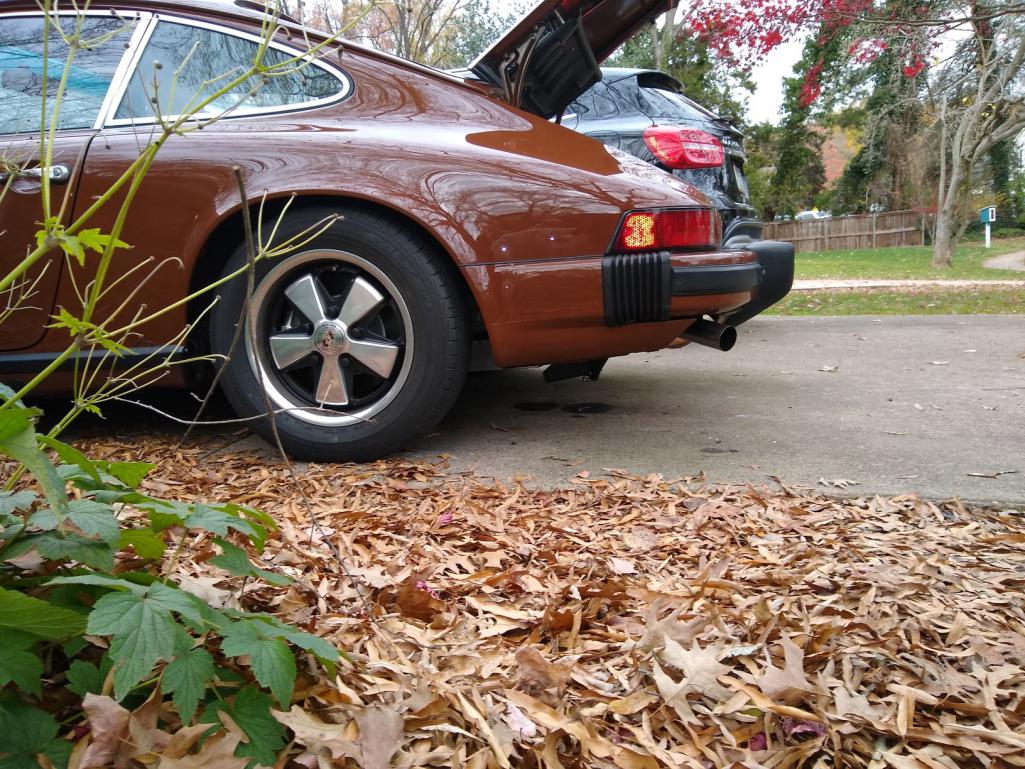
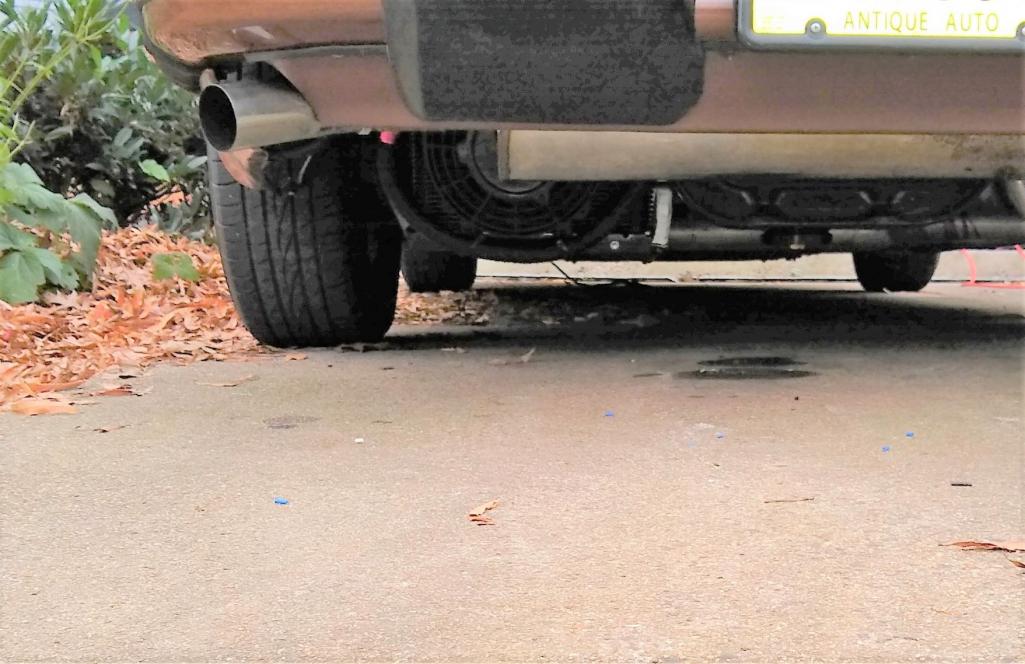
Posted by: jaredmcginness Dec 3 2020, 09:48 AM
I love lurking this thread, the brown is absolutely fabulous! I've probably commented that before. A Sepia 912 longhood is my long term plan, and this is total inspiration.
Posted by: Bulldog9 Dec 8 2020, 07:54 PM
I love lurking this thread, the brown is absolutely fabulous! I've probably commented that before. A Sepia 912 longhood is my long term plan, and this is total inspiration.
Thanks, it has definitely been a labor of love and learning experience. Wouldn't have been possible without this forum. I can't believe it has been 10 years, and almost 5 since completion.
I FINALLY found a low pressure fuel check valve with proper seals. Manufacturer claims it opens with 1lb or pressure. Hoping that this will help solve the fuel draining back into the tank. If the car sits more than a day, I have to run the pump for a few minutes to refill the fuel bowls. Will report on that and the heater blower when complete.
Posted by: rgalla9146 Dec 9 2020, 07:56 AM
My first visit here. Can't believe I missed this.
The first photos of the engine compartment showing the original Sepia paint made me
think 'what a shame'......re-sale red....typical.
What a beautiful transformation !
The contrast of first photo and last is fantastic, the craftsmanship and choices made
are outstanding.
Now to go through and enjoy the the whole process. Can't wait !
Great job.
Posted by: Bulldog9 Jan 25 2024, 06:45 PM
Hey 914rs.........
#770 is still going strong. Has been all over the US with me, and currently in Kentucky. 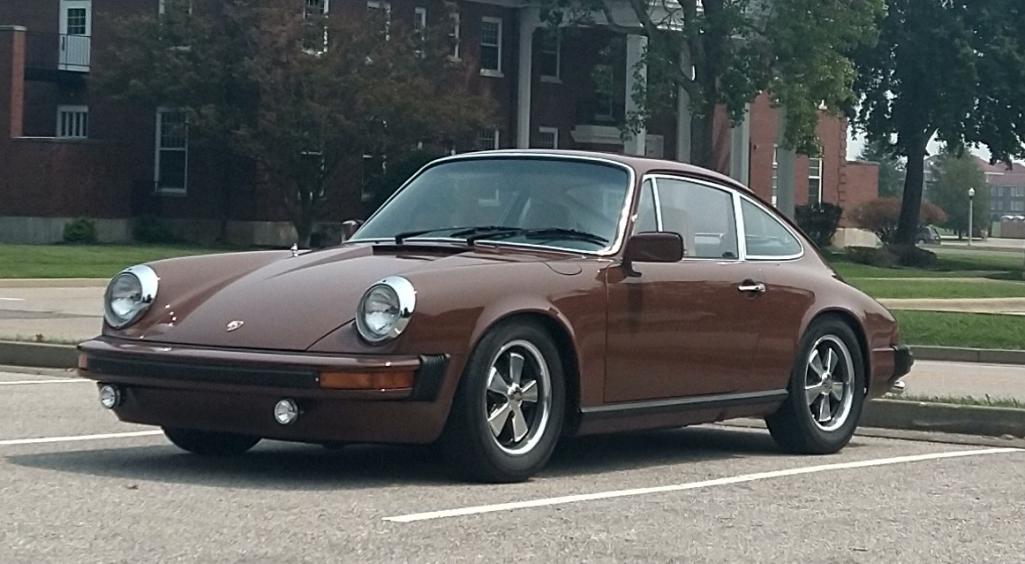
I'd been searching for a 914 for a while, but came across a different' removeable roof car. Don't hate me......... It was a steal of a deal, and another rescue. Cosmetically perfect, it just needed mechanicals refreshed after sitting in a climate controlled garage for 10 years.
I retire from the Army this summer, and this new 944 S2 will keep me busy driving while I drop the motor from the 912E. do a some inspections for wear, and resealing of the case. I'll also finally install the stainless pushrod tubes.
The 912E motor runs fine, especially now that I have the right plugs in the motor. When I reported what I thought was carbon buildup in 1 CYL a couple years ago ended up being that I replaced them with ones with the "P" which indicates a longer electrode, and it slightly touched on CYL 3. Once I put in the right plugs, the issue was gone. 5K miles later, the car is still fantastic, especially with the Tangerine Cooling system. Pricey, but like all of Chris's stuff well worth it.
The Motor runs great, and other than the corroded pushrod tubes and leaks has been excellent. I will take measurements of everything and inspect the bearings, cam, etc, and replace as necessary. Unlikely due to the Dellorto 36 carbs, but I may bump to larger pistons and cyls.
I havent had the time (or space) and most importantly didn't want to drop the motor and have it off the road for an extended period just to fix my crappy case sealing job, so was waiting till retirement, and another 'fun' car to drive.
Jury is out on the 944, but it is growing on me.
Anyhow, I hope all are well, and I will probably be back once I start the engine teardown and inspection.
Powered by Invision Power Board (http://www.invisionboard.com)
© Invision Power Services (http://www.invisionpower.com)