Printable Version of Topic
Click here to view this topic in its original format
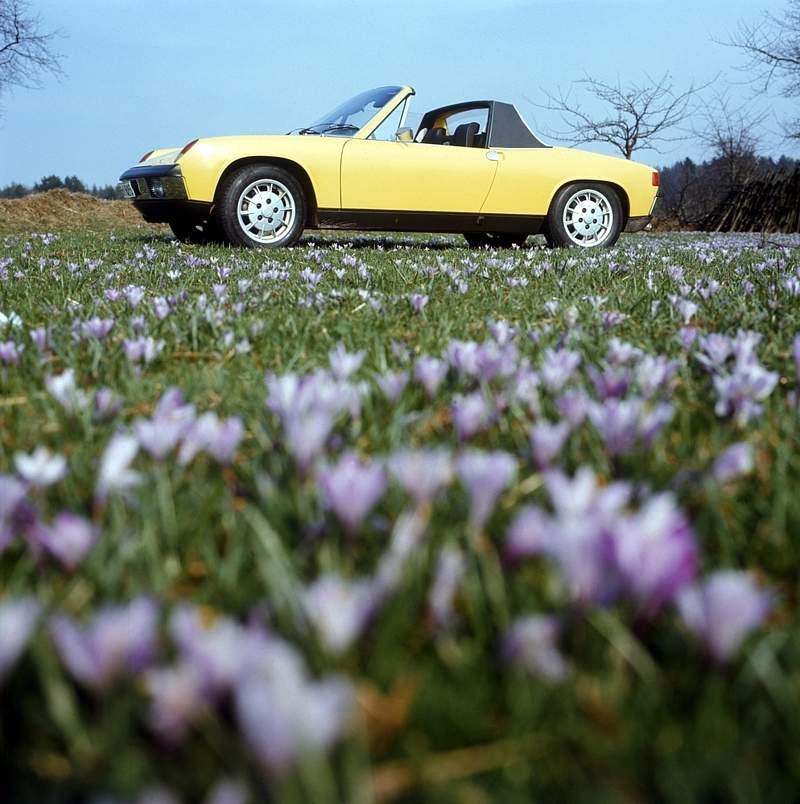
914World.com _ 914World Garage _ what do you think of this 914-6? [I bought it!]
Posted by: siverson Aug 22 2013, 10:06 PM
(UPDATED with comments below)
From the photos, this is what I see that is not correct. Anything I'm missing?
Not correct / things to fix:
- outside mirror
- speaker boxes
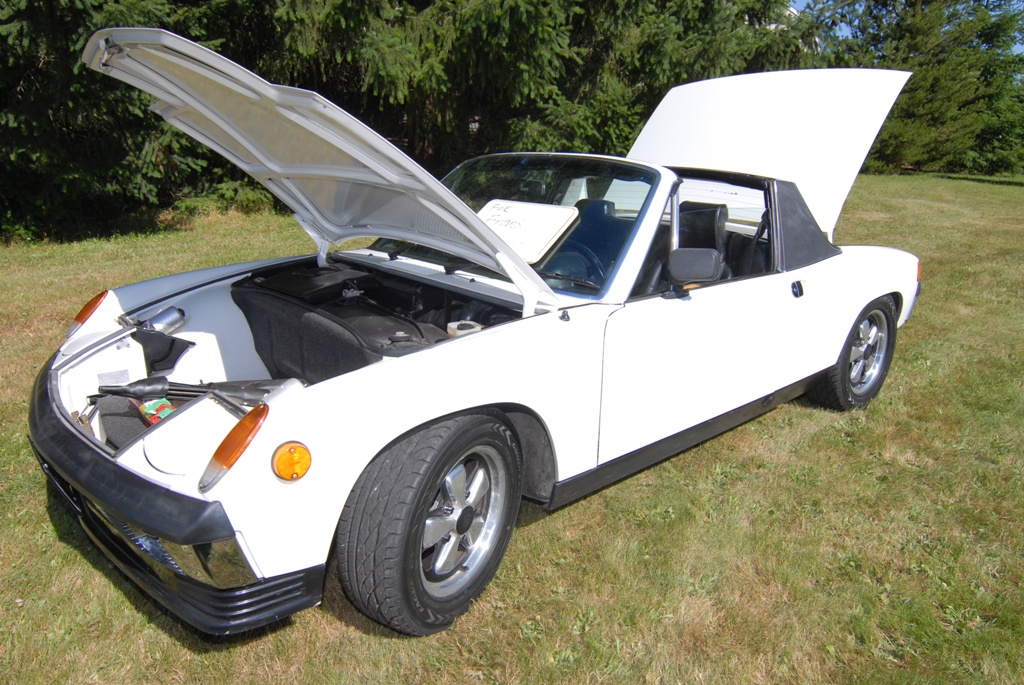
- after market front air dam
- 80s radio
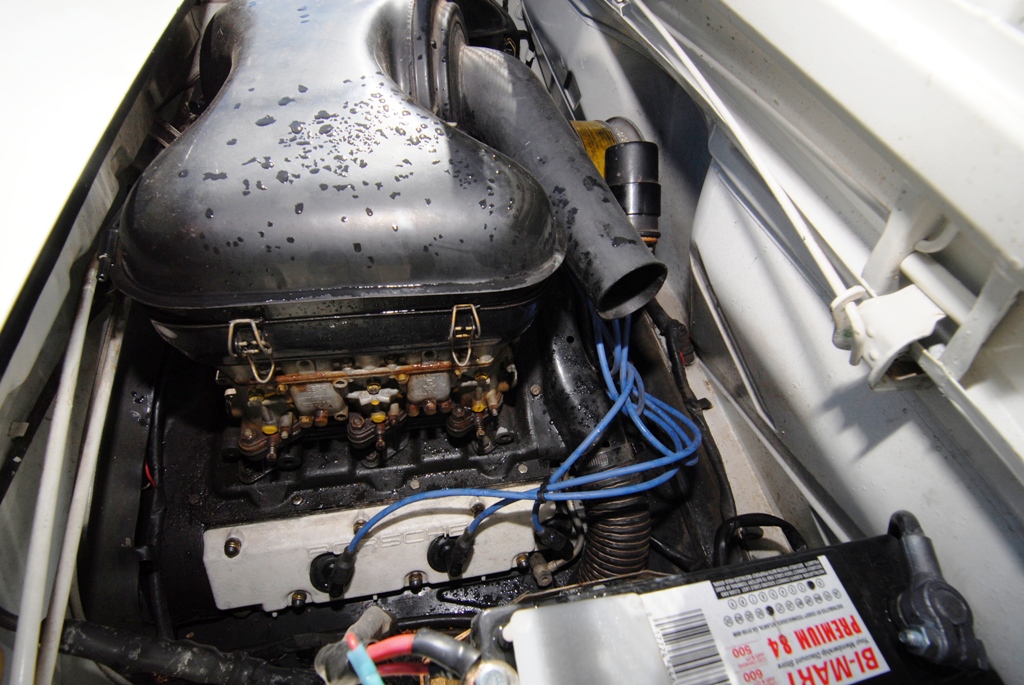
- white valve covers
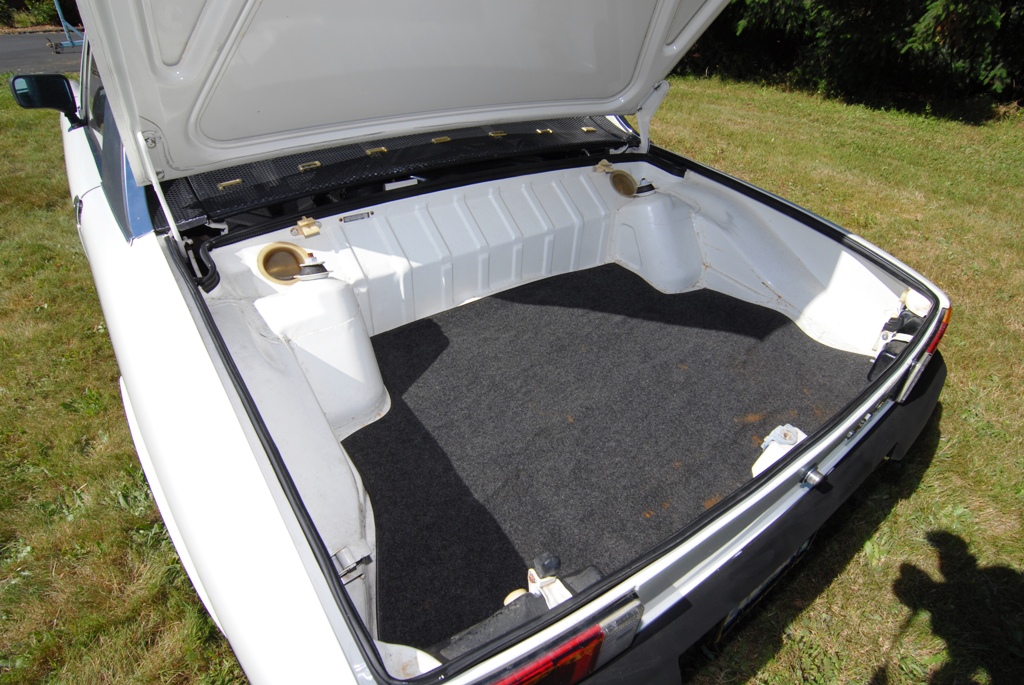
- rust (?) spots on carpet
- painted (?) headlight motors
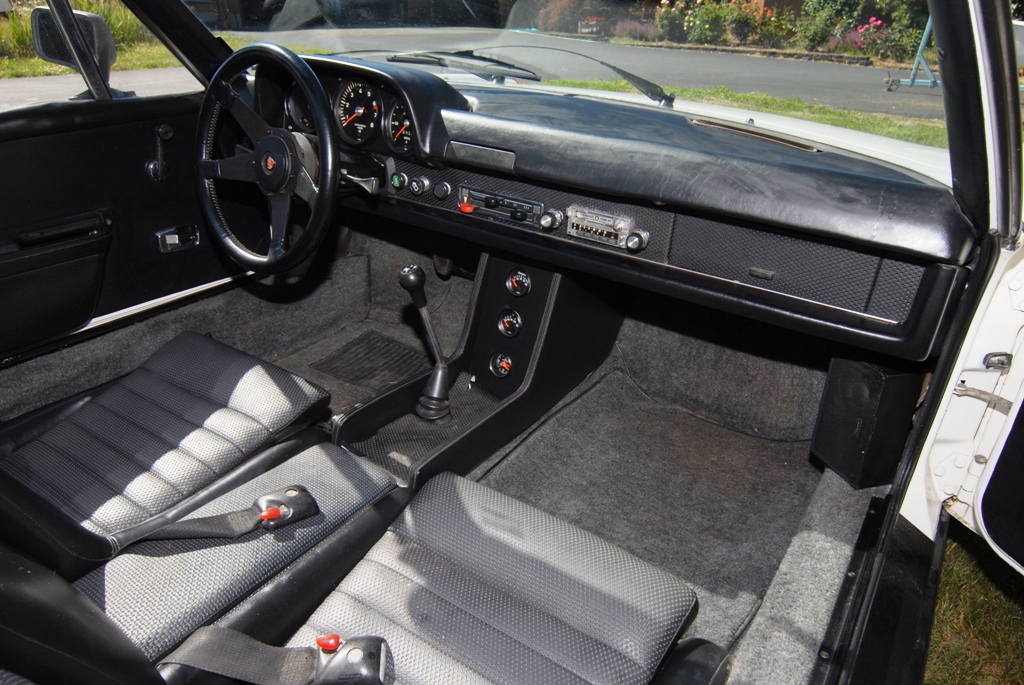
- 4-cyl center console
- color change back to Irish Green
- wheel center caps need to be anodized or something
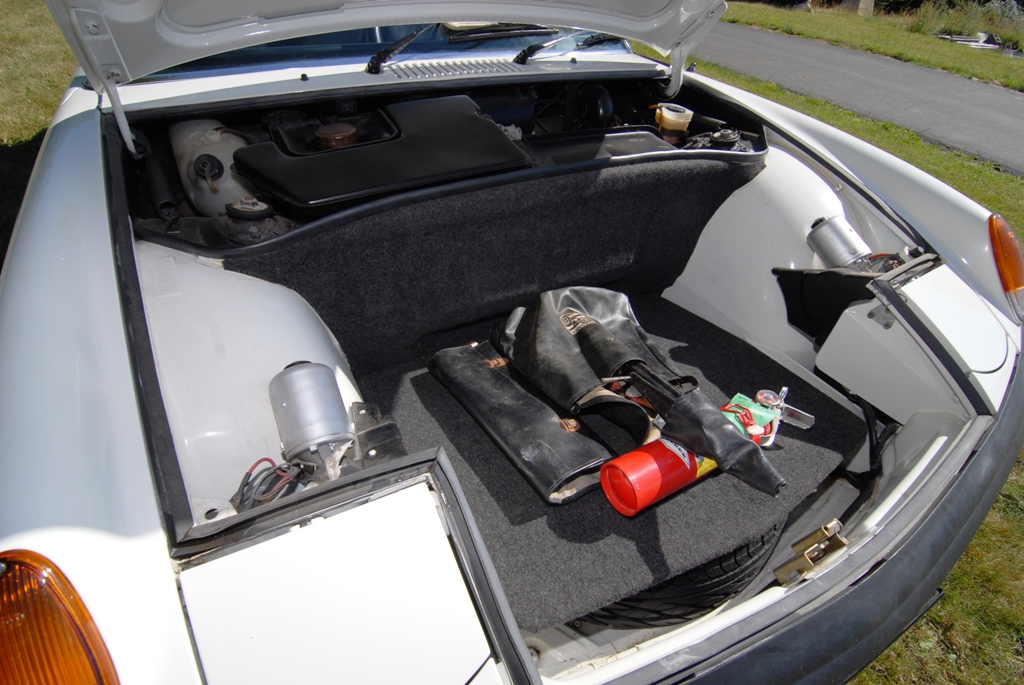
- incorrect jack
- black plastic threshold plates and carpet cleat should be aluminum
Not right but no reason to "correct" (IMO):
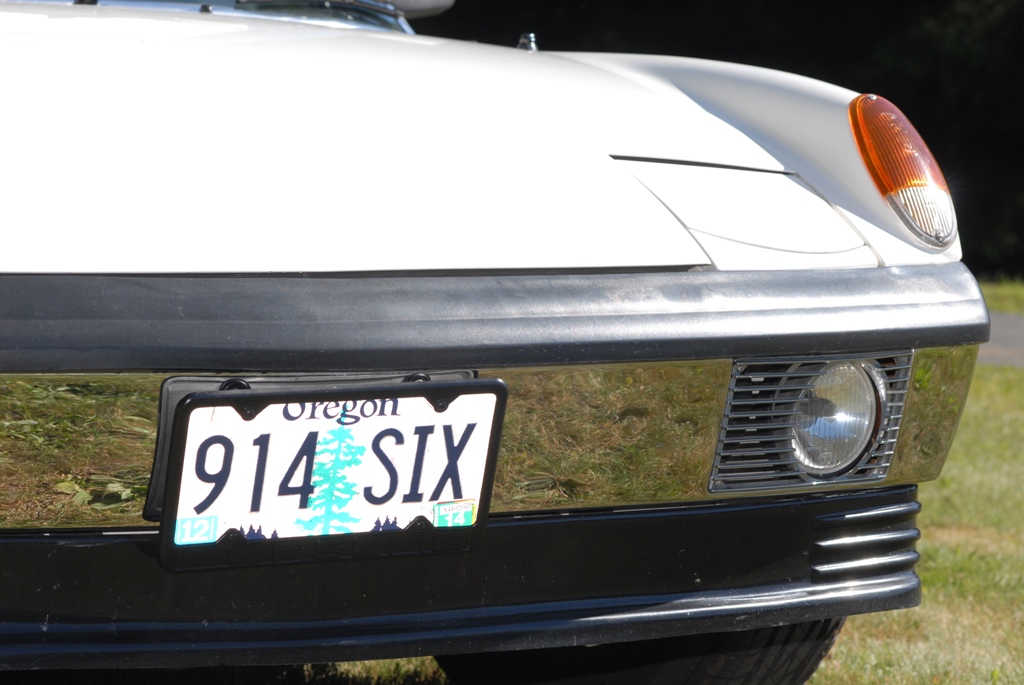
- Euro lenses
- Euro driving lights vs USA fog lights
- 15x6 Fuchs (was originally steel)
May or may not be correct:
- horn button is not correct
- center seat fabric should be smooth (Center cushion could be the Colgan aftermarket item, period correct)
questions / not sure:
- antenna may not be right... ?
- repro rear trunk carpet (missing grommet). or might be orig.
-Steve
Attached image(s)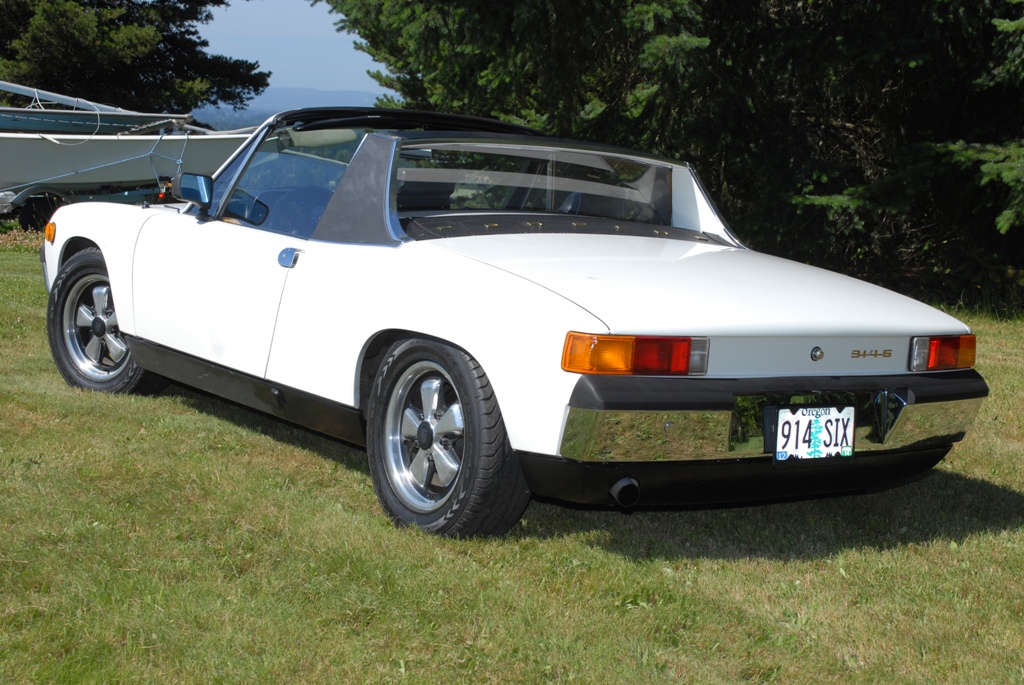
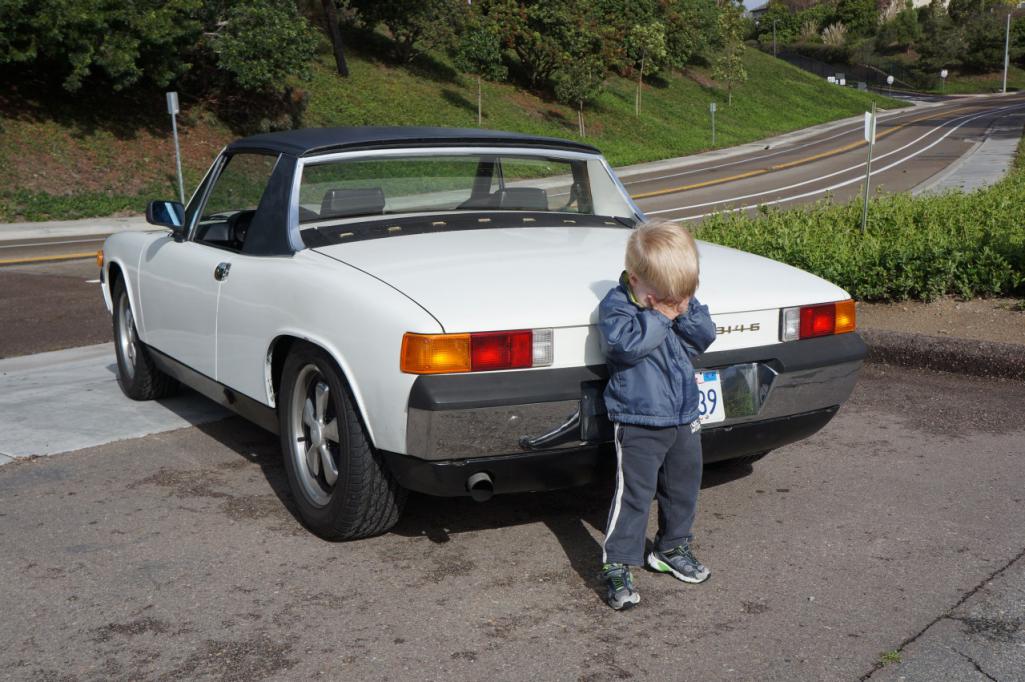
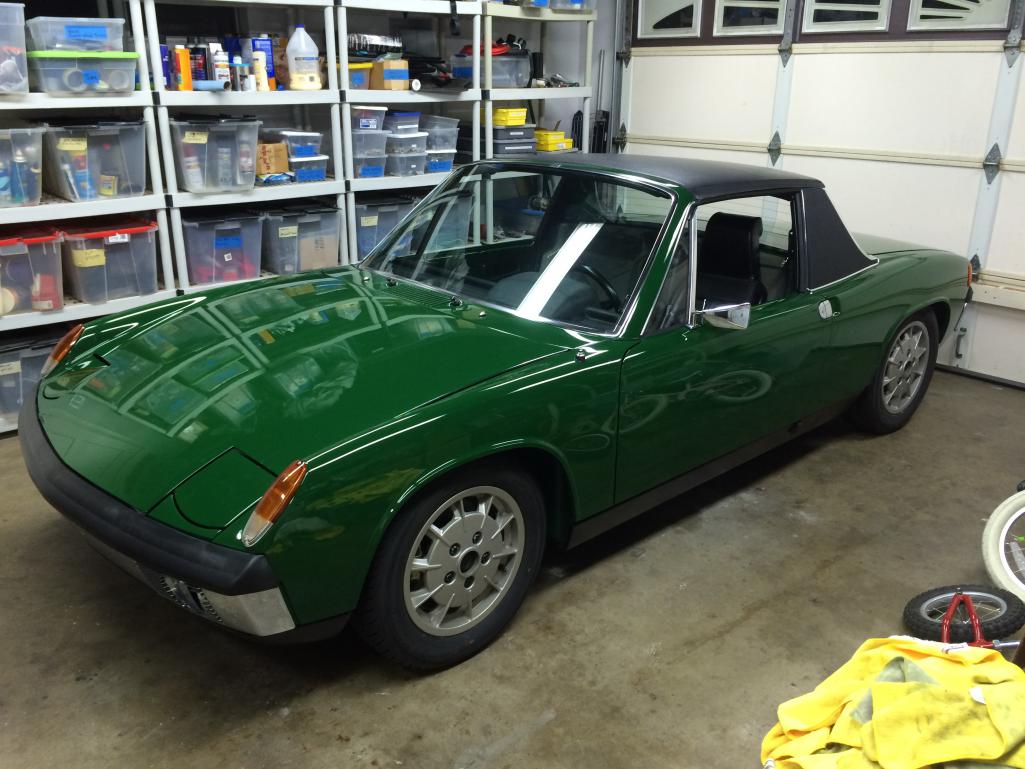
Posted by: siverson Aug 22 2013, 10:08 PM
914
Attached image(s)
Posted by: siverson Aug 22 2013, 10:10 PM
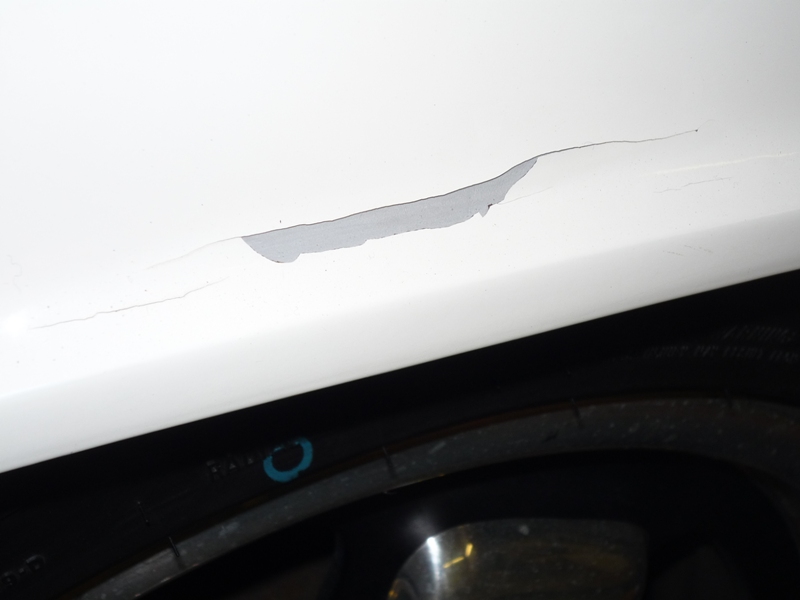
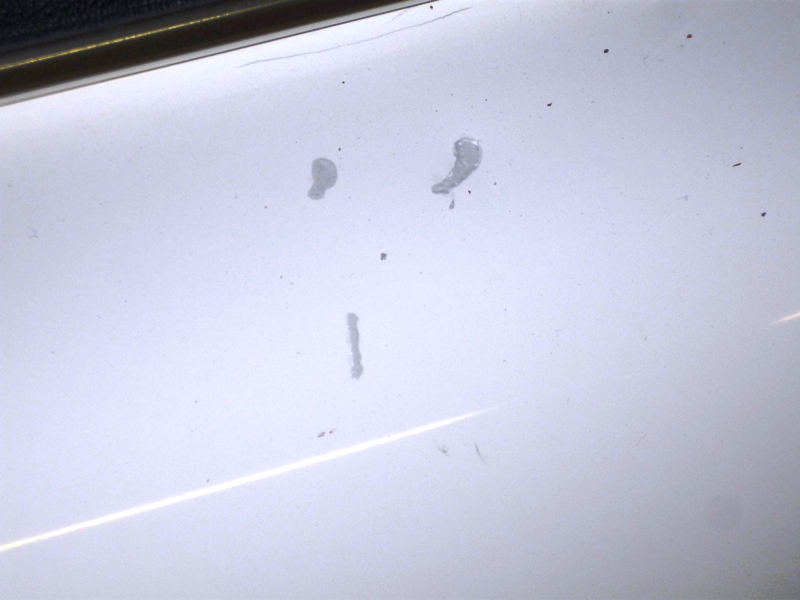
And paint (color change from Irish Green) from the 80s that is going bad...
Attached image(s)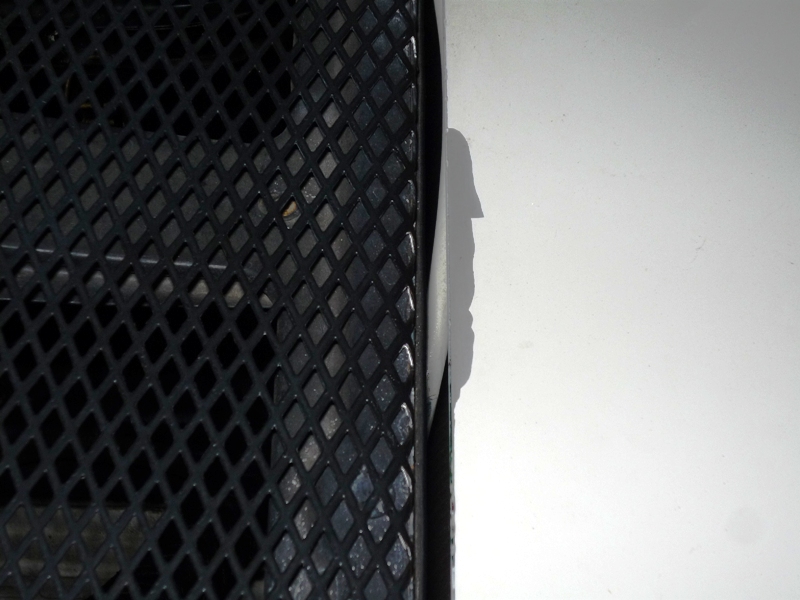
Posted by: Jaymann Aug 22 2013, 10:11 PM
Looks fun:I would drive it!!
Posted by: gms Aug 22 2013, 10:21 PM

questions:
no center dash vent & no dash vents... ?
Not on the 914/6
send me the VIN and I will see if I have any other info on the car
Posted by: Jeff Bowlsby Aug 22 2013, 10:37 PM
Euro driving lights vs USA fog lights
Center cushion could be the Colgan aftermarket item, period correct
Euro lenses!
Black plastic threshold plates and carpet cleat should be aluminum
Incorrect jack
Repro rear trunk carpet (missing grommet)
Looks like a cared-for driver now...could be a gem in Irish Green after a full strip and rotisserie
Posted by: Eric_Shea Aug 23 2013, 06:30 AM
Tool kit doesn't appear to be basket weave...
Posted by: Jasfsmith Aug 23 2013, 10:49 AM
Repro rear trunk carpet (missing grommet)
My '70 rear trunk carpet does not have the grommet. I believe it was added in '73.
Posted by: 396 Aug 23 2013, 12:04 PM
I believe a previous asking was 35k for this -6
Posted by: Chris H. Aug 23 2013, 12:16 PM
Painted headlight motors!? RUN AWAY... 

Looks pretty good from here. None of the low points are un-fixable.
Very few things are better than an Irish Green 6er...it needs to go back to that color! I'd say high 20's low 30's....
Posted by: siverson Aug 23 2013, 05:31 PM
Thanks for the feedback. I updated the first post.
Posted by: JmuRiz Aug 23 2013, 05:52 PM
It's just what happens with years of owners customizing. I wouldn't mind getting it and fixing some of those things.
Granted a purist wouldn't like what I'm doing to my car...but it was a lowly 1.7 to start with (found the original badge marks when I sent it off for paint)
Posted by: lostreasure Aug 23 2013, 07:12 PM
Gas tank area is suppose to be painted body color. Shock tower area is undercoated. A lot of people do a color change and just spray bomb black that area since it takes some time to dismantle. My opinion that is a drawback- many comments on cosmetics-do not overlook the drivetrain-make sure car has good compression and trans shifts properly- engine rebuild on a 914-6 is the same as a 911 Big $$ Good luck!
Posted by: Gustl Aug 24 2013, 11:39 AM
From the photos, this is what I see that is not correct. Anything I'm missing?
inside rear view mirror is the later version
Posted by: siverson Aug 26 2013, 09:45 PM
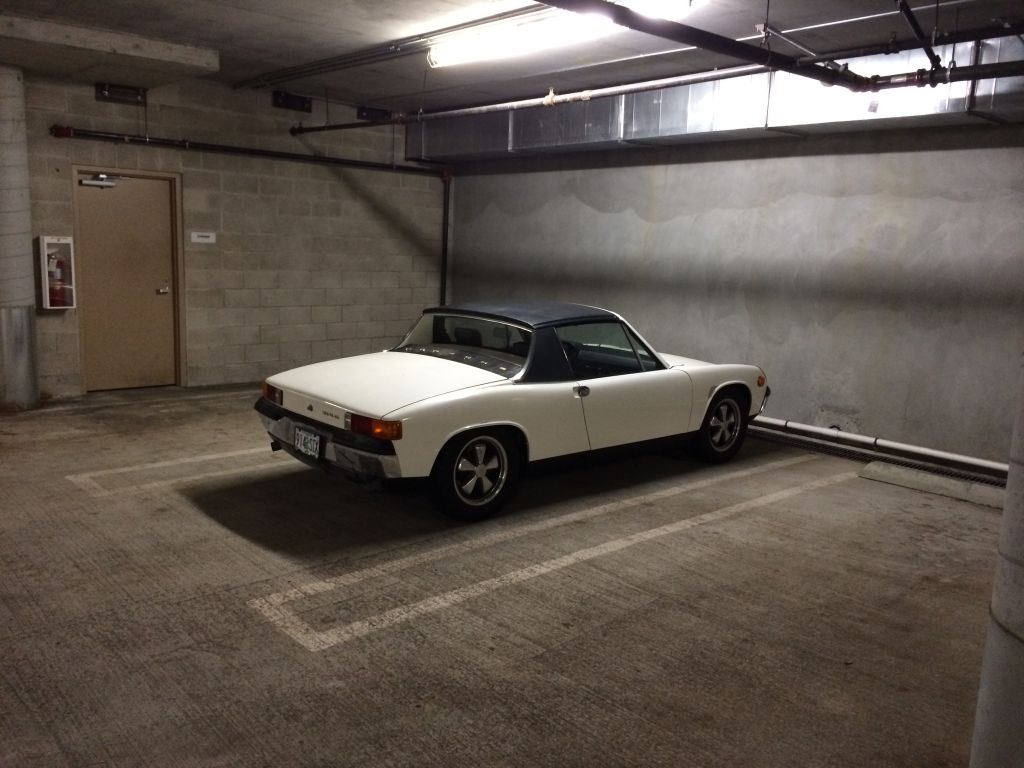
An update! The seller and I finally came to agreement (was about 3 weeks of back and forth) and I bought the car this weekend. I flew to Portland this weekend and drove back in 2 days. Just over 1,000 miles in 2 days, and that's more than the car has been driven in 10 years. He really needed it and seemed quite happy to be on the road again (especially south on the I-5 near Sacramento at 1am...).
It's funny how much more you learn about a car just driving it a bunch, even beyond photos, PPI, and close inspection.
I've got a long list of items to fix on the car (that got a little longer as I drove home), but it's quite fun to own my first real 6. My 5th 914, but my first real six.
And given that I have 3 914s now, the 1971 1.7 will probably be for sale shortly. The wife wants to limit it to 3 914s at any given time, and that actually seems somewhat reasonable to me...
-Steve
Posted by: siverson Aug 26 2013, 09:50 PM
> Black plastic threshold plates and carpet cleat should be aluminum
Right, but the weird thing is these are the original aluminum peices that the PO had anodized (or something) black. He said in the 80s he was going for a black and white theme...
> Incorrect jack
> Tool kit doesn't appear to be basket weave...
Correct - all wrong and missing
> Repro rear trunk carpet (missing grommet)
> My '70 rear trunk carpet does not have the grommet.
It looks like some don't have the grommet. PO said that was the correct color and the Brett Johnson book has some photos of rear carpet with the grommet too.
> It needs to go back to that color!
I agree. Too bad it was ever painted. Even ratty Irish Green would be better than peeling white...
> Shock tower area is undercoated.
Correct. Anyone know why the factory did this on -6s? It doesn't make any sense to me. It's ugly and seems to serve no purpose.
-Steve
Posted by: Eric_Shea Aug 26 2013, 09:53 PM
All original sixes are like that. Six shock towers are all painted black, then aligned and covered with a tarish goo that marks any changes.
Congrats Steve, given your eye for detail, it will be fun to watch this one come back to it's original glory.

Posted by: Gustl Aug 26 2013, 09:57 PM
The seller and I finally came to agreement (was about 3 weeks of back and forth) and I bought the car this weekend.
congrats
good luck and lots of joy

Posted by: Cairo94507 Aug 26 2013, 09:58 PM
Congratulations! You have yourself a nice Six there. I really look forward to seeing it come to the level that I know you will bring it to.
Posted by: Eric_Shea Aug 26 2013, 10:06 PM
Only assumptions. I have a video of a 70's era 911 assembly line. The front end is installed as a completed unit as these go down the line. It comes toward the front of the car with the struts in a horizontal position and is tilted into position and bolted up in one smooth operation.
It may be a flag to denote a six tub that would get the basic 911T front suspension (with the exception of the special 17mm 914 size t-bars with the 911 spline count).
They could be aligned differently with the slightly different track and again, the black used as a marker to indicate a six.
I kinda like it. It was applied with a sloppy brush and reeks of one of those quirky -6 things. I even emulated it on my build because I thought it was a neat, yet odd feature.
Posted by: racerbvd Aug 26 2013, 10:13 PM
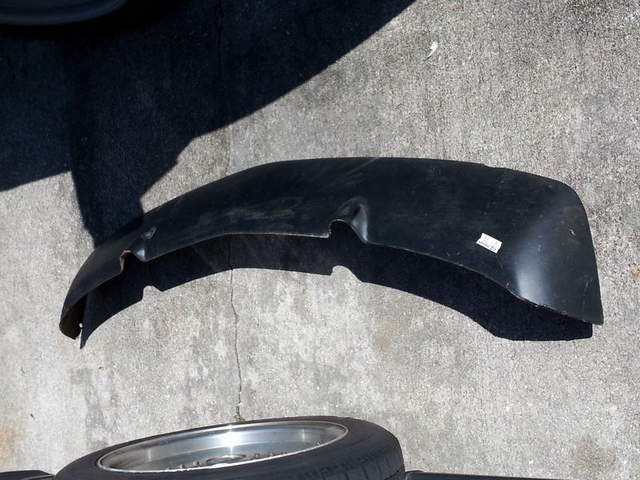
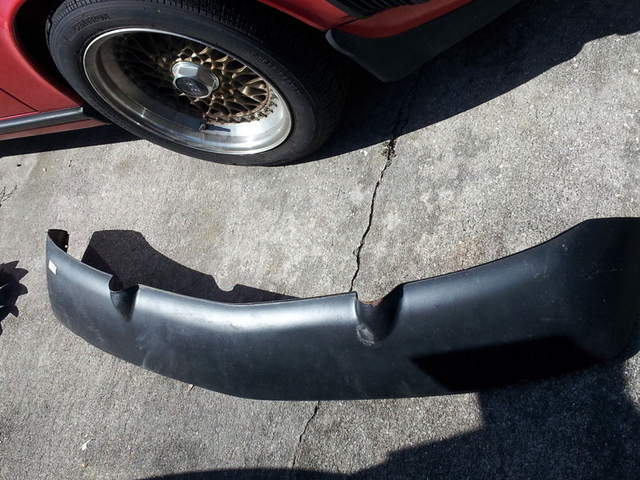
I have the correct front valance if you chose to go back stock.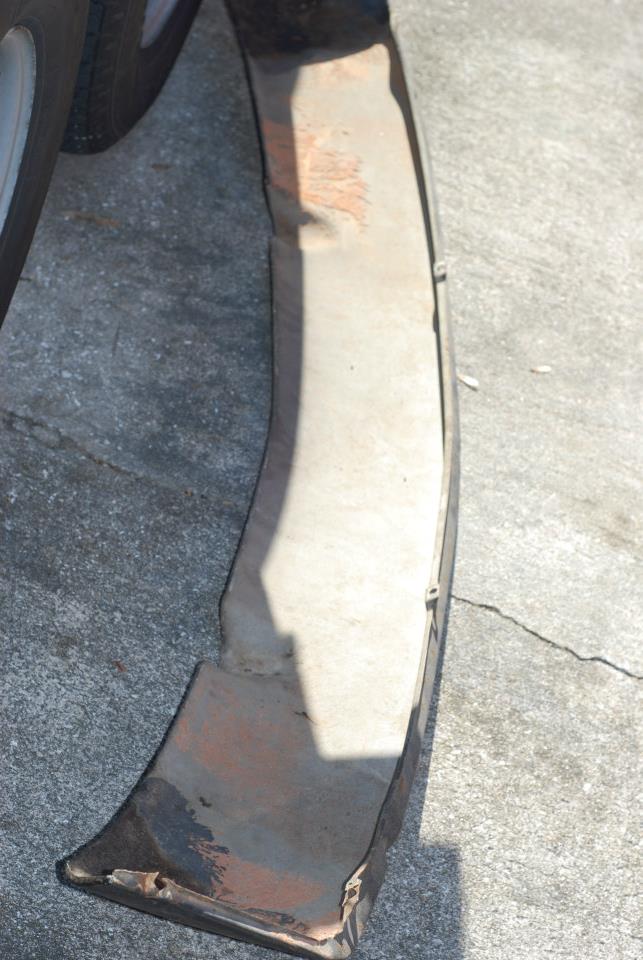
Posted by: r_towle Aug 27 2013, 01:21 PM
Only assumptions. I have a video of a 70's era 911 assembly line. The front end is installed as a completed unit as these go down the line. It comes toward the front of the car with the struts in a horizontal position and is tilted into position and bolted up in one smooth operation.
It may be a flag to denote a six tub that would get the basic 911T front suspension (with the exception of the special 17mm 914 size t-bars with the 911 spline count).
They could be aligned differently with the slightly different track and again, the black used as a marker to indicate a six.
I kinda like it. It was applied with a sloppy brush and reeks of one of those quirky -6 things. I even emulated it on my build because I thought it was a neat, yet odd feature.
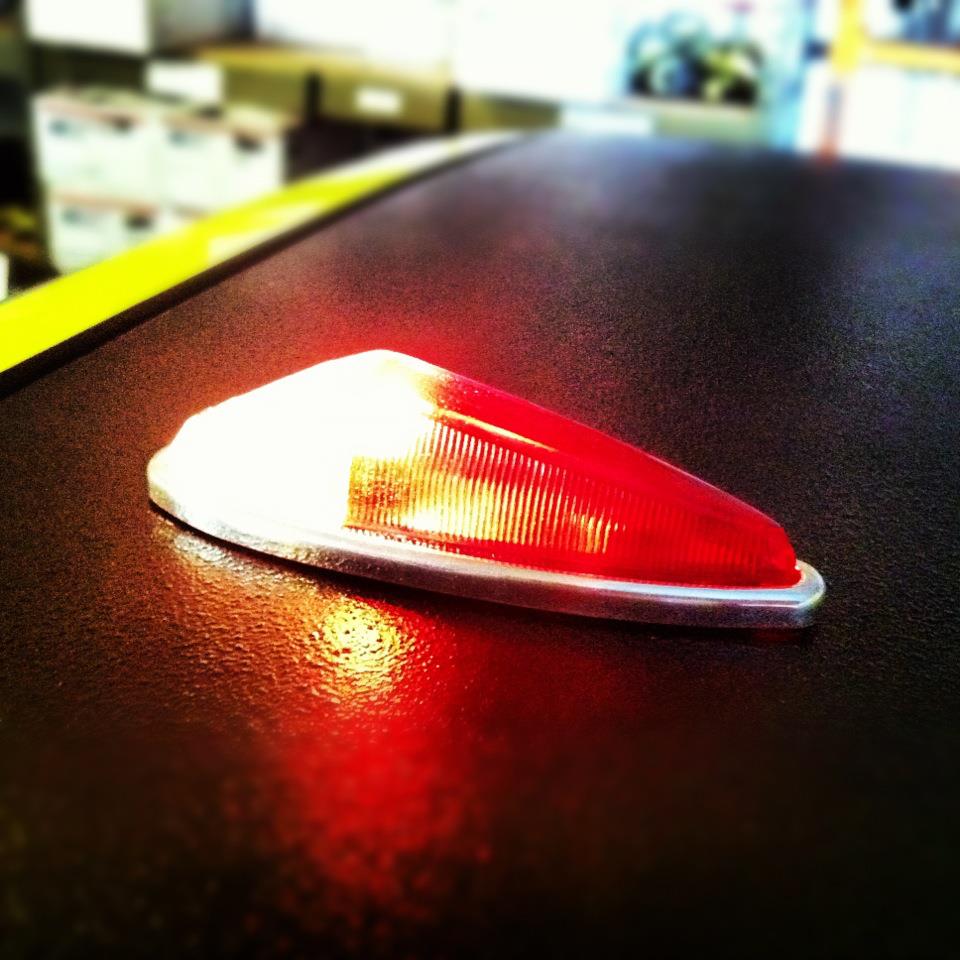
Like the roof blinker?
Posted by: 396 Aug 27 2013, 03:08 PM
Steve,
Well educated move. You posted it and asked for advice and hopefully you used it in your favor to set your target price. Congrats on another -6
Posted by: Eric_Shea Aug 27 2013, 09:37 PM
All sixes had those too...

Posted by: siverson Nov 2 2013, 07:34 PM
> I have the correct front valance if you chose to go back stock
That's actually an old photo, it has a repro stock looking front valence on it now.
Posted by: siverson Nov 2 2013, 07:54 PM
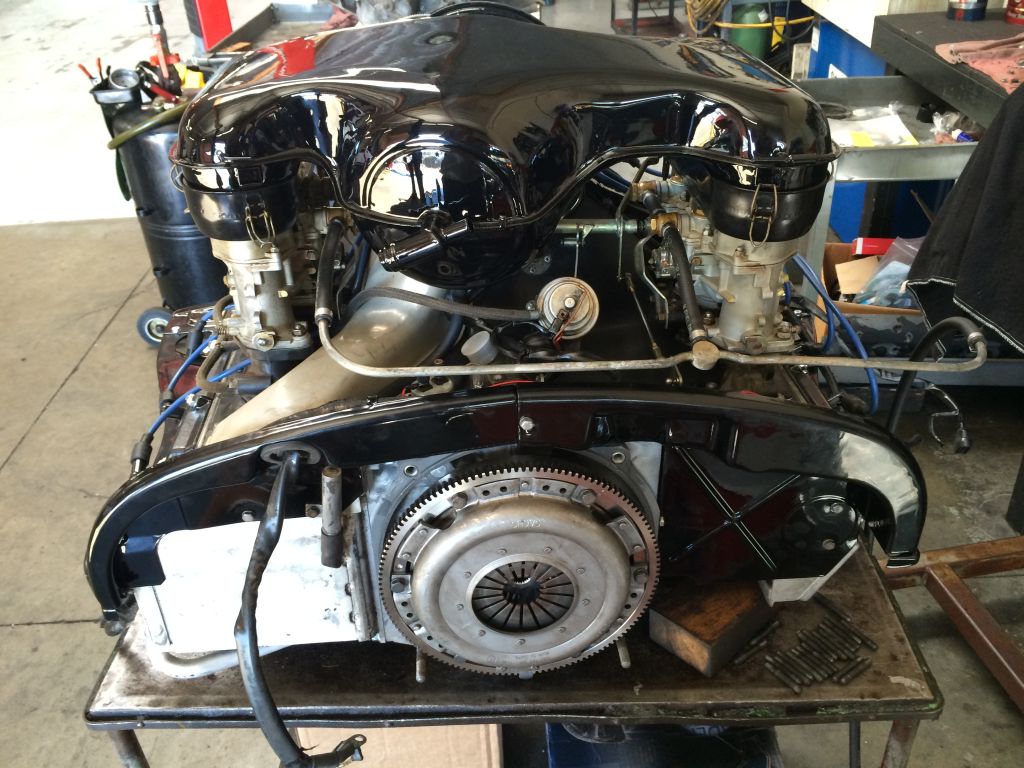
Well I've been digging into fixing all the things wrong with my new -6.
I assumed the engine would need a full rebuild, and of course it did. And like all 914 projects it ends up taking twice and long and twice as much as you'd expect.
I've done 95% of the work on my orange conversion, but for this project I'm just planning on keeping it a stock [very nice] driver and letting some shops do 90% of the work.
I had European Motorsports in nearby Vista do the engine rebuild. They do general euro car maintenance and work on some very high end cars at the same time. An original 73 RS and original speedster were both getting engine rebuilds at the same time as mine. I've never had them do major work like this before, but they come pretty highly recommended.
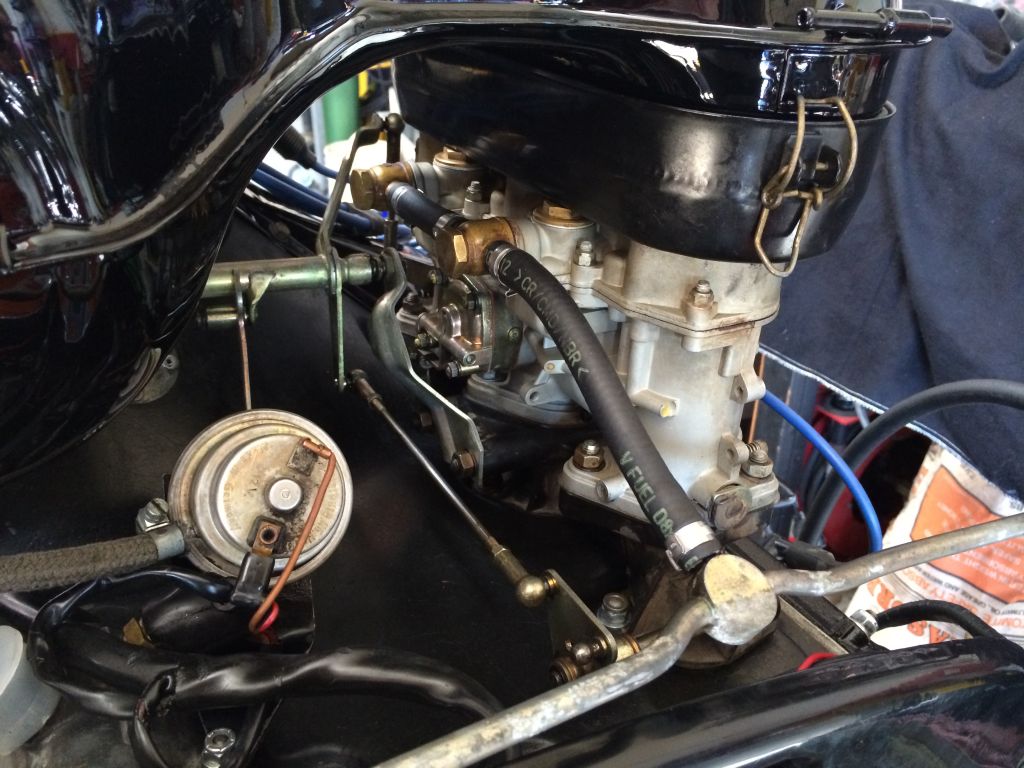
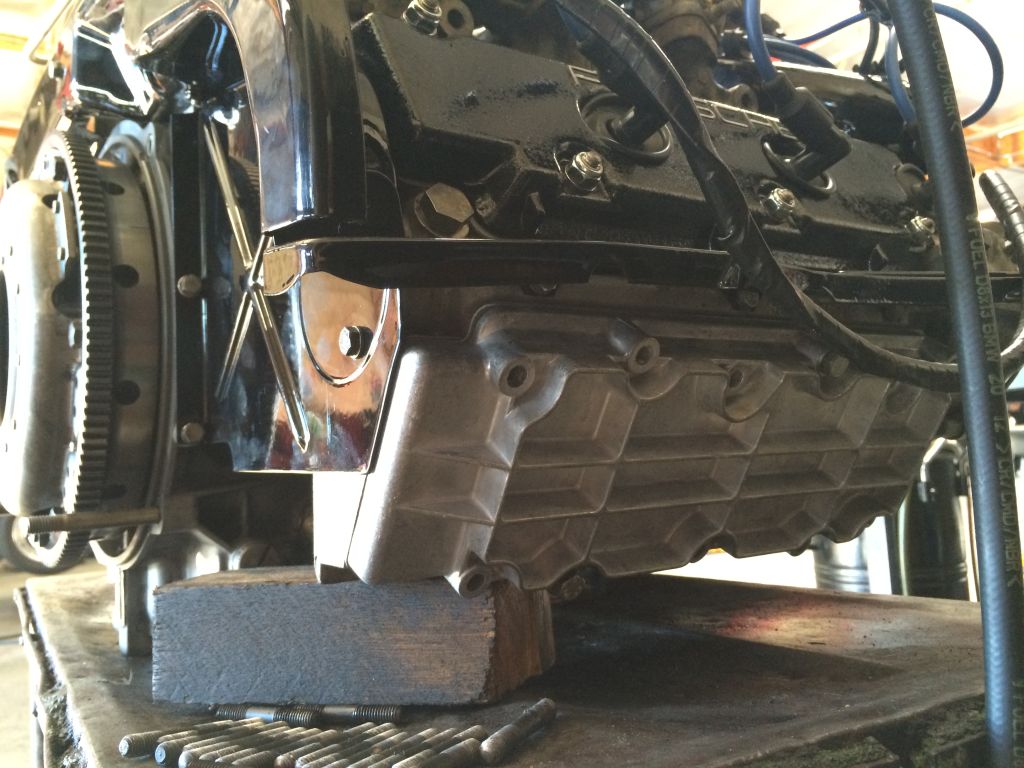
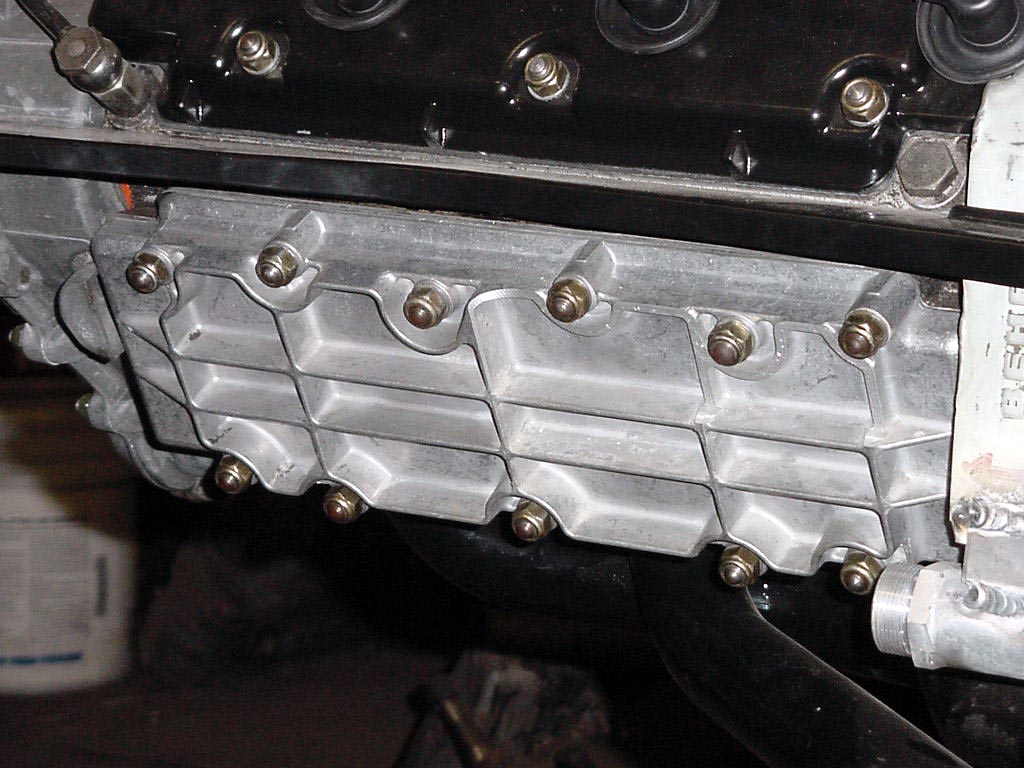
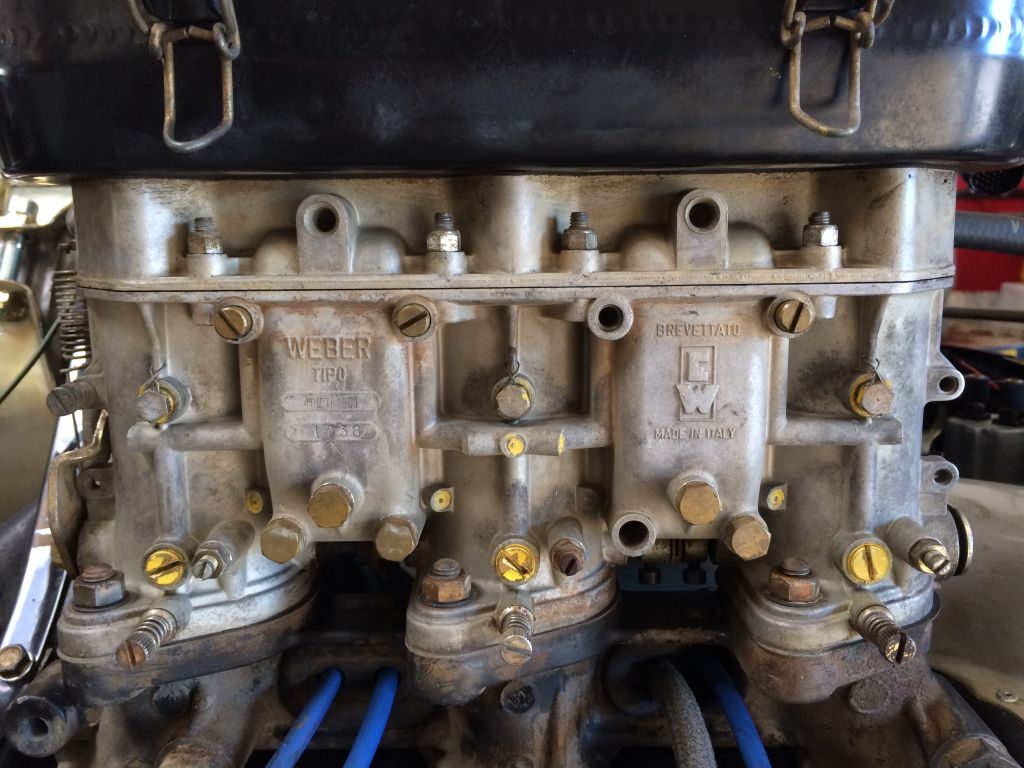
I'm pretty happy with the results and communication so far, but I thought I'd share some photos here for any additional input you guys may have. While I'm not building a perfect concours car, I guess I did expect things to end up, cosmetically, a little more perfect and shiny. Especially given the $$$$$ involved. Or maybe I'm just way overly anal retentive on my orange car. Let me know your thoughts.
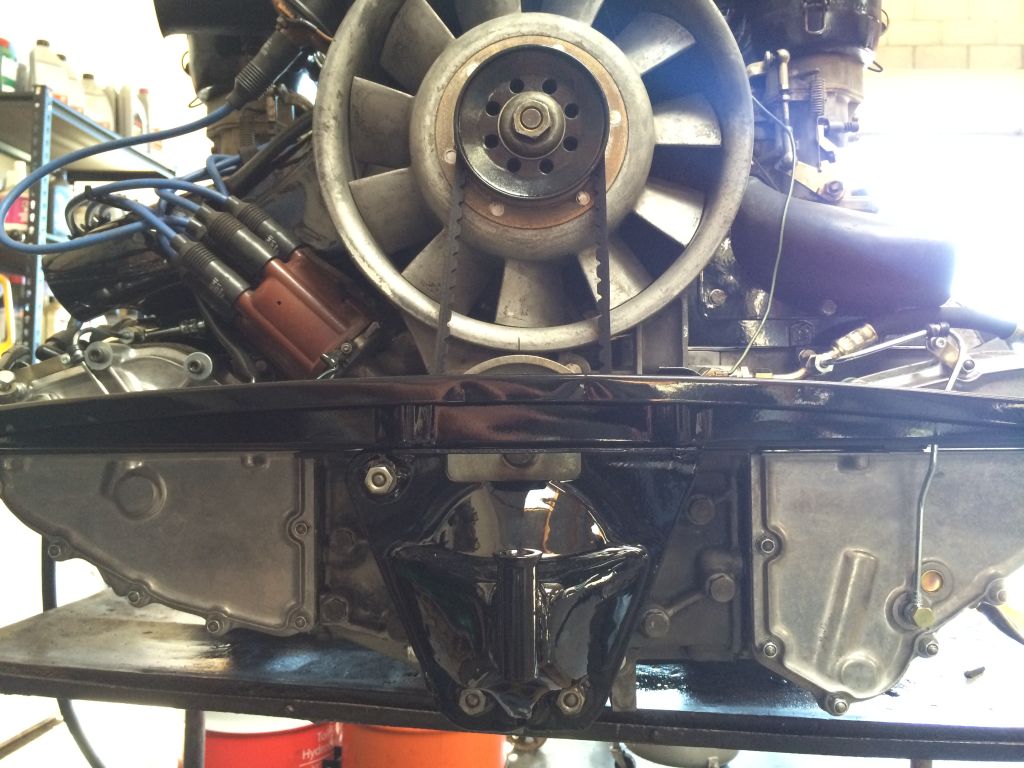
After much deliberation, we re-used the old cylinders and bored them out to 81mm (from 80mm) and have new 81mm pistons. E cams, updated tensioners, and otherwise 100% stock. I really didn't have any interest in trying to get a little more horsepower out of it, because even if I could get 170+ HP out of the little 2.0 (or 2.4 or ...) it would still be a relatively (to a 3.6) slow car. So the build was just to get a very nice 2.0 motor.
Factory 80mm 2.0 pistons are much (like an additional $6k) more expensive than going to 81mm. And in the interest of keeping everything stock, I didn't want to machine the heads for anything larger. I think it will end up with 130 HP or so. Should be fun.
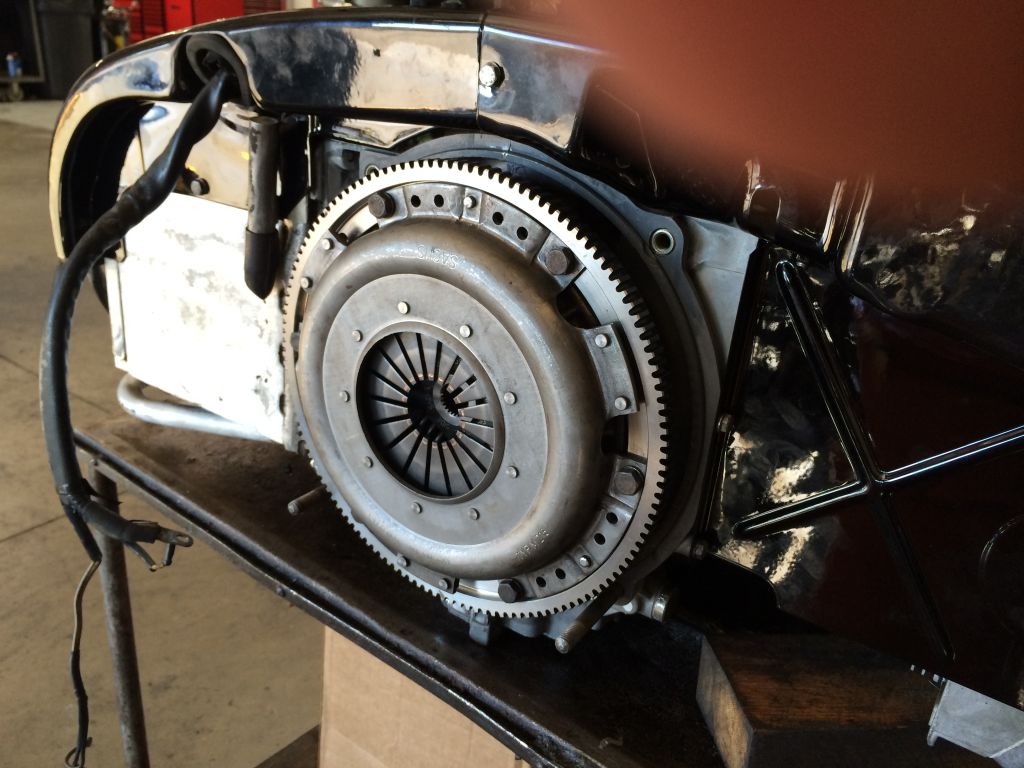
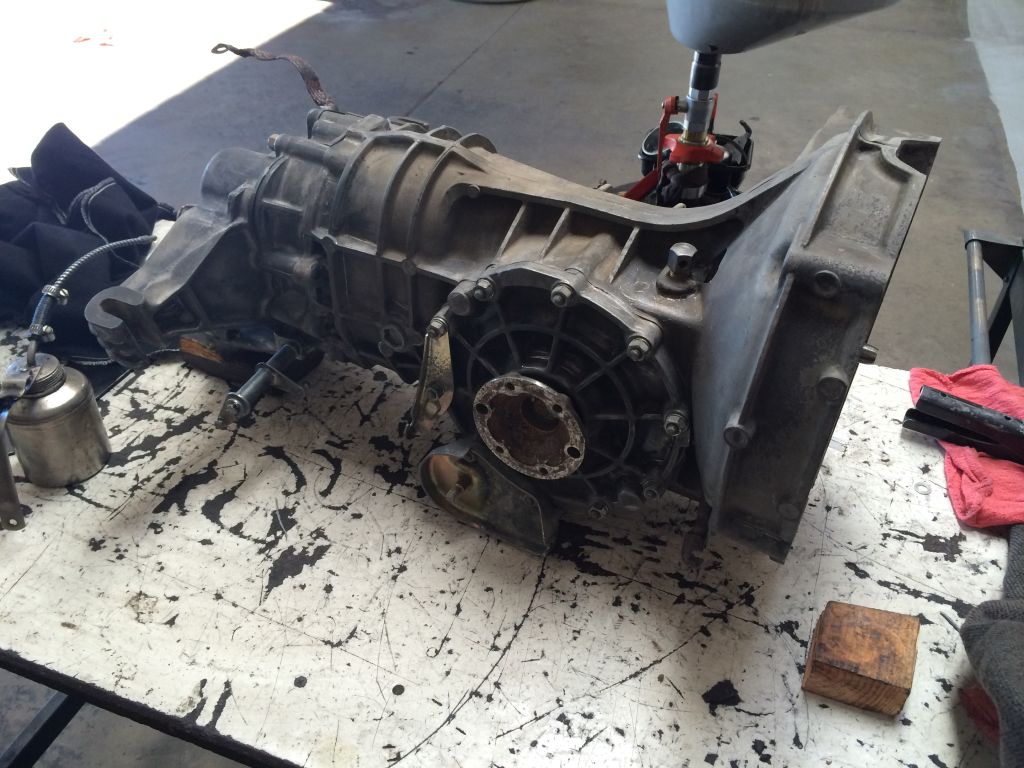
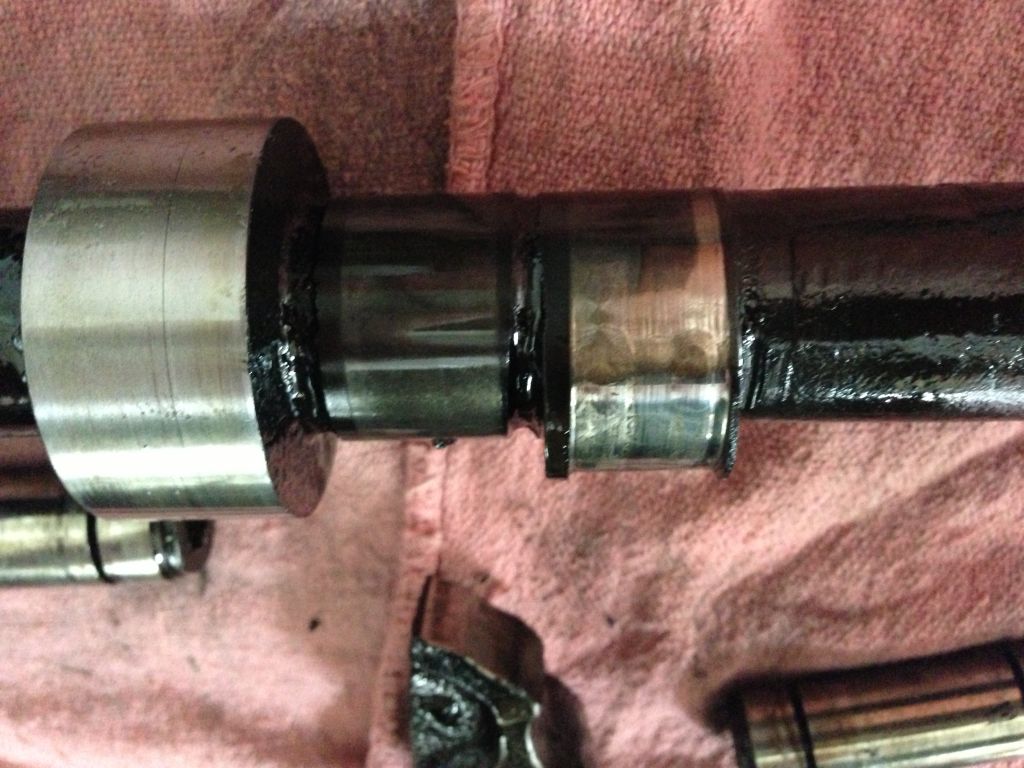
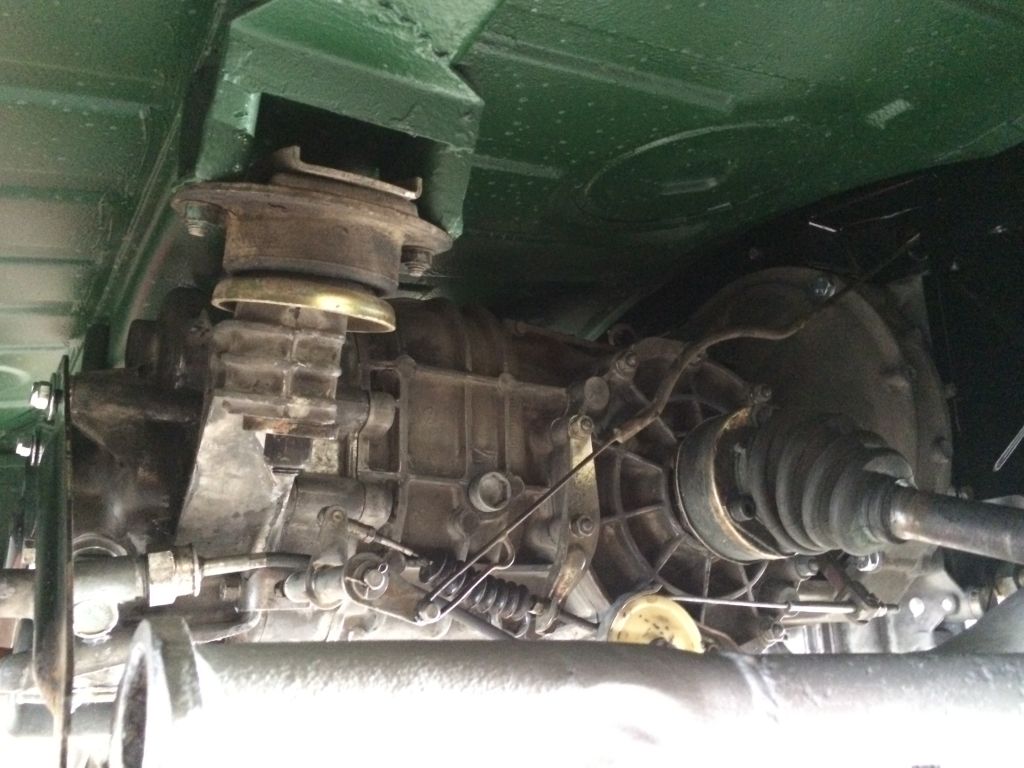
And new flywheel, new clutch, and rebuilt the transmission too...
See any problems? Things that should be changed before it goes back into the car?
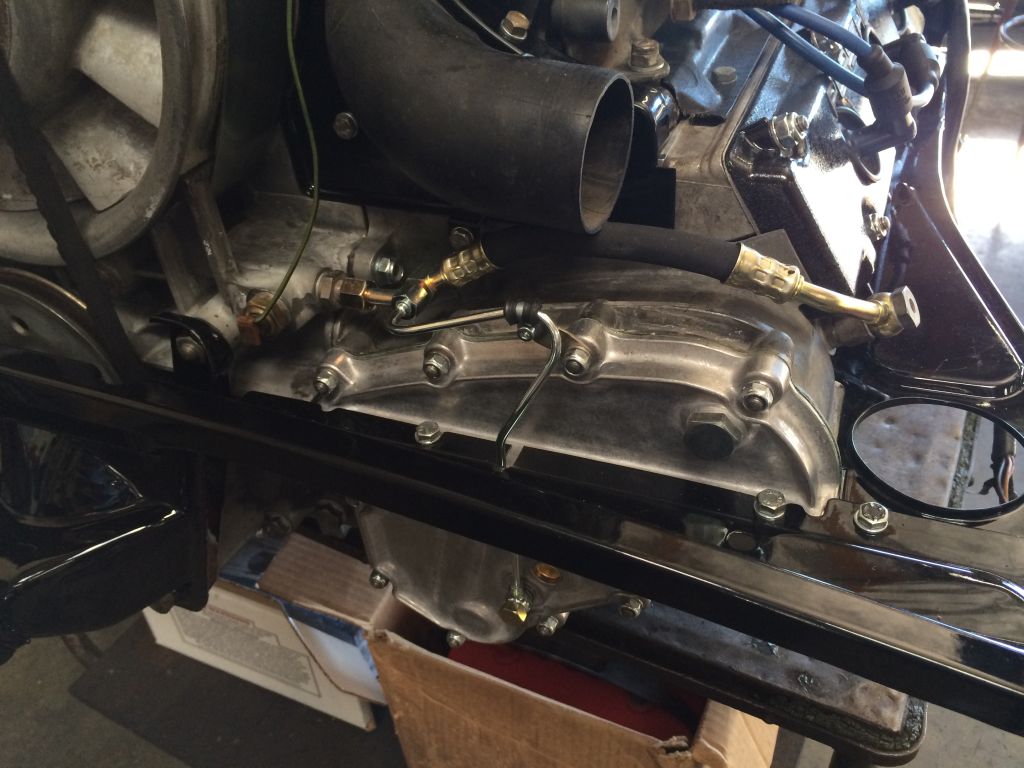
My questions:
- is that hardware (1 nut, 1 wingnut) correct for the air cleaner/snorkel?
- I'm guessing blue plug wires are wrong?
- can the carbs be cleaned up easily with a little more effort or ?
- rubber fuel lines ok or should I really bother finding german/cloth lines?
- allen bolts on cam covers look right?
- whats proper for the valve covers? (lowers were updated to later covers)
- what the proper way to cover/protect the oil temp/pressure wires? or is there nothing like it currently is?
Thanks for any tips!
And I'll follow up shortly with the "replace the battery tray" repair that turned into something much more! (first time that's happened in a 914, right?!?! 
-Steve
Attached thumbnail(s)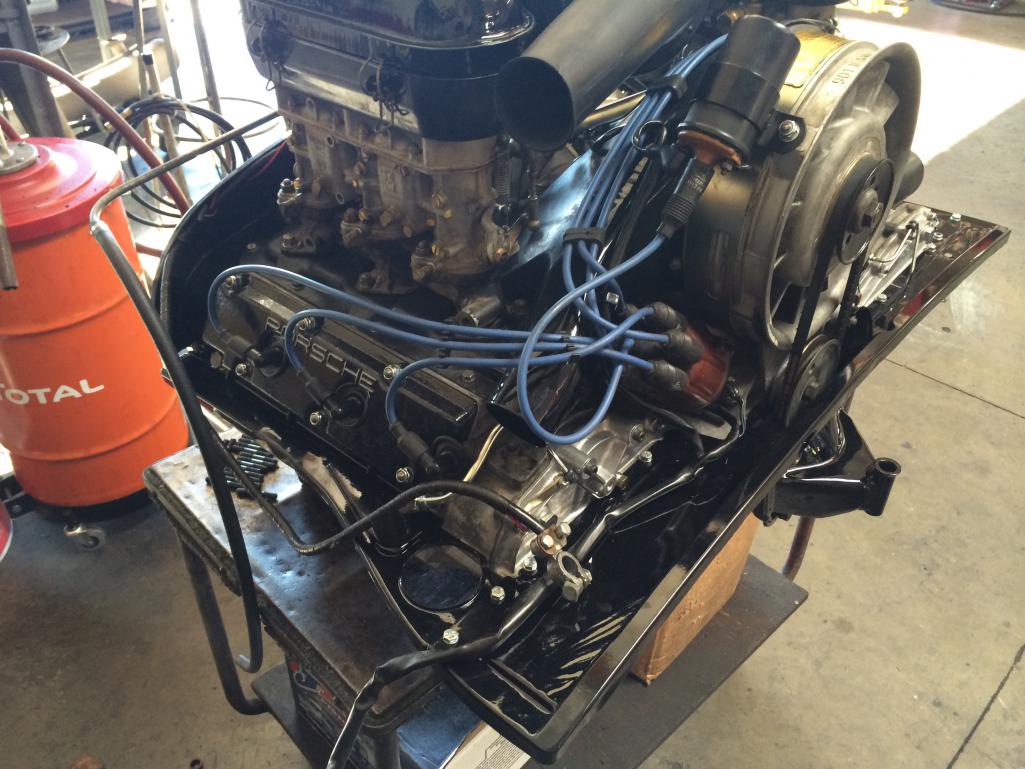
Posted by: siverson Nov 2 2013, 07:58 PM
914
Attached image(s)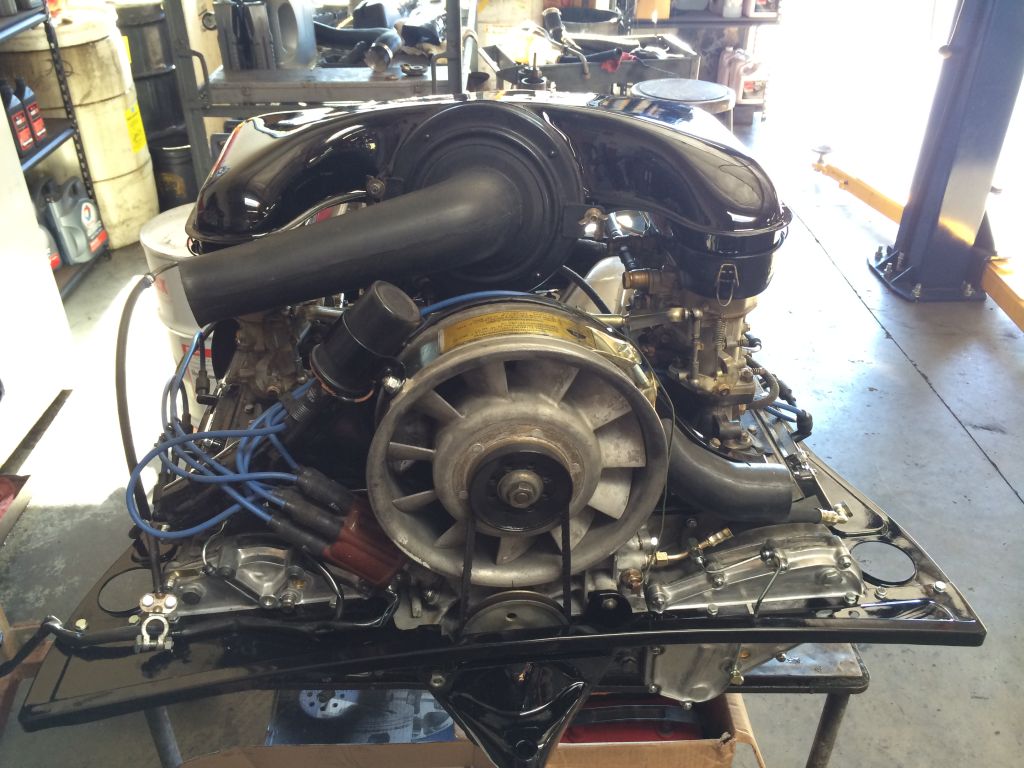
Posted by: rick 918-S Nov 2 2013, 09:25 PM
To me, there are some things that just make sense to change. With todays fuels, fuel lines is one of them. I'm glad you have this car. It's in good hands.
Posted by: boxstr Nov 2 2013, 10:13 PM
Small 914 world. I looked at that 6 for a customer.
Crag at CAMP
Posted by: sixnotfour Nov 3 2013, 04:43 AM
studs on lower covers and get SC lowers , as they are aluminum and look stock,.air cleaner should be plastic. plug wires? no biggy consumable
Irish Green .....
Posted by: bcheney Nov 3 2013, 10:26 AM
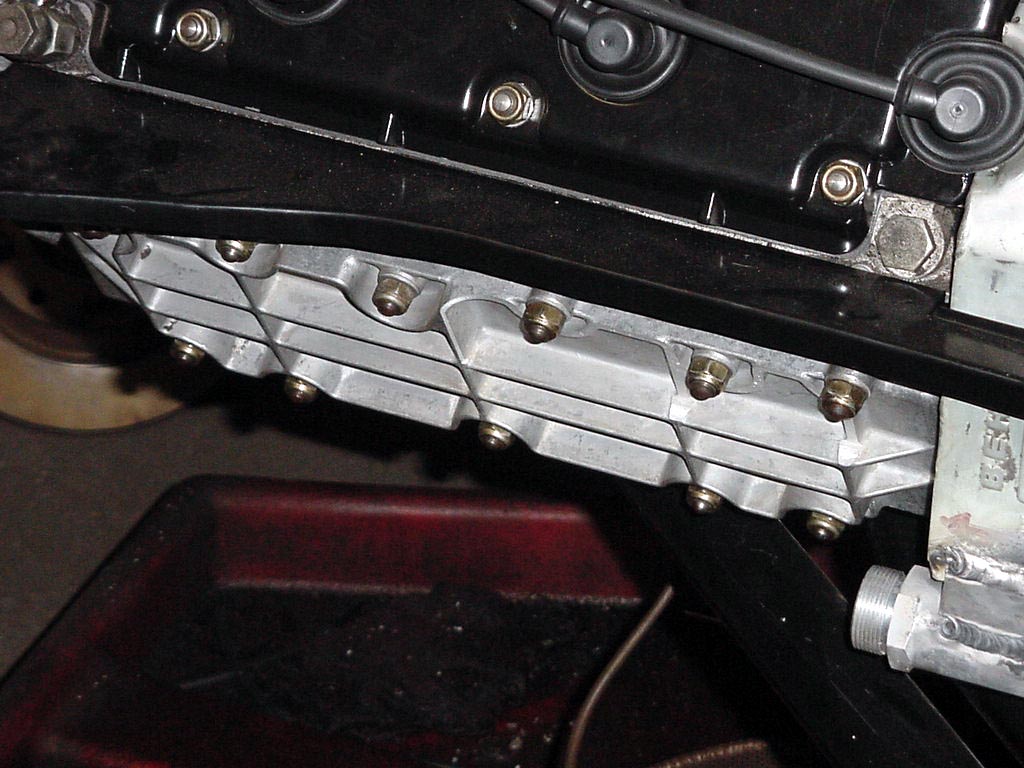
What a cool story and project. I hadn't seen this thread until today. I did notice something IMPORTANT...at least if you want your valve adjustments to go well and not have to include dropping or lowering the engine. The turbo valve covers must be machined down about one half inch on the rear half or they will not be able to be removed once the engine is in the car. Some folks say only the right side needs to me machined...I didn't take the chance and just had both covers machined down. I've attached a couple of pics that Rich Johnson sent to me when I was making this mod to my car. I took the covers to a local machine shop and I think they charged me about 1/2 hour labor or approximately $30 to do the work. Additionally, some years ago I found a photobucket from "RJ Wilmoth" that has quite a lot of great pics of his fairly unmolested 1971 Silver 914/6...It's a beauty...I have used these pics to help understand what things look like for parts of my car which is a -6 conversion. Here is the link to his photobucket pics. Some great shots of the engine and engine bay along with many other areas of the car. Hope this helps!
http://s199.photobucket.com/user/rj968/library/#/user/rj968/library/1971%20Porsche%20914-6?sort=3&page=0&_suid=1383497129961032975035906505395
Attached image(s)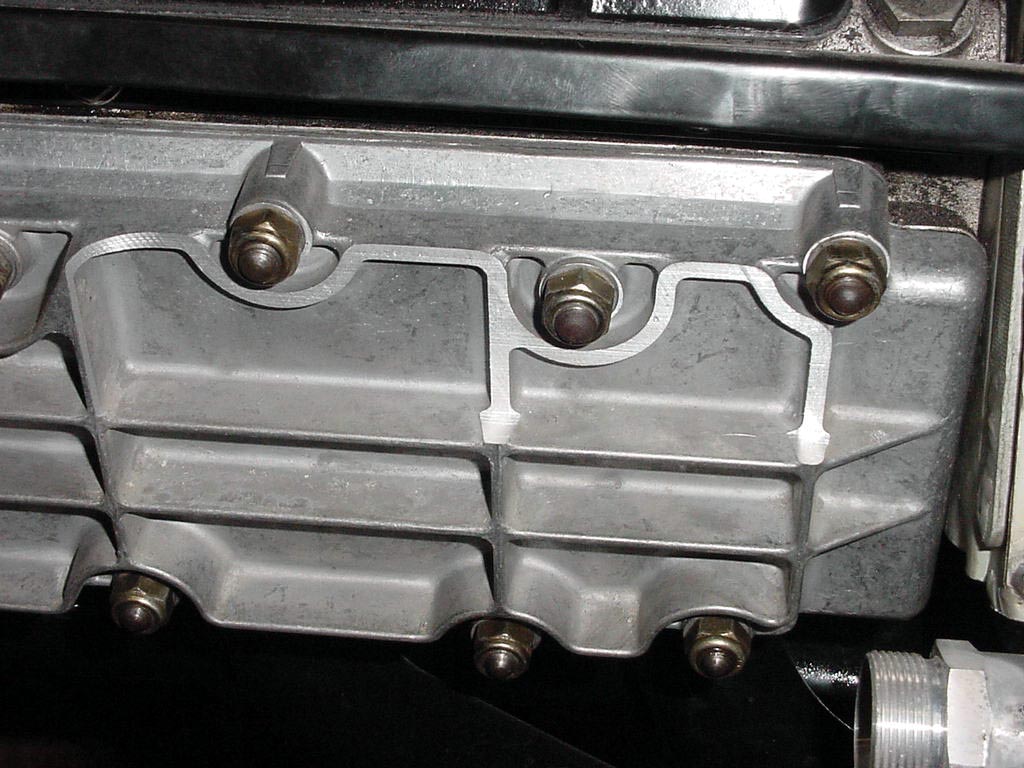
Posted by: siverson Nov 3 2013, 12:10 PM
> The turbo valve covers must be machined down
Yup, that's on the list. And I think they mentioned they were going to use bolts instead of studs/nuts there...
-Steve
Posted by: siverson Nov 3 2013, 12:13 PM
> fuel lines is one of them
Yup, all the fuel lines have been replaced, I guess I was just wondering about using the rubber ones (pictures) versus what I believe should be german/cloth covered fuel lines.
-Steve
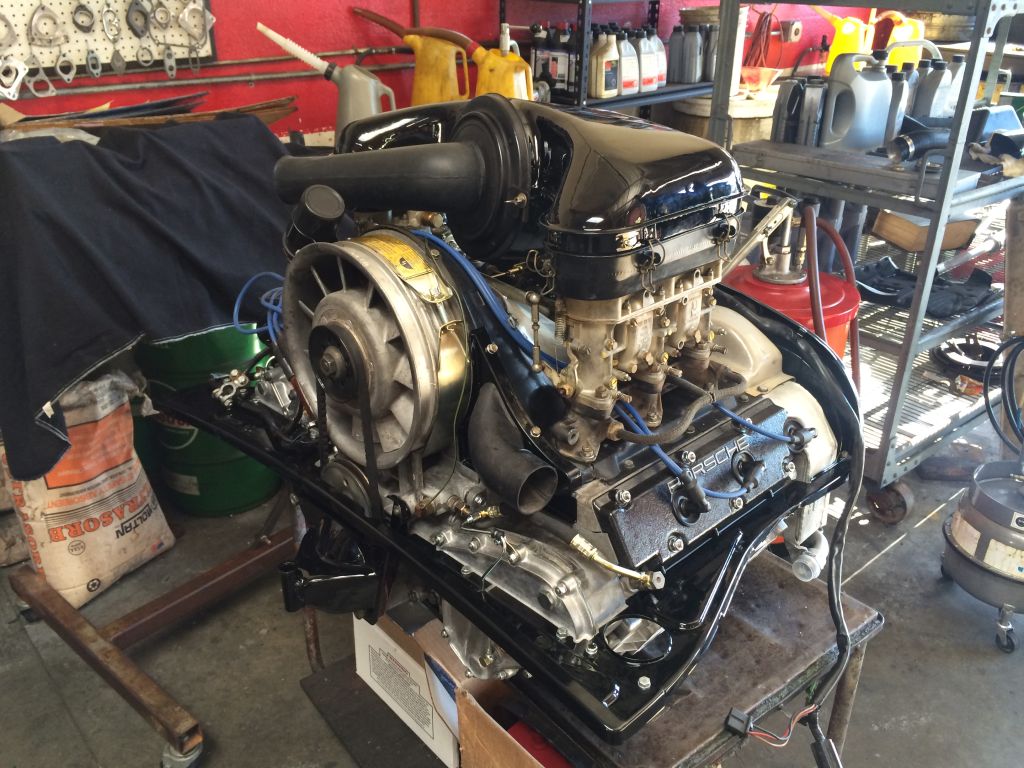
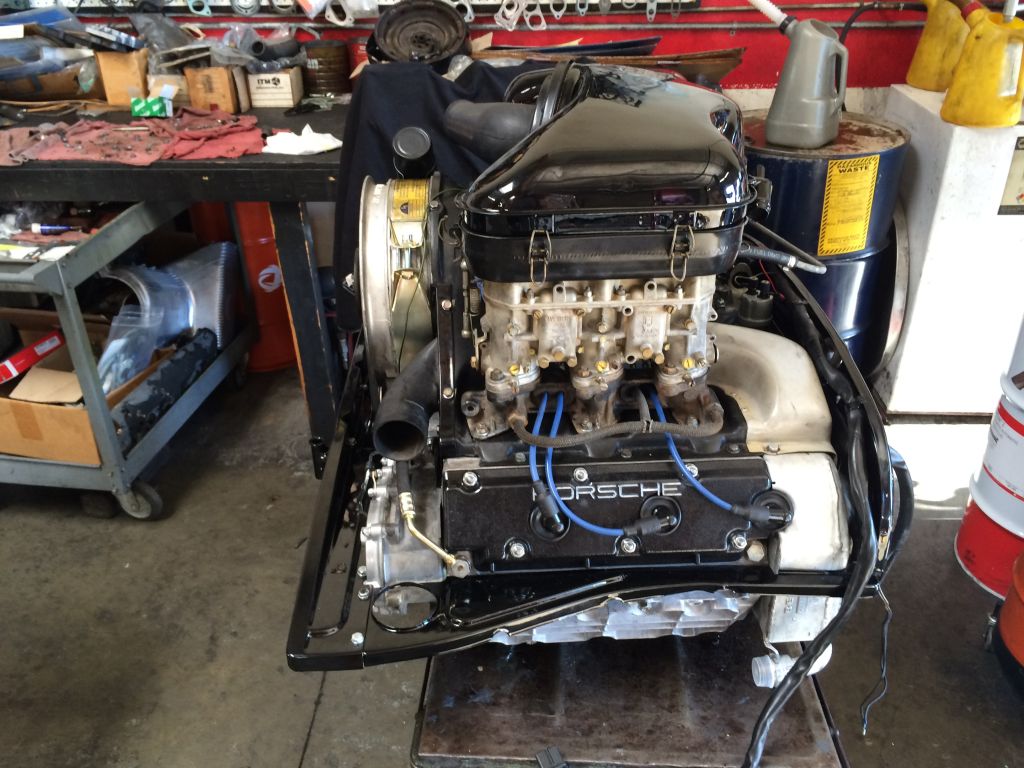
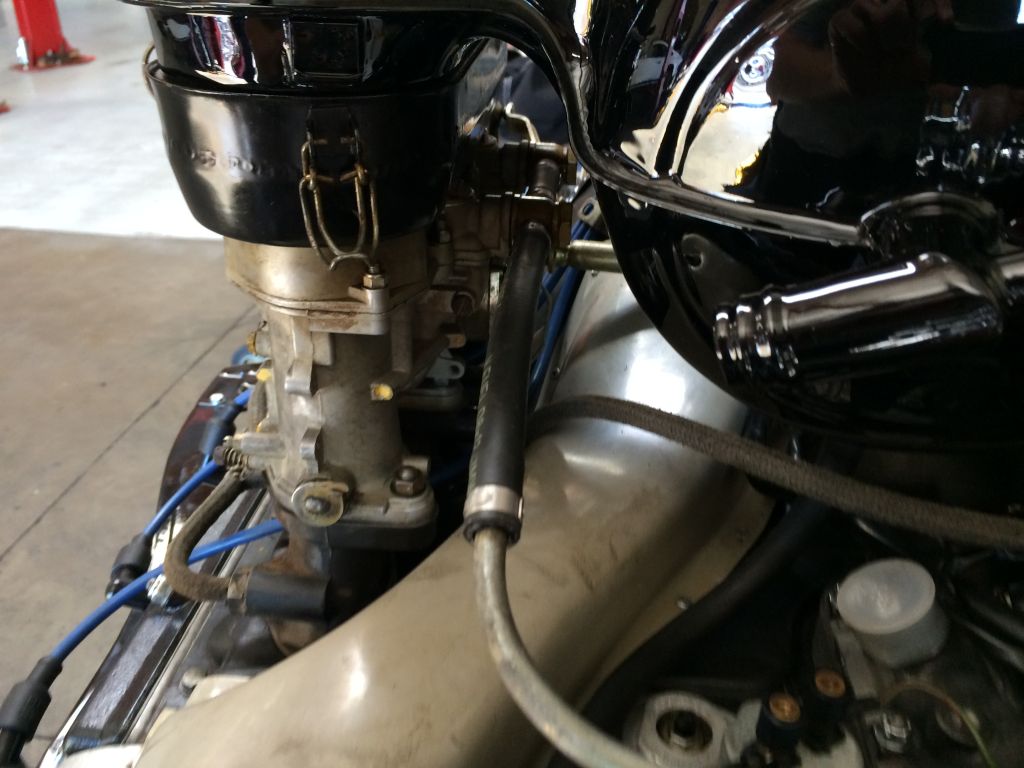
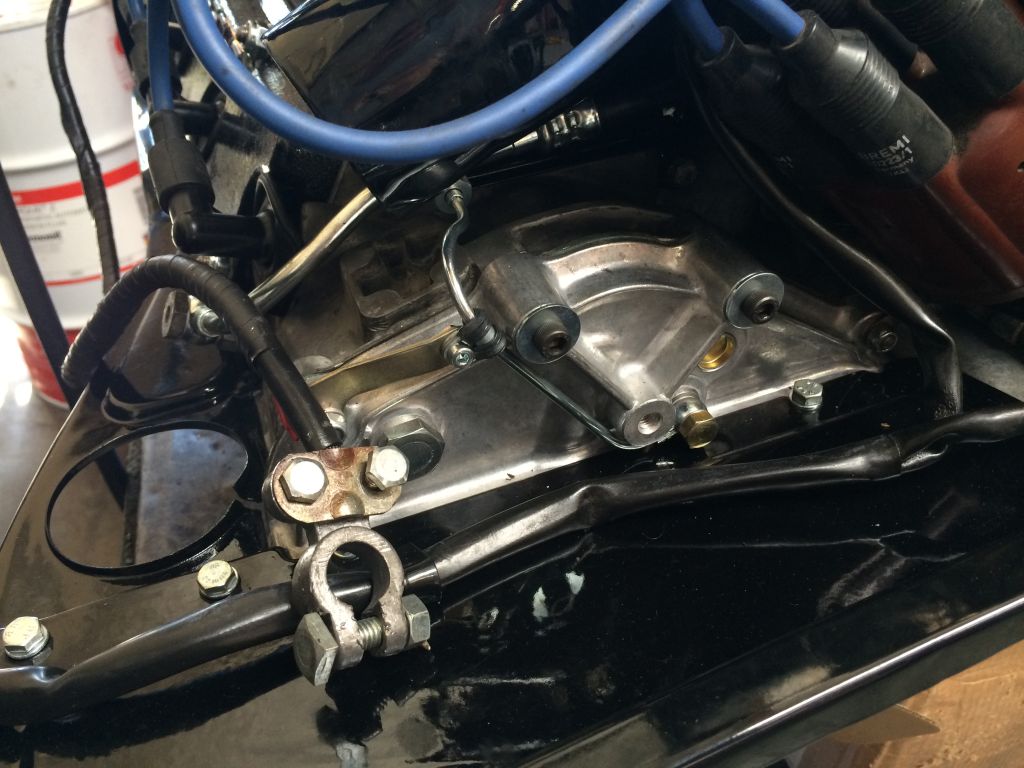
Posted by: siverson Nov 3 2013, 12:15 PM
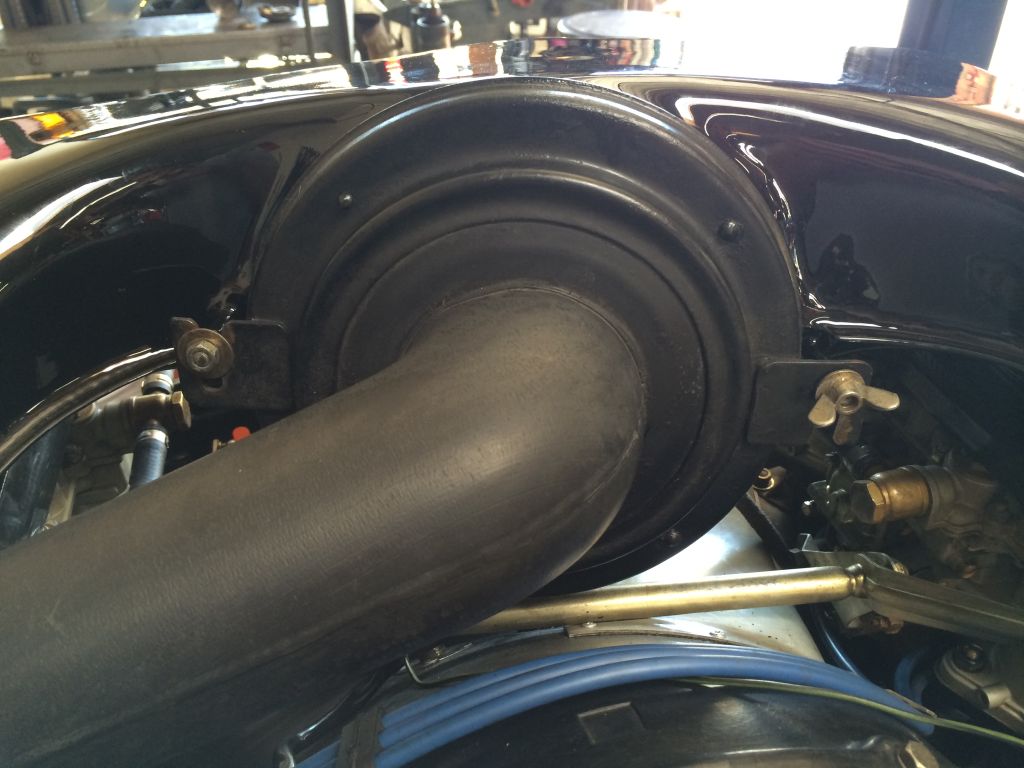
A couple more photos...
Attached image(s)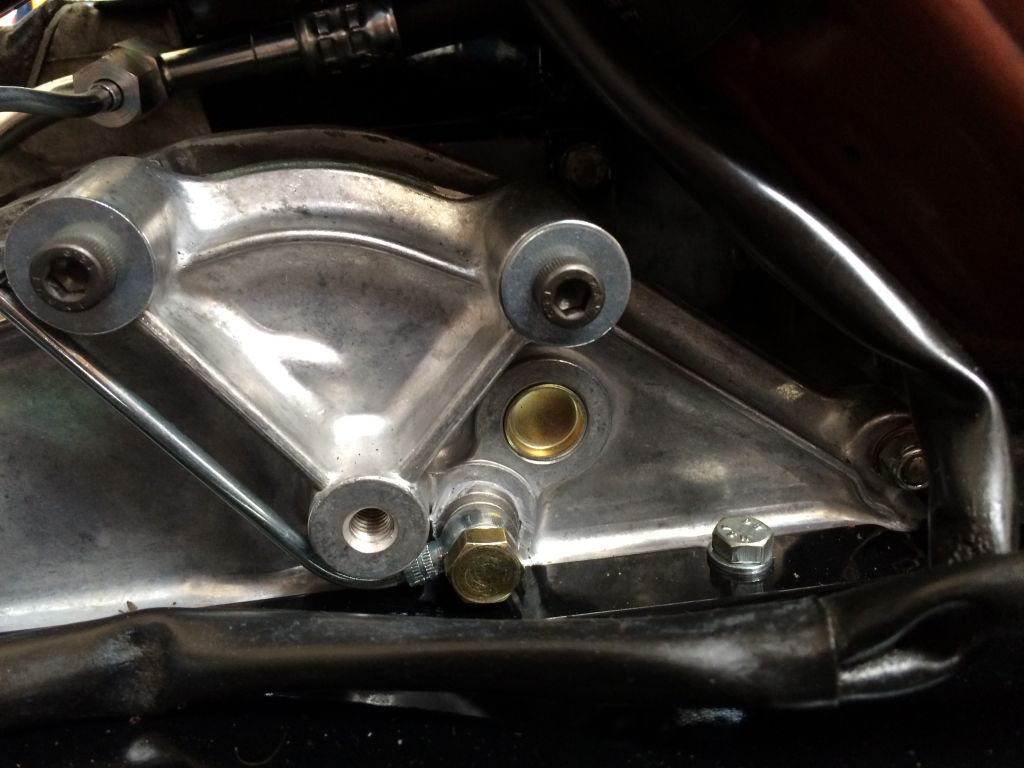

Posted by: bcheney Nov 3 2013, 03:09 PM
> fuel lines is one of them
Yup, all the fuel lines have been replaced, I guess I was just wondering about using the rubber ones (pictures) versus what I believe should be german/cloth covered fuel lines.
-Steve
Keep this in mind that today's pump gasolines contain additives which will degrade older rubber hoses and even new hoses that aren't made specifically to guard against the additives. Sometimes the breakdown can be in as little as one year. Even brand new low pressure fuel hose (non-fuel injection) isn't guaranteed to protect against this degradation. You can get rubber hose today called 30R9 that is resistant to corrosive fuel additives. It's an excellent choice for carb applications. Looking at your pics I can't tell if the fuel lines are made from 30R9 or not. If they are you will see 30R9 labled on them somewhere along the outside. You can find it locally...Just have to ask for it specifically. I used it for all of flexible lines on my -6 conversion. Chris Foley owner of Tangerine Racing who you can find on the web or in our Vendor Forum, is a big advocate for these lines.
http://www.tangerineracing.com/stainlessfuellines.htm
Posted by: Eric_Shea Nov 3 2013, 03:15 PM
Neither one is correct on the air cleaner, that said, neither is the air cleaner. The snorkel is correct but the cleaner housing is not.
Both should be "Plastic" wing nuts on black plastic studs with black plastic nuts to lock the studs in place.
Speaking of plastic, the original -6 housing is plastic, low profile with the cold enrichment circuit squirters built in. You can possibly use an old MFI housing (same housing without the cumbersome enrichment circuit) but you may have to drill a few holes for your float vents.
Black plug wires for sure.
Carbs, yes but, how far do you want to go? They do look pretty bad though.
I prefer new cloth covered fuel lines. Your call.
Posted by: JmuRiz Nov 3 2013, 04:53 PM
Re: valve covers. Do you need to machine turbo covers if you don't mind dropping the engine for maint?
Posted by: mepstein Nov 3 2013, 05:35 PM
Re: valve covers. Do you need to machine turbo covers if you don't mind dropping the engine for maint?
No. But machining the covers should be very low cost. You're just knocking all the ribs down ~1/2"
Some guys use bolts instead of studs but then you risk loosening up the threads with repeated removal.
Posted by: rgalla9146 Nov 3 2013, 06:27 PM
Re: valve covers. Do you need to machine turbo covers if you don't mind dropping the engine for maint?
No. But machining the covers should be very low cost. You're just knocking all the ribs down ~1/2"
Some guys use bolts instead of studs but then you risk loosening up the threads with repeated removal.
Congratulations ! Good Luck
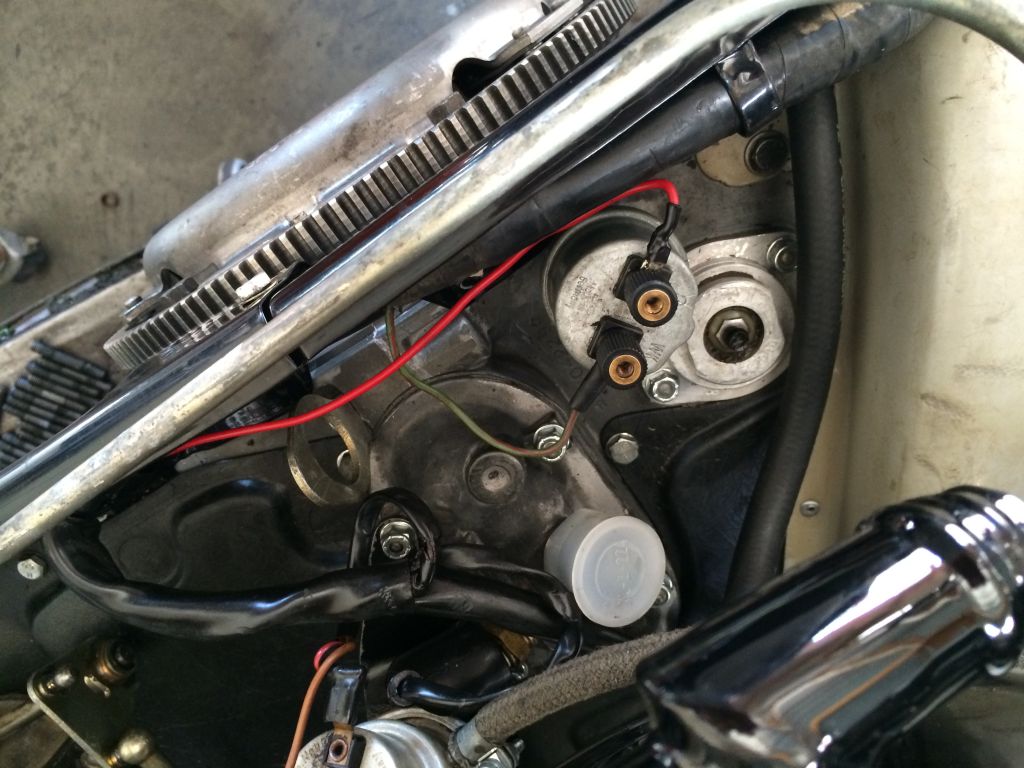
The Marelli distributor is right, but it is also not so good. If you need points I have new. Get a Bosch.
The oil temp and pressure wires are not covered, correct as pictured.
Tins and front mount way too shiny. Hardware should be yellow chromate.
Positive battery terminal is a generic replacement and it will be difficult to find a suitable appearing substitute. The original end is a permanent part of the cable and that is part of the engine harness. I'd look into a 356 positive battery terminal. It's detachable and looks about right.
It will also have the necessary attachment point for the alt. and other wires.
Metal wing nuts and flat washers are right for the air filter snorkel. But I don't think that you have the wing nut. I can send pics if you need.
What's the VIN ?
Posted by: siverson Nov 3 2013, 09:15 PM
> original -6 housing is plastic, low profile with the cold enrichment circuit squirters built in
Is the 911 plastic housing different than the 914-6 plastic housing?
I.e. is this the right one:
http://www.ebay.com/itm/PORSCHE-901-911-PLASTIC-AIR-FILTER-CLEANER-BOX-SNORKEL-/380749017920?pt=Motors_Car_Truck_Parts_Accessories&hash=item58a668f340&vxp=mtr
> The Marelli distributor is right, but it is also not so good.
By "not so good" do you mean just dirty or ?
VIN is 9140430377
-Steve
Posted by: siverson Nov 3 2013, 09:50 PM
Or is this one correct?
-Steve
Attached image(s)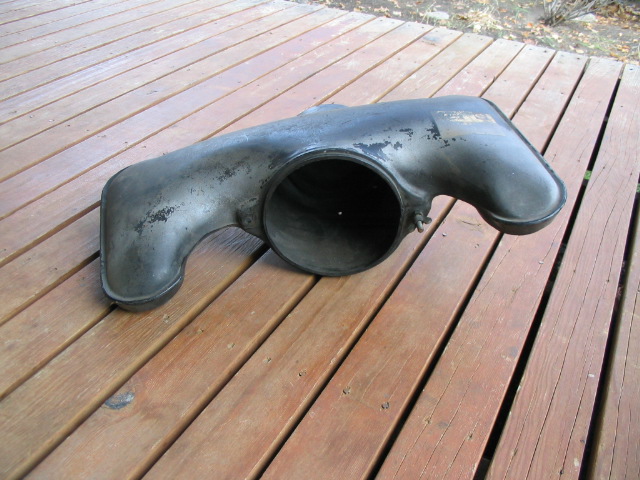
Posted by: rgalla9146 Nov 4 2013, 08:34 AM
Or is this one correct?
-Steve
That air filter is for a 911 with mechanical fuel injection, probably '72-'73
I think it has the plastic stud on one side that is for that application as well.
The Shell oil factory fill sticker is positioned to be read from behind the car.
Also, there are no squirter tubes or plumbing for cold start (or car fire) on that filter.
But it is plastic.
Marelli distributors are hard to find parts for and are less dependable than Bosch distributors. There are many more choices and parts availability with a Bosch.
Best choice would be one for a 911S
Posted by: Eric_Shea Nov 4 2013, 11:18 AM

That's the MFI housing I mentioned. If you look at the top of your carbs you will see two float bowl vents sticking up between the air horns. If you look at that housing, it has no means to accommodate those vents.
That said, I really like that housing because it is basically the same as the 914-6 unit but, without the cumbersome and somewhat dangerous cold start we mentioned in the previous posts.
Solution = 1/2" Spade bit. Drill 4 holes.
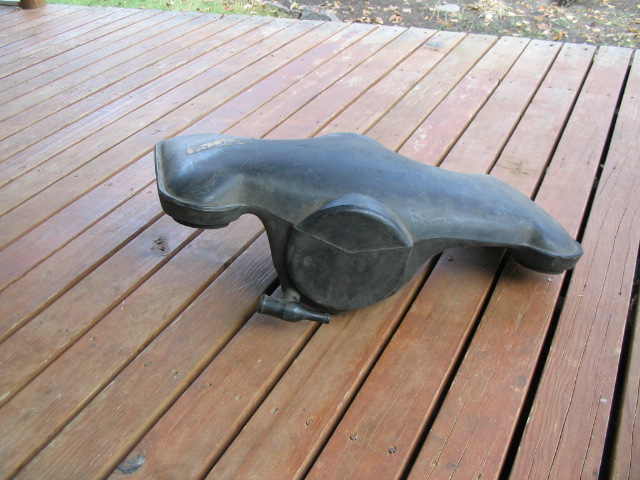
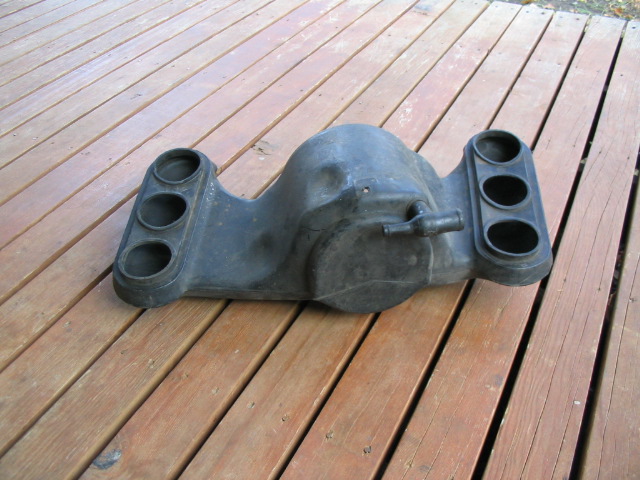
Posted by: johnhora Nov 4 2013, 12:18 PM
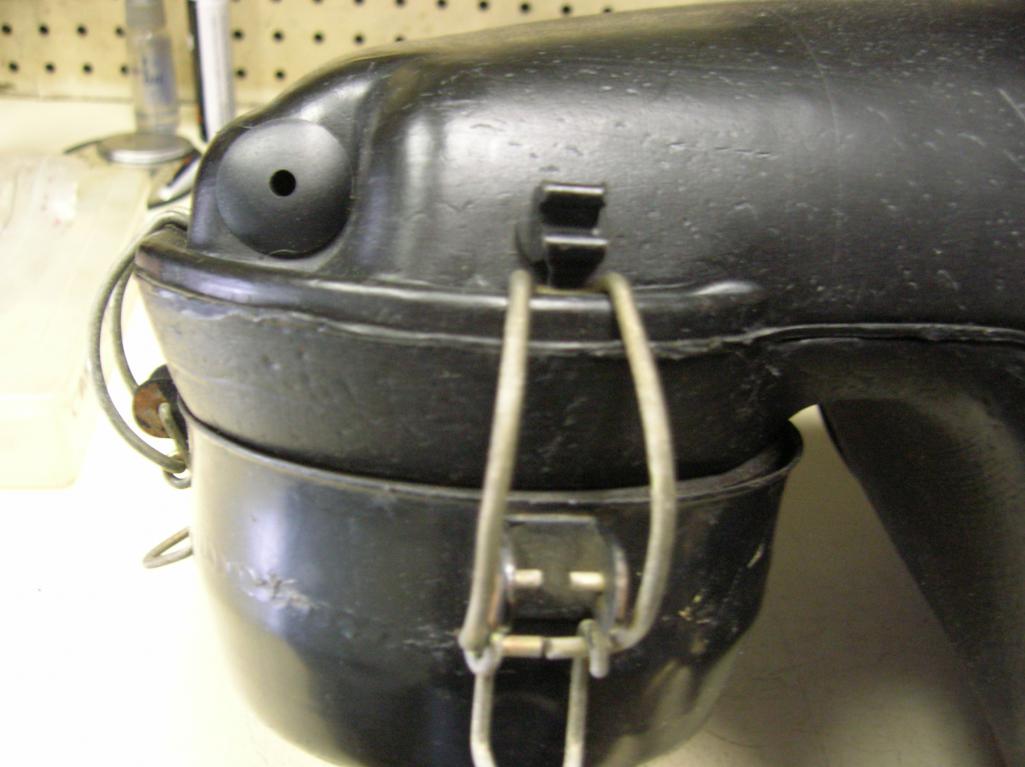
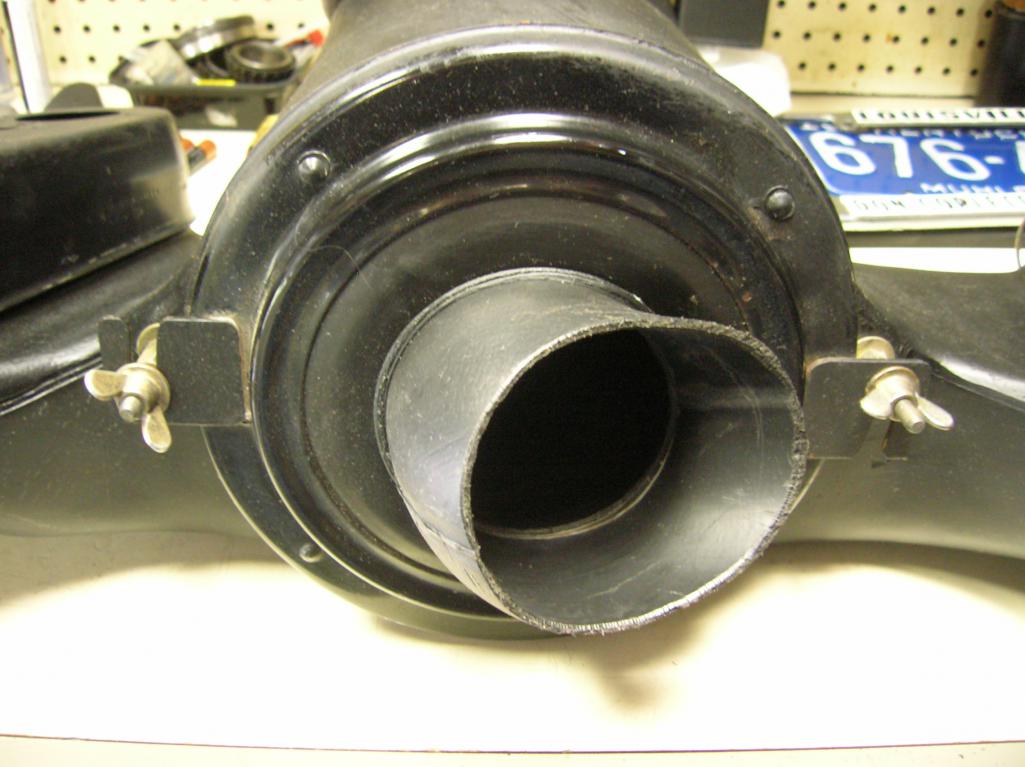
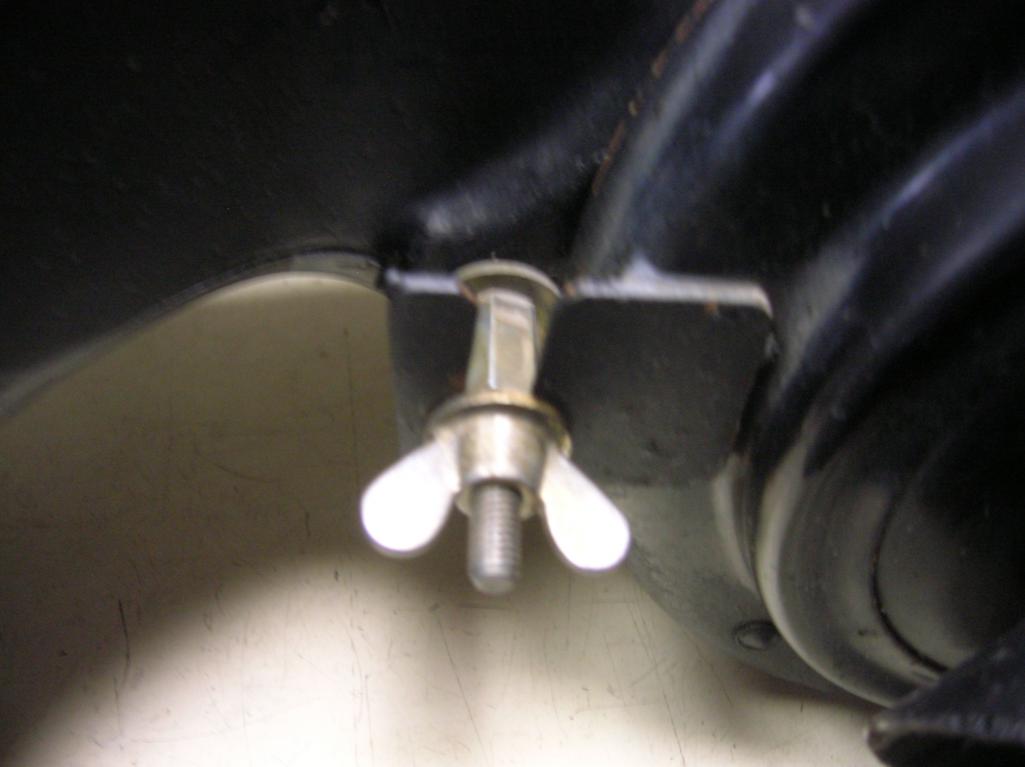
Steve...
went and took a couple of shots of the air box off my 914-6
my snorkel was cut off (by a PO) long time ago...wish I could find one..anyone have one for sale??
you can see the holes for the cold start arrangement...they are plugged up right now
with plastic hole plugs....it has metal studs, washers, and wing nuts for the snorkel and metal breather hose inlet...
John
Attached thumbnail(s)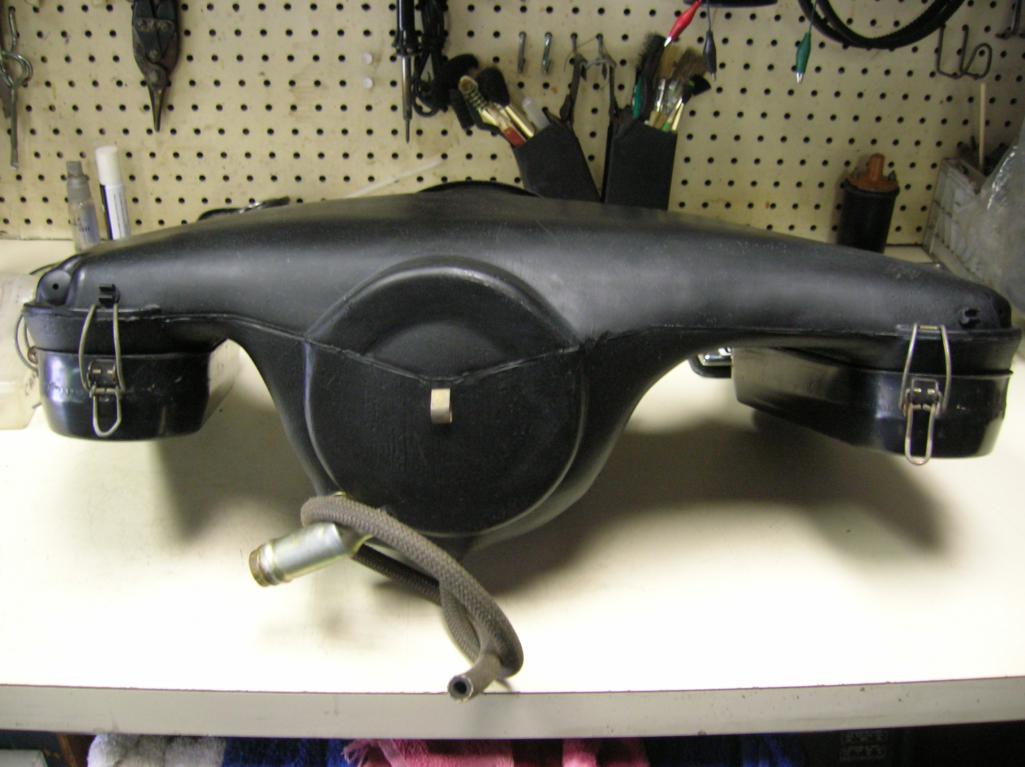
Posted by: rgalla9146 Nov 4 2013, 05:52 PM
Steve...
went and took a couple of shots of the air box off my 914-6
my snorkel was cut off (by a PO) long time ago...wish I could find one..anyone have one for sale??
you can see the holes for the cold start arrangement...they are plugged up right now
with plastic hole plugs....it has metal studs, washers, and wing nuts for the snorkel and metal breather hose inlet...
John
Jhoyas air filter is the one.
The wing nuts,studs, plastic holders etc. are the same as the four sixes that I've owned.
The cold start plumbing is missing. No need to collect those parts too soon. If you do find them don't dare connect them. Can you say "KABOOM" ?
Posted by: siverson Dec 9 2013, 12:02 PM
Car is back and has a fully rebuilt 2.0 now. Wow, that was expensive. In general, I've discovered that the less horsepower a Porsche engine makes, the more expensive they are to rebuild. Strange.
Anyways, doesn't it look like the engine is sitting too low?
-Steve
Attached thumbnail(s)
Posted by: siverson Dec 9 2013, 12:02 PM
914
Attached thumbnail(s)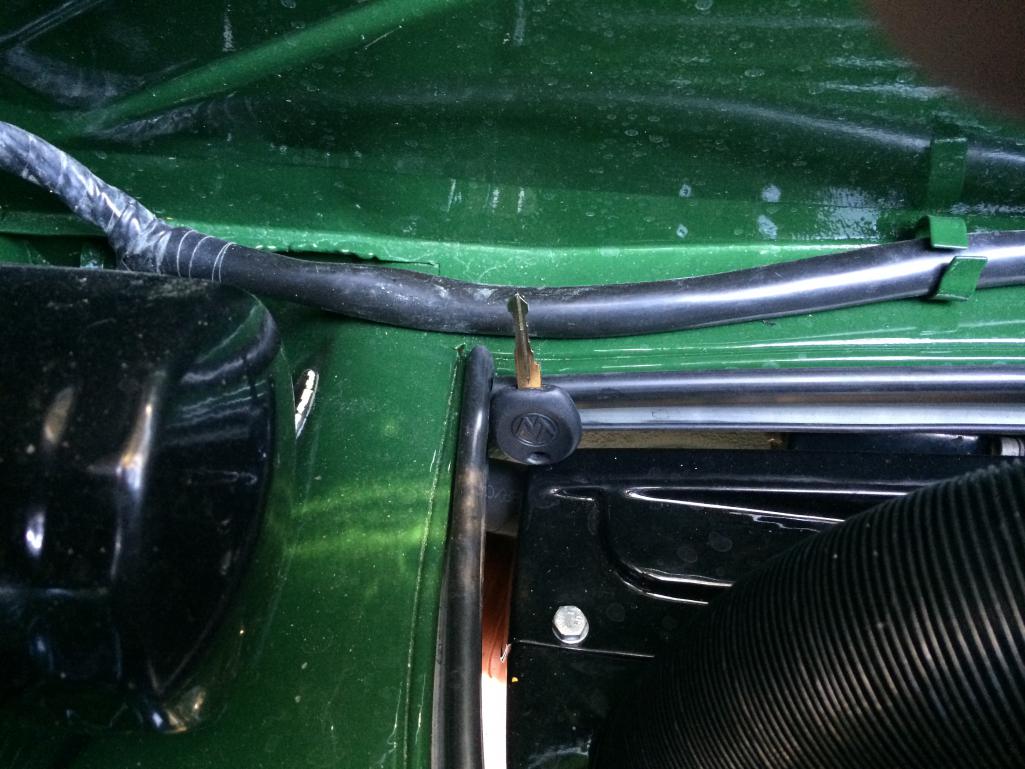
Posted by: siverson Dec 9 2013, 12:03 PM
914
Attached thumbnail(s)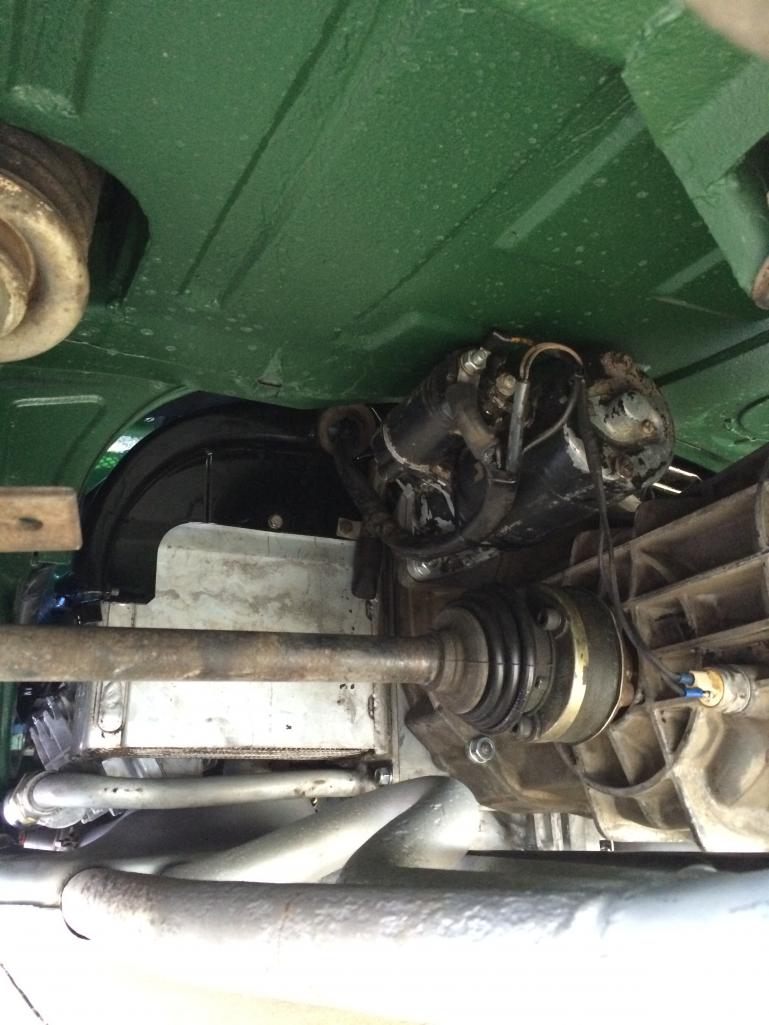
Posted by: JmuRiz Dec 9 2013, 12:27 PM
Yep, it's sitting too low, check to see which way the washers for the mount are installed 
I think a Porsche engine rebuild is about the same no matter the power. Stock/low HP versions usually use factory bits instead of aftermarket, so that may be the $$.
Good thing mine is not going to be stock  But color me jealous of the heat exchangers. Did I miss something, I thought this car was white...
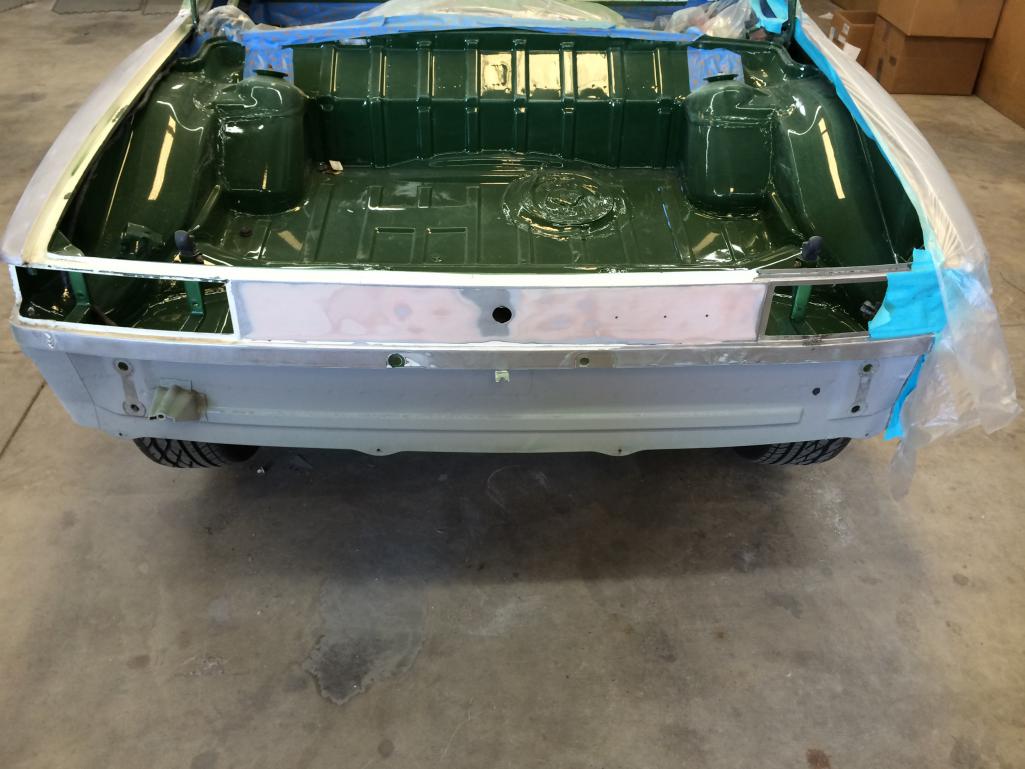
Posted by: siverson Dec 9 2013, 12:37 PM
> I thought this car was white
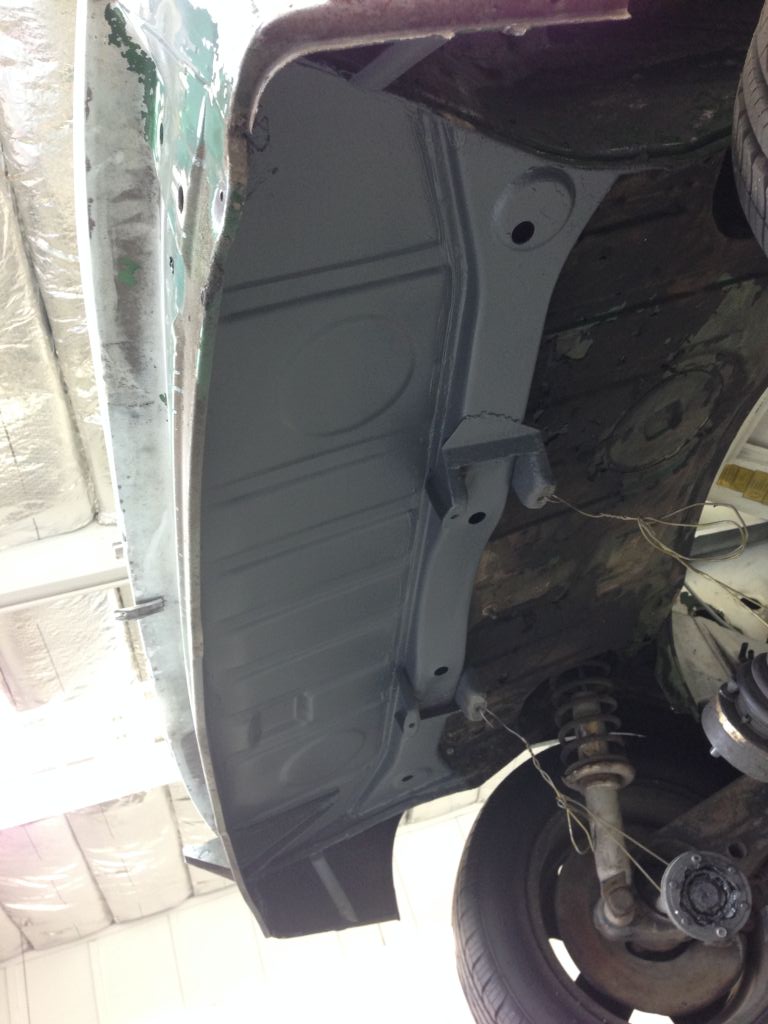
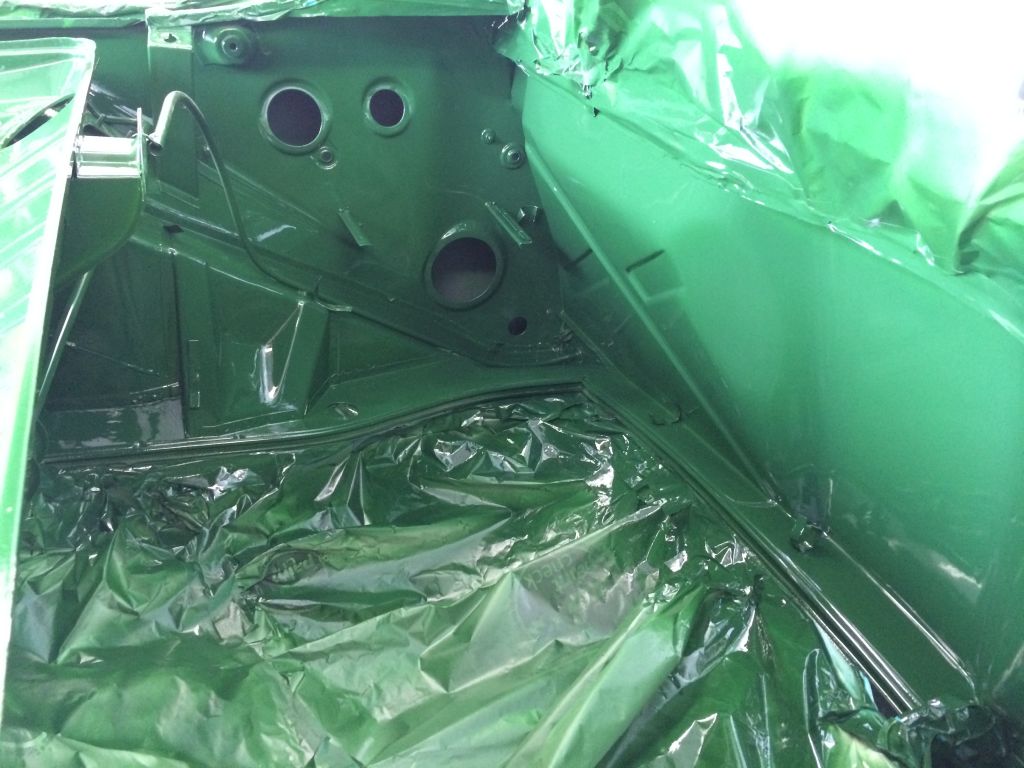
Yup, the car is white, but is originally Irish Green, which I'm bring it back to. So the engine bay and rear trunk were entirely
I've basically started the car change process, and hopefully don't need to pull the engine again.
-Steve
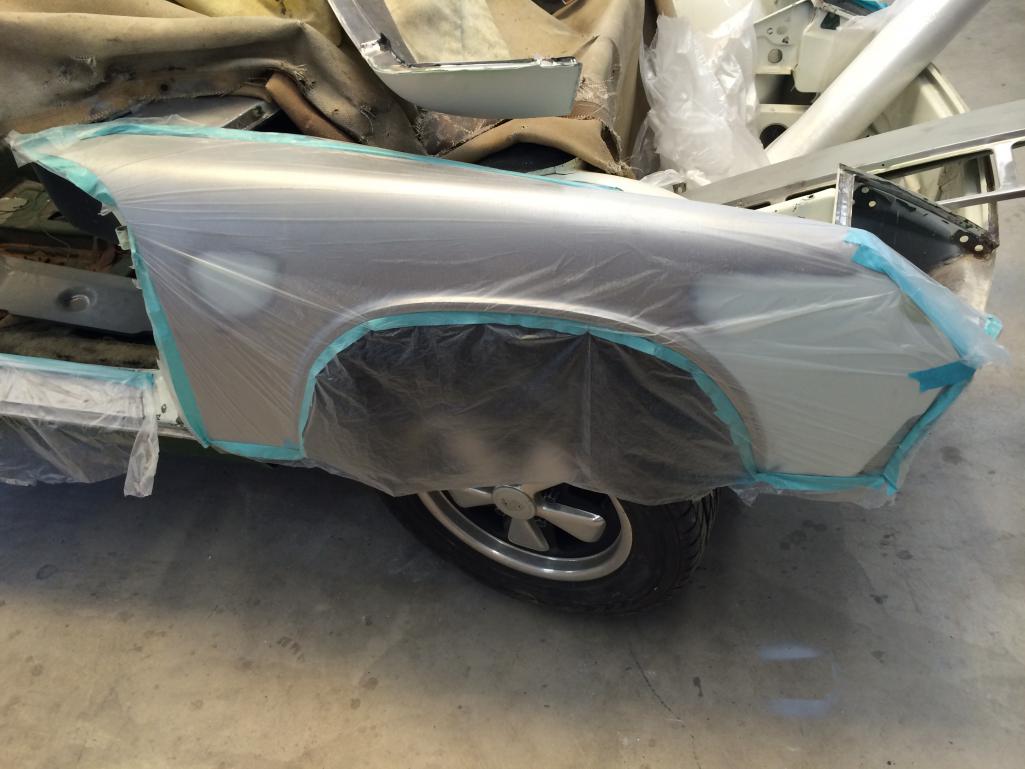
Posted by: siverson Dec 9 2013, 01:18 PM
And some more photos... (before and after)
It's amazing how much faster this stuff happens when I'm not the one doing the work.
Attached image(s)


Posted by: ben*james Dec 9 2013, 01:24 PM
Nice choice to bring back the Irish Green!!! I'm green with envy...
Looking good, I'm excited to see this car get the attention it deserves.
Posted by: siverson Dec 9 2013, 01:25 PM
> I think a Porsche engine rebuild is about the same no matter the power.
It actually would have been cheaper for me to rebuild the car as a 2.2 or 2.4 with a little more horsepower, but that would require machining the heads and making it more non-stock.
My thought was it's going to be a slow car compared to my 3.6 no matter how I build this engine, so I'm trying to keep it very near stock, or at least 100% reversible. And so far I'm pretty happy with my choice. The engine sounds awesome - just like an early 911 - imagine that!
The engine does have E cams now, because that just seemed like a better choice (S is too peaky). But if someone really cared in the future they could go back to T cams.
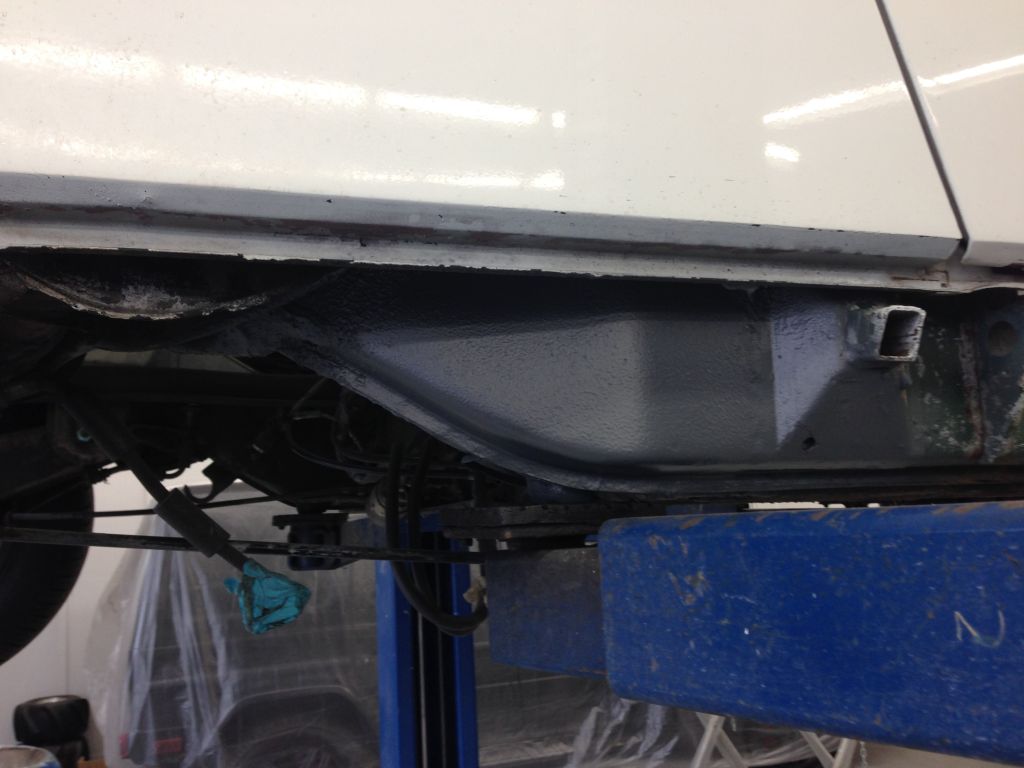
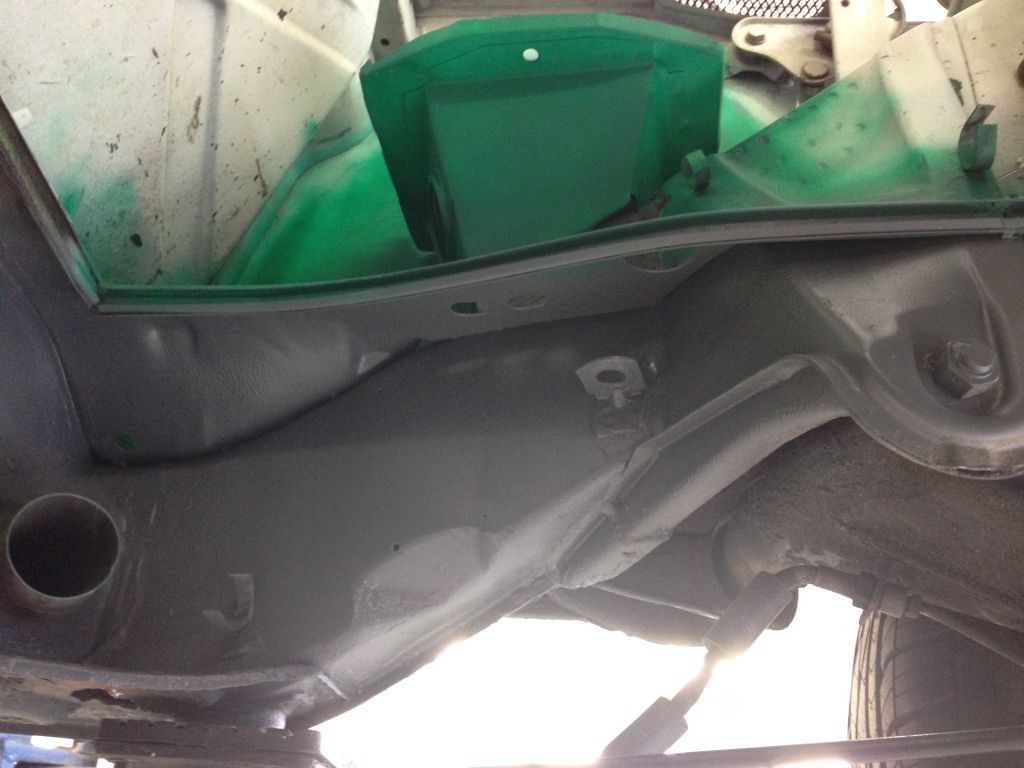
And I have decided to paint the whole bottom of the car body color (rather than the gray/white/overspray debate) because I just don't feel like it makes sense to try and copy the factory's imperfections. All body color looks better to me, and probably protects a little better too.
-Steve
Posted by: siverson Dec 9 2013, 01:41 PM
This was his roommate while getting worked on (it's real).
-Steve
Attached image(s)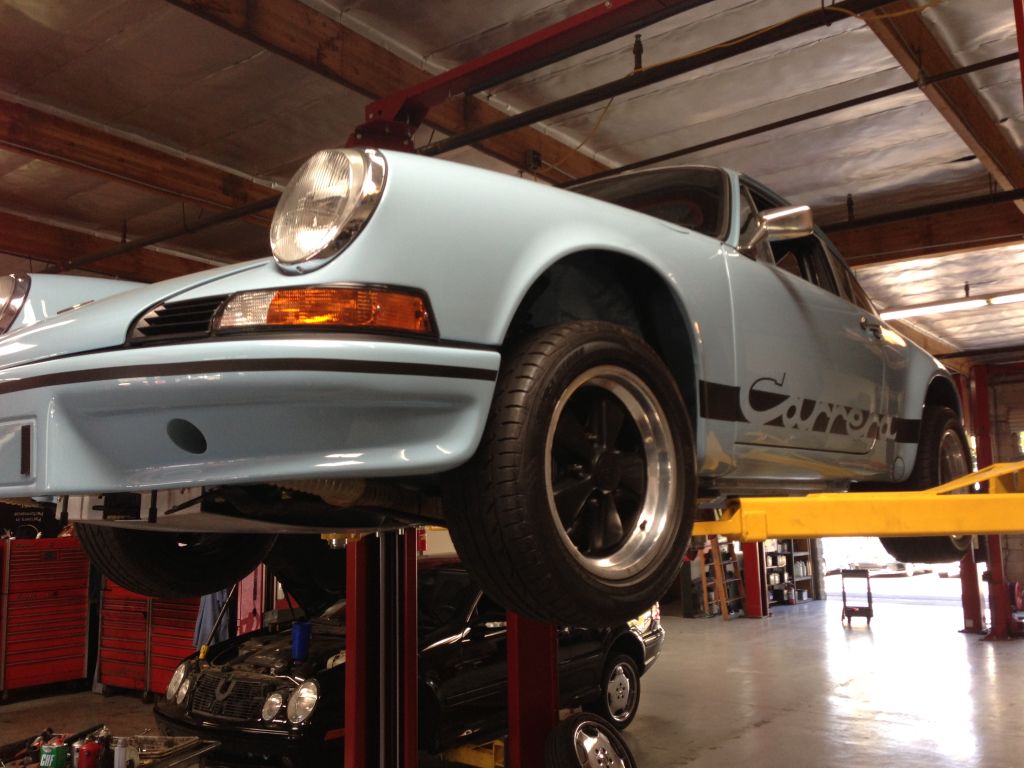
Posted by: rick 918-S Dec 9 2013, 01:52 PM
> And I have decided to paint the whole bottom of the car body color (rather than the gray/white/overspray debate) because I just don't feel like it makes sense to try and copy the factory's imperfections. All body color looks better to me, and probably protects a little better too.
-Steve
Posted by: JmuRiz Dec 9 2013, 02:15 PM
Very cool updated pictures, the change back to irish green is always nice. Old local 914club member had one and it always looked sharp. Nice garage roomie while the work was being done too!
Posted by: Cairo94507 Dec 10 2013, 08:55 AM
I agree with you 100% regarding the underside of the car. I would rather have the bottom painted as nicely as the rest of the body panels. I know that they came less than that from the factory but I want mine completely painted and protected as much as possible.
Gotta love the Irish Green….
Posted by: FourBlades Dec 10 2013, 06:50 PM
Nice work on a great car! 
I think you are making the right choices.
John
Posted by: wndsnd Dec 11 2013, 04:01 PM
Real sweet......

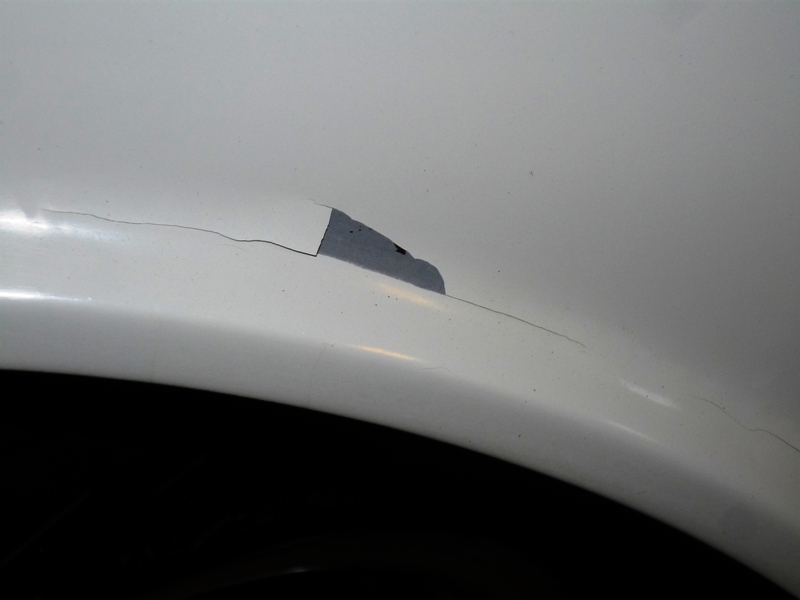
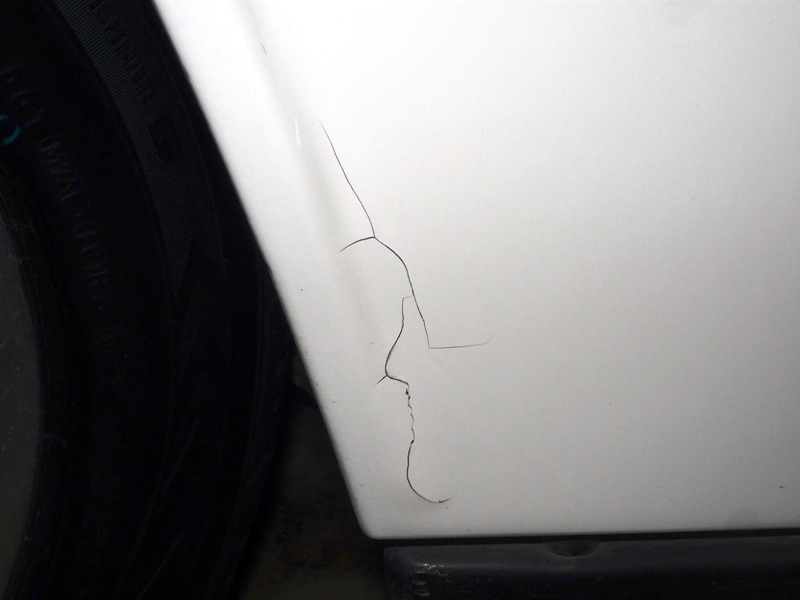
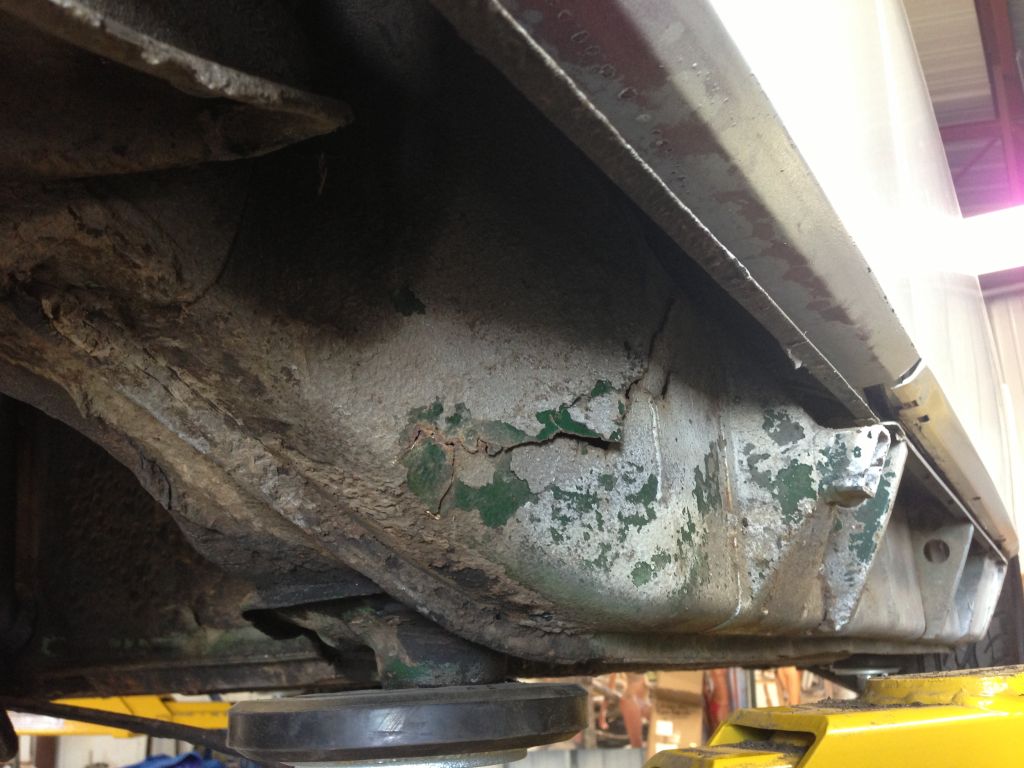
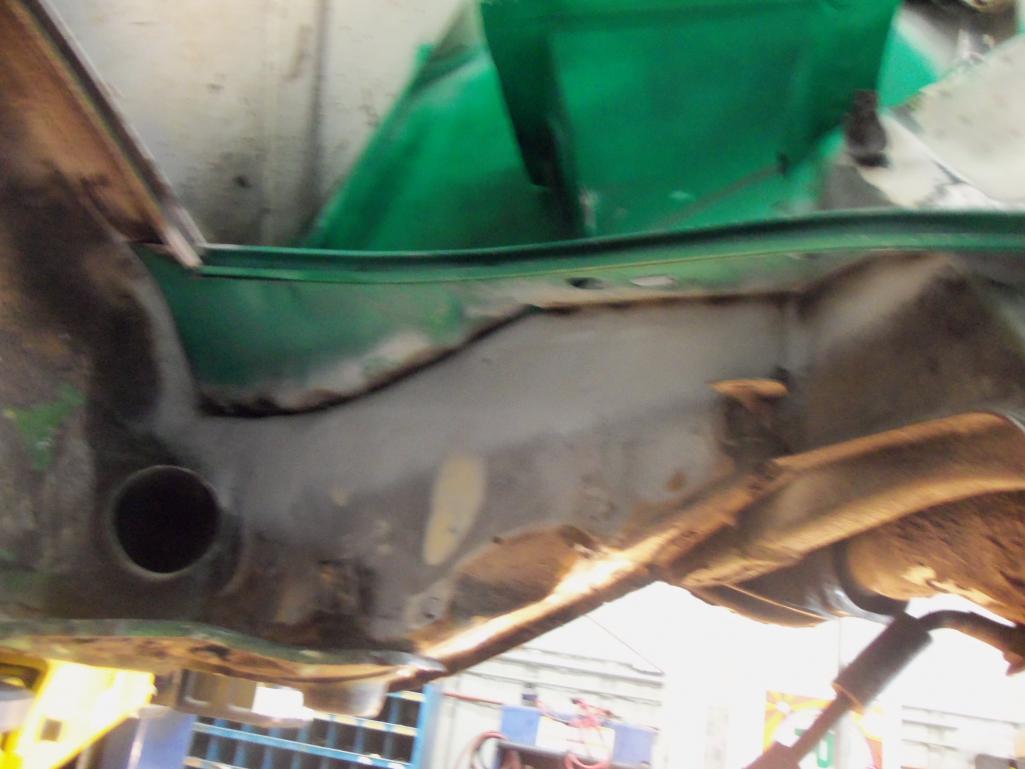
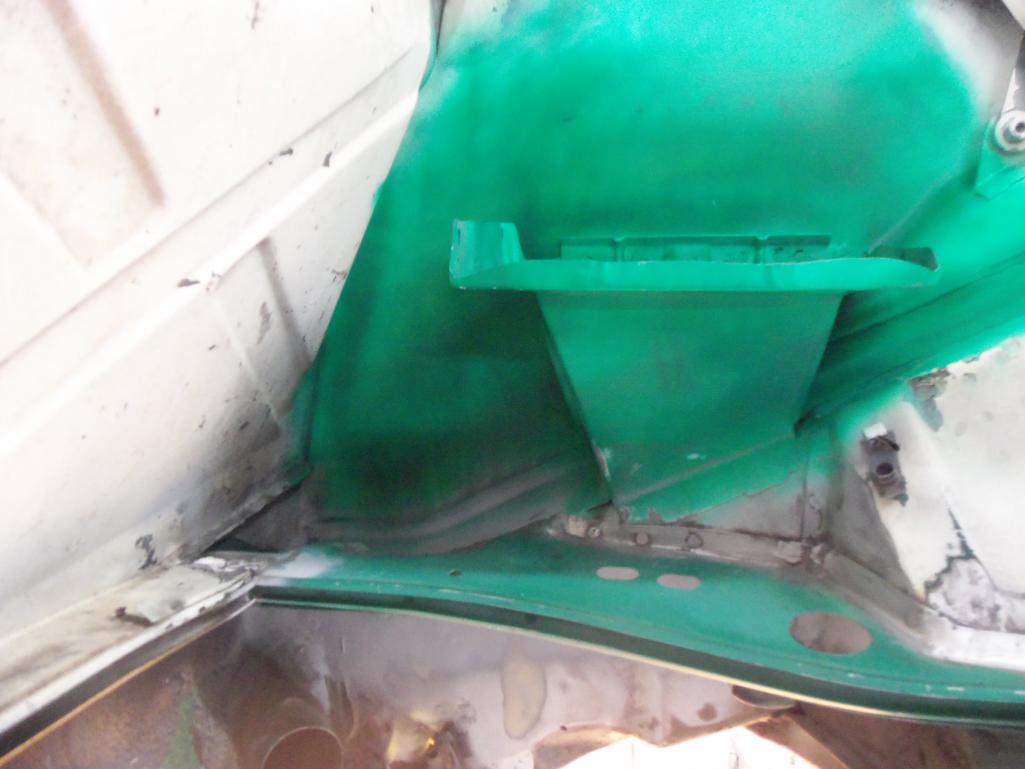
Posted by: siverson Dec 19 2013, 11:47 PM
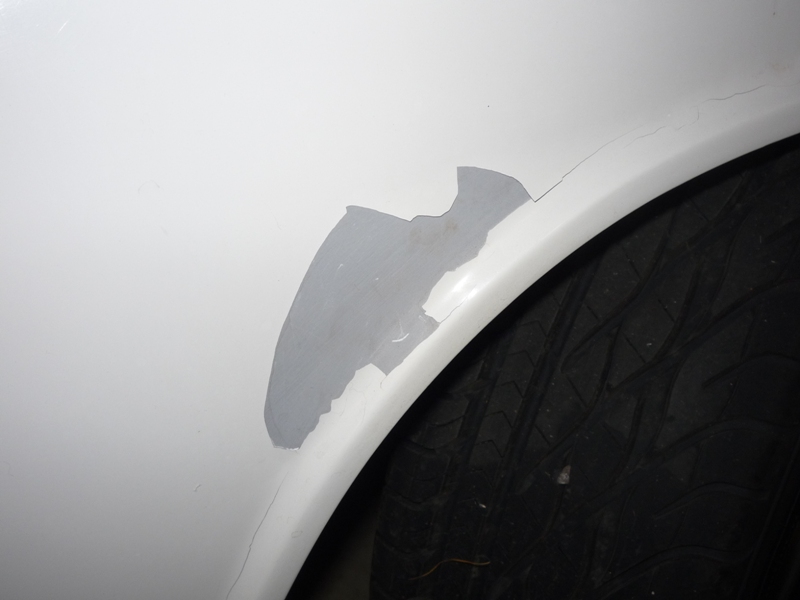
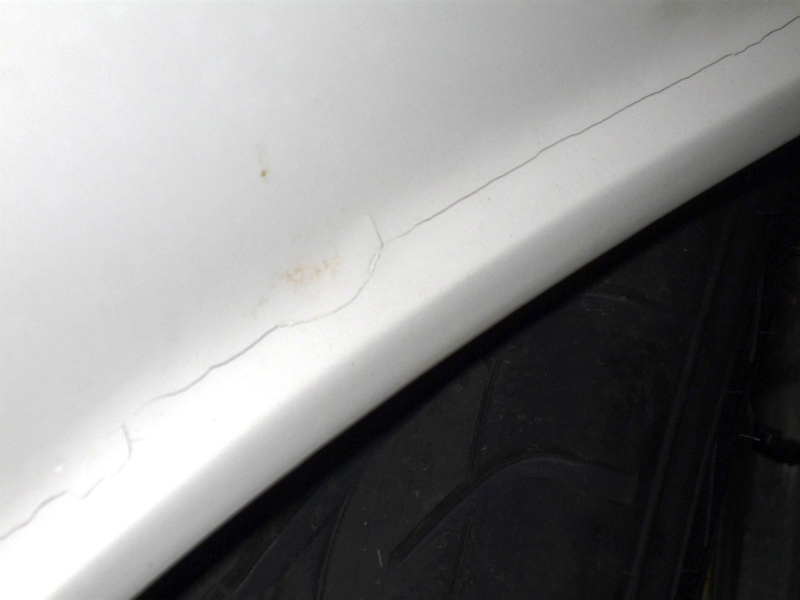
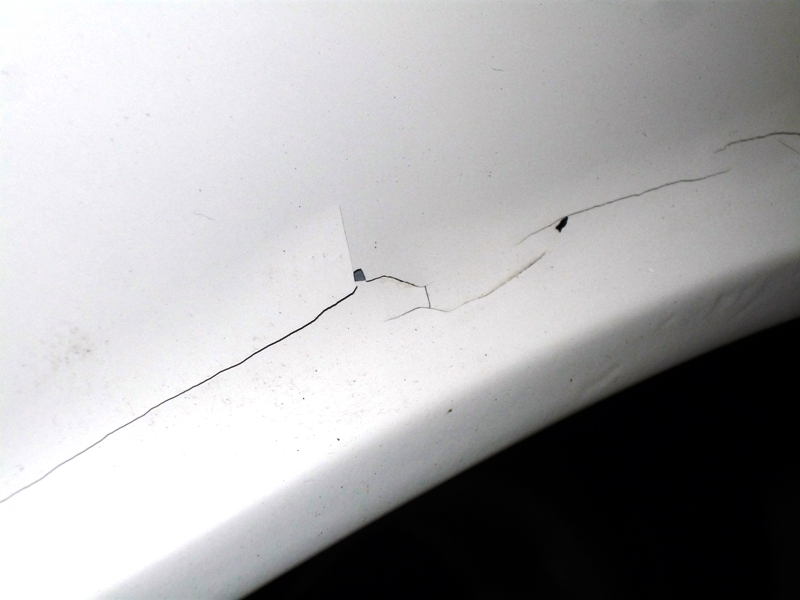
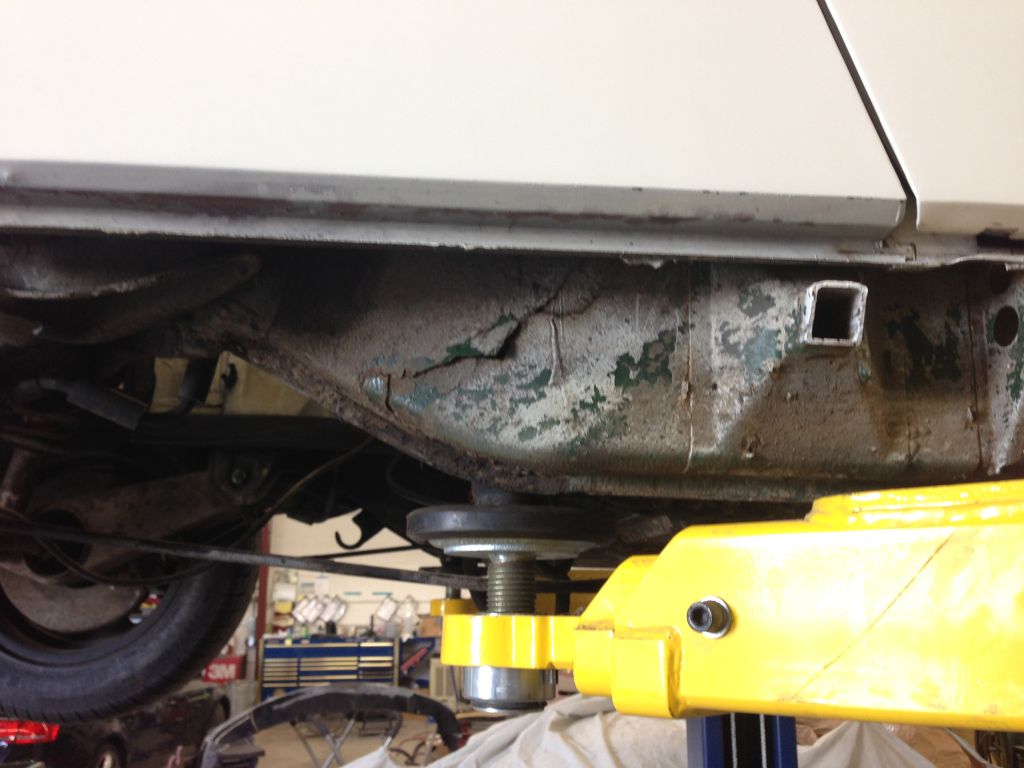
I got these photos from the body shop today...
The long repair. Funny how small cracks make for BIG holes...
-Steve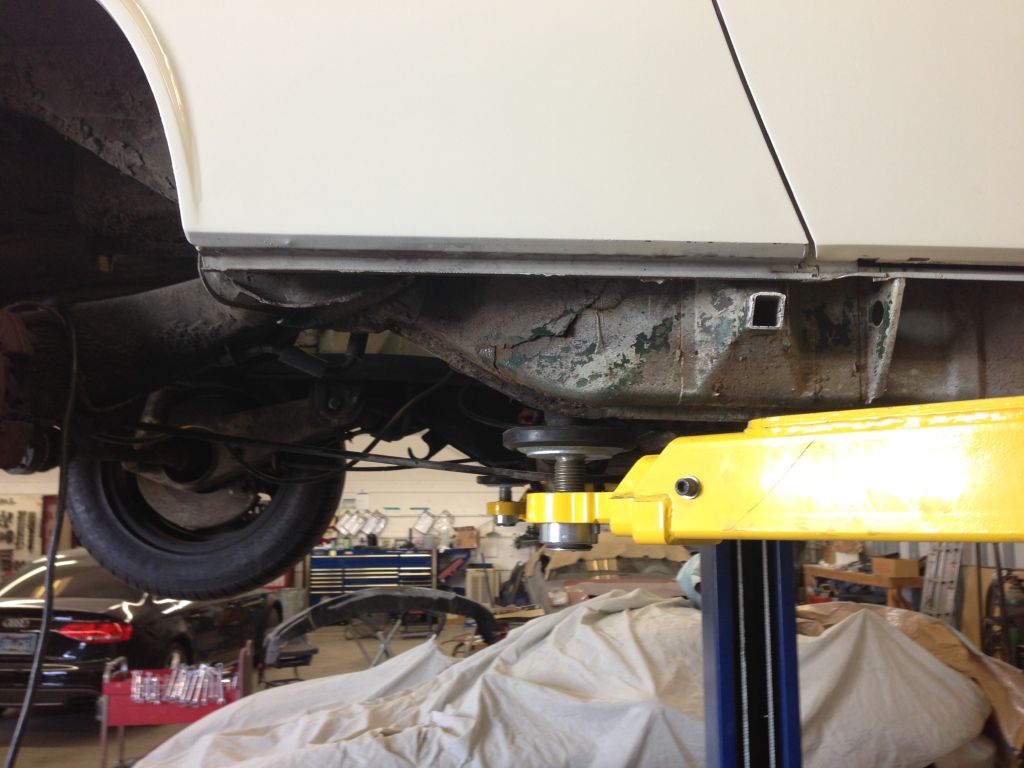
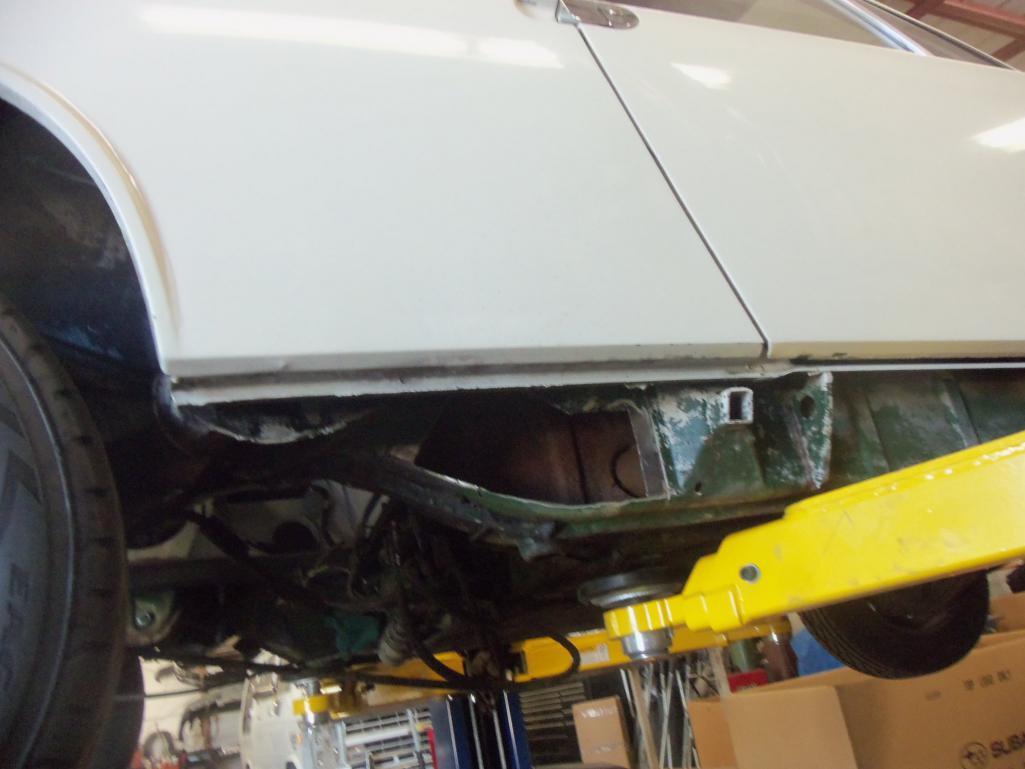
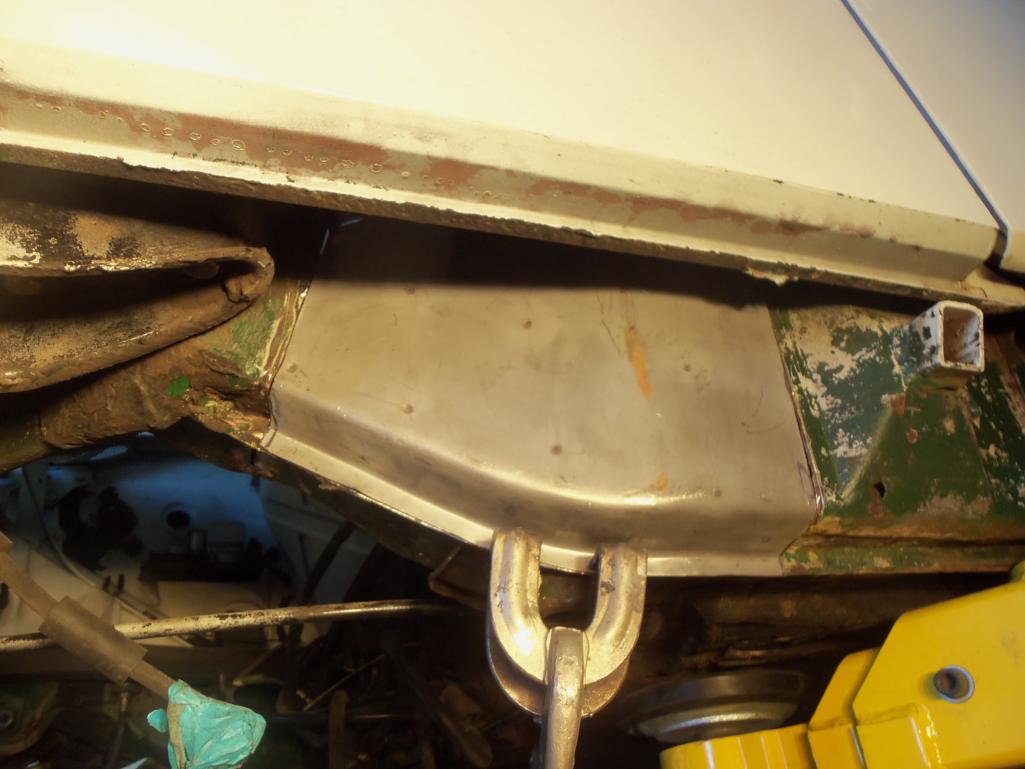
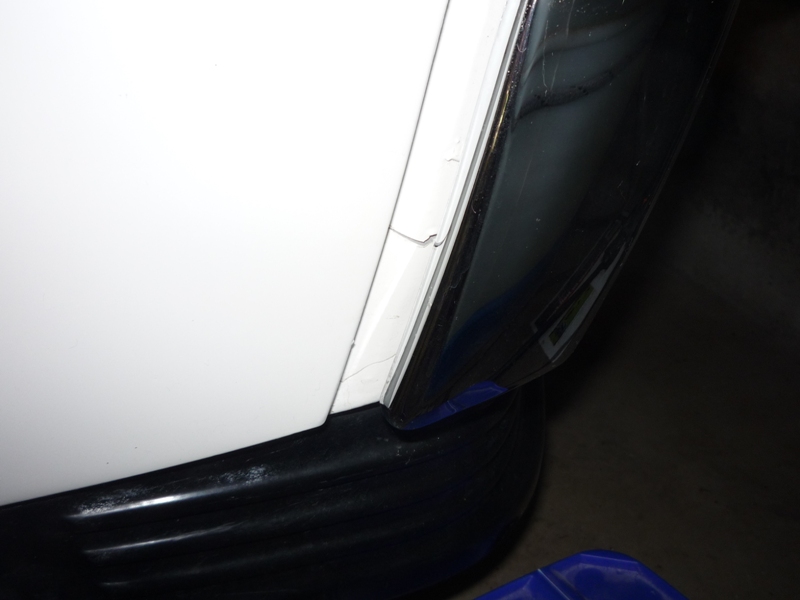
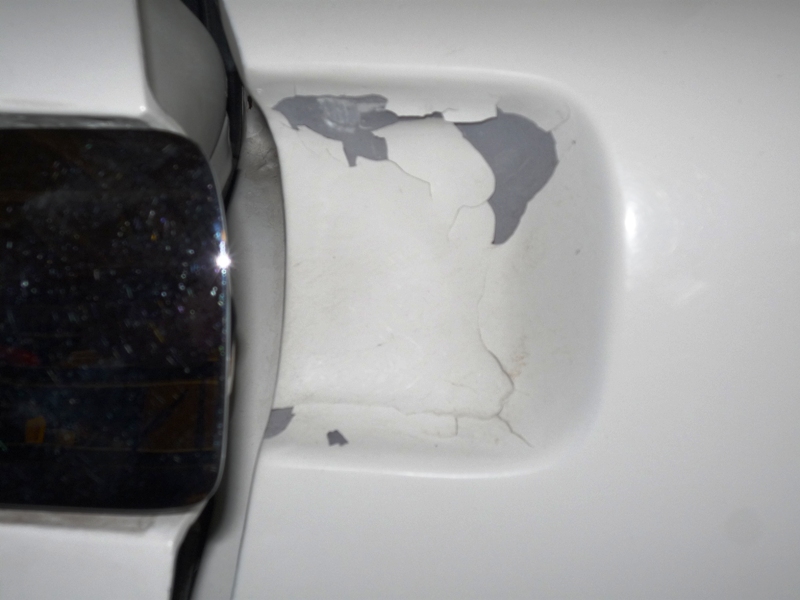
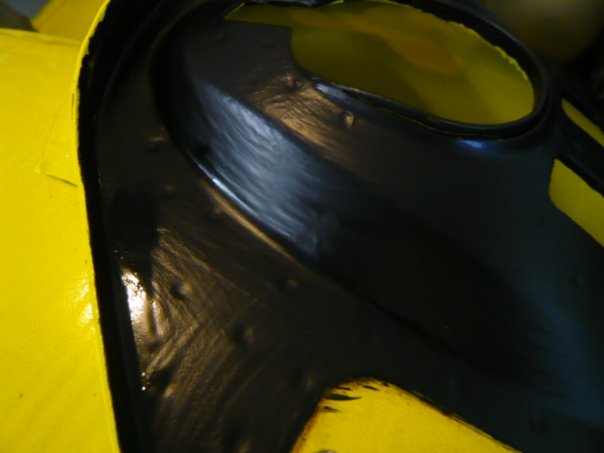
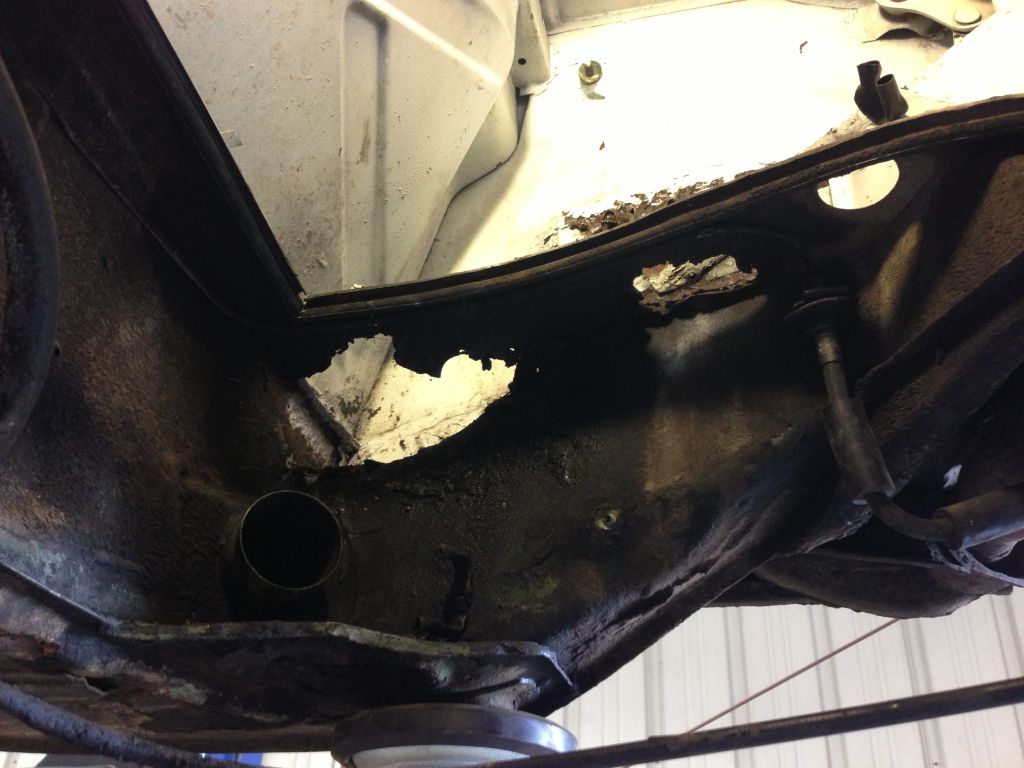
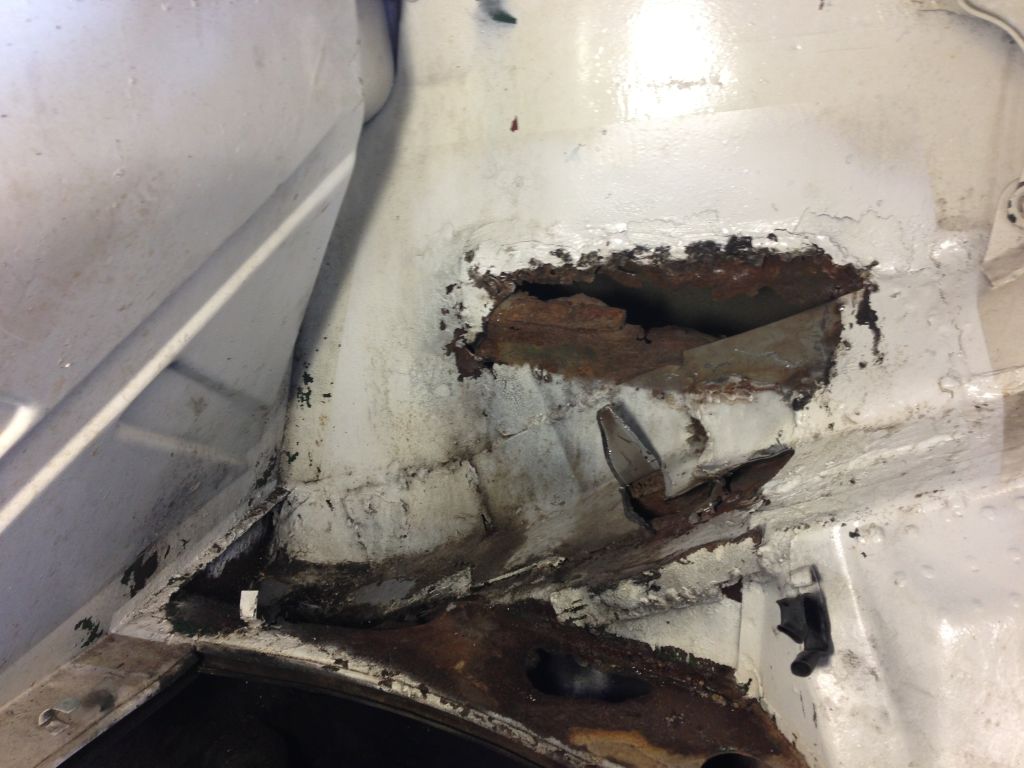
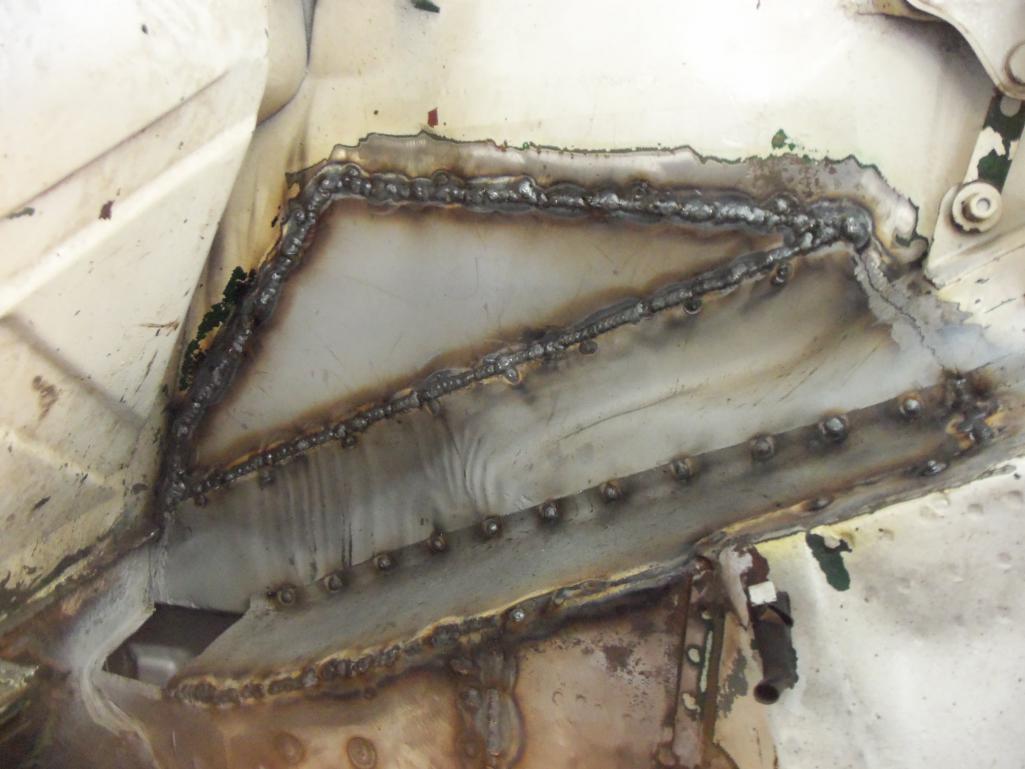
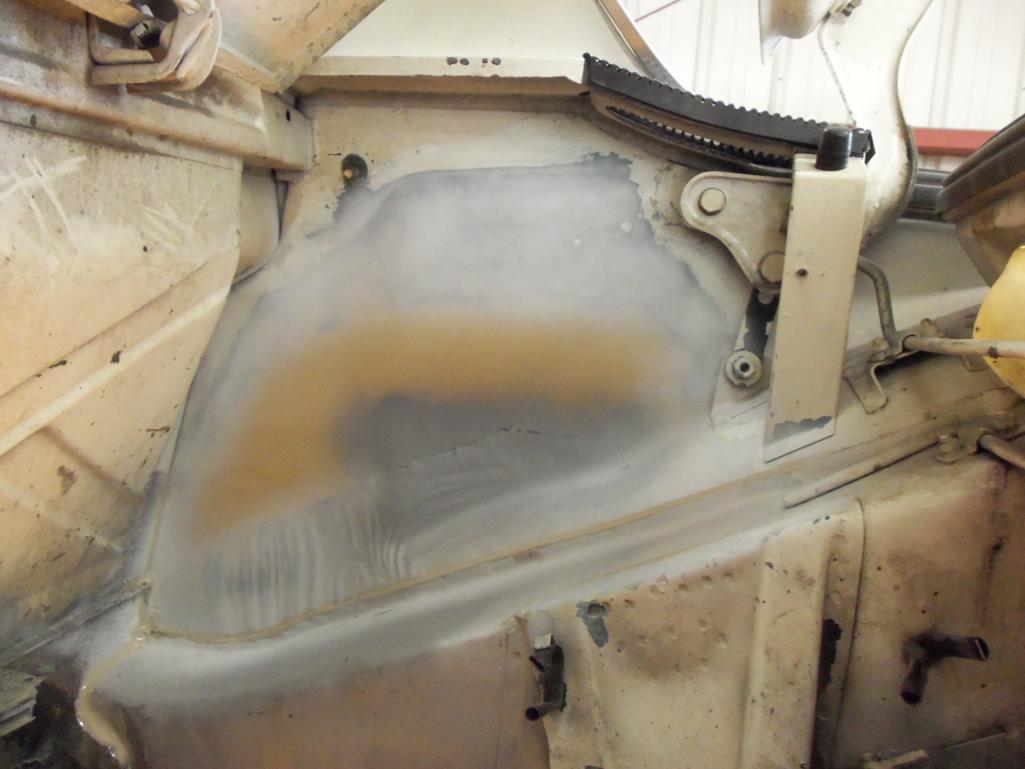
Posted by: siverson Dec 19 2013, 11:58 PM
And the battery box area repair.
Anything the experts out there would have done differently? I'm considering having this shop do the exterior as well...
-Steve
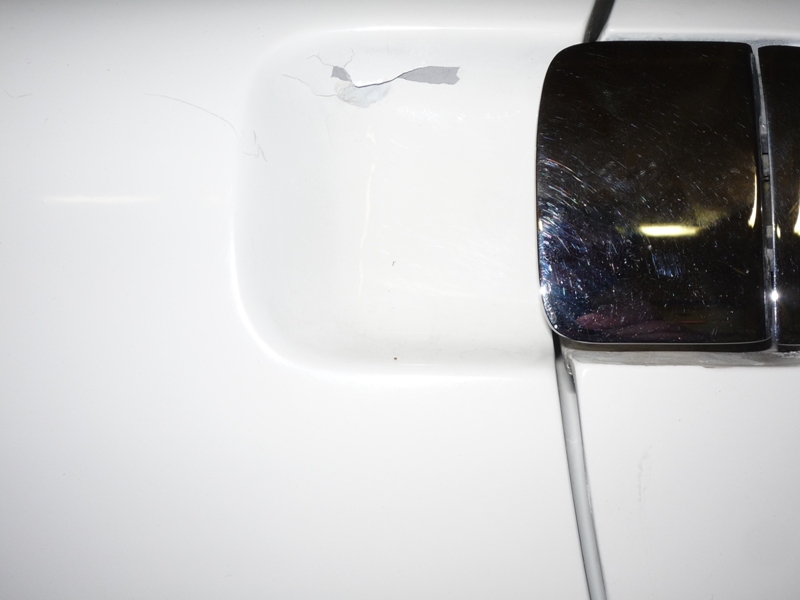
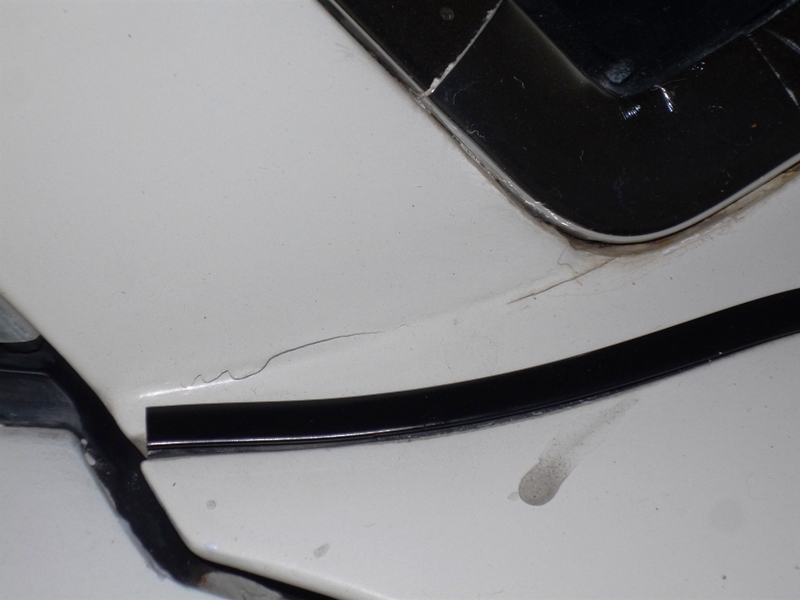
This doesn't look so bad...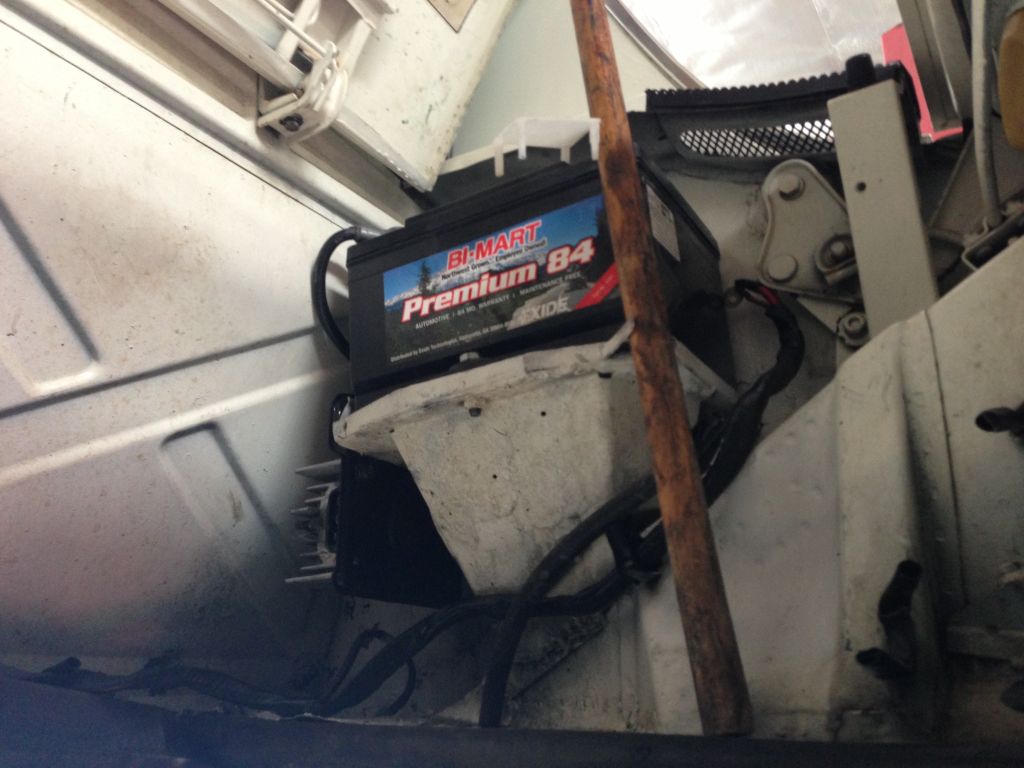
Argh, worse than I thought...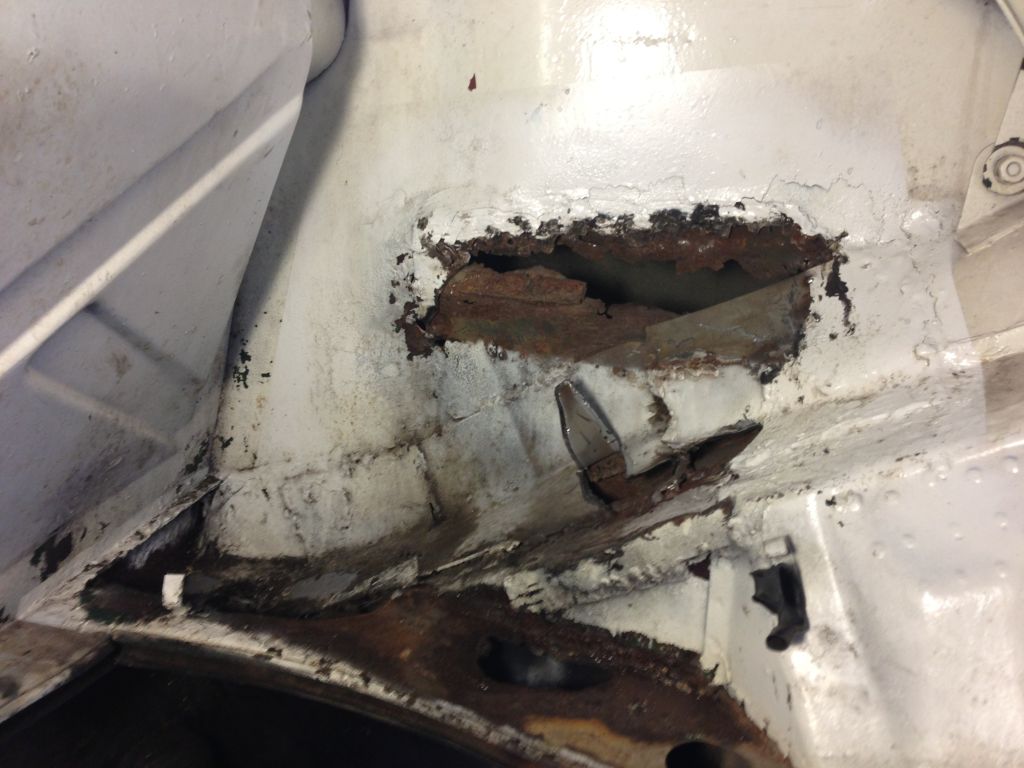
Holy crap!!!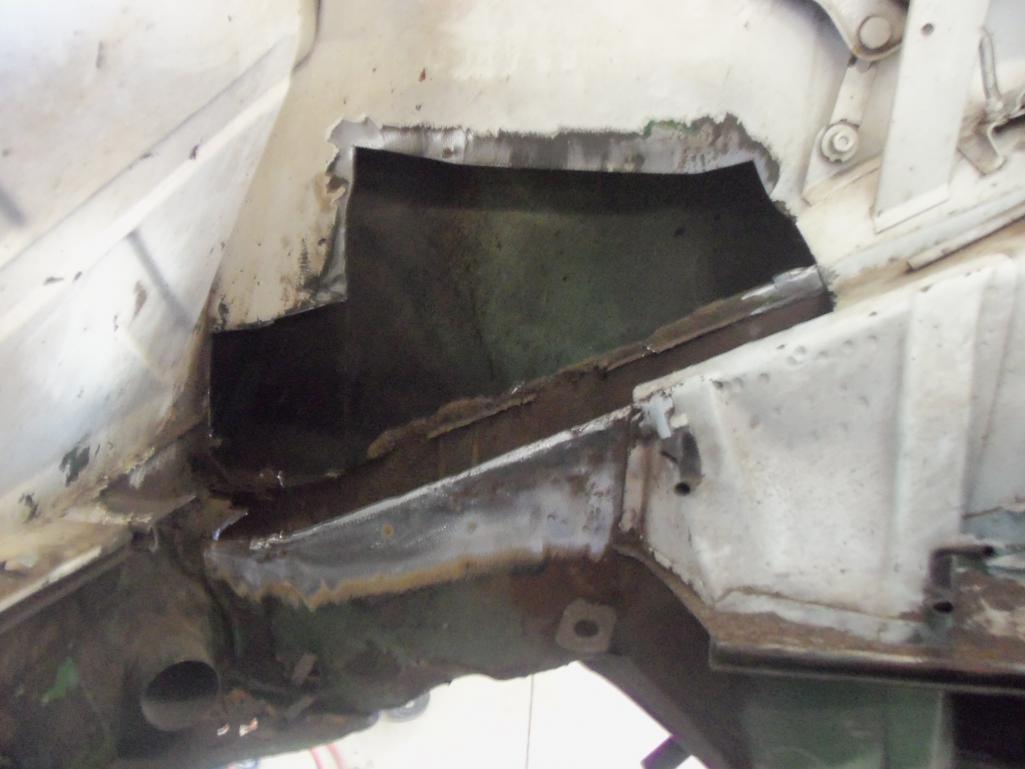
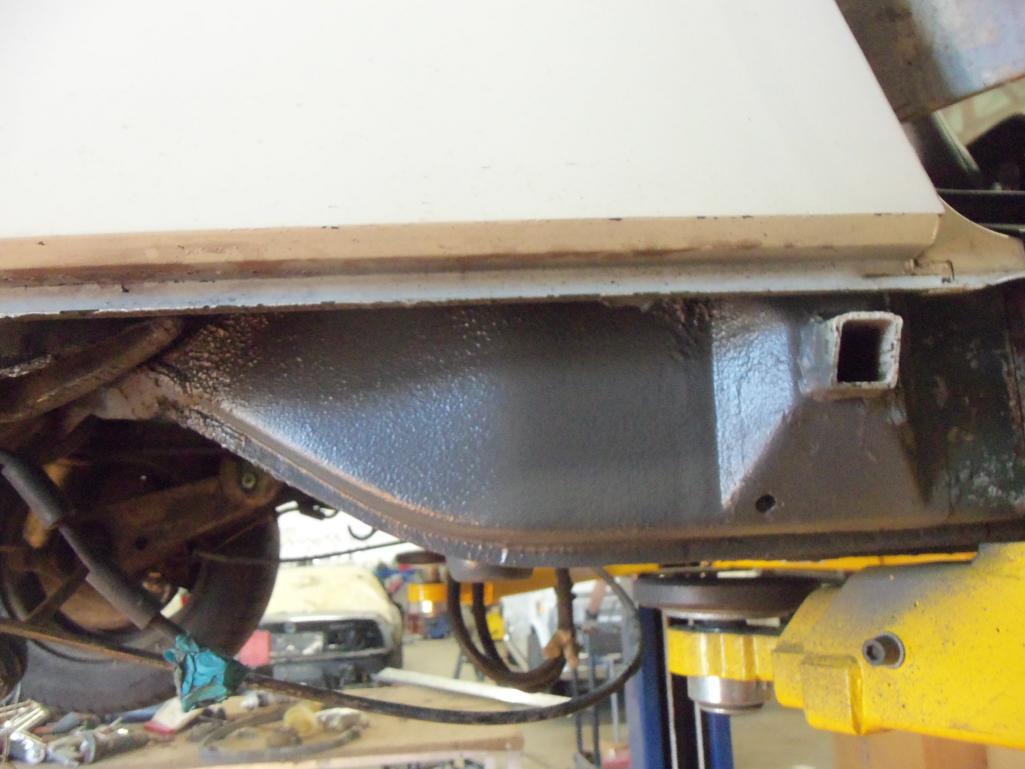
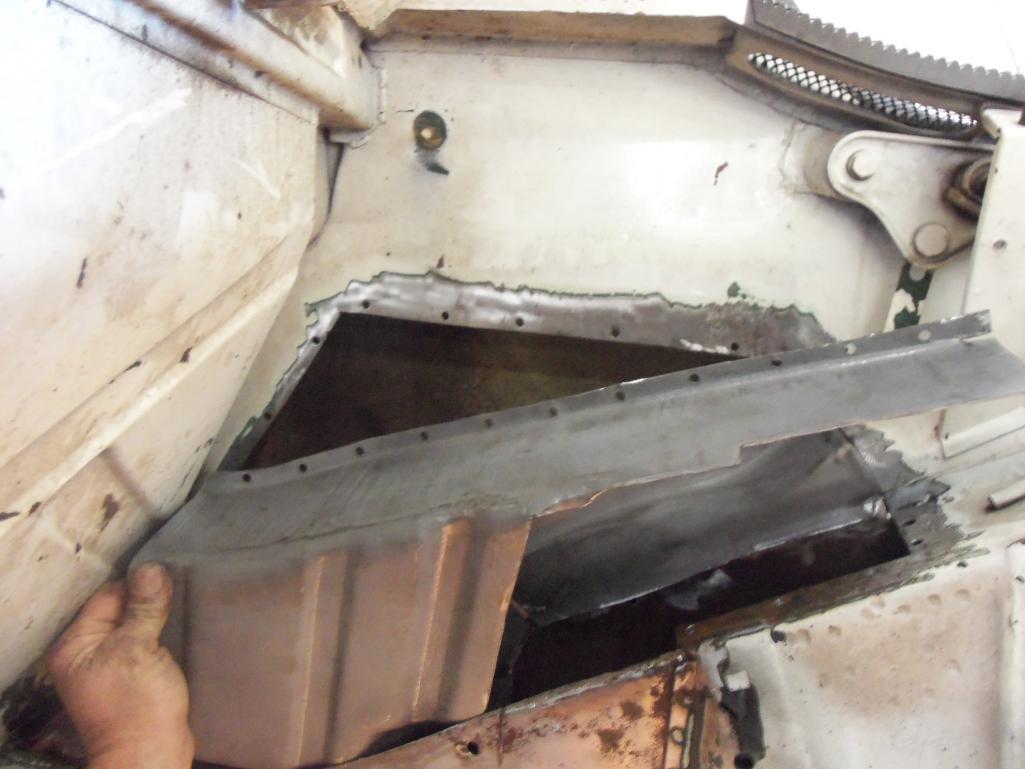
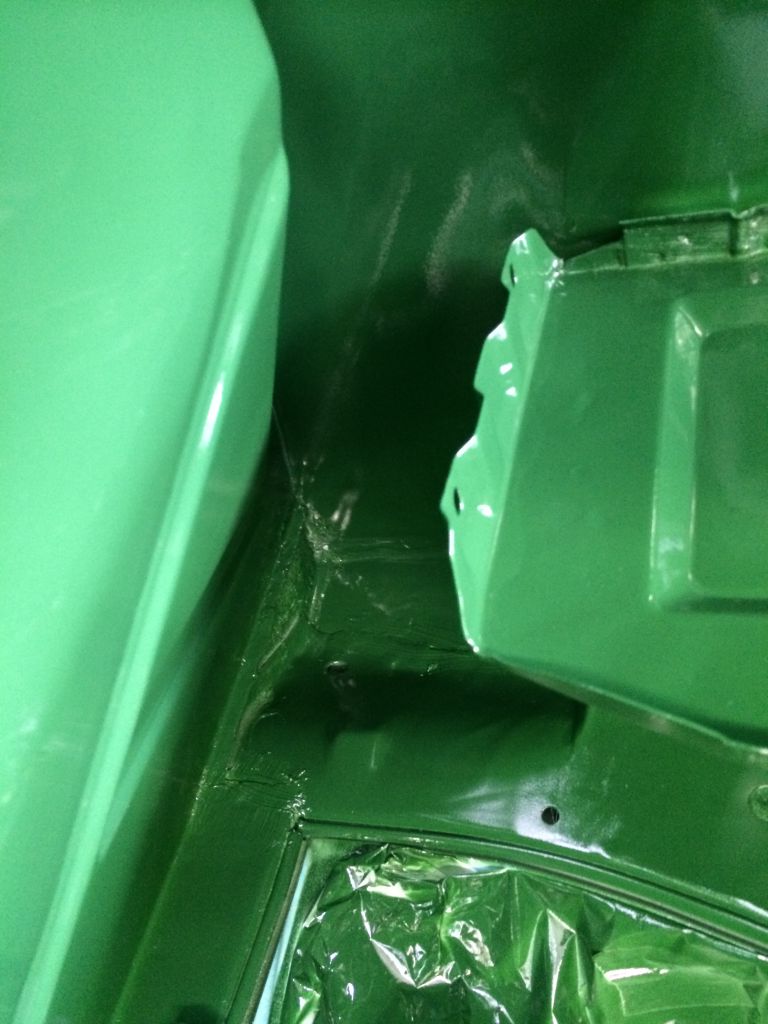
Posted by: siverson Dec 20 2013, 12:00 AM
And the repair...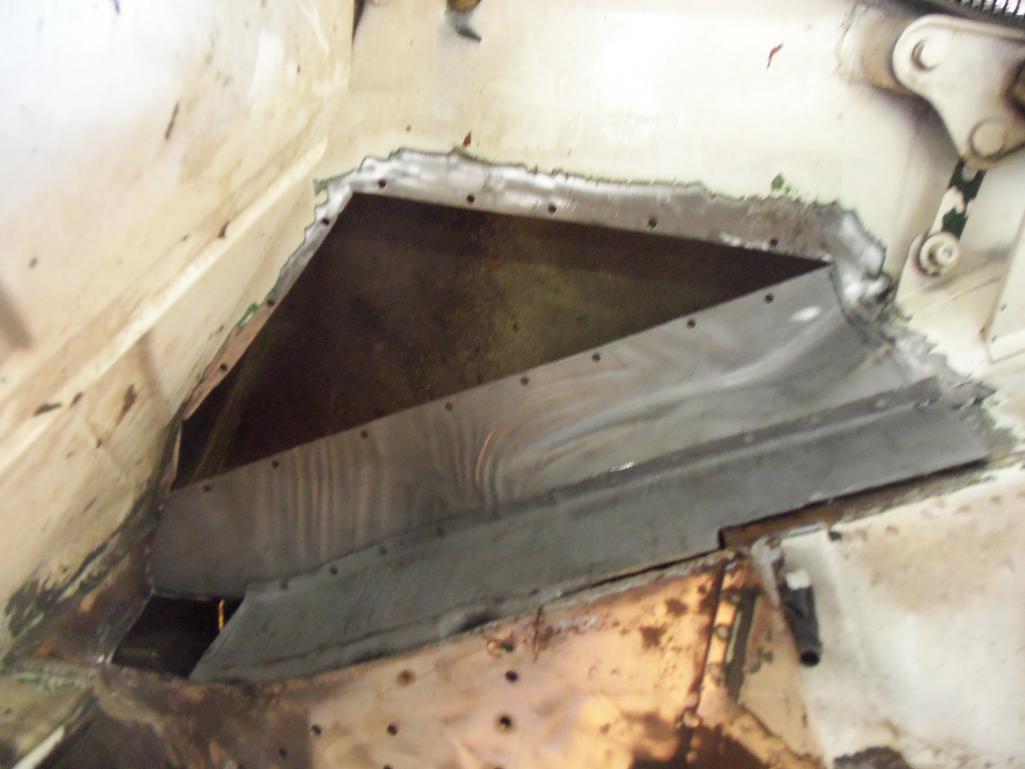

Posted by: siverson Dec 20 2013, 12:01 AM
914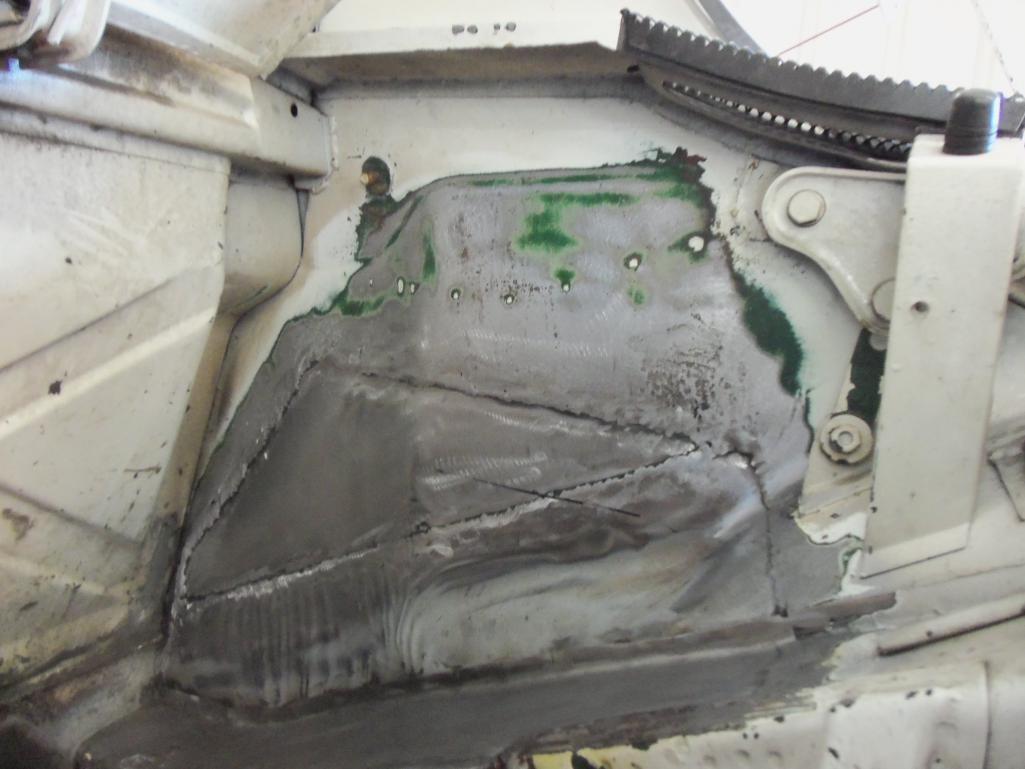
Posted by: siverson Dec 20 2013, 12:03 AM
914

Posted by: rick 918-S Dec 20 2013, 06:36 AM
Nice! There moving right along! 

Posted by: JmuRiz Dec 20 2013, 08:31 AM
I think it's safe to say they are all rusted out in the battery box area. The more Scotty cleaned in mine, the more he found...and my car is a damn solid car (in 914 terms).
Good work getting it fixed when you see it!
Posted by: siverson Dec 22 2013, 01:04 PM
From May 1977 when he was still Irish Green... But has the 15" Fuchs that it still has today - originally had steelies.
-Steve
Attached thumbnail(s)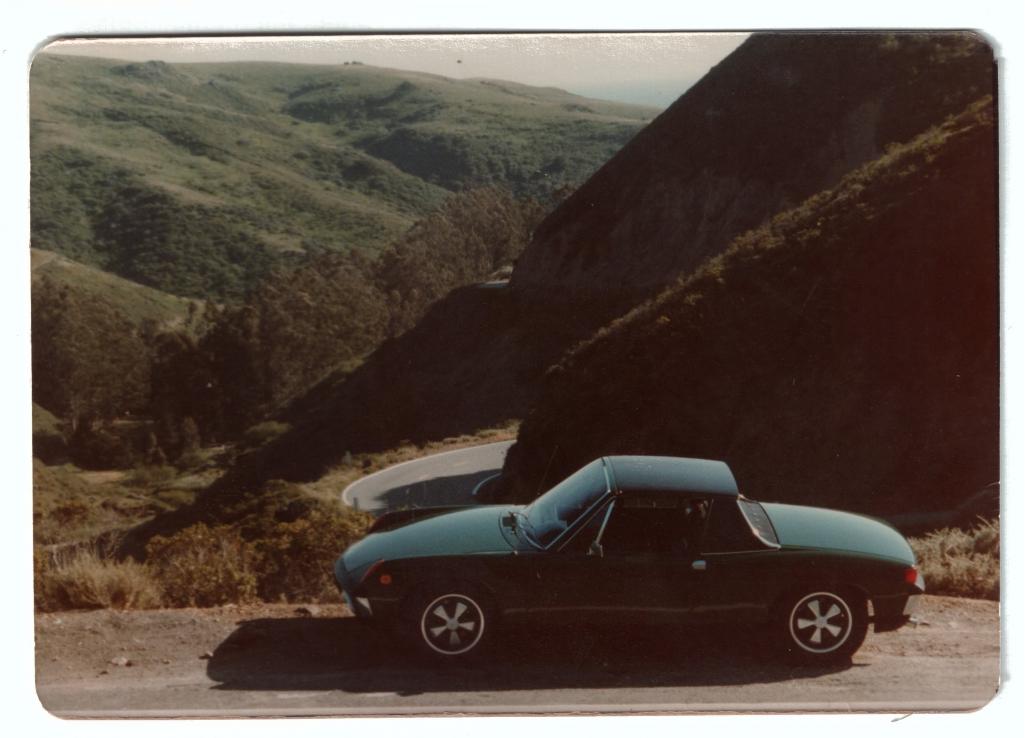
Posted by: trojanhorsepower Dec 22 2013, 04:31 PM
Man that looks great! What are you going to tackle next?
Posted by: sixnotfour Dec 22 2013, 04:46 PM
Me and My Six 1979, Irish green all the way
Attached image(s)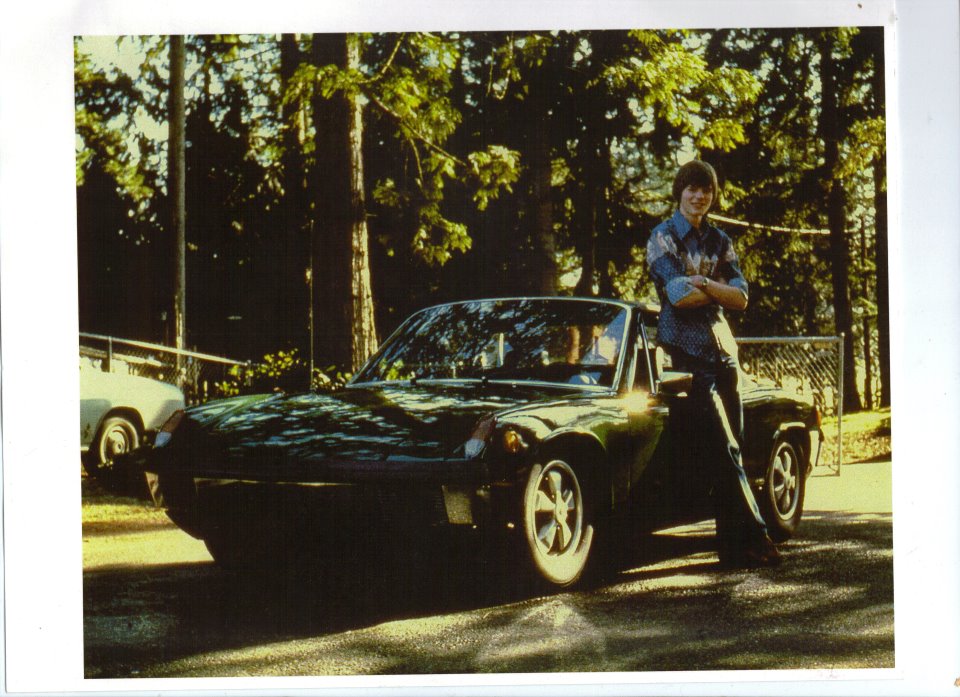
Posted by: Ferg Dec 22 2013, 05:29 PM
Best Color Ever. 
Posted by: siverson Dec 31 2013, 10:05 PM
> What are you going to tackle next?
The car is running and drivetrain-wise is pretty solid now. The plan is to put a couple hundred miles on it to work out all the kinks, and then take the rest of it apart for a full repaint (leaving the engine in). And that time I'll also refurbish the suspension, brakes, gas tank, new carpet, etc and then have a pretty nice little six!
-Steve
Posted by: siverson Jan 5 2014, 11:24 AM
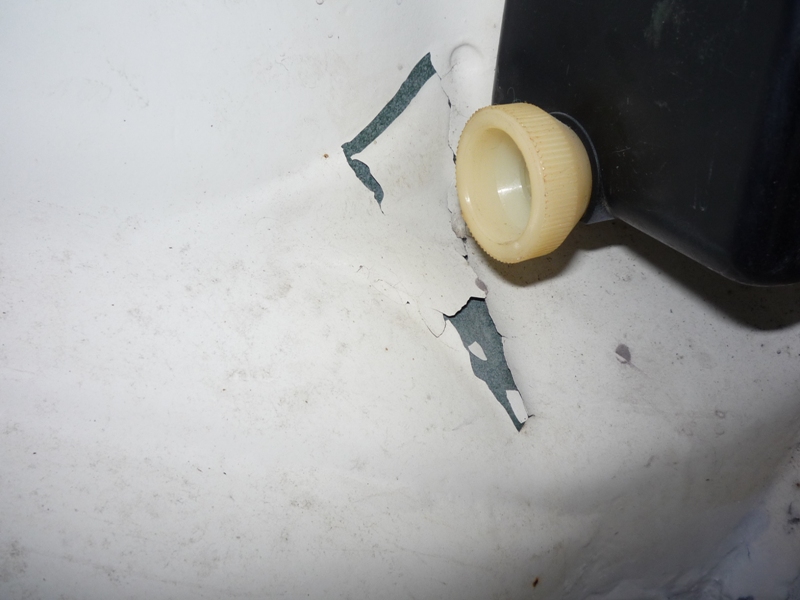
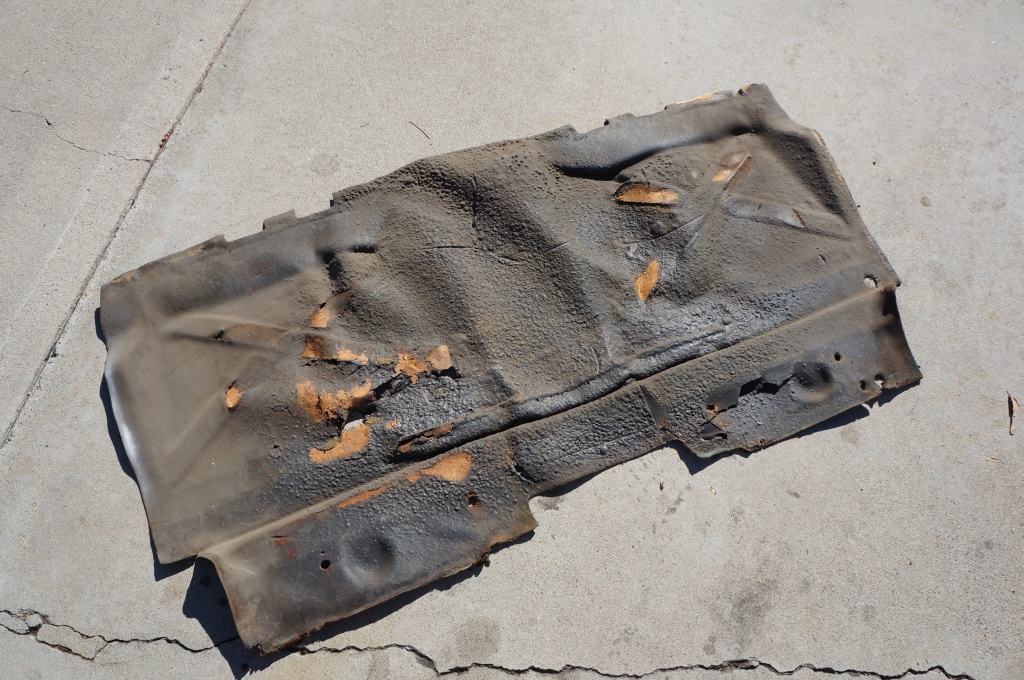
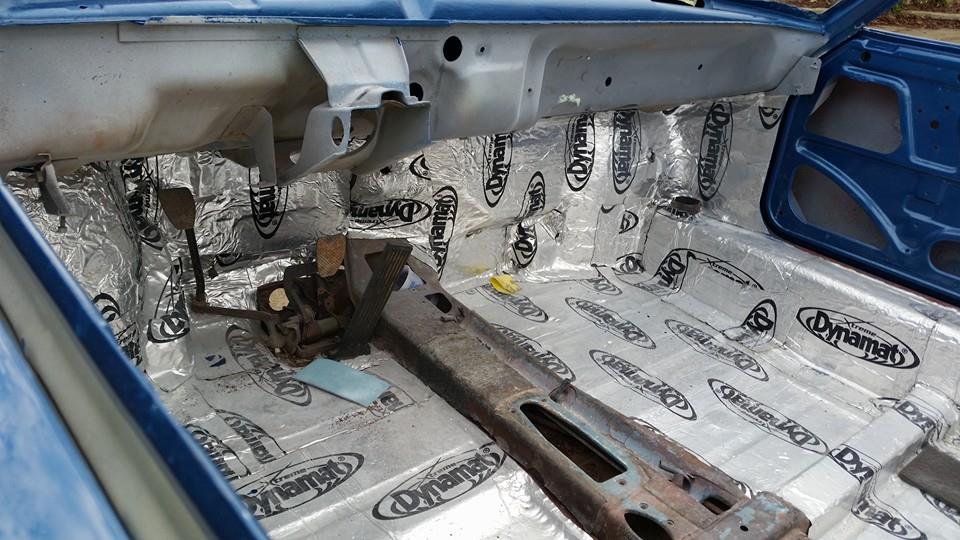
I haven't seen this before. Maybe it's just early car vs late car, but the thin sound padding on the firewall was sprayed/melted on. On all the later cars I've seen this is just a sheet the peels (usually falls) off.
-Steve
Attached thumbnail(s)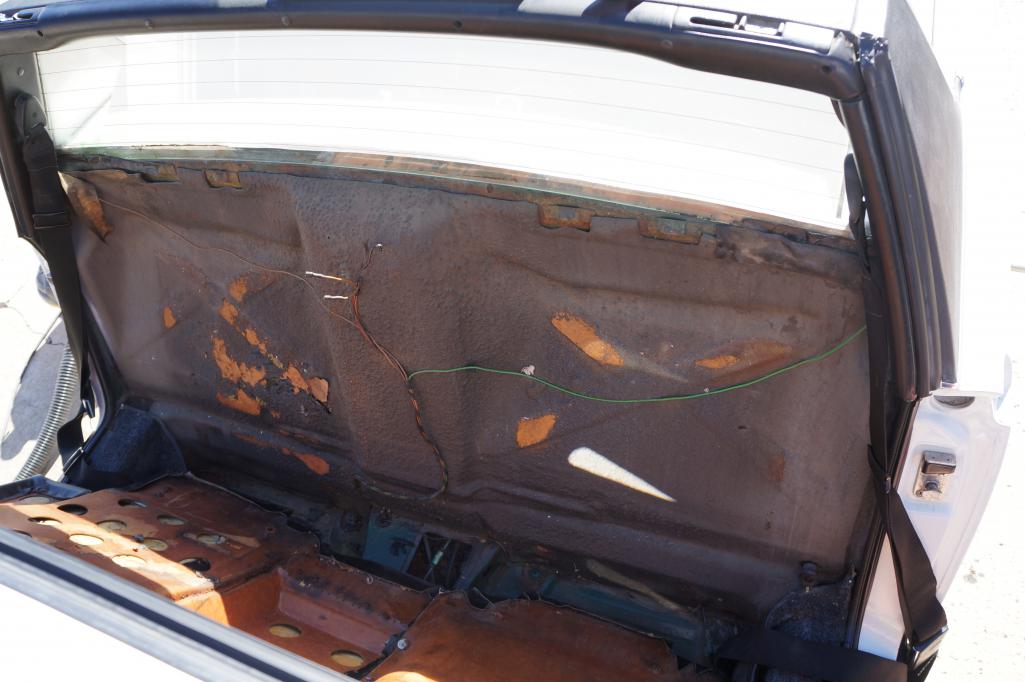
Posted by: siverson Jan 5 2014, 11:29 AM
The wires were embedded in it a bit...
-Steve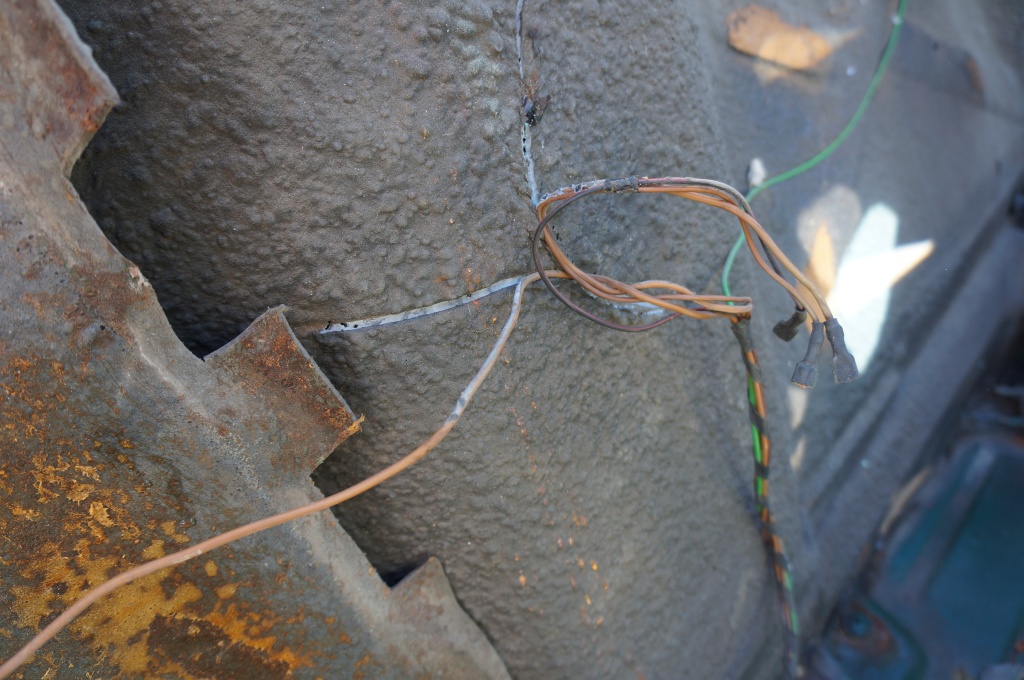
Posted by: siverson Jan 5 2014, 11:31 AM
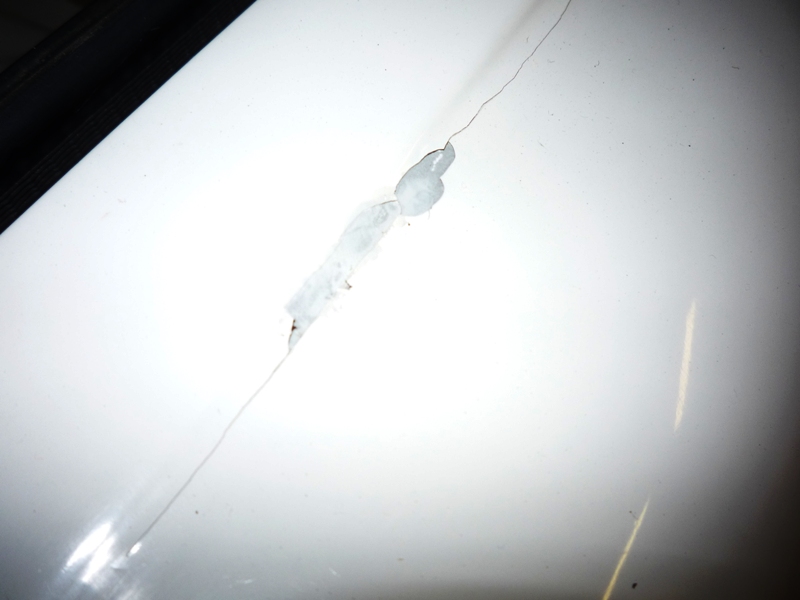
Why you should fix a loose rear window... Especially if you live in Portland.
-Steve
Attached image(s)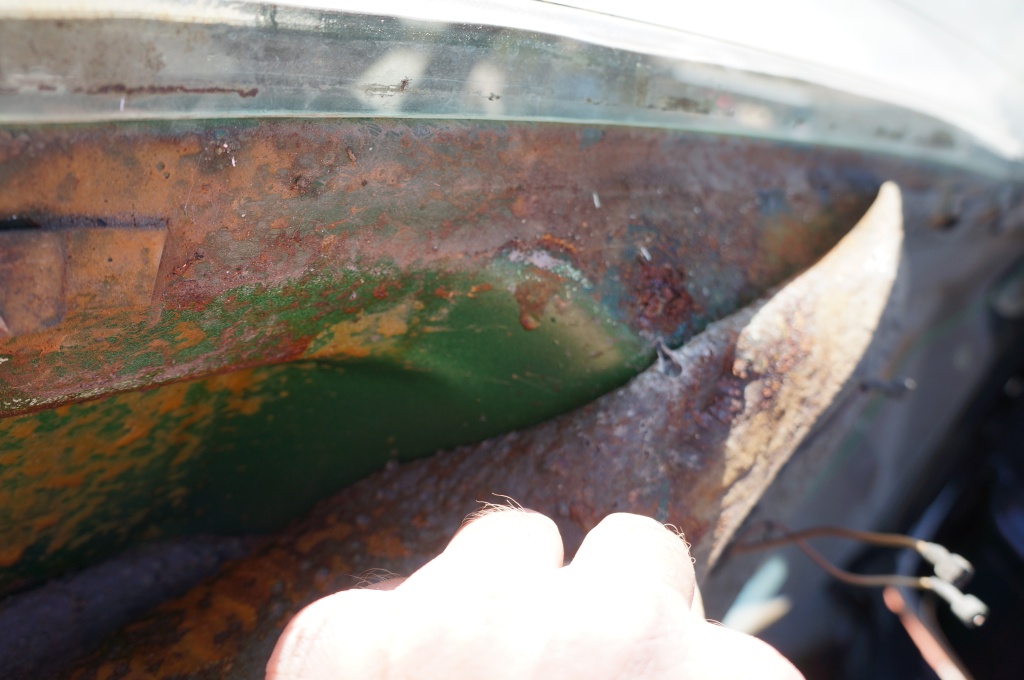
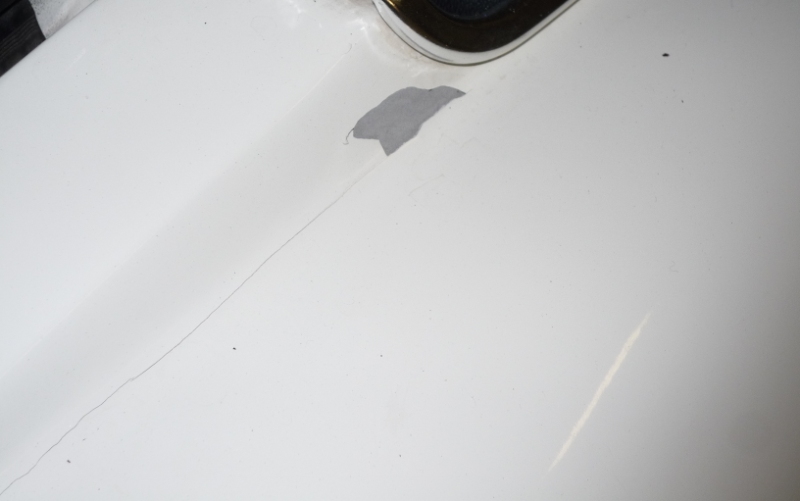
Posted by: siverson Jan 5 2014, 11:33 AM
When I started to pull up all the tar. Note there are no "carpet hold downs" on the main floor board. They aren't on either side, but the factory tar is still everywhere.
-Steve
Attached image(s)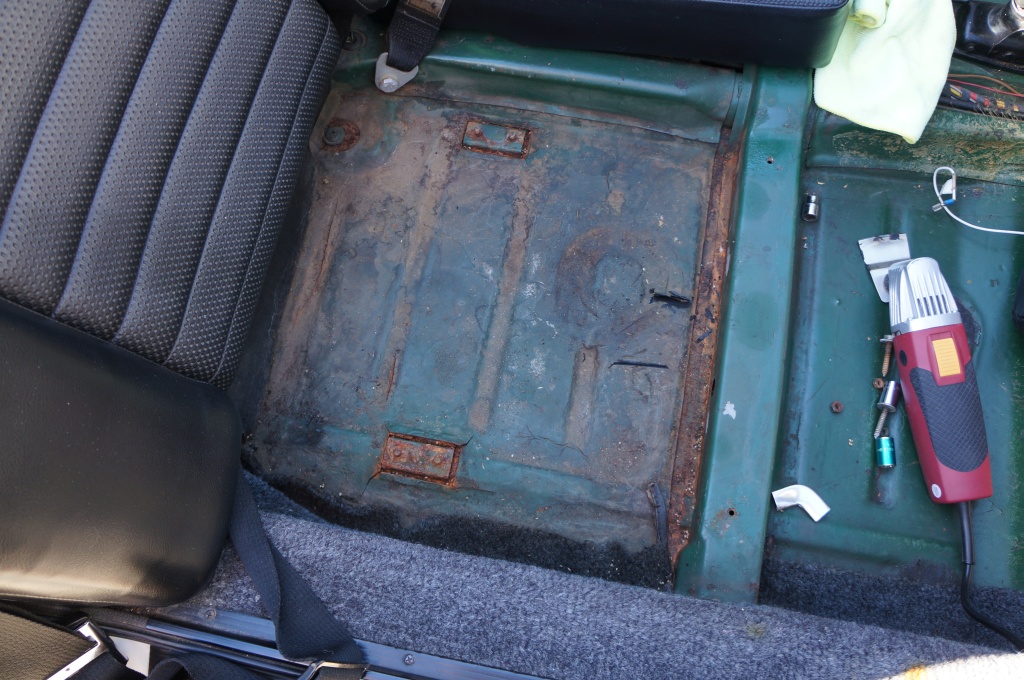
Posted by: mepstein Jan 5 2014, 11:34 AM
what your showing in the pic should just peel off.
Posted by: siverson Jan 5 2014, 11:36 AM
> what your showing in the pic should just peel off.
I agree, it "should", but something happened to this one. It was glued/melted on to the the firewall, and also onto the backpad. It did come out eventually though.
-Steve
Posted by: rick 918-S Jan 5 2014, 11:50 AM
That's weird about the carpet holders....
Posted by: sixnotfour Jan 5 2014, 01:46 PM
my six has no carpet holders and factory carpet has no holes. 0390
Posted by: siverson Jan 19 2014, 12:16 AM
> my six has no carpet holders and factory carpet has no holes. 0390
Well that's news to me. I'll leave it as-is.
-Steve
Posted by: siverson Jan 19 2014, 12:23 AM
While I love Fuchs on 914s, and 15x6s are one of my favorites (great proportions), it's been bugging me that these aren't "correct" for a 914-6. So I've been debating going with 14" Fuchs or something different, but still correct for a 914-6.
These arrived today...
-Steve
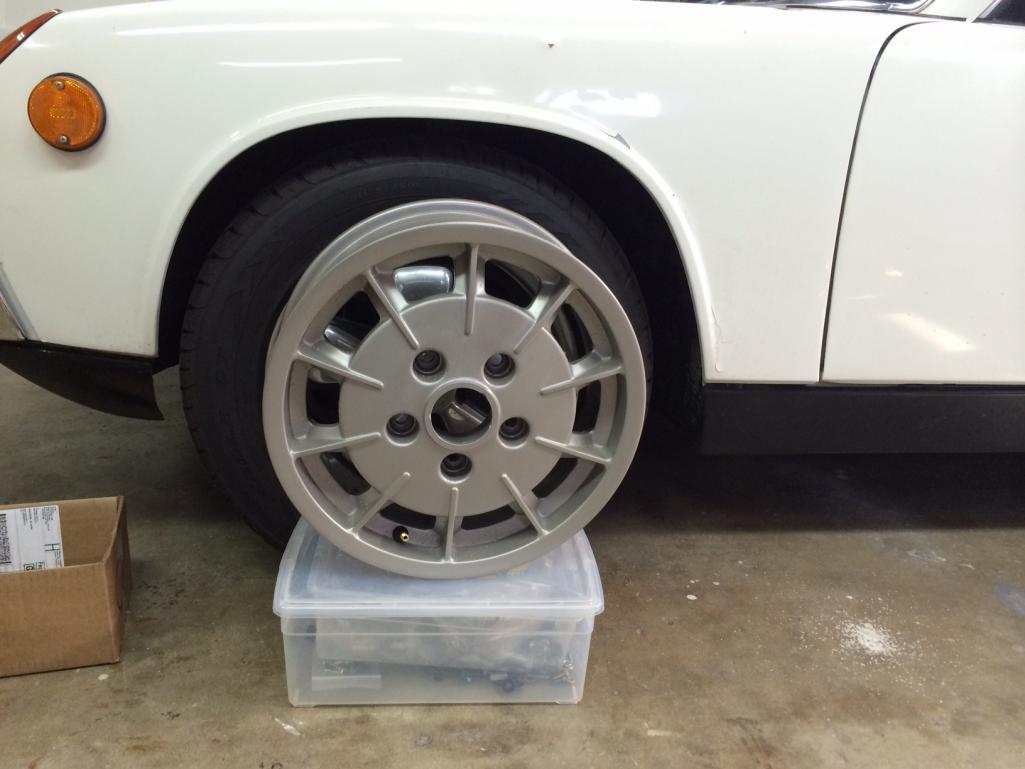
Posted by: siverson Jan 19 2014, 12:25 AM
That's cosmoline in the first picture, but they cleaned up very nicely.
-Steve
Posted by: mepstein Jan 19 2014, 09:35 AM
I like the look of the gas burners. Mine weighed 10.2 lbs. Nothing wrong with having more than one set of wheels to play with. I believe prices will only increase on all the favorite Porsche wheels so you can't go wrong sitting on a set or 2.
Posted by: 914Sixer Jan 19 2014, 09:39 AM
Correct wheels can be a fuzzy area. They can fall into the same area as "stock radio" and antenna. They were not installed at the factory but the dealer installed what the customer wanted. Lots of 911 updates were dealer installed per customer request.
Posted by: siverson Jan 19 2014, 01:15 PM
> Correct wheels can be a fuzzy area.
Sort of, if we start the factory vs dealer debate. But for factory wheels and what appears on a COA, I think it's pretty clear that the only options for 914-6s were:
- steel wheels
- 14" fuchs wheels
- mahle gas burner wheels
Right?
-Steve
Posted by: toolguy Jan 19 2014, 01:20 PM
That is correct. . .only 14" Fuch's
however IIRC factory GT's did come with 15" Fuch's
Posted by: sixnotfour Jan 19 2014, 01:58 PM
My version of the Bible shows em, printed 1/74
Attached thumbnail(s)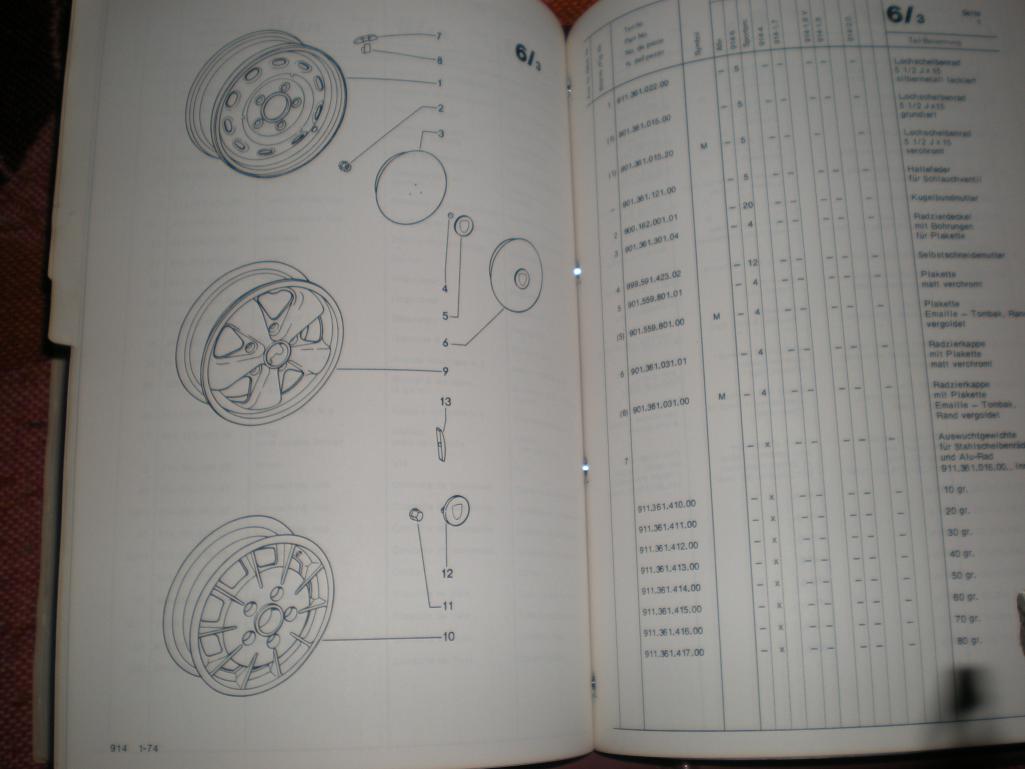
Posted by: sixnotfour Jan 19 2014, 02:10 PM
I think wheel choice was a crap shoot, not an option , depended on the rest of the options, dictated by bean counters. Then at the dealer is a whole nother deal..
well documented OG -6
http://www.pbase.com/9146gt/image/25927225
Posted by: siverson Jan 23 2014, 10:44 PM
> My version of the Bible shows em, printed 1/74
Show's what? That photo looks like steelies, 14" Fuchs, and Mahles... ?
-Steve
Posted by: sixnotfour Jan 23 2014, 11:07 PM
- 14" fuchs wheels
- mahle gas burner wheels
Right?
Porsche printed parts list, yes the mahles are listed for the 914-6, more documentation..
Posted by: Cairo94507 Jan 24 2014, 08:26 AM
I think the Gas Burner is one of the best looking wheels on a Six. I badly want a set of for my Six but since I have a matching set of deep sixes I need to wait until my car is actually a car again before I search for Gas Burners….but I fully intend to have a set for it then.
Posted by: 2mAn Jan 24 2014, 11:37 AM
I like the look of the gas burners. Mine weighed 10.2 lbs.
thats super light. Im a big fan of Fuchs, but thats just crazy. What size are the gas burners? also, random question, what do Fuchs weigh?on topic: The car looks great, I love the simple white, but that Irish Green will look amazing!
Posted by: siverson Mar 7 2014, 09:47 PM
And one last "test ride" before disassembly for paint...
-Steve
Attached thumbnail(s)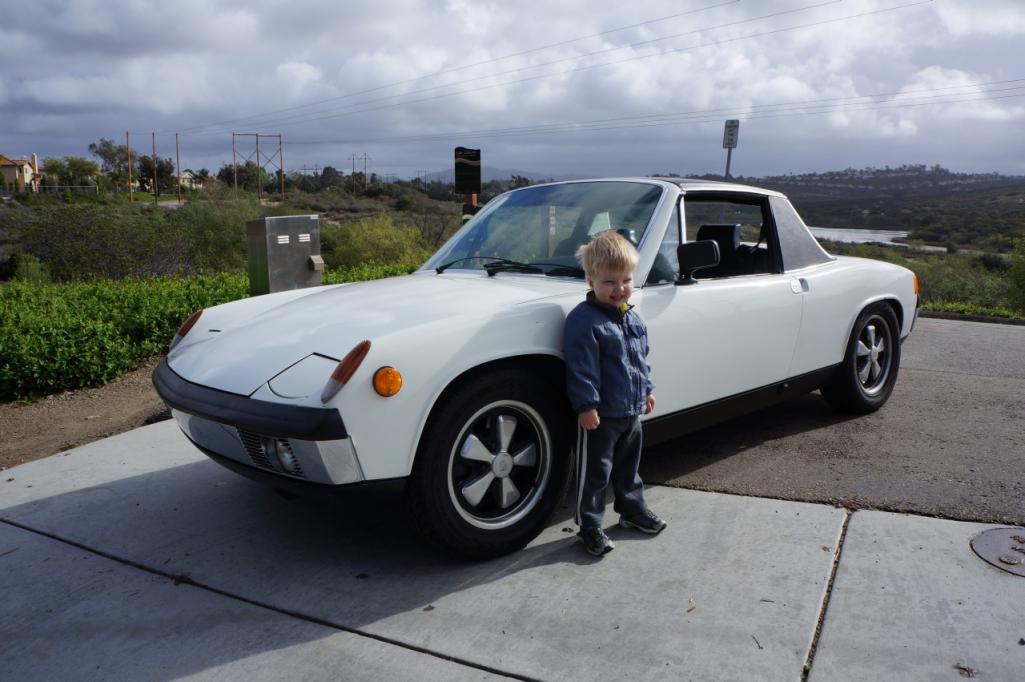
Posted by: ben*james Mar 7 2014, 09:50 PM
Way to go!
Posted by: siverson Mar 7 2014, 10:11 PM
White, green, and black (spray paint! argh!!!!), and a little rust...
-Steve
Attached thumbnail(s)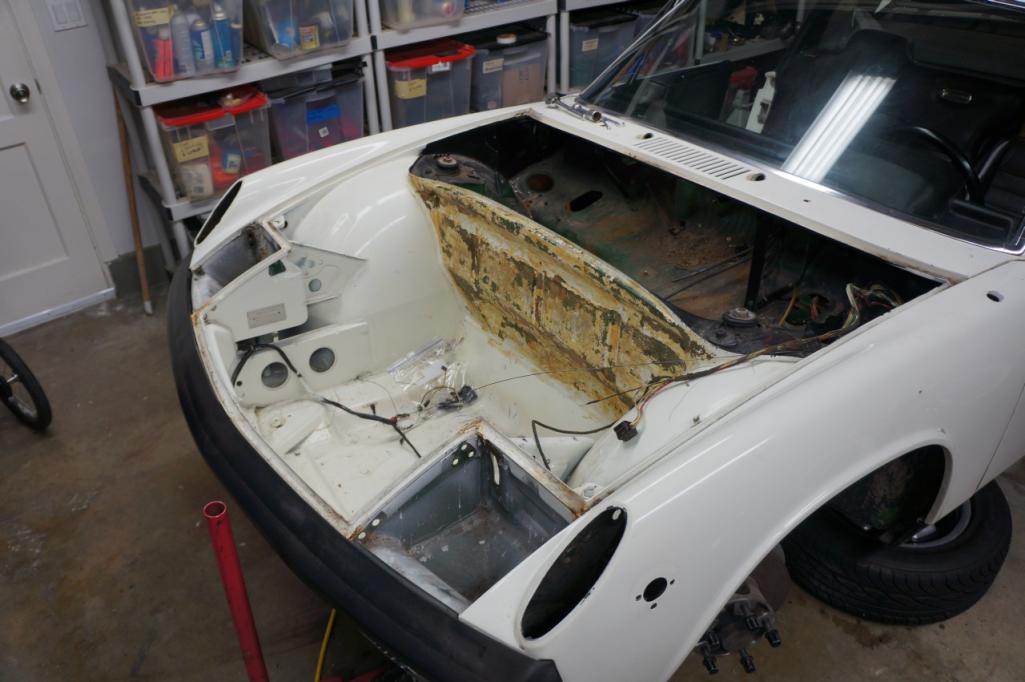
Posted by: siverson Mar 7 2014, 10:13 PM
One spray painted horn, one not. And... are these original? They look different than those on my other cars.
-Steve
Attached thumbnail(s)

Posted by: siverson Mar 7 2014, 10:15 PM
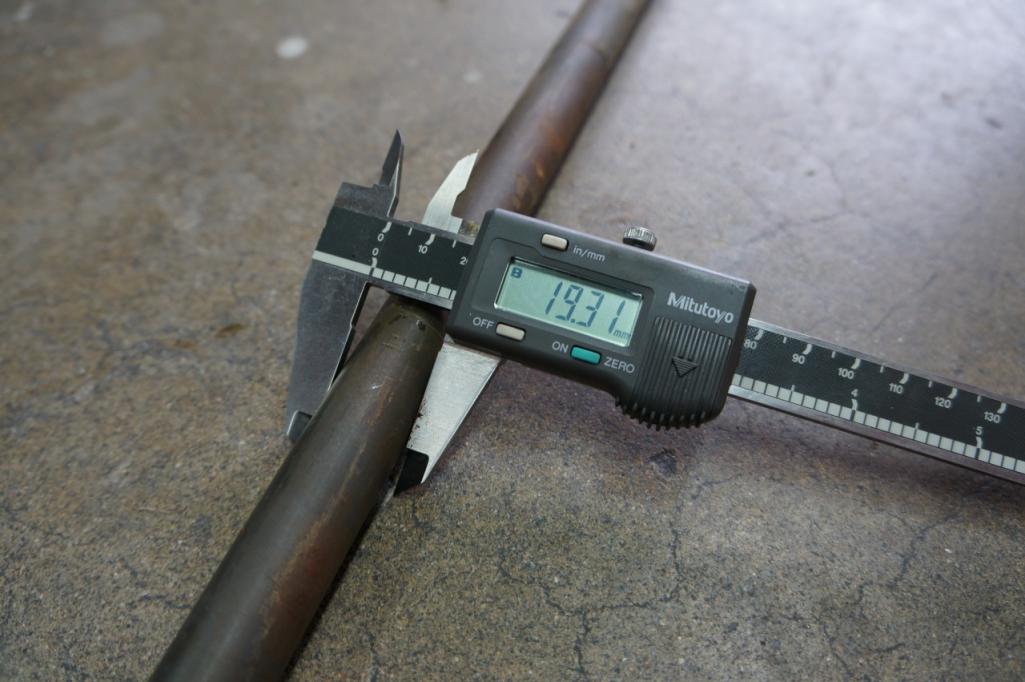
Removed old aftermarket sway bar. Anyone know what brand it is? Quality actually seems pretty decent...
-Steve
Attached thumbnail(s)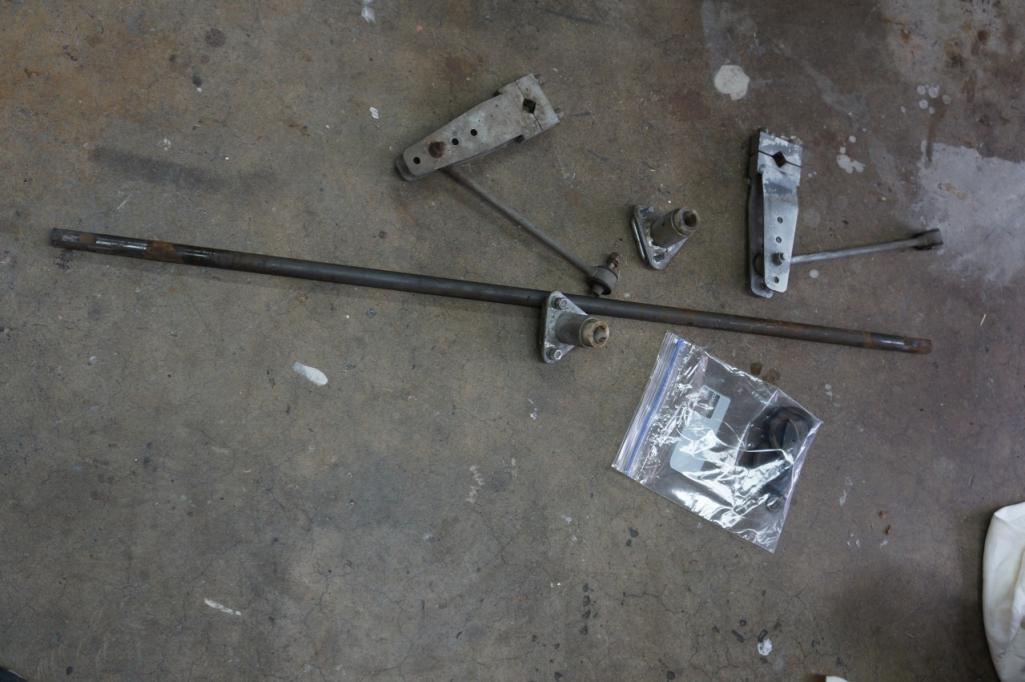
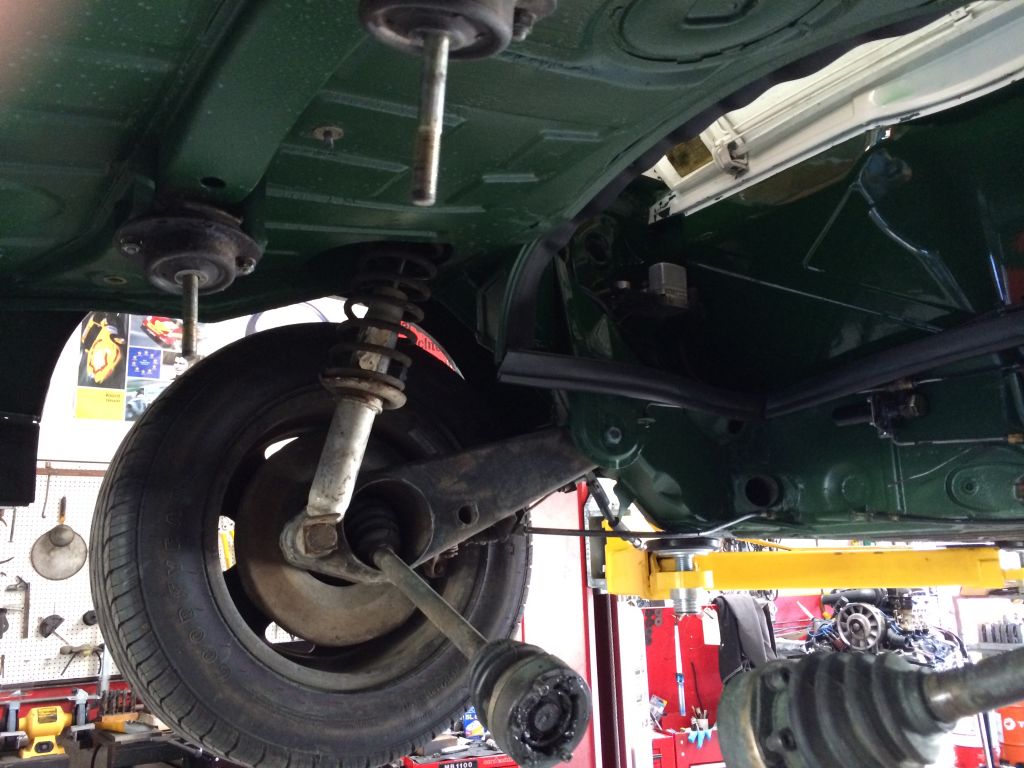
Posted by: siverson Mar 7 2014, 10:17 PM
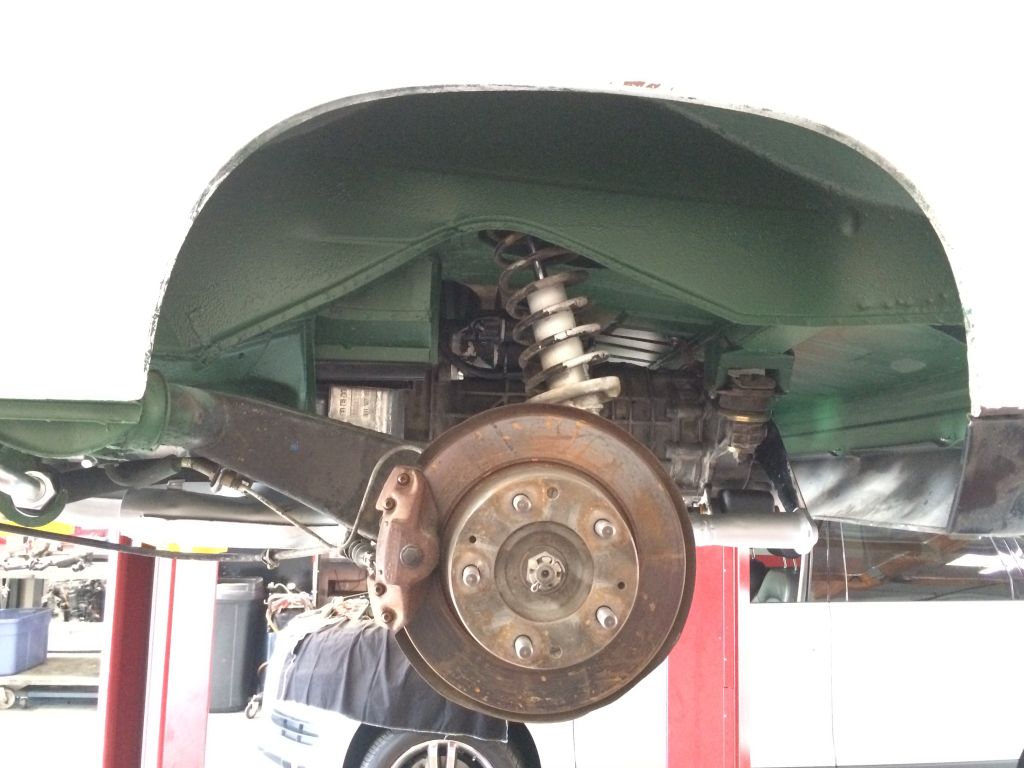
Green, white overspray, and original 914-6 grey struts peeking through...
-Steve
Attached thumbnail(s)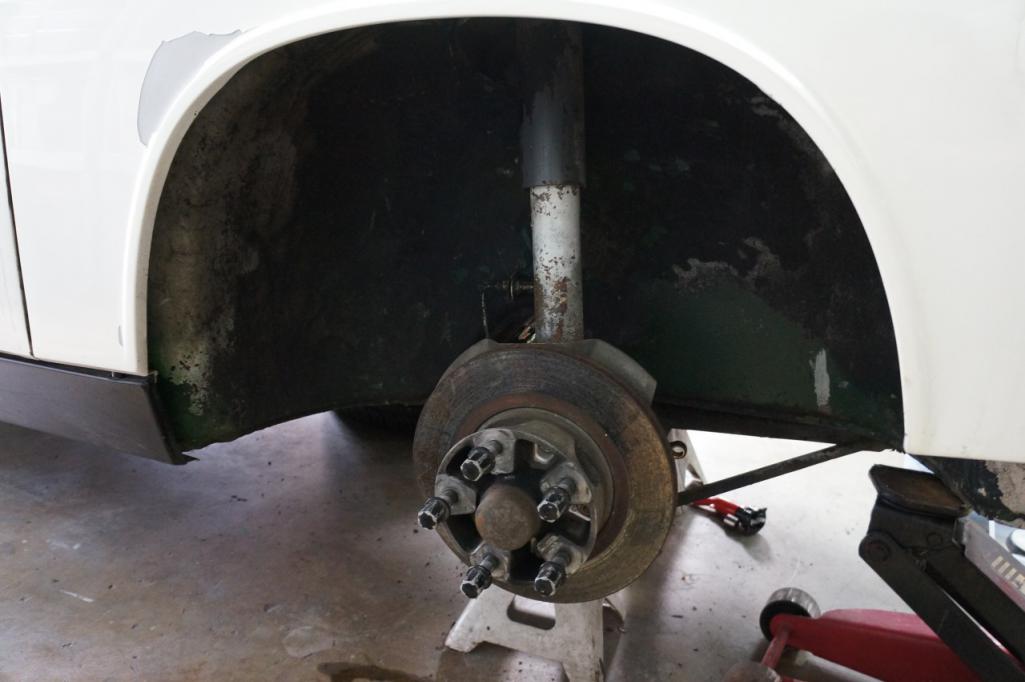
Posted by: siverson Mar 7 2014, 10:18 PM
All four calipers removed and ready to be restored.
-Steve
Attached thumbnail(s)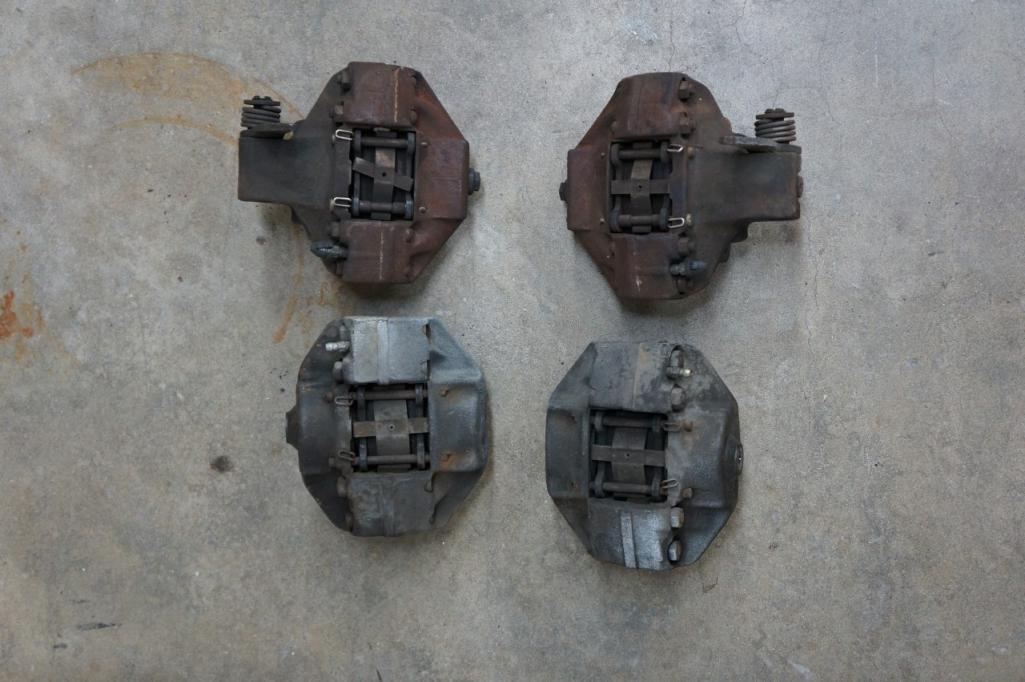
Posted by: siverson Mar 7 2014, 10:20 PM
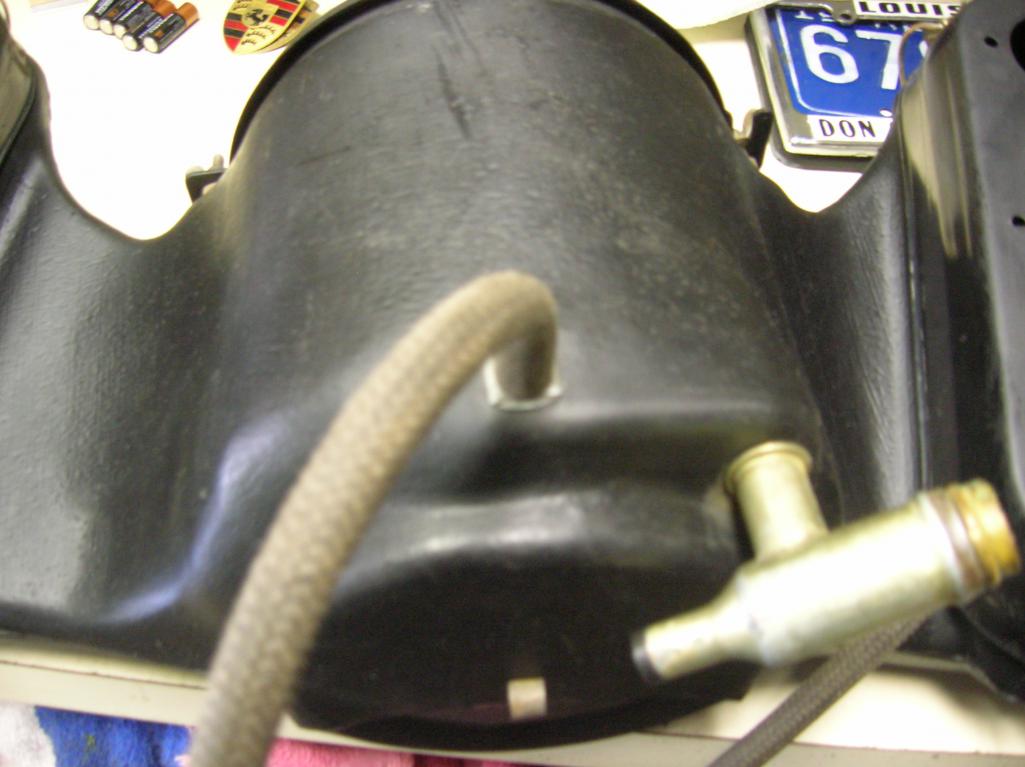
Nice... I'm pretty sure these are the original fuel lines. One also didn't have a hose clamp - on the car end of the hose. Is that right? Perhaps the return line didn't require a clamp? That doesn't seem right to me, but it looks like this gas tank had never been removed.
Attached thumbnail(s)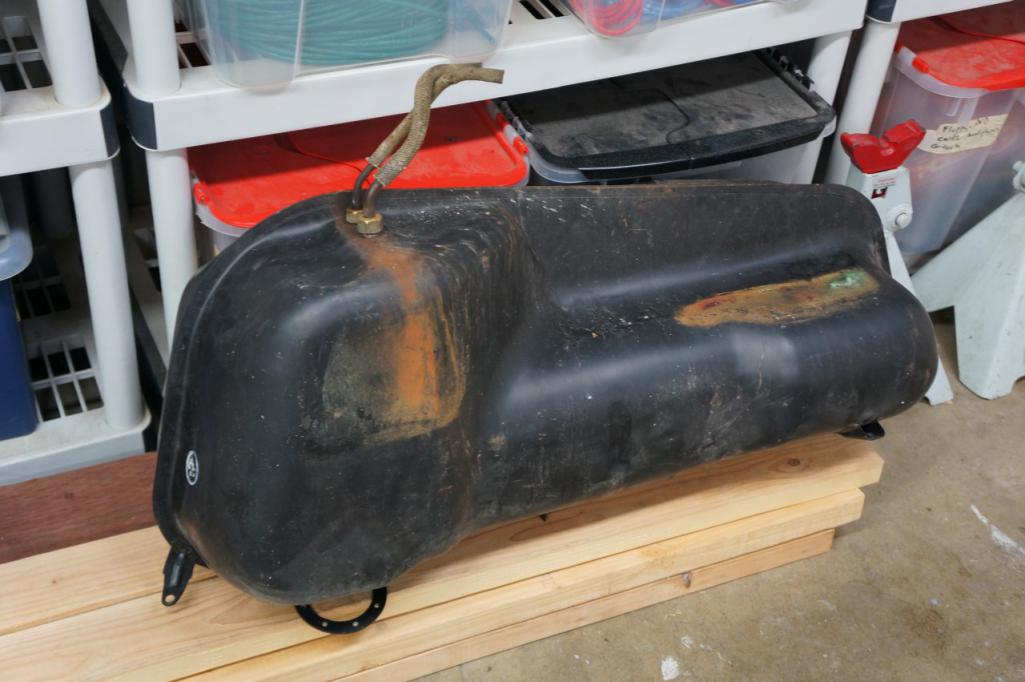
Posted by: siverson Mar 7 2014, 10:22 PM
My first 914 with one of these pumps.
Attached thumbnail(s)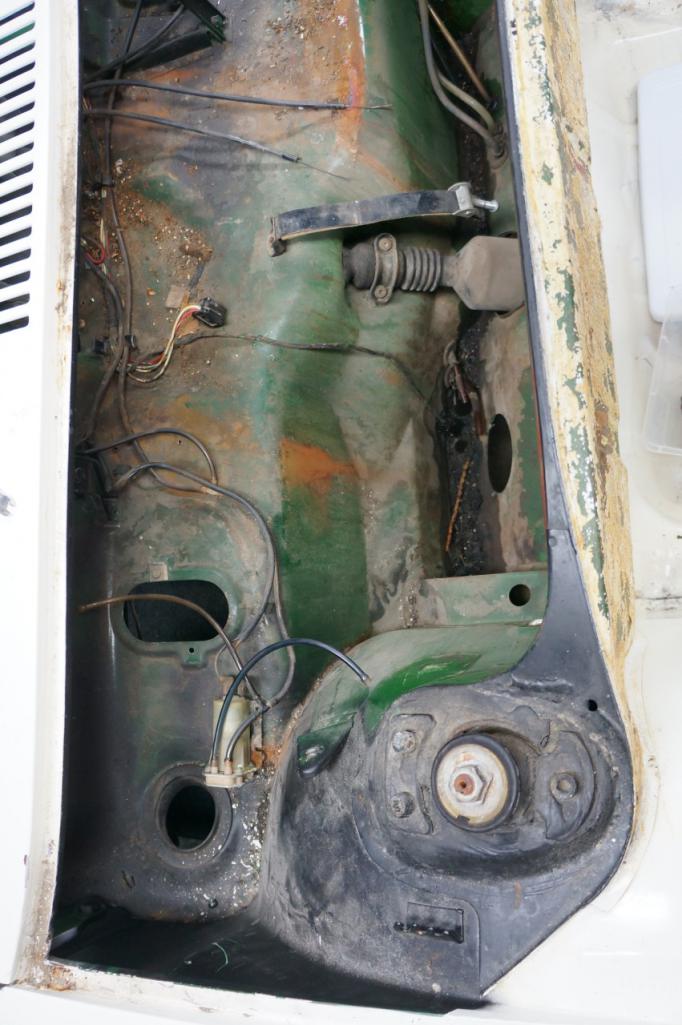
Posted by: 914Sixer Mar 8 2014, 07:21 AM
It is the stock six washer pump. Same one used on the 911 of the period. Easy to find, reproductions now available.
Posted by: Phoenix-MN Mar 8 2014, 07:51 AM
H&H Carrera, I have the same bar on my 911 and 914
Removed old aftermarket sway bar. Anyone know what brand it is? Quality actually seems pretty decent...
-Steve
Posted by: Maltese Falcon Mar 8 2014, 09:13 AM
While I love Fuchs on 914s, and 15x6s are one of my favorites (great proportions), it's been bugging me that these aren't "correct" for a 914-6. So I've been debating going with 14" Fuchs or something different, but still correct for a 914-6.
These arrived today...
-Steve
Did you happen to buy the Mahle wheels from a guy on Samba?
He buys +sells over there...he bought our wheels last month.
Marty
Posted by: Eric_Shea Mar 8 2014, 09:30 AM
Lucky the calipers survived.
Posted by: siverson Mar 8 2014, 09:58 AM
> Did you happen to buy the Mahle wheels from a guy on Samba?
I did, but they came from New Zealand. Same guy?
-Steve
Posted by: siverson Mar 8 2014, 10:01 AM
> H&H Carrera, I have the same bar on my 911 and 914
Thanks. Any idea why are some people looking for them:
http://www.early911sregistry.org/forums/showthread.php?40283-WTB-H-amp-H-old-school-sway-bars-f-r
?
-Steve
Posted by: siverson Mar 8 2014, 10:04 AM
> Eric
> Lucky the calipers survived.
Yup, and you'll probably see them in a box shortly; I just need to get my parts list organized.
I'm curious, why do you say lucky? Sure they all get fugly with age, but with normal use/storage they don't often fail or become unrestorable, right? I guess I was just expecting to pull them off with issue.
-Steve

Posted by: Socalandy Mar 8 2014, 10:32 AM
Looking good!!! looks wet under the gas tank as mine did, Are you going to remove the seam sealer ? We ran into a lot of rust under seam sealer
Attached image(s)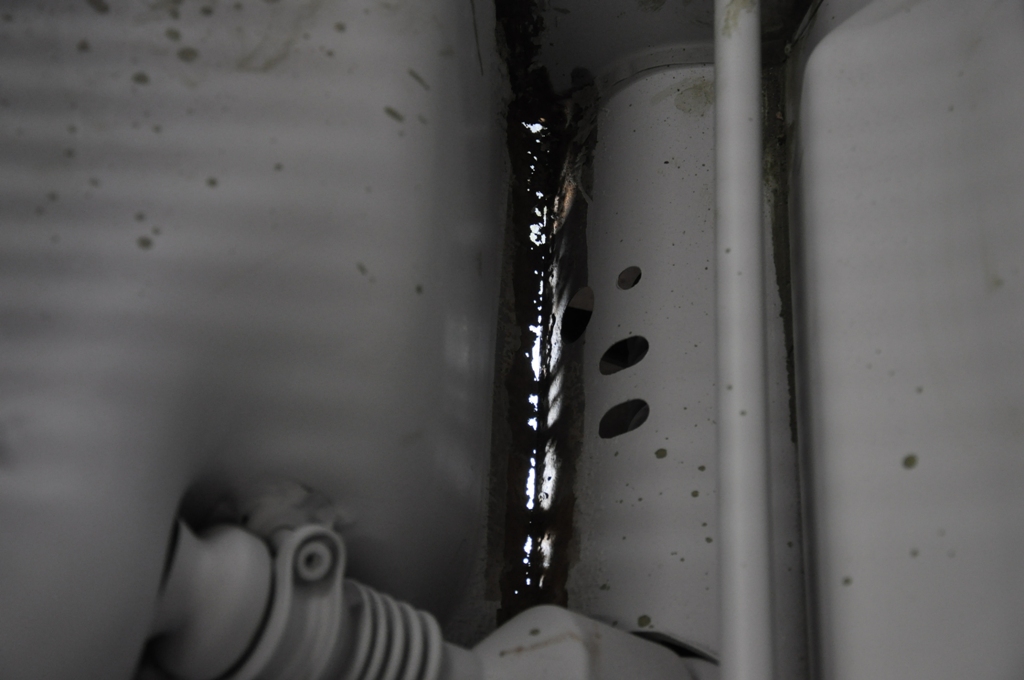
Posted by: Eric_Shea Mar 8 2014, 10:55 AM
> Eric
> Lucky the calipers survived.
Yup, and you'll probably see them in a box shortly; I just need to get my parts list organized.
I'm curious, why do you say lucky? Sure they all get fugly with age, but with normal use/storage they don't often fail or become unrestorable, right? I guess I was just expecting to pull them off with issue.
-Steve
Many are missing their real six rear calipers.
Posted by: siverson Mar 8 2014, 05:20 PM
> Many are missing their real six rear calipers.
Oh I see. Yes, nearly all the original parts are there.
-Steve
Posted by: sixnotfour Mar 8 2014, 06:35 PM
save the goo around the struts,, its original
Is the circled area wrinkled ??
Attached image(s)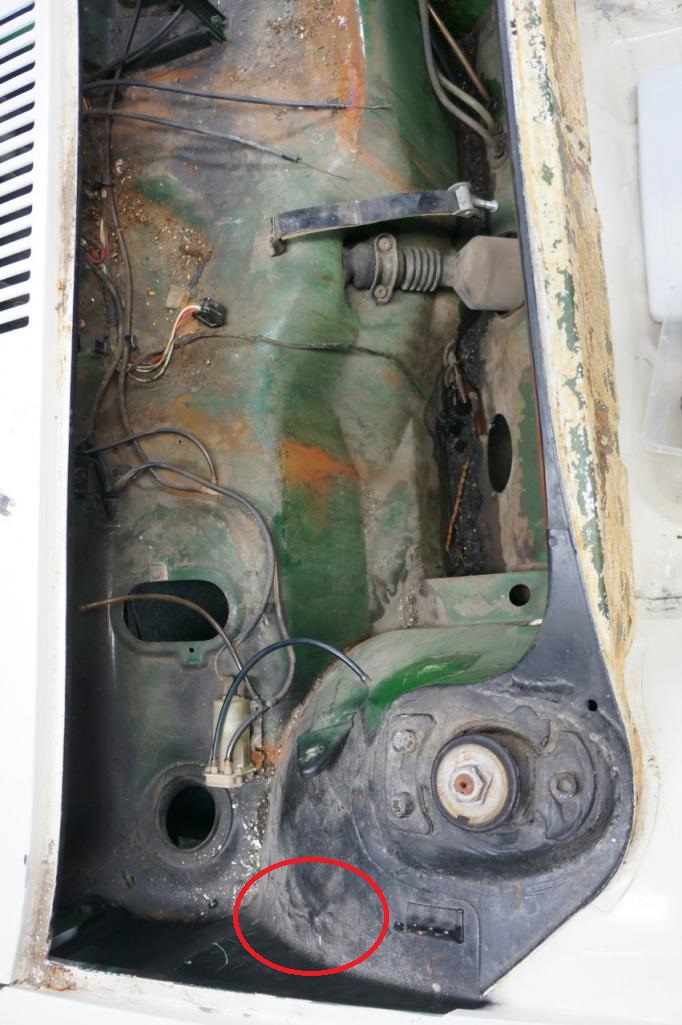
Posted by: siverson Mar 30 2014, 11:41 PM
> Is the circled area wrinkled ??
Nope, just goop.
Body is almost entirely stripped now - I'll have some photos tomorrow.
-Steve
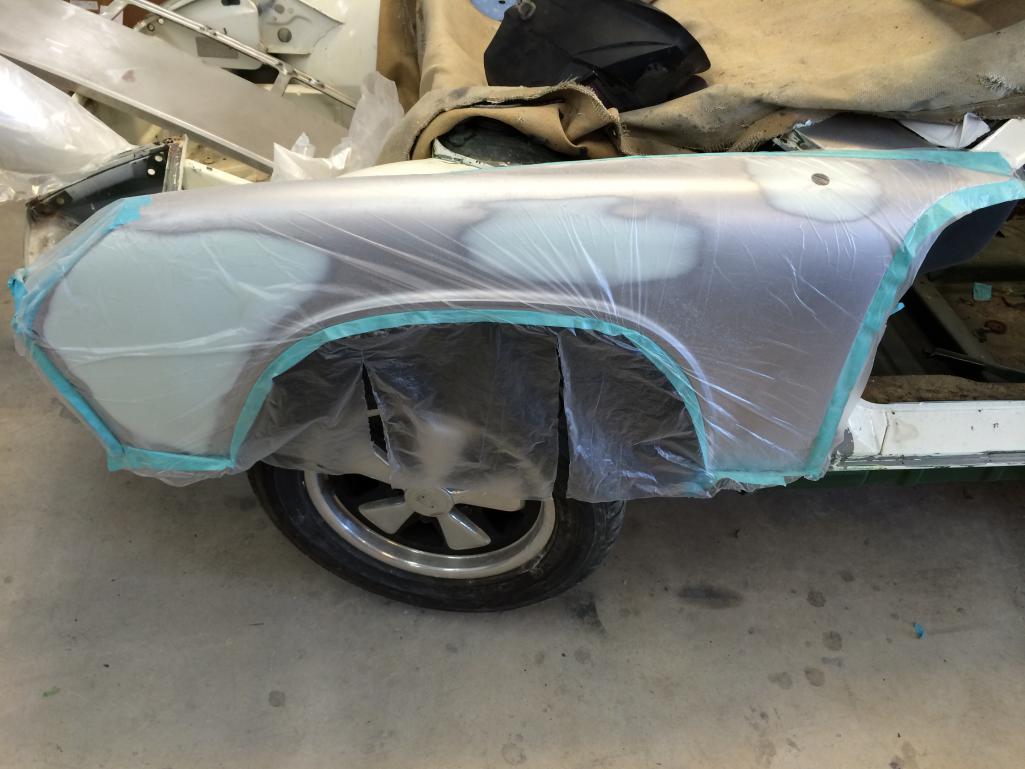
Posted by: siverson Apr 1 2014, 11:11 AM
Making progress.
-Steve
Attached thumbnail(s)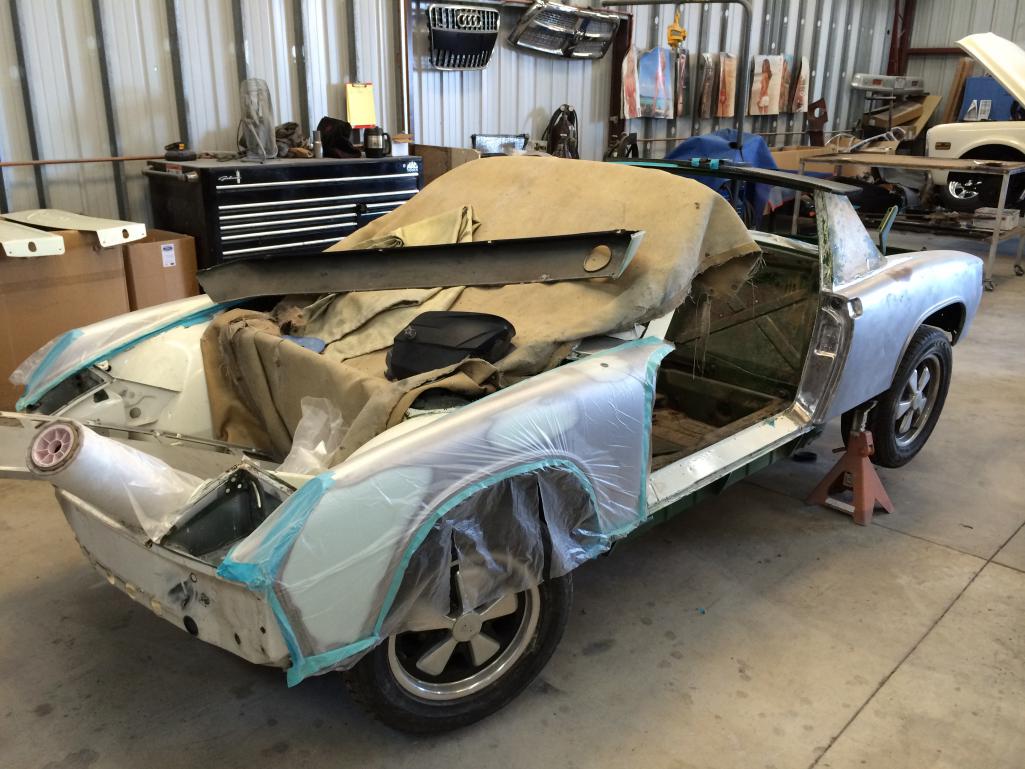
Posted by: siverson Apr 1 2014, 11:11 AM
914
Attached thumbnail(s)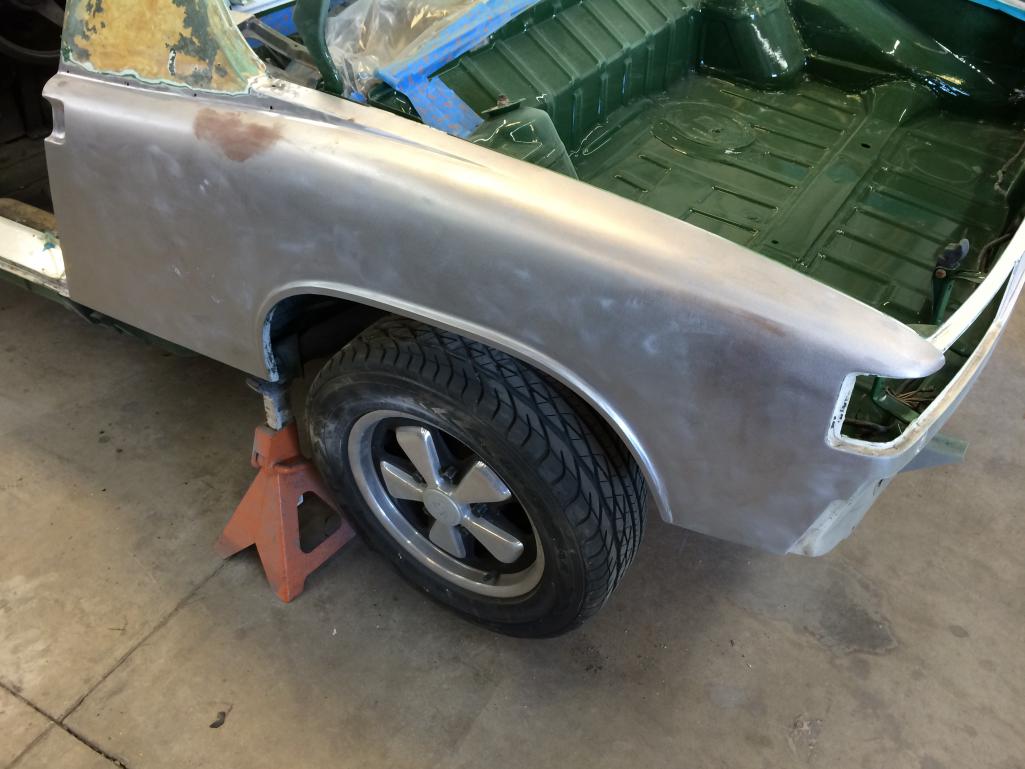
Posted by: siverson Apr 1 2014, 11:12 AM
914
Attached thumbnail(s)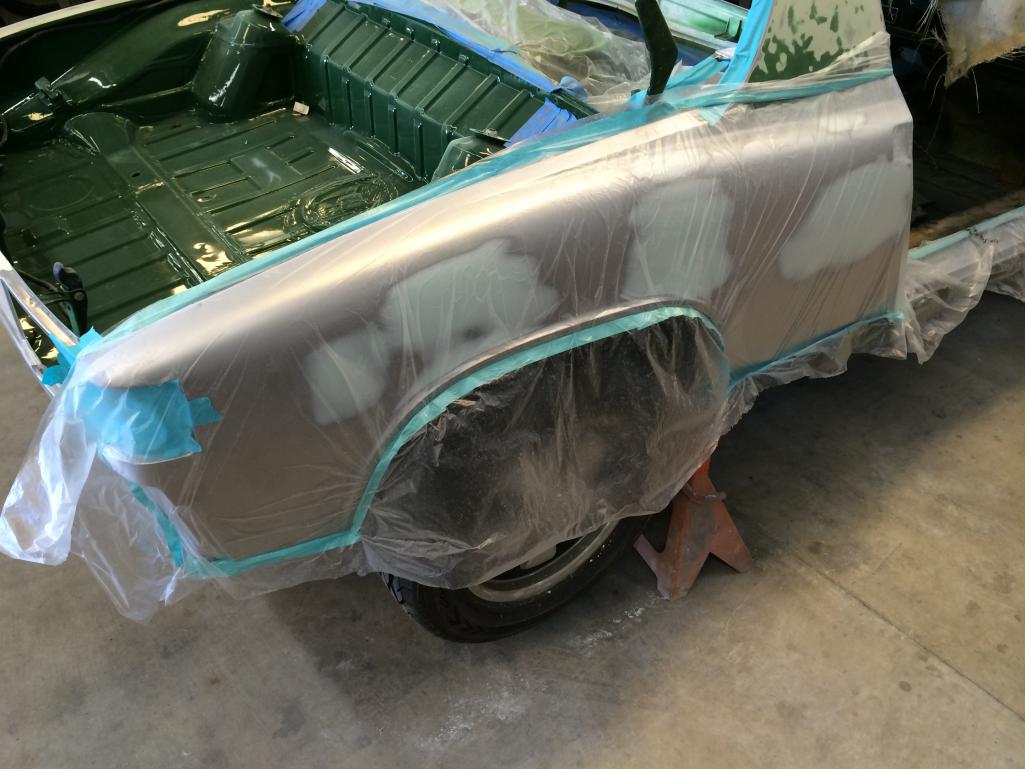
Posted by: siverson Apr 21 2014, 10:53 PM
Now in primer...
Attached thumbnail(s)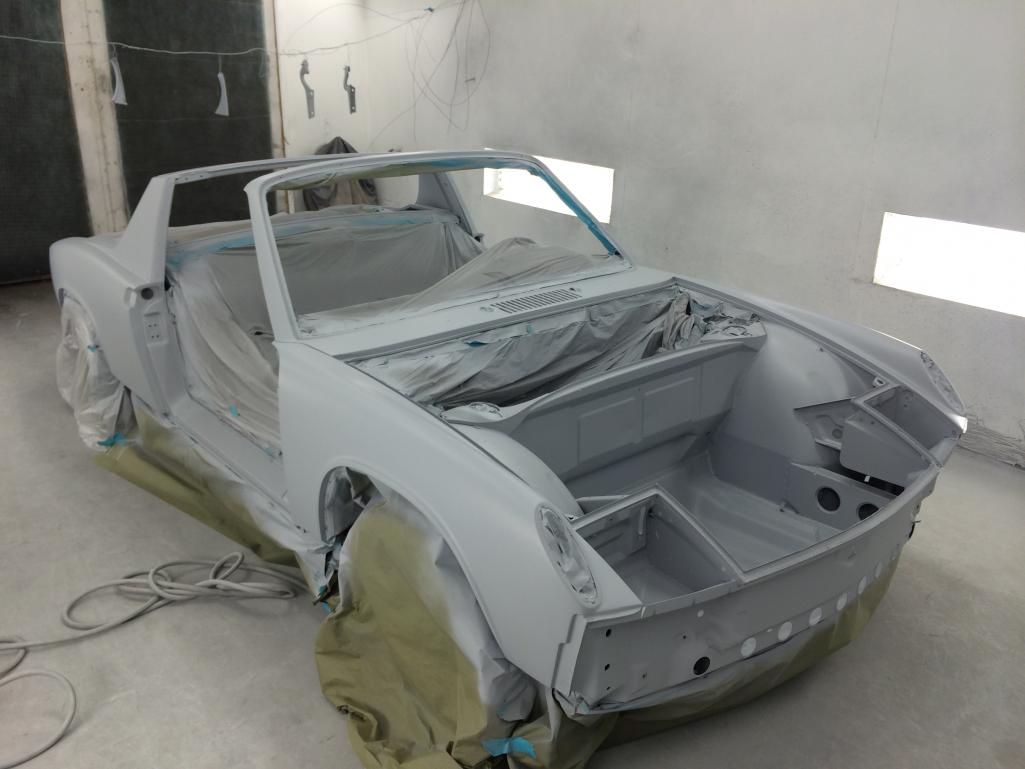
Posted by: Larmo63 Apr 22 2014, 09:47 AM
I'd like a shot at those Fuchs if you decide to sell them. Great car, great project!
Posted by: Socalandy Apr 22 2014, 10:05 AM
Awesome 
Posted by: rick 918-S Apr 22 2014, 01:17 PM
Nice progress!
Posted by: CptTripps Apr 22 2014, 01:32 PM
Nothing sexier than a teener in primer.
....except...well...one that's done.
Posted by: Larmo63 Apr 22 2014, 03:29 PM
Irish Green looks a bit better than primer IMHO.
Posted by: Cairo94507 Apr 23 2014, 07:00 AM
That is very exciting. One of these days I hope to see another Six in primer.......
Posted by: siverson May 14 2014, 11:31 PM
Rear calipers look a little better. I'll try to clean them up a bit before putting them on.
-Steve
Attached thumbnail(s)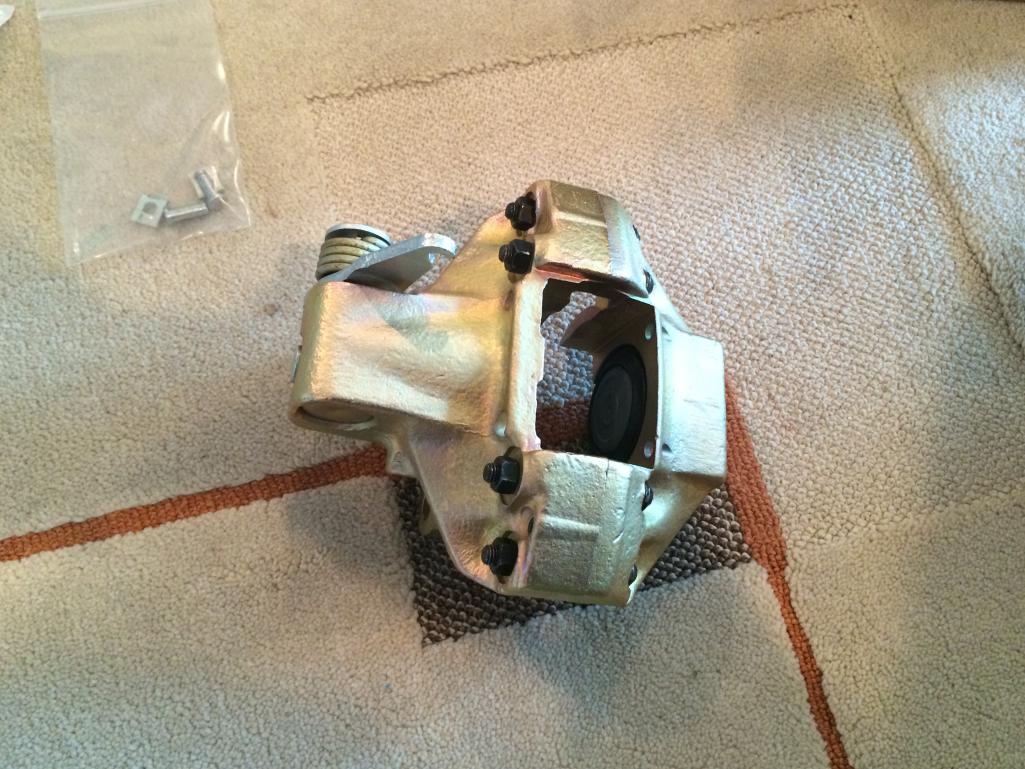
Posted by: siverson May 14 2014, 11:34 PM
914
Attached thumbnail(s)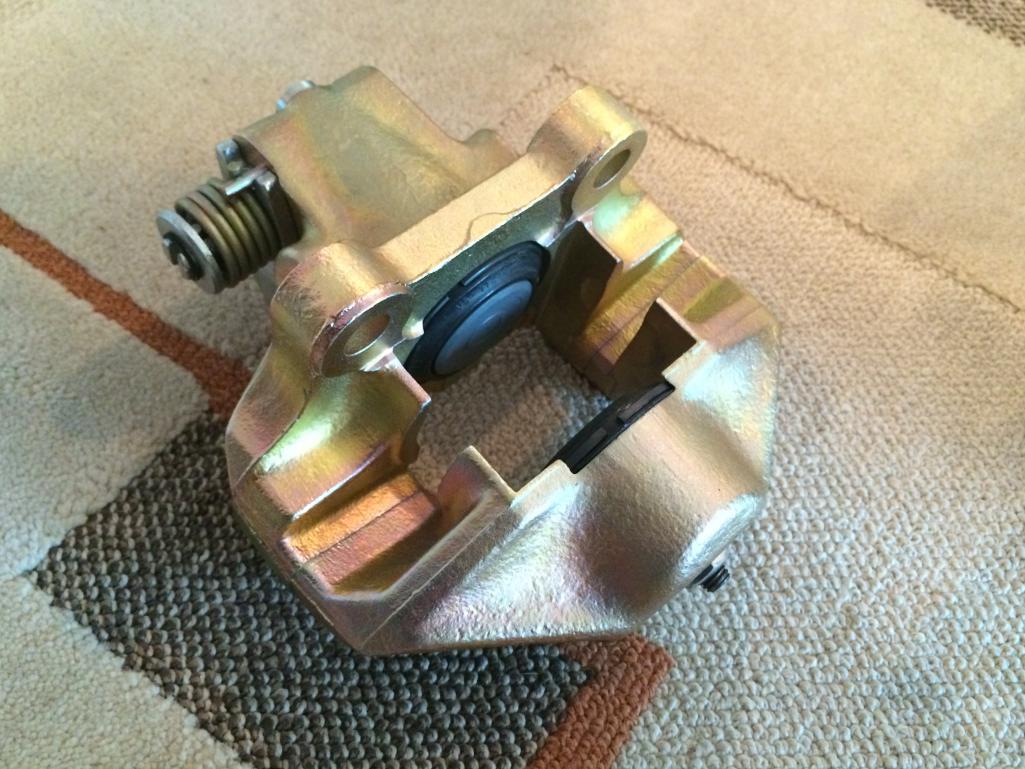
Posted by: siverson May 14 2014, 11:36 PM
This is what Eric @ PMB started with:
http://www.914world.com/bbs2/index.php?s=&showtopic=217713&view=findpost&p=2007775
(I assume the fronts are still coming, only one box showed up today...)
-Steve
Posted by: siverson Jun 6 2014, 06:59 PM
Body to be painted next week. No more white and almost back to Irish Green...
-Steve
Attached thumbnail(s)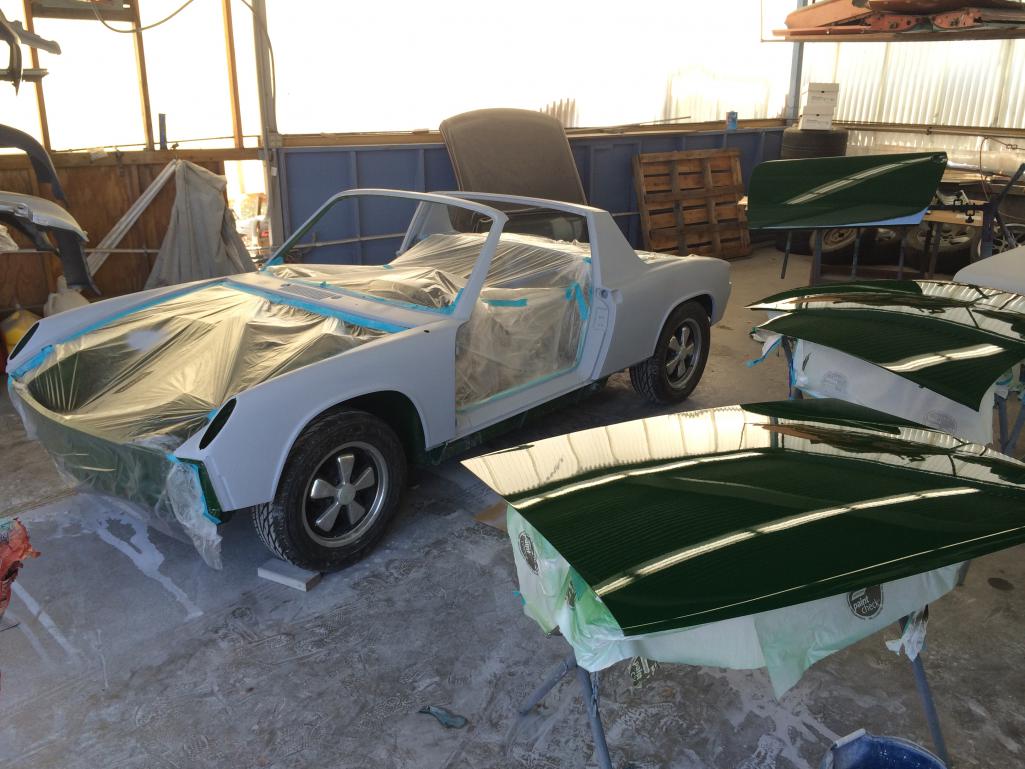
Posted by: ben*james Jun 6 2014, 07:44 PM
Wow....looking awesome!
Posted by: SirAndy Jun 6 2014, 08:02 PM
Putting the black goo back on top of the shock towers is a nice touch. First thing i look for in a real /6 if i suspect a repaint.
Posted by: Socalandy Jun 6 2014, 10:18 PM
Looks awesome!!!
I got the black goo recipe from Mr Shea and was just waiting for the alignment to get done.
Posted by: rgalla9146 Jun 7 2014, 06:55 AM
Looks great!
Take a close look at your washer pump.
Originals are often date stamped on the bottom.
Best part is, that they can usually be repaired or rebuilt.
Posted by: siverson Jun 10 2014, 11:25 AM
I had sort of a strange question from the body shop today.
SHOP:
After review ...<snip>..., but we had no time for
color sand and buffing. So I just need to know how flat you would like the
finish product, I will take care of any dirt specs or drips. I know we
discussed leaving some orange peel but it is up to you.
ME:
Ok, understood. I'd like it to look really, really, nice. To be honest, I wasn't aware that some people intentionally left any orange peel.
SHOP:
but we had no time for color sand and buffing
ME:
I guess I assumed this was just part of the quote to "paint the whole car".
Regardless, how much time or money are we talking about? I don't want to cut corners now to save a small amount of time because this final work can have a major impact on the final product. So what's it take to make it really nice? I understand it's not a "Ridler show car", but the initial orange peel I saw the other day was way too much (looked like it was just sprayed which I understand).
My initial thought is I'd like it to be at least as flat as the original 1970 paint was, and probably a little better. I'll also research more to figure out what the right answer is.
-
So, 914world, any tips? How much orange peel is "right" for our cars?
-Steve
Posted by: Maltese Falcon Jun 10 2014, 12:14 PM
For my dollar with new paint, it has to be wet sanded and buffed . An original painted 914 + its texture (original patina) is there for the next buyer; or with a re-spray = a better looking car but no longer original paint/ texture. As far as affecting the values of the 914 at the selling point, some people want the unrestored patina / others welcome fresh + perfect. I think that color change affects value downward. I think your body shop is taking the short road on your deal.
Marty
Posted by: pete000 Jun 10 2014, 02:33 PM
When I started to pull up all the tar. Note there are no "carpet hold downs" on the main floor board. They aren't on either side, but the factory tar is still everywhere.
-Steve
My early 6 #131 does not have any carpet mat hold downs on the main floor either. I was wondering if they got removed over the years or never came with any.

Posted by: pete000 Jun 10 2014, 03:05 PM
I vote for no orange peal ...
Nothing beats a nice straight body than a perfect paint job !
Posted by: rick 918-S Jun 10 2014, 11:07 PM
No peal. Blocked, buffed, polished, hand rubbed. BTW: Single stage not clear coated. The reflection looks softer like factory paint.
Posted by: sixnotfour Jun 11 2014, 08:42 AM
100% Origonal Irish Green...showing the orange peel..
closeup of the door...best I can do.... 
Attached thumbnail(s)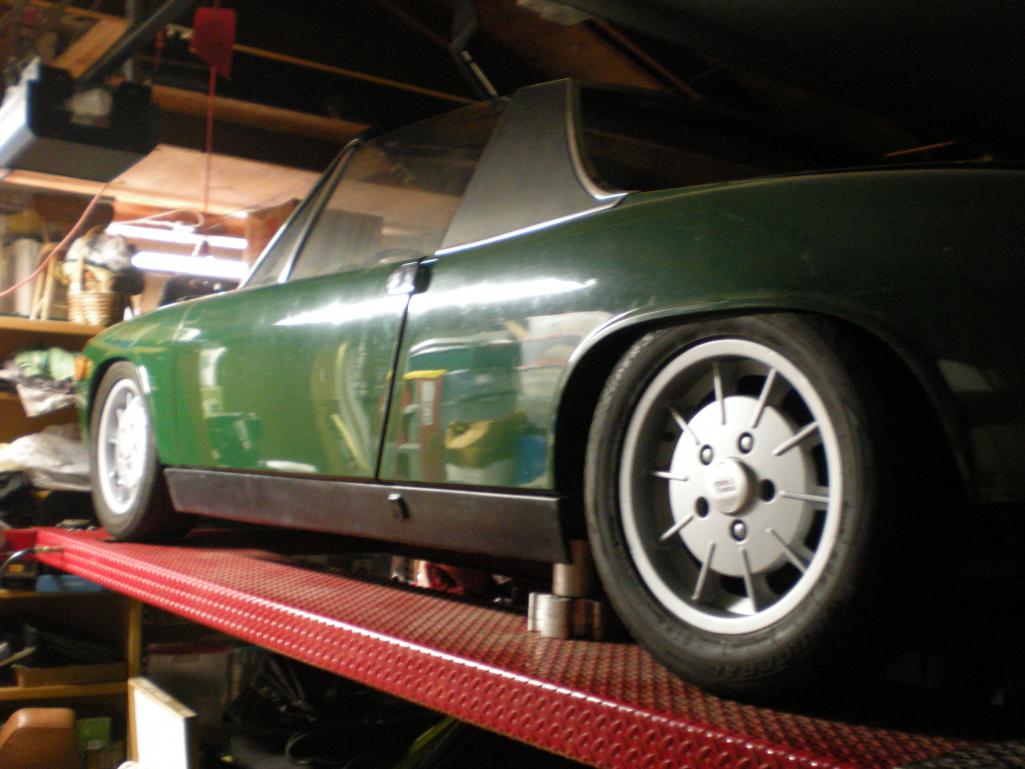
Attached image(s)
Posted by: JmuRiz Jun 11 2014, 10:53 AM
Talk to ScottyB...there's also the option of factory finish if it's been polished for the past 40+ years. One of our 356 friends wanted a factory finish, which means orange peel....saw another guy's original paint car that's been buffed/polished for 50 years...naturally he wanted his paint like that. FWIW the car won best of show at the Deutsche Marque Concours
Basically if you want it to look old stock, you'll have to buff/polish the orange peel out.
Posted by: siverson Jun 11 2014, 06:29 PM
Great, thanks - that's helpful.
-Steve
Posted by: boogie_man Jun 12 2014, 11:23 AM
No peal. Blocked, buffed, polished, hand rubbed. BTW: Single stage not clear coated. The reflection looks softer like factory paint.
If it's been curing this long, a good block sand and a good polishing would do wonders on it. !!!
Posted by: siverson Jul 1 2014, 03:50 PM
Getting closer... (glass is back in)
-Steve
Attached thumbnail(s)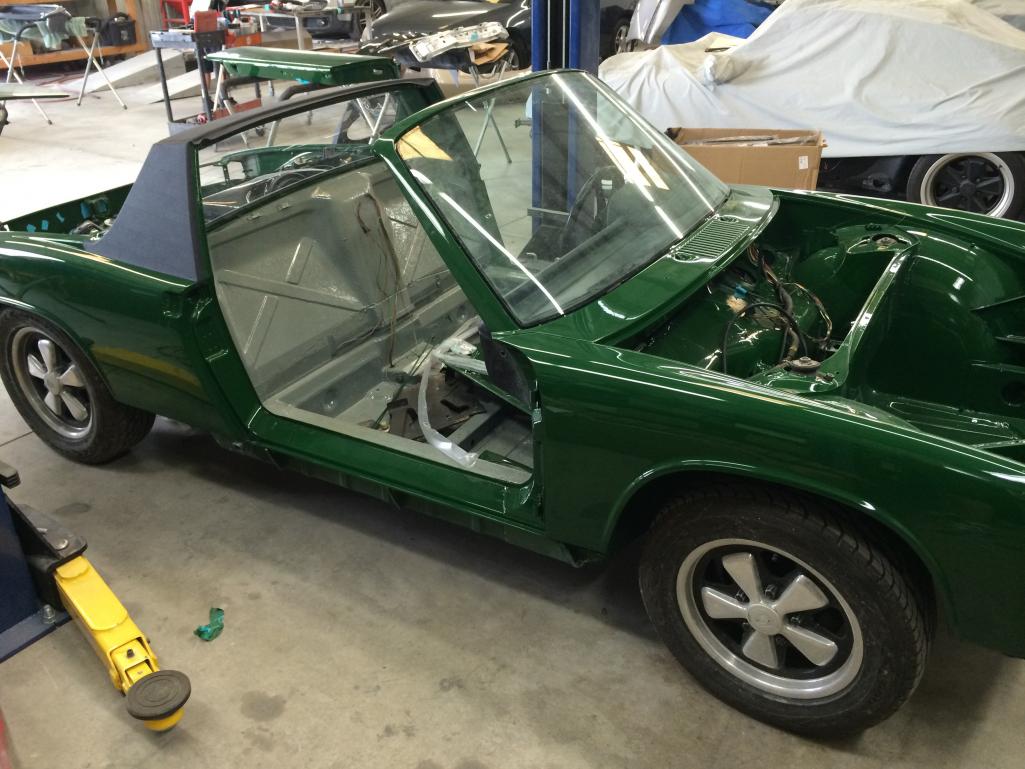
Posted by: siverson Jul 1 2014, 03:51 PM
914
Attached thumbnail(s)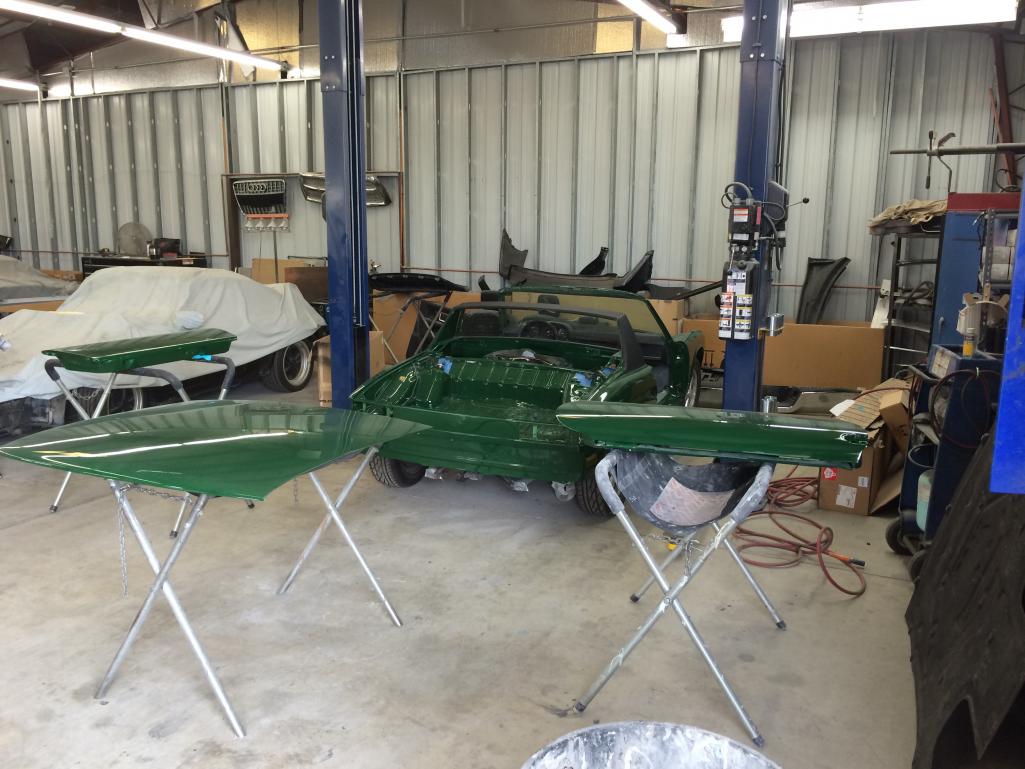
Posted by: siverson Jul 17 2014, 10:49 AM
On the way home for further dis-assembly (suspension) and then re-assembly.
-Steve
Attached thumbnail(s)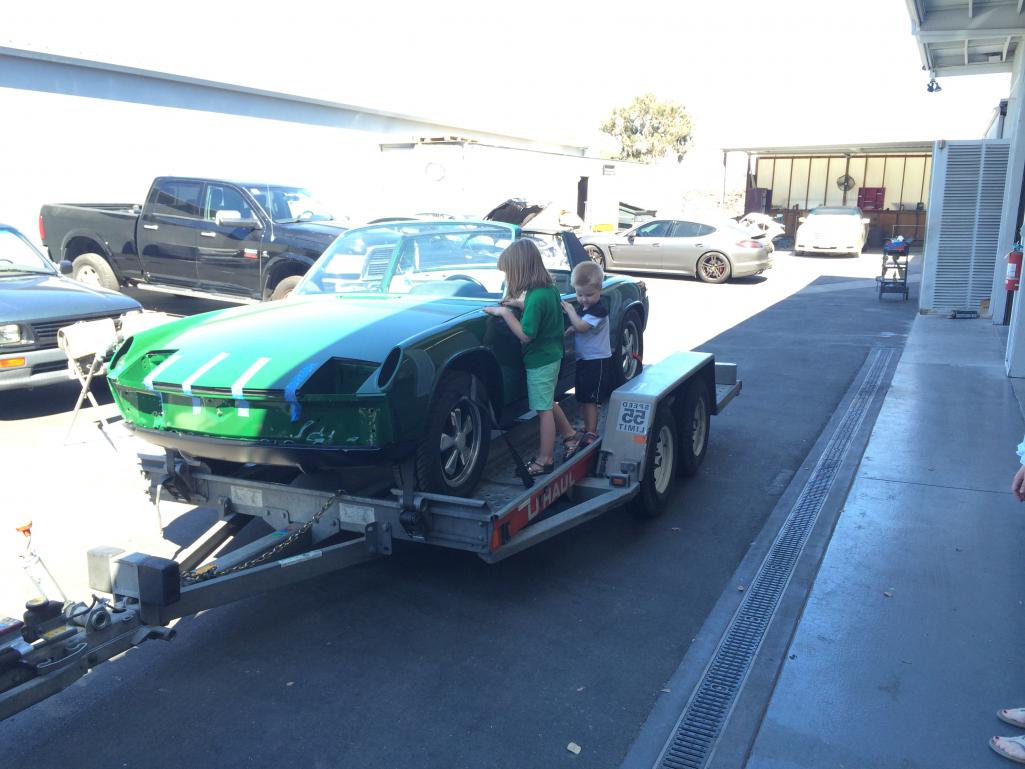
Posted by: siverson Jul 17 2014, 10:57 AM
Anyone ever heard of this brand of shocks? It was on all four corners.
All the suspension components on this car were totally shot - most were original. The other strut insert fell apart and leaked oil everywhere when I pulled it out.
And it still had the original (long) rear springs - I hadn't removed a set of those in 15+ years or so. I don't have a spring compressor, but my kids were amused how I could "shoot" the retaining nut and plate across the yard. It was relatively safe operation; I setup an 914 shock part artillery range in the front yard because I knew what to expect after having been quite surprised many years ago.
-Steve
Attached thumbnail(s)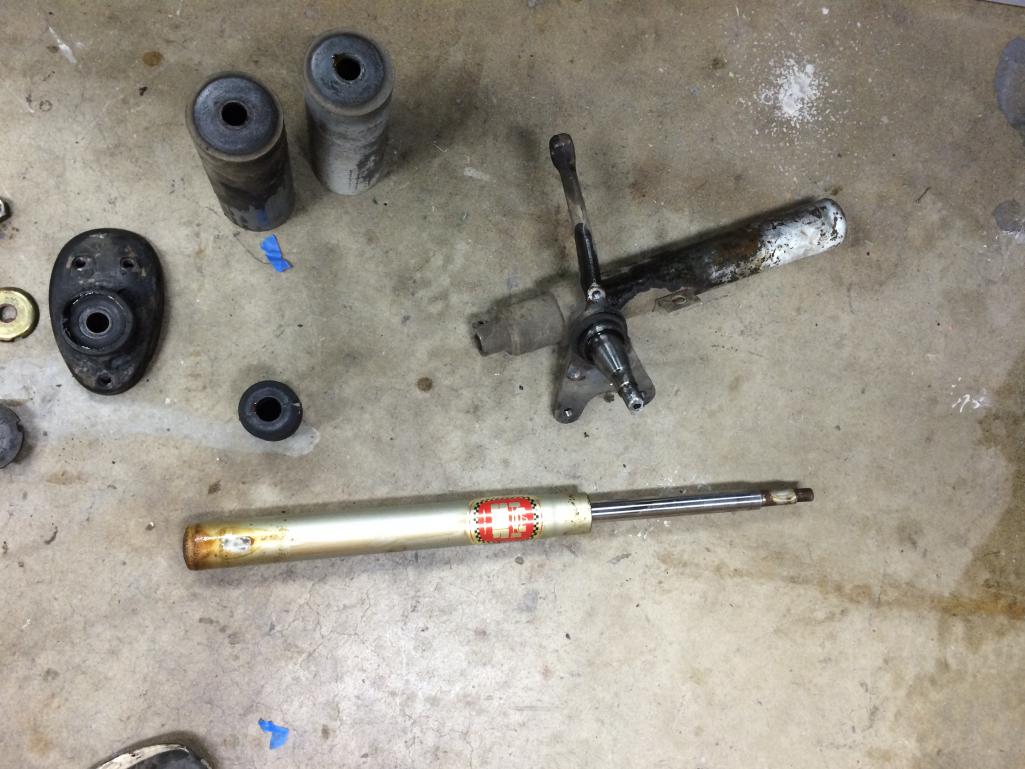
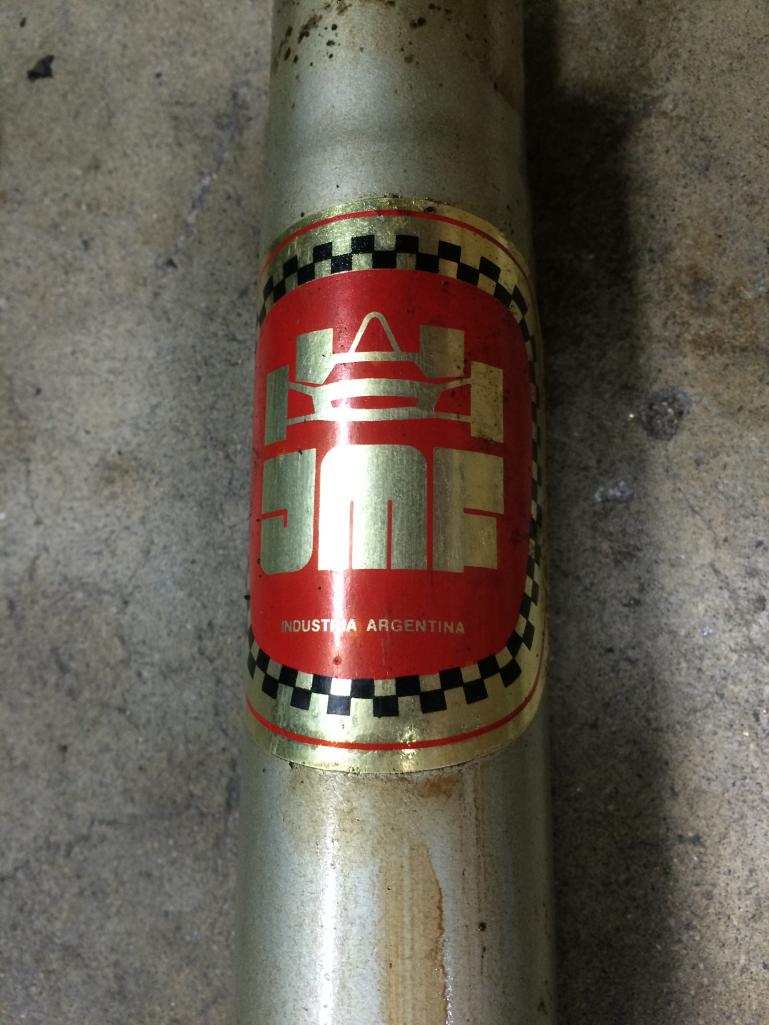
Posted by: siverson Jul 17 2014, 10:58 AM
Hmmm.... ?
https://www.google.com/?gws_rd=ssl#q=JMF+argentina
-Steve
Posted by: JmuRiz Jul 17 2014, 11:21 AM
You had to look that up?
Strange though, didn't know he had his own line of signature shocks...
Posted by: Mere's_72_914 Jul 17 2014, 11:27 AM
Getting closer... (glass is back in)
-Steve
That color is gorgeous! Total girl thing to say, but wow!
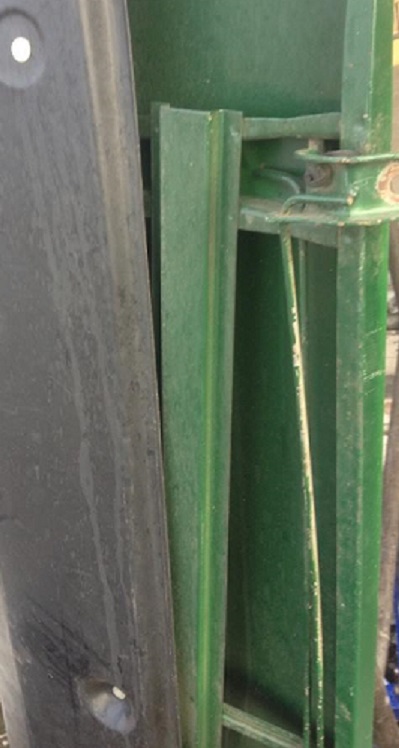
Posted by: siverson Aug 6 2014, 07:17 PM
Most of the plating and powder coating is done now. It's always hard to put cars back together like this and not make it too nice - this car will be 100% driver. Why do I need to re-plate the window guide that is inside the door that no one will ever see? I have no idea...
-Steve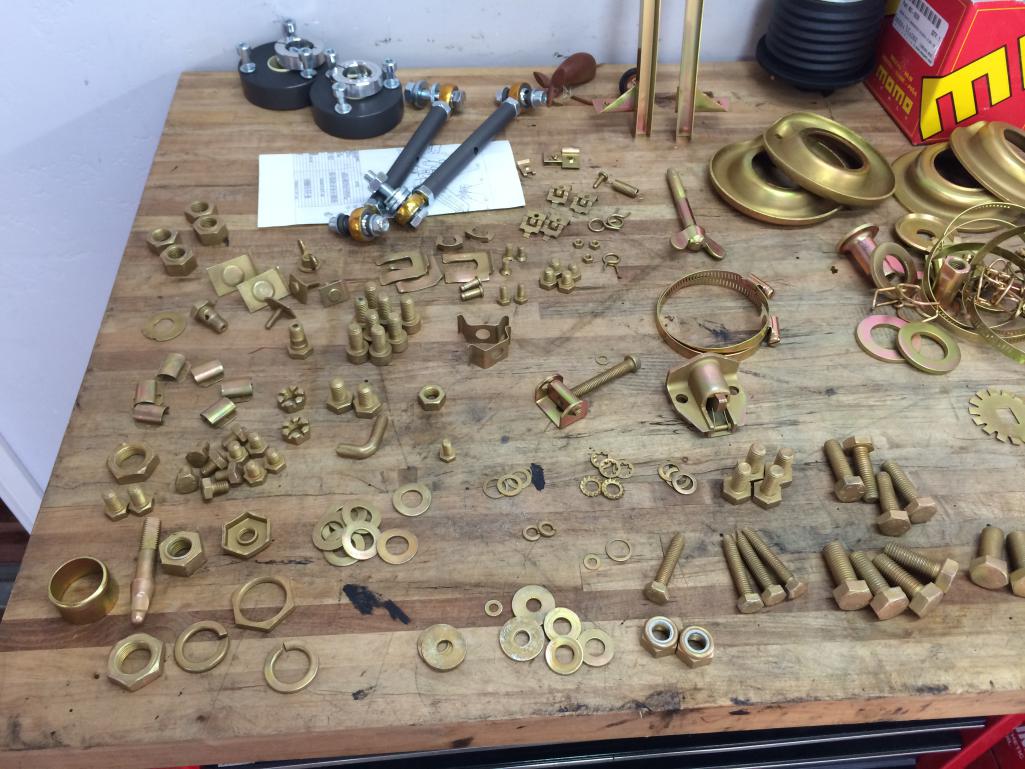
Posted by: siverson Aug 6 2014, 07:17 PM
More
Attached thumbnail(s)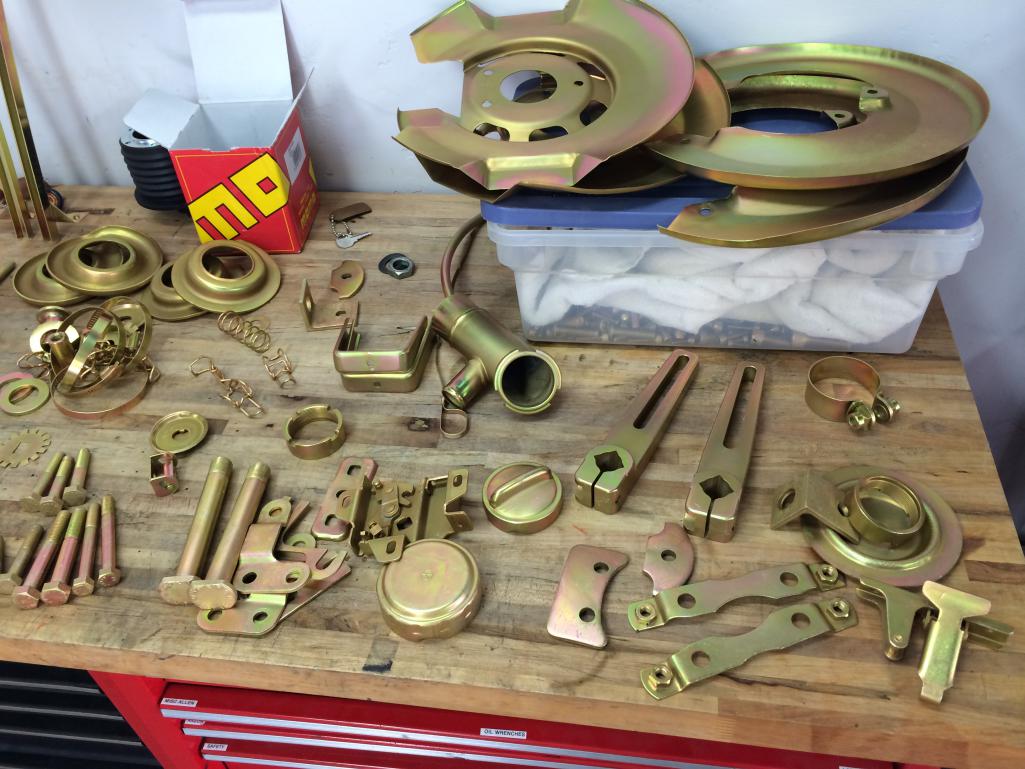
Posted by: siverson Aug 6 2014, 07:19 PM
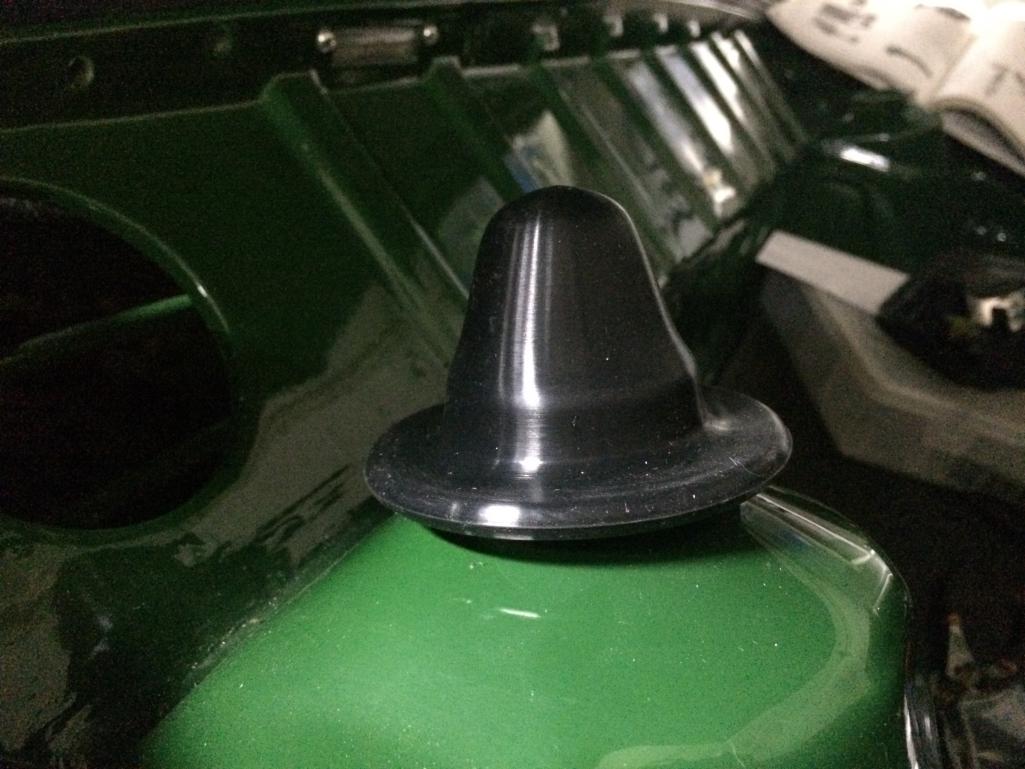
That "upside-down washer" on top of the rear shocks never looks right to me, but I'm pretty sure that's what the Haynes manual says.
It's been a while since I've re-assembled a stock shock mount. Is this right?
-Steve
Attached thumbnail(s)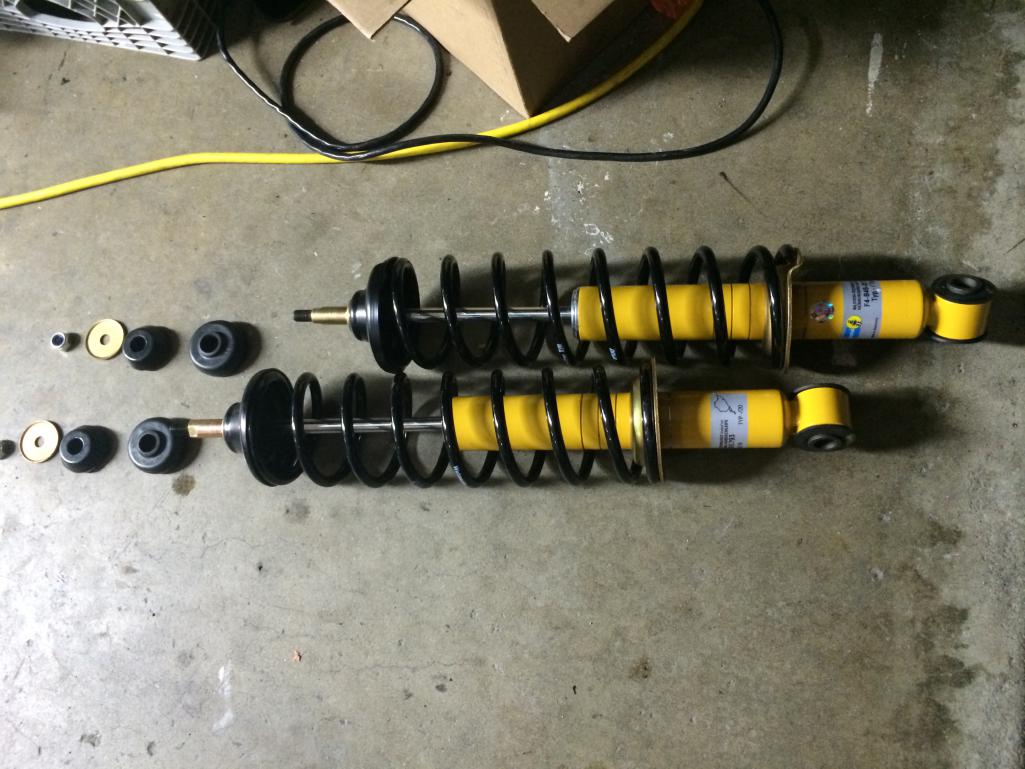
Posted by: siverson Aug 6 2014, 07:20 PM
another... Is this right?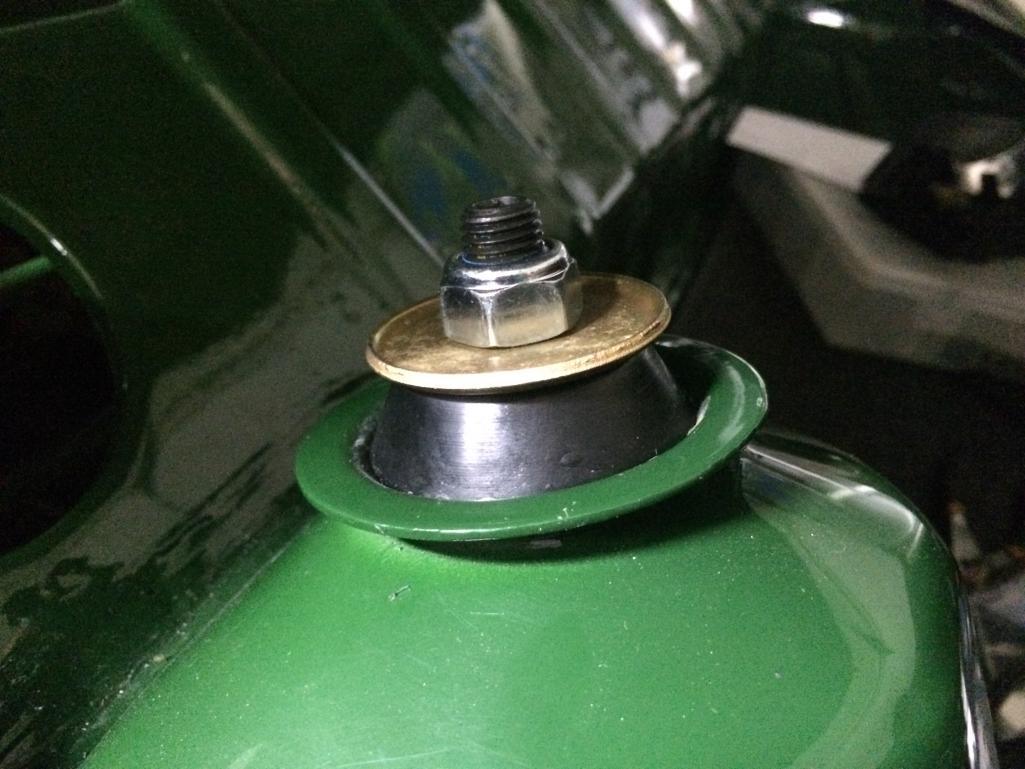
Posted by: Cairo94507 Aug 6 2014, 07:23 PM
Man is that car looking sweet. I can't wait until we are plating and powder coating parts for my car. Great job!
Posted by: siverson Aug 6 2014, 07:24 PM
Another new item I learned is that the front shock mount plates are not all the same. I ordered a new one that came from Porsche, and it doesn't match the originals - it's a little smaller.
-Steve
Attached thumbnail(s)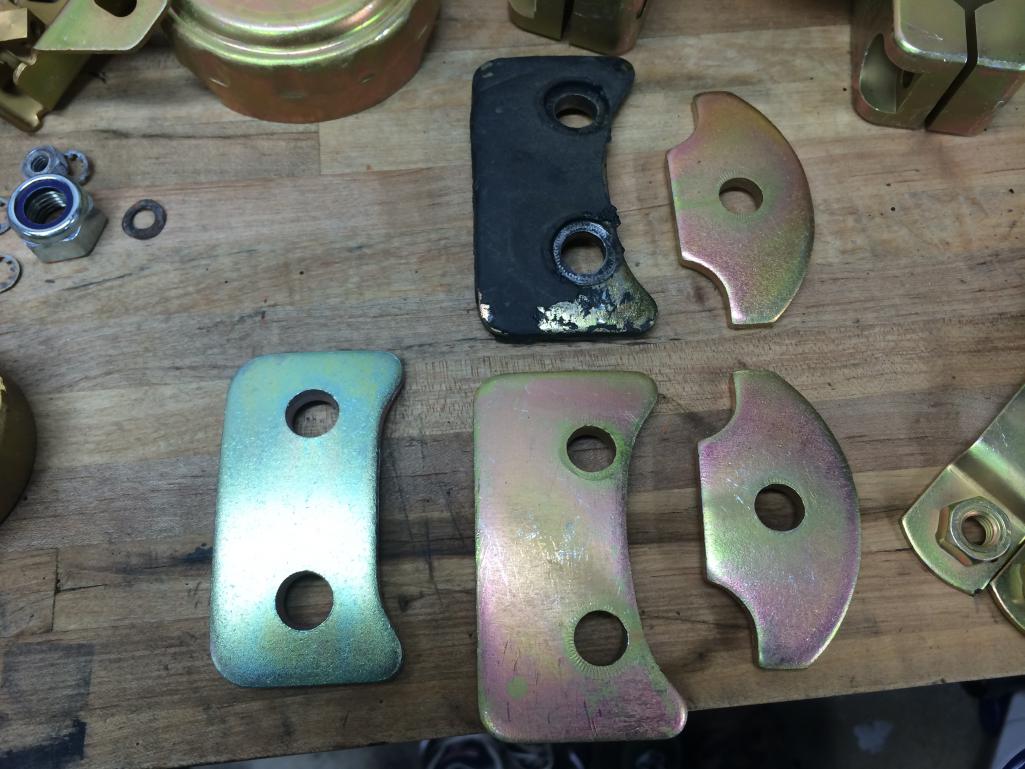
Posted by: siverson Aug 6 2014, 07:24 PM
914
Attached thumbnail(s)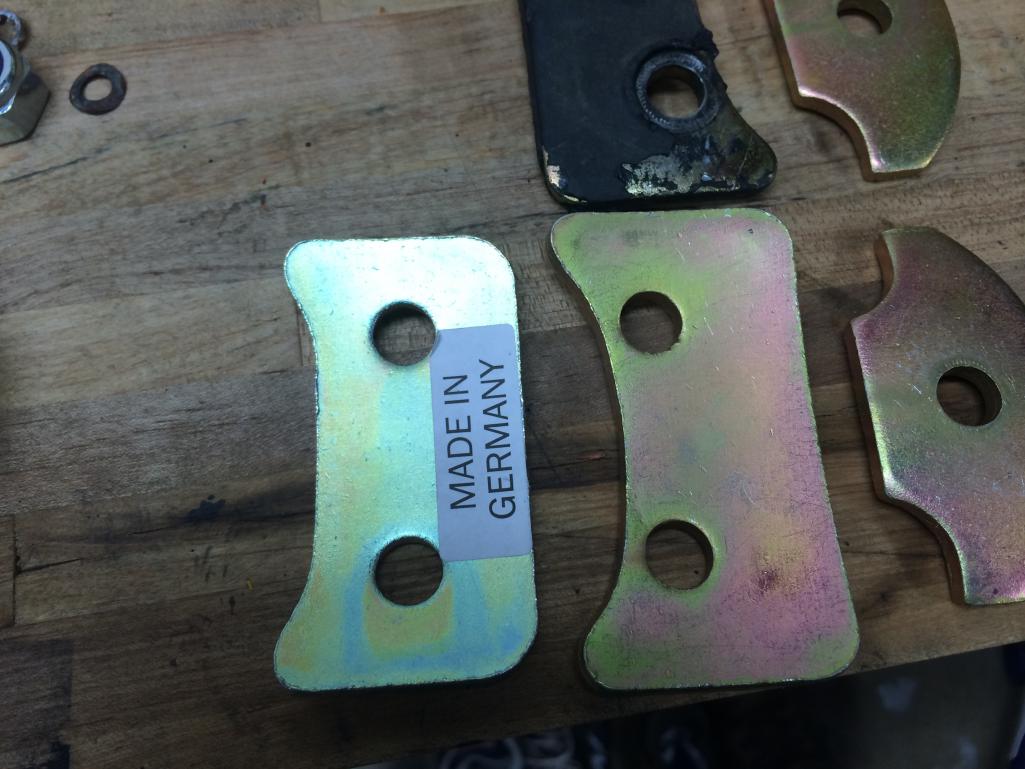
Posted by: siverson Aug 6 2014, 07:25 PM
And yes... I re-plated those shock mounts and then I'm going to cover them up with black -6 goop again. I'm an idiot.
-Steve
Posted by: 914Sixer Aug 7 2014, 06:25 AM
The smaller mount looks like the one for a early 64-68 911.
Posted by: siverson Aug 18 2014, 11:59 AM
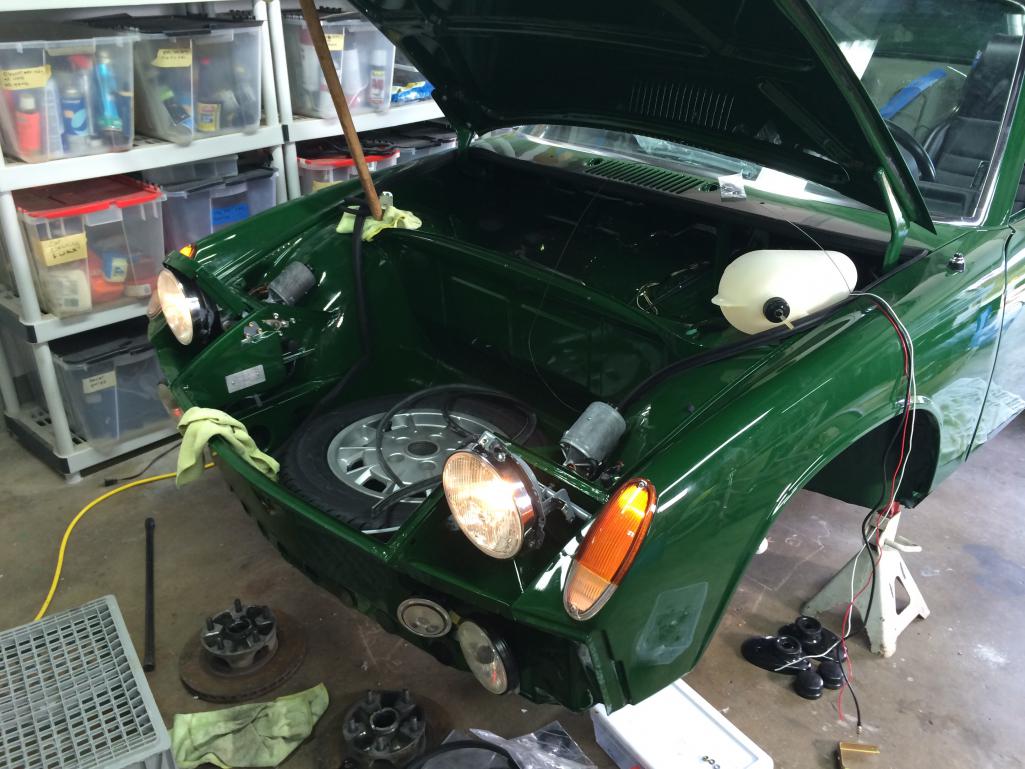
Lots of work on the 914 this weekend, but not a whole lot of progress to show. I got the engine grill, rear lights, bumper, and valence installed, I thought I'd tackle the front turn signals. But, to do that I had to:
- Fix old hacked "repairs" in the original wiring harness
- Clean up old (white) overspray on the wiring harness
- Clean up the grounds.
- Install power antenna (to add to wiring harness).
- Apply heat shrink tubing to all the wiring harness tie downs. Man, I forgot how many of these things there are up there! They are everywhere.
So, about 6 hours later (literally), I had the front turn signals installed and working.
-Steve
Attached thumbnail(s)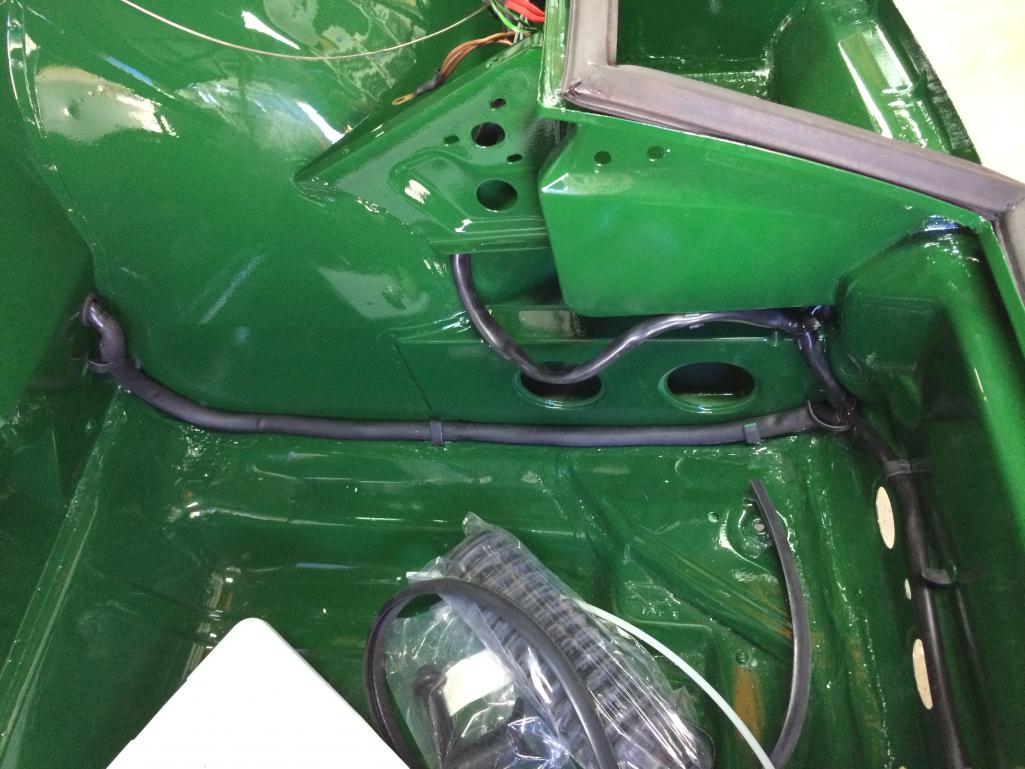
Posted by: siverson Aug 18 2014, 12:00 PM
More
Attached thumbnail(s)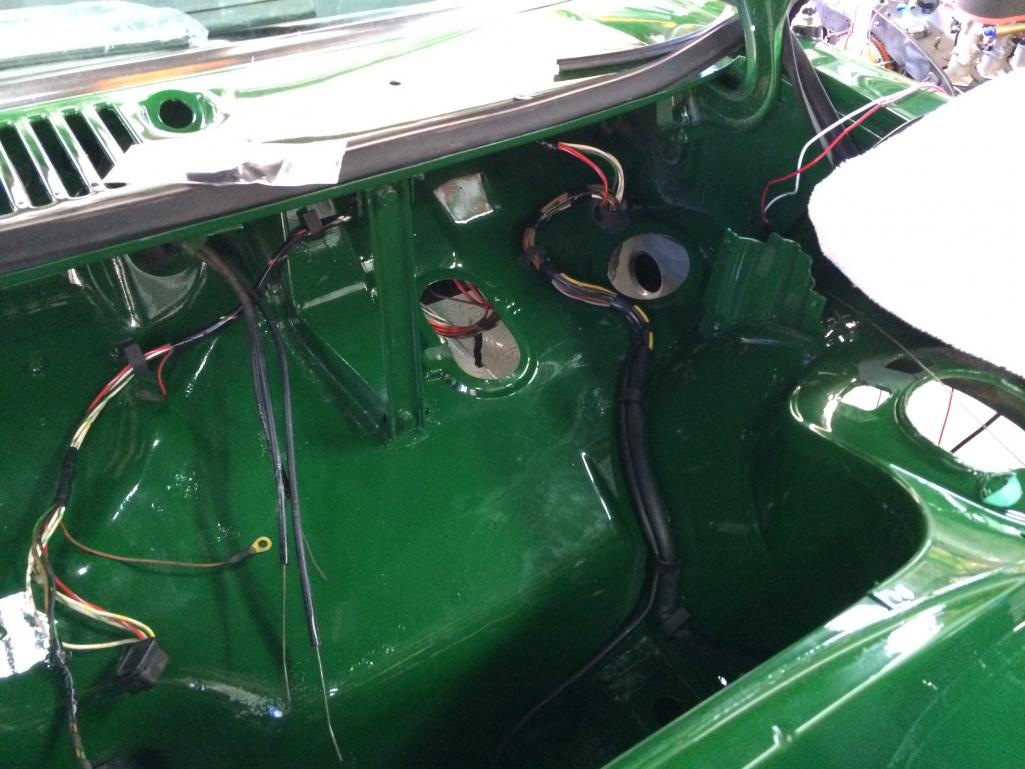
Posted by: siverson Aug 18 2014, 12:01 PM
Shiny ground.
Attached thumbnail(s)
Posted by: Socalandy Aug 18 2014, 01:34 PM
looks great!!! the hours add up fast for sure
Posted by: JmuRiz Aug 19 2014, 09:43 AM
Thanks for the ground picture, I think my passenger headlight ground sucks. I have a reference now to make sure it's correct looking/functioning.
Posted by: siverson Aug 30 2014, 09:39 PM
FU stuck torsion bar, and FU rusted on brake lines. A long day with little progress. Argh.
-Steve
Posted by: siverson Aug 30 2014, 09:40 PM
I did drop these off for new tires...
-Steve
Attached thumbnail(s)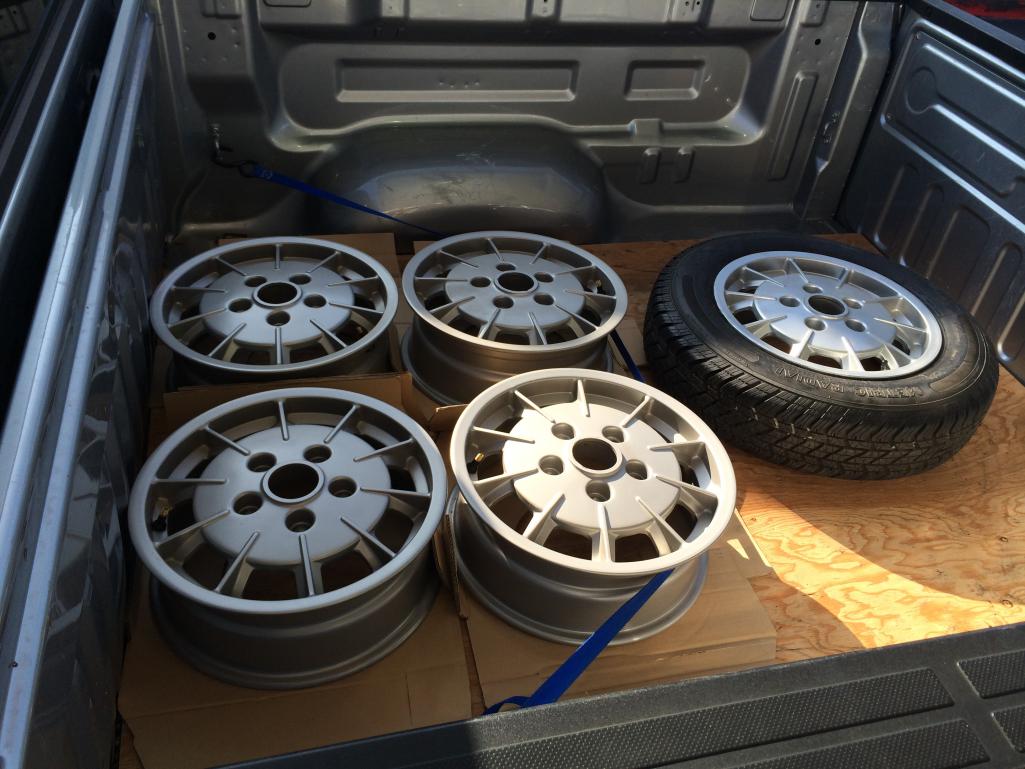
Posted by: KELTY360 Aug 30 2014, 10:38 PM
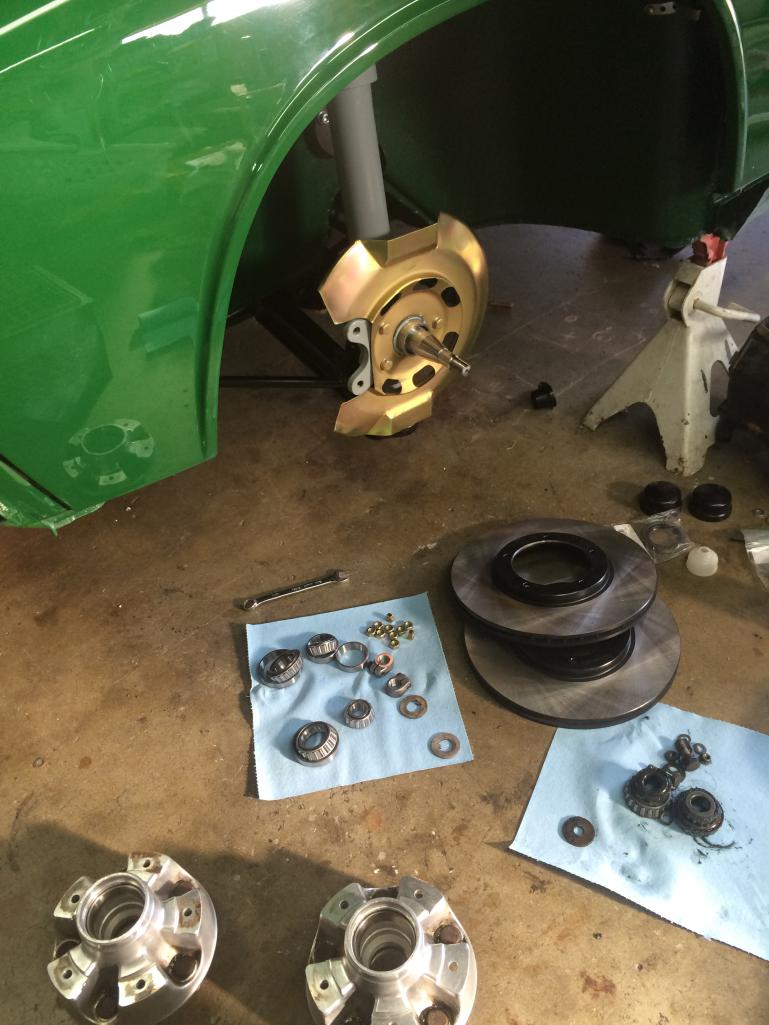
Posted by: siverson Sep 8 2014, 10:53 PM
Shiny (evidently brake covers were cad plated on -6s, and black on -4s).
Attached thumbnail(s)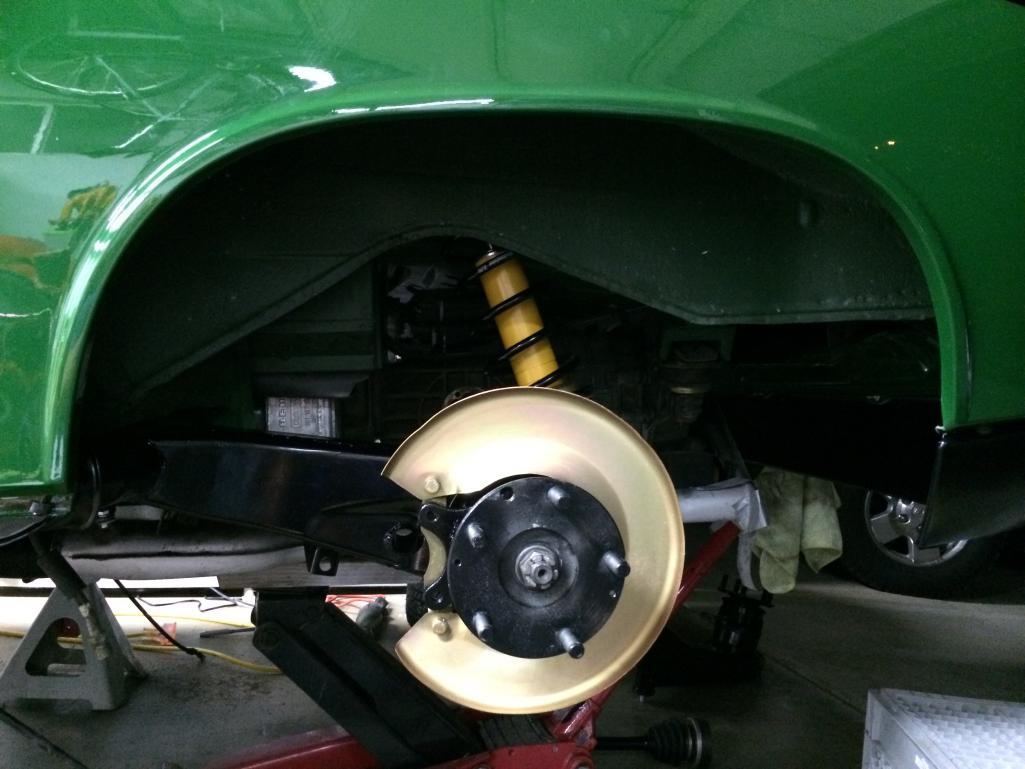
Posted by: siverson Sep 8 2014, 10:54 PM
And a nice caliper
Attached thumbnail(s)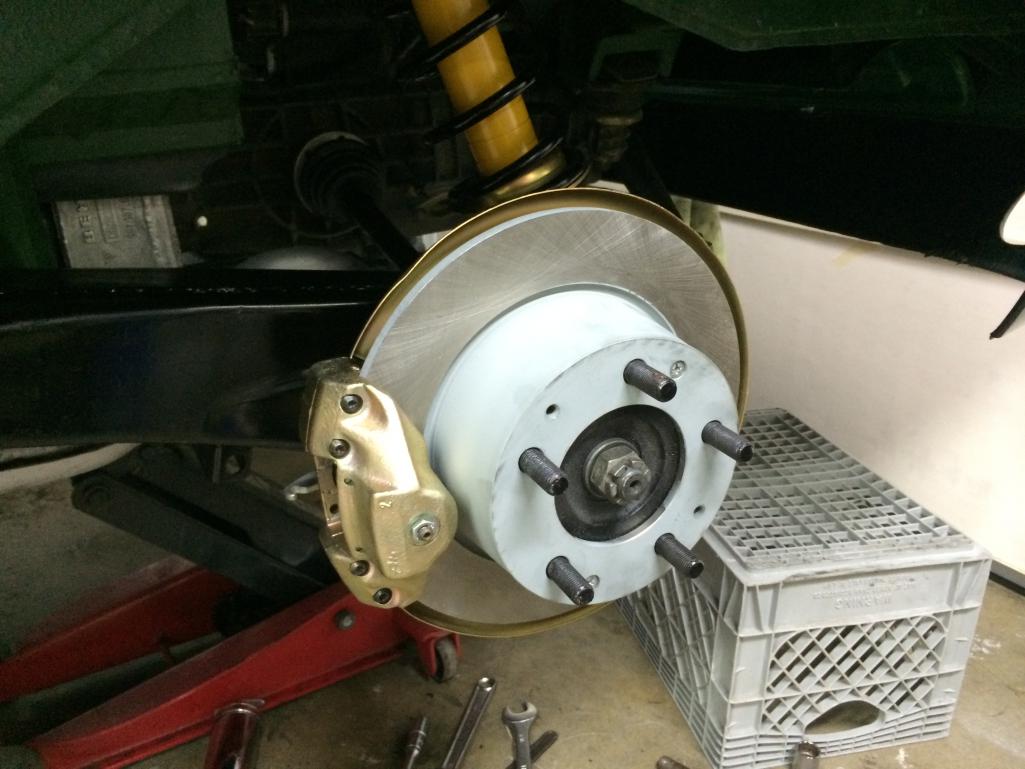
Posted by: siverson Sep 8 2014, 10:56 PM
I didn't really *need* a new brake reservoir, but the new one look so much nicer...
Attached thumbnail(s)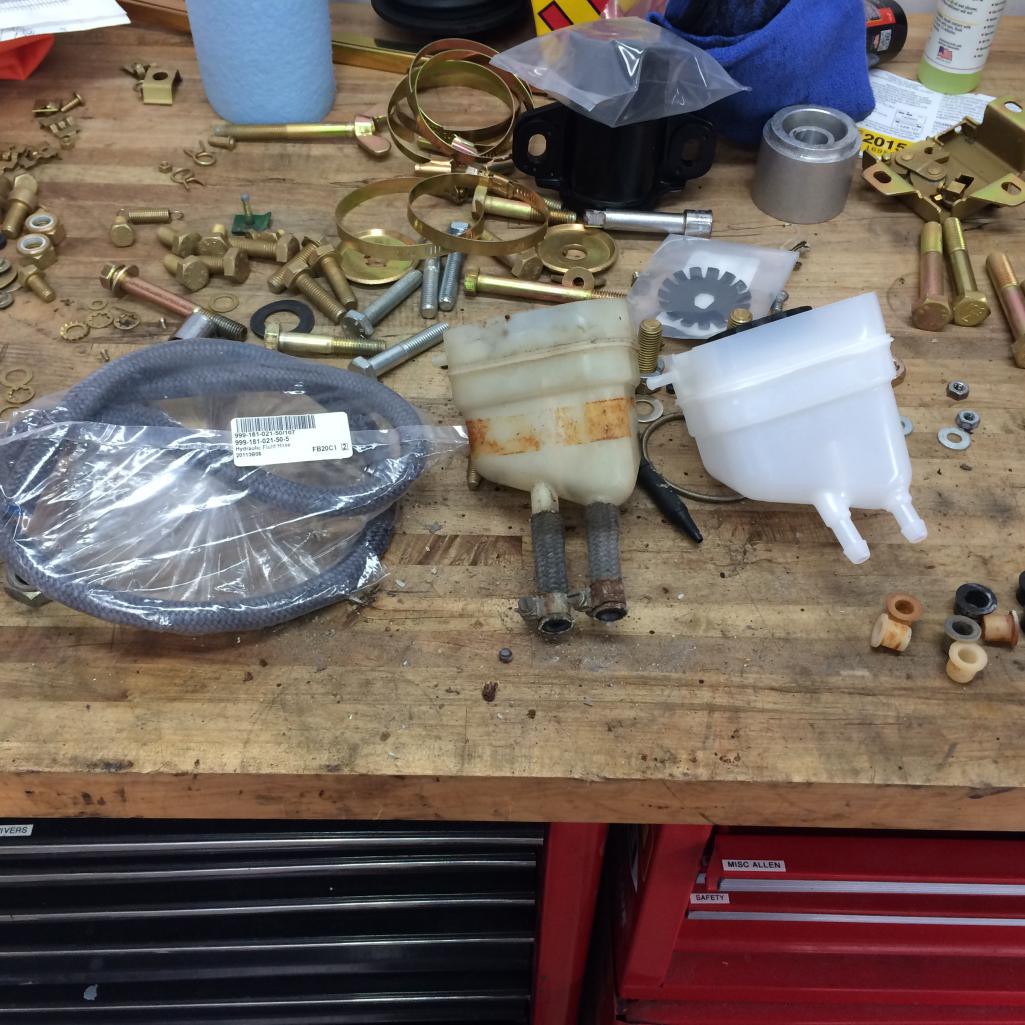
Posted by: siverson Sep 8 2014, 10:58 PM
Why these were painted silver, I have no idea...
And more white overspray was removed. Sometimes this project feels like it's 90% cleaning, 9% looking for parts/tools, 1% assembly.
Attached thumbnail(s)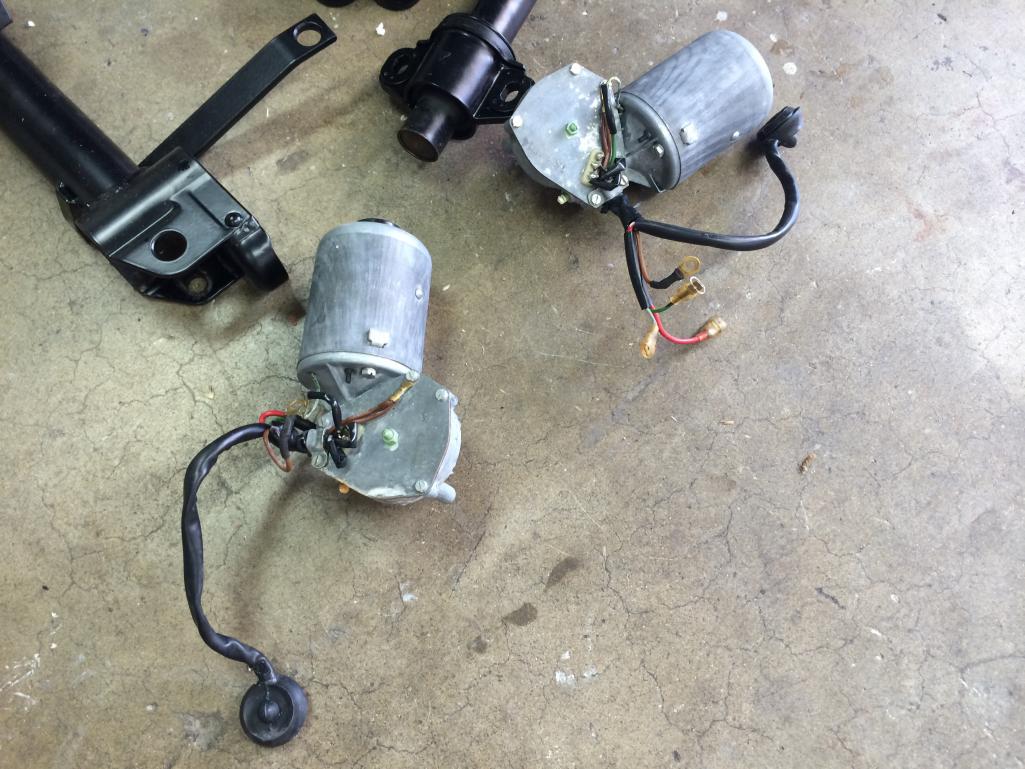
Posted by: siverson Sep 8 2014, 10:59 PM
New [to me] 914 trivia:
I'm pretty sure that early 914 headlight bushings are white, and the later ones are black.
I know, fascinating.
-Steve
Attached thumbnail(s)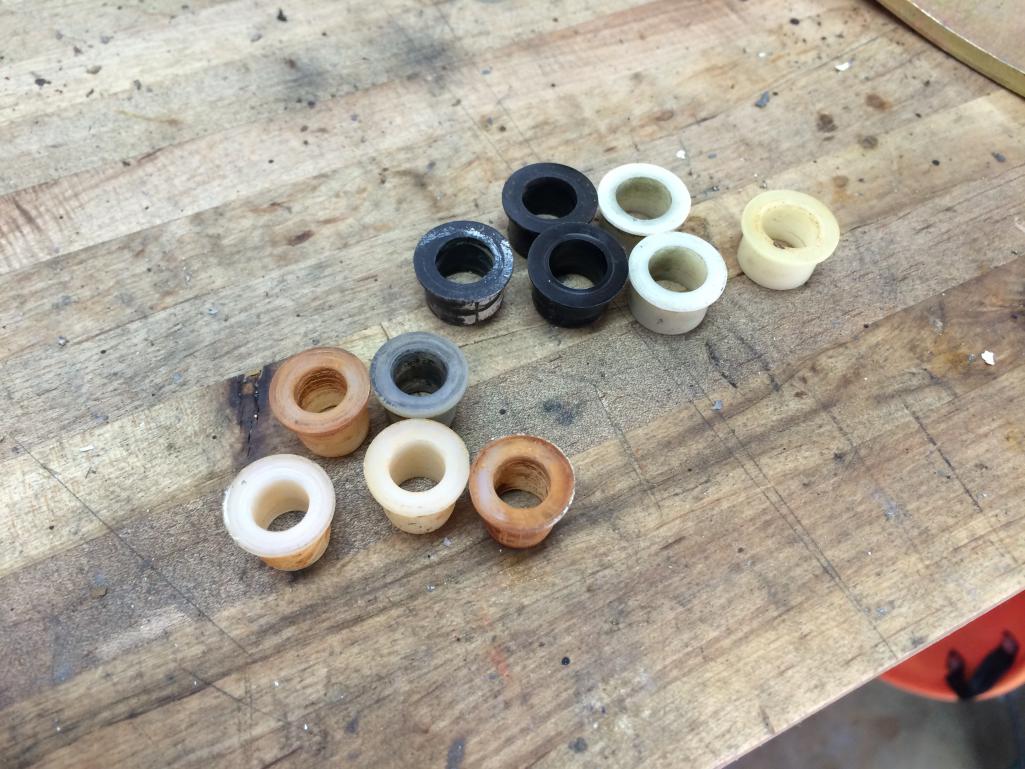
Posted by: siverson Sep 8 2014, 11:01 PM
This cleaned up really well. I also got rid of a water line stain on the inside by sloshing some diluted bleach around for a couple minutes.
-Steve
Attached thumbnail(s)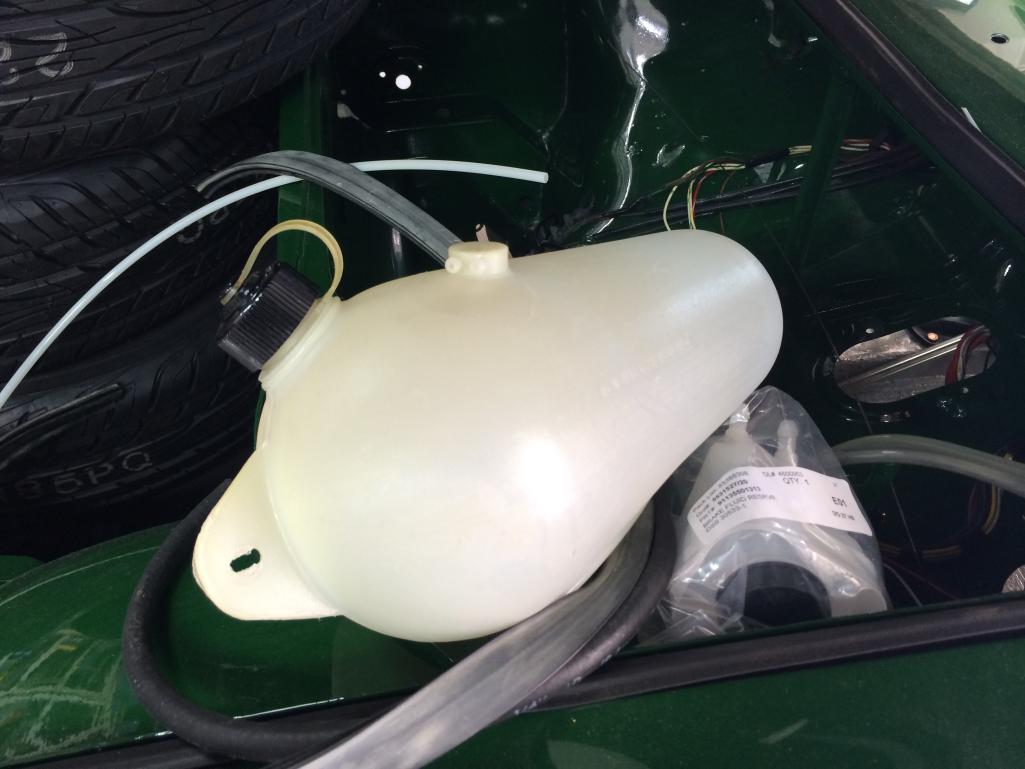
Posted by: Cairo94507 Sep 9 2014, 07:04 AM
Looking very nice my friend.
Posted by: Dave_Darling Sep 9 2014, 09:20 AM
Why these were painted silver, I have no idea...
Probably as a "rebuild"...

--DD
Posted by: siverson Sep 9 2014, 03:36 PM
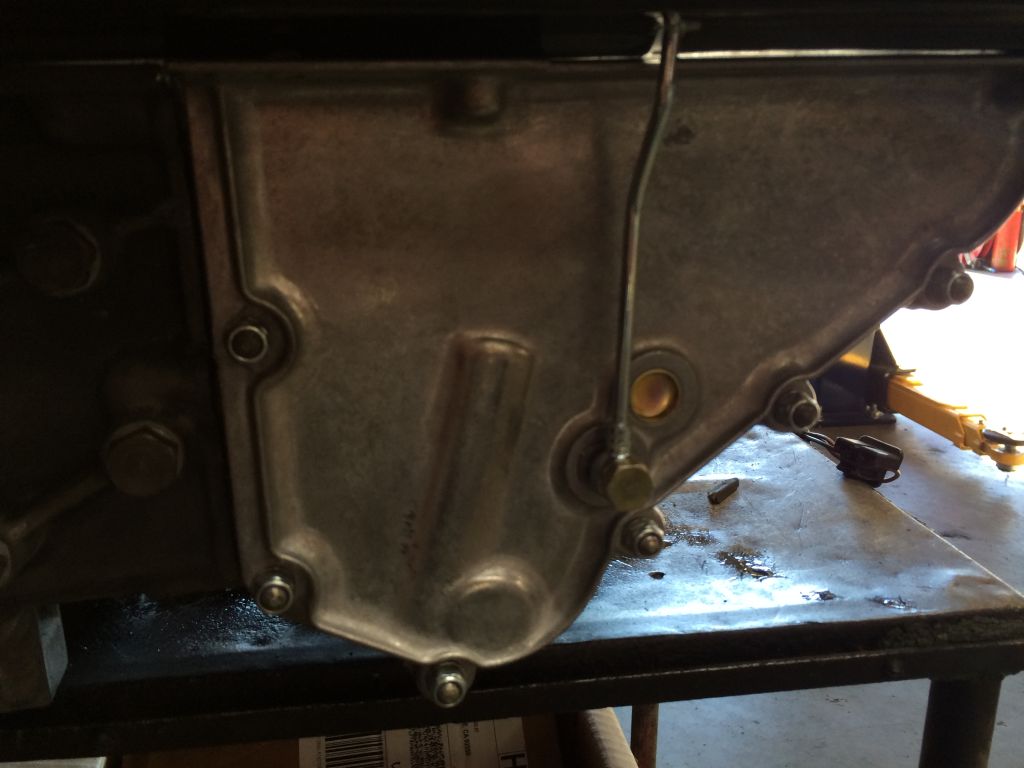
Is this right? I don't think I've had a car with this part before, I don't exactly remember what it looked like when I took it off.
-Steve
Attached thumbnail(s)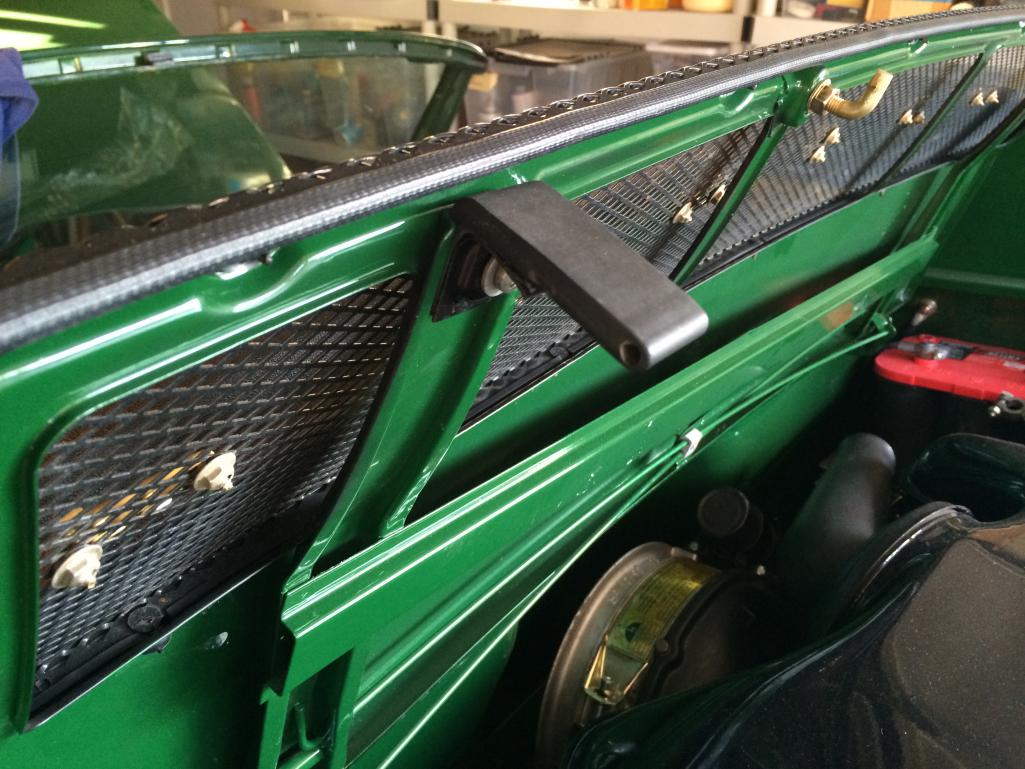
Posted by: siverson Sep 9 2014, 03:36 PM
914
Attached thumbnail(s)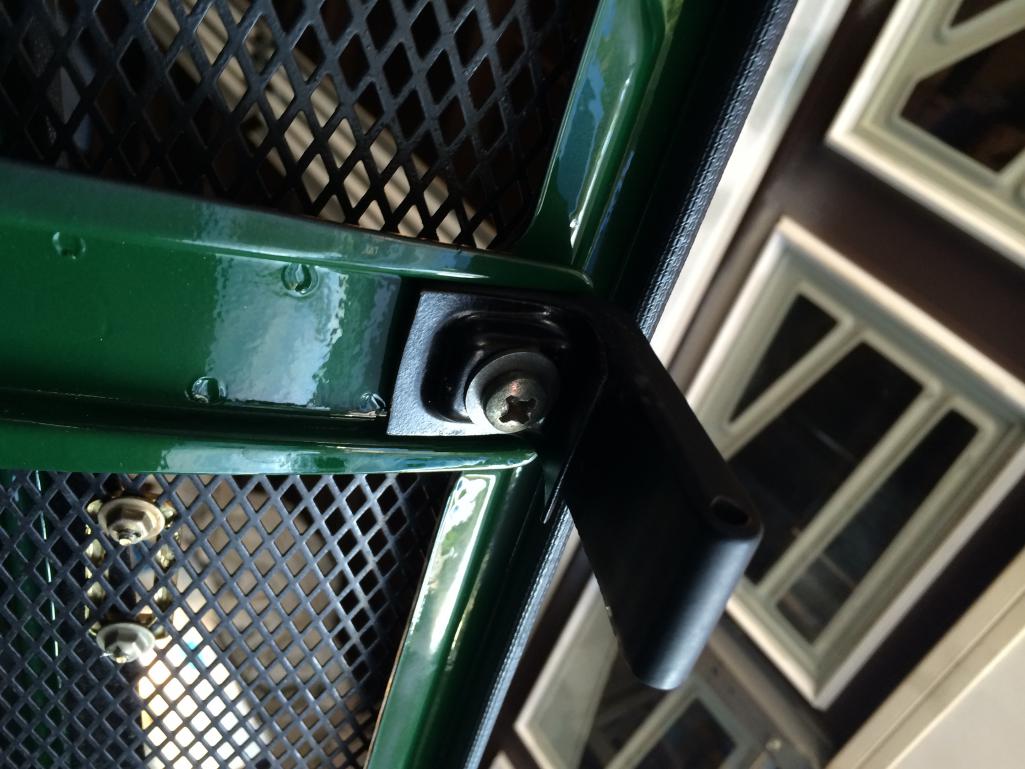
Posted by: Cairo94507 Sep 9 2014, 04:23 PM
Yes that is correct. I keeps the engine lid from damaging the rear trunk and vice-versa when they are both opened.
Posted by: Larmo63 Sep 9 2014, 05:54 PM
This is a very nice build and, yes, a few of us are jealous, very jealous. You are doing in real life what we dream about doing. What a nice car and a great project.
Bravo!!
Posted by: siverson Sep 9 2014, 06:10 PM
> Yes that is correct. I keeps the engine lid from damaging the rear trunk and vice-versa when they are both opened.
Thanks. The black angle bracket being curved back inwards threw me off a little. I'm not sure why it would do that. Anyways...
-Steve
Posted by: siverson Oct 7 2014, 11:54 PM
cleaned up the headlights.
Attached thumbnail(s)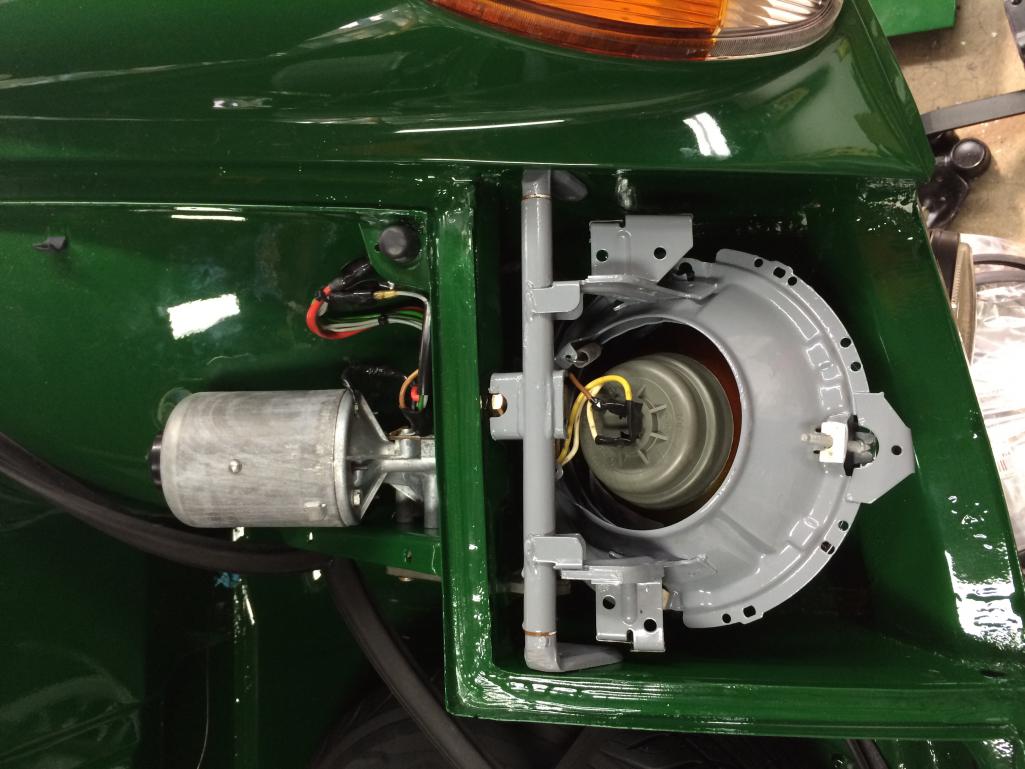
Posted by: siverson Oct 7 2014, 11:56 PM
latched the hood
Attached thumbnail(s)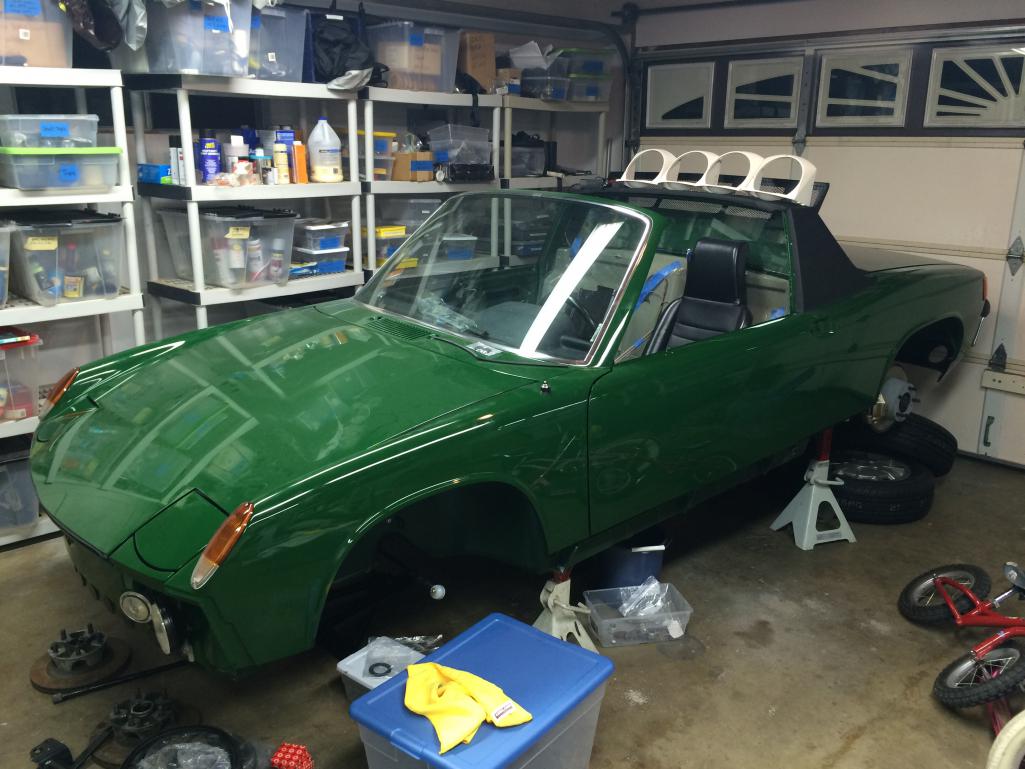
Posted by: Cairo94507 Oct 8 2014, 07:07 AM
Posted by: siverson Oct 13 2014, 12:23 PM
Made some more good progress this weekend. I'm getting closer...
-Steve
Attached thumbnail(s)
Posted by: siverson Oct 13 2014, 12:24 PM
914
Attached thumbnail(s)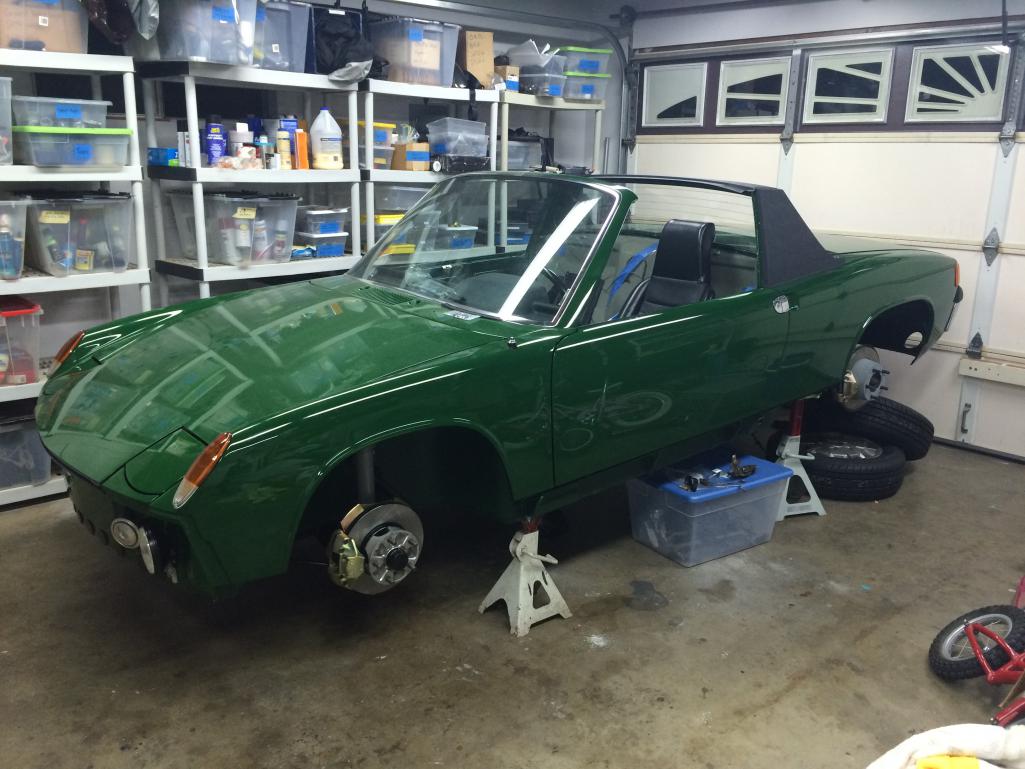
Posted by: siverson Oct 13 2014, 12:25 PM
And yes, those kids bikes next to the 914 make me EXTREMELY nervous.
(new house has two separate garages... )
-Steve
Posted by: jeeperjohn56 Oct 13 2014, 02:21 PM
Looking great Steve can't wait to see it finished, keep the pictures coming. John
Posted by: siverson Nov 8 2014, 09:39 PM
I postulate that it takes about 20 times longer to assemble than disassemble. Maybe more.
I only spent about 10 hours taking this car apart for paint, but I've easily spent more than 200 hours putting it back together. I'm almost there now, but even though this is the 4th major 914 assembly I have done, it still surprises my how long this stuff can take.
1 minute to disconnect and remove a front turn signal? Yeah, probably about 20 minutes to put it back together until it's right again.
If you spent 30 minutes taking something apart, it's going to take a full 10 hour day to put it back together.
Or maybe I'm just really slow and meticulous.
Plus - I think "assembling a car" is about 1% actually bolting things together...
9% - where is that part?
50% - cleaning, painting, plating, oiling, prepping
10% - finding nice new hardware for reassembly
10% - where is that tool?
10% - where is that nut I just dropped?
10% - taking it apart again (x2 or x3) because things were assembled in the wrong order
1% - actual final assembly
Anyways... almost there... (meaning probably only a couple hundred hours more )
Posted by: altitude411 Nov 8 2014, 09:45 PM
Nice work Steve. It's like eating an elephant. 
Posted by: veekry9 Nov 8 2014, 10:00 PM
BTW,a word of caution re: the temporary hood prop.
I once caused great damage to a very expensive car by inadvertently knocking the prop out of place.
When it fell shut,it bent itself by gravity and momentum.
AM DB4,ouch.Had to repair it myself,a week's work.
Immaculate work on the 914.
Posted by: Hank914 Nov 8 2014, 11:26 PM
I postulate that it takes about 20 times longer to assemble than disassemble. Maybe more.
I only spent about 10 hours taking this car apart for paint, but I've easily spent more than 200 hours putting it back together. I'm almost there now, but even though this is the 4th major 914 assembly I have done, it still surprises my how long this stuff can take.
1 minute to disconnect and remove a front turn signal? Yeah, probably about 20 minutes to put it back together until it's right again.
If you spent 30 minutes taking something apart, it's going to take a full 10 hour day to put it back together.
Or maybe I'm just really slow and meticulous.
Plus - I think "assembling a car" is about 1% actually bolting things together...
9% - where is that part?
50% - cleaning, painting, plating, oiling, prepping
10% - finding nice new hardware for reassembly
10% - where is that tool?
10% - where is that nut I just dropped?
10% - taking it apart again (x2 or x3) because things were assembled in the wrong order
1% - actual final assembly
Anyways... almost there... (meaning probably only a couple hundred hours more
)Yes, so very true!
"10% - taking it apart again (x2 or x3) because things were assembled in the wrong order"
For me it is at least 20%!
When replacing the transmission, it took three installs before it finally stayed installed. Once was when a wire got stuck between the tranny and the engine.
That is why this forum (and the Pelican tech notes) is so helpful to us first timers. Gain the wisdom of those who have "been there, done that"!
Posted by: siverson Nov 11 2014, 12:25 AM
still a lot of work to do, but a good milestone...
Attached thumbnail(s)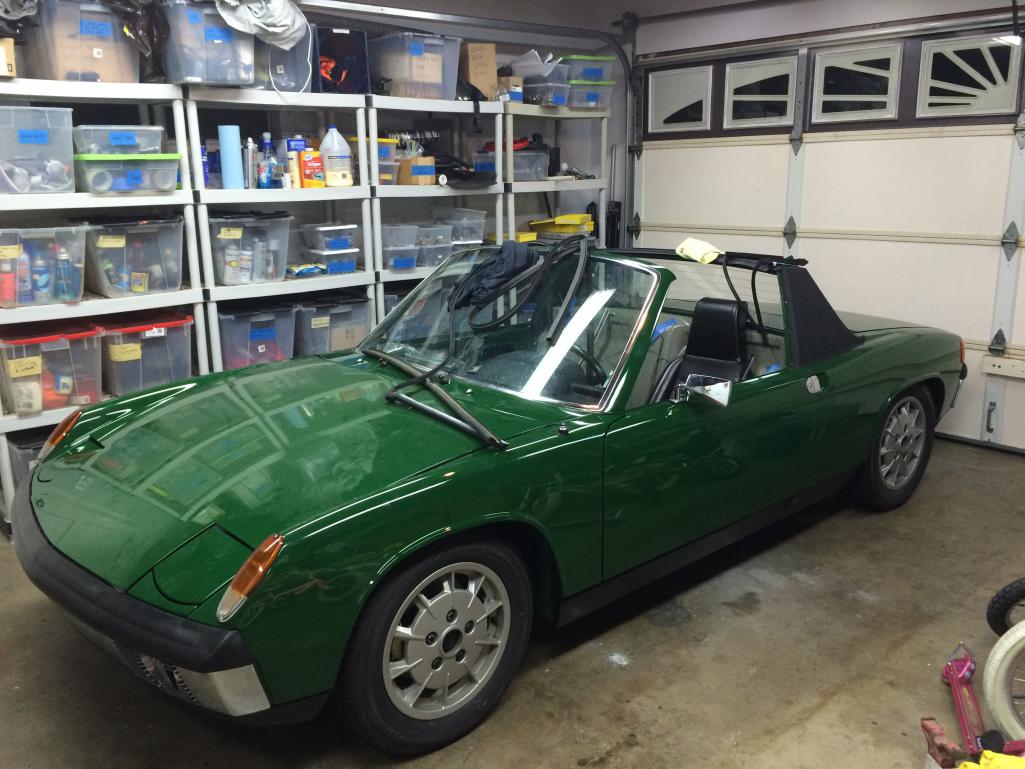
Posted by: Cairo94507 Nov 11 2014, 01:55 PM
The gas burner is the best looking wheel on these cars. I gotta get a set for my car!
Posted by: sbsix Nov 12 2014, 10:24 AM
The combo Irish green with the gas burners is stunning.
Posted by: siverson Nov 12 2014, 08:56 PM
whats the proper "hub cap" for the mahles? also painted?
Posted by: mepstein Nov 12 2014, 09:01 PM
The combo Irish green with the gas burners is stunning.
classic look. Pretty car.
Posted by: ben*james Nov 12 2014, 09:16 PM
I'm so jealous. beautiful. Nice to be able to share the journey on this thread.
Keep up the great work!
Posted by: siverson Nov 12 2014, 09:44 PM
got the wing windows and some trim installed tonight.
Attached thumbnail(s)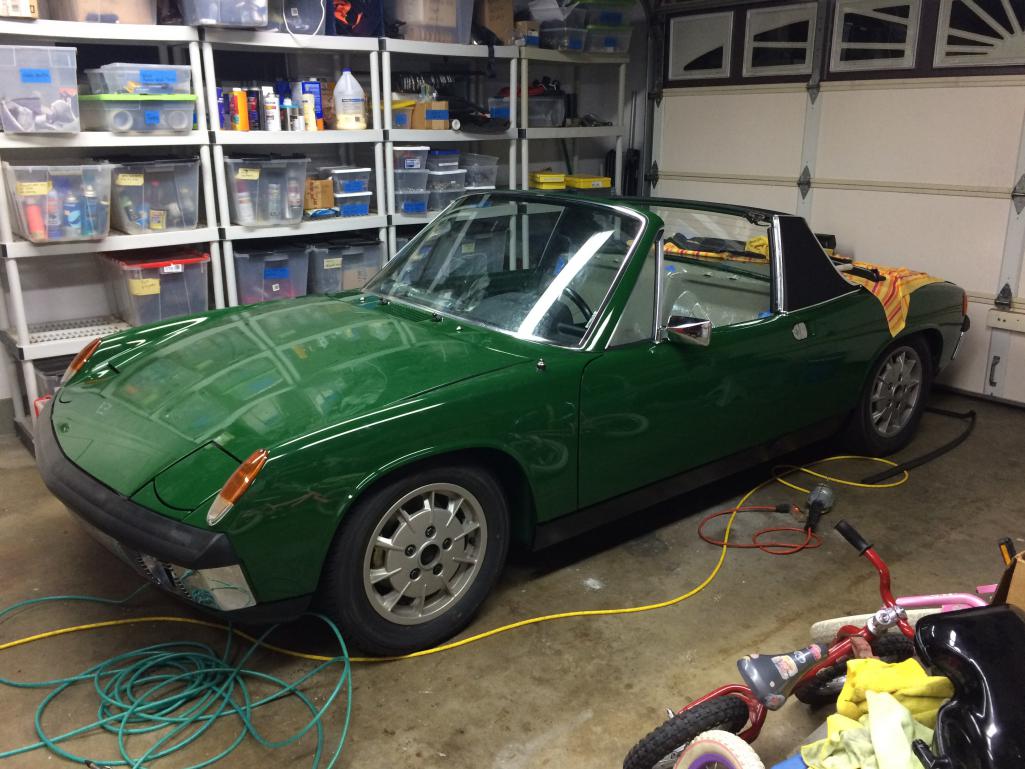
Posted by: 914Gelb Nov 13 2014, 07:01 AM
Nice six, Ialso own one which is currently under restoration. The engine is read to install. Just to show my air filter housing a added a picture. I think this is the original one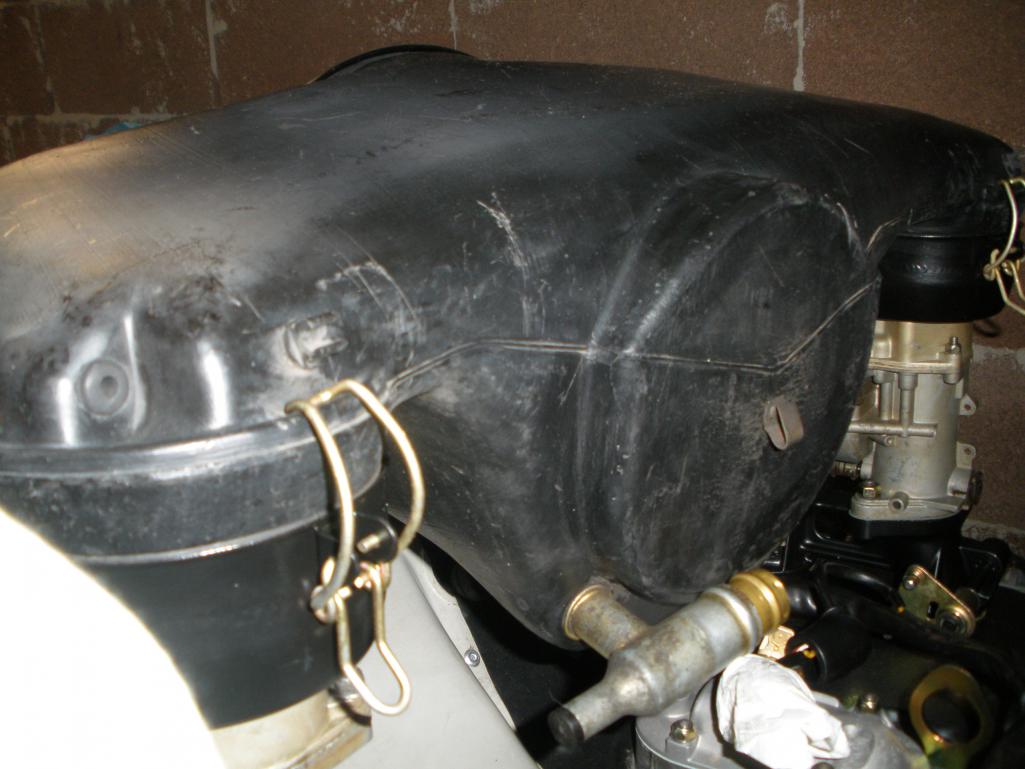

Posted by: Cairo94507 Nov 13 2014, 07:53 AM
Nice- I do believe that is the original Six air cleaner.
Posted by: siverson Nov 13 2014, 10:51 AM
Yup - that looks like the right air cleaner to me. I bought one like it, but it's super warped and pretty much unusable - like most of the plastic ones.
Posted by: johnhora Nov 13 2014, 11:47 AM
Yes...correct 914-6 air filter housing....has the little rubber inlet holes and clips for the cold start fuel lines....nice looking engine rebuild!
Posted by: siverson Nov 14 2014, 12:16 AM
another evening in the garage. fuel line was pinched so i had to pull the gas tank again. ive owned 914s for 23 years and have always been told to just install long lines to make the tank easier to pull. well that mostly works, but tonight i thought id try something different and use short lines that attach from the bottom like they came from the factory. it was actually really easy to connect
them that way.
anyways, he fired right up after sitting for about 10 months.
http://youtu.be/vcw4GCZAe0s
vroooooom.
still no brakes and no interior, but getting closer...
Posted by: Cairo94507 Nov 14 2014, 08:21 AM
Sounds perfect and looks perfect.
Posted by: JmuRiz Nov 14 2014, 09:24 AM
Great video, I hope to get to that point some day.
Get an LED troublelight for working so close to an open fuel tank, made me nervous.
Posted by: Kaeferfreund Nov 15 2014, 02:34 PM
whats the proper "hub cap" for the mahles? also painted?
Hi, first let me say. I'm deeply impressed how you manage the restoration of that irishgreen "6"

To your question. In the PET (Porsche spare parts catalogue) your MAHLE wheels (Lochscheibenrad, Aluminium Druckguss, lackiert) have the original number 901.361.017.00. The hub cabs ("Radzierdeckel") are mentioned as
901.361.032.00 without any colour code or something like that. So they are in "plastik grey". Porsche mentioned later a "SOW" alternative which means as a "special wish" option there were hub caps available in black with a coloured emblem (Spare parts number: (SOW) 911.038.11)
From my side of view and you could interpret it by the spare parts number beginning with a 911, the coloured version was used by Porsche 911
See here:
I'm not quite sure, but I think it was indeed an official picture by Porsche.
So, use the grey version.
BR

Kaeferfreund
Posted by: Cairo94507 Nov 16 2014, 08:51 AM
I totally agree that the grey version is the correct way to go.
Posted by: siverson Nov 16 2014, 12:31 PM
great. Thanks for the info. Does anyone know of a source for the grey hubcaps?
Posted by: Kaeferfreund Nov 16 2014, 03:08 PM
great. Thanks for the info. Does anyone know of a source for the grey hubcaps?
PORSCHE ? I guess these parts are still available.
Another question from my side. I saw at the second glance that you cleaned the side markers...why? That's a typical nice part of the US-equipment. Isn't it now a problem if you want to participate in a concours?
Posted by: ben*james Nov 16 2014, 04:08 PM
great. Thanks for the info. Does anyone know of a source for the grey hubcaps?
PORSCHE ? I guess these parts are still available.
Another question from my side. I saw at the second glance that you cleaned the side markers...why? That's a typical nice part of the US-equipment. Isn't it now a problem if you want to participate in a concours?
I was thinking the same although I've never been a fan of side warts. It's a beautiful car.
Posted by: siverson Nov 17 2014, 12:37 PM
>> great. Thanks for the info. Does anyone know of a source for the grey hubcaps?
> PORSCHE ? I guess these parts are still available.
Ah, I was looking up the wrong part number. I see now. Yes, readily available:
http://www.sierramadrecollection.com/store/cart.php?m=product_detail&p=432
I doubt that silver matches my wheels exactly though...
> Another question from my side. I saw at the second glance that you cleaned the side markers...why? That's a typical nice part of the US-equipment. Isn't it now a problem if you want to participate in a concours?
I just think those warts are super ugly, and would never have been added to the cars unless the US mandated it.
And I'm not too worried about "concours". My plan for the car is just to make a really nice, original driver. Some parts are probably over restored for just a driver, but it's hard for me not to clean things up as it goes back together. But it's really far from 100% concours correct.
Here is my current list of "what's not correct":
- Mahle wheels. These are correct for a 914-6, but this car came with steel wheels.
- 185 tires (should be 165 with the Mahle wheels).
- Original cylinders bored to 81mm, new 81mm pistons. Not 80mm, but heads did not have to be machined. So in theory, someone could go back to 100% original with new P&Cs if they really cared. 81x66 = 2041 cc, so it's still a "2.0".
- "E" cam (original have "T" cams, but if someone really cared, this could also be reversed 100%.
- Added later Carrera chain tensioners. Not original, but stupid not to add them (IMO).
- Added front sway bar (Tarrett).
- Bilstein shock and struts.
- Porterfield brake pads (not OE).
- Used an aftermarket washer pump, not OE.
- H4 headlights, not sealed beam.
- Not OE seatbelts
- Small triangle headlight plate is plated silver, and should be zinc plated.
- Gas cap is yellow cadmium plated, but should be zinc plated (I think). But it looks better this way IMO.
- Gas cap shroud thing is held in with socket cap screws, should be hex screws (it's all I had).
- Momo prototipo steering wheel with adapter.
- Power Hershmann antennea (original was manual).
- Used black undercoating on bottom of car (original was grey).
- Euro front and rear tail lights on a US car.
- Several parts powder coated, but original was paint.
- Several bolts/washers are zinc plated, and should be yellow cadmium (98% are correct).
And I'm probably missing a lot of other things. See anything else? Feel free to tear it apart!
On a side, note, I don't think I'll ever try to do a "correct"/"original" restoration again. I just don't enjoy being restricted to find the right bolts/coating/etc. I'd just rather put something in that looks nice and works well and not worry about it. It was more fun to be creative when building my orange 3.6 car.
-Steve
Posted by: siverson Nov 17 2014, 12:45 PM
Off to get an alignment today...
-Steve
Attached thumbnail(s)
Posted by: Kaeferfreund Nov 17 2014, 02:42 PM
Off to get an alignment today...
-Steve
Steve,
if you like you could also use 195 with the 5 1/2 MAHLE wheels. There is given an official approval by Porsche.
Car looks great and I guess that most of the experts do not know all the differences you listed.
Keep on restoring it

Posted by: siverson Dec 1 2014, 12:44 PM
Still some minor details like windows and an interior, but I did drive it to work today!
Vrooom!
Attached thumbnail(s)
Posted by: siverson Dec 1 2014, 12:45 PM
914
Attached thumbnail(s)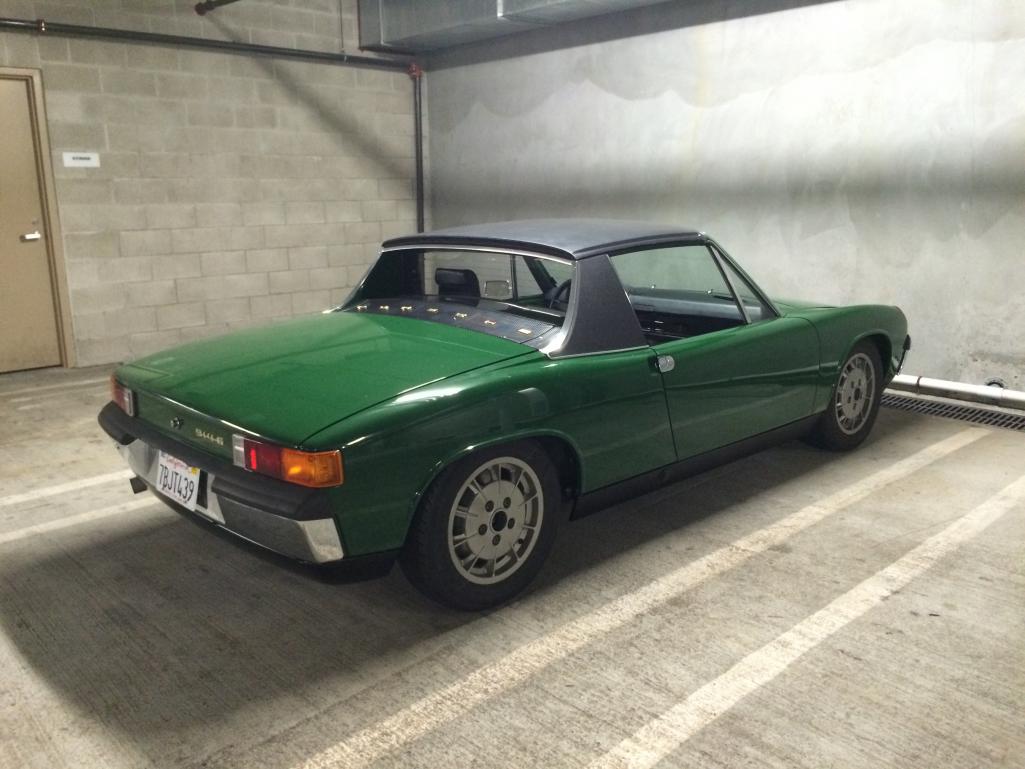
Posted by: Maltese Falcon Dec 1 2014, 01:12 PM
Showroom fresh, excellent work ! 
Marty
Posted by: rhodyguy Dec 1 2014, 01:25 PM
Very nice. The footage of how the strainer sock should look is informative for those experiencing fuel delivery issues.
Posted by: Cairo94507 Dec 1 2014, 01:46 PM
I am so jealous...... happy motoring.
Posted by: ben*james Dec 1 2014, 07:28 PM
What a transformation from when I saw the car last year. Amazing, what a beautiful car you have there!
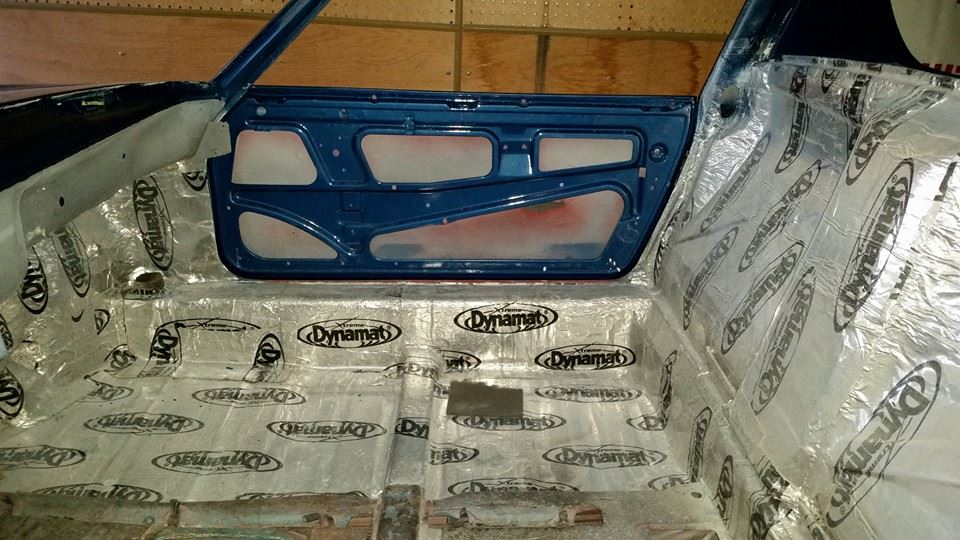
Posted by: siverson Dec 13 2014, 07:38 PM
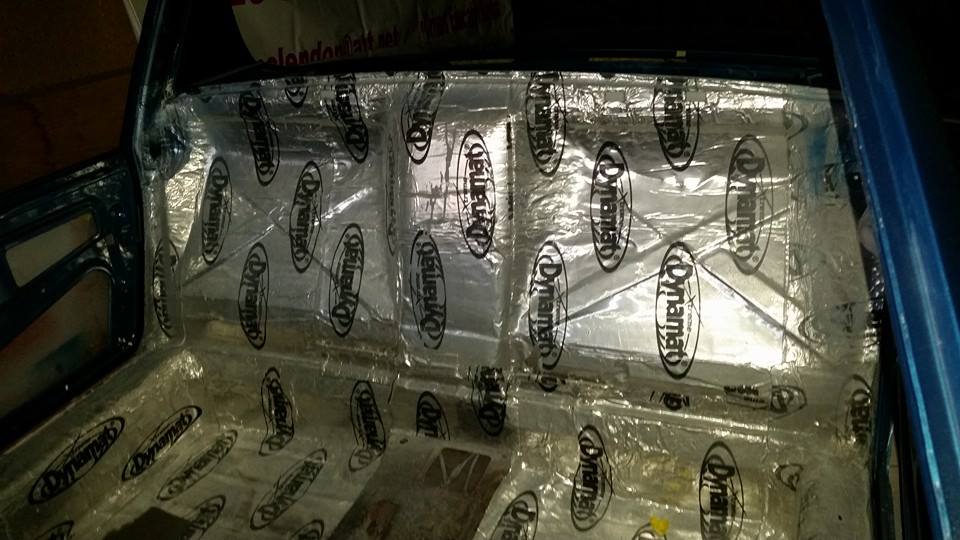
i was going to do just the back pad, but thought id try everything.
100 sq ft roll, probably 30%+ wasted.
Attached thumbnail(s)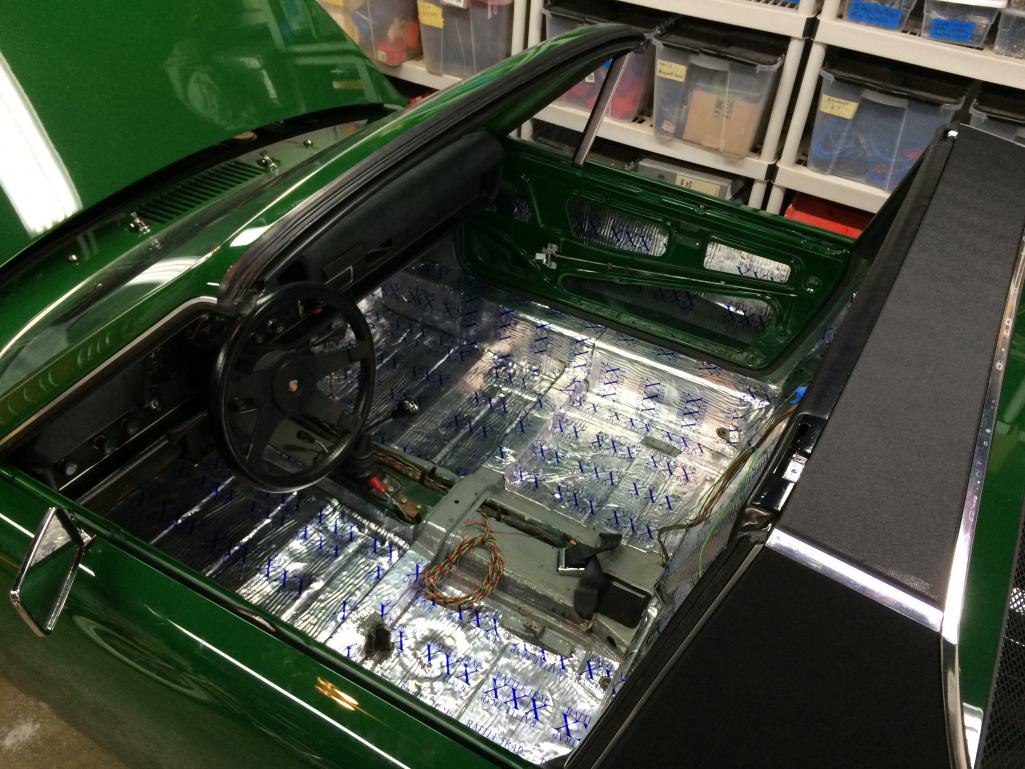
Posted by: siverson Dec 13 2014, 07:39 PM
914
Attached thumbnail(s)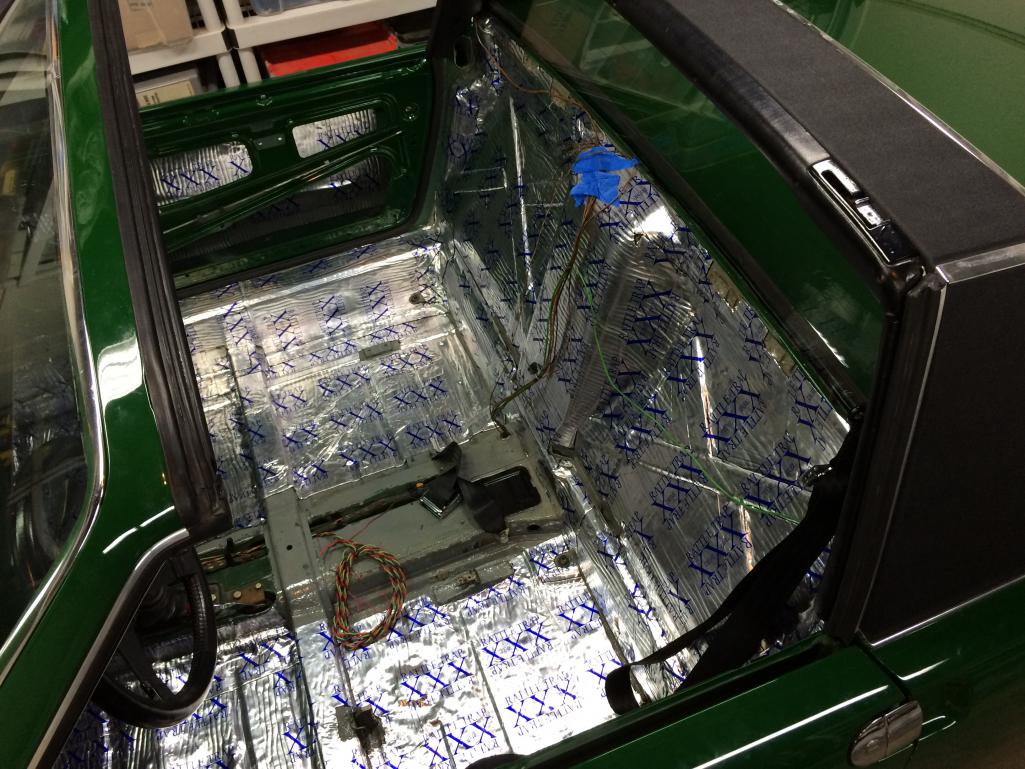
Posted by: matthepcat Dec 13 2014, 07:48 PM
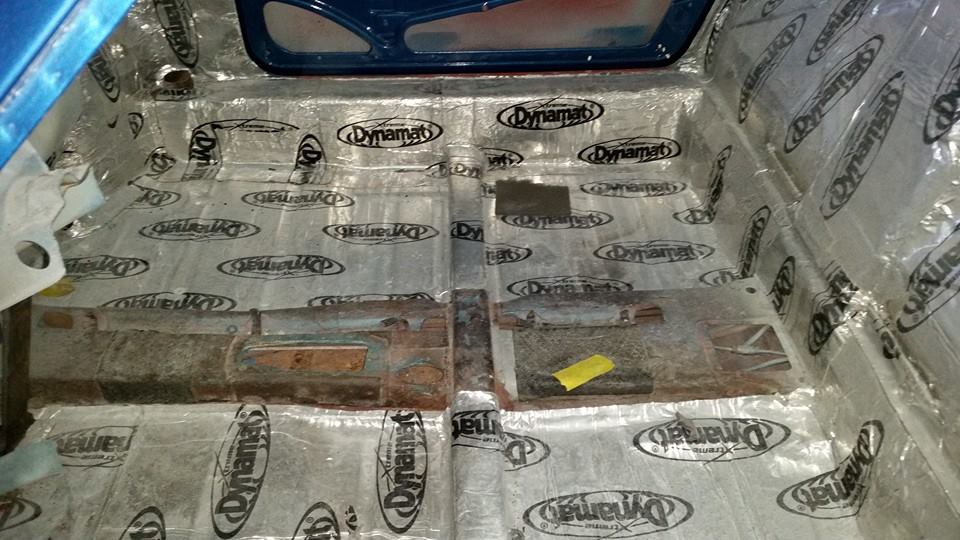
I would suggest cutting out in the channels in the floor. This will alow any moisture that collects there to dry out an not be trapped under the sound deadening.
Posted by: Larmo63 Dec 13 2014, 08:54 PM
Somehow, I'm now a fan of the Mahle wheels. They look unique and great on your car.
Bravo.
Posted by: Cairo94507 Dec 14 2014, 09:05 AM
I have thought about the sound deadening foil-backed material for my Six. I believe I even sent a roll of it with the car when it went to Scotty's. We will be doing this as it keeps vibration and noise down inside and makes the car more comfortable to drive.
To be honest, I can't ever see my car sitting outside in the rain either. I think we would likely do the sound deadening material as siverson has done on his car. I know the school of thought regarding trapped moisture, but my car is not going to be a daily winter driver. How real is the threat of trapped moisture given those parameters?
Posted by: siverson Dec 22 2014, 02:00 PM
> How real is the threat of trapped moisture given those parameters?
I did cut all edges/bends so there are no air pockets.
I think it is much better material than the factory tar, and provided you keep water out, even floors with the factory tar don't look that bad after 40 years.
So, I'm obviously betting it will be ok - only install flat sheets (when in doubt cut it out) and keep the water out of the car.
-Steve
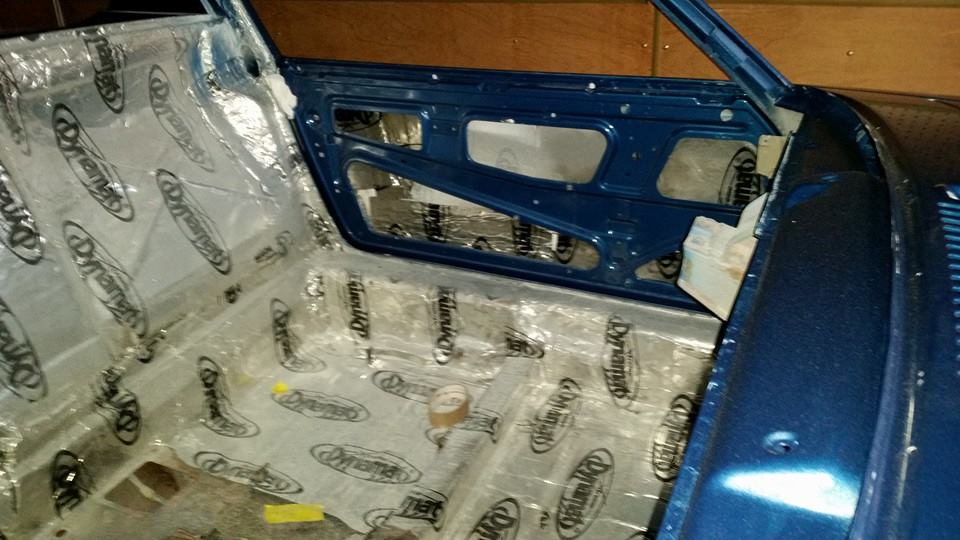
Posted by: siverson Dec 22 2014, 03:38 PM
I got a lot more done on the car this weekend.
- Finished the sound deadening.
- Hacked together 6 black vinyl strips to sit below the carpet.
- Took me three attempts at building a speaker mount to get one that would fit. It's tight in there!
- Cleaned up the brake handle and seat rails.
- Starting installing the carpet.
- Installed the back pad and seats again and took him on a short drive.
-Steve
Attached thumbnail(s)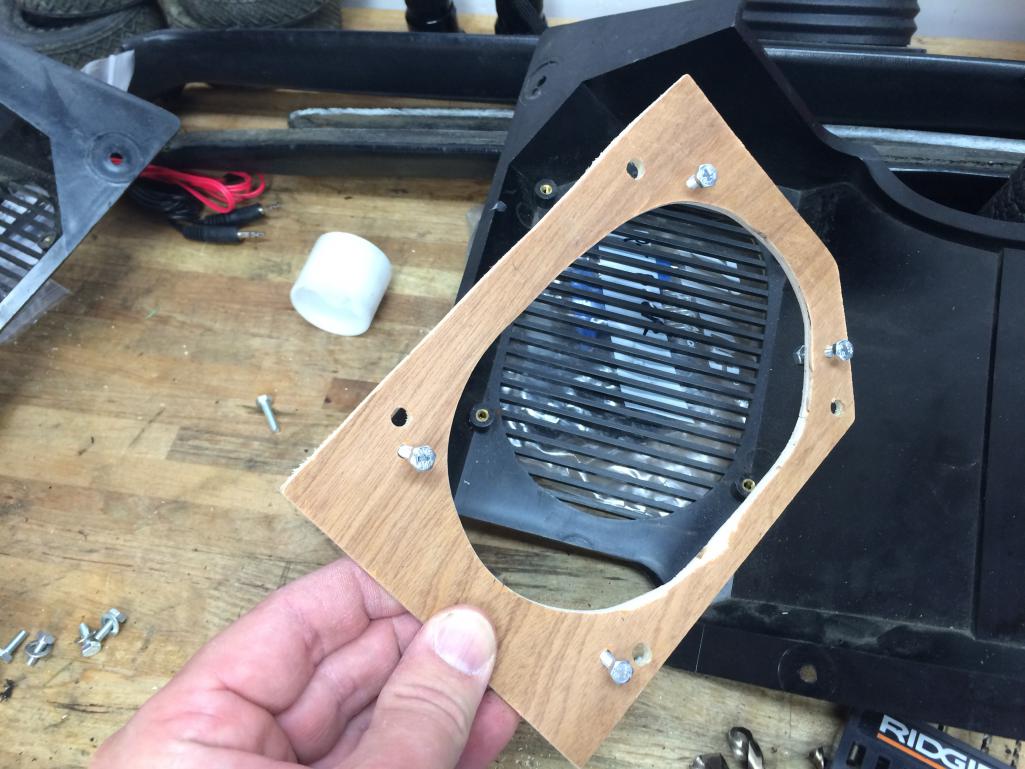
Posted by: siverson Dec 22 2014, 03:39 PM
Blacked out the shiny stuff.
-Steve
Attached thumbnail(s)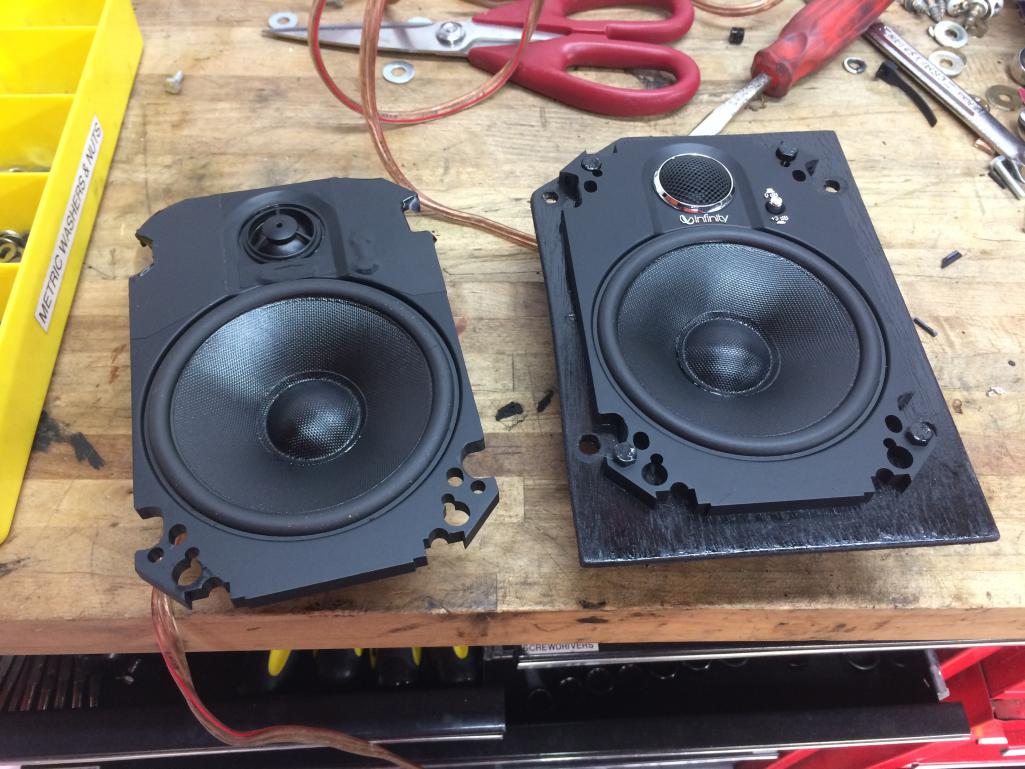
Posted by: siverson Dec 22 2014, 03:40 PM
How it mounts.
![popcorn[1].gif](style_emoticons/default/popcorn[1].gif)
Attached thumbnail(s)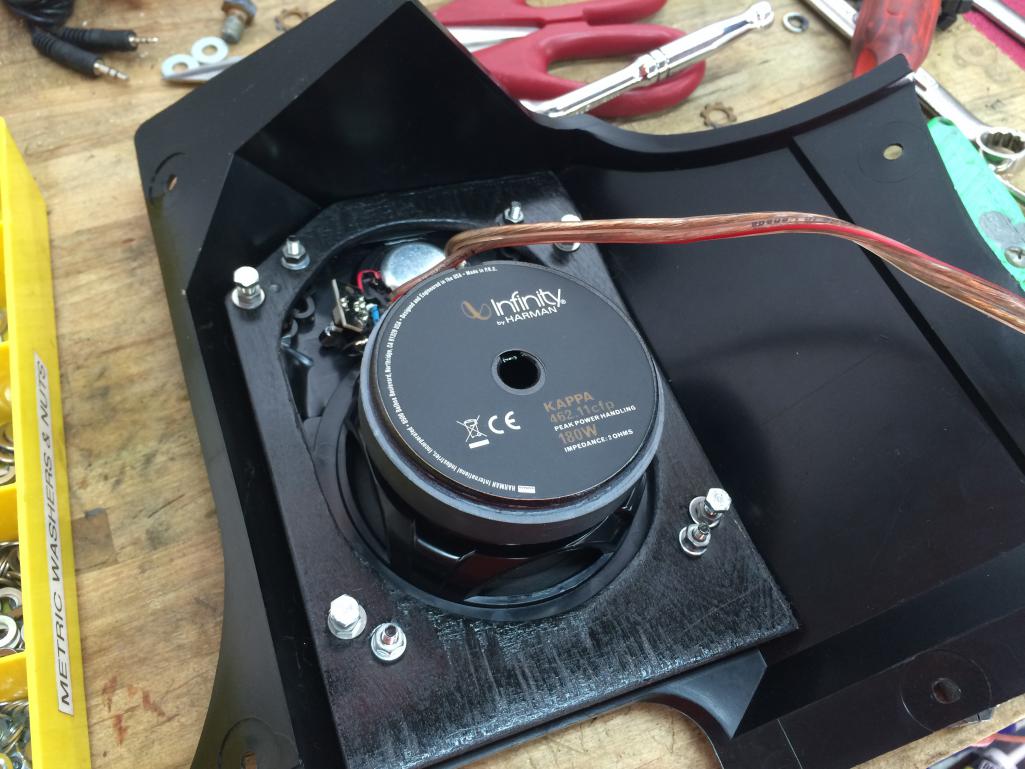
Posted by: siverson Dec 22 2014, 03:41 PM
Vinyl and carpet.
Attached thumbnail(s)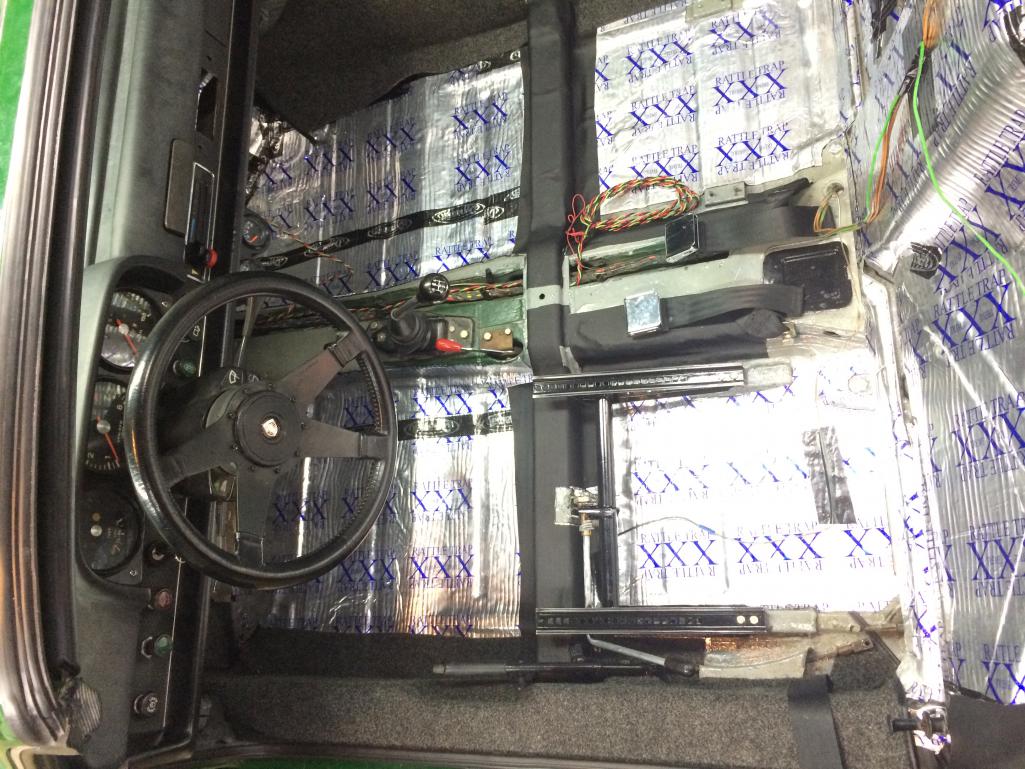
Posted by: siverson Dec 22 2014, 03:43 PM
62S written on the back pad... ?
-Steve
Attached thumbnail(s)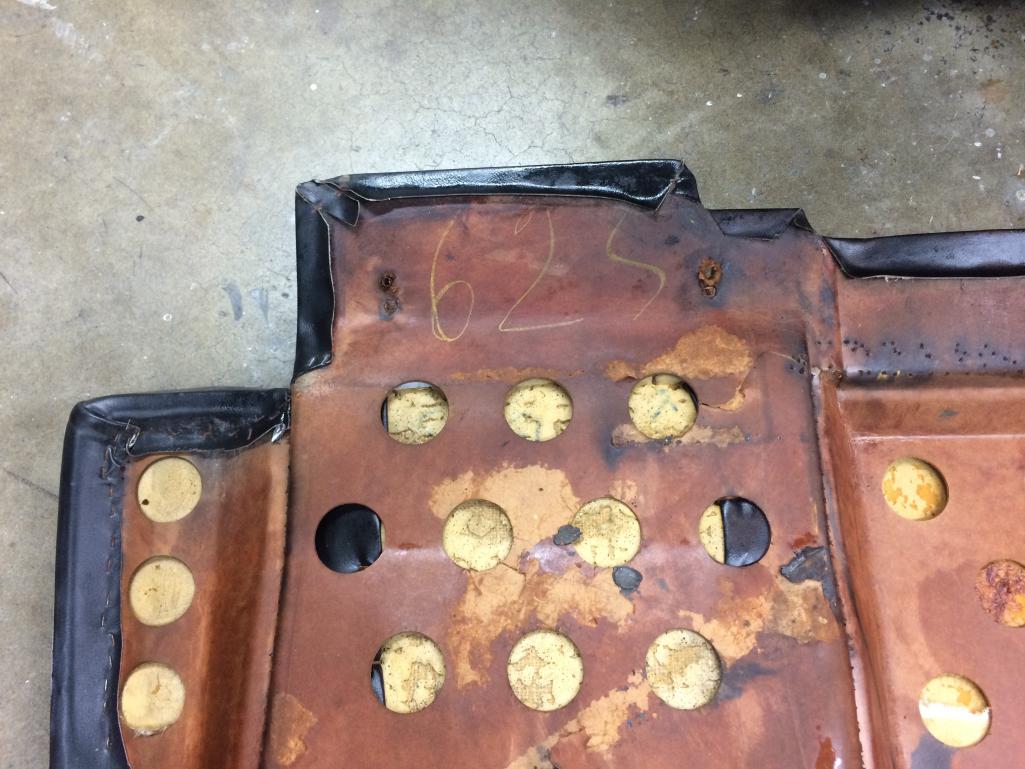
Posted by: Cairo94507 Dec 22 2014, 03:48 PM
Terrific. Looks like 625 to my untrained eyes.
Posted by: Dave_Darling Dec 22 2014, 07:47 PM
What's the chassis number again? Might have something to do with that. Might not...
--DD
Posted by: siverson Dec 22 2014, 07:55 PM
#377 (9140430377)
-Steve
What's the chassis number again? Might have something to do with that. Might not...
--DD
Posted by: Gustl Dec 22 2014, 11:17 PM
Terrific. Looks like 625 to my untrained eyes.
Posted by: siverson Dec 28 2014, 11:05 PM
Now that my front trunk is pretty and super clean, might as well put it to work hauling some flat tires. Doh...
-Steve
Attached thumbnail(s)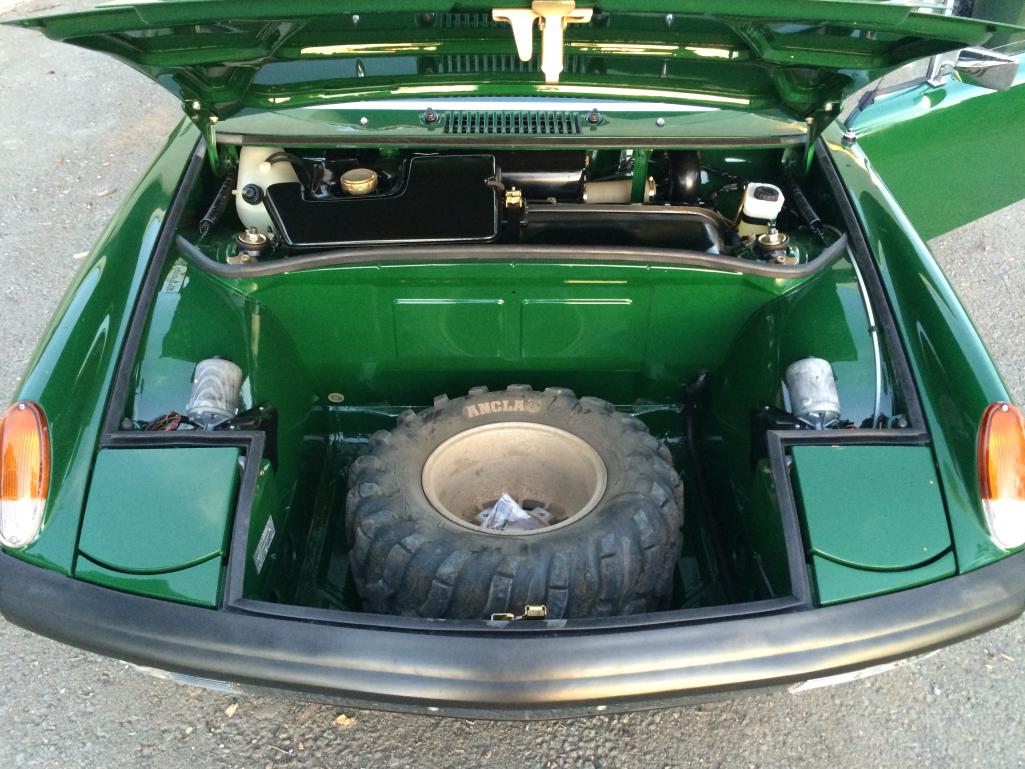
Posted by: siverson Dec 28 2014, 11:05 PM
BTW - that is an OEM front trunk seal that replaced the super garbage repro seal. It is MUCH better.
-Steve
Posted by: siverson Feb 20 2015, 12:13 AM
I've put another 1000 miles on him or so now.
After some evening cleanup, I drove the car the first time without the intake airbox and WOW that's really loud. But this isn't my "loud/fast" 914, so I put it back on.
I tried to make a comparison video of no airbox vs with airbox, but it didn't really turn out - you can't tell a difference on the video. But regardless, here is a short video of some 914-6 2.0 sounds:
With airbox:
http://youtu.be/sbuZiksBq0k
It really does sounds about 3x faster than it is!
-Steve
Posted by: porbmw Feb 20 2015, 09:24 AM
NICE!
Gorgeous car, looks and sounds perfect!
Will have to go thru your thread and get more inspiration. Hope your little guy loves it.
will have to send you a few PMs once I get back on the reassembly horse
Paul
Posted by: Chris H. Feb 20 2015, 09:30 AM
Yeah great job Steve. The color is so rich. It looks like candy. Well worth the investment. Who painted it again?
Posted by: oldschool Feb 20 2015, 11:00 AM
nice sound
Posted by: pete000 Feb 20 2015, 11:59 AM
Love that paint !
Posted by: siverson Mar 5 2015, 08:00 PM
Thanks!
> Who painted it again?
Collisions Plus in Escondido, CA. They do mostly new cars & collisions, but also always seem to also have 1-3 vintage cars being worked on. They were recommended to me by European Motorsports (a mechanic in Vista, CA). I'm pretty happy with things and will be bring my orange car in for some work.
Having said that, (a) the rear trunk has some very small pin holes in sections of the paint and isn't as smooth as the other panels and (b) there are some new rock chips in sections that doesn't seem like it should have chipped that easily.
They have been pretty standup guys and are taking the car on Monday to fix a couple of those issues. And to paint the Mahles.
-Steve
Posted by: racerbvd Mar 5 2015, 09:43 PM
i was going to do just the back pad, but thought id try everything.
100 sq ft roll, probably 30%+ wasted.
Yep, did it as well..
Posted by: Cairo94507 Mar 5 2015, 10:10 PM
Nice Dynamat job. I am planning to have my done the same way- cover all of the cockpit and then I want to do the inside of the doors too.
Posted by: siverson Jan 29 2016, 04:40 PM
I finally got around to replacing the 3.5" ID 100# springs with an adjustable collar with 2.5" ID 100# springs.
Maybe I'm getting old, but I really like how a fairly stock 914 handles, which is why I stuck with the 100# springs. Car has:
- all new suspension rubber bushings/etc (Elephant I think)
- stock front torsion bars
- 100# rear springs
- Bilstein shocks/struts
- 19mm Tarrett front sway bar
- 185/65 P4 tires
- fairly high ride height
And I think it just rips. Comfy (as far as 914s go), corners almost perfectly flat, and the grip can really exceed anything that I probably should be doing on public roads. Or, again, maybe I'm just getting old.
When I did this, I also wanted to raise the back a little (3/8" or so) because it looked a little off. New ride height is in photos below.
With these relatively soft/stockish springs, what is surprising is the left rear corner will drop about 1/2" (a lot!) when I sit in the car (6'6" 270 lbs). So it's not exactly corner balanced, but I did set the ride height even on a left/right basis when I had about 270 lbs of big rocks in the drivers seat.
-Steve
Attached thumbnail(s)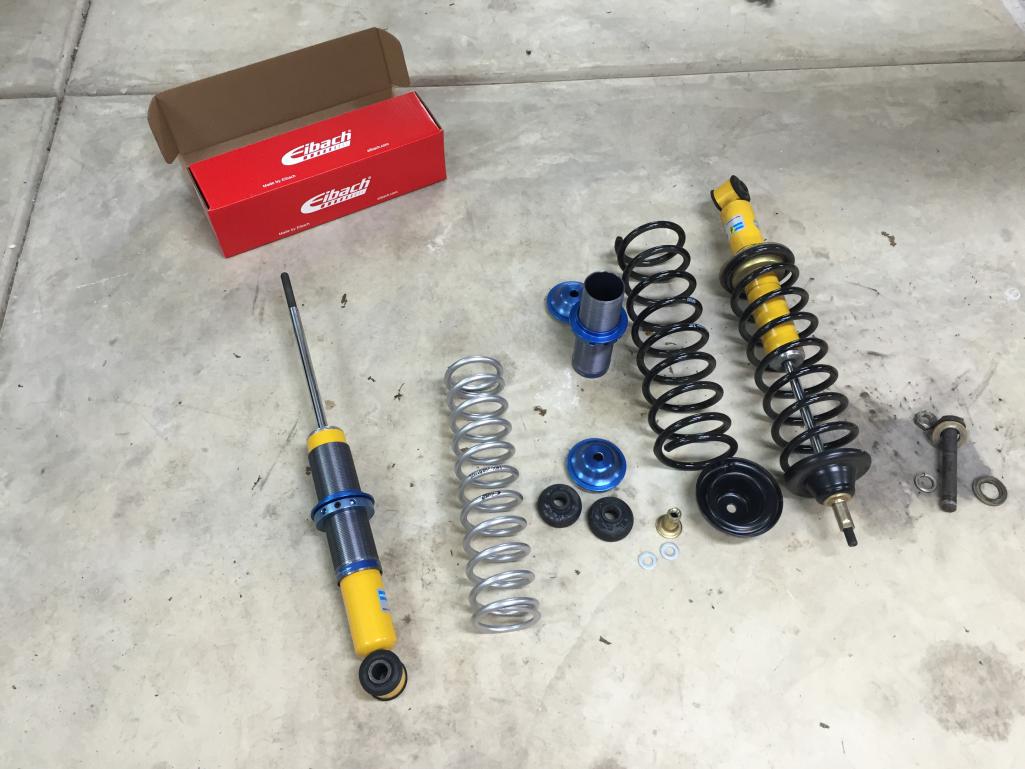
Posted by: siverson Jan 29 2016, 04:43 PM
914
Attached thumbnail(s)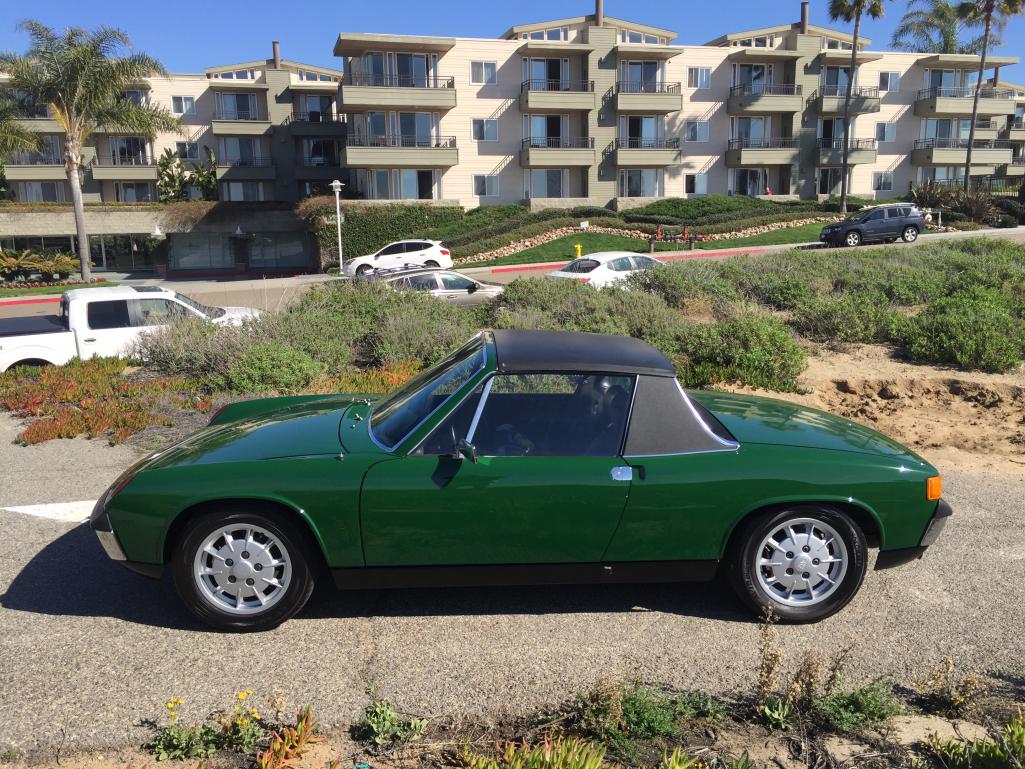
Posted by: siverson Jan 29 2016, 04:43 PM
914
Attached thumbnail(s)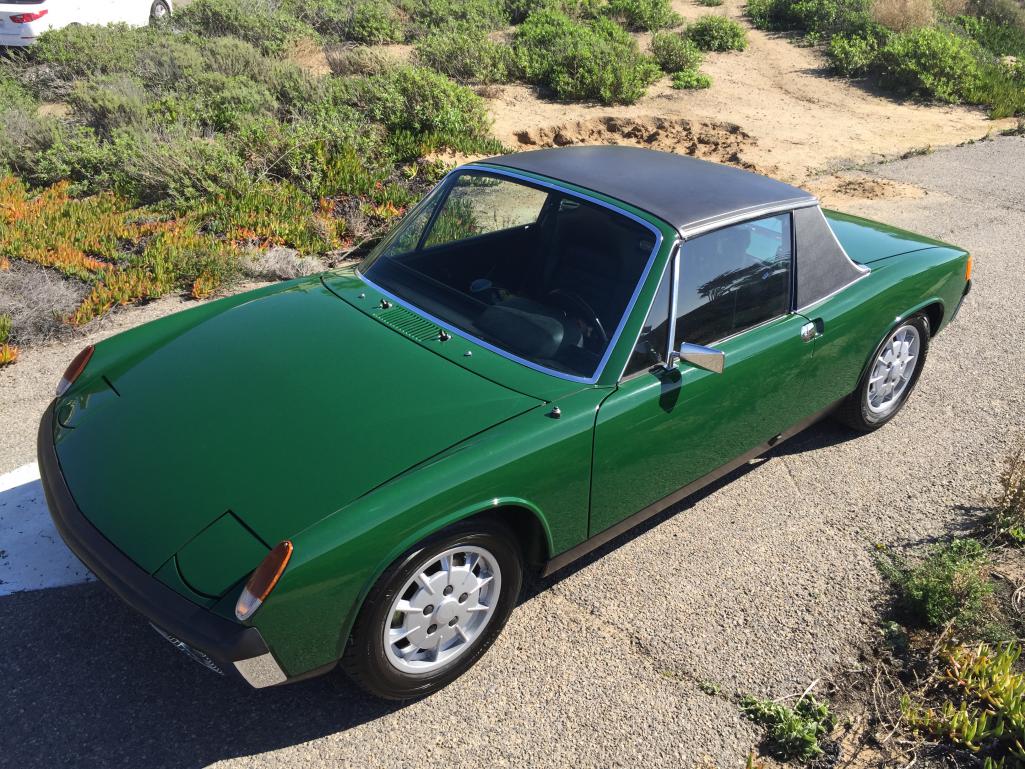
Posted by: siverson Jan 29 2016, 04:44 PM
914
Attached thumbnail(s)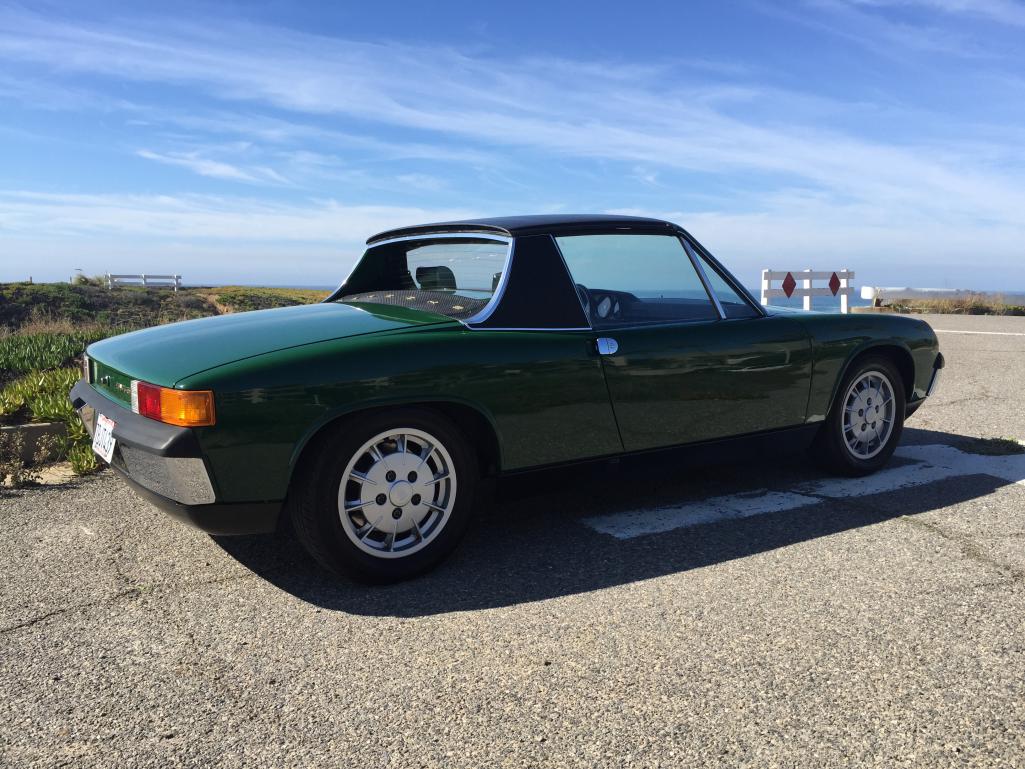
Posted by: rhodyguy Jan 29 2016, 04:49 PM
That is my fav color for a 914.
Posted by: Ferg Jan 29 2016, 04:50 PM
That is my fav color for a 914.
Well done.
Posted by: siverson Jan 29 2016, 04:51 PM
> That is my fav color for a 914.
I like it, but I think it's my 4th favorite 914 color.
1 Signal Orange
2 Olympic Blue (never owned one)
3 Adriatic Blue (never owned one)
4 Irish Green
-Steve
Posted by: rhodyguy Jan 29 2016, 04:57 PM
Most every original Irish green car I've seen has had a crappy color change. Usually some red or white. The wheels and bright work set the IG off.
Posted by: ben*james Jan 29 2016, 05:04 PM
> That is my fav color for a 914.
I like it, but I think it's my 4th favorite 914 color.
1 Signal Orange
2 Olympic Blue (never owned one)
3 Adriatic Blue (never owned one)
4 Irish Green
-Steve
Steve - my favorites:
1) Signal Orange
2) Irish Green
I'm envious of your stable..
3) Ivory
4) Aftermarket Bright White (so's I don't get in trouble with my ride)

Great looking cars and what an awesome job you have done to that 6!
Posted by: siverson Jan 29 2016, 05:25 PM
Thanks.
I suppose my #5 is Ivory. That is a good color.
Black is my least favorite, then silver. 
-Steve
Posted by: stevegm Jan 29 2016, 05:29 PM
What a great looking car. Awesome job on it. I'm jealous.
Posted by: pete000 Jan 29 2016, 05:33 PM
Paint and the Gas burners look stunning !
Posted by: Coondog Jan 29 2016, 08:04 PM
Beautiful. I know you are proud....
Posted by: SKL1 Jan 29 2016, 08:21 PM
Boy that is NICE. GOOD JOB! Love the euro lenses and absent side markers!! And love those wheels on that car!
Posted by: Puebloswatcop Jan 29 2016, 09:06 PM
I thought I recognized some of those pictures as being from my home town...Anyway you did a beautiful job on your 14. Really turned out nice. Great Job. 
Posted by: Dion Jan 29 2016, 10:04 PM
Steve, great job. Beautiful 6. Happy Motoring!
Posted by: rgalla9146 Jan 29 2016, 10:29 PM
Well done !
Beautiful.
Posted by: Cairo94507 Jan 29 2016, 10:30 PM
Just a spectacular looking Six.
Posted by: sixnotfour Jan 31 2016, 10:13 AM
Posted by: turk22 Jan 31 2016, 05:58 PM
I guess its never gonna see rain... no windshield wipers!

Posted by: rhodyguy Jan 31 2016, 06:49 PM
I would put a driver's side assem and nut in the front trunk with a 13mm wrench. Like a box of chocolates...
Posted by: rgalla9146 Jan 31 2016, 07:56 PM
I would put a driver's side assem and nut in the front trunk with a 13mm wrench. Like a box of chocolates...
.....you never know what you get .....
better make that a 14 and don't forget the tiny wave washer.
Posted by: siverson Jan 31 2016, 09:26 PM
Thanks for the compliments.
> I guess its never gonna see rain... no windshield wipers!
Actually that's just one of items still on the todo list. And yes, now the undercarriage is super dirty and I basically feel compelled to tear the car apart again.
He actually saw some light rain the other night with the top off - my 7yo daughter loved it.
-Steve
Posted by: rhodyguy Jan 31 2016, 09:31 PM
I stand corrected.
Posted by: rhodyguy Jan 31 2016, 09:36 PM
I think doing the the Siskyous in May with no wipers is a little risky. Positive on that one. The weather can go sideways quickly on the Oregon side.
Posted by: smg914 Feb 8 2016, 07:53 PM
Is this right? I don't think I've had a car with this part before, I don't exactly remember what it looked like when I took it off.
-Steve
The torsion bars holding the engine lid up should be black not body color
Posted by: siverson Feb 9 2016, 01:15 AM
> The torsion bars holding the engine lid up should be black not body color
Really? Are all 914s that way or just the sixes? I've never really noticed before, but I think my orange car (1974 914-4) has orange bars there too.
You have any photos to share?
But the rear trunk torsion bars are body color, right?
I guess I'll add that to my list of crimes against humanity I've committed. I suppose at some point we are all some future owners DPO. Someone, sometime in the future is going to open that engine lid and start swearing about some hack (me) couldn't take the time to paint the torsion bars the right color.
I actually found another one this weekend that I can't believe I've never noticed - this car has a late dash in it! I knew it was replaced in the 80s sometime, and the PO had notched the late dash slightly so the glove box would still open all the way. I've crawled all over this car and interior, and I never really thought to look and just noticed it this weekend.
-Steve
Posted by: siverson Feb 9 2016, 01:16 AM
Weird. Not sure why I never thought of that. They do all appear to be black.
EDIT/UPDATE: this does appear just to be bars for -4 lids.
-Steve
Attached thumbnail(s)
Posted by: sixnotfour Feb 9 2016, 04:29 AM
Sixes were body color....well all of mine are.. not repainted..
picture is rgalla9146
Attached thumbnail(s)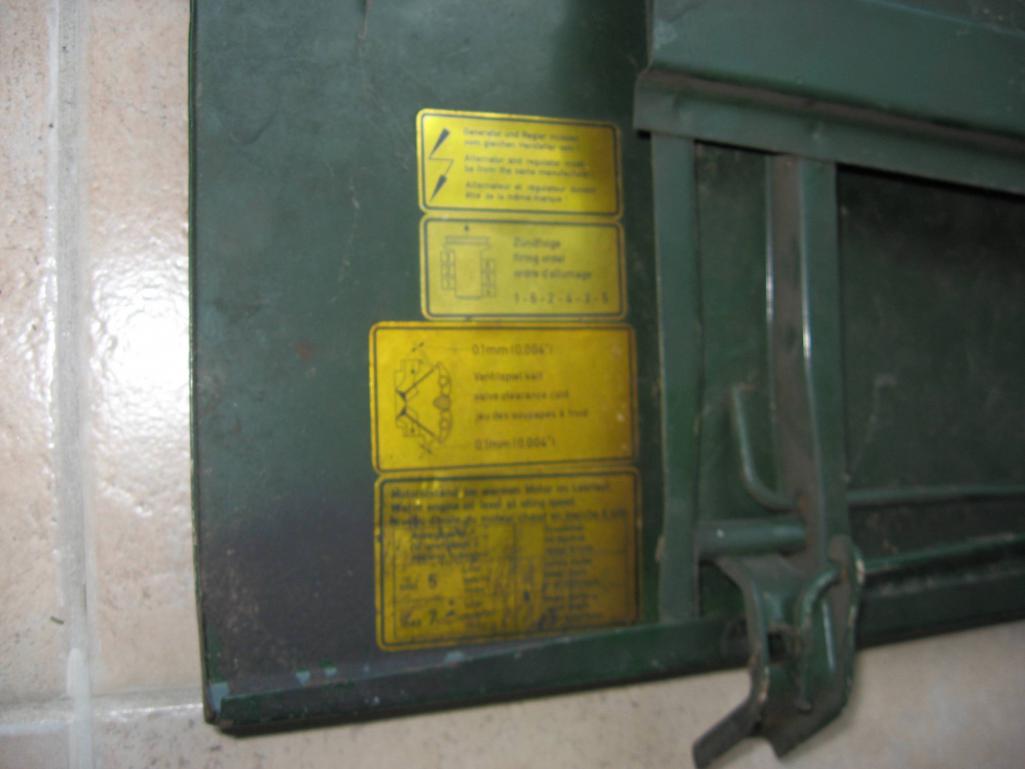
Posted by: siverson Feb 9 2016, 09:25 AM
The battle lines have been drawn!!!
-Steve
Posted by: siverson Feb 9 2016, 09:31 AM
Hmmm... another quick search for just 914-6 engine lids does look they should be body color.
The silver photo is from a nice restored six, the orange one is from an unrestored supposedly never repainted original six.
-Steve
Attached thumbnail(s)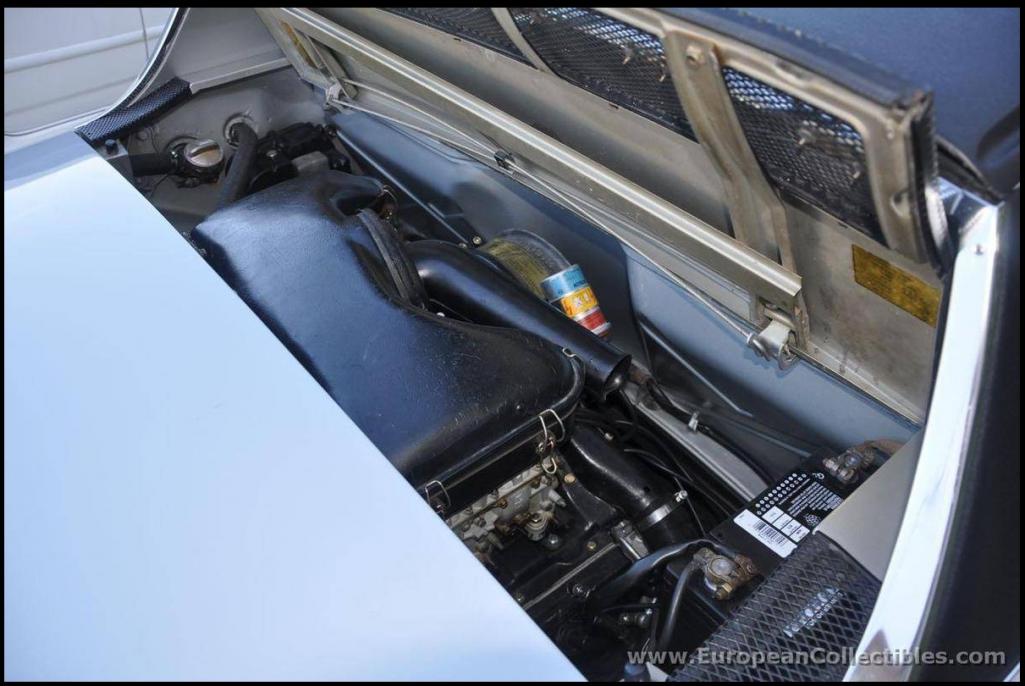
Attached image(s)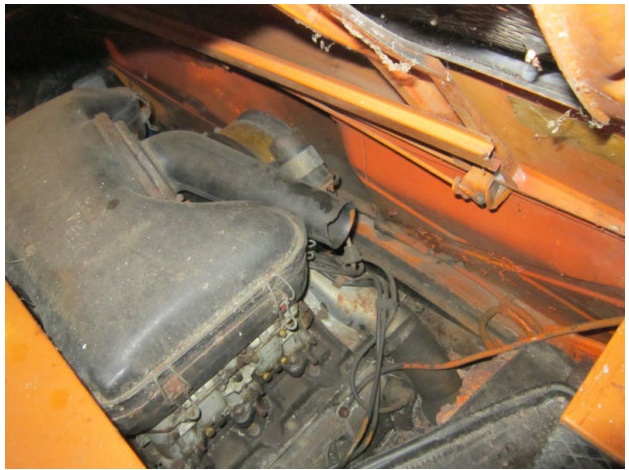
Posted by: smg914 Feb 10 2016, 09:07 PM
Very interesting.
Here is a photo scanned from a 1993 European Car magazine of the 5,600 mile willow green 914-6.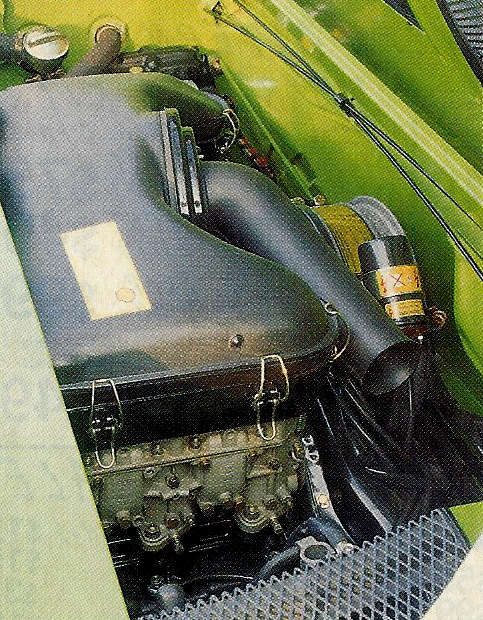
Posted by: Racer Feb 10 2016, 09:17 PM
IIRC both my '70 1.7 and my Dad's '70 914-6 are body color.
Posted by: Cairo94507 Feb 10 2016, 10:48 PM
Both of my 70 Sixes were body color. One SignalOrange and the other Irish Green. My '71, with original paint still in the engine compartment, were body color, albeit chipped up pretty good.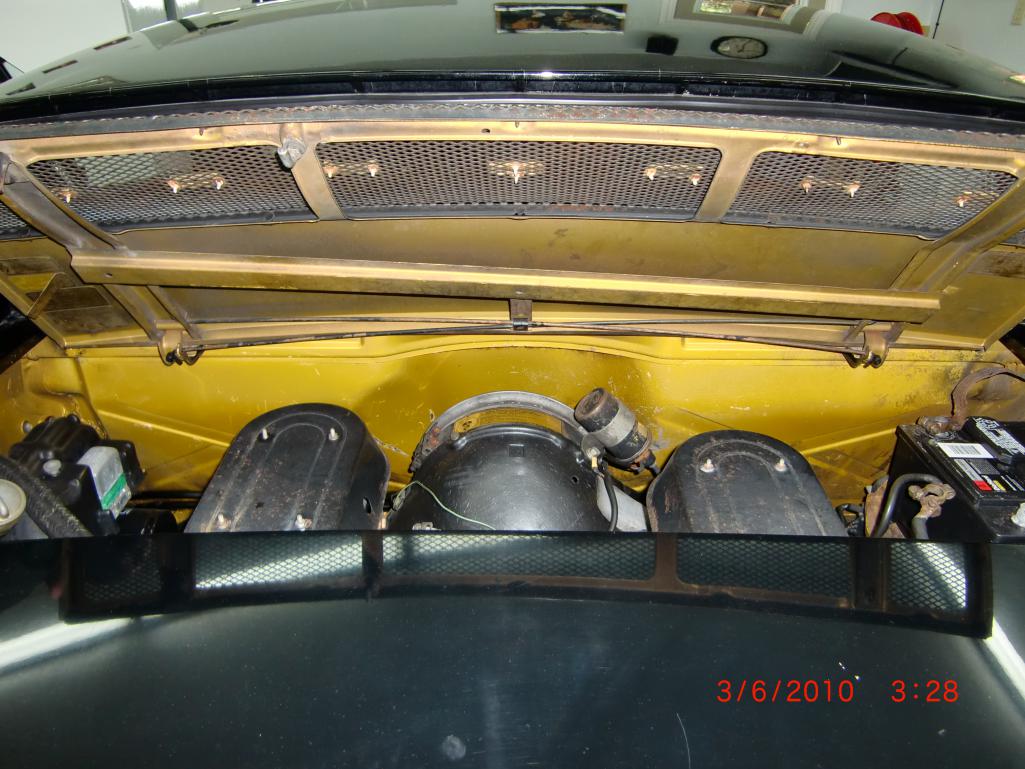
Posted by: sbsix Feb 11 2016, 10:56 AM
My '70 six is body color; light ivory.
Posted by: pete000 Feb 11 2016, 01:38 PM
I went through some photos of sixes that I looked at purchasing in the past and found most were painted at some time body color during a repaint. Not sure what they were originally.
I did find one that was black, but not sure if they painted them black them selves.
Attached thumbnail(s)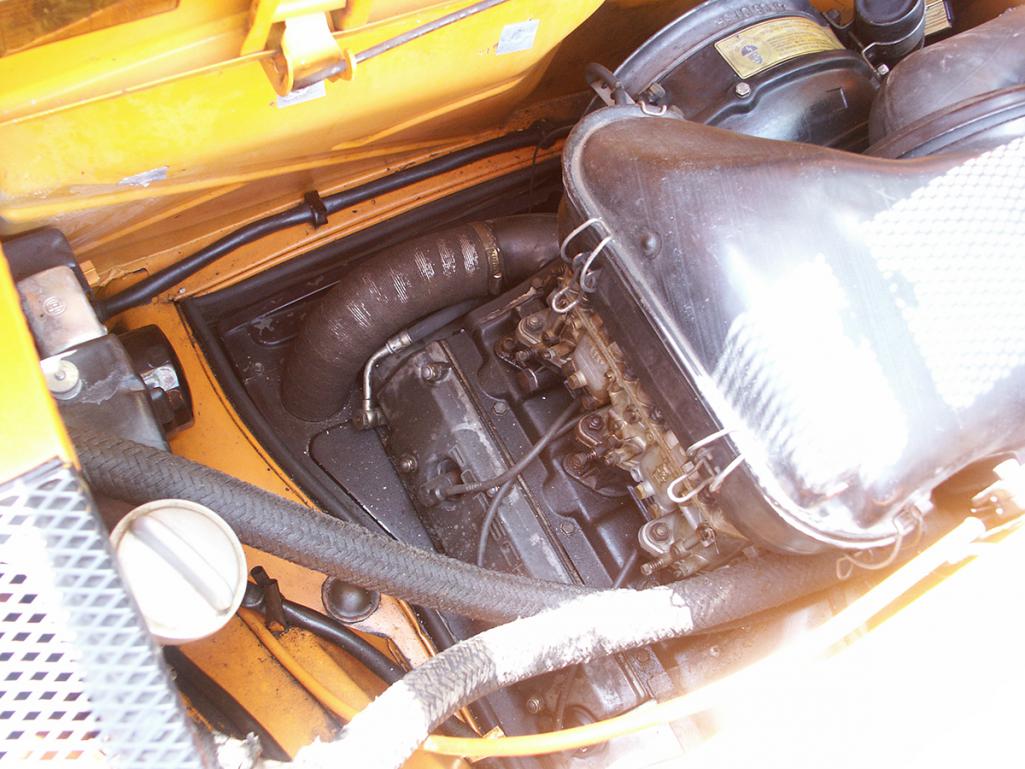
Attached image(s)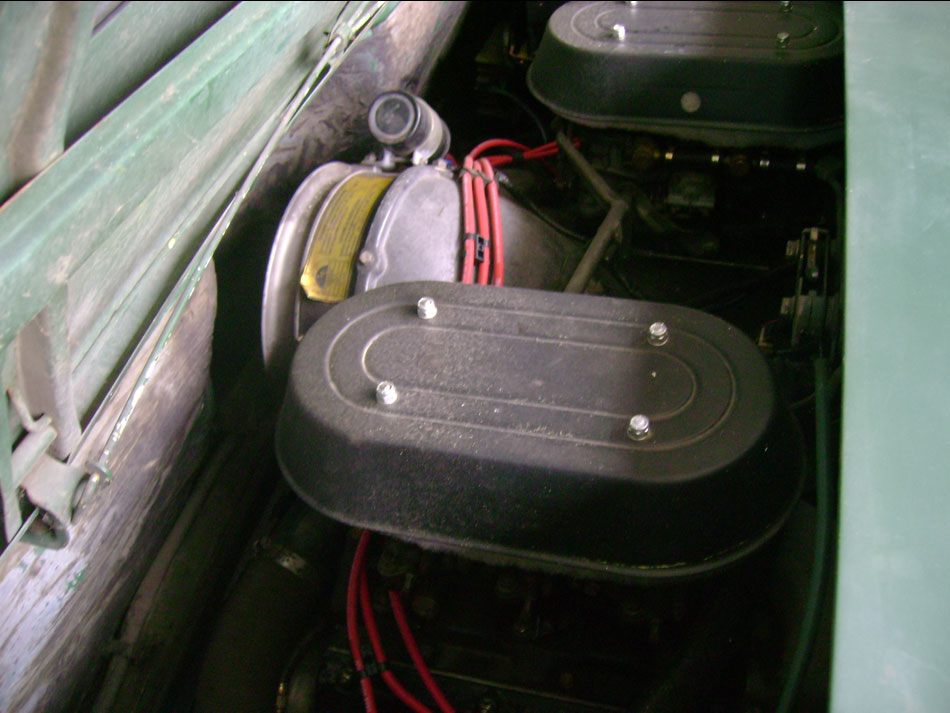
Posted by: larryM Feb 12 2016, 11:02 PM
interesting thread
- lots of nice pictures
- lots of different opinions on originality, etc
obviously the repaint as acquired was crummy at best
some folks want you to keep it absolutely 100 point oem to maximize it at six figures
others want you to ditch the Marelli, etc - which means it is no longer a 100 point oem Parade Concours car
is there anyone here who will really PAY six figures for it when it is finished? ??
?
Posted by: sixnotfour Feb 16 2016, 03:59 PM
Here is 2 1970 4 banger engine lids and guess what the torsion springs are body color also...yes they are both Irish Green...I also measured the diameter of the spring and the -4 painted ones and the -6 painted ones are the same diameter.
I suspect when they changed the rain trey they needed a bit heftier spring..
So the myth of -6 having lighter torsion springs is almost correct , except that all the early 914's have lighter torsion springs...solved [attachmentid=541329]
AA's willow green 914-6 is a 71 , I have seen another 71 -6 and 2 -4's that have black torsion springs... ![]()
Attached image(s)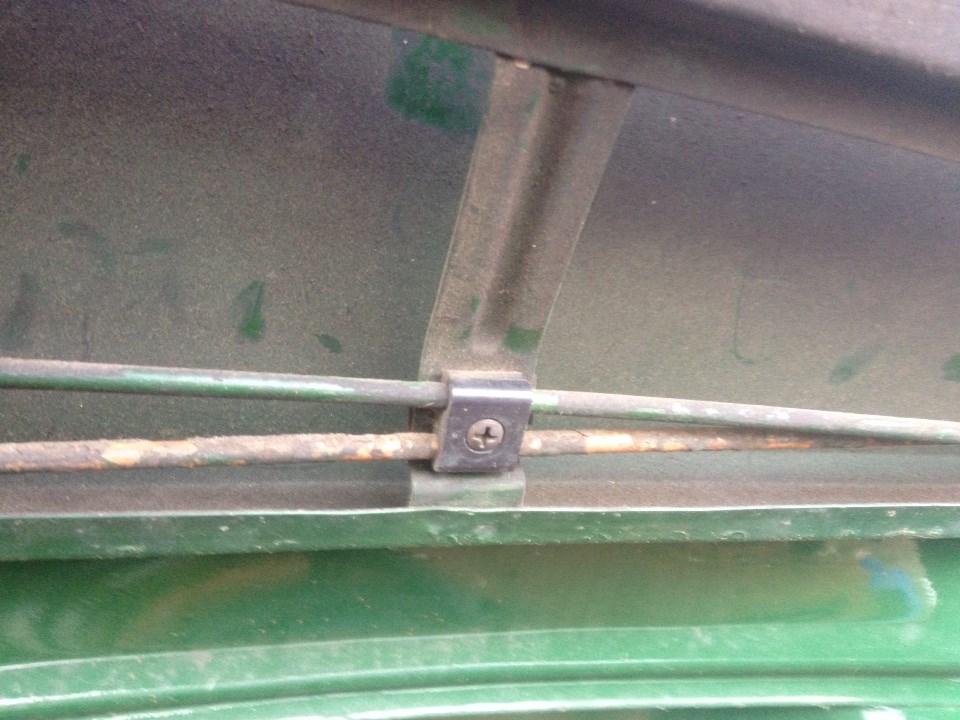
Posted by: siverson May 10 2016, 11:05 PM
I brought the car into European Motorsports a couple weeks ago because I just couldn't get the carbs to work well. It was running "ok", but it seemed like throttle response was really poor, flat spots in the middle, etc. I'm not sure what happened because when the engine was first built (~5k miles ago) it was running really well.
Anyways, after two trips there (argh), two sets of new spark plugs, and increasing the venturis from 27mm to 30mm and jets from 105 to 120, it's a whole new car. Running much better and just rips all the way to 7k. Vrooom.
While it was there they thought both rear wheel bearings were noisy. I didn't really notice anything, but since I had the WCR trip to Oregon coming up, I didn't want to risk it and took it apart.
I'm glad I did, the passenger side was totally shot, so I just decided to replace both. I honestly can't think of any other wear component that I didn't replace during this entire rebuild and have been kicking myself for not replacing these while the car was apart. Good news is everything came apart pretty easily.
-Steve
Attached thumbnail(s)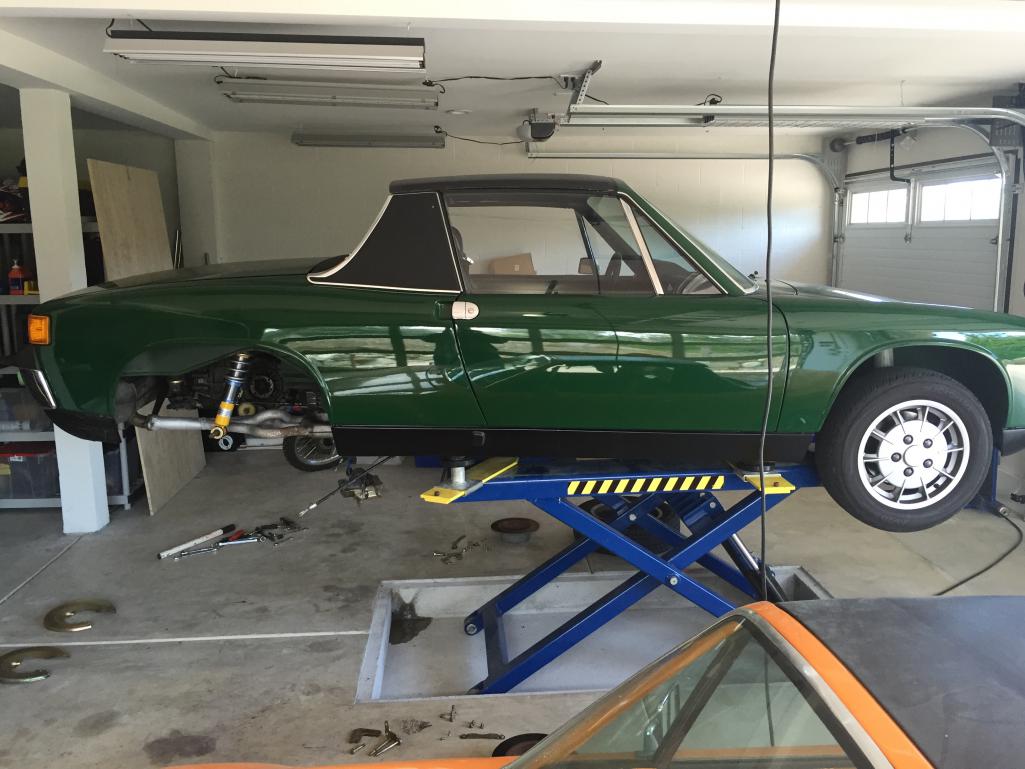
Posted by: siverson May 10 2016, 11:06 PM
One bearing in...
Attached thumbnail(s)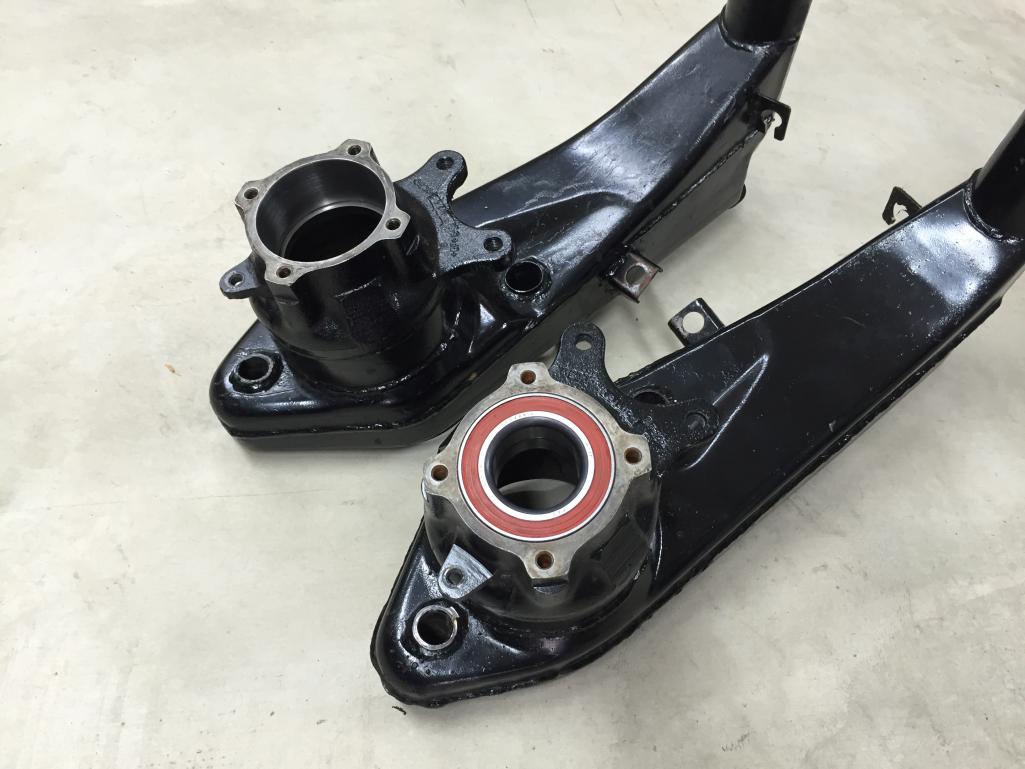
Posted by: siverson May 10 2016, 11:08 PM
I know you're "supposed" to press the arm into the bearing (not the bearing into the arm), but I don't have any fancy bearing tools/jigs and could never really get that to work.
With a hacked together wooden control arm support though, the bearing still presses in pretty easily (IMO). Just start it with a rubber mallet, and then make sure you press everything in while the bearing is level (see red level on top).
-Steve
Attached thumbnail(s)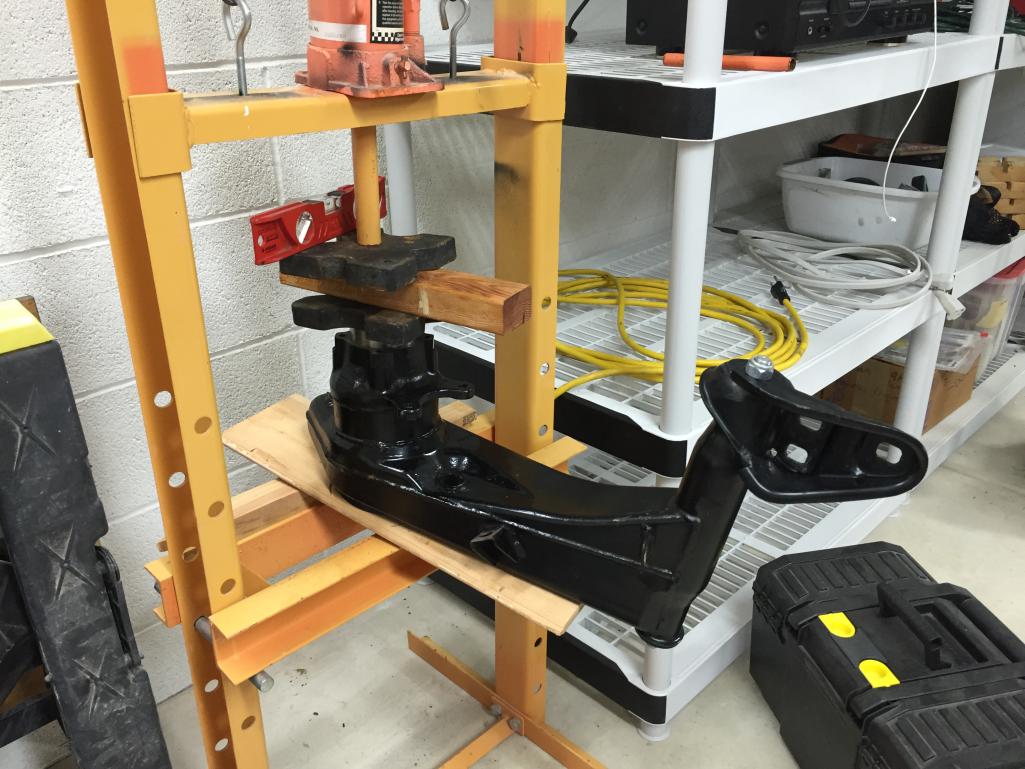
Posted by: siverson May 10 2016, 11:09 PM
Smooosh.
Attached thumbnail(s)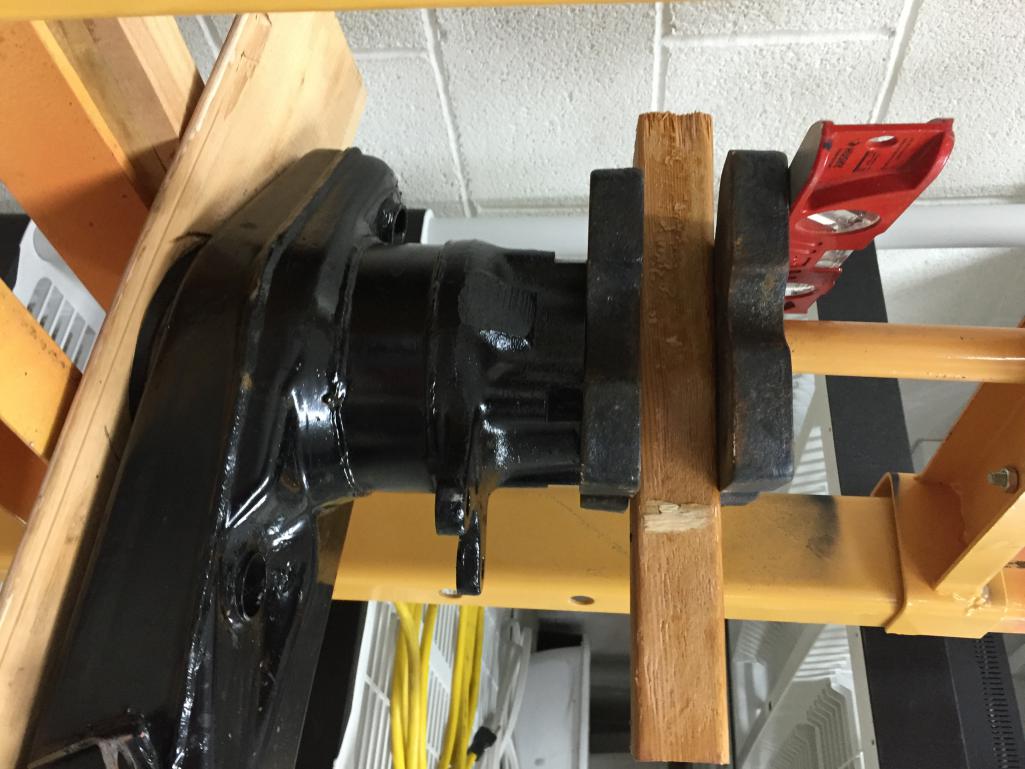
Posted by: siverson May 10 2016, 11:12 PM
I'm not sure why I'm so anal retentive about restoring and cleaning everything while assembling things, and then proceed to actually drive it. Everything is so much dirtier and just worn looking than it was just 5k miles ago. Oh well - I suppose I can just put on more miles now.
-Steve
Attached thumbnail(s)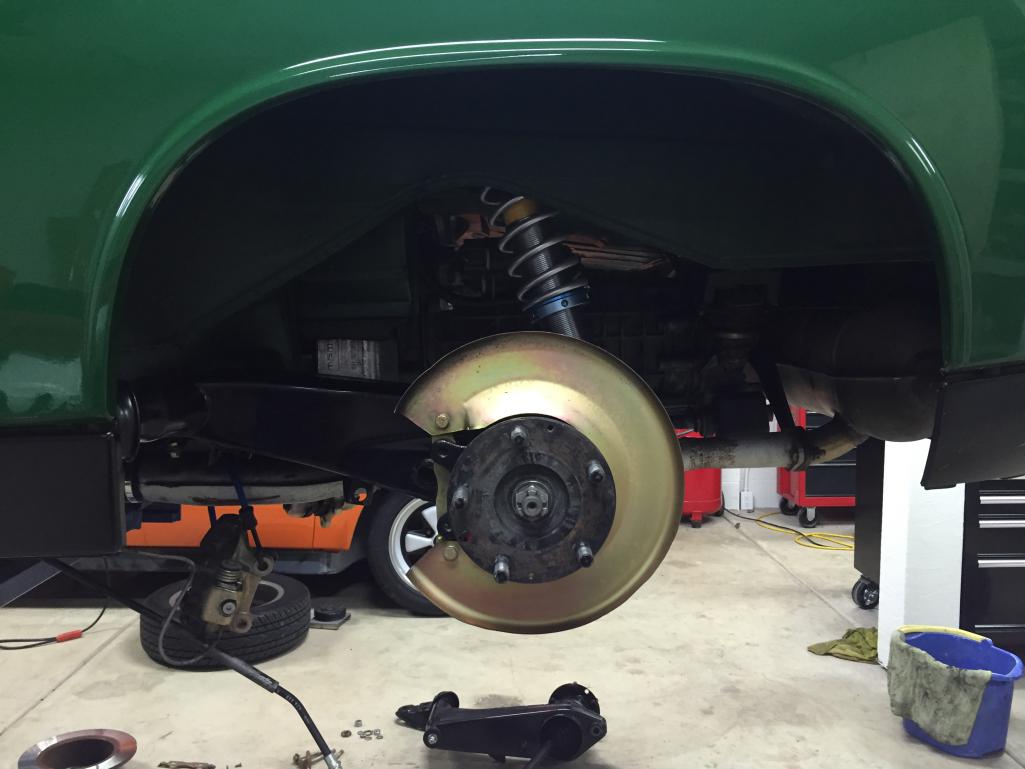
Posted by: siverson May 10 2016, 11:13 PM
Front calipers really take a beating.
-Steve
Attached thumbnail(s)
Posted by: siverson May 10 2016, 11:15 PM
And an artsy shot with my super dusty and pissed off orange car wondering why he isn't being worked on.  Sorry Orange 914...
-Steve
Attached thumbnail(s)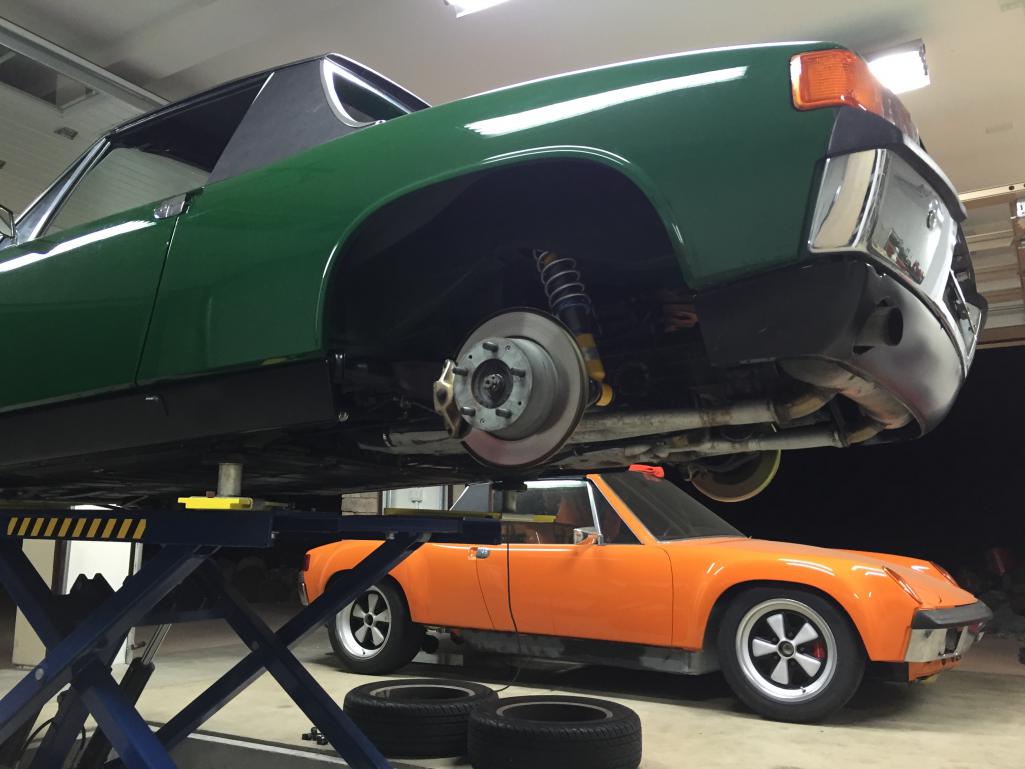
Posted by: pete000 May 11 2016, 12:12 AM
Love your recessed floor jack !
Spacious garage is to die for as well !
Posted by: Cairo94507 May 11 2016, 06:54 AM
Love that car!  Oh, so the orange Six does not feel left out, if I had another Six it would be flared and signal orange like my 1st Six was - color not flares.
I have to meet Steve one of these days because that is the same lift set-up that is going in my garage too. Maybe instead of being a twin I was a triplet and Steve was separated from us????
Posted by: siverson Jun 2 2016, 04:46 PM
CDI box died on the way home from Oregon. That was less fun.
When it died, the CDI was still making a whining noise (it's supposed to), but it was a little different and louder. But given I had confirmed everything else seemed fine, I ordered a replacement and it worked. Vrooom.
PartsKlassik puts new electronics in the old box:
https://www.partsklassik.com/p-1508-cdi-box-3-pin-refurbished-rpm-7100.aspx
-Steve
Attached thumbnail(s)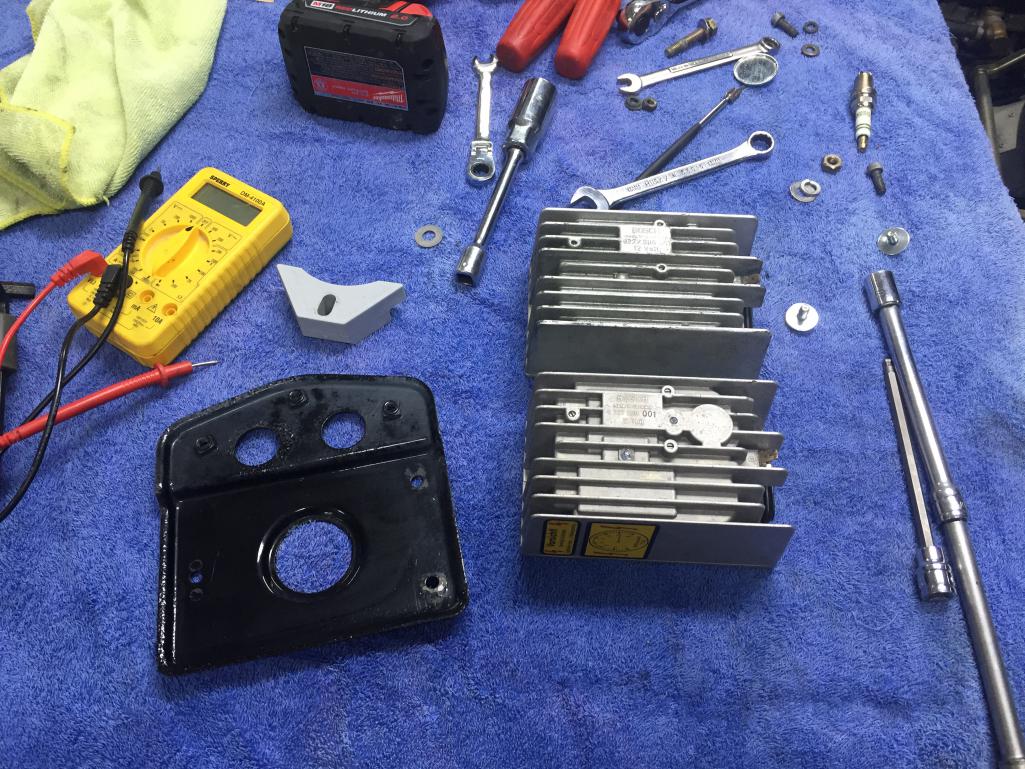
Posted by: siverson Jun 2 2016, 04:46 PM
And it gave me a chance to clean out the hell hole. A leaf had fell down there!!!
-Steve
Attached thumbnail(s)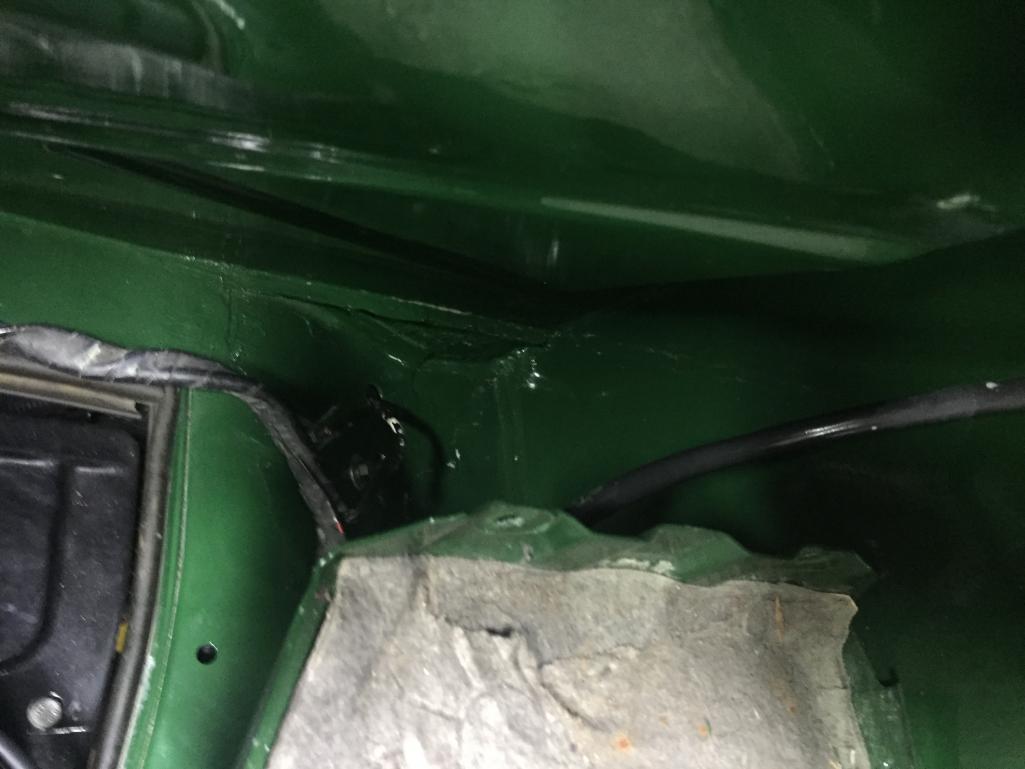
Posted by: rhodyguy Jun 2 2016, 09:47 PM
How close to home did you get before the box quit? Sorry about the leaf.
Posted by: brp986s Jun 3 2016, 04:52 PM
Does the new cdi whine? I got a rblt cdi. Works great and all, but dead silent. I want my whine back! 
Posted by: siverson Jul 10 2016, 11:45 PM
No, new CDI is dead silent. I honestly don't miss the whine.
Here is my favorite photo from the WCR that someone took of me (sorry, I forgot your name!). This is what happens with stock rear springs (100#)!
-Steve
Attached thumbnail(s)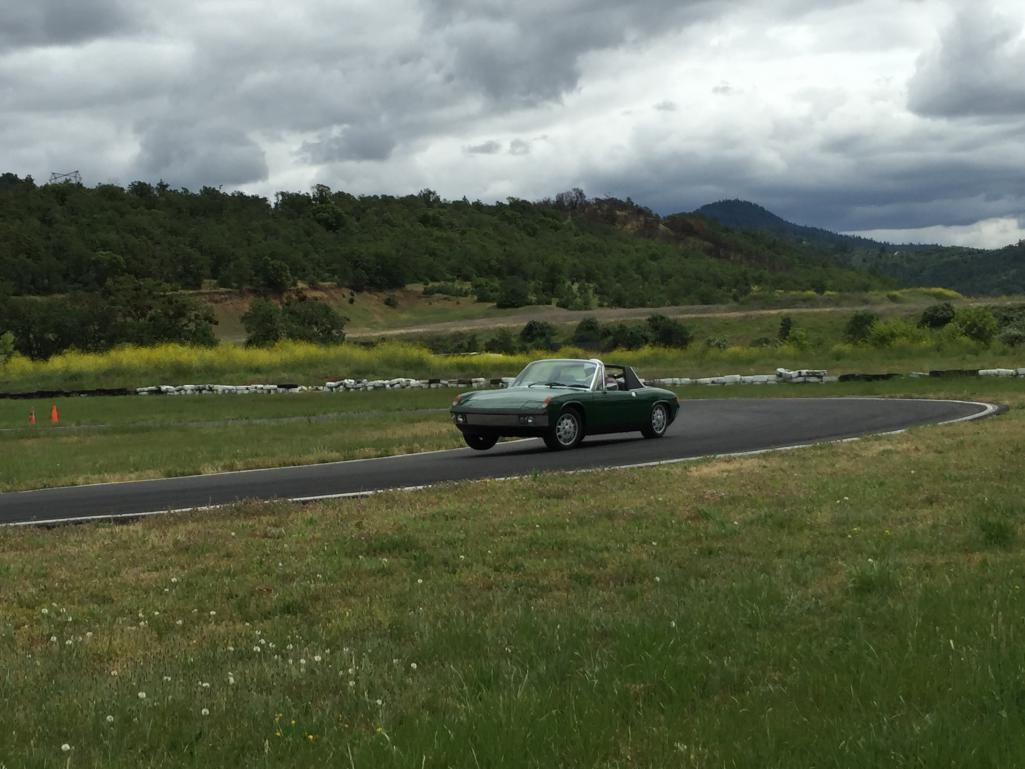
Posted by: siverson Jul 10 2016, 11:54 PM
Zoomed and paint.net oil painting effect...
-Steve
Attached thumbnail(s)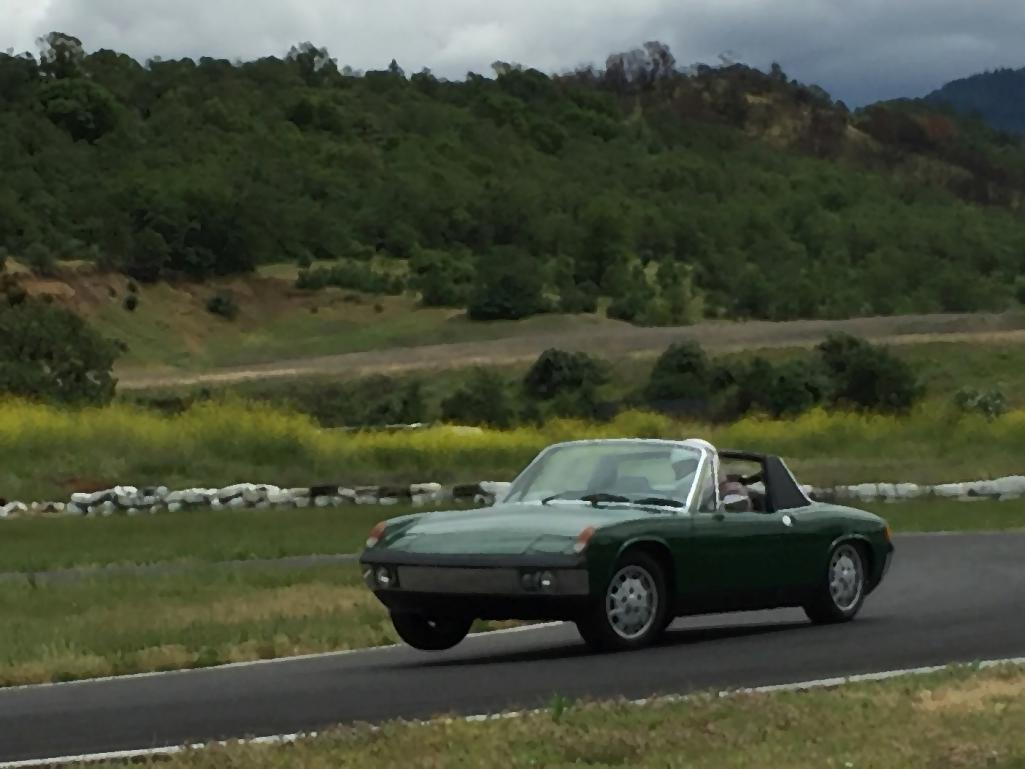
Posted by: Ferg Jul 11 2016, 09:22 AM
Awesome Pic!
Posted by: 6freak Jul 11 2016, 09:55 AM
No, new CDI is dead silent. I honestly don't miss the whine.
Here is my favorite photo from the WCR that someone took of me (sorry, I forgot your name!). This is what happens with stock rear springs (100#)!
-Steve
that happens with 180lbs springs too
thats a fun picture Todd probably took that I know he snapped a bunch
Posted by: siverson Dec 29 2016, 03:58 PM
Washed green 914 yesterday...
Attached thumbnail(s)
Posted by: siverson Dec 29 2016, 03:59 PM
I thought about fitting some bigger tires... (Rally 914?)
Attached thumbnail(s)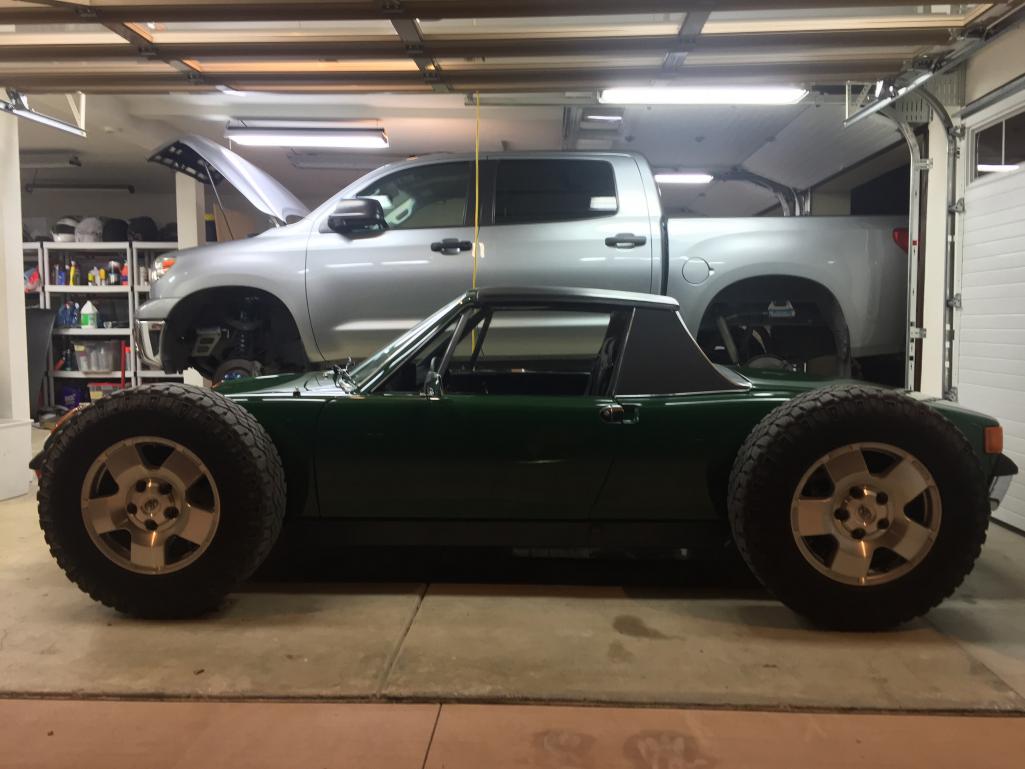
Posted by: siverson Dec 29 2016, 04:00 PM
But then decided against it...
-Steve
Attached thumbnail(s)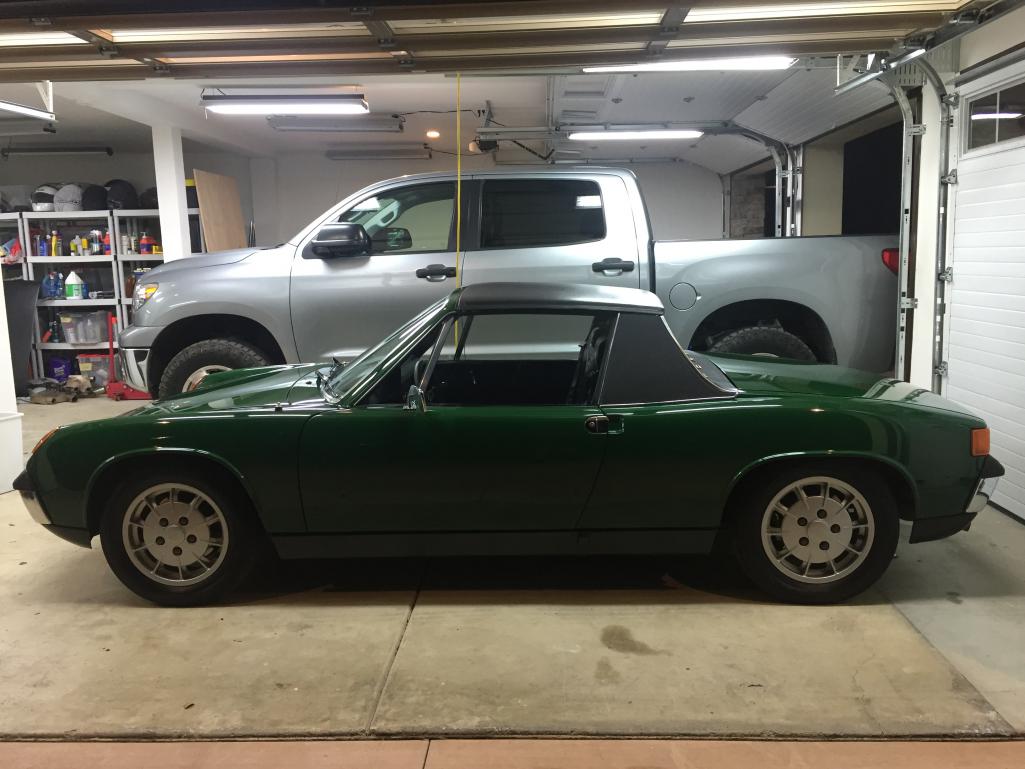
Posted by: Steve Dec 29 2016, 04:11 PM
The best of both worlds!! Love your orange car too!!
Posted by: Cairo94507 Dec 29 2016, 05:15 PM
Yeah, I still love your car. 
Posted by: siverson May 16 2017, 10:29 AM
Stopped on the way to work and was playing with the drone.
-Steve
Attached thumbnail(s)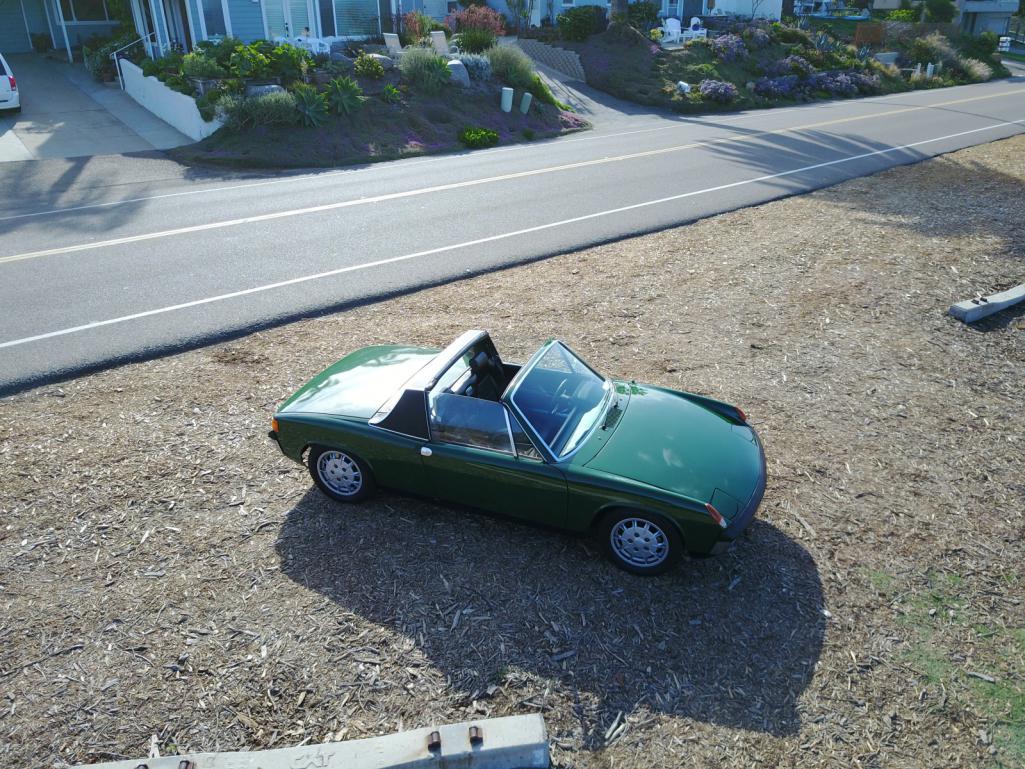
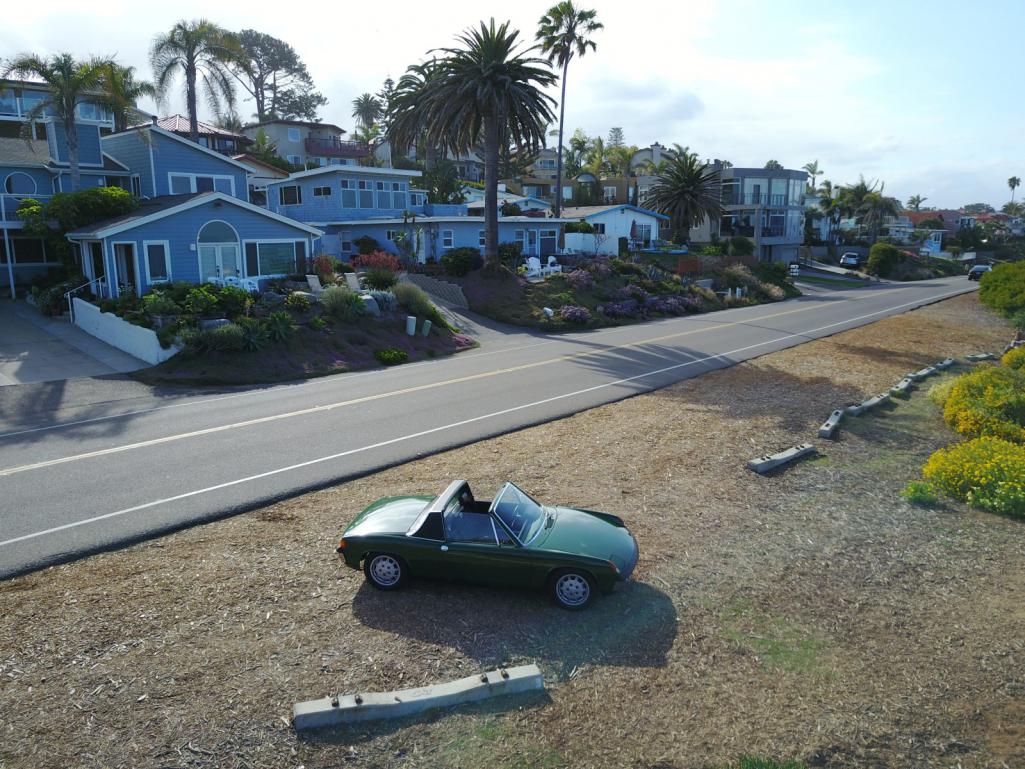
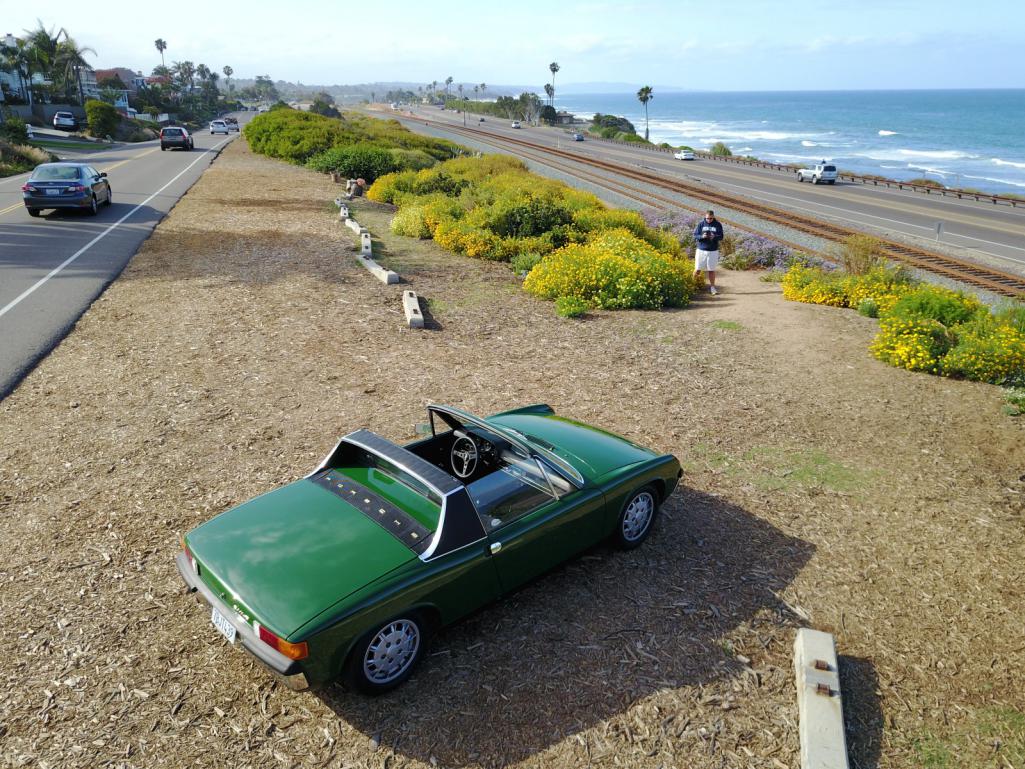

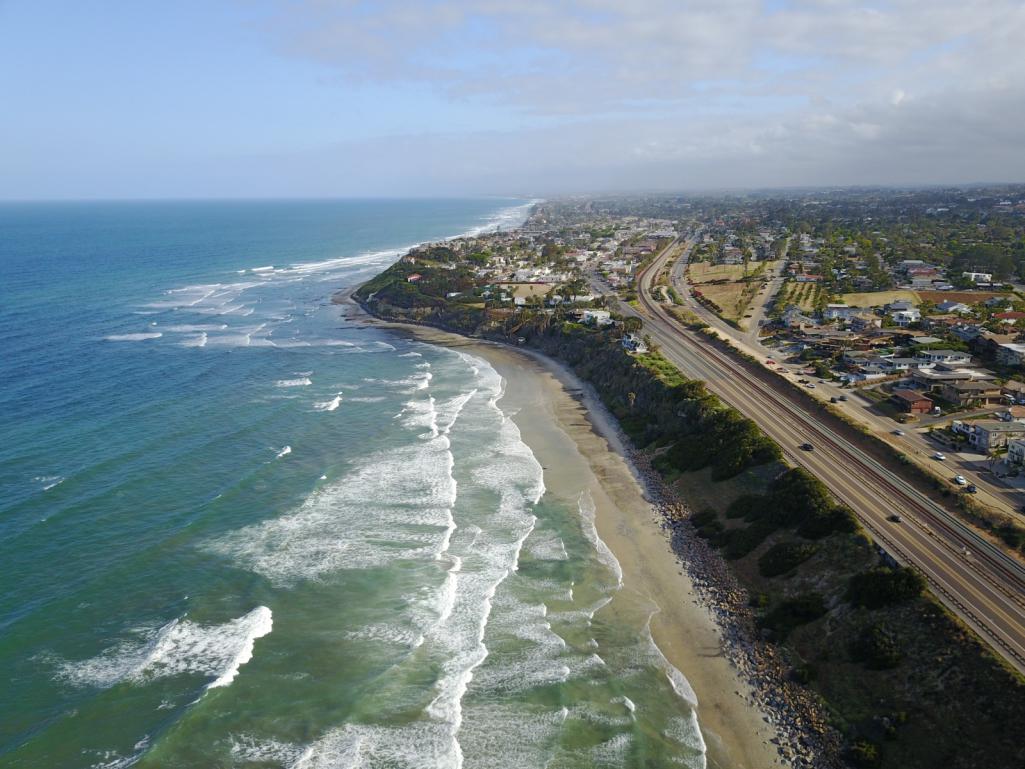
Posted by: dlkawashima May 16 2017, 10:33 AM
Nice pictures, looks like a lot of fun. Hope you can make it to Mammoth for this year's WCR.
Posted by: Alphaogre May 16 2017, 12:21 PM
I love taking pics there over Swami's
Car is looking good!
Powered by Invision Power Board (http://www.invisionboard.com)
© Invision Power Services (http://www.invisionpower.com)