Printable Version of Topic
Click here to view this topic in its original format
914World.com _ 914World Garage _ Stud remover
Posted by: worn Sep 10 2013, 09:56 AM
I wanted to pull the studs from a transmission case so I wouldn't poke my eye out with the darn things and while it wears the magnesium it also shows when there isn't any really left in the threads. there - the excuses, version 1.
So I got 1 bolt and 1 nut and set the lathe for stun, er taper cut.
The nut and the bolt are tapered so there is a countersink in the large nut and a fly-head screw look to the bolt. BTW the nut is a loose fit over the bolt - they aren't matched.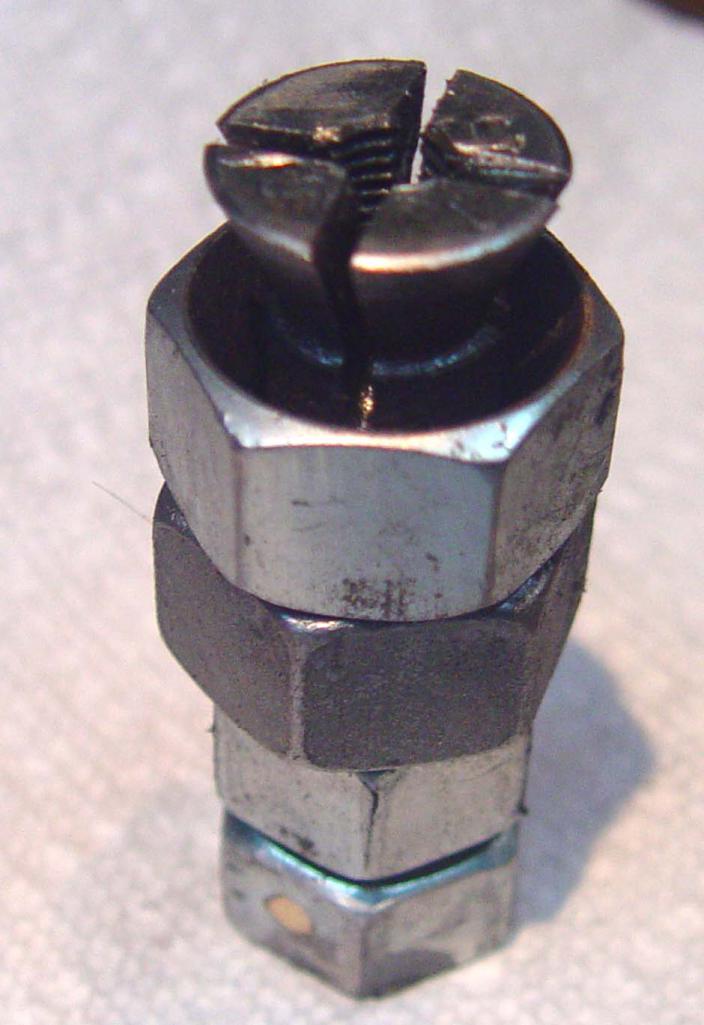
While I was at it I drilled straight into the top of the bolt to allow for thread tapping.
Off the lathe, the hole in the top of the bolt was tapped to fit the stud - this was 8 mm, but I am gunning for 911 head studs eventually. I used a slotting wheel on the angle grinder to make an X cut down the length. Then I added a nut that does fit the bolt. Whoops, didn't go down far enough so another loose nut was added as a spacer. This is what it looked like in action.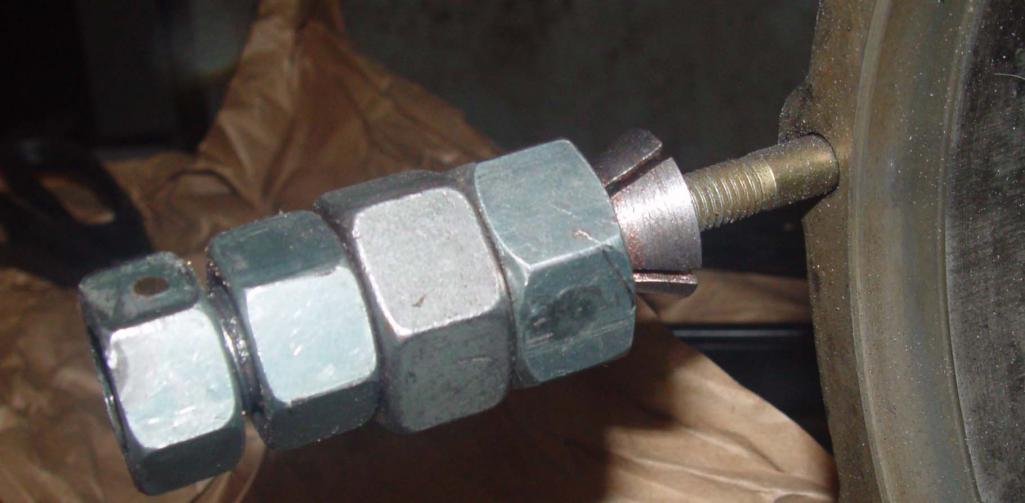
Unfortunately I pinned a nut to allow for wrenching so it doesn't come apart and the pix aren't so great, but here is the stud.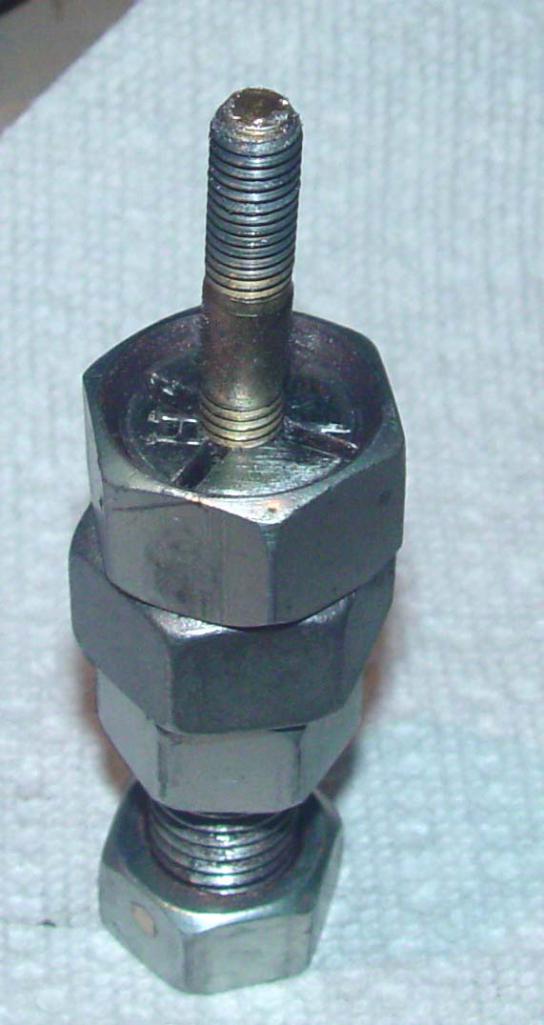
Posted by: bulitt Sep 10 2013, 10:07 AM
You know you can buy that from Snap-On ? 

Posted by: SLITS Sep 10 2013, 10:33 AM
You made a collet style stud remover. Only about $400 from SnapOn (unit + thread)
Posted by: worn Sep 10 2013, 10:52 AM

You know you can buy that from Snap-On ?
OMG, I could have bought it!!? Oh no!
Well I was surprised that I could actually complete it in about an hour - real clock time. I generally underestimate the time my projects take by a factor of 5.
Posted by: stugray Sep 10 2013, 10:53 AM
Nice!
One way I have done it and worked great (suggested by another 914world member):
Take a nut for the stud you want to extract.
using a hacksaw, cut through one side of the nut along the bolt axis.
Leave the other side of the nut intact.
Thread the "sliced nut' over the stud & clamp with vise grips.
Since the nut is sliced down one side, it will compress over the threads.
If you want the tool to be permanent, weld the nut onto the vise grips, then cut it all the way through.
Posted by: sixnotfour Sep 10 2013, 02:45 PM
Two nuts tighten agianst each other works good too.
I do have the old snap-on stud and dowel remover, way better than the one they sell now IMHO.
Posted by: Nine_14 Sep 10 2013, 02:53 PM
Two nuts tighten agianst each other works good too.

Why doing it easily when it also works complicated

Posted by: worn Sep 10 2013, 03:01 PM
Two nuts tighten agianst each other works good too.
Why doing it easily when it also works complicated
I do that. The stud I showed was going to be distorted by the simple method. I have done that too, where the stud is more than willing to ruin two perfectly nice matching nuts and itself as well, just in order to stay put. And then the vice grips and the torch and the pain and the slow weeping in the corner. Wait, I think I went too far.

Posted by: sixnotfour Sep 10 2013, 03:41 PM
Like you siad it only took an hour to make, not bad 
Posted by: pcar916 Sep 10 2013, 05:15 PM
Looks good! Didja' heat-treat the collet?
Posted by: Dr Evil Sep 10 2013, 05:34 PM
Group buy?
Posted by: worn Sep 10 2013, 07:38 PM
Looks good! Didja' heat-treat the collet?
No, but I remember learning about case nite at Bellingham, where I took only shop and my son got an ME, so either that or grade 8 , or both might be good. Also the angle. I was stunned that it worked first try. I can think of many easy improvements.
Powered by Invision Power Board (http://www.invisionboard.com)
© Invision Power Services (http://www.invisionpower.com)